Category: Quick Meal

  • 20 Sheet Pan Dinners for Easy Weeknights

    20 Sheet Pan Dinners for Easy Weeknights

    Sheet pan dinners are one of my favorite weeknight magic tricks. Minimal prep, fewer dishes, everything roasting together in the oven… it’s more than ideal. When life feels busy (which is… most of the time), these are the types of recipes I come back to again and again.

    This list of dinners is full of the recipes we make on repeat in my house – flavor-packed, low-effort, and super flexible. You’ve got cozy options, fresh-feeling meals, and a few fun little twists. It’s a little bit of everything, all built for real life.

    If you’re looking for dinners that don’t require a ton of thinking (or cleanup), you’re in the right place. Pick one, toss it on a sheet pan, and let the oven do the heavy lifting!


    Sheet Pan Dinner Recipes
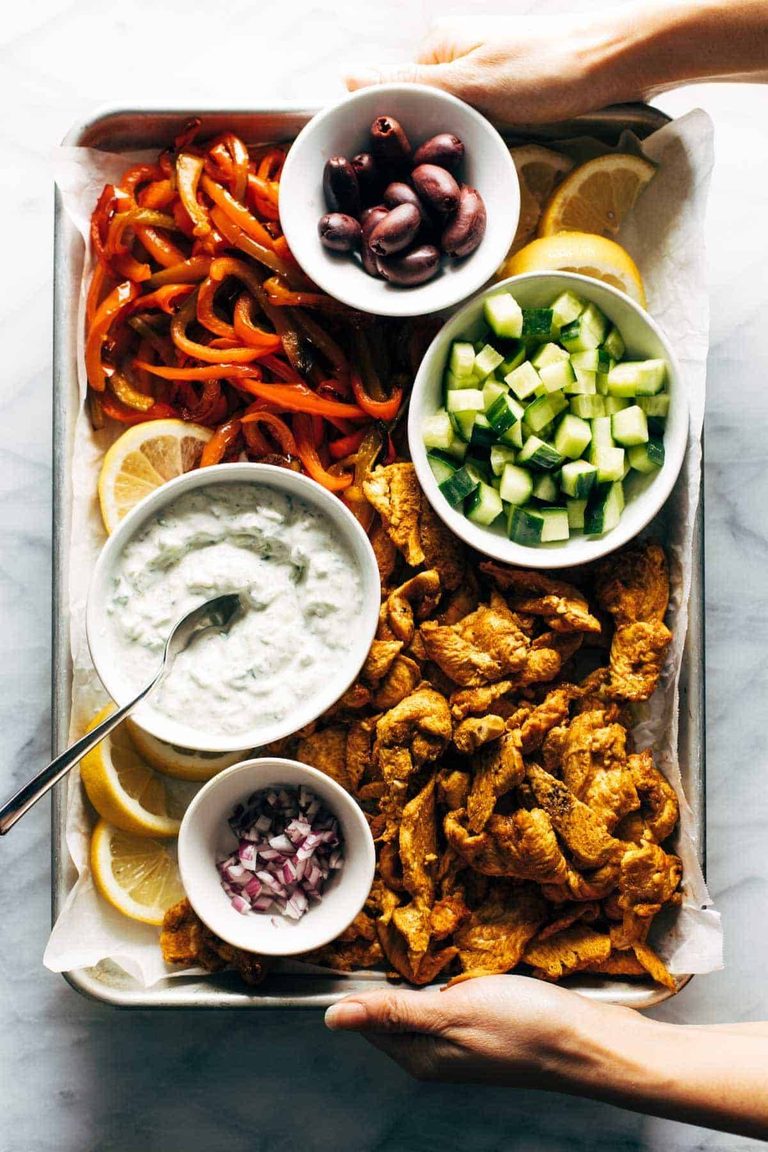
    Sheet pan chicken pitas.

    Sheet Pan Chicken Pitas with Tzatziki

    Part bowl, part salad, part sandwich folded up into any kind of bread you like, and I’m here for it in every form.
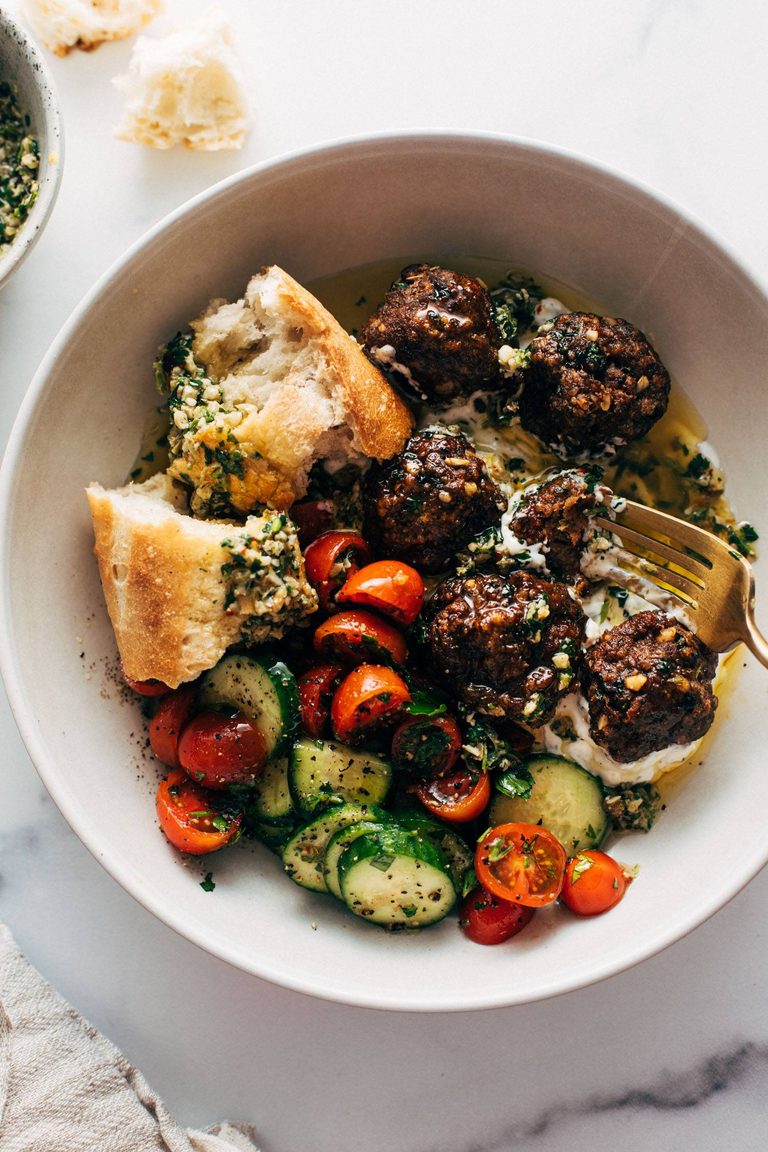
    Sheet pan meatballs with tomato salad and bread.

    Sheet Pan Meatballs with Tomato Salad and Green Sauce

    Juicy little sheet pan meatballs that are salty, zesty, briney, and so so delicious. Pile them on tzatziki, spoon some punchy green sauce over top, and serve with a simple salad and crusty bread.
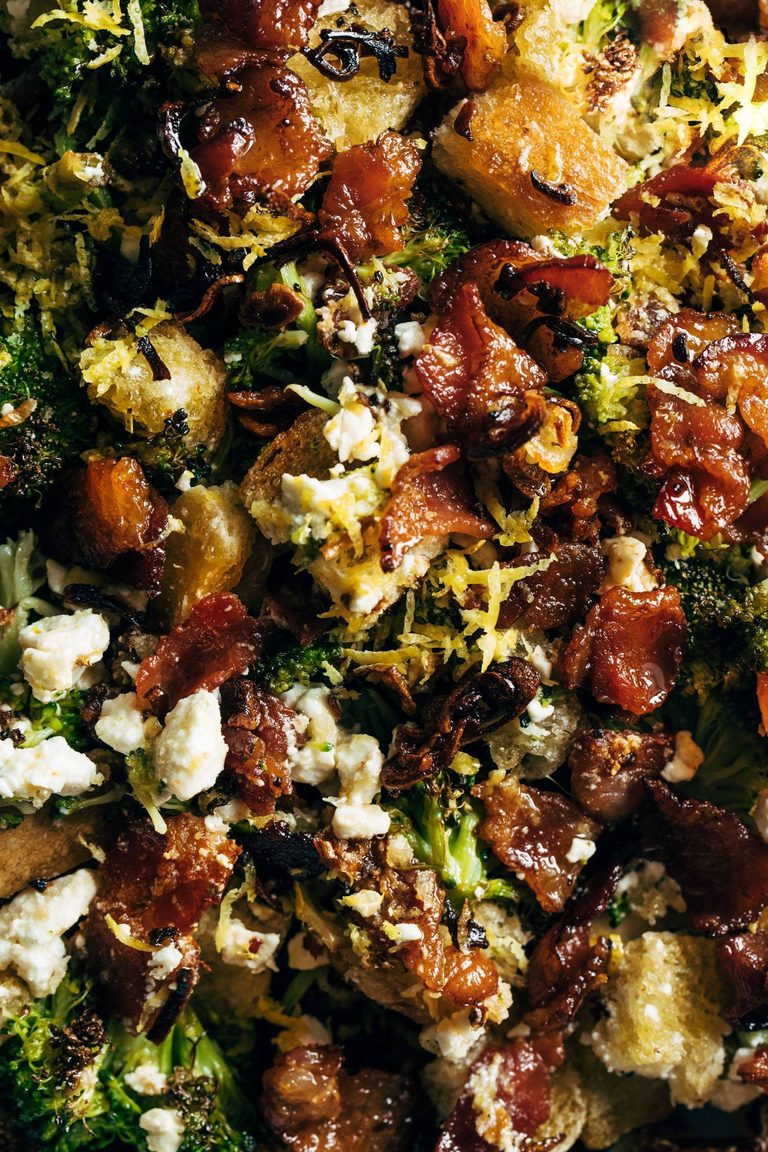
    Roasted broccoli salad with bacon.

    Liz’s Roasted Broccoli Salad

    This Roasted Broccoli Salad is EVERYTHING! Bright lemon, crisped-up bacon, tangy feta, and it’s all built around a big bowl of roasted broccoli. A true hero of a meal!
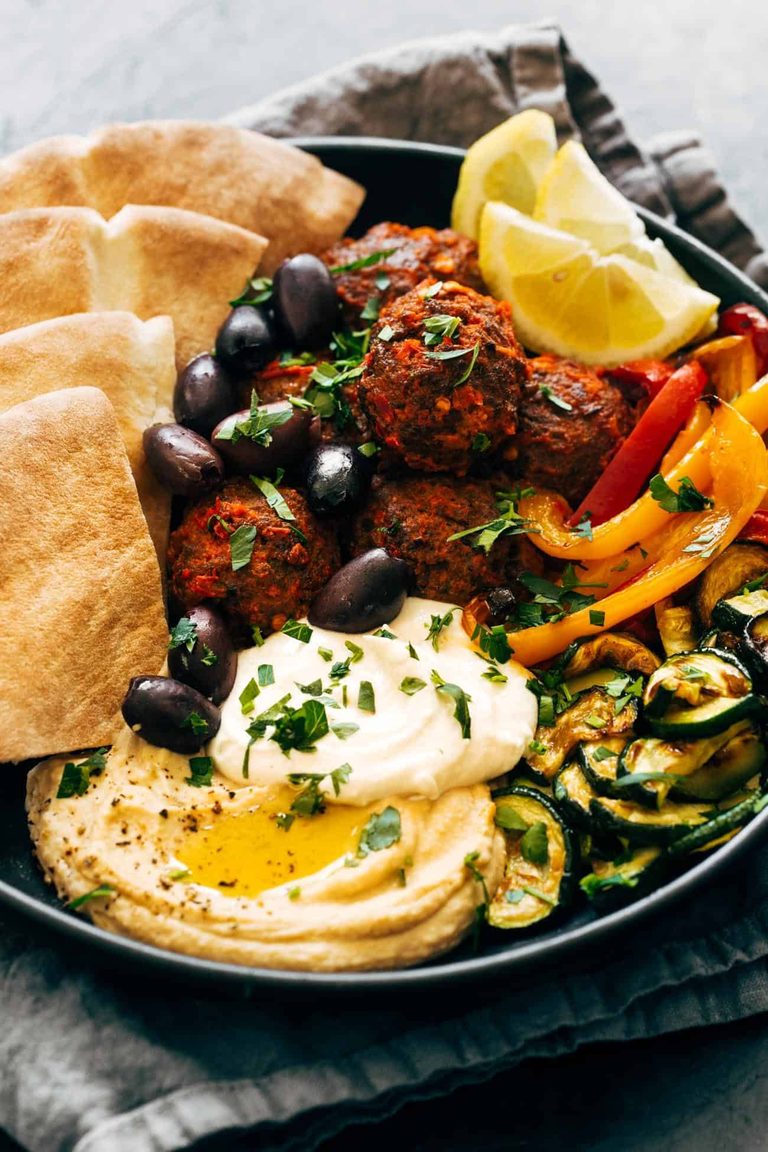
    Harissa meatballs in a bowl with hummus, peppers, zucchini, and pita.

    Harissa Meatballs with Whipped Feta

    These Harissa Meatballs with Whipped Feta are perfect for an easy SOS dinner! Store-bought meatballs, bell peppers, zucchini, harissa, and whipped feta all in one bowl. YUMMY!
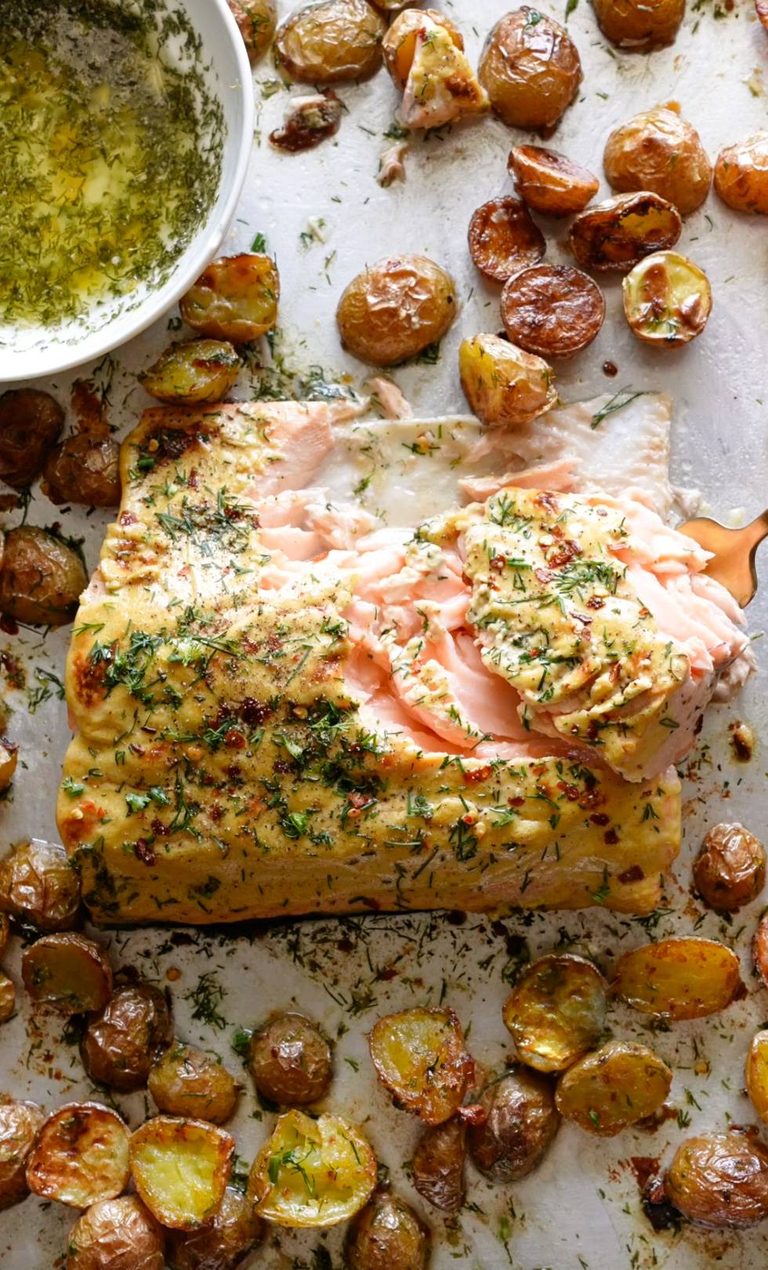
    Sheet pan salmon with potatoes and dill.

    Sheet Pan Salmon with Dill Potatoes

    Simple and delicious salmon and potatoes roasted on a sheet pan, and covered in a garlic dill butter sauce! One of my family’s favorite dinners.
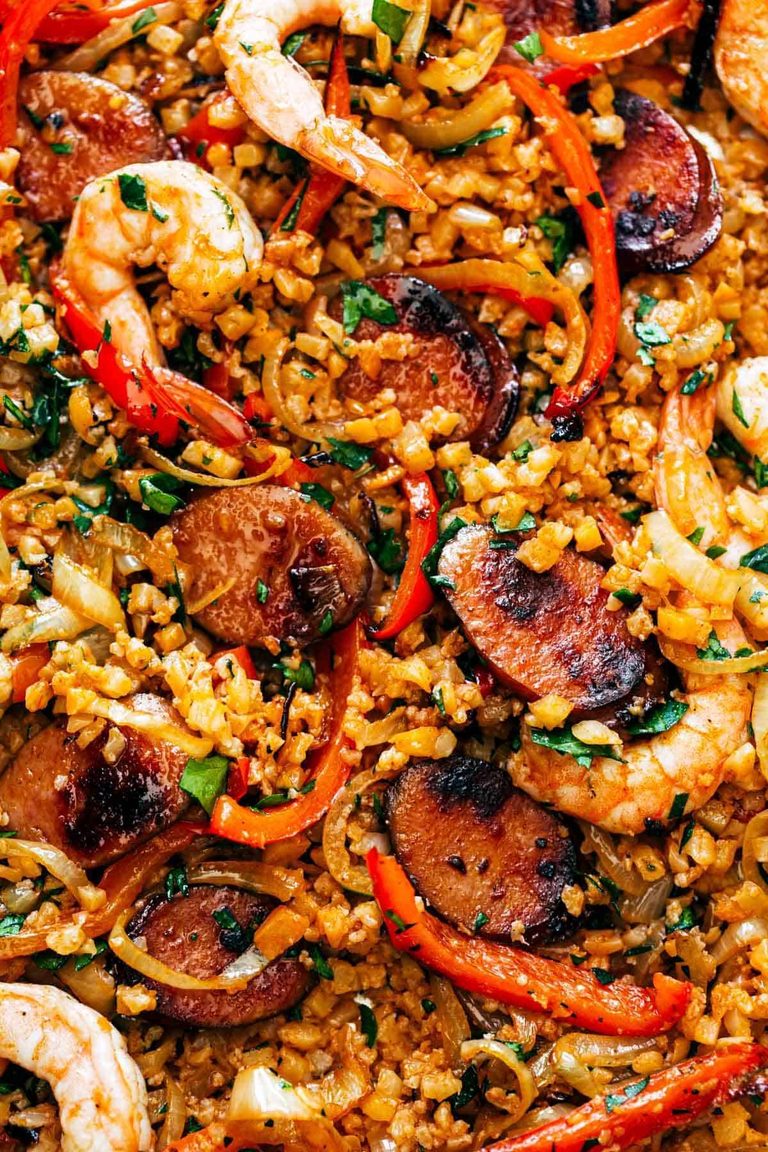
    Jambalaya on a sheet pan.

    Sheet Pan Jambalaya

    Sheet Pan Jambalaya: maximum flavor, minimal dishes. Sausage, peppers, onions, shrimp, and cauliflower rice all roasted up on a sheet pan. Big flavor, easy dinner!
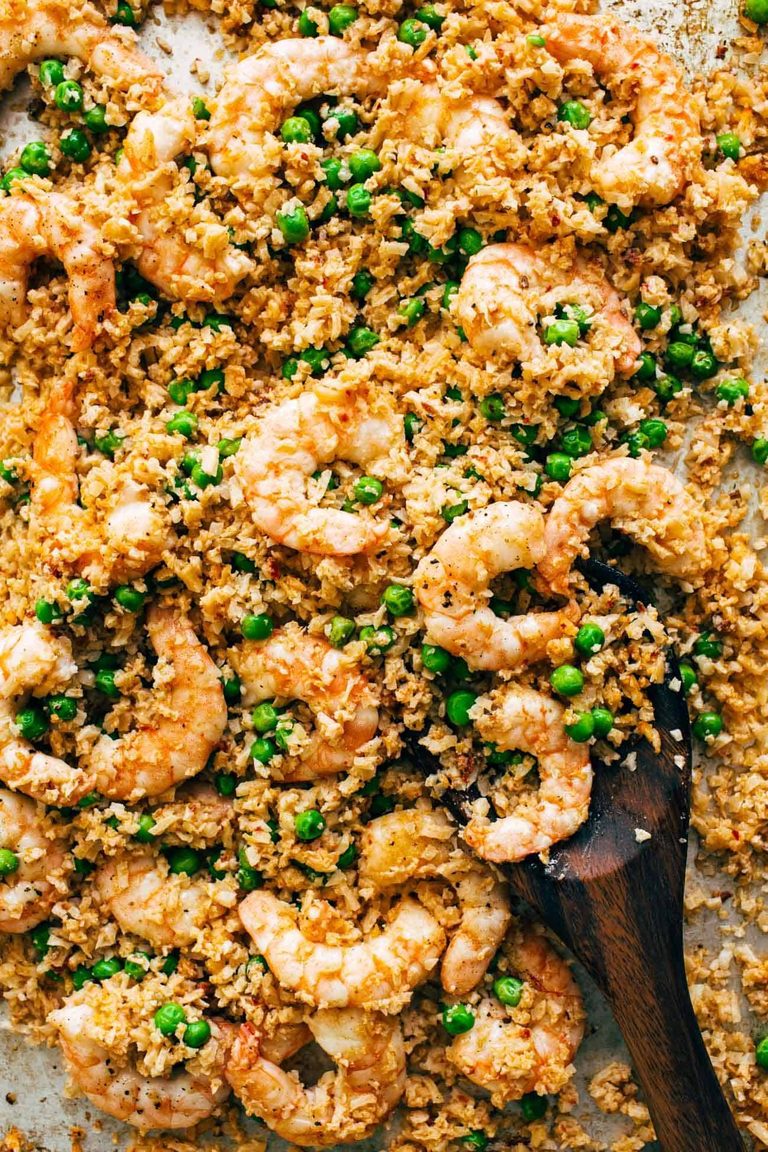
    Sheet pan with shrimp, cauliflower rice, and peas.

    Sheet Pan Shrimp and Cauli Rice

    This Sheet Pan Shrimp and Cauli Rice is the easiest sheet pan dinner! Shrimp, peas, cauliflower rice, seasonings, and Rosso pesto sauce all come together on one pan for a delicious springy meal.
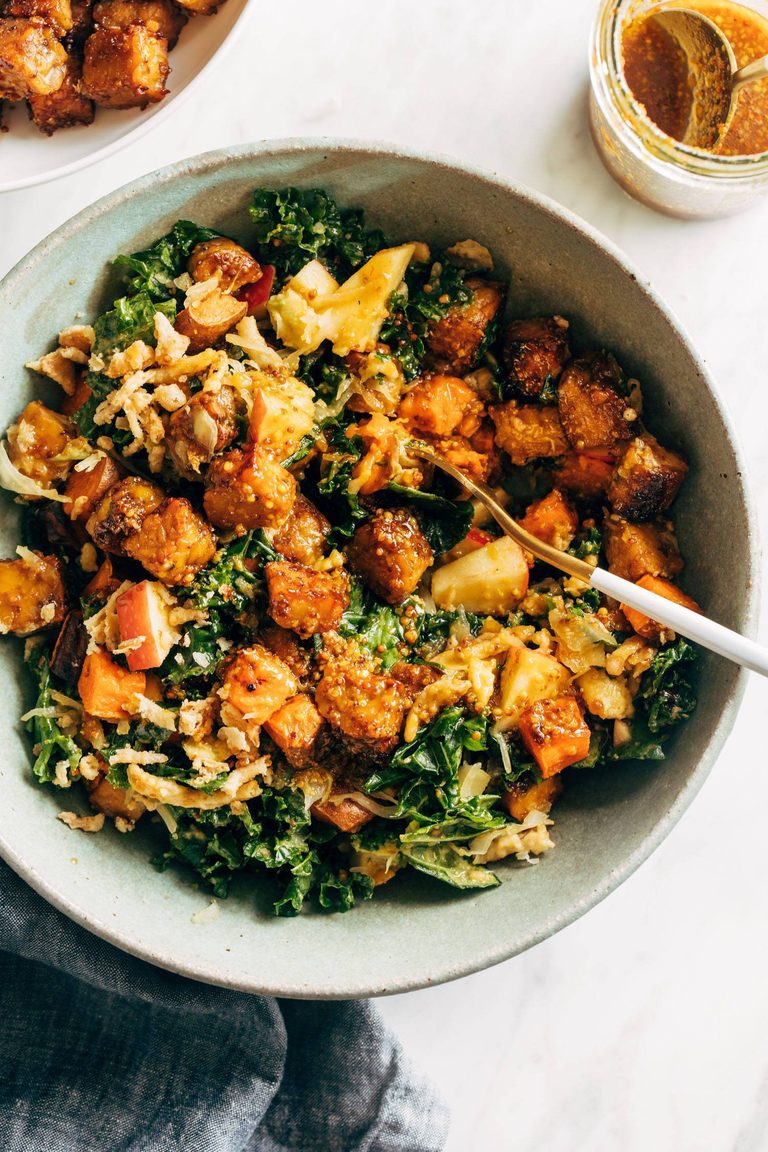
    Mustard tempeh bowl.

    Fall Favorite Maple-Mustard Tempeh Bowls

    These tempeh bowls are a true fall favorite! Massaged kale, sweet potatoes, roasty marinated maple-mustard tempeh, crunchy apple, and an unexpected pile of briney sauerkraut.
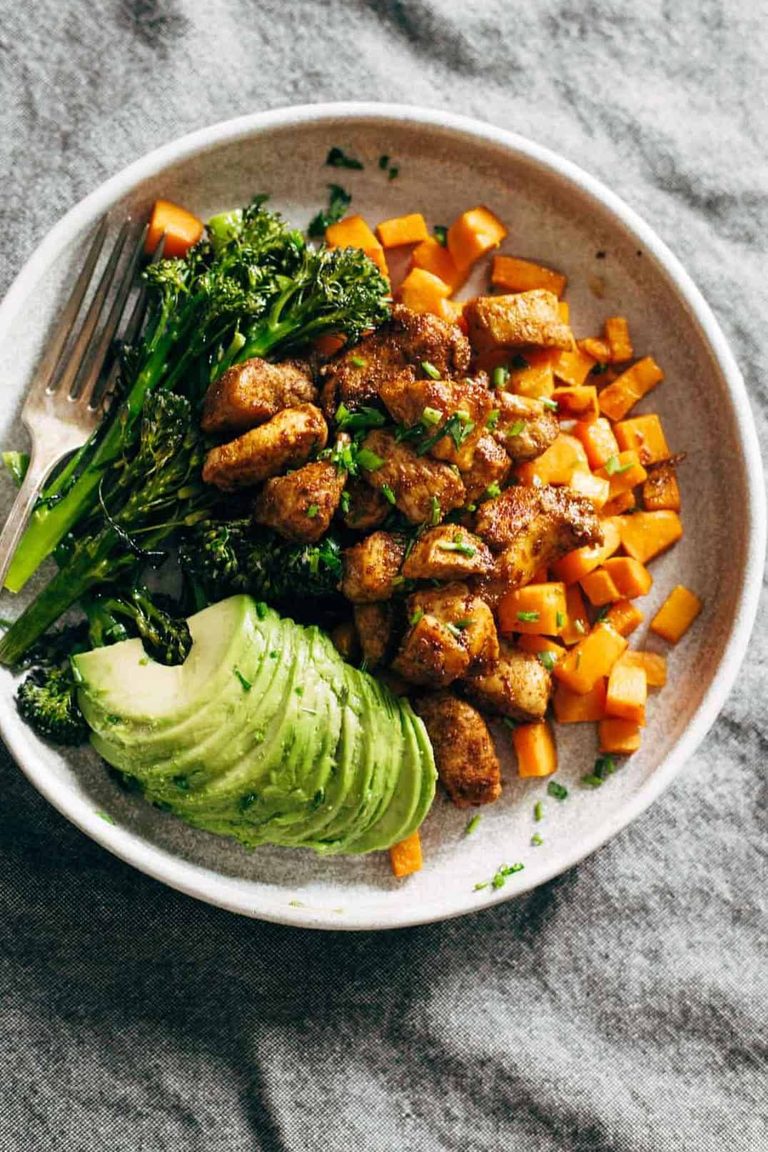
    Chicken, sweet potatoes, broccoli, and avocado on a plate.

    Sheet Pan Chicken and Sweet Potato Meal Prep

    Spicy Chicken and Sweet Potato Meal Prep Magic! Just chicken, sweet potatoes, broccoli, avocado, and seasonings. 3 big sheet pans + 45 minutes = healthy meals for a week!
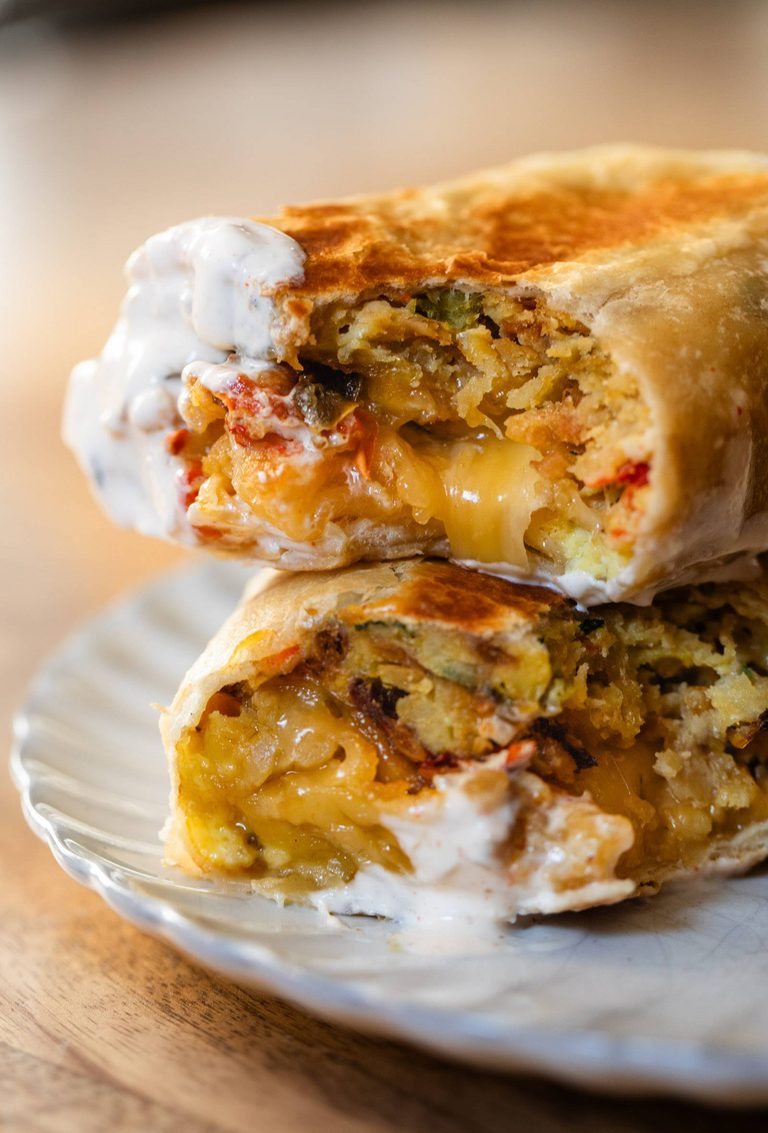
    Breakfast burritos.

    Sheet Pan Breakfast Burritos with Creamy Chipotle Sauce

    I absolutely love these breakfast burritos. Creamy scrambled eggs, roasted garlic veggies, smoky cheese, and refried beans all wrapped up in a delicious burrito!
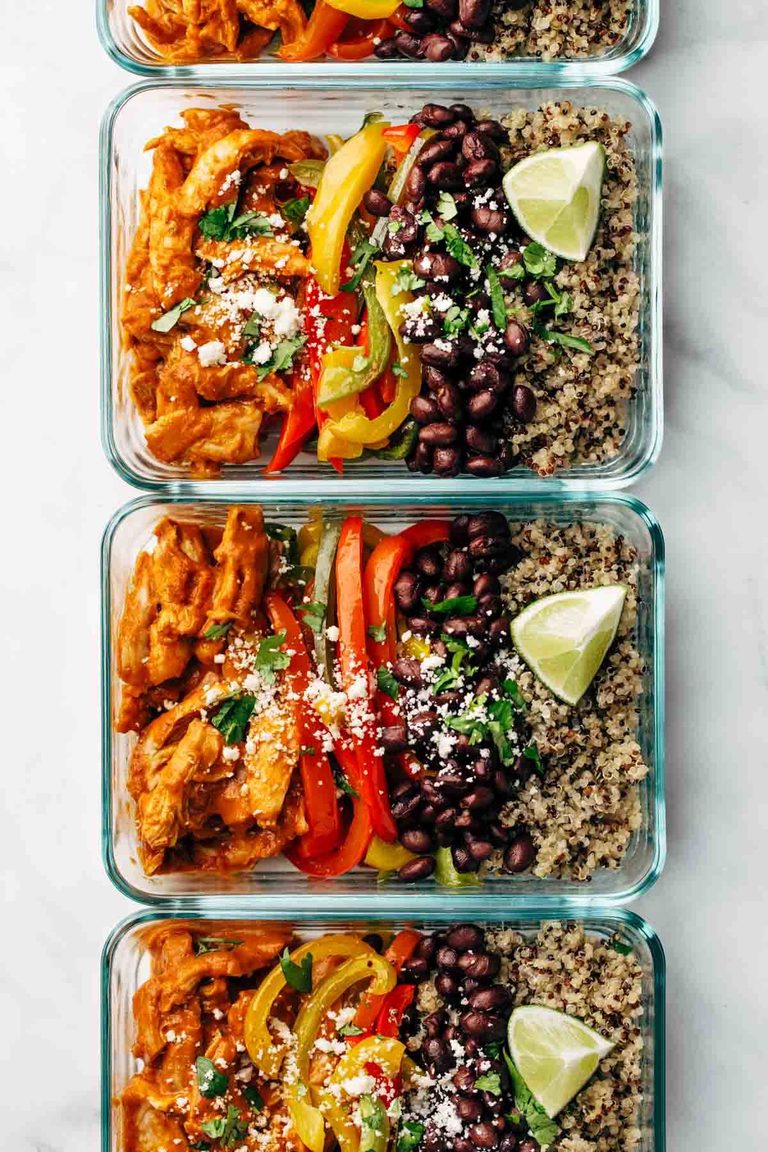
    Chicken tinga bowls.

    Sheet Pan Chicken Tinga Bowls

    These Chicken Tinga Bowls are the BEST! Made in just 15 minutes, all on a sheet pan. My favorite kind of meal prep!
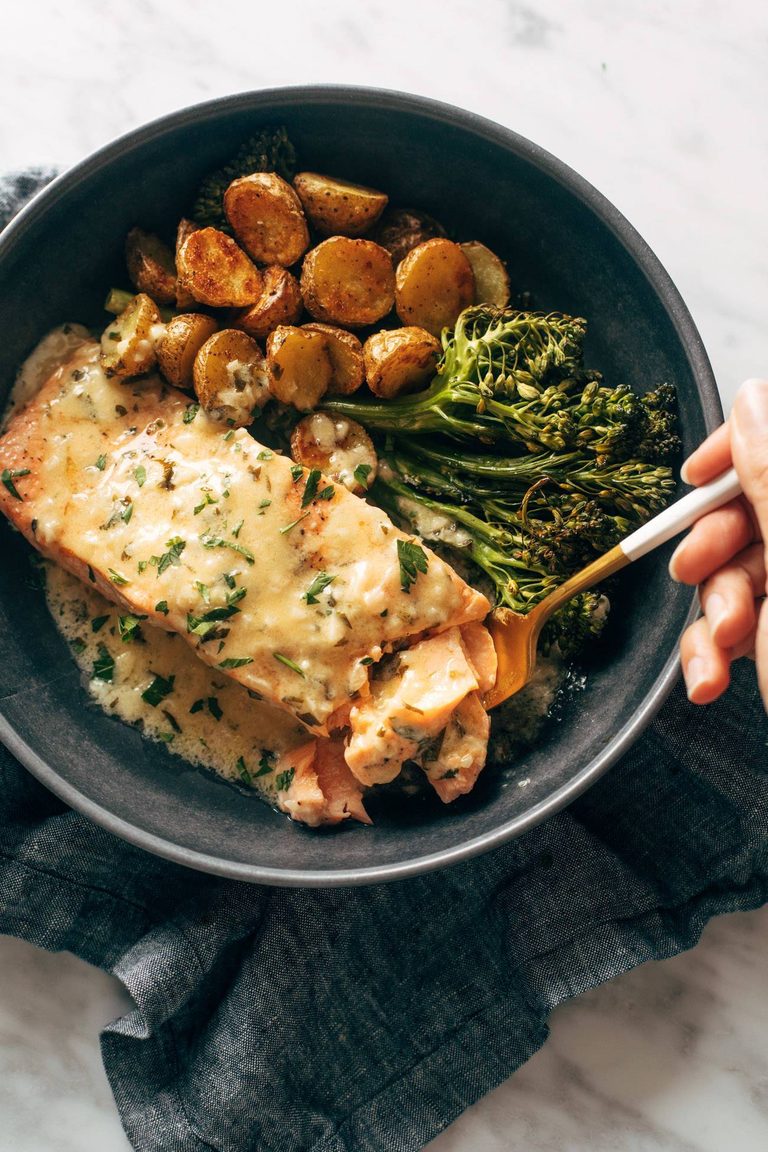
    Lemon salmon with potatoes and broccoli.

    Baked Salmon with Amazing Lemon Sauce

    Delicious baked salmon with crispy potatoes, broccoli, and the most amazing life-changing lemon sauce smothered on top of it all. This is restaurant bistro-style eating!
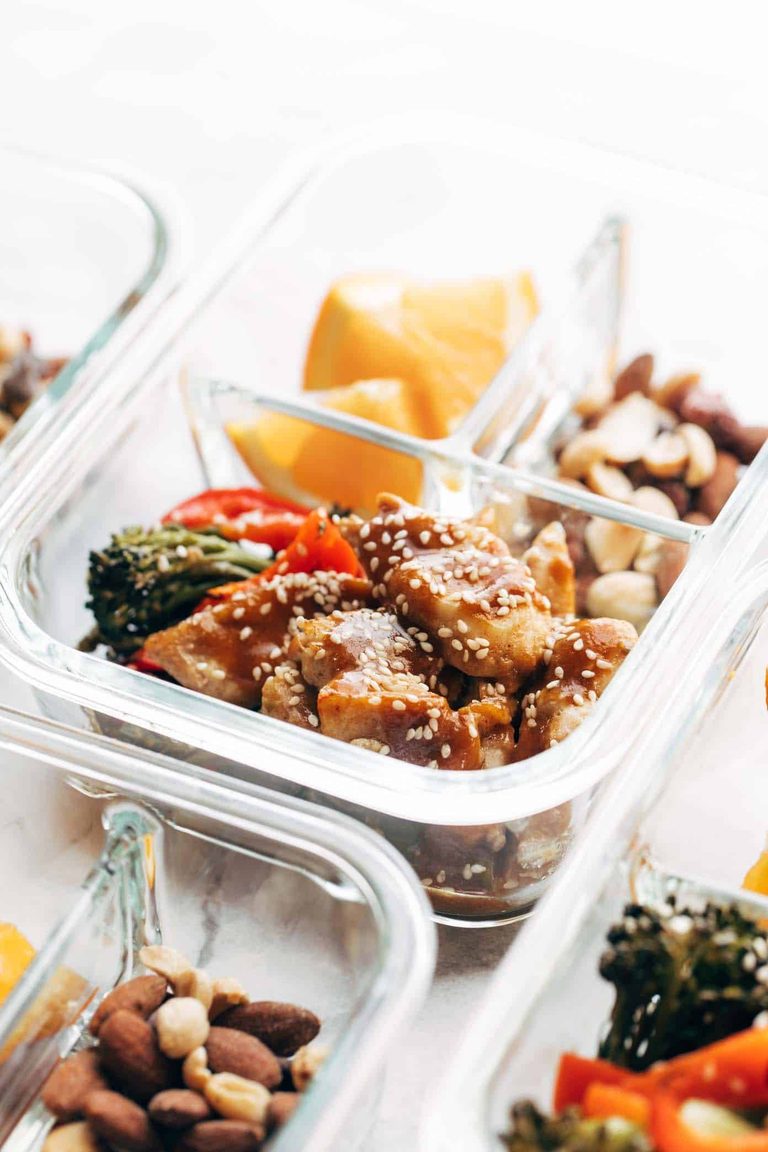
    Garlic ginger chicken.

    Sheet Pan Garlic Ginger Chicken & Broccoli

    Sheet Pan Garlic Ginger Chicken and Broccoli – a simple and low-maintenance meal prep option, with huge flavor and no refined sugar.
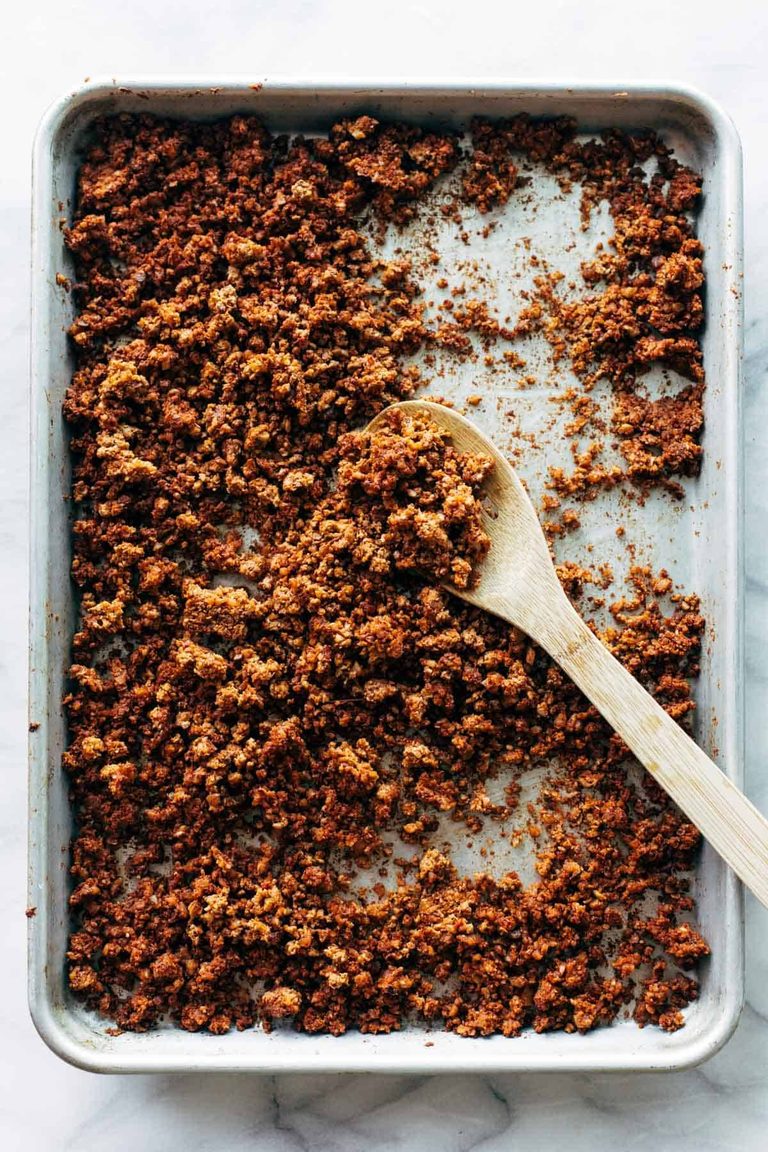
    Cauliflower walnut taco meat.

    Cauliflower Walnut Vegetarian Taco Meat

    This vegetarian taco meat is made with cauliflower, walnuts, and chipotle peppers. It’s so easy: just mix and bake. Meatless miracle!
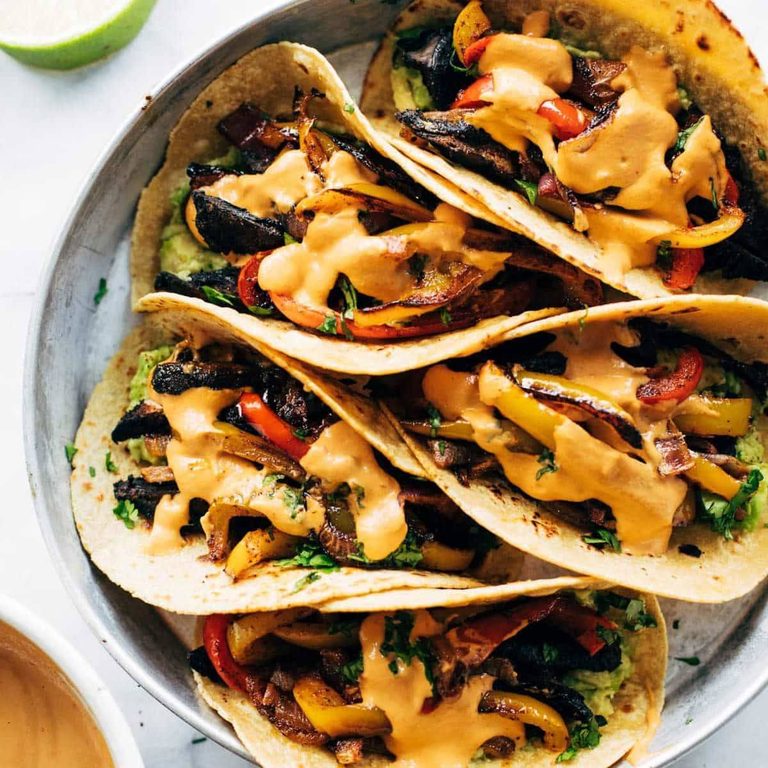
    Vegan fajitas in tortillas.

    Vegan Sheet Pan Fajitas with Chipotle Queso

    These Vegan Sheet Pan Fajitas are SO GOOD. Roasted peppers and onions, steak-like portobello mushrooms, some mashed avocado, and a waterfall of spicy cashew queso.
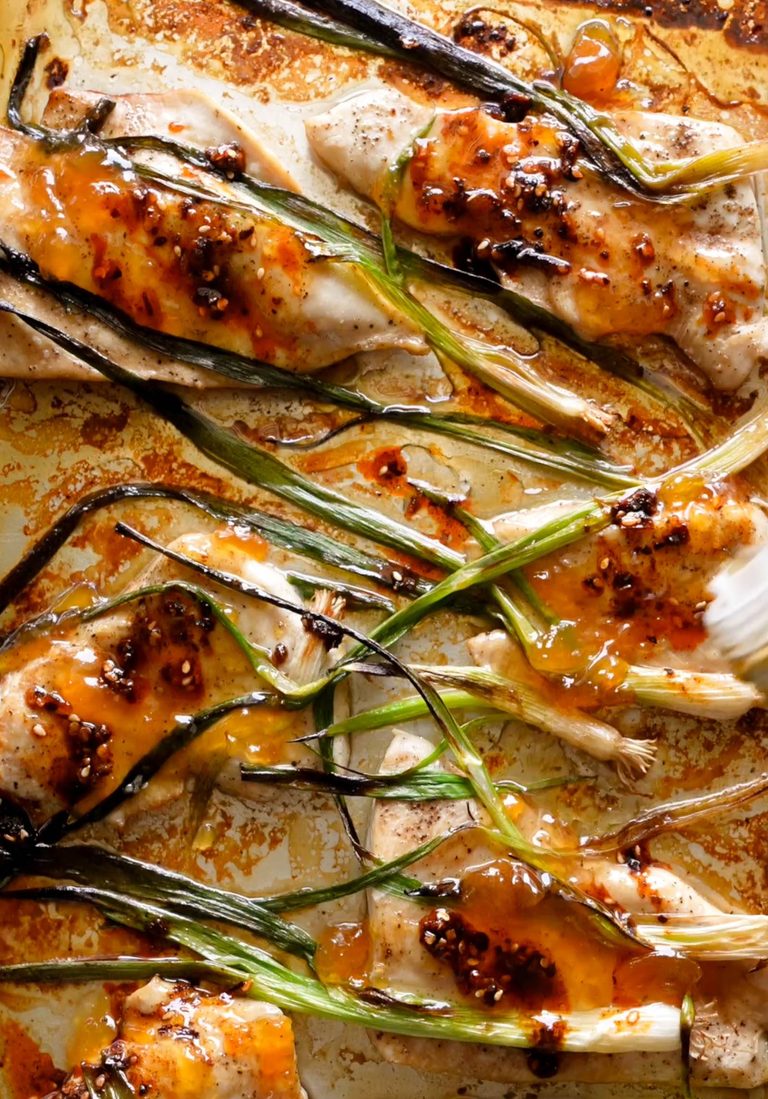
    Apricot chicken and scallions.

    Apricot Chicken with Charred Scallions

    This apricot chicken, made on a sheet pan, is so easy and SO GOOD! Just a few simple ingredients, minimal cleanup, and a major flavor boost from the roasty charred scallions on top.
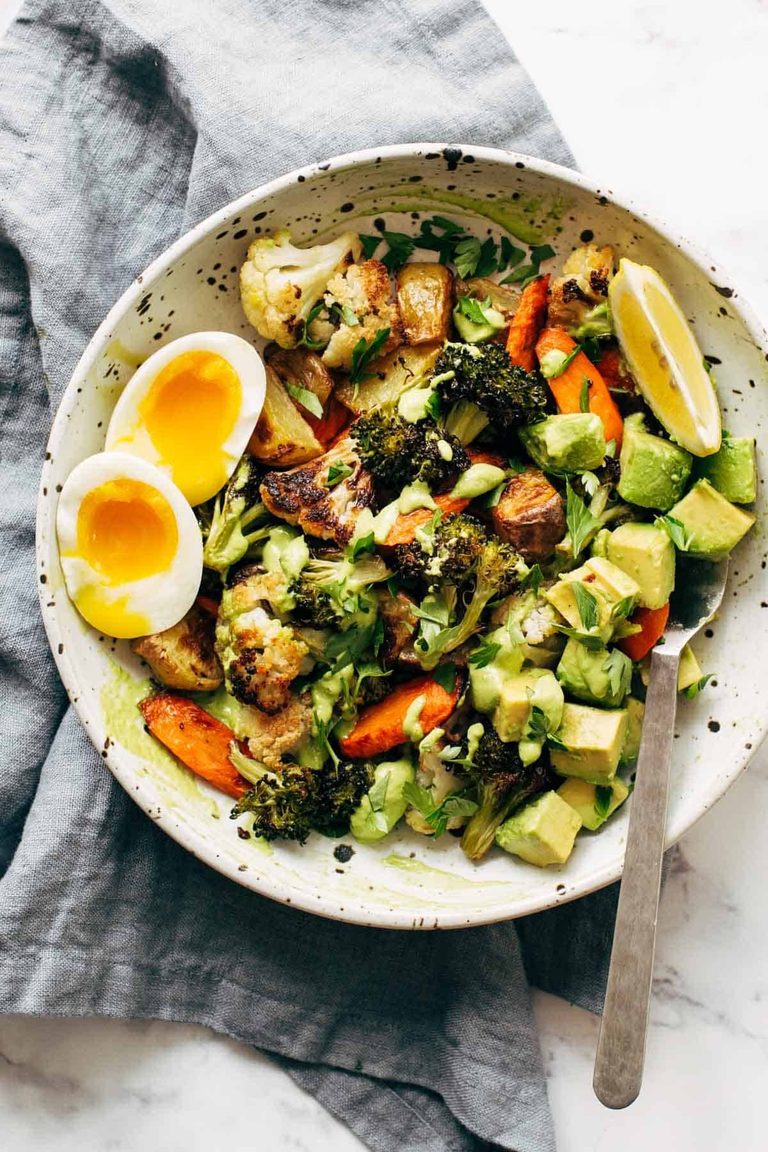
    Roasted vegetable bowls.

    Roasted Vegetable Bowls with Green Tahini

    Roasted Vegetable Bowls! Crispy tender roasted veggies, buttery avocado, all together in a bowl with a drizzle of green tahini sauce.
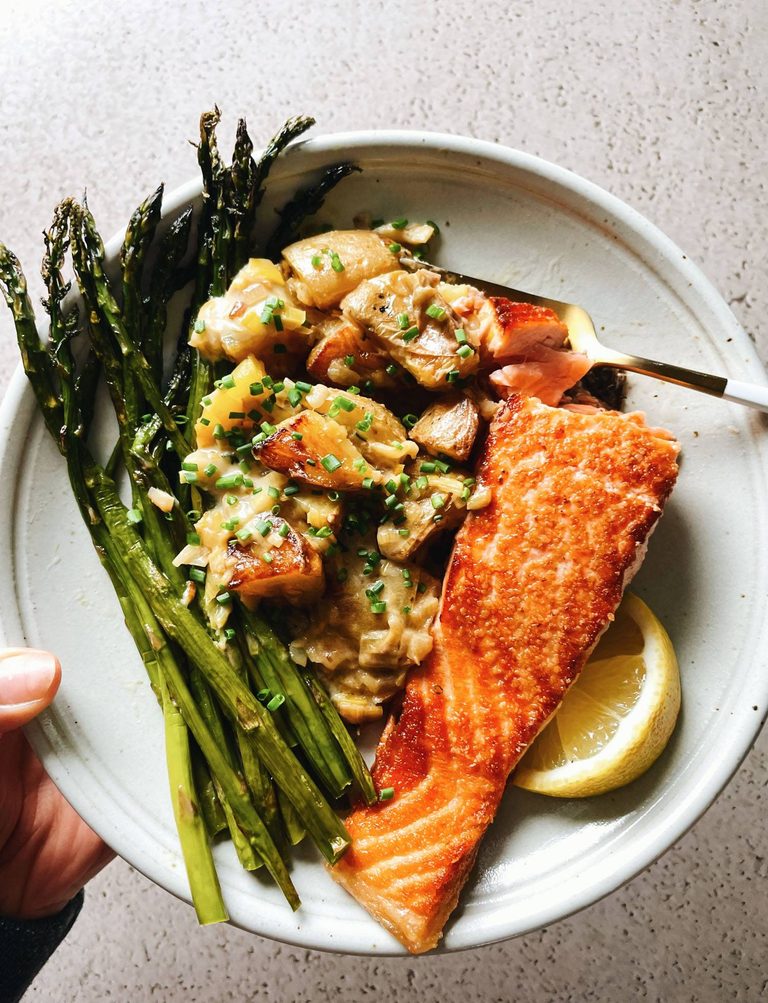
    Salmon with potatoes and asparagus.

    Spring Salmon with Creamed Leeks, Potatoes, and Asparagus

    We’re bringing you a plate of sunshine for dinner! Perfectly golden-crisp salmon partnered next to oven-roasted asparagus and a buttery, rich, creamy leek sauce piled on crispy potatoes.
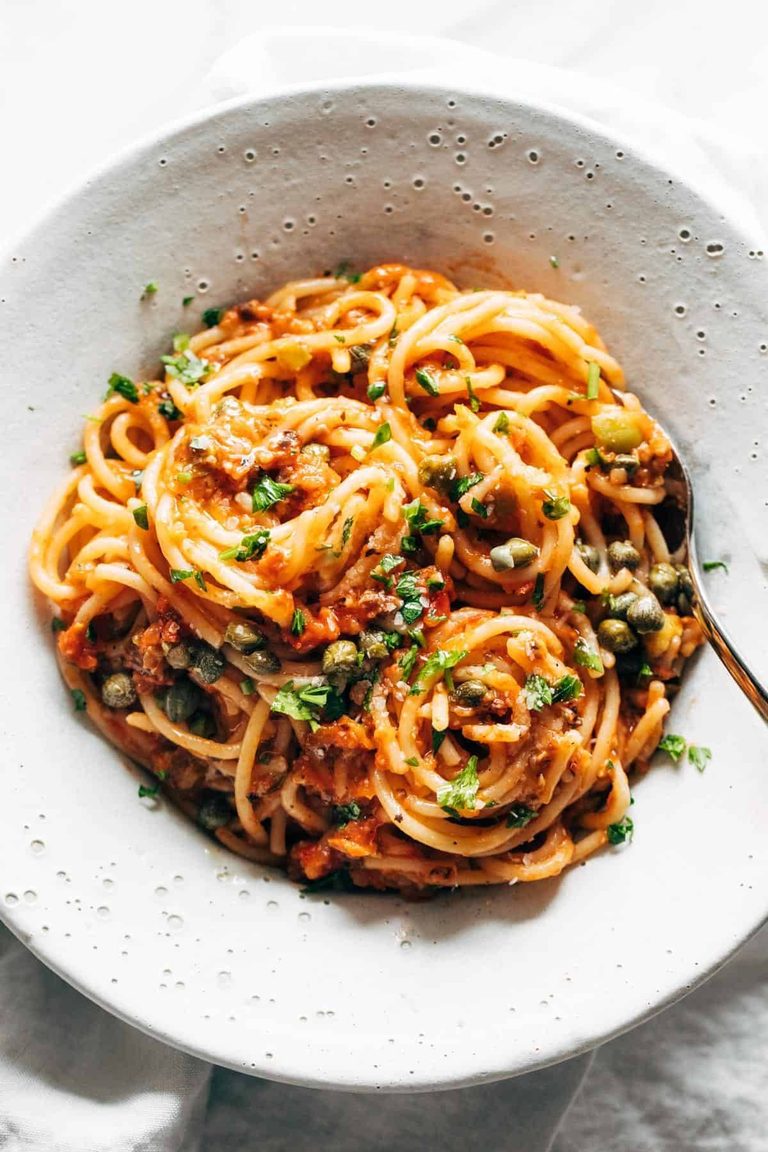
    Tomato puttanesca.

    Roasted Tomato Puttanesca

    The easiest Roasted Tomato Puttanesca with all the silky, all the briney, and all the zippy summer freshness.
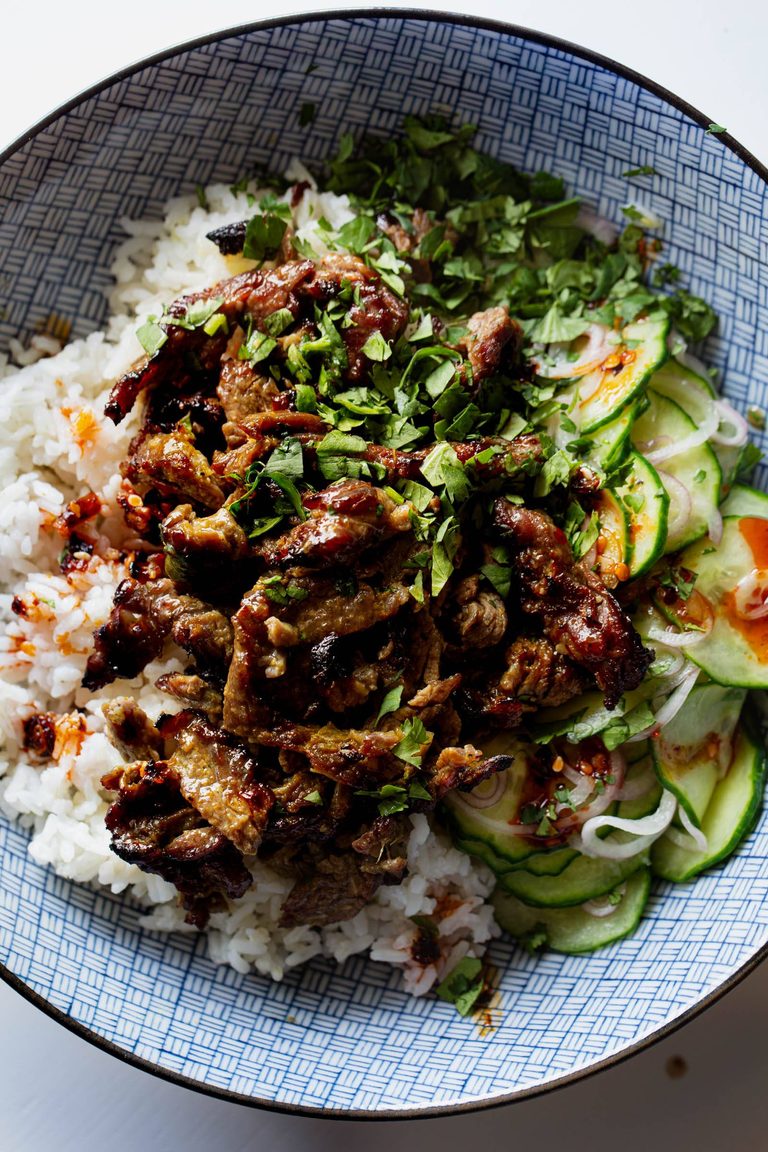
    Garlic and black pepper beef in a bowl with rice and cucumbers.

    Garlic and Black Pepper Beef Skewers

    These beef skewers are bringing all the flavor! Thinly sliced strips of steak browned and caramelized to juicy, sweet perfection.


    My Favorite Sheet Pans
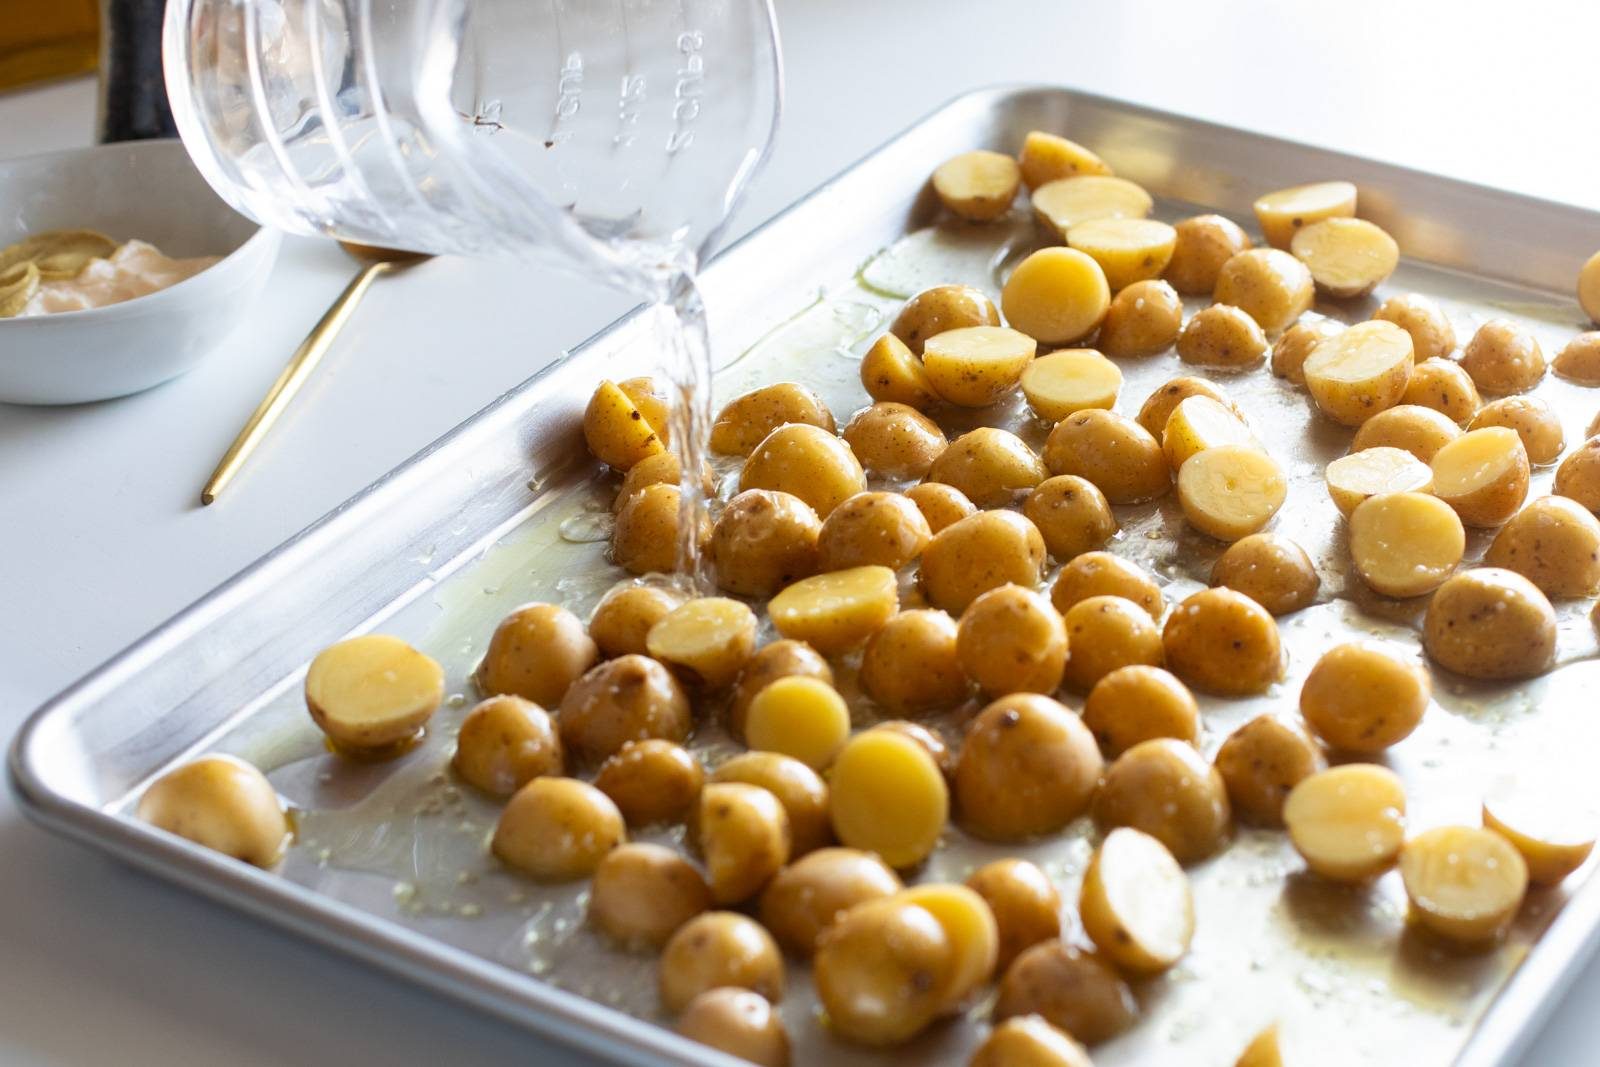
    Potatoes on a sheet pan.

    All these recipes start and end with a really good sheet pan. One that holds up, keeps it shape, and doesn’t make things stick.

    My top, one-and-only, forever sheet pan: Nordic Ware Sheet Pans. I have several sizes – the half sheet, full sheet, and quarter sheet.

    I use these all the time to toast, bake, and serve! They’ve been well-loved and well-worn and still get the job done perfectly every time.

    Links above are affiliate links and I may receive a commission from your purchase!
    Source link

  • Easy Almond Butter Recipe

    Easy Almond Butter Recipe

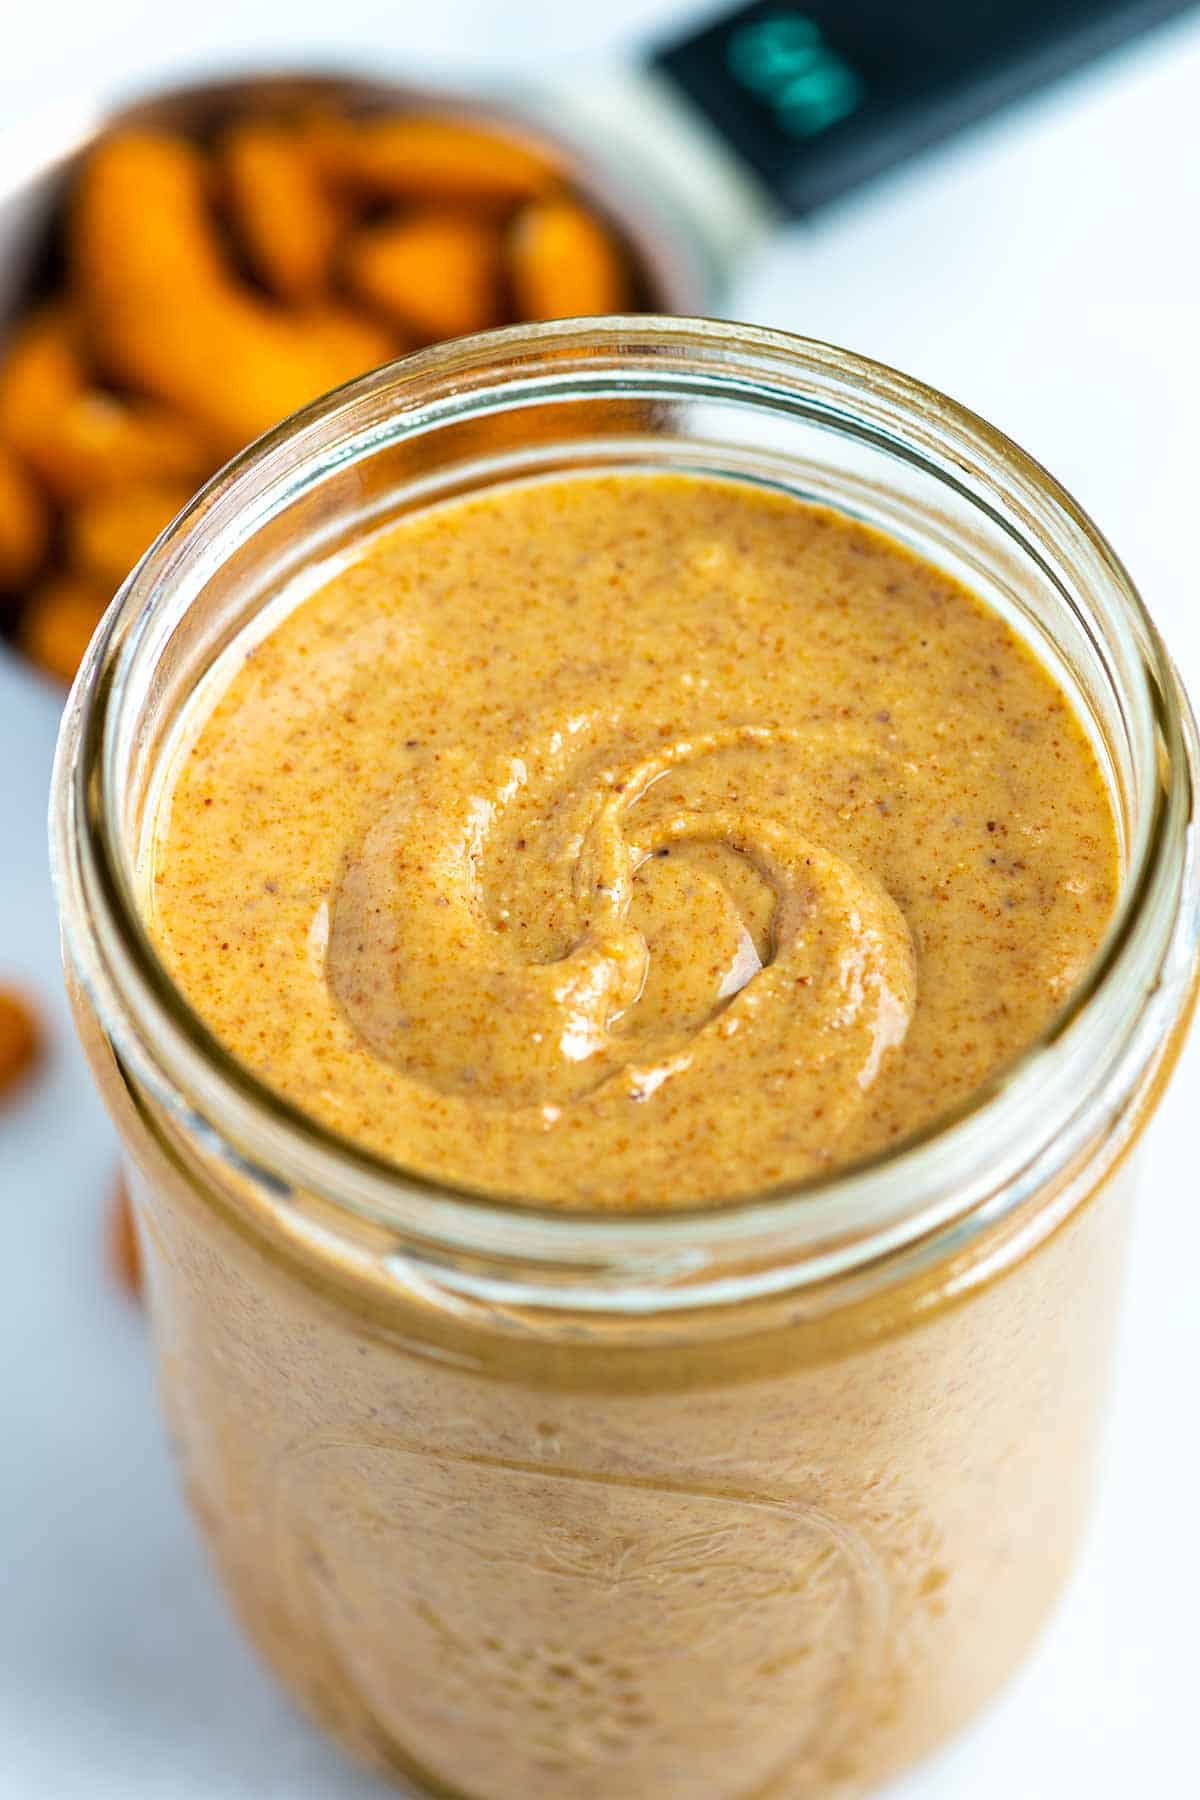
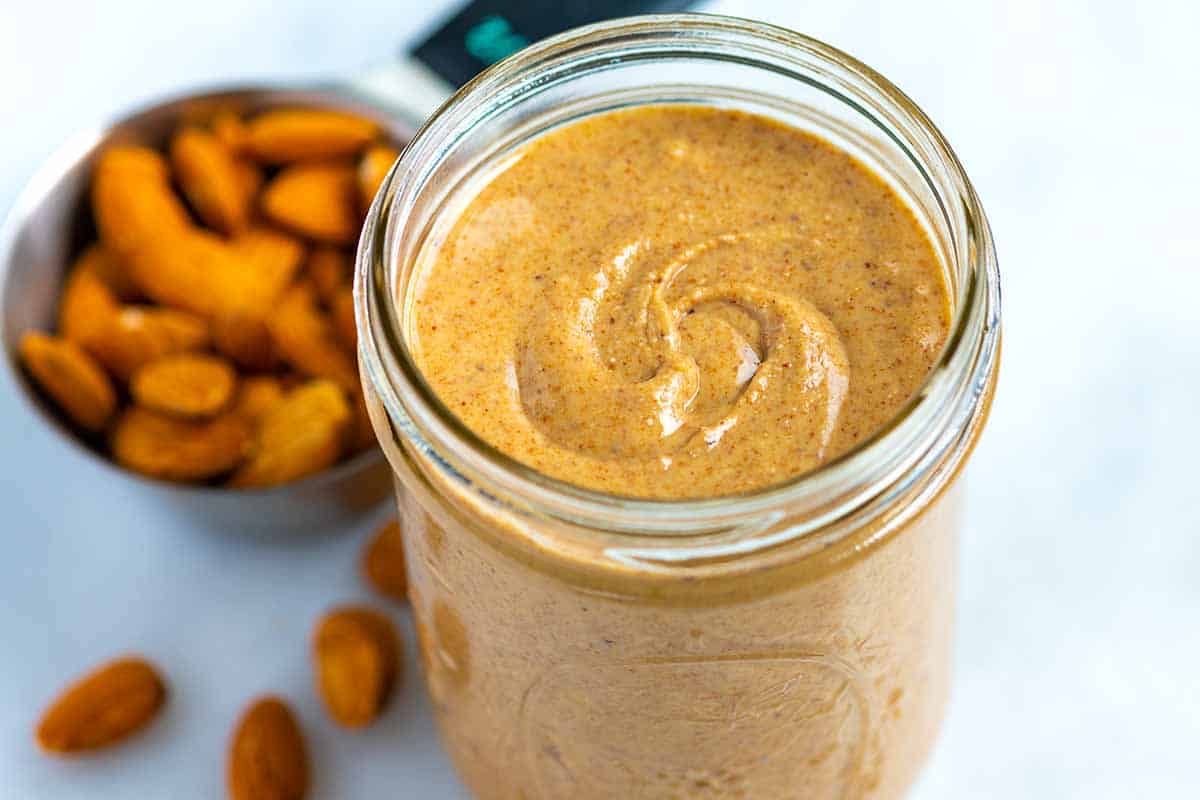
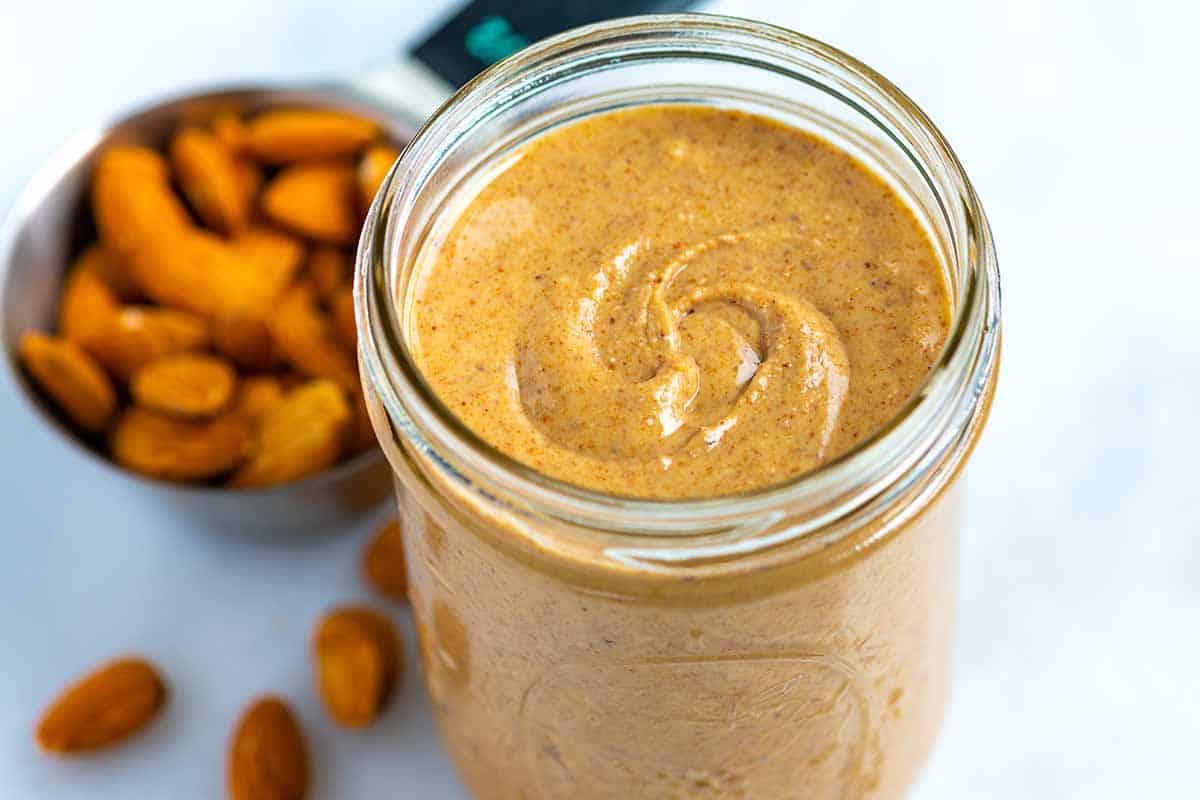
    Our homemade almond butter recipe is thick, creamy and tastes way better than anything you can buy at the store, trust me!
    Homemade Almond Butter

    Every time I make this recipe, I’m amazed at how much better it tastes compared to the jars I’ve bought from the store. My family loves adding a few extras like cinnamon and vanilla, which makes it seriously delicious!
    Making almond butter is just as simple as homemade peanut butter, cashew butter, and tahini. You even can make it super creamy or crunchy. I’ve shared how below.

    Key Ingredients

    • Almonds: I always start with raw, unsalted whole almonds and roast them in the oven until they’re perfectly toasty. Roasting the almonds before blending them into butter brings out their nutty flavor and releases their natural oils, resulting in a creamier texture.
    • Salt: Just a pinch of salt makes all the difference in flavor! You can adjust the amount to your liking.
    • Cinnamon and Vanilla: These are optional additions, but add a warm, sweet flavor that complements the almonds beautifully.
    • Sweetener: I like adding a drizzle of honey or maple syrup to balance the flavors. I don’t add much, but you can adjust it to your taste.

    Find the full recipe with measurements below.

    How to Make Almond Butter

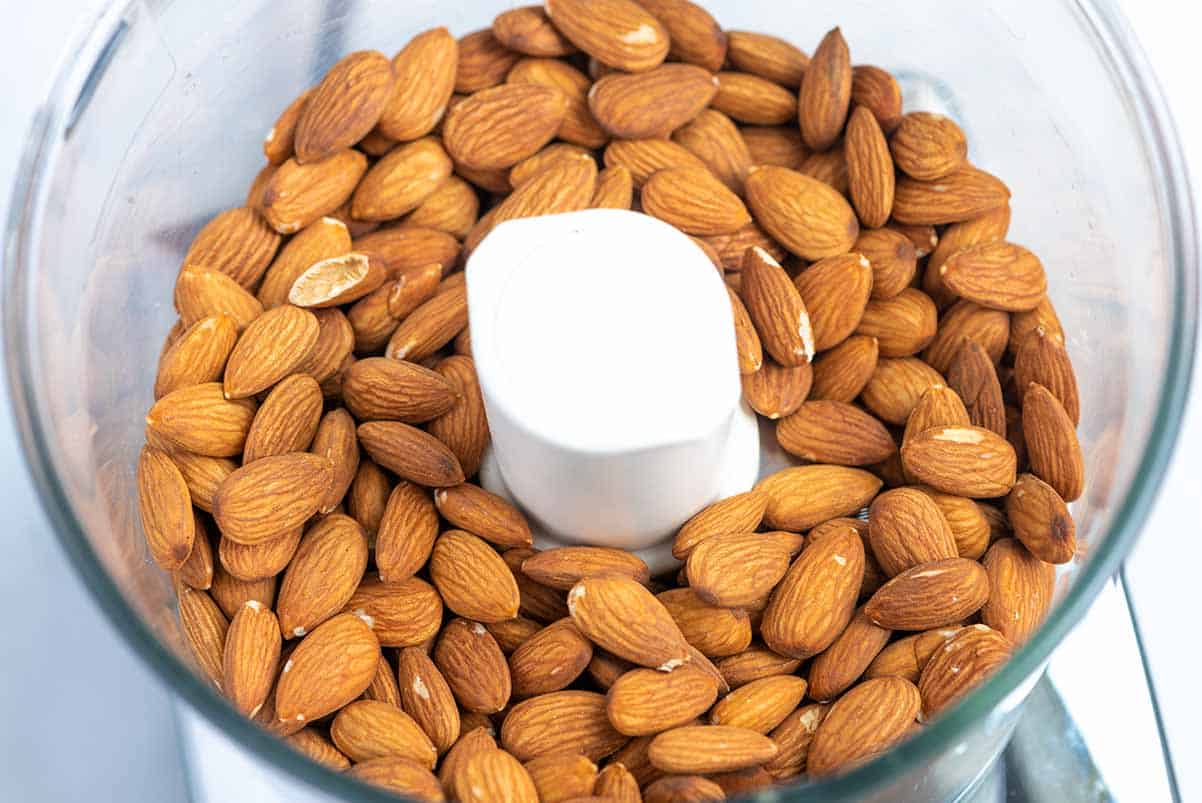
    Tip 1: Toast the almonds. I toast the raw almonds until fragrant in the oven, which takes about 10 minutes. After letting the almonds cool for a few minutes so they are not piping hot, we toss them into our food processor (you can also use a high-speed blender).

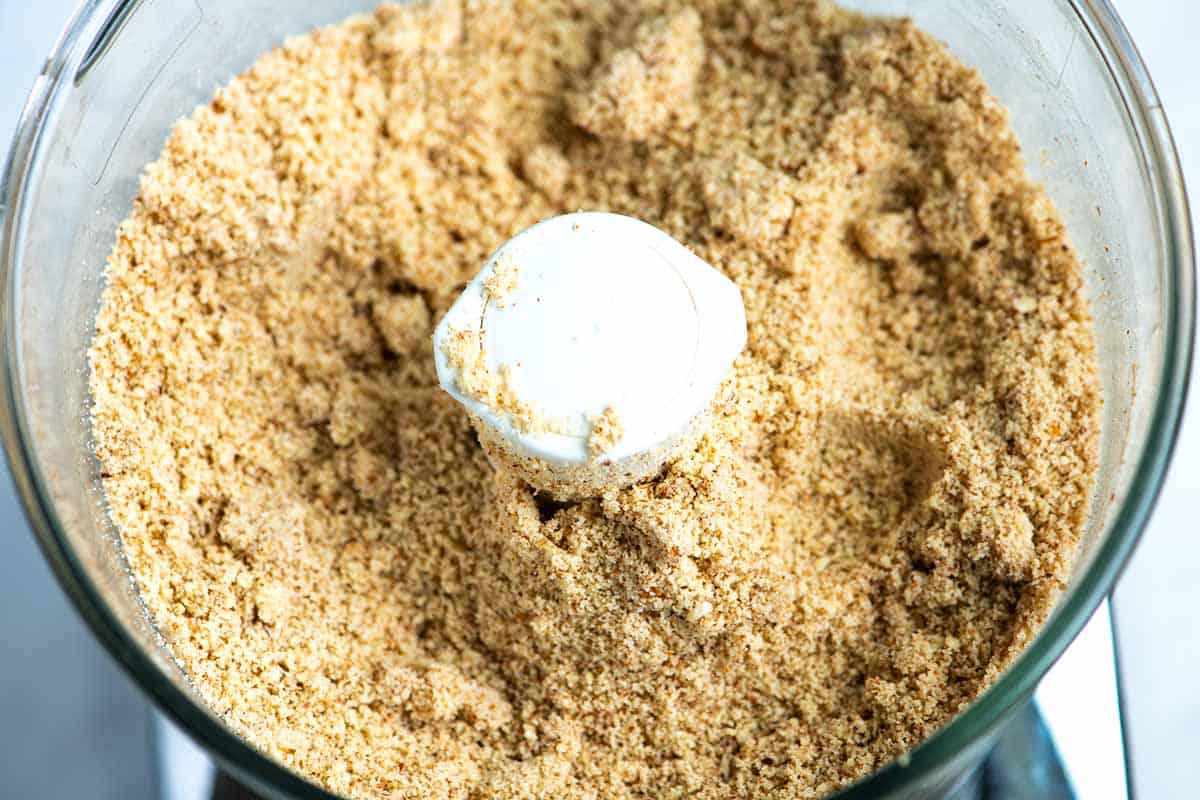
    Tip 2: Use a food processor. After processing for 20 seconds or so, the almonds turn into almond flour. It’s very fine and like a heavy powder. It’s hard to imagine that this eventually turns into silky smooth almond butter, but trust me. Give the almonds longer in the food processor so the heavy powder begins clumping on you. Then, after a minute or two of blending, we have creamy almond butter!

    As you process the almonds, you may need to open the lid, scrape down the sides, and break up any large clumps a few times to help it out.

    Whole toasted almonds in a food processor
    Almonds that have been processed into a almond meal/flour
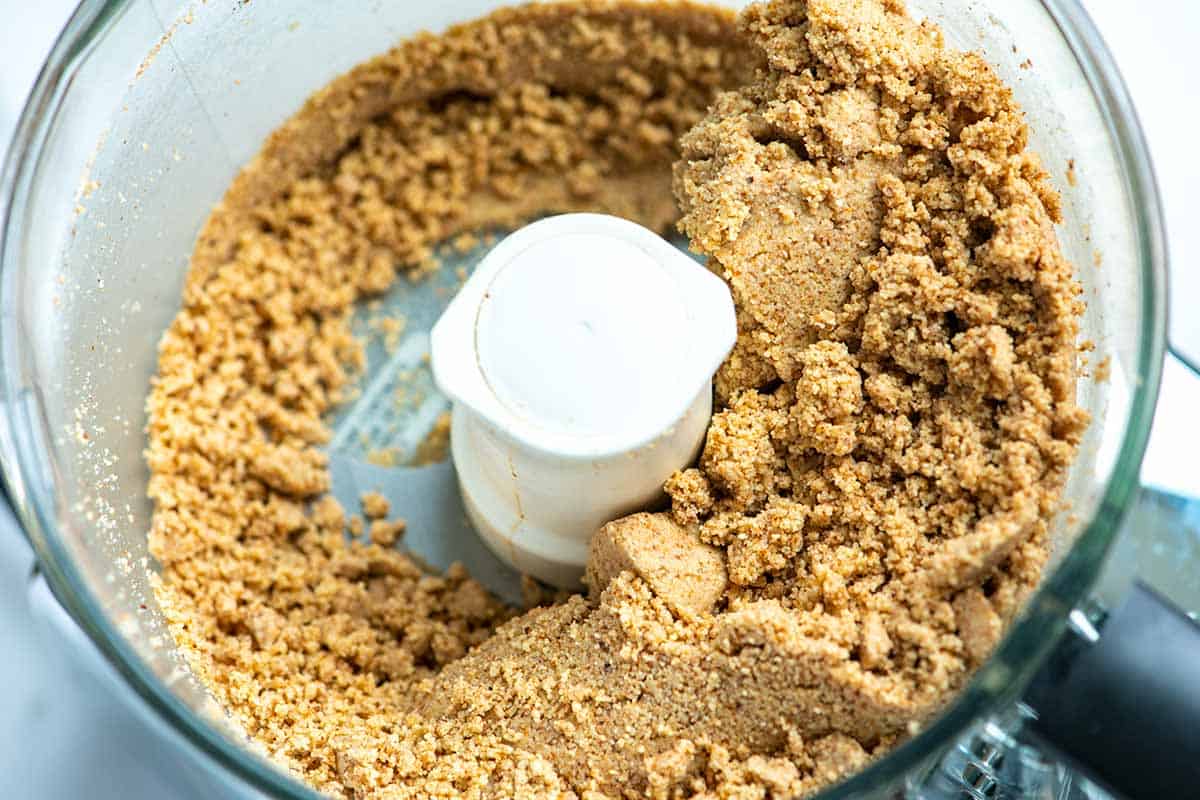
    A process shot of making almond butter. Before it turns creamy, it looks like a clumpy mess.

    Tip 3: Add extra flavor. Once you have creamy almond butter, you can add seasonings like salt, cinnamon, or vanilla extract. You can also add a sweetener like honey or maple syrup if it needs it. I love a little maple syrup.

    Homemade Almond Butter

    Easy Almond Butter

    • PREP
    • COOK
    • TOTAL

    My family loves this homemade almond butter! If you are anything like my family, you go through jars (and jars) of nut butter every week. We eat oatmeal most mornings and always add almond butter on top.

    We use a 12-cup food processor (10-cup should be sufficient), but a large high powered blender should also work.

    Makes 16 ounces (about 2 cups)

    You Will Need

    1 pound (450g) raw unsalted whole almonds (3 cups)

    1/4 teaspoon fine sea salt, plus more to taste

    1/4 teaspoon ground cinnamon, optional

    1/4 teaspoon vanilla extract, optional

    Honey or maple syrup, optional

    Directions

      1Preheat your oven to 350°F (176°C).

      2Add the almonds to a round or square cake pan (or rimmed baking sheet). Roast them for 3 minutes, shake the pan, then roast another 3 to 5 minutes or until the nuts are lightly browned and smell nutty (be careful as they can burn quickly). Let them cool until you can handle them.

      3For crunchy almond butter: Set aside 1/3 cup of the roasted almonds. Pulse them in a food processor 6 to 8 times until finely chopped. Transfer the chopped almonds to a bowl and set aside.

      4Add the remaining roasted almonds to the food processor. Process for 1 minute, then scrape down the sides of the bowl.

      5Continue processing for another 2 to 3 minutes until the almond butter is smooth and creamy. It will go through different stages, starting as whole nuts, turning into a fine powder, a clumpy mess, and finally, a smooth paste. Scraping down the sides and breaking up any clumps will help speed up the process.

      6Once smooth, add the salt, cinnamon, and vanilla. Process for 10 to 20 seconds.

      7Taste and adjust the seasonings if needed. If you prefer a sweeter almond butter, add a teaspoon or more of honey or maple syrup and process for another 5 to 10 seconds to incorporate it.

      8For crunchy almond butter: Stir in the reserved chopped almonds.

    Adam and Joanne’s Tips

    • Storing: Homemade almond butter lasts 3 to 4 weeks. I like to store mine in mason jars in the refrigerator.
    • Creamier almond butter: If your almond butter is too thick, add 2 to 3 teaspoons of neutral oil (like walnut oil or avocado oil), and process a little longer.
    • Blender method: Use a high-powered blender (which most are). More expensive models with a tamper (like Vitamix) will make the process much quicke
    • The nutrition facts provided below are estimates.

    Nutrition Per Serving
    Serving Size
    About 2 tablespoons
    /
    Calories
    156
    /
    Total Fat
    13.4g
    /
    Saturated Fat
    1g
    /
    Choesterol
    0mg
    /
    Sodium
    36.6mg
    /
    Carbohydrate
    5.8g
    /
    Dietary Fiber
    3.4g
    /
    Total Sugars
    1.2g
    /
    Protein
    5.7g


    AUTHOR:

    Joanne Gallagher

    Adam and Joanne of Inspired Taste

    We are Adam and Joanne Gallagher, the creators of Inspired Taste. Established in 2009, Inspired Taste grew from a childhood dream into one of the internet’s most trusted recipe sites with hundreds of reliable recipes, step-by-step videos, and expert tips.More About Us

    Source link

  • Easy BBQ Chicken Wings Recipe

    Easy BBQ Chicken Wings Recipe

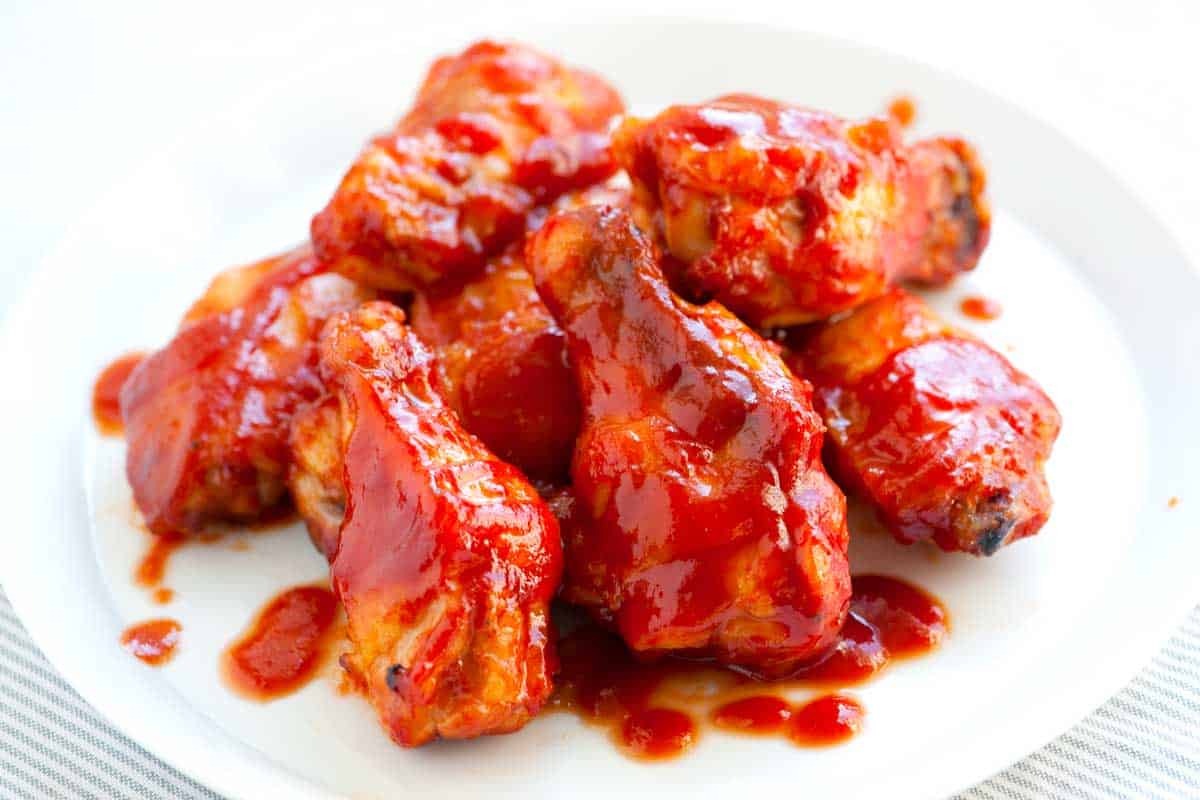
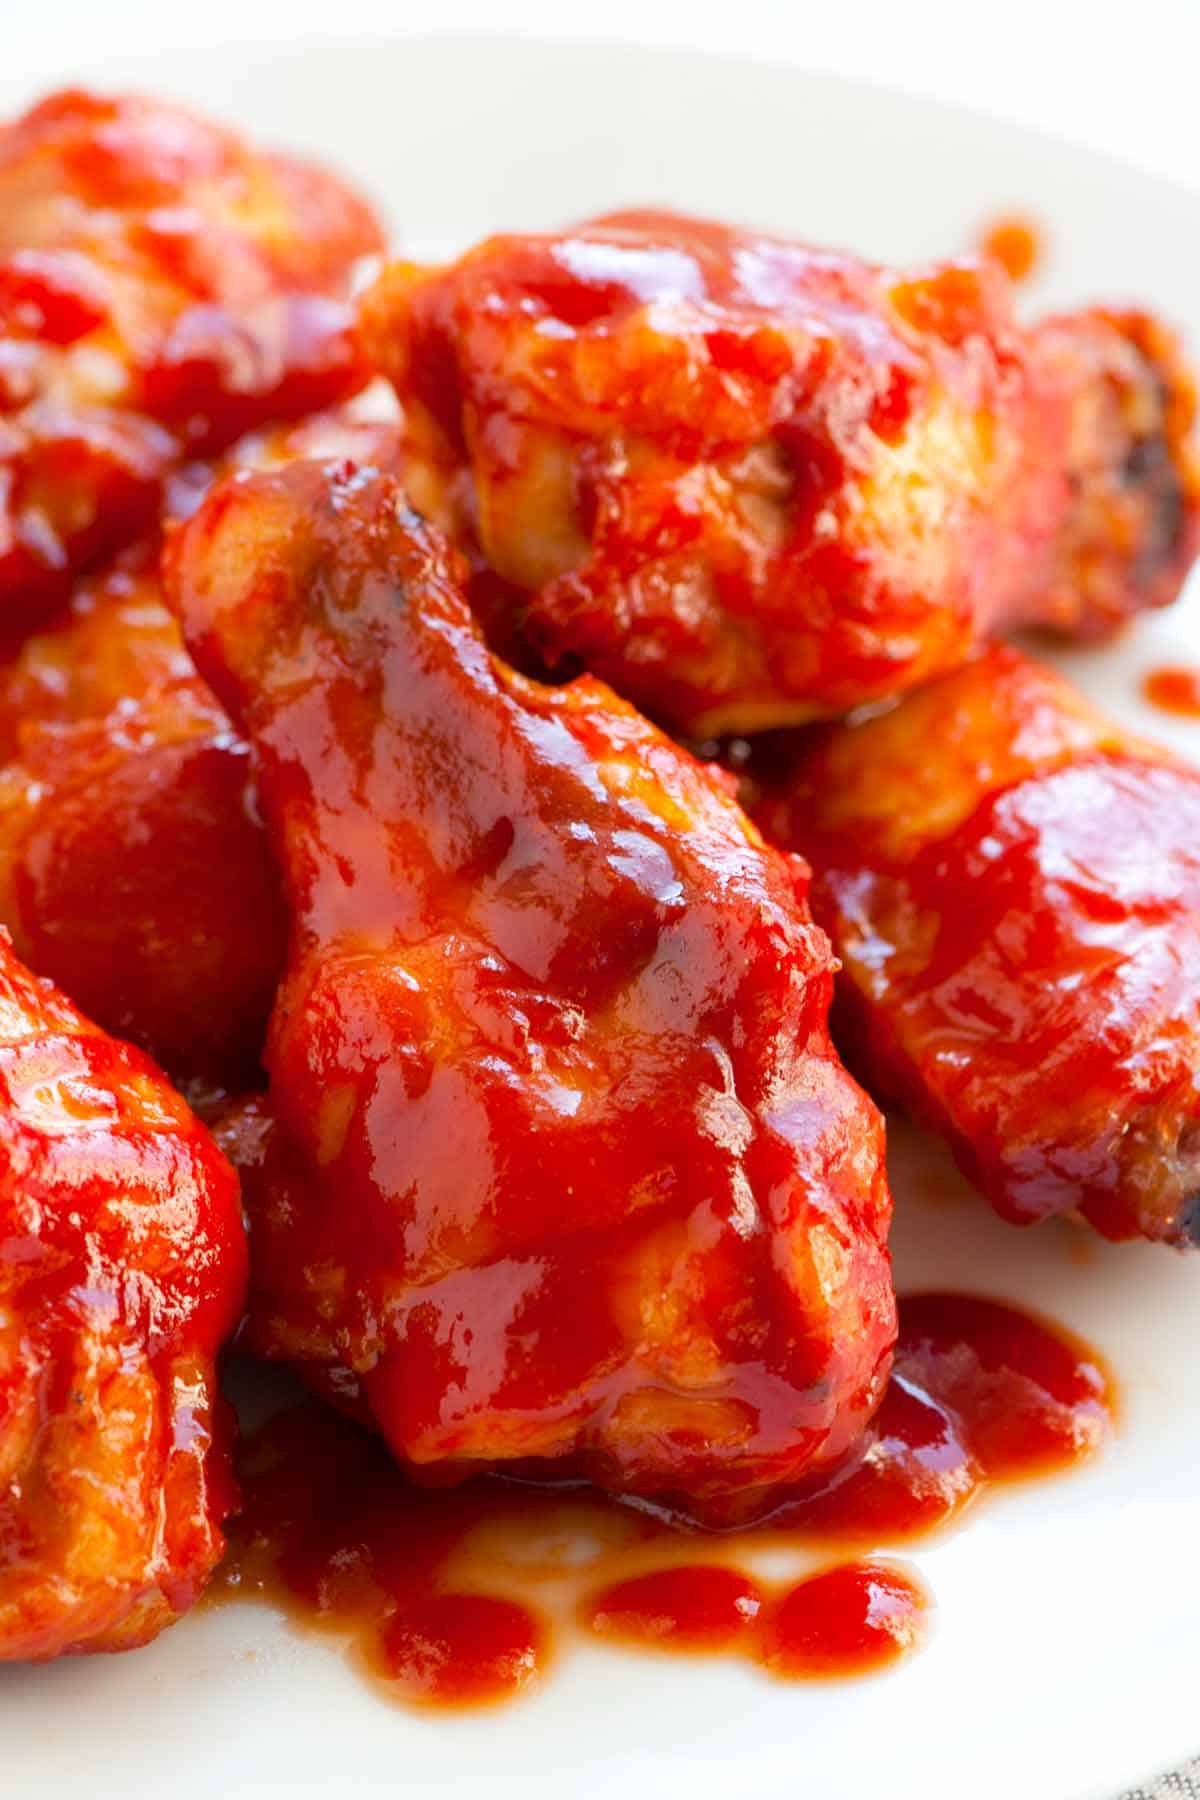
    Our brown sugar baked BBQ chicken wings are easy for you to make at home. With our recipe, you can skip the oil and fryer and make amazing wings tossed in our delicious homemade barbecue sauce. These barbecue wings are sweet, smoky, and just a little sticky!

    Baked BBQ Chicken Wings

    We love chicken wings, but the last thing we want to do at home is use a deep fryer. That’s why we’re such big fans of baking chicken wings at home. For this BBQ chicken wings recipe, we use the same method as our crispy baked hot wings, but instead of tossing the baked wings with buffalo sauce, we use our easy homemade BBQ sauce.

    This recipe guarantees crispy and delicious wings! They are also perfect for serving a crowd. This simple recipe lets you make big batches of wings with little work from you. For more recipes like this, look at our spicy chicken wings or these sweet chili chicken wings.

    Key Ingredients

    • Chicken Wings: We use chicken wings already split into the drumstick and wingette. Most stores sell them this way, but you can separate them yourself if you need to. You can also leave them whole (I do this in my grilled wings recipe). The recipe works either way. If you need guidance on separating the wings, check out our tutorial on how to cut a chicken wing.
    • Homemade BBQ Sauce: For the BBQ sauce, we use a sauce similar to the one we use for our oven baked ribs. You’ll need ketchup, brown sugar, apple cider vinegar, Sriracha, soy sauce, and cumin. It’s quick and easy. I also love this sweet and tangy BBQ sauce, which also works well with these wings.

    How to Make BBQ Chicken Wings

    Making BBQ wings at home is so easy. Below, we share how we make them, how long it takes to bake wings so they are crispy, and a quick and easy barbecue sauce to coat them in. There are 3 things to keep in mind for making the best wings:

    1. Instead of frying them, bake the chicken wings on a wire rack inside a rimmed baking sheet and toss in some homemade BBQ sauce. By cooking the chicken wings on a wire rack, fat drips away from them while they bake, helping to make them extra crispy.
    2. Bake the chicken wings at a high oven temperature (we like 400ºF) for 35 to 45 minutes. (You can bake wings at an even higher temperature, but depending on your oven, you might find the oven smokes a little.)
    3. Toss the baked wings with more BBQ sauce. Then, serve them with your favorite dipping sauce. We like homemade ranch or blue cheese dressing.
    BBQ Chicken Wings with Homemade BBQ Sauce

    Easy BBQ Chicken Wings

    • PREP
    • COOK
    • TOTAL

    Sweet, smoky, and just a little spicy, the sauce for these baked BBQ chicken wings comes together in 5 minutes and is fantastic. If you have a favorite store-bought BBQ sauce, feel free to use it instead. Baking your wings on a rack inset to your baking sheet helps make them extra crispy, so if you have one, use it!

    Serves 6

    You Will Need

    3 pounds (1.3kg) chicken wings, separated at joints, tips discarded

    1 cup (250g) ketchup, try homemade ketchup

    1/2 cup (100g) lightly packed brown sugar

    1 tablespoon apple cider vinegar

    1 tablespoon Sriracha chili sauce

    1 teaspoon light soy sauce

    1/2 teaspoon ground cumin

    Directions

      1Heat oven to 400°F (204°C). Set a wire rack inside a large-rimmed baking sheet. Spray rack with nonstick cooking spray.

      2Make BBQ sauce: In a medium saucepan over medium heat, stir together the ketchup, brown sugar, vinegar, Sriracha, cumin, and soy sauce. Cook for 2 to 3 minutes or until the sugar dissolves. Taste and adjust with additional soy sauce or sugar.

      3Divide the sauce in half, saving half for serving the wings.

      4Toss the chicken wings with the remaining half of BBQ sauce, and then place onto the prepared baking sheet.

      5Bake the chicken wings, turning once during cooking, until an internal thermometer registers 165°F, 35 to 45 minutes.

      6Serve the baked wings with the sauce you set aside earlier, either on the side or tossed with the chicken.

    Adam and Joanne’s Tips

    • No wire rack: If you do not have a wire rack that will fit inside a baking sheet, you can still make wings. Arrange them on the baking sheet, without the rack and rotate a few times during baking.
    • BBQ sauce: You will need 1 ¼ cups barbecue sauce, homemade or store-bought.
    • We have used the USDA database to calculate approximate values. 1 pound of wings will be 8 to 12 wings, depending on size.

    Nutrition Per Serving
    Serving Size
    1/6 of the recipe
    /
    Calories
    554
    /
    Total Fat
    29.2g
    /
    Saturated Fat
    8g
    /
    Cholesterol
    251.6mg
    /
    Sodium
    694mg
    /
    Carbohydrate
    30.4g
    /
    Dietary Fiber
    0.1g
    /
    Total Sugars
    27.2g
    /
    Protein
    39.9g


    AUTHOR:

    Joanne Gallagher

    Previous Post: Easy Cilantro Lime Slaw
    Next Post: Homemade Honey Almond Granola

    Source link

  • Easy Egg Salad Recipe

    Easy Egg Salad Recipe

    Our best egg salad recipe calls for just a few simple ingredients. I love it tucked into sandwiches, wrapped in lettuce or tortillas, spooned over greens, or eaten by itself as a quick snack.

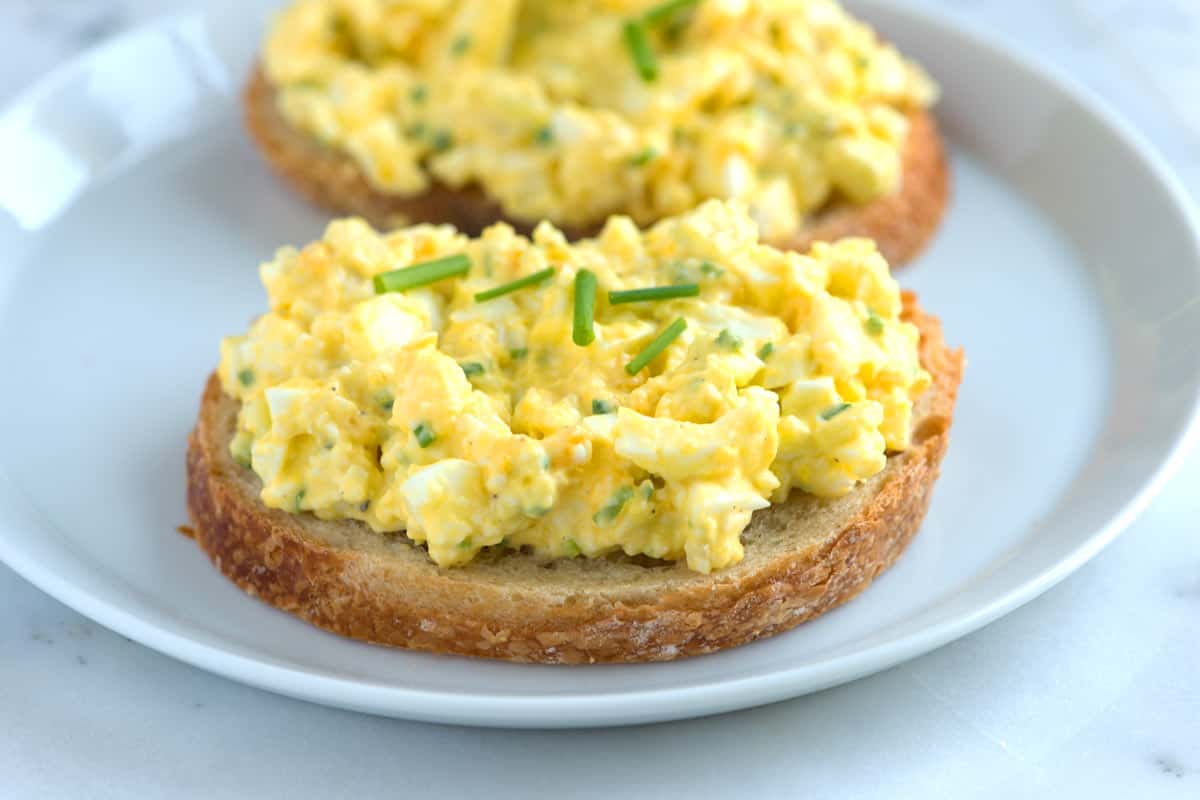
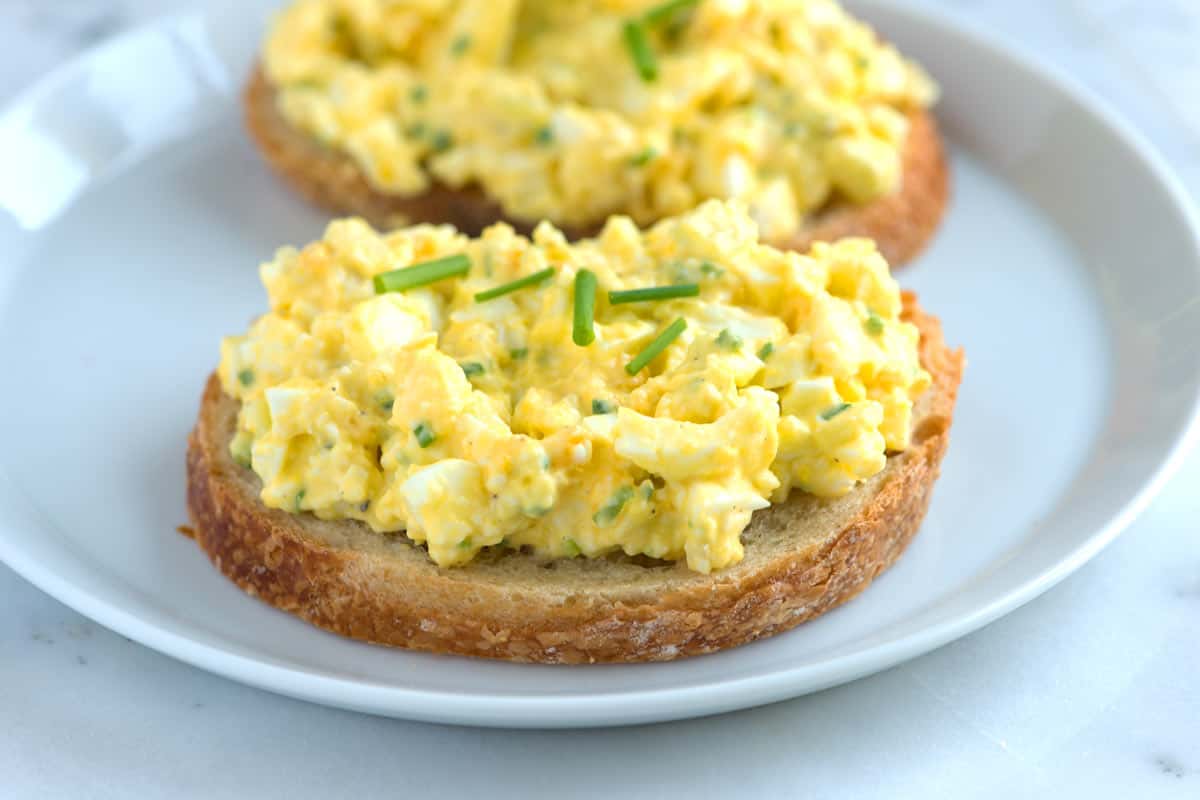
    Egg Salad on bread

    We’re a little picky about egg salad, so trust me when I say this is the one. It’s light instead of heavy, perfectly creamy without being too mayonnaisey, and brightened with fresh lemon juice and herbs for amazing flavor.

    It comes together fast, especially if you already have hard-boiled eggs in the fridge (and if not, don’t worry, I’ve shared how to make them below). It also keeps well for up to 4 days, so consider making a double batch for easy lunches or snacks all week.

    Key Ingredients

    • Eggs: You’ll need hard-boiled eggs for this recipe. They’re simple to make, and I’ve shared how in the tips section below.
    • Mayonnaise: Mayonnaise makes egg salad creamy and rich. For a lighter twist, substitute some or all of it with plain yogurt or mashed avocado (like I do in my avocado egg salad). When I have it on hand, I love using homemade mayonnaise for even better flavor.
    • Celery: A little finely chopped celery adds freshness and crunch. You can also experiment with minced onions, chopped dill pickles, or even diced apples (apples may sound unusual, but they are delicious).
    • Fresh Herbs: Chives are my favorite for egg salad, but parsley or dill work beautifully, too. I use chives in my favorite scrambled eggs recipe, too.
    • Lemon: A squeeze of fresh lemon juice brightens everything and balances the richness of the mayo, making the salad taste lighter and fresher.

    Find the full recipe with measurements below.

    How to Make My Favorite Egg Salad

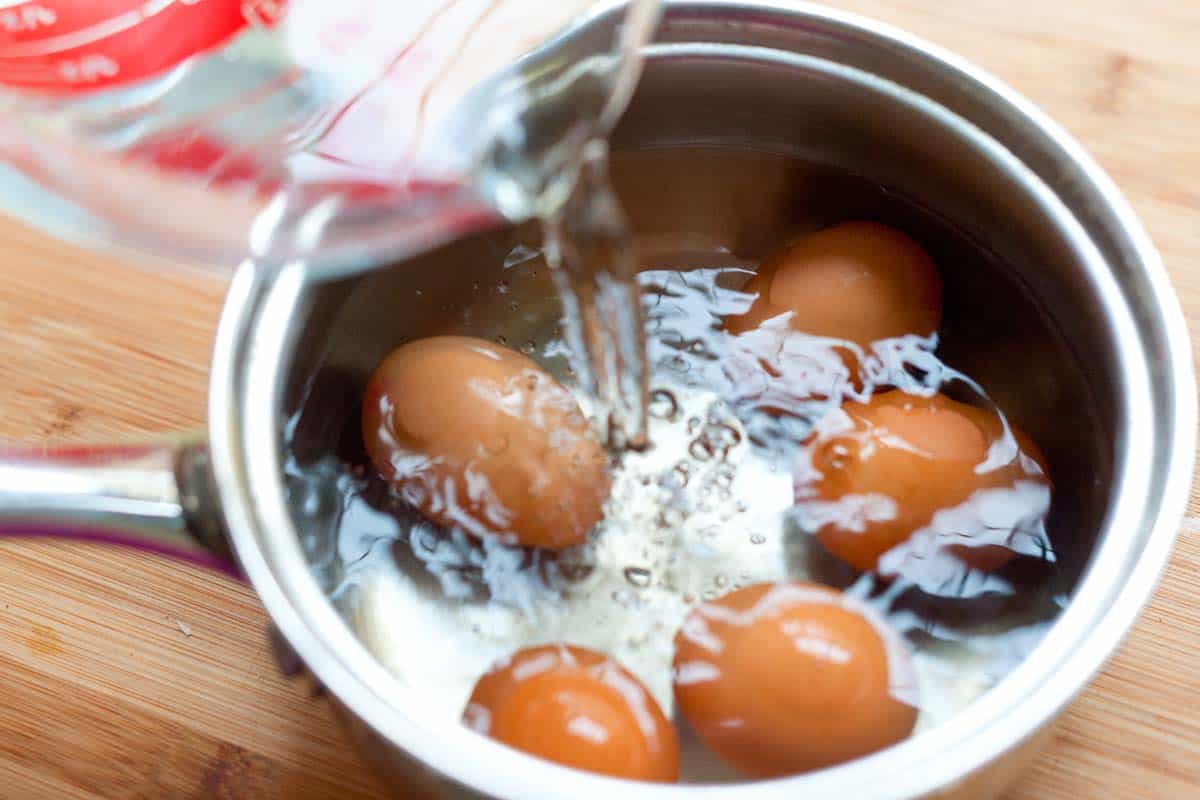
    Tip 1: How to boil eggs for egg salad. I have two favorite methods for making perfectly cooked eggs for egg salad. The first is done on the stovetop (see below), and the second uses the Instant Pot (you can find that method here: Instant Pot Boiled Eggs). Both methods give you tender whites and creamy yolks, perfect for egg salad.

    To cook eggs on the stove:

    1. Add the eggs to a saucepan in a single layer and cover with at least an inch of water.
    2. Bring the water to a boil, then let it boil for 30 seconds.
    3. Turn off the heat, cover with a lid, and let the eggs sit for 12 minutes (for large eggs).
    4. Transfer the eggs to an ice water bath to cool, then peel.
    Boiling eggs in a saucepan with water for egg salad
    Placing boiled eggs into a bowl of ice water to stop the cooking before peeling them.

    Tip 2: Make the salad. Once you have cooked eggs, the salad goes quickly. Peel your eggs, then chop them into small pieces. Add them to a bowl and toss with finely chopped celery, chives, a bit of lemon juice, and mayonnaise. Season with salt and pepper, and you’re all set.

    Making egg salad - ingredients ready to be stirred together in a bowl

    Serving Suggestions

    I love this salad for egg salad sandwiches, which I usually keep open-faced on lightly toasted bread spread with a bit of butter. This is also fantastic wrapped, either in flour tortillas or in lettuce cups. I’ll often munch on this all by itself or with some sliced cucumbers or crackers.

    It’s a great topping for salad (especially with this lemon vinaigrette). And, finally, it makes incredible toasts for breakfast. Start with avocado toast, then add the egg salad, some thinly sliced radish, and more fresh herbs. Delicious!

    More Easy Salads

    Classic Egg Salad with visible chunks of egg, diced celery, and a sprinkle of chives.

    Easy Egg Salad

    • PREP
    • COOK
    • TOTAL

    This is my favorite way to make egg salad! I keep it really simple with mayo, herbs, a little crunch from celery, and some lemon juice. I don’t add mustard, but if you love it, add 1/2 to 1 teaspoon. Instructions below include cooking the eggs on the stove. If you have an Instant Pot, see my Instant Pot hard boiled eggs. If you love avocado, I also recommend our avocado egg salad!

    Makes 2 Servings

    You Will Need

    4 large eggs

    2 tablespoons mayonnaise or substitute plain or Greek yogurt, try homemade mayo

    1 medium-length celery stalk, finely chopped

    1 tablespoon finely chopped chives, parsley or dill

    1 teaspoon fresh lemon juice

    Salt and fresh ground black pepper

    Directions

      1Cook the eggs: Place the eggs in a single layer in a saucepan and cover with cold water by 1 to 2 inches. Heat over high heat until the water comes to a rolling boil. Cover the saucepan with a lid, cook for 30 seconds, then remove from the heat and let stand for 11 to 12 minutes. A minute or so before the eggs finish cooking, prepare a bowl of ice water.

      2Cool the eggs: Transfer the cooked eggs to the ice water using a slotted spoon and leave for 5 minutes (or longer).

      3Prepare the eggs: Crack egg shells and carefully peel them away. If the shells are not easily peeling away from the eggs, place them back into the ice water and try again in 5 minutes.

      4Make the salad: Dice the hard-boiled eggs and add them to a bowl. Stir in the mayonnaise, celery, herbs, lemon juice, salt, and pepper. Taste and adjust with more salt or pepper.

    Adam and Joanne’s Tips

    • Storing: Homemade egg salad can be stored in an airtight container in the fridge for up to 4 days. We do not recommend freezing it.
    • Eggs: Instructions for eggs are for large eggs, for medium or extra-large, see this hard boiled eggs tutorial with accurate timing.
    • The nutrition facts provided below are estimates. We assumed mayonnaise and did not include any bread.

    Nutrition Per Serving
    Serving Size
    Half the recipe
    /
    Calories
    241
    /
    Protein
    13 g
    /
    Carbohydrate
    2 g
    /
    Dietary Fiber
    0 g
    /
    Total Sugars
    1 g
    /
    Total Fat
    20 g
    /
    Saturated Fat
    5 g
    /
    Cholesterol
    375 mg


    AUTHOR:

    Adam Gallagher

    Adam and Joanne of Inspired Taste

    We are Adam and Joanne Gallagher, the creators of Inspired Taste. Established in 2009, Inspired Taste grew from a childhood dream into one of the internet’s most trusted recipe sites with hundreds of reliable recipes, step-by-step videos, and expert tips.More About Us

    Source link

  • Fresh Pineapple Avocado Salsa Recipe

    Fresh Pineapple Avocado Salsa Recipe

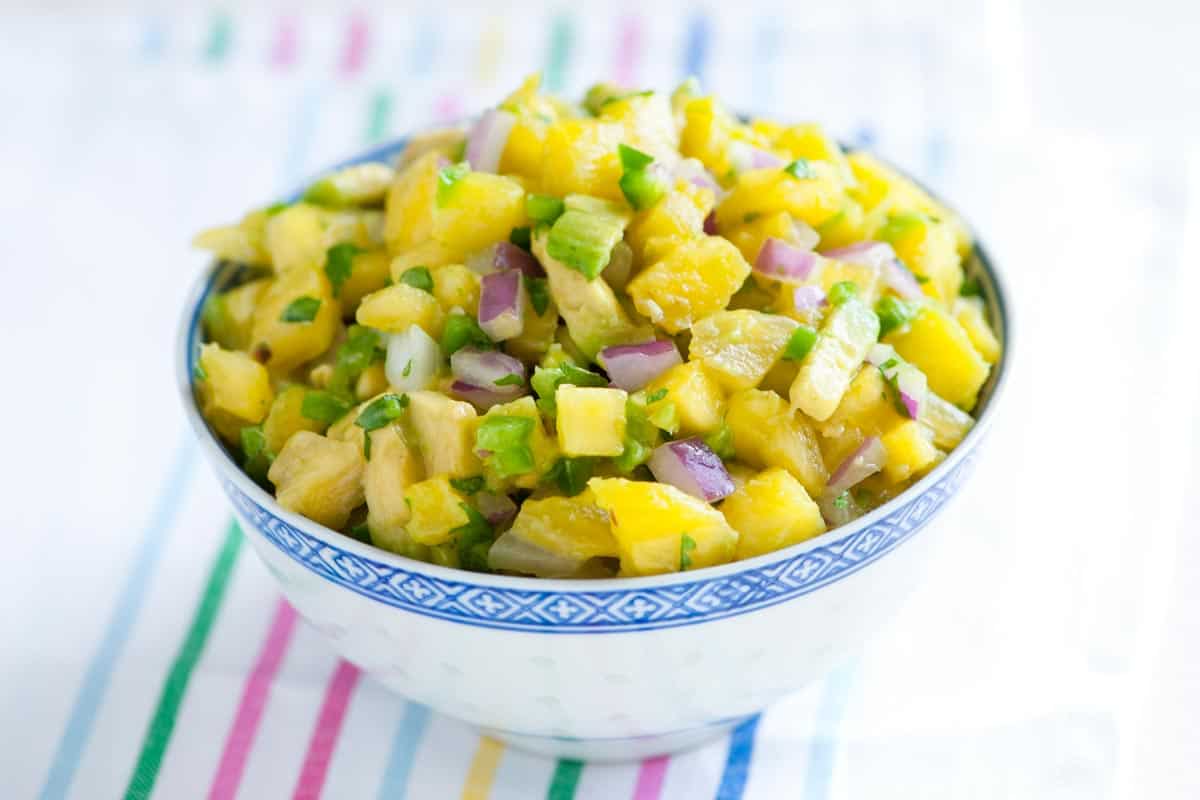
    This fresh pineapple avocado salsa recipe is perfect with tortilla chips and works really well as a topping for tacos, fish, and grilled meats. It’s simple, quick, and absolutely delicious!

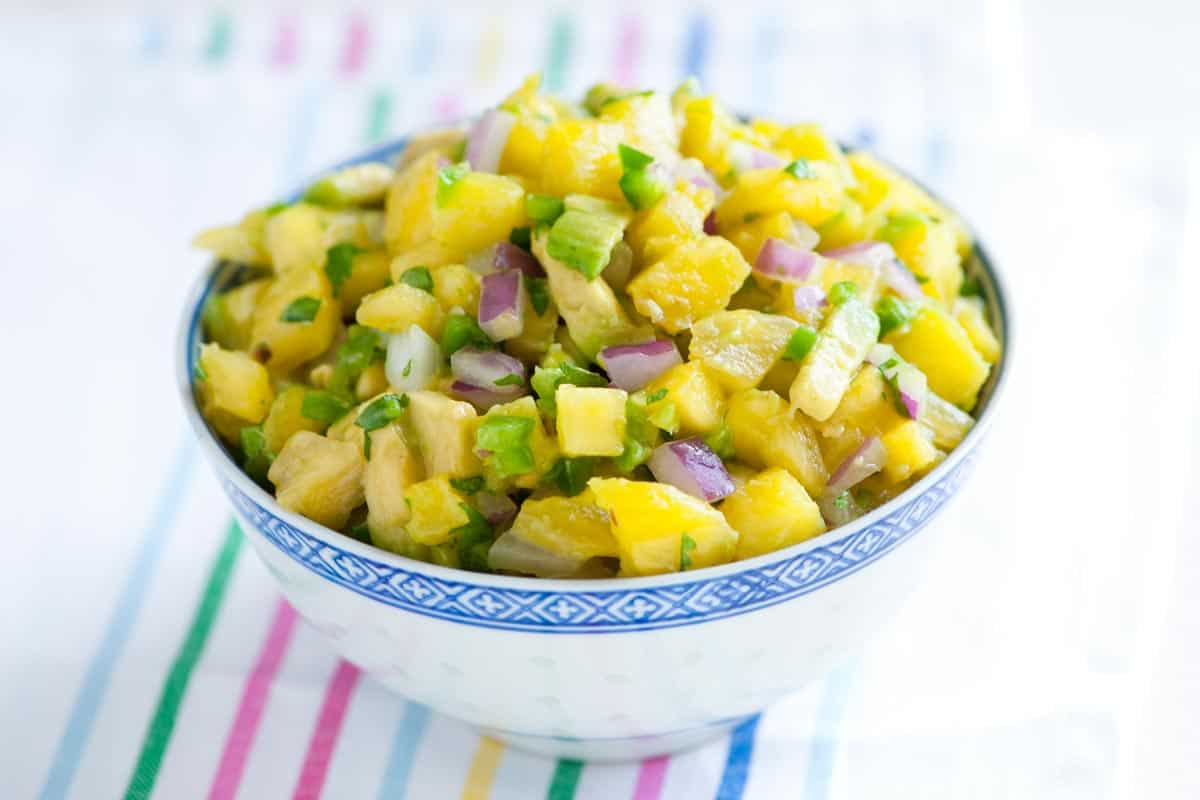
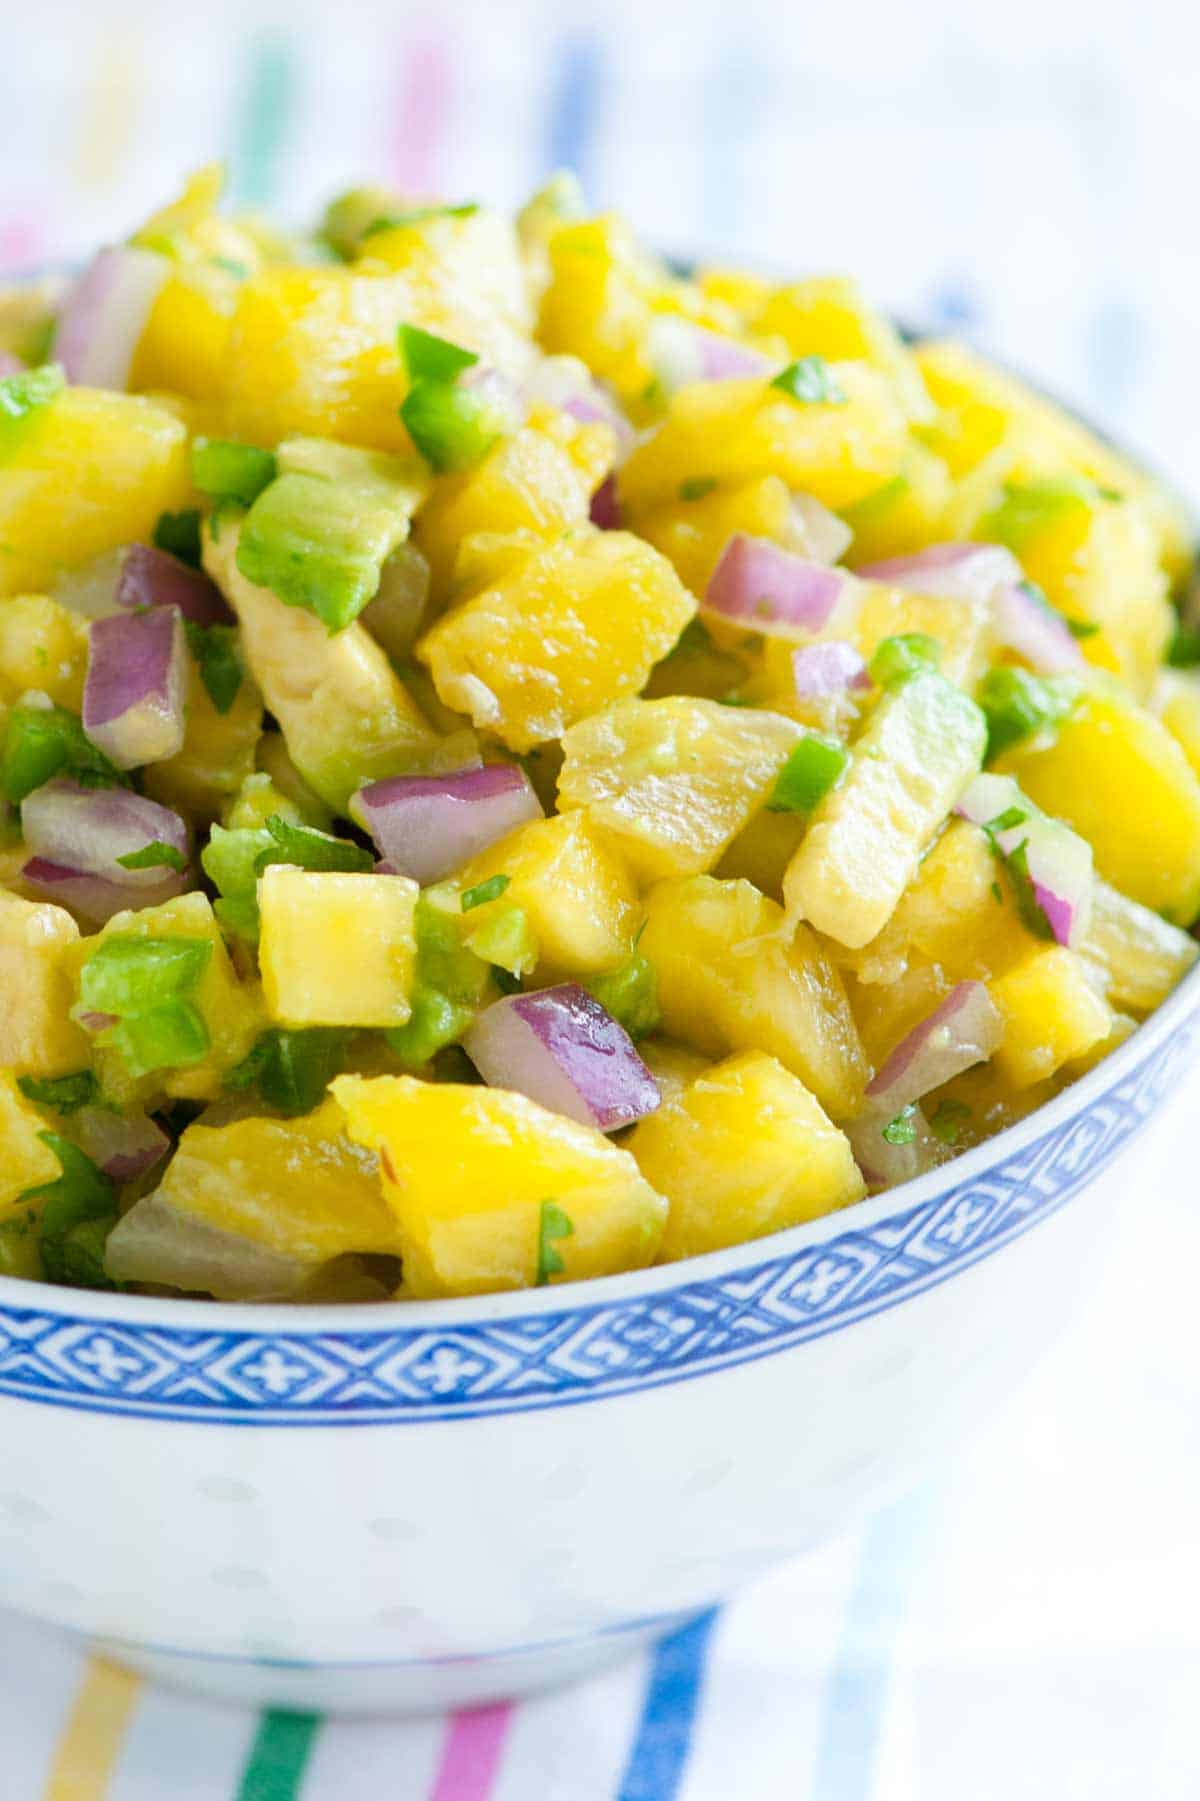
    Fresh Pineapple Avocado Salsa

    This pineapple avocado salsa makes me so happy! I mean, look at it, it’s beautiful. More importantly, it’s really delicious. The pineapple is sweet, the avocado creamy, and there’s just enough heat from jalapeños and lime.

    Many people think of pineapple for sweet recipes like pineapple upside-down cake or carrot cake, but I’m here to tell you that this pineapple salsa is incredible! I love it on top of almost all our favorite taco recipes. It’s wonderful spooned over grilled steak or fish (like this grilled swordfish) and works really well beside a bowl of homemade tortilla chips.

    Key Ingredients

    • Pineapple: I love fresh pineapple for this salsa. Look for a large pineapple with golden or yellow hues on its skin/peel (that means it will be sweet). Another trick is to smell it. You’re on the right track if you smell a hint of sweet pineapple. And lastly, it should be firm, but give just a little when you feel it. Put anything back that’s bruised or soft. If fresh pineapples are out of season for you, pick up canned pineapple in light syrup instead, but drain it before chopping and adding it to the salsa.
    • Avocado: I love the cool, creamy texture of avocado with the pineapple. Here are our tips for choosing avocados if you aren’t sure.
    • Red Onion: I love the look of red onion and think it makes our salsa really pretty. That said, feel free to use sweet or white onion instead. I use the same trick of minimizing the raw bite of the onion in this salsa as I do when making guacamole. I chop them, then cover the onion with cold water for 5 minutes. After a quick drain and rinse, this process cuts the raw bite of the onion a bit.
    • Jalapeños: Since the pineapple is sweet, I like adding some heat with fresh chile. We call for two peppers in the recipe, but you can always adjust to your tastes. Use both peppers for a medium spicy salsa, but remove the seeds and white membrane inside them (that’s where most of the heat comes from). If you love spicy food, leave the seeds in.
    • Lime and Cilantro: I love using the zest and juice of my lime for this salsa, and I am pretty generous with the cilantro, too. The sweetness of the pineapple can take it. If you don’t like cilantro as much as I do, cut back or substitute with something else (mint, basil, and parsley are good options).

    Find the full recipe with measurements below.

    How to Make Pineapple Avocado Salsa

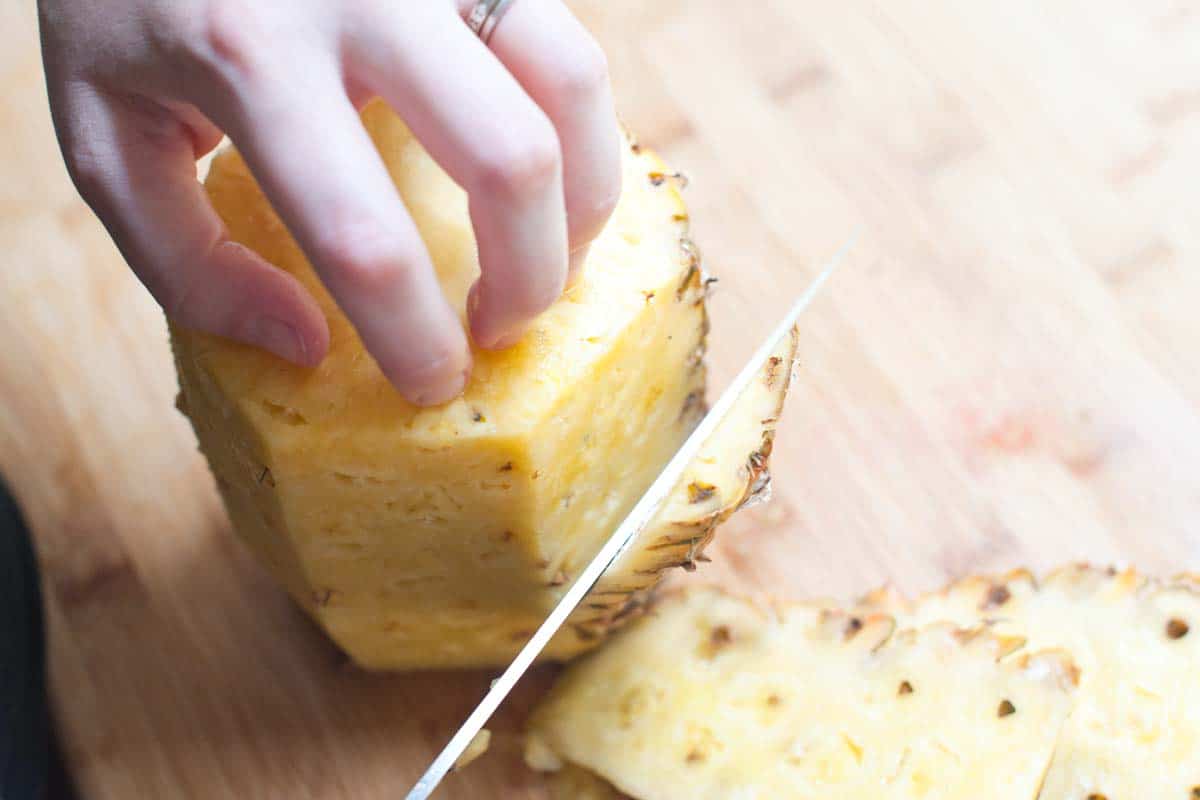
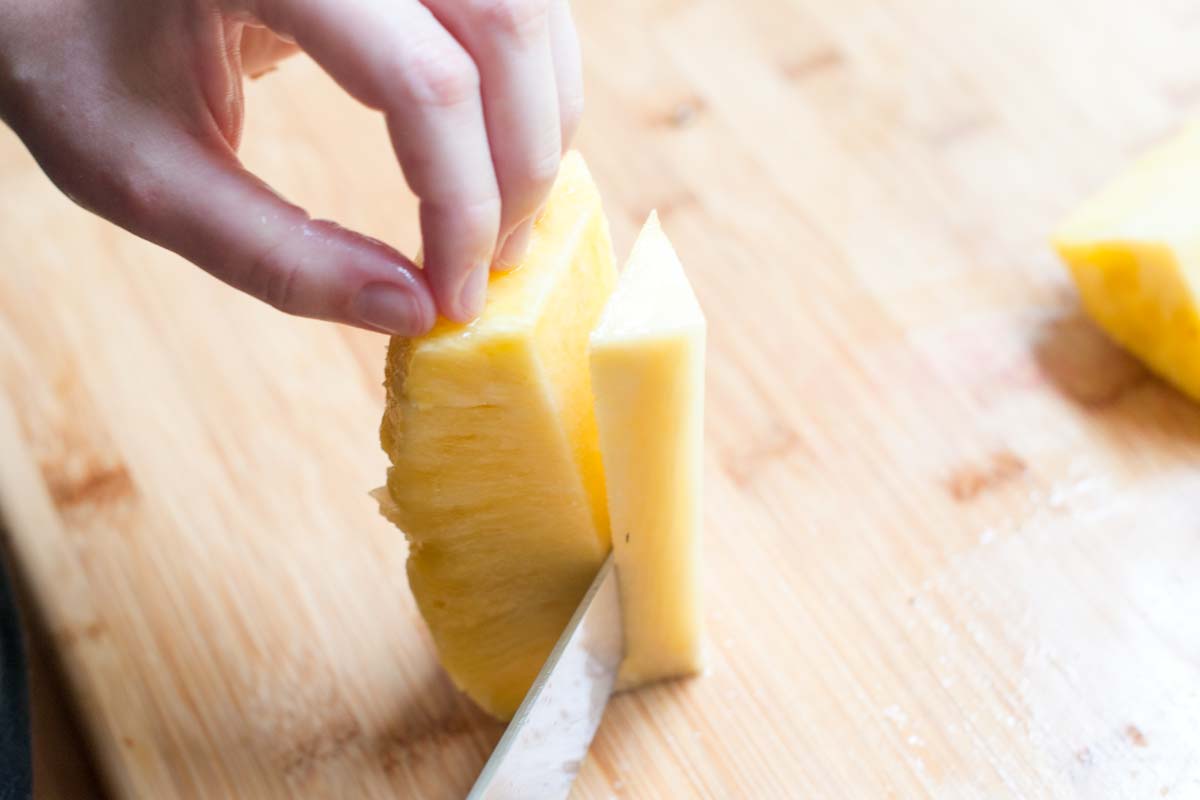
    Tip 1: Prepare the pineapple. Remove each end (the bottom and leafy top). Then, use your knife to cut away it’s peel, following the pineapple’s curve from top to bottom. Then, remove the core. Cut the pineapple into quarters and use a knife to cut away the inner fibrous core. From there, you can cut into small pieces.

    How to cut a pineapple for salsa - Removing the peel
    Removing pineapple core to make salsa

    Tip 2: Tame the onions. I love onions, but do not enjoy them when their raw, pungent flavor overpowers everything else, leaving you with onion breath. My answer is to let the onions sit in cold water for 5 to 10 minutes before draining. This super simple trick cuts down on that strong onion flavor, while retaining their crunch.

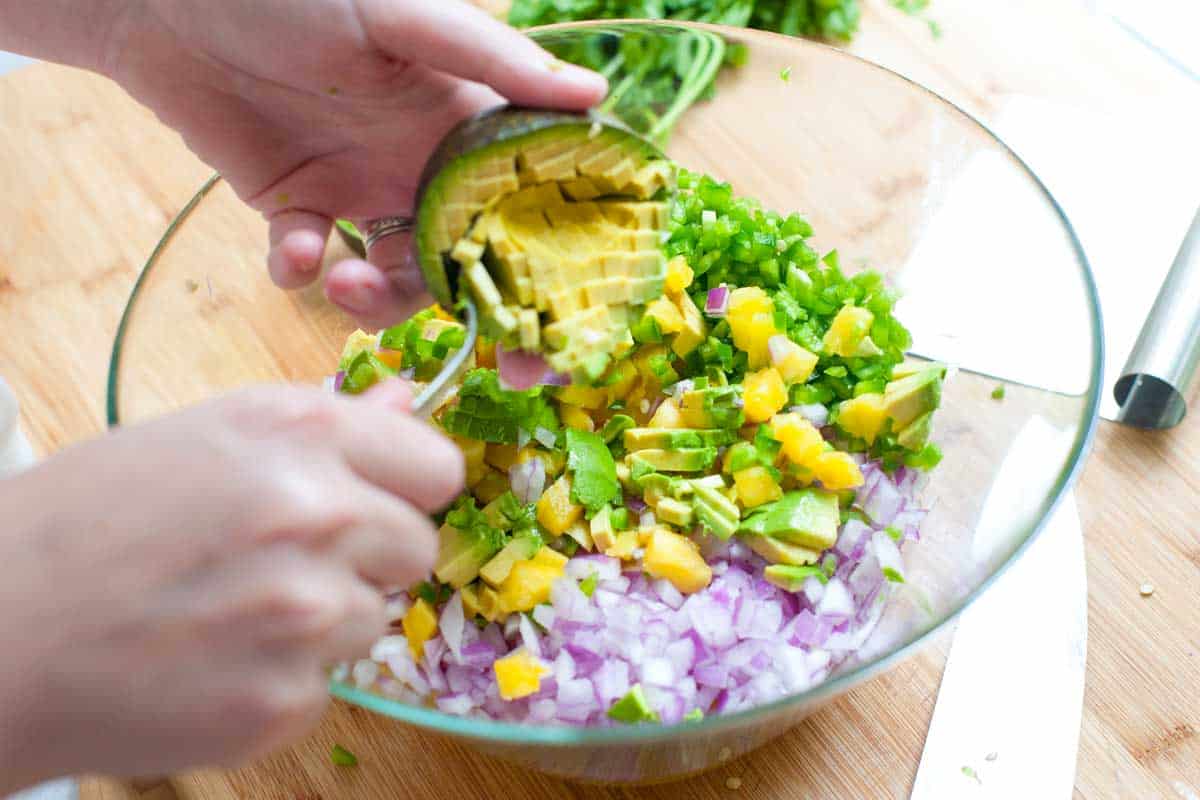
    Tip 3: Make the salsa. The salsa is as simple as tossing everything together and serving. Make sure you taste it before serving to see if it needs a bit of extra salt. Then, enjoy!

    Tossing all salsa ingredients in a large bowl.

    More Salsa Recipes

    Pineapple Avocado Salsa

    Fresh Pineapple Avocado Salsa

    • PREP
    • TOTAL

    We love this easy salsa with pineapple and avocado! I love fresh pineapple for this recipe, but you can use drained canned pineapple if that is all you have access to. Serve this simple salsa next to homemade tortilla chips or with your favorite tacos.

    6 Servings

    You Will Need

    1 medium pineapple, peeled, core removed, and cut into 1/4-inch pieces (about 5 cups)

    1 cup finely chopped red onion, about half an onion

    2 jalapeños, or to taste

    1 medium avocado, peeled and cut into 1/4-inch pieces

    1 lime, zested and juiced

    1/3 cup loosely packed cilantro leaves and tender stems, chopped

    1/4 teaspoon sea salt, or more to taste

    Directions

      1Add the chopped red onion to a small bowl and cover with cold water. Set aside for 5 minutes. Drain, then rinse. This tones down the raw flavor of the onion.

      2For a mild salsa, remove the seeds and white membrane of both jalapeño peppers, and then finely mince. For a spicier salsa, leave some or all of the seeds and membrane.

      3Add the pineapple, drained onion, minced jalapeños, lime zest, lime juice, cilantro, and salt to a large bowl. Toss well, taste, and then adjust with more salt as needed.

    Adam and Joanne’s Tips

    • Storing: Avocado pineapple salsa is best eaten the same day, as the avocado may begin to brown after a night in the fridge. Without the avocado, the salsa lasts in the refrigerator for up to 3 days, but expect a bit more liquid at the bottom of the bowl.
    • Ways to serve it: I love this salsa next to guacamole with a big bowl of tortilla chips, but it is a fantastic taco topping. Try it on our veggie tacos, shrimp tacos, or shredded chicken tacos, or ground pork tacos. It’s also amazing spooned on top of these chicken nachos, grilled swordfish, grilled chicken, and steak!
    • The nutrition facts provided below are estimates.

    Nutrition Per Serving
    Serving Size
    1/6 of the recipe
    /
    Calories
    63
    /
    Total Fat
    3.6g
    /
    Saturated Fat
    0.5g
    /
    Cholesterol
    0mg
    /
    Sodium
    222.8mg
    /
    Carbohydrate
    8.4g
    /
    Dietary Fiber
    2.5g
    /
    Total Sugars
    3.9g
    /
    Protein
    0.9g


    AUTHOR:

    Joanne Gallagher

    Adam and Joanne of Inspired Taste

    We are Adam and Joanne Gallagher, the creators of Inspired Taste. Established in 2009, Inspired Taste grew from a childhood dream into one of the internet’s most trusted recipe sites with hundreds of reliable recipes, step-by-step videos, and expert tips.More About Us

    Source link

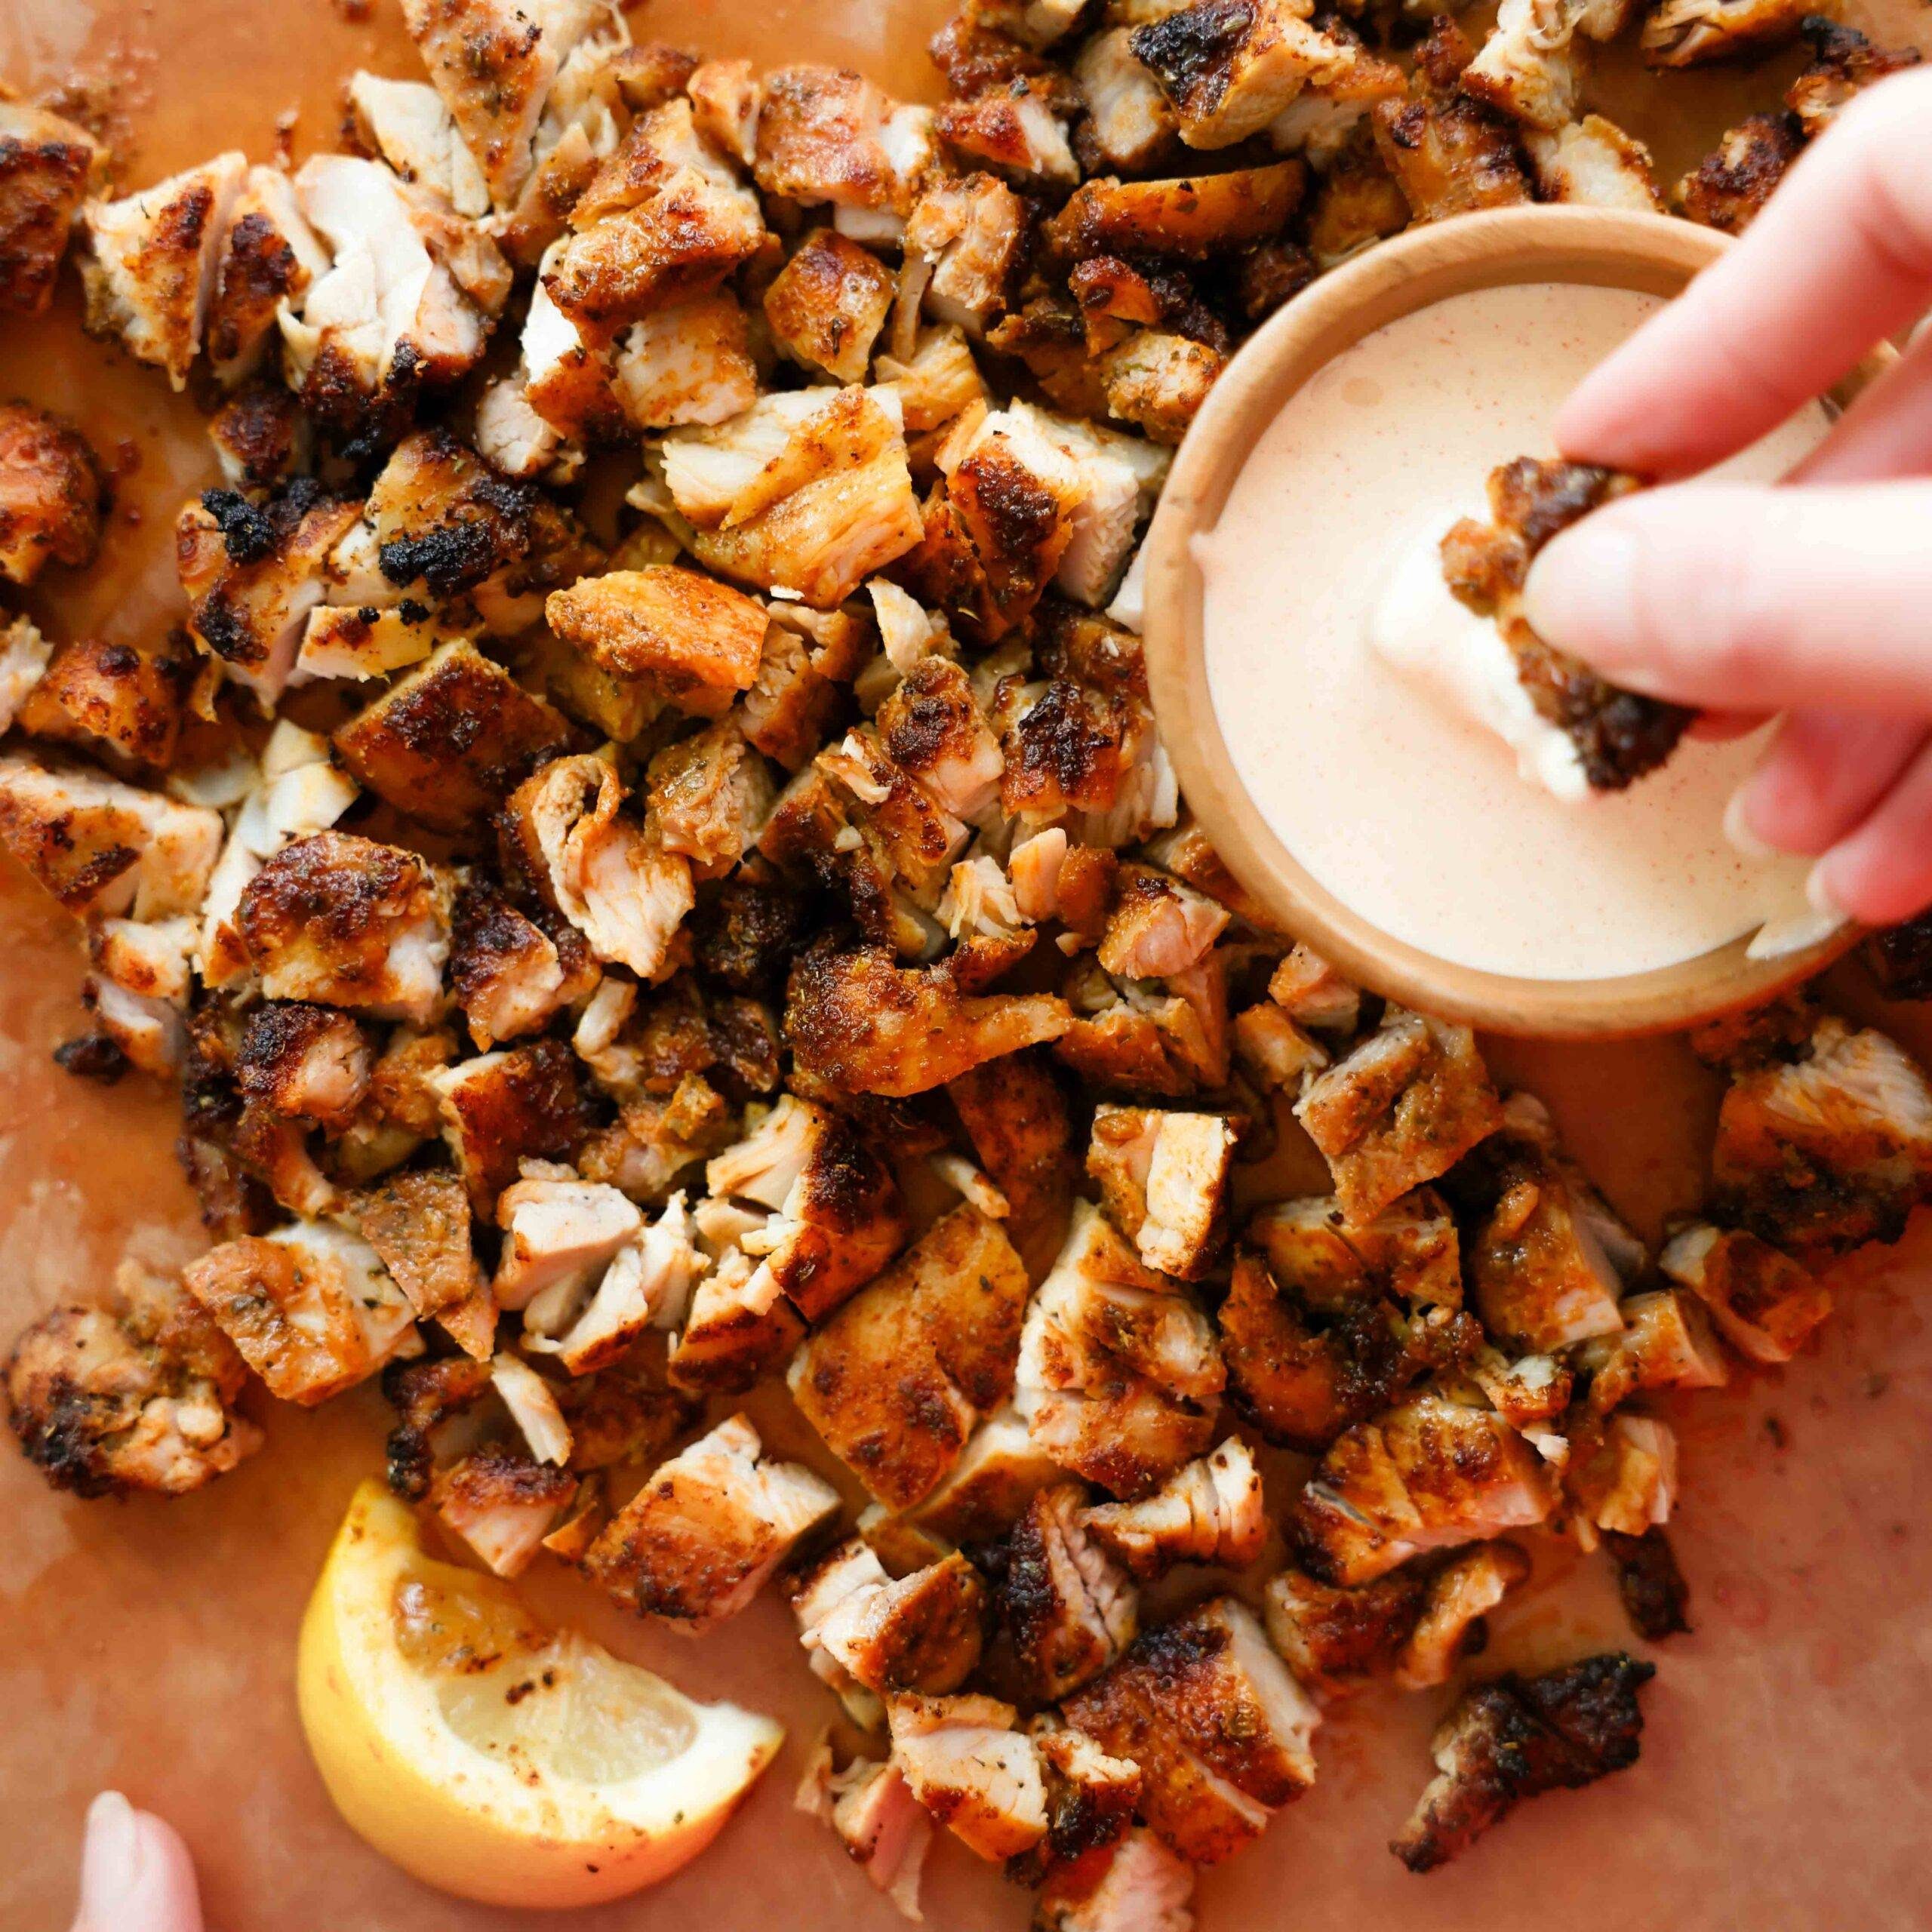
  • Air Fryer Chicken Thighs Recipe

    Air Fryer Chicken Thighs Recipe

    Smoky Paprika Aioli (my current favorite sauce with this): Whisk 1/2 cup mayo, 1/4 cup yogurt, 1 clove freshly grated garlic, 1/2 teaspoon smoked paprika, 2 tablespoons water, 1/4 teaspoon salt (more to taste).

    Spice Coverage on The Chicken: Every package of chicken thighs is a slightly different size, so if your package is 1.5 pounds or more (or if you love a lot of spices), you may want to add a few extra shakes of spices to get more complete spice coverage!

    Preheating the Air Fryer: I do not preheat my air fryer. I just put the chicken in, turn the air fryer on, and then make sure to use a meat thermometer to check that it’s completely cooked.

    Lining the Air Fryer: I also don’t line the air fryer basket with anything. I just put the chicken thighs directly onto the grill grate. 

    Flipping the Chicken: I also do not flip the chicken thighs halfway through. I’ve tried it, but I like the texture better with just the top being crispy and the underside being a bit juicy. If you think you want both the top and bottom to be crisped up a bit, you can air fry for 8-9 minutes, then flip and cook for another 5 minutes to get both sides a bit crisped. 

    Source link

  • Grapefruit Paloma Mocktail Recipe

    Grapefruit Paloma Mocktail Recipe

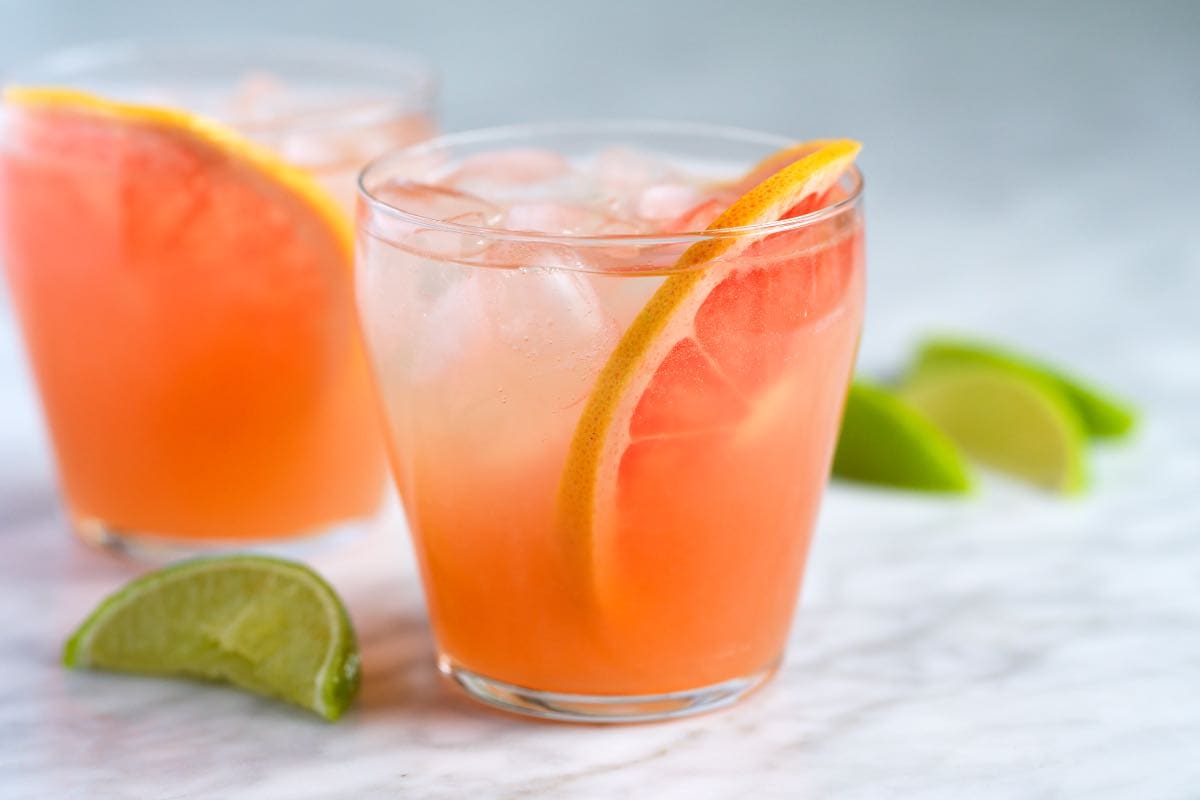
    I love this easy Paloma mocktail recipe, made with fresh grapefruit, lime, maple syrup, and sparkling water.

    Grapefruit Paloma Mocktail

    A mocktail is a non-alcoholic drink, usually with a similar flair to popular cocktails. I love a good mocktail and expect it to be as delicious and exciting as a traditional cocktail.

    This sparkling mocktail is my go-to non-alcoholic drink to make at home. It’s really easy to make and tastes great. For more mocktail recipes, see our ginger hibiscus mocktail.

    Key Ingredients

    • Grapefruit: I love the fresh taste of freshly squeezed grapefruit juice! One large grapefruit should provide enough juice for 3 refreshing mocktails. As a bonus, adding a grapefruit slice to each glass makes the drink smell amazing.
    • Lime: This mocktail is inspired by the classic Paloma, which always features fresh lime juice. We’ll follow suit and add a squeeze of lime to this mocktail.
    • Maple Syrup: For sweetness, I prefer using maple syrup. It adds a lovely, toasty flavor that complements the other ingredients. If you don’t have maple syrup, use homemade simple syrup instead.
    • Green Tea (Optional): This sounds unusual, but trust me, chilled green tea adds a subtle depth to the mocktail. It provides a bit of backbone, similar to tequila in a traditional Paloma.
    • Sparkling Water: I usually opt for plain sparkling water or club soda (which has a touch of salt). Feel free to use your favorite type of sparkling water to create your perfect mocktail.

    Find the full recipe with measurements below.

    How to Make a the Best Paloma Mocktail

    Tip 1: Making for one. This really could not be any easier to make. All you need to do is combine fresh grapefruit juice, lime juice, maple syrup, and chilled green tea if you have it. Next, add some ice and top the drink off with sparkling water.

    Tip 2: Making for a crowd. You can mix grapefruit, lime, maple syrup, and green tea in advance, making this a quick and easy non-alcoholic drink for parties. Keep the mixture in the fridge for up to 3 days. When you are ready to serve, add the mix to glasses filled with ice and top with sparkling water.

    Grapefruit Paloma Mocktail

    Grapefruit Paloma Mocktail

    I love this Paloma mocktail, made with grapefruit, lime, maple syrup, and sparkling water! Think of it as a non-alcoholic version of the Paloma cocktail. It’s refreshing, pretty, and delicious. The green tea is optional but gives the drink a backbone and makes it taste more like a cocktail.

    Serves 1

    You Will Need

    1 ounce (2 tbsp) strong green tea, chilled, optional, see tips

    2 ounces (1/4 cup) freshly squeezed grapefruit juice

    1 ounce (2 tbsp) fresh lime juice

    1/2 ounce (1 tbsp) maple syrup, or more to taste

    Sparkling water

    Directions

      1Combine one ounce of green tea, grapefruit juice, lime juice, and maple syrup in the bottom of an 8-ounce (or larger) glass. Taste and add more maple syrup if the drink needs it.

      2Add ice cubes, and then top with sparkling water. Serve with lime slices or grapefruit slices as a garnish.

    Adam and Joanne’s Tips

    • Green tea: This mocktail is delicious without green tea, but if you have some on hand, strong green tea adds a lovely backbone to the drink in the same way strong liquor would. I brew green tea and allow it to cool to room temperature or store it in the refrigerator for up to a week. For strong green tea, we use two tea bags.
    • To make a pitcher for 6: Combine 6 ounces (3/4 cup) strong green tea, 12 ounces (1 ½ cups) grapefruit juice, 6 ounces (3/4 cup) fresh lime juice, and 3 ounces (6 tbsp) of maple syrup. Chill, and then divide into glasses and top with sparkling water when serving.
    • The nutrition facts provided below are estimates. We included 1/2 ounce of maple syrup.

    Nutrition Per Serving
    Serving Size
    1 Mocktail
    /
    Calories
    55
    /
    Total Fat
    0.1g
    /
    Saturated Fat
    0g
    /
    Cholesterol
    0mg
    /
    Sodium
    2.3g
    /
    Carbohydrate
    14.3g
    /
    Dietary Fiber
    0.1g
    /
    Total Sugars
    6.5g
    /
    Protein
    0.4g


    AUTHOR:

    Joanne Gallagher

    Previous Post: Greek Pasta Salad
    Next Post: Easy Egg Salad

    Source link

  • Creamy Cheesy Bean Dip

    Creamy Cheesy Bean Dip

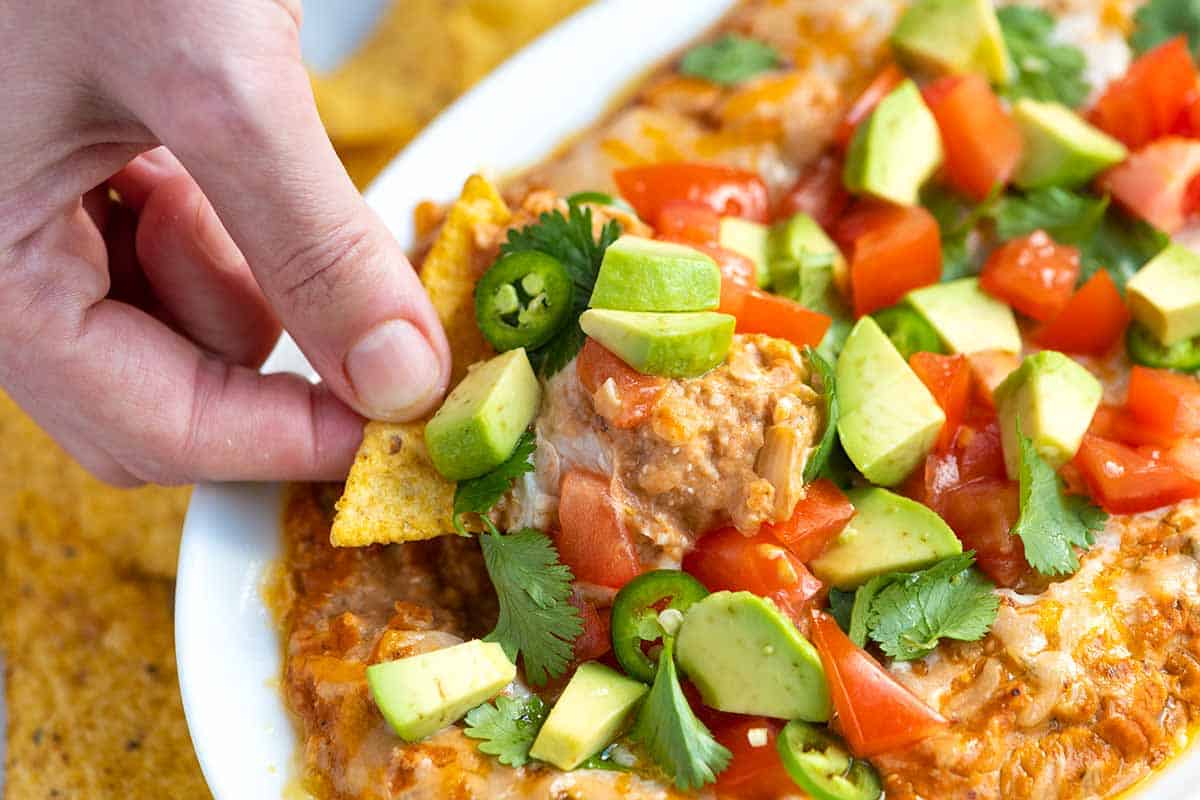
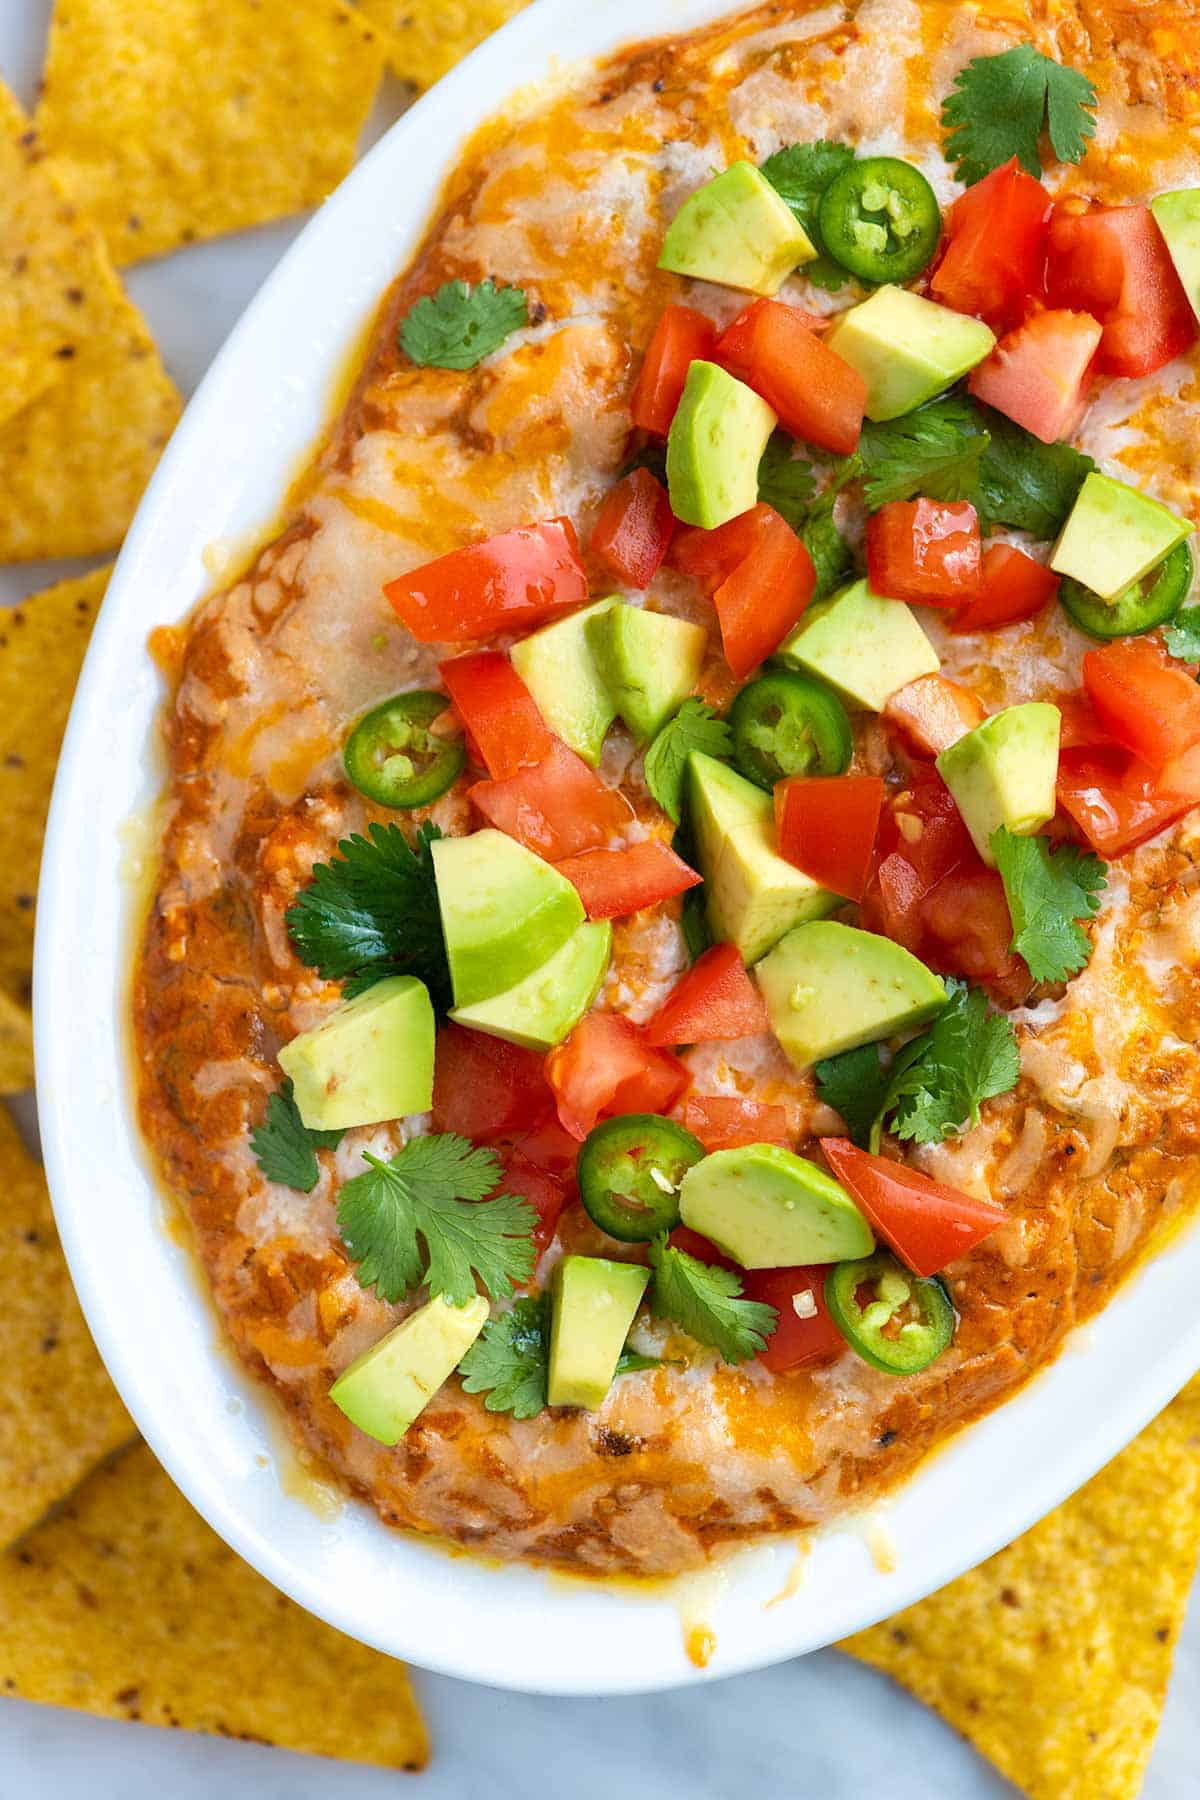
    Our bean dip recipe combines refried beans, sour cream, the perfect blend of spices, and melty shredded cheese. It’s hot, bubbly, cheesy, and really delicious!

    Cheesy Bean Dip

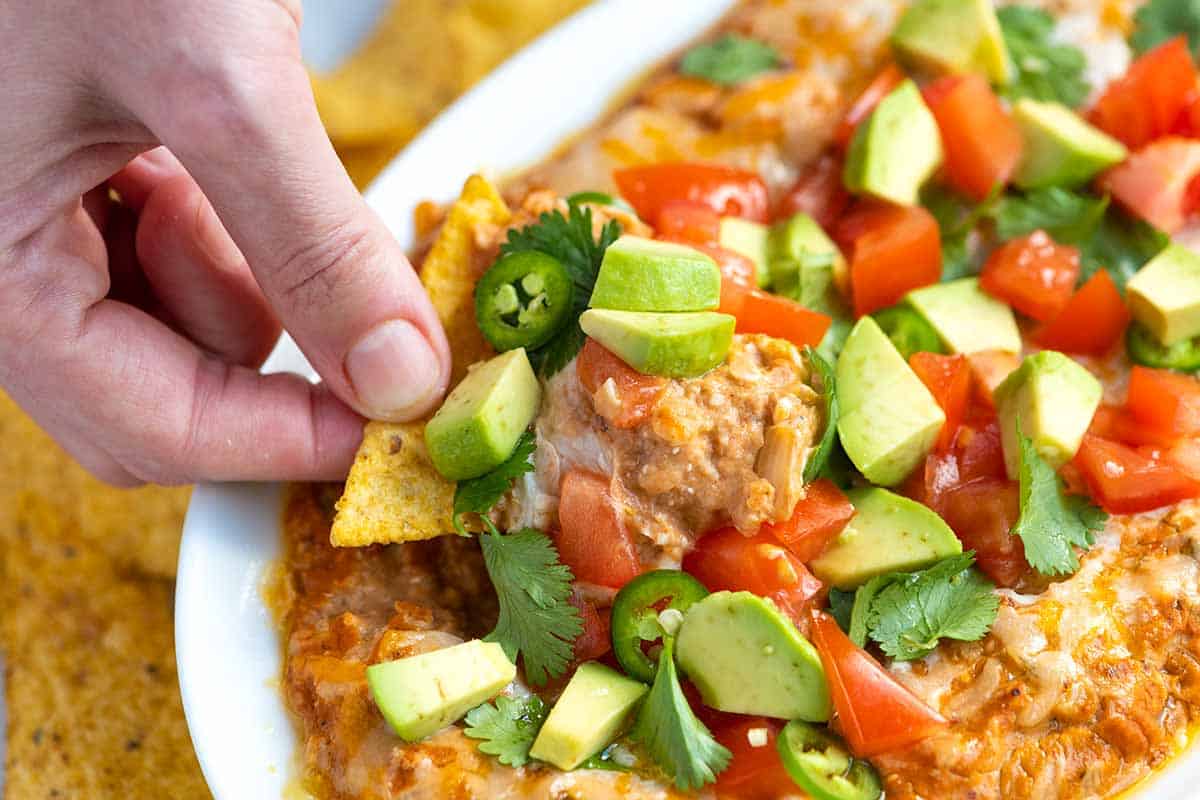
    Serve this easy bean dip with tortilla chips, toasted bread, or veggies! It’s basically my new go-to party appetizer (well, this and our infamous onion dip). It’s excellent with homemade refried beans, but you can absolutely use canned for ease.

    This is perfect with chips, especially homemade tortilla chips. It never lasts long.

    Key Ingredients

    • Refried Beans: Canned works perfectly fine, but I love making our refried beans from scratch when I have the time.
    • Onion, Garlic, and Spices: You’ll cook these in a bit of oil before adding our spices. We combine chili powder (I love ancho chili powder or homemade chili powder), cumin, smoked paprika, and coriander.
    • Salsa: Use your favorite store-bought salsa or make your own. I love this roasted tomato salsa or this quicker restaurant-style salsa.
    • Green Chiles: I use canned green chiles in quite a few of our recipes and love them! They are sold in small (4-ounce) cans near salsas and hot sauce. When buying them, look for either “mild” or “hot” on the can and choose whichever you prefer based on how spicy you want the dip. Other recipes where I use them include homemade queso, this white chicken chili, and our weeknight taco soup.
    • Cream Cheese and Sour Cream: These make our dip extra creamy. I love full-fat versions of each for the best flavor. To make this dip vegan, you can substitute your favorite dairy-free versions.
    • Melty Cheese: This dip has two layers of melted cheese (on top and in the middle), so when you dig in with a tortilla chip, you are guaranteed to get some cheese. Use something that melts well, like cheddar, Monterey Jack, or my favorite, Oaxaca melting cheese, which I buy in a local Mexican grocery store.

    Find the full recipe with measurements below.

    How to Make Our Cheesy Bean Dip

    Tip 1: Cook the onions with spices. You want your onions to turn soft and sweet, so cook them in a bit of oil wth the garlic. When they smell sweet, stir in the dried spices and let them toast in the pan to really bring out their flavor.

    Tip 2: Bring everything together. Once your onions are ready, you’ll stir them with the other dip ingredients (refried beans, salsa, chilies, cream cheese, and sour cream). It doesn’t look like much, but wow, does it turn out delicious.

    Stirring all the bean dip ingredients together in a bowl

    Tip 3: Add two layers of cheese. Instead of adding all the shredded cheese to the top of your dip. Spread about half of the bean dip mixture into a baking dish, then cover with cheese, add the remaining dip mixture, and top with more cheese. Layering the cheese like this guarantees a cheesy dip every time you go in for more.

    Adding two layers of cheese to the bean dip before baking in the oven

    Tip 4: Bake until hot. You are looking at about 25 minutes in the oven. Then you want to serve it hot. If you aren’t quite ready to bake, cover the dip and refrigerate until you are. It can sit in the fridge up to 3 days, and then be baked for serving.

    Tip 5: Add some toppings. The dip is lovely as is, but you can make it even better by adding a sprinkle of your favorite fresh toppings like diced avocado, chopped tomatoes, onions, or cilantro.

    More Favorite Party Appetizers

    Cheesy Bean Dip

    Cheesy Bean Dip

    • PREP
    • COOK
    • TOTAL

    Perfect for parties, watching the game, and family gatherings, this easy bean dip comes together in no time. Start with canned refried beans, or use homemade refried beans to make it. I love serving this with homemade tortilla chips!

    12 Servings (4 cups)

    Watch Us Make the Recipe

    You Will Need

    1 (15-ounce) can of refried beans or 1 ¾ cups homemade refried beans

    1 tablespoon avocado oil or olive oil

    ¾ cup finely chopped onion, half a medium onion

    1 tablespoon minced garlic, 3 cloves

    ¾ teaspoon ancho chili powder or homemade chili powder

    ¾ teaspoon ground cumin

    ½ teaspoon smoked paprika

    ½ teaspoon ground coriander

    ½ cup mild or medium salsa, like homemade roasted tomato salsa

    1 (4-ounce) can of diced green chilies

    ½ cup cream cheese (113g or 4oz)

    ½ cup sour cream (113g or 4oz)

    ¾ cup shredded cheese like cheddar, Monterey Jack, or Oaxaca cheese (85g or 3oz)

    Salt and fresh ground black pepper

    Pinch cayenne or hot sauce, optional for spicy dip

    Optional toppings: lime juice, diced avocado, guacamole, chopped tomatoes, sliced jalapeño, fresh cilantro, extra hot sauce

    Directions

      1Prep: Preheat the oven to 350°F (180°C). Set aside a small (1 to 1 ½ quart) baking dish or 8-inch cast iron skillet.

      2Cook the onions and garlic: Heat 1 tablespoon of oil in a small skillet over medium heat. Add the onions and garlic, then cook, stirring occasionally, until the onions are soft, translucent, and smell sweet, about 5 minutes. Stir in 3/4 teaspoon chili powder, 3/4 teaspoon cumin, 1/2 teaspoon smoked paprika, and 1/2 teaspoon coriander.

      3Prepare the bean dip: In a medium bowl, stir the refried beans, salsa, diced chilies, cream cheese, and sour cream. When they are ready, stir in the cooked spiced onions and garlic.

      4Taste the dip, and then adjust with salt and pepper as needed. To make it spicy, add a pinch of cayenne pepper or a few dashes of hot sauce.

      5Bake the bean dip: Transfer half of the dip to a small baking dish. Top with half of the shredded cheese. Then, spread the remaining bean dip over the cheese and finish with the rest of the shredded cheese.

      6Bake until hot throughout, and the cheese melted, for 20 to 25 minutes. Serve warm with a spritz of fresh lime juice and any optional toppings.

    Adam and Joanne’s Tips

    • Make-ahead: Make the dip as directed in our recipe below, and then add the dip and cheese to a baking dish. Cover the dish, then refrigerate for up to 3 days until you are ready to bake.
    • Diced green chilies: Small 4 ounce cans are sold at the supermarket. We love the Hatch brand and usually purchase mild.
    • Vegan adaptations: Use vegan refried beans, vegan sour cream, and vegan cream cheese (a combination of or use just one), as well as vegan shredded cheese or substitute with 4 to 5 tablespoons of nutritional yeast for sprinkling in the middle and on top.
    • Slow cooker version: Cook the onions, garlic, and spices as directed in the recipe below, and then add them along with the remaining ingredients to your slow cooker. Stir until well combined, then cook on LOW for 2 to 3 hours or until the cheese melts and the dip is heated throughout.
    • The nutrition facts provided below are estimates.

    Nutrition Per Serving
    Serving Size
    1/3 cup
    /
    Calories
    127
    /
    Total Fat
    8.8g
    /
    Saturated Fat
    4.4g
    /
    Cholesterol
    22.4g
    /
    Sodium
    296.8mg
    /
    Carbohydrate
    7.9g
    /
    Dietary Fiber
    2.1g
    /
    Total Sugars
    1.7g
    /
    Protein
    4.6g


    AUTHOR:

    Joanne Gallagher

    Adam and Joanne of Inspired Taste

    We are Adam and Joanne Gallagher, the creators of Inspired Taste. Established in 2009, Inspired Taste grew from a childhood dream into one of the internet’s most trusted recipe sites with hundreds of reliable recipes, step-by-step videos, and expert tips.More About Us

    Source link

  • Crispy Kale Chips Recipe

    Crispy Kale Chips Recipe

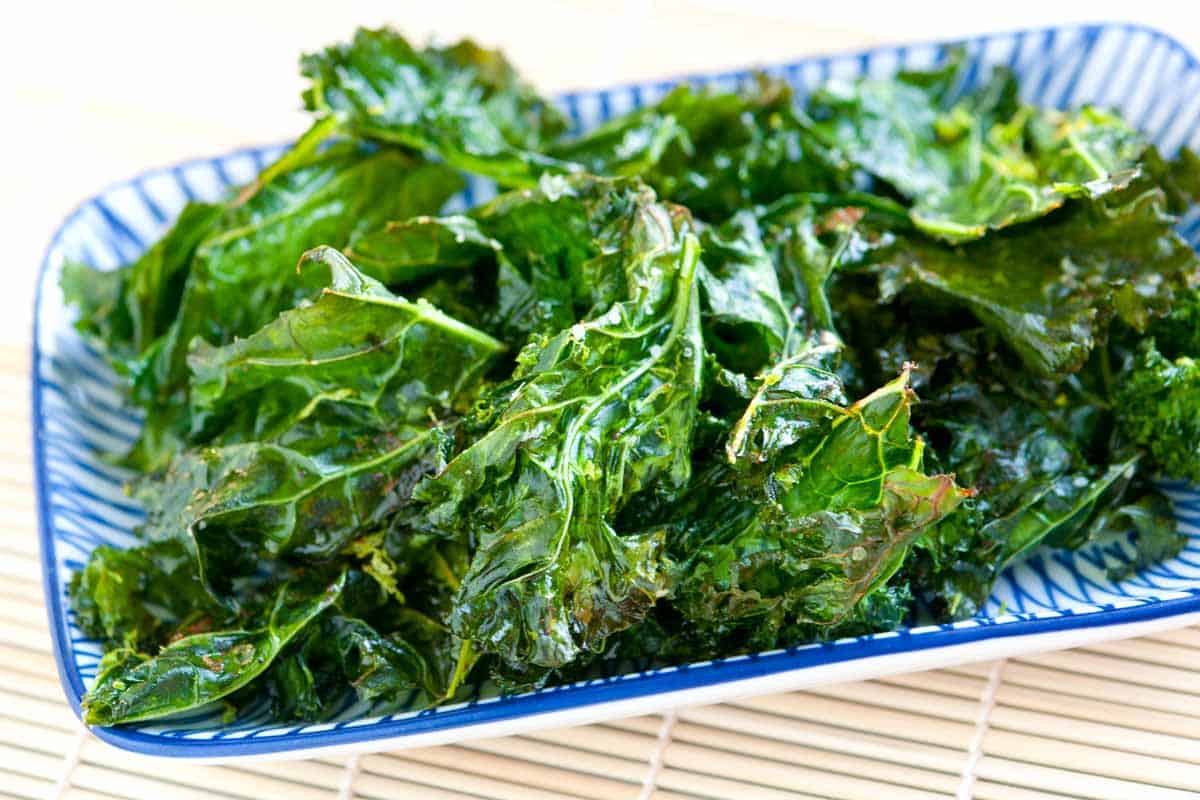
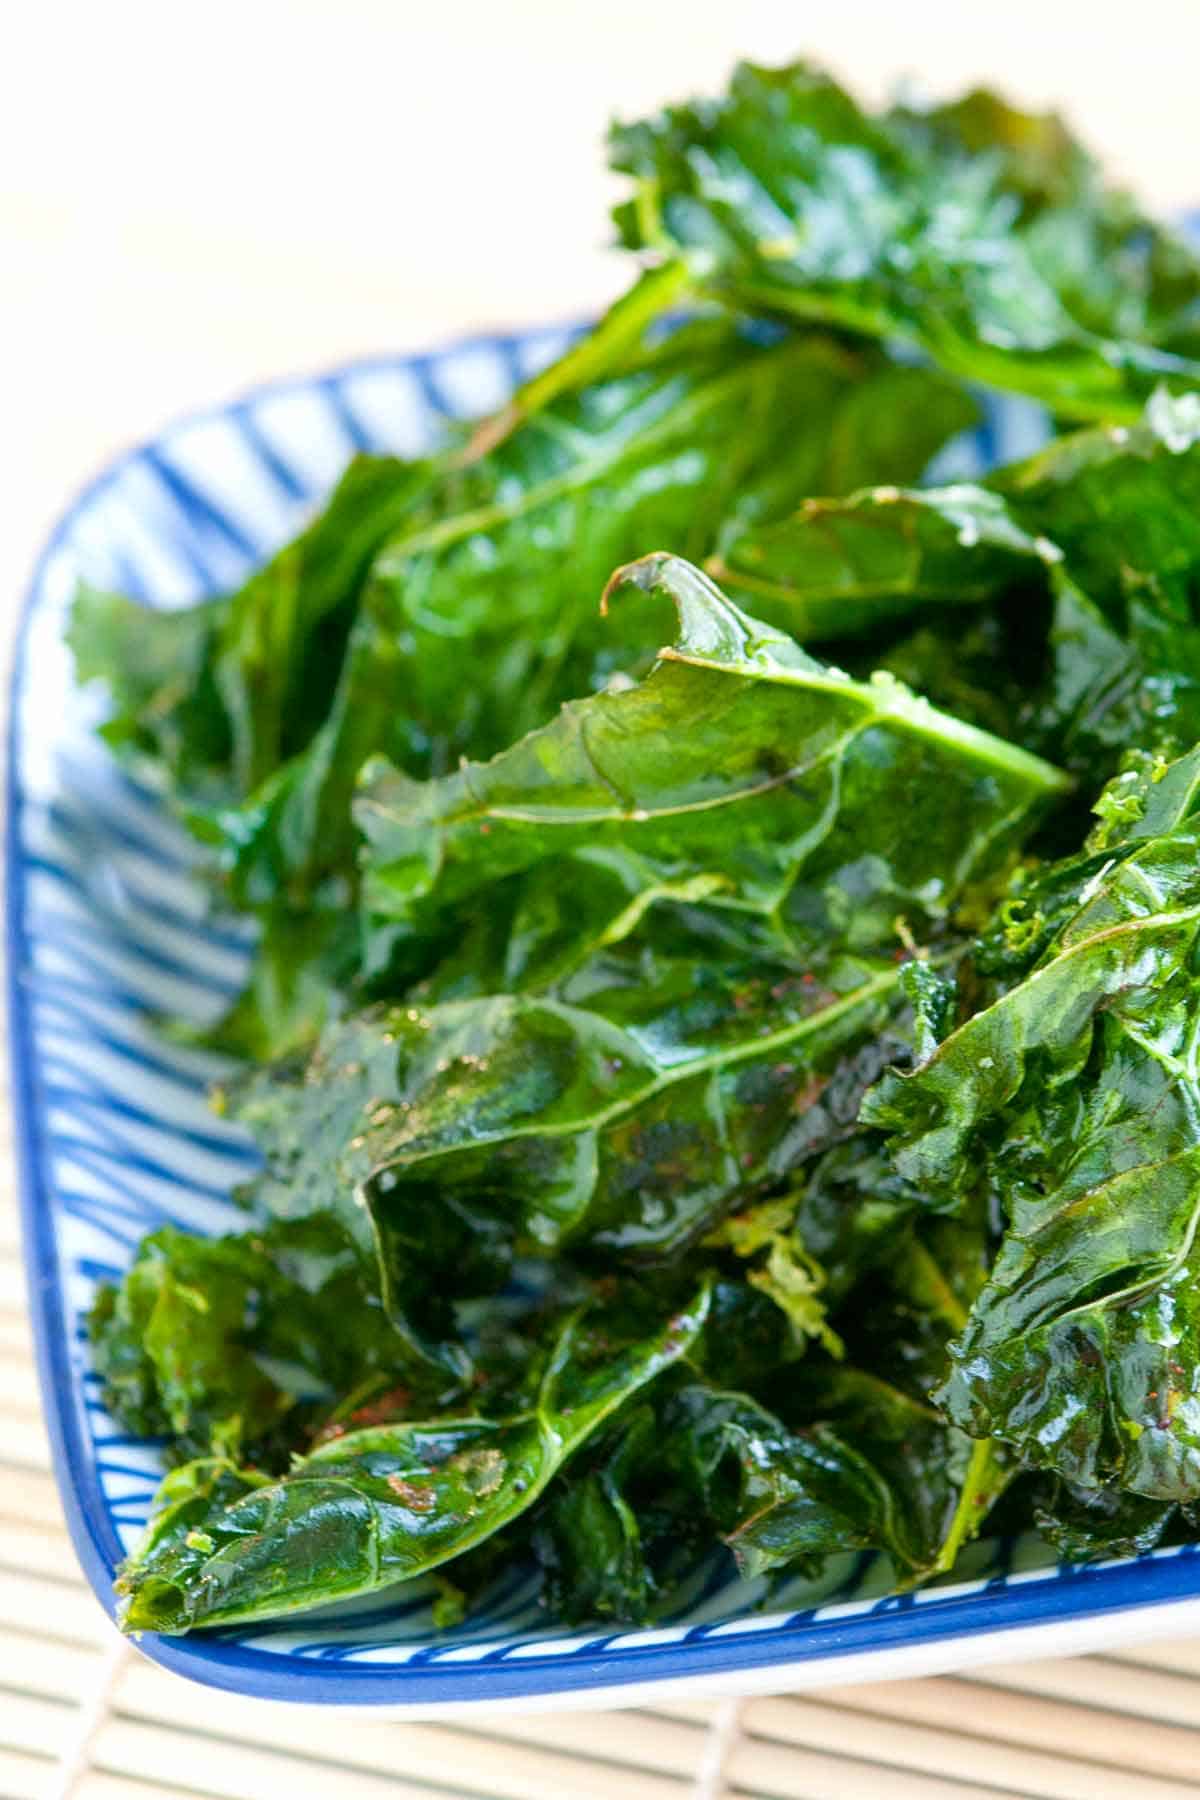
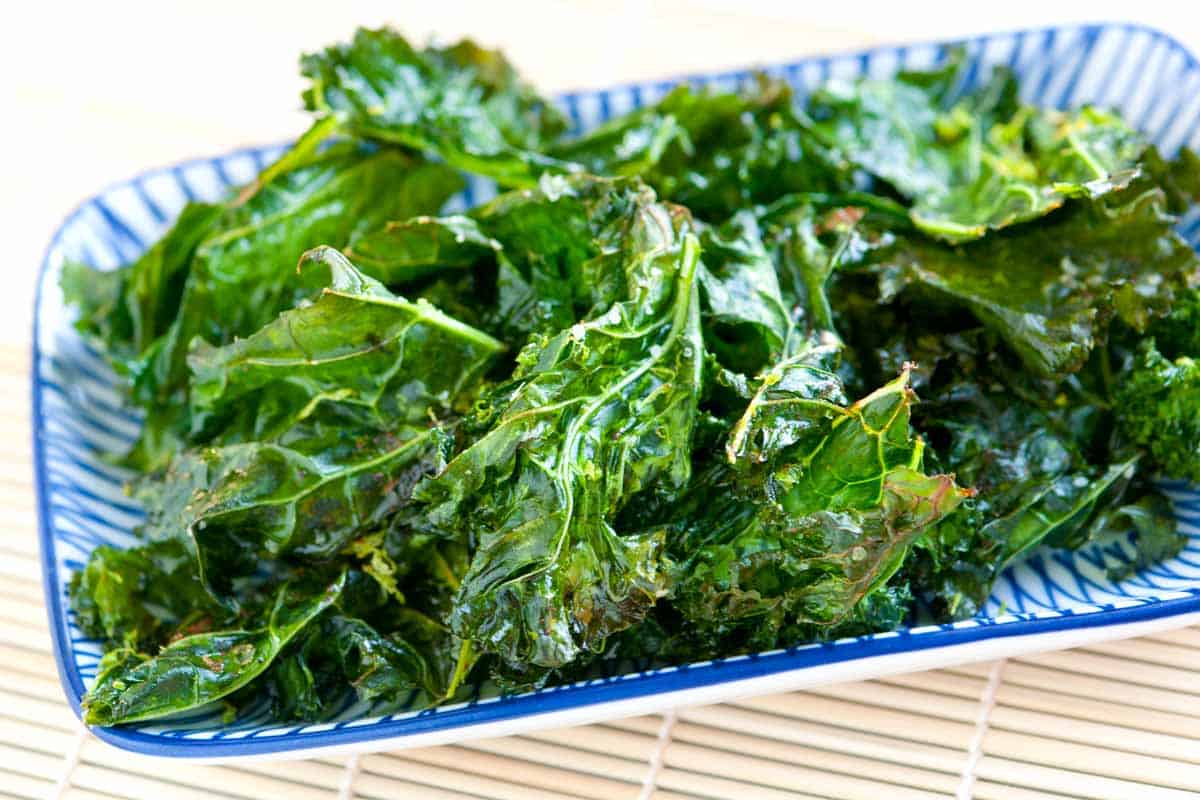
    Our kale chips recipe is so easy to make! They bake up perfectly crisp in just 20 minutes, and you can season them any way you like.

    Crispy Kale Chips

    When I first tried making kale chips in the oven, I couldn’t believe how simple they were. All you need is fresh kale, a baking sheet, and a hot oven. This recipe turned me from someone who wasn’t the biggest fan of kale into someone who makes kale chips all the time.

    What I love most is how fun they are to season. Use your favorite spice blends, or keep things simple with a sprinkle of salt. I’ve shared a few of my go-to flavor ideas below!

    Key Ingredients

    • Kale: You can make kale chips with any variety, but my favorite is curly kale, which is also the most common. I love the curly, ruffled leaves—they crisp up beautifully in the oven. Lacinato kale (also called Tuscan or dinosaur kale) works well, too. It’s a bit thicker, so the chips turn out heartier and slightly less delicate.
    • Olive Oil: I like using extra-virgin olive oil for its flavor, especially since we’re not cooking at super high heat. If you prefer to avoid heating olive oil, avocado oil is a great alternative.
    • Salt and Pepper: Be generous when seasoning with salt (I like fine sea salt) and fresh ground black pepper. Below, I’ve also shared some spices/spice blends that work well for kale chips.
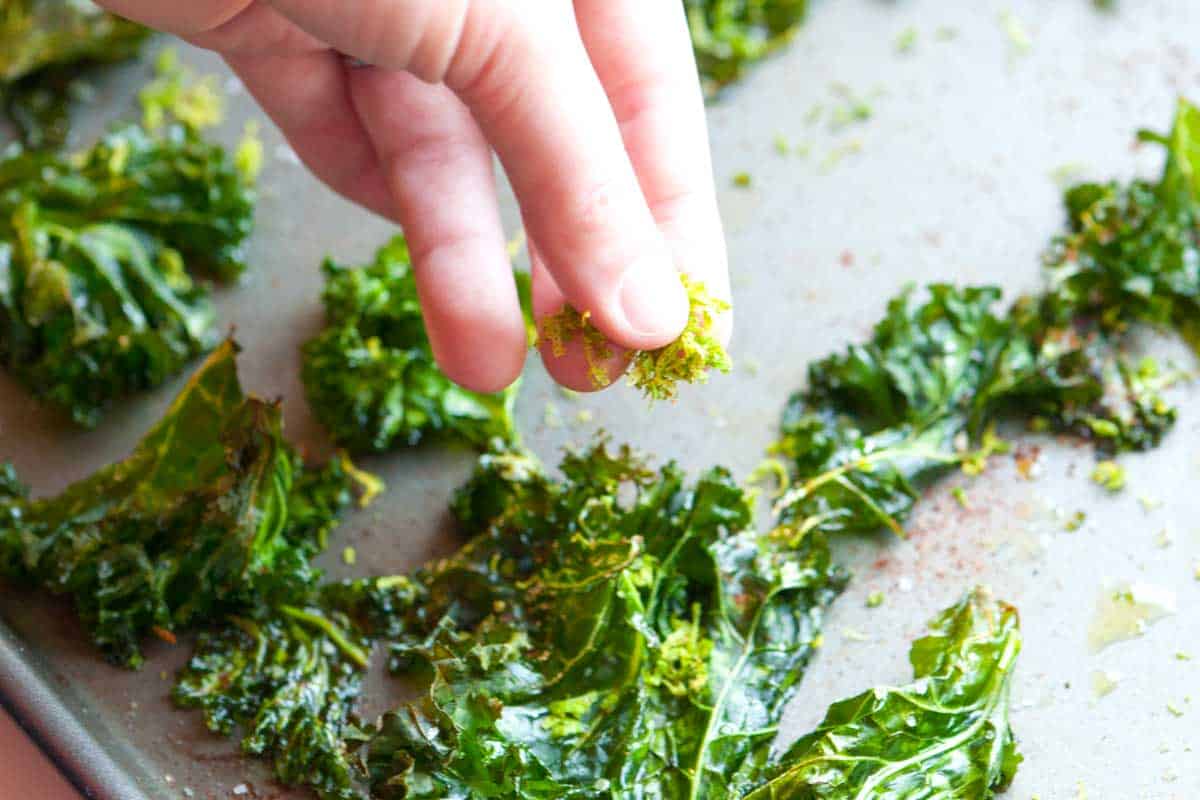
    • Optional Seasonings: Consider spicing up the chips with Cajun seasoning, Old Bay, seasoned salt, curry powder, Togarashi, chili powder, ranch seasoning, mushroom powder, nutritional yeast, sesame seeds, or lime zest. I like to sprinkle extra spices after baking while the chips are still warm. In the photo below, I’ve added lime zest and chili powder for chili-lime kale chips!

    Find the full recipe with measurements below.

    How to Make Kale Chips

    Tip 1: Prep the kale. Start by removing the leaves from the thick, woody stalks. (You can save the stalks for vegetable broth.) Tear the leaves into large pieces, and remember, they’ll shrink a bit as they bake, so make them slightly larger than tortilla chips.

    Tip 2: Rinse and dry well. Rinse the kale thoroughly, then make sure that it is 100% dry. Any leftover moisture will cause the kale to steam rather than crisp. A salad spinner works best, but you can also pat the leaves dry with a clean kitchen towel or paper towels.

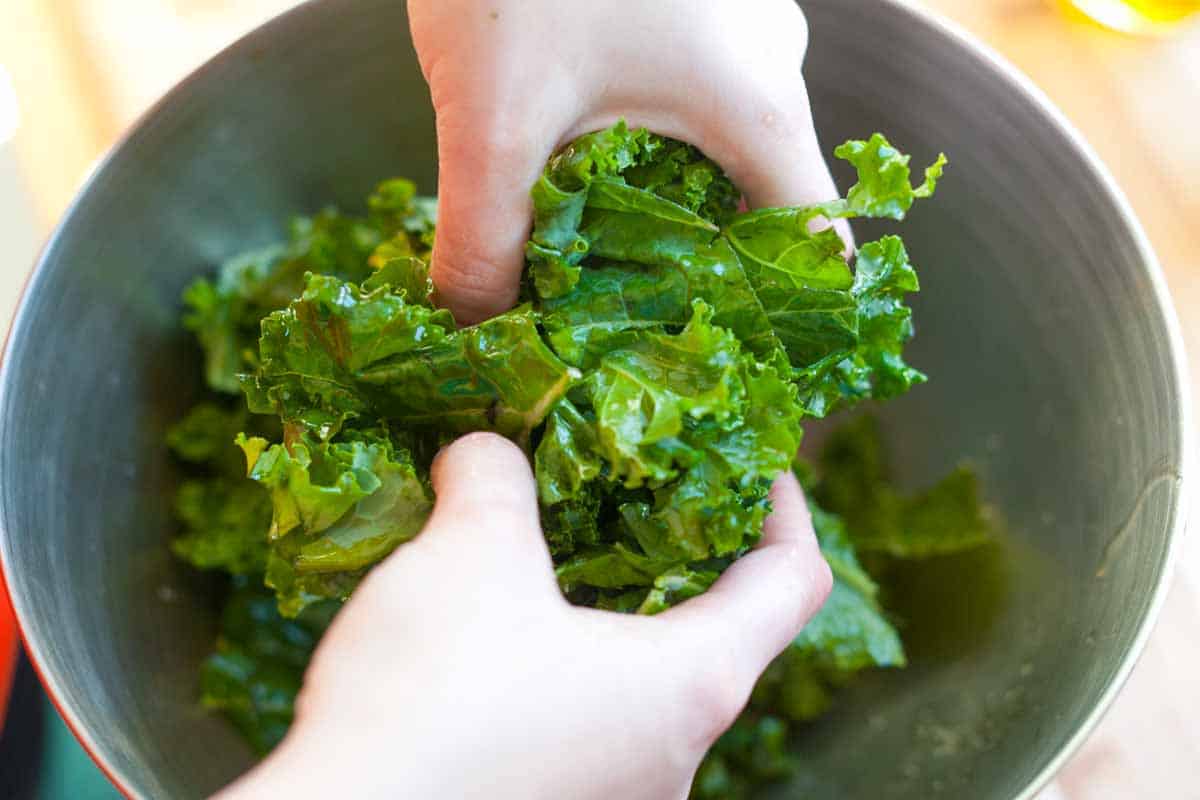
    Tip 3: Add oil and salt. Toss the dry kale with a drizzle of oil and a sprinkle of salt (or seasoned salt), then bake. If you plan to add other seasonings, it’s best to sprinkle them on after baking while the chips are still warm.

    Tossing kale with salt, pepper, and olive oil before baking

    Tip 4: Don’t crowd the pan. Spread the kale out in a single layer on a large baking sheet. Overcrowding traps steam and prevents crisping.

    Tip 5: Bake until crisp. Bake the kale chips at 350°F for 10 to 12 minutes, until crisp and lightly browned. Keep an eye on them near the end, as they can go from perfect to overdone quickly. Once baked, enjoy them as-is or toss with your favorite seasonings.

    Seasoning baked kale chips with chili and lime

    More Kale Recipes

    Crispy Kale Chips

    Crispy Kale Chips

    • PREP
    • COOK
    • TOTAL

    Our kale chips recipe takes 20 minutes, and you can customize the chips however you like. Check the tips for spice suggestions. Remember, for the best, most crispy kale chips, you must dry the kale very well before baking.

    4 Servings

    You Will Need

    1 bunch kale, we prefer curly kale for chips

    2 tablespoons extra-virgin olive oil

    1/4 teaspoon fine sea salt

    1/8 teaspoon ground black pepper

    Directions

      1Preheat the oven to 350°F (177°C). Line a baking sheet with parchment paper or a silicone baking mat.

      2Remove the thick, woody stalks and ribs from kale leaves and tear leaves into smaller pieces. Discard stalks and ribs or save them for another use.

      3Rinse the kale leaves, then use a salad spinner or clean kitchen towel/paper towel to dry them completely. If the kale leaves are not dry, they will steam instead of becoming crisp, so make sure they are as dry as you can get them.

      4Toss leaves with olive oil, salt, and pepper. Arrange kale in one layer on the baking sheet (you may need to work in batches or use two baking sheets.) Keeping a bit of space between the chips helps them crisp better.

      5Bake until the kale is crisp, 10 to 12 minutes. If, after 10 to 12 minutes, the kale is not yet crisp, bake another 2 to 3 minutes. (Stay close to watch for the kale becoming overcooked/browned.) Let cool for 5 minutes, and enjoy!

    Adam and Joanne’s Tips

    • Optional seasonings: Anything goes! We usually add these once the kale chips are baked and crispy. Try Cajun seasoning, Old Bay, curry powder, Togarashi, chili powder, ranch seasoning, mushroom powder, nutritional yeast, sesame seeds, and lime zest. To make chili lime kale chips, sprinkle the baked and crispy chips with 1/2 teaspoon chili powder and 1/2 teaspoon fresh lime zest.
    • The nutrition facts provided below are estimates.

    Nutrition Per Serving
    Serving Size
    1/4 of batch
    /
    Calories
    81
    /
    Protein
    2g
    /
    Carbohydrate
    4g
    /
    Dietary Fiber
    1g
    /
    Total Sugars
    0g
    /
    Total Fat
    7g
    /
    Saturated Fat
    1g
    /
    Cholesterol
    0mg
    /
    Sodium
    175mg


    AUTHOR:

    Adam Gallagher

    Adam and Joanne of Inspired Taste

    We are Adam and Joanne Gallagher, the creators of Inspired Taste. Established in 2009, Inspired Taste grew from a childhood dream into one of the internet’s most trusted recipe sites with hundreds of reliable recipes, step-by-step videos, and expert tips.More About Us

    Source link

  • Easy Cowboy Candy Recipe

    Easy Cowboy Candy Recipe

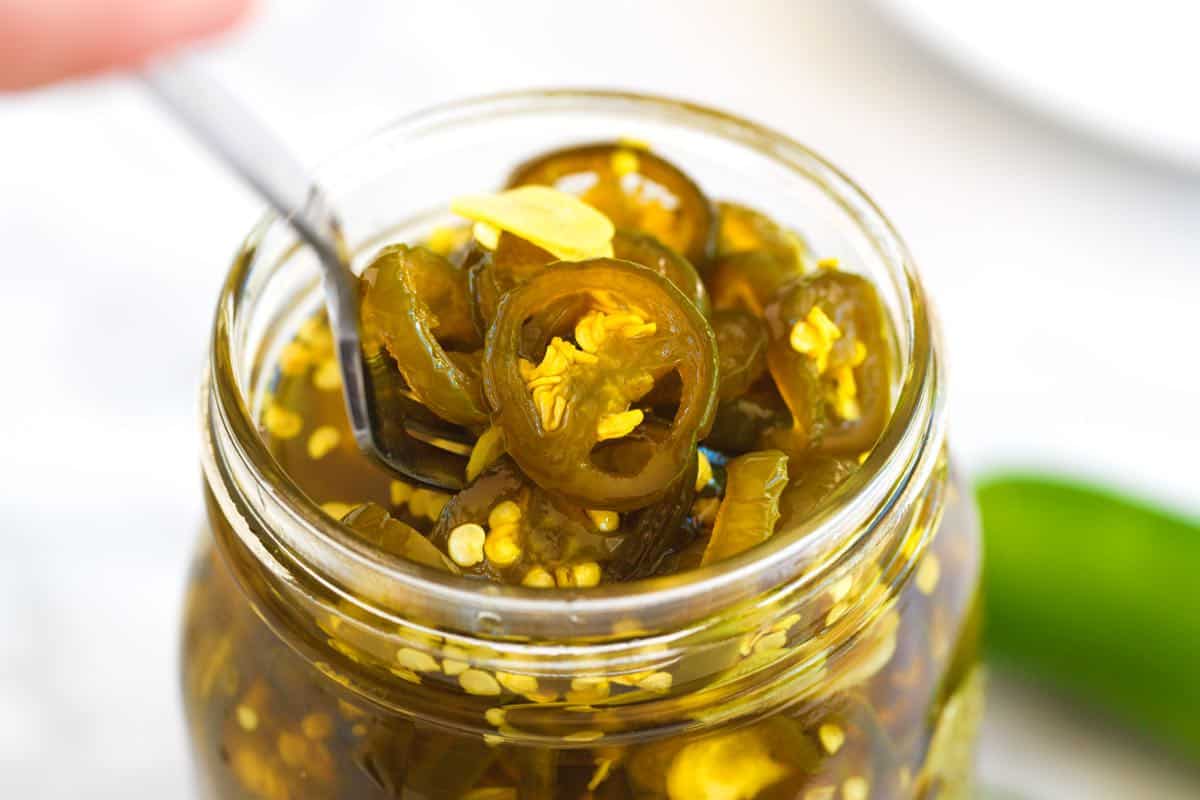
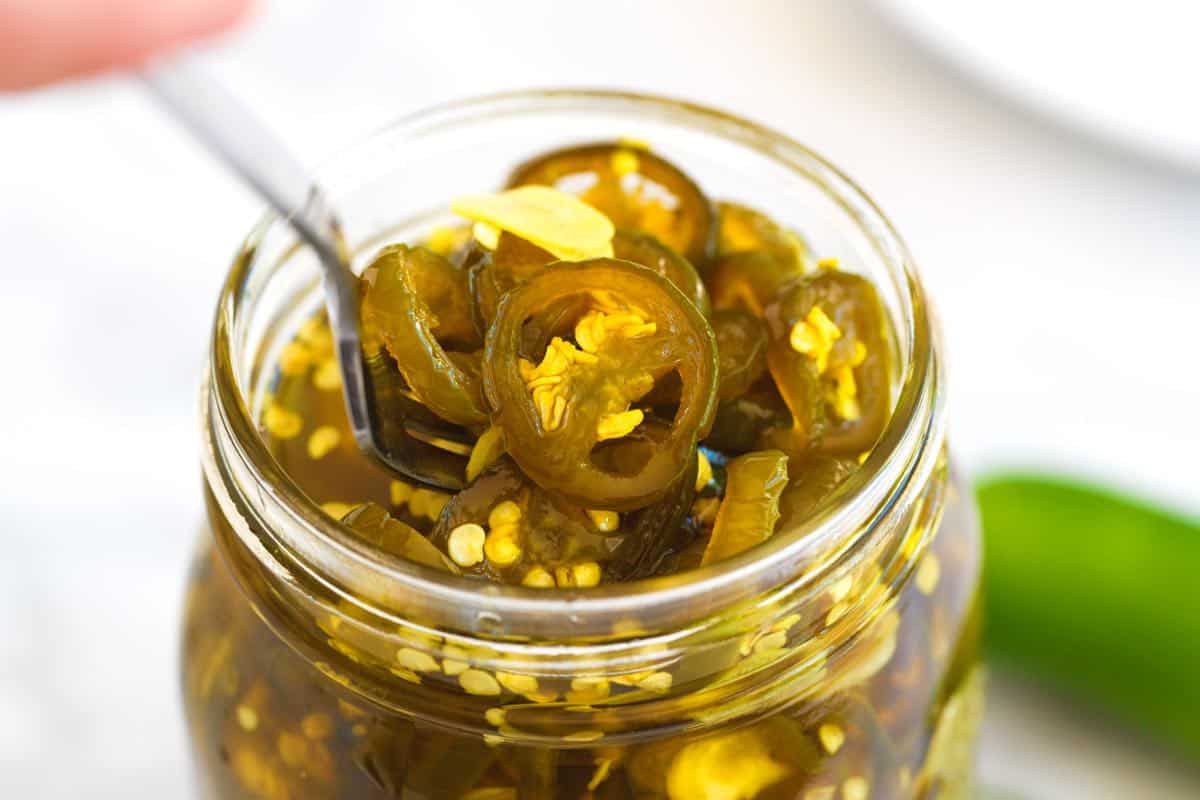
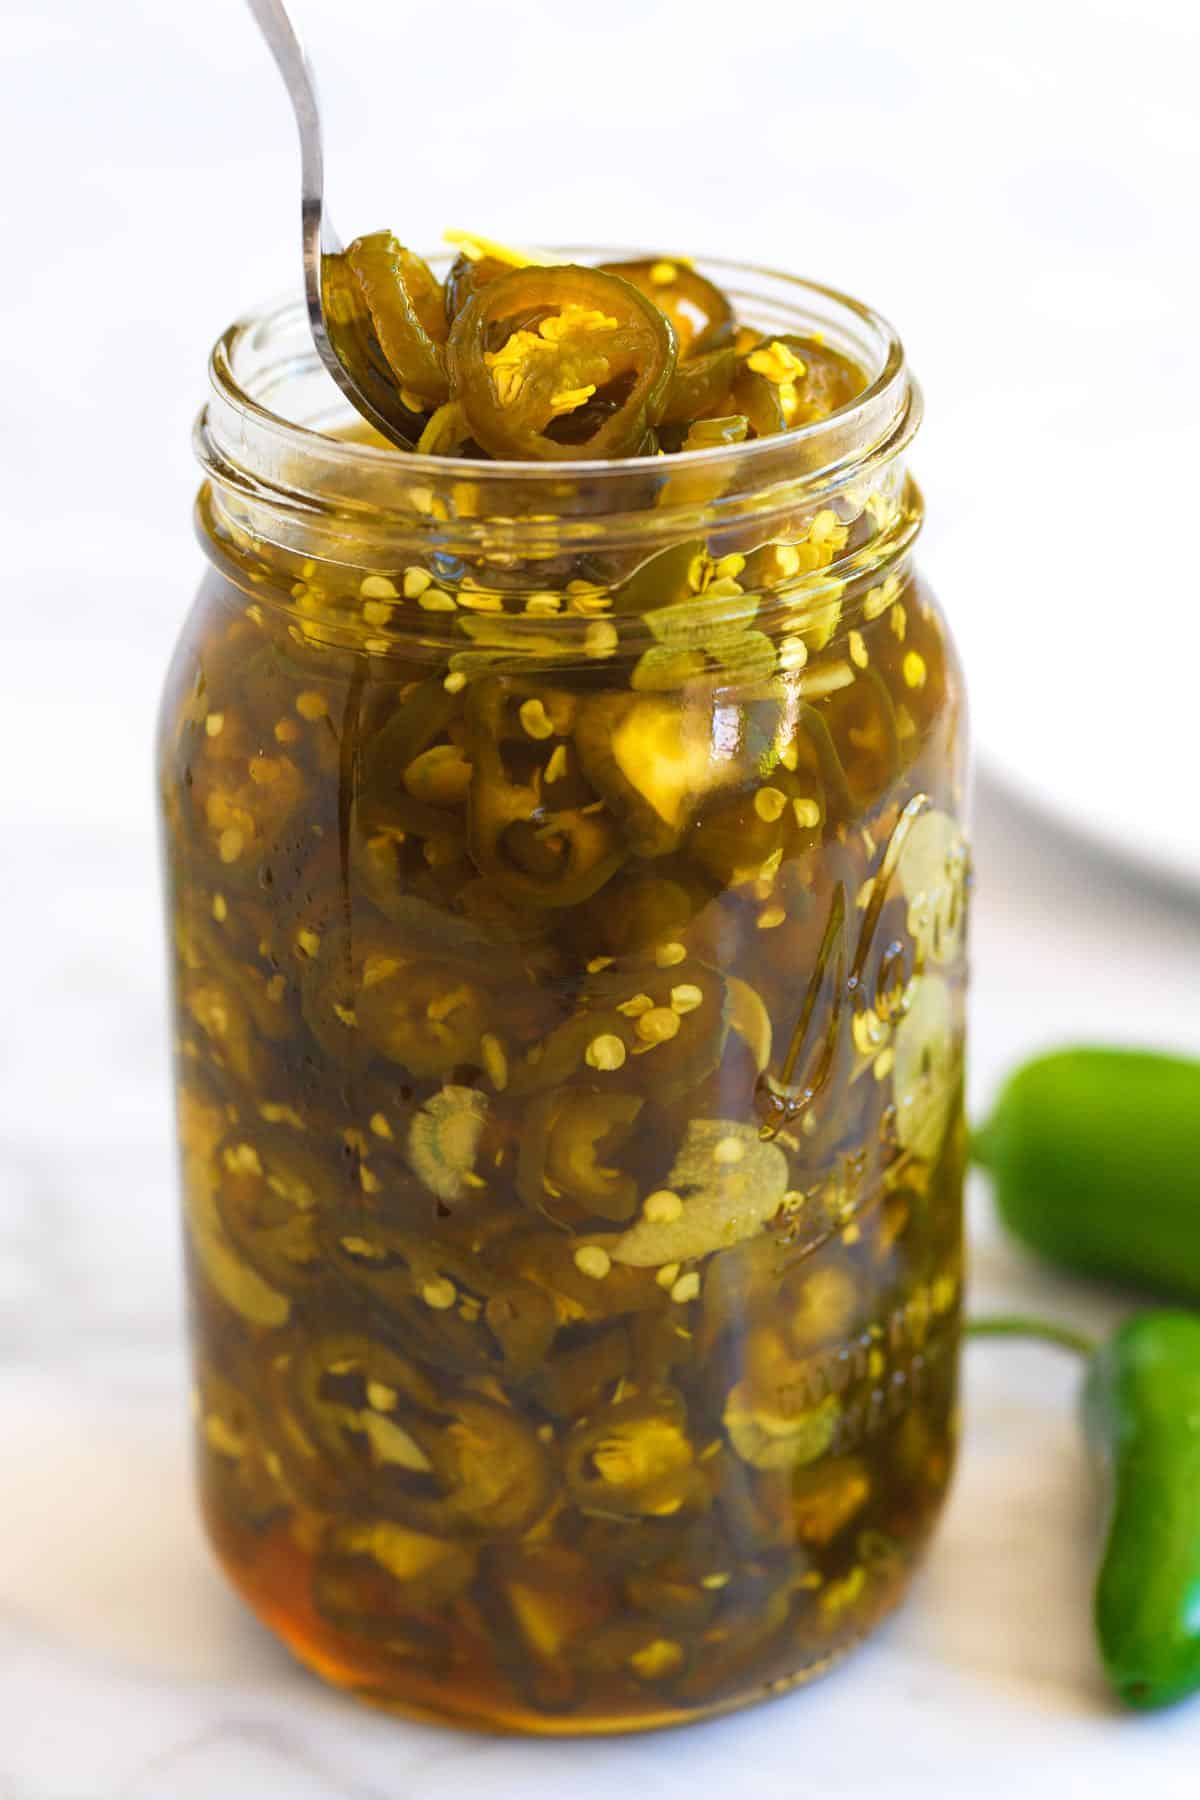
    This easy cowboy candy recipe makes sweet and spicy candied jalapeños that keep for months and taste incredible on everything.

    Homemade Cowboy Candy

    I’ve fallen hard for cowboy candy recipe. With the perfect balance of sweet and spicy, this is the best thing we’ve made in our kitchen lately, and it goes with almost anything!

    I seriously can’t stop sneaking these sweet and spicy peppers onto my plate. The jar has been on the table for every dinner lately. If you’ve never tried candied jalapeños, consider this my gentle nudge to try them. For more of a tangy, pickled version, see our pickled peppers!

    Key Ingredients

    • Peppers: I use fresh jalapeño peppers, but feel free to experiment with other varieties. I leave the seeds and membranes in since the sugar syrup tones the heat of the peppers quite a bit. For extra heat, mix in spicier peppers or swap the jalapeños entirely.
    • Garlic: Thinly sliced raw garlic adds amazing flavor and texture. The candied garlic turns sweet and mellow. I love it as much as the peppers themselves.
    • Vinegar: We use a mix of apple cider vinegar and distilled white vinegar. The combination adds flavor without tasting too much like apples.
    • Sugar: This is a candied jalapeño recipe, so you’ll use a generous amount of sugar. The sugar combines with vinegar to form a syrup that sweetens, preserves, and coats the peppers beautifully.
    • Turmeric: Turmeric enhances both the flavor and color of the jalapeños as they sit. It’s the same trick we use in our bread and butter pickles.

    Find the full recipe with measurements below.

    How to Make Cowboy Candy

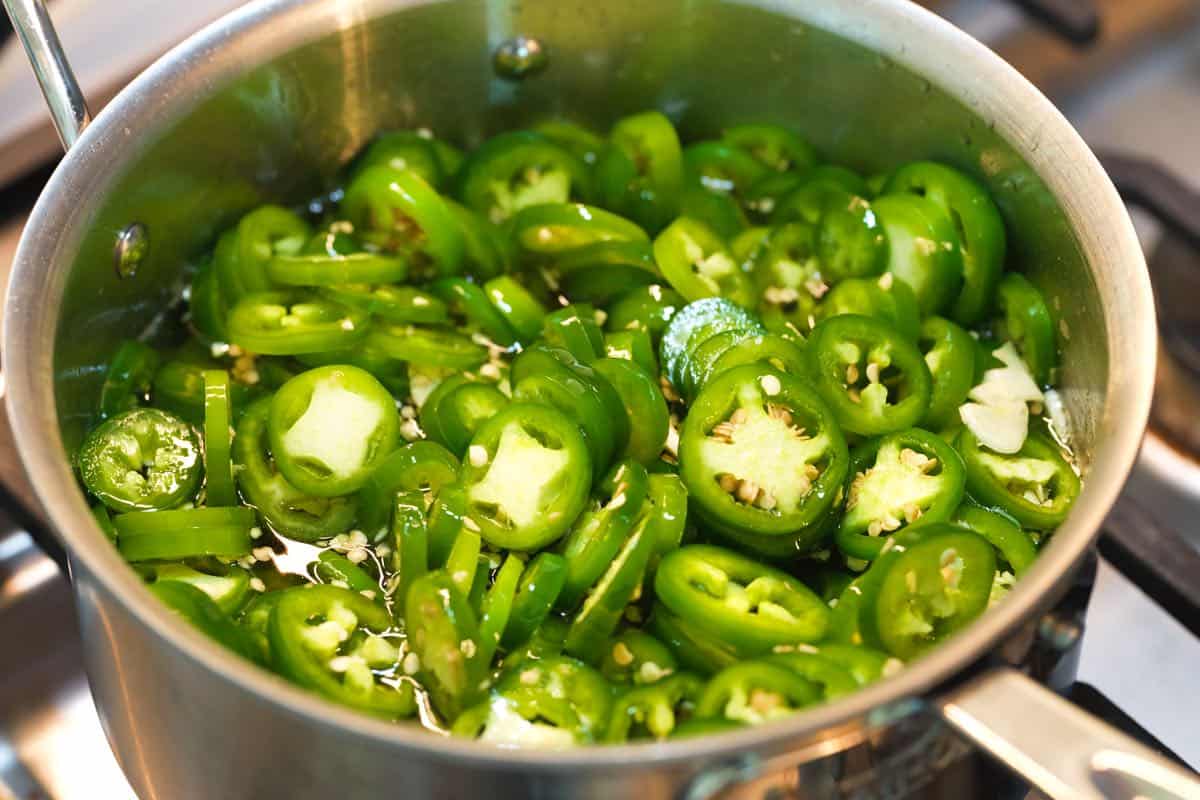
    Tip 1: Make the sweet and tangy syrup. The secret to perfectly candied peppers lies in the syrup. You’ll add all the syrup ingredients to a saucepan and heat. Once the sugar dissolves, you can add the sliced peppers and garlic. Then, transfer the peppers to jars, but keep the syrup in the pan to reduce it slightly for extra flavor.

    Making our cowboy candy recipe by cooking jalapeños and garlic in a vinegar sugar syrup

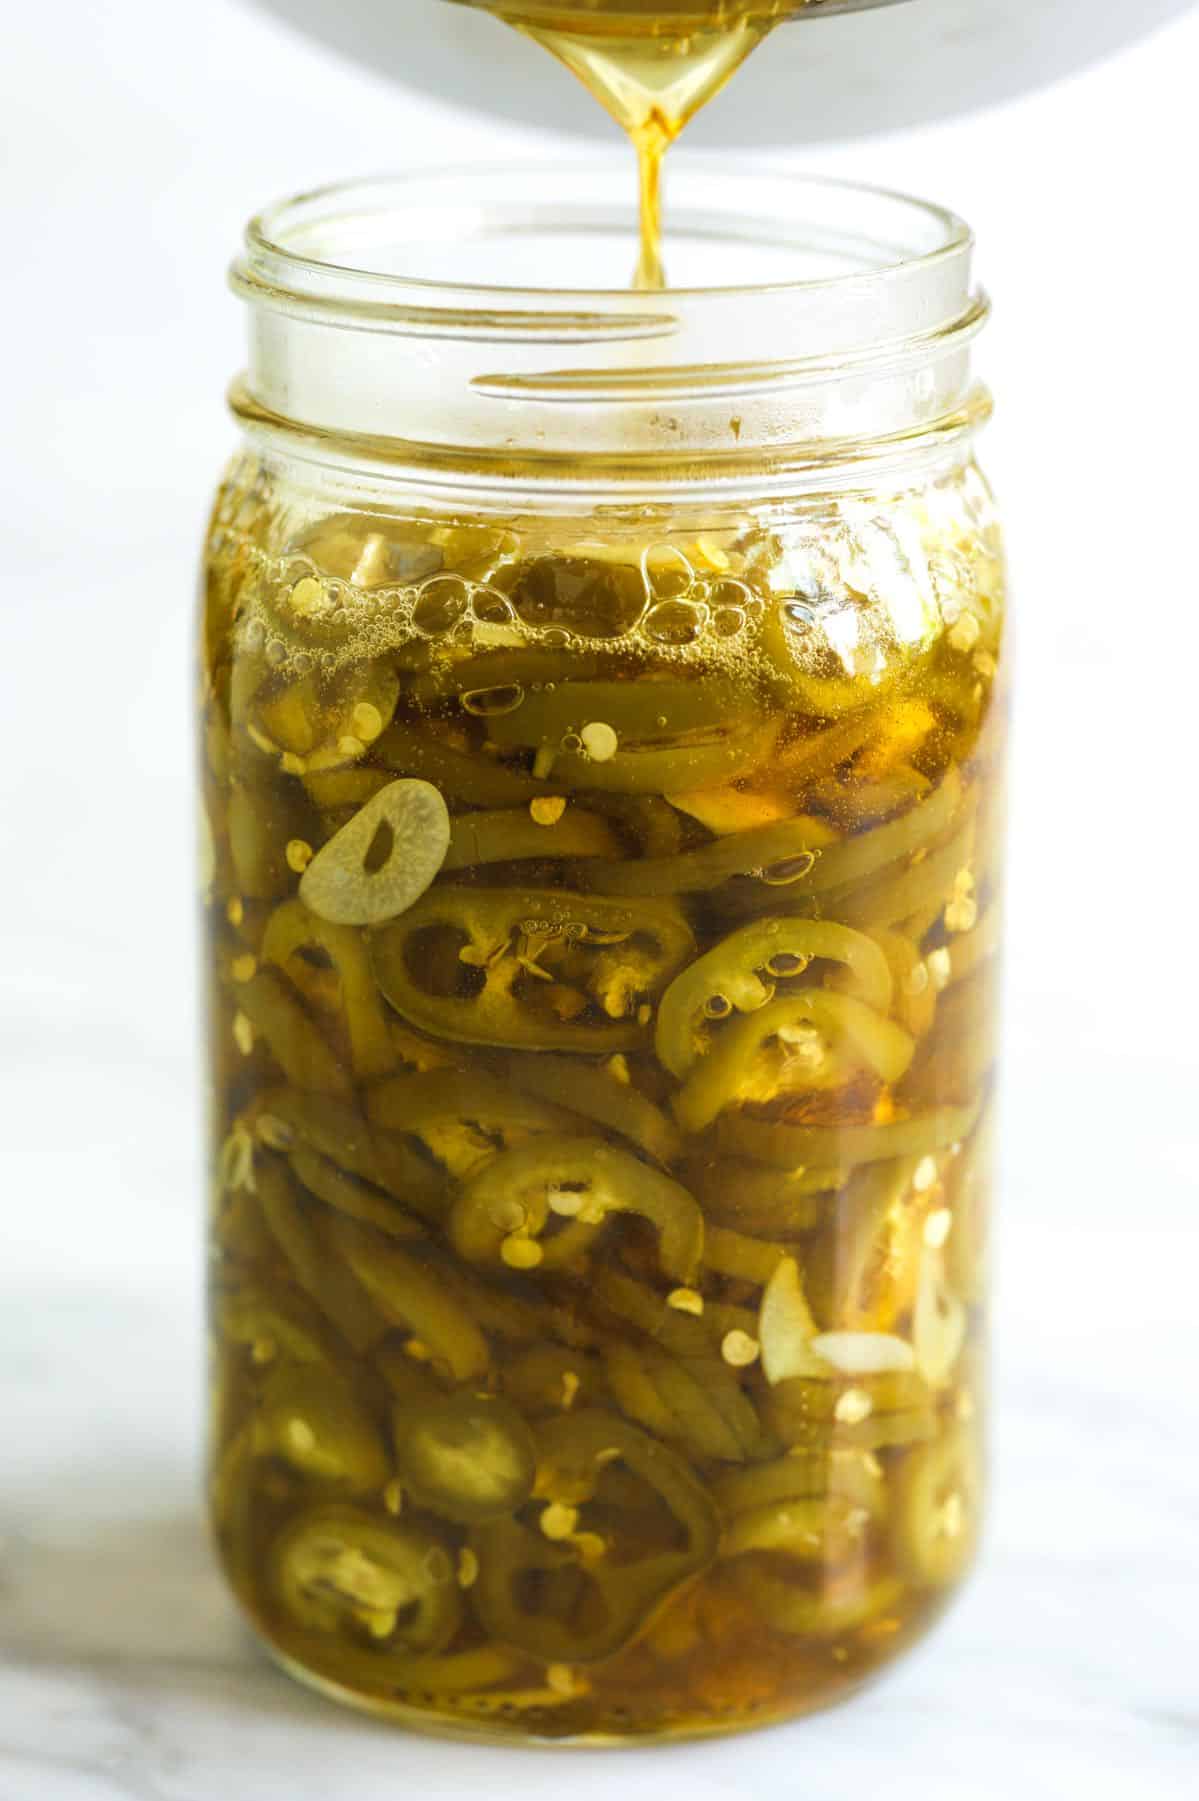
    Tip 2: Save the extra syrup. After reducing the syrup, you’ll pour it over the peppers in the jars. You might have some syrup leftover. Please don’t throw it away! It’s delicious in marinades, dressings, and cocktails, or even drizzled over fruit for a sweet and spicy kick.

    Pouring a sugar syrup into a jar with jalapeños and garlic.

    Tip 3: Let the flavors develop. Refrigerate the candied jalapeños overnight before eating. They’re good the next day, even better after two days, and downright amazing after a week.

    Ways to Enjoy It

    Cowboy candy goes with just about everything! Once you try these candied jalapeños, you’ll want to add them to everything on your plate. They’re fantastic with sandwiches, hot dogs, burgers, salads, tacos, nachos, and scrambled eggs. They even make potato salad, egg salad, and creamy pasta salad taste better.

    I love adding them to a charcuterie board with cheese and cured meats or layering them onto bagels with smoked salmon and cream cheese. Try them with mac and cheese or chili (see my favorite chili recipe and Texas red chili). And, if that wasn’t enough, you can even stir them into margaritas, cocktails, or mocktails for a sweet-spicy kick.

    Easy Cowboy Candy (candied jalapeños)

    Easy Cowboy Candy

    • PREP
    • COOK
    • TOTAL

    Here’s how to make cowboy candy, also known as candied jalapeños. You don’t need to be a master canne. Our recipe is quick, easy, and keeps for months in the fridge. You’ll have some leftover syrup, which is delicious in marinades, dressings, cocktails, or even tossed with fruit (try it with melon!).

    We recommend wearing food-safe gloves when slicing the peppers to protect your hands from the oils. You’ll need about 20 peppers and a 1-quart canning jar or airtight glass container.

    Makes 1 quart jar

    You Will Need

    1 ½ pounds jalapeño peppers, about 20 jalapeños (680g)

    5 garlic cloves, sliced

    ½ teaspoon fine sea salt

    1 cup apple cider vinegar (236ml)

    1 cup distilled white vinegar (236ml)

    3 cups granulated sugar (600g)

    ⅛ teaspoon ground turmeric

    Directions

      1Prepare peppers: Slice the peppers between 1/8″ and 1/4″ thick. Then, place them into a mixing bowl and add the sliced garlic. Sprinkle the salt over the peppers, toss well, and set aside on the counter for 20 minutes.

      2Make syrup: Add apple cider vinegar, white vinegar, sugar, and turmeric to a small saucepan and bring to a boil. Boil the mixture for 3 minutes.

      3Add peppers and garlic: Add the peppers and garlic, and boil for another 3 minutes. With a slotted spoon, scoop out the peppers and garlic and put them into a 1-quart jar.

      4Reduce the syrup: Simmer the vinegar mixture until it reduces to about 1 pint of liquid (2 cups), 5 to 8 minutes.

      5To finish: Pour the reduced vinegar mixture over the peppers and garlic, then add a lid to the jar. Refrigerate overnight, but if you can wait, they are better on day 2 and even better after a week.

    Adam and Joanne’s Tips

    • Storing: Homemade cowboy candy lasts in an airtight jar in the fridge for 3 months, though my family finishes the jar well before that! For longer storage, you can preserve it using a traditional water bath (I recommend reviewing a canning resource for tips).
    • The nutrition facts provided below are estimates.

    Nutrition Per Serving
    Serving Size
    1 tablespoon (includes syrup)
    /
    Calories
    82
    /
    Total Fat
    0.1g
    /
    Saturated Fat
    0g
    /
    Cholesterol
    0mg
    /
    Sodium
    37.8mg
    /
    Carbohydrate
    20.4g
    /
    Dietary Fiber
    0.6g
    /
    Total Sugars
    19.6g
    /
    Protein
    0.2g


    AUTHOR:

    Joanne Gallagher

    Adam and Joanne of Inspired Taste

    We are Adam and Joanne Gallagher, the creators of Inspired Taste. Established in 2009, Inspired Taste grew from a childhood dream into one of the internet’s most trusted recipe sites with hundreds of reliable recipes, step-by-step videos, and expert tips.More About Us

    Source link