Category: Quick Meal

  • Easy Fruit Dip Recipe

    Easy Fruit Dip Recipe

    Our 5-minute fruit dip recipe turns out incredibly delicious thanks to cream cheese, cream, and orange. It’s so good, and reminds me of an orange creamsicle.
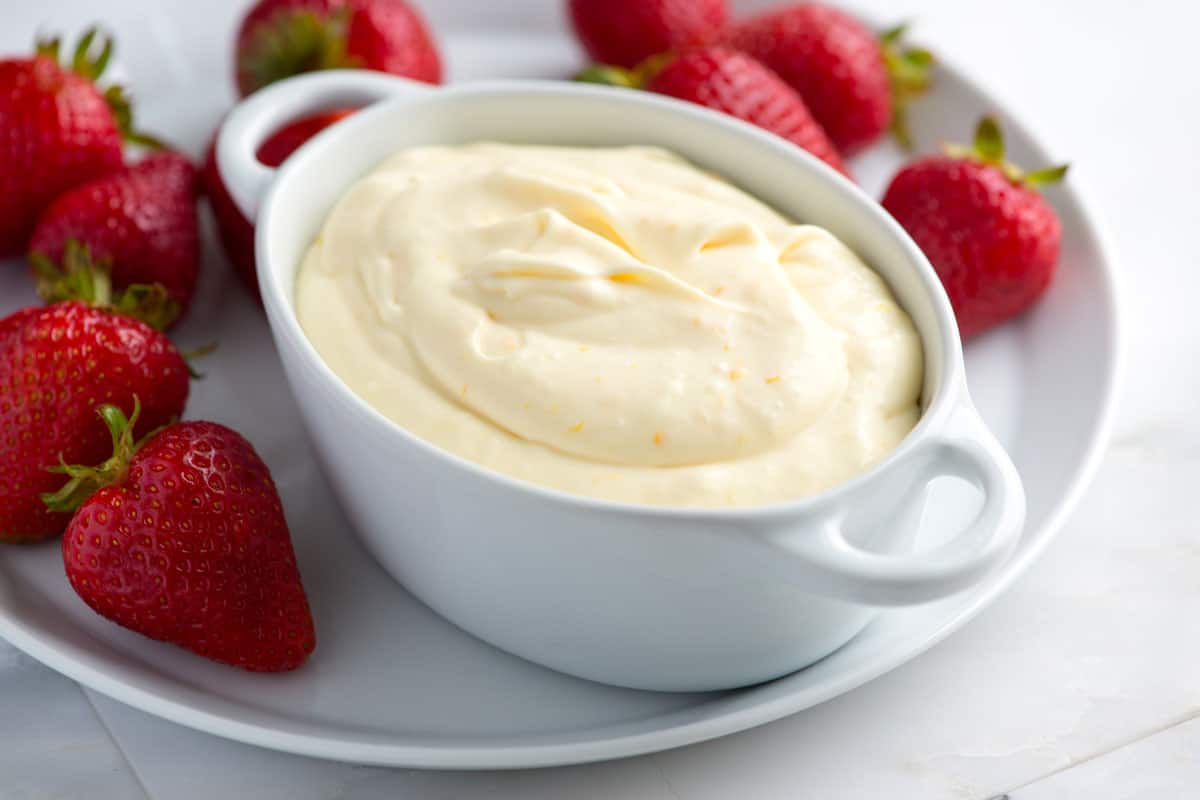
    Fruit Dip

    Imagine a party with a table filled with tempting treats. At one end, you see chocolate cupcakes. At the other end, there’s a bowl of this irresistible creamy fruit dip. Where will you find me? I’ll be hovering over the fruit dip, happily devouring it.

    This creamy dip is perfect with fresh fruit, but it works really well with other sweets like graham crackers, shortbread cookies, and biscotti. Although, to be honest, I hardly even need the fruit – this dip is so good that I could eat it with a spoon!

    Key Ingredients

    • Cream Cheese and Cream: I love the combination of cream cheese and heavy cream. I use the same base for the frosting of my favorite carrot cake. It’s so simple, yet so good! You will need softened or room-temperature cream cheese for this recipe, so plan ahead.
    • Orange: Fresh orange is best since it allows you to use some of the zest, which adds an extra pop of orange flavor.
    • Vanilla: Use your favorite vanilla extract or swap in vanilla bean paste.
    • Powdered Sugar: I like using just enough to make the dip slightly sweet, not overly so. If you find it needs a bit more, it’s easy to add to taste. Powdered sugar is best here, as it easily dissolves into the cream cheese mixture.

    Find the full recipe with measurements below.

    How to Make My Favorite Fruit Dip

    Tip 1: Use an electric or stand mixer. Think of this fruit dip as a slightly less-sweet, creamier version of cream cheese frosting. Just like when making frosting, an electric hand mixer or a stand mixer makes things really quick and easy.

    Combine the cream cheese, cream, vanilla, orange zest, orange juice, and powdered sugar in a bowl. Then use your hand or stand mixer to beat the ingredients until the dip is light, whipped, and creamy.
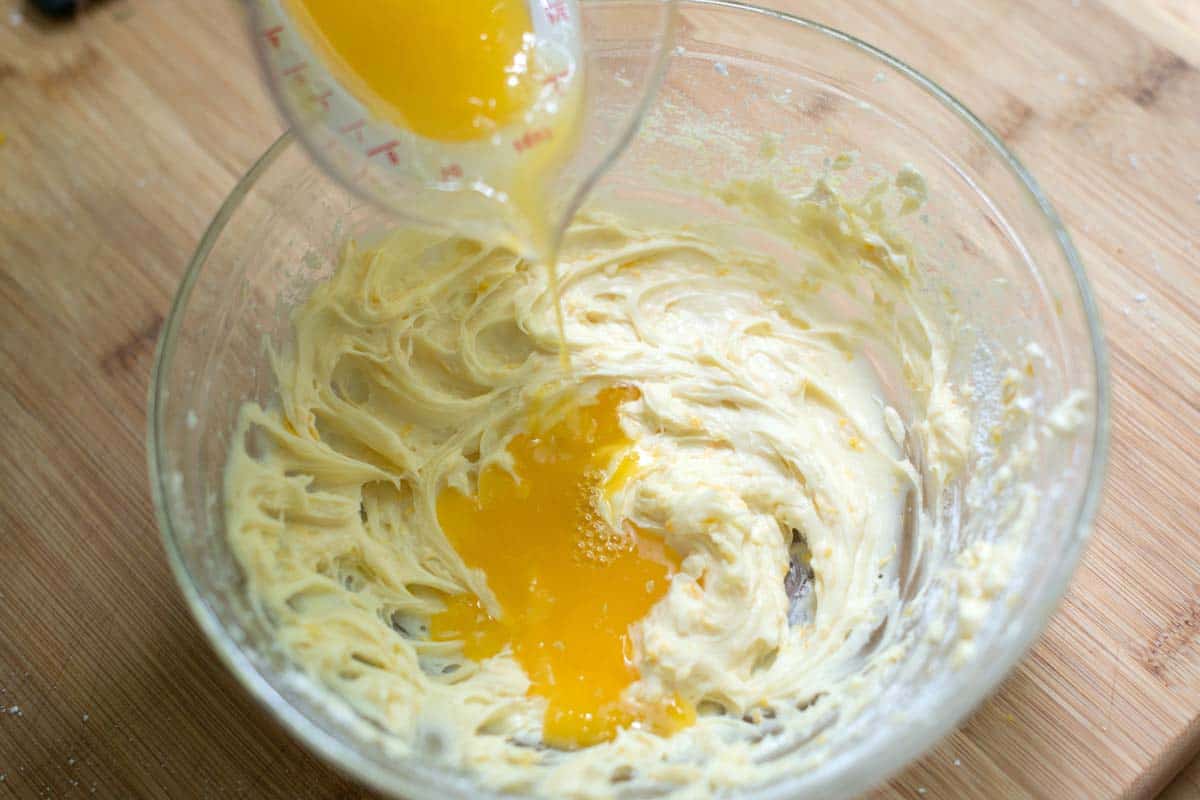
    Making fruit dip by adding orange juice to whipped cream cheese and cream

    Tip 2: Keep in mind that it firms up when cold. Just like buttercream or frosting, once this dip goes into the fridge, it firms up, which can make dipping a little more difficult. You can absolutely store this in the fridge for a few days. Just remember to take it out and set it on the counter for 20 to 30 minutes before you plan to serve it. Beating it a few times with a spoon softens it up more quickly, too.

    More Easy Desserts
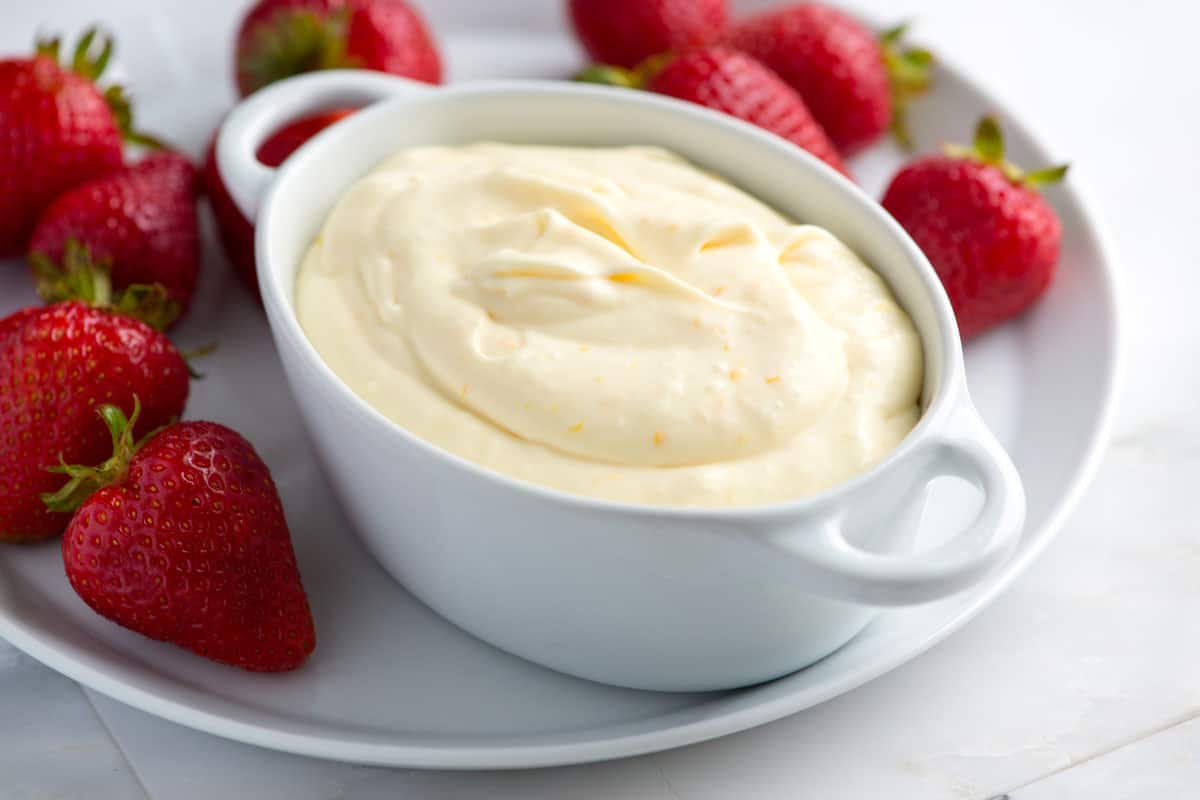
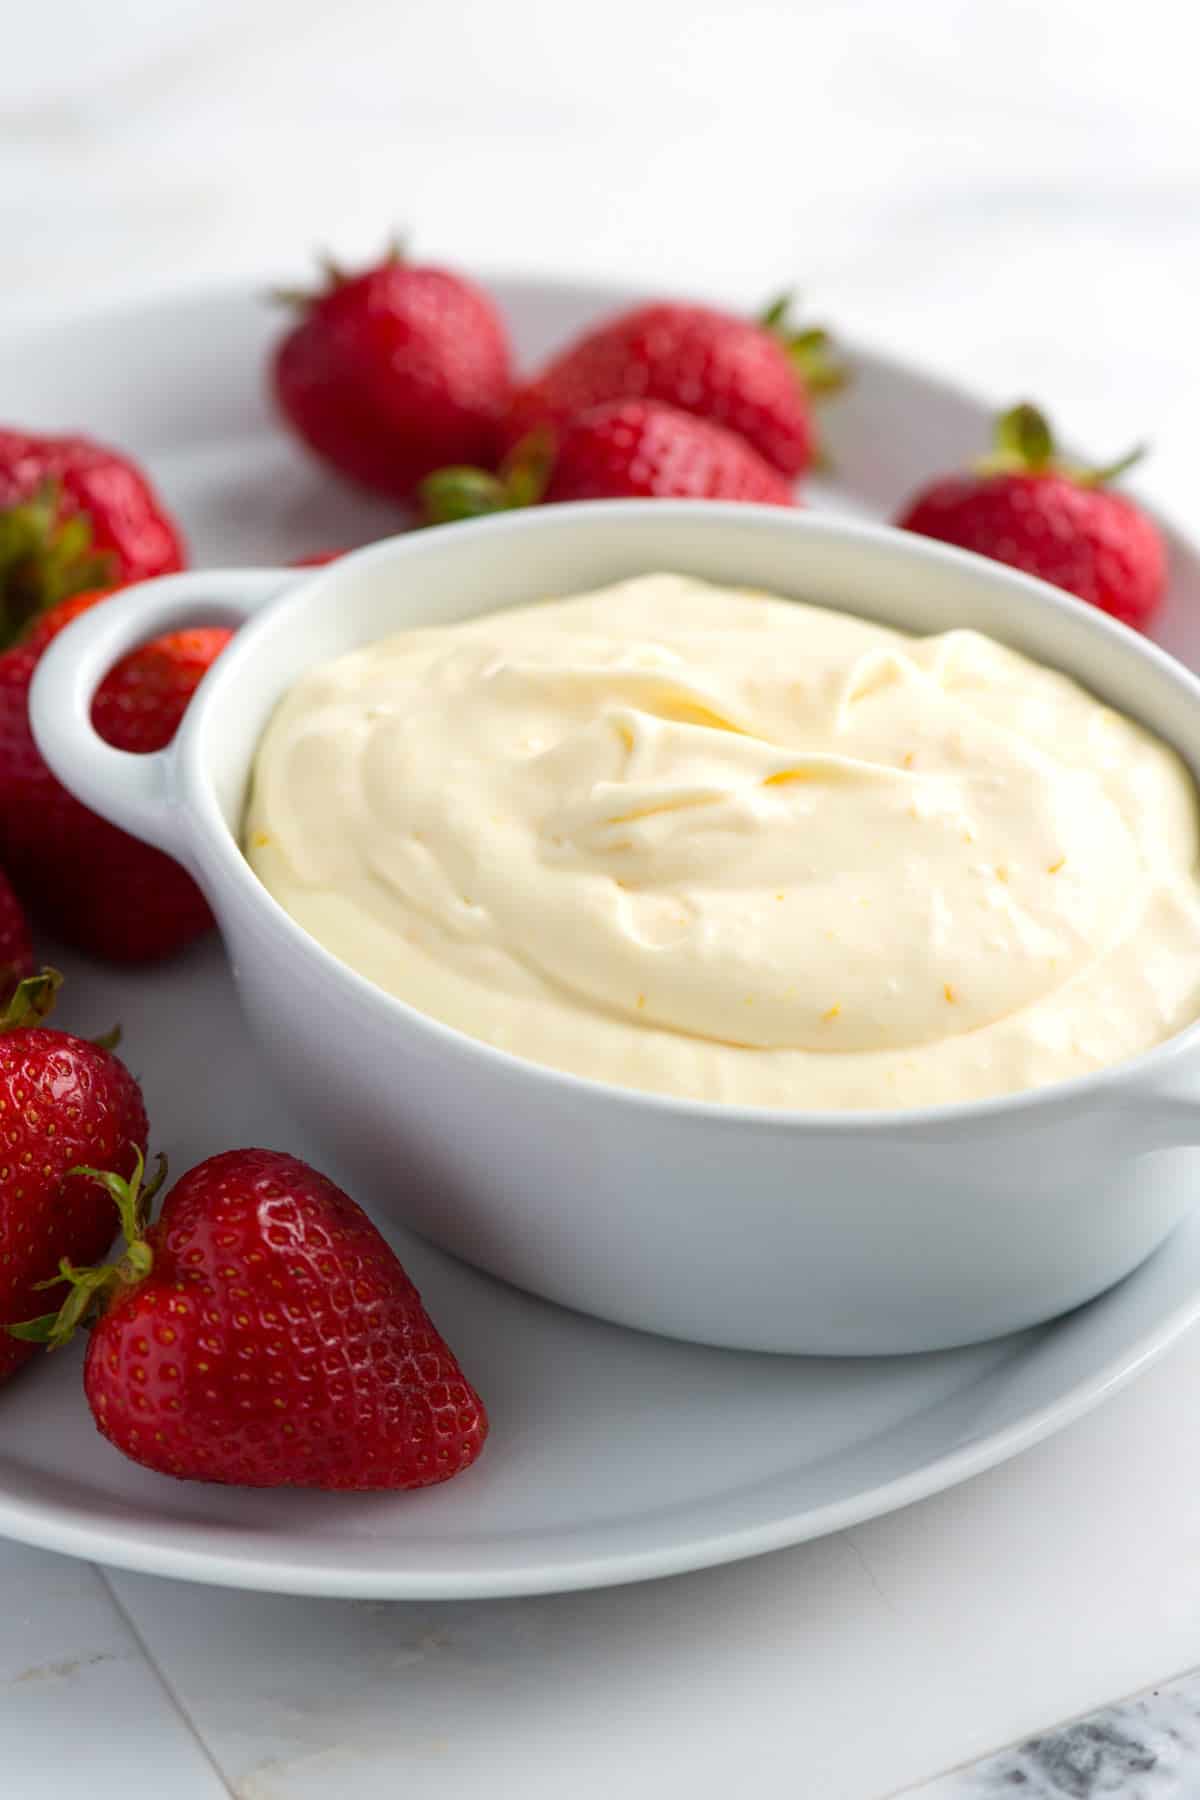
    Fruit Dip with Strawberries

    Easy Fruit Dip

    This super simple fruit dip is perfect served with fresh fruit, but it’s also incredible with cookies or graham crackers.

    Makes 1 1/4 cups

    You Will Need

    4 ounces cream cheese, at room temperature (113g)

    ½ teaspoon vanilla extract

    1 tablespoon orange zest

    ½ cup powdered sugar (55g)

    ¼ cup fresh squeezed orange juice (60ml)

    ¼ cup heavy cream (60ml)

    Directions

      1Add cream cheese, vanilla, and the orange zest to a medium bowl, then beat on medium speed with a hand mixer until smooth (or use a stand mixer with a paddle attachment).

      2Add powdered sugar a little at a time, mixing after each addition. Add the orange juice, then beat until smooth.

      3Pour in the cream and beat with the mixer until thick and creamy, about 1 minute.

    Adam and Joanne’s Tips

    • Storing: Keep tightly covered in the refrigerator for up to 3 days.
    • The nutrition facts provided below are estimates.

    Nutrition Per Serving
    Serving Size
    2 tablespoons
    /
    Calories
    86
    /
    Protein
    1 g
    /
    Carbohydrate
    7 g
    /
    Dietary Fiber
    0 g
    /
    Total Sugars
    7 g
    /
    Total Fat
    6 g
    /
    Saturated Fat
    4 g
    /
    Cholesterol
    21 mg


    AUTHOR:

    Joanne Gallagher

    Adam and Joanne of Inspired Taste

    We are Adam and Joanne Gallagher, the creators of Inspired Taste. Established in 2009, Inspired Taste grew from a childhood dream into one of the internet’s most trusted recipe sites with hundreds of reliable recipes, step-by-step videos, and expert tips.More About Us
    Source link

  • Easy Pickled Peppers Recipe

    Easy Pickled Peppers Recipe

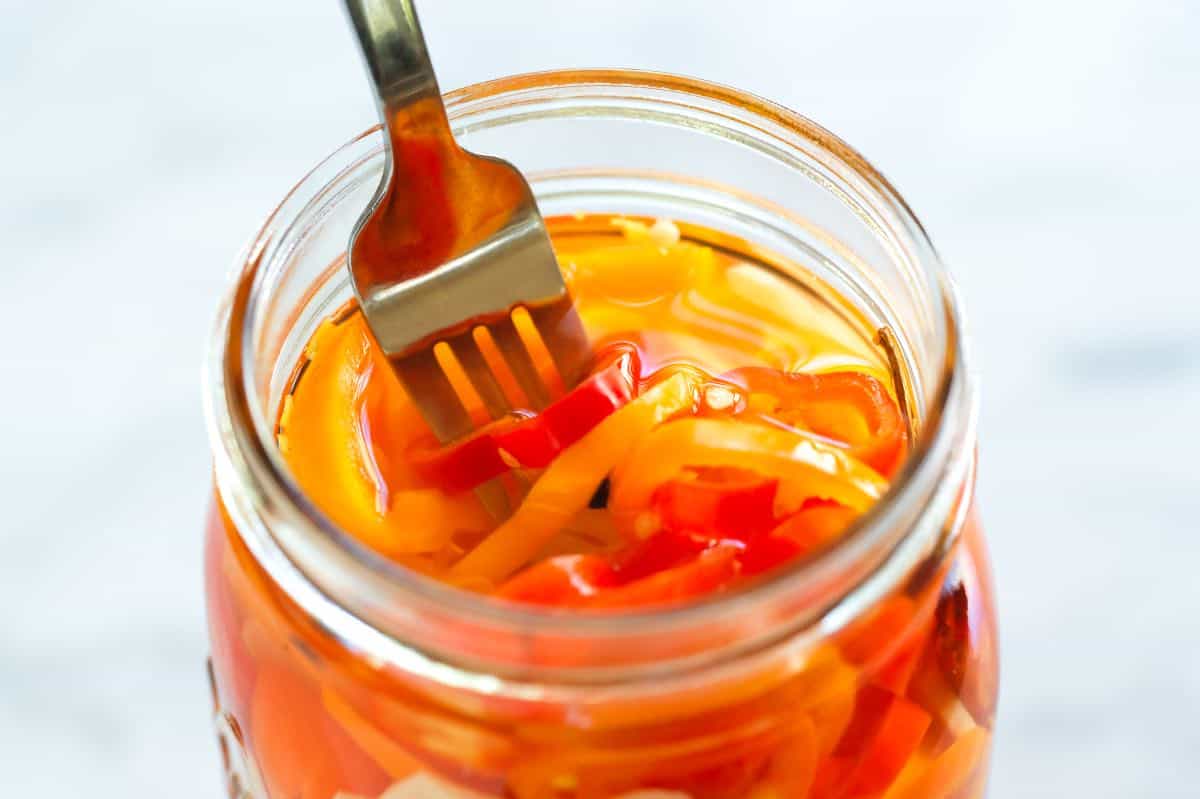
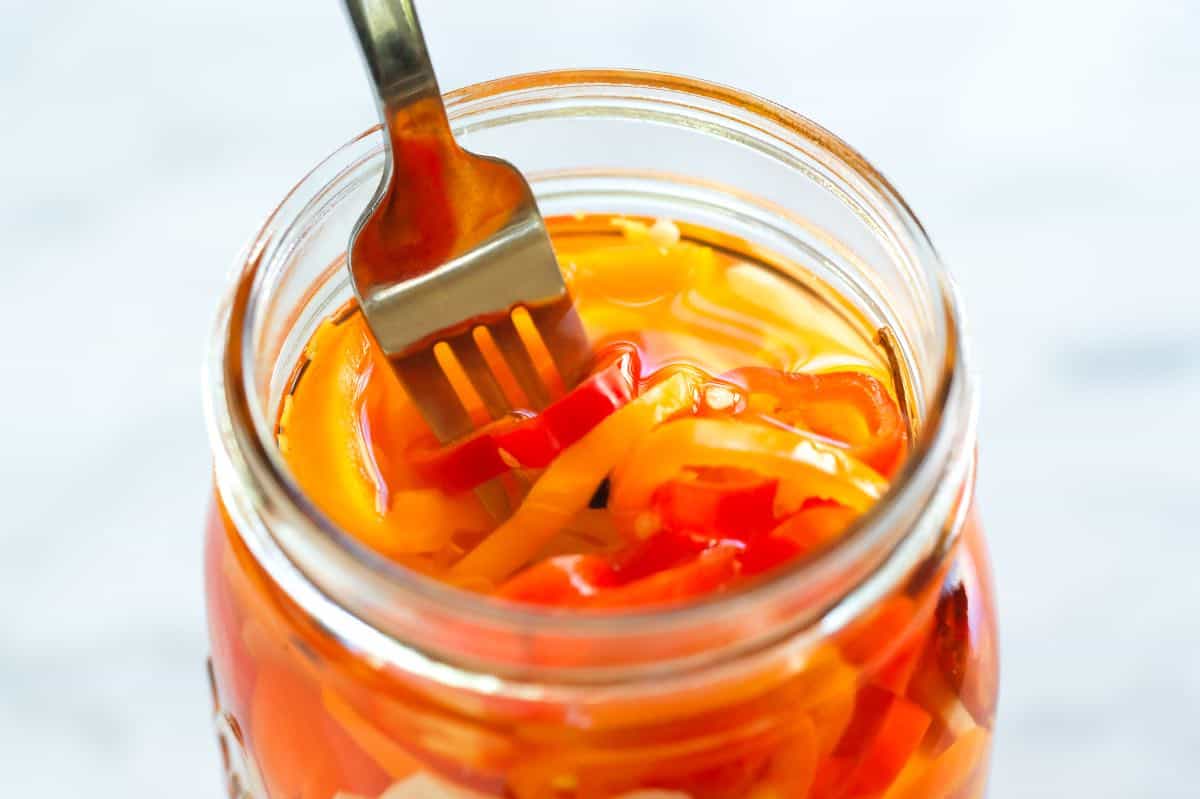
    I’m obsessed with this pickled peppers recipe and find myself adding them to everything! They only take 20 minutes to prep and last in the fridge for a month.

    Pickled Peppers

    I’m convinced these pickled peppers make just about anything taste better. When I’m putting together a dish, I’m always surprised at how much a hint of tanginess (from lemon or vinegar) can take the flavor from simply okay to absolutely excellent. These are my secret for adding crunch and that perfect hint of tanginess to everything from taco recipes and sandwiches to my favorite salad recipes, homemade pizza, and so much more!

    For the photos, I’ve made a batch of sweet pickled peppers, but this recipe is easily adaptable to all sorts of peppers (even the hottest you can find). It truly depends on what you’re looking for! Feel free to experiment with different peppers or a combination of them to achieve the spice level you love.

    Key Ingredients

    • Peppers: I love pickled sweet peppers, but this recipe works with any variety of peppers. It depends on what you are looking for. For sweet peppers, we love using mini peppers (like what I used to make these sweet pepper poppers). They are thinner than regular bell peppers, which makes for a better texture in the end. You can use 100% sweet peppers or mix in some hotter varieties, such as banana peppers, cherry peppers, jalapeños, serrano peppers, or even hotter options like Fresno peppers.
    • Vinegar: We keep the brine for these peppers simple with regular distilled vinegar (5% acidity). It gives the pickles a clean, classic flavor, allowing the sweetness of the peppers and the garlic to come through (it’s also inexpensive!). Feel free to substitute with rice wine vinegar or white wine vinegar if you prefer.
    • Salt and Sugar: These are essential for balancing the brine. Without salt or sugar, our brine would taste too intensely like plain vinegar (we take this approach for most of the pickle recipes on Inspired Taste). For salt, I use sea salt or pickling salt (it’s best to avoid table salt here, as the added iodine can interfere with the pickling process). For the sugar, I use plain granulated sugar as my go-to. You can substitute brown sugar or honey, but this may cause your brine to appear slightly cloudy.
    • Garlic and Spices: For a classic flavor, we love adding sliced garlic to the jars (you can mince it, but be prepared for a slightly more intense garlicky flavor in your brine!). Then, for the spices, we keep it simple with an allspice berry (yep, one is enough) and whole peppercorns.
    • Optional Chile Pepper: When I use 100% sweet peppers, I like adding a hint of heat with a small dried chile (chile de Arbol is perfect). This is optional and won’t make the pickles spicy. They taste more warm than anything else. For more heat, increase to 2 or 3, or mix in some fresh hot peppers instead.

    How to Make Pickled Peppers

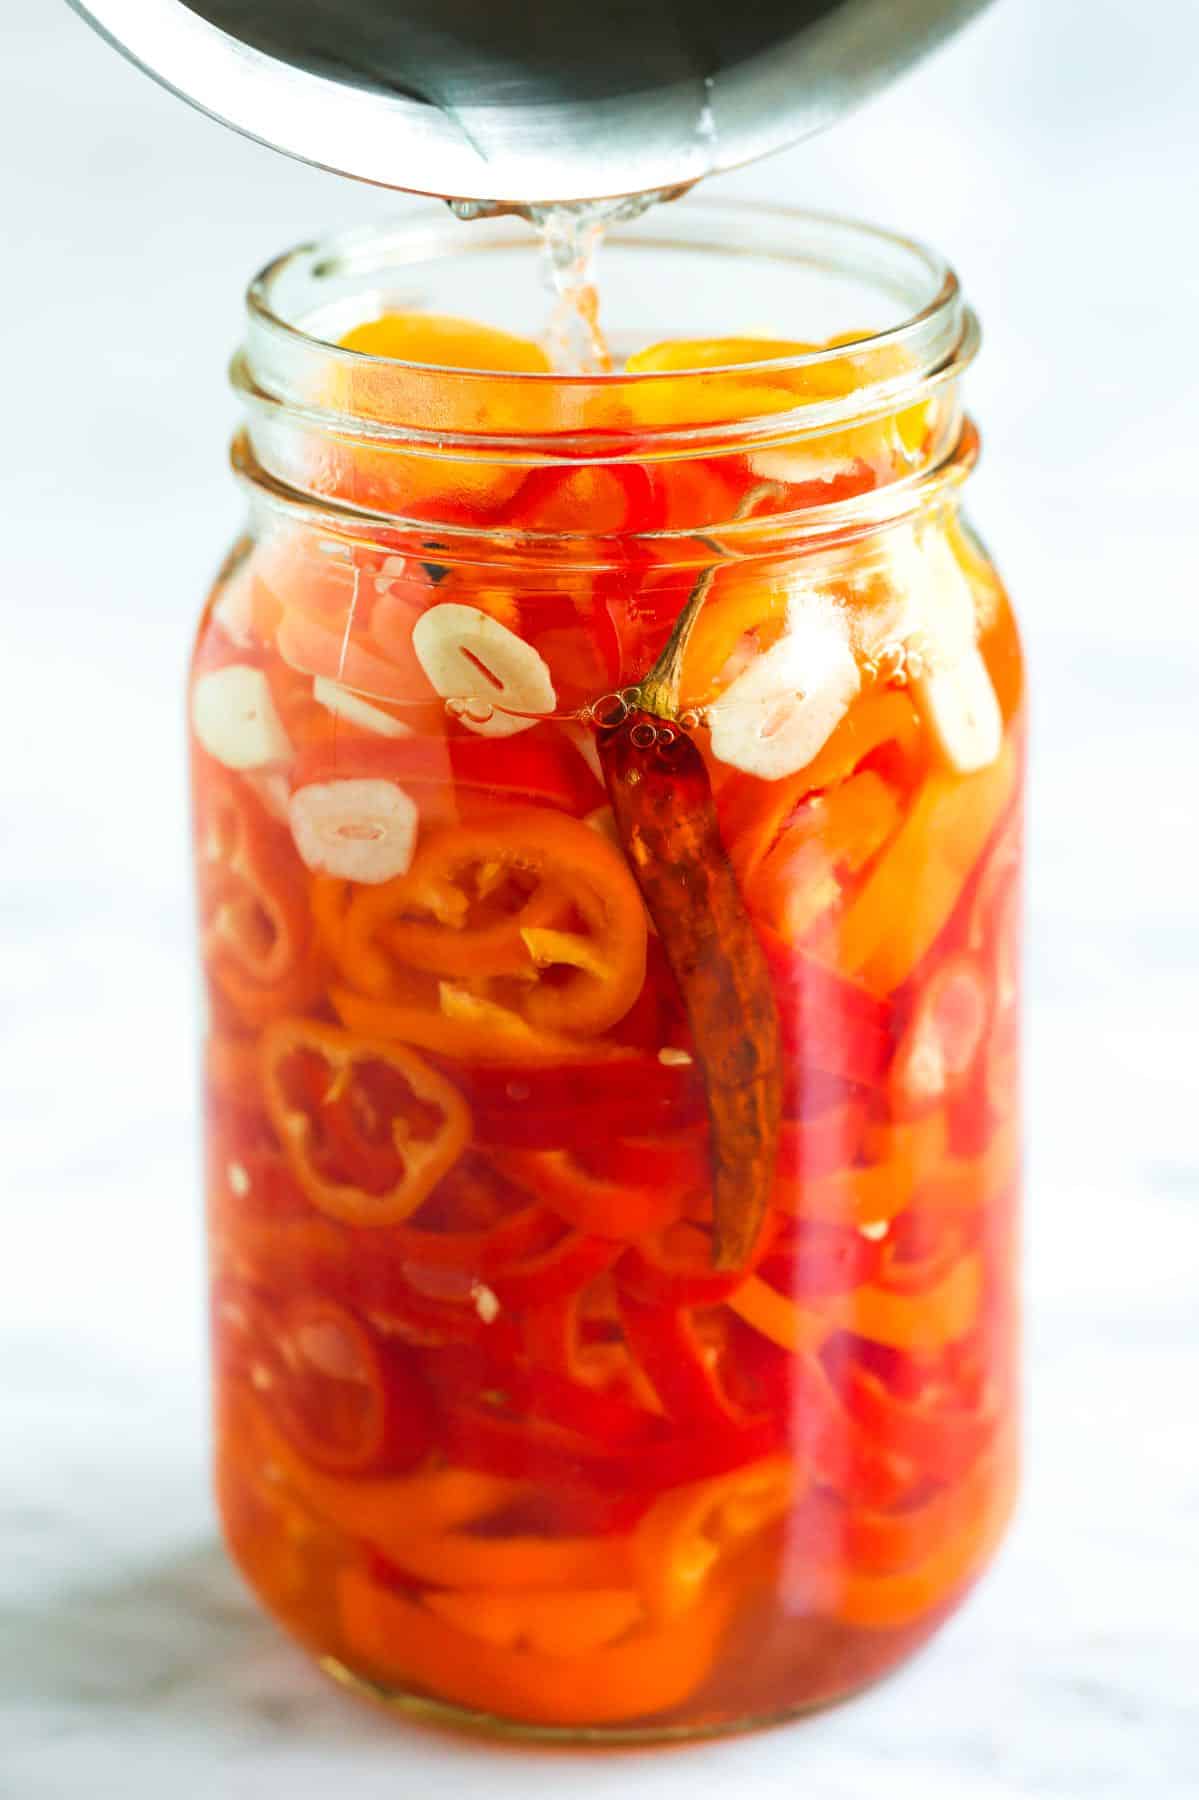
    These peppers get better over time. Pack your peppers into a jar, then pour the hot brine over them. Transfer them to the fridge once they’ve cooled to room temperature. As they sit overnight, they transform into incredibly crunchy, tangy peppers and continue to improve with each passing day, as the garlic has more time to infuse our brine with its flavor. I can’t wait for you to try them!

    More Quick Pickle Recipes

    Pickled Peppers

    Easy Pickled Peppers

    • PREP
    • TOTAL

    These crunchy, quick pickled peppers are a great snack, excellent on meat and cheese boards, added to sandwiches and wraps, scattered over cheese pizza, or used in any recipe where you would typically use bell peppers. They keep their crunch but take on a pickled, bright flavor, adding a nice pop of flavor to just about anything!

    Note: Just like other quick pickles (like our pickled carrots), these peppers are ready after a night in the fridge, but they continue to improve as they sit in the brine. They really light up around day 3!

    Makes One 1-quart jar, 8 Servings

    You Will Need

    1 pound mini sweet peppers

    2 cloves garlic, finely sliced

    1 dried chile de arbol, optional

    16 ounces (470ml) distilled vinegar, 5% acidity

    1 ½ teaspoons fine sea salt or pickling salt

    2 tablespoons granulated sugar

    1 allspice berry

    5 whole peppercorns

    Directions

      1Prepare the peppers: Cut the tops off of the peppers and scrape or tap out the seeds and most of the white membrane. Slice into rings. Place the pepper rings into a clean 1-quart jar.

      2Add the chile and garlic: Place the sliced garlic and chile de arbol (optional) around the peppers in the jar.

      3Make the vinegar brine: In a small saucepan, combine the vinegar, salt, sugar, allspice berry, and peppercorns. Bring to a simmer and cook until the salt and sugar dissolve.

      4Pour the brine into the jar: Pour the vinegar brine over the peppers. Make sure the brine completely covers all the peppers. Secure the lid on the jar until it’s “finger-tight” (meaning snug but not overly cranked).

      5Cool and refrigerate: Set the jar aside on your counter and let it cool completely to room temperature. Once cooled, transfer the jar to your refrigerator. For the best flavor, refrigerate pickled peppers overnight before enjoying them. If you can wait, they get even better after 2 to 3 days! These quick pickled peppers will last, covered in their brine, in the fridge for up to 1 month.

    Adam and Joanne’s Tips

    • The jar: We use a 1-quart wide-mouth mason jar (32 ounces or 946ml).
    • Peppers: We developed this recipe for sweet peppers (the mini, colorful peppers often sold in bags). The chile de arbol adds a little heat, but for more, feel free to use 2 to 3 of them or swap a portion of the sweet peppers for hotter peppers, such as jalapeños, Fresno, or serrano peppers.
    • Allspice berries: These taste like a combination of cloves, cinnamon, and nutmeg. We found whole allspice berries less common in the grocery spice aisle, but we recommend buying a “pickling spice blend” instead. McCormick’s “Mixed Pickling Spice” contains allspice berries, which we purchased and picked out 1 berry for this recipe. We also use it for making sauerkraut.
    • Canning: These pickled peppers have been specifically designed for the refrigerator and are meant to be kept in the fridge at all times. However, if you’re experienced in canning, you could adapt them for long-term shelf stability. This would involve using sanitized jars, new lids, and a pressure canner.
    • The nutrition facts provided below are estimates. Calculating how much salt is in the peppers is difficult, so we have included all of the brine in the calculations.

    Nutrition Per Serving
    Serving Size
    1/8 of the jar (about 2 ounces)
    /
    Calories
    42
    /
    Total Fat
    0.2g
    /
    Saturated Fat
    0g
    /
    Cholesterol
    0mg
    /
    Sodium
    449.3mg
    /
    Carbohydrate
    7.1g
    /
    Dietary Fiber
    1.4g
    /
    Total Sugars
    5.6g
    /
    Protein
    0.7g


    AUTHOR:

    Joanne Gallagher

    Previous Post: Our Favorite Giardiniera
    Next Post: Fluffy Saffron Rice

    Source link

  • No Mayo Herb Potato Salad Recipe

    No Mayo Herb Potato Salad Recipe

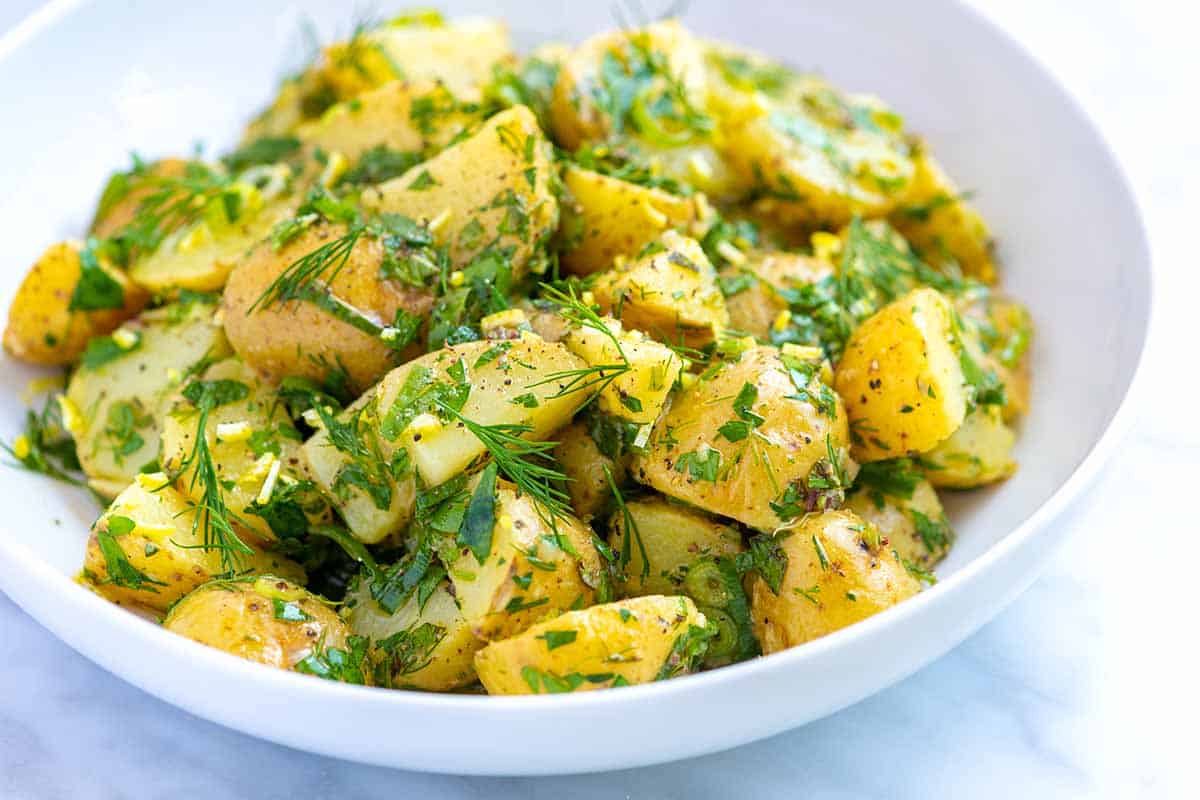
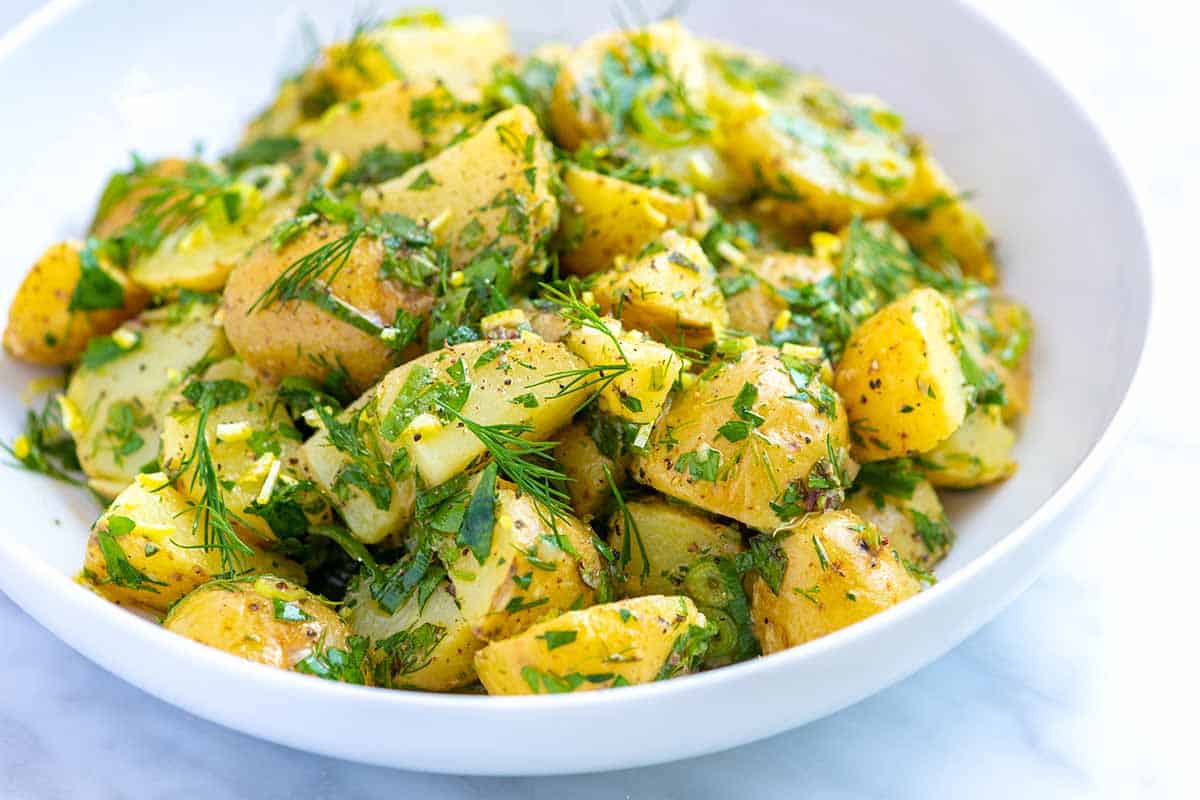
    My favorite no mayo herb potato salad recipe calls for lots of fresh herbs and swaps a creamy dressing for one made with lemon juice and olive oil.

    Herb Potato Salad (no mayo)

    In this salad, I toss warm potatoes with our zesty lemon Dijon vinaigrette. This salad is reminiscent of a French potato salad. Since the potatoes are warm, they absorb all the delicious flavors of the dressing.

    Our mayonnaise-free herb potato salad dressing is quick to make, a bit healthier, and tastes fantastic! If you prefer a more traditional creamy dressing, see our creamy potato salad.

    Key Ingredients

    • Potatoes: I love using small waxy potatoes for this herbed potato salad. Red bliss potatoes or fingerlings are also excellent options. The smaller the potatoes, the better since they cook quickly and don’t require extra time chopping.
    • Lemon and red wine vinegar: I love the combination of fresh lemon juice and red wine vinegar for the potato salad vinaigrette. You can use just one if you don’t have both in the kitchen.
    • Dijon mustard: I use Dijon mustard a lot when making salad dressings. It’s tangy and helps to make vinaigrettes creamy and emulsified.
    • Olive oil: Mayonnaise is a popular ingredient in classic American potato salad, but for this recipe, we leave the mayo out and make a simple olive oil dressing. The combination of olive oil and mustard helps to make it a creamy (dairy-free) vinaigrette.
    • Fresh herbs and scallions: This is my favorite part of this recipe. I’ve said it before, and I’ll say it again. When it comes to fresh salads, I honestly don’t think you can add too many herbs! I usually end up adding parsley, dill, and mint, but basil, chives, or tarragon would also be wonderful.

    Find the full recipe with measurements below.

    Tips for Making Our Herb Potato Salad

    Tip 1: Cook potatoes in salted water. I like to start cooking my potatoes in cold water and add about 1 tablespoon of salt to the water to help season the potatoes as they cook. When I can easily pierce them with a fork, I drain them and set them aside to cool down a bit. I cut the potatoes in halves or quarters when I can handle them.

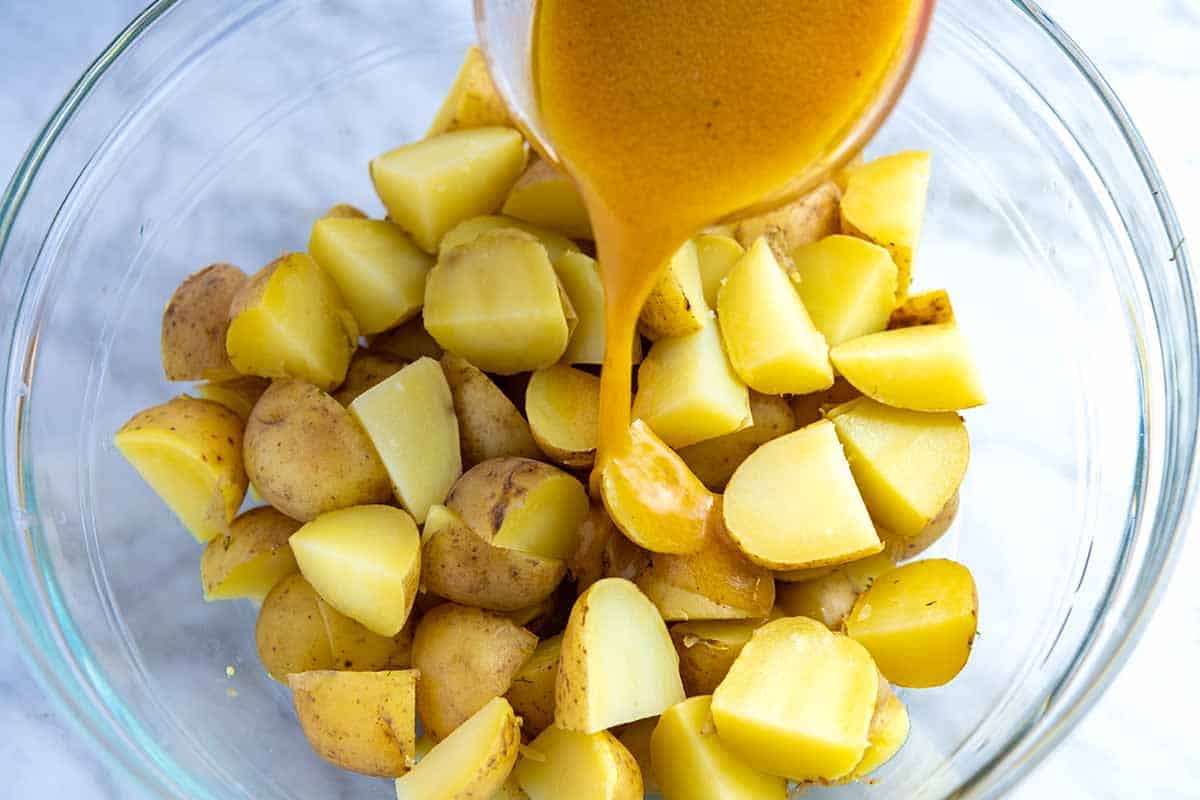
    Tip 2: Pour our dressing over warm potatoes. My olive oil dressing is quick and simple. I whisk lemon zest, lemon juice, red wine vinegar, Dijon mustard, a pinch of salt, pepper, and olive oil together until emulsified and creamy. Then, pour the dressing over the warm potatoes. The warm potatoes will soak up the dressing much better than cold potatoes.

    Add olive oil dressing to warm potatoes

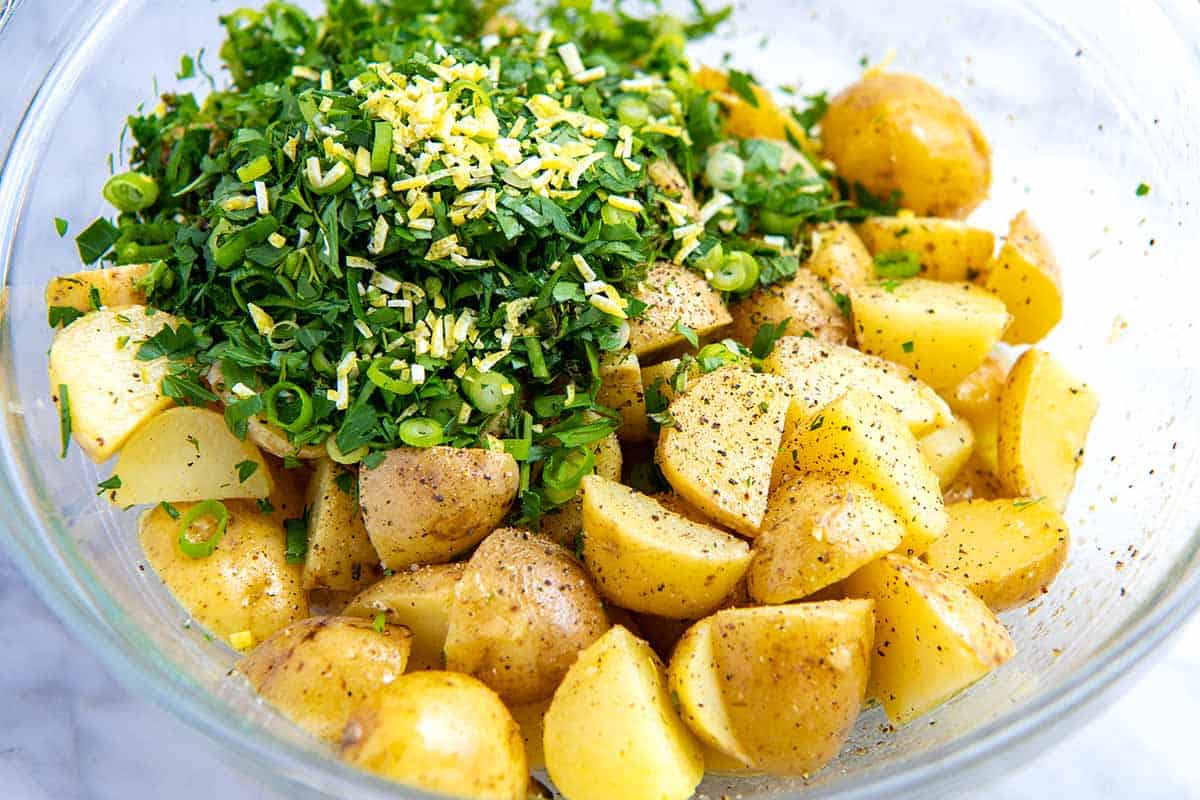
    Tip 3: Add fresh herbs and serve warm. Finally, I carefully toss the potatoes with lots of fresh herbs and scallions. I love serving this mayo-free potato salad warm or at room temperature. It’s delicious!

    Adding herbs to potato salad

    Serving Suggestions

    This no mayo potato salad works well for summer cookouts and picnics, but I really love it as a side dish for dinner. I especially love serving this herby salad next to my garlic caper baked salmon, this incredible shrimp scampi, and our perfectly roasted chicken. It’s also excellent served next to tuna steaks, tuna salad, and chicken salad.

    More Potato Salad Recipes

    Herb Potato Salad without Mayo

    No Mayo Herb Potato Salad

    • PREP
    • COOK
    • TOTAL

    Our no mayo herb potato salad is packed with flavor thanks to a simple olive oil vinaigrette, lots of fresh herbs, and lemon. We prefer to use small baby potatoes (sometimes labeled New Potatoes), fingerling potatoes, or Red Bliss potatoes for this salad.

    Makes 6 servings (side portions)

    Watch Us Make the Recipe

    You Will Need

    2 pounds (907g) small yellow or red potatoes

    2 teaspoons Dijon mustard

    1 ½ teaspoons finely grated lemon zest

    2 tablespoons fresh lemon juice

    2 tablespoons red wine vinegar or champagne vinegar

    6 tablespoons extra virgin olive oil

    3 medium green onions, thinly sliced

    1/4 cup chopped fresh parsley

    2 tablespoons chopped fresh mint

    2 tablespoons chopped fresh dill

    Salt and freshly ground black pepper, to taste

    Directions

      1Add the potatoes to a large stockpot and cover with water by 2 inches. Add 1 tablespoon of salt to the water and bring to a boil.

      2Reduce to a simmer and cook until the potatoes are fork tender, 15 to 20 minutes. Drain, then set aside to cool.

      3When the potatoes are cool enough to handle, cut them into bite-sized chunks or slice them into thin rounds. Add them to a large salad bowl.

      4Whisk the mustard, lemon zest, lemon juice, vinegar, and olive oil until creamy and emulsified. Season to taste with salt and pepper.

      5Pour all but 1/4 cup of the dressing over the potatoes and toss. Set the potatoes aside for five minutes to absorb the dressing (it will look like a lot at first, but the potatoes will soak it up).

      6Add the scallions and fresh herbs. Toss gently but thoroughly. If the potato salad seems dry, add a splash of the remaining dressing.

      7Serve warm or cover and refrigerate, and then serve cold.

    Adam and Joanne’s Tips

    • Storing: Store herb potato salad in an airtight container in the fridge for up to 3 days. As the herbs sit in the dressing, they will lose some color.
    • Make ahead: Since the herbs lose color over time, toss the potatoes with the dressing and store them in an airtight container in the fridge. When you are ready to serve it, toss in fresh herbs, scallions, and lemon zest.
    • The nutrition facts provided below are estimates.

    Nutrition Per Serving
    Serving Size
    1/6 of the recipe
    /
    Calories
    235
    /
    Total Fat
    14.5g
    /
    Saturated Fat
    2.1g
    /
    Cholesterol
    0mg
    /
    Sodium
    224.6mg
    /
    Carbohydrate
    25.4g
    /
    Dietary Fiber
    4.3g
    /
    Sugars
    2.2g
    /
    Protein
    3.1g


    AUTHOR:

    Joanne Gallagher

    Adam and Joanne of Inspired Taste

    We are Adam and Joanne Gallagher, the creators of Inspired Taste. Established in 2009, Inspired Taste grew from a childhood dream into one of the internet’s most trusted recipe sites with hundreds of reliable recipes, step-by-step videos, and expert tips.More About Us
    Source link

  • Creamy Vegan Queso Recipe

    Creamy Vegan Queso Recipe

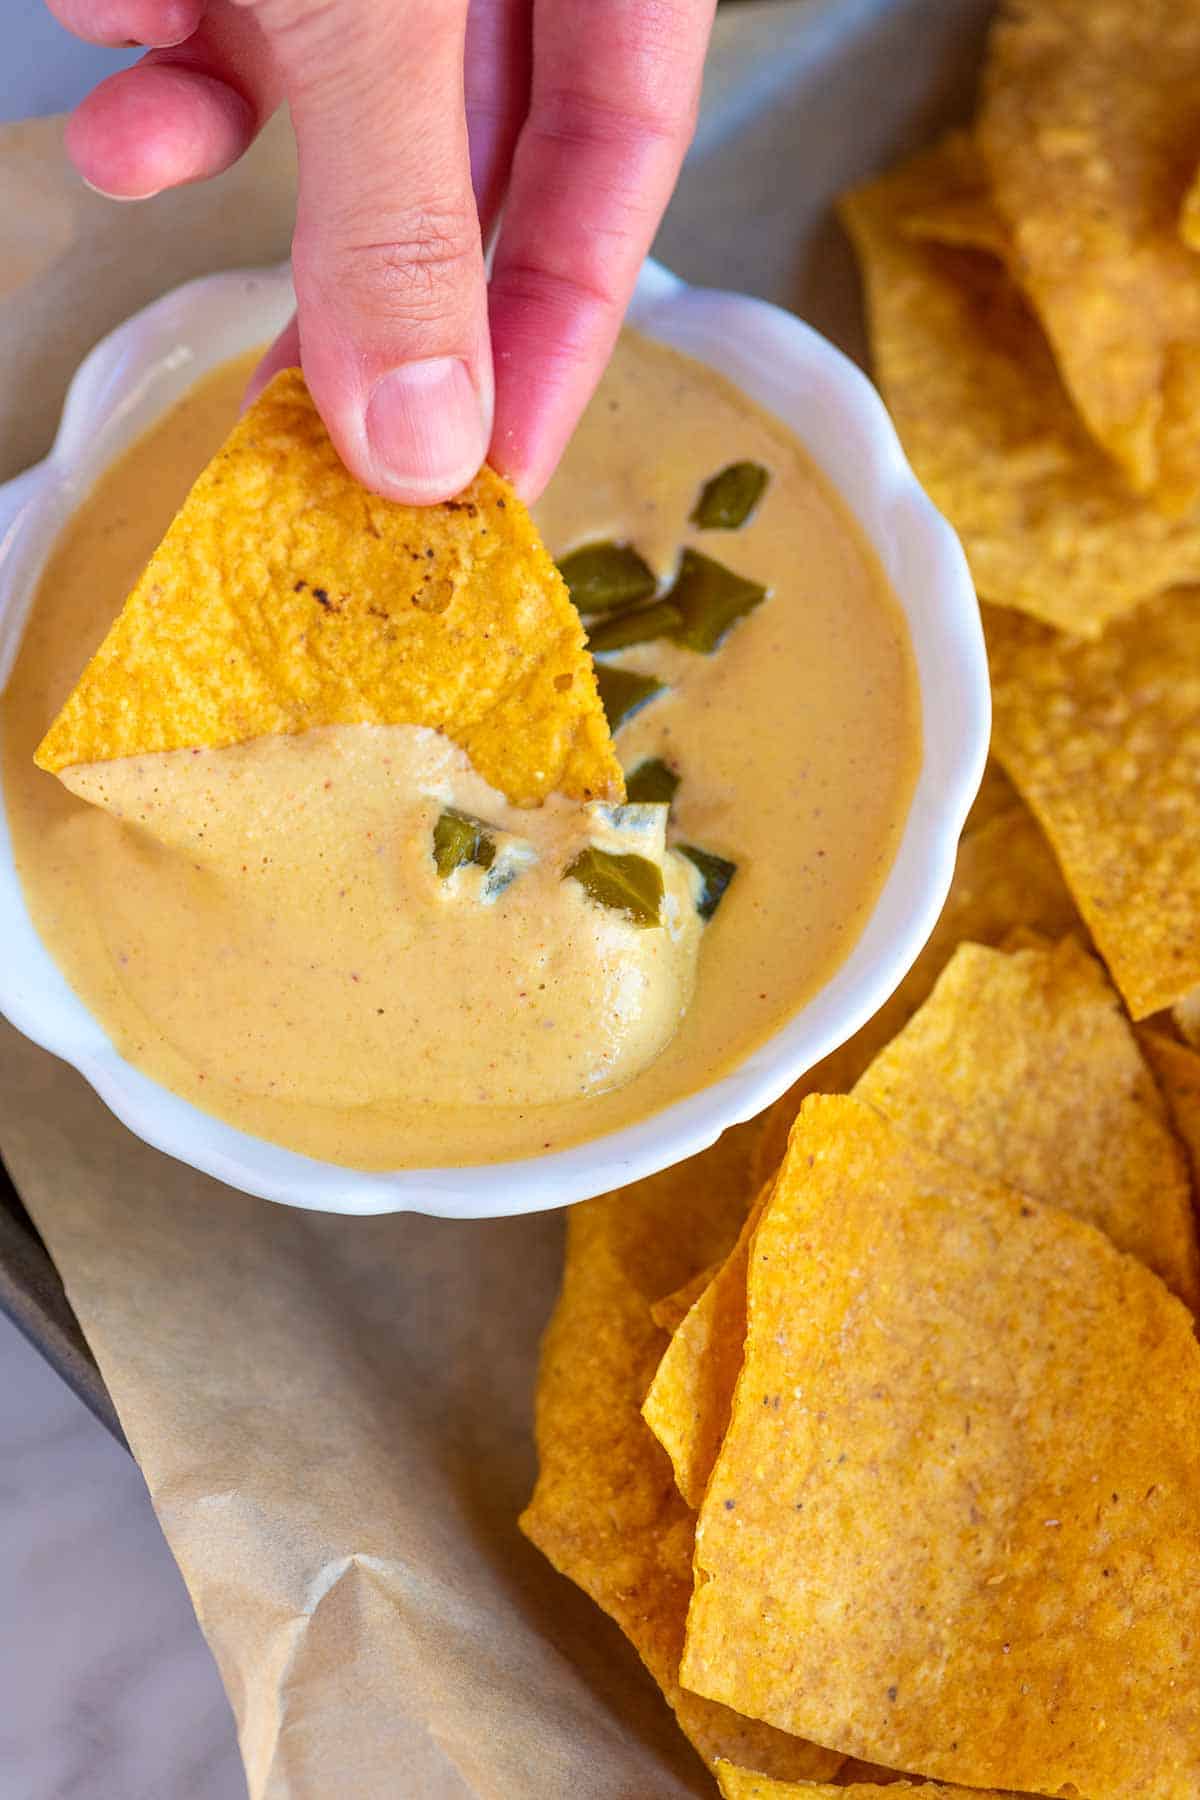
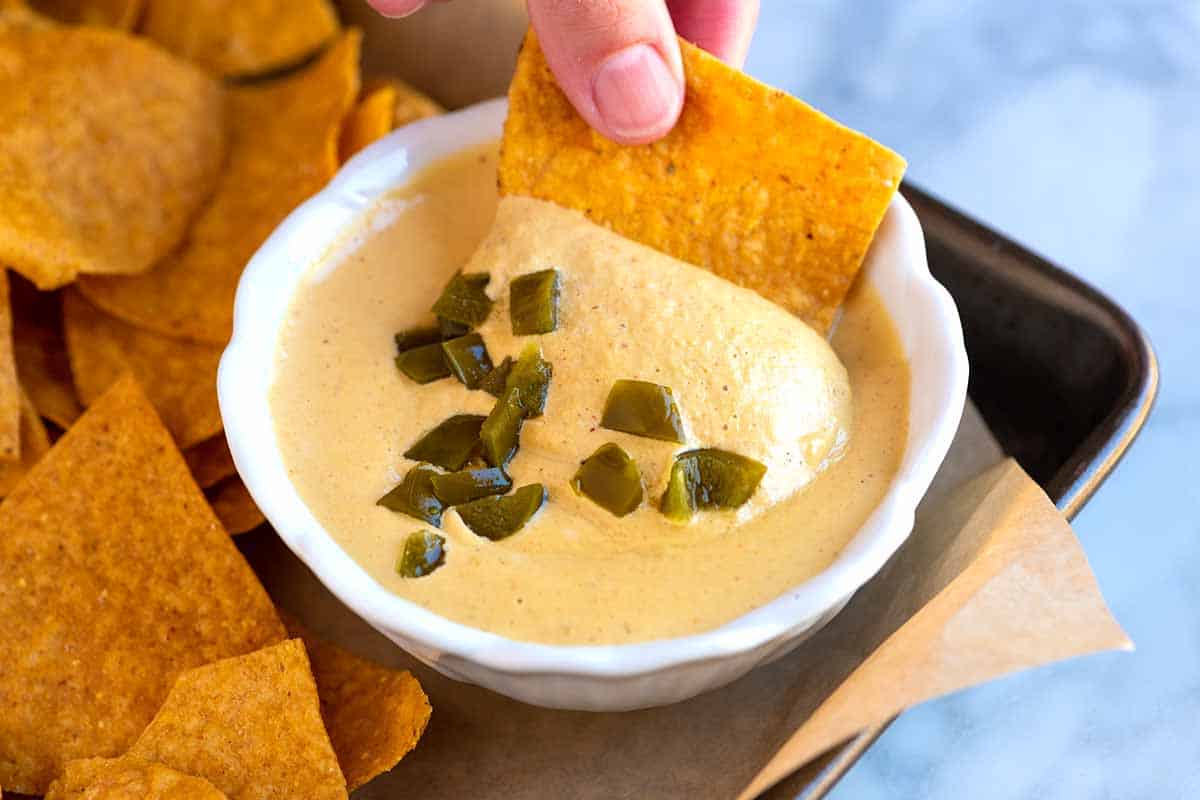
    Our vegan queso recipe truly is a game-changer. It’s outrageously creamy texture is all thanks to the magic of cashews. Both vegans and non-vegans consistently rave about this dairy-free dip.

    Creamy Vegan Queso

    I’ve served this countless times to those who typically eat dairy, and they’re always blown away by how incredibly creamy and flavorful it is. With just about a minute in a blender, cashews transform into a velvety smooth cashew cream, forming the perfect base for this easy dip. It honestly rivals any traditional queso made with dairy cheese!

    It’s fantastic spooned generously onto tacos or tucked inside burritos for an extra layer of creamy goodness. Beyond that, I adore serving it simply with a big bowl of homemade tortilla chips for dipping. It also makes an amazing cheese replacement for our veggie quesadillas, a perfect addition to our spiced cauliflower burritos, and my absolute favorite topping for these veggie tacos.

    Key Ingredients

    • Cashews: These make the base of our queso. We add them along with some water to a blender and blend until smooth, creating what we call cashew cream. I use raw cashews and don’t find it necessary to soak them before blending, especially with my high-powered blender. If you prefer to soak your cashews, you can (I’ve shared how in the tips below our recipe).
    • Taco Seasoning: I use my favorite homemade taco seasoning here, and I just love it! However, if you prefer a store-bought blend, please feel free to use it. It’s all about getting that perfect flavor you love.
    • Nutritional Yeast: If you’re familiar with vegan recipes, I bet you already have nutritional yeast on hand. I’m a major fan and find myself sprinkling it over everything from popcorn to avocado toast! For our queso, it’s key for adding that distinct cheesy flavor as well as a hint of yellow color.
    • Canned Green Chilies: I absolutely love canned green chilies (Hatch is my favorite brand!). In the U.S., they are typically sold in 4-ounce cans and are available in both mild and hot varieties. I usually go for the mild, but if you love a super spicy queso, the hot might be more your style.
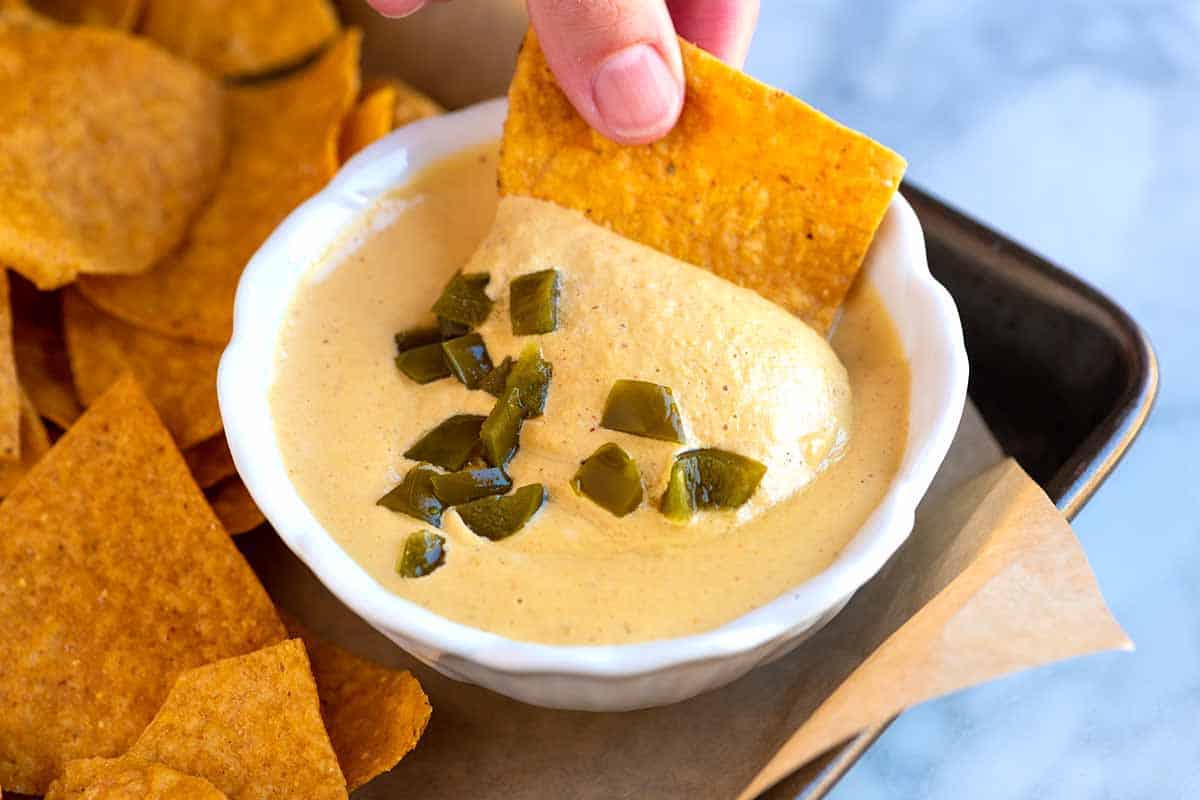
    • Pickled Jalapeños (optional): We almost always have a jar of pickled jalapeños in our fridge (thanks, Adam!). Our vegan queso tastes amazing with just a splash of the brine from the pickled jalapeños. I also love scattering a small handful of chopped jalapeños right over the top for extra flavor and a bit of a kick.

    Find the full recipe with measurements below.

    How to Make Vegan Queso

    Tip 1: Make the creamy base. Cashews are the base for this vegan queso. If you’ve not made it before, it’s incredibly straightforward. Toss cashews and hot water into your blender, hit blend, and watch as the nuts turn into a smooth, creamy consistency.

    Since you’ll be blending hot water, remember to remove the blender lid insert and cover the hole with a dishtowel. This will allow steam to escape and prevent too much pressure from building inside the blender. (I learned this the hard way in culinary school when I blended a hot soup without removing the lid insert. The blender pretty much exploded, and soup was everywhere!)

    Cashews and hot water inside a blender
    Blended cashews for the base of vegan queso

    Tip 2: Make it “cheesy.” Now that you have the creamy base, you can add lots of flavor with nutritional yeast, taco seasoning, chopped green chiles, and pickled jalapeño brine (if using them). Blend until smooth, then check the consistency. If it’s too thick (mine often is), add a tablespoon or two of water to thin.

    You can serve it however you like, but for a pop of heat, I love to add some chopped pickled jalapeños on top.

    Make Ahead Tips

    This lasts in the fridge for up to 5 days, but you’ll probably notice it thickens over time. I like to slowly reheat on the stove or microwave with a little splash of water or unsweetened dairy-free milk to get it back to its proper consistency. If it just doesn’t seem as blended or creamy as when you first made it, consider blending it again to bring it back to its super creamy, luxurious texture.

    More Vegan Recipes

    Dipping a chip into Vegan Queso

    Creamy Vegan Queso

    • PREP
    • TOTAL

    Our favorite vegan queso recipe turns out incredibly creamy and flavorful, thanks to a base of cashews, nutritional yeast, and canned green chiles. If you have a high-powered blender, there is no need to soak your cashews before making the dip. However, if your blender is not very powerful, consider soaking the cashews for a smoother consistency (tips for this are below).

    I love this with homemade tortilla chips, used as a substitute for cheese in our veggie quesadillas, and added to these veggie burritos.

    Makes 1 ½ cups

    Watch Us Make the Recipe

    You Will Need

    1 cup raw cashews (140g or 5oz)

    ¾ to 1 cup hot water

    1 to 2 teaspoons taco seasoning, see our taco seasoning recipe

    3 tablespoons nutritional yeast

    1 (4-ounce) can chopped green chilies, mild or hot depending on preference

    1 tablespoon juice from jar of pickled jalapeños, optional

    1 tablespoon chopped pickled jalapeño, optional

    Salt to taste

    Chips for serving, try homemade tortilla chips

    Directions

      1Make cashew cream: Place the cashews and ¾ cup of hot water into your blender. Blend until it’s very smooth – we’re looking for a smooth, creamy consistency. For safety and to allow steam to escape, leave the top insert out and cover the opening with a clean dishtowel, holding it firmly in place with your hand.

      2Make vegan queso: To the cashew cream in your blender, add 1 teaspoon of taco seasoning, the nutritional yeast, chopped green chilies, and a tablespoon of jalapeño pickle juice. Blend again until everything is perfectly smooth and combined. If you find the queso is a bit too thick for your liking, blend in a little more water, a tablespoon at a time, until it reaches your desired consistency.

      3Serve: Taste it, and then season with salt or a bit more taco seasoning as needed. Spoon into a bowl. For an extra pop of flavor and a touch of heat, top it generously with chopped pickled jalapeños.

    Adam and Joanne’s Tips

    • Soaking cashews: This step can help soften them, making them easier to blend into a smooth cream. However, if you’re like me and have a high-powered blender, soaking isn’t even necessary. However, if you do want to soak them, I have a couple of quick methods: bring water to a boil, turn off the heat, add the cashews, and let them soak for about 30 minutes before draining. Alternatively, for a more hands-off approach, you can soak them in room-temperature water for 3 to 4 hours.
    • Storing: Store vegan queso in an airtight container in the fridge for up to 5 days or freeze for 1 to 2 months. Thaw overnight in the refrigerator (you may find it needs a good stir or quick blend to get back to the right texture).
    • The nutrition facts provided below are estimates.

    Nutrition Per Serving
    Serving Size
    About 1/2 cup
    /
    Calories
    145
    /
    Total Fat
    10.6g
    /
    Saturated Fat
    2.1g
    /
    Cholesterol
    0mg
    /
    Sodium
    105.1mg
    /
    Carbohydrate
    9.6g
    /
    Dietary Fiber
    1.8g
    /
    Total Sugars
    1.9g
    /
    Protein
    4.5g


    AUTHOR:

    Joanne Gallagher

    Adam and Joanne of Inspired Taste

    We are Adam and Joanne Gallagher, the creators of Inspired Taste. Established in 2009, Inspired Taste grew from a childhood dream into one of the internet’s most trusted recipe sites with hundreds of reliable recipes, step-by-step videos, and expert tips.More About Us
    Source link

  • Brandon’s Egg Roll Tacos Recipe

    Brandon’s Egg Roll Tacos Recipe

    icon-arrowicon-chevron-whiteicon-chevronicon-commenticon-facebookicon-hearticon-instagramicon-instant-poticon-listicon-lockicon-meal-prepicon-nexticon-pinteresticon-popularicon-quoteicon-searchicon-staricon-sugar-freeicon-tiktokicon-twittericon-veganicon-videoicon-youtubemenu-closemenu-open


    Our recipes, your inbox. Sign up

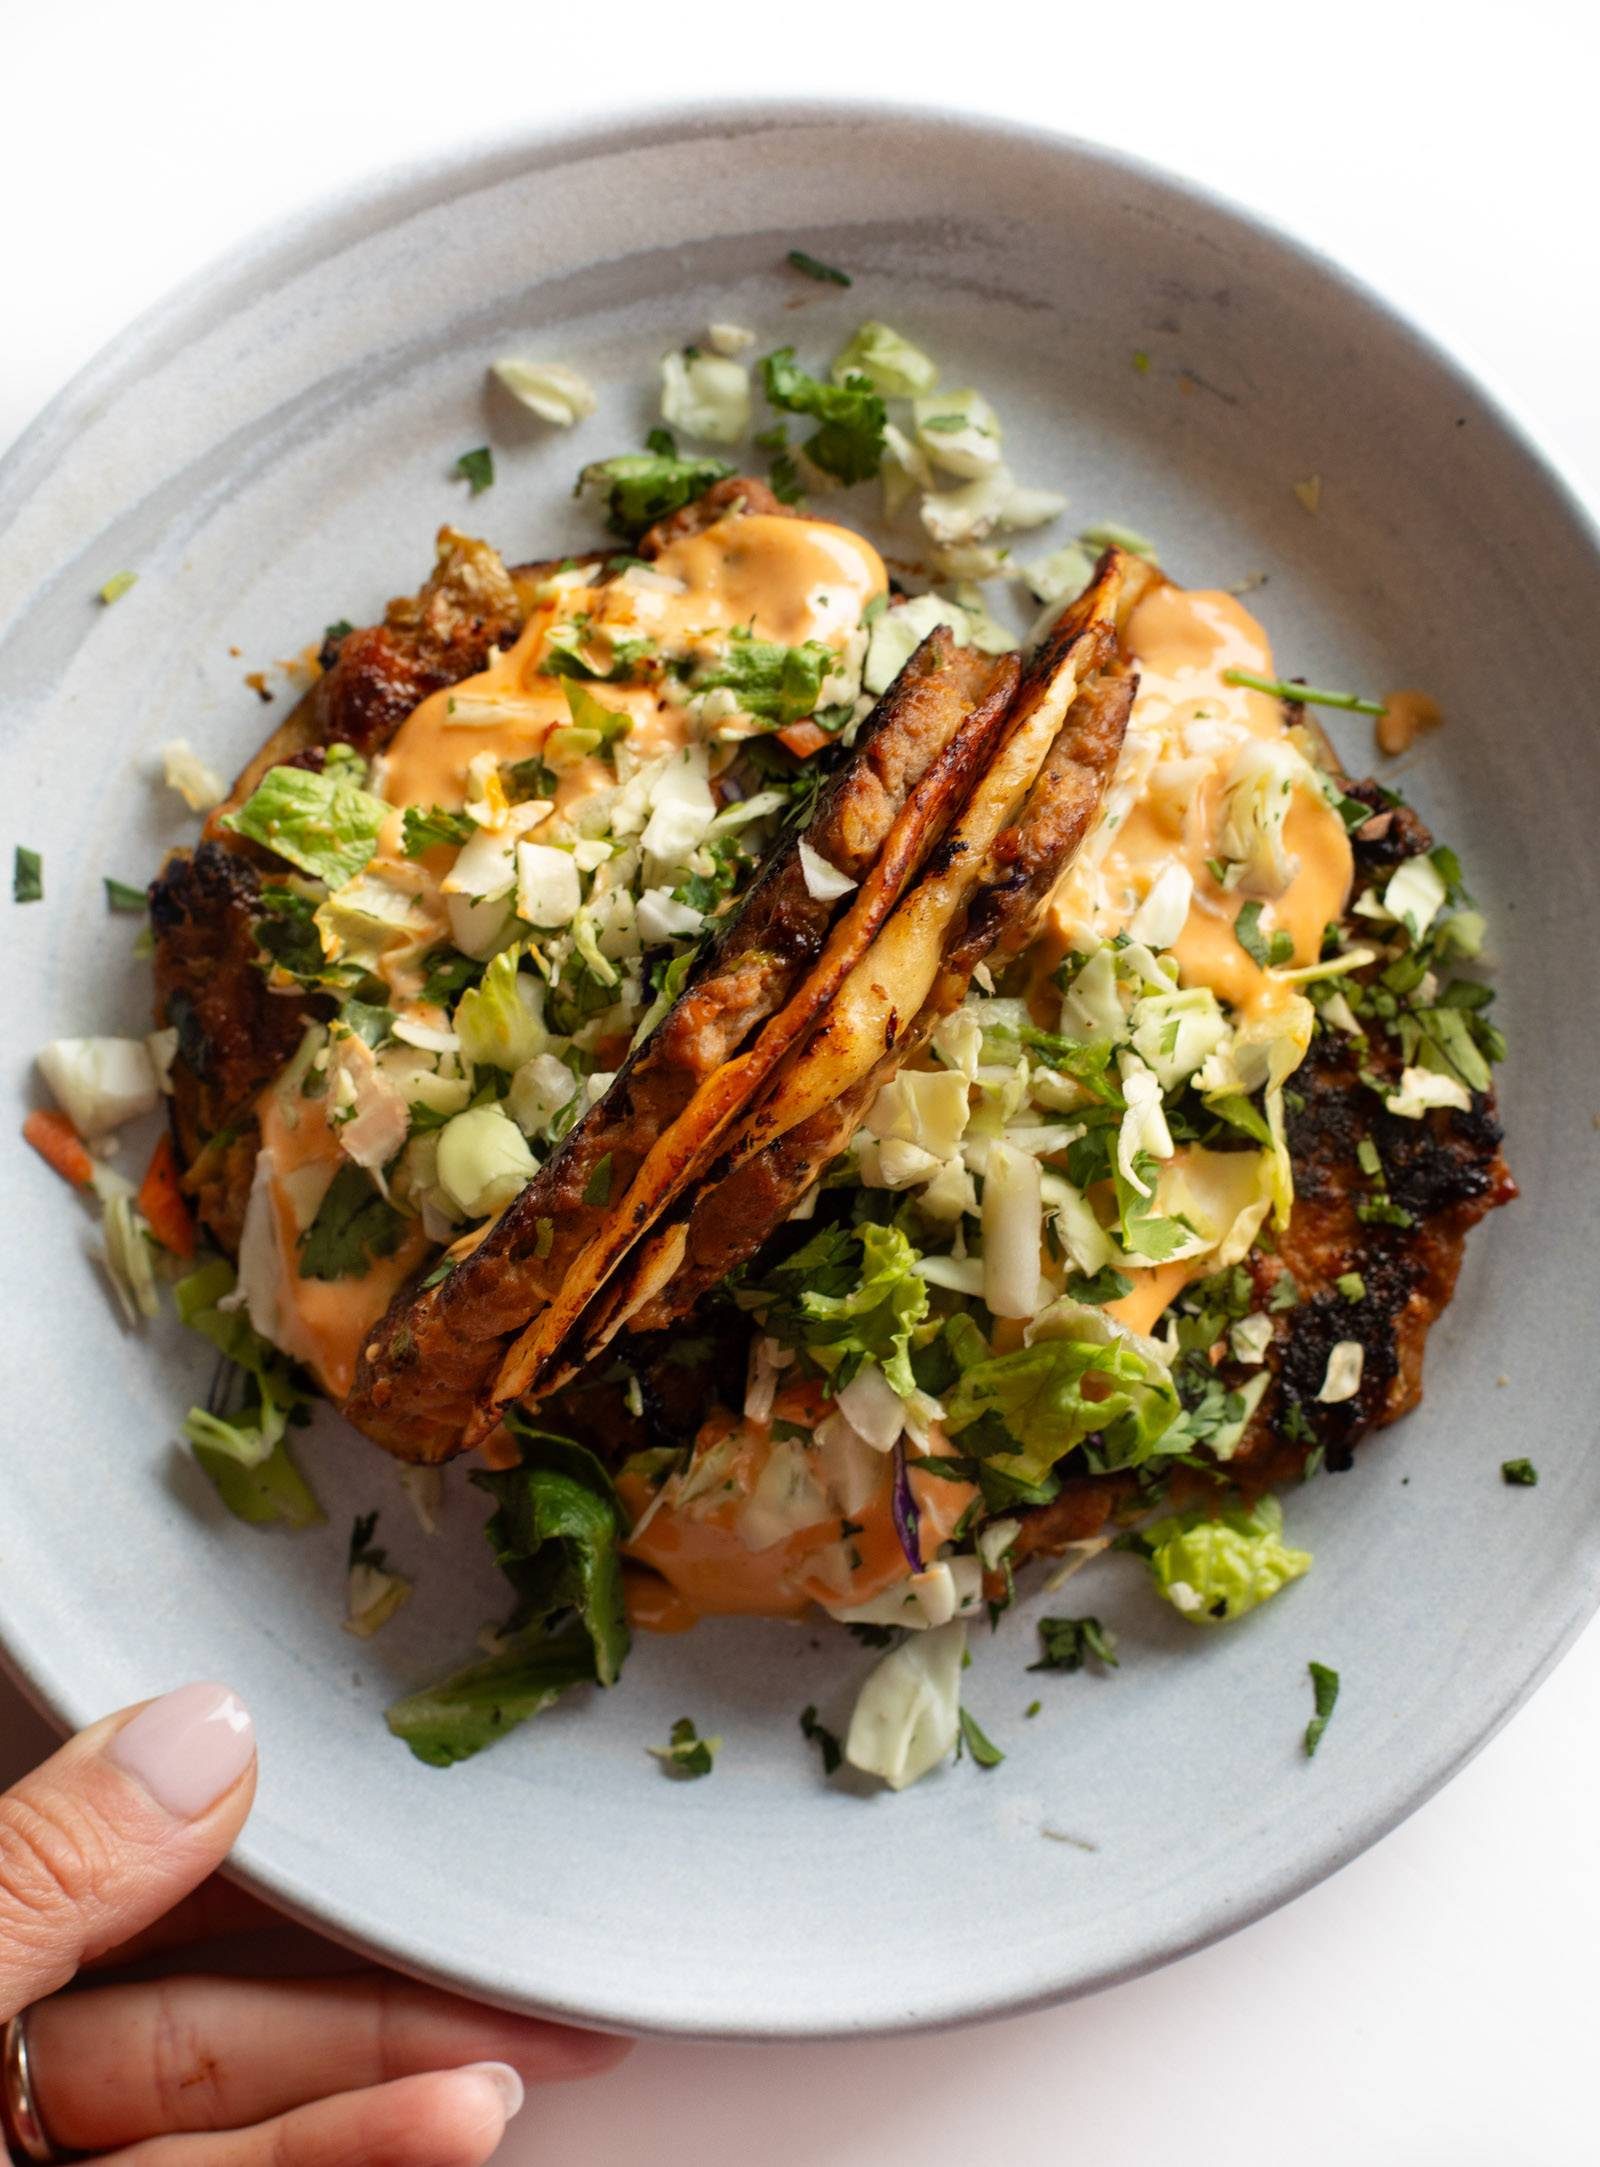
    Egg rolls meet tacos! I love this! Easy to make and ridiculously good with a classic egg roll filling, crunchy veg, pillowy tortillas, and a spicy gochujang sauce.

    Egg Roll, Meet Taco.

    Lindsay Ostrom headshot.

    Are you even ready for this? What we have here is like an egg roll filling (meat, cabbage, carrots, soy sauce, garlic, ginger) meets a fried little taco (flour tortilla, fresh veg on top, gochujang sauce for serving) and the whole thing eats a lot like a folded sandwich.

    That’s going to be a big yes from me.

    My friend Brandon has been telling me about these for weeks. I know the whole idea of meat smashed into tortillas is really having a moment on social media (smash burger tacos, chicken Caesar smash tacos, etc.), but the concept has always seemed a little strange to me.

    Until I tried these ones – and now I’m a believer.

    Besides being super yummy (don’t skip the gochujang sauce it is DIVINE on there) – these are shockingly easy to make. I know some of the recipes in the last SOS series leaned a little more towards “involved” than I normally do – there were some extras that I just couldn’t let go of. Shallot crispies, panko breading, house sauce, etc. So let’s think of this as a BONUS SOS recipe. You can easily make this in 20 minutes without breaking a sweat.

    Hope you love it! And thanks to Brandon for sharing this idea with me! YOU WERE RIGHT!

    Lindsay signature.

    Watch Me Make This Recipe

    [embed]https://www.youtube.com/watch?v=CwtR_bB-nSw[/embed]
    Print
    clock clock iconcutlery cutlery iconflag flag iconfolder folder iconinstagram instagram iconpinterest pinterest iconfacebook facebook iconprint print iconsquares squares iconheart heart iconheart solid heart solid icon
    A picture of Brandon’s Egg Roll Tacos

    Brandon’s Egg Roll Tacos


    5 Stars 4 Stars 3 Stars 2 Stars 1 Star

    4.9 from 35 reviews

    • Author: Lindsay
    • Total Time: 20 minutes
    • Yield: 4 servings (2 tacos each)

    Description

    Egg rolls meet tacos! I love this! Easy to make and ridiculously good with a classic egg roll filling, crunchy veg, pillowy tortillas, and a spicy gochujang sauce.


    Instructions

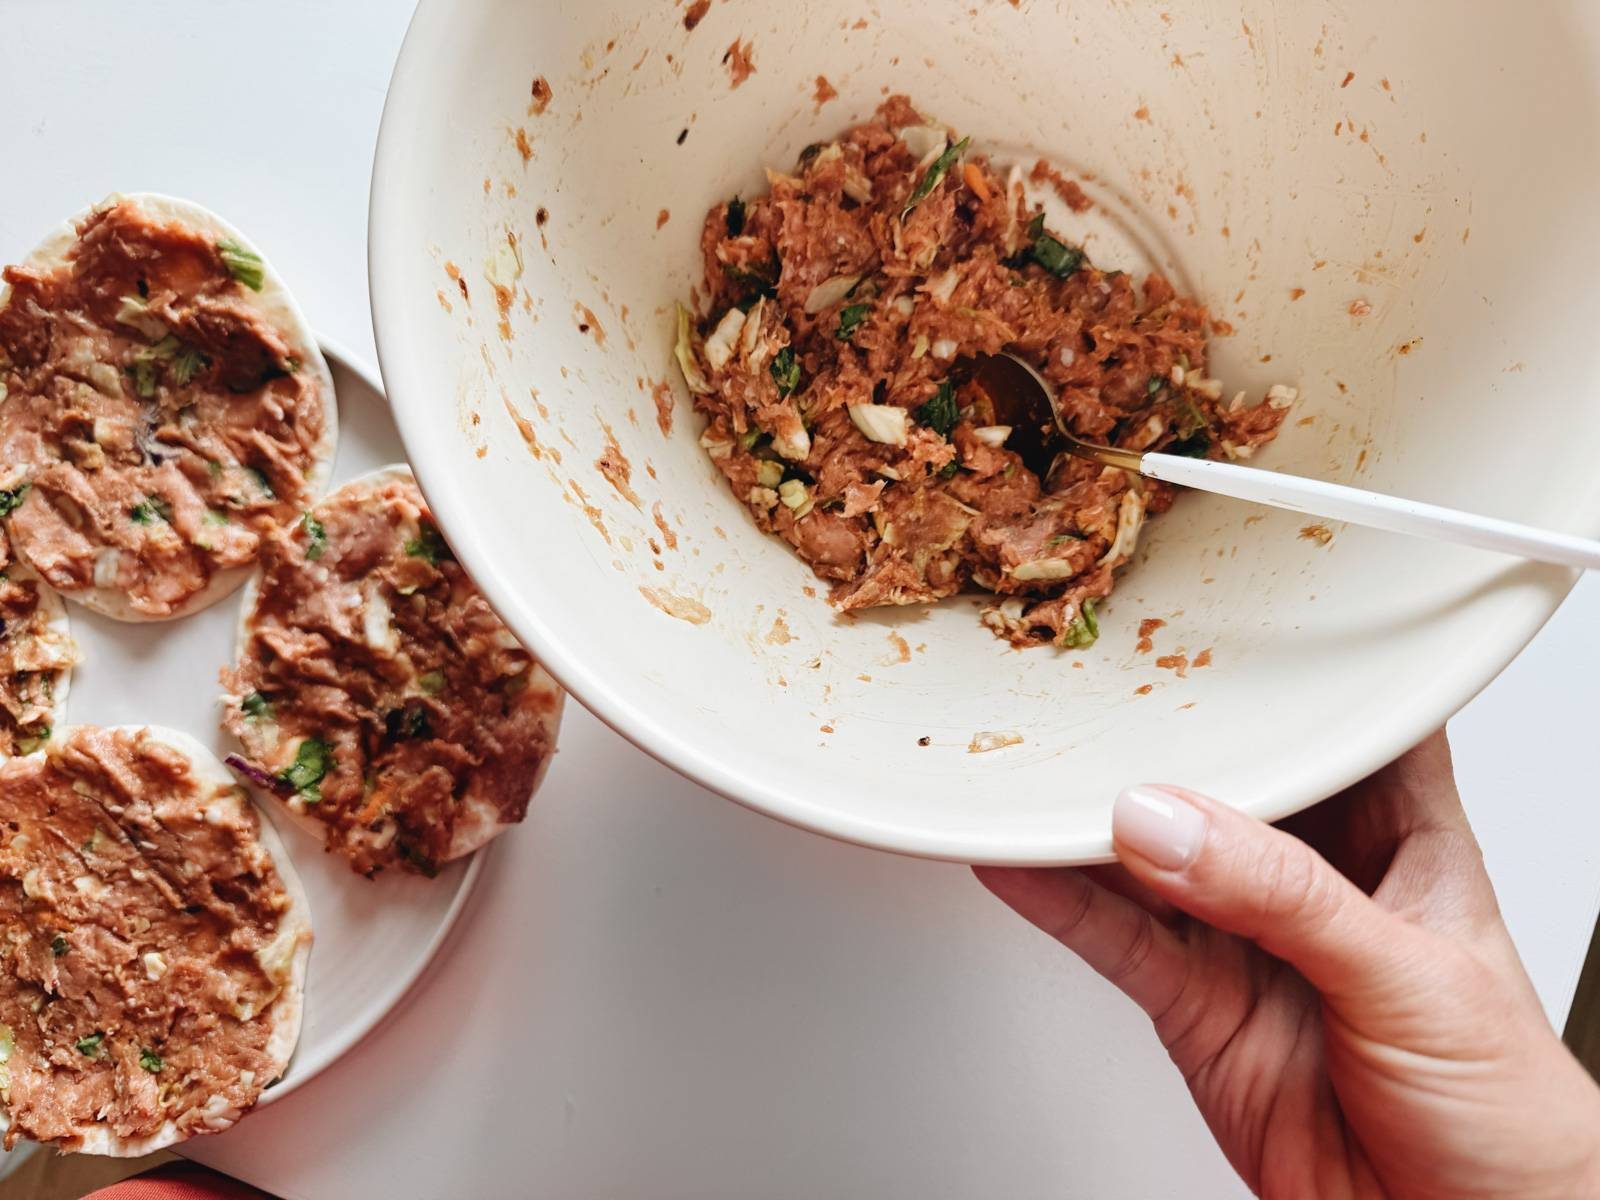
    1. Make Filling: Mix the ground meat, soy sauce, chili crisp, garlic, ginger, and veggies together. I just mix it all up with my hands.

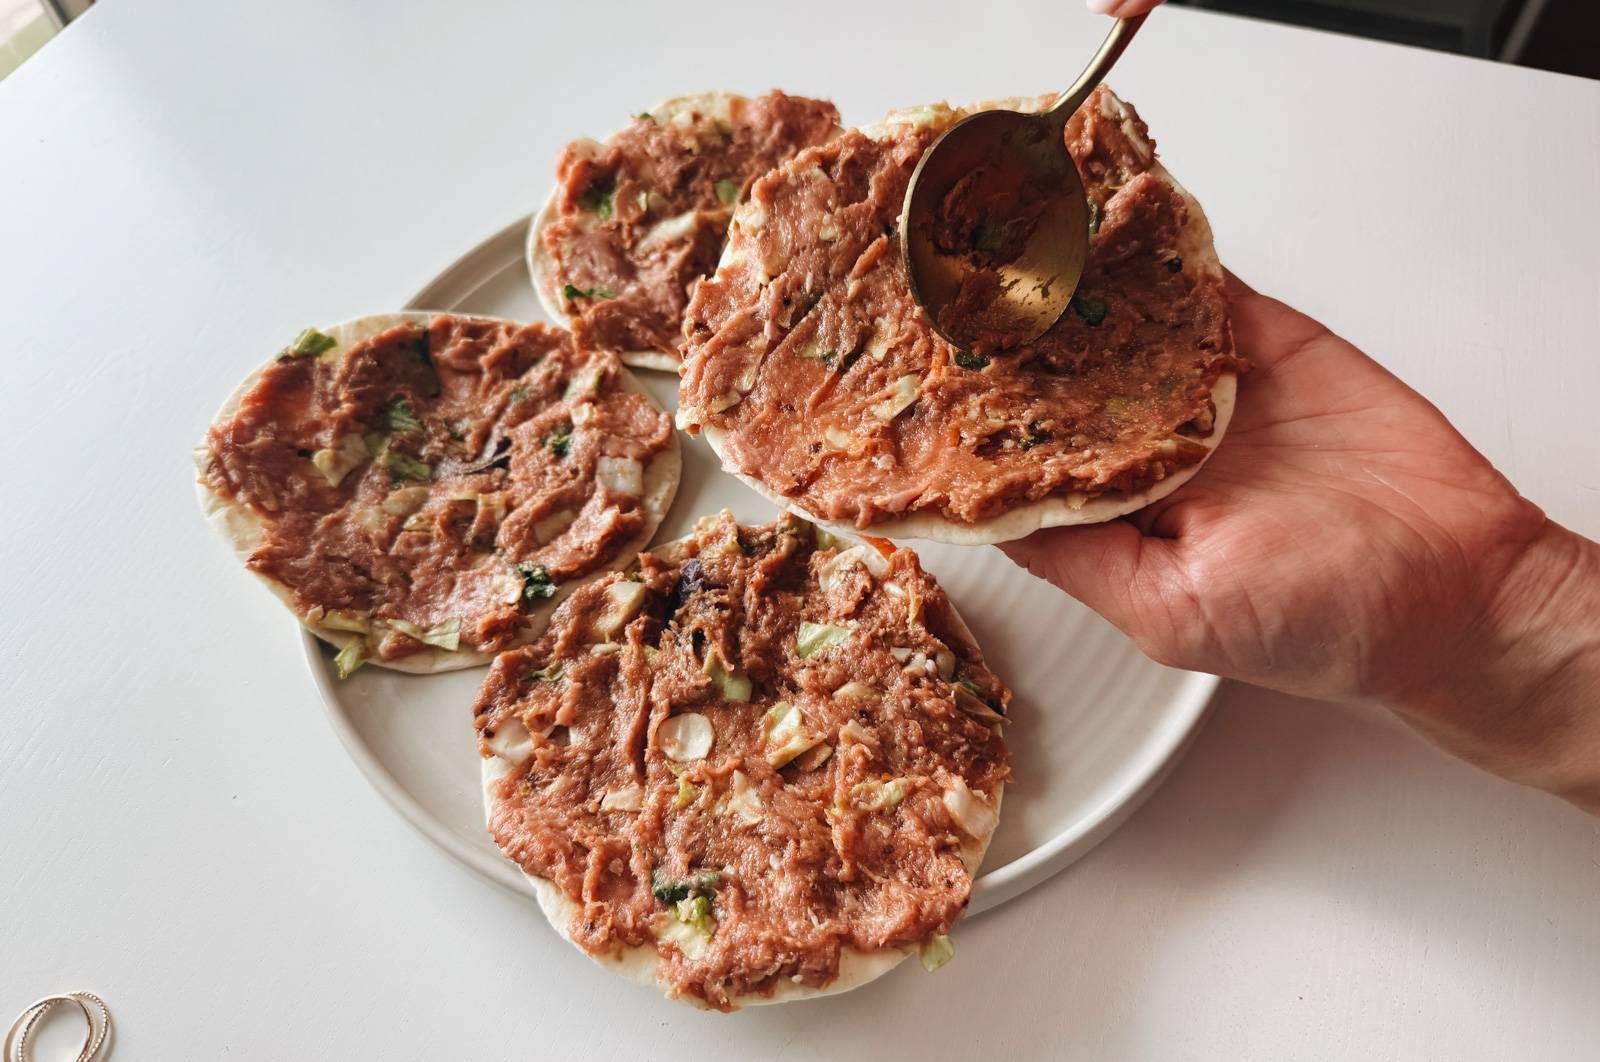
      Spreading egg roll filling on flour tortillas.

    2. Spread Filling: Press the mixture onto one side of the tortillas. I find it easiest to do all of them at once, before you start cooking them.

      Spreading egg roll mixture on flour tortillas.

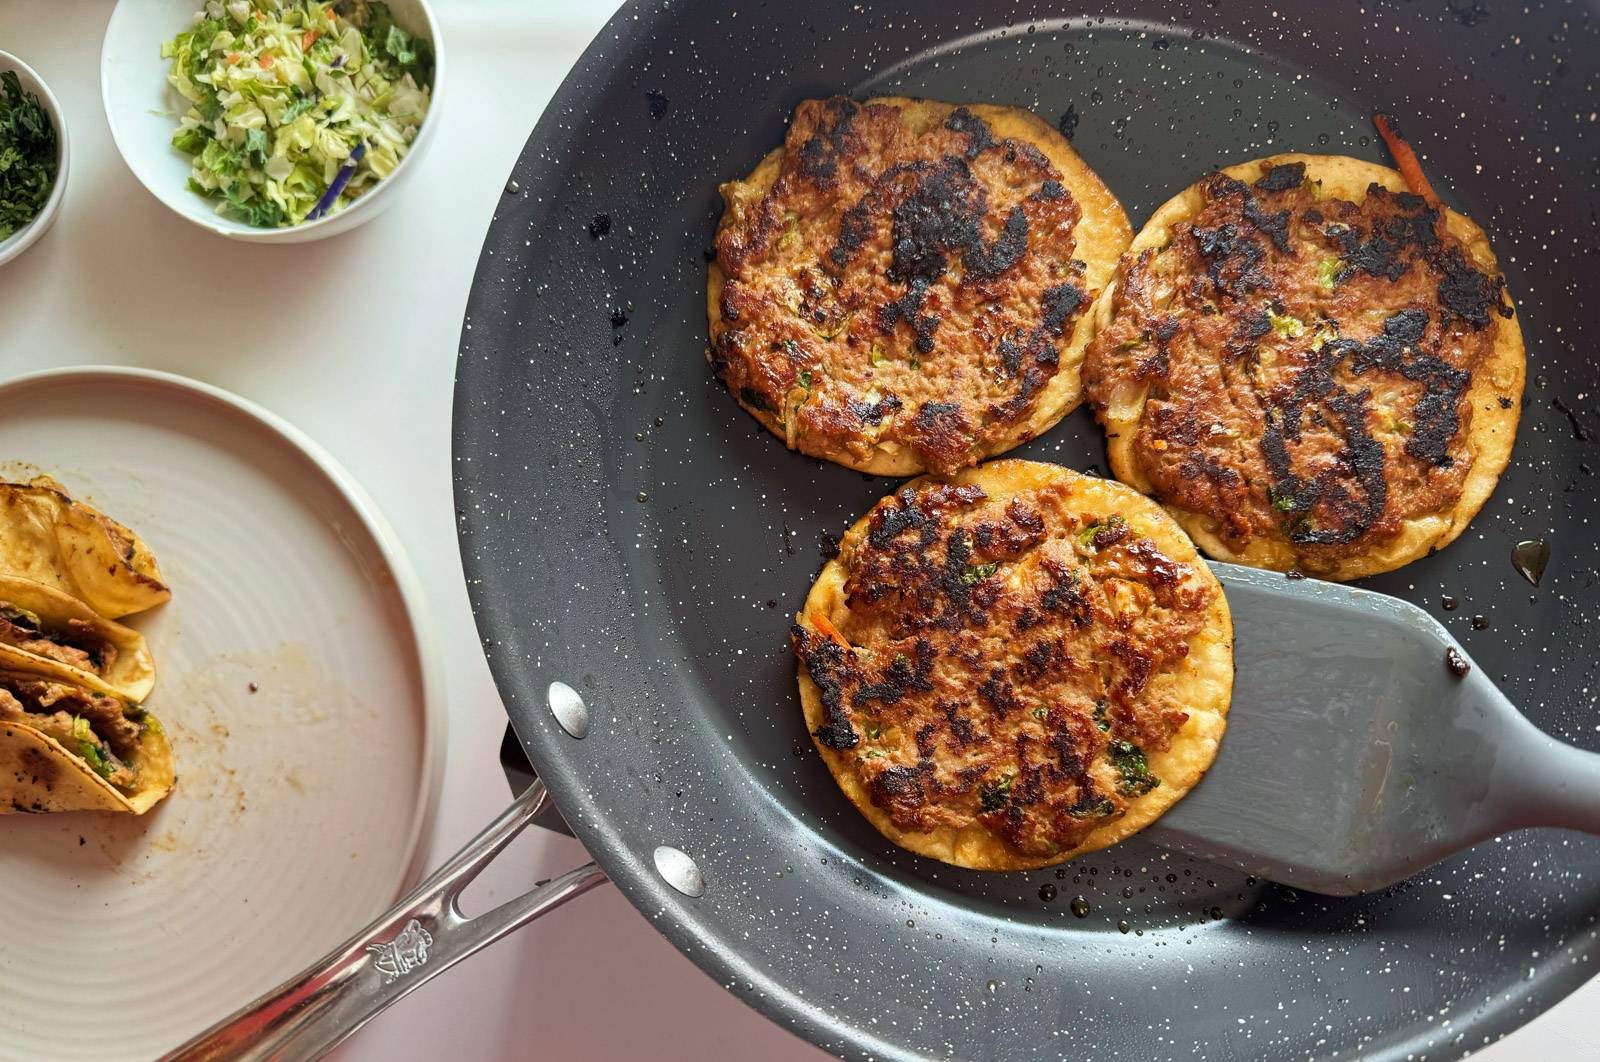
    3. Cook Tacos: Heat a skillet over medium high heat. Add the oil. Working in batches, add the tacos, meat-side down, and cook for 3-4 minutes until they are browned. Flip to the back side for 1 minute to get the tortillas a bit golden, and then finish with one more flip to being meat-side down to ensure it’s cooked through. (165 degrees for chicken and turkey, 160 for ground pork.)

      Frying egg roll tacos in a skillet.

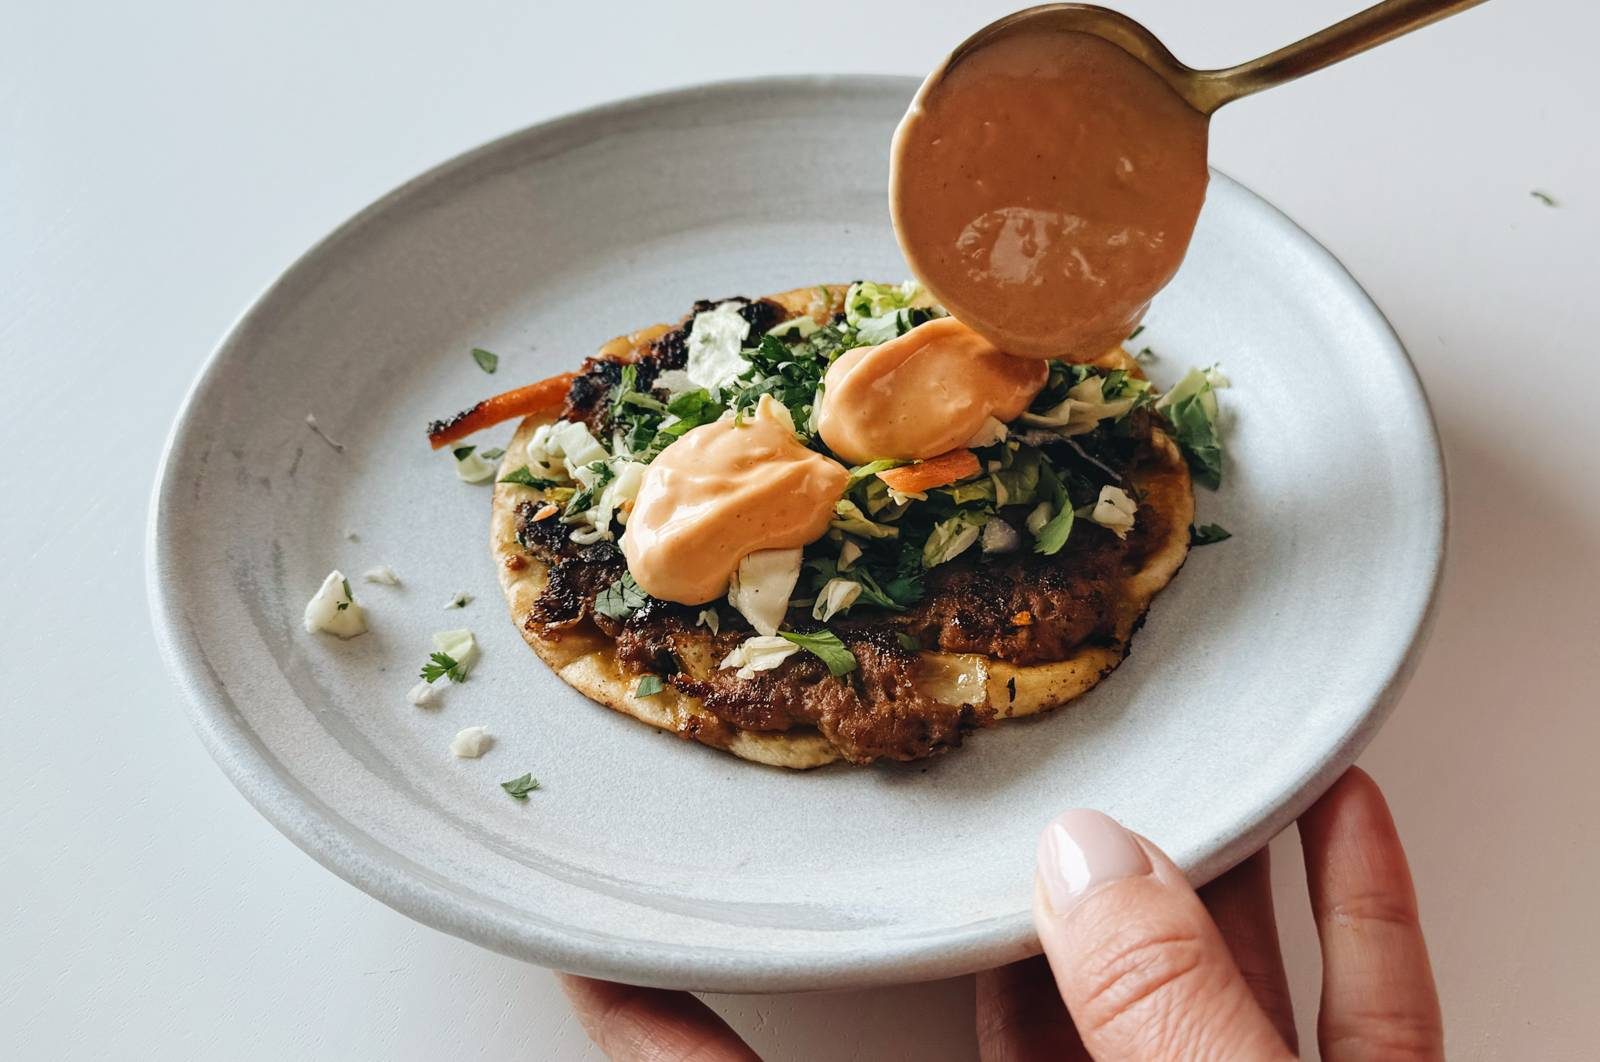
    4. Top and Eat: Top with more fresh cabbage, cilantro or green onions, and your sauces of choice. Fold in half – it eats kind of like a hybrid between a taco and sandwich, but tastes like an eggroll. I *love* these with the gochujang sauce!

      Spooning gochujang sauce on egg roll tacos.

    Notes

    Egg rolls meet tacos! I love this! Easy to make and ridiculously good with a classic egg roll filling, crunchy veg, pillowy tortillas, and a spicy gochujang sauce.

    • Prep Time: 10 minutes
    • Cook Time: 10 minutes
    • Category: Dinner
    • Method: Stovetop
    • Cuisine: Asian-Inspired

    Keywords: egg roll tacos, egg roll recipe, taco recipe

    More Seriously Fast Taco Recipes


    Source link

  • Essential Mignonette Sauce Recipe

    Essential Mignonette Sauce Recipe

    If you love oysters, then you need this mignonette sauce recipe in your life. It’s shockingly easy and made with shallots, red wine vinegar, and pepper.

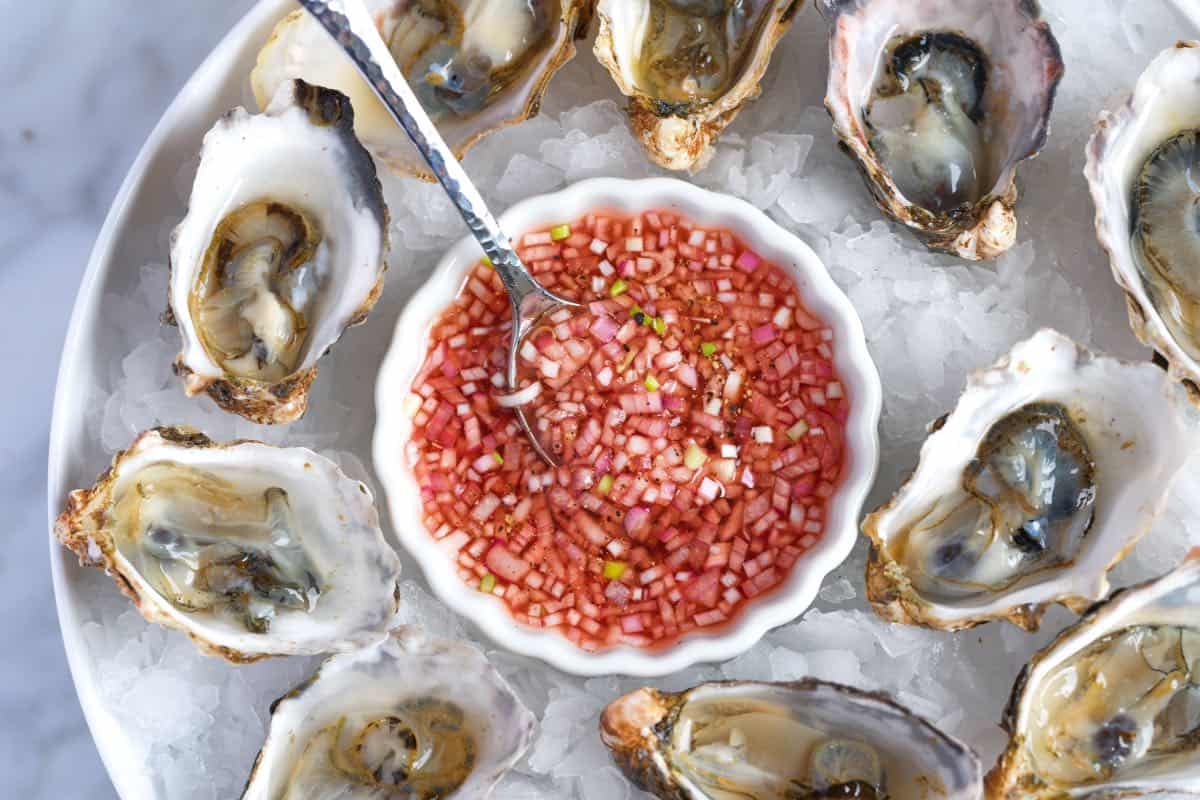
    Classic Mignonette Sauce

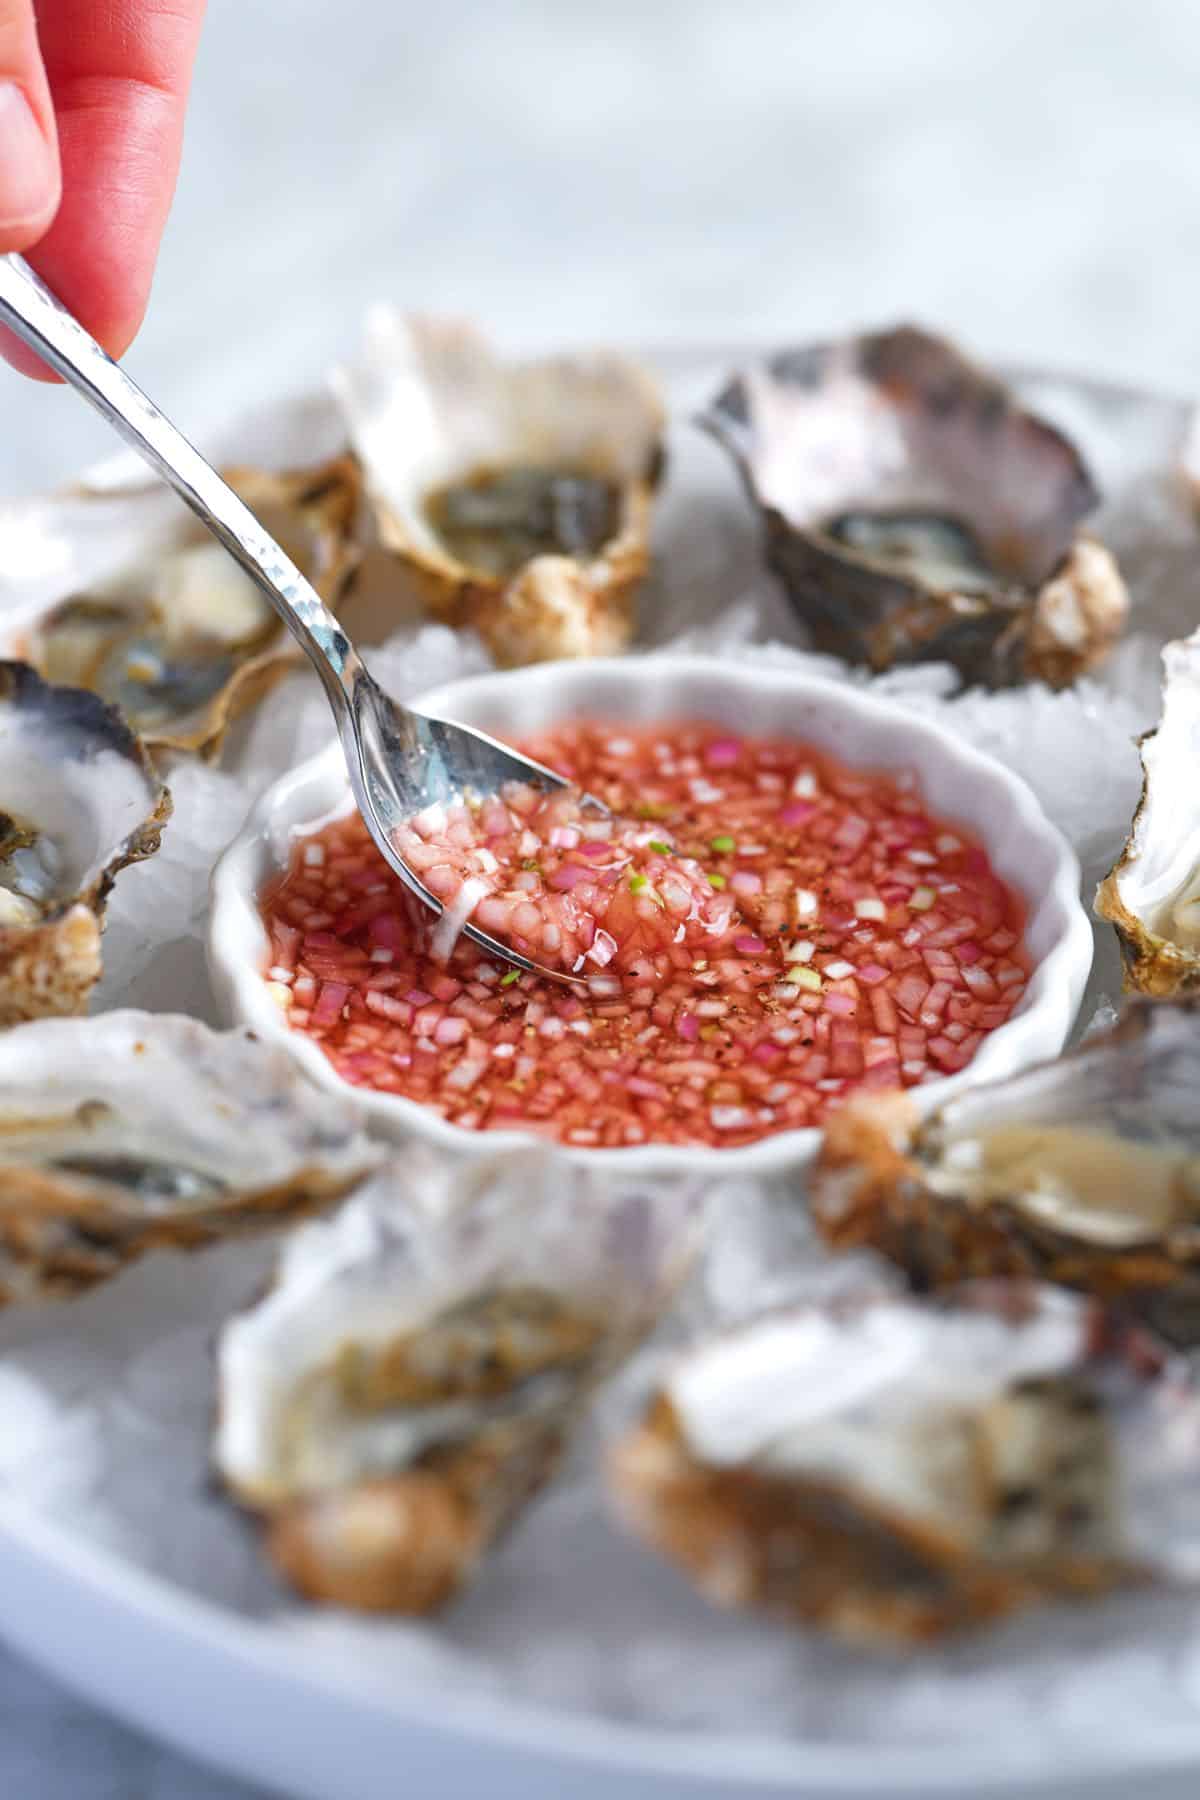
    This is our family’s essential mignonette. Mignonette (French) is roughly translated to “cute” or “dainty,” which seems fitting since it’s always served with a tiny spoon in a tiny bowl (haha).

    I love this sauce with fresh oysters and think you will, too! This one is super classic, but try our herb mignonette for a herby, sweeter twist!

    Key Ingredients

    • Shallots: I mince my shallots finely and use a lot. The vinegar cuts their sharpness and gently pickles them. We hand-mince our shallot instead of using a food processor. (A food processor creates a more mushy situation that tastes stronger in the sauce.)
    • Pepper: You can use white or black peppercorns. I like both. White pepper tastes more mellow and less spicy than black pepper, but both work nicely in this sauce.
    • Vinegar: We have used red wine vinegar in our photos, but white wine vinegar and champagne vinegar are also excellent choices. Use something you enjoy the taste of. My favorite widely available brand of red wine vinegar is Pompeian, but you can always look in specialty stores and online for more high-end options.

    Find the full recipe with measurements below.

    How to Make Mignonette Sauce

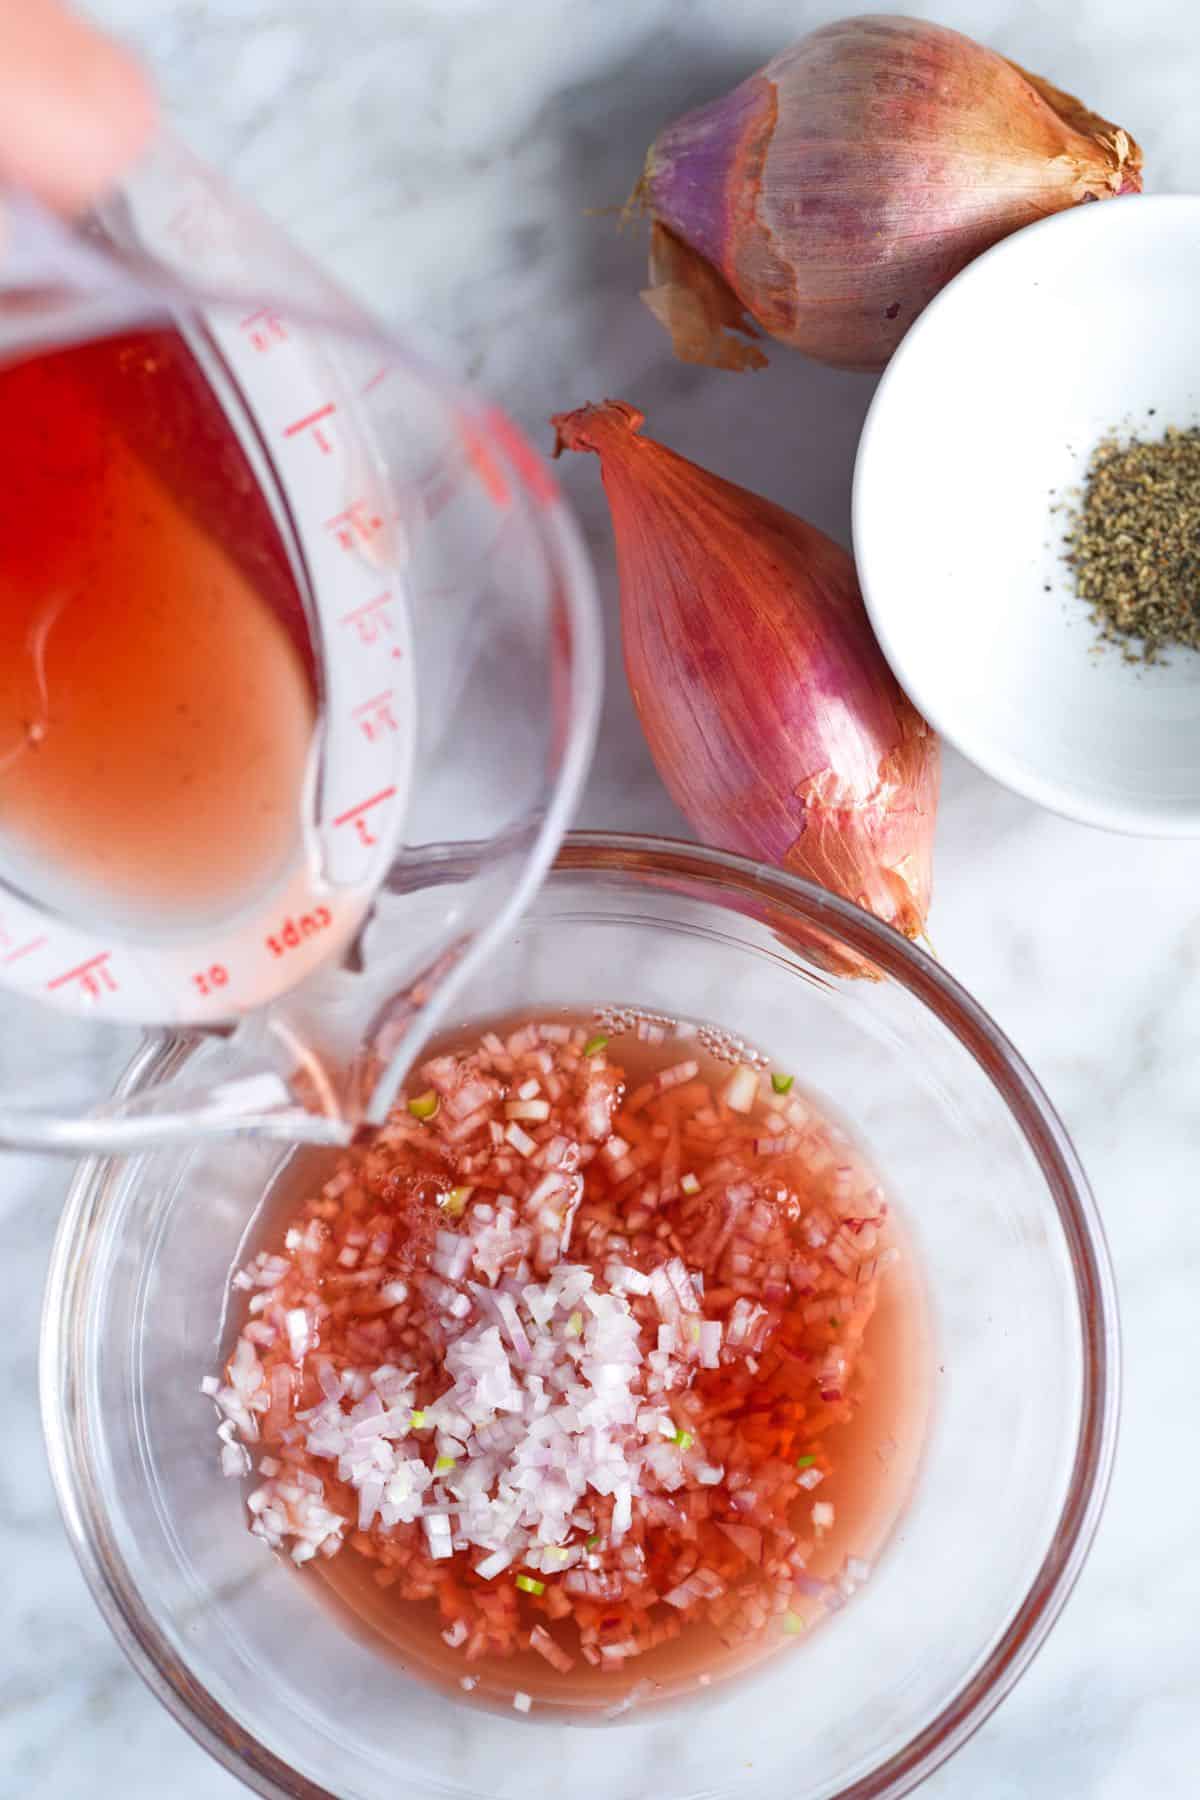
    Tip 1: Make the sauce. To make a classic mignonette for oysters, combine the finely minced shallots with vinegar and pepper. I also add a small pinch of sea salt, but that’s optional!

    Making mignonette sauce for oysters

    Tip 2: Let it sit in the fridge for a bit. After making it, store the sauce in the fridge for at least two hours so the shallots can mellow and pickle before serving it. And, here’s a fun fact about mignonette: it lasts in the fridge for a month! I actually love it after it has sat for a while in the refrigerator.

    More Sauce Recipes

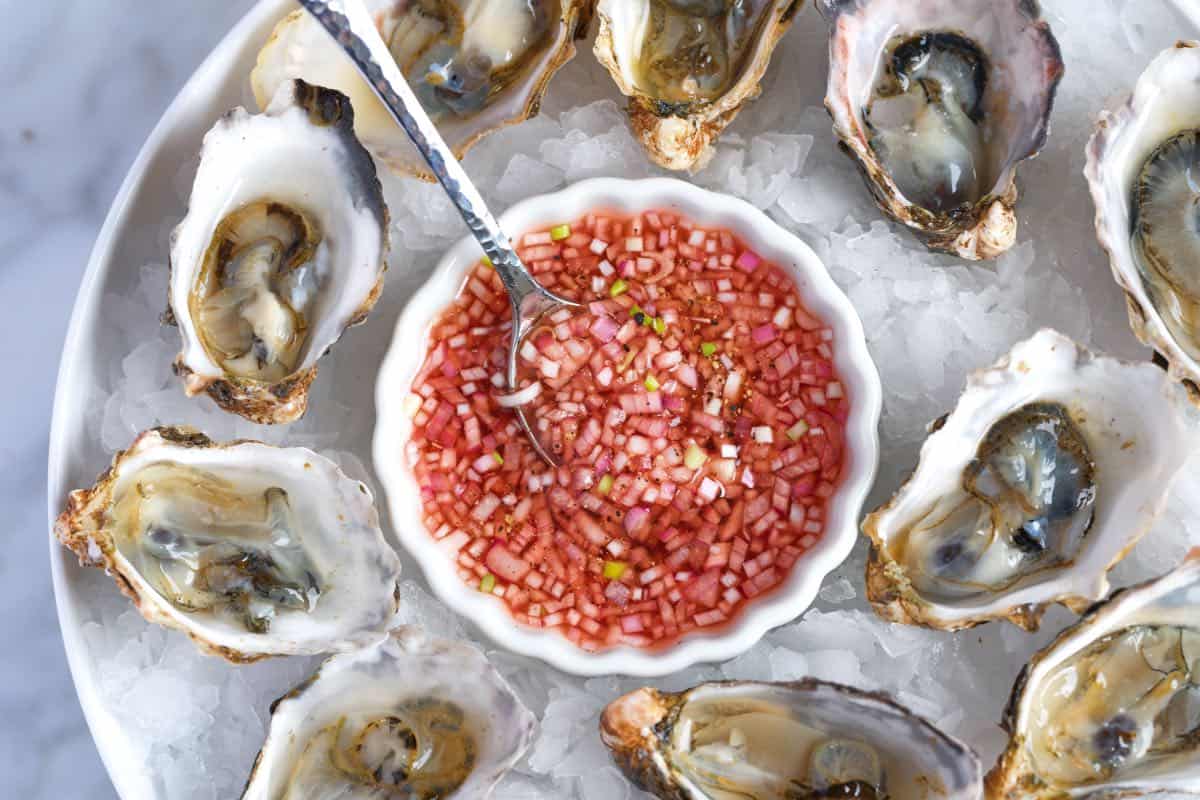
    Mignonette Sauce with Oysters

    Essential Mignonette Sauce

    • PREP
    • TOTAL

    If you love oysters, then you need this essential sauce in your life. It’s shockingly easy and made with shallots, red wine vinegar, and pepper. We have used red wine vinegar in our photos, but white wine vinegar and champagne vinegar are also excellent choices. Use something you enjoy the taste of. My favorite widely available brand of red wine vinegar is Pompeian, but you can always look in specialty stores and online for more high-end options.

    Makes 4 ounces or just over 1/3 cup

    You Will Need

    ¼ cup finely diced shallots, 1 to 2 shallots (30g)

    ⅓ to ½ cup red wine vinegar, white wine vinegar, or champagne vinegar; use something you enjoy (80-120ml)

    ¼ to ½ teaspoon coarsely ground black or white peppercorns

    Small pinch of fine sea salt, optional

    Directions

      1Make the sauce: Combine the shallots, vinegar, pepper, and a small pinch of salt in a non-reactive bowl or glass jar. Taste and adjust with more pepper. The vinegar will taste sharp at first, but it mellows as the shallots sit in the fridge. If the sauce tastes too abrasive, stir in a small pinch of sugar to balance it.

      2Refrigerate: Cover and refrigerate for at least 2 hours before serving so the shallots can soften and pickle.

      3Serve: Shuck your oysters and spoon the sauce into a small ramekin. Serve on the side and add a spoonful to each oyster just before eating. I like to go heavy on the shallots. Then repeat.

    Adam and Joanne’s Tips

    • Storing: This keeps for up to 1 month in the refrigerator. It will continue to mellow over time (which I enjoy). If it loses some of its brightness, stir in a splash of fresh vinegar to perk it up.
    • The nutrition facts provided below are estimates.

    Nutrition Per Serving
    Serving Size
    1/4 of the recipe
    /
    Calories
    13
    /
    Total Fat
    0g
    /
    Saturated Fat
    0g
    /
    Cholesterol
    0mg
    /
    Sodium
    42.2mg
    /
    Carbohydrate
    1.9g
    /
    Dietary Fiber
    0.4g
    /
    Total Sugars
    0.8g
    /
    Protein
    0.3g


    AUTHOR:

    Joanne Gallagher

    Previous Post: Perfect French Toast
    Next Post: Easy Potato Leek Soup

    Source link

  • Perfect Black Bean Dip Recipe

    Perfect Black Bean Dip Recipe

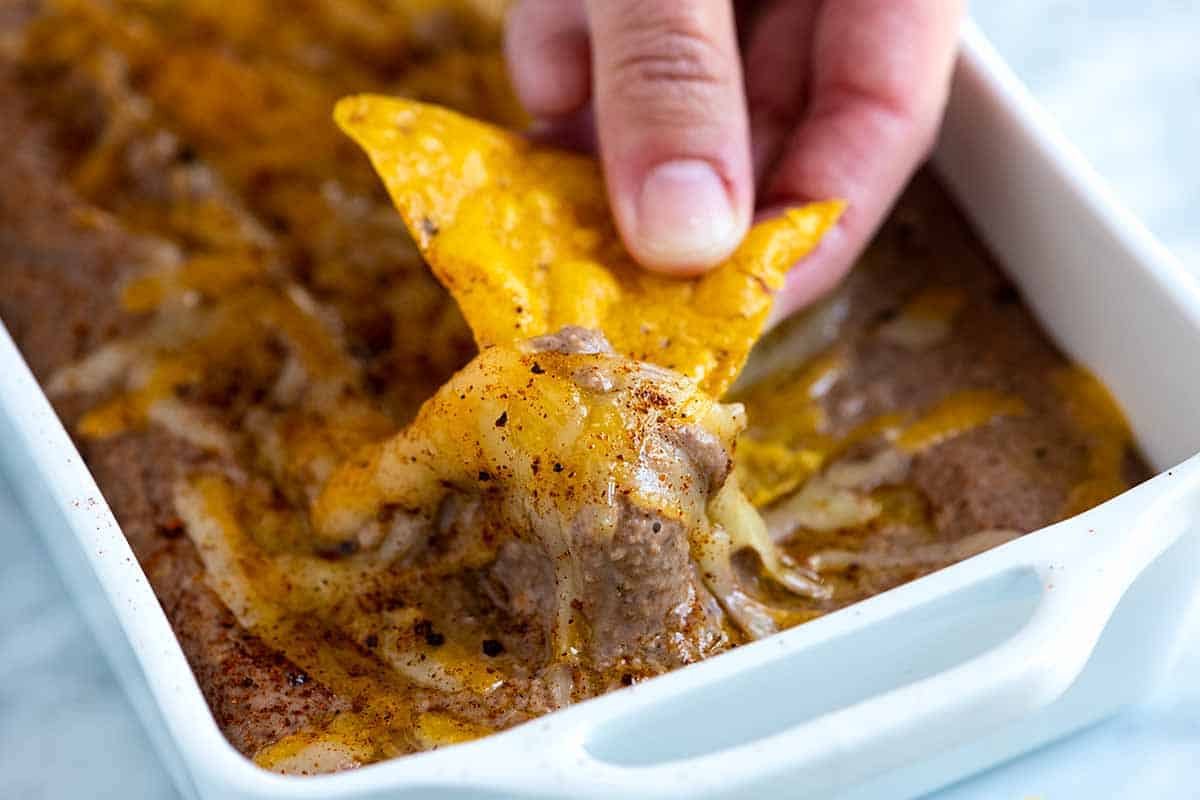
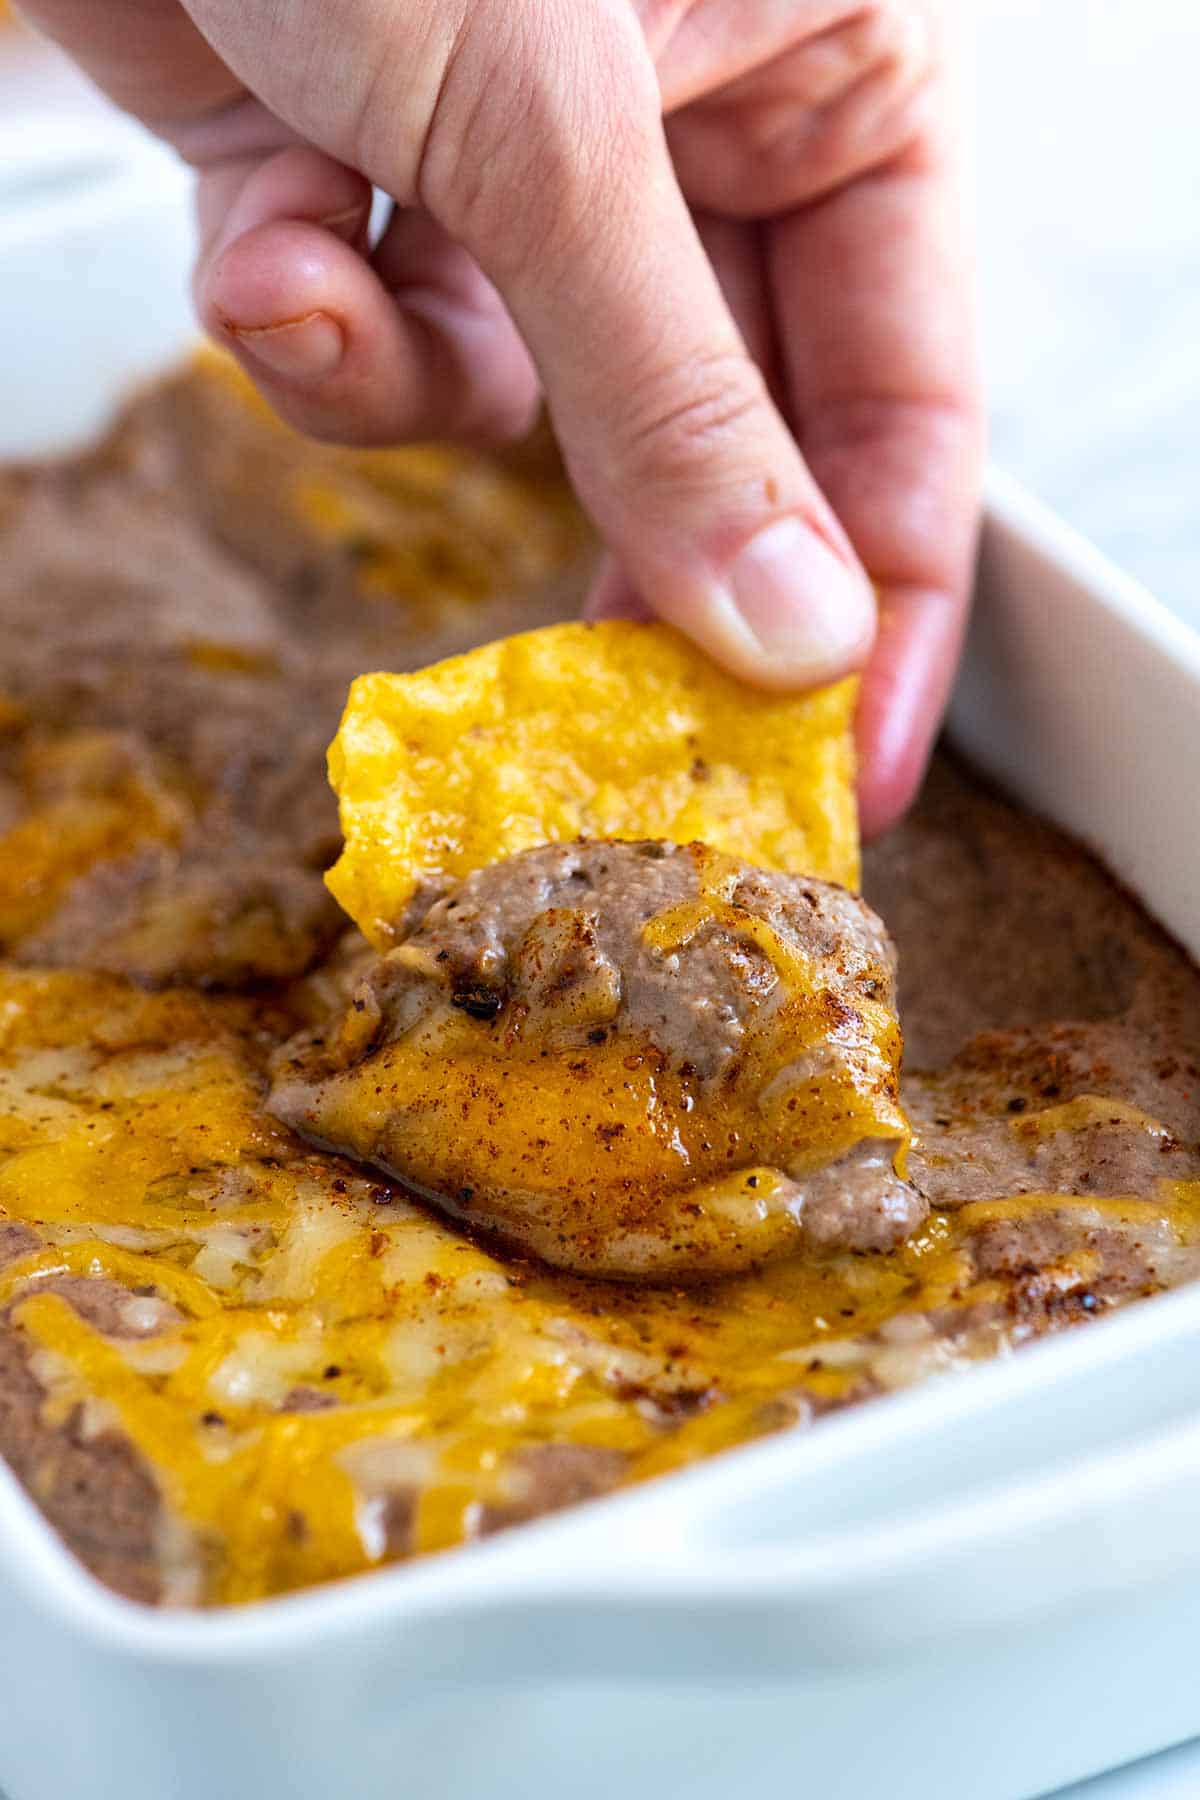
    Think of this black bean dip as a mash-up of black bean puree and onion dip. Thanks to the addition of cooked sweet onions, this easy bean dip is absolutely delicious and perfect served with pita wedges or chips.

    Perfect Black Bean Dip

    This black bean dip is truly a slam-dunk appetizer, hitting the mark with its super creamy, almost airy texture. We blend sweet onions, fragrant spices, and sour cream directly into the black beans, creating an irresistible dip.

    Beyond tortilla chips and veggies, I love using it as a spread for wraps and sandwiches. Picture it over a warm corn tortilla, topped with fresh lettuce and pico de gallo—truly incredible! For more bean dips, try our cheesy bean dip (made with pinto beans) or our popular hummus recipe.

    Key Ingredients

    • Black Beans: For the easiest dip, use canned, drained, and rinsed black beans. For the absolute best flavor, start with our recipe for cooking black beans from scratch.
    • Onion: Cooked sweet onions are the secret weapon here. They add a natural sweetness and are essential for that ultra-creamy texture once everything is blended.
    • Spices: You won’t find this dip lacking in flavor! We use a generous blend of garlic powder, ground cumin, chili powder, and cayenne pepper. Our homemade chili powder or store-bought ancho chili powder takes it to the next level when you have it on hand!
    • Sour Cream: A half cup of sour cream is crucial for making this dip light and wonderfully creamy, giving it an almost airy texture. Feel free to substitute with crème fraiche or cream cheese.
    • Lime: Fresh lime juice is the non-negotiable ingredient that ties all the flavors together. Don’t skip it!
    • Cheese (optional): If you’re baking your dip, choose a good melting cheese, such as Monterey Jack, cheddar, or Oaxaca. Just add it to the top and bake until it’s bubbly and golden.

    Find the full recipe with measurements below.

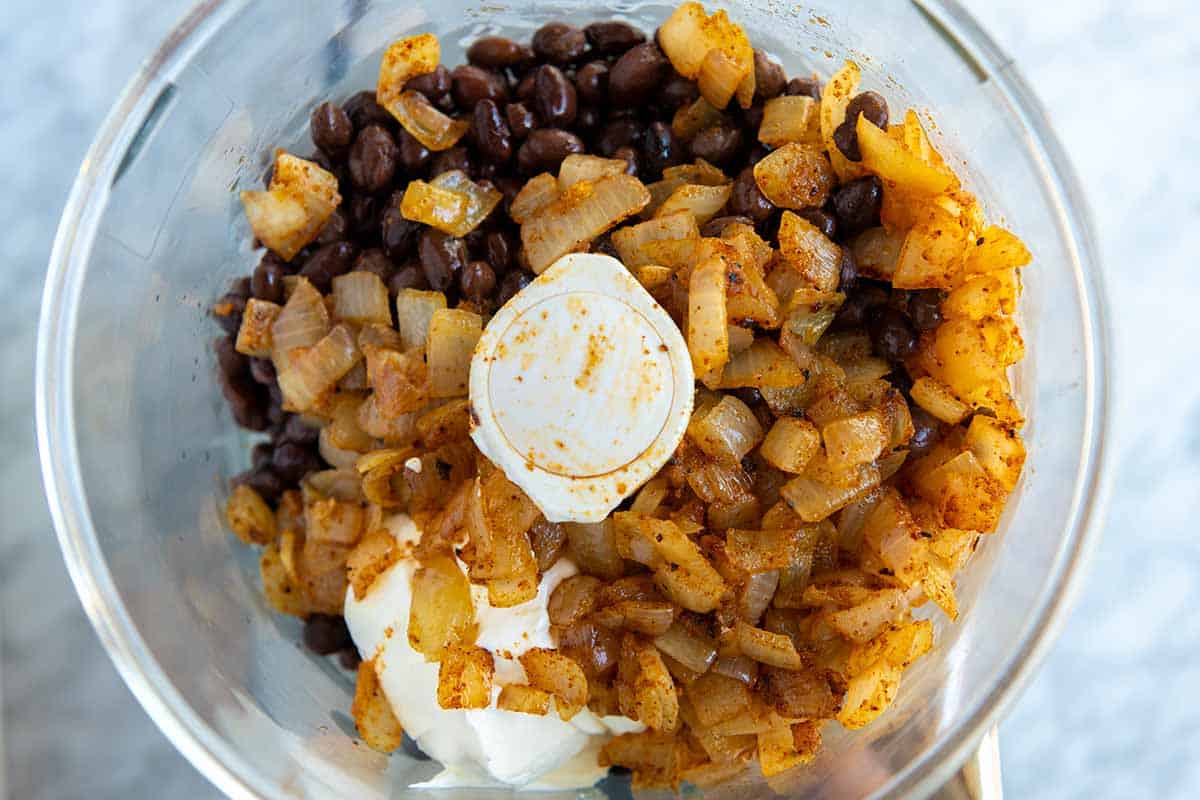
    How to make black bean dip: Ingredients in a food processor

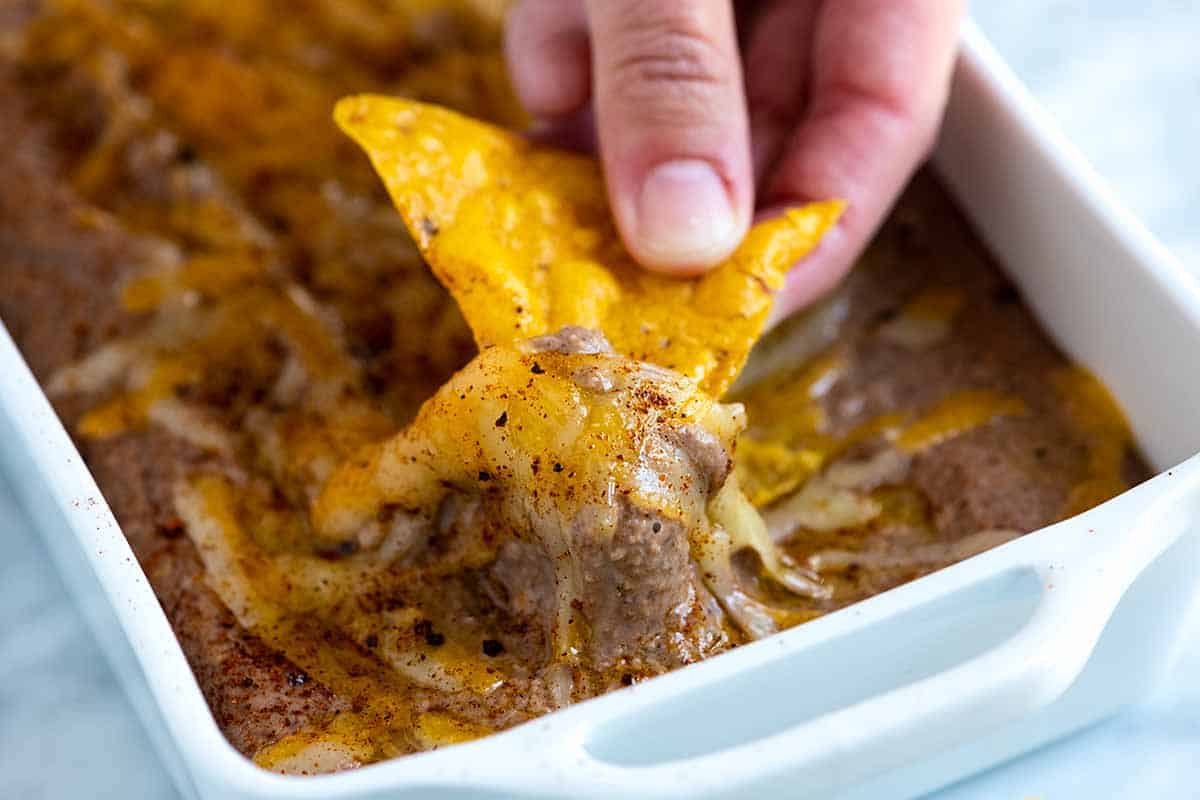
    For the best results, blend the dip ingredients using a blender or food processor. Once blended, you can serve it at room temperature like hummus, or transfer it to a baking dish, top with cheese, and bake until warm and the cheese is bubbly.

    Perfect Black Bean Dip

    Perfect Black Bean Dip

    • PREP
    • COOK
    • TOTAL

    Think of this as a mash-up of black bean dip and onion dip. Thanks to the addition of cooked sweet onions, this easy bean dip is delicious and perfect when served with pita wedges or chips. While you can serve this at room temperature (more like a hummus), I prefer it baked with cheese on top. For a more traditional sour cream-based dip, see our recipe for creamy onion dip.

    8 Servings

    Watch Us Make the Recipe

    You Will Need

    2 tablespoons olive oil

    1 medium sweet onion, chopped, like Walla Walla or Vidalia, about 2 cups

    1/2 teaspoon garlic powder

    1/2 teaspoon ground cumin

    1/2 teaspoon chili powder, see our chili powder recipe

    1/8 teaspoon to 1/4 teaspoon cayenne pepper

    2 (15oz) cans black beans, drained and rinsed or 3 cups cooked black beans

    1/2 cup sour cream

    2 to 3 tablespoons water

    Spritz of fresh lime

    Salt and fresh ground black pepper

    1/3 cup shredded cheese, optional for baked dip

    Directions

      1Cook the onions: In a skillet over medium heat, add the oil, onions, and 1/4 teaspoon of salt. Cook until they are very soft and smell sweet, 15 to 20 minutes. Stir in the garlic powder, cumin, chili powder, and cayenne pepper. Remove from heat and set aside for 5 minutes.

      2Make black bean puree: In a blender or the bowl of a food processor, combine the cooked onions, drained black beans, and sour cream. Add 2 tablespoons of water, and then blend. If the mixture is having trouble blending, add one or two more tablespoons of water to help it along.

      3Taste, and then season with salt and lime to taste. Serve now, or follow the directions for baked black bean dip below.

      4Baked black bean and onion dip: For a baked dip, transfer the bean dip to a small baking dish and top with shredded cheese. Bake in a 350°F (177°C) oven until heated through and the cheese has melted, about 10 minutes.

    Adam and Joanne’s Tips

    • Vegan modifications: Leave out the sour cream and increase the water by a tablespoon or so. The dip will still be delicious. You can also substitute the sour cream with a plant-based sour cream or cream cheese.
    • The nutrition facts provided below are estimates.

    Nutrition Per Serving
    Serving Size
    1/8 servings
    /
    Calories
    173
    /
    Total Fat
    6.9g
    /
    Saturated Fat
    2.4g
    /
    Cholesterol
    7.4mg
    /
    Sodium
    146.7mg
    /
    Carbohydrate
    20.4g
    /
    Dietary Fiber
    6.4g
    /
    Total Sugars
    2g
    /
    Protein
    8.5g


    AUTHOR:

    Joanne Gallagher

    Previous Post: Creamy Vegan Queso
    Next Post: Baked Red Pepper Chicken Breast

    Source link

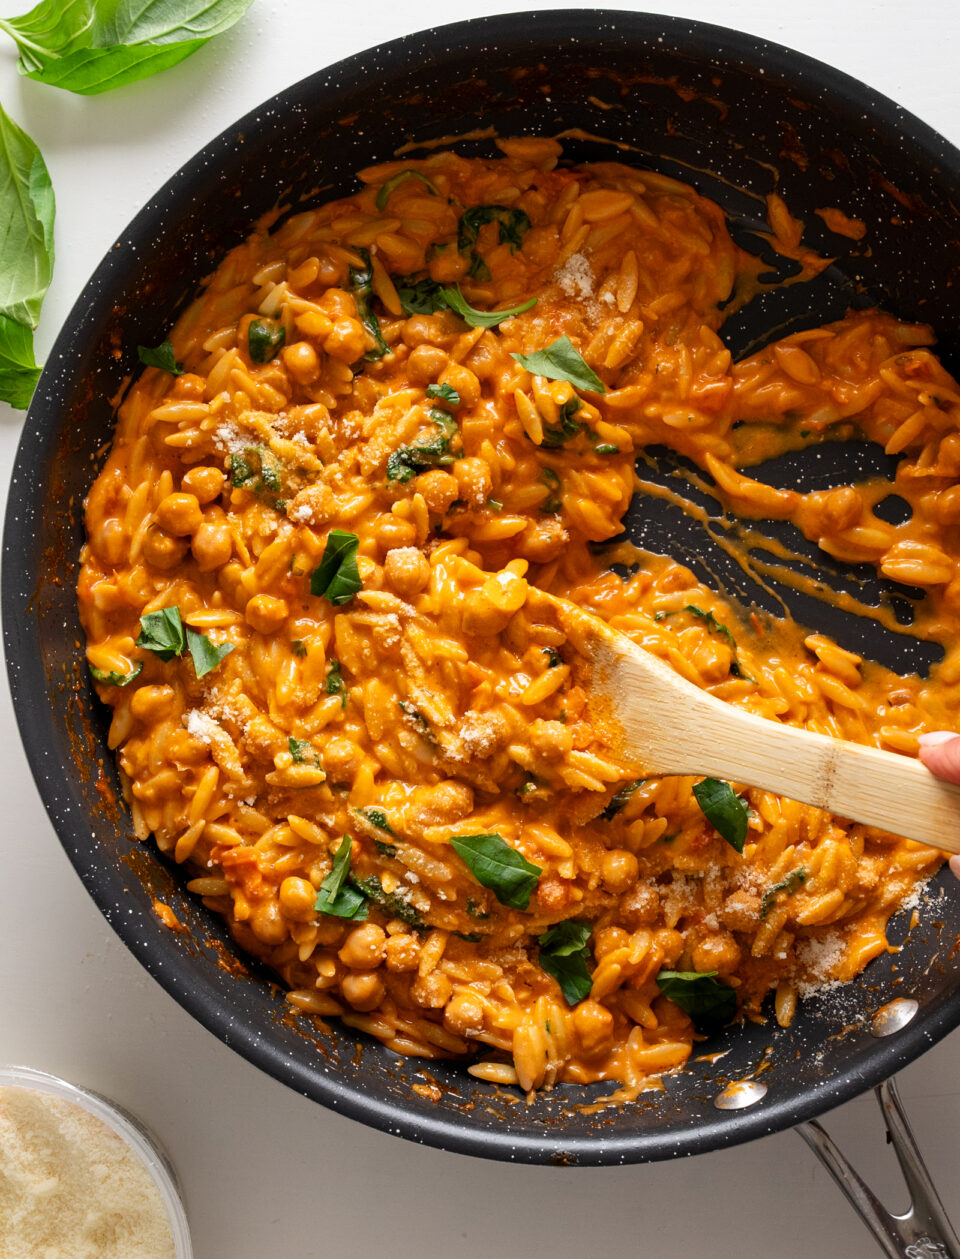
  • Marry Me Chickpeas and Orzo Recipe

    Marry Me Chickpeas and Orzo Recipe

    Marry Me Orzo Is So Good.

    Lindsay Ostrom headshot.

    The last time I made this, I think I ate half of the batch by myself.

    Here’s what makes this so good, for me:

    • The flavors of shallot, garlic, thyme. Mic drop.
    • A tomato cream sauce.
    • Little chewy, carby, textured bits that are delightfully all the same size – the orzo and the chickpeas just WANT to be together.

    The way it clings together, the luscious creaminess, max flavor with the shallot, garlic, and fresh thyme. UGH.

    We use DeLallo products all over the place in this kitchen – I always love their orzo (and my friend swears by their GF orzo) and their Castelvetrano olive oil in the squeeze bottle. But for this recipe I also really love all their little jarred tomato products as an add-in – the sun-dried tomatoes if you want to keep it classic to the Marry Me flavor profile, but also the fresh tomato bruschetta (personal fave), the calabrian chiles for something different, or the roasted tomatoes for a chunkier option.

    Guys, a bonus that deserves mention: this comes together in practically 20 minutes. Maybe 30, tops. It’s easy, minimal cutting board activity, but still plenty of veg and protein in there. This girl is a teeny bit fancy but she’s also weeknight-ready.

    Hope you love it.

    (If you want an option with another protein – like chicken – the original Marry Me Chicken is here for you!)

    Lindsay signature.

    Source link

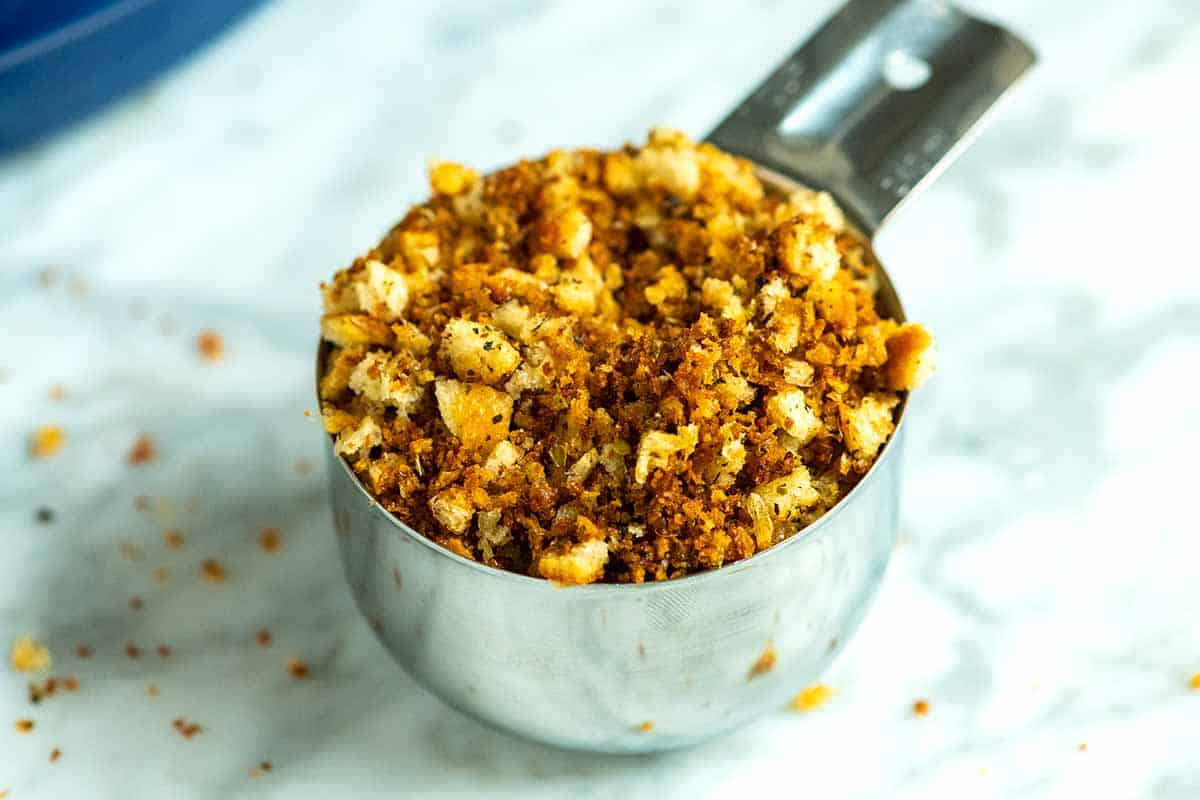
  • Easy Homemade Breadcrumbs Recipe

    Easy Homemade Breadcrumbs Recipe

    Making homemade breadcrumbs is easy! We love using these bread crumbs for meatballs, meatloaf, breaded chicken, and so much more!

    Homemade Breadcrumbs

    While you can easily find breadcrumbs at the grocery store, I’ve recently discovered the joy of making my own. You can use almost any bread you have lying around. Better yet, stale bread or the harder end of a bread loaf are ideal.

    Another benefit is that you have complete control over the texture. You can make them as fine or coarse as you like. Another option is to make homemade croutons and smash them into bits.

    How to Make Homemade Breadcrumbs

    Tip 1: Use a food processor. I love using my food processor or blender to make bread crumbs (for smaller batches you can also use a spice grinder). Slice or cube your bread into small pieces, and then pulse until the bread breaks down into your desired size. Depending on how much bread you have and how powerful your food processor or blender is, you might need to do this in batches.

    Making bread crumbs using a food processor

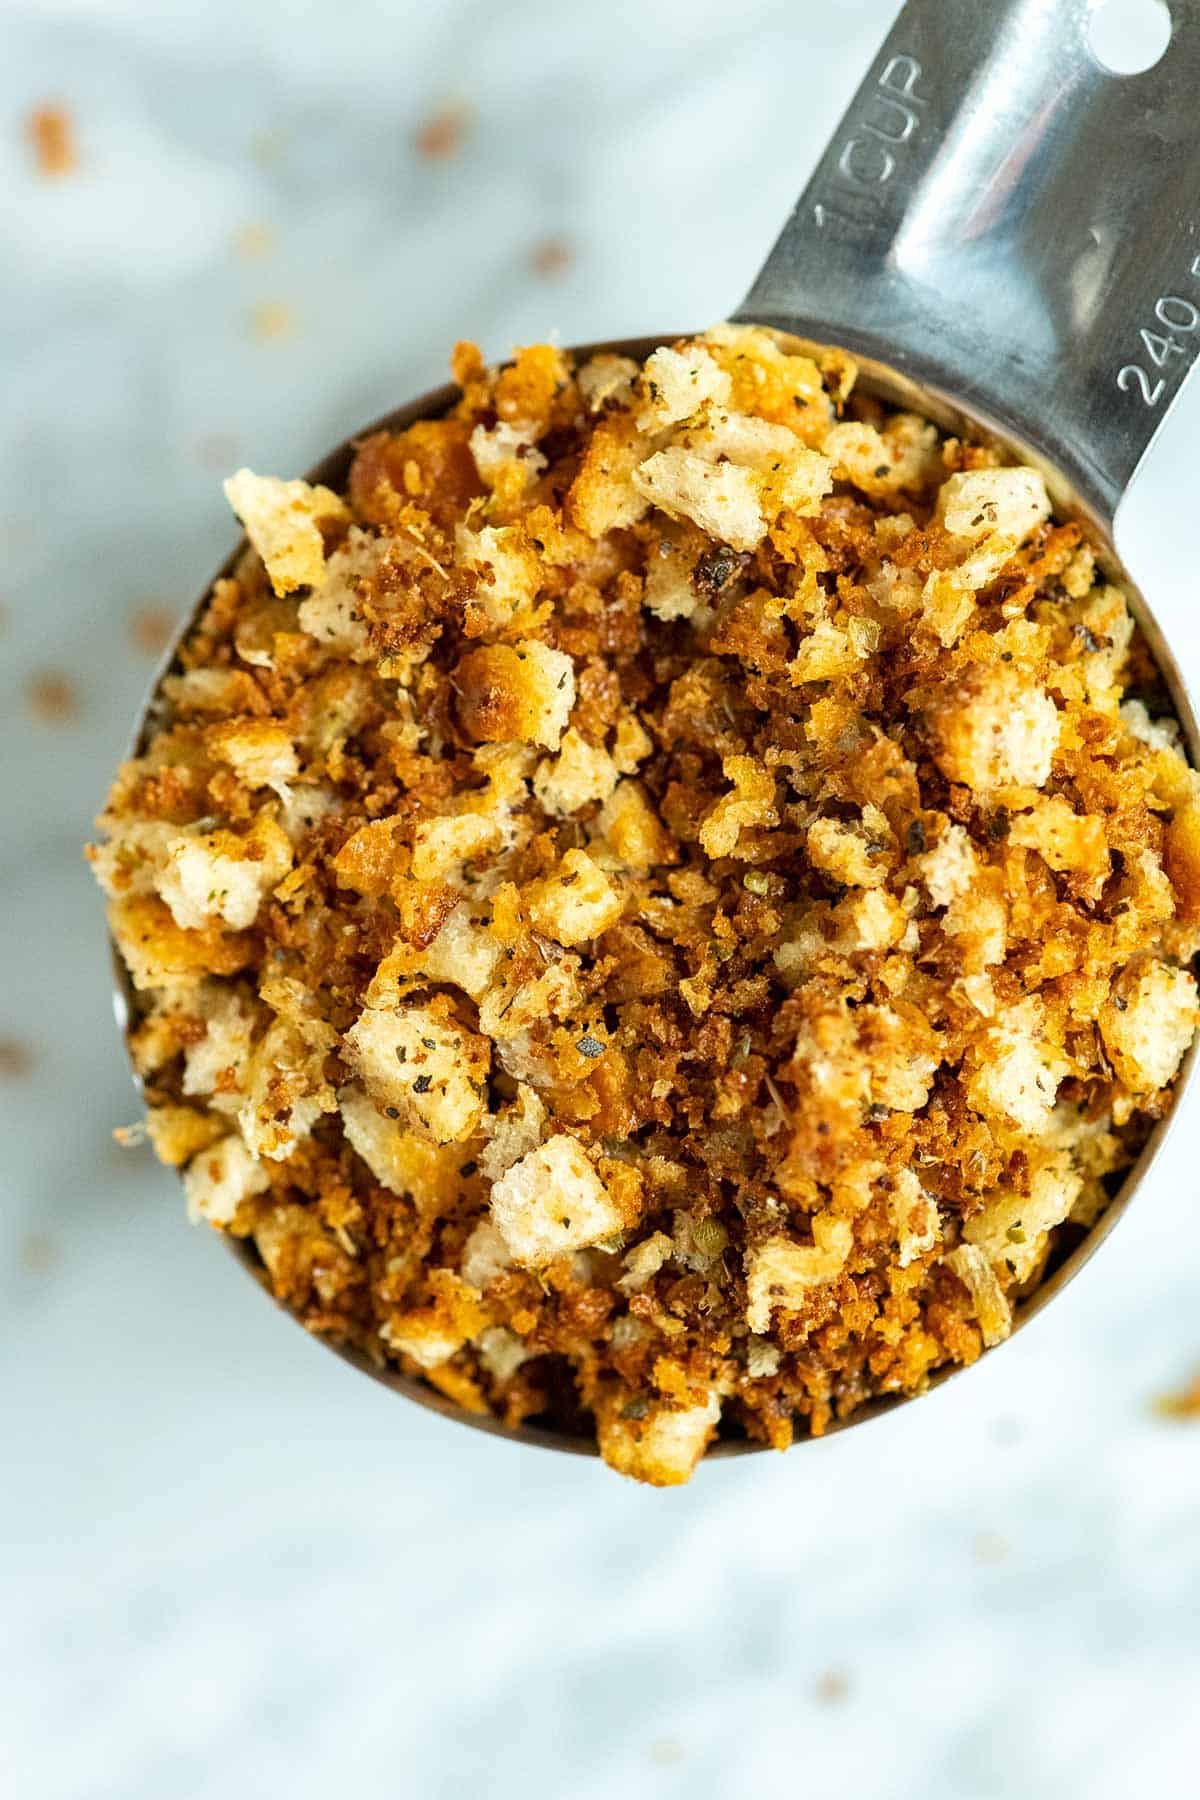
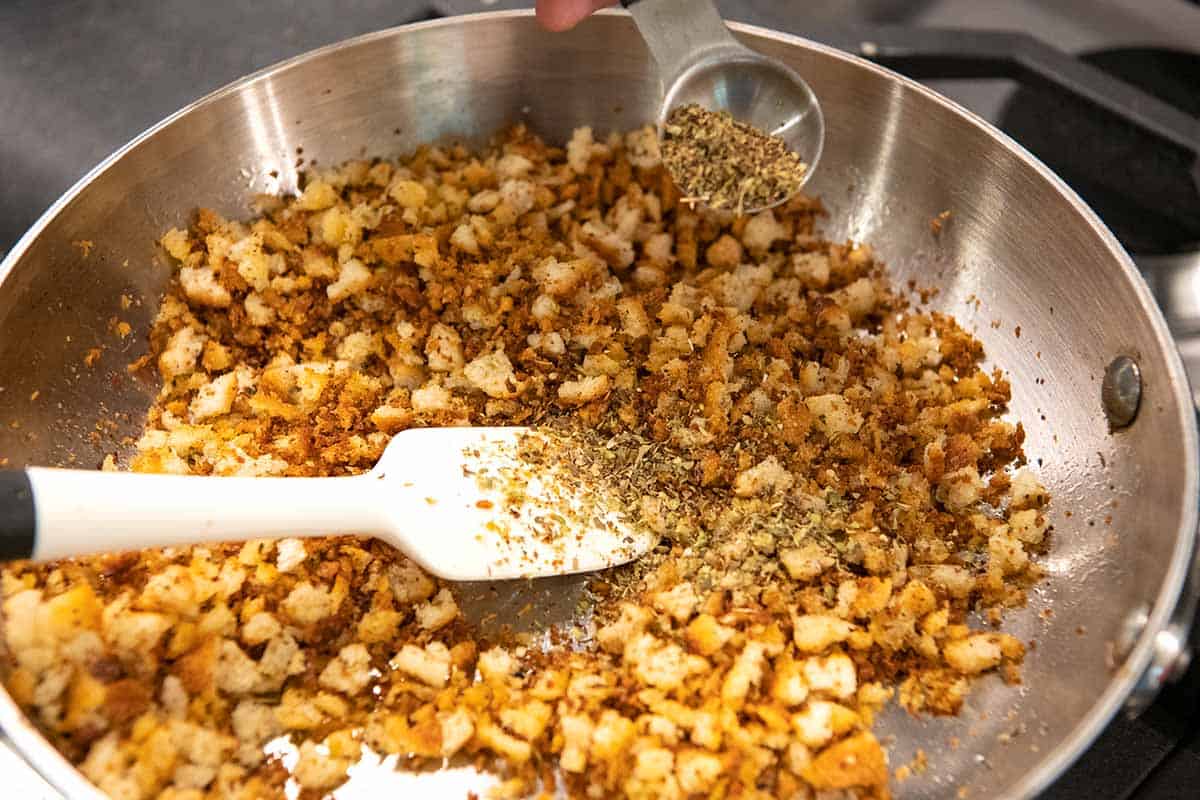
    Tip 2: Toasting your breadcrumbs. Depending on what you plan to do with them, you can make fresh bread crumbs or toast them in a skillet until golden and crisp. To toast my breadcrumbs, I stir them with olive oil or butter and seasonings over medium heat until they are golden and crisp (I’ve included tips for Italian breadcrumbs below in the recipe).

    I love the oil (or butter) and spices, but you can skip them and toast the breadcrumbs in a dry pan for plain breadcrumbs.

    Toasting bread crumbs in a skillet with spices.

    Ways to Use Breadcrumbs

    Use homemade bread crumbs anytime you would have used store-bought. Some of my favorites ways to use them, include our popular turkey meatloaf, our easy chicken parmesan, and my favorite stuffed mushrooms.

    If you are making them for a specific recipe, you can dial in the texture. For example, I prefer finer breadcrumbs in our recipes for meatballs and meatloaf, but I like them coarser when using them as a crunchy salad topping.

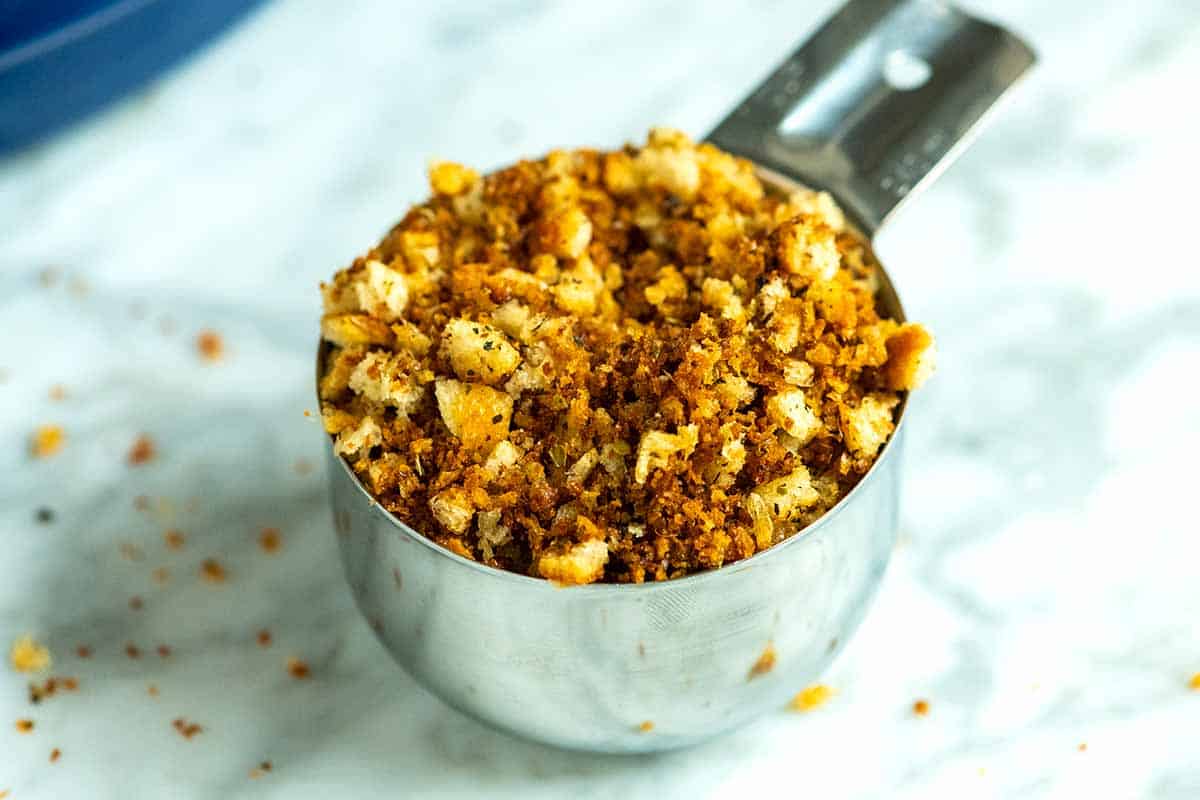
    Homemade breadcrumbs

    Easy Homemade Breadcrumbs

    • PREP
    • COOK
    • TOTAL

    Breadcrumbs are easy to make at home and can be spiced up any way you like. Remember that you can control how fine or coarse the crumbs are. When making them for meatballs, we want them a bit finer. If we make breadcrumbs for a crunchy topping, we keep them more rustic and coarse. For Italian breadcrumbs, use Italian seasoning when toasting the breadcrumbs.

    Makes 1 cup

    You Will Need

    2 to 3 cups cubed bread (about 2 ounces)

    2 tablespoons olive oil or melted butter

    1/4 teaspoon fine sea salt

    1/4 teaspoon fresh ground black pepper

    2 to 3 teaspoons Italian seasoning or dried herbs, optional

    Directions

      1Cut the bread into small pieces. (The smaller the pieces, the easier for your device to break them down.)

      2Add the bread pieces to your food processor or blender and pulse until they break down into your desired size of breadcrumbs.

      3For toasted breadcrumbs, add breadcrumbs, olive oil, salt, pepper, and dried herbs to a wide skillet over medium heat. Cook, stirring often, until they are golden and crisp, about 5 minutes.

      4Alternatively, heat the oven to 300°F. Toss the breadcrumbs with the olive oil, salt, pepper, and dried herbs. Add the mixture to a rimmed baking sheet and spread it into an even layer. Bake for 5 minutes, stir, and then bake another 3 to 5 minutes or until the breadcrumbs are golden and crisp.

    Adam and Joanne’s Tips

    • Storing: Cool and store the breadcrumbs in an airtight container. They can be kept at room temperature for a few days or in the freezer for up to a month. If they soften a little, throw them into a hot skillet for a few minutes to crisp them up.
    • Fresh vs. toasted: Depending on what you plan to do with them, you can leave bread crumbs fresh (an excellent option for meatballs or meatloaf) or toast them in a skillet or bake in the oven until golden and crisp.
    • Do you need to cut off the crust? This is up to you, but we never cut off the crusts when making bread crumbs. I love the different colors and textures you achieve when using the middle and the bread crusts.
    • No food processor or blender: If your bread is hard and stale, add it to a bag and beat it into submission with something heavy like a rolling pin, heavy pan, or mallet. This method doesn’t work well for softer, fresh bread, so if that’s all you have, consider baking the bread to dry it out, just like we do when making homemade croutons.
    • The nutrition facts provided below are estimates.

    Nutrition Per Serving
    Serving Size
    1/4 cup
    /
    Calories
    137
    /
    Total Fat
    8 g
    /
    Saturated Fat
    1.2g
    /
    Cholesterol
    0mg
    /
    Sodium
    287.4mg
    /
    Carbohydrate
    14.3g
    /
    Dietary Fiber
    0.8g
    /
    Total Sugars
    1.6g
    /
    Protein
    2.6g


    AUTHOR:

    Joanne Gallagher

    Adam and Joanne of Inspired Taste

    We are Adam and Joanne Gallagher, the creators of Inspired Taste. Established in 2009, Inspired Taste grew from a childhood dream into one of the internet’s most trusted recipe sites with hundreds of reliable recipes, step-by-step videos, and expert tips.More About Us
    Source link

  • Seriously Good 7 Layer Dip Recipe

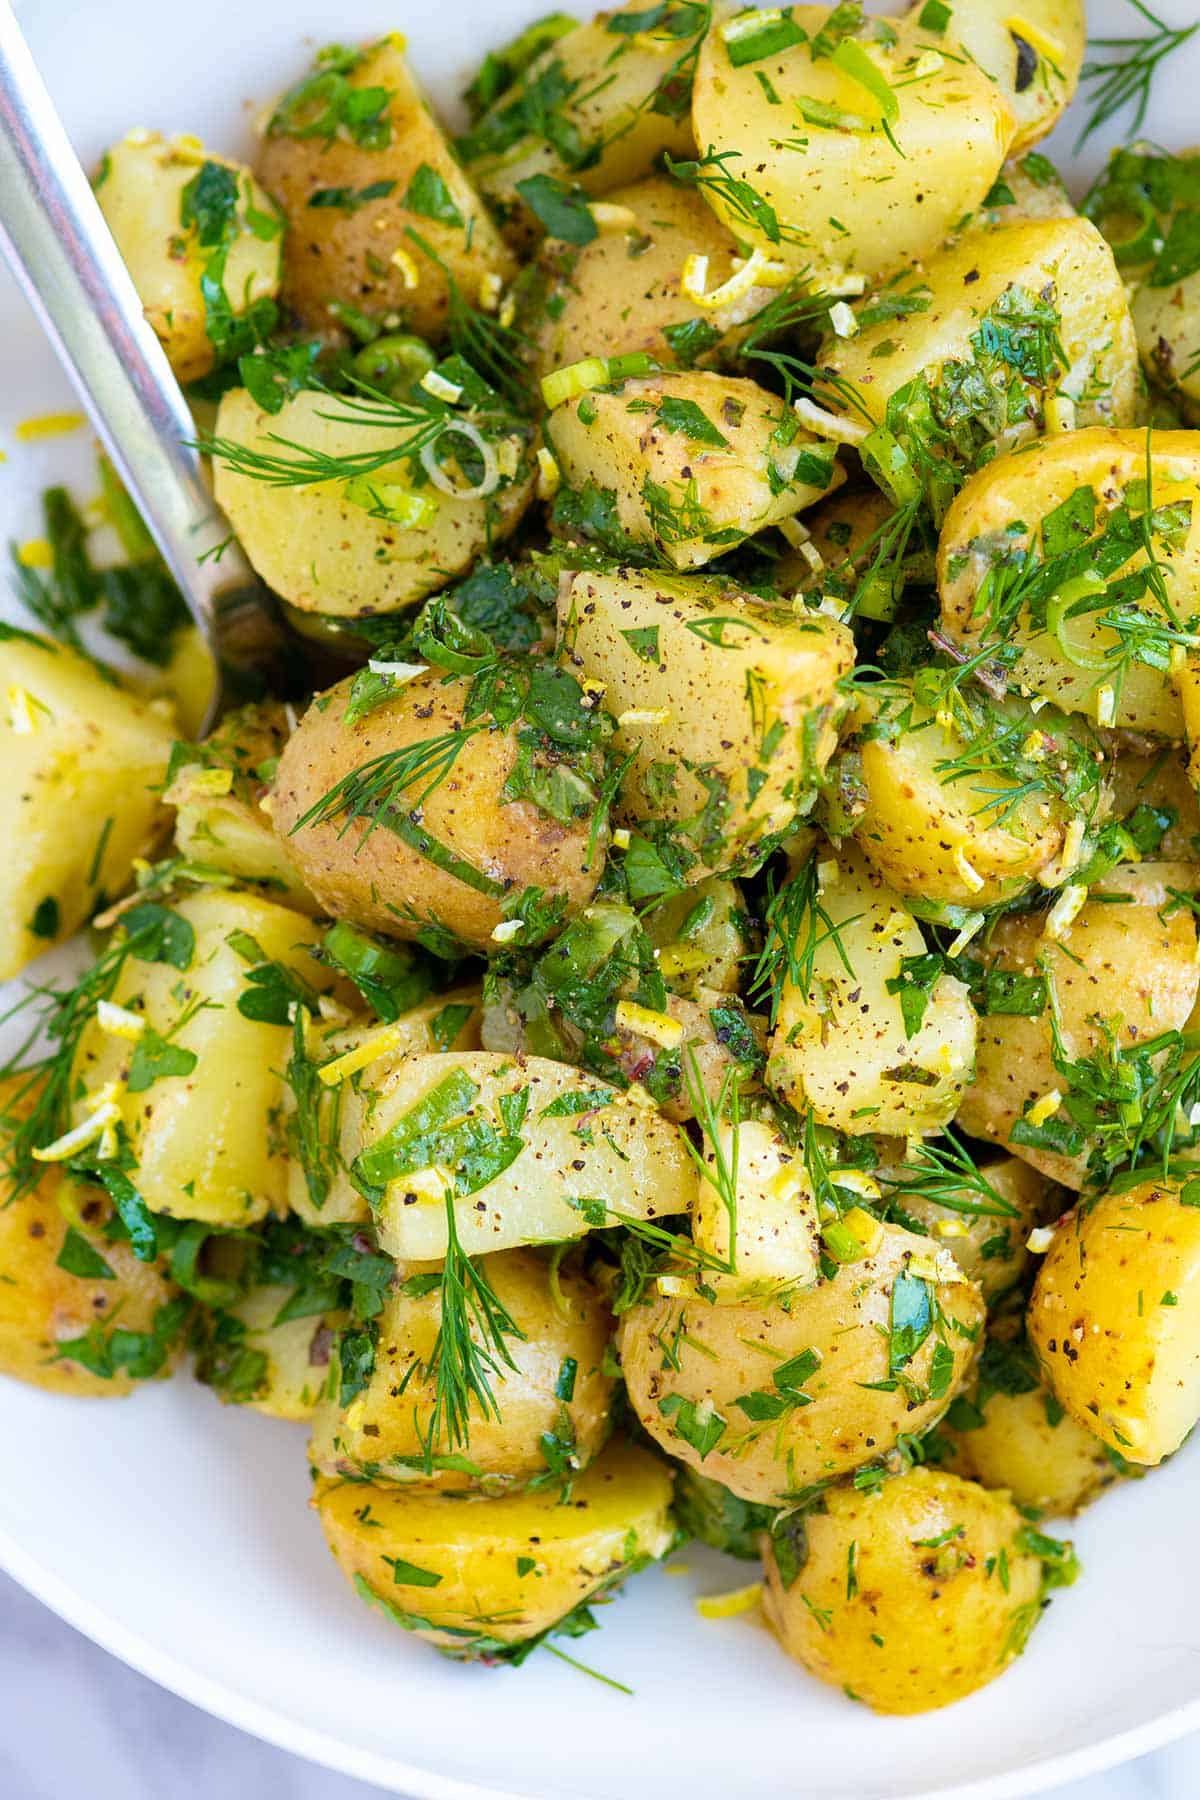
    Seriously Good 7 Layer Dip Recipe

    I’m planting my flag and declaring this the ultimate 7 layer dip recipe. Arguably the best party appetizer you can serve.

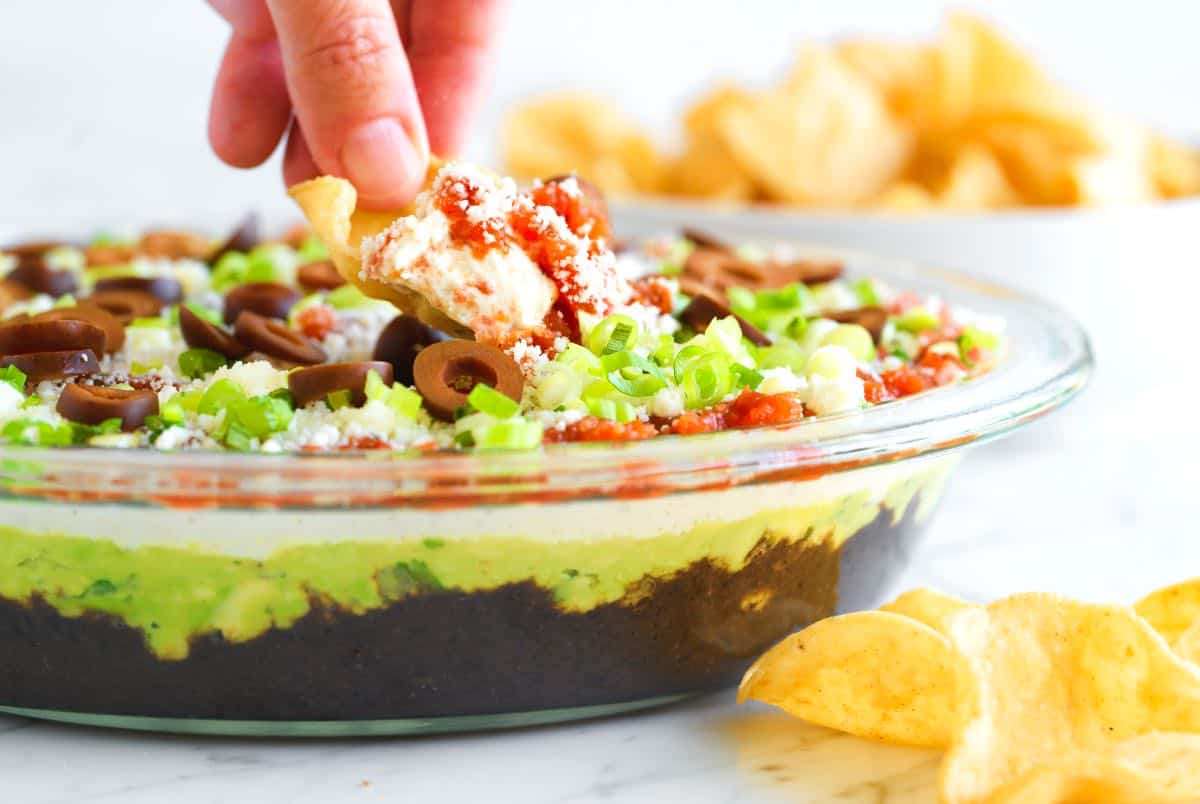
    7 Layer Dip

    What makes this recipe so delicious is the homemade black bean puree, which we make from scratch. By cooking our own beans, we pack in so much flavor from fresh garlic, onion, and spices. It’s an easy step that makes all the difference in the world. Once you try seven layer dip made with this puree, I know you’ll never go back.

    This is truly the ultimate 7 layer bean dip recipe. Every layer has been carefully considered and seasoned to perfection. For more of our favorite dip recipes like this one, be sure to check out our cheesy bean dip, homemade guacamole, and my favorite black bean dip. Get the tortilla chips ready!

    Key Ingredients

    • Black Bean Puree: So this is the star of our recipe. You’ll start with dry black beans and cook them with lots of garlic, onion, chili powder, cumin, oregano, smoked paprika, chicken broth (or veggie broth), and salt. You can use a pot and stove or an Instant Pot. Instructions for both methods are provided in the recipe. They are very similar to our homemade refried beans, but require a few less steps. Don’t let the from scratch beans scare you off. They really do make the best 7 layer bean dip. That said, I’ve shared tips for using canned below the recipe.
    • Avocado Mash: Pretty similar to our favorite guacamole, we mash ripe avocados with a bit of lime juice, salt, and cilantro. Simple and so good in this dip!
    • Spiced Sour Cream: We mix the sour cream with a bit of chili powder, cumin, and salt. This not only adds flavor but also creates a barrier to keep the avocado from browning.
    • Salsa: Use what you love! Just be sure to choose a thicker salsa and strain it in a fine mesh strainer to remove any excess liquid. This keeps the dip from becoming watery. If you’re up for homemade, I love this easy salsa or this roasted tomato salsa.
    • Cheese: Instead of the shredded cheeses you often see, we use briny, crumbly queso fresco or cotija cheese. It adds a more interesting flavor to the dip.
    • Green Onion and Black Olives: We finish the dip with these two classic toppings. Green onion adds a fresh bite, and the black olives are a great final touch. If you’re not a fan of olives, feel free to skip them!

    Find the full recipe with measurements below.

    Tips for Making the Best 7 Layer Dip

    This dip is hard to resist (really, I caught Adam sneaking into the fridge more times than I can remember to steal a bite!). It combines seven glorious layers of all my favorite things. Here’s my best tips for making it:

    Tip 1: Don’t skip the homemade beans. If you were to do a taste test of canned refried beans and compare it to our homemade black bean puree, there would be no contest. The flavor of our homemade beans is what makes this dip so good. The good news is that you can cook them in an Instant Pot for about an hour or on the stove for 1 ½ hours. Either way, they’re pretty hands-off, and you can make them up to four days ahead of time.

    How to Make 7 Layer Dip: Homemade black bean puree

    Tip 2: Drain your salsa. This is the number one thing you can do to prevent a soggy dip. A watery salsa will make your dip a mess, so be sure to drain it in a fine mesh strainer before adding it as a layer.

    Tip 3: Serve it in a clear dish. This dip looks as good as it tastes! Serving it in a glass dish, like a 9×13-inch Pyrex, is a great way to showcase all the colorful layers.

    7 Layer Dip

    Seriously Good 7 Layer Dip

    • PREP
    • COOK
    • TOTAL

    Your friends and family will fight over this seven layer dip! The homemade black bean puree truly makes it the best with extra spices and garlic blended in. When choosing your salsa, go with something that’s on the thicker side. I love serving this with homemade tortilla chips, but any sturdy tortilla chip will do!

    12 Servings

    You Will Need

    For the Black Bean Puree

    2 cups dry black beans, about 12 ounces (340g)

    8 cloves garlic, smashed and peeled

    Half an onion, roughly chopped

    2 teaspoons ground cumin

    1 tablespoon chili powder

    1 ½ tablespoons dried oregano

    1 ½ teaspoons smoked paprika

    2 bay leaves

    4 cups low-sodium chicken broth (950ml)

    1 teaspoon fine sea salt, plus more as needed


    For the Dip

    1 batch black bean puree

    4 large avocados

    Juice of half a lime

    1/4 cup fresh cilantro leaves, finely chopped

    16 ounces sour cream, 2 cups (450g)

    3/4 teaspoon fine sea salt, for the avocado and sour cream (½ tsp for avocado and ¼ tsp for sour cream)

    1 teaspoon chili powder

    1/4 teaspoon ground cumin

    16 ounces thick salsa, 2 cups (450g)

    8 ounces queso fresco or cojita cheese, crumbled (226g)

    2 green onions, finely sliced

    1 (2.25oz) can sliced black olives, drained

    Tortilla chips, for serving

    Directions

    • Cook the Black Beans
    • 1Stovetop Method: Add all black bean puree ingredients to a large saucepan or Dutch oven. If the liquid doesn’t cover the beans by about ½ an inch, add a bit of water. Bring to a boil over medium-high heat, then reduce to a low simmer. Cook, partially covered with a lid, for 1 ½ to 2 hours, or until the beans are tender, adding more water if the mixture gets too dry. Test 4 to 5 of the beans by pressing them against the side of the pot with a fork. They should be easy to press. If not, continue to simmer until the beans are tender.

      2Instant Pot Method: Add all black bean puree ingredients to a 6-quart Instant Pot. Secure the lid, then pressure cook on high for 45 minutes. Allow the pressure to naturally release. Carefully open the lid. Test 4 to 5 of the beans by pressing them against the side of the pot with a fork. They should be easy to press. If not, use the sauté setting and simmer the beans until tender.

    • Make the Black Bean Puree
    • 1Blend the beans: Remove the bay leaves, then use an immersion blender to puree the beans until completely smooth. Taste the puree, then adjust with salt as needed. I season generously because it acts as the base of the dip.

    • Assemble the 7 Layer Dip
    • 1Layer 1: Spread the black bean puree evenly on the bottom of a 9×13-inch serving dish.

      2Layer 2: In a medium bowl, mash the avocados with the lime juice, ½ teaspoon of the salt, and the cilantro. Spread this mixture evenly over the bean puree.

      3Layer 3: In a separate bowl, stir together the sour cream, 1 teaspoon chili powder, the remaining ¼ teaspoon of salt, and the ground cumin. Carefully spread this mixture over the avocado layer to prevent browning.

      4Layer 4: Strain the salsa in a fine mesh strainer to remove excess liquid, then spread it evenly over the sour cream.

      5Layer 5: Sprinkle the crumbled cheese evenly over the salsa.

      6Layer 6: Scatter the sliced green onions over the cheese.

      7Layer 7: Top the dip with the drained black olives.

      8Serving: Serve the dip immediately with tortilla chips, or cover and refrigerate until you’re ready to serve.

    Adam and Joanne’s Tips

    • Storing: This dip is best when served the day you make it, as the layers (especially the avocado layer) are the most distinct and the ingredients are at their freshest. However, you can tightly cover it and keep it in the refrigerator for 3 to 4 days. Keep in mind that as it sits, the layers may “bleed” into each other, and some watery liquid may pool at the bottom. When ready to serve, drain off any pooled liquid or dab it with a paper towel.
    • Make ahead: You can cook and blend the black beans up to 5 days in advance, just keep in mind that this will affect the storage time shared above.
    • Batch size: The recipe above works really well in a standard 9×13-inch baking dish. If you have a clear, glass baking dish, use it. It’s fun to see each layer through the sides. If you’d like to make a smaller batch, make half of the recipe (using a smaller saucepan to cook the beans if cooking on the stove). Then, use a pie dish or a 9-inch square dish for serving.
    • Substituting the homemade bean puree: I highly recommend the bean puree above as it is so nicely spiced and seasoned well for this recipe. That said, you can substitute store-bought or homemade refried beans. You will need about 6 cups.
    • For a vegetarian version: Use vegetable broth for cooking the beans and make sure that your cheese is vegetarian-friendly.
    • The nutrition facts provided are estimates.

    Nutrition Per Serving
    Serving Size
    1/12 of the pan
    /
    Calories
    339
    /
    Total Fat
    18.6g
    /
    Saturated Fat
    7.1g
    /
    Cholesterol
    26.4mg
    /
    Sodium
    775.5mg
    /
    Carbohydrate
    31.1g
    /
    Dietary Fiber
    9.6g
    /
    Total Sugars
    4.2g
    /
    Protein
    15.2g


    AUTHOR:

    Joanne Gallagher

    Adam and Joanne of Inspired Taste

    We are Adam and Joanne Gallagher, the creators of Inspired Taste. Established in 2009, Inspired Taste grew from a childhood dream into one of the internet’s most trusted recipe sites with hundreds of reliable recipes, step-by-step videos, and expert tips.More About Us
    Source link