Category: Quick Meal

  • Fried Rice Sauce Recipe

    Fried Rice Sauce Recipe

    This super simple fried rice sauce recipe is a weeknight lifesaver, and I bet you already have everything you need to make it.

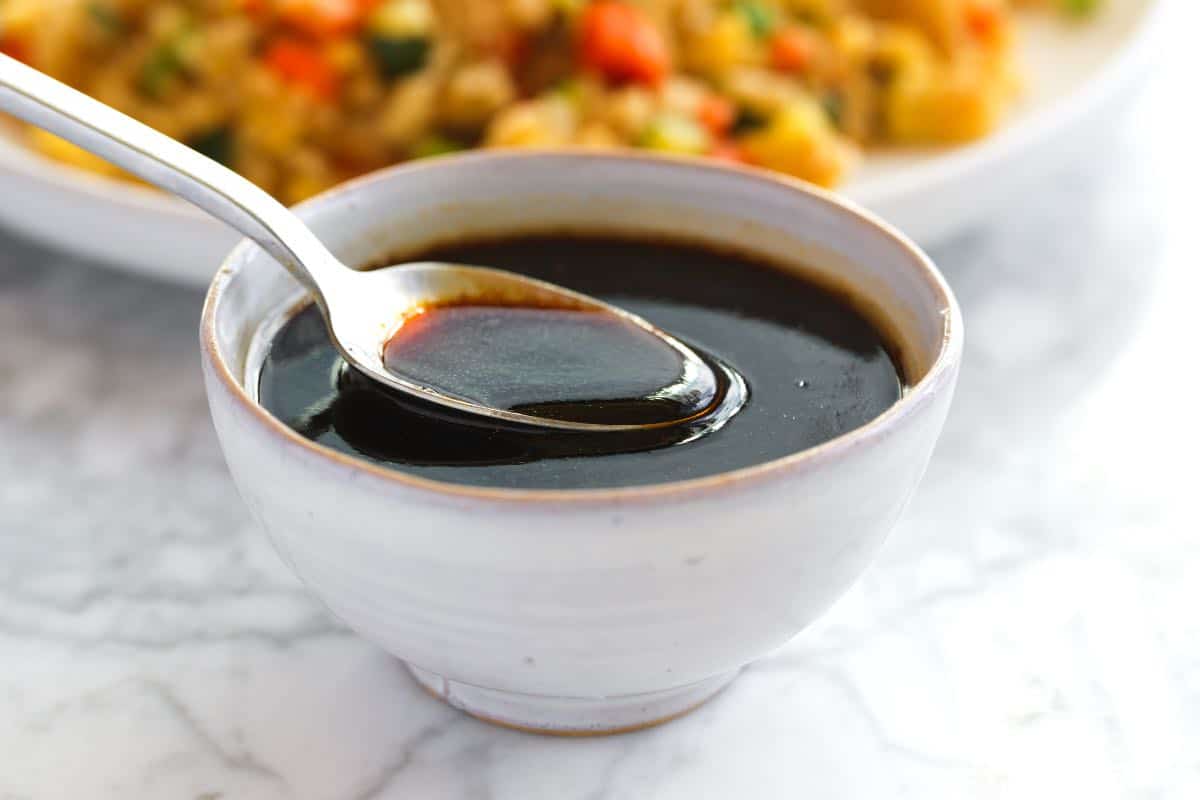
    Homemade Fried Rice Sauce

    I always have a jar of this sauce in my fridge because it’s so versatile. It takes less than 5 minutes to make, and it helps me get dinner on the table fast.

    You have to try making our easy fried rice with this sauce! It’s also perfect as a quick and delicious sweet soy glaze for other proteins like chicken or tofu.

    Key Ingredients

    • Soy Sauce: This is the base of our sauce, so you’ll want to use a low-sodium soy sauce or low-sodium tamari. For some extra richness, you can substitute some of the low-sodium soy sauce with a dark soy sauce or mushroom soy sauce (which adds a bit more flavor).
    • Brown Sugar: The sugar balances the saltiness of the soy sauce. Brown sugar adds more flavor than regular sugar. Coconut sugar would be great, too! I use a 3:1 ratio of soy sauce to sugar, but when making this sauce, you can always adjust with more sugar to make it sweeter.
    • Rice Vinegar: Unseasoned rice vinegar makes the sauce pop. It usually has a green top.
    • Sesame Oil: You’ll want to add toasted sesame oil to this sauce. I usually add extra sesame oil when making my fried rice recipe.
    • Mirin: This is optional, but it really pulls the sauce together. It’s sweet and fragrant. I also use it when making teriyaki sauce.
    • More Optional Ingredients: This is why I love making homemade sauces, you can always make them your own! This sauce is lovely with the ingredients above, but for more flavor, consider a little Chinese 5 spice or chili paste (like sambal oelek or gochujang) to add some heat.

    Find the full recipe with measurements below.

    My Tips for Making and Using Your Sauce

    Tip 1: Adjust to your taste. Feel free to adjust to your taste. You can add more sugar or any of the optional ingredients for extra flavor. Remember, the sauce needs to taste strong on its own to season all the rice and vegetables properly. If the sauce seems overpowering, you’re on the right track.

    Tip 2: A quick guide to making fried rice. For my favorite recipe, see our homemade fried rice, but here’s a quick rundown of what you’ll need to do:

    1. Cook proteins such as beef, chicken, pork, and shrimp in a large skillet or wok with some vegetable oil until barely cooked through. Then, remove it and set it aside.
    2. Sauté hearty vegetables like onions, mushrooms, and carrots in a large saucepan or wok for 1 to 2 minutes.
    3. Stir in aromatics like minced garlic, ginger, or the white parts of green onions, along with quick-cooking veggies like zucchini, edamame, or peas. Cook for about 1 minute.
    4. Add cold rice. Cook and stir it until it’s heated through and slightly browned.
    5. Pour in the sauce, starting with 2 tablespoons and adding more as needed.
    6. Add eggs (optional) by pushing the rice to one side of the pan. Scramble eggs in the empty space, then break them up and stir them into the rice.
    7. Serve topped with sliced green parts of green onions and sesame seeds.
    Adding sauce to fried rice

    Tip 3: More ways to use your sauce. This sauce also works as a sweet soy for beef, chicken, pork, tofu, and shrimp. Quickly cook your protein in a bit of oil or butter. Add 2 to 3 tablespoons of the sauce along with an equal amount of water or broth. To thicken it into a perfect glaze, mix 1 teaspoon of cornstarch with 2 teaspoons of water. Stir this into the pan and simmer until the sauce thickens and coats the protein.

    More Homemade Sauces

    Fried Rice Sauce

    Fried Rice Sauce

    • PREP
    • COOK
    • TOTAL

    Our family loves fried rice, so we usually have a jar of this easy to make sauce in our fridge. It’s perfect with soy sauce, sugar, rice vinegar, and sesame oil, but if you have the other ingredients on hand, they really take this sauce to the next level. I highly recommend the mirin!

    Makes 1 cup

    You Will Need

    ¾ cup low-sodium soy sauce (190g)

    ¼ cup brown sugar (50g)

    2 tablespoons rice vinegar

    1 tablespoon toasted sesame oil

    2 tablespoons mirin, optional

    ¼ teaspoon Chinese five spice, optional

    1 tablespoon sambal oelek chili paste or gochujang, optional

    Directions

      1Add soy sauce, brown sugar, rice vinegar, and sesame oil to a small saucepan over medium heat. Bring to a simmer and cook until the sugar dissolves. If you are adding them, stir in the optional ingredients.

    Adam and Joanne’s Tips

    • Storing: Keep this sauce in an airtight container like a mason jar in the refrigerator for up to one week. Shake before using.
    • Freeze: Freeze this sauce in ice cube trays, dividing it between the ice cube holes. When frozen, pop them out and add to a freezer-safe container or zip-top bag.
    • Soy sauce: Use a low-sodium soy sauce for this. For extra flavor, consider substituting 4 tablespoons (¼ cup) of it with dark soy sauce or mushroom soy sauce, both of which add a richer taste to the sauce.
    • Tips for fried rice: Use day-old, leftover rice or cold rice for the best results. Freshly cooked rice tends to turn out mushier. I like short or medium-grain white rice, such as Calrose or Jasmine rice. Brown rice and quinoa will also work.
    • Seasoning: This sauce adds a good amount of seasoning, but we still recommend lightly seasoning with salt as you go along when making fried rice. So, lightly season the protein and the veggies as you cook them before adding the sauce. This way it will turn out just as delicious as your favorite restaurant!
    • The nutrition facts provided are estimates.

    Nutrition Per Serving
    Serving Size
    1 tablespoon
    /
    Calories
    24
    /
    Total Fat
    0.9g
    /
    Saturated Fat
    0.1g
    /
    Cholesterol
    0mg
    /
    Sodium
    326.4mg
    /
    Carbohydrate
    5.5g
    /
    Dietary Fiber
    0g
    /
    Total Sugars
    4.5g
    /
    Protein
    0.9g


    AUTHOR:

    Joanne Gallagher

    Previous Post: Easy Fried Rice
    Next Post: Easy Scones
    Source link

  • Garlic Ginger Spicy Edamame Recipe

    Garlic Ginger Spicy Edamame Recipe

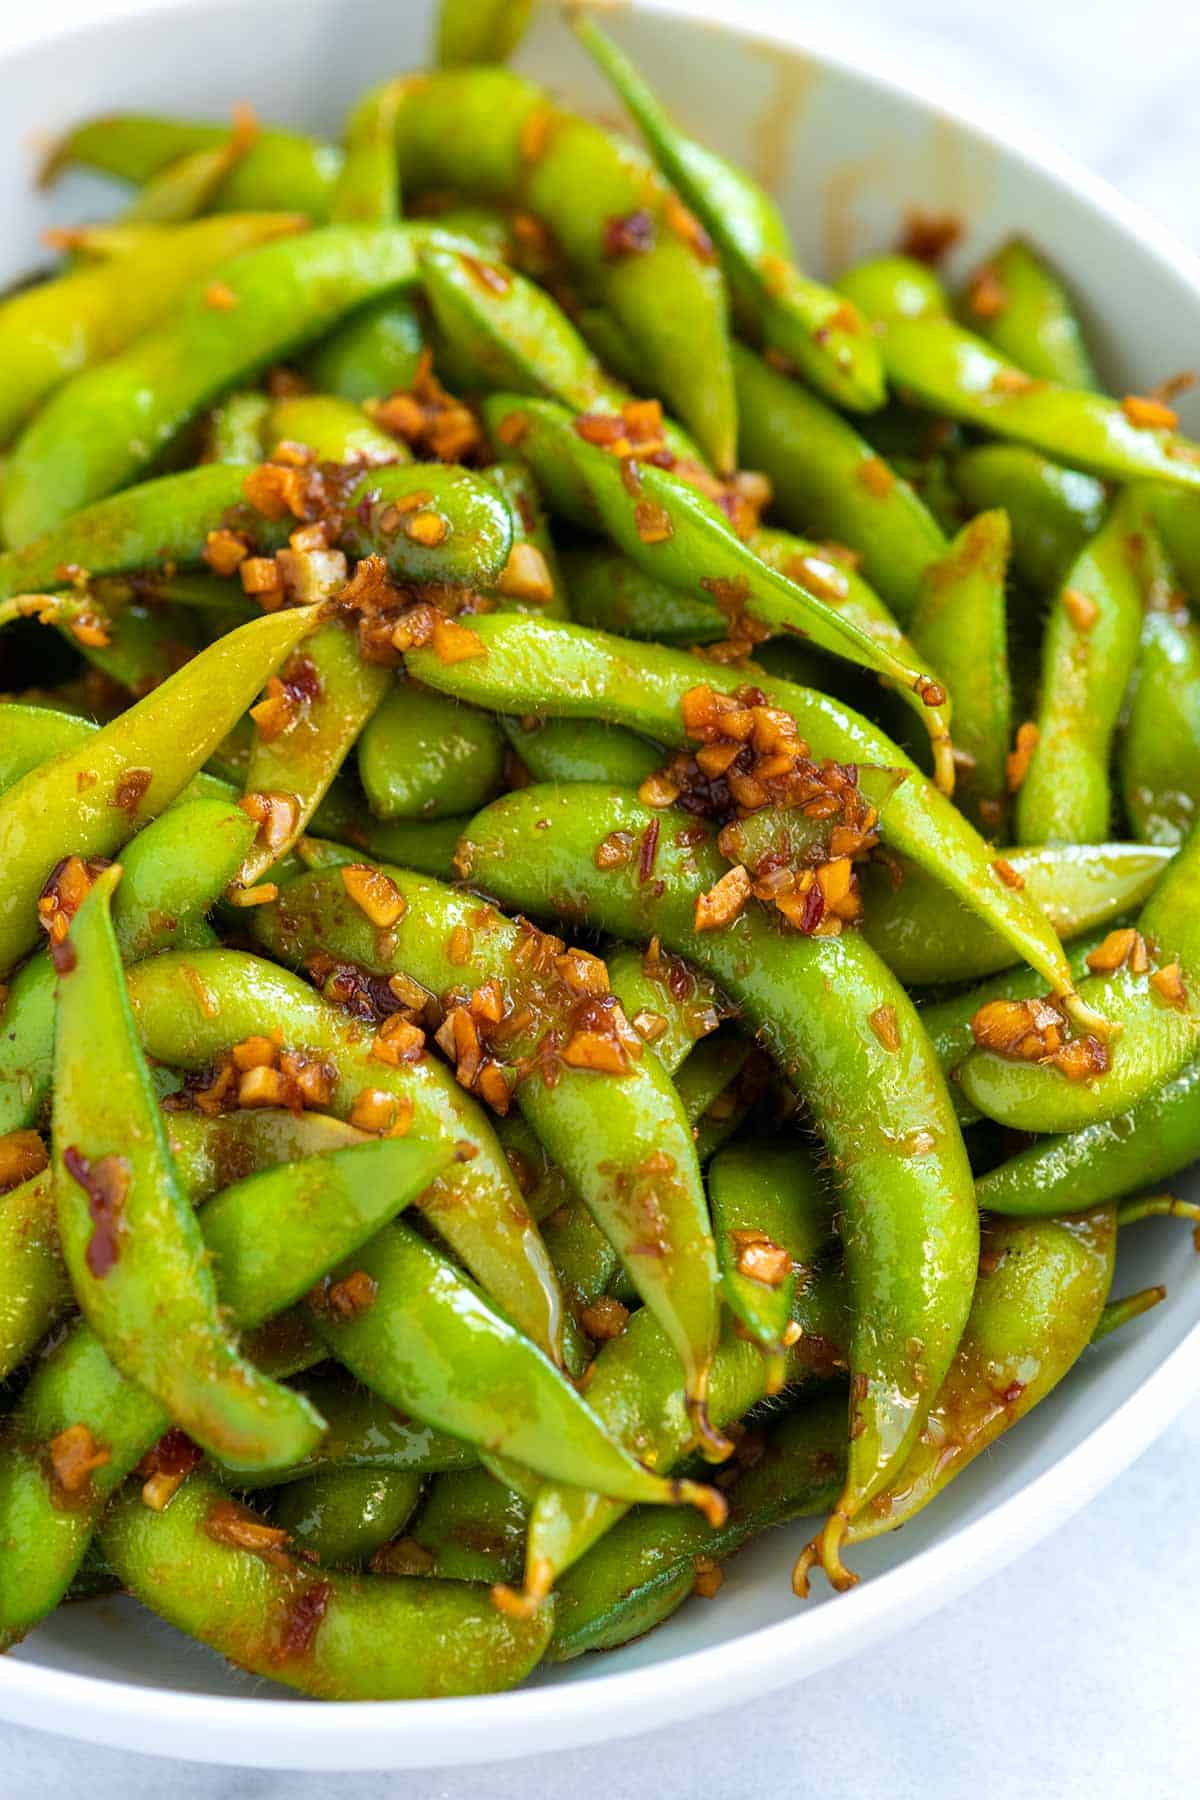
    This spicy edamame recipe is easy and tastes incredible, thanks to garlic, ginger, and a spicy chili sauce. This is one of my favorite edamame recipes!

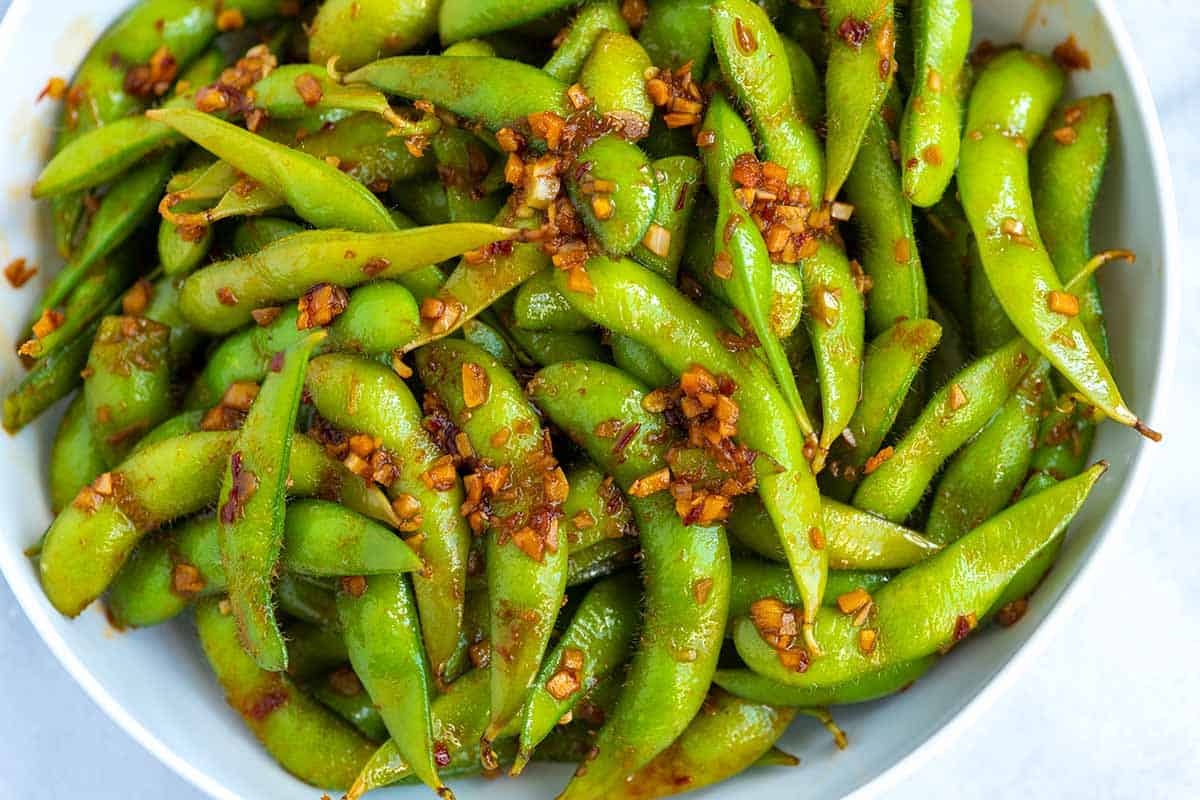
    Spicy edamame with chili garlic sauce

    You’ll often see steamed edamame with sea salt on restaurant menus, but in this recipe, we kick the flavors up a notch. You are going to love the ridiculously easy ginger, garlic, chili sauce!

    Of all the recipes I’ve tried, this is seriously my favorite way to cook edamame. It’s so flavorful!

    Key Ingredients

    • Edamame: These are young soybeans, which means the beans are soft and easy to eat. In this edamame recipe, we cook the beans inside their shell. You don’t eat the shell. I use my front teeth to scrape the beans out of the pod (they pop out easily). You can use shelled edamame in the recipe. I’ve included tips below the recipe.
    • Garlic and ginger: I use a tablespoon each of minced garlic and ginger. If you don’t want to buy fresh ginger, look in the produce section of your grocery store for the tubes of ginger (sometimes you can also find frozen pureed ginger). 
    • Soy sauce, maple syrup, and toasted sesame oil: I love the simple sauce in this recipe. It’s a little salty from the soy sauce (or use tamari), sweet from maple syrup (or use honey), and toasty from the sesame oil.
    • Chili sauce: I love Sambal Oelek. It’s made with crushed raw red chiles, a little vinegar, and salt. It’s sold in most grocery stores. Check the grocery aisle where you’d buy soy sauce, and it should be there. If you can’t find it, Sriracha or Gochujang are good alternatives.

    Find the full recipe with measurements below.

    How to Make Spicy Edamame

    Tip 1: Keep the shells on. You’ll start with fresh or frozen edamame in their shells. Since it’s more available where we live, we use frozen. You’ll steam or boil the edamame until the pods are bright green and heated through. I boil my edamame in the video in the recipe below.

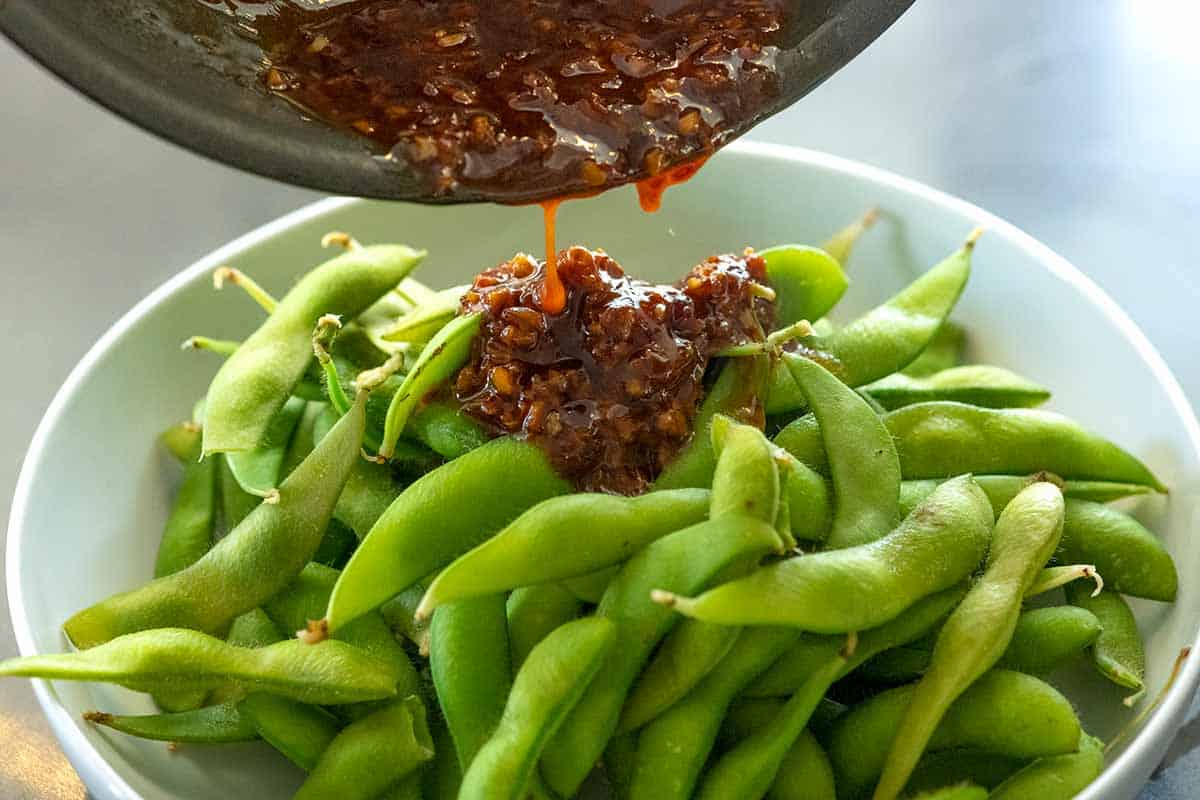
    Tip 2: Toss with our chili sauce. To make it, heat minced garlic and ginger in oil for a minute in a skillet on the stove. Now that the garlic and ginger are fragrant and have released their flavors into the oil, you can stir in soy sauce, maple syrup, and chili sauce. Toss the sauce with your cooked edamame pods, and you are ready to dig in.

    Tossing spicy garlic sauce with cooked edamame

    Serving Suggestions

    I love this as a snack or appetizer. It’s excellent served next to other appetizers like egg rolls, spring rolls, and homemade crab Rangoon. 

    You can make it a complete meal by serving it next to rice, fried rice, homemade sushi, and stir fries like this broccoli chicken stir fry or this veggie stir fry. I also love it with chicken teriyaki!

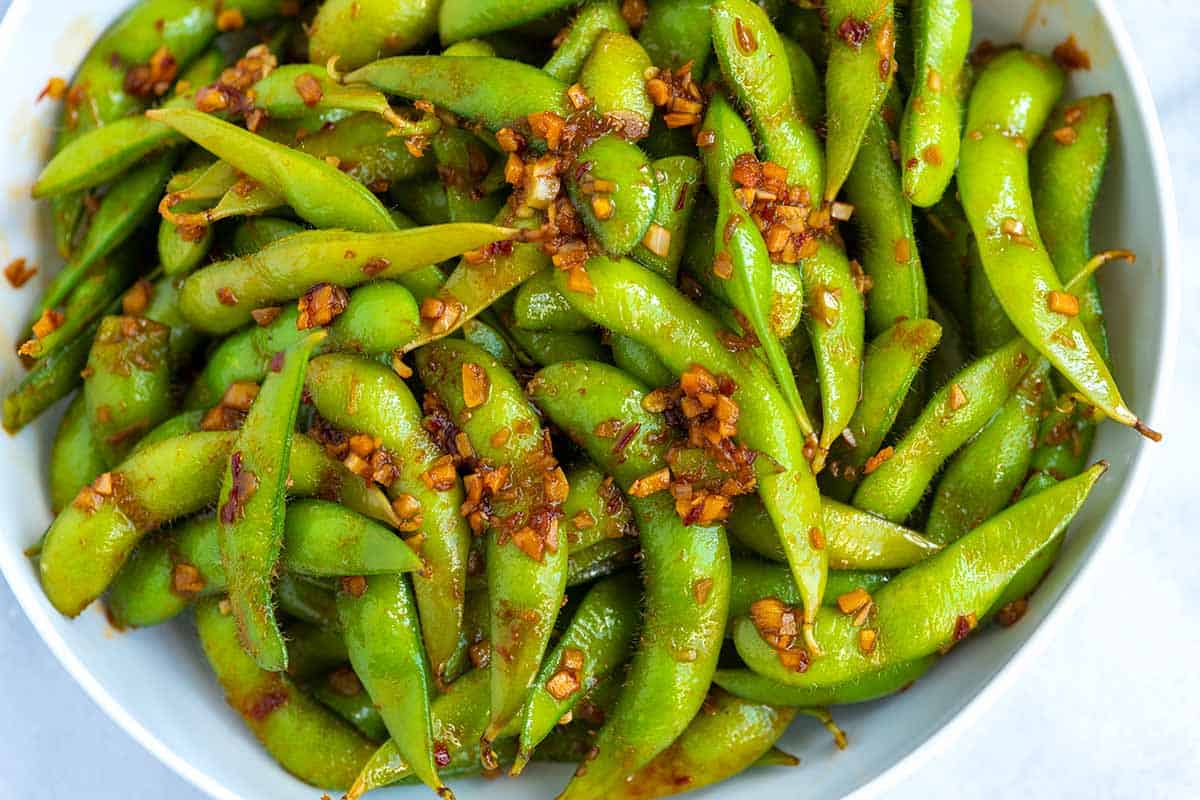
    Spicy edamame recipe with garlic and ginger

    Garlic Ginger Spicy Edamame

    • PREP
    • COOK
    • TOTAL

    This spicy edamame is simple and tastes incredible. Cooking edamame at home is easy and takes minutes. In the recipe, we cook the edamame in their shells. You don’t eat the shells, though. To eat the beans inside, scrap them out of their shell using your front teeth. They pop out easily.

    4 Servings

    Watch Us Make the Recipe

    You Will Need

    1 pound fresh or frozen edamame in their pods

    1 tablespoon avocado oil or other neutral oil

    1 tablespoon minced garlic

    1 tablespoon minced fresh ginger

    2 tablespoons light soy sauce or tamari

    2 to 3 teaspoons pure maple syrup, sugar or honey

    1 teaspoon toasted sesame oil

    1/2 to 1 tablespoon Sambal Oelek or Sriracha

    Directions

    • Cook Edamame
    • 1To boil edamame, bring a large pot of water to a boil and add a teaspoon of salt. Add the edamame and return to a boil. Cook until bright green and heated through, 3 to 5 minutes. Drain.

      2To microwave edamame, place the edamame in a microwave-safe dish with 1/4 cup of water and a pinch of salt. Partially cover the dish with a plate, then microwave on high until bright green and heated through. Depending on your microwave, this can take 1 to 5 minutes.

    • Make the Spicy Sauce
    • 1Heat the oil in a medium skillet over medium heat. Add the garlic and ginger. Cook until fragrant, but before they brown, 30 to 60 seconds.

      2Remove the skillet from the heat, and then stir in the soy sauce, maple syrup, sesame oil, and chili sauce.

      3Taste and adjust with additional maple syrup to balance out the soy sauce or more chili sauce to make it spicier.

      4Toss the edamame with the sauce and serve.

    Adam and Joanne’s Tips

    • Sambal Oelek is a chili paste made with crushed raw red chiles, a little vinegar, and salt. It’s sold in most grocery stores, just check the aisle where you’d buy soy sauce.
    • Shelled edamame: You can toss cooked shelled edamame beans with the spicy sauce.
    • The nutrition facts provided below are estimates.

    Nutrition Per Serving
    Serving Size
    1/4 of the recipe
    /
    Calories
    183
    /
    Total Fat
    9.9g
    /
    Saturated Fat
    2.9g
    /
    Cholesterol
    0mg
    /
    Sodium
    265.7mg
    /
    Carbohydrate
    12.9g
    /
    Dietary Fiber
    5.5g
    /
    Total Sugars
    5.6g
    /
    Protein
    13.5g


    AUTHOR:

    Joanne Gallagher

    Adam and Joanne of Inspired Taste

    We are Adam and Joanne Gallagher, the creators of Inspired Taste. Established in 2009, Inspired Taste grew from a childhood dream into one of the internet’s most trusted recipe sites with hundreds of reliable recipes, step-by-step videos, and expert tips.More About Us

    Source link

  • Creamy Cilantro Lime Dressing Recipe

    Creamy Cilantro Lime Dressing Recipe

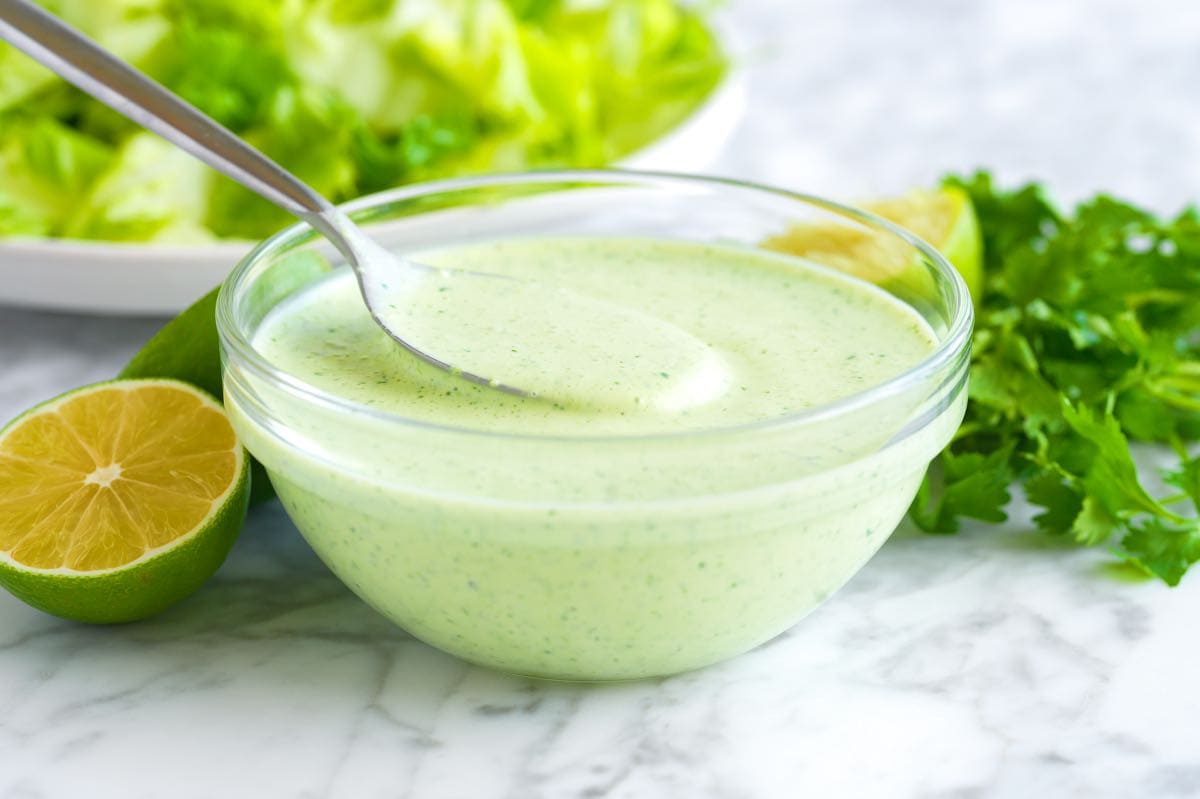
    This easy, creamy cilantro lime dressing recipe is one of our favorite sauces to keep in the fridge. Use it for salads, drizzle over tacos, add to burritos, and more!

    Creamy Cilantro Lime Dressing

    This dressing came to be when I was craving a taco salad and wanted a bright, creamy cilantro dressing to go with it. I started with our homemade ranch as a base, but swapped the herbs for a bunch of cilantro and the lemon for fresh lime juice.

    The results were one of the yummiest salad dressings we’ve made. This creamy dressing is perfect for salads, but you can use it for so much more. Think tacos, burritos, rice bowls, a dip for veggie quesadillas, and even as a dip for vegetables.

    Key Ingredients

    • Sour Cream and Mayonnaise: I use sour cream and mayonnaise to make our ranch recipe extra creamy, so I do the same here. If you want to lighten things up a little, you can substitute the sour cream with Greek yogurt or even blended cottage cheese (weird, but it works!).
    • Buttermilk or Milk: Buttermilk adds a tangy, creamy flavor that’s hard to beat. If you don’t have buttermilk, regular milk with a bit more lime juice also works. If you buy buttermilk for this recipe and have some left over, try these buttermilk pancakes (I love them!).
    • Lime Juice: A splash of fresh lime juice brightens the dressing in a way that store-bought bottles can’t compete with. Plus, the lime works so well with the fresh cilantro.
    • Cilantro and Green Onion: I love fresh herbs and am committed to using a lot of them whenever I buy them. That’s why you’ll be using an entire cup of cilantro leaves for this cilantro dressing. The green onion adds even more fresh flavor. I love it!
    • Jalapeño: This was a last-minute addition the first time I made this, and I’ve been adding it ever since. I mince about 1 tablespoon of fresh jalapeño, and then blend it with the other ingredients. It doesn’t make it spicy. That said, you can always increase it.
    • Spices: Onion powder, garlic powder, salt, and pepper round everything out and make this dressing extra delicious.

    Find the full recipe with measurements below.

    Tips for Making My Cilantro Lime Dressing

    Tip 1: Use a blender. The quickest way to make this recipe is to add all the ingredients to a blender, hit go, and wait 30 seconds. A food processor works, too!

    Blending cilantro lime dressing ingredients.

    Tip 2: Make it ahead of time. Making your own salad dressing every night of the week is probably not ideal. That’s why I am happy to say that this one lasts when stored in an airtight container for about 4 days. The green of the cilantro may dull slightly, but not much, and the dressing will still taste great.

    Ways to Use Your Dressing

    I’m already using it for everything. It’s excellent for this taco salad, as a sauce for these simple chicken breasts, drizzled over roasted veggies, and I’ve added it to burrito bowls made with my favorite cilantro lime rice!

    Cilantro Lime Dressing

    Creamy Cilantro Lime Dressing

    • PREP
    • TOTAL

    Make this cilantro lime dressing today, and it will last in your fridge for up to 4 days. Use it for taco salad, drizzle over tacos, add to burritos, and more! I like to think of it as a cilantro ranch. It’s so good!

    Makes 2 cups

    You Will Need

    ½ cup mayonnaise, try homemade mayonnaise (113g)

    ½ cup sour cream (113g)

    ⅓ cup buttermilk or regular milk (80ml)

    2 tablespoons fresh lime juice

    1 cup fresh cilantro leaves and tender stems, finely chopped (30g)

    2 green onions, sliced

    1 teaspoon minced jalapeño, or more to taste

    ½ teaspoon onion powder

    ½ teaspoon garlic powder

    ¼ teaspoon fine sea salt, plus more to taste

    ¼ teaspoon fresh ground black pepper

    Directions

      1Add all the ingredients to a blender or food processor and blend until smooth. Taste, and then adjust with extra lime juice, salt, or pepper.

    Adam and Joanne’s Tips

    • Storing: Keep in the fridge in an airtight container for up to 4 days.
    • Greek yogurt: While I love the tangy, rich flavor of full-fat sour cream, you can substitute the sour cream for plain Greek yogurt. Cottage cheese is also a nice option and adds extra protein.
    • The nutrition facts provided are estimates.

    Nutrition Per Serving
    Serving Size
    2 tablespoons
    /
    Calories
    65
    /
    Total Fat
    6.6g
    /
    Saturated Fat
    1.6g
    /
    Cholesterol
    7.3mg
    /
    Sodium
    92.6mg
    /
    Carbohydrate
    1g
    /
    Total Sugars
    0.6g
    /
    Protein
    0.5g


    AUTHOR:

    Joanne Gallagher

    Adam and Joanne of Inspired Taste

    We are Adam and Joanne Gallagher, the creators of Inspired Taste. Established in 2009, Inspired Taste grew from a childhood dream into one of the internet’s most trusted recipe sites with hundreds of reliable recipes, step-by-step videos, and expert tips.More About Us

    Source link

  • Easy Flatbread Pizza Recipe

    Easy Flatbread Pizza Recipe

    This flatbread pizza recipe is quick and easy! You can make homemade flatbread (it’s easy, I’ll show you) or use your favorite store-bought flatbread.

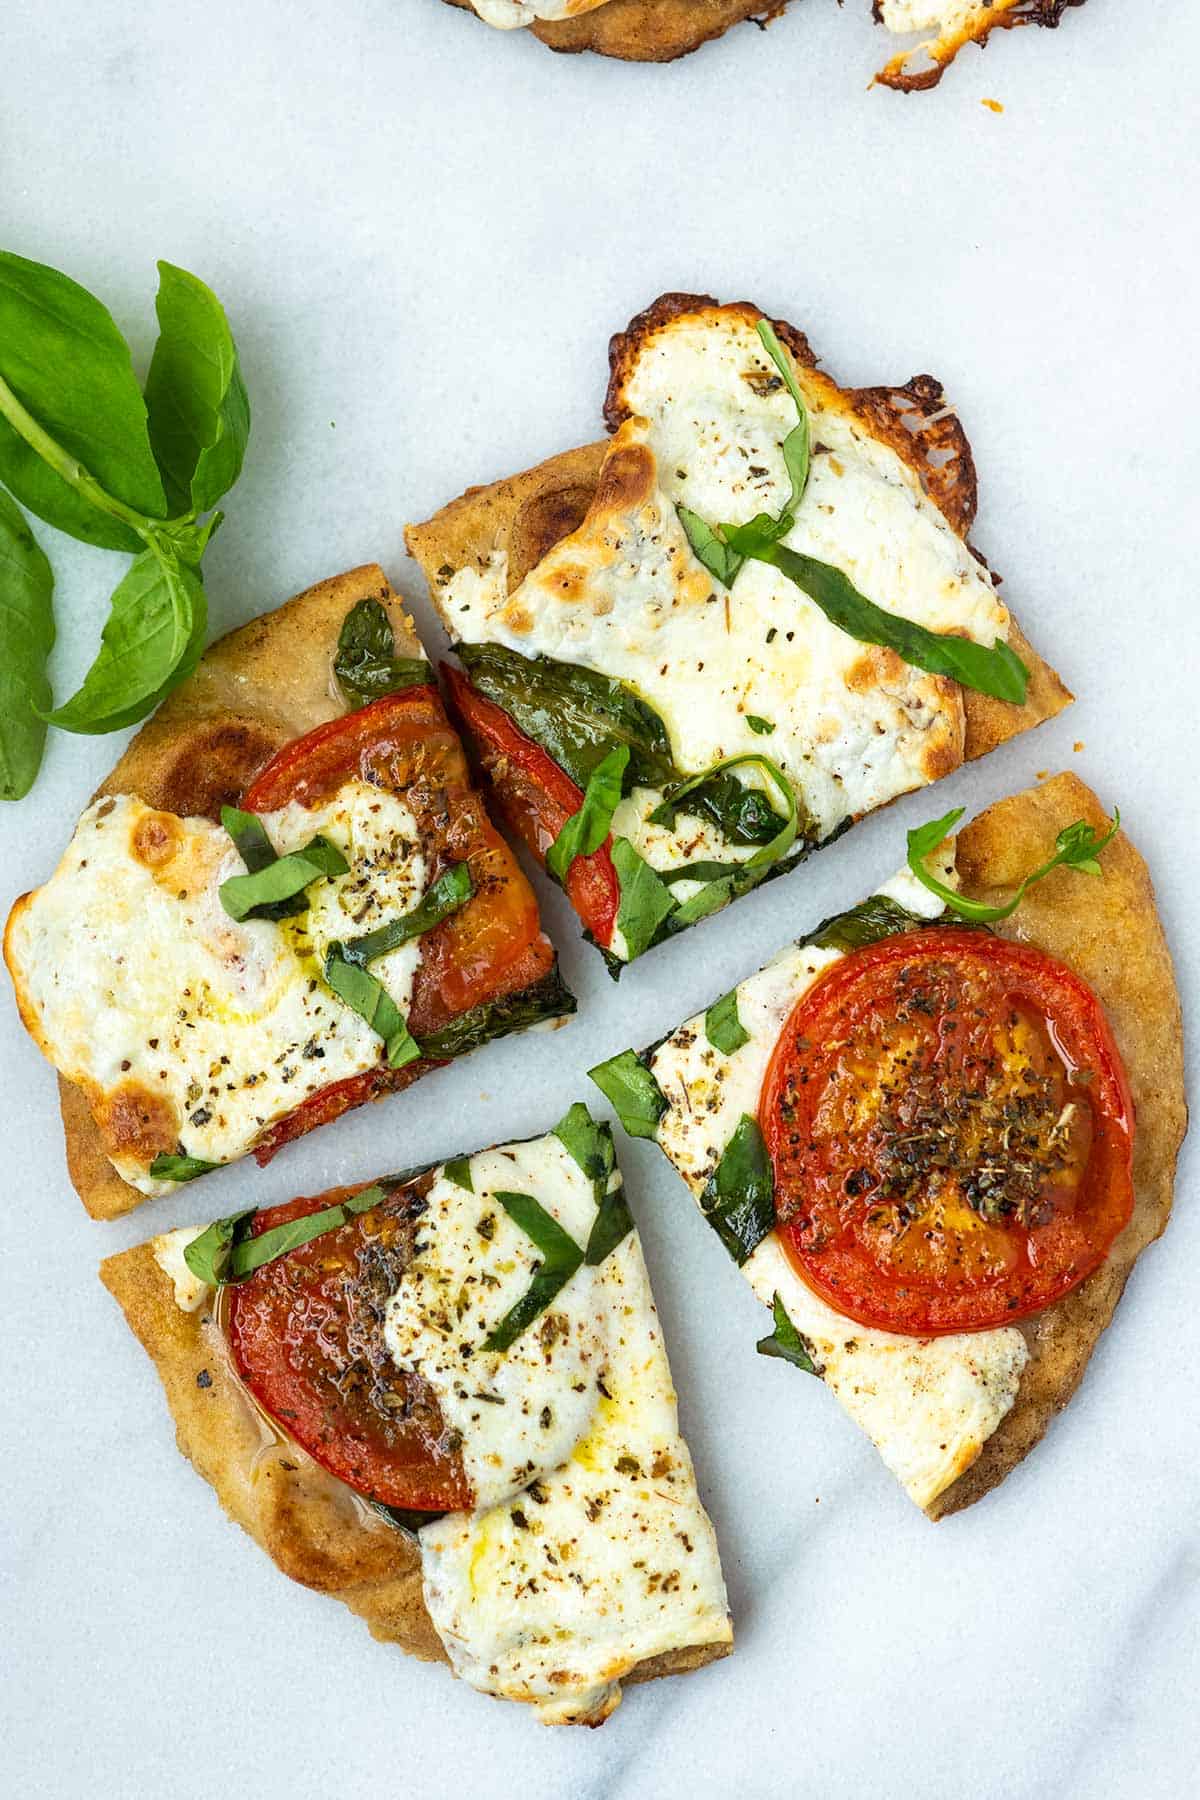
    Flatbread pizza with tomatoes, mozzarella and basil

    My family loves this easy flatbread pizza made with tomatoes, basil, and mozzarella. It’s my secret weapon for a quick dinner, which I know everyone will love. With a short list of ingredients and a 15-minute prep time, it’s a lifesaver!

    Serve it with a simple salad, and you’ve got a full meal. Below, I’m sharing my family’s favorite flatbread recipe and lots of topping ideas for you to try.

    Key Ingredients

    Use store-bought flatbread or make your own. Our family loves this no-yeast flatbread recipe, so we usually have a few already made in the freezer. We also have this yeasted garlic flatbread that works well for pizzas. I have used our no-yeast flatbread in our photos and video.

    Add your favorite toppings. Here are a few of my favorite toppings to inspire you:

    • Olive oil or sauce: My son isn’t the biggest fan of sauce on his pizza, so we stick with olive oil. I also love this homemade pizza sauce if you want a layer of sauce on your flatbread. For pesto pizza, try homemade basil pesto.
    • Cheese: I love fresh mozzarella for this recipe, but any cheese will work. Use what you have and love. For something special, I love ricotta, creme fraîche, or mascarpone cheese (which are especially delicious with caramelized onions and fresh thyme).
    • Meats: Cooked sausage, bacon, or pepperoni
    • Veggies: Try sliced onion, bell peppers, and fresh or roasted mushrooms

    How to Make Flatbread Pizza

    Tip 1: Assemble with cooked flatbread. When making pizza with flatbread, I like starting with cooked flatbread. This differs slightly from homemade pizza, where I add my toppings to uncooked pizza dough.

    Cooking flatbread in a skillet

    Tip 2: Bake your pizza. Add your sauce and toppings, and then bake the flatbread in your oven until the bottom is slightly crusty and the cheese has melted on top. Our pizzas bake in the oven for about 10 minutes. Since the flatbread goes into the oven precooked, this recipe is FAST.

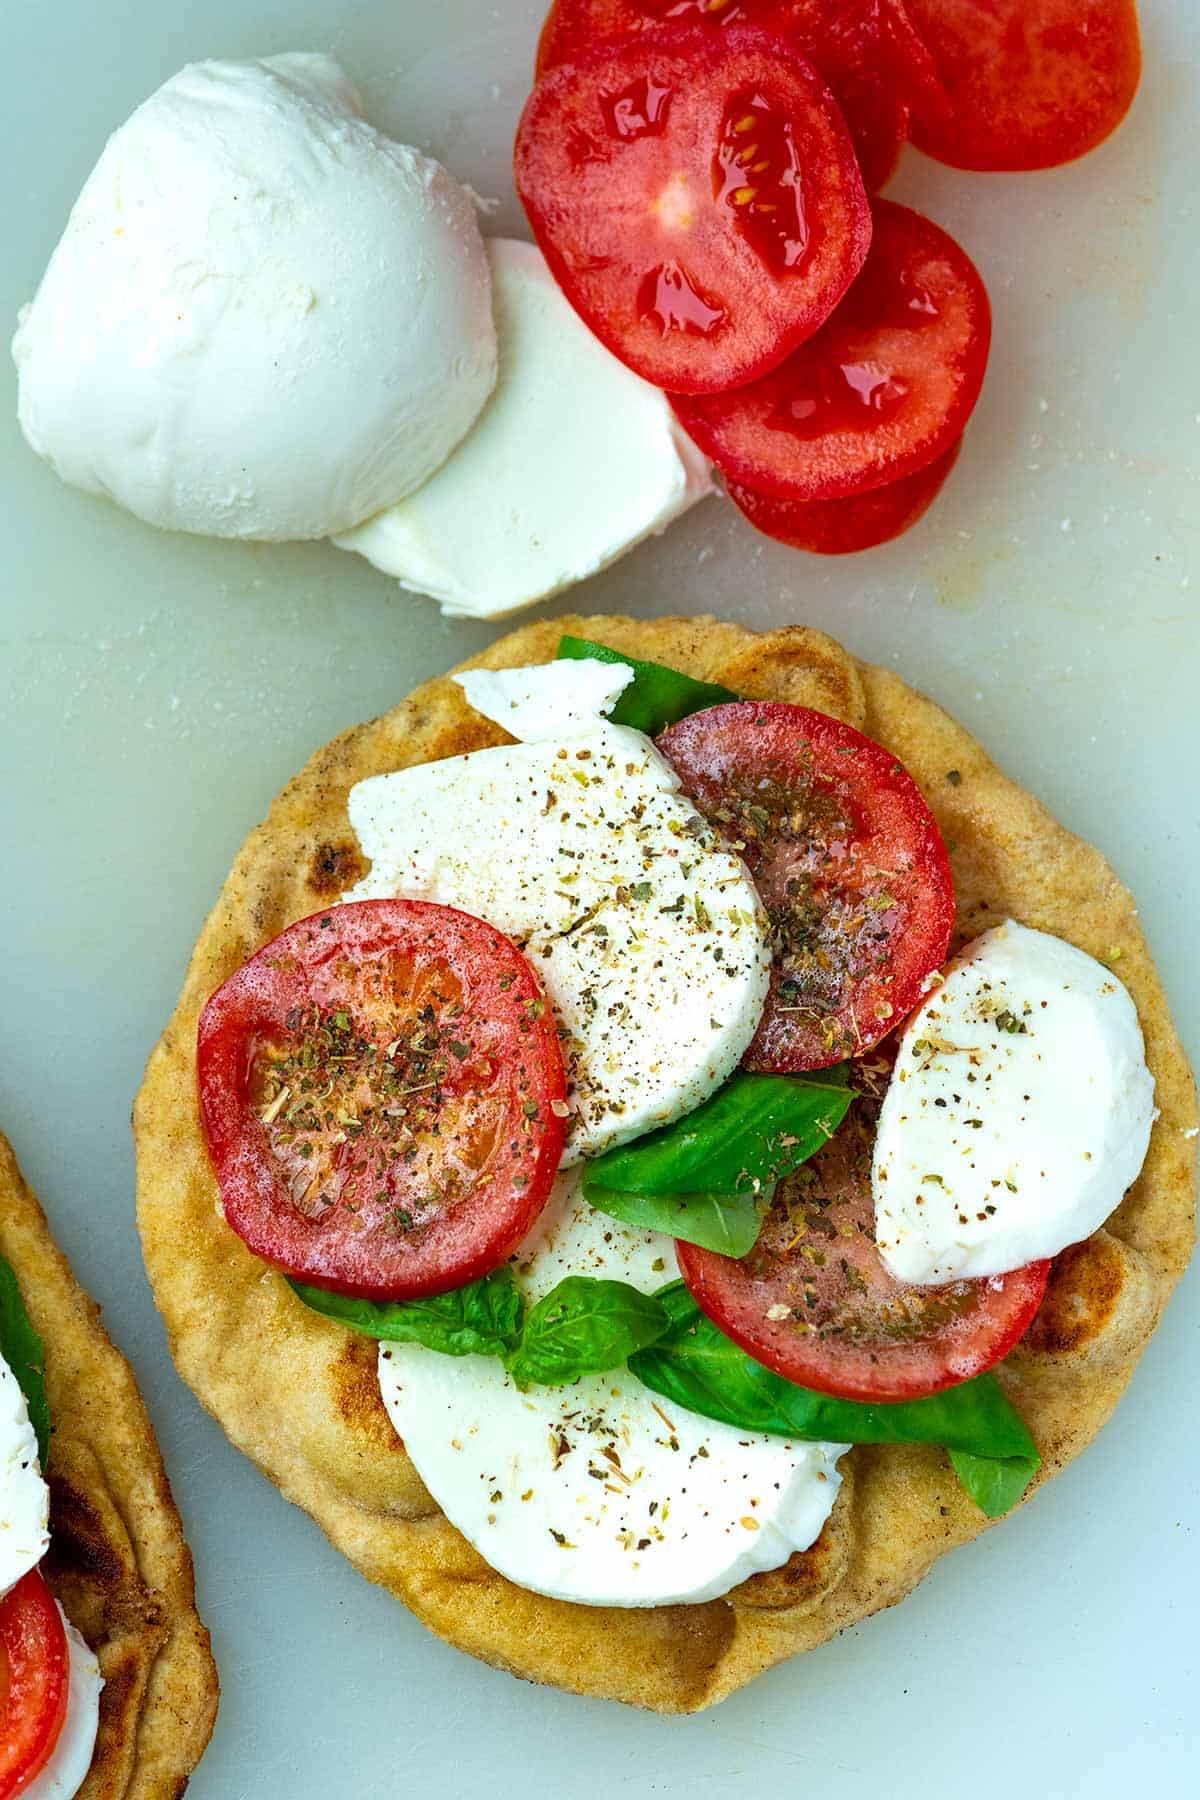
    For the pizzas in our photos, I brushed on olive oil and layered sliced tomatoes, mozzarella, and basil on top. Before baking, I sprinkled over some oregano, salt, and pepper. It is simple and seriously delicious.

    Prepping pizza made with flatbread, sliced tomatoes and sliced mozzarella

    Serving Suggestions

    I love serving these with a big salad. Some of my favorites include this homemade Caesar salad, our Greek salad, or this chopped salad.

    Veggies on the side work, too. Try roasted vegetables, sautéed zucchini, or these easy sautéed vegetables. Since they are so easy, I’ve also made these pizzas and served them with soup. I especially love our roasted tomato soup.

    Flatbread pizza with tomatoes and mozzarella

    Easy Flatbread Pizza

    • PREP
    • COOK
    • TOTAL

    Flatbread pizza is perfect for busy mealtimes. Make this quick and easy pizza with homemade or store-bought flatbread. We have two flatbread recipes on Inspired Taste: no-yeast flatbread made with baking powder and this homemade garlic flatbread made with yeast.

    Makes two pizzas

    Watch Us Make the Recipe

    You Will Need

    2 flatbread, 6 to 8 inches in diameter, try homemade flatbread

    1 tablespoon extra-virgin olive oil, plus more for serving

    1 large tomato, thinly sliced

    4 ounces fresh mozzarella cheese, sliced

    8 fresh basil leaves, plus more for serving

    2 pinches dried oregano

    Salt and fresh ground black pepper

    Directions

      1Heat the oven to 425°F (218°C).

      2Brush or rub the olive oil over the bread. Layer the sliced tomatoes, mozzarella, and basil leaves on top.

      3Scatter a pinch of oregano over each flatbread, then season with salt and fresh ground pepper.

      4Bake the flatbread pizzas until the cheese is bubbling and turning light brown in spots, 10 to 15 minutes.

      5Serve, cut into slices, with an extra drizzle of olive oil and a few more fresh basil leaves, torn into smaller pieces, scattered on top.

    Adam and Joanne’s Tips

    • Add garlic: Mince 1 clove of garlic and spread onto the flatbread before adding the sliced cheese, basil and tomatoes.
    • The nutrition facts provided below are estimates. Our soft and fluffy flatbread recipe was used for the calculations.

    Nutrition Per Serving
    Serving Size
    1 flatbread pizza
    /
    Calories
    442
    /
    Total Fat
    24.9g
    /
    Saturated Fat
    9.2g
    /
    Cholesterol
    44.6mg
    /
    Sodium
    1040.4mg
    /
    Carbohydrate
    38.2g
    /
    Dietary Fiber
    2.5g
    /
    Total Sugar
    3.1g
    /
    Protein
    17.7g


    AUTHOR:

    Joanne Gallagher

    Adam and Joanne of Inspired Taste

    We are Adam and Joanne Gallagher, the creators of Inspired Taste. Established in 2009, Inspired Taste grew from a childhood dream into one of the internet’s most trusted recipe sites with hundreds of reliable recipes, step-by-step videos, and expert tips.More About Us

    Source link

  • Easy Homemade Oat Milk Recipe

    Easy Homemade Oat Milk Recipe

    The moment I learned how to make oat milk, I was obsessed! It takes less than 10 minutes, requires very few ingredients, and is perfect for everything from coffee and smoothies to pancakes and muffins.

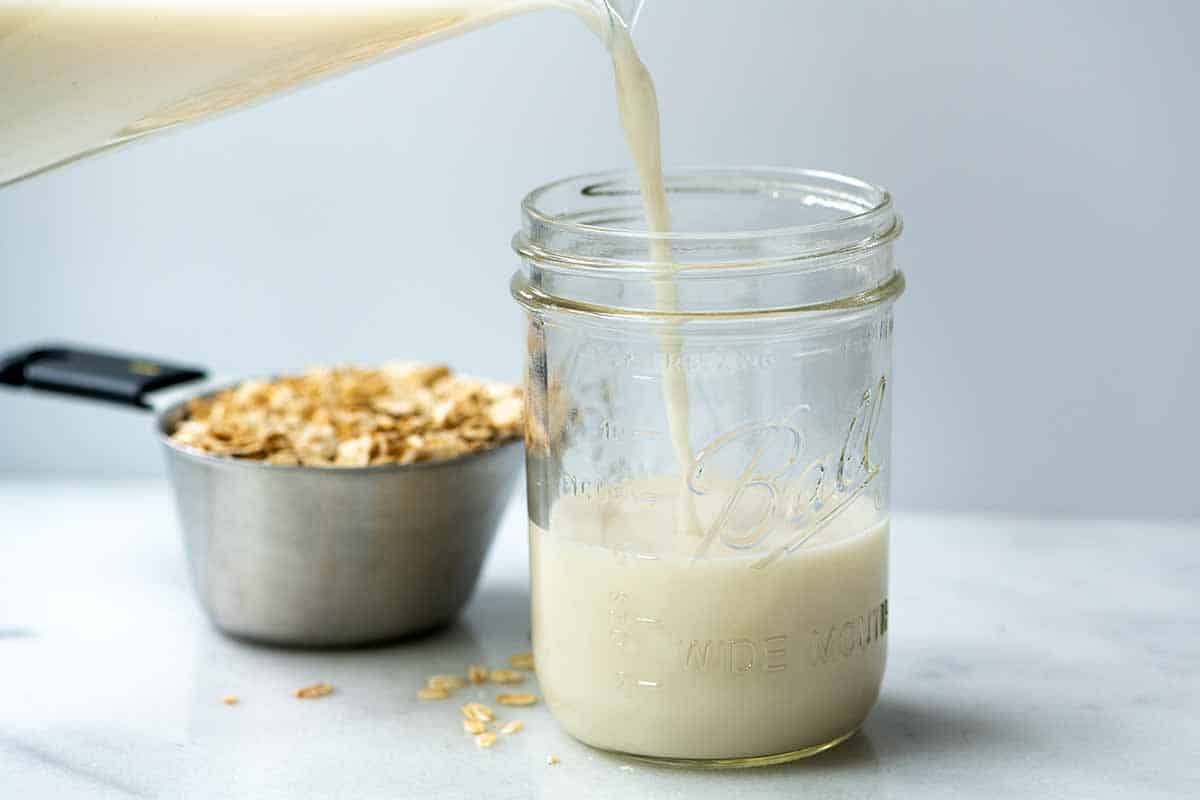
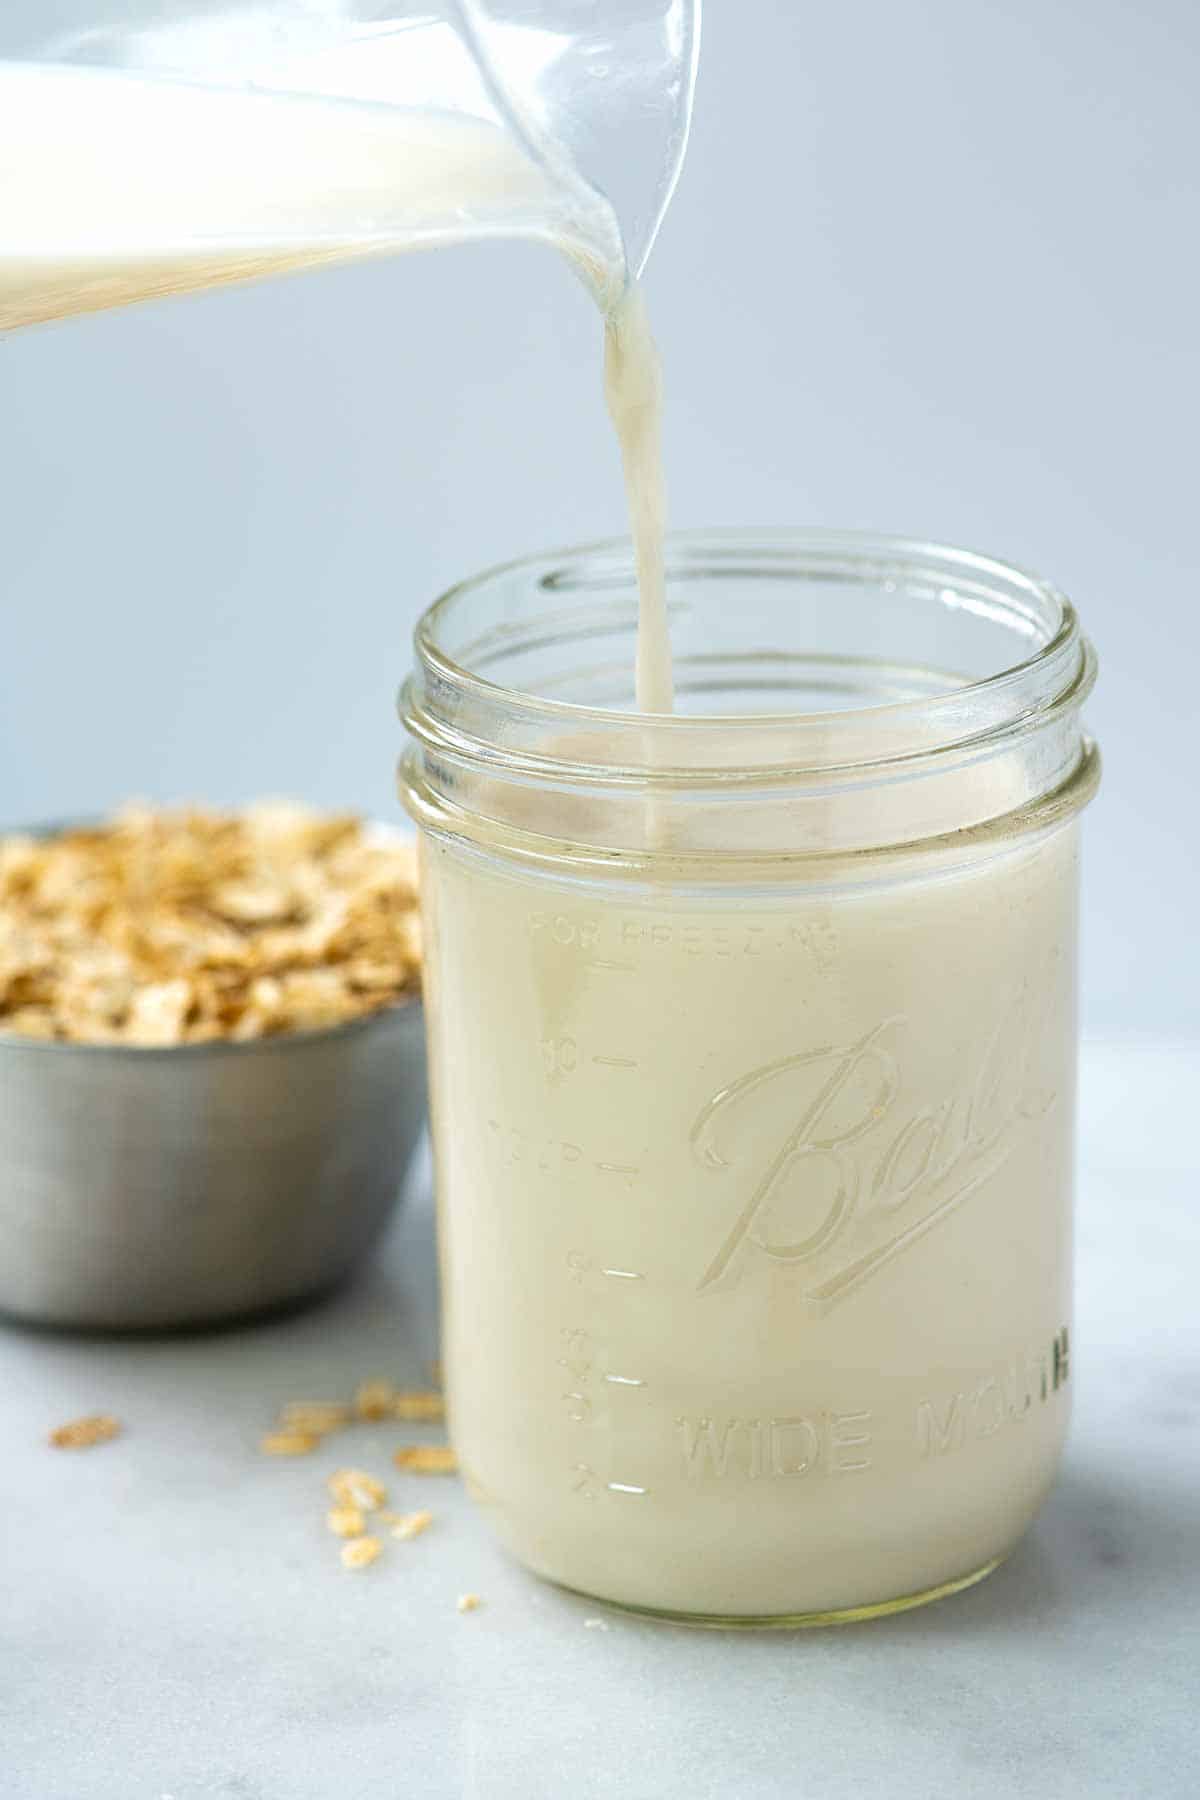
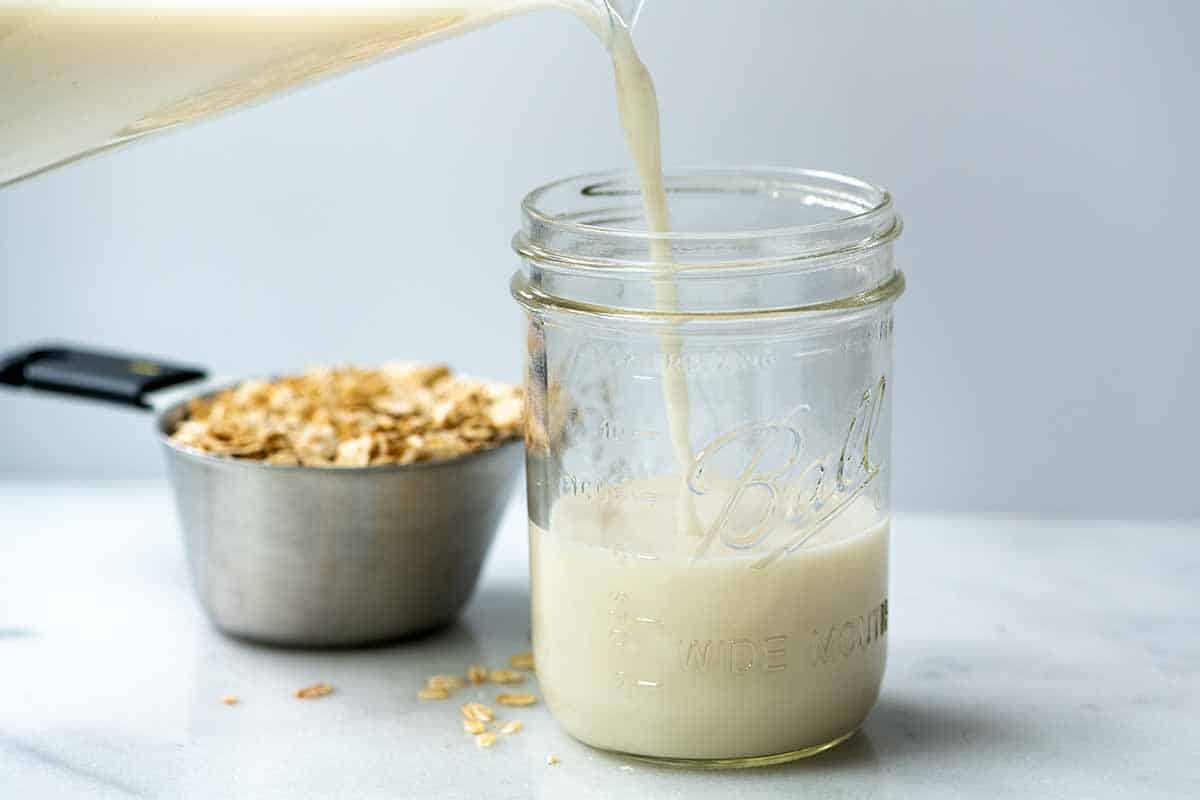
    Homemade Oat Milk

    Of all the plant-based milks, oat milk might be my favorite. It’s incredibly creamy, doesn’t require a lot of sweeteners to taste great, and, as you’re about to see, is surprisingly easy to make right in your kitchen!

    All you need is a blender and rolled oats to whip up fresh oat milk. You can easily add it to your morning coffee or cold brew, use it in one of our smoothie recipes, or enjoy it with cereal. Plus, whenever I’m baking and suddenly realize I’ve run out of milk, homemade oat milk is my hero! I use it to make delicious vegan pancakes, vegan blueberry muffins, and more!

    Key Ingredients

    • Rolled Oats: These are your best bet for creamy, perfectly blended oat milk (and are also what I use for my everyday oatmeal). Avoid instant oats, as they can lead to a slimy texture due to being more processed. Steel-cut oats may work, but are generally not recommended, as they’re harder to blend and won’t give you that creamy texture we all expect from oat milk. If you’re sensitive to gluten, be sure to choose gluten-free certified rolled oats.
    • Cold Water: This is the secret weapon against slimy oat milk! Using icy cold water when blending helps to control the starch in the oats, preventing that gummy, slimy unappetizing texture.
    • Optional: Feel free to flavor your homemade milk with vanilla extract, sea salt, cocoa powder, or sweeteners like maple syrup or honey. You can even make strawberry oat milk and blend in some strawberries (frozen is best)!
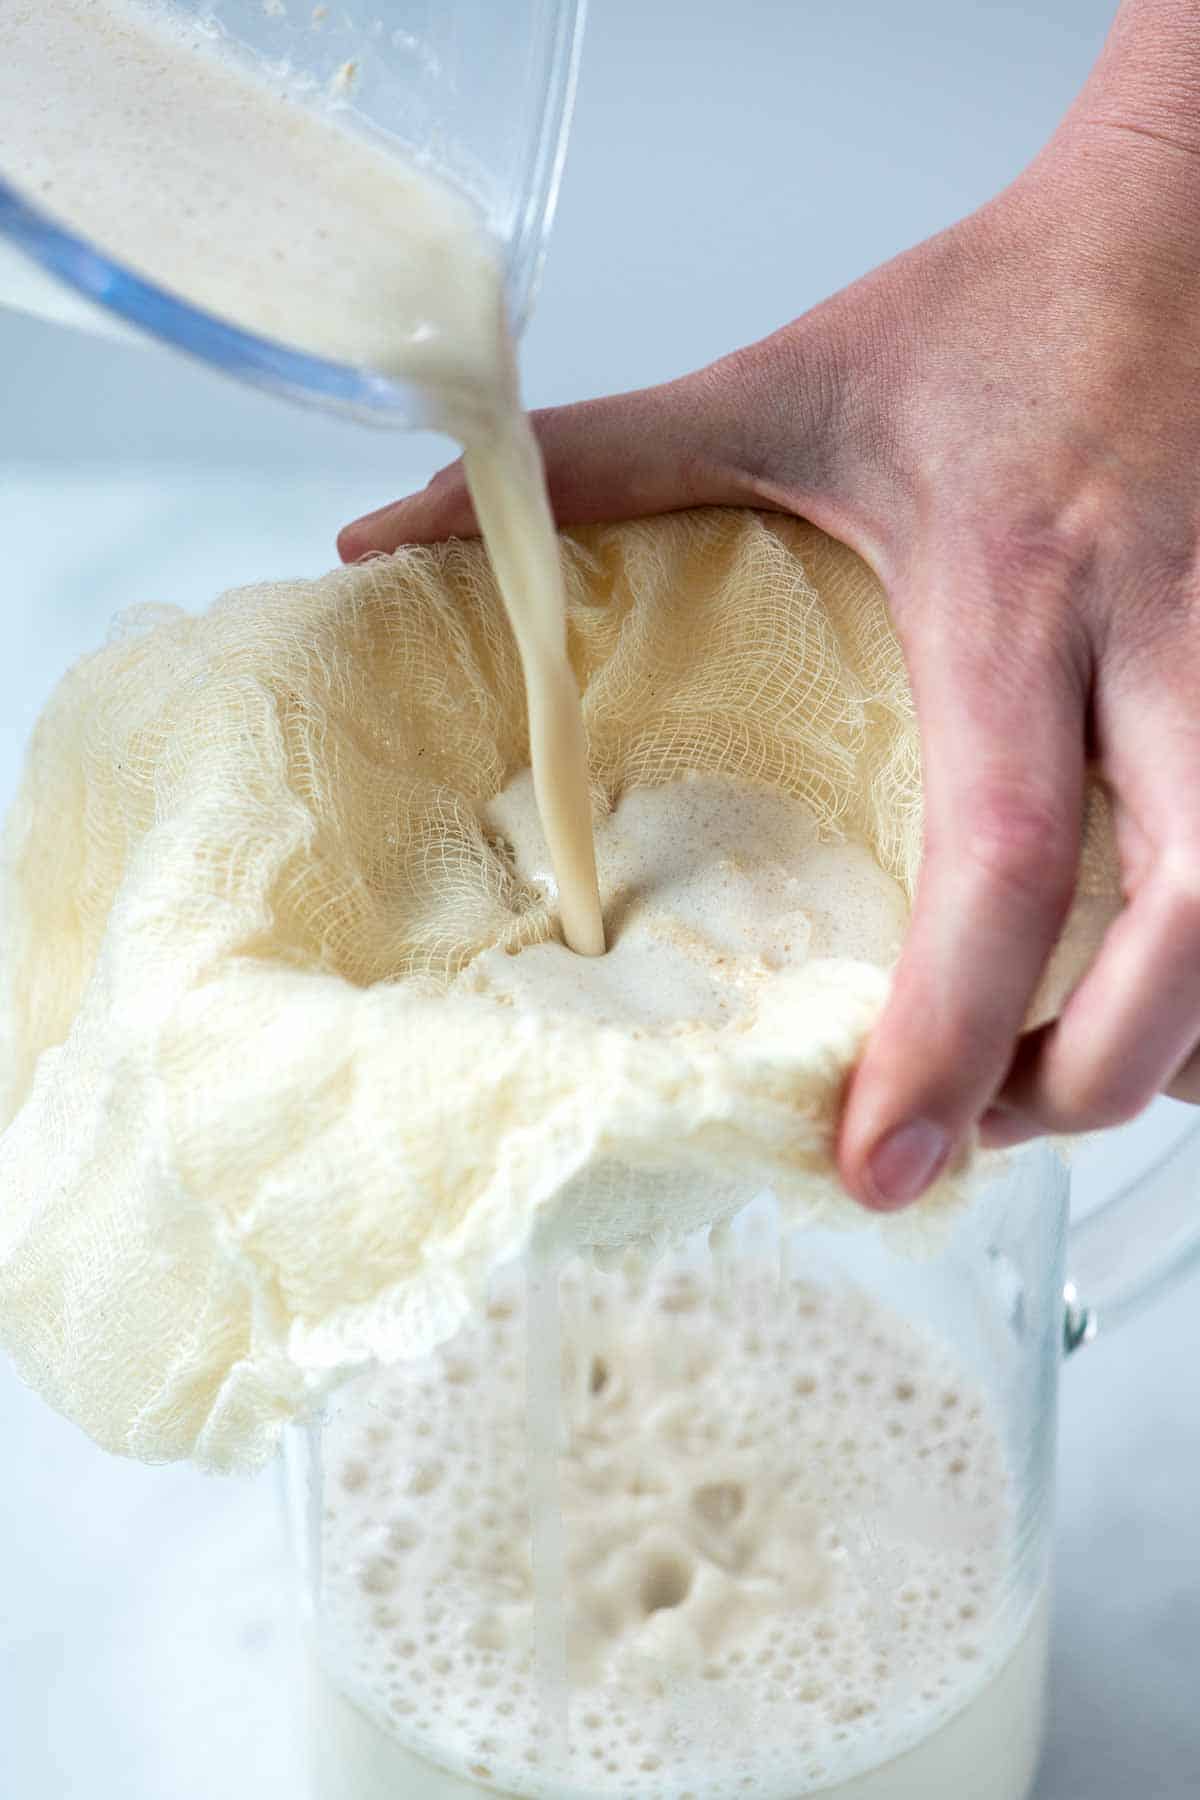
    How to Make Oat Milk: Straining homemade oat milk.

    The secret to the best homemade oat milk—one that’s never slimy or gummy—lies in two crucial steps. In addition to blending the oats with ice-cold water, you must thoroughly strain the liquid. Use a nut milk bag, a clean cotton dishtowel, or even a few layers of cheesecloth to remove any remaining oat bits, which yields a silky smooth consistency that’s perfect for everything from coffee and smoothies to your baking needs.

    Homemade Oat Milk

    Easy Homemade Oat Milk

    Our homemade oat milk recipe is really easy to make. Just keep two things in mind for the best results. First, use rolled oats and ice-cold water. The cold water prevents the oat milk from turning slimy. Second, strain your oat milk using a nut bag, a clean dish towel, or a few layers of cheesecloth. Straining removes any extra bits of oats, which would make your milk slimy and gummy. The staining is so helpful that I like to strain my oat milk twice. Once you have it ready, enjoy your oat milk in smoothies like my favorite blueberry smoothie, or make these incredible vegan pancakes!

    Makes 3 cups

    You Will Need

    1 cup (115g) rolled oats

    4 cups (945ml) cold water

    1 to 2 tablespoons maple syrup or honey, optional

    1/2 to 1 teaspoon vanilla extract, optional for vanilla oat milk

    Pinch fine sea salt, optional

    Directions

      1Blend the oats and water: Add the oats, cold water, and any optional ingredients to a blender. Cover with the lid and blend for 30 to 40 seconds. It’s okay if you see little speckles of oats. It is best not to over blend, as this can cause a slimy texture.

      2Strain the oat milk: To prevent a slimy or gummy texture further, strain your oat milk. Strain it through a nut milk bag, a clean cotton dish towel, or multiple layers of cheesecloth set over a large bowl or pitcher. I like to double-strain the mixture so that most of the solids are removed.

      3Storing: Store homemade oat milk in a sealed container in the fridge for up to a week. Shake or stir before using.

    Adam and Joanne’s Tips

    • Make strawberry oat milk: Add frozen berries for a berry-flavored milk. Fresh are fine, but the cold berries help reduce starch.
    • Chocolate oat milk: Add a tablespoon or two of cocoa powder and sweeten it to taste with maple syrup or honey.
    • Why did my oat milk separate? Some separation is entirely normal. Stir or shake the milk before using.
    • Does homemade oat milk froth? Unfortunately, no. Store-bought oat milk that froth has a few more ingredients added (like stabilizers) to help it froth and heat up without turning slimy.
    • The nutrition facts provided below are estimates.

    Nutrition Per Serving
    Serving Size
    1/2 cup
    /
    Calories
    50
    /
    Total Fat
    0g
    /
    Saturated Fat
    0g
    /
    Cholesterol
    0mg
    /
    Sodium
    0mg
    /
    Carbohydrate
    9g
    /
    Dietary Fiber
    1.3g
    /
    Total Sugars
    0g
    /
    Protein
    1.7g


    AUTHOR:

    Joanne Gallagher

    Previous Post: Perfect Vegan Pancakes
    Next Post: Chocolate Chia Pudding

    Source link

  • The Best Onion Dip Recipe

    The Best Onion Dip Recipe

    This onion dip recipe is so much tastier than anything you can buy at the store, it always gets rave reviews!

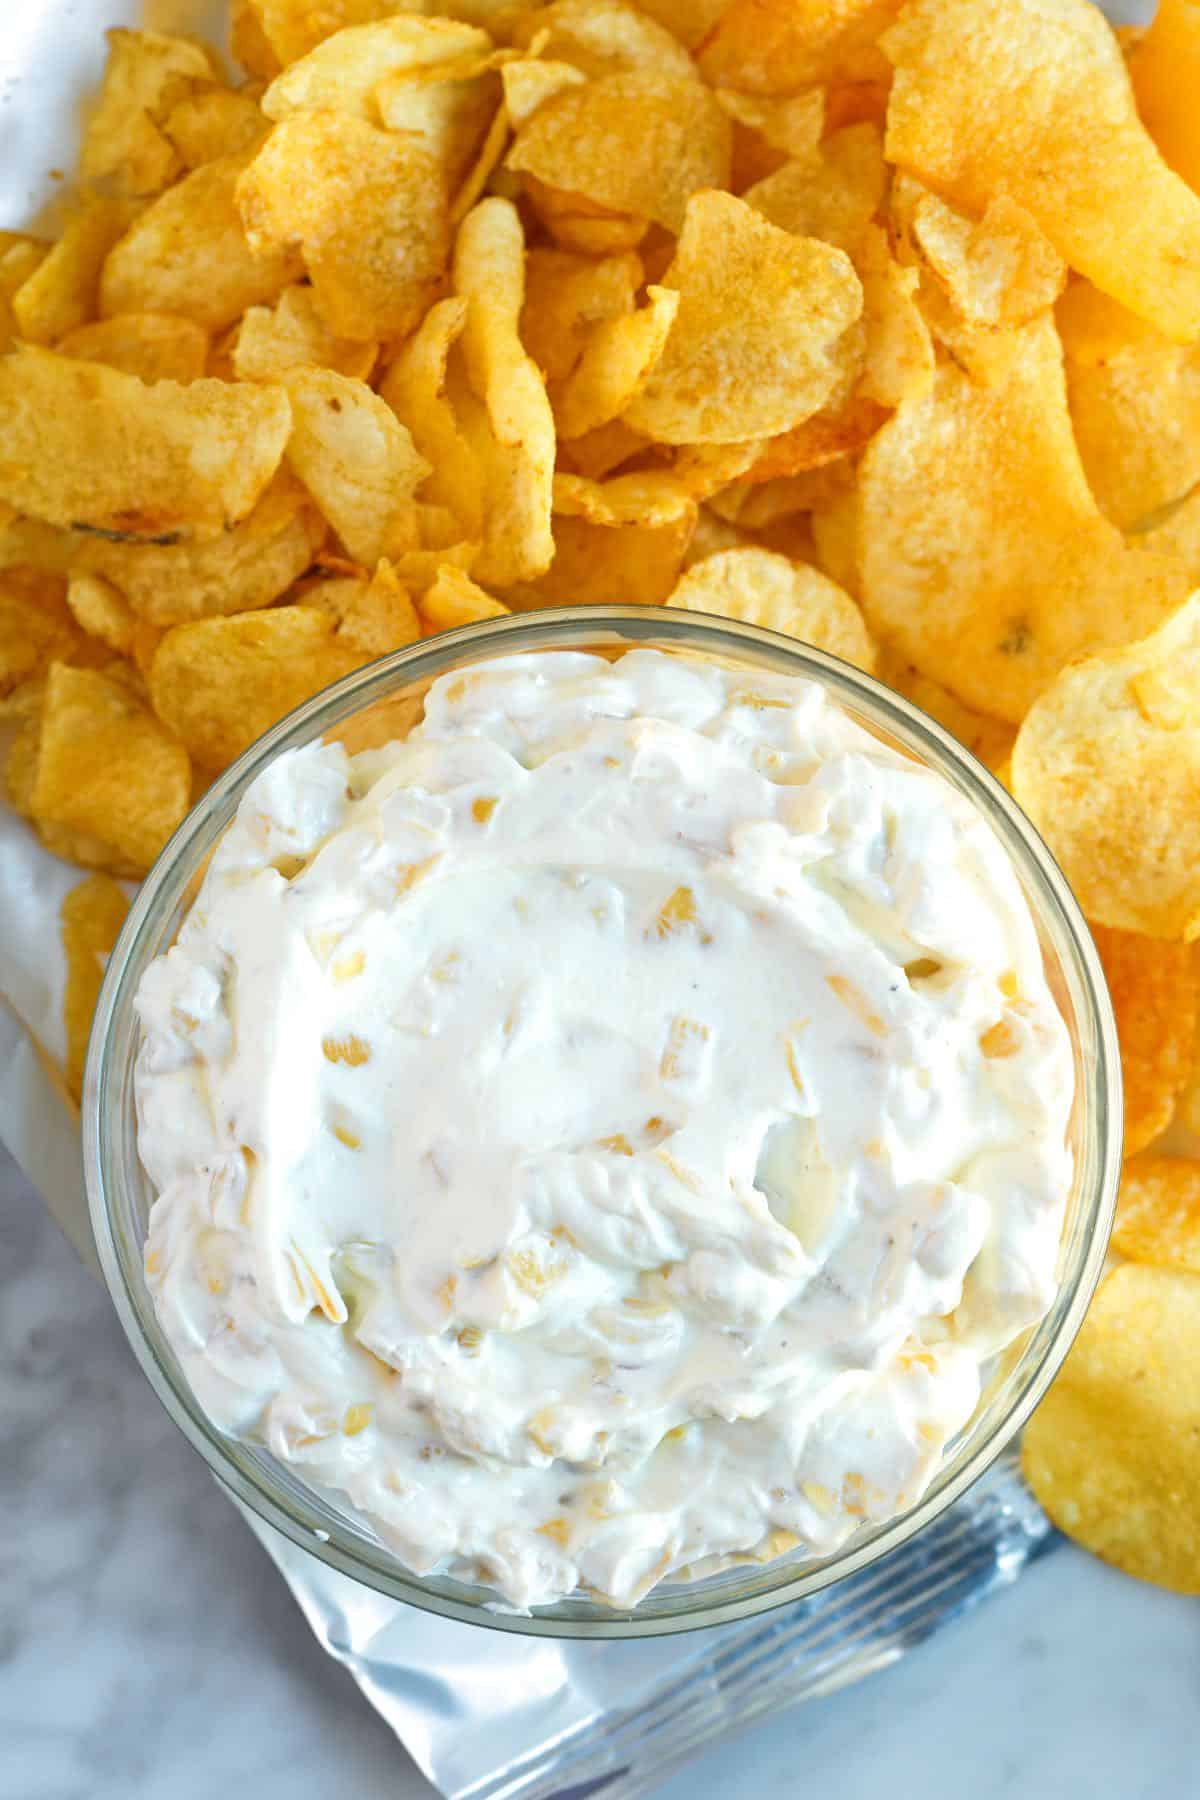
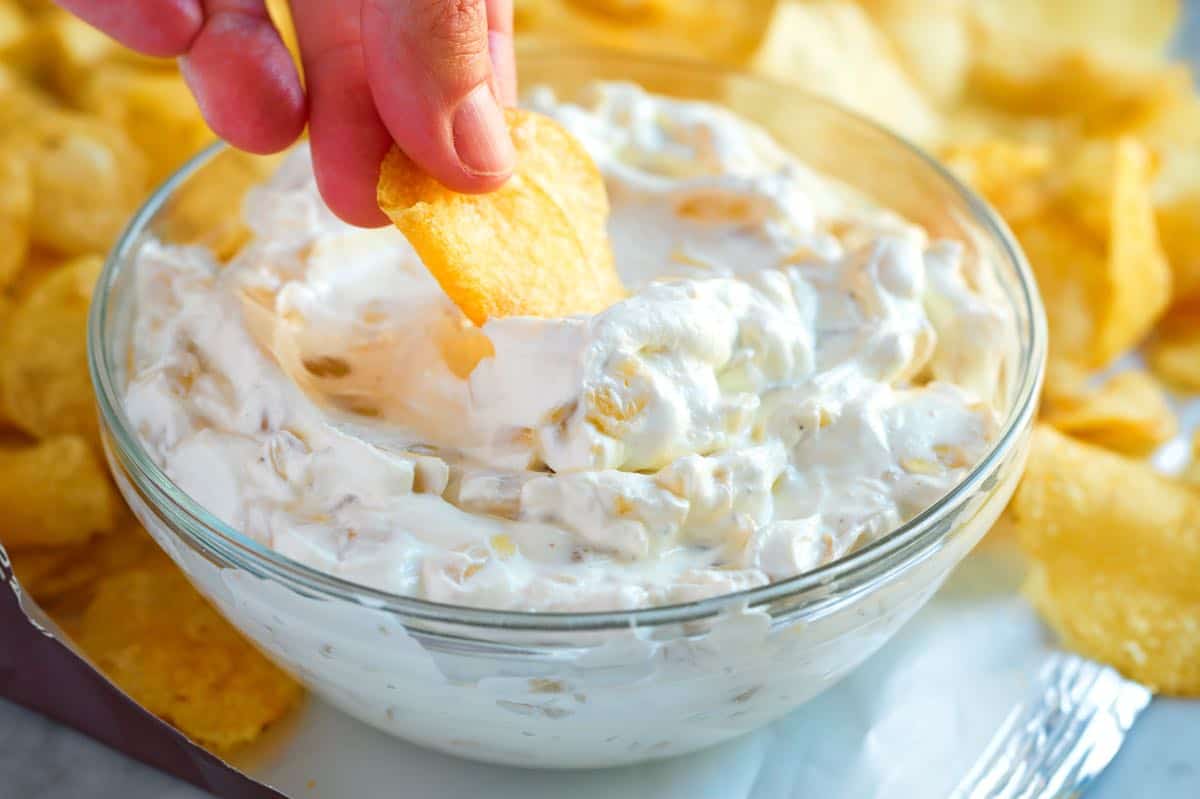
    Caramelized Onion Dip with Chips

    Skip the prepackaged French onion soup mix or store-bought dips and make this homemade caramelized onion dip instead. Trust me, it’s really easy!

    This sour cream and onion dip gets better over time, so save this recipe for when you need to prepare an appetizer ahead of time. I also love this black bean onion dip.

    Key Ingredients

    • Onion: I use a sweet onion when making this dip. Look for Vidalia or Walla Walla onions. Yellow onions will work in the recipe but are less sweet.
    • Butter: We cook the onion with melted butter in the oven so it browns and becomes soft. I use salted butter, but unsalted is fine, you might need more salt at the end.
    • Sour cream: The base of our dip! Use a high-quality, full-fat sour cream for the best flavor. Some readers have asked about substituting yogurt. While I do prefer the flavor of this recipe with sour cream, plain, thick Greek or Icelandic style yogurt work.

    Find the full recipe with measurements below.

    How to Make the Best Onion Dip

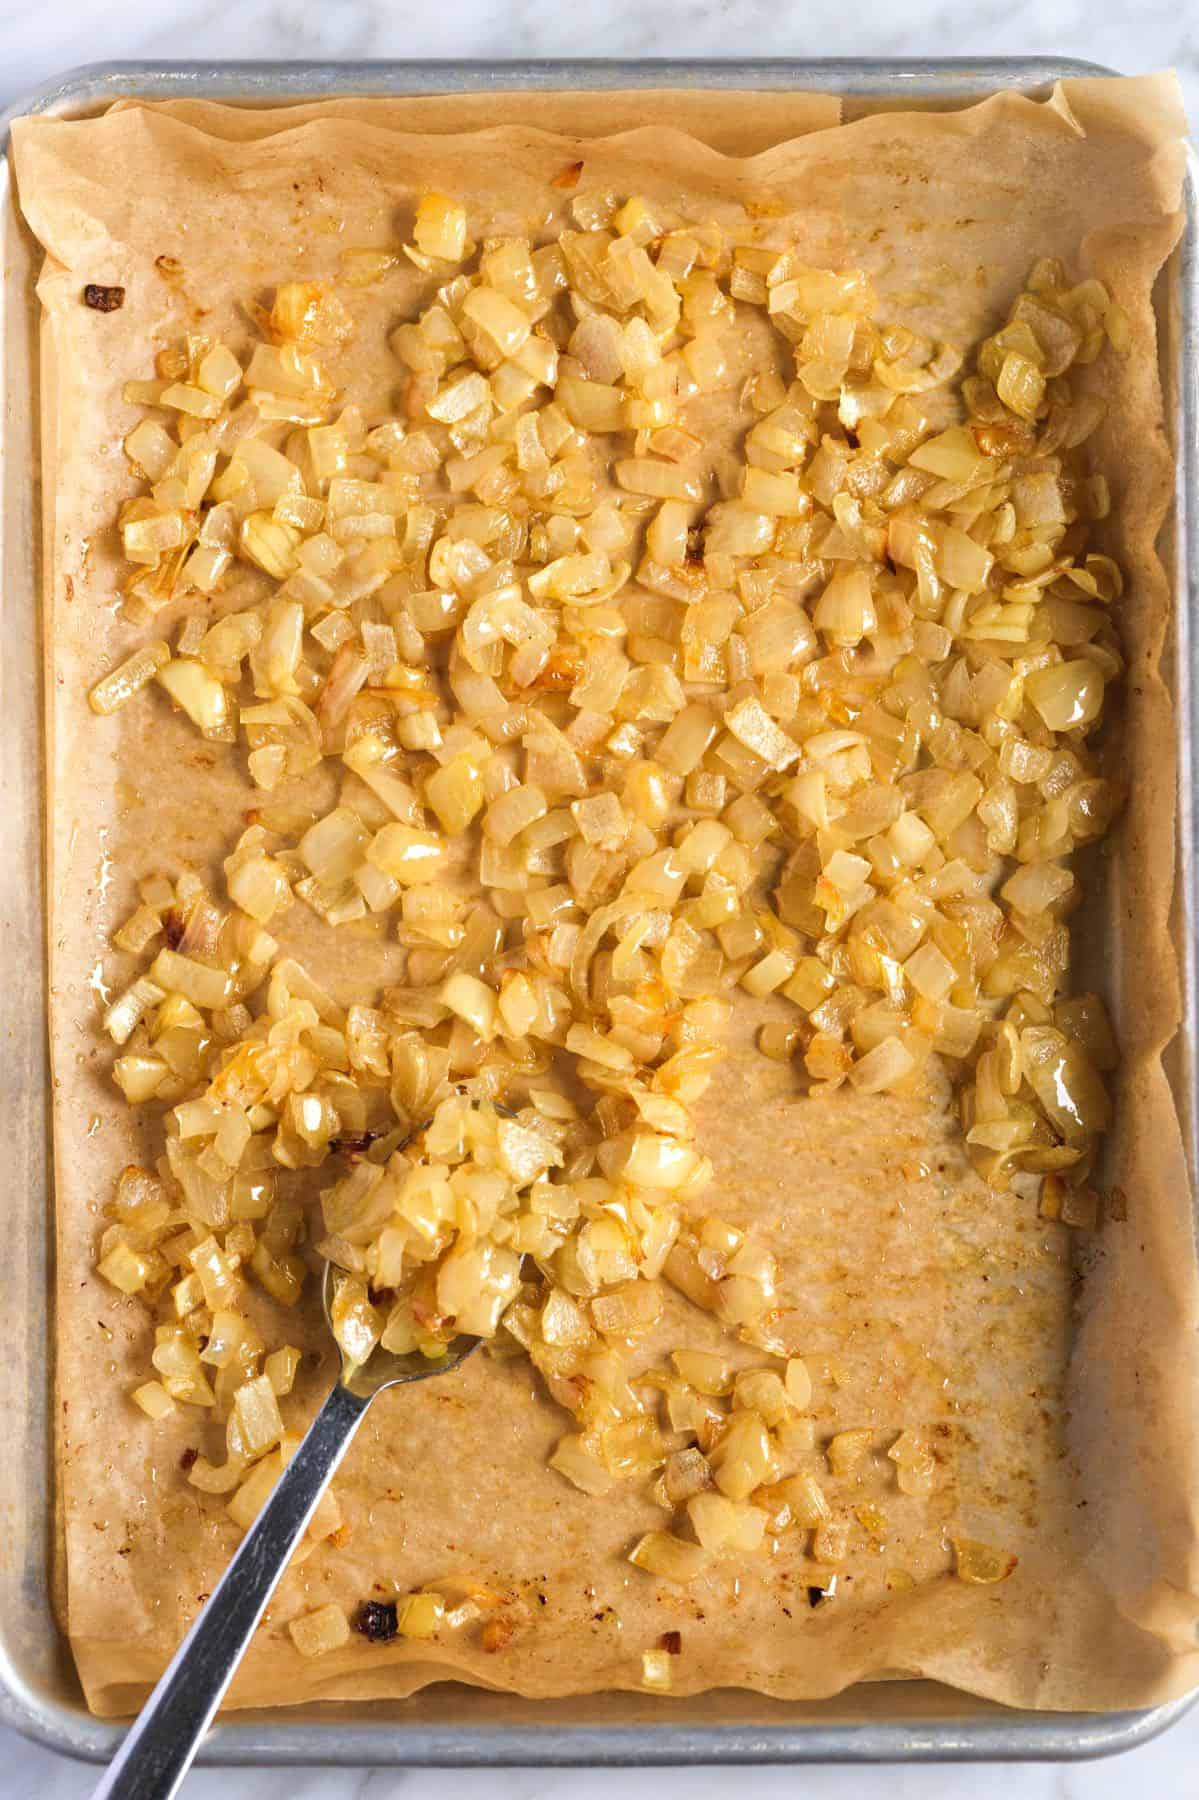
    Tip 1: Caramelize your onions. For the easiest French onion dip, caramelize your onions in the oven, it keeps things easy and hassle-free. You can caramelize the onions on the stove, like when making French onion soup. If you’d prefer to use the stovetop, we’ve included how to caramelize onions in the recipe below. I use the oven because it requires less hands-on time.

    To caramelize the onions, mix them with melted butter and then bake until they smell sweet and softened. Roasting takes 50 to 60 minutes, but most of this time is hands-off. You’ll want to stir them every 10 to 15 minutes to ensure they roast evenly.

    Caramelizing onions in the oven for onion dip

    Tip 2: Let your dip sit in the fridge. When your onions finish roasting, stir them into sour cream and season with salt and pepper. We don’t add mayonnaise or other ingredients. Honestly, the dip doesn’t need it. Trust me. This dip is perfect the way it is. I prefer making this dip a day before I plan to serve it. It gets so much better after a night in the fridge, and all the caramelized onion flavor leaks out into the sour cream.

    Serving Suggestions

    I love serving homemade onion dip with potato chips (I especially love kettle chips), but tortilla chips, pita chips, flatbread, and pretzels are all excellent. It’s also delicious with raw vegetables like carrots, celery, cucumbers, and bell peppers. You can even serve it next to some roasted vegetables. These crispy potatoes and roasted broccoli are our family’s favorites.

    More Dips and Spreads

    Onion Dip in a bowl

    The Best Onion Dip

    • PREP
    • COOK
    • TOTAL

    Skip the prepackaged French onion soup mix and make this easy homemade onion dip instead. It’s easy to make, only requires five simple ingredients (two of which are salt and pepper), and tastes much better than anything you can buy at the store. This dip gets better over time, making this the perfect make-ahead appetizer!

    Makes 2 cups

    Watch Us Make the Recipe

    You Will Need

    1 medium-to-large sweet onion like Walla Walla or Vidalia, chopped small (2 ½ cups)

    3 tablespoons salted butter, melted

    1/4 teaspoon fine sea salt

    1/8 teaspoon fresh ground black pepper

    1 pint (16oz or 2 cups) sour cream

    Directions

      1Preheat the oven to 375°F (190°C). Line a small baking sheet with parchment paper or use a large baking dish.

      2Toss the chopped onions with the melted butter and spread them into a thin layer on the baking sheet.

      3Roast, stirring every 10 minutes, until the onions are soft, smell sweet, and turn a light golden color, 50 to 60 minutes. Keep a closer eye towards the end of the cooking time to ensure the onions do not overbrown.

      4Transfer the onions while they are still hot to a mixing bowl and scrape all the butter left in the pan into the bowl with the onions.

      5Stir in the salt, pepper, and sour cream.

      6Cover and refrigerate overnight, and then serve. The dip will last up to 4 days in the fridge. Stir well before serving.

    Adam and Joanne’s Tips

    • Storing: You can store in an airtight container in the fridge for up to 4 days. In fact, it tastes better the longer it sits since the sour cream has more opportunity to absorb the flavor of the roasted onions. When you are ready to serve the dip, give it a good stir. You might notice some liquid pooled at the top from the onions. That liquid tastes amazing, so we want to stir it back into the dip.
    • Freezing: Unfortunately, we do not recommend freezing your dip. Sour cream does not freeze and thaw well. While it’s okay to eat thawed frozen sour cream, the texture changes, making it less than ideal for a dip.
    • Caramelize onions on the stove instead of in the oven: Slice the onions into thin half-moons. Melt the butter in a wide pot over medium heat, add the onions, cover with a lid, and cook, over medium heat, until the onions look translucent, 12 to 15 minutes. Uncover the pot, and continue to cook the onions, stirring occasionally and scraping up any stuck browned bits from the bottom and sides. The onions take 45 to 60 minutes to caramelize. Keep a close eye on them. When you notice they begin to brown, stir them more often to keep them from burning. When they are golden and smell caramelized, mix into the sour cream mixture. Watch us caramelize onions in our French onion soup video.
    • Vegan alternatives: Swap the sour cream for vegan sour cream or use cashew cream. Use a plant-based butter when cooking the onions.
    • The nutrition facts provided below are estimates.

    Nutrition Per Serving
    Serving Size
    1 of 8 servings (about 1/4 cup)
    /
    Calories
    147
    /
    Total Fat
    13.6g
    /
    Saturated Fat
    7.6g
    /
    Cholesterol
    39.8mg
    /
    Sodium
    91.5mg
    /
    Carbohydrate
    5.4g
    /
    Dietary Fiber
    0.4g
    /
    Total Sugars
    3.7g
    /
    Protein
    1.6g


    AUTHOR:

    Joanne Gallagher

    Adam and Joanne of Inspired Taste

    We are Adam and Joanne Gallagher, the creators of Inspired Taste. Established in 2009, Inspired Taste grew from a childhood dream into one of the internet’s most trusted recipe sites with hundreds of reliable recipes, step-by-step videos, and expert tips.More About Us

    Source link

  • Perfect Vegan Pancakes Recipe

    Perfect Vegan Pancakes Recipe

    My easy vegan pancake recipe yields light, extra-fluffy pancakes that taste amazing every single time. Best of all, they’re naturally dairy-free and egg-free. If you’re looking for a gluten-free option, simply use your favorite gluten-free flour blend.

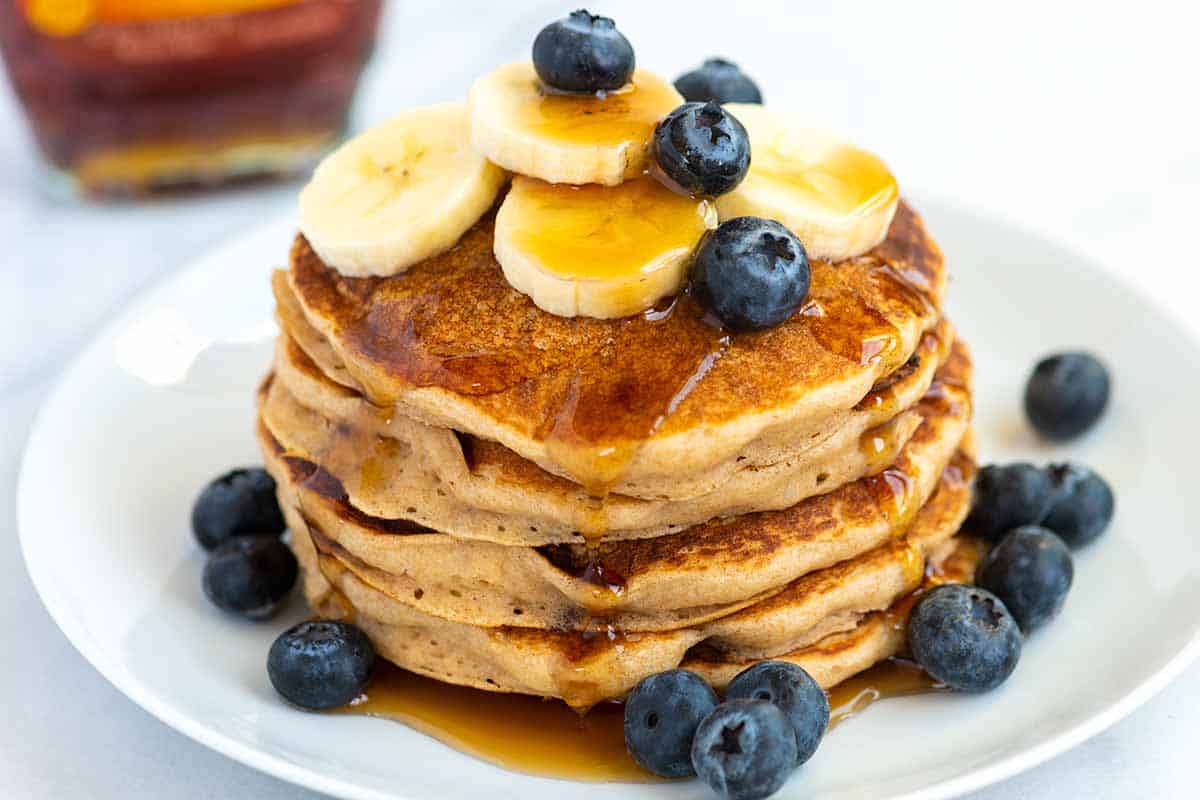
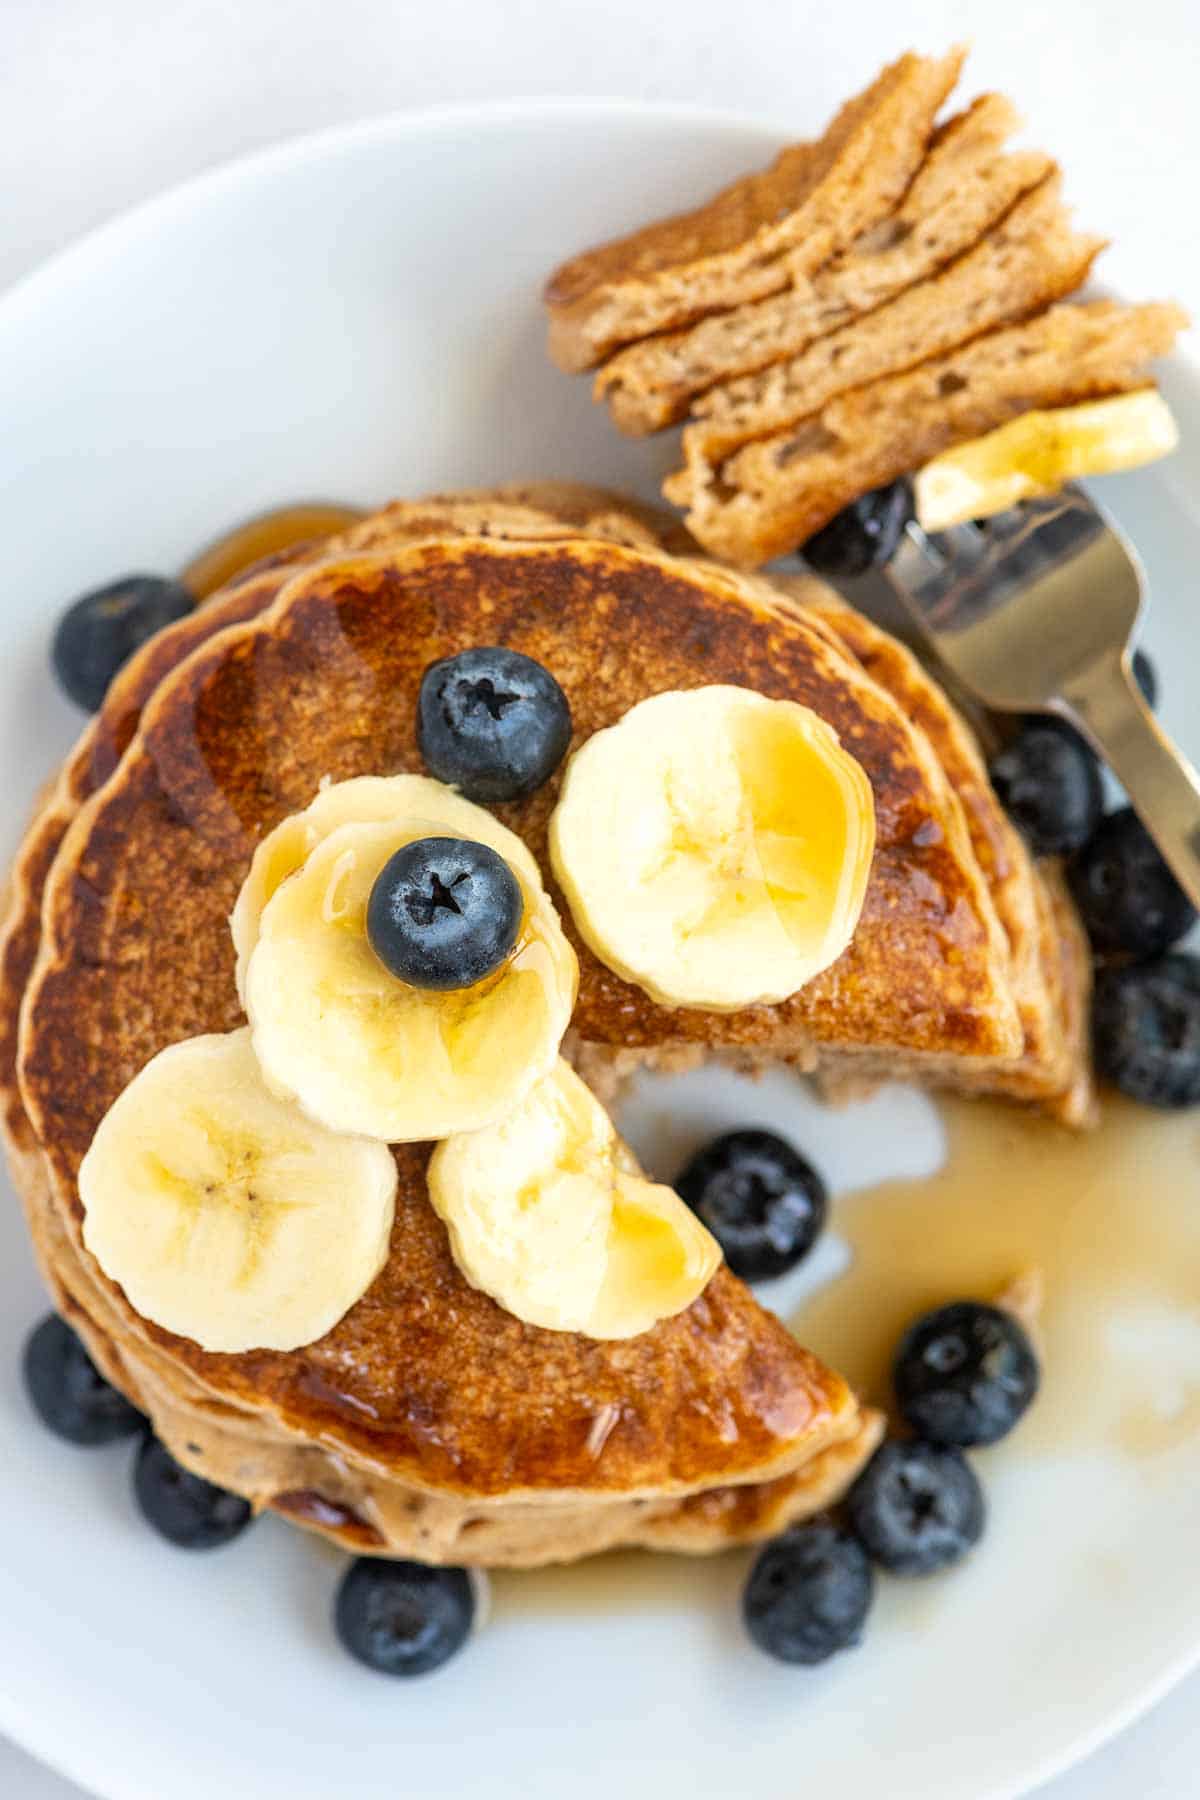
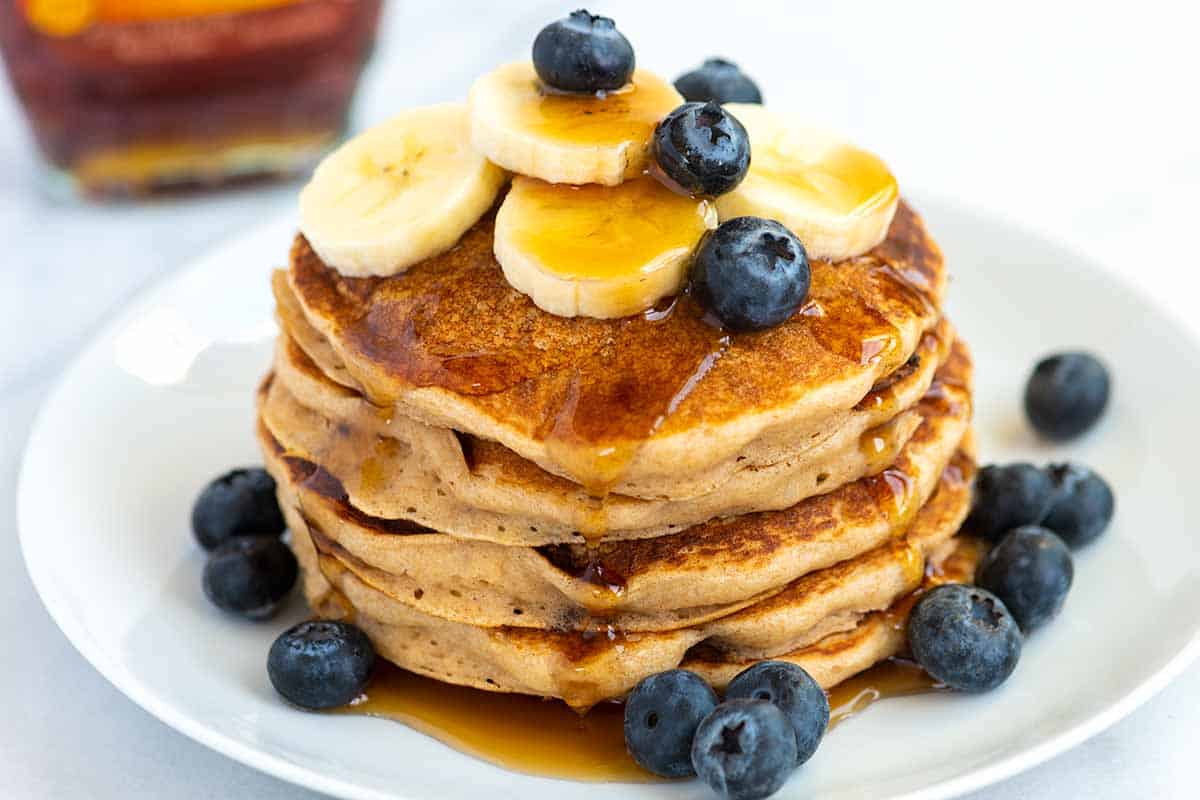
    Perfect Vegan Pancakes

    I’ve made these vegan pancakes countless times, and my son absolutely loves them—he asks for them all the time! This recipe is pure magic, whether you’re vegan or not. They work perfectly for plant-based eaters, but they’re also a lifesaver when your fridge is almost empty, and you’ve run out of eggs.

    Trust me, you won’t miss a thing with these pancakes. They’re light and fluffy in the middle, still get those perfect crispy brown edges, and taste incredible. Go ahead and save this recipe. You’ll be so glad you did! For more vegan recipes, see our easy vegan blueberry muffins!

    Key Ingredients

    • Flour: You’ve got options! Use all-purpose, whole wheat, or your favorite gluten-free flour blend. All work beautifully in this recipe.
    • Baking Powder: This is your secret weapon for achieving those light, extra-fluffy pancakes. We use a generous amount, which might seem like a lot, but trust the process—it creates that incredible airy middle. To avoid any metallic aftertaste, I highly recommend using aluminum-free baking powder (like Bob’s Red Mill). I use the same trick for my classic pancakes.
    • Salt, Vanilla Extract, and Cinnamon: These make our pancakes taste incredible. Don’t skip these!
    • Non-Dairy Milk: Feel free to use whatever you have in the fridge. Almond, coconut, hemp, cashew, and oat milk all work perfectly. For an extra special touch, you can even try our homemade oat milk recipe.
    • Oil or Plant-Based Butter: These add moisture and flavor. I particularly love using coconut oil or melted vegan butter for their rich taste. Regular oil, like olive oil, is also a great option and works wonderfully.
    • Sugar: For the tastiest pancakes, a bit of sugar really makes a difference. Granulated, brown, coconut, or even maple syrup will work. While you can omit the sugar, be aware that your pancakes won’t brown as well and will have slightly less flavor.

    Vegan pancakes are so easy to make (my 4-year-old even helps me make them). I love serving my vegan pancakes with fruit, such as bananas or berries, and a drizzle of maple syrup. You could also add a spoonful of vegan whipped coconut cream (yum) and make them extra special with this berry fruit salad!

    Easy Vegan Pancakes

    Perfect Vegan Pancakes

    • PREP
    • COOK
    • TOTAL

    Our vegan pancakes are perfect for everyone (vegans and non-vegans alike!). They are just as fluffy as our classic pancakes and taste incredible. They also freeze really well! See my tips for freezing them below the recipe. I love these topped with fruit, our berry fruit salad, and this coconut whipped cream (also known as vegan whipped cream).

    Makes 6 pancakes

    You Will Need

    1 cup (130g) all-purpose flour, whole wheat flour, or gluten-free flour blend

    2 teaspoons aluminum-free baking powder

    1/4 teaspoon fine sea salt

    1/4 teaspoon ground cinnamon, optional

    1 cup (236ml) dairy-free milk, try homemade oat milk

    1 ½ tablespoons sugar or maple syrup

    3 tablespoons olive oil, melted coconut oil, or melted plant-based butter

    1 teaspoon pure vanilla extract

    Nonstick cooking spray, melted vegan butter, or oil for the skillet

    Directions

      1Prepare the dry ingredients: In a medium bowl, whisk the flour, baking powder, and salt until well blended.

      2Prepare the wet ingredients: In another bowl, whisk the milk, sugar, olive oil, and vanilla extract until well combined.

      3Make the pancake batter: Create a well in the center of the flour mixture, then pour the milk mixture into it. Use a fork to stir until no clumps of flour remain. It is okay if the batter has a few small lumps.

      4Cook the pancakes: Heat a large skillet over medium heat (or use a griddle). The pan is ready if you splatter a little water onto the pan surface, and the water dances around the pan and eventually evaporates.

      5Lightly brush or spray the skillet with oil or melted plant-based butter. Use a 1/4 cup measuring cup to spoon the batter onto the skillet. Gently spread the batter into a 4-inch circle.

      6When the edges appear dry, bubbles start to form and pop on the top surface of the pancake, flip it over. This takes about 2 minutes. Once flipped, cook for an additional 1 to 2 minutes or until lightly browned and cooked through in the middle.

      7Serve immediately with warm syrup and berries.

    Adam and Joanne’s Tips

    • Storing: Place cooked and cooled vegan pancakes in an airtight container in the fridge for up to a week, or freeze them for up to 2 months. If freezing, line the pancakes on a baking sheet and freeze for about 30 minutes. Then, transfer them to a freezer-safe bag with parchment paper between each pancake to prevent sticking.
    • Reheating pancakes: Place them on a microwave-safe plate and cook for 20 seconds per pancake (add more time for multiple pancakes). Or wrap the pancakes in foil and bake at 350°F for about 10 minutes.
    • Baking powder: For the fluffiest pancakes, use baking powder. We use quite a bit to achieve that fluffy middle (I know it seems like a lot, but trust us). I buy aluminum-free baking powder (Bob’s Red Mill) since it prevents that tinny flavor that can appear when baking powder is used in higher quantities (like in this recipe). For extra fluffy pancakes, use 3 teaspoons of baking powder.
    • Non-dairy milk: We use unsweetened dairy-free milk in these pancakes. If you only have sweetened milk, consider reducing the sugar called for in the recipe.
    • The nutrition facts provided below are estimates.

    Nutrition Per Serving
    Serving Size
    1 pancake
    /
    Calories
    160
    /
    Total Fat
    7.7g
    /
    Saturated Fat
    1g
    /
    Cholesterol
    0mg
    /
    Sodium
    131.4mg
    /
    Carbohydrate
    21g
    /
    Dietary Fiber
    0.7g
    /
    Total Sugars
    3.3g
    /
    Protein
    2.4g


    AUTHOR:

    Joanne Gallagher

    Previous Post: Easy Vegan Blueberry Muffins
    Next Post: Easy Homemade Oat Milk

    Source link

  • Easy Sweet Chili Chicken Wings Recipe

    Easy Sweet Chili Chicken Wings Recipe

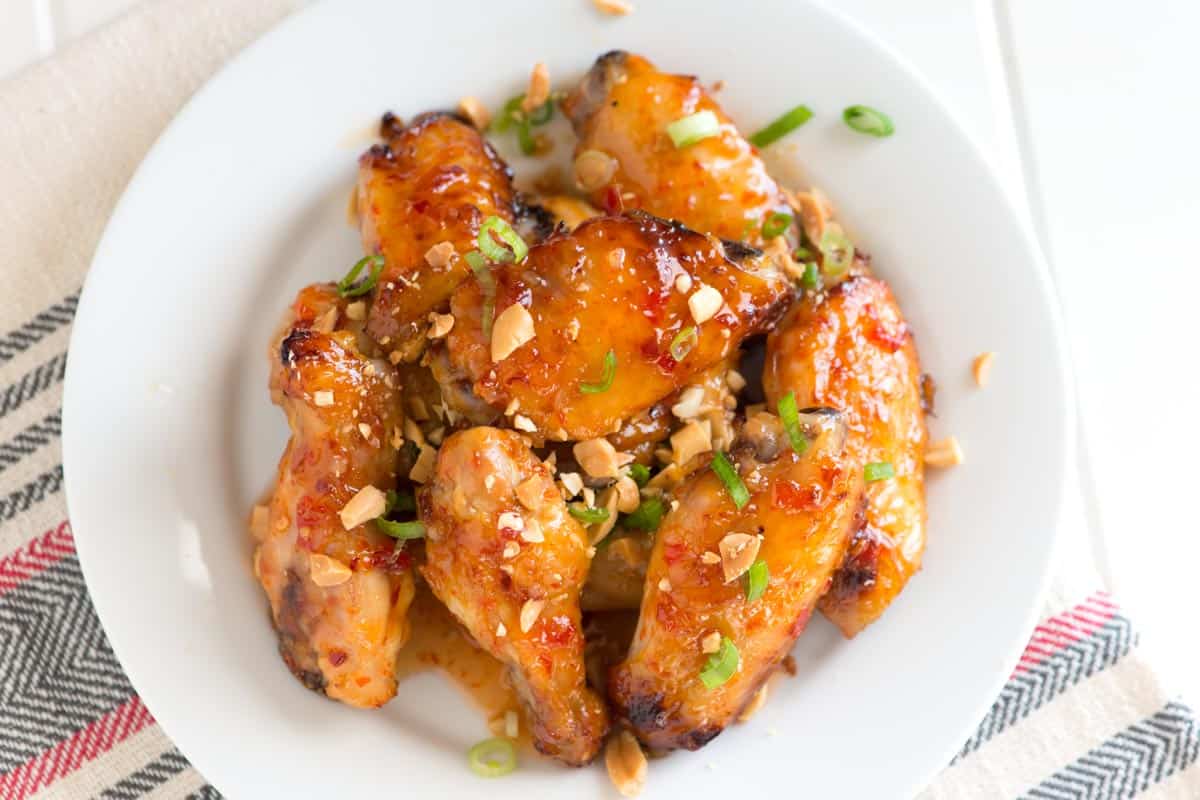
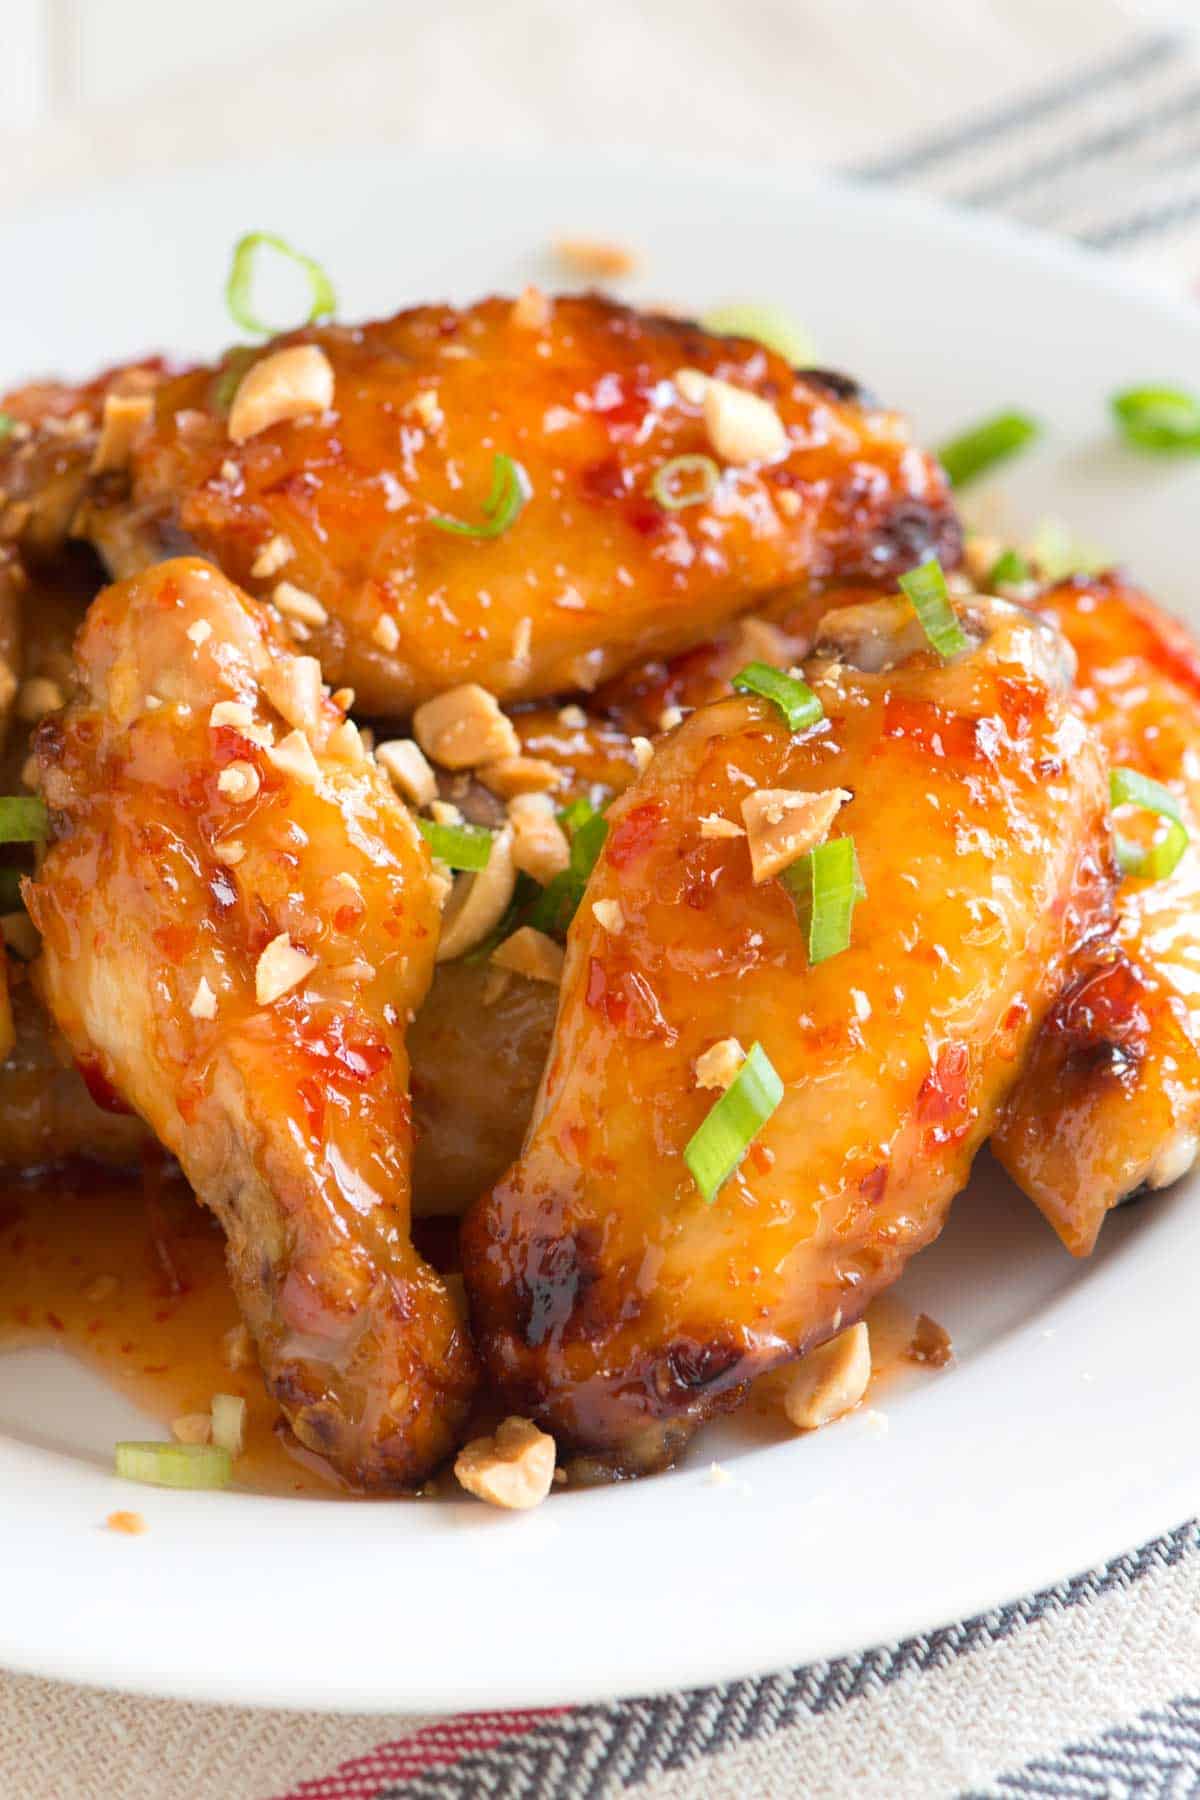
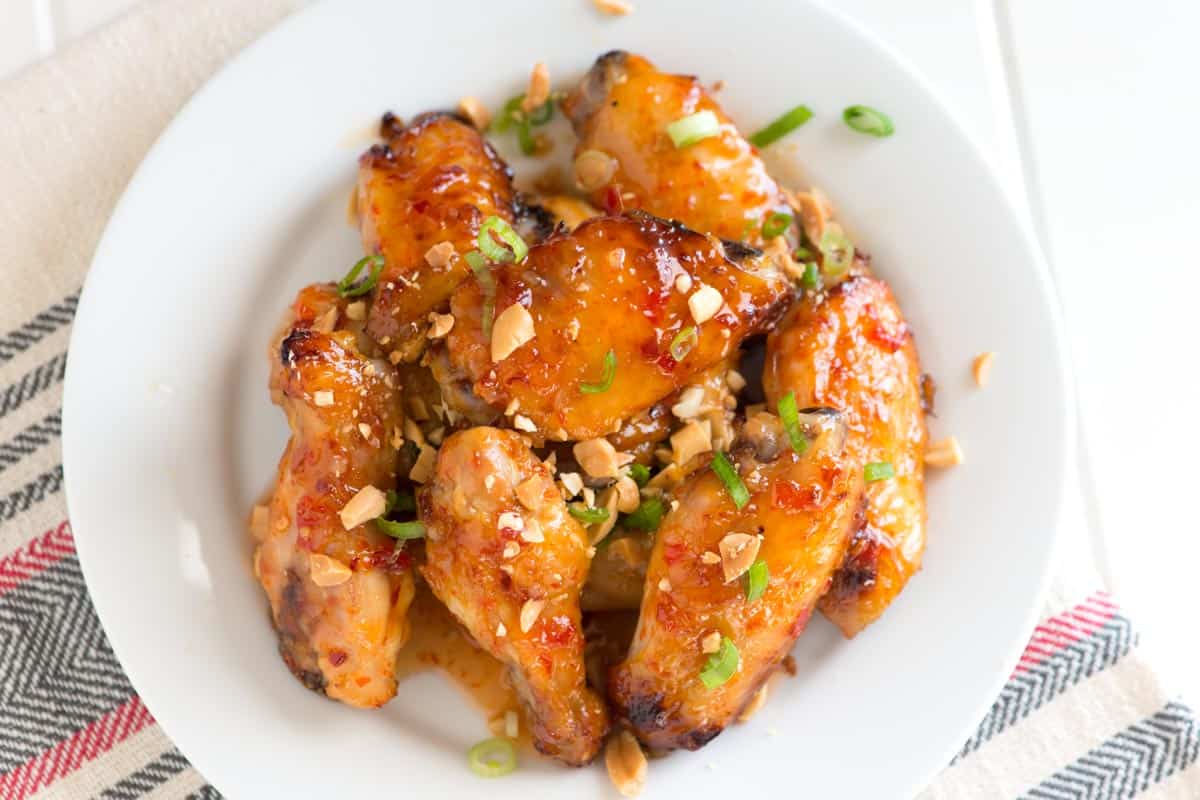
    Our Thai sweet chili chicken wings are out of this world delicious and so simple to make. You’ll bake the wings to sticky perfection and then toss them with even more delicious sticky Asian sweet chili glaze. So good!

    Sweet Chili Baked Chicken Wings

    Our sweet chili wings are sticky, sweet, and spicy, with a bit of crunch, thanks to a handful of chopped peanuts and sliced green onion sprinkled on top. They are easy, too. The sweet chili glaze only needs three ingredients!

    It’s no secret that we love our chicken wings. For more recipes like this, see our baked buffalo hot wings, spicy glazed chicken wings, BBQ chicken wings, or these Vietnamese wings made with fish sauce!

    Key Ingredients

    • Chicken Wings: You can usually find them whole or already separated into drumsticks and wingettes. If you can only find whole chicken wings, hop over to our tutorial for separating a chicken wing.
    • Thai Sweet Chili Sauce: This is the main ingredient of our glaze. It’s a delicious blend of sweet, spicy, and tangy flavors. I love Mae Ploy Sweet Chili Sauce, but feel free to use your favorite brand. I also use sweet chili sauce to make the dressing for this Thai chicken salad!
    • Light Soy Sauce or Tamari: This adds a savory balance and seasons the sticky glaze.
    • Chili Paste: Sambal Oelek is my go-to for its pure chili heat, but you can also use Sriracha or Gochujang. Just remember to adjust the amount to your desired level of spice. I also use Sambal Oelek in our spicy garlic ginger edamame.
    • Peanuts and Green Onions (Optional): These add a lovely crunch to the finished wings. Toasted sesame seeds are also a great option! I use the same topping for our hoisin sticky ribs.

    Find the full recipe with measurements below.

    How to Make Sweet Chili Chicken Wings

    These sweet and spicy Thai chili chicken wings are incredibly easy to make! You’ll whisk together Thai sweet chili sauce, soy sauce, and chili paste to create the sticky glaze. You can easily adjust the heat by adding more or less chili paste.

    Next, toss the wings with half of the glaze and arrange them on a baking sheet fitted with a rack. Baking the wings on a rack allows hot air to circulate, resulting in crispy skin. If you don’t have a rack, no worries! Just bake them directly on the sheet, and remember to flip and rotate them a few times during cooking.

    How to Make Sweet Chili Chicken Wings: Baking in the oven

    Once the wings are out of the oven, toss them with the remaining glaze and finish with a sprinkle of chopped peanuts and sliced green onions. These wings are so simple yet incredibly delicious! I love them.

    Sweet Chili Chicken Wings

    Easy Sweet Chili Chicken Wings

    • PREP
    • COOK
    • TOTAL

    These Thai sweet chili chicken wings are out of this world delicious and so simple to make. You can adjust the spice level of the sticky glaze by reducing or increasing the chile paste. I love Sambal Oelek for its fresh, clean heat, but Sriracha or Gochujang are good substitutes (you will need to adjust to your taste, though).

    2 to 3 Servings

    Watch Us Make the Recipe

    You Will Need

    1 ½ pounds (680g) chicken wings, separated at joints, tips discarded

    3/4 cup (177ml) Thai sweet chili sauce, I use Mae Ploy Brand

    2 teaspoons light soy sauce or tamari

    1 to 3 teaspoons Sambal Oelek

    1/4 cup chopped peanuts

    2 green onions, trimmed and thinly sliced

    Directions

      1Preheat the oven to 425°F (220°C). Set a wire rack inside a large-rimmed baking sheet.

      2Whisk the Thai sweet chili sauce, soy sauce, and Sambal Oelek together, adjusting the chili paste according to how spicy you’d like the glaze. Transfer 1/2 cup of the glaze to another bowl to toss the baked wings later.

      3Pat the wings dry, and then add them to the remaining glaze. Toss well, then spread out in one layer on the wire rack.

      4Bake until cooked through and crispy, 35 to 45 minutes.

      5Toss the baked chicken wings in the reserved glaze, pile them onto a plate, and sprinkle them with sliced green onions and chopped peanuts.

    Adam and Joanne’s Tips

    • No wire rack: If you do not have a wire rack that will fit inside a baking sheet, you can still bake hot wings. Arrange them on the baking sheet without the rack and rotate a few times during baking.
    • The nutrition facts provided below are estimates.

    Nutrition Per Serving
    Calories
    373
    /
    Total Fat
    10.5g
    /
    Saturated Fat
    2.2g
    /
    Sodium
    837mg
    /
    Cholesterol
    96.9mg
    /
    Carbohydrate
    26g
    /
    Dietary Fiber
    2.3g
    /
    Total Sugars
    21.9g
    /
    Protein
    39.9g


    AUTHOR:

    Adam Gallagher

    Adam and Joanne of Inspired Taste

    We are Adam and Joanne Gallagher, the creators of Inspired Taste. Established in 2009, Inspired Taste grew from a childhood dream into one of the internet’s most trusted recipe sites with hundreds of reliable recipes, step-by-step videos, and expert tips.More About Us

    Source link

  • Easy Vegan Blueberry Muffins Recipe

    Easy Vegan Blueberry Muffins Recipe

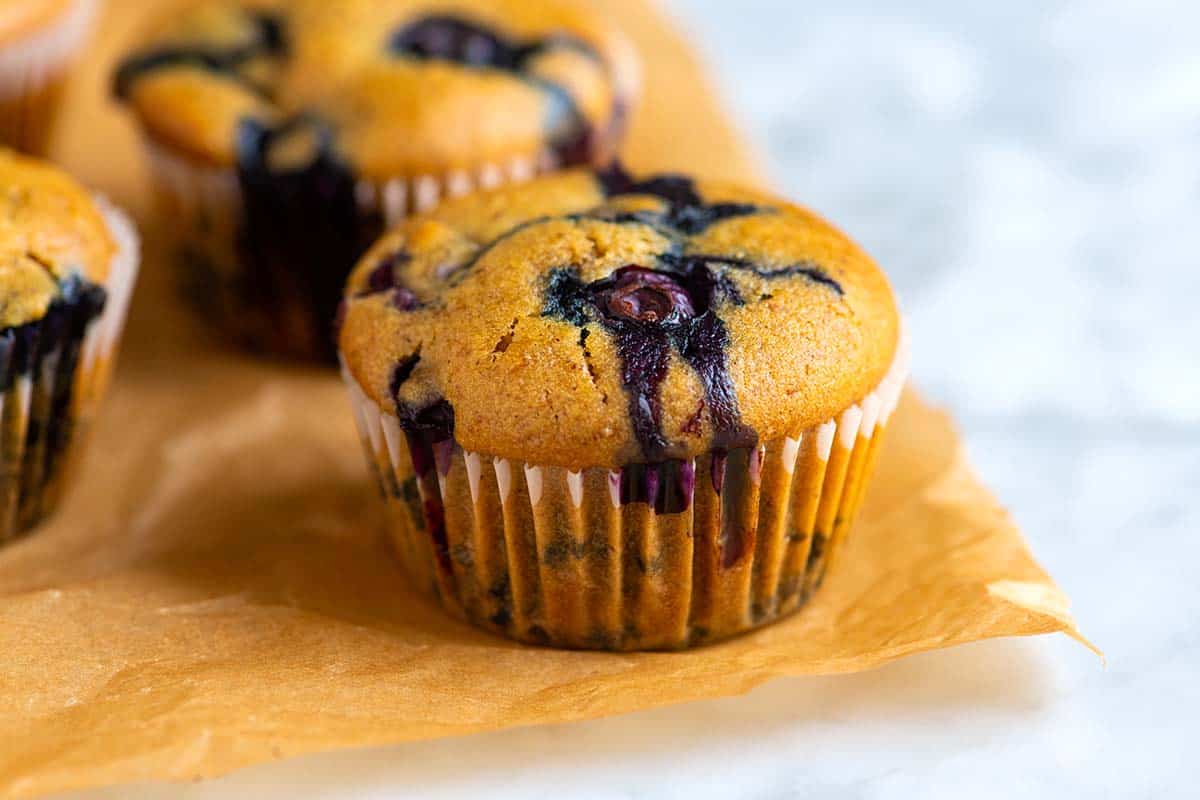
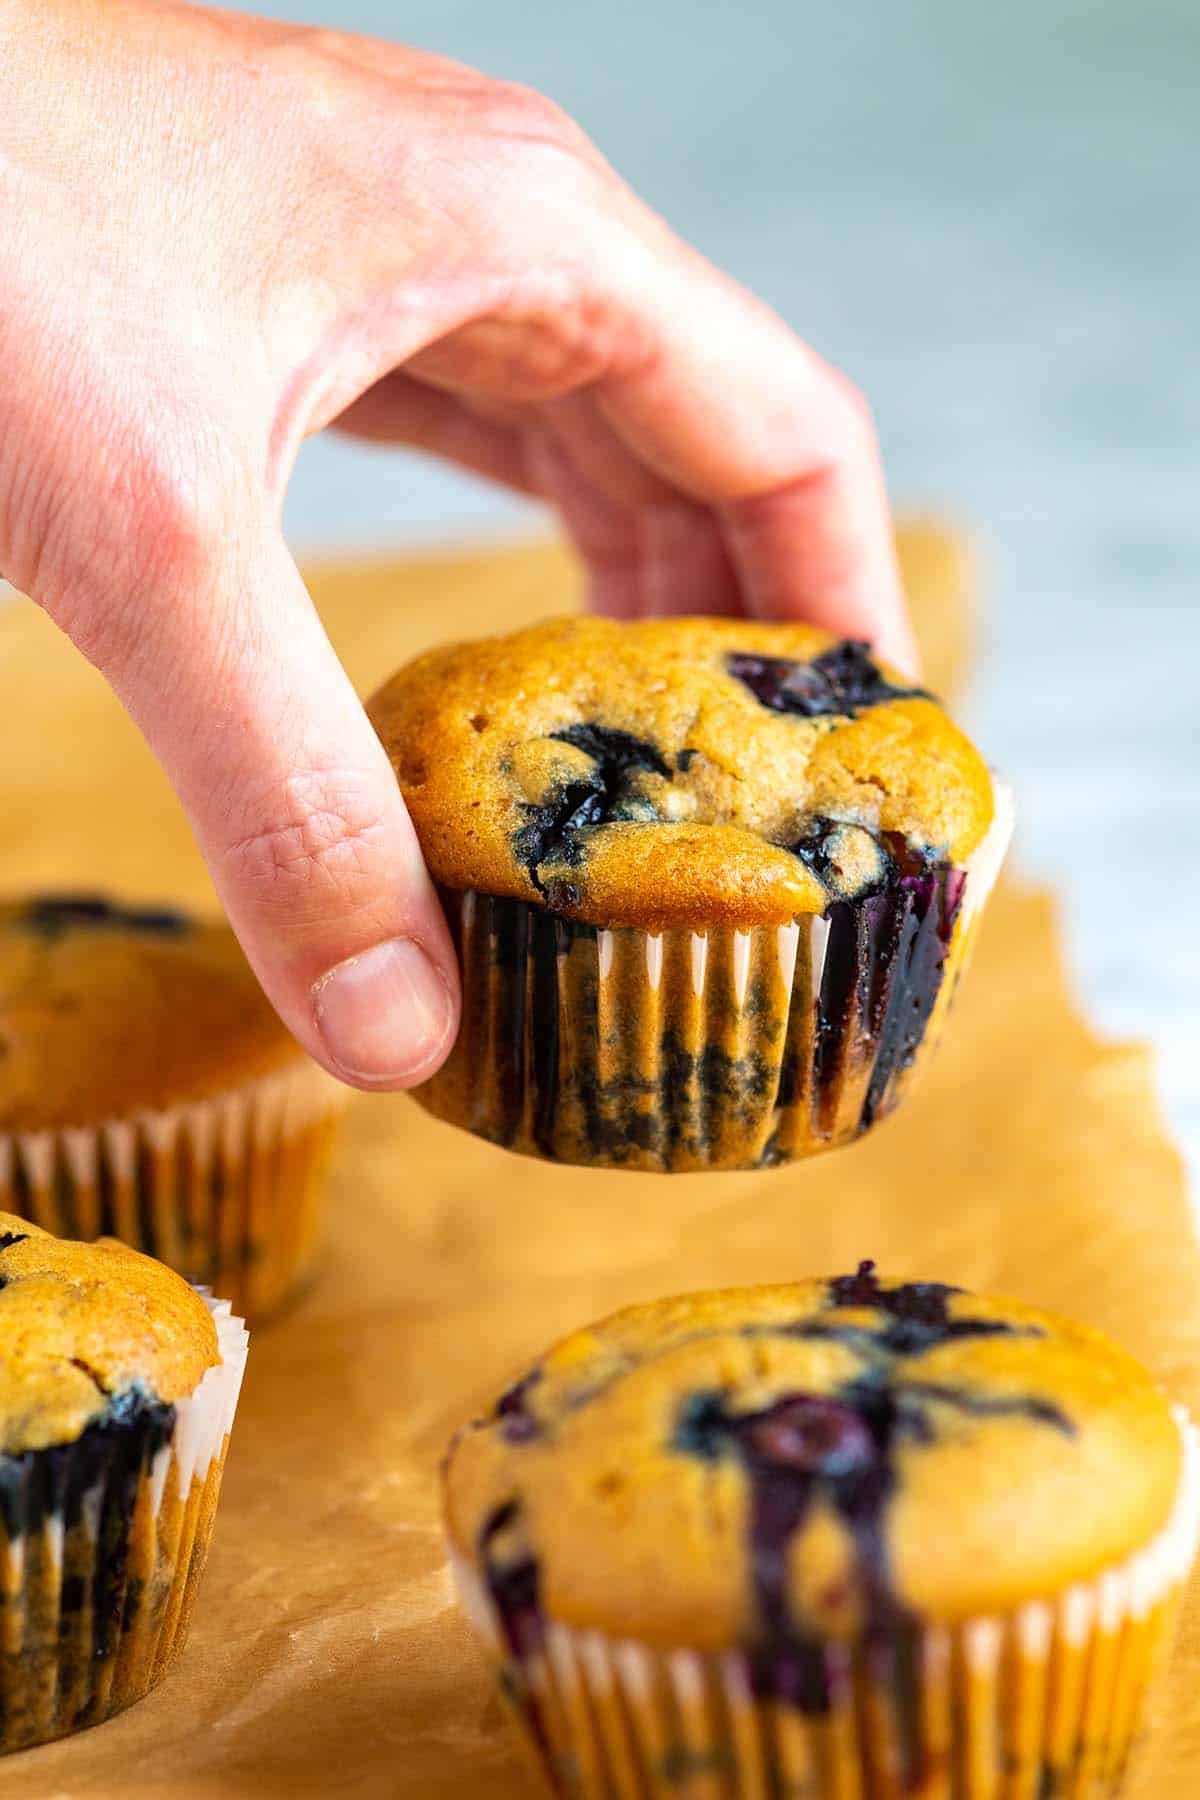
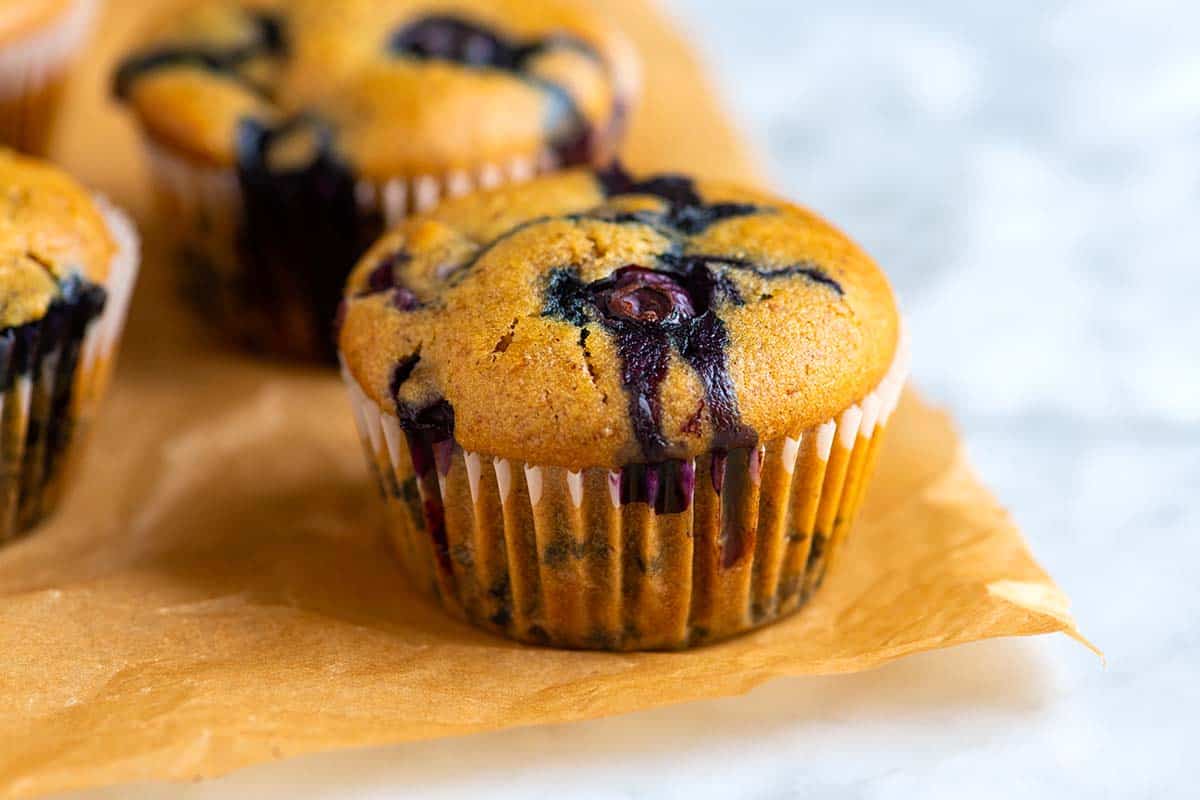
    This vegan blueberry muffin recipe is a family favorite. You won’t believe they’re made without eggs or dairy. They turn out light, fluffy, and packed with berries.

    Vegan Blueberry Muffins

    While we’re not a strictly vegan household, we do appreciate a great plant-based baked good. My son is always requesting our vegan pancakes, so trust me when I say this vegan blueberry muffin recipe is a hit with everyone, regardless of diet.

    Adapted from our easy blueberry muffins, this recipe relies on two simple, yet smart swaps. A ground flax egg adds a subtle, nutty flavor to the batter, while a 5-minute vegan buttermilk made from plant-based milk and lemon juice reacts with the baking soda, helping the muffins rise.

    Key Ingredients

    • Blueberries: Fresh or frozen blueberries work here. If you do use frozen berries, keep them in the freezer until you are ready to add them to your batter. Otherwise, they will begin to thaw on the counter, adding a purple tint to your muffin batter.
    • Flax Egg: This acts as our egg replacer. You’ll mix 1 tablespoon of ground flaxseed meal with 3 tablespoons of water, then let it thicken for 10 to 15 minutes before adding it to the muffin batter. Aquafaba works as a substitute. Tips for using aquafaba are below the recipe.
    • Plant-Based Milk: I prefer unsweetened oat milk or soy milk, but feel free to use your favorite. You will make a “vegan buttermilk” in our recipe below by mixing the milk with vinegar or lemon juice.
    • Sugar: I love brown sugar or coconut sugar in these muffins, as they add a toasted caramel flavor.
    • Oil: We use oil in this vegan batter, which makes the muffins tender, light, and moist. Melted plant-based butter works, too, but the muffins will be a little heavier.
    • Vanilla, Salt, and Cinnamon: These add extra flavor and richness to the batter. I love vanilla with the blueberries, and the cinnamon adds a bit of warmth.
    • Flour: I use all-purpose flour, but this recipe works with whole wheat flour, spelt flour, and an all-purpose gluten-free flour blend (like Bob’s Red Mill).
    • Baking Powder and Baking Soda: We call for both leavening agents. The baking soda reacts with the vegan buttermilk, and the baking powder really helps the batter rise tall in the muffin cups. I prefer aluminum-free double-acting baking powder.

    Find the full recipe with measurements below.

    How to Make Vegan Blueberry Muffins

    Tip 1: Use a flax egg or aquafaba. To get the right texture, we like adding an egg replacer to the muffin batter. The easiest is to add a flax egg, which is simply flaxseed meal mixed with water and left to thicken. This is what we have made standard in our recipe below. The other option is to use aquafaba, which actually helps the muffins brown and dome nicely. We’ve offered tips for substituting aquafaba for the flax egg in our recipe below.

    Tip 2: Make vegan buttermilk. When you remove dairy and eggs from baking recipes, you will sometimes lose flavor. We make up for that with a vegan buttermilk made with non-dairy milk mixed with vinegar or lemon juice. It takes 5 minutes and makes a big difference. The baking soda in the recipe also reacts well with the acid, helping the muffins rise.

    Tip 3: Whisk the dry and wet ingredients separately. You’ll need two bowls to make this batter. In the first bowl, whisk the dry ingredients well to ensure the baking powder and baking soda are evenly distributed throughout the flour. Then, in the second bowl, you’ll whisk the wet ingredients (oil, sugar, vegan buttermilk, and a flax egg or aquafaba).

    Tip 4: Stir (or fold) the dry and wet ingredients. To make the batter, grab a flexible spatula and gently stir (or fold) the wet ingredients into the dry. You aren’t beating the two mixtures together. Instead, gently combine them until you no longer see any flour clumps or streaks. Then fold in most of the blueberries, saving some for the tops just before baking.

    Vegan blueberry muffin batter

    Tip 5: How to tell the muffins are done. Vegan blueberry muffins take about the same amount of time to bake as other muffin recipes. Expect somewhere from 15 to 20 minutes in the oven. To tell the muffins are ready to come out of the oven, look for these cues:

    1. The tops are golden brown and risen.
    2. When you lightly press a muffin, it bounces back instead of jiggling or leaving an indent.
    3. A toothpick inserted into the center comes out clean or with a few moist crumbs.

    More Vegan Recipes

    Vegan Blueberry Muffins

    Easy Vegan Blueberry Muffins

    • PREP
    • COOK
    • TOTAL

    Our family’s favorite vegan blueberry muffins turn out just as delicious as classic blueberry muffins, but are made without eggs and dairy. The easiest egg replacer for this recipe is a flax egg made with flaxseed meal (ground flax seeds) and water — this is what we have used in the recipe below. Aquafaba (chickpea liquid) is also excellent for muffins. See our tips below the recipe for substituting aquafaba for the flax egg.

    Makes 12 muffins

    You Will Need

    1 tablespoon ground flaxseed meal

    ⅔ cup (160 ml) unsweetened soy milk or other non-dairy milk

    1 tablespoon apple cider vinegar or fresh lemon juice

    ½ cup (100 g) brown sugar or coconut sugar

    ⅓ cup (80 ml) neutral oil, such as avocado oil

    1 ½ teaspoons vanilla extract

    2 cups (260 g) all-purpose flour, spooned and leveled

    1 teaspoon baking powder

    1 teaspoon baking soda

    Rounded ¼ teaspoon fine sea salt

    ½ teaspoon ground cinnamon

    1 ¼ cups (6 ounces / 170 g) fresh or frozen blueberries (do not thaw)

    Directions

      1In a small bowl, stir the flaxseed meal with 3 tablespoons of water to make a flax egg. Refrigerate to thicken, about 15 minutes.

      2Heat the oven to 400°F (200°C). Line a 12-cup muffin tin with paper liners.

      3In a liquid measuring cup, combine the soy milk and apple cider vinegar. Set aside to curdle and thicken slightly, creating a vegan buttermilk, about 5 minutes.

      4In a medium bowl, whisk together the flour, baking powder, baking soda, salt, and cinnamon.

      5In a large bowl, whisk together the brown sugar, oil, vanilla, curdled soy milk mixture, and the flax egg until blended.

      6Using a large rubber spatula, gently fold the dry ingredients into the wet ingredients in two additions, stirring just until the flour disappears and a smooth batter forms. Gently stir in 1 cup of the blueberries.

      7Divide the batter evenly among the muffin cups. Scatter the remaining ¼ cup of blueberries over the tops, pressing them lightly into the batter.

      8Bake until the tops are golden, and a toothpick inserted into the center of a muffin comes out clean or with a few moist crumbs, 15 to 20 minutes. Transfer the muffin tin to a wire rack to cool slightly, then remove the muffins from the tin to cool completely.

    Adam and Joanne’s Tips

    • Store cooled muffins in an airtight container at room temperature for up to 3 days. To freeze, wrap tightly in plastic wrap or aluminum foil, or place in a freezer-safe bag, for up to 3 months.
    • Use aquafaba: To substitute the flax egg with aquafaba (chickpea liquid), measure 3 tablespoons of the liquid from a shaken can of chickpeas into a small bowl. Whisk vigorously until very frothy, then add to the wet ingredients in step 5. Muffins made with aquafaba may brown slightly more and develop a more pronounced dome.
    • Batter consistency: The batter should be thick and scoopable, rather than runny or dough-like. If it appears too thin, fold in additional flour 1 tablespoon at a time. If it feels too dense or dry, stir in non-dairy milk 1 tablespoon at a time until it reaches the correct texture.
    • The nutrition facts provided below are estimates.

    Nutrition Per Serving
    Serving Size
    1 muffin
    /
    Calories
    183
    /
    Total Fat
    6.7g
    /
    Saturated Fat
    1g
    /
    Cholesterol
    0mg
    /
    Sodium
    162.1mg
    /
    Carbohydrate
    27.9g
    /
    Dietary Fiber
    1.2g
    /
    Total Sugars
    10.6g
    /
    Protein
    2.8g


    AUTHOR:

    Joanne Gallagher

    Adam and Joanne of Inspired Taste

    We are Adam and Joanne Gallagher, the creators of Inspired Taste. Established in 2009, Inspired Taste grew from a childhood dream into one of the internet’s most trusted recipe sites with hundreds of reliable recipes, step-by-step videos, and expert tips.More About Us

    Source link

  • Easy Buffalo Cauliflower Wings Recipe

    Easy Buffalo Cauliflower Wings Recipe

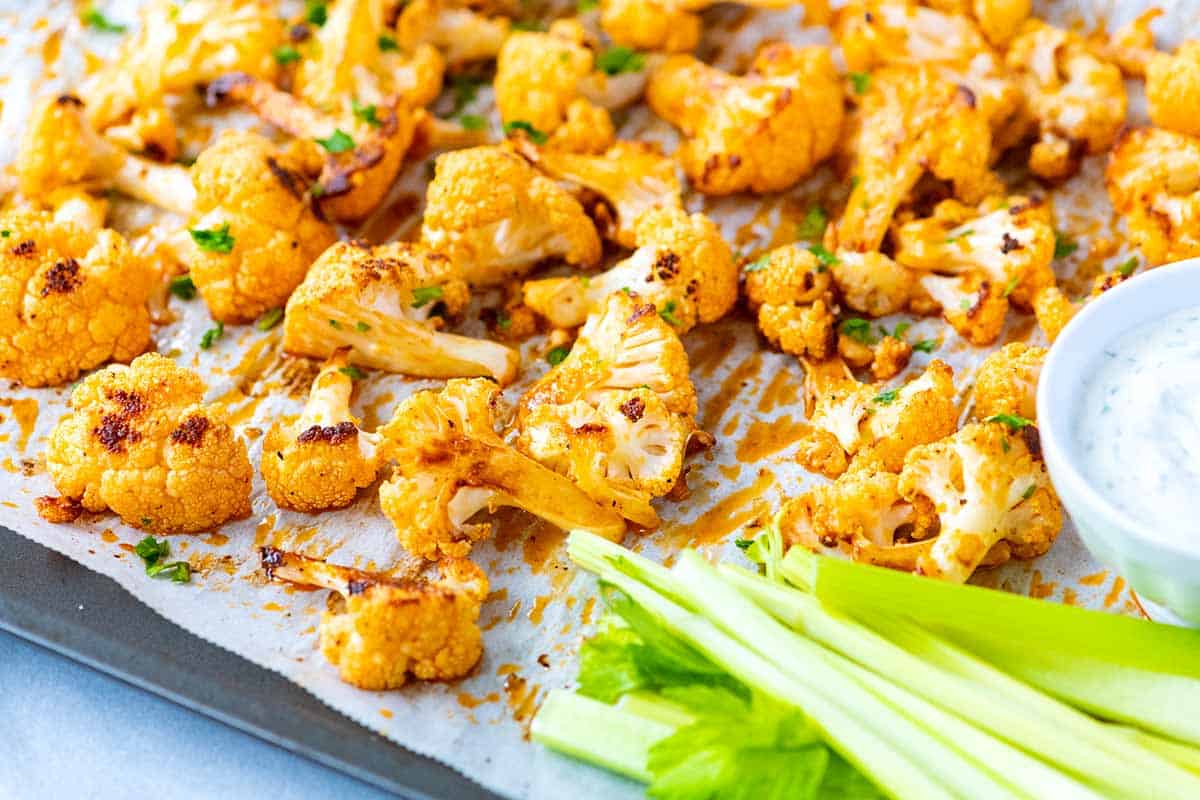
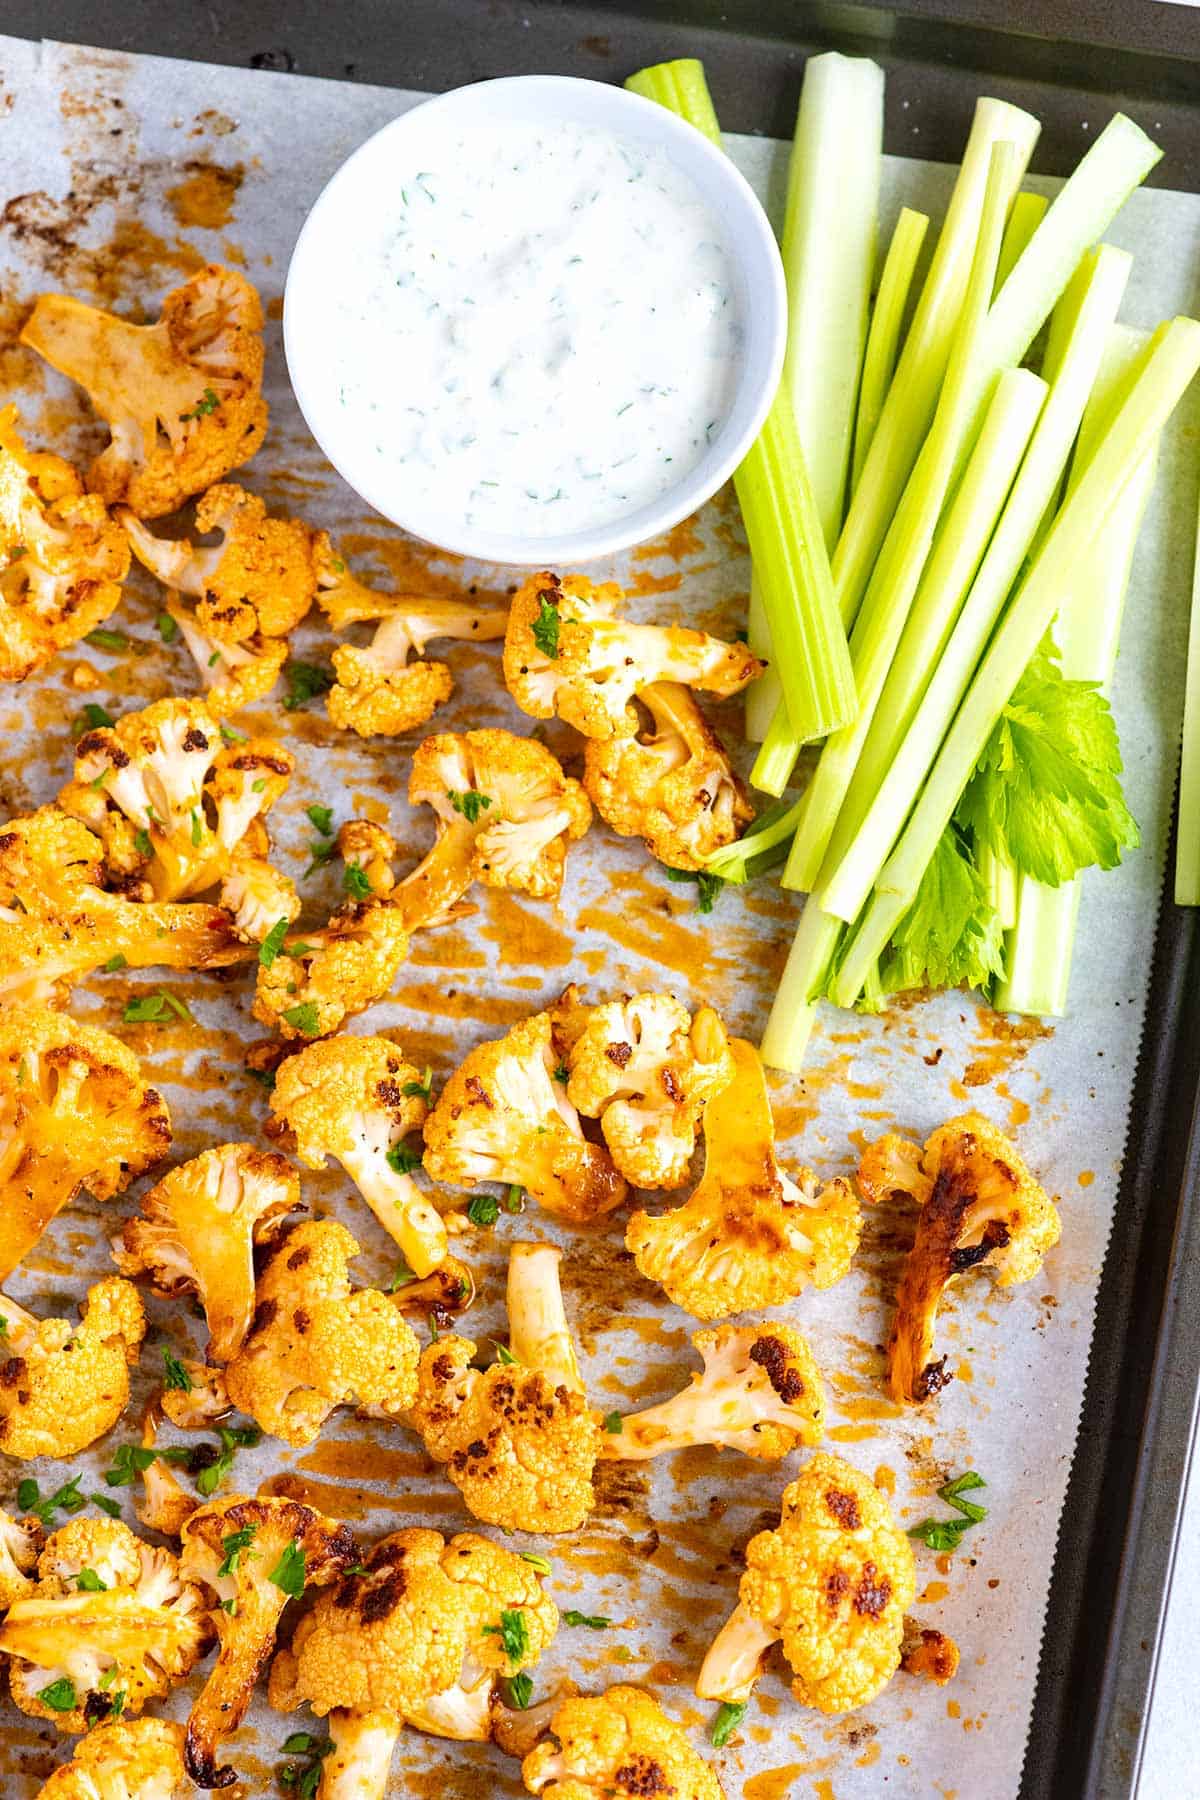
    This healthy, baked buffalo cauliflower wings recipe has crispy cauliflower tossed with a simple spicy buffalo sauce! Such a delicious vegetarian appetizer!

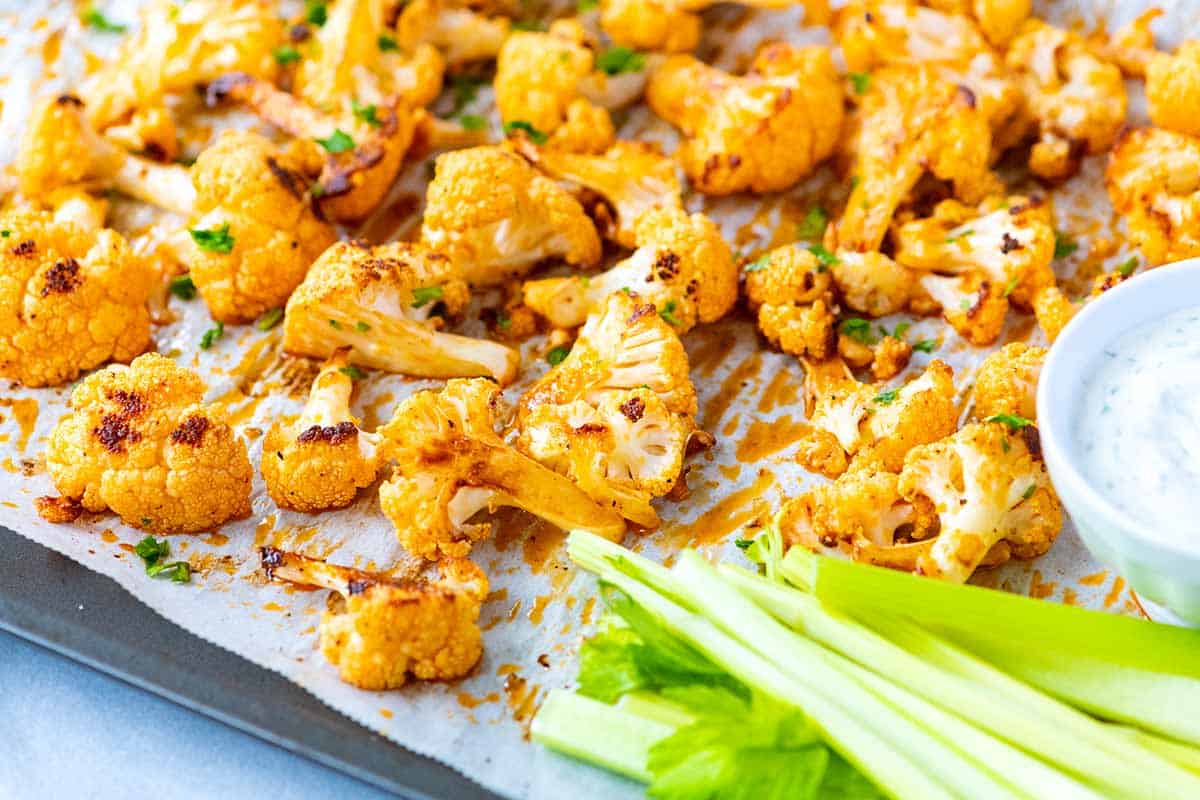
    Buffalo Cauliflower Wings

    My favorite cauliflower wings are a vegetarian spin off our classic Buffalo Hot Wings, and I have to tell you, everyone in my family LOVES them (even the meat eaters). I use my Homemade Buffalo Sauce to make this recipe, and I highly recommend that you do, too!

    My favorite cauliflower wings are quicker and easier than a lot of the recipes you’ll find online. We skip the breading and batter, and instead rely on my favorite method for roasting cauliflower to guarantee they turn out golden brown and crisp. I use the same method for this Chili Lime Roasted Cauliflower, and love it!

    Key Ingredients

    • Cauliflower: Look for firm, creamy white heads with tight florets. Pass on any cauliflower that’s spotted or discolored. For more tips, see how to buy cauliflower.
    • Oil, Salt, and Pepper: Before tossing the cauliflower florets with buffalo sauce, you’ll roast them with oil, salt, and pepper. I love olive oil or avocado oil for roasting veggies.
    • Homemade Buffalo Sauce: This is what makes these vegetarian wings so delicious! Our homemade sauce below combines hot sauce (like Frank’s or Crystal’s), butter (you can use plant-based butter if you need to), garlic powder, and a touch of honey. If you want to make these vegan, leave out the honey and use plant-based butter.
    Find the full recipe with measurements below.

    My Tips for Making Buffalo Cauliflower Wings

    Tip 1: Skip the breading. Trust me, you can skip adding flour, breading, and batter. Baking at a high temperature is all you need for crispy edges and tender middles. To make cauliflower wings, separate your head of cauliflower into florets of similar size, then toss them with oil, salt, and pepper. Spread them onto a baking sheet and roast until the edges are crisp and the middles are tender. Skipping the breading/batter also means this recipe is gluten-free.

    Tip 2: Use homemade buffalo sauce. We highly recommend trying our homemade buffalo sauce. When you make your own, you can use your favorite homemade or store-bought hot sauce (I love Crystal). While the cauliflower roasts, make your buffalo sauce in a small saucepan by melting the butter (or plant-based butter) into the rest of the ingredients until a sauce forms.

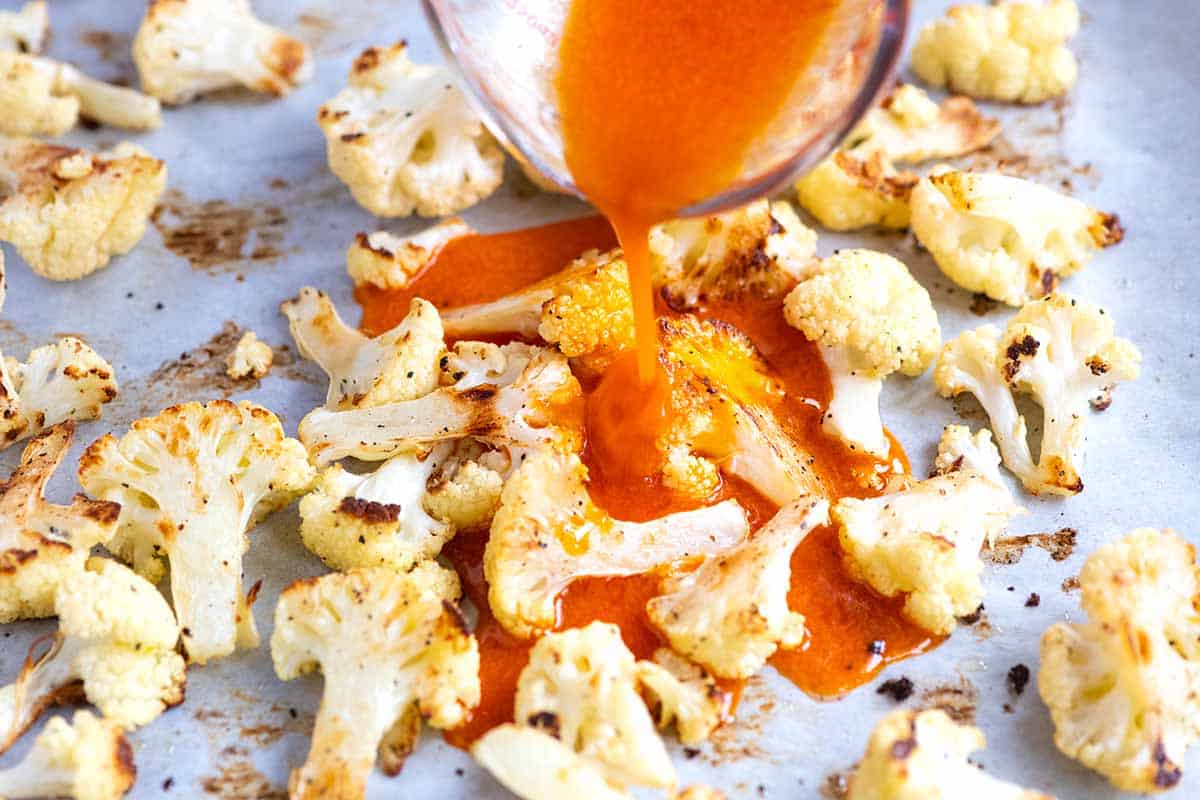
    Cauliflower wings recipe step: Pouring buffalo sauce over roasted cauliflower

    Tip 3: Toss with some sauce, then bake a little longer. This small step guarantees the roasted cauliflower soaks up all of the yummy buffalo flavor. After baking the cauliflower, remove it from the oven and pour the sauce over it right on the baking sheet. Toss really well, spread the cauliflower wings back onto the baking sheet, and roast for an additional 5 minutes.

    Tip 4: Don’t forget the dipping sauce. Serve cauliflower wings with our Homemade Blue Cheese Dressing or Ranch Dressing! Or, use your favorite vegan dipping sauce from the store!

    Buffalo Cauliflower Wings

    Easy Buffalo Cauliflower Wings

    • PREP
    • COOK
    • TOTAL

    This cauliflower wings recipe is so easy to make at home, and thanks to our buffalo sauce, it tastes incredible. They’re great for veggie and meat lovers. Serve them as a game day appetizer or snack. Everyone I’ve serving them to loves them (adults, kids, vegetarians, and meat lovers!).

    4 Servings

    You Will Need

    For Cauliflower Wings

    1 medium head of cauliflower, 5 cups florets

    2 tablespoons avocado oil or olive oil

    ½ teaspoon fine sea salt

    ¼ teaspoon fresh ground black pepper

    Celery sticks or carrot sticks for serving, optional

    Homemade Ranch or Homemade Blue Cheese Dressing, for serving, optional


    For Buffalo Sauce

    2 tablespoons unsalted butter or plant-based butter

    2 ½ tablespoons hot sauce, like Frank’s or Crystal

    ¼ teaspoon garlic powder

    ¼ teaspoon honey, or more to taste, optional

    Pinch of cayenne pepper, optional to make it spicier

    Directions

      1Prepare oven and pan: Preheat the oven to 425°F (218°C). Line a baking sheet with parchment paper, foil, or a silicone baking mat.

      2Bake the cauliflower: Cut the cauliflower into florets, rinse, and pat them very dry. Add the florets to the baking sheet, then toss with the oil, 1/2 teaspoon salt, and 1/4 teaspoon fresh ground pepper. Spread them out in a single layer, facing as many of the flatter edges down onto the baking sheet so that they brown nicely. Roast, stirring after 15 minutes, until the edges are crisp and brown and the stems are tender, 20 to 25 minutes.

      3Make the sauce: While the cauliflower roasts, make the buffalo sauce. Melt the butter in a small saucepan (or use the microwave). Remove the pan with melted butter from the heat and whisk in the hot sauce, garlic powder, optional honey, and optional cayenne. Set aside.

      4Toss the sauce and cauliflower: Remove the roasted cauliflower from the oven and pour the sauce directly over it on the baking sheet. Toss the buffalo sauce with the roasted cauliflower, and then place it back into the oven for 5 minutes. Serve immediately alongside celery and a creamy dipping sauce like ranch or blue cheese.

    Adam and Joanne’s Tips

    • Make a larger batch of sauce: Make the original recipe for buffalo sauce. It makes 2 cups of sauce, which lasts in the fridge for weeks.
    • Dairy-free and vegan-friendly tips: Replace butter with creamy vegan butter and omit the honey. Or, use agave nectar instead of honey to balance the sauce (optional).
    • The nutrition facts provided below are estimates.

    Nutrition Per Serving
    Serving Size
    1/4 of the recipe
    /
    Calories
    141
    /
    Total Fat
    13.1g
    /
    Saturated Fat
    4.7g
    /
    Cholesterol
    15.3mg
    /
    Sodium
    558.6mg
    /
    Carbohydrate
    6.1g
    /
    Dietary Fiber
    2.4g
    /
    Total Sugars
    2.3g
    /
    Protein
    2.3g


    AUTHOR:

    Joanne Gallagher

    Adam and Joanne of Inspired Taste

    We are Adam and Joanne Gallagher, the creators of Inspired Taste. Established in 2009, Inspired Taste grew from a childhood dream into one of the internet’s most trusted recipe sites with hundreds of reliable recipes, step-by-step videos, and expert tips.More About Us

    Source link