My Kindergartener Can Make This Recipe – And I Actually, Genuinely Love It
It’s a parenting first!
I love the idea of matching your kid’s age to a number of goal recipes – for example, when you’re 5 years old – you learn how to make 5 recipes. (I got this idea from Nita and Jess at Healthy Happy Eaters – they are wonderful.)
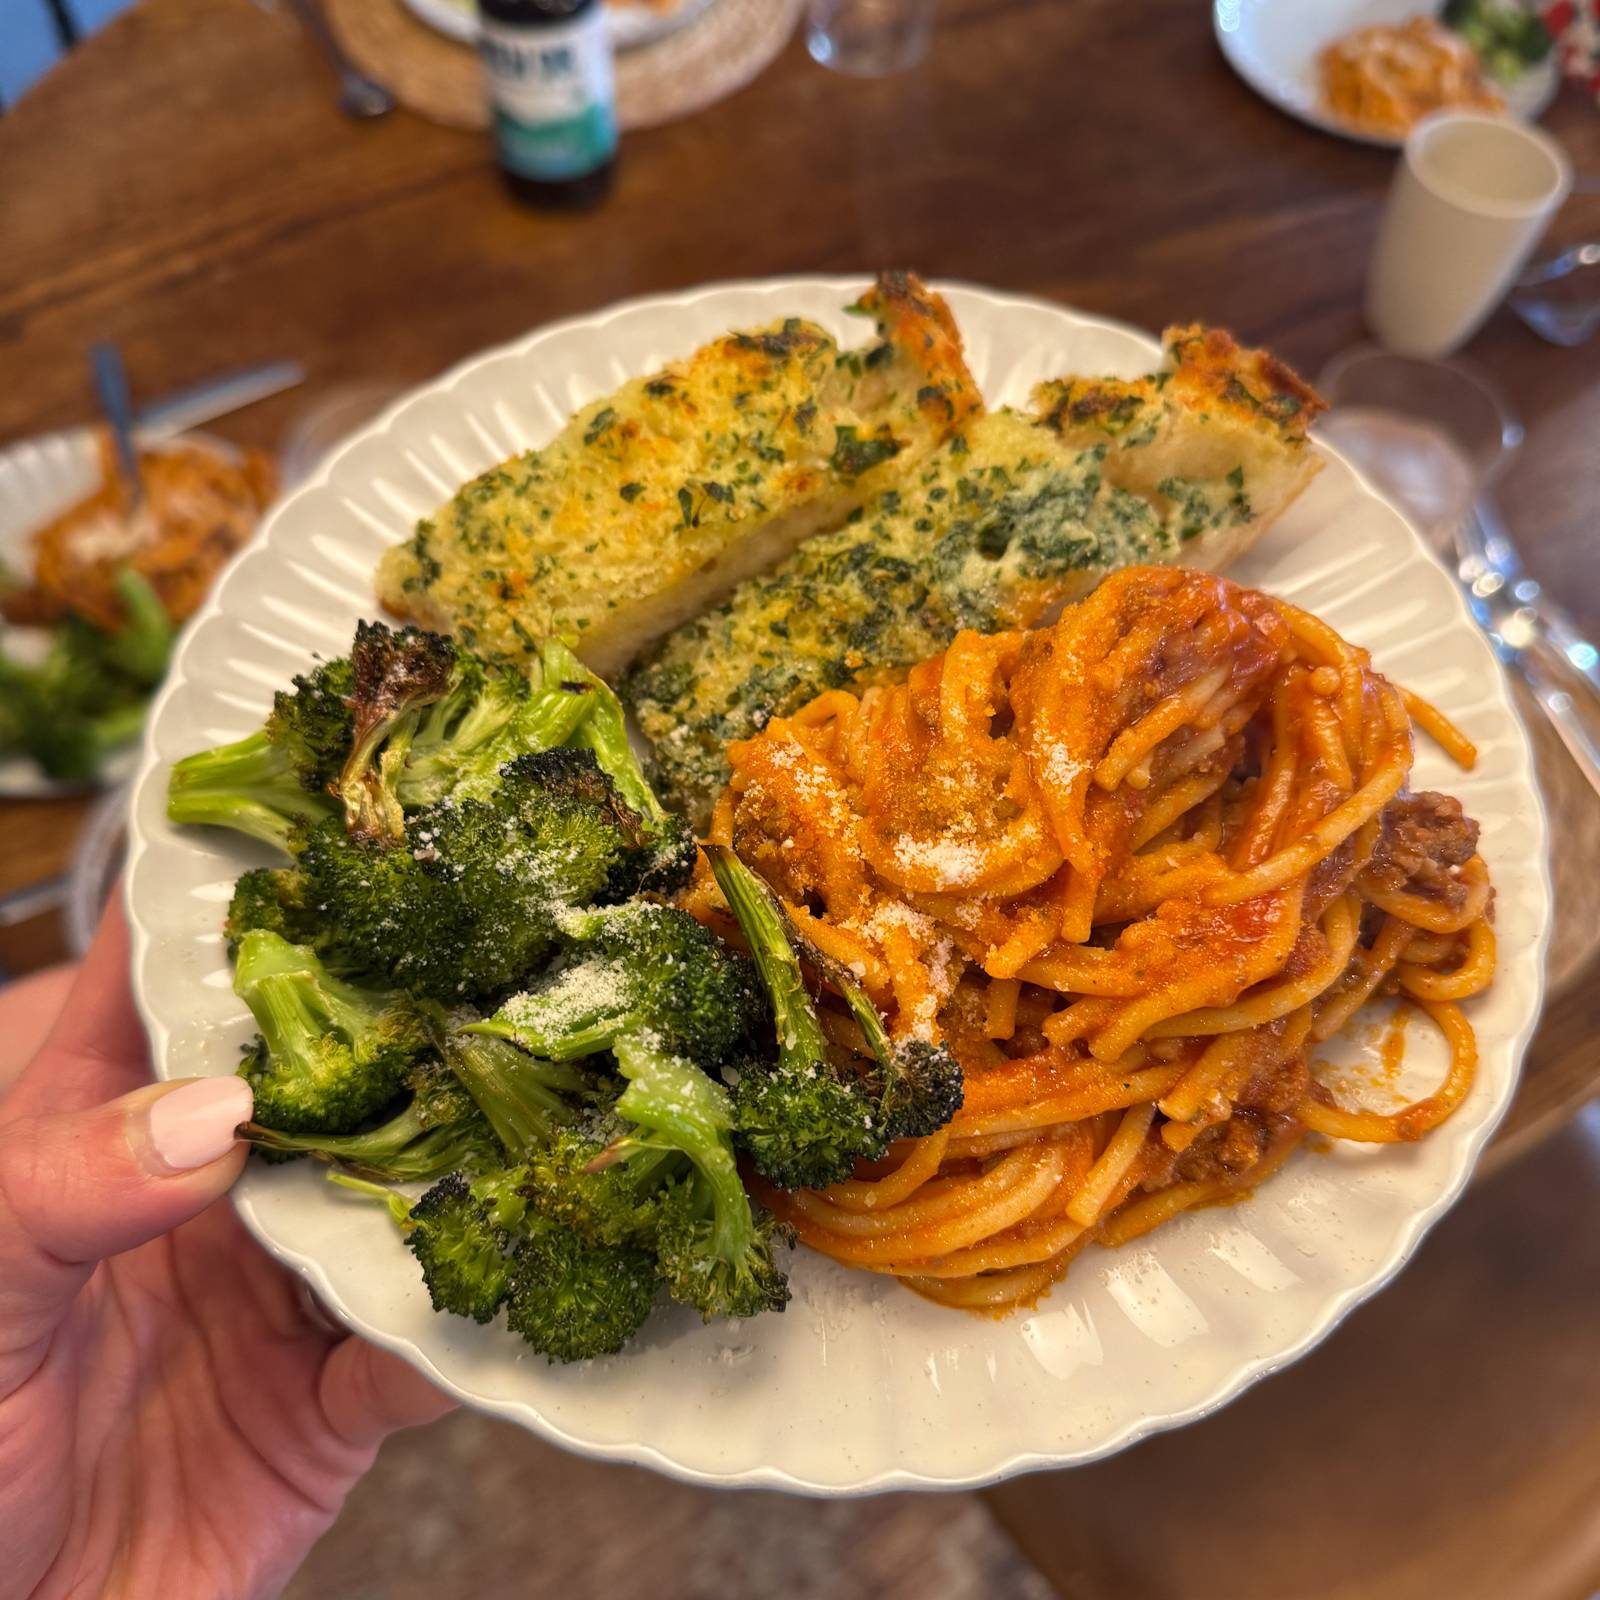
My daughter’s favorite dinner is spaghetti, so I thought making it in the Instant Pot might help it feel more manageable:
it’s one single pot.
no cutting board required.
it has higher sides so there’s less splattering.
no draining of boiling water.
We started making it this way “to help her” but quickly realized… Instant Pot spaghetti is actually kinda special. It’s silky, flavorful, and extra clingy. Makes for an ideal combo with house favorite garlic bread and air fryer broccoli.
These days, when my family requests spaghetti for dinner (made by me, or my daughter), THIS is the spaghetti they are asking for. Some people might be offended by the breaking of the noodles, which you have to do to get them to fit – but in our house we roll with it and the shorter noodles work great for kids.
The ratios are just how I like them: meaty, saucy, so comforting. A home run hit with my kids and my husband every time.
(But I’d make this for myself even if I didn’t have kids!)
Hope you love it! If you love easy dinner recipes – check out this mega page of all my favorites!
Easy fall dinners that are cozy, simple, and totally doable for busy weeknights. Soups, curries, casseroles, and more!
Fall feels like the best and busiest time of year! It’s the back-to-school transition, the arrival of evening activities, and all kinds of new routines. It feels like a lot, and somehow dinner still needs to be made!?
These recipes are the weeknight lifesavers that I need when life feels a little crazy: cozy, simple, and very doable meals that don’t ask for much, but deliver big. Easy cozy soups, sheet pan dinners, crockpot meals, and more.
Here are the easy fall dinners I’m making on repeat!
Easy Fall Dinner Recipes
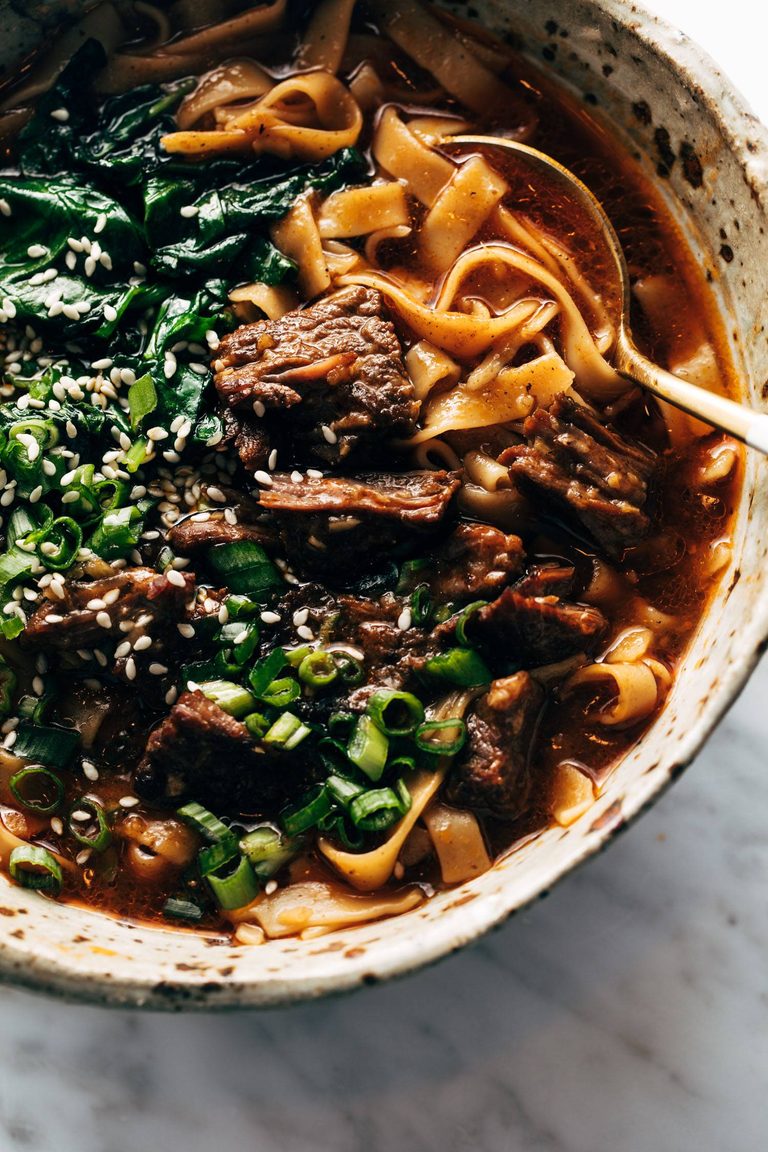
Instant Pot Spicy Short Rib Noodle Soup
Short ribs simmer away in an Instant Pot or slow cooker, and are served in bowls with tender noodles and lots of delicious broth! This is one of my all-time cold-weather favorites.
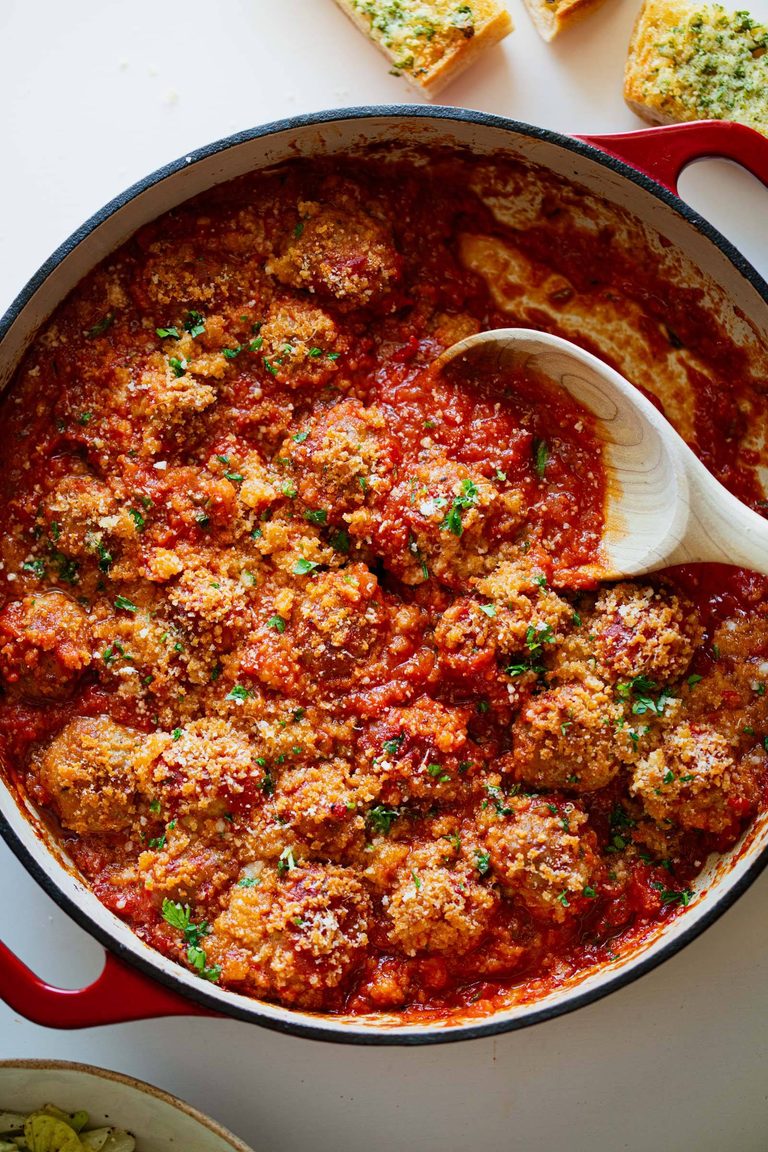
Ricotta Meatballs with the Crispy Topping
One of the most popular weeknight dinners on the site! Homemade ricotta meatballs baked under a blanket of crispy topping. Serve it with garlic bread or pasta!
Chicken with Coconut Kale
A luxurious-feeling but super easy one-skillet meal packed with protein! I love to serve this one over a pile of steamy rice.
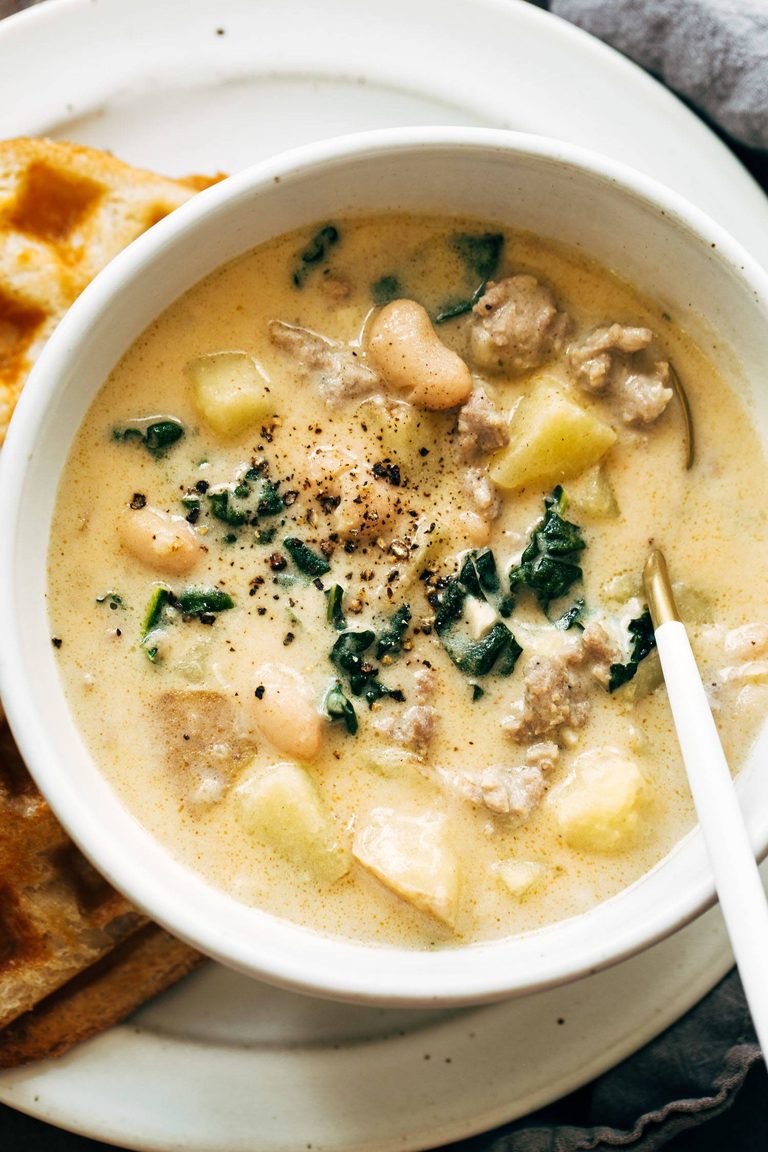
Sausage, Kale, and White Bean Soup
Such a simple, delicious, and cozy soup! Herby Italian sausage, kale, smoky paprika, creamy beans and potatoes, and a splash of cream.
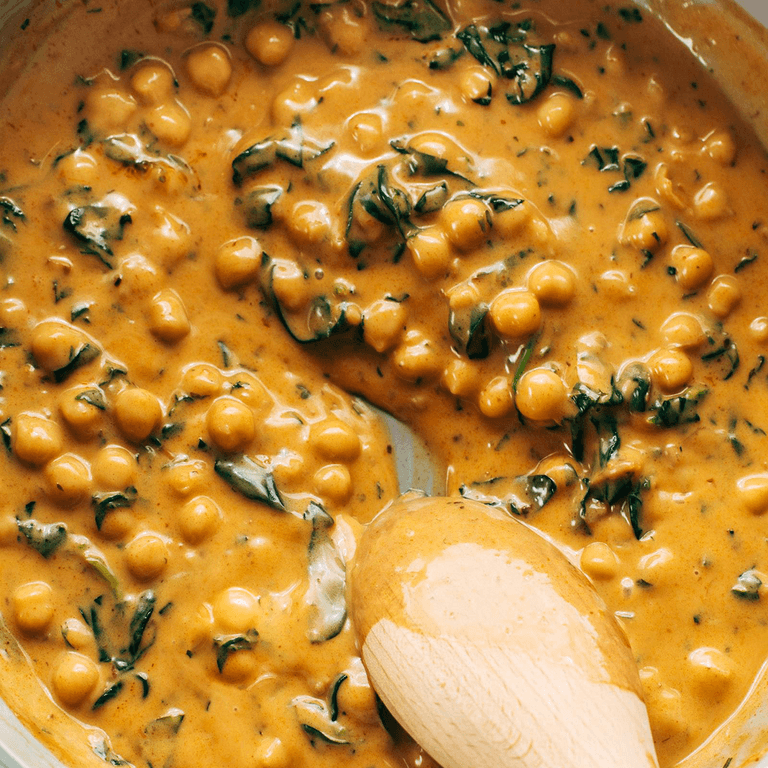
Steph’s Chickpea Curry with Spinach and Rice
Amazingly creamy, saucy chickpea curry served over rice with a dollop of chili crisp and a side of cucumber salad. Ready in 20 minutes!
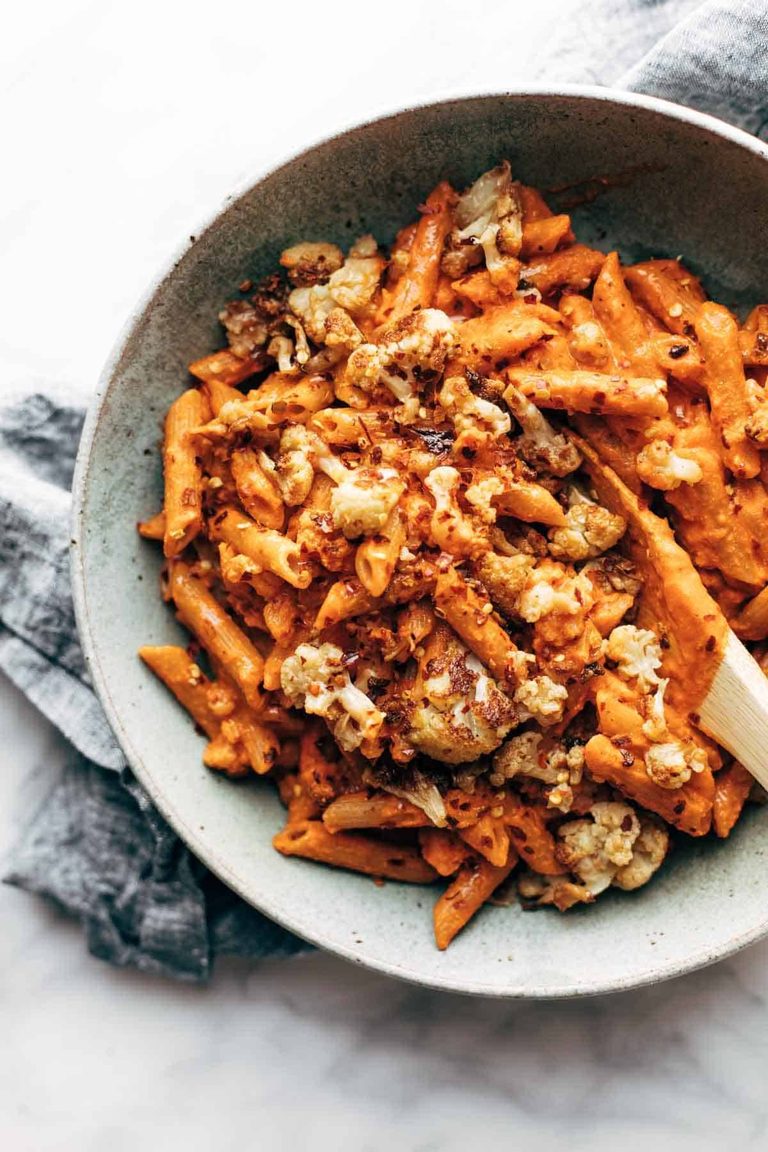
Red Pepper Cashew Pasta with Roasted Cauliflower
Three-ingredient red pepper cashew sauce, roasted crispy cauliflower, and piles of noodles. Hearty and so delicious!
Butter Chicken Meatballs
Storebought (or homemade) chicken meatballs covered in a rich and mildly spiced tomato gravy that is made luxurious with just a little bit of butter and cream. One of my family’s absolute favorites!
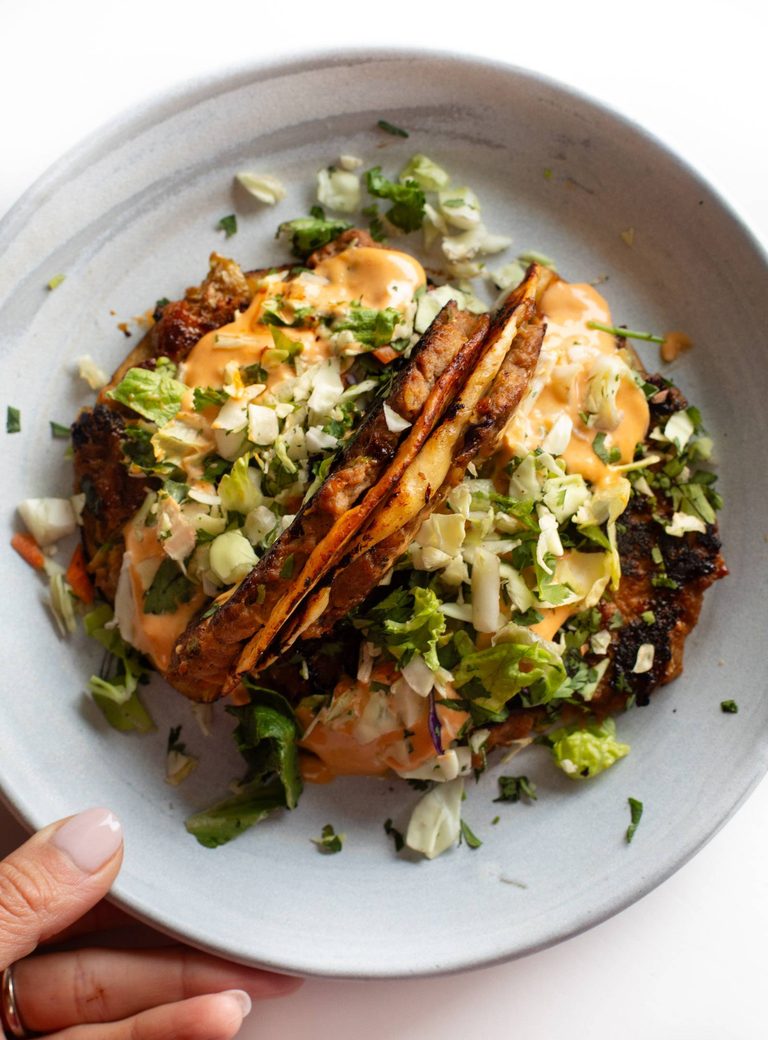
Brandon’s Egg Roll Tacos
Egg rolls meet tacos! I love this! Easy to make and ridiculously good with a classic egg roll filling, crunchy veg, pillowy tortillas, and a spicy gochujang sauce.
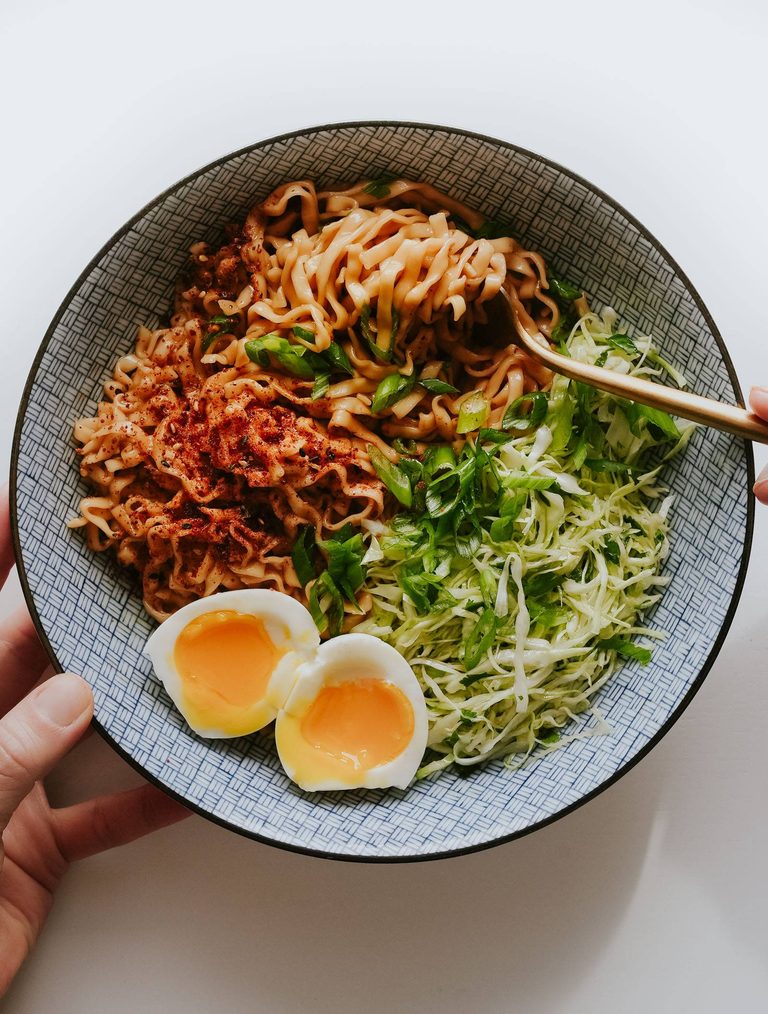
Shortcut Sesame Butter Noodles
One of my favorite back-pocket recipes! Packaged noodles for ease, butter for creaminess, honey for sweetness, and sesame oil for depth. Just tangly slips of joy!
Chicken Wontons in Spicy Chili Sauce
Big, beautiful, bossy flavors! Shiitake mushrooms and chicken wontons swim in a brothy flavor-filled sauce and get finished with a swirl of sesame oil and chili crisp on top.
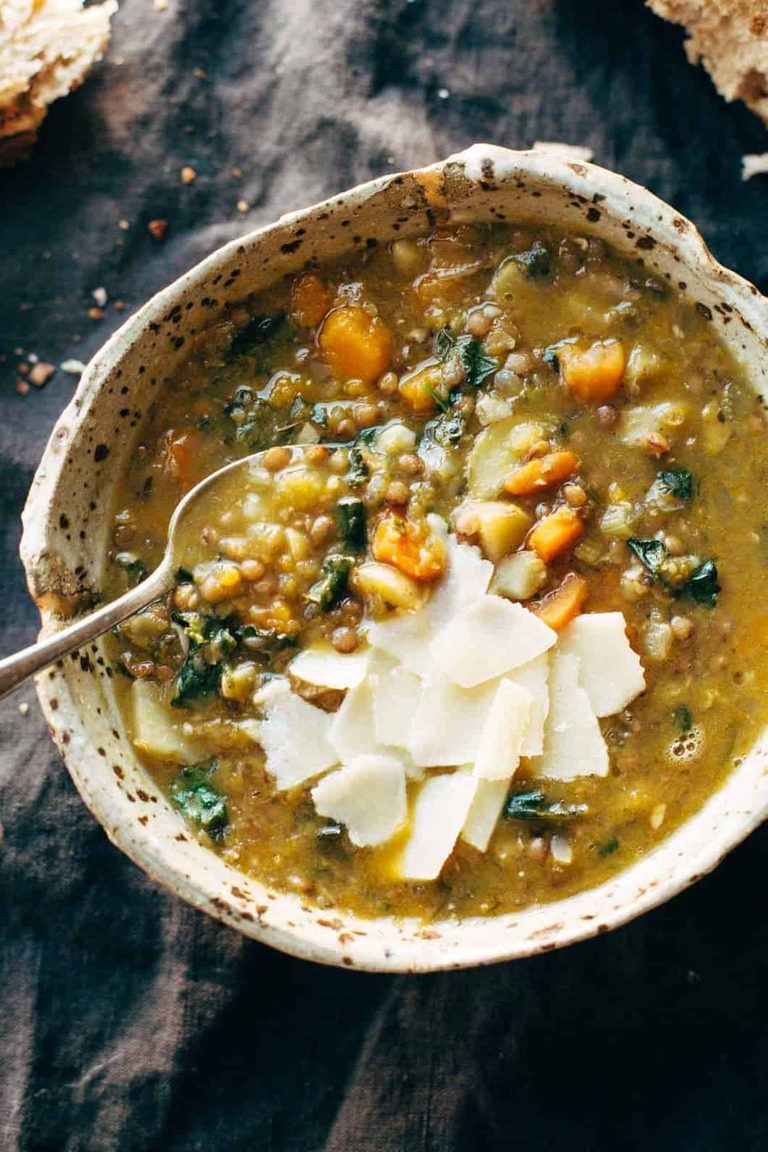
The Best Detox Crockpot Lentil Soup
This one is such a classic, and has been made so many times by so many of you! Lentils, squash, kale, and all sorts of soothing and nutritious things. Made in the crockpot so super hands-off, too!
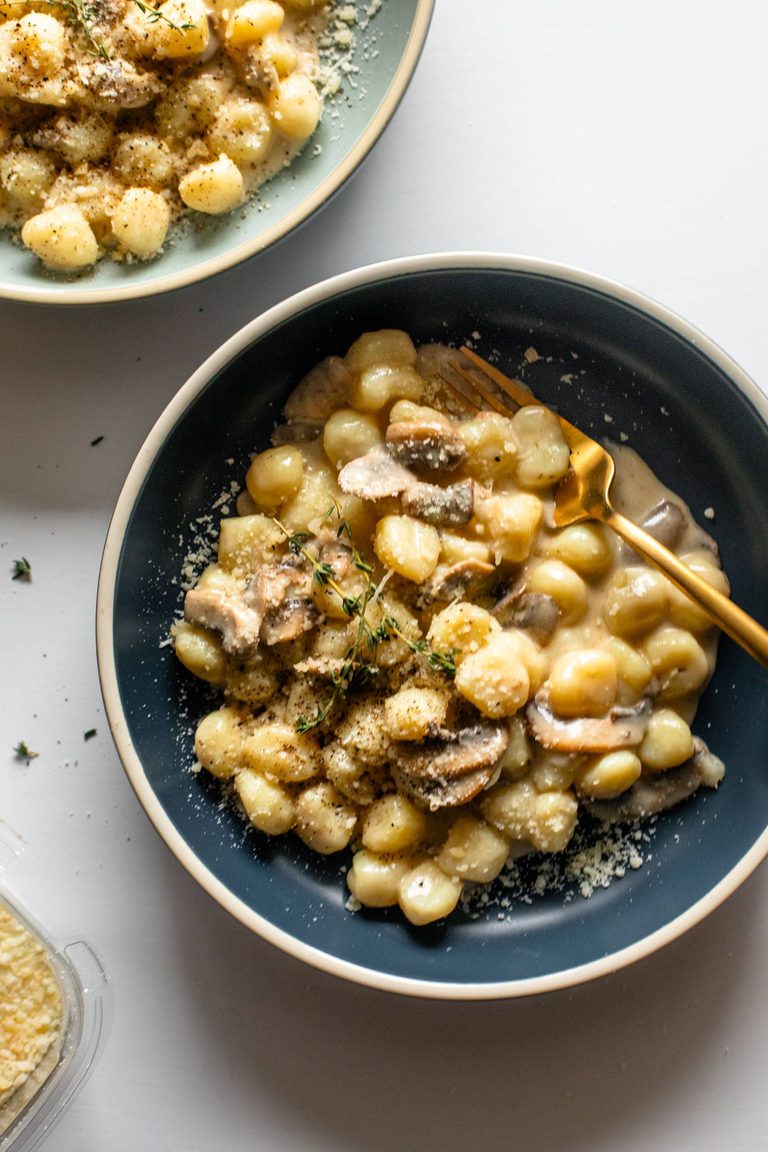
Gnocchi with Creamy Mushroom Sauce
Delicious pillowy gnocchi swimming in a silky creamy sauce that’s laced with thyme and loaded with little slips of garlic butter-browned mushrooms! This is fall!
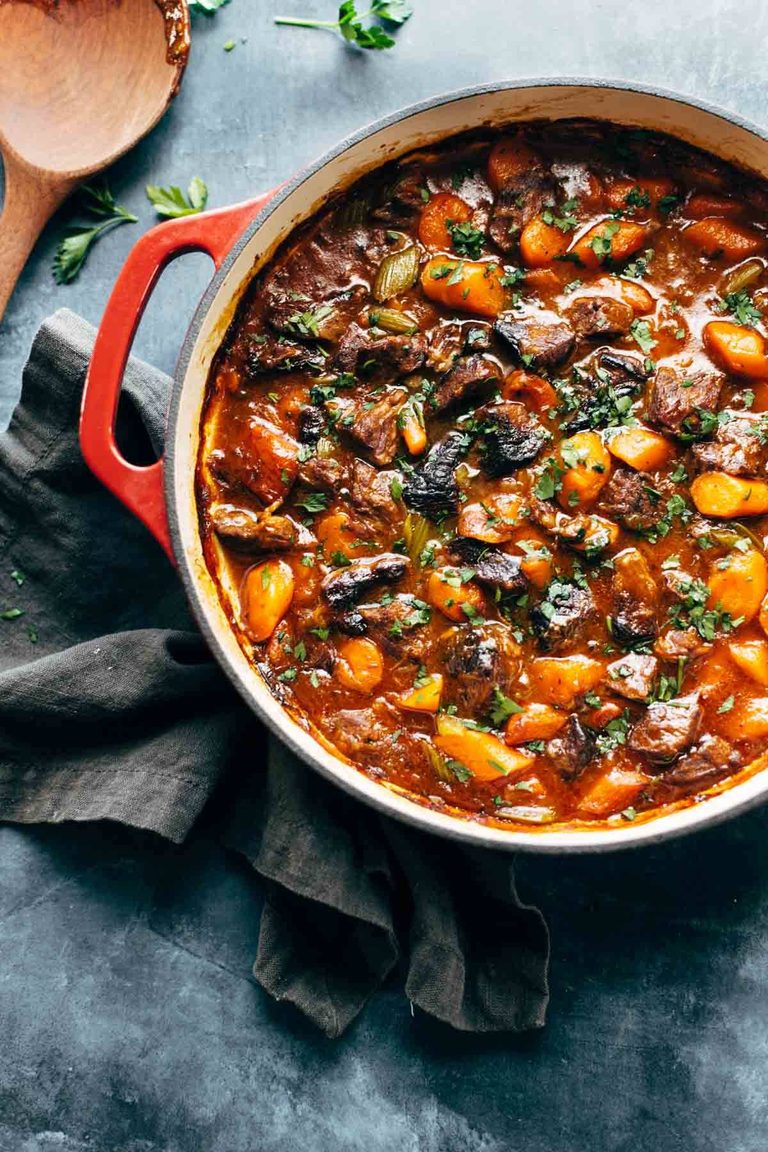
Life Changing Instant Pot Beef Stew
Six ingredients, 45 minutes, SO EASY. The perfect, comforting meal that’s filling, heart, and incredibly simple to make.
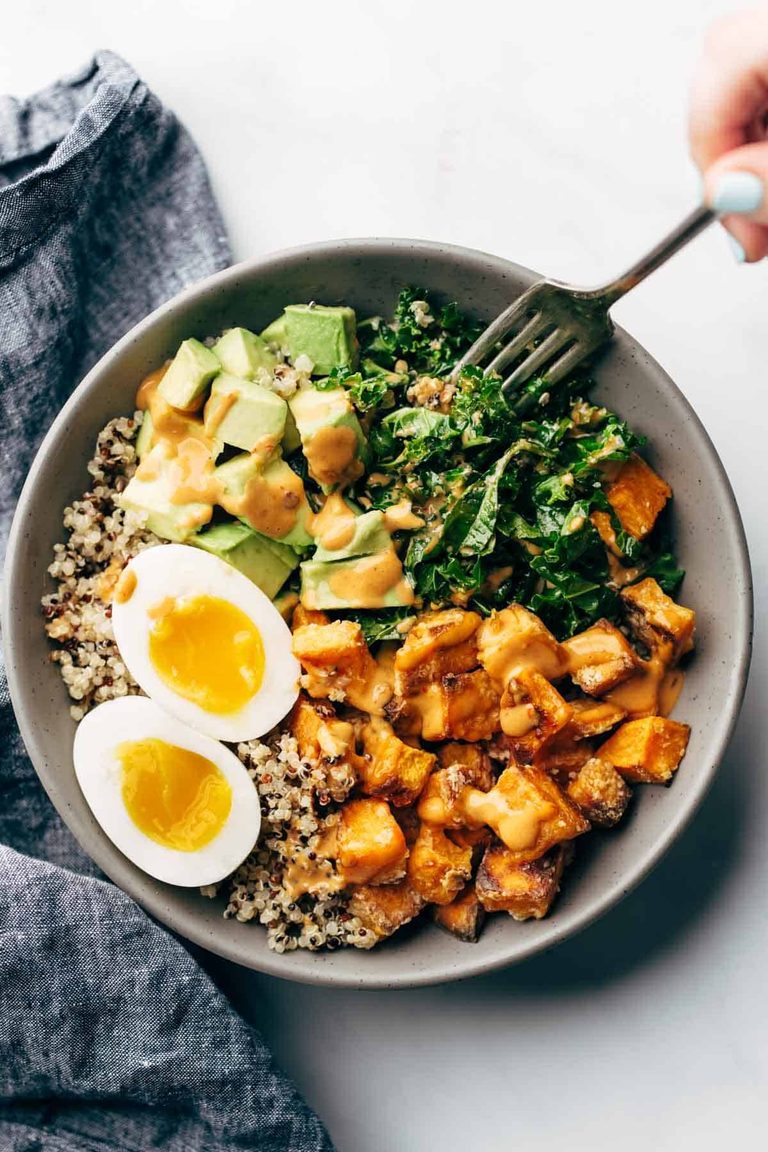
Chipotle Tahini Bowls
The chipotle tahini in this recipe is in my top 10 sauces of all time. It’s perfectly smoky, luxuriously creamy, and the perfect spicy combo with a pile of roasted sweet potatoes.
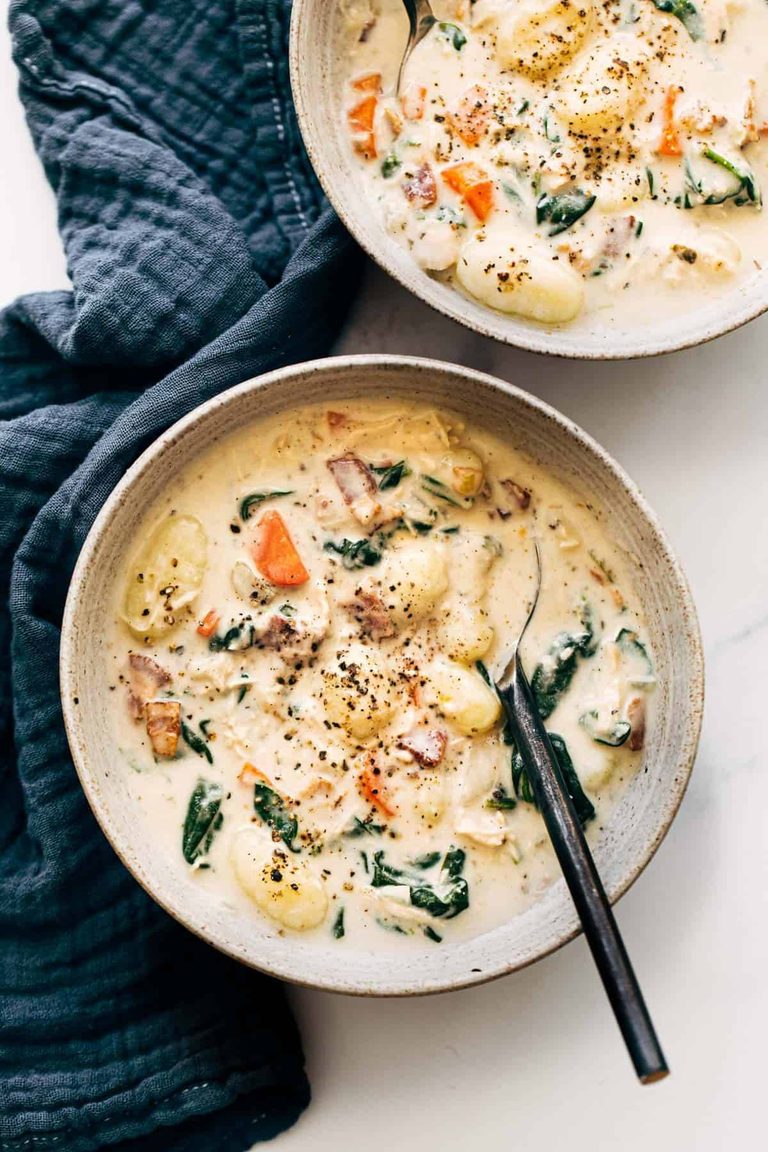
Crockpot Chicken Gnocchi Soup
Another crockpot favorite for fall soups! You let it simmer all day with chicken to make a delicious soup base, and then add creaminess and carby-ness with gnocchi before serving. Love this one!
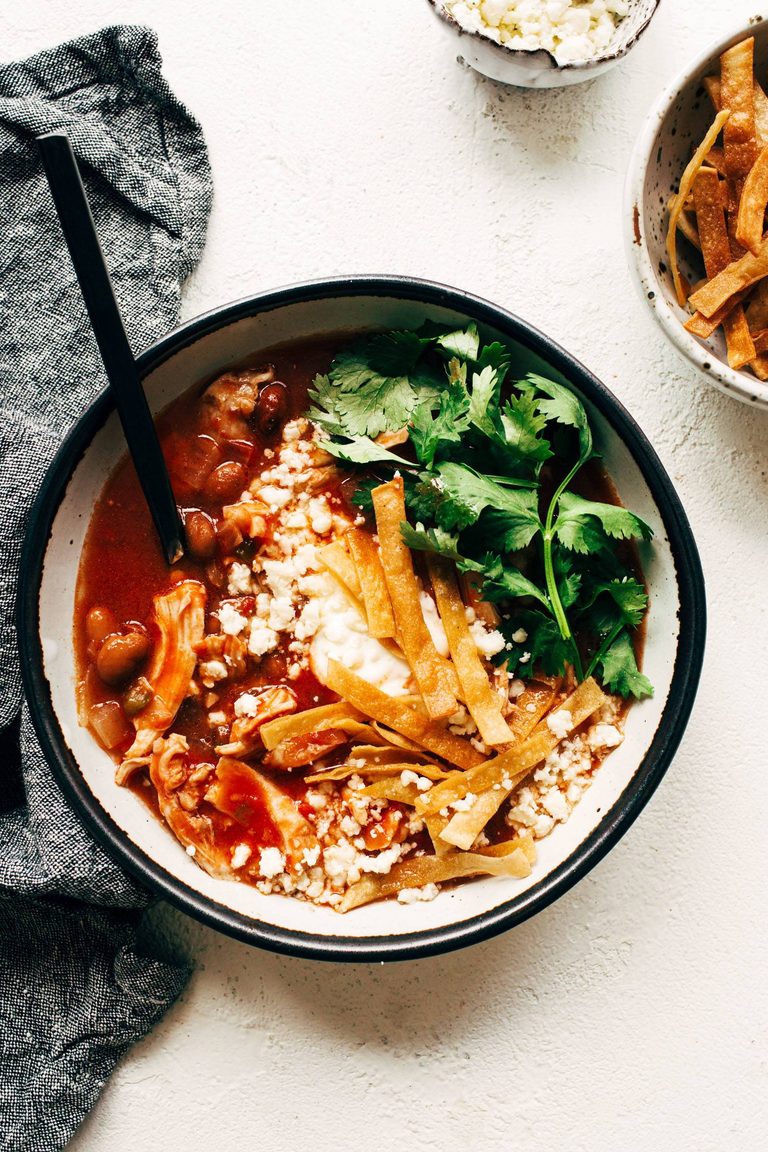
Chicken Tortilla Soup
Just a basic and super delicious chicken tortilla soup! I could eat this every week, and the bonus is that it makes for excellent leftovers for lunch.
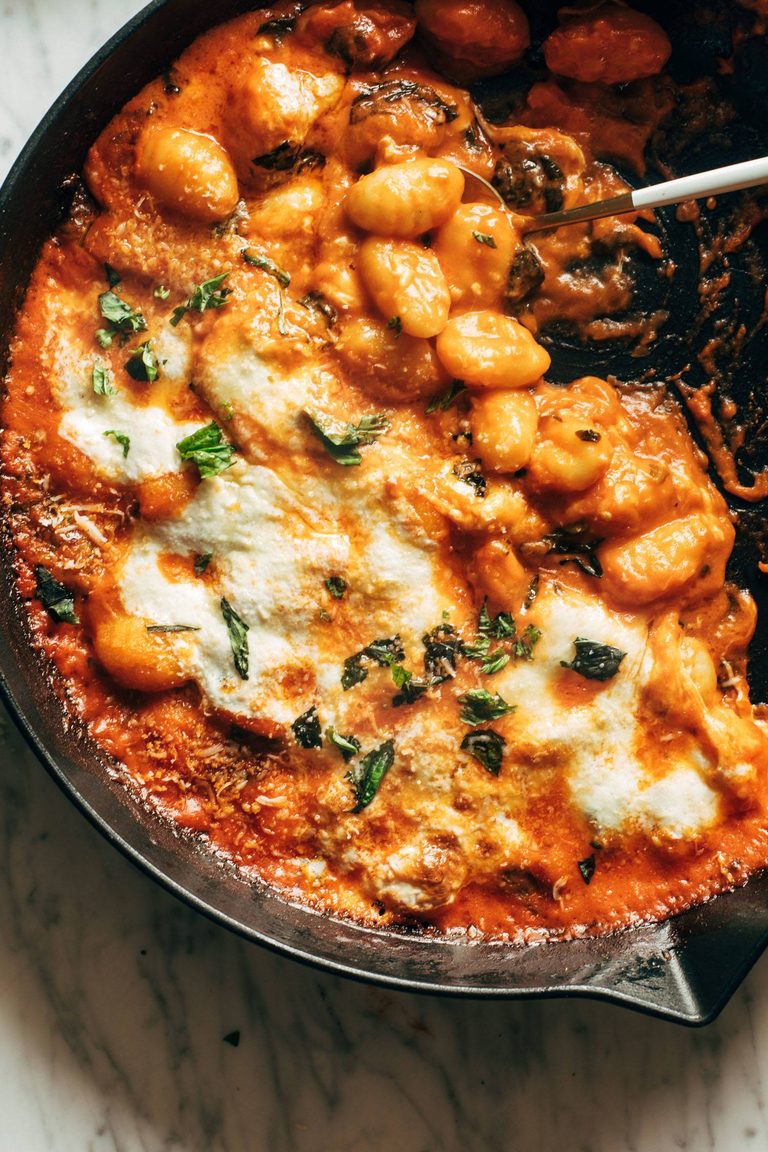
Three Cheese Baked Gnocchi with Spinach
This is so cheesy, cozy, and comforting and it really is a stunner all bubbled up in a skillet. Serve with bread and salad!
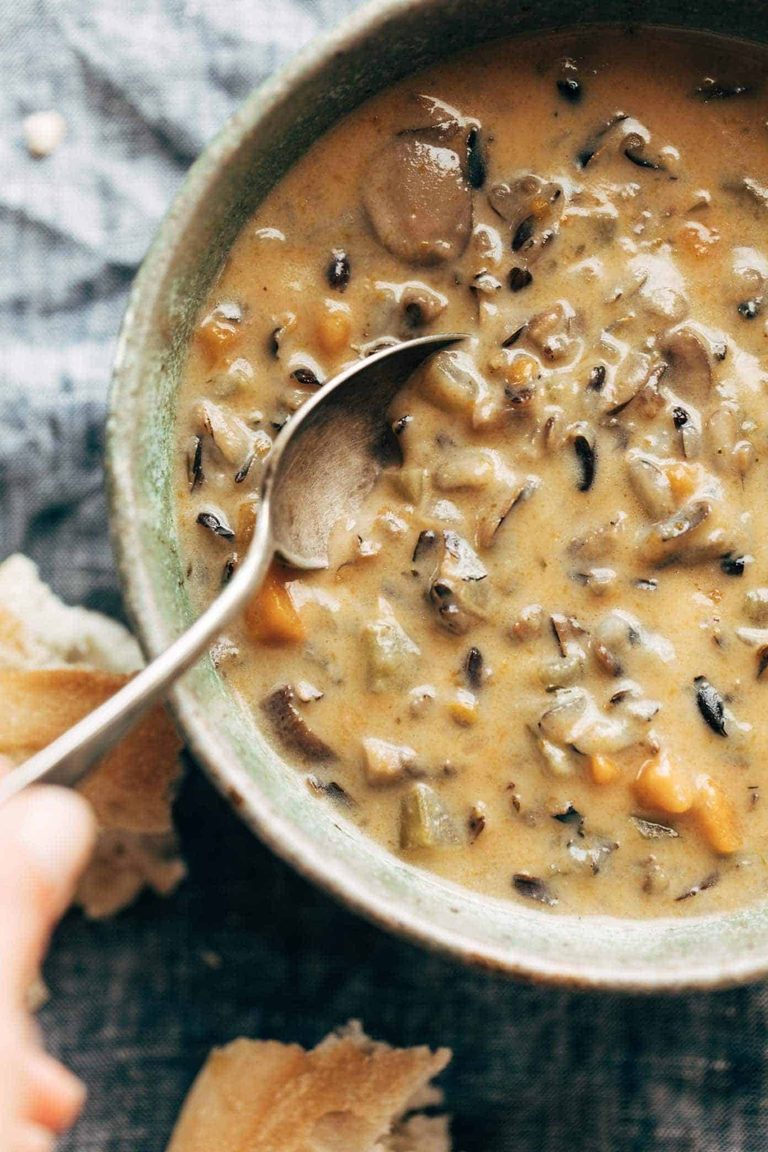
Instant Pot Wild Rice Soup
This really is the best wild rice soup (and as a Minnesotan, I know these things!). You can even add chicken too if that’s your thing, or keep it veg with mushrooms only. Either way, it’s not fall without it!
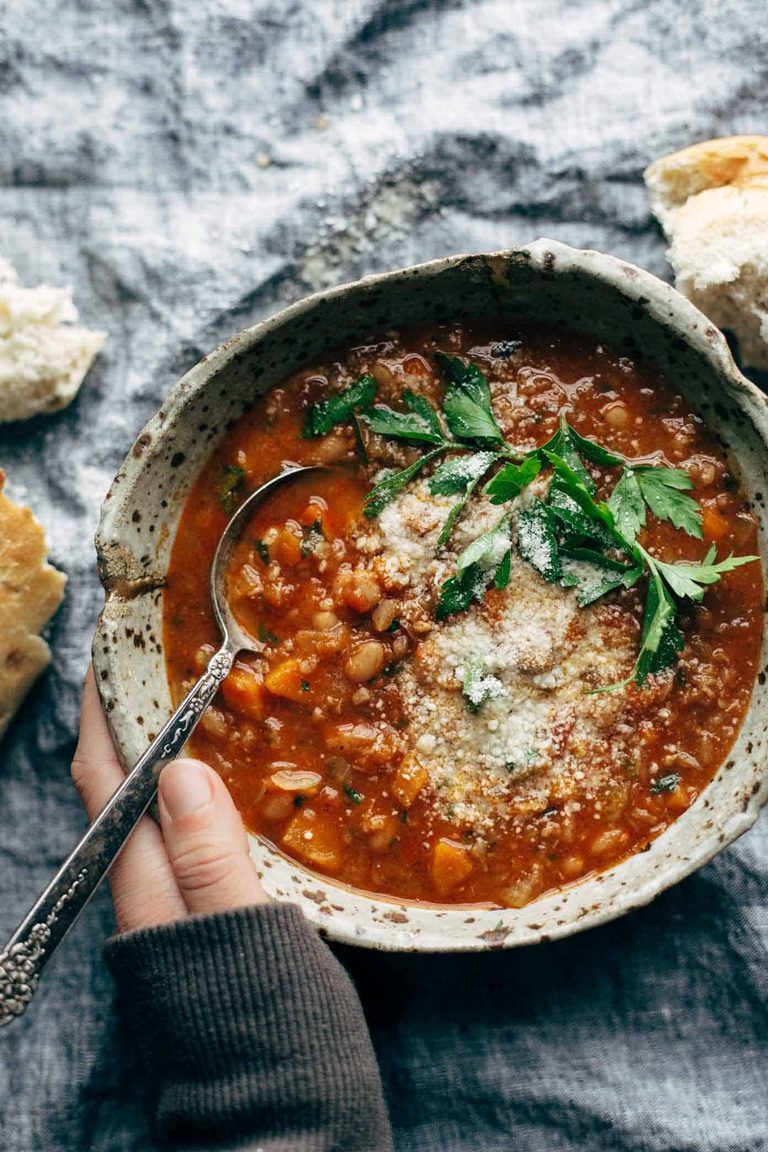
Instant Pot Minestrone Soup
This soup has a shocking amount of veggies! And packed with cannelini beans and cheese, it’s the perfect balance of nourishing and nutritious but also filling and comforting. Made all in one pot!
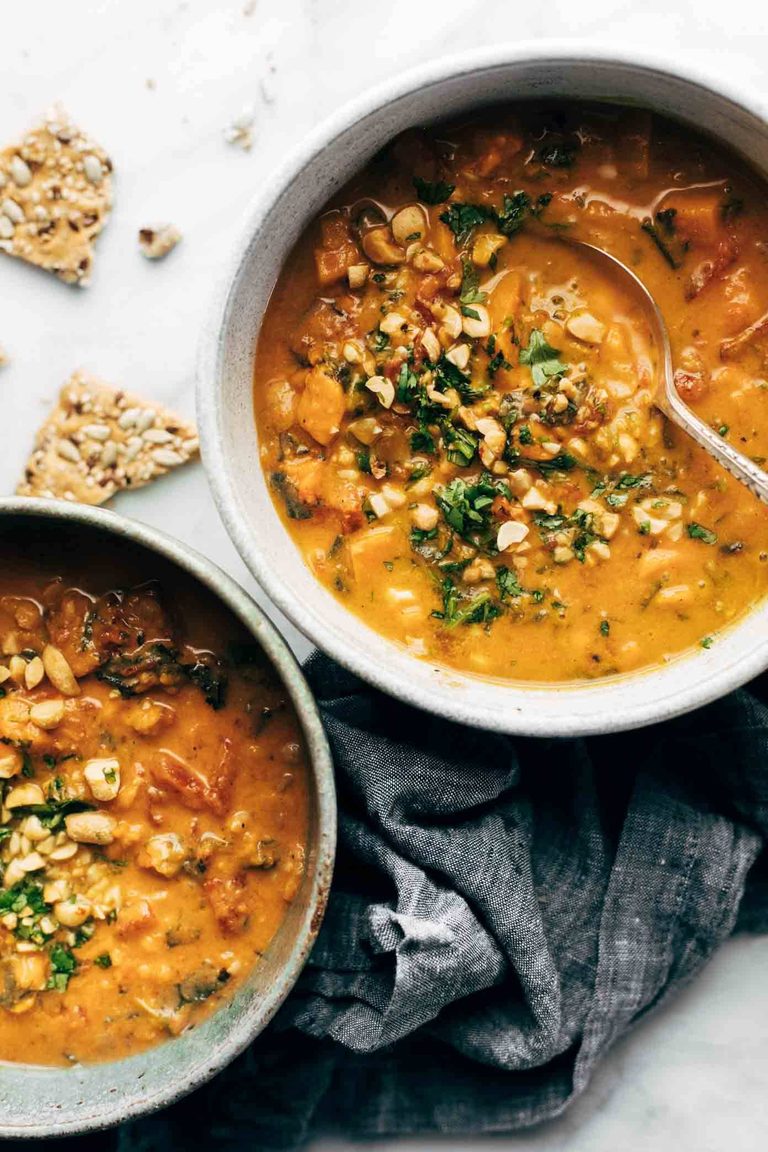
Spicy Peanut Soup with Sweet Potato + Kale
Another one of the most popular soups on the site! There’s something so magical about the sweet potatoes, coconut milk, and peanut butter coming together to make the most creamy (vegan!) bowl of deliciousness.
Red Curry Chicken Stir Fry with Spicy Cashew Sauce
Caramelized red curry chicken sits next to a bed of hot, fluffy rice and steamed broccoli and then totally sauced up with the BEST spicy cashew sauce. Ooof, this is so, so good.
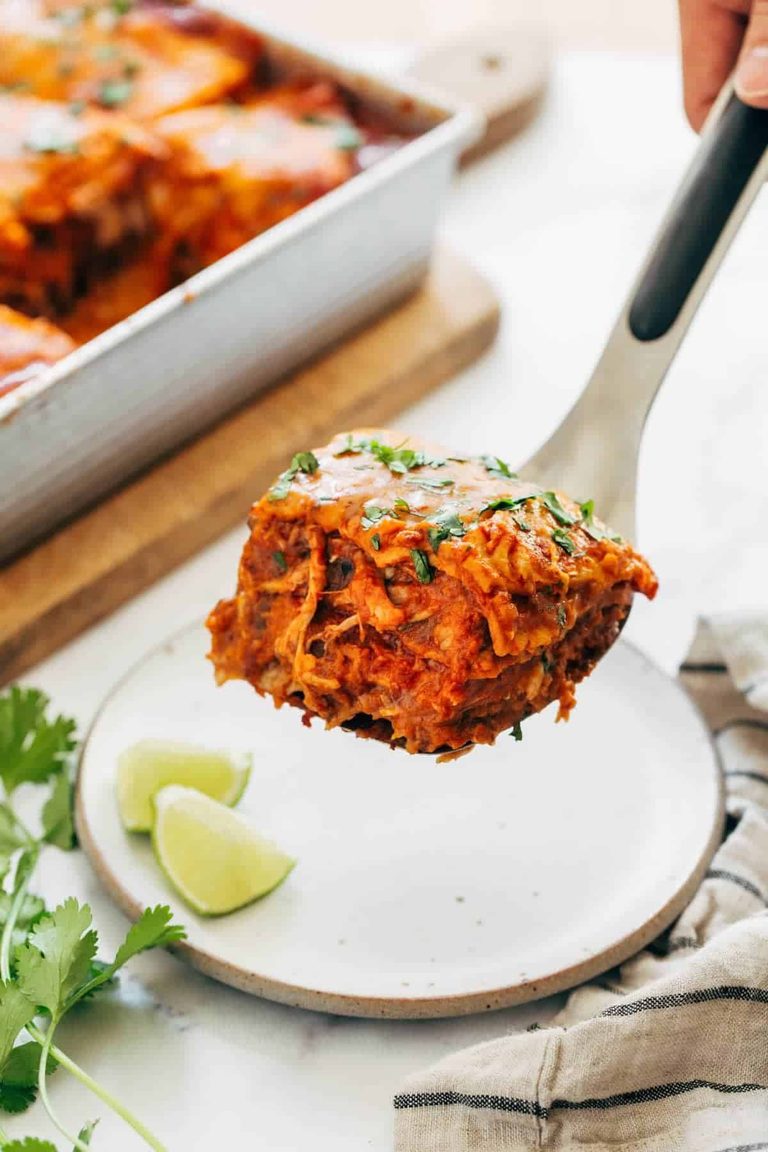
Chicken Enchilada Casserole
A five-ingredient stacked enchilada casserole layered with tortillas, beans, and chicken and covered with cheese and enchilada sauce. Basic, easy, filling, and so good.
Little Things That Make Fall Cooking Easy
I have a few favorite tricks and tools to make dinner easier throughout the week. Here’s what I recommend checking out! (FYI: Some links below are affiliate links!)
Air Fryer: I use this multiple times per week, if not every day. My favorite use is for the Air Fryer Chicken – it is the best chicken I’ve ever made and is quick enough to add to a dinner plate in under 15 minutes.
Instant Pot: Perfect for soups, and a whole lot of other things!
Slow Cooker: The OG of making dinner easier. There are several recipes above that use it, and so many others to enjoy! The bonus is that it also makes your house smell amazing on cozy chilly nights after school/work.
Freezer Meals: This kit of freezer meals is a lifesaver. You can prep up to 22 meals, stick them in the freezer, and pull them out to get dinner on the table (hands-off!) quickly and easily.
Happy fall to you and yours! Here’s to making weenight cooking easier!
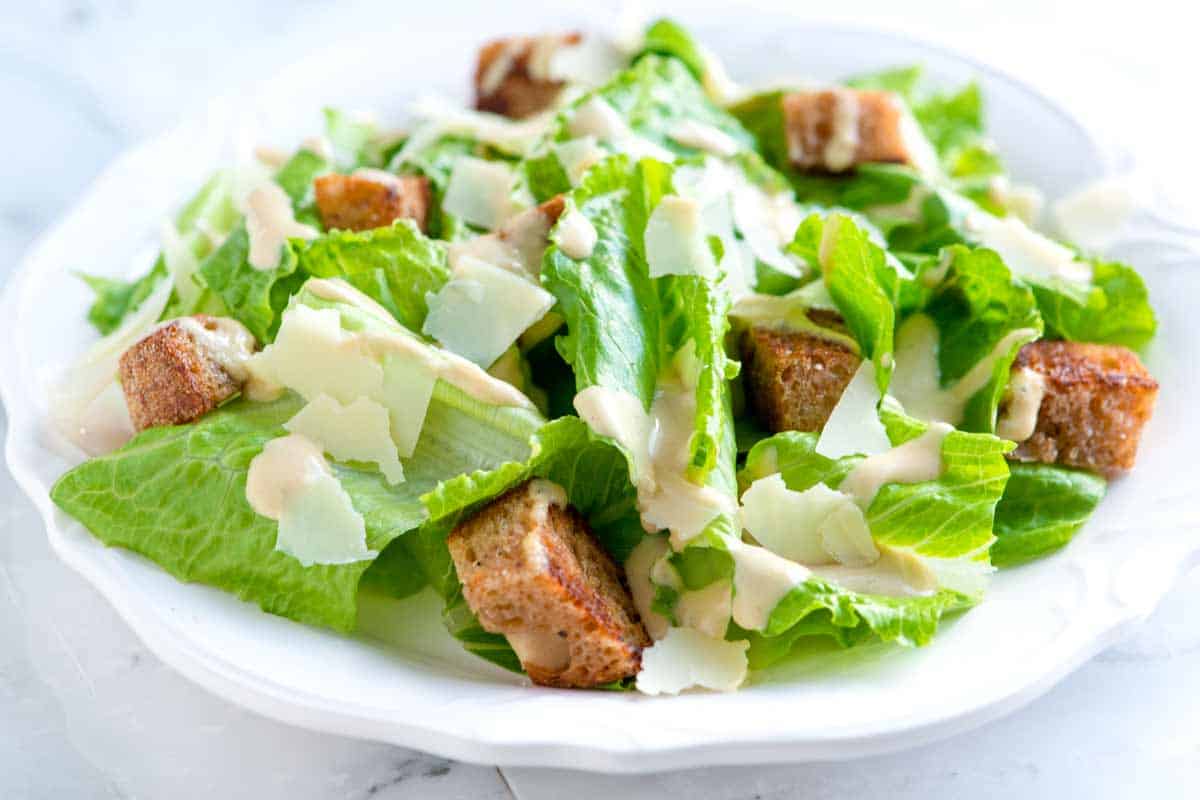
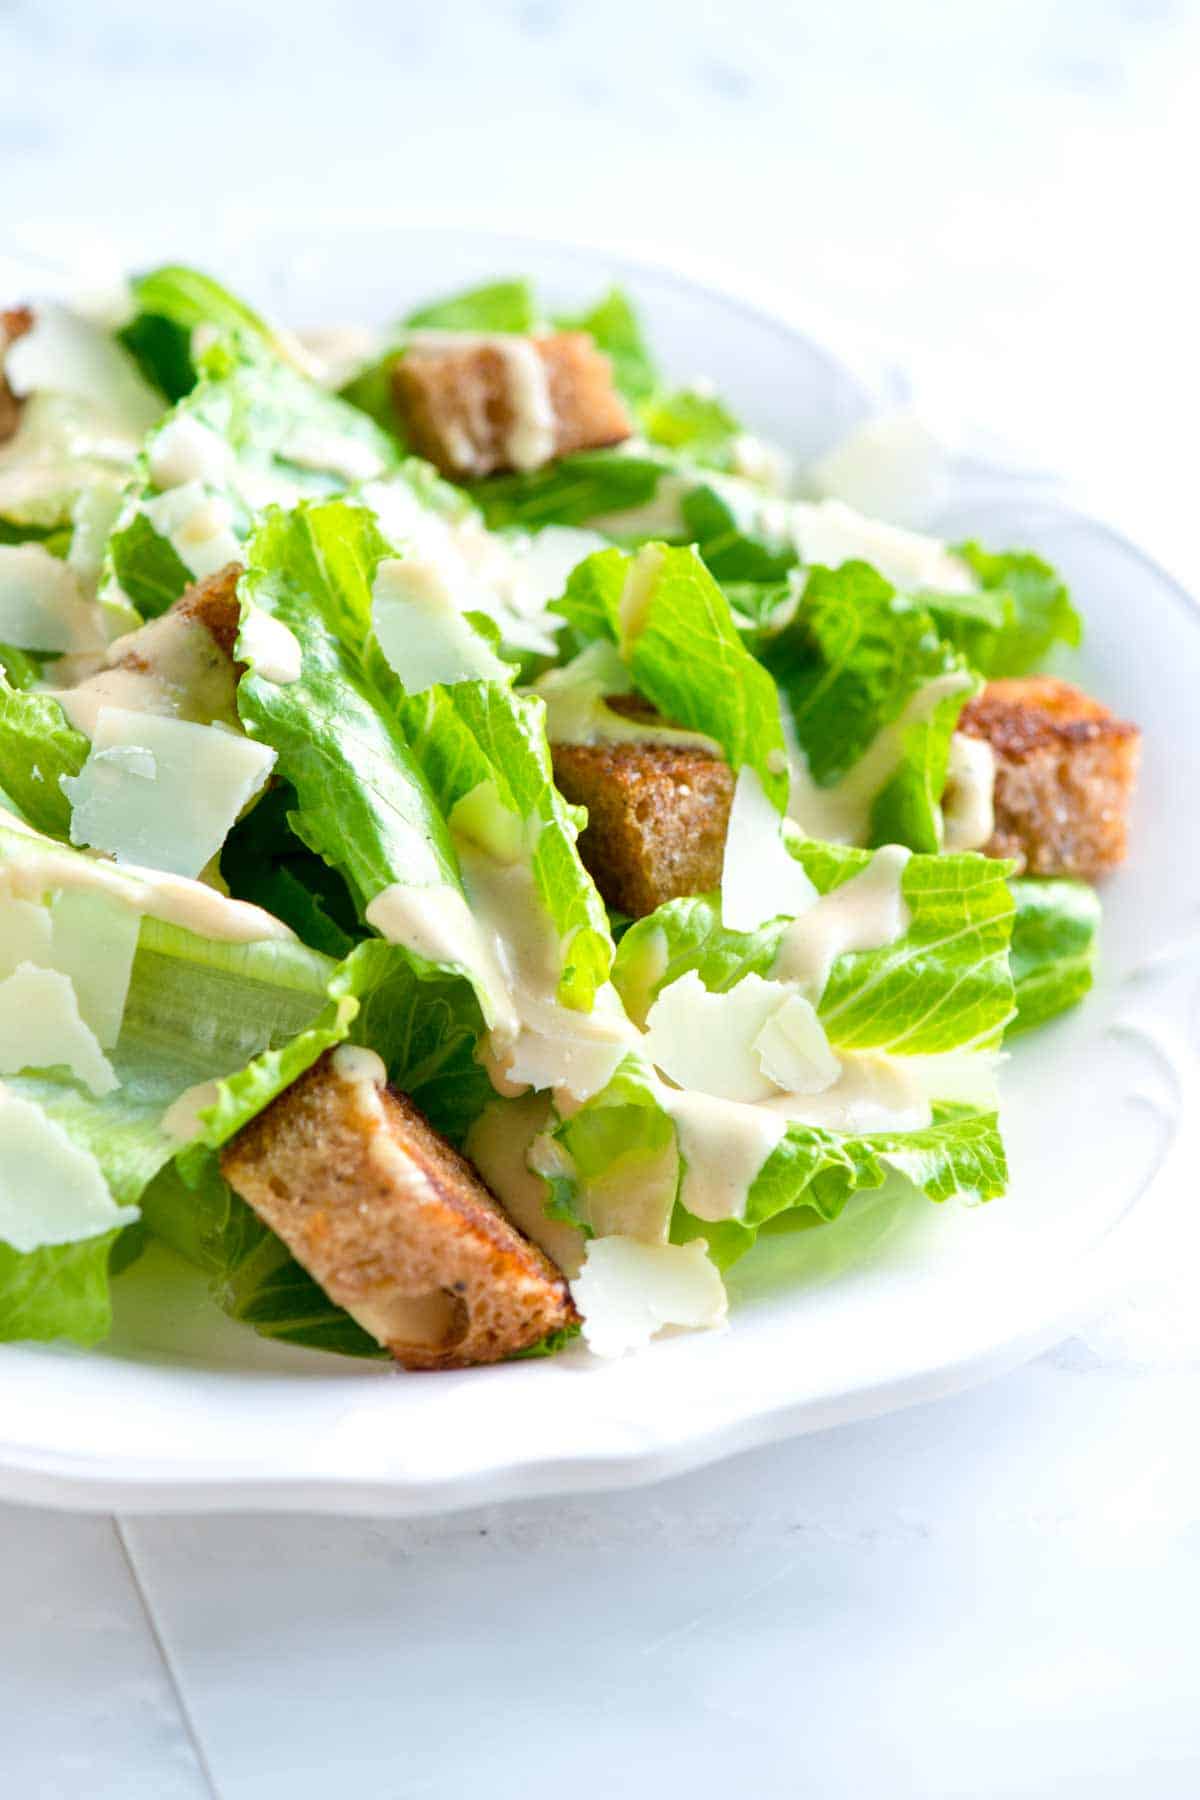
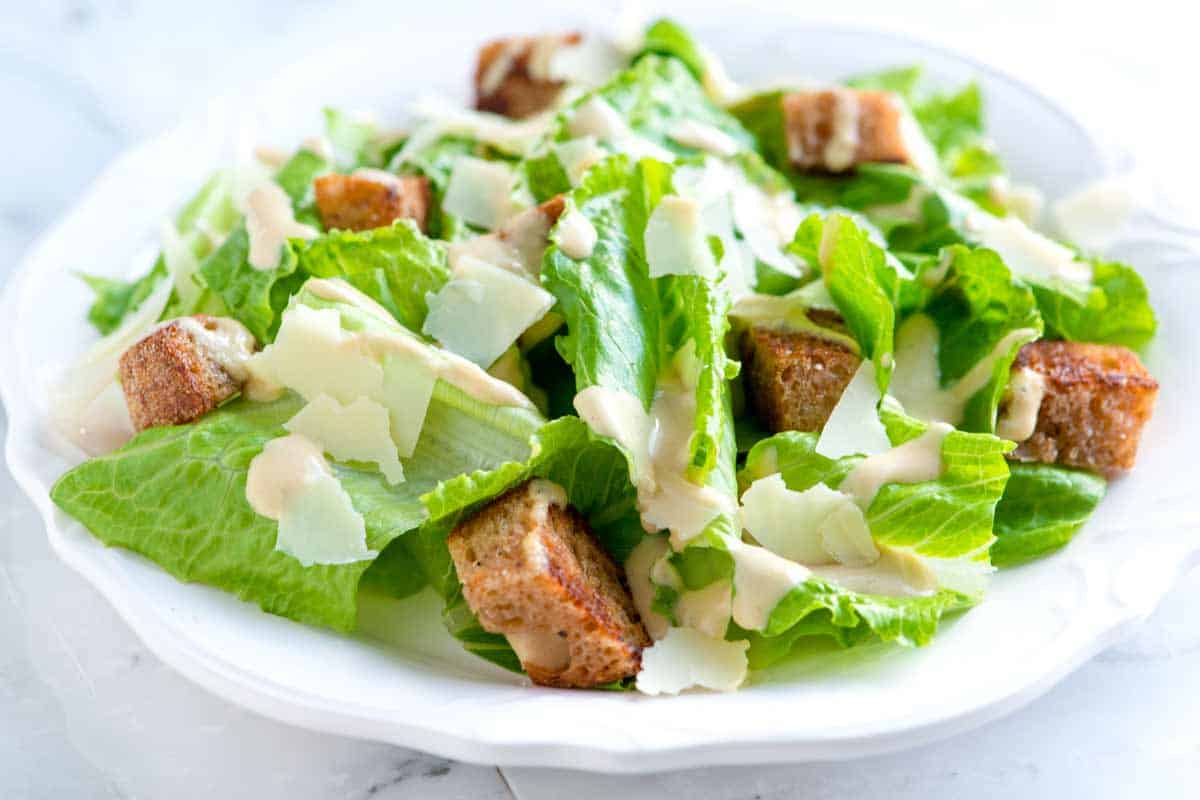
I love this simple Caesar dressing made without eggs or mayonnaise. Our eggless dressing is easy to make, light, and super flavorful!
You’ll love this egg-free Caesar dressing recipe. Instead of using egg yolk as our base to make the dressing creamy, we make a vinaigrette-style dressing with garlic, lemon, anchovy, parmesan, and olive oil. It’s delicious and still surprisingly creamy!
I love Caesar salad (especially chicken Caesar salad), and making your dressing at home is easy and tastes much better than store-bought. To see my classic dressing made with egg yolks, see this Caesar dressing.
Key Ingredients
Parmesan Cheese: I always add a handful of parmesan to my salad, but I also love adding a few tablespoons of grated parmesan to the dressing for extra flavor. I do the same when making my Italian dressing.
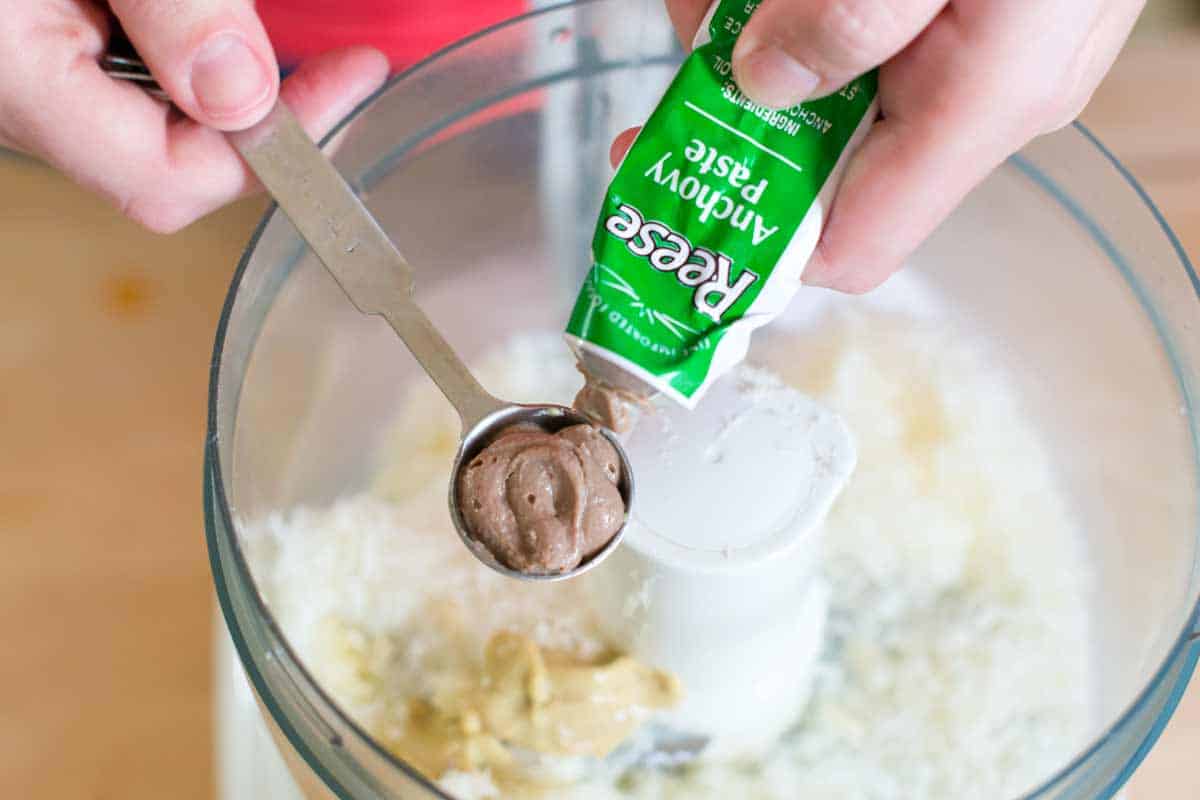
Anchovies: These little fish add a savory depth to the dressing we associate with classic Caesar salad. You can use whole anchovies or anchovy paste.
Olive Oil: I prefer a light and fruity olive oil for this simple dressing. Since you’ll be using 1/4 cup, choose one you really enjoy the taste of.
Garlic: I use one clove, which gives it a mild garlic flavor. You can adjust the amount depending on how much you love raw garlic.
Lemon: Fresh lemon juice cuts through the richness of the dressing and emulsifies with the olive oil to create a smooth vinaigrette.
Mustard and Worcestershire: Mustard acts as an emulsifier, helping to bind the ingredients together, while Worcestershire sauce adds a savory, umami flavor that we all associate with Caesar salad.
Sour Cream: This is optional but makes the dressing super creamy!
How to Make Eggless Caesar Dressing
You can make this dressing by hand, but a food processor blender makes it quick and creamy. To make it, add the parmesan, garlic, lemon juice, mustard, anchovy, and Worcestershire sauce and blend until smooth. Then, stream in the olive oil with the food processor running until you’ve got a thick and creamy dressing.
For extra creamy dressing, add a tablespoon or two of sour cream. (I always do this and love how creamy it makes the dressing.) Then, toss your eggless dressing with Romaine lettuce, add more cheese, and a handful of homemade croutons!
Easy Eggless Caesar Dressing
PREP
COOK
TOTAL
You can make this homemade egg-free Caesar dressing by hand, but it’s quicker and creamier when made in a food processor or blender. The sour cream is optional, but makes it extra creamy.
Makes 4 to 6 servings
You Will Need
1 cup (30g) finely grated parmesan cheese
1 garlic clove, peeled and finely chopped
2 tablespoons fresh lemon juice
1 teaspoon anchovy paste or 1 to 2 anchovies, smashed and minced
1 teaspoon Dijon mustard
2 teaspoons Worcestershire sauce
1/4 cup (60ml) extra-virgin olive oil
2 tablespoons sour cream, optional
Salt and fresh ground black pepper
Directions
Make Dressing
1Add the parmesan cheese, garlic, lemon juice, mustard, anchovy, and Worcestershire sauce to the bowl of a food processor or blender. Turn the machine on and let it run for 15 to 20 seconds.
2Scrape the sides with a spatula, turn the machine on, and let it run for 15 to 20 seconds.
3With the machine running, slowly drizzle in the olive oil.
4Add sour cream (if using) and season with salt and pepper. Let the machine run for 15 to 20 seconds until thick and creamy.
Adam and Joanne’s Tips
Storing: Eggless Caesar dressing will last up to 3 days in the refrigerator. Store it in an airtight jar or container. I do not recommend freezing this dressing. The emulsification will break as it thaws.
The nutrition facts provided below are estimates. We did not include additional salt.
Nutrition Per Serving Serving Size 1/6 of the recipe / Calories 147 / Total Fat 13.6g / Saturated Fat 4g / Cholesterol 11.3mg / Sodium 271.5mg / Carbohydrate 1.6g / Dietary Fiber 0g / Total Sugars 0.5g / Protein 5.4g
AUTHOR:
Adam Gallagher
We are Adam and Joanne Gallagher, the creators of Inspired Taste. Established in 2009, Inspired Taste grew from a childhood dream into one of the internet’s most trusted recipe sites with hundreds of reliable recipes, step-by-step videos, and expert tips.More About Us
From smooth and creamy hummus to crisp, cool salads, here are 20 appetizer recipes that we can’t stop making. They are easy to make, great for parties, and many are ideal for warmer-weather cookouts and BBQs.
Most people think of appetizers as the start of the meal, but after years of cooking and entertaining ourselves, they are also perfect for combining to make a main meal.
Some of my favorites right off the bat are the smoked salmon dip (we did live in the PNW, so this one had to make it, right?), our easy bacon-wrapped jalapeños, and our regular readers would be mad if I didn’t highlight our original hummus recipe! On a similar note, Joanne wouldn’t let me off the hook if I didn’t mention her guacamole. She makes it all the time, and it’s always one of the first things to go. Find all 20 appetizer recipes below!
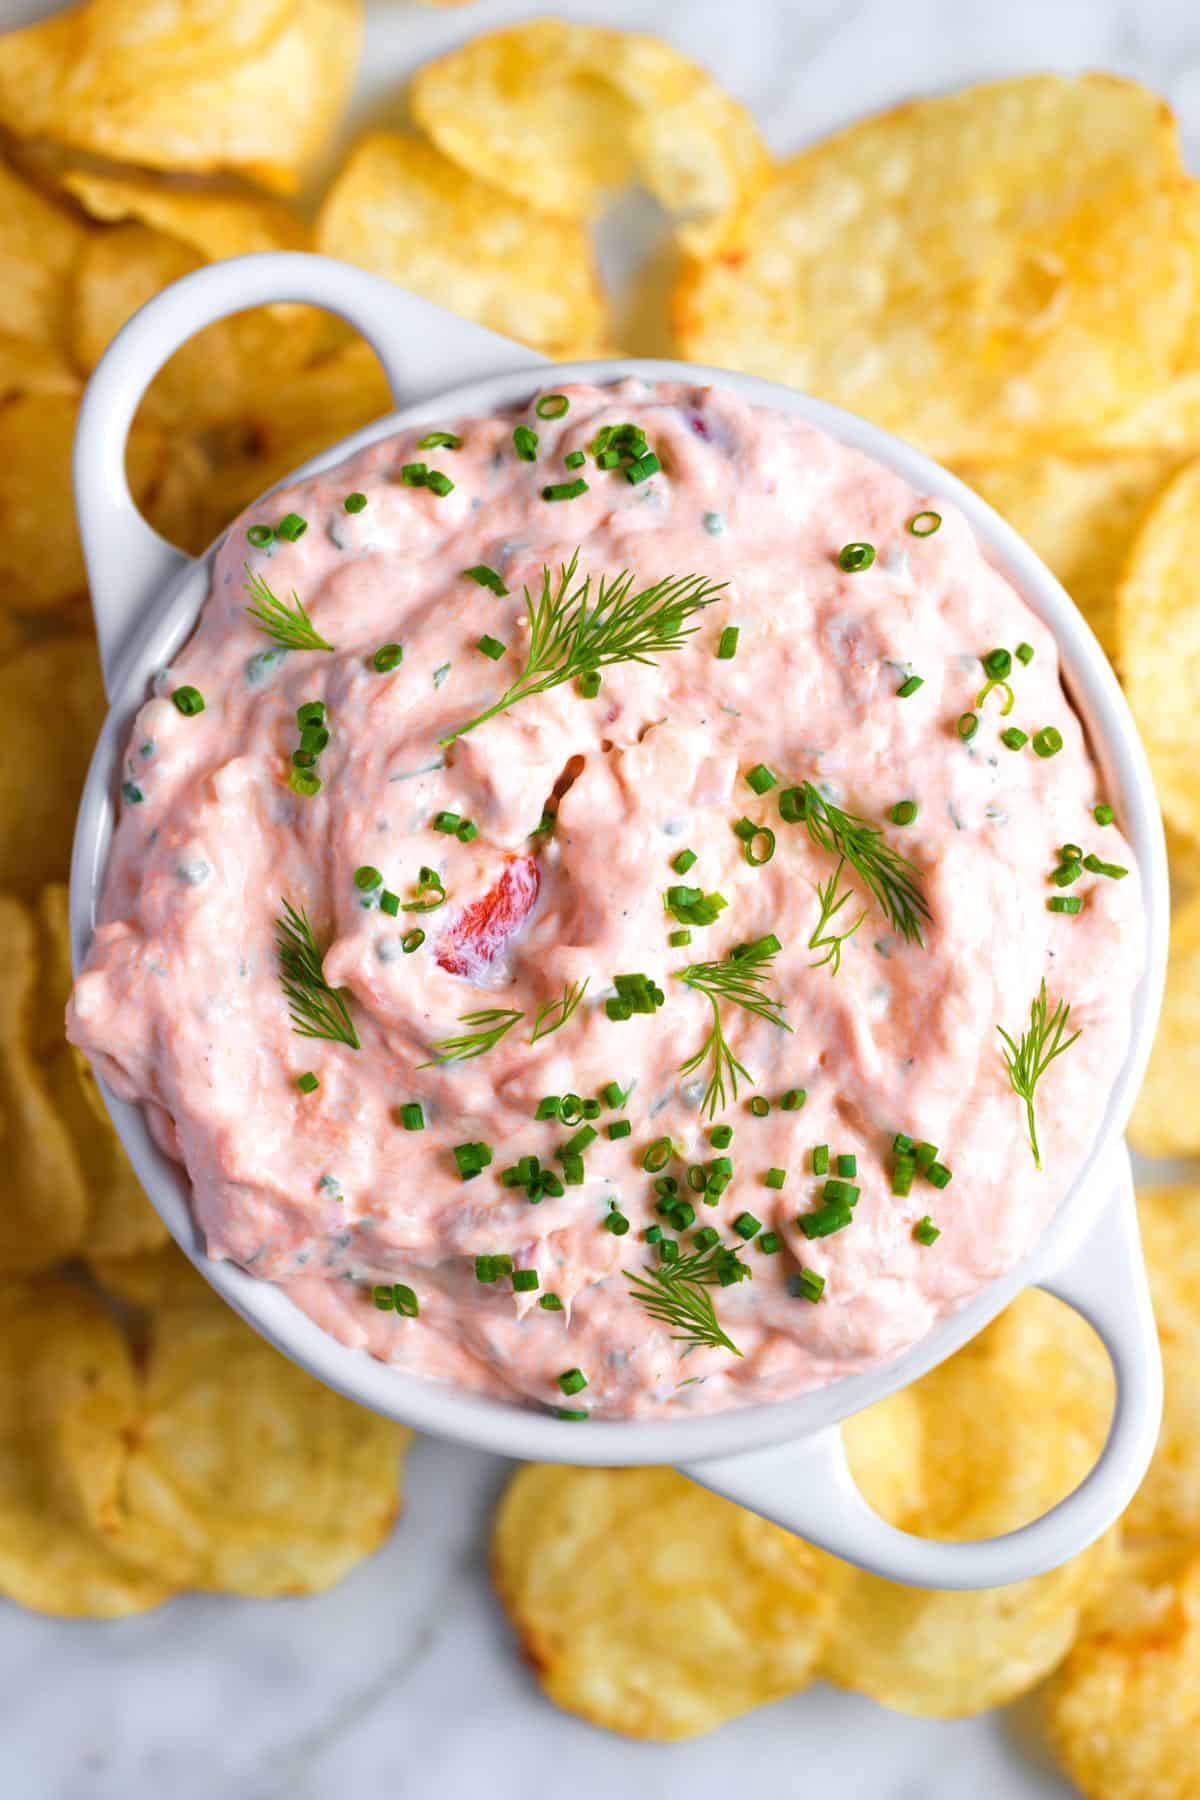
Easy Smoked Salmon Dip
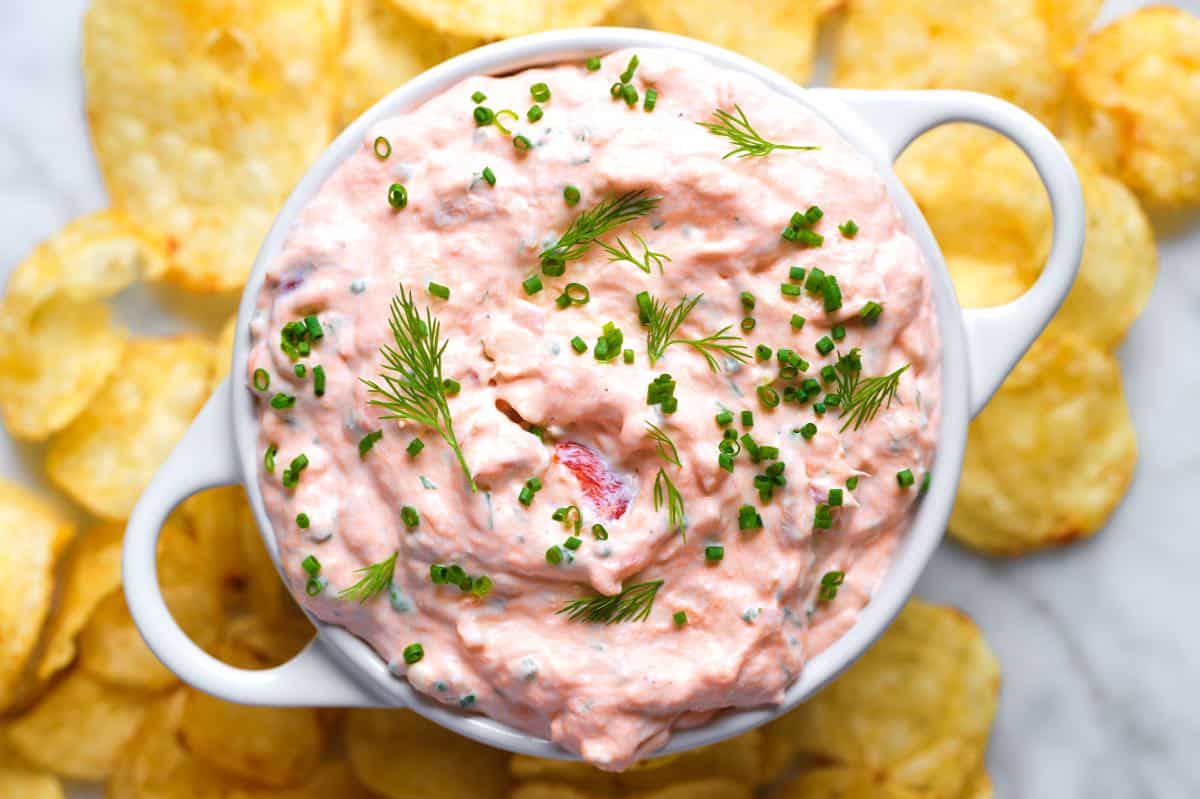
You’ll love our smoked salmon dip recipe. It’s incredibly creamy and absolutely delicious. I love serving it with thick kettle chips, crackers, sliced bread, or even spread onto bagels.
Easy Smoked Salmon Dip
I can’t get enough of this creamy, delicious salmon dip! We love smoked salmon and are always looking for more ways to use it. This smoked salmon dip has quickly turned into one of my favorite recipes!
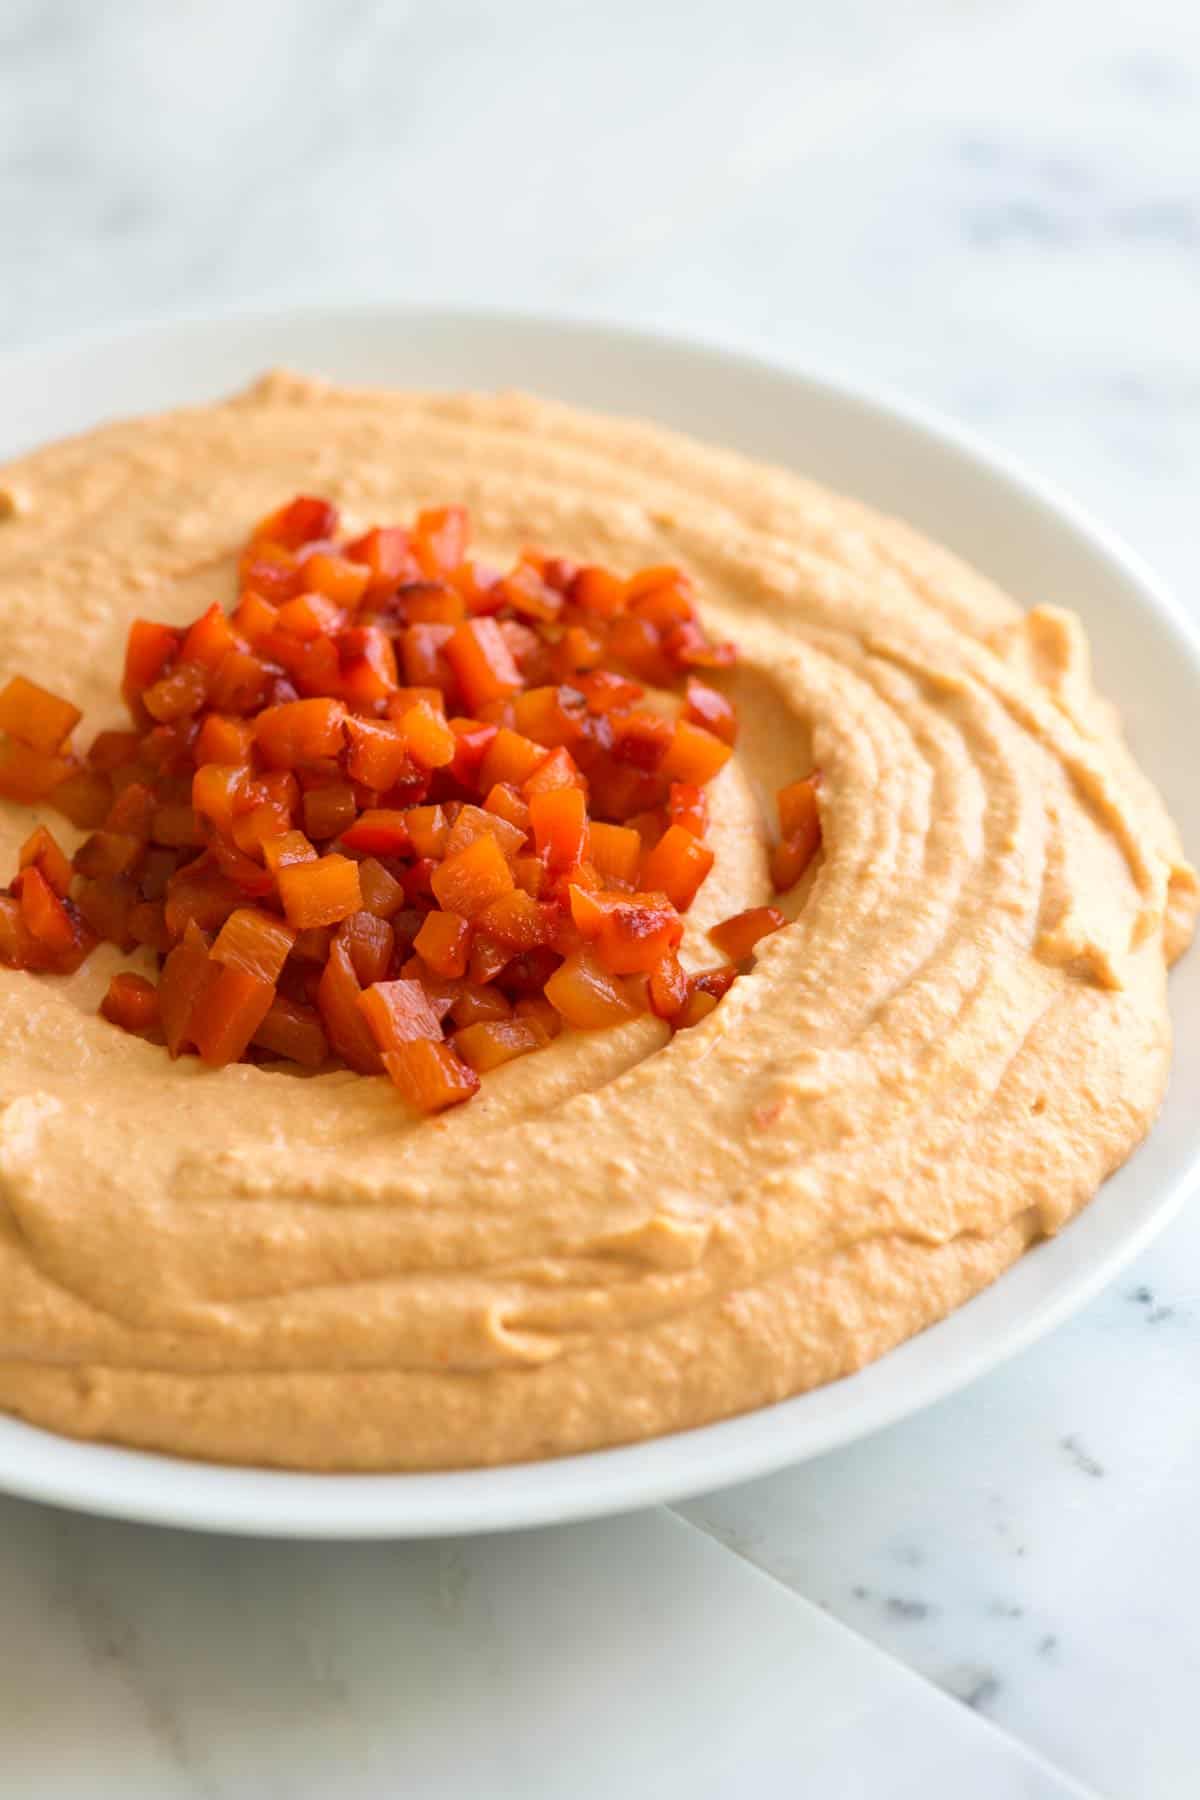
Easy Roasted Red Pepper Hummus
My easy roasted red pepper hummus is made with sweet red bell peppers, chickpeas, garlic, and tahini. It’s super simple to make and tastes much better than the hummus you can buy at the store.
Easy Roasted Red Pepper Hummus
After falling in love with how easy it is to make hummus at home, we’ve been playing around with more of our favorite store-bought hummus flavors. I love roasted peppers, and am excited to share this roasted red pepper hummus recipe with you! It’s creamy, smooth, and so delicious.
Perfect Guacamole
My family swears by this guacamole recipe! The best, most authentic guacamole starts with fresh ingredients and a few simple tricks that guarantee perfect texture and flavor. All you need are avocados, onion, cilantro, lime, tomato, and salt. It’s so simple, and so good!
Perfect Guacamole
I’m not kidding when I say this homemade guacamole does not last long in my house. The whole family loves it so much my teenage niece has even made it her special dish for years (and that’s how you know it’s good!).
Seriously Good 7 Layer Dip
I’m planting my flag and declaring this the ultimate 7 layer dip. Arguably the best party appetizer you can serve, this dip features delicious layers of homemade black bean puree, guacamole, spiced sour cream, cheese, and more.
Seriously Good 7 Layer Dip
What makes this dip so delicious is the black bean puree, which we make from scratch. By cooking our own beans, we pack in so much flavor from fresh garlic, onion, and spices. It’s an easy step that makes all the difference in the world. Once you try seven layer dip made with this puree, I know you’ll never go back.
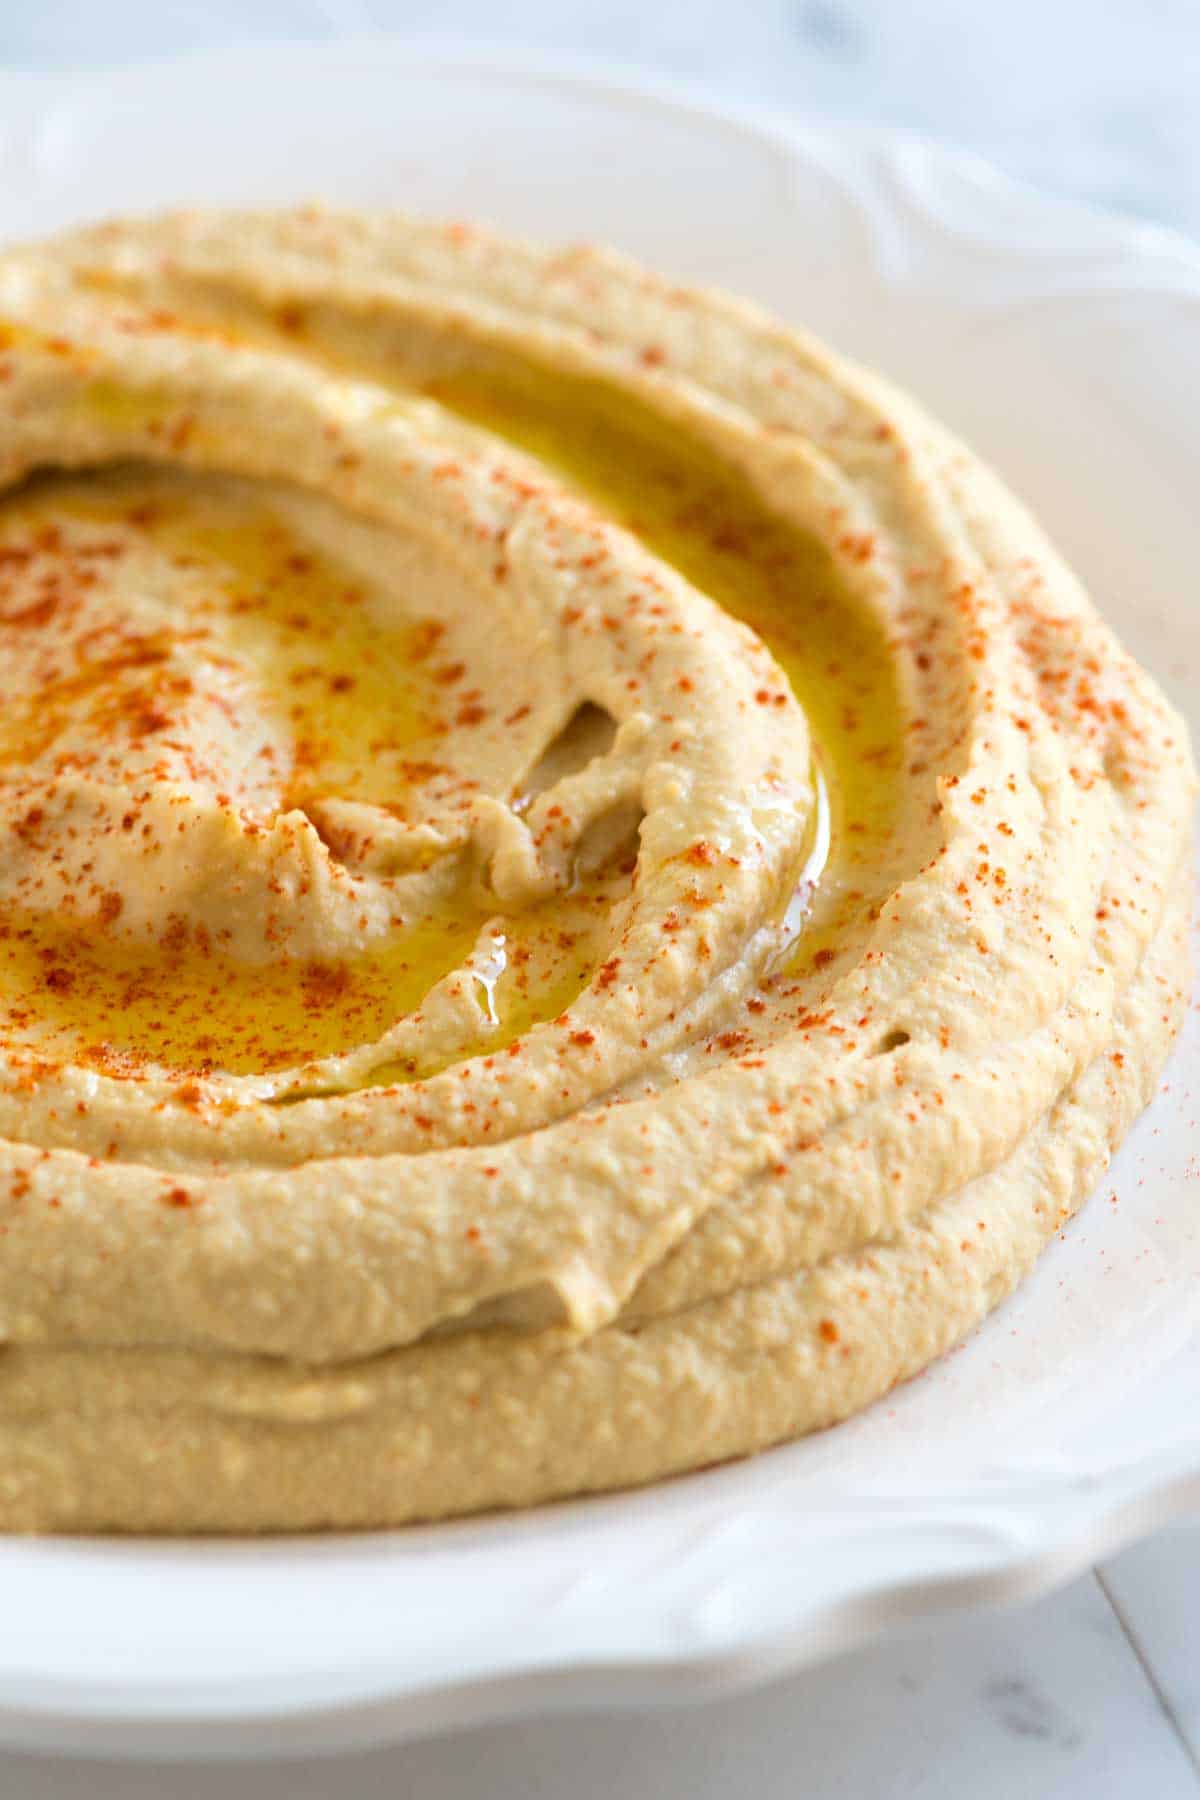
Easy Hummus (Better than Store-Bought)
My favorite hummus recipe! With a few simple tricks, you can make the best creamy, smooth homemade hummus, and yes, it’s better than store-bought.
Easy Hummus (Better than Store-Bought)
Hummus is a delicious spread (or dip) made from chickpeas, tahini, lemon, and spices. It is a popular dish in the Middle East and the Mediterranean. You can find it in most grocery stores, but trust me, you’ll want to skip those and make your own. Homemade hummus is just so much better!
Easy Bacon Wrapped Shrimp
These bacon wrapped shrimp are the ultimate party appetizer! They’re coated in a spicy maple glaze and are perfect for any party. With our recipe, you’ll have crispy bacon and perfectly cooked shrimp!
Easy Bacon Wrapped Shrimp
Our bacon wrapped shrimp recipe is incredibly easy to make! The shrimp are so juicy and flavorful. They are high on my list of favorite appetizer recipes! We coat them in an irresistible spicy maple glaze that will have everyone coming back for more.
Easy Bacon Wrapped Jalapeno Poppers
Learn how to make the easiest, most delicious jalapeño poppers! With my recipe, you’ll have perfect, bacon-wrapped poppers in no time. Make an extra batch because these fly off the plate!
Easy Bacon Wrapped Jalapeno Poppers
These bacon wrapped jalapeño poppers are shockingly good. I’ll take a few of these over the store-bought fried poppers sold in grocery stores any day! Thin bacon is the secret to these incredible cream cheese stuffed poppers. Its fat renders down into the filling and over the peppers. So good!
Chili Lime Shrimp Wonton Cups
These chili lime shrimp wonton cups are the perfect party appetizer! We bake wonton wrappers in the oven until crisp, fill them with arugula and lime sour cream, and then top them with a big juicy chili lime baked shrimp.
Chili Lime Shrimp Wonton Cups
These easy wonton cups are like mini shrimp tacos. The shrimp are spiced with chili powder, the lime brightens everything up, and the arugula keeps the whole thing fresh. So many of our readers have made these for parties with great success!
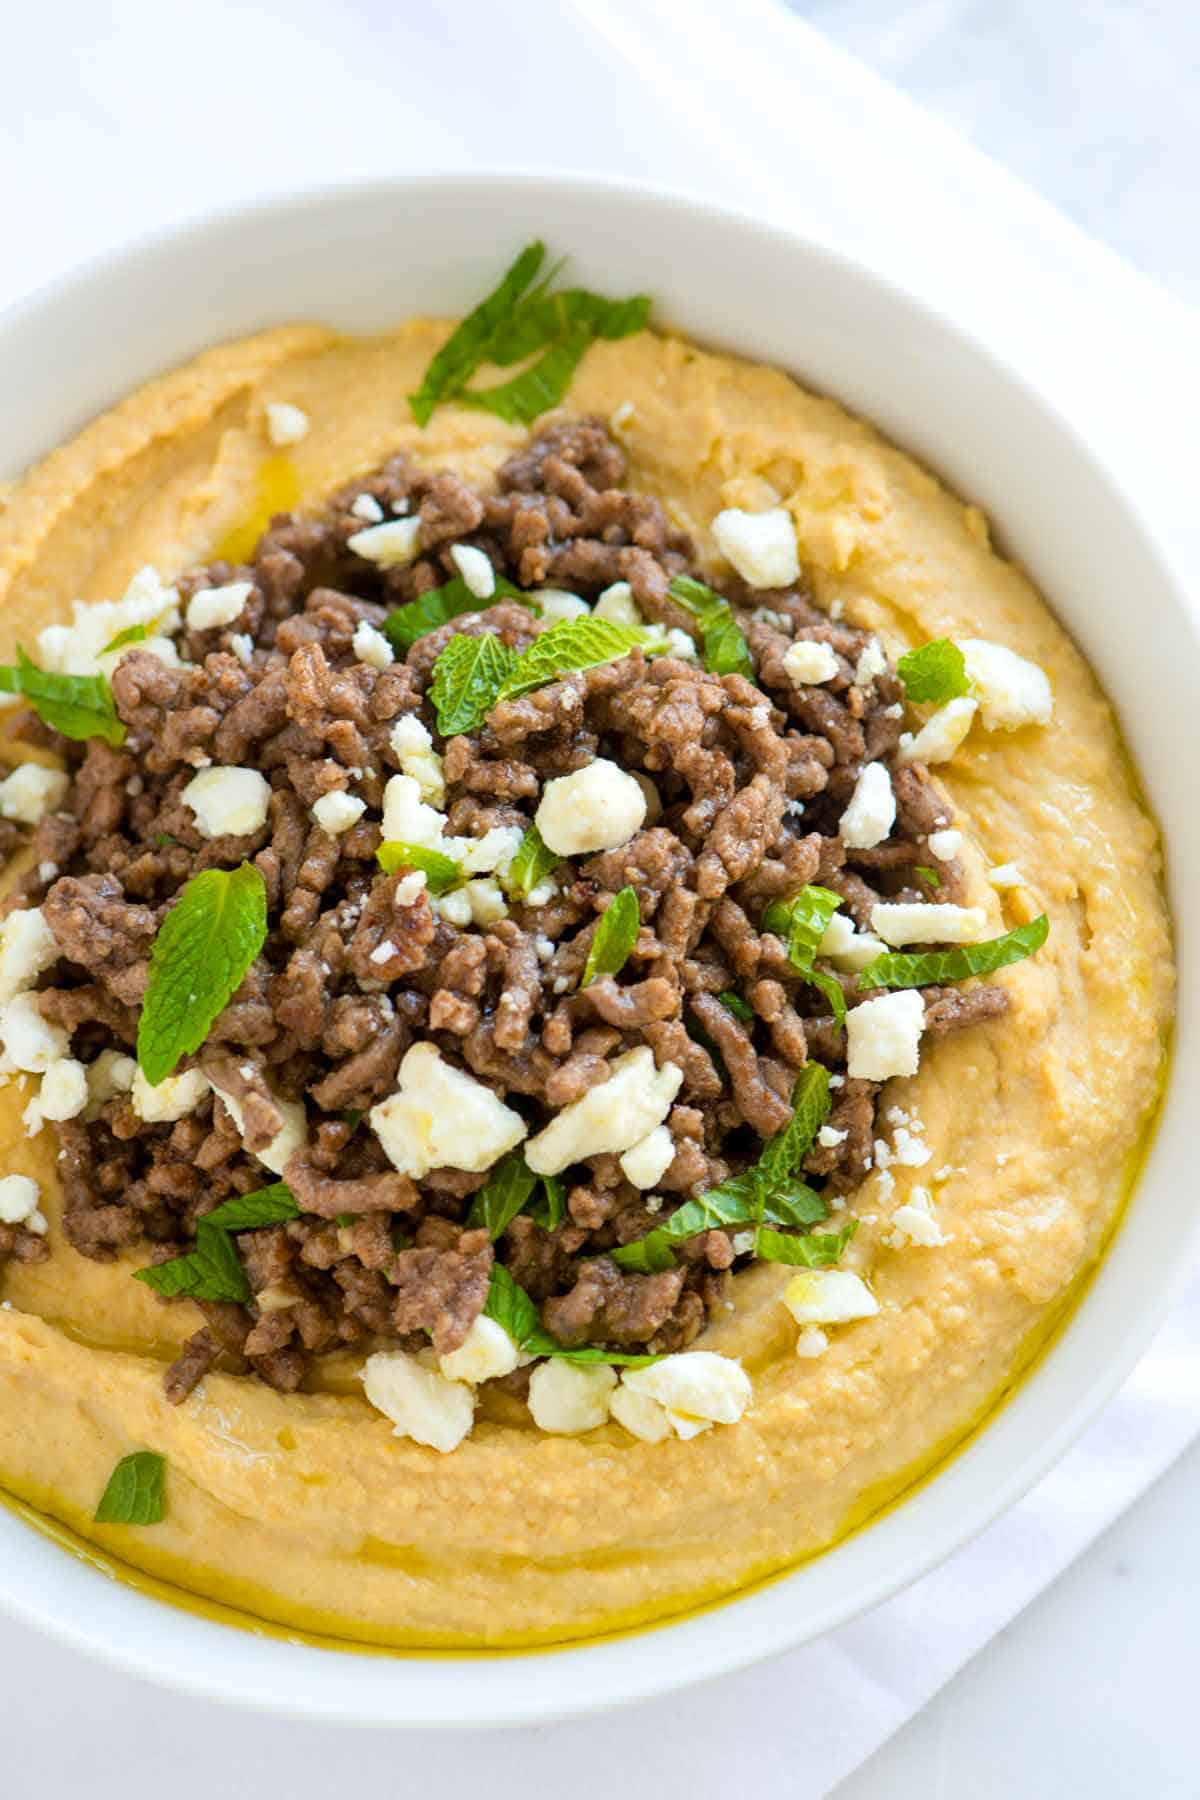
Hummus with Spiced Ground Beef, Feta and Mint
How to make hummus topped with spiced ground beef, feta cheese and mint.
Hummus with Spiced Ground Beef, Feta and Mint
A spiced up and easy ground beef recipe with cumin, coriander and spicy cayenne pepper that’s added to a big bowl of creamy hummus.
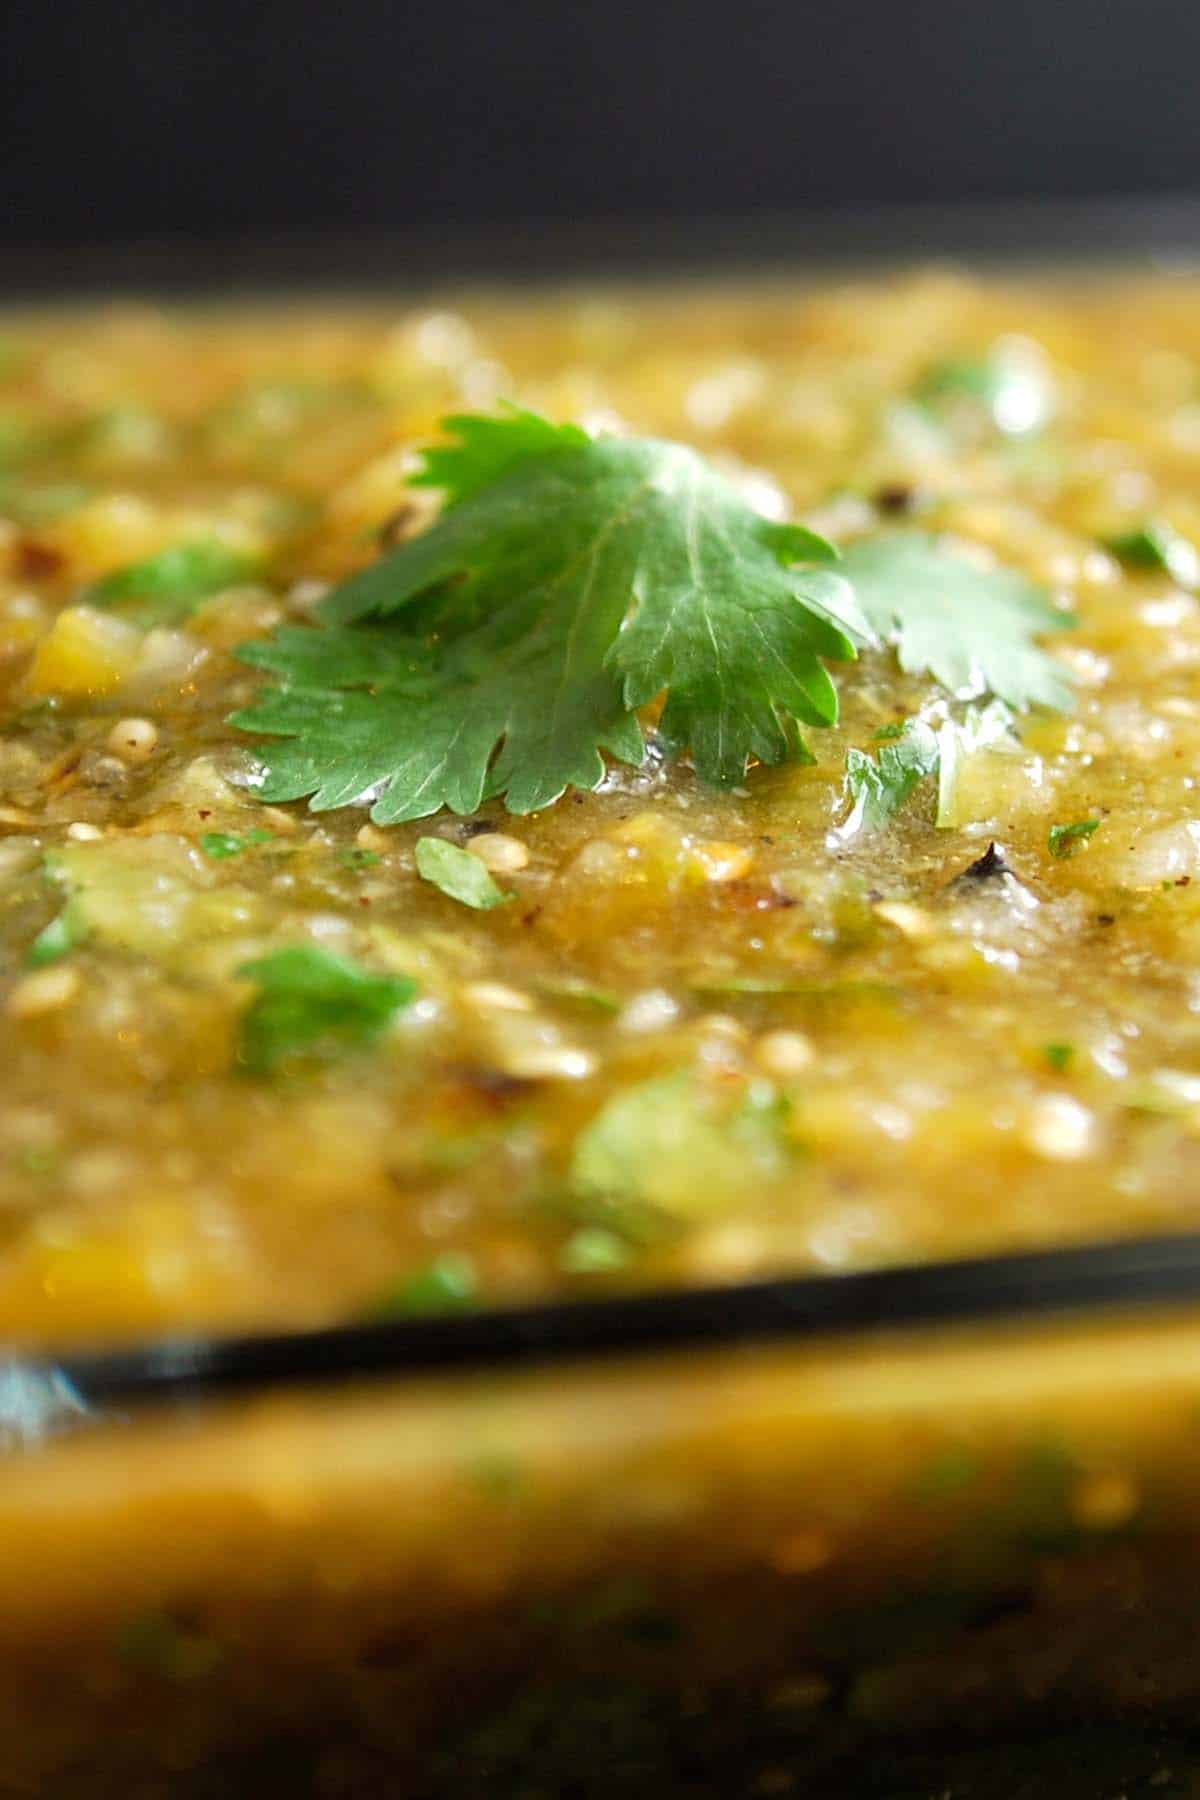
Roasted Tomatillo Salsa Verde
Our Mexican salsa verde recipe made with roasted tomatillos, chile peppers, and garlic is genuinely one of my favorite homemade salsa recipes! It’s easy, incredibly flavorful, and makes everything taste better. Trust me, once you try it, you’ll be hooked!
Roasted Tomatillo Salsa Verde
We shared this roasted tomatillo salsa recipe years ago, and so many of our readers have kept coming back to it over the years. This one is a keeper! To make this easy green salsa, we roast tomatillos alongside other ingredients like chiles and garlic, guaranteeing so much flavor!
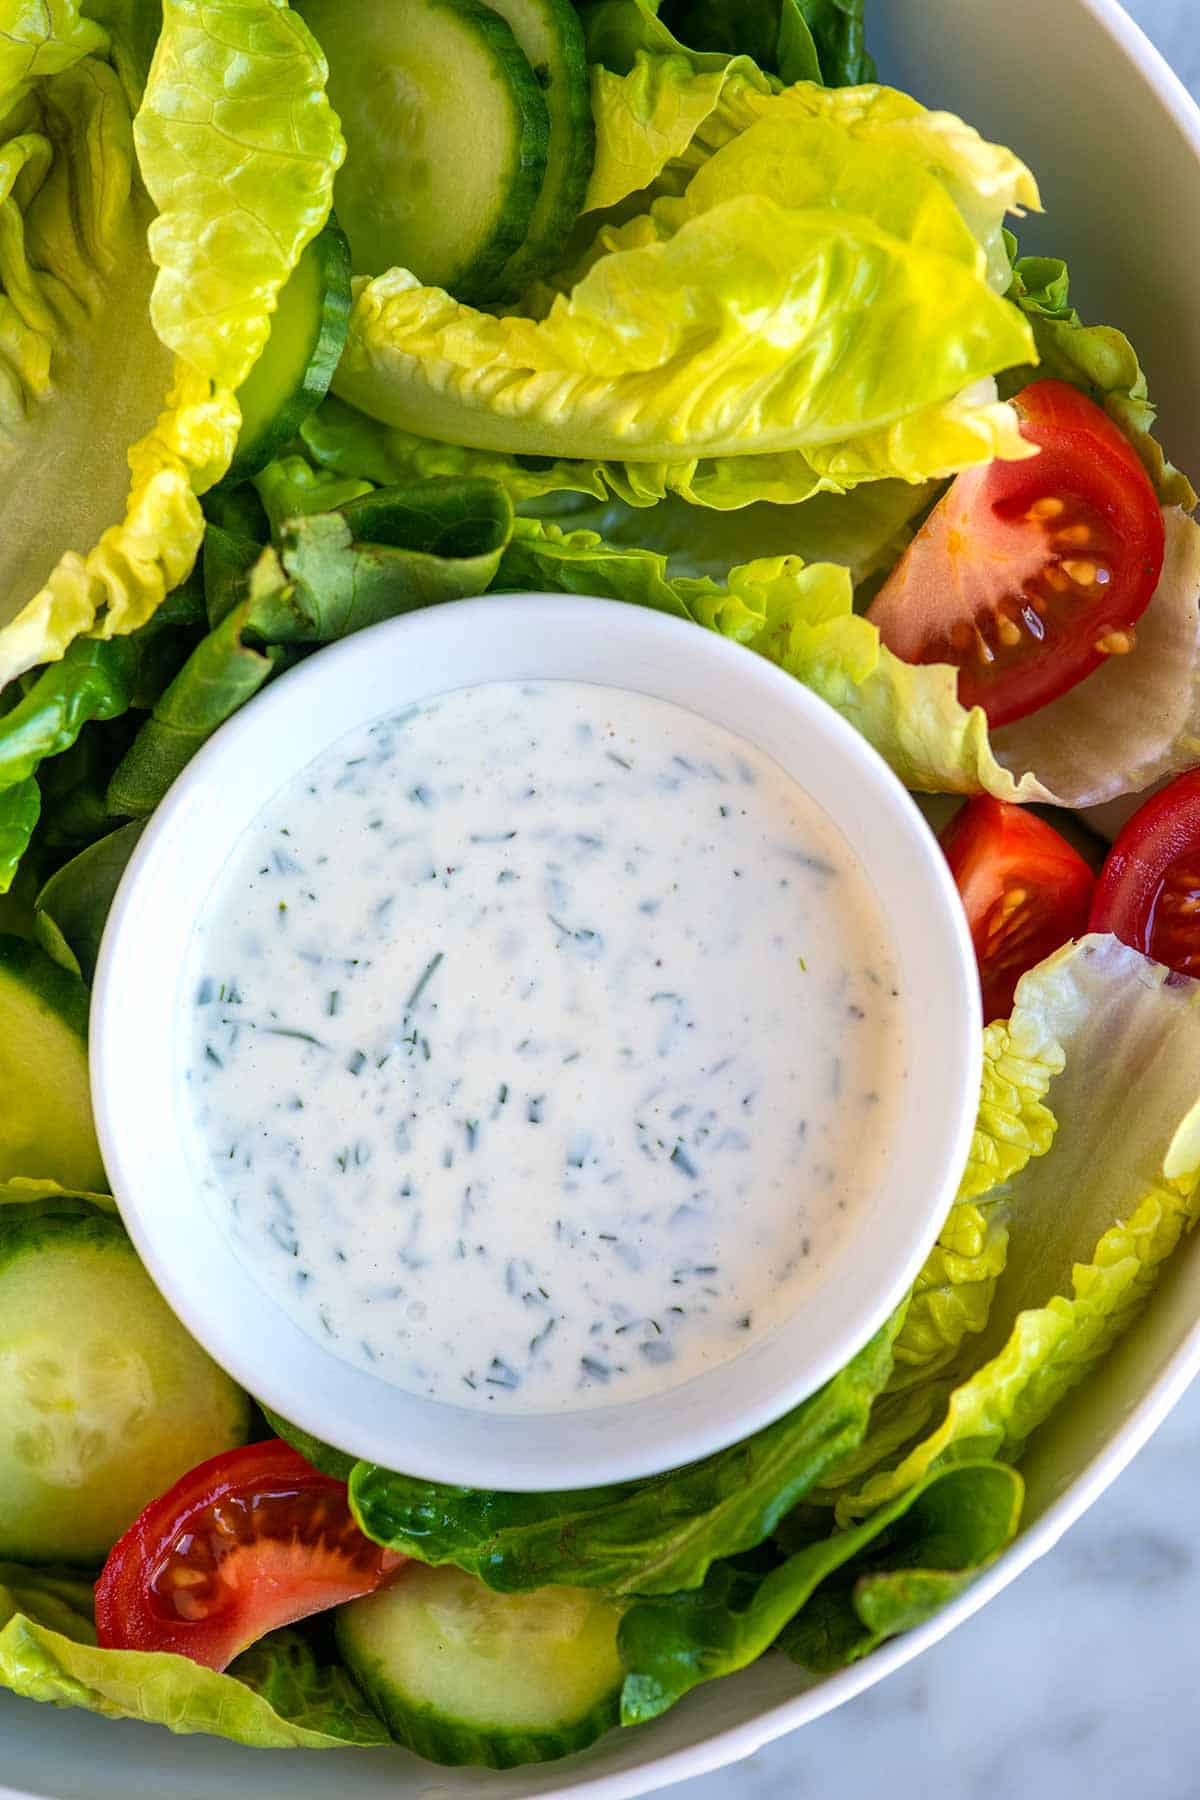
Easy Homemade Ranch & Veggies
This homemade ranch dressing recipe is so easy and delicious that it will make you ditch the store-bought bottles for good. It’s extra creamy and perfect for salads and dipping!
Easy Homemade Ranch
I’ve always loved ranch dressing, and this homemade version is truly the best I’ve had. My homemade ranch dressing is incredibly simple to make and tastes so much better than what you can buy at the store (promise). Serve it with lots of colorful veggies for a super easy appetizer.
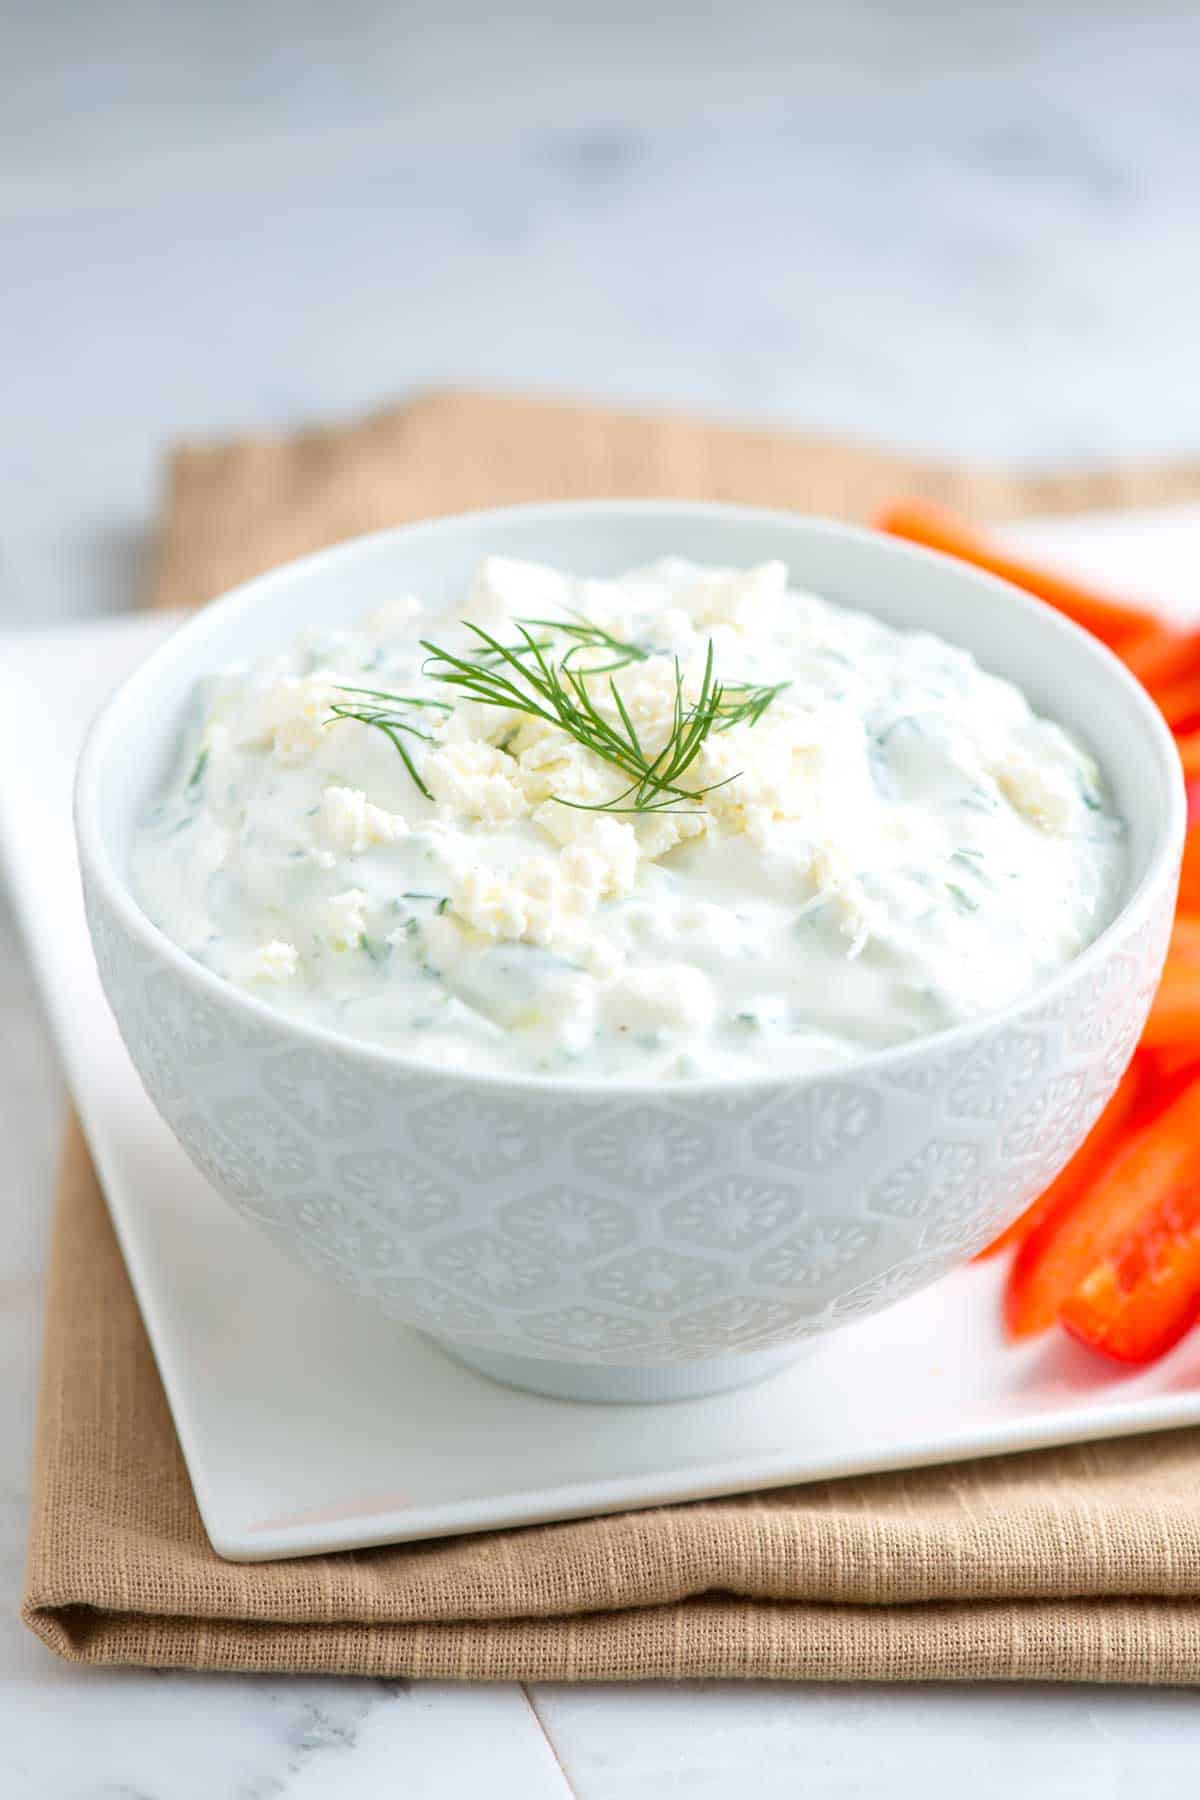
Feta Tzatziki
We love this thick, creamy tzatziki with feta cheese and fresh herbs! It’s delicious as a sauce or dip with veggies, pita chips, grilled meats, and sandwiches.
Feta Tzatziki
We absolutely love tzatziki sauce around here! It’s so versatile, and we’ll happily spoon it onto just about anything. This recipe takes classic tzatziki to the next level by adding tangy feta cheese for extra flavor and creaminess.
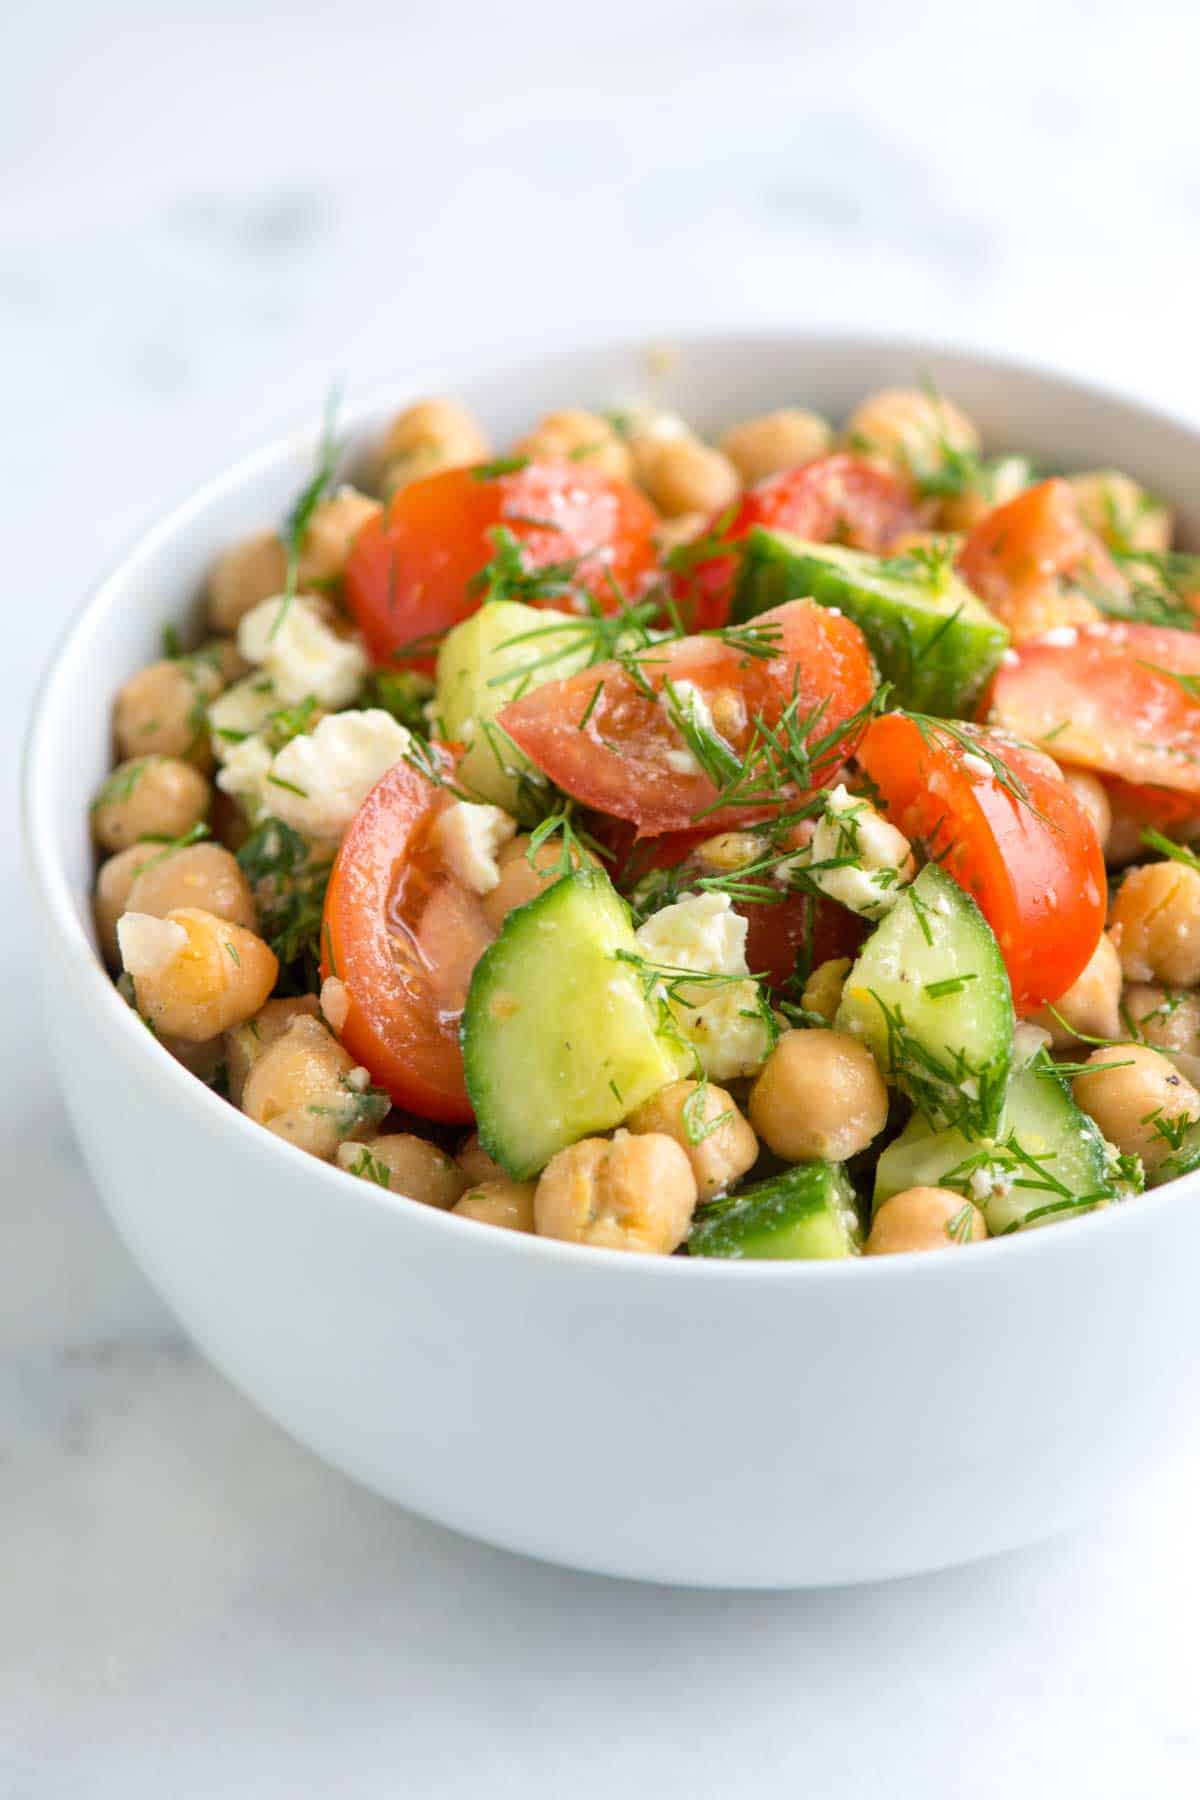
Easy Chickpea Salad
I can’t get enough of this easy chickpea salad recipe with lemon and dill. I’ve been making this delicious salad with chickpeas for years and fall in love all over again every time I do.
Easy Chickpea Salad
Thanks to the dill and lemon vinaigrette, this chickpea salad has the most delicious Mediterranean vibe. It’s super fresh, incredibly flavorful, and perfectly filling as a healthy, speedy lunch or dinner (thanks to those hearty chickpeas!).
Easy Sweet Chili Chicken Wings
Our Thai sweet chili chicken wings are out of this world delicious and so simple to make. You’ll bake the wings to sticky perfection and then toss them with even more delicious sticky Asian sweet chili glaze. So good!
Easy Sweet Chili Chicken Wings
Our sweet chili wings are sticky, sweet, and spicy, with a bit of crunch, thanks to a handful of chopped peanuts and sliced green onion sprinkled on top. They are easy, too. The sweet chili glaze only needs three ingredients!
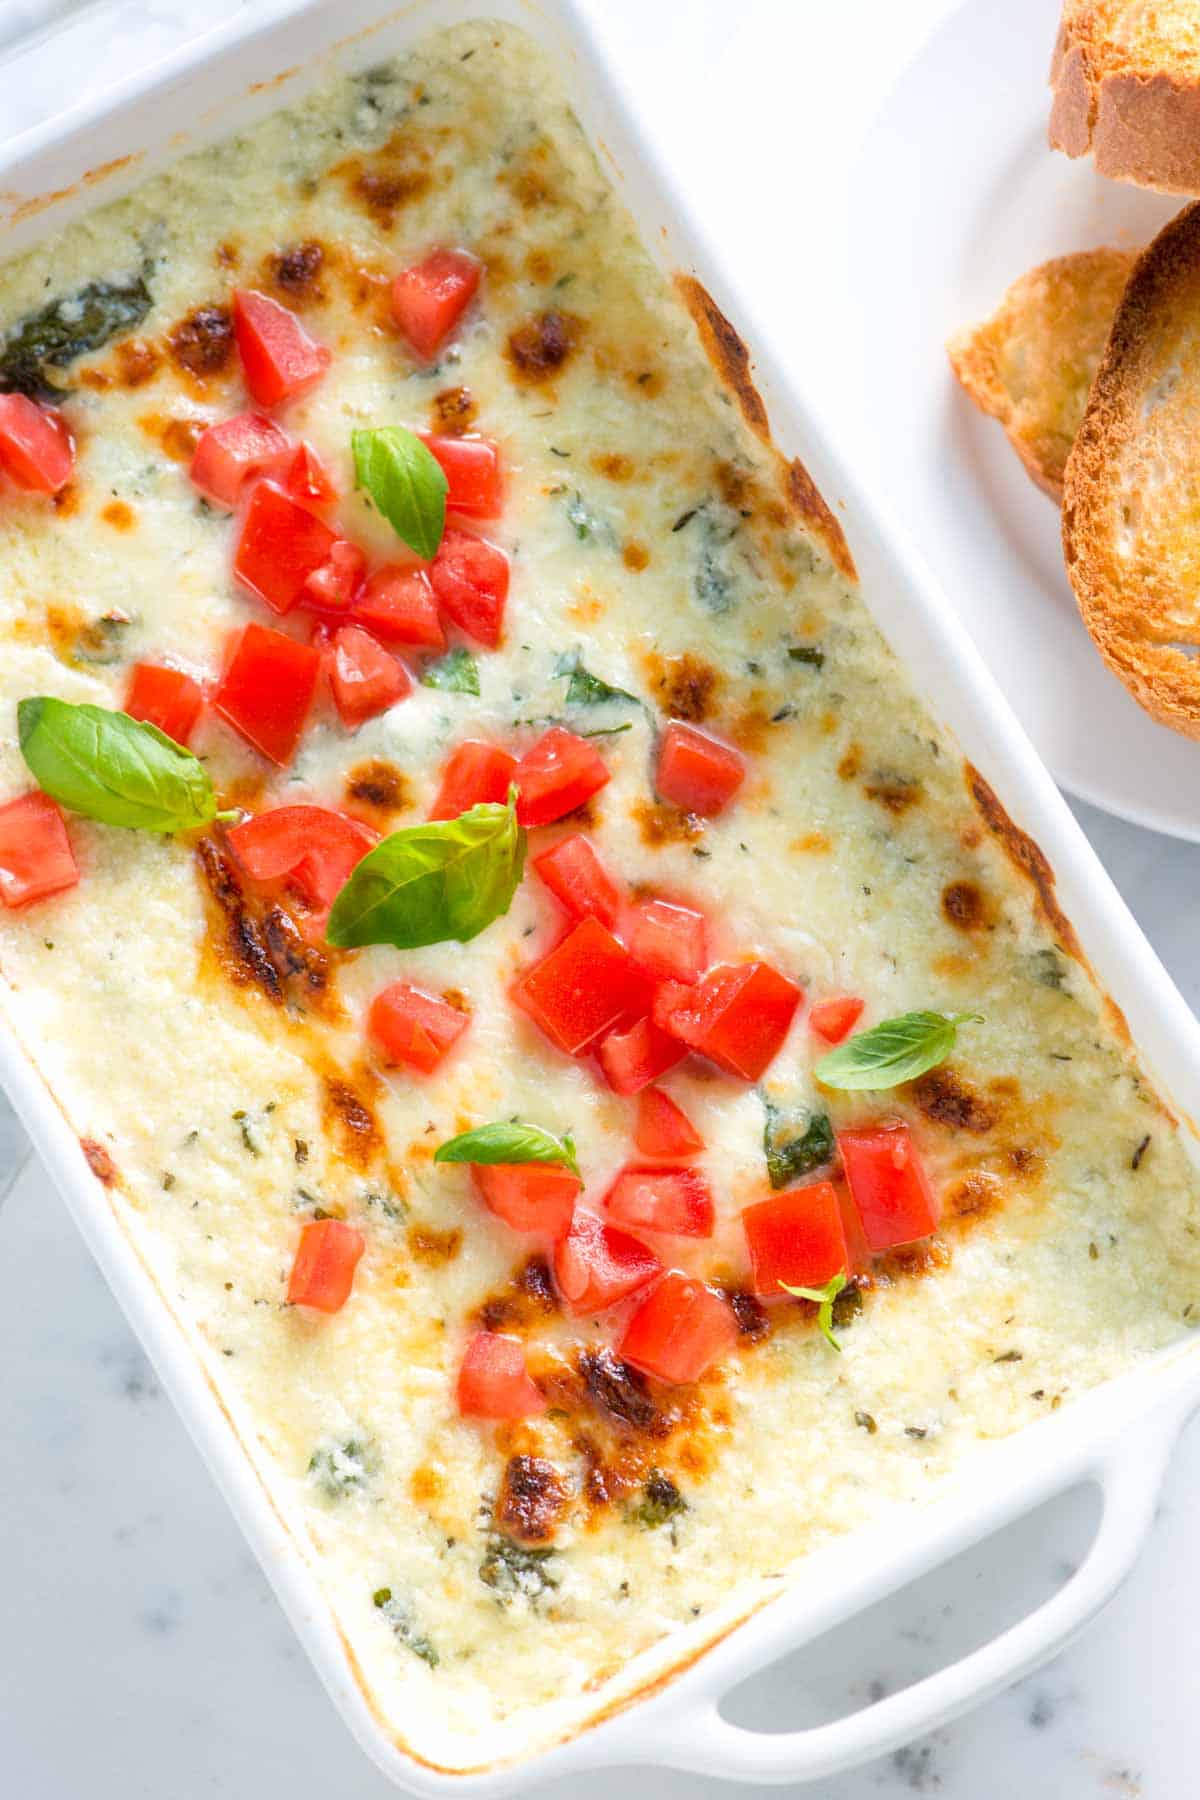
Roasted Tomatoes with Ricotta and Mint
These roasted tomatoes with ricotta are perfect when served as an appetizer (or even dinner with toast).
Roasted Tomatoes with Ricotta
As they roast in the oven, the tomatoes release their juices, which taste incredible with creamy ricotta cheese. You have to serve this one family style right out of the baking dish – no fuss.
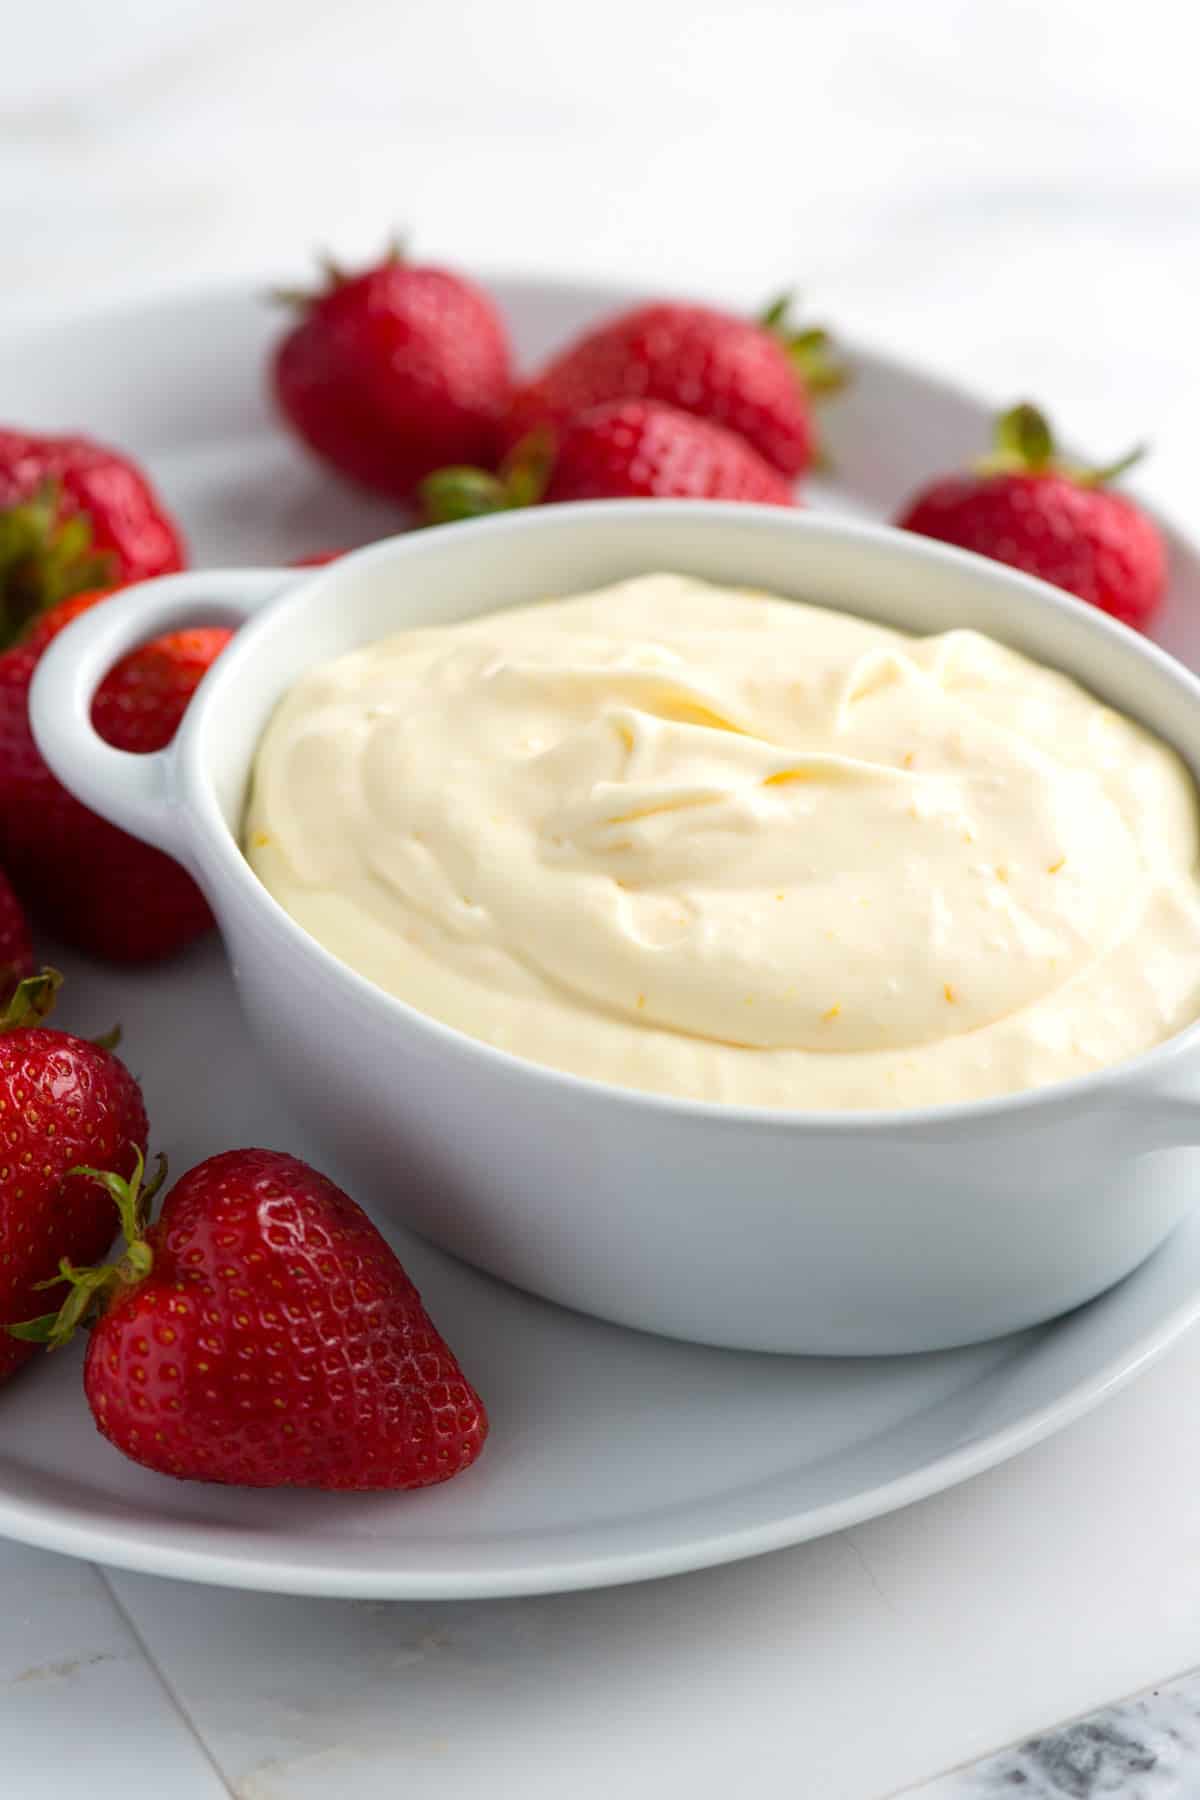
Easy Fruit Dip
This is the most delicious fruit dip recipe I’ve made! Our recipe combines cream cheese, cream, and orange. It’s insanely good!
Easy Fruit Dip
Imagine you’re at a party with a table filled with tempting treats. At one end, you see chocolate cupcakes. At the other end, there’s a bowl of this irresistible creamy fruit dip. Where will you find me? I’ll be practically attached to that fruit dip bowl, happily devouring it. Honestly, I hardly even need the fruit – this dip is so good that I could eat it with a spoon!
Cheese Pinwheels
Our easy cheese pinwheels made with puff pastry, two cheeses, and roasted red peppers are such a delicious appetizer! These cute little pinwheels fly off the plate!
These puff pastry pinwheels are high on my list of best hors d’oeuvres. They are simple, pretty on the plate, taste incredible, and are perfect for making in advance! In our recipe below, we spread puff pastry with Boursin cheese, add lots of parmesan, and top with roasted red pepper for sweetness and color.
Buffalo Chicken Pizza Sticks
Thanks to store-bought (or homemade) pizza dough, you can make this easy buffalo chicken pizza with shredded chicken tossed in buffalo wing sauce and cheddar cheese.
Buffalo Chicken Pizza Sticks
This buffalo chicken pizza is so incredibly easy. You can use homemade pizza dough or buy pre-made dough from the store.
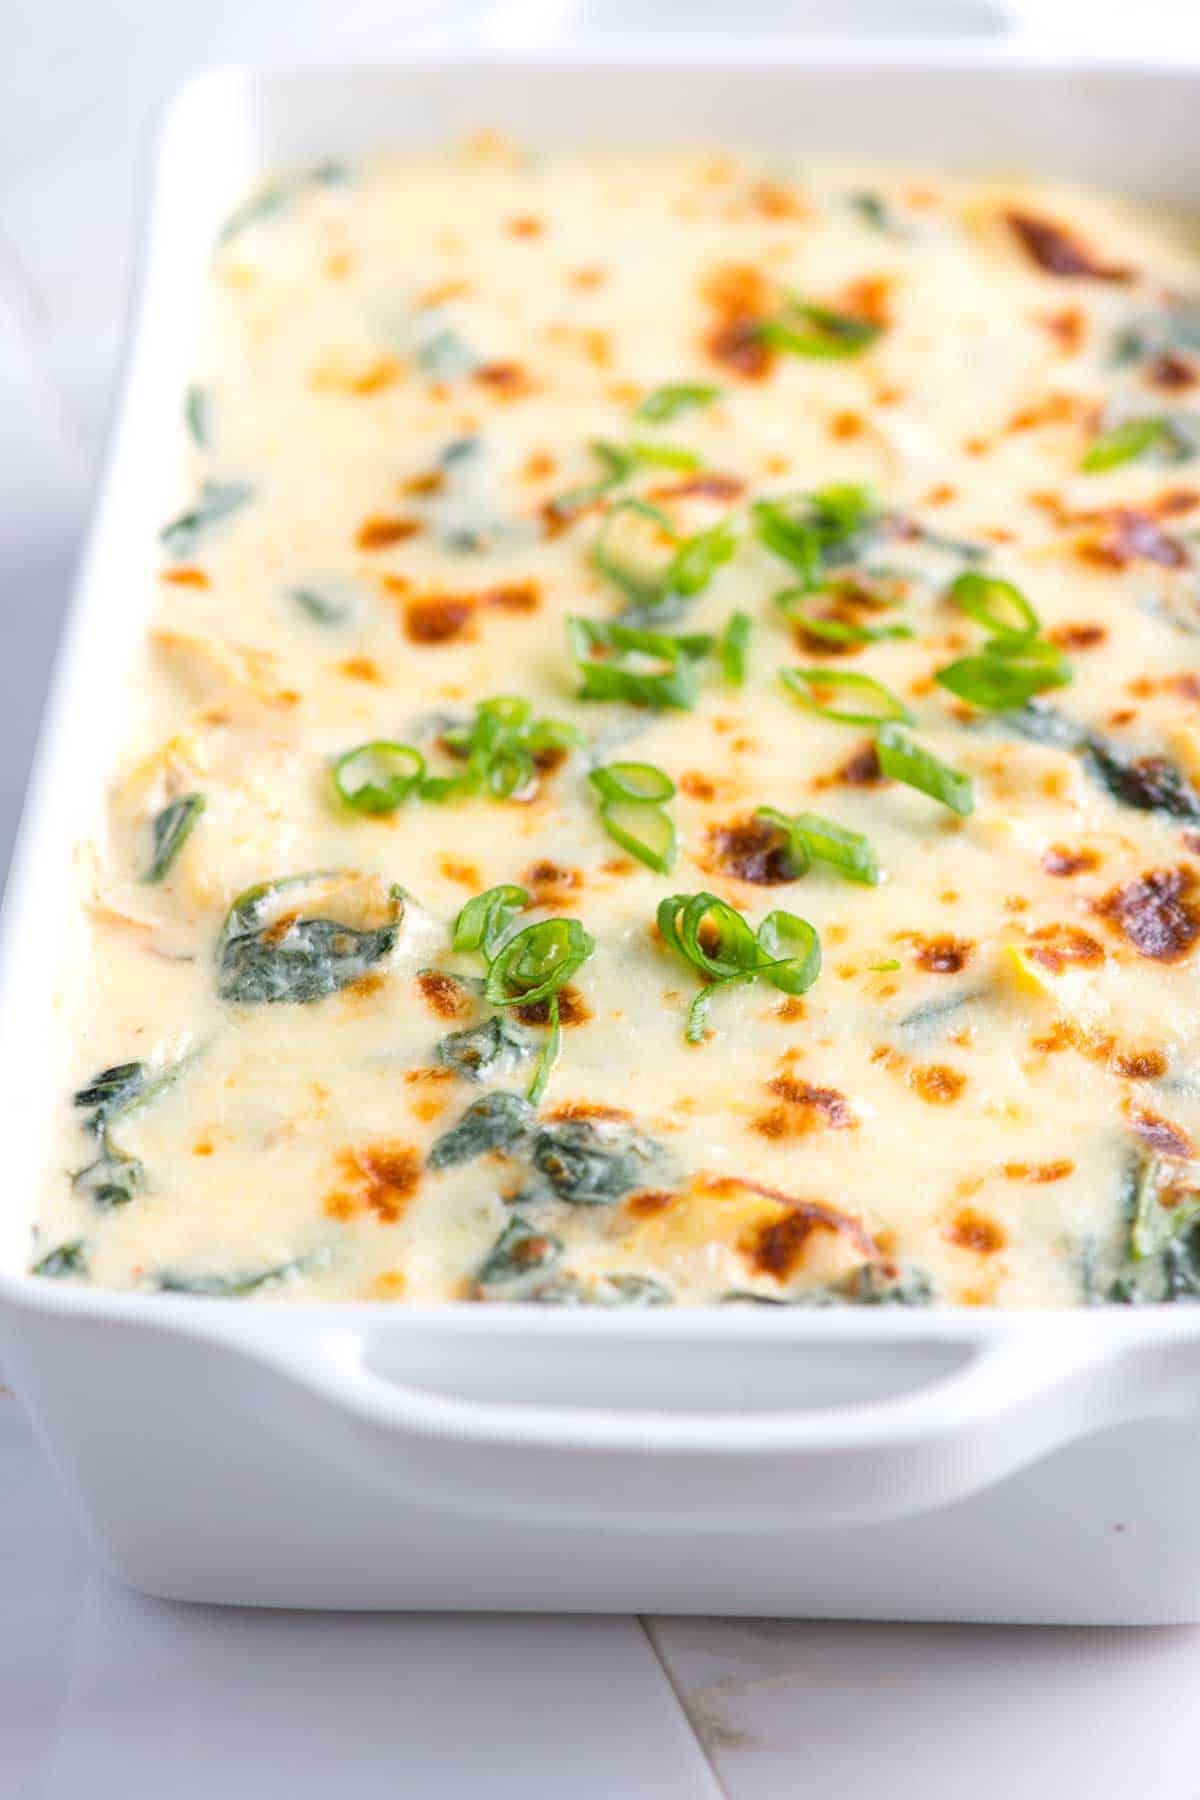
Easy Spinach Artichoke DIp
My family and friends love this homemade spinach and artichoke dip so much! We serve it hot and make it with three cheeses! It’s so creamy and delicious!
Easy Spinach Artichoke Dip
We love this warm, gooey spinach and artichoke dip with not one but three cheeses, lots of artichoke, fresh spinach, and garlic.Serve this with pita bread, tortilla chips, crusty bread, or vegetables. It’s incredibly delicious and so creamy!
Cheese Dip
This cheese dip is so easy to make and impossible to resist. We combine tangy sour cream with lots of gooey mozzarella, plus fresh basil, and bake it until it’s bubbly and golden. It’s perfect with sliced bread, and don’t be surprised when it’s the first thing to disappear!
Cheese Dip
Every time we make this cheese dip, we’re asked for the recipe. And now, it is yours to share, too! It’s almost too easy to put together, requiring only stirring the ingredients in a bowl and baking in the oven until bubbly.
Bowls packed with teriyaki tofu that gets shredded and caramelized in a sweet and garlicky sauce! A fast and easy weeknight dinner that’s high in texture and flavor!
This Teriyaki Tofu Is A Weekly Event In My Life
Remember the tofu from the ramen bowls? I can’t stop making it. I shared this bowl combo on Instagram the other day and got lots of requests to write up the recipe, which brings us to this moment!
Lately what I’ve been doing is:
Plating up some steamed jasmine rice
Putting a scoop of that saucy, chewy tofu on it
Adding some steamed broccoli (or air fryer broccoli!)
Dolloping it all with a tangy, lightly spicy kimchi mayo
Finishing it off with green onions and/or togarashi or some kind of sesame-seedy sprinkle
If you do nothing else with this, just make the teriyaki tofu. That shreddy tofu is so good. It gets coated and caramelized with a teriyaki sauce (store-bought, no prob) and laced with just enough fresh garlic to make your house smell like a restaurant, so, yeah, I’m pretty into it.
It’s a high-flavor, fast and easy dinner recipe, topped with a creamy-mouthfeel-kinda sauce, that’s conveniently also packed with fiber and protein. I sound like a salesperson right now and if that’s my legacy for these teriyaki tofu bowls, so be it!
Bowls packed with teriyaki tofu that gets shredded and caramelized in a sweet and garlicky sauce! A fast and easy weeknight dinner that’s high in texture and flavor!
Teriyaki Tofu:
Kimchi Mayo:
Bowls:
Instructions
Prep Tofu: Drain and press the tofu with a few paper towels to remove some of the moisture. (I use the high protein tofu from Trader Joe’s and it needs almost no pressing!)
Grate Tofu: Gently grate the tofu on a box grater so you get medium shreds.
Fry Tofu: Heat the oil over medium high heat in a nonstick pan. Add shredded tofu and pan-fry for 10-15 minutes, stirring occasionally, until browned a little bit crisped.
Rice, Broccoli, and Sauce: The tofu takes a bit, so while it’s cooking, prep your rice and broccoli. Mix the kimchi and mayo to make a sauce. Season to taste.
Finish Tofu: Add the teriyaki sauce and grated garlic to the crisped tofu in the hot pan. Let it sizzle for a minute on medium heat. (It’ll smell amazing when the garlic hits!)
Serve: Serve the tofu over rice, with broccoli and a dollop of the kimchi mayo. I like to finish it off with green onions, more teriyaki sauce, and a spicy sprinkle like togarashi!
Broth: I always use 6 cups water + 2 tablespoons Better Than Bouillon chicken flavor base. It’s amazing. Highly recommend. If you’re not using this, you’ll probably need to add a bit more salt.
Pork Fat: This soup will have small beads of the pork fat distributed throughout the soup and/or pearling on top of the soup. That’s a good thing – it is a sign of both amazing flavor and a luscious mouthfeel. These will incorporate as it gently bubbles, and they will rise to the surface as it cools. To re-incorporate, just heat it back up again and give it a stir.
Bacon: Hot take, but I don’t think it’s necessary which is why I didn’t include it. You get so much flavor already from the pork sausage. I have never eaten this and wished it had bacon in it.
Potato Peels vs. No Peels: If you want to save a bit of time, use baby potatoes and just cut them into quarters – you don’t have to peel them! It has a slightly different, more earthy taste (as potato peels do), but can confirm, it’s still delicious.
White Wine: For weeks now, I’ve considered adding white wine to this recipe to deglaze the pan after the sausage, onion, and garlic; in my mind, it would add a nice layer of acidity to a very savory, rich broth. However, I have made this so many times and never had white wine in the house on any of the times, and I have loved every batch so much exactly as it is. Let me know if you try it with white wine in there!
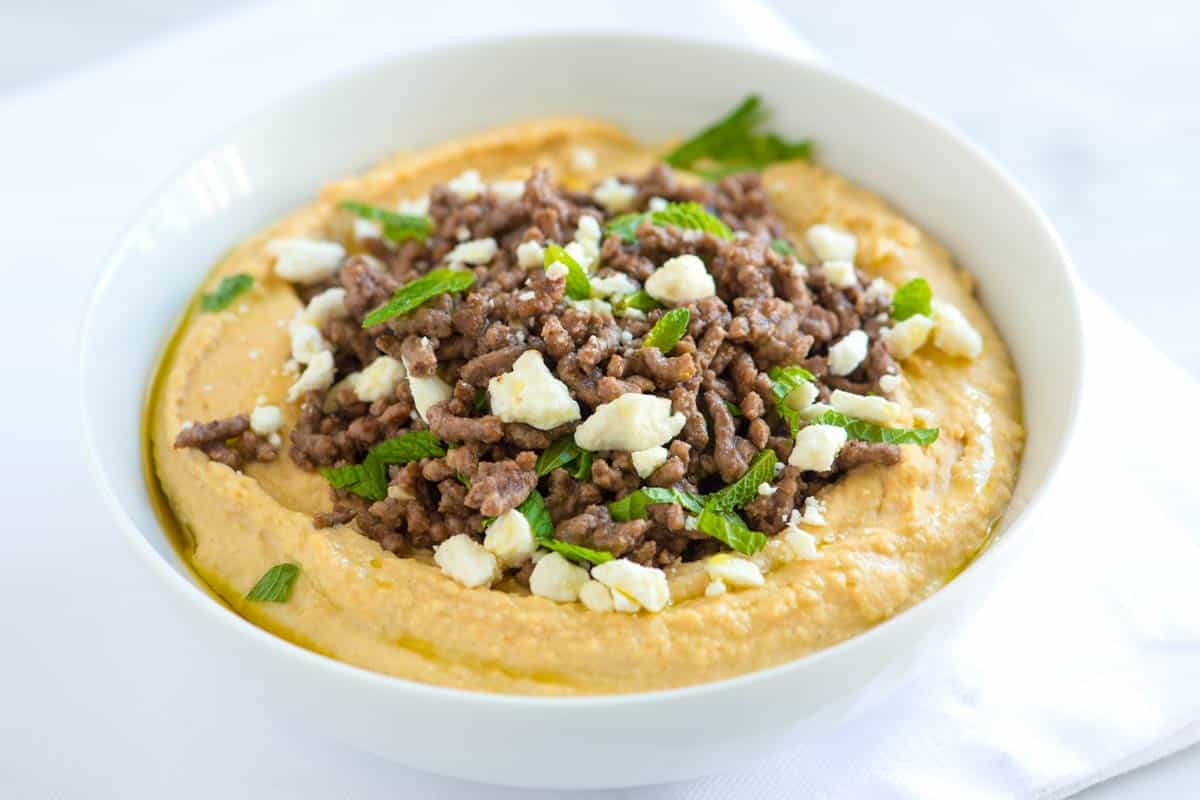
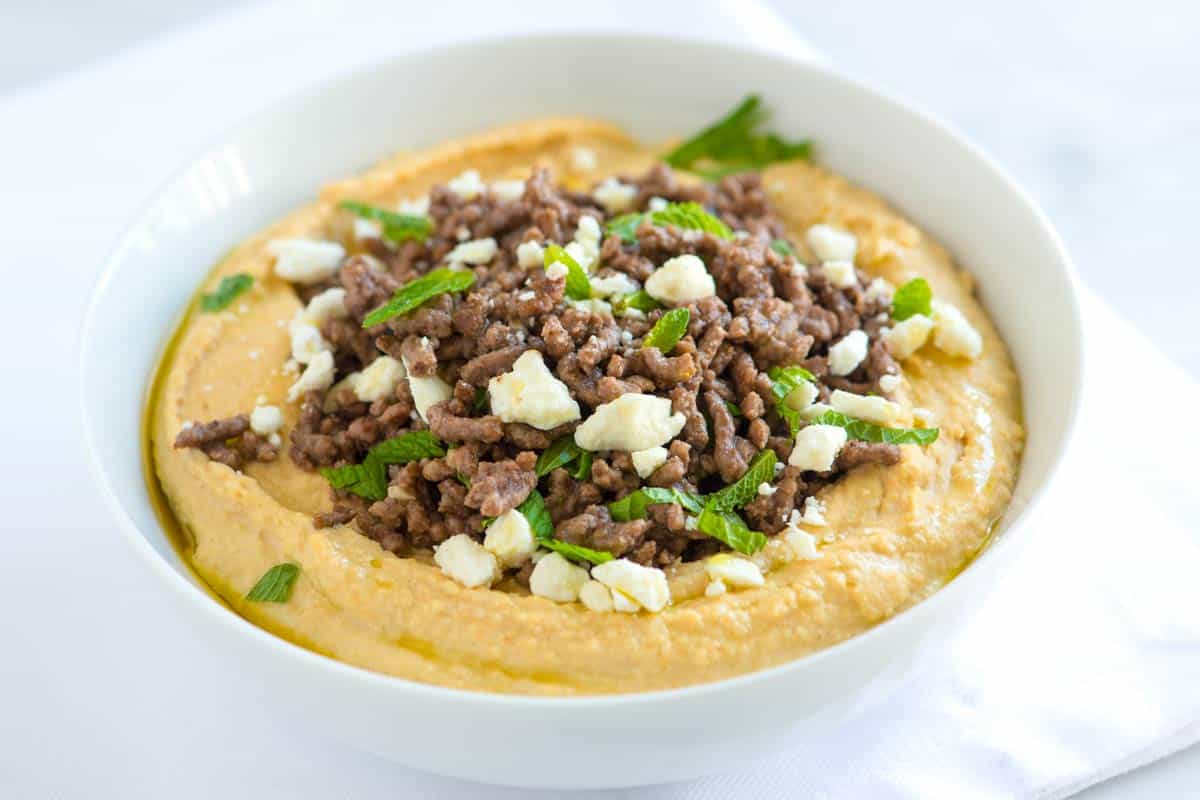
This creamy hummus with spiced ground beef, feta cheese, and fresh mint is absolutely delicious! It’s the perfect appetizer or turn it into a light, high-protein meal.
Our long-time readers know how much we love our recipe for homemade hummus (shared many years ago). We’re always on the lookout for new ways to enjoy it, which is where this hummus with ground beef recipe came from.
We take hummus and pile on lots of spiced ground beef, crumbled feta cheese, and fresh mint. It’s extra tasty, easy to do, and works really well with homemade pita bread, this quicker flatbread, or served on top of salad for a light protein-forward meal.
Key Ingredients
Hummus: I highly recommend our simple hummus recipe, but feel free to use your favorite store-bought brand.
Ground Beef: Look for ground beef with some fat (85/15 or close to it is perfect). Ground lamb is also excellent.
Spices: We’re going for a Middle-Eastern vibe with the spice mixture, so you’ll combine cumin, cinnamon, cayenne, coriander, and allspice. These make the beef really delicious with an almost intoxicating warm spice.
Broth: Use beef stock, chicken stock, veggie stock, or, if you are in a pinch, water. We just need a little liquid to make our beef juicier.
Feta and Mint: I love the salty pop of feta cheese and the fresh flavor of mint. That said, you could skip this altogether and add a spoonful of homemade tzatziki sauce on top, instead.
Find the full recipe with measurements below.
My Tips for Making Hummus with Spiced Beef
Tip 1: Don’t miss the opportunity to brown your beef. When cooking ground beef, I like to press it down into my skillet and resist the urge to stir it until the bottom is nicely browned. When it is, I stir and add my spice mixture.
Tip 2: Season the beef really well. Think of the ground beef as a topper to the hummus, so it’s okay if it’s very well seasoned. That’s a good thing. You’ll likely be enjoying this with flatbread and scooping up some of the hummus with the beef for each bite, so while the meat on its own may seem too seasoned, once it’s all put together, it works.
And there you go! If you want more ways to spice up hummus, see our roasted red pepper hummus (a reader favorite!).
Hummus with Spiced Ground Beef
PREP
COOK
TOTAL
This hummus with spiced beef is seriously delicious. You can buy your hummus or make our simple hummus recipe. It only takes about 10 minutes and tastes better than store-bought. Feel free to substitute the ground beef in our recipe below for ground lamb. I especially love this with our soft and fluffy pita bread!
6 Servings
You Will Need
1 batch homemade hummus or 2 cups store-bought hummus
1/2 teaspoon ground cumin
1/2 teaspoon ground coriander
1/4 teaspoon ground cinnamon
1/4 teaspoon ground allspice
1/4 teaspoon cayenne pepper
1/2 teaspoon fine sea salt
2 tablespoons olive oil
1 pound ground beef, we prefer 85/15 (450g)
1/4 cup beef stock, chicken stock, or water (60ml)
2 tablespoons chopped mint leaves
1 ounce crumbled feta cheese (28g)
Directions
1Make the spice mixture: In a small bowl, whisk the cumin, coriander, cinnamon, allspice, cayenne, and salt together.
2Brown the beef: Preheat a large skillet over medium heat. When it is hot, add the olive oil, and then press the beef down into the pan. Cook, without disturbing it, until browned on one side, about 8 minutes. Break the beef up, then stir in the spice mixture and continue for 2 minutes. Pour in the stock and cook until reduced and the beef is cooked, about 5 minutes more.
3To serve: Spoon the hummus into a serving bowl, top with the spiced ground beef, and finish by sprinkling over the mint and feta cheese.
Nutrition Per Serving Serving Size 1/6 of the recipe / Calories 362 / Total Fat 24.1g / Saturated Fat 6.6g / Cholesterol 55.6mg / Sodium 486.4mg / Carbohydrate 17g / Dietary Fiber 3.4g / Total Sugars 0.4g / Protein 18.8g
AUTHOR:
Joanne Gallagher
We are Adam and Joanne Gallagher, the creators of Inspired Taste. Established in 2009, Inspired Taste grew from a childhood dream into one of the internet’s most trusted recipe sites with hundreds of reliable recipes, step-by-step videos, and expert tips.More About Us
This cranberry orange scones recipe is a keeper! They turn out light and flaky, with fresh orange zest and dried cranberries.
My Mom makes a lot of scones. She inherited her love from her Mom, and I can only imagine it goes back from there. Now, here I am sharing our favorite recipe with you! You can top these with bit of sugar, or add my delicious orange glaze.
Scones are really easy to make. If you’ve made homemade biscuits, you’ll recognize many of the steps in our recipe below. For more scones recipes, see our classic scones, blueberry scones, blackberry lemon scones or these pumpkin scones.
Key Ingredients
Cranberries: I use dried cranberries in my photos, but you can absolutely use fresh or frozen cranberries in these scones. If you opt for fresh cranberries, keep in mind that they are more tart, so you might want to add a touch more sugar to the dough (I’ve shared tips below the recipe).
Orange: I use plenty of orange zest to infuse the dough with a bright citrus flavor. For more orange flavor, try my optional orange glaze, which you’ll find in the recipe below.
Flour: I stick to all-purpose flour for my scones. It consistently yields light and flaky results.
Baking powder: This adds a little extra lift and lightness to the scones. I also use baking powder when making this strawberry shortcake!
Butter: I always use very cold butter when making these. The cold butter creates steam in the oven, resulting in that delightful flaky texture we all love.
Heavy cream: I’m partial to cream scones because they tend to be lighter and more tender than those made solely with butter.
Honey: I love the subtle sweetness honey adds to these cranberry orange scones. For an extra special touch, try using orange blossom honey! Feel free to substitute with sugar.
Find the full recipe with measurements below.
Tips for Making the Best Cranberry Orange Scones
Tip 1: Use chilled ingredients. Using cold ingredients is really important when making scones. The butter should be chilled and hard, and you want to use the cream straight from the refrigerator.
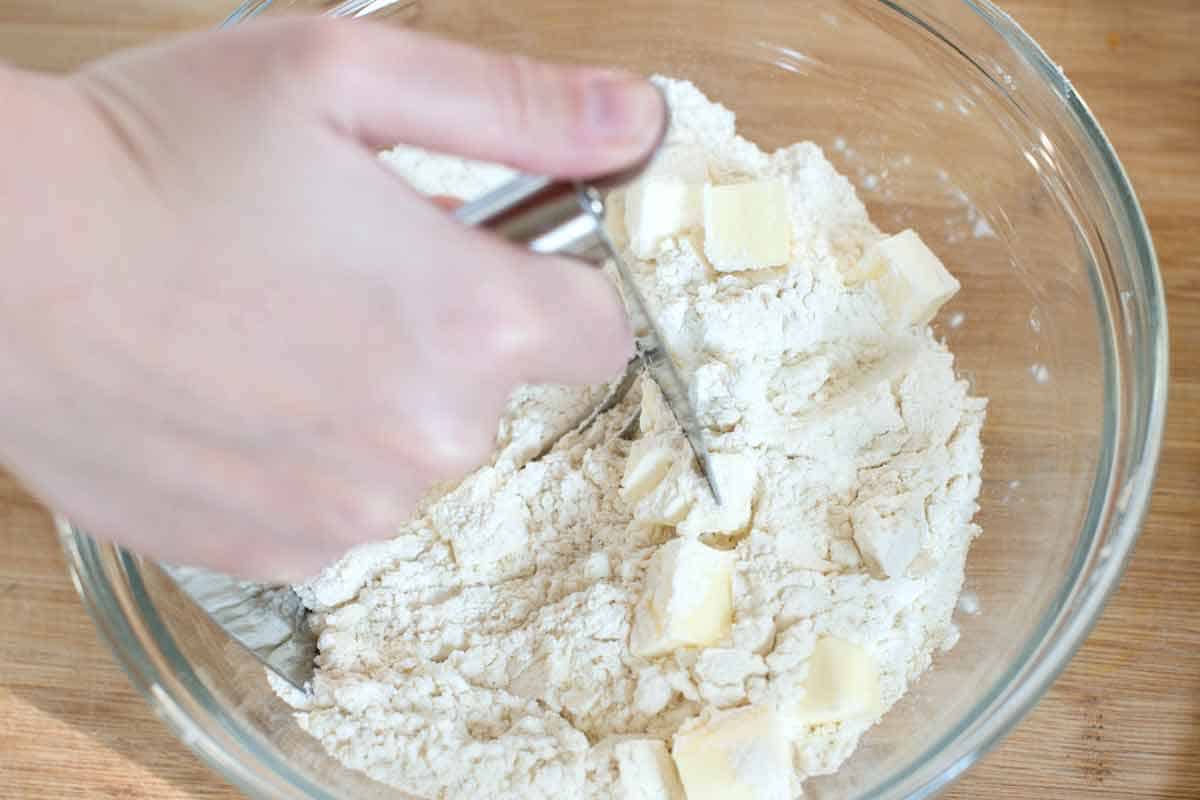
To make scones, you will “cut in” very cold butter. I use a pastry blender, but cold hands or a food processor will work. The goal is to distribute small pieces of butter throughout the flour. As the scones bake, these little bits of butter create steam pockets that make the dough rise, resulting in a light and tender texture (the same happens in my butter pie crust recipe and these biscuits).
Tip 2: Add fresh orange flavor. You can add orange flavor in two ways to these scones. First, add a generous amount of orange zest to the dough itself (similar to how we add lemon zest to these blueberry scones). Second, you can make our orange glaze. It’s optional, but it’s really easy! Stir powdered sugar and fresh orange juice together, then drizzle the glaze over the baked and cooled scones.
Tip 3: Don’t overwork your dough. When making these, gentle handling is key! Overworking the dough develops gluten, which can make your scones less fluffy and tender. That’s why I skip the biscuit cutter and lightly pat the dough into a circle before cutting them into 8 triangles.
Tip 4: Sprinkle sugar on top (optional). Transfer your triangles of dough onto a baking sheet, leaving a little room (they will spread slightly), and then brush them generously with cream. For a beautiful, shiny, textured top, sprinkle coarse sugar over the cream and bake.
Easy Cranberry Orange Scones
PREP
COOK
TOTAL
These incredible cranberry orange scones are light and flaky, with fresh orange zest and dried cranberries. I love topping them with a little coarse sugar, but they are also delicious drizzled with our optional orange glaze shared in the recipe below.
Makes 8 scones
You Will Need
2 cups (260g) all-purpose flour
1 tablespoon baking powder
1/2 teaspoon fine sea salt
5 tablespoons (70g) cold, unsalted butter, cut into 1/4-inch cubes
1 cup (235ml) heavy cream, plus more for tops of scones
3 tablespoons honey or sugar
1 tablespoon grated orange zest
3/4 cup (100 grams) dried cranberries, see tips for fresh cranberries
1 tablespoon coarse sugar for tops of scones
Optional Glaze
1 cup (120g) powdered sugar
2 to 3 tablespoons (30ml to 45ml) orange juice
Directions
1Adjust the oven rack to the middle position and heat the oven to 425°F (218°C). Line a large baking sheet with parchment paper or use a silicon baking mat.
2Whisk together flour, baking powder, and salt in a medium bowl.
3Combine cream, honey, and orange zest in a measuring jug. Stir until the honey is completely incorporated into the cream.
4Use a pastry blender to work the butter into the flour mixture until it resembles a coarse meal with a few small crumbles of butter the size of peas. (Or use a food processor).
5Stir in cranberries. Pour in the cream mixture and use a rubber spatula to mix until a crumbly dough forms.
6Transfer the dough and all dry, floury bits to a lightly floured work surface. Knead the dough 3 to 5 times until it just comes together. Form into an 8-inch circle. Cut into 8 triangles, or use a biscuit cutter.
7Place the scones on the baking sheet, brush with extra cream, and lightly sprinkle the tops with coarse sugar.
8Bake until light golden brown, 12 to 15 minutes. Cool at least 10 minutes before serving.
9For the optional glaze, whisk the powdered sugar and 2 tablespoons of the orange juice until smooth. If it’s too thick, add a bit more orange juice. Drizzle over the cooled scones.
Adam and Joanne’s Tips
Fresh or frozen cranberries: You can substitute 1 heaping cup of fresh or frozen (not thawed) cranberries in the recipe above. They will be more tart, so consider increasing the honey or sugar by 1 to 2 tablespoons.
Storing: Scones are best eaten fresh. If you do have leftovers, your best bet for keeping them fresh is to freeze them. Freeze baked and cooled scones until hard, then transfer to resealable plastic bags. Freeze for up to 1 month. To reheat, bake in a 350°F oven until warmed. It shouldn’t take long.
You can freeze unbaked scone dough: Chill cut scones in the freezer until firm, then transfer to resealable plastic bags. They can be kept for up to one month. Bake in a 425°F oven straight from the freezer. (They may take a few extra minutes.)
Recipe inspired and adapted from America’s Test Kitchen
Nutrition Per Serving Serving Size 1 scone / Calories 343 / Protein 4 g / Carbohydrate 42 g / Dietary Fiber 1 g / Total Sugars 16 g / Total Fat 19 g / Saturated Fat 11 g / Cholesterol 60 mg / Sodium 342 mg
AUTHOR:
Joanne Gallagher
We are Adam and Joanne Gallagher, the creators of Inspired Taste. Established in 2009, Inspired Taste grew from a childhood dream into one of the internet’s most trusted recipe sites with hundreds of reliable recipes, step-by-step videos, and expert tips.More About Us
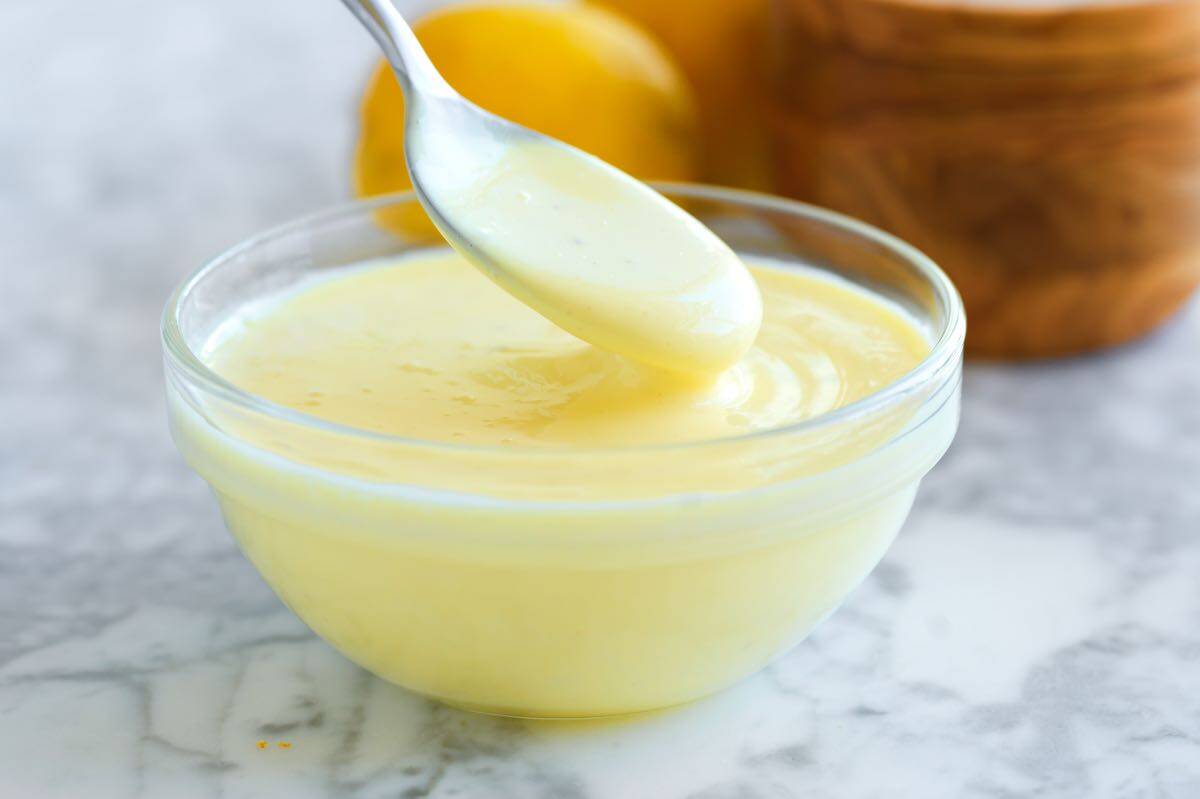
How to make incredible homemade hollandaise sauce! Using a blender and a short list of simple ingredients, this hollandaise sauce recipe is practically failproof and extra easy!
There are very few homemade sauces that hit as well as hollandaise. It’s creamy, velvety, decadent, and incredible with eggs (hello, Eggs Benedict), as a dip for vegetables, and with simple seafood dishes.
Hollandaise was one of the first sauces I learned how to make in culinary school. We made it by hand with a whisk, and in large batches (my arms were so tired!). This home cook friendly hollandaise sauce recipe skips the whisk and calls on a blender, which means you’ll have a delicious batch of hollandaise in under 5 minutes! For another classic sauce, see our Homemade Mayonnaise.
Key Ingredients
Melted Butter: Butter makes up the majority of this sauce, so spoiler, you need quite a bit of it. I use clarified butter for hollandaise. It’s easy to do, and I’ve shared how in the recipe below. You can make it with plain melted butter, but the clarifying process removes water and milk solids, which can cause our sauce to separate or break. Also, it tastes super rich and buttery, so your sauce tastes better. So, for the best hollandaise sauce, use clarified butter.
Egg Yolks: Classic hollandaise uses egg yolks. You can save the whites for scrambled later (as a note, scrambled egg whites with hollandaise spooned on top is really delicious).
Lemon Juice: You only need a little bit, but the lemon cuts through the richness of our sauce. Freshly squeezed really is best.
White Wine (optional): This is a tip from Chef Richard, who, for many years, was tasked with making hollandaise for brunch service at a very high-end hotel. You only need a couple of teaspoons, so only add this if you already have a bottle open! It makes the sauce more interesting and does a similar job as the lemon, cutting through the richness of the butter and egg yolks.
Salt and Pepper: Don’t forget to season your sauce and use a bit of pepper. Cayenne pepper is popular, but we skip that and use ground white pepper, which harmonizes a bit better with the sauce.
Find the full recipe with measurements below.
How to Make Hollandaise Sauce
Tip 1: Use a blender. Hollandaise sauce is a rich, creamy, and decadent emulsion of egg yolks and butter. While some classic recipes call for making it by hand with a bowl and whisk, a blender is a game-changer for home cooks (kind of like how a food processor is a game-changer when making mayo). It simplifies the process and gives you a beautiful sauce every time. That said, I shared how we make it by hand below anyway, in case you wanted to give it a go.
Tip 2: Use HOT butter. Drizzling hot (not warm) melted butter into the blender is key. If the butter isn’t hot enough, the sauce won’t thicken properly.
Tip 3: Make it right before serving. Hollandaise is best served immediately. Prepare your other dishes first, then make the sauce just before serving.
Tip 4: Keep it warm. Since the sauce is mostly butter, it will start to cool and thicken as it sits. To keep it warm, you can set the blender jar in a bowl of lukewarm water (hot from the tap) until you’re ready to serve.
Tip 5: Fixing broken hollandaise sauce. While our blender method is more foolproof, this classic sauce can still break if your butter is added too quickly or isn’t hot enough. Here’s what to do if your sauce breaks (note, I use a blender, but you can do this in a bowl with a whisk):
Pour your broken sauce into a bowl.
Add 1 to 2 teaspoons of warm water to the blender.
Turn the blender on, and slowly pour the broken sauce back into the blender through the lid opening. The sauce should re-emulsify and become smooth again. Hooray!
Serving Suggestions
Use your delicious hollandaise for dishes like Eggs Benedict (especially on a homemade English muffin) and Eggs Florentine. It’s also fantastic with poached eggs, vegetables like roasted asparagus, and simple seafood dishes like poached salmon.
Failproof Hollandaise Sauce
PREP
COOK
TOTAL
Here’s our favorite recipe for hollandaise sauce. Using a blender and hot butter are the secrets for the best results. I prefer clarified butter, which does add a step, but clarifying butter removes the water and milk solids, which can cause your sauce to break. Also, it tastes more buttery and rich! For my favorite way to use this sauce, see our Homemade Eggs Benedict Recipe.
Makes 3/4 cup
You Will Need
12 tablespoons unsalted butter (170g)
3 large egg yolks, cold from the fridge
1 ½ tablespoons warm water
2 teaspoons fresh lemon juice, plus more to taste
2 teaspoons white wine, optional
½ teaspoon fine sea salt
¼ teaspoon ground white pepper, plus more to taste, see tips
Directions
Make Clarified Butter
1Melt the butter: Place the butter in a small saucepan to melt, then bring the melted butter to a gentle simmer and cook for 2 to 3 minutes, until a foamy layer forms on top and the butter underneath appears clear and golden.
2Remove foamy layer: Use a spoon to skim all the foam from the top, and discard it. Set the saucepan of butter aside until you are ready to make your hollandaise sauce.
Blender Hollandaise (Preferred Method)
1Blend the eggs: Add the egg yolks, water, lemon juice, white wine, salt, and white pepper to a blender. Pulse for about 5 seconds to combine.
2Re-heat the butter: Place the saucepan of butter over low heat and heat until steamy, about 30 seconds. Your butter needs to be hot for the sauce to thicken.
3Emulsify the sauce: With the blender running, remove the center insert from the lid. Slowly and steadily pour the hot clarified butter through the opening, stopping just before any milky white milk solids fall in from the bottom of the saucepan. The sauce will thicken and emulsify. If the sauce gets too thick at any point, whisk in a tablespoon of warm water to thin it.
4Season and serve: Taste and adjust with more salt, pepper, or lemon juice as needed. Serve immediately or keep the blender jar in a bowl of warm water. If serving at the table, and it starts to thicken too much, stir in a little warm water to thin it back out to a creamy sauce.
Classic Hollandaise Made by Hand
1Set up your double boiler: Fill a small saucepan with about an inch of water and bring it to a gentle simmer. Place a heat-proof bowl on top, making sure the bottom of the bowl does not touch the water.
2Re-heat the butter: Heat the clarified butter in a small saucepan until it is hot.
3Whisk the yolks: Add your egg yolks, water, lemon juice, and white wine to the bowl and whisk them constantly. Keep a close eye on them. If they get too hot, lift the bowl off the heat to prevent them from scrambling, then set it back down once they’ve cooled off. The yolks will go from a liquid to frothy, and then they will start to thicken.
4Slowly add the butter: Once the yolks have thickened a bit, SLOWLY drizzle in the hot, melted butter. It’s crucial to add it a little at a time to prevent the sauce from “breaking.” Whisk continuously to incorporate the butter as you add it.
5Adjust and finish: If the sauce gets too thick at any point, whisk in a tablespoon of warm water to thin it. Once all the butter is incorporated, season the hollandaise with salt and white pepper.
Adam and Joanne’s Tips
Storing: Hollandaise is best enjoyed right away. You can keep it in an airtight container in the refrigerator for up to 3 days, but you need to take care when reheating it as it is easy to break (butter separates).
Reheating hollandaise: I do not recommend a microwave and prefer to reheat on the stove. Pour your sauce into a saucepan over low heat. Add a little bit of melted butter and a tablespoon of warm water. Whisk it as it warms up so it turns into a smooth, creamy sauce. Adding more warm water if it is too thick.
Clarified butter vs. melted butter: You can use plain melted butter in this recipe. Clarified butter is an extra fail-safe to prevent the sauce from breaking, AND it tastes richer and buttery. The sauce is still lovely when made with plain butter, though.
Pepper: White pepper fades into the sauce and is a bit more delicate, but you can use black pepper or for heat, cayenne.
The nutrition facts provided are estimates.
Nutrition Per Serving Serving Size 1 tablespoon / Calories 87 / Total Fat 9.5g / Saturated Fat 5.7g / Cholesterol 57.4mg / Sodium 111.7mg / Carbohydrate 0.2g / Dietary Fiber 0g / Total Sugars 0g / Protein 0.6g
AUTHOR:
Joanne Gallagher
We are Adam and Joanne Gallagher, the creators of Inspired Taste. Established in 2009, Inspired Taste grew from a childhood dream into one of the internet’s most trusted recipe sites with hundreds of reliable recipes, step-by-step videos, and expert tips.More About Us
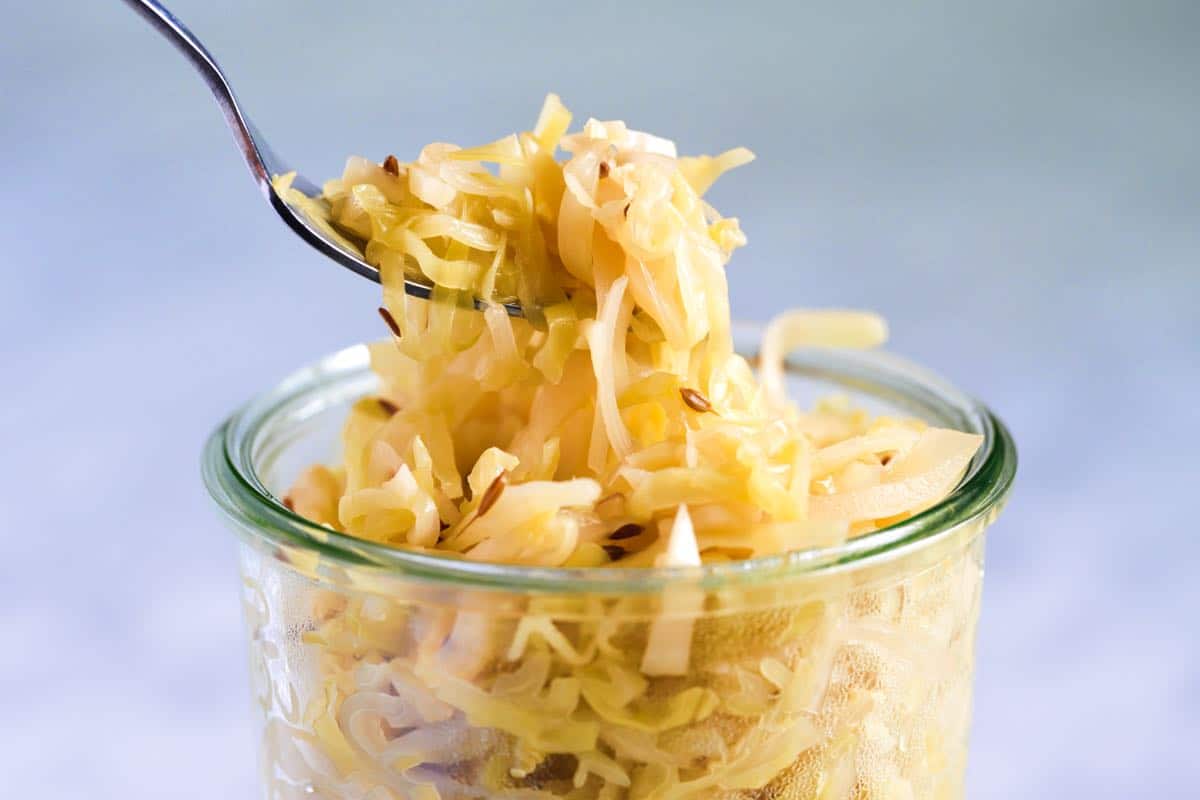
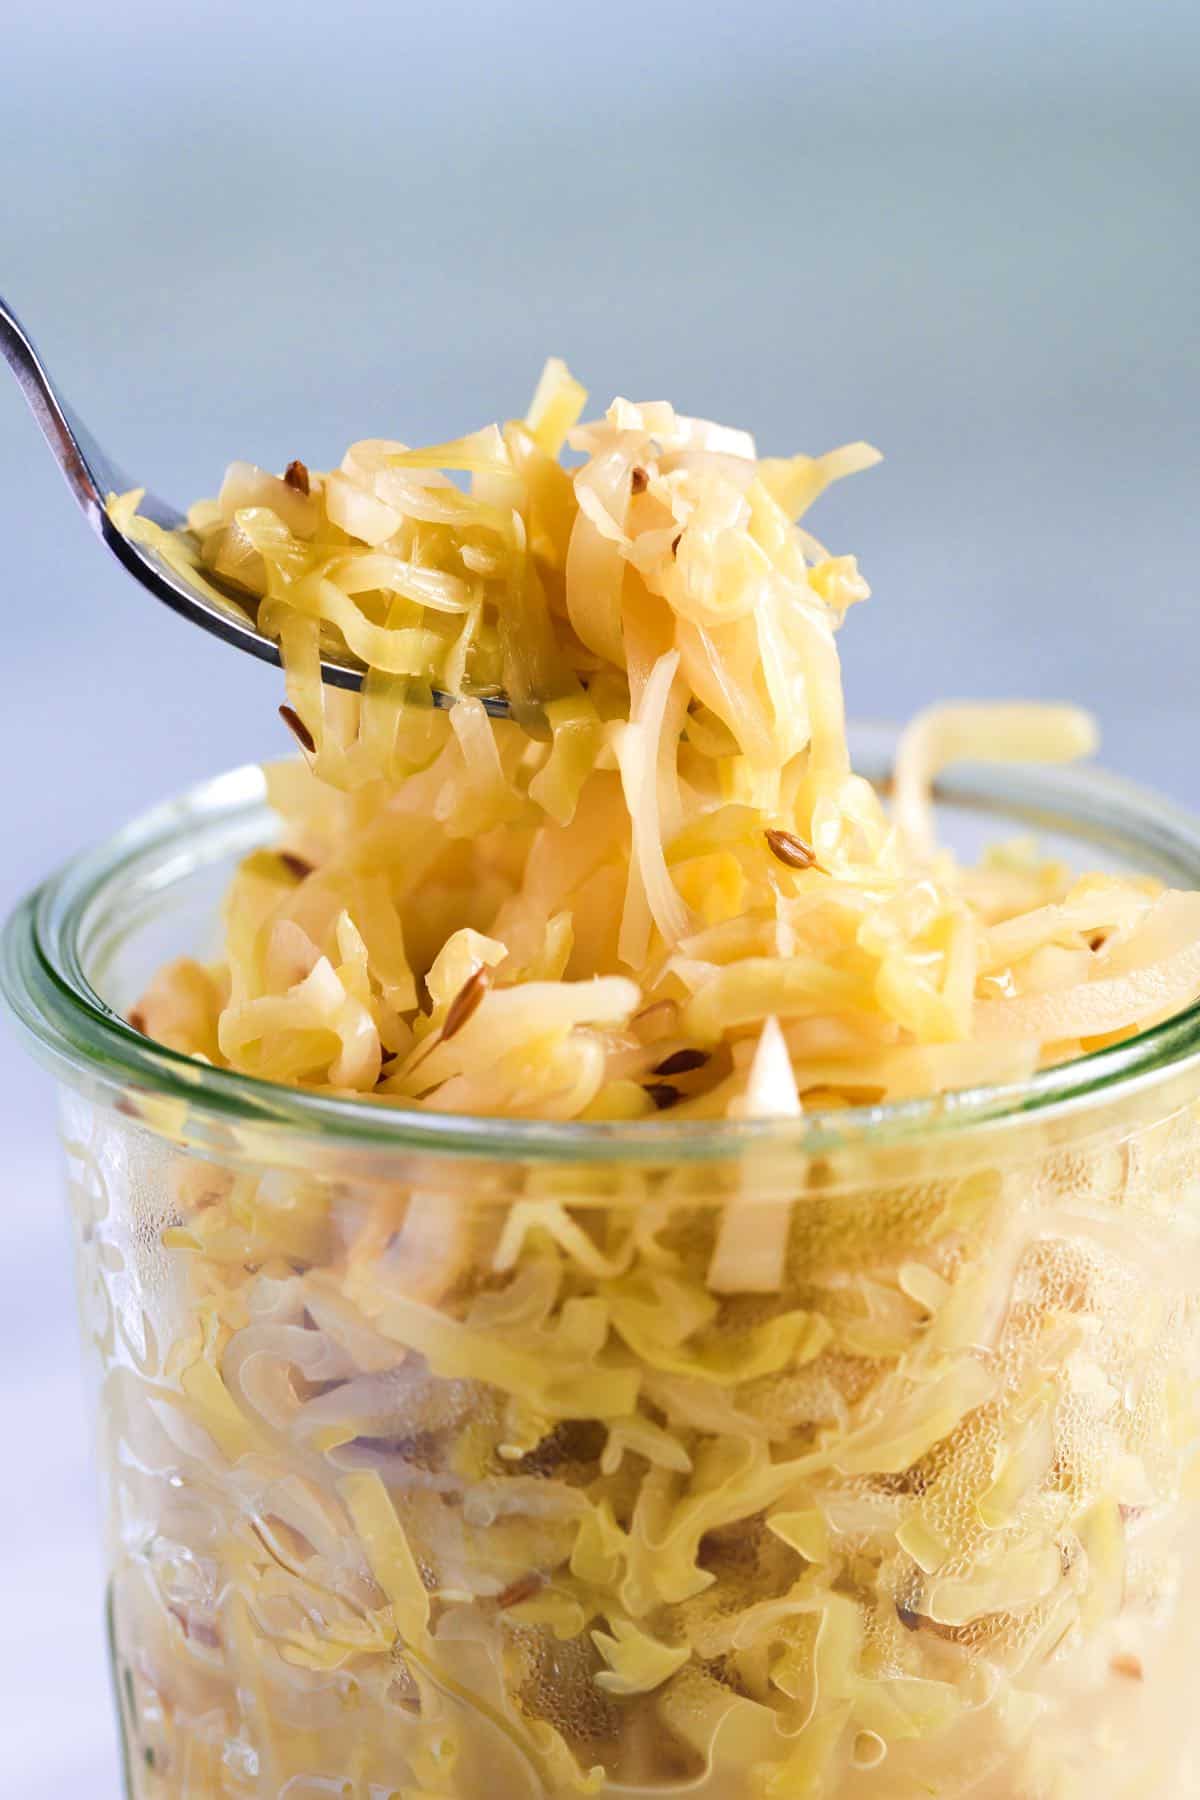
When I’m in a pinch for time and crave the flavors of sauerkraut, this is the recipe I use. Our quick sauerkraut takes just over an hour, and it’s ready to eat!
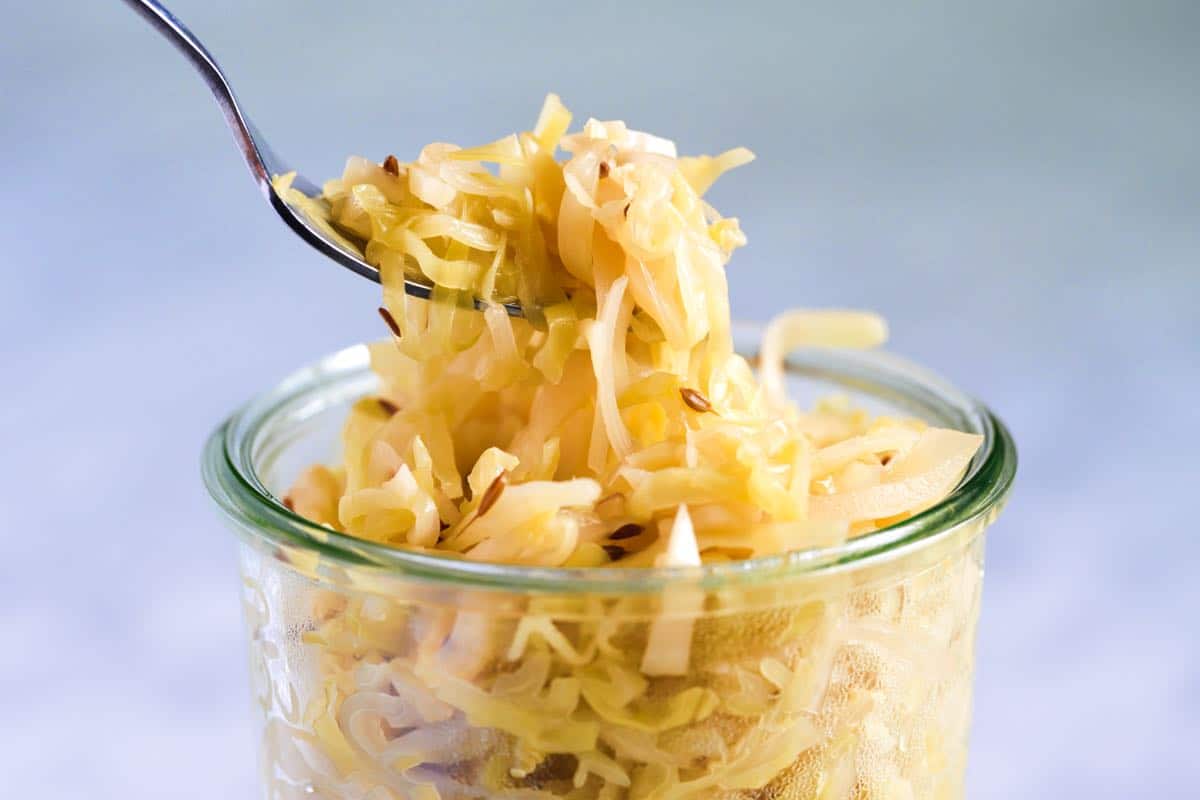
This easy sauerkraut, inspired by traditional German sauerkraut (which can take weeks), has a slightly sour taste and crunchy texture. I love fermented sauerkraut, but our quicker recipe is the solution for when you want to enjoy homemade sauerkraut today.
We genuinely love it, and we hope you do, too. I love it with pork, especially my skillet pork chops, these apple-stuffed pork chops, or this pork tenderloin with apples.
Key Ingredients
Green Cabbage: When choosing green cabbage, look for a head that feels heavy for its size and has a firm texture. Avoid any heads that look dried out or discolored. I love green cabbage for this recipe, but purple cabbage will work.
Onion: I love the onion since it almost melts into the cabbage. I use a yellow or sweet onion.
Salt and Spices: This is a German-inspired recipe, so we use salt, caraway seeds, a juniper berry, an allspice berry, and a bit of sugar (less than a teaspoon).
Apple Cider Vinegar and Apple Cider: These create the perfect balance of sweet and tangy. It’s the combination of apple cider and vinegar that makes this sauerkraut so delicious with pork recipes!
Find the full recipe with measurements below.
How to Make Quick Sauerkraut
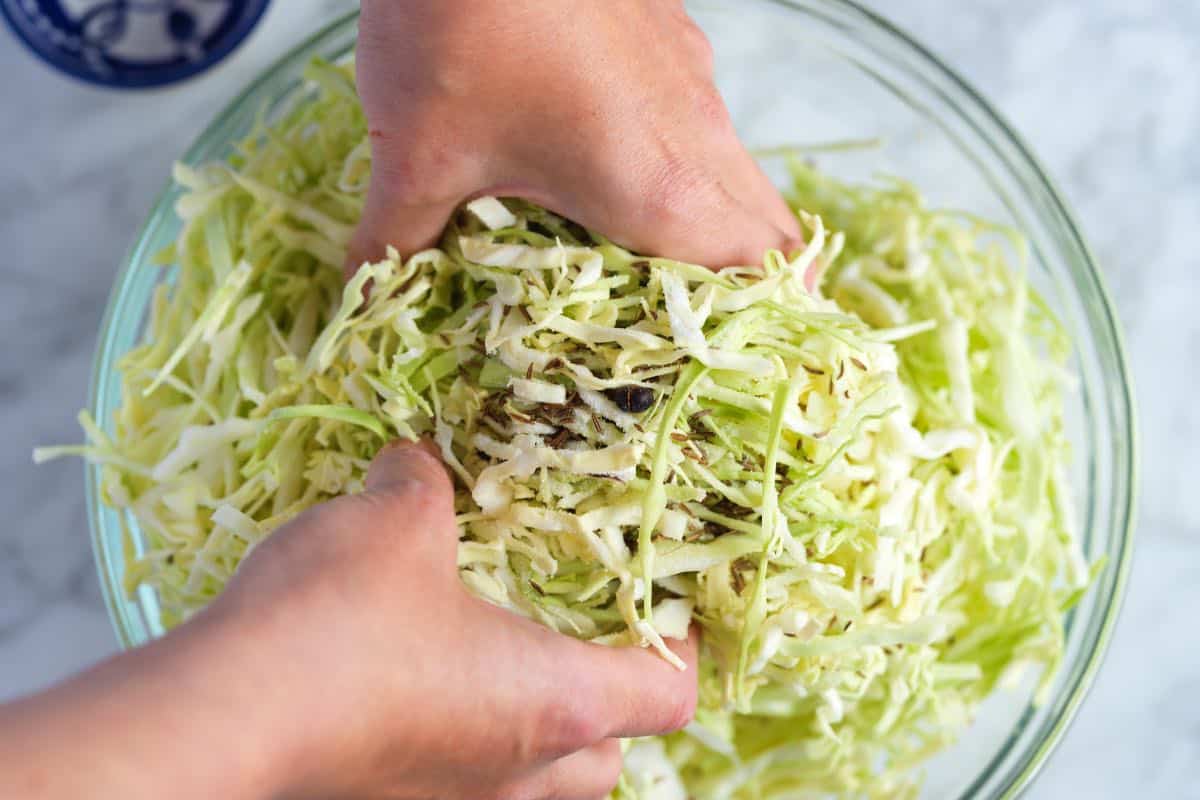
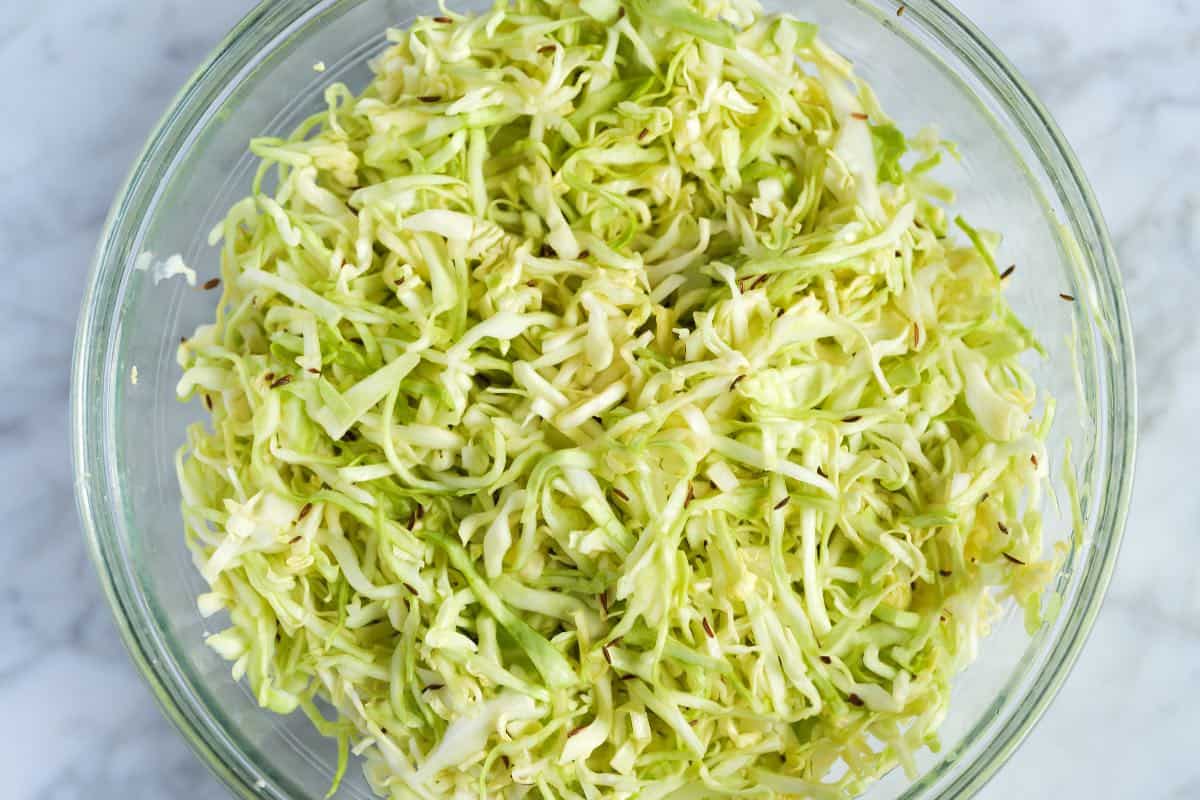
Tip 1: Massage with salt and spices. To make this taste like traditional sauerkraut, massage shredded cabbage with salt and spices and set aside for 30 minutes. We use classic spices like caraway seeds, juniper berries, and allspice. I love the caraway seeds in this recipe!
After sitting with the salt and spices for 30 minutes, the cabbage releases some of its juices, wilts a bit, and looks floppy (see the second photo below).
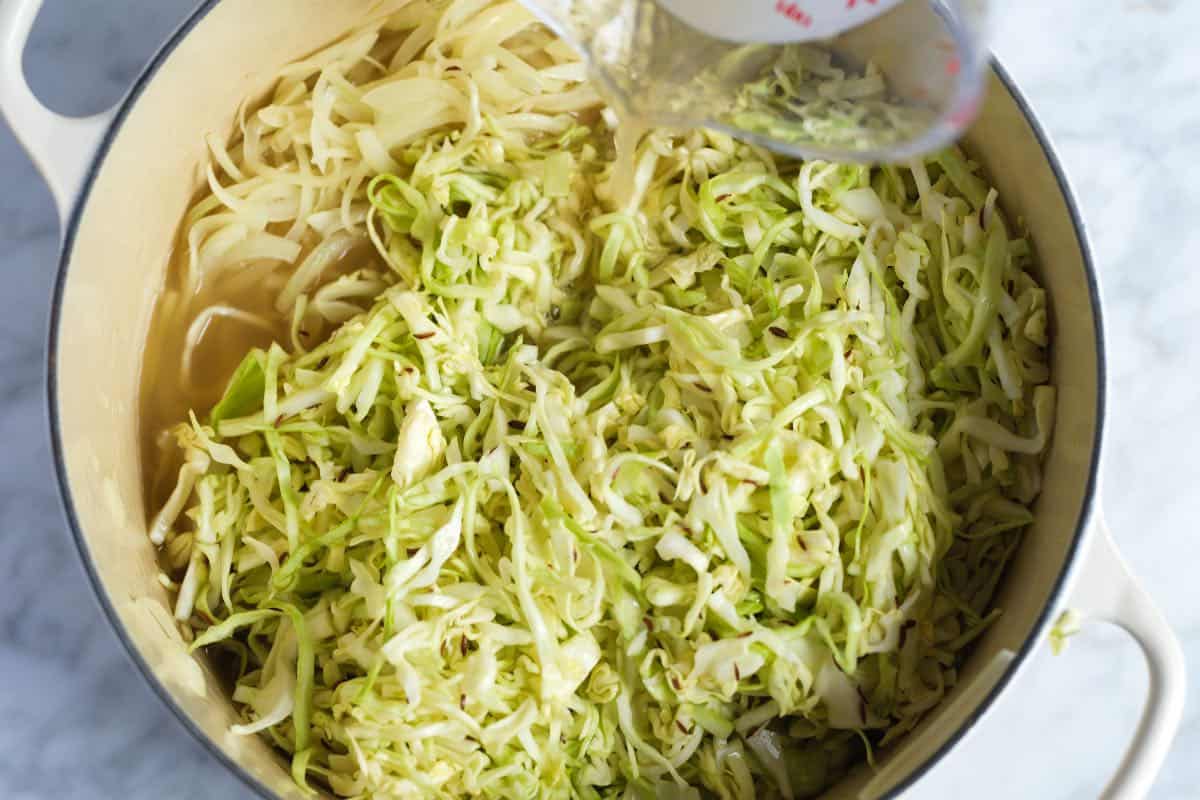
Tip 2: Simmer the cabbage. Instead of fermenting, you will simmer the cabbage, all the juices from the bottom of the bowl, and spices with onions, apple cider vinegar, and apple cider for 30 minutes. This is why this recipe is so much quicker than fermenting (30 minutes vs. weeks).
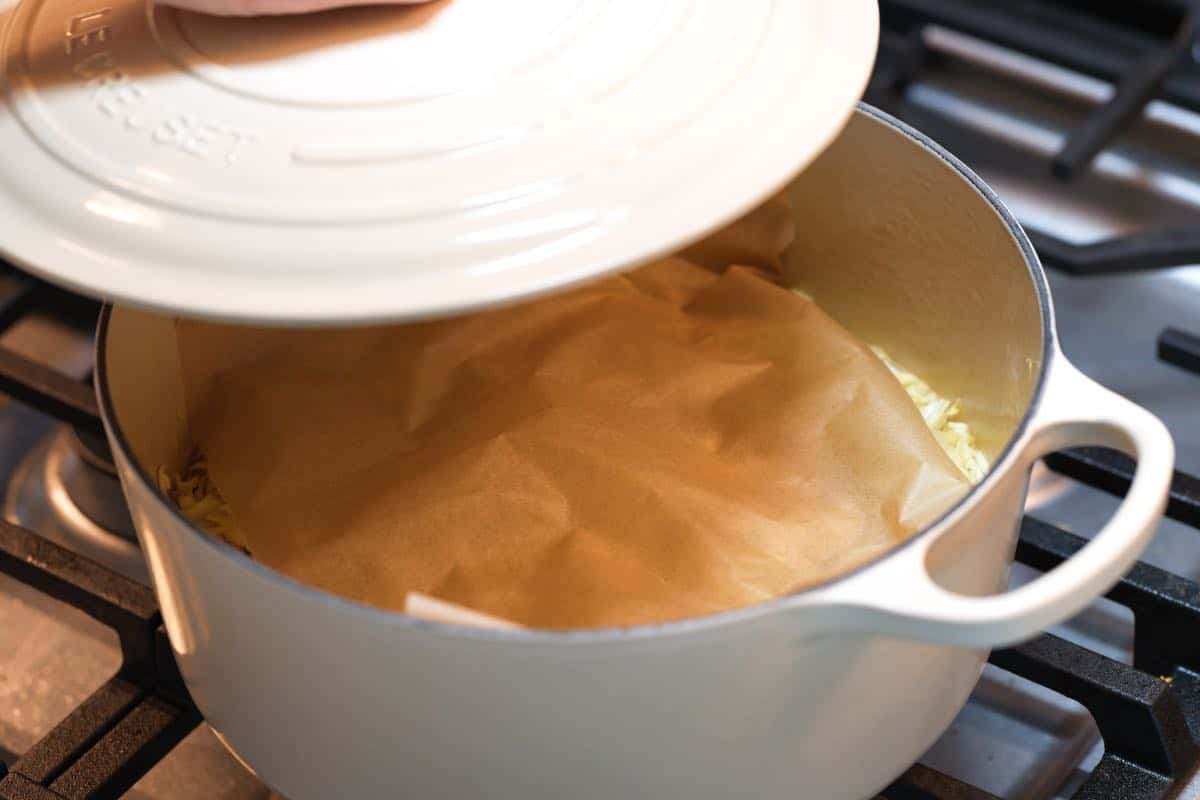
Simmer the cabbage, covered with a lid for 30 minutes. If you have it, a piece of parchment paper set directly on top keeps the cooking environment nice and moist. It’s optional, but a great trick for the best texture.
Tip 3: Serve warm or chill. This is lovely served warm with sausages or pork dishes, like this pork tenderloin with apples. You can also let the sauerkraut cool and sit in the fridge for a few hours (or overnight) so that the flavors bloom. It lasts in the fridge for 2 weeks!
Ways to Use It
Use our quick and easy sauerkraut as you would use fermented sauerkraut. It keeps in the fridge for up to two weeks and gets better over time. I love adding it to sandwiches, salads, and on the side to pretty much anything. It’s great with baked pork chops, beer brats, and I use it to make this sauerkraut soup!
Quick Fresh Sauerkraut
PREP
COOK
TOTAL
This quick homemade sauerkraut recipe is the solution for when you want to enjoy sauerkraut today. Inspired by traditional German sauerkraut (which can take weeks), this fresh homemade sauerkraut takes just over an hour before it is ready to eat!
Makes 5 to 6 cups
You Will Need
1 large head green cabbage, nearly 2 pounds
1 medium yellow onion, thinly sliced, about 2 cups
1 ¾ teaspoons fine sea salt
2 teaspoons caraway seeds
1 juniper berry, lightly crushed
1 allspice berry, left whole, see notes
1 tablespoon olive oil
1/2 teaspoon sugar
1 ¾ cups apple cider vinegar
1/2 cup apple cider
1/2 cup water
Directions
1Quarter and core the cabbage, then thinly slice crossways. You should have close to 12 cups (3 quarts) of sliced cabbage.
2Add the cabbage to a large bowl with 1 ½ teaspoons of salt, the caraway seeds, juniper berry, and allspice berry. Massage the salt into the cabbage and let it stand for 30 minutes.
3Five minutes before the cabbage is ready, heat the olive oil in a large pot over medium heat. Stir in the onions, and cook until translucent, about 5 minutes. Be careful not to brown the onions — if you notice that they begin to take on some color, reduce the heat slightly.
4Add the cabbage, its liquid, and all the spices from the bowl to the pot with the onions. Stir in the sugar, apple cider vinegar, apple cider, and water.
5Bring to a boil and cook for 5 minutes. Reduce the heat to a simmer and place a sheet of parchment paper on top of the cabbage. Cover the pot with a lid and simmer for 30 minutes. The parchment paper helps to maintain a moist environment for the cabbage. You can make this without it, but keep an eye that the liquid in the pot does not evaporate.
6Season with the remaining 1/4 teaspoon of salt, and then allow to cool. Transfer to jars and refrigerate. Keep in the fridge for up to two weeks.
Adam and Joanne’s Tips
Caraway seeds taste nutty with hints of anise and citrus. They are common in German dishes, such as sauerkraut. Find them in the spice aisle of most grocery stores.
Juniper berries have a piney taste with hints of citrus. Find them in the spice aisle of grocery stores or online.
Allspice berries taste like a combination of cloves, cinnamon, and nutmeg. We found whole allspice berries less common in the grocery spice aisle, but Chef Richard recommends buying a “pickling spice blend” instead. McCormick “Mixed Pickling Spice” contains allspice berries, which we purchased and picked out 3 berries for this recipe.
The nutrition facts provided below are estimates.
Nutrition Per Serving
Serving Size
1/2 cup (assumed 5 cups total)
/
Calories
59
/
Total Fat
1.6g
/
Saturated Fat
0.2g
/
Cholesterol
0mg
/
Sodium
369.4mg
/
Carbohydrate
9.2g
/
Dietary Fiber
3g
/
Total Sugars
4.8g
/
Protein
1.6g