Category: Quick Meal

  • Almond Flour Shortbread Cookies

    Almond Flour Shortbread Cookies

    Almond Flour Shortbread Cookies are the perfect thing when you’re craving cookies and want an easy recipe that’s low in carbs! And these amazing gluten-free and keto shortbread cookies only take minutes to make!

    PIN Almond Flour Shortbread Cookies to make them later!

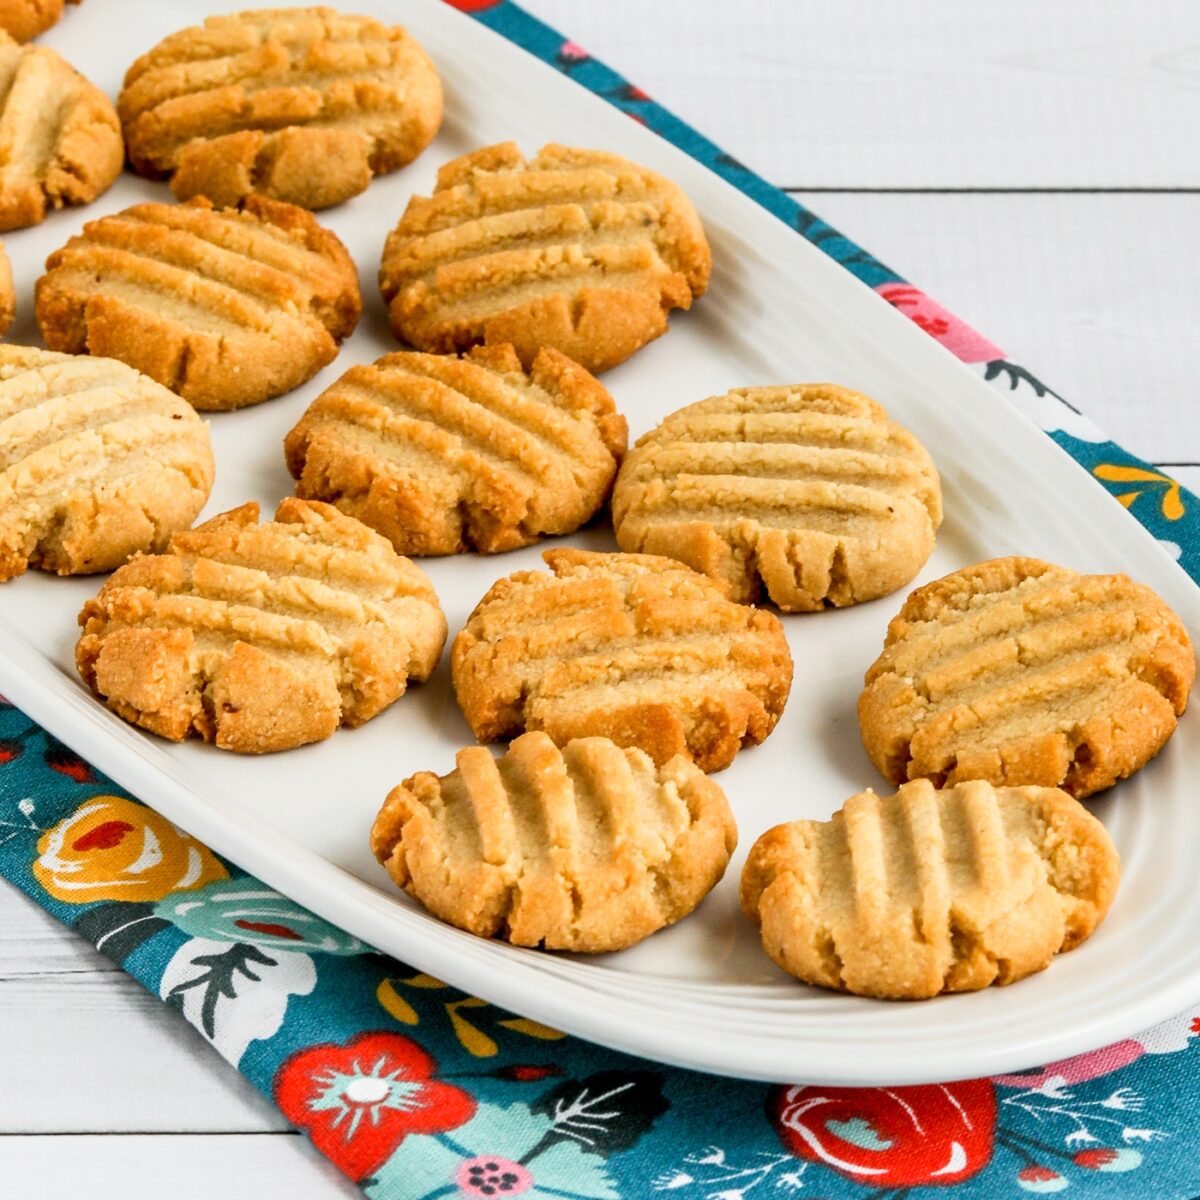
    Almond Flour Shortbread Cookies on plates with blue napkin in back

    These amazing Almond Flour Shortbread Cookies would definitely be my favorite cookie to make during the holidays! So I’m featuring them for my Friday Favorites pick this week to encourage you to try them. And if you do make the shortbread cookies, I bet you’re going to end up making them all year long. These tasty little cookies can literally be made in under 30 minutes, and they’re low-carb, Keto, and gluten-free!

    Even if you’re someone like me who’s not much into baking, these cookies are so quick and easy to make that you can whip them up in no time whenever you’re wanting something sweet. I hope you enjoy them too!

    What ingredients do you need?

    (This is only a list of ingredients; please scroll down for complete printable recipe. Or if you use the JUMP TO RECIPE link at the top of the page, it will take you directly to the complete recipe.)

    What are Shortbread Cookies?

    Shortbread is a classic cookie that traditionally has sugar, butter, flour, and salt and sometimes a touch of vanilla extract. Unlike many other cookies, shortbread does not contain any baking powder or baking soda. This keto almond flour shortbread cookie replaces the flour with almond flour, uses less butter because of the fat in the almond flour, and does use some vanilla.

    What almond flour did we use for the Shortbread Cookies?

    We tested this recipe with Costco Brand Kirkland Blanched Almond Flour. I think any brand of blanched almond flour will work fine, but I wouldn’t use unblanched almond flour.

    Can you use regular Monkfruit for the Almond Flour Shortbread Cookies?

    I’m sure some people are going to wonder if you can use Classic Monkfruit Sweetener in these cookies instead of the Powdered Monkfruit Sweetener (affiliate link) that’s recommended. I haven’t tested it that way, and I am going to guess that you need the super-fine powdered monkfruit to mix into a recipe like this with so few ingredients and no liquids. But if anyone successfully makes this with classic Monkfruit (or another non-powdered sweetener) please let us know in the comments!

    Can you make Almond Flour Shortbread Cookies dairy-free?

    I haven’t tried making a dairy-free version of these cookies, but I am guessing that Coconut Oil (affiliate link) will work for a dairy-free option. If anyone has good luck with that, let us know in the comments!

    How low in carbs are these shortbread cookies?

    These amazing cookies have only 1 net carb per small cookie, and 2 grams of protein!
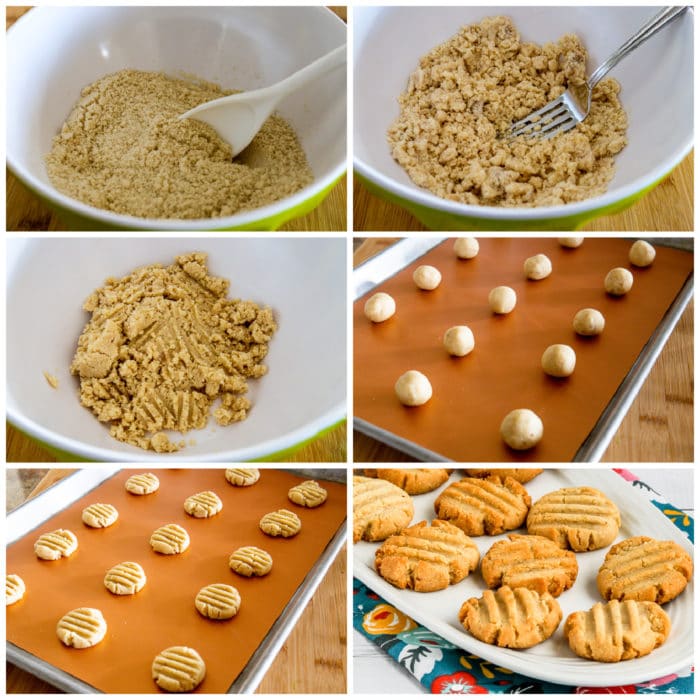
    Almond Flour Shortbread Cookies process shots collage

    How to Make Almond Flour Shortbread Cookies:

    (This is only a summary of the steps for the recipe; please scroll down for complete printable recipe. Or if you use the JUMP TO RECIPE link at the top of the page, it will take you directly to the complete recipe.)

    1. Preheat oven to 350F/176C. Line baking sheet with parchment paper or silicone baking mat.
    2. Be sure your almond flour is at room temperature and not clumped.
    3. Add softened butter, Lakanto Powdered Monkfruit Sweetener, salt, and vanilla extract, and mix with a fork.
    4. Continue mixing until the mixture comes together into a loose dough.
    5. Use a teaspoon to measure out a heaping teaspoon of dough, then roll with your clean hands into 15 small balls.
    6. Use the fork to press the cookies down.
    7. Bake cookies 9-10 minutes, or until they are starting to get firm.
    8. Leave cookies on the baking mat to cool for 5 minutes.
    9. Cookies can be stored in a container with a snap-tight lid or frozen.
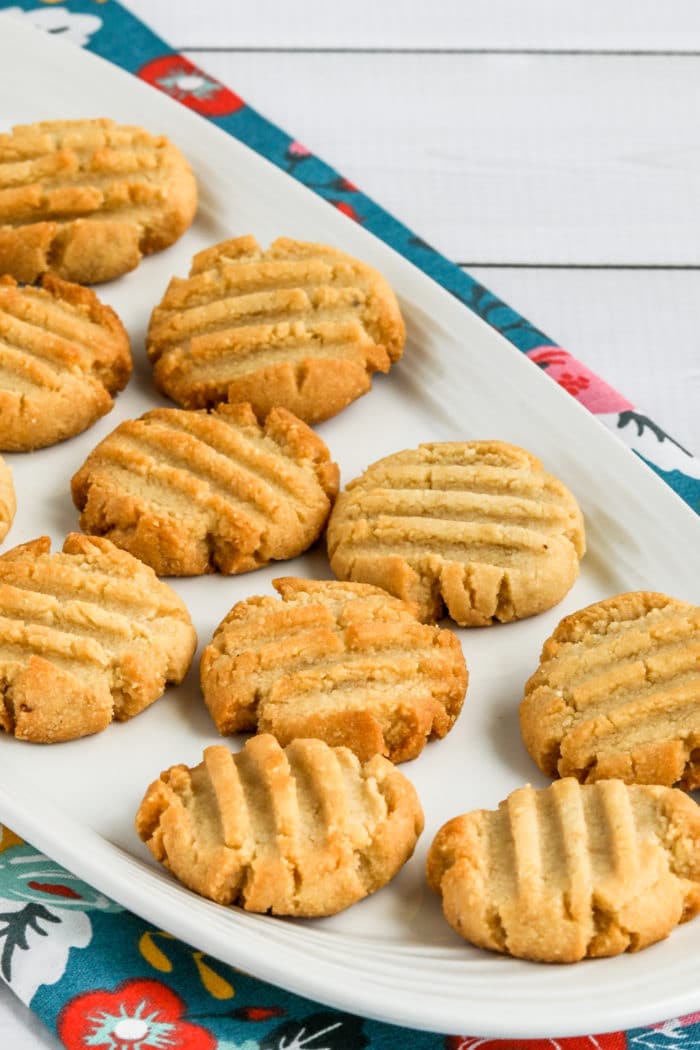
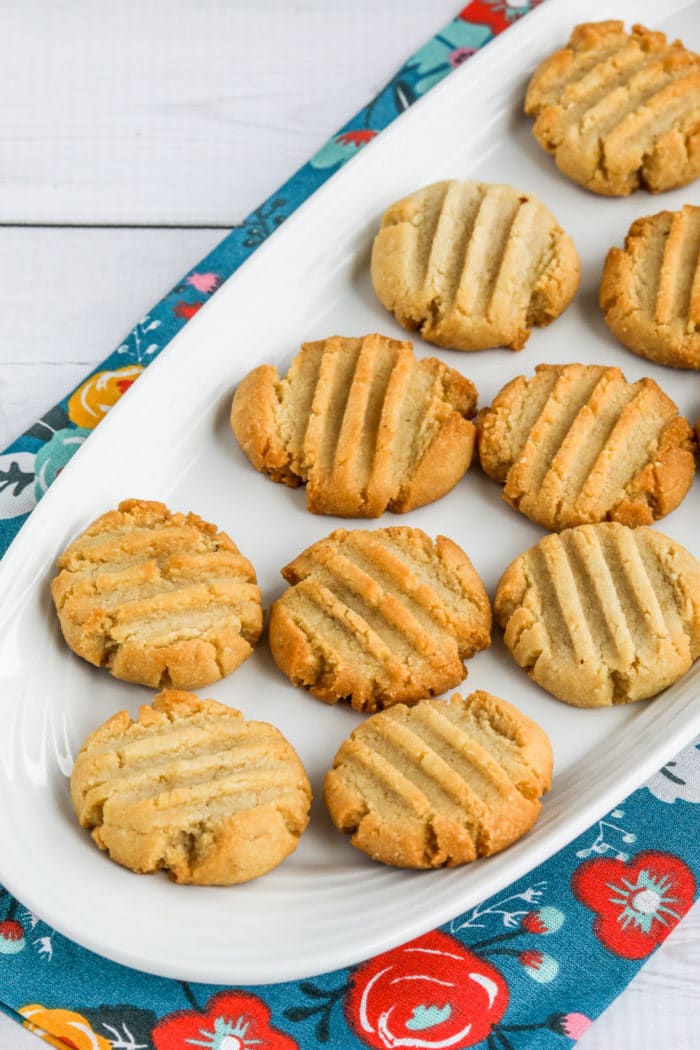
    Almond Flour Shortbread Cookies on plate facing left

    More Tasty Cookies with Almond Flour:

    Ingredients

    • 1 cup blanched almond flour
    • 3 T butter, softened
    • 3 T Lakanto Powdered Monkfruit Sweetener (see notes)
    • 1/8 tsp. salt
    • 1/2 tsp. vanilla extract

    Instructions

    1. Preheat oven to 350F/176C. Line a baking sheet with parchment paper or use a silicone baking mat (affiliate link) like I did.
    2. Be sure your almond flour is at room temperature and not clumped. (If you store it in the freezer, remove and let it warm up, then use a fork to break apart any lumps.)
    3. Add softened butter, Lakanto Powdered Monkfruit Sweetener, salt, and vanilla extract, and mix with a fork.
    4. Continue mixing until the mixture comes together into a loose dough.
    5. Use a teaspoon to measure out a heaping teaspoon of dough, then roll with your clean hands into 15 small balls.
    6. Use the fork to press the cookies down (either in straight lines or in a criss-cross pattern, whichever you prefer.)
    7. Bake cookies 9-10 minutes, or until they are starting to get firm.
    8. Leave cookies on the baking mat to cool for 5 minutes, or slightly longer. (Ours did get darker on the baking mat so remove them after 5 minutes if you prefer lighter cookies.)
    9. Cookies can be stored in a container with a snap-tight lid or frozen.

    Nutrition Information

    Yield

    15

    Serving Size

    1

    Amount Per Serving

    Calories 65Total Fat 6gSaturated Fat 2gTrans Fat 0gUnsaturated Fat 4gCholesterol 6mgSodium 37mgCarbohydrates 2gFiber 1gSugar 1gProtein 2g

    Nutrition information is automatically calculated by the Recipe Plug-In I am using. I am not a nutritionist and cannot guarantee 100% accuracy, since many variables affect those calculations.
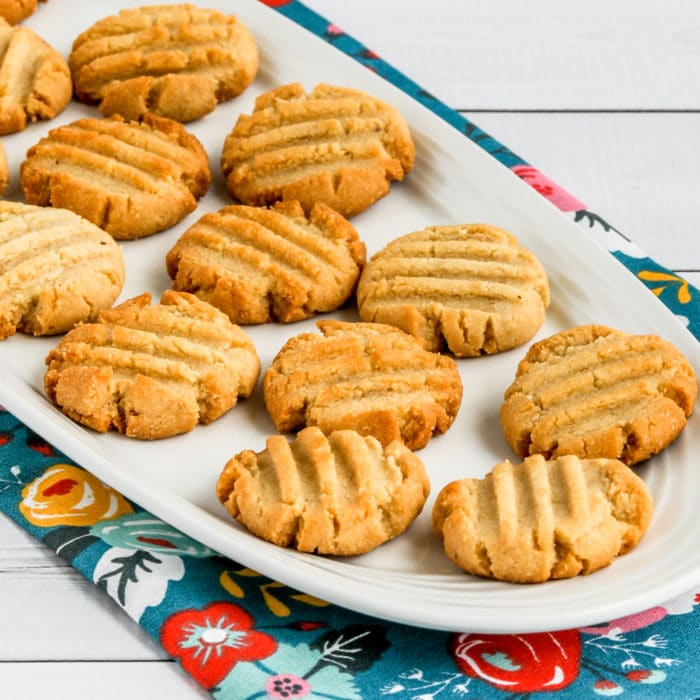
    Did you make this recipe?

    Did you make this recipe? Please leave a star rating (under the PRINT button in the recipe) or share a photo of your results on Instagram! THANKS!

    Almond Flour Shortbread Cookies thumbnail image of cookies on plate

    Low-Carb Diet / Low-Glycemic Diet / South Beach Diet Suggestions:
    Almond Flour Shortbread Cookies are a perfect recipe for Keto or for any low-carb eating plan. These cookies are fairly high in fat for the original South Beach Diet, although I certainly wouldn’t judge if you ate a few occasionally.

    Find More Recipes Like This One:
    Use Desserts and Baking to find more cookie recipes like this one. Use the Diet Type Index to find more recipes suitable for a specific eating plan. You might also like to follow Kalyn’s Kitchen on Pinterest, on Facebook, on Instagram, on TikTok, or on YouTube to see all the good recipes I’m sharing there.

    Historical Notes for this Recipe:
    These tasty cookies were first posted in 2019, and the recipe has been extra popular ever since! The recipe was last updated with more information in 2025.
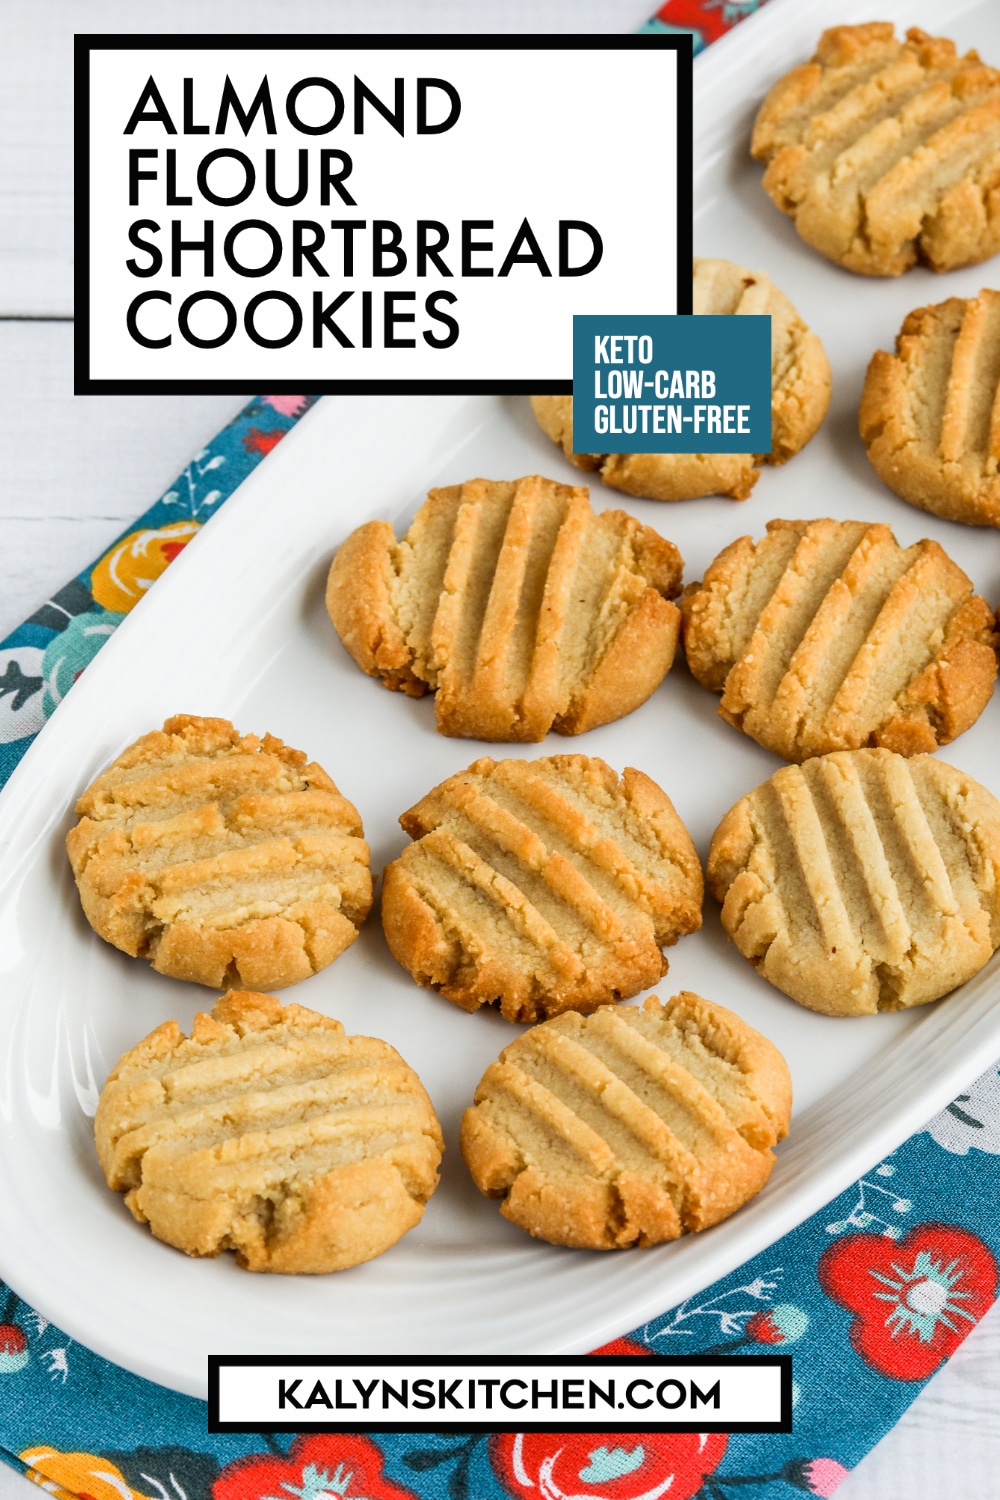
    Pinterest image of Almond Flour Shortbread Cookies

    We are a participant in the Amazon Services LLC Associates Program, an affiliate advertising program designed to provide a means for us to earn fees by linking to Amazon.com and affiliated sites. As an Amazon Associate, I earn from qualifying purchases.



    Source link

  • Trader Joe’s Chicken Shawarma with Lemon Rice Recipe

    Trader Joe’s Chicken Shawarma with Lemon Rice Recipe

    icon-arrowicon-chevron-whiteicon-chevronicon-commenticon-facebookicon-hearticon-instagramicon-instant-poticon-listicon-lockicon-meal-prepicon-nexticon-pinteresticon-popularicon-quoteicon-searchicon-staricon-sugar-freeicon-tiktokicon-twittericon-veganicon-videoicon-youtubemenu-closemenu-open


    Our recipes, your inbox. Sign up

    Easy Trader Joe’s chicken shawarma bowls with fluffy lemon rice, crunchy cabbage, and creamy feta sauce. Fast, flavorful, and perfect for weeknights!

    Trader Joe’s Chicken Shawarma + Lemon Rice Is a Thing To Behold

    Lindsay Ostrom headshot.

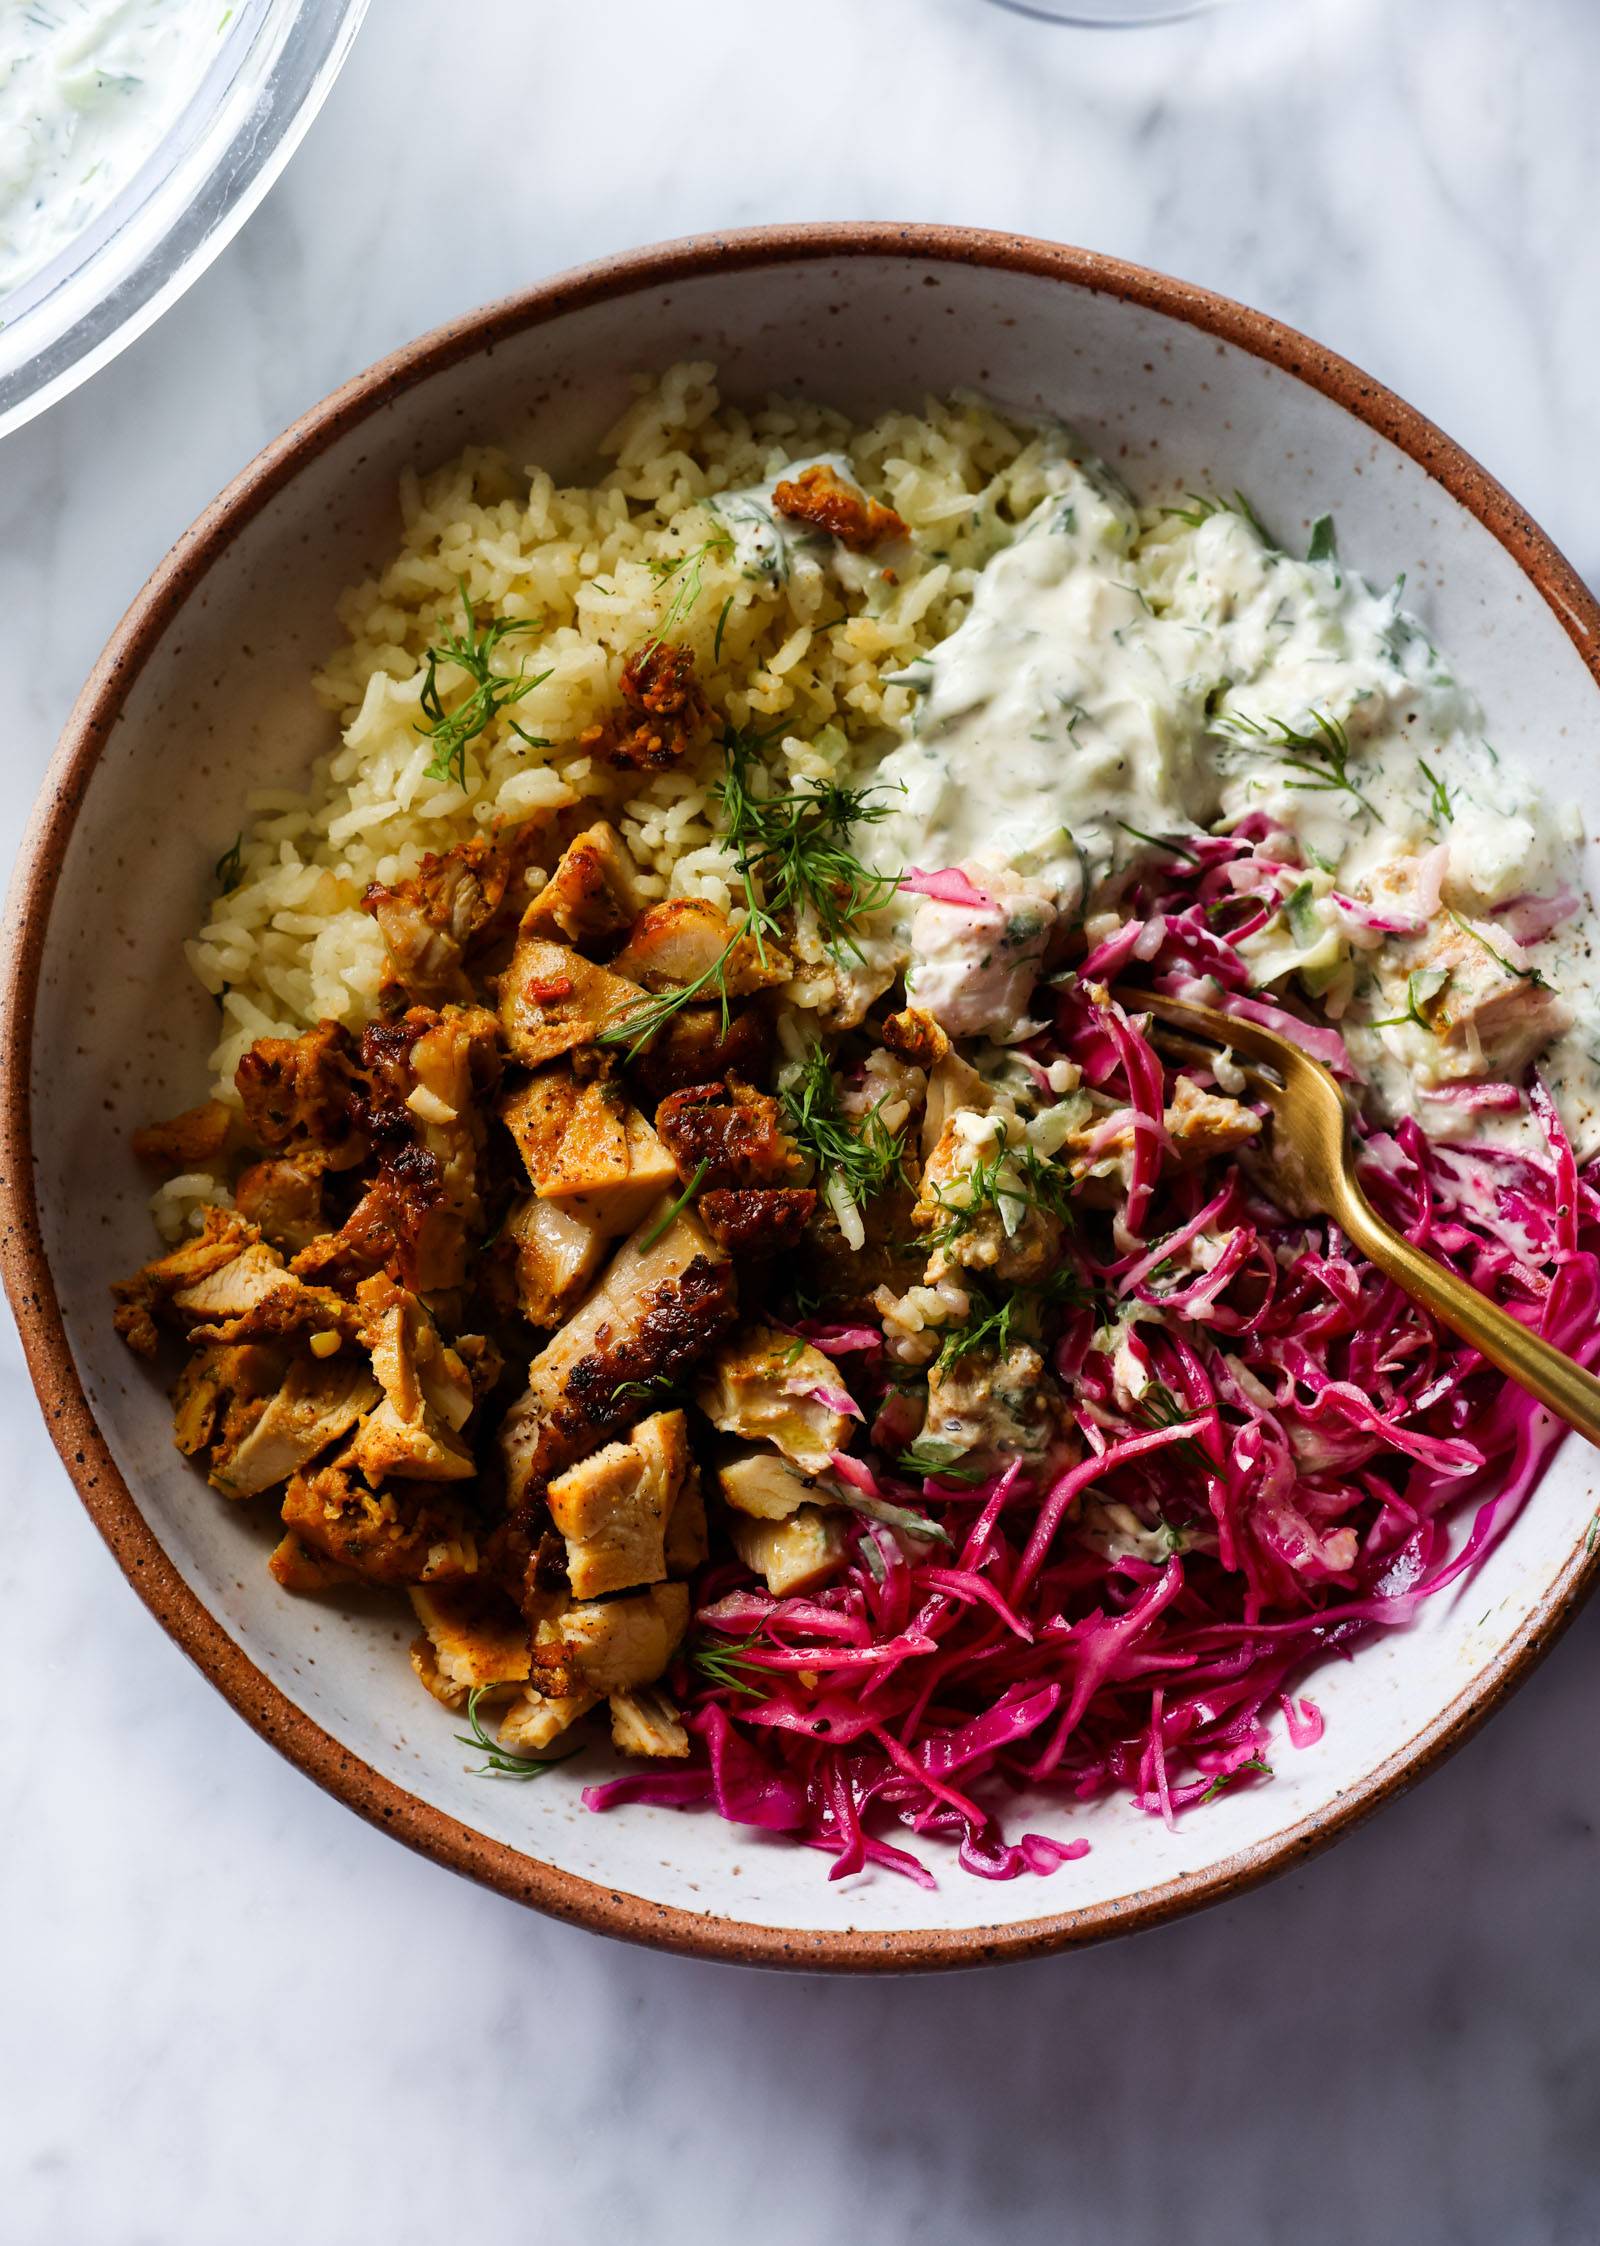
    Do you guys know Naf Naf grill? This is a Naf Naf bowl, made at home! Using TJ’s chicken shawarma! Lots going on here!

    This bowl is a power combo. It’s loaded with:

    • Lemon rice (lightly scented, fluffy, and gorgeous)
    • Crisped, golden chicken shawarma
    • Cabbage slaw that’s almost pickled
    • A tangy, creamy feta cucumber sauce

    I am a huge fan of shortcuts cheesy smile so I am regularly using the chicken shawarma from Trader Joe’s for these bowls.

    If you’re looking for the fastest possible path to a meal, just make the chicken and lemon rice, and pile on some store-bought tzatziki and/or fresh cucumbers! The chicken and lemon rice make such a solid base.

    And if you’ve got it in you to make the cabbage and feta cucumbers, you’re in for a big big treat.

    The first time I made this, I knew it would end up as a recipe on the blog. And then when I made it for a final test with my friend Amanda, we were just losing our minds. This combo is just SO GOOD.

    Lindsay and Amanda with chicken shawarma bowls.

    Amanda actually pointed out that the leftovers would also be amazing in a wrap?! and now I can’t get that out of my mind. Can someone make that happen?

    Hope you guys love it. Cheers to shortcuts! And feel-good food!

    Lindsay signature.

    If you want to make the chicken shawarma from scratch – this is my go-to marinade for chicken breasts for recipes like this!

    Print
    clock clock iconcutlery cutlery iconflag flag iconfolder folder iconinstagram instagram iconpinterest pinterest iconfacebook facebook iconprint print iconsquares squares iconheart heart iconheart solid heart solid icon
    Chicken shawarma bowls.

    Chicken Shawarma with Lemon Rice


    5 Stars 4 Stars 3 Stars 2 Stars 1 Star

    No reviews

    • Author: Lindsay
    • Total Time: 45 minutes
    • Yield: 4 servings

    Description

    Easy Trader Joe’s chicken shawarma bowls with fluffy lemon rice, crunchy cabbage, and creamy feta sauce. Fast, flavorful, and perfect for weeknights!


    Chicken Shawarma:

    Lemon Rice:

    Cabbage Salad:

    Feta Cucumber Sauce:


    Instructions

    1. Make Lemon Rice: Sauté rice, onion powder, garlic powder, and salt. Add bouillon and water; bring to a simmer. Cover the pot, and keep it on a very low simmer for 18 minutes. When it’s done, add lemon zest; fluff with a fork.
    2. Toss Cabbage Salad: Toss together cabbage, white vinegar, water, olive oil, salt, and sugar; taste and adjust. Let it rest while you finish up.
    3. Make Feta Cucumber Sauce: Stir together grated cucumber, Greek yogurt, olive oil or mayo, feta cheese, garlic, and dill; taste and adjust. 
    4. Air Fry Chicken Shawarma: I do this last so it’s hot and fresh! Air fry the chicken at 390 for 9-10 minutes, until 165 degrees and deeply browned on the outside. (You can also cook the chicken on a sheet pan in the oven – 450 for 5 minutes, and then broil on low for 5 more minutes). Chop into bite-sized pieces.
    5. Serve: Plate rice with the chopped chicken shawarma, a scoop of the cabbage, and a dollop of the feta cucumbers.
    • Prep Time: 15 minutes
    • Cook Time: 30 minutes
    • Category: Dinner
    • Method: Air Fry
    • Cuisine: Middle Eastern

    Keywords: chicken shawarma, chicken recipe, air fryer chicken

    Frequently Asked Questions For This Chicken Shawarma

    If I don’t have access to Trader Joe’s, how should I make the chicken?

    I love the marinade used in this chicken pitas recipe and it would be a great fit here as well!

    Can you use store-bought tzatziki?

    Yes! And you can get tzatziki from Trader Joe’s as well!

    Can I make this vegan?

    Replace the chicken with something plant-based, like: falafel (from Trader Joe’s too!), marinated chickpeas, air fryer tofu, or roasted veggies. Trader Joe’s also sells a vegan tzatziki that’s fantastic!

    How long do leftovers last?

    This will keep for 3-4 days as leftovers! I like to keep all the ingredients separate so I can still warm the chicken and rice before adding the cabbage and sauce. Just a heads up that the cabbage will pickle more as it sits!

    Three More Trader Joe’s Shortcut Recipes


    Source link

  • Easy Brown Butter Recipe

    Easy Brown Butter Recipe

    Here’s my method for how to brown butter perfectly every time. It takes 5 minutes, and you can use this brown butter in your favorite baking and savory recipes.

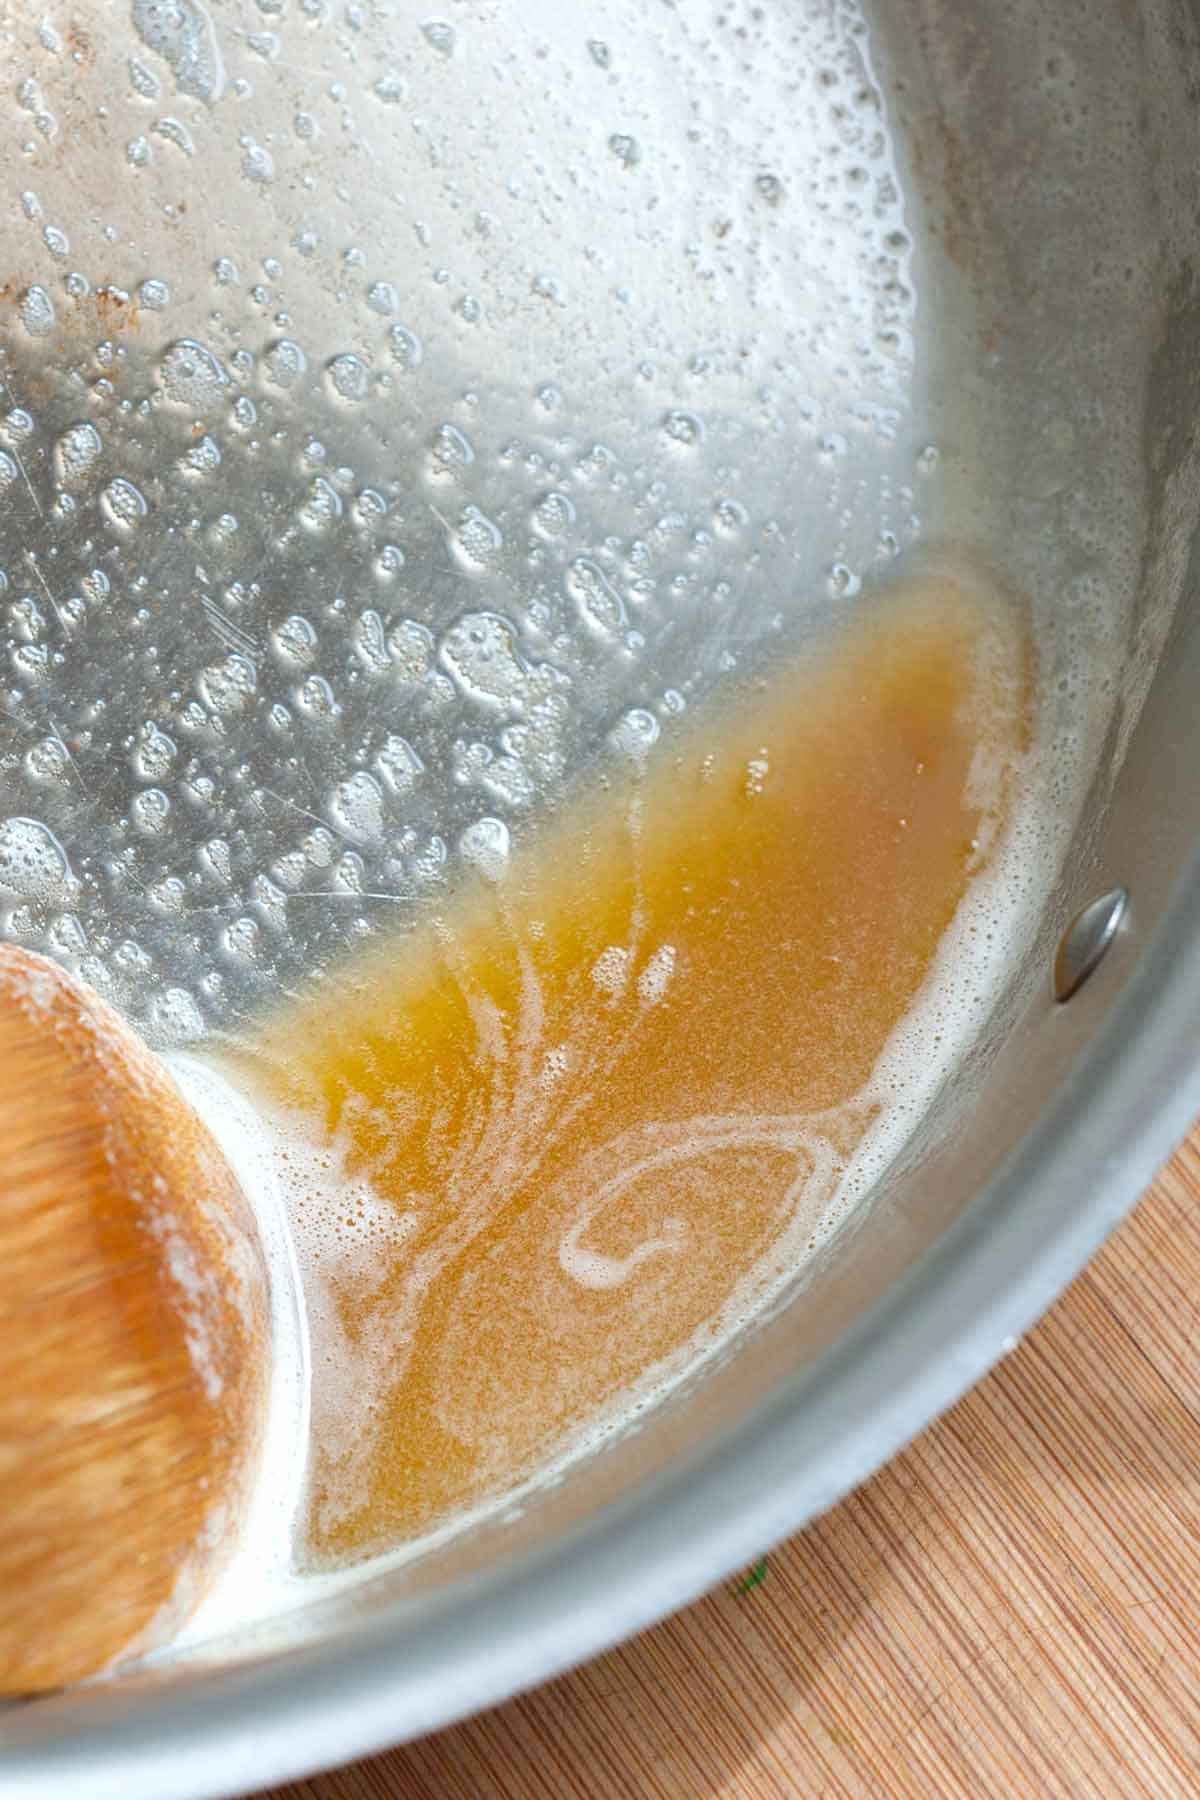
    How to Brown Butter - Skillet with butter that has been browned to perfection. Brown butter looks light brown.

    Brown butter is regular butter cooked a bit longer than usual until the milk solids toast and turn brown. You’ll cook the butter just past the melting point.

    Browning butter creates a magical toasty flavor you don’t get with regular melted butter. Brown butter (or beurre noisette in France) tastes nutty, toasted, and like toasted hazelnuts.

    How to Use Brown Butter

    Use brown butter in almost any recipe that calls for melted butter. Toss cooked pasta or noodles with browned butter, as we do for our brown butter pasta with egg and this kale pasta. I also love drizzling vegetables with brown butter before (or after) roasting them. It’s absolutely amazing when used to make mashed potatoes, and it makes the best popcorn!

    For sweeter recipes, swap plain melted butter for brown butter in cookies, bars, and even buttercream (yes, you can chill the butter and whip it!). I love using brown butter to make chocolate chip cookies, oatmeal cookies, and blondies. It also makes these easy sautéed apples extra delicious, and I love drizzling it over oatmeal.

    Perfect Brown Butter

    Easy Brown Butter

    It takes five minutes to make brown butter. You can use it almost anytime a recipe calls for melted butter (hello, brown butter chocolate chip cookies). For herb brown butter, add a handful of fresh sage leaves, rosemary sprigs, or fresh thyme to the pan while you make the brown butter.

    3/4 cup

    You Will Need

    1 cup (227g) butter, salted or unsalted

    Directions

      1Add butter to a heavy-bottomed pan over medium-low heat. As the butter melts, continuously swirl it around the pan. The butter will quickly go from brown to burnt, so stay close to the pan when you do this.

      2Continue swirling the butter over the heat. It will melt, get a little foamy, and finally start turning golden brown. Remove it from the heat when the butter is light brown and smells nutty.

      3Store brown butter in the fridge for up to two weeks or freeze for up to three months.

    Adam and Joanne’s Tips

    • Storing: Homemade brown butter lasts in an airtight container in the fridge for up to 2 weeks or frozen for up to 3 months. The butter will solidify again, but you can warm it over low heat when needed. To freeze brown butter, pour it into a clean ice cube tray, freeze, and then transfer the frozen cubes to a freezer-safe container or bag.
    • How to freeze brown butter: Pour it into a clean ice cube tray, freeze, and then transfer the frozen cubes to a freezer-safe container or bag. Freeze for up to 3 months. Gently reheat in a pan over low heat.
    • Nutrition facts are estimates. We assumed unsalted butter.

    Nutrition Per Serving
    Serving Size
    About 1 tablespoon
    /
    Calories
    136
    /
    Total Fat
    15.3g
    /
    Saturated Fat
    9.6g
    /
    Cholesterol
    40.7mg
    /
    Sodium
    2.1mg
    /
    Carbohydrate
    0g
    /
    Dietary Fiber
    0g
    /
    Total Sugars
    0g
    /
    Protein
    0.2g


    AUTHOR:

    Adam Gallagher

    Previous Post: Easy Smoked Salmon Dip
    Next Post: Sausage Stuffed Shells

    Source link

  • Baked Buffalo Chicken Dip Recipe

    Baked Buffalo Chicken Dip Recipe

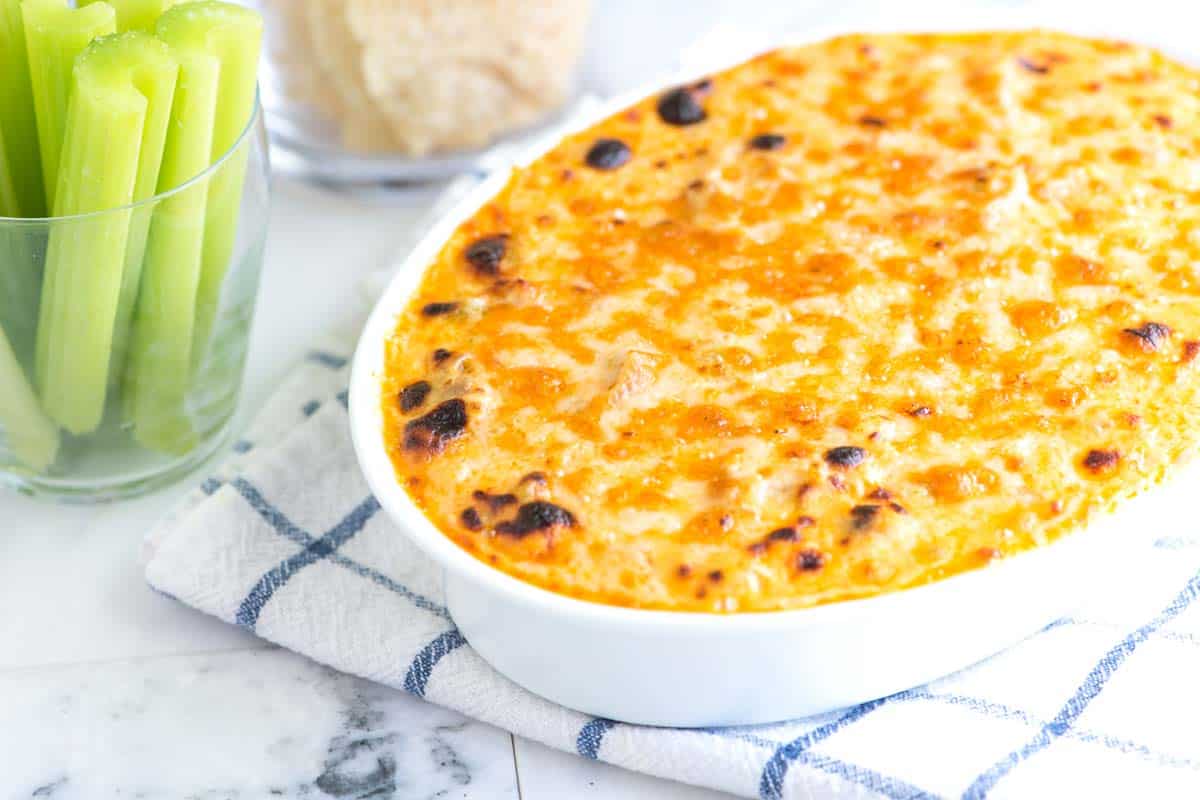
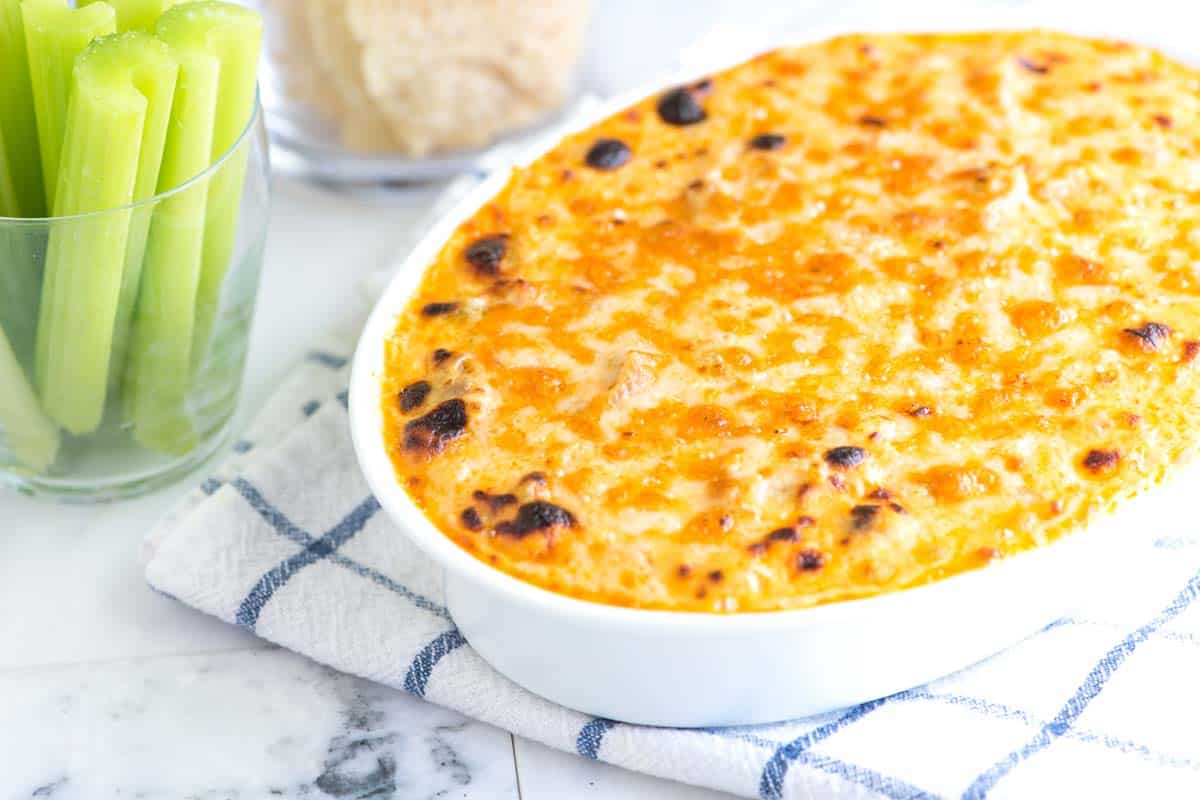
    This Buffalo chicken dip recipe is the perfect appetizer for game day or a crowd. Creamy, cheesy, and loaded with shredded chicken and tangy Buffalo sauce.

    Buffalo Chicken Dip

    It bakes up hot and bubbly with a fondue-like cheese sauce and just the right amount of heat, thanks to Frank’s hot sauce. Everyone I’ve served it to loves it!

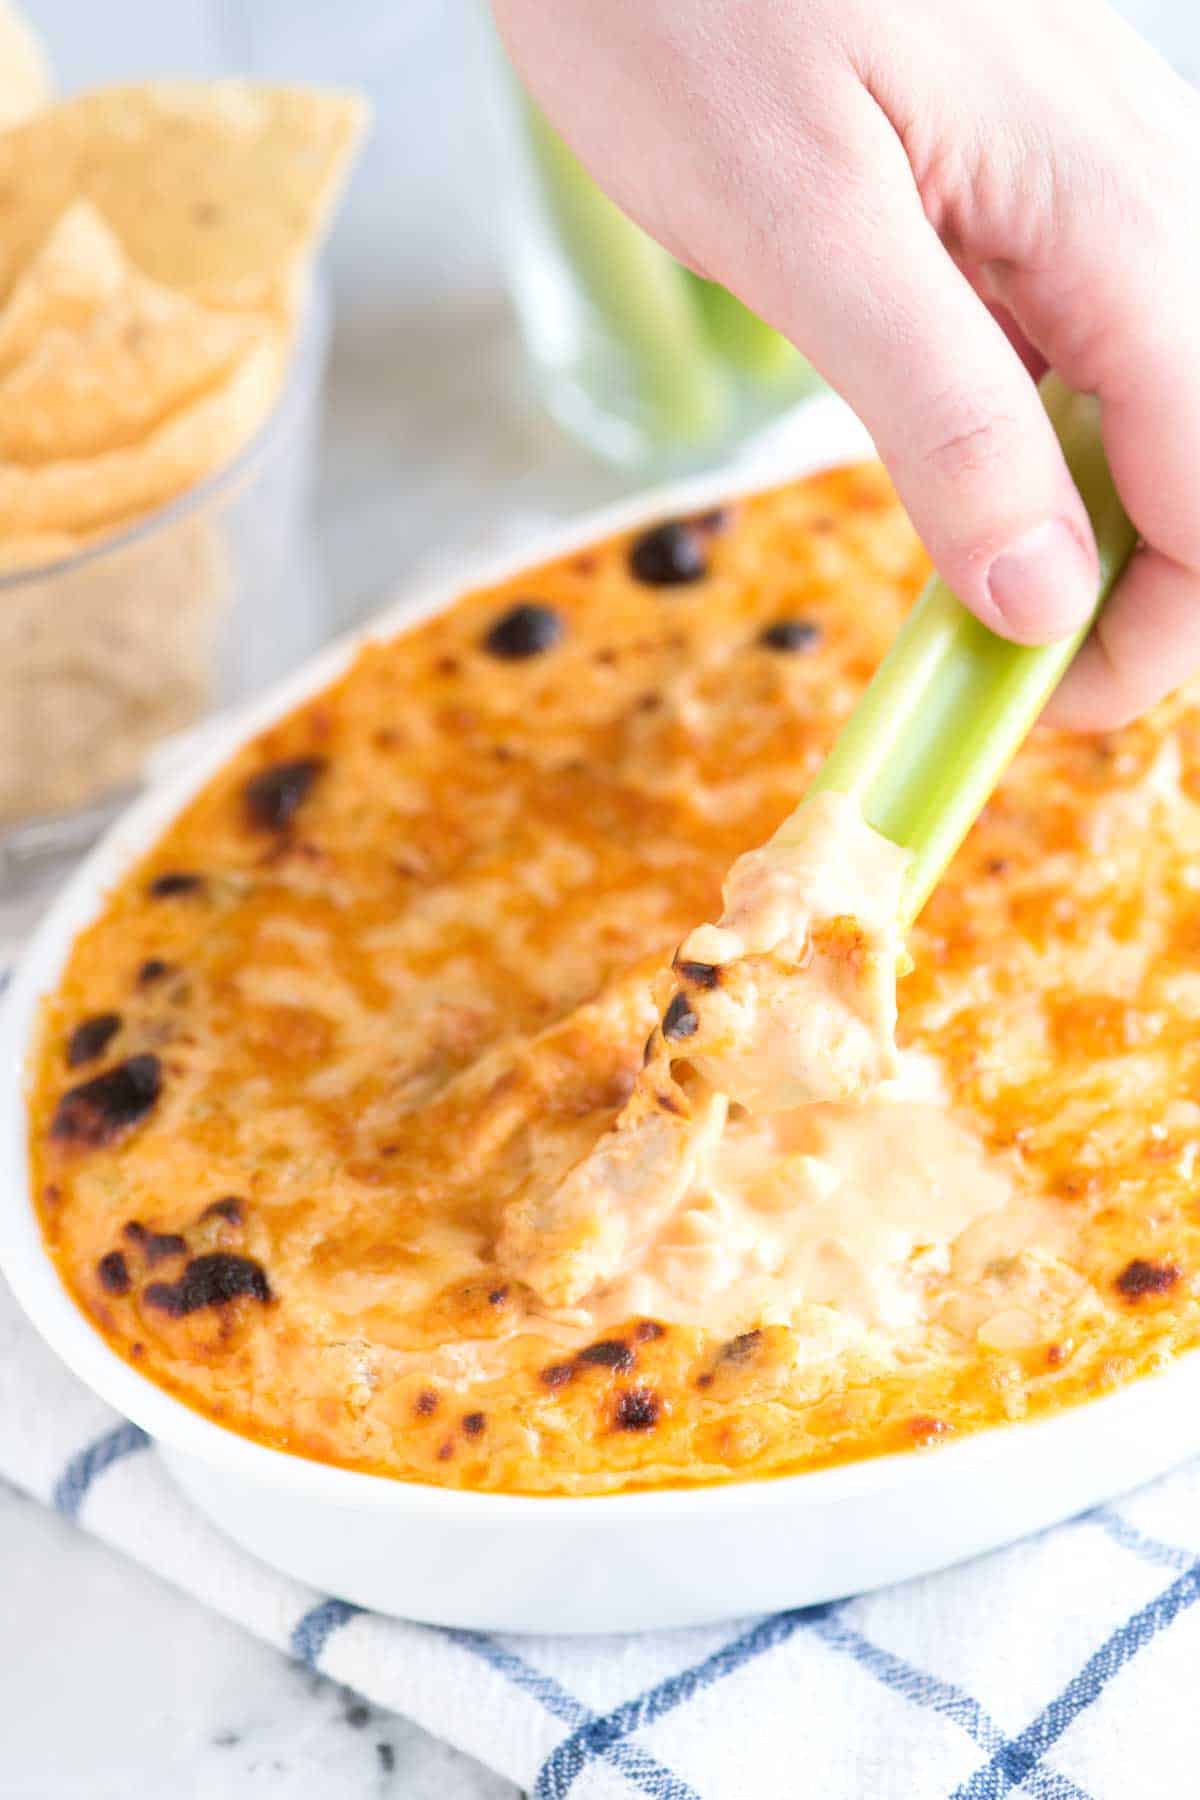
    If you love Buffalo hot wings, this buffalo chicken dip is for you. It’s especially good served with crusty bread, sturdy crackers, or crisp veggies like carrots and celery.

    Key Ingredients

    • Chicken: I usually start with leftover roasted chicken or a store-bought rotisserie chicken. You can also use our stovetop shredded chicken, slow cooker shredded chicken, or poached chicken recipes.
    • Hot Sauce: Use your favorite brand. We love Frank’s RedHot or Crystal Hot Sauce for their flavor and mild heat. These are also what I use when making homemade Buffalo sauce.
    • Butter and Flour: These form the base of our creamy dip. They turn into a roux that thickens the milk (similar to making creamy mac and cheese).
    • Milk: I like the richness of whole milk, but 2% is fine.
    • Veggies: To add flavor to the dip, cook finely diced onion, carrot, and celery in butter with minced garlic.
    • Cheese: For a smooth, creamy dip, use a mix of cream cheese and a melty cheese such as white cheddar, Monterey Jack, or Pepper Jack for a little extra heat.

    Find the full recipe with measurements below.

    How to Make the Best Buffalo Chicken Dip

    Tip 1: Make the creamy base. The base of this dip starts like a classic macaroni and cheese. Cook onion and celery in butter until soft, then stir in garlic and flour. Cook until the flour turns lightly golden, then whisk in the milk until it thickens into a smooth béchamel sauce.

    Making the creamy base of buffalo dip

    Tip 2: Make it cheesy. For the creamiest texture, stir in a bit of cream cheese. The stabilizers help the dip stay silky and smooth (just like in our queso recipe). Then add shredded cheese for flavor. I love white cheddar, but pepper jack adds a nice kick.

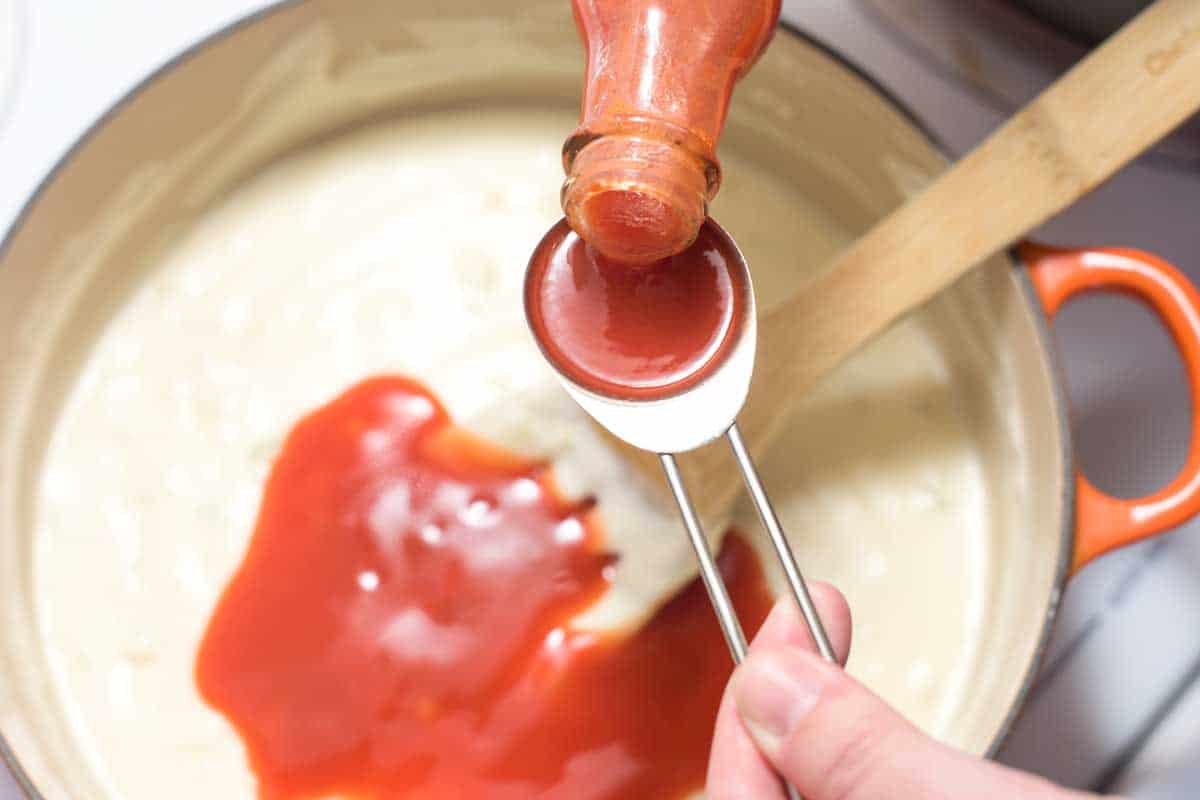
    Tip 3: Make it Buffalo-style. To transform this from a creamy sauce to a Buffalo dip, stir in a generous amount of hot sauce. You can add to taste on this one, so you can make it as spicy as you want. When you are happy with the flavor, stir in your chicken.

    Adding Frank's Redhot to homemade buffalo chicken dip

    Tip 4: Bake it! Transfer the dip to a baking dish, sprinkle extra cheese on top, and broil until hot and bubbly. It only takes a few minutes, and that gooey, golden topping makes all the difference.

    Adding cheese to the top of buffalo chicken dip

    More Buffalo Chicken Recipes

    Buffalo Chicken Dip

    Baked Buffalo Chicken Dip

    • PREP
    • COOK
    • TOTAL

    This Buffalo chicken dip recipe is easy to make and perfect served with crisp celery sticks and crusty bread. We love using Frank’s RedHot Original since it’s full of flavor without being too spicy, but feel free to use your favorite hot sauce. Just taste as you go, since some brands pack a bit more heat.

    This dip is just as good with or without chicken. We’ve made it both ways, and it’s always a hit.

    8 Servings

    You Will Need

    2 cups cooked, shredded chicken, see tips

    2 cups whole milk

    4 tablespoons unsalted butter

    1 cup finely chopped onion (1 medium)

    ½ cup finely chopped celery (1 stalk)

    2 garlic cloves, minced

    4 tablespoons all-purpose flour

    3 ounces cream cheese, block-style

    8 ounces sharp white cheddar, coarsely grated, about 2 cups

    Dash Worcestershire sauce

    5 tablespoons Frank’s RedHot Original, or more to taste

    Celery sticks and/or crusty bread, for serving

    Directions

      1Warm the milk: Heat the milk in a medium saucepan over medium heat until it just begins to simmer. Turn off the heat and set aside. You can also warm it in the microwave.

      2Cook the vegetables: Melt the butter in a large, heavy-bottomed saucepan over medium heat. Add the onion, celery, and ¼ teaspoon salt. Cook, stirring occasionally, until softened, about 5 minutes.

      3Make the roux: Stir in the garlic and flour. Cook, whisking constantly, until the flour turns lightly golden, about 2 to 3 minutes. Remove from the heat.

      4Add the milk: Slowly whisk in the warm milk a little at a time, whisking until smooth. Return the pan to medium heat and cook, whisking constantly, until the sauce thickens enough to coat the back of a spoon, about 2 minutes.

      5Add cheese: Remove from the heat. Stir in the cream cheese and all but a small handful of the cheddar until melted and smooth.

      6Add hot sauce and chicken: Add the Worcestershire sauce and 5 tablespoons of hot sauce. Taste and adjust the spice and salt as needed. Stir in the shredded chicken.

      7Broil and serve: Position a rack 6 inches from the broiler and preheat the broiler to high. Transfer the dip to a 2-quart baking dish and sprinkle the remaining cheese on top. Place the dish on a foil-lined baking sheet and broil until bubbling and lightly browned, about 2 to 3 minutes. Serve hot with celery sticks, or slices of crusty bread.

    Adam and Joanne’s Tips

    • Make ahead: You can prepare this up to 3 days in advance. Follow our recipe directions, but do not broil. Store the dip covered in the refrigerator until ready to serve. Gently reheat the dip in a saucepan over medium-low heat until thoroughly heated through. Pour the dip into the baking dish, add extra cheese on top, and broil until the top is bubbling and cheese begins to brown.
    • The nutrition facts provided below are estimates.

    Nutrition Per Serving
    Calories
    291
    /
    Protein
    16 g
    /
    Carbohydrate
    8 g
    /
    Dietary Fiber
    1 g
    /
    Total Sugars
    4 g
    /
    Total Fat
    21 g
    /
    Saturated Fat
    12 g
    /
    Cholesterol
    89 mg
    /
    Sodium
    315 mg


    AUTHOR:

    Adam Gallagher

    Adam and Joanne of Inspired Taste

    We are Adam and Joanne Gallagher, the creators of Inspired Taste. Established in 2009, Inspired Taste grew from a childhood dream into one of the internet’s most trusted recipe sites with hundreds of reliable recipes, step-by-step videos, and expert tips.More About Us

    Source link

  • Mediterranean Zucchini Noodle Salad Recipe

    Mediterranean Zucchini Noodle Salad Recipe

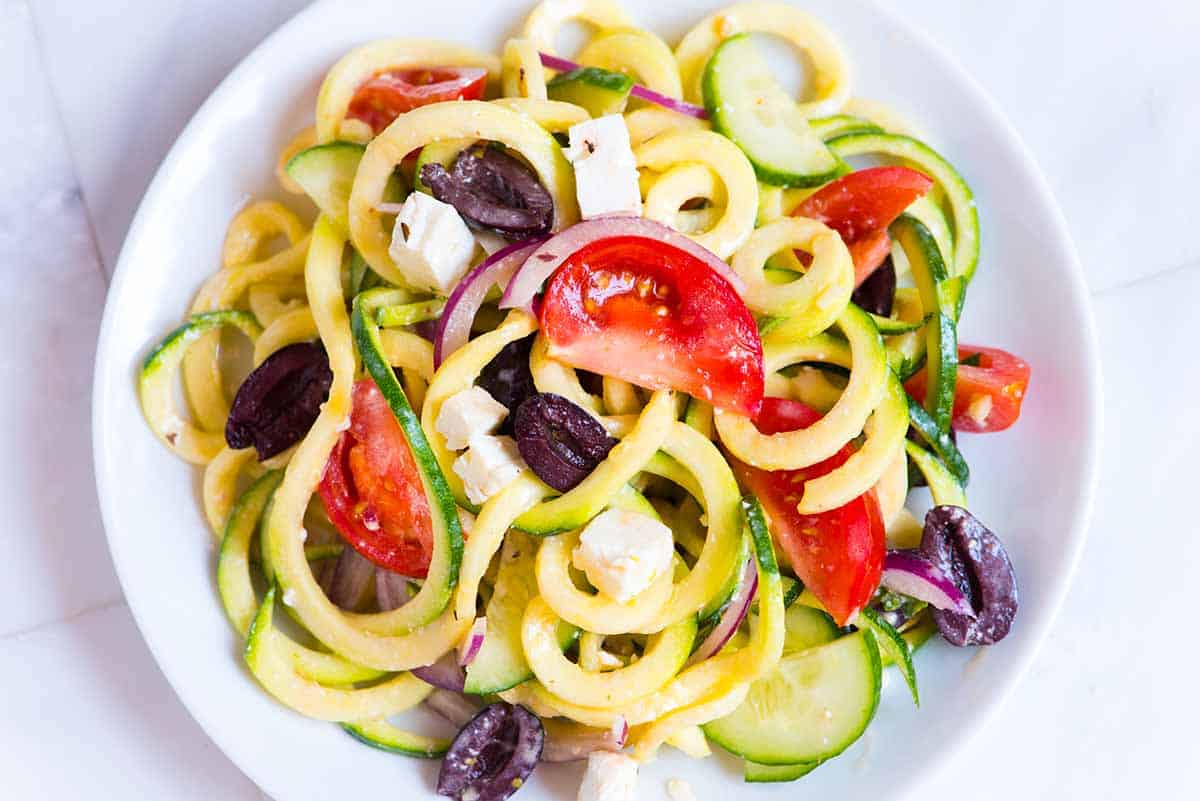
    We love this fresh zucchini noodle salad recipe! Raw zucchini makes delicious salads, especially when tossed with our unbelievably good Greek yogurt dressing!

    Zucchini Noodle Salad

    Zucchini doesn’t get enough credit for salads! I love raw zucchini salads, so I’m obsessed with this zoodles salad with a spicy Greek yogurt dressing, feta, and tomatoes. Since the zucchini goes in raw, it holds a bit better than cooked zucchini noodles, which are better enjoyed right away. Once dressed, this salad is good for a couple of days.

    If you’ve not made noodles out of zucchini before, I’ve got you covered with a quick tutorial below (with and without a spiralizer). For another salad like this, see our lemon herb zucchini salad.

    Key Ingredients

    • Zucchini: You can use store-bought zoodles or make them (noodles made from zucchini). Use fresh, firm zucchini for the best results. I have shared how to make them below.
    • Cucumber, Tomatoes, Red Onion, and Olives: The extra veggies we add to this zucchini salad are inspired by a classic Greek salad. For the olives, I use Kalamata, but green Castelvetrano olives are also really delicious.
    • Feta Cheese: Like a classic Greek salad, we add lots of feta. You can crumble it onto the salad or do what I did in our photos and add larger cubes.
    • Greek Yogurt Dressing: My dressing starts with plain Greek yogurt, then I mix in a garlic clove, crumbled feta, lemon zest and juice, olive oil, honey, and to add a tiny bit of spice, some Sriracha.

    Find the full recipe with measurements below.

    How to Make a Zucchini Noodle Salad

    Tip 1: Turn zucchini into noodles. I highly recommend using a spiralizer for this recipe. If you don’t have one, I’ve included tips below for making zoodles without (a mandoline or peeler work in a pinch). A spiralizer creates long, curly noodles in minutes. My model is from Paderno (it was around $30). To make zoodles:

    1. Secure the spiralizer to your countertop (mine has suction cups). Trim the ends of the zucchini and press it firmly into the spiralizer.
    2. Turn the handle until all the zucchini turns into noodles. Since your noodles will be long, use scissors to cut the noodles around 12 inches long.
    3. Use the zoodles immediately in the salad, or store them in the fridge or freezer. I have included storing tips below the recipe. I also like making a double batch and saving them for my garlic parmesan zucchini noodles recipe.
    Spiralizing zucchini

    Tip 2: Use our Greek yogurt dressing. Once you have your noodles ready, you can toss them with the dressing (which is as simple as stirring everything together) and the extra veggies, then top with feta cheese. Easy, fresh, and so delicious!

    Adding Greek yogurt dressing to zucchini noodle salad

    Serving Suggestions

    This salad is tasty served by itself, or you can add some protein with poached shrimp, lemon dill baked salmon, or sliced juicy chicken breasts.

    More Zucchini Recipes

    Mediterranean Zucchini Noodle Salad

    Mediterranean Zucchini Noodle Salad

    • PREP
    • TOTAL

    You can make this Greek-inspired zucchini salad in 20 minutes! The yogurt-based dressing has just the right amount of kick from garlic, feta cheese, lemon, and Sriracha hot sauce. The salad is perfect to eat immediately or make up to 2 days in advance.

    2 to 3 Servings

    You Will Need

    Zucchini Salad

    2 medium zucchini, about 2 pounds

    1/2 medium hothouse cucumber, sliced into half moons

    2 medium tomatoes, cut into small wedges

    1/4 medium red onion, sliced thinly into half moons

    2 ½ ounces feta cheese, cubed, about 1/2 cup

    15 Kalamata olives, pitted and halved


    Yogurt Dressing

    1/4 cup Greek yogurt

    1 medium garlic clove, finely minced

    1 tablespoon crumbed feta cheese

    1 teaspoon lemon zest

    1 tablespoon lemon juice

    1 tablespoon olive oil

    1/2 teaspoon Sriracha hot sauce, or more to taste

    1/2 teaspoon honey

    Salt and fresh ground black pepper

    Directions

      1Prepare zucchini: Trim and spiralize the zucchini (see notes below for doing this without a spiralizer). Then, cut the spiralized zucchini into long noodles to be about the length of spaghetti.

      2Make the dressing: Stir yogurt, garlic, feta cheese, lemon zest, lemon juice, olive oil, Sriracha, and honey together. Taste for seasoning and adjust with salt, pepper, and/or Sriracha as needed.

      3Make the salad: Add zucchini noodles, cucumber, tomato, red onion, cubed feta cheese, and olives to a large bowl, then toss with two-thirds of the yogurt dressing. Add more dressing if needed.

    Adam and Joanne’s Tips

    • Storing: Enjoy the salad immediately, or keep it refrigerated for up to one day. The noodles will soften slightly over time but will still have crunch. If making ahead more than a day, for the crispiest salad, keep the salad and dressing separate and toss the day of.
    • No spiralizer: You can use a julienne vegetable peeler or a mandoline. You can also use a standard vegetable peeler to make wide noodles or ribbons.
    • Storing raw zoodles: Store your raw zucchini noodles in an airtight container lined with paper towels (the paper towels help absorb extra moisture). Refrigerate and use within 3 days.
    • The nutrition facts provided below are estimates.

    Nutrition Per Serving
    Serving Size
    Half the recipe
    /
    Calories
    356
    /
    Total Fat
    20.4g
    /
    Saturated Fat
    8.3g
    /
    Cholesterol
    40.3mg
    /
    Sodium
    885.8mg
    /
    Carbohydrate
    33.1g
    /
    Dietary Fiber
    3.2g
    /
    Total Sugars
    7.3g
    /
    Protein
    14.5g


    AUTHOR:

    Joanne Gallagher

    Adam and Joanne of Inspired Taste

    We are Adam and Joanne Gallagher, the creators of Inspired Taste. Established in 2009, Inspired Taste grew from a childhood dream into one of the internet’s most trusted recipe sites with hundreds of reliable recipes, step-by-step videos, and expert tips.More About Us

    Source link

  • Focaccia Grinder Sandwich Recipe – Pinch of Yum

    Focaccia Grinder Sandwich Recipe – Pinch of Yum

    icon-arrowicon-chevron-whiteicon-chevronicon-commenticon-facebookicon-hearticon-instagramicon-instant-poticon-listicon-lockicon-meal-prepicon-nexticon-pinteresticon-popularicon-quoteicon-searchicon-staricon-sugar-freeicon-tiktokicon-twittericon-veganicon-videoicon-youtubemenu-closemenu-open


    Our recipes, your inbox. Sign up

    This focaccia grinder sandwich might be my favorite sandwich I’ve ever made. Salty, juicy, crispy, and dense. Bought everything at Trader Joe’s!

    Can’t Stop Thinking About This Focaccia Grinder Sandwich

    Lindsay Ostrom headshot.

    Remember the Trader Joe’s focaccia sandwich with the pesto mayo that got millions of views on the socials and that people have stopped me in the grocery store to talk about?!

    I really thought it was my favorite sandwich of all time, until I made this one. BUCKLE UP, YOU GUYS. This focaccia grinder sandwich might be even better! When we filmed this video, we ate the entire sandwich right on the spot and couldn’t shut up about it for the rest of the afternoon.

    The sandwich:

    • Trader Joe’s roasted tomato focaccia, once again
    • Pesto
    • Salami and capicola
    • Provolone cheese
    • A tangy, shreddy, oregano-forward Italian salad
    • Pepperoncini for a bite
    • One last smear of mayo before you top it off!
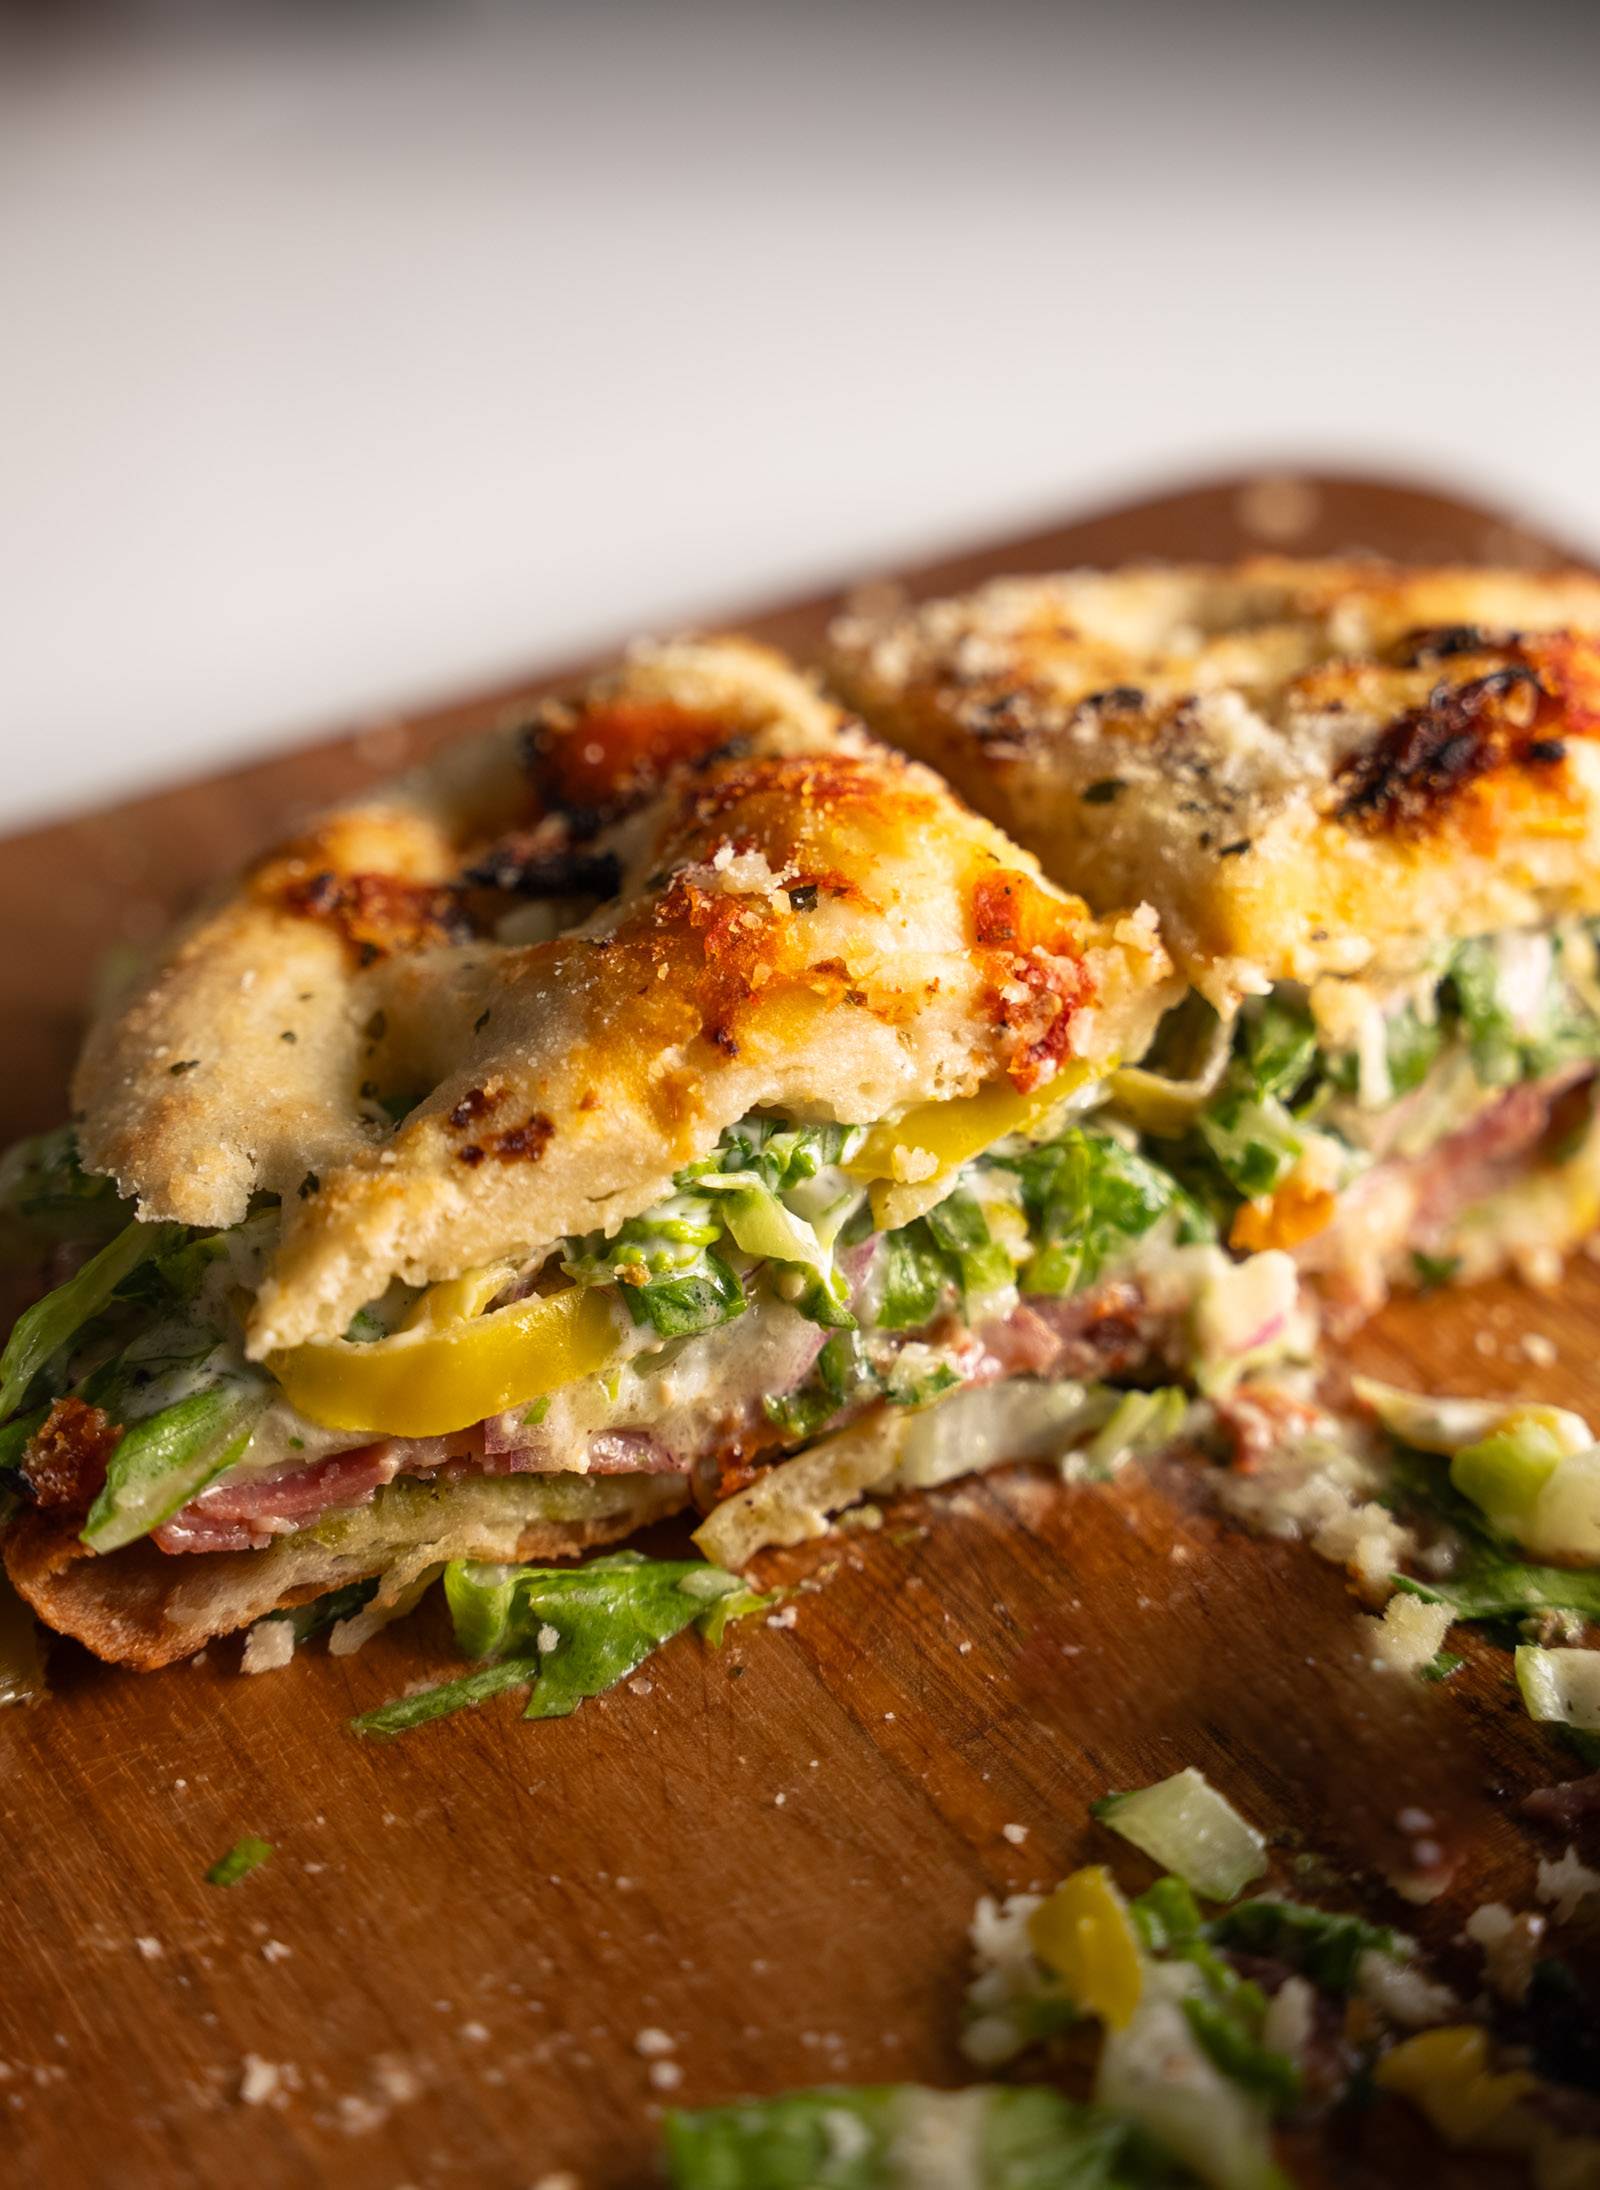
    Slice of focaccia grinder sandwich.

    I love this recipe for anytime, but especially for right now in the middle of the holiday abyss. Because what day is it? And what have I been doing for the last 3 days? And wait, actually friends are coming over in 30 minutes?

    This is where this sandwich shines. It’s a quick dinner sandwich but also a party sandwich. One quick and cohesive prep (and by “prep” I just mean layering), and a satisfying slice into wedges, and you have a meal that’s ready to make everybody so happy.

    Lindsay signature.

    I got the pesto, Italian dressing, and focaccia all from Trader Joe’s (not spon, just a big fan) – so technically you could use any brand but I would definitely recommend the Trader Joe’s stuff, it is delicious.

    Print
    clock clock iconcutlery cutlery iconflag flag iconfolder folder iconinstagram instagram iconpinterest pinterest iconfacebook facebook iconprint print iconsquares squares iconheart heart iconheart solid heart solid icon
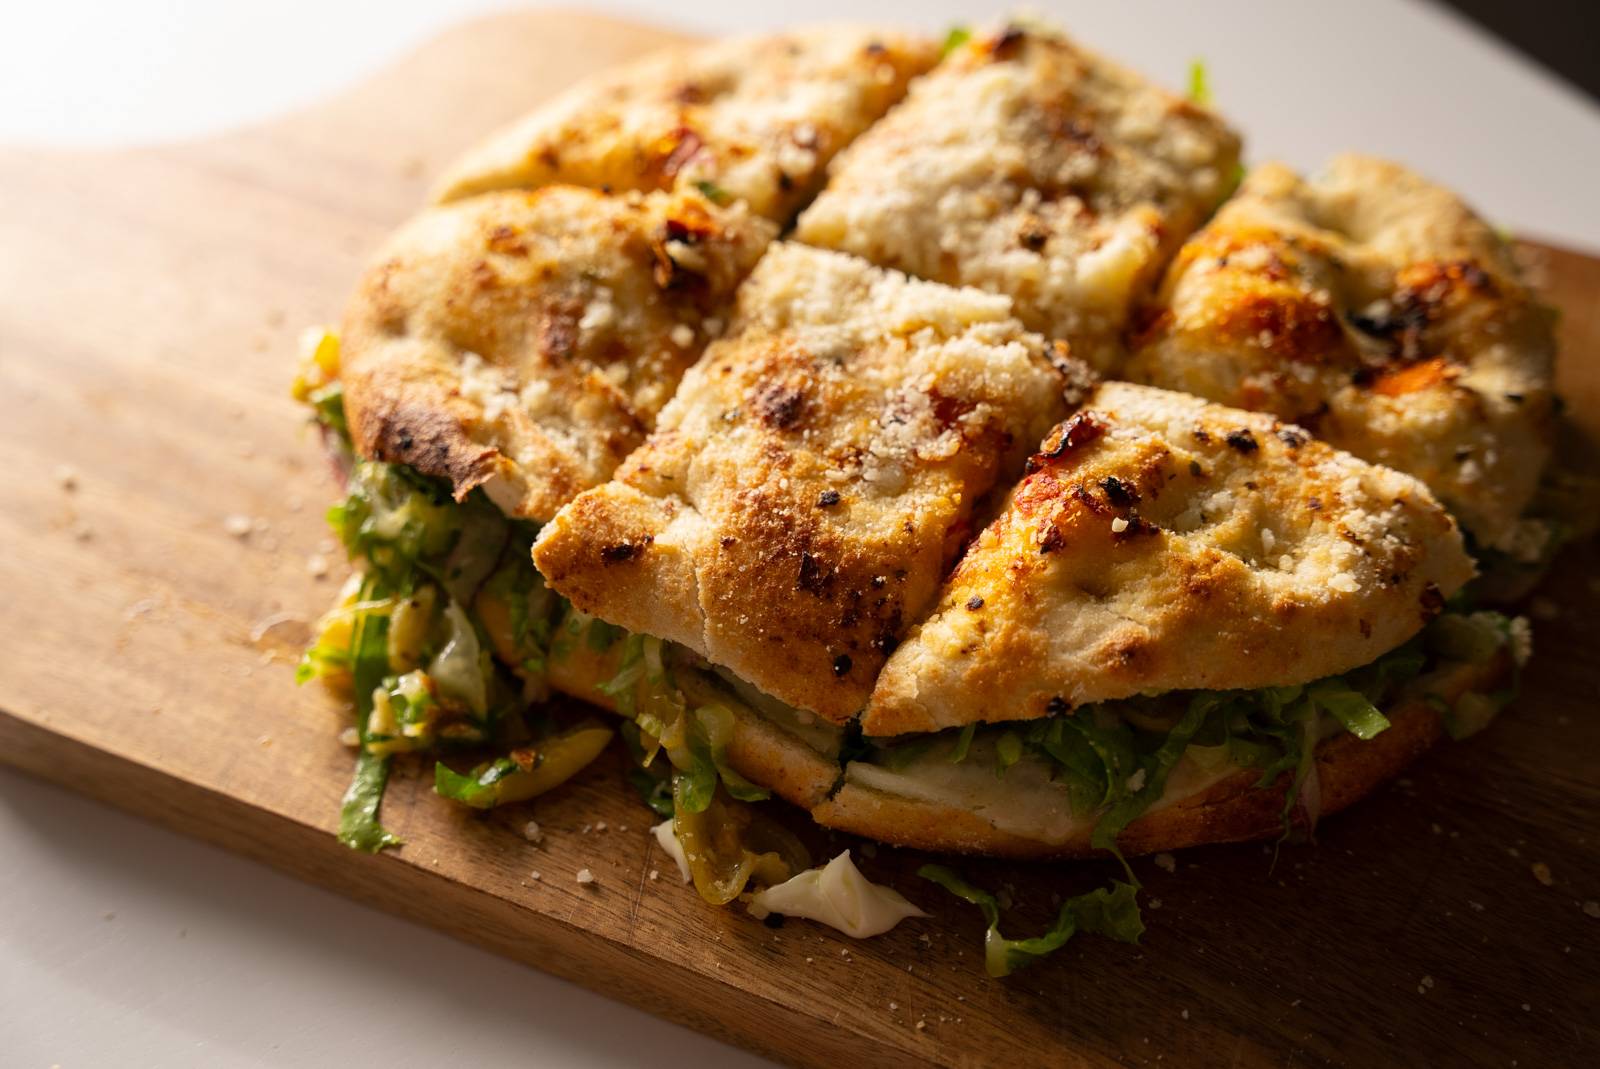
    Focaccia grinder sandwich sliced.

    Focaccia Grinder Sandwich


    5 Stars 4 Stars 3 Stars 2 Stars 1 Star

    5 from 1 review

    • Author: Lindsay
    • Total Time: 20 minutes
    • Yield: 6

    Description

    Holy smokes this is so good. Trader Joe’s roasted tomato focaccia loaded with pesto, salami, capocola, Provolone, pepperoncini, and a shreddy, tangy Italian salad. Absolutely amazing.


    The Sandwich Base:

    The Salady Part:


    Instructions

    1. Preheat Oven: Preheat the oven to 350 degres.
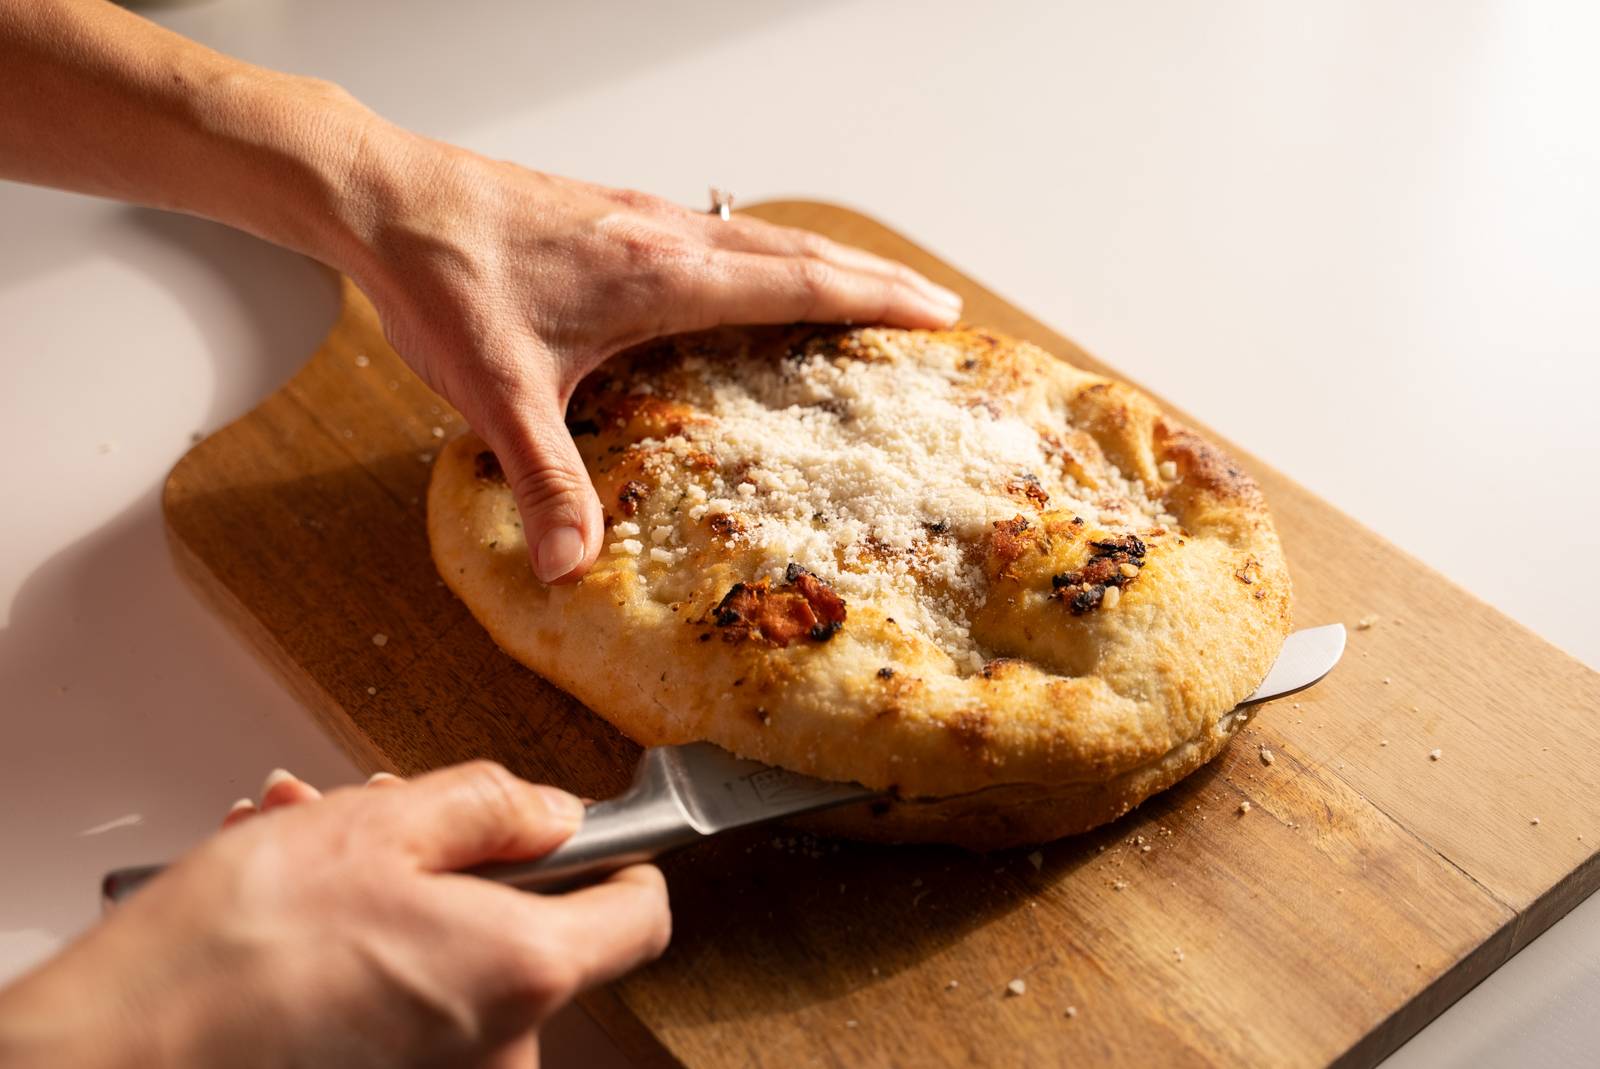
    2. Slice Focaccia: Keeping the focaccia flat, use a serrated knife to cut the focaccia in half horizontally. (You don’t want to tip the bread up because all the toppings will fall off.) Lift the top half of the bread off and set to the side. Slicing focaccia bread.
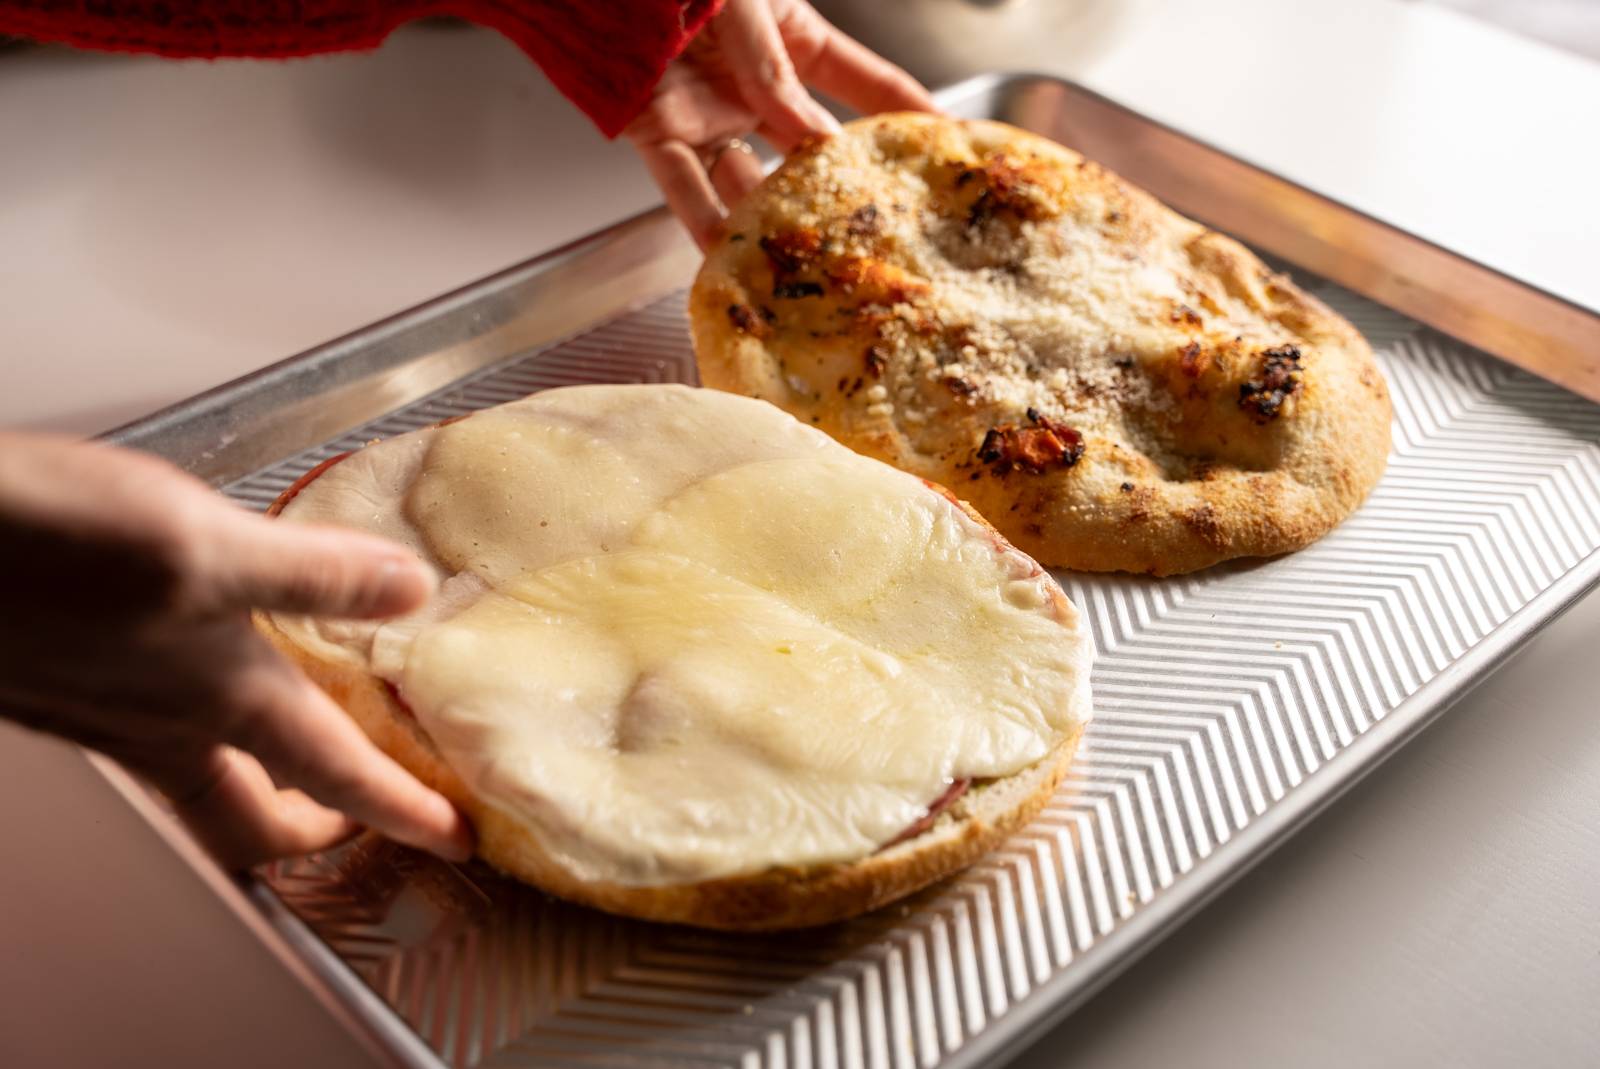
    3. Layer Sandwich: Layer the bottom piece of focaccia with pesto. Then layer the salame, capocollo, and Provolone. Layering meat on grinder sandwich.
    4. Toast Sandwich: Toast in the oven for 6-8 minutes. (Leave the top piece laying to the side so it doesn’t stick to the cheese yet.) Melting cheese on grinder sandwich.
    5. Toss and Layer Greens: In a separate bowl, toss lettuce, red onion, pepperoncini, Italian dressing, and oregano. Season with salt and pepper. Arrange salad on top of the toasted sandwich. Dollop with a bit of mayo (optional but I love it).Adding greens to sandwich.
    6. Finish: Press the top part of the focaccia over the sandwich and cut into wedges! WHOA NELLY that’s good. It’s juicy, crispy, salty, dense, and everything I want in a sandwich!Focaccia sandwich sliced on a cutting board.
    • Prep Time: 10 minutes
    • Cook Time: 10 minutes
    • Category: Lunch
    • Method: Bake
    • Cuisine: Italian American

    Keywords: sandwich recipe, focaccia sandwich, sandwich for a crowd, Italian sandwich


    Source link