Category: Quick Meal

  • Easy Steel Cut Oats Recipe

    Easy Steel Cut Oats Recipe

    This is my family’s favorite steel cut oats recipe! I make it on the stovetop, but I have also included tips for cooking steel cut oats in a slow cooker or pressure cooker (like an Instant Pot).
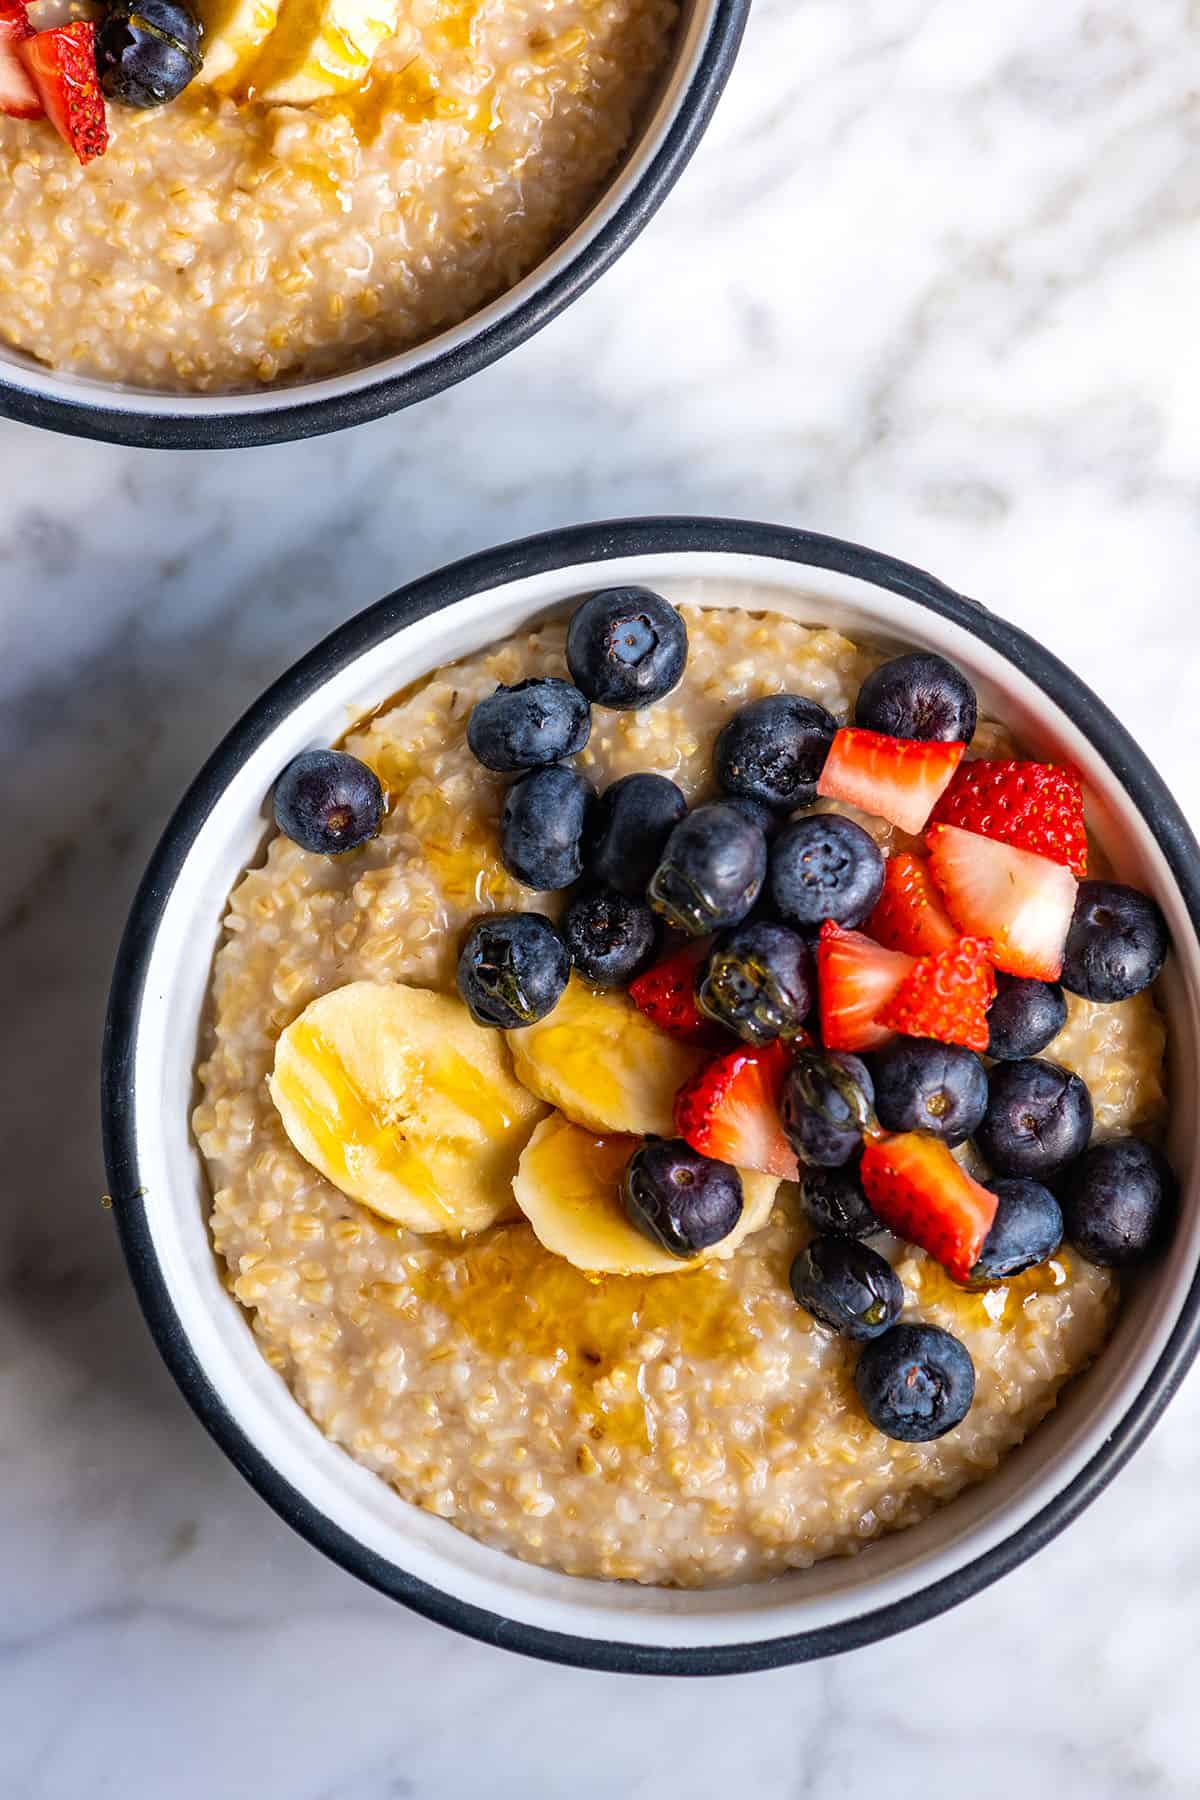
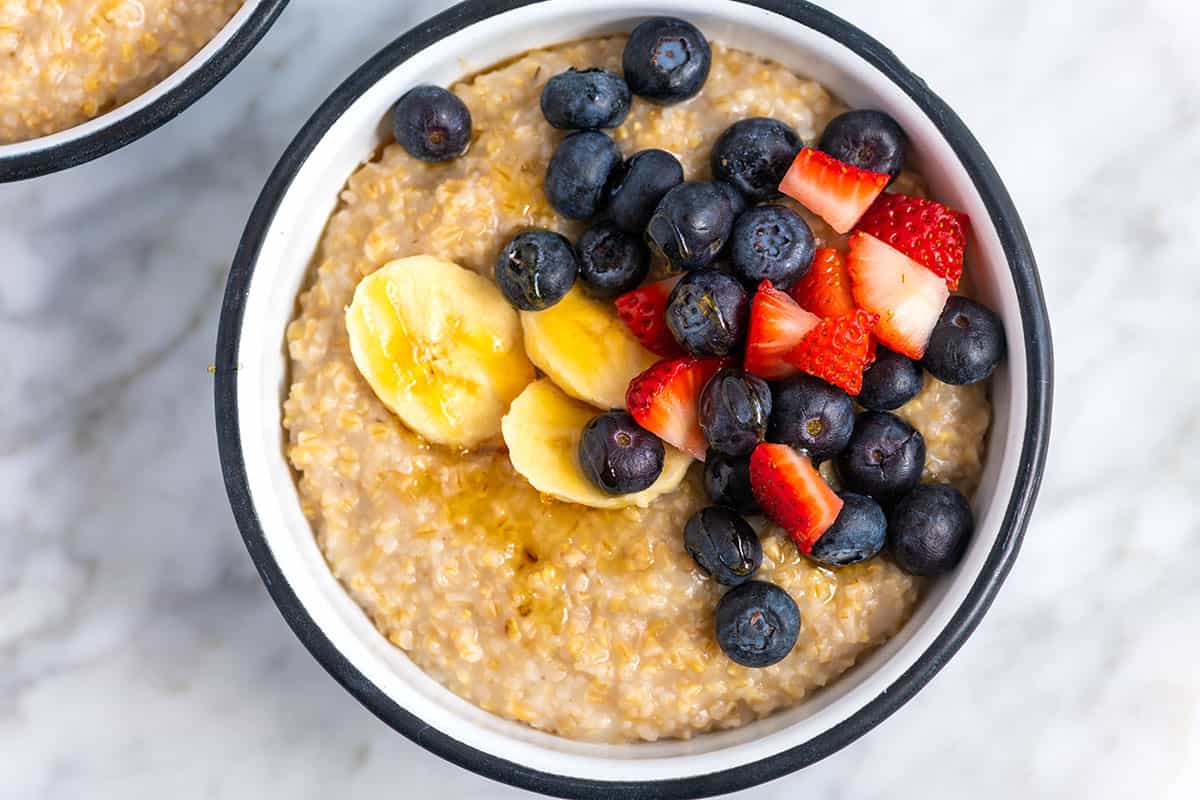
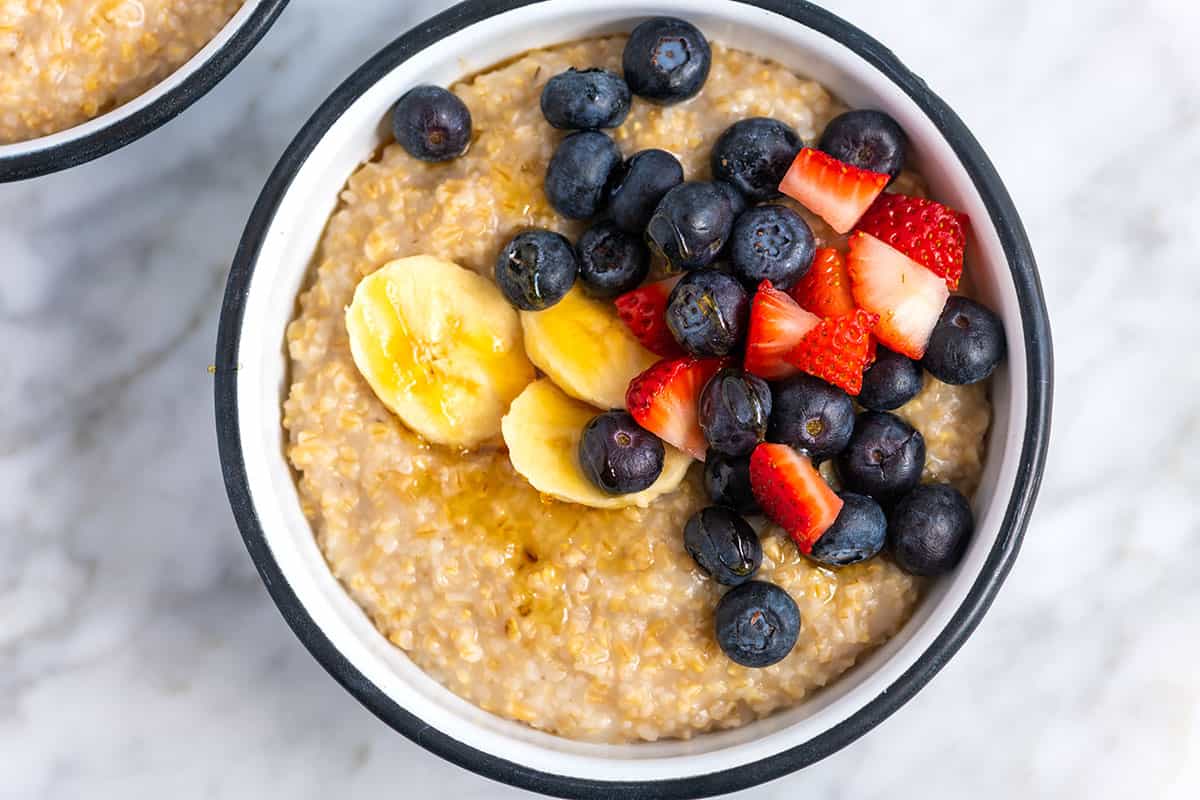
    Creamy Steel Cut Oats with berries and banana on top

    My family often eats oatmeal for breakfast. We love it almost any way we can get it, like this easy oatmeal recipe with rolled oats, our baked oatmeal, and even turned into energy balls with peanut butter and honey. We call steel cut oats “fancy oats” in our home and absolutely love them.

    Steel cut oats are whole oat groats cut into small bits (instead of rolled into flat discs like with rolled oats). They take slightly longer to cook than rolled oats but are delicious. My method for cooking them is super simple, too! I can’t wait for you to try it.

    How to Make Steel Cut Oats

    I love cooking steel cut oats on the stovetop. However, if you prefer a hands-off approach, you can absolutely make them in a slow cooker or Instant Pot! You’ll find detailed instructions for those methods in the recipe below. (Just a heads up: we don’t recommend cooking steel cut oats in the microwave. If you need a super quick oatmeal recipe, check out our easy oatmeal with tips for microwave cooking.)

    When cooking steel cut oats on the stovetop, I stick to a simple ratio: one part oats to three parts liquid, guaranteeing perfectly cooked, creamy oats every time. Keep in mind that the liquid ratio might vary slightly when using a slow cooker or pressure cooker. You’ll find specific tips for those appliances in the recipe below.
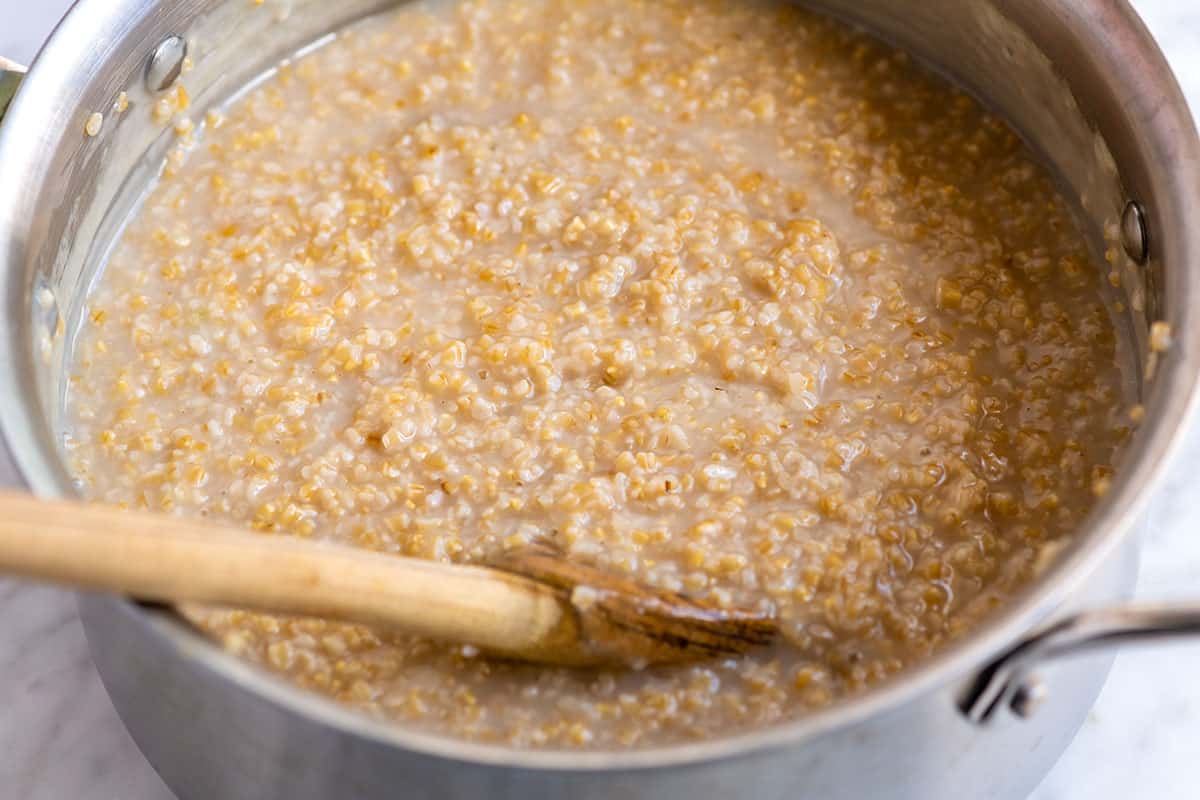
    Cooking steel cut oats

    To make steel cut oats, start by toasting them in a tablespoon of butter, coconut oil, or vegan butter for about 2 minutes, adding a lovely nutty flavor to the oats. Then, pour in the water and bring it to a gentle simmer, uncovered. Cook for 20 to 25 minutes, stirring occasionally, until the oats are tender and have absorbed most of the water.

    For extra creaminess, stir in 1/2 to 1 cup of milk. Finally, customize your bowl with spices, a pat of butter, and a touch of sweetness like maple syrup or honey. More topping suggestions are below!

    How to Serve Steel Cut Oats

    You can stir just about anything you love into cooked oatmeal, but here’s a bit of extra inspiration for you:

    • Mashed or sliced fruit. I love bananas, strawberries, and blueberries
    • Toasted nuts and seeds like walnuts, pecans, hazelnuts, or roasted pumpkin seeds.
    • Nut butter like peanut butter, almond butter, or cashew butter
    • Chia seeds, hemp seeds, or ground flax
    • Splash of cream, milk, buttermilk, yogurt, or non-dairy milk (like homemade oat milk)
    • Vanilla extract or spices like cinnamon, nutmeg, or pumpkin pie spice
    • Brown sugar, honey, or maple syrup
    • Dried fruit like cranberries, mulberries, or raisins
    • Sautéed spinach or kale and a poached egg or soft boiled egg
    Steel Cut Oats

    Easy Steel Cut Oats

    • PREP
    • COOK
    • TOTAL

    Steel cut oats are whole oat groats cut into small bits (instead of rolled into flat discs like with rolled oats). They take slightly longer to cook than other oat varieties but are delicious. When cooked, steel cut oats have a creamy, chewy texture. We love them topped with fruit and nut butter, but take a look at our article above for topping suggestions.

    For a quicker cooking time, consider soaking the oats in water the night before you plan to make them. Soaking them will reduce the cooking time by about half.

    4 Servings

    You Will Need

    2 tablespoons butter or vegan butter

    1 cup steel cut oats

    3 cups water

    Pinch salt

    1/2 to 1 cup milk, dairy or non-dairy

    1/4 teaspoon ground cinnamon

    1 tablespoon sweetener like brown sugar, honey, or maple syrup

    Optional oatmeal toppings like nut butter, fruit, nuts, and seeds

    Directions

    • Stovetop Steel Cut Oats
    • 1Melt 1 tablespoon of butter in the bottom of a medium saucepan over medium heat. Add the oats and stir them in the butter for a minute or two or until they smell nutty.

      2Combine the oats with the water and bring to a simmer. Reduce the heat so that the water is just barely simmering. Cook for about 20 minutes, stirring once or twice to lift any oats stuck to the bottom of the pan.

      3Stir in the milk, butter, cinnamon, and honey. Cook for 5 to 10 minutes or until the oats are soft with a slight chew. If the oatmeal seems dry, add a splash of more water or milk. Serve with your favorite oatmeal toppings.

    • Slow Cooker Steel Cut Oats
    • 1Slow cooker steel cut oats are much creamier than when cooked using other methods (think creamy, delicious oatmeal pudding). To cook steel cut oats in the slow cooker, combine 1 cup steel cut oats with 4 cups water. Add whatever seasonings you love (I add 1 tablespoon butter, 1/2 teaspoon ground cinnamon, and a pinch of salt). Cover the slow cooker and cook on LOW for 7 to 8 hours or on HIGH for 3 to 4 hours. Stir the oats before serving. For extra creamy oatmeal, stir in 1/2 to 1 cup of milk.

    • Instant Pot Steel Cut Oats
    • 1To cook steel cut oats in a pressure cooker like an Instant Pot, combine 1 cup steel cut oats with 3 cups water, a pinch of salt, 1/4 teaspoon ground cinnamon, and 1 tablespoon butter (or vegan butter). Stir the oats, secure the lid, and then cook on the manual or pressure cooker setting for 3 minutes at high pressure. When the cooking time is complete, allow the cooker to naturally release the pressure. Stir well before serving. For creamier oats, add 1/2 to 1 cup milk.

    Adam and Joanne’s Tips

    • Storing: Store cooked steel cut oats in the refrigerator for up to 5 days and freeze for up to 3 months. Steel cut oats thicken as they sit, so you might need to add a splash of water or milk when reheating them to achieve the perfect consistency again.
    • Soaking steel cut oats: You do not need to soak steel cut oats before cooking them. However, if you soak steel cut oats in water (usually 8 hours or overnight), they will soften slightly. Since the oats are softer, they cook quicker the following day. Soaking also may help unlock some of the nutrients in the oats, making them more available to us to absorb. If you plan on soaking steel cut oats, the stovetop cook time will be reduced by about half.
    • For gluten-free oatmeal, make sure that the oats and any toppings that you plan to use are certified gluten-free.
    • The nutrition facts provided below are estimates. We did not include any toppings in the calculations. We assumed whole milk in the calculations.

    Nutrition Per Serving
    Serving Size
    1/4 of the recipe
    /
    Calories
    215 calories
    /
    Total Fat
    9g
    /
    Saturated Fat
    4.5g
    /
    Cholesterol
    18.3mg
    /
    Sodium
    60mg
    /
    Carbohydrate
    28.7g
    /
    Dietary Fiber
    3.9g
    /
    Total Sugars
    5.9g
    /
    Protein
    5.6g


    AUTHOR:

    Joanne Gallagher

    Adam and Joanne of Inspired Taste

    We are Adam and Joanne Gallagher, the creators of Inspired Taste. Established in 2009, Inspired Taste grew from a childhood dream into one of the internet’s most trusted recipe sites with hundreds of reliable recipes, step-by-step videos, and expert tips.More About Us
    Source link

  • Slow Cooker Chicken Meatballs Recipe

    Slow Cooker Chicken Meatballs Recipe

    This slow cooker chicken meatballs recipe is easy and delicious. Serve them on top of pasta, spiralized noodles, vegetables, or bread. They are so good!

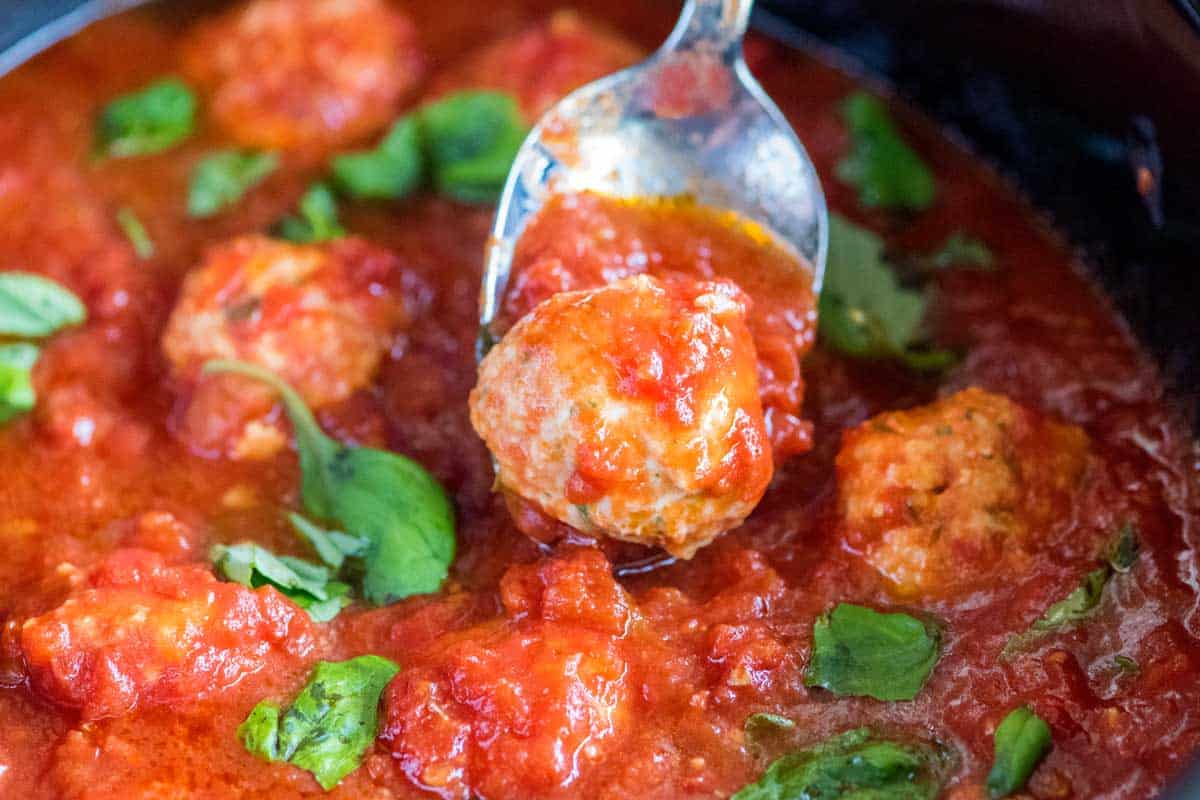
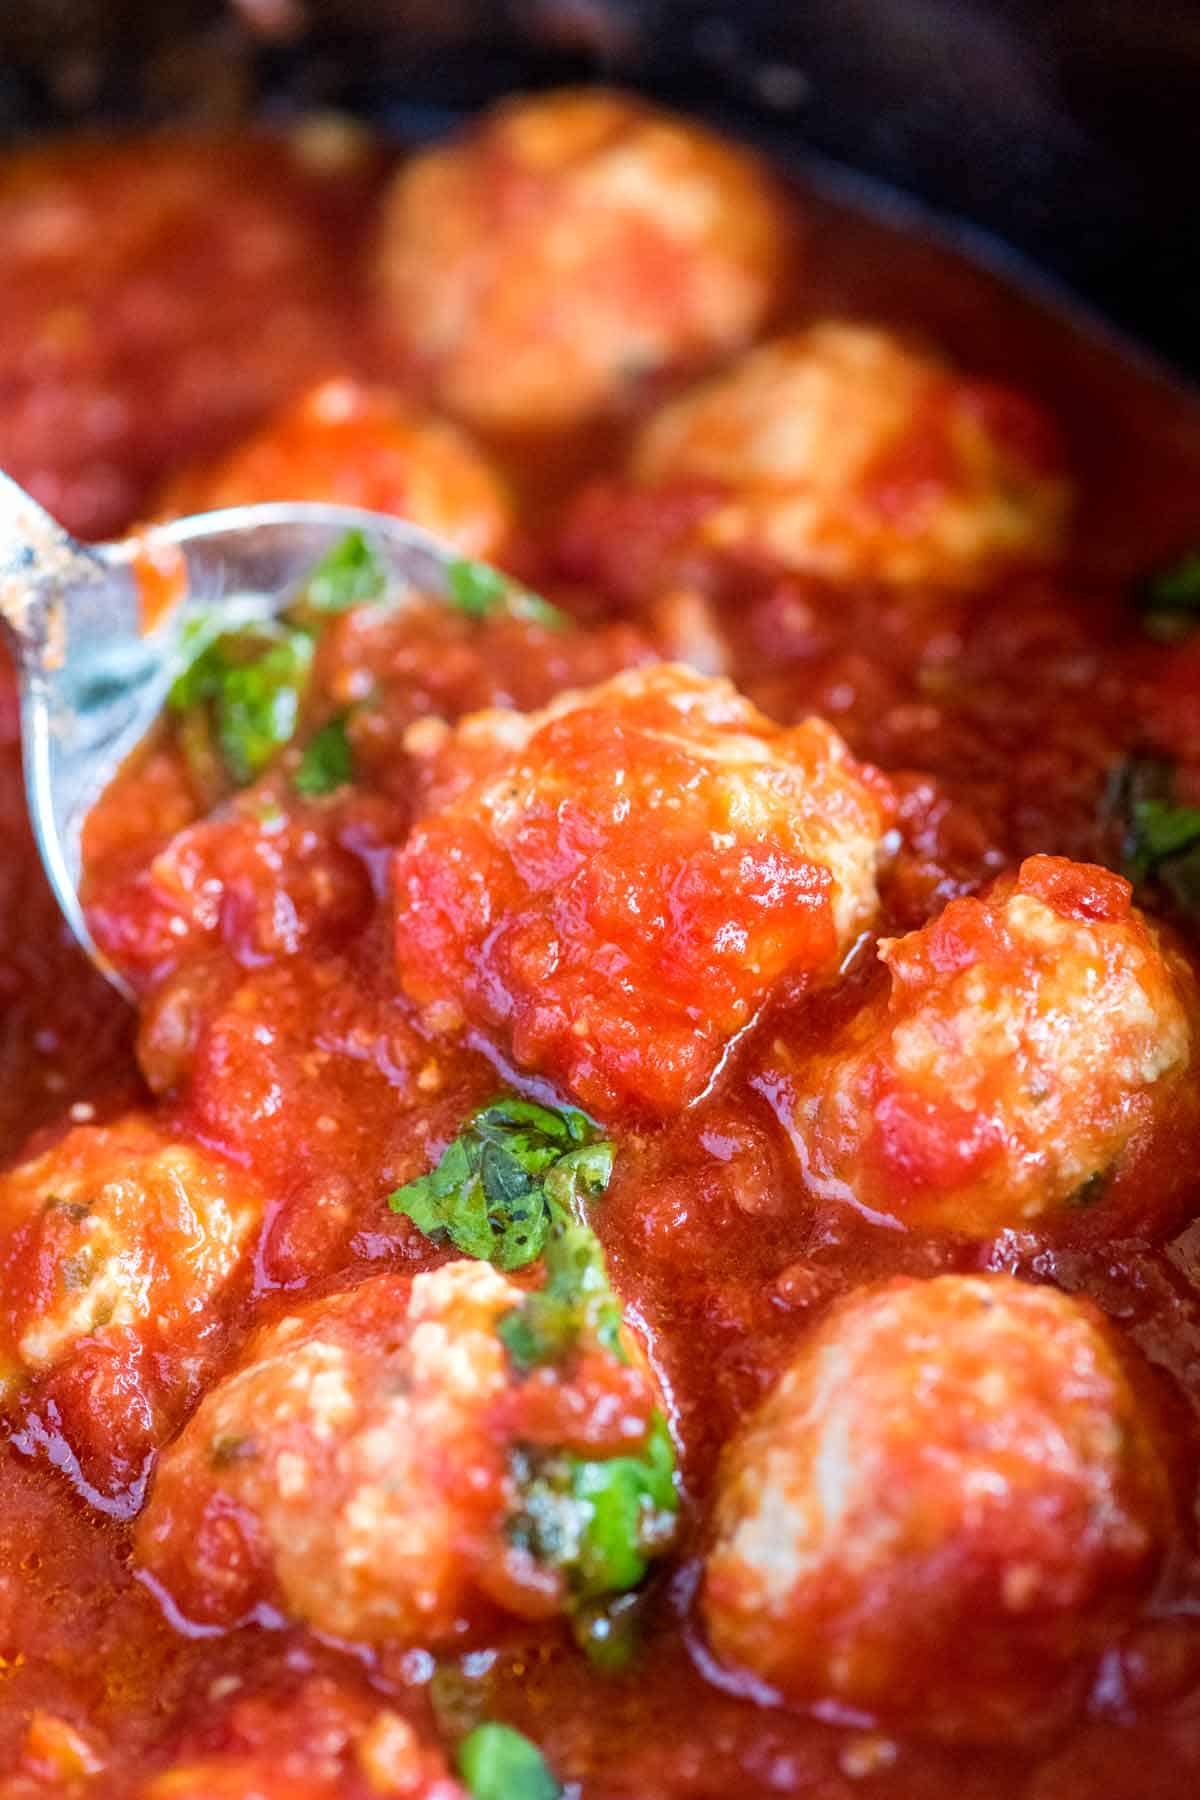
    Slow Cooker Chicken Meatballs

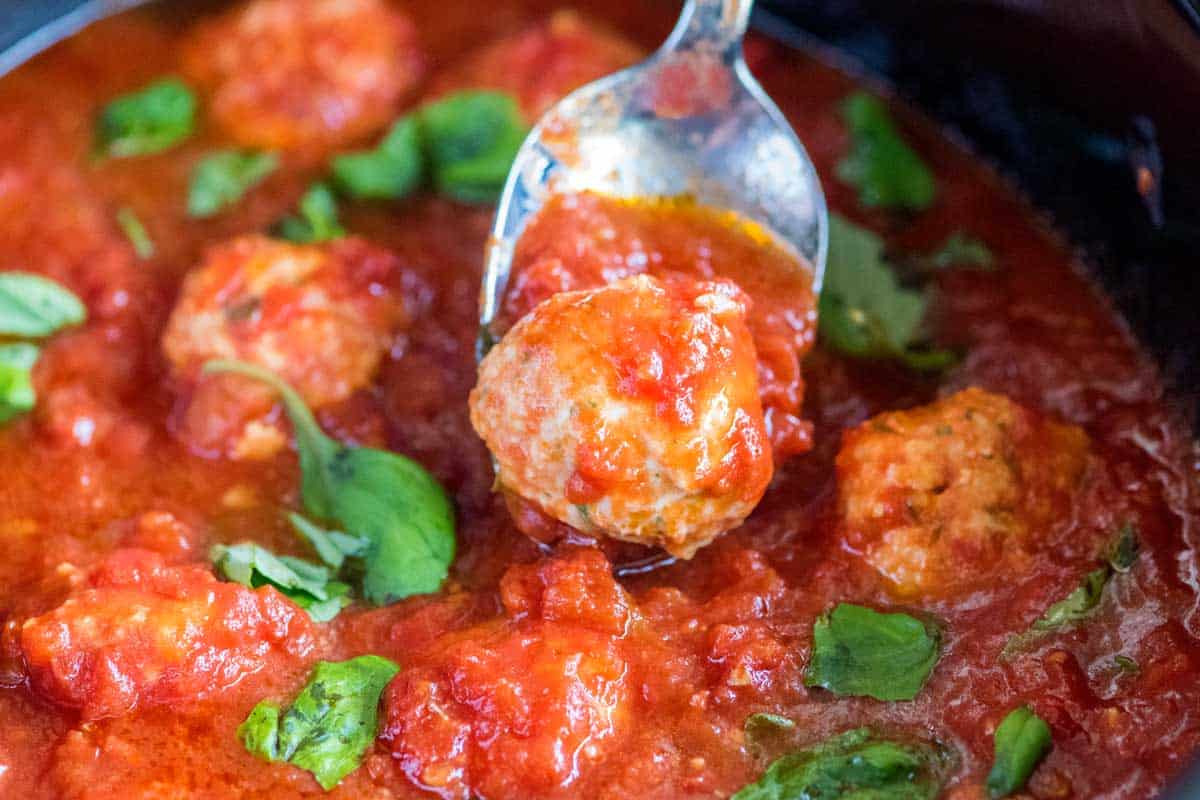
    My family loves this slow cooker chicken meatball recipe. The sauce is from scratch and gets better and better as it slowly cooks in a crockpot. Then, you’ll drop in the meatballs and let them cook for about 1 hour.

    Since they gently poach in the sauce, the meatballs become extra tender and stay juicy inside. These chicken meatballs are similar to our turkey meatballs, but in that recipe, we cook the sauce and meatballs on the stove instead of in our slow cooker. For something totally different, look at our sweet and sour chicken meatballs made with a coconut lime sauce.

    Key Ingredients

    • Ground Chicken: I use 93% lean ground chicken when making these meatballs (leaner ground chicken makes less juicy meatballs). The extra 7-10% fat helps keep our chicken meatballs moist and juicy in the middle. Ground turkey, pork, or beef are all great substitutes.
    • Milk, breadcrumbs, and egg: Help to keep our meatballs together and soft and tender in the middle.
    • Parmesan: For really flavorful meatballs, add some shredded parmesan cheese to the mixture. I also use parmesan cheese when making these Italian meatballs with beef and pork.
    • Spices: I love fresh parsley in these, and I stir in a little dried oregano and salt.
    • Tomato basil sauce: I make the easy homemade tomato sauce with crushed canned tomatoes, tomato paste, onion, garlic, olive oil, and fresh basil. If you want a shortcut, use 2 jars of your favorite store-bought spaghetti sauce in this recipe.

    Find the full recipe with measurements below.

    How to Make Slow Cooker Chicken Meatballs

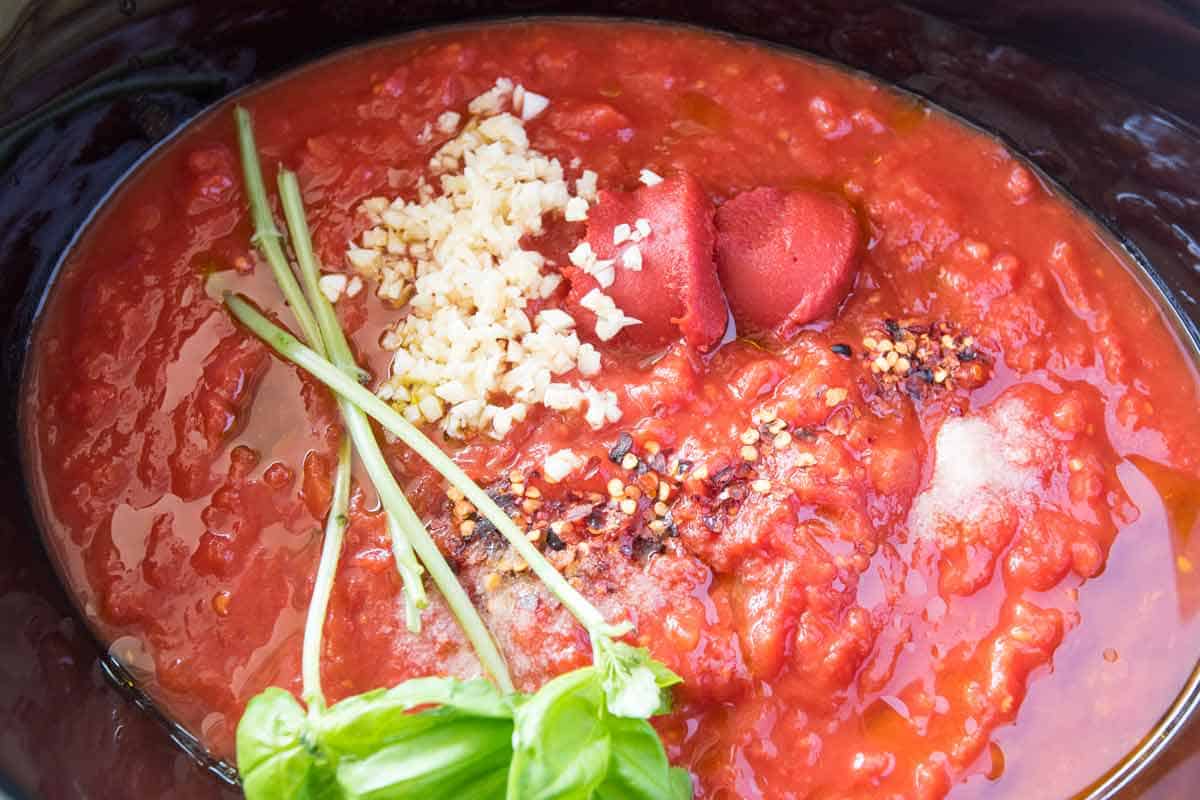
    Tip 1: Make our easy tomato sauce. To make the slow cooker marinara sauce, you’ll add canned tomatoes, tomato paste, olive oil, a small onion cut in half, lots of garlic, and spices to the slow cooker. If I’m in a hurry, I turn it to HIGH and cook for 3 hours. If I’ve got more time, I use LOW and cook for 6 hours.

    Slow cooker Marinara Sauce

    Tip 2: Cooking the meatballs. Make your meatball mixture and form it into balls. I use wet hands when forming them, which keeps them from sticking too much. Drop the chicken meatballs into the sauce in the slow cooker and cover the tops with sauce by gently pushing the sauce over each meatball. Cook on HIGH for 1 hour or until the meatballs are cooked through. Then serve however you like.

    Serving Suggestions

    These meatballs are great on their own, with some veggies on the side (I love roasted cabbage or sautéed cabbage). They are also excellent with pasta or slices of focaccia bread to soak up that amazing sauce.

    Slow Cooker Chicken Meatballs

    Slow Cooker Chicken Meatballs

    • PREP
    • COOK
    • TOTAL

    We love these crock pot chicken meatballs. We cook them in our simple slow cooker marinara sauce, which you will make first, then drop the meatballs into later an hour before you plan to serve them. Serve these meatballs with pasta, spiralized noodles, vegetables, bread, or as an appetizer.

    6 Servings (18 meatballs)

    You Will Need

    Tomato Basil Sauce

    2 (28oz) cans crushed tomatoes

    2 tablespoons tomato paste

    1 medium onion, cut in half

    4 garlic cloves, minced (about 1 ½ tablespoons)

    2 tablespoons extra-virgin olive oil

    1 bay leaf

    1/4 teaspoon crushed red pepper flakes

    1 small bunch fresh basil

    Salt, to taste


    Chicken Meatballs

    1 pound (450g) ground chicken

    1/2 cup (50g) panko breadcrumbs or homemade breadcrumbs

    1/2 cup (118ml) milk

    1 large egg

    6 tablespoons (1.5oz) finely grated Parmigiano-Reggiano cheese

    1/4 cup fresh parsley leaves and tender stems, chopped

    1/2 teaspoon dried oregano

    3/4 teaspoon salt

    1/4 teaspoon fresh ground black pepper

    Directions

    • Make Slow Cooker Marinara
    • 1Remove the leaves from the basil sprig and save them for later. You will add the basil sprig to the sauce to infuse it with basil flavor, then serve it with the leaves later.

      2Add the tomatoes, tomato paste, halved onion, garlic, olive oil, bay leaf, red pepper flakes, and basil sprig to a slow cooker. Stir, then add salt to taste—we use between 1/2 teaspoon and 1 teaspoon of salt, depending on the tomatoes. It will be cold, but you will get a good idea of whether or not the sauce is well-seasoned.

      3Cover and cook on LOW for 6 hours or on HIGH for 3 hours. Remove the onion, bay leaf, and basil sprig. Taste, then add additional salt as needed.

    • Prepare Chicken Meatballs
    • 1The meatballs can be shaped and kept refrigerated for up to a day ahead. Arrange them on a baking sheet, cover them, and then refrigerate for up to 1 day.

      2Combine the panko breadcrumbs and the milk in a large bowl. Wait 3 to 5 minutes until the breadcrumbs have absorbed most of the milk, then whisk in the egg. Whisk in the parmesan cheese, parsley, oregano, salt, and pepper.

      3Add the ground chicken and use a fork or your hands to blend the chicken and the egg mixture. The meatball mixture will be pretty moist. Shape into one-inch meatballs, pressing no more than necessary. This recipe makes approximately 18 meatballs.

      4Once the marinara sauce has finished cooking, add the chicken meatballs. To add them, gently lower them into the sauce with a spoon or two forks. Cover the tops of the meatballs by gently pushing sauce over each meatball. Cook on HIGH for 1 hour or until the meatballs are cooked through.

    Adam and Joanne’s Tips

    • Make-ahead sauce: The sauce can be made ahead and kept refrigerated for 2 to 3 days and 3 to 4 months in the freezer.
    • Freezing uncooked meatballs: Shape and arrange meatballs on a baking sheet lined with aluminum foil or parchment paper. Freeze until solid, transfer them to a freezer-safe container or bag, and freeze for up to 1 month. Add the frozen meatballs to the simmering sauce and expect them to take longer to cook through (1 ½ to 2 hours).
    • The nutrition facts provided below are estimates.

    Nutrition Per Serving
    Serving Size
    1/6 of recipe (3 meatballs)
    /
    Calories
    304
    /
    Protein
    21.7g
    /
    Carbohydrate
    26.6g
    /
    Dietary Fiber
    5.6g
    /
    Total Sugars
    13.3g
    /
    Total Fat
    14.2g
    /
    Saturated Fat
    3.8g
    /
    Cholesterol
    99.7g
    /
    Sodium
    1029.8mg


    AUTHOR:

    Joanne Gallagher

    Adam and Joanne of Inspired Taste

    We are Adam and Joanne Gallagher, the creators of Inspired Taste. Established in 2009, Inspired Taste grew from a childhood dream into one of the internet’s most trusted recipe sites with hundreds of reliable recipes, step-by-step videos, and expert tips.More About Us
    Source link

  • Perfect Cinnamon Apples Recipe

    Perfect Cinnamon Apples Recipe

    This stovetop cinnamon apples recipe can be whipped up in about 15 minutes and are a perfect topping for oatmeal, pancakes, ice cream, and more!

    Cinnamon Apples

    This might be one of the easiest apple recipes on our site. I love them with my everyday oatmeal, as a side for breakfast, and spooned over vanilla ice cream with caramel sauce for dessert. My son even loves them added to his school lunchbox!

    Warm cinnamon apples are the best, especially during the fall!

    Key Ingredients

    • Apples: You can use any variety of apples for this recipe. I love crispier varieties like Honeycrisp, Granny Smith, and Pink Lady apples. These are the same apples I use for apple cobbler. You can peel them or leave the peel on. I love the peel, but my toddler prefers this recipe when made with peeled apples since the apples turn out a little softer.
    • Lemon Juice or Apple Cider Vinegar: A little acid, like lemon juice or vinegar, balances the sweetness of the apples and maple syrup. It makes everything pop.
    • Butter: I love cooking the apples in a bit of butter since it turns into a silky sauce. Plant-based butter or coconut oil is an excellent substitute.
    • Cinnamon: We are pretty generous with the cinnamon in this recipe. You can add or reduce as you see fit.
    • Optional Spices: I love adding extra spices like cardamom and nutmeg. They bump up the cozy factor and taste wonderful.
    • Vanilla and Maple Syrup: These make the apples taste more rich and add a bit of sweetness.

    Find the full recipe with measurements below.

    How to Make Cinnamon Apples

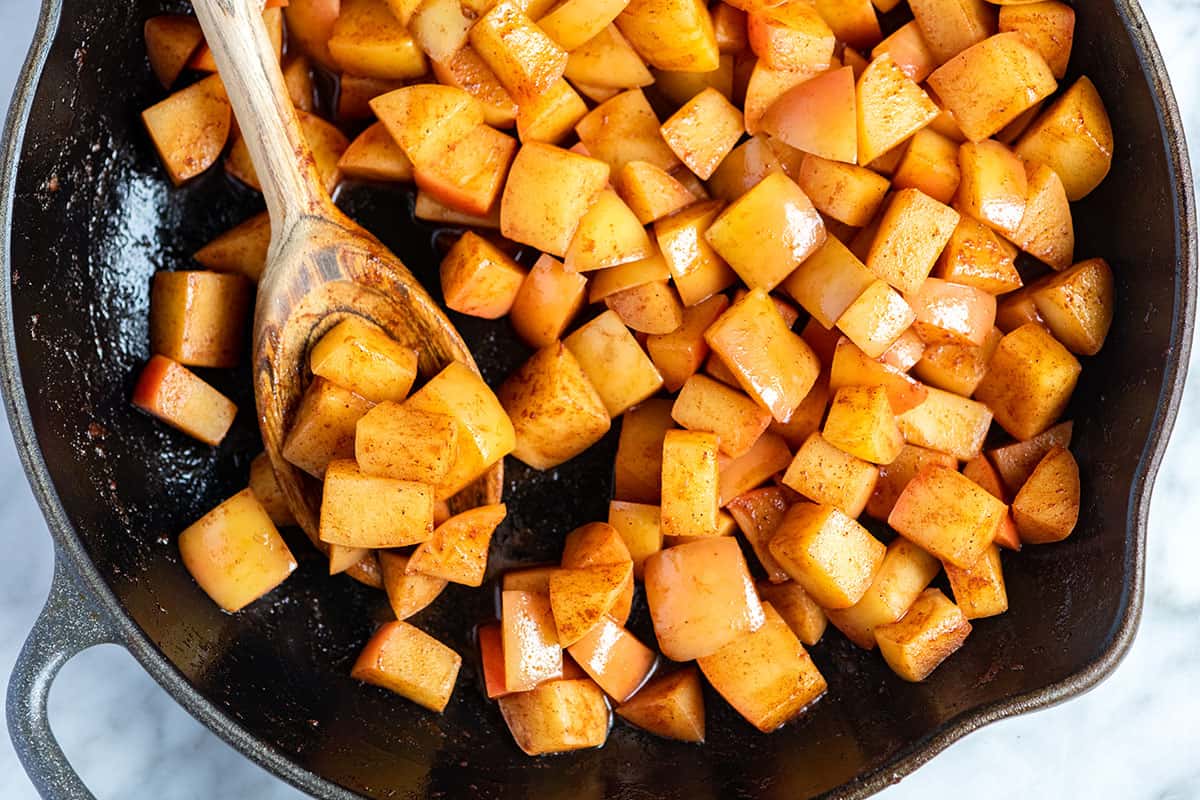
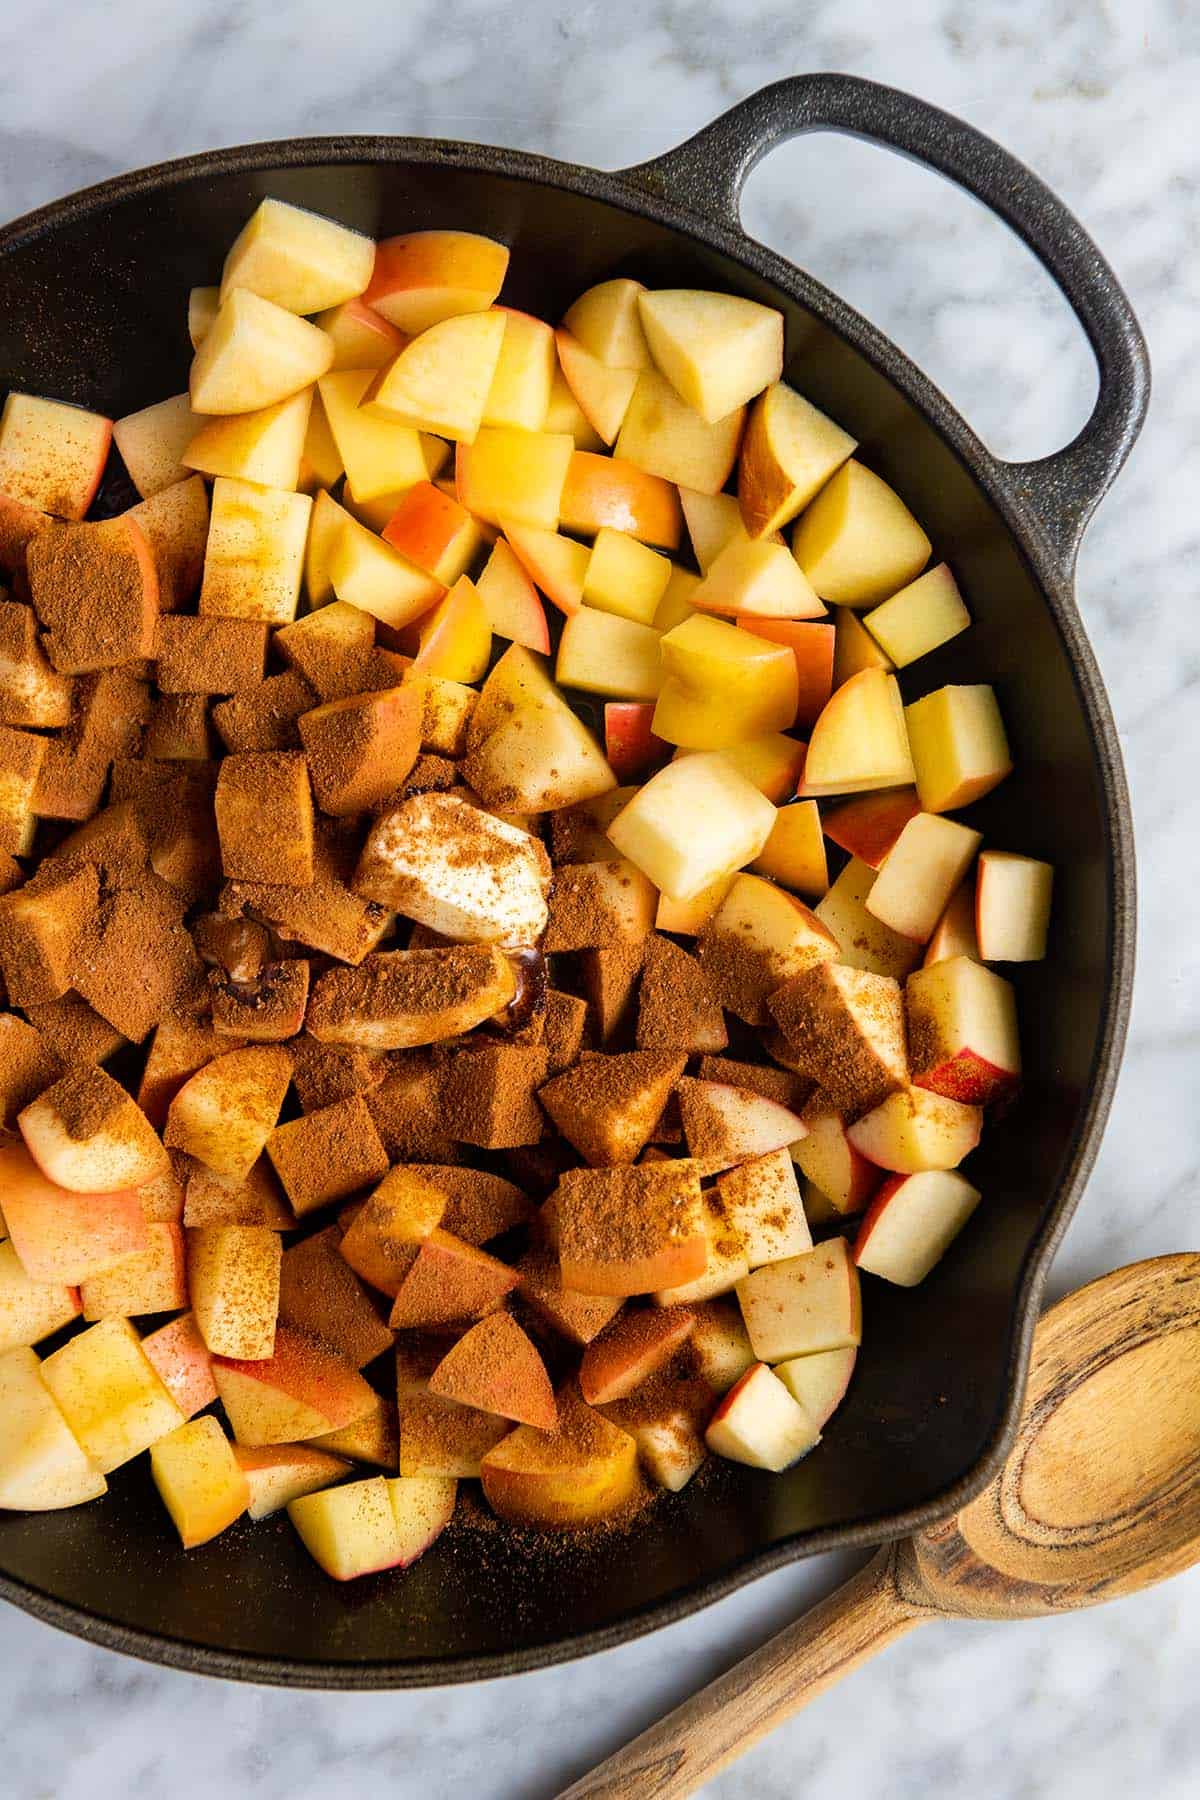
    Tip 1: Lemon is your best friend. We love the balance and brightness that lemon adds to the party. When adding the chopped apples to a skillet we add lemon juice and a bit of water. Cover the skillet with a lid and cook over medium-high heat until the apples soften. When they are soft, toss in your butter, cinnamon, extra spices, vanilla, and maple syrup.

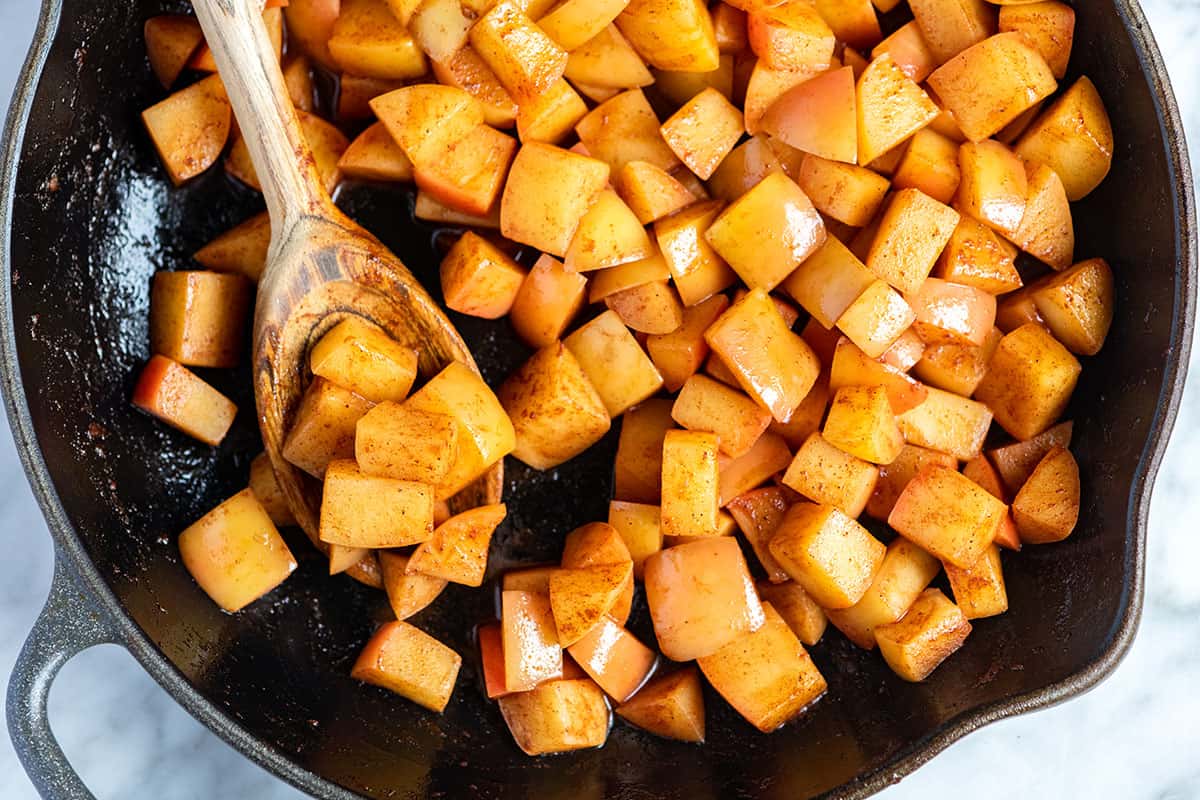
    Apples in a Skillet with Cinnamon, and other baking spices.

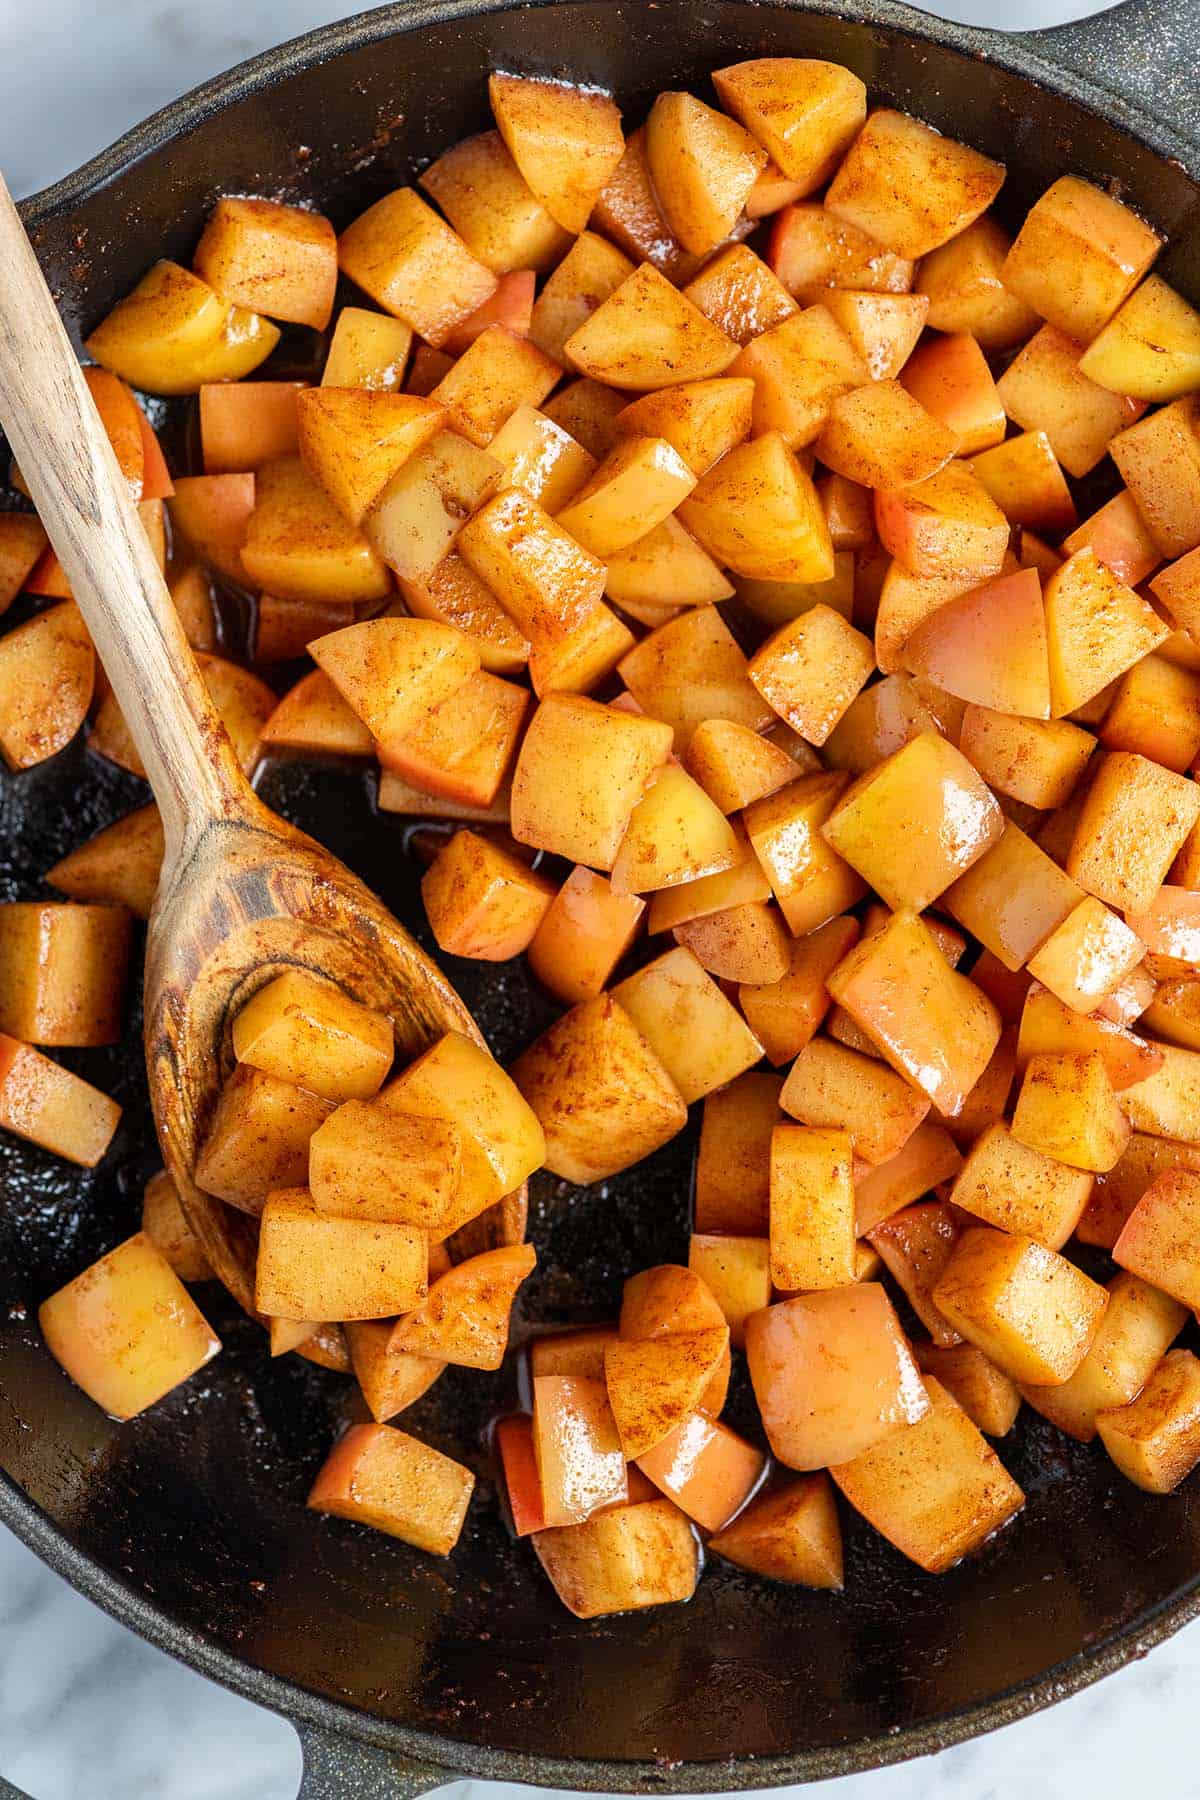
    Tip 2: Stir until the butter turns into a butter sauce. Stir the apples around the pan until the butter melts and turns into a silky cinnamon butter sauce that coats the apples. When it does, the apples are ready!

    Tip 3: Serving ideas. I love serving them with pumpkin pancakes and on top of steel-cut oats. My toddler also loves these and happily eats them with a spoon (or, more often, his fingers).

    More Easy Apple Recipes

    Easy Stovetop Cinnamon Apples

    Perfect Cinnamon Apples

    • PREP
    • COOK
    • TOTAL

    Extra easy cinnamon apples made on the stovetop in about 15 minutes! Enjoy these buttery spiced apples over ice cream for dessert, spooned over pancakes and waffles for breakfast, or as a deliciously sweet side.

    Makes 4 cups

    You Will Need

    1 ¾ pounds apples, 5 to 6 small

    1 teaspoon lemon juice or apple cider vinegar

    2 tablespoons water, plus more as needed

    2 tablespoons butter or vegan butter

    1 ½ teaspoons ground cinnamon

    1/4 teaspoon ground cardamom, optional

    1/8 teaspoon fresh grated nutmeg, optional

    1/2 teaspoon vanilla extract

    1/2 tablespoon to 1 tablespoon maple syrup, optional

    Directions

      1Choose whether or not you want to peel the apples. We prefer our apples with the peel. However, for softer cinnamon apples, peel them.

      2Core and cut the apples into bite-size pieces, 3/4-inch to 1-inch cubes. For slices, slice the apples into 1/4-inch thick slices.

      3Toss the apples, lemon juice (or vinegar), and two tablespoons of water into a wide skillet over medium-high heat. Cover the skillet with a lid (or tent them with aluminum foil). Cook, covered, for 3 to 4 minutes.

      4Uncover the apples, and stir in the butter, cinnamon, optional spices (cardamom and nutmeg), vanilla, and maple syrup (optional).

      5Cook, while stirring, until the butter melts and the apples soften to your liking, 3 to 5 minutes more. For more saucy apples, stir in 2 to 3 tablespoons more water. Simmer the water until it thickens and coats the apples. Taste, and then adjust with more maple syrup.

    Adam and Joanne’s Tips

    • Storing: These apples can be stored in an airtight container in the fridge for up to 5 days. You can also freeze them for a few months.
    • The nutrition facts provided below are estimates.

    Nutrition Per Serving
    Serving Size
    1/2 cup
    /
    Calories
    80
    /
    Total Fat
    3.1g
    /
    Saturated Fat
    1.8g
    /
    Cholesterol
    7.6mg
    /
    Sodium
    1.5mg
    /
    Carbohydrate
    14.2g
    /
    Dietary Fiber
    2.7g
    /
    Total Sugars
    10.4g
    /
    Protein
    0.3g


    AUTHOR:

    Joanne Gallagher

    Previous Post: Easy Pumpkin Cupcakes
    Next Post: Crispy Tofu Fingers

    Source link

  • Cheese Pinwheels Recipe

    Cheese Pinwheels Recipe

    Our easy cheese pinwheels made with puff pastry, two cheeses, and roasted red peppers are such a delicious appetizer! These cute little pinwheels fly off the plate!

    Cheese Pinwheels

    These puff pastry pinwheels are high on my list of best hors d’oeuvres. They are simple, pretty on the plate, taste incredible, and are perfect for making in advance! In our recipe below, we spread puff pastry with Boursin cheese, add lots of parmesan, and top with roasted red pepper for sweetness and color.

    I love them so much, and based on how quickly these disappear at parties, I can tell you my friends and family love them, too. Serve these alongside other popular appetizers, like red pepper hummus, classic shrimp cocktail, and tomato bruschetta.

    Key Ingredients

    • Puff Pastry: Use 1 sheet of frozen puff pastry, thawed. A standard box usually contains 2 sheets. I used Pepperidge Farm in the photos, but any brand will work! I thaw my puff pastry sheet in the fridge overnight. You can also thaw it on the counter. It should be ready in about 1 hour. I also use puff pastry to make quick and easy chocolate croissants, which would be the perfect way to use that leftover sheet.
    • Cheese: I use two cheeses in these. First, something creamy like garlic and herb Boursin cheese (it’s so delicious). Goat cheese or even herbed cream cheese are good substitutes. Then, I sprinkle grated parmesan cheese over the filling. Pecorino cheese or even a sharp cheddar work, too.
    • Roasted Red Peppers: People eat with their eyes, and rolling up chopped roasted red peppers makes these pinwheels so pretty and appetizing. I grab a few peppers from a jar of store-bought roasted peppers. You can use fresh diced red peppers if you don’t have them. In fact, can roll up just about anything. Think bacon, ham, caramelized onions, or different vegetables.
    • Fresh Herbs: These are optional, but I love adding something fresh and green to the pinwheel filling. Fresh parsley or basil are excellent.
    • Egg: So that the pinwheels bake up to be golden brown and pretty, we brush a little egg wash over them right before sliding them into the oven. It’s simple and made with beaten egg and water.

    How to Make Cheese Pinwheels

    Once your puff pastry is thawed, this recipe goes very quickly. Unfold the sheet, roll lightly to flatten any creases, and then add the filing. You’ll spread the soft Boursin cheese over the whole sheet and then top with parmesan, chopped roasted peppers, and herbs.

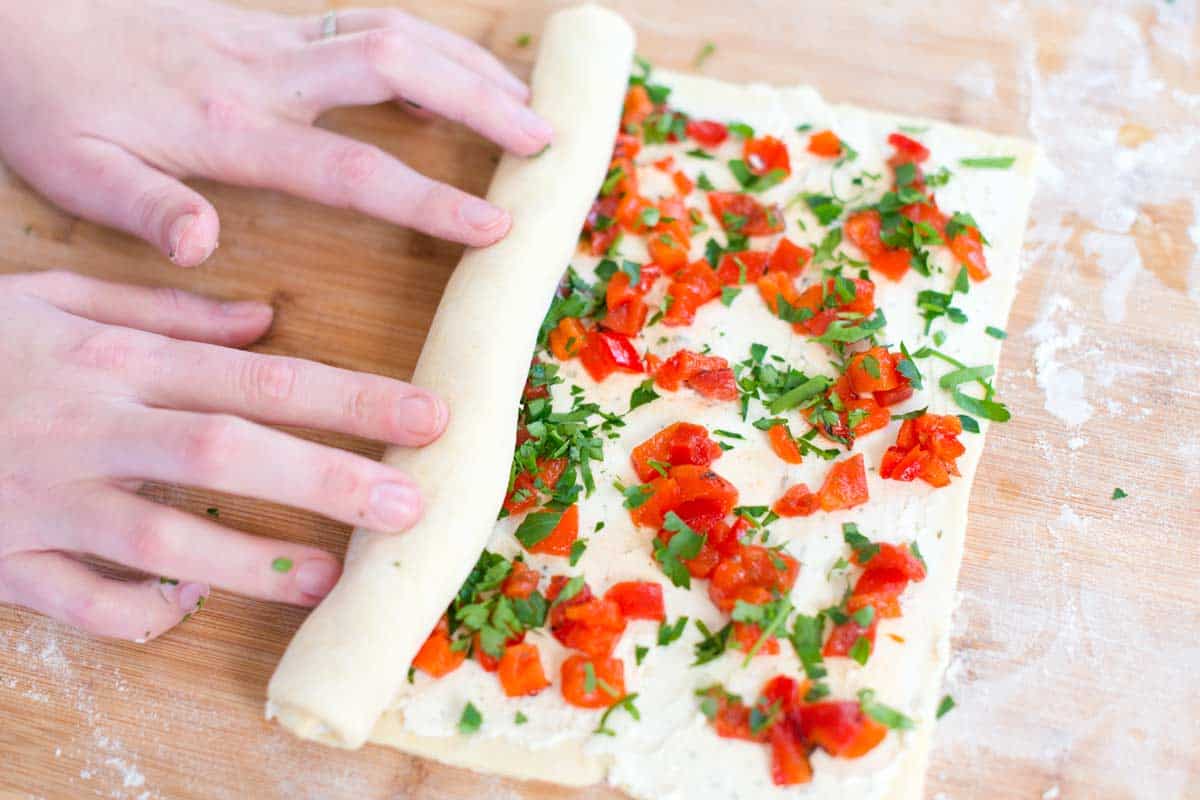
    How to Make Cheese Pinwheels: Rolling up the puff pastry.

    Roll the sheet up like a jelly roll, then slice it into your pinwheels. Place them onto a baking sheet, brush on some egg wash, and bake. They’ll take less than 20 minutes! Serve them hot or at room temperature.

    Cheese Pinwheels

    Cheese Pinwheels

    • PREP
    • COOK
    • TOTAL

    These easy pinwheels are the perfect appetizer or hors d’oeuvres! We use store-bought puff pastry, which makes them so easy! You will need thawed puff pastry, so leave it overnight in the fridge or on the counter for about 1 hour before making the pinwheels.

    Makes 20 Pinwheels

    You Will Need

    1 sheet frozen puff pastry, thawed

    1 large egg

    1 tablespoon water

    1/2 cup garlic and herb spreadable cheese, such as Boursin

    1/4 cup grated Parmigiano-Reggiano cheese

    1/2 cup roasted red peppers, chopped

    2 tablespoons chopped fresh parsley or basil

    Directions

      1Preheat the oven to 400°F (204°C). Line a baking sheet with parchment paper and set it aside.

      2Beat the egg and water in a small bowl with a fork or whisk and set aside.

      3Lightly flour your work surface. Unfold the pastry sheet, then lightly dust the top with flour. Use a rolling pin to roll lightly so the creases are flattened out (you don’t want to make the square much bigger).

      4Brush the square of pastry with egg wash. Evenly spread with the 1/2 cup of garlic and herb cheese, then sprinkle with the Parmigiano-Reggiano, peppers, and herbs.

      5Starting at the side closest to you, roll the puff pastry up like a jelly roll.

      6Cut into 20 slices, about 1/2 inch thick. A serrated bread knife works well for this.

      7Place pinwheel slices onto the baking sheet. Then, lightly brush the tops with egg wash. Bake for 14 to 18 minutes or until light golden brown. Serve warm or at room temperature.

    Adam and Joanne’s Tips

    • Puff pastry: Use 1 sheet of frozen puff pastry, thawed. A standard box usually contains 2 sheets. I used Pepperidge Farm in the photos, but any brand will work! I thaw my puff pastry sheet in the fridge overnight. You can also thaw it on the counter. It should be ready in about 1 hour.
    • Nutrition facts provided are estimates.

    Nutrition Per Serving
    Serving Size
    1 pinwheel
    /
    Calories
    93
    /
    Total Fat
    6.5g
    /
    Saturated Fat
    1.8g
    /
    Cholesterol
    13mg
    /
    Sodium
    83.5mg
    /
    Carbohydrate
    6g
    /
    Dietary Fiber
    0.3g
    /
    Protein
    2.7g


    AUTHOR:

    Adam Gallagher

    Adam and Joanne of Inspired Taste

    We are Adam and Joanne Gallagher, the creators of Inspired Taste. Established in 2009, Inspired Taste grew from a childhood dream into one of the internet’s most trusted recipe sites with hundreds of reliable recipes, step-by-step videos, and expert tips.More About Us
    Source link

  • Easy Hummus Cups Recipe

    Easy Hummus Cups Recipe

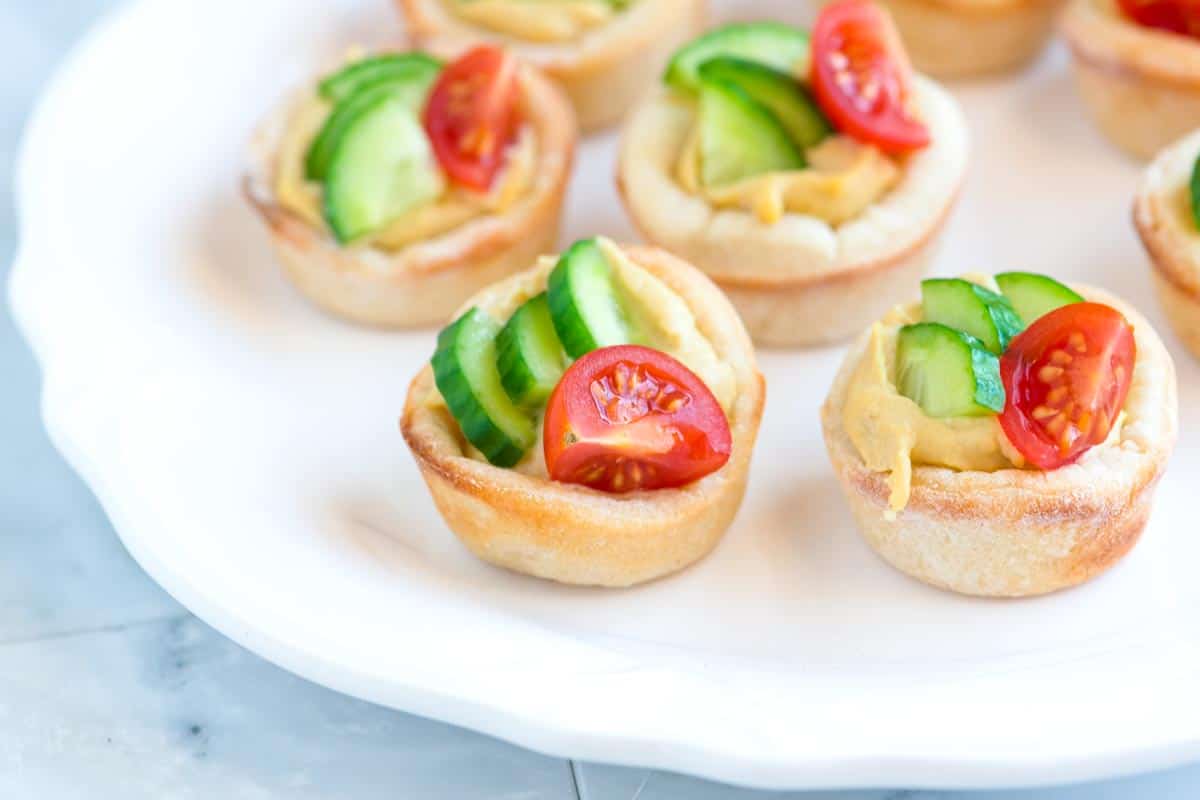
    These cute hummus appetizers are perfect for parties and entertaining! We make mini cups using pizza dough and then fill them with hummus and veggies. They are so much fun!

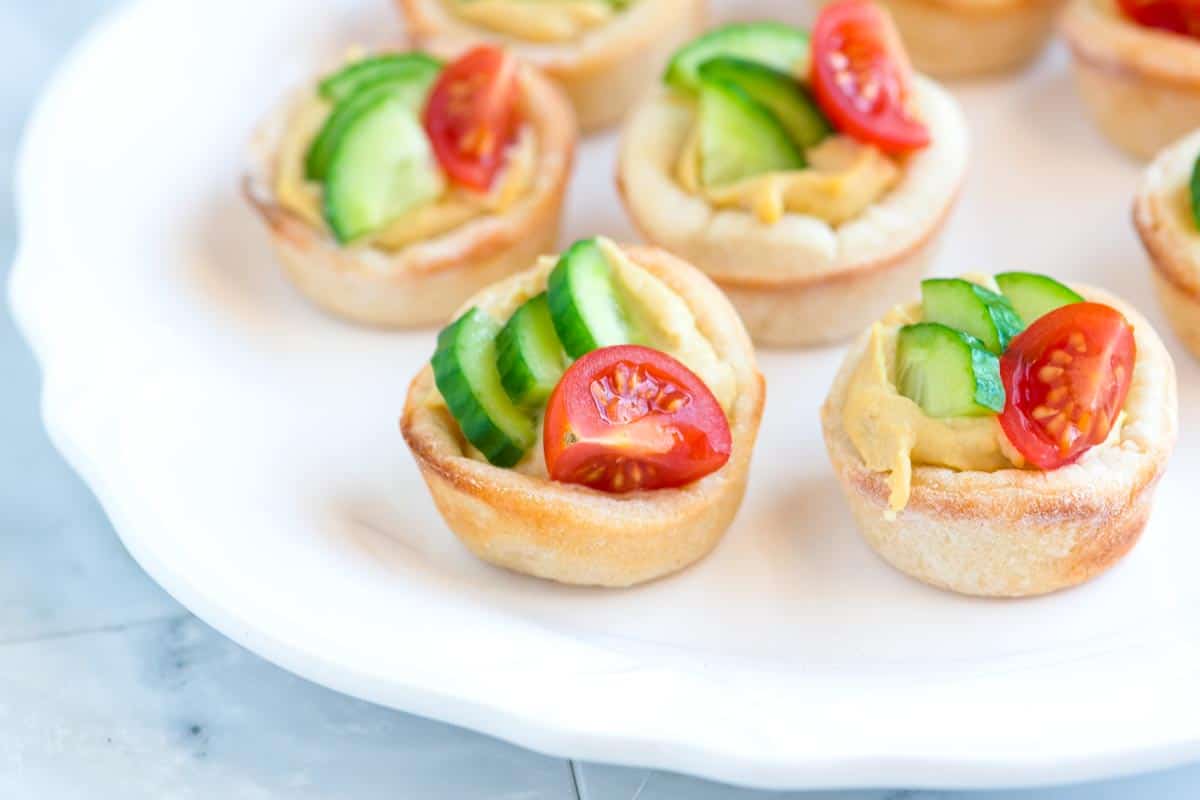
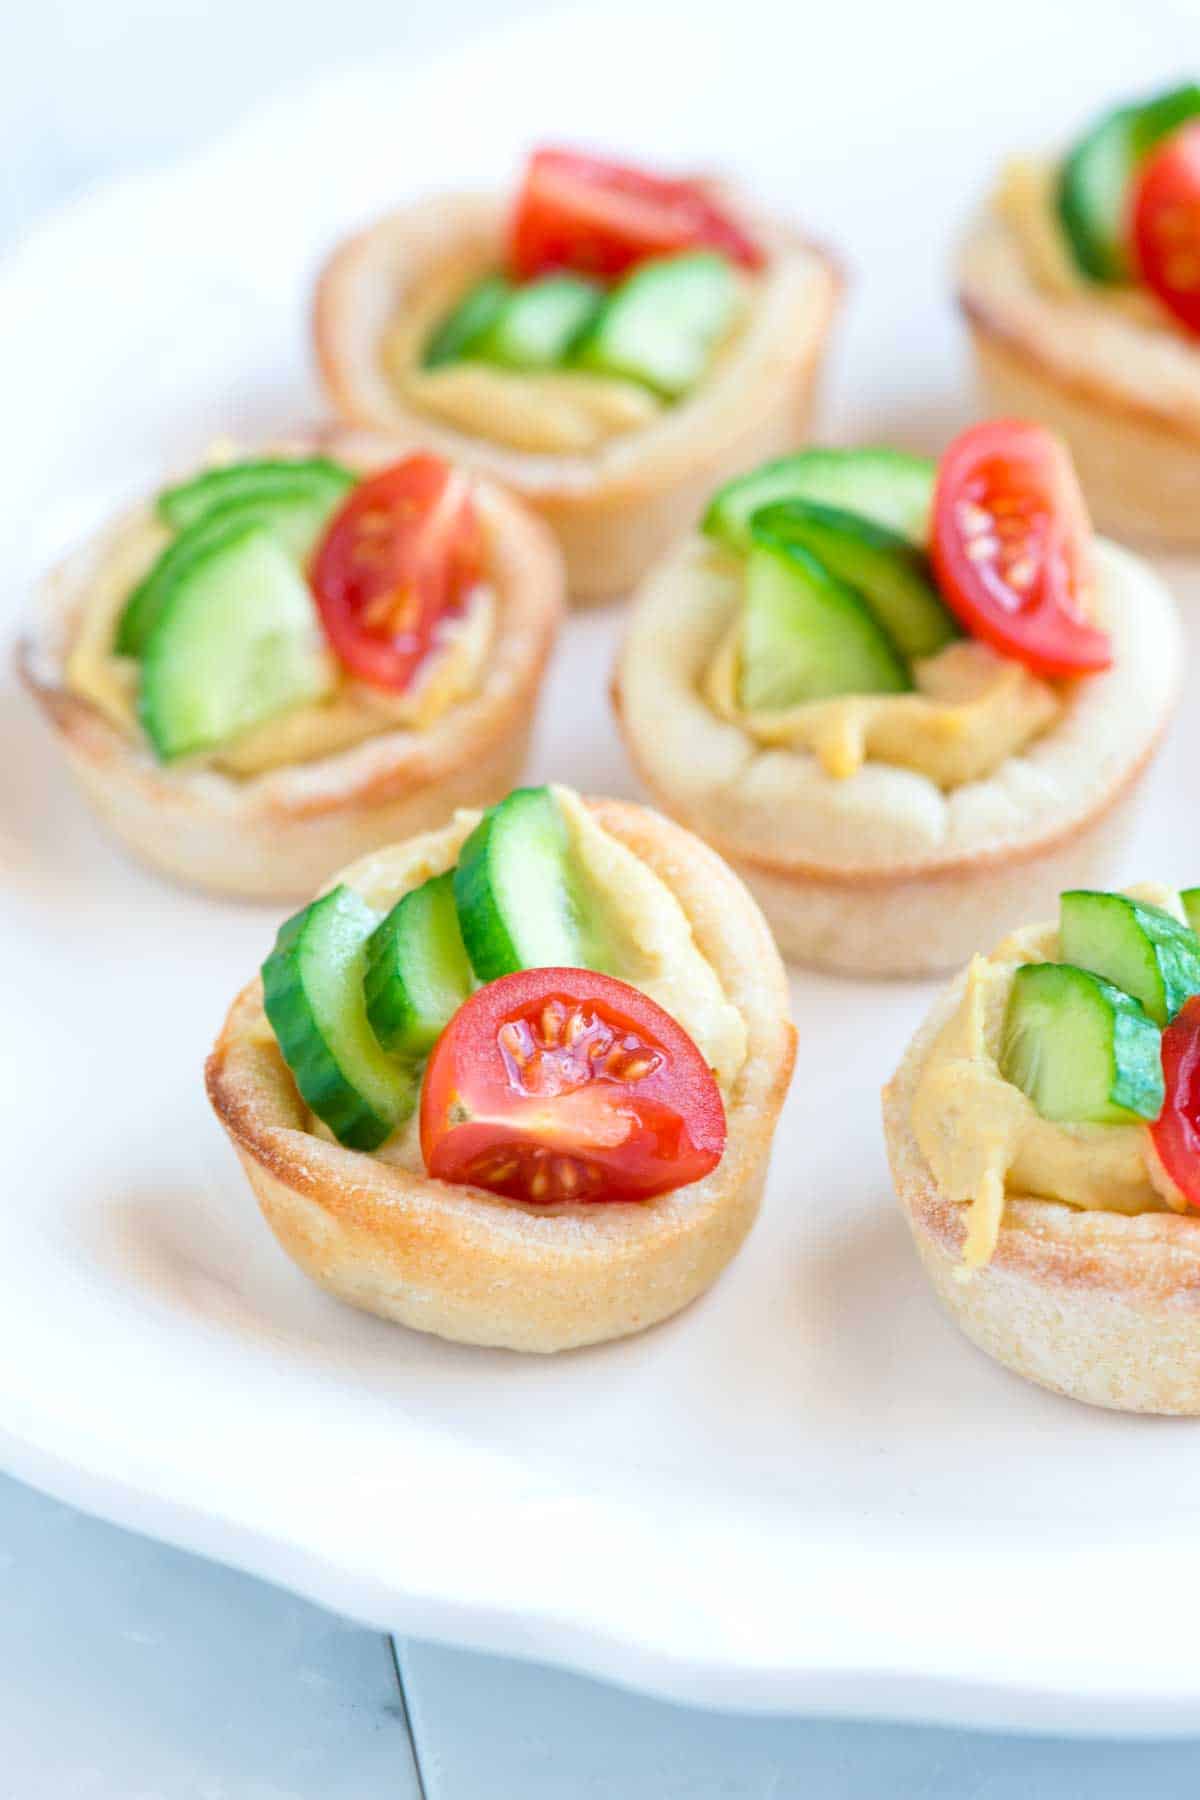
    Easy Hummus Cups

    If you’re a regular reader, you know how much we adore hummus, especially this simple homemade hummus! We love it so much that we’ve found many ways to serve it. And what better way to enjoy it than with these adorable hummus appetizers made with baked pizza dough cups?

    For more hummus inspiration, check out our roasted red pepper hummus and this hummus with spiced beef. You can also use hummus in our honey dijon chicken lettuce wraps or create a delicious platter with hummus, homemade falafel, tahini sauce, and creamy homemade labneh!

    Key Ingredients

    • Pizza Dough: I’ve experimented with different pizza doughs for these cups, both store-bought and homemade. One thing to keep in mind is that many doughs puff up during baking, which can fill in the cup and leave less room for the hummus. While we have included some tips to minimize this, I’ve found that Pillsbury pizza dough works best. It doesn’t puff up as much as my favorite homemade pizza dough (which I prefer for my pizza recipes because I love a bubbly crust!).
    • Hummus: Use your favorite hummus for these appetizer cups. I love our easy hummus recipe. You can swap the hummus for other dips, too. Think about baba ganoush (roasted eggplant dip), labneh, smoked salmon dip, or onion dip!
    • Cucumber and Tomatoes: I love adding something fresh, and love cucumber and tomatoes with a tiny sprinkle of salt. I’ve also made this chopped cucumber tomato salad and spooned it into the cups, and I loved it!

    How to Make Hummus Cups

    Let’s start by making the pizza cups! It’s super easy, but we’ll use a couple of tricks to make sure the dough bakes up perfectly with plenty of room for the delicious fillings.

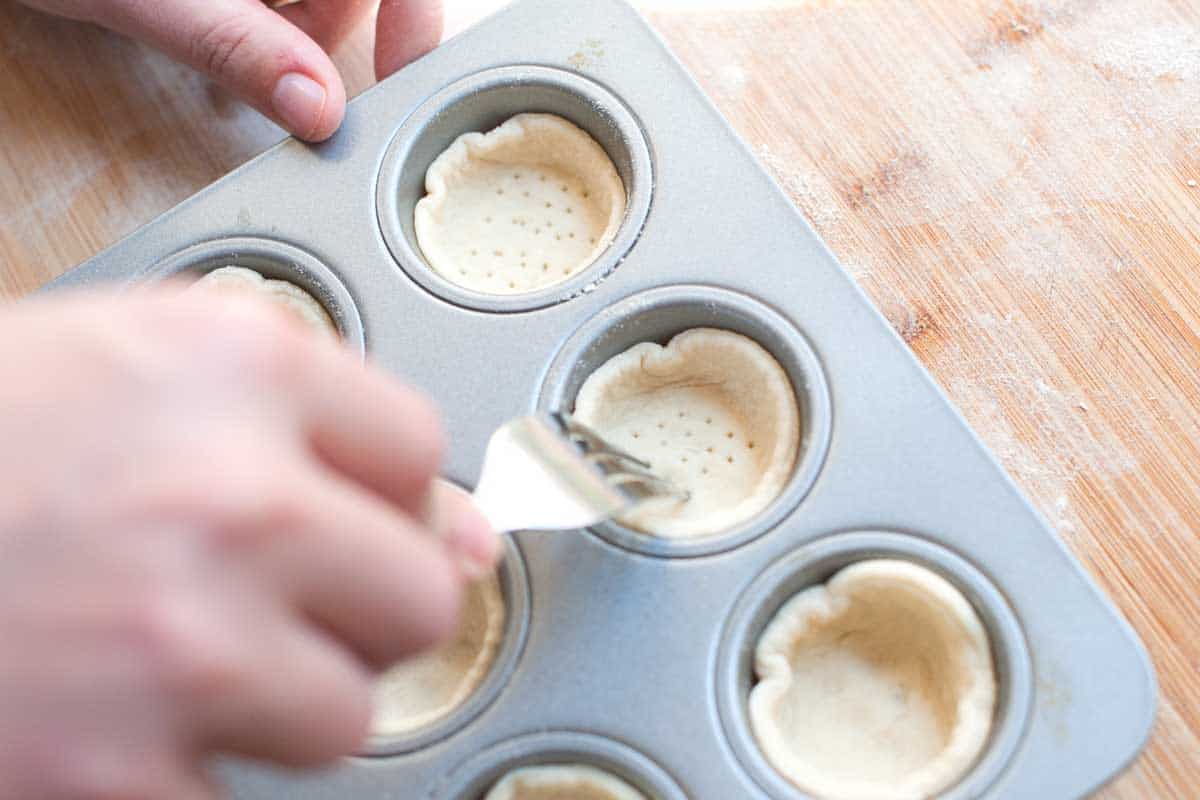
    First, roll the pizza dough into a thin rectangle and use a cookie cutter to cut out rounds. Press each round into a mini muffin cup, then grab a fork and poke a few holes in the bottom. This helps prevent the dough from puffing up too much.

    How to Make Hummus Cups: Pressing pizza dough in to a muffin tin

    For extra insurance, I like to place a mini muffin liner inside each cup and fill it with pie weights (dried rice or beans work great, too!). It’s the same idea as when you par-bake a pie crust.

    Once the pizza cups are baked and cooled, it’s time to fill them with hummus and your favorite veggies! Then, you can enjoy them!

    Easy Hummus Cups

    Easy Hummus Cups

    • PREP
    • COOK
    • TOTAL

    These are such a fun appetizer! You can fill the hummus cups 1 hour in advance. Cover them with plastic wrap and store them in the fridge to prevent the tomatoes, cucumber, and hummus from drying out.

    Makes 20

    You Will Need

    1 (13.8oz) roll Pillsbury Classic Pizza Crust, see tips

    1/2 cup hummus, try homemade hummus

    1/2 cup diced cucumber

    5 cherry tomatoes, quartered

    1/8 teaspoon sea salt

    Directions

      1Preheat oven to 400°F (204°C) and lightly spray 20 mini muffin cups with cooking spray. Set aside 20 mini muffin paper liners, as well as pie weights, uncooked rice, or dried beans for baking the pizza cups.

      2Form pizza dough into a 14-inch by 12-inch rectangle (this doesn’t have to be exact, just close).

      3Use a 2 ½-inch round cookie cutter to cut out 20 circles of dough. Press each circle of dough into the muffin cups. Use a fork to pierce the bottom of each pizza cup. Three to four pricks with a fork should do it.

      4Place a muffin liner inside each pizza cup and fill it with pie weights, uncooked rice, or dried beans.

      5Bake the pizza cups for 8 to 10 minutes or until the edges are light golden brown. Transfer cups to a cooling rack to cool completely.

      6When cooled, fill each pizza cup with a heaping teaspoon of hummus and top with a few pieces of cucumber and a tomato quarter. Finish with a light sprinkle of salt.

    Adam and Joanne’s Tips

    • Pizza dough: While homemade pizza dough is delicious, we’ve found that Pillsbury pizza crust works best for pizza cups. Many doughs, like our homemade dough, puff up in the oven, making it hard to get a deep cup for your hummus. If you want to try your favorite store-bought or homemade dough, here’s a trick: press a cupcake liner into each cup and fill it with pie weights, dried beans, or rice. This will keep the dough from puffing up too much. I’ve added this tip to the recipe instructions so everyone has success.
    • Rolling the dough: If your pizza dough keeps bouncing back on you as you roll it out. Leave it for 5 to 10 minutes on the counter to rest and come to room temperature, and then try again.
    • Nutrition facts provided below are estimates.

    Nutrition Per Serving
    Serving Size
    1 hummus cup
    /
    Calories
    69
    /
    Total Fat
    3.5g
    /
    Saturated Fat
    1.2g
    /
    Cholesterol
    0mg
    /
    Sodium
    78.2mg
    /
    Carbohydrate
    8.6g
    /
    Dietary Fiber
    0.9g
    /
    Total Sugars
    1g
    /
    Protein
    1g


    AUTHOR:

    Adam Gallagher

    Previous Post: Chocolate Toffee Cookies
    Next Post: Easy Pumpkin Cupcakes

    Source link

  • The Best Chicken Quesadillas Recipe

    The Best Chicken Quesadillas Recipe

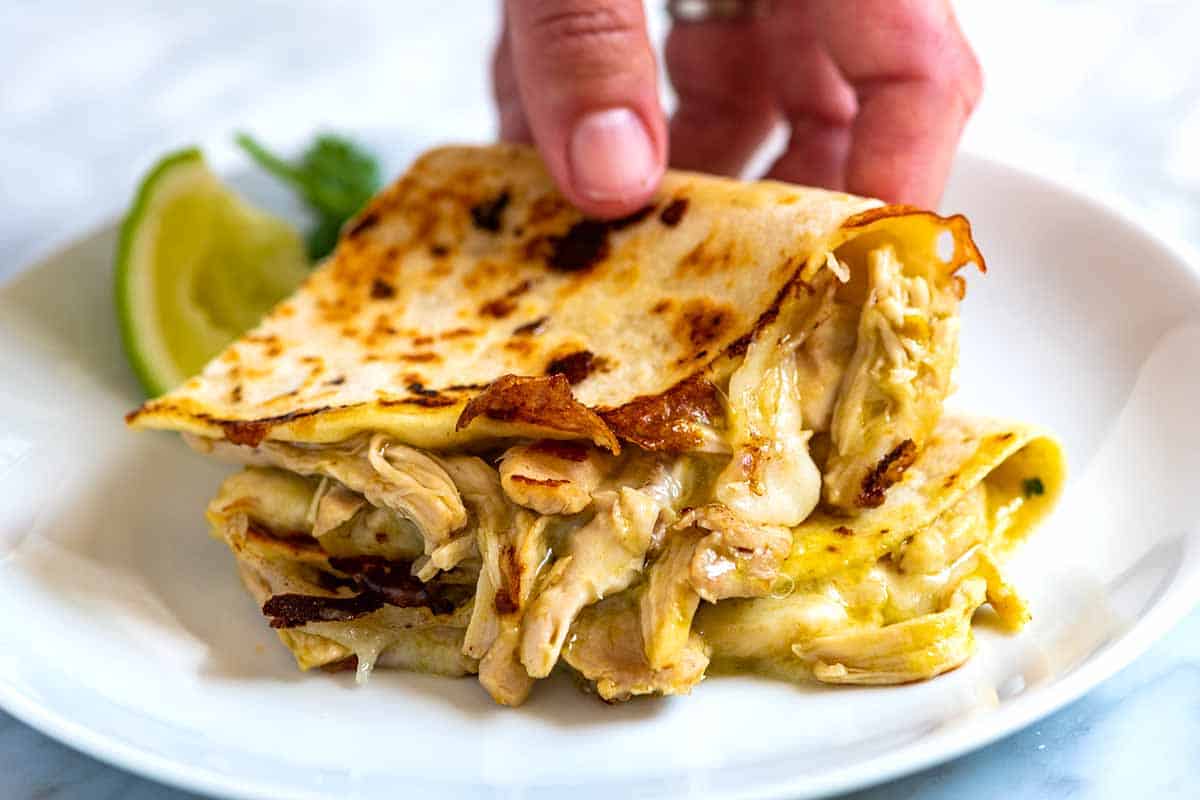
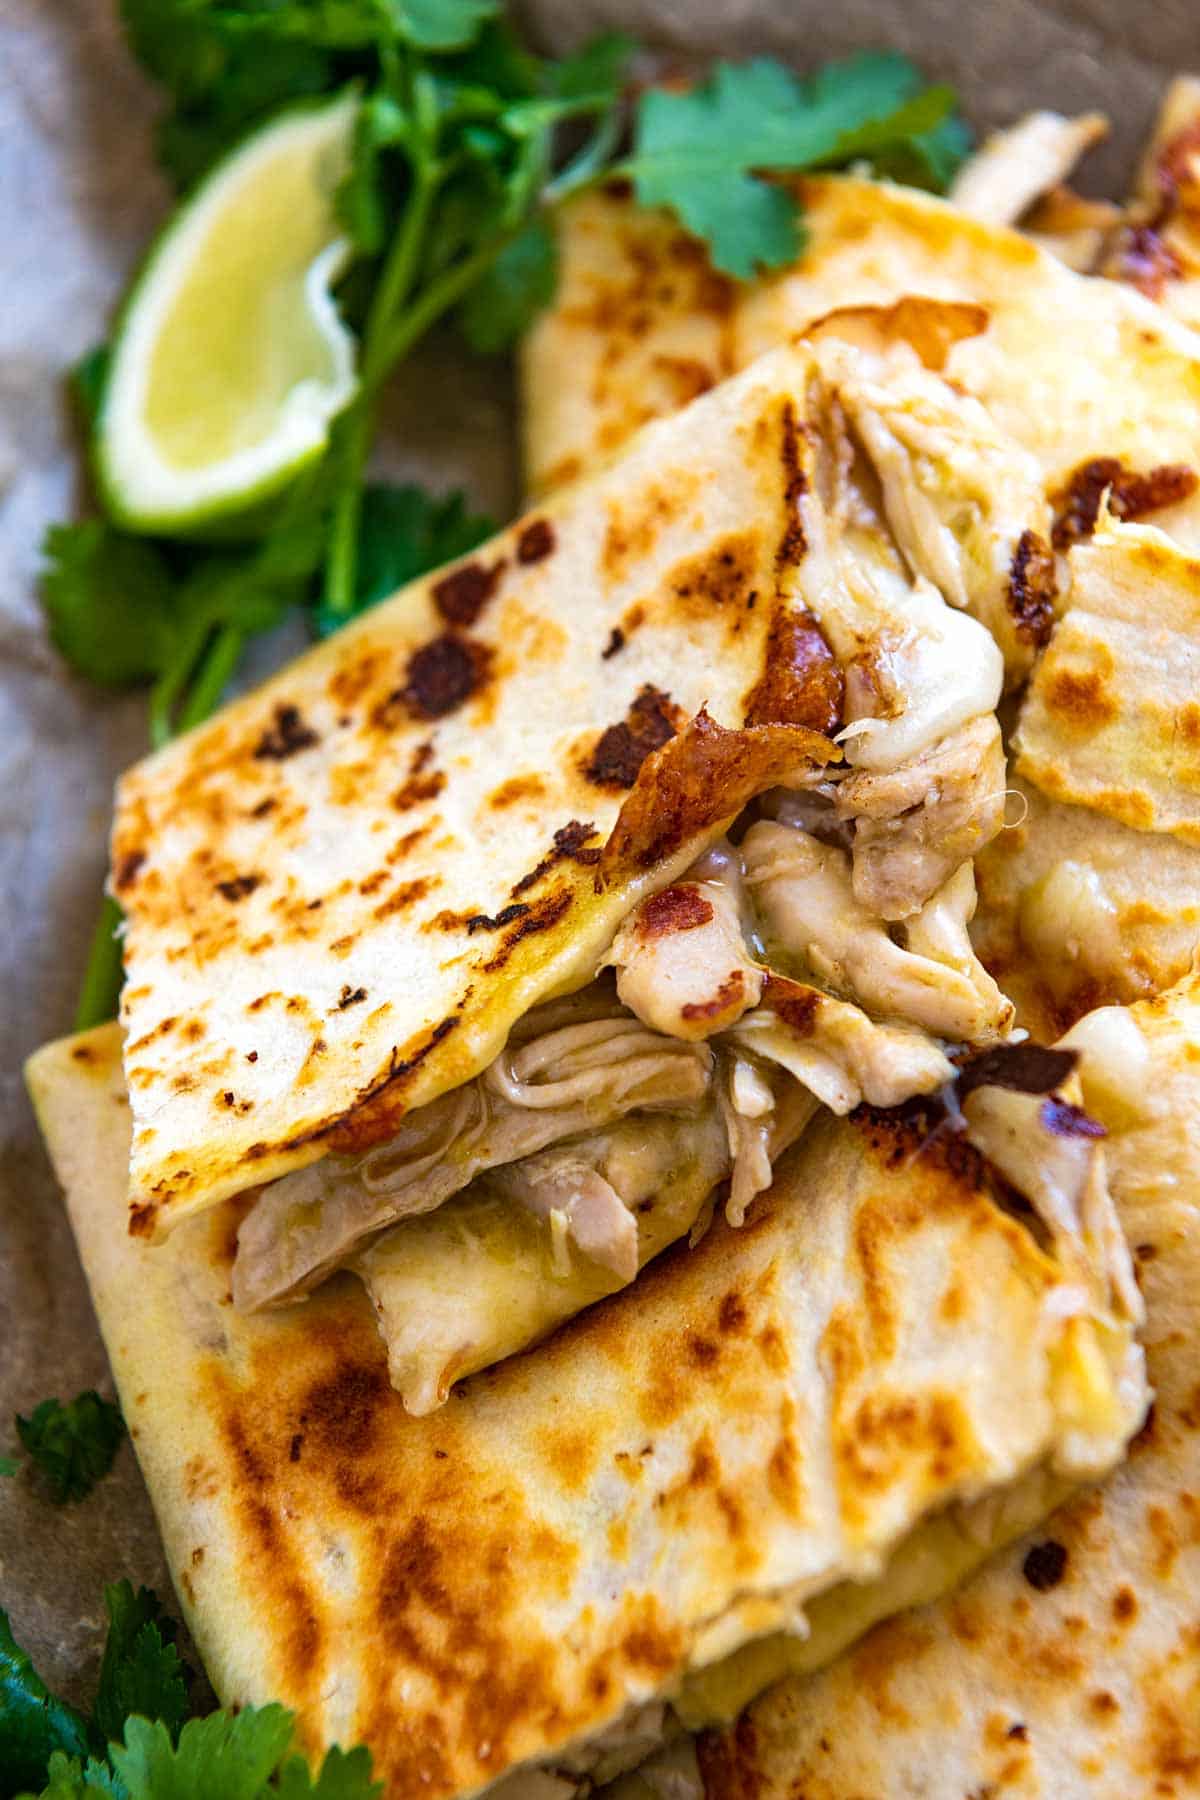
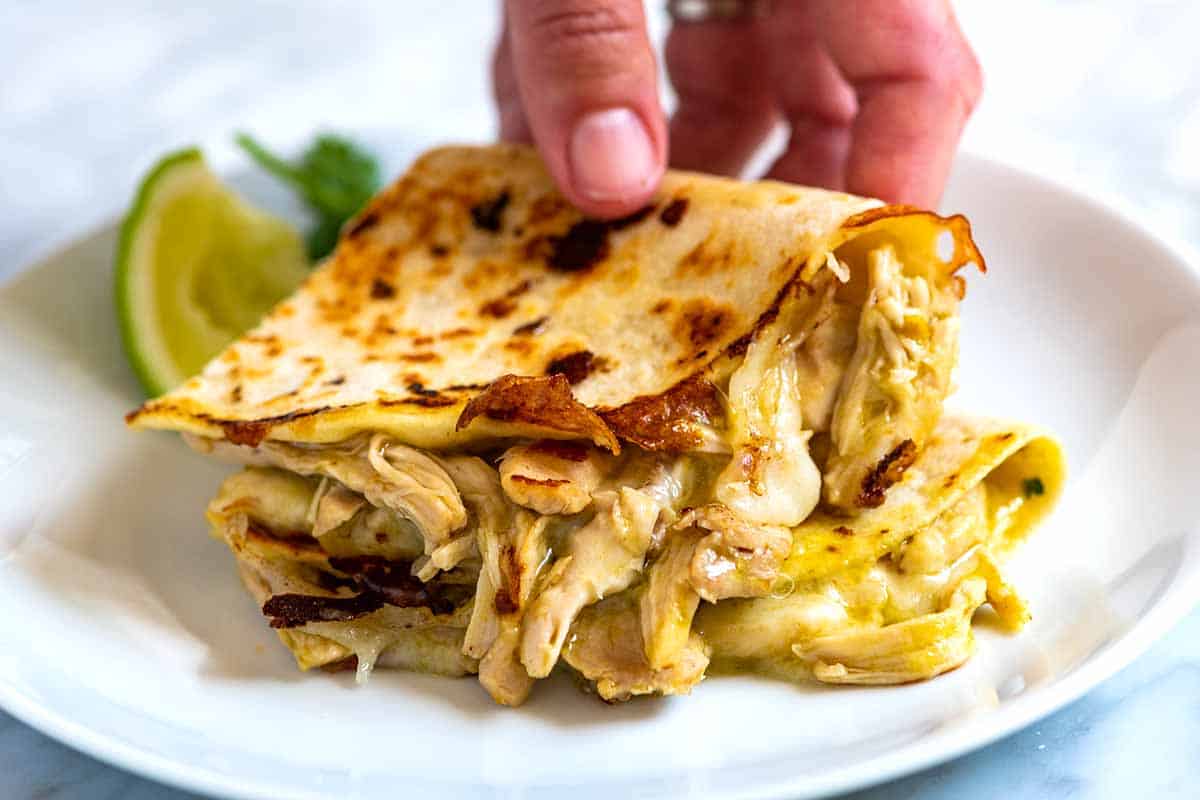
    My favorite chicken quesadilla recipe has gooey cheese and tender chicken cooked in flavorful green chile sauce. They’re so good that it’s hard to eat just one.

    Chicken Quesadillas

    Save this chicken quesadilla recipe for the next time you need a slam dunk, super flavorful, easy meal. Our green chicken enchiladas inspired the chicken inside the quesadilla. It’s juicy, tender, and quick!

    I love using homemade flour tortillas, but if you’re in a hurry, skip that and use your favorite store-bought brand instead. For another easy, really delicious option, try our vegetable quesadillas or these breakfast quesadillas, which are also a personal favorite!

    Key Ingredients

    • Tortillas: I love using these flour tortillas or homemade corn tortillas, but if you’re short on time, store-bought works great. I usually use flour for quesadillas, but my son prefers corn, so use whatever you prefer!
    • Chicken: You can use either chicken breast or chicken thighs for these quesadillas. I cook the chicken using a quick and easy method similar to my shredded chicken recipe, which keeps it juicy and tender.
    • Green Enchilada Sauce: Feel free to use your favorite store-bought enchilada sauce (I recommend Hatch or Fronterra) or try my homemade salsa verde. If you’re not a fan of green chile sauce, you can swap it for red, like this easy enchilada sauce.
    • Cheese: If you add cheese, go for something that melts nicely, like queso de Oaxaca or Monterey Jack. For a dairy-free option, try a spoonful of my delicious vegan queso.

    Find the full recipe with measurements below.

    How to Make Our Favorite Chicken Quesadillas

    Tip 1: Don’t miss the green chile chicken. Tossing your chicken with green enchilada sauce truly makes these the best quesadillas. They turn out so flavorful, and thanks to the sauce, the chicken stays juicy.

    Here are two ways to prepare it: Add your chicken to a saucepan with green enchilada sauce and gently simmer until cooked through, or use our Instant Pot salsa verde chicken recipe.

    Shredded Green Chile Chicken ready for Chicken Quesadillas

    Tip 2: Use a heavy-bottomed pan. For the very best quesadillas that are perfectly browned on the outside, cook them in a heavy-bottomed pan or skillet. Think a cast-iron pan, a heavy stainless steel skillet, or the more traditional comal (a flat griddle used in Mexico, Central America, and parts of South America).

    Serving Suggestions

    Serve these warm with your favorite quesadilla toppings and sides. I love homemade guacamole, pico de gallo, fresh lime wedges, and a little sour cream. To make this a complete meal, consider adding rice and beans. I love our cilantro lime rice or Mexican rice with homemade refried beans or these saucy black beans.

    More Quesadilla Recipes

    A plate with chicken quesadillas

    The Best Chicken Quesadillas

    • PREP
    • COOK
    • TOTAL

    I love this chicken quesadilla recipe with tender chicken cooked in flavorful salsa verde and lots of melted cheese. You can make the chicken in advance and keep it in the fridge or freezer for another day. See our storing tips below the recipe!

    6 Quesadillas

    Watch Us Make the Recipe

    You Will Need

    3 pounds boneless chicken thighs or chicken breasts

    2 cups green enchilada sauce or Mexican salsa verde

    6 medium to large flour or corn tortillas, see homemade flour tortillas

    2 cups mild melting cheese like queso de Oaxaca or Monterey Jack, shredded, 8 ounces

    Spray oil or oil brushed onto the pan

    Fresh cilantro and lime wedges for serving

    Salt, to taste

    Directions

      1Cook the chicken: In a large, heavy-bottomed saucepan, combine the chicken and green enchilada sauce (or salsa). Bring to a boil over high heat, then reduce to a gentle simmer. Partially cover the pan and cook until the chicken is tender and cooked through, 20 to 30 minutes.

      2Shred the chicken: Transfer the chicken to a cutting board. When cool enough to handle, shred the meat with two forks (or your fingers). Return the shredded chicken to the sauce and stir to coat. Taste and season with salt, if needed.

      3Prepare the skillet: Heat a heavy-bottomed skillet over medium heat. Lightly brush or spray the pan with oil, then place one tortilla in the skillet.

      4Cook the quesadillas: Scatter about ⅓ cup of cheese over the tortilla, then spoon ½ cup of shredded chicken onto one half, letting any excess sauce drip off first. Fold the tortilla in half and press gently with a spatula to seal. Cook until the underside is golden and toasted, about 2 minutes.

      5Flip and serve: Flip the quesadilla and cook for 1 to 2 minutes more, until the second side is toasted and the cheese has melted. Transfer the tortillas to a cutting board, slice them in half, and repeat with the remaining tortillas.

    Adam and Joanne’s Tips

    • Make-ahead and storing: This recipe makes about 5 cups of shredded chicken, enough for 6 quesadillas (maybe more). Leftover chicken can be stored in an airtight container in the fridge for up to 3 days or in the freezer for up to 1 month. Add leftover chicken to rice bowls, tacos, or salad.
    • Keep quesadillas warm: Keep them warm on a baking sheet in a 200°F (93°C) oven while you finish making the remaining quesadillas.
    • The nutrition facts provided below are estimates.

    Nutrition Per Serving
    Serving Size
    1 quesadilla
    /
    Calories
    444
    /
    Total Fat
    19.7g
    /
    Saturated Fat
    8.8g
    /
    Cholesterol
    127.7mg
    /
    Sodium
    1003.7mg
    /
    Carbohydrate
    31.9g
    /
    Dietary Fiber
    1.7g
    /
    Total Sugars
    3.9g
    /
    Protein
    34.6g


    AUTHOR:

    Joanne Gallagher

    Adam and Joanne of Inspired Taste

    We are Adam and Joanne Gallagher, the creators of Inspired Taste. Established in 2009, Inspired Taste grew from a childhood dream into one of the internet’s most trusted recipe sites with hundreds of reliable recipes, step-by-step videos, and expert tips.More About Us
    Source link

  • Instant Pot Boiled Eggs Recipe

    Instant Pot Boiled Eggs Recipe

    The Instant Pot makes boiled eggs foolproof! Here’s how to make perfectly hard boiled and soft boiled eggs using your pressure cooker.

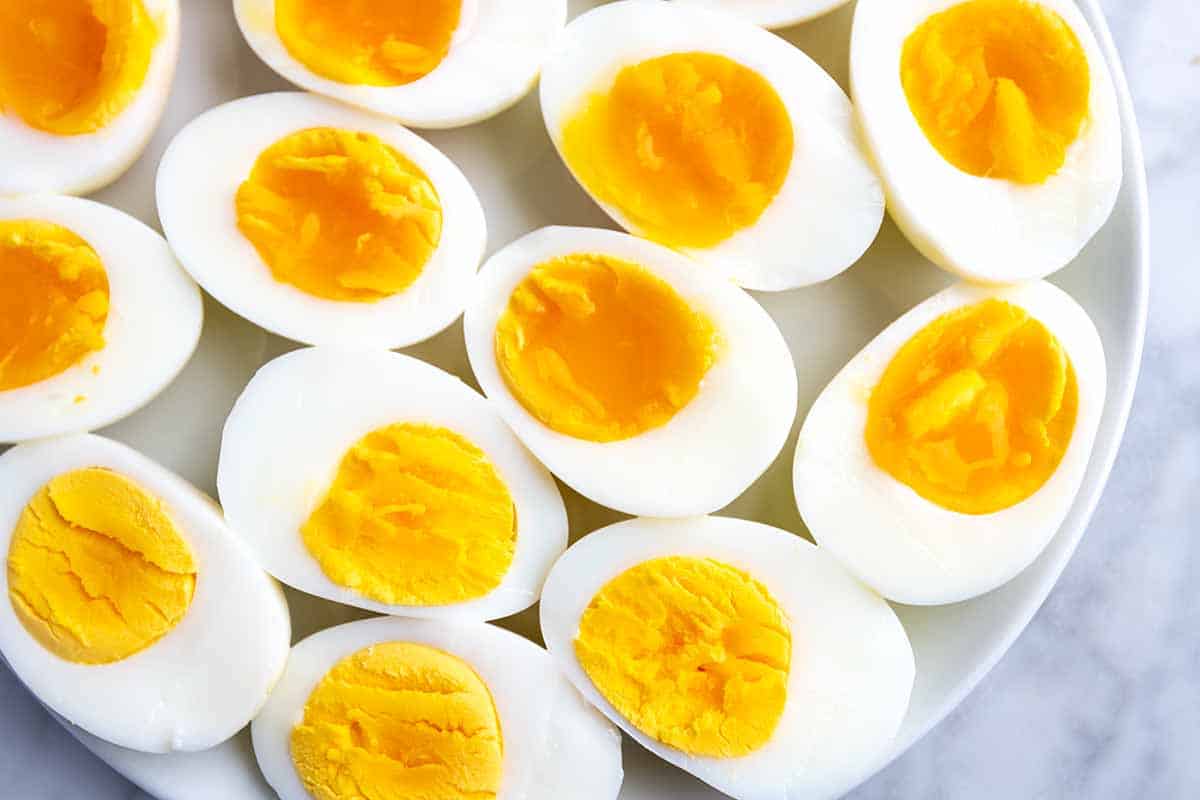
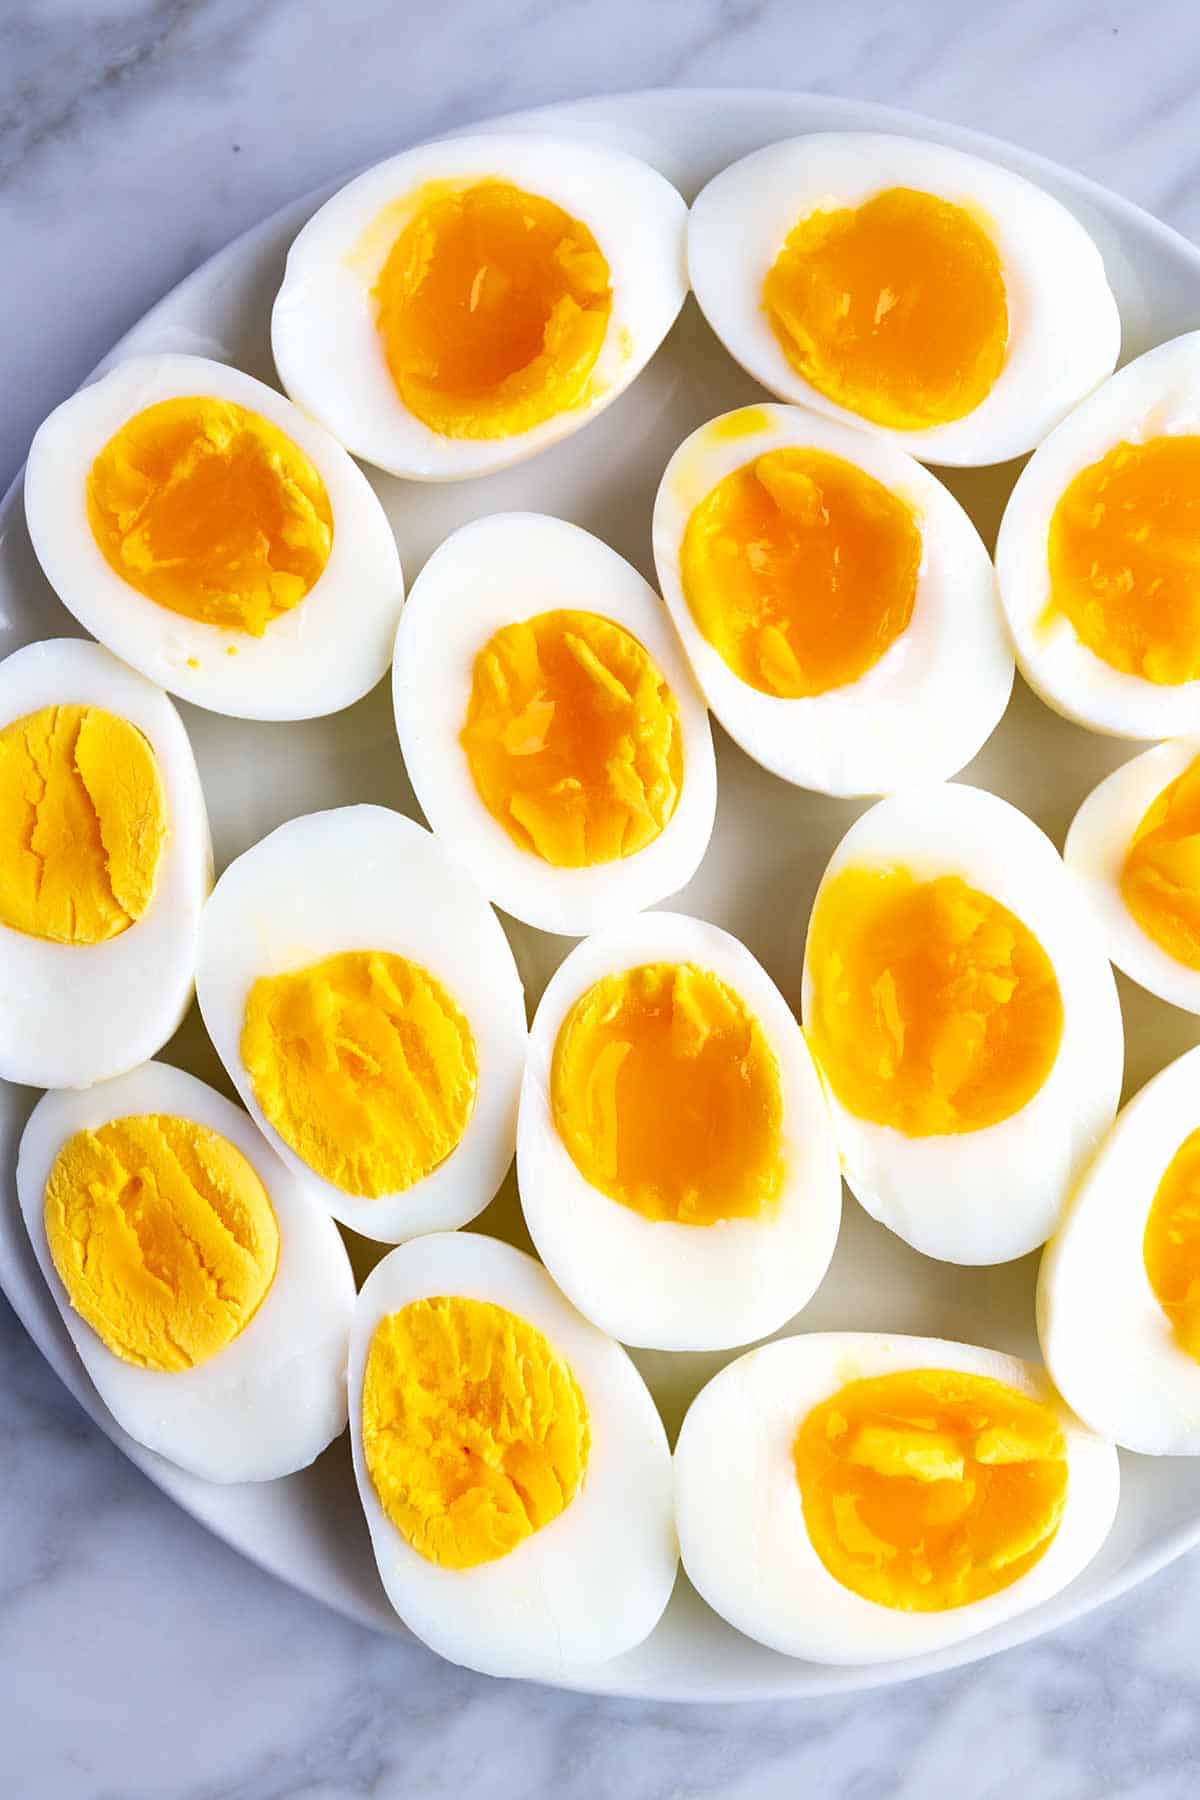
    Instant Pot hard-boiled eggs and soft-boiled eggs cut in half on a plate

    My stovetop boiled eggs are easy, but lately I’ve been reaching for my Instant Pot instead. I especially love it for soft-boiled eggs, which can be a little tricky to get just right on the stove.

    As a bonus, Instant Pot eggs are incredibly easy to peel. The high pressure and temperature help loosen the shells so they practically slide right off.

    Key Ingredients

    • Eggs: Use as many eggs as will fit in a single layer. My 6-quart model fits 10 to 12 large eggs.
    • Water: You’ll need a little water for cooking the eggs and an ice bath for when they are finished.

    Find the full recipe with measurements below.

    Key Equipment

    • Pressure cooker: An Instant Pot or other electric pressure cooker.
    • Trivet or steamer basket: This raises the eggs above the water. Most Instant Pots come with a suitable trivet.
    • Slotted spoon or tongs: To safely transfer eggs to the ice bath.

    How to Make Instant Pot Eggs

    Tip 1: Set up the pressure cooker. Add 1 cup of water to the Instant Pot and place a trivet or steamer basket at the bottom. Then, arrange the eggs in a single layer on top.

    Eggs on a trivet at the bottom of an Instant Pot

    Tip 2: Best cooking times. How long you cook the eggs depends on how soft or firm you want the yolks. Use the Manual or High Pressure setting. Here’s a guide for timing:

    • 3 minutes: Soft, runny yolk with just-set whites. Ideal for dipping toast soldiers!
    • 4 to 5 minutes: Jammy yolk, bright yellow center, firm whites. Great for ramen or salads.
    • 6 to 7 minutes: Mostly set yolk with fully firm whites. Versatile for snacks or egg salad.
    • 8 to 9 minutes: Completely cooked yolk. Perfect for deviled eggs or potato salad.

    Tip 3: Manually release the pressure. Manually release the pressure right after cooking, then transfer the eggs to an ice water bath to stop them from overcooking. Once cool, peel. The shells should slide right off.

    My Favorite Ways to Use Them

    Soft-boiled eggs are all about the jammy, golden yolk. They’re perfect for topping ramen, grain bowls, roasted vegetables, or salads. I also love them on avocado toast or served with buttered toast soldiers for dipping (one of my childhood favorites!).

    Hard-boiled eggs are more sturdy and great for meal prep or quick snacks. Slice them for salads, turn them into deviled eggs, or mix them into potato salad, egg salad, or avocado egg salad.

     Instant Pot boiled eggs on a plate

    Instant Pot Boiled Eggs

    • PREP
    • COOK
    • TOTAL

    These Instant Pot eggs couldn’t be simpler! If you’re looking for a 100% foolproof way to cook eggs, you’ve found it. This recipe works for both hard-boiled and soft-boiled eggs.

    Please read the manufacturer’s instructions for your pressure cooker before following this recipe.

    Makes 2 to 12 eggs

    You Will Need

    2 to 12 large eggs

    1 cup water

    Directions

      1Set up the cooker: Place a steaming rack or metal trivet at the bottom of the pressure cooker (ours came with the 6-quart Instant Pot).

      2Add water and eggs: Pour 1 cup of water into the pot, then place the eggs on the rack in a single layer, making sure they don’t touch the water.

      3Pressure cook: Seal the lid and cook on high pressure for your desired time. Suggested cooking times: 3 minutes for soft-boiled eggs, 5 to 6 minutes for medium-boiled eggs, and 7 to 9 minutes for hard-boiled eggs.

      4Prepare the ice bath: While the eggs cook, fill a medium bowl with ice and water.

      5Release pressure and cool: When the timer goes off, manually release the pressure, keeping your hands away from the steam. Once the pressure is fully released, open the lid and immediately transfer the eggs to the ice bath. Let them sit for a few minutes, then peel and enjoy.

    Adam and Joanne’s Tips

    • Storing unpeeled eggs: Refrigerate in their shells for up to 1 week in a bowl or airtight container. Soft-boiled eggs don’t keep as long, so plan to eat them within 2 days.
    • Storing peeled eggs: Refrigerate right after cooling. To keep them moist, store them in a container of cold water (changing the water daily) or wrap them in damp paper towels and place them inside an airtight container. Eat within 5 days. We don’t recommend storing peeled soft-boiled eggs.
    • Should I use the “Egg” setting? No need! Simply use the High Pressure setting. It’s simple, reliable, and allows you to customize the cook time for soft-, medium-, or hard-boiled eggs.
    • What’s a manual release? A manual or quick-release lets you safely release the built-up steam as soon as the cooking time ends. Check your model’s manual for the specific button or valve to use.
    • The nutrition facts provided below are estimates.

    Nutrition Per Serving
    Serving Size
    1 egg
    /
    Calories
    71
    /
    Protein
    6g
    /
    Carbohydrate
    0g
    /
    Dietary Fiber
    0g
    /
    Total Sugars
    0g
    /
    Total Fat
    5g
    /
    Saturated Fat
    2g
    /
    Cholesterol
    185mg
    /
    Sodium
    62mg


    AUTHOR:

    Joanne Gallagher

    Adam and Joanne of Inspired Taste

    We are Adam and Joanne Gallagher, the creators of Inspired Taste. Established in 2009, Inspired Taste grew from a childhood dream into one of the internet’s most trusted recipe sites with hundreds of reliable recipes, step-by-step videos, and expert tips.More About Us

    Source link

  • Feta Tzatziki Recipe

    Feta Tzatziki Recipe

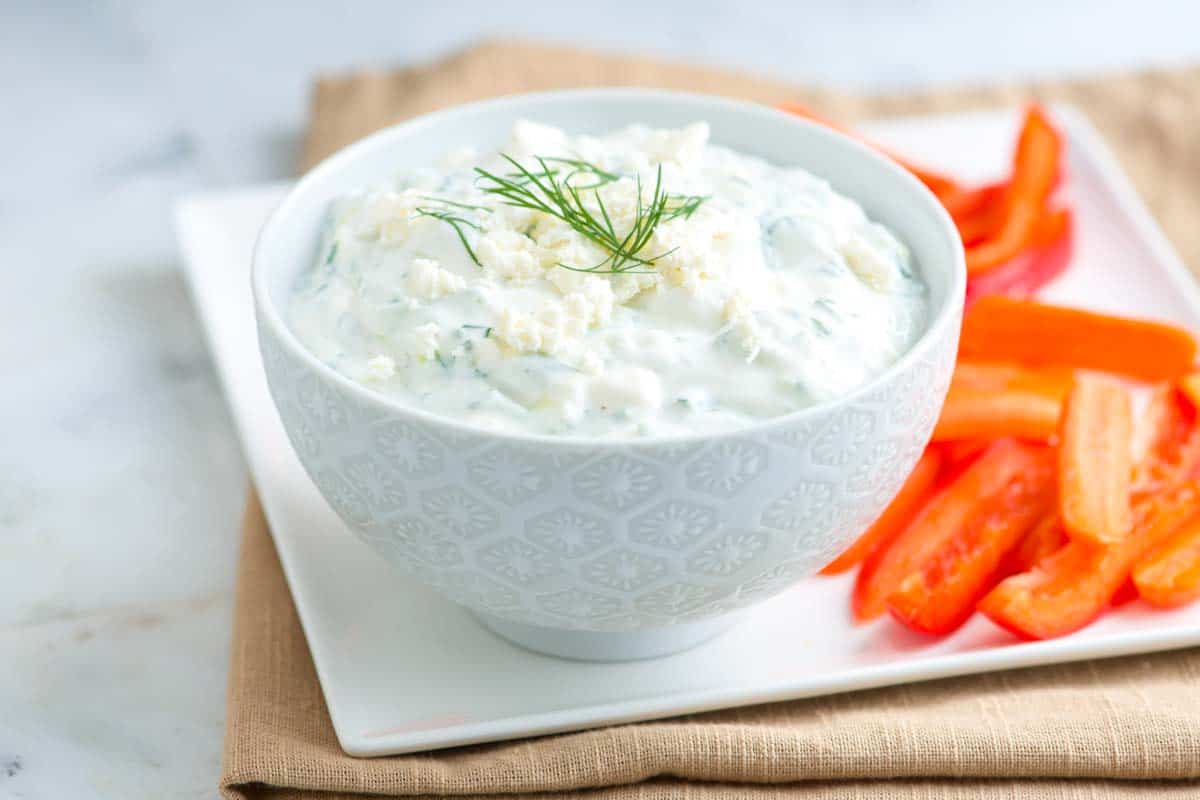
    We love this thick, creamy tzatziki with feta cheese and fresh herbs! It’s delicious as a sauce or dip with veggies, pita chips, grilled meats, and sandwiches.

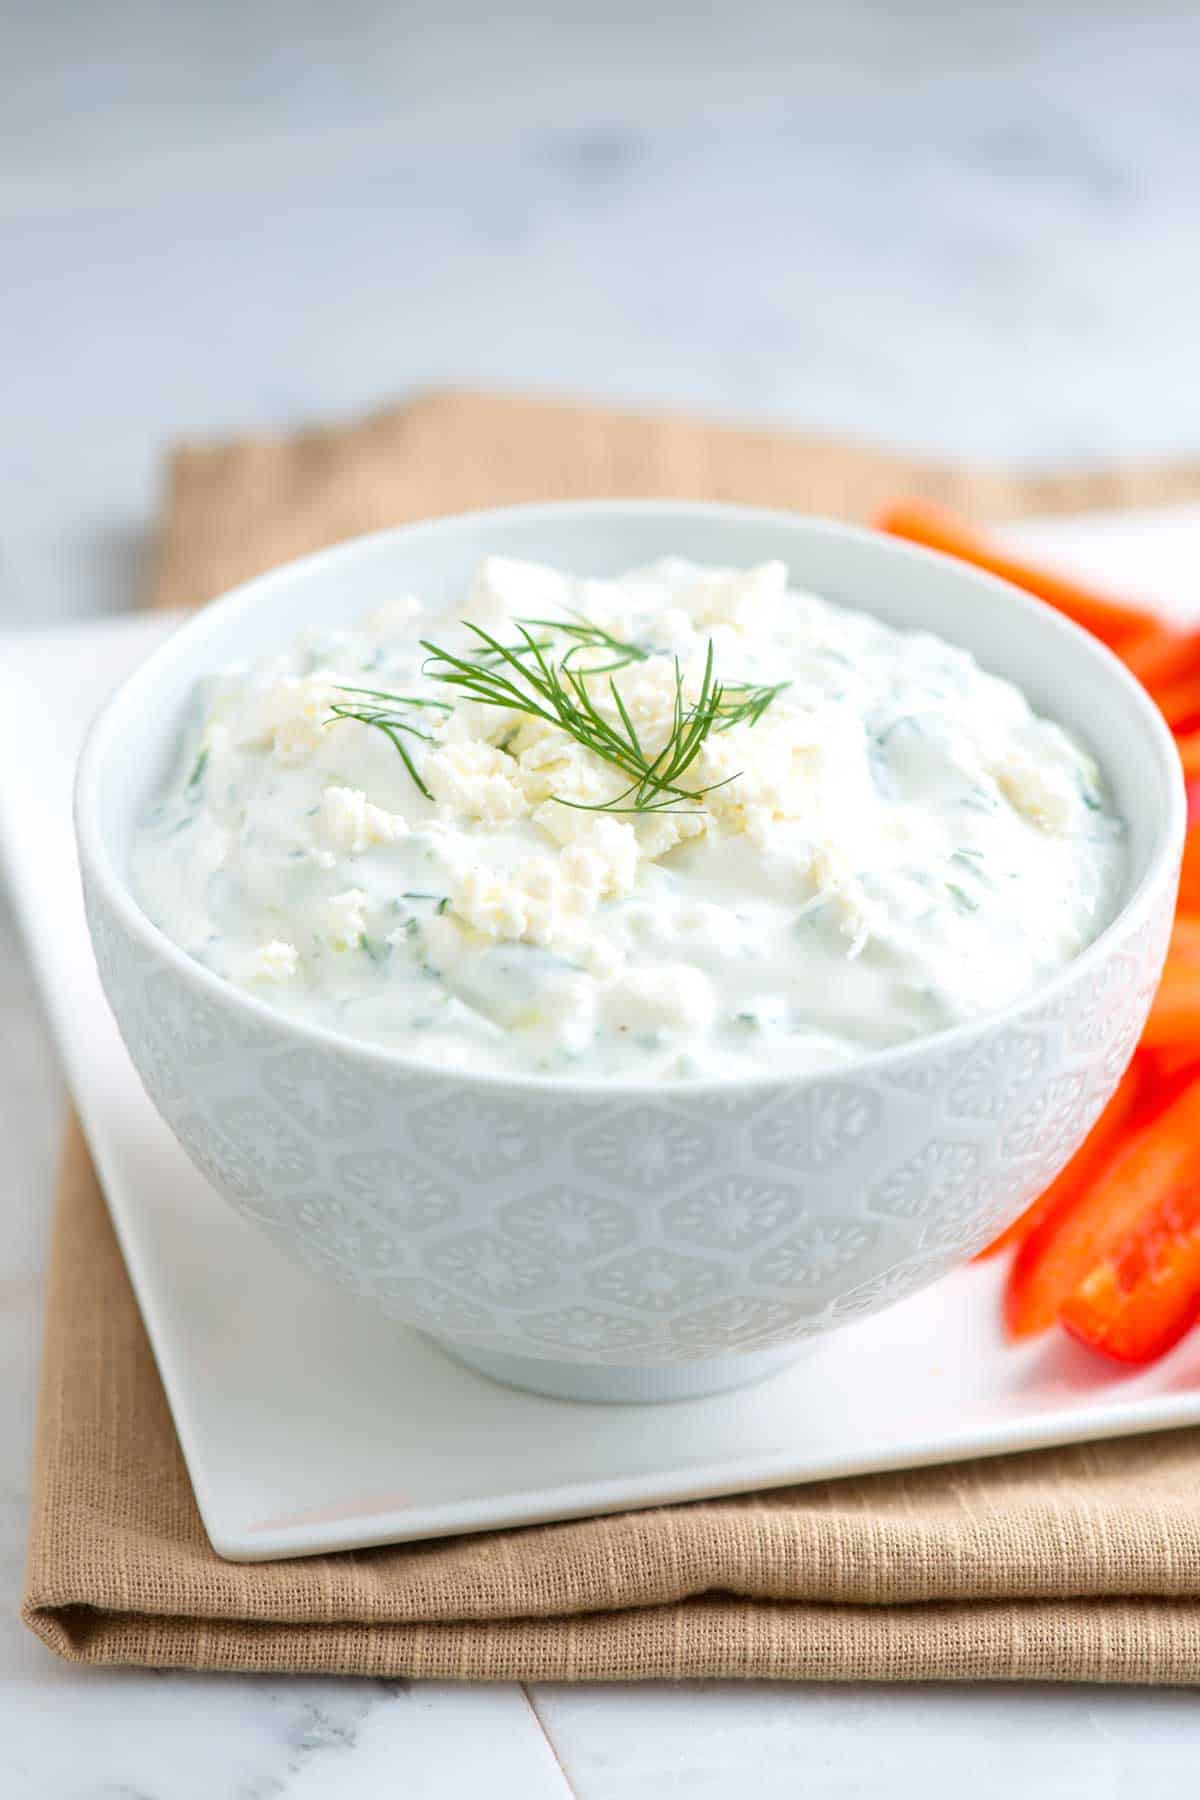
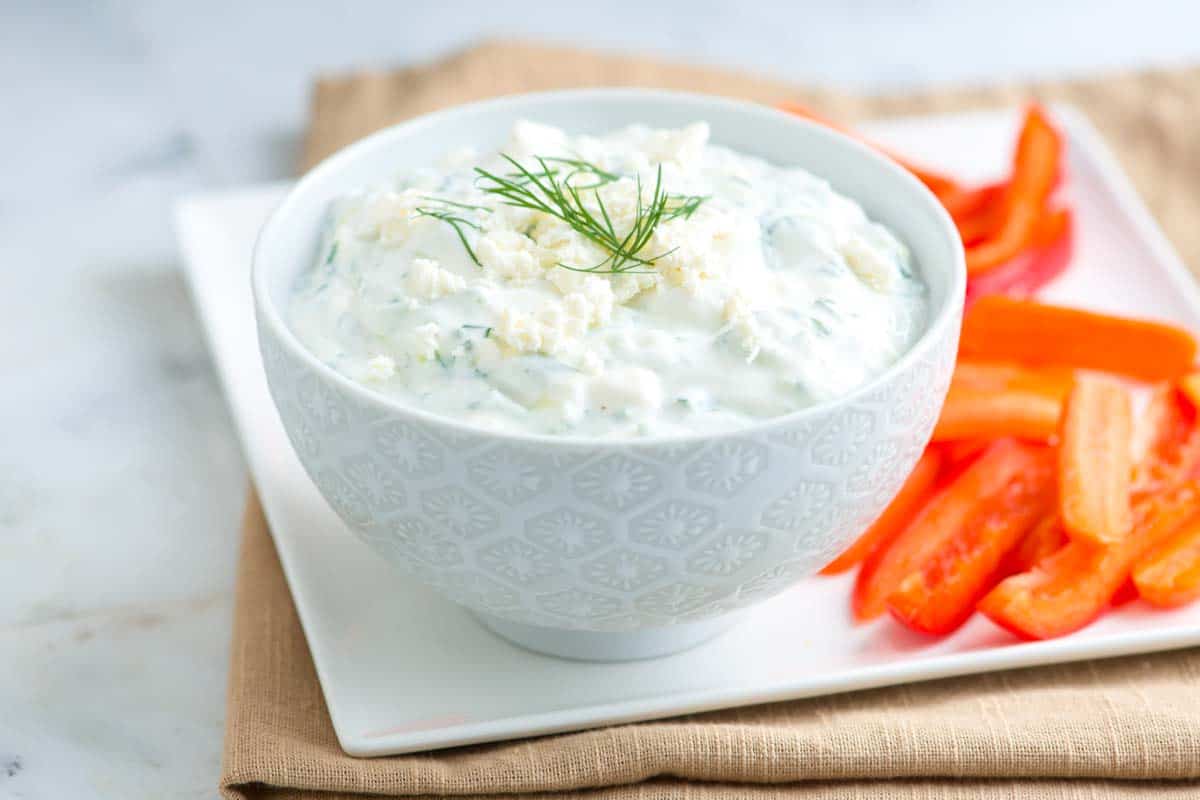
    Tzatziki with Feta

    We absolutely love tzatziki sauce around here! It’s so versatile, and we’ll happily spoon it onto just about anything. This recipe takes classic tzatziki to the next level by adding tangy feta cheese for extra flavor and creaminess.

    I love this feta tzatziki with homemade pita bread! It’s also incredible with baked chicken breasts, poached salmon, grilled lamb chops, or falafel wraps. Honestly, the possibilities are endless!

    Key Ingredients

    • Cucumbers: For the best tzatziki, use English or hothouse cucumbers. These are the long, thin ones usually sold in plastic wrap. They have thinner skin and fewer seeds, so you can skip peeling and seeding them. Baby cucumbers or Persian cucumbers also work great!
    • Yogurt: For a thick and creamy tzatziki, use full-fat plain Greek yogurt. Icelandic-style yogurt is another good option. If you only have thinner yogurt, strain it in cheesecloth for a few hours to thicken it. (It’s like making labneh!)
    • Feta Cheese: Crumbled feta cheese adds a deliciously salty tang to tzatziki. If you can find feta packed in brine, grab it! You can use a little of the brine to thin out the tzatziki (if you think it needs it).
    • Garlic, Lemon, and Herbs: These ingredients give the tzatziki an amazing flavor. I use one clove of garlic, but feel free to add more. Fresh dill and mint are my favorite herbs.

    How to Make Feta Tzatziki

    Tzatziki is very simple to make. To make the best, remember this: too much moisture is tzatziki’s enemy. It makes things watery and stops all the flavors like lemon, garlic, and dill from mingling.

    We reduce the moisture in two ways: by using thick Greek yogurt and by salting the cucumbers.

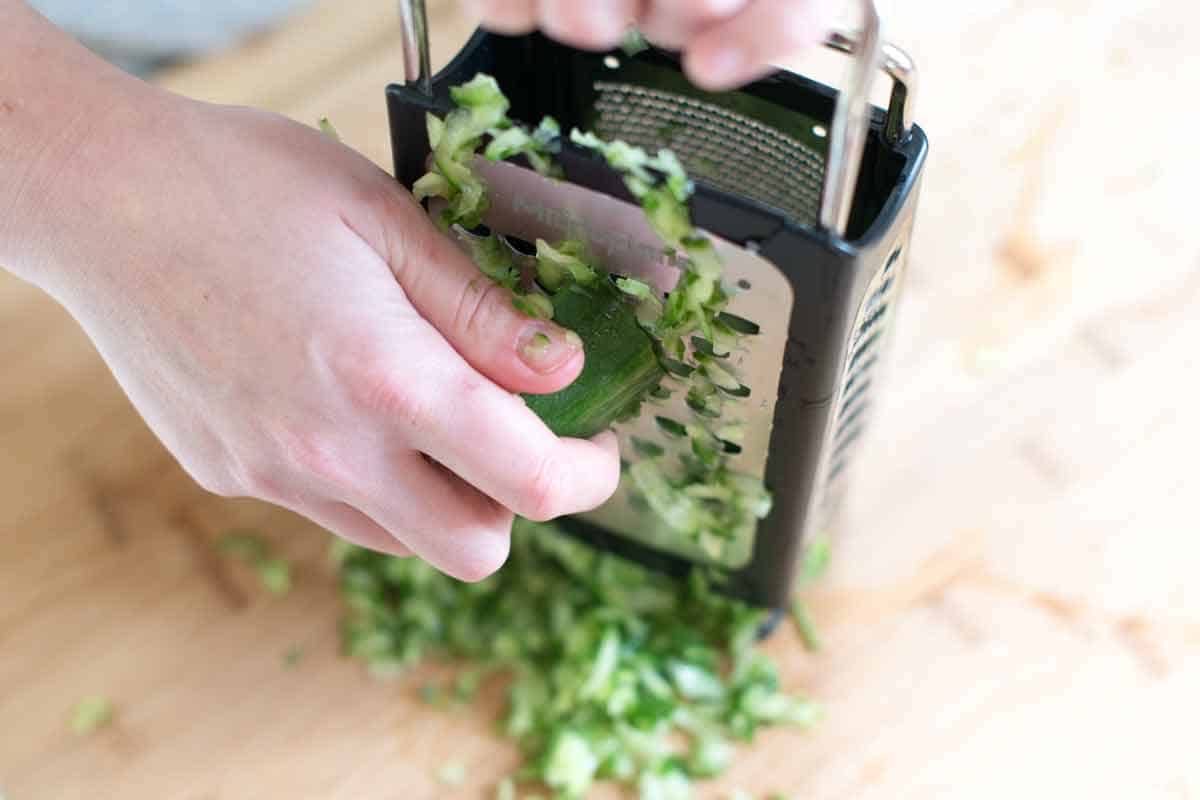
    How to Make Feta Tzatziki: Grating cucumbers

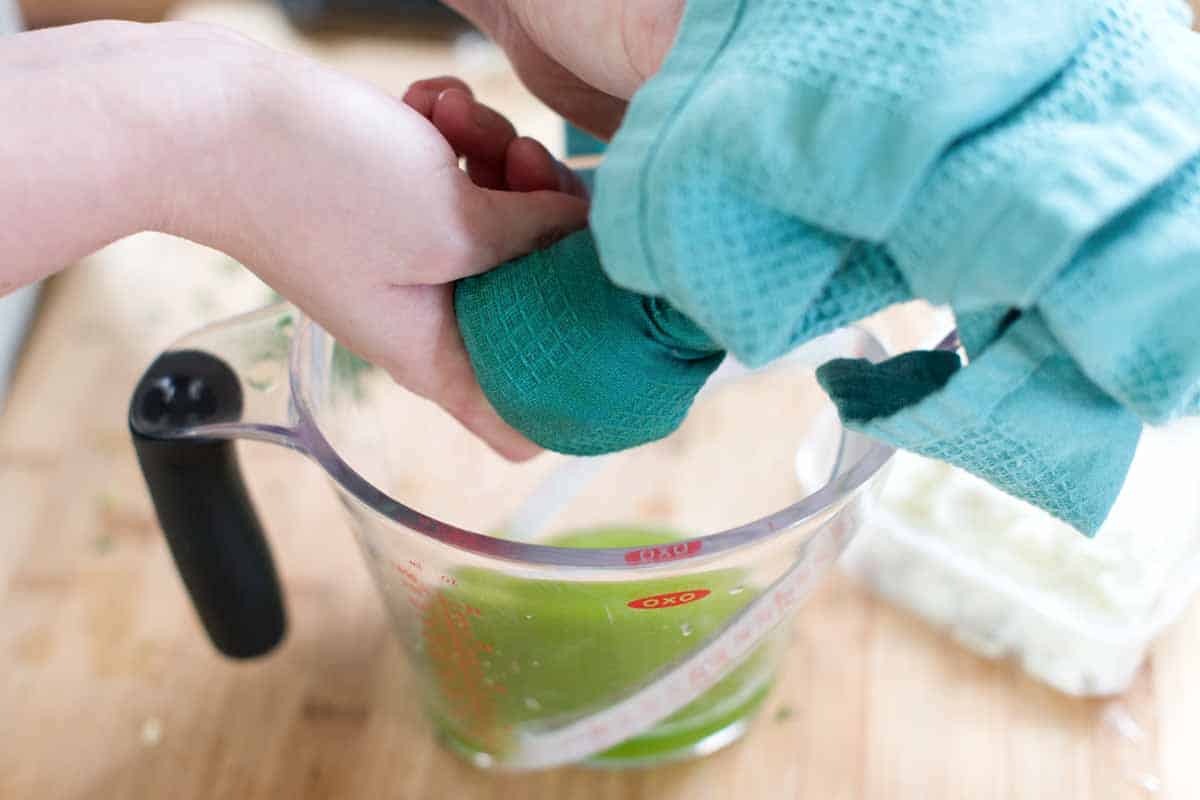
    For the cucumber, we remove the seeds (if there are any ) and grate it. Scatter the grated cucumber over a clean dishcloth and season with salt. The salt does two things: it makes the cucumber taste more like cucumber and helps draw moisture out. Finally, wrap the dishcloth up and squeeze all the liquid out. You’ll be shocked at how much comes out.

    How to Make Feta Tzatziki: Squeeze out the extra moisture from cucumbers

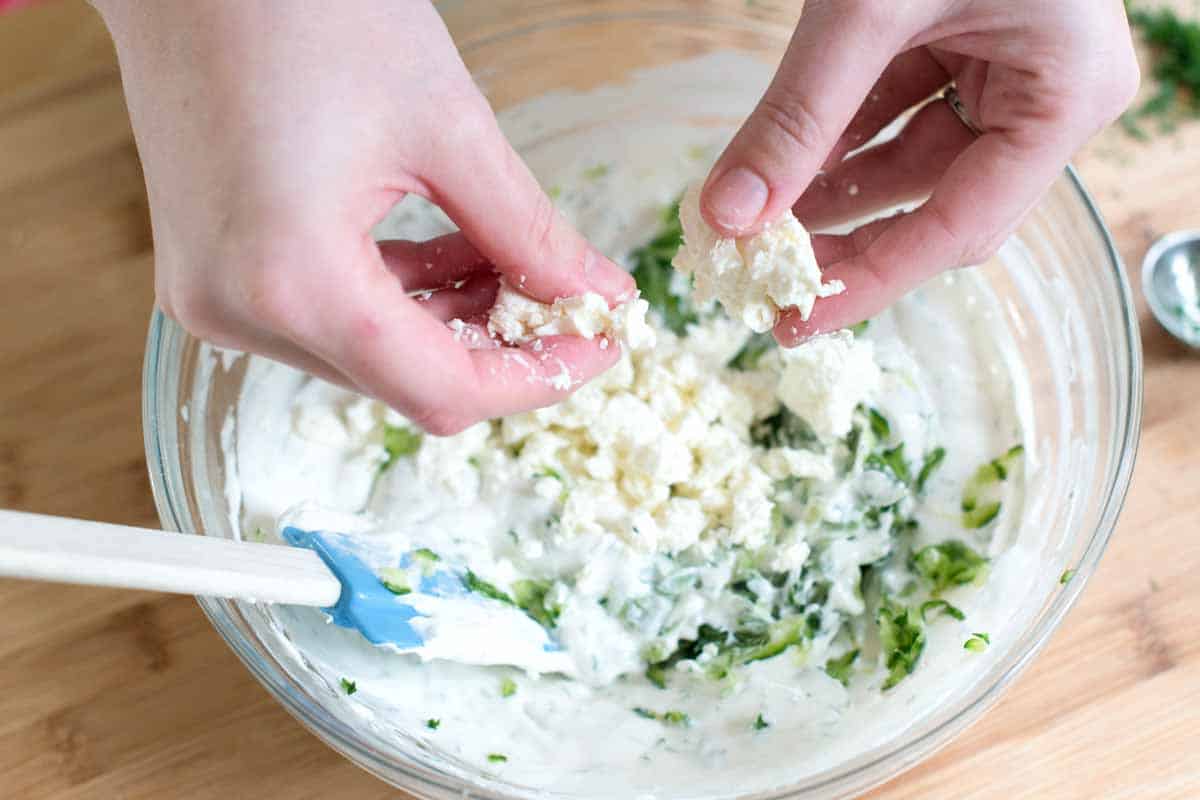
    Then mix the yogurt, cucumbers, and remaining tzatziki ingredients, and last but not least, stir in lots of feta cheese!

    How to Make Feta Tzatziki: Adding the feta cheese to tzatziki

    Spoon this feta Tzatziki onto our lemon dill baked salmon, seriously good turkey burgers and our lemon dill chicken breasts (so good).

    Tzatziki Sauce with Feta

    Feta Tzatziki

    • PREP
    • TOTAL

    We love this thick, creamy yogurt sauce with fresh cucumber, lemon, dill, and feta cheese. It’s brightly flavored and perfect for serving with veggies, pita chips, grilled meats, and even sandwiches. There are two options for the yogurt. The easiest is to use Greek yogurt. However, you can also use strained plain yogurt. To strain yogurt, place it in a fine mesh strainer lined with cheesecloth or paper towels and rest it over a bowl. Place the yogurt into the refrigerator for 3 to 4 hours to drain. Then, discard the liquid.

    Makes 2 cups

    You Will Need

    1 hothouse cucumber, also called English cucumber

    2 (7oz) containers Greek yogurt, we use Fage

    2 tablespoons fresh lemon juice

    1 garlic clove, finely minced (about 1 ½ teaspoons)

    1 tablespoon finely chopped fresh dill

    2 teaspoons apple cider vinegar or substitute white wine vinegar

    2 ounces feta cheese, crumbled

    1 teaspoon salt plus more to taste

    Directions

      1Cut the cucumber in half lengthwise. Use a spoon to scrape out the seeds, then discard them. Grate the cucumber. Scatter the grated cucumber over a clean dishcloth (or paper towels). Sprinkle with 1/4 teaspoon of salt. Let sit for at least 10 minutes. Then, gather up the corners of the dishcloth and squeeze as much liquid from the grated cucumber as possible. Discard the liquid.

      2In a medium bowl, combine the squeezed cucumber with yogurt, lemon juice, garlic, dill, apple cider vinegar, and feta cheese.

      3Season with 1/2 teaspoon of salt, then taste and adjust as necessary with more salt.

      4Serve now, or if you can spare the time, cover the dip with plastic wrap and refrigerate for 2 to 4 hours to develop flavor.

    Adam and Joanne’s Tips

    • The nutrition facts provided below are estimates.

    Nutrition Per Serving
    Serving Size
    1/4 cup
    /
    Calories
    59
    /
    Protein
    3 g
    /
    Carbohydrate
    4 g
    /
    Dietary Fiber
    0 g
    /
    Total Sugars
    4 g
    /
    Total Fat
    3 g
    /
    Saturated Fat
    2 g
    /
    Cholesterol
    14 mg


    AUTHOR:

    Adam Gallagher

    Adam and Joanne of Inspired Taste

    We are Adam and Joanne Gallagher, the creators of Inspired Taste. Established in 2009, Inspired Taste grew from a childhood dream into one of the internet’s most trusted recipe sites with hundreds of reliable recipes, step-by-step videos, and expert tips.More About Us
    Source link

  • Baked Brie Crescent Rolls Recipe

    Baked Brie Crescent Rolls Recipe

    These mini baked brie crescent rolls are super simple and so delicious! They are perfect for the holidays and gatherings. Everyone I’ve served them to loves them!

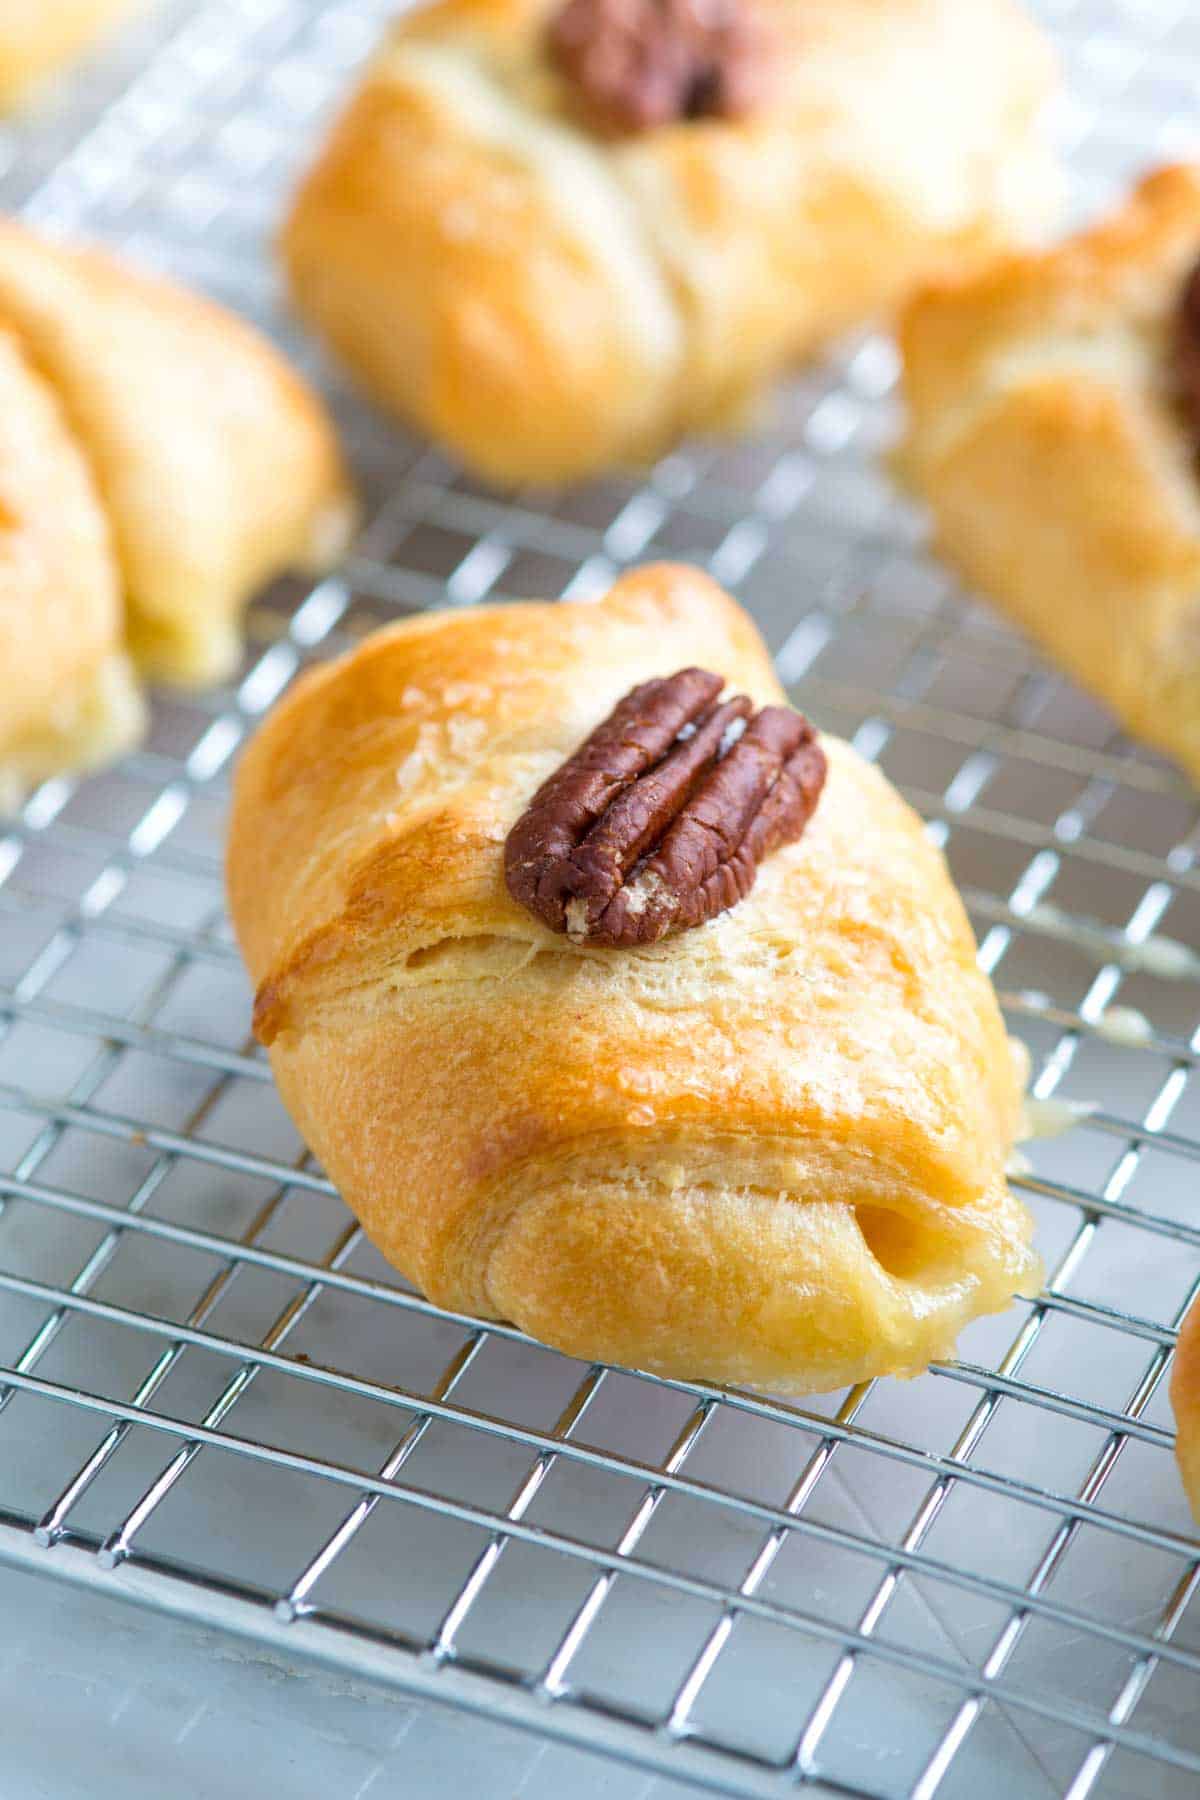
    Baked Brie Crescent Rolls

    I serve these brie stuffed crescent rolls as appetizers and in my bread basket as a side for holiday meals. They are quick to make and versatile, so if you don’t have brie cheese, substitute it with whatever you love!

    Store-bought crescent dough (like from Pillsbury) makes these easy, but any brand or homemade pizza dough works well! If you love brie, I highly recommend our brie stuffed bread rolls or this brie with hot honey!

    How to Make Baked Brie Roll Ups

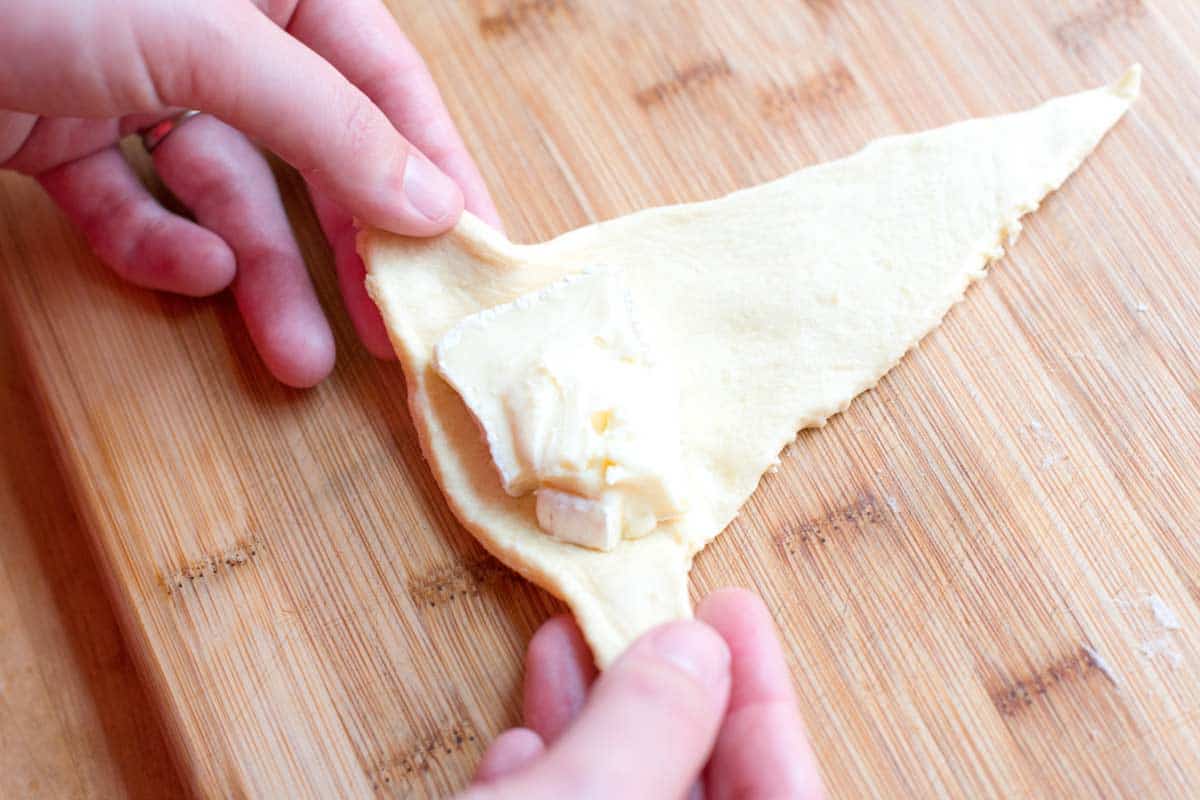
    These crescent rolls really could not get any easier. Place a big piece of brie onto the long end of a crescent dough triangle, tuck in the sides, and roll up. Then brush the tops with egg wash so they turn shiny and golden brown after baking. I also add a pecan half and some sea salt to the top before baking. I love the way it looks.

    How to Make Baked Brie Crescent Rolls: Rolling up the cheese

    The rolls take about 15 minutes to bake and are perfect for parties or as a side dish. A little brie might escape during baking, but the rolls will still taste amazing. See our holiday recipes or appetizer recipes for more recipes like this one.

    Baked Brie Crescent Rolls

    Baked Brie Crescent Rolls

    • PREP
    • COOK
    • TOTAL

    We use store-bought crescent dough for these easy mini baked brie rolls. Brie is excellent, but most cheeses will work as a substitute. Adding more fillings, such as diced olives, ham, or jam, is also great.

    Makes 8 Rolls

    You Will Need

    1 (8oz) can refrigerated crescent dinner rolls

    6 ounces brie cheese

    1 large egg

    1 tablespoon water

    8 pecan halves

    Coarse sea salt for sprinkling on top

    Directions

      1Preheat the oven to 375°F (190°C). Line a baking sheet with parchment paper.

      2Separate the crescent dough into 8 triangles and then slice the brie into 8 pieces.

      3Place one piece of brie onto the wider end of a dough triangle. Fold in the sides, then roll the dough into a tight packet, making sure the ends are closed so the cheese won’t come out during baking. Repeat with remaining dough triangles and place the rolls onto the baking sheet.

      4Whisk the egg and water in a small bowl, then use a pastry brush to lightly brush the tops with egg wash. Press one pecan half onto the top and sprinkle with salt.

      5Bake until golden brown, 12 to 15 minutes. Cool on the baking sheet for 10 to 15 minutes before serving.

    Nutrition Per Serving
    Serving Size
    1 roll
    /
    Calories
    192
    /
    Total Fat
    12.3g
    /
    Saturated Fat
    6g
    /
    Cholesterol
    44.6mg
    /
    Sodium
    411.6mg
    /
    Carbohydrate
    12.4g
    /
    Total Sugars
    3.2g
    /
    Dietary Fiber
    0.2g
    /
    Protein
    7.4g


    AUTHOR:

    Adam Gallagher

    Previous Post: Perfect Roasted Broccoli
    Next Post: Weeknight Homemade Spaghetti Sauce

    Source link

  • Easy Shredded Chicken Recipe

    Easy Shredded Chicken Recipe

    This shredded chicken recipe is quick, simple, and the chicken can be used 100 different ways.

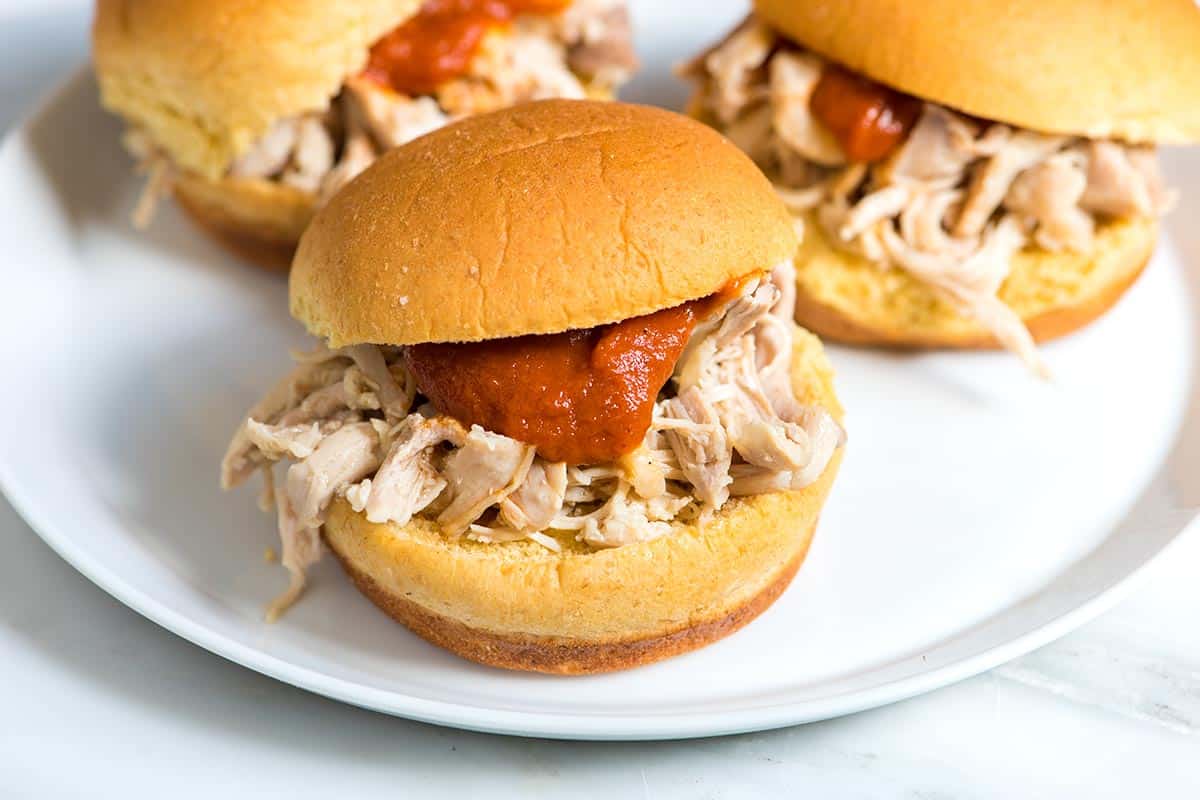
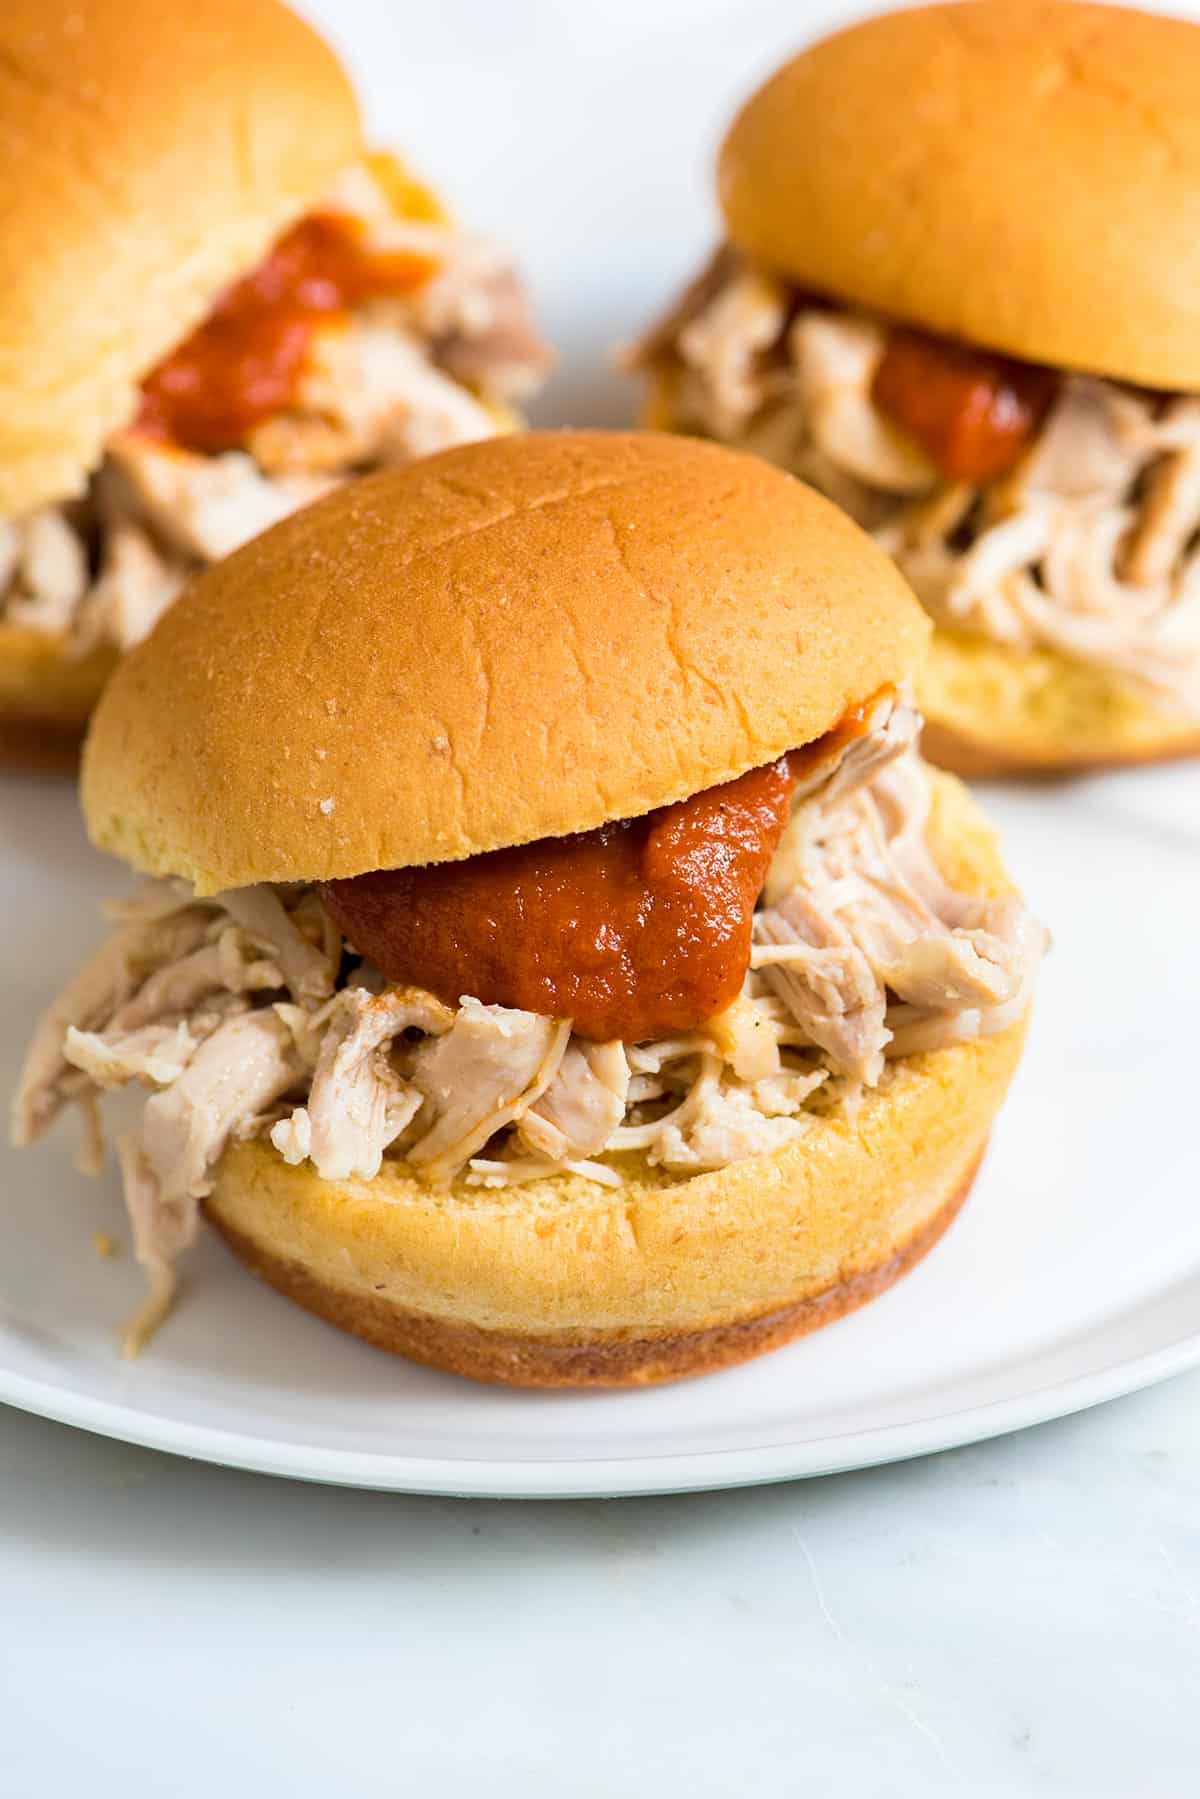
    Shredded Chicken sandwiches

    I love keeping shredded chicken on hand for easy dinners. It’s perfect for chicken salad, tacos, soups, easy chicken pot pie, and my favorite green chicken enchiladas. With my easy stovetop shredded chicken recipe, you’ll have juicy, flavorful chicken ready in under an hour.

    If you prefer a hands-off method, try our slow cooker shredded chicken, but for speed and flavor, this stovetop version is hard to beat.

    Key Ingredients

    • Chicken: The best chicken for shredded chicken is boneless, skinless chicken thighs, as they stay extra tender, but chicken breast works well, too. You can even swap in turkey.
    • Aromatics: Onion, garlic, and a bay leaf add so much flavor as the chicken simmers.
    • Spices: A simple mix of salt, cumin, and black pepper keeps the chicken well-seasoned and versatile for all your favorite dishes.
    • Water or Broth: Water works perfectly (the aromatics and spices add plenty of flavor), but feel free to use chicken broth or vegetable broth for even more flavor.

    Find the full recipe with exact measurements below.

    How to Make the Best Shredded Chicken

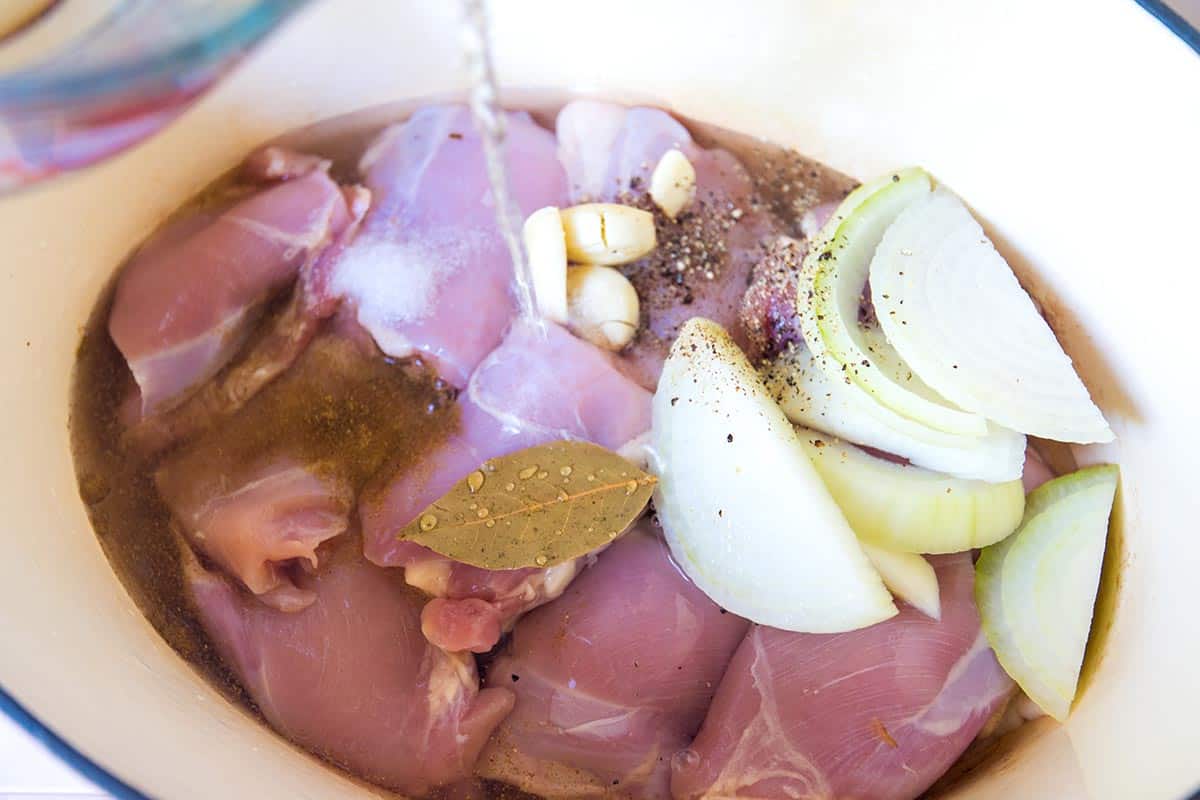
    Tip 1: Simmer gently for tender chicken. The best way to make tender shredded chicken is to simmer it gently, similar to poaching chicken.

    Place the chicken in a pot with onion, garlic, and spices, then add just enough water (or broth) to cover. Bring to a low simmer and cook for about 30 minutes, or until the chicken is tender enough to shred easily with a fork.

    Simmering chicken thighs with water, onion, garlic, and spices to make shredded chicken

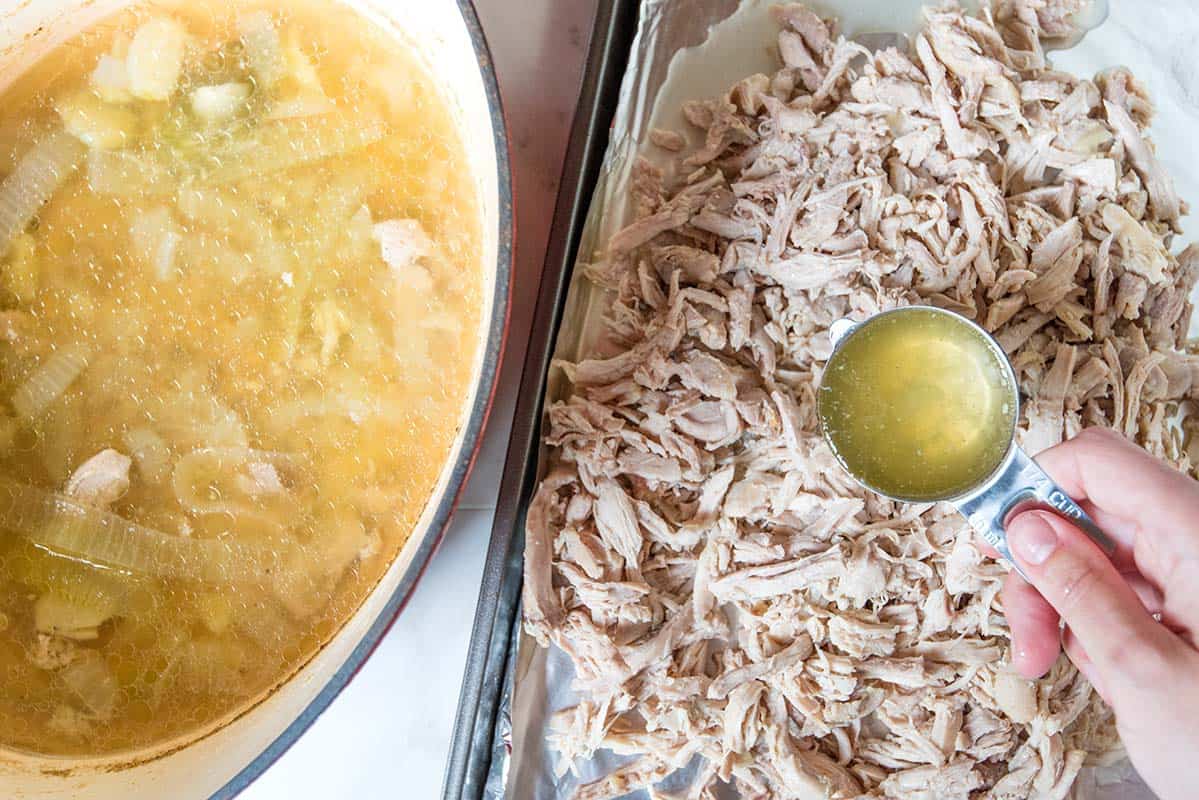
    Tip 2: Reduce the broth for more flavor. After cooking, remove the chicken and let it cool slightly before shredding. Return the cooking liquid to the stove and simmer until it reduces by one-third. Then, you can use some of it to spoon over the shredded chicken, making it extra juicy and flavorful. You’ll have some broth leftover, which I highly recommend saving for a bowl of soup (it’s delicious!).

    Pouring reduced cooking liquid over shredded chicken to make it extra flavorful and juicy.

    Ways to Use Your Chicken

    You can use this so many different dishes. Here are a few of my favorite shredded chicken recipes for inspiration:

    Shredded Chicken on sandwiches

    Easy Shredded Chicken

    • PREP
    • COOK
    • TOTAL

    This is my favorite method for making shredded chicken. It’s quick and easy, and the chicken turns out tender, juicy, and flavorful. After cooking, we take one extra step and reduce the cooking liquid before spooning some over the shredded chicken. This easy step keeps our chicken moist and adds extra flavor. You’ll have some broth leftover, which I love turning into a soup (it’s really tasty!).

    Makes 5 cups

    Watch Us Make the Recipe

    You Will Need

    3 pounds boneless chicken thighs (1360g)

    1 medium onion, peeled and sliced

    4 cloves garlic, peeled and lightly crushed

    1 bay leaf

    1 teaspoon salt

    1 ½ teaspoons ground cumin

    1/2 teaspoon ground black pepper

    Water

    Directions

      1Combine chicken, onion, garlic, bay leaf, salt, cumin, and pepper in a large heavy-bottomed saucepan. Add just enough water to cover the chicken. Turn heat to high, bring to a boil, then remove any foam or scum that floats to the top.

      2Adjust the heat so that the water simmers very gently around the chicken. Cook until the chicken is very tender, about 30 minutes.

      3Transfer the chicken to a cutting board. When it is cool enough to handle, shred the meat with two forks or your fingers.

      4While the chicken cools, boil the liquid left in the pot until it has reduced by one-third or until its flavor has concentrated.

      5Spoon about 1 cup of the concentrated cooking liquid over the shredded chicken and toss to coat.

    Adam and Joanne’s Tips

    • Storing: The chicken and broth will keep refrigerated up to 4 days and can be frozen for 3 months.
    • Skin-on chicken: We have made this recipe using boneless, skinless chicken thighs and chicken thighs with skin still attached. Both work very well. If you use chicken with skin, simply remove and discard the skin before you shred the chicken. You may also find that you need to skim some of the fat from the cooking broth before spooning it over the chicken.
    • Leftover cooking liquid: You will have cooking liquid leftover. It is quite delicious on its own as a light soup. You can also use it as broth for other recipes. Or, if you’re keeping the chicken more than a day, add a spoonful or two to add a little extra moisture.
    • The nutrition facts provided below are estimates.

    Nutrition Per Serving
    Serving Size
    1/2 cup
    /
    Calories
    139
    /
    Protein
    18 g
    /
    Carbohydrate
    2 g
    /
    Dietary Fiber
    0 g
    /
    Total Sugars
    1 g
    /
    Total Fat
    6 g
    /
    Saturated Fat
    2 g
    /
    Cholesterol
    99 mg
    /
    Sodium
    356 mg


    AUTHOR:

    Adam Gallagher

    Adam and Joanne of Inspired Taste

    We are Adam and Joanne Gallagher, the creators of Inspired Taste. Established in 2009, Inspired Taste grew from a childhood dream into one of the internet’s most trusted recipe sites with hundreds of reliable recipes, step-by-step videos, and expert tips.More About Us
    Source link