Category: Quick Meal

  • Perfect Hard Boiled Eggs Recipe

    Perfect Hard Boiled Eggs Recipe

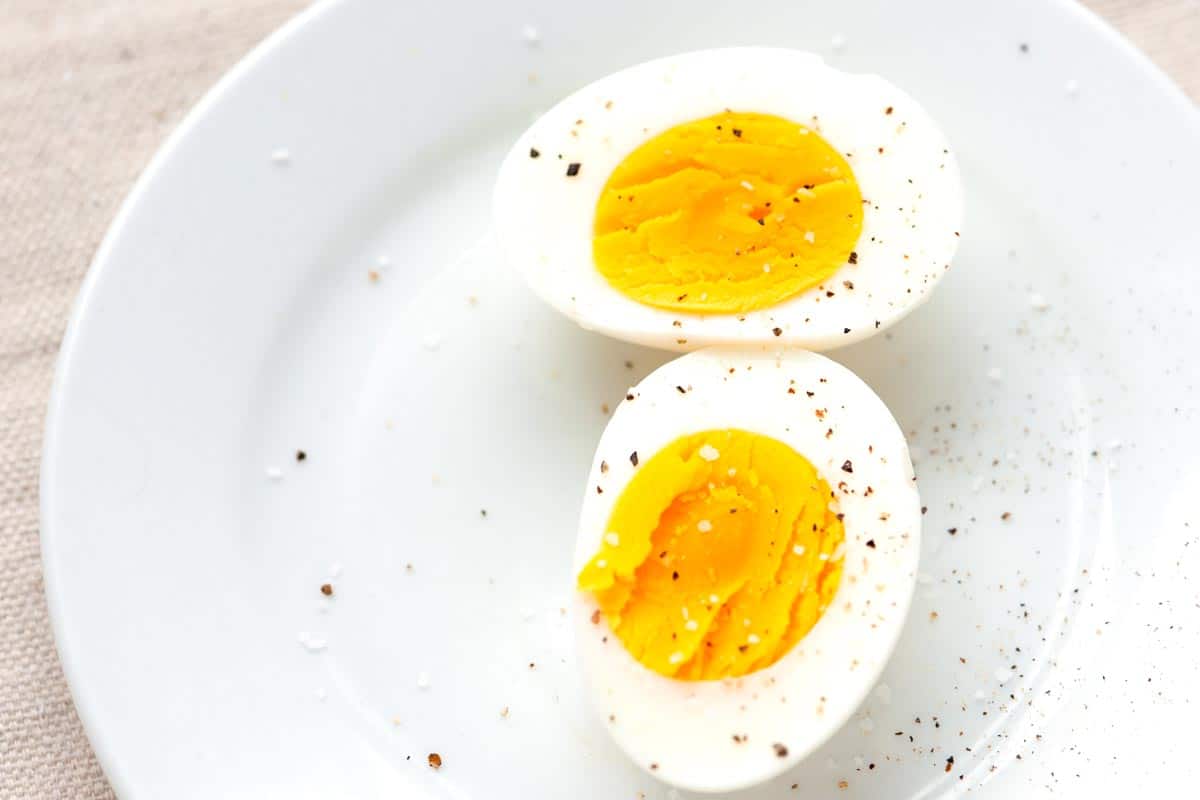
    Learn how to make perfect hard boiled eggs with our easy, no fail recipe. It takes less than 15 minutes and produces perfectly cooked eggs every time.
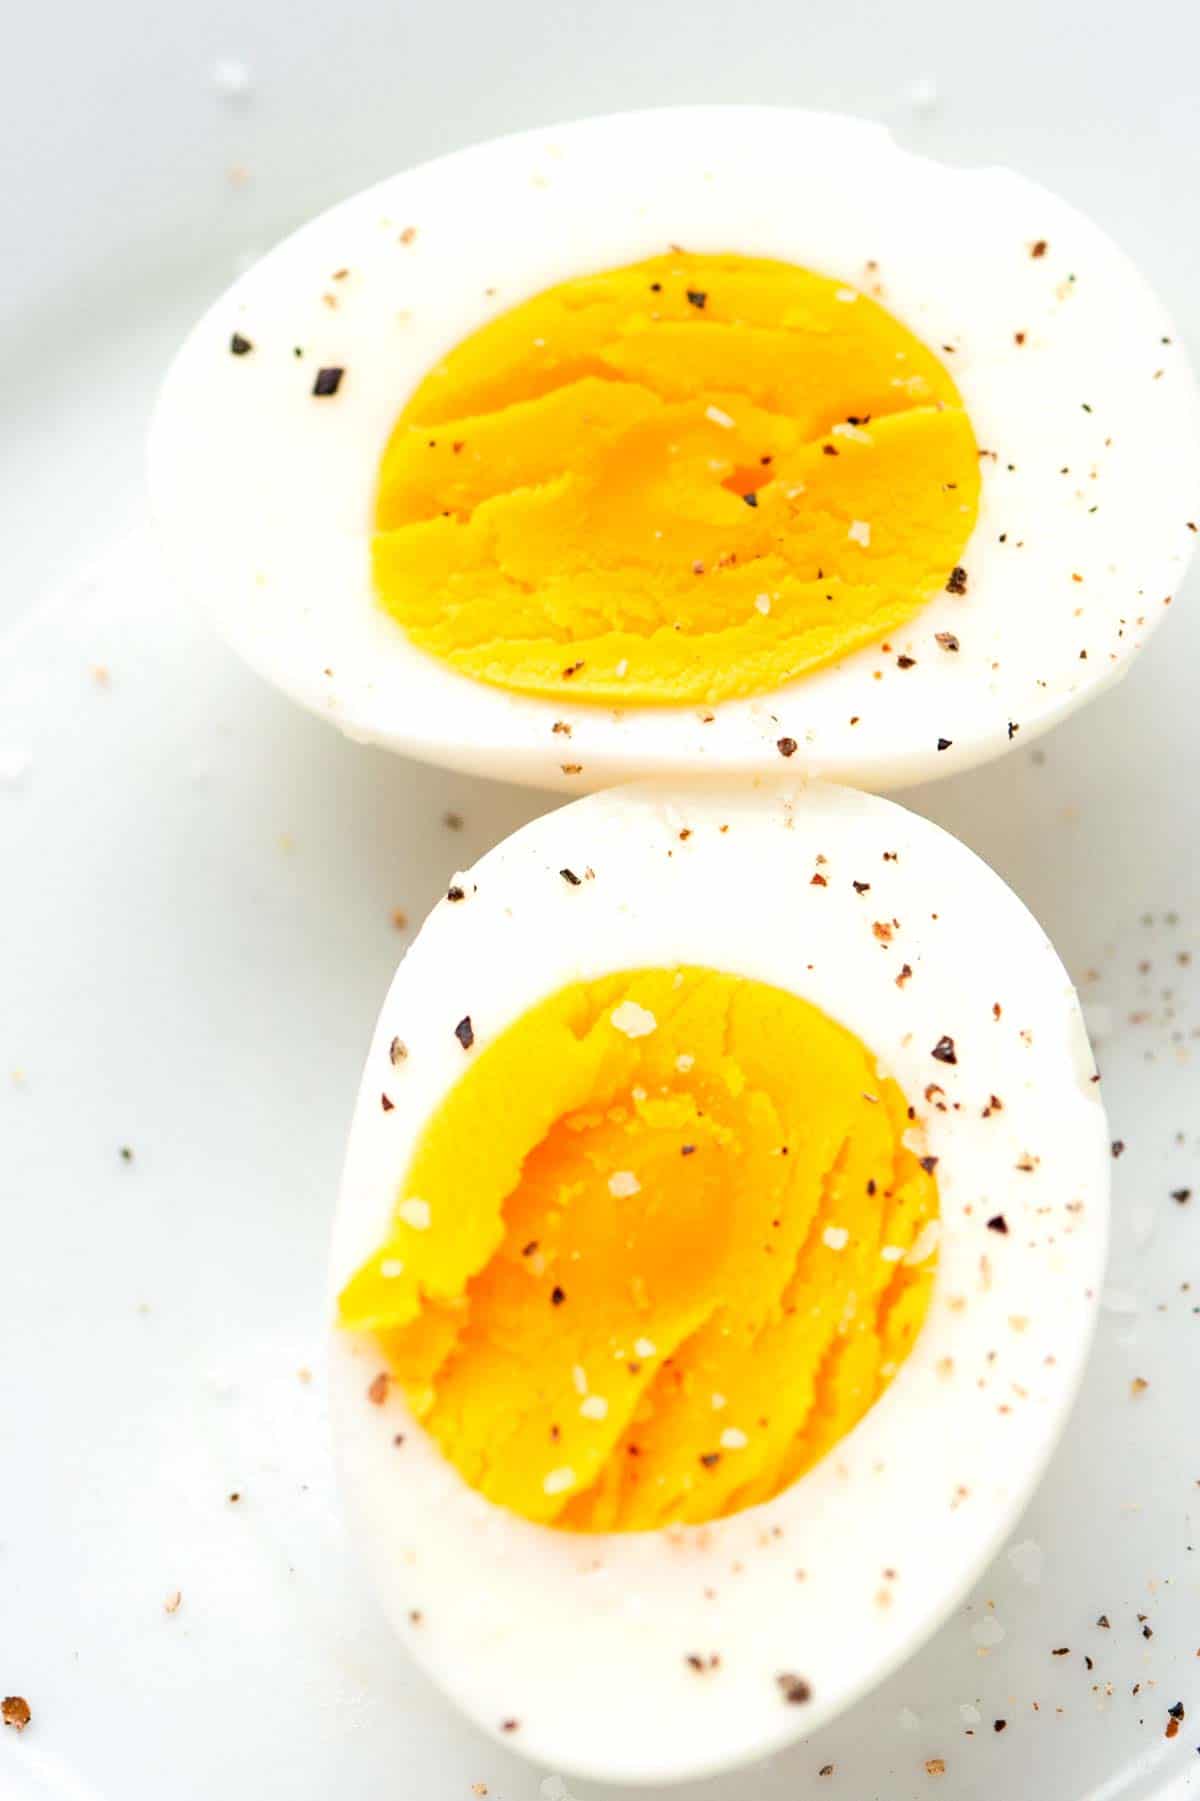
    Hard Boiled Eggs

    This is my favorite method for making hard boiled eggs. I love to keep a batch in the fridge for snacks throughout the week. I also use them to make classic egg salad, deviled eggs, avocado toast with egg, and my favorite potato salad.

    You won’t believe how easy it is to cook hard boiled eggs. Follow my tips, and you’ll be making the best boiled eggs in no time! If you have an Instant Pot, we also have this easy recipe for Instant Pot hard boiled eggs.

    How to Cook Hard Boiled Eggs

    Tip 1: Place eggs in a single layer. You don’t want to pile them on top of each other. Keeping them in one layer at the bottom of the pot, reduces the risk of cracking the shells when they come to a boil.

    Tip 2: Cover by about two inches. Pour in water and cover by about two inches. Some hard boiled egg recipes have you bring water to a simmer and then tell you to add the eggs. I don’t like doing this since adding a cold egg to very hot water risks cracking the egg.
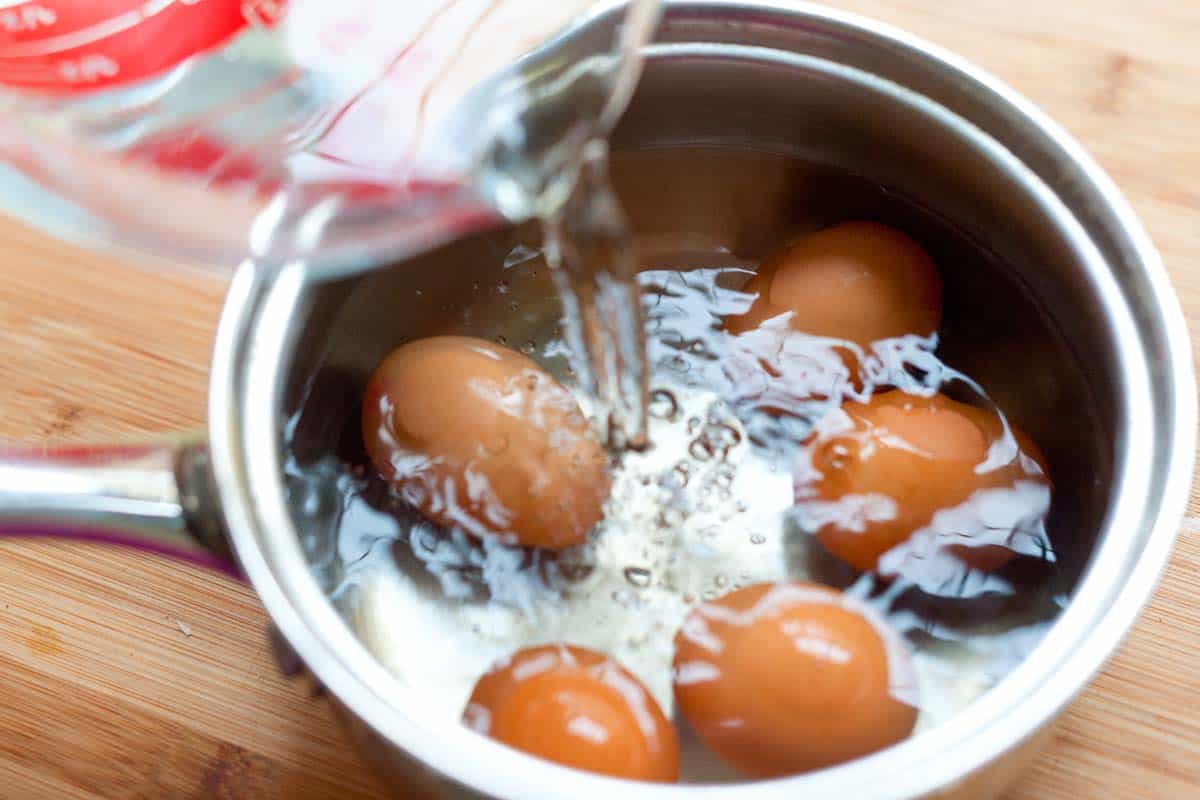
    Cover the eggs with about two inches of room temperature or cold water.

    Tip 3: Watch your pot closely. The moment the water begins to boil, cover the pot with a lid and cook for 30 seconds. After 30 seconds, move the pot off of the heat then set a timer for 10 to 12 minutes (I’ve shared suggested cooking times below).
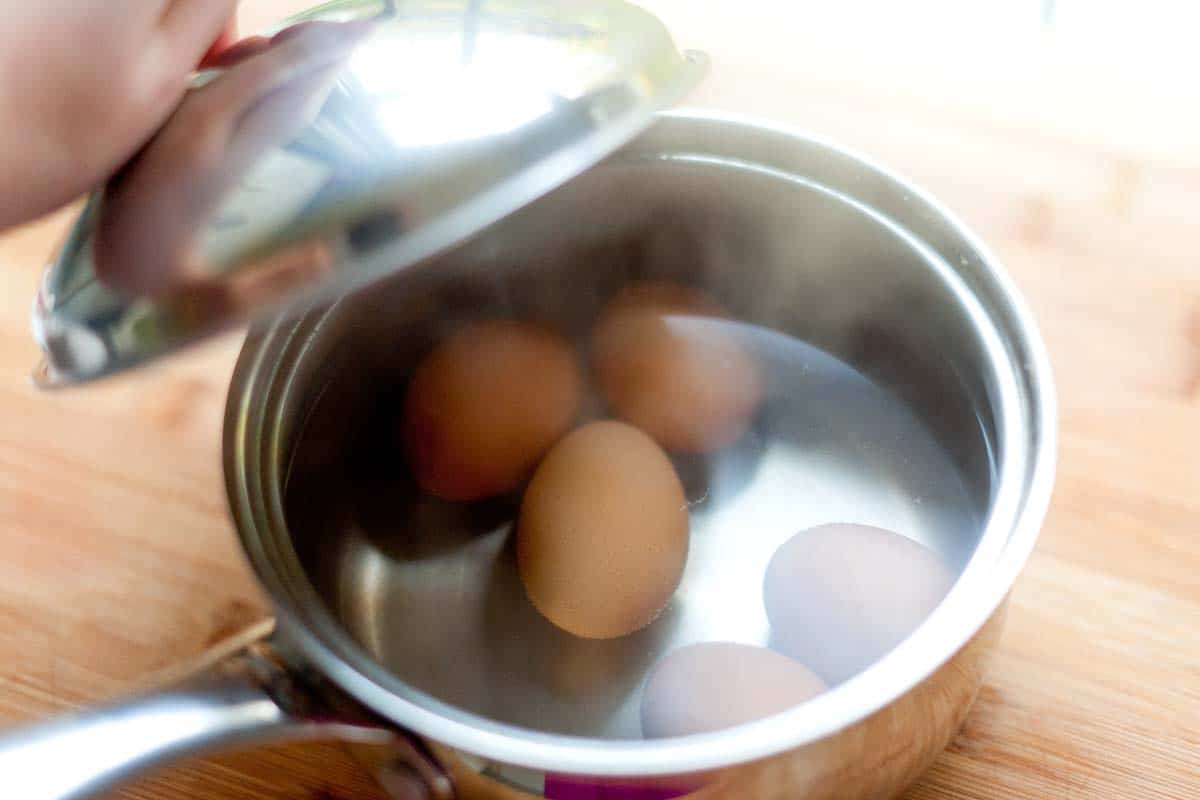
    After boiling for 30 seconds, I move the pan off of the heat, and then set a timer for 10 to 12 minutes (depending on how large my eggs are).

    Tip 4: Quickly cool your eggs. Transfer the cooked eggs to an ice bath so they stop cooking. I use a slotted spoon to remove each egg from the hot water and then carefully drop them into a big bowl filled with cold water and ice. When the eggs are cool enough to handle, you can peel them.

    How Long to Boil Eggs

    What size eggs do you have? The right cook time for hard boiled eggs depends on a few things: the size of your eggs, your altitude, and how firm you want the yolks. After lots of experimenting, here’s our guide to the most accurate cook times:

    • Medium eggs: Cook for 9 to 10 minutes
    • Large eggs: Cook for 11 to 12 minutes
    • Extra-large eggs: Cook for 13 to 14 minutes

    For softer eggs. If you prefer a slightly softer yolk, reduce the cooking time by a minute or two. When making a large batch of eggs, I like to “sacrifice” one egg at around the 10-minute mark and check for doneness. If it’s underdone, I’ll keep the eggs in the water a minute or two longer.

    Higher altitude. If you live at a higher altitude, you may need to cook the eggs slightly longer than we mentioned above (I’d start with three to four additional minutes of cooking time).

    More Egg Recipes
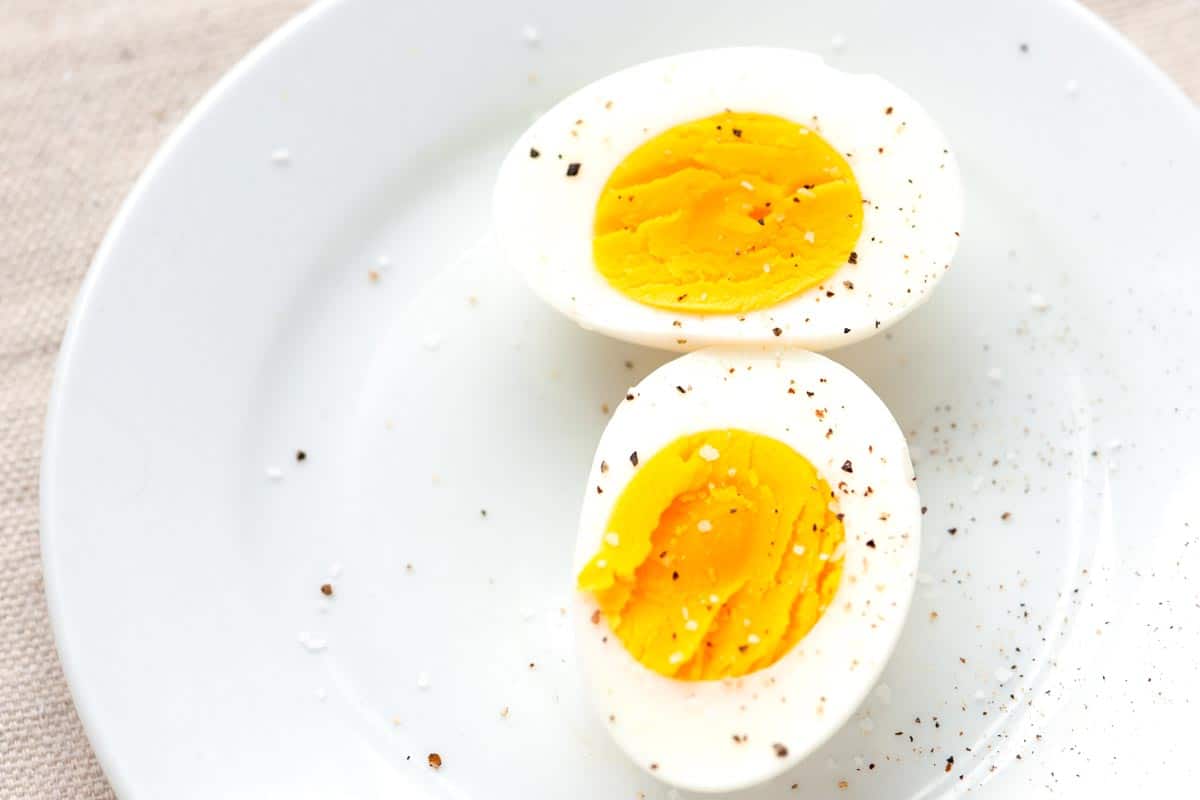
    Hard Boiled Eggs

    Perfect Hard Boiled Eggs

    • COOK
    • TOTAL

    Here’s our foolproof stovetop hard boiled eggs recipe. The recipe assumes four eggs, but you can increase or decrease them as you see fit (as long as the eggs can sit in the saucepan in one layer).

    4 or more eggs

    Watch Us Make the Recipe

    You Will Need

    4 or more large eggs

    Water

    Directions

      1Place the eggs in a single layer in a saucepan and cover with cold water by 1 to 2 inches. Heat over high heat until the water comes to a rolling boil.

      2Cover the saucepan with a lid, cook for 30 seconds, then remove from the heat and let stand for 12 minutes.

      3A minute or so before the eggs finish cooking, prepare a bowl of ice water.

      4Transfer the cooked eggs to the ice water using a slotted spoon and leave for 5 minutes (or longer).

      5Crack egg shells and carefully peel them away. If the shells are not easily peeling away from the eggs, place them back into the ice water and try again in 5 minutes.

      6**Cooking time can range from 10 to 14 minutes, depending on the size of your eggs, altitude, and how firm you want them to be. If you are cooking a large batch of eggs, it might be a good idea to “sacrifice” one egg and check doneness.

    Adam and Joanne’s Tips

    • Easy peel hard boiled eggs: Cool your hard boiled eggs completely before peeling them! If you’re still struggling with peeling hard-boiled eggs, crack the cooled egg and place it back into the ice bath. Water will work under the shell, making peeling a breeze after about 5 minutes.
    • Storing unpeeled hard boiled eggs: Unpeeled hard boiled eggs are your best bet for longer storage. Refrigerate them in their shells for up to one week. You can store them in a bowl or an airtight container.
    • Storing peeled hard boiled eggs: Peeled hard boiled eggs don’t last as long. Store peeled eggs in a container full of water or wrapped with damp paper towels so they don’t dry out. Eat them within 5 days.
    • The nutrition facts provided below are estimates.

    Nutrition Per Serving
    Serving Size
    1 egg
    /
    Calories
    71
    /
    Protein
    6 g
    /
    Carbohydrate
    0 g
    /
    Dietary Fiber
    0 g
    /
    Total Sugars
    0 g
    /
    Total Fat
    5 g
    /
    Saturated Fat
    2 g
    /
    Cholesterol
    185 mg
    /
    Sodium
    62 mg


    AUTHOR:

    Joanne Gallagher

    Adam and Joanne of Inspired Taste

    We are Adam and Joanne Gallagher, the creators of Inspired Taste. Established in 2009, Inspired Taste grew from a childhood dream into one of the internet’s most trusted recipe sites with hundreds of reliable recipes, step-by-step videos, and expert tips.More About Us
    Source link

  • Seriously Good Apple Salad Recipe

    Seriously Good Apple Salad Recipe

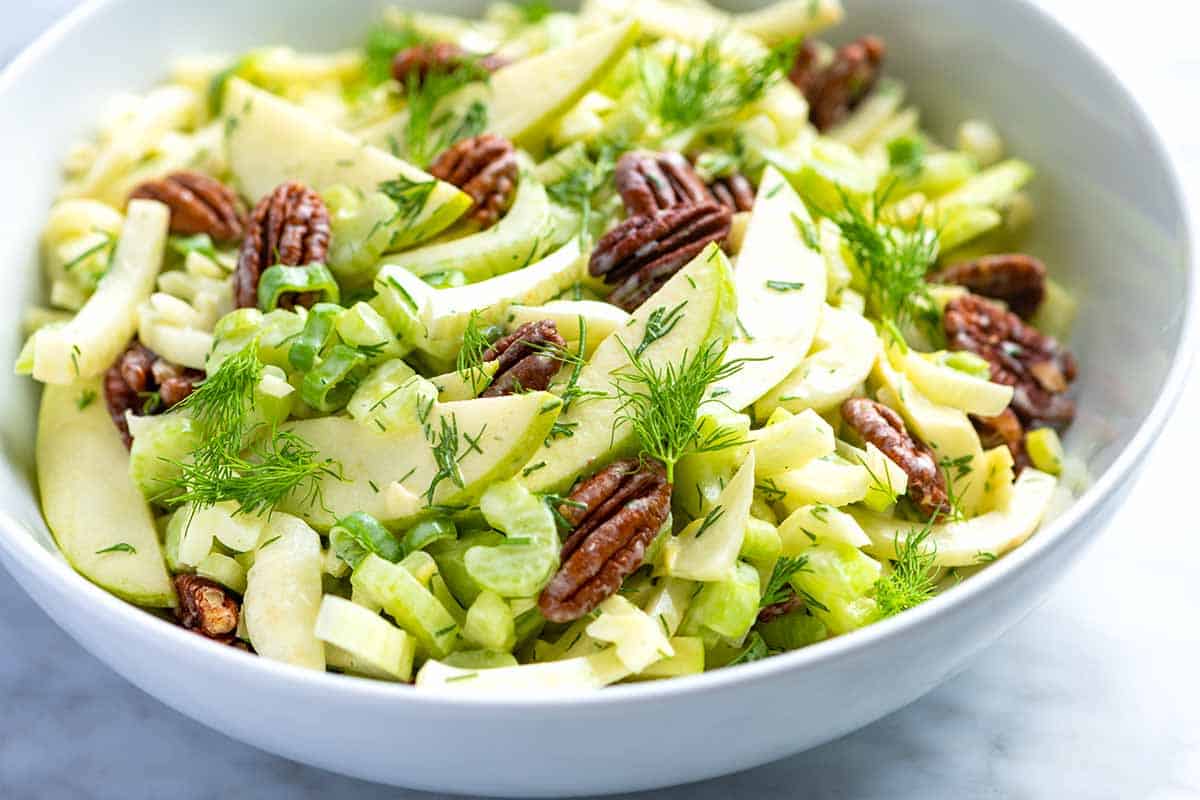
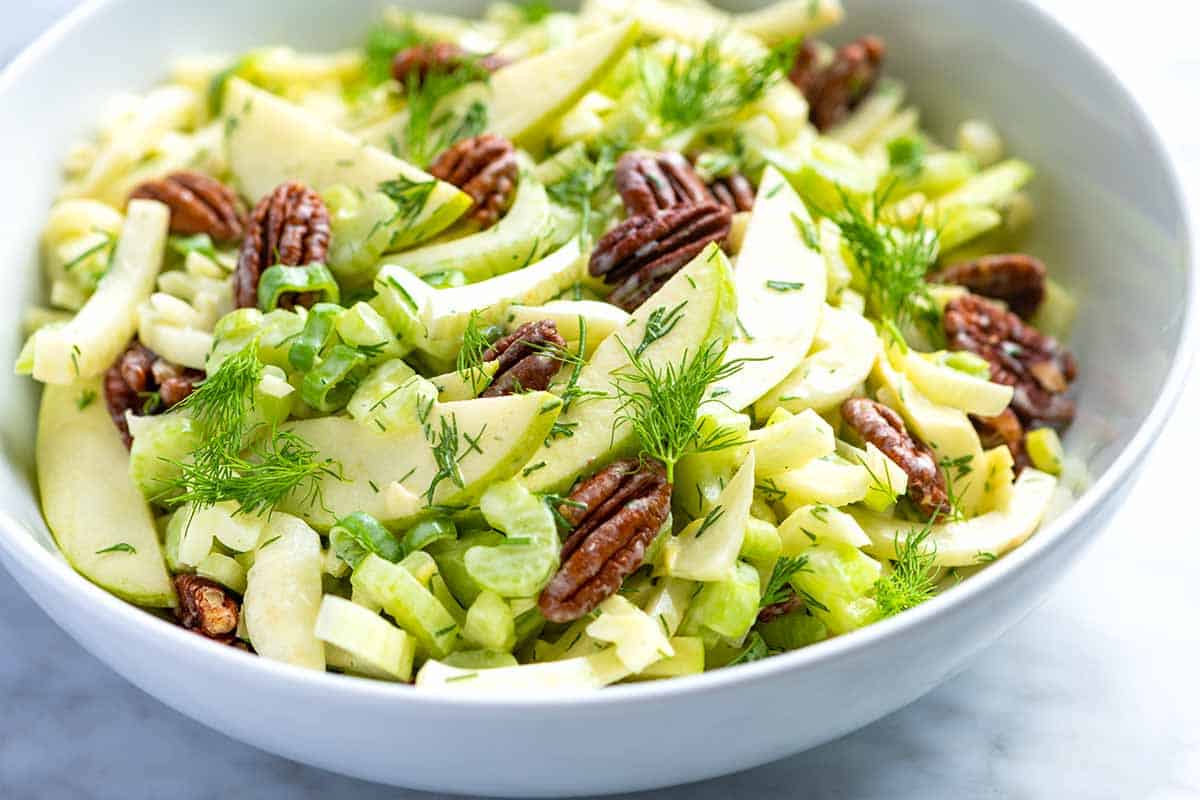
    This apple salad recipe is one of my favorite fall salad recipes. Its creamy dressing and toasted pecans make it a perfect side dish or holiday salad!

    Apple Salad

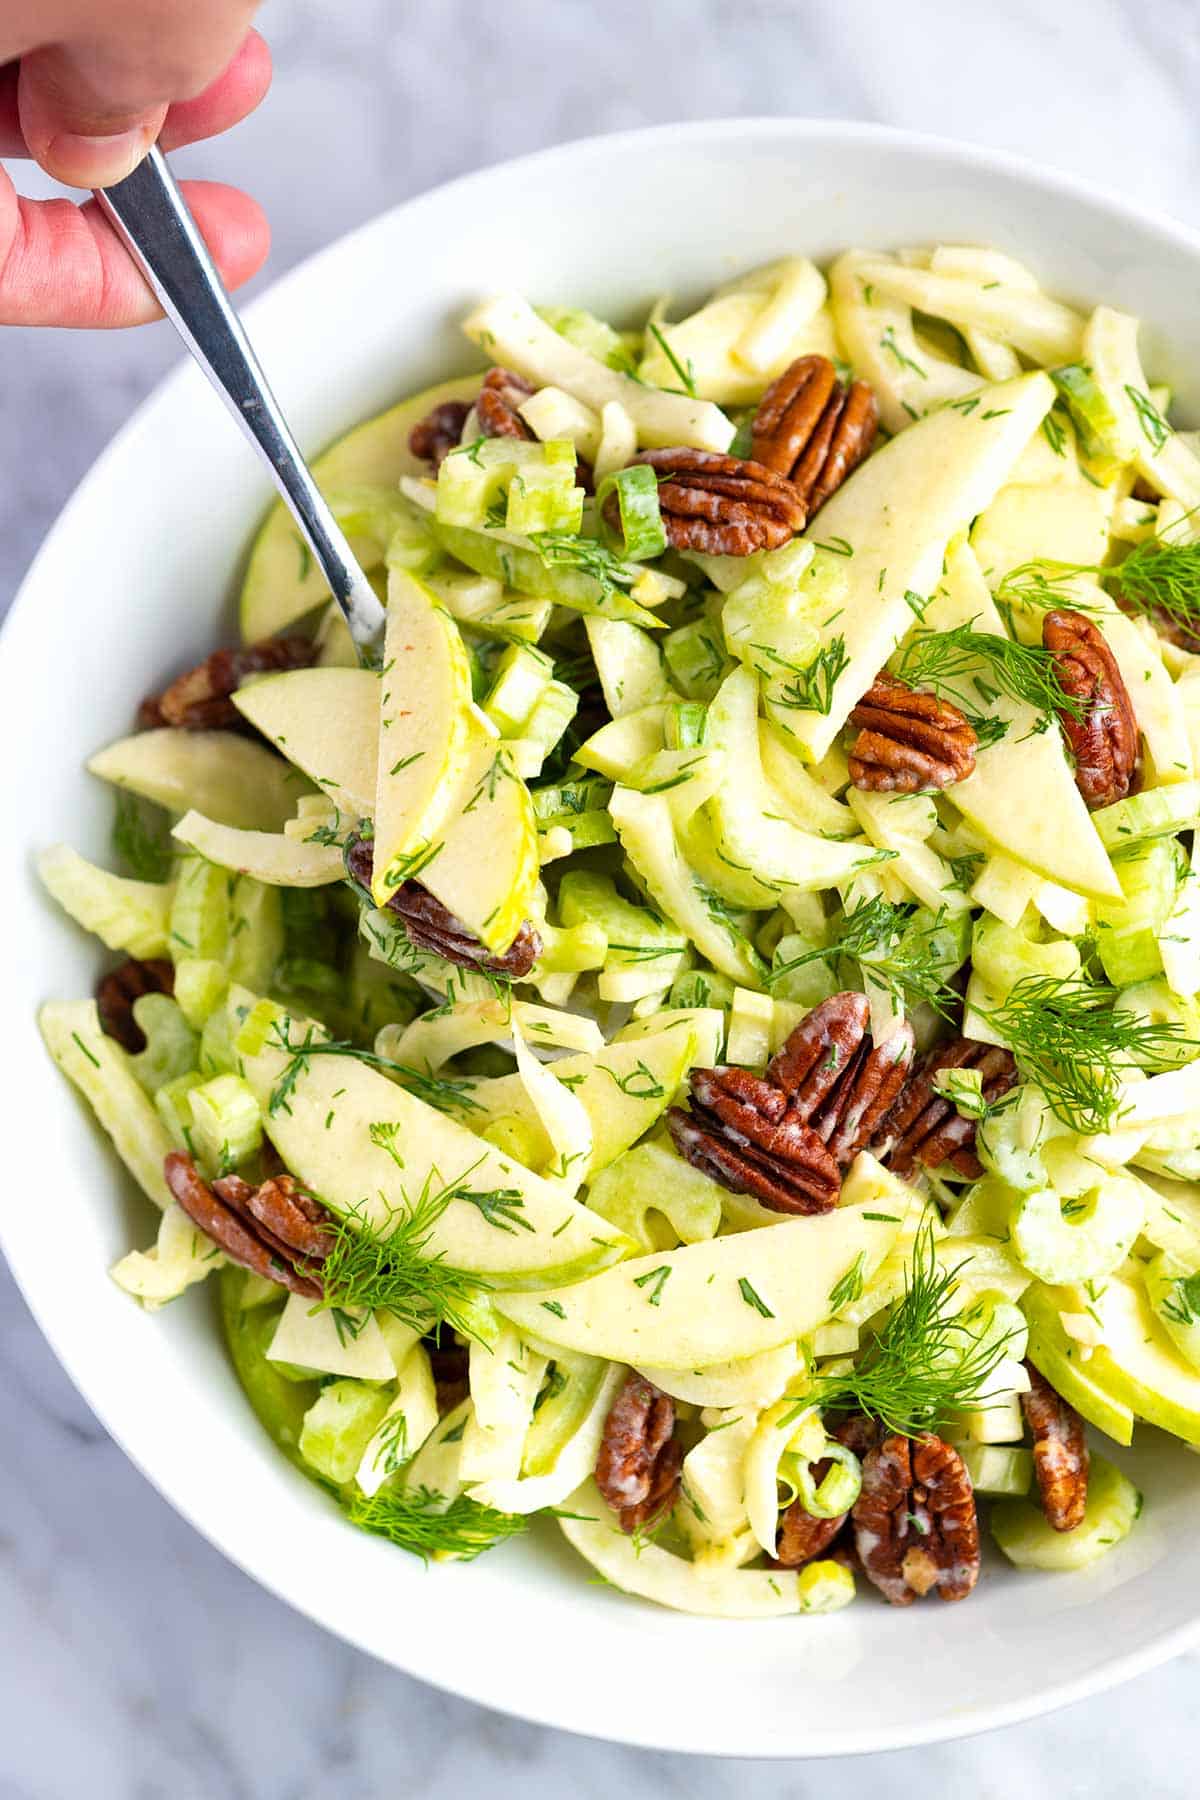
    When fall hits, I start craving this crispy green apple salad with fennel. It’s incredibly easy to make and has one of my favorite creamy salad dressings. It’s great throughout the fall and absolutely perfect on the table for Thanksgiving.

    I cannot wait for you to try this easy recipe. For more like this, see our arugula fennel salad or farro salad with apples.

    Key Ingredients

    • Apples: I love tart Granny Smith apples for this salad, but any variety of crunchy apples works well.
    • Celery and Fennel: If you aren’t familiar with raw celery and fennel in salads, hear me out. It’s delicious! You’ll quickly peel the celery, which removes any stringy bits, and then slice them thin for the salad. The fennel adds a light licorice (or anise) crunch. Seriously, it’s one of my favorite salads right here!
    • Green Onion and Fresh Dill: I love tossing chopped fresh dill and sliced green onions for even more fresh flavor. You can also use chives or mint.
    • Nuts: I use pecans in the photos, but pistachios, walnuts, and hazelnuts are great here. Toast them briefly first before you add them to the apples. Candied pecans would be amazing, too!
    • Creamy Dressing: This salad dressing is zippy and creamy. I make it with Dijon mustard, apple cider vinegar, maple syrup, olive oil, and crème fraîche. Crème fraîche tastes like a creamy, slightly less tangy sour cream. If you don’t have it on hand, mayonnaise, sour cream, and even plain yogurt will work in its place.

    Find the full recipe with measurements below.

    How to Make Apple Salad

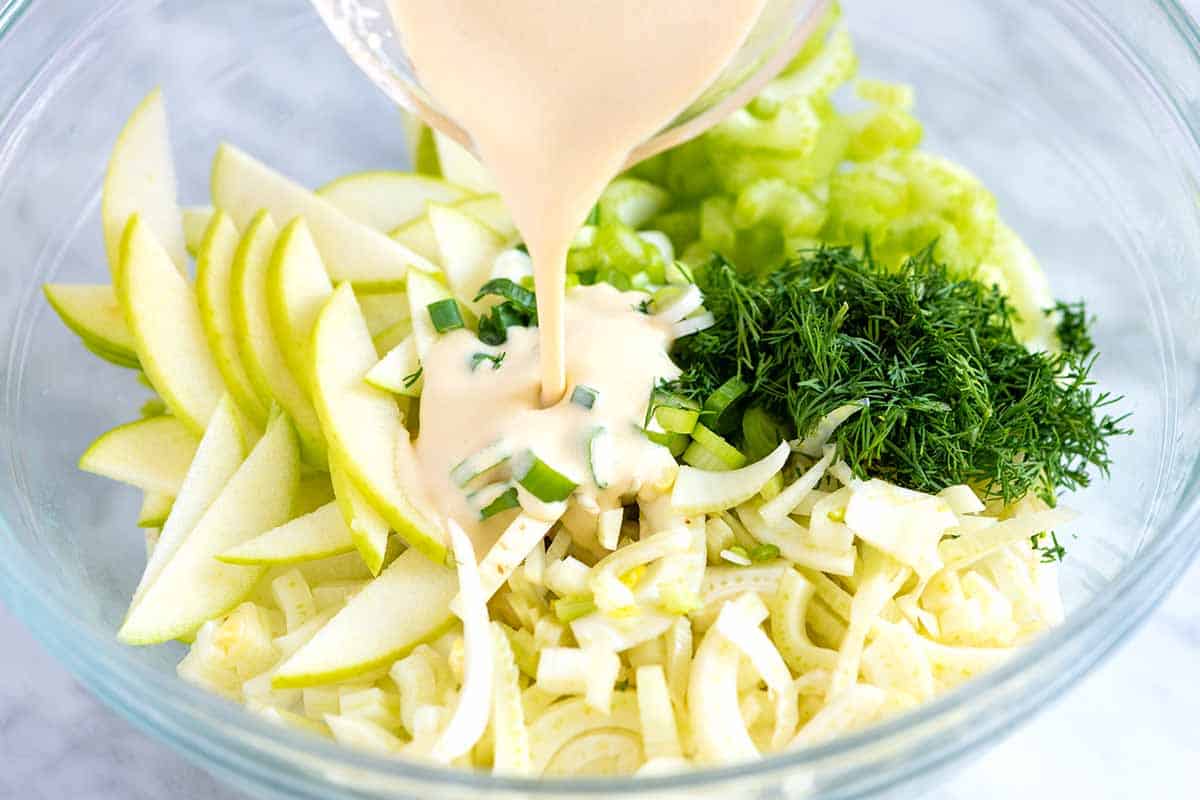
    Tip 1: Make the creamy dressing. I genuinely love the salad dressing for this apple salad. It’s easy to make and requires whisking Dijon, cider vinegar, maple syrup, olive oil, and crème fraîche together until creamy. It’s light, creamy, and incredible with the apples.

    Tip 2: Prepping the apples, fennel, and celery. To bring this salad together, you’ll slice the apples (I keep the peel on). Then, for the celery, use a vegetable peeler to remove the tougher, stringy outer layers, and finally thinly slice the fennel. When prepping the fennel, remove the core first, then thinly slice from there.

    Adding dressing to apples, celery, and fennel to make salad

    Serving Suggestions

    This creamy, crunchy salad is incredible with all your favorite fall or holiday dishes. For a simple weeknight dinner, serve it alongside baked pork chops or chicken milanese (instead of the typical arugula salad). It’s also incredible next to roast chicken or pan-roasted chicken breasts. I’ve even served it with this balsamic pear pizza and loved it!

    For the holidays, this works beautifully on the table next to a roast turkey or a roasted turkey breast. It’s also amazing with glazed ham. Really, anytime your meal can stand a little extra freshness and crunch, this is your salad!

    More Fall Salad Recipes

    Apple Salad

    Seriously Good Apple Salad

    • PREP
    • TOTAL

    Who said you need lettuce to make a salad? This apple salad with celery and fennel is crisp, fresh, creamy, and delicious. Serve this on the side or as a bed for grilled or roasted meats. We love using a crisp apple like Honeycrisp or Pink Lady.

    4 Servings

    You Will Need

    For the salad

    2 medium apples, cored and thinly sliced

    3 celery stalks, peeled and sliced

    1 fennel bulb, cored and thinly sliced

    1 scallion, finely chopped

    ¼ cup fresh dill, finely chopped

    ½ cup pecans, hazelnuts, or walnuts, lightly toasted


    For the dressing

    1 tablespoon Dijon mustard

    3 tablespoons apple cider vinegar

    1 teaspoon maple syrup

    3 tablespoons extra-virgin olive oil

    2 tablespoons crème fraîche

    Salt and fresh ground pepper to taste

    Directions

      1Make the dressing: Whisk together the mustard, vinegar, and maple syrup in a large salad bowl until blended. Gradually add the oil, whisking constantly, until the dressing looks well blended and creamy. Whisk in the crème fraîche, a pinch of salt, and a few grinds of fresh ground black pepper. Taste and adjust with additional salt, vinegar, or maple syrup if necessary.

      2Make the salad: Add the sliced apples, celery, fennel, scallion, dill, and the nuts. Toss well. If you have any fennel fronds (the wispy tops of the fennel stalk that look similar to dill), scatter a few over the salad, then serve.

    Adam and Joanne’s Tips

    • Storing: Make sure the apples are well coated with the dressing, then store the salad in an airtight container in the fridge for up to 2 days. The apples may soften a little as they sit. Use crisp apples that aren’t as prone to browning, like Honeycrisp or Pink Lady.
    • Prepping the celery: Peeling celery removes the tough, sometimes stringy outer surface. Use a vegetable peeler to peel each stalk until the outer layer is smooth.
    • Substituting crème fraîche: Use mayo, sour cream, or plain yogurt. You may need to adjust the maple syrup slightly.
    • Toasting the nuts: Spread them in an even layer on a sheet pan and slide them into a 350°F oven. Toast 6 to 8 minutes or until they smell toasty, shaking the pan halfway during cooking.
    • Optional add-ins: Try tossing in some chopped kale or spinach, adding extra punch and creaminess with cheese (blue cheese or goat cheese is perfect), or crumble in some cooked bacon or pancetta.
    • The nutrition facts provided below are estimates.

    Nutrition Per Serving
    Serving Size
    1/4 of the recipe
    /
    Calories
    226
    /
    Total Fat
    17.3g
    /
    Saturated Fat
    2.4g
    /
    Cholesterol
    3.5g
    /
    Sodium
    123g
    /
    Carbohydrate
    18.2g
    /
    Dietary Fiber
    4.3g
    /
    Total Sugars
    12.7g
    /
    Protein
    1.9g


    AUTHOR:

    Joanne Gallagher

    Adam and Joanne of Inspired Taste

    We are Adam and Joanne Gallagher, the creators of Inspired Taste. Established in 2009, Inspired Taste grew from a childhood dream into one of the internet’s most trusted recipe sites with hundreds of reliable recipes, step-by-step videos, and expert tips.More About Us

    Source link

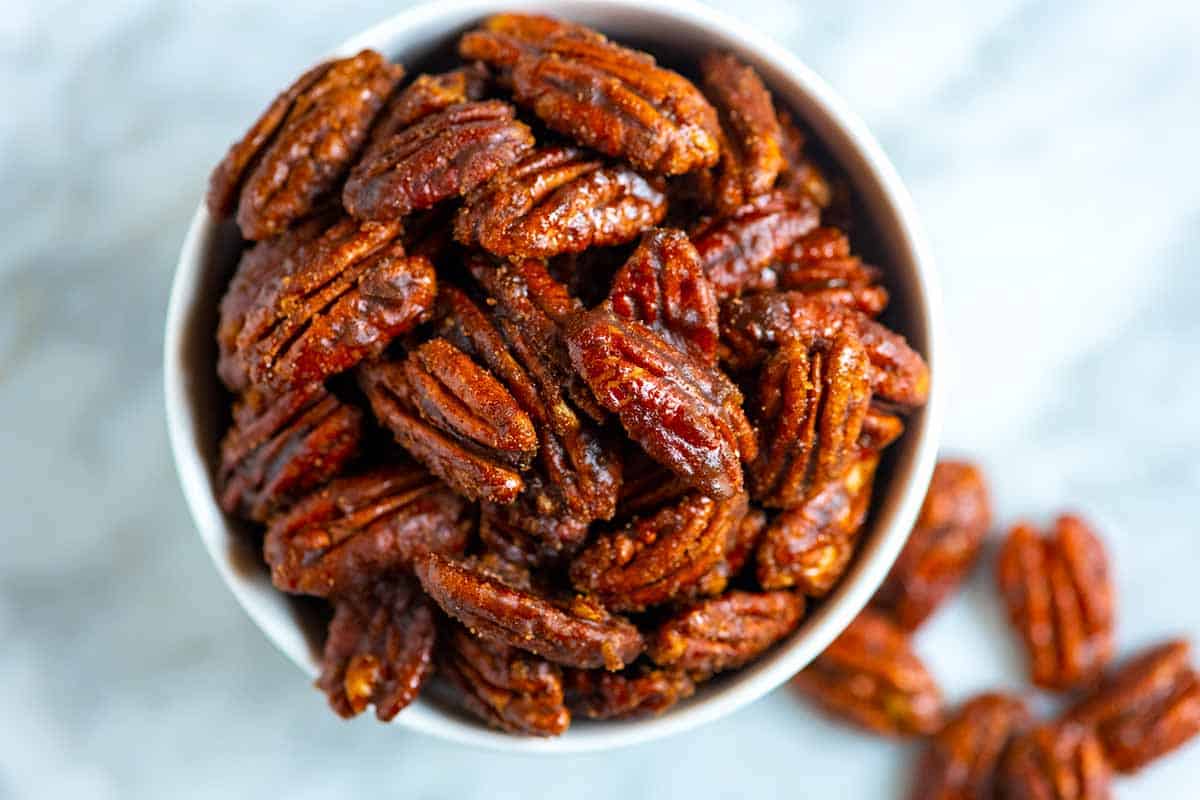
  • Easy Candied Pecans Recipe

    Easy Candied Pecans Recipe

    Learn how to make our easy candied pecans recipe on the stove. It only takes 10 minutes. These are egg-free, gluten-free, and perfect for snacking, salads, and cheeseboards.

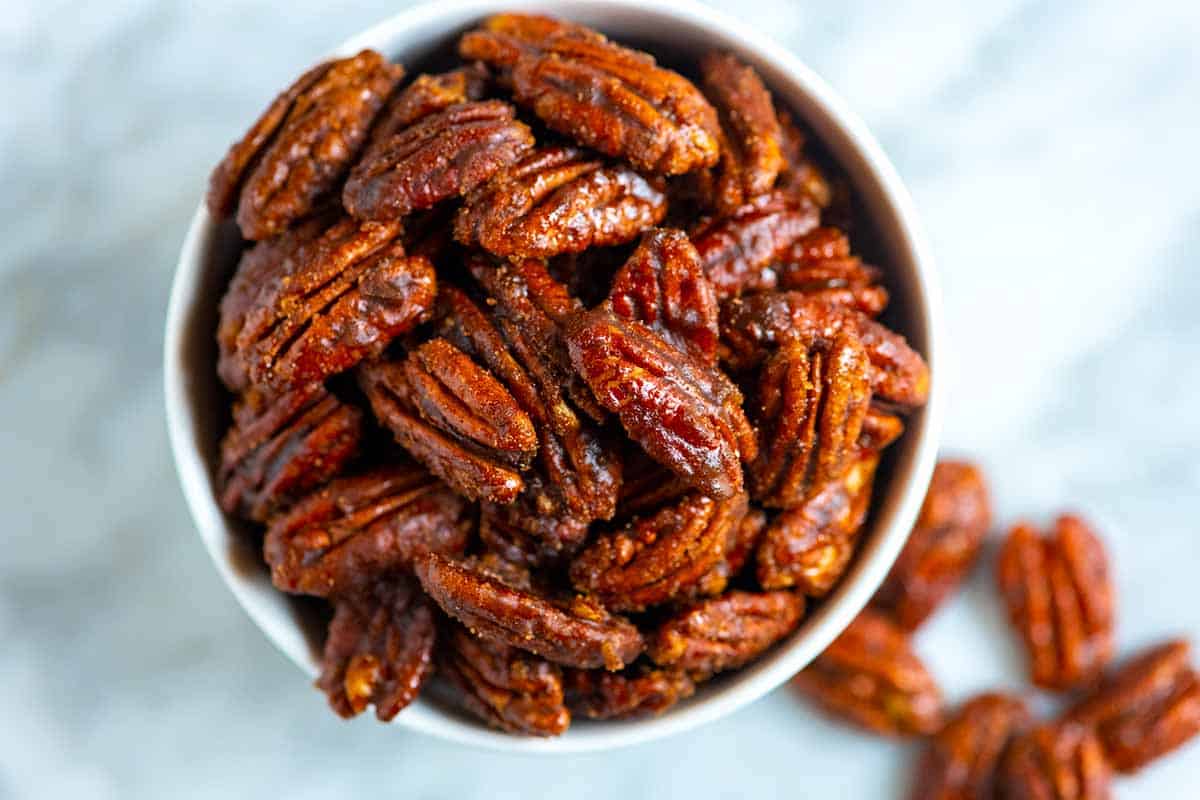
    Candied Pecans with a Brown Sugar Coating

    I’ve made this candied pecans recipe so many times, especially during the holiday season! I love these candied pecans for salads, snacks, and cheeseboards. They are perfectly sweet and a little bit salty, plus I add a little cinnamon and orange zest, making them extra delicious.

    If you love candied nuts as much as we do, you may also enjoy these candied pecans made in the oven, calling for egg whites, which makes them light and crispy. I love them, but when I’m in a time crunch, the 5-minute recipe shared below is where I turn.

    Key Ingredients

    • Pecans: I use pecan halves to make this recipe, but you can easily swap the pecans for other nuts like walnuts, hazelnuts, or cashews!
    • Brown Sugar: I love the rich flavor of brown sugar with these candied pecans.
    • Spices: I combine cinnamon, salt, vanilla extract, and a little orange zest for these candied nuts. I also love a pinch of cayenne pepper for some heat, but that is optional.

    Find the full recipe with measurements below.

    How to Make Perfect Candied Pecans

    Tip 1: Troubleshooting with water for the perfect glaze. You’ll combine sugar with spices, vanilla extract, and a little water in a skillet. Heat everything until it looks like a glaze, and then stir in the nuts. Sometimes you might need to add a tiny bit more water, especially if your sugar mixture starts to get thick and grainy before fully coating the nuts. Add a teaspoon or two of water and keep stirring to help the sugar re-dissolve and give you a smooth, even glaze that coats every pecan.

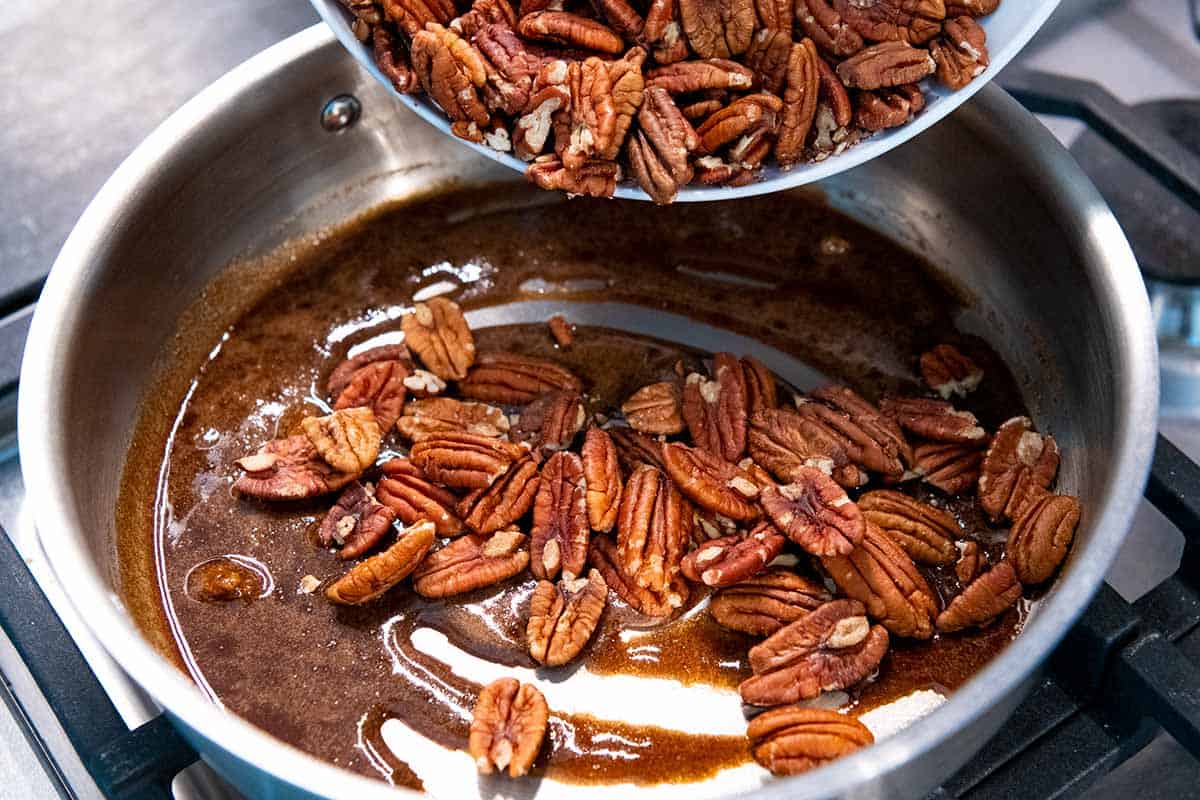
    Adding pecans to brown sugar and spices for candied pecans.

    Tip 2: Knowing when they are done. The most crucial part is knowing when to take candied pecans off the heat. You’ll know they’re ready when the liquid is completely gone and the sugar has formed a shiny coating on the nuts. If they start to look grainy, go back to tip 1 where we suggest adding a teaspoon or two of water to thin the glaze.

    Tip 3: Cool them on a baking sheet. Spread the pecans out into a single layer so they cool and harden evenly. If a few nuts stick together as they cool, gently break them apart once they’ve fully hardened.

    Ways to Use Candied Pecans

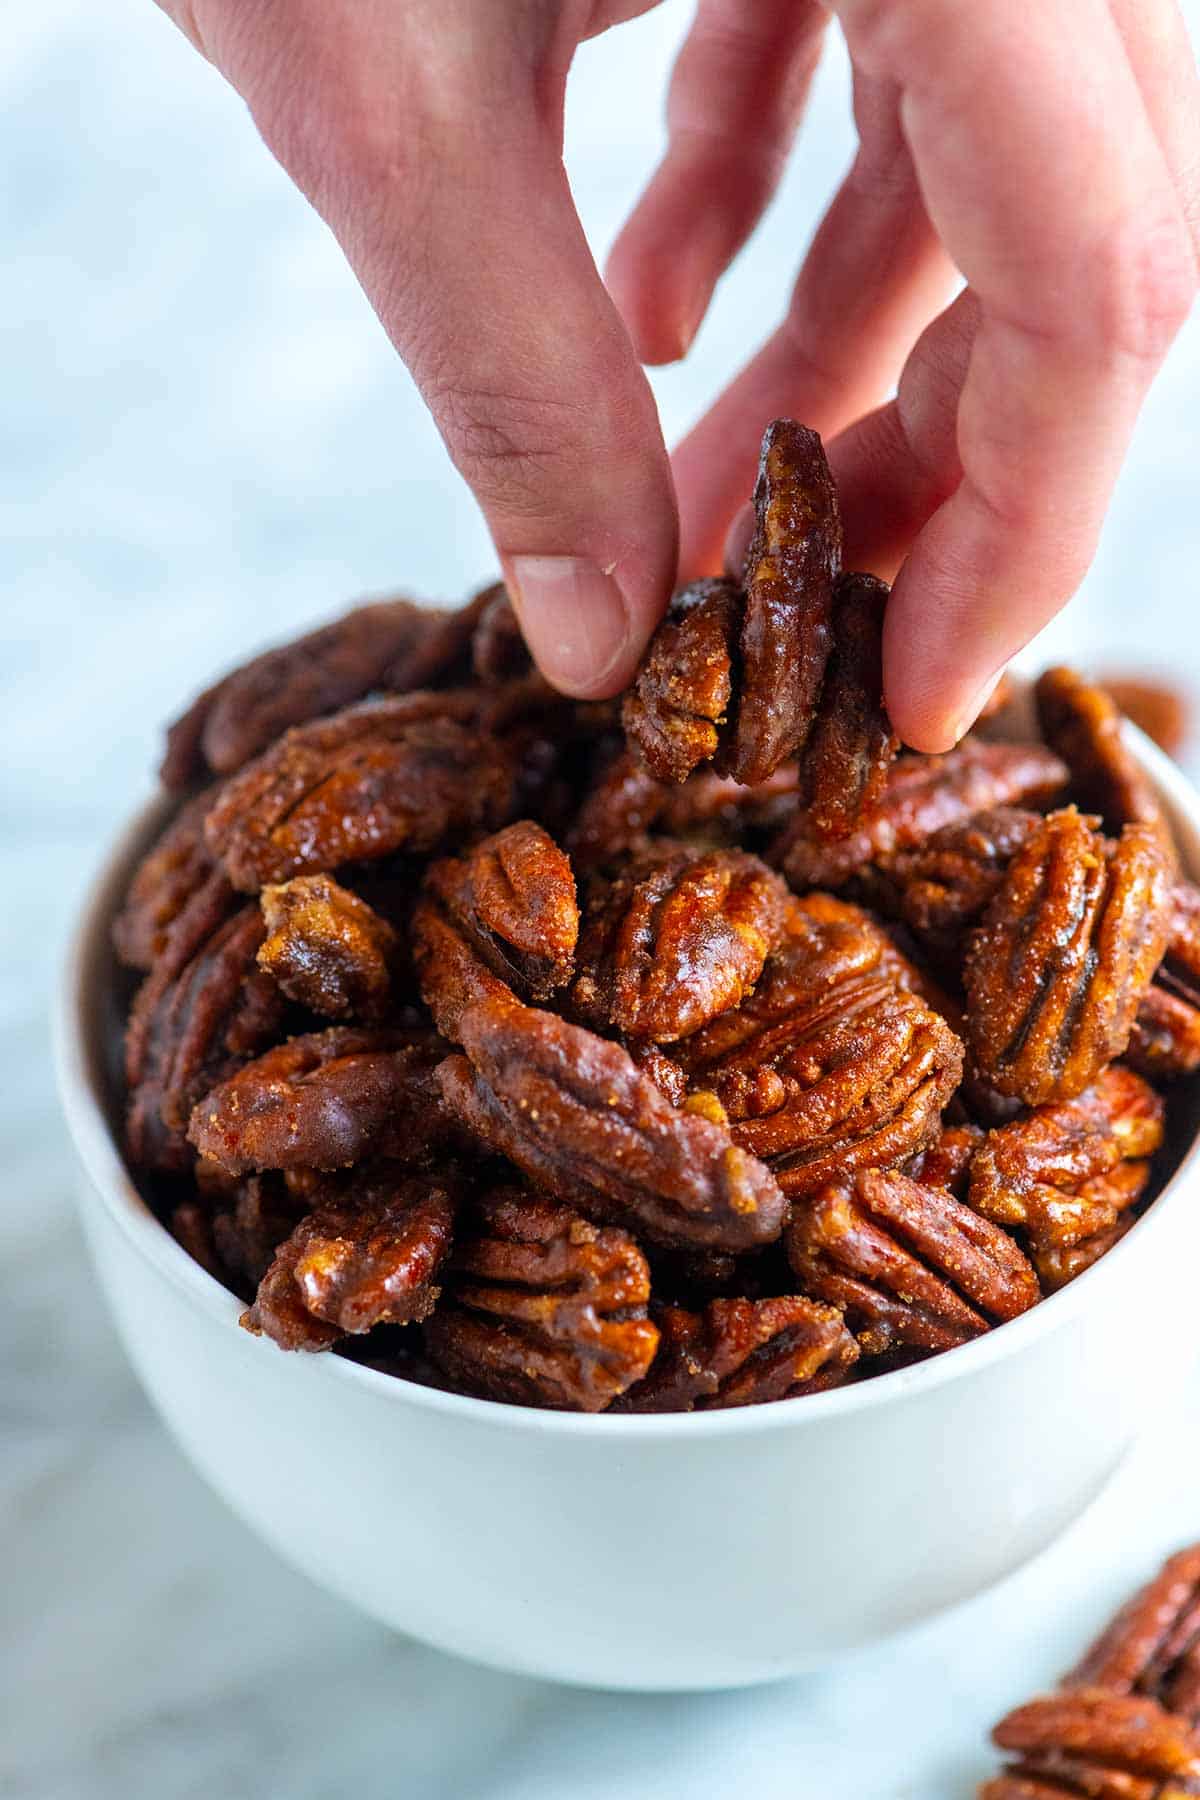
    These candied pecans are so simple to make! I add them to salads, desserts, and cheeseboards, and they are also amazing as a standalone snack.

    A few recipes that would benefit from a handful of these sweet and salty nuts are this Apple Salad, this Farro Salad, my favorite Quinoa Salad, and this Warm Apple Cabbage Salad. I also love using candied nuts for this Balsamic Strawberry Salad and these coconut oil Roasted Sweet Potatoes.

    Homemade Candied Pecans

    Easy Candied Pecans

    • PREP
    • COOK
    • TOTAL

    Thanks to a skillet and the stovetop, you can make this easy recipe in under 10 minutes. You can use it with other varieties of nuts, too. We especially love walnuts and cashews. For an oven-based recipe, try these Oven Roasted Candied Pecans.

    Makes 2 cups

    Watch Us Make the Recipe

    You Will Need

    2 cups pecan halves, 6 ounces (170g)

    6 tablespoons brown sugar (75g)

    1 ½ teaspoons ground cinnamon

    ½ teaspoon fine sea salt

    ½ teaspoon vanilla extract

    1 ½ tablespoons water, or more as needed

    2 teaspoons orange zest, optional

    Pinch cayenne pepper, optional

    Directions

      1Prepare baking sheet for cooling: Line a baking sheet with parchment paper or a silicone baking mat.

      2Make the glaze: Add the brown sugar, cinnamon, salt, vanilla, water, orange zest, and cayenne to a medium skillet. Place the skillet over medium heat and cook, stirring often, until the brown sugar melts into a bubbling sauce, about 1 minute.

      3Add the nuts: Stir in the pecans so that the brown sugar sauce coats them. Cook, stirring the entire time, until the pecans look candied and smell nutty, 2 to 3 minutes. As the nuts heat up in the pan, the sauce will slowly coat them and turn shiny. Watch closely as the nuts cook so that they do not burn. If the glaze starts to get thick and grainy before coating the nuts, add a teaspoon or two more water and keep stirring to help the sugar re-dissolve and give you a smooth, even glaze that coats every pecan.

      4Cool them: Transfer the candied pecans to the prepared baking sheet and spread them out in one layer. Allow the pecans to cool down and break them up before serving.

    Adam and Joanne’s Tips

    • Storing: Store cooled candied nuts in an airtight container. They will last at room temperature for 1 week, in the refrigerator for a few weeks, and in the freezer for a month, if not longer.
    • Salt: ½ teaspoon of fine sea salt makes these taste salty-sweet. If you’d prefer to not taste the salt, reduce to ¼ teaspoon of salt.
    • Pecans too sticky: If your nuts are still sticky after cooling, heat your oven to 325°F (162°C) and bake for 5 to 10 minutes to help harden the candy coating.
    • The nutrition facts provided below are estimates.

    Nutrition Per Serving
    Serving Size
    1/4 cup
    /
    Calories
    176
    /
    Total Fat
    15.4g
    /
    Saturated Fat
    1.3g
    /
    Cholesterol
    0mg
    /
    Sodium
    147.4mg
    /
    Carbohydrate
    10.1g
    /
    Dietary Fiber
    2.4g
    /
    Total Sugars
    7.5g
    /
    Protein
    2g


    AUTHOR:

    Joanne Gallagher

    Adam and Joanne of Inspired Taste

    We are Adam and Joanne Gallagher, the creators of Inspired Taste. Established in 2009, Inspired Taste grew from a childhood dream into one of the internet’s most trusted recipe sites with hundreds of reliable recipes, step-by-step videos, and expert tips.More About Us

    Source link

  • Easy Braised Fennel Recipe

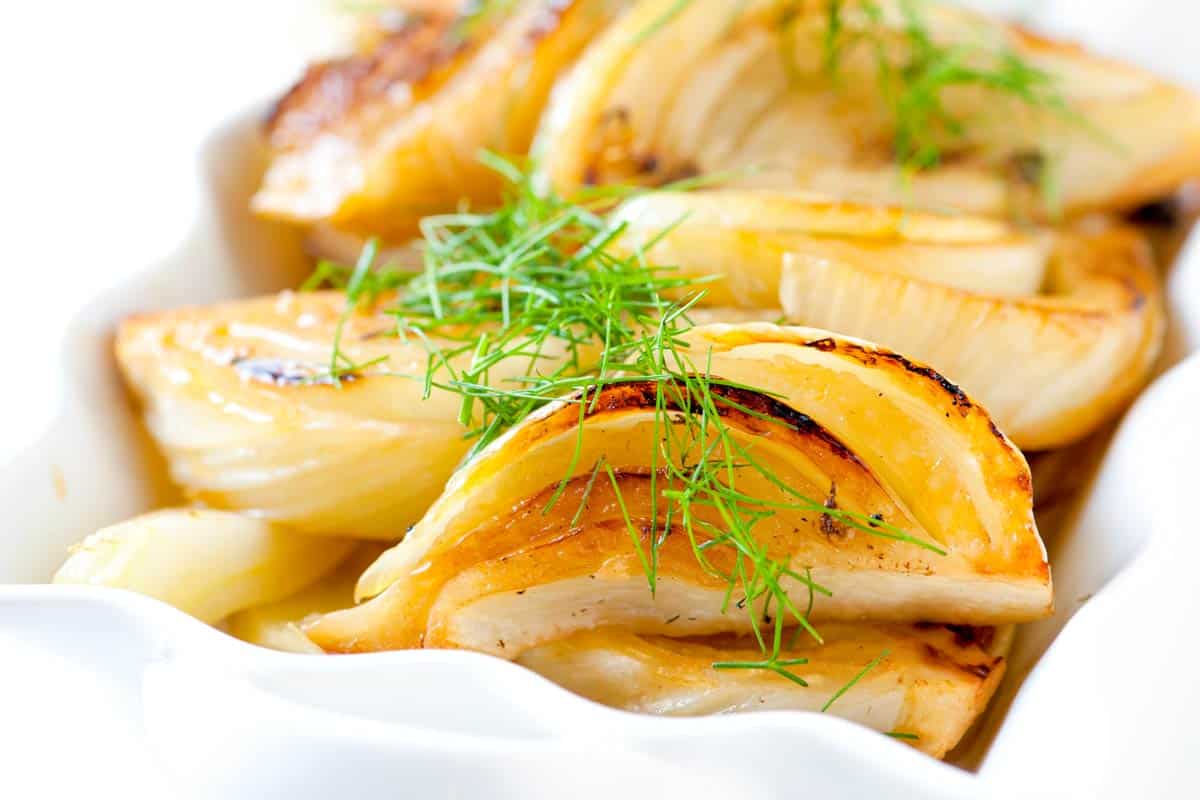
    Easy Braised Fennel Recipe

    This braised fennel recipe is a delicious side dish for chicken, fish, or seafood. It has become one of my favorite ways to cook fennel.

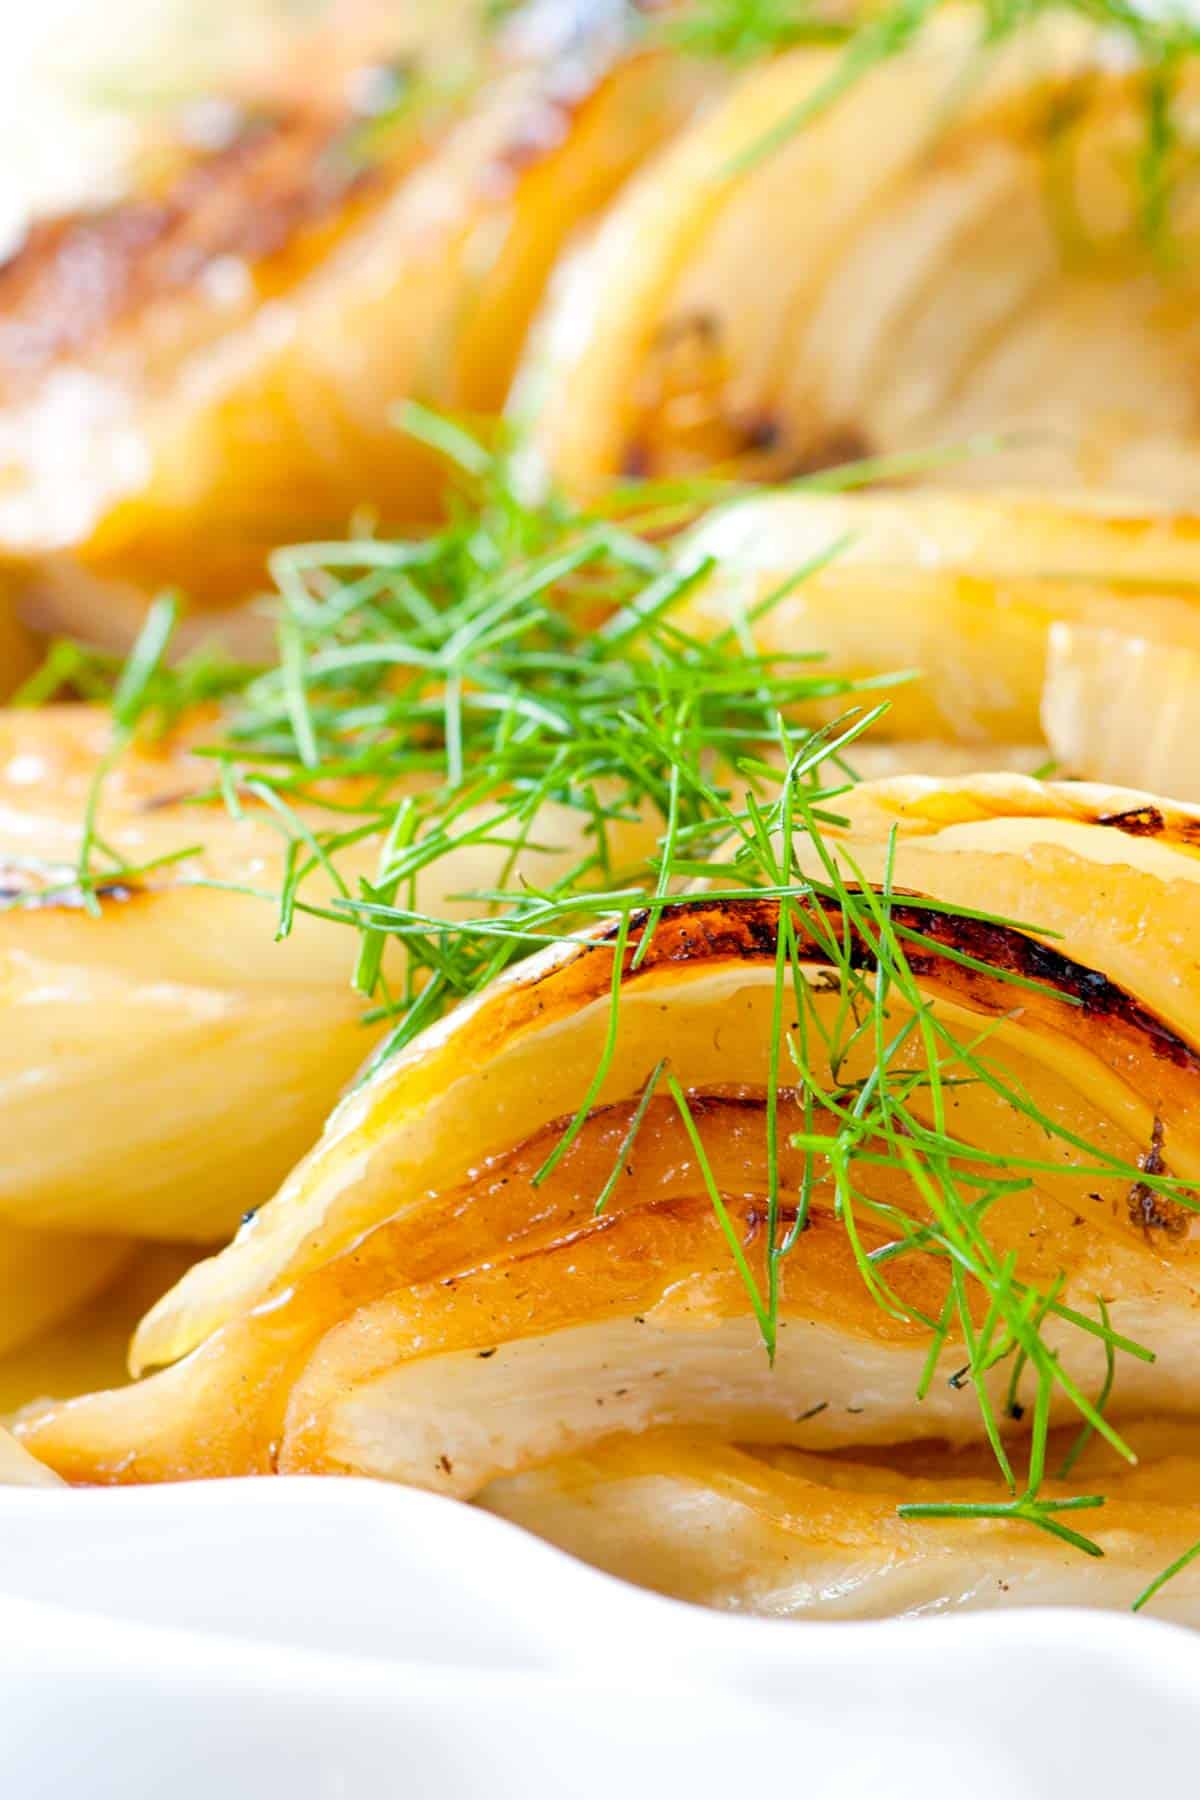
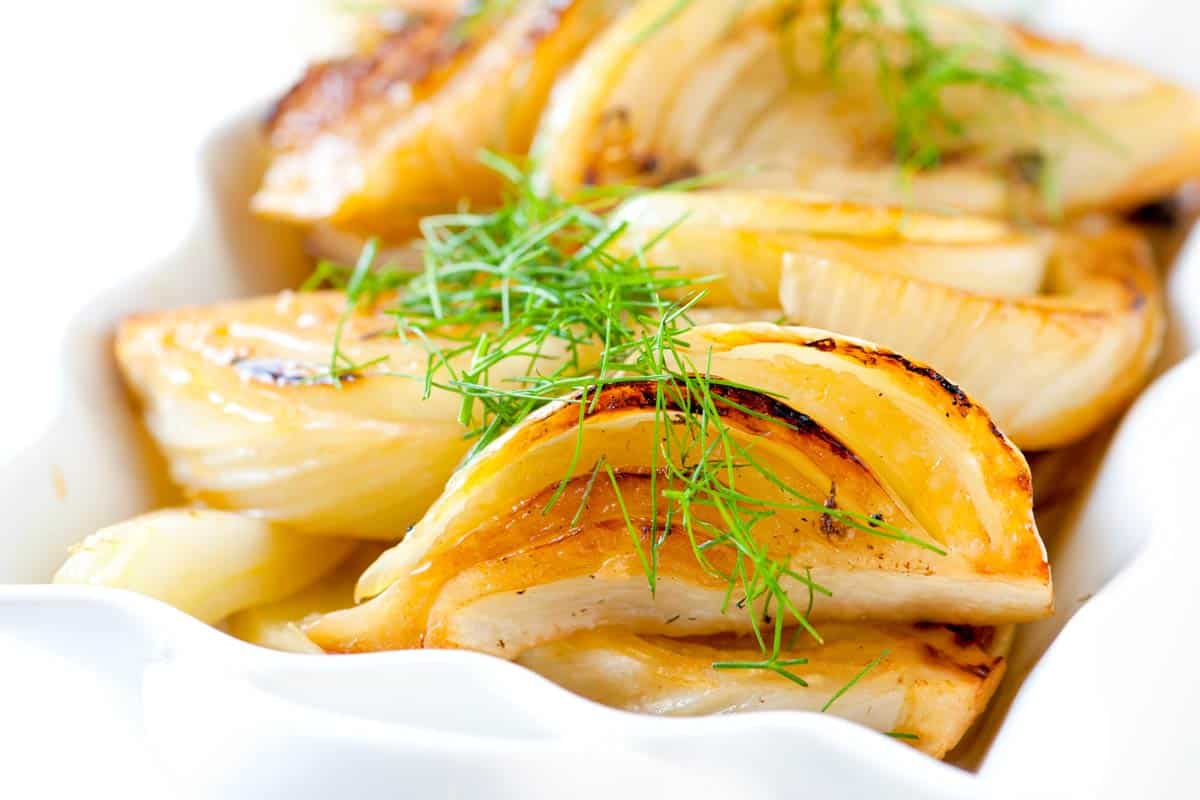
    Braised Fennel

    Fennel is so underrated. It’s naturally sweet with a light licorice flavor. In this fennel recipe, we lean into that flavor and add fresh orange, which brightens and balances everything. It’s simple, but so good.

    If fennel feels intimidating, don’t worry. Once you’ve cooked it, you’ll see how versatile it is. This is a great place to start if you’ve never made it before.

    Key Ingredients

    • Fennel: Choose fennel bulbs that are mostly white with pale green tops. They should feel firm and heavy for their size, without browning or soft spots. For this recipe, we use the bulb (the bottom part). You can save the stalks for homemade stock if you’d like.
    • Orange: Fennel and orange are a classic pairing. We use both the zest and juice from half an orange to brighten the flavor. If you don’t have a fresh orange, a splash of orange juice works.
    • Stock: Braising means we gently cook the fennel in liquid. Part of that liquid comes from the orange, and the rest is stock or broth. Both chicken broth and vegetable broth work well here.

    Find the full recipe with measurements below.

    How to Make Braised Fennel

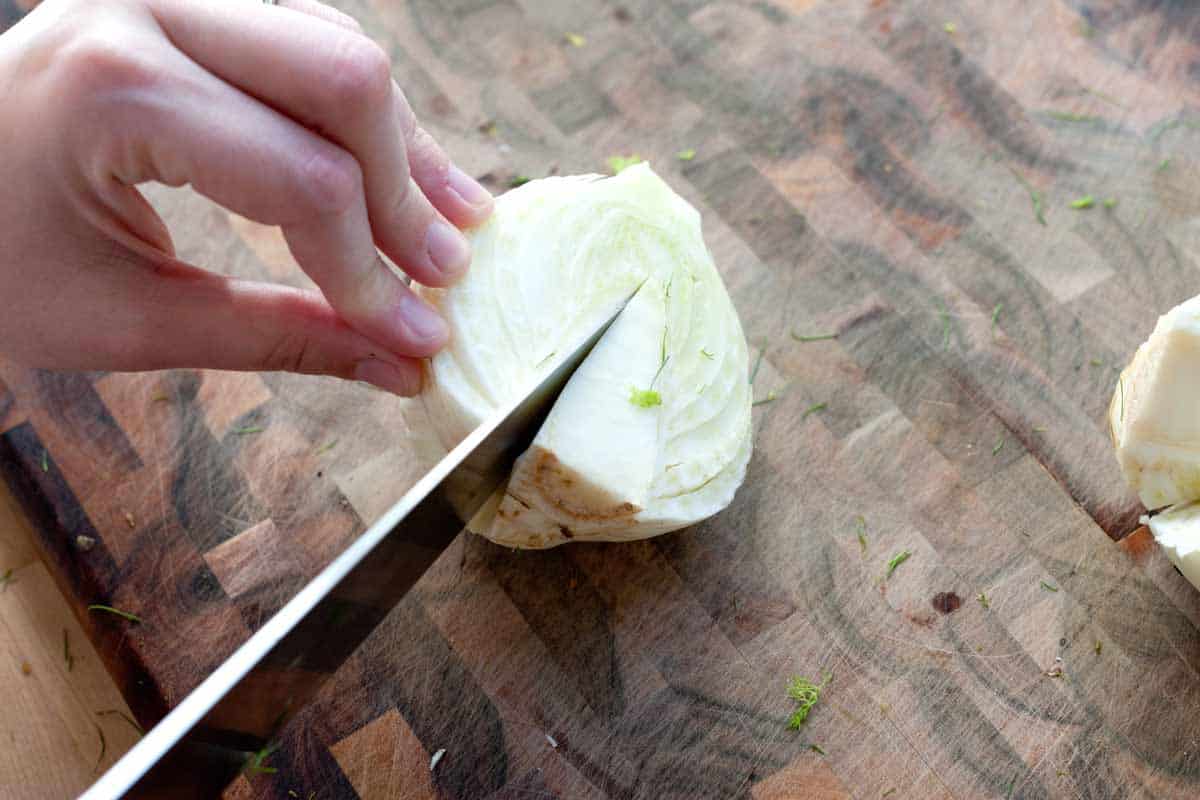
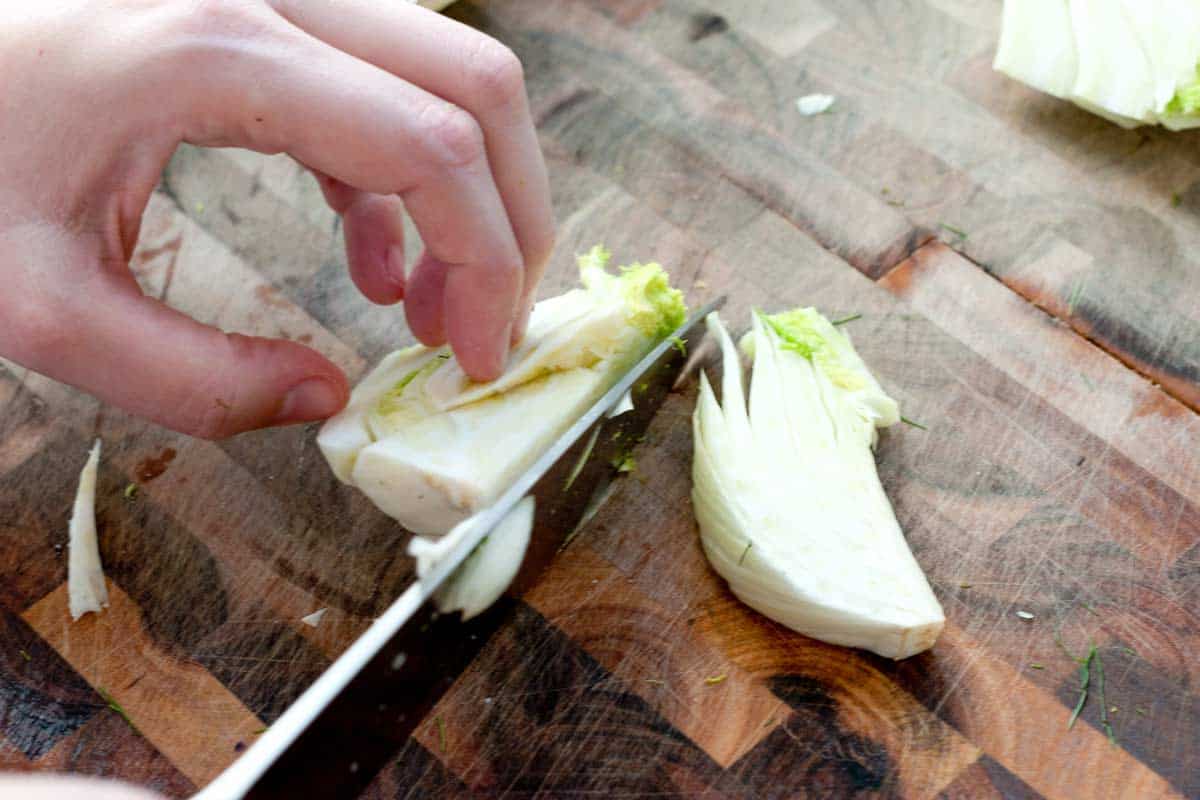
    Tip 1: How to cut the fennel. If fennel is new to you, it can look a bit intimidating, but it’s actually very simple to prepare.

    1. Pull off a few of the feathery green fronds at the top and save them. They make a beautiful garnish.
    2. Remove the stalks. You can save them to add to broth or stock later.
    3. Working with the bulb, trim the very bottom (just enough to clean it up), then cut the bulb in half.
    4. Use your knife to make two angled cuts to remove the core.
    5. Slice each half into wedges, keeping the end of the bulb attached. This helps the wedges hold their shape while cooking.
    How to cut fennel for braising
    How to cut fennel for braising

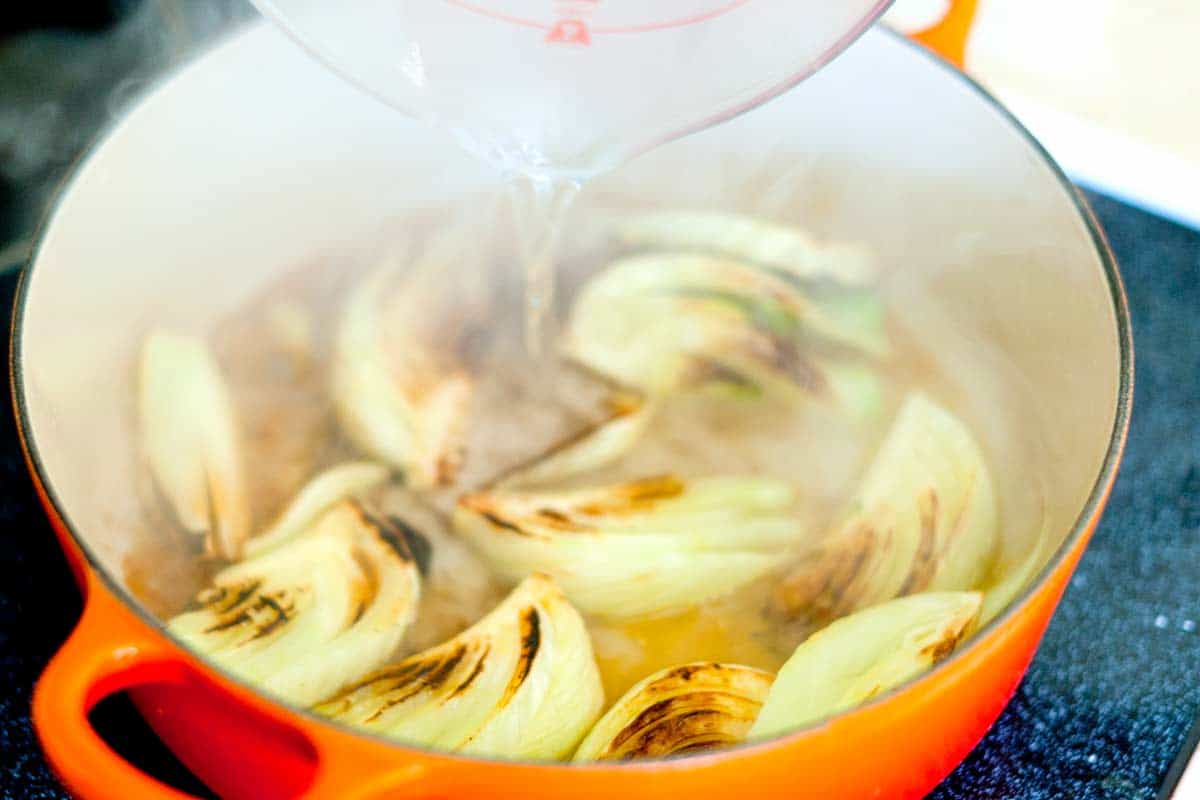
    Tip 2: Cooking the fennel. Use a wide pot with a lid (a Dutch oven works well). Start by browning the fennel wedges in a bit of olive oil to add flavor and color. Then add the orange zest, orange juice, and broth. This creates a simple braising liquid that gently steams and simmers the fennel, making it tender and so flavorful. Once the pot is covered, it only needs about 8 minutes to finish cooking.

    Adding the stock to braise fennel

    Serving Suggestions

    This veggie side is especially good with light mains like poached salmon, baked salmon, perfectly cooked scallops, and this cilantro lime shrimp. I also love it with roasted chicken or this roasted turkey breast (which also has orange).

    Pork and fennel go really well together, too. Try this with pork chops, pork milanese, or simply cooked pork tenderloin. And for a vegetarian option, spoon the braising liquid over couscous, quinoa, or farro, and add a heaping cup of garlicky white beans.

    More Fennel Recipes

    Braised Fennel

    Easy Braised Fennel

    • PREP
    • COOK
    • TOTAL

    Most often, you’ll find fennel with stalks still attached. For this fennel recipe, we’re after the bulb, but make sure you keep the stalks and fronds for another day. Use the fronds as you would fresh herbs, and save the stalks for a future homemade stock (see our chicken stock recipe).

    4 Servings

    You Will Need

    2 medium fennel bulbs

    1 tablespoon extra-virgin olive oil

    1 medium orange

    ¾ cup chicken broth, vegetable broth, or water

    Salt and fresh ground black pepper, to taste

    Directions

      1Prepare the fennel: Cut off the stems/stalks from the fennel bulb, reserving some fronds (the wispy green tips). Slice the fennel in half lengthwise. Make two angled cuts to remove the tough core. Then cut the halves into ½-inch-thick wedges. Season both sides with salt and pepper.

      2Prepare the orange: Use a microplane zester to zest about half of the orange.

      3Brown the fennel: Heat olive oil in a medium pot with a lid over medium-high heat. Add the fennel wedges and brown on both sides, about 2 minutes per side.

      4Braise: Reduce heat to low, add orange zest, the juice of half an orange, and stock, and cook, covered, until fennel is tender, 8 to 10 minutes. Serve with a few reserved fennel fronds sprinkled on top.

    Adam and Joanne’s Tips

    • Storing: Keep in an airtight container in the refrigerator for up to 4 days. It reheats well on the stovetop over low heat or in the microwave. If it looks a little dry when reheating, add a splash of broth or water to bring it back to life.
    • Serving: You can serve this hot, cold, or room temperature. They’re actually delicious cold tucked into grain bowls, salads, or alongside other chilled roasted vegetables.
    • The nutrition facts provided below are estimates.

    Nutrition Per Serving
    Serving Size
    1/4 of the recipe
    /
    Calories
    46
    /
    Total Fat
    3.7g
    /
    Saturated Fat
    0.5g
    /
    Cholesterol
    0.9mg
    /
    Sodium
    251.5mg
    /
    Carbohydrate
    3.4g
    /
    Dietary Fiber
    1.3g
    /
    Total Sugars
    1.9g
    /
    Protein
    0.8g


    AUTHOR:

    Joanne Gallagher

    Adam and Joanne of Inspired Taste

    We are Adam and Joanne Gallagher, the creators of Inspired Taste. Established in 2009, Inspired Taste grew from a childhood dream into one of the internet’s most trusted recipe sites with hundreds of reliable recipes, step-by-step videos, and expert tips.More About Us

    Source link

  • Easy Chicken Nuggets Recipe

    Easy Chicken Nuggets Recipe

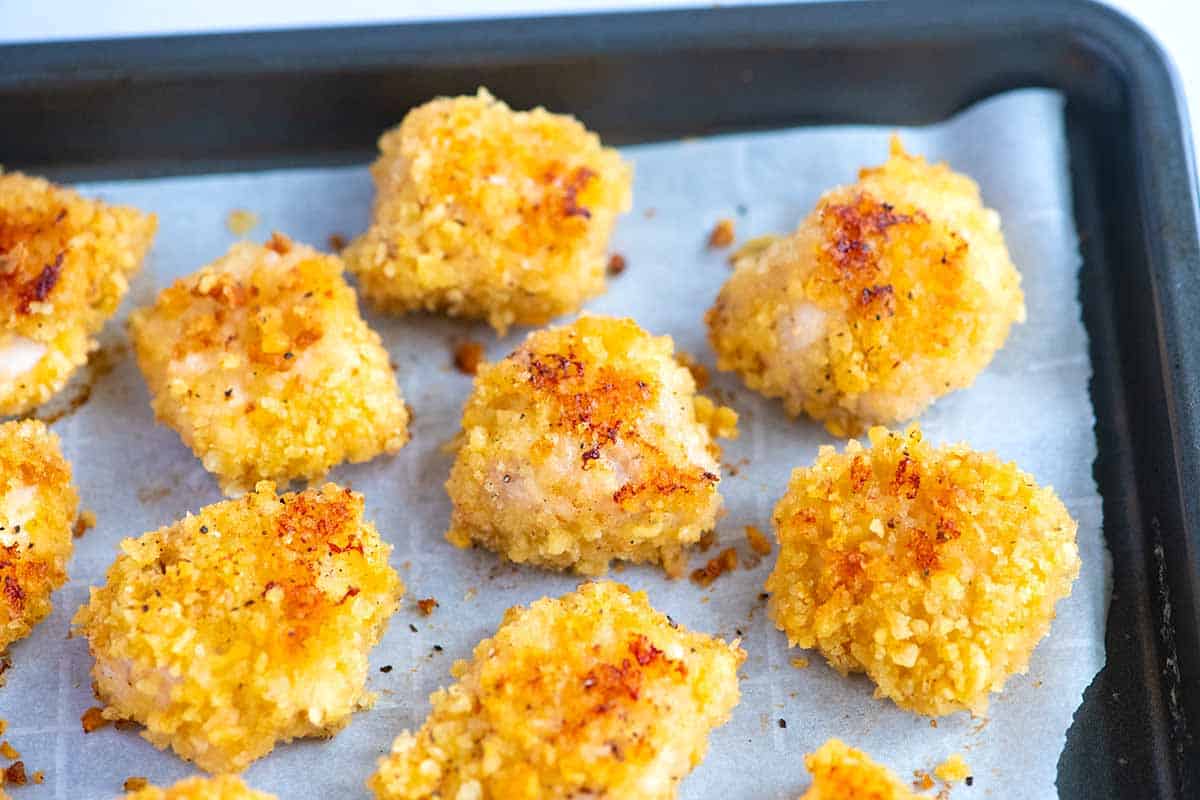
    This homemade chicken nugget recipe is a lifesaver (my son loves them!). To make things extra easy, we use potato chips for the coating, then bake until crispy.

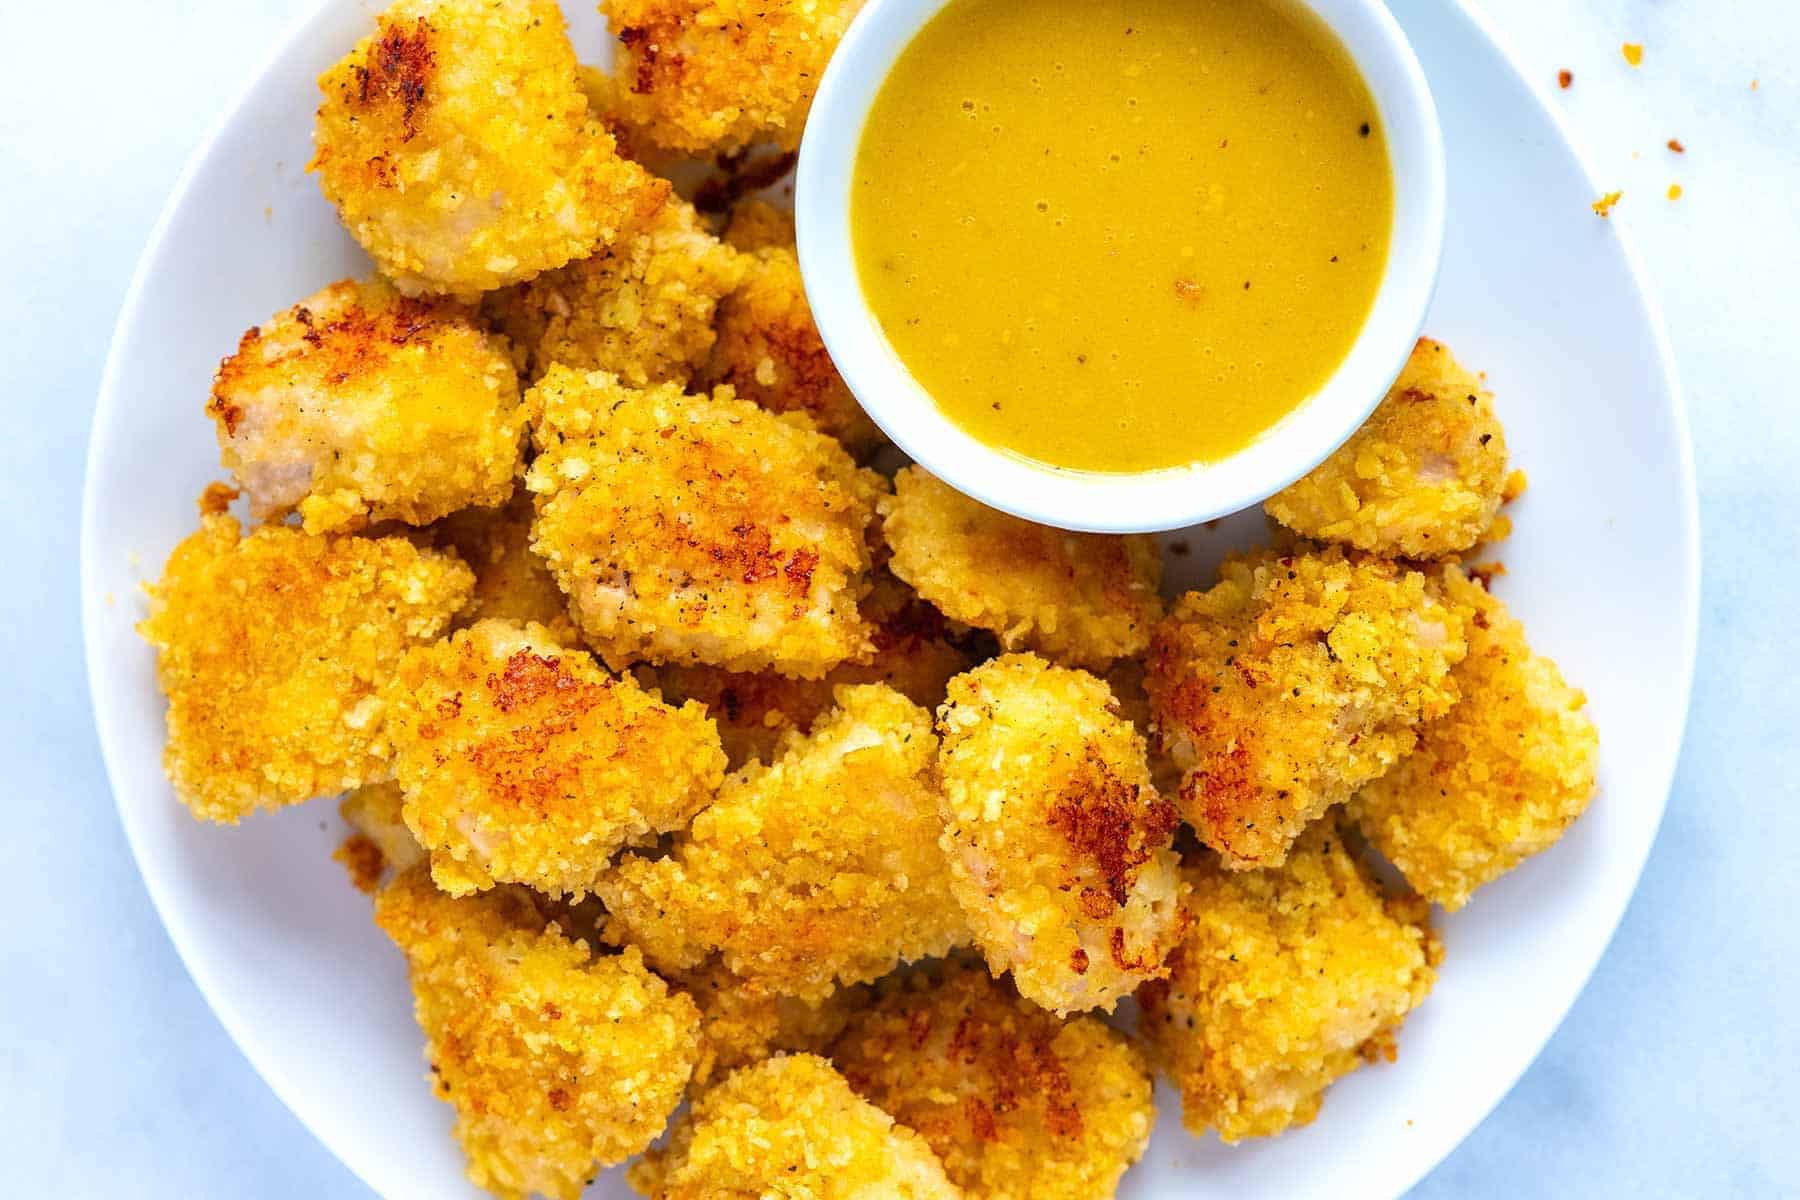
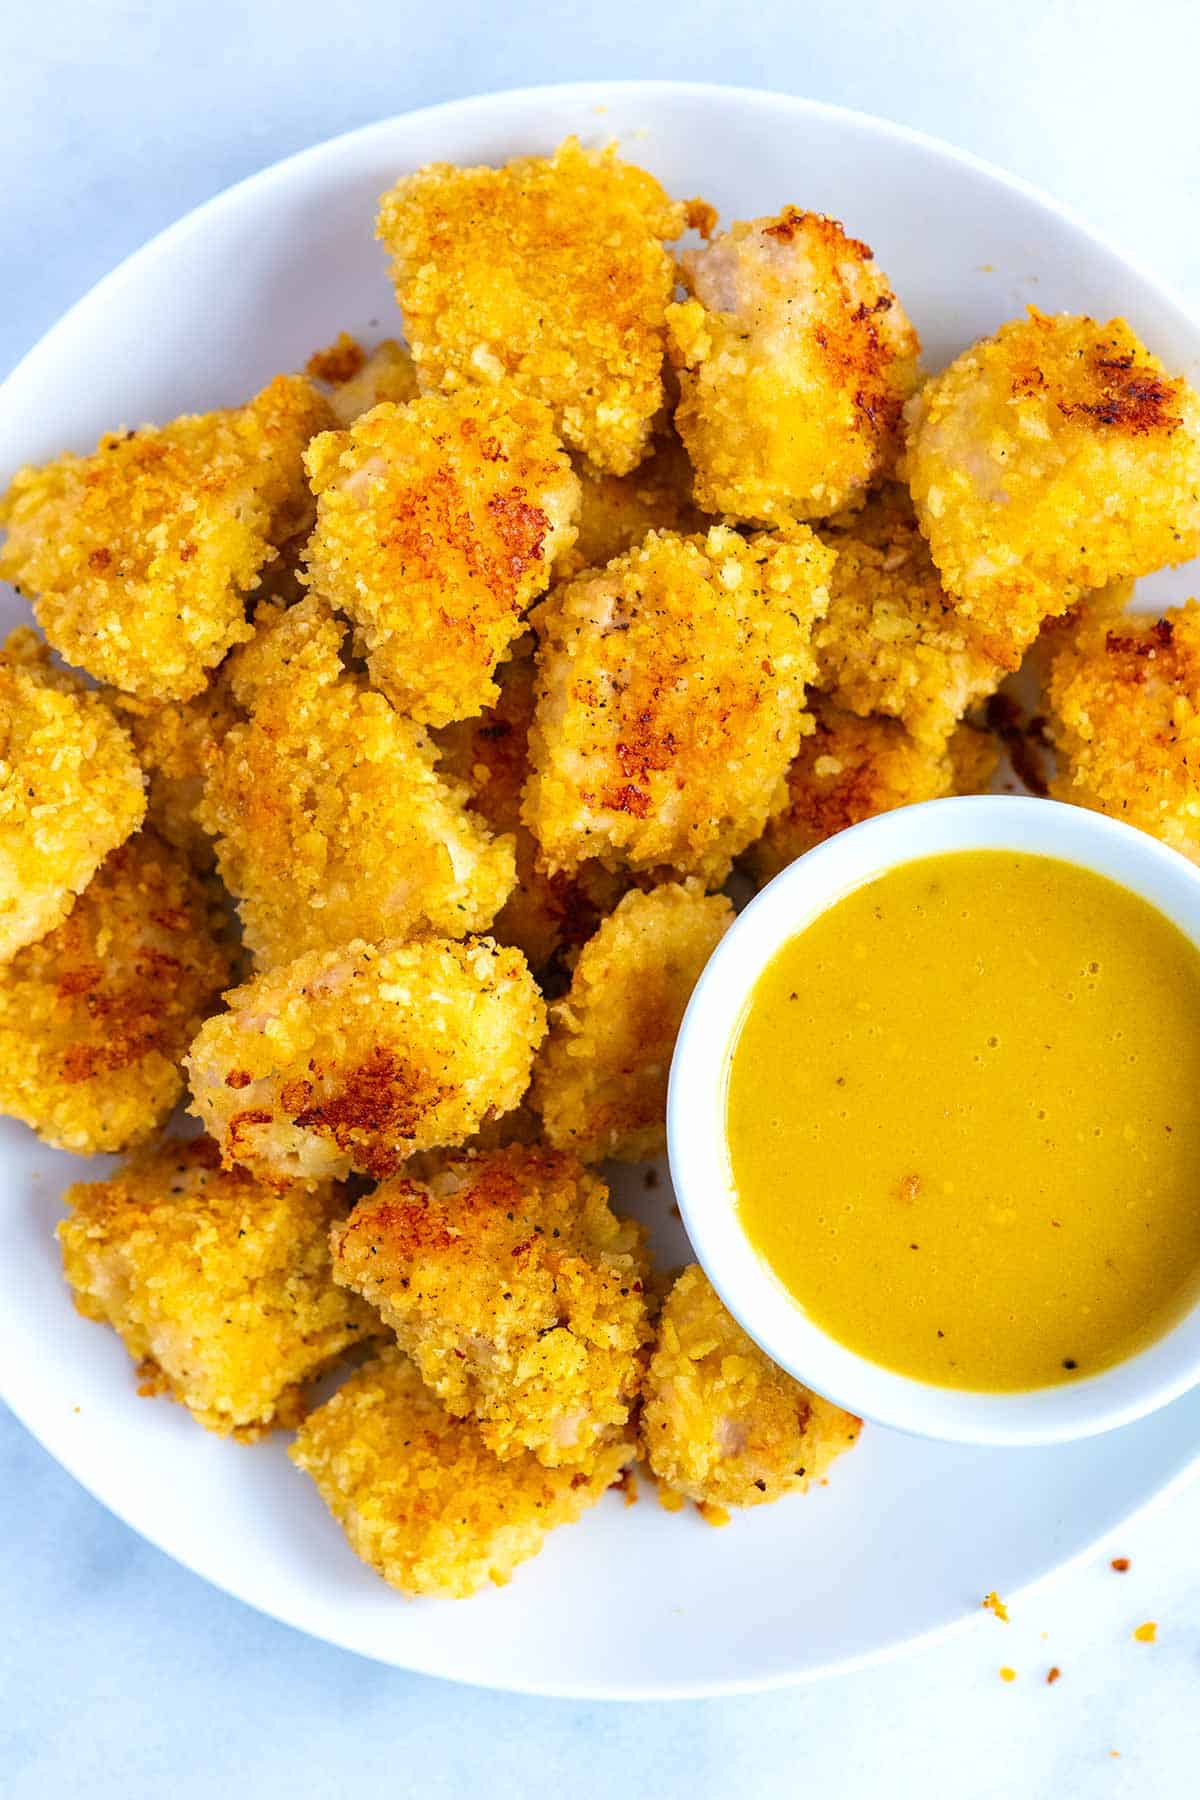
    Crispy Baked Homemade Chicken Nuggets with honey mustard sauce.

    You only need three ingredients (really!). And instead of frying them in oil, which can be messy, we bake them right in the oven for that same satisfying crunch.

    Before kids, I already loved this recipe. But once my son came along, it quickly became one of my go-tos. I love that I can make homemade nuggets in minutes, with almost no cleanup, and I know he’ll eat every bite. For more like this, see our homemade popcorn chicken!

    Key Ingredients

    • Chicken: You can use either chicken breasts or thighs for this recipe. Chicken thighs are a bit more tender and flavorful, but both work nicely.
    • Potato Chips: Use your favorite kind! I love dill pickle or sour cream and onion for extra flavor. The chips make this a naturally gluten-free breading (double-check the package to be sure they’re certified GF). You can also choose between baked and fried chips, depending on how light or indulgent you want them.
    • Egg: The egg helps the crushed chips stick to the chicken. Since we’re skipping the traditional three-step breading (flour, egg, breadcrumbs), one beaten egg is all you need.

    Find the full recipe with measurements below.

    How to Make Chicken Nuggets at Home

    Tip 1: Crush potato chips. The more crushed the chips, the better they will coat your chicken. Crush them right in the bag they came in (I open the corner, releasing the air inside, and then go to town with a heavy can). Another option is to pulse them in a blender or food processor.

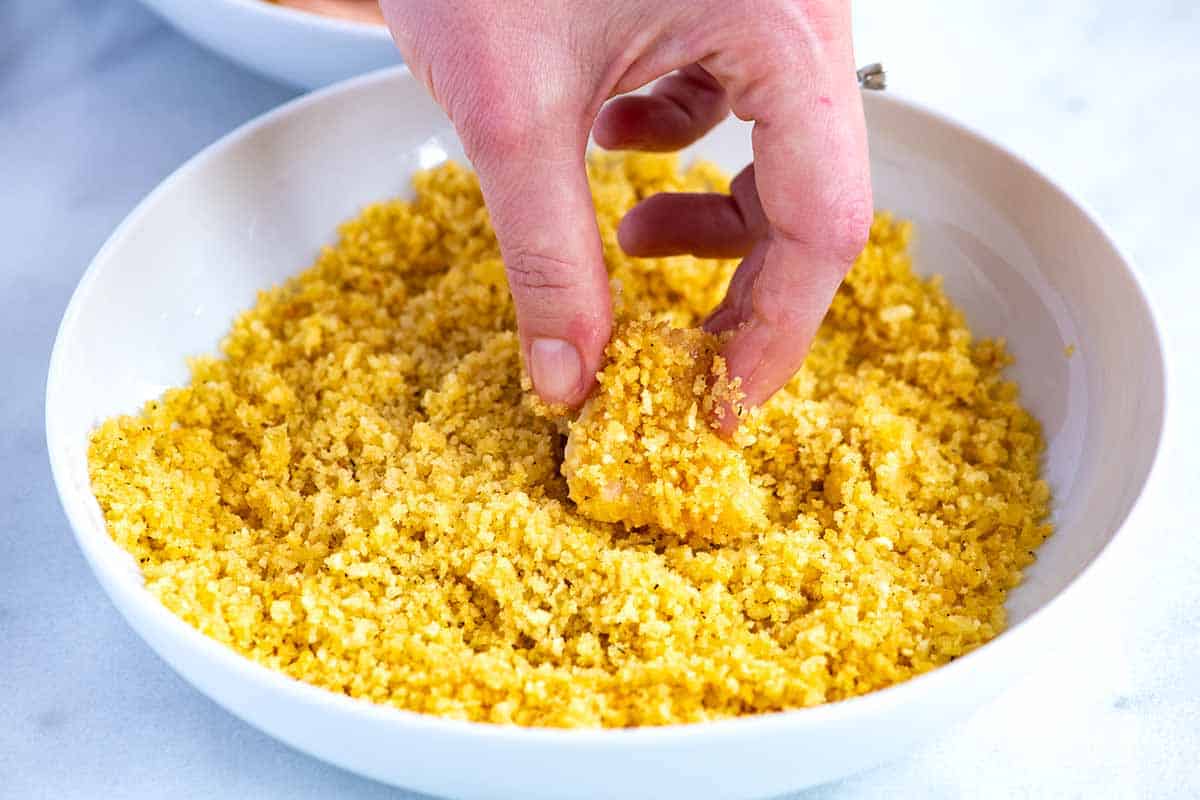
    Tip 2: Bread them. Cut your chicken into bite-sized pieces, dip them in beaten egg, then roll them in crushed potato chips.

    Breading chicken nuggets in crushed potato chips

    Tip 3: Bake them. Line the chicken nuggets on a baking sheet, spray with a bit of cooking oil, then bake until they are cooked through in the middle and golden on the outside. I like flipping them halfway for even browning.

    Homemade Chicken Nuggets

    Tip 4: Air fry them. When we first shared this recipe, air fryers weren’t a big deal, but now that’s a whole different story. You can make these chicken nuggets in the air fryer. Add them to your basket, give them a spritz of cooking oil, then air fry until golden and crispy, 8 to 10 minutes.

    Serving Suggestions

    These are classic with some ketchup or BBQ sauce on the side. Add a side of roasted potato wedges or baked fries and some roasted broccoli with homemade ranch, fry sauce, or creamy honey mustard.

    I also love a side of sweet potato fries or serving these on top of a fresh salad. They are also amazing tossed with buffalo sauce!

    More Easy Chicken Recipes

    Homemade chicken nuggets

    Easy Chicken Nuggets

    • PREP
    • COOK
    • TOTAL

    Forget store-bought, frozen nuggets! These kid (and adult) approved homemade chicken nuggets is so easy, and the secret is that crispy potato chip coating!

    Makes 4 servings

    You Will Need

    1 ¼ pounds skinless, boneless chicken breast or thighs (566g)

    5 ounces favorite potato chips, 3 heaping cups (140g)

    1 large egg, see notes

    Nonstick cooking spray or olive oil

    Directions

      1Prep: Preheat the oven to 400°F (204°C). Line a baking sheet with parchment paper, foil, or a silicone baking mat. See below for using an air fryer.

      2Prepare breading: Add the potato chips to a resealable bag, then crush them into bits using a rolling pin. You can also add to a food processor and pulse until crumbled. Add the crushed potato chip crumbles to a wide bowl. Beat the egg in a separate bowl.

      3Bread the chicken: Cut the chicken into 1-inch pieces (about 24 pieces). With one hand, dip a piece of chicken into the beaten egg. Shake any excess egg off to prevent soggy nuggets. Roll the chicken into the crushed potato chips with your other hand or kitchen tongs and place them onto the prepared baking sheet. Repeat with the remaining pieces of chicken.

      4Bake: Spray the tops of the chicken with nonstick cooking spray or add a drizzle of olive oil. Bake for 15 minutes, flip, and then bake until an internal thermometer inserted into the chicken reads 165°F, another 8 to 12 minutes more.

      5Air Fry (optional): Instead of baking them, place the coated chicken nuggets in your air fryer basket in a single layer. Spray them lightly with cooking spray. Air fry at 390°F for 4 minutes. Shake the basket, spray lightly again, then air fry for another 3 to 5 minutes (or until golden brown and cooked in the middle).

    Adam and Joanne’s Tips

    • Storing: Store leftover nuggets in an airtight container in the fridge for up to 4 days. Or, freeze the cooked, cooled nuggets on a sheet pan for an hour or two until solid. Then, transfer them to an airtight container and freeze them for up to 3 months. To reheat, bake in a preheated 400°F oven for 10 to 15 minutes or air fry at 390°F for 4 to 7 minutes.
    • One egg is usually enough. If you run out, whisk a second egg into the bowl.
    • For crispier chicken nuggets, insert a wire baking rack into a rimmed baking sheet. Then, bake the nuggets on top of the wire rack. Since air flows around the chicken, there is no need to flip the chicken.
    • Recipe inspired by Gimme Some Oven.
    • The nutrition facts provided below are estimates. We assumed full-fat salted potato chips. For fewer calories and fat, use baked chips.

    Nutrition Per Serving
    Serving Size
    1/6 of the recipe, 4 nuggets
    /
    Calories
    277
    /
    Total Fat
    13g
    /
    Saturated Fat
    1.8g
    /
    Cholesterol
    99.9g
    /
    Sodium
    204mg
    /
    Carbohydrate
    15.4g
    /
    Dietary Fiber
    0.9g
    /
    Total Sugars
    0.1g
    /
    Protein
    24.1g


    AUTHOR:

    Adam Gallagher

    Adam and Joanne of Inspired Taste

    We are Adam and Joanne Gallagher, the creators of Inspired Taste. Established in 2009, Inspired Taste grew from a childhood dream into one of the internet’s most trusted recipe sites with hundreds of reliable recipes, step-by-step videos, and expert tips.More About Us

    Source link

  • Easy Green Smoothie Recipe

    Easy Green Smoothie Recipe

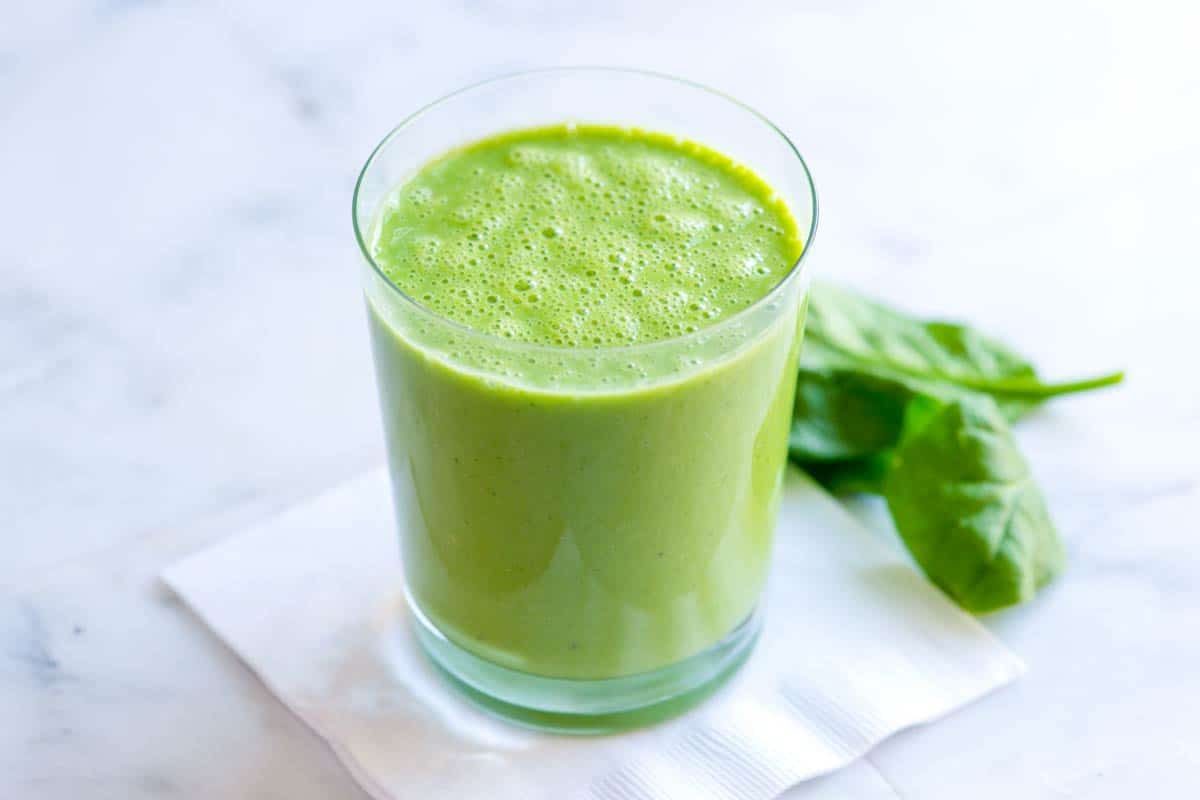
    I love this simple green smoothie recipe, which blends together spinach, banana, and Greek yogurt for added protein. It is naturally sweetened with fruit and tastes incredible!

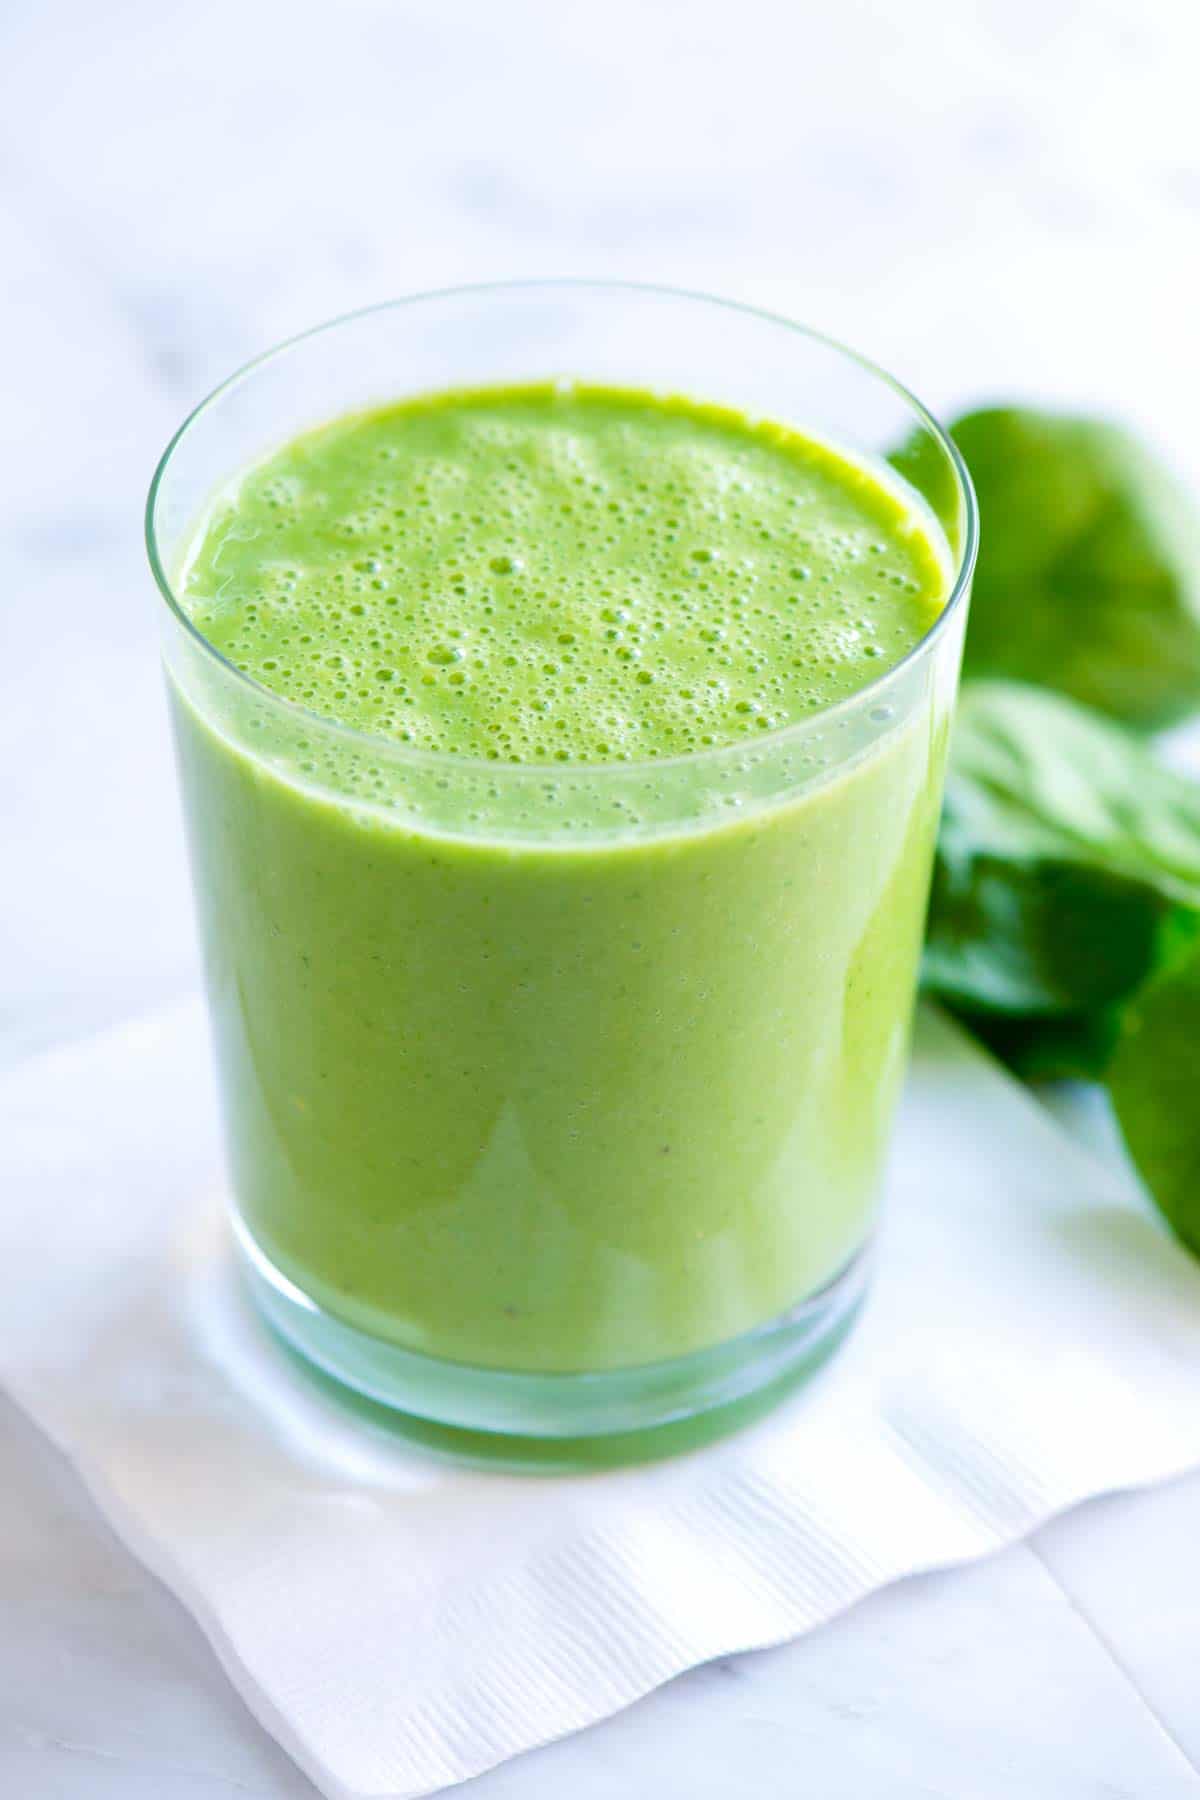
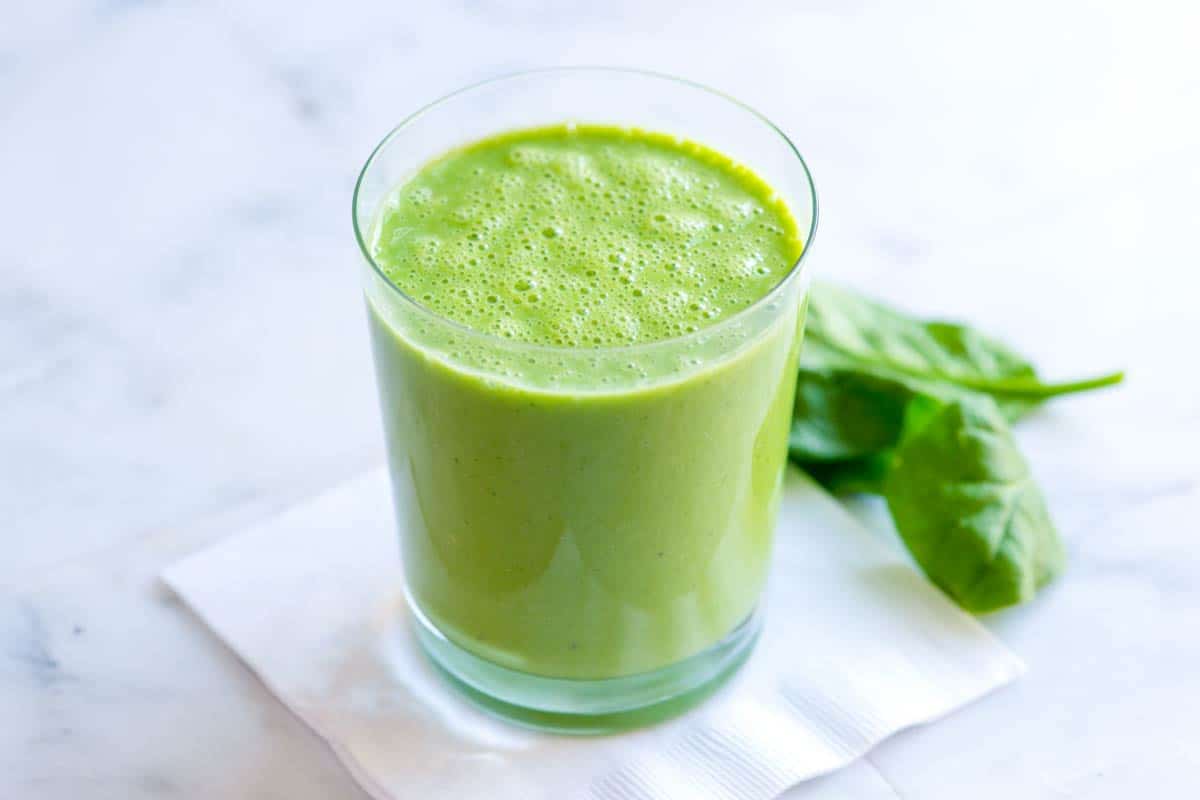
    Easy Green Smoothie

    When it comes to smoothies, simple is best. I can’t keep up with lots of extra ingredients, and if I am going to make something daily, I need it to be quick with ingredients I already have on hand. This green smoothie is perfect!

    Inspired by our popular banana smoothie, you can make this easy green smoothie in 5 minutes or less! It’s easy, healthy, and delicious. For more super simple smoothie recipes, see our blueberry smoothie and strawberry smoothie. You may also enjoy our homemade green juice!

    Key Ingredients

    • Spinach: I blend in 2 cups of baby spinach to make this super green. Even with so much spinach, you won’t really taste it. In fact, this is my son’s favorite smoothie, and he’s pretty sensitive to the taste of spinach. Other greens, like kale, are great, too, but you might taste them a bit more than baby spinach.
    • Banana: I use one banana to make one large or two smaller kid-size smoothies. For the best smoothie, use a ripe banana. For the creamiest smoothie, use frozen banana slices. I’ve shared how I freeze bananas for smoothies in my banana smoothie recipe.
    • Half an Orange: When I have oranges in the house, I love adding them to my morning smoothie. They add extra vitamin C and tropical flavor. You can substitute oranges with other fruits like mango, pineapple, or berries (but remember that berries will change the smoothie’s color).
    • Greek Yogurt: I love adding a spoonful for extra creaminess and protein. If you want more protein, use plain high-protein yogurt or a scoop of your favorite vanilla protein powder.
    • Milk: You need a bit of liquid to thin things out. I love milk or dairy-free milk, but even water will do the trick.
    Easy Green Smoothie

    Easy Green Smoothie

    This creamy, protein-packed green smoothie is simple and only takes a few minutes. We’ve shared a basic recipe below with optional ingredients after that. If you are looking for a substitute for Greek yogurt, leave it out or replace it with more fruit. For an extra boost of protein, add 1 to 2 scoops of your favorite protein powder.

    Makes 2 kid-size smoothies or 1 large

    You Will Need

    Basic Green Smoothie

    1 medium banana, peeled

    1/2 medium orange, peeled and quartered

    1/3 cup plain Greek yogurt

    1/4 cup milk or non-dairy milk

    2 cups fresh spinach


    Optional

    1 tablespoon flaxseed meal or shelled hemp hearts

    1 tablespoon peanut butter or almond butter

    1 to 2 teaspoons pure honey

    1/2 cup mixed frozen berries

    Adam and Joanne’s Tips

    • Using a frozen banana makes this really refreshing and thick.
    • This smoothie tastes best fresh, but it can be frozen for later. To save the smoothie for later, add to a food-safe resealable plastic bag or container and freeze. Then 45 to 60 minutes before needing the smoothie, take out from freezer.

    Nutrition Per Serving
    Serving Size
    1 smoothie (large)
    /
    Calories
    240
    /
    Total Fat
    6.1g
    /
    Saturated Fat
    2.4g
    /
    Cholesterol
    12.3mg
    /
    Sodium
    128.8mg
    /
    Carbohydrate
    38.2g
    /
    Dietary Fiber
    5.5g
    /
    Total Sugars
    22.4g
    /
    Protein
    12.4g


    AUTHOR:

    Joanne Gallagher

    Previous Post: Hibiscus Ginger Beer Mocktail
    Next Post: Honey Roasted Chickpeas

    Source link

  • Easy Smoked Salmon Dip Recipe

    Easy Smoked Salmon Dip Recipe

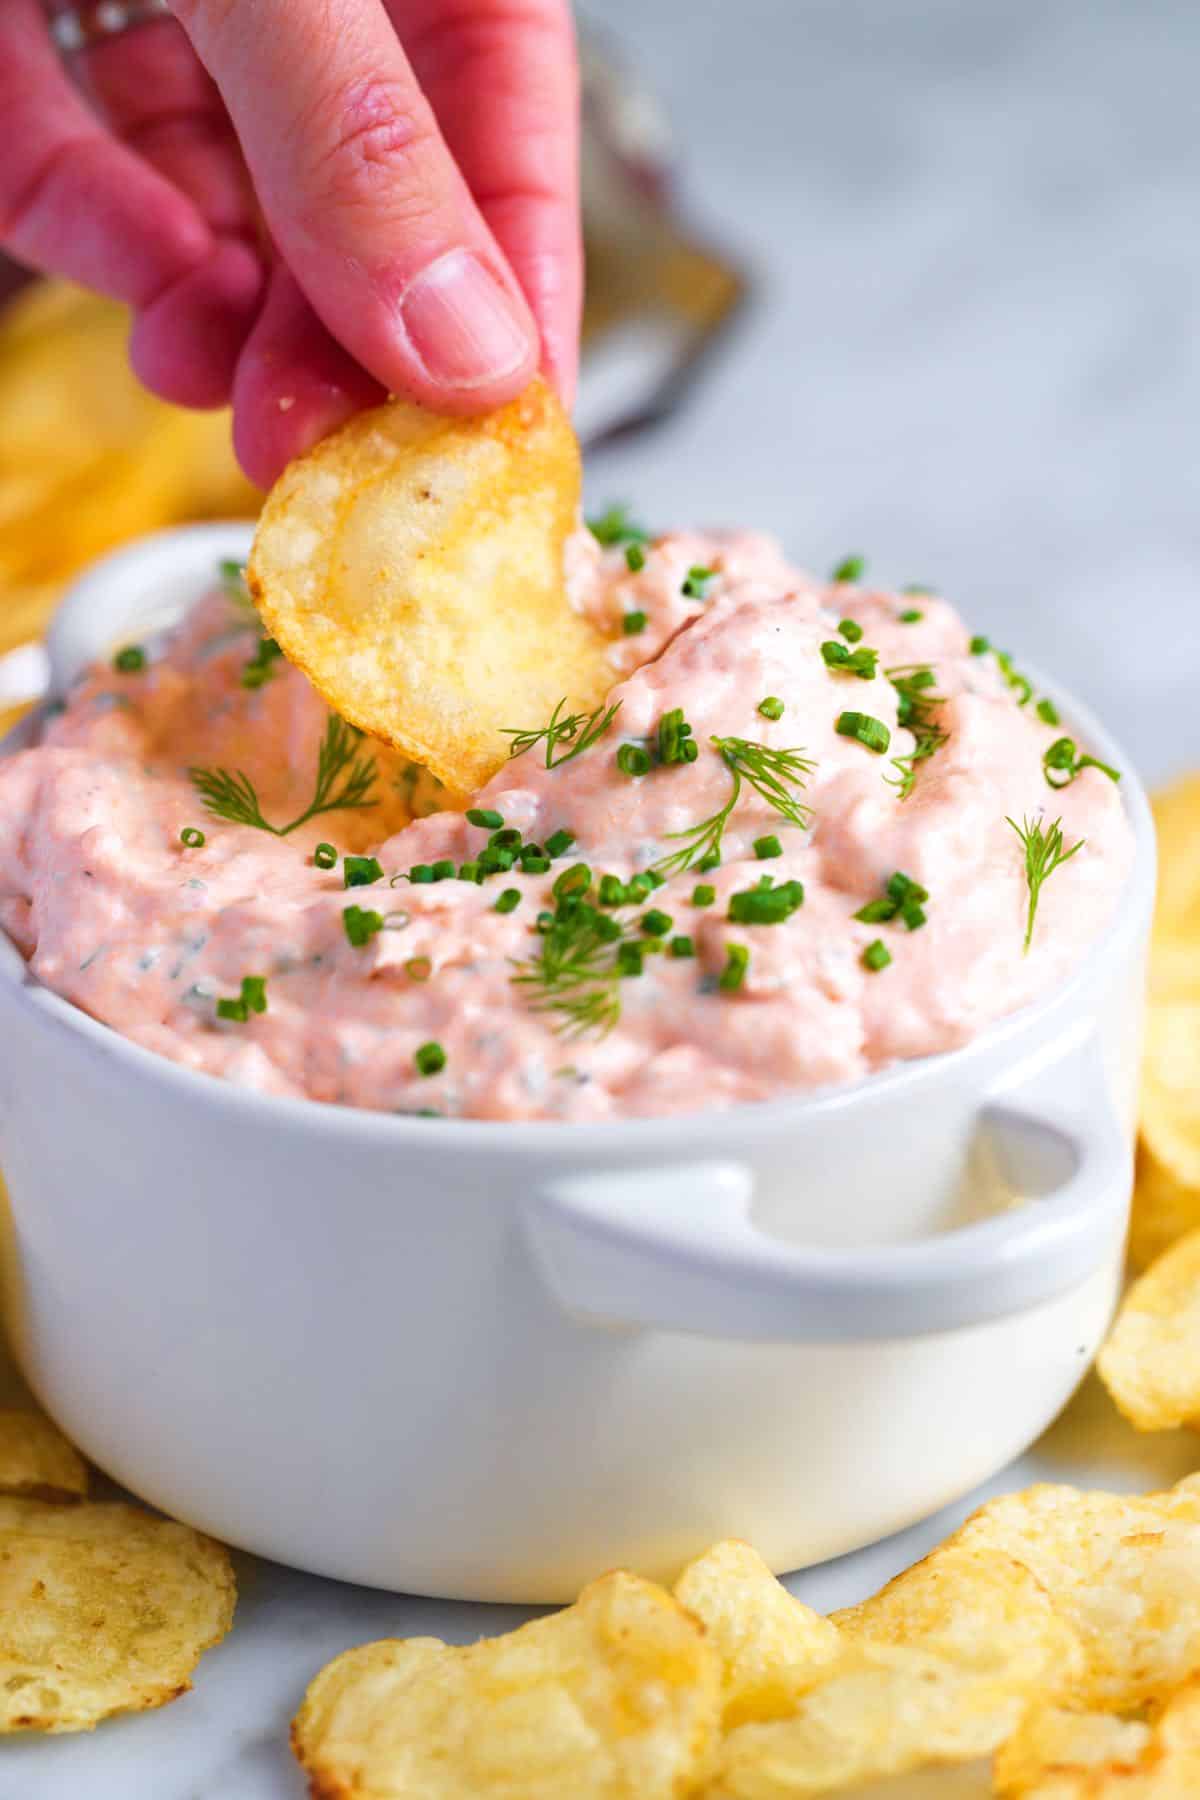
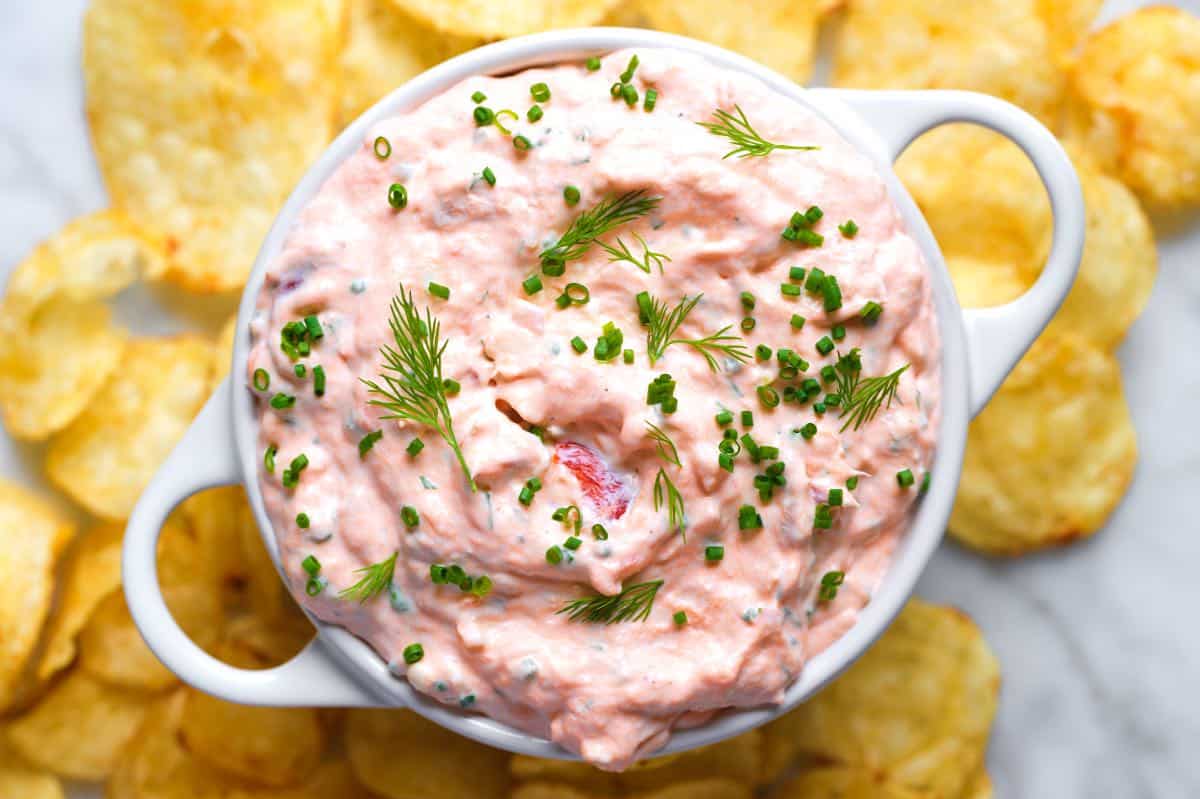
    Our smoked salmon dip recipe is incredibly creamy and delicious. I love serving it with thick potato chips, crackers, sliced bread, or even spread onto bagels.

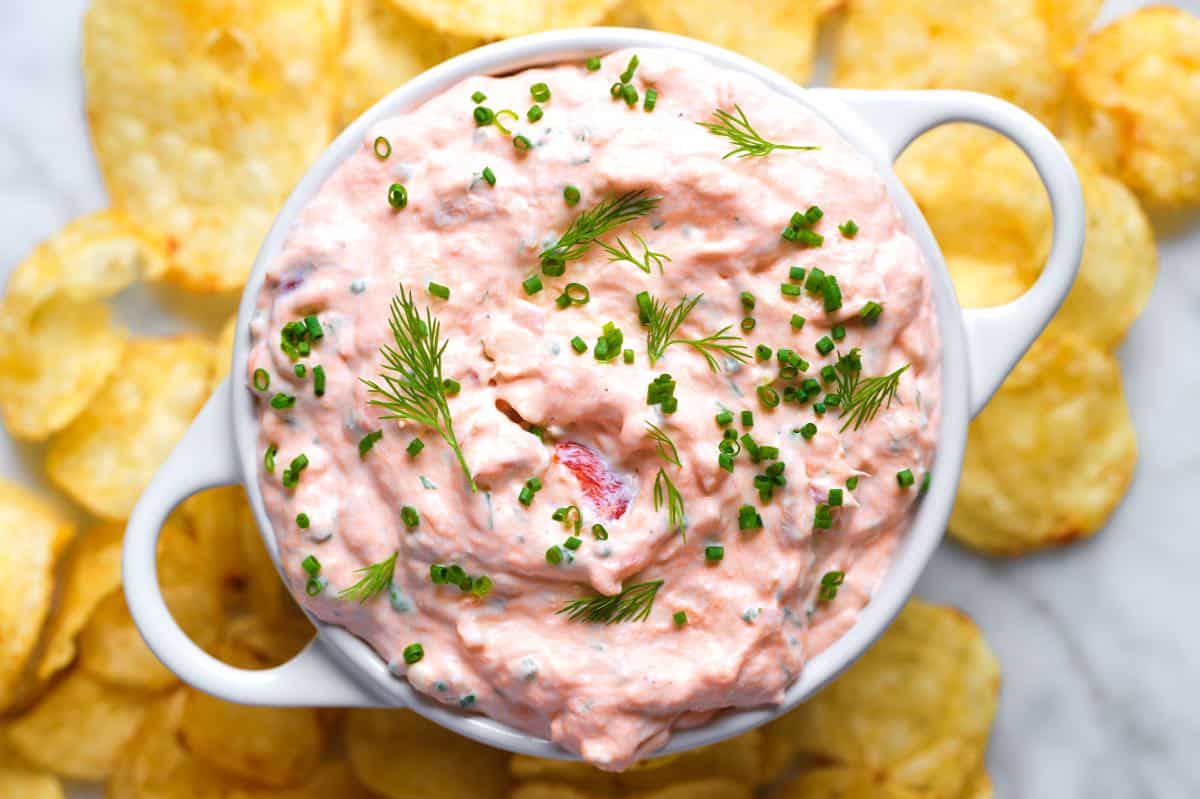
    Smoked Salmon Dip

    We love smoked salmon and are always looking for more ways to use it. This salmon dip has quickly turned into one of my favorite recipes! It’s a knockout appetizer and works just as well for brunch with bagels!

    This never disappoints at celebrations and get-togethers, and honestly, it’s usually one of the first things to go! Get ready for everyone to ask you for the recipe. For another seafood dip, try our incredible homemade crab dip, which is just as delicious served hot as it is served cold.

    Key Ingredients

    • Hot Smoked Salmon: This is my go-to for this recipe, but you can use cold smoked salmon or gravlax (lox). It has a firm, flaky texture, and the smoky flavor pairs perfectly with the cream cheese base.
    • Cream Cheese: I use full-fat block cream cheese because it makes the dip so delicious.
    • Sour Cream and Mayonnaise: These add flavor and creaminess while lightening the texture of the cream cheese. I love using homemade mayo when I have it in the fridge. For a lighter dip, you can try substituting some of the sour cream for Greek yogurt (although, I do really love the sour cream in this recipe).
    • Shallot and Fresh Herbs: I love the light onion flavor of shallot in this dip, but use your favorite fresh herbs. I love using chives and dill, which complement the salmon well.
    • Lemon: This cuts through the heaviness of the cream cheese, sour cream, and mayo.
    • Worcestershire Sauce: This adds another layer of flavor. A little bit makes creamy dips and sauces so much better. I also use Worcestershire sauce when making homemade ranch.

    Find the full recipe with measurements below.

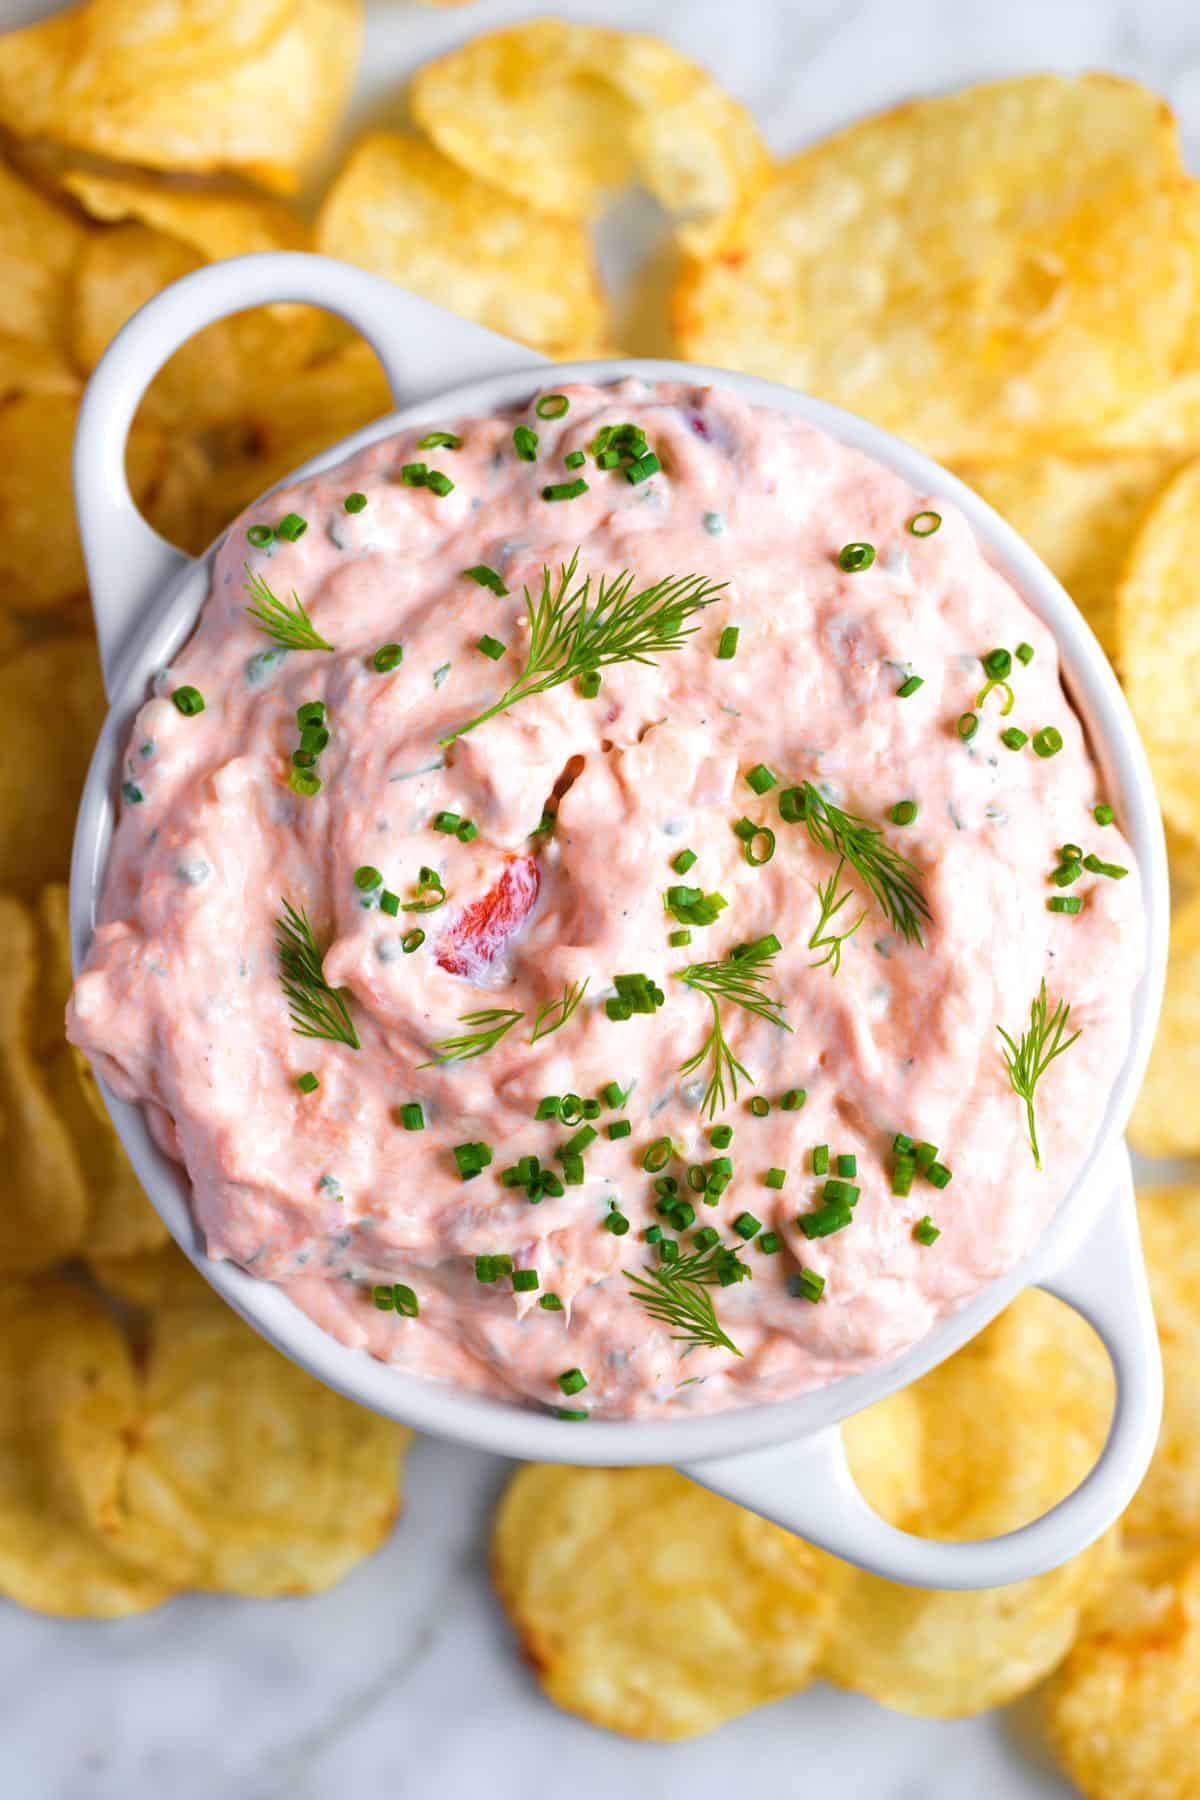
    Homemade Smoked Salmon Dip

    How to Make Our Favorite Smoked Salmon Dip

    Tip 1: Use hot-smoked salmon. You can make this dip with hot-smoked, cold-smoked, or cured salmon (such as gravlax or lox), but I prefer the rich, smoky flavor of hot-smoked salmon. It pairs beautifully with the creamy ingredients, adding a smoky, sweet flavor that makes this dip irresistible.

    Hot smoked salmon ready to be turned into dip

    Tip 2: Use an electric mixer. For a light, fluffy texture, whip the cream cheese with an electric hand mixer or stand mixer. This step gives our salmon dip a smooth, whipped consistency that’s perfect for dipping or spreading.

    Tip 3: Add the salmon last. Once the cream cheese is whipped, light, and fluffy, gently fold in the salmon. Mix just enough to combine. Over-mixing will break the salmon into tiny pieces, rather than leaving those delicious, flaky bits throughout the dip.

    Adding smoked salmon to stand mixer for salmon dip

    More of My Favorite Dips

    Easy smoked salmon dip with chips

    Easy Smoked Salmon Dip

    • PREP
    • TOTAL

    This is lovely served with thick potato chips, pita bread, crostini, bagel chips, veggies, and spread onto bagels. For the most flavorful, smoky dip, use hot smoked salmon, as we do in the video. For a more mild, creamy dip, use cold smoked salmon (or cured salmon). If you use cold smoked or cured salmon, finely chop the salmon into tiny bits before mixing it into the dip.

    For the most creamy and whipped texture, use a stand mixer or large mixing bowl with an electric hand mixer.

    Makes 2 1/2 cups

    Watch Us Make the Recipe

    You Will Need

    8 ounces hot smoked salmon (225g)

    1 cup (8oz) cream cheese, softened, see notes

    ½ cup sour cream (120g)

    ½ cup mayonnaise, try homemade mayo (120g)

    Heaped tablespoon minced shallot, from half a small shallot

    1 ½ teaspoons fresh lemon juice

    1 teaspoon Worcestershire sauce or Pickapeppa sauce

    5 twists fresh ground black pepper

    ⅛ teaspoon fine sea salt

    2 tablespoons finely chopped fresh chives, plus more for garnish

    1 tablespoon finely chopped fresh dill, plus more for garnish

    Directions

      1Beat the cream cheese: In a stand mixer or a large mixing bowl with an electric hand mixer, beat cream cheese on medium-low speed until creamy, 30 seconds to 1 minute.

      2Make the dip: Scrape the bottom and sides of the bowl, then add the sour cream, mayonnaise, shallots, lemon juice, Worcestershire sauce, pepper, and salt. Mix on low speed until blended.

      3Add the salmon: Flake in the salmon (do not use the skin). Mix on low speed until blended. If using cold-smoked or cured salmon, finely chop the salmon before adding it to the dip.

      4To finish: Scrape the bowl’s sides and bottom, then scatter over the chives and dill. Mix in on the lowest speed so the herbs don’t bruise. Remove from the mixer and serve with a few extra herbs sprinkled on top. We love this salmon dip served immediately, but it is even better after a night in the refrigerator.

    Adam and Joanne’s Tips

    • Storing: This will last up to 4 days in the fridge. We recommend storing it in an airtight container. Stir the dip well before serving, and consider letting it sit out for 20 minutes to warm up so it is dippable and spreadable. We do not recommend freezing salmon dip.
    • Hot smoked salmon vs. cold smoked salmon: Hot smoked salmon is smoked at a high temperature, while cold smoked salmon is cured in salt for several days. Hot smoked salmon has a firm and flaky texture and is usually sold in 4 to 8 ounces fillets. On the other hand, cold smoked salmon has a silky and delicate texture and is sold sliced, similar to gravlax.
    • Softened cream cheese: For best results, use room-temperature cream cheese to ensure it mixes well.
    • The nutrition facts provided below are estimates.

    Nutrition Per Serving
    Serving Size
    1/4 cup (about 10 servings total)
    /
    Calories
    258
    /
    Total Fat
    20.3g
    /
    Saturated Fat
    7.5g
    /
    Cholesterol
    66.7mg
    /
    Sodium
    196.3mg
    /
    Carbohydrate
    3.4g
    /
    Dietary Fiber
    0.4g
    /
    Total Sugars
    1.1g
    /
    Protein
    16.3g


    AUTHOR:

    Joanne Gallagher

    Adam and Joanne of Inspired Taste

    We are Adam and Joanne Gallagher, the creators of Inspired Taste. Established in 2009, Inspired Taste grew from a childhood dream into one of the internet’s most trusted recipe sites with hundreds of reliable recipes, step-by-step videos, and expert tips.More About Us

    Source link

  • Easy Italian Pasta Salad Recipe

    Easy Italian Pasta Salad Recipe

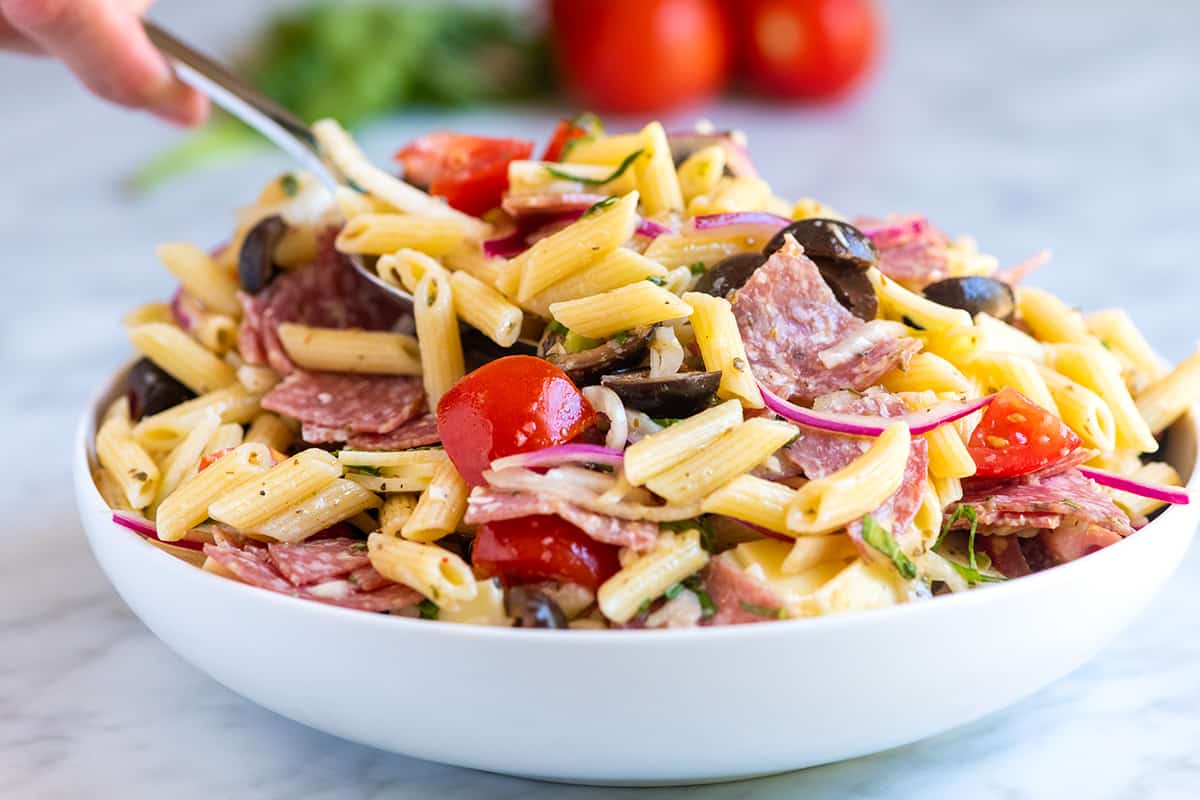
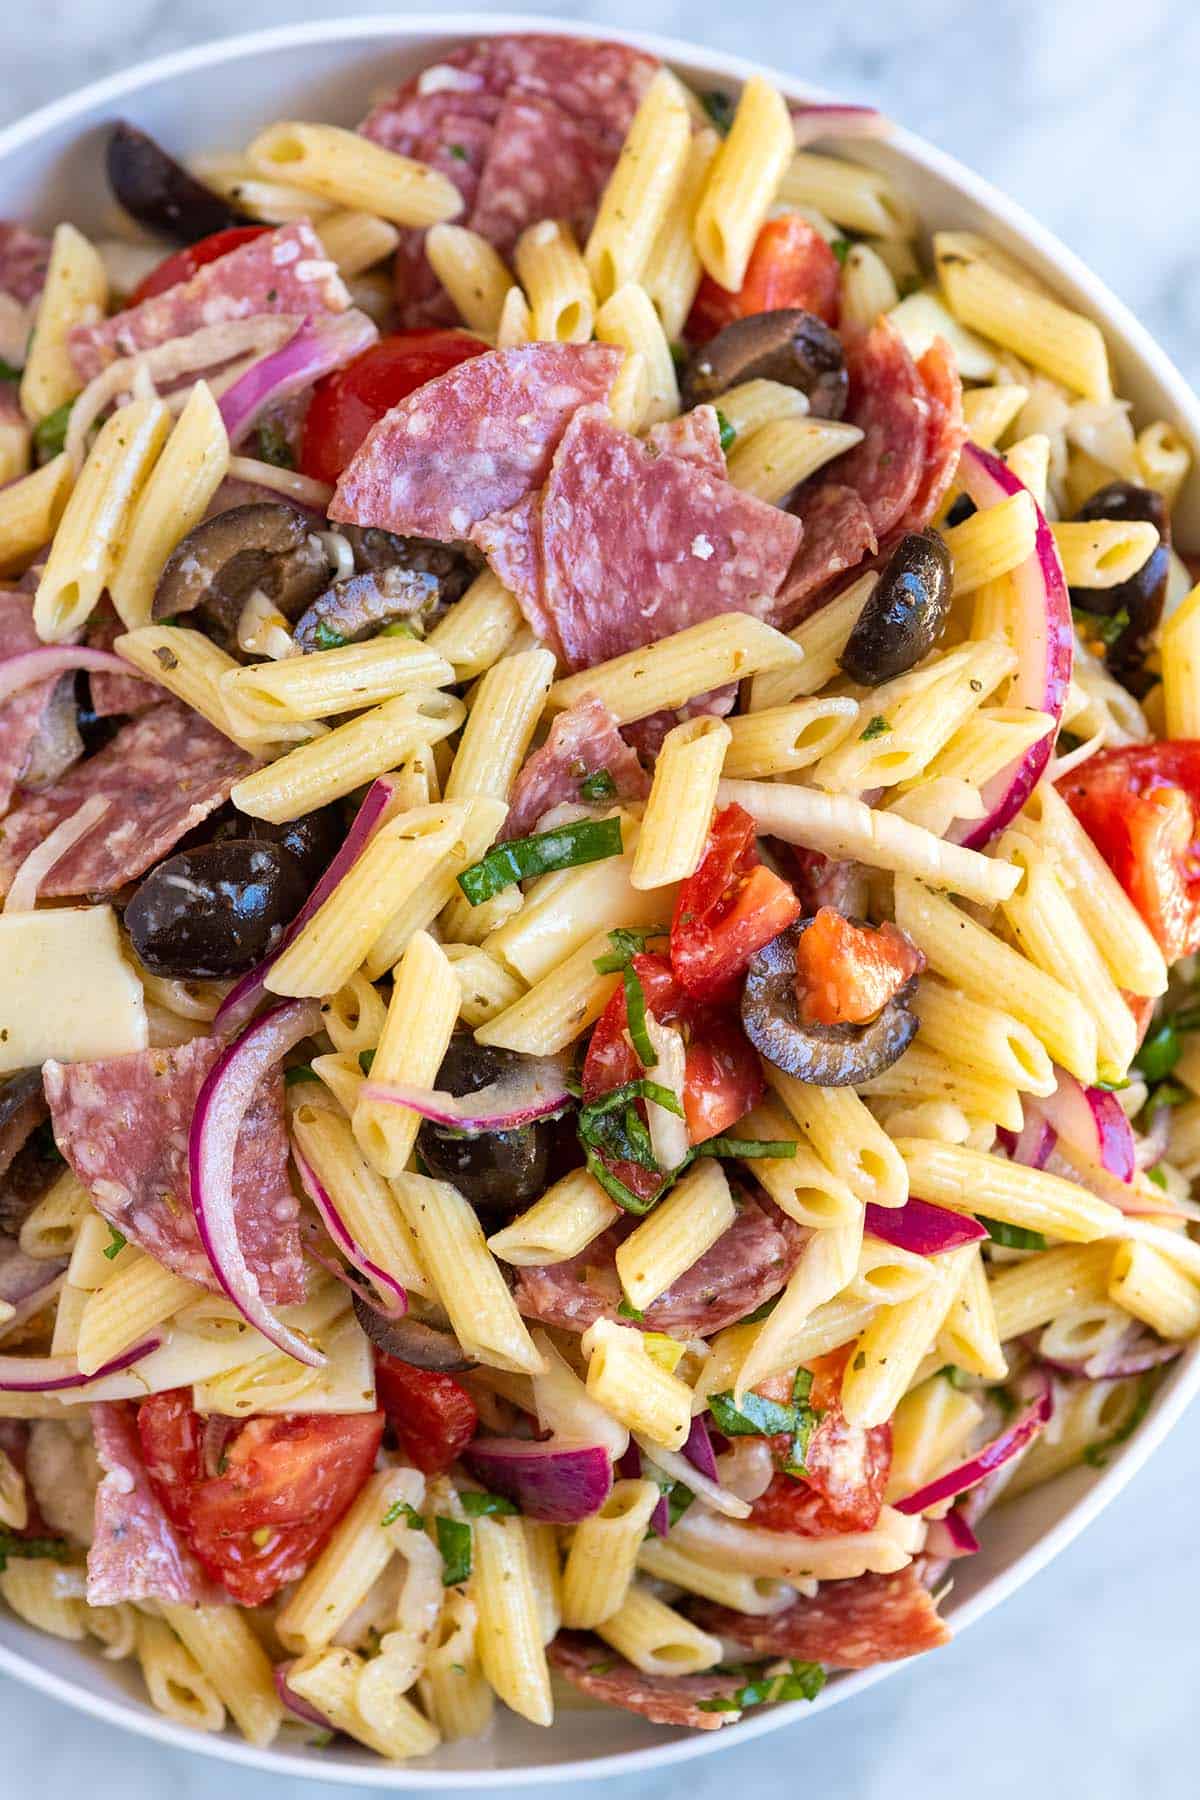
    Our Italian pasta salad recipe has a fresh and flavorful dressing, two kinds of cheese, salami, olives, and the perfect blend of Italian herbs. Take one bite, and you won’t be able to stop!

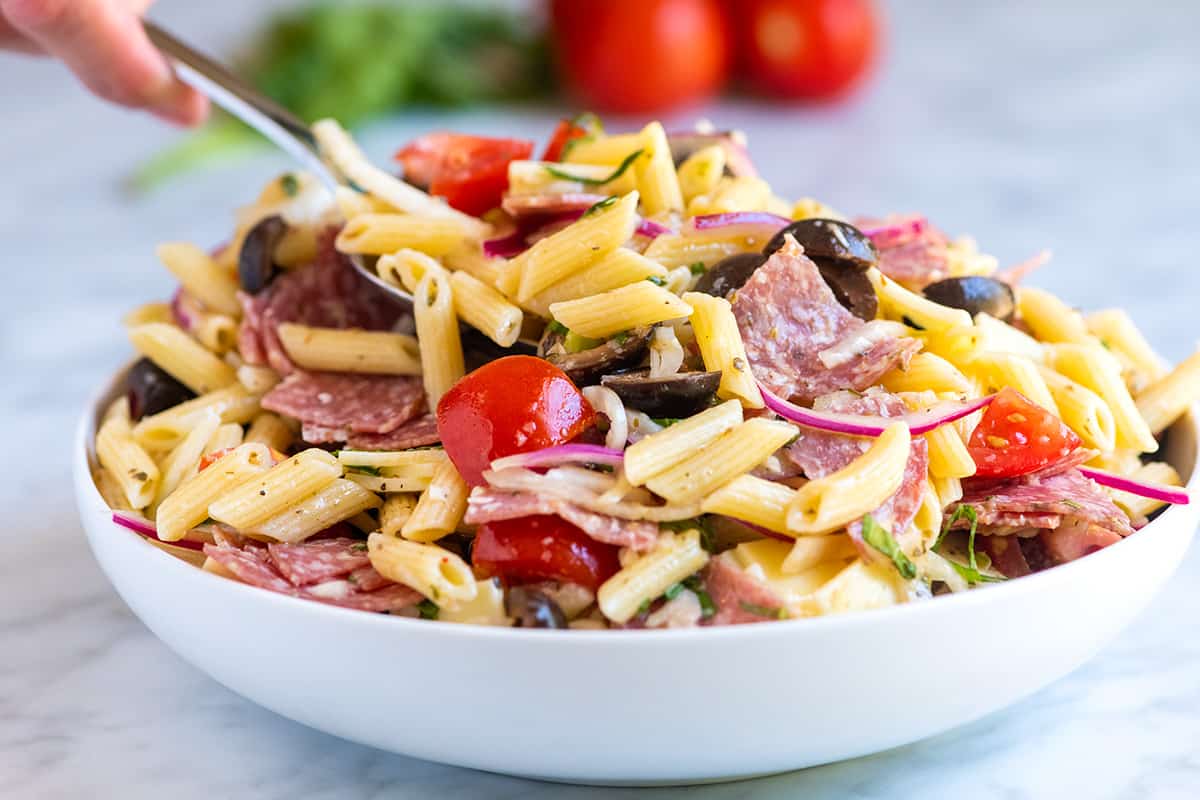
    A bowl of Italian pasta salad

    Just like our easy pasta salad, we pack in as many textures and flavors to this Italian-inspired salad as we can. There’s not one, but two kinds of cheese, salami, briny olives, fresh tomatoes, and a generous handful of fresh basil. (If you love briny salads, take a look at this briny Greek pasta salad made with the brine from a jar of pepperoncini peppers.)

    The dressing is a winner, too. It’s not all that different from the dressing we use for the other pasta salad, with the exception of an extra pop of flavor from lemon juice, Dijon mustard, and minced garlic.

    Key Ingredients

    • Pasta: Choose hearty pasta shapes like penne, fusilli, rotini, and farfalle (bow tie). They also have the advantage of lots of nooks and crannies, which trap the dressing and bits of cheese.
    • Red Onion, Tomatoes, and Basil: I love red onion for its bite and tomatoes and basil for their freshness.
    • Salami and Cheese: I love a sweeter salami in this, but for a spicy option, use pepperoni. For the cheese, use shredded parmesan and provolone. The parmesan is salty and the provolone is creamy.
    • Olives: I used black olives in the photos, but feel free to substitute green olives or Kalamata olives. They all add a salty, briny flavor.
    • Italian Salad Dressing: This pasta salad’s dressing is inspired by our homemade Italian dressing. It’s bright, herby, and much better than anything you can buy at the store.

    How to Make Italian Pasta Salad

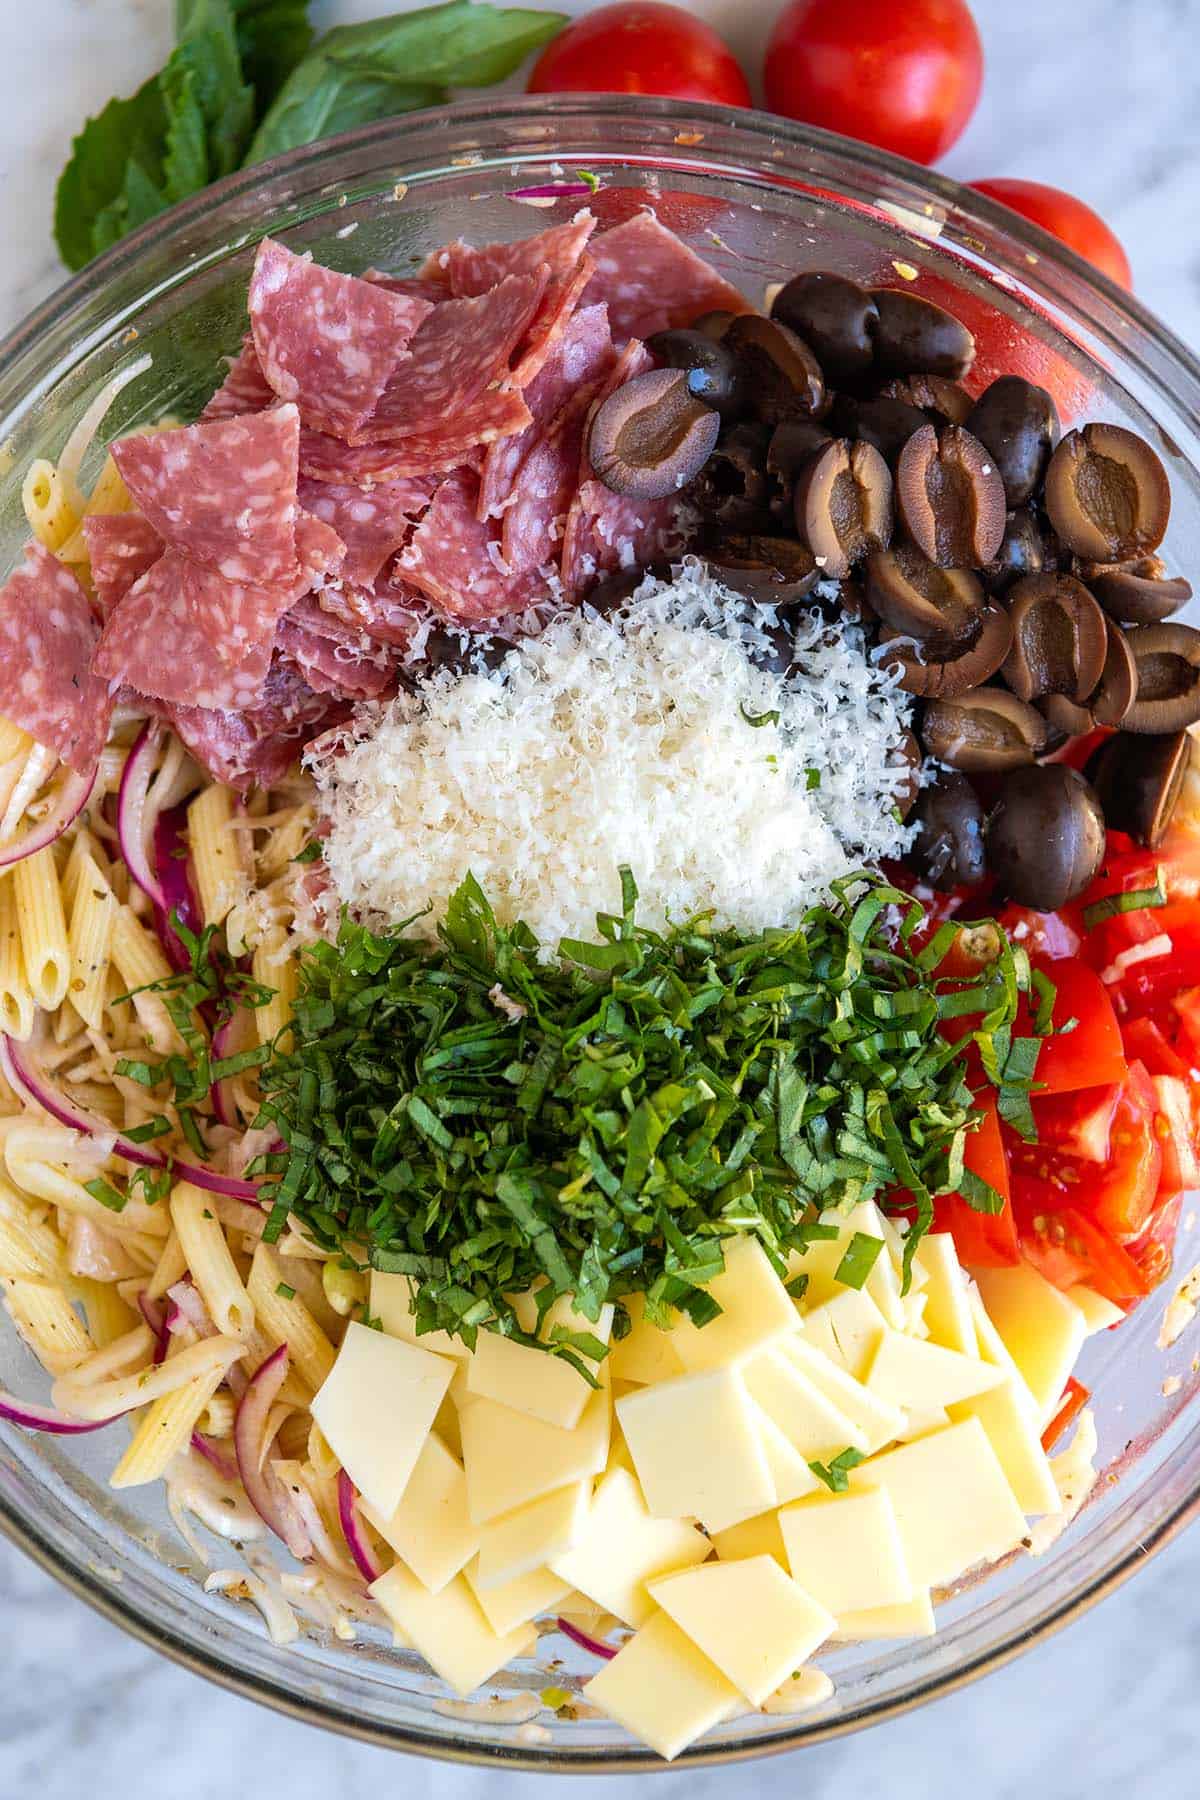
    We’ve got a few pasta salad recipes already on Inspired Taste so you might be wondering why we needed another one, but trust me, this hearty salad with salami and cheese is a keeper. It’s super simple to make, too! Whisk the dressing ingredients together in the bottom of a big serving bowl, then pile in everything else.

    Italian Pasta Salad Ingredients -- Pasta, cheese, basil, tomatoes, onions, olives

    Letting the salad sit in the dressing for a while makes a huge difference in flavor. We take the same approach when making potato salad. Make pasta salad and keep it in the fridge for up to 5 days.

    Italian Pasta Salad with salami, tomatoes, and cheese

    Easy Italian Pasta Salad

    • PREP
    • COOK
    • TOTAL

    Italian pasta salad made with a fresh and flavorful dressing, two kinds of cheese, salami, olives, and the perfect blend of Italian herbs. Take one bite of this pasta salad, and you won’t be able to stop.

    Start with a hearty pasta shape that has nooks and crannies to hold onto the dressing like penne or rotini. We love adding parmesan cheese, which melts into the dressing as well as provolone cheese and salami, but you can always adjust the ingredient list based on your favorite Italian cheeses and meats.

    6 Servings

    You Will Need

    Pasta Salad

    8 ounces dried pasta like penne, fusilli or rotini

    1/2 medium red onion, thinly sliced

    4 ounces sliced provolone cheese, cut into 1-inch pieces

    1/3 cup finely grated parmesan cheese

    4 ounces Italian-style salami, sliced and quartered

    6 ounces tomatoes, chopped, about 1 cup

    1 cup olives, pitted and halved

    1/4 cup fresh basil leaves, chopped


    Salad Dressing

    1/4 cup (60ml) extra-virgin olive oil

    1/4 cup (60ml) fresh lemon juice

    2 tablespoons (30ml) red wine vinegar

    1 small garlic clove, finely grated or minced, about 1/2 teaspoon

    1 teaspoon Dijon mustard

    1 teaspoon honey

    1 teaspoon dried oregano

    1 teaspoon chopped fresh thyme or use 1/4 teaspoon dried thyme

    1/2 teaspoon fine sea salt plus more to taste

    1/2 teaspoon fresh ground black pepper

    Directions

      1Place the sliced onion into a small bowl and cover with cold water. Set the bowl aside for 10 minutes so that the raw flavor on the onion calms a little. Drain, and then rinse the onions before adding them to the salad.

      2Bring a large pot of salted water to a boil. Add pasta and cook until tender, 6 to 10 minutes (check the package for recommended cook time). Drain and rinse well under cold water.

      3While the pasta cooks, in the bottom of a large bowl, make the dressing. Whisk the olive oil, lemon juice, red wine vinegar, garlic, mustard, honey, oregano, thyme, salt, and black pepper together until well blended.

      4Add the drained and rinsed pasta to the dressing and mix well.

      5Stir in the drained and rinsed red onion, provolone cheese, parmesan cheese, salami, tomatoes, olives, and basil.

      6Taste for seasoning and adjust with salt and pepper as needed. Serve or for the best results, cover and refrigerate for at least 30 minutes and up to 5 days.

    Adam and Joanne’s Tips

    • Pasta salad gets better and better over time so making it a day in advance is a great idea.
    • The nutrition facts provided below are estimates.

    Nutrition Per Serving
    Serving Size
    1/6 of the recipe
    /
    Calories
    424
    /
    Total Fat
    24.4g
    /
    Saturated Fat
    7.8g
    /
    Cholesterol
    33.3mg
    /
    Sodium
    743.5mg
    /
    Carbohydrate
    37.1g
    /
    Dietary Fiber
    2.7g
    /
    Total Sugars
    4.6g
    /
    Protein
    14.9g


    AUTHOR:

    Joanne Gallagher

    Adam and Joanne of Inspired Taste

    We are Adam and Joanne Gallagher, the creators of Inspired Taste. Established in 2009, Inspired Taste grew from a childhood dream into one of the internet’s most trusted recipe sites with hundreds of reliable recipes, step-by-step videos, and expert tips.More About Us

    Source link

  • Herb Mignonette Sauce Recipe

    Herb Mignonette Sauce Recipe

    Oyster mignonette made with rice wine vinegar, shallot, fresh herbs, and pepper. It’s gorgeous and tastes fantastic with fresh raw oysters. Bonus, it’s even delicious spooned over grilled meats.

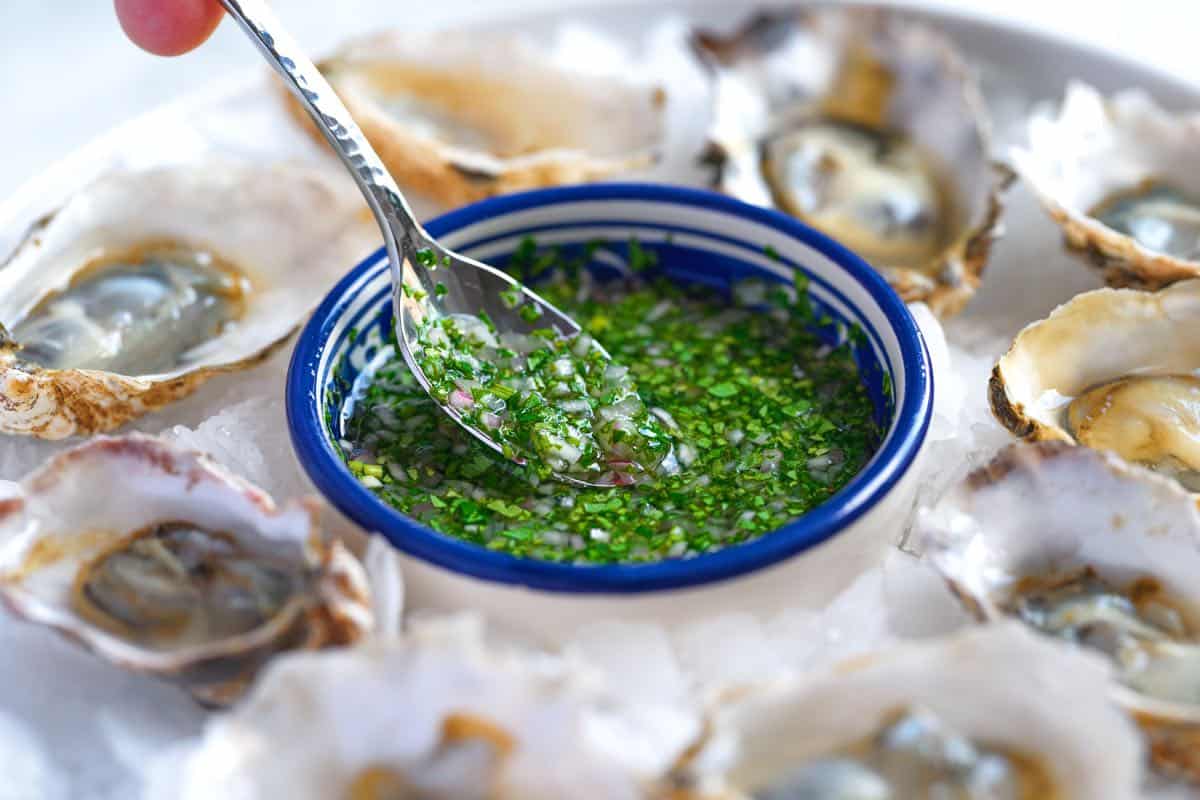
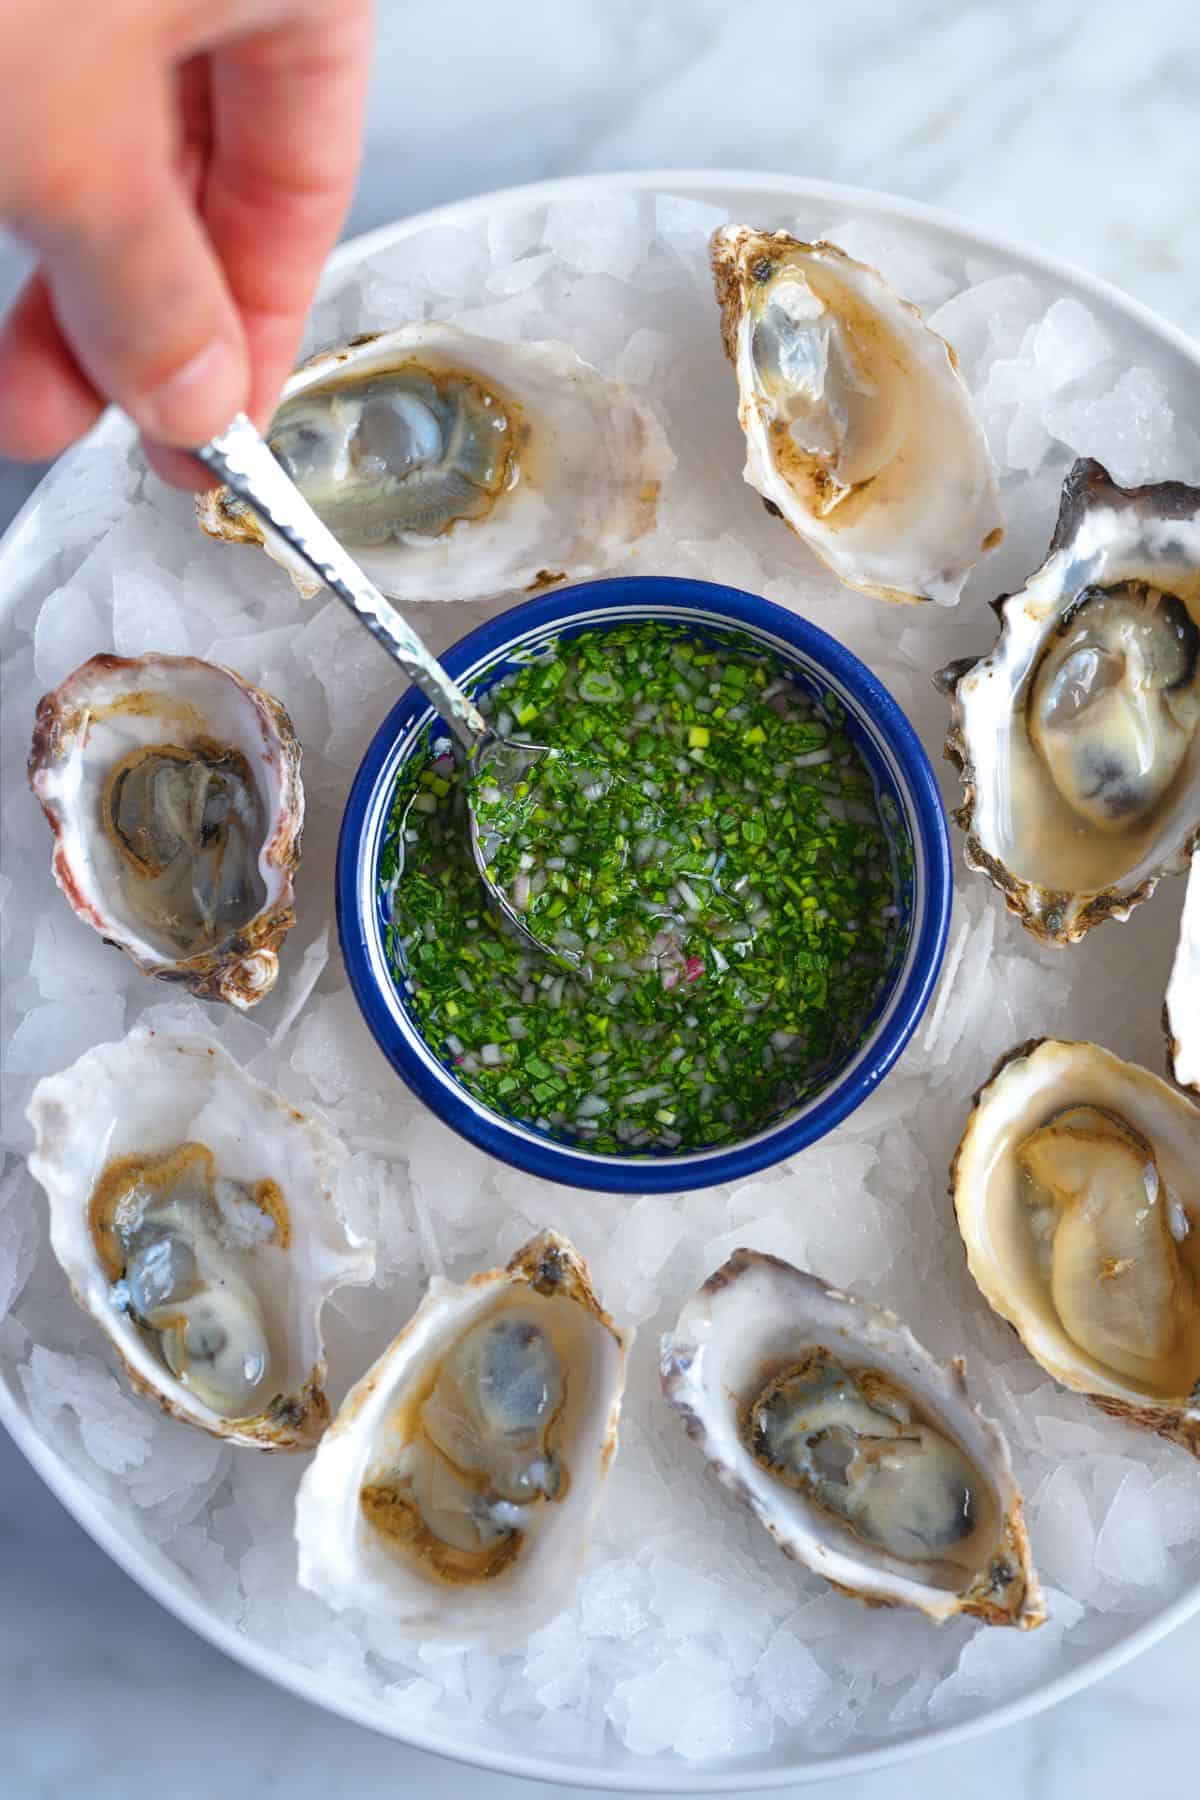
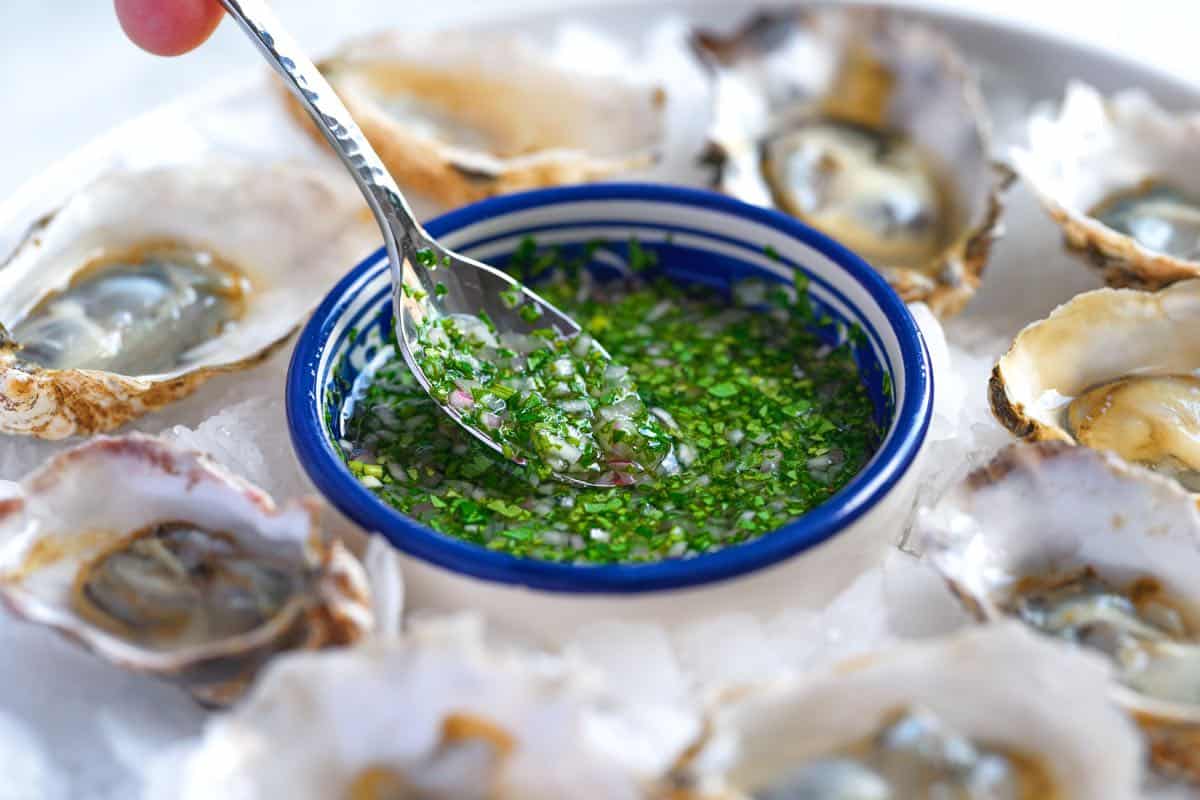
    Raw Oysters with Herb Mignonette

    We shared our essential mignonette sauce a few weeks back, combining red wine vinegar, shallot, and pepper. Now we want to introduce you to this herby mignonette. It’s excellent with fresh raw oysters and doubles as a reverse marinade for grilled or baked meats. (A reverse marinade is soaking meat in a sauce after it’s cooked–a common practice when grilling.)

    This sauce is all about balance. Unlike our basic mignonette, which is more acidic thanks to vinegar, this mignonette combines seasoned and unseasoned rice vinegar, which makes it ever so slightly sweet. It’s delicious!

    Key Ingredients

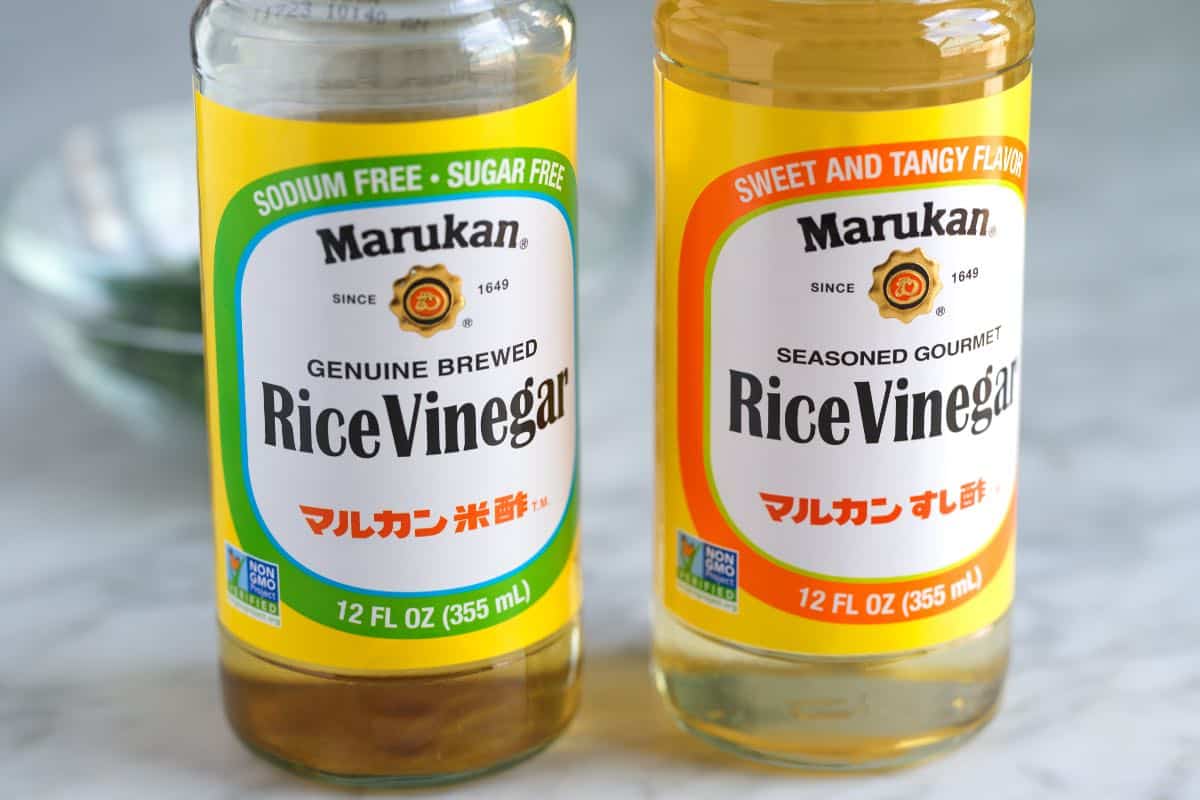
    • Rice Vinegar: We use unseasoned and seasoned rice vinegar. The unseasoned vinegar is more acidic (like red wine vinegar), while seasoned vinegar adds salt and sugar, adding a sweeter note to the sauce. This extra sweet note works beautifully for oysters, especially the slightly sweeter, less salty oysters we get here on the West Coast of the US. (Although, I’d wager this would be excellent with just about any oyster you can access.)
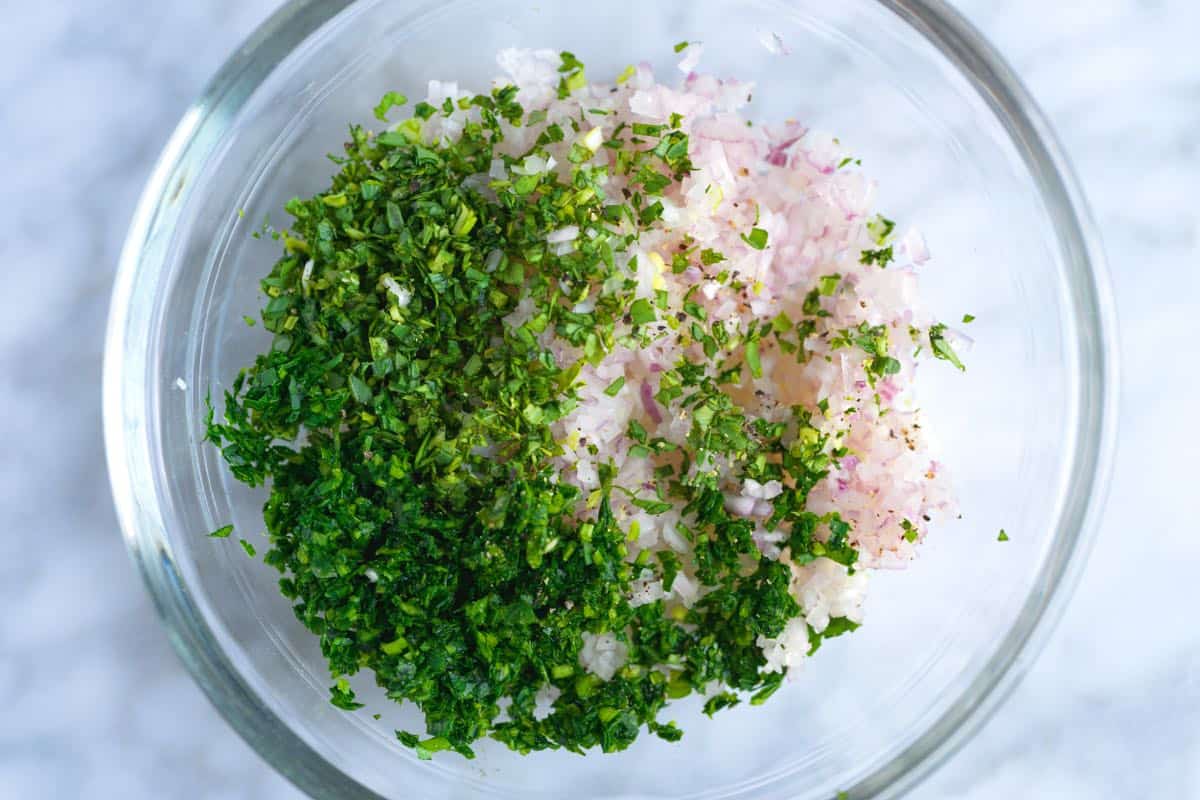
    • Shallot: I mince my shallot finely. The vinegar cuts their sharpness and gently pickles them. We hand-mince our shallot instead of using a food processor. (A food processor creates a more mushy situation that tastes stronger in the sauce.)
    • Herbs: For that striking green color, be generous with your herbs. I love parsley and tarragon. Just make sure you mince them finely.
    Unseasoned rice vinegar and seasoned rice vinegar

    How to Make Herb Mignonette

    Making the sauce is simple. Finely mince shallot and herbs — take your time when mincing so that everything is tiny. Then mix in both kinds of vinegar (seasoned and unseasoned) and a pinch of pepper.

    Herb Mignonette ingredients

    Like other mignonette recipes, this lasts for a while in the fridge. It gets better and better over time since the shallots have time to mellow and pickle. Keep in mind that the green herbs will lose some vibrancy over time. I’m not too concerned about it, but if you’d like a bright green pop of color (like in our photos), you can always add the herbs an hour or so before serving, but make the base mignonette a few days in advance.

    I serve this sauce alongside freshly shucked oysters. You can serve this sauce alone or provide additional options for your friends and family, like fresh lemon wedges and this classic mignonette.

    This mignonette recipe comes from Richard Hattaway, a renowned chef and friend. We already have a classic recipe on the blog, but we love how he incorporated rice wine vinegar and herbs for this version. It’s beautiful and tastes fantastic.

    Herb Mignonette Sauce with Raw Oysters

    Herb Mignonette Sauce

    • PREP
    • TOTAL

    Oyster mignonette made with rice wine vinegar, shallot, fresh herbs, and pepper. It’s gorgeous and tastes fantastic with fresh raw oysters. Bonus, it’s even delicious spooned over grilled meats. Scroll to the notes & tips section for an explanation of rice vinegar vs. seasoned rice vinegar as well as a DIY seasoned rice vinegar recipe if you do not have it on hand.

    Makes 3/4 cup

    You Will Need

    1 ½ ounces (3 tablespoons) rice vinegar

    3 ounces (6 tablespoons) seasoned rice vinegar

    7 tablespoons minced shallot, 1 medium-to-large shallot

    2 tablespoons minced parsley

    2 tablespoons finely chopped tarragon

    Pinch fresh ground black pepper

    Directions

      1Combine the rice vinegar, seasoned rice vinegar, shallot, parsley, tarragon, and pepper in a non-reactive bowl or glass jar. Taste, and adjust with more pepper. Remember that the vinegar will taste its strongest at first but will mellow as it sits with the shallots in the refrigerator.

      2Refrigerate for at least an hour before serving with oysters so that the shallots have a chance to pickle and mellow. The mignonette will last up to a week in the refrigerator. It will mellow even more over time, but I enjoy that! If you taste the sauce after some time in the fridge, and find that it has lost its zestiness, add a splash of fresh vinegar.

      3Shuck your oysters and serve with the mignonette sauce in a small ramekin. Place a small spoonful of the sauce (I go heavy on the shallots) and add to a raw oyster before eating. Then repeat!

    Adam and Joanne’s Tips

    • Rice vinegar vs. seasoned rice vinegar: Seasoned rice vinegar is plain rice vinegar with salt and sugar added. It’s an excellent condiment to have on hand for marinades, sauces, and dressings. It is sold next to rice vinegar in most grocery stores.
    • Homemade seasoned rice vinegar: Combine 1/2 cup unseasoned rice vinegar, 1/4 cup sugar, and one tablespoon of fine salt in a bowl. Let sit for five minutes, and then whisk until the sugar dissolves. Store in an airtight container at room temperature for up to 1 week.
    • How long does mignonette sauce last? Quite a while, but be mindful that the bright green color of the herbs will dull over time. I’ve had this in the fridge for a week and still enjoyed it.
    • More ways to use this sauce: Try spooning some sauce over cooked shrimp or fish. It’s also delicious with grilled or seared meats like chicken and steak. Think of it like a chimichurri sauce or reverse marinade.
    • The nutrition facts provided below are estimates.

    Nutrition Per Serving
    Serving Size
    2 tablespoons
    /
    Calories
    37
    /
    Total Fat
    0.1g
    /
    Saturated Fat
    0g
    /
    Cholesterol
    0mg
    /
    Sodium
    482.5mg
    /
    Carbohydrate
    8.6g
    /
    Dietary Fiber
    0.6g
    /
    Total Sugar
    5.9g
    /
    Protein
    0.5g


    AUTHOR:

    Joanne Gallagher

    Adam and Joanne of Inspired Taste

    We are Adam and Joanne Gallagher, the creators of Inspired Taste. Established in 2009, Inspired Taste grew from a childhood dream into one of the internet’s most trusted recipe sites with hundreds of reliable recipes, step-by-step videos, and expert tips.More About Us

    Source link

  • Easy Tomato Broth Recipe

    Easy Tomato Broth Recipe

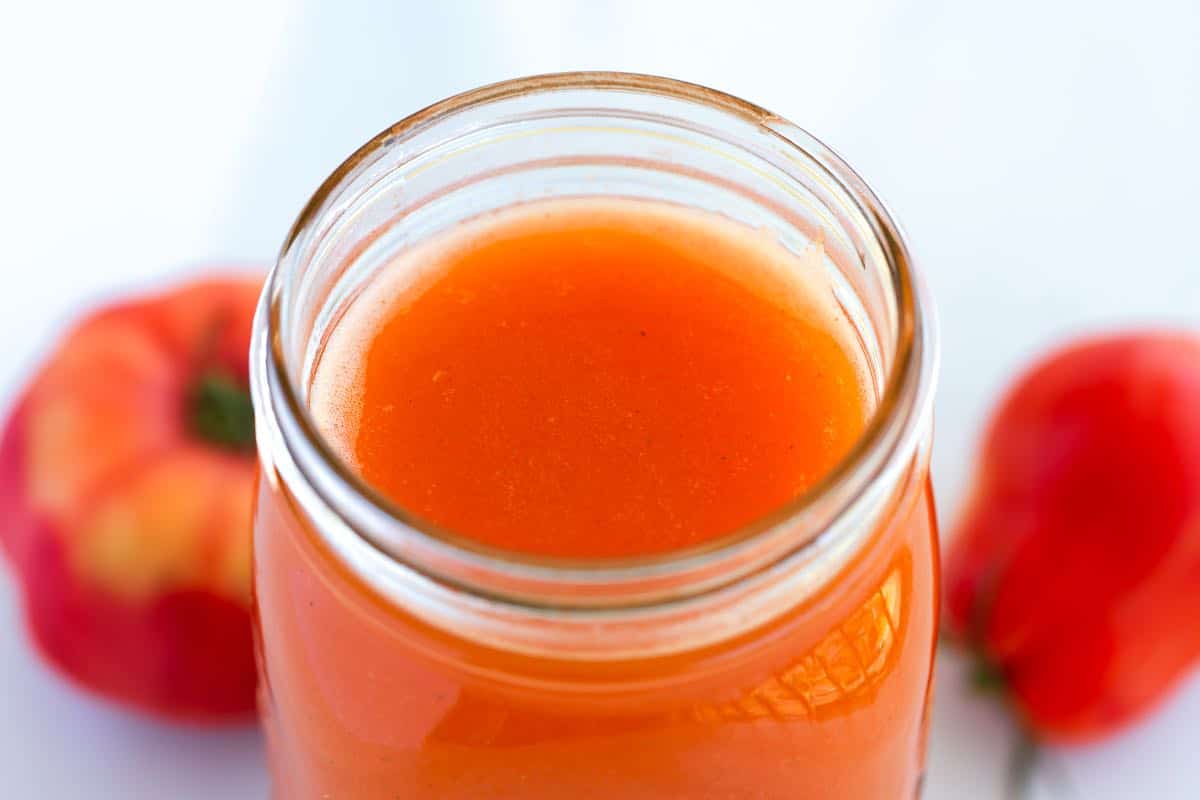
    We love this homemade tomato broth made from fresh tomatoes, bell pepper, and smoked paprika. It’s flavorful and a little smoky, making it perfect for using as a base for vegetable dishes. Use this tomato broth for soups, stews, and rice dishes like risotto.

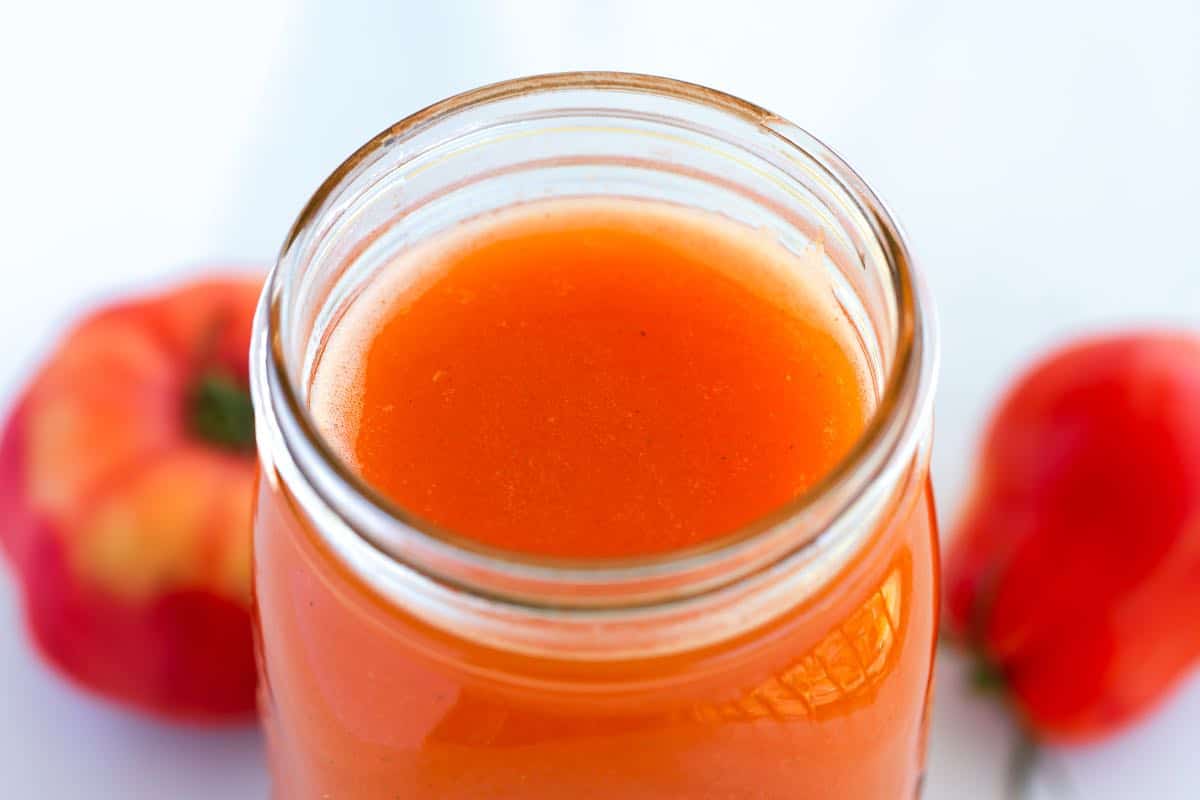
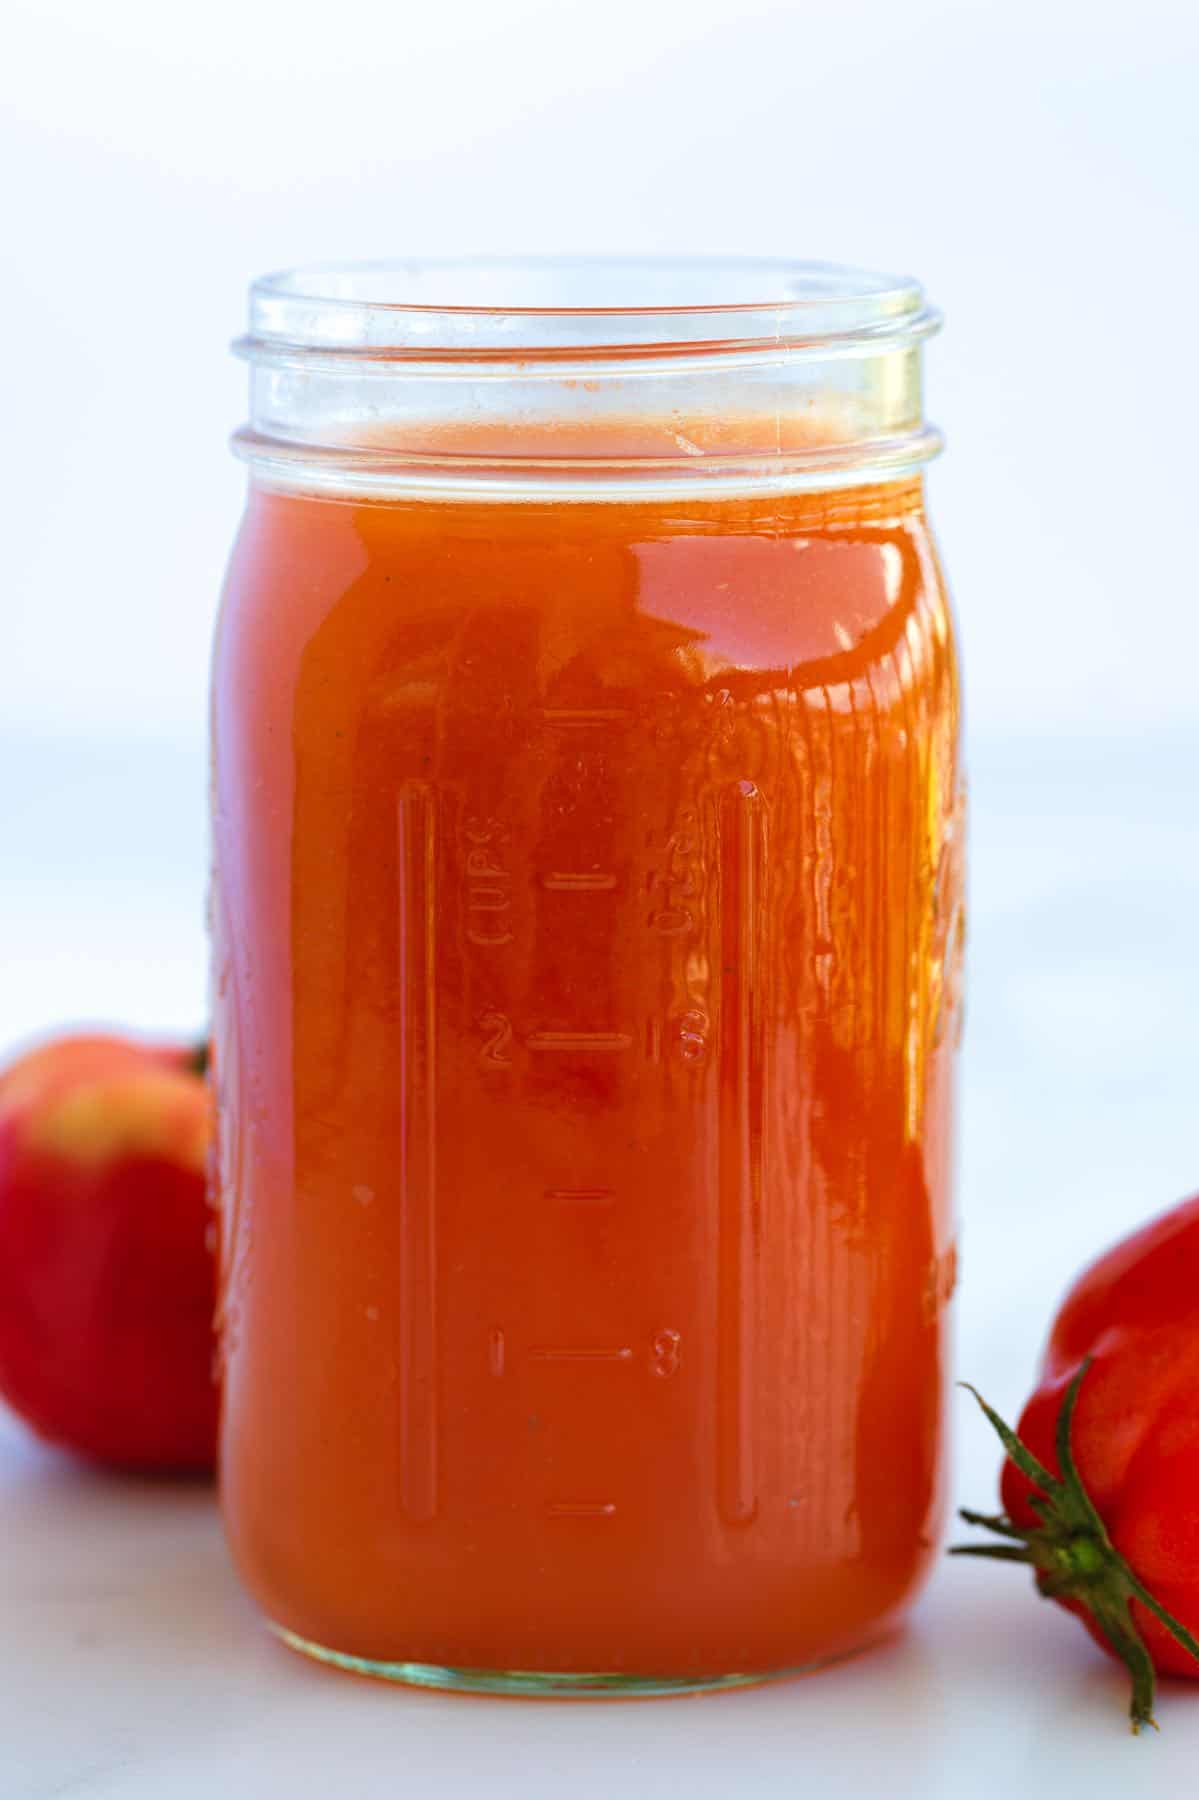
    Homemade Tomato Broth

    We have a few broths and stocks on Inspired Taste. I especially love this vegetable broth recipe with carrots, onions, and mushrooms. It’s rich and satisfying. This tomato stock is the answer when I want something lighter and more summery.

    Our tomato broth recipe combines fresh tomatoes, bell peppers, garlic, and spices. It’s vegetarian, takes about 30 minutes to make, and is easy!

    How to Make Tomato Broth

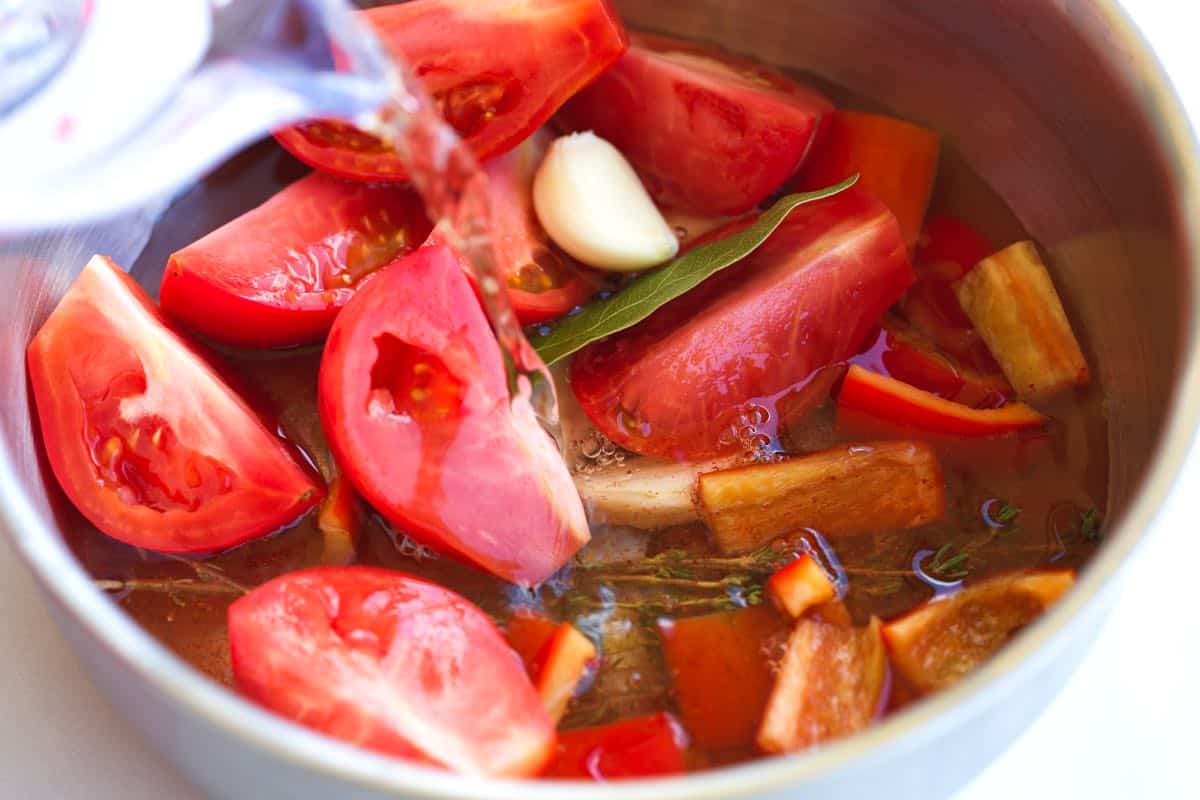
    To make tomato broth, throw quartered tomatoes and chopped bell pepper into a pot. Add salt, smoked paprika, thyme, a bay leaf, and water. Bring to a simmer, and then cook, covered for 30 minutes (it smells great!).

    Making tomato broth with fresh tomatoes

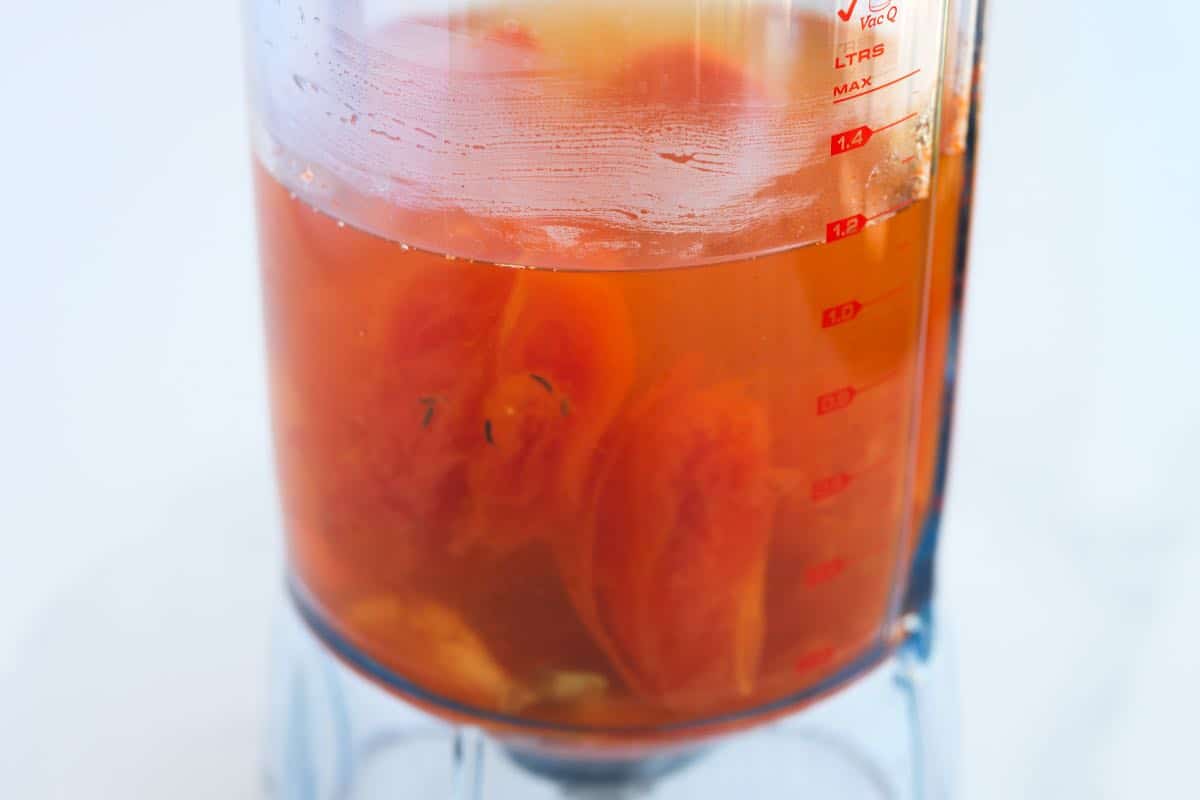
    Throw away the thyme stems and bay leaf, then blend the broth until smooth. Pour it through a mesh strainer to remove any bits of tomato skin, and you are done!

    Blending tomato broth

    We use this broth for soup — like this tomato soup — and especially love it when making our summery vegetable risotto.

    Homemade Tomato Broth

    Easy Tomato Broth

    • PREP
    • COOK
    • TOTAL

    We love this tomato broth made from fresh tomatoes, bell pepper, and smoked paprika. It’s flavorful and a little smoky, perfect for using as a base for lighter vegetable dishes. We especially love this broth when making our summer vegetable risotto.

    Makes 6 cups

    You Will Need

    8 ounces tomatoes, quartered, 2 medium

    1 red bell pepper, roughly chopped

    4 cloves garlic, smashed

    1 ½ teaspoons fine sea salt

    1/2 teaspoon smoked paprika

    4 thyme sprigs

    1 bay leaf

    6 cups water

    Directions

      1Add quartered tomatoes, bell pepper, garlic, salt, smoked paprika, thyme, bay leaf, and 6 cups of water to a medium saucepan. Cover with a lid, and bring to a simmer. Simmer for 30 minutes, adjusting the heat so that it does not bubble over.

      2Remove the thyme and bay leaf. Puree the broth using an immersion or regular blender, then strain. Measure the broth and add enough water to bring the liquid up to 6 cups. Store in in the refrigerator for up to 4 days and freeze for up to 3 months.

    Adam and Joanne’s Tips

    • Nutrition facts: The nutrition facts provided below are estimates. We have used the USDA database to calculate approximate values.

    If you make this recipe, snap a photo and hashtag it #inspiredtaste — We love to see your creations on Instagram and Facebook! Find us: @inspiredtaste

    Nutrition Per Serving
    Serving Size
    1 cup
    /
    Calories
    18
    /
    Saturated Fat
    0.2g
    /
    Saturated Fat
    0g
    /
    Cholesterol
    0mg
    /
    Sodium
    594.2mg
    /
    Carbohydrate
    3.8g
    /
    Dietary Fiber
    1.1g
    /
    Total Sugars
    2.1g
    /
    Protein
    0.7g


    AUTHOR:

    Joanne Gallagher

    Adam and Joanne of Inspired Taste

    We are Adam and Joanne Gallagher, the creators of Inspired Taste. Established in 2009, Inspired Taste grew from a childhood dream into one of the internet’s most trusted recipe sites with hundreds of reliable recipes, step-by-step videos, and expert tips.More About Us


    Source link