Category: Quick Meal

  • Easy Tomato Feta Salad Recipe

    Easy Tomato Feta Salad Recipe

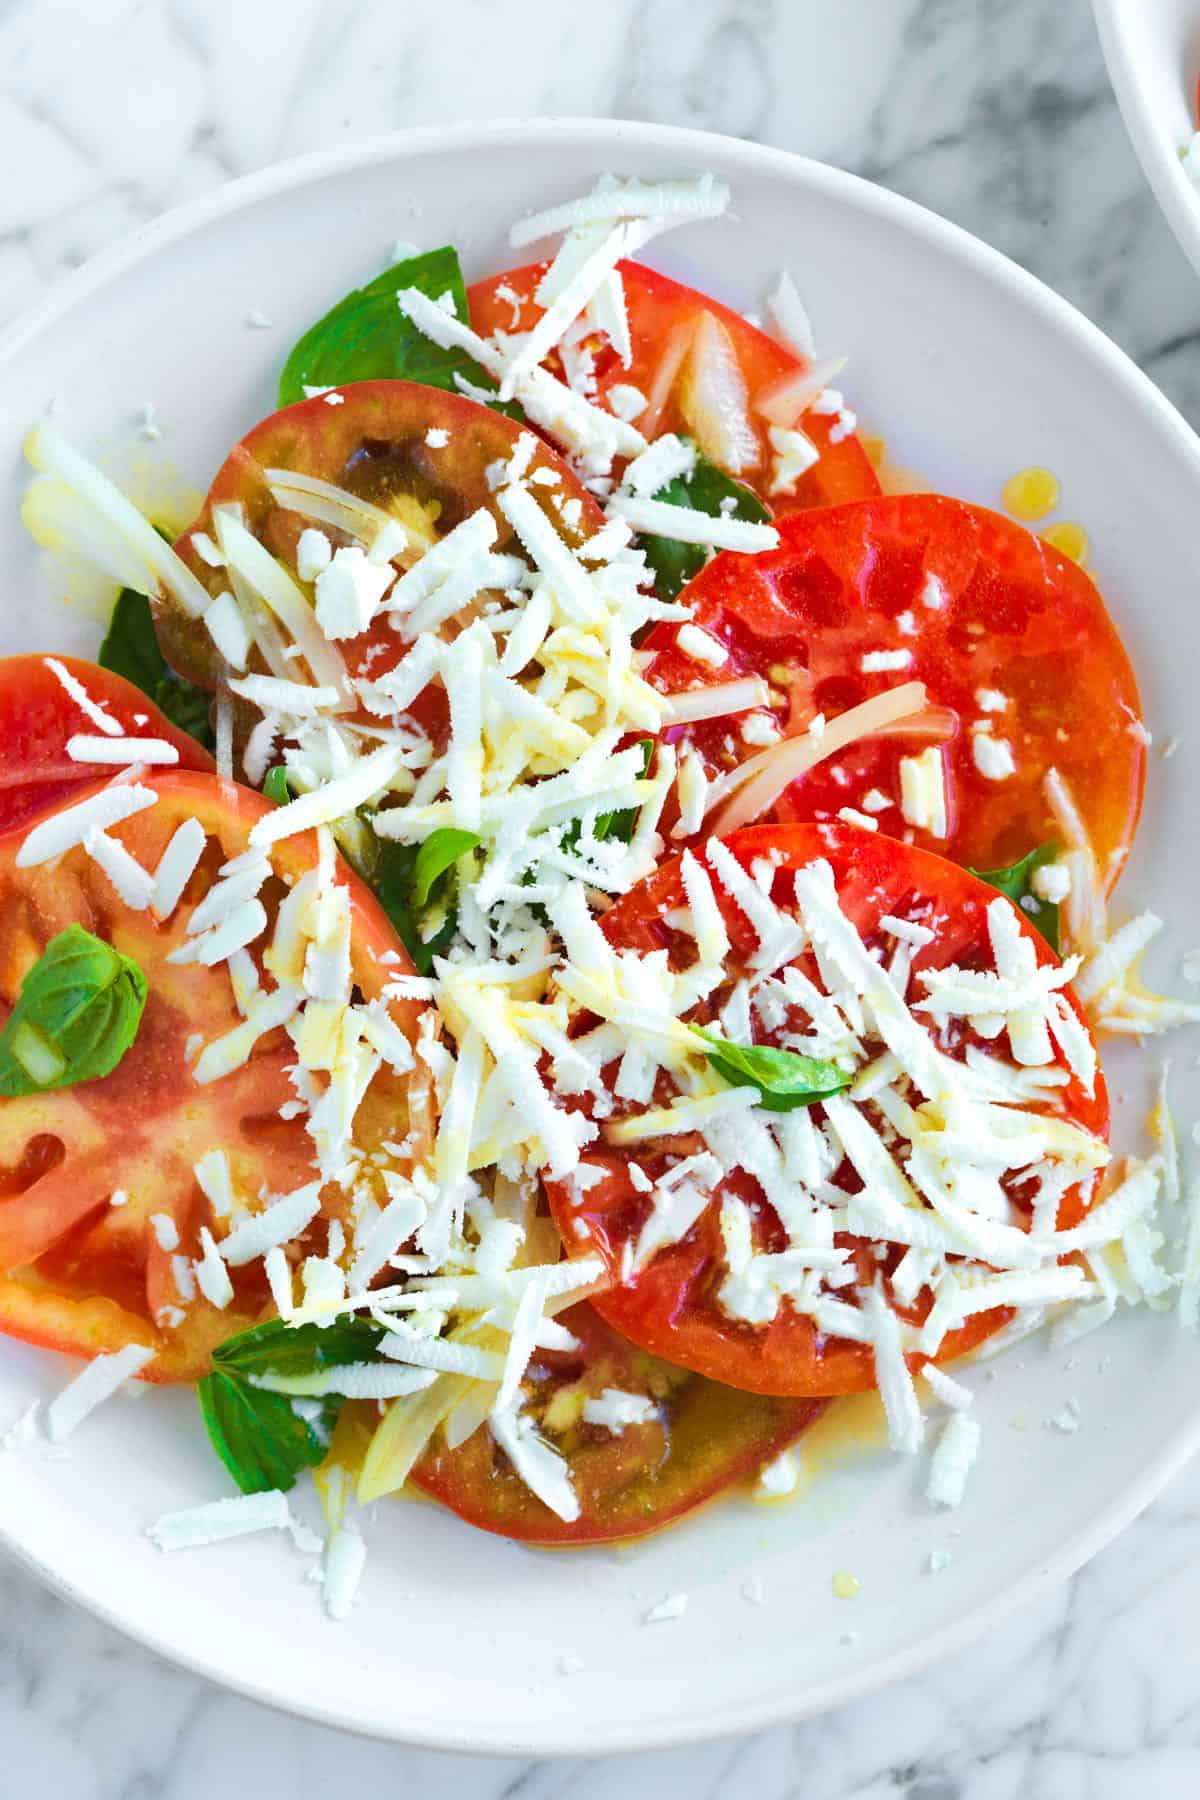
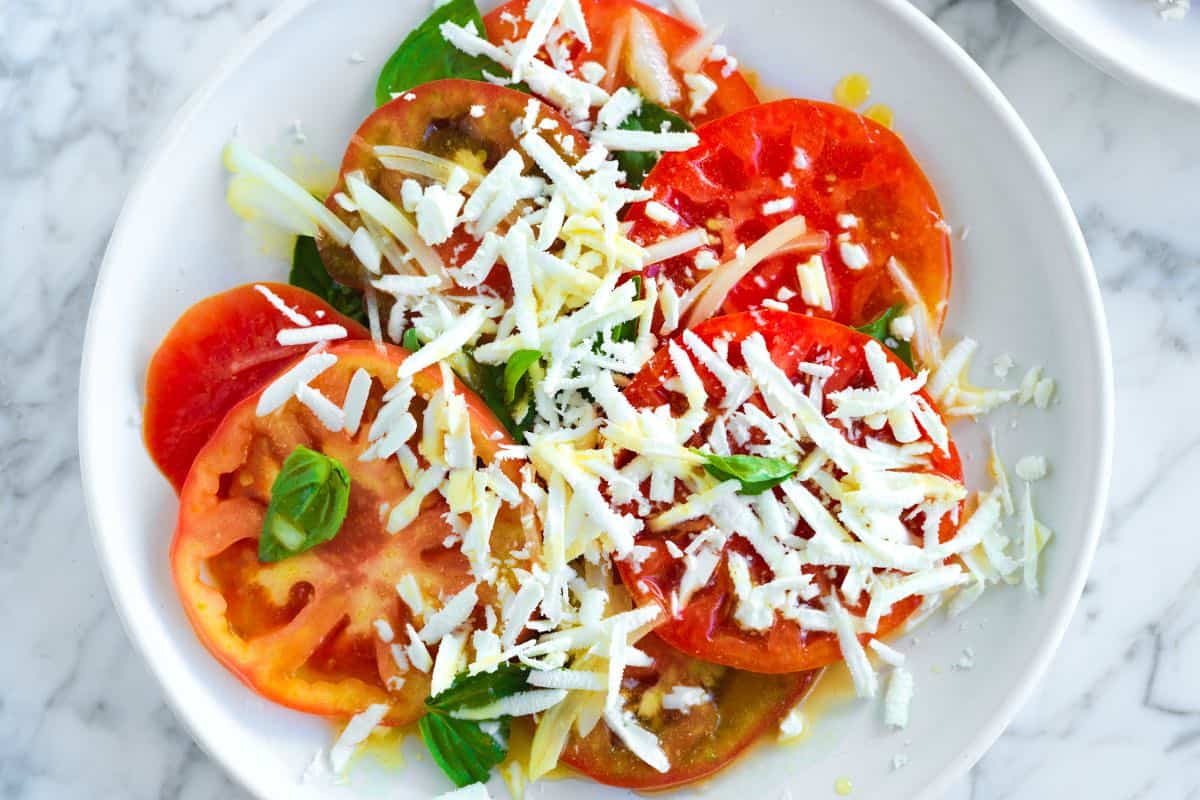
    Our tomato feta salad with honey mustard lime vinaigrette is a true showstopper. It combines peak-season tomatoes, fresh basil, a simple homemade dressing, and the surprising, creamy texture of grated feta for a truly standout dish.
    Tomato Feta Salad

    As proven by all our tomato recipes, we’re obsessed and especially get excited during the summer when tomatoes are in full season. This recipe is a fun twist on classic tomato salad. We keep the tomatoes and basil but go rogue with the dressing and make a zesty honey mustard lime vinaigrette, which works beautifully with the tomatoes and feta cheese.

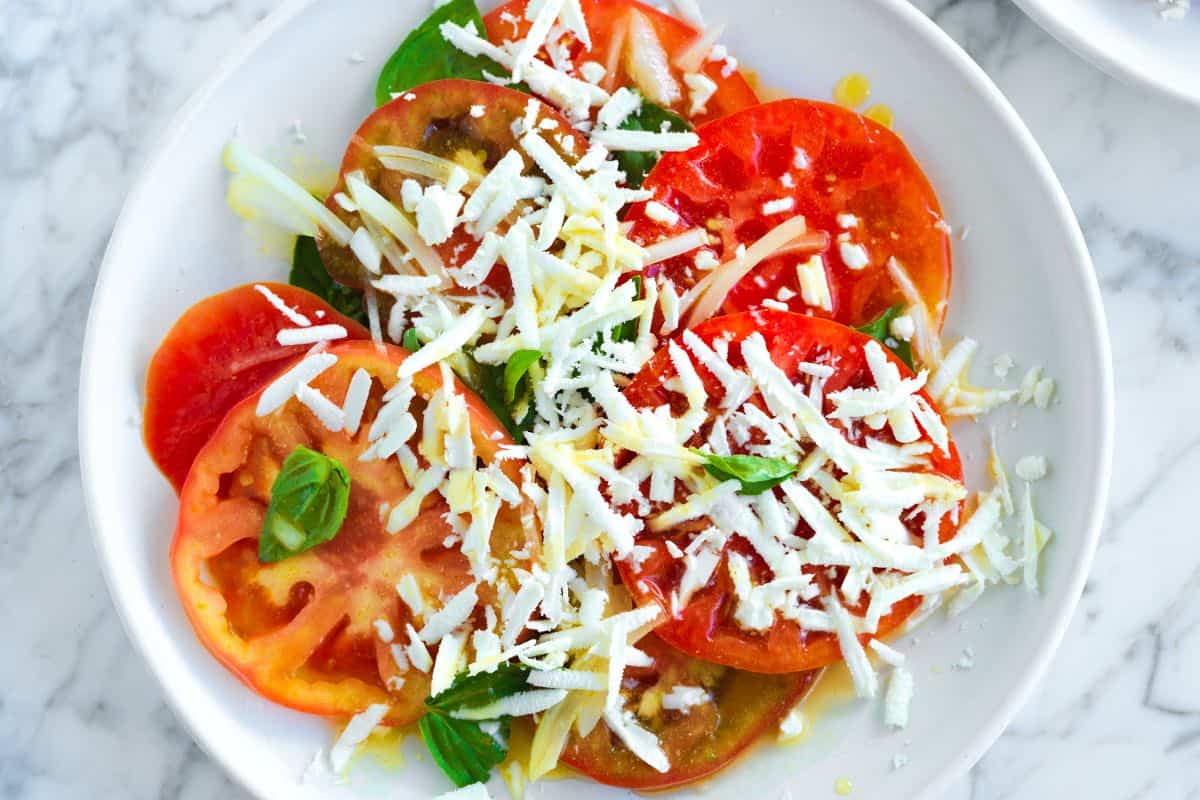
    The secret to this salad is to use the large holes on your box grater and grate the feta over the tomatoes on your plate. The thin gratings of feta melt in your mouth with each bite of tomato. We can all thank Chef Richard for the tip, and you can be sure that I’ll be grating my feta over salads from now on. For more salad recipes like this one, see our Greek salad with tomato, cucumber, and feta or this watermelon feta salad.

    Key Ingredients

    • Tomatoes: Choose slicer or juicy heirloom tomatoes for this salad. You’ll slice them into rounds before drizzling with the vinaigrette. When shopping for tomatoes, you want them to feel heavy for their size and really smell like a tomato (if you take a sniff and they don’t smell like anything, the tomato won’t taste that great). For a salad calling for cherry tomatoes, see this cherry tomato salad (which also has feta).
    • Basil and Onion: Sweet Italian basil is lovely, or substitute Thai basil or purple basil (really pretty!). Then, for the onion, use a sweet onion, such as Walla Walla or Vidalia, if you can get your hands on one.
    • Feta: Use block feta cheese sold in brine. You’ll grate the feta over your salad using a box grater. This shreds it into thin strips, letting you enjoy its salty, briny kick with every bite. If you don’t have a box grater, you can crumble the cheese instead.
    • Honey Mustard Lime Vinaigrette: You can make the vinaigrette in a bowl with a whisk or shake it all together in a glass jar. It combines fresh lime juice (from 1 lime), honey (maple syrup is a good substitute), salt, cumin, Dijon mustard, and extra-virgin olive oil.
    Tomato Feta Salad

    Easy Tomato Feta Salad

    • PREP
    • TOTAL

    When tomatoes are in season, I’m all about enjoying them in every way possible. This tomato feta salad is a standout, especially when made with our honey mustard lime vinaigrette. It’s particularly perfect for larger tomatoes like heirlooms. The secret? We use a box grater to thinly shave the feta directly over the salad. This makes the feta so delicate it practically melts in your mouth with each bite of tomato. I highly recommend it! No problem if you don’t have a box grater. Crumbling the feta works beautifully, too. For another recipe with tomatoes and feta, see our cherry tomato salad or this authentic Greek salad!

    2 large servings or 4 small salads

    You Will Need

    3 medium heirloom tomatoes, about 1 pound

    1/2 cup thinly sliced onion, preferably sweet onion

    2 ounces block feta cheese

    14 basil leaves, torn

    1 lime, juiced, about 2 tablespoons

    1 ½ tablespoons honey

    1/4 teaspoon fine sea salt

    1/4 teaspoon ground cumin

    1 teaspoon Dijon mustard

    2 tablespoons extra-virgin olive oil

    Maldon flaky sea salt, as needed

    Directions

      1Make the lime vinaigrette: Combine the juice of lime juice, honey, salt, cumin, Dijon mustard, and olive oil in a medium bowl. Whisk well until emulsified (or add to a glass jar, close the lid, and shake until emulsified).

      2Add the onions: Drop the sliced onions into the vinaigrette and mix well. (This will tone down the raw flavor of the onion a bit).

      3Prepare the tomato salad: Slice the tomatoes into 1/4-inch thick rounds and lay them on a large platter or plate. Spoon some of the vinaigrette and onions over the tomatoes and sprinkle with a pinch or two of flaky sea salt (like Maldon). Scatter the basil over the tomatoes. Then, grate the feta cheese over the top using the large holes of a box grater or crumble it with your fingers. Serve.

    Adam and Joanne’s Tips

    • Storing: Tomato salad is best eaten on the same day (at room temperature), but you can refrigerate it for up to 2 days.
    • The nutrition facts are estimates.

    Nutrition Per Serving
    Serving Size
    1 small side salad (4 total)
    /
    Calories
    154
    /
    Total Fat
    10.3g
    /
    Saturated Fat
    3.2g
    /
    Cholesterol
    12.6mg
    /
    Sodium
    354mg
    /
    Carbohydrate
    14.2g
    /
    Dietary Fiber
    1.8g
    /
    Total Sugars
    11.1g
    /
    Protein
    3.4g


    AUTHOR:

    Joanne Gallagher

    Previous Post: Easy Blueberry Scones
    Next Post: Easy Vegan Blueberry Muffins
    Source link

  • Crispy Baked Buffalo Hot Wings Recipe

    Crispy Baked Buffalo Hot Wings Recipe

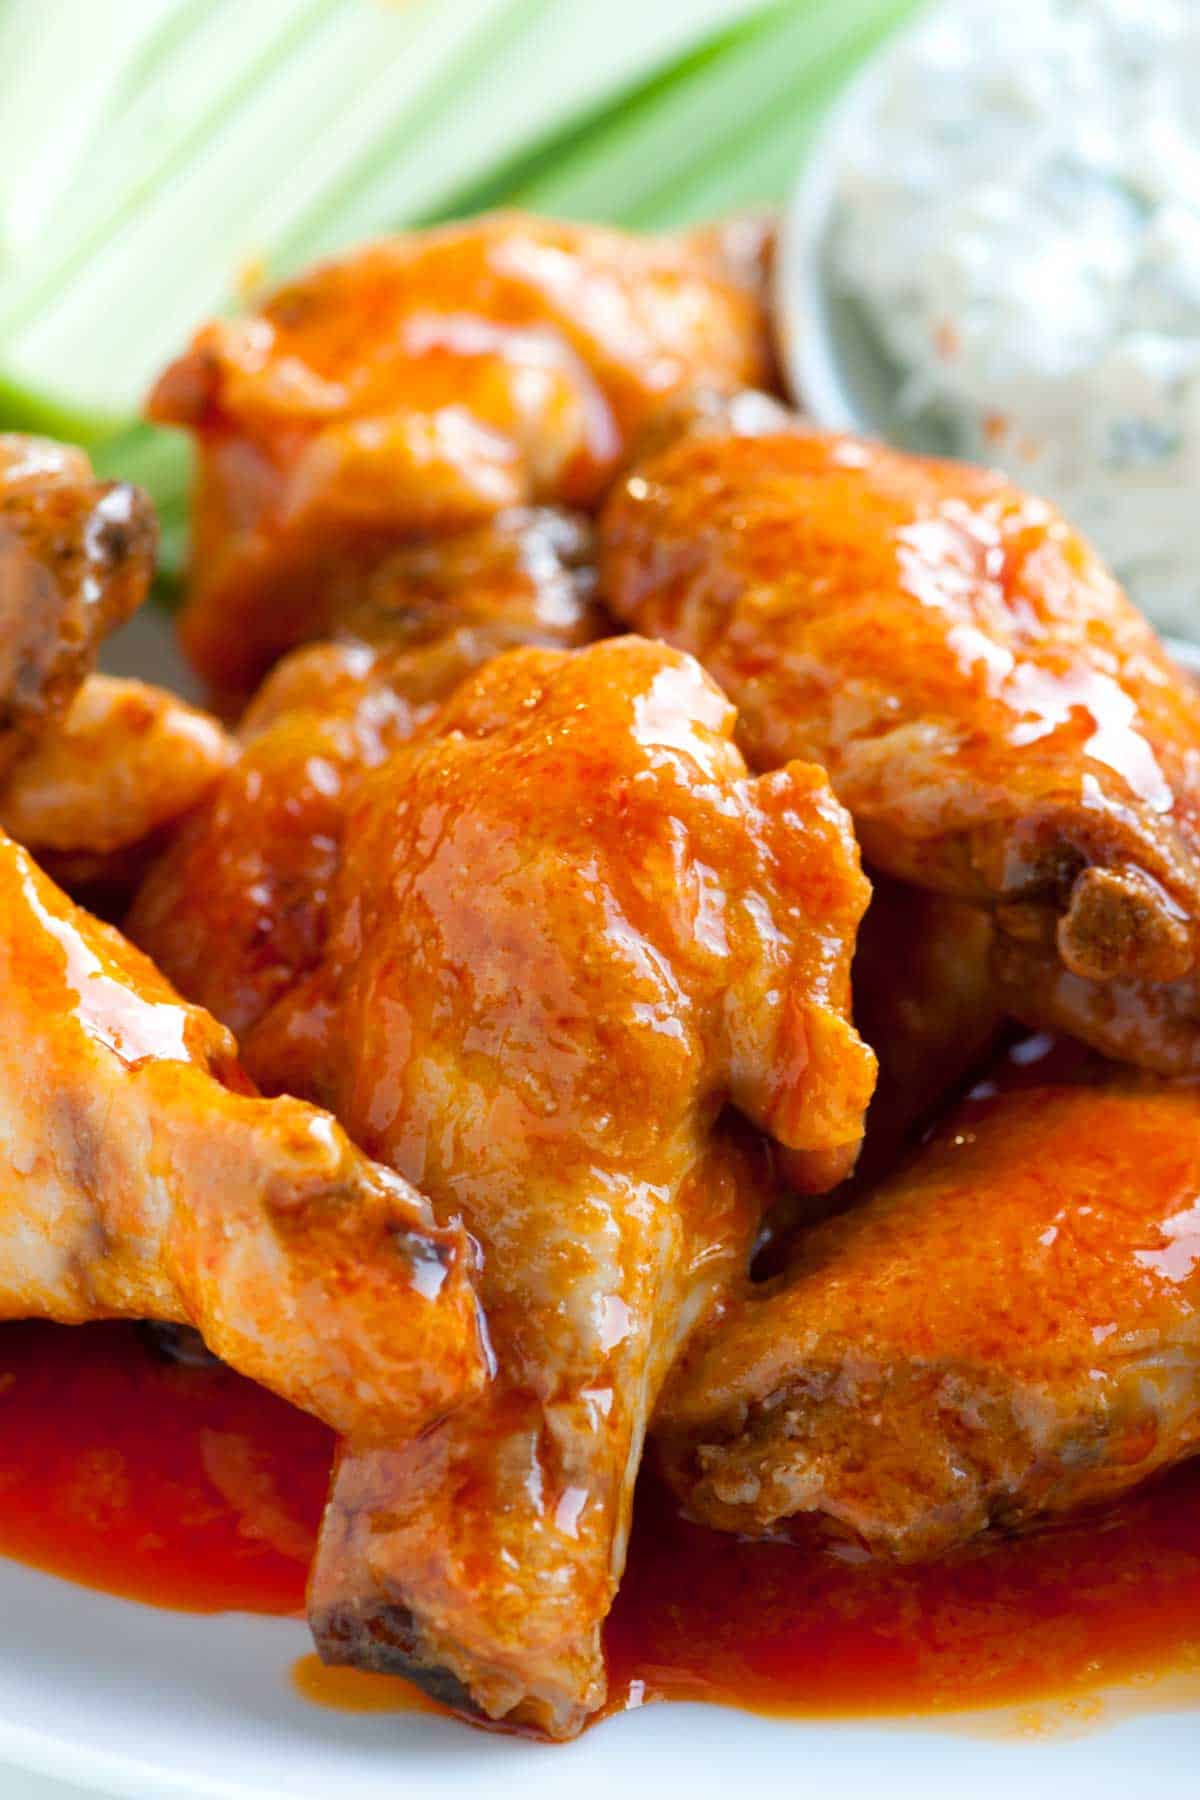
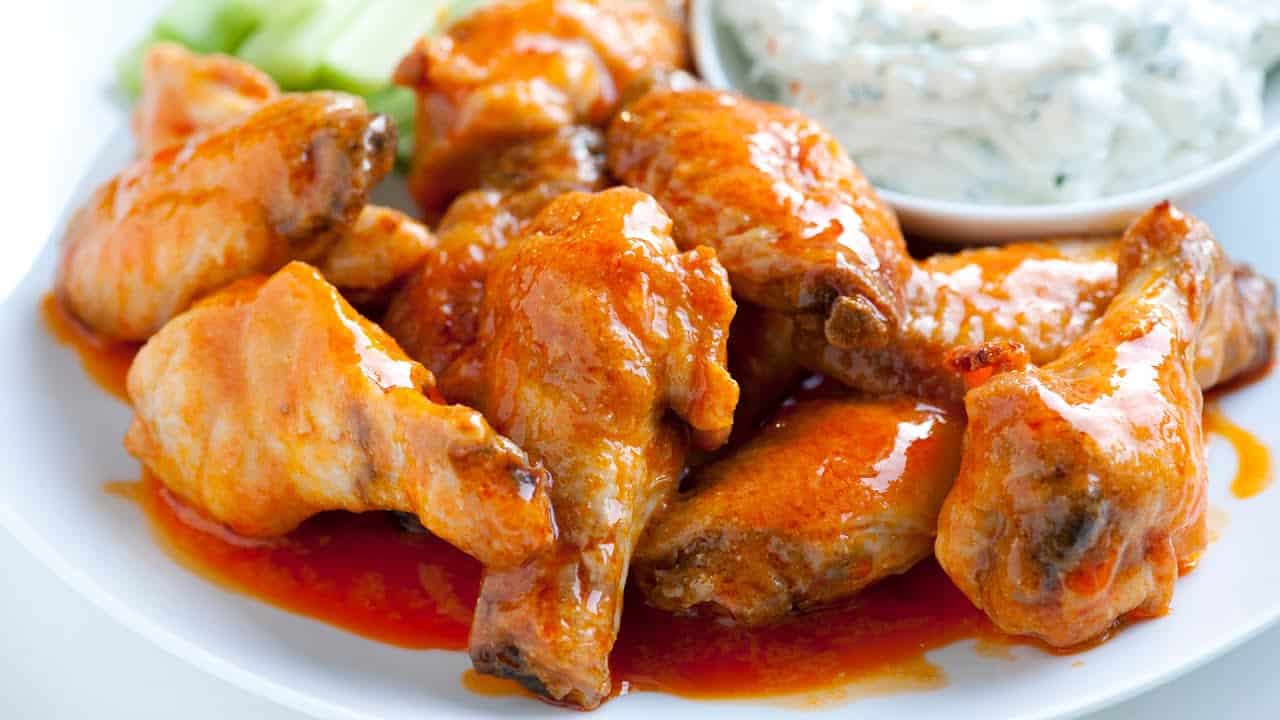
    With our crispy buffalo wings recipe, you can skip the oil and fryer and make delicious, crispy baked wings that rival your favorite restaurants.

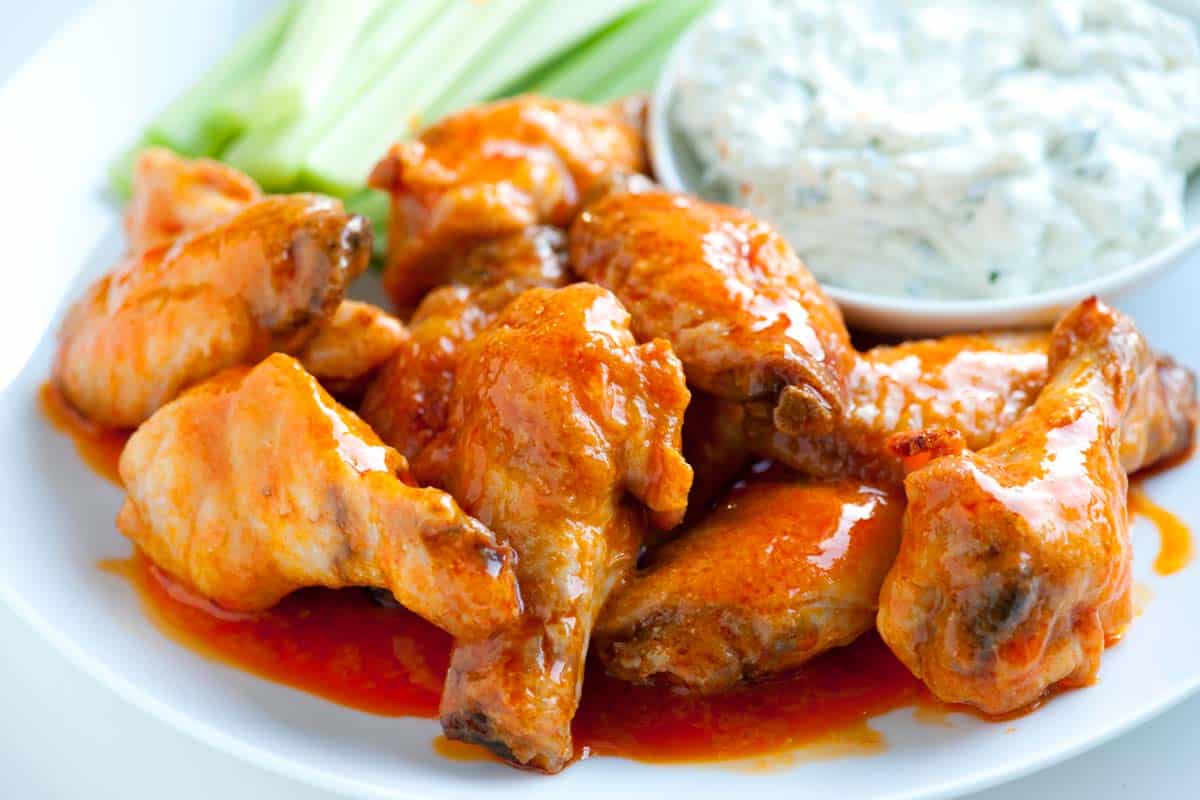
    Baked Buffalo Chicken Hot Wings

    This recipe guarantees crispy and delicious chicken wings. You are going to LOVE them! They are perfect for serving a crowd. I use my easy buffalo sauce, and love to serve them with the blue cheese dressing shared below.

    This is my favorite method for making chicken wings at home, so we’ve shared a few different versions over the years. You might also enjoy these BBQ wings, spicy glazed wings, and these sticky sweet chili wings.

    Key Ingredients

    • Chicken Wings: Depending on where you buy them, they are sold as the whole wing or separated into a drumstick and wingette. If you can only find whole chicken wings, hop over to our tutorial for separating a chicken wing.
    • Buffalo Sauce: I love using my favorite homemade buffalo sauce. It’s easy and quick to make. You can make it while your wings bake in the oven with butter, hot sauce (like Crystal), garlic powder, and a bit of honey. It’s delicious and I think it tastes better than the store-bought.
    • Blue Cheese Dip: I love these served with thick blue cheese dip, so I’ve shared a quick recipe below, but if you prefer ranch, I highly recommend trying our homemade ranch. I also have this thinner blue cheese dressing.

    Find the full recipe with measurements below.

    How to Make Crispy Baked Wings

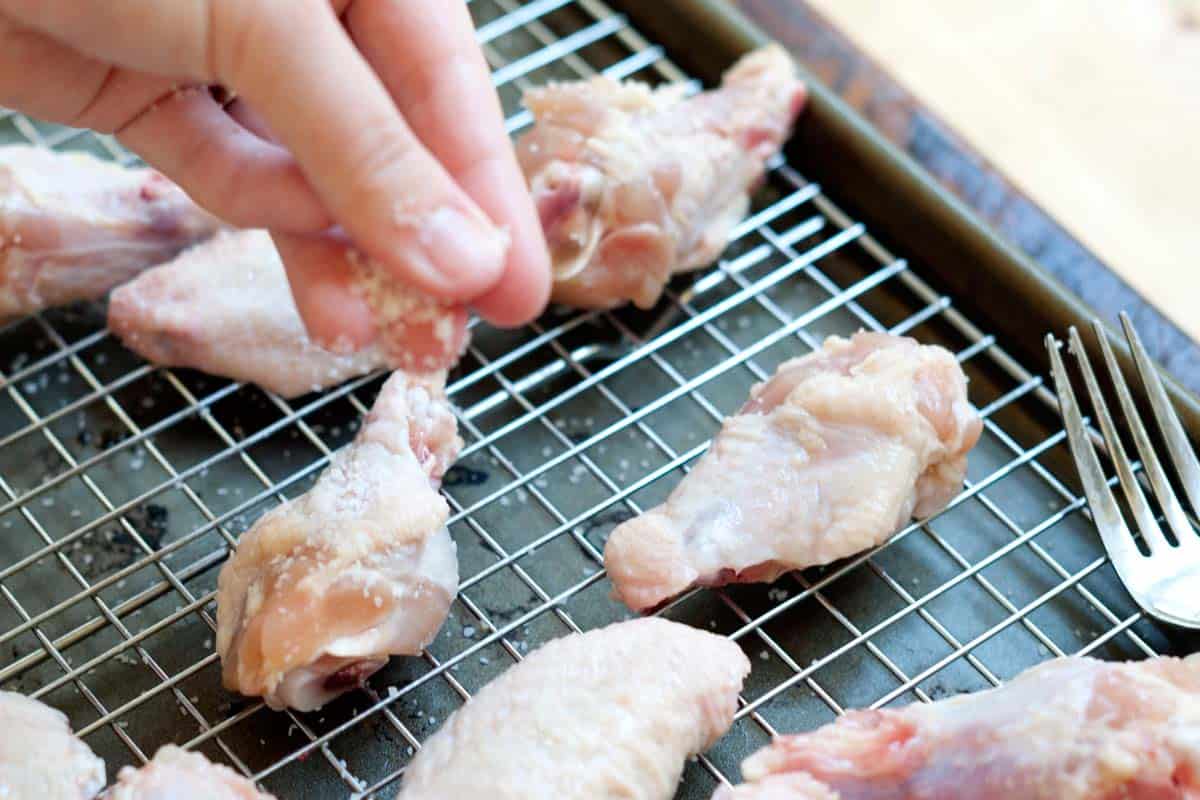
    Tip 1: Use an oven-safe rack. For the crispiest wings, use an oven-safe baking rack inset into a rimmed baking sheet (like in my photos and video). This rack lifts the wings and allows some airflow around them. I use the same setup when baking crispy bacon.

    Seasoning chicken wings with salt

    Tip 2: Pat dry before baking. It’s really important to pat your wings dry, helping them crisp up in the oven even more. And don’t forget to season them with salt! I don’t use any other seasonings, but feel free to do so if you’d like.

    Tip 3: Bake wings at a higher temperature. I bake my chicken wings in a 425°F oven until crispy, usually 30 to 45 minutes. Adam and I really love them when they are extra crispy, so I continue baking until they have had enough chance to render their fat and crisp up the skin. That means I usually cook them a few more minutes than necessary to reach an internal temperature of 165°F.

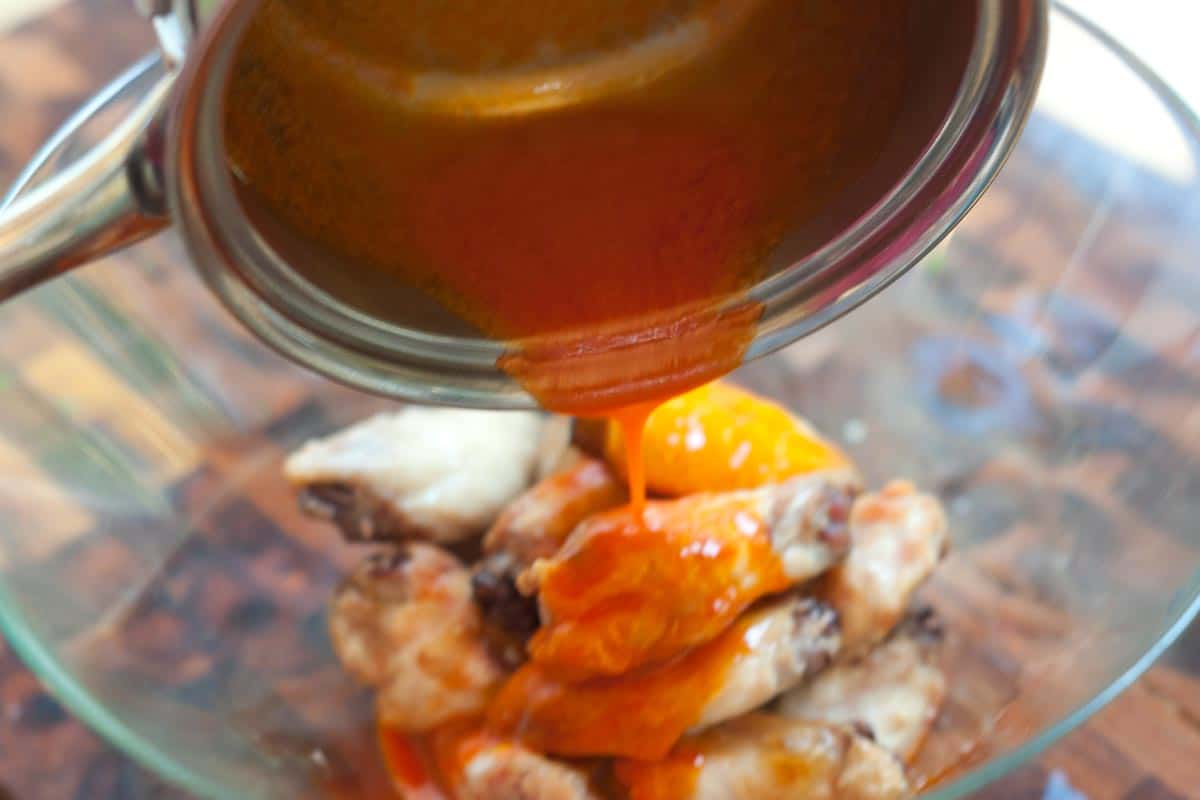
    Tip 4: Try our homemade buffalo sauce. Once your wings are ready, toss them in your favorite sauce. Our homemade wing sauce combines melted butter, hot sauce (I use Crystal), and a little garlic powder. I also like adding a slight drizzle of honey, balancing the sauce and making everything taste even better.

    Adding Buffalo sauce to baked chicken wings

    Serving Suggestions

    Celery, carrot sticks, and blue cheese or ranch dressing are classic sides. I love serving them alongside creamy coleslaw, refreshing cucumber salad, or creamy potato salad to turn them into a meal.

    You can also serve wings with crispy baked French fries, potato wedges, or try these roasted fingerling potatoes with its creamy sauce for dipping. I also highly recommend browsing our game day recipes category for more ideas.

    Baked Chicken Hot Wings

    Crispy Baked Buffalo Hot Wings

    • PREP
    • COOK
    • TOTAL

    Skip the oil and fryer and make our baked chicken wings instead. I love using the homemade wing sauce shared below, but you can substitute your favorite store-bought sauce or use BBQ sauce.

    2 to 3 Servings

    Watch Us Make the Recipe

    You Will Need

    Baked Chicken Wings

    1 pound chicken wings, separated at joints, tips discarded (450g)

    Salt, to season the chicken

    4 tablespoons unsalted butter (56g)

    ⅓ cup cayenne pepper hot sauce, like Crystal or Frank’s (80ml)

    ½ teaspoon garlic powder

    1 teaspoon honey, or more to taste, optional

    Celery sticks or carrot sticks, for serving


    Blue Cheese Dip

    ½ cup sour cream (113g)

    ½ cup mayonnaise, try homemade mayo (113g)

    6 ounces crumbled blue cheese (170g)

    1 tablespoon minced parsley

    Salt and fresh ground pepper

    Directions

      1Prepare oven and pan: Preheat the oven to 425°F (220°C). Set a wire rack inside a large-rimmed baking sheet.

      2Bake the wings: Pat dry chicken wings with paper towels, and then season with salt. Spread out in one layer on the wire rack. Bake until cooked through and crispy, 35 to 45 minutes.

      3Make blue cheese dip: Stir the sour cream, mayonnaise, blue cheese, and parsley together in a bowl. Season to taste with salt and pepper, then refrigerate until ready to serve with the wings.

      4Make buffalo sauce: Meanwhile, melt the butter in a medium saucepan over medium heat. Remove the saucepan from the heat, then stir in the hot sauce, garlic powder, and honey. Season with salt to taste. Set aside until the wings are out of the oven.

      5To finish: In a large bowl, toss the baked chicken wings in the sauce and serve with the blue cheese dip and veggies on the side.

    Adam and Joanne’s Tips

    • Wings: There are 8 to 12 wings in 1 pound (depends on size). If you need to separate the wings into the wing and drumette, see How to Cut and Break Down Chicken Wings.
    • No wire rack: If you do not have a wire rack that will fit inside a baking sheet, you can still bake them. Arrange them on the baking sheet without the rack and rotate a few times during baking.
    • The nutrition facts provided below are estimates. We did not include the blue cheese dipping sauce in our calculations.

    Nutrition Per Serving
    Serving Size
    1/2 the recipe
    /
    Calories
    487
    /
    Total Fat
    41g
    /
    Saturated Fat
    20g
    /
    Cholesterol
    222mg
    /
    Carbohydrate
    0 g
    /
    Dietary Fiber
    0g
    /
    Total Sugars
    0g
    /
    Protein
    29g


    AUTHOR:

    Joanne Gallagher

    Adam and Joanne of Inspired Taste

    We are Adam and Joanne Gallagher, the creators of Inspired Taste. Established in 2009, Inspired Taste grew from a childhood dream into one of the internet’s most trusted recipe sites with hundreds of reliable recipes, step-by-step videos, and expert tips.More About Us

    Source link

  • Easy Napa Cabbage Salad Recipe

    Easy Napa Cabbage Salad Recipe

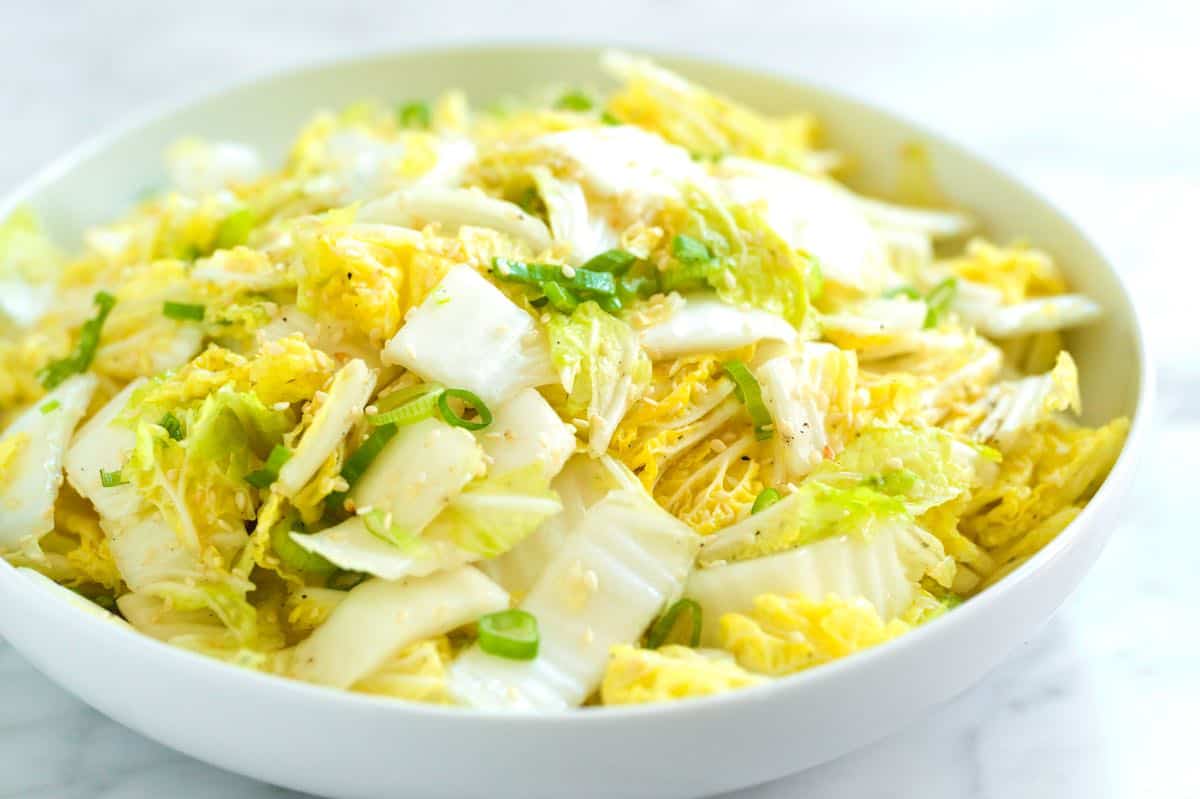
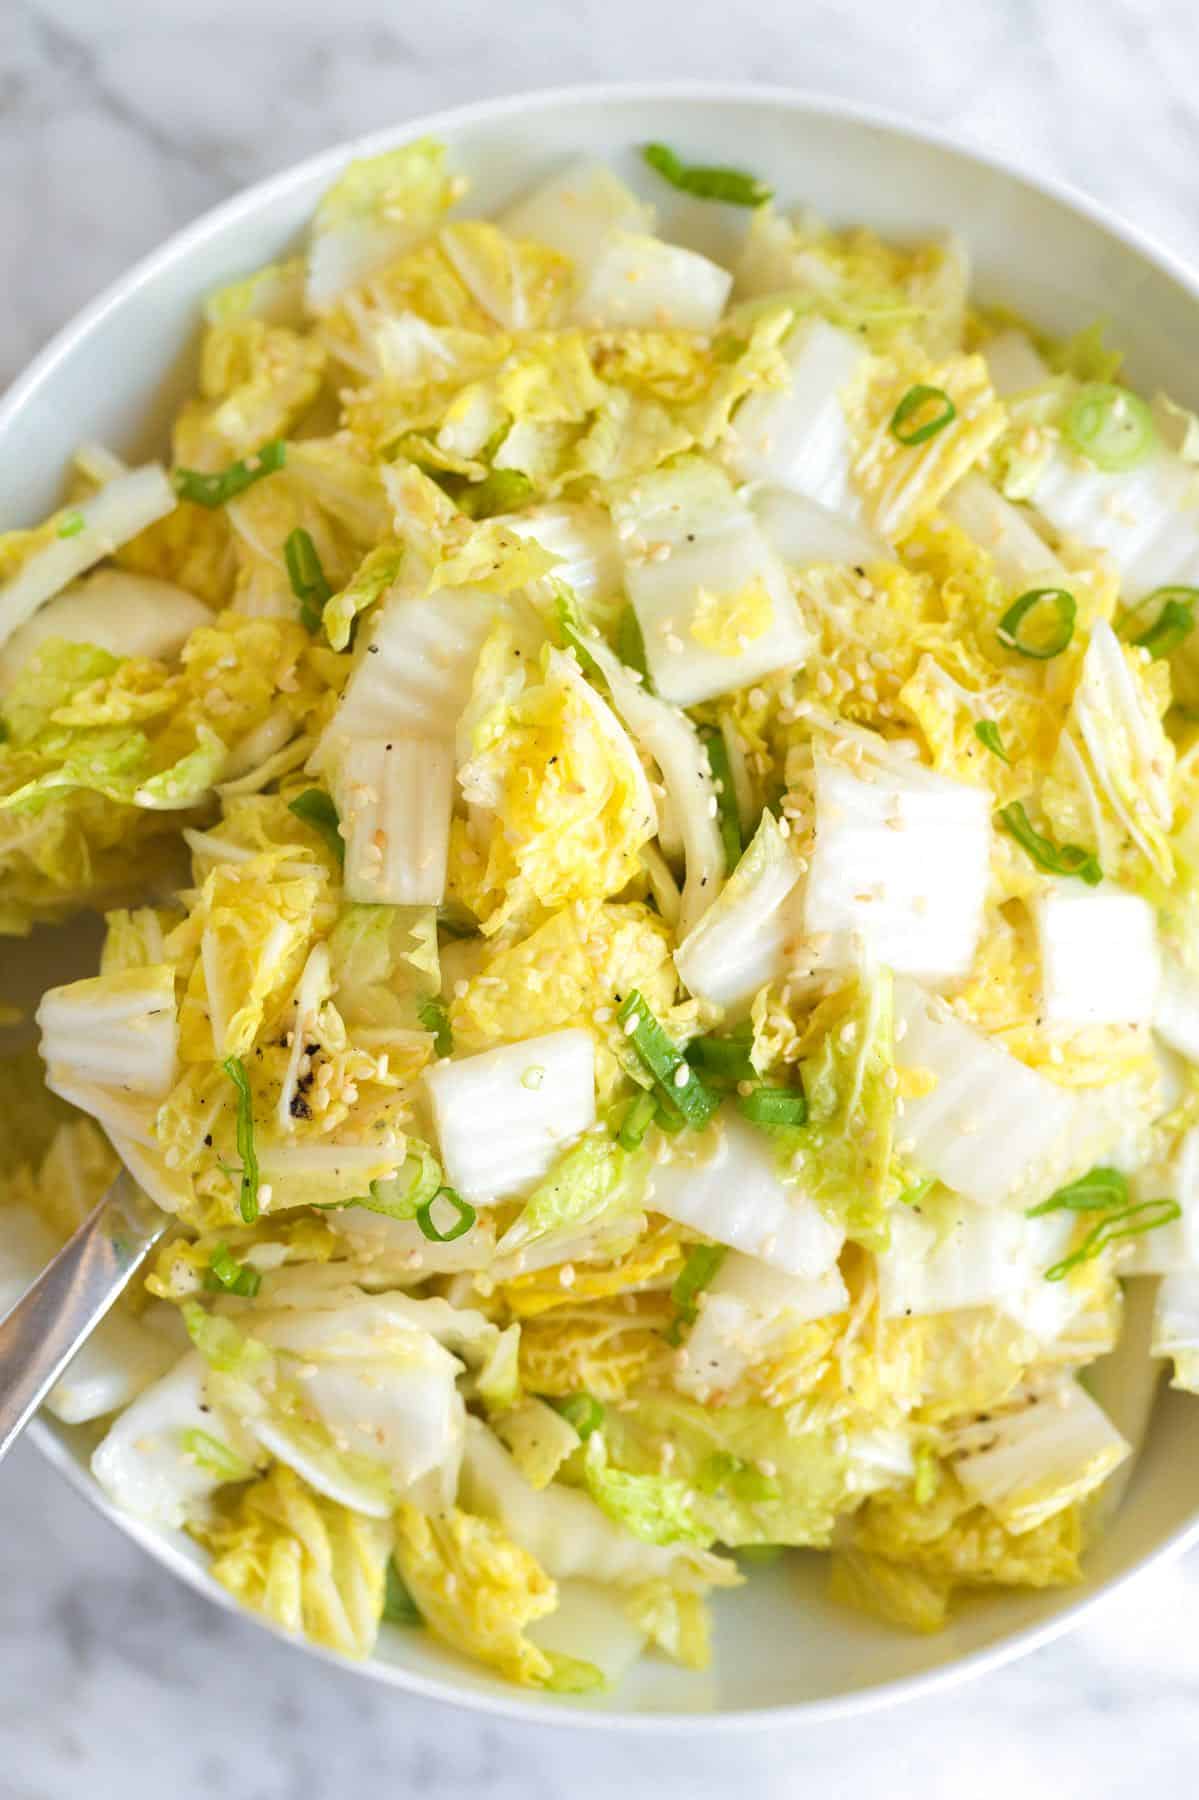
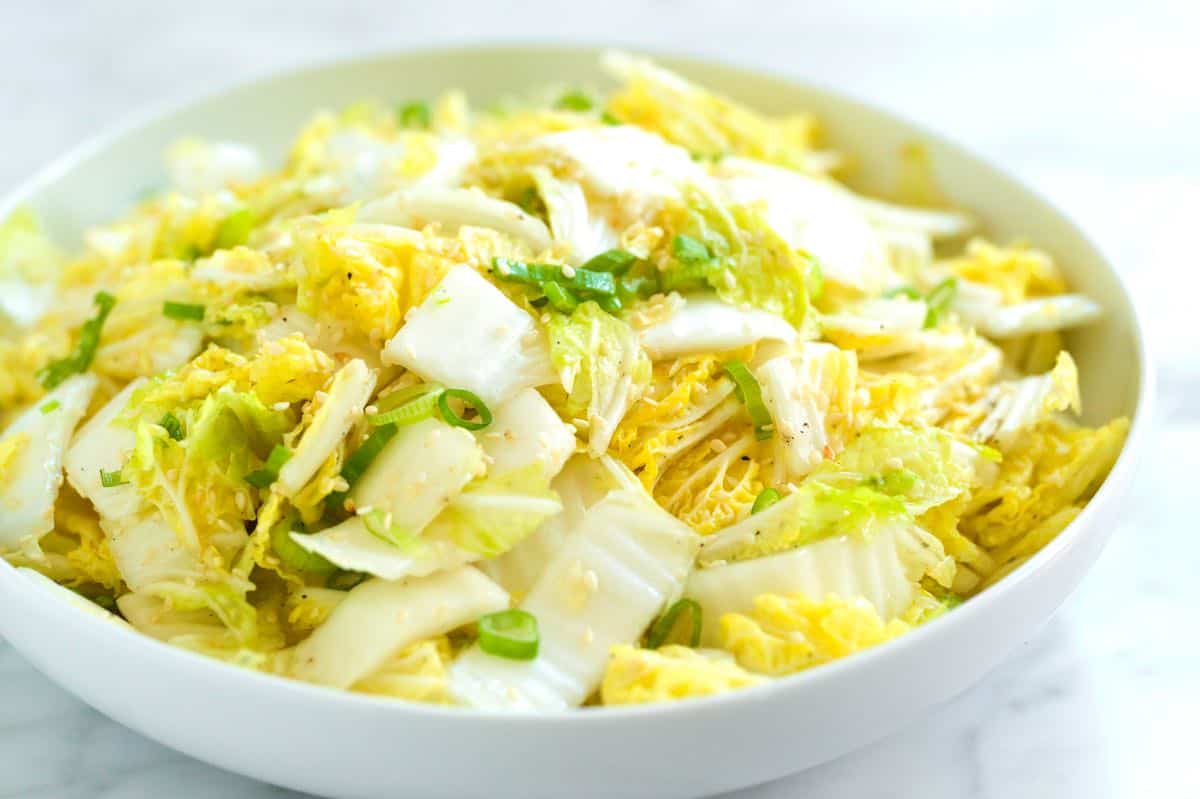
    Here’s the Napa cabbage salad recipe I’ve been making on repeat. It’s remarkably tasty for how easy it is to throw together, and the sesame in the dressing will have you going back for more!

    Easy Napa Cabbage Salad

    I’ve fallen so hard for this cabbage salad, and I think you will, too. I’m always on the hunt for super simple, quick-to-prepare sides, and this Napa cabbage salad with garlic and sesame is hitting it out of the park.

    This truly is a low-effort dish. Just a quick massage of toasted sesame oil, grated garlic, and salt into the cabbage rewards you with a sweet, toasty, and delicious salad. It pairs incredibly well with grilled meats, chicken, and seafood, and I especially love it with meaty or umami-rich dishes, such as grilled steak and pork chops made with this pork marinade.

    Key Ingredients

    • Napa Cabbage: I adore cabbage, made evident by the many cabbage recipes we have, but Napa cabbage holds a special place in my heart. It’s lighter on its feet and wonderfully crunchy, making it an incredibly refreshing base for salads.
    • Sesame Oil and Sesame Seeds: I love the deep, toasty notes that toasted sesame oil adds to this salad. It brings a rich, nutty flavor that makes it incredibly hard to stop eating! To really lean into the sesame, we also toss in some toasted sesame seeds.
    • Garlic and Green Onions: A finely grated garlic clove, massaged into the cabbage, adds so much flavor, but don’t worry, it doesn’t overpower the salad. The natural sweetness of the cabbage stands up beautifully to the raw garlic, and the toasted sesame oil perfectly cuts through. I also love thinly sliced green onions for more flavor and color.
    • Salt and Pepper: These are obvious, but the salt really helps with making our cabbage taste incredible. You’ll massage it into the cabbage, so it helps to tenderize the cabbage and make it taste more like cabbage.

    The secret to this salad’s amazing flavor is massaging the Napa cabbage with the dressing ingredients. I do the same when making kale salad and kimchi because it works wonders. The massage relaxes the cabbage, making it more tender and incredibly receptive to absorbing the garlicky and toasty sesame flavors. It’s a simple step that makes a big difference in the end.

    Easy Napa Cabbage Salad

    Easy Napa Cabbage Salad

    • PREP
    • TOTAL

    It’s hard to stop eating this Napa cabbage salad with toasted sesame oil and garlic. Think of it as a light-on-its-feet, crispy side perfect for richer, umami-rich dishes like grilled steak, baked pork chops, teriyaki chicken, my favorite baked tofu, or grilled swordfish. This salad never overpowers! Instead, it adds a lovely crisp, savory, fresh bite that truly works well with so many things. While Napa cabbage is perfect for this recipe, feel free to substitute other varieties of cabbage if that’s what you have on hand.

    4 Servings

    You Will Need

    Half of a large head Napa Cabbage, about 1 pound, about 8 cups sliced

    3 tablespoons sesame seeds

    1 ½ tablespoons toasted sesame oil, or more to taste

    1 medium garlic clove, finely grated, about 1/4 teaspoon grated

    1/4 teaspoon fine sea salt, or more to taste

    1/4 teaspoon fresh ground black pepper

    2 green onions, thinly sliced

    Directions

      1Prepare the cabbage: Remove the core of the cabbage. Cut lengthwise into 1-inch ribbons, then slice crosswise into 1-inch thick pieces. Rinse under cool water and pat very dry or spin dry using a salad spinner (wet cabbage will water down the salad).

      2Toast the sesame seeds: Add the sesame seeds to a small skillet over medium-low heat and toast, stirring frequently, until golden brown and fragrant, 2 to 4 minutes. Keep a close eye on them, as they can burn quickly.

      3Make the salad: In a large bowl, add the cabbage, toasted sesame seeds, 1 ½ tablespoons of toasted sesame oil, the grated garlic, 1/4 teaspoon of salt, 1/4 teaspoon of black pepper, and thinly sliced green onions. Toss and lightly massage everything together until well combined. Taste and adjust with more salt or sesame oil if needed. As the cabbage is massaged and sits with the salt, it will reduce in size.

    Adam and Joanne’s Tips

    • Storing: The Napa cabbage is at its crispiest when served right away, but this salad will keep well in the refrigerator for 1 to 2 days. Beyond that, the cabbage may become too soft.
    • The nutritional information provided are estimates.

    Nutrition Per Serving
    Serving Size
    1/4 of the recipe (about 1 cup)
    /
    Calories
    104
    /
    Total Fat
    8.7g
    /
    Saturated Fat
    1.2g
    /
    Cholesterol
    0mg
    /
    Sodium
    156.8mg
    /
    Carbohydrate
    5.7g
    /
    Dietary Fiber
    2.3g
    /
    Total Sugars
    1.7g
    /
    Protein
    2.6g


    AUTHOR:

    Joanne Gallagher

    Previous Post: Cheesy Bean Dip
    Next Post: Easy Beer Brats

    Source link

  • Perfect Baked Sweet Potato Fries Recipe

    Perfect Baked Sweet Potato Fries Recipe

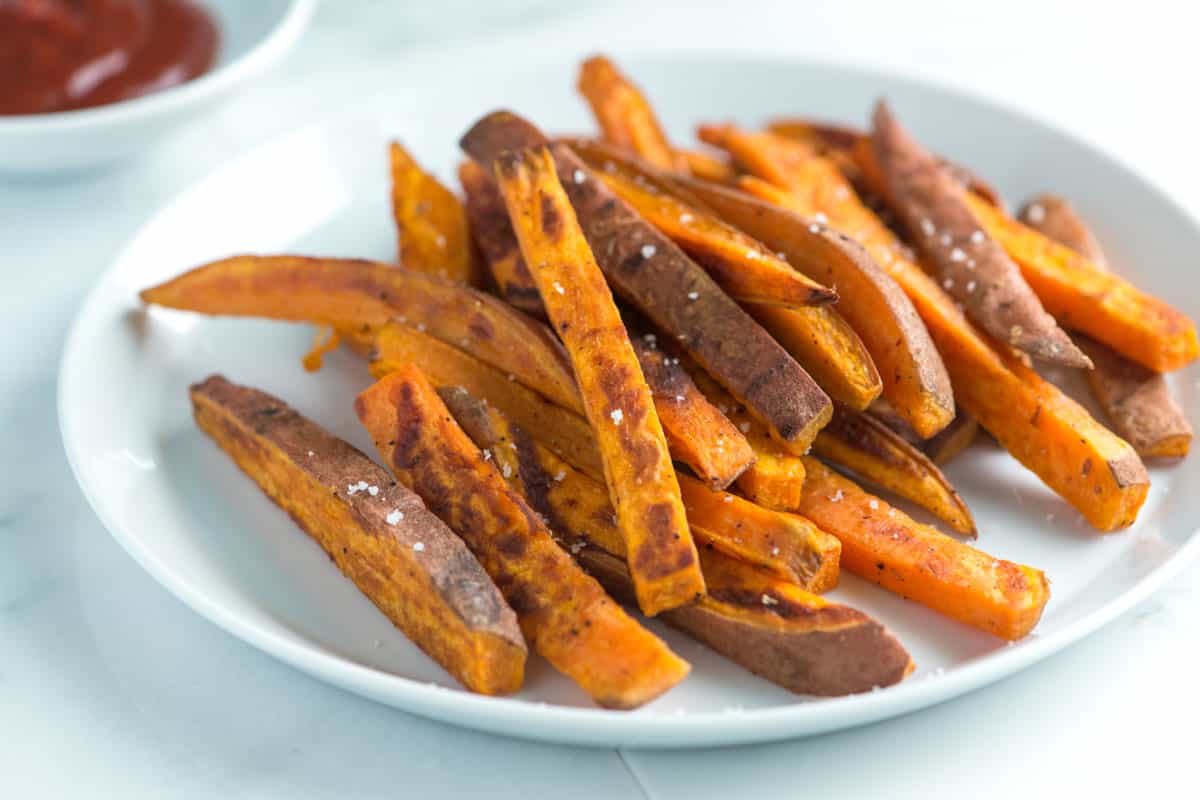
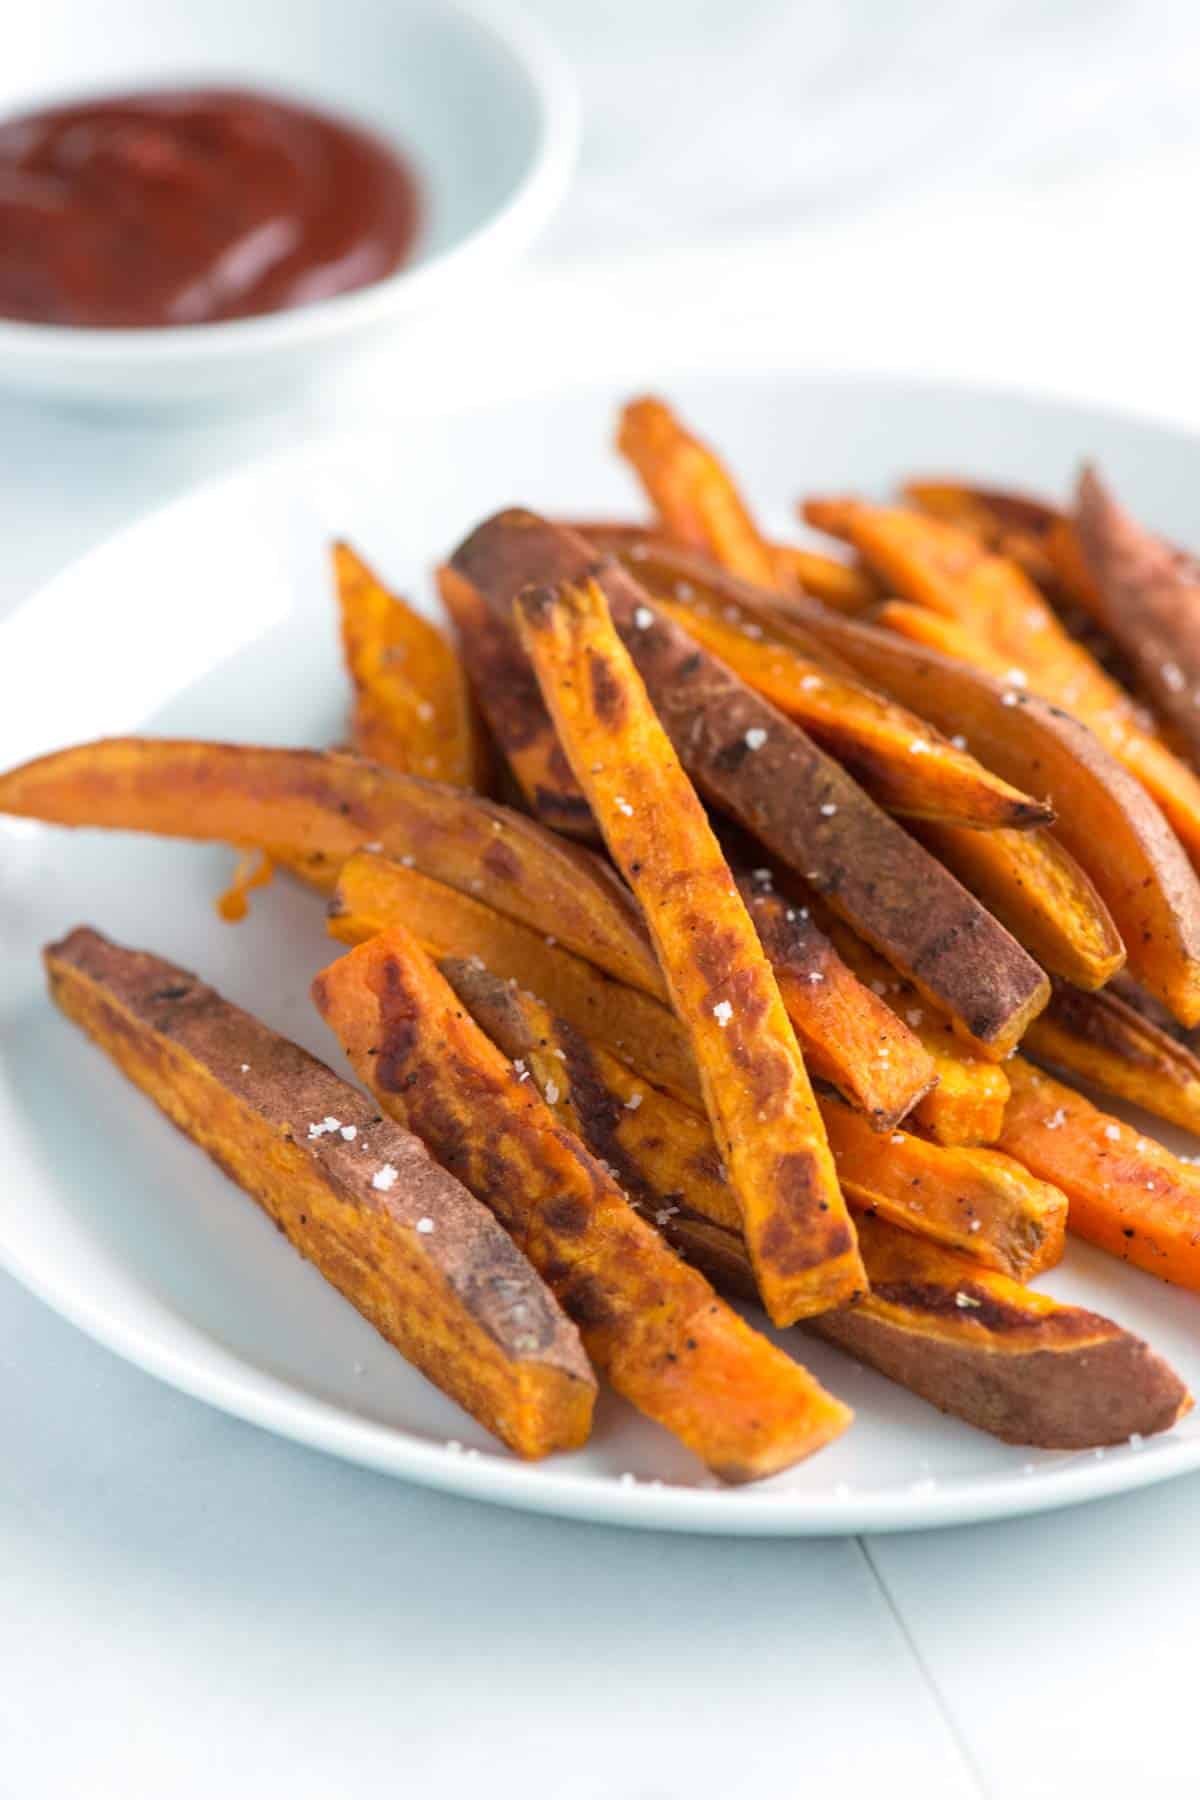
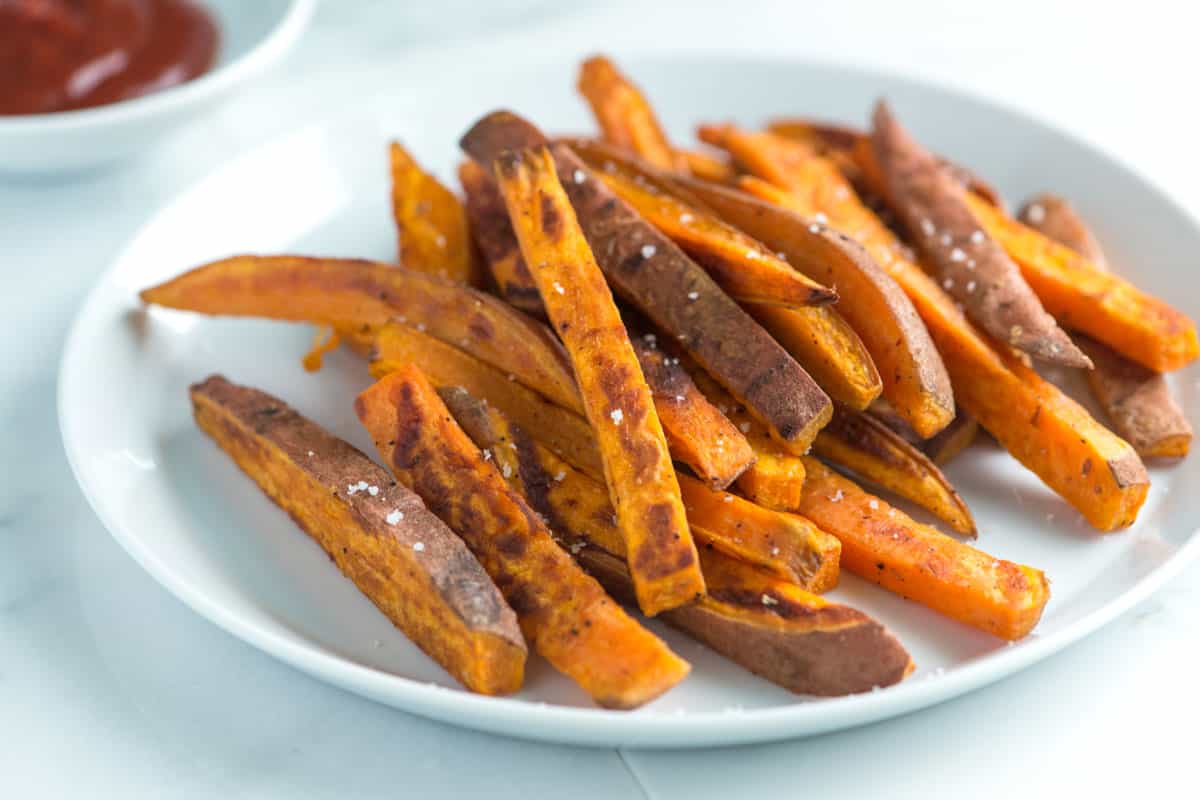
    My easy baked sweet potato fries recipe guarantees crispy, golden-brown outsides with sweet and tender insides. Trust us, you’ll want to make a double batch.

    Crispy Baked Sweet Potato Fries

    Our family absolutely devours these sweet potato fries! If Joanne is in the kitchen while I’m making them, she starts eating them straight off the sheet pan. That’s why we always recommend making a double batch. Bonus: they’re unbelievably easy to make!

    We’re pretty picky about fries, which is why we’re obsessed with how these turn out. Perfectly caramelized and crispy on the outside, yet sweet and tender in the middle. If you love these, be sure to check out some of our other favorites, like our baked french fries, potato wedges, and homemade tater tots.

    Key Ingredients

    • Sweet potatoes: I like medium sweet potatoes (sometimes sold as yams) for these fries. It doesn’t matter if the label says sweet potato or yam, as long as you buy small-to-medium potatoes with orange flesh. Look for Beauregard, Jewel, or Garnet sweet potatoes. They make the best fries.
    • Oil: I use avocado oil or olive oil for coating the fries before baking.
    • Salt and pepper: I keep them simple, but this is a great time to bring out seasoned salt or your favorite spice blend (I love this Cajun seasoning).

    Find the full recipe with measurements below.

    How to Make the Best Sweet Potato Fries

    Tip 1: Don’t worry about peeling. I bake my sweet potato fries in the oven. They’re not quite as crispy as deep-fried fries, but they’re healthier and taste incredible. I don’t bother peeling the sweet potatoes. Just scrub them clean under cold water before slicing.

    Tip 2: Cut them thin. It’s up to you how thick you want your fries, but we like them thin and crispy, so we slice them on the thinner side. Cut the sweet potato into slabs, then slice the slabs into thin fries. Watch our video to see exactly how we do it. It’s really easy!

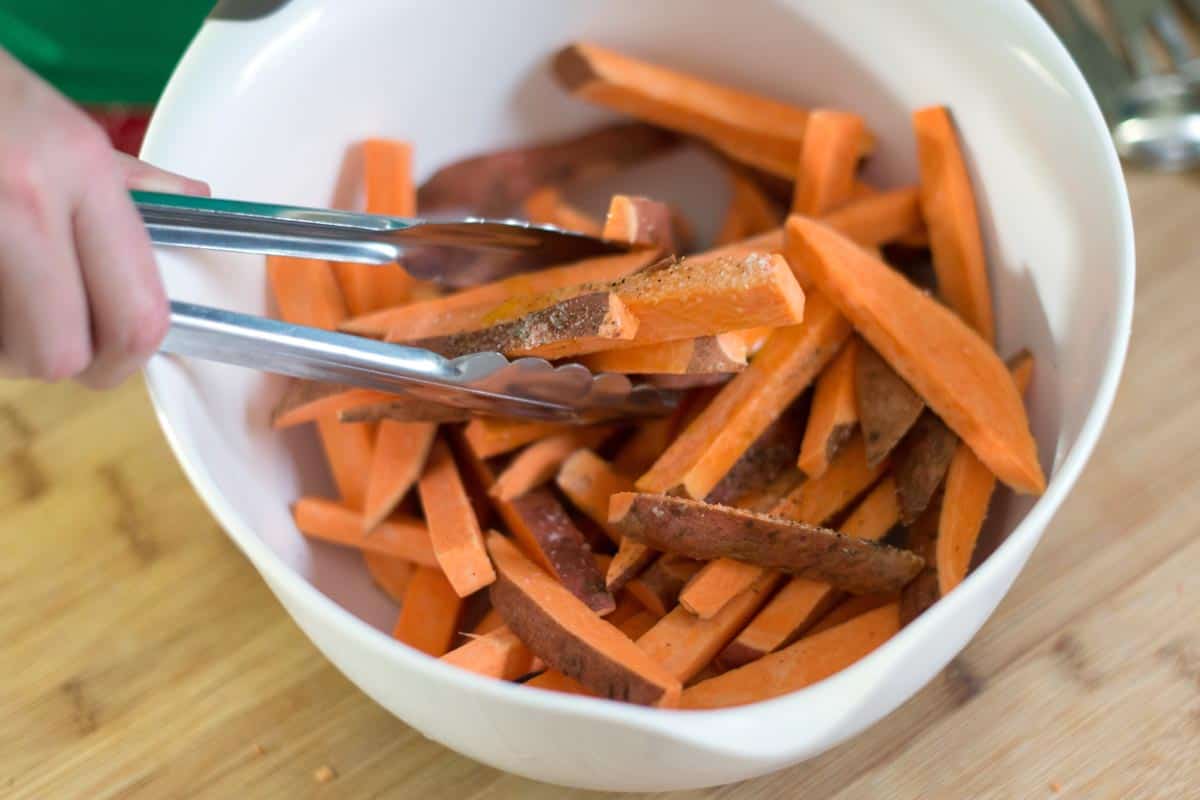
    Seasoning sweet potato fries before baking them

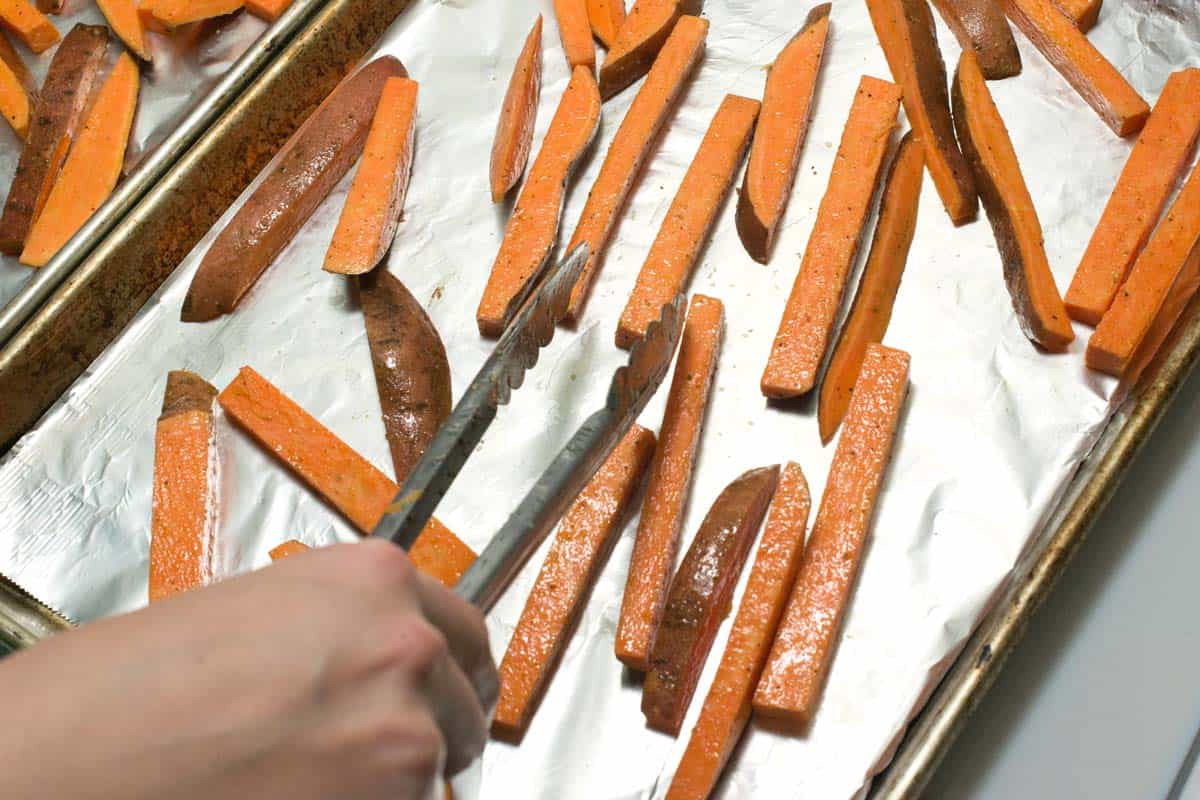
    Tip 3: Don’t overcrowd your baking sheet and preheat it. The secret to crispy baked sweet potato fries is giving them plenty of space. If they’re packed too tightly, they’ll steam instead of crisp up. I also like to preheat my baking sheets before adding the fries since it gives them a head start and helps them brown beautifully.

    Toss the fries with oil, salt, and pepper, then spread them out on foil- or parchment-lined, preheated baking sheets.

    Baking sweet potato fries

    Tip 4: Bake at a higher temperature. Bake the sweet potato fries in a 425°F oven until they’re golden brown and crisp. Depending on how thick you cut them, this usually takes 15 to 25 minutes. Keep an eye on them near the end so they don’t over-brown. Sweet potatoes can go from perfectly caramelized to too dark pretty quickly.

    Serving Suggestions

    Serve these delicious oven-baked sweet potato fries with burgers, veggie burgers, Caesar salad, sandwiches, and turkey meatloaf. My son also loves these with homemade fish sticks and chicken nuggets.

    Depending on your favorite dipping sauce, you can make a homemade sauce alongside them. I love homemade ketchup, mayonnaise, or this creamy honey mustard sauce. Garlic aioli is another favorite, and don’t forget fry sauce!

    More Sweet Potato Recipes

    Homemade Baked Sweet Potato Fries

    Perfect Baked Sweet Potato Fries

    • PREP
    • COOK
    • TOTAL

    This is my favorite sweet potato fries recipe. The fries bake up with caramelized edges and tender centers every time. Watch our recipe video to see exactly how we cut the sweet potatoes into fries. I like to keep the skins on for extra texture and flavor, but you can peel them if you prefer.

    4 Servings

    Watch Us Make the Recipe

    You Will Need

    4 medium sweet potatoes

    3 tablespoons avocado oil or olive oil

    ½ teaspoon fine sea salt

    ½ teaspoon fresh ground black pepper

    Directions

      1Preheat the oven: Preheat the oven to 425°F (218°C). Set aside two baking sheets. The fries caramelize best when placed directly on the baking sheet, but you can line them with aluminum foil for easier cleanup.

      2Preheat the baking sheets: Place the baking sheets in the oven while it heats. Preheating them gives the fries a head start and helps them crisp up.

      3Prepare the sweet potatoes: Slice the sweet potatoes into ½-inch sticks. Add them to a large bowl and toss with oil, salt, and pepper until evenly coated.

      4Arrange the fries: Carefully remove the hot baking sheets from the oven. Divide the sweet potatoes between them and spread into a single layer. Avoid crowding them, if the fries are too close together, they’ll steam instead of brown.

      5Bake the fries: Bake the sweet potato fries, turning once and rotating the pans halfway through, until the edges are lightly browned and the centers are tender, 15 to 25 minutes. They’re done when the surface looks dry and puffy. Don’t worry if the edges turn brown; they’ll taste caramelized, not burnt. Serve the fries hot with your favorite dipping sauce and a final sprinkle of salt.

    Adam and Joanne’s Tips

    • Cornstarch: Some swear by adding a generous pinch of cornstarch to the fries before tossing and baking to make them extra crispy. It really does work, so give it a try if you’d like. We usually skip it because we’re already happy with how crispy the fries turn out as-is.
    • Storing leftovers: Store cooled fries in an airtight container and refrigerate for up to 3 days. They’ll soften as they sit, but you can easily bring them back to life.
    • Re-crisping fries: To reheat, spread the fries on a baking sheet and bake at 400°F (204°C) for 5 to 10 minutes until warmed through and crisp again.
    • The nutrition facts provided below are estimates.

    Nutrition Per Serving
    Calories
    201
    /
    Protein
    2 g
    /
    Carbohydrate
    26 g
    /
    Dietary Fiber
    4 g
    /
    Total Sugars
    5 g
    /
    Total Fat
    10 g
    /
    Saturated Fat
    1 g
    /
    Cholesterol
    0 mg


    AUTHOR:

    Adam Gallagher

    Adam and Joanne of Inspired Taste

    We are Adam and Joanne Gallagher, the creators of Inspired Taste. Established in 2009, Inspired Taste grew from a childhood dream into one of the internet’s most trusted recipe sites with hundreds of reliable recipes, step-by-step videos, and expert tips.More About Us

    Source link

  • Pizza Burgers Recipe – Pinch of Yum

    Pizza Burgers Recipe – Pinch of Yum

    My Grandma Knew.

    Lindsay Ostrom headshot.

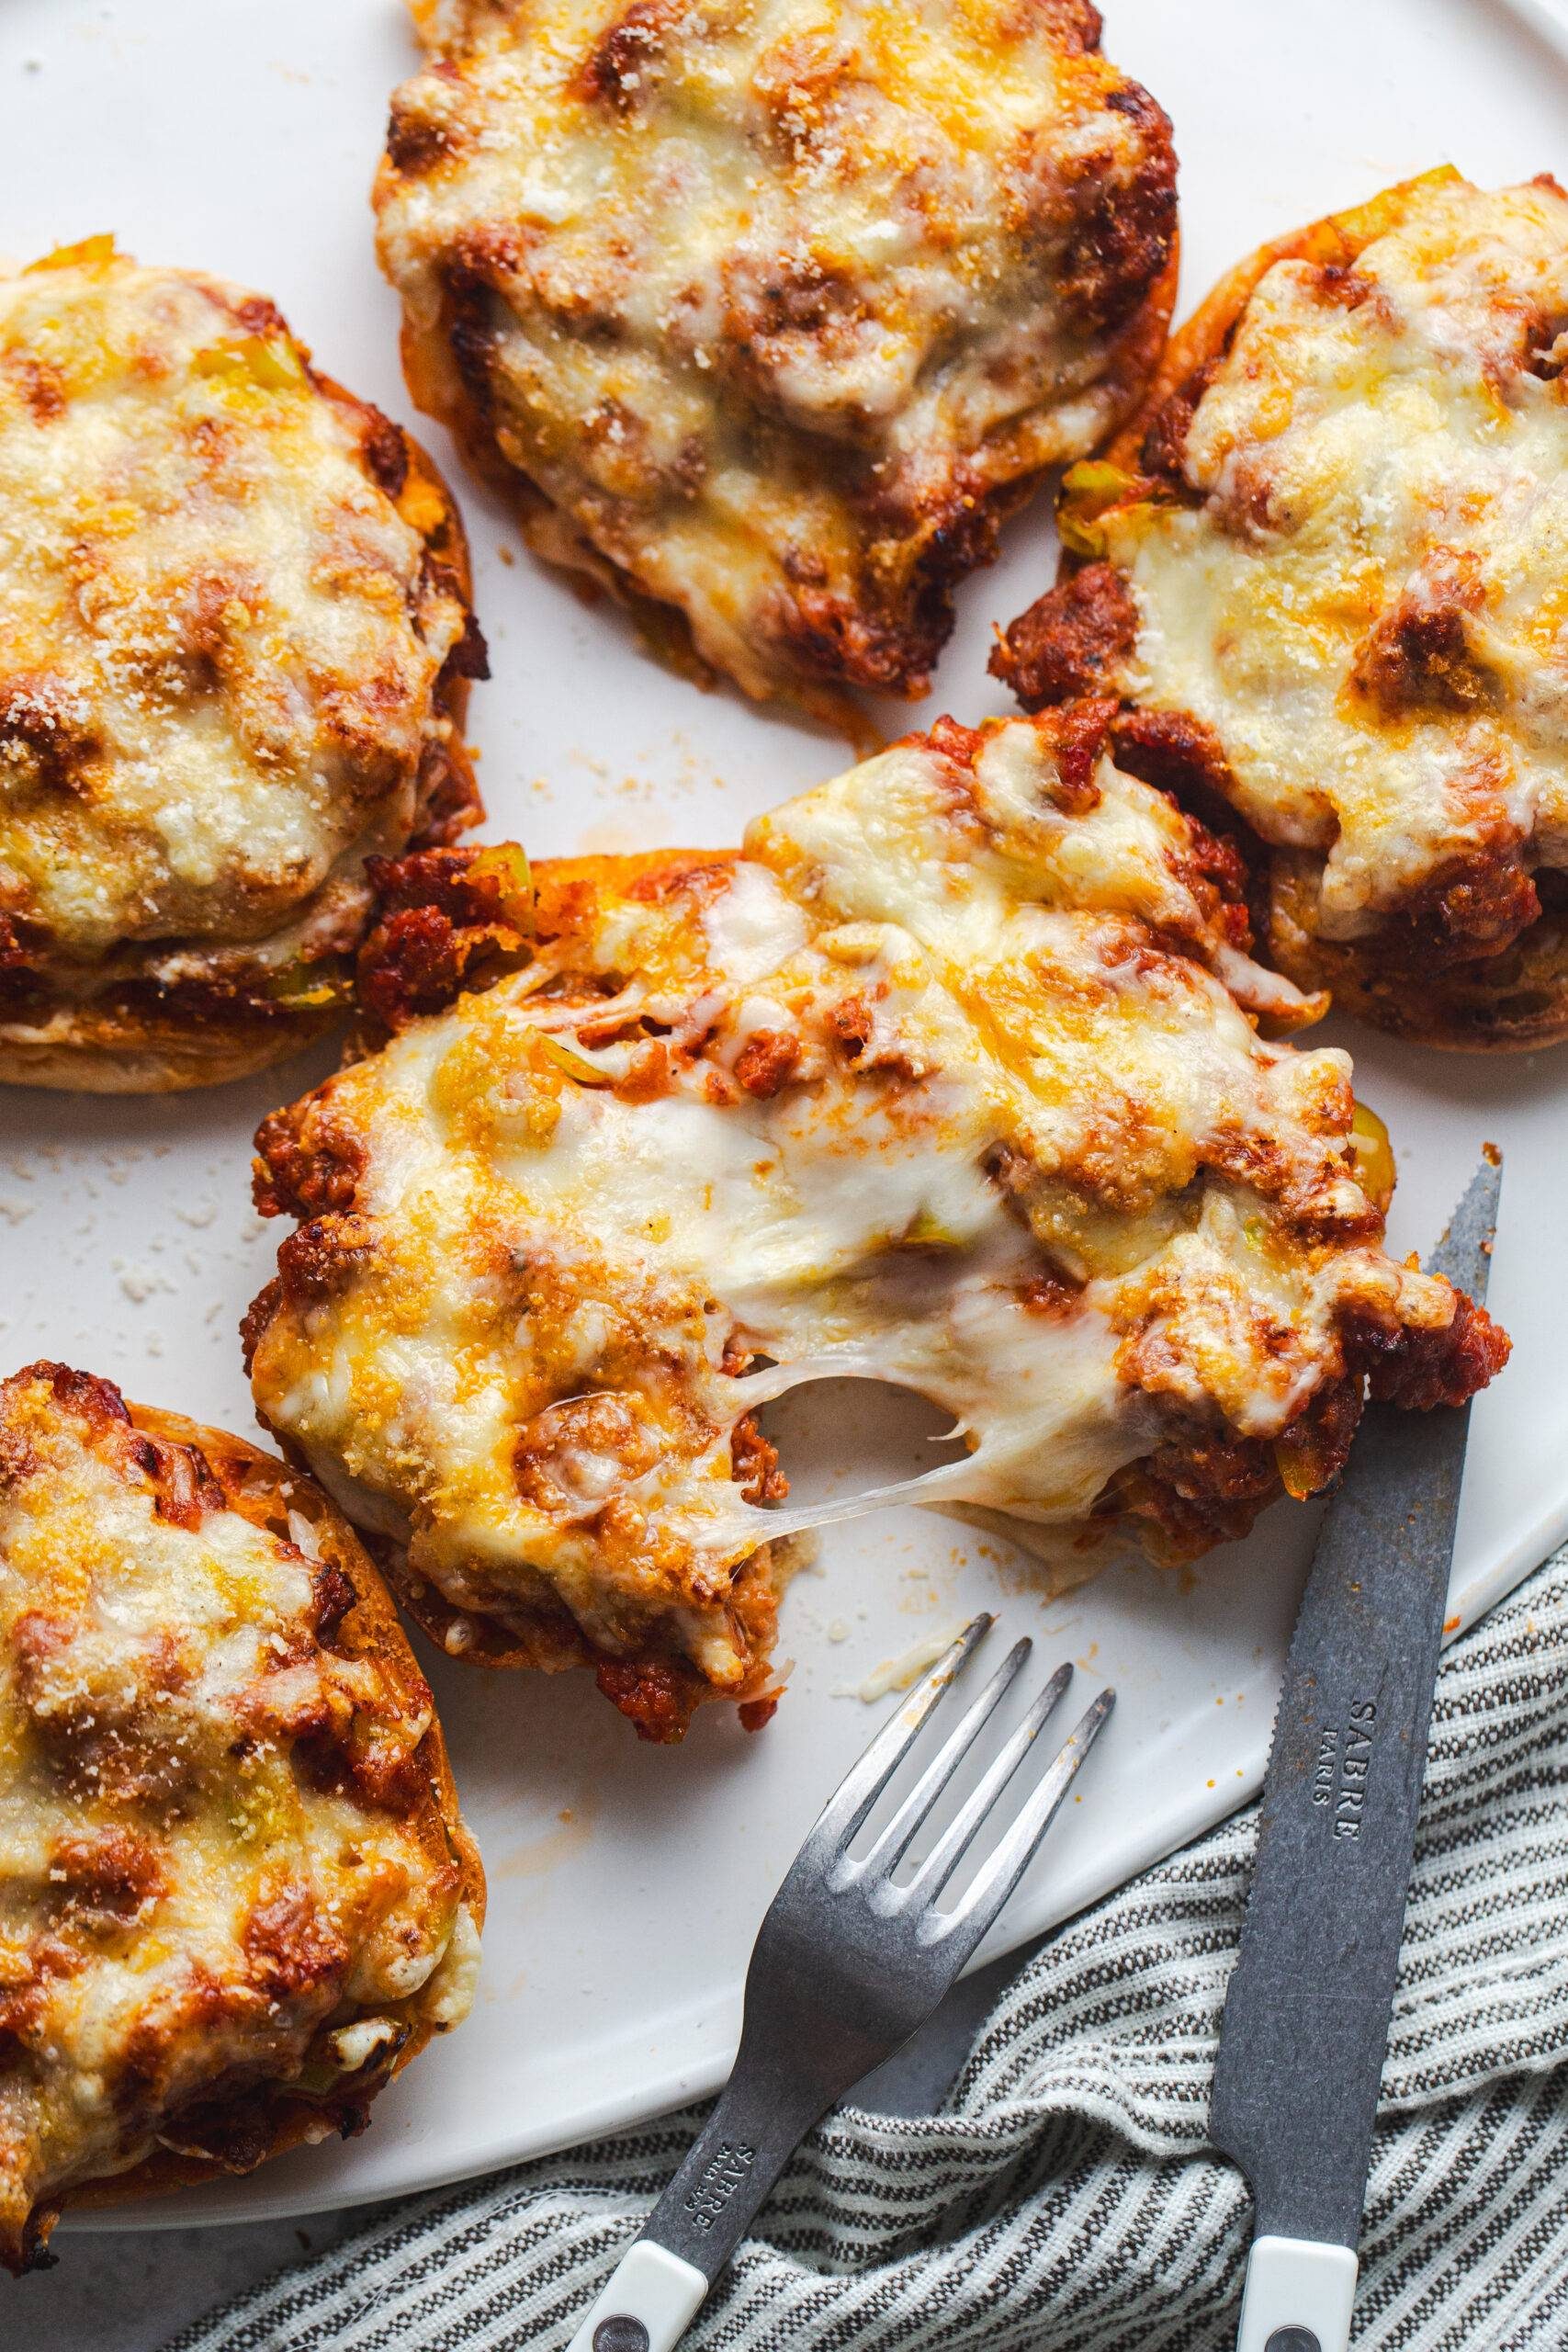
    A crisped English muffin brushed with garlic butter, topped with a savory meat sauce and melty cheese? Oh MAN these are good.

    I’m currently very obsessed with these, which is kind of making me chuckle, because it feels like a peak 90s Midwestern mom moment. HERE FOR IT!

    “Pizza burgers” are a staple of my childhood. My grandma made these all the time, and whenever she would come visit our family, she’d re-up our freezer stash.

    This recipe is like a collab between my grandma and me: she always did them on English muffins, and I prefer ground Italian sausage (or turkey, or chicken), and brushing all of it with garlic butter.

    They’re just my favorite for the end-of-school-year madness right now:

    • They’re MINDLESSLY EASY.
    • My kids love them.
    • Fun toppings can be mixed in (my fave = pepperoncini).
    • And, importantly: they can be pulled out of the freezer and reheated one at a time – ideal for the times we are trying to get out the door to soccer or find something to eat quickly between work meetings and just questioning every life decision that led us to this moment.
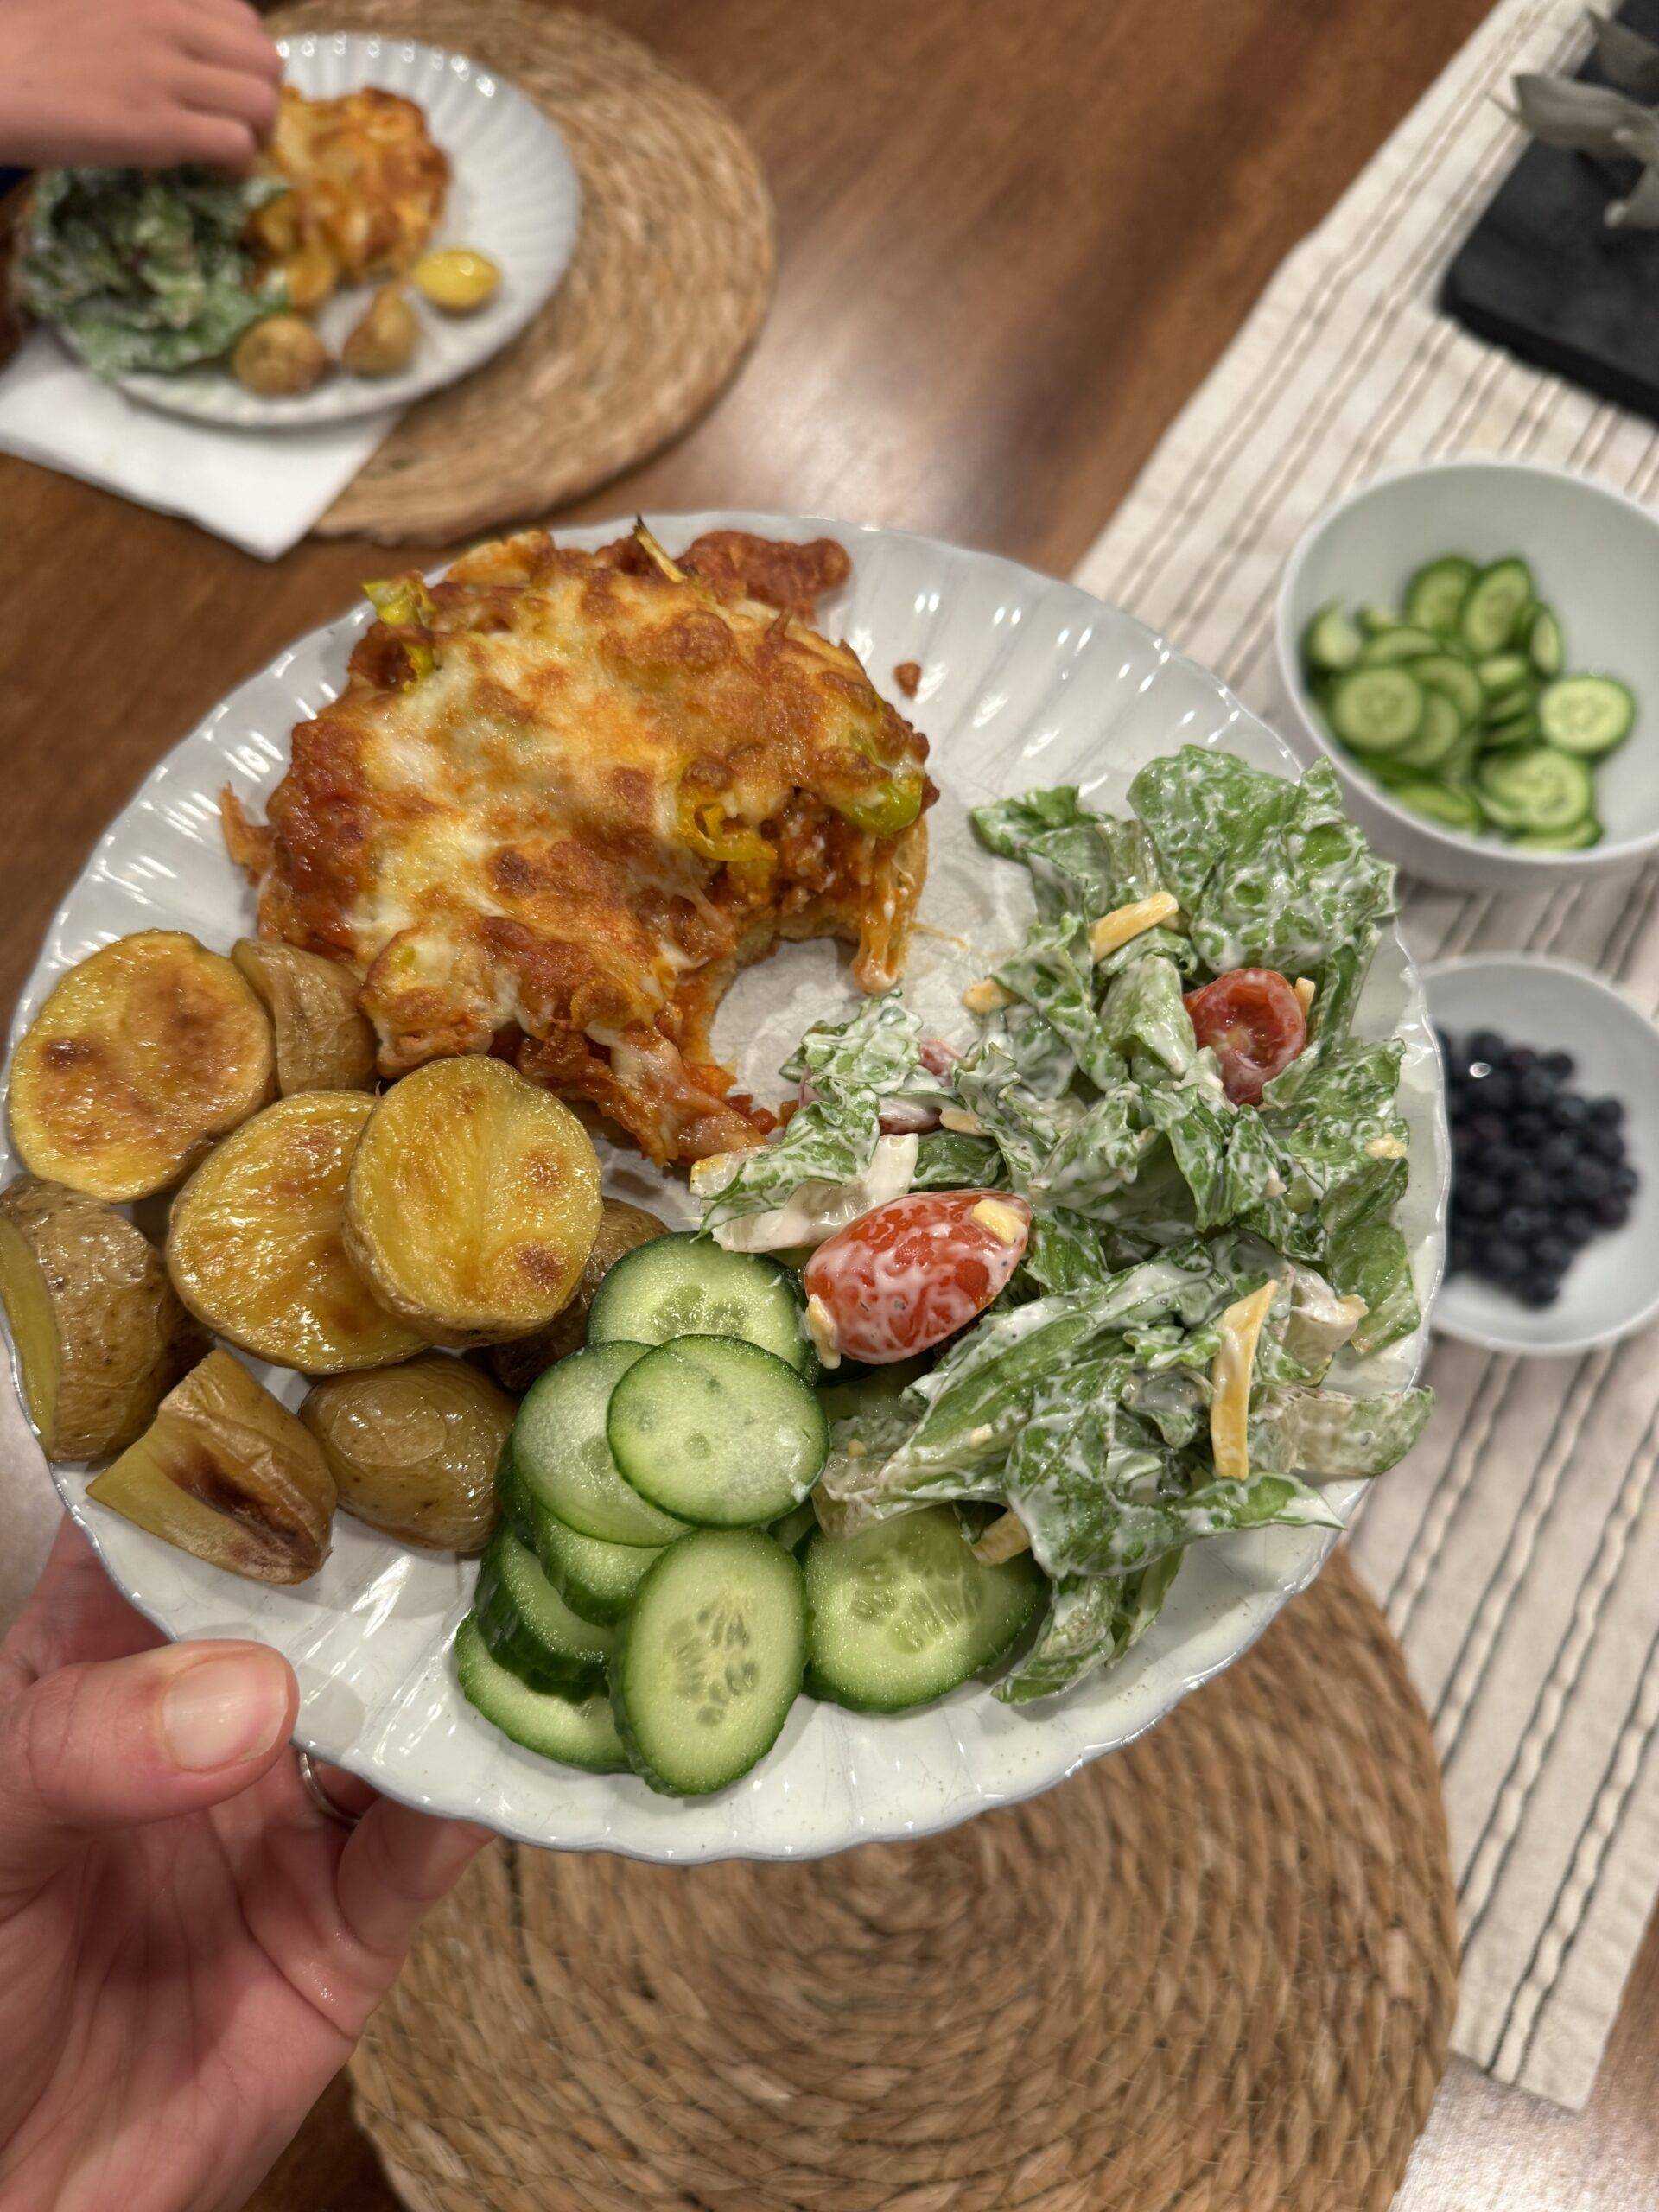
    Pizza burger on a plate with potatoes, cucumber, and salad.

    While in the process of writing this post, I literally just ate two of them for lunch. Oh man, so good.

    Pulled out of the freezer. Air-fried for 8 minutes. Drizzled them with good olive oil (DELICIOUS) and topped with some kosher salt and served alongside a pile of supremely crunchy cucumbers. It was a moment!

    Hope you love these! From my Midwestern grandma, to me, to all of us. 🙂

    Lindsay signature.

    Source link

  • Roasted Carrots and Parsnips Recipe

    Roasted Carrots and Parsnips Recipe

    My roasted carrots and parsnips are such a classic side dish, and for good reason! The oven transforms them, intensifying their flavor, caramelizing the sugars, and browning the outsides with very little effort from you!

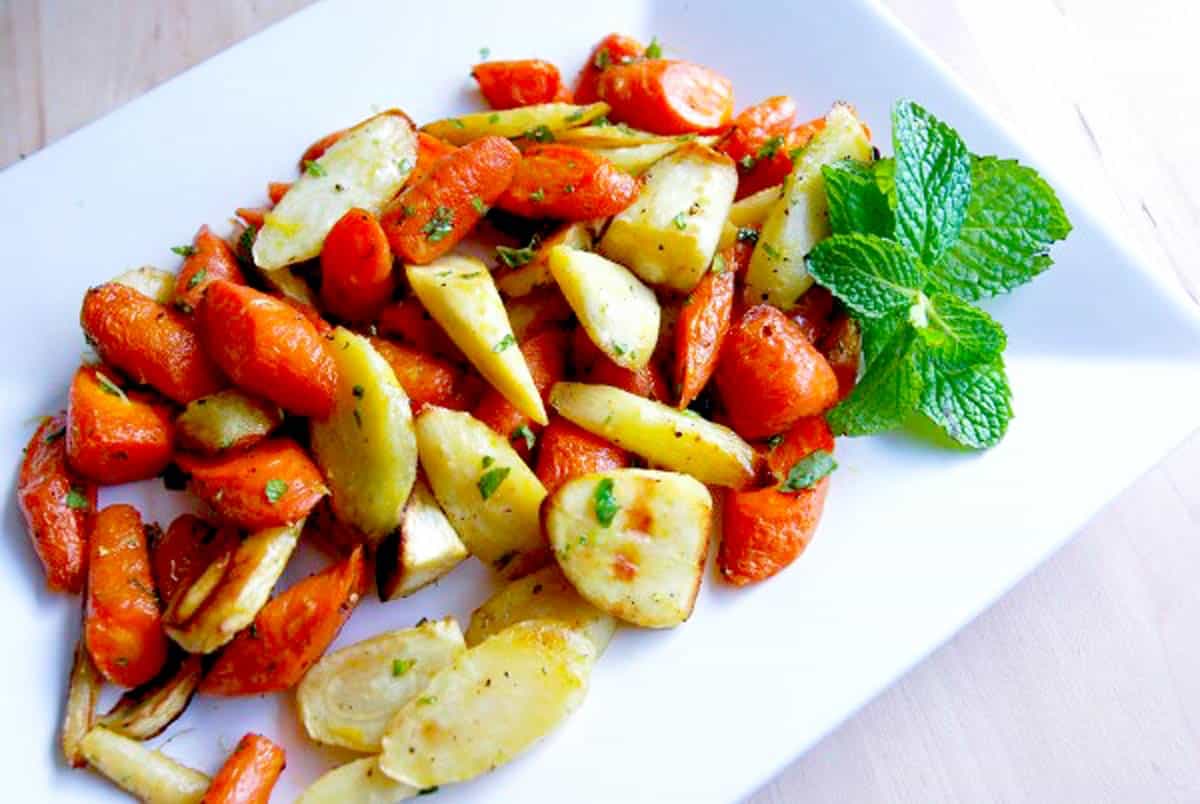
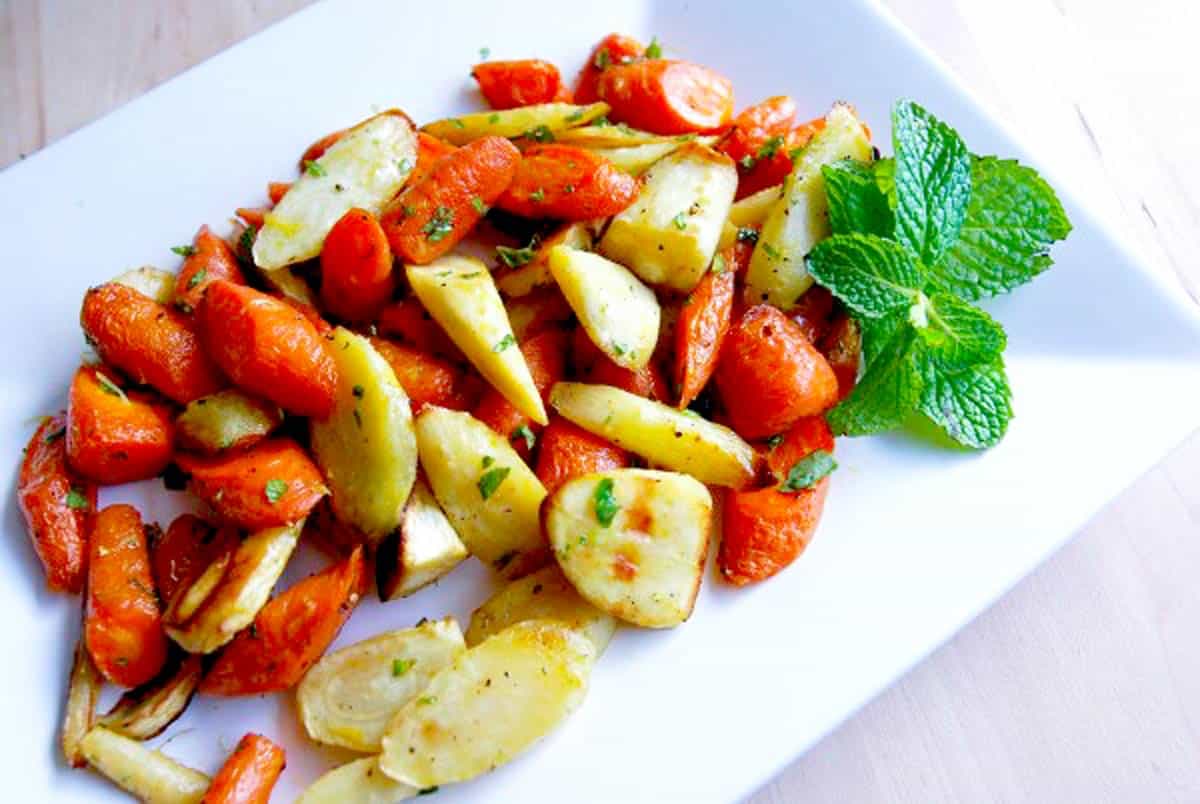
    Easy Roasted Carrots and Parsnips with Mint

    I grew up with this dish. My Mom (who’s from the UK) made roasted carrots and parsnips at least once every week, and I am so happy that she did! Roasting will forever be my favorite way to make vegetables even better. This happens with our favorite roasted carrots recipe, and it happens with this recipe, which adds parsnips to the party.

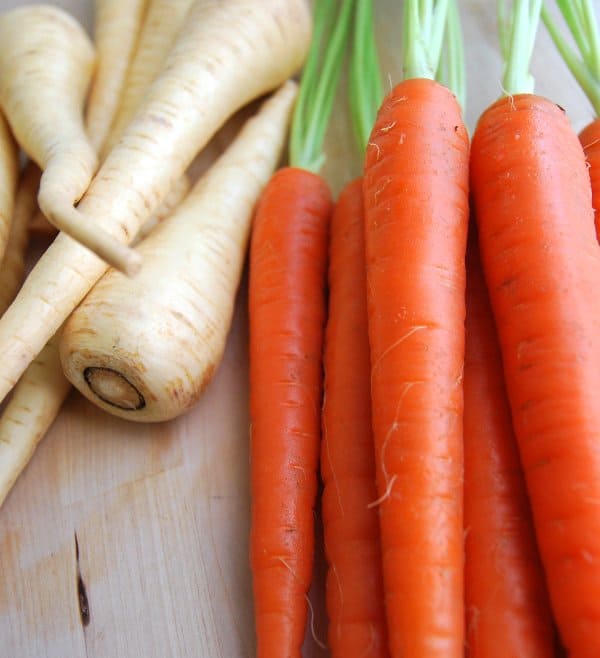
    If you are unfamiliar with parsnips, they are between a carrot and a potato (sweet like carrots and creamy like a potato). I love them! We also use them to make creamy parsnip puree, which I think rivals mashed potatoes any day.

    Key Ingredients

    • Carrots: Use any variety of carrots for this recipe. Orange carrots are the most common, but yellow, purple, or more exciting varieties are great! Scrub your carrots clean and then skip peeling them (helpful on a busier night when time is limited) or peel them.
    • Parsnips: Often sold near other root vegetables, parsnips look like white carrots. Look for firm, smooth, and evenly colored parsnips with no soft spots. Like the carrots, you can scrub them clean and then skip peeling or peel them.
    • Oil, Salt, and Pepper: I love avocado oil or olive oil. Then, I simply season the carrots and parsnips with salt and pepper. You can swap for my favorite seasoned salt, or use an herb blend like Herbes de Provence.
    • Fresh Mint: When I have it on hand, I love tossing the warm roasted veggies with chopped fresh mint. Other herbs are lovely too! You can even make a herbed butter like I do for my buttery roasted carrots.
    Parsnips and Carrots

    Roasted Carrots and Parsnips

    • PREP
    • COOK
    • TOTAL

    Carrots and parsnips are lovely together, and you can make this roasted version in about 30 minutes. Roasted carrots and parsnips are great with just oil, salt, and pepper, but we especially love them tossed with fresh mint just before serving!

    6 Servings

    You Will Need

    1 pound (450g) carrots, peeled, 4 to 5 medium

    1 pound (450g) parsnips, peeled, 4 to 5 medium

    2 tablespoons olive oil or avocado oil

    1/2 teaspoon fine sea salt

    1/2 teaspoon fresh ground black pepper

    2 tablespoons chopped fresh mint, optional

    Directions

      1Heat the oven to 400°F (200°C). Line a large baking sheet with parchment paper or use a silicone baking mat.

      2Trim the carrot and parsnip ends and slice them diagonally into 1-inch-thick slices. As the carrots roast, they will shrink. (Depending on how wide the thicker ends of the parsnips are, you may need to slice each stick in half, lengthwise.)

      3Add the carrots, parsnips, oil, salt, and pepper to a large bowl, and toss until well coated. Spread them in one layer on the prepared baking sheet.

      4Roast for 15 minutes, stir, and then roast until the carrots and parsnips are tender and caramelized around the edges, 5 to 10 minutes longer. (For even more caramelization, roast for another 5 to 10 minutes.)

      5Toss with chopped mint and serve.

    Adam and Joanne’s Tips

    • Storing: Place roasted carrots and parsnips in an airtight container and refrigerate for up to 4 days. To freeze them, freeze them in a single layer on a parchment-lined baking sheet. Once frozen, transfer them to a freezer-safe container, and they’ll keep for up to 3 months.
    • The nutrition facts provided below are estimates.

    Nutrition Per Serving
    Serving Size
    1 of 6 servings
    /
    Calories
    118
    /
    Total Fat
    5g
    /
    Saturated Fat
    0.7g
    /
    Cholesterol
    0mg
    /
    Sodium
    236.4mg
    /
    Carbohydrate
    18.5g
    /
    Dietary Fiber
    5.2g
    /
    Total Sugars
    6g
    /
    Protein
    1.4g


    AUTHOR:

    Joanne Gallagher

    Previous Post: Creamy Parsnip Purée
    Next Post: Garlic Olive Oil Mashed Potatoes

    Source link

  • Easy Tomato Bruschetta Recipe

    Easy Tomato Bruschetta Recipe

    This bruschetta recipe is hands down my favorite recipe to make in the summer when tomatoes are at their best and it comes together in minutes!

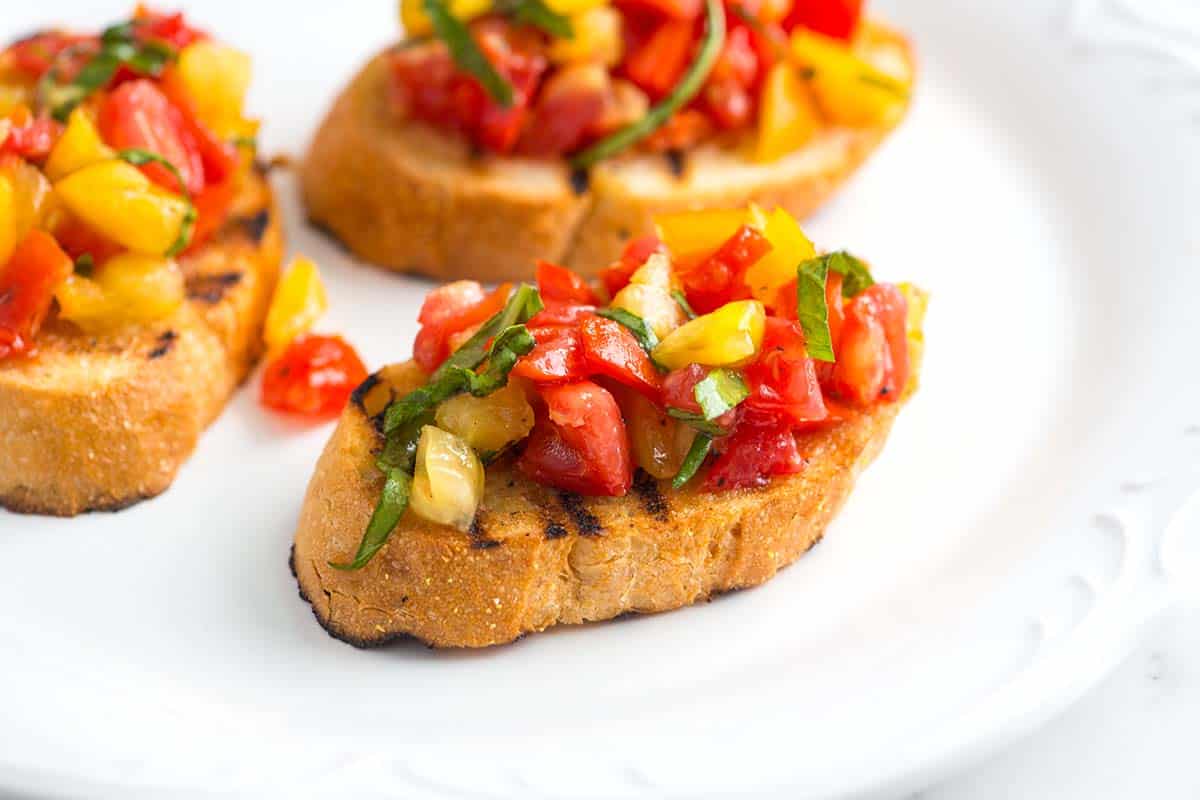
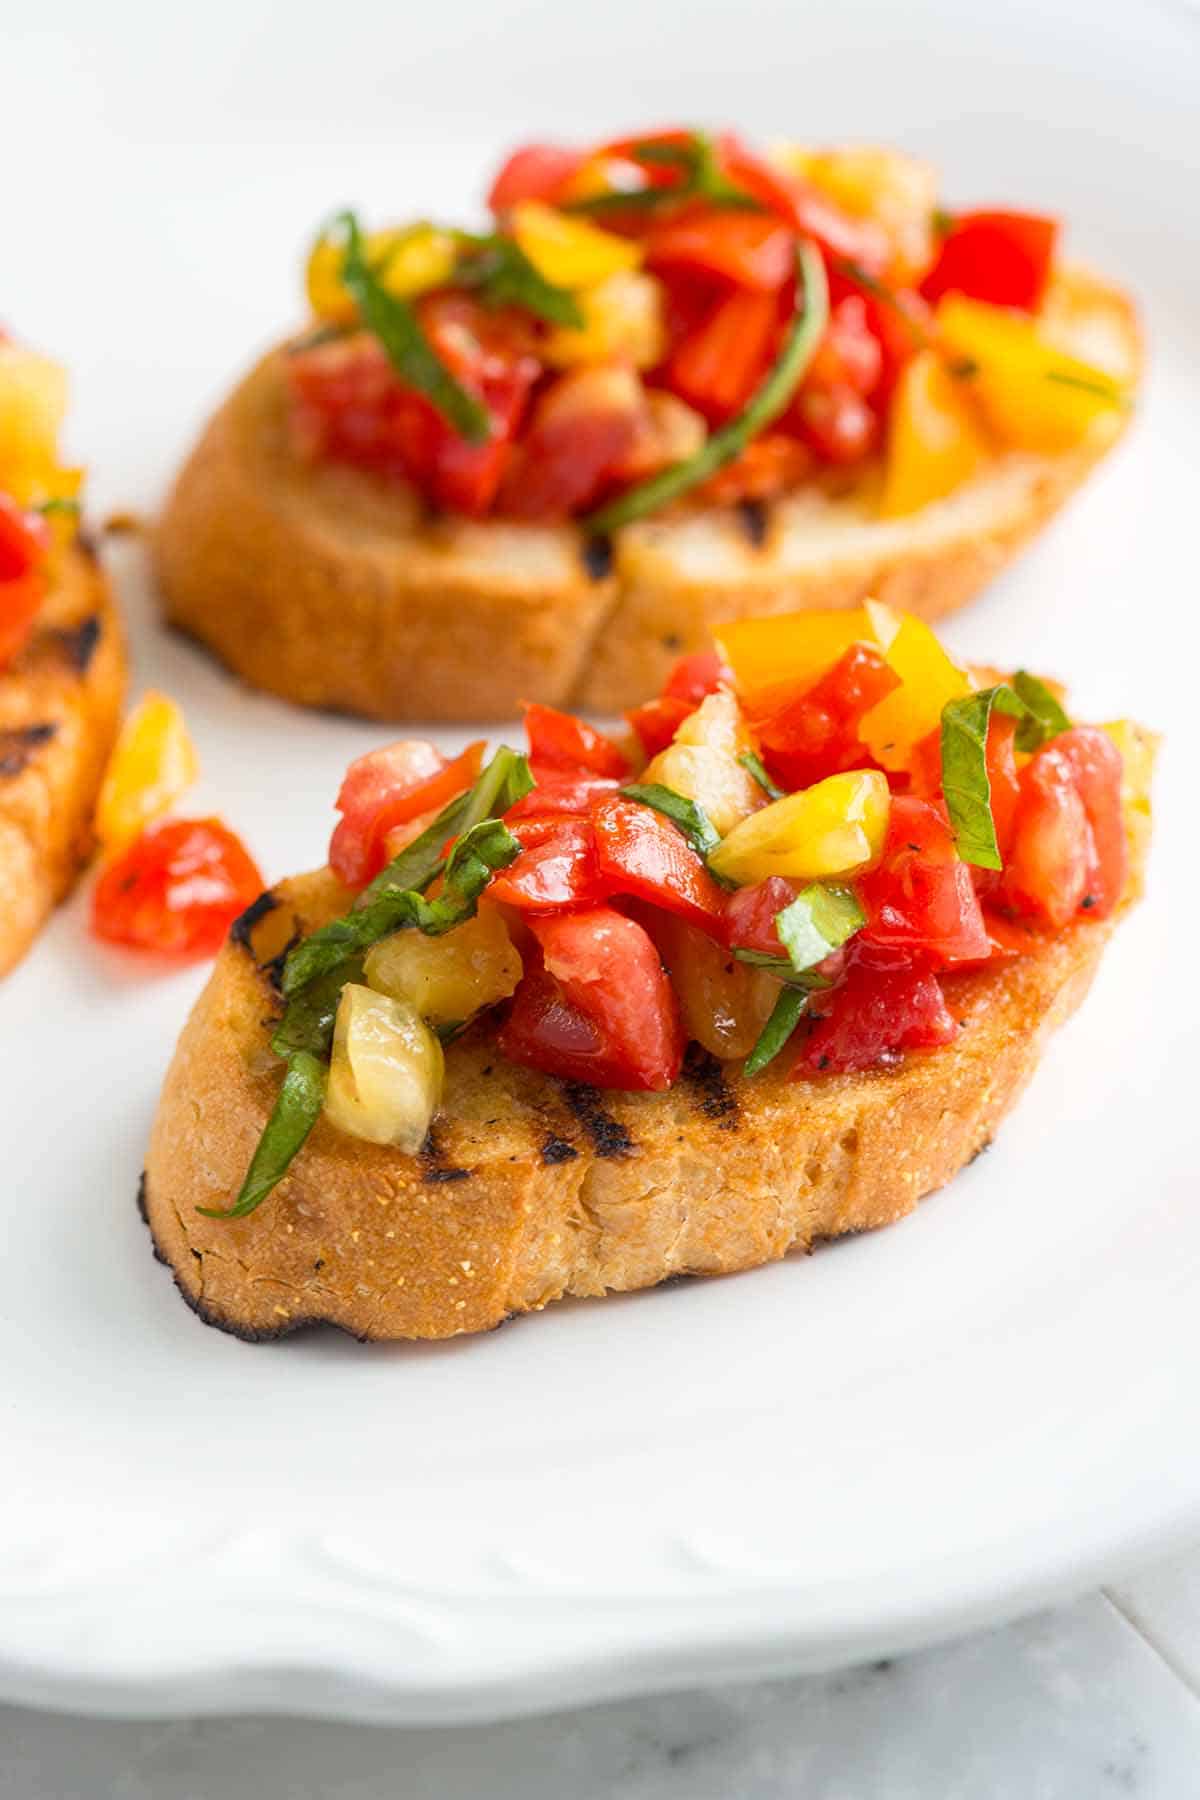
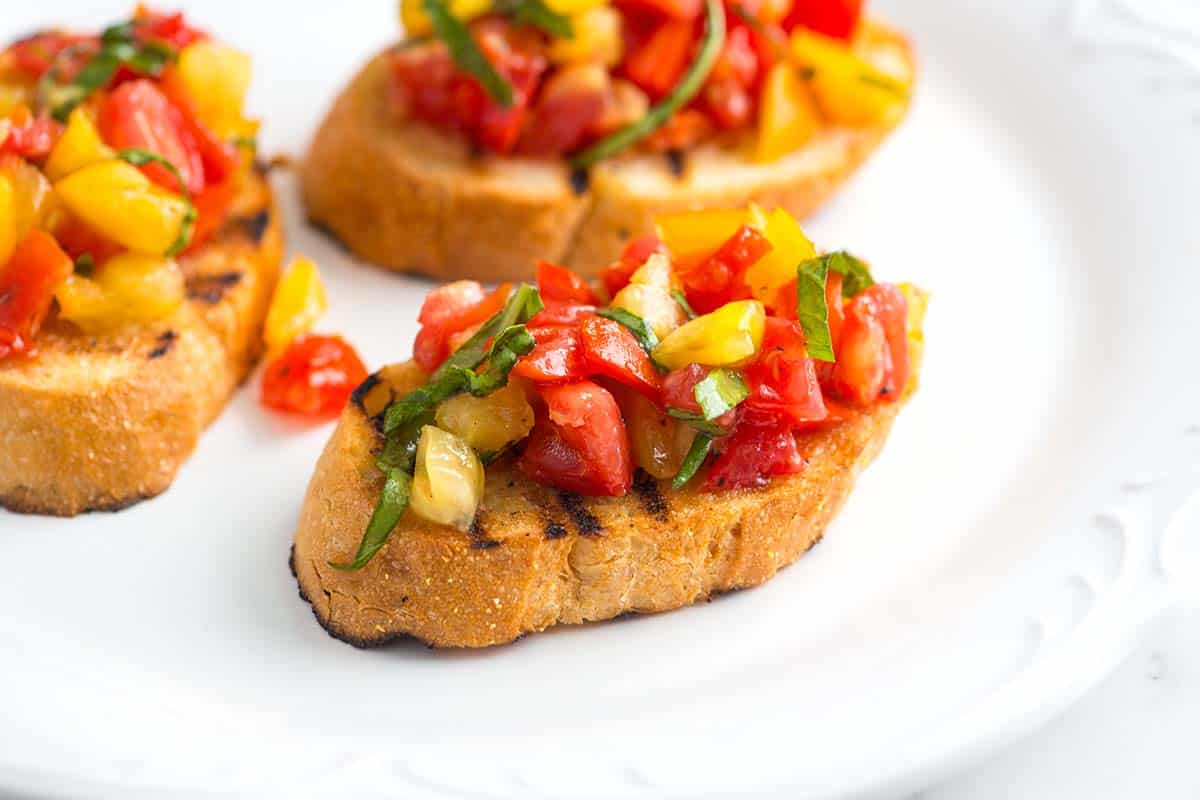
    Homemade Tomato Bruschetta

    I can’t tell you how often we’ve made this recipe! Like so many incredible Italian dishes, it calls for fresh, high-quality ingredients and very little fuss.

    This homemade bruschetta is one of my most made appetizer recipes. For more like this, see our Caprese salad or antipasto salad!

    Key Ingredients

    • Tomatoes: Everyone is probably telling you to use the best tomatoes for the best bruschetta (including me), but let’s make sure we are on the same page with what that means. You will find the best tomatoes later in the summer. They should feel heavy and have smooth skin. They should also smell like tomatoes (if there’s no smell, skip it!). Finally, don’t refrigerate your tomatoes. Something happens after refrigerating tomatoes (they become less flavorful and tomato-y). We store them on the counter. Roma tomatoes, heirloom tomatoes, garden tomatoes, and cherry tomatoes all work nicely for this recipe. If you crave bruschetta outside of tomato season, use cherry tomatoes. We’ve found them to be sweeter and more consistent all year round.
    • Bread: I use a rustic Italian bread or a French loaf (like a baguette) to make bruschetta. It should be soft and chewy in the middle, with a little bite around the crust. Slices of homemade focaccia bread work nicely, too.
    • Garlic: Fresh garlic is key to authentic bruschetta. I don’t add garlic to my tomatoes, but rub my warm, toasted (or grilled) bread with it instead.
    • Olive Oil, Salt, Pepper, and Basil: I use olive oil when toasting my bread and add a drizzle to my chopped tomatoes. Salt helps bring out the tomato flavor, and fresh basil is lovely (although don’t fret if you don’t have any – the tomatoes are the star here).
    • Cheese (Optional): For bruschetta with mozzarella, tear fresh mozzarella into smaller pieces and place them on top of the tomatoes and bread.

    Find the full recipe with measurements below.

    How to Make the Best Bruschetta

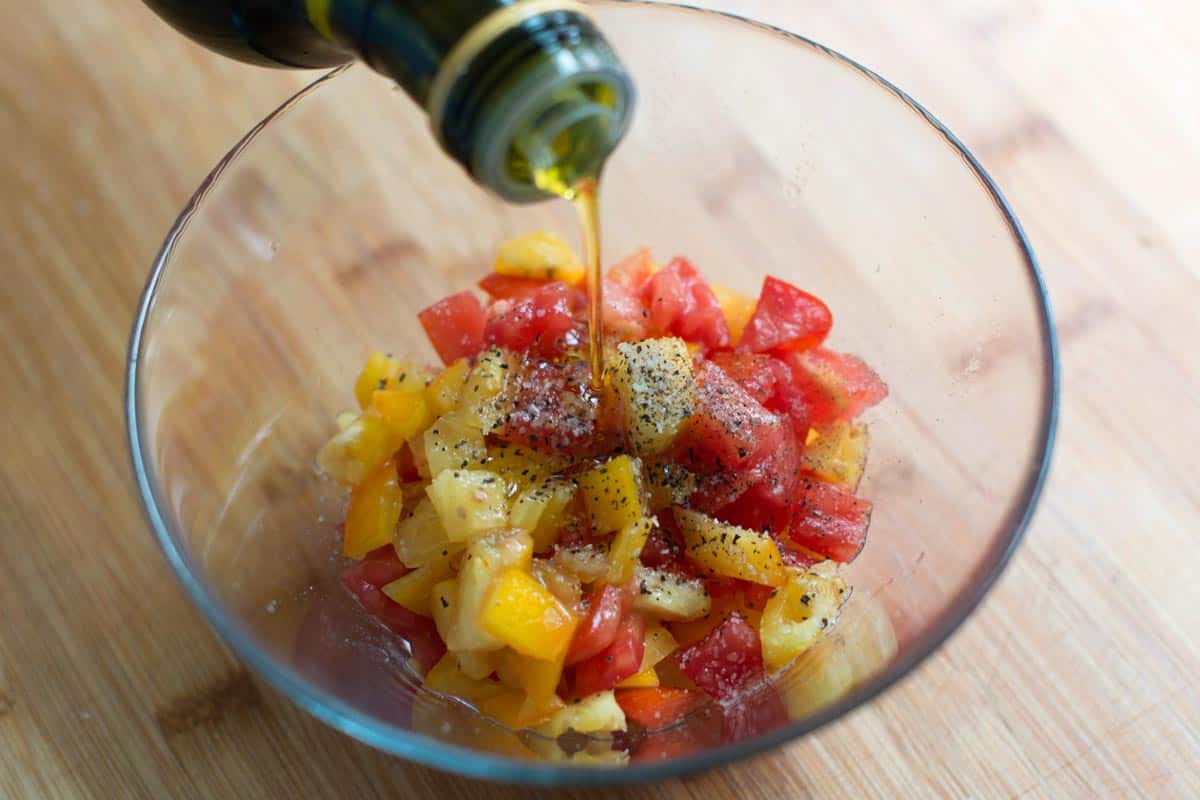
    Tip 1: Season your tomatoes. Chop and toss yours tomatoes with salt, pepper, and a drizzle of olive oil. Then, set the bowl aside while you toast or grill your bread. As the tomatoes sit with the salt, they release lots of delicious juices, making the tomato topping extra delicious (I do the same when making my tomato and mozzarella salad).

    Adding olive oil, salt and pepper to chopped fresh tomatoes

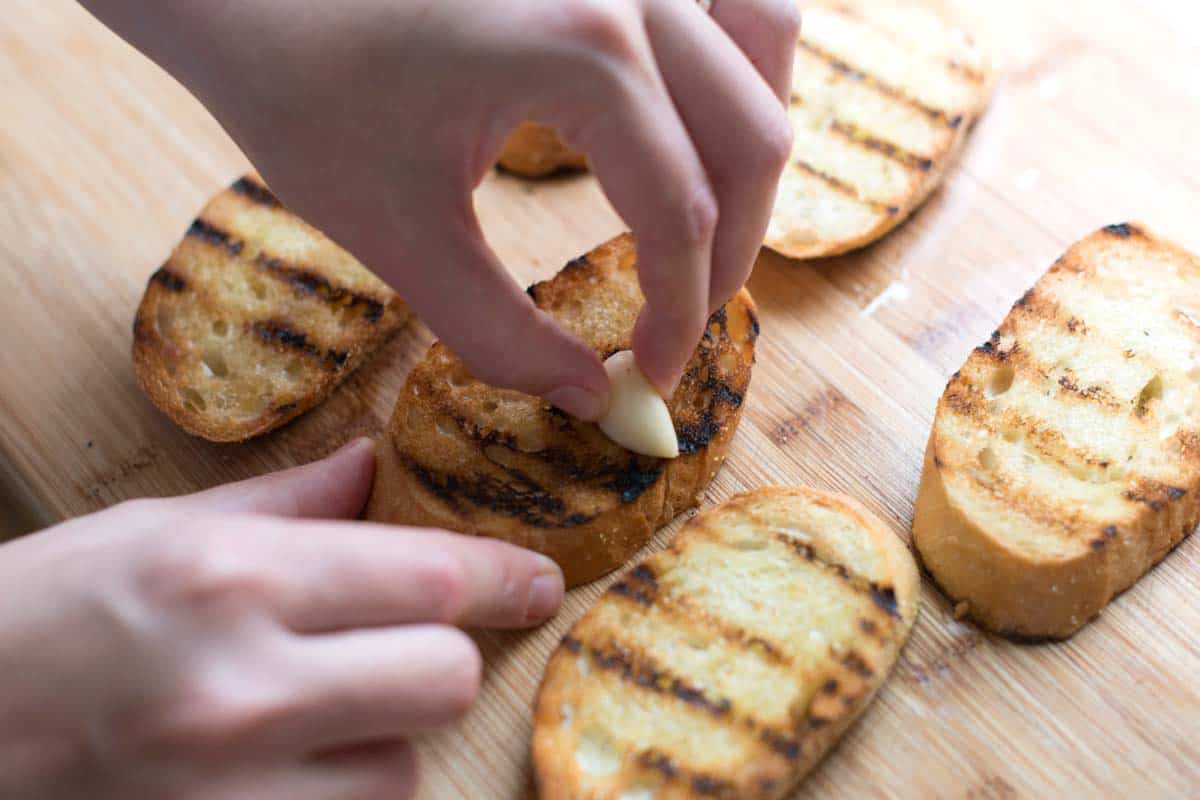
    Tip 2: Rub your bread with fresh garlic. Once my bread has been toasted (or grilled), rub it with fresh garlic. This is a classic Italian trick for making bruschetta. The garlic melts onto the warm bread and prepares it for the tomato topping.

    Rubbing toasted bread with a fresh garlic clove.

    Tip 3: Consider extra toppings. I’m happy with classic tomato bruschetta, but you can always add fresh mozzarella and a drizzle of balsamic glaze (my personal favorite).

    More Easy Appetizers

    Tomato Bruschetta

    Easy Tomato Bruschetta

    • PREP
    • COOK
    • TOTAL

    When serving this classic bruschetta recipe, spoon some of the tomato juices from the bowl over each bread slice. Thanks to the tomatoes, olive oil, and salt, that liquid is pure gold! If you have any extra, use it as a dip for more bread or sip on it (it is the best!).

    Makes 6 Servings, 2 bruschetta each

    Watch Us Make the Recipe

    You Will Need

    12 slices Italian bread or French baguette, 1/2-inch-thick

    3 cloves garlic, peeled and left whole

    1 pound ripe fresh tomatoes, at room temperature, 3 to 4 medium (450g)

    2 tablespoons extra virgin olive oil, plus more for the bread

    12 fresh basil leaves, thinly sliced

    Salt and fresh ground black pepper

    6 ounces fresh mozzarella, torn into small pieces, optional (170g)

    Directions

      1Prepare tomato topping: Chop the tomatoes into 1/4-inch pieces, then add to a medium mixing bowl with a generous pinch of salt, a small pinch of black pepper, and the olive oil. Stir and let sit for 10 minutes.

      2Prepare the bread: Meanwhile, heat a grill pan over medium heat or prepare an outdoor grill for medium heat. Drizzle the bread slices with the remaining olive oil and grill for 2 to 3 minutes on each side until warmed through and grill marks appear.

      3Rub garlic over the bread: Rub one side of the warm grilled bread with garlic (two to three strokes per slice should do it), and then place it onto a serving plate with the garlic-rubbed side facing up.

      4To finish: Stir and taste the tomatoes, then add more salt or pepper as needed. Spoon a generous amount of tomatoes onto each bread slice. Drizzle a little of the juice remaining at the bottom of the bowl over the tomatoes, and add basil and optional mozzarella. Serve immediately.

    Adam and Joanne’s Tips

    • Canned tomatoes: If you cannot access sweet, ripe tomatoes, use high-quality canned whole tomatoes. Reserve the juice for another recipe and chop the whole tomatoes for the bruschetta. We love San Marzano tomatoes and have also been very happy with canned Muir Glen tomatoes.
    • Balsamic vinegar: For extra flavor, stir 1 to 2 teaspoons of balsamic vinegar into the tomatoes. Or, after assembling the bruschetta, drizzle over a balsamic glaze.
    • The nutrition facts provided below are estimates. We did not include mozzarella.

    Nutrition Per Serving
    Serving Size
    2 bruschetta
    /
    Calories
    169
    /
    Protein
    4 g
    /
    Carbohydrate
    18 g
    /
    Dietary Fiber
    2 g
    /
    Total Sugars
    3 g
    /
    Total Fat
    10 g
    /
    Saturated Fat
    1 g
    /
    Cholesterol
    0 mg


    AUTHOR:

    Joanne Gallagher

    Previous Post: Perfect Juicy Grilled Chicken
    Next Post: The Best Instant Pot Pot Roast

    Source link

  • Steamed Cabbage Recipe with Lime Butter

    Steamed Cabbage Recipe with Lime Butter

    This steamed cabbage recipe hits the spot when I need a simple, healthy, delicious side dish. It’s fast and genuinely so delicious thanks to our lime butter!

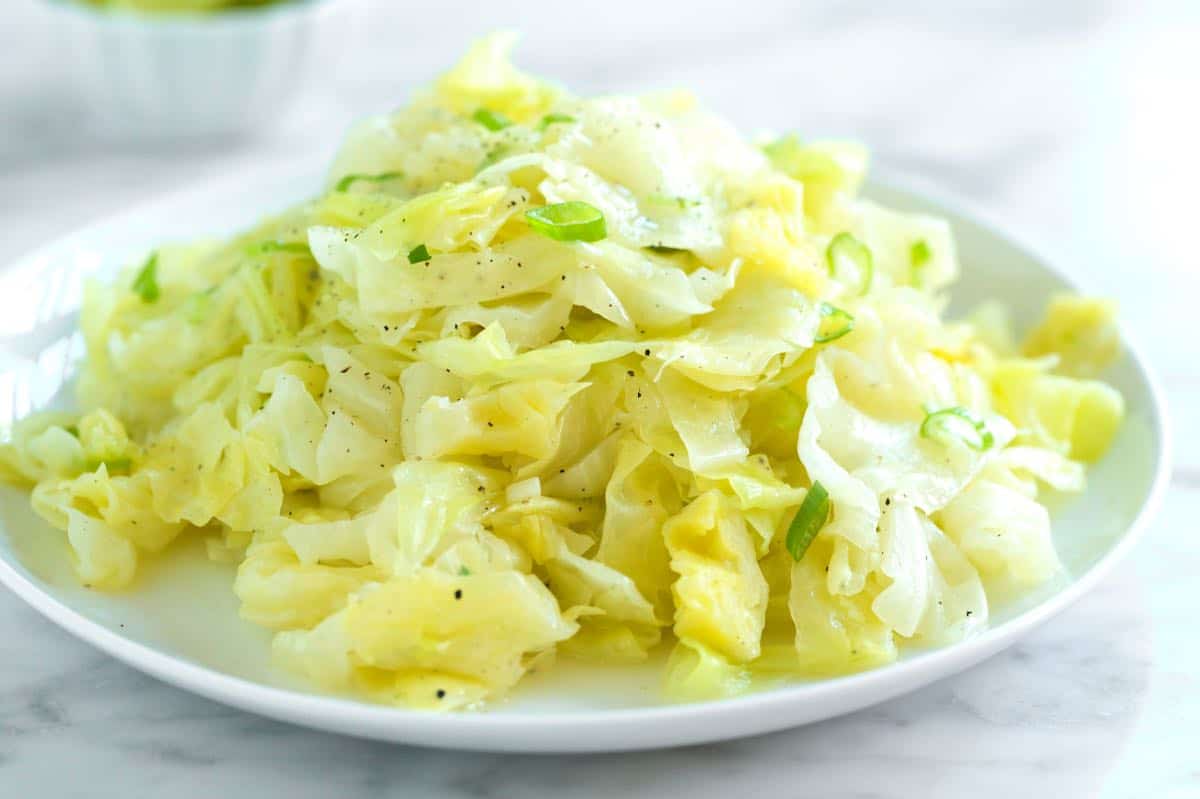
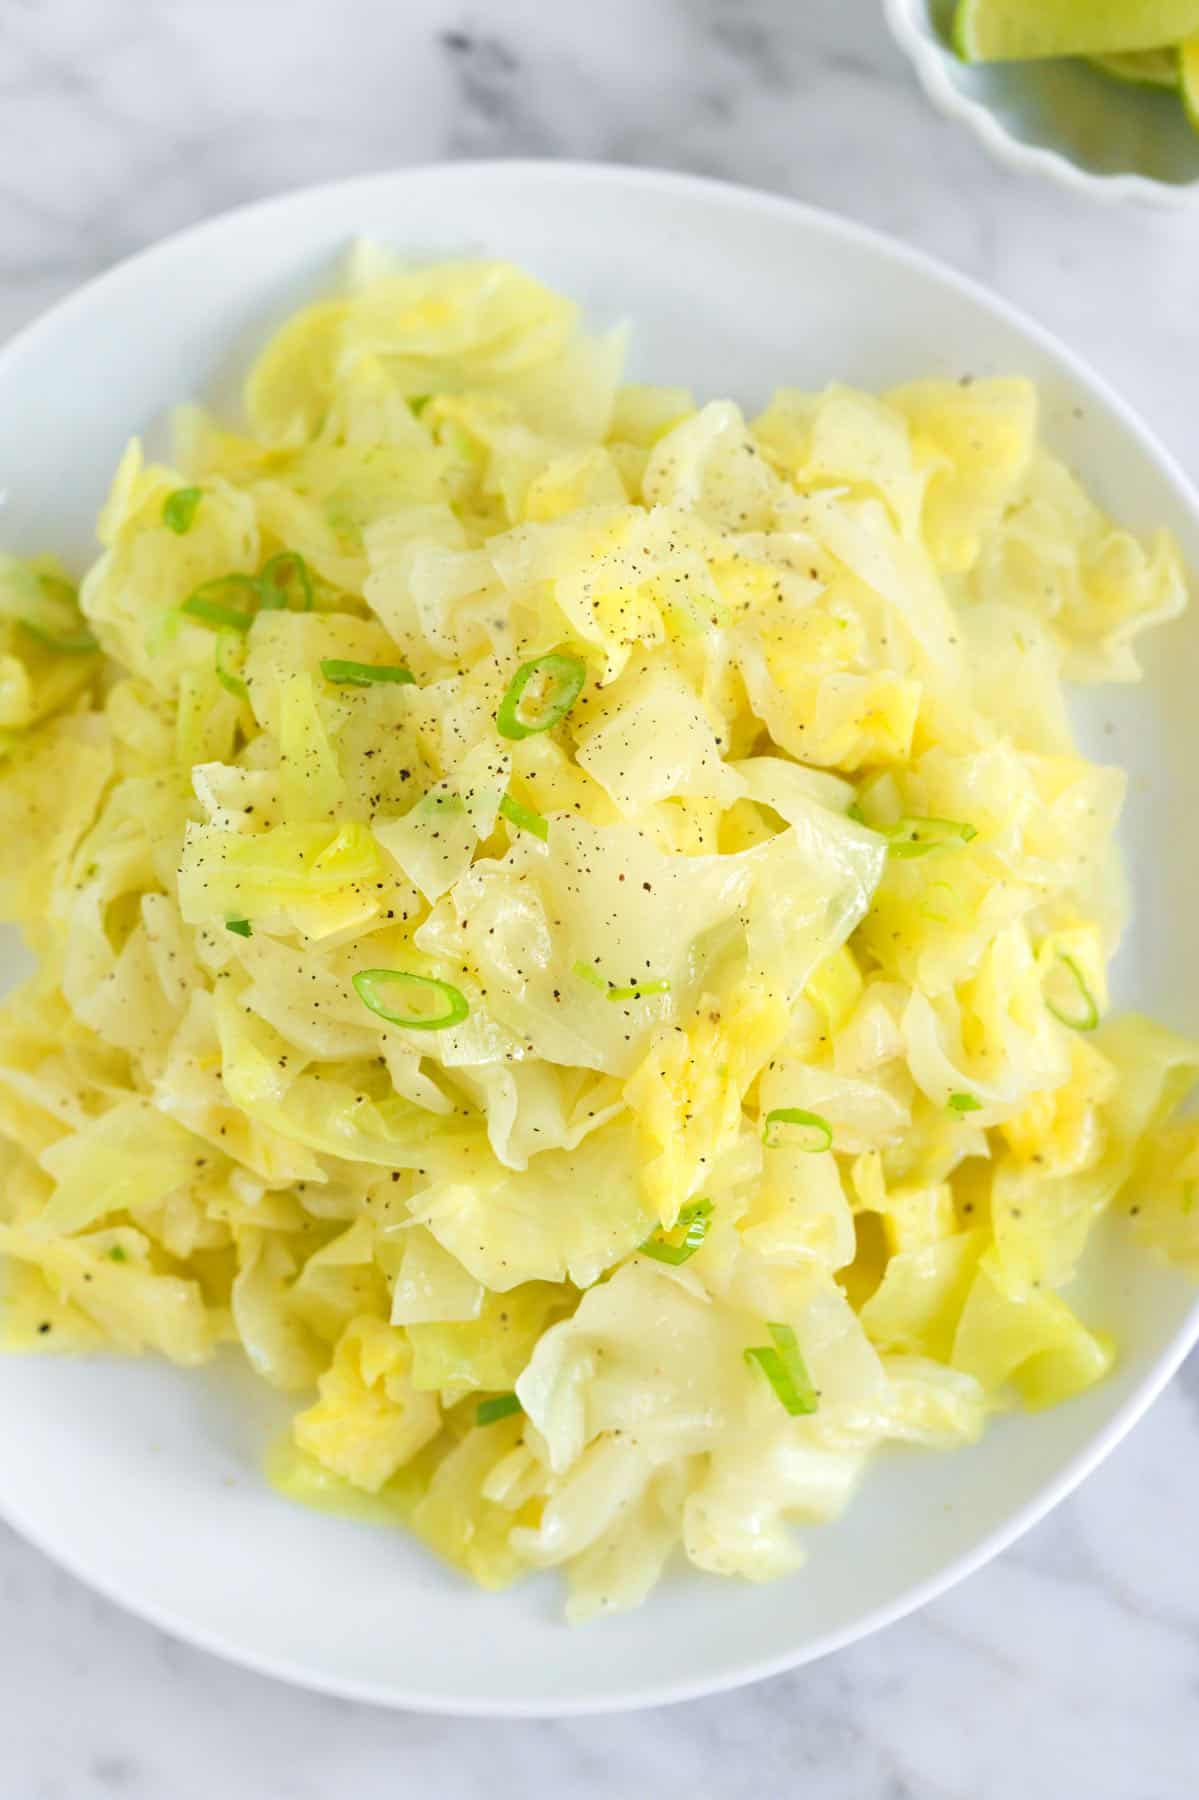
    Steamed Cabbage

    We love cabbage on Inspired Taste, and this simple steamed version is a go-to recipe! It’s incredibly quick (under 20 minutes) and perfect on the side to almost any main dish.

    Steaming cabbage makes it tender and sweet, but the real magic happens when you add our simple lime butter, which takes the flavor to the next level! For more cabbage inspiration, be sure to check out our other favorite cabbage recipes!

    Key Ingredients

    • Cabbage: I used green cabbage in our photos, but you can steam other varieties of cabbage without any changes to our recipe. Consider savoy, napa, red cabbage, or pointed cabbage (like Hispi)
    • Butter: I use salted butter, but unsalted is fine! Just adjust with a bit more salt to taste before serving. For a vegan option, use plant-based butter.
    • Lime: Cabbage and lime are such a fantastic combination, but you can always substitute lemon!
    • Green Onion: Also called spring onions, these cook quickly and help to flavor our lime butter.

    How to Make Our Favorite Steamed Cabbage

    Tip 1: Pan-steam if you don’t have a steaming basket. If you have a steaming basket, great! It works perfectly for this recipe. If you don’t have a steaming basket, no worries at all! You can still make delicious cabbage by pan-steaming it instead. I’ve shared how to do either (with a basket or not) in the recipe below!

    Tip 2: Don’t miss the lime butter. Steamed cabbage is delicious on it’s own but if you want to kick things up a notch you have to try our lime butter. While the cabbage steams we cook the whites of green onion in butter and add lime zest. It’s so good!

    More Cabbage Recipes

    Steamed Cabbage

    Steamed Cabbage with Lime Butter

    • PREP
    • COOK
    • TOTAL

    My family loves this easy steamed cabbage! It’s incredibly easy, and we love the simple lime butter! If you have one, a steaming basket set inside a larger pot makes steaming cabbage really easy. That said, you can make this recipe without one. You can easily steam the cabbage in a deep skillet instead. Just add the cabbage right after rinsing it under cold water (so it’s still wet), add a couple of tablespoons of water, pop on the lid, and cook. Keep an eye on it, and add a splash more water if the skillet seems dry.

    4 Servings

    You Will Need

    Half of a medium cabbage, about 1 pound

    2 tablespoons butter

    2 teaspoons lime zest

    1 green onion, finely sliced

    Juice of half a lime

    Salt and fresh ground black pepper

    Directions

      1Prep the cabbage: Remove the core and cut the cabbage into quarters. Then, slice each quarter into thin strips about 1/2-inch wide. Add to a colander and rinse with cool water.

      2Steam the cabbage: If using one, add the cabbage to a steaming basket set over about 2 inches of water. Or, if you do not have a steaming basket, add the cabbage (still wet from rinsing) and 2 tablespoons of extra water to a deep skillet.

      3Cover with a lid, place the pot or skillet over medium-high heat, and cook until steamy, reduce the heat to medium-low, and steam for 5 to 7 minutes. Check it occasionally to see how soft/tender it is becoming. If the pot or skillet is dry, add 1 to 2 tablespoons of water.

      4Make lime butter: While the cabbage steams, melt the butter in a saucepan, add the whites of the green onion, cook for 1 minute, turn off the heat, and then stir in the lime zest, pepper, and salt. Set aside.

      5Serve: Toss the cooked cabbage with the lime butter, add a spritz of lime juice, and season with salt and pepper.

    Nutrition Per Serving
    Serving Size
    1/4 of the recipe
    /
    Calories
    82
    /
    Total Fat
    5.9g
    /
    Saturated Fat
    3.7g
    /
    Cholesterol
    15.3mg
    /
    Sodium
    105.2mg
    /
    Carbohydrate
    7.3g
    /
    Dietary Fiber
    3g
    /
    Total Sugars
    3.8g
    /
    Protein
    1.6g


    AUTHOR:

    Joanne Gallagher

    Previous Post: Easy Egg Roll in a Bowl
    Next Post: Easy Vinegar Coleslaw

    Source link

  • Mini Fish Tacos with Chipotle Slaw Recipe

    Mini Fish Tacos with Chipotle Slaw Recipe

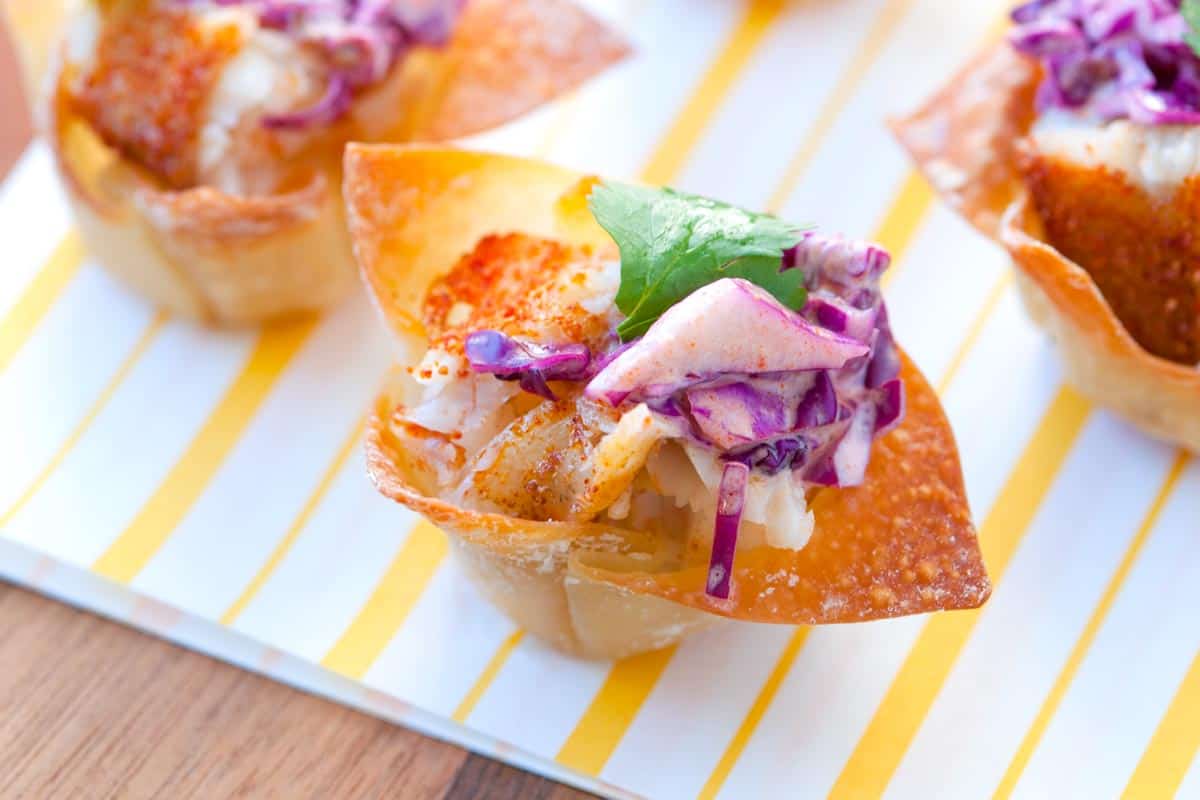
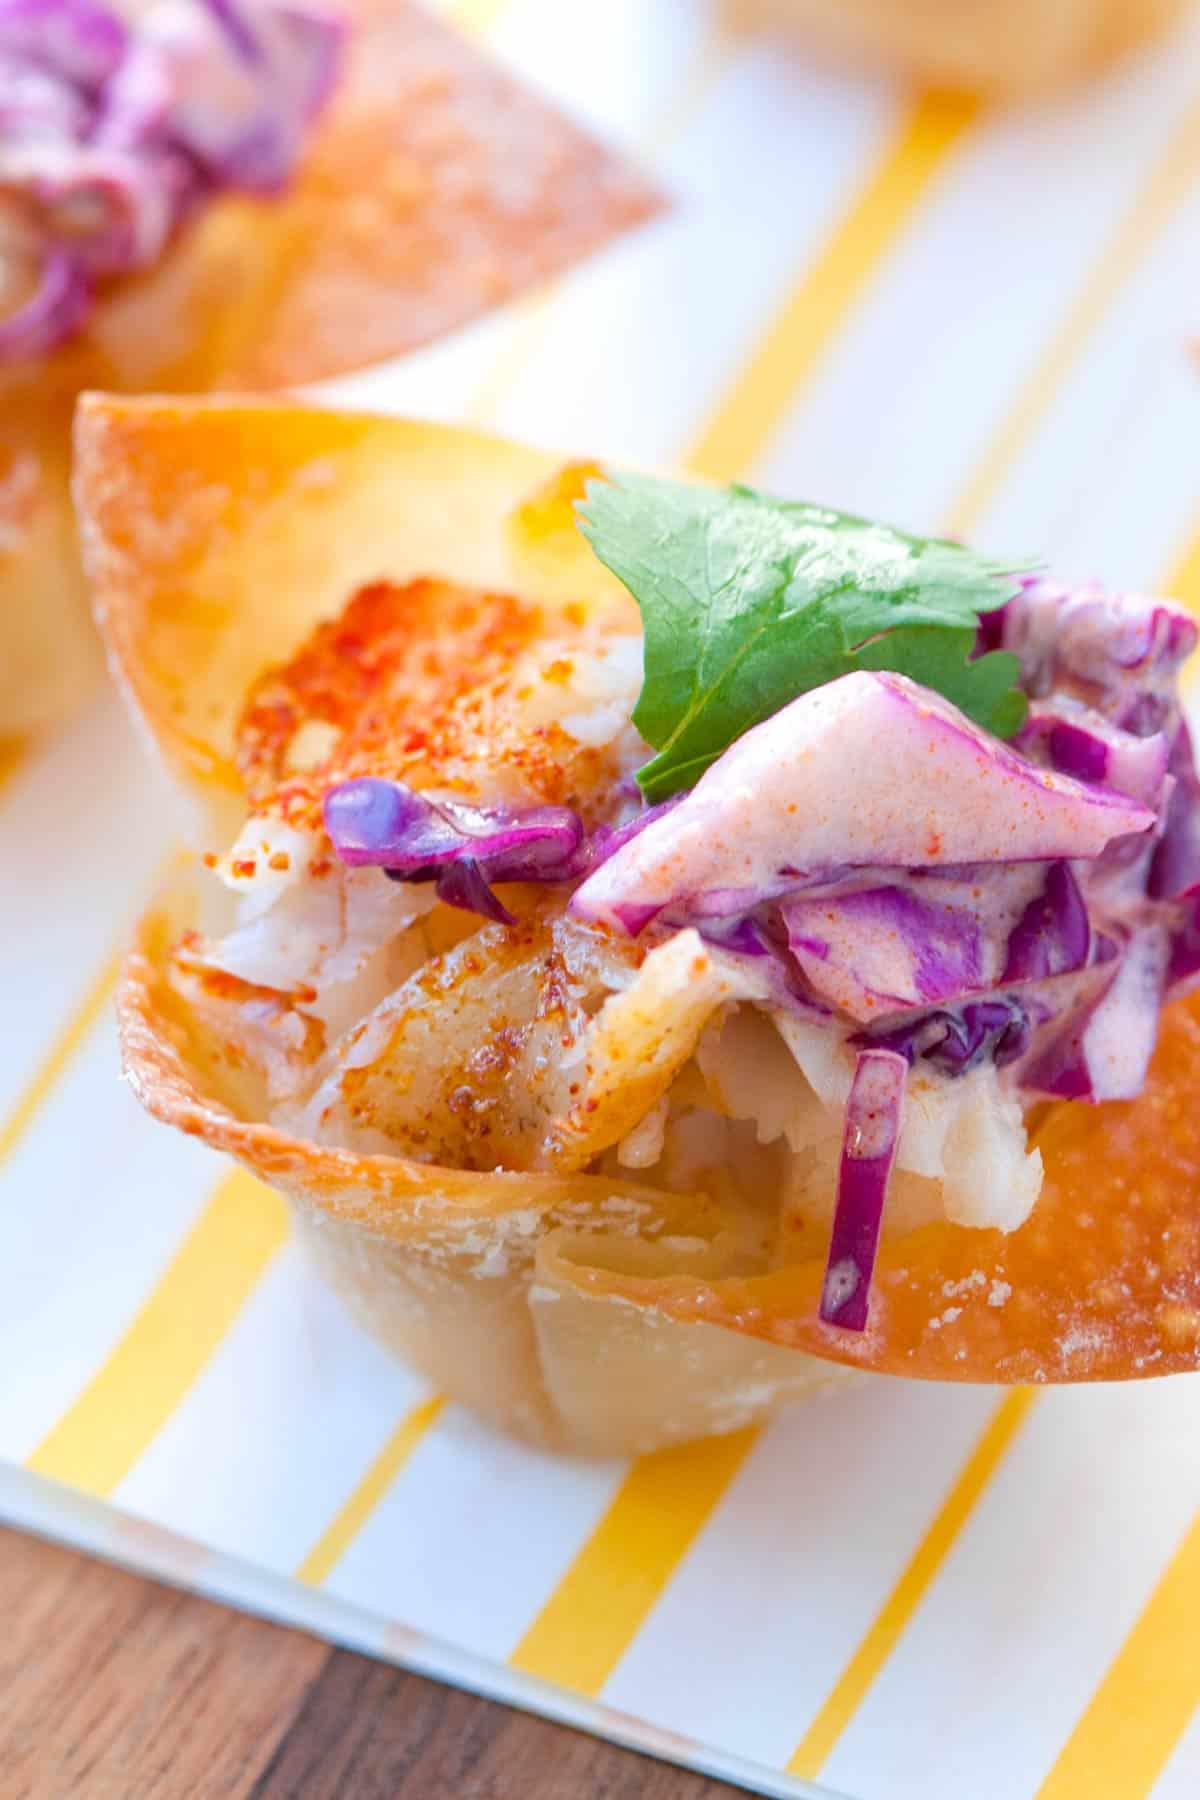
    These mini fish tacos are such a fun dinner or party appetizer! We use wonton wrappers for the base, fill them with spiced fish, and top with our easy chipotle slaw.

    Mini Fish Tacos with Chipotle Slaw

    These mini fish tacos fly off the plate when I serve them to friends and family. They are such a fun twist on fish tacos. We use baked wonton cups for the base, which hold the perfect amount of fish and slaw.

    The recipe comes together quickly, and if you want to get a head start, you can make the wonton cups a week in advance. Then, the day you plan on serving them, bake the fish with our delicious spice rub and make the spicy chipotle slaw.

    Key Ingredients

    • Wonton Wrappers: I use square wonton wrappers to make little taco cups. I do the same for these chili lime shrimp wonton cups. Wonton wrappers generally come in a few different thicknesses. If you have the choice, go with thin or medium. If you’d like to use tortillas, you can use the smaller tacos, often called street tacos, or make your own, but intentionally make them mini. Here’s our corn tortillas recipe or flour tortillas recipe.
    • Fish: We have used tilapia in our photos, but any firm white fish will work in this recipe. Consider mahi-mahi, cod, or sea bass.
    • Fish Taco Seasoning: I combine chili powder, cumin, smoked paprika, onion powder, and salt for my fish seasoning. If you’ve not seen our homemade chili powder yet, I highly recommend it! Otherwise, when shopping for chili powder, I love ancho chili powder, which I find much more flavorful than generic chili powder.
    • Cabbage: Use red or green (white) cabbage for this slaw.
    • Sour Cream and Lime: I like a creamy slaw for this, so I mix my cabbage with a bit of sour cream and fresh lime juice.
    • Chipotles in Adobo Sauce: I add minced chipotles in adobo sauce to my slaw for a spicy kick. These smoky, spicy peppers are smoked jalapeños preserved in a flavorful adobo sauce made with spices and chili peppers. You can buy them in small cans, usually found next to salsas or in your store’s International aisle. I also use them to make our roasted corn with chipotle butter, the creamy spread for salmon burgers, and our sweet potato black bean tacos.

    How to Make Mini Fish Tacos

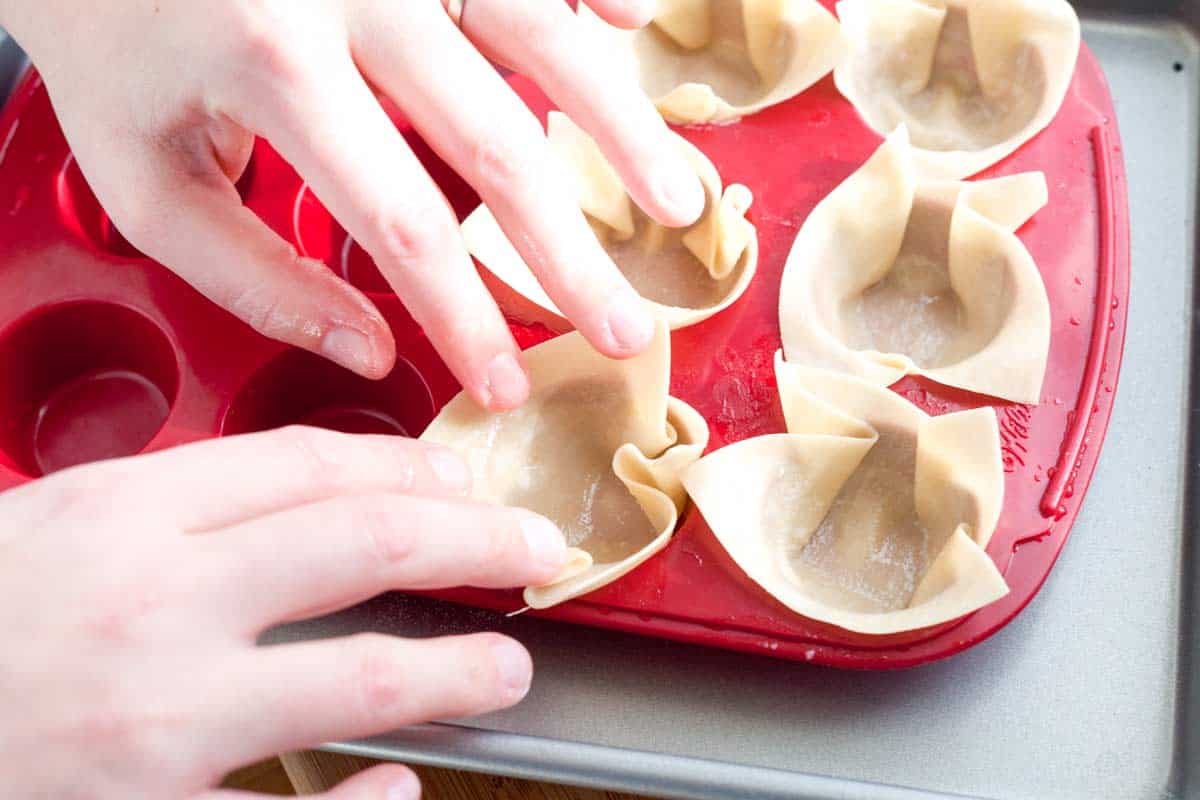
    These mini fish tacos are super easy to make. First, make the cups. Brush wonton wrappers with oil, then press into mini muffin cups. Bake them until golden brown and crisp. They take 8 to 10 minutes.

    How to Make Mini Fish Tacos: Baking the mini cups

    While the wontons bake, you can get the fish ready. Season with the spice blend, then bake until just cooked through. You’ll know when it is done when a fork can easily flake the fish.

    We round the recipe out with an easy chipotle slaw. Toss finely chopped red cabbage with sour cream, salt, lime, and chipotles in adobo sauce. From there, you can assemble the tacos. Place a cilantro leaf at the bottom of each wonton cup (help prevent them from becoming soggy over time). Then, fill it with fish and slaw. Easy!

    Mini Fish Tacos with Chipotle Slaw

    Mini Fish Tacos with Chipotle Slaw

    • PREP
    • COOK
    • TOTAL

    These mini tacos are great for a fun dinner or to serve at parties. I like assembling them just before I plan to serve them so that the filling doesn’t make the bottom of the wonton cups soggy. You can make the wonton cups in advance and keep them (unfilled) for up to a week. You can also make the fish and slaw a day in advance.

    Makes 12 mini cups

    You Will Need

    15 wonton wrappers

    2 tablespoons avocado oil or olive oil

    8 ounces (226g) tilapia fillets or firm white fish

    1 ½ teaspoons ancho chili powder, try homemade chili powder

    1/4 teaspoon ground cumin

    1/4 teaspoon smoked paprika

    1/4 teaspoon onion powder

    Salt and fresh ground black pepper

    1 cup finely chopped red cabbage

    1 tablespoon sour cream or more as needed

    Juice of 1 lime

    1 teaspoon finely minced chipotles in adobo sauce

    12 fresh cilantro leaves, plus more as needed

    Salt and fresh ground black pepper

    Directions

    • Bake Wonton Cups
    • 1Preheat oven to 350°F (177°C). Set aside a mini muffin pan.

      2Lightly brush wonton wrappers on both sides with oil. Lightly season one side with salt. Press the wonton wrappers into the cups, spreading back the corners and pressing the bottoms to make a defined cup.

      3Bake until lightly browned, 8 to 10 minutes. Keep a close eye on them as they bake to ensure they are not over-browning. Transfer to a rack and let cool. Baked wonton cups will keep, unfilled, in an airtight container for up to a week. For the best results, fill them right before serving.

    • Make Fish Tacos
    • 1In a small bowl, stir 1 ½ teaspoons chili powder, 1/4 teaspoon cumin, 1/4 teaspoon smoked paprika, 1/4 teaspoon onion powder, and 1/4 teaspoon salt. Rub both sides of the fish fillets with a tablespoon of oil and spice mix.

      2Place the fish onto a baking sheet and bake uncovered until the fish flakes, 8 to 12 minutes, depending on the thickness of the fillets.

      3Meanwhile, make the chipotle slaw. Rub the cabbage with 1/4 teaspoon of salt. Add the sour cream, lime juice, chipotles in adobo, and cilantro, then toss well. Taste, then adjust with more sour cream if it is too dry. Or adjust with salt or chipotle as needed.

      4Assemble the mini fish tacos by placing a cilantro leaf at the bottom of each wonton cup (this prevents the filling from making the bottom soggy). Divide the fish between the cups, and then top with chipotle slaw. Serve right away.

    Adam and Joanne’s Tips

    • Wonton cups: Occasionally, a wonton will collapse during baking, making it difficult to stand up without falling over. So, we bake a few extra cups.
    • Nutrition facts estimates.

    Nutrition Per Serving
    Serving Size
    1 of 12 mini fish tacos
    /
    Calories
    31
    /
    Total Fat
    1.5g
    /
    Saturated Fat
    0.3g
    /
    Cholesterol
    9.5mg
    /
    Sodium
    166.6mg
    /
    Carbohydrate
    1.2g
    /
    Dietary Fiber
    0.3g
    /
    Total Sugars
    0.4g
    /
    Protein
    3.1g


    AUTHOR:

    Joanne Gallagher

    Adam and Joanne of Inspired Taste

    We are Adam and Joanne Gallagher, the creators of Inspired Taste. Established in 2009, Inspired Taste grew from a childhood dream into one of the internet’s most trusted recipe sites with hundreds of reliable recipes, step-by-step videos, and expert tips.More About Us

    Source link

  • Easy Spicy Mayo Recipe

    Easy Spicy Mayo Recipe

    This spicy mayo recipe adds a delicious kick to just about everything! It’s perfect in rice bowls, sushi, sandwiches, and more!

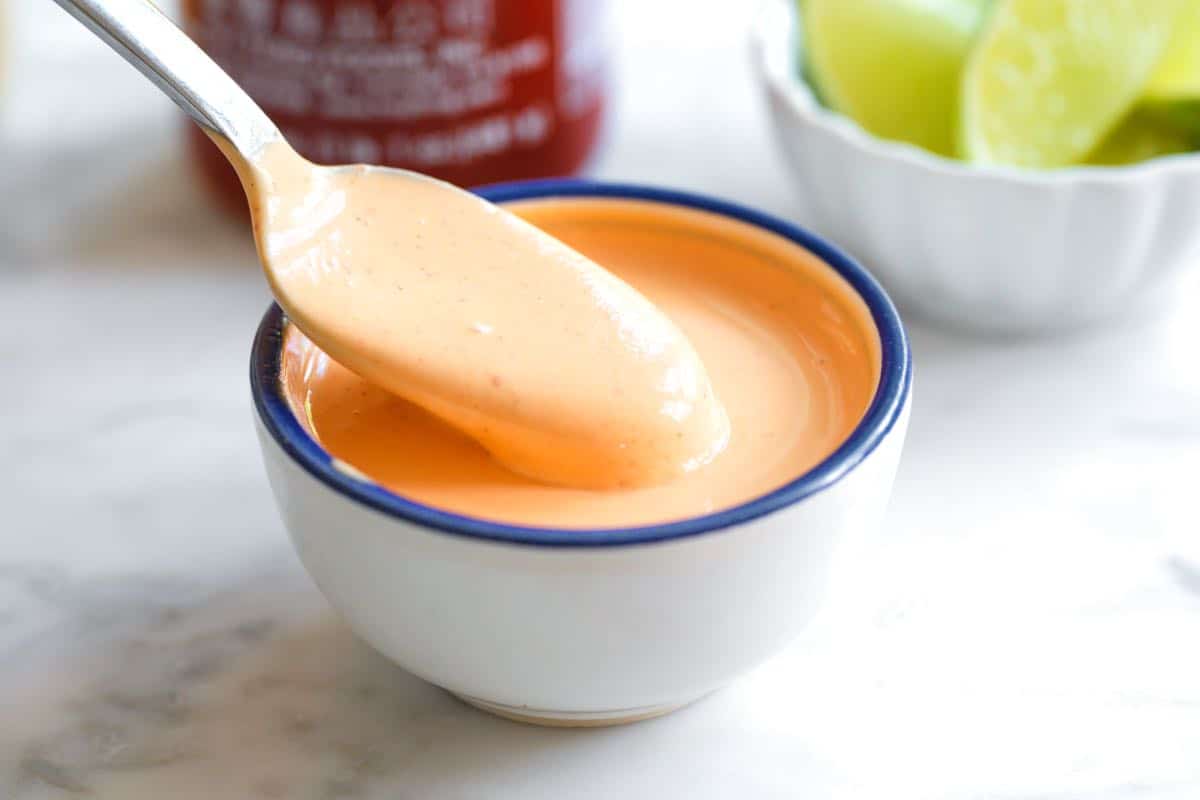
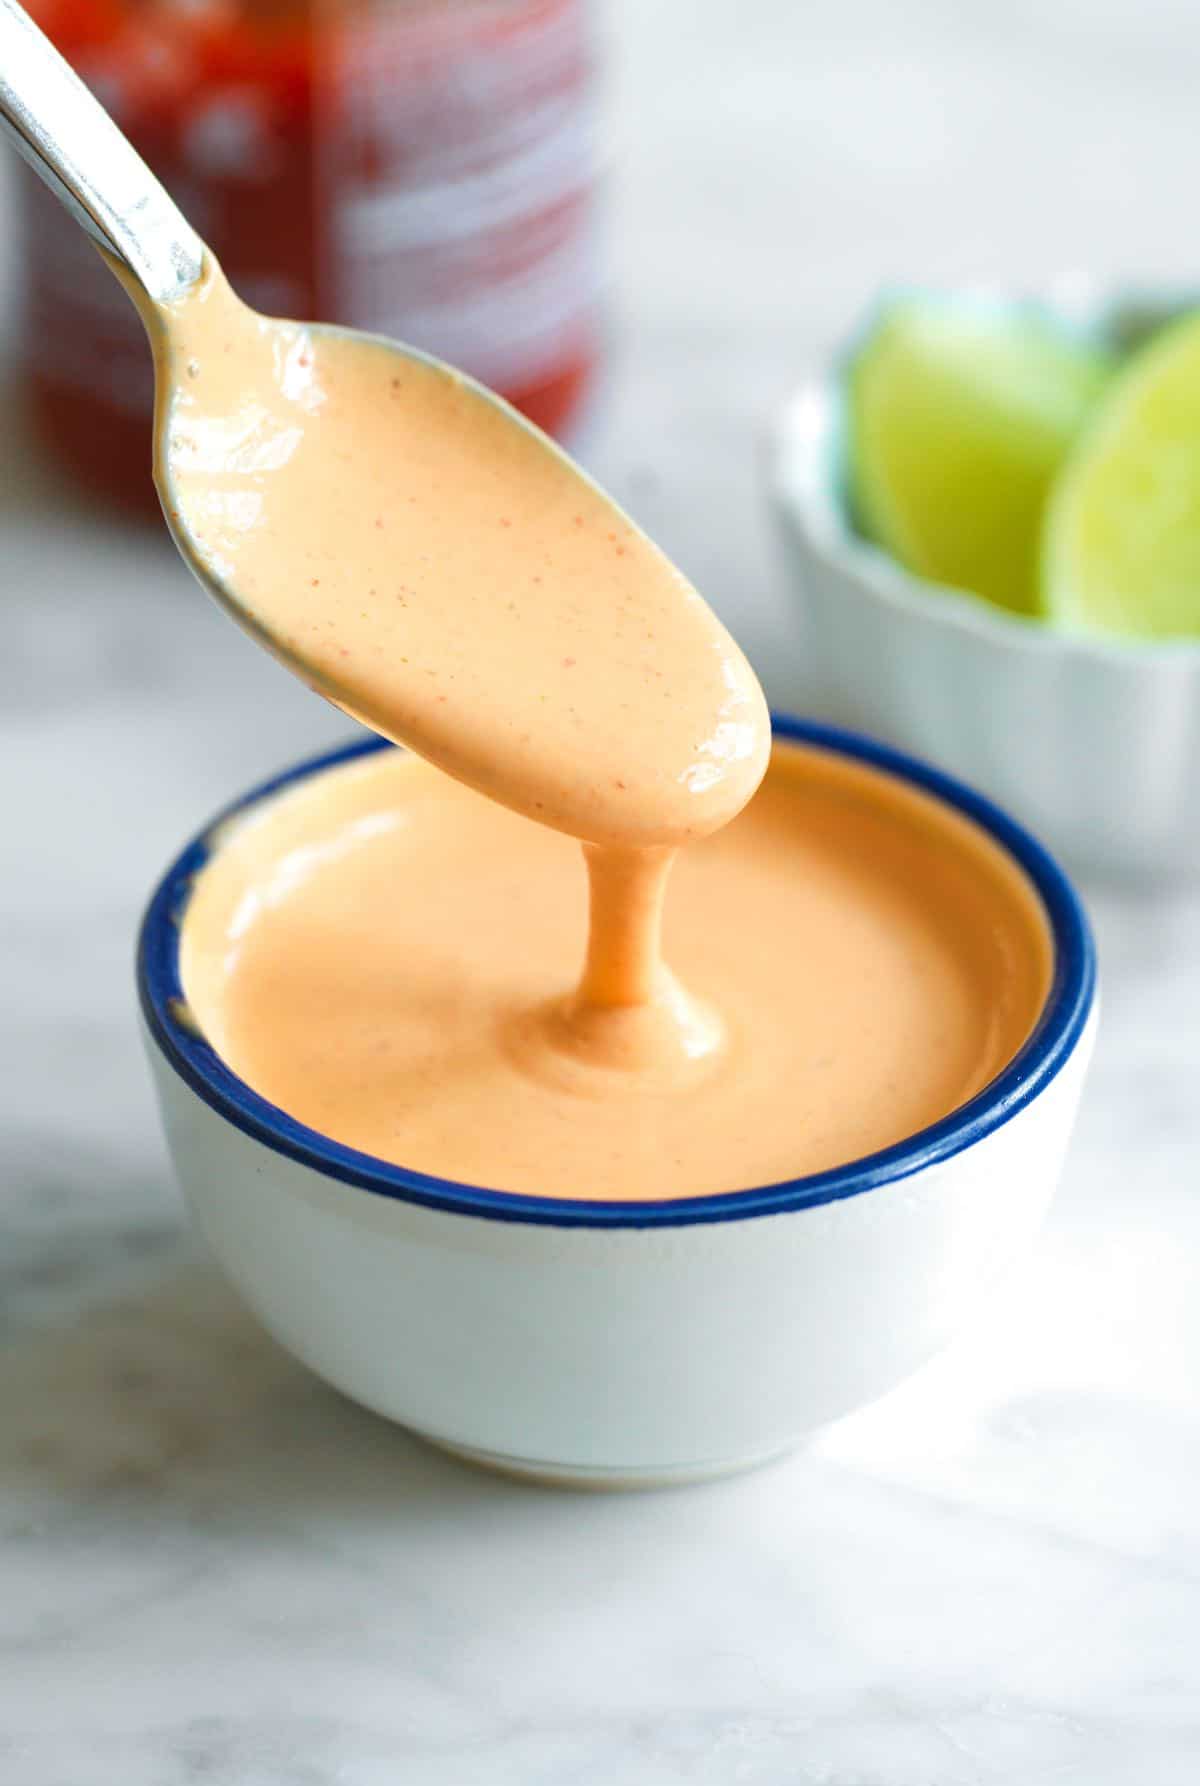
    Spicy Mayo

    I’m not exaggerating when I say that I’ve been adding this spicy mayo to just about everything lately. It’s unbelievably simple to make and so delicious.

    You need less than 5 minutes and a few simple ingredients you probably already have on hand. You can use either sriracha or gochujang (Korean chili paste) to get that perfect spicy flavor.

    Key Ingredients

    • Mayonnaise: I’ve made this with Hellman’s (also called Best Foods), Japanese Kewpie mayonnaise, and homemade mayonnaise, and I loved all of them. I’d give the edge to homemade and Kewpie, but they genuinely all taste great. If you’d like to make vegan spicy mayo, use vegan mayo and make sure the other ingredients used to make your sauce are listed as vegan on their packaging.
    • Sriracha or Gochujang: Most spicy mayos served at restaurants (especially sushi restaurants) use Sriracha, but this recipe works just as well with Gochujang, a Korean fermented chili paste. I absolutely love it and think it has more flavor than Sriracha. I also use it to make our hoisin sauce and this sesame garlic shrimp marinade. I find Mother-in-Law’s Gochujang in my local grocery store, but many more options exist if you go into an Asian or Korean market.
    • Lime: A little fresh lime juice brightens the mayo and makes it a little lighter on its feet. Rice wine vinegar is a great substitute!
    • Sesame Oil: We add a little toasted sesame oil to most of the sauces on Inspired Taste (see this tahini dressing or the sauce for our broccoli slaw as examples). You don’t need much, but it genuinely makes the mayo taste incredible.

    Ways to Use Your Spicy Mayo

    I use this spicy many so many ways. My current obsession is drizzling it over our egg roll in a bowl. The spicy, creamy sauce works so nicely with it. It’s fantastic for other rice or noodle bowls, with sushi, spread onto sandwiches, and served with burgers. Try it with our juicy burgers, smash burgers, turkey burgers, or our popular veggie burgers!

    You can dip things into it, too. I love it with french fries, sweet potato fries, roasted potatoes, baked tofu, chicken nuggets, and even roasted veggies like roasted broccoli. Whenever you’re looking down at your meal and think this needs something, come back to this spicy mayo recipe. I bet it will help! More sauce recipes to keep in your back pocket are this burger sauce or fry sauce!

    Spicy Mayo

    Easy Spicy Mayo

    This homemade spicy mayo recipe takes minutes to make and is a game-changer for weekday dinners. Anytime I find my dinner a little lacking in flavor, I drizzle some of this spicy mayonnaise over the top, and the problem is solved! The most common way to make this is using sriracha for a spicy sriracha mayo. It’s delicious, but I highly recommend swapping the sriracha for gochujang (Korean fermented chili paste). It makes the mayo more flavorful and a bit more interesting.

    Makes 1/2 cup

    You Will Need

    1/2 cup (113g) mayonnaise, try homemade mayo

    1 to 2 tablespoons sriracha or gochujang

    1 teaspoon fresh lime juice

    1/4 teaspoon toasted sesame oil

    Pinch salt

    2 to 4 teaspoons water, to thin

    Directions

      1Add 1/2 cup mayonnaise, 1 tablespoon sriracha or gochujang, 1 teaspoon lime juice, 1/4 teaspoon toasted sesame oil, and a pinch of salt to a small bowl.

      2Stir well, then taste for spiciness. Add the second tablespoon (or more) of sriracha or gochujang as needed. Depending on how you plan to serve it, consider thinning it with a little bit of water.

    Adam and Joanne’s Tips

    • Storing: When using store-bought mayo (like Hellman’s, Best Foods, or Kewpie), spicy mayo lasts 1 to 2 weeks in the fridge. When made with homemade mayonnaise, it should last about 1 week.
    • Make it more spicy: With 2 tablespoons of sriracha or gochujang, this is medium spicy. For even more heat, add 1/8 teaspoon to 1/4 teaspoon ground chili flakes (like gochugaru) or use cayenne pepper.
    • The nutrition facts provided below are estimates.

    Nutrition Per Serving
    Serving Size
    1 tablespoon
    /
    Calories
    99
    /
    Total Fat
    10.5g
    /
    Saturated Fat
    1.6g
    /
    Cholesterol
    5.8mg
    /
    Sodium
    178.3mg
    /
    Carbohydrate
    0.9g
    /
    Dietary Fiber
    0.1g
    /
    Total Sugars
    0.6g
    /
    Protein
    0.2g


    AUTHOR:

    Joanne Gallagher

    Previous Post: Homemade Berry Tart
    Next Post: Easy Egg Roll in a Bowl

    Source link