Category: Quick Meal

  • Chili Lime Shrimp Wonton Cups Recipe

    Chili Lime Shrimp Wonton Cups Recipe

    These chili lime shrimp wonton cups are the perfect party appetizer! We bake wonton wrappers in the oven until crisp, fill them with arugula and lime sour cream, and then top them with a big juicy chili lime baked shrimp.

    Chili Lime Shrimp Wonton Cups

    These easy wonton cups are like mini shrimp tacos. The shrimp are spiced with chili powder, the lime brightens everything up, and the arugula keeps the whole thing fresh. So many of our readers have made these for parties with great success!

    You can even make the baked wonton cups in advance and then assemble them with the arugula, sour cream, and shrimp just before serving. If you love the idea of wonton cups, try our mini fish taco wonton cups or these smoked salmon wonton cups with cucumber and dill!

    Key Ingredients

    • Wonton Wrappers: I love using wonton wrappers to make little cups for our shrimp filling. They are really easy to make and keep for a while when stored in an airtight container. I use a mini muffin tin to make the cup shape and lightly season them with olive oil and salt.
    • Shrimp: Use fresh, high-quality large shrimp. If you have frozen shrimp, thaw them overnight in the fridge, and then pat dry with a paper towel.
    • Spices: Use a high-quality chili powder (I love ancho chili powder), or try our homemade chili powder with some extra spices stirred to add flavor. I also season the shrimp with salt, pepper, and lime zest.
    • Arugula: I love a little green in each cup, and arugula is perfectly sized for mini cups. Baby spinach or other baby greens are also great!
    • Lime Sour Cream: I stir a little lime zest and lime juice into plain sour cream for extra flavor. It’s super simple and makes the shrimp pop.

    Find the full recipe with measurements below.

    How to Make Chili Lime Shrimp Wonton Cups

    First, you’ll make your wonton cups. I use a mini cupcake pan, but you can make these in a regular pan if needed (the cups will just be a bit larger). Brush each side of the wonton wrappers with oil, lightly season with salt, and press the wrappers into the cups in the cupcake pan. I bake them for 8 to 10 minutes in a 350°F oven or until golden around the edges and crisp.
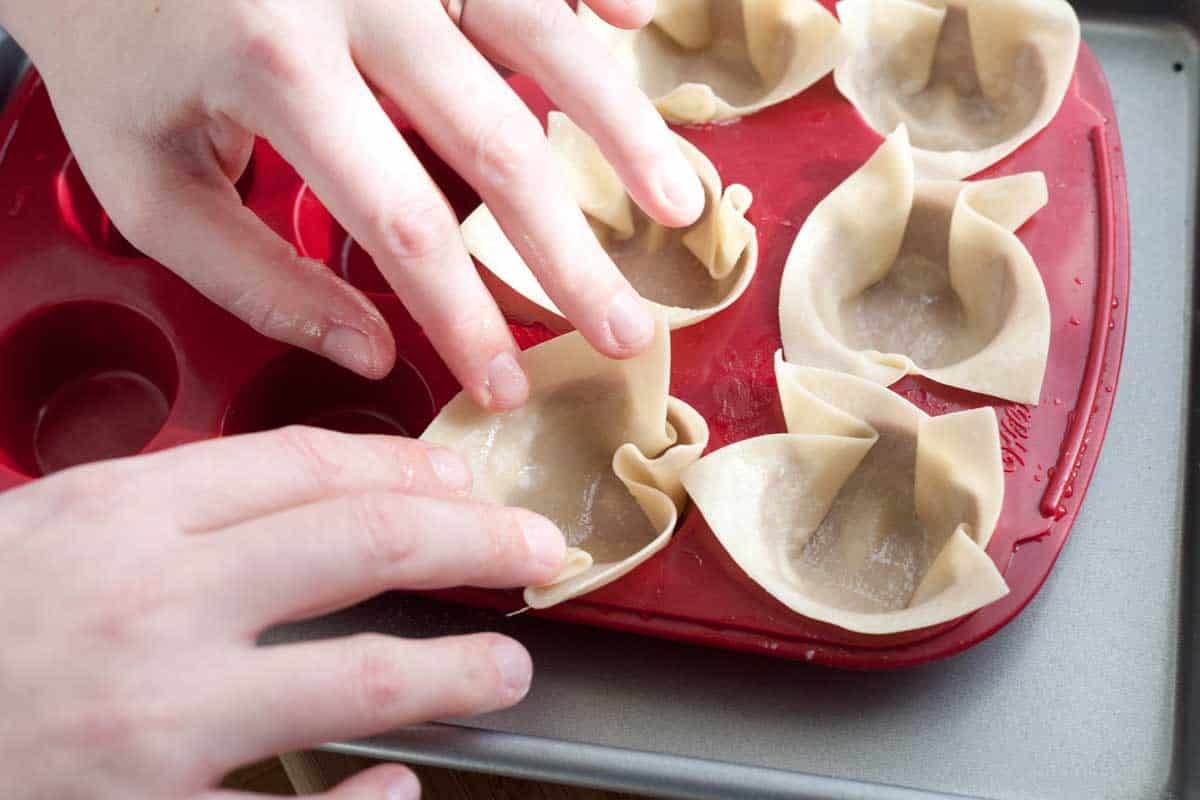
    How to Make Chili Lime Shrimp Cups: Baking wonton cups.

    While the wonton cups bake, prepare the shrimp. Toss them with olive oil, lime zest, chili powder, salt, and pepper. Then, bake them in the same oven until they are firm and opaque throughout.

    I like to assemble the cups close to when I plan to serve them so that they stay nice and crisp. Add arugula to the bottom, a bit of the lime sour cream, and finish with a shrimp. Easy!

    More Shrimp Recipes

    Chili Lime Shrimp Wonton Cups

    Chili Lime Shrimp Wonton Cups

    • PREP
    • COOK
    • TOTAL

    These shrimp-filled wonton cups are like mini shrimp tacos. Wonton wrappers are baked in the oven until crisp, filled with arugula and lime sour cream, and then topped with a big juicy chili-lime shrimp. You can make the wonton shells in advance, but assemble the cups just before serving.

    Another option for the cups is to use store-bought tortilla chips, sometimes called scoops, in the shape of cups.

    Makes 12 Shrimp Cups

    Watch Us Make the Recipe

    You Will Need

    15 wonton wrappers

    2 tablespoons olive oil, divided

    Salt

    12 large shrimp, peeled and deveined

    1 lime

    1 teaspoon ancho chili powder or homemade chili powder

    1/4 teaspoon fresh ground black pepper

    1 cup baby arugula leaves

    3 tablespoons sour cream

    Directions

    • Bake Wonton Cups
    • 1Preheat the oven to 350°F (177°C).

      2Lightly brush the wonton wrappers on both sides with 1 tablespoon of olive oil. Then, lightly season one side of each wrapper with salt.

      3Using a mini muffin pan, press the wonton wrappers down into the cups, laying back the corners and pressing the bottoms down to make a defined cup. Bake until lightly browned, 8 to 10 minutes. Transfer to a rack and let cool.

    • Make Shrimp Cups
    • 1While the wontons bake in the oven, prepare the lime sour cream and shrimp.

      2Zest the lime using a Microplane. Add the zest to a medium bowl with the shrimp, 1 tablespoon of olive oil, chili powder, 1/4 teaspoon of salt, and 1/4 teaspoon of pepper. Toss well.

      3Spread the shrimp onto a baking sheet and bake until firm and opaque, 8 to 12 minutes.

      4Make the lime sour cream in a small bowl by stirring 1 teaspoon of lime juice and a pinch of salt into the sour cream.

      5To assemble, fill the cooled wonton cups with a few leaves of arugula, a small blob of lime sour cream, and a shrimp. Serve with lime wedges for spritzing on top.

    Adam and Joanne’s Tips

    • Wonton wrappers: A few wonton cups may collapse during baking, making them difficult to stand up without falling over. We usually bake a few extras, just in case.
    • Make ahead: The wonton cups can be stored unfilled in an airtight container for up to a week. Fill them right before serving, or they’ll get soggy. The shrimp may be prepared up to two days ahead. Store them in an airtight container in the coldest part of the refrigerator.
    • The nutrition facts provided below are estimates.

    Nutrition Per Serving
    Serving Size
    1 shrimp cup
    /
    Calories
    74
    /
    Total Fat
    3.2g
    /
    Saturated Fat
    0.7g
    /
    Cholesterol
    32.4mg
    /
    Sodium
    185.7mg
    /
    Carbohydrate
    6.5g
    /
    Dietary Fiber
    0.3g
    /
    Total Sugars
    0.1g
    /
    Protein
    5.1g


    AUTHOR:

    Joanne Gallagher

    Adam and Joanne of Inspired Taste

    We are Adam and Joanne Gallagher, the creators of Inspired Taste. Established in 2009, Inspired Taste grew from a childhood dream into one of the internet’s most trusted recipe sites with hundreds of reliable recipes, step-by-step videos, and expert tips.More About Us

    Source link

  • Easy Blueberry Hand Pies Recipe

    Easy Blueberry Hand Pies Recipe

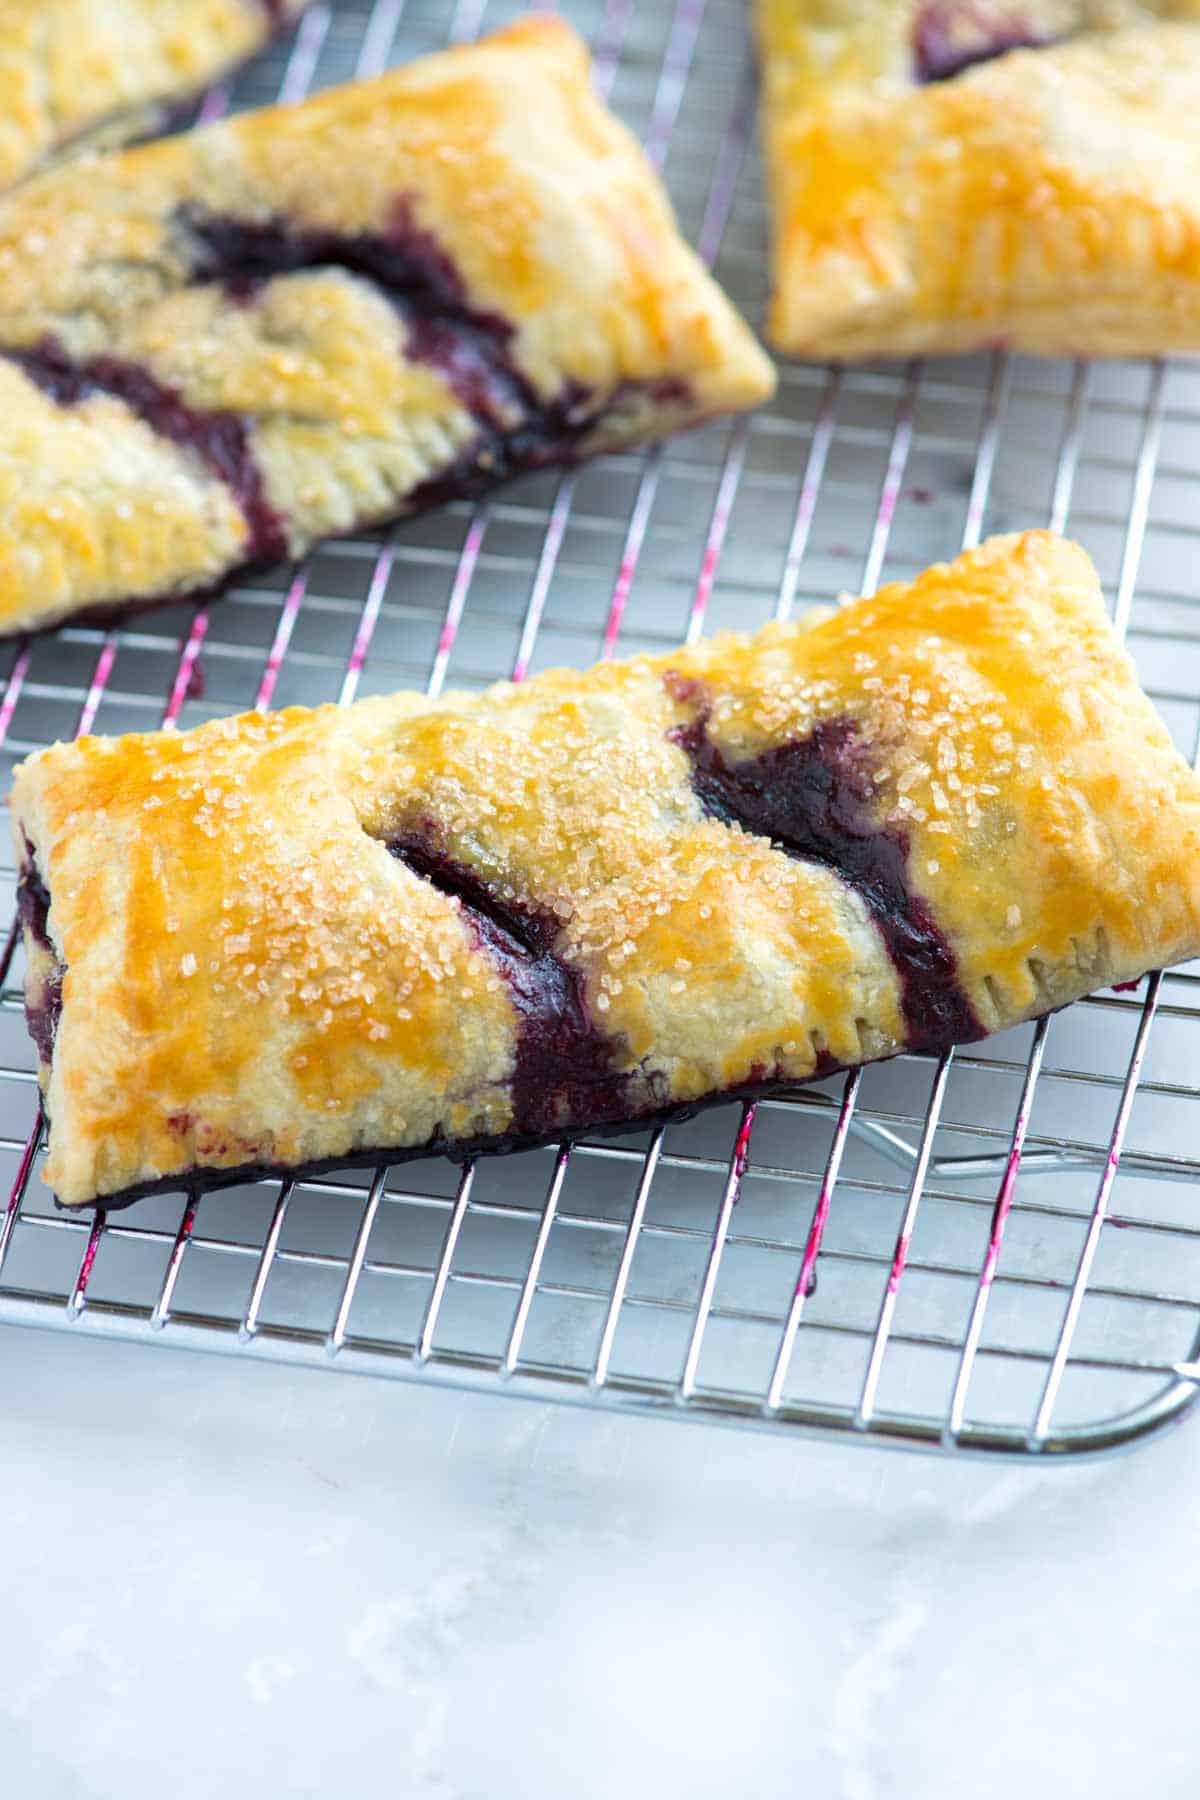
    Get ready to fall in love with these easy blueberry hand pies, featuring a jammy blueberry filling wrapped in a perfectly crisp buttery crust. All made simple thanks to store-bought puff pastry!

    Blueberry Hand Pies

    These hand pies filled with blueberries make me smile whenever we make them! My family loves blueberry pie, and the fact that this recipe turns it into a handheld experience is seriously the best! I keep these super easy with store-bought puff pastry, making them a little lighter and airier than if you swap it for traditional pie crust (which is an option, by the way).

    I love fresh blueberries in these pies, but I’ve shared tips for swapping them for frozen blueberries, blackberries, cherries, and strawberries below! For more pie inspired recipes, try our apple pie cupcakes, made with a base of cinnamon roll dough (I know!). Or, for another blueberry recipe, see this easy blueberry crumble!

    Key Ingredients

    • Store-Bought Puff Pastry: Puff pastry is the secret to these easy individual hand pies. It is made with multiple layers of dough separated by butter. When you bake it, the butter puffs and lifts the layers of dough above it. That’s why puff pastry becomes so flaky. I used Pepperidge Farm in the photos, but use what you have available! You can also substitute it with homemade pie crust (no changes necessary).
    • Blueberries: I love fresh blueberries (especially during the summer when they are in season). You can also use frozen berries in our recipe (tips for this are in the recipe). Or substitute for other berries or cherries.
    • Sugar: I don’t like the filling to be too sweet, but I add a little sugar to help make that jammy texture. Granulated sugar or coconut sugar is perfect. If you have some, sprinkle coarse sugar over the dough before baking (or use more granulated sugar).
    • Cornstarch: This thickens the filling nicely. For fresh fruit, use 2 tablespoons to 2 cups of fruit. If you have frozen, increase by 1/2 tablespoon.
    • Lemon Juice, Salt, and Almond Extract: These make our filling taste incredible. I love the almond extract (and also call for it in my homemade blueberry pie), but you can leave it out if you don’t have any on hand.
    • Egg Wash: I love these hand pies with a shiny, golden exterior, so I brush a little egg wash with an egg yolk and cream over them before baking.
    Blueberry Hand Pies

    Easy Blueberry Hand Pies

    • PREP
    • COOK
    • TOTAL

    These blueberry hand pies are perfect when you want pie but don’t have the time to make a whole pie! We use store-bought puff pastry dough for these, which makes them extra easy. Before making these, make sure that your puff pastry is thawed according to the package directions. I usually take them out of the freezer and place them into the fridge overnight.

    Makes 8

    You Will Need

    1 (17.3oz) package puff pastry sheets, thawed, 2 sheets puff pastry

    2 cups fresh blueberries

    1/4 cup (50g) granulated sugar

    2 tablespoons (14g) cornstarch

    1 tablespoon fresh lemon juice

    1/8 teaspoon salt

    1/8 teaspoon almond extract, optional

    1 egg yolk

    1 tablespoon cream

    Coarse sugar or extra granulated sugar for topping pies

    Directions

      1Preheat the oven to 400°F (204°C). Line two baking sheets with parchment paper or aluminum foil.

      2Prepare blueberry filling: Combine blueberries, 1/4 cup of sugar, 2 tablespoons of cornstarch, 1 tablespoon of lemon juice, 1/8 teaspoon of salt, and the optional 1/8 teaspoon of almond extract in a saucepan over medium heat.

      3Cook, stirring often, until the liquid at the bottom comes to a simmer. Reduce the heat to medium-low and cook for 3 to 5 minutes or until it thickens. Transfer to a bowl and let cool to room temperature (to speed this up, stir it occasionally and place into the refrigerator).

      4Make egg wash: Whisk an egg yolk and 1 tablespoon of cream in a small bowl. Set aside.

      5Prepare pie crusts: When the filling is mostly cooled down. Unfold one of the thawed puff pastry sheets on a lightly floured work surface. Roll the pastry sheet into a 12-inch square. Cut into four 6-inch squares. Repeat with the remaining pastry sheet. Transfer pastry squares to the baking sheets.

      6Assemble hand pies: Divide the filling between the pastry squares, placing it onto one-half of each pastry square. Spoon any liquid accumulated on the bottom of the bowl over blueberries.

      7Brush the edges of the pastry with egg wash, fold the half of pastry without filling over blueberries then use a fork to press edges and seal. Brush the tops with more egg wash and top them with a sprinkle of sugar. Cut two 1-inch slits into the top of each pie.

      8Bake pies: Bake for 15 to 20 minutes until golden brown and the filling is bubbling out of the slits on top. (Don’t worry. Plenty of filling is left inside.) Cool the hand pies on baking sheets for 5 minutes, then transfer to cooling racks to cool completely.

    Adam and Joanne’s Tips

    • Storing: Once cool, store the hand pies in an airtight container at room temperature for up to 2 days, in the fridge for up to one week, or in the freezer for up to 1 month.
    • Using frozen blueberries: You can use frozen blueberries in this recipe. Add them frozen, but increase the cornstarch by 1/2 tablespoon (so use 2 ½ tablespoons total).
    • Using cherries, strawberries, or blackberries: Use 2 cups of fresh blackberries, pitted and halved cherries, or chopped fresh strawberries. You may need to increase the sugar by 1 tablespoon for blackberries unless they are very ripe and sweet.
    • The nutrition facts provided below are estimates.

    Nutrition Per Serving
    Serving Size
    1 Hand Pie
    /
    Calories
    396
    /
    Total Fat
    24g
    /
    Saturated Fat
    6.2g
    /
    Cholesterol
    24.1mg
    /
    Sodium
    188.5mg
    /
    Carbohydrate
    40.9g
    /
    Dietary Fiber
    1.8g
    /
    Total Sugars
    10.5g
    /
    Protein
    5.1g


    AUTHOR:

    Joanne Gallagher

    Previous Post: Perfect Ricotta Gnocchi
    Next Post: Homemade Berry Tart

    Source link

  • Perfect Pickled Beets Recipe

    Perfect Pickled Beets Recipe

    This pickled beets recipe is quick, easy, and makes outrageously delicious, tangy, and slightly sweet beets.

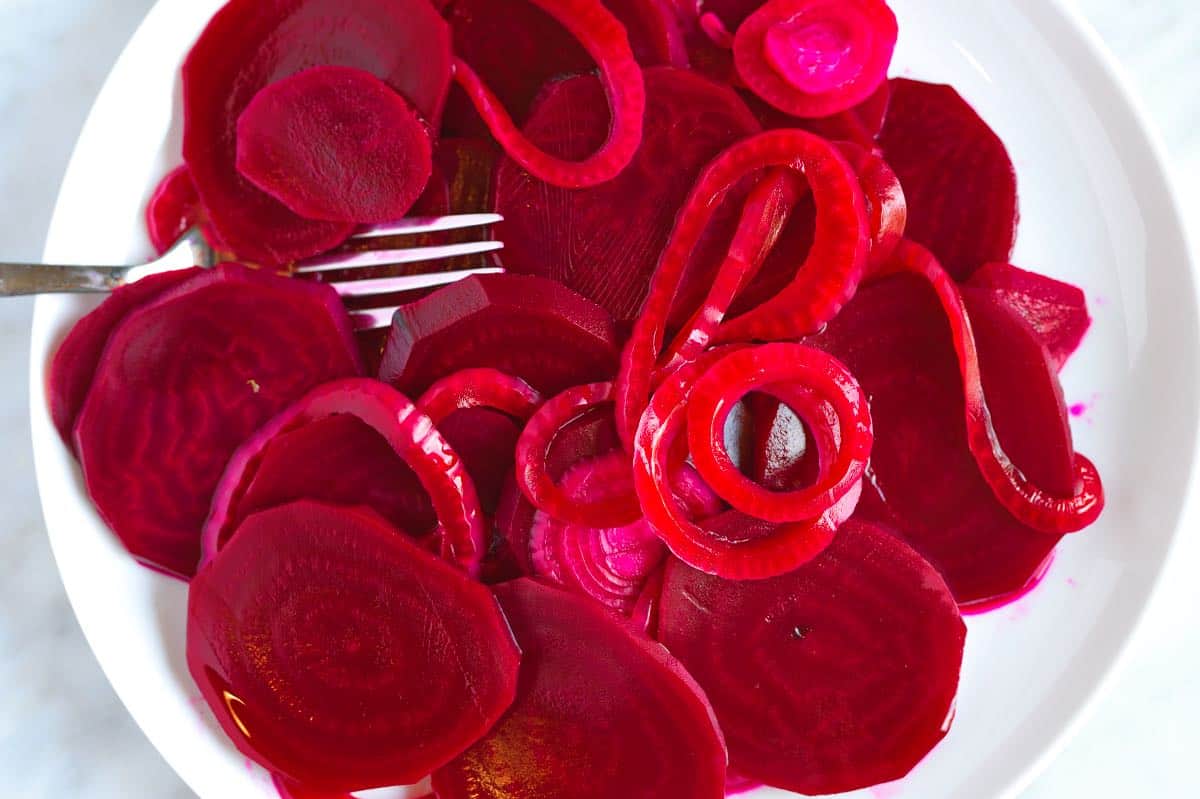
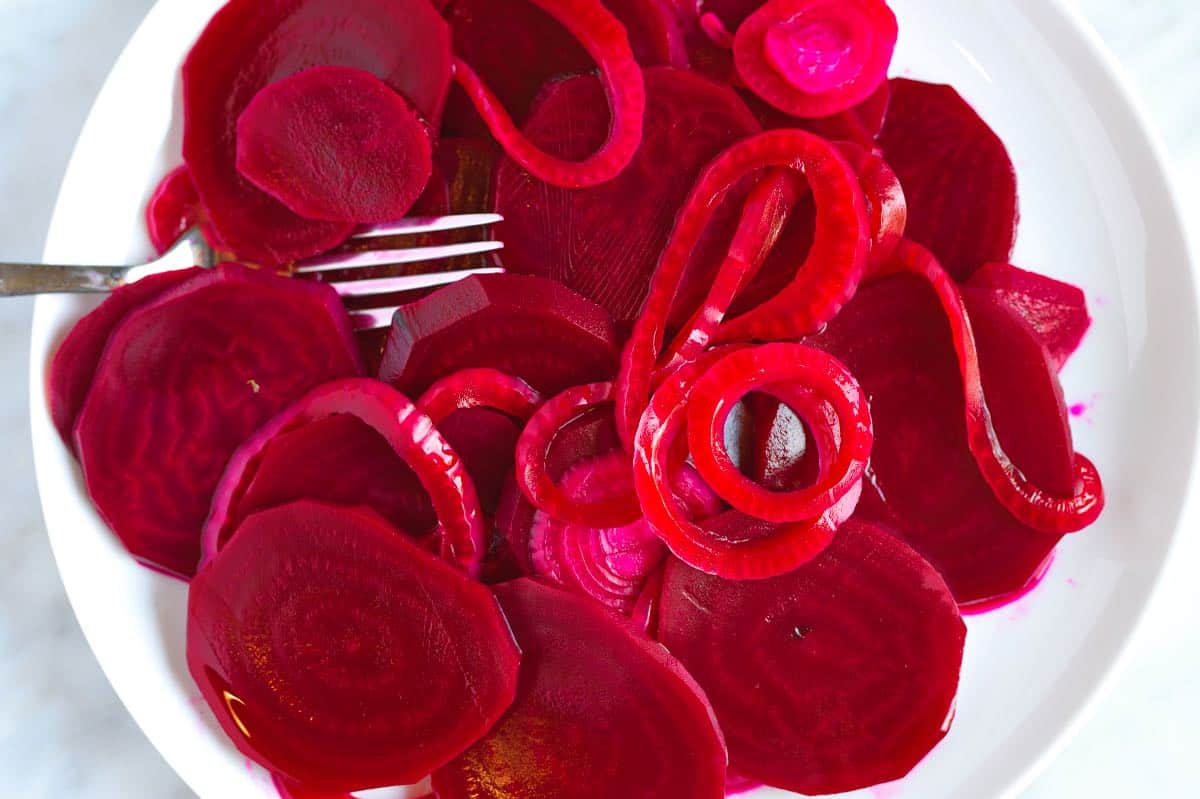
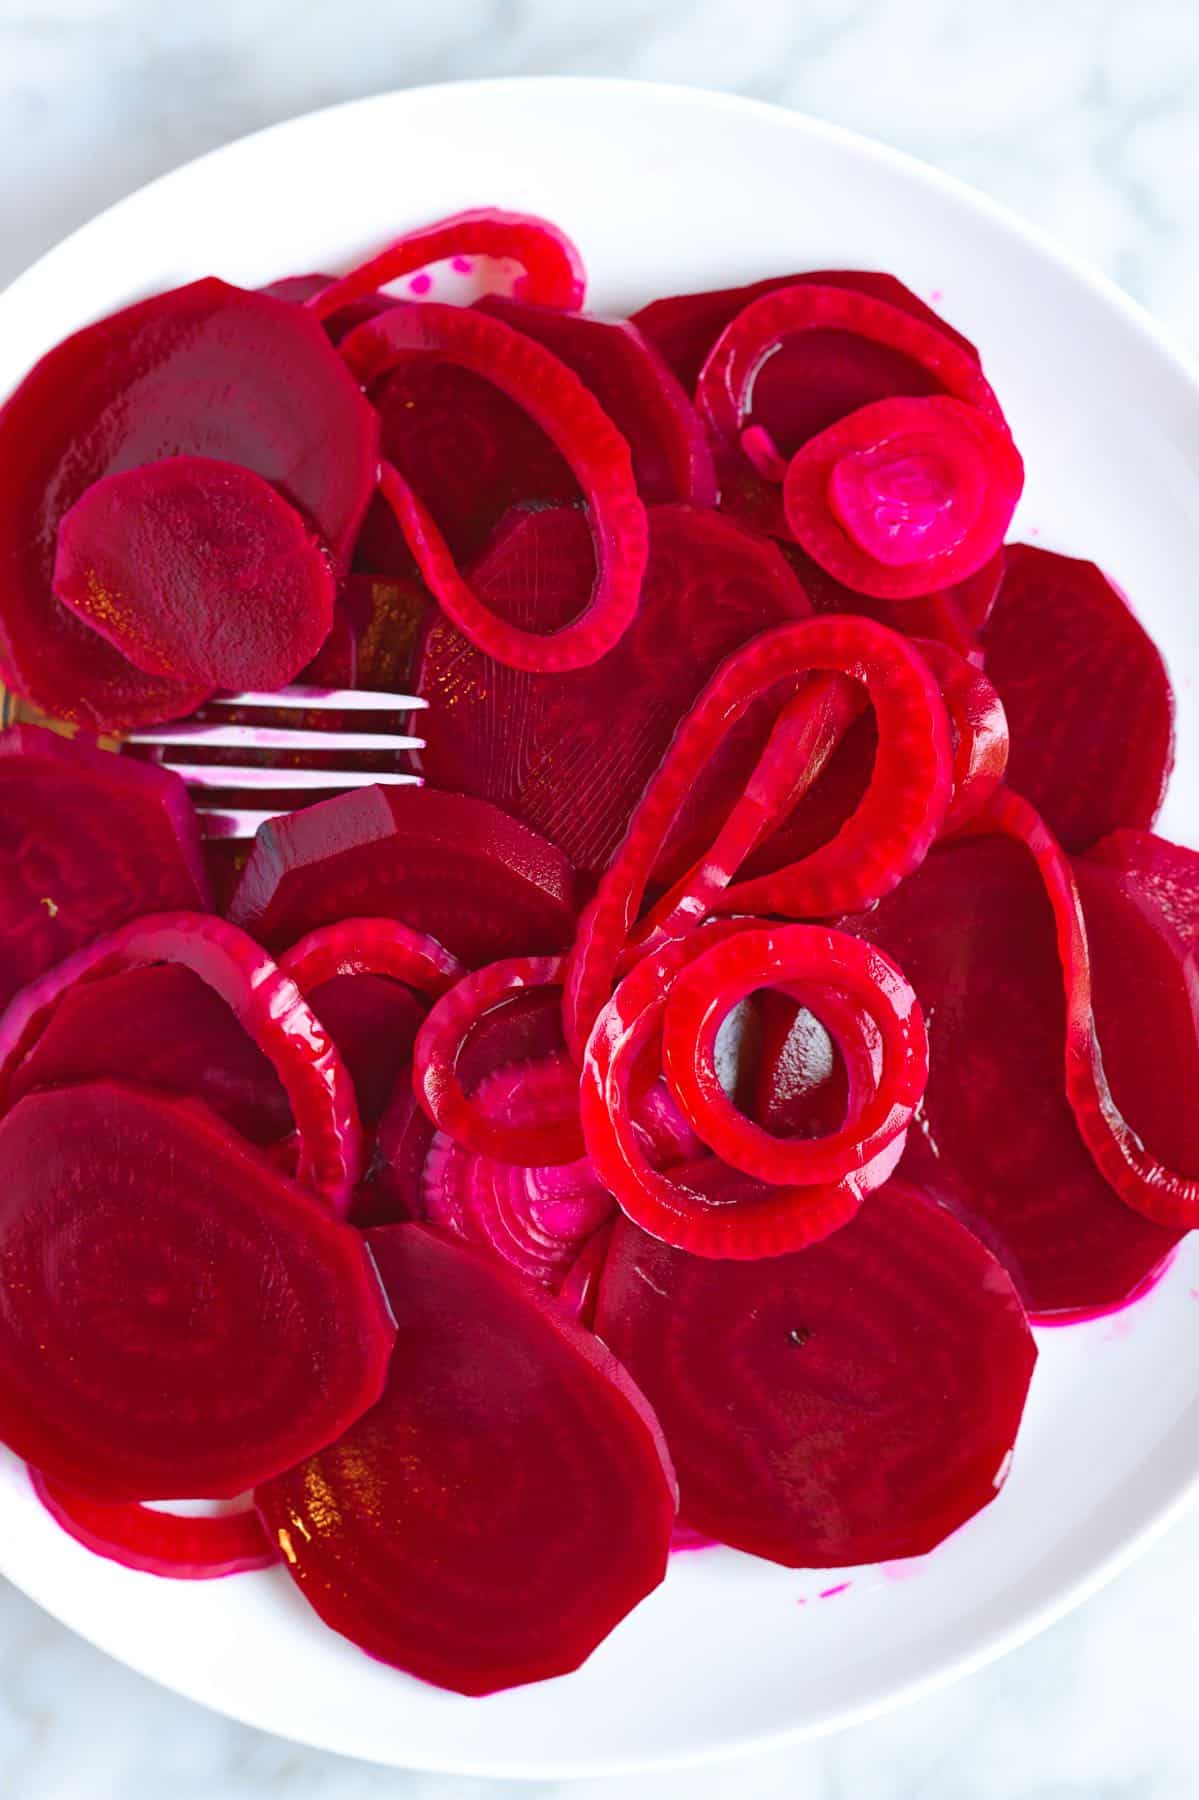
    Pickled Beets

    I love homemade pickled beets. This recipe has tangy, slightly sweet flavor with a subtle hint of spice. Plus, since we add onions, you also get pickled onions!

    These are refrigerator pickles, which means you can enjoy them as early as tomorrow. For another easy refrigerator pickle, try our dill pickles.

    Key Ingredients

    • Beets: Look for firm beets with smooth, unblemished skin. Red or yellow beets work well. Before pickling the beets, you’ll first roast them with a bit of olive oil.
    • Onion: I love pickled beets and onions, so we always add a few slices of onion to the top of the jar so they pickle with the beets. If you only want to pickle onions, see our pickled red onions recipe.
    • Vinegar: Plain distilled vinegar works, but I prefer the flavor of apple cider vinegar.
    • Sugar: This balances the acidity of the vinegar. You can reduce the sugar in our recipe below. When making the brine on the stovetop, add sugar to taste. We enjoy the balance of 4 tablespoons (see the full recipe below). That said, you can adjust the amount as needed. You can also substitute the sugar for honey or maple syrup.
    • Pickling Spices: I use salt, a clove, and an allspice berry in this pickle brine. Since I don’t use allspice berries very often, I steal one from a jar of pickling spice, which I also use to make these bread and butter pickles.

    Find the full recipe with measurements below.

    How to Make the Best Pickled Beets

    Tip 1: Ready in no time. These are refrigerator pickled beets, which fall into the refrigerator pickle category, requiring no complicated canning process. They are fast and easy to make, and you can enjoy them in as little as a day. For another easy refrigerator pickle, try these dill pickles.

    Tip 2: Roast the beets. For the best flavor and texture, roast your beets in the oven until they are tender enough to be pierced with a fork. Roasting them brings out more flavor. If you prefer to boil them, you can, but you’ll lose a little flavor.

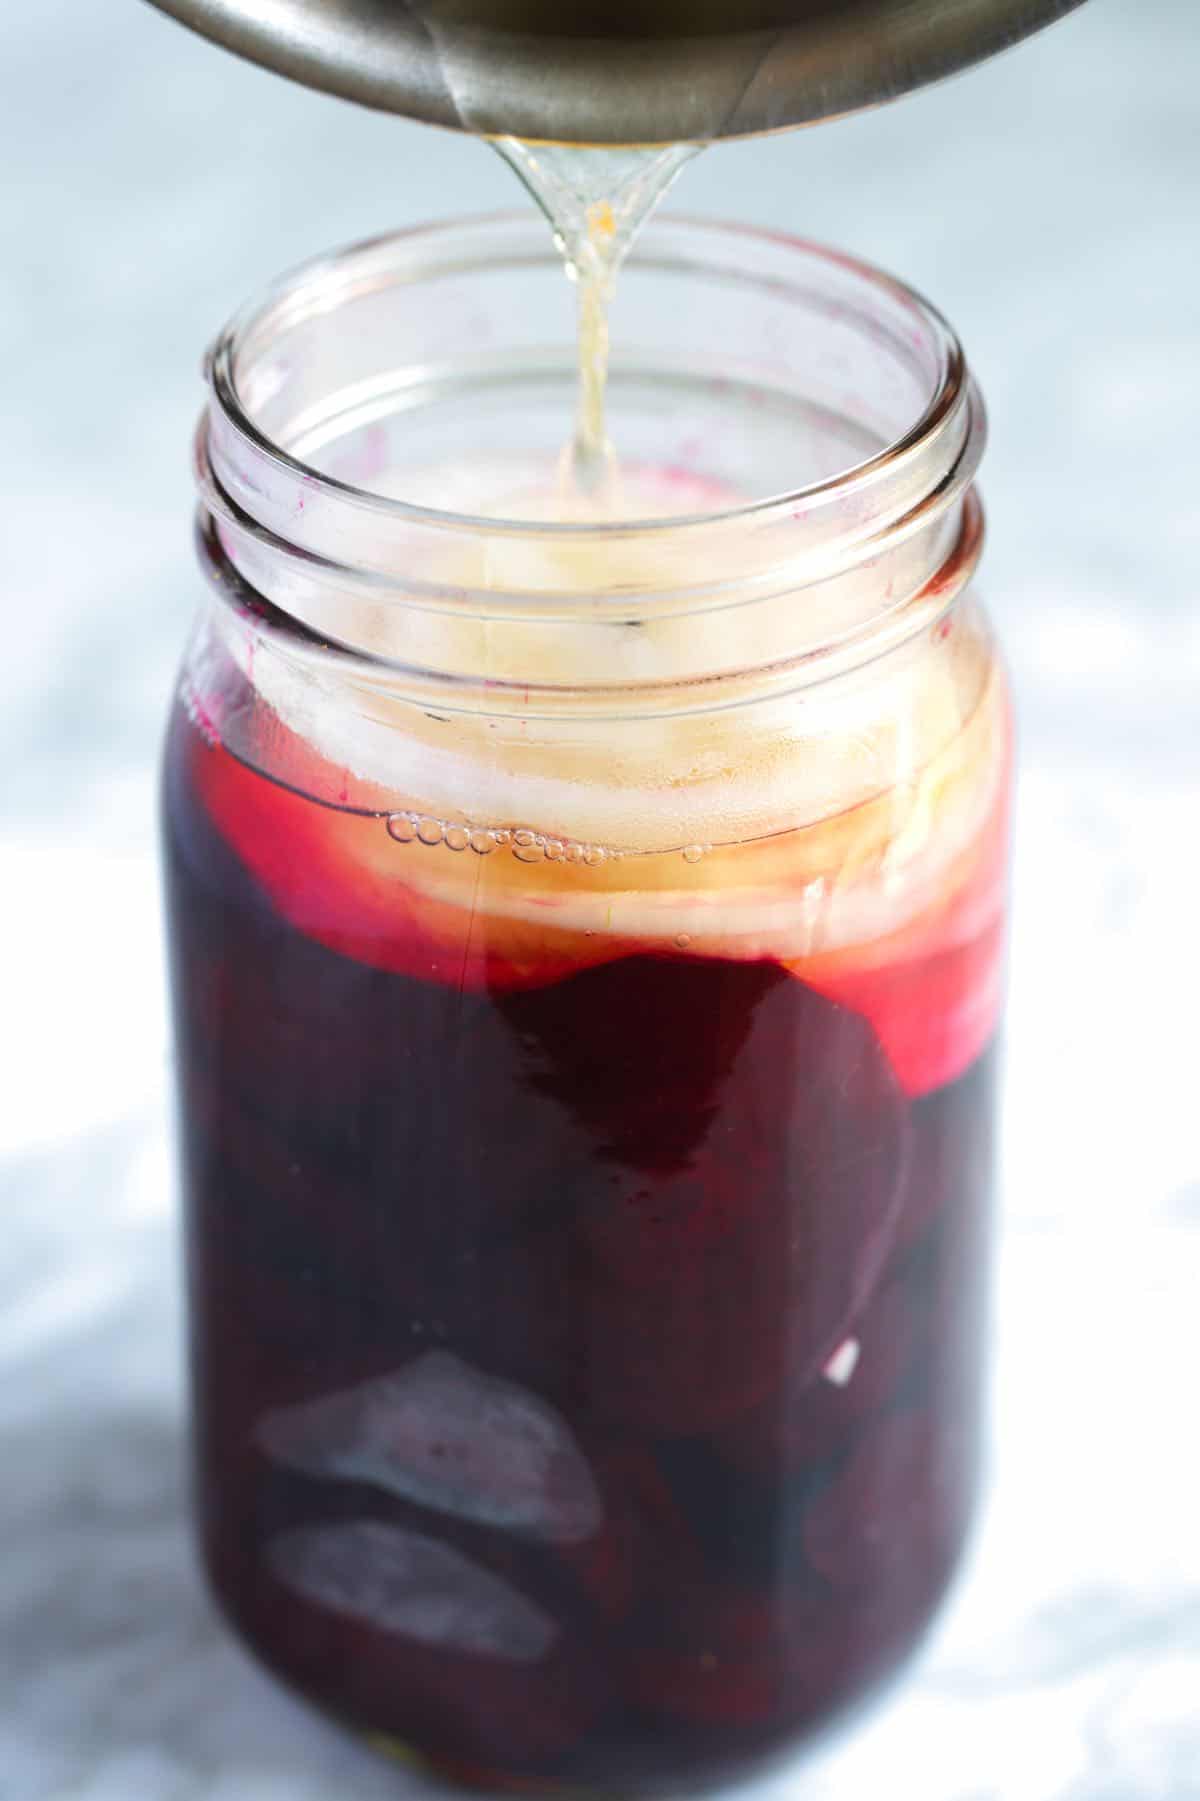
    Tip 3: Pickle with onions. Once the cooked beets have cooled down, you can peel and slice them. Then, combine them with sliced onions in a jar and prepare a simple vinegar brine using cider vinegar, sugar, cloves, and allspice berries. As the brine works its magic, you’ll end up with a jar full of delightful pickled beets and a bonus of pickled onions.

    Pouring the hot brine over the beets and onions

    Tip 4: Enjoying them. Once you have a jar of these pickled beets in your fridge, you’ll discover endless possibilities for enjoying them. They’re a fantastic addition to sandwiches, wraps, and salads, and they stand alone as a hearty and delightful side dish. I especially love them with sharp cheddar cheese and this cucumber salad for a snack or light lunch.

    More Homemade Pickles

    Homemade Pickled Beets

    Perfect Pickled Beets

    • PREP
    • COOK
    • TOTAL

    Pickling beets is simple, and our recipe results in amazingly delicious, tangy, and slightly sweet beets. These work wonders in sandwiches, salads, or as a stand-alone side dish. Use any variety or color of beet for this recipe.

    Makes 1 quart

    You Will Need

    4 medium beets

    1 ½ tablespoons olive oil, for roasting

    A quarter of an onion, sliced 1/4-inch thick

    4 tablespoons granulated sugar (50g)

    1 ¼ cups apple cider vinegar (295ml)

    1/2 teaspoon fine sea salt

    1 whole clove

    1 allspice berry, see notes

    Directions

    • Roast Beets
    • 1Preheat the oven to 375°F (190°C). Set aside a large baking sheet.

      2Prepare the beets by removing the tops and roots, and then place them on a large sheet of aluminum foil or parchment paper. Drizzle olive oil over them, ensuring they are well coated, and fold up the foil or paper to create a sealed packet.

      3Place the packet on the baking sheet and roast in the oven until they are easily pierced with a fork, 45 to 55 minutes. Allow the beets to cool in the packet at room temperature or, better yet, refrigerate until cold.

    • Pickle the Beets
    • 1Peel the beets and slice them into 1/4-inch thick pieces. If needed, use a vegetable peeler to help with the peeling. Pack the sliced beets tightly into a clean jar and add the sliced onions.

      2Heat the vinegar, sugar, salt, clove, and allspice berry in a small saucepan over medium-high heat until simmering and the sugar dissolves.

      3Pour the hot liquid over the onions and beets, leaving a 1/8-inch gap between the pickle brine and the top of the jar. Place the lid on the jar and tighten it until finger-tight. Let cool to room temperature.

      4Once cooled, fully tighten the lid and store the jar in the refrigerator. Initially, place the jar upside down in a bowl and flip it right-side up after a day or two. Enjoy pickled beets as early as the next day. As long as the brine covers the beets and onions, they will last in the fridge for up to a month.

    Adam and Joanne’s Tips

    • Allspice berries taste like a combination of cloves, cinnamon, and nutmeg. We found whole allspice berries less common in the grocery spice aisle, but Chef Richard recommends buying a “pickling spice blend” instead. McCormick “Mixed Pickling Spice” contains allspice berries, which we pick out of the jar and use in this recipe.
    • The nutrition facts provided below are estimates.

    Nutrition Per Serving
    Serving Size
    1/6 of the jar
    /
    Calories
    123
    /
    Total Fat
    3.7g
    /
    Saturated Fat
    0.5g
    /
    Cholesterol
    0mg
    /
    Sodium
    268.5mg
    /
    Carbohydrate
    20.1g
    /
    Dietary Fiber
    3g
    /
    Total Sugars
    15.8g
    /
    Protein
    1.8g


    AUTHOR:

    Joanne Gallagher

    Adam and Joanne of Inspired Taste

    We are Adam and Joanne Gallagher, the creators of Inspired Taste. Established in 2009, Inspired Taste grew from a childhood dream into one of the internet’s most trusted recipe sites with hundreds of reliable recipes, step-by-step videos, and expert tips.More About Us
    Source link

  • Hoisin Sauce Recipe (Better than Store-Bought)

    Hoisin Sauce Recipe (Better than Store-Bought)

    Make this homemade hoisin sauce recipe, and you’ll never feel the need to buy it from the store again. Use in stir-fries, marinades, glazes, and more!

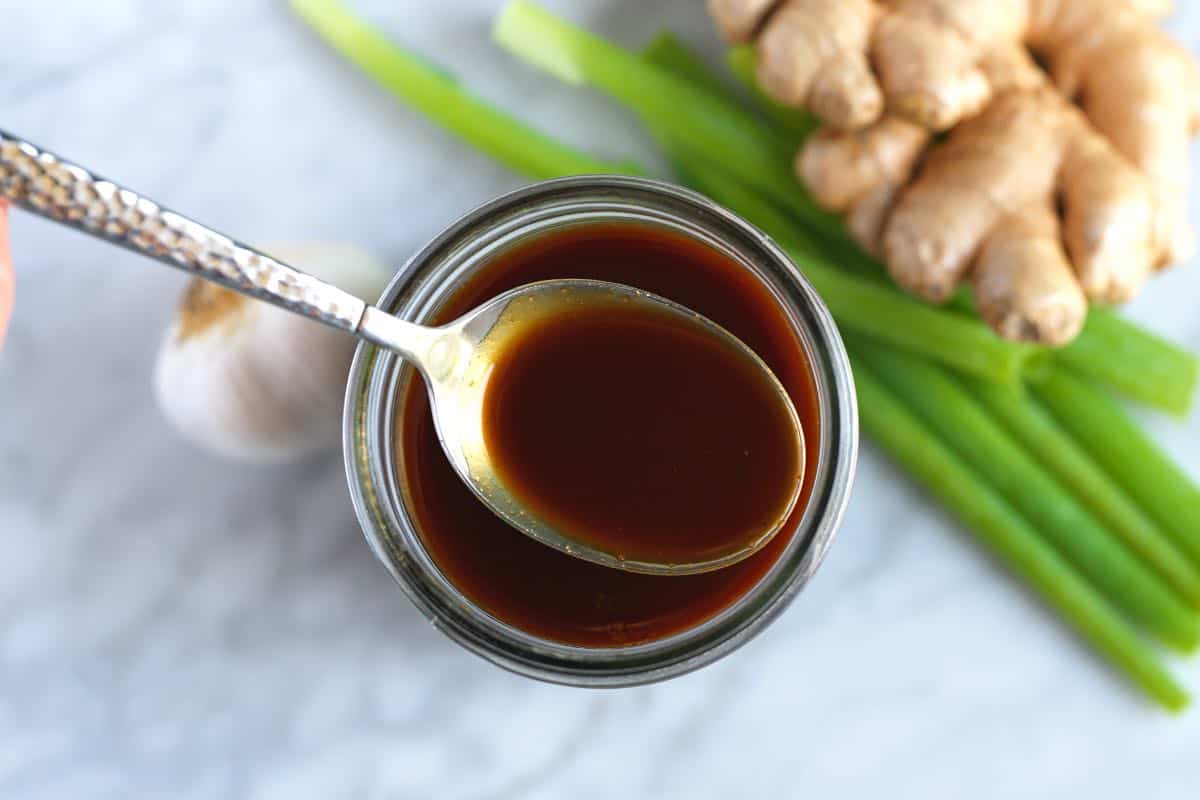
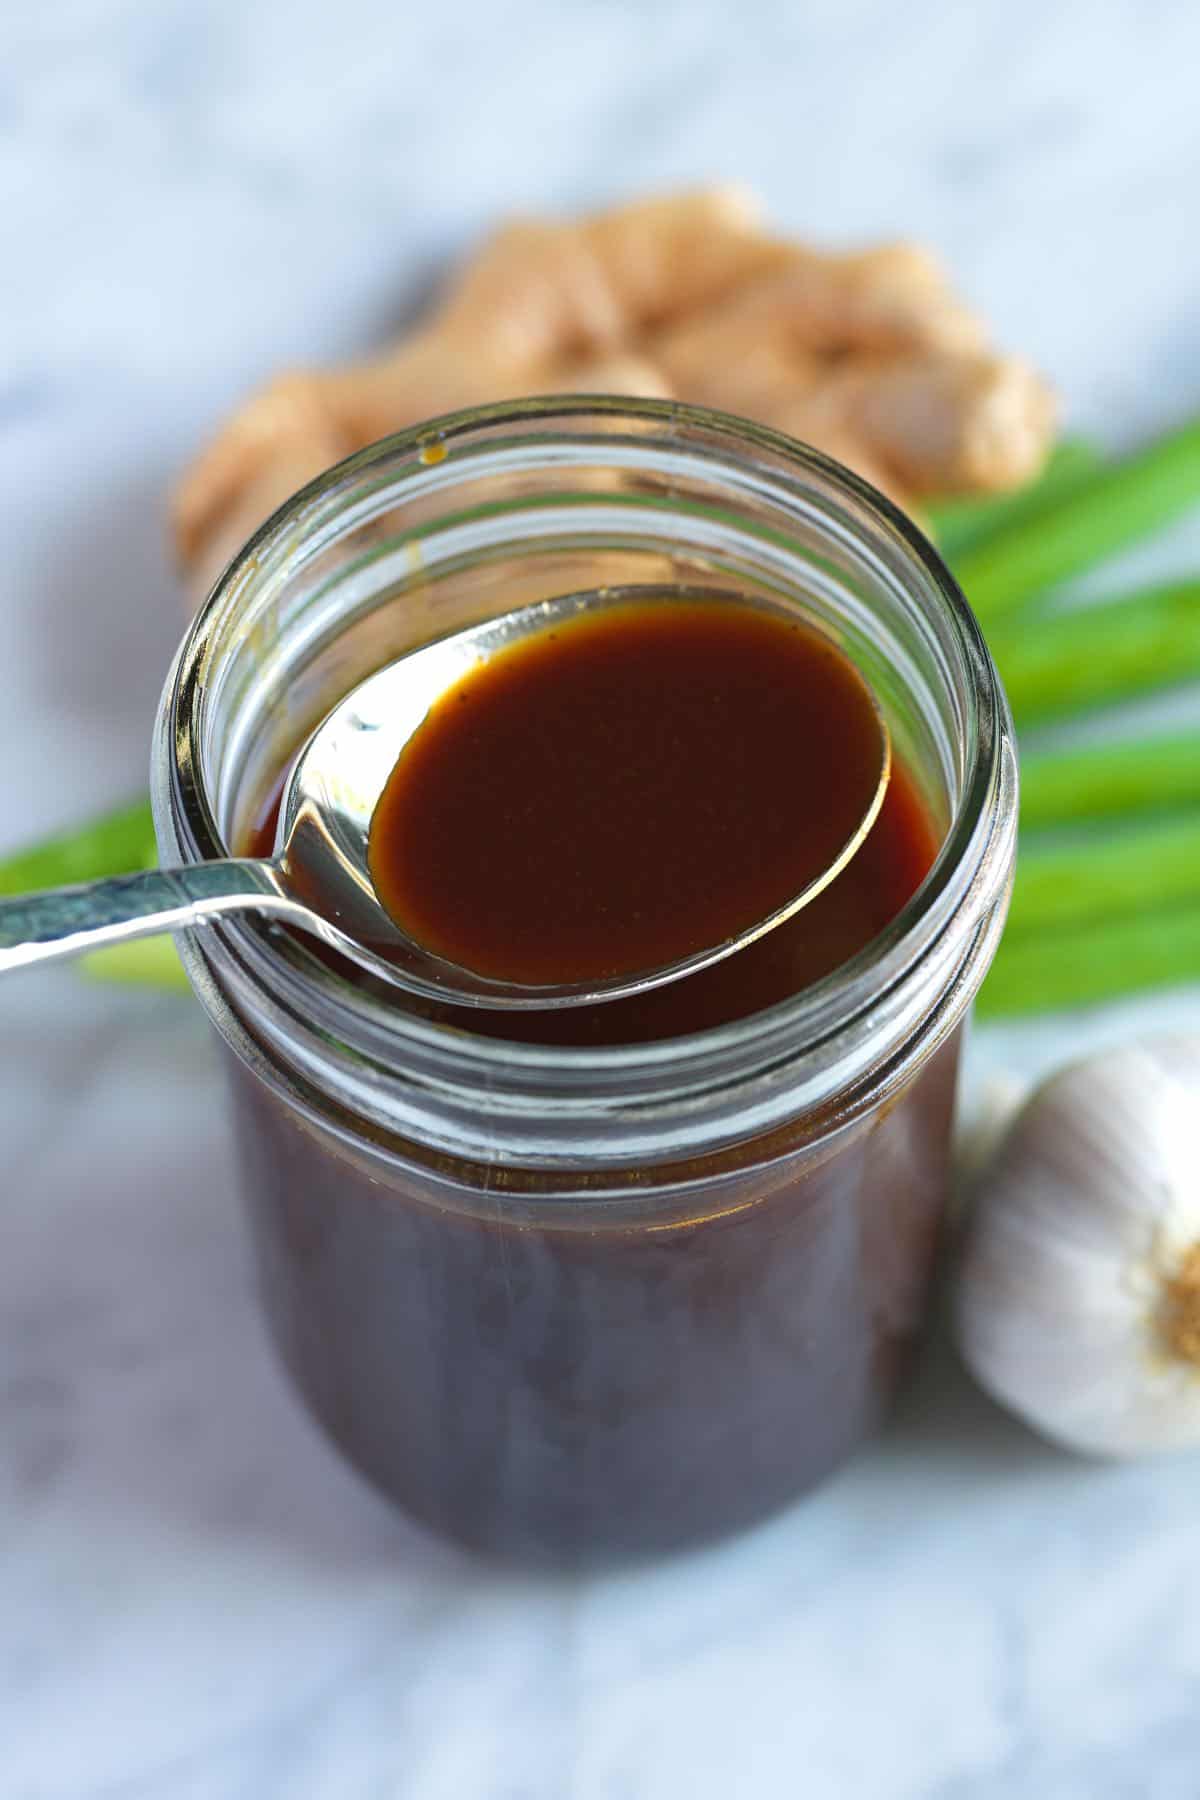
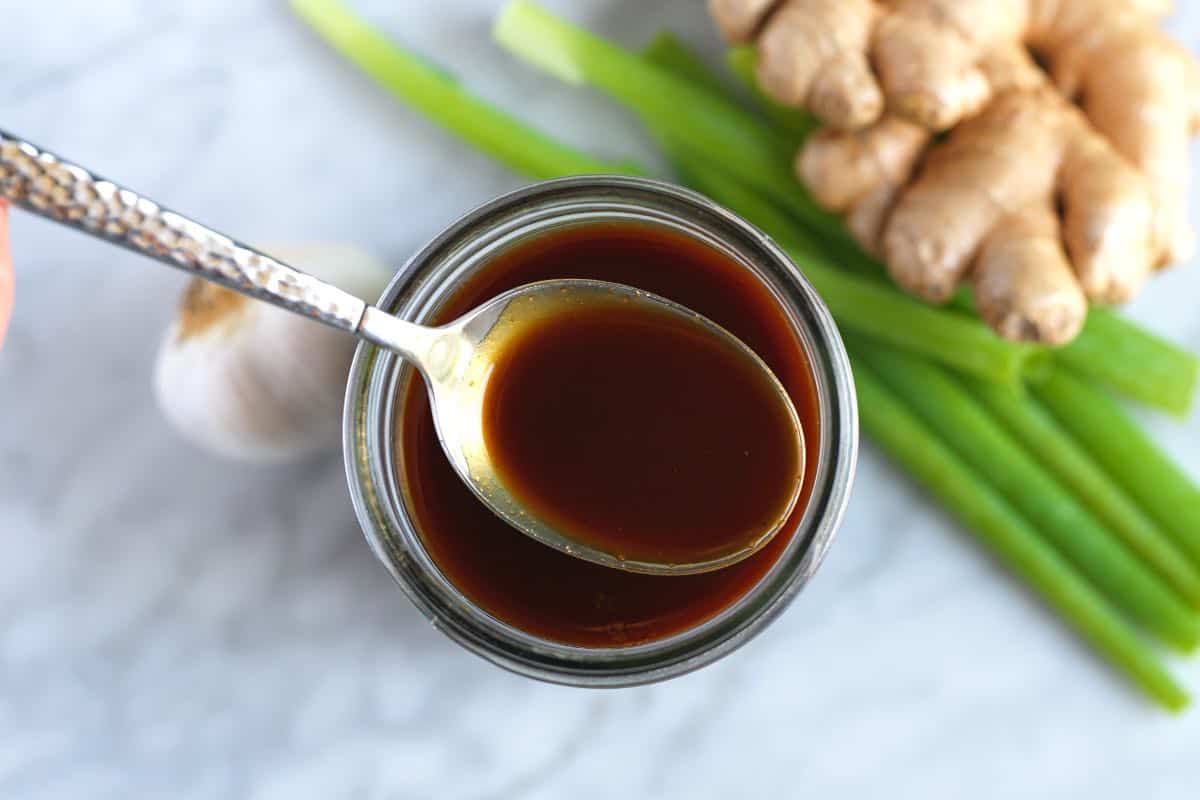
    Homemade hoisin sauce

    Store-bought hoisin tends to be excessively salty, overly sweet, and disappointingly thick. Our recipe tastes sweet, salty, tangy, and downright delicious. Use this umami-rich sauce for chicken, salmon, ribs, tofu, and veggies.

    Since perfecting this homemade hoisin sauce recipe, we’ve explored so many ways to use it. To date, we’ve used it to make glazed salmon, tossed it with tofu, and used it for hoisin sticky ribs. We also love using this sauce to make these chicken lettuce wraps.

    Key Ingredients

    • Garlic, ginger, and green onion: Add fresh flavor to our sauce. I especially love the ginger in this homemade sauce.
    • Light tamari or soy sauce: The foundation of our sauce’s salty, savory flavor. Light tamari offers a cleaner taste, but light soy sauce works nicely.
    • Maple syrup and molasses: Sweeten our sauce and balance the salty tamari.
    • Peanut butter: Makes the hoisin taste more complex. However, the finished sauce does not taste like peanut butter. You can substitute tahini or almond butter.
    • Gochujang: Replicates the complex flavor of fermented beans in traditional hoisin sauce. For a substitute, use miso paste and add a dash of your favorite hot sauce for optional heat. We also use gochujang when making our easy shrimp marinade.
    • Rice wine vinegar: Just a little vinegar brightens the sauce and brings all of the flavors together.
    • Chinese Five Spice: A warm and fragrant blend of star anise, fennel, Szechuan peppercorns, cloves, and cinnamon. Look for this in the spice aisle of most grocery stores.
    • Cornstarch: Thickens our sauce (optional, but recommended).

    Find the full recipe with measurements below.

    How to Make the Best Hoisin Sauce

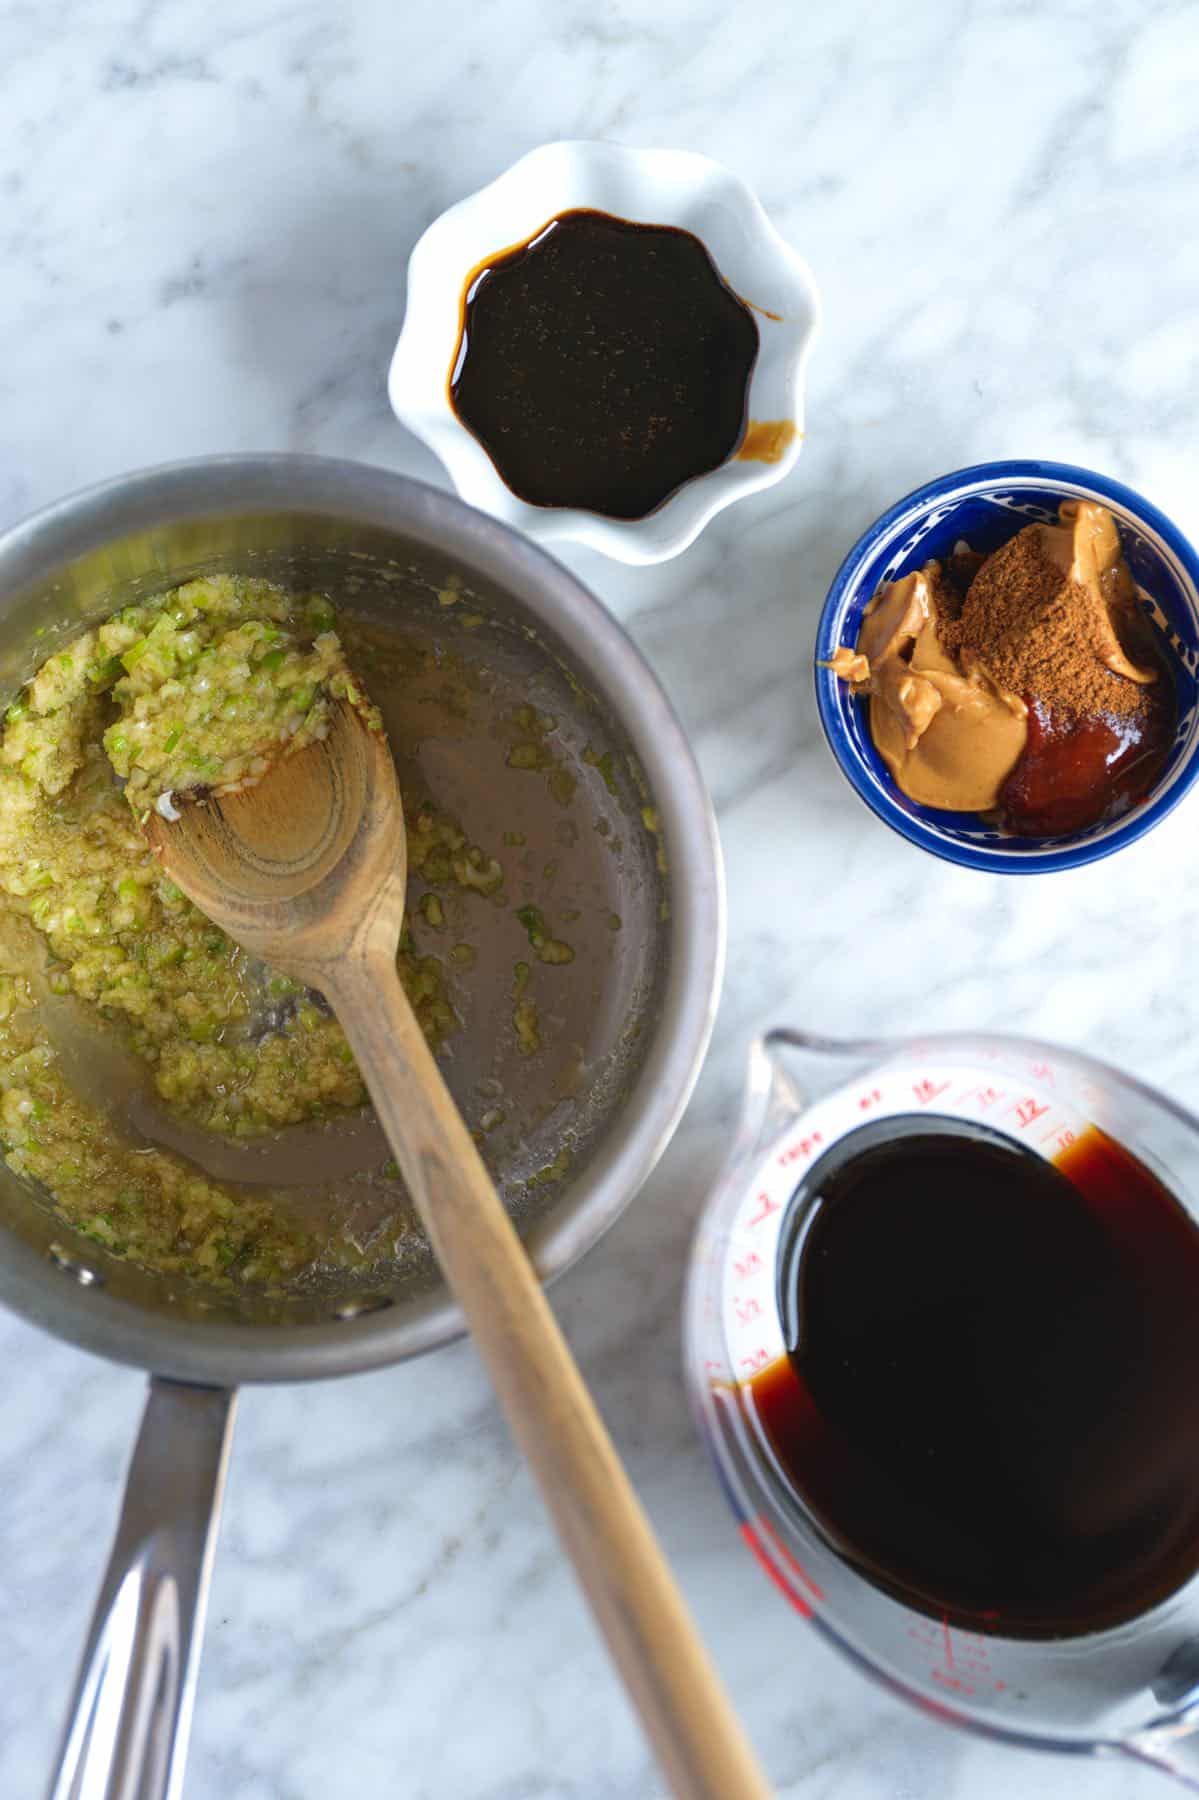
    Tip 1: Make in small saucepan. This recipe only takes about 15 minutes to make, and it all happens in a small saucepan. Sauté fresh garlic, ginger, and scallions until softened, then stir in everything left on your ingredient list. The peanut butter melts into the sauce, and the garlic and ginger perfume the sauce nicely.

    Hoisin sauce ingredients

    Tip 2: Thicken your sauce. Our recipe includes cornstarch, which helps thicken the sauce. You can stick with our suggested amount or add more for a thicker sauce. (As written, the hoisin is slightly thinner than you might find with store-bought.)

    Tip 3: Keep a jar on standby. This sauce makes weeknight dinners so easy. Whenever I have something like chicken or tofu (like our baked tofu) in the fridge and have no idea what to do with it, I reach for this sauce. Toss whatever you have in the fridge in some sauce and bake. Easy!

    More Homemade Sauces

    A jar of homemade hoisin sauce

    Hoisin Sauce (Better than Store-Bought)

    • PREP
    • COOK
    • TOTAL

    Homemade hoisin sauce is a thick, flavorful condiment popular in Chinese cuisine, particularly Cantonese cooking. It’s added to stir-fries, marinades, and glazes (think Peking duck!). I find store-bought hoisin too sweet, salty, and thick. Once you try this homemade hoisin, you’ll never need to buy it from the store again.

    Makes 1 cup

    Watch Us Make the Recipe

    You Will Need

    1 tablespoon toasted sesame oil

    2 cloves garlic, finely minced or grated

    One 1-inch thumb-size piece fresh ginger, finely minced or grated

    2 green onions, whites and light green parts only, finely minced

    5 tablespoons (65g) light tamari or light soy sauce, plus more to taste

    5 tablespoons (65g) pure maple syrup

    2 tablespoons (30g) molasses

    1 tablespoon (20g) peanut butter, try homemade peanut butter

    1 ½ teaspoons Gochujang, see notes

    1 teaspoon rice wine vinegar

    1/4 teaspoon Chinese Five Spice, see notes

    1/4 teaspoon cornstarch

    Directions

      1Heat sesame oil in a small saucepan over medium heat. Stir in the garlic, ginger, and green onion. Cook, stirring occasionally, until tender and translucent, 3 to 5 minutes. Set the saucepan aside to cool.

      2Stir in soy sauce, maple syrup, molasses, peanut butter, Gochujang, rice wine vinegar, and the Chinese Five Spice. Return the saucepan to medium heat and, while stirring, slowly bring to a simmer. Taste the sauce and adjust with 1/2 tablespoon to 1 tablespoon of soy sauce if necessary.

      3Make a cornstarch slurry by mixing 1/2 teaspoon cornstarch with 2 teaspoons water. Whisk the slurry into the sauce. As it simmers, the sauce will thicken. Once thickened, remove it from the heat and let it cool. Refrigerate your sauce for up to one month.

    Adam and Joanne’s Tips

    • Storing: Your sauce can be refrigerated for up to 1 month. As it sits, it may separate. We store our sauce in an airtight glass jar, which allows us to shake it to combine before using it. The sauce also freezes well. Keep it in a freezer-safe container in the freezer for up to 3 months.
    • Gochujang: Gochujang is a spicy Korean condiment made with rice and fermented soybeans. Substitute miso paste, and if you’d like to add some spice, add a dash or two of hot sauce or chili paste like sambal oelek.
    • Adjusting to your taste: Feel free to adjust the spice level, saltiness, and sweetness to your taste. I love the heat from Gochujang, but you can substitute it with miso paste if you’d prefer.
    • Thickness of the sauce: I like to keep this on the thinner side, which makes it more saucy when tossing it into stir-fries or slathering it over ribs. Increase the cornstarch for a thicker sauce.
    • Gluten-free: Double check that all products are labeled gluten-free (especially the soy sauce or tamari) for gluten-free hoisin sauce.
    • The nutrition facts provided below are estimates.

    Nutrition Per Serving
    Serving Size
    2 tablespoons
    /
    Calories
    86
    /
    Total Fat
    2.8g
    /
    Saturated Fat
    0.5g
    /
    Cholesterol
    0mg
    /
    Sodium
    290mg
    /
    Carbohydrate
    14.8g
    /
    Fiber
    0.3g
    /
    Total Sugars
    12.3g
    /
    Protein
    1.3g


    AUTHOR:

    Joanne Gallagher

    Adam and Joanne of Inspired Taste

    We are Adam and Joanne Gallagher, the creators of Inspired Taste. Established in 2009, Inspired Taste grew from a childhood dream into one of the internet’s most trusted recipe sites with hundreds of reliable recipes, step-by-step videos, and expert tips.More About Us

    Source link

  • Easy Tzatziki Sauce Recipe

    Easy Tzatziki Sauce Recipe

    This easy tzatziki sauce recipe is unbelievably delicious and super simple to make. It’s a creamy cucumber yogurt dip you can serve with almost anything!

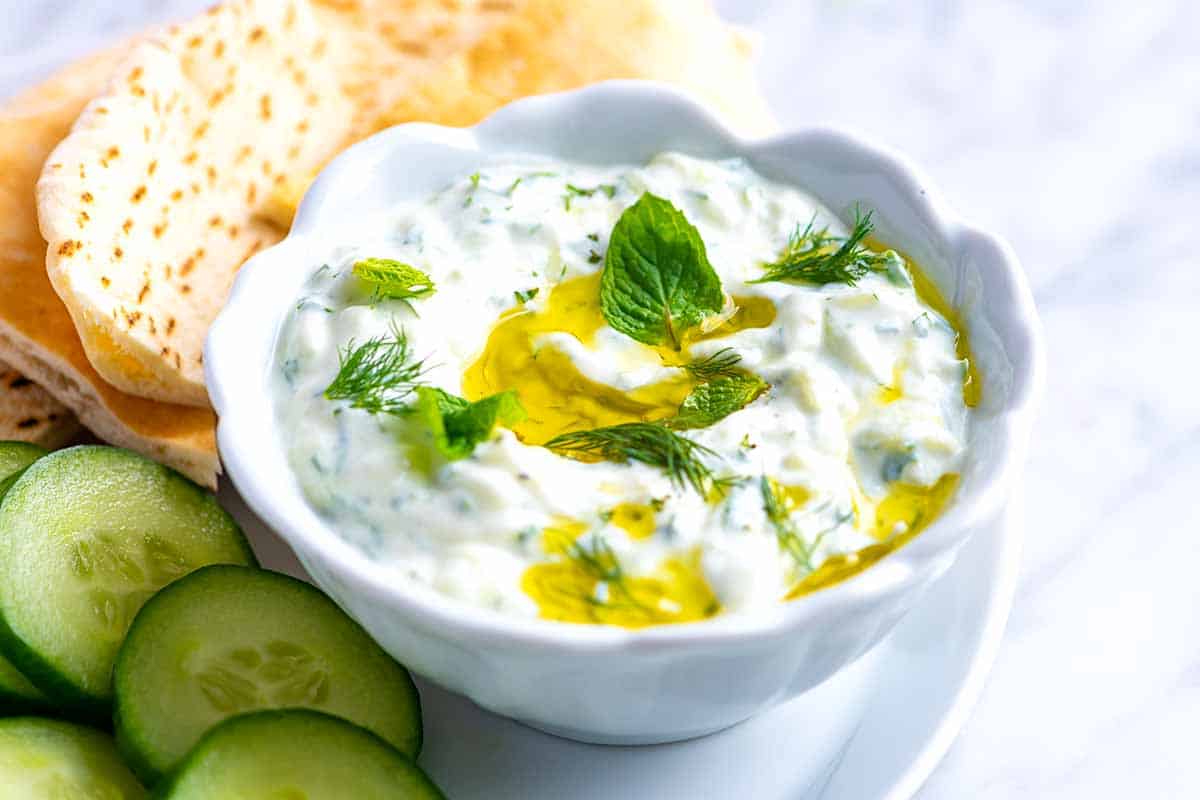
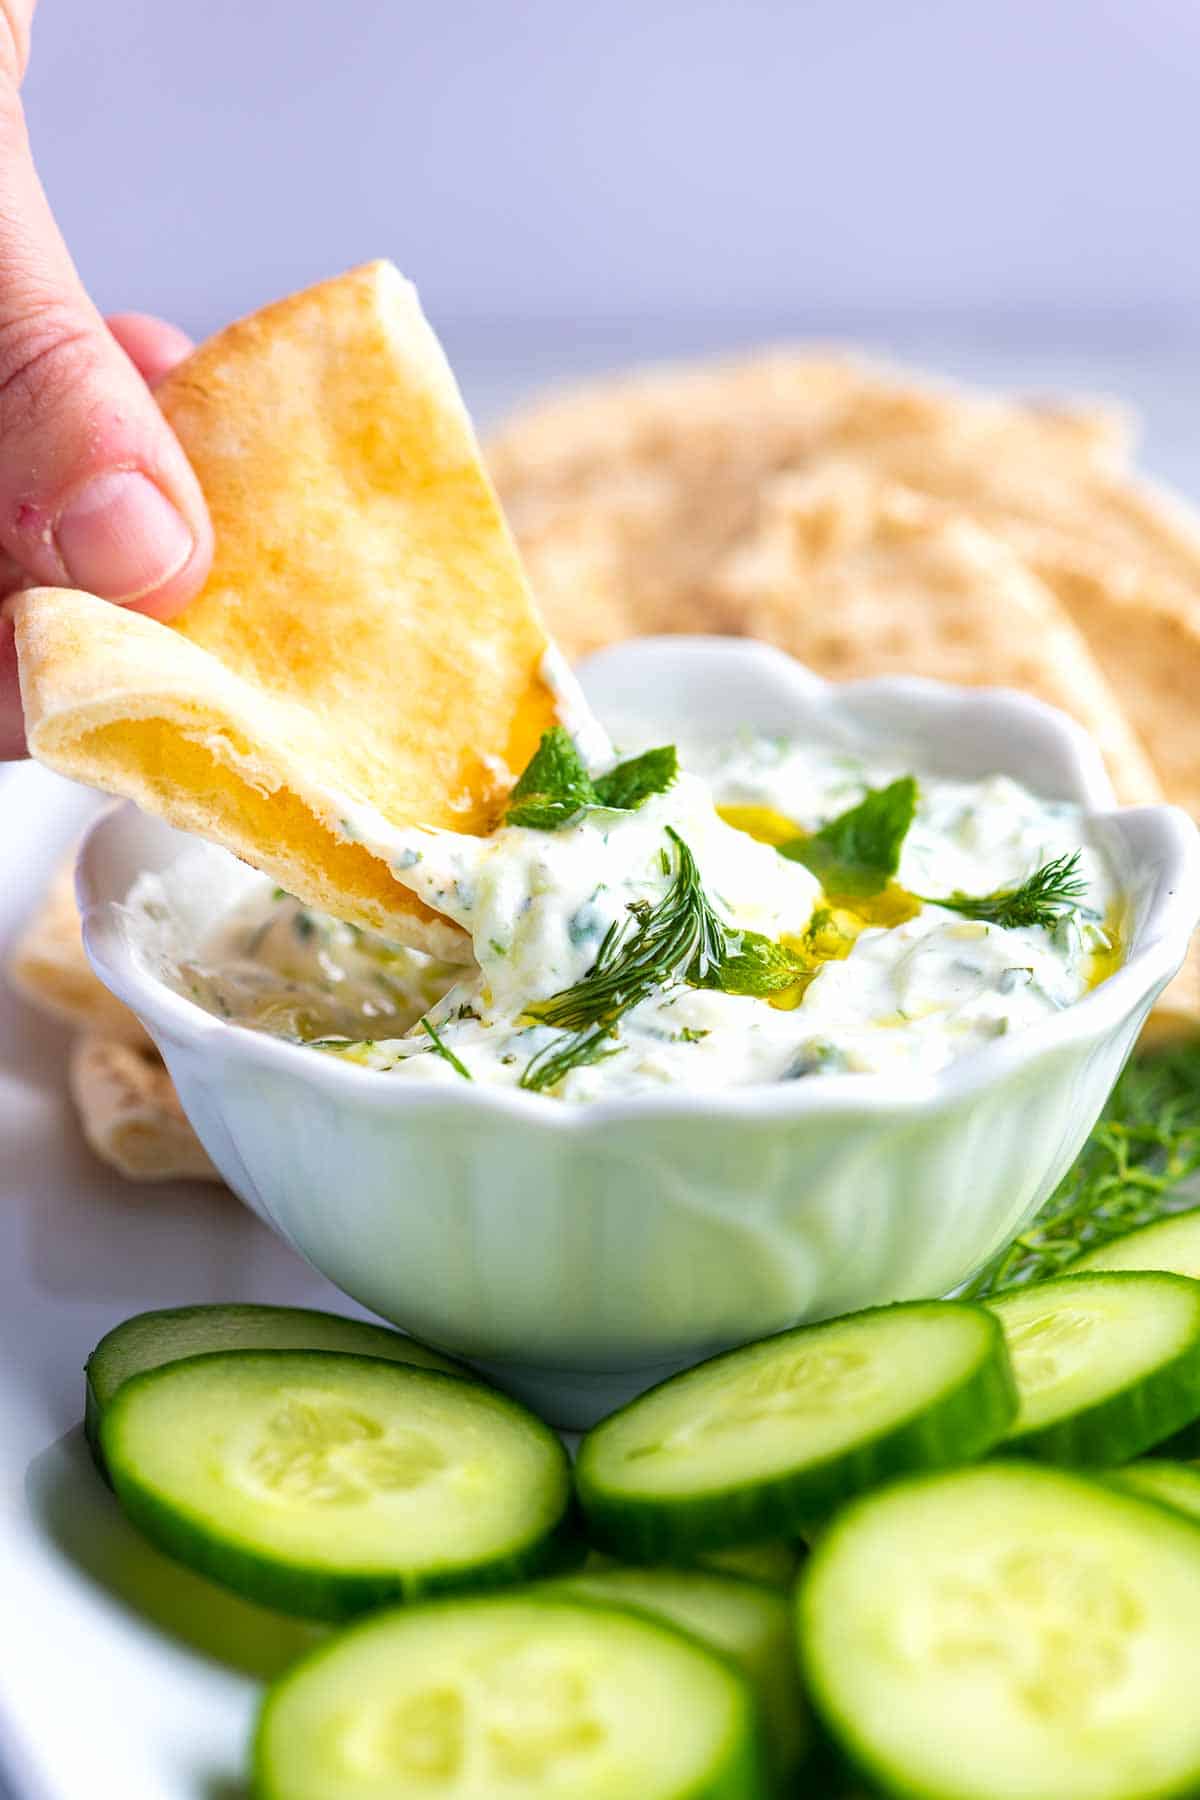
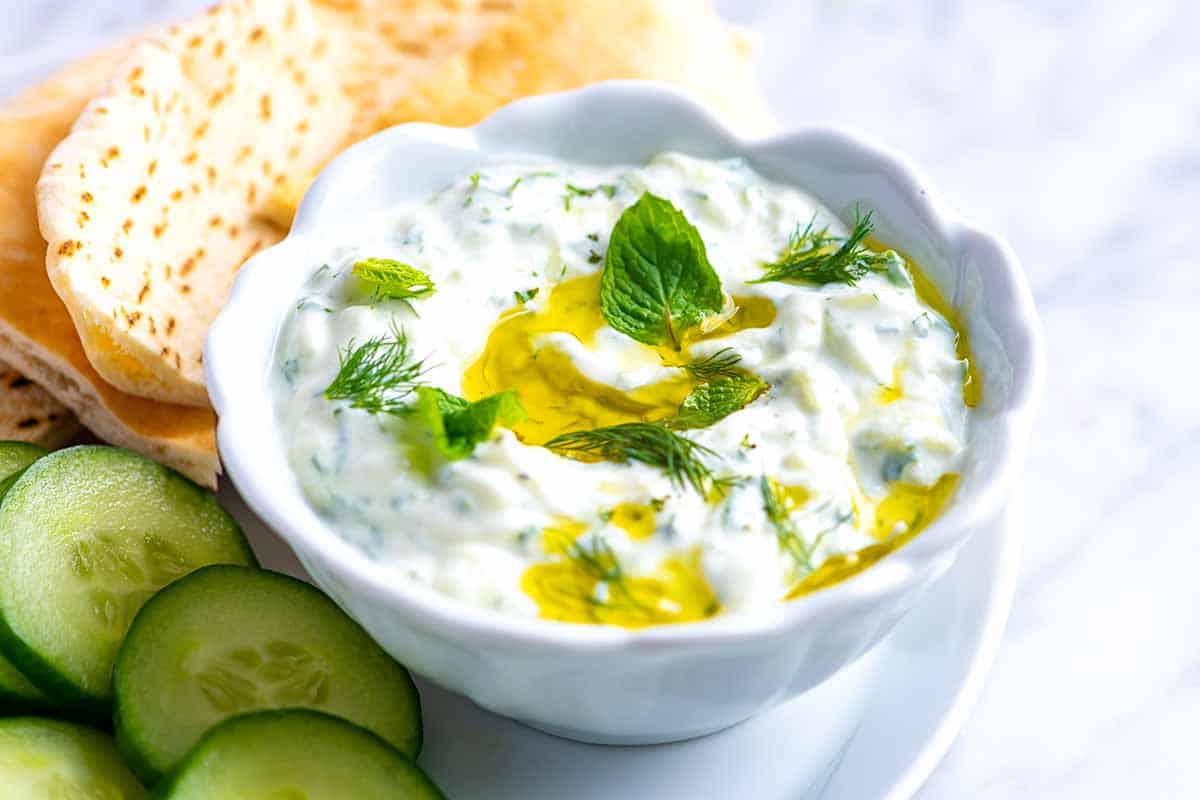
    Tzatziki Sauce with pita and cucumbers

    Tzatziki (pronounced tuh-zee-kee) is a creamy sauce made with yogurt, cucumber, fresh herbs, and garlic. It’s often associated with Greek food, but similar sauces are served throughout the Mediterranean and Middle East. I love to serve it as a sauce, spread, or dip for homemade pita and veggies.

    If this is your first time making it, tzatziki is easy. You don’t need much time or fancy equipment. I love this sauce so much that I’ve also shared this feta tzatziki and this creamy cucumber salad with a dressing inspired by authentic Greek tzatziki.

    Key Ingredients

    • Cucumber: I use thin-skinned cucumbers, such as hothouse, English, or Persian cucumbers. I don’t peel them, and since they are usually seedless, I don’t need to remove any seeds.
    • Yogurt: I use full-fat plain Greek yogurt when making homemade tzatziki sauce. Icelandic-style yogurt will work well, too (you are just looking for a thicker-style yogurt). If you can only find thinner yogurt, add it to cheesecloth and strain it for a few hours, like we do when making homemade labneh.
    • Garlic: The amount of garlic you use is up to you. I use 2 medium cloves, which gives the sauce a strong garlic flavor. Reduce or increase the garlic in your sauce, depending on how much you want to taste it.
    • Olive oil: Adds flavor and a little richness to our sauce.
    • Lemon: I love fresh lemon juice in my tzatziki sauce. It really brings all the ingredients together.
    • Fresh herbs: I’ll never pass up an opportunity to add some fresh herbs, and I absolutely love them in tzatziki. I love fresh dill and fresh mint.

    Find the full recipe with measurements below.

    Tzatziki is a creamy, delicious, and simple sauce made with cucumber, yogurt, and fresh herbs.

    How to Make Tzatziki Sauce

    Tip 1: Grate your cucumbers. You’ll start by grating your cucumber. I use my box grater, which takes less than a minute, or you can use the grater attachment for your food processor.

    Tip 2: Salting the cucumber makes it taste better. Sprinkle salt over the grated cucumber and leave it for 5 minutes. Salting cucumbers like this helps to season them, bump up their “cucumbery” flavor, and pull out excess water, which would inevitably make our sauce too runny.

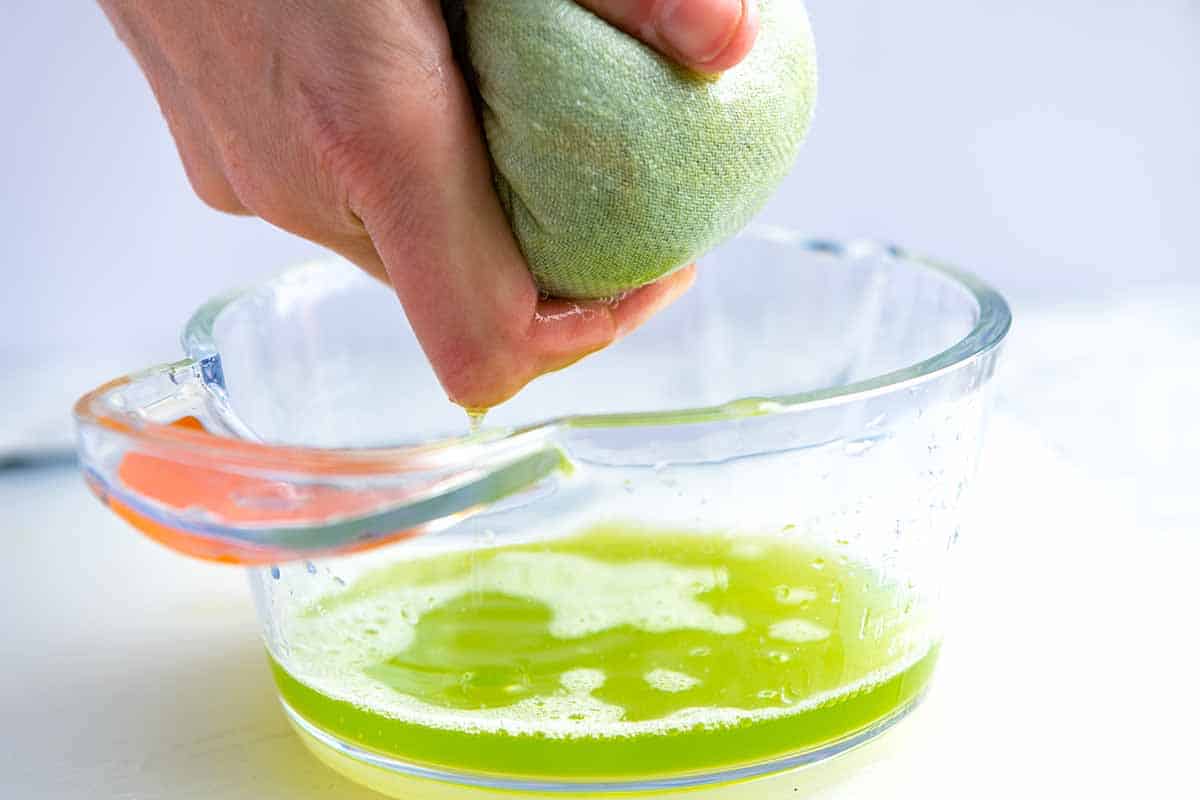
    Tip 3: Wring out the cucumbers. After 5 minutes of sitting with the salt, place the cucumber in a clean dishcloth or cheesecloth and wring it out. We want the cucumber’s flavor in our tzatziki, but we don’t want all the water that comes with it. By the way, the cucumber water is delicious, so don’t throw it away. I add it to soups, grains, or salad dressings.

    Showing how to make the best tzatziki by wringing excess water out of the grated cucumber

    Tip 4: Let the sauce sit for 10 minutes. Stir the cucumber into the other tzatziki ingredients and let them sit for at least 10 minutes so the flavors meld, making our tzatziki taste incredible.

    Stirring cucumber and herbs into yogurt for tzatziki sauce

    What to Serve with Tzatziki Sauce

    Tzatziki sauce can be served in so many different ways. It can be served alongside other dips like our hummus or baba ganoush with this easy flatbread or homemade pita bread. I also love it with seafood and chicken. Next time you make this lemon dill baked salmon, add a dollop of tzatziki (it will be so good!). Or, try it with our juicy skillet chicken breasts.

    You can also add it to sandwiches and burgers. I love a dollop of tzatziki on these juicy turkey burgers and our homemade veggie burgers! You can also serve it with raw or roasted veggies or this Greek salad!

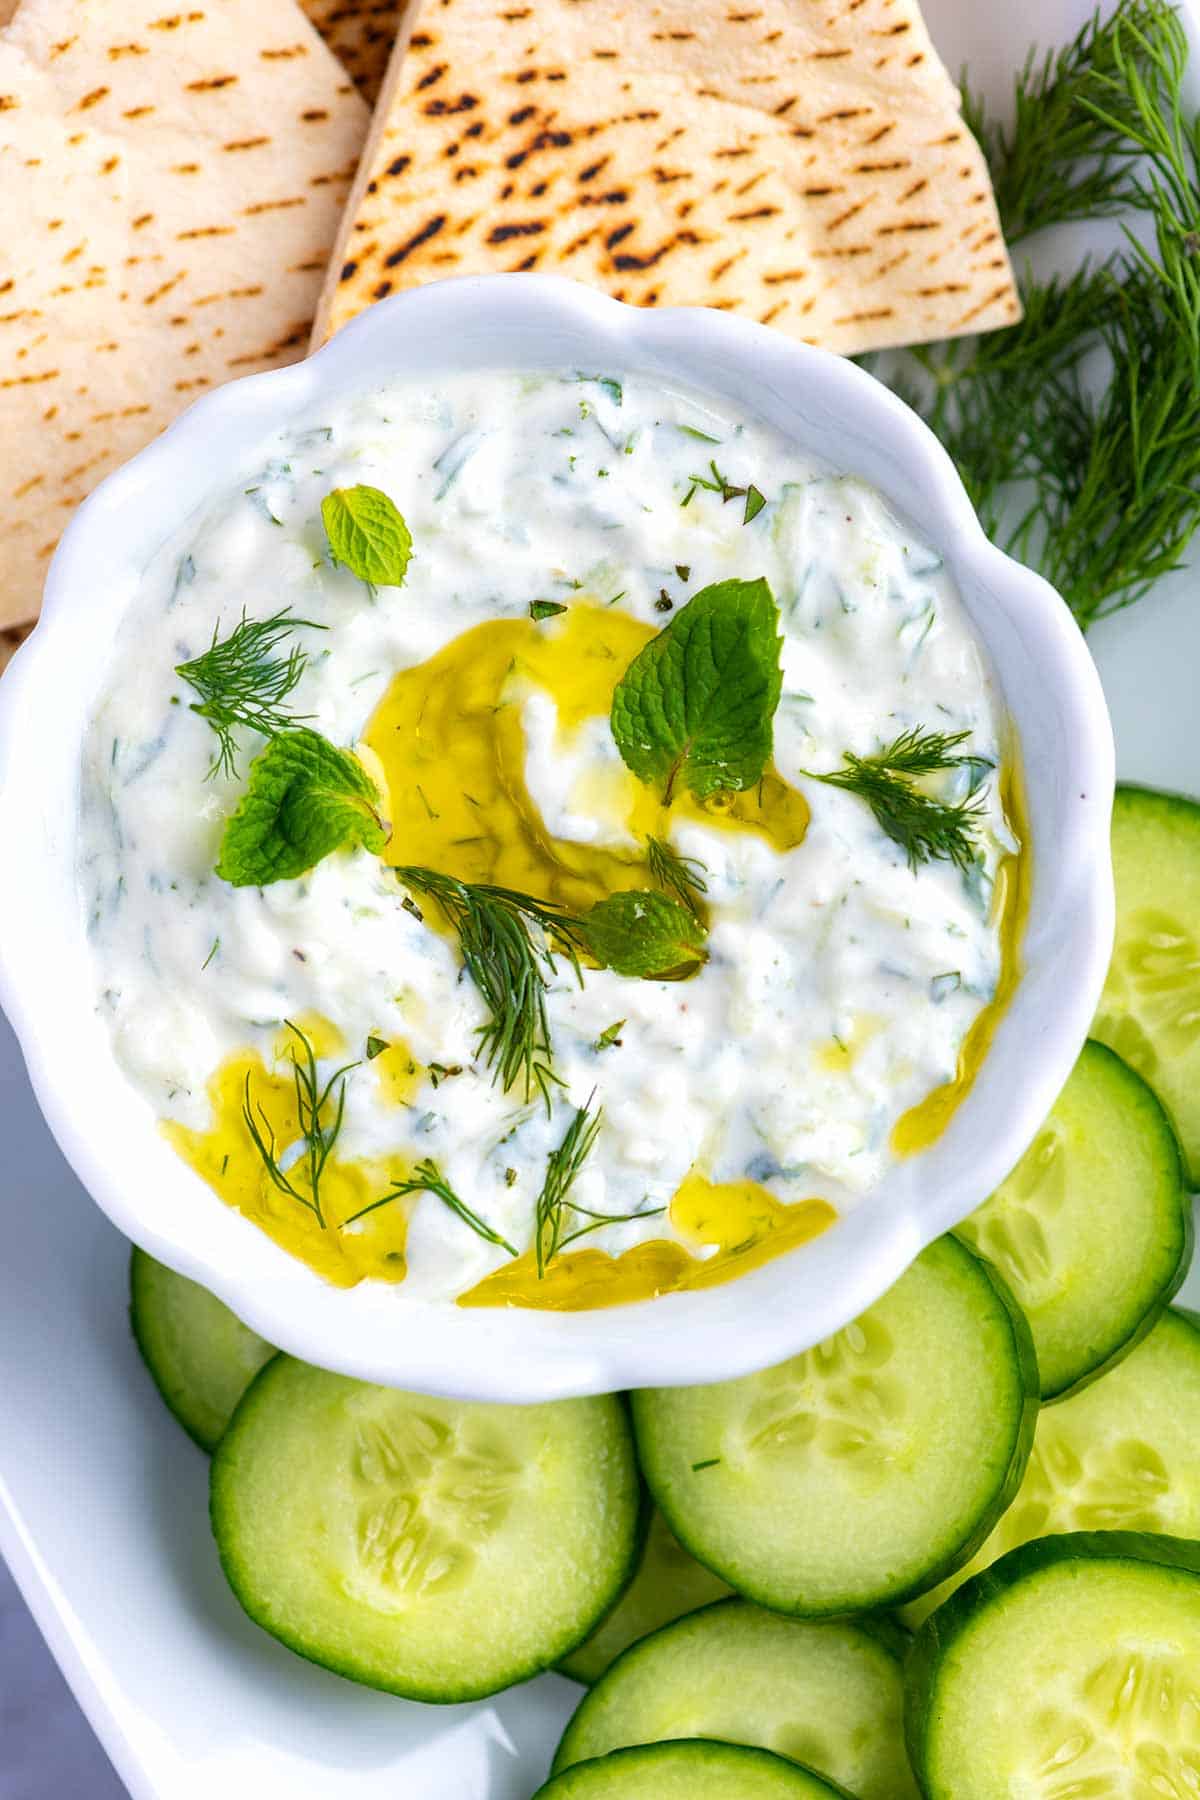
    Tzatziki is a creamy, delicious, and simple sauce made with cucumber, yogurt, and fresh herbs.

    Easy Tzatziki Sauce Recipe

    • PREP
    • TOTAL

    Tzatziki is a creamy, delicious sauce made with cucumber, yogurt, and fresh herbs. Salting and wringing out your cucumbers is the secret to making the best tzatziki sauce. This seasoning makes them taste more cucumbery and removes excess water that would water the sauce down. Use a thick plain yogurt for this (Greek or Icelandic yogurt is perfect).

    Makes about 2 cups

    You Will Need

    2 cups grated cucumber (we love hothouse or seedless cucumbers)

    2 cups plain Greek yogurt

    2 tablespoons extra-virgin olive oil

    1 to 2 medium cloves garlic, minced, depending on how much you love garlic

    2 tablespoons fresh squeezed lemon juice or more to taste

    2 to 3 tablespoons chopped fresh mint and/or dill

    Salt and fresh ground black pepper

    Directions

      1Grate the cucumber and scatter it over a clean dishcloth (or cheesecloth). Sprinkle with 1/4 teaspoon salt. Let sit for 5 minutes.

      2Gather up the corners of the dishcloth and squeeze as much liquid from the grated cucumber as possible. Discard the liquid or save it for another use.

      3In a medium bowl, combine the squeezed cucumber with yogurt, olive oil, garlic, lemon juice, fresh herbs, a pinch of salt, and a pinch of pepper.

      4Set aside for at least 10 minutes, then serve.

    Adam and Joanne’s Tips

    • Storing: Homemade tzatziki lasts in an airtight container in the fridge for 3 to 4 days. It might get runnier as it sits since the cucumbers will continue to release some of their water. Give a good stir before serving.
    • Cucumber water: Save the cucumber water and use in salad dressings, soups, or grains.
    • The nutrition facts provided below are estimates.

    Nutrition Per Serving
    Serving Size
    About 2 tablespoons
    /
    Calories
    53
    /
    Total Fat
    3.6g
    /
    Saturated Fat
    1.1g
    /
    Cholesterol
    4.6mg
    /
    Sodium
    85.7mg
    /
    Carbohydrate
    2.2g
    /
    Dietary Fiber
    0.1g
    /
    Total Sugars
    1.7g
    /
    Protein
    3.3g


    AUTHOR:

    Joanne Gallagher

    Adam and Joanne of Inspired Taste

    We are Adam and Joanne Gallagher, the creators of Inspired Taste. Established in 2009, Inspired Taste grew from a childhood dream into one of the internet’s most trusted recipe sites with hundreds of reliable recipes, step-by-step videos, and expert tips.More About Us
    Source link

  • Easy Creamy Cucumber Salad Recipe

    Easy Creamy Cucumber Salad Recipe

    I love this creamy cucumber salad made with fresh dill, our simple yogurt dressing, and onions! This tzatziki-inspired summer salad is super simple to make and tastes incredible.

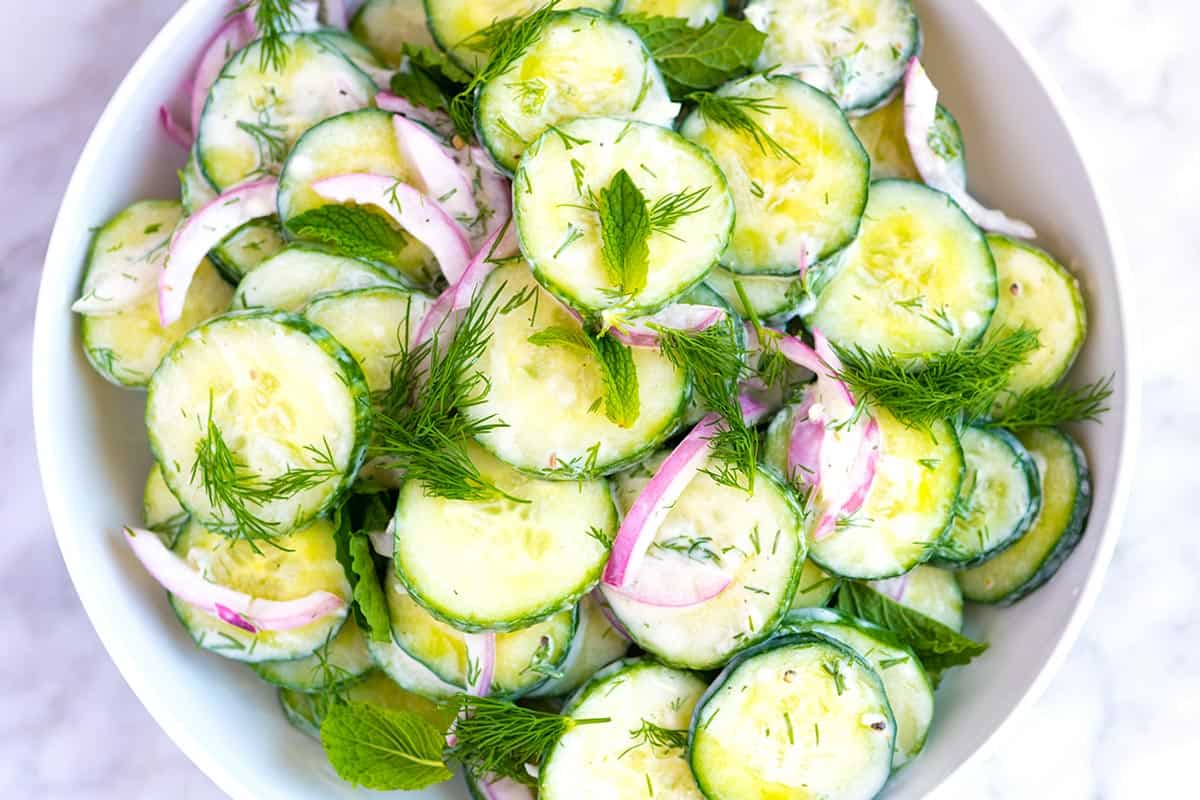
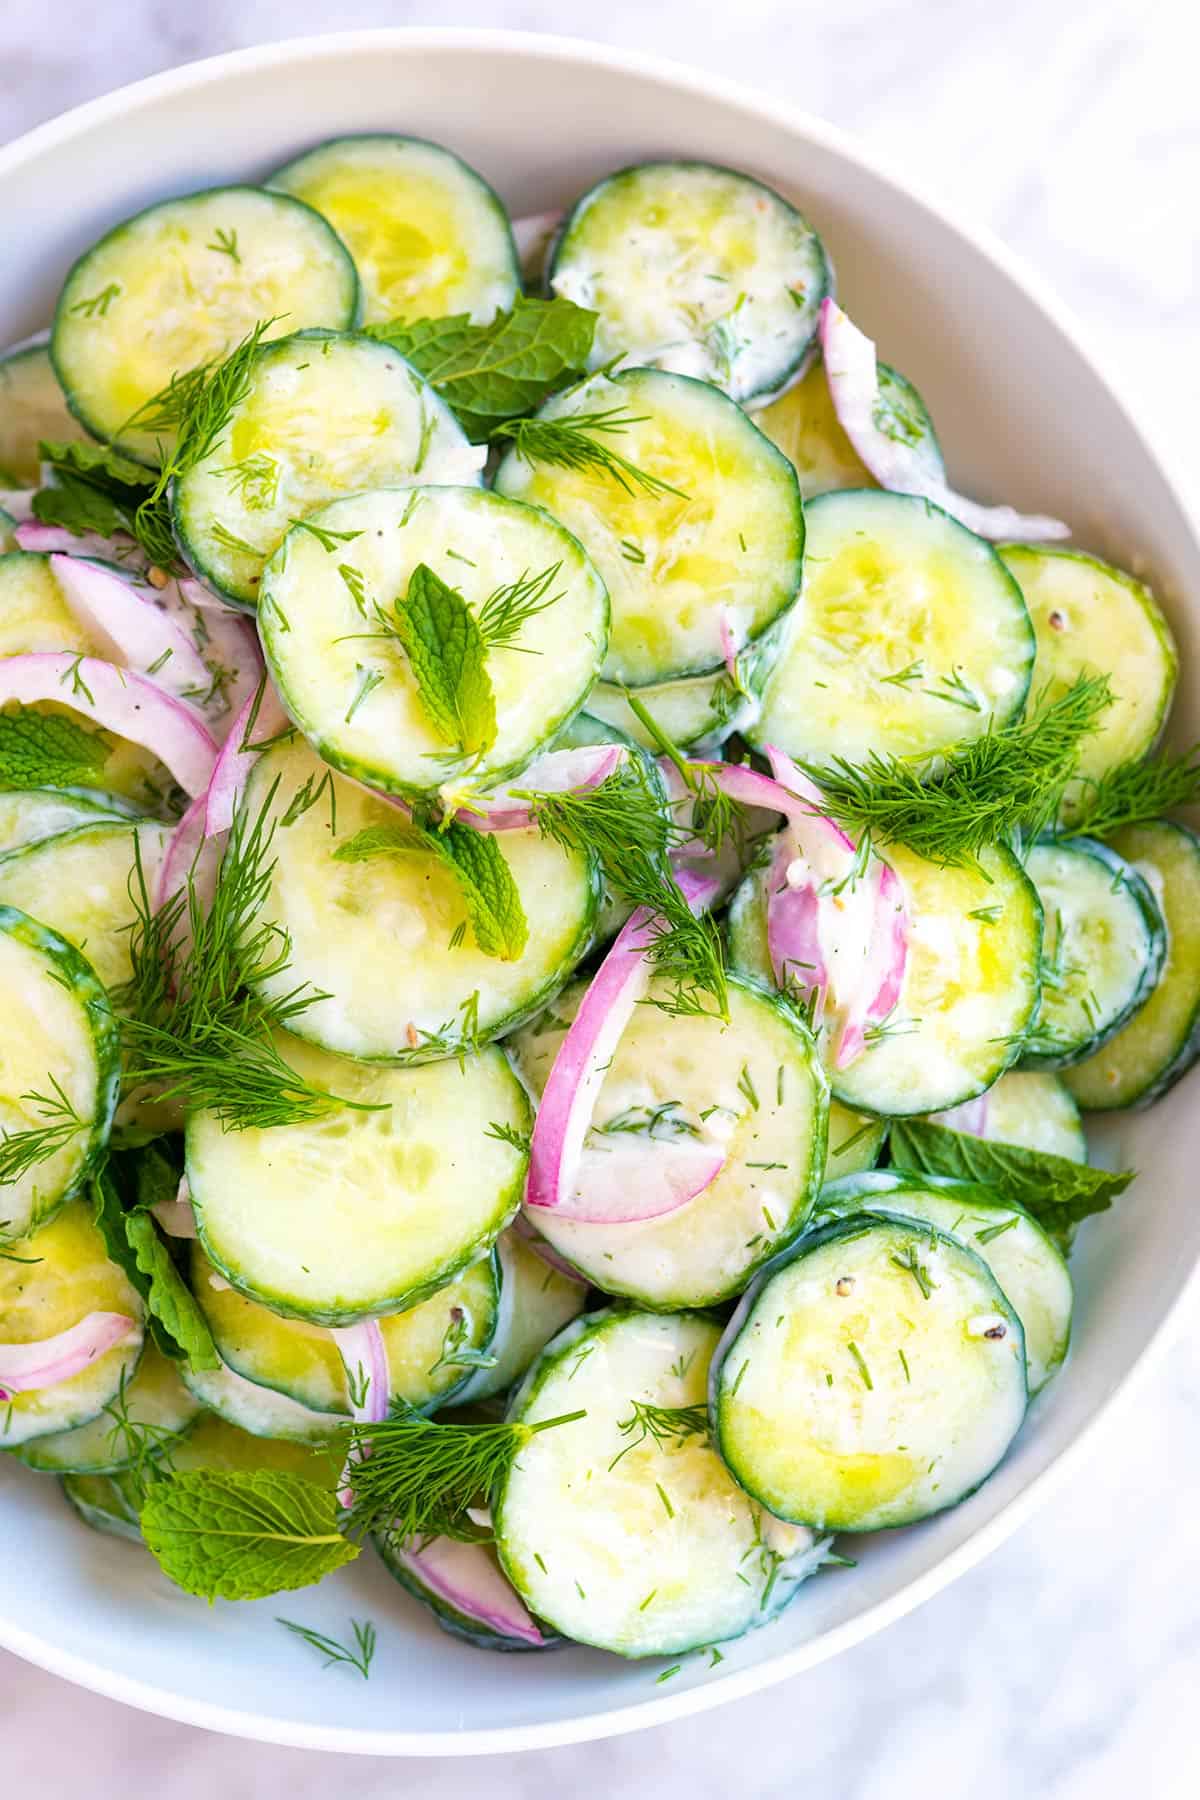
    Tzatziki Cucumber Salad

    This creamy cucumber salad recipe, inspired by our tzatziki sauce, has been on repeat lately. It’s super simple to make, goes with almost anything, and, thanks to the Greek yogurt, is healthy!

    See this easy cucumber salad recipe for a vinegar-based salad, or try our chopped cucumber tomato salad!

    Key Ingredients

    • Cucumber: I prefer thin-skinned cucumbers like Hot House or Persian varieties for this salad. Garden cucumbers are okay, too, but I peel and remove most of their seeds beforehand since they often have thicker skins.
    • Yogurt: I use full-fat plain Greek yogurt for my homemade cucumber salad dressing. Icelandic-style yogurt is a good substitute as long as it’s a thicker variety. If you’d like, you can use sour cream instead, which will give you a more German-style cucumber salad.
    • Vinegar and Lemon: I enjoy adding both red wine vinegar and fresh lemon juice to my dressing. They really enhance the overall flavor of the salad.
    • Garlic: Since fresh garlic is a key ingredient in tzatziki sauce, I add a small clove to this salad for that extra kick.
    • Dill: Dill is a must-have in my cucumber salad! I prefer fresh dill, but dried dill works just as well (I’ve included substitution tips in the recipe).
    • Onion: I love the pop of color that red onion adds to this salad, but feel free to use any onion you have on hand.
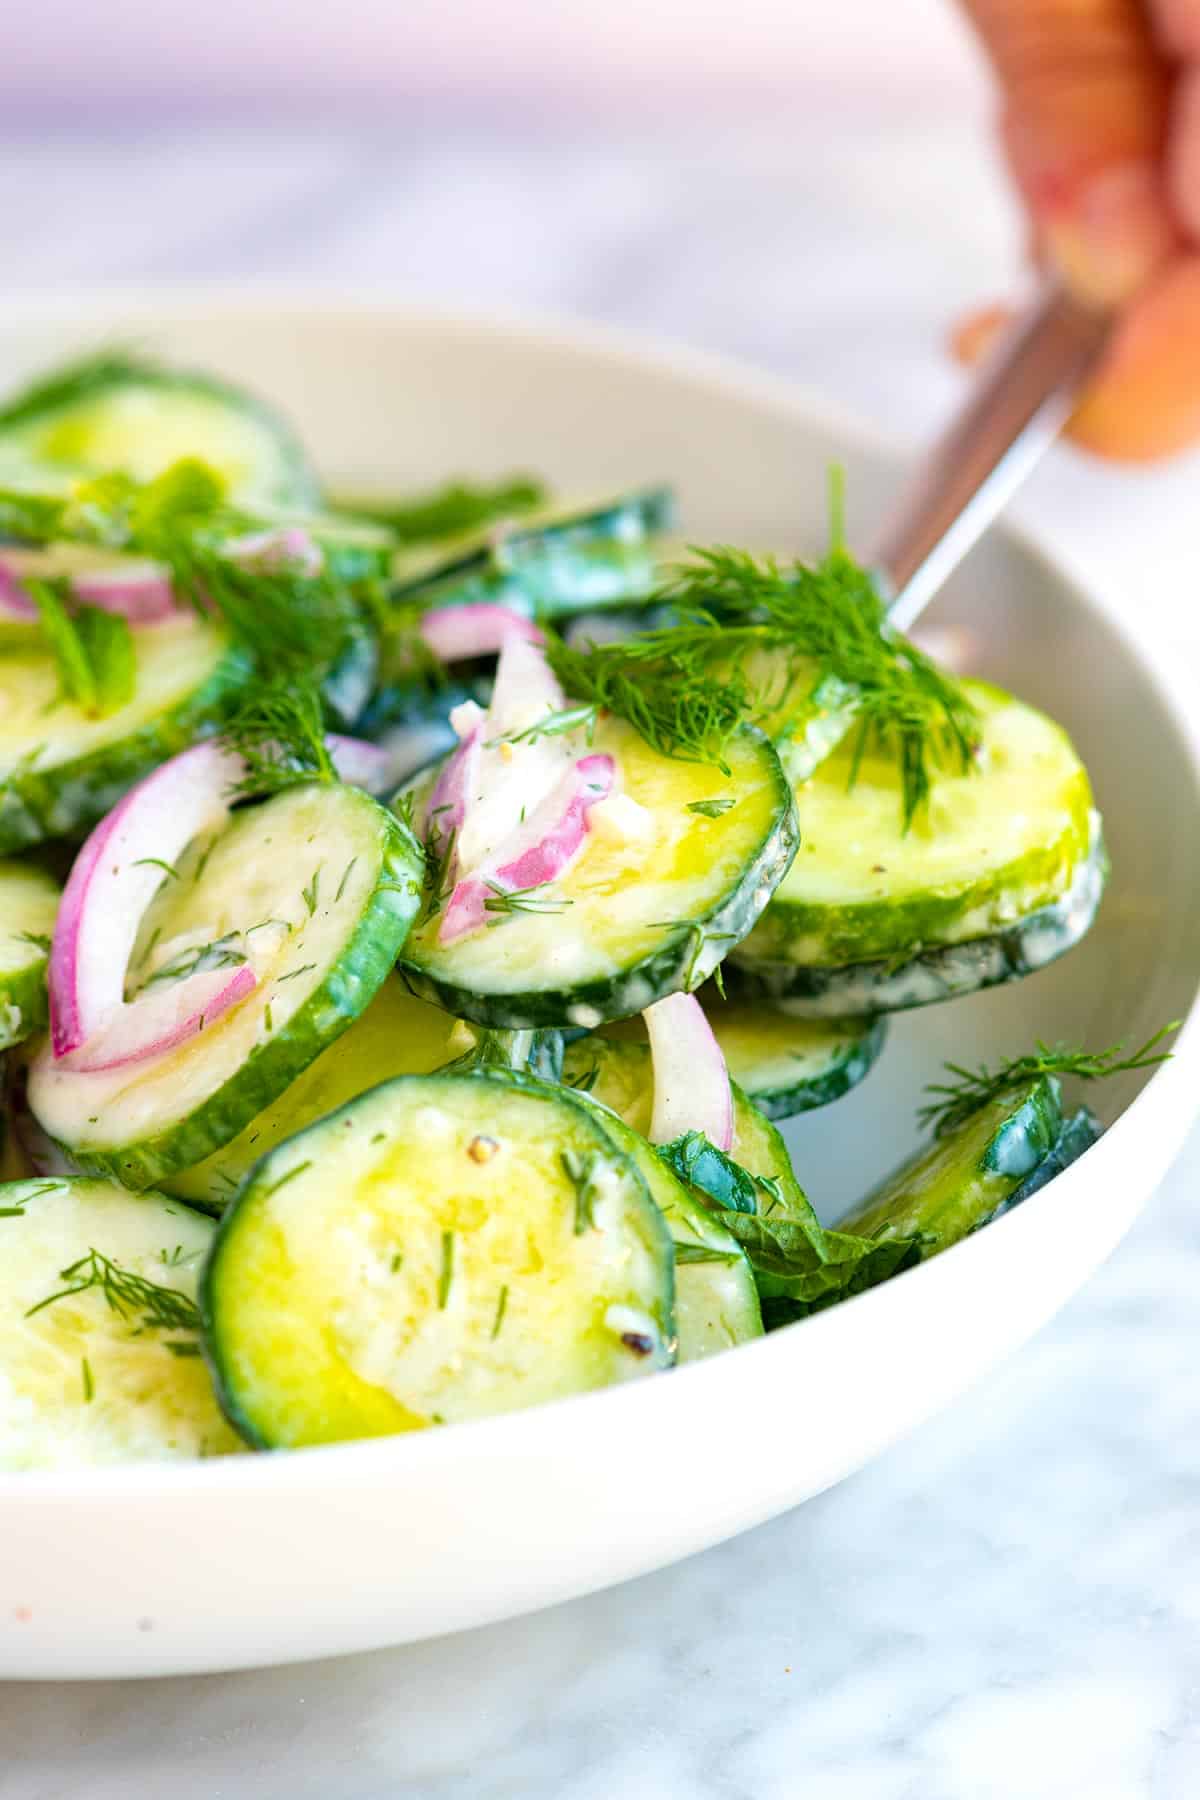
    Easy Creamy Cucumber Salad

    How to Make Creamy Cucumber Salad

    When making cucumber salads, I always salt my cucumbers. Think of it as a quick marinade for the cucumbers. Salting makes cucumbers taste better! We do the same thing with tomatoes (see our bruschetta recipe or this cherry tomato salad).

    To do it, toss your cucumber slices with salt in a colander. After 30 minutes, rinse the cucumbers and shake them mostly dry. While you wait for the cucumbers, make the dressing, which also benefits from some extra time.

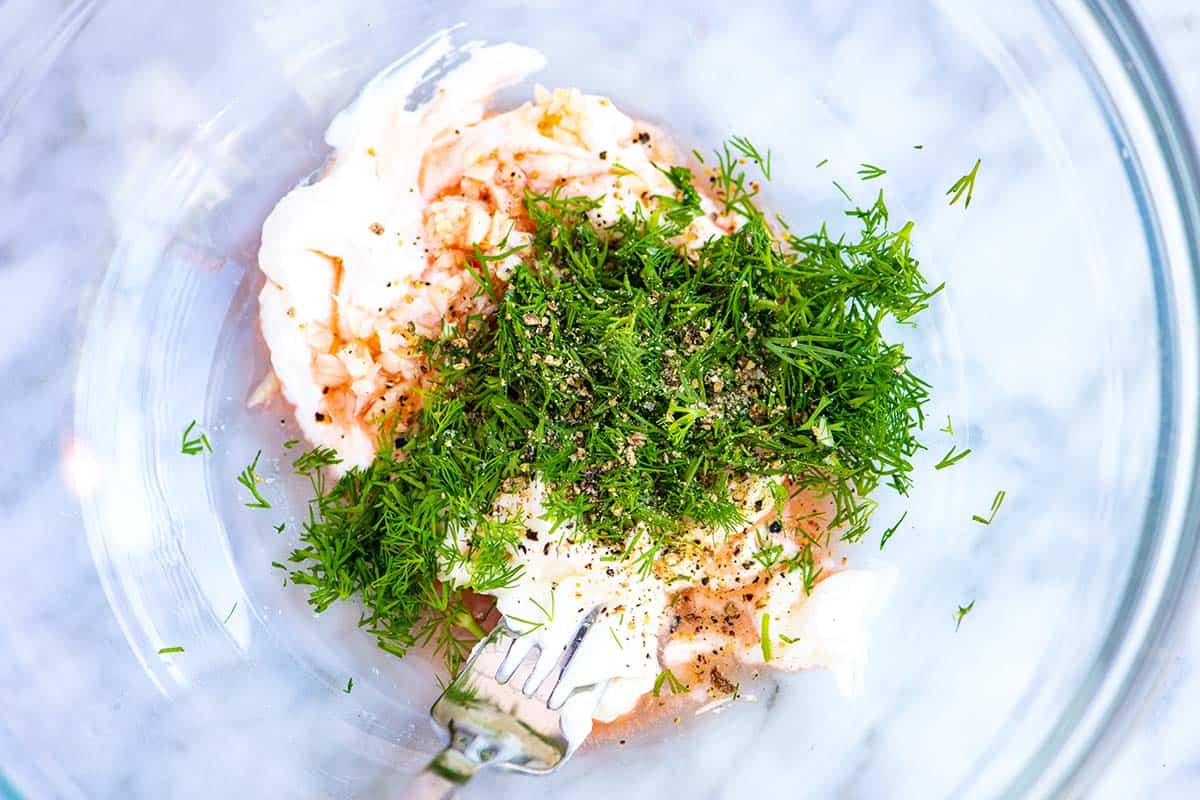
    For the tzatziki yogurt dressing, combine Greek yogurt with garlic, red wine vinegar, lemon juice, dill, and lots of black pepper. Season with a pinch of salt, then set it aside while the cucumbers sit. Since the dressing contains garlic, the extra 30 minutes give the garlic a chance to flavor the dressing.

    Tzatziki Yogurt Dressing for Creamy Cucumber Salad

    Since we love cucumber and onion salads, we throw in sliced red onion. Like garlic, onion adds flavor, so we add the sliced onions straight to the dressing. This way, while the cucumbers are salting, we take full advantage of the time to infuse as much flavor into the dressing as possible.

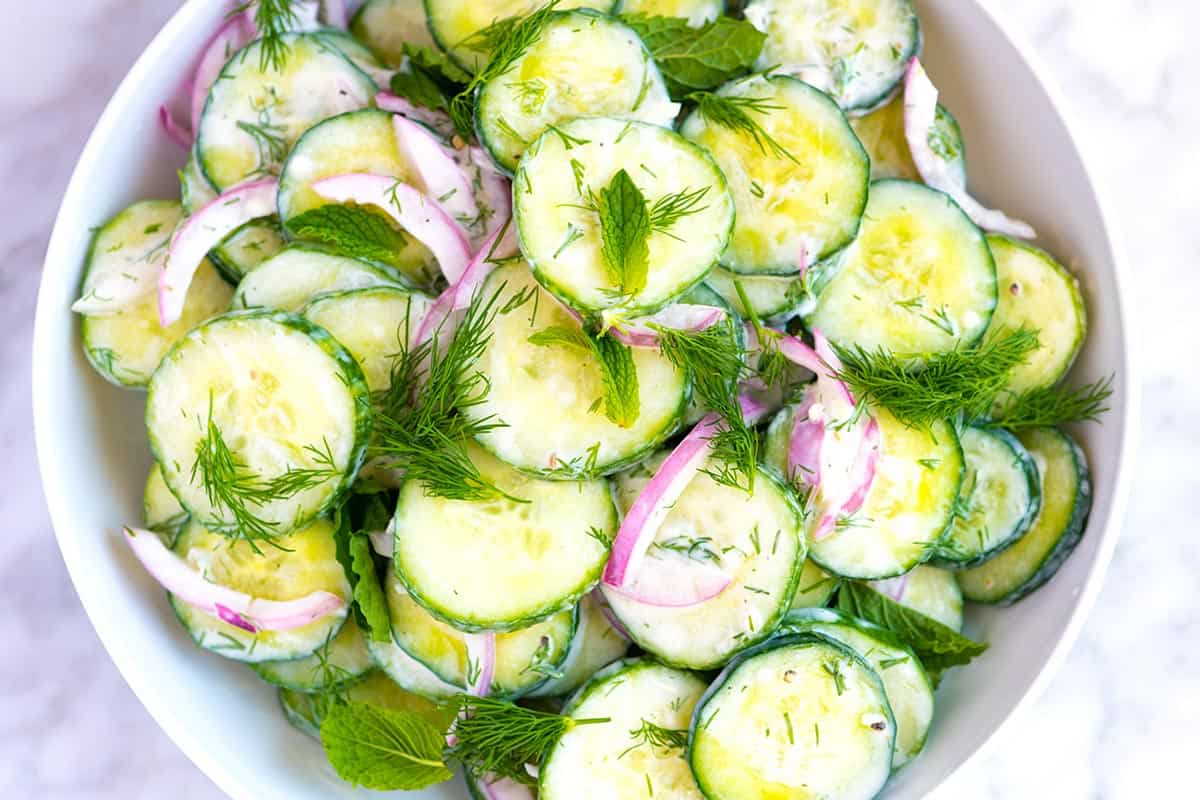
    When the cucumbers are ready, toss them with the dressing and onions. You can serve the salad immediately or let it sit in the refrigerator for a day. As the salad sits, it becomes more flavorful, but the cucumbers soften. We’re not too worried about that, but it is something to remember.

    Creamy Cucumber Salad with Greek Yogurt (Tzatziki cucumber salad)

    Easy Creamy Cucumber Salad

    • PREP
    • TOTAL

    My creamy cucumber salad recipe features cucumbers tossed in a creamy, tzatziki-inspired yogurt dressing. Salting your cucumbers for 30 minutes before assembling the salad draws out excess moisture, intensifying their flavor. I highly recommend it!

    Makes about 6 cups

    You Will Need

    1 ¼ pounds cucumber, sliced (2 medium)

    1/2 teaspoon fine sea salt, plus more as needed

    3 tablespoons thick plain Greek yogurt, we use full-fat

    1 tablespoon red wine vinegar

    Juice from 1 lemon wedge

    1 teaspoon finely minced garlic (1 small clove)

    1 tablespoon chopped fresh dill or 1 teaspoon dried dill

    Fresh ground black pepper

    1/2 cup sliced red onion (1 small onion)

    Handful fresh dill and or mint leaves, for serving, optional

    Directions

      1Add the sliced cucumbers to a colander and toss with 1/2 teaspoon salt. Set them aside for 30 minutes in the sink or place them over a bowl to drain.

      2Meanwhile, make the cucumber salad dressing. In a large bowl, stir the yogurt, red wine vinegar, lemon juice, garlic, and chopped dill. Season with a pinch of salt and a generous amount of black pepper.

      3Stir the onions into the yogurt dressing, then set aside until the cucumbers are ready.

      4After 30 minutes of salting the cucumbers, rinse them with cold water. Shake off excess water then add to the dressing.

      5Toss the cucumbers until coated in the dressing. Taste, then season with additional salt and pepper, if needed.

      6Serve with more fresh herbs scattered on top. Serve or keep refrigerated for up to 2 days.

    Adam and Joanne’s Tips

    • Mint is excellent in this salad. We especially love adding torn or whole mint leaves to the salad before serving.
    • The combination of red wine vinegar and fresh lemon makes the salad more interesting, but you can use one or the other if that is all you have.
    • As the salad sits, the cucumbers release some water, which may slightly thin the dressing. This is perfectly fine, as the cucumber water adds another layer of flavor. If the dressing becomes too thin, stir in another spoonful of yogurt before serving.
    • The nutrition facts provided below are estimates. We have used the USDA database to calculate approximate values.

    Nutrition Per Serving
    Serving Size
    1 cup
    /
    Calories
    28
    /
    Total Fat
    0.6g
    /
    Saturated Fat
    0.3g
    /
    Cholesterol
    1.2mg
    /
    Sodium
    200.1mg
    /
    Total Carbohydrate
    5g
    /
    Dietary Fiber
    0.7g
    /
    Total Sugars
    2.4g
    /
    Protein
    1.6g


    AUTHOR:

    Adam Gallagher

    Adam and Joanne of Inspired Taste

    We are Adam and Joanne Gallagher, the creators of Inspired Taste. Established in 2009, Inspired Taste grew from a childhood dream into one of the internet’s most trusted recipe sites with hundreds of reliable recipes, step-by-step videos, and expert tips.More About Us
    Source link

  • Easy Roasted Red Pepper Hummus Recipe

    Easy Roasted Red Pepper Hummus Recipe

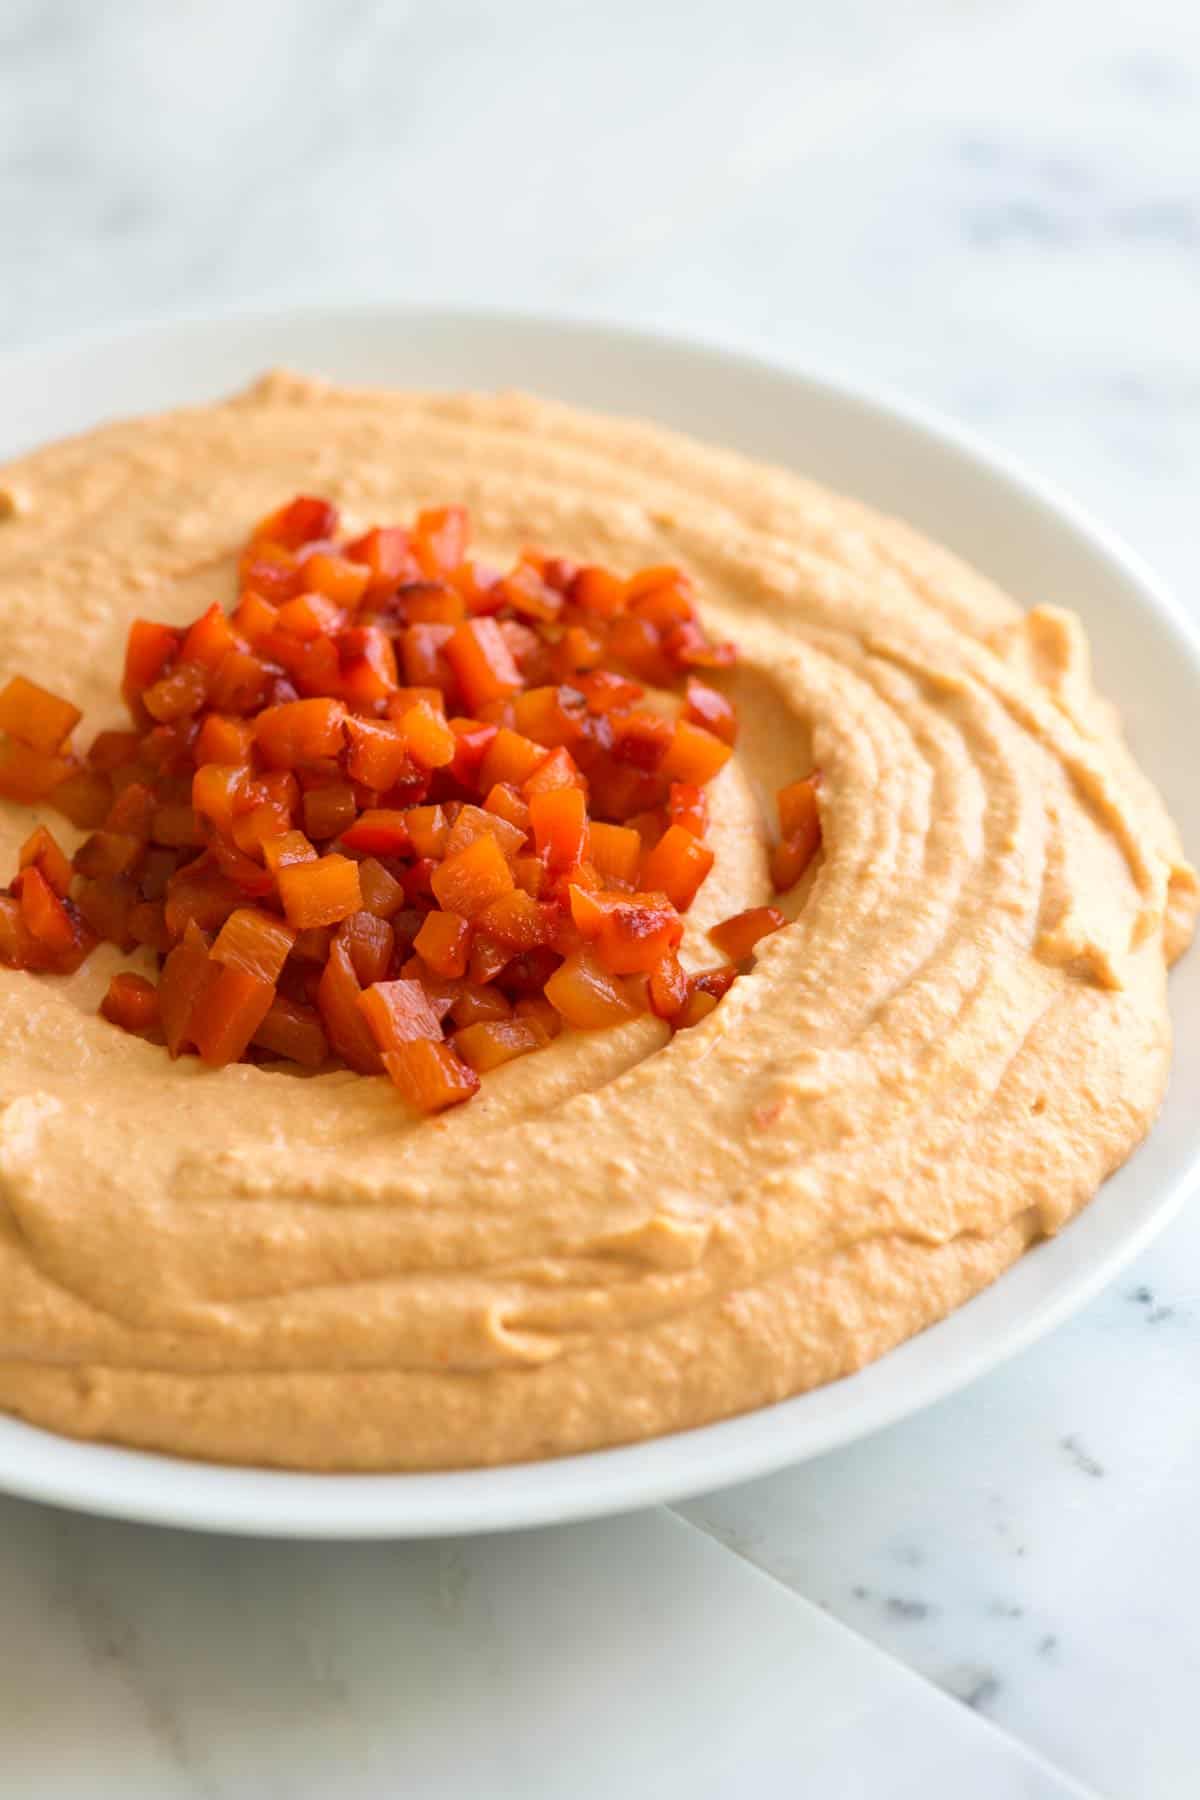
    My easy roasted red pepper hummus is made with sweet red bell peppers, chickpeas, garlic, and tahini. It’s super simple to make and tastes much better than the hummus you can buy at the store.

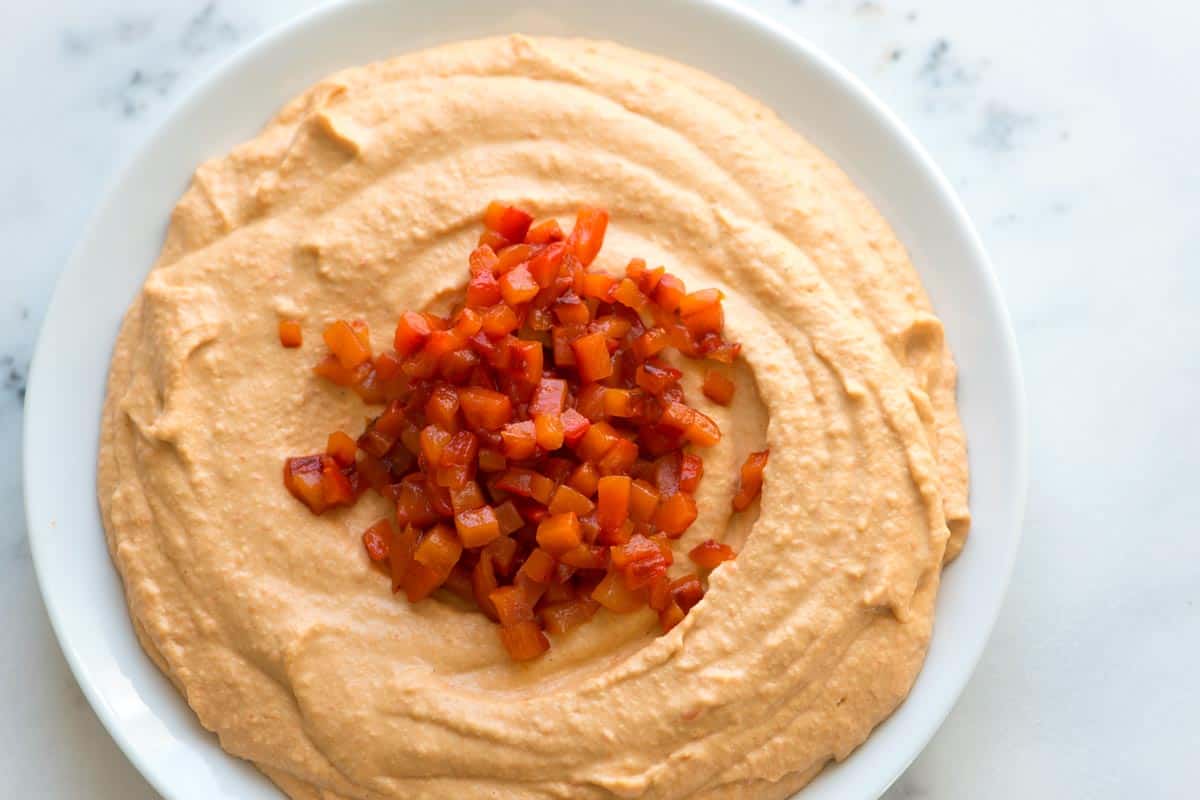
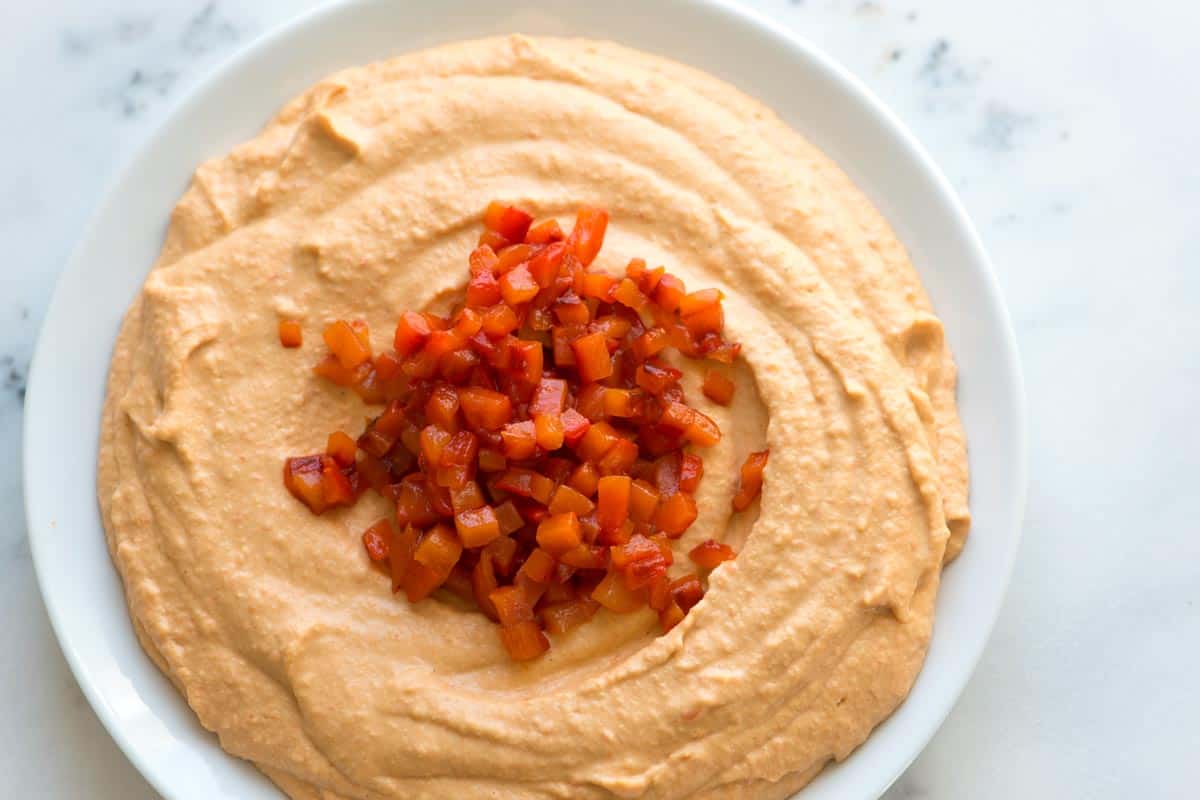
    Easy roasted red pepper hummus

    After falling in love with how easy it is to make hummus at home, we’ve been playing around with more of our favorite store-bought hummus flavors. I love roasted peppers, and am excited to share this roasted red pepper hummus recipe with you! It’s creamy, smooth, and so delicious.

    Roasted bell peppers add a smoky sweetness to the hummus. We roast the peppers at home (it’s easy), but if you are short on time, you can use jarred roasted peppers. Serve with veggies, in sandwiches, with pita bread or flatbread.

    Key Ingredients

    • Red Bell Peppers: I roast red bell peppers for this hummus, blend them in, and use them as a topping. If you don’t want to roast your own, most stores sell jarred roasted bell peppers, which also work.
    • Chickpeas (or garbanzo beans): These are the base of this red pepper hummus. You can use canned chickpeas or cook them from scratch. I use both, but homemade chickpeas have a slightly better flavor. If you do cook your own chickpeas and have some leftover, I highly recommend this smashed chickpea salad.
    • Tahini: Use a high-quality, drippy tahini. You can buy it at the store or use my homemade tahini recipe. For more ways to use tahini, try our creamy tahini sauce or this tahini dressing.
    • Lemon: Fresh lemon juice is key to making great hummus.
    • Garlic: I use one small clove, but feel free to add more if you prefer a stronger garlic taste.
    • Ground Cumin and Salt: These two spices enhance the flavor of the hummus, and the cumin adds a bit of extra richness and spice.
    • Olive oil: Olive oil gives hummus a rich and smooth texture.

    Find the full recipe with measurements below.

    How to Make Roasted Red Pepper Hummus

    You asked for more hummus recipes, so here we go. Adding roasted bell peppers to hummus is one of my favorite ways to spice it up. If you’ve seen our original hummus recipe, you know that making the best hummus at home is easy. This red pepper hummus recipe is simple. We’ve added two roasted red peppers to our original recipe.

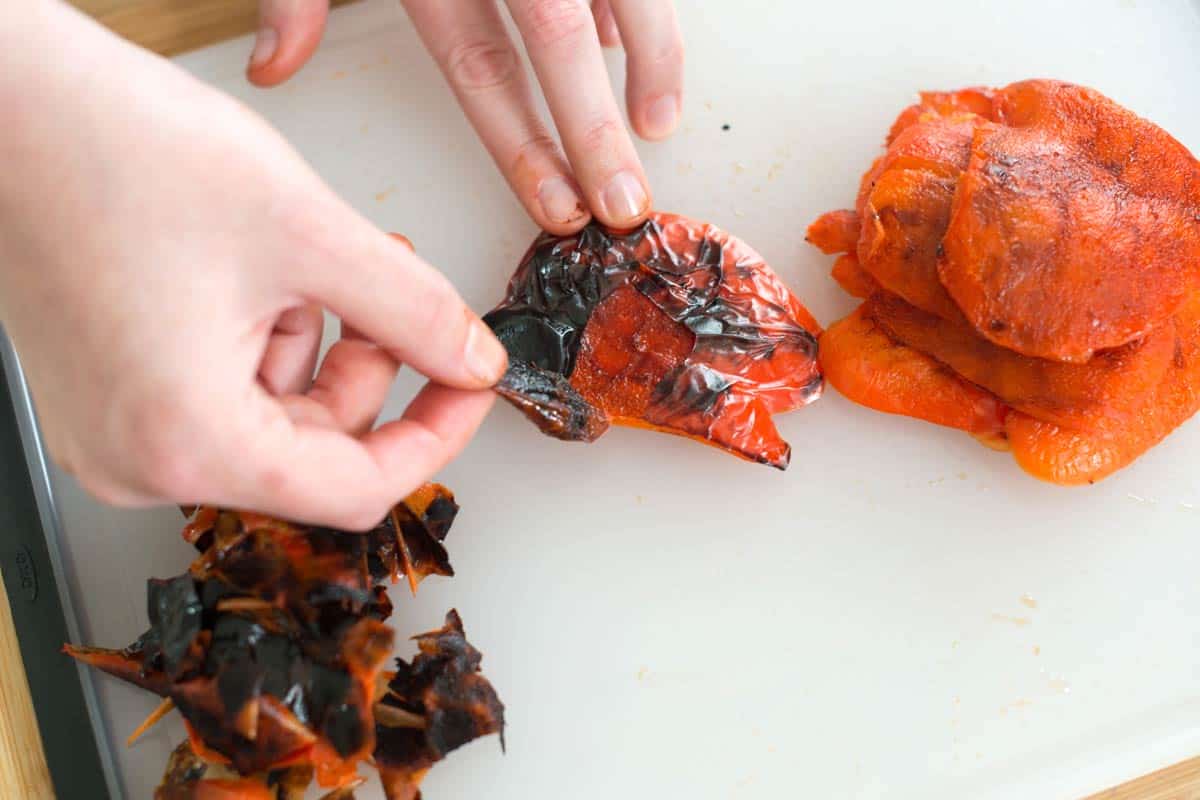
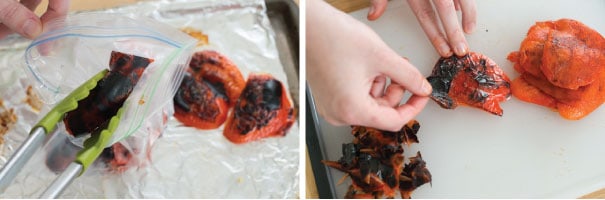
    I roast the peppers myself (although store-bought roasted peppers will do the trick). To roast peppers for this hummus, I remove the core and cut my peppers into a few flat pieces so they don’t roll around on me. Then I place them, skin-side up, onto a baking sheet, slide them under the broiler, and broil until the pepper skin chars.

    It only takes 10 minutes to roast the peppers. Then, I add them to a resealable plastic bag or a bowl covered with plastic wrap and set them aside. They steam a little, which helps the skin pull away from the pepper, making it extra easy to peel. You can see how easily it peels away in the photo below.

    How to roast peppers for hummus

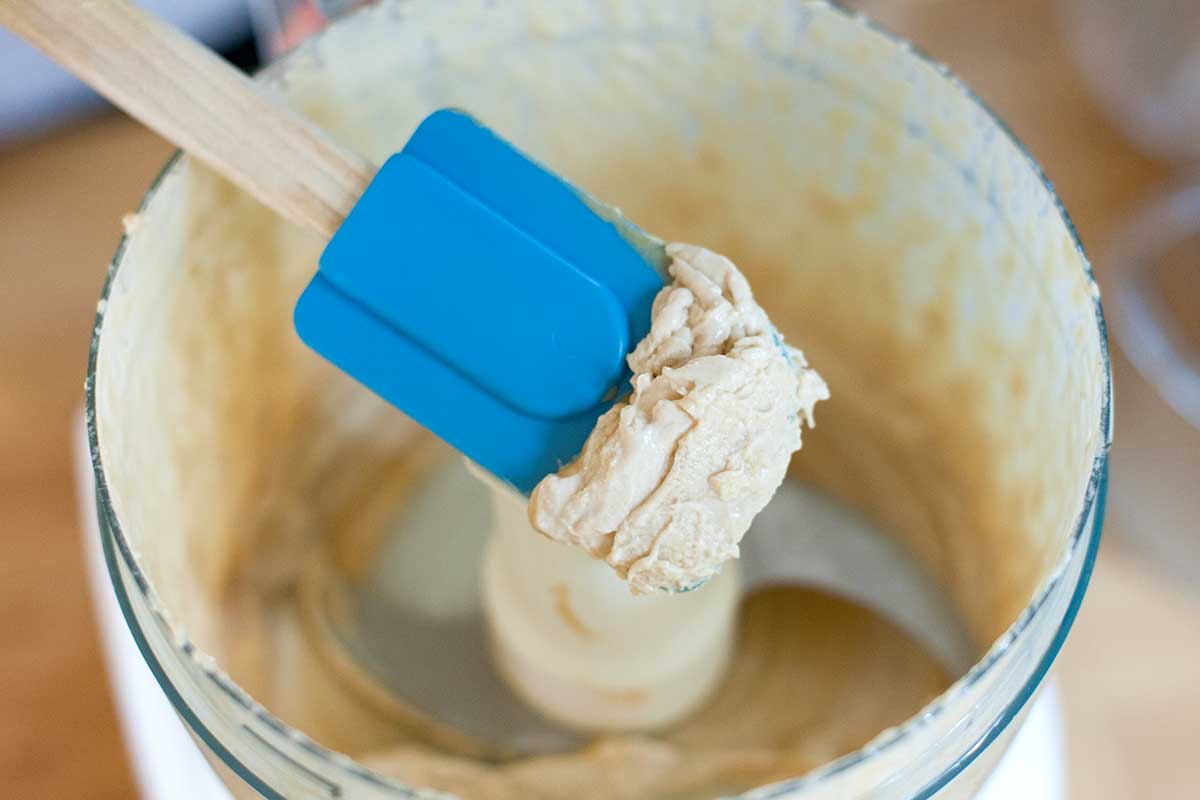
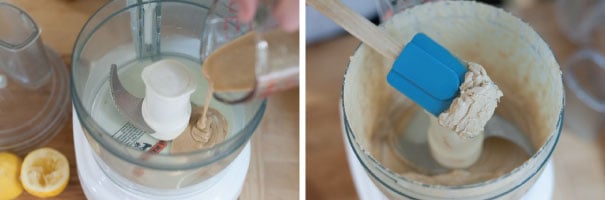
    When you have roasted red peppers, you can make your hummus. I use a food processor and blend my tahini and lemon juice first, which helps to cream the tahini and lemon juice, guaranteeing the creamiest homemade hummus.

    Whipped tahini and lemon juice for hummus

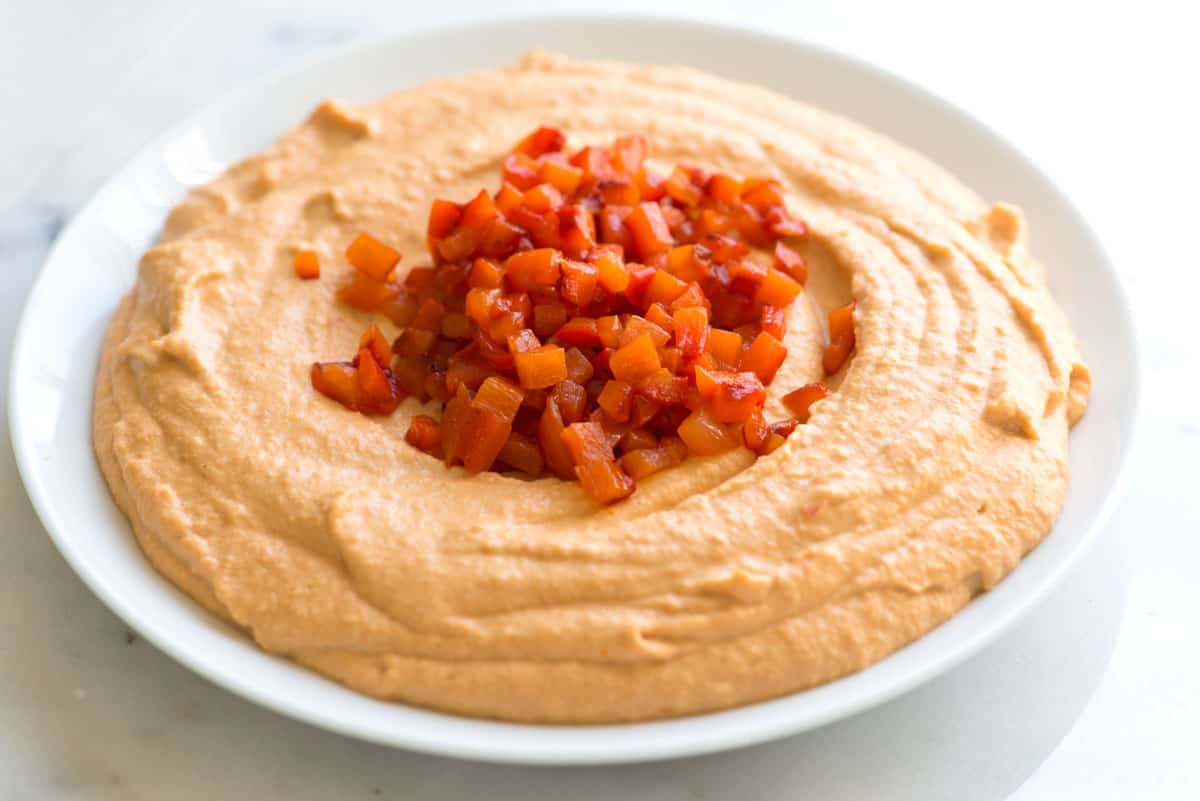
    Then, I blend in olive oil, garlic, cumin, salt, and the chickpeas. When all chickpeas have been added, I add my roasted red peppers and blend until smooth. At this point, the hummus is usually a bit thick, so I drizzle in a bit of cold water or aquafaba. Then it’s ready to serve! I love saving some of the roasted pepper for chopping and placing it on top so everyone knows they are about to dig into red pepper hummus.

    Easy red pepper hummus

    Ways to Serve Red Pepper Hummus

    I love serving this red pepper hummus with a variety of veggies. Sliced carrots, celery, cucumber, radishes, snap peas, cauliflower, and even roasted broccoli are perfect for dipping. It’s also amazing with homemade bread. I especially love this homemade pita bread or this quicker no-yeast flatbread.

    We often make hummus bowls and fill a bowl with salad greens, some cooked quinoa (here’s my quinoa recipe), hummus, some homemade labneh or feta cheese, and a drizzle of tahini sauce.

    Easy red pepper hummus made with sweet red bell peppers, chickpeas, garlic, and tahini.

    Easy Roasted Red Pepper Hummus

    • PREP
    • COOK
    • TOTAL

    I love this roasted red pepper hummus so much. When we first figured out how to make hummus, we were shocked at how easy (and fast) it was. In this recipe, we’ll blend in roasted red peppers and serve the hummus with more on top. The recipe includes instructions for roasting the peppers, but you can substitute them with jarred roasted peppers.

    Makes 6 Servings or 1 1/2 cups

    Watch Us Make the Recipe

    You Will Need

    2 red bell peppers or substitute 3/4 cup chopped jarred roasted peppers

    1 (15-ounce) can chickpeas or 1 ½ cups (250g) cooked chickpeas

    1/4 cup (60ml) fresh lemon juice, 1 large lemon

    1/4 cup (60ml) tahini, see homemade tahini recipe

    1 small garlic clove, minced or finely grated

    2 tablespoons extra virgin olive oil, plus more for serving

    1/2 teaspoon ground cumin

    Pinch cayenne pepper, optional

    2 to 3 tablespoons (30 to 45ml) water or aquafaba

    Salt to taste

    Directions

    • Roast Peppers
    • 1Move an oven rack so that it is about 5 inches from the broiler. Turn the oven broiler on.

      2Remove the core of the peppers, then cut them into large, flat pieces.

      3Arrange pepper pieces, skin-side up, on a baking sheet. Broil for 5 to 10 minutes until the pepper skin has charred.

      4Add peppers to a resealable plastic bag, seal it, and then wait 10 to 15 minutes until cool enough to handle. (Or, add the peppers to a bowl and cover it with plastic wrap.)

      5Gently peel away the charred pepper skin and discard. Reserve 1 to 2 pieces of the peeled roasted pepper pieces to use as a garnish, then roughly chop the rest.How-to-Roast-Peppers-Step-2

    • Make Hummus
    • 1In the bowl of a food processor, combine the tahini and lemon juice and process for 1 minute. Scrape the sides and bottom of the bowl, then process for 30 seconds more. This extra time helps “whip” or “cream” the tahini, making the hummus smooth and creamy.How to Make Hummus-Recipe-Step-1

      2Add the olive oil, minced garlic, cumin, cayenne, and a 1/2 teaspoon of salt to the whipped tahini and lemon juice. Process for 30 seconds, scrape the sides and bottom of the bowl, and then process for another 30 seconds or until well blended.

      3Add half of the chickpeas to the food processor and process for 1 minute. Scrape the sides and bottom of the bowl, then add the remaining chickpeas and process them until thick and relatively smooth, 1 to 2 minutes.

      4Add the roughly chopped roasted peppers, saving 1 to 2 pieces for use as a garnish. Process until smooth.

      5The hummus will likely be too thick and still have tiny bits of chickpea. To fix this, slowly add 2 to 3 tablespoons of cold water or aquafaba with the food processor turned on until you reach the perfect consistency. Taste and adjust as needed.

      6Finely chop the reserved peppers. Spoon hummus into a bowl, make a small well in the middle and add the chopped peppers.

      7Store homemade hummus in an airtight container and refrigerate for up to one week. Freeze, covered with a thin layer of olive oil, for up to one month.

    Adam and Joanne’s Tips

    • How to cook dried chickpeas: Use canned or home-cooked chickpeas for this recipe. To see how we cook dried chickpeas, see our simple tutorial here. We have included three methods, including in the slow cooker.
    • Aquafaba is the starchy liquid in a can of beans (or the bean cooking liquid). You can use this instead of water in the last step of the recipe. Before using, taste it to see how salty it is. If it is salty, hold some of the salt in the ingredient list back, and then season to taste after adding the aquafaba. See our deep dive into aquafaba here.
    • Blender: A food processor is best for making hummus, but a high-powered blender will work. Be sure to scrape the sides down a few extra times as you make it.
    • Tahini & lemon juice are not creaming: Depending on your food processor, the blade might not come into contact with the tahini and lemon juice. You need to increase the amount of liquid in the food processor, so add the olive oil. If they still do not cream, add a tablespoon of cold water.
    • Nutrition Facts: The nutrition facts provided below are estimates. We have used the USDA database to calculate approximate values.

    Nutrition Per Serving
    Serving Size
    1/4 cup
    /
    Calories
    168
    /
    Total Fat
    11.1g
    /
    Saturated Fat
    1.5g
    /
    Cholesterol
    0mg
    /
    Sodium
    279.9mg
    /
    Carbohydrate
    14.2g
    /
    Dietary Fiber
    3.8g
    /
    Total Sugars
    3.5g
    /
    Protein
    4.9g


    AUTHOR:

    Adam Gallagher

    Source link

  • Cranberry Pear Vodka Cocktail Recipe

    Cranberry Pear Vodka Cocktail Recipe

    This is such a simple pear vodka cocktail! We are upgrading a classic cranberry vodka and using pear vodka, which adds a lovely, fruity sweetness. It’s also perfect for the holidays!

    Cranberry Pear Vodka Cocktail

    This upgraded vodka cranberry made with pear vodka is one of my favorite holiday cocktails. It’s pretty, easy to make for many, and it feels special thanks to the pear vodka. Our recipe below shares how to make one cocktail, but check the notes for my tips for making this in a pitcher to serve a crowd!

    This is one of many cocktail recipes on Inspired Taste. A few more you might enjoy is this lemon drop martini (I love the lemon sugar), our classic cosmopolitan, and another crowd-friendly cocktail, the mimosa!

    Key Ingredients

    • Pear Vodka: Use good-quality pear vodka (we like Grey Goose La Poire). Feel free to substitute for other flavored or infused vodkas, such as citrus, orange, and peach.
    • Cranberry Juice: The most common option is “cranberry juice cocktail,” which adds some sugar. You can also find unsweetened cranberry juice, which is much more tart. Use what you love, but keep in mind that if you use unsweetened juice, you may need to add a sweetener to the cocktail to balance it out.
    • Triple Sec: This orange-flavored liqueur adds a subtle sweetness and a hint of citrus that complements the tart cranberry. You can make this cocktail without it, but if you have it on hand, try it.
    • Lime: I love squeezing a wedge of lime into the glass and think it brings everything together.
    • Pear Slices and Mint: These are optional, but if you plan to serve this during the holidays, they make the cocktail look extra special.
    Cranberry Pear Vodka Cocktail

    Cranberry Pear Vodka Cocktail

    This is such a simple cocktail recipe! We are upgrading a classic cranberry vodka and using pear vodka, which adds a lovely, fruity sweetness. I use a bottled cranberry cocktail, which has a bit of sugar added. If you use unsweetened cranberry juice, you might need a bit of sweetener to balance the cocktail.

    Makes 1 cocktail

    You Will Need

    1 ½ ounces pear vodka

    4 ounces cranberry juice

    1/2 ounce triple sec

    1 lime wedge

    Ice

    Fresh pear slices and fresh mint for garnish

    Directions

      1Fill a highball glass with ice.

      2Add the pear vodka, triple sec, and cranberry juice.

      3Squeeze the lime wedge over the drink and drop it in. Garnish with pear slice and fresh mint.

    Adam and Joanne’s Tips

    • Cranberry juice: 100% cranberry juice is usually unsweetened, so you may need some sweetener (see note below). Cranberry juice cocktail usually has a bit of sugar added.
    • Make sweeter: If you prefer a sweeter drink, add a teaspoon of simple syrup, agave nectar, or maple syrup. This lemon ginger syrup would also be pretty delicious.
    • Make a pitcher serving 6: Combine 6 ounces pear vodka, 2 cups (16oz) cranberry juice, 2 ounces triple sec, and the juice of 1/2 a lime in a pitcher. Stir well, taste, and adjust with a sweetener or more lime. Serve over ice.
    • Nutrition facts are estimates.

    Nutrition Per Serving
    Serving Size
    1 cocktail
    /
    Calories
    218
    /
    Total Fat
    0.2g
    /
    Saturated Fat
    0g
    /
    Cholesterol
    0mg
    /
    Sodium
    3.7mg
    /
    Carbohydrate
    22.5g
    /
    Dietary Fiber
    0g
    /
    Total Sugars
    19.9g
    /
    Protein
    0g


    AUTHOR:

    Adam Gallagher

    Previous Post: Easy Apple Pie Cupcakes
    Next Post: Easy Banana Cake

    Source link

  • Easy Roasted Pumpkin Seeds Recipe

    Easy Roasted Pumpkin Seeds Recipe

    My roasted pumpkin seeds recipe is super simple, and they taste amazing! Use this recipe for pumpkin seeds or seeds from other winter squash, like butternut squash.

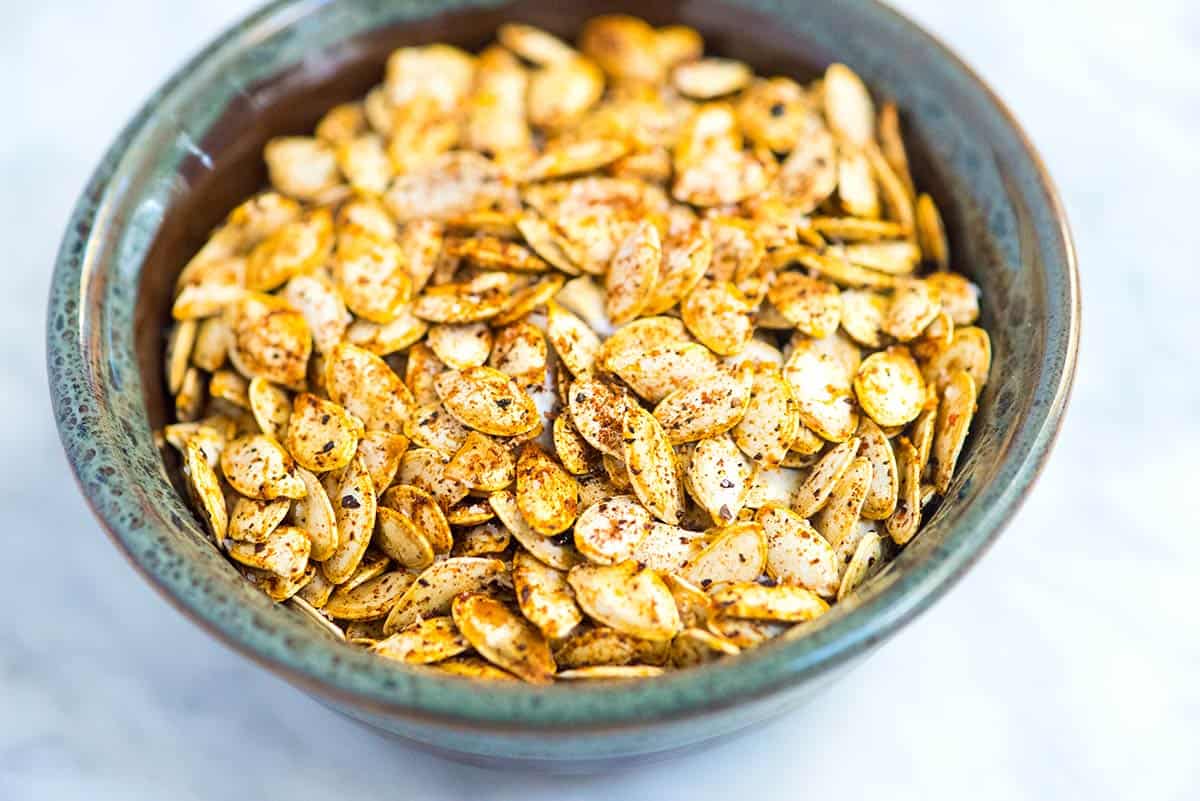
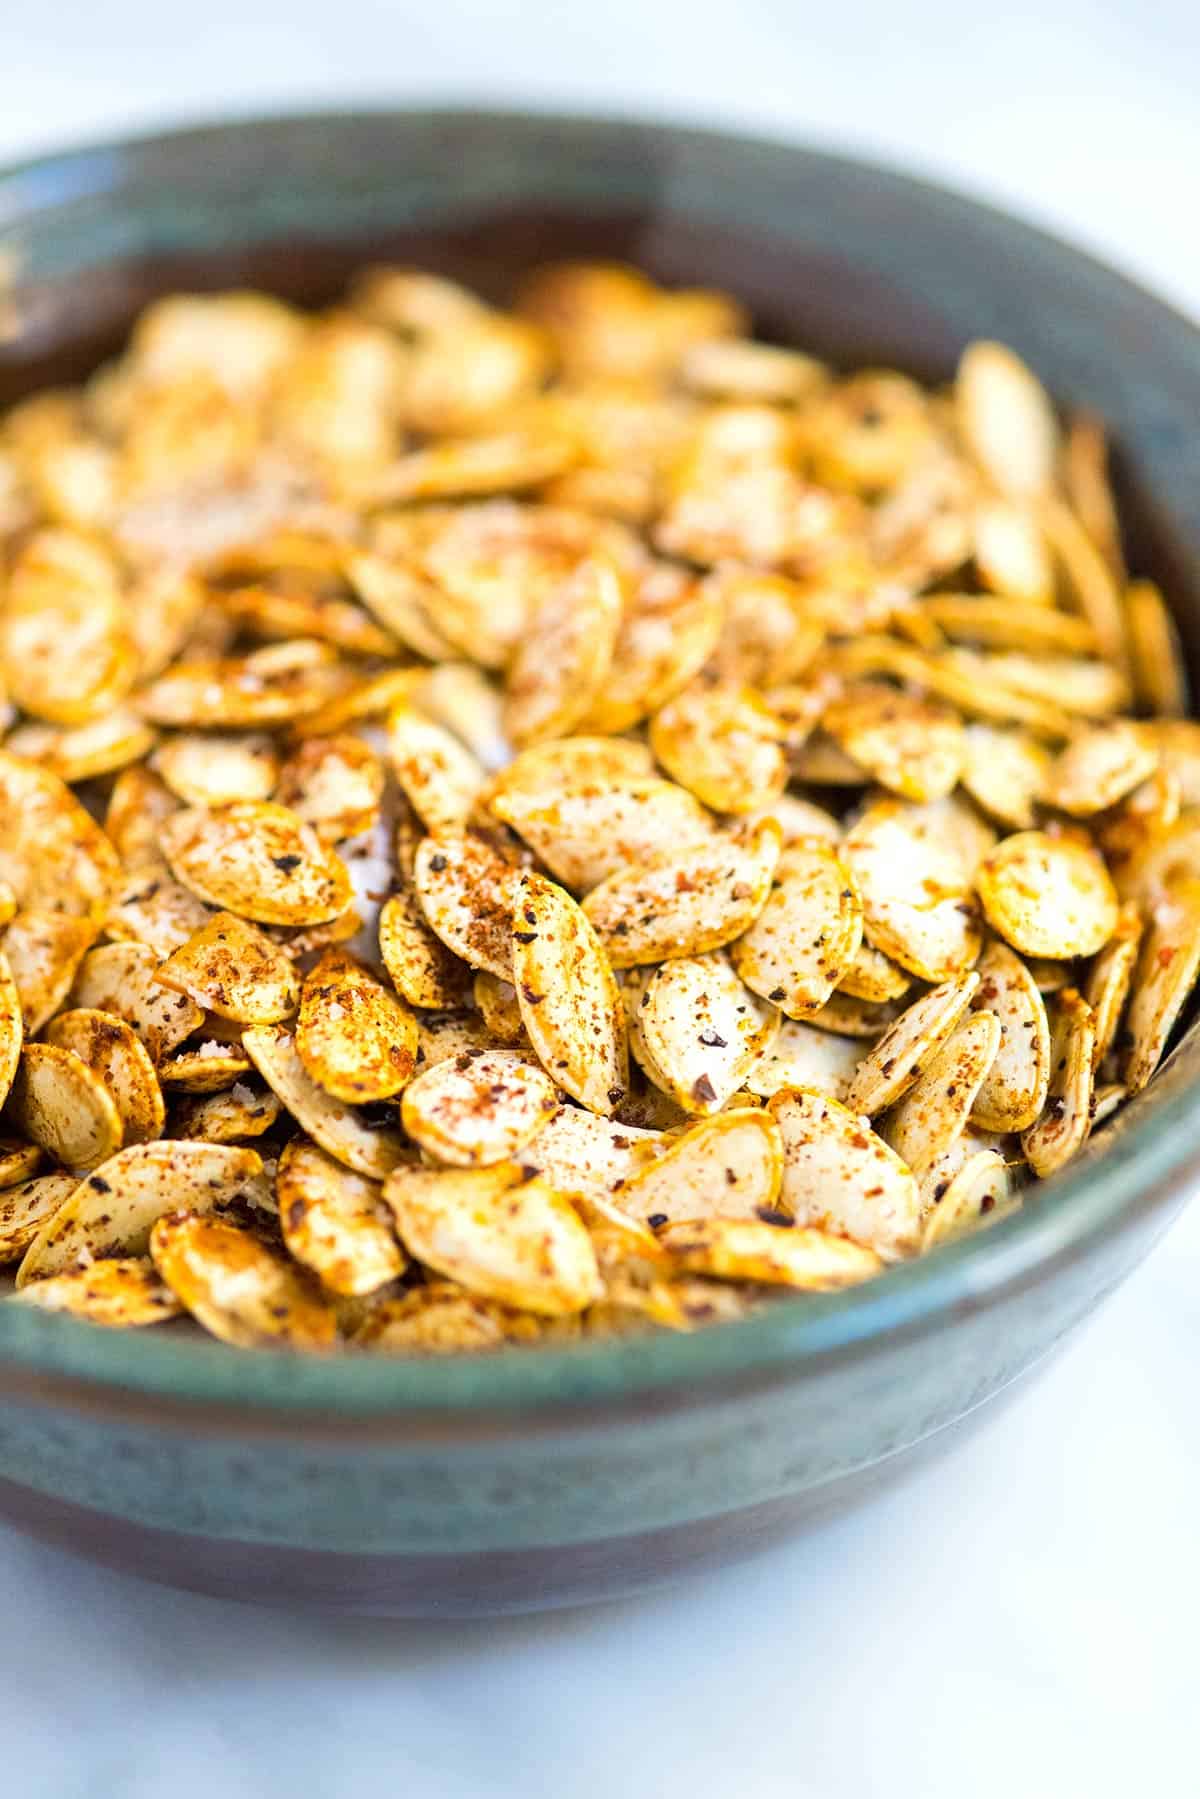
    Roasted Pumpkin Seeds

    This recipe takes me straight back to my childhood. Carving pumpkins goes hand in hand with roasting pumpkin seeds. Bonus, the aroma from the oven is incredible! If you have never tried it before, I’ve got you covered. This is my favorite method for how to roast pumpkin seeds!

    Our family loves pumpkins. Be sure to check out some of our other favorite pumpkin recipes. Making homemade pumpkin puree is fun and easy, which you can use for pumpkin pie, maple pumpkin butter, or pumpkin spice latte.

    How to Make the Best Roasted Pumpkin Seeds

    Please don’t throw away those pumpkin seeds! Use our recipe and turn them into a delicious snack! After scooping out your seeds (they will be messy), we need to clean them of all those stringy bits.

    Tip 1: Clean your pumpkin seeds. Throw your seeds into a bowl of cold water. Swish the seeds around the bowl, then remove them as they float to the top. They’re mostly clean now, but we have one more chance to clean them up.

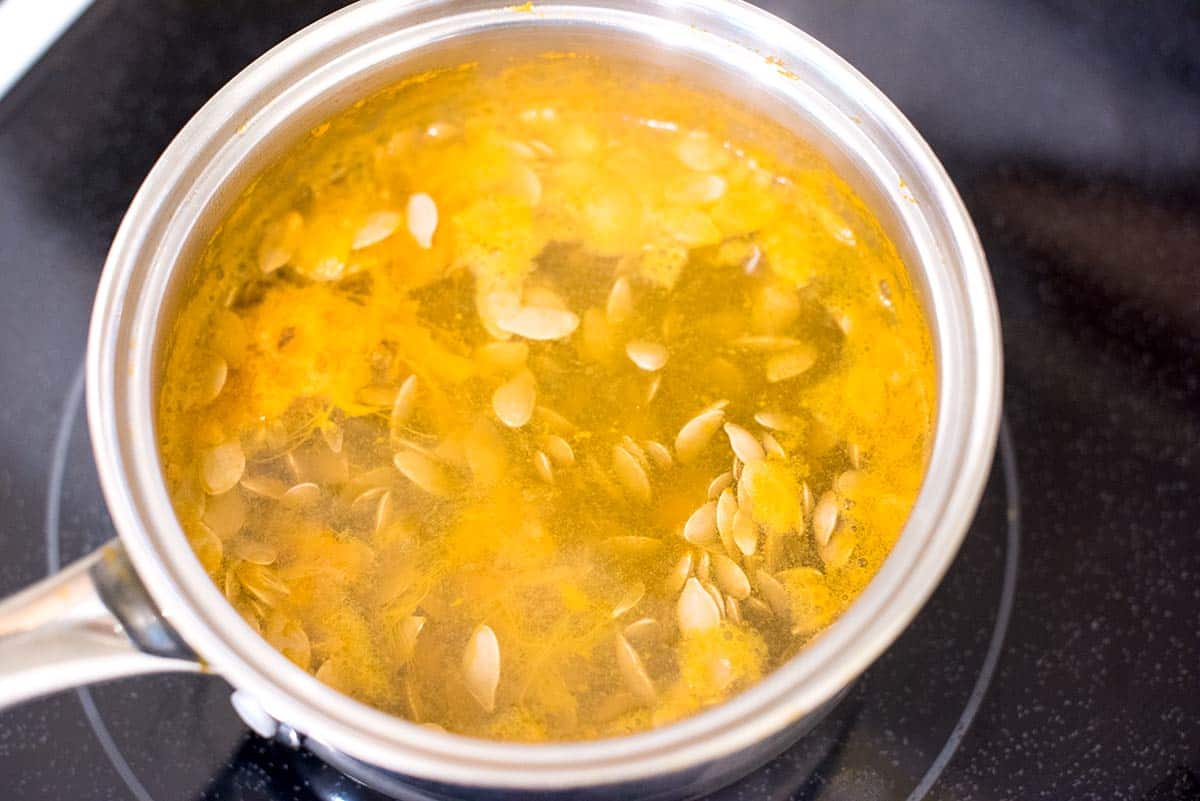
    Tip 2: Boil in salted water. Next, add the mostly clean seeds to a pot of boiling salted water and simmer for about 5 minutes. This step cleans the seeds even more and seasons them (like adding salt to the boiling water to season pasta).

    Simmering pumpkin seeds before roasting them.

    Tip 3: Pat your seeds dry. Drain and rinse the seeds. Pull away any extra bits of pumpkin left, then dry them as well as you can. The more dry your pumpkin seeds are, the better they will roast in the oven.

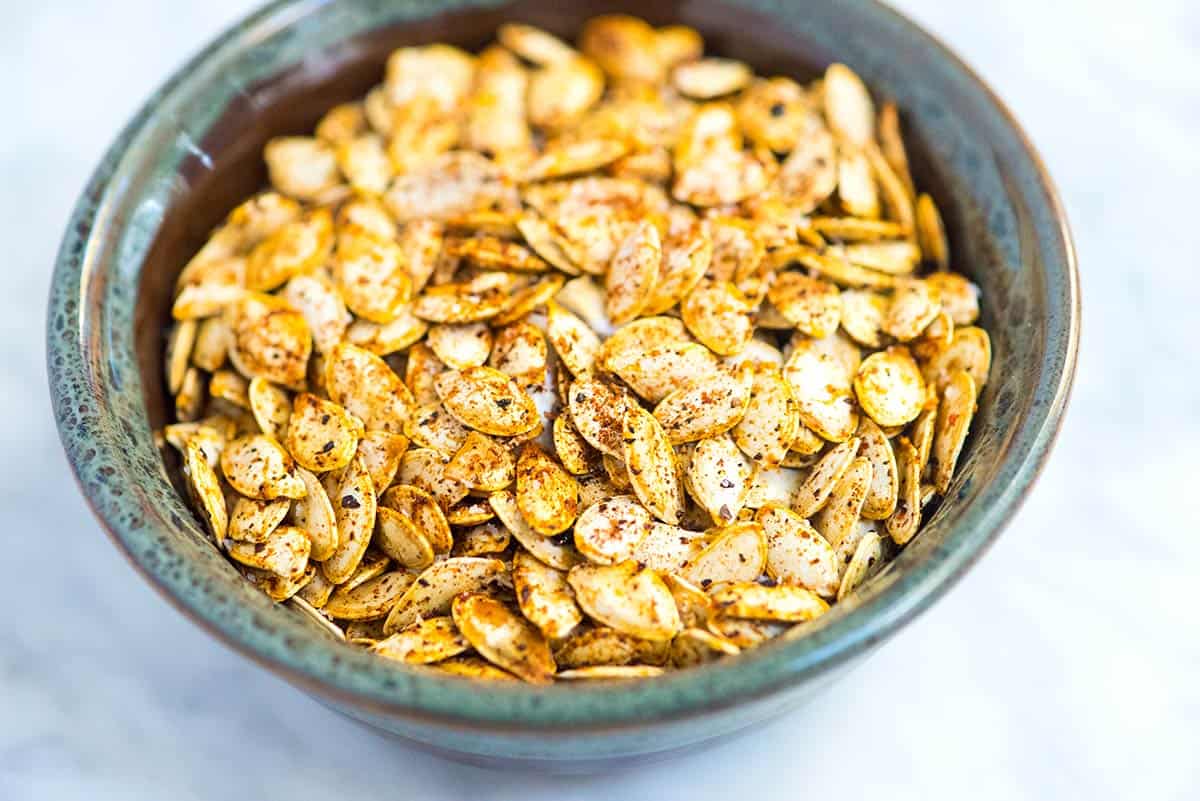
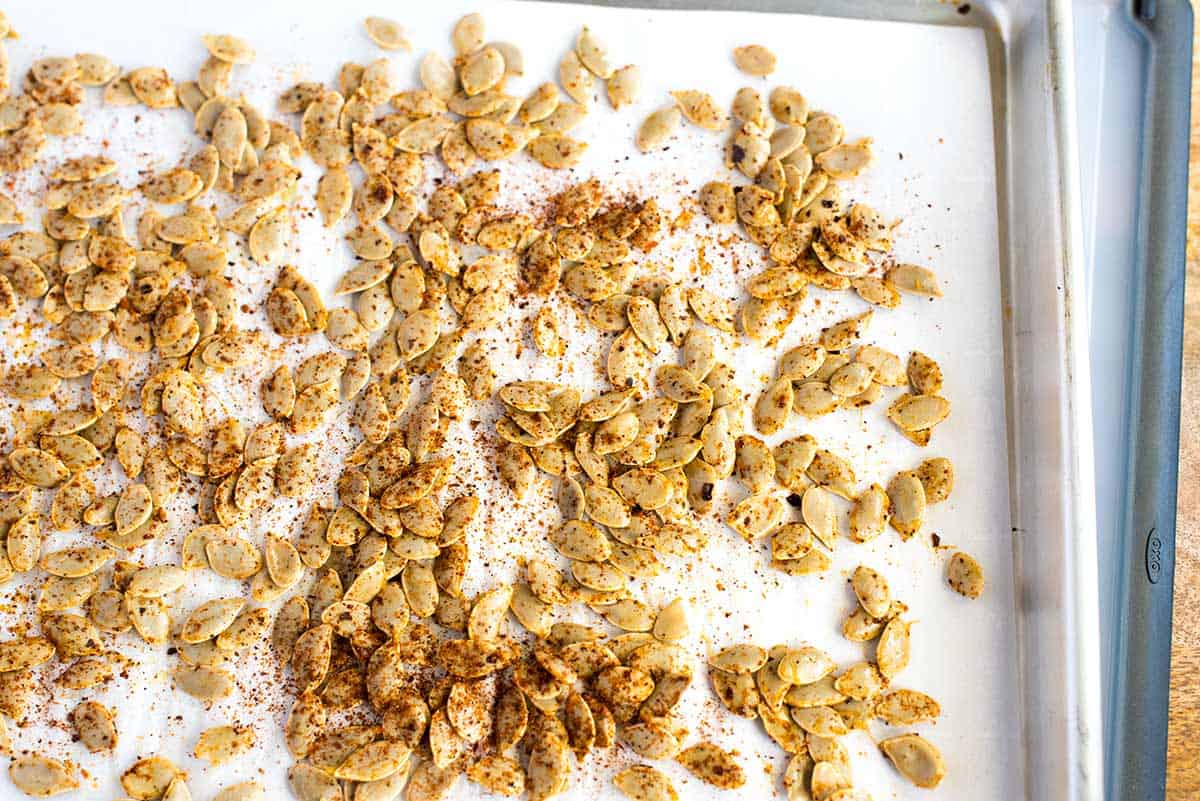
    Tip 4: Add flavor and roast. Toss the dry seeds with oil (use olive oil, coconut oil, or a nut oil like walnut). Add a sprinkle of your favorite spice blend. I used harissa in the photo, but curry powder, pumpkin spice, or chili powder is also excellent. Spread your seeds into one layer and roast them in a 350°F oven until crisp and browned around the edges.

    Roasting pumpkin seeds with spices on a baking sheet

    Tip 5: Try roasting winter squash seeds. Halloween isn’t the only time to roast pumpkin seeds. You can do it throughout fall and winter or swap the pumpkin for other winter squash, such as butternut squash, spaghetti squash, or delicata squash. The method stays the same, although you may find the smaller seeds don’t need as much time in the oven.

    Roasted pumpkin seeds

    Easy Roasted Pumpkin Seeds

    • PREP
    • COOK
    • TOTAL

    This is my favorite roasted pumpkin seeds recipe. The secret is simmering your pumpkin seeds in salted water for 5 minutes before roasting, which helps to clean and season them. Before roasting, pat them dry, otherwise, they will not brown or crisp.

    Makes 1 1/2 cups

    Watch Us Make the Recipe

    You Will Need

    1 ½ cups pumpkin seeds

    2 teaspoons fine sea salt, plus more for serving

    2 teaspoons olive oil, melted coconut oil, or nut oil like walnut

    2 teaspoons favorite spice blend such as pumpkin pie spice, curry powder, harissa or chili powder

    Directions

      1Preheat the oven to 350°F (177°C). Line a baking sheet with parchment paper and set aside.

      2Fill a medium saucepan with 2 cups of water and season with 2 teaspoons of salt. Bring to a boil.

      3Meanwhile, scoop the seeds from your pumpkin. Add the pumpkin seeds to a bowl filled with cold water and swish them until they float and are mostly clean.

      4Add the cleaned seeds to the boiling salted water. Simmer for 5 minutes.

      5Drain and pull away any remaining pumpkin attached to the seeds.

      6Scatter the seeds onto clean dishcloths and pat them very dry.

      7Mound the dried seeds onto the prepared baking sheet. Add the oil and spices, then toss until well coated.

      8Spread the seeds into one layer. Bake, stirring the seeds at least once, until fragrant and golden around the edges, 10 to 25 minutes, depending on the size of the seeds.

    Adam and Joanne’s Tips

    • Storing: Allow the roasted seeds to cool, then store them in an air-tight container. They will last this way at room temperature for a couple of weeks and in the freezer for a few months.
    • Can you eat pumpkin seed shells? We enjoy the shells and love that they add some extra fiber. If you don’t like the shells, you can always hull them after roasting. I usually do this by biting into the seed and using my teeth to crack the shell.
    • The nutrition facts provided below are estimates.

    Nutrition Per Serving
    Serving Size
    2 tablespoons
    /
    Calories
    105
    /
    Protein
    5 g
    /
    Carbohydrate
    2 g
    /
    Dietary Fiber
    1 g
    /
    Total Sugars
    0 g
    /
    Total Fat
    9 g
    /
    Saturated Fat
    2 g
    /
    Cholesterol
    0 mg


    AUTHOR:

    Adam Gallagher

    Adam and Joanne of Inspired Taste

    We are Adam and Joanne Gallagher, the creators of Inspired Taste. Established in 2009, Inspired Taste grew from a childhood dream into one of the internet’s most trusted recipe sites with hundreds of reliable recipes, step-by-step videos, and expert tips.More About Us
    Source link

  • Perfect Flax Egg Recipe

    Perfect Flax Egg Recipe

    Making a flax egg is super easy! I’m sharing all my tips for creating these simple vegan egg substitutes with just water and flaxseed meal.
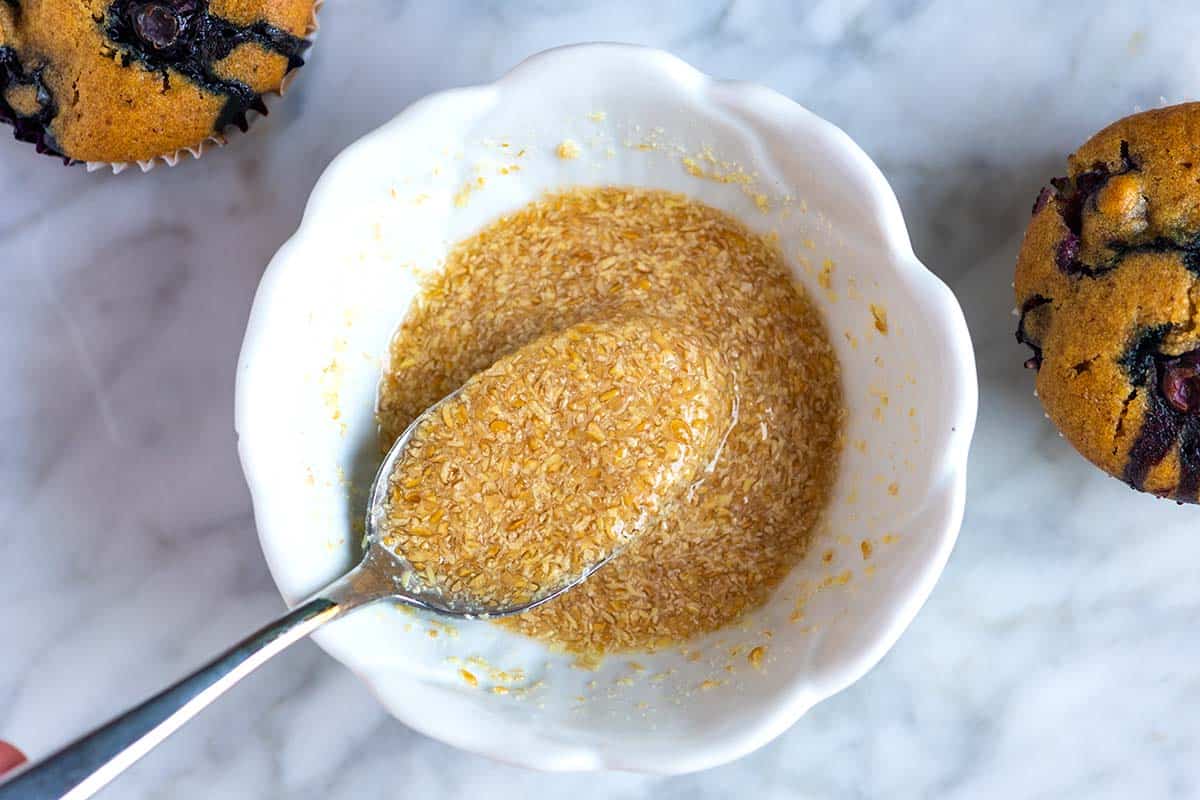
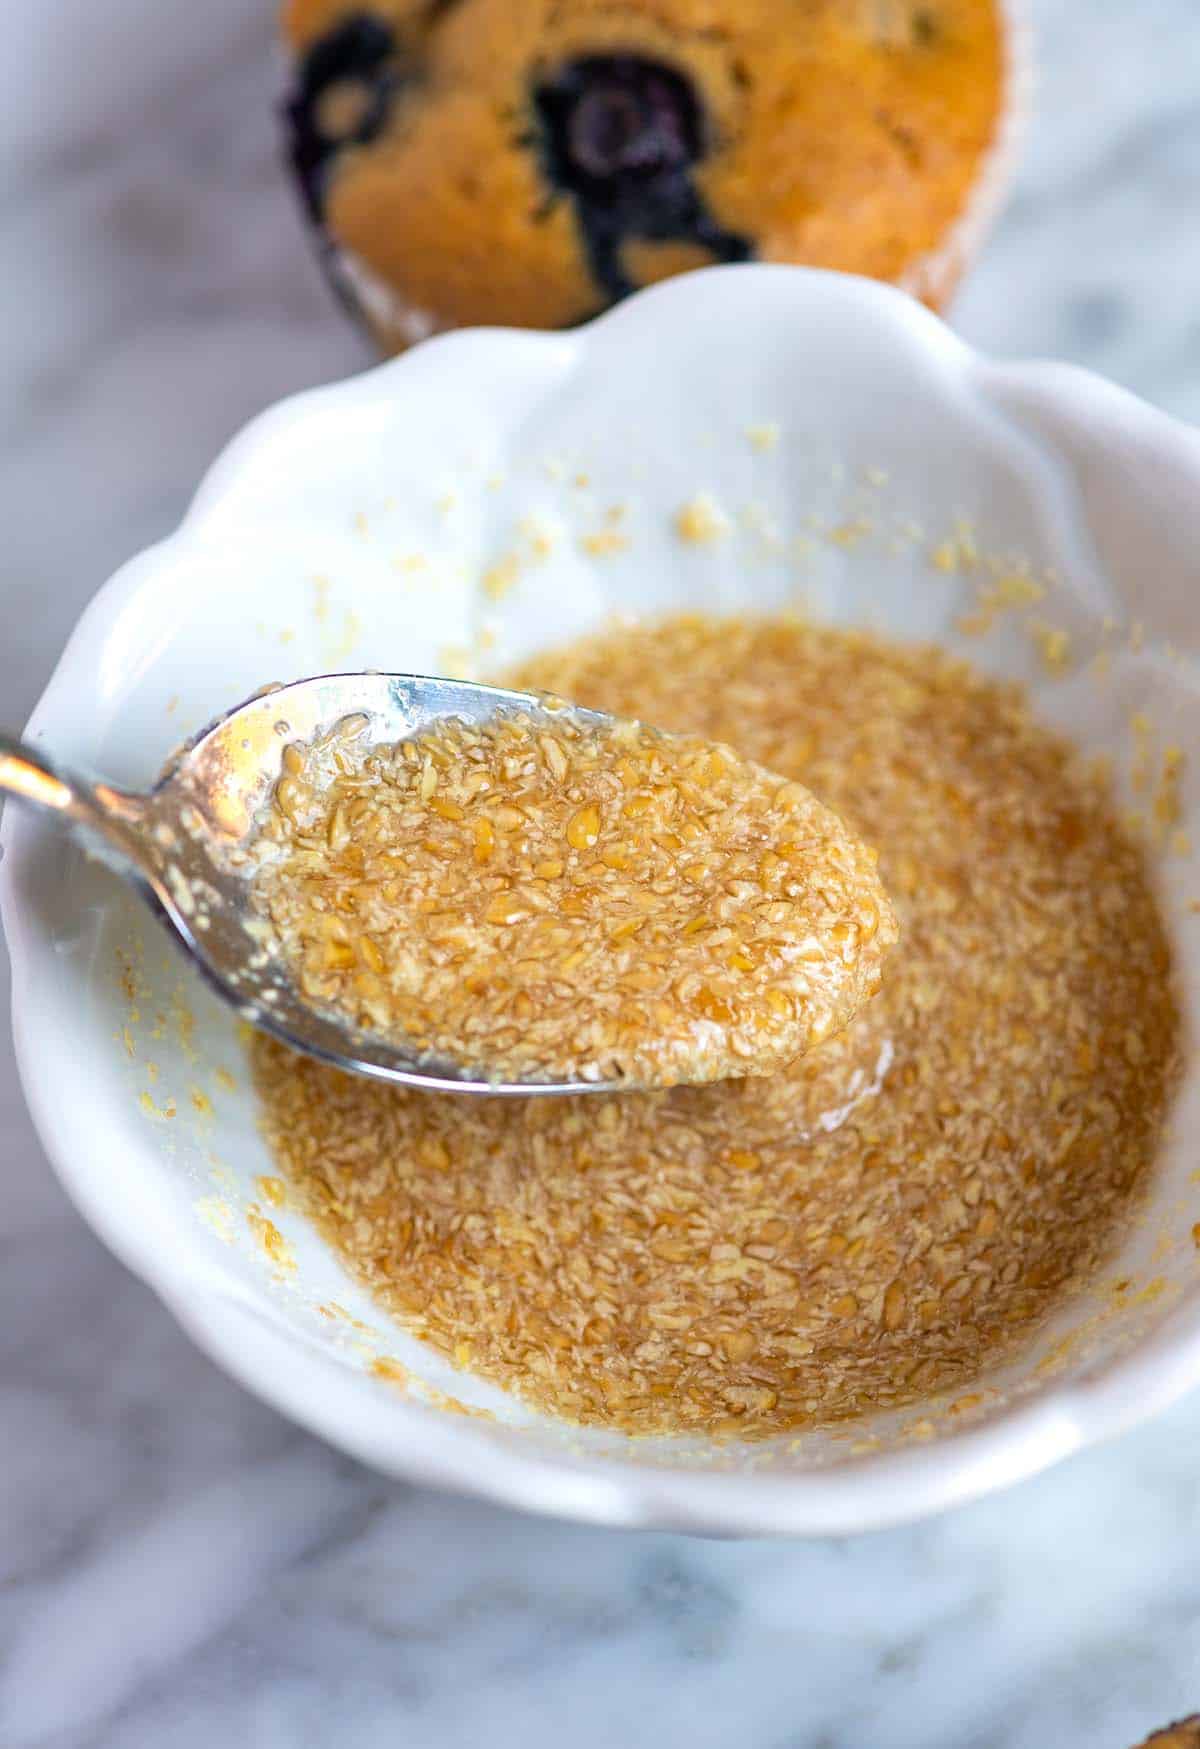
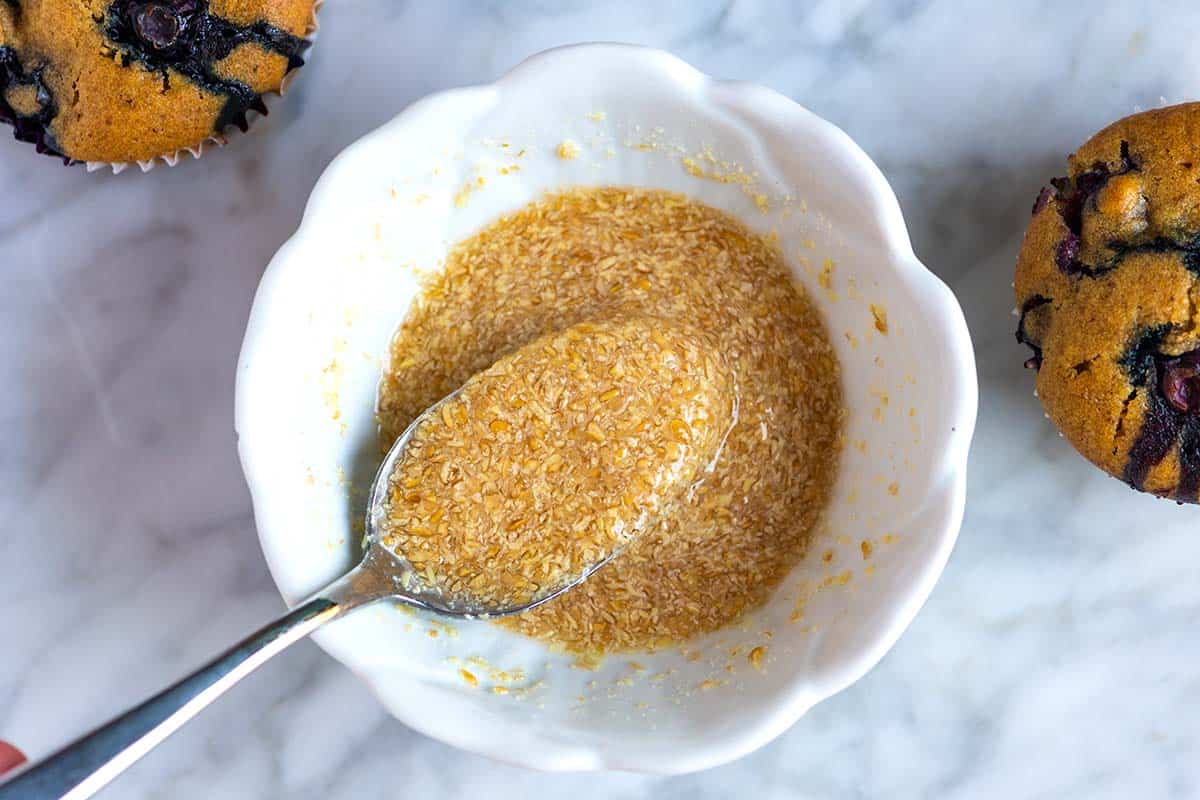
    How to Make a Flax Egg: Stirring flaxseed meal with water.

    Flax eggs are perfect for eggless pancakes, muffins, and cookies! When made correctly, they provide binding and moisture, similar to regular eggs. Another popular egg replacer is aquafaba.

    My favorite recipe that calls for a flax egg is my vegan blueberry muffins. If you have a recipe that calls for one or two eggs and need that recipe to be egg-free, flax eggs might be your answer.

    Key Ingredients

    • Flaxseed Meal: Flaxseed meal or flax meal is simply ground flaxseeds. You can buy it pre-ground or grind whole flaxseeds yourself. I prefer using pre-ground flaxseed meal for convenience (I buy Bob’s Red Mill). Flaxseeds are packed with nutrients and offer two varieties: golden and brown. Both work great for making flax eggs! If you do not have flaxseed meal, try chia seeds!
    • Water: Plain water is great. Filtered is even better.
    Flax Egg

    Perfect Flax Egg

    • PREP
    • TOTAL

    Learn how to make a flax egg! This simple egg substitute is a staple for vegan baking. They work wonders in flour-based recipes that call for 1 or 2 eggs, like pancakes and muffins. However, flax eggs might not be the best option for recipes needing more than 2 eggs, like airy cakes, as they don’t provide the same leavening power.

    Makes 1 flax egg

    You Will Need

    1 tablespoon (7g) flaxseed meal

    3 tablespoons (45ml) water

    Directions

      1Stir the flaxseed meal and water together in a small bowl.

      2Place in the refrigerator for 10 to 15 minutes or until the mixture is thick. Stir again, and then use in your favorite baking recipe.

    Adam and Joanne’s Tips

    • Storing: I make flax eggs as needed for freshness and texture. However, you can store them in an airtight container in the fridge for up to 2 days.
    • How to make a chia egg: Substitute the flaxseed meal with 1 tablespoon (9g) chia seeds.
    • The nutrition facts provided below are estimates.

    Nutrition Per Serving
    Serving Size
    1 flax egg
    /
    Calories
    30
    /
    Total Fat
    0g
    /
    Saturated Fat
    0g
    /
    Cholesterol
    0mg
    /
    Sodium
    0mg
    /
    Carbohydrate
    0g
    /
    Dietary Fiber
    2g
    /
    Total Sugars
    0g
    /
    Protein
    1.5g


    AUTHOR:

    Joanne Gallagher

    Previous Post: Easy Homemade Croutons
    Next Post: Chorizo and Eggs

    Source link