Tag: Recipe

  • Failproof Hollandaise Sauce Recipe

    Failproof Hollandaise Sauce Recipe

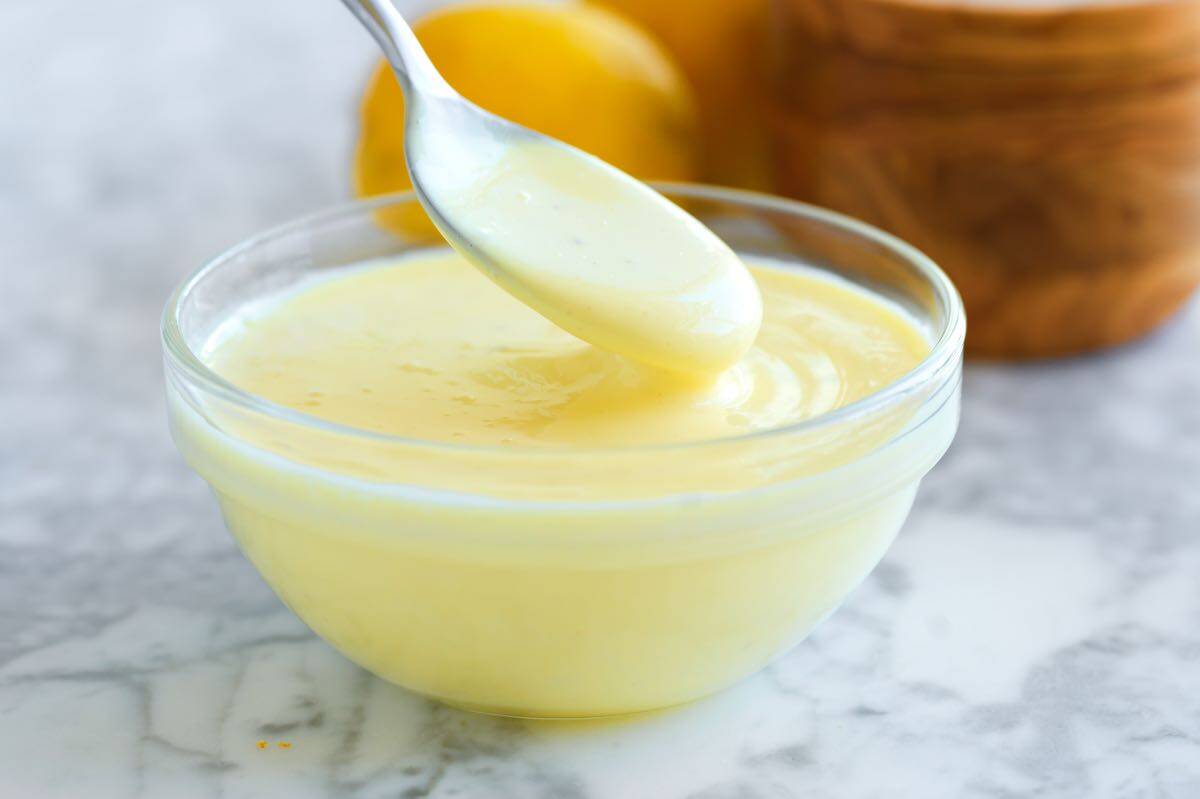
    How to make incredible homemade hollandaise sauce! Using a blender and a short list of simple ingredients, this hollandaise sauce recipe is practically failproof and extra easy!

    Hollandaise Sauce

    There are very few homemade sauces that hit as well as hollandaise. It’s creamy, velvety, decadent, and incredible with eggs (hello, Eggs Benedict), as a dip for vegetables, and with simple seafood dishes.

    Hollandaise was one of the first sauces I learned how to make in culinary school. We made it by hand with a whisk, and in large batches (my arms were so tired!). This home cook friendly hollandaise sauce recipe skips the whisk and calls on a blender, which means you’ll have a delicious batch of hollandaise in under 5 minutes! For another classic sauce, see our Homemade Mayonnaise.

    Key Ingredients

    • Melted Butter: Butter makes up the majority of this sauce, so spoiler, you need quite a bit of it. I use clarified butter for hollandaise. It’s easy to do, and I’ve shared how in the recipe below. You can make it with plain melted butter, but the clarifying process removes water and milk solids, which can cause our sauce to separate or break. Also, it tastes super rich and buttery, so your sauce tastes better. So, for the best hollandaise sauce, use clarified butter.
    • Egg Yolks: Classic hollandaise uses egg yolks. You can save the whites for scrambled later (as a note, scrambled egg whites with hollandaise spooned on top is really delicious).
    • Lemon Juice: You only need a little bit, but the lemon cuts through the richness of our sauce. Freshly squeezed really is best.
    • White Wine (optional): This is a tip from Chef Richard, who, for many years, was tasked with making hollandaise for brunch service at a very high-end hotel. You only need a couple of teaspoons, so only add this if you already have a bottle open! It makes the sauce more interesting and does a similar job as the lemon, cutting through the richness of the butter and egg yolks.
    • Salt and Pepper: Don’t forget to season your sauce and use a bit of pepper. Cayenne pepper is popular, but we skip that and use ground white pepper, which harmonizes a bit better with the sauce.

    Find the full recipe with measurements below.

    How to Make Hollandaise Sauce

    Tip 1: Use a blender. Hollandaise sauce is a rich, creamy, and decadent emulsion of egg yolks and butter. While some classic recipes call for making it by hand with a bowl and whisk, a blender is a game-changer for home cooks (kind of like how a food processor is a game-changer when making mayo). It simplifies the process and gives you a beautiful sauce every time. That said, I shared how we make it by hand below anyway, in case you wanted to give it a go.

    Tip 2: Use HOT butter. Drizzling hot (not warm) melted butter into the blender is key. If the butter isn’t hot enough, the sauce won’t thicken properly.

    Streaming hot butter into a blender with egg yolks

    Tip 3: Make it right before serving. Hollandaise is best served immediately. Prepare your other dishes first, then make the sauce just before serving.

    Tip 4: Keep it warm. Since the sauce is mostly butter, it will start to cool and thicken as it sits. To keep it warm, you can set the blender jar in a bowl of lukewarm water (hot from the tap) until you’re ready to serve.

    Tip 5: Fixing broken hollandaise sauce. While our blender method is more foolproof, this classic sauce can still break if your butter is added too quickly or isn’t hot enough. Here’s what to do if your sauce breaks (note, I use a blender, but you can do this in a bowl with a whisk):

    1. Pour your broken sauce into a bowl.
    2. Add 1 to 2 teaspoons of warm water to the blender.
    3. Turn the blender on, and slowly pour the broken sauce back into the blender through the lid opening. The sauce should re-emulsify and become smooth again. Hooray!

    Serving Suggestions

    Use your delicious hollandaise for dishes like Eggs Benedict (especially on a homemade English muffin) and Eggs Florentine. It’s also fantastic with poached eggs, vegetables like roasted asparagus, and simple seafood dishes like poached salmon.

    Homemade Hollandaise Sauce

    Failproof Hollandaise Sauce

    • PREP
    • COOK
    • TOTAL

    Here’s our favorite recipe for hollandaise sauce. Using a blender and hot butter are the secrets for the best results. I prefer clarified butter, which does add a step, but clarifying butter removes the water and milk solids, which can cause your sauce to break. Also, it tastes more buttery and rich! For my favorite way to use this sauce, see our Homemade Eggs Benedict Recipe.

    Makes 3/4 cup

    You Will Need

    12 tablespoons unsalted butter (170g)

    3 large egg yolks, cold from the fridge

    1 ½ tablespoons warm water

    2 teaspoons fresh lemon juice, plus more to taste

    2 teaspoons white wine, optional

    ½ teaspoon fine sea salt

    ¼ teaspoon ground white pepper, plus more to taste, see tips

    Directions

    • Make Clarified Butter
    • 1Melt the butter: Place the butter in a small saucepan to melt, then bring the melted butter to a gentle simmer and cook for 2 to 3 minutes, until a foamy layer forms on top and the butter underneath appears clear and golden.

      2Remove foamy layer: Use a spoon to skim all the foam from the top, and discard it. Set the saucepan of butter aside until you are ready to make your hollandaise sauce.

    • Blender Hollandaise (Preferred Method)
    • 1Blend the eggs: Add the egg yolks, water, lemon juice, white wine, salt, and white pepper to a blender. Pulse for about 5 seconds to combine.

      2Re-heat the butter: Place the saucepan of butter over low heat and heat until steamy, about 30 seconds. Your butter needs to be hot for the sauce to thicken.

      3Emulsify the sauce: With the blender running, remove the center insert from the lid. Slowly and steadily pour the hot clarified butter through the opening, stopping just before any milky white milk solids fall in from the bottom of the saucepan. The sauce will thicken and emulsify. If the sauce gets too thick at any point, whisk in a tablespoon of warm water to thin it.

      4Season and serve: Taste and adjust with more salt, pepper, or lemon juice as needed. Serve immediately or keep the blender jar in a bowl of warm water. If serving at the table, and it starts to thicken too much, stir in a little warm water to thin it back out to a creamy sauce.

    • Classic Hollandaise Made by Hand
    • 1Set up your double boiler: Fill a small saucepan with about an inch of water and bring it to a gentle simmer. Place a heat-proof bowl on top, making sure the bottom of the bowl does not touch the water.

      2Re-heat the butter: Heat the clarified butter in a small saucepan until it is hot.

      3Whisk the yolks: Add your egg yolks, water, lemon juice, and white wine to the bowl and whisk them constantly. Keep a close eye on them. If they get too hot, lift the bowl off the heat to prevent them from scrambling, then set it back down once they’ve cooled off. The yolks will go from a liquid to frothy, and then they will start to thicken.

      4Slowly add the butter: Once the yolks have thickened a bit, SLOWLY drizzle in the hot, melted butter. It’s crucial to add it a little at a time to prevent the sauce from “breaking.” Whisk continuously to incorporate the butter as you add it.

      5Adjust and finish: If the sauce gets too thick at any point, whisk in a tablespoon of warm water to thin it. Once all the butter is incorporated, season the hollandaise with salt and white pepper.

    Adam and Joanne’s Tips

    • Storing: Hollandaise is best enjoyed right away. You can keep it in an airtight container in the refrigerator for up to 3 days, but you need to take care when reheating it as it is easy to break (butter separates).
    • Reheating hollandaise: I do not recommend a microwave and prefer to reheat on the stove. Pour your sauce into a saucepan over low heat. Add a little bit of melted butter and a tablespoon of warm water. Whisk it as it warms up so it turns into a smooth, creamy sauce. Adding more warm water if it is too thick.
    • Clarified butter vs. melted butter: You can use plain melted butter in this recipe. Clarified butter is an extra fail-safe to prevent the sauce from breaking, AND it tastes richer and buttery. The sauce is still lovely when made with plain butter, though.
    • Pepper: White pepper fades into the sauce and is a bit more delicate, but you can use black pepper or for heat, cayenne.
    • The nutrition facts provided are estimates.

    Nutrition Per Serving
    Serving Size
    1 tablespoon
    /
    Calories
    87
    /
    Total Fat
    9.5g
    /
    Saturated Fat
    5.7g
    /
    Cholesterol
    57.4mg
    /
    Sodium
    111.7mg
    /
    Carbohydrate
    0.2g
    /
    Dietary Fiber
    0g
    /
    Total Sugars
    0g
    /
    Protein
    0.6g


    AUTHOR:

    Joanne Gallagher

    Adam and Joanne of Inspired Taste

    We are Adam and Joanne Gallagher, the creators of Inspired Taste. Established in 2009, Inspired Taste grew from a childhood dream into one of the internet’s most trusted recipe sites with hundreds of reliable recipes, step-by-step videos, and expert tips.More About Us

    Source link

  • Chicken Pillows Recipe (Creamy Chicken Crescent Rolls)

    Chicken Pillows Recipe (Creamy Chicken Crescent Rolls)

    This website may contain affiliate links and advertising so that we can provide recipes to you. Read my disclosure policy.

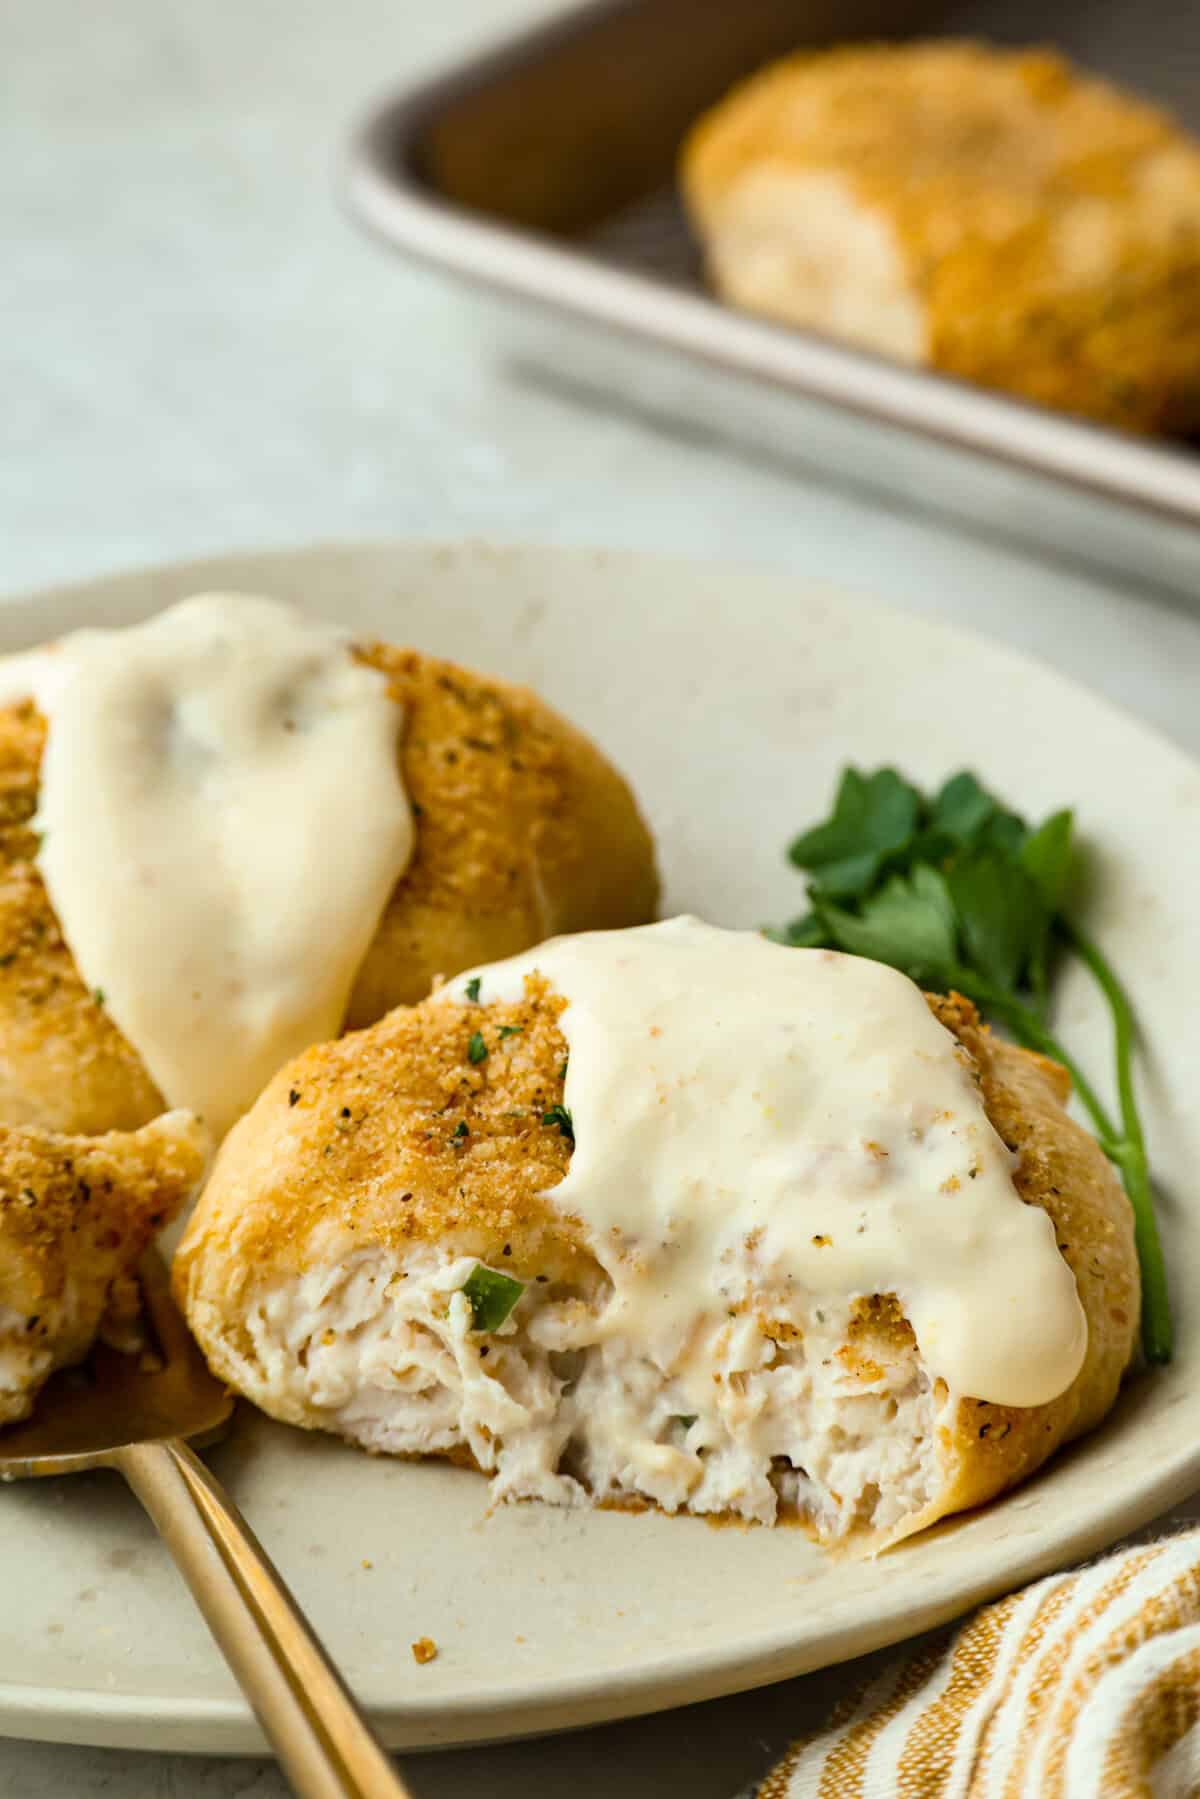
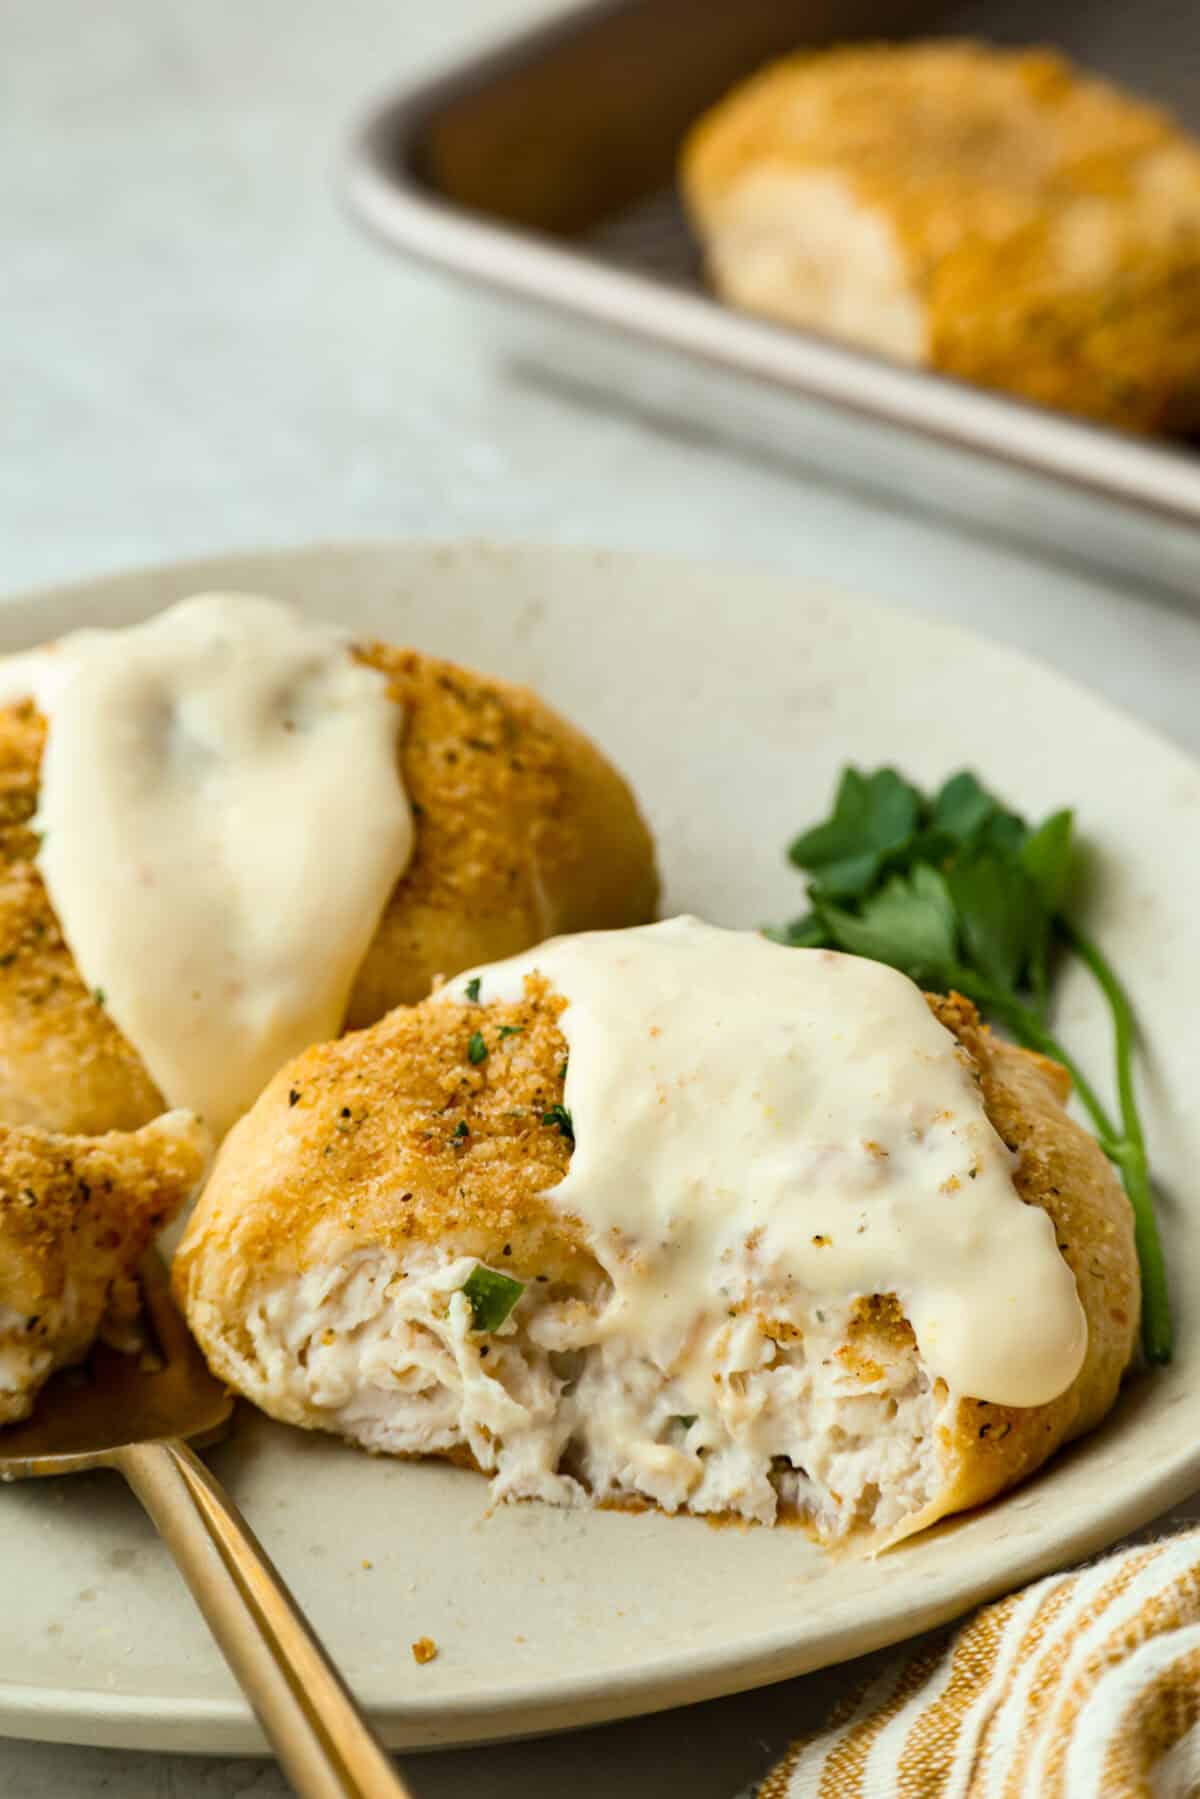
    If you grew up in Utah, chicken pillows were practically a weeknight tradition. Creamy chicken wrapped in warm crescent dough is the kind of cozy comfort kids love and adults secretly crave.

    Plated chicken pillows.

    Why This Utah Classic Still Hits

    • Nostalgic comfort: Buttery crescent roll dough and creamy chicken filling give you that classic Utah-style coziness in every bite.
    • Kid-Friendly: Simple flavors and the fun “pillow” shape make this an easy weeknight dinner win picky eaters.
    • Weeknight Easy: Minimal ingredients, quick prep, and everything bakes in the oven for a simple dinner.

    Chicken Pillow Ingredients

    Overhead shot of labeled chicken pillow ingredients.
    • Crescent Rolls: Refrigerated dough makes this recipe easy! I also like to use crescent dough sheets. Simply cut the sheet of dough into 8 even squares before putting them together.
    • Chicken: Canned or rotisserie chicken is a great alternative!
    • Bread Crumbs: Plain or panko bread crumbs can be used. Add flavor with 1 teaspoon of Italian seasoning if you use either of these options!
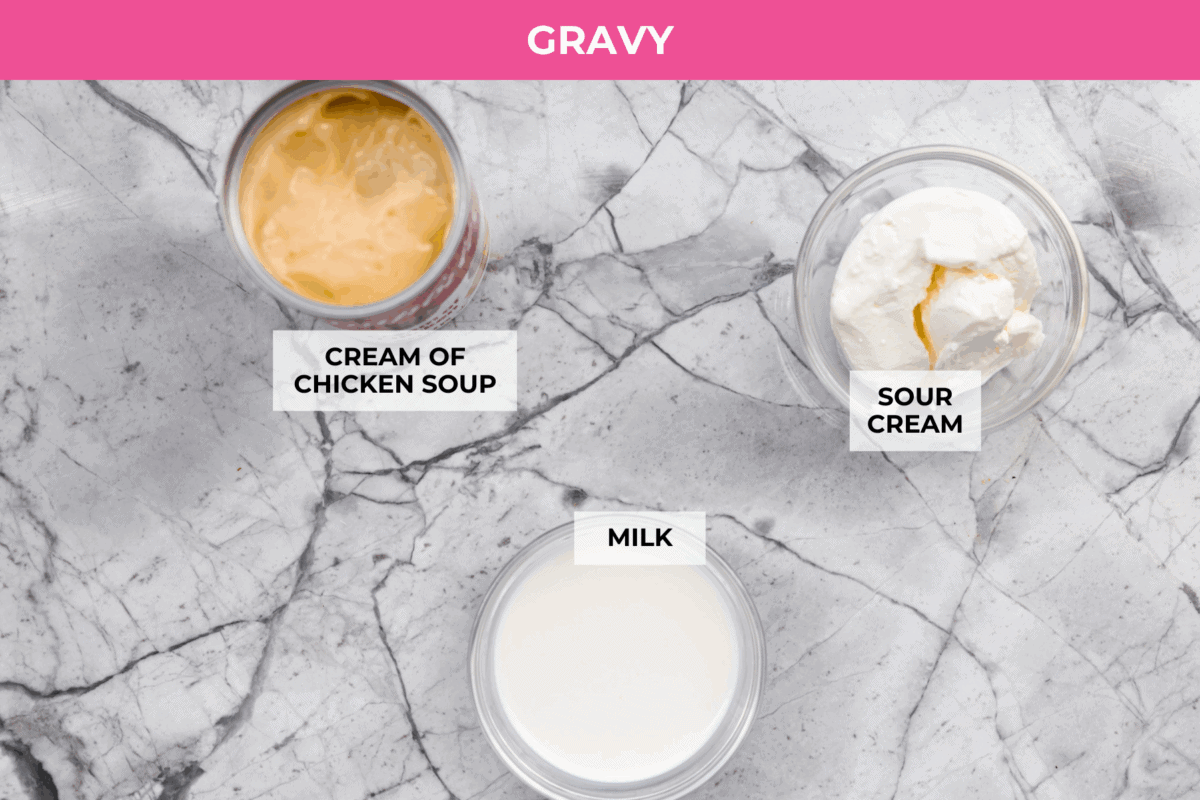
    Overhead shot of gravy ingredients.
    • Milk: Add a splash of milk for a thinner gravy, if preferred.

    How to Make Chicken Pillows

    This chicken pillows recipe is my go to when I haven’t planned dinner. I keep crescent rolls on hand because this is my girls’ favorite recipe. And, there’s almost always some cooked chicken in the fridge or freezer.

    Chicken Pillows

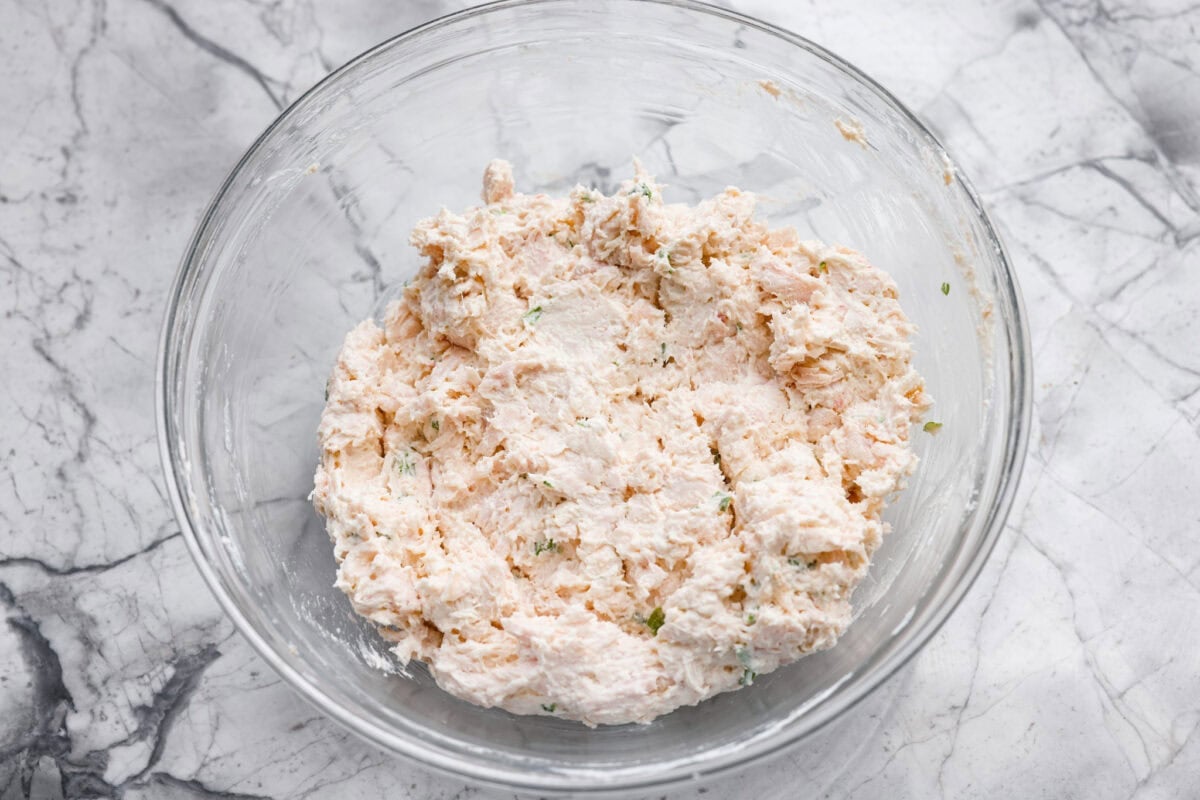
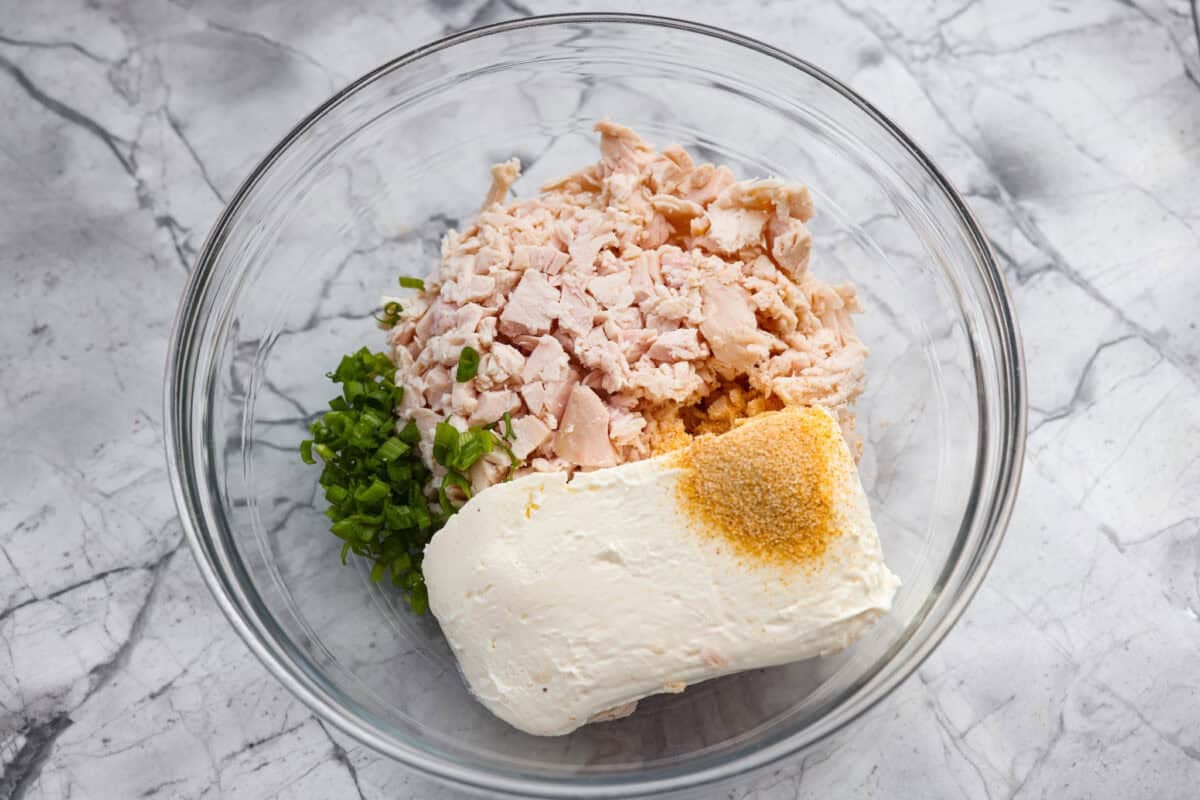
    1. Prep and Chicken Filling: Preheat the oven to 375°F. Spray 2 sheet pans with non stick cooking spray and set aside. In a medium sized bowl, add shredded chicken, cream cheese, green onion, and garlic powder.
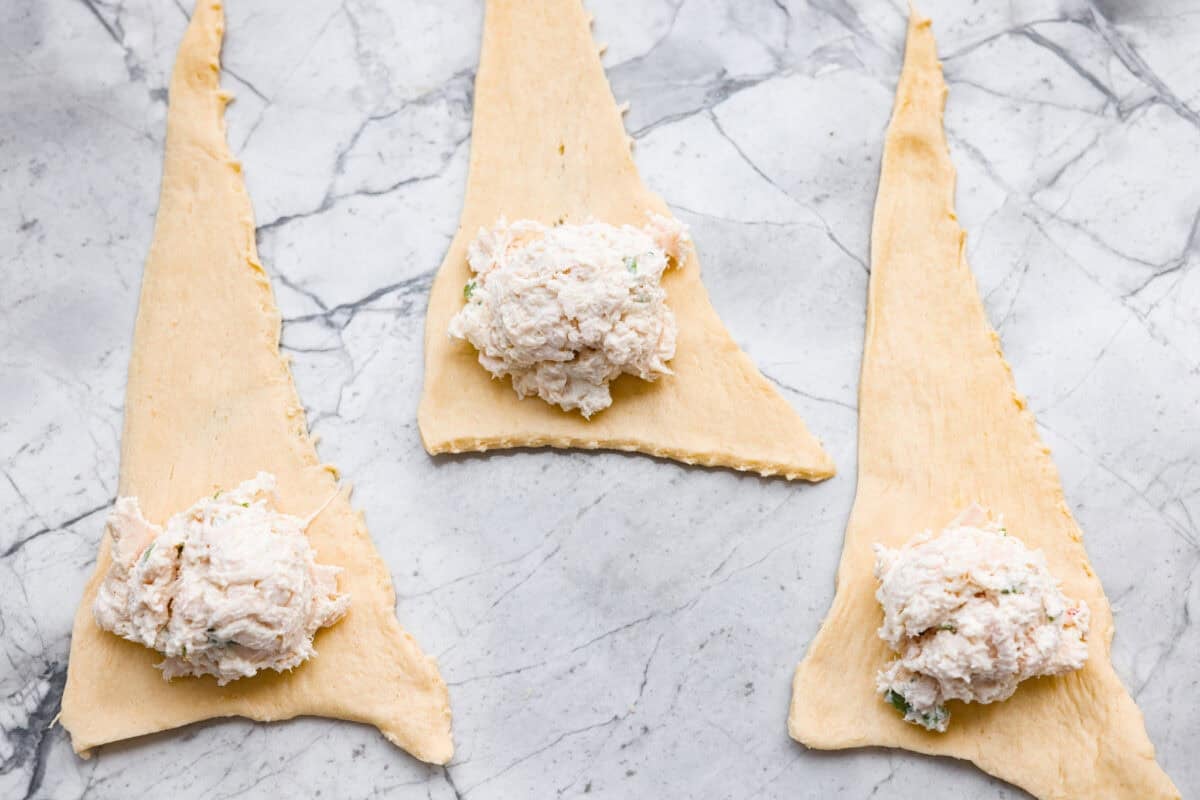
    2. Combine & Open: Stir chicken mixture well until well combined. Next, open crescent rolls and separate the triangles.
    3. Fill Pillows: Place about 2 tablespoons of the chicken mixture onto the wider end of the crescent roll.
    4. Seal Pillows: Fold the sides of the dough over the chicken mixture, then roll the crescent roll. Pinch the dough around the chicken mixture to fully seal it. Repeat the method until done.
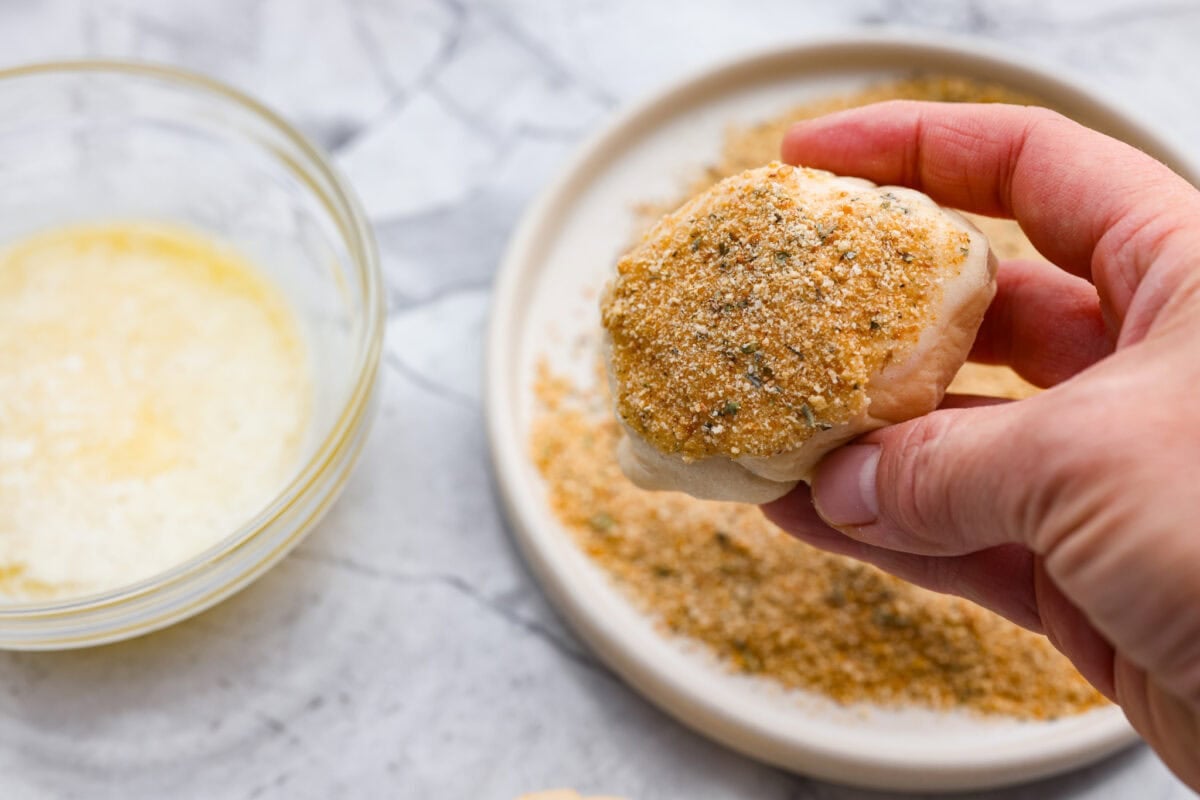
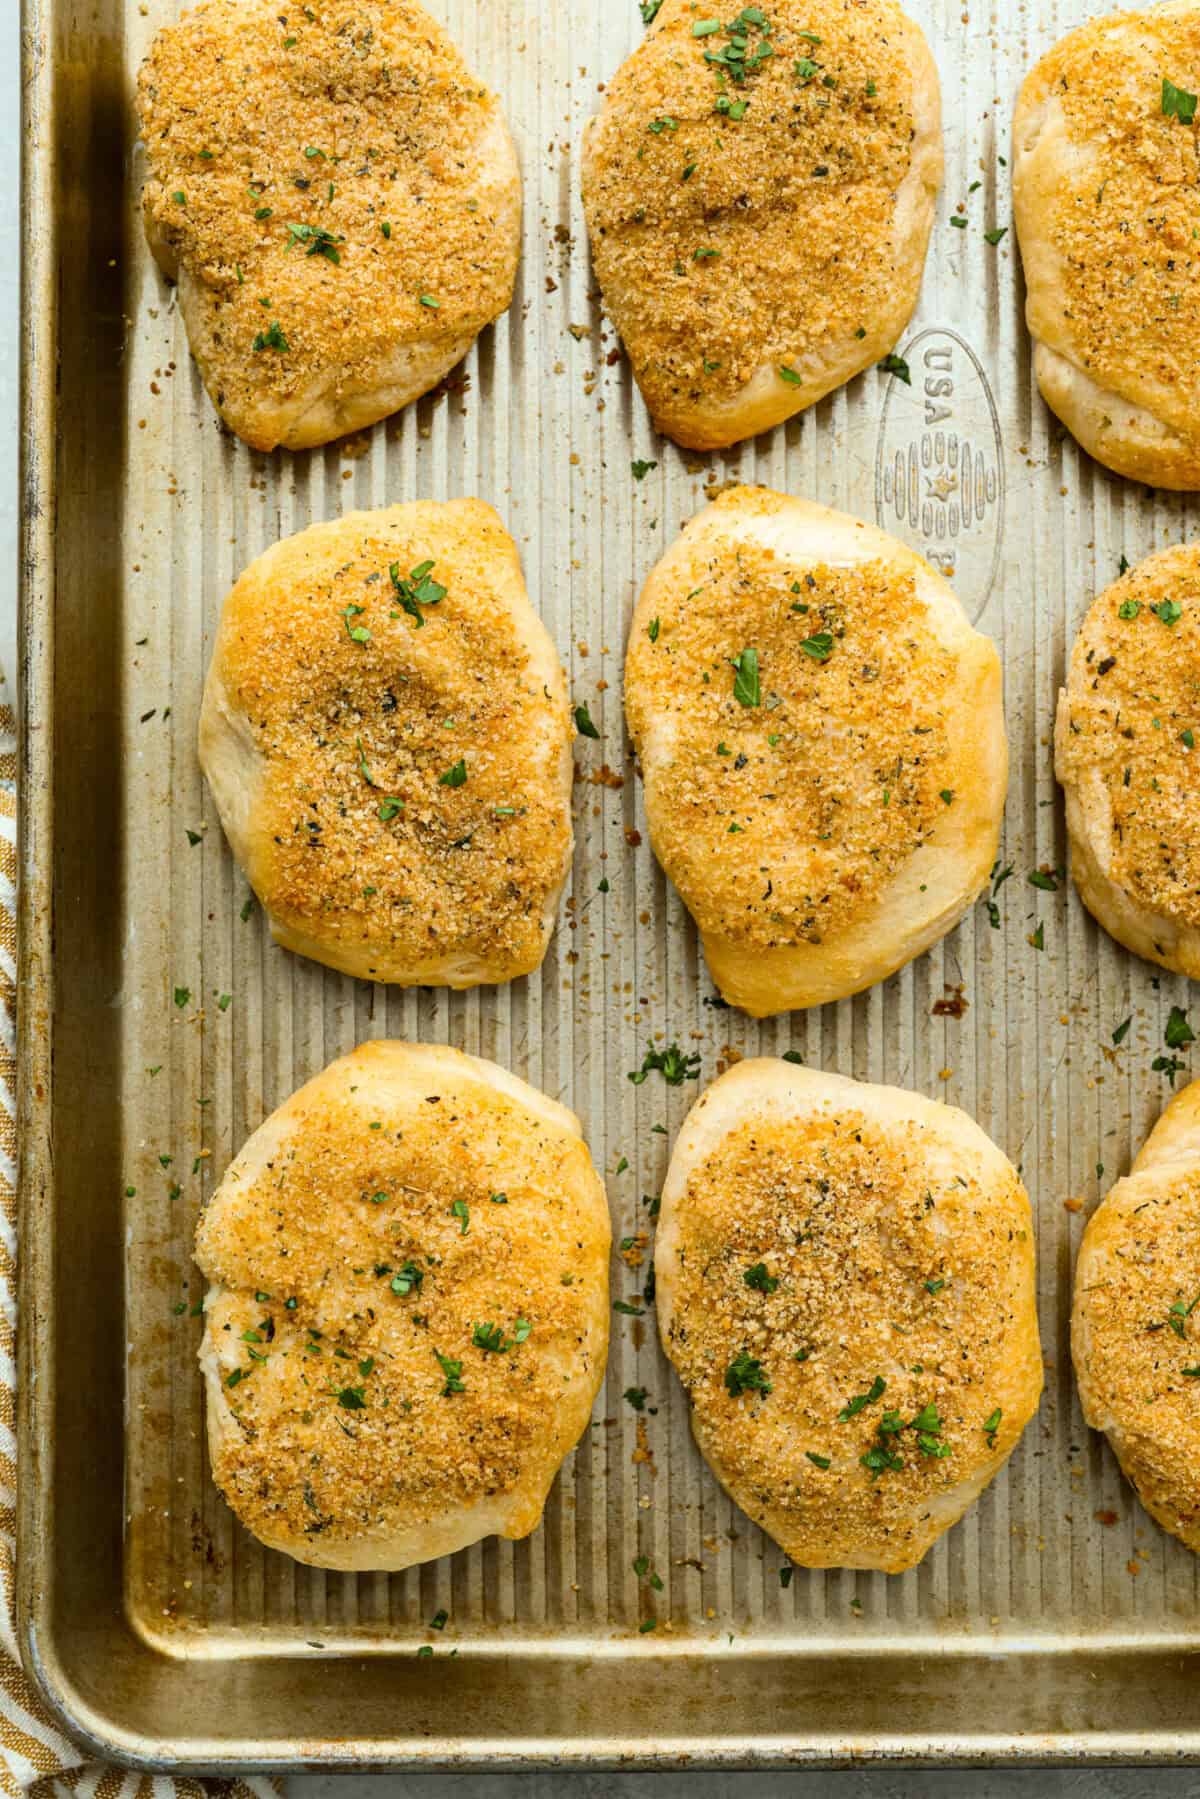
    5. Coat Pillows: Melt butter in a microwaveable bowl for about 40 seconds. Pour Italian bread crumbs on a plate for easy dipping! Dip the top of each chicken pillow in the bowl of melted butter, followed by the Italian bread crumbs.
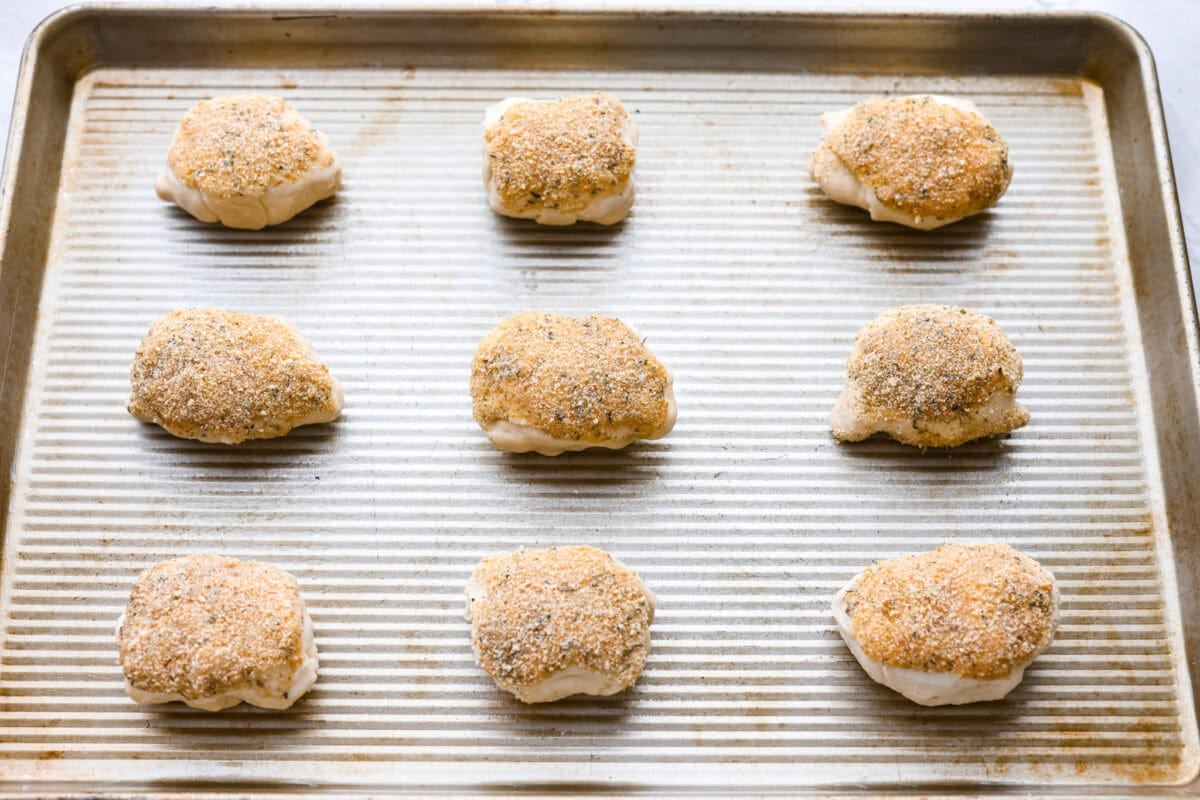
    6. Bake: Place the coated chicken pillows on the prepared pan. Bake for 10-15 minutes or until the chicken pillows are golden brown.

    Chicken Gravy

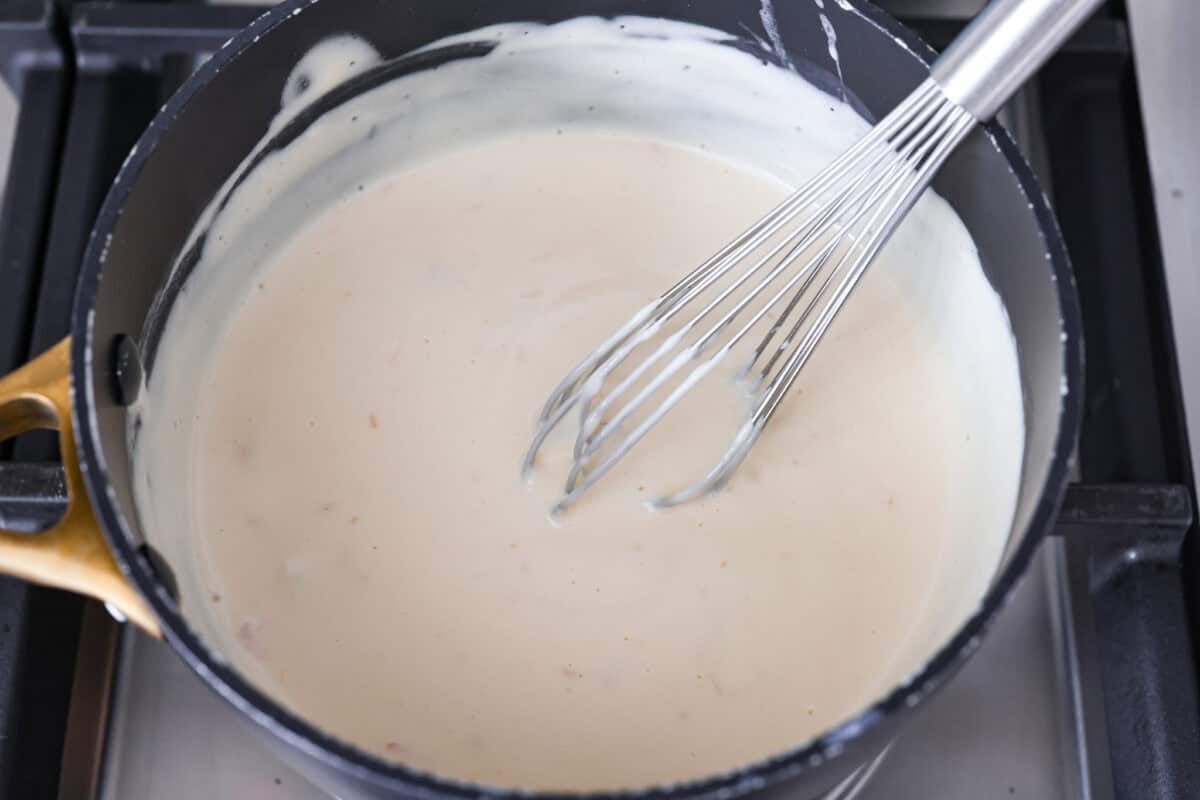
    1. In a small pan, add cream of chicken soupmilk, and sour cream. Heat and stir over medium heat until warmed through, about 5 minutes. Add more milk if needed to reach the desired thickness. Serve the gravy on the side or pour it over the warm chicken pillows and enjoy!
    Gravy ingredients added to a sauce pan being whisked together.

    Alyssa’s Pro Tip

    Gravy: These pillows are delicious with or without gravy! Make my easy gravy recipe, or use store bought if you’re short on time!

    Pin this now to find it later

    Pin It

    Chicken pillows on the baking sheet all baked and out of the oven.

    More Simple Chicken Recipes

    A spoon taking a scoop of chicken divan out of a white casserole dish.

    The Very Best Poppy Seed Chicken Casserole

    35 minutes


    Source link

  • Buttery Roasted Carrots Recipe

    Buttery Roasted Carrots Recipe

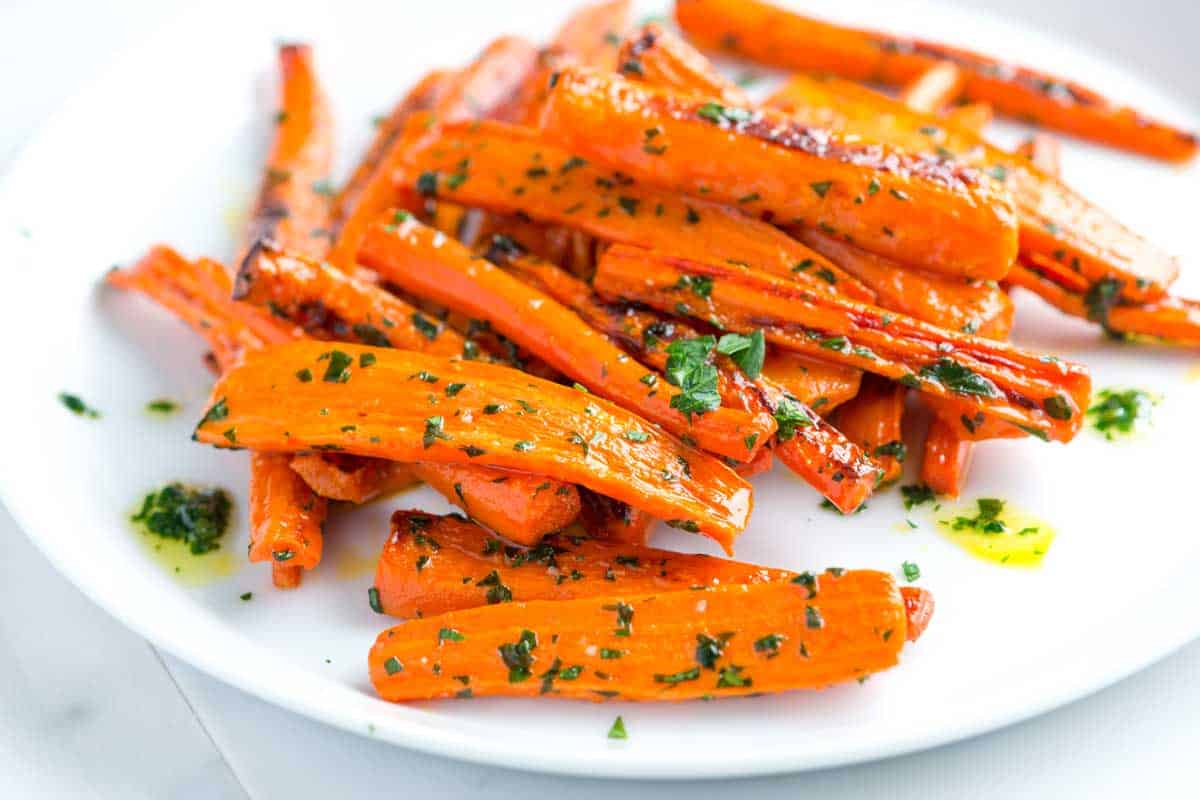
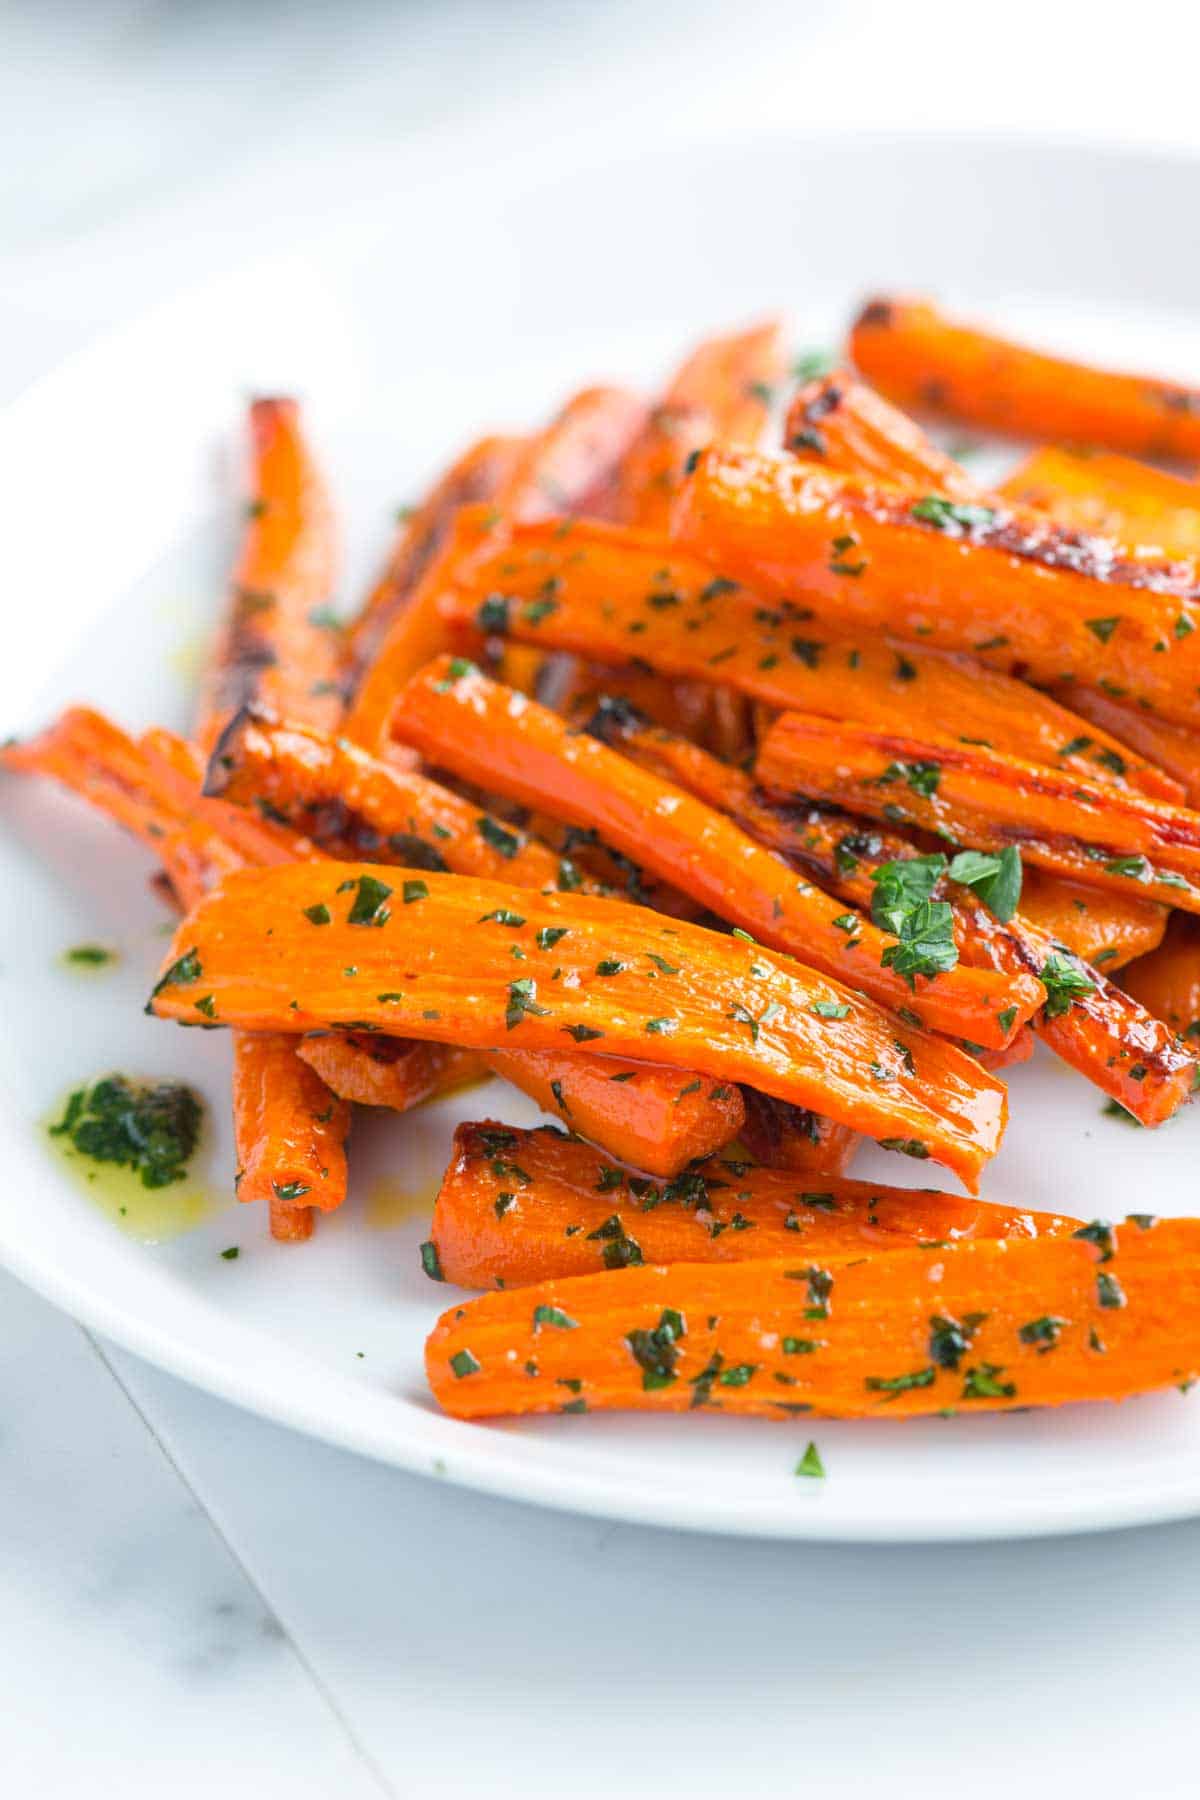
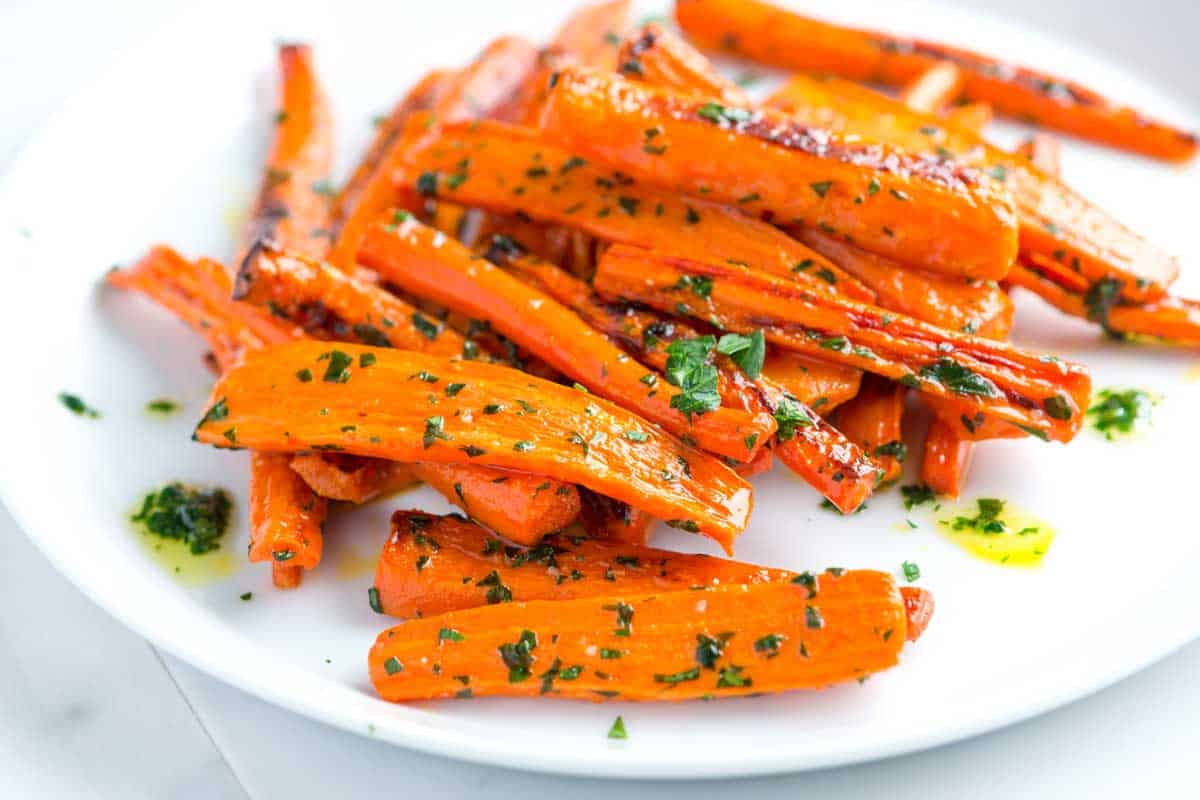
    This roasted carrots recipe has perfectly tender carrots tossed in the most delicious garlic parsley butter.

    Roasted Carrots with Garlic Parsley Butter

    Of all the carrot recipes on Inspired Taste, these garlic butter roasted carrots are my absolute favorite!

    I make them for weeknights, special occasions, and even for Thanksgiving! For more carrot recipes, see our honey roasted carrots, and my favorite carrot ginger dressing!

    Key Ingredients

    • Carrots: You can use any kind of carrot for this recipe. I typically buy medium to large ones and give them a good scrub before cutting. Feel free to peel them if you prefer. Baby carrots work, but you might need to adjust the roasting time.
    • Butter: I roast the carrots with olive oil and salt, then toss them with homemade garlic parsley butter once they’re tender and caramelized. You can use salted or unsalted butter or even a plant-based alternative.
    • Garlic and Parsley: You’ll need one small garlic clove and a generous handful of parsley for this recipe. Feel free to experiment with other herbs, such as cilantro, mint, rosemary, or sage. Just remember to use a bit less of the stronger herbs, such as rosemary and sage.

    Find the full recipe with measurements below.

    How to Make Buttery Roasted Carrots

    Tip 1: Roasting carrots. The trick to perfectly roasted carrots is to give them enough room on the baking sheet. You want the sugars to caramelize and brown, not steam. Giving them some room helps a lot. The butter in this recipe comes later, so I roast roast these with olive oil, salt, and pepper. They only take 25-30 minutes.

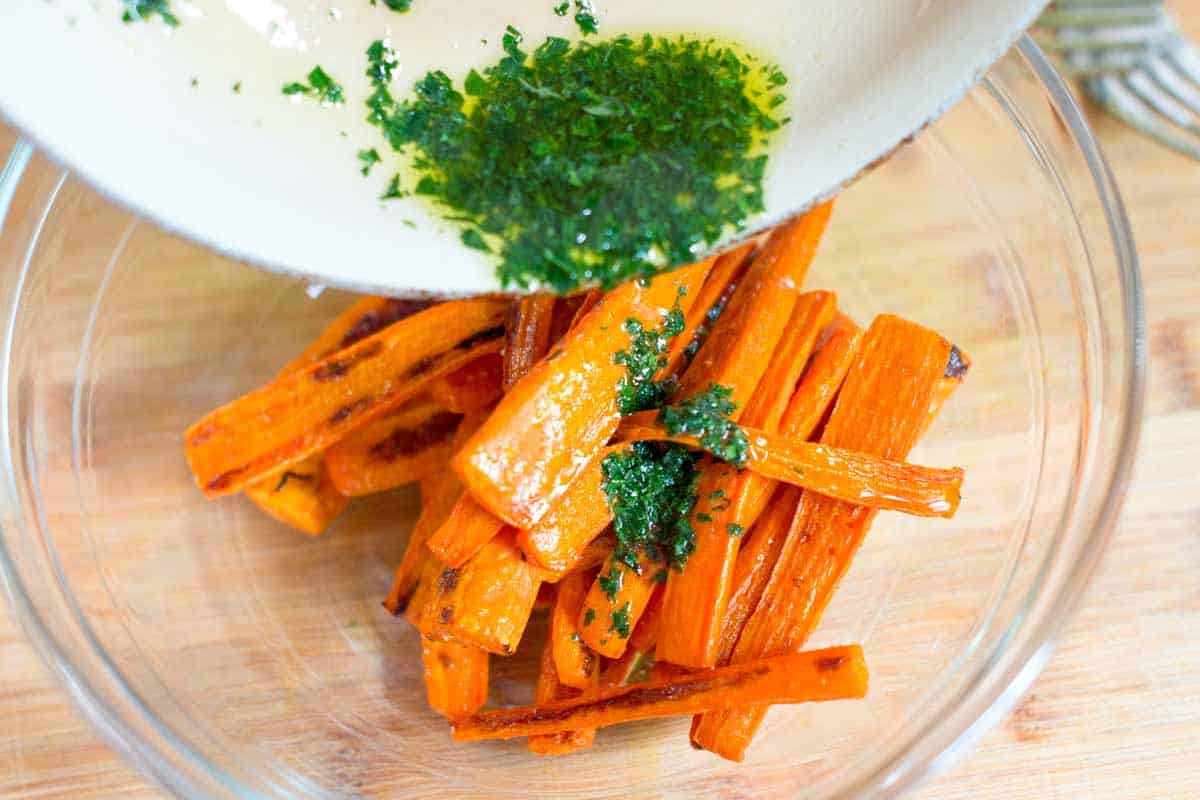
    Tip 2: Make our parsley butter. You can make the flavored butter while the carrots are roasting. Melt butter in a small pan over low heat, then add a smashed garlic clove and some chopped fresh parsley. The butter will gently bubble around the garlic and parsley, infusing itself with their amazing flavors. Once the carrots are done, I remove the garlic clove and pour the garlicky butter over them.

    By the way, this garlic parsley butter isn’t just for carrots! It’s amazing poured over other roasted vegetables, like roasted potatoes, or even drizzled over baked salmon.

    Tossing cooked carrots with garlic butter

    Serving Suggestions

    We love to serve them next to pan roasted chicken, my mother’s baked salmon with lemon and dill, and our roasted pork tenderloin with apples. They are also perfect for topping grain or rice bowls. I love these tahini lemon quinoa bowls.

    Garlic Butter Roasted Carrots

    Buttery Roasted Carrots

    • PREP
    • COOK
    • TOTAL

    You’ll love this easy roasted carrots recipe with our garlic herb butter. I use parsley in our photos, but other herbs work well. Substitute the parsley for cilantro, dill, or mint. Or, use a little less and try sage or rosemary.

    Makes 4 servings

    You Will Need

    1 ½ pounds carrots, peeled with ends trimmed (8 to 9 carrots)

    1 tablespoon extra-virgin olive oil

    1/4 teaspoon kosher salt

    1 tablespoon butter

    1 garlic clove

    1/3 cup loosely packed fresh parsley leaves, chopped

    Directions

      1Heat your oven to 425°F (218°C) and line a baking sheet with aluminum foil or parchment paper for easy cleanup.

      2Chop your carrots into sticks 2 to 3 inches long. If the thicker ends are wide, cut them in half lengthwise for even cooking.

      3Toss the carrot sticks with olive oil and salt and spread them on the prepared baking sheet in a single layer.

      4Roast for 25 to 30 minutes, stirring twice, until tender and lightly browned on the edges.

      5While the carrots roast, melt butter in a small pan over low heat. Gently crush a garlic clove with the back of a knife, remove the skin, and add it to the melted butter and the parsley.

      6Let the butter bubble gently for about 1 minute. Then, slide the pan off the heat and let it sit for 10 to 15 minutes to infuse the flavors. Discard the garlic clove.

      7Transfer the roasted carrots into a bowl with the garlic parsley butter. Toss, then season to taste with additional salt as needed.

    Adam and Joanne’s Tips

    • To make this vegan, swap the butter for vegan butter, coconut oil or olive oil.

    Nutrition Per Serving
    Calories
    118
    /
    Protein
    1 g
    /
    Carbohydrate
    15 g
    /
    Dietary Fiber
    4 g
    /
    Total Sugars
    7 g
    /
    Total Fat
    7 g
    /
    Saturated Fat
    2 g
    /
    Cholesterol
    8 mg


    AUTHOR:

    Adam Gallagher

    Adam and Joanne of Inspired Taste

    We are Adam and Joanne Gallagher, the creators of Inspired Taste. Established in 2009, Inspired Taste grew from a childhood dream into one of the internet’s most trusted recipe sites with hundreds of reliable recipes, step-by-step videos, and expert tips.More About Us

    Source link

  • Socca with Whipped Feta and Tomato Salad Recipe

    Socca with Whipped Feta and Tomato Salad Recipe

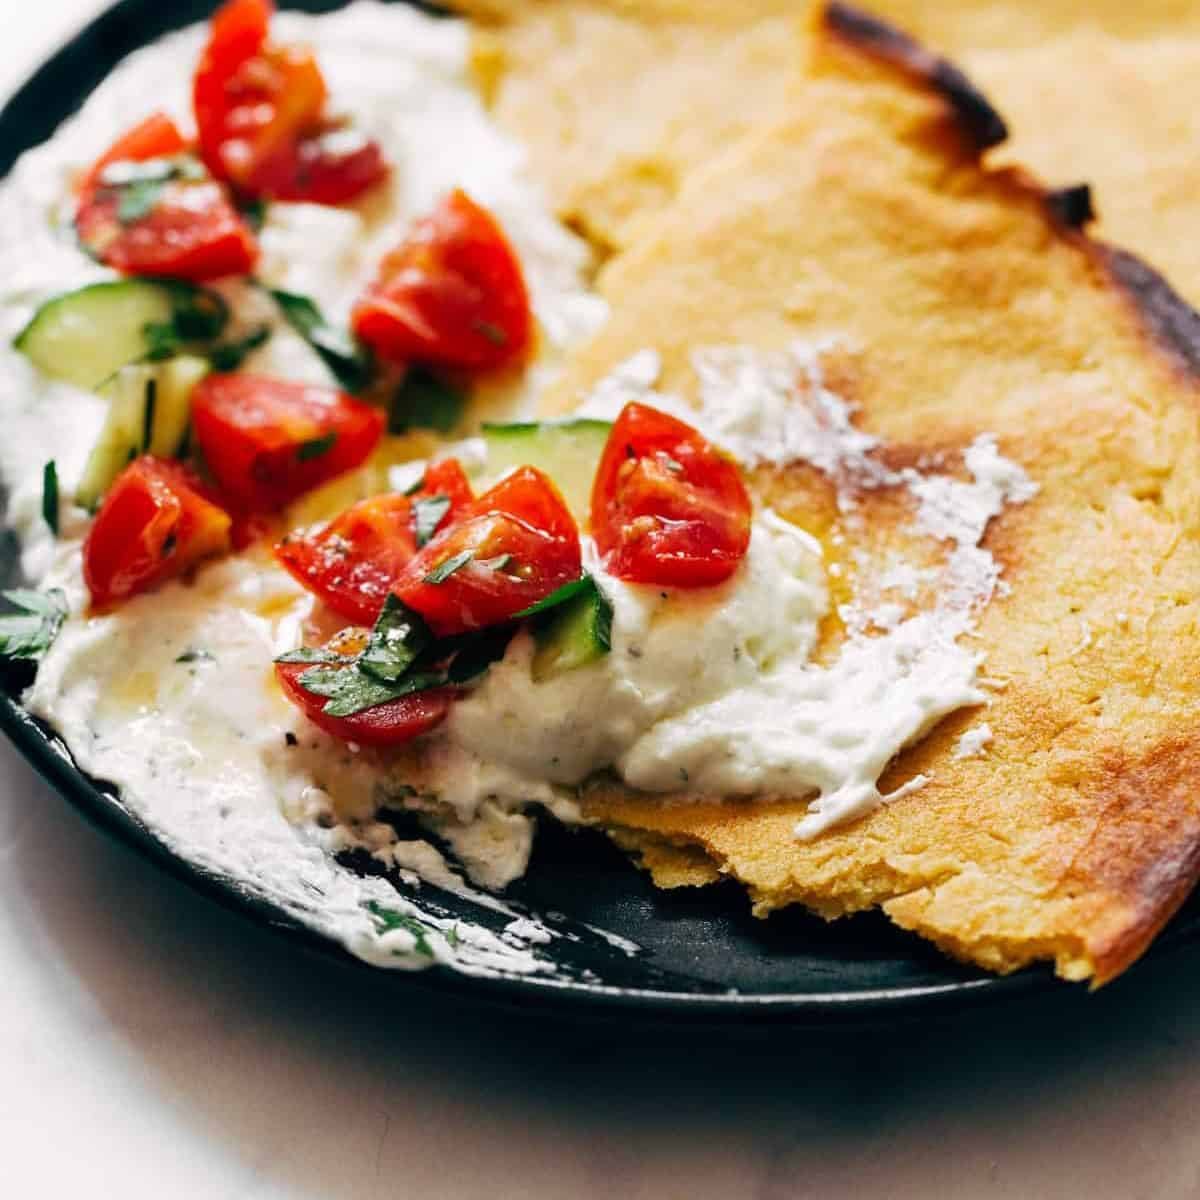
    Socca with Whipped Feta and Tomato Salad! HELLO. Crispy, creamy, tangy, and summery all on one plate.

    Crispy, creamy, tangy, and summery all on one plate.

    Yes, yes, and yes to all of three of these things right now:

    Let’s talk about Socca first. The origin of Socca is heavily debated between France and Italy (known as Farinata there) but one thing is certain: this simple street food made with only chickpea flour, olive oil, water, and salt is the crispy rich snacker of your dreams.

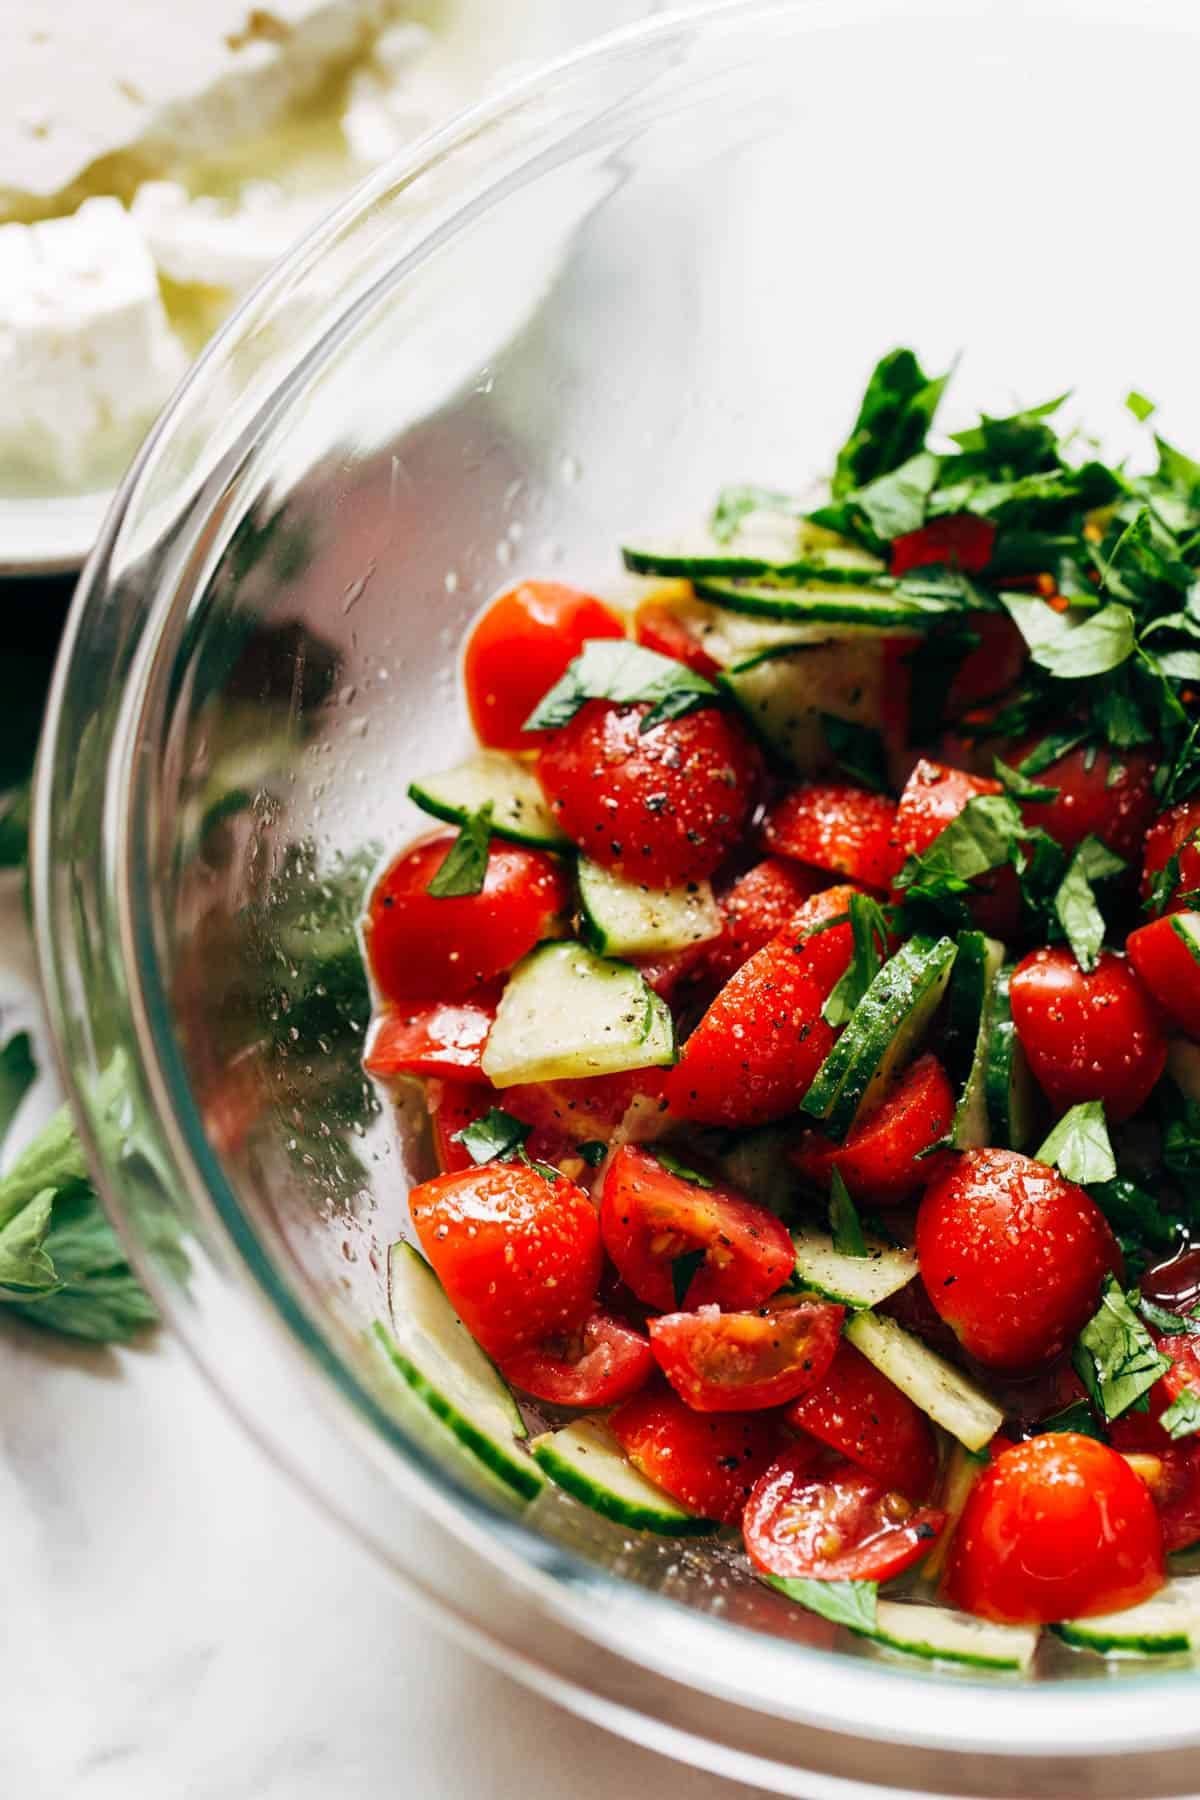
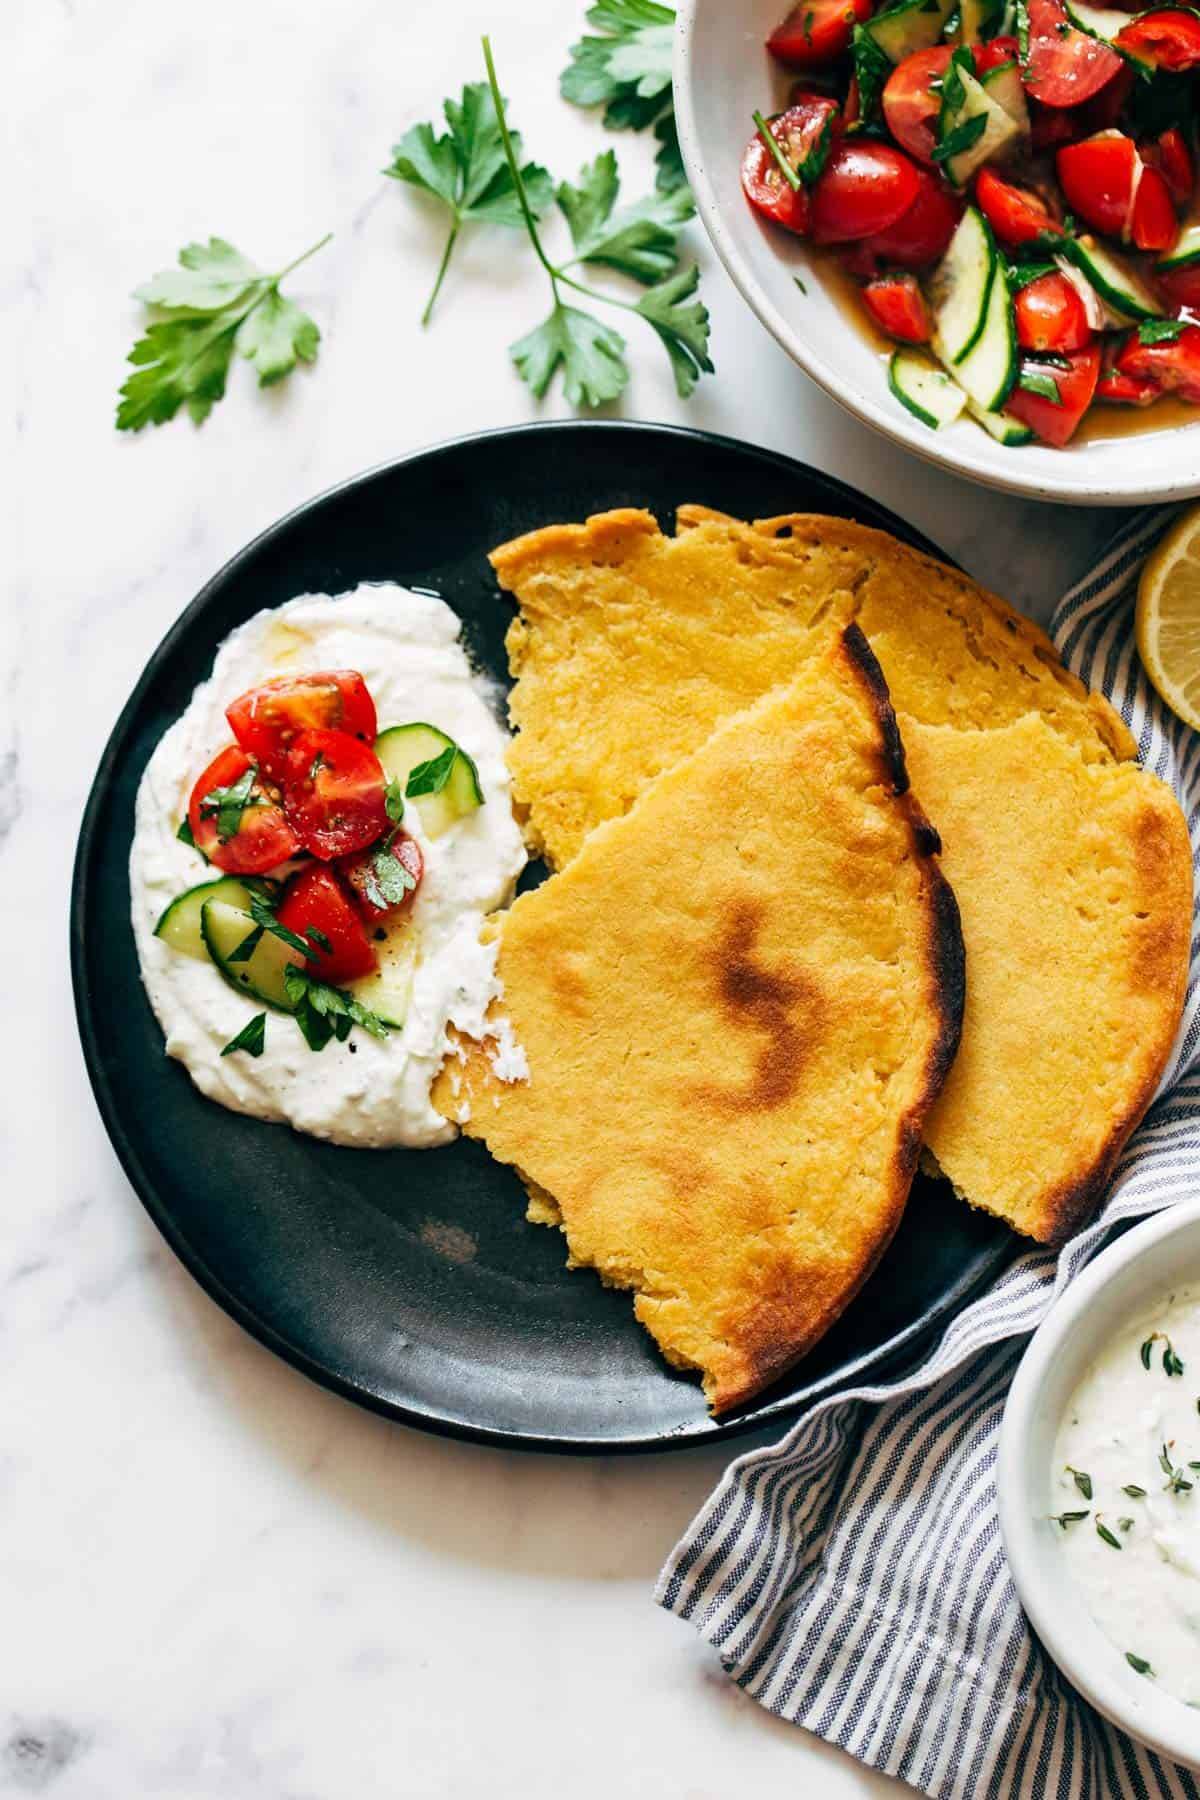
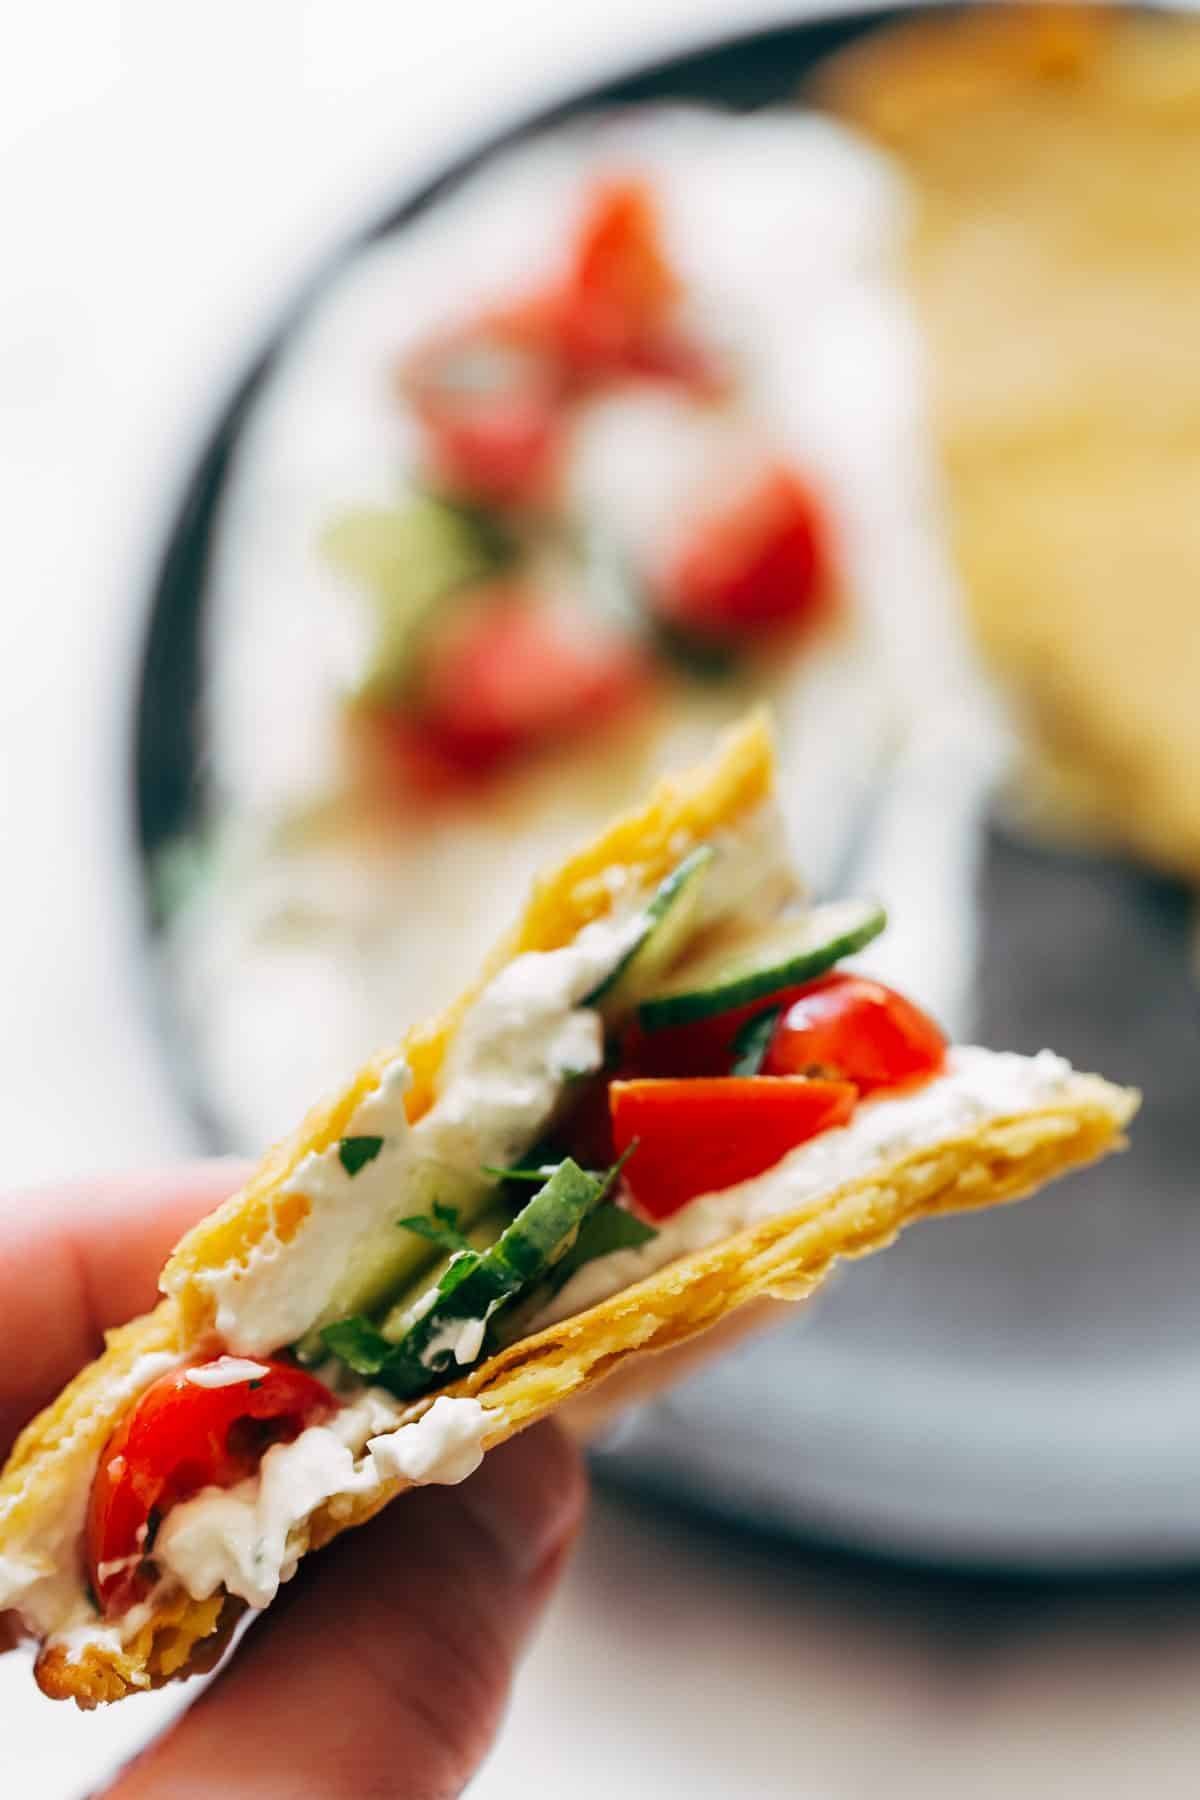
    And here is how you make this meal that isn’t really a meal but also is everything a meal should be: take your piping hot freshly baked socca out of the cast iron, break it into a few crispy, chewy pieces, swoop it through a tangy dollop of herby whipped feta, and top the whole thing with a spoonful of juicy, vinegary tomato and cucumber salad on top for a crunchy finish. If you want to take it even further, this little lemony minty cucumber salad would be delicious too.

    I cannot get enough of this meal-that-isn’t-really-a-meal which is exactly how I like to eat in the summer.

    Prefer To Watch Instead Of Read?

    Feta and Tomato Salad in a clear bowl sitting on a countertop.

    Want to add chickpeas or roasted chicken? Do it.

    Want to eat straight spoonfuls of whipped feta out of the food processor? You’re not wrong.

    Want to make the golden crunchy edges of that socca a part of your regular life routine? I support you.

    Socca with whipped feta along with tomato salad on the plate.

    This whole combo platter meal is low-key, it’s summery, and it’s currently my favorite (healthyish) thing to eat. The variations are endless. It works well for serving people because they can make it what they want – we served it for Bjork’s parents out on the deck the other night and it was a hit all around (especially the socca).

    I know you think you cannot bear to turn on your oven right now but that is the only effort required of you. Also, personal opinion, but oven in the AC > grill outside. It is HOT out there.

    Go forth, whip that feta, load up your socca, make it your own!

    Crispy socca with feta and tomatoes.

    Common Questions About Socca

    How important is the pan size for the Socca?

    The size of your cast iron greatly impacts the end product and how thick / thin / crispy it will be. Those crispy, thin edges are EVERYTHING. That’s why I prefer to split it into two batches when working with my 10-inch cast iron skillet.

    How important is it to use a cast iron pan?

    I have only used my cast iron for this. I think it could work with another oven-safe skillet but I have not tried it. Let us know in the comments if you try it!

    Where do I get chickpea flour?

    Most grocery stores will carry chickpea flour – often by the “Natural Foods” section or something similar. If you can’t find it at your local store, you can but it here (affiliate link).


    Print

    clock clock iconcutlery cutlery iconflag flag iconfolder folder iconinstagram instagram iconpinterest pinterest iconfacebook facebook iconprint print iconsquares squares iconheart heart iconheart solid heart solid icon

    Description

    Socca with Whipped Feta and Tomato Salad! HELLO. Crispy, creamy, tangy, and summery all on one plate.


    For the Socca:

    For the Tomato Salad:

    For the Whipped Feta:


    1. Preheat oven to 450 degrees. While oven is preheating, mix up your tomato salad so it has a little time to sit together and get real yummy.

    2. Whisk all socca ingredients until smooth. Pour 1-2 tablespoons olive oil into a 10-inch cast iron skillet, and pop the skillet in the oven for 5 minutes to preheat. Pour half of the socca batter evenly into the pan and bake for 15-18 minutes, until golden around the edges. (Repeat with the second half of the batter.)

    3. While the socca is baking, blend the feta in a food processor or blender, or with a hand mixer, until smooth-ish. Add your cream cheese, yogurt, mascarpone, whatever you pick to help make the whole thing into a sort of fluffy, creamy sauce. Season with what you like – I love thyme, olive oil, and a little black pepper.

    4. Tear off chunks of hot, crispy socca to be served / dipped / spread / topped with whipped feta and a bunch of fresh, garlicky tomato salad.

    • Prep Time: 15 minutes
    • Cook Time: 15 minutes
    • Category: Lunch
    • Method: Stovetop
    • Cuisine: Italian-Inspired

    Keywords: socca, gluten free, tomato salad, cucumber salad, whipped feta, gluten free lunch, healthy lunch

    Source link

  • Hot Honey Salmon Recipe – Pinch of Yum

    Hot Honey Salmon Recipe – Pinch of Yum

    This Hot Honey Salmon is giving off major fancy-to-eat-but-not-fancy-to-make vibes. Spicy-sweet salmon coated in fresh garlic, stone ground mustard, sweet honey, and flecks of red peppers flakes. It’s a magical little number!

    What looks fancy but actually comes together super quickly and makes you feel like A BOSS with all that big, feisty flavor?

    It’s this. It’s Hot Honey Salmon.

    And it’s here for us because this is the SOS series, and fancy-but-not-actually-fancy is the vibe we aspire to.

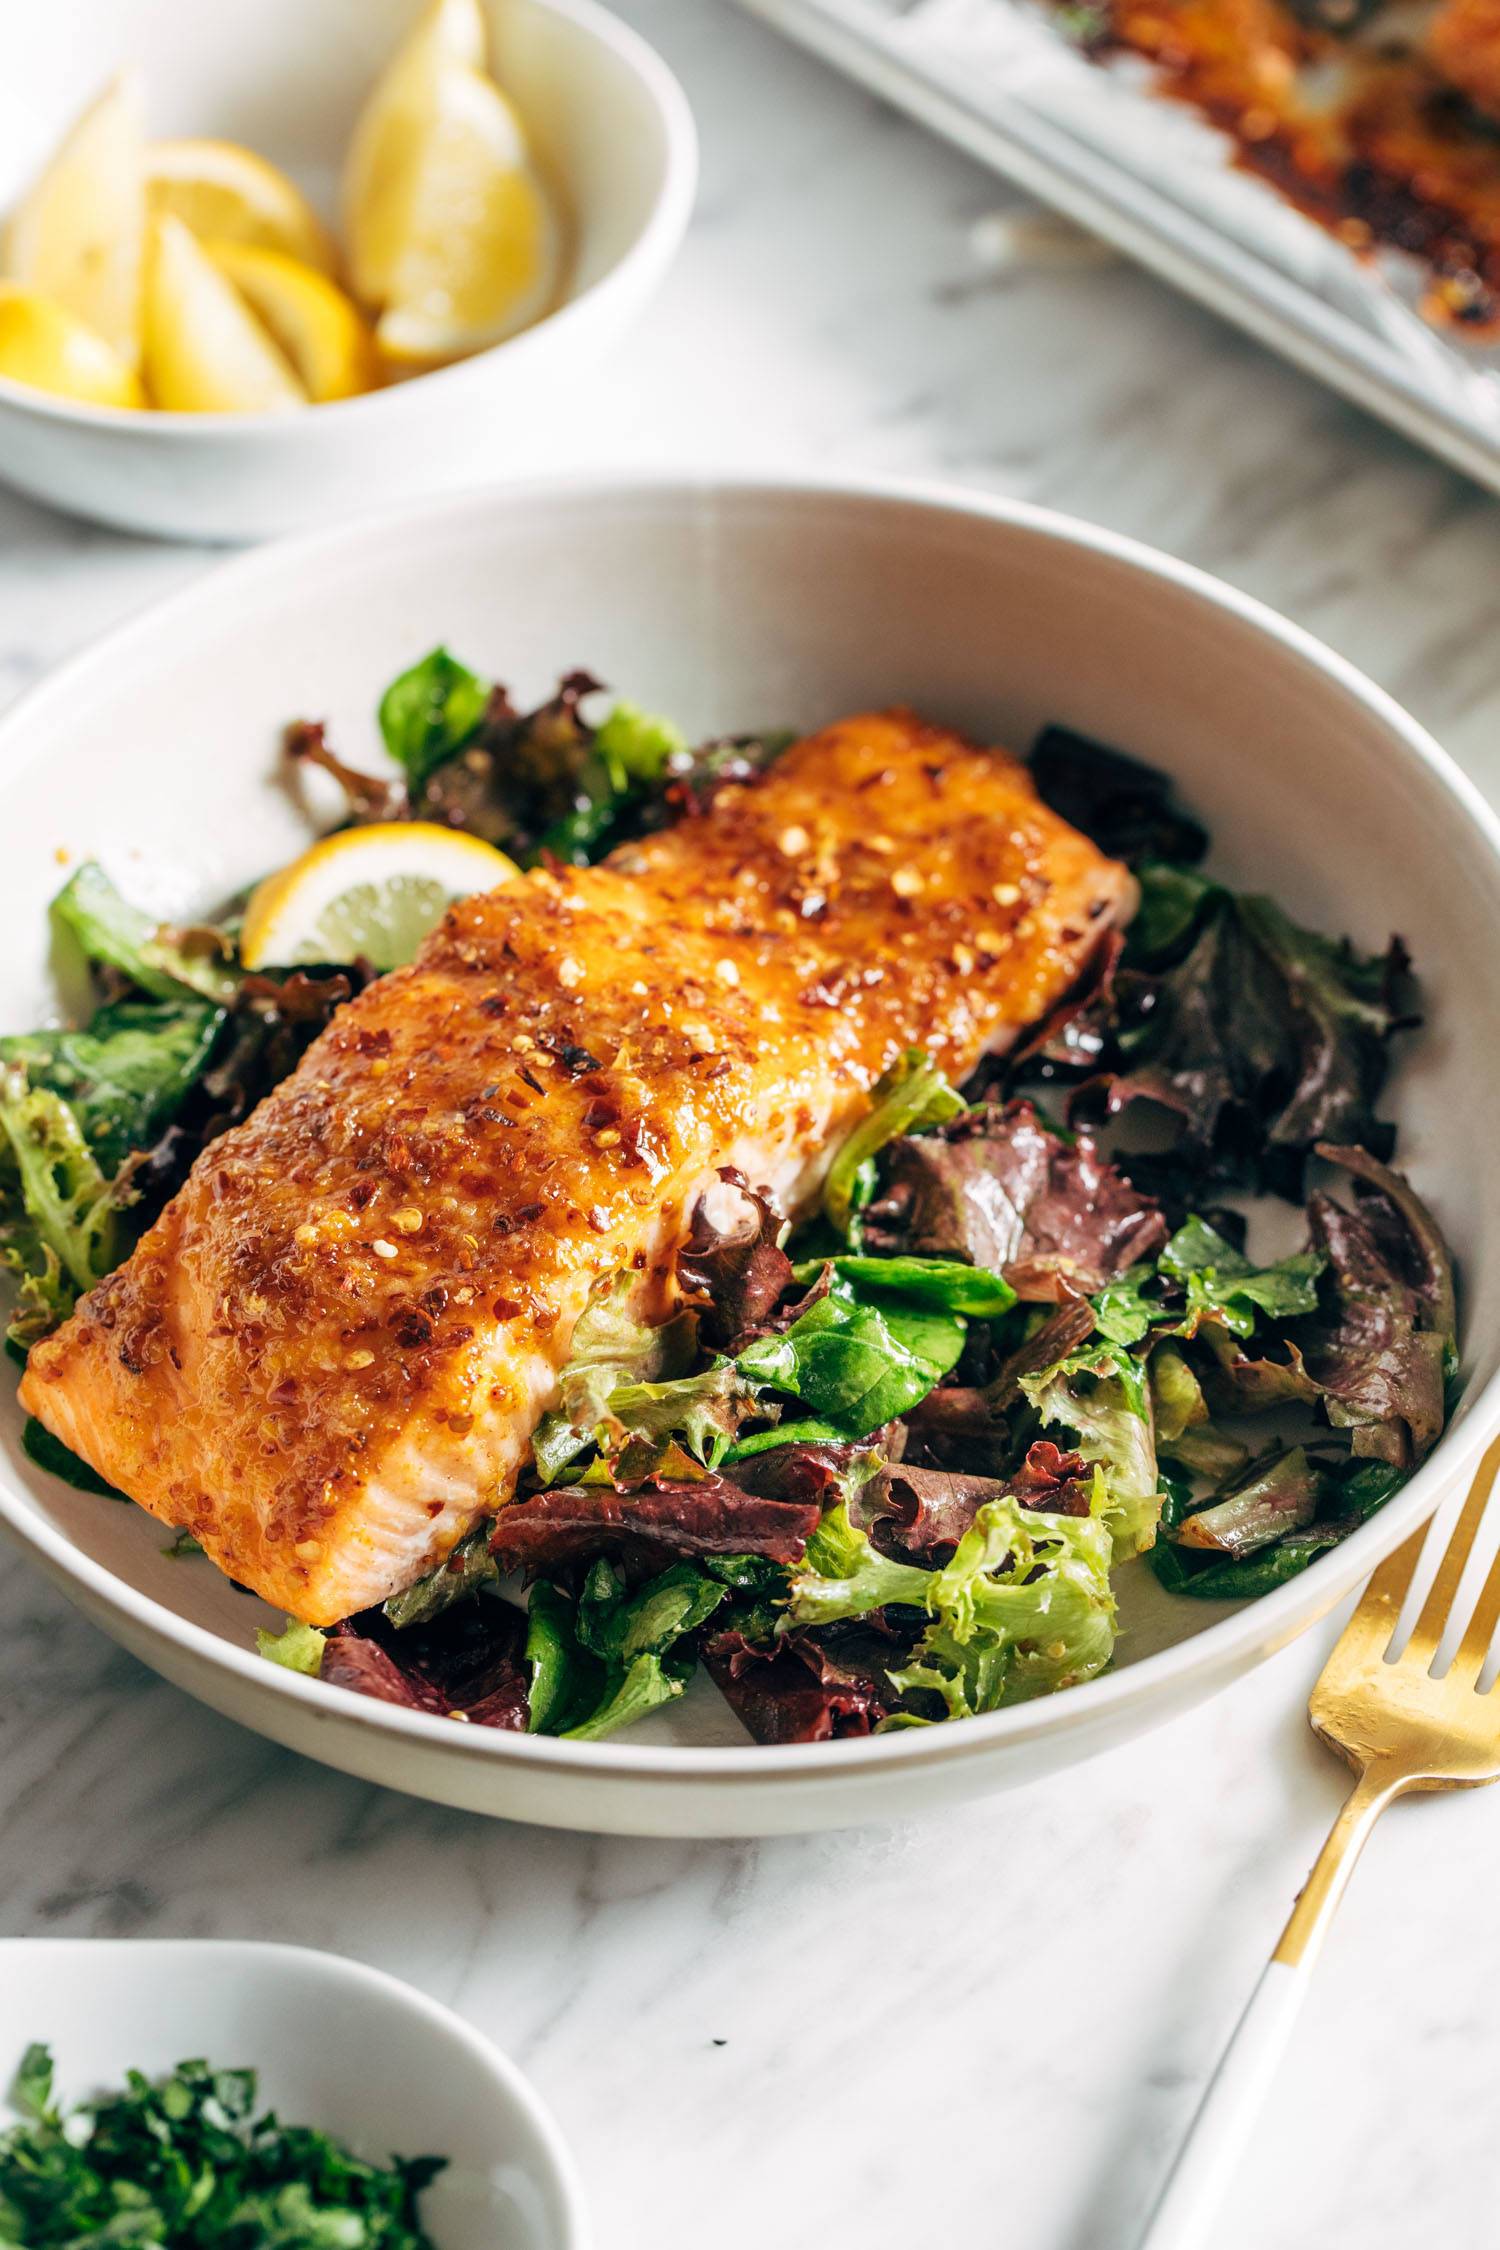
    This is a spicy-sweet little number (hello, “hot honey”) and it gets its name from the sauce that gets brushed over the whole thing, which is grainy from the mustard and flecks of fresh garlic, sweet and sticky from the honey, and a little, medium, or LOT hot from however many red pepper flakes you wanna throw in there. I cannot stress enough how beautiful it is to look at! And it’s one of those salmon recipes that works for even people who aren’t salmon people, because garlic, honey, stone ground mustard, and some peppery heat are magical little wonder foods. If you’re one of those people and want to further your adventure into delicious salmon, we have a how-to guide for cooking salmon right here.

    It is about the most foolproof way you could ever think to make salmon. Chaotic dinnertime, stress, and lack of time and energy is no problem for this beauty.

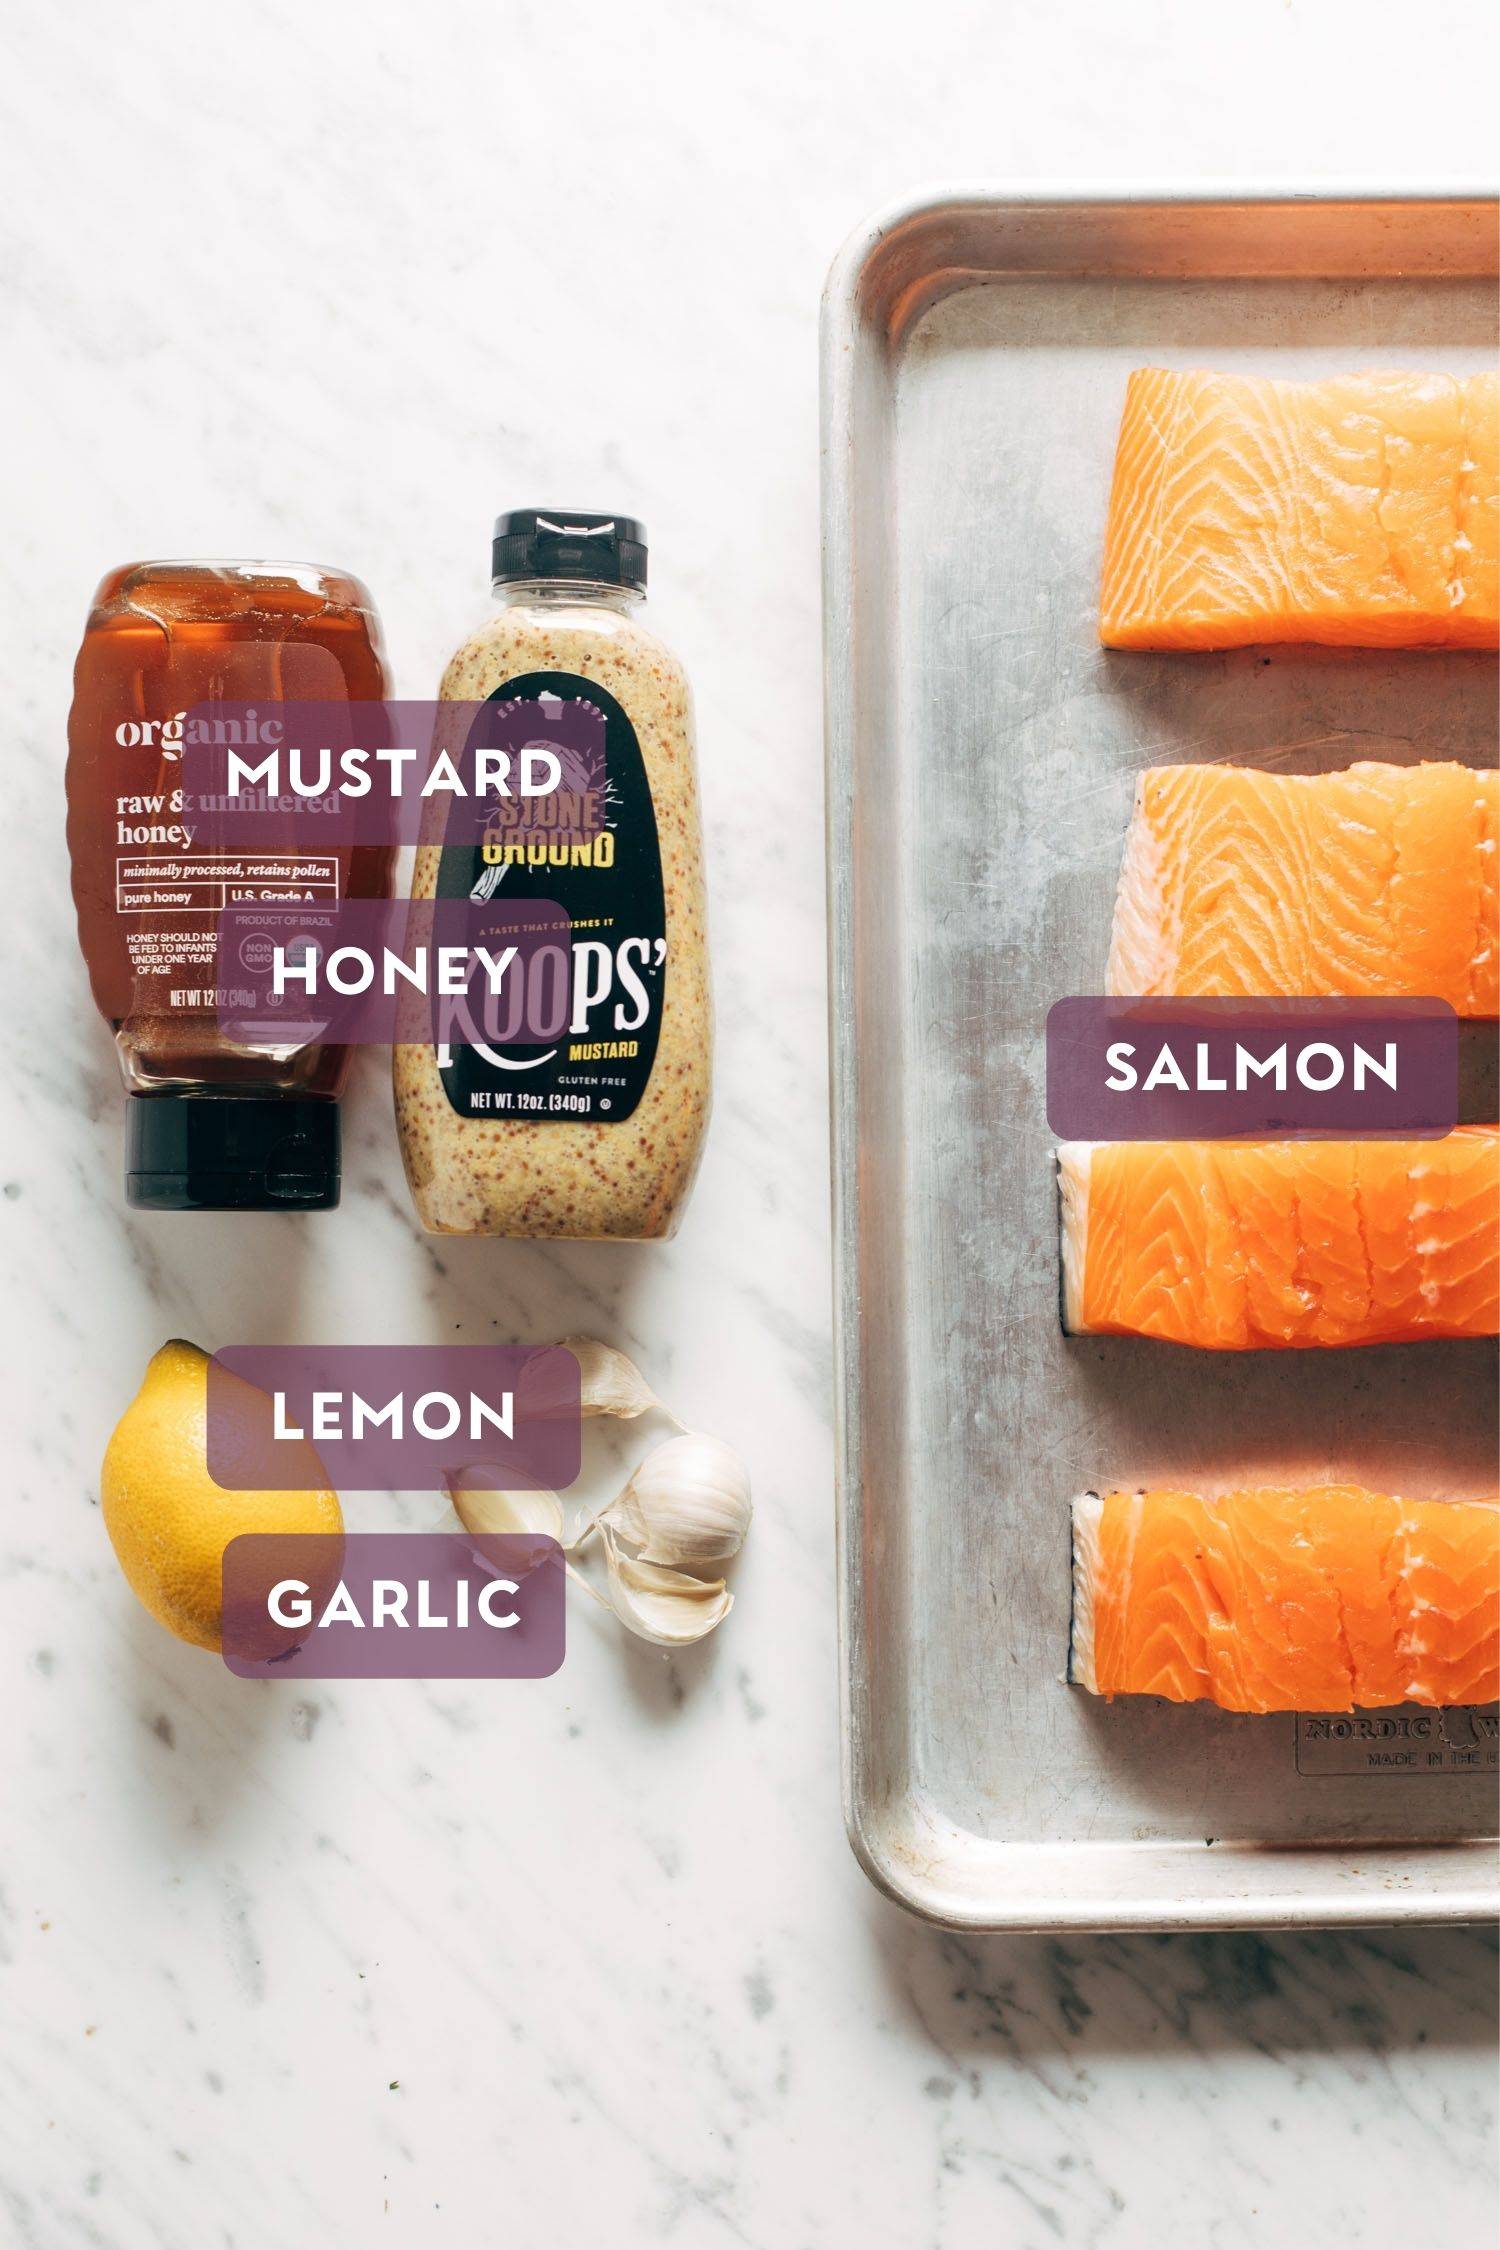
    Ingredients for hot honey salmon. Each ingredient is labeled with the name in a purple bubble.

    The Ingredient Details

    Our basic / fabulous ingredient list:

    • Stoneground mustard
    • Honey
    • Garlic
    • Paprika
    • Red Pepper Flakes
    • Lemon
    • Salmon

    … Salt? Olive oil? I’m trying to think if there’s anything else worth mentioning, but I think that’s pretty much the whole shebang right there.

    You shake up the sauce, you brush the salmon, and you bake it.

    That’s the whole recipe.

    And this is why the SOS series is my favorite.

    Looking for another SOS salmon favorite? This Bang Bang Salmon is SO GOOD.

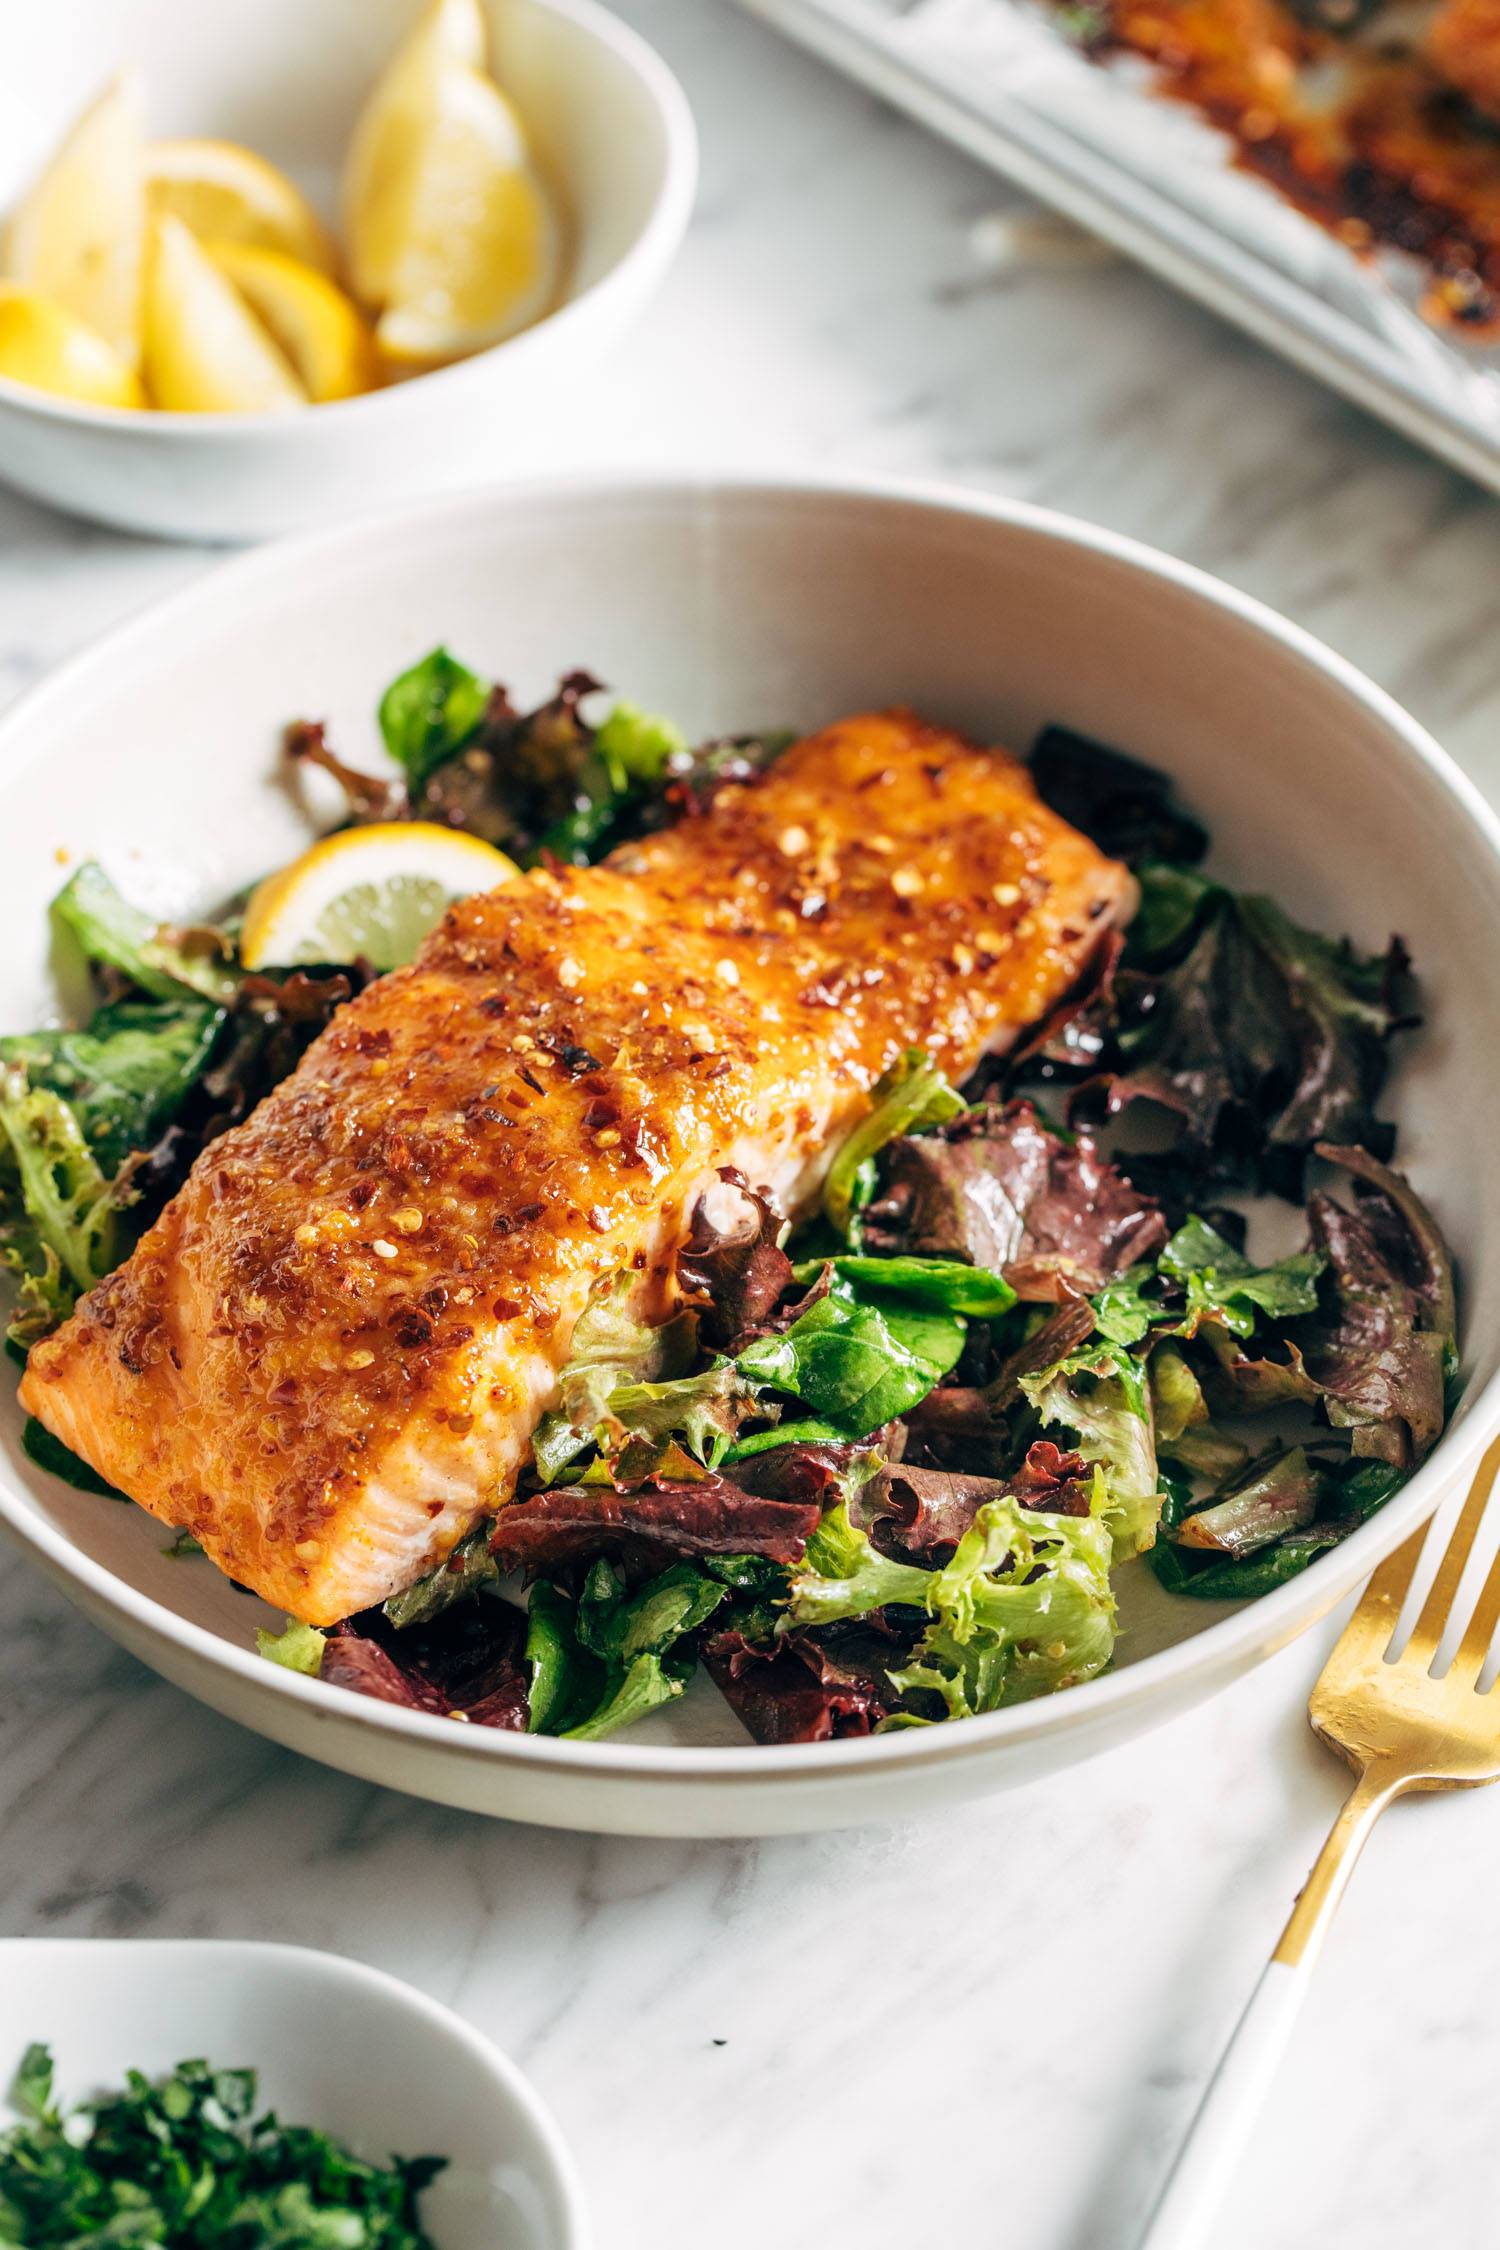
    Hot honey salmon in a bowl on top of a green salad. There's a fork on the side of the bowl.

    What To Serve with This Salmon

    A pro tip: your sauce can actually work really nicely as a dressing, so save a little bit in your jar, drizzle with olive oil, and toss it on some greens and you’ll almost immediately round out your meal.

    This salmon is extremely versatile – pair it with those dressed up greens, or steamed green beans from the garden, some roasted potatoes or rice or cauliflower rice or, preferably, HOT CRUSTY BREAD WITH BUTTER, and just enjoy your life, really.

    Hot Honey Salmon: FAQs

    What kind of salmon should I use?

    Fresh Atlantic salmon or wild sockeye salmon work great here! The Atlantic salmon has a bit more fat in it, so the fish doesn’t dry out as easily. It’s so good!

    That salad – YUM! How did you make it?

    Super SOS-friendly salad here. Just some mixed greens of your choice and toss some of that extra hot honey sauce on your salad for a quick dressing. Another idea is this Toasted Bread and Parmesan Kale Salad – muah! Delish!

    Not a big salmon fan here. Anything I can sub?

    But have you tried THIS salmon yet? This one might convert you to start proclaiming “Salmon 4 Prez!” If you’re still like 🙅‍♀️🙅‍♀️🙅‍♀️, try the hot honey sauce on some chicken or tofu. Yum!

    Prefer To Watch Instead Of Read?

    Watch Lindsay make this salmon on stories!


    Print

    clock clock iconcutlery cutlery iconflag flag iconfolder folder iconinstagram instagram iconpinterest pinterest iconfacebook facebook iconprint print iconsquares squares iconheart heart iconheart solid heart solid icon

    Description

    This Hot Honey Salmon is giving off major fancy-to-eat-but-not-fancy-to-make vibes. Spicy-sweet salmon coated in fresh garlic, stone ground mustard, sweet honey, and flecks of red peppers flakes. It’s a magical little number! 


    For the salmon: 

    Extras: 


    1. Make the sauce: Preheat the oven to 400 degrees. Mix the sauce ingredients in a small dish. Set a little sauce aside for to make a salad dressing later. See notes for this.

    2. Bake the salmon: Line a baking sheet with foil (optional, but makes cleanup much easier). Place salmon skin side down. Brush or spoon the sauce over the salmon, getting it really well coated on top. Bake for 8-10 minutes depending on desired doneness and the thickness of your salmon filets, and broil for just a few minutes at the end to get it extra browned and pretty on top.

    3. Finish and serve: Top each piece with more red pepper flakes. Serve with little lemon wedges, plus a green salad and maybe (for surely) a hunk of hot, crusty, buttered bread. Dreamy.

    Notes

    Salad hack: If you take care not to dip your raw salmon utensils back into the sauce, you can repurpose any remaining sauce as a dressing for some spring greens! Just add a little olive oil and red wine vinegar, and there’s your dressing. Easy green salad, done.

    Nutrition: The nutrition info listed is only for the hot honey salmon and doesn’t include any of the extras. 

    • Prep Time: 10 minutes
    • Cook Time: 10 minutes
    • Category: Dinner
    • Method: Bake
    • Cuisine: American

    Keywords: baked salmon recipe, hot honey salmon, easy salmon recipe

    More Salmon Recipes To Make ASAP

    Time To Show You Off!

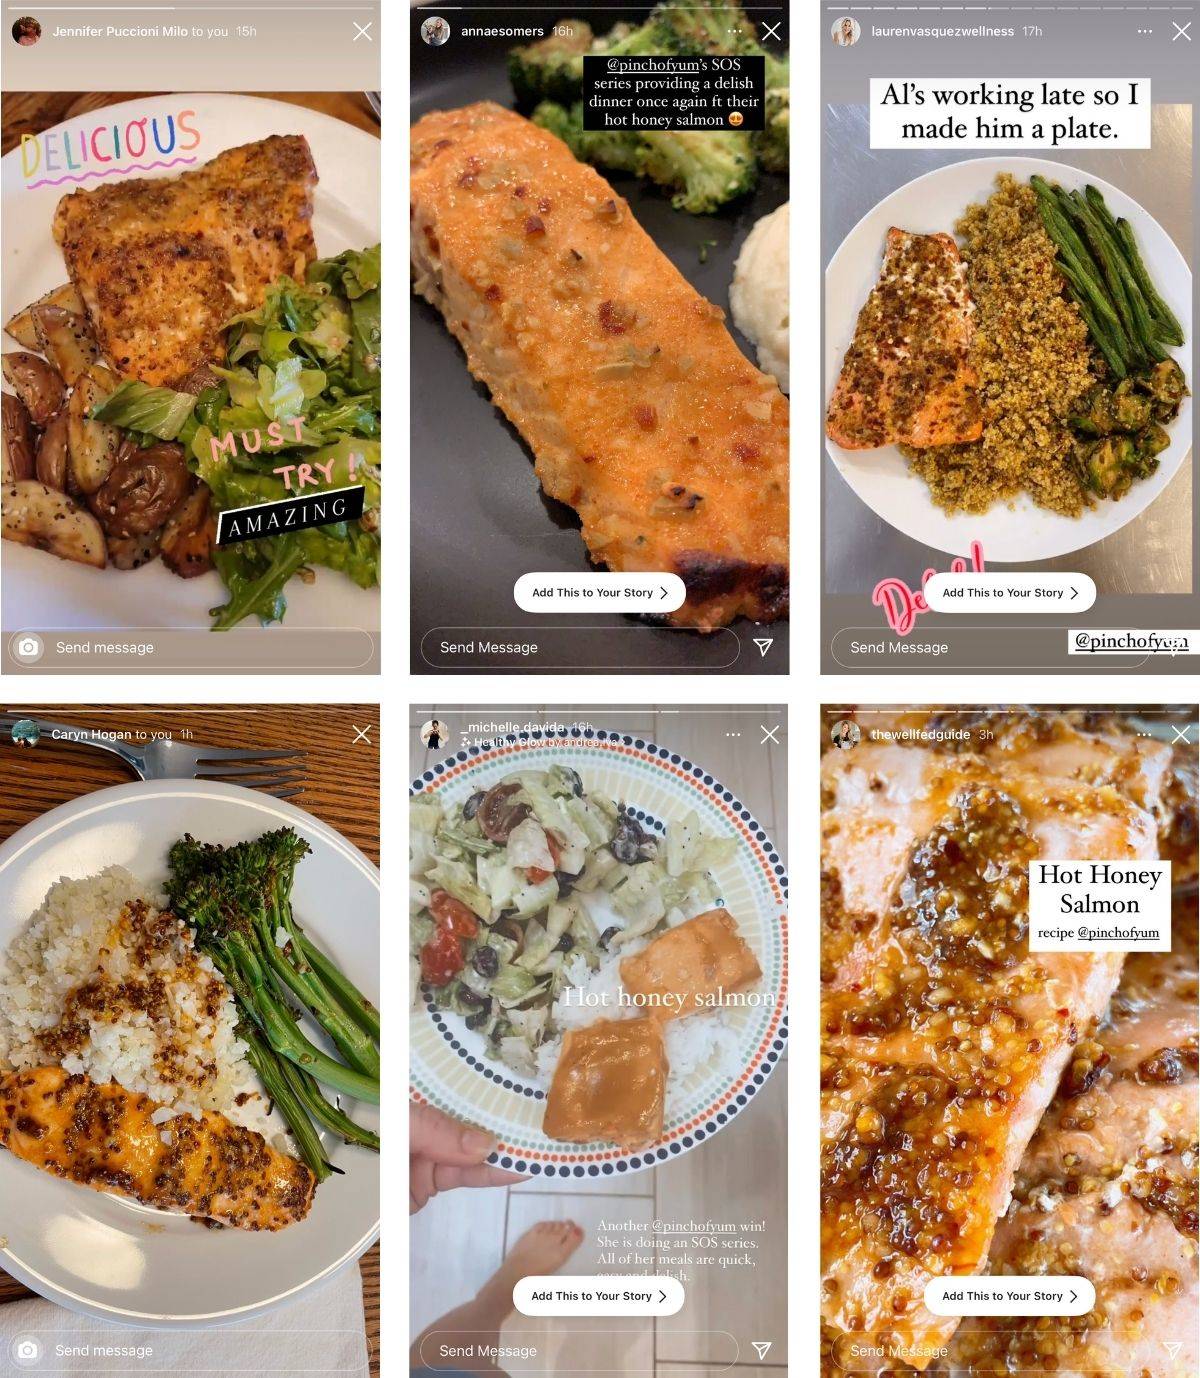
    Reader images of the Hot Honey Salmon recipe.

    One More Thing

    This recipe is part of our collection of sweet honey recipes. Check it out!

    Source link

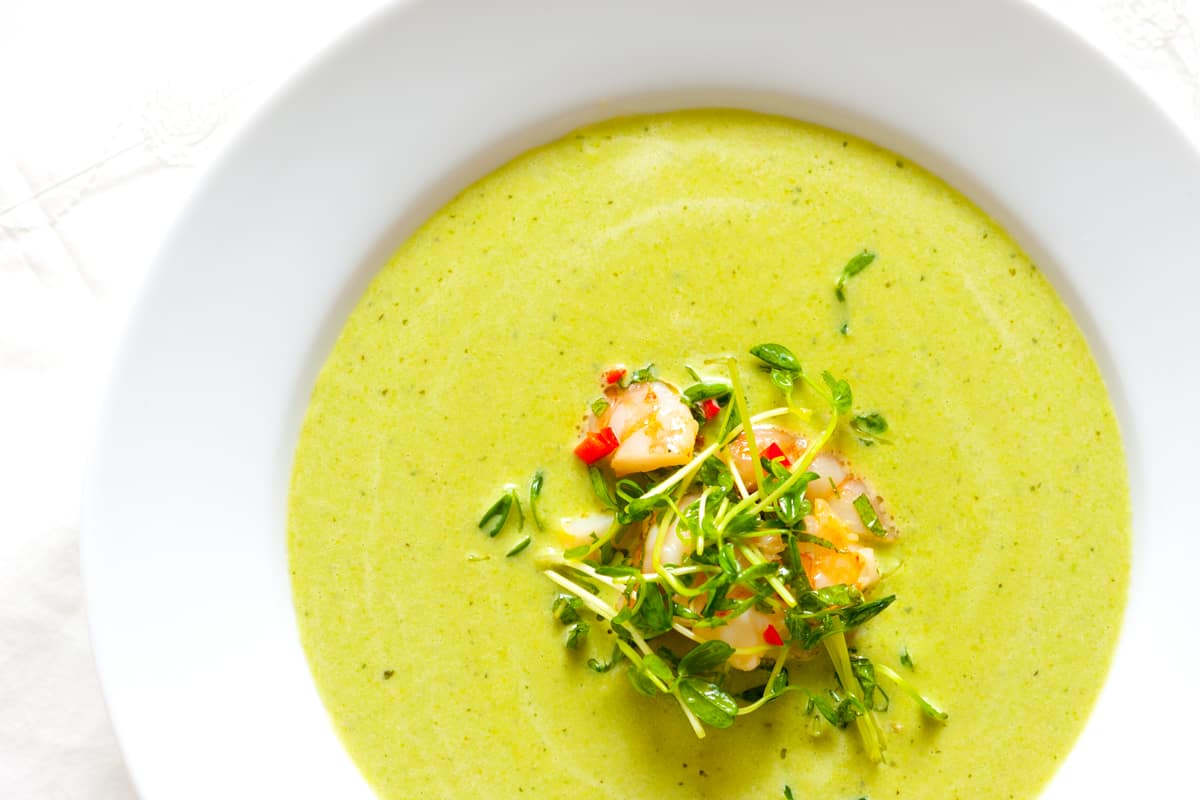
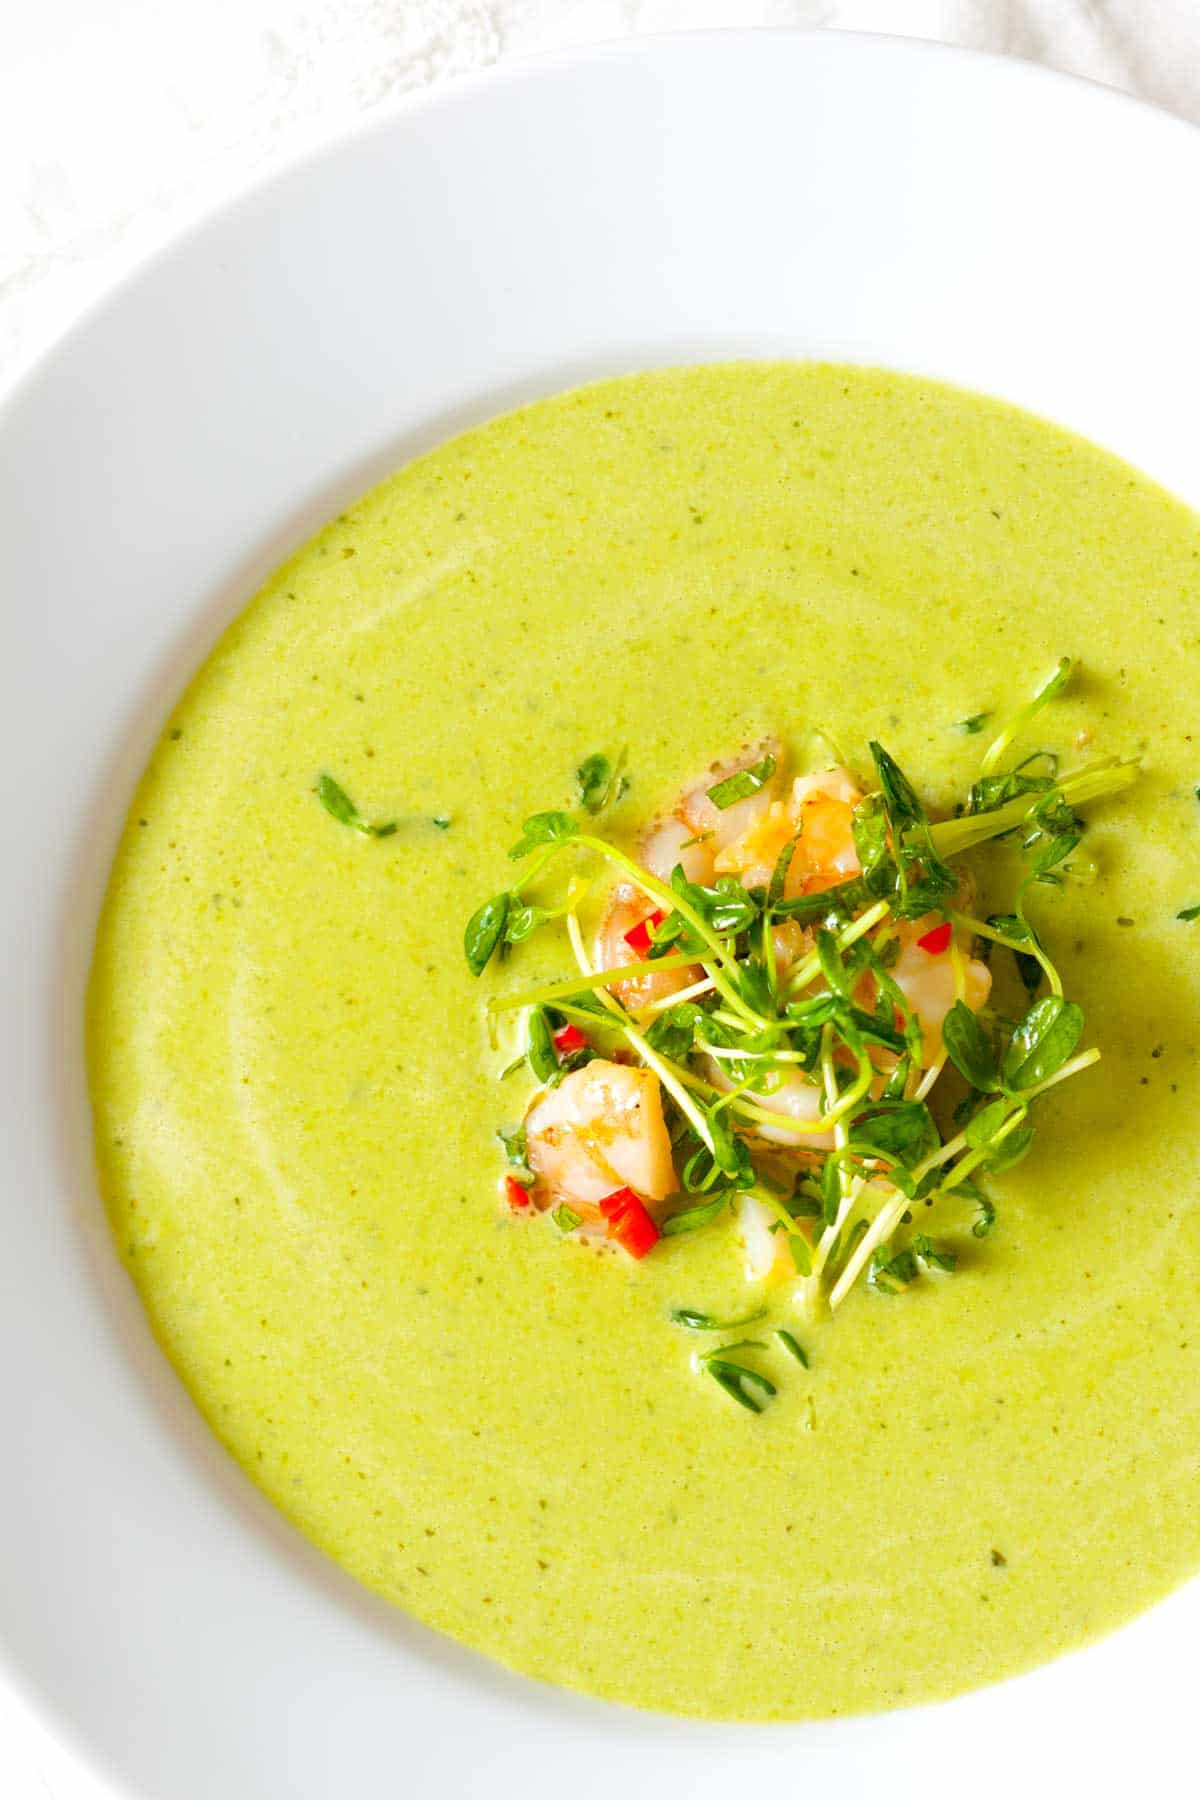
  • Chilled Pea Soup with Shrimp Recipe

    Chilled Pea Soup with Shrimp Recipe

    How to make chilled pea soup with shrimp, mint and lime. Jump to the Chilled Pea Soup Recipe or read on to see our thoughts on making it.

    Chilled Pea Soup Recipe with Shrimp

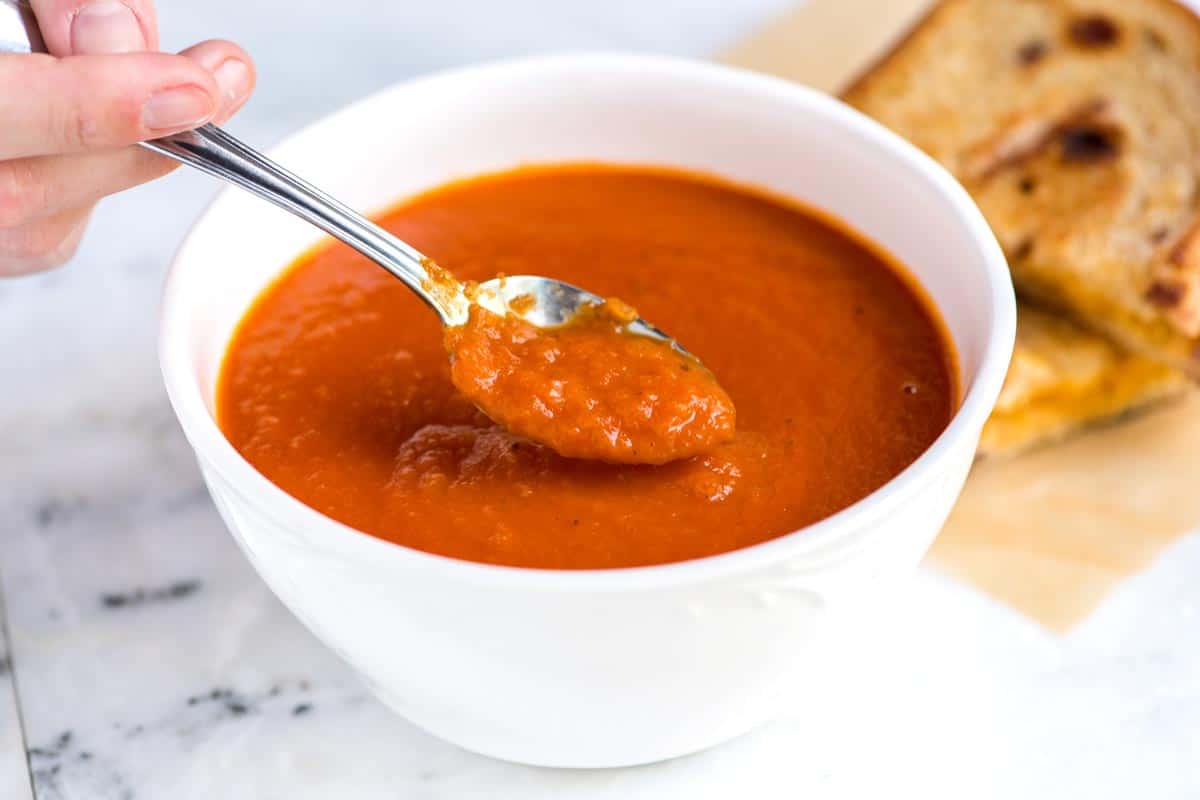
    Easy Three-Ingredient Tomato SoupYOU MAY ALSO LIKE: You wouldn’t think that three ingredients — butter, onion, and tomato — can come together to make such a velvety and delicious tomato soup, but let me tell you. They can. Jump to the Tomato Soup Recipe.

    The kitchen is our therapy, it always has been. Food is kind. The world outside our kitchen can often seem unkind and full of too many questions without answers. But, inside our small kitchen, it is happy and makes sense. On a day when outside seemed too much, we stayed in to make this pea soup. It was everything we needed and more; we talked, we drank wine, we laughed and even wiggled our hips a bit when our favorite songs played through the speakers.

    How to Make Chilled Pea Soup with Shrimp and Mint

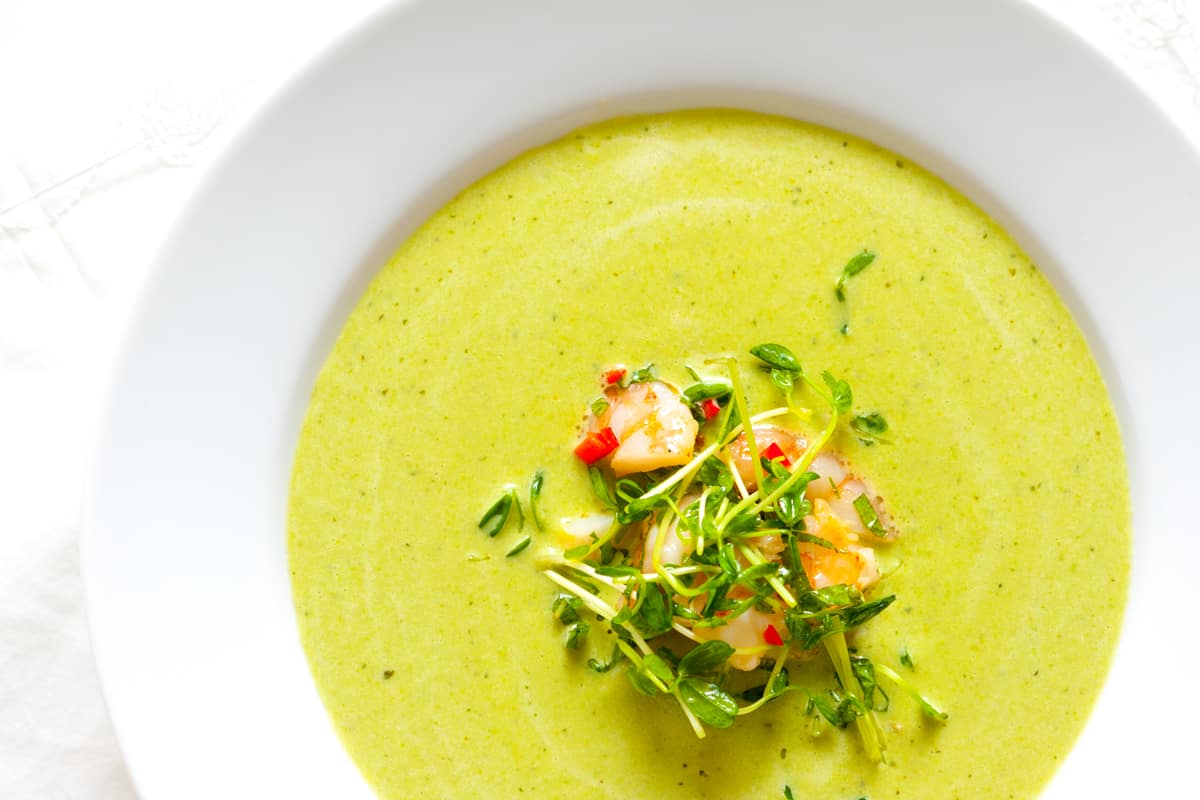
    The soup comes together in minutes. It’s delicious hot, but absolute perfect cold. When it’s chilled, we add a big handful of roasted shrimp (click for recipe), greens, mint and lime in the middle.

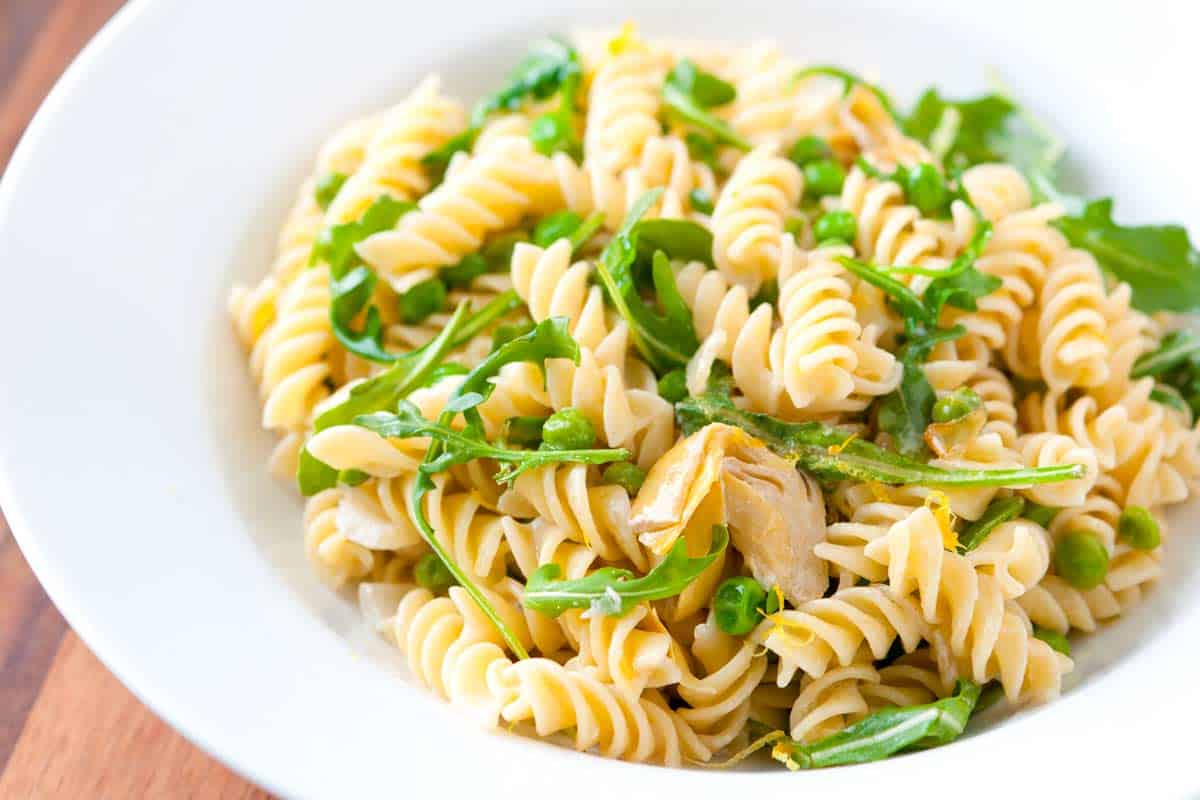
    Goat Cheese and Artichoke Pasta RecipeYOU MAY ALSO LIKE: Thanks to artichokes, lemon and arugula this pasta isn’t heavy, but still has a little creaminess from goat cheese and just a touch of cream. Jump to the Goat Cheese and Artichoke Pasta Recipe.

    Recipe updated, originally posted August 2011. Since posting this in 2011, we have tweaked the recipe to be more clear. – Adam and Joanne

    Chilled Pea Soup Recipe with Shrimp

    • PREP
    • COOK
    • TOTAL

    This soup is best served cold, but it is quite delicious hot. We roast the shrimp for this — you can see how we do it by looking at our roasted shrimp recipe.

    Makes approximately 4 servings

    You Will Need

    Pea Soup

    1/2 cup sliced shallots (1 to 2 large shallots)

    1/4 cup sliced garlic (4 to 6 cloves)

    1 tablespoon coriander seeds, toasted

    1 Anaheim pepper, sliced, seeds and stem included

    4 cups shelled English peas or thawed frozen peas

    3 1/2 cups creme fraiche

    1/4 cup packed whole mint leaves

    Salt and fresh ground black pepper


    For Serving

    2 cups cooked shrimp, see our roasted shrimp recipe

    1/4 cup finely sliced mint leaves

    Extra-virgin olive oil

    2 limes, zested and juiced

    1/2 cup pea shoots

    1 red chili, minced, optional

    Salt and fresh ground black pepper

    Directions

    • Make Soup
    • 1Bring a large pot of salted water to a boil over medium heat. Add the shallots, garlic, coriander seeds and sliced pepper. Bring the water back to a boil then add the peas and cook until the peas are tender but not mushy, about 45 seconds.

      2Using a slotted spoon or spider, add the pea mixture to a blender with about 1/2 cup of the liquid. Add 3 to 4 grinds of fresh black pepper, the the creme fraiche and mint leaves. Puree until smooth, adding more liquid as needed.

      3Add soup to a bowl set over a larger bowl filled with ice water. Stir the soup until chilled. Or refrigerate until well chilled.

    • Serve Soup
    • 1Toss the shrimp, a drizzle of olive oil, lemon zest, lime juice, pea shoots, chili and a sprinkle of salt and pepper together in a bowl.

      2Taste the chilled soup and adjust with more salt and/or pepper as needed then divide between bowls. Add a handful of the shrimp salad to the middle of each bowl.

    Adam and Joanne’s Tips

    • This recipe was inspired and adapted by Michael Symon’s Chilled Spring Pea Soup with Crab Salad, Creme Fraiche and Mint.

    If you make this recipe, snap a photo and hashtag it #inspiredtaste — We love to see your creations on Instagram and Facebook! Find us: @inspiredtaste


    AUTHOR:

    Adam Gallagher

    Adam and Joanne of Inspired Taste

    We are Adam and Joanne Gallagher, the creators of Inspired Taste. Established in 2009, Inspired Taste grew from a childhood dream into one of the internet’s most trusted recipe sites with hundreds of reliable recipes, step-by-step videos, and expert tips.More About Us


    Source link

  • Perfect Cheese Pizza Recipe

    Perfect Cheese Pizza Recipe

    My family loves this homemade cheese pizza recipe! Made with two types of cheese, it’s been on repeat in our home for years. This extra cheesy pizza is perfect for any pizza lover and occasion.

    Homemade Cheese Pizza

    Are you ready to make the best homemade cheese pizza we have ever made? This recipe has become our family’s go-to homemade pizza. It’s super simple and so good!

    We have lots of pizza recipes on Inspired Taste. Check out our Margherita pizza, this easy flatbread pizza, or if you are looking for homemade dough, this pizza dough.

    Key Ingredients

    • Dough: I love using my homemade pizza dough recipe, but any store-bought dough will work.
    • Sauce: Your favorite store-bought pizza sauce is perfect! In a pinch, I’ve even used spaghetti sauce. This homemade pizza sauce is great, too.
    • Cheese: I use shredded mozzarella (not fresh mozzarella) for that classic pizza melt. A sprinkle of shredded Parmigiano-Reggiano adds a nice salty kick!
    • Toppings: Fresh chives and dried oregano are my go-to toppings for this cheese pizza. Chives add a subtle onion-garlic flavor, while oregano gives it that classic pizzeria taste.

    How to Make Cheese Pizza

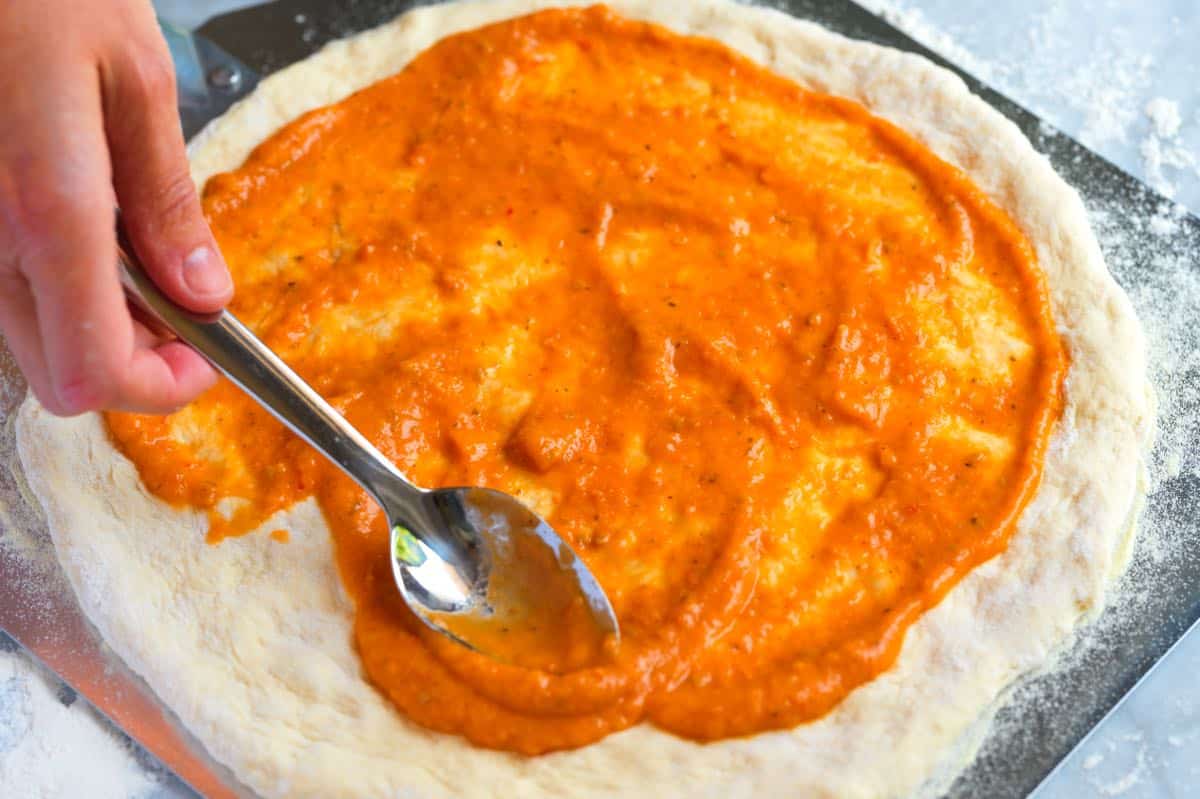
    Here’s how to make my family’s favorite cheese pizza! First, we use a good pizza dough and leave it on the counter to warm up a bit before patting it into a thin disc. Then, I’m pretty generous with my sauce (I love this pizza sauce).

    How to Make Cheese Pizza: Adding sauce to pizza crust

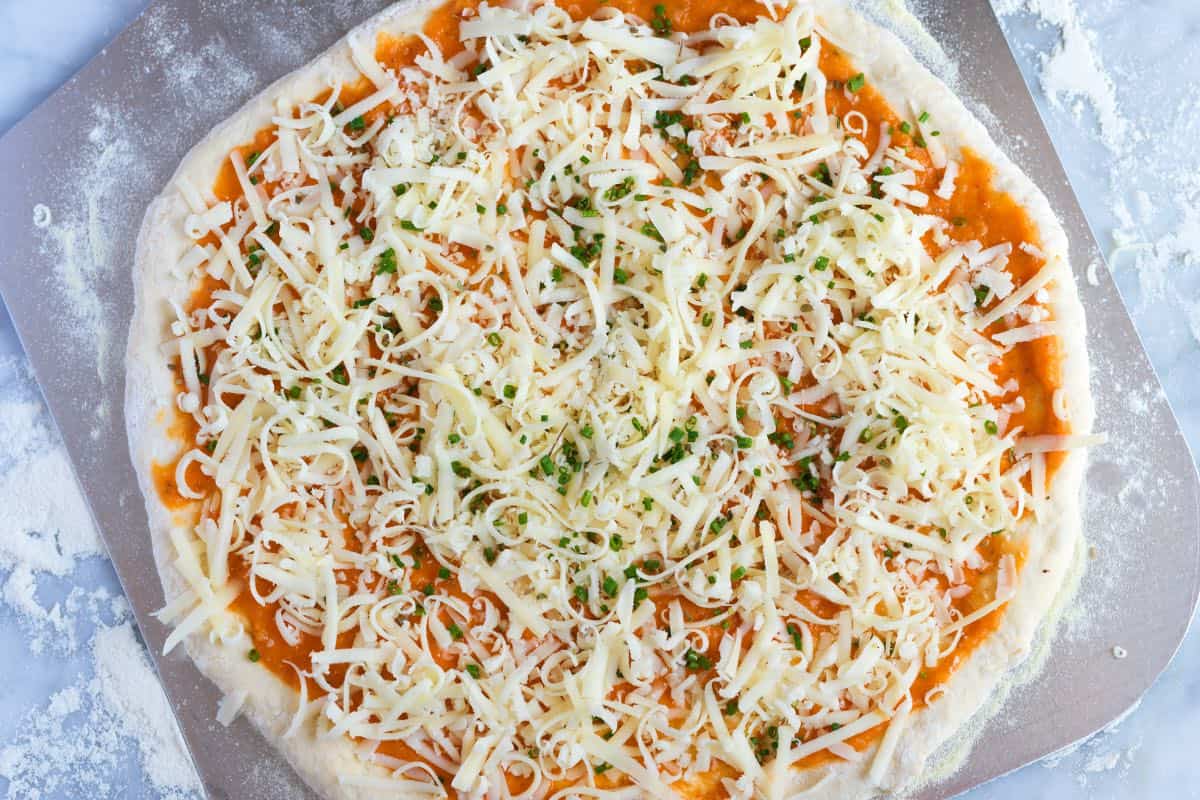
    Now grab a bowl and toss together shredded mozzarella, parmesan cheese, chives, and oregano. Then, generously scatter the mixture all over the pizza. Last but not least, bake it!

    How to Make Cheese Pizza: Cheese pizza ready to be baked

    I bake my pizzas in a very hot oven and use a pizza steel. Since not everyone has one, I’ve included all my tips in the recipe below. By the way, I love this pizza topped with a spoonful of giardiniera (which is an herby pickled vegetable relish-so good!).

    Best Homemade Cheese Pizza

    Perfect Cheese Pizza

    • PREP
    • COOK
    • TOTAL

    Our best recipe for cheese pizza! We use our favorite homemade pizza dough, a garlicky pizza sauce, two types of cheese, and herbs.

    Makes 1 large pizza

    You Will Need

    1 batch homemade pizza dough or use store-bought dough

    4 to 6 tablespoons pizza sauce, try homemade pizza sauce

    1 cup (57g) shredded mozzarella, not fresh mozzarella

    1/2 cup (28g) shredded parmesan

    1 tablespoon chopped fresh chives

    1/4 teaspoon dried oregano

    All-purpose flour, for forming dough disc

    Semolina flour, for dusting pan

    Directions

      1At least 30 minutes before you plan to bake your pizza, preheat the oven to 450° Fahrenheit (232°C). If you have one, place a pizza steel or pizza stone into the oven before preheating. Personally, we use a higher temperature, see the tips section for our thoughts on what temperature is best for baking pizza at home.

      2If your pizza dough is cold, allow it to warm at room temperature for 20 to 30 minutes.

      3When ready to bake your pizza, prepare a pizza peel or pizza pan by dusting it with semolina flour.

      4In a medium bowl, mix the shredded mozzarella, parmesan, chives, and oregano together.

      5Dust a clean work surface with all-purpose flour, and then form your pizza dough into a round, large enough to fit your pizza peel or pan. To stretch the dough, avoid rolling it out, as this can flatten the bubbles that have formed. Instead, use your fingers to make dimples in the dough, starting from the center and working outwards. Carefully stretch and push the dough to fit your pizza pan or peel. Use a light touch to maintain as many air pockets in the dough as possible.

      6Transfer the dough round to your pizza peel or pan, and reform it if it shrinks back a bit.

      7Spread pizza sauce over the pizza, leaving a thin edge untouched for the crust. Scatter the cheese mixture over the sauce.

      8Bake until the crust is set and golden brown and the cheese has melted with golden spots all over, 6 to 15 minutes, depending on oven temperature. Remove from the oven, cut, and serve.

    Adam and Joanne’s Tips

    • Oven temperature: We recommend 450° Fahrenheit (232°C) in the recipe, but if you are comfortable with it, increasing the temperature to 550° Fahrenheit (288°C) will provide even better results. If you have a vented hood above your oven, turn it on high. When our oven is heated to such a high temperature, the fire alarm occasionally goes off due to the hot air that escapes when we open our oven door. It’s not a problem, other than the noise, and in our experience, it is remedied with a few fans of a dish towel near the alarm, but it is something to consider. If 550° Fahrenheit (288°C) is too high for you, feel free to use a lower temperature. However, keep in mind that this pizza bakes best between 425° Fahrenheit and 550° Fahrenheit (218°C to 288°C). The lower the temperature, the longer it will take to bake and the less bubbly it will be.
    • The nutrition facts provided below are estimates.

    Nutrition Per Serving
    Serving Size
    1/4 of the recipe
    /
    Calories
    330
    /
    Total Fat
    9.1g
    /
    Saturated Fat
    5.1g
    /
    Cholesterol
    27.2mg
    /
    Sodium
    934.4mg
    /
    Carbohydrate
    45.5g
    /
    Dietary Fiber
    2.5g
    /
    Total Sugars
    1.7g
    /
    Protein
    15.8g


    AUTHOR:

    Joanne Gallagher

    Adam and Joanne of Inspired Taste

    We are Adam and Joanne Gallagher, the creators of Inspired Taste. Established in 2009, Inspired Taste grew from a childhood dream into one of the internet’s most trusted recipe sites with hundreds of reliable recipes, step-by-step videos, and expert tips.More About Us
    Previous Post: The Best Vegetable Broth
    Next Post: Fluffy Buttermilk Pancakes

    Source link

  • Baked Ziti Recipe with Shrimp and Spinach

    Baked Ziti Recipe with Shrimp and Spinach

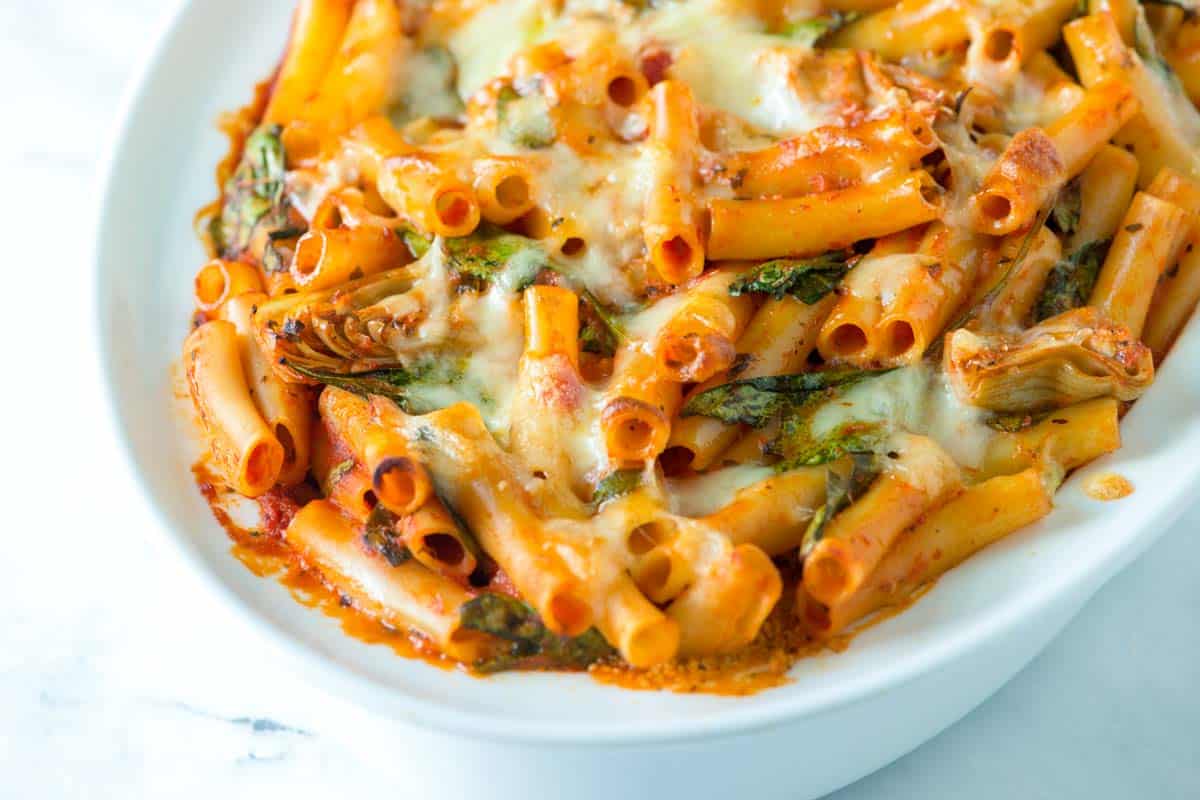
    How to make baked ziti with shrimp, spinach, and feta cheese. Jump to the Baked Ziti Recipe with Shrimp or read on to see our tips for making it.

    Baked Ziti Recipe with Shrimp and Spinach

    There are very few things that can beat pasta for me — I absolutely love it. I love that pasta can be hearty like our Pumpkin Mac and Cheese or light, like this shrimp ziti. I love that you can combine it with almost anything, from brown butter and walnuts to sausage and ricotta. Most of all, I love that it’s fast. With about 15 minutes of hands-on time this easy baked ziti is perfect for busy nights.

    Easy Baked Ziti with SpinachYOU MAY ALSO LIKE: This Easy Baked Ziti Recipe with Spinach has lots of spinach, artichokes, and a creamy pesto layer in the middle. Easy and delicious.

    How to Make Baked Ziti with Shrimp and Spinach

    Start by cooking your pasta, but undercook it by 1 to 2 minutes. This way, when we toss it with the other ingredients and bake the pasta won’t become mushy.

    One of my favorite parts to this recipe is the lemony tomato sauce. It’s light and plays so nicely with the shrimp and feta cheese. It’s extremely simple to make — just olive oil, canned tomatoes, garlic, red pepper flakes, and lemon zest.

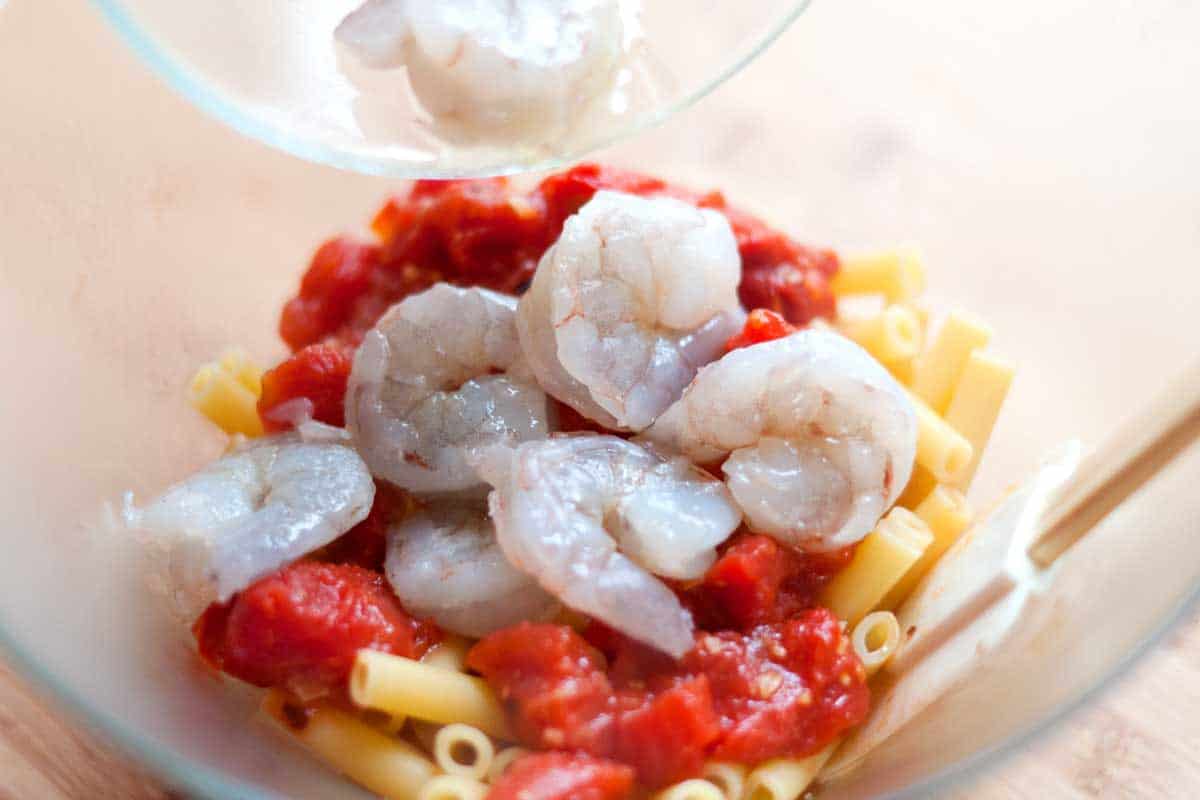
    For the shrimp, season them lightly with a little olive oil, salt, and pepper. Then, when the pasta is cooked, toss it with the shrimp, our homemade sauce, spinach, and feta cheese.

    How to Make Baked Ziti with Shrimp and Spinach

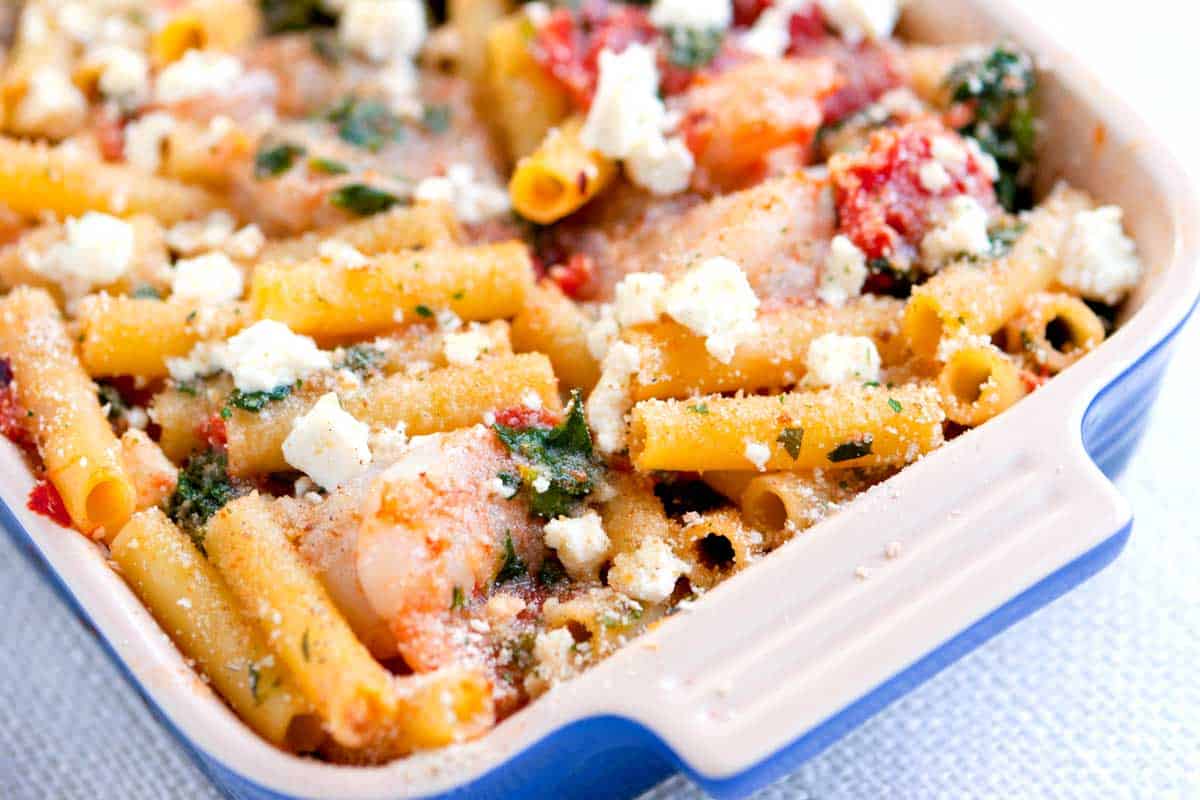
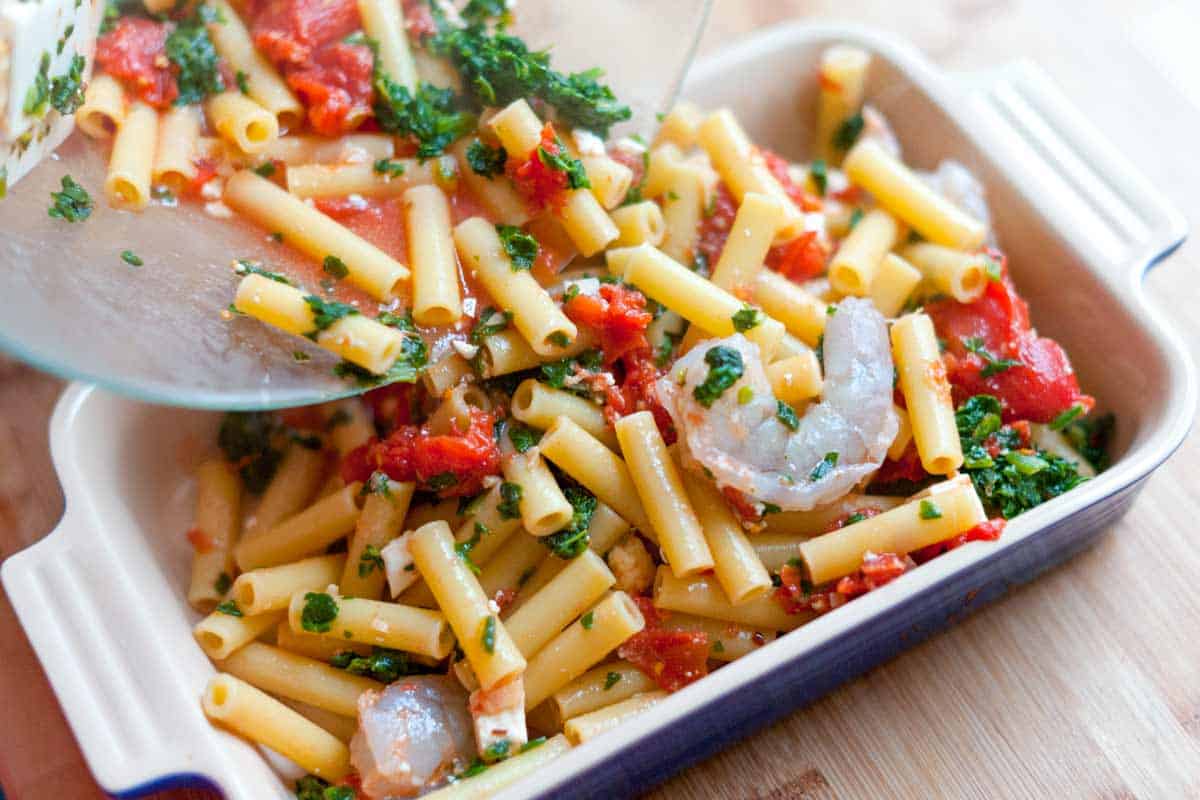
    Toss everything together and slide into a baking dish. See how fresh and light it looks. I love that.

    How to Make Ziti with Shrimp and Spinach

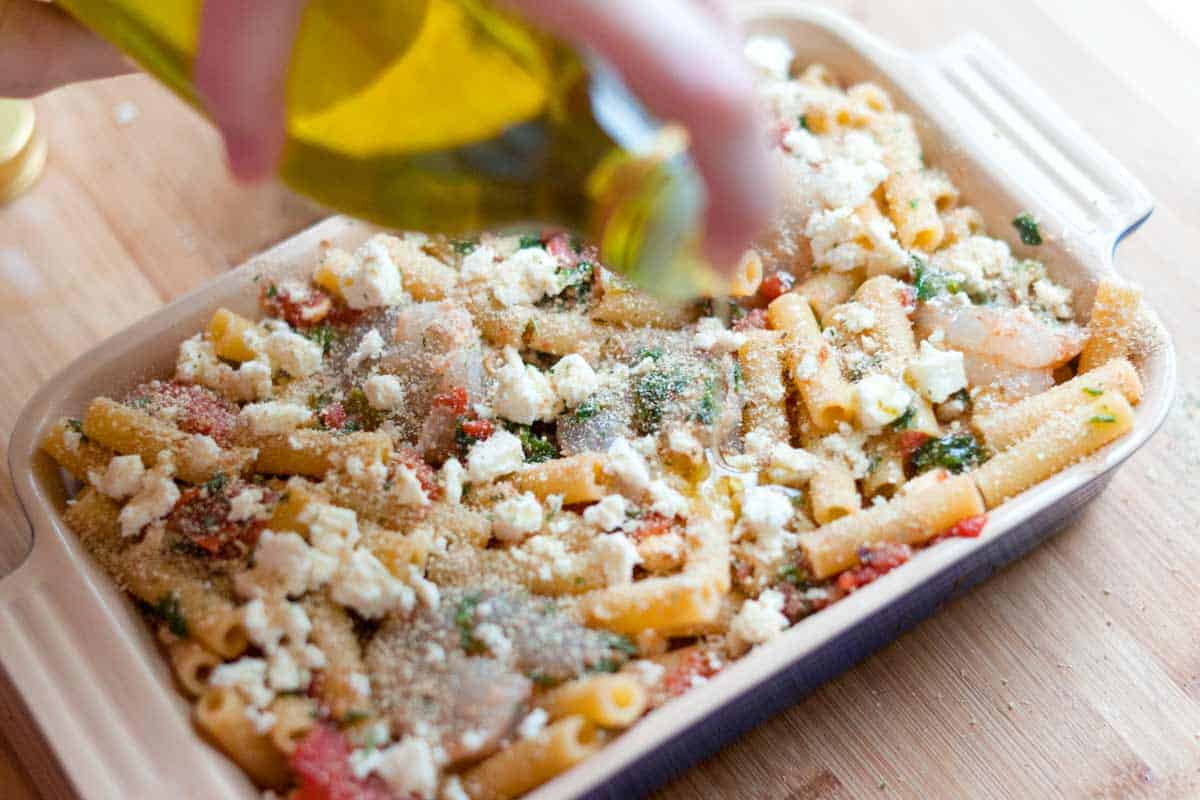
    Just before baking, we scatter breadcrumbs, feta cheese, and a drizzle of olive oil on top. Then the ziti is baked until the shrimp are cooked through and the top of the ziti begins to brown.

    How to Make Baked Pasta with Shrimp and Spinach

    Recipe updated, originally posted February 2012. Since posting this in 2012, we have tweaked the recipe to be more clear. – Adam and Joanne

    Easy Baked Ziti Recipe with Shrimp and Spinach

    • PREP
    • COOK
    • TOTAL

    With about 15 minutes of hands-on time this easy baked ziti is perfect for busy nights. When cooking the pasta, undercook it by 1 to 2 minutes. This way, when it is tossed with the other ingredients and baked the pasta won’t become mushy.

    Makes approximately 4 servings

    You Will Need

    8 ounces dried pasta, such as ziti, penne, or rigatoni

    2 tablespoons extra-virgin olive oil

    2 medium garlic cloves, finely chopped

    1/4 teaspoon crushed red pepper flakes

    1 (14.5-ounce) can diced tomatoes

    1 teaspoon grated lemon zest

    8 ounces medium shrimp, peeled and deveined

    1 (10-ounce) package frozen spinach, thawed and squeezed dry (about 1 1/4 cups)

    2 ounces feta cheese, crumbled

    2 tablespoons dried breadcrumbs

    Salt and fresh ground black pepper

    Directions

      1Heat oven to 350 degrees F. Butter a 2-quart baking dish or spray with non-stick cooking spray.

      2Bring a large pot of salted water to the boil, add the pasta then follow package directions, but cook 1 to 2 minutes less than the package calls for. Drain.

      3Meanwhile, make the sauce. Heat 1 tablespoon of the olive oil, garlic, and red pepper flakes over medium heat until the garlic turns light brown; about 1 minute. Add the tomatoes with juices, lemon zest, a 1/4 teaspoon of salt, and a pinch of pepper. Cook until heated through, about 5 minutes. Taste the sauce for seasoning, and adjust with additional salt and pepper if necessary.

      4Toss the shrimp with 1 teaspoon of olive oil, a 1/4 teaspoon of salt, and a few grinds of black pepper.

      5In a large bowl, toss the drained pasta, tomato sauce, shrimp, ringed out spinach, and half of the feta cheese. Add to the baking dish then top with remaining feta cheese, breadcrumbs, and a drizzle of olive oil.

      6Bake the ziti, covered, until the shrimp are thoroughly cooked (they will become firm and opaque); about 15 minutes. Uncover, and then bake until the cheese and breadcrumbs begin to brown, about 10 minutes.

    Adam and Joanne’s Tips

    • Cooked fresh spinach can be substituted for frozen. Cook about 1 pound of fresh spinach until wilted, squeeze out excess moisture and add to the filling.

    If you make this recipe, snap a photo and hashtag it #inspiredtaste — We love to see your creations on Instagram and Facebook! Find us: @inspiredtaste


    AUTHOR:

    Joanne Gallagher

    Adam and Joanne of Inspired Taste

    We are Adam and Joanne Gallagher, the creators of Inspired Taste. Established in 2009, Inspired Taste grew from a childhood dream into one of the internet’s most trusted recipe sites with hundreds of reliable recipes, step-by-step videos, and expert tips.More About Us


    Source link

  • Lobster Chowder | The Recipe Critic

    Lobster Chowder | The Recipe Critic

    This website may contain affiliate links and advertising so that we can provide recipes to you. Read my disclosure policy.

    Creamy, indulgent Lobster Chowder takes only 40 minutes to make and is incredibly flavorful! Tender potatoes, crisp bacon, and luscious lobster are enveloped in a creamy, velvety broth.

    Overhead shot of a bowl of lobster chowder.

    Reasons You’ll Love This Recipe

    • Easy to Make: For how fancy and indulgent this soup feels, it takes under an hour to prepare.
    • Indulgent Yet Accessible: This chowder is seriously so good. The best part is you probably already have all of the ingredients, minus the lobster.
    • Versatile: You can make this soup for a weeknight dinner or a fancy date night in. Pair it with boursin stuffed mushrooms as an appetizer, alongside roasted beet salad and creme brûlée for dessert.

    Excellent For Any Occasion

    This lobster chowder is so rich and creamy with succulent lobster, you guys are going to love it! It would be a great soup to serve your loved one for a Valentine’s Day date or a special occasion. But honestly, this soup is easy enough for any night of the week. If you love lobster, you’ll love my simple Instant Pot lobster tail recipe.

    Ingredients Needed for Lobster Chowder

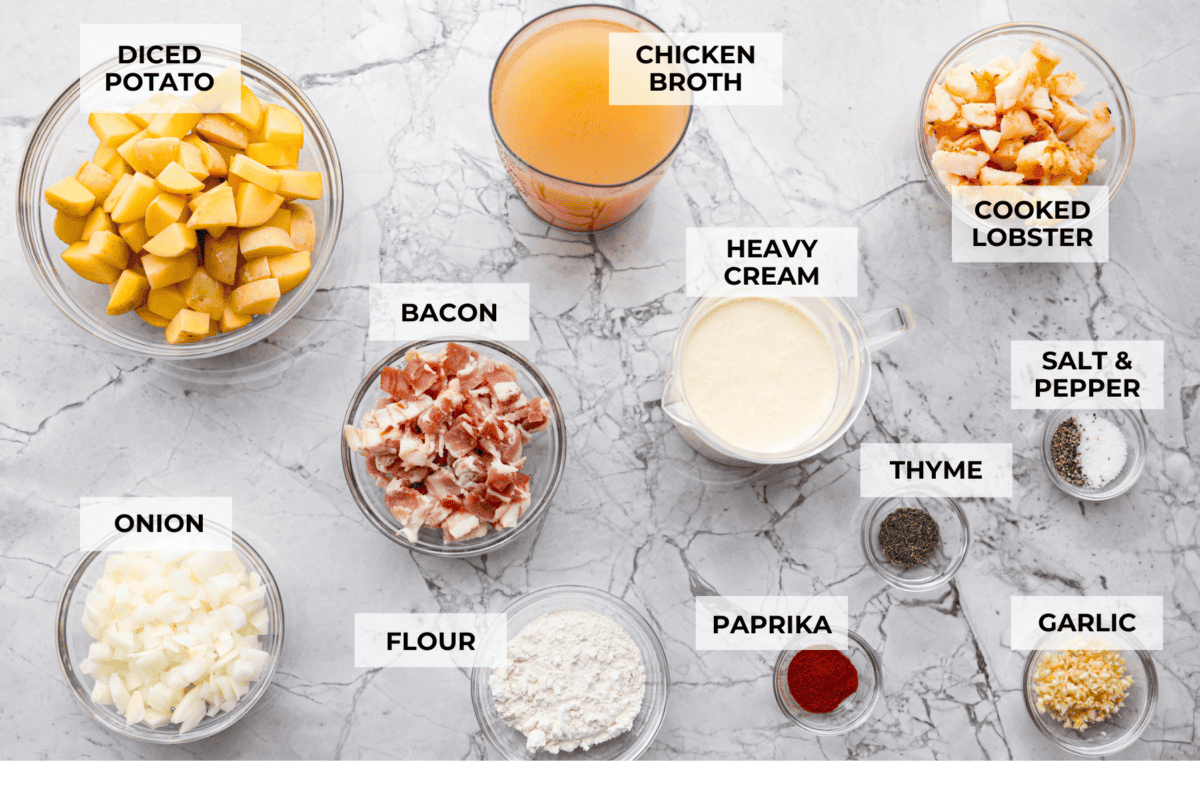
    Overhead shot of labeled ingredients. Overhead shot of labeled ingredients.

    How to Make Lobster Chowder

    You’re going to feel so fancy when you eat this delicious soup! Your family, friends, or loved ones will never know how easy it is to make! For exact measurements of the ingredients, be sure to scroll to the bottom of the post.

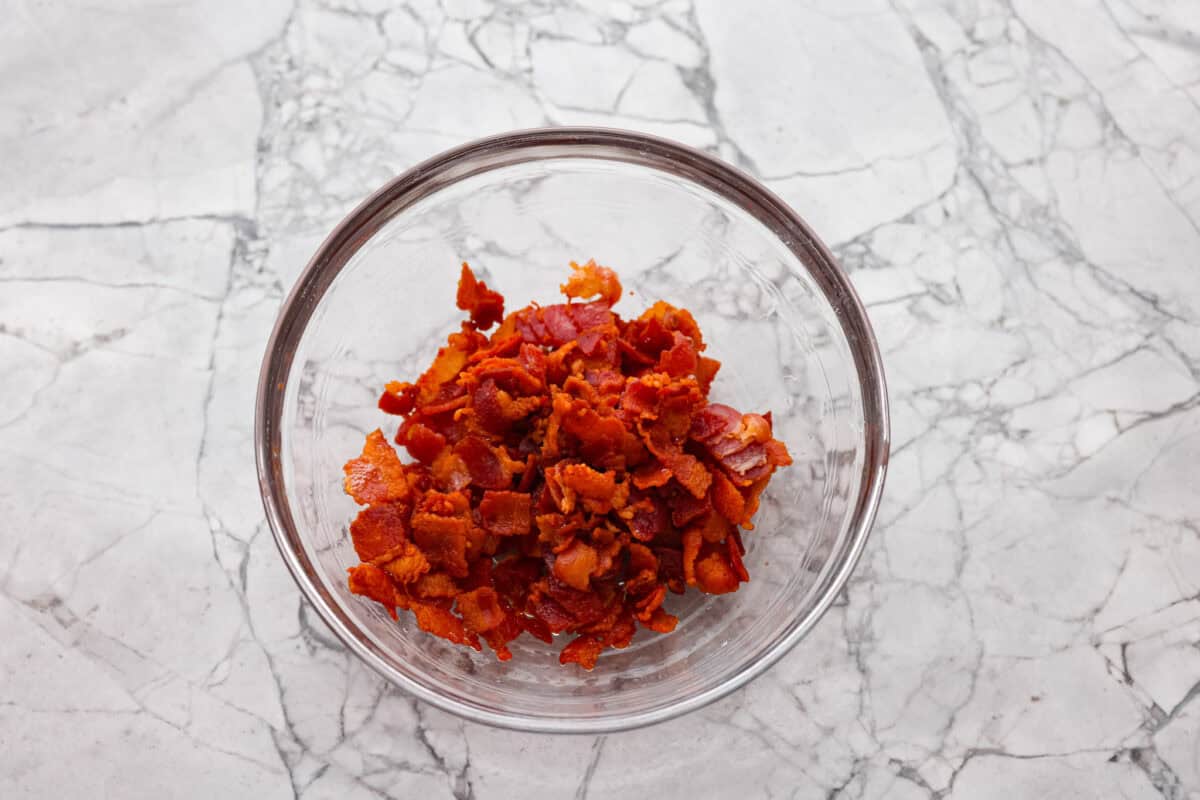
    1. Crisp the Bacon: Add the diced bacon to a large pot over medium-high heat and cook until crispy. Remove it using a slotted spoon and set aside.
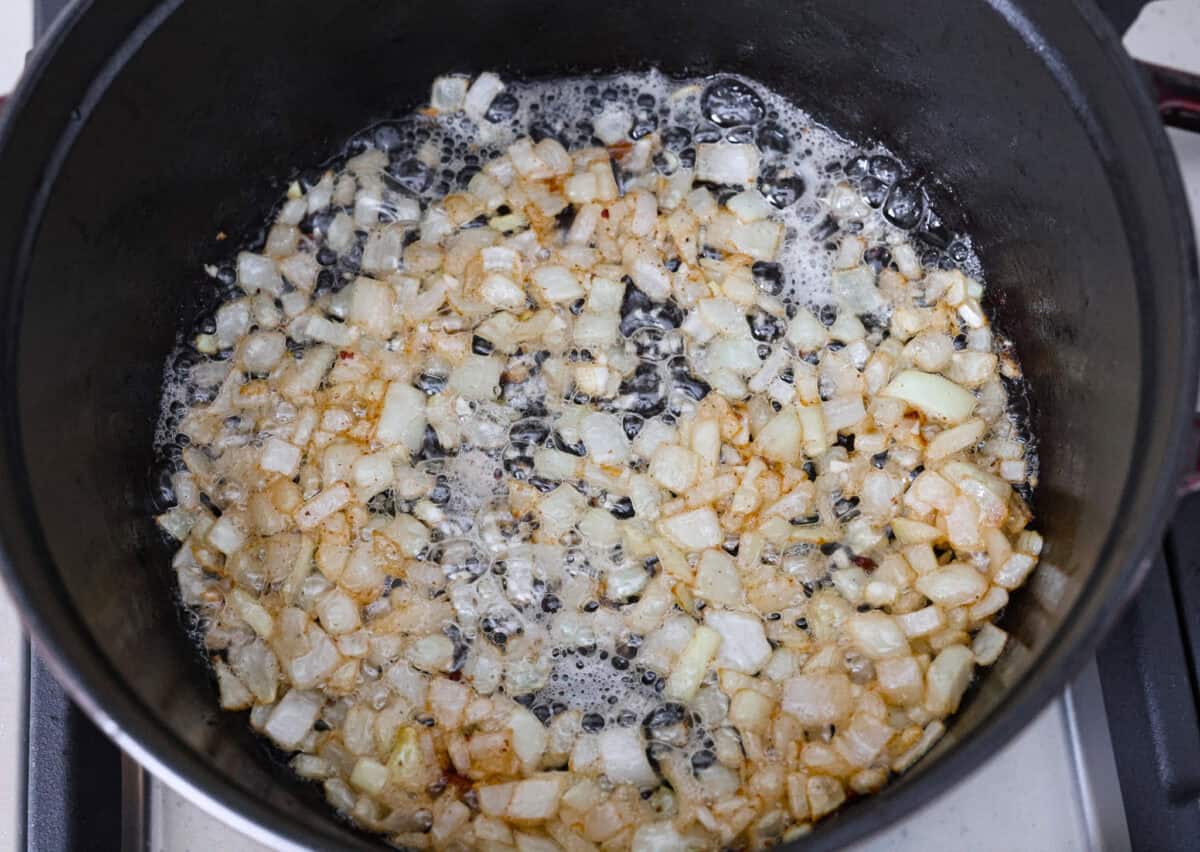
    2. Saute: Add the diced onion to the bacon grease and cook until tender. Stir in the minced garlic and cook for 30 seconds. 
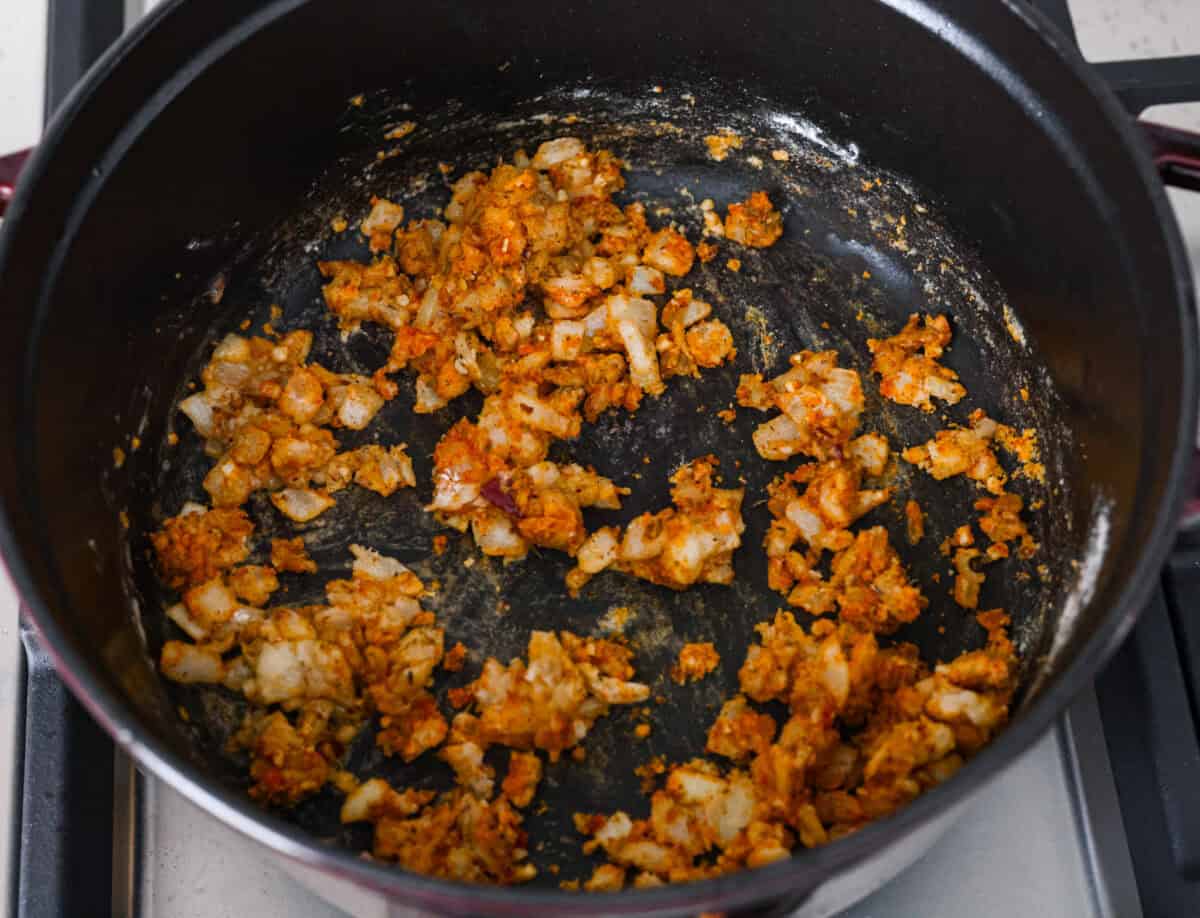
    3. Add: Sprinkle in the flour, paprika, and thyme, then stir to make a paste.
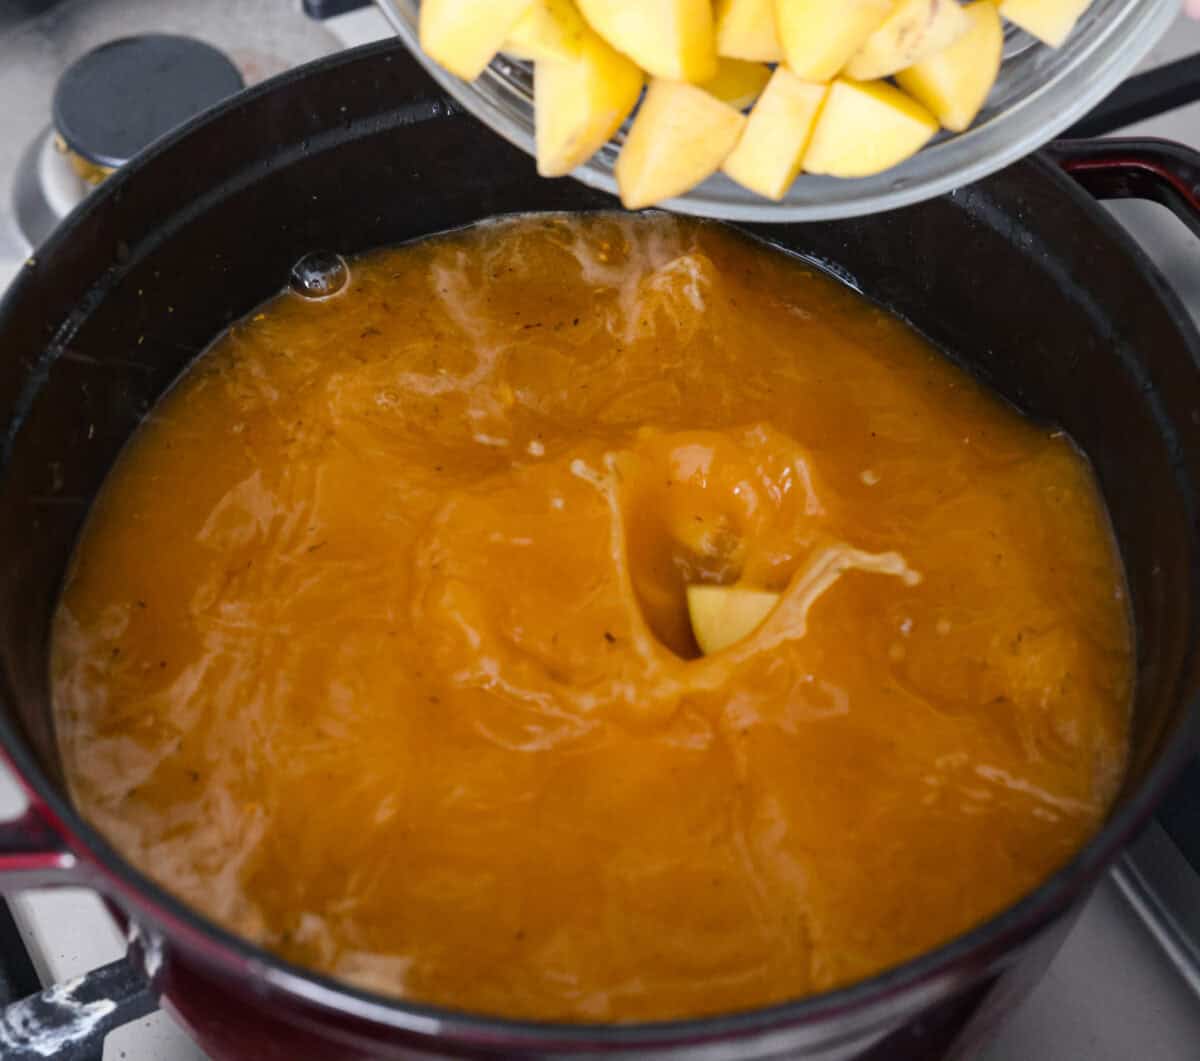
    4. Simmer: Pour in the chicken broth and cubed potato pieces. Bring the liquid to a boil and reduce to a simmer for 10-15 minutes or until the potatoes are tender.
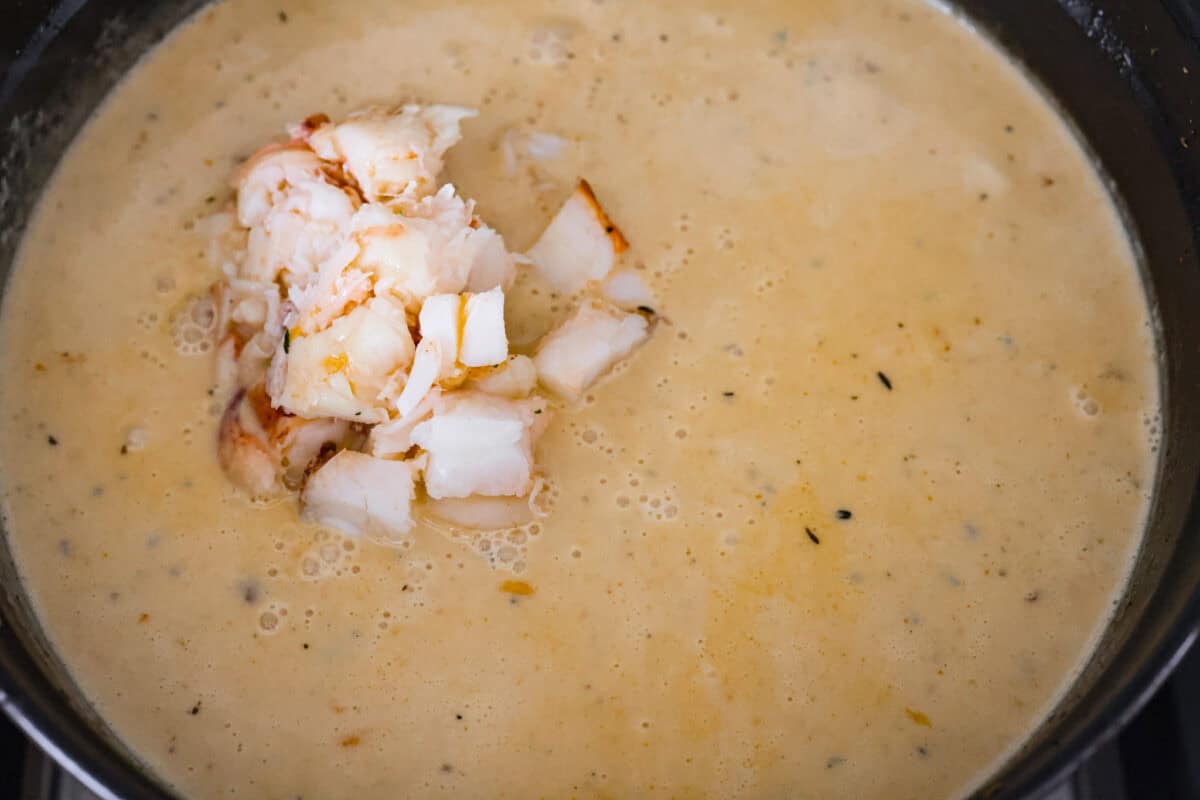
    5. Combine and Season: Stir in the heavy cream, cooked lobster, and the cooked crumbled bacon. Season to taste with salt and pepper, then garnish with fresh dill and parsley, if desired.

    Lobster Chowder VS. Lobster Bisque?

    If you’re wondering what the difference is between lobster chowder and lobster bisque, the answer is the texture! Both versions are absolutely delicious!

    • What Makes It Lobster Chowder? Chowder is thick and chunky with pieces of potato and lobster. I love Yukon gold potatoes in this recipe but feel free to use red or russet potatoes if you prefer. Have fun with the textures. Try adding carrots, celery, or corn!
    • What Makes It Lobster Bisque? Bisque is smooth and creamy with a silky texture. Use a blender or an immersion blender to puree the bisque so that all the lumps are gone. I love to serve my lobster bisque with a few pieces of lobster meat on top! It makes an elegant presentation.

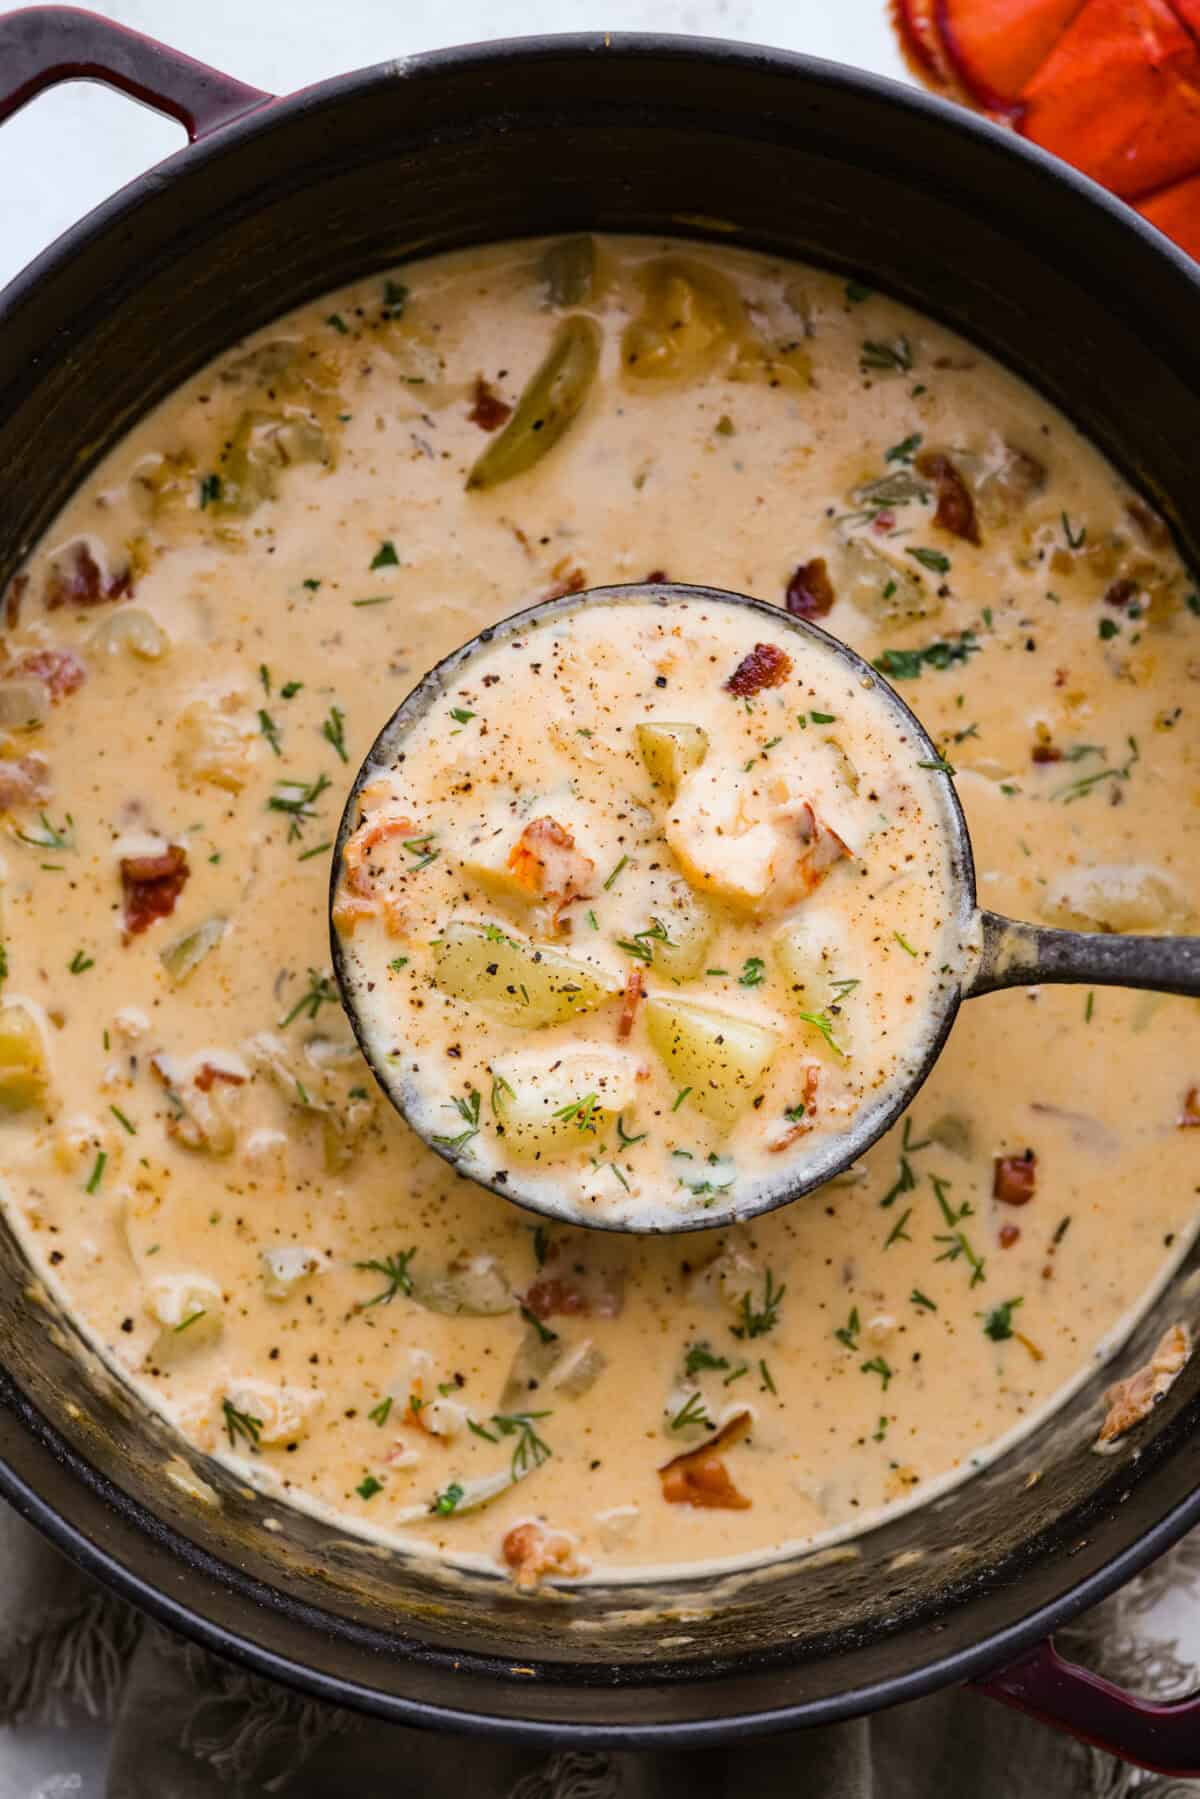
    Overhead shot of lobster chowder in a pot with a ladle.Overhead shot of lobster chowder in a pot with a ladle.

    Storing and Reheating Leftovers

    This lobster chowder recipe makes great leftovers! The flavors meld together and taste even better the next day. It’s the tastiest, hearty soup for lunch! And if you’re looking for more chowder recipes, you have to try my Clam Chowder!

    • In the Refrigerator: Once it has cooled down then place any leftover lobster chowder in an airtight container. Then, go ahead and put it in your fridge, and it will last 3-4 days!
    • In the Freezer: I don’t recommend freezing leftover chowder. The texture of the cream and potatoes can cause the chowder to be mushy as it thaws. It’s best enjoyed fresh or within a few days of making it!
    • To Reheat: Reheat leftovers in a pot over the stove. Heat the chowder on medium-high heat until warmed through. You can also reheat leftovers in the microwave.

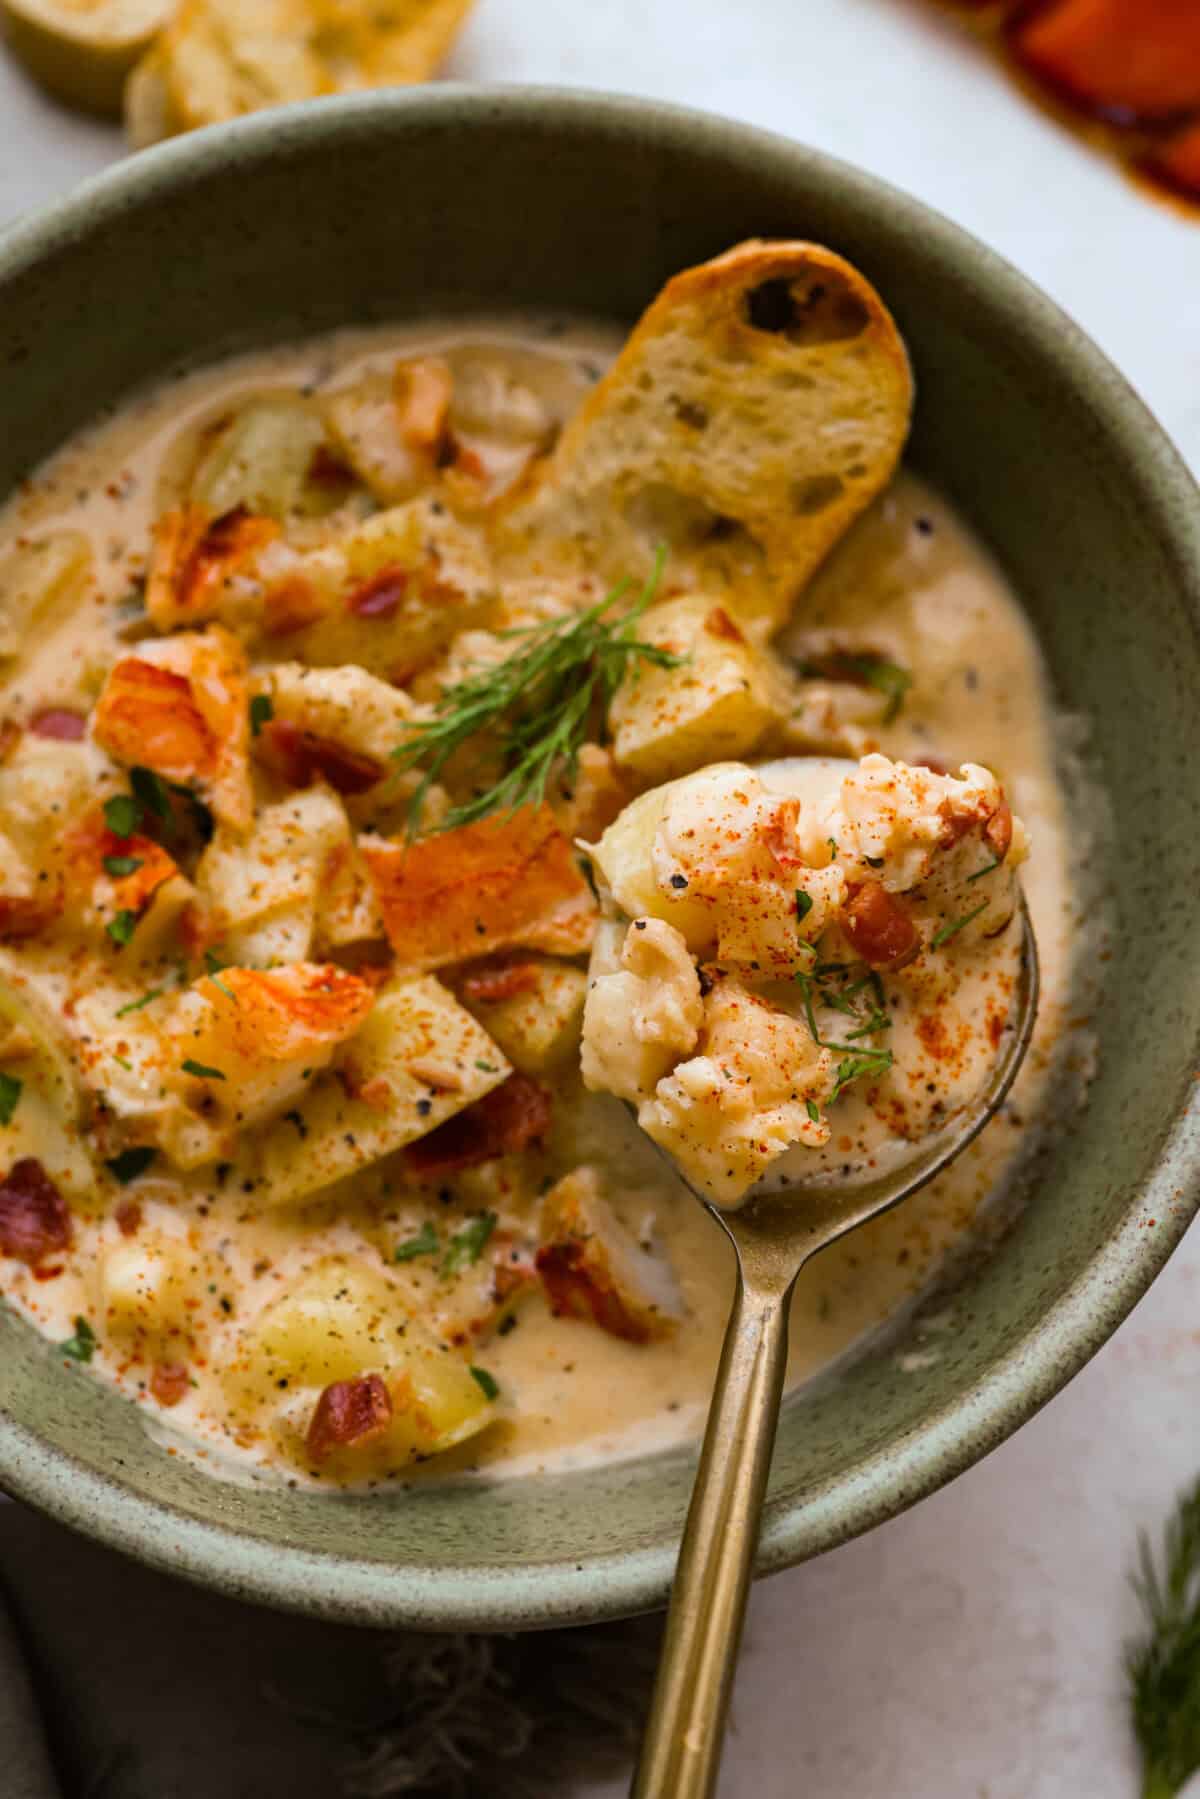
    Overhead shot of a spoon with a bite of lobster chowder being held over a bowl of chowder. Overhead shot of a spoon with a bite of lobster chowder being held over a bowl of chowder.

    More Seafood Recipes I Know You’ll Love

    Pin this now to find it later

    Pin It


    Source link

  • Grilled Swordfish Recipe with Coriander and Lime

    Grilled Swordfish Recipe with Coriander and Lime

    How to cook swordfish on the grill with coriander and lime. Jump to the Grilled Swordfish with Coriander and Lime Recipe or read on to see our tips for making it.

    Grilled Swordfish Recipe with Coriander and Lime

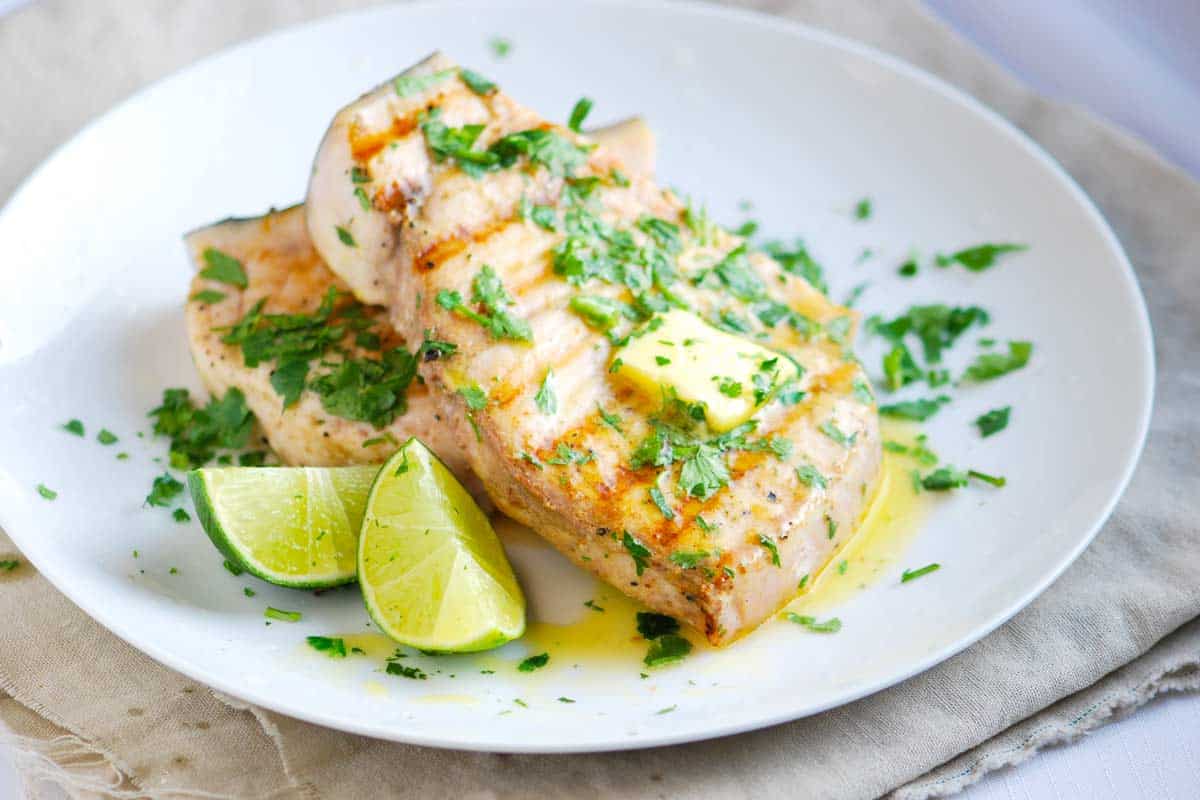
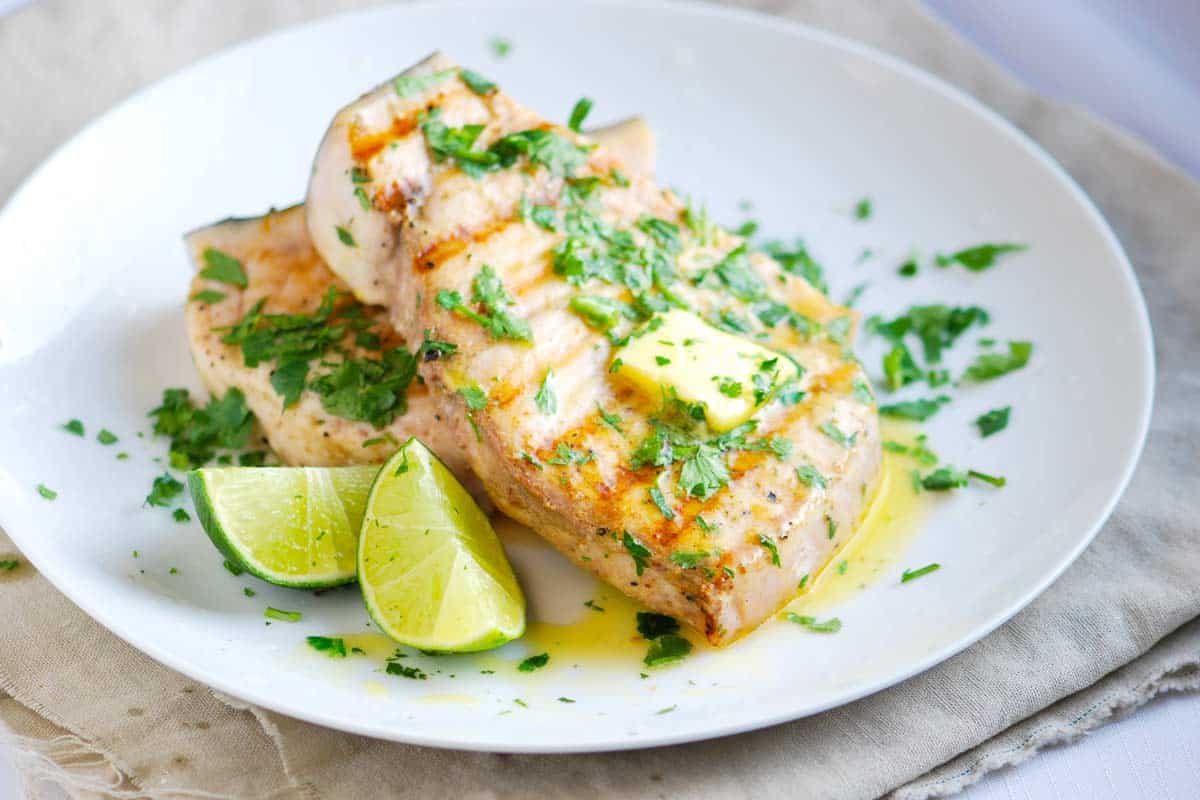
    When it comes to grilled seafood, we like things to be simple. This grilled swordfish is exactly that. We season the fish with salt, pepper and coriander then grill on both sides. For serving, we add a little butter, a generous squeeze of lime and cilantro.

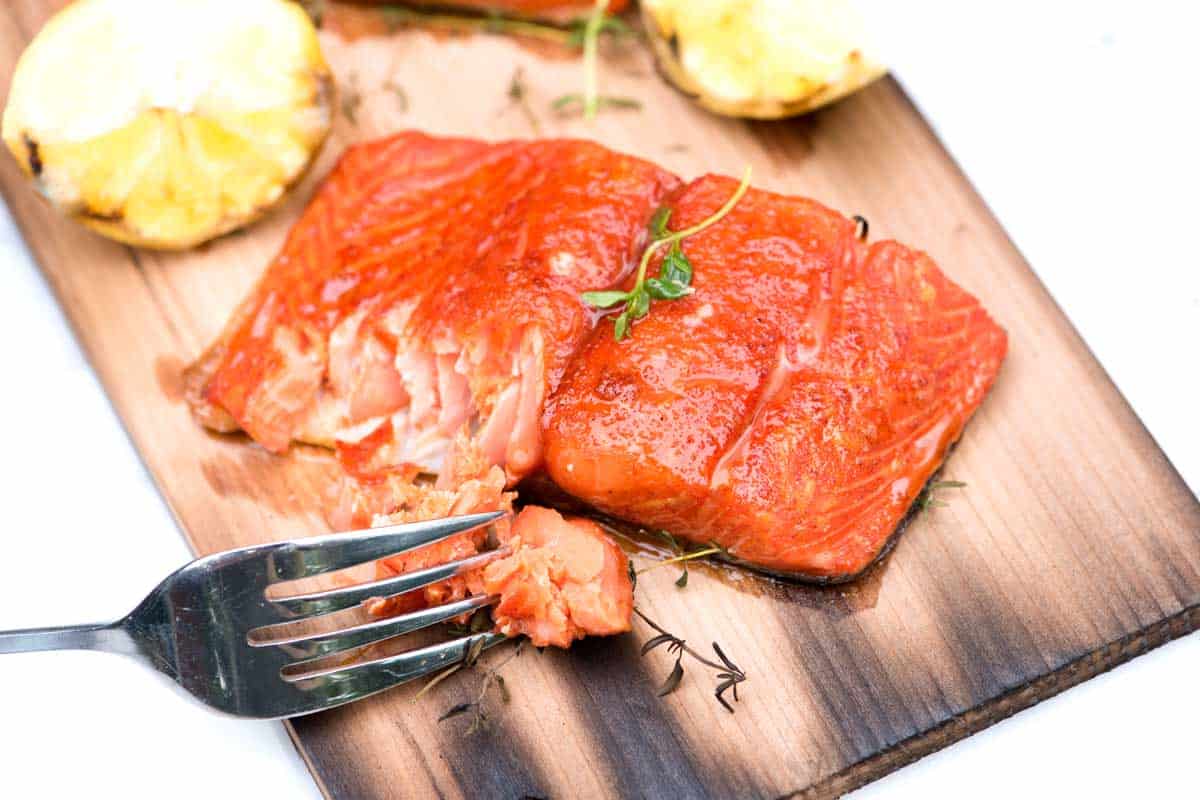
    Cedar Plank Salmon RecipeYOU MAY ALSO LIKE: Grilling salmon on a cedar plank is genius. If you haven’t tried it, let me tell you, you need to. Jump to the Sweet Citrus Cedar Plank Salmon Recipe.
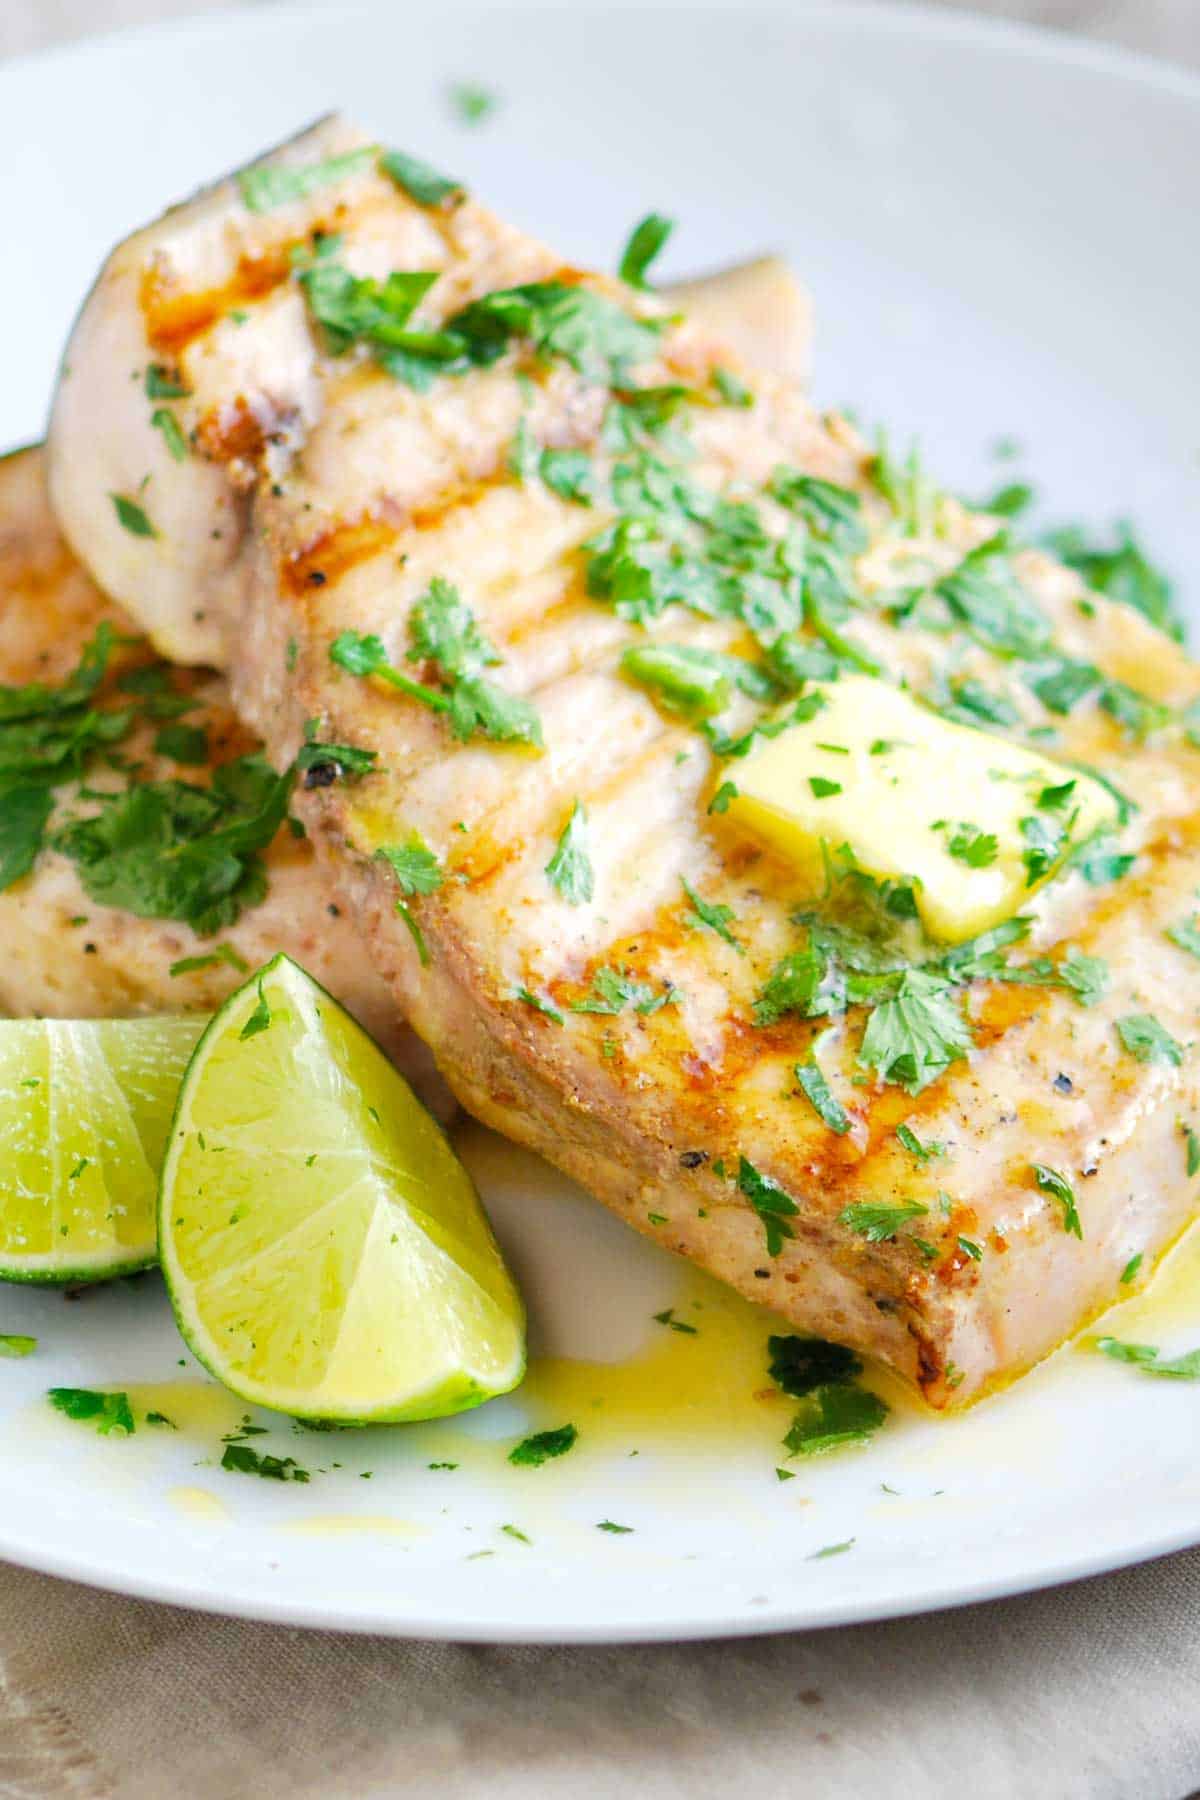
    Like most seafood these days, it’s important to take care when buying swordfish. Look for sustainable options. Monterey Bay Aquarium’s Seafood Watch Program is my favorite resource for finding out what the best options are. When it comes to swordfish, the sustainability depends on where and how it was fished.

    If you can’t find sustainable swordfish.  Try this recipe with Mahi Mahi or Striped Bass.

    How to Grill Swordfish with Coriander and Lime

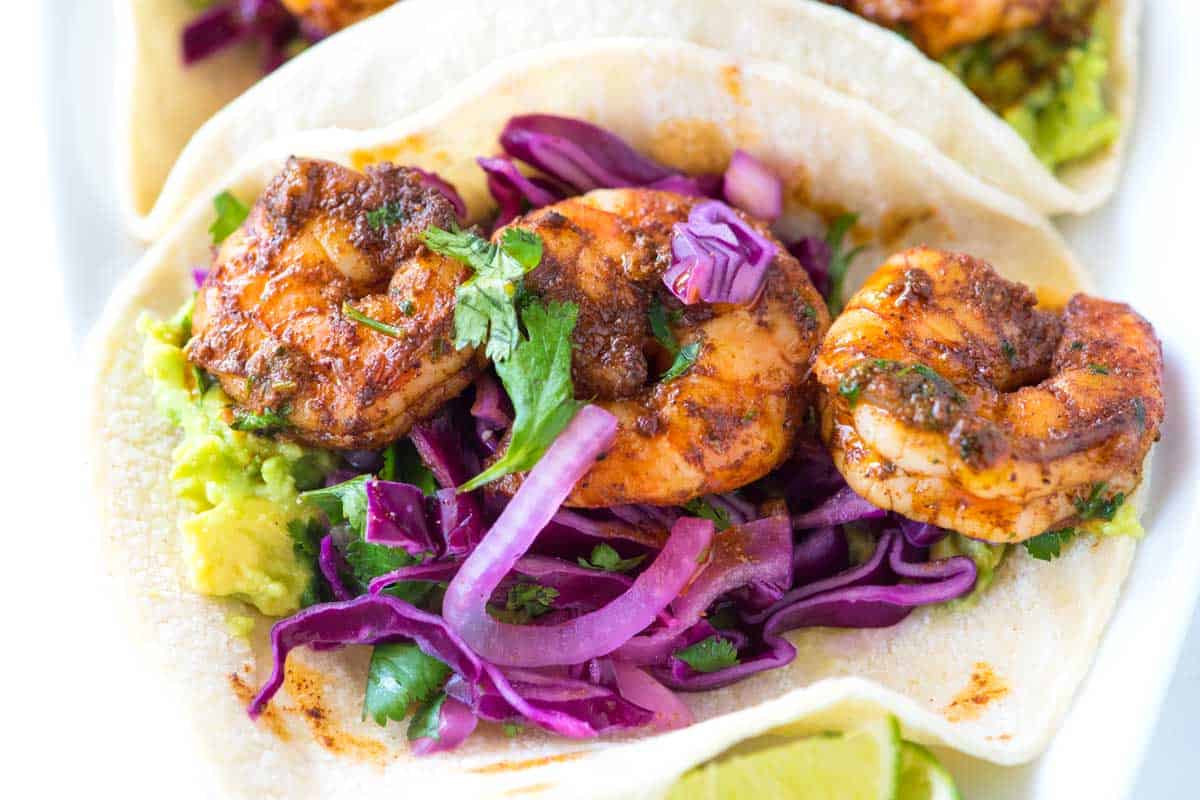
    Chile Butter Shrimp Tacos RecipeYOU MAY ALSO LIKE: Meet your new favorite shrimp taco recipe. There’s chile butter shrimp, mashed avocado and a quick and crunchy slaw. Jump to the Chile Butter Shrimp Tacos Recipe.

    Recipe updated, originally posted August 2010. Since posting this in 2010, we have tweaked the recipe to be more clear. – Adam and Joanne

    Grilled Swordfish Recipe with Coriander and Lime

    • PREP
    • COOK
    • TOTAL

    This is a simple recipe. We season the fish with salt, pepper and coriander then grill on both sides. For serving, we add a little butter, a generous squeeze of lime and cilantro. If you can’t find sustainable swordfish. Try this recipe with Mahi Mahi or Striped Bass.

    Makes 2 servings

    You Will Need

    2 swordfish steaks, 6 ounces each

    2 tablespoons extra-virgin olive oil

    1/2 teaspoon ground coriander

    Salt and fresh ground black pepper

    2 tablespoons butter, at room temperature

    1 lime, halved

    Handful of cilantro leaves, coarsely chopped

    Directions

      1Heat grill to medium-high heat.

      2Brush both sides of the swordfish with the olive oil then season with coriander, a pinch of salt and a few grinds of black pepper.

      3Grill swordfish steaks until just cooked through, about 3 minutes per side (depending on thickness of steaks). Transfer the steaks to plates. Top each steak with a tablespoon of butter, a generous squeeze of lime juice and cilantro.

    Adam and Joanne’s Tips

    If you make this recipe, snap a photo and hashtag it #inspiredtaste — We love to see your creations on Instagram and Facebook! Find us: @inspiredtaste


    AUTHOR:

    Adam Gallagher

    Previous Post: Creamy Pasta with Yogurt, Bacon and Snap Peas
    Next Post: Crispy Beer Battered Fried Apples Recipe


    Source link