My Family Literally Said “Please Add These To The Rotation”
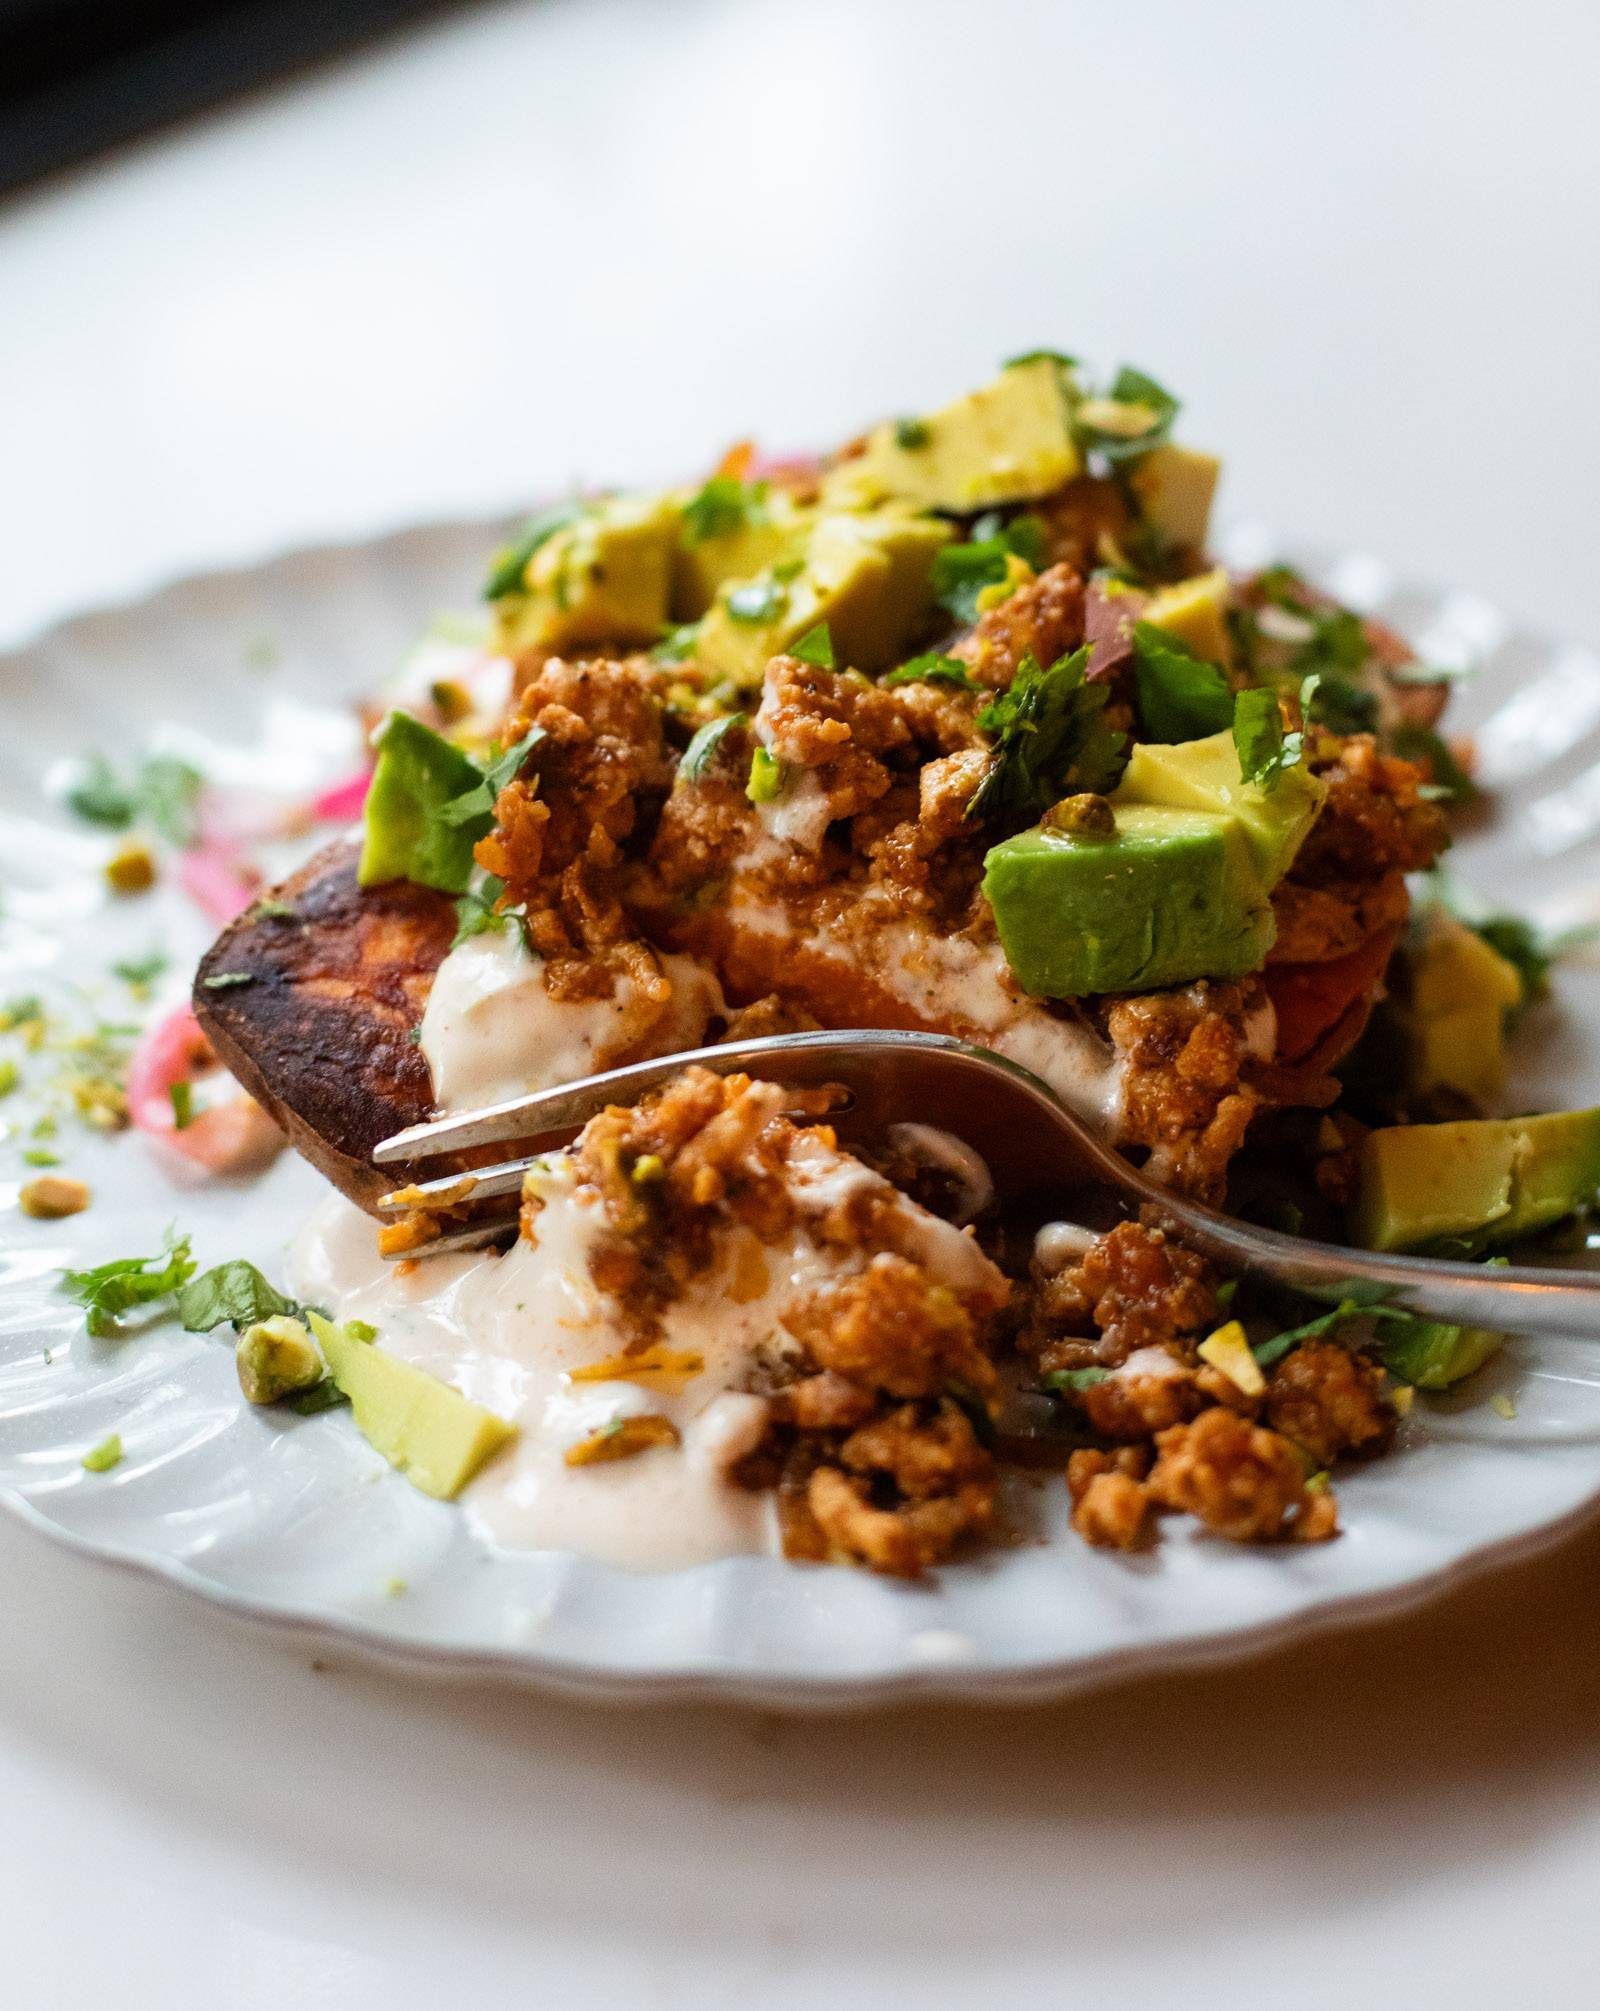
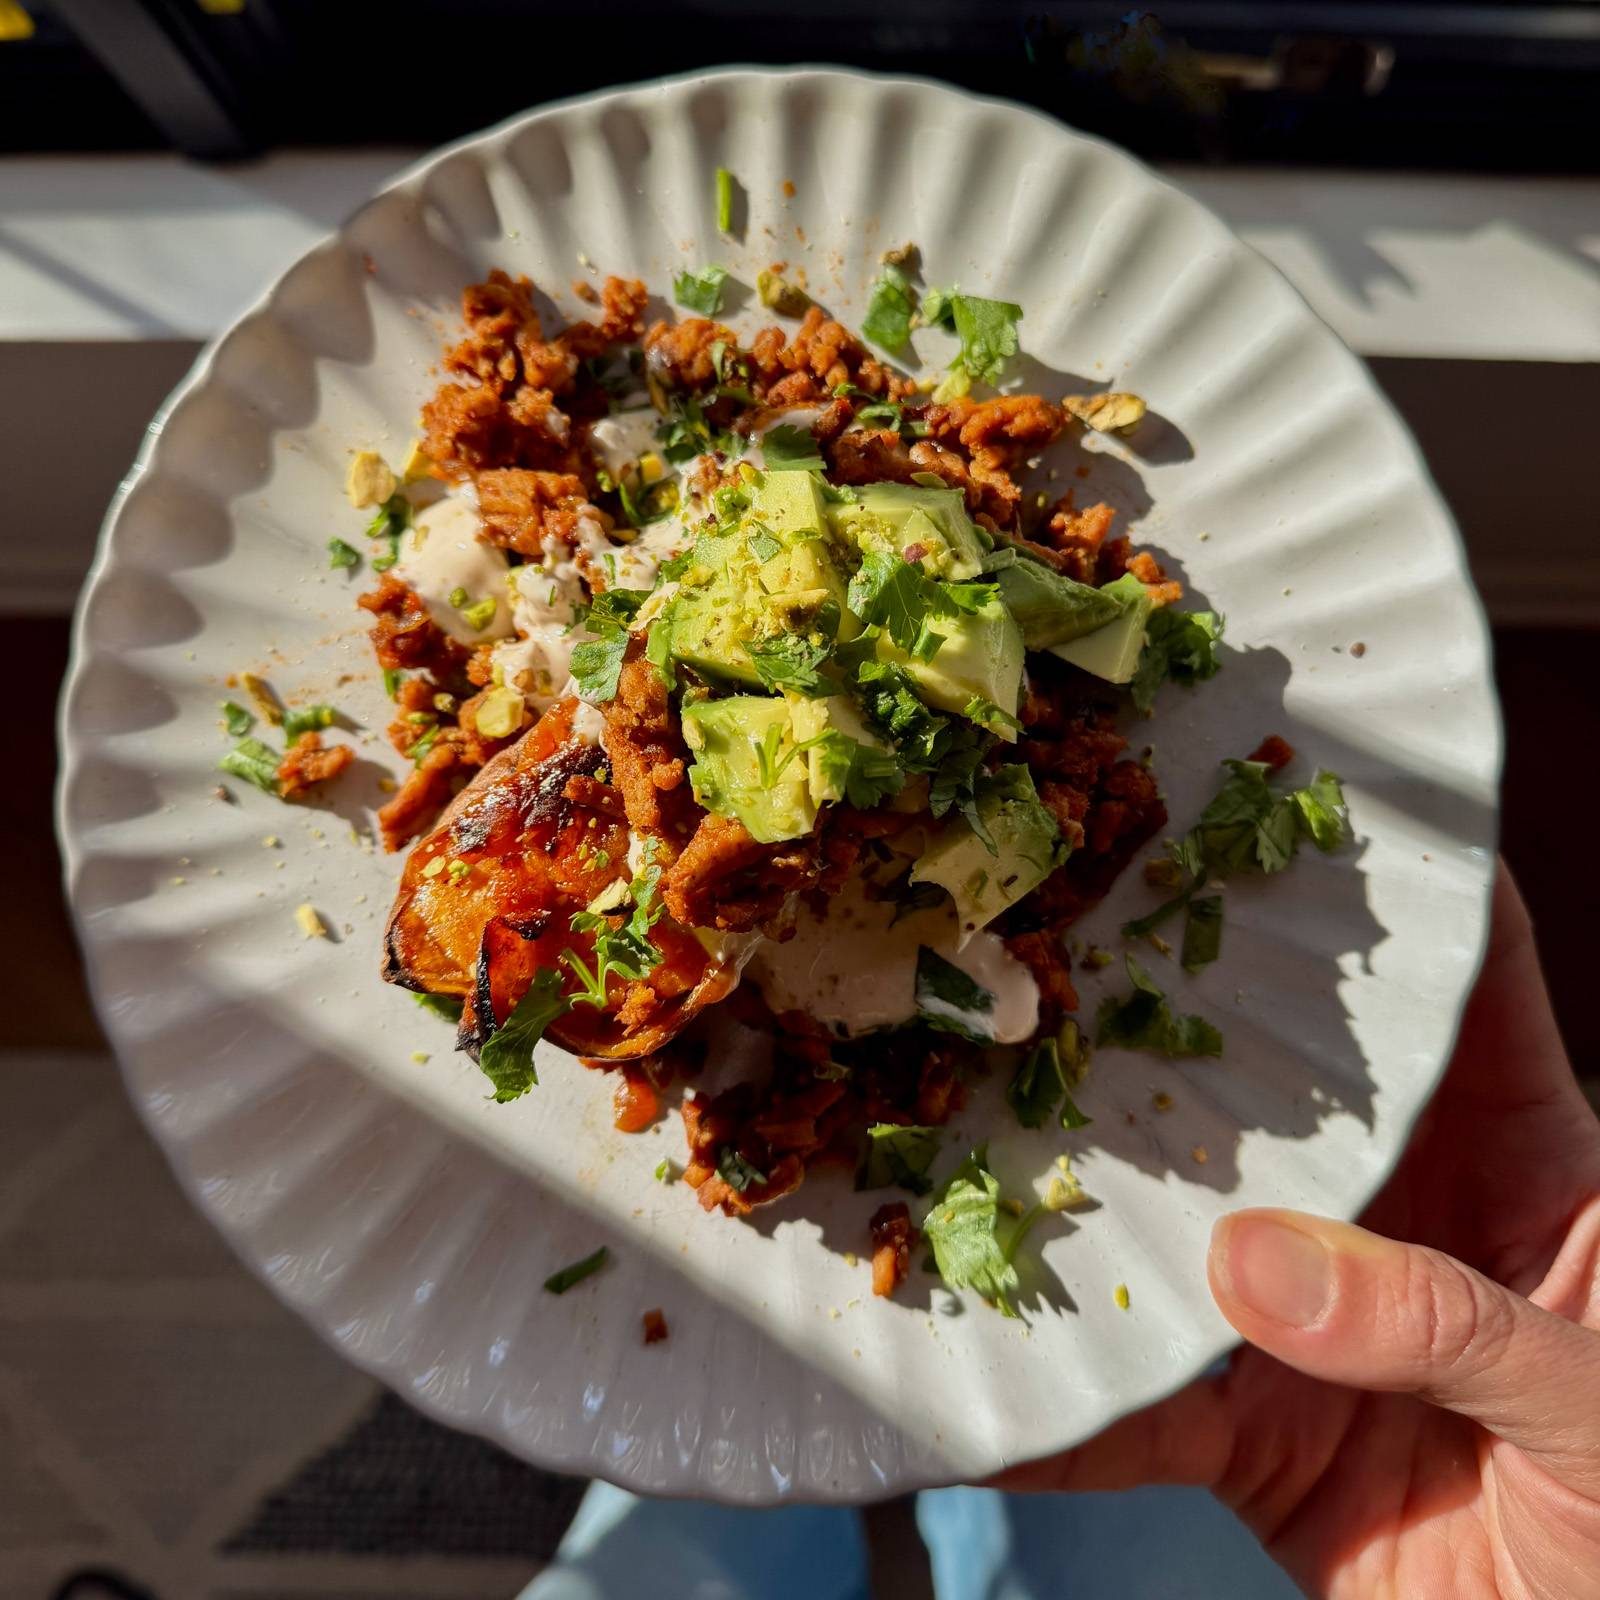
These Roasted Sweet Potato Stacks, as I’m calling them, got an immediate stamp of approval from my whole family the first time I made them.
Roasted, caramelized, open-face sweet potatoes
Creamy chipotle sauce
Spicy ground chicken
Avocado
Cilantro, avocado, maybe pickled red onions
Crushed pistachios or something seedy and crunchy
Everybody gets to build their own right at the table, which is an A+ method when you’re serving people with all different ideas of what tastes good.
I mean, HOW GORGEOUS!
I LOVE the caramelized edges on these sweet potatoes. It makes them look so pretty. If you didn’t get as much caramelization as you wanted from the oven, you can pop the sweet potatoes in a skillet with some butter to extra-caramelize the open face sides of them before serving.
My family adores these. We’ve done them for 3 weeks straight now and my husband says he’s a “10/10 for this meal.” We’ve also loved this bowl variation with street corn dip on top!
Macros friendly, flavor friendly, and great for leftovers / meal prep. Hope you love them, too!
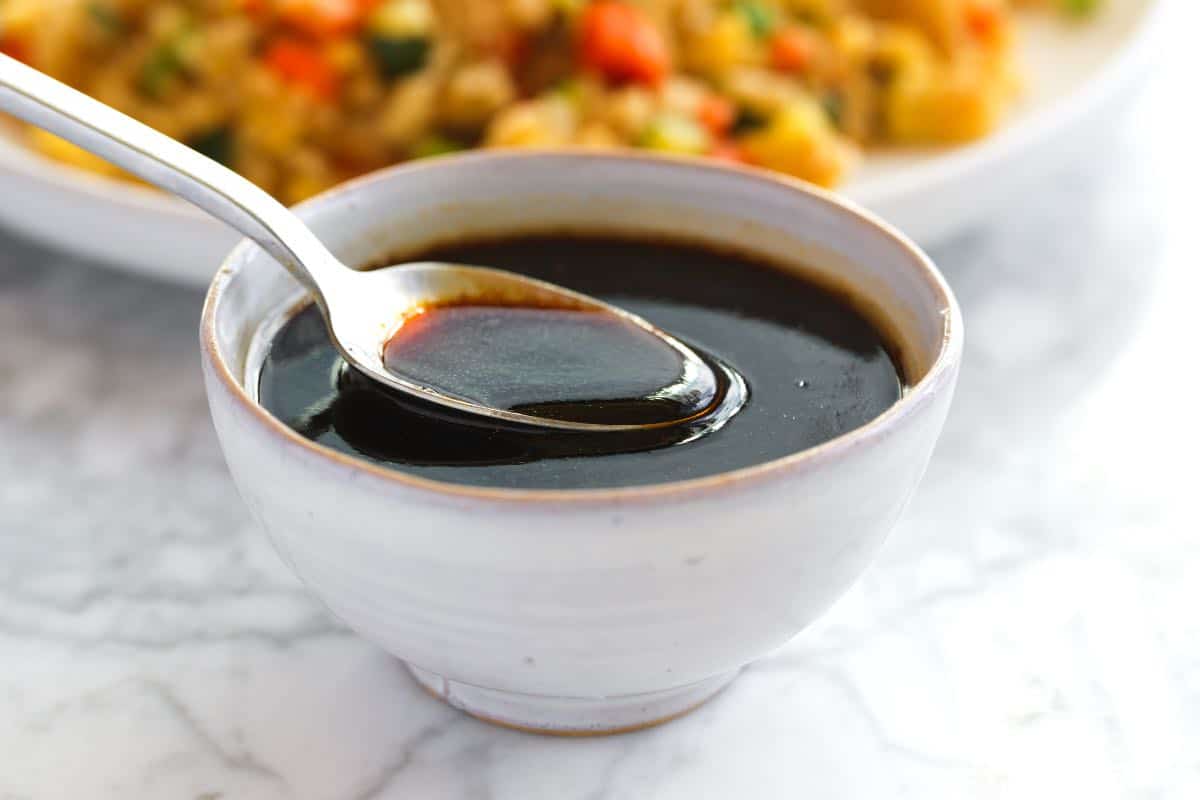
This super simple fried rice sauce recipe is a weeknight lifesaver, and I bet you already have everything you need to make it.
I always have a jar of this sauce in my fridge because it’s so versatile. It takes less than 5 minutes to make, and it helps me get dinner on the table fast.
You have to try making our easy fried rice with this sauce! It’s also perfect as a quick and delicious sweet soy glaze for other proteins like chicken or tofu.
Key Ingredients
Soy Sauce: This is the base of our sauce, so you’ll want to use a low-sodium soy sauce or low-sodium tamari. For some extra richness, you can substitute some of the low-sodium soy sauce with a dark soy sauce or mushroom soy sauce (which adds a bit more flavor).
Brown Sugar: The sugar balances the saltiness of the soy sauce. Brown sugar adds more flavor than regular sugar. Coconut sugar would be great, too! I use a 3:1 ratio of soy sauce to sugar, but when making this sauce, you can always adjust with more sugar to make it sweeter.
Rice Vinegar: Unseasoned rice vinegar makes the sauce pop. It usually has a green top.
Sesame Oil: You’ll want to add toasted sesame oil to this sauce. I usually add extra sesame oil when making my fried rice recipe.
Mirin: This is optional, but it really pulls the sauce together. It’s sweet and fragrant. I also use it when making teriyaki sauce.
More Optional Ingredients: This is why I love making homemade sauces, you can always make them your own! This sauce is lovely with the ingredients above, but for more flavor, consider a little Chinese 5 spice or chili paste (like sambal oelek or gochujang) to add some heat.
Find the full recipe with measurements below.
My Tips for Making and Using Your Sauce
Tip 1: Adjust to your taste. Feel free to adjust to your taste. You can add more sugar or any of the optional ingredients for extra flavor. Remember, the sauce needs to taste strong on its own to season all the rice and vegetables properly. If the sauce seems overpowering, you’re on the right track.
Tip 2: A quick guide to making fried rice. For my favorite recipe, see our homemade fried rice, but here’s a quick rundown of what you’ll need to do:
Cook proteins such as beef, chicken, pork, and shrimp in a large skillet or wok with some vegetable oil until barely cooked through. Then, remove it and set it aside.
Sauté hearty vegetables like onions, mushrooms, and carrots in a large saucepan or wok for 1 to 2 minutes.
Stir in aromatics like minced garlic, ginger, or the white parts of green onions, along with quick-cooking veggies like zucchini, edamame, or peas. Cook for about 1 minute.
Add cold rice. Cook and stir it until it’s heated through and slightly browned.
Pour in the sauce, starting with 2 tablespoons and adding more as needed.
Add eggs (optional) by pushing the rice to one side of the pan. Scramble eggs in the empty space, then break them up and stir them into the rice.
Serve topped with sliced green parts of green onions and sesame seeds.
Tip 3: More ways to use your sauce. This sauce also works as a sweet soy for beef, chicken, pork, tofu, and shrimp. Quickly cook your protein in a bit of oil or butter. Add 2 to 3 tablespoons of the sauce along with an equal amount of water or broth. To thicken it into a perfect glaze, mix 1 teaspoon of cornstarch with 2 teaspoons of water. Stir this into the pan and simmer until the sauce thickens and coats the protein.
More Homemade Sauces
Fried Rice Sauce
PREP
COOK
TOTAL
Our family loves fried rice, so we usually have a jar of this easy to make sauce in our fridge. It’s perfect with soy sauce, sugar, rice vinegar, and sesame oil, but if you have the other ingredients on hand, they really take this sauce to the next level. I highly recommend the mirin!
Makes 1 cup
You Will Need
¾ cup low-sodium soy sauce (190g)
¼ cup brown sugar (50g)
2 tablespoons rice vinegar
1 tablespoon toasted sesame oil
2 tablespoons mirin, optional
¼ teaspoon Chinese five spice, optional
1 tablespoon sambal oelek chili paste or gochujang, optional
Directions
1Add soy sauce, brown sugar, rice vinegar, and sesame oil to a small saucepan over medium heat. Bring to a simmer and cook until the sugar dissolves. If you are adding them, stir in the optional ingredients.
Adam and Joanne’s Tips
Storing: Keep this sauce in an airtight container like a mason jar in the refrigerator for up to one week. Shake before using.
Freeze: Freeze this sauce in ice cube trays, dividing it between the ice cube holes. When frozen, pop them out and add to a freezer-safe container or zip-top bag.
Soy sauce: Use a low-sodium soy sauce for this. For extra flavor, consider substituting 4 tablespoons (¼ cup) of it with dark soy sauce or mushroom soy sauce, both of which add a richer taste to the sauce.
Tips for fried rice: Use day-old, leftover rice or cold rice for the best results. Freshly cooked rice tends to turn out mushier. I like short or medium-grain white rice, such as Calrose or Jasmine rice. Brown rice and quinoa will also work.
Seasoning: This sauce adds a good amount of seasoning, but we still recommend lightly seasoning with salt as you go along when making fried rice. So, lightly season the protein and the veggies as you cook them before adding the sauce. This way it will turn out just as delicious as your favorite restaurant!
The nutrition facts provided are estimates.
Nutrition Per Serving Serving Size 1 tablespoon / Calories 24 / Total Fat 0.9g / Saturated Fat 0.1g / Cholesterol 0mg / Sodium 326.4mg / Carbohydrate 5.5g / Dietary Fiber 0g / Total Sugars 4.5g / Protein 0.9g
AUTHOR:
Joanne Gallagher
Previous Post: Easy Fried Rice Next Post: Easy Scones
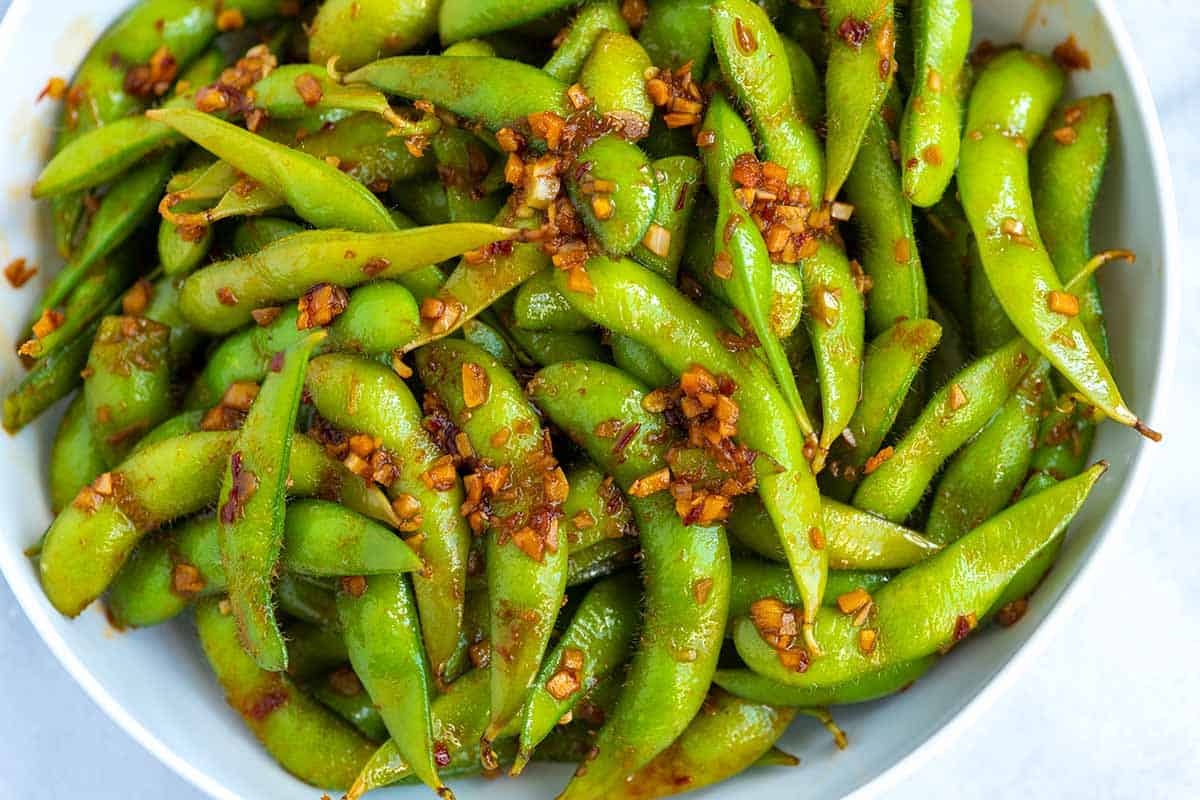
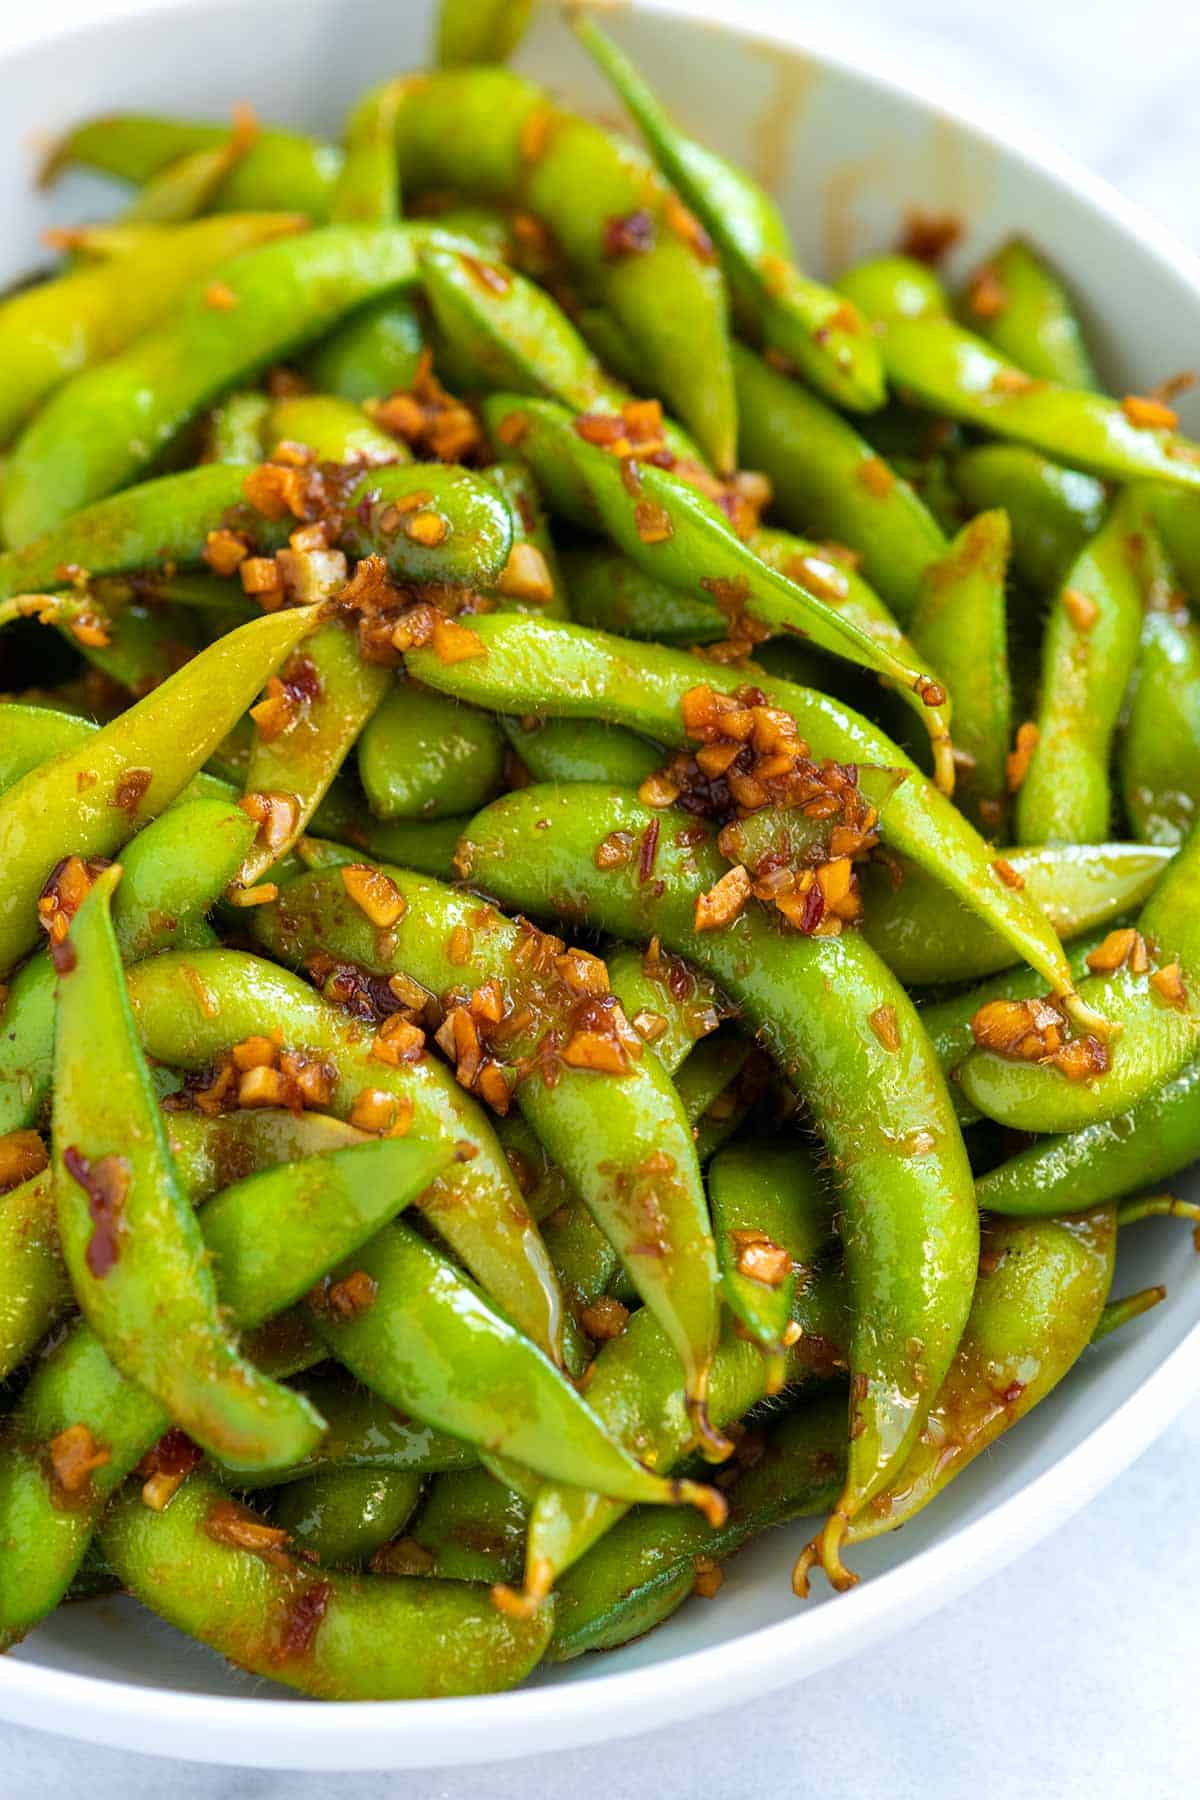
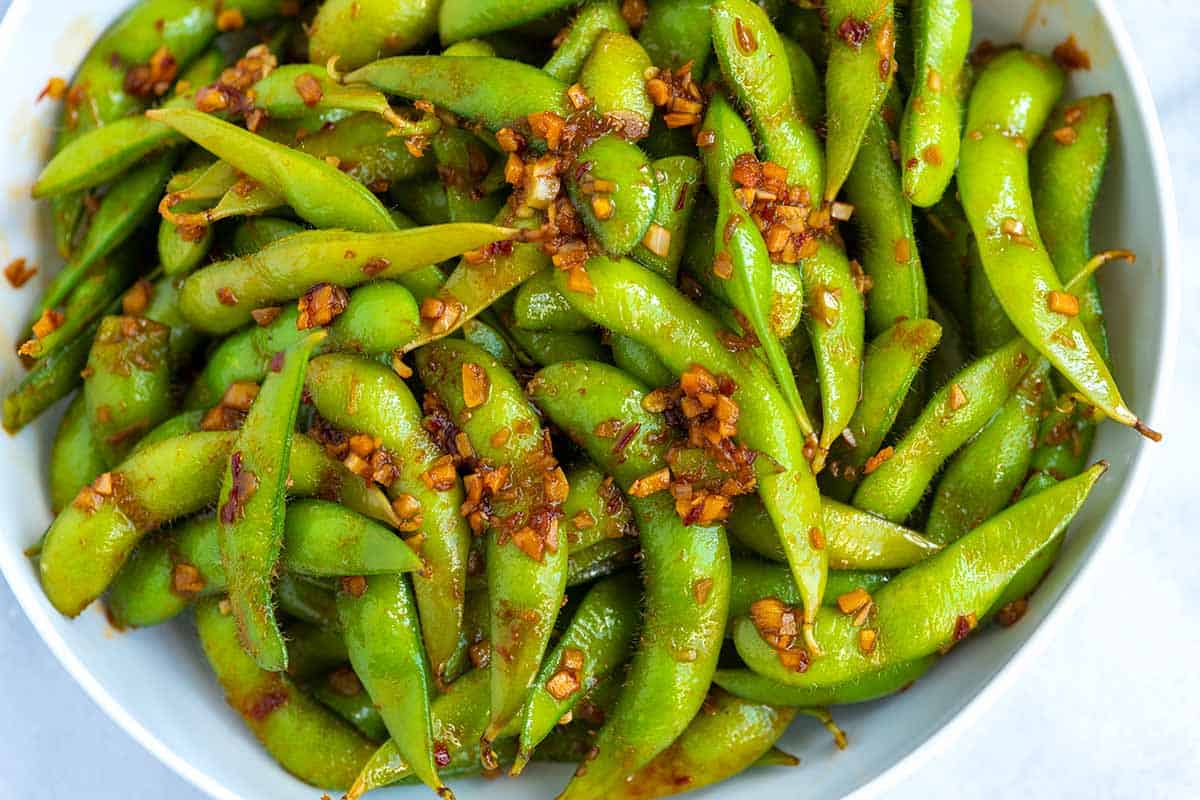
This spicy edamame recipe is easy and tastes incredible, thanks to garlic, ginger, and a spicy chili sauce. This is one of my favorite edamame recipes!
You’ll often see steamed edamame with sea salt on restaurant menus, but in this recipe, we kick the flavors up a notch. You are going to love the ridiculously easy ginger, garlic, chili sauce!
Of all the recipes I’ve tried, this is seriously my favorite way to cook edamame. It’s so flavorful!
Key Ingredients
Edamame: These are young soybeans, which means the beans are soft and easy to eat. In this edamame recipe, we cook the beans inside their shell. You don’t eat the shell. I use my front teeth to scrape the beans out of the pod (they pop out easily). You can use shelled edamame in the recipe. I’ve included tips below the recipe.
Garlic and ginger: I use a tablespoon each of minced garlic and ginger. If you don’t want to buy fresh ginger, look in the produce section of your grocery store for the tubes of ginger (sometimes you can also find frozen pureed ginger).
Soy sauce, maple syrup, and toasted sesame oil: I love the simple sauce in this recipe. It’s a little salty from the soy sauce (or use tamari), sweet from maple syrup (or use honey), and toasty from the sesame oil.
Chili sauce: I love Sambal Oelek. It’s made with crushed raw red chiles, a little vinegar, and salt. It’s sold in most grocery stores. Check the grocery aisle where you’d buy soy sauce, and it should be there. If you can’t find it, Sriracha or Gochujang are good alternatives.
Find the full recipe with measurements below.
How to Make Spicy Edamame
Tip 1: Keep the shells on. You’ll start with fresh or frozen edamame in their shells. Since it’s more available where we live, we use frozen. You’ll steam or boil the edamame until the pods are bright green and heated through. I boil my edamame in the video in the recipe below.
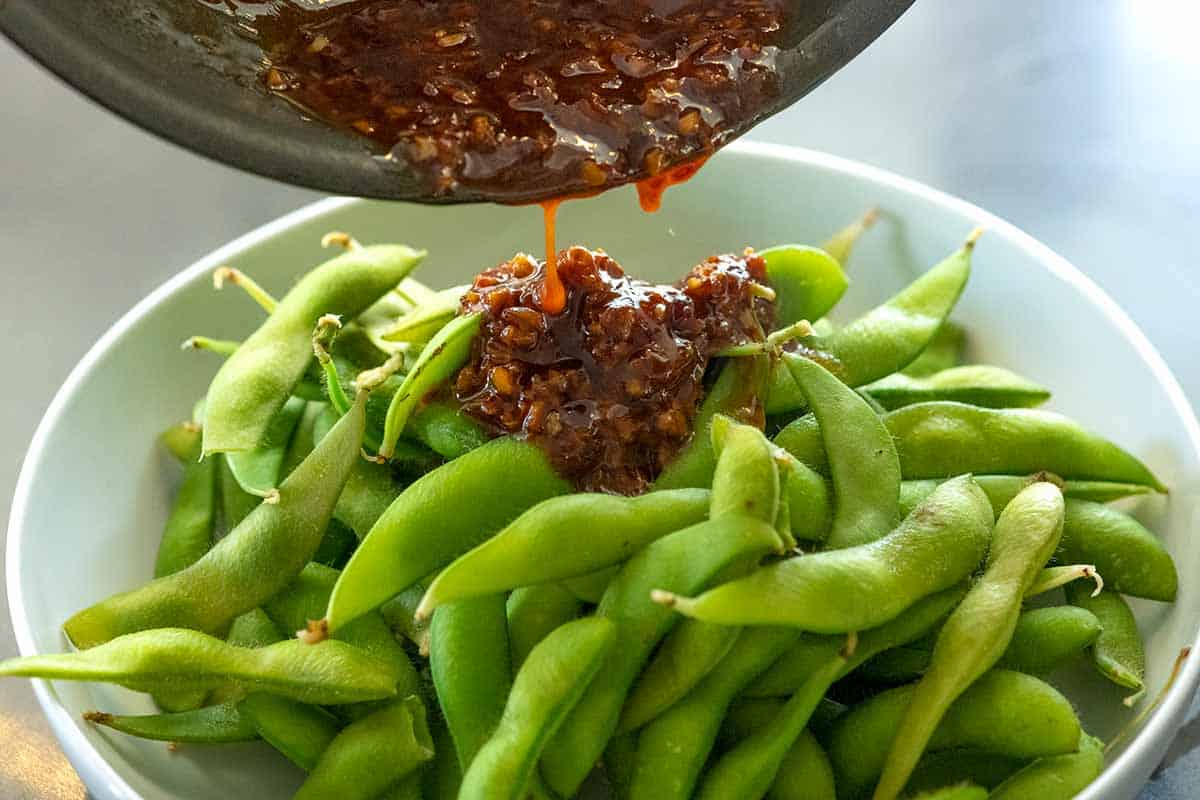
Tip 2: Toss with our chili sauce. To make it, heat minced garlic and ginger in oil for a minute in a skillet on the stove. Now that the garlic and ginger are fragrant and have released their flavors into the oil, you can stir in soy sauce, maple syrup, and chili sauce. Toss the sauce with your cooked edamame pods, and you are ready to dig in.
Serving Suggestions
I love this as a snack or appetizer. It’s excellent served next to other appetizers like egg rolls, spring rolls, and homemade crab Rangoon.
You can make it a complete meal by serving it next to rice, fried rice, homemade sushi, and stir fries like this broccoli chicken stir fry or this veggie stir fry. I also love it with chicken teriyaki!
Garlic Ginger Spicy Edamame
PREP
COOK
TOTAL
This spicy edamame is simple and tastes incredible. Cooking edamame at home is easy and takes minutes. In the recipe, we cook the edamame in their shells. You don’t eat the shells, though. To eat the beans inside, scrap them out of their shell using your front teeth. They pop out easily.
4 Servings
Watch Us Make the Recipe
You Will Need
1 pound fresh or frozen edamame in their pods
1 tablespoon avocado oil or other neutral oil
1 tablespoon minced garlic
1 tablespoon minced fresh ginger
2 tablespoons light soy sauce or tamari
2 to 3 teaspoons pure maple syrup, sugar or honey
1 teaspoon toasted sesame oil
1/2 to 1 tablespoon Sambal Oelek or Sriracha
Directions
Cook Edamame
1To boil edamame, bring a large pot of water to a boil and add a teaspoon of salt. Add the edamame and return to a boil. Cook until bright green and heated through, 3 to 5 minutes. Drain.
2To microwave edamame, place the edamame in a microwave-safe dish with 1/4 cup of water and a pinch of salt. Partially cover the dish with a plate, then microwave on high until bright green and heated through. Depending on your microwave, this can take 1 to 5 minutes.
Make the Spicy Sauce
1Heat the oil in a medium skillet over medium heat. Add the garlic and ginger. Cook until fragrant, but before they brown, 30 to 60 seconds.
2Remove the skillet from the heat, and then stir in the soy sauce, maple syrup, sesame oil, and chili sauce.
3Taste and adjust with additional maple syrup to balance out the soy sauce or more chili sauce to make it spicier.
4Toss the edamame with the sauce and serve.
Adam and Joanne’s Tips
Sambal Oelek is a chili paste made with crushed raw red chiles, a little vinegar, and salt. It’s sold in most grocery stores, just check the aisle where you’d buy soy sauce.
Shelled edamame: You can toss cooked shelled edamame beans with the spicy sauce.
The nutrition facts provided below are estimates.
Nutrition Per Serving Serving Size 1/4 of the recipe / Calories 183 / Total Fat 9.9g / Saturated Fat 2.9g / Cholesterol 0mg / Sodium 265.7mg / Carbohydrate 12.9g / Dietary Fiber 5.5g / Total Sugars 5.6g / Protein 13.5g
AUTHOR:
Joanne Gallagher
We are Adam and Joanne Gallagher, the creators of Inspired Taste. Established in 2009, Inspired Taste grew from a childhood dream into one of the internet’s most trusted recipe sites with hundreds of reliable recipes, step-by-step videos, and expert tips.More About Us
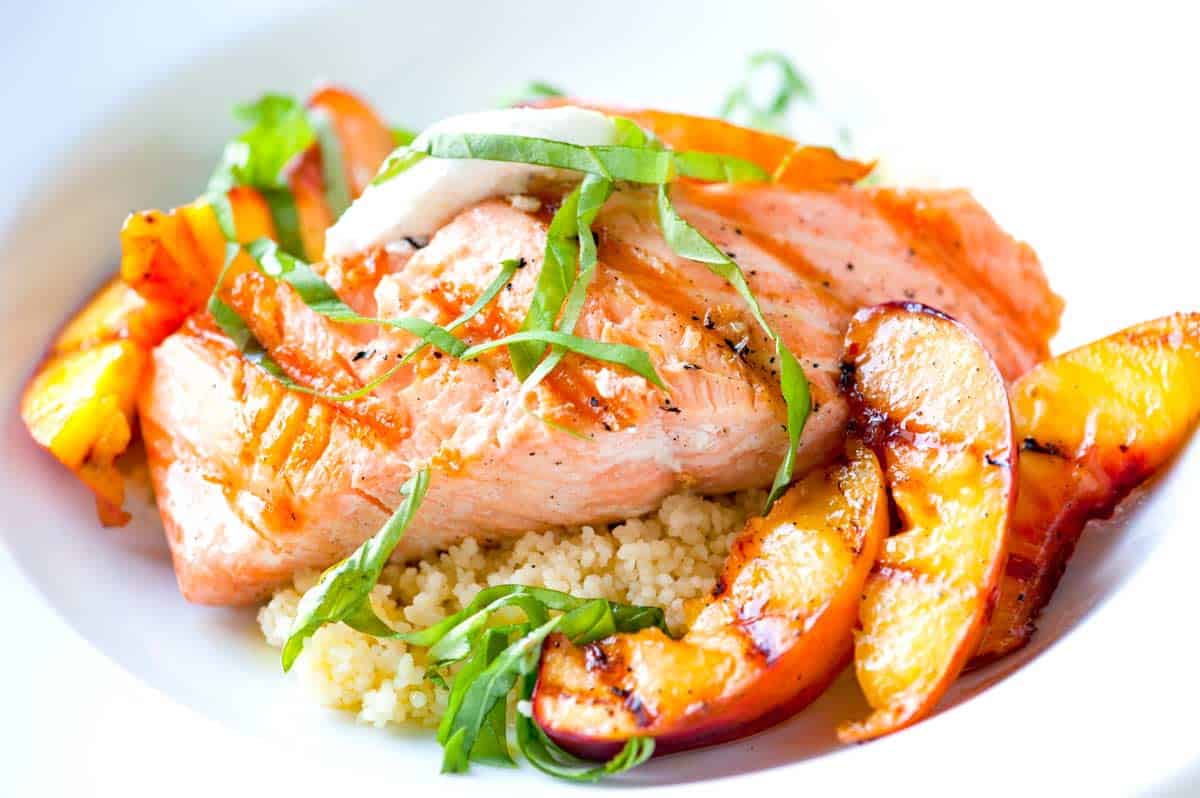
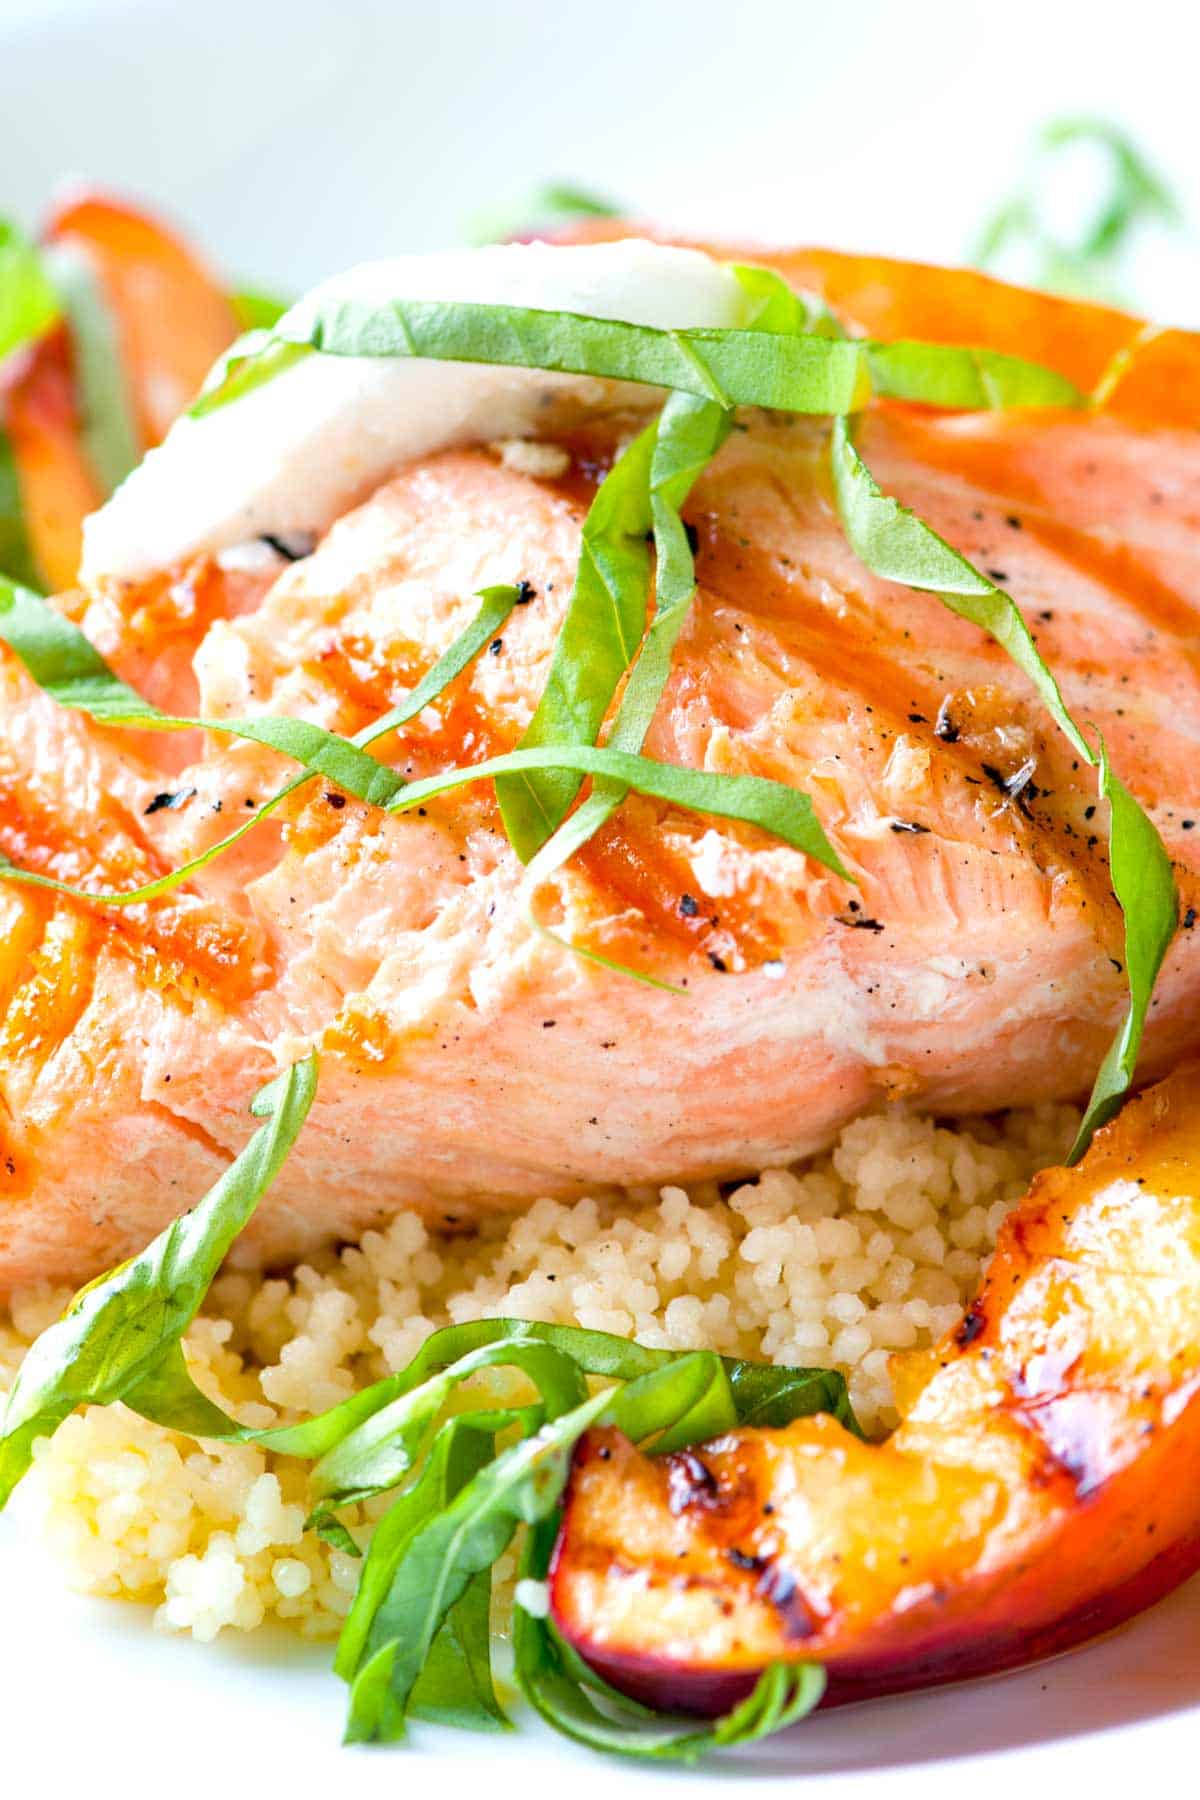
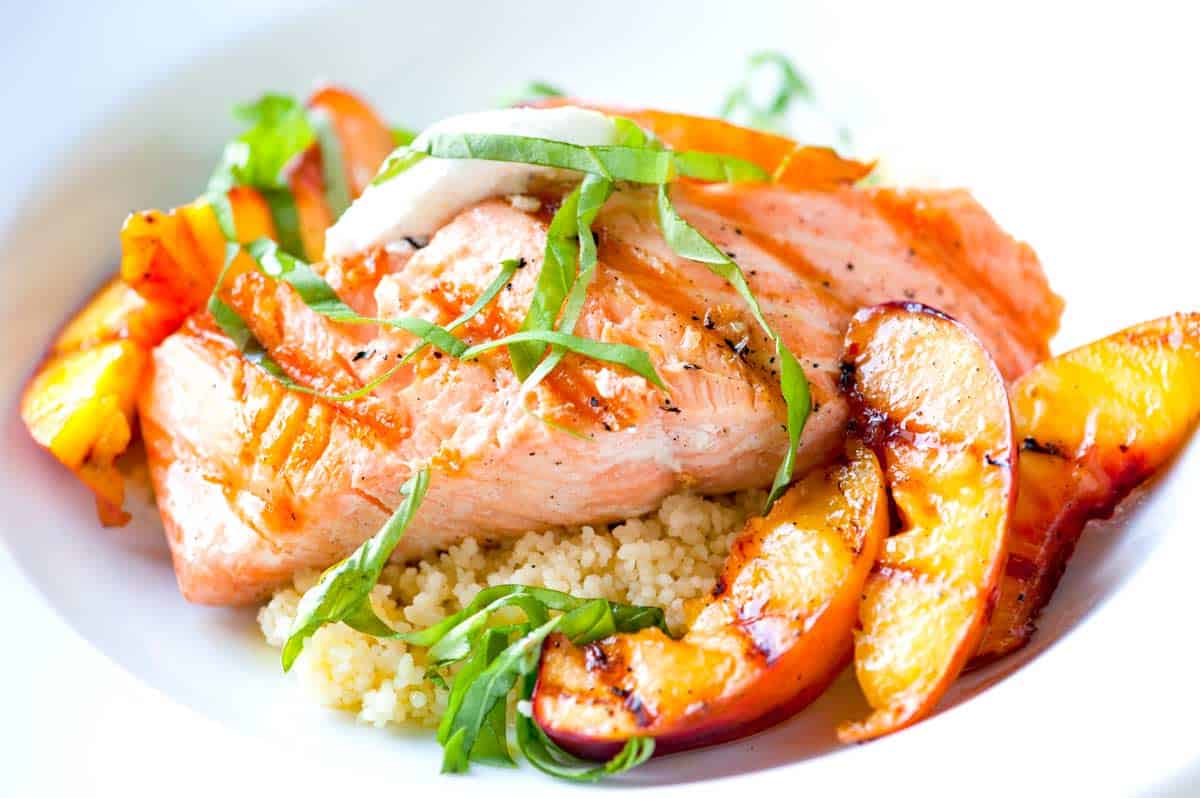
This grilled salmon with nectarines and goat cheese is such an easy, light dinner, especially during the warmer months!
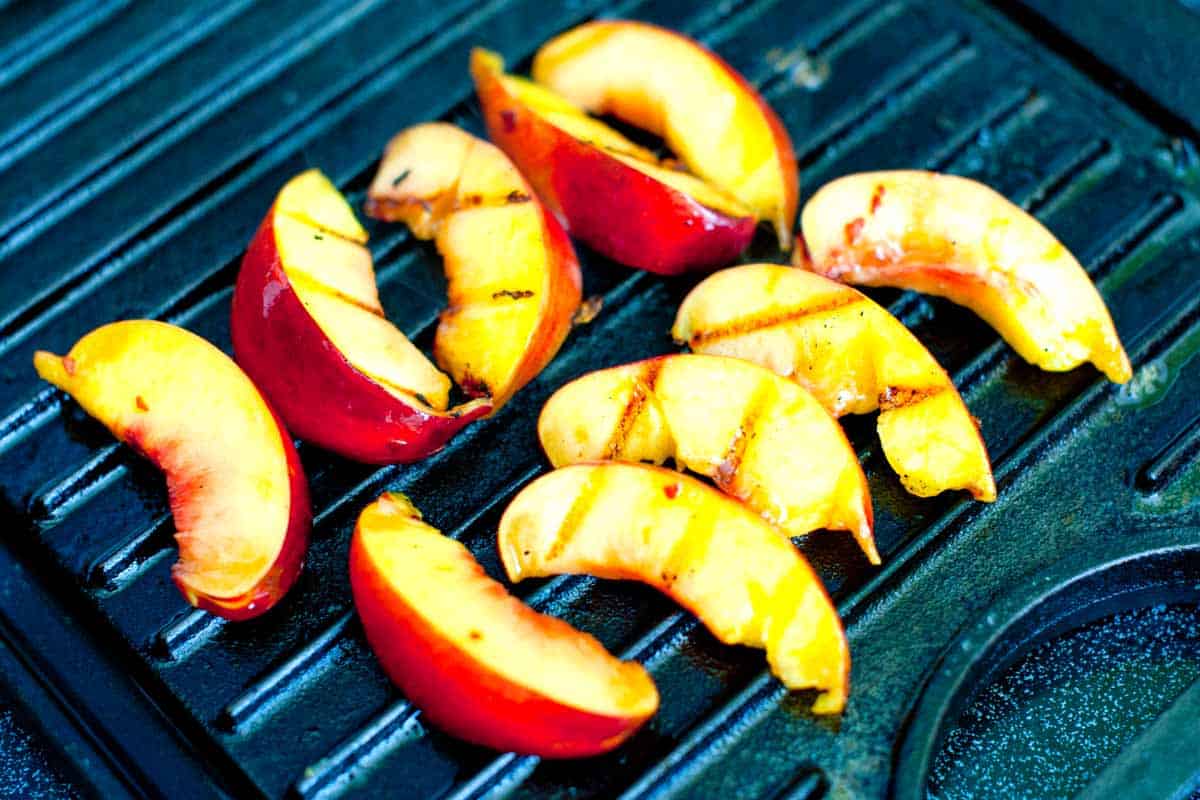
If you’ve never grilled nectarines or peaches, consider this your sign to start. We toss nectarine wedges with maple syrup and a pinch of red pepper flakes, then grill them until they are soft, sweet, and absolutely mouthwatering.
Serve them over a bed of couscous with simply grilled salmon and creamy goat cheese. It’s fresh and gorgeous, and it comes together so quickly. A total winner.
Key Ingredients
Salmon: Any salmon fillet will work for this recipe. We especially love salmon with a higher fat content, like sockeye, king, and coho. Salmon with a higher fat content stays soft and moist after it is grilled.
Nectarines: Grilled stone fruit is lovely. In this dish, we grill nectarines, but peaches or apricots would be excellent, too. Look for ripe, but slightly firmer fruit and save the really soft ones for eating fresh.
Maple Syrup and Pepper Flakes: Toss the nectarines with these before grilling. The sugars in the maple syrup caramelize on the grill and get a little smoky.
Couscous: Any cooked grain or quinoa is perfect here. Couscous, rice, quinoa, or orzo are all great. Before serving, fluff it and stir in a little olive oil, lemon juice, and a pinch of salt.
Goat Cheese: Use fresh, soft goat cheese, usually sold in logs.
Basil: Fresh herbs add a pop of color and fresh flavor. If you do not have basil, use parsley, cilantro, mint, or dill.
Find the full recipe with measurements below.
How to Make Grilled Salmon with Nectarines
You can make this recipe indoors with a grill pan or outdoors on an outdoor grill. Fish is delicate and can be a little tricky to grill, so I’ll tell you upfront that the most foolproof option is the grill pan on the stove. That said, grilling salmon on an outdoor grill is absolutely doable, so I’ve shared all my best tips below.
Tip 1: Prepping the grill. If you are staying inside, you’ll need a preheated grill pan over medium heat. If you are using an outdoor grill, preheat it for a good while and make sure the grates are very clean (otherwise the salmon will stick).
Tip 2: Have a fish spatula ready. When flipping the fish, you might find it sticks to the grates (even if you have oiled it and preheated the grill). A flexible fish spatula is really helpful for wiggling underneath the salmon fillets so you can flip them.
Tip 3: Keep the salmon skin on and oil the fish. In our photos, the salmon skin was removed. That said, I much prefer to cook my salmon with the skin still on. It acts as a little insulator, helping keep the fish moist and tender inside.
If you have salmon with the skin still on, keep it that way and place your fillets skin-side down when you start cooking them. Before you grill, rub the salmon all over with oil (adding the oil to the fish instead of the grill grates prevents it from sticking).
Tip 4: Grill salmon until an internal temperature of 125°F. I realize this is yet another gadget I am recommending for this recipe, but I promise it is worth it. When cooking delicate fish, like salmon, an internal thermometer is really helpful. Pierce it into the thicker part of a fillet for a reading. Remove the fish from the grill when it reaches 125°F, which means it will still be ever-so-slightly undercooked in the middle. That’s okay, though, because carryover cooking will finish it for you.
Tip 5: Grill the nectarines. After cutting them into wedges, toss the fruit with some maple syrup and a pinch of red pepper flakes. Then, add them to the grill. Look for them to pick up some color and grill marks, then flip.
Tip 6: Serve over seasoned couscous. Toss cooked couscous (or rice or quinoa) with a little olive oil, lemon juice, a pinch of salt, and a little fresh basil. It’s a simple step, but it adds so much more interest to the final dish.
More Summer Dinners
Easy Grilled Salmon with Nectarines
PREP
COOK
TOTAL
We keep the salmon simple with olive oil, salt, and pepper for this recipe, but add flavor with grilled nectarines and creamy goat cheese. We’ve offered tips for grilling the salmon in the recipe below. If using an outdoor grill, make sure your grates are very clean; otherwise, use a grill pan (either on the grill or on the stove). Feel free to swap nectarines with peaches or another stone fruit (apricots would be lovely).
Serves 4
You Will Need
1 ½ pounds center-cut salmon, skin-on, cut into 4 filets, about 6 ounces each
Extra-virgin olive oil
Salt and freshly ground black pepper
2 medium nectarines or peaches, pits removed and cut into wedges
1 ½ tablespoons maple syrup
½ teaspoon gochugaru or crushed red pepper flakes
3 cups cooked couscous, quinoa, or rice
½ lemon, juiced
4 ounces fresh goat cheese
Large handful of basil leaves, chopped
Directions
1Prepare a grill for cooking over medium heat. If using an outdoor grill, make sure the grates are very clean to help prevent the fish from sticking. If grilling inside, heat a lightly oiled, well-seasoned grill pan over medium-high heat.
2Pat the salmon fillets dry with paper towels. Brush both sides generously with olive oil and season with salt and pepper (oiling the fish itself, rather than just the grates, is the best way to ensure the salt and pepper adhere and the fish won’t stick).
3Grill the salmon skin-side down first—leaving the skin on to protect the delicate flesh from the heat—for 5 to 6 minutes per side. When flipping, a thin, flexible fish spatula works best. If you feel resistance when trying to slide the spatula under, do not force it; give it another minute to release naturally from the grates. Cook until it flakes easily with a fork. (If you have one, take the salmon off the heat when an internal thermometer reads 125°F.)
4Meanwhile, toss the nectarine wedges with 1 tablespoon of olive oil, maple syrup, and crushed red pepper flakes. Place on the grill and cook until warmed through and grill marks appear, about 2 minutes per side.
5In a medium bowl, toss the warm cooked couscous or rice with a drizzle of olive oil, the juice from half a lemon, a pinch of salt, and half of the chopped basil.
6Serve the salmon on a bed of seasoned couscous, topped with the grilled nectarines, a few crumbles of goat cheese, and the remaining fresh basil.
Adam and Joanne’s Tips
The nutrition facts provided are estimates.
Nutrition Per Serving Serving Size 1/4 of the recipe (1 fillet, 3/4 cup couscous) / Calories 528 / Total Fat 19.7g / Saturated Fat 6.3g / Cholesterol 100mg / Sodium 560.9mg / Carbohydrate 40.4g / Dietary Fiber 2.9g / Total Sugars 10.4g / Protein 48.4g
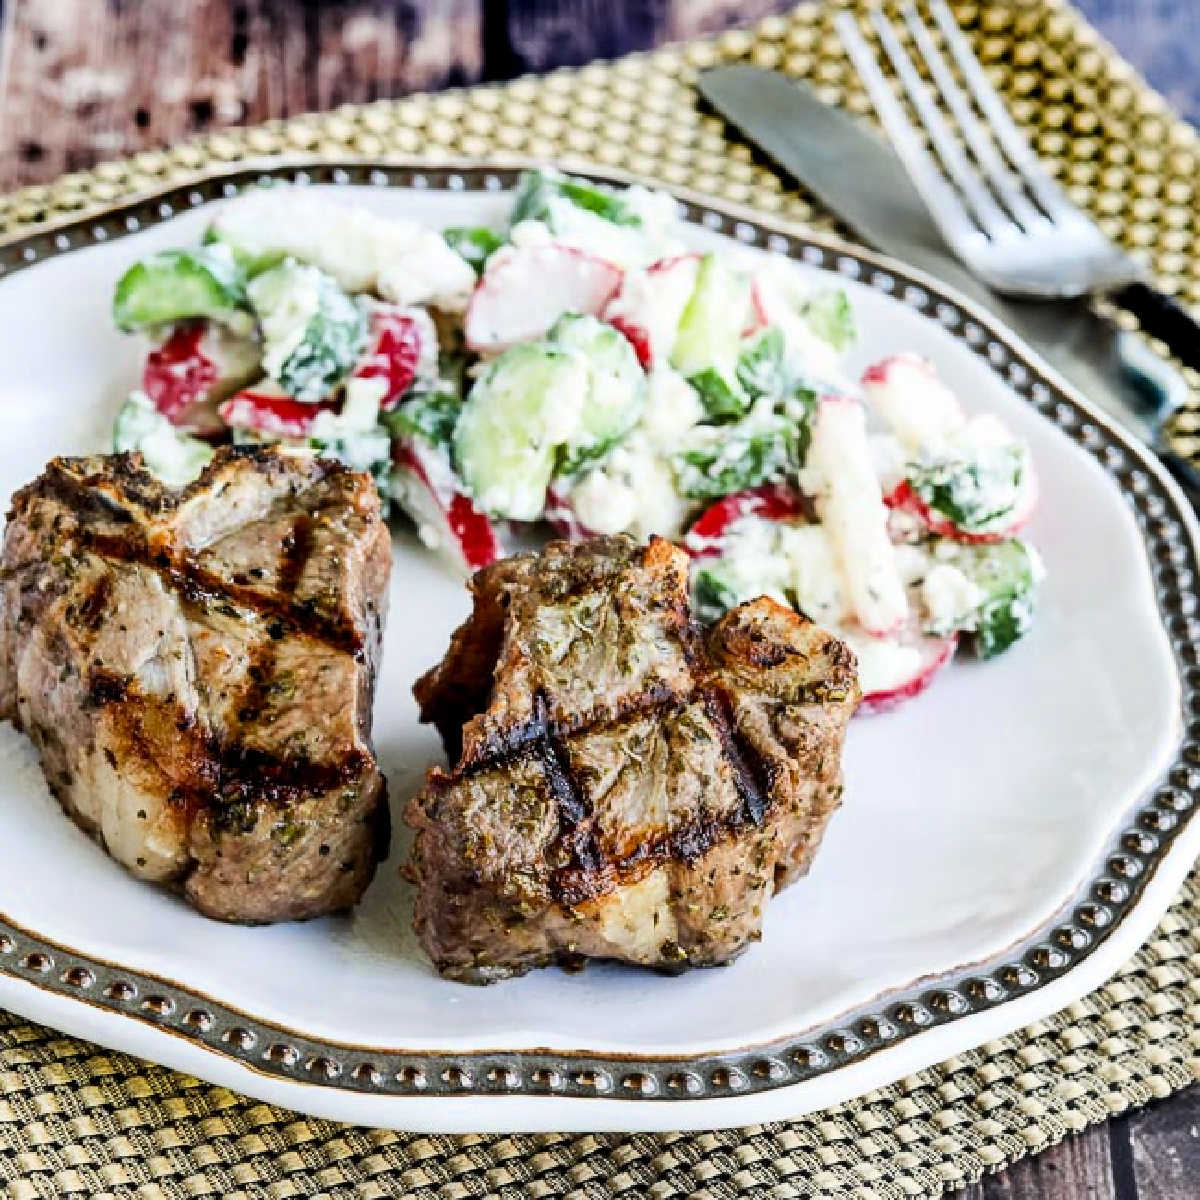
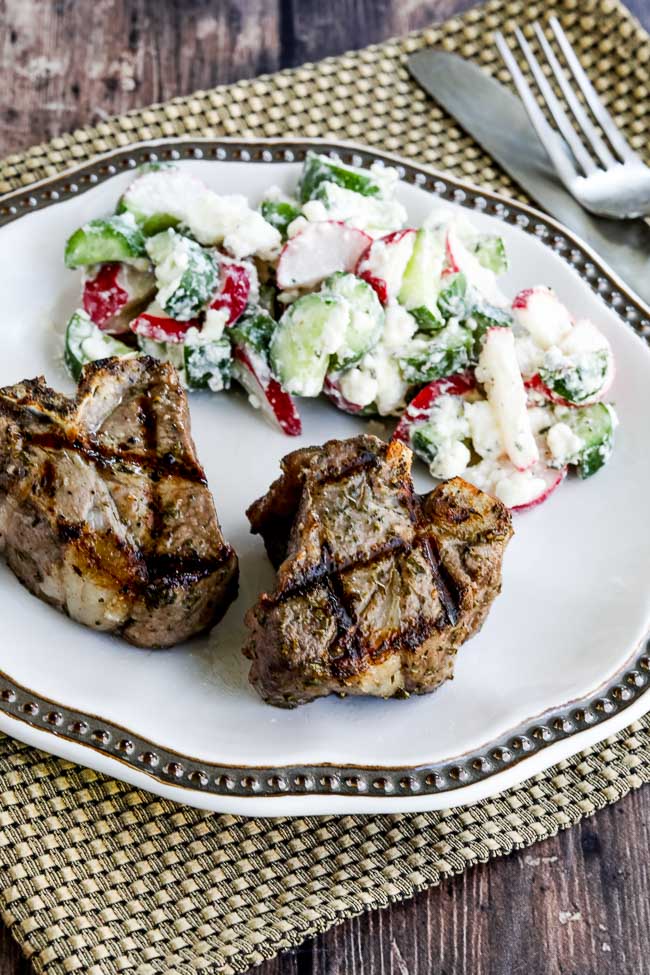
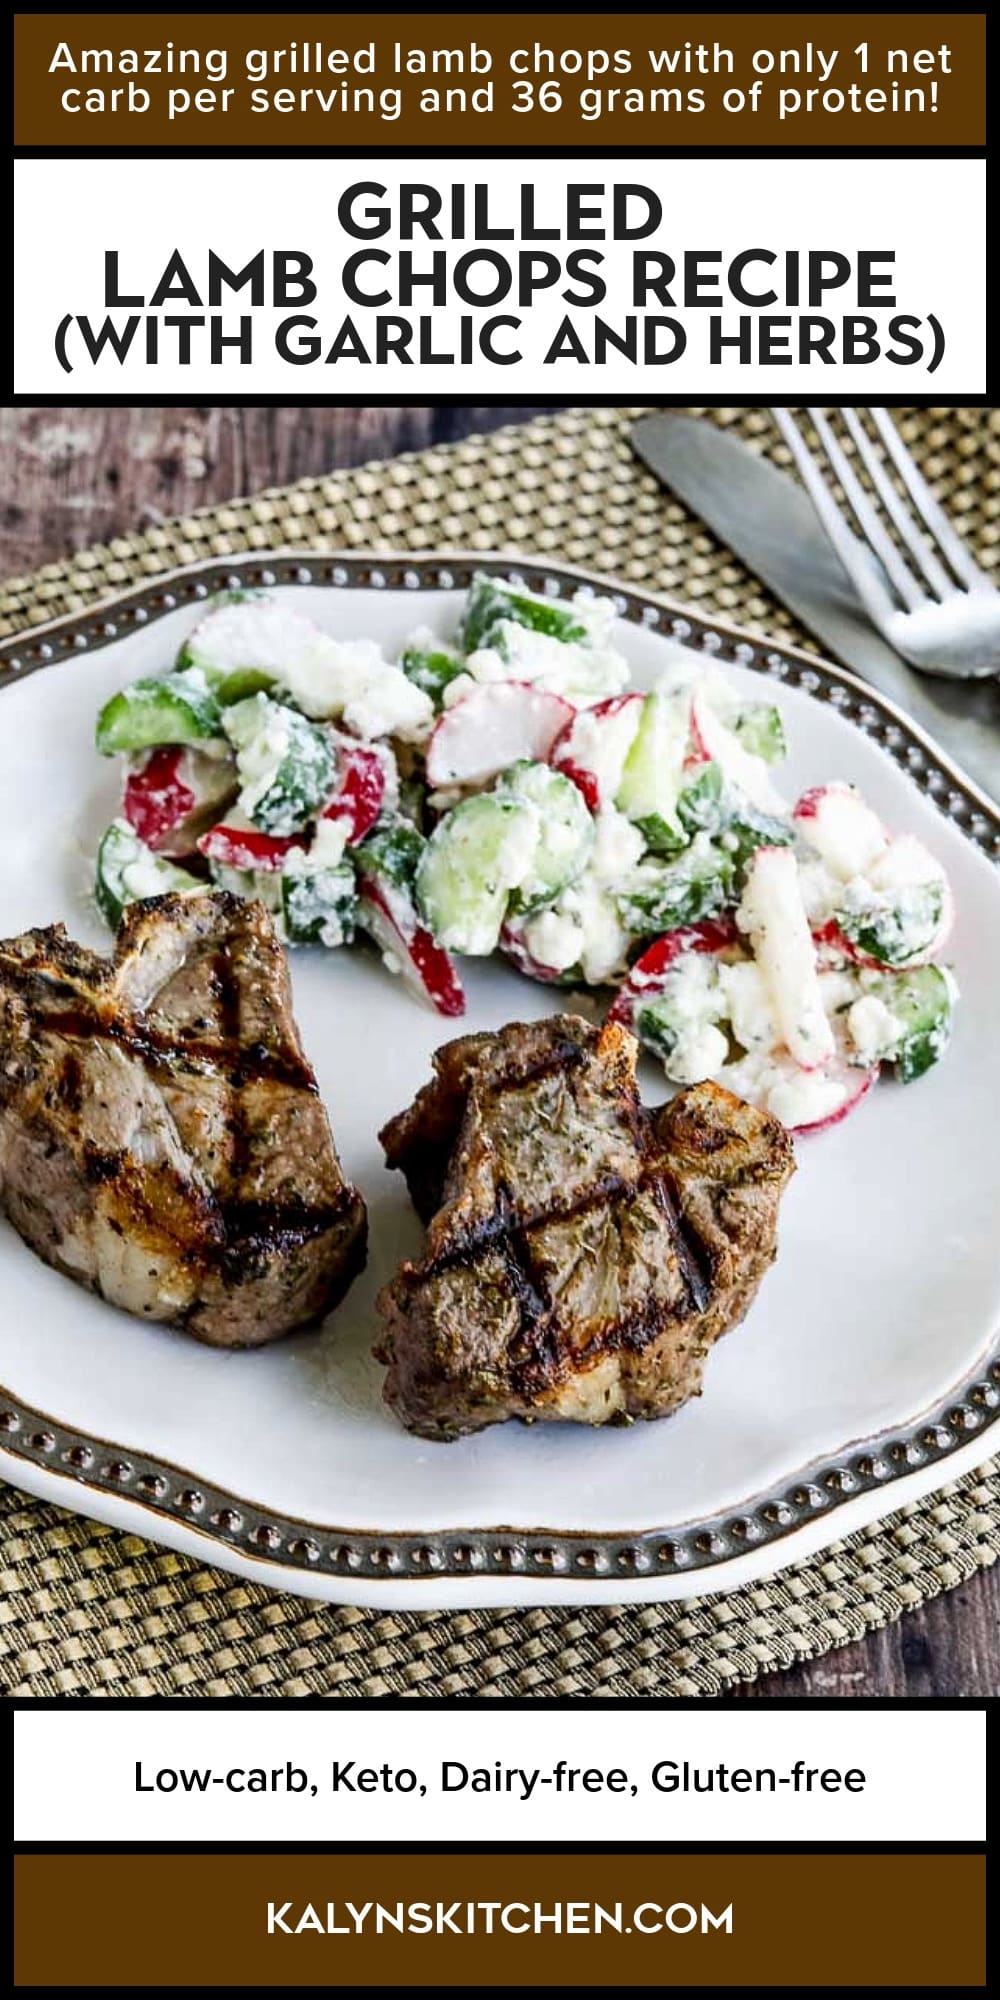
This Grilled Lamb Chops Recipe is perfect for a special occasion and I use a lamb marinade with garlic and herbs to add flavor. If lamb chops aren’t in the budget, see ideas in this post for less expensive options for cooking lamb on the grill.
PIN the Grilled Lamb Chops Recipe to try it later!
I made this Grilled Lamb Chops Recipe with a package of lamb chops from Costco, and everyone loved this for a special dinner. I used a tasty lamb marinade with lots of garlic and herbs, and marinated the lamb chops for a few hours. Then we quickly grilled them for a truly memorable meal!
Lamb chops are something I would order as a splurge when I’m eating in a nice restaurant. And I love cooking lamb at home once in a while, although I realize they’re a budget splurge for most people. But the Grilled Lamb Chops are extra low in carbs, and lamb is just so delicious!
I hope you try this easy recipe for grilling lamb chops if you don’t mind splurging a bit. Or see the links below for other ideas for cooking grilled lamb that are a bit less expensive.
What ingredients do you need?
(This is only a list of ingredients; please scroll down for complete printable recipe. Or if you use the JUMP TO RECIPE link at the top of the page, it will take you directly to the complete recipe with ingredient amounts.)
lamb loin chops
sea salt to taste
Red Wine Vinegar (affiliate link)
chopped fresh rosemary
chopped fresh thyme
Minced Garlic (affiliate link)
Olive Oil (affiliate link)
fresh ground black pepper to taste
Is fresh rosemary and thyme a must for the grilled lamb chops marinade?
This recipe is amazing with chopped fresh herbs in the lamb marinade, but if that’s not an option just use a slightly smaller amount of ground rosemary (affiliate link) and ground thyme (affiliate link).
Can you make grilled lamb chops without an outdoor grill?
If you don’t have an outdoor grill, these marinated lamb chops can be cooked on a Stovetop Grill Pan (affiliate link) or a George Foreman Grill (affiliate link) with good results. Remember that the George Foreman grill cooks both sides at once so the grilling time will be shorter.
Want less expensive ideas for Grilled Lamb?
Here are some options if you like the sound of marinated lamb cooked on the grill but lamb chops aren’t in the budget. Use a cheaper cut of lamb for Kabobs or Souvlaki. And both those recipes for lamb cooked on skewers are amazing served with Tzatziki Sauce.
How low in carbs are the Grilled Lamb Chops?
These amazing lamb chops cooked on the grill have only 1 net carb per serving with 36 grams of protein!
How to Make Grilled Lamb Chops (with Garlic and Herbs):
(This is only a summary of the steps for the recipe; please scroll down for complete printable recipe. Or if you use the JUMP TO RECIPE link at the top of the page, it will take you directly to the complete recipe.)
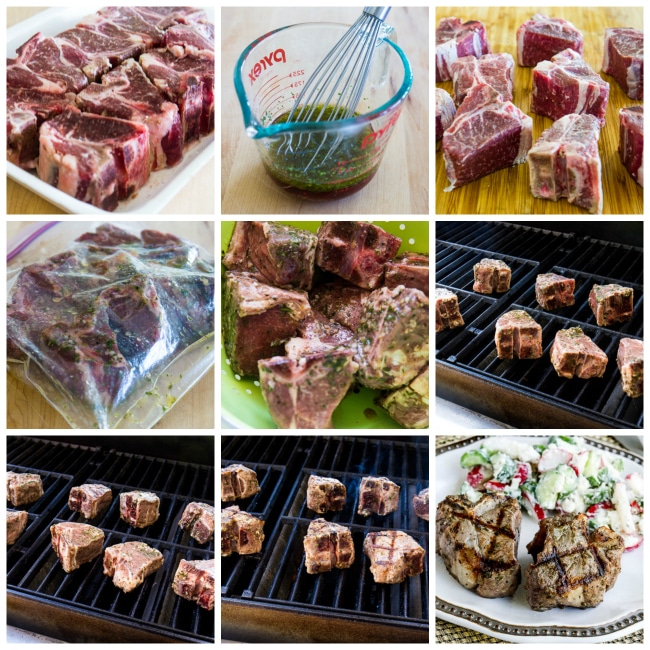
The first photo is the package of lamb chops I got at Costco and they were a pretty good buy for a special meal.
Whisk together vinegar, rosemary, thyme, garlic, olive oil, and pepper to make the marinade.
I trimmed just a little fat on each lamb chop.
Put lamb chops into a Ziploc bag with the marinade and marinate in the fridge for a few hours (or all day while you’re at work.)
When it’s time to cook, drain the lamb chops into a colander and let lamb come to room temperature while you heat the grill.
Put lamb chops on grill, placing them diagonally across the grill grates, and cook until you see nice grill marks, about 4 minutes.
Rotate each lamb chop to go the other way on the grill grates and cook about 4 minutes longer (or until you have nice criss-cross grill marks.)
Turn lamb chops over and cook to your desired doneness, about 2 minutes more for medium rare.
You can use an Instant-Read Meat Thermometer (affiliate link) to check the lamb, most sources recommend 145F/60C for medium rare. Or here’s a good chart with lamb cooking temperatures from The Kitchn.
Let the Grilled Lamb Chops rest for a few minutes after you take them off the grill, then season with sea salt and serve hot.
Make it a Low-Carb Meal:
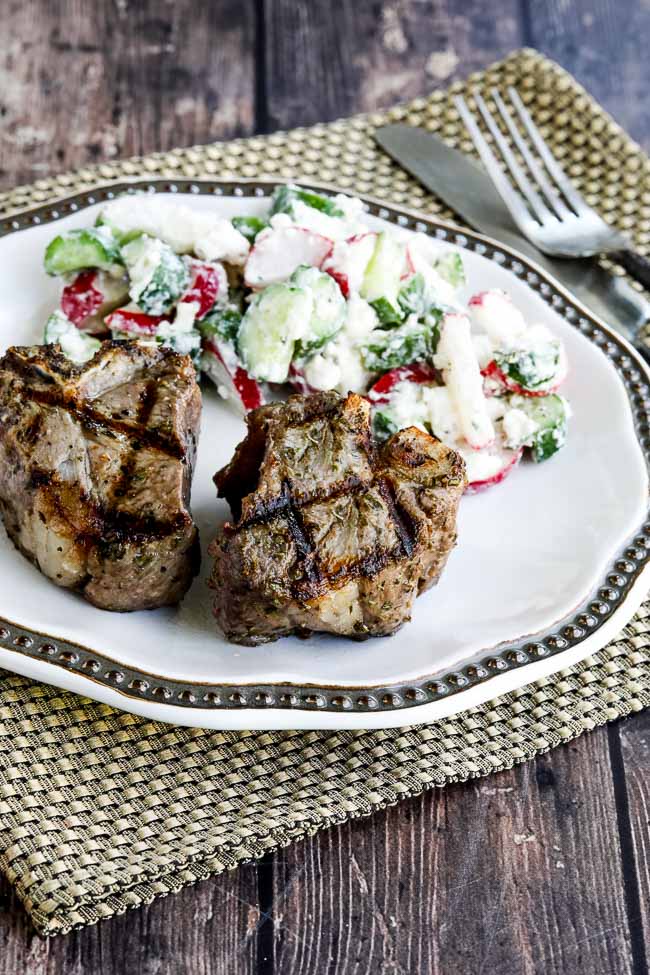
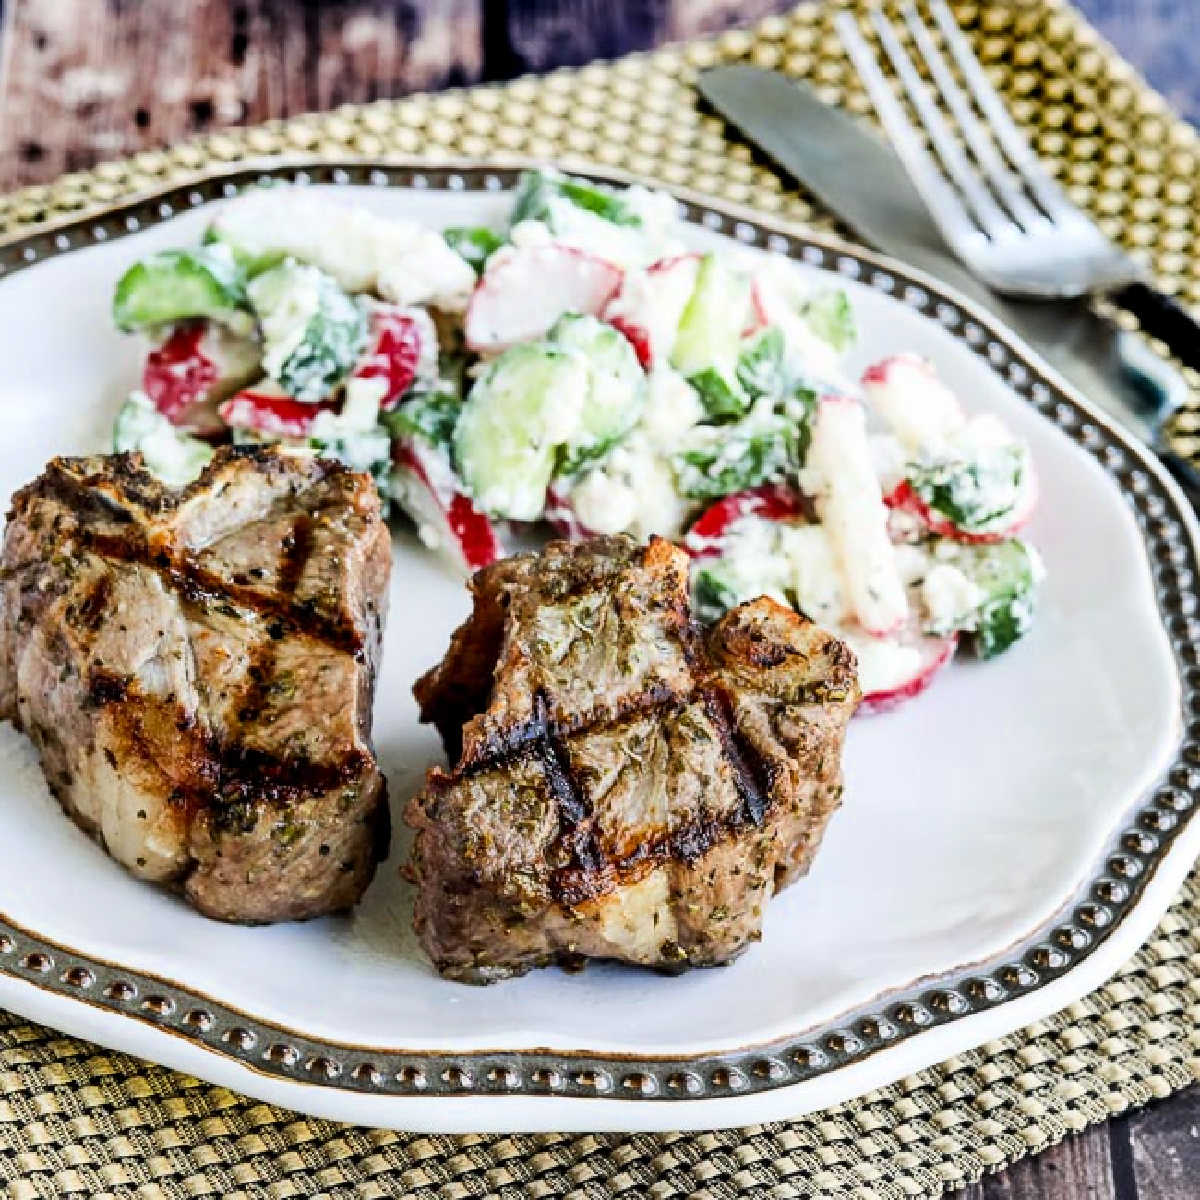
The Grilled Lamb Chops are shown with Cucumber and Radish Salad with Feta Dressing in the photo, and that was a great combination. They would also taste great with any of these side dishes for a low-carb meal:
Want more low-carb recipes for meat cooked on the grill?
You might like to check out Amazing Keto Steak Recipes or Grilling Recipes with Beef, Pork, or Lamb if you’re someone who enjoys meat cooked on the grill!
Ingredients
8 lamb loin chops, about 1 inch thick (you can use thinner ones, but adjust the cooking time)
sea salt to taste to season cooked lamb chops
1/4 cup red wine vinegar
2 T chopped fresh rosemary
1 T chopped fresh thyme
1 tsp. garlic puree or minced fresh garlic
2 T olive oil
fresh ground black pepper to taste
Instructions
I trimmed some of the outside fat from lamb chops; keep more fat on if you prefer.
Combine red wine vinegar, chopped fresh rosemary, chopped fresh thyme, minced garlic, olive oil, and black pepper to make the marinade.
Place lamb chops inside Ziploc bag, pour marinade in, and marinate lamb for 1-4 hours in the fridge. (Or marinating all day while you’re at work is also fine.)
When it’s time to cook, drain lamb chops into a colander placed in the sink and let them come to room temperature while you preheat the grill.
Preheat gas or charcoal barbecue grill to medium-high heat. (You can only hold your hand there for 2-3 seconds at that heat.)
Put lamb chops on the grill, placing them diagonally across the grill grates, and cook until you see nice grill marks, about 4 minutes.
Rotate each lamb chop to go the opposite way on the grill grates and cook about 4 minutes longer (or until you have nice criss-cross grill marks.)
Turn lamb chops over and cook to your desired doneness, about 2 minutes more for medium rare. (If you want to use an Instant-Read Meat Thermometer (affiliate link) to check the lamb, most sources recommend 145F/60C for medium rare, or here’s a good chart with lamb cooking temperatures from The Kitchn.)
Let the lamb rest for a couple of minutes when you take it off the grill. Then season Grilled Lamb Chops with sea salt to taste and serve hot.
Notes
The marinade used here was adapted from this recipe.
Nutrition information is automatically calculated by the Recipe Plug-In I am using. I am not a nutritionist and cannot guarantee 100% accuracy, since many variables affect those calculations.
Did you make this recipe?
Did you make this recipe? Please leave a star rating (under the PRINT button in the recipe) or share a photo of your results on Instagram! THANKS!
Low-Carb Diet / Low Glycemic Diet / South Beach Diet Suggestions: Marinated lamb chops cooked on the grill are a perfect choice for low-carb or Keto diets. If you’re following the original South Beach Diet, lamb is a bit high in fat but I would eat this for a treat if you trim the lamb chops to remove most of the fat.
Find More Recipes Like This One: Use Grilling Recipes to find more recipes like this one. Use the Diet Type Index to find recipes suitable for a specific eating plan. You might also like to follow Kalyn’s Kitchen on Pinterest, on Facebook, on Instagram, on TikTok, or on YouTube to see all the good recipes I’m sharing there.
Historical Notes for this Recipe This Grilled Lamb Chops Recipe was first posted in 2007, probably with a photo that was pretty dismal in those days. The photos were improved in 2018 and the recipe was last updated with more information in 2026. And now many years later I’m still a huge fan of lamb chops cooked on the grill!
We are a participant in the Amazon Services LLC Associates Program, an affiliate advertising program designed to provide a means for us to earn fees by linking to Amazon.com and affiliated sites. As an Amazon Associate, I earn from qualifying purchases.
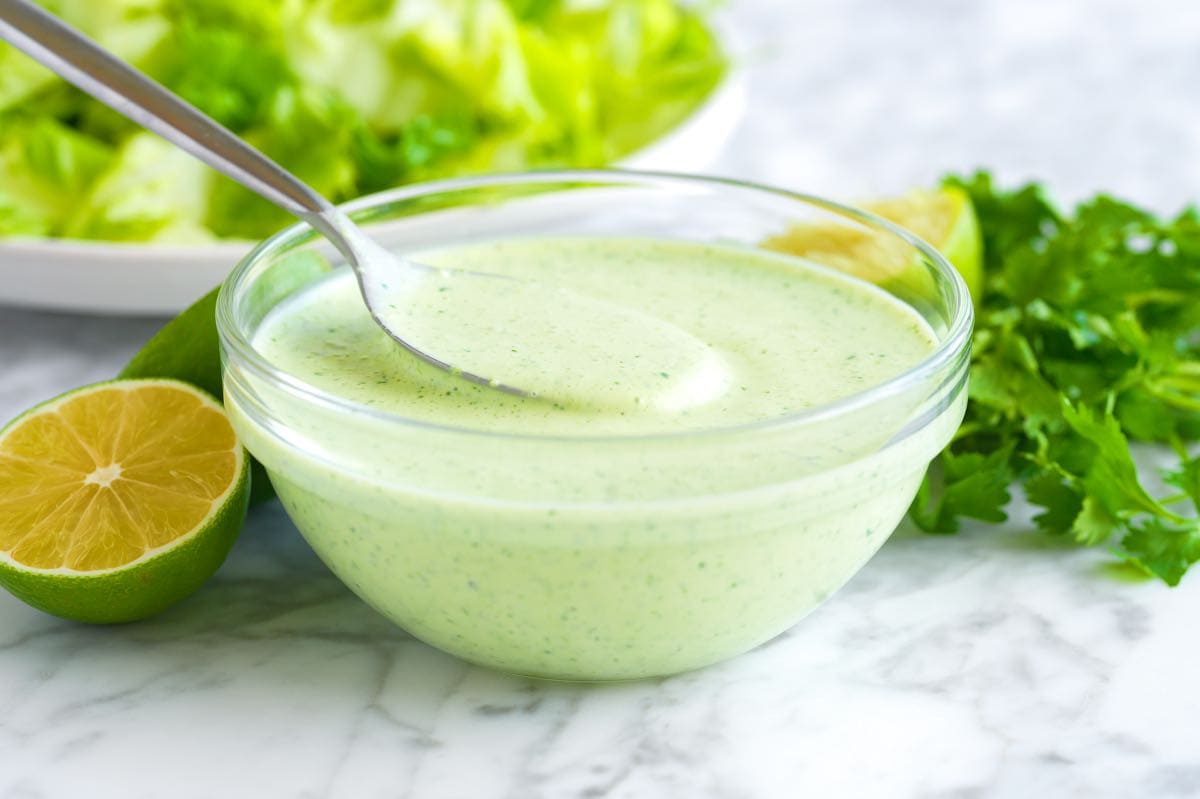
This easy, creamy cilantro lime dressing recipe is one of our favorite sauces to keep in the fridge. Use it for salads, drizzle over tacos, add to burritos, and more!
This dressing came to be when I was craving a taco salad and wanted a bright, creamy cilantro dressing to go with it. I started with our homemade ranch as a base, but swapped the herbs for a bunch of cilantro and the lemon for fresh lime juice.
The results were one of the yummiest salad dressings we’ve made. This creamy dressing is perfect for salads, but you can use it for so much more. Think tacos, burritos, rice bowls, a dip for veggie quesadillas, and even as a dip for vegetables.
Key Ingredients
Sour Cream and Mayonnaise: I use sour cream and mayonnaise to make our ranch recipe extra creamy, so I do the same here. If you want to lighten things up a little, you can substitute the sour cream with Greek yogurt or even blended cottage cheese (weird, but it works!).
Buttermilk or Milk: Buttermilk adds a tangy, creamy flavor that’s hard to beat. If you don’t have buttermilk, regular milk with a bit more lime juice also works. If you buy buttermilk for this recipe and have some left over, try these buttermilk pancakes (I love them!).
Lime Juice: A splash of fresh lime juice brightens the dressing in a way that store-bought bottles can’t compete with. Plus, the lime works so well with the fresh cilantro.
Cilantro and Green Onion: I love fresh herbs and am committed to using a lot of them whenever I buy them. That’s why you’ll be using an entire cup of cilantro leaves for this cilantro dressing. The green onion adds even more fresh flavor. I love it!
Jalapeño: This was a last-minute addition the first time I made this, and I’ve been adding it ever since. I mince about 1 tablespoon of fresh jalapeño, and then blend it with the other ingredients. It doesn’t make it spicy. That said, you can always increase it.
Spices: Onion powder, garlic powder, salt, and pepper round everything out and make this dressing extra delicious.
Find the full recipe with measurements below.
Tips for Making My Cilantro Lime Dressing
Tip 1: Use a blender. The quickest way to make this recipe is to add all the ingredients to a blender, hit go, and wait 30 seconds. A food processor works, too!
Tip 2: Make it ahead of time. Making your own salad dressing every night of the week is probably not ideal. That’s why I am happy to say that this one lasts when stored in an airtight container for about 4 days. The green of the cilantro may dull slightly, but not much, and the dressing will still taste great.
Ways to Use Your Dressing
I’m already using it for everything. It’s excellent for this taco salad, as a sauce for these simple chicken breasts, drizzled over roasted veggies, and I’ve added it to burrito bowls made with my favorite cilantro lime rice!
Creamy Cilantro Lime Dressing
PREP
TOTAL
Make this cilantro lime dressing today, and it will last in your fridge for up to 4 days. Use it for taco salad, drizzle over tacos, add to burritos, and more! I like to think of it as a cilantro ranch. It’s so good!
Makes 2 cups
You Will Need
½ cup mayonnaise, try homemade mayonnaise (113g)
½ cup sour cream (113g)
⅓ cup buttermilk or regular milk (80ml)
2 tablespoons fresh lime juice
1 cup fresh cilantro leaves and tender stems, finely chopped (30g)
2 green onions, sliced
1 teaspoon minced jalapeño, or more to taste
½ teaspoon onion powder
½ teaspoon garlic powder
¼ teaspoon fine sea salt, plus more to taste
¼ teaspoon fresh ground black pepper
Directions
1Add all the ingredients to a blender or food processor and blend until smooth. Taste, and then adjust with extra lime juice, salt, or pepper.
Adam and Joanne’s Tips
Storing: Keep in the fridge in an airtight container for up to 4 days.
Greek yogurt: While I love the tangy, rich flavor of full-fat sour cream, you can substitute the sour cream for plain Greek yogurt. Cottage cheese is also a nice option and adds extra protein.
The nutrition facts provided are estimates.
Nutrition Per Serving Serving Size 2 tablespoons / Calories 65 / Total Fat 6.6g / Saturated Fat 1.6g / Cholesterol 7.3mg / Sodium 92.6mg / Carbohydrate 1g / Total Sugars 0.6g / Protein 0.5g
AUTHOR:
Joanne Gallagher
We are Adam and Joanne Gallagher, the creators of Inspired Taste. Established in 2009, Inspired Taste grew from a childhood dream into one of the internet’s most trusted recipe sites with hundreds of reliable recipes, step-by-step videos, and expert tips.More About Us
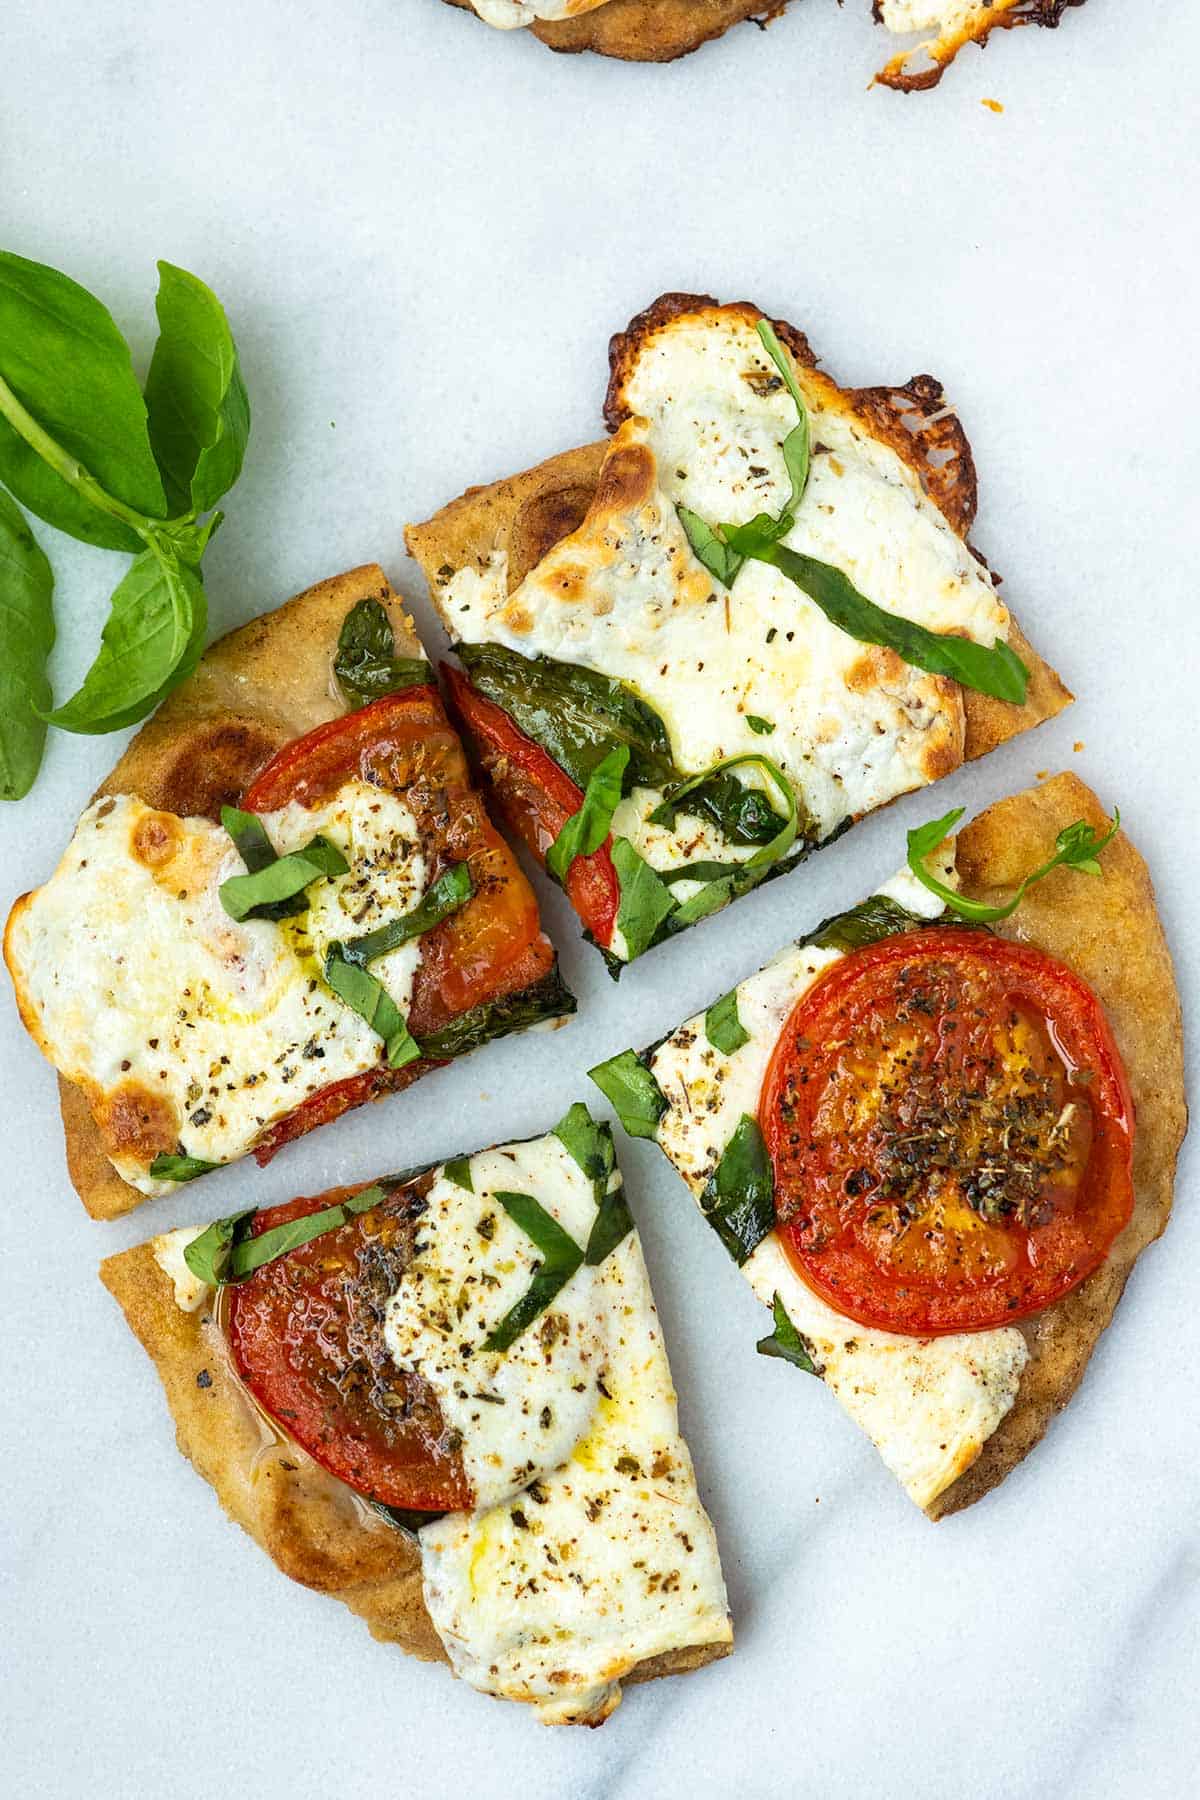
This flatbread pizza recipe is quick and easy! You can make homemade flatbread (it’s easy, I’ll show you) or use your favorite store-bought flatbread.
My family loves this easy flatbread pizza made with tomatoes, basil, and mozzarella. It’s my secret weapon for a quick dinner, which I know everyone will love. With a short list of ingredients and a 15-minute prep time, it’s a lifesaver!
Serve it with a simple salad, and you’ve got a full meal. Below, I’m sharing my family’s favorite flatbread recipe and lots of topping ideas for you to try.
Key Ingredients
Use store-bought flatbread or make your own. Our family loves this no-yeast flatbread recipe, so we usually have a few already made in the freezer. We also have this yeasted garlic flatbread that works well for pizzas. I have used our no-yeast flatbread in our photos and video.
Add your favorite toppings. Here are a few of my favorite toppings to inspire you:
Olive oil or sauce: My son isn’t the biggest fan of sauce on his pizza, so we stick with olive oil. I also love this homemade pizza sauce if you want a layer of sauce on your flatbread. For pesto pizza, try homemade basil pesto.
Cheese: I love fresh mozzarella for this recipe, but any cheese will work. Use what you have and love. For something special, I love ricotta, creme fraîche, or mascarpone cheese (which are especially delicious with caramelized onions and fresh thyme).
Meats: Cooked sausage, bacon, or pepperoni
Veggies: Try sliced onion, bell peppers, and fresh or roasted mushrooms
How to Make Flatbread Pizza
Tip 1: Assemble with cooked flatbread. When making pizza with flatbread, I like starting with cooked flatbread. This differs slightly from homemade pizza, where I add my toppings to uncooked pizza dough.
Tip 2: Bake your pizza. Add your sauce and toppings, and then bake the flatbread in your oven until the bottom is slightly crusty and the cheese has melted on top. Our pizzas bake in the oven for about 10 minutes. Since the flatbread goes into the oven precooked, this recipe is FAST.
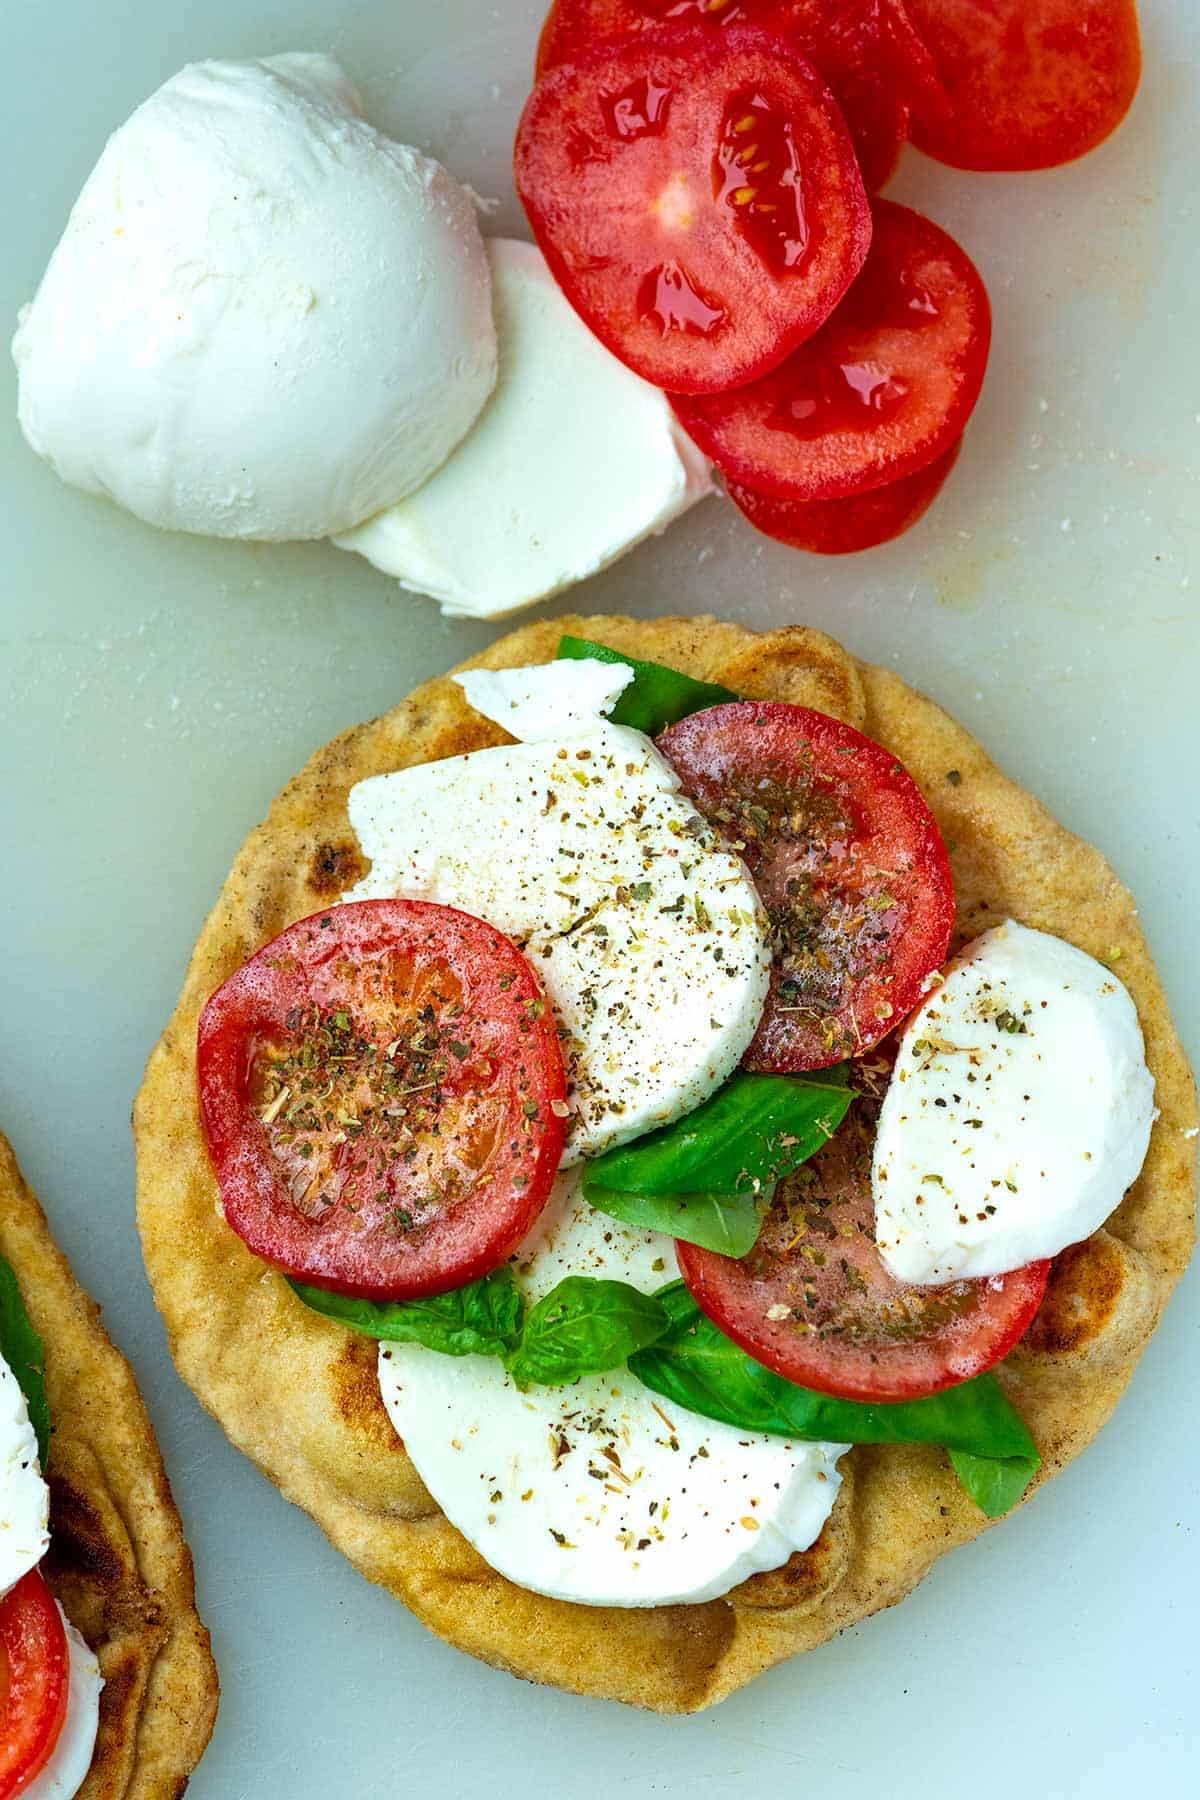
For the pizzas in our photos, I brushed on olive oil and layered sliced tomatoes, mozzarella, and basil on top. Before baking, I sprinkled over some oregano, salt, and pepper. It is simple and seriously delicious.
Serving Suggestions
I love serving these with a big salad. Some of my favorites include this homemade Caesar salad, our Greek salad, or this chopped salad.
Veggies on the side work, too. Try roasted vegetables, sautéed zucchini, or these easy sautéed vegetables. Since they are so easy, I’ve also made these pizzas and served them with soup. I especially love our roasted tomato soup.
Easy Flatbread Pizza
PREP
COOK
TOTAL
Flatbread pizza is perfect for busy mealtimes. Make this quick and easy pizza with homemade or store-bought flatbread. We have two flatbread recipes on Inspired Taste: no-yeast flatbread made with baking powder and this homemade garlic flatbread made with yeast.
Makes two pizzas
Watch Us Make the Recipe
You Will Need
2 flatbread, 6 to 8 inches in diameter, try homemade flatbread
1 tablespoon extra-virgin olive oil, plus more for serving
1 large tomato, thinly sliced
4 ounces fresh mozzarella cheese, sliced
8 fresh basil leaves, plus more for serving
2 pinches dried oregano
Salt and fresh ground black pepper
Directions
1Heat the oven to 425°F (218°C).
2Brush or rub the olive oil over the bread. Layer the sliced tomatoes, mozzarella, and basil leaves on top.
3Scatter a pinch of oregano over each flatbread, then season with salt and fresh ground pepper.
4Bake the flatbread pizzas until the cheese is bubbling and turning light brown in spots, 10 to 15 minutes.
5Serve, cut into slices, with an extra drizzle of olive oil and a few more fresh basil leaves, torn into smaller pieces, scattered on top.
Adam and Joanne’s Tips
Add garlic: Mince 1 clove of garlic and spread onto the flatbread before adding the sliced cheese, basil and tomatoes.
The nutrition facts provided below are estimates. Our soft and fluffy flatbread recipe was used for the calculations.
Nutrition Per Serving Serving Size 1 flatbread pizza / Calories 442 / Total Fat 24.9g / Saturated Fat 9.2g / Cholesterol 44.6mg / Sodium 1040.4mg / Carbohydrate 38.2g / Dietary Fiber 2.5g / Total Sugar 3.1g / Protein 17.7g
AUTHOR:
Joanne Gallagher
We are Adam and Joanne Gallagher, the creators of Inspired Taste. Established in 2009, Inspired Taste grew from a childhood dream into one of the internet’s most trusted recipe sites with hundreds of reliable recipes, step-by-step videos, and expert tips.More About Us
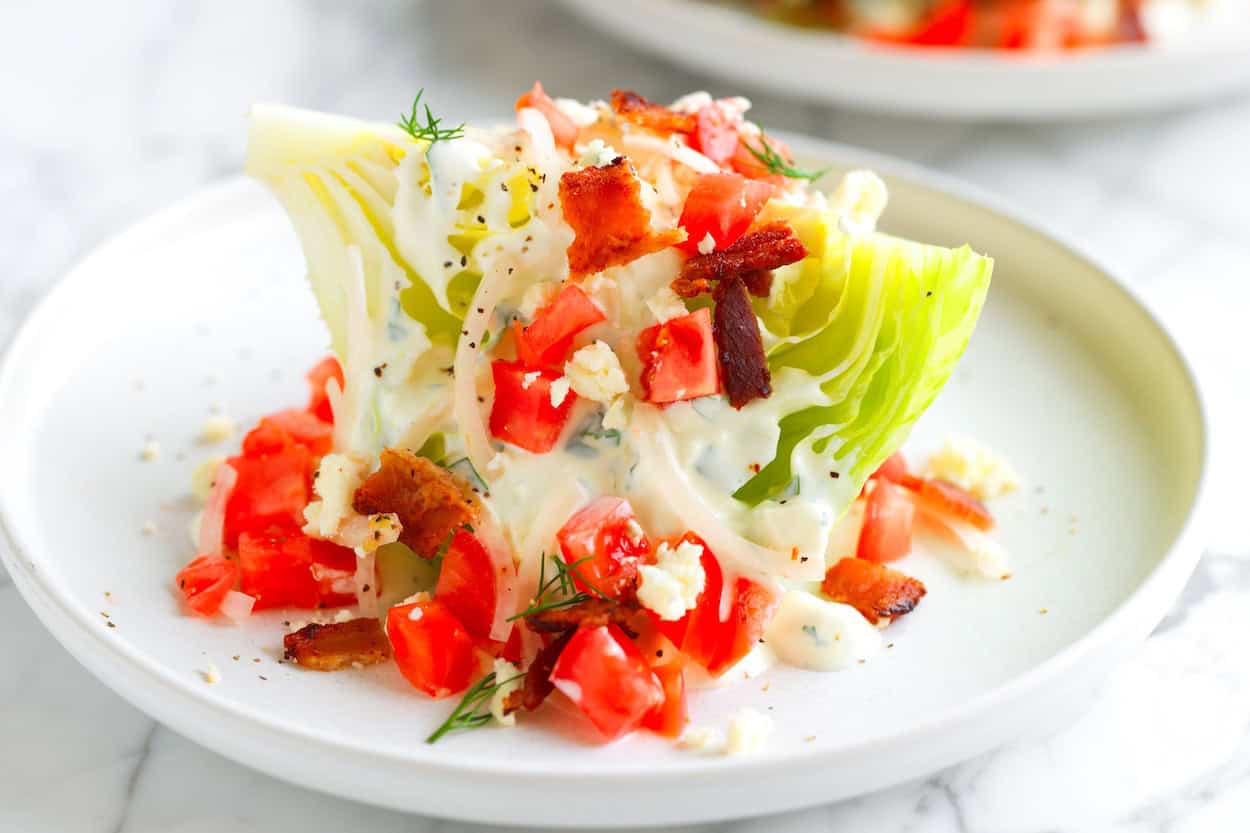
This is the wedge salad recipe we are always happy to eat. Crispy lettuce, a thick homemade dressing, bacon, and a quick tomato-onion pickle. It’s a good one!
Take us to a classic steakhouse, and there’s a very good chance at least one of us will order a wedge salad. We’re picky about it, though. The lettuce should be generous, the dressing needs to be thick and seriously blue cheesy, and tomatoes are a must (bacon is also up there on the expectations list).
We eat this homemade wedge salad for dinner, sometimes on its own or alongside some protein like grilled steak or baked salmon.
Key Ingredients
Iceberg Lettuce: The classic choice for wedge salads! Grab a larger head and remove any tattered or browned leaves. Then, trim the bottom so the stalk isn’t brown. Slice into four wedges, and you are ready for the salad. Halved romaine lettuce hearts are great, too.
Bacon: We love thick-cut bacon for this and usually cook it in the oven, which creates less mess than in a skillet. Cook your bacon until crisp, then chop it to top the salad.
Tomato: Use the best tomatoes available. We’ve shown a medium slicer tomato in the photos, but cherry tomatoes or heirloom tomatoes are also excellent.
Onion: We prefer sweet onions and quickly pickle them for 5 minutes to tone down their raw, sharp flavor. Yellow or red onions work nicely, too.
Blue Cheese Dressing: We use our homemade blue cheese dressing and highly recommend you do, as well. It’s easy to pull together and tastes much better than what’s sold at the supermarket. You’ll need mayo, sour cream (or yogurt), blue cheese, lemon juice, and parsley. Then, to thin it a little, a bit of milk or buttermilk. When shopping for blue cheese, we prefer buying wedges rather than pre-crumbled cheese, and especially love gorgonzola.
Find the full recipe with measurements below.
How to Make a Wedge Salad
Tip 1: Make a tomato-onion quick pickle. The first step to making our wedge salad recipe is to combine thinly sliced sweet onion, chopped tomatoes, a bit of rice wine vinegar, and a pinch of salt. Then set this aside while you make the dressing and salad. As the onion sits, it softens, and the raw flavor tones down a little, and the tomato releases some of its juices (which are wonderful spooned over the salad).
Tip 2: You can make the dressing ahead. Our dressing below sits well in the fridge for up to a week. It also only takes 5 minutes to make, so if you are up for a quick meal-prep session, make the dressing, and you will be one step closer to a homemade wedge salad later on in the week. As you make it, you’ll notice it’s quite thick. Add a tablespoon or two of milk to thin it out a bit, or wait until you are ready to build your salad and thin it out then.
Tip 3: Assembling the salad. Place your wedge of iceberg onto a plate, then drizzle the thick, creamy dressing over it, making sure to get it into the nooks and crannies of the lettuce. Then pile on your pickled onion and tomato, chopped bacon, fresh herbs, and more blue cheese (if you like). Finish with a pinch of freshly ground black pepper and enjoy! By the way, you can also cut your lettuce into slabs, like we do for this strawberry iceberg salad.
Serving Suggestions
This salad makes a fantastic appetizer, but we mostly enjoy it as our main meal with a little extra protein added to it. Think a side of lemon dill salmon, juicy chicken breasts, marinated steak, or grilled chicken.
More Classic Salads
Wedge Salad
PREP
COOK
TOTAL
We’re always happy with a really good wedge salad. Iceberg sometimes gets a bad rap, but it’s perfect with the bacon and thick homemade dressing here. You can make the dressing up to a week in advance, and if you’d like to lighten things a bit, plain thick yogurt (like Greek or Icelandic) works well as a substitute for sour cream.
Serves 4
You Will Need
¼ small sweet onion, thinly sliced into quarter moons
1 medium tomato, chopped (about 1 cup)
1 tablespoon rice wine vinegar
Fine sea salt and freshly ground black pepper
¼ cup mayonnaise (try homemade mayo)
¼ cup sour cream
1 tablespoon fresh lemon juice
2 ounces blue cheese, crumbled (about ½ cup), plus more for serving
1 tablespoon minced fresh parsley
1 to 3 tablespoons milk or buttermilk
1 large head iceberg lettuce, browned outer leaves removed, cut into 4 wedges
4 slices thick-cut bacon, cooked until crispy and chopped
Fresh herbs, like dill, chives, or parsley, for serving (optional)
Directions
1In a small bowl, toss the onion and tomato with the rice wine vinegar and a pinch of salt. Set aside to pickle.
2Make the dressing. In a medium bowl, stir together the mayonnaise, sour cream, lemon juice, blue cheese, parsley, a pinch of salt, and a pinch of pepper. Add enough milk to thin for a thick, drizzly dressing.
3Set a wedge of lettuce onto four plates. Generously drizzle the dressing over it, then top with the pickled onion and tomato (and some of the juices from the bottom of the bowl), chopped bacon, more blue cheese crumbles, and fresh herbs. Add a good pinch of pepper, then serve.
Adam and Joanne’s Tips
To cook the bacon, either crisp the slices in a skillet or use your oven. Here is how to cook bacon in the oven (our favorite, hands-off method).
The nutrition facts provided are estimates.
Nutrition Per Serving Serving Size 1 wedge (1/4 of full recipe) / Calories 326 / Total Fat 28.8g / Saturated Fat 9.6g / Cholesterol 44.1mg / Sodium 537.9mg / Carbohydrate 8.9g / Dietary Fiber 2.2g / Total Sugars 5.9g / Protein 9g
AUTHOR:
Joanne Gallagher
We are Adam and Joanne Gallagher, the creators of Inspired Taste. Established in 2009, Inspired Taste grew from a childhood dream into one of the internet’s most trusted recipe sites with hundreds of reliable recipes, step-by-step videos, and expert tips.More About Us
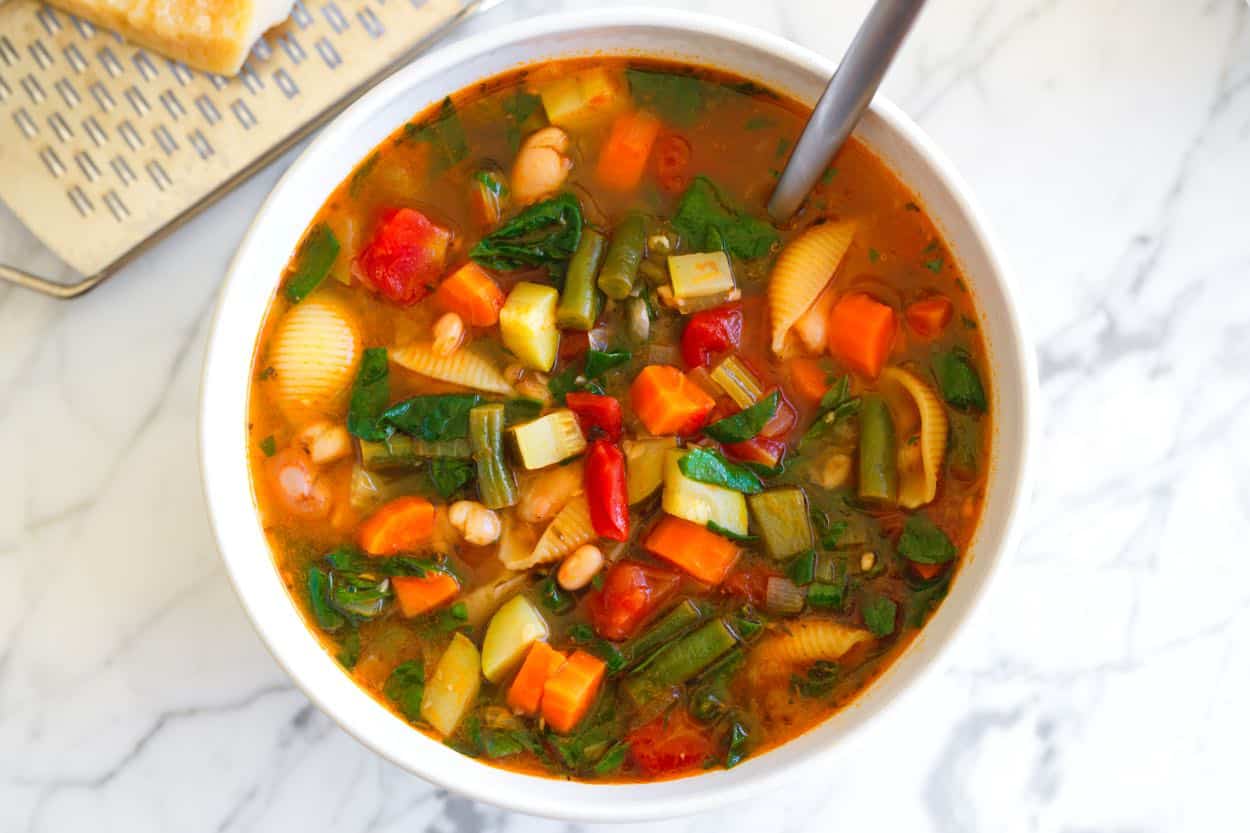
This is, hands-down, our favorite minestrone soup recipe. It’s packed with veggies, beans, and pasta, all swimming in the coziest tomato-Parmesan broth. We can’t get enough of it.
I love this soup so much. It’s perfect on day one, but somehow it gets even better as the days go by. The trick is to add a Parmigiano Reggiano rind to the broth as it simmers. It melts a bit, seasons the broth, and adds a light cheesy flavor.
Thanks to the beans, tomatoes, loads of veggies, and a handful of pasta, this soup is hearty enough to be a meal all on its own. If you want something even heartier, check out our minestrone soup with sausage or try one of our other veggie soups like this easy vegetable soup.
Key Ingredients
Vegetables: The heart of any minestrone is a lot of veggies. You can play around with what you have on hand or what’s in season, but in our most made version, we use onion, carrots, celery, green beans, zucchini, and spinach.
Canned Tomatoes: I’m all about fire-roasted canned tomatoes for this soup. They add a little extra flavor compared to regular tomatoes.
White Beans: Use whatever white beans you love best. Canned or cooked both work. We usually go for cannellini, navy, or Great Northern beans. That said, kidney beans are popular in minestrone soup, so if you have a can of them, feel free to use them.
Pasta: I love a handful of dried pasta added to this soup. Go for a smaller shape like ditalini or orzo, or use shells, which trap some of the vegetables inside.
Stock: I used chicken broth in the photos, but vegetable broth is just as good. If you want to make your own, check out our chicken broth, chicken stock, and vegetable broth recipes.
Garlic, Tomato Paste, Rosemary, and Parmesan: These are what make the broth so good. Use fresh garlic if you can. Tomato paste makes the broth richer, and a tablespoon of chopped fresh rosemary makes it aromatic. If you have a Parmesan rind, drop it right into the pot and let it work its magic as the soup simmers. If you don’t have a rind, just stir in some grated Parmesan at the end.
Find the full recipe with measurements below.
How to Make Our Favorite Minestrone Soup
Tip 1: Sweat the vegetables. To remove the raw flavors of onions, carrots, and celery, briefly sauté them in olive oil. After a few minutes, that raw flavor will disappear, and they will smell sweet. We keep the other vegetables to the side for adding later since they do not need as long to become tender.
Tip 2: Build flavor with garlic, tomato paste, and rosemary. Just before pouring in your canned tomatoes, add the garlic, tomato paste, and rosemary. A minute or so of stirring them around the pot toasts the garlic and turns the tomato paste from a bright red to orange, which deepens its flavor.
Tip 3: Make the broth. Now, you can pile in the green beans, zucchini, canned tomatoes, beans, and broth. We drain and rinse our beans before adding them.
Tip 4: Add a Parmigiano Reggiano rind. This is my secret for the best minestrone soup. It works wonders. As the soup simmers, the cheese melts a bit and seasons the broth. Depending on how hard the rind you use is, it may not dissolve completely.
Tip 5: Add the pasta towards the end. So it doesn’t get too mushy, add your pasta when the soup has about 10 minutes left. The veggies only take about 20 minutes, so I usually simmer them for 10 minutes, then add my dried pasta and stir.
Tip 6: Turn off the heat, then stir in the spinach. I love finishing this soup with a generous amount of roughly chopped fresh spinach. It doesn’t take long to cook, so turn off the heat and stir in the spinach. Leave it for a minute or two, and it will be nicely wilted into the soup.
Serving Suggestions
I am perfectly happy to sit with a bowl of this soup and call it a day, but if you are looking for more, I’ve got a few suggestions for you. First off, a slice of homemade focaccia or sourdough with salted butter would be lovely. Then, for something light, try a salad on the side. Some of our favorites include panzanella salad, Caprese salad, arugula couscous salad, and lemon-herb zucchini salad.
More Vegetable Soups
Our Favorite Minestrone Soup
PREP
COOK
TOTAL
We’re always up for a bowl of veggie soup, and this minestrone soup recipe has so many things we adore. The broth is light but still has that cozy Parmesan flavor, thanks to a Parmesan rind that simmers right in the pot. Then, there are loads of vegetables and just the right amount of beans and pasta to make it feel like a real meal.
Some minestrone recipes start with pancetta, but we usually skip it. If you want to add it, just cook it in a little olive oil until it’s crisp, then scoop it out before you start the veggies. You can sprinkle the crispy bits on top when you serve, or save them for another meal. The soup will pick up a little extra flavor from the rendered pancetta fat.
6 Servings
You Will Need
¼ cup olive oil
1 medium onion, chopped
2 medium carrots, peeled and chopped
2 ribs celery, chopped
3 garlic cloves, minced, about 1 tablespoon
1 tablespoon finely chopped fresh rosemary, from 2 to 3 sprigs
2 tablespoons tomato paste
5 ounces fresh green beans, trimmed and chopped, 1 ½ cups (140g)
1 medium zucchini, chopped, 1 ½ cups
1 (15-ounce) can diced tomatoes, fire-roasted if available
2 (15-ounce) cans beans, like navy beans, cannellini beans, or kidney beans, drained and rinsed
8 cups chicken broth or vegetable broth
Fine sea salt and fresh ground black pepper
1 to 2 ounce piece Parmesan Reggiano cheese rind
5 ounces dried pasta, like shells, ditalini, or elbows (140g)
1Cook the veggies: Heat the olive oil over medium-low heat in a large, heavy soup pot or Dutch oven, then add the onion, carrot, and celery, and cook until they begin to soften and smell sweet, about 5 minutes.
2Build the soup: Stir in the garlic, rosemary, and tomato paste and cook, stirring them around the pot, for about one minute. Then, add the green beans, zucchini, tomatoes with all the juices, and the drained and rinsed beans to the vegetables.
3Simmer: Pour in the broth and bring to a simmer. Taste and season the broth with salt and pepper (we add around 1 teaspoon, but it will depend on your broth). Push the cheese rind into the soup so it is fully submerged in the broth. Simmer, partially covered for 10 minutes.
4To finish: Stir in the pasta and cook until al dente, about 10 minutes. Then, turn off the heat and stir in the spinach. Leave for 2 minutes, or until the spinach wilts. Remove any remaining cheese rind, then taste the soup and season with more salt and pepper as needed. Serve with grated Parmigiano Reggiano over the top.
Adam and Joanne’s Tips
Storing: Keep leftover soup in an airtight container in the fridge for up to 4 days. Reheat in a saucepan over medium heat.
Parmesan rind: Note that the Parmesan rind won’t fully melt. It softens, melts a little bit, and mostly “steeps” like a tea bag. It adds a light flavor to the broth, but you will likely need to remove it before serving. If you do not have rind, grate some Parmesan cheese and stir it into the broth before serving (¼ to ⅓ cup would be lovely).
Dried rosemary: Use 1 to 1 ½ teaspoons dried rosemary as a substitute for fresh.
The nutrition facts provided are estimates.
Nutrition Per Serving Serving Size 1/6 of the recipe / Calories 391 / Total Fat 14g / Saturated Fat 2.7g / Cholesterol 2.4mg / Sodium 784.3mg / Carbohydrate 51.5g / Total Fiber 9.4g / Total Sugars 8g / Protein 19.3g
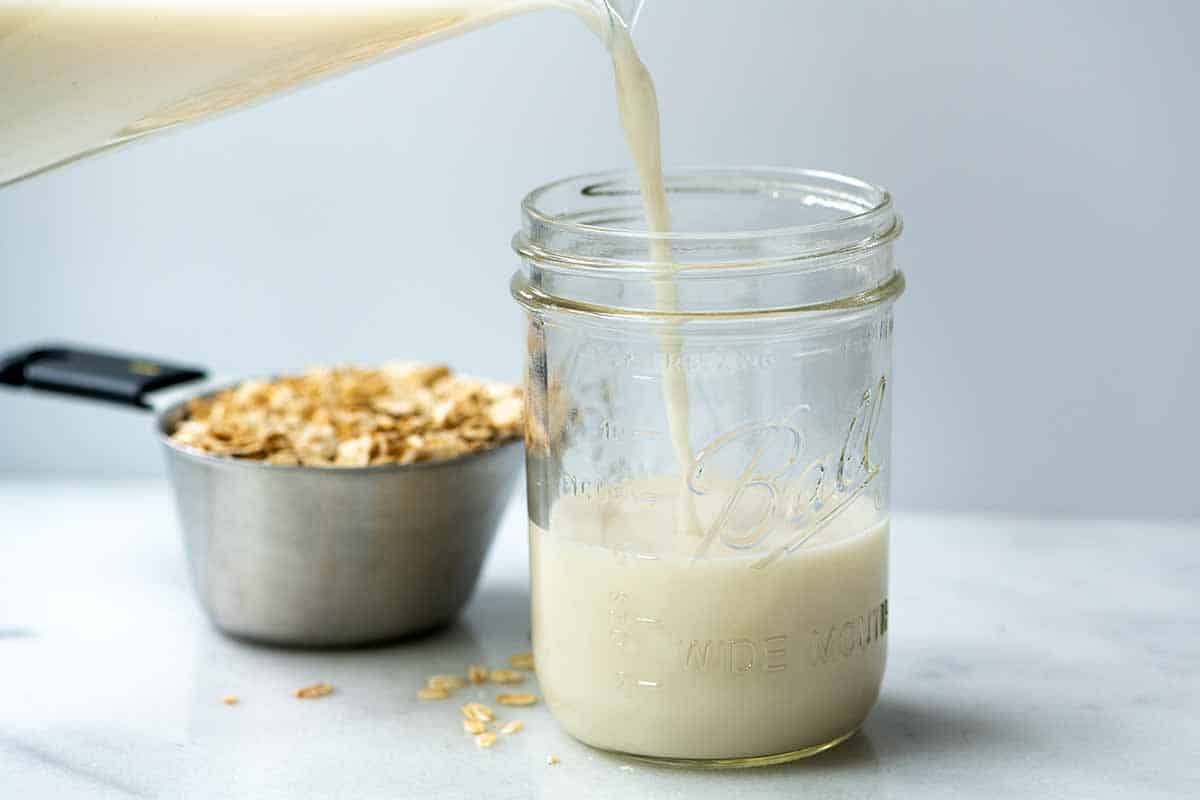
The moment I learned how to make oat milk, I was obsessed! It takes less than 10 minutes, requires very few ingredients, and is perfect for everything from coffee and smoothies to pancakes and muffins.
Of all the plant-based milks, oat milk might be my favorite. It’s incredibly creamy, doesn’t require a lot of sweeteners to taste great, and, as you’re about to see, is surprisingly easy to make right in your kitchen!
All you need is a blender and rolled oats to whip up fresh oat milk. You can easily add it to your morning coffee or cold brew, use it in one of our smoothie recipes, or enjoy it with cereal. Plus, whenever I’m baking and suddenly realize I’ve run out of milk, homemade oat milk is my hero! I use it to make delicious vegan pancakes, vegan blueberry muffins, and more!
Key Ingredients
Rolled Oats: These are your best bet for creamy, perfectly blended oat milk (and are also what I use for my everyday oatmeal). Avoid instant oats, as they can lead to a slimy texture due to being more processed. Steel-cut oats may work, but are generally not recommended, as they’re harder to blend and won’t give you that creamy texture we all expect from oat milk. If you’re sensitive to gluten, be sure to choose gluten-free certified rolled oats.
Cold Water: This is the secret weapon against slimy oat milk! Using icy cold water when blending helps to control the starch in the oats, preventing that gummy, slimy unappetizing texture.
Optional: Feel free to flavor your homemade milk with vanilla extract, sea salt, cocoa powder, or sweeteners like maple syrup or honey. You can even make strawberry oat milk and blend in some strawberries (frozen is best)!
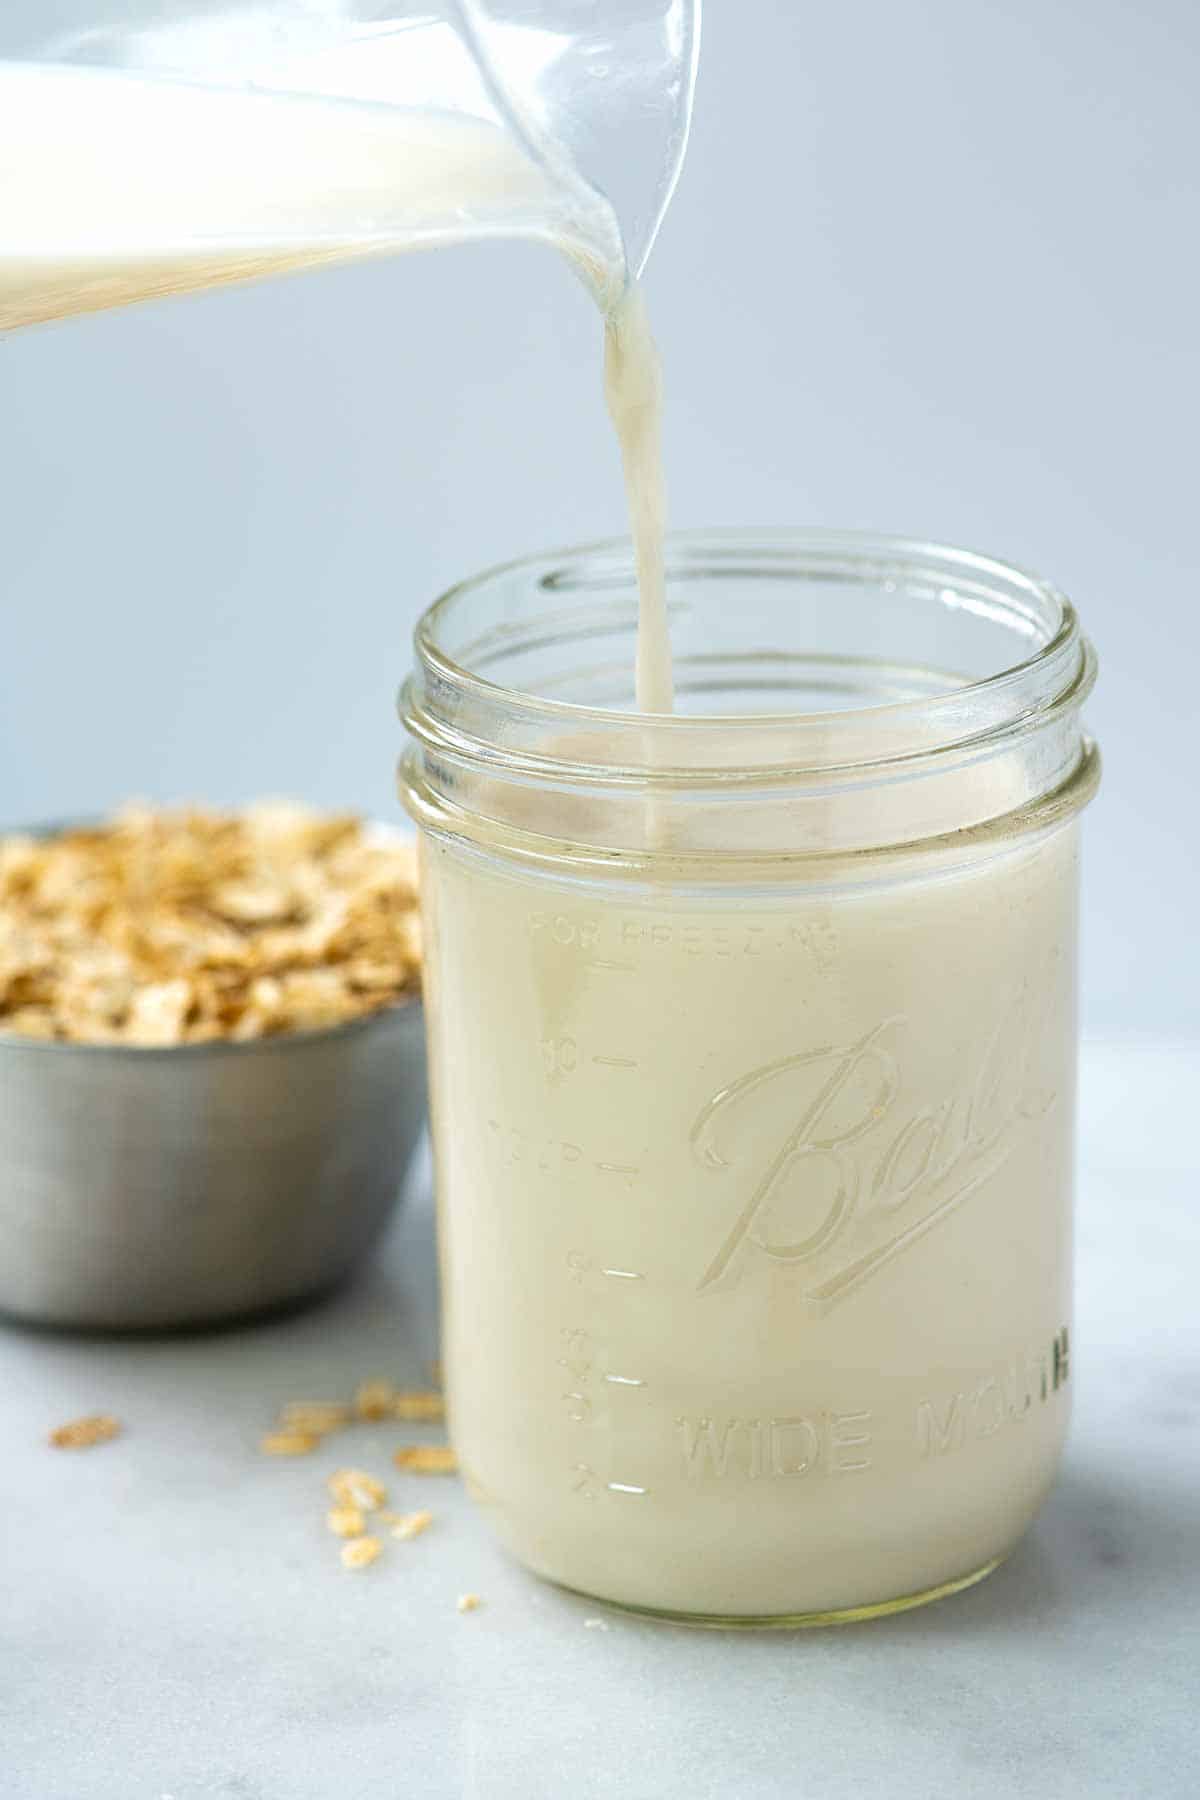
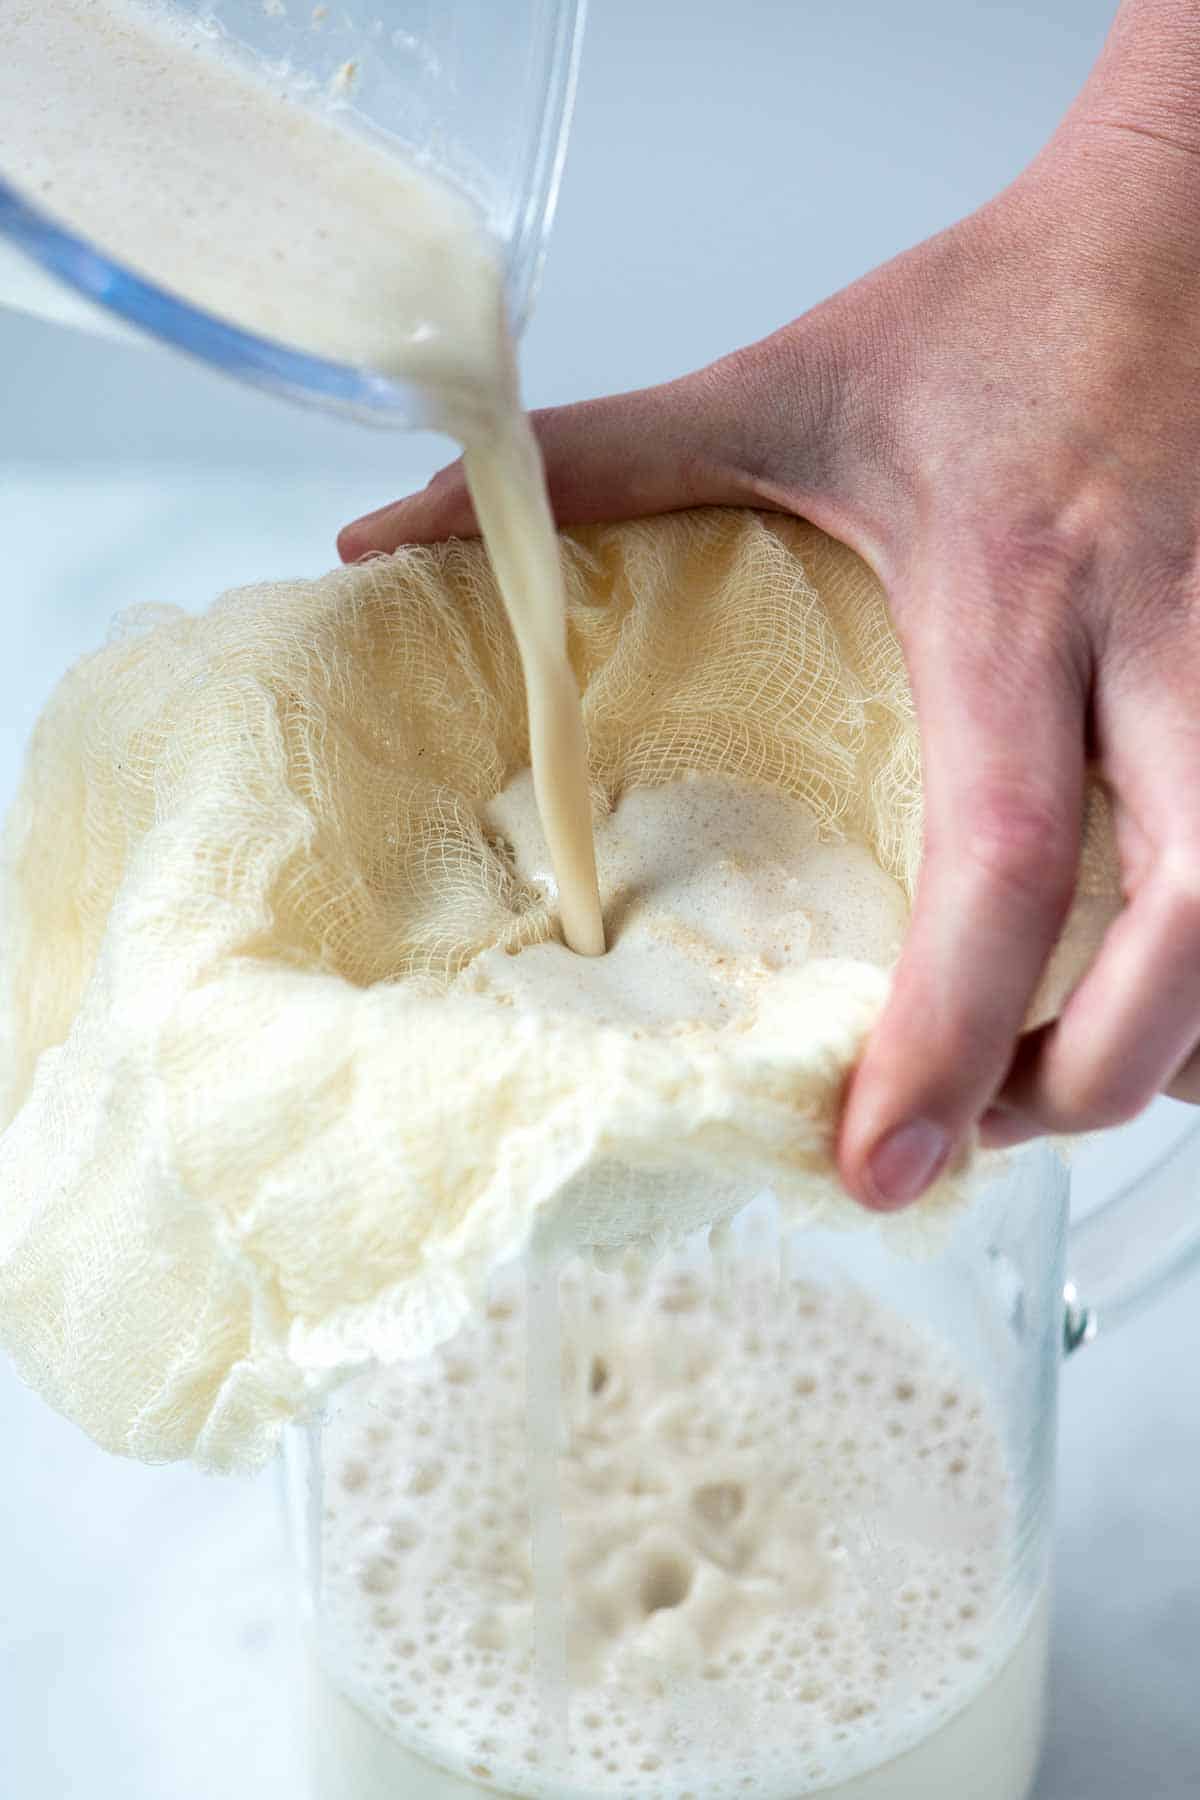
The secret to the best homemade oat milk—one that’s never slimy or gummy—lies in two crucial steps. In addition to blending the oats with ice-cold water, you must thoroughly strain the liquid. Use a nut milk bag, a clean cotton dishtowel, or even a few layers of cheesecloth to remove any remaining oat bits, which yields a silky smooth consistency that’s perfect for everything from coffee and smoothies to your baking needs.
Easy Homemade Oat Milk
Our homemade oat milk recipe is really easy to make. Just keep two things in mind for the best results. First, use rolled oats and ice-cold water. The cold water prevents the oat milk from turning slimy. Second, strain your oat milk using a nut bag, a clean dish towel, or a few layers of cheesecloth. Straining removes any extra bits of oats, which would make your milk slimy and gummy. The staining is so helpful that I like to strain my oat milk twice. Once you have it ready, enjoy your oat milk in smoothies like my favorite blueberry smoothie, or make these incredible vegan pancakes!
Makes 3 cups
You Will Need
1 cup (115g) rolled oats
4 cups (945ml) cold water
1 to 2 tablespoons maple syrup or honey, optional
1/2 to 1 teaspoon vanilla extract, optional for vanilla oat milk
Pinch fine sea salt, optional
Directions
1Blend the oats and water: Add the oats, cold water, and any optional ingredients to a blender. Cover with the lid and blend for 30 to 40 seconds. It’s okay if you see little speckles of oats. It is best not to over blend, as this can cause a slimy texture.
2Strain the oat milk: To prevent a slimy or gummy texture further, strain your oat milk. Strain it through a nut milk bag, a clean cotton dish towel, or multiple layers of cheesecloth set over a large bowl or pitcher. I like to double-strain the mixture so that most of the solids are removed.
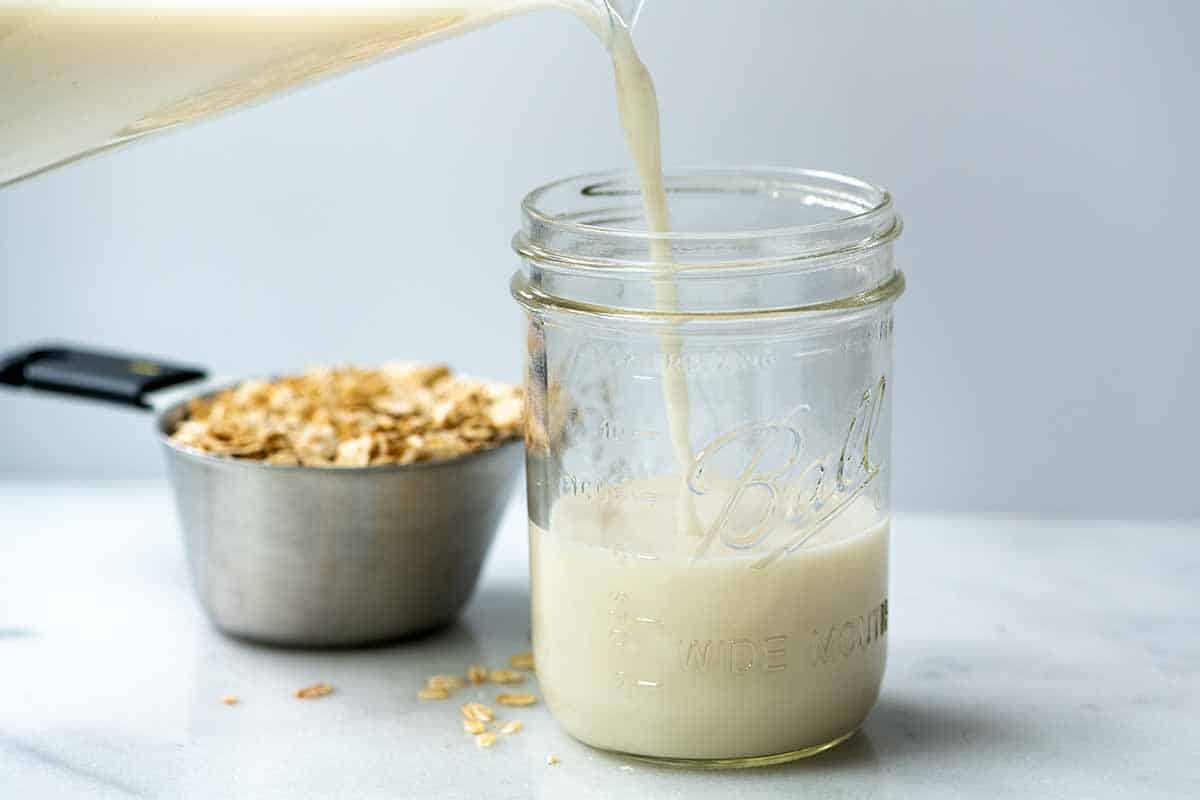
3Storing: Store homemade oat milk in a sealed container in the fridge for up to a week. Shake or stir before using.
Adam and Joanne’s Tips
Make strawberry oat milk: Add frozen berries for a berry-flavored milk. Fresh are fine, but the cold berries help reduce starch.
Chocolate oat milk: Add a tablespoon or two of cocoa powder and sweeten it to taste with maple syrup or honey.
Why did my oat milk separate? Some separation is entirely normal. Stir or shake the milk before using.
Does homemade oat milk froth? Unfortunately, no. Store-bought oat milk that froth has a few more ingredients added (like stabilizers) to help it froth and heat up without turning slimy.
The nutrition facts provided below are estimates.
Nutrition Per Serving Serving Size 1/2 cup / Calories 50 / Total Fat 0g / Saturated Fat 0g / Cholesterol 0mg / Sodium 0mg / Carbohydrate 9g / Dietary Fiber 1.3g / Total Sugars 0g / Protein 1.7g
AUTHOR:
Joanne Gallagher
Previous Post: Perfect Vegan Pancakes Next Post: Chocolate Chia Pudding