Tag: Recipe

  • The Best Chicken Noodle Soup Recipe

    The Best Chicken Noodle Soup Recipe

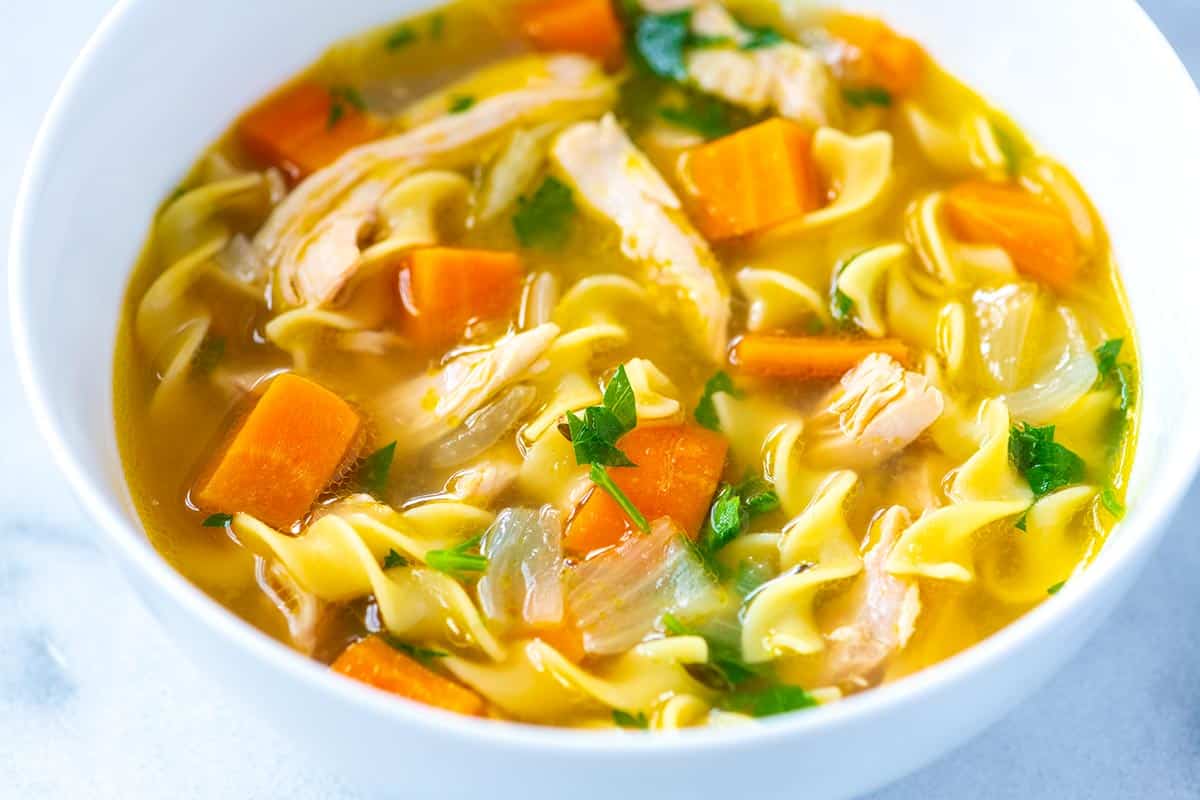
    Our easy homemade chicken noodle soup recipe has tender chicken, fresh veggies, and the most delicious broth that tastes like it’s been cooking for hours.
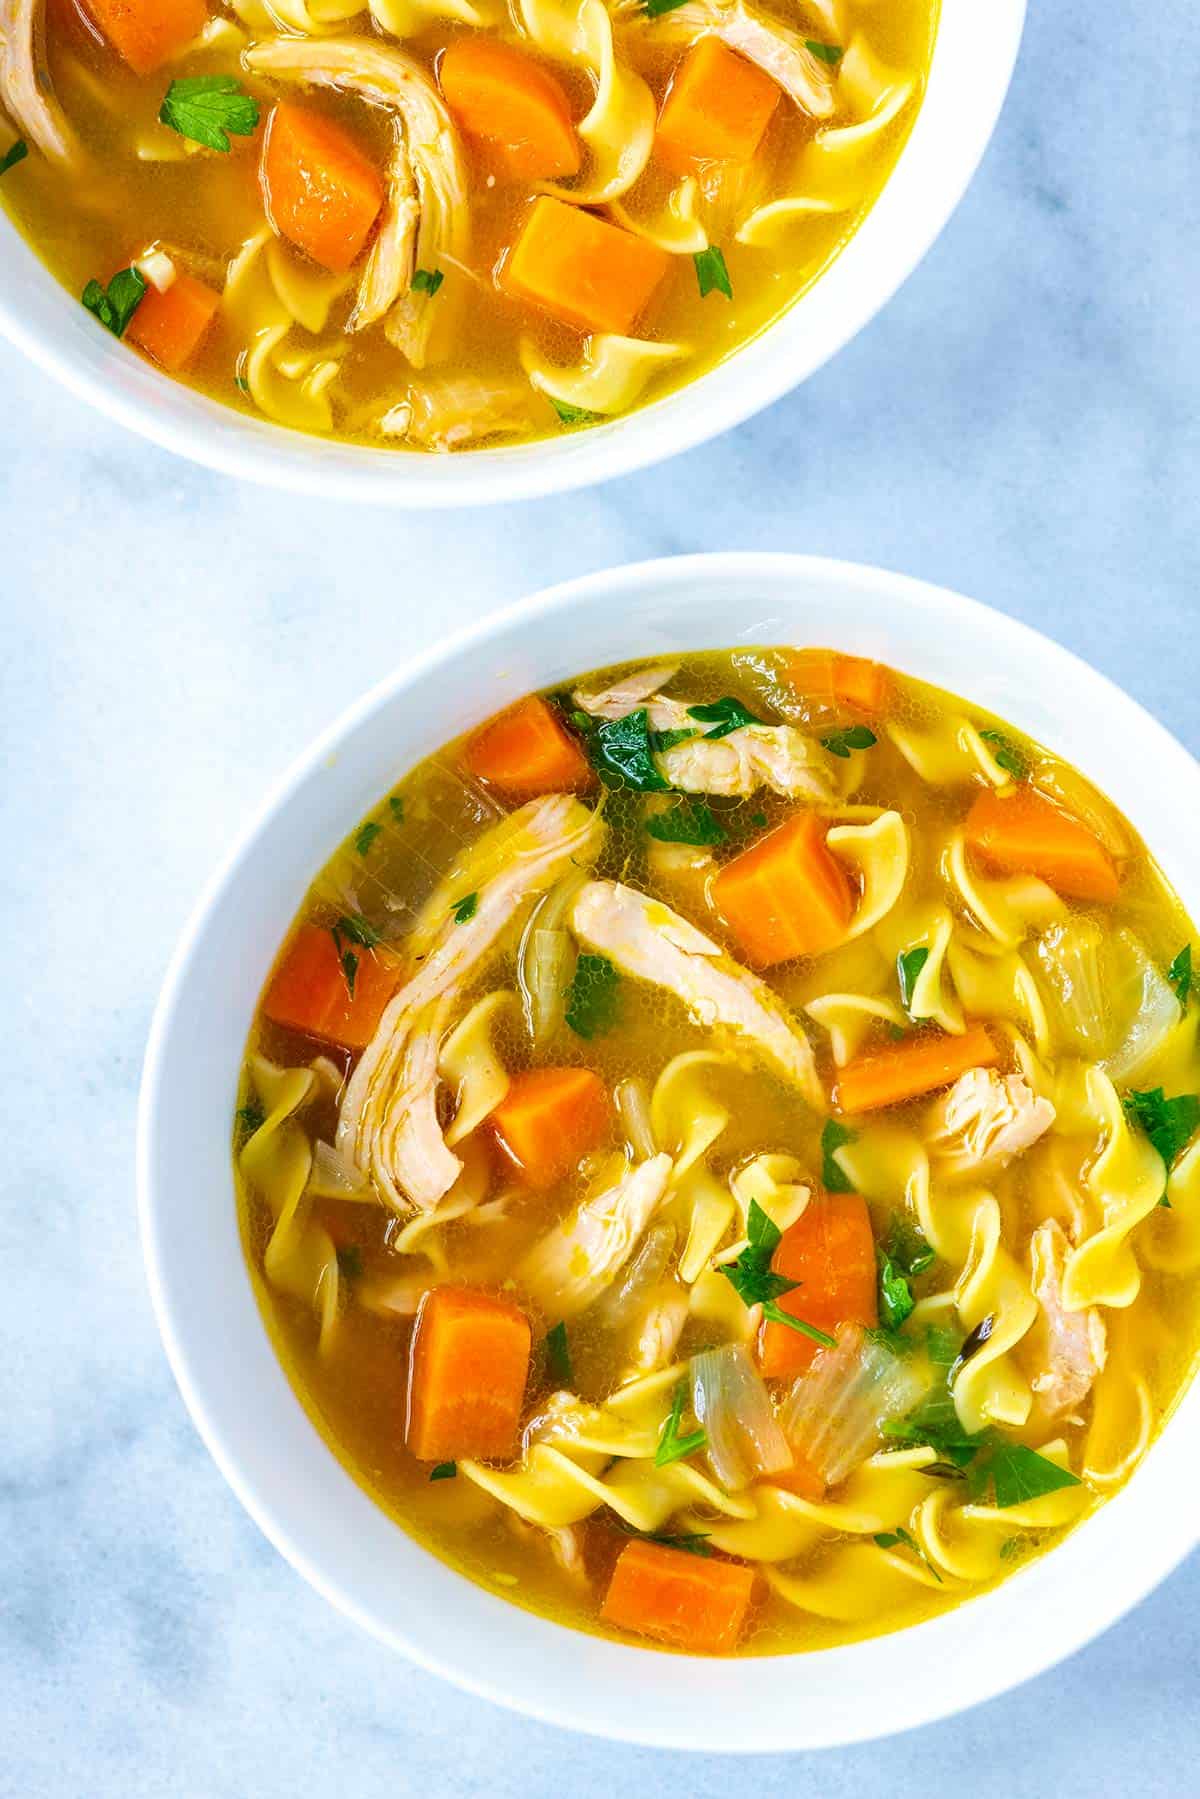
    Homemade chicken noodle soup

    This homemade chicken noodle soup makes me smile just thinking about it! Our family has been making this for years! Not to mention it’s my go-to soup whenever it’s chilly or someone is sick.

    It tastes way better than store-bought and it’s fast! The secret is chicken thighs! They guarantee a ridiculously flavorful broth that’s ready in under 40 minutes, with most of the time being hands-off. For a creamier soup, I highly recommend this incredible creamy chicken noodle soup. For another classic chicken recipe, see this chicken pot pie.

    Key Ingredients

    • Chicken Thighs: My secret for the best soup! Chicken thighs get super soft and delicious. You can make this soup with a whole chicken, but usually I don’t have time for that, so chicken thighs are my answer. They have a little fat, add lots of flavor, and stay tender.
    • Chicken Stock: I highly recommend homemade chicken stock or chicken broth, but store-bought works! When shopping for stock, darker broth or bouillon usually means more flavor. I also love boxed bone broths (or you can make bone broth).
    • Egg Noodles: I love them, but you can always substitute your favorite pasta. I’ve even swapped the noodles for tortellini like in our veggie tortellini soup!
    • Veggies: I keep this soup simple with onion, celery, carrots, and garlic. Feel free to add more, but these four will get you to that classic chicken soup flavor. When I have them in the fridge, I often stir in a few handfuls of fresh spinach or kale leaves.
    • ThymeBay Leaves, and Parsley: These add a little backbone to the broth. I love fresh thyme and parsley, and then use dried bay leaves. For more of a herby soup, stir in chopped mint, basil, cilantro, or a combination just before serving.

    Find the full recipe with measurements below.

    How to Make the Best Chicken Noodle Soup

    Tip 1: Start your vegetables in butter. For the best flavor, I always sauté my vegetables in butter before adding any broth. You’re not really looking to brown them, just soften them a bit and cook off that raw onion and garlic flavor. If you have rendered chicken fat (schmaltz) on hand, use it instead of butter for even more flavor.
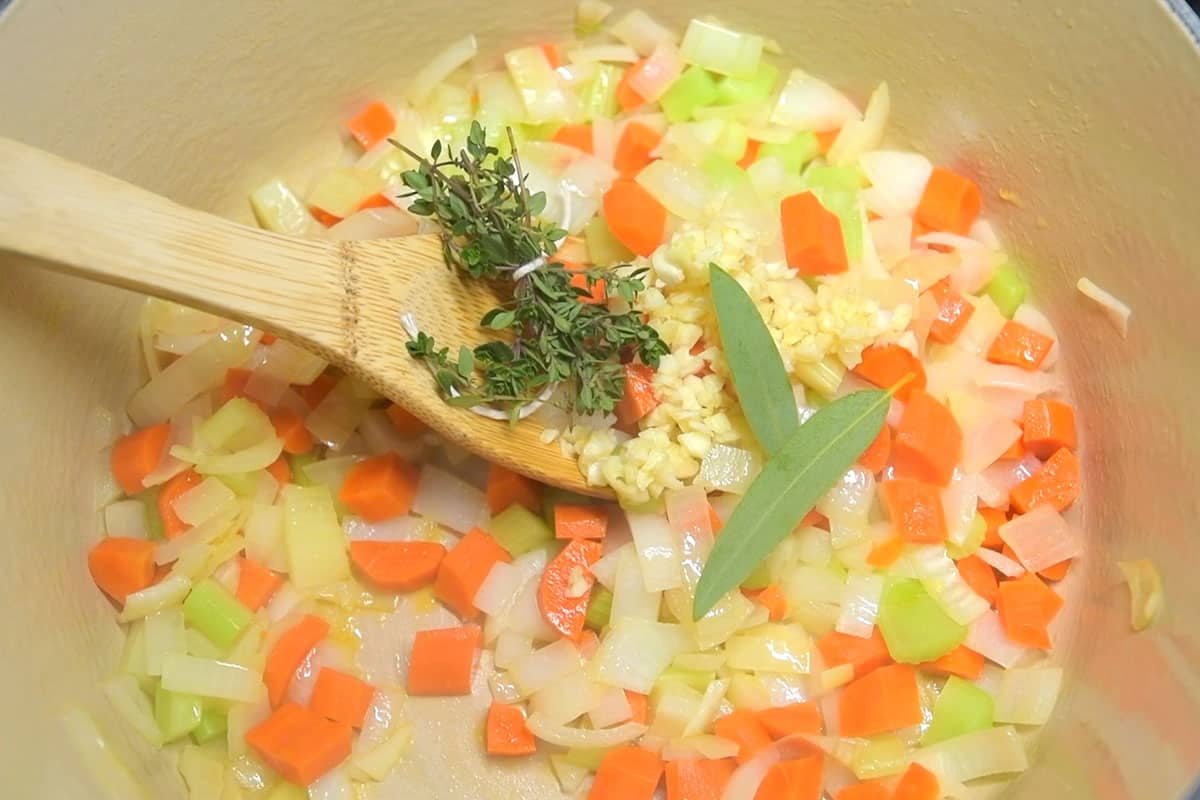
    Step for making chicken noodle soup - cooking onion, carrot and celery in a pot

    Tip 2: Taste your broth early. Once you add the broth to your softened vegetables, taste it. Store-bought broths can be light on flavor, so seasoning early helps you build a more flavorful broth. Add a little salt now, then continue adjusting as the soup cooks. This simple step separates an okay soup from one that tastes truly great.

    Tip 3: Gently poach the chicken thighs. Here’s why I love using chicken thighs for this soup. They fit nicely in the pot, cook through in about 20 minutes, and release lots of flavor into the broth as they simmer. They are easy to shred, too, which is why I also use them to make our favorite shredded chicken.

    Adding chicken thighs to broth for chicken noodle soup

    Tip 4: Add the noodles last. To keep your noodles from turning mushy, add them about 10 minutes before serving. I like cooking them directly in the soup so they soak up all that delicious chicken flavor. They also release just a little starch into the broth, giving the soup a lovely, silky texture.

    Adding noodles to a soup pot

    Tip 5: Don’t be shy with seasoning. Before serving, taste your chicken soup one last time. If it doesn’t make you smile, it probably needs a touch more salt, or a little something extra. A few dashes of fish sauce (my secret weapon) work wonders in this soup. Or brighten things up with a squeeze of lemon juice or a dash of hot sauce.

    A pot of homemade chicken noodle soup

    Recipe Variations

    Use rotisserie chicken: For an even faster chicken soup, skip poaching and stir in shredded rotisserie chicken or leftover roast chicken toward the end of cooking. It’s a great shortcut for busy nights and still adds plenty of flavor.

    Add extra vegetables: Make this soup even more nutritious and hearty by adding extra veggies. Mushrooms, spinach, kale, peas, and corn all work beautifully. Cook heartier vegetables like mushrooms with the onions and garlic, then add the quicker-cooking ones toward the end so they stay bright and tender.

    Make it creamy: Stir in a splash of cream or half-and-half at the end, just like we do in our creamy chicken noodle soup. It gives the broth a silky texture and makes it more luxurious.

    Substitute the noodles: Try swapping them for another pasta shape, or even broken spaghetti. For a lighter, low-carb option, use spiralized zucchini or spaghetti squash strands. Or make it more filling with cooked rice, quinoa, or barley instead of noodles.

    More Favorite Soup Recipes
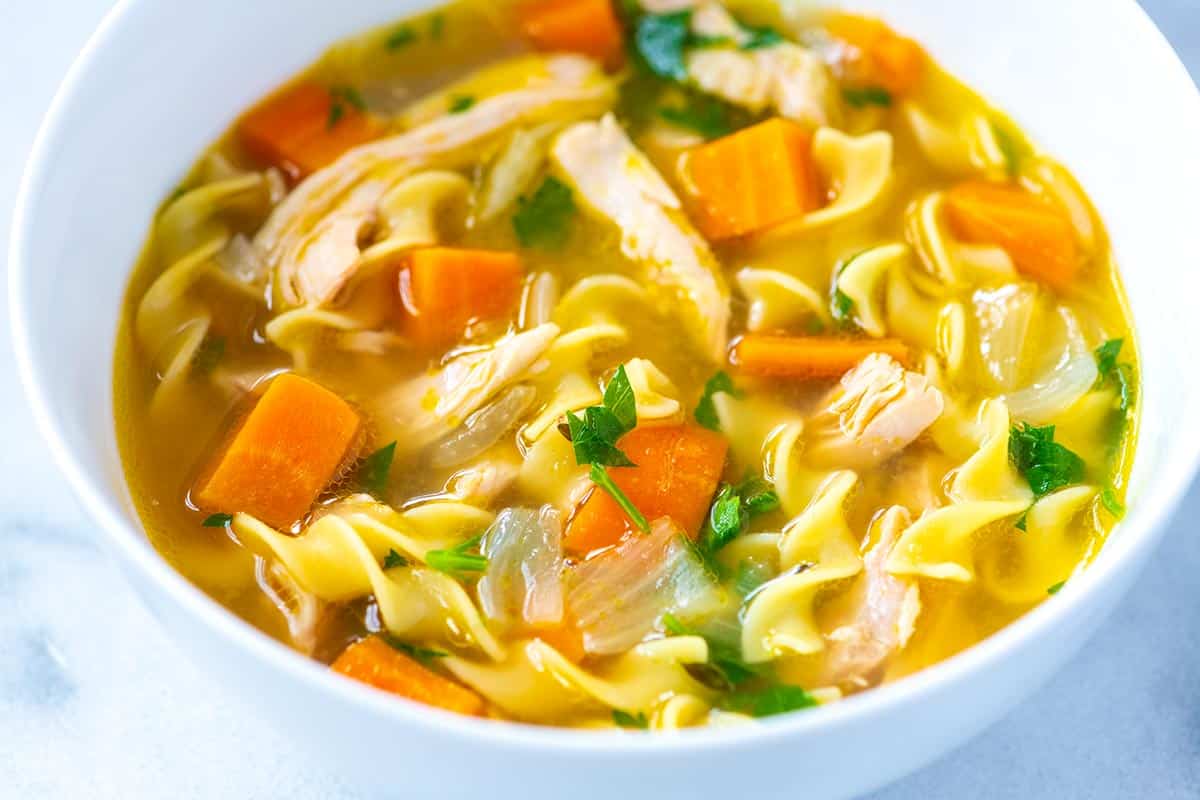
    Easy Chicken Noodle Soup

    The Best Chicken Noodle Soup

    • PREP
    • COOK
    • TOTAL

    You will love this homemade chicken noodle soup, which skips cooking a whole chicken and calls on boneless, skinless chicken thighs instead. The soup tastes incredible, satisfying, and classic, and the significantly reduced cooking time makes it perfect for a weeknight. If you love creamy soups, take a look at this creamy chicken noodle soup, which uses the same base recipe as this one.

    6 Servings

    Watch Us Make the Recipe

    You Will Need

    1 pound skinless, boneless chicken thighs, 4 to 5 thighs (450g)

    5 ounces egg noodles or pasta of choice (140g)

    2 tablespoons butter, chicken fat, or olive oil (28g)

    1 large onion, chopped

    2 large carrots, chopped

    2 ribs celery, chopped, optional

    1 heaped tablespoon minced garlic, 4 cloves

    2 bay leaves

    3 sprigs fresh thyme or use 1/2 teaspoon dried thyme

    8 cups chicken stock or broth, low sodium, or use homemade stock (1.89L)

    Salt and pepper, to taste

    1/4 cup fresh parsley, finely chopped

    Directions

      1Cook the vegetables: Melt the butter in a large pot or Dutch oven over medium heat. Add the diced onions, carrots, and celery, and cook, stirring every few minutes, until the onions turn translucent and the vegetables begin to soften, about 5 to 6 minutes.

      2Stir in the garlic, bay leaves, and thyme, and cook for another minute until the garlic smells fragrant.

      3Add the broth: Pour in the chicken stock and bring the soup to a gentle simmer (you should see small bubbles breaking on the surface). Taste the broth and adjust with salt and pepper as needed. Depending on your stock, you may need to add a teaspoon or more of salt to build a rich, flavorful broth.

      4Poach the chicken thighs: Nestle the chicken thighs into the pot so they’re fully submerged in the broth. Bring the soup back to a low simmer, then partially cover the pot, leaving a small gap for steam to escape.

      5Cook, stirring occasionally, until the chicken is cooked through and tender, about 20 minutes. Transfer the chicken to a plate. If the broth reduces too much, add a splash of stock or water and lower the heat to medium-low.

      6Add the noodles: Stir the noodles into the simmering soup and cook until tender, about 6 to 10 minutes, depending on the type of noodles you’re using (check the cook time on the package).

      7Shred the chicken: While the noodles cook, shred the chicken into bite-size pieces using two forks (or dice it into cubes if you prefer).

      8Finish the soup: Return the shredded chicken to the pot and taste again for seasoning. Add more salt and pepper if needed. Stir in fresh parsley, then ladle your chicken soup into bowls and enjoy!

    Adam and Joanne’s Tips

    • Storing: Refrigerate chicken noodle soup in an airtight container for 3 to 4 days. Or freeze for up to 3 months. As the soup sits, the noodles soak up the broth. When you reheat, add a splash of extra broth or water.
    • Make ahead: Follow the recipe above, but do not add the noodles. Refrigerate or freeze the soup. When ready to reheat, bring the soup to a low simmer and add the dried noodles. Cook until they are done, and enjoy.
    • Seasoning: If you feel the soup is missing some zing, add a bit more salt. You can also add a pop of flavor with a squeeze of fresh lemon juice, a dash of fish sauce (we use this trick for store-bought stocks and broths often) or Worcestershire sauce.
    • Using rotisserie chicken: Add two to three cups of shredded or diced cooked chicken to the soup when you add the dried noodles and reduce the simmer time by 10 minutes. (I also love using leftover roasted chicken!)
    • The nutrition facts provided below are estimates.

    Nutrition Per Serving
    Serving Size
    1/6 of the recipe
    /
    Calories
    298
    /
    Total Fat
    11.4g
    /
    Saturated Fat
    4.4g
    /
    Cholesterol
    97.7mg
    /
    Sodium
    748.7mg
    /
    Carbohydrate
    22.9g
    /
    Dietary Fiber
    1.7g
    /
    Total Sugars
    7.5g
    /
    Protein
    24.8g

    AUTHOR:

    Joanne Gallagher

    Source link

  • 5-Minute Burger Sauce | The Recipe Critic

    5-Minute Burger Sauce | The Recipe Critic

    This website may contain affiliate links and advertising so that we can provide recipes to you. Read my disclosure policy.

    This burger sauce is a game-changer for your cookouts, adding a delicious twist to your favorite meals. Whip it up in minutes and enjoy a flavorful blend that’s perfect for burgers or as a dip for fries.

    My family is obsessed with this special sauce! I cannot wait for you to enjoy it yourself. Making different sauce recipes at home is such a great way to elevate meals! Try some of our other favorites like this alfredo sauce, this cheese sauce, or our copycat Cane’s sauce.

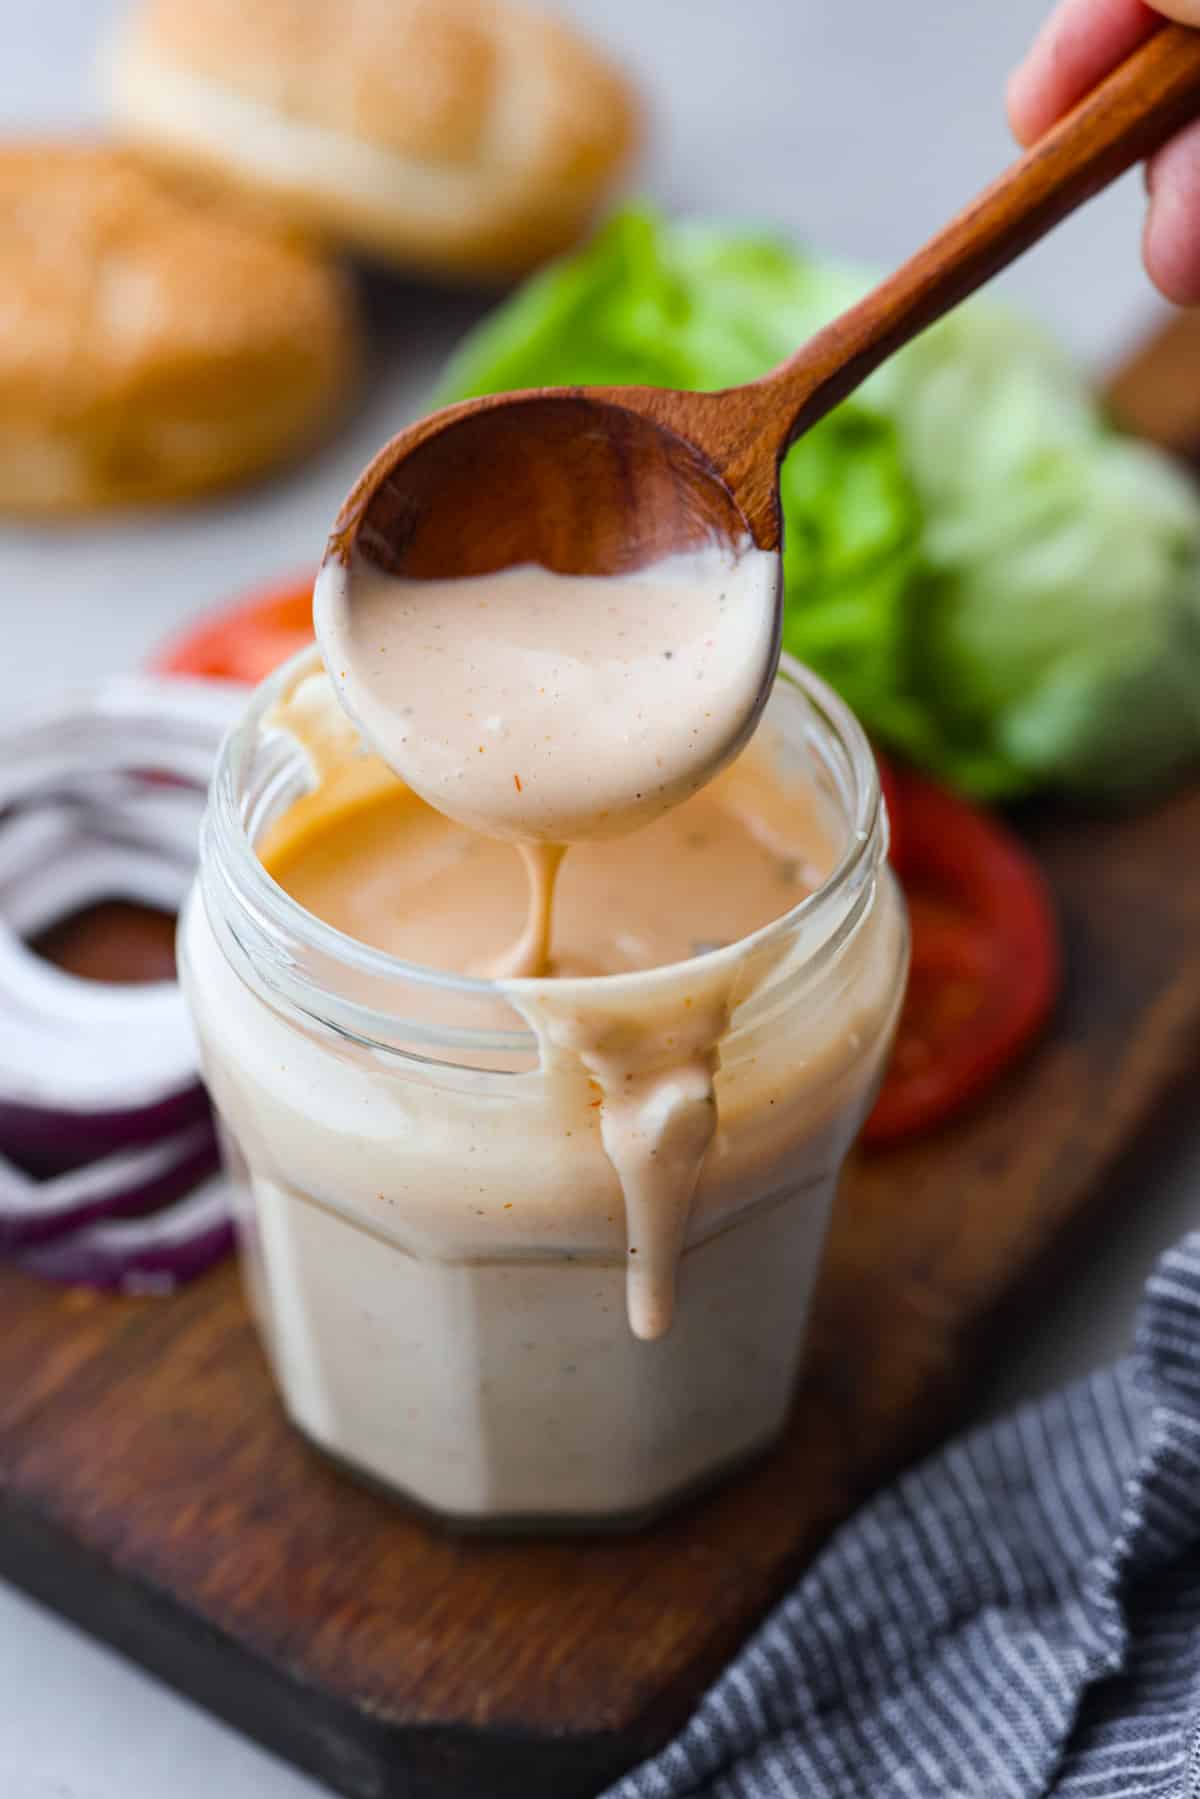
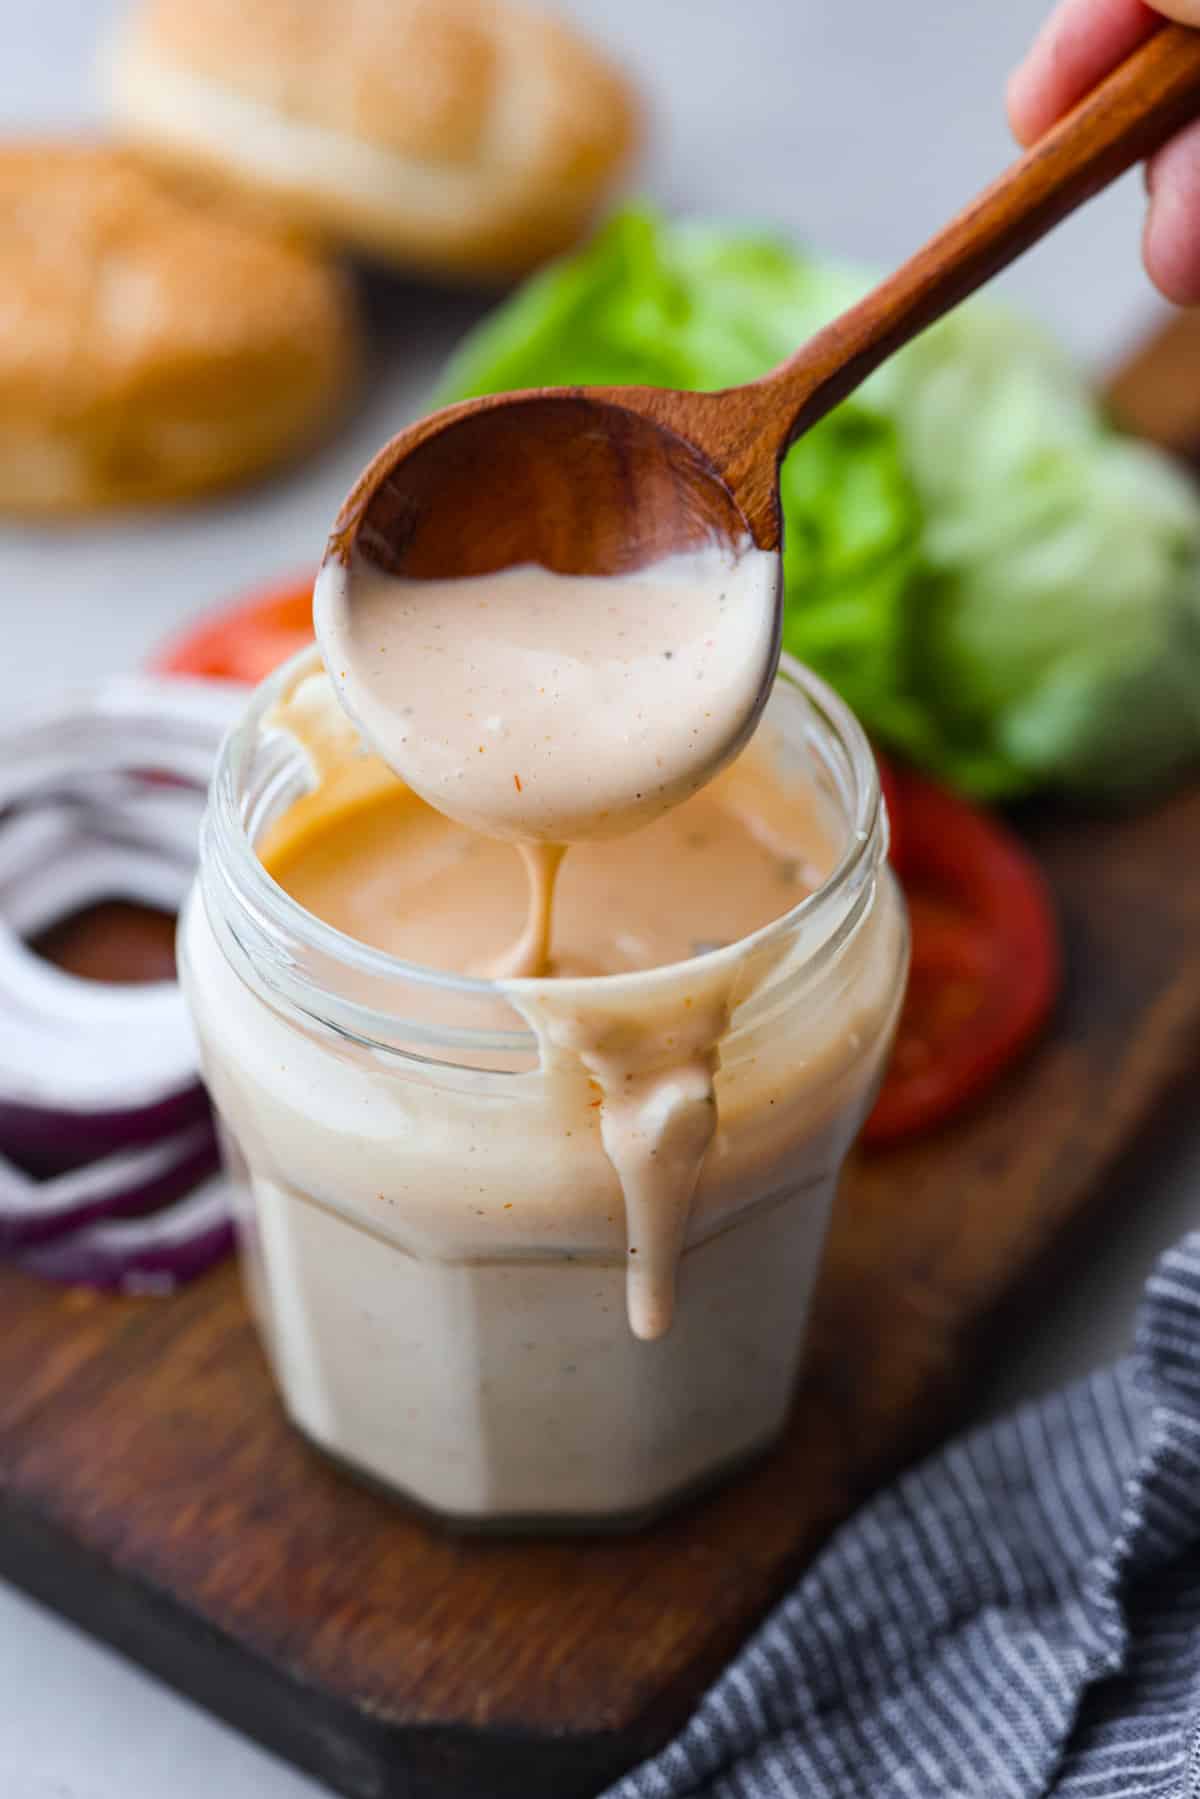
    Burger sauce in a jar with a wooden spoon.

    Reasons You’ll LOVE This Burger Sauce

    • Quick and Easy to Make: Whipping up this spread is as simple as stirring together some of your pantry staple ingredients. It can be whipped up in less than 5 minutes!
    • Versatile:  While it’s perfect on burgers and as a dip for French fries, it’s also incredible with other grilled meats, drizzled over roasted vegetables, and spooned onto sandwiches and wraps.
    • Unbeatable Flavor: This secret sauce will totally take your burger game to the next level! It’s creamy with a blend of perfectly balanced sweet, savory and tangy flavors. You’re going to love it!

    Burger Sauce Recipe

    Take your hamburgers from ordinary to extraordinary with this sensational burger sauce! It could not be easier to make and you can use it on everything from burgers and chicken tenders to fries and onion rings. It adds so much flavor to foods, you’re going to want to try it with everything!

    It’s a simple mix of mayo, ketchup, sweet relish and a hint of both Worcestershire sauce and seasoning salt for a taste that is absolutely heavenly. Have this available at your next backyard barbecue and everyone will be asking you for the recipe!

    Ingredients You’ll Need

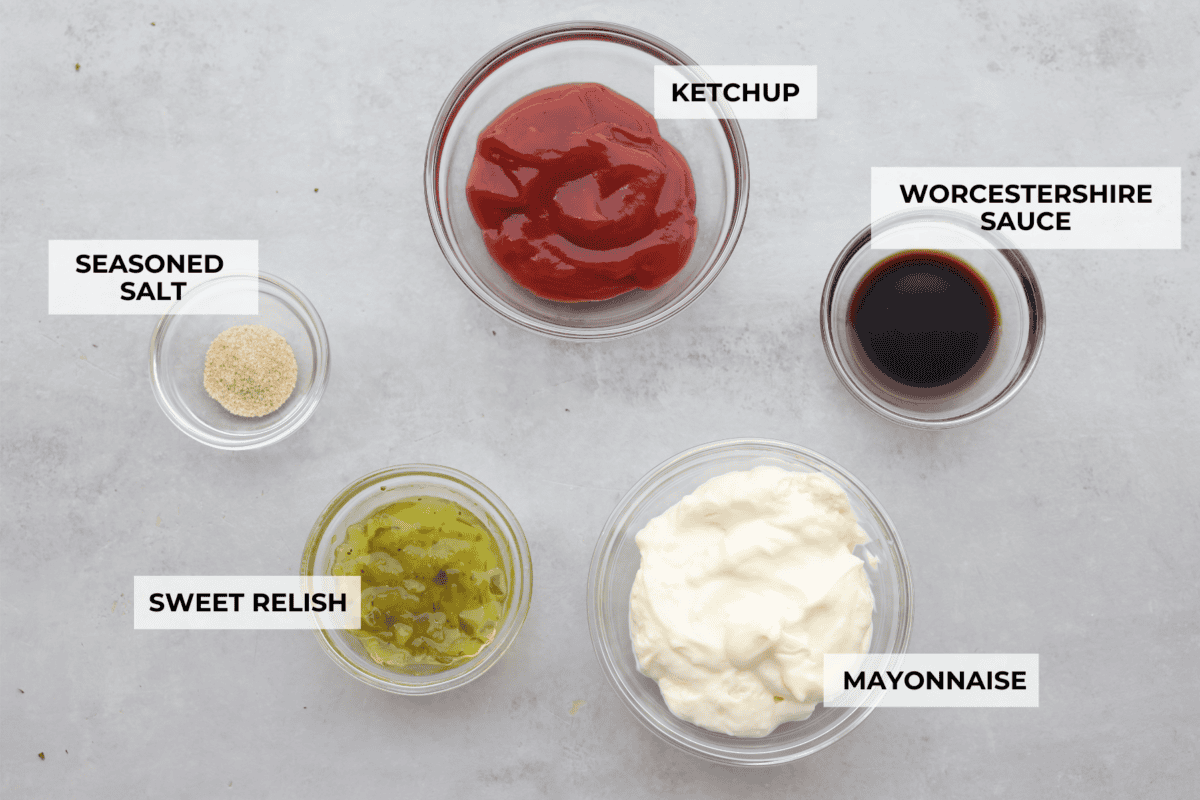
    With just 5 simple ingredients you can make this burger sauce recipe any day of the week. In fact, you probably have everything needed in your kitchen right now! Exact measurements can be found in the recipe card below.

    • Mayonnaise: The base of the burger sauce that makes it perfectly creamy.
    • Ketchup: Adds sharp flavor and a touch of sweetness to balance out the mayo.
    • Sweet Relish: It’s a combination of tart, sweet, and salty making it an absolute must in this recipe.
    • Worcestershire Sauce: For a deep, complex taste.
    • Seasoned Salt: To enhance and bring out all of the delicious flavors.
    A top view of the ingredients in individual glass bowls and each labeled.

    How to Make Burger Sauce

    This irresistible burger sauce is ready to serve in just about 5 minutes! It’s so good, you’re going to want to keep this on-hand at all times! Want a BBQ burger sauce? Make my copycat Red Robbin campfire sauce!

    1. Mix Ingredients: Add all of the sauce ingredients to a small bowl and whisk to combine.
    2. Test the Flavor: Taste and adjust ingredients to your liking if needed.
    3. Refrigerate: Chill until ready to serve. The longer it chills the more the flavors meld.
    4. Enjoy: Use as a sauce on burgers or as a dipping sauce for fries.

    Change up the Flavor

    Burger sauce can be made just the way you like it! Here are some ideas to adjusting the flavors.

    • Mayonnaise Substitution: It is best to enjoy the thick, rich texture of real mayonnaise but substitute it for Miracle Whip or a veganaise mayo for a preferred taste.
    • Adjust the Sweetness: If you like your burger sauce a little sweeter, add a pinch of granulated sugar. It will help balance out the salty, tangy flavor.
    • Heat: Make this burger sauce spicy if you want! Try adding a dash or two of hot sauce like Tabasco sauce. You can also sprinkle in some cayenne pepper to bring on some extra heat.

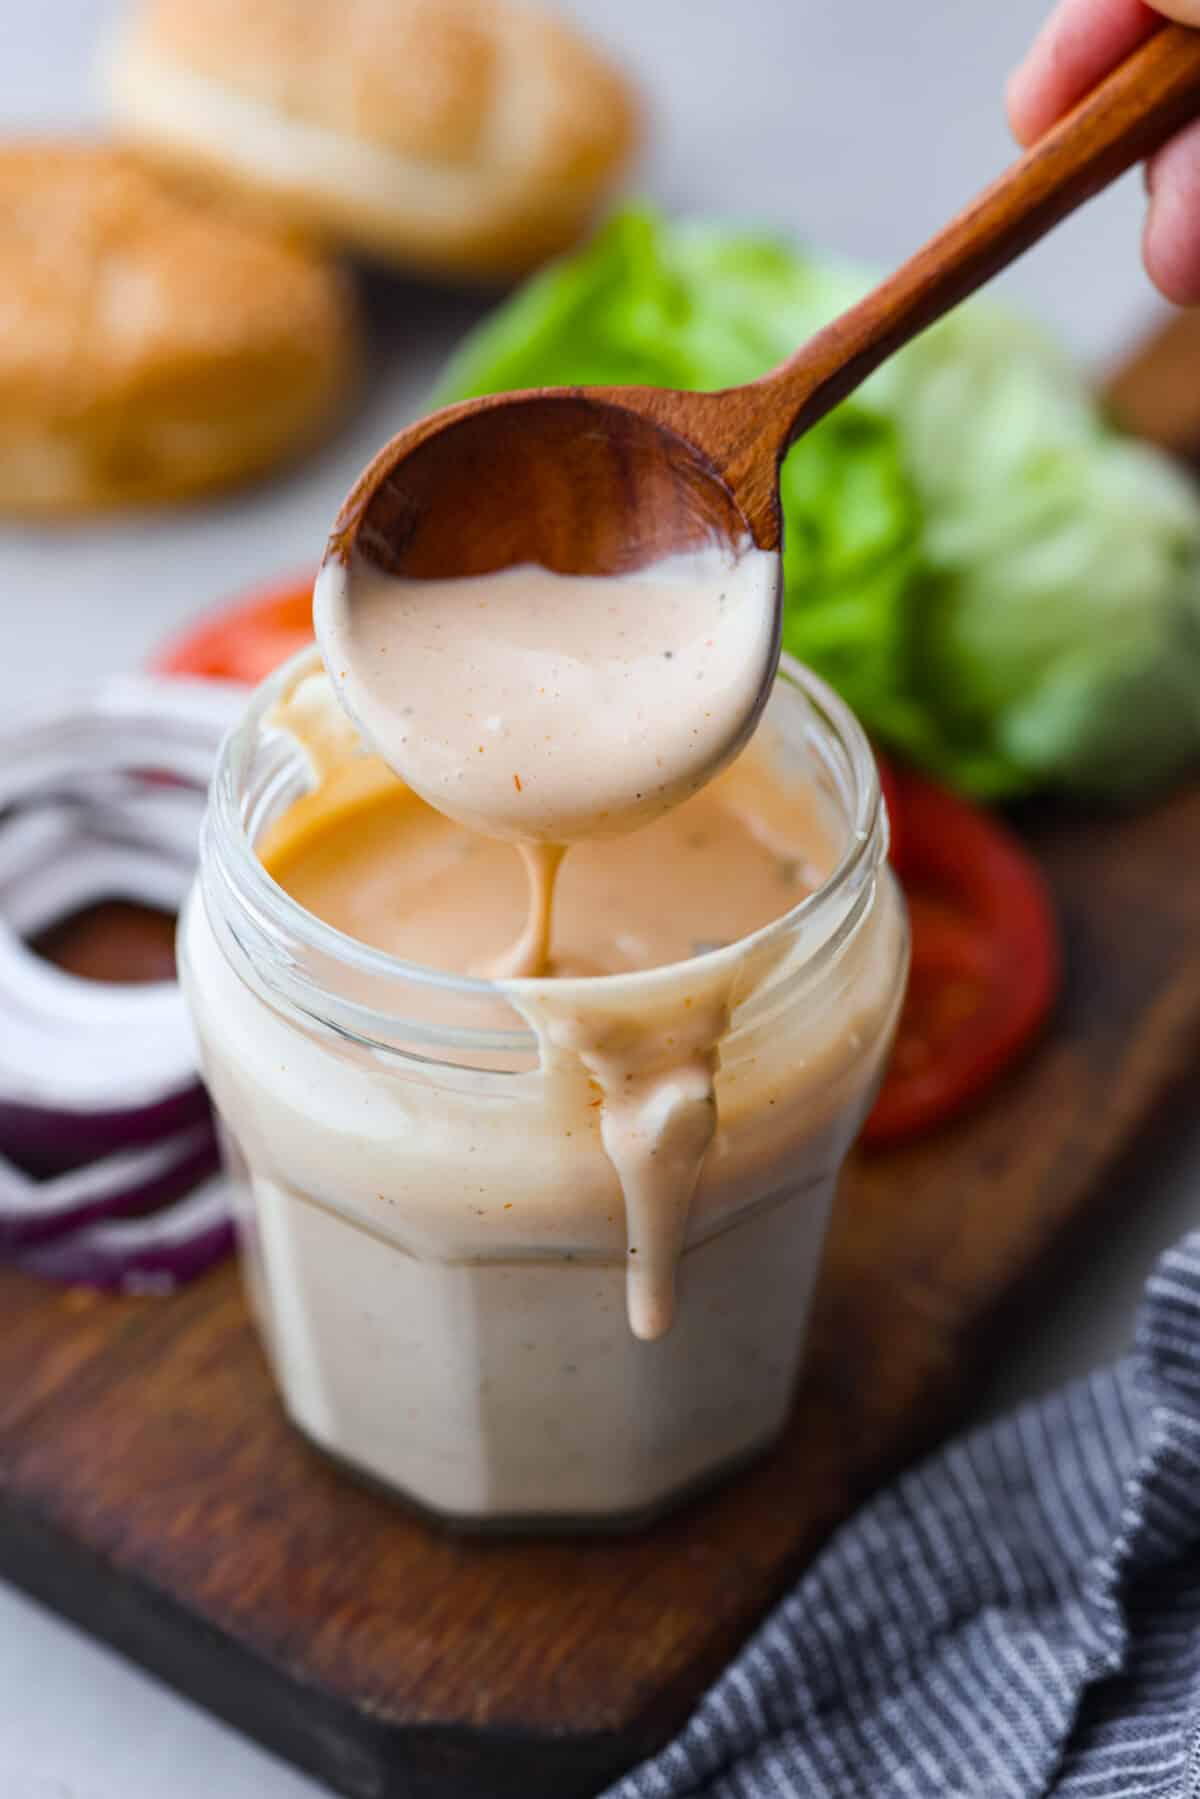
    A close up of a jar of burger sauce.

    Storing Leftovers

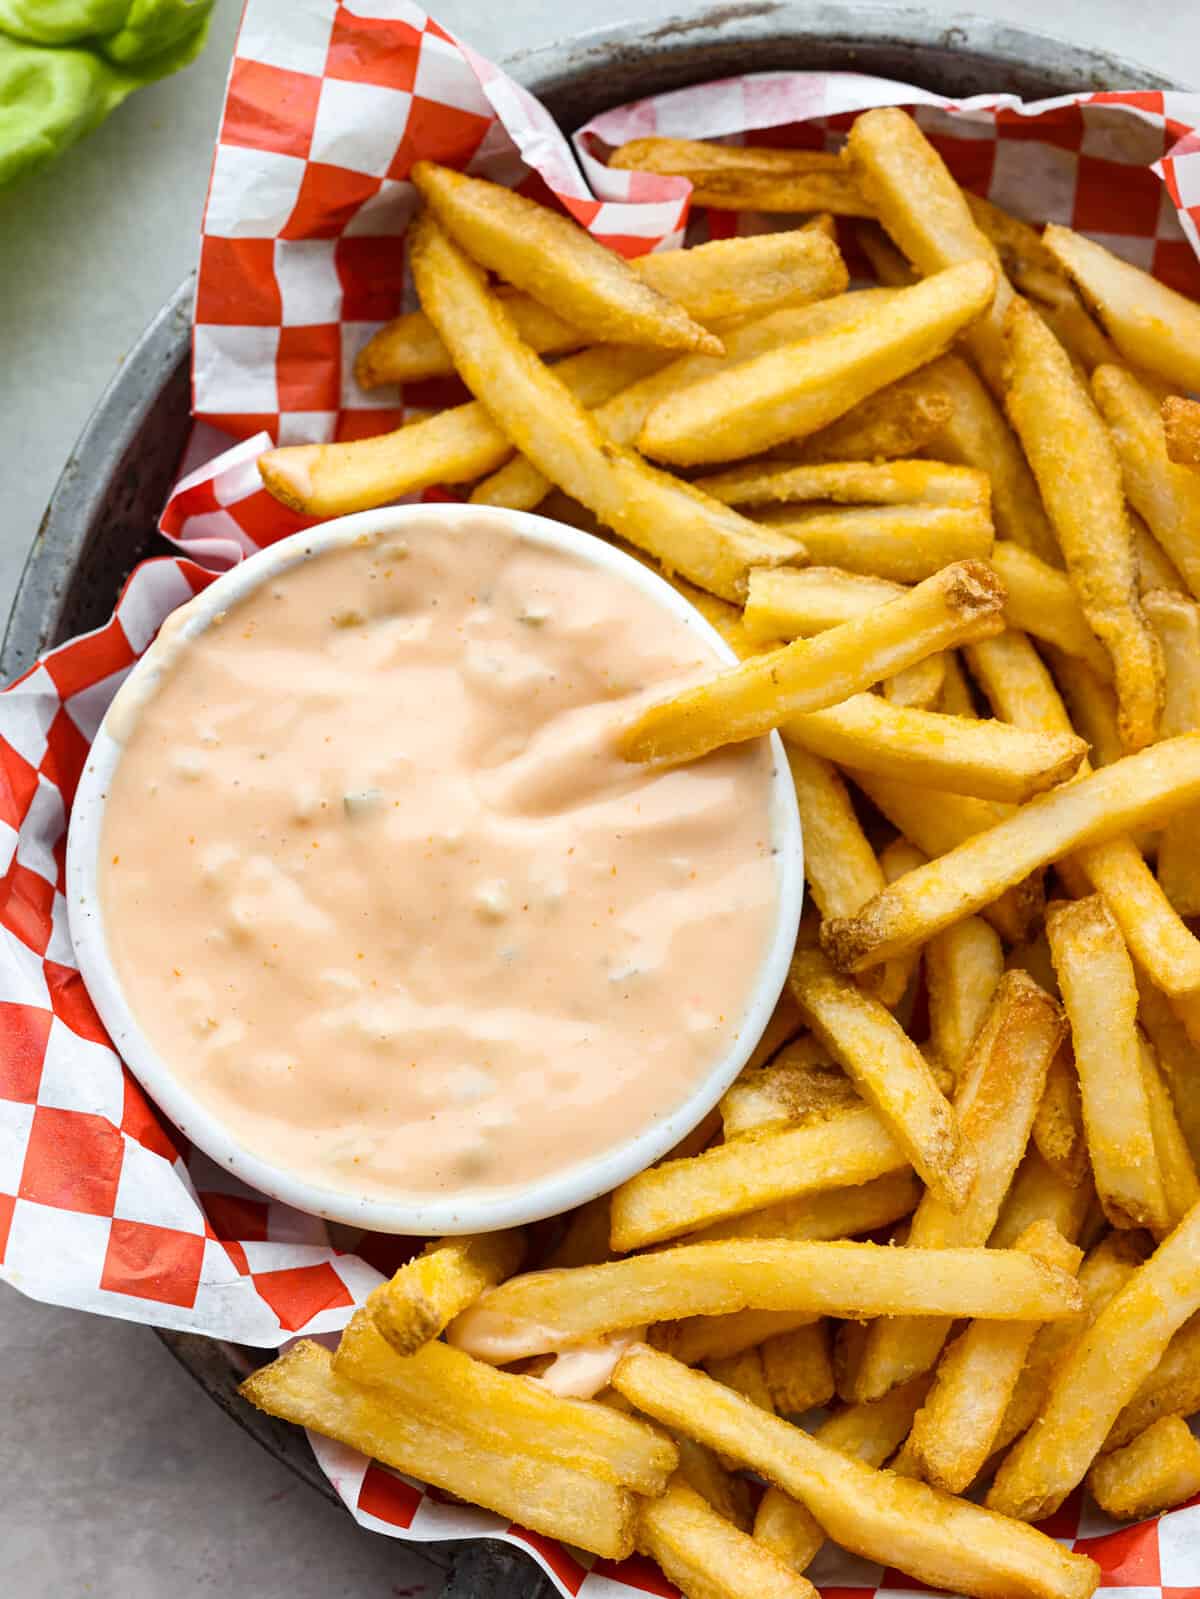
    Be sure to save any leftover sauce! This burger sauce is so versatile and can be used for more than just burgers. My kids love this sauce with a quick and easy batch of air fryer French fries!

    • In the Refrigerator: Store burger sauce in an airtight jar or container for 4-5 days. Give it a quick stir before using it!

    Burger sauce being spread onto a patty that is on a bun with lettuce.

    More Delicious Sauce Recipes

    Homemade sauces not only taste better than store-bought, but they’re also free of additives and preservatives! In addition, they’re super easy to mix up and usually only take a few simple ingredients to make. Most of which you probably already have in your pantry! Here are some other favs:

    Easy Homemade BBQ Sauce

    15 minutes

    Pin this now to find it later

    Pin It


    Source link

  • Crab Rangoon Recipe | The Recipe Critic

    Crab Rangoon Recipe | The Recipe Critic

    This website may contain affiliate links and advertising so that we can provide recipes to you. Read my disclosure policy.

    Crab Rangoons are a fun, Asian-inspired appetizer filled with crab meat, smooth cream cheese, and seasoning. Wrapped in a wonton wrapper and deep-fried, they are irresistible!

    Overhead shot of crab rangoon on a serving platter.

    Reasons You’ll Love This Recipe

    • Flavor: There’s just something amazing about creamy crab filling wrapped in a crispy wonton shell, so good, I could eat them all! Love this falvor combo? Make my crab rangoon dip next!
    • Customizable: These are just as good as what you get at any restaurant. You can also switch up the ingredients to suit your tastes and preferences.
    • Versatile: You can make this for a yummy snack or appetizer for a party or get-together. You can also serve it with shrimp fried rice, cucumber salad, and miso chicken for dinner.

    Ingredients Needed for Crab Rangoon

    This list is short, but you might not have everything on hand. No Worries, though; these can usually be found at most grocery stores. Scroll to the bottom of the post for exact measurements.

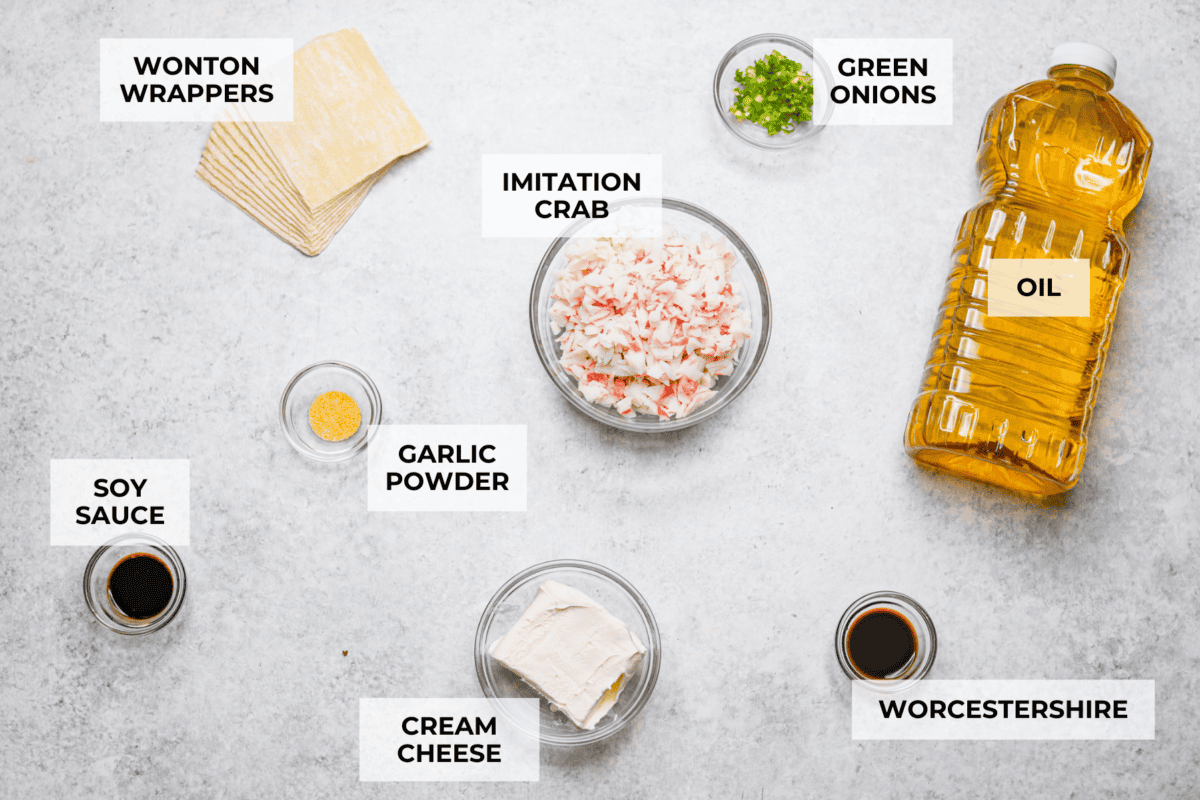
    • Imitation Crab Meat: The yummy meat that adds a nice texture and flavor.
    • Cream Cheese: Adds the perfect creamy tang that complements the crispy wonton and savory seasoning.
    • Green Onion: Gives the best savory flavor!
    • Worcestershire Sauce: Just a little bit adds the best depth of flavor you can’t get anywhere else.
    • Soy Sauce: Provides a nice umami flavor.
    • Garlic Powder: Give me all the garlic!
    • Wonton Wrappers: These fry up perfectly crispy and flavorful!
    • Oil: For frying.
    Overhead shot of labeled ingredients. Overhead shot of labeled ingredients.

    How to Make Fried Crab Rangoon

    My favorite things to order from Chinese takeout are egg rolls, kung pao chicken, fried rice, and crab rangoon. So, when we were stuck at home for months and were craving takeout, I decided to make my own crab rangoon recipe. They were great as an appetizer for my beef chow mein!

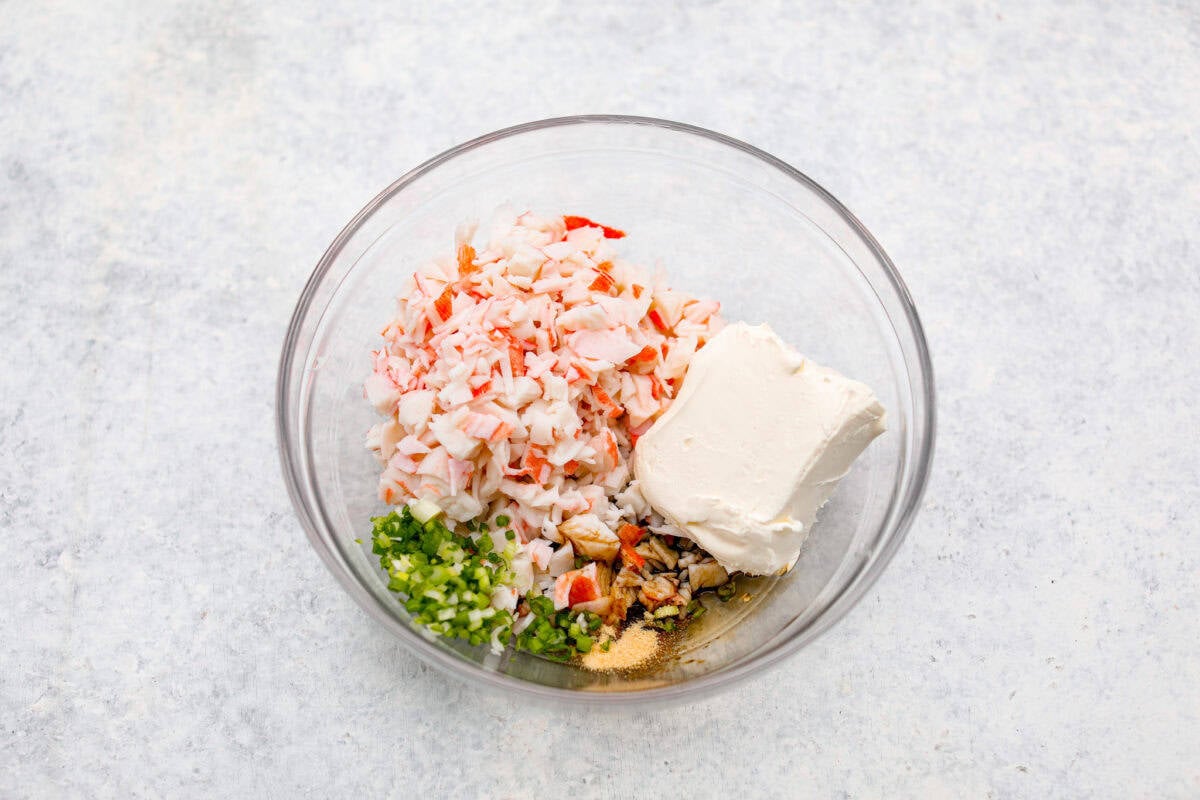
    1. Combine: Add the crab, cream cheese, green onion, Worcestershire, soy sauce, and garlic powder to a medium bowl and mix until fully combined.
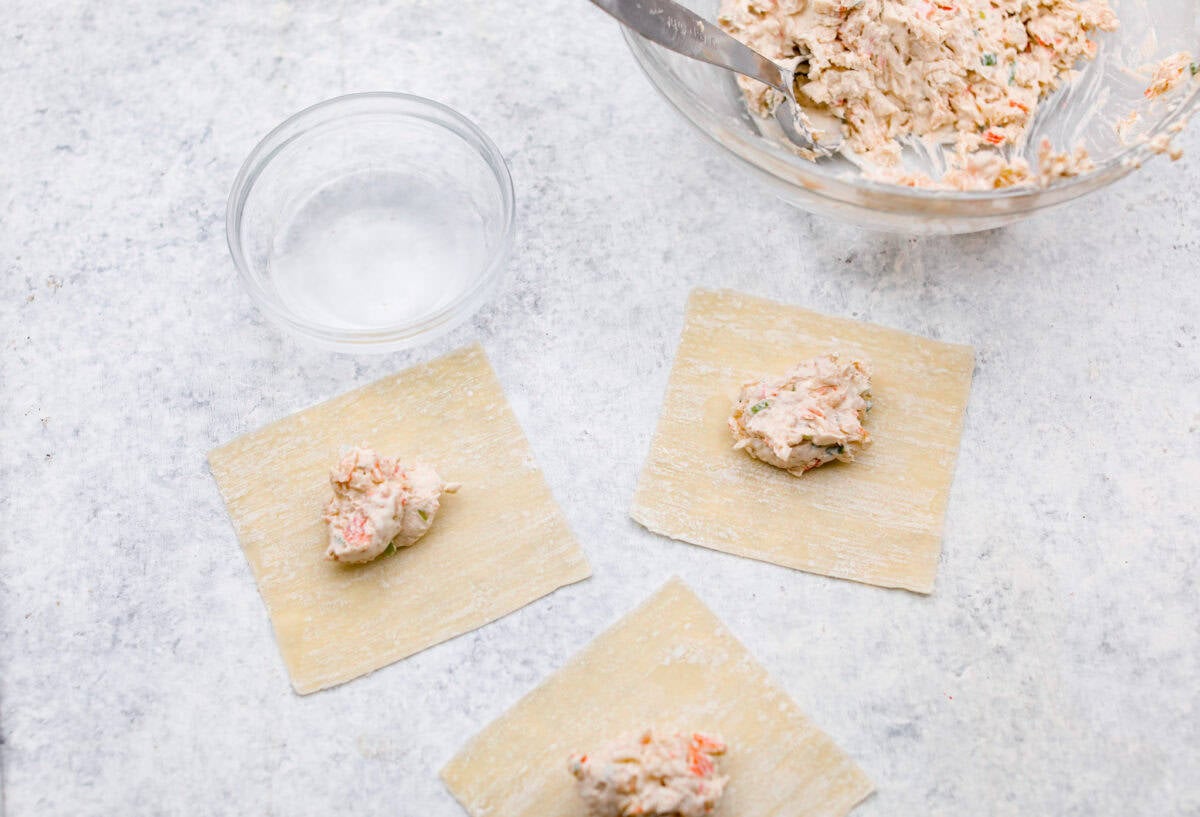
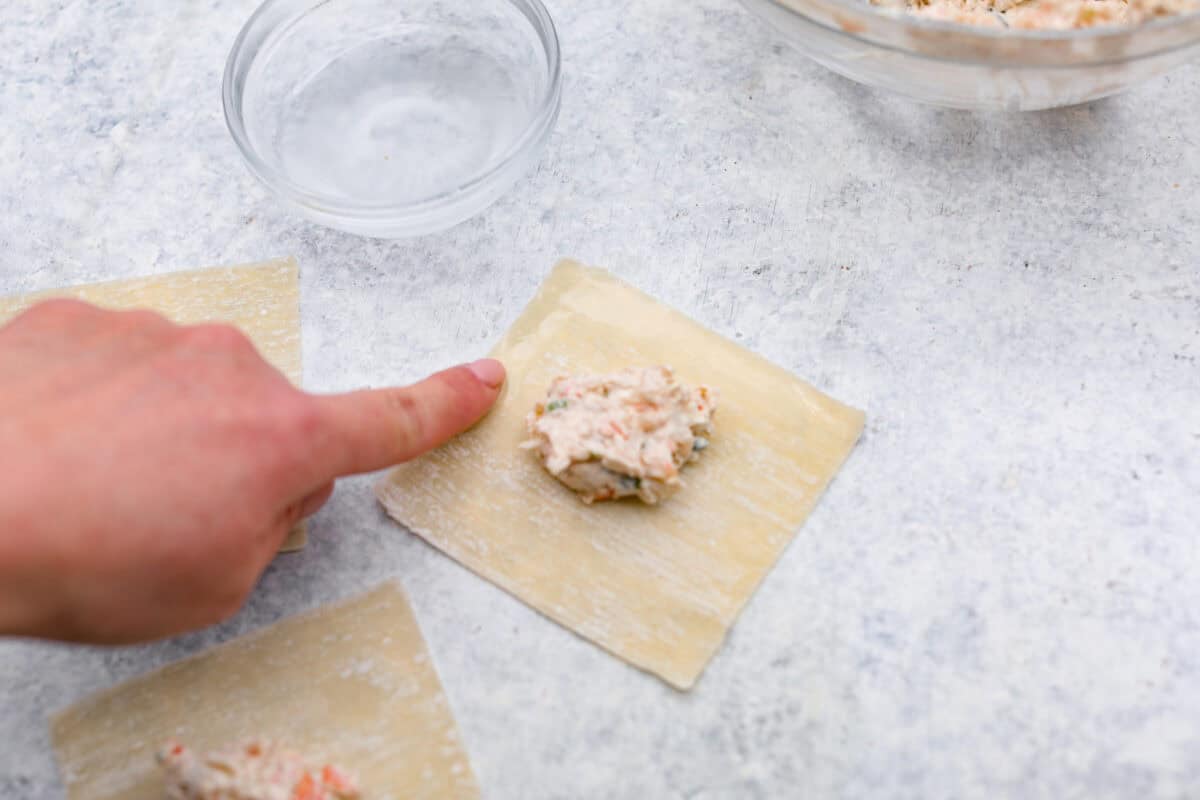
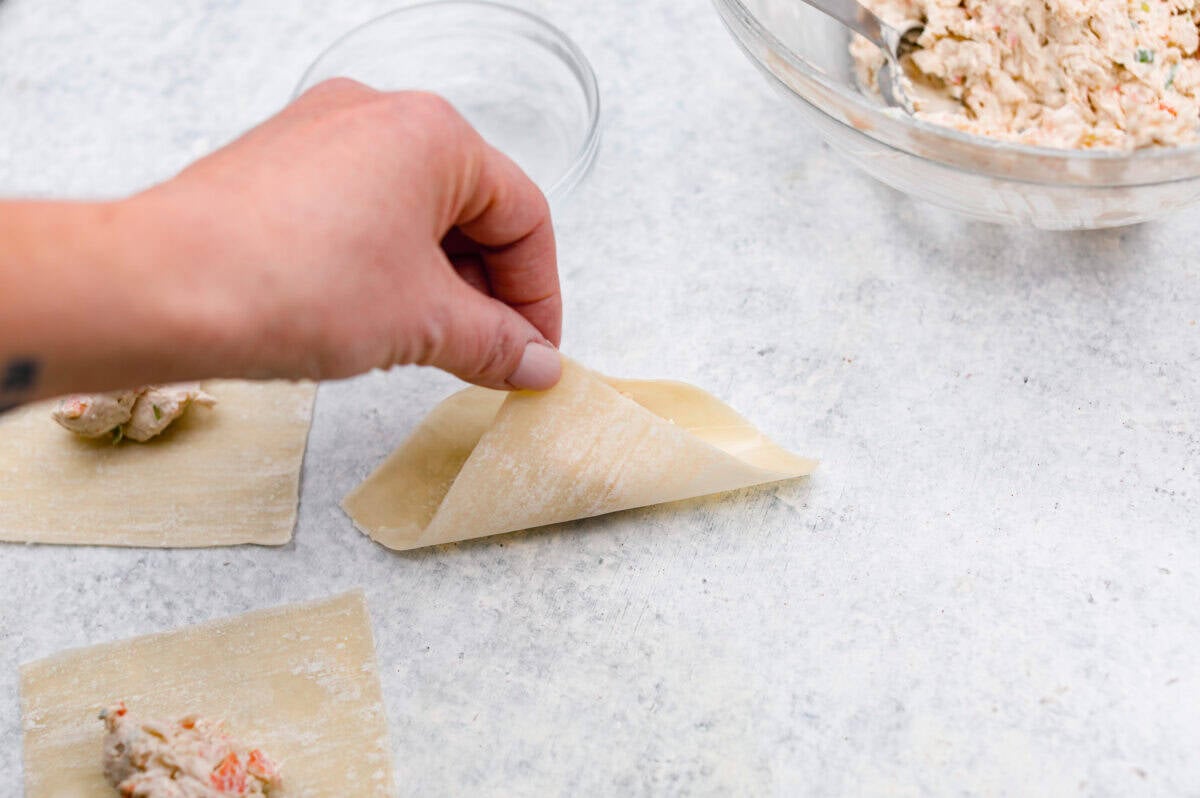
    2. Add: Assemble up to four wonton wrappers at a time, adding about two teaspoons of filling to the center.
    3. Wet: Wet the edges of the wrappers with water or a beaten egg.
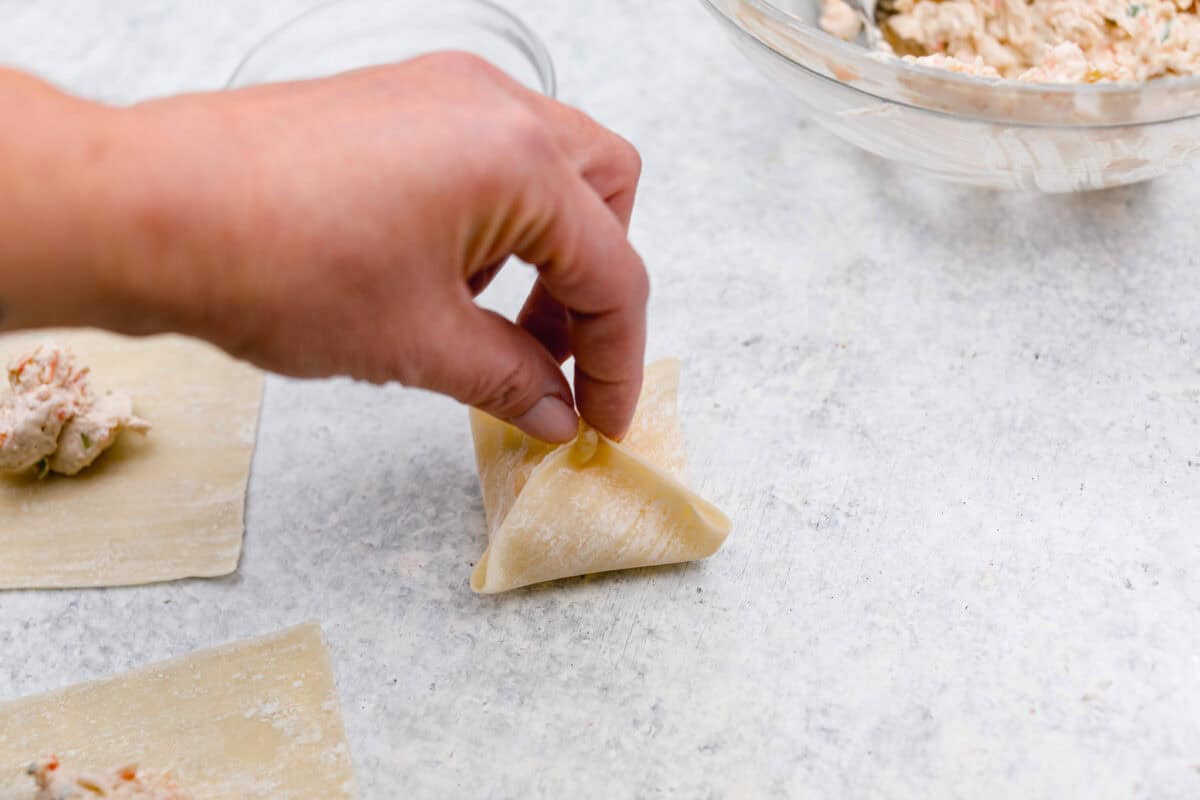
    4. Fold: Pinch two opposite corners together before bringing up the other two corners to form the shape.
    5. Cover: Pinch all the edges together to seal and set aside. Cover the formed rangoons with a damp paper towel until you are ready to fry them. Continue to assemble rangoons until all of the filling has been used, about 30.
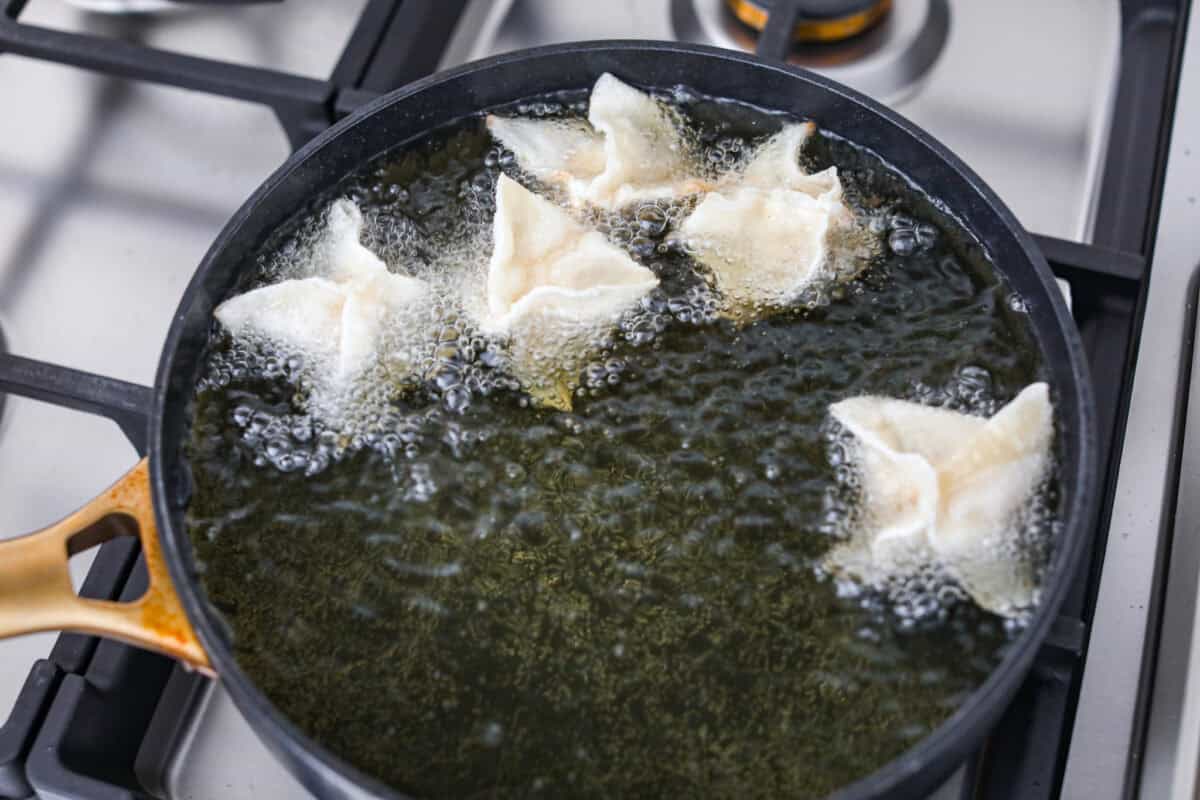
    6. Fry: Heat about 3 inches of oil in a deep skillet or Dutch oven until the oil reaches 350 degrees Fahrenheit. Fry the rangoons in batches for 3-4 minutes until they are golden brown. Remove them from the oil to a paper towel lined plate. Serve immediately with the dipping sauce of your choice.

    Crab Rangoon Tips and Variations

    This process might seem intimidating, but trust me, you can do this! Here are a few tips to make sure your cran rangoons turn out just the way you like!

    • Filling Amount: When filling your wonton wrappers, it might take a few tries to get the perfect amount. Overfilling can cause the rangoons to burst while underfilling leaves you with just fried wonton shells. I found that about two teaspoons of filling worked perfectly for me!
    • Blowouts: To avoid blowouts, you can try squeezing the air out of the center of the rangoons before sealing all the edges shut.
    • Drying Out: Fill only 4-5 rangoons at a time to prevent the wonton wrappers from drying out. Make sure you cover the filled ones with a damp paper towel to prevent them from drying out.
    • Crab: I used finely chopped imitation crab for my rangoons, but you can use real crab meat or canned crab if you drain it really well.
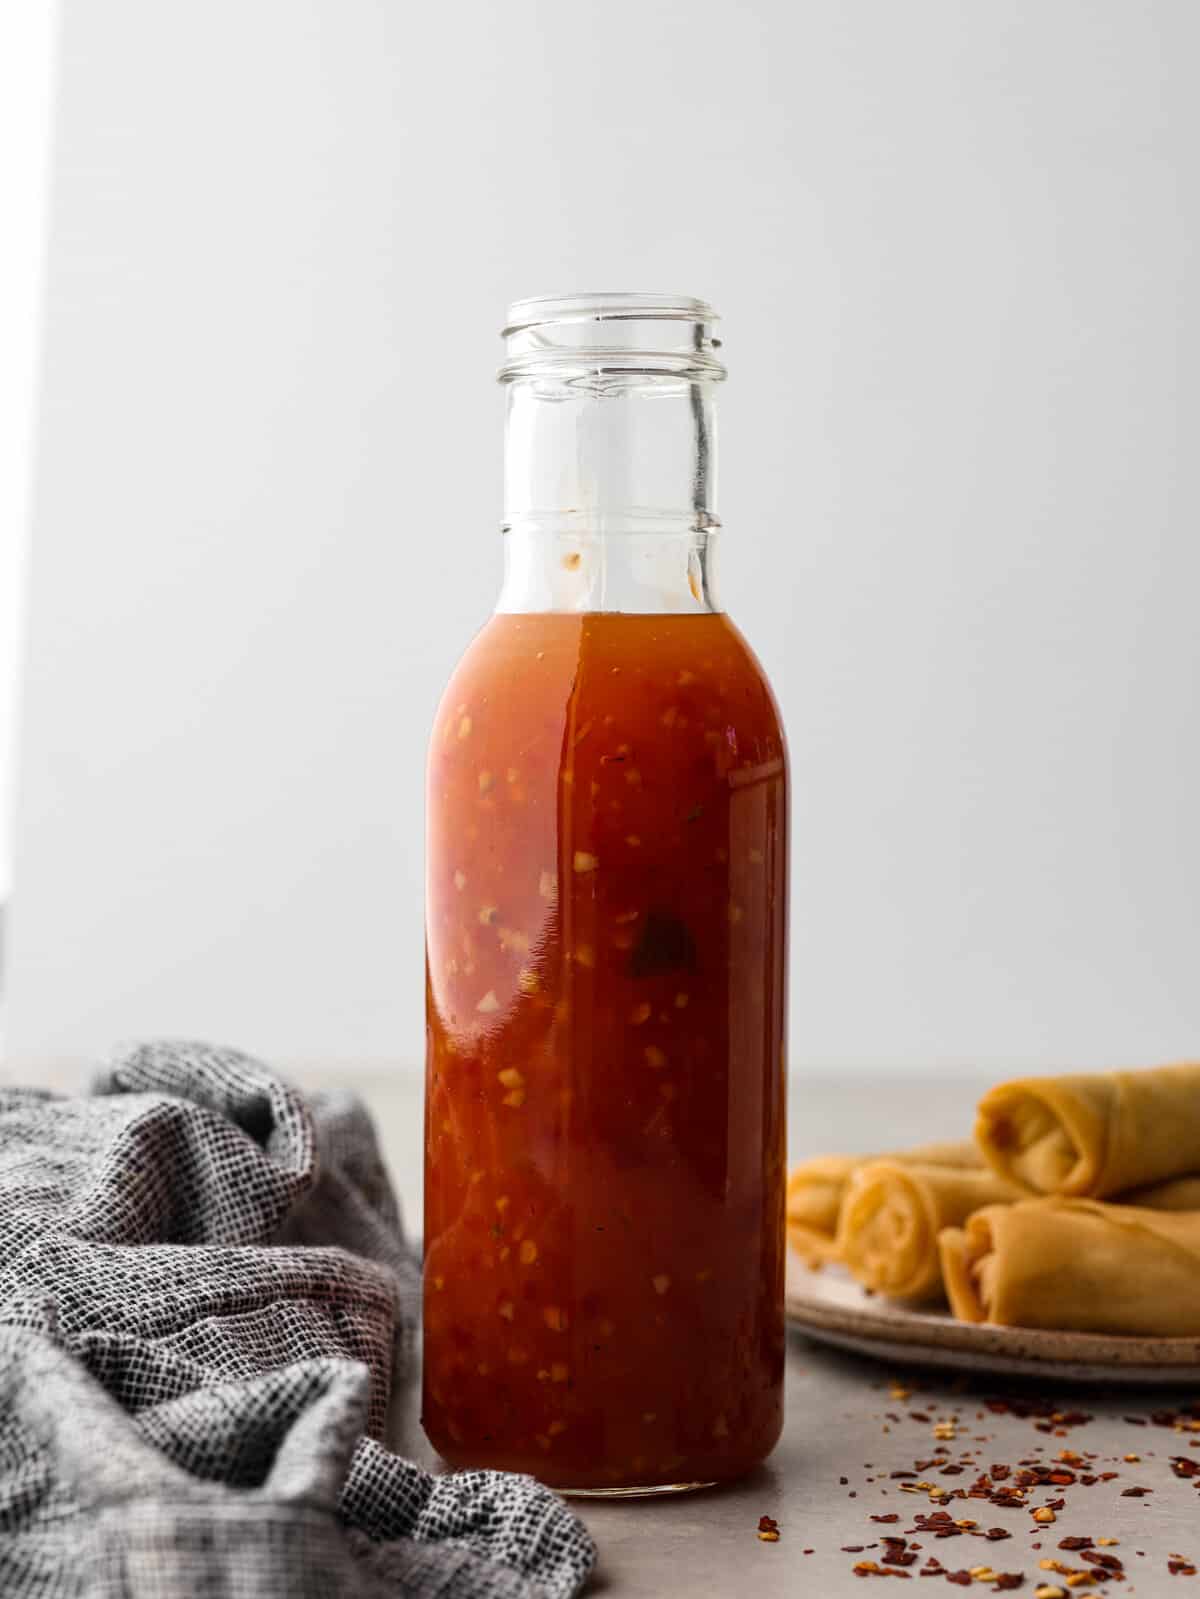
    • Dipping Suace: My favorite dipping sauce is sweet red chili sauce, but you can use whatever dipping sauce you prefer!

    Close up shot of a crab rangoon cut in half over a pile of crab rangoons. Close up shot of a crab rangoon cut in half over a pile of crab rangoons.

    Make Ahead and Storing Instructions

    • Make Ahead: You can form the rangoons about half a day in advance; just cover the formed ones with a lightly dampened paper towel or two and then tightly wrap them in plastic wrap. I found it most helpful to uncover the rangoons and let them sit in the open air for 20–30 minutes before frying, especially if I made them in advance. 
    • Fridge: Store fried crab rangoons in an airtight container in the refrigerator for up to 3 days. You can reheat them in the oven at 350 degrees Fahrenheit for about 5 minutes or in the air fryer at 350 degrees Fahrenheit for about 4 minutes. 
    • Freezer: You can freeze crab rangoons before or after they are fried.
    • Before: Before they are fried, crab rangoons can be frozen for up to 3 months. Place the formed rangoons on a parchment-lined baking sheet and place the baking sheet in the freezer. When fully frozen, transfer them to a large freezer bag. Fry them from frozen in oil at 350 degrees Fahrenheit for 5-7 minutes. 
    • After: For fried rangoons, place them on a parchment-lined baking sheet and place the baking sheet in the freezer. When fully frozen, transfer them to a large freezer bag. Reheat them in the oven at 375 degrees Fahrenheit for about 8 minutes, flipping them over halfway through. Or you can air fry them at 350 degrees Fahrenheit for 5-8 minutes.

    Close up shot of someone dipping their crab rangoon into sauce. Close up shot of someone dipping their crab rangoon into sauce.

    More Asian-Inspired Recipes to Try

    I love making these crab rangoons to gobble up with some fried rice and maybe some teriyaki beef! Here are a few other recipes to try.

    Sweet Chili Sauce

    10 minutes

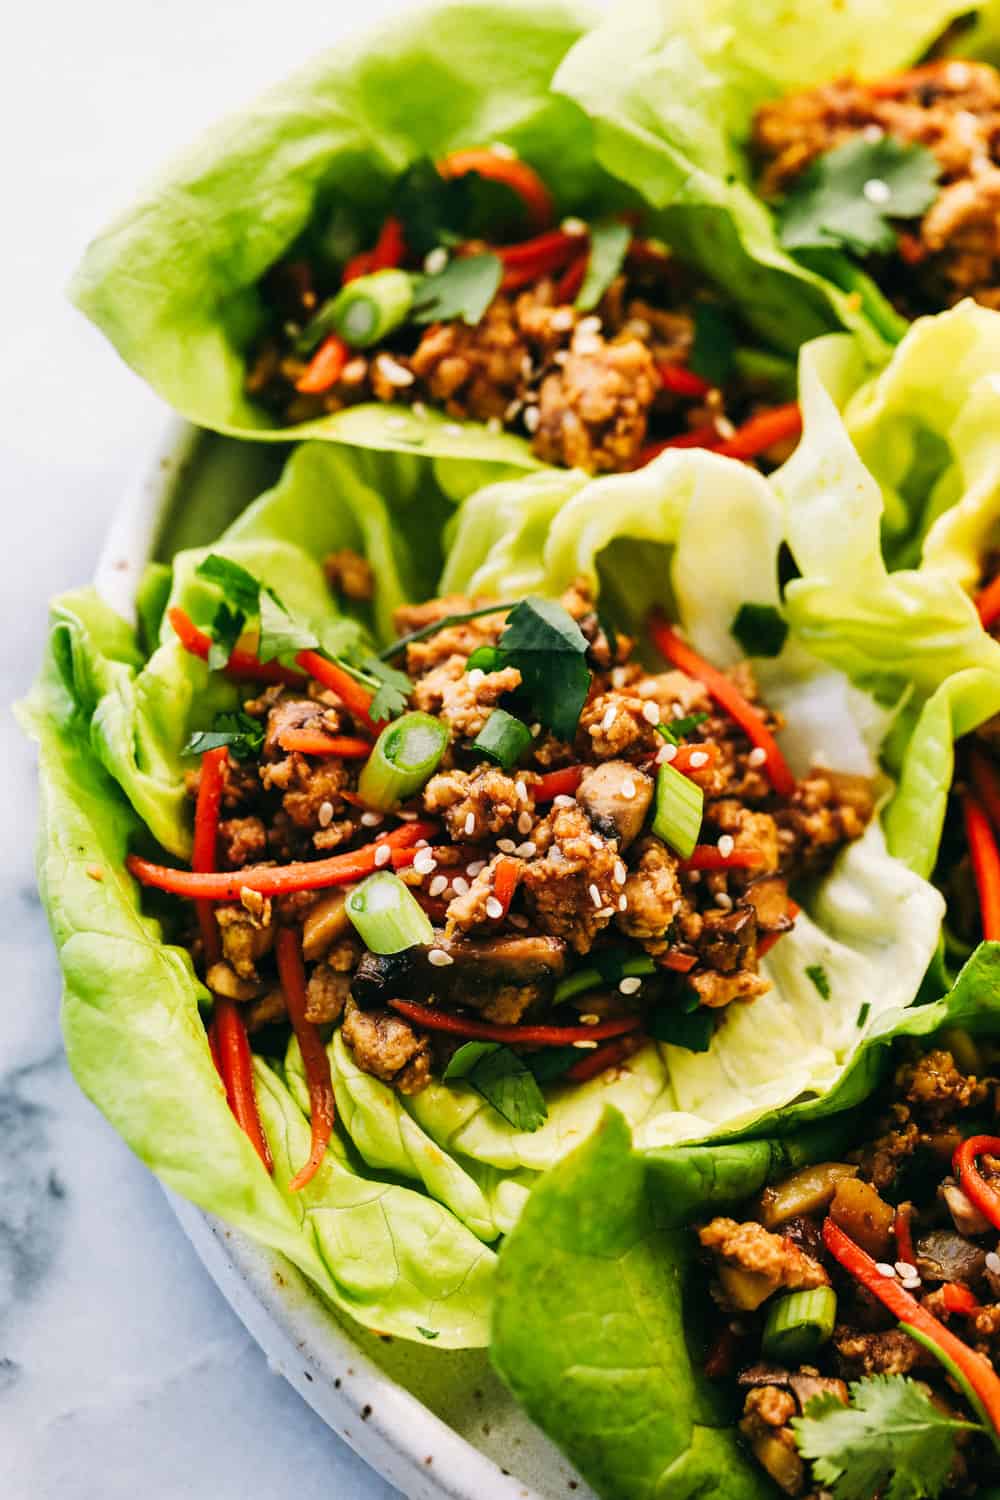
    Asian Turkey Lettuce Wraps

    30 minutes

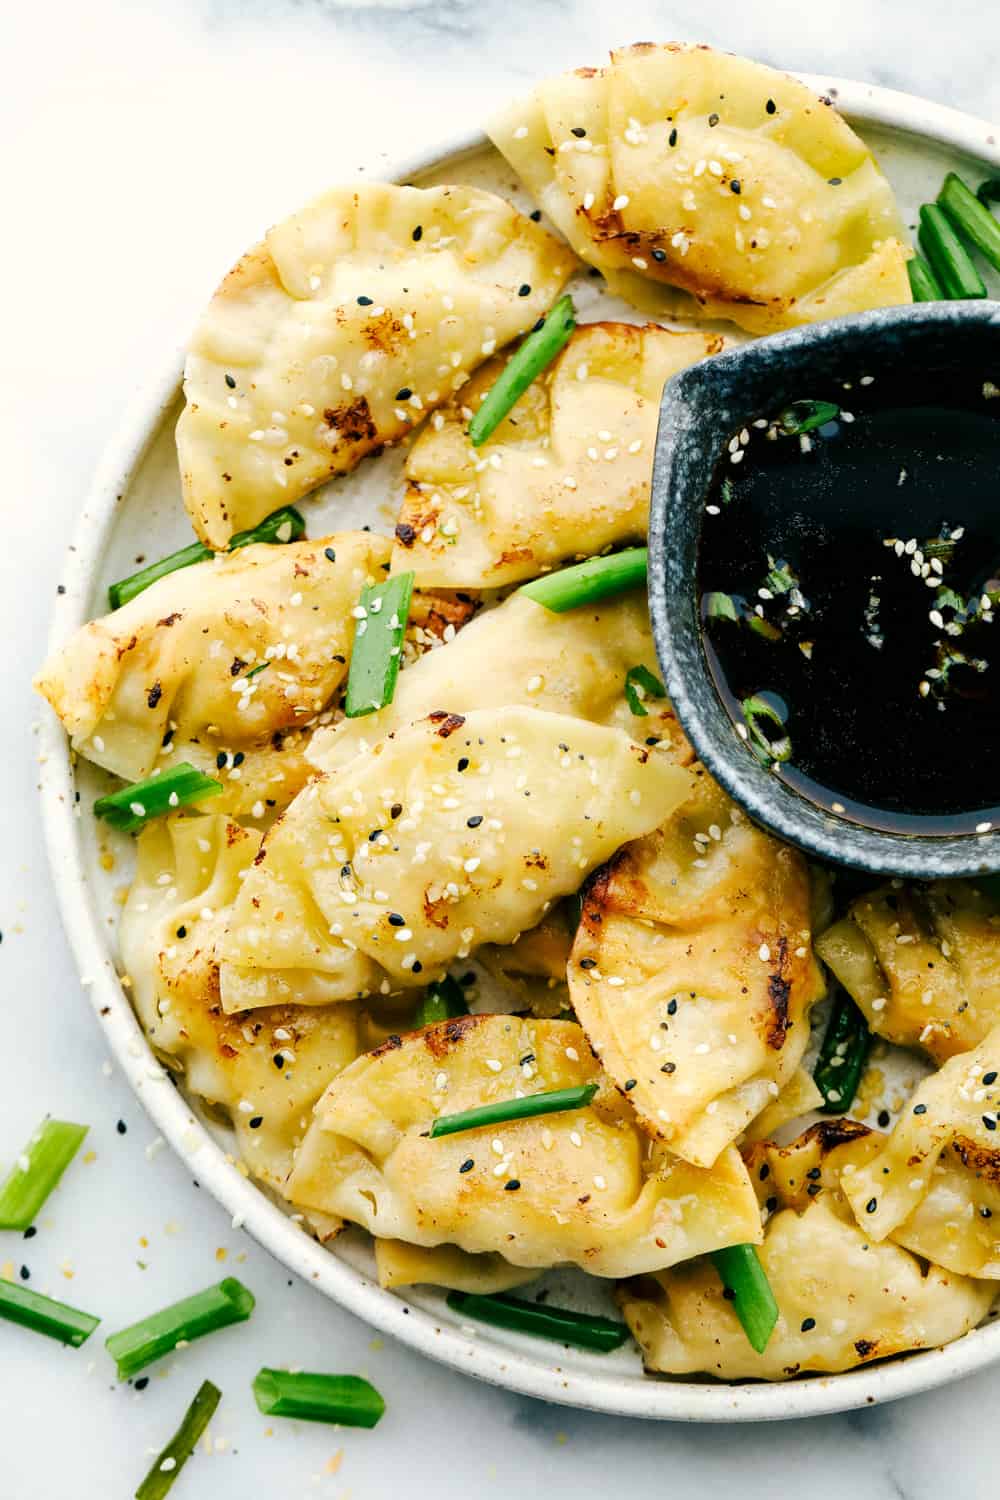
    Chicken Potstickers

    20 minutes

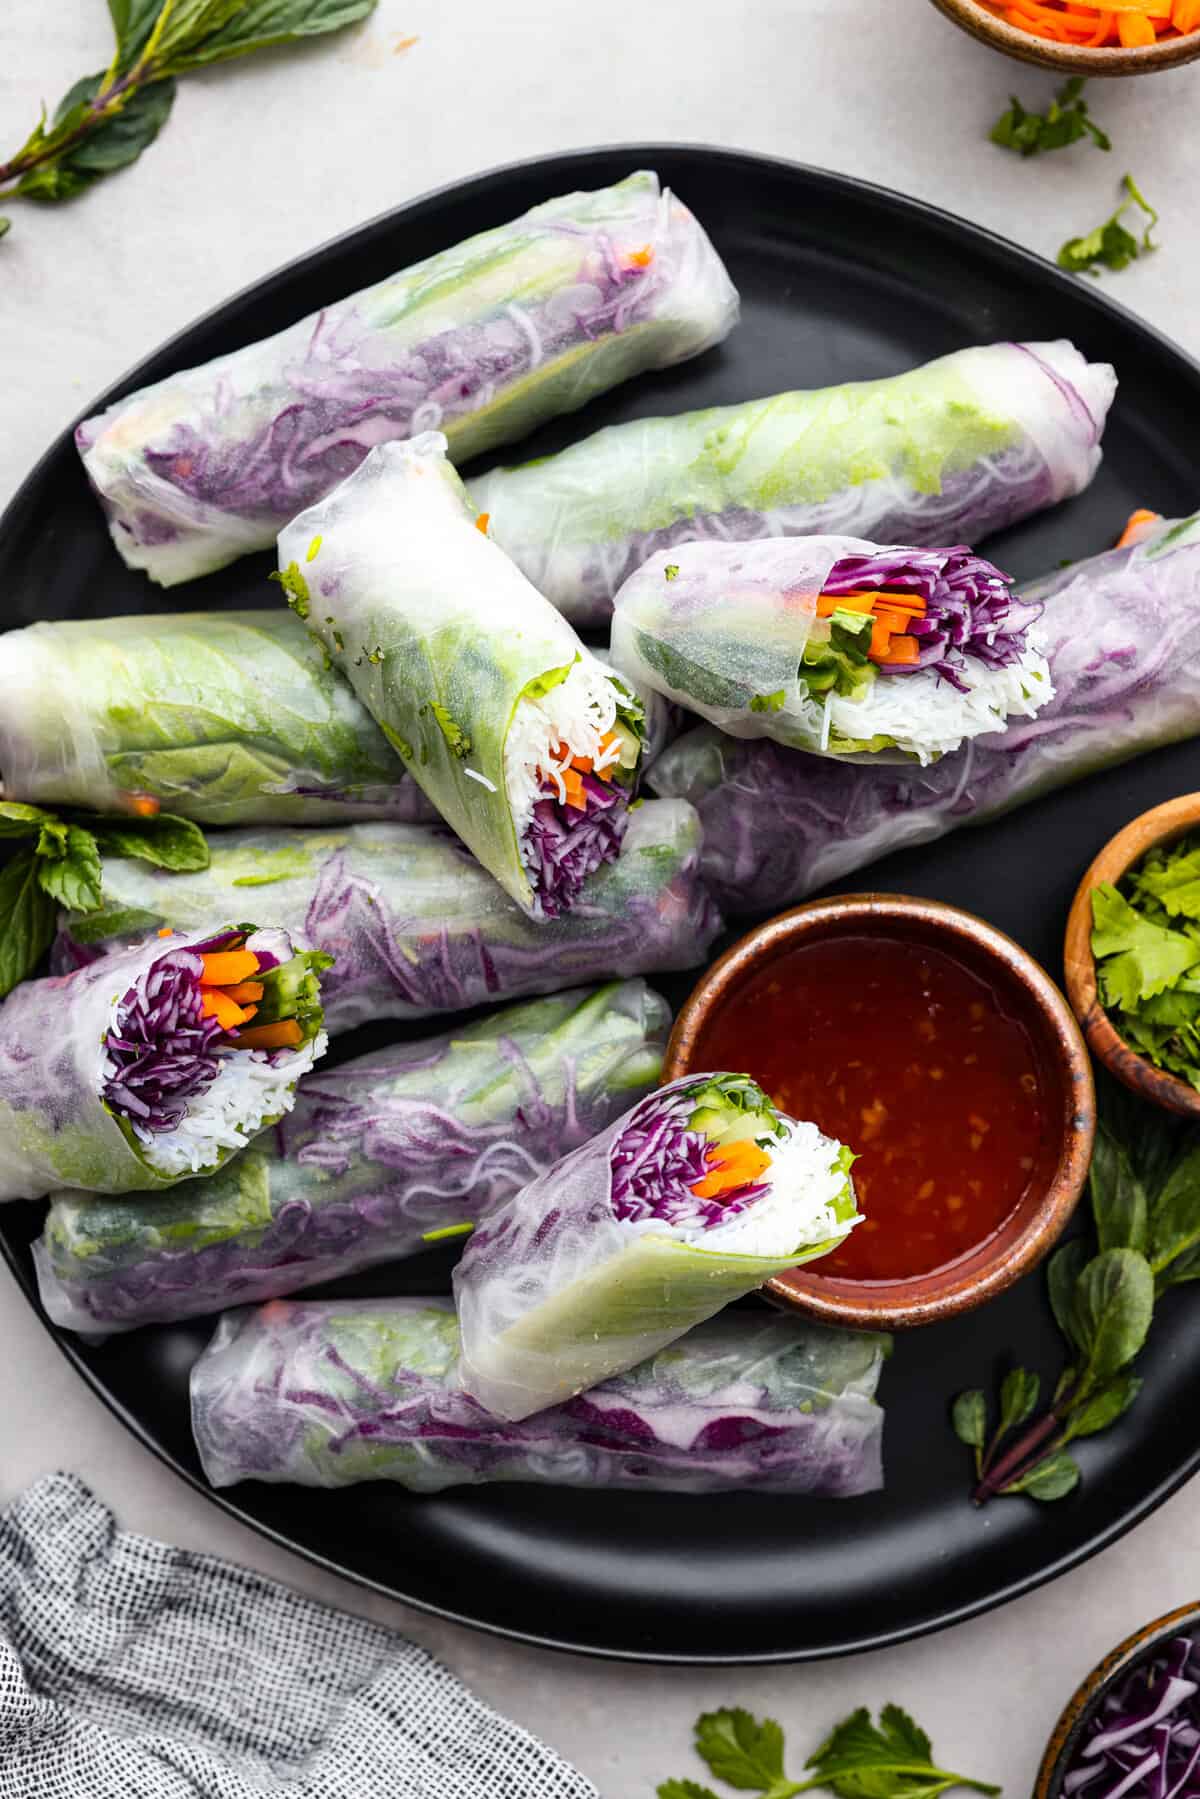
    Spring Rolls

    35 minutes

    Pin this now to find it later

    Pin It


    Source link

  • Raw Vegan Carrot Cake Bites Recipe

    Raw Vegan Carrot Cake Bites Recipe

    Raw Vegan Carrot Cake Bites that are chewy, cinnamony, cake-bally, and just the right amount of sweet. Perfect on-the-go snack for spring!

    These carrot cake bites are chewy, cinnamony, cake-bally, and just the right amount of sweet. They are flecked with coconut and oats and made creamy with almond butter. The carrots are there, but they’re not excessively salady – they just add some specks of color, flavor, and texture to an almost-cookie-dough-like bite of joy that lives in a little jar in your fridge, waiting for that 3pm moment to make your day a little brighter.

    Breakfast bites, snack-with-coffee bites, desserty bites… with these little gems, all of it is fair game.

    I mean, the thing about real carrot cake is that you want it, and you want it loaded with cream cheese frosting. Lots of cream cheese frosting. And then you finally have it and it is, in fact, so so good. But then you spike, crash, and can’t shake the feeling that you need to go to the dentist immediately? I don’t know, maybe that’s just me.

    Guess what is there for you in a more wholesome, sustaining, but still tastes like yummy carrot cake way?

    THESE BITES. These raw, vegan, delicious carrot cake bites.

    How To Make Carrot Cake Bites That Are Vegan and Raw and Delicious

    You 100% need a food processor for these. You guys know I LOVE MY FOOD PROCESSOR. Please buy yourself a food processor. This is the one I have. (This is an affiliate link.)

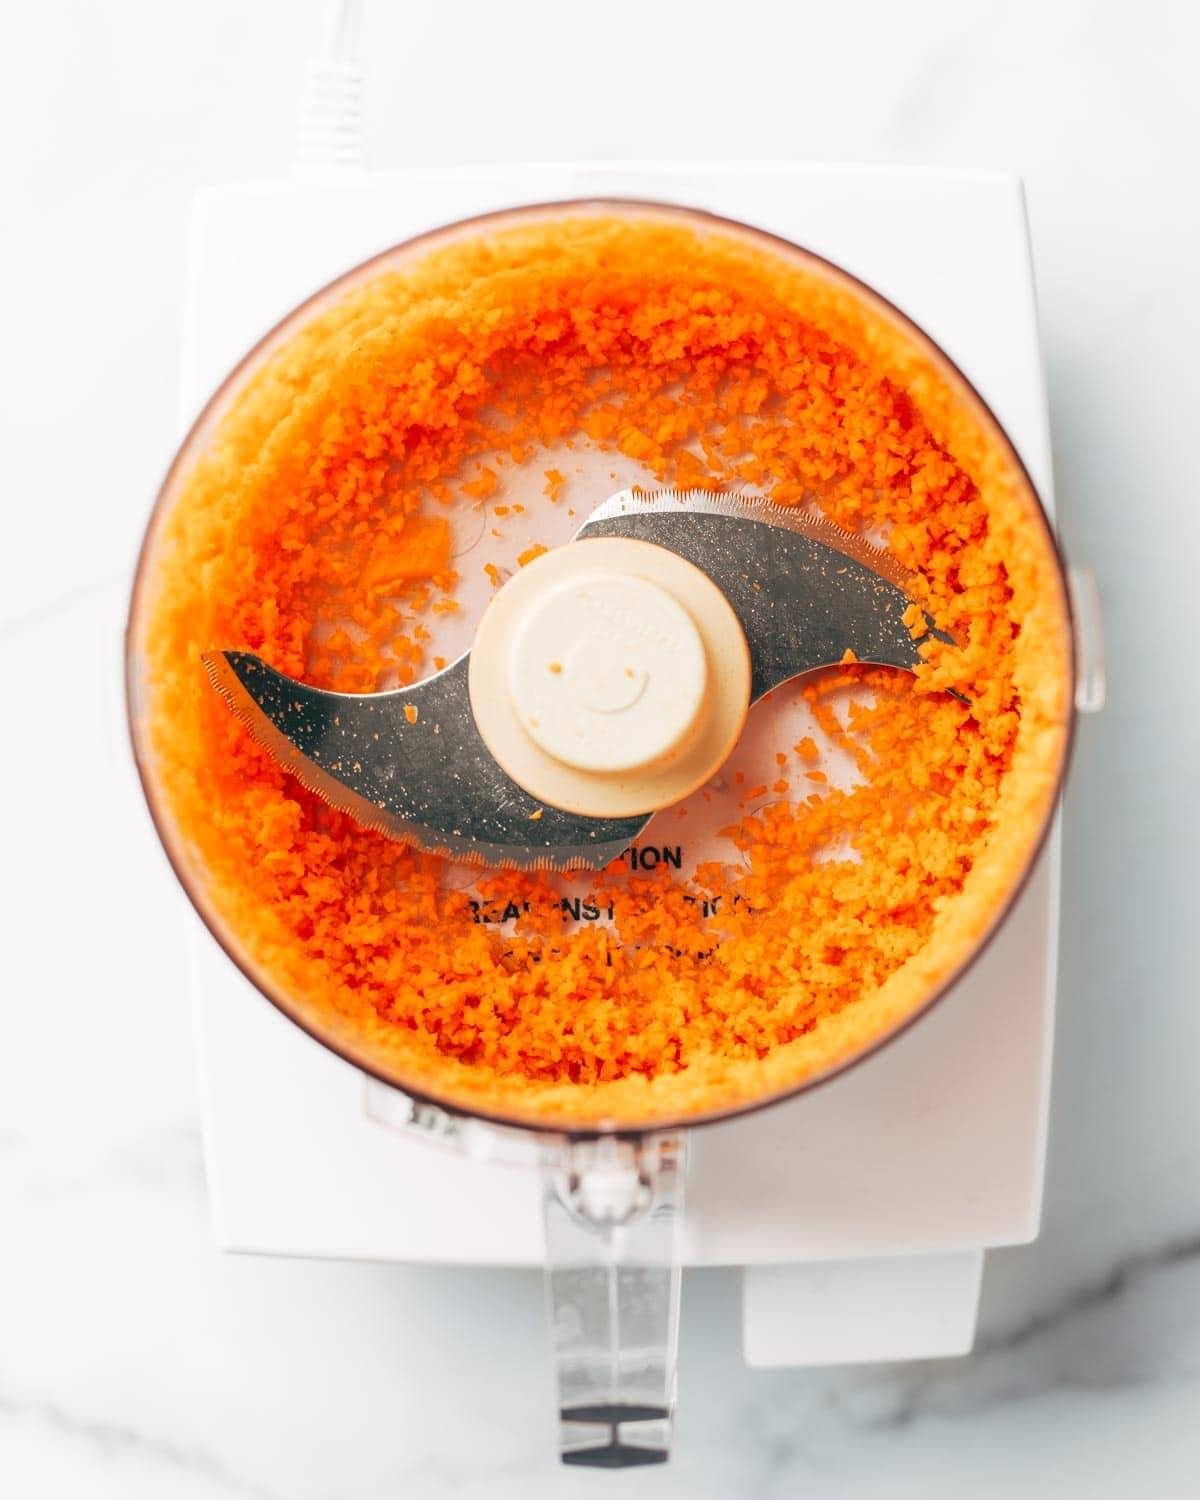
    First up: carrots. Just pop in the food processor and go. I seriously hate grating carrots so I will not ask you to do any of that.

    Carrots pulsed in a food processor.

    Next up: clean out the carrots and pulse up your oats and coconut, so it’s kind of like a flour.

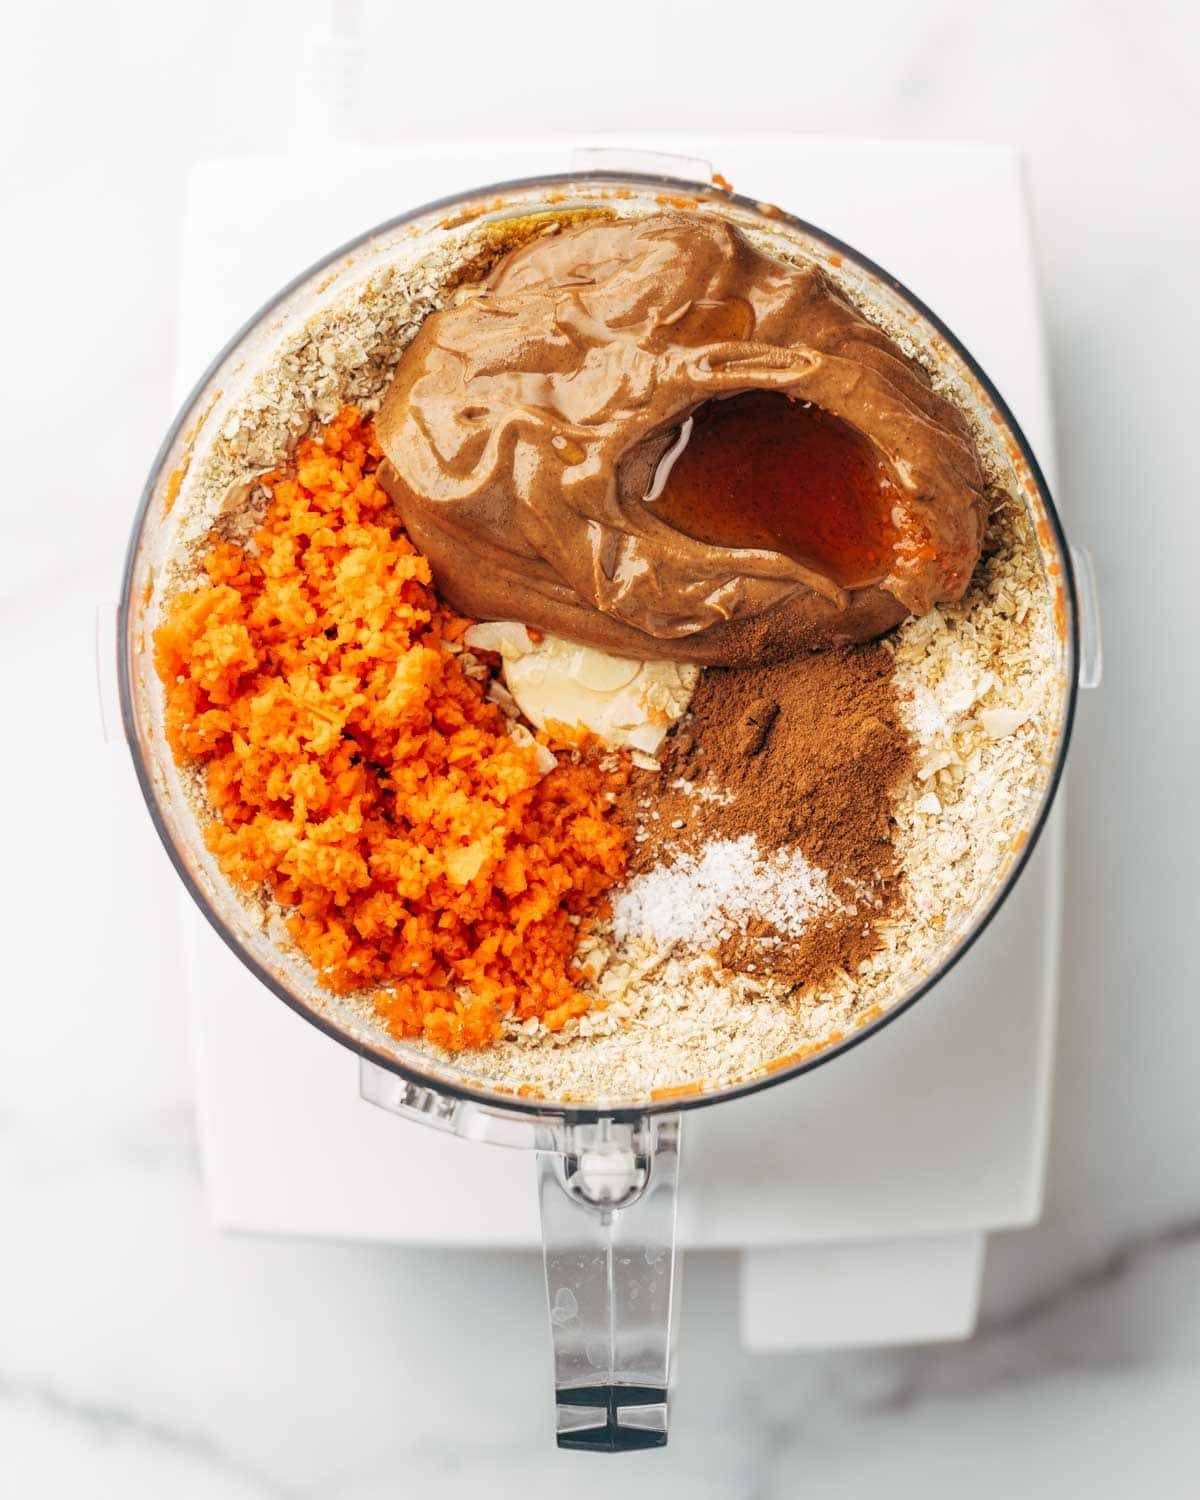
    And now: everybody in.

    Ingredients for carrot cake bites in a food processor before blending.
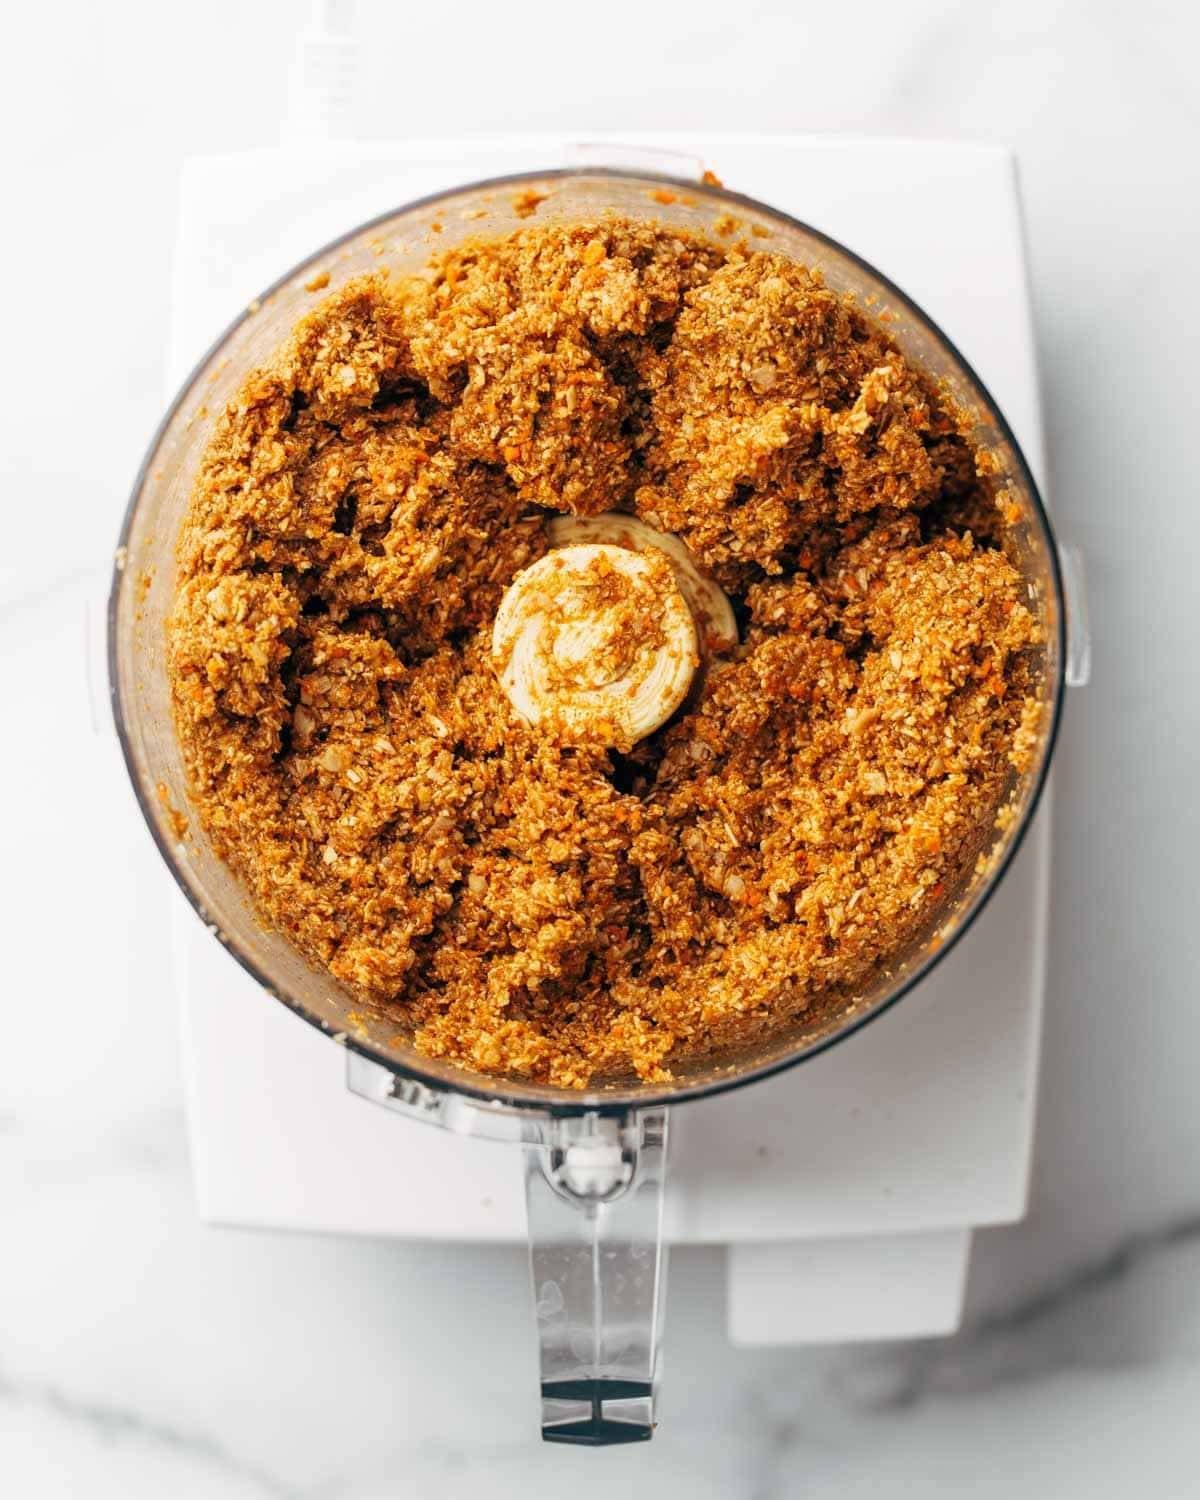
    Carrot cake bites in a food processor after blending.

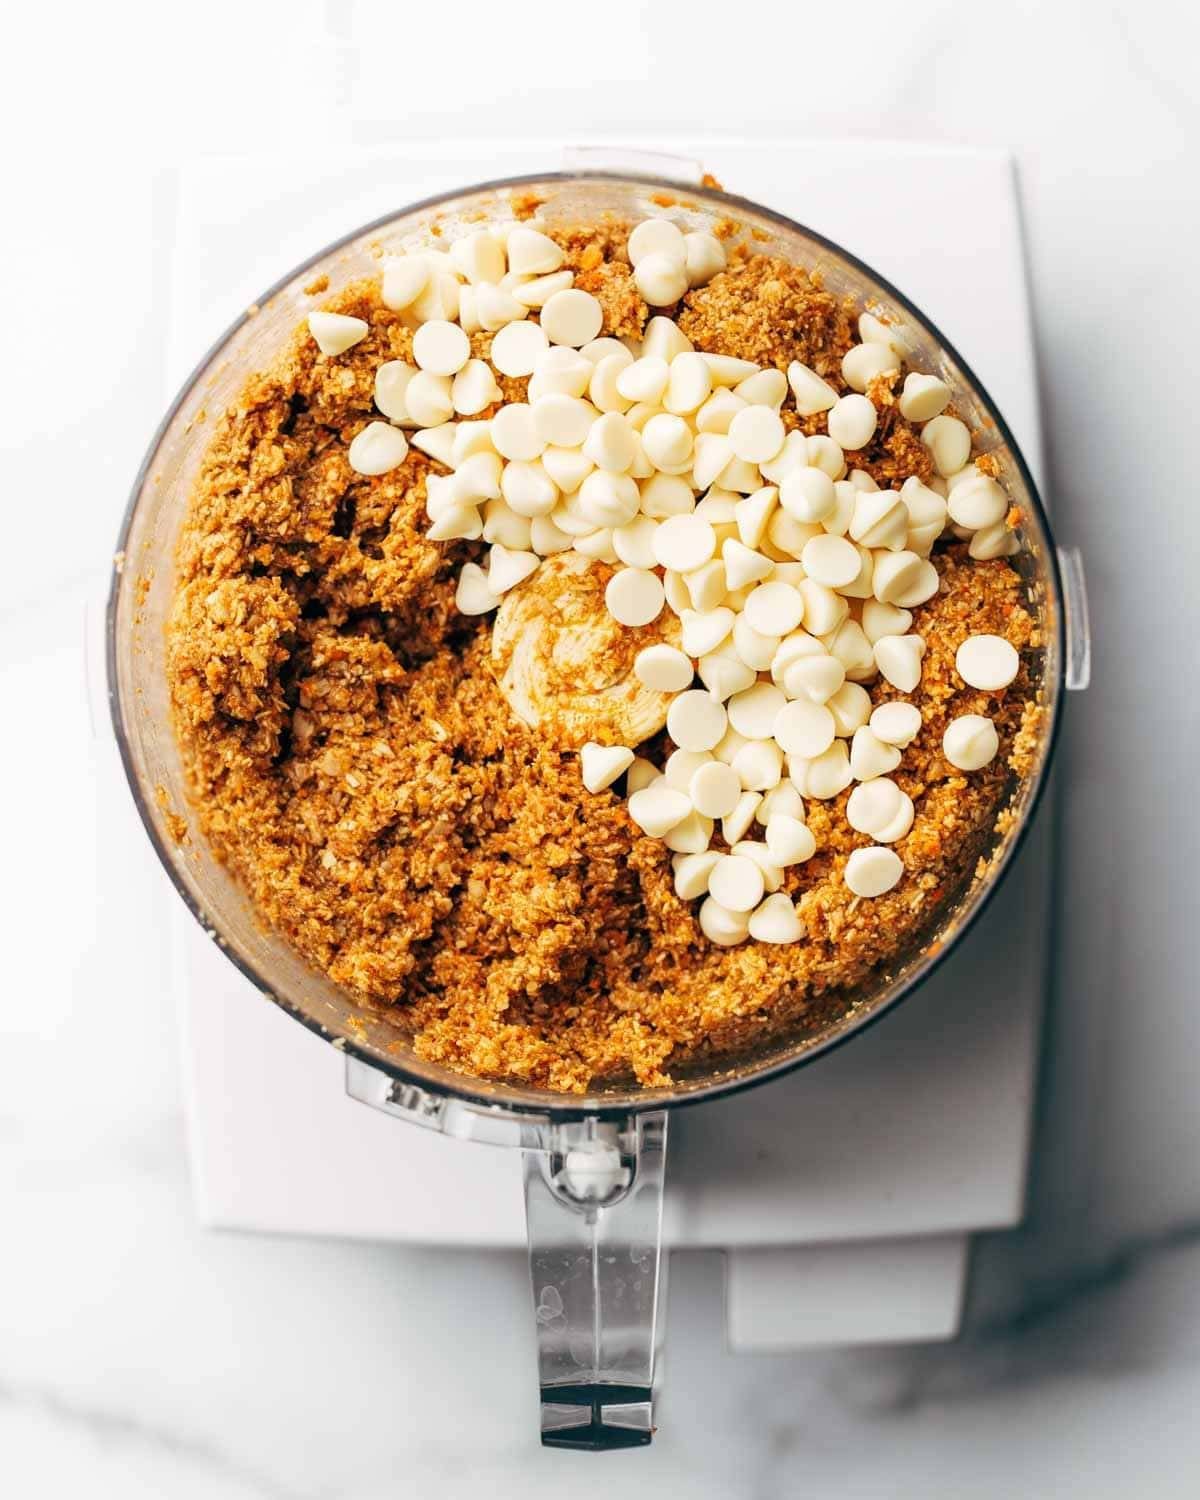
    Finally: white chocolate chips for the people who like to be extra.

    If you’re vegan or want to keep it totally clean, go for some chunky nuts, cacao nibs, or vegan chips instead.

    Carrot cake bites in a food processor with white chocolate chips.

    Roll, refrigerate, and done.

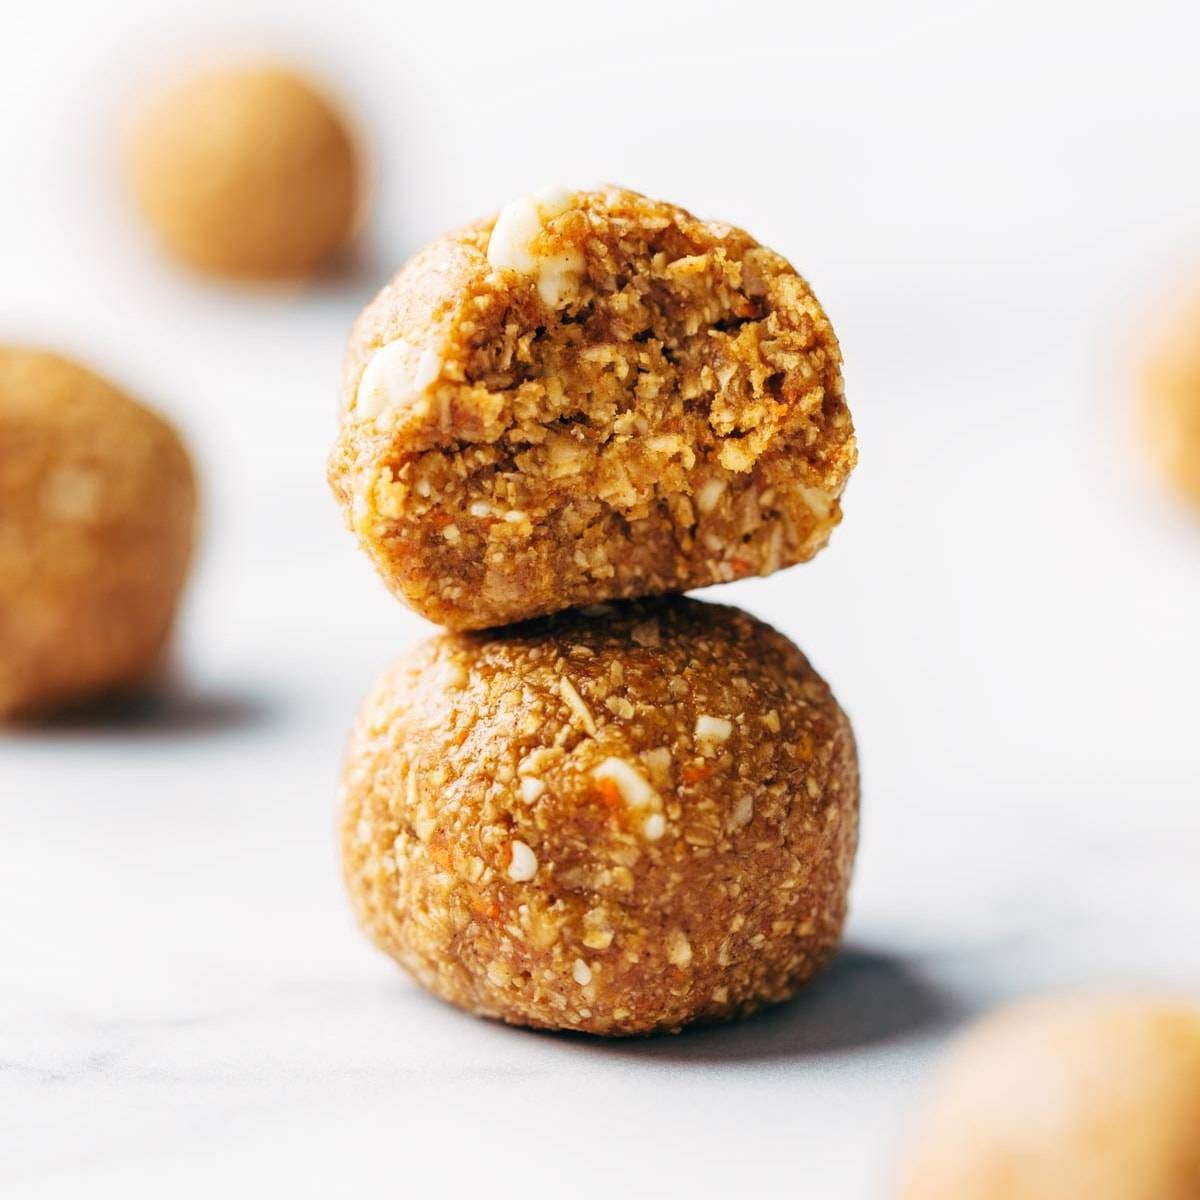
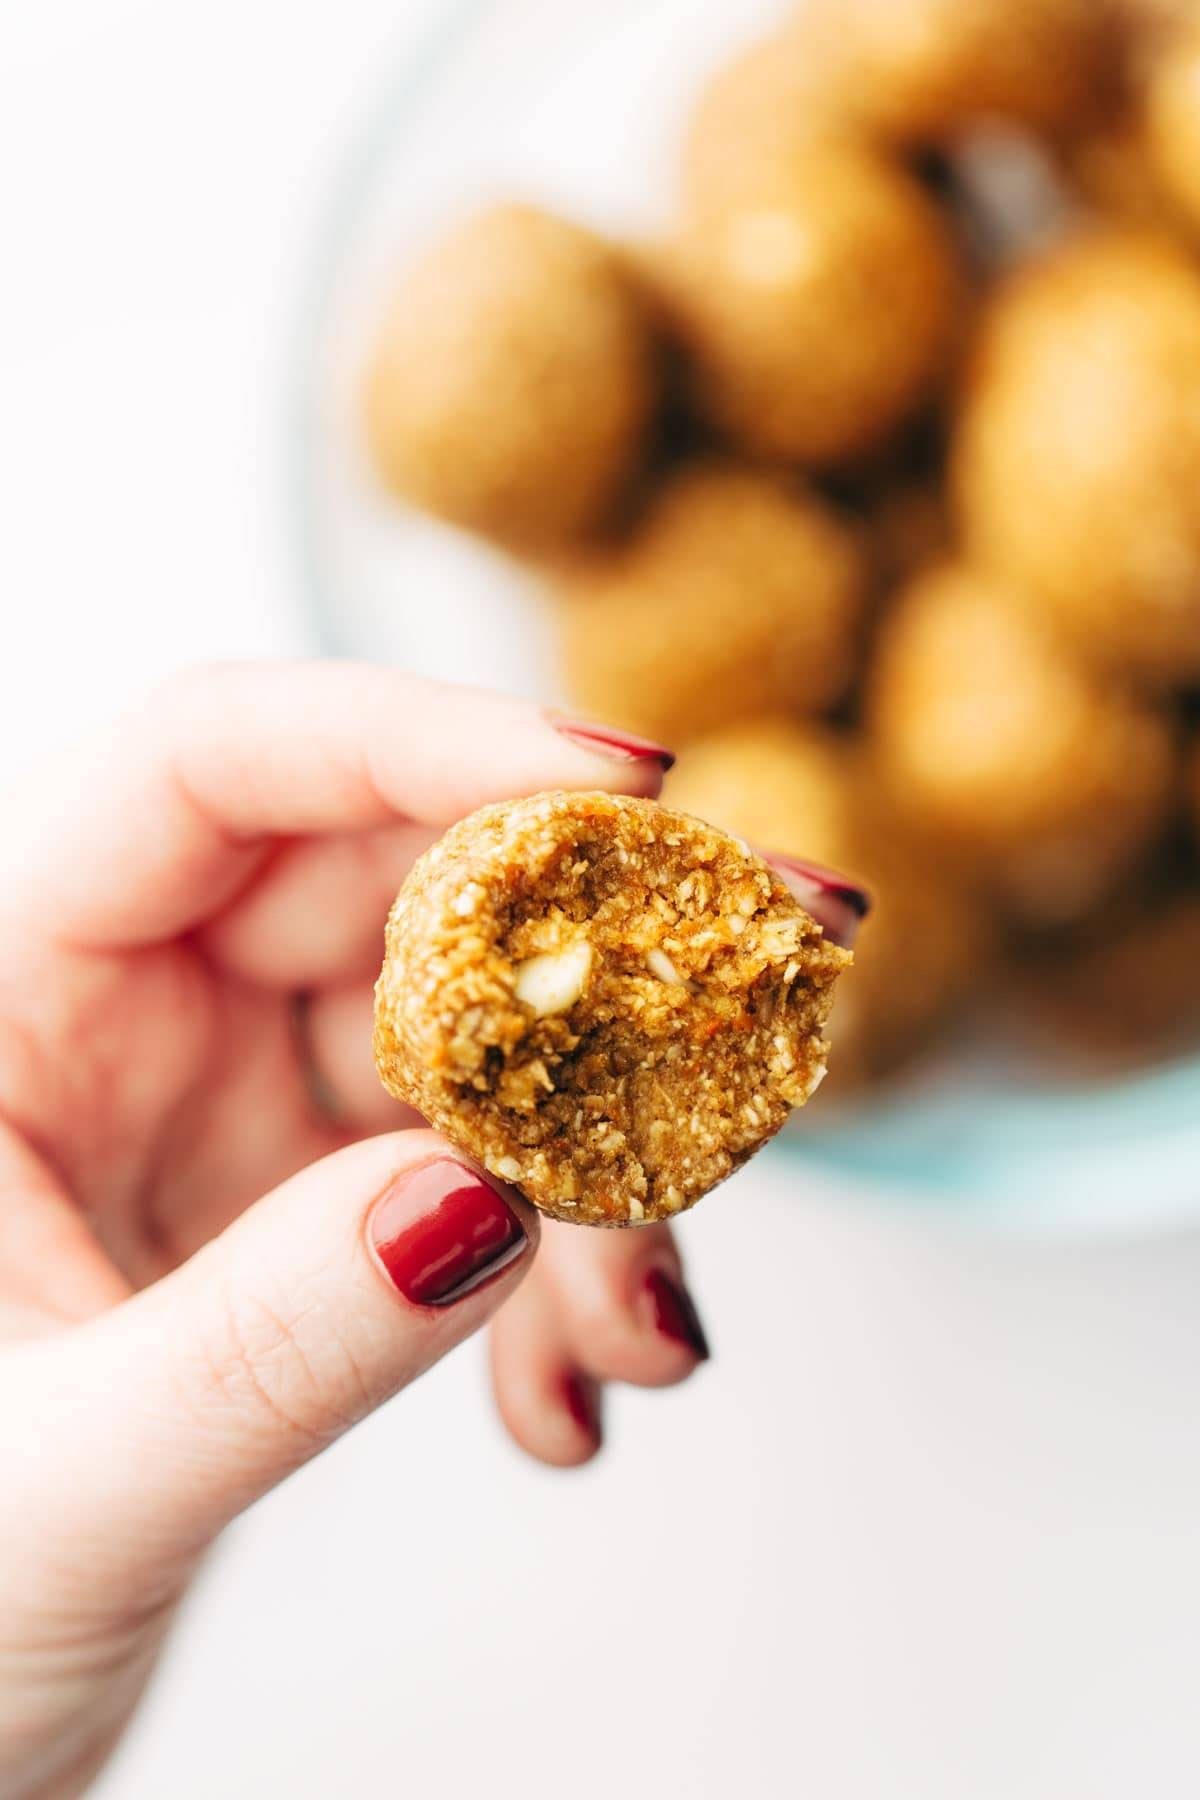
    Carrot cake bite with bite taken out.

    Yep, I’d say the spring snacking season is off to an excellent start. Carrot cake bites for all!

    Check Out Our Video For How To Make Carrot Cake Bites:


    Print

    clock clock iconcutlery cutlery iconflag flag iconfolder folder iconinstagram instagram iconpinterest pinterest iconfacebook facebook iconprint print iconsquares squares iconheart heart iconheart solid heart solid icon

    Description

    Raw Vegan Carrot Cake Bites that are chewy, cinnamony, cake-bally, and just the right amount of sweet. Perfect on-the-go snack for spring!


    1. Add carrot chunks to the bowl of a food processor and pulse until finely chopped. (You should have a generous 1/2 cup.)
    2. Remove carrots and set aside. Add oats and coconut. Pulse until coarsely ground.
    3. Add all other ingredients, including the chopped carrots. Pulse until a smooth-ish, sticky “dough” forms. (You might have to push it down with a spatula a few times to help it along.)
    4. Add white chocolate chips and pulse until chopped.
    5. Roll into balls. Store in the fridge or freezer. Mwah! This week is looking good.

    • Prep Time: 15 minutes
    • Category: Snack
    • Method: Mix and Roll
    • Cuisine: American

    Keywords: raw vegan carrot cake bites, carrot cake bites, healthy carrot energy bites


    One More Thing!

    This recipe is part of our collection of best healthy snacks. Check it out!

    Source link

  • Marry Me Chickpeas and Orzo Recipe

    Marry Me Chickpeas and Orzo Recipe

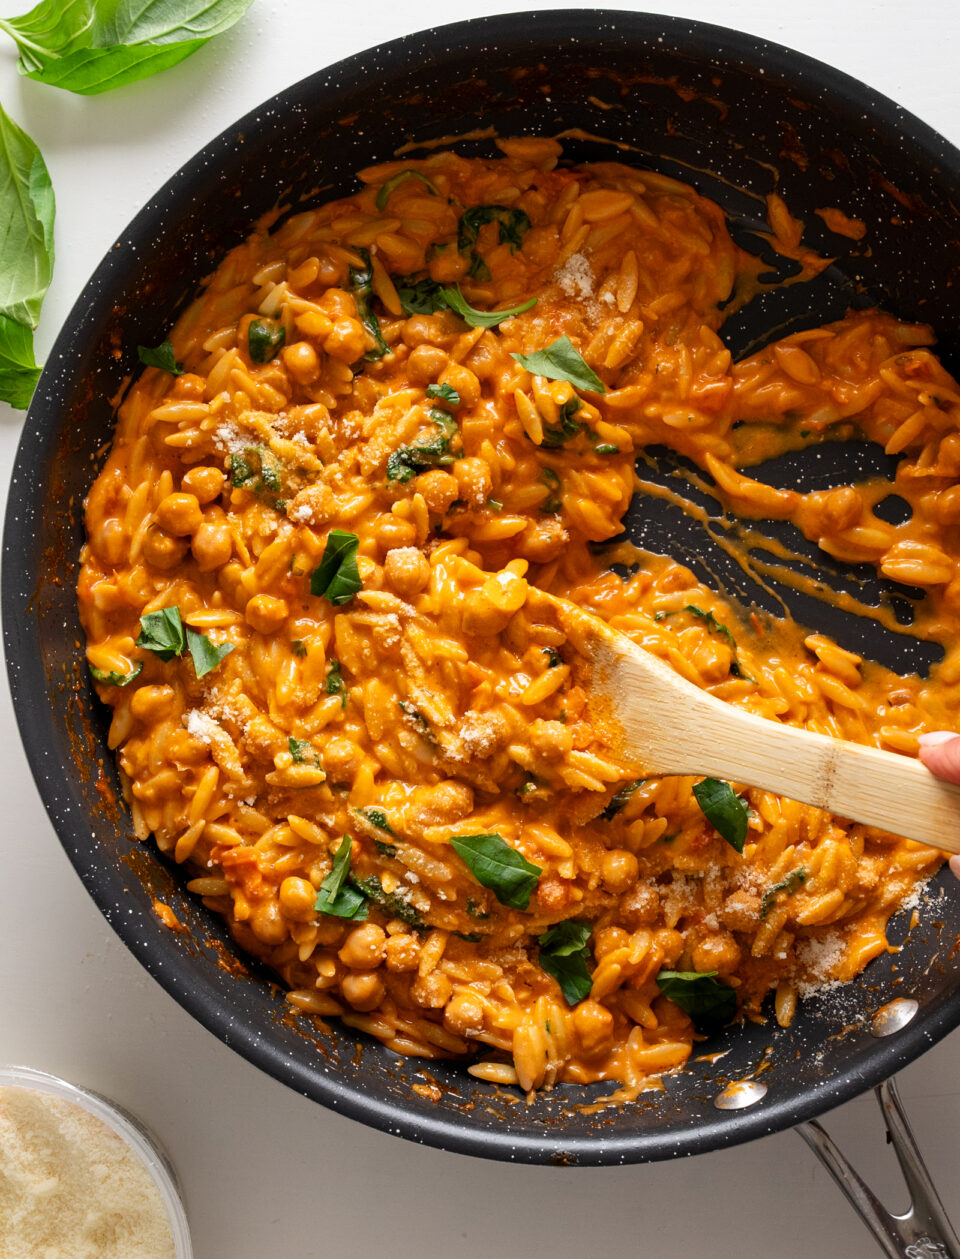
    Marry Me Orzo Is So Good.

    Lindsay Ostrom headshot.

    The last time I made this, I think I ate half of the batch by myself.

    Here’s what makes this so good, for me:

    • The flavors of shallot, garlic, thyme. Mic drop.
    • A tomato cream sauce.
    • Little chewy, carby, textured bits that are delightfully all the same size – the orzo and the chickpeas just WANT to be together.

    The way it clings together, the luscious creaminess, max flavor with the shallot, garlic, and fresh thyme. UGH.

    We use DeLallo products all over the place in this kitchen – I always love their orzo (and my friend swears by their GF orzo) and their Castelvetrano olive oil in the squeeze bottle. But for this recipe I also really love all their little jarred tomato products as an add-in – the sun-dried tomatoes if you want to keep it classic to the Marry Me flavor profile, but also the fresh tomato bruschetta (personal fave), the calabrian chiles for something different, or the roasted tomatoes for a chunkier option.

    Guys, a bonus that deserves mention: this comes together in practically 20 minutes. Maybe 30, tops. It’s easy, minimal cutting board activity, but still plenty of veg and protein in there. This girl is a teeny bit fancy but she’s also weeknight-ready.

    Hope you love it.

    (If you want an option with another protein – like chicken – the original Marry Me Chicken is here for you!)

    Lindsay signature.

    Source link

  • Easy Shredded Chicken Tacos Recipe

    Easy Shredded Chicken Tacos Recipe

    This easy shredded chicken tacos recipe is such an easy dinner! They’re fresh, flavorful, and the kind of easy dinner that never feels boring.

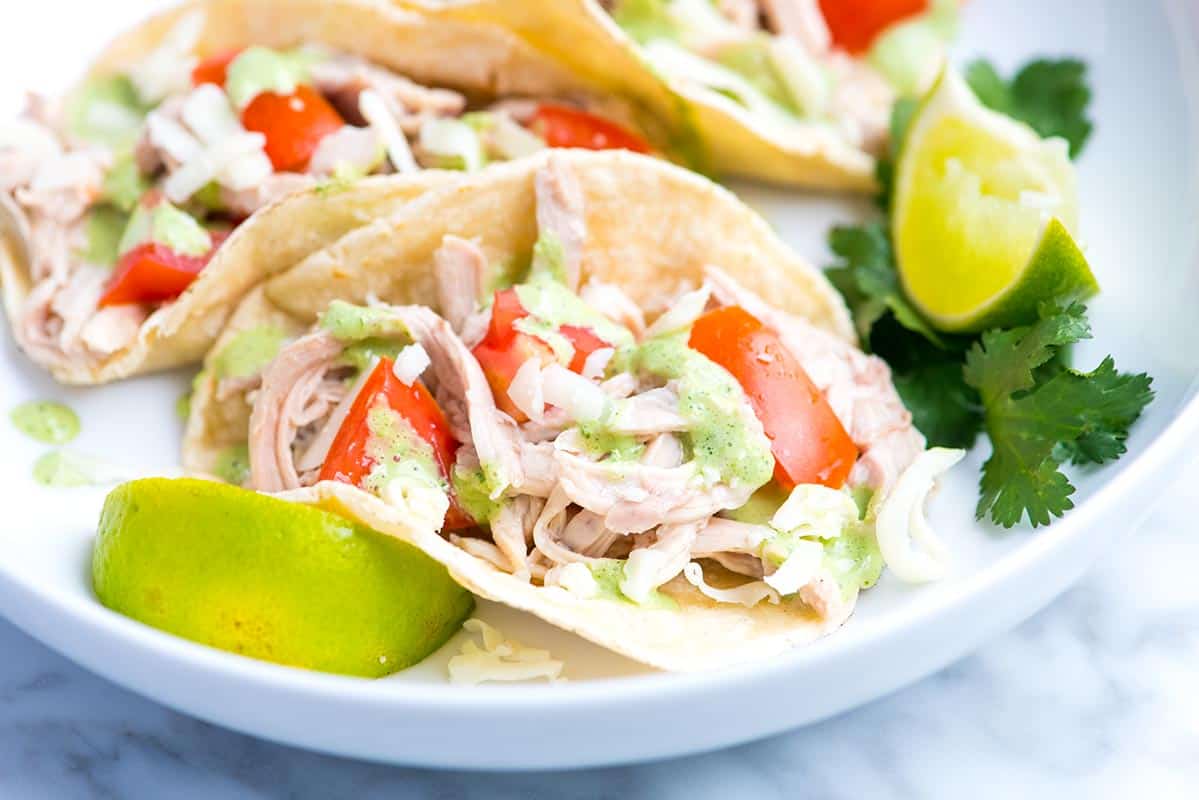
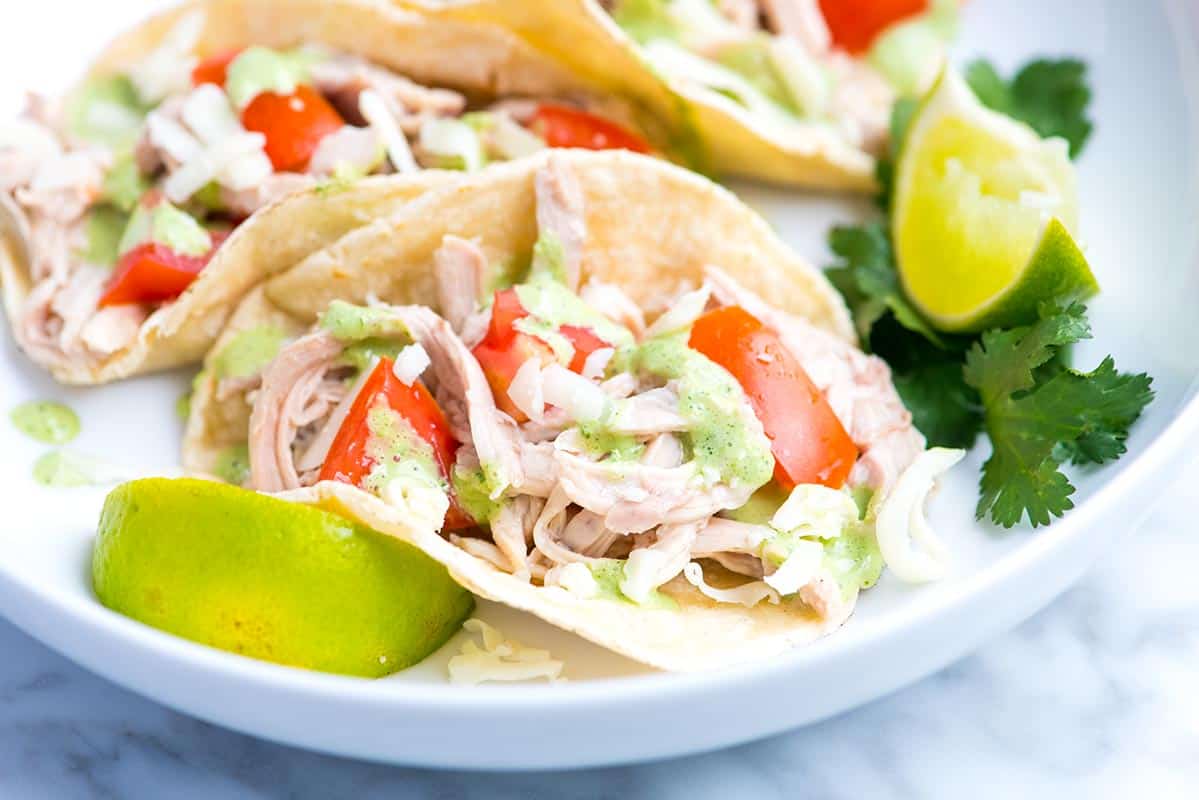
    Shredded Chicken Tacos

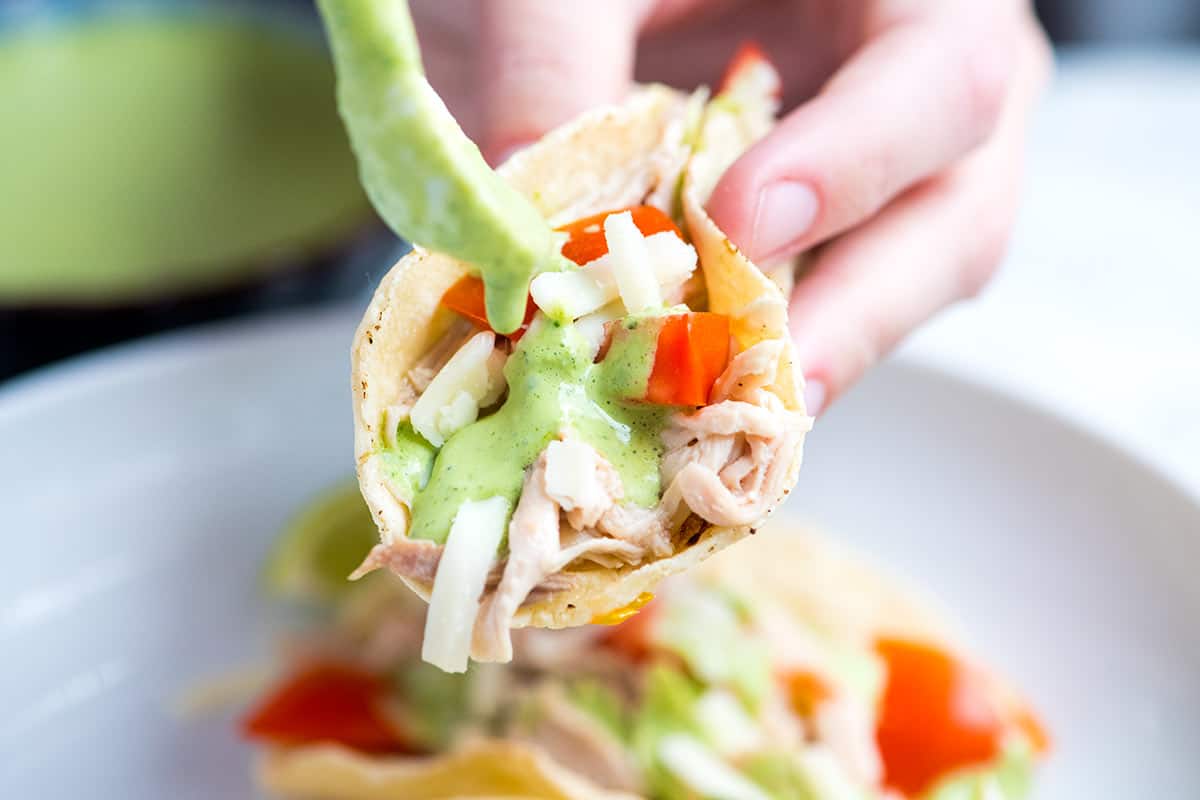
    They’re a mash-up of two of our most-loved recipes on Inspired Taste: our tender shredded chicken and the creamy cilantro sauce from our veggie tacos. The combination makes every bite fresh, zesty, and absolutely delicious.

    These tacos come together fast, making them ideal for busy nights. You can even prepare the chicken and sauce in advance, so dinner practically makes itself. For more like this, see our shredded chicken nachos.

    Key Ingredients

    • Chicken: Make chicken for this, use leftover chicken, or use a rotisserie chicken. I love making the chicken by gently simmering chicken thighs or breasts with onion, garlic, bay leaf, cumin, salt, and pepper until they are tender and shreddable. You can do this on the stove, like in our stovetop shredded chicken, or in a slow cooker using our crockpot shredded chicken recipe.
    • Creamy Cilantro Sauce: I love drizzling our creamy cilantro lime sauce over the tacos, which I make with sour cream, lime juice, jalapeño, and cilantro. You can always substitute your favorite store-bought sauce or dressing, but it really does add a lot to the flavor of these tacos. I also use it for these veggie tacos. For more of a cilantro ranch, try this cilantro lime dressing, which I use for our taco salad.
    • Tortillas: Use your favorite tortillas. Corn or flour both work great. When I have the time, I love making my own using our recipes for soft flour tortillas or corn tortillas.
    • Extras: Finish your tacos with your favorite toppings. I love adding extra cilantro, chopped tomato, and crumbled queso fresco. You can also top them with guacamole, pico de gallo, or quick pickled onions for even more flavor.

    Find the full recipe with measurements below.

    How to Make Shredded Chicken Tacos

    Tip 1: The best chicken for tacos. When making shredded chicken for tacos, I love using one of the recipes below. Since the chicken gently cooks in flavorful cooking liquid, it turns out incredibly tender and juicy. Depending on your day, you can choose the quicker stovetop version or the slow cooker option.

    Tip 2: Seasoning the chicken. If you use one of the recipes above, the chicken will already be quite flavorful. For even more flavor, consider tossing it with red enchilada sauce or green enchilada sauce. You can buy them (I love Hatch), or make them with one of our recipes:

    Tip 3: Make-ahead tips. This is one of those dishes I rely on during busy weeks, as it is incredibly easy to meal prep. The cooked chicken will keep in the fridge for up to 3 days and in the freezer for up to a month. The sauce will keep in the refrigerator for about a week.

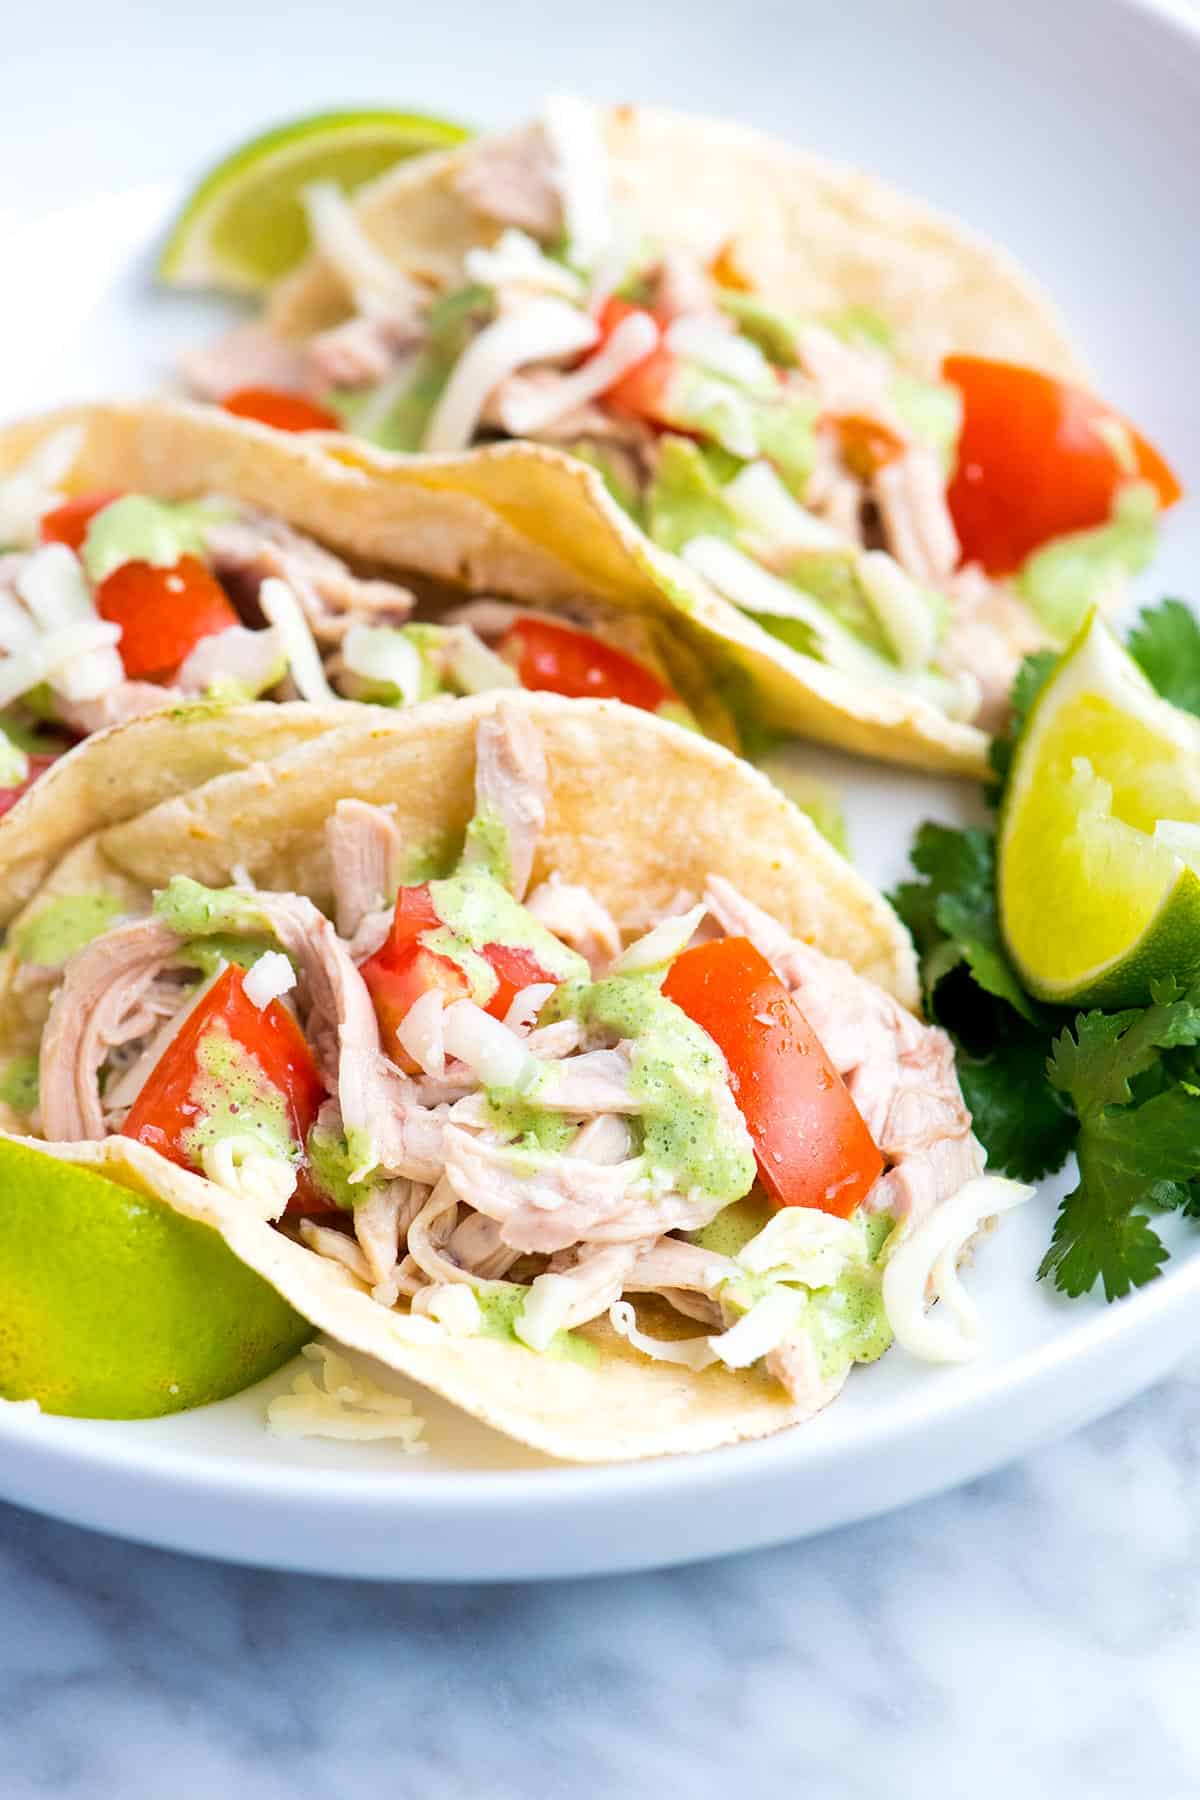
    Spooning Cilantro Sauce over Shredded Chicken Tacos

    Serving Suggestions

    I’m happy with just tacos on my plate, but if you’d like to add a few more dishes, consider serving these alongside homemade refried beans and Mexican rice, or try this yellow saffron rice. A bowl of tortilla chips and homemade salsa or queso always goes down well, too!

    These easy shredded chicken tacos are full of flavor thanks to well seasoned chicken and a bright and creamy cilantro sauce.

    Easy Shredded Chicken Tacos

    • PREP
    • COOK
    • TOTAL

    These chicken tacos has been a lifesaver for my family. They are quick, delicious, and you can build your tacos however you want. I highly recommend the cilantro sauce, but feel free to customize your tacos with your favorite toppings.

    4 Servings

    You Will Need

    Chicken Tacos

    1 ½ pounds boneless chicken thighs or chicken breasts

    1 medium onion, peeled and sliced

    4 cloves garlic, peeled and lightly crushed

    1 bay leaf

    1 ½ teaspoons ground cumin

    1 teaspoon salt

    1/2 teaspoon ground black pepper

    12 corn tortillas or flour tortillas

    1 medium tomato, chopped

    Cheese such as queso fresco for serving

    1 lime, cut into wedges


    Creamy Cilantro Sauce

    ½ cup sour cream

    2 tablespoons fresh lime juice

    ½ jalapeño, seeds and membrane removed

    ½ cup packed cilantro leaves and tender stems

    Salt to taste

    Directions

      1Cook the chicken: Combine chicken, onion, garlic, bay leaf, salt, cumin, and pepper in a large heavy-bottomed saucepan. Add just enough water to cover the chicken. Turn heat to high, bring to a boil, then remove any foam or scum that floats to the top.

      2Adjust the heat so that the water simmers very gently around the chicken. Cook until chicken is very tender, about 30 minutes. Transfer chicken to a cutting board, and then when it is cool enough to handle, use two forks or your fingers to shred the meat.

      3Reduce cooking liquid: After removing the chicken, boil the remaining liquid in the saucepan until it has reduced by one-third or until its flavor has concentrated. Spoon about 1 cup of the concentrated cooking liquid over the shredded chicken and toss to coat. Use within 2 to 3 days or freeze.

      4Make the sauce: Add sour cream, lime juice, jalapeño, cilantro, and a pinch of salt to a blender. Blend until smooth. Taste, then add more lime juice or salt if needed. Refrigerate for up to a week.

      5Warm tortillas: Wrap tortillas in two stacks with aluminum foil. Place into the oven for 10 to 15 minutes or until warm.

      6Make tacos: Fill each warmed tortilla with chicken and tomatoes. Top with cheese and a drizzle of the cilantro sauce. Serve with extra sauce and lime wedges on the side.

    Adam and Joanne’s Tips

    • Make-ahead tips: The shredded chicken will keep in the fridge for up to 3 days and in the freezer for up to a month. The sauce will keep in the refrigerator for about a week.
    • Double batch of chicken: To make a double batch, increase the chicken to 3 pounds then add more water to the pot. The onion, garlic, and spices do not need to change.
    • Skin-on chicken: We have made this recipe using boneless, skinless chicken thighs and chicken thighs with skin still attached. Both work very well. If you use chicken with skin, just remove and discard the skin before you shred the chicken. You may also find that you need to skim some of the fat from the cooking broth before spooning it over the chicken.
    • Leftover cooking liquid: You will have cooking liquid leftover. It is quite delicious on its own as a light soup. You can also use it as broth for other recipes. Or, if you’re keeping the chicken more than a day, add a spoonful or two to add a little moisture.
    • Slow cooker shredded chicken: add all the ingredients to the slow cooker then cook on LOW until the chicken is cooked and tender, 3 to 4 hours. Shred the chicken and transfer the broth to a saucepan. Simmer the broth until reduced by a third then spoon over the chicken.
    • The nutrition facts provided below are estimates.

    Nutrition Per Serving
    Serving Size
    3 small tacos
    /
    Calories
    313
    /
    Protein
    23g
    /
    Carbohydrate
    22g
    /
    Dietary Fiber
    3g
    /
    Total Sugars
    4g
    /
    Total Fat
    15g
    /
    Saturated Fat
    6g
    /
    Cholesterol
    121mg
    /
    Sodium
    801mg


    AUTHOR:

    Joanne Gallagher

    Adam and Joanne of Inspired Taste

    We are Adam and Joanne Gallagher, the creators of Inspired Taste. Established in 2009, Inspired Taste grew from a childhood dream into one of the internet’s most trusted recipe sites with hundreds of reliable recipes, step-by-step videos, and expert tips.More About Us

    Source link

  • Easy Homemade Breadcrumbs Recipe

    Easy Homemade Breadcrumbs Recipe

    Making homemade breadcrumbs is easy! We love using these bread crumbs for meatballs, meatloaf, breaded chicken, and so much more!

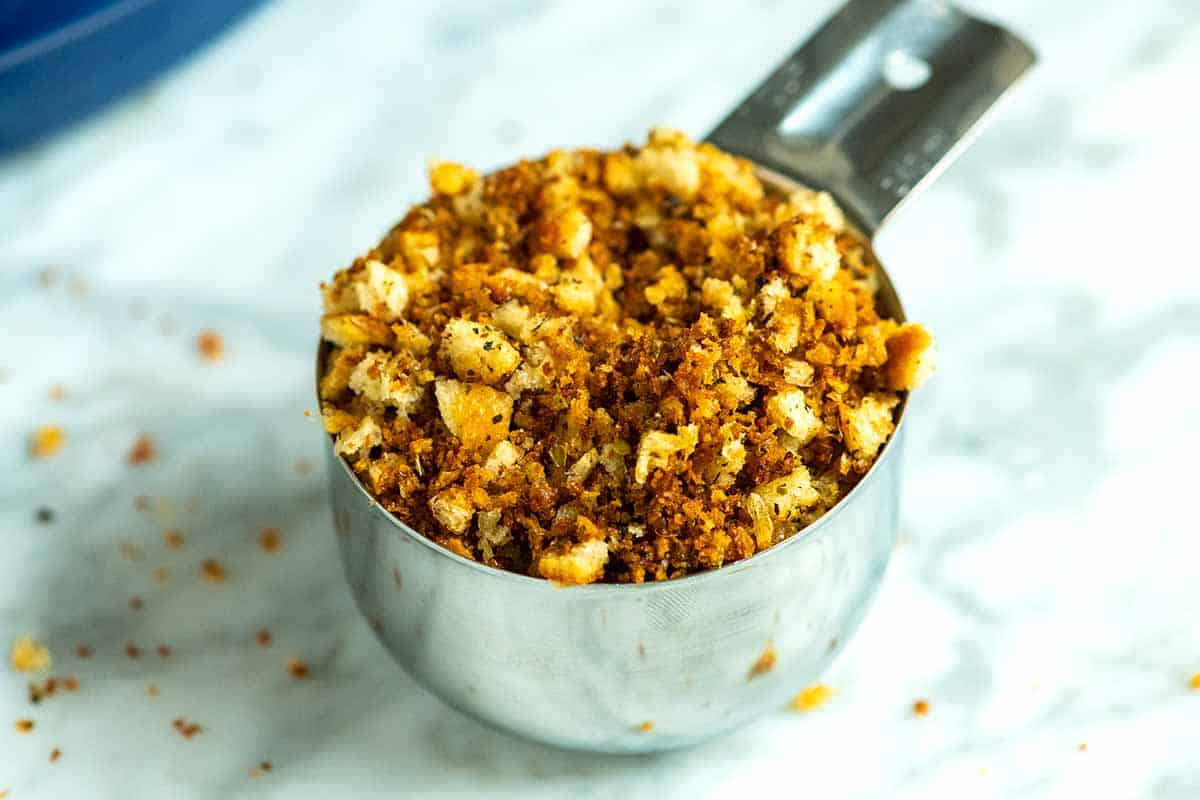
    Homemade Breadcrumbs

    While you can easily find breadcrumbs at the grocery store, I’ve recently discovered the joy of making my own. You can use almost any bread you have lying around. Better yet, stale bread or the harder end of a bread loaf are ideal.

    Another benefit is that you have complete control over the texture. You can make them as fine or coarse as you like. Another option is to make homemade croutons and smash them into bits.

    How to Make Homemade Breadcrumbs

    Tip 1: Use a food processor. I love using my food processor or blender to make bread crumbs (for smaller batches you can also use a spice grinder). Slice or cube your bread into small pieces, and then pulse until the bread breaks down into your desired size. Depending on how much bread you have and how powerful your food processor or blender is, you might need to do this in batches.

    Making bread crumbs using a food processor

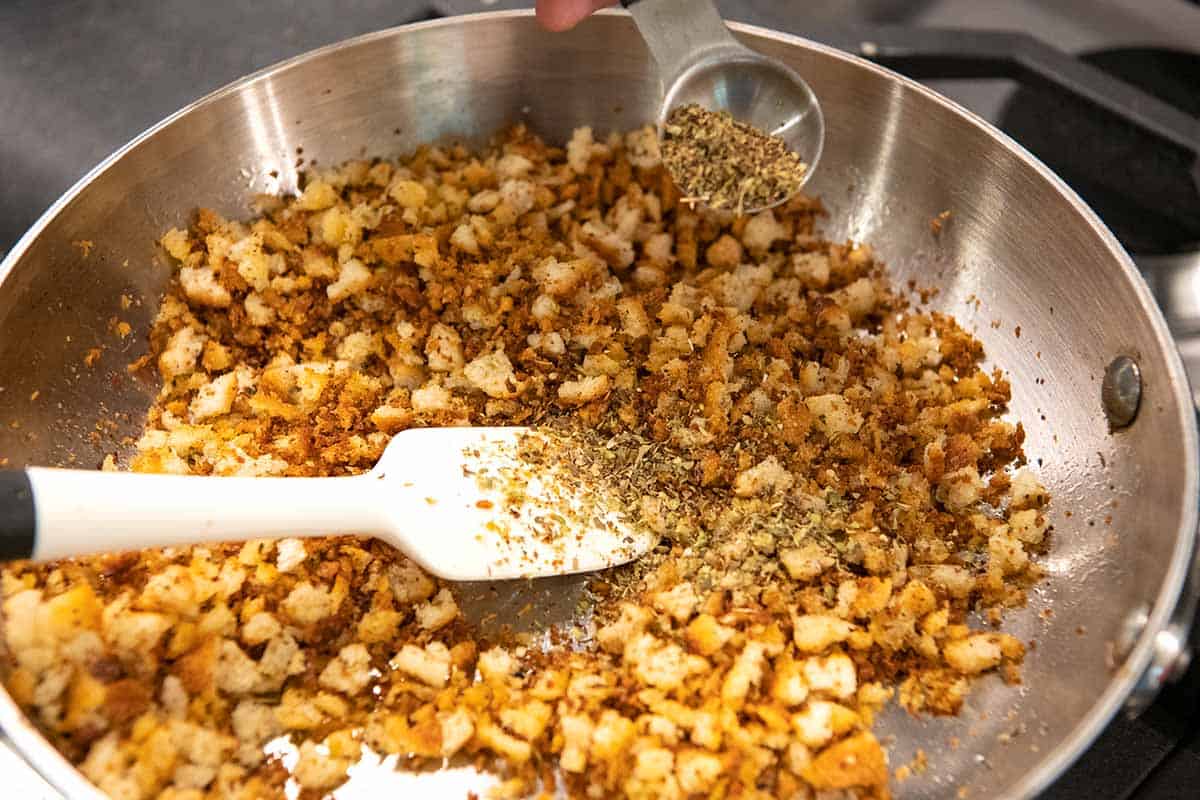
    Tip 2: Toasting your breadcrumbs. Depending on what you plan to do with them, you can make fresh bread crumbs or toast them in a skillet until golden and crisp. To toast my breadcrumbs, I stir them with olive oil or butter and seasonings over medium heat until they are golden and crisp (I’ve included tips for Italian breadcrumbs below in the recipe).

    I love the oil (or butter) and spices, but you can skip them and toast the breadcrumbs in a dry pan for plain breadcrumbs.

    Toasting bread crumbs in a skillet with spices.

    Ways to Use Breadcrumbs

    Use homemade bread crumbs anytime you would have used store-bought. Some of my favorites ways to use them, include our popular turkey meatloaf, our easy chicken parmesan, and my favorite stuffed mushrooms.

    If you are making them for a specific recipe, you can dial in the texture. For example, I prefer finer breadcrumbs in our recipes for meatballs and meatloaf, but I like them coarser when using them as a crunchy salad topping.

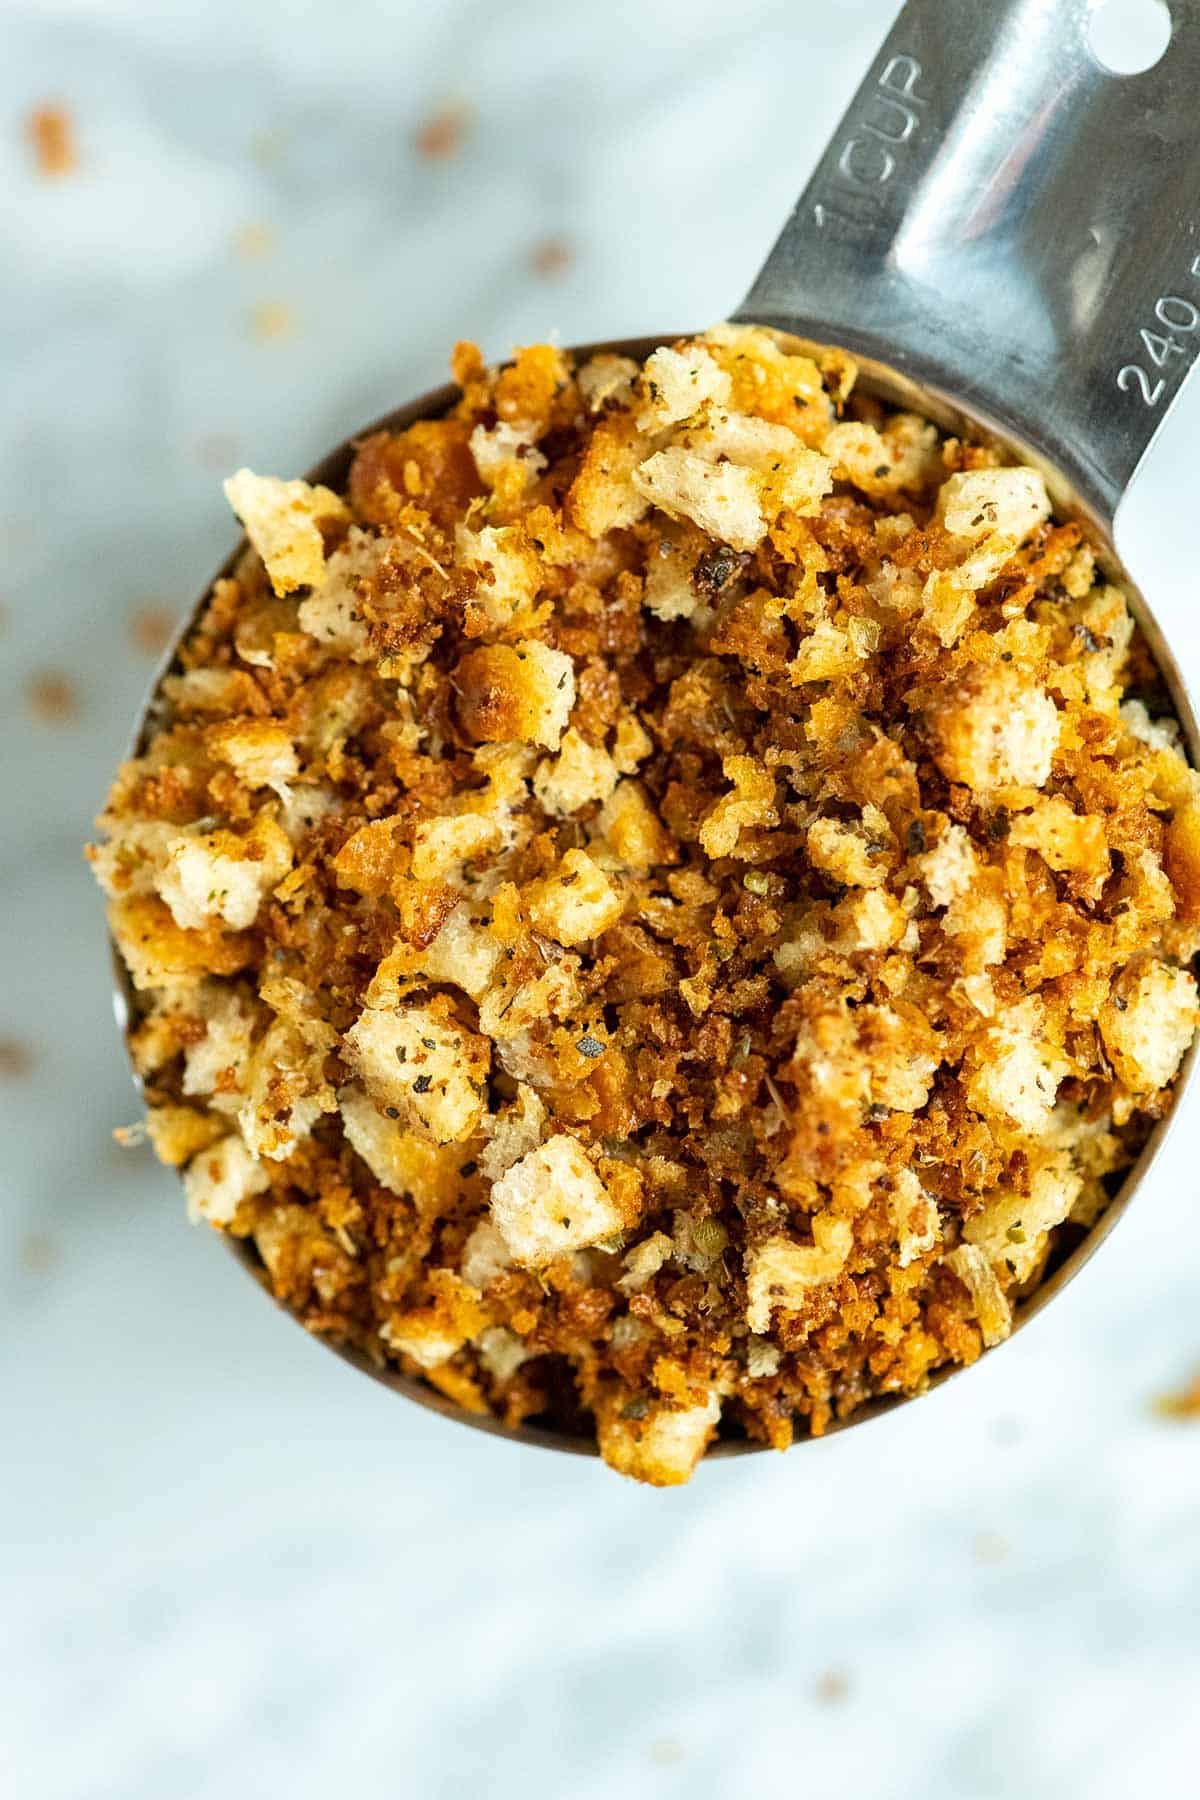
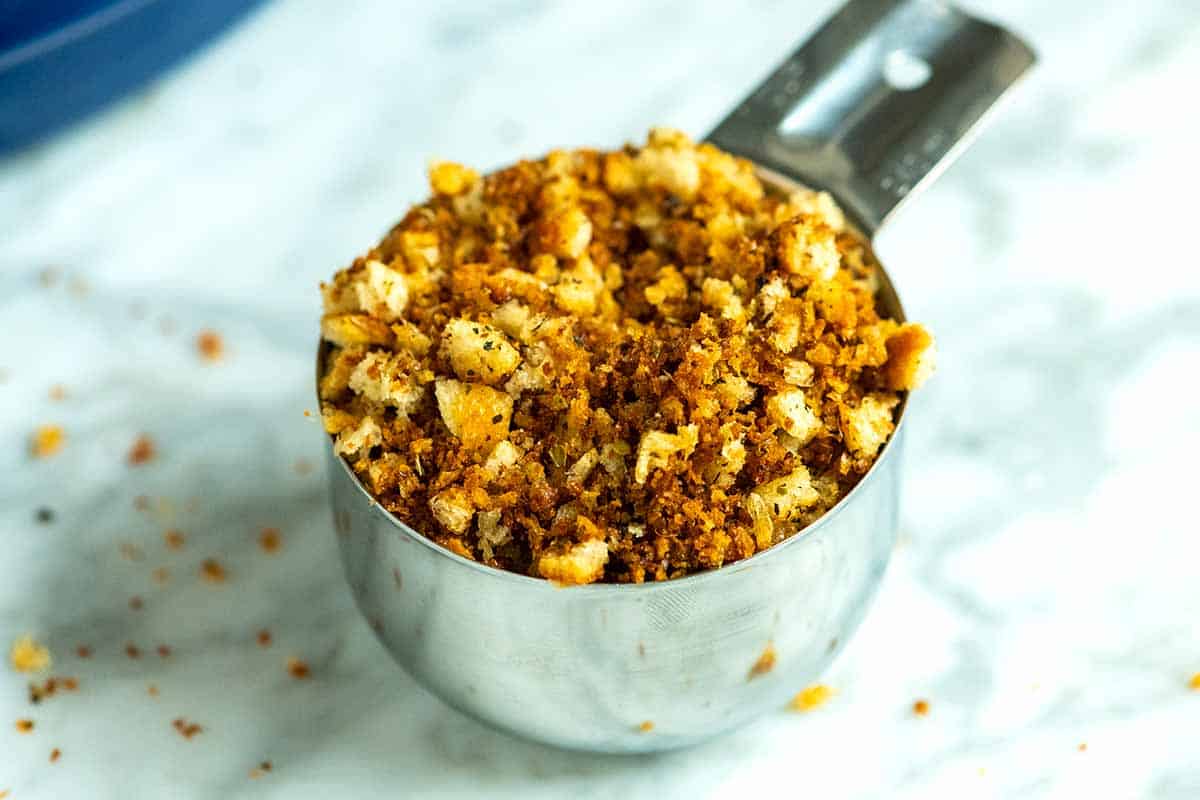
    Homemade breadcrumbs

    Easy Homemade Breadcrumbs

    • PREP
    • COOK
    • TOTAL

    Breadcrumbs are easy to make at home and can be spiced up any way you like. Remember that you can control how fine or coarse the crumbs are. When making them for meatballs, we want them a bit finer. If we make breadcrumbs for a crunchy topping, we keep them more rustic and coarse. For Italian breadcrumbs, use Italian seasoning when toasting the breadcrumbs.

    Makes 1 cup

    You Will Need

    2 to 3 cups cubed bread (about 2 ounces)

    2 tablespoons olive oil or melted butter

    1/4 teaspoon fine sea salt

    1/4 teaspoon fresh ground black pepper

    2 to 3 teaspoons Italian seasoning or dried herbs, optional

    Directions

      1Cut the bread into small pieces. (The smaller the pieces, the easier for your device to break them down.)

      2Add the bread pieces to your food processor or blender and pulse until they break down into your desired size of breadcrumbs.

      3For toasted breadcrumbs, add breadcrumbs, olive oil, salt, pepper, and dried herbs to a wide skillet over medium heat. Cook, stirring often, until they are golden and crisp, about 5 minutes.

      4Alternatively, heat the oven to 300°F. Toss the breadcrumbs with the olive oil, salt, pepper, and dried herbs. Add the mixture to a rimmed baking sheet and spread it into an even layer. Bake for 5 minutes, stir, and then bake another 3 to 5 minutes or until the breadcrumbs are golden and crisp.

    Adam and Joanne’s Tips

    • Storing: Cool and store the breadcrumbs in an airtight container. They can be kept at room temperature for a few days or in the freezer for up to a month. If they soften a little, throw them into a hot skillet for a few minutes to crisp them up.
    • Fresh vs. toasted: Depending on what you plan to do with them, you can leave bread crumbs fresh (an excellent option for meatballs or meatloaf) or toast them in a skillet or bake in the oven until golden and crisp.
    • Do you need to cut off the crust? This is up to you, but we never cut off the crusts when making bread crumbs. I love the different colors and textures you achieve when using the middle and the bread crusts.
    • No food processor or blender: If your bread is hard and stale, add it to a bag and beat it into submission with something heavy like a rolling pin, heavy pan, or mallet. This method doesn’t work well for softer, fresh bread, so if that’s all you have, consider baking the bread to dry it out, just like we do when making homemade croutons.
    • The nutrition facts provided below are estimates.

    Nutrition Per Serving
    Serving Size
    1/4 cup
    /
    Calories
    137
    /
    Total Fat
    8 g
    /
    Saturated Fat
    1.2g
    /
    Cholesterol
    0mg
    /
    Sodium
    287.4mg
    /
    Carbohydrate
    14.3g
    /
    Dietary Fiber
    0.8g
    /
    Total Sugars
    1.6g
    /
    Protein
    2.6g


    AUTHOR:

    Joanne Gallagher

    Adam and Joanne of Inspired Taste

    We are Adam and Joanne Gallagher, the creators of Inspired Taste. Established in 2009, Inspired Taste grew from a childhood dream into one of the internet’s most trusted recipe sites with hundreds of reliable recipes, step-by-step videos, and expert tips.More About Us

    Source link

  • Seriously Good 7 Layer Dip Recipe

    Seriously Good 7 Layer Dip Recipe

    I’m planting my flag and declaring this the ultimate 7 layer dip recipe. Arguably the best party appetizer you can serve.

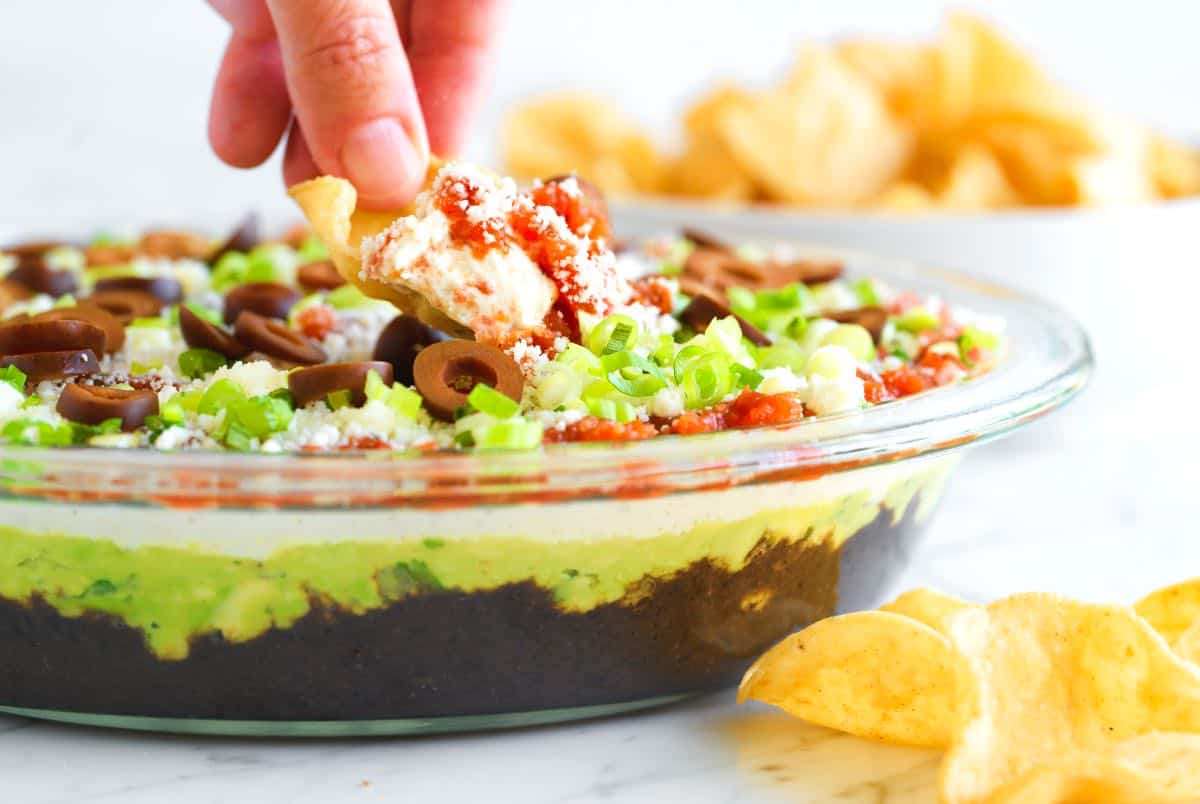
    7 Layer Dip

    What makes this recipe so delicious is the homemade black bean puree, which we make from scratch. By cooking our own beans, we pack in so much flavor from fresh garlic, onion, and spices. It’s an easy step that makes all the difference in the world. Once you try seven layer dip made with this puree, I know you’ll never go back.

    This is truly the ultimate 7 layer bean dip recipe. Every layer has been carefully considered and seasoned to perfection. For more of our favorite dip recipes like this one, be sure to check out our cheesy bean dip, homemade guacamole, and my favorite black bean dip. Get the tortilla chips ready!

    Key Ingredients

    • Black Bean Puree: So this is the star of our recipe. You’ll start with dry black beans and cook them with lots of garlic, onion, chili powder, cumin, oregano, smoked paprika, chicken broth (or veggie broth), and salt. You can use a pot and stove or an Instant Pot. Instructions for both methods are provided in the recipe. They are very similar to our homemade refried beans, but require a few less steps. Don’t let the from scratch beans scare you off. They really do make the best 7 layer bean dip. That said, I’ve shared tips for using canned below the recipe.
    • Avocado Mash: Pretty similar to our favorite guacamole, we mash ripe avocados with a bit of lime juice, salt, and cilantro. Simple and so good in this dip!
    • Spiced Sour Cream: We mix the sour cream with a bit of chili powder, cumin, and salt. This not only adds flavor but also creates a barrier to keep the avocado from browning.
    • Salsa: Use what you love! Just be sure to choose a thicker salsa and strain it in a fine mesh strainer to remove any excess liquid. This keeps the dip from becoming watery. If you’re up for homemade, I love this easy salsa or this roasted tomato salsa.
    • Cheese: Instead of the shredded cheeses you often see, we use briny, crumbly queso fresco or cotija cheese. It adds a more interesting flavor to the dip.
    • Green Onion and Black Olives: We finish the dip with these two classic toppings. Green onion adds a fresh bite, and the black olives are a great final touch. If you’re not a fan of olives, feel free to skip them!

    Find the full recipe with measurements below.

    Tips for Making the Best 7 Layer Dip

    This dip is hard to resist (really, I caught Adam sneaking into the fridge more times than I can remember to steal a bite!). It combines seven glorious layers of all my favorite things. Here’s my best tips for making it:

    Tip 1: Don’t skip the homemade beans. If you were to do a taste test of canned refried beans and compare it to our homemade black bean puree, there would be no contest. The flavor of our homemade beans is what makes this dip so good. The good news is that you can cook them in an Instant Pot for about an hour or on the stove for 1 ½ hours. Either way, they’re pretty hands-off, and you can make them up to four days ahead of time.

    How to Make 7 Layer Dip: Homemade black bean puree

    Tip 2: Drain your salsa. This is the number one thing you can do to prevent a soggy dip. A watery salsa will make your dip a mess, so be sure to drain it in a fine mesh strainer before adding it as a layer.

    Tip 3: Serve it in a clear dish. This dip looks as good as it tastes! Serving it in a glass dish, like a 9×13-inch Pyrex, is a great way to showcase all the colorful layers.

    7 Layer Dip

    Seriously Good 7 Layer Dip

    • PREP
    • COOK
    • TOTAL

    Your friends and family will fight over this seven layer dip! The homemade black bean puree truly makes it the best with extra spices and garlic blended in. When choosing your salsa, go with something that’s on the thicker side. I love serving this with homemade tortilla chips, but any sturdy tortilla chip will do!

    12 Servings

    You Will Need

    For the Black Bean Puree

    2 cups dry black beans, about 12 ounces (340g)

    8 cloves garlic, smashed and peeled

    Half an onion, roughly chopped

    2 teaspoons ground cumin

    1 tablespoon chili powder

    1 ½ tablespoons dried oregano

    1 ½ teaspoons smoked paprika

    2 bay leaves

    4 cups low-sodium chicken broth (950ml)

    1 teaspoon fine sea salt, plus more as needed


    For the Dip

    1 batch black bean puree

    4 large avocados

    Juice of half a lime

    1/4 cup fresh cilantro leaves, finely chopped

    16 ounces sour cream, 2 cups (450g)

    3/4 teaspoon fine sea salt, for the avocado and sour cream (½ tsp for avocado and ¼ tsp for sour cream)

    1 teaspoon chili powder

    1/4 teaspoon ground cumin

    16 ounces thick salsa, 2 cups (450g)

    8 ounces queso fresco or cojita cheese, crumbled (226g)

    2 green onions, finely sliced

    1 (2.25oz) can sliced black olives, drained

    Tortilla chips, for serving

    Directions

    • Cook the Black Beans
    • 1Stovetop Method: Add all black bean puree ingredients to a large saucepan or Dutch oven. If the liquid doesn’t cover the beans by about ½ an inch, add a bit of water. Bring to a boil over medium-high heat, then reduce to a low simmer. Cook, partially covered with a lid, for 1 ½ to 2 hours, or until the beans are tender, adding more water if the mixture gets too dry. Test 4 to 5 of the beans by pressing them against the side of the pot with a fork. They should be easy to press. If not, continue to simmer until the beans are tender.

      2Instant Pot Method: Add all black bean puree ingredients to a 6-quart Instant Pot. Secure the lid, then pressure cook on high for 45 minutes. Allow the pressure to naturally release. Carefully open the lid. Test 4 to 5 of the beans by pressing them against the side of the pot with a fork. They should be easy to press. If not, use the sauté setting and simmer the beans until tender.

    • Make the Black Bean Puree
    • 1Blend the beans: Remove the bay leaves, then use an immersion blender to puree the beans until completely smooth. Taste the puree, then adjust with salt as needed. I season generously because it acts as the base of the dip.

    • Assemble the 7 Layer Dip
    • 1Layer 1: Spread the black bean puree evenly on the bottom of a 9×13-inch serving dish.

      2Layer 2: In a medium bowl, mash the avocados with the lime juice, ½ teaspoon of the salt, and the cilantro. Spread this mixture evenly over the bean puree.

      3Layer 3: In a separate bowl, stir together the sour cream, 1 teaspoon chili powder, the remaining ¼ teaspoon of salt, and the ground cumin. Carefully spread this mixture over the avocado layer to prevent browning.

      4Layer 4: Strain the salsa in a fine mesh strainer to remove excess liquid, then spread it evenly over the sour cream.

      5Layer 5: Sprinkle the crumbled cheese evenly over the salsa.

      6Layer 6: Scatter the sliced green onions over the cheese.

      7Layer 7: Top the dip with the drained black olives.

      8Serving: Serve the dip immediately with tortilla chips, or cover and refrigerate until you’re ready to serve.

    Adam and Joanne’s Tips

    • Storing: This dip is best when served the day you make it, as the layers (especially the avocado layer) are the most distinct and the ingredients are at their freshest. However, you can tightly cover it and keep it in the refrigerator for 3 to 4 days. Keep in mind that as it sits, the layers may “bleed” into each other, and some watery liquid may pool at the bottom. When ready to serve, drain off any pooled liquid or dab it with a paper towel.
    • Make ahead: You can cook and blend the black beans up to 5 days in advance, just keep in mind that this will affect the storage time shared above.
    • Batch size: The recipe above works really well in a standard 9×13-inch baking dish. If you have a clear, glass baking dish, use it. It’s fun to see each layer through the sides. If you’d like to make a smaller batch, make half of the recipe (using a smaller saucepan to cook the beans if cooking on the stove). Then, use a pie dish or a 9-inch square dish for serving.
    • Substituting the homemade bean puree: I highly recommend the bean puree above as it is so nicely spiced and seasoned well for this recipe. That said, you can substitute store-bought or homemade refried beans. You will need about 6 cups.
    • For a vegetarian version: Use vegetable broth for cooking the beans and make sure that your cheese is vegetarian-friendly.
    • The nutrition facts provided are estimates.

    Nutrition Per Serving
    Serving Size
    1/12 of the pan
    /
    Calories
    339
    /
    Total Fat
    18.6g
    /
    Saturated Fat
    7.1g
    /
    Cholesterol
    26.4mg
    /
    Sodium
    775.5mg
    /
    Carbohydrate
    31.1g
    /
    Dietary Fiber
    9.6g
    /
    Total Sugars
    4.2g
    /
    Protein
    15.2g


    AUTHOR:

    Joanne Gallagher

    Adam and Joanne of Inspired Taste

    We are Adam and Joanne Gallagher, the creators of Inspired Taste. Established in 2009, Inspired Taste grew from a childhood dream into one of the internet’s most trusted recipe sites with hundreds of reliable recipes, step-by-step videos, and expert tips.More About Us

    Source link

  • Perfect Steamed Mussels Recipe

    Perfect Steamed Mussels Recipe

    This incredible steamed mussels recipe is my favorite way to cook mussels! We cook them in a flavorful broth made with white wine and garlic. It is easy, quick, and delicious.

    Steamed Mussels Recipe Video

    I love making steamed mussels in white wine at home. I prefer the mussels I’ve made at home to those I’ve ordered at restaurants. As the mussels steam, the broth gets trapped inside the shells.

    It’s divine, plus the leftover broth is fantastic for soaking up with a good loaf of bread.

    Key Ingredients

    • Mussels: I use fresh mussels in this recipe. Buy them from a trusted seafood counter. The nice thing about mussels is their price. Even at a gourmet or pricy store, they cost $7 to $8 a pound. Cleaning and storing tips for mussels are below.
    • White wine and broth: Mussels and white wine are a classic combination. Use a dry white wine like Pinot Grigio, Sauvignon Blanc, or unoaked chardonnay. In addition to the white wine, we add a splash of broth. I use chicken broth, but vegetable or seafood stock works, too.
    • Shallot and garlic: We want lots of cooked shallot and garlic. As the mussels cook, the shallot and garlic fall into the shells.
    • Cream: It is optional, but I always add a splash. It mellows out the broth and makes it more luxurious.
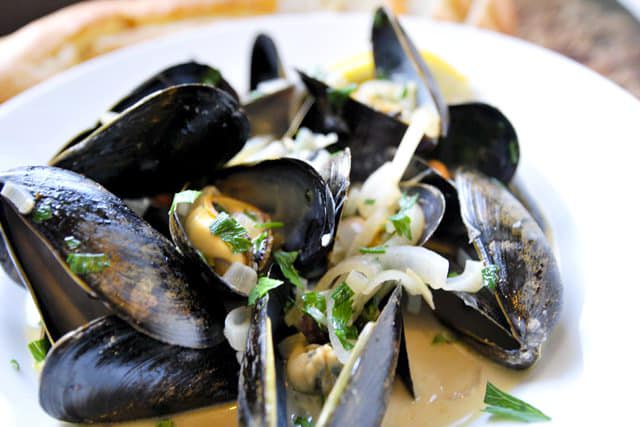
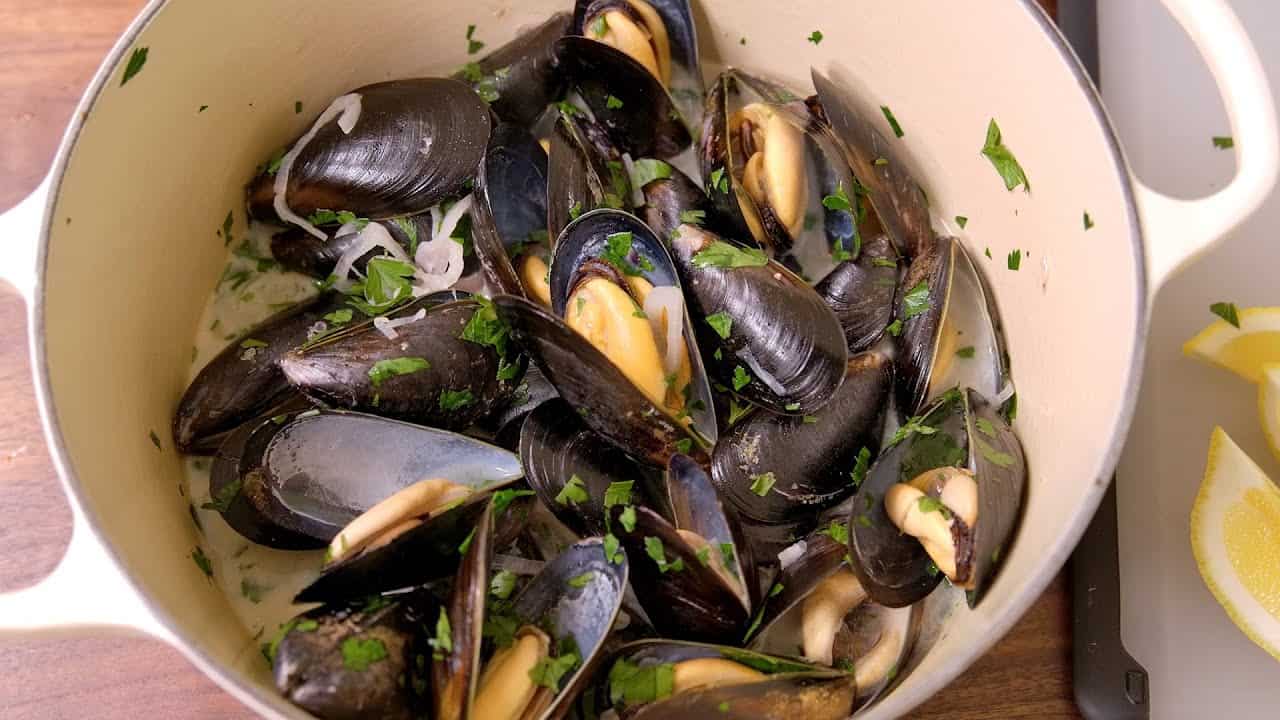
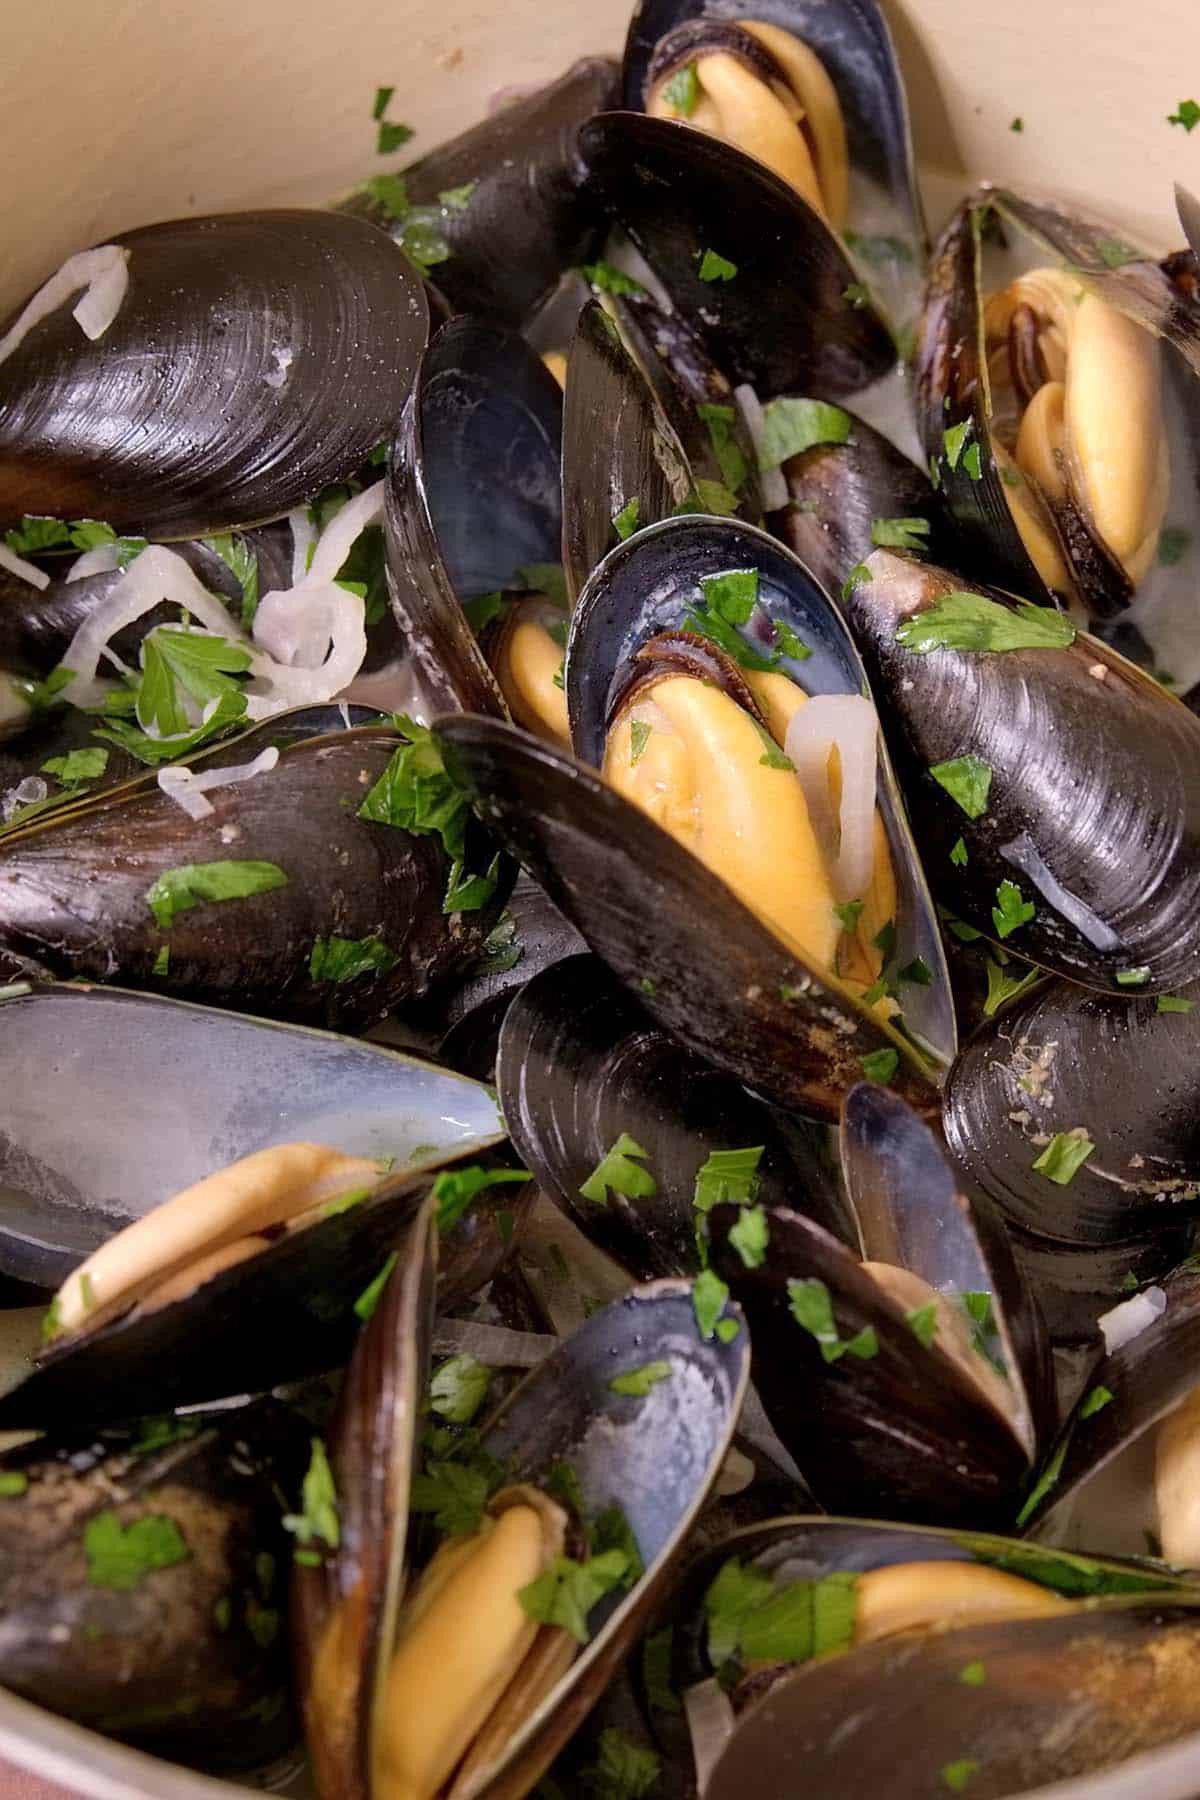
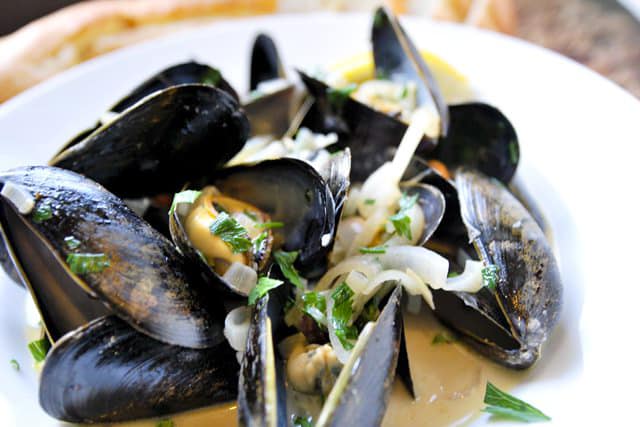
    Steamed Mussels with shallots, garlic, parsley and a white wine broth

    How to Prepare Mussels for Cooking

    Remember that mussels are alive when you buy them. When stored properly, live mussels will last 2 to 3 days in the refrigerator (sometimes longer). Do not store live mussels in water. When you get home from the store, remove them from any ice and airtight bags (the mesh bags are okay). Store the mussels in a colander set over a large bowl. Cover the colander with damp dish towels. Check on the mussels daily (or more often, if possible). Do not let the mussels sit in water, and keep the dishtowel damp so they do not dry out.

    Look through your mussels. If you find any cracked or chipped shells, discard them. If any mussels are open, give them a quick tap on the counter and watch if they close again. If they do not close, discard them.

    I remove the beard. Most mussels have a beard (the fibers that emerge from the shell). It’s not great to eat, so I remove it. To debeard mussels, hold a mussel in one hand using a dry towel. Then, pull the beard out and away from the mussel with your other hand. Sometimes, removing it can be tricky, but with a good wiggle, it will eventually come out.

    Clean your mussels before you cook them. Use a firm brush to remove extra sand and the odd barnacle. Then, rinse the cleaned mussels under cold water.

    How to Steam Mussels

    This steamed mussels recipe is easy and quick to prepare. Start by cooking shallots and garlic in butter, then add white wine and a bit of broth. Stir in the mussels, cover the pot, and let them steam.

    You know the mussels are cooked when most of the shells are open. It takes 6 to 10 minutes. If you notice any that have not opened, discard them. To finish, I take the pot off the heat, then stir in a splash of cream and parsley, and squeeze over a little fresh lemon juice. So easy and so delicious.

    Make sure that you have some crusty bread to soak up all the wonderful white wine broth.

    Steamed Mussels in White Wine Broth

    Perfect Steamed Mussels

    • PREP
    • COOK
    • TOTAL

    Shallots, garlic, and white wine make the perfect broth for steamed mussels. Serve the mussels in a big bowl with bread on the side so you can sop up all that delicious broth. The article above has tips on storing live mussels and cleaning them.

    Makes 2 Servings

    Watch Us Make the Recipe

    You Will Need

    2 pounds mussels, cleaned

    1 tablespoon butter

    2 small shallots, thinly sliced

    2 garlic cloves, finely chopped

    1 cup (236ml) low-sodium chicken stock

    1/2 cup (118ml) dry white wine

    Splash heavy cream

    1/4 cup roughly chopped fresh parsley

    Salt and fresh ground black pepper

    Lemon wedges, for serving

    1 baguette, warmed for serving

    Directions

      1Melt butter in a large pot with a lid over medium heat. When the butter begins to bubble, stir in the shallot and garlic. Cook until softened, about 5 minutes.

      2Add the chicken stock, white wine, and mussels, then give them a good toss. Cover the pot with its lid and cook until the mussels have opened 6 to 10 minutes. If any mussels do not open, discard them.

      3Remove the pot from the heat, then stir in the cream and parsley. Taste the broth, and then adjust to taste with salt, pepper, or more cream.

      4Serve in big bowls with lemon wedges and plenty of warmed bread to sop up the broth.

    Adam and Joanne’s Tips

    • The nutrition facts provided below are estimates.

    Nutrition Per Serving
    Serving Size
    1/2 the recipe
    /
    Calories
    510
    /
    Protein
    48 g
    /
    Carbohydrate
    28 g
    /
    Dietary Fiber
    2 g
    /
    Total Sugars
    6 g
    /
    Total Fat
    17 g
    /
    Saturated Fat
    7 g
    /
    Cholesterol
    133 mg


    AUTHOR:

    Adam Gallagher

    Adam and Joanne of Inspired Taste

    We are Adam and Joanne Gallagher, the creators of Inspired Taste. Established in 2009, Inspired Taste grew from a childhood dream into one of the internet’s most trusted recipe sites with hundreds of reliable recipes, step-by-step videos, and expert tips.More About Us

    Source link

  • Herbed Shrimp Salad Recipe on Endive Spears

    Herbed Shrimp Salad Recipe on Endive Spears

    How to make shrimp salad with a dressing made of sour cream, mayonnaise and lots of fresh herbs. Jump to the Herbed Shrimp Salad Recipe on Endive Spears or read on to see our tips for making.

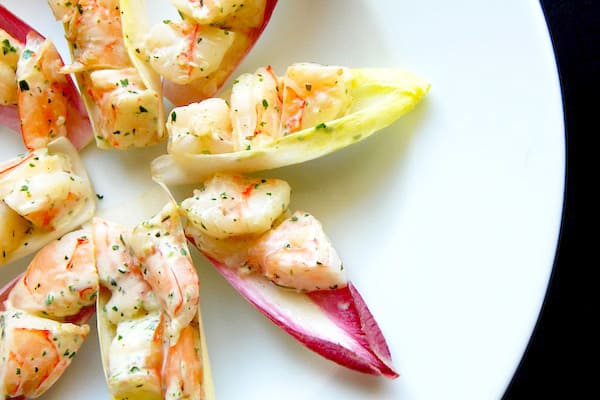
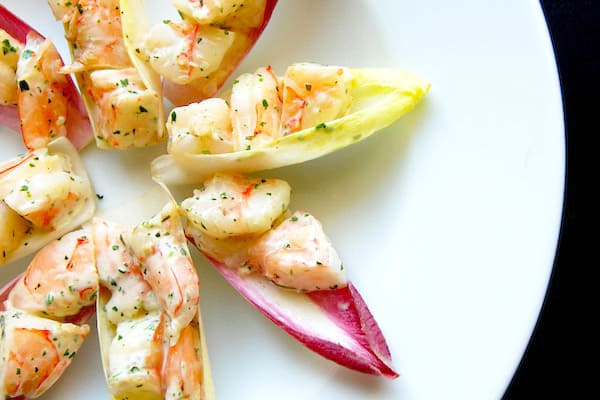
    Herbed Shrimp Salad Recipe on Endive Spears

    Let me start by saying the dressing recipe below is one you need in your life. It’s equally delicious as a veggie dip, dressing for salads or used as a dressing for chicken. We pack in lots of fresh herbs like tarragon, mint and parsley. If you’re short on one, not to worry other fresh green herbs like basil or cilantro will work nicely. The key is keeping the dressing creamy with a nice punch of fresh from the herbs and citrus.

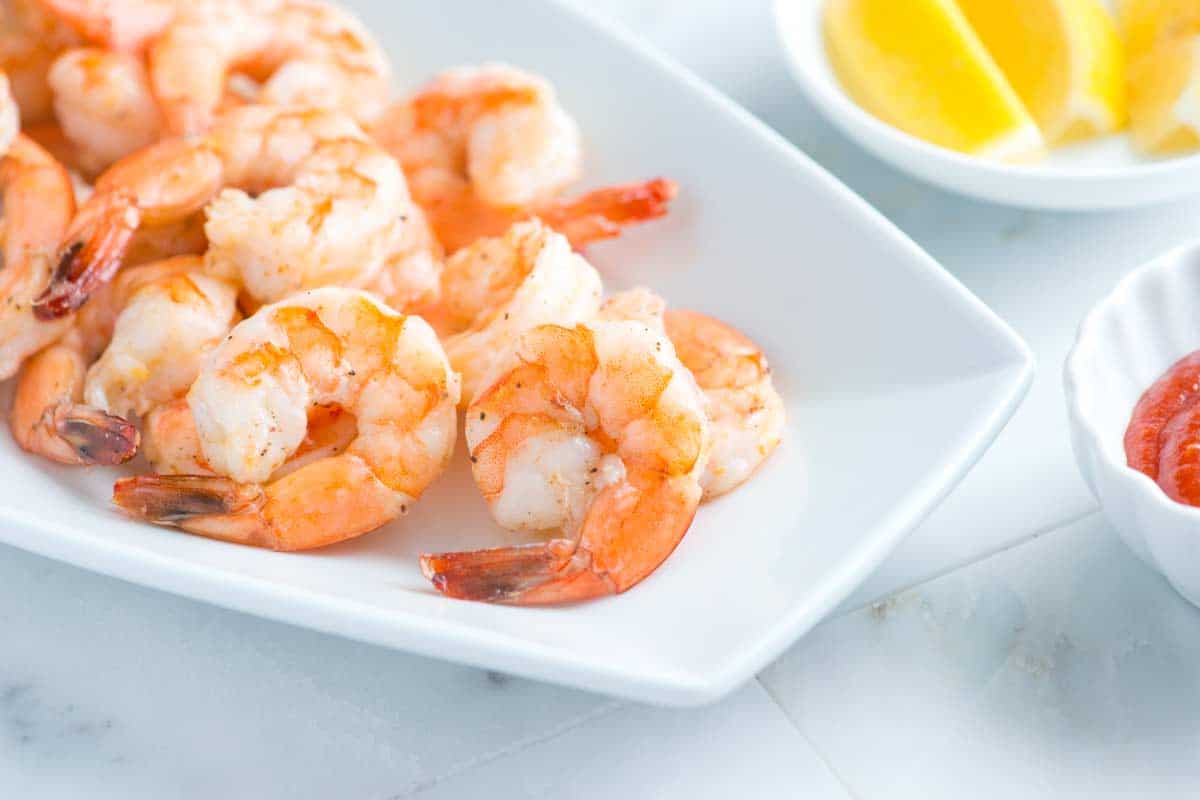
    Roasted Shrimp Cocktail RecipeYOU MAY ALSO LIKE: Forget poaching and try this easy roasted shrimp cocktail. Instead of poaching, quickly roast shrimp in a hot oven until sweet and tender. Jump to the Easy Roasted Shrimp Cocktail Recipe.
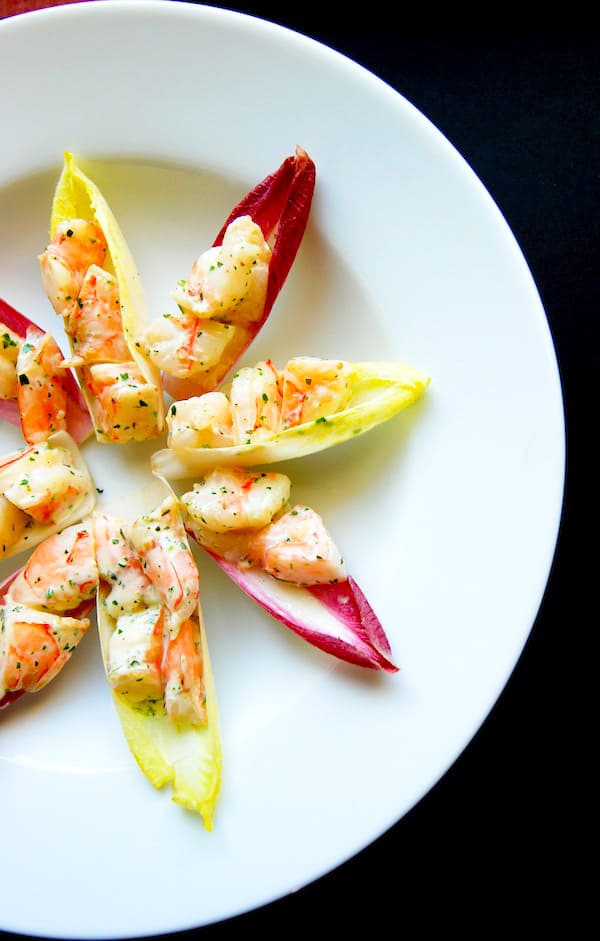
    This shrimp salad can be served alone or on just about anything. I love the look and taste of it with endive leaves. The slightly bitter and crunchy endive works nicely with the shrimp.

    Herbed Shrimp Salad Recipe on Endive Spears

    This is great for parties, but I’m kind of in love with the idea of turning these into dinner and calling them lettuce wraps. If you were to whip out a head of Boston or Bibb lettuce, sliced avocado and a few vegetables like carrot or cucumber this would be excellent as dinner.

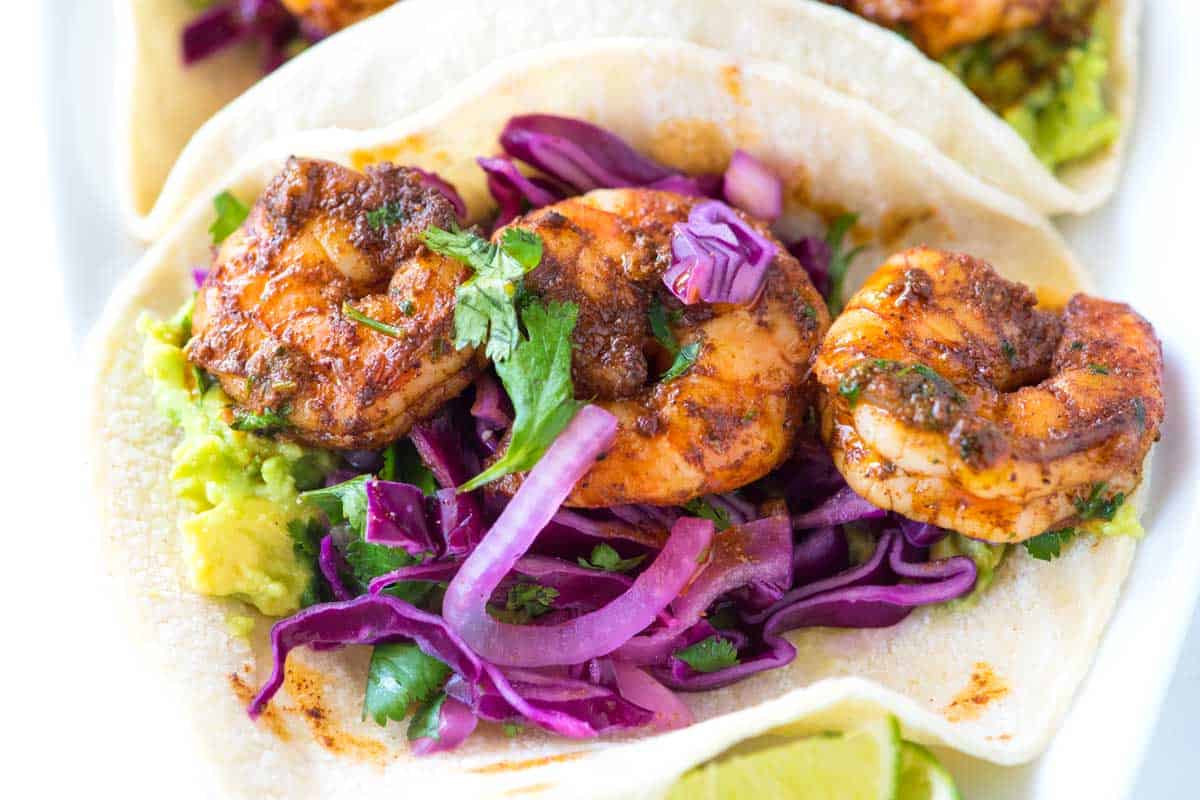
    Chile Butter Shrimp Tacos RecipeYOU MAY ALSO LIKE: Meet your new favorite shrimp taco recipe. There’s chile butter shrimp, mashed avocado and a quick and crunchy slaw. Jump to the Chile Butter Shrimp Tacos Recipe.

    Recipe updated, originally posted January 2010. Since posting this in 2010, we have tweaked the recipe to be more clear. – Adam and Joanne

    Herbed Shrimp Salad Recipe on Endive Spears

    • PREP
    • COOK
    • TOTAL

    Shrimp is excellent, but chicken, lobster and crab will all work nicely. The dressing below is versatile, too. Use it as a vegetable dip or salad dressing. You will need lime for both the shrimp and dressing. The dressing calls for lime zest, it is best to remove the zest before juicing the lime.

    Makes 4 to 6 servings

    You Will Need

    Shrimp

    1 pound shrimp, shelled and deveined

    2 tablespoons olive oil

    1/2 teaspoon sea salt

    1/8 teaspoon fresh ground black pepper

    2 tablespoons lime juice


    Salad

    1/2 cup sour cream

    2 tablespoons mayonnaise

    1 teaspoon lime zest

    1 tablespoon lime juice or more to taste

    1 tablespoon chopped tarragon leaves

    2 teaspoons chopped mint leaves

    3 tablespoons chopped parsley

    Salt and fresh ground black pepper

    3 medium-size endive, leaves pulled apart

    Directions

      1Heat oven to 400 degrees F. Line a baking sheet with aluminum foil.

      2Toss the shrimp with olive oil, salt, and the pepper. Tumble shrimp onto the baking sheet and spread into one layer. Roast the shrimp for 5 to 10 minutes until pink, firm, and cooked through. Immediately toss with lime juice.

      3Meanwhile, make the dressing. In a large bowl, stir the sour cream, mayonnaise, lime zest, lime juice, herbs, a pinch of salt and a few grinds of black pepper. Or use a food processor to blend. Taste then adjust with salt, pepper or more lime juice.

      4Chop the shrimp into bite-size chunks then add to the bowl with dressing. Toss then serve spooned onto endive leaves.

    Adam and Joanne’s Tips

    If you make this recipe, snap a photo and hashtag it #inspiredtaste — We love to see your creations on Instagram and Facebook! Find us: @inspiredtaste


    AUTHOR:

    Joanne Gallagher

    Previous Post: Pasta with Roasted Tomato Sauce, Mint and Feta
    Next Post: Brownie Pie Recipe with Sliced Almonds


    Source link