Tag: Recipe

  • Roasted Brussels Sprouts Recipe with Ham

    Roasted Brussels Sprouts Recipe with Ham

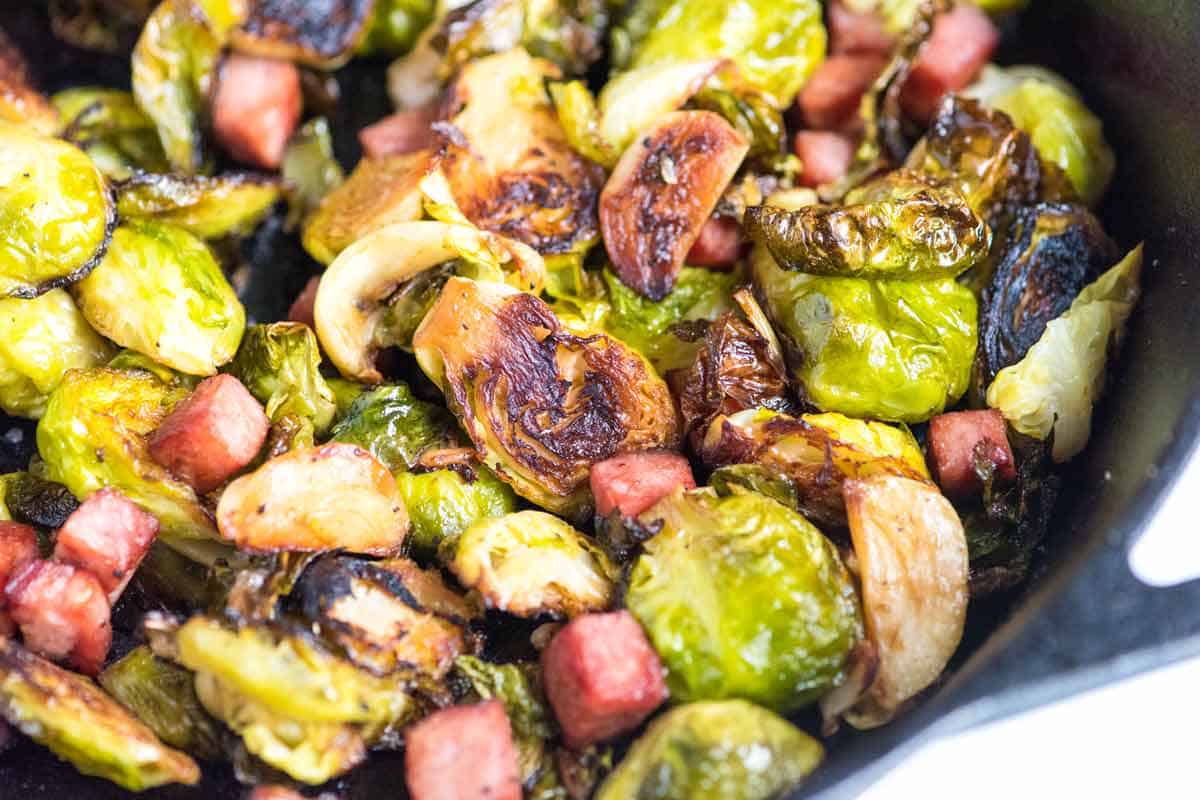
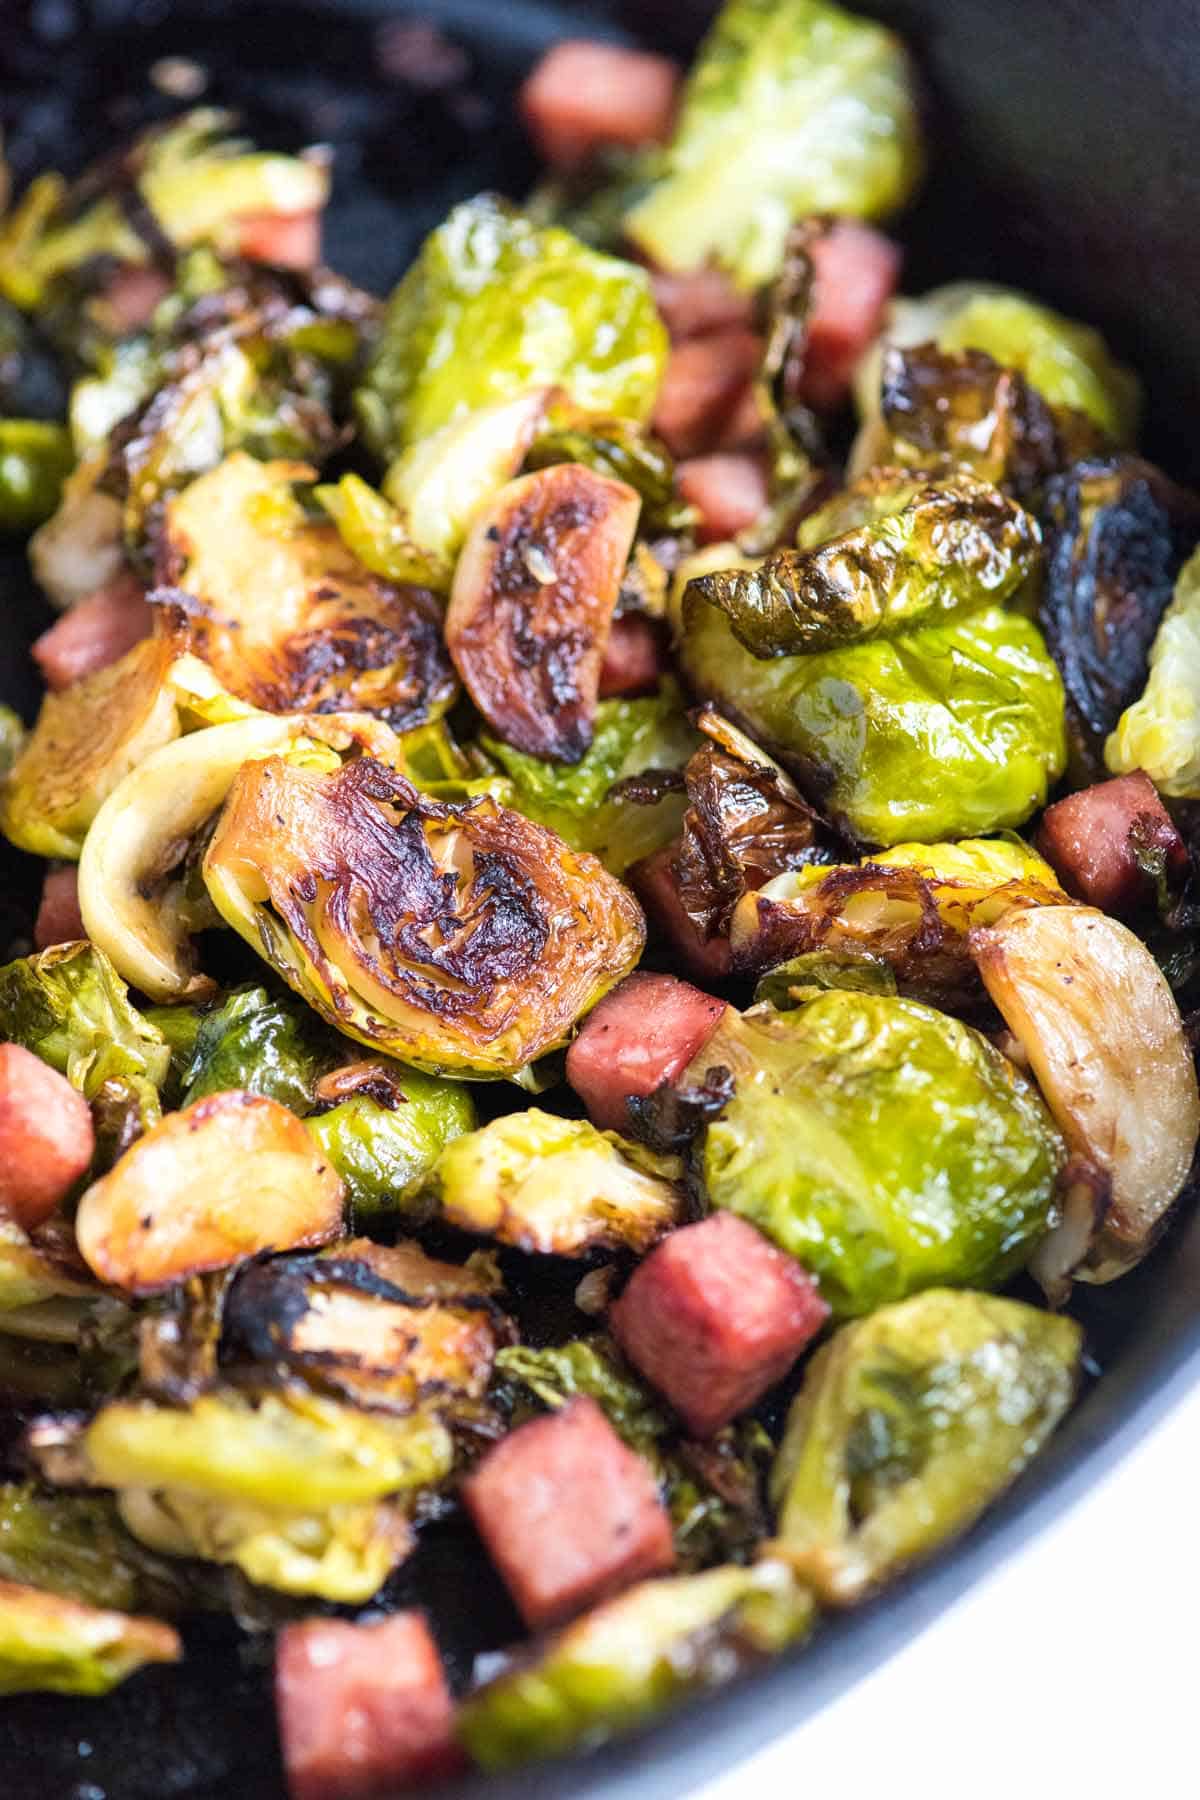
    Our roasted Brussels sprouts recipe with garlic and ham is incredibly good! We roast the sprouts until they are crispy, caramelized, and perfectly tender.
    Roasted Brussels Sprouts with Ham and Garlic

    The secret to the best Brussels sprouts is to skip the baking sheet and use a cast iron pan instead! A pan lets you start the sprouts on the stovetop to get them beautifully browned and caramelized. Then, you finish them in the oven. This simple cooking method, inspired by Mark Bittman, makes the best Brussels sprouts we’ve ever had!

    We also toss in a few garlic cloves and some cubed ham for an extra layer of flavor (bacon works great, too!). The garlic roasts right in the pan, becoming sweet and mellow, while the ham heats through and crisps up. I love this recipe, but for a quicker way to cook Brussels sprouts, see our sautéed Brussels sprouts!

    Key Ingredients

    • Brussels Sprouts: Look for firm Brussels sprouts with vibrant green, tightly packed leaves. Avoid any with yellowing or wilted leaves. You can use loose sprouts or those still attached to the stalk for this recipe. If you have pre-shredded Brussels sprouts, our sautéed Brussels sprouts is a better fit.
    • Oil: Use a high-heat oil like avocado or safflower oil to prevent the oil from smoking at the higher temperatures used in this recipe.
    • Garlic: I absolutely love the flavor the garlic adds to this dish! Instead of mincing it, cut each clove in half lengthwise. The garlic will roast in the oven, becoming tender and sweet.
    • Ham: The ham is optional but I do love it. I use ham steak and cube it. Bacon is another option. Start with chopped bacon, and cook it in the pan before adding the sprouts to render some fat. Remove the bacon and scatter it back into the pan when the sprouts are almost done. For a meatless dish, simply leave out the ham or bacon.
    • Apple Cider Vinegar: Just before serving, we’ll scatter a little apple cider vinegar over the Brussels sprouts. This simple ingredient livens them up and makes them taste incredible. I use the same trick for cooked potatoes, like in our recipes for roasted fingerling potatoes or potato salad.

    Find the full recipe with measurements below.

    How Make Roasted Brussels Sprouts

    Tip 1: Cut them in half. Trim the dry bottom of the Brussels sprout stem. Then, cut the sprout in half lengthwise, creating two flat halves. This cut side is where the magic happens! It will caramelize beautifully and become deliciously crispy during roasting.

    Tip 2: Start the sprouts cut-side down. To cook the Brussels sprouts, arrange the halves cut-side down in an oiled cast iron pan over medium heat. Cook, without moving them, until they’re nicely browned underneath. Then, toss in your garlic and ham and season with salt and pepper.
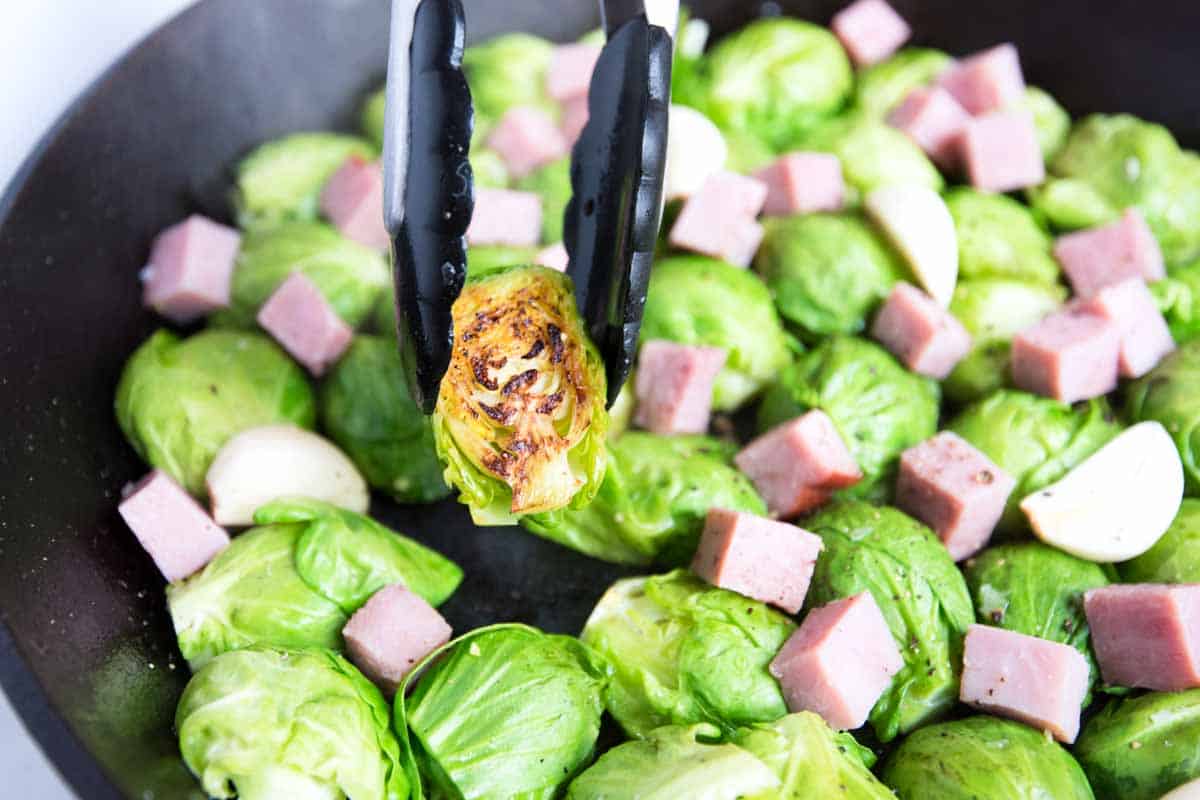
    Placing the Brussels sprouts cut-side-down ensures a lovely golden brown crust.

    Tip 3: Finish in the oven. After the sprouts are caramelized, you’ll slide the pan into a preheated 400°F oven and roast for 10 to 20 minutes. You want to stir every 5 minutes or so, until the sprouts are caramelized and tender.

    Tip 4: Don’t skip the vinegar. For an extra pop of flavor, right after taking the sprouts out of the oven, scatter about a tablespoon of apple cider vinegar over them. This simple trick brightens the flavor and makes them unbelievably good.
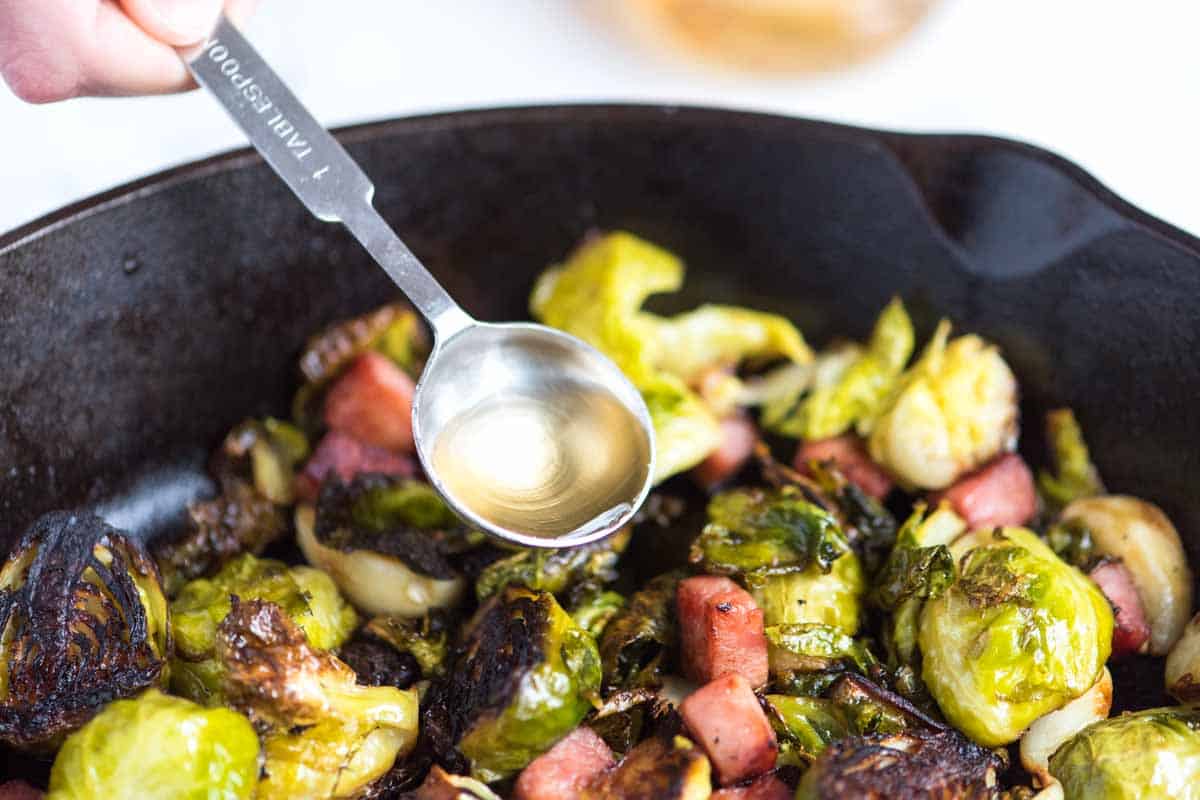
    Add a pop of flavor to roasted Brussels spouts with apple cider vinegar just after roasting.

    Serving Suggestions

    I love these roasted Brussels sprouts with many of our main dishes, especially this simple roasted chicken, sour cream baked salmon, and our garlic herb roasted turkey breast!
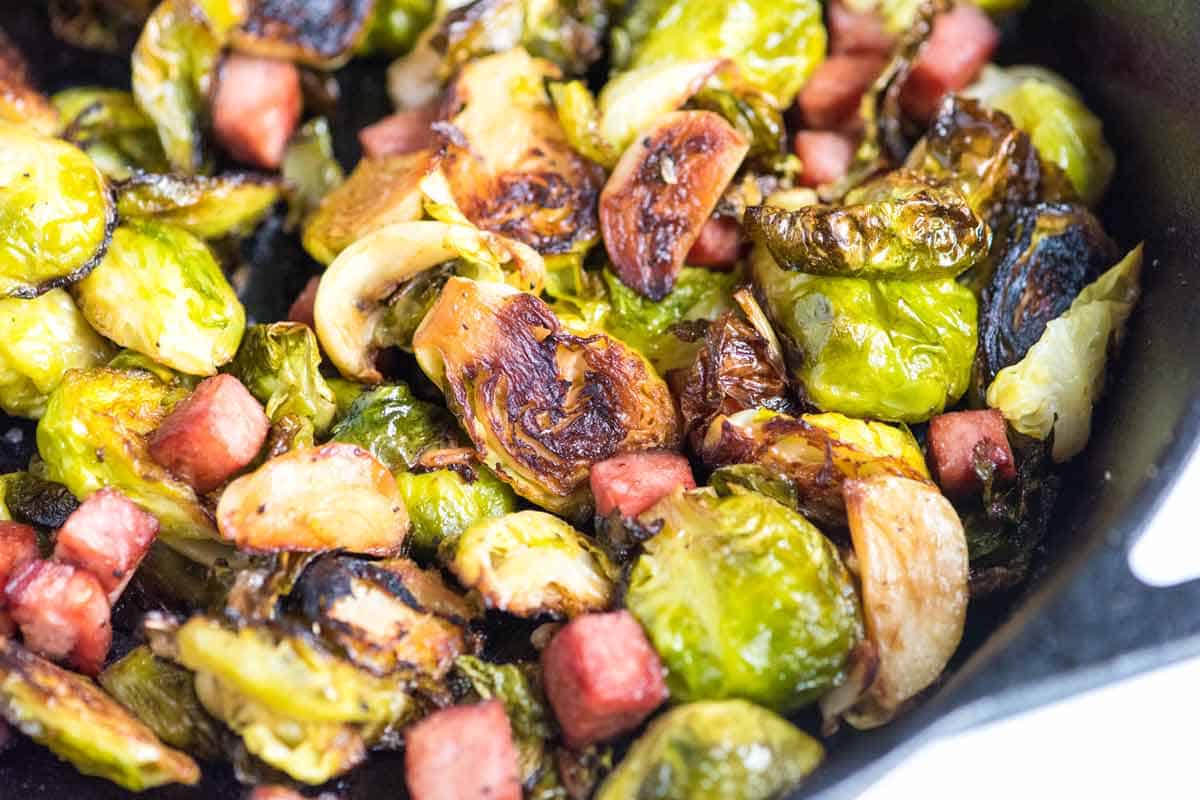
    Roasted Brussels Sprouts

    Roasted Brussels Sprouts with Ham

    • PREP
    • COOK
    • TOTAL

    Here’s how we roast Brussels sprouts to be crispy on the outside and tender inside. Our easy two-part method guarantees the best roasted Brussels sprouts. The ham is optional and can be left out or substituted for turkey, bacon, turkey bacon, or tofu. If you use bacon, we suggest rendering some of the fat first instead of adding raw bacon to the tops of the sprouts. This way, you can use some of the rendered bacon fat instead of the olive oil called for in the recipe.

    4 Servings

    You Will Need

    1 pound (450g) Brussels sprouts, 15 to 20 sprouts

    4 tablespoons (60ml) avocado oil or olive oil

    4 ounces (130g) thick-cut ham, cut into 1/2-inch cubes

    6 cloves garlic, halved lengthwise

    1 tablespoon (15ml) apple cider vinegar

    Salt and fresh ground black pepper

    Directions

      1Preheat the oven to 400°F (204 °C). Set aside a large cast iron pan or oven-safe pan.

      2Trim away the brown ends of the Brussels sprouts and discard any yellow outer leaves. Slice Brussels sprouts in half, top to bottom.

      3Heat oil in a cast-iron pan over medium heat until it shimmers. Place Brussels sprouts cut side down in one layer in the pan. If a few don’t fit, put them around the edge of the pan. Toss garlic and the cubed ham on top and sprinkle with salt and pepper.

      4Cook until the sprouts begin to brown on the bottom. If some of the sprouts on the outer edge are not becoming brown, rotate them with sprouts in the middle of the pan (where it is hottest).

      5Once the sprouts are mostly browned on the bottom, transfer them to the oven and roast them until they are browned and tender, 10 to 20 minutes. Stir the sprouts, garlic, and ham every 5 minutes.

      6Taste a sprout and add more salt and pepper if needed. Stir in the apple cider vinegar and serve.

    Adam and Joanne’s Tips

    • Storing: Store the Brussels sprouts in an airtight container in the refrigerator for up to 4 days.
    • No oven-safe pan: You can brown the Brussels sprouts in a regular skillet and then transfer them to a baking sheet or baking pan to finish them in the oven.
    • The nutrition facts provided below are estimates.

    Nutrition Per Serving
    Serving Size
    1/4 of the recipe
    /
    Calories
    202
    /
    Protein
    9 g
    /
    Carbohydrate
    9 g
    /
    Dietary Fiber
    3 g
    /
    Total Sugars
    2 g
    /
    Total Fat
    15 g
    /
    Saturated Fat
    2 g
    /
    Cholesterol
    15 mg


    AUTHOR:

    Adam Gallagher

    Adam and Joanne of Inspired Taste

    We are Adam and Joanne Gallagher, the creators of Inspired Taste. Established in 2009, Inspired Taste grew from a childhood dream into one of the internet’s most trusted recipe sites with hundreds of reliable recipes, step-by-step videos, and expert tips.More About Us
    Source link

  • Homemade Vietnamese Pho Recipe

    Homemade Vietnamese Pho Recipe

    This Vietnamese pho recipe is made with an authentic broth made from scratch using charred ginger, onion, fennel, clove, star anise, cardamom, and cinnamon.

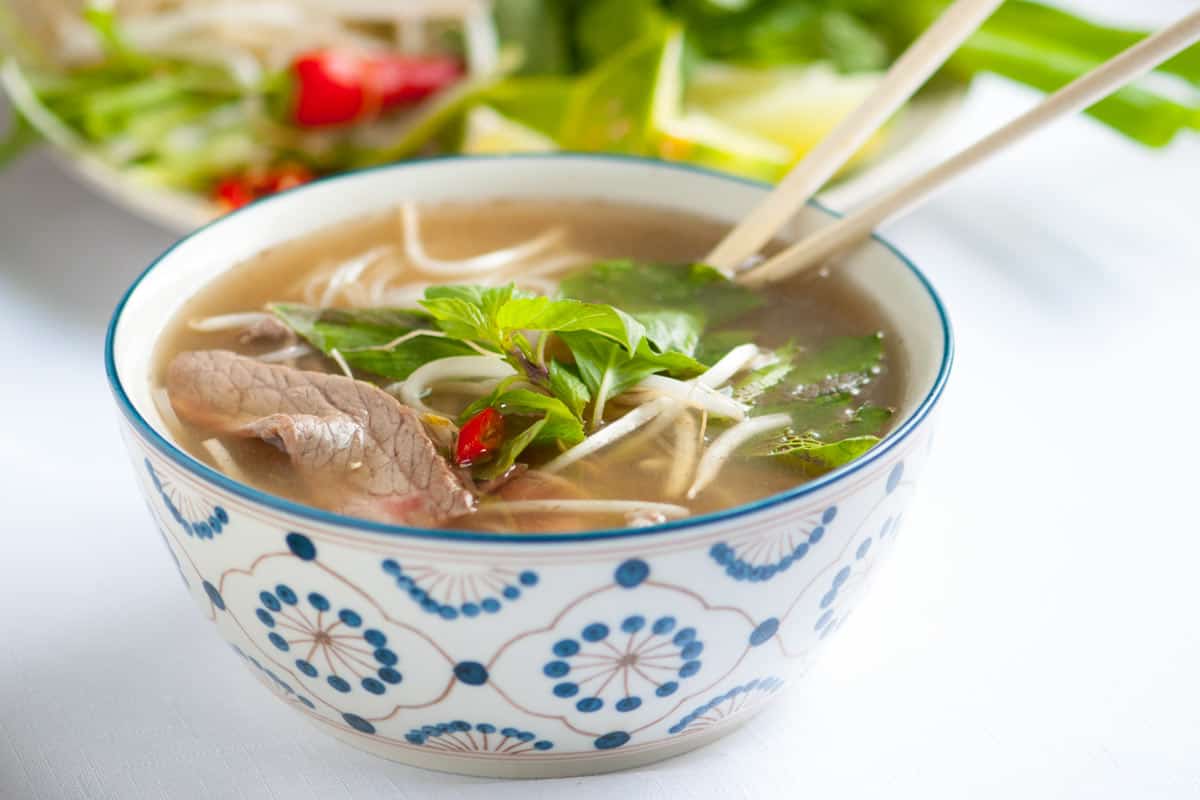
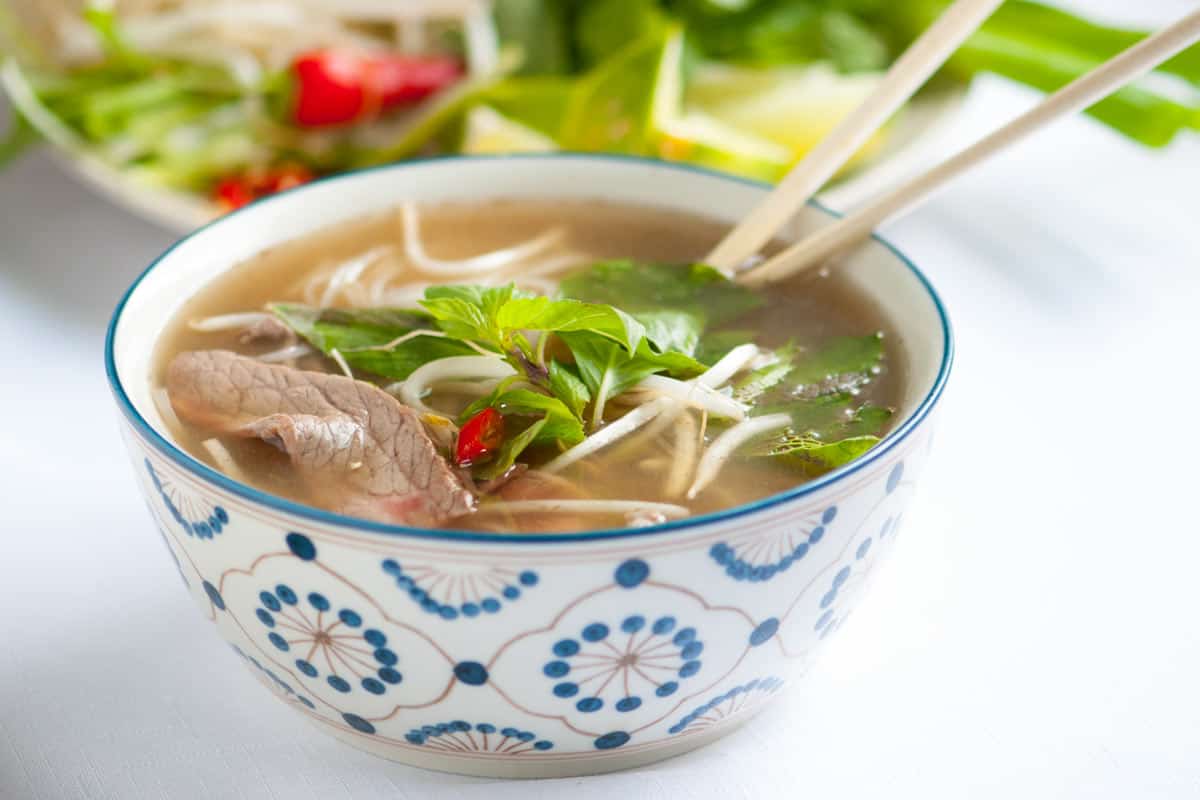
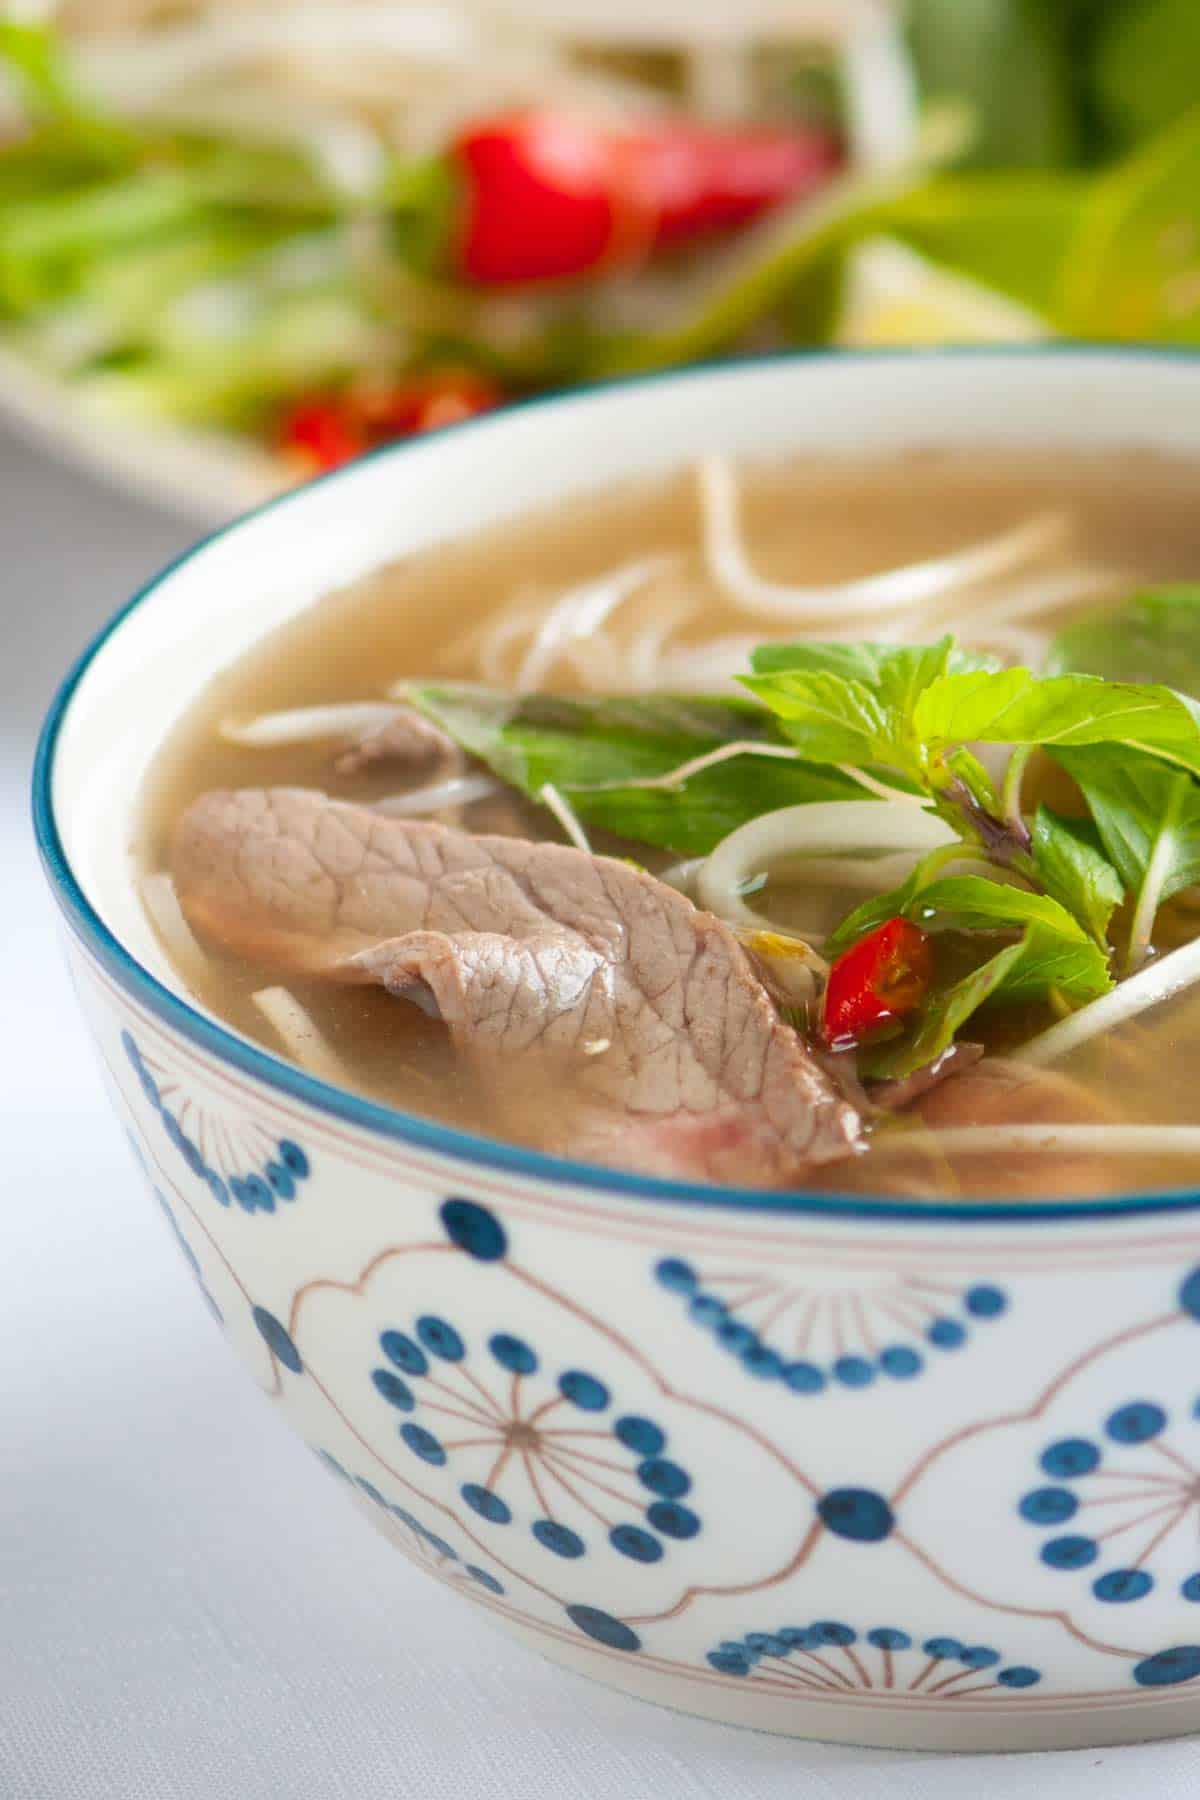
    Bowl of Homemade Pho Soup (Vietnamese Beef Noodle Soup)

    Pho (pronounced “fuh”) is a Vietnamese noodle soup originating in northern Vietnam in the early 20th century. Since then, it has spread across the globe, becoming one of the world’s most beloved noodle soups. One taste, and you’ll see why. If you haven’t tried it, Vietnamese pho is savory, incredibly aromatic thanks to the perfect balance of spices.

    Every time I make this authentic beef pho recipe (phở bò), I want to make it again. It takes some time, but it’s mostly letting it simmer on the stove (the aroma is incredible). We first learned how to make pho many years ago and are so happy that we did. Even if you’ve never made pho before, you can do it, and after you make one bowl you will be hooked.

    Key Ingredients

    Beef Bones: The secret to the best, most flavorful pho is to simmer bones rich in collagen and marrow for 3 hours. I love knuckle and leg bones for pho, but you can mix and match what’s available. Neck, marrow, knuckle, and leg bones are all excellent options.

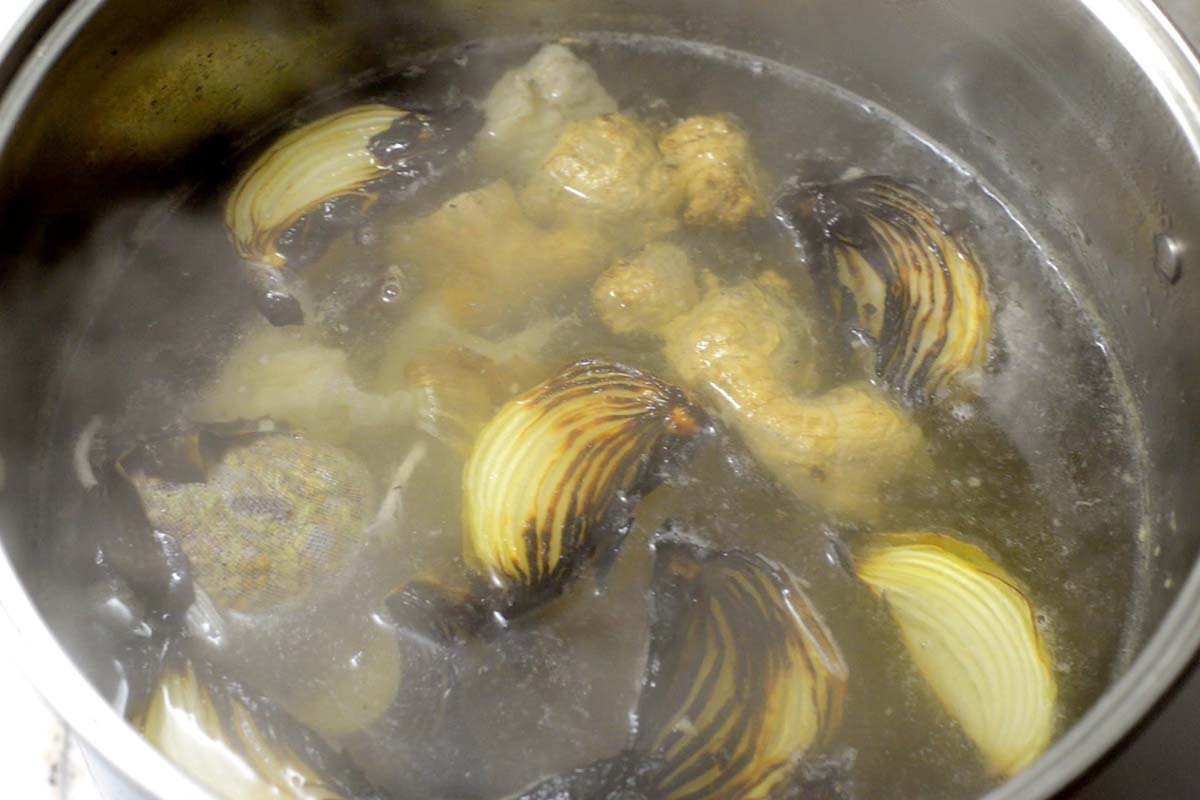
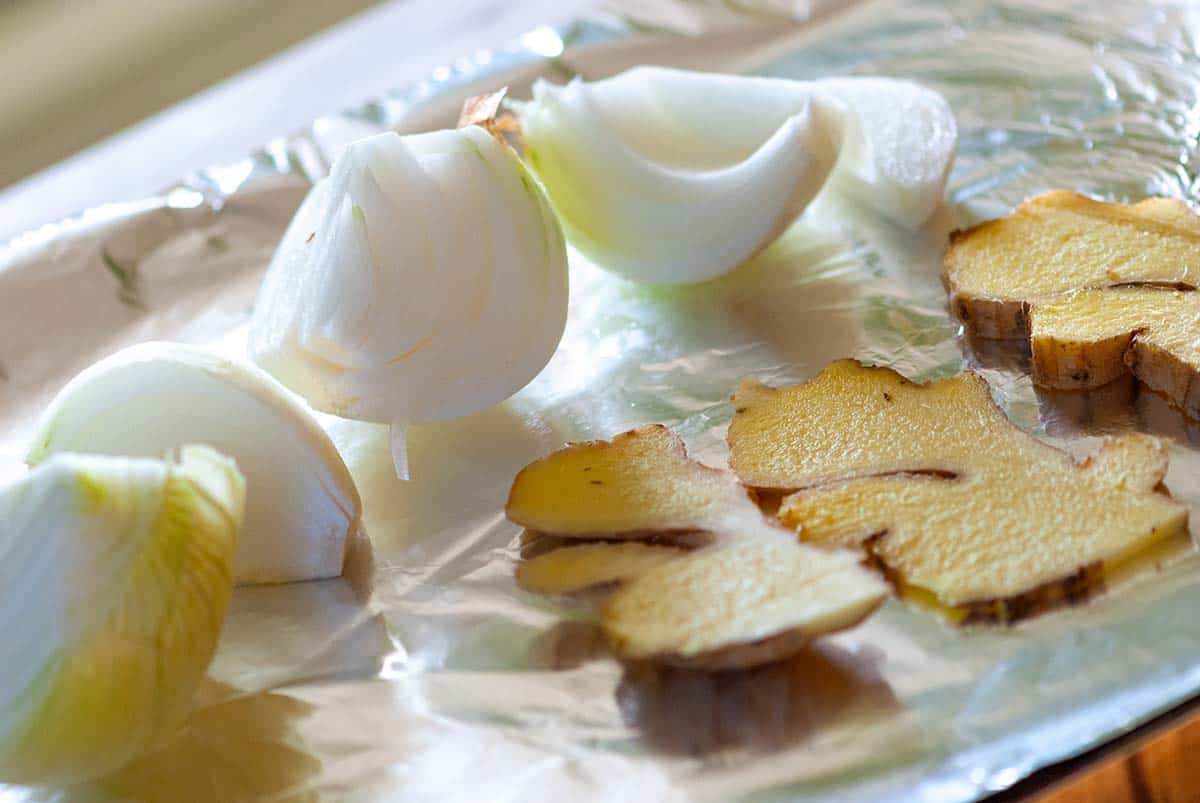
    Onion and Fresh Ginger: To get that distinctive, smoky flavor of traditional beef pho, you’ll want to char the onion and ginger before simmering them with the bones. It’s a simple step that adds incredible flavor and a bit of color to our broth. You’ll lay onion and slabs of ginger on a baking sheet and broil them until charred around the edges (watch me do it in the video). Then, add them to the stockpot with your parboiled bones.

    Charring onion and ginger for making pho

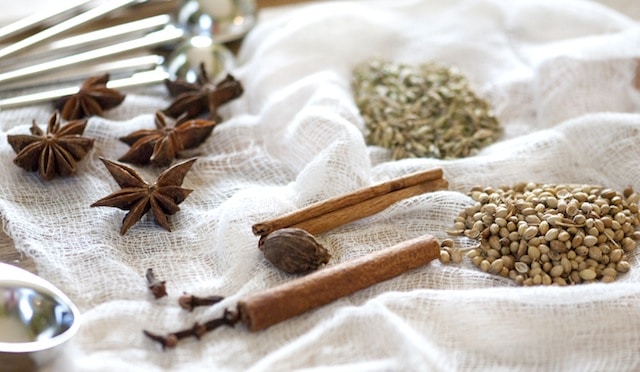
    Pho Spices: Beef bones add incredible savory flavor, but it’s the spices that really make the best pho. Our recipe calls for cinnamon, whole coriander seeds, fennel seeds, star anise, cloves, and a black cardamom pod. If you do not have these in your spice cabinet, you may have success at an Asian market where I’ve often seen spice packets for pho.

    The most unusual spice I listed is black cardamom, which I’ll admit I’ve only really use for this recipe. That said, if you can find it, it’s so worth it! I’ve seen it in Asian markets or online. It’s very smoky, and even though we only add one pod, it adds so much flavor.

    Pho Spices: cinnamon, fennel seeds, clove, coriander, star anise, and black cardamom

    Fish Sauce: You can’t make pho without fish sauce. You’ll use it when cooking and serving the broth. Andrea Nguyen of Viet World Kitchen suggests that when shopping for fish sauce, look for glass bottles, not plastic, and allow price to guide you. Go for the mid to high-priced fish sauce (which will run you $8 to $15). Two brands of pho we have in our kitchen are Three Crabs and Red Boat.

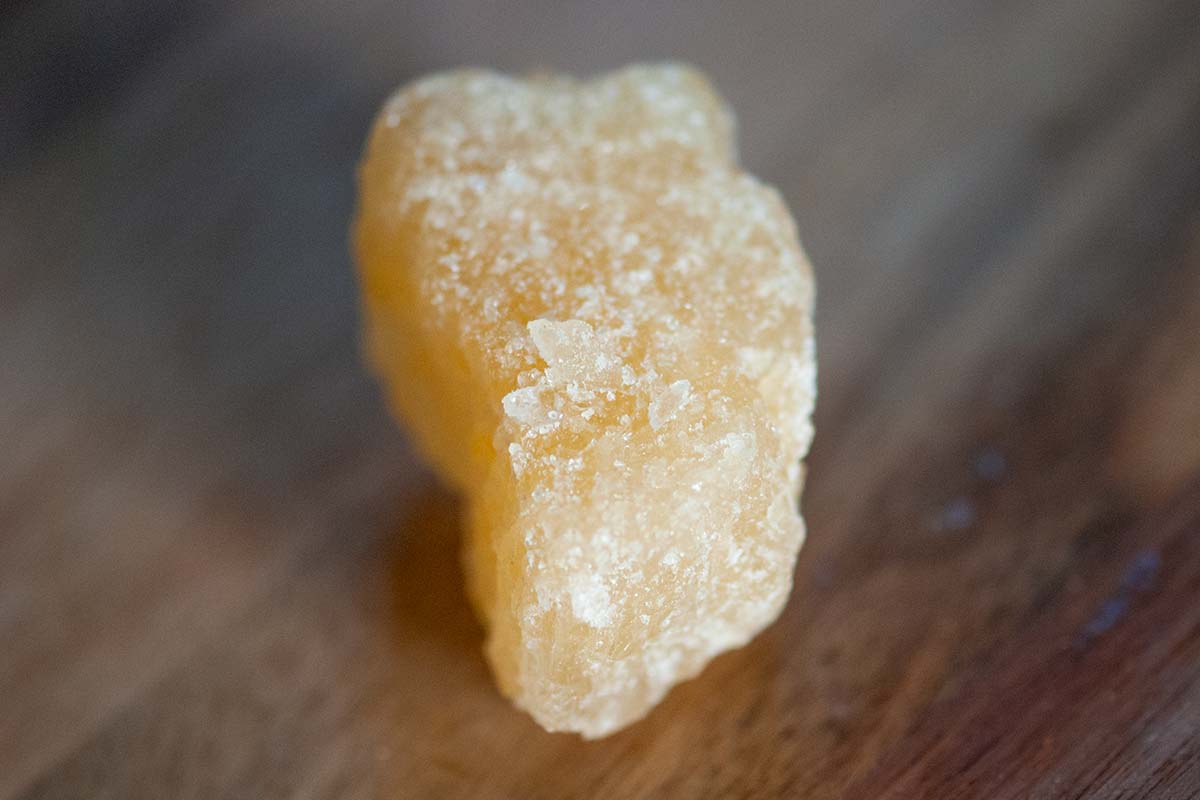
    Rock Sugar: Sugar balances the savoriness of our beef broth. I use yellow rock sugar for traditional pho, which I buy at a local Korean market (it is also sold online). If you cannot find it, you can use regular sugar. The flavor is not exactly the same, but it works. (Rock sugar does a better job at rounding out the flavors.)

    yellow rock sugar for pho

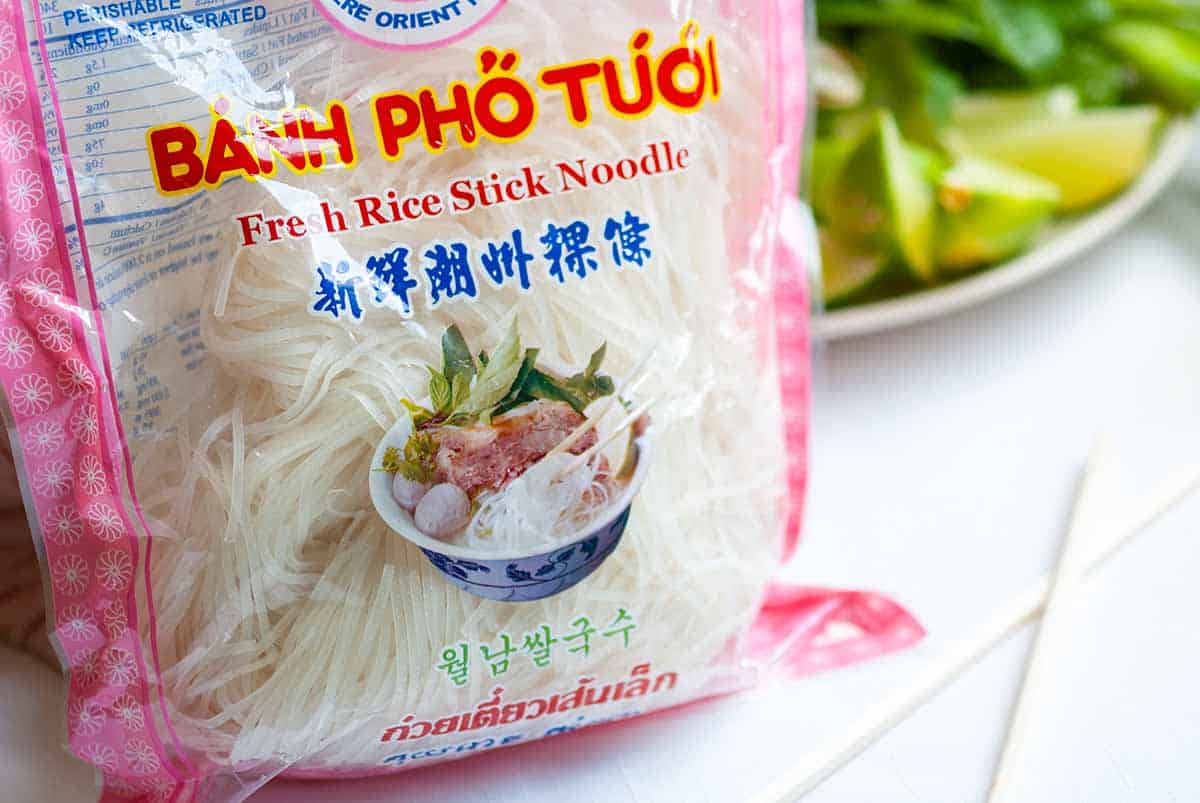
    Noodles: Use flat rice noodles for pho, also known as bánh phở in Vietnamese. Rice noodles are delicate and a little chewy, made from rice flour and water. I use the noodles that are around 1/4-inch wide. You can buy fresh noodles at Asian markets (pictured below), which is a nice treat, but dried rice noodles work nicely.

    a bag of fresh Vietnamese rice noodles for pho recipe

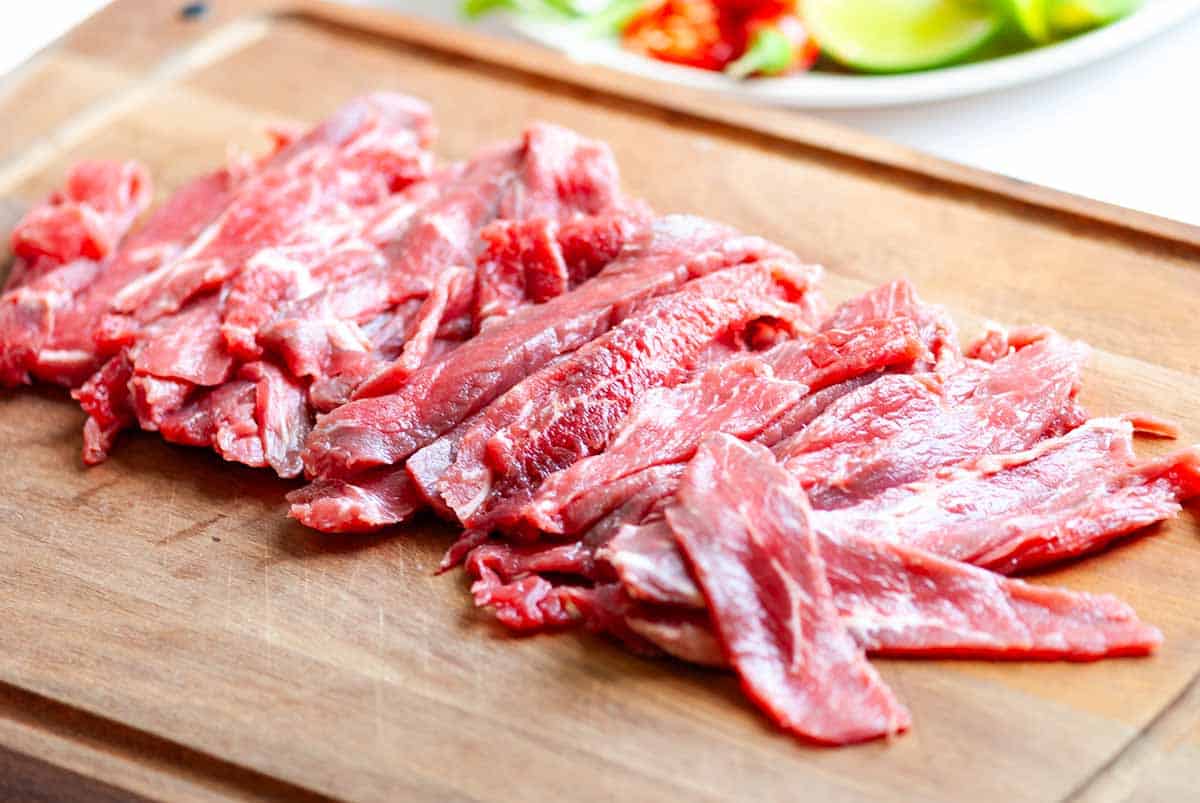
    Beef for Serving: In traditional Vietnamese pho, thinly sliced raw beef is often added to the serving bowls before pouring over hot broth. The heat of the hot broth gently cooks the thinly sliced raw beef to a tender medium or medium-rare, depending on the broth’s temperature. You can use cooked beef instead or leave it out (the soup is still delicious without extra meat).

    raw beef for pho noodle soup

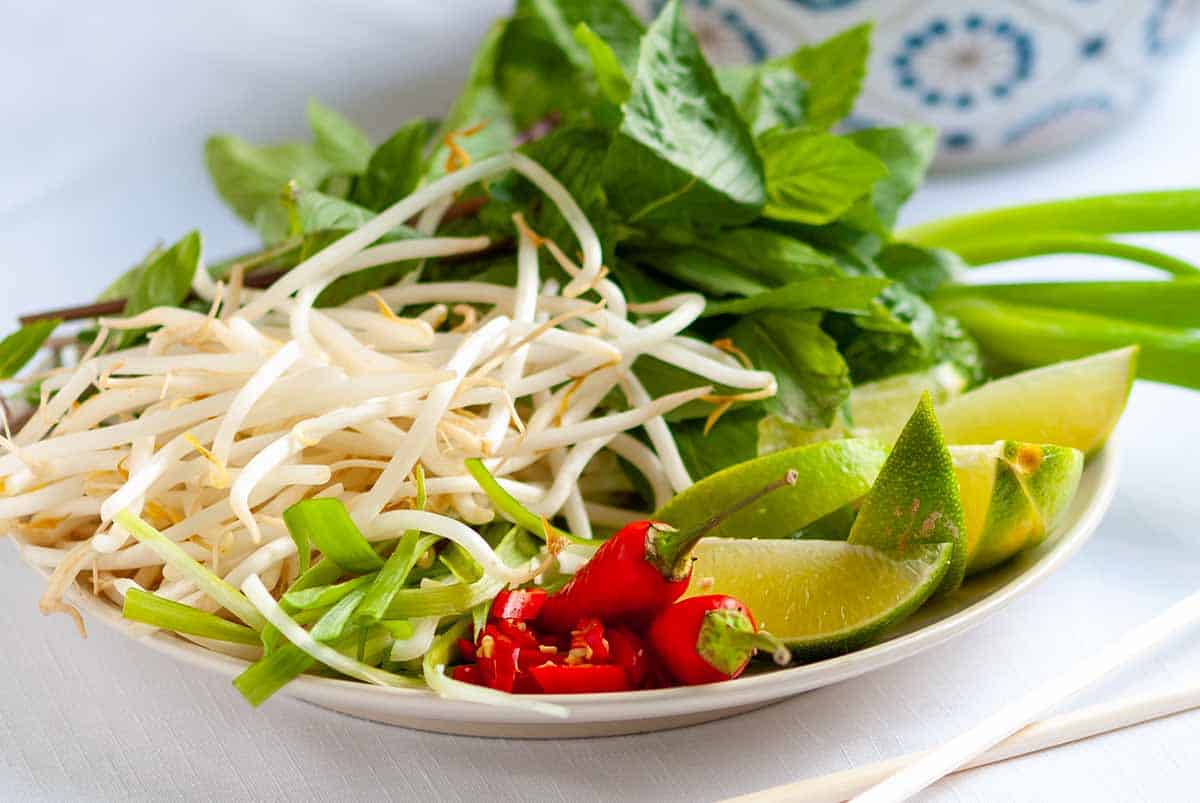
    Toppings for Pho: If you’ve ordered pho at a Vietnamese restaurant, then you know one of the most exciting things about it is the plate of optional toppings that comes with your big bowl of pho! We serve pho soup next to a plate of Thai basil, fresh mint, thinly sliced onion, crispy bean sprouts, and lime. Fresh chilies are also lovely! You can also keep fish sauce, Asian chili sauce, and hoisin sauce nearby.

    fresh condiments for serving pho

    How to Make the Best Pho

    Making pho at home takes some time, but most of that time is hands-off. You’ll spend most of your hands-on time in the first 40 minutes, and then it’s sitting back while the broth gently simmers.

    Tip 1: Parboil the beef bones. I highly recommend that you par-boil the bones before simmering them for our broth. It feels a little odd since you’ll fill a pot with the bones and water, bring it to a boil, and then dump all the water down the drain. Many of our readers worry this is getting rid of flavor for your broth, but it isn’t. The flavor comes much later after a few hours of simmering. Par-boiling simply helps clean the bones of any impurities that would muddy the flavor or color of your broth. You can watch me do it in our video!

    Tip 2: Toast your spices. The second tip for the best tasting pho is to toast your spices. Toasting them wakes them up and makes them even more aromatic. Toss them into a dry pan over medium heat, stay close, and shake them around several times. You’ll know when they’re ready when you start to smell them. It only takes two to three minutes.

    Tip 3: Simmer broth low and slow. Cover the parboiled bones with water, and add the charred onion and ginger, toasted spices, salt, fish sauce, and rock sugar. The broth will cook at a very low, gentle simmer for about 3 hours, and then you are ready to serve! Before serving, I like to taste my broth and then adjust the seasoning with more salt, sugar, or fish sauce as needed.

    How to Make Pho Broth

    Tip 4: Prepare your bowls for serving. When your broth is done, you can strain and get your bowls ready! To assemble the bowls, cook your noodles in a separate saucepan (never in the broth), rinse them, and divide them between serving bowls. Place raw or cooked beef on the noodles, then ladle the simmering broth over them.

    Tip 5: It’s all about the toppings. Serve immediately with your favorite toppings, such as fresh herbs, bean sprouts, and lime. I hope that’s helpful! Remember, we have a full-length video walking you through this process, so if you are hesitant, make sure you hit play!

    More Delicious Beef Recipes

    Vietnamese Pho Soup

    Homemade Vietnamese Pho

    • PREP
    • COOK
    • TOTAL

    Making Vietnamese pho at home is easy, especially with our traditional pho recipe. We realize our from-scratch recipe may look daunting, but it’s easier than you think, and there is a lot of inactive time while you wait for the broth (we’ve just been extra tedious to share everything we know).

    A few notes before you begin: (1) Parboiling the bones makes our broth clear, and you do not lose any flavor. (2) Keep your broth at a low simmer. Otherwise, it will reduce too much. If it seems that it is reducing too quickly, partially cover the pot with a lid. (3) There will be a generous amount of fat at the top of the broth when it is done. Skim it away with a spoon, or refrigerate the broth overnight. The fat rises to the top and solidifies, making it really easy to remove.

    Makes 3 to 4 quarts of broth (4 large or 6 small bowls)

    Watch Us Make the Recipe

    You Will Need

    Pho Broth

    5 to 6 pounds of beef knuckles or leg bones

    6 quarts cold water

    2 onions, quartered

    4-inch piece of fresh ginger, halved lengthwise

    2 cinnamon sticks

    1 tablespoon coriander seeds

    1 tablespoon fennel seeds

    6 whole star anise

    6 whole cloves

    1 black cardamom pod

    1 ½ tablespoons fine sea salt

    1/4 cup fish sauce

    1-inch piece of yellow rock sugar


    Assembly

    1 pound dried or fresh “banh pho” noodles

    8 ounces raw eye of round, sirloin, or tri-tip steak, thinly sliced across the grain

    1/4 cup thinly sliced onions

    1/4 cup chopped cilantro leaves

    Optional for the table: fresh mint, Thai basil, bean sprouts, lime wedges, sliced green or red chilies, fish sauce, hoisin sauce, sriracha or chili sauce

    Directions

    • Make the Broth
    • 1Place beef bones in a stockpot (10-quart or larger). Cover with cold water. Bring to a boil over high heat for 3 to 5 minutes. As the bones boil, scum and foam will float to the top. Drain the bones, rinse with warm water, and scrub the stockpot clean. Return bones to the pot and add 6 quarts of cold water.

      2Preheat oven broiler to high. Line a baking sheet with foil. Place onion quarters and halved ginger on the baking sheet and broil for 10 to 15 minutes, turning occasionally until nicely charred.

      3Place cinnamon, coriander, fennel, star anise, cloves, and cardamom pod in a dry frying pan over low heat. Toast for about 5 minutes, stirring occasionally, until fragrant. Transfer the spices to a muslin bag or cheesecloth and seal with twine.

      4Bring the stockpot to a boil, then reduce heat to a gentle simmer. Add the charred onions, ginger, spice bag, salt, fish sauce, and rock sugar. Gently simmer uncovered for 3 hours, skimming off any foam that rises to the surface.

      5Use tongs to remove bones, onions, and ginger. Strain the broth through a fine-mesh strainer. To remove the fat, skim it off with a spoon or refrigerate the broth overnight (the fridge solidifies the fat at the top, which is easy to remove in the morning).

    • Assembling Pho
    • 1Place the strained broth into a stockpot and simmer over medium-low heat while you prepare the noodles.

      2To prepare the noodles for cooking, place dried pho noodles in a bowl and cover with hot water. Soak for 15 to 20 minutes or until they are soft and opaque. If you have fresh noodles, do not cover them with hot water. Add them to a colander and rinse with cold water.

      3Bring a medium saucepan of water to a boil. Add noodles and cook briefly (about 10 seconds) until they soften. Drain the noodles and divide them evenly between serving bowls, filling each bowl about 1/3 of the way.

      4Arrange slices of raw meat over the noodles in each bowl. Carefully ladle the very hot broth over the meat, cooking it gently. Top with onion slices and cilantro. Serve with your favorite pho toppings at the table.

    Adam and Joanne’s Tips

    • Equipment: Large stockpot (10-quart capacity or larger), baking sheet, skillet, Muslin bag/herb sachet or cheesecloth with twine (for spices), and fine-mesh strainer
    • Black cardamom pod: Highly recommend for it’s smoky flavor, but optional. Find in International and Asian markets or online.
    • Yellow rock sugar: Also known as “lump sugar” sold in boxes at Asian markets. Break into smaller chunks – use a hammer or rolling pin.
    • Raw beef: Ask your butcher to thinly slice or place beef into the freezer for 15 minutes to harden a little. Carefully slice the beef across the grain into 1/16-inch thick slices.
    • Storing the pho broth: Your broth will last in an airtight container in the fridge for up to 5 days. To freeze, transfer to freezer-friendly containers and freeze for up to 6 months. Thaw frozen pho broth in the refrigerator overnight and reheat the next day. To reheat, add to a saucepan and bring to a simmer before pouring into your serving bowls. We do not recommend storing/freezing cooked noodles, as they tend to break up over time.
    • Can I use store-bought beef broth? If you want to make pho as good as you’d find at the most authentic restaurants, substituting store-bought beef broth for this recipe won’t cut it. We know our process takes longer than some, but trust me, this homemade pho broth has so much more flavor. You won’t regret it.
    • Recipe inspired by Andrea Nguyen of Viet World Kitchen and Jaden Hair of Steamy Kitchen.
    • The nutrition facts provided below are estimates.

    Nutrition Per Serving
    Calories
    436
    /
    Protein
    23 g
    /
    Carbohydrate
    74 g
    /
    Dietary Fiber
    3 g
    /
    Total Sugars
    6 g
    /
    Total Fat
    5 g
    /
    Saturated Fat
    1 g
    /
    Cholesterol
    20 mg


    AUTHOR:

    Adam Gallagher

    Source link

  • Tomato Shrimp Pasta Recipe

    Tomato Shrimp Pasta Recipe

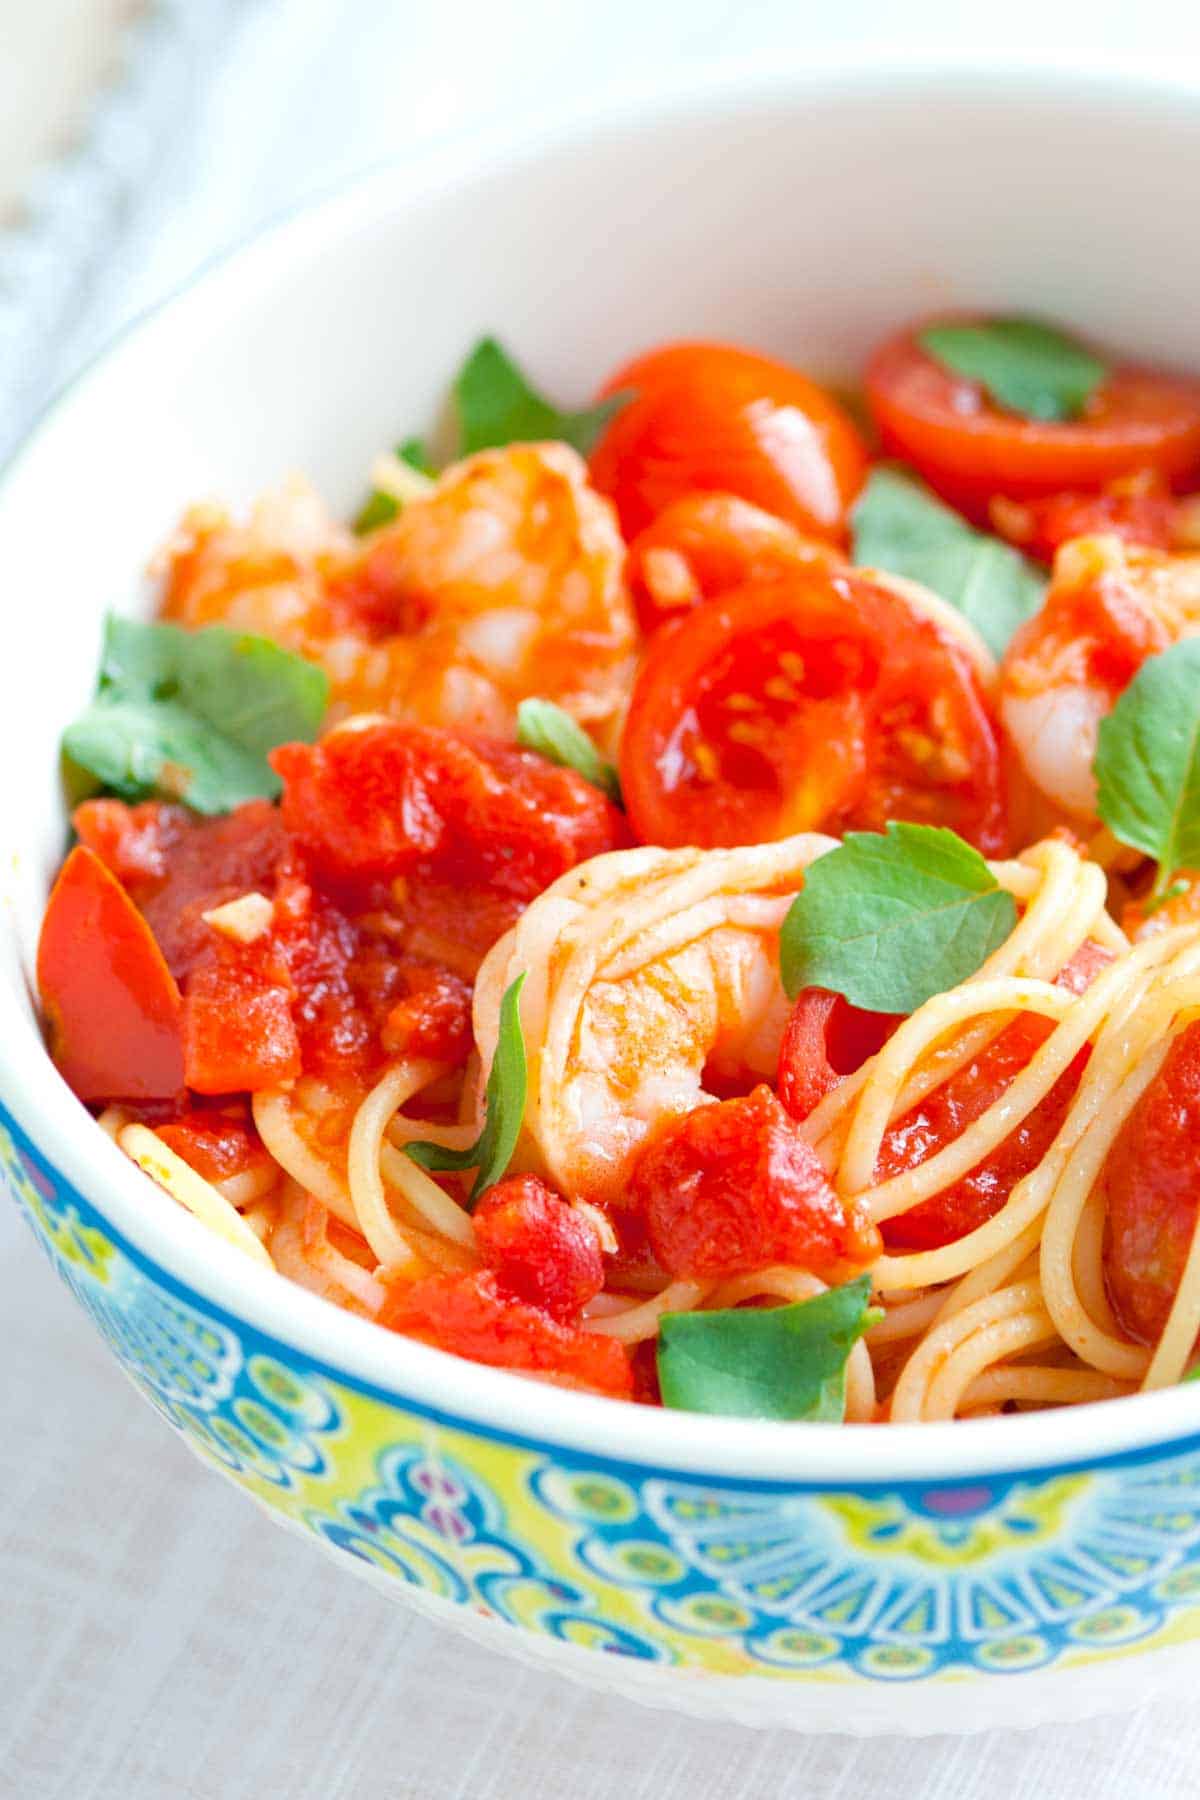
    This tomato shrimp pasta recipe is incredibly easy, light, and comes together in the time it takes the pasta to cook.

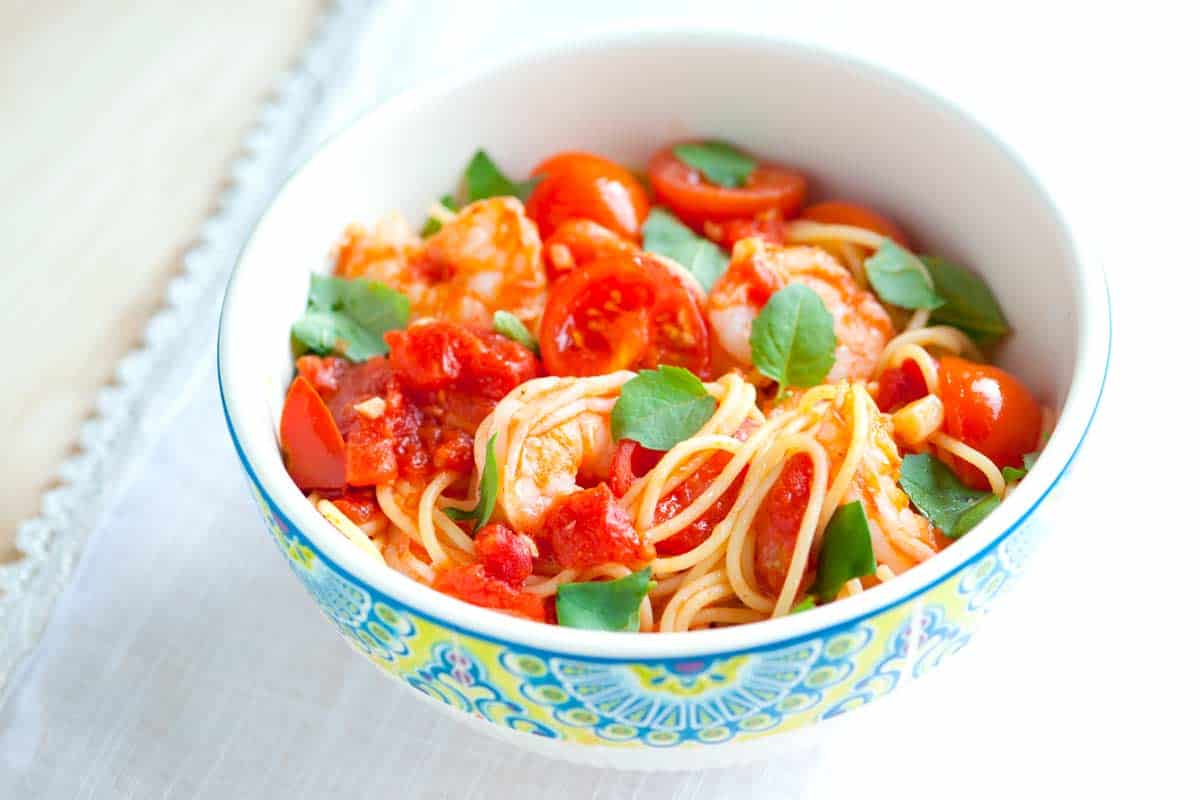
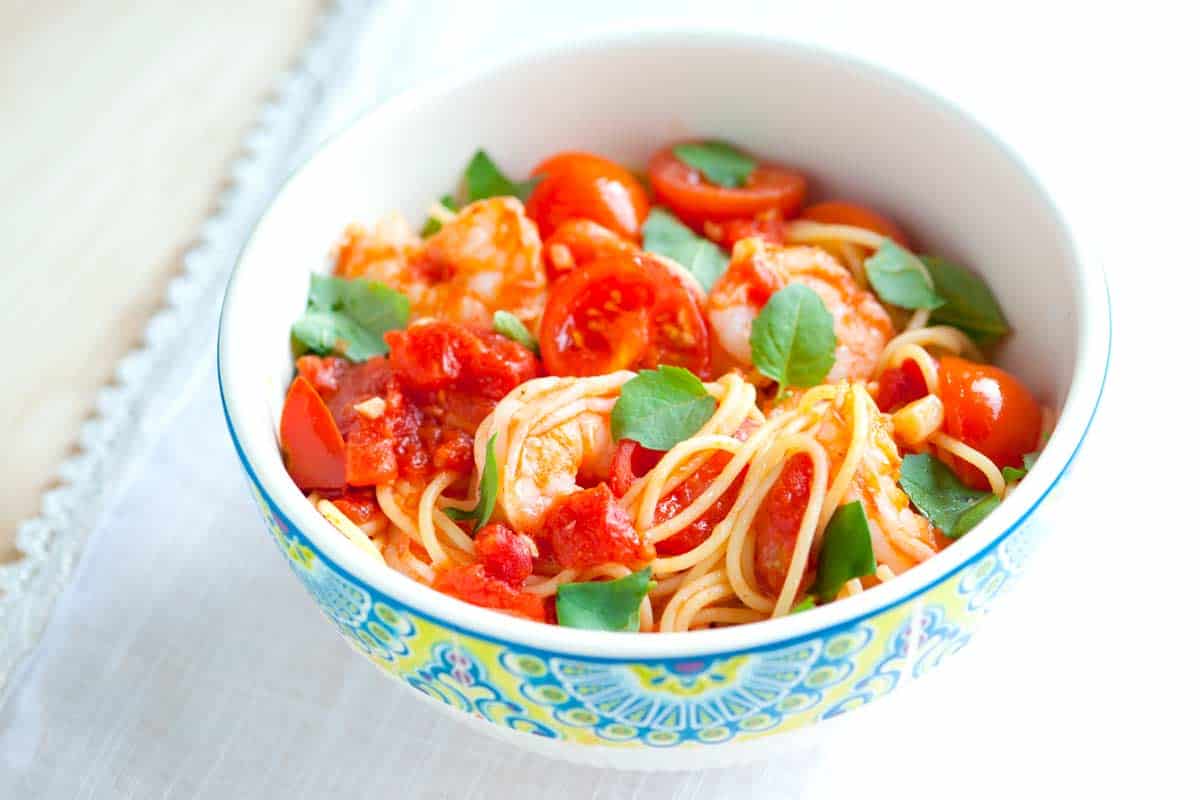
    Tomato Basil Shrimp Pasta

    This shrimp pasta is one of my go-to meals when craving something light, fresh, and flavorful. It comes together quickly and easily, making it perfect for busy weeknights.

    The combination of juicy shrimp, sweet tomatoes, and fragrant basil is simply irresistible! This dish truly screams summer. For more easy shrimp recipes, see our shrimp carbonara, shrimp scampi, shrimp ziti, and these sesame ginger shrimp.

    Key Ingredients

    • Pasta: While I love using thin pasta like angel hair or thin spaghetti for this dish, feel free to use your favorite shape. Any kind of pasta will work!
    • Shrimp: I recommend using large or jumbo shrimp for this recipe. They’re less likely to overcook and dry out in the sauce. When you’re buying shrimp, look for fresh ones that are firm to the touch and have a slightly sweet smell.
    • Garlic: This recipe uses 3 cloves of garlic for a bold garlic flavor. If you’re a garlic lover like me, you can even add more!
    • Tomatoes: This recipe combines canned tomatoes with fresh cherry tomatoes. The canned tomatoes create a flavorful sauce, while the cherry tomatoes add a burst of freshness.
    • Basil: To brighten up the dish and add another layer of fresh flavor, toss in a generous handful of fresh basil leaves just before serving.

    Find the full recipe with measurements below.

    How to Make Our Favorite Shrimp Pasta

    Tip 1: Cook shrimp while pasta cooks. Start by cooking your pasta. We love using angel hair or thin spaghetti, but any shape will work. While the pasta is cooking, make the shrimp. Cook garlic in olive oil in a skillet. When it becomes fragrant, add the shrimp.

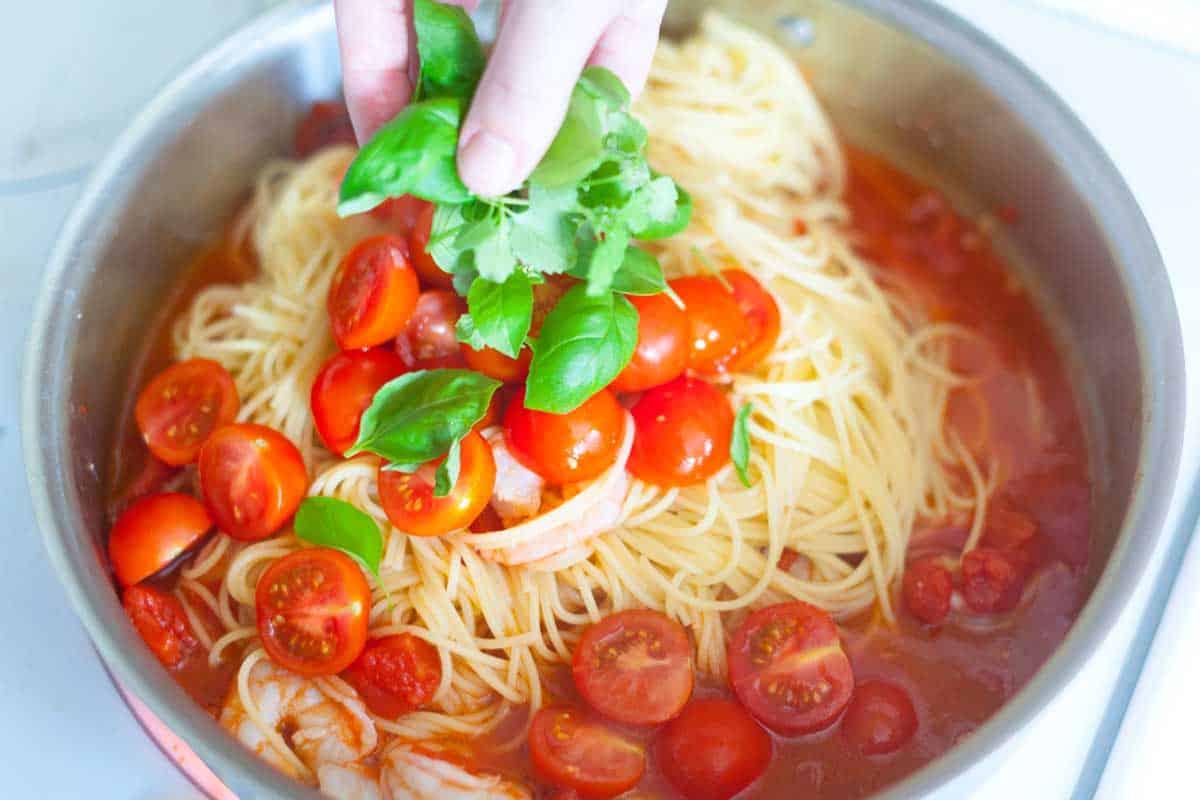
    Finishing the tomato basil sauce

    Tip 2: Add a lot of tomatoes. Add a whole can of diced tomatoes, and a handful of basil leaves as the shrimp turn translucent in the middle. Then toss in cooked pasta, fresh cherry tomatoes, and cook until coated. The pasta will absorb the sauce flavors, the basil will wilt, and the fresh cherry tomatoes will warm through.

    Tomato Shrimp Pasta

    Tomato Shrimp Pasta

    • PREP
    • COOK
    • TOTAL

    This light shrimp pasta comes together in minutes and is flavored with garlic, tomatoes and fresh basil. When you choose the pasta, go for something thin like angel hair or thin spaghetti.

    4 Servings

    You Will Need

    8 ounces dry pasta, like angel hair or thin spaghetti

    1 tablespoon extra-virgin olive oil, plus more for serving

    3 garlic cloves, minced

    1 pound large shrimp, peeled and deveined

    1 (16oz) can diced tomatoes

    1 cup cherry tomatoes, halved

    1/2 cup loosely packed basil leaves

    Salt and fresh ground black pepper

    Directions

      1Cook the pasta in boiling salted water until it is tender but not mushy. Drain.

      2Pat the shrimp dry then season with salt and pepper. Heat a large skillet over medium-high heat. Add the olive oil and garlic and cook until fragrant, about 1 minute. Add the shrimp in one layer then cook, flipping once, until they turn translucent in the middle, 2 to 3 minutes.

      3Stir in the canned tomatoes and use a wooden spoon to scrape any bits of garlic stuck to the bottom of the skillet. Cook until the juices from the tomatoes have reduced slightly, about 2 minutes. Taste the sauce and adjust with salt and/or pepper.

      4Add the cooked pasta, halved cherry tomatoes and half of the basil to the pasta. Toss well and cook until the cherry tomatoes are warmed through and the sauce begins to coat the pasta, another 2 to 3 minutes. Serve in bowls with basil and a drizzle of olive oil on top.

    Adam and Joanne’s Tips

    • The nutrition facts provided below are estimates.

    Nutrition Per Serving
    Serving Size
    1/4 of the recipe
    /
    Calories
    364
    /
    Total Fat
    5.2g
    /
    Saturated Fat
    0.8g
    /
    Cholesterol
    182.5mg
    /
    Sodium
    572.2mg
    /
    Carbohydrate
    48.6g
    /
    Dietary Fiber
    3g
    /
    Total Sugars
    4.8g
    /
    Protein
    31.3g


    AUTHOR:

    Joanne Gallagher

    Adam and Joanne of Inspired Taste

    We are Adam and Joanne Gallagher, the creators of Inspired Taste. Established in 2009, Inspired Taste grew from a childhood dream into one of the internet’s most trusted recipe sites with hundreds of reliable recipes, step-by-step videos, and expert tips.More About Us
    Source link

  • Copycat Big Mac Burger | The Recipe Critic

    Copycat Big Mac Burger | The Recipe Critic

    This website may contain affiliate links and advertising so that we can provide recipes to you. Read my disclosure policy.

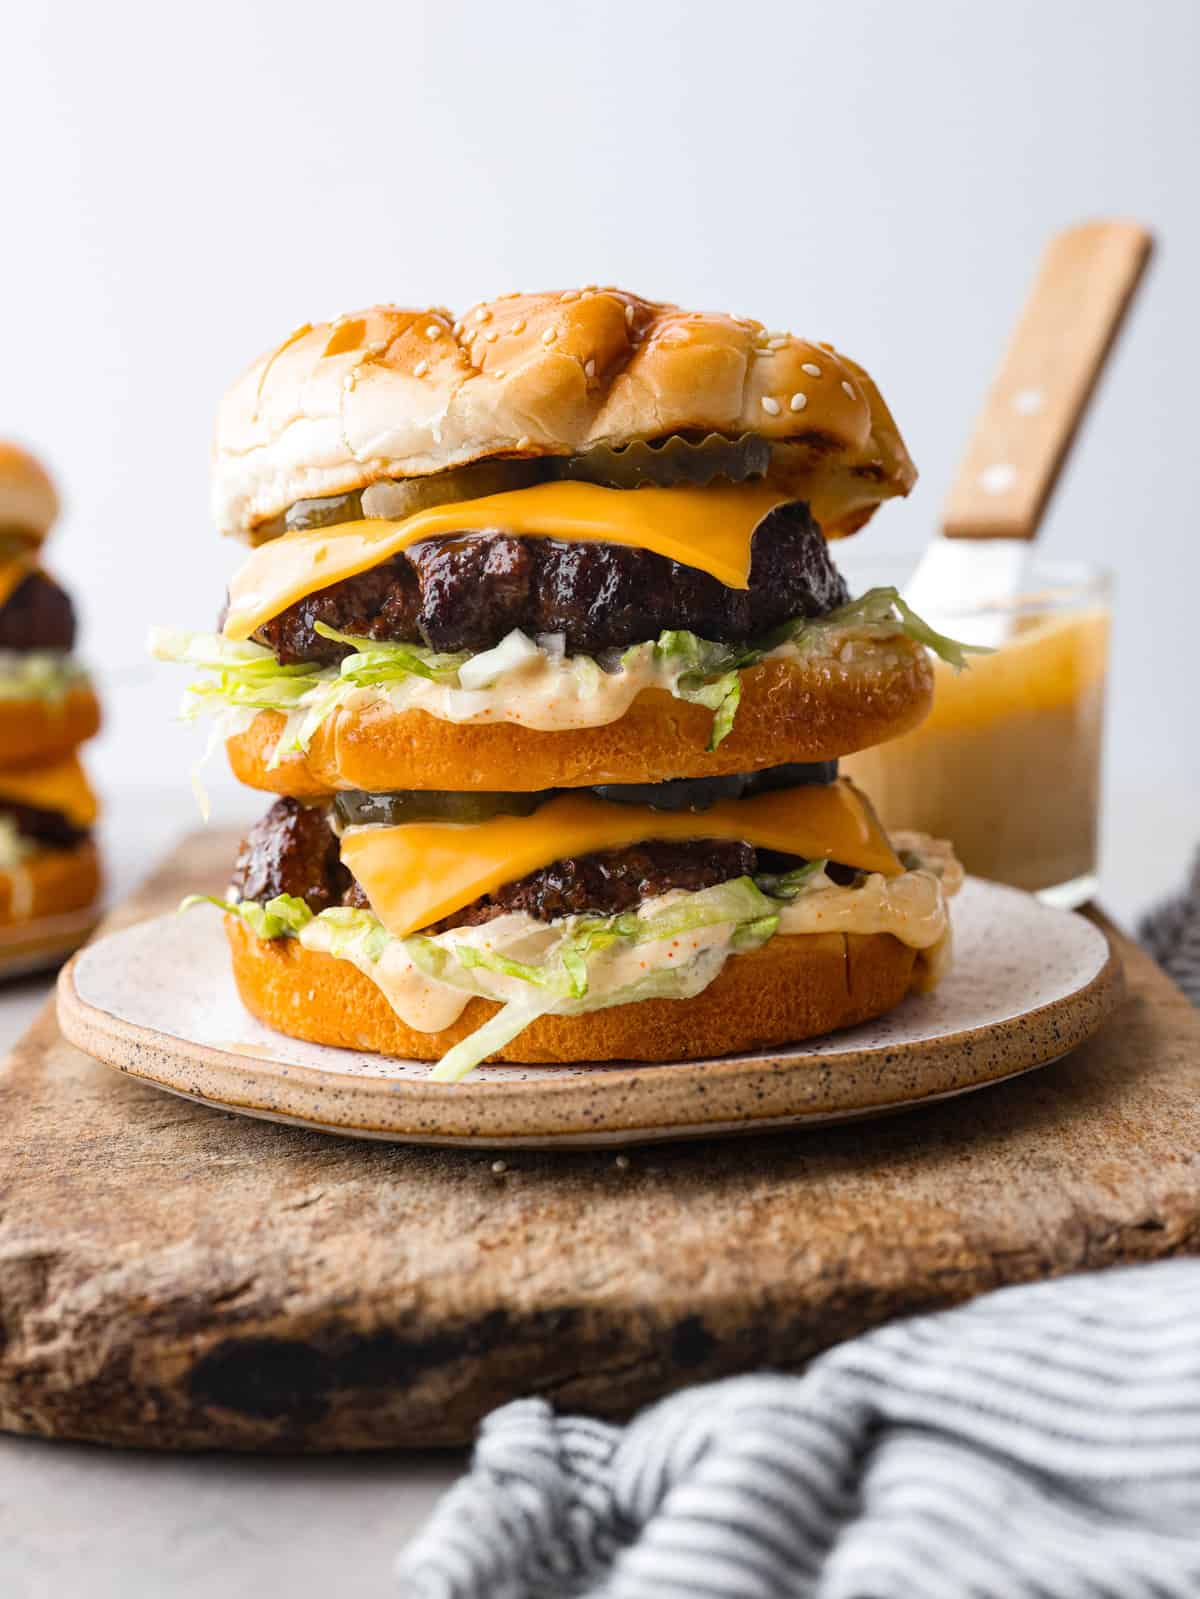
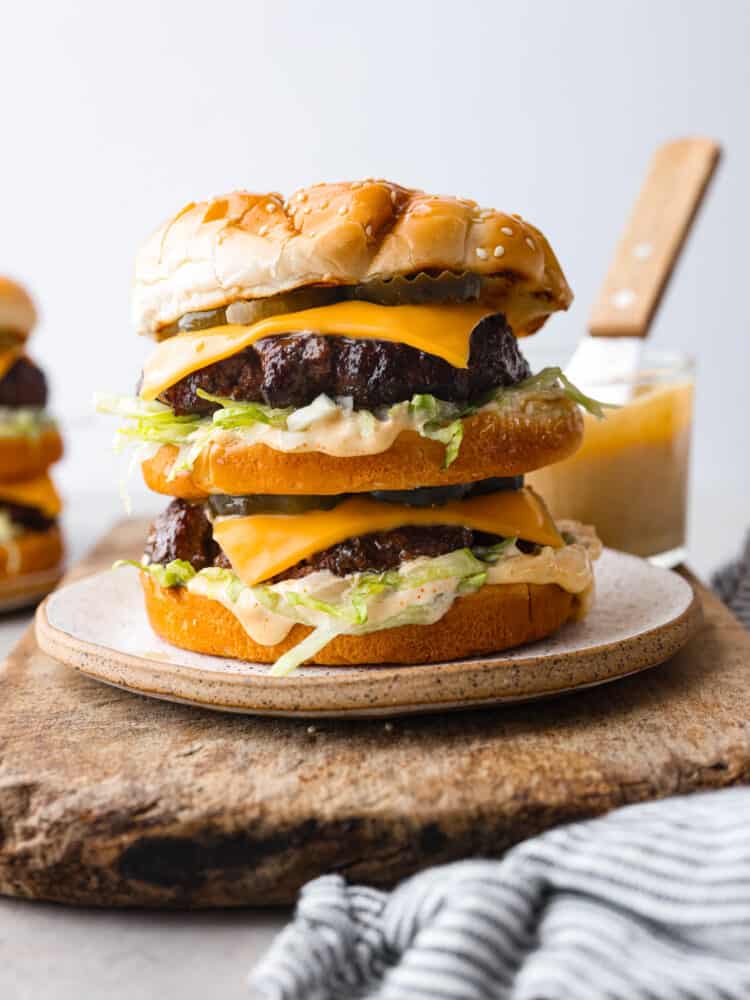
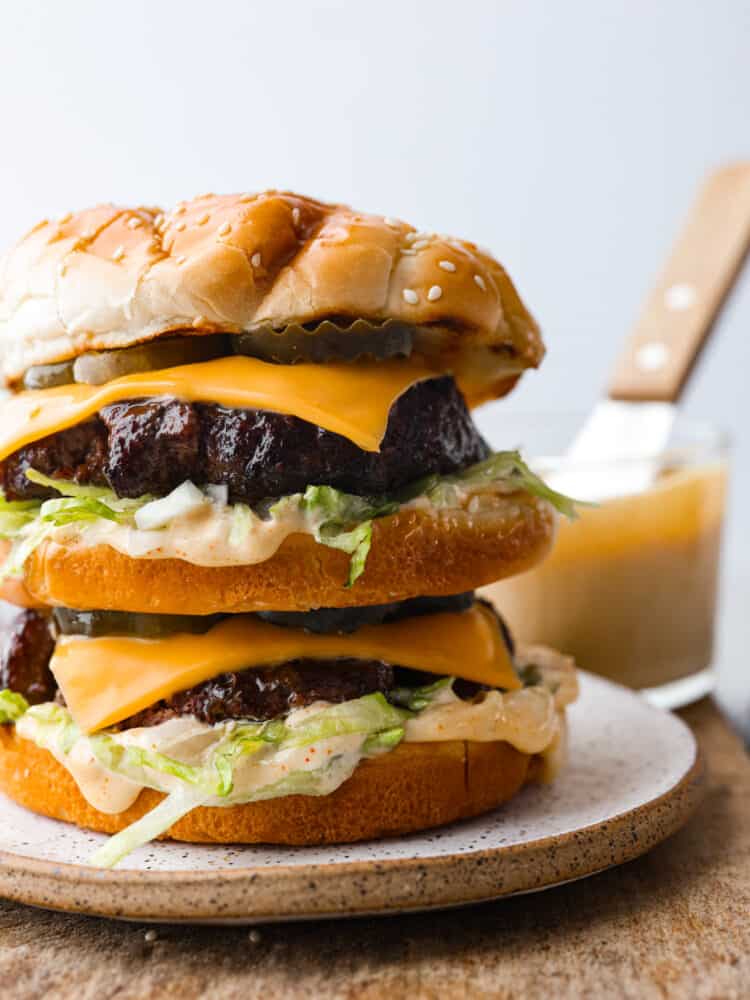
    Two juicy all-beef patties, special sauce, lettuce, cheese, pickles, and onions all on sesame seed buns! You’ll love recreating this copycat Big Mac burger at home.

    If you really want to take your homemade burgers up a notch, try using homemade buns! They’re so much better than store-bought and have the best texture. Try these classic hamburger buns or brioche buns if you want to switch things up.

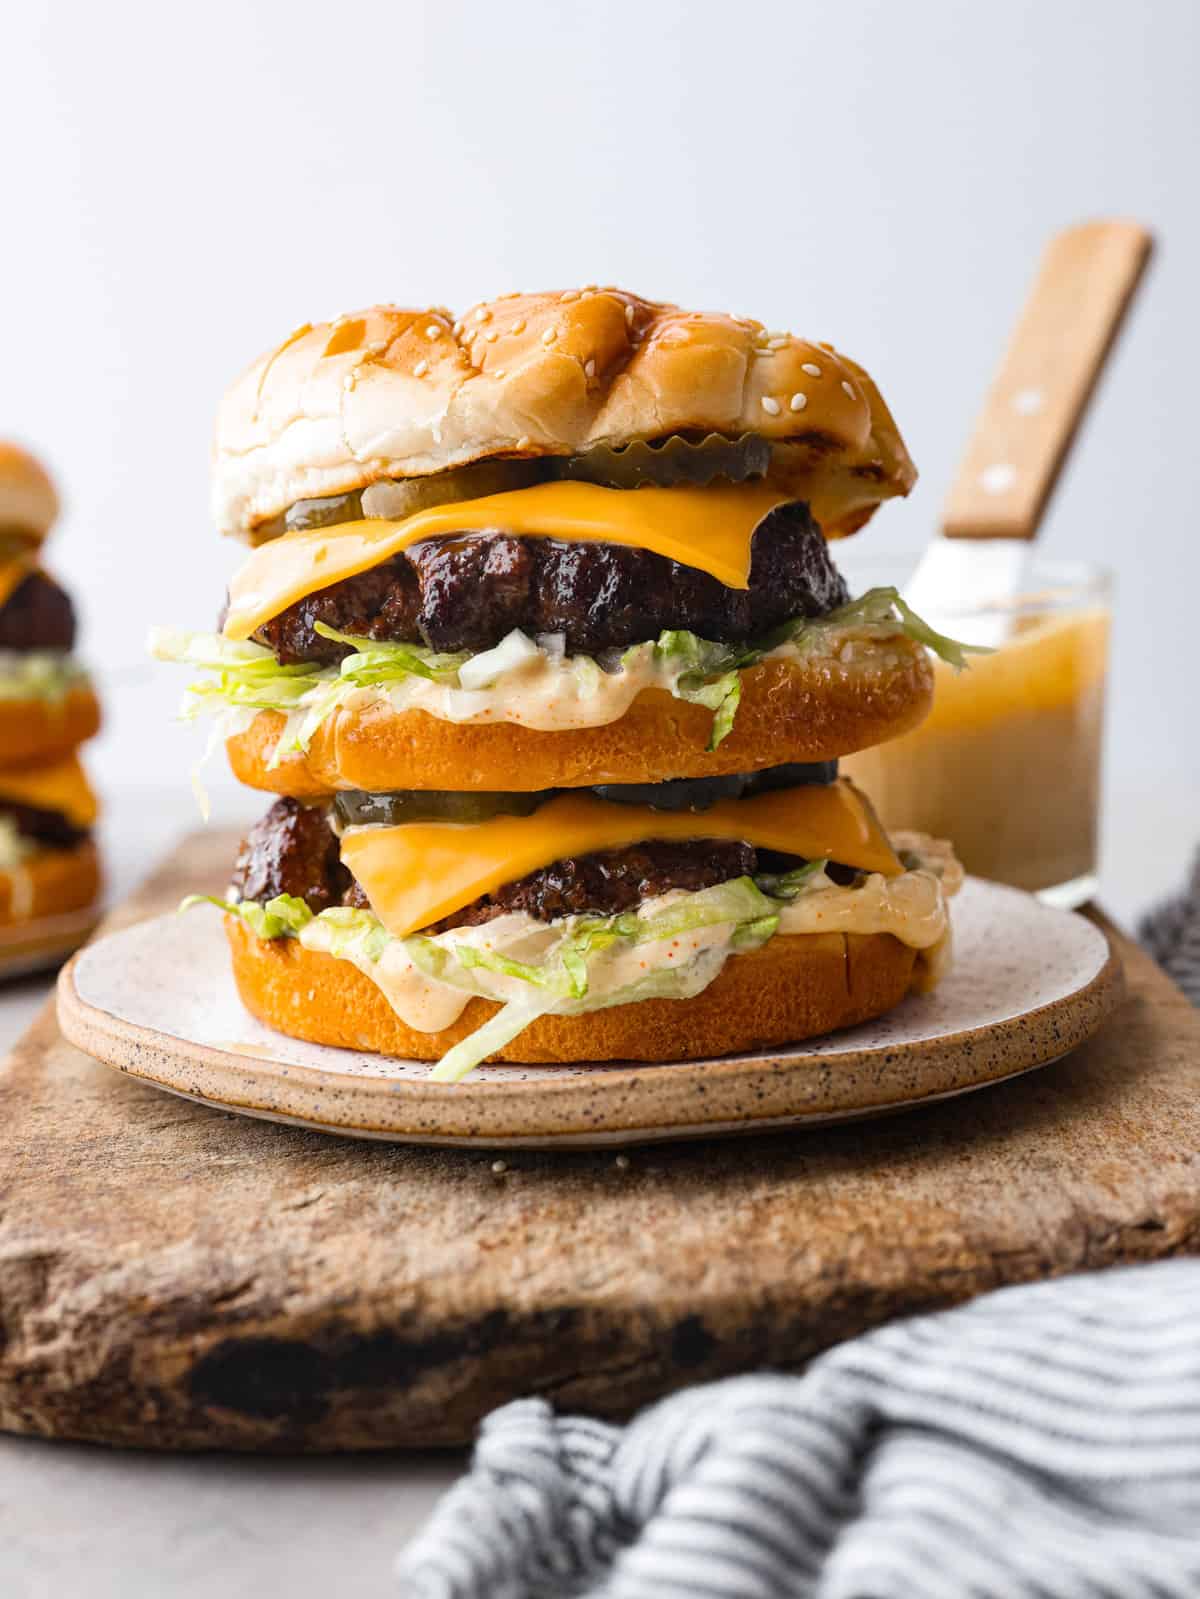
    A homemade Big Mac burger on a stoneware plate.

    Homemade Big Mac Burger Recipe

    Sure, you could just go to McDonald’s, but who wants a burger chock full of fillers that looks nothing like its picture? With this Big Mac burger recipe, you get everything you love about a Big Mac (like the special sauce!) but it’s much better quality. It’s comfort food at its finest and will have you satisfied down to the last bite.

    Because, let’s be honest, is there anything better than sinking your teeth into a juicy all-beef patty topped with melty cheese, lettuce, onions, and Big Mac sauce? And let’s not forget that Big Macs have an extra bun in the middle, so the bread to burger ratio is just perfect! My mouth is watering just writing this. Trust me, you’re going to want to add these copycat Big Macs to the dinner lineup this week.

    Burger and Sauce Ingredients

    Mix all these flavors and textures up, and you’ve got yourself a homemade Big Mac – a tasty tower of yum that’s got a little bit of everything in each bite. Exact measurements are in the recipe card below.

    • Ground Beef: The juicy patty that’s the heart of the Big Mac burger. It’s seasoned and cooked just right for that delicious, meaty taste.
    • Salt and Pepper: Think of these as the flavor boosters. They make the beef taste even better!
    • Sesame Seed Buns: You’ll need 2 bottoms and 1 top per burger.
    • American Cheese: For some cheesy, melty goodness! You can also swap this out for cheddar, pepper jack, colby jack, you name it!
    • Diced White Onion: These are the crispy, kind of spicy bits that add a kick and a satisfying crunch.
    • Shredded Iceberg Lettuce: It’s crisp, it’s light, and it’s there to balance out the richness of the meat and cheese.
    • Dill Pickle Slices: Sour and tangy, these cut through the richness, making sure each bite isn’t too heavy.

    Big Mac Sauce:

    • Mayonnaise: The rich and creamy base of the Big Mac sauce.
    • Sweet Pickle Relish: Relish adds a sweet and tangy flavor to the sauce that’s so delicious.
    • White Vinegar: For a little bit of tang.
    • Garlic Powder: Makes the sauce nice and savory.
    • Onion Powder: Another flavor booster!
    • Paprika: Paprika adds a bit of smokiness and gives the Big Mac sauce a bit of kick.
    • Turmeric: For a subtle earthy flavor that pairs well with the other ingredients.

    Copycat Big Mac Burger and Sauce Recipe

    Delicious, gourmet burgers ready in less than 30 minutes! Big Mac burgers are the perfect hearty meal and something that the whole family will enjoy.

    Big Mac Sauce

    1. Whisk Ingredients Together: In a small bowl, combine the mayonnaise, pickle relish, vinegar, garlic powder, onion powder, paprika, and turmeric. Chill in the refrigerator for several hours before serving. This will help the flavors meld together.

    For the Burgers

    • Shape: Divide the ground beef evenly into 3-ounce portions and form into balls. Then cover and place in the refrigerator while you prepare the rest of the ingredients.
    • Heat Skillet: Heat your griddle or cast iron skillet to 400 degrees Fahrenheit.
    • Add to Pan: Place two balls of beef on the hot griddle or skillet. You can cook all of the hamburgers at the same time if your griddle will fit them all. Just work quickly because the meat cooks fast.
    • Flatten: Press the ball of meat down with a large flat metal spatula. Get the patty as flat and thin as you can. You’ll be doubling up the patties, so don’t be nervous about a thin patty. It helps to cover the meat with a piece of parchment paper so it doesn’t stick to the spatula.
    • Cook: Cook for 2-3 minutes on each side, then assemble.

    To Assemble

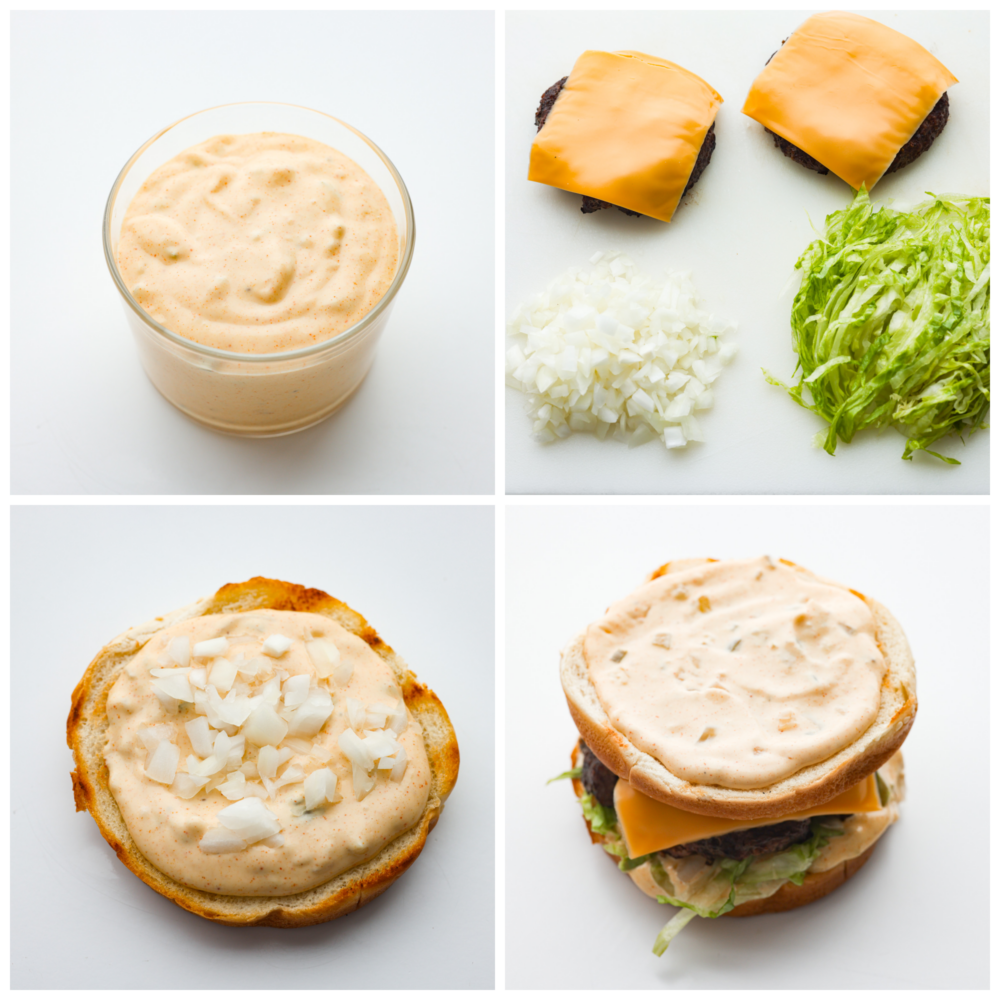
    • Layer: Add the following ingredients, working from the bottom up: bottom bun, big mac sauce, onion, lettuce, beef patty, cheese, pickles, bottom bun, big mac sauce, onion, lettuce, beef patty, pickles, top bun.
    4-photo collage of a burger being assembled.

    Tips and Variations

    The best part of making homemade Big Mac burgers is getting creative and tailoring them to your liking. Enjoy experimenting with different ingredients and flavors!

    • Quality Beef: Use good quality ground beef for the patty. Lean meat with a bit of fat (80/20 ratio) works well for a juicy and flavorful burger.
    • Press Down Those Patties: While cooking, gently press down on the patties with a spatula to create a crispy exterior.
    • Toasting Buns: Toast the sesame seed buns slightly to enhance their texture and prevent sogginess.
    • Spicy Twist: Add a slice of pepper jack cheese and a drizzle of hot sauce or hot honey for a spicy kick.
    • Different Sauces: Play around with other sauces – chipotle mayo, garlic aioli, or BBQ sauce for a personalized touch.
    • Big Mac Sliders: Make smaller versions using slider buns for a fun party appetizer.

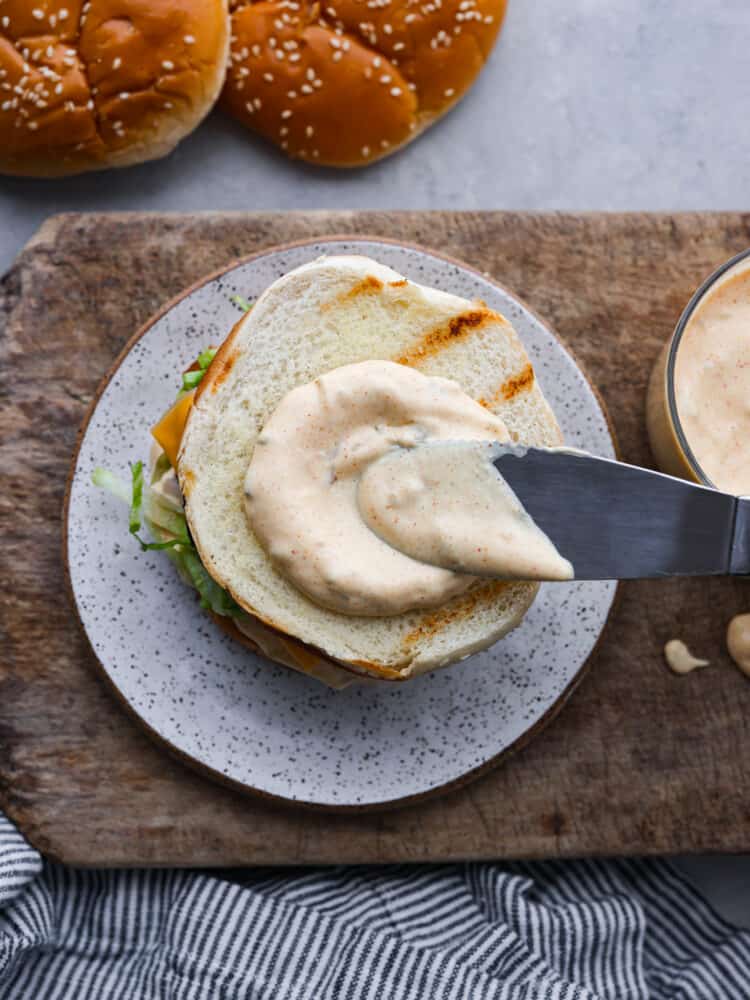
    Spreading Big Mac sauce onto a bun.

    Storing Leftovers

    So, here’s the deal with a homemade Big Mac – it’s best when it’s freshly made. Since it contains ingredients like lettuce, pickles, and Big Mac sauce, it won’t hold up well over an extended period. The lettuce will wilt, the bun will become soggy, and the overall quality just won’t be as good. So enjoy it while it’s hot and fresh!

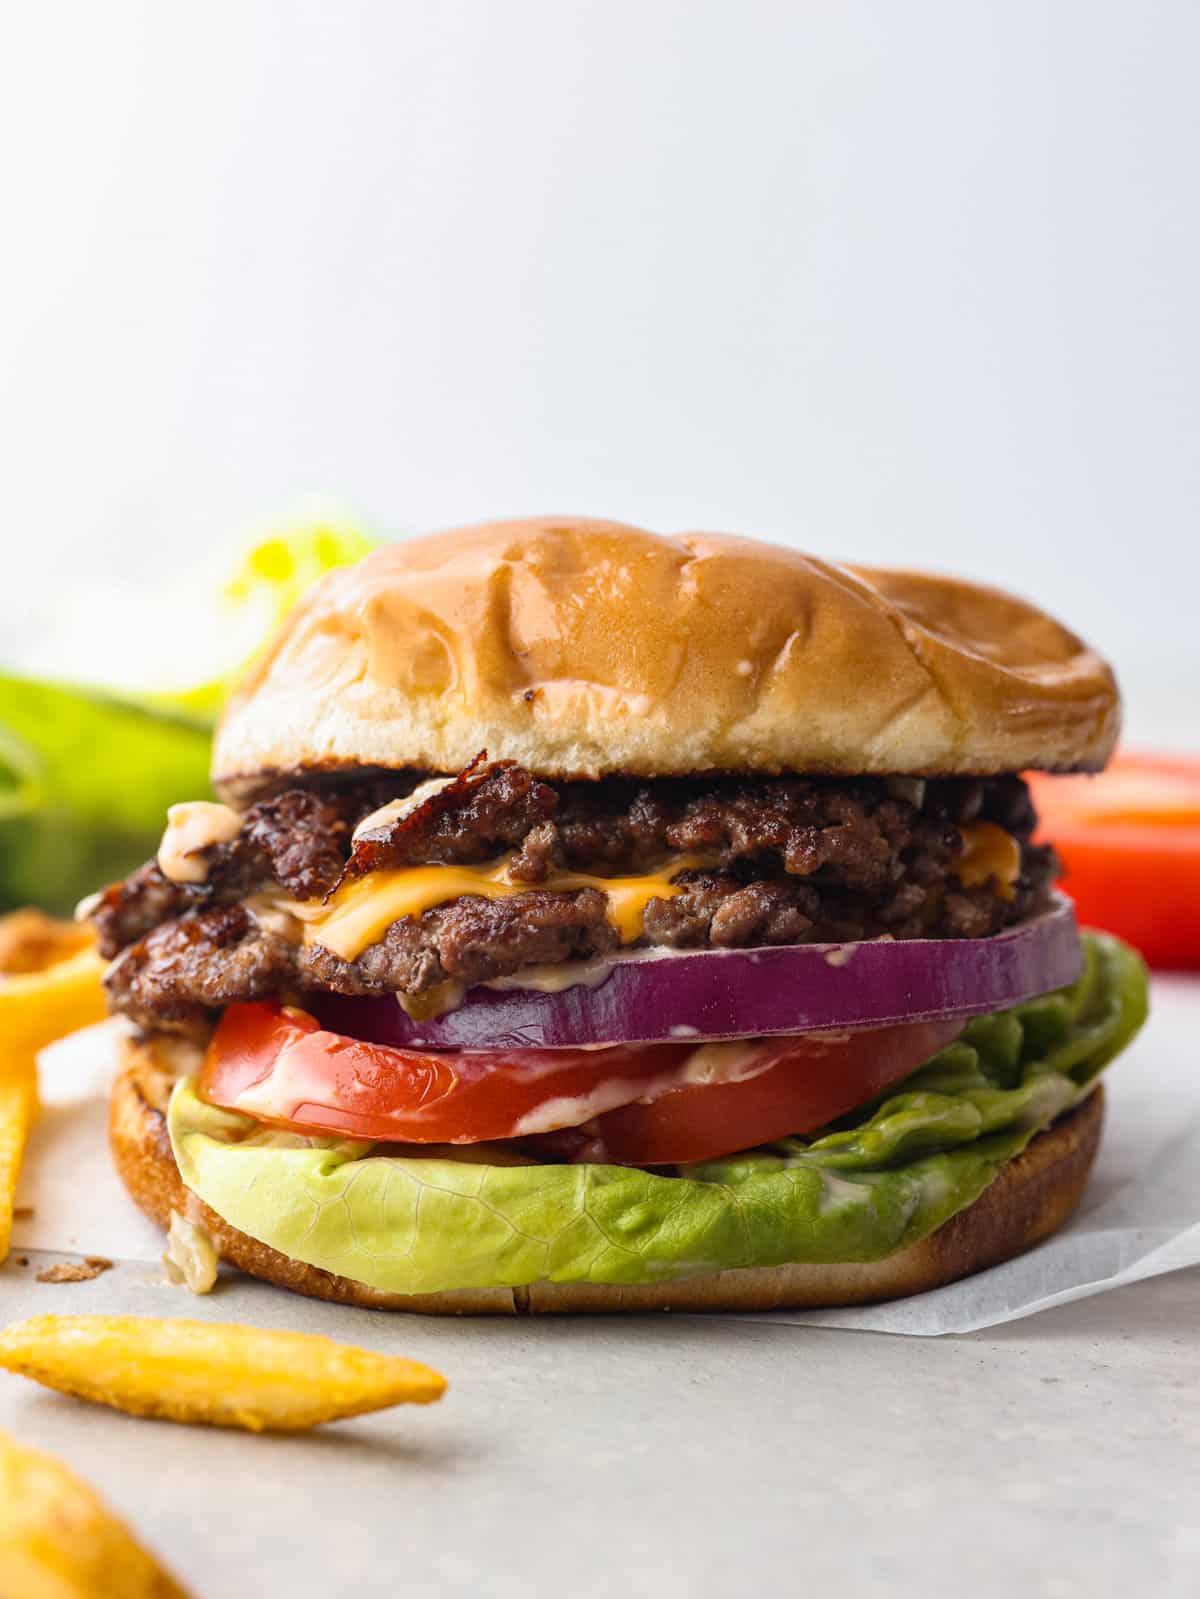
    Closeup of a Big Mac burger.

    Pin this now to find it later

    Pin It


    Source link

  • Bang Bang Shrimp (Copycat Recipe)

    Bang Bang Shrimp (Copycat Recipe)

    This website may contain affiliate links and advertising so that we can provide recipes to you. Read my disclosure policy.

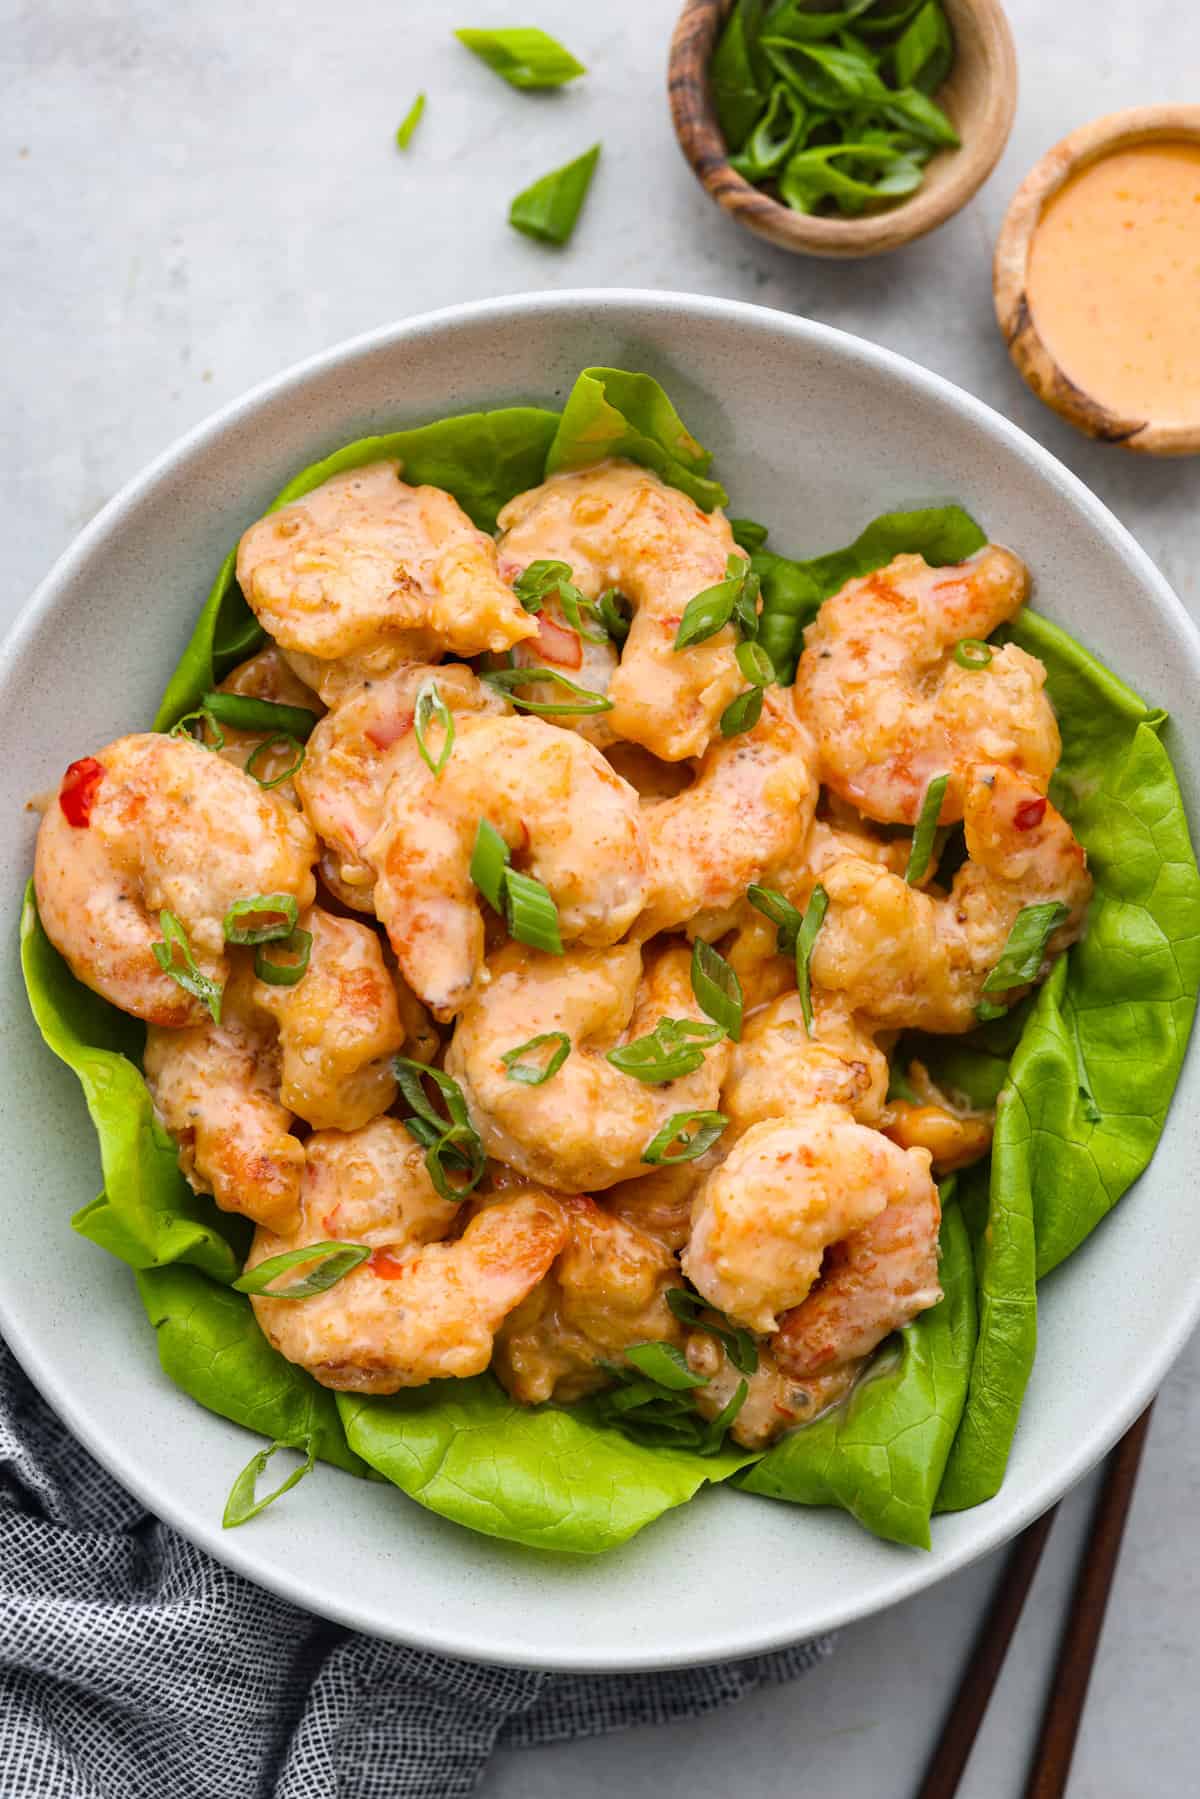
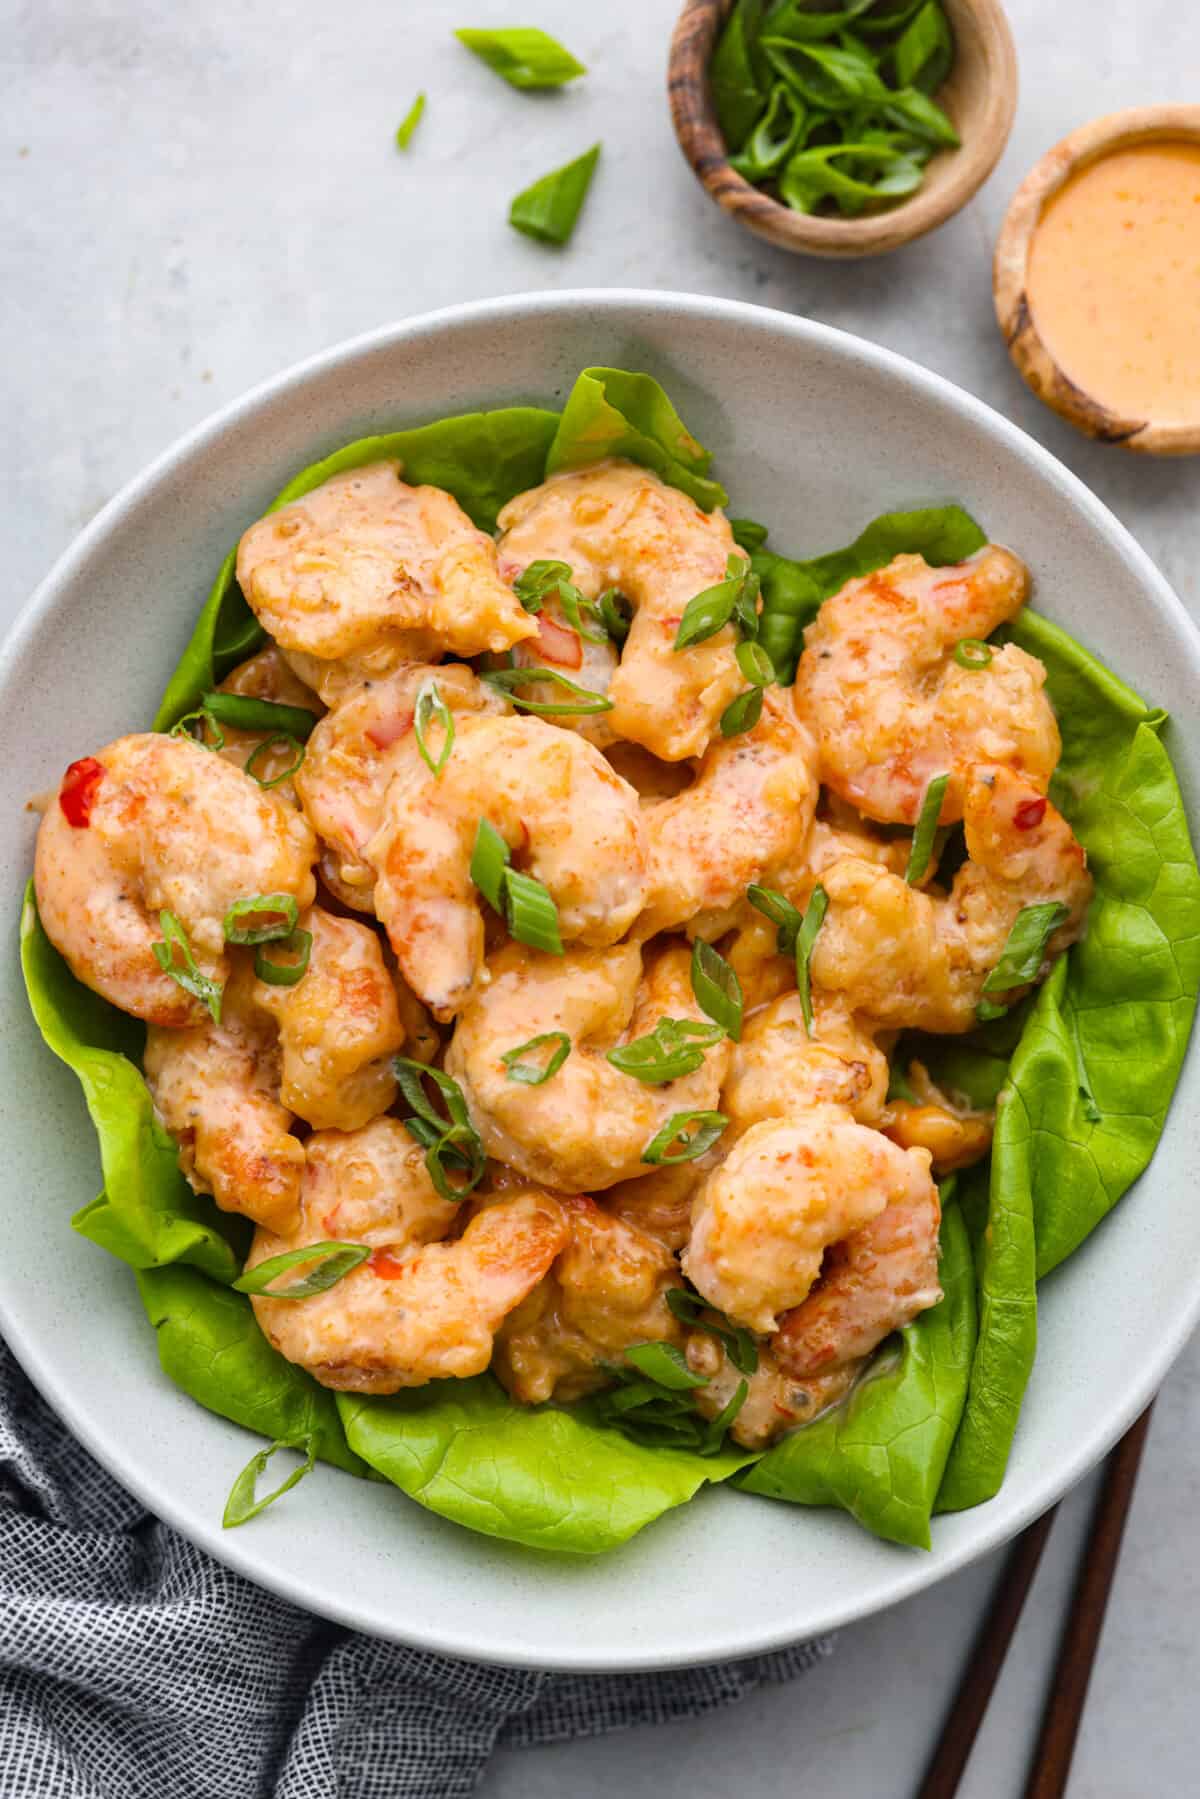
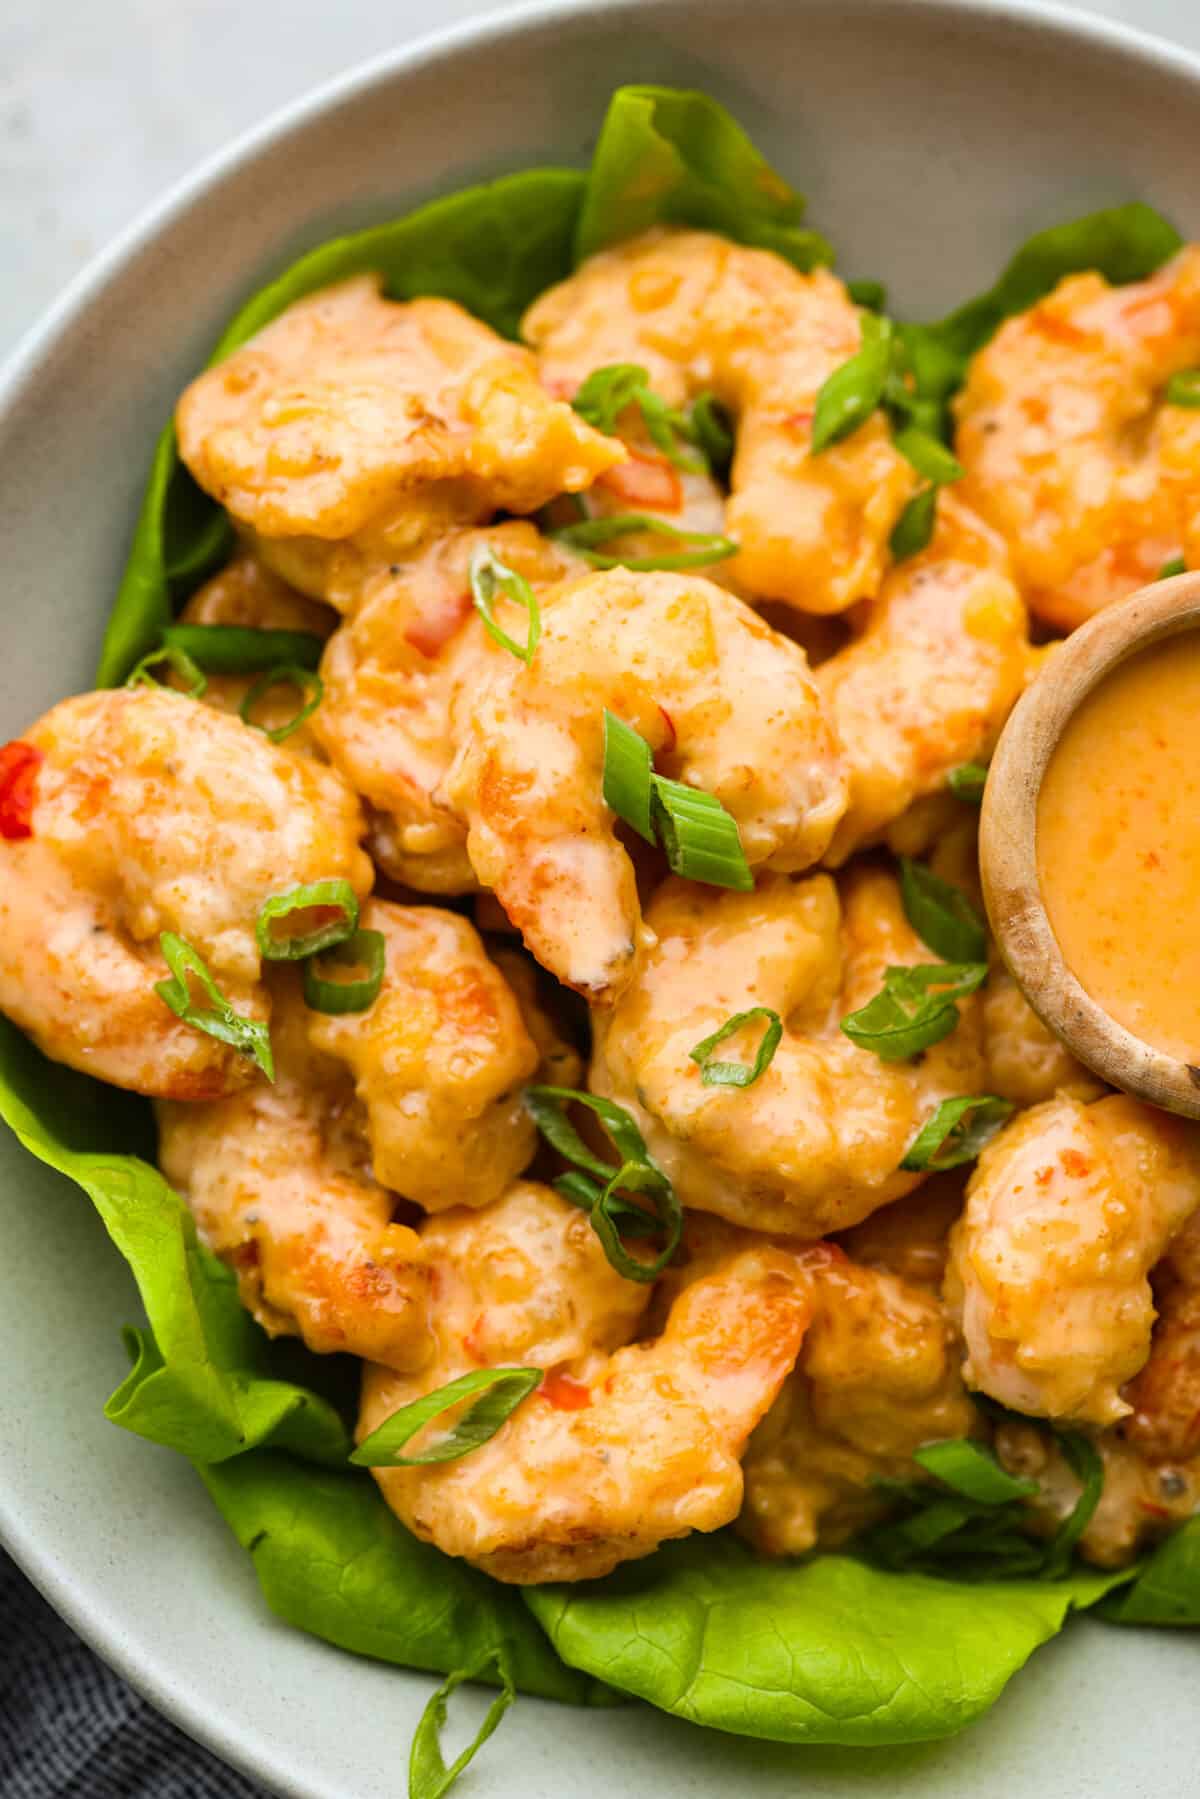
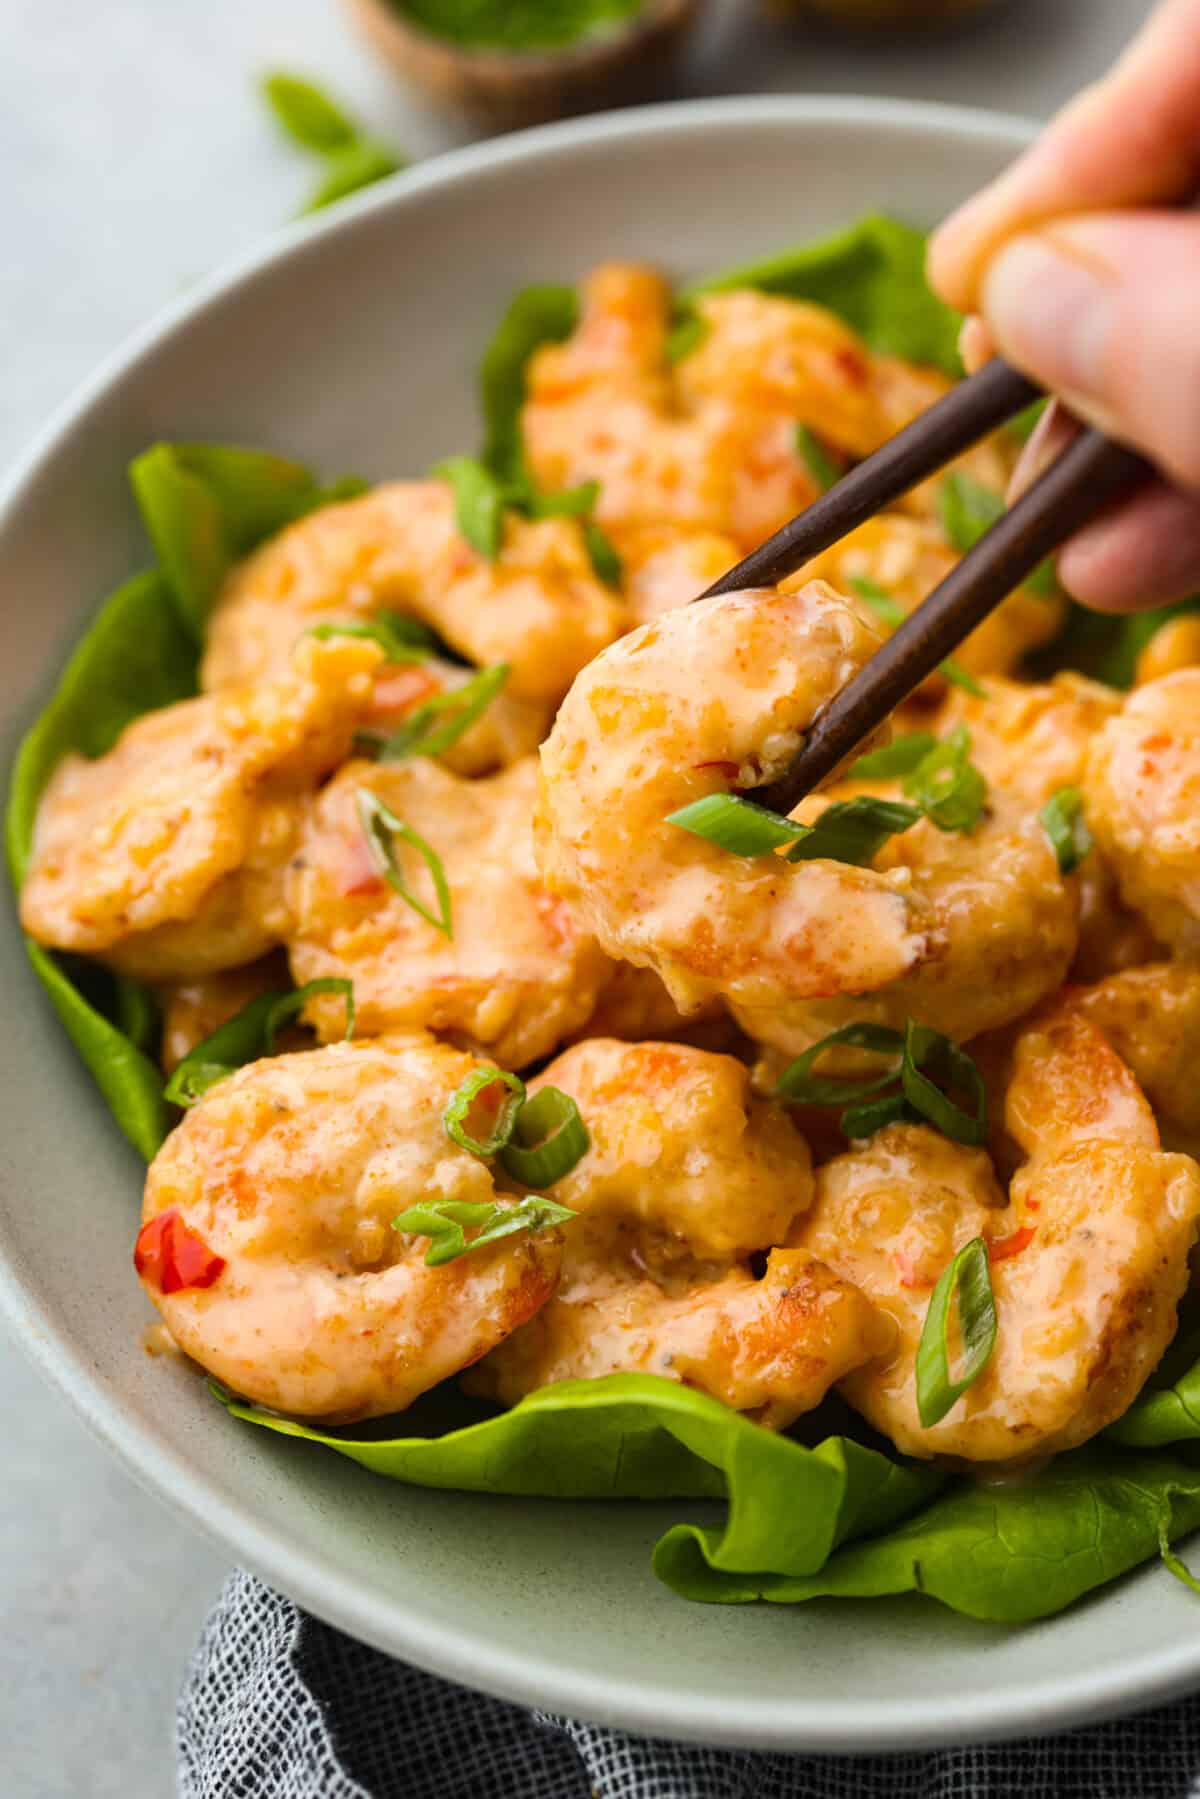
    This Copycat Bonefish Grill Bang Bang Shrimp is a replica of everyone’s favorite shrimp appetizer! Sweet shrimp are fried until crispy, then tossed in a spicy, creamy mayo, and topped with chives. Perfect for sharing!

    We love bite-sized apps, so be sure to check out these Crispy Cauliflower Fritters, Slow Cooker Honey Garlic Sriracha Wings, or this Sweet and Savory Bacon Wrapped Shrimp.

    Bang bang shrimp served over a bed of greens in a white bowl.Bang bang shrimp served over a bed of greens in a white bowl.

    Copycat Bang Bang Shrimp Recipe

    A copycat version of the popular appetizer from Bonefish Grill in Florida! If you’re not familiar, their signature appetizer consists of lightly breaded shrimp (fried of course) tossed in an addictively creamy and spicy mayo-based sauce. What I love so much about this appetizer is it’s not heavy at all. The shrimp are ever-so-slightly fried, with the most delicate coating. (SO good.)

    To achieve this, I used a combination of cornstarch and flour (and plenty of salt of course), which helps to get a super light crust in the end. Bang bang shrimp is always a win and I know you’ll love it as much as I do. It will make everyone in your family a shrimp fan! The flavor and texture of this dish is just too good to resist.

    Ingredients You’ll Need

    You really don’t need too many ingredients to achieve that classic ‘Bang Bang’ flavor. Just some sriracha and sweet chili sauce! You’ll likely have everything else on hand to whip it up.

    • Peeled and Deveined Shrimp: Choose large shrimp for a heartier bite. Make sure they’re peeled, deveined (that’s the dark vein running down the back), and with the tails removed for easy eating.

    What Size Shrimp Should I Use?

    Large or 31-count shrimp. This means there are about 30-33 shrimp per pound.

    Breading:

    • Salt and Pepper: Basic seasonings to add a little flavor.
    • Whole Milk: This helps the cornstarch coating adhere to the bang bang shrimp.
    • Large Egg: Also helps the cornstarch stick and adds a touch of richness.
    • Cornstarch: The corn starch creates a crispy, light coating when fried.

    Bang Bang Sauce:

    • Mayonnaise: The creamy base of the sauce.
    • Honey: For the perfect sweetness and sticky texture.
    • Thai Sweet Chili Sauce: The perfect blend of sweet and spicy! This is a must-add to get the sauce tasting just like Bonefish Grill.
    • Sriracha Sauce: So your sauce has some heat! Adjust the amount to your spice preference.
    • Salt: Enhances all the other flavors in the sauce.

    Let’s Get Cooking!

    Don’t let the frying intimidate you- bang bang shrimp is actually pretty easy to prepare and only takes 30 minutes from start to finish. A restaurant-quality appetizer in a snap? Yes please!

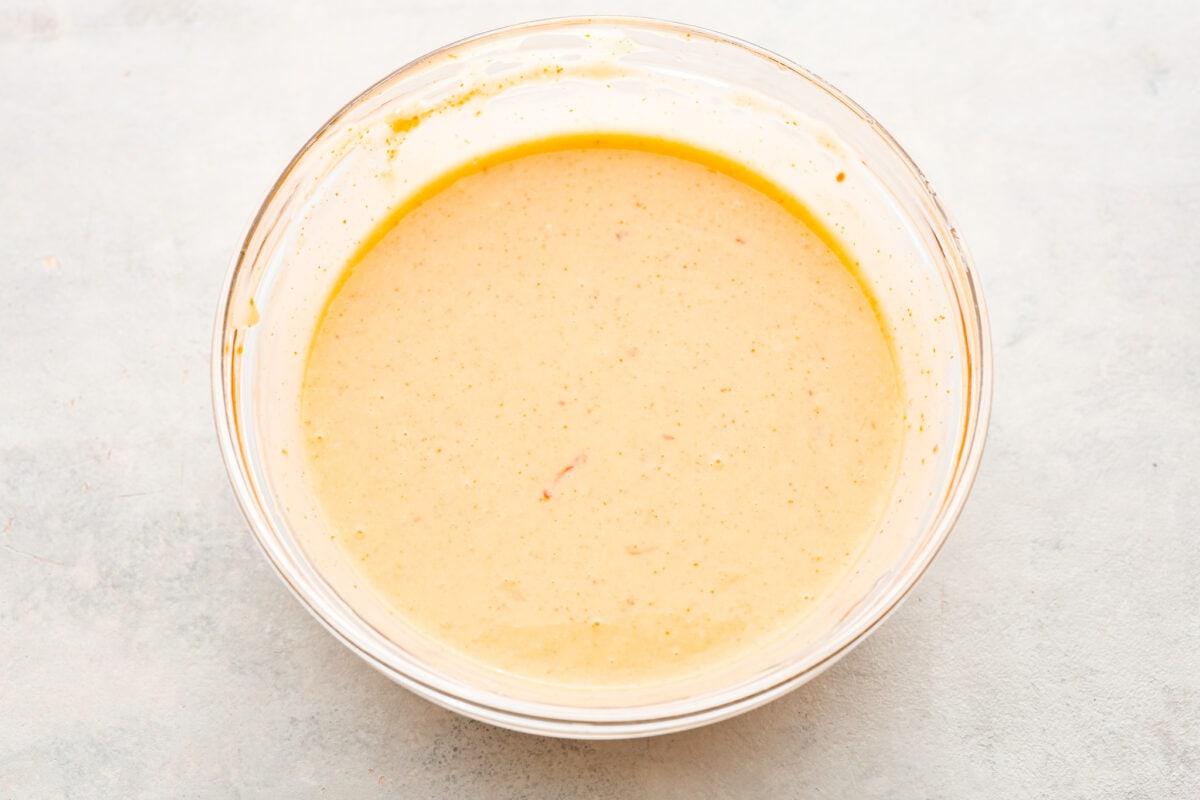
    1. Prepare the Bang Bang Sauce: Prepare the bang bang sauce by adding the mayonnaise, honey, sweet chili sauce, sriracha, and salt to a medium bowl. Whisk to combine and set aside.
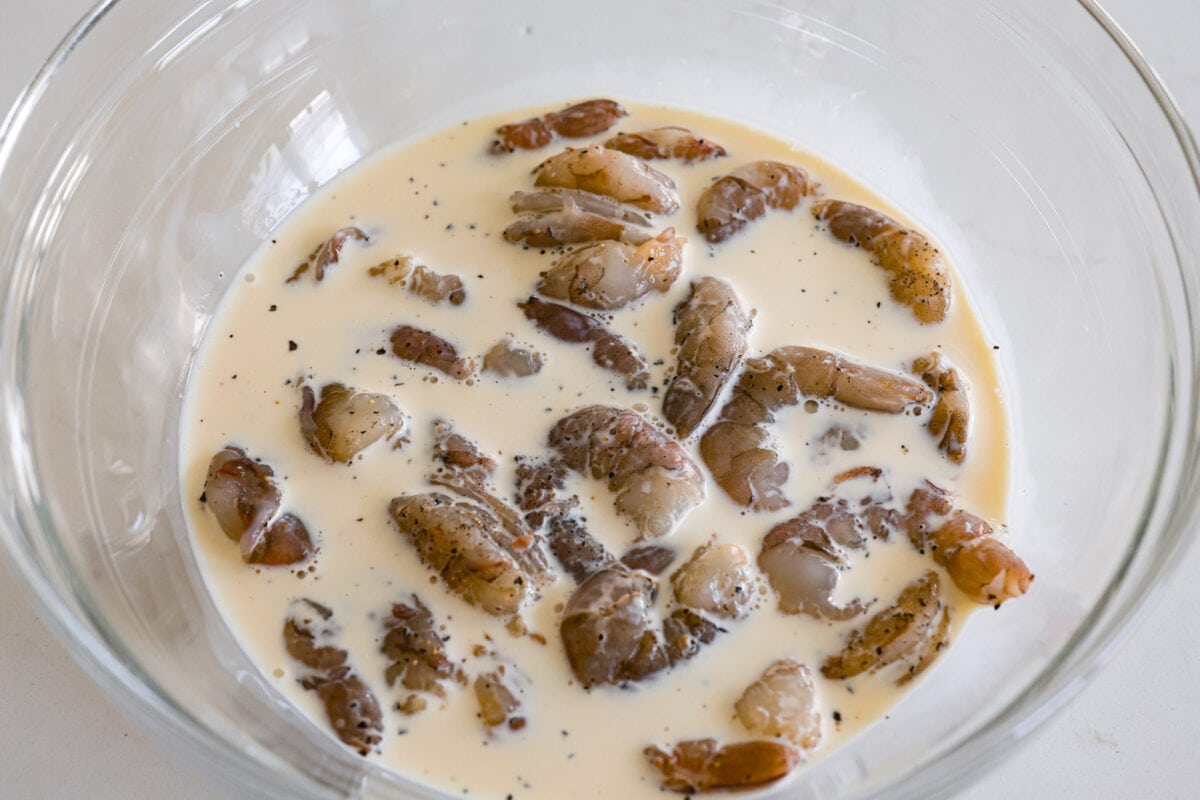
    2. Whisk Together the Milk and Egg: In a large bowl, whisk together the milk and egg.
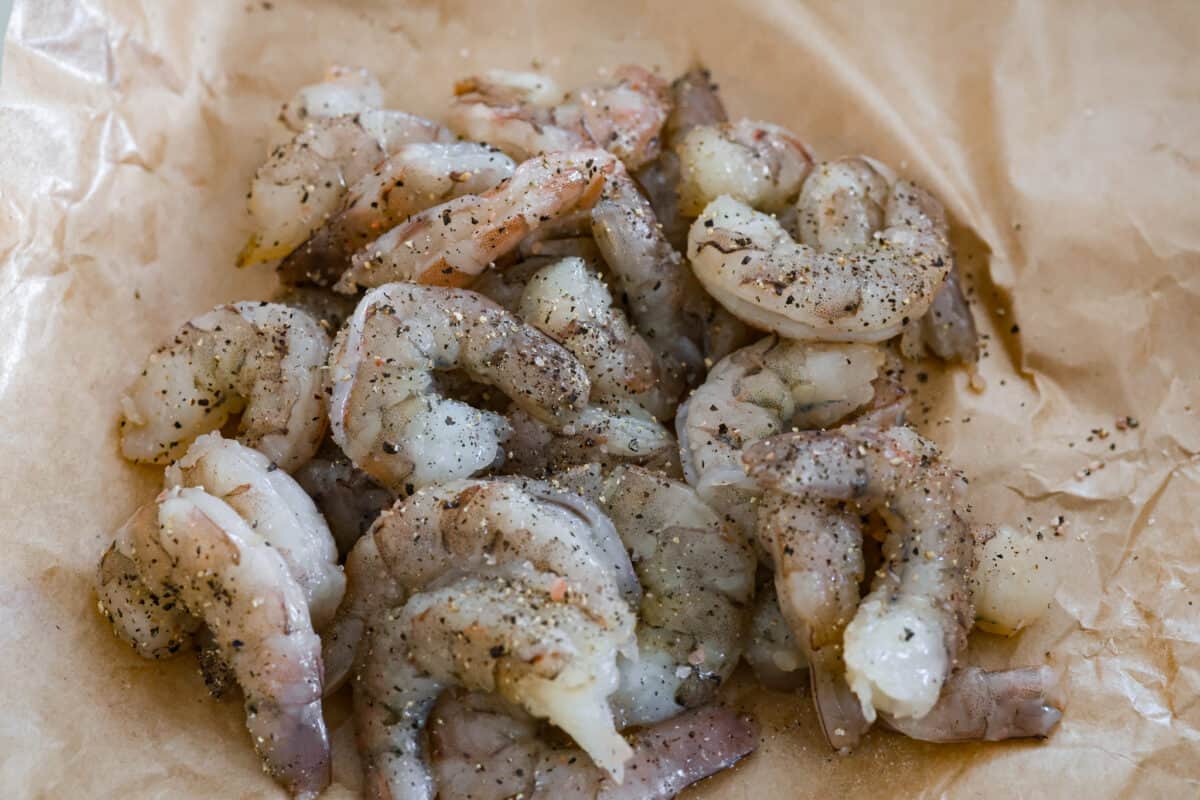
    3. Season and Coat the Shrimp in the Milk Mixture: Season the peeled and deveined shrimp with salt and pepper. Add the shrimp to the milk and egg mixture then toss to coat.
    4. Heat the Oil: Heat the oil in a heavy-bottomed deep pot. Add enough oil to come up about 5 inches. Heat to 375 degrees Fahrenheit.
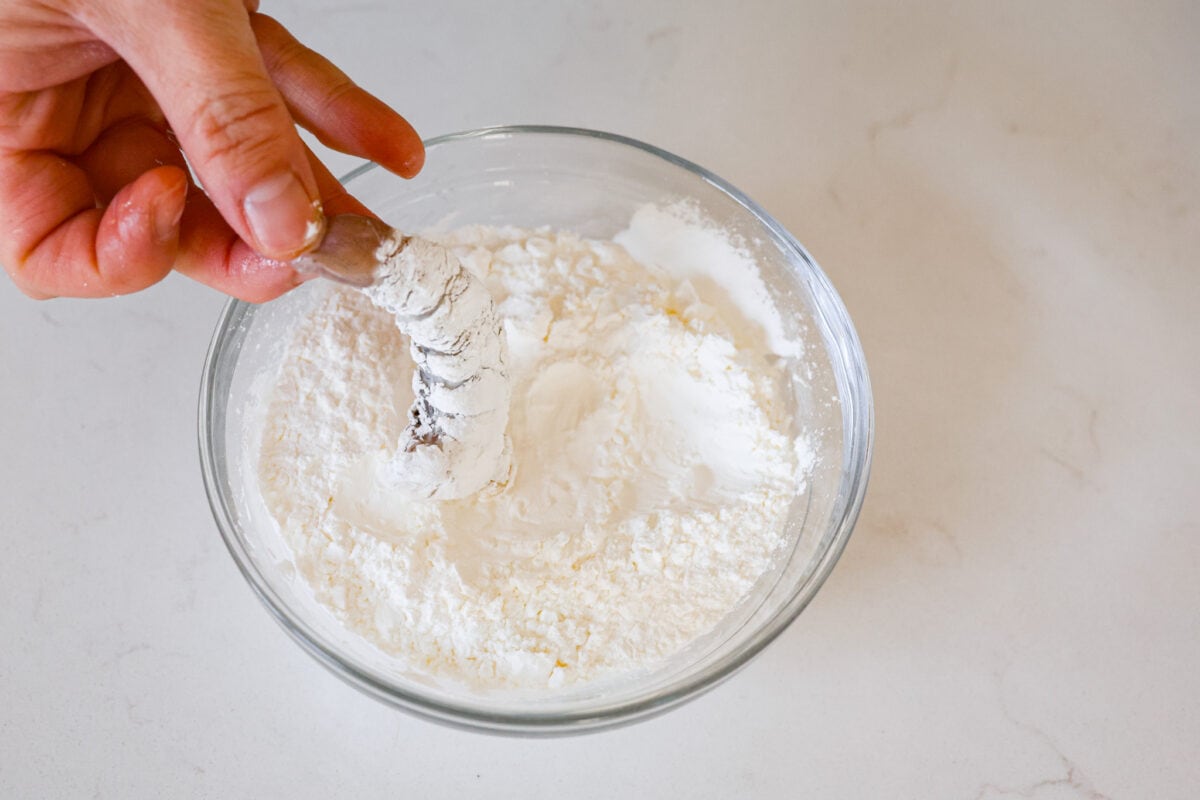
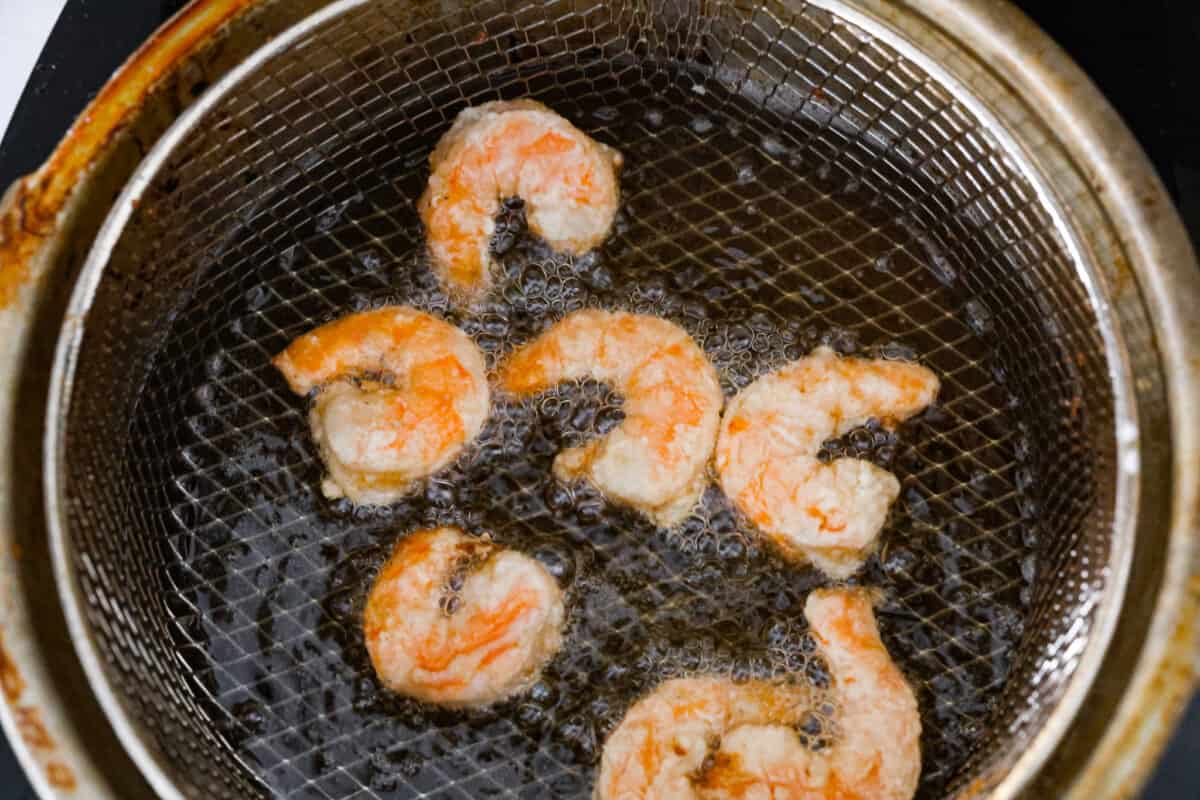
    5. Coat the Shrimp in Cornstarch: In a shallow bowl, add the cornstarch. Working in batches, use tongs to remove 1 shrimp from the milk mixture, letting any excess liquid drip off. Coat the shrimp in cornstarch then place in the hot oil.
    6. Fry the Shrimp: Fry until golden brown and cooked through, about 2-3 minutes. Remove the shrimp with a slotted spoon and then drain on paper towels. Repeat this process with the remaining shrimp.
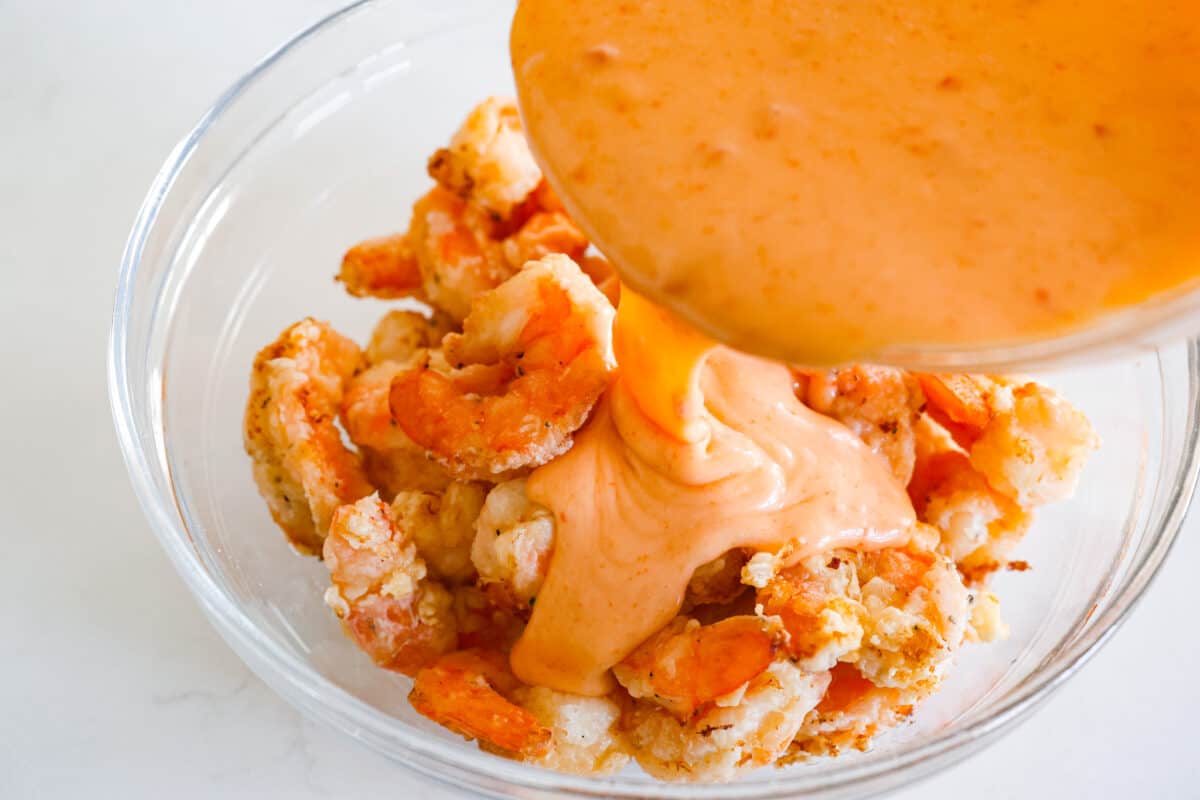
    7. Coat the Shrimp With the Bang Bang Sauce: Toss the fried shrimp with the bang bang sauce then enjoy!

    Bang Bang Shrimp FAQ

    A few extra things to keep in mind so your bang bang shrimp turns out perfectly! Your friends and family are going to go crazy over it.

    • Do I need to take the tails off of my shrimp? This is totally a personal preference. I like to the leave the tails on because it’s pretty, but it’s more practical to take them off, so you can just pop them into your mouth!
    • Can I use low-fat mayo? Absolutely! I actually encourage it. I don’t find there to be a big enough flavor or texture difference in full-fat mayo versus low-fat mayo, so I always suggest doing something that alleviates some of the extra fat and calories.
    • Can I use a mayo substitute? Yes! If you aren’t a fan of mayo, you can swap out the mayonnaise for plain Greek yogurt or sour cream.
    • How many people does this serve? As an appetizer, I would say this bang bang shrimp feeds four people, but if it’s more of an entree (which I completely encourage), then I’d say it feeds two people. I would recommend doubling it if you’re unsure about there being enough for everyone.

    Closeup of bang bang shrimpCloseup of bang bang shrimp

    Storing Leftover Bang Bang Shrimp and Sauce

    While I recommend enjoying your bang bang shrimp fresh, leftovers can be stored for up to 3 days in the fridge. The key here is to keep the shrimp separate from the sauce to prevent the breading from getting soggy.

    • In the Refrigerator: Let the shrimp cool completely, then store them in an airtight container in the refrigerator for up to 3 days. In an airtight container or jar, the sauce will last for up to 1 week.
    • Reheating: To reheat, skip the microwave and opt for an oven or air fryer to keep things crispy. Bake the shrimp for 10 minutes at 350 degrees Fahrenheit, or until heated through. Alternatively, use your air fryer at 320 degrees Fahrenheit for about 5 minutes. Warm up the bang bang sauce separately in the microwave if needed, and toss the shrimp in it just before serving.

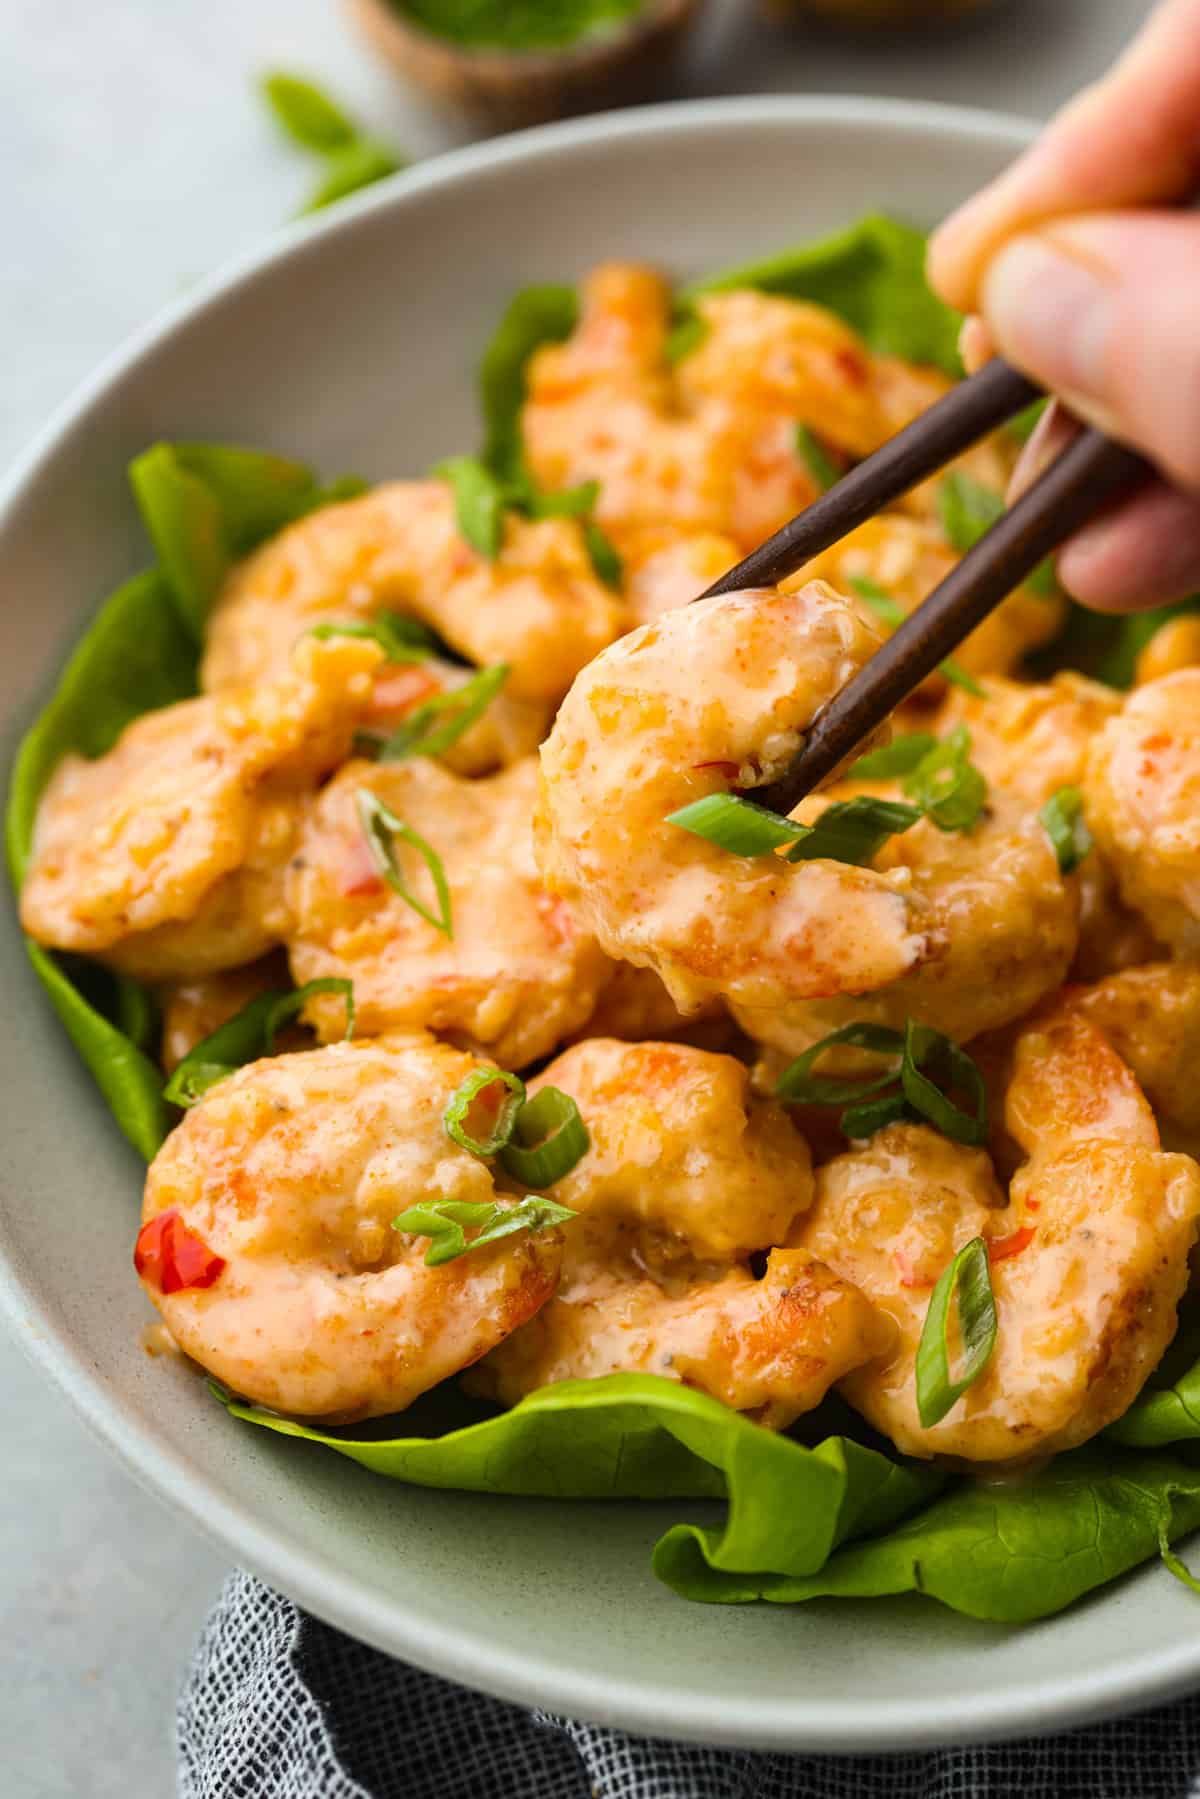
    Picking up a piece of shrimp with chopsticksPicking up a piece of shrimp with chopsticks

    More Irresistible Shrimp Recipes

    Pin this now to find it later

    Pin It


    Source link

  • Easy Almond Butter Recipe

    Easy Almond Butter Recipe

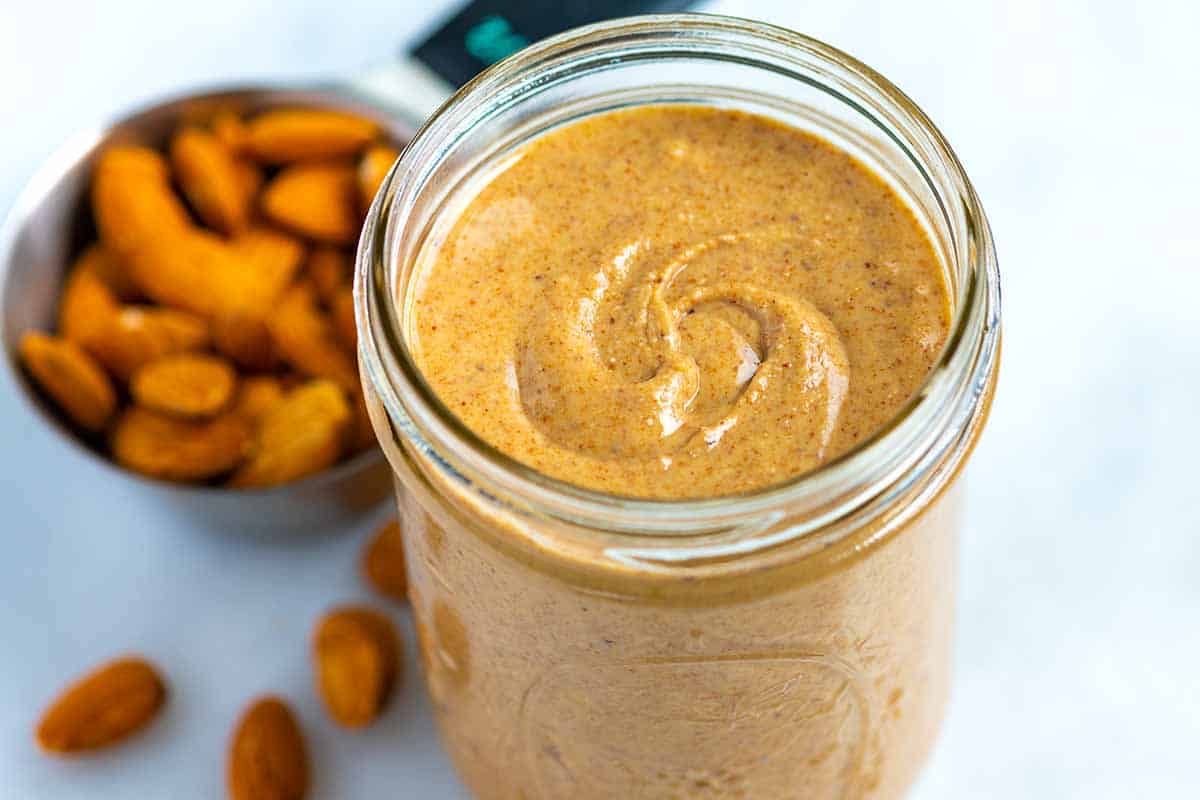
    Our homemade almond butter recipe is thick, creamy and tastes way better than anything you can buy at the store, trust me!

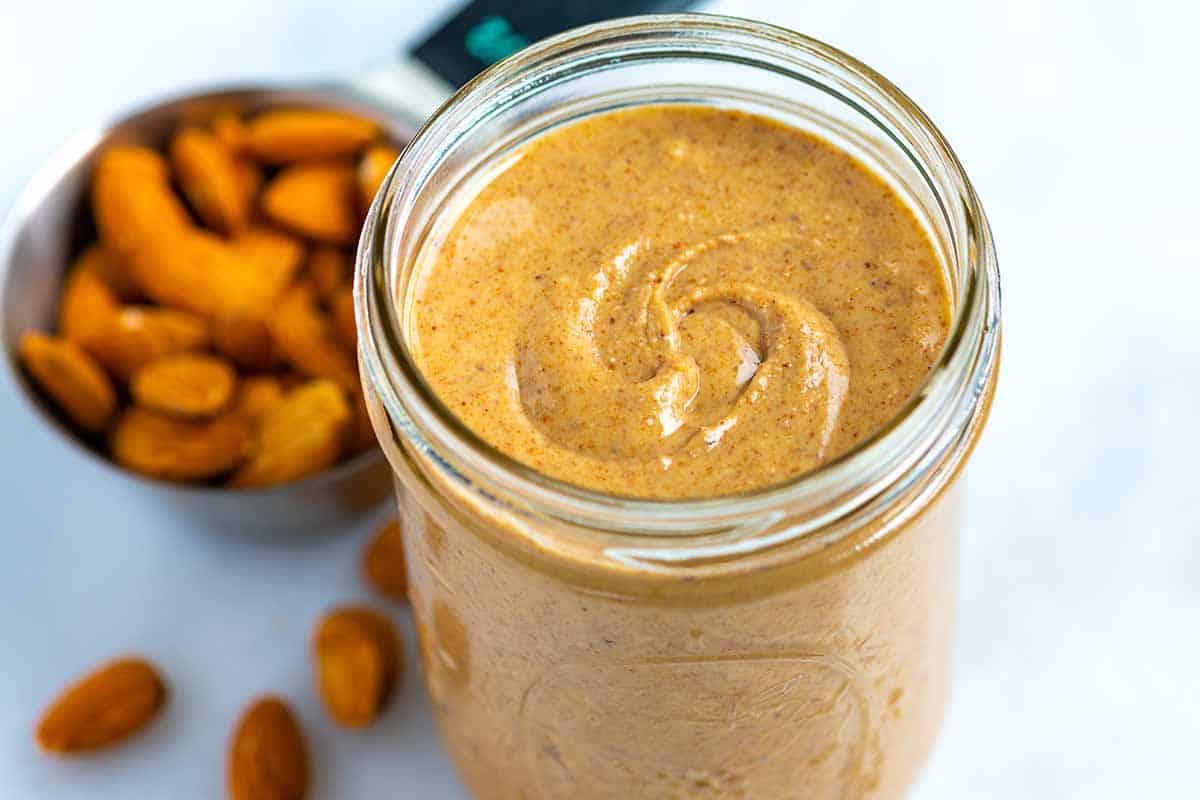
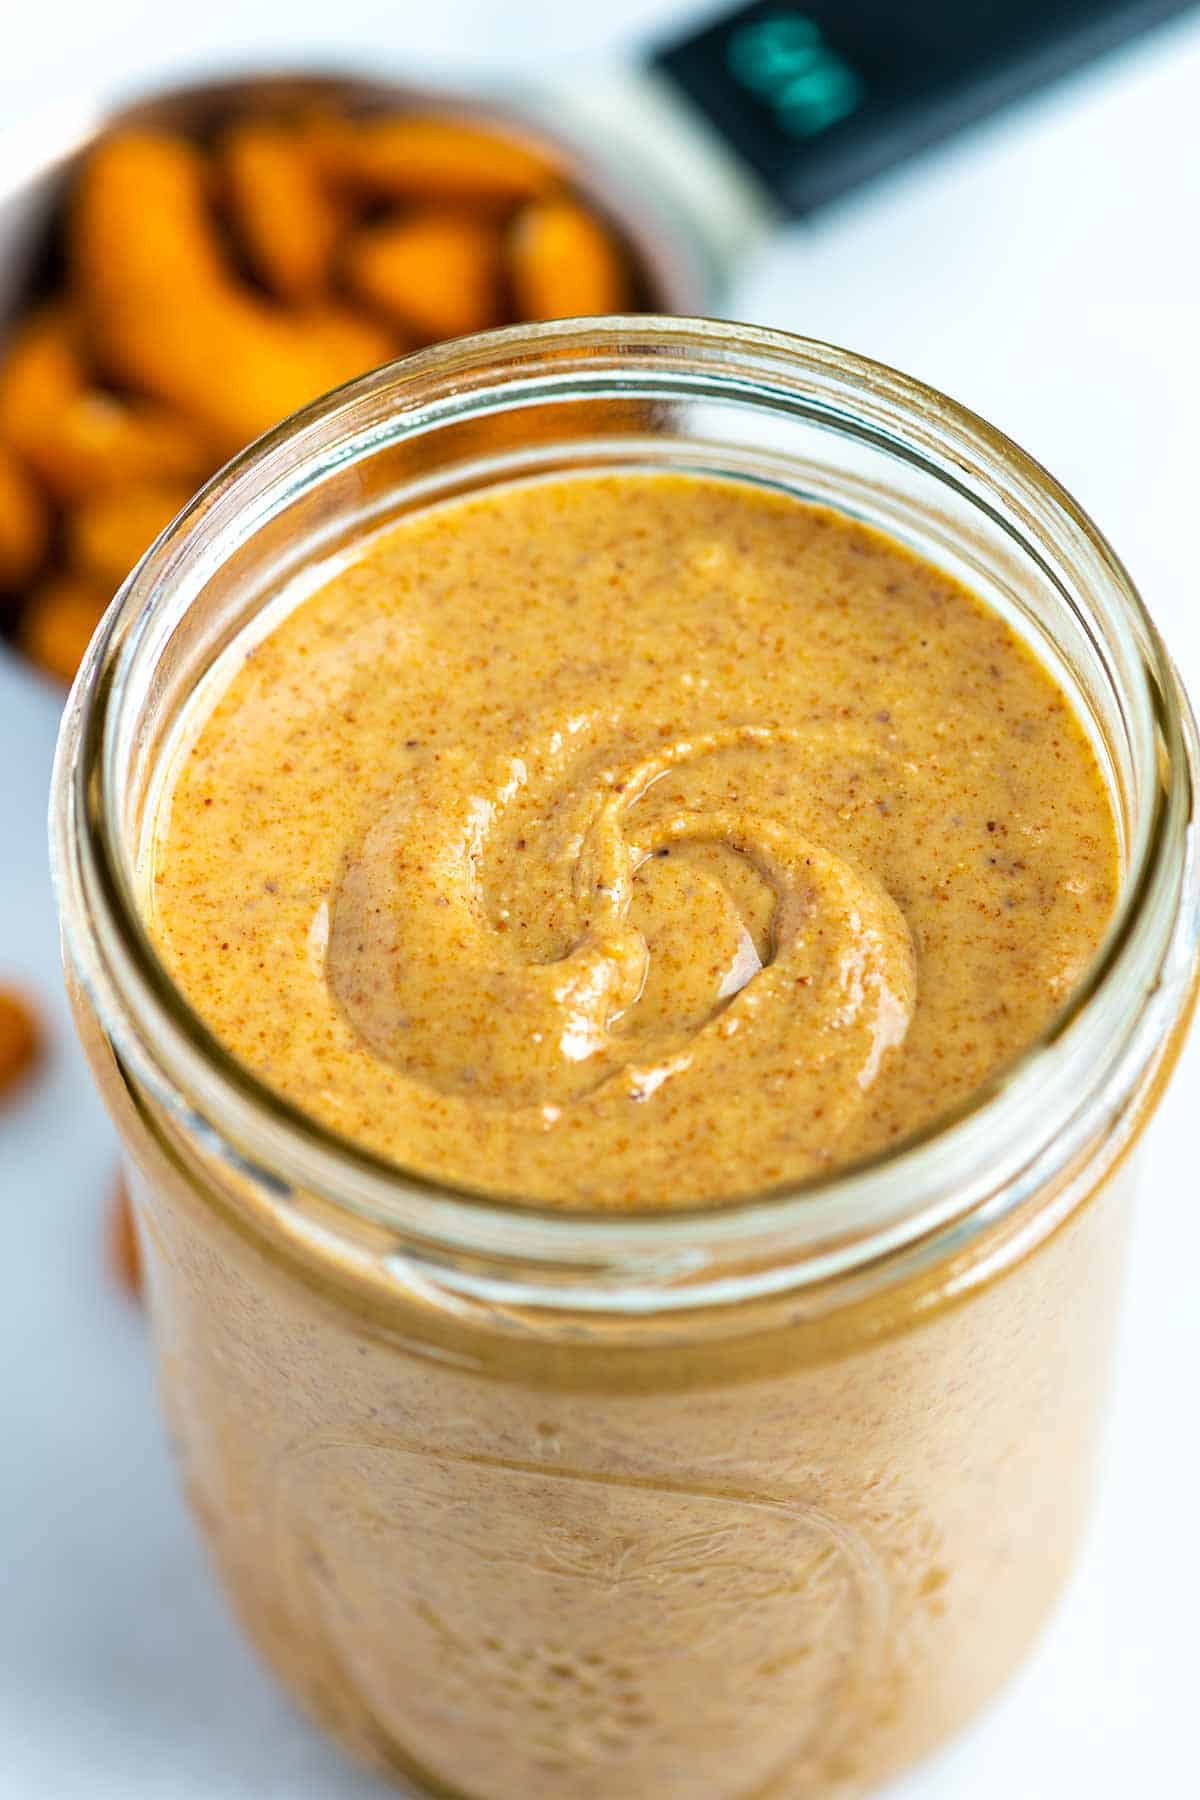
    Homemade Almond Butter

    Every time I make this recipe, I’m amazed at how much better it tastes compared to the jars I’ve bought from the store. My family loves adding a few extras like cinnamon and vanilla, which makes it seriously delicious!

    Making almond butter is just as simple as homemade peanut butter, cashew butter, and tahini. You even can make it super creamy or crunchy. I’ve shared how below.

    Key Ingredients

    • Almonds: I always start with raw, unsalted whole almonds and roast them in the oven until they’re perfectly toasty. Roasting the almonds before blending them into butter brings out their nutty flavor and releases their natural oils, resulting in a creamier texture.
    • Salt: Just a pinch of salt makes all the difference in flavor! You can adjust the amount to your liking.
    • Cinnamon and Vanilla: These are optional additions, but add a warm, sweet flavor that complements the almonds beautifully.
    • Sweetener: I like adding a drizzle of honey or maple syrup to balance the flavors. I don’t add much, but you can adjust it to your taste.

    Find the full recipe with measurements below.

    How to Make Almond Butter

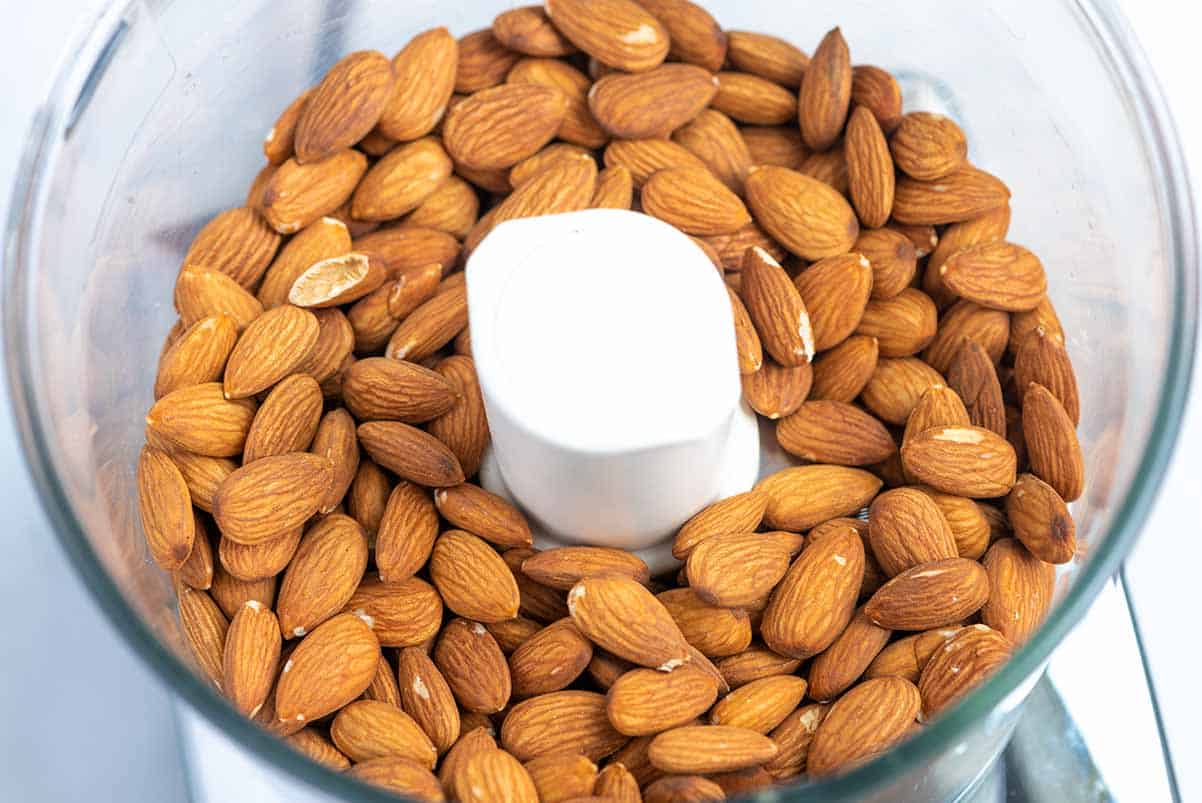
    Tip 1: Toast the almonds. I toast the raw almonds until fragrant in the oven, which takes about 10 minutes. After letting the almonds cool for a few minutes so they are not piping hot, we toss them into our food processor (you can also use a high-speed blender).

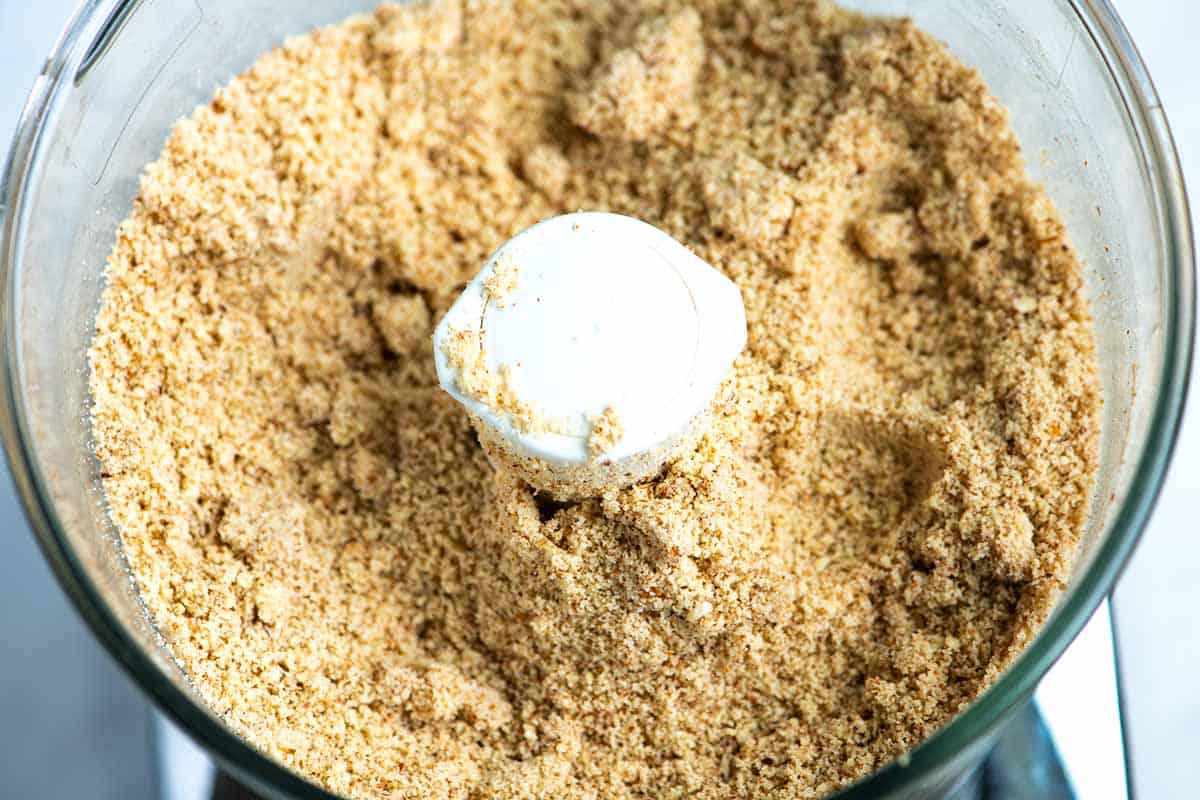
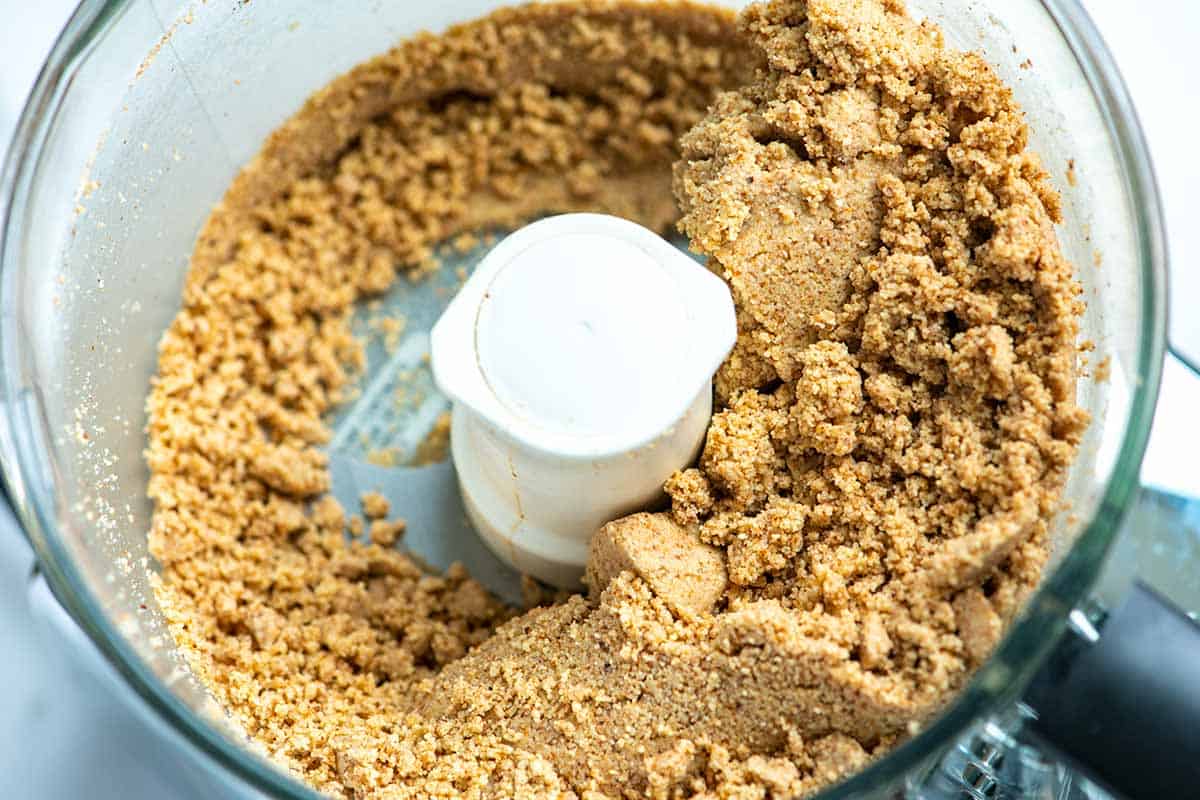
    Tip 2: Use a food processor. After processing for 20 seconds or so, the almonds turn into almond flour. It’s very fine and like a heavy powder. It’s hard to imagine that this eventually turns into silky smooth almond butter, but trust me. Give the almonds longer in the food processor so the heavy powder begins clumping on you. Then, after a minute or two of blending, we have creamy almond butter!

    As you process the almonds, you may need to open the lid, scrape down the sides, and break up any large clumps a few times to help it out.

    Whole toasted almonds in a food processor
    Almonds that have been processed into a almond meal/flour
    A process shot of making almond butter. Before it turns creamy, it looks like a clumpy mess.

    Tip 3: Add extra flavor. Once you have creamy almond butter, you can add seasonings like salt, cinnamon, or vanilla extract. You can also add a sweetener like honey or maple syrup if it needs it. I love a little maple syrup.

    Homemade Almond Butter

    Easy Almond Butter

    • PREP
    • COOK
    • TOTAL

    My family loves this homemade almond butter! If you are anything like my family, you go through jars (and jars) of nut butter every week. We eat oatmeal most mornings and always add almond butter on top.

    We use a 12-cup food processor (10-cup should be sufficient), but a large high powered blender should also work.

    Makes 16 ounces (about 2 cups)

    You Will Need

    1 pound (450g) raw unsalted whole almonds (3 cups)

    1/4 teaspoon fine sea salt, plus more to taste

    1/4 teaspoon ground cinnamon, optional

    1/4 teaspoon vanilla extract, optional

    Honey or maple syrup, optional

    Directions

      1Preheat your oven to 350°F (176°C).

      2Add the almonds to a round or square cake pan (or rimmed baking sheet). Roast them for 3 minutes, shake the pan, then roast another 3 to 5 minutes or until the nuts are lightly browned and smell nutty (be careful as they can burn quickly). Let them cool until you can handle them.

      3For crunchy almond butter: Set aside 1/3 cup of the roasted almonds. Pulse them in a food processor 6 to 8 times until finely chopped. Transfer the chopped almonds to a bowl and set aside.

      4Add the remaining roasted almonds to the food processor. Process for 1 minute, then scrape down the sides of the bowl.

      5Continue processing for another 2 to 3 minutes until the almond butter is smooth and creamy. It will go through different stages, starting as whole nuts, turning into a fine powder, a clumpy mess, and finally, a smooth paste. Scraping down the sides and breaking up any clumps will help speed up the process.

      6Once smooth, add the salt, cinnamon, and vanilla. Process for 10 to 20 seconds.

      7Taste and adjust the seasonings if needed. If you prefer a sweeter almond butter, add a teaspoon or more of honey or maple syrup and process for another 5 to 10 seconds to incorporate it.

      8For crunchy almond butter: Stir in the reserved chopped almonds.

    Adam and Joanne’s Tips

    • Storing: Homemade almond butter lasts 3 to 4 weeks. I like to store mine in mason jars in the refrigerator.
    • Creamier almond butter: If your almond butter is too thick, add 2 to 3 teaspoons of neutral oil (like walnut oil or avocado oil), and process a little longer.
    • Blender method: Use a high-powered blender (which most are). More expensive models with a tamper (like Vitamix) will make the process much quicke
    • The nutrition facts provided below are estimates.

    Nutrition Per Serving
    Serving Size
    About 2 tablespoons
    /
    Calories
    156
    /
    Total Fat
    13.4g
    /
    Saturated Fat
    1g
    /
    Choesterol
    0mg
    /
    Sodium
    36.6mg
    /
    Carbohydrate
    5.8g
    /
    Dietary Fiber
    3.4g
    /
    Total Sugars
    1.2g
    /
    Protein
    5.7g


    AUTHOR:

    Joanne Gallagher

    Adam and Joanne of Inspired Taste

    We are Adam and Joanne Gallagher, the creators of Inspired Taste. Established in 2009, Inspired Taste grew from a childhood dream into one of the internet’s most trusted recipe sites with hundreds of reliable recipes, step-by-step videos, and expert tips.More About Us
    Source link

  • Easy BBQ Chicken Wings Recipe

    Easy BBQ Chicken Wings Recipe

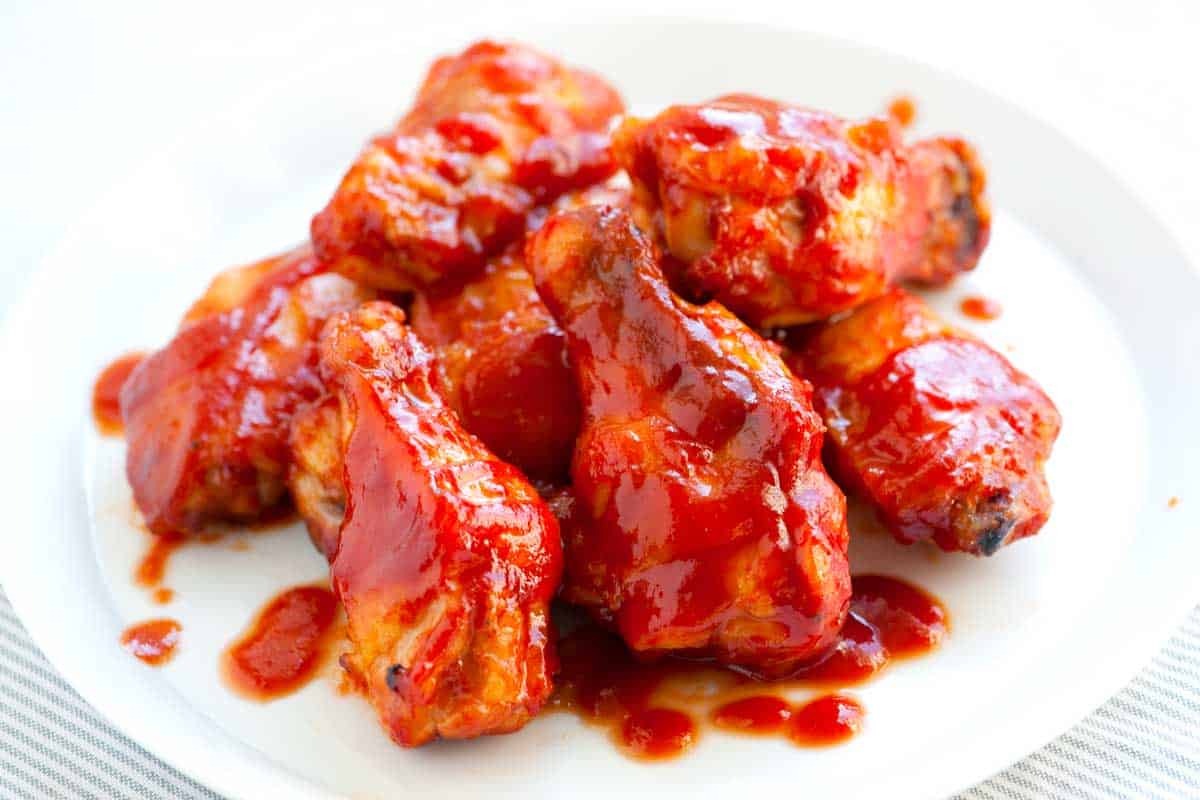
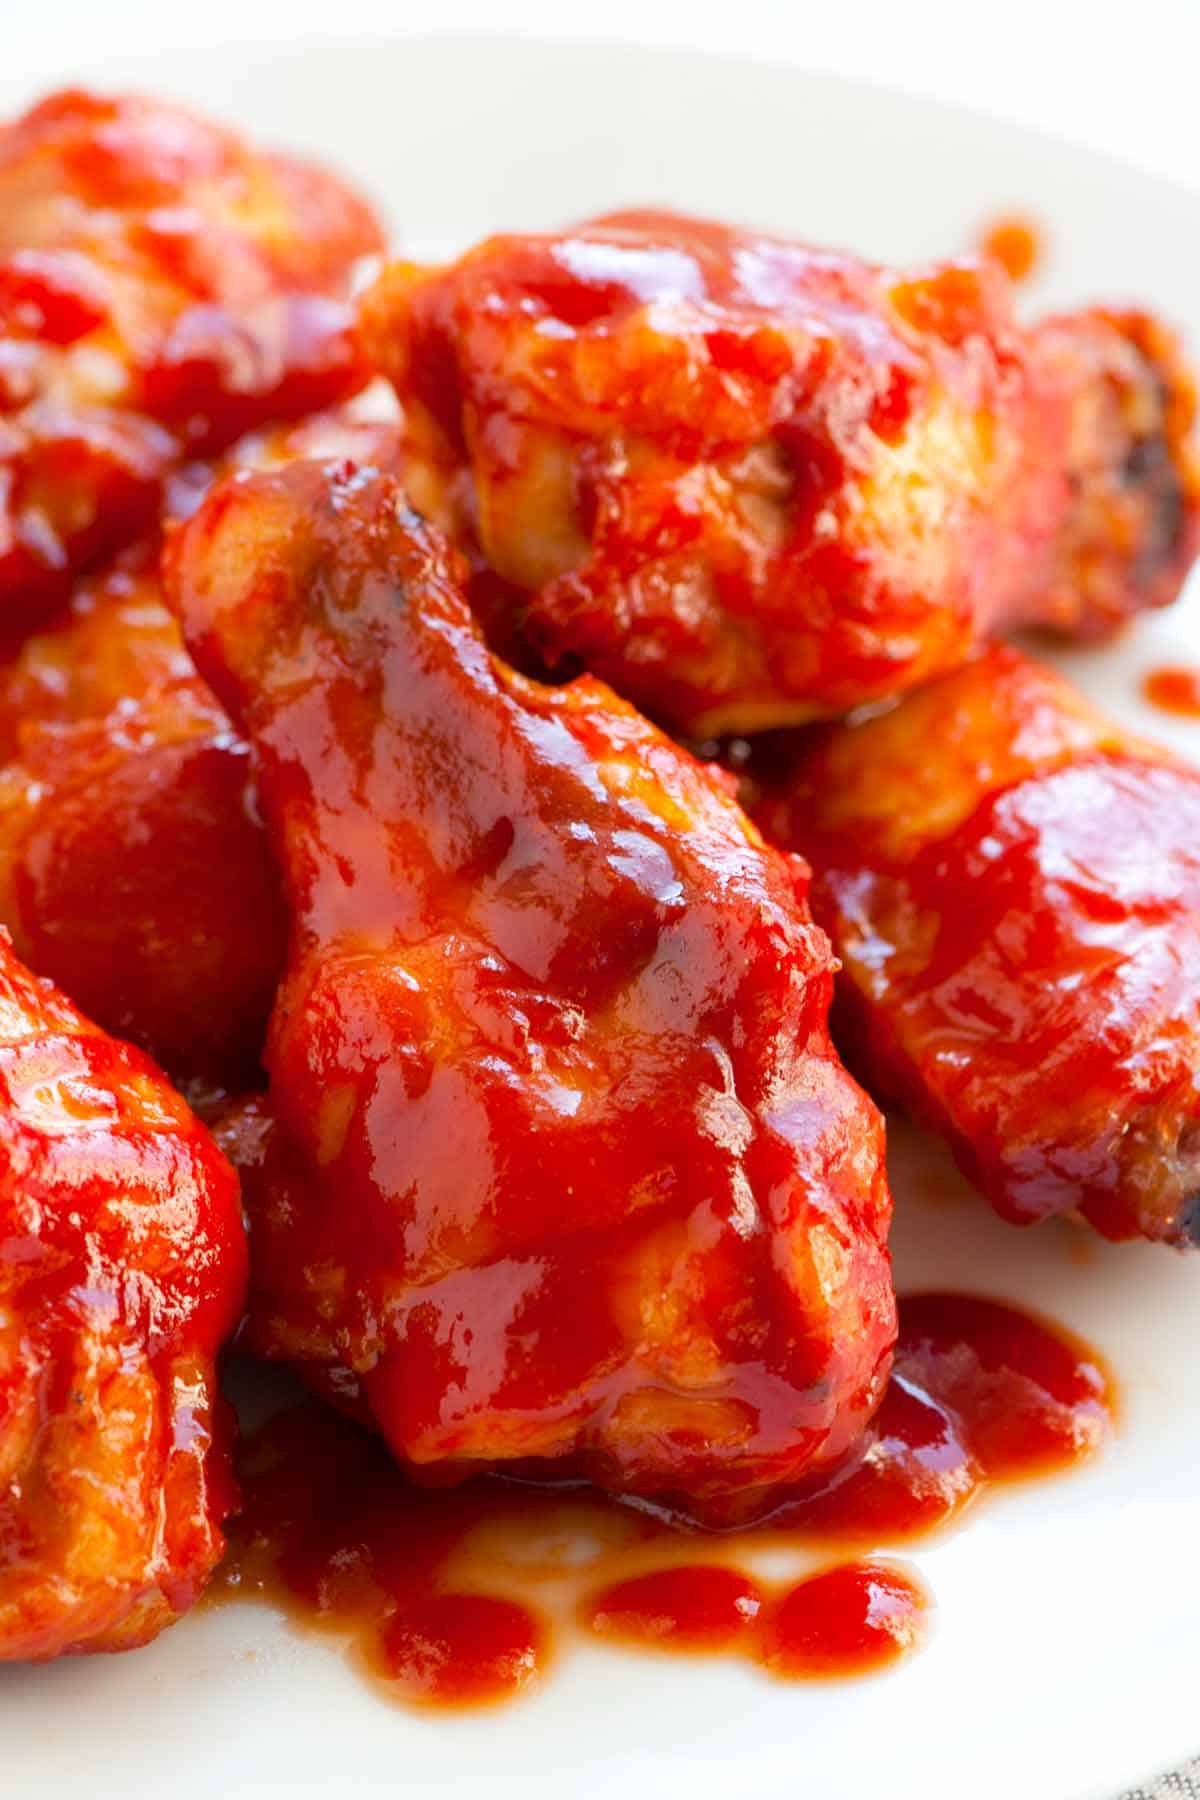
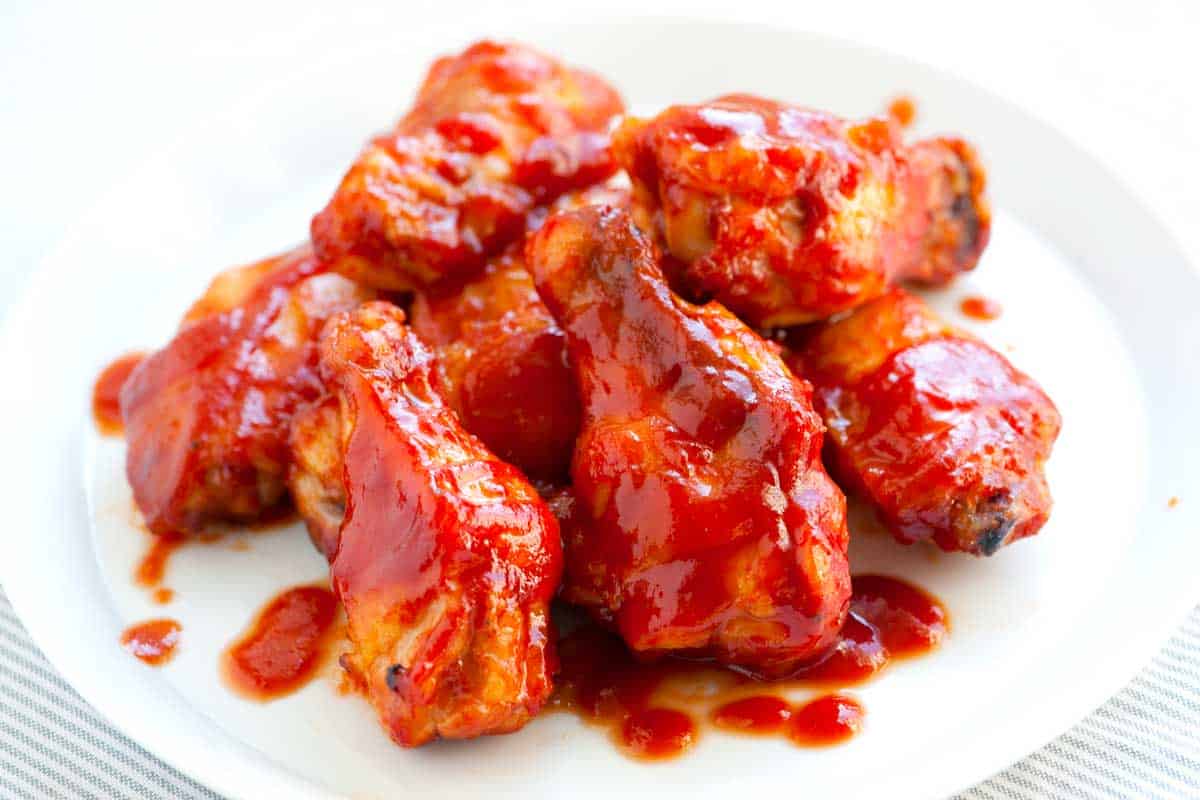
    Our brown sugar baked BBQ chicken wings are easy for you to make at home. With our recipe, you can skip the oil and fryer and make amazing wings tossed in our delicious homemade barbecue sauce. These barbecue wings are sweet, smoky, and just a little sticky!

    Baked BBQ Chicken Wings

    We love chicken wings, but the last thing we want to do at home is use a deep fryer. That’s why we’re such big fans of baking chicken wings at home. For this BBQ chicken wings recipe, we use the same method as our crispy baked hot wings, but instead of tossing the baked wings with buffalo sauce, we use our easy homemade BBQ sauce.

    This recipe guarantees crispy and delicious wings! They are also perfect for serving a crowd. This simple recipe lets you make big batches of wings with little work from you. For more recipes like this, look at our spicy chicken wings or these sweet chili chicken wings.

    Key Ingredients

    • Chicken Wings: We use chicken wings already split into the drumstick and wingette. Most stores sell them this way, but you can separate them yourself if you need to. You can also leave them whole (I do this in my grilled wings recipe). The recipe works either way. If you need guidance on separating the wings, check out our tutorial on how to cut a chicken wing.
    • Homemade BBQ Sauce: For the BBQ sauce, we use a sauce similar to the one we use for our oven baked ribs. You’ll need ketchup, brown sugar, apple cider vinegar, Sriracha, soy sauce, and cumin. It’s quick and easy. I also love this sweet and tangy BBQ sauce, which also works well with these wings.

    How to Make BBQ Chicken Wings

    Making BBQ wings at home is so easy. Below, we share how we make them, how long it takes to bake wings so they are crispy, and a quick and easy barbecue sauce to coat them in. There are 3 things to keep in mind for making the best wings:

    1. Instead of frying them, bake the chicken wings on a wire rack inside a rimmed baking sheet and toss in some homemade BBQ sauce. By cooking the chicken wings on a wire rack, fat drips away from them while they bake, helping to make them extra crispy.
    2. Bake the chicken wings at a high oven temperature (we like 400ºF) for 35 to 45 minutes. (You can bake wings at an even higher temperature, but depending on your oven, you might find the oven smokes a little.)
    3. Toss the baked wings with more BBQ sauce. Then, serve them with your favorite dipping sauce. We like homemade ranch or blue cheese dressing.
    BBQ Chicken Wings with Homemade BBQ Sauce

    Easy BBQ Chicken Wings

    • PREP
    • COOK
    • TOTAL

    Sweet, smoky, and just a little spicy, the sauce for these baked BBQ chicken wings comes together in 5 minutes and is fantastic. If you have a favorite store-bought BBQ sauce, feel free to use it instead. Baking your wings on a rack inset to your baking sheet helps make them extra crispy, so if you have one, use it!

    Serves 6

    You Will Need

    3 pounds (1.3kg) chicken wings, separated at joints, tips discarded

    1 cup (250g) ketchup, try homemade ketchup

    1/2 cup (100g) lightly packed brown sugar

    1 tablespoon apple cider vinegar

    1 tablespoon Sriracha chili sauce

    1 teaspoon light soy sauce

    1/2 teaspoon ground cumin

    Directions

      1Heat oven to 400°F (204°C). Set a wire rack inside a large-rimmed baking sheet. Spray rack with nonstick cooking spray.

      2Make BBQ sauce: In a medium saucepan over medium heat, stir together the ketchup, brown sugar, vinegar, Sriracha, cumin, and soy sauce. Cook for 2 to 3 minutes or until the sugar dissolves. Taste and adjust with additional soy sauce or sugar.

      3Divide the sauce in half, saving half for serving the wings.

      4Toss the chicken wings with the remaining half of BBQ sauce, and then place onto the prepared baking sheet.

      5Bake the chicken wings, turning once during cooking, until an internal thermometer registers 165°F, 35 to 45 minutes.

      6Serve the baked wings with the sauce you set aside earlier, either on the side or tossed with the chicken.

    Adam and Joanne’s Tips

    • No wire rack: If you do not have a wire rack that will fit inside a baking sheet, you can still make wings. Arrange them on the baking sheet, without the rack and rotate a few times during baking.
    • BBQ sauce: You will need 1 ¼ cups barbecue sauce, homemade or store-bought.
    • We have used the USDA database to calculate approximate values. 1 pound of wings will be 8 to 12 wings, depending on size.

    Nutrition Per Serving
    Serving Size
    1/6 of the recipe
    /
    Calories
    554
    /
    Total Fat
    29.2g
    /
    Saturated Fat
    8g
    /
    Cholesterol
    251.6mg
    /
    Sodium
    694mg
    /
    Carbohydrate
    30.4g
    /
    Dietary Fiber
    0.1g
    /
    Total Sugars
    27.2g
    /
    Protein
    39.9g


    AUTHOR:

    Joanne Gallagher

    Previous Post: Easy Cilantro Lime Slaw
    Next Post: Homemade Honey Almond Granola

    Source link

  • Baked Lemon Chicken Breast Recipe

    Baked Lemon Chicken Breast Recipe

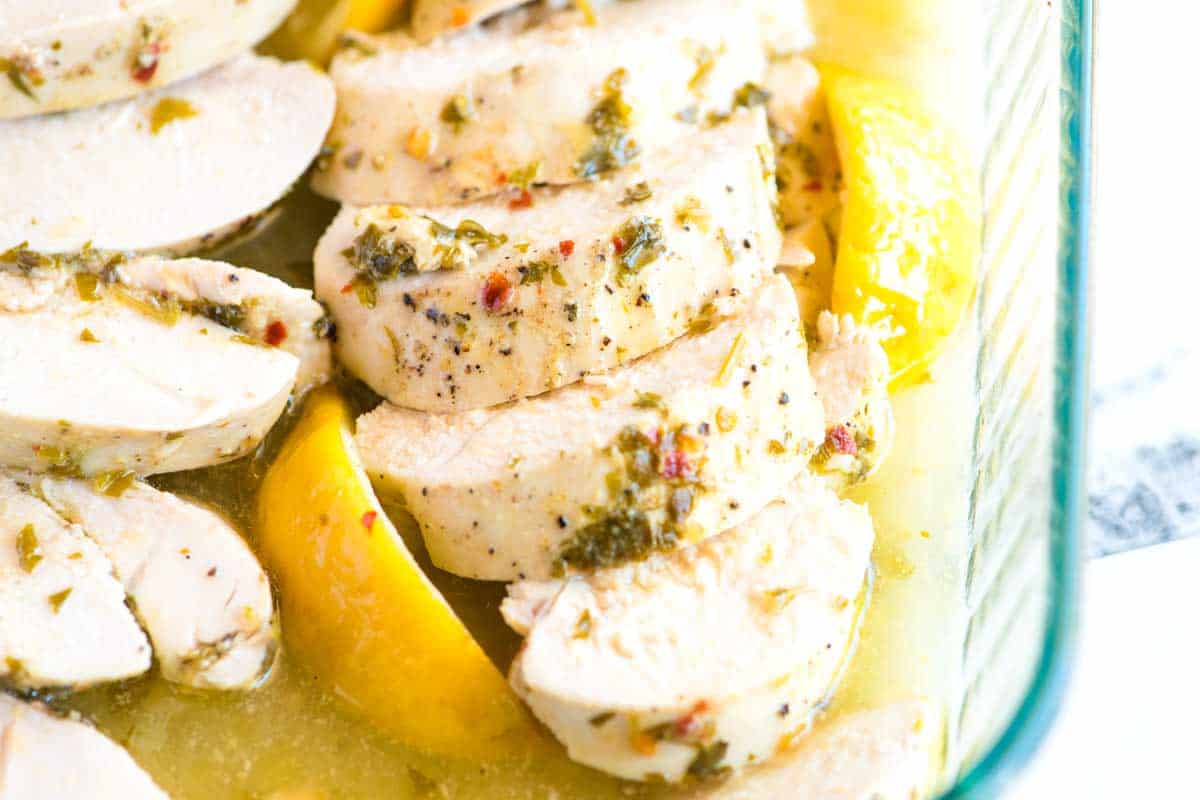
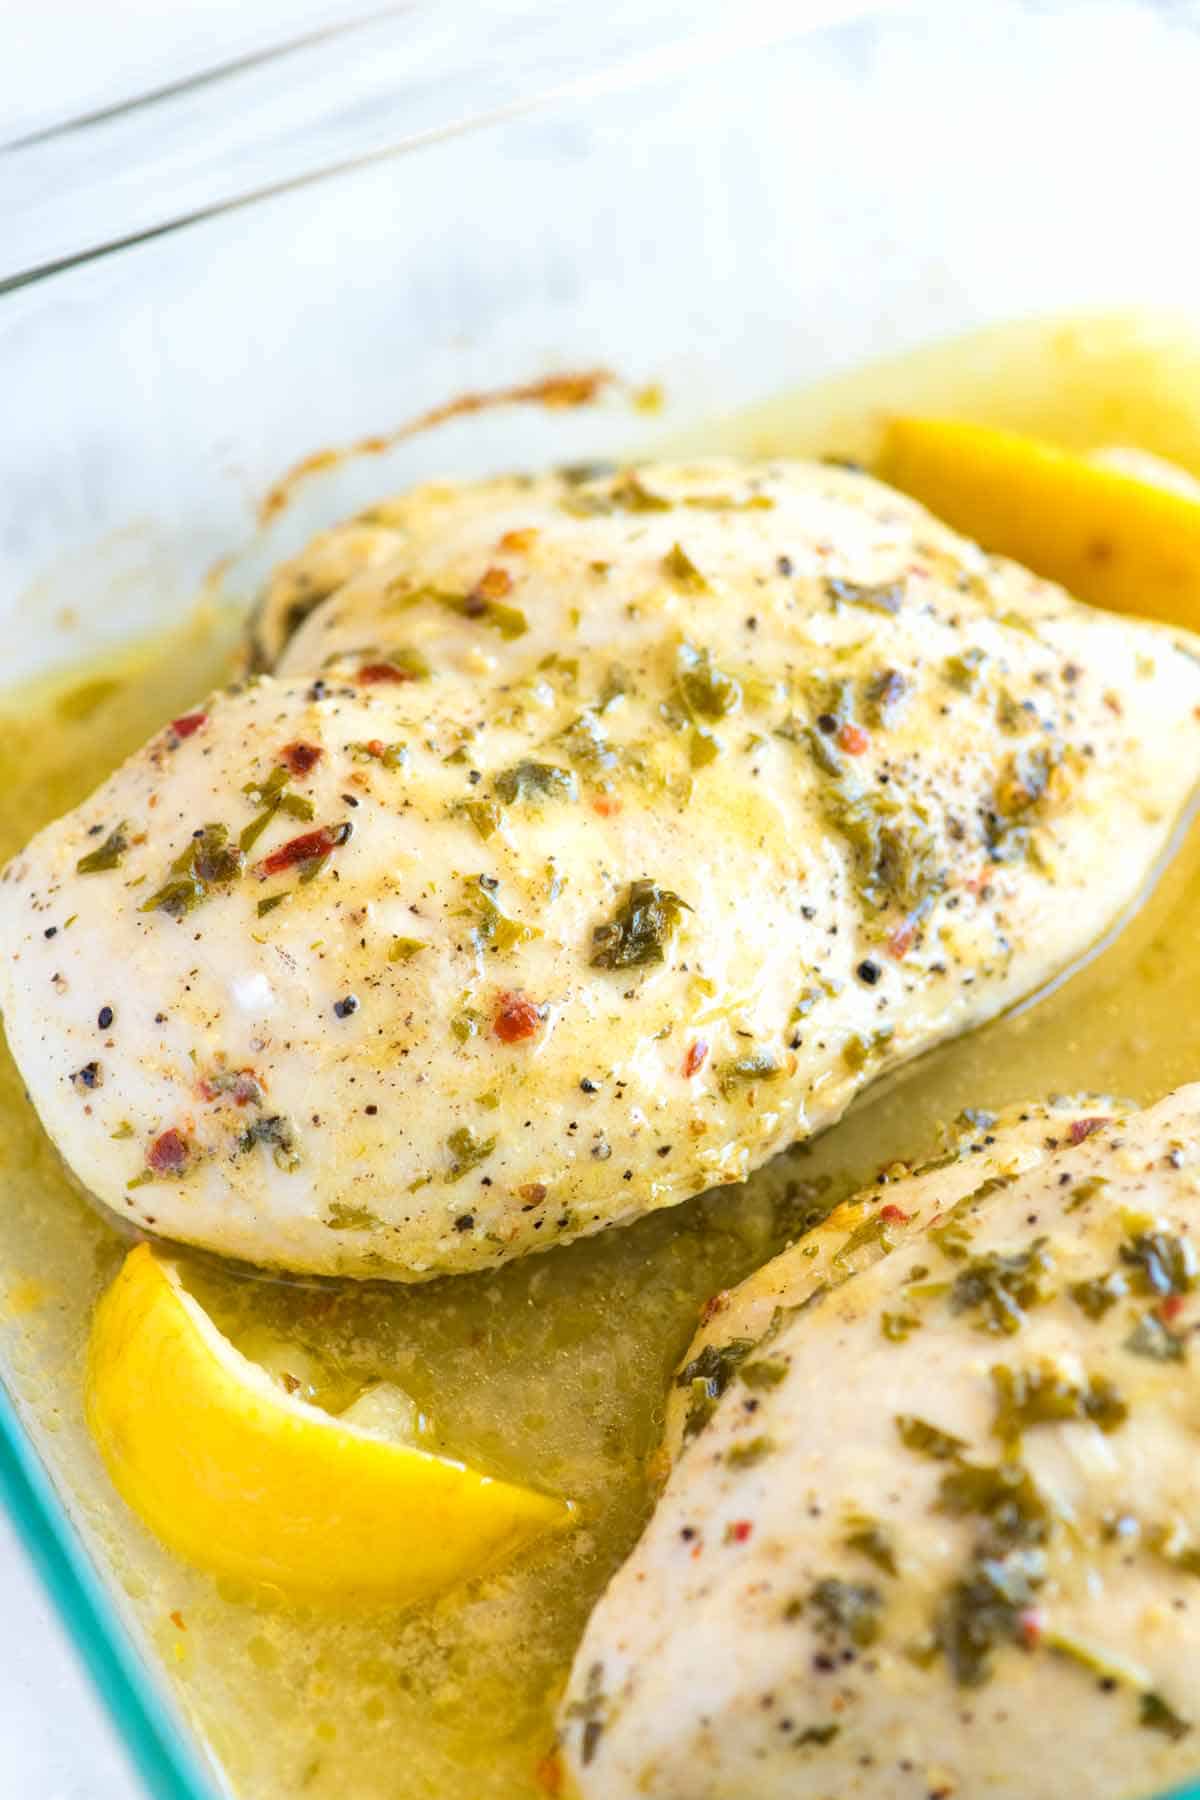
    Say goodbye to dry, flavorless chicken! This easy lemon baked chicken breast recipe has a simple marinade that guarantees incredibly juicy, flavorful chicken.

    Baked Lemon Chicken

    We have a lot of chicken recipes on Inspired Taste, and honestly, I love them all! These lemon baked chicken breasts fit right in. Thanks to our lemon chicken marinade, they are super flavorful, extra juicy, and tender, thanks to our easy baking method.

    Skinless, boneless chicken breasts are easy to overcook. With our method, you’ll be guaranteed juicy, flavorful chicken! Try our lemon dill chicken breasts for a stovetop method, or for another take on this baked recipe, see these tomato basil baked chicken breasts.

    Key Ingredients

    • Chicken Breasts: While this recipe features chicken breasts, you can easily adapt it to use chicken thighs. Thighs may require a slightly longer cooking time. In fact, we also a recipe for lemon chicken thighs if you are interested.
    • Lemon: I use fresh lemon juice and zest for this. Lemon juice makes the base of the marinade, while the zest gives it an extra lemony punch. I like using a vegetable peeler to make strips of the zest.
    • Olive Oil: I love the flavor of olive oil in this marinade. It makes the chicken more delicious. If you plan to cook your chicken over high heat, consider substituting it with avocado oil.
    • Dijon Mustard: Mustard and lemon work beautifully together, so I always add a little Dijon to this marinade.
    • Garlic: Smashed whole garlic cloves add the right amount of fresh garlic flavor and balance the acidity of the lemon. Keeping them whole also prevents any garlic from burning later on.
    • Fresh Herbs: These are optional, but I love adding fresh herbs to this chicken marinade. I use fresh parsley in the photos, but dill, cilantro, and basil are excellent choices.

    Find the full recipe with measurements below.

    How to Make the Best Baked Lemon Chicken Breast

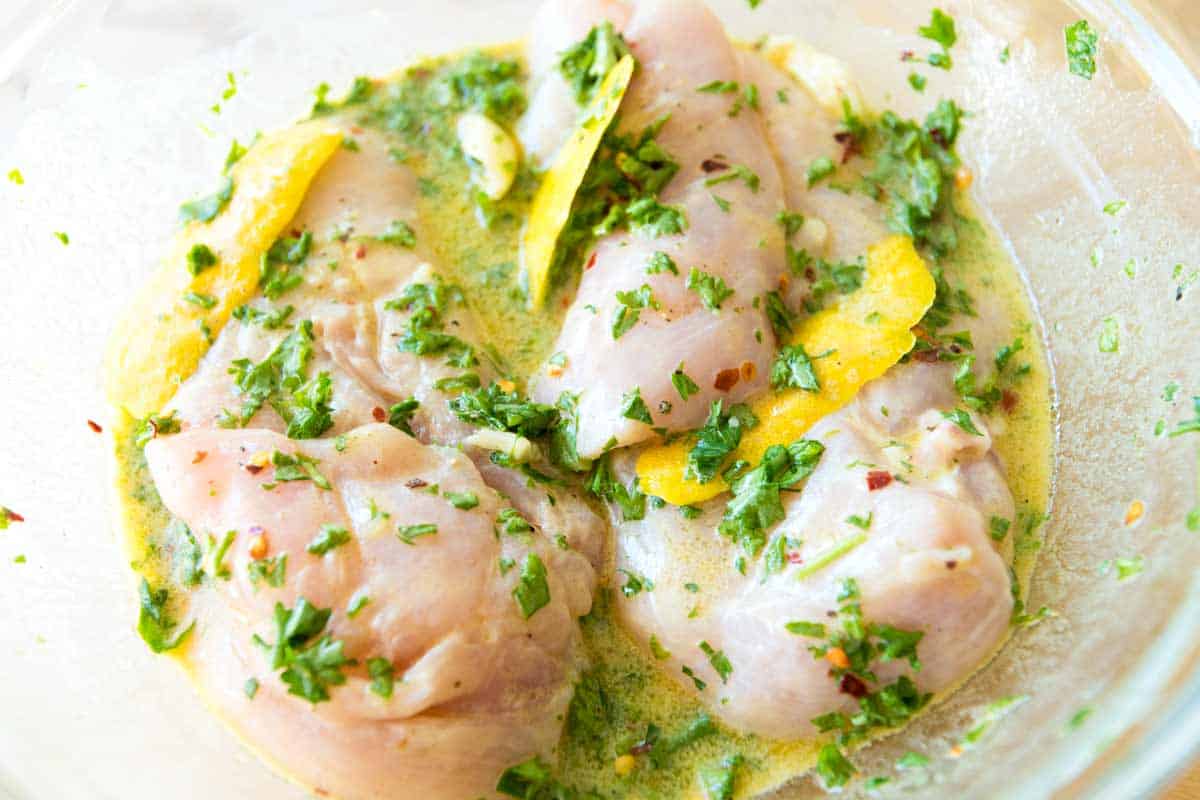
    Tip 1: Use our marinade. In our recipe below, we share a marinade made of fresh lemon, garlic, and Dijon mustard. It’s best to marinate chicken breasts 1 to 2 hours before baking. There isn’t a need to go longer than that.

    Marinating the chicken breasts in a lemon marinade

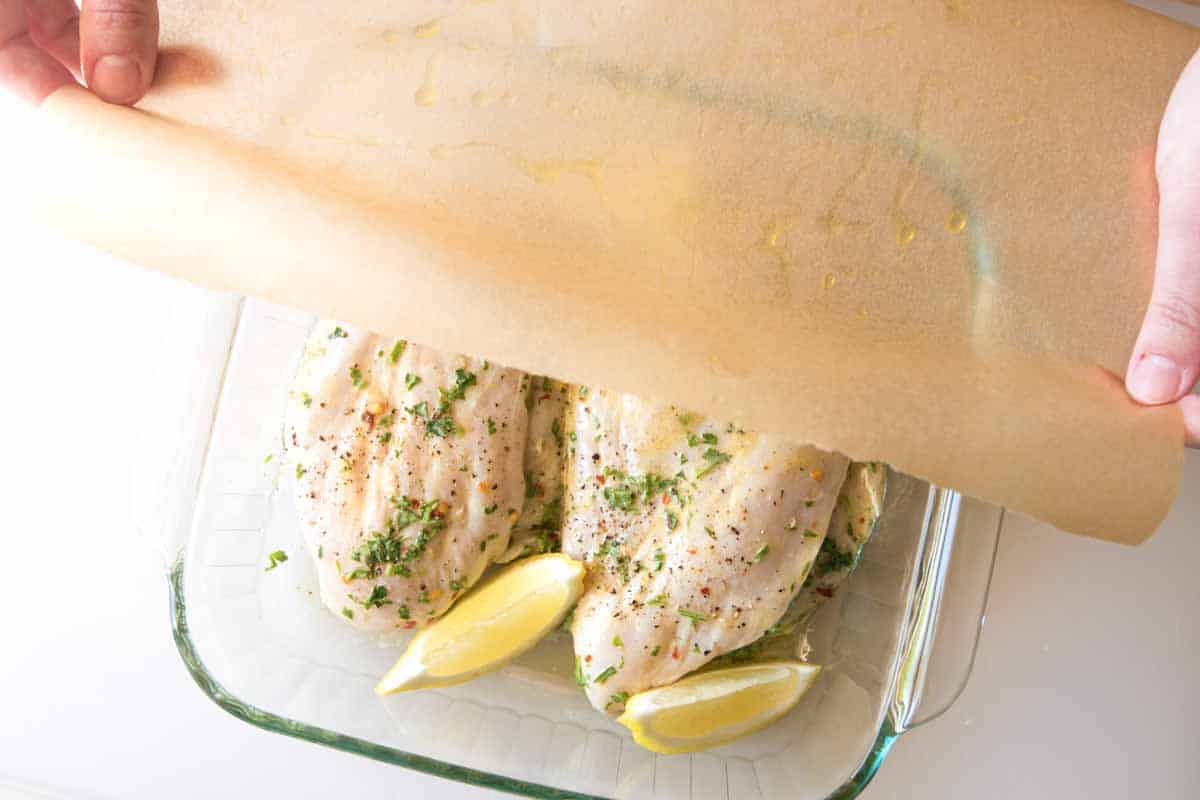
    Tip 2: Bake your chicken covered. After marinating, we add the chicken to a baking dish and loosely cover it with parchment paper (aluminum foil is a good alternative). By loosely covering the chicken, the chicken breasts bake and braise simultaneously, meaning the chicken bakes in its juices. This method of baking chicken breasts keeps the chicken breasts juicy and so tender.

    Loosely covering the chicken before baking.

    Tip 3: Knowing when the chicken is done. The bake time depends on how large your chicken breasts are. I check for doneness around 25 minutes and then proceed from there. Most chicken breasts take 35 to 40 minutes to bake in the oven (I use 400°F). An internal thermometer is one foolproof way to check if your chicken is done. Insert it into the thickest part of the breast and take the chicken out once you see 165°F. Then, let the chicken rest before serving.

    Baked Lemon Chicken Breasts

    Baked Lemon Chicken Breast

    • PREP
    • COOK
    • TOTAL

    For the best, juicy, and tender lemon baked chicken breast remember these three things: marinate first, bake loosely covered, and use a meat thermometer. Before baking in the oven, we marinate the chicken breasts in a magical mixture of fresh lemon, garlic, Dijon mustard, and parsley. If you’re short on time, marinate as close to an hour as you can. If you’re flexible, go for a whole two hours. And since we want to keep things safe, it’s best to marinate the chicken in the refrigerator (no matter how long you do it for).

    4 Servings

    Watch Us Make the Recipe

    You Will Need

    4 boneless, skinless chicken breasts (6 to 8 ounces each)

    2 large lemons

    2 tablespoons olive oil

    1 tablespoon Dijon mustard

    1/2 teaspoon fine sea salt

    1/4 teaspoon red pepper flakes, or more to taste

    1/2 teaspoon fresh ground black pepper

    3 cloves garlic, crushed with the side of a large knife or minced

    1/2 cup loosely packed fresh parsley, roughly chopped

    Directions

    • Marinate Chicken
    • 1Peel or zest the thin, yellow skin (zest) from one lemon, and then juice the lemon so that you have 1/4 cup of fresh lemon juice. (If the first lemon was not enough, Use half of the second lemon to make up the 1/4 cup of juice.)

      2Whisk lemon juice, olive oil, mustard, salt, red pepper flakes, and black pepper until the salt has dissolved. Stir in the garlic, lemon zest, and parsley (if using). Refrigerate and use within 1 to 2 hours.

      3Add the chicken breasts to the marinade and marinate for 1 hour or up to 2 hours in the refrigerator.

    • Bake Chicken Breasts
    • 1Position the oven rack in the middle of the oven and preheat it to 400°F (204°C). Lightly oil one side of a sheet of parchment paper large enough to cover the baking dish. (Aluminum foil can also be used.)

      2Transfer the chicken breasts to the prepared baking dish, removing any large pieces of garlic that might be stuck to them. Season the chicken with salt and pepper.

      3Quarter the second lemon. Scatter lemon wedges around the chicken, then cover with parchment paper, oiled side down, towards the chicken. Loosely tuck the parchment paper around the chicken.

      4Bake until the chicken is opaque all the way through and an internal thermometer reads 165°F when inserted into the thickest part of the breast. Check for doneness in around 25 minutes, and then go from there. Most chicken breasts will take 35 to 40 minutes.

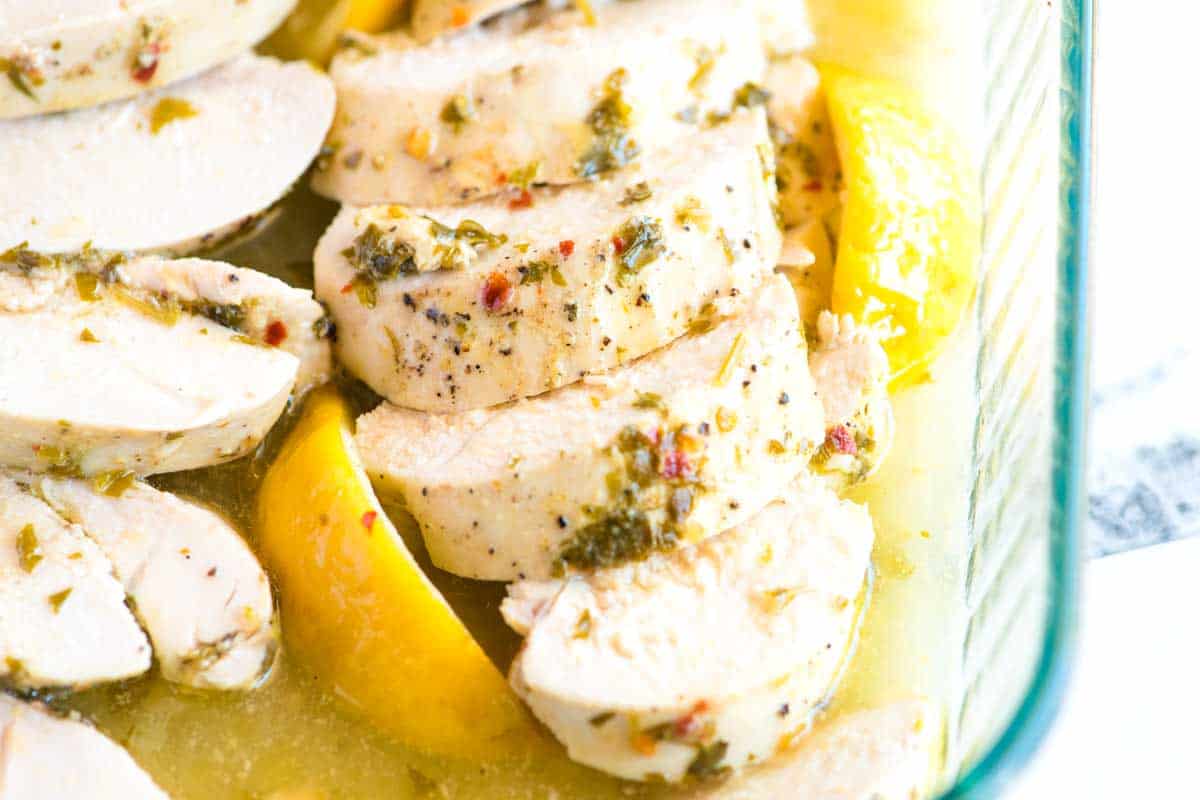
      5Let the chicken rest for about 10 minutes, then serve drizzled with some of the liquid left in the baking dish. You can also slice the chicken and place it back into the baking dish with all the leftover cooking liquid (our favorite).

    Adam and Joanne’s Tips

    • The nutrition facts provided below are estimates.

    Nutrition Per Serving
    Calories
    212
    /
    Protein
    27 g
    /
    Carbohydrate
    4 g
    /
    Dietary Fiber
    1 g
    /
    Total Sugars
    1 g
    /
    Total Fat
    10 g
    /
    Saturated Fat
    2 g
    /
    Cholesterol
    83 mg


    AUTHOR:

    Joanne Gallagher

    Adam and Joanne of Inspired Taste

    We are Adam and Joanne Gallagher, the creators of Inspired Taste. Established in 2009, Inspired Taste grew from a childhood dream into one of the internet’s most trusted recipe sites with hundreds of reliable recipes, step-by-step videos, and expert tips.More About Us
    Source link

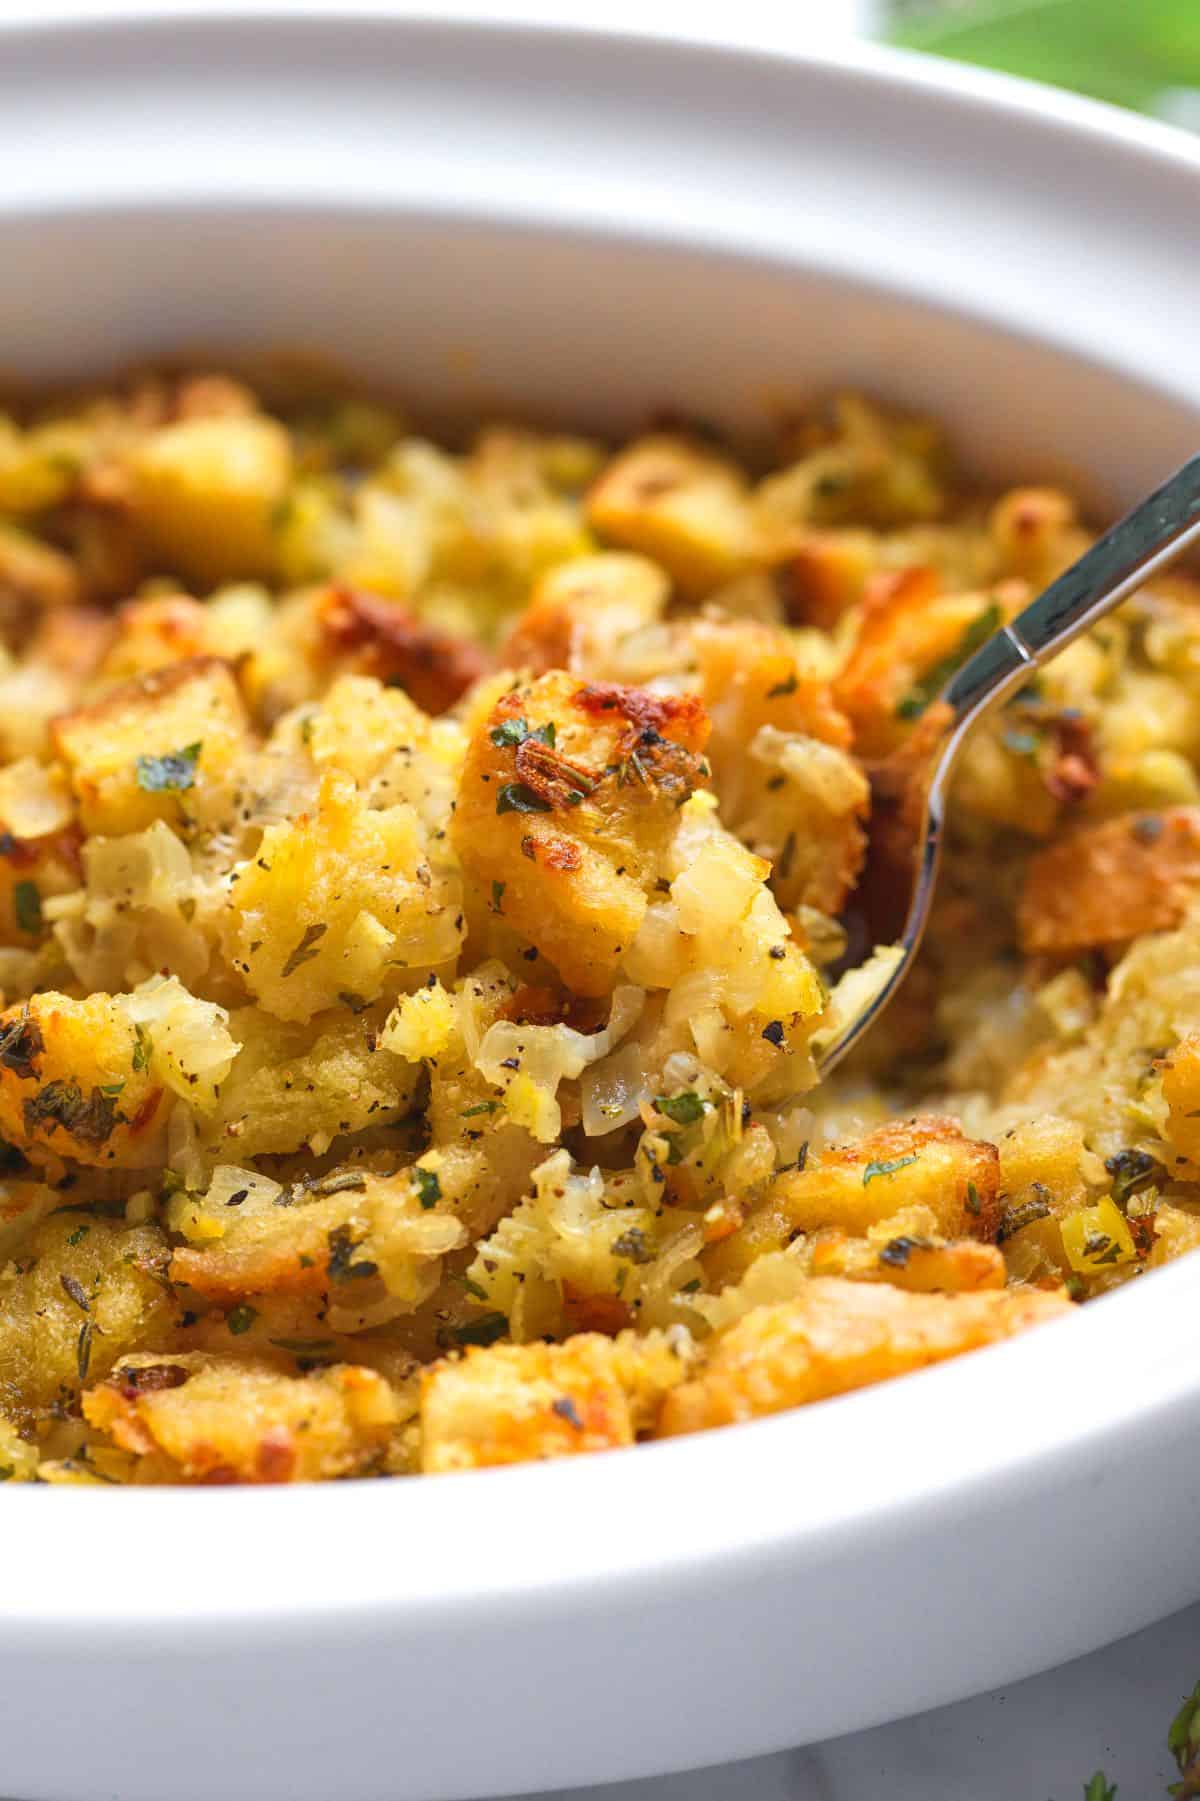
  • Easy Herb Stuffing Recipe

    Easy Herb Stuffing Recipe

    This classic homemade stuffing recipe is the perfect side dish for Thanksgiving and holidays.

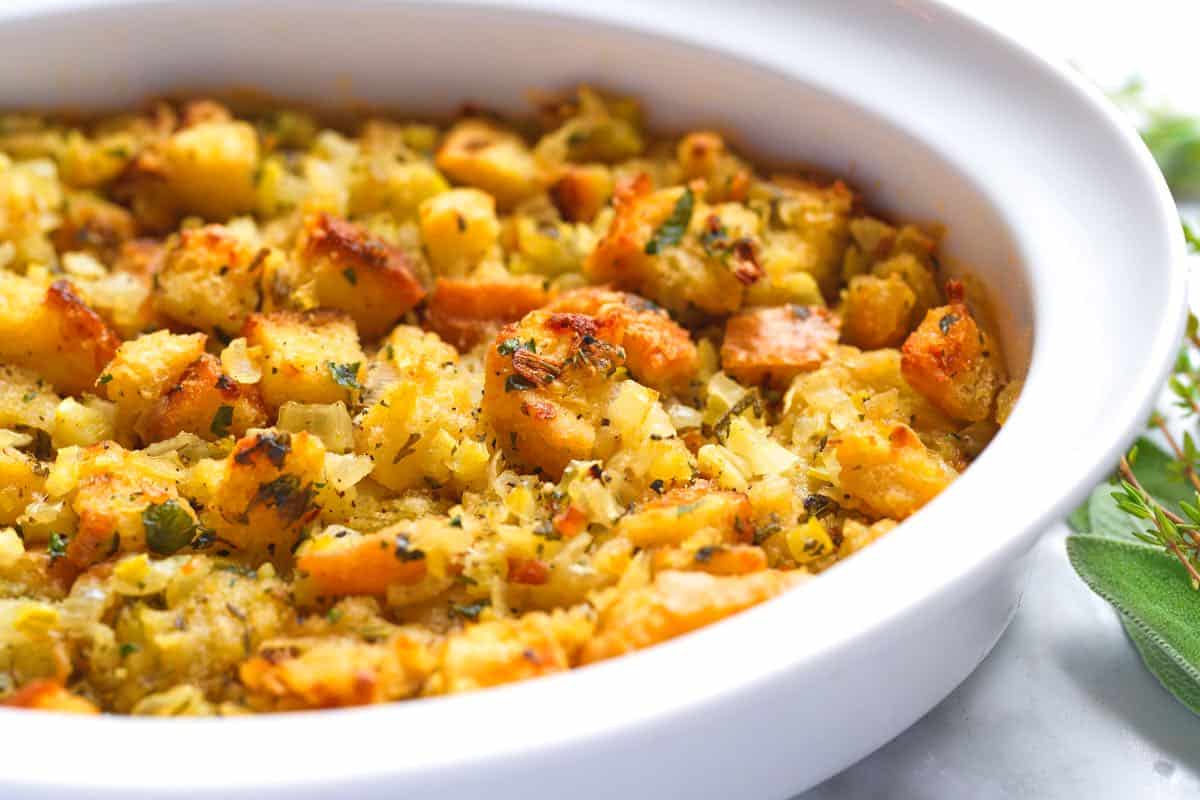
    Homemade Stuffing

    Your search for the perfect holiday stuffing ends here. It’s so good that my family requests it every single year for Thanksgiving.

    It’s easy to make from scratch, and the traditional combination of buttery onions and fresh sage tastes incredible alongside roasted turkey or roast chicken. If you love mushrooms, try our incredible mushroom stuffing instead.

    Key Ingredients

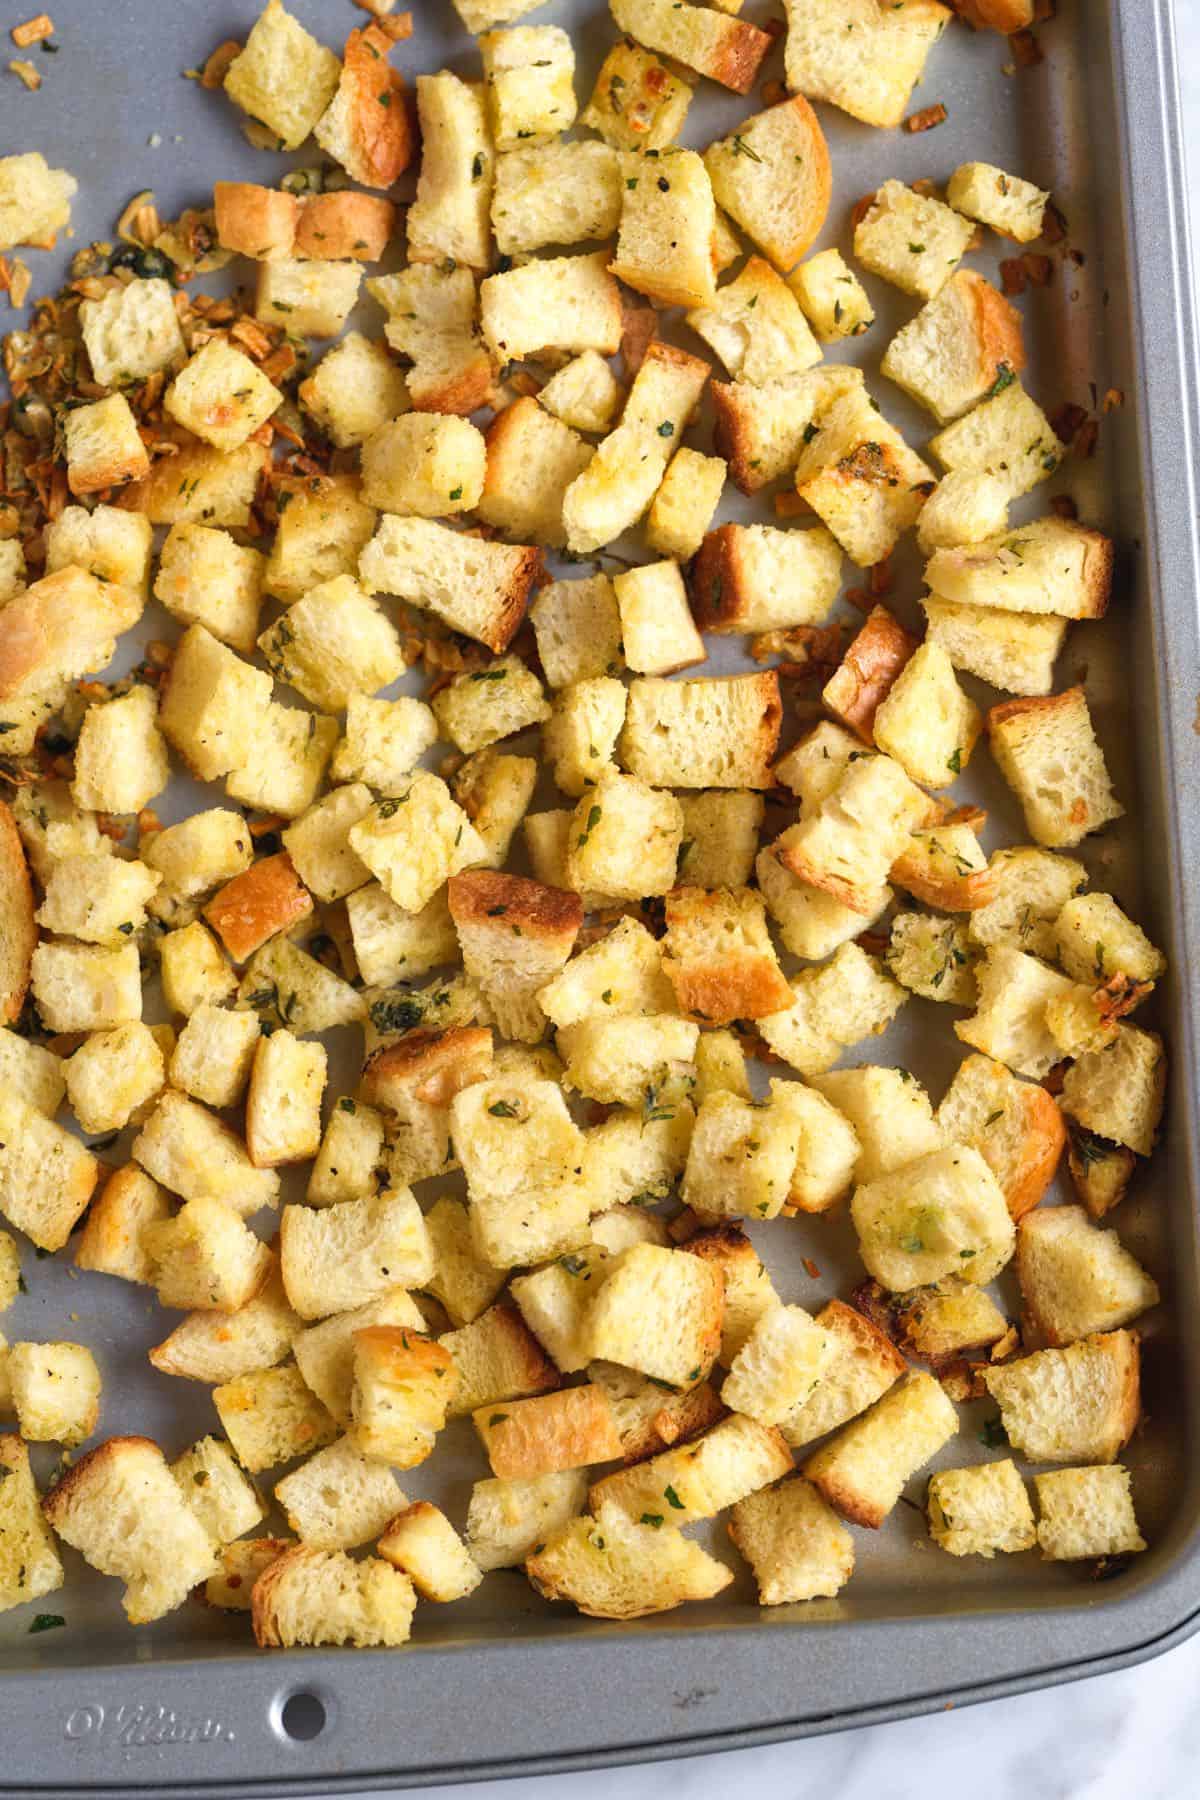
    • Bread: The key to great stuffing is dry bread. For the best stuffing, use homemade garlic croutons. They’re already dried out and packed with flavor, giving your stuffing an incredible texture.
    • Butter: I use salted butter in this recipe. Unsalted or a plant-based butter works great too, especially if you’re making a vegan version. You’ll just need a touch more salt.
    • Onion, Celery, and Garlic: These are the classic, must-have aromatics. You’ll cook them in the butter to build a savory base before adding the broth and bread.
    • Broth: Use your favorite type, whether it’s chicken broth or vegetable broth. It’s the key to a moist stuffing. In other stuffing recipes, eggs serve as a binder, helping to make the mixture fluffy when baked. We use butter and broth in our recipe for our binder and don’t miss the eggs at all.
    • Herbs: For me, stuffing isn’t complete without fresh herbs. I use sage, thyme, and parsley. The sage is my favorite. It reminds me of my grandmother’s stuffing and makes the whole dish taste like the holidays.

    Find the full recipe with measurements below.

    How to Make the Best Homemade Stuffing

    Tip 1: Bread works, but homemade croutons are better. I love using these garlic croutons. They are easy to make and make our stuffing taste so good. I realize this adds a step, but you can make them well in advance (they keep for 2 weeks!). All that said, you can use plain bread. I’ve shared tips for this below the recipe.

    Homemade croutons for stuffing

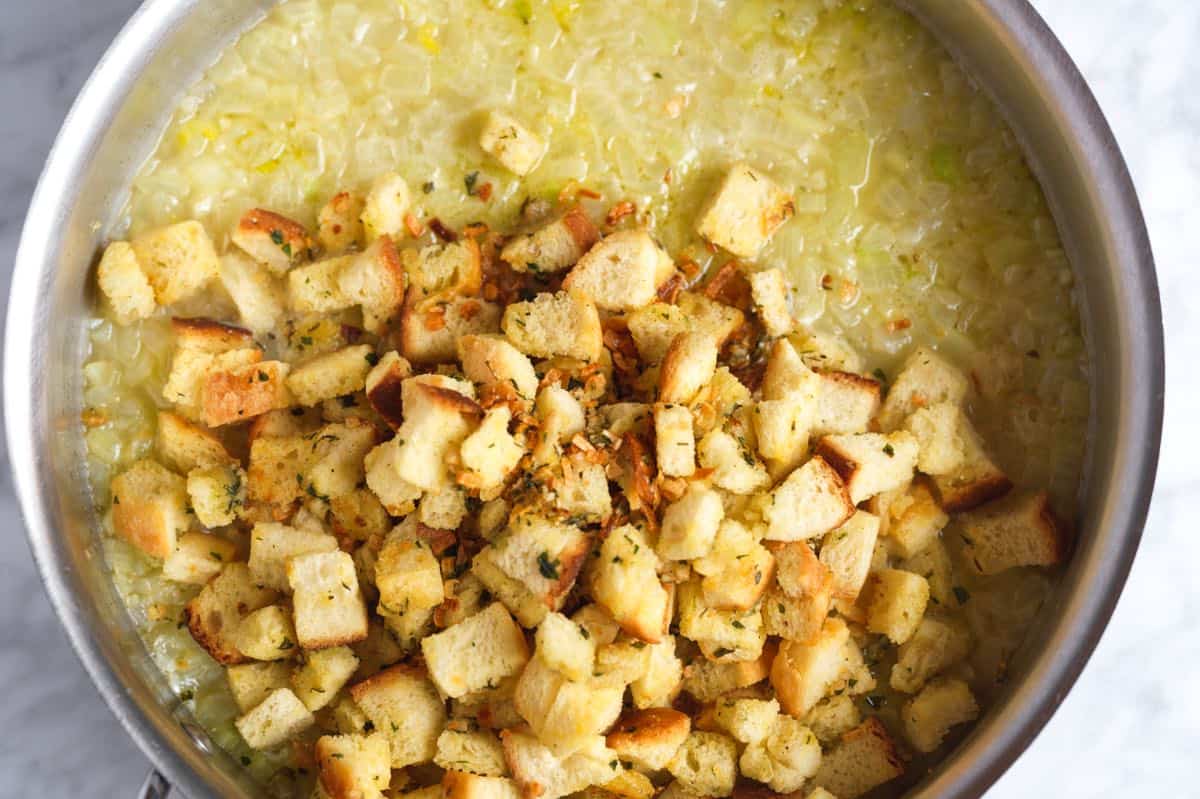
    Tip 2: There’s no need to brown the onions. When cooking your onions, celery, and garlic, use a skillet with a lid. You aren’t trying to brown them. Instead, we want the soft and sweet. When they are, you can add broth, croutons, and fresh herbs.

    Toasted bread in a pan with broth, onions, and herbs for homemade stuffing.

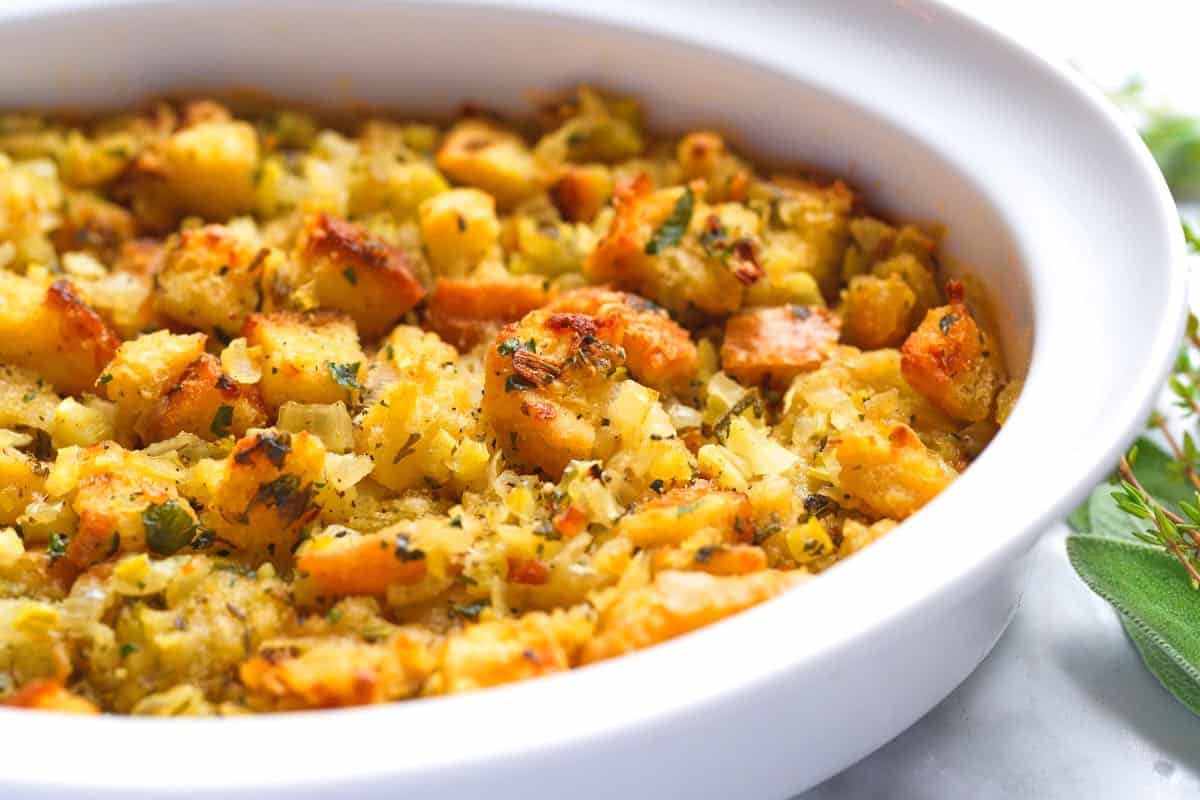
    Tip 3: Finish in the oven. Bake your stuffing (uncovered) in a 350°F oven for about 40 minutes. I like to rotate the casserole dish halfway through baking. When baked, the stuffing is moist and set in the middle, with a golden brown and crispy top. Then, let it sit on the counter for a few minutes to firm up before serving.

    Serving Suggestions

    You can make this stuffing recipe anytime, but it’s perfect for Thanksgiving alongside our Best Roast Turkey or Garlic Herb Roasted Turkey Breast. Here are a few more of our favorite side dishes:

    Classic Stuffing

    Easy Herb Stuffing

    • PREP
    • COOK
    • TOTAL

    We love this classic herb stuffing recipe. It is especially good served with roasted chicken and roasted turkey. This is an excellent Thanksgiving stuffing recipe. For extra flavor, we love using our homemade garlic croutons. They are easy to make. If you do not want to use croutons, tips are provided below the recipe for using plain bread.

    Makes 4 to 5 servings

    You Will Need

    8 ounces homemade garlic croutons (about 6 cups), see tips

    4 tablespoons (57g) butter, plus more for baking dish

    1 medium onion, finely chopped, 1 ½ cups

    3 celery stalks, finely chopped, 1 ½ cups

    2 garlic cloves, minced, 2 teaspoons

    1 ¾ cups (415ml) chicken broth or veggie broth

    1 teaspoon chopped thyme

    1 teaspoon chopped sage

    2 ½ tablespoons chopped parsley

    1/8 teaspoon fresh ground black pepper

    1/4 teaspoon to 1/2 teaspoon fine sea salt

    Directions

      1Preheat the oven to 350°F (177°C). Grease a 1 ½ to 2-quart baking dish with butter.

      2Melt the butter in a large skillet (with a lid) over medium heat. Stir in the onion, celery, and garlic. Cover with the lid and cook until translucent, about 5 minutes.

      3Pour in the broth and bring to a simmer. Toss in the croutons, stirring around the pan to combine. Cook for 5 minutes.

      4Stir in the thyme, sage, parsley, and pepper. Taste, and then season with salt. Depending on the broth you have used, you may need to add 1/4 teaspoon to 1/2 teaspoon.

      5Spread the stuffing in the buttered baking dish, and bake uncovered for 40 minutes, or until the middle sets and the top turns golden brown and crisp. Rotate the stuffing halfway through baking. Let stand on the counter for 5 to 10 minutes before serving.

    Adam and Joanne’s Tips

    • Homemade croutons: I love the garlic croutons, and they truly make this stuffing better. You can make the croutons up to two weeks in advance.
    • Plain bread cubes: If you prefer plain bread cubes instead of garlic croutons, cut 8 ounces of crusty white bread into 1/2-inch cubes. We recommend tossing them onto a baking sheet and bake for 10 to 20 minutes in a 350°F oven. This short time in the oven will dry the bread, making it stand up better in the stuffing mixture. Remember, you will lose a bit of herb flavor when not using the croutons.
    • Can you stuff this stuffing into a turkey? Yes, but we prefer not to when preparing a turkey. Stuffing the turkey can affect the overall cooking process. The heat takes longer to penetrate the cavity, and stuffing your turkey pretty much guarantees overcooked turkey meat. By cooking the stuffing separately, we guarantee we cook the turkey and stuffing perfectly without compromise.
    • The nutrition facts provided below are estimates.

    Nutrition Per Serving
    Serving Size
    1/4 of the recipe
    /
    Calories
    268
    /
    Total Fat
    13.3g
    /
    Saturated Fat
    7.6g
    /
    Cholesterol
    638.8mg
    /
    Carbohydrate
    31.8g
    /
    Dietary Fiber
    3.9g
    /
    Total Sugars
    5.8g
    /
    Protein
    6.9g


    AUTHOR:

    Joanne Gallagher

    Adam and Joanne of Inspired Taste

    We are Adam and Joanne Gallagher, the creators of Inspired Taste. Established in 2009, Inspired Taste grew from a childhood dream into one of the internet’s most trusted recipe sites with hundreds of reliable recipes, step-by-step videos, and expert tips.More About Us
    Source link

  • Easy Three Ingredient Tomato Soup Recipe

    Easy Three Ingredient Tomato Soup Recipe

    This easy tomato soup recipe is the best you’ll ever make, and it’s shockingly simple. It calls for just three main ingredients: butter, onion, and tomatoes.

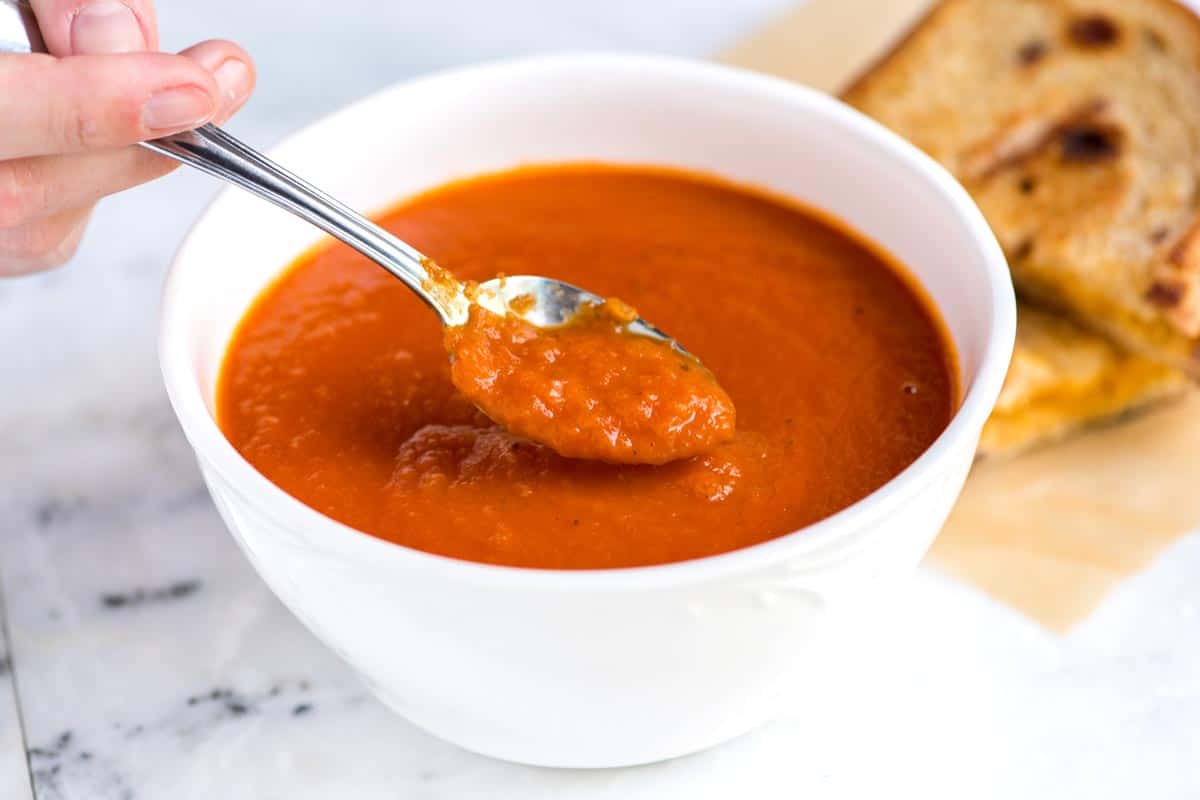
    Homemade Tomato Soup

    Marcella Hazan’s famous tomato sauce inspires this easy tomato soup recipe, and I’m not exaggerating when I say it makes one of the best bowls of soup I’ve made. Don’t let the short ingredient list fool you, this soup is absolutely delicious! You might not think three ingredients can combine to make such a velvety and tasty soup, but they can.

    This homemade tomato soup is truly one of my favorite soup recipes on Inspired Taste. If you love roasted tomatoes, see our roasted tomato soup recipe. Or for a summery chilled soup, I love our tomato gazpacho.

    Key Ingredients

    • Tomatoes: I love canned tomatoes for this soup. They’re always in season, so I can enjoy this recipe year-round. San Marzano or Muir Glen are my go-to. If you have fresh tomatoes, you’ll need about 10 to 12 medium (or 2 pounds). There is no need to peel them. Everything is blended in the end, anyway!
    • Onion: I cut half a large onion into large wedges and then allow them to simmer with the tomatoes until it’s sweet and soft. The onion adds a lovely flavor and makes the soup creamy.
    • Butter: I don’t add any cream or milk and use butter instead. The butter simmers with the tomatoes and onion, which flavors the soup and makes it taste rich and creamy.

    Find the full recipe with measurements below.

    How to Make Tomato Soup

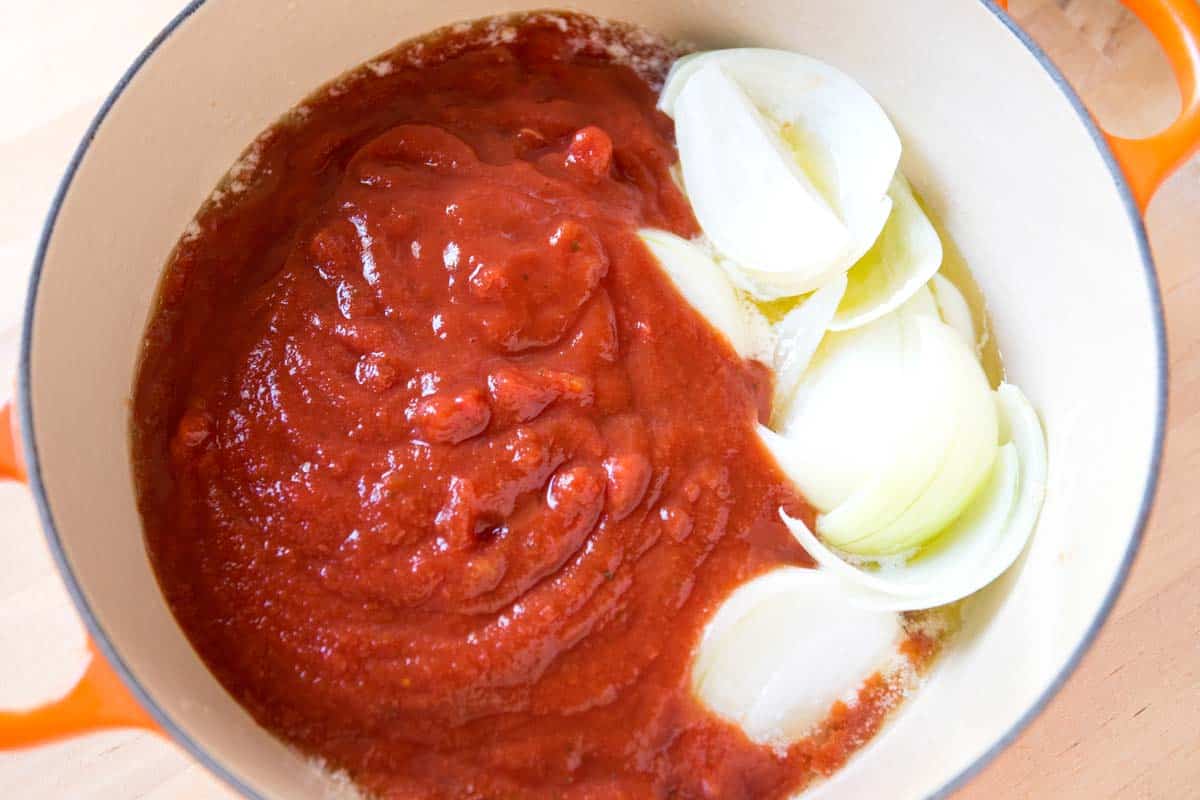
    Tip 1: Toss everything into a pot. To make the easiest tomato soup, toss butter, onion, a large can of tomatoes, and water into a large pot. (I usually use water in this soup, but vegetable broth, tomato broth, or chicken broth works, too.)

    Tomato Soup Ingredients in a pot (canned tomatoes, butter, and onion)

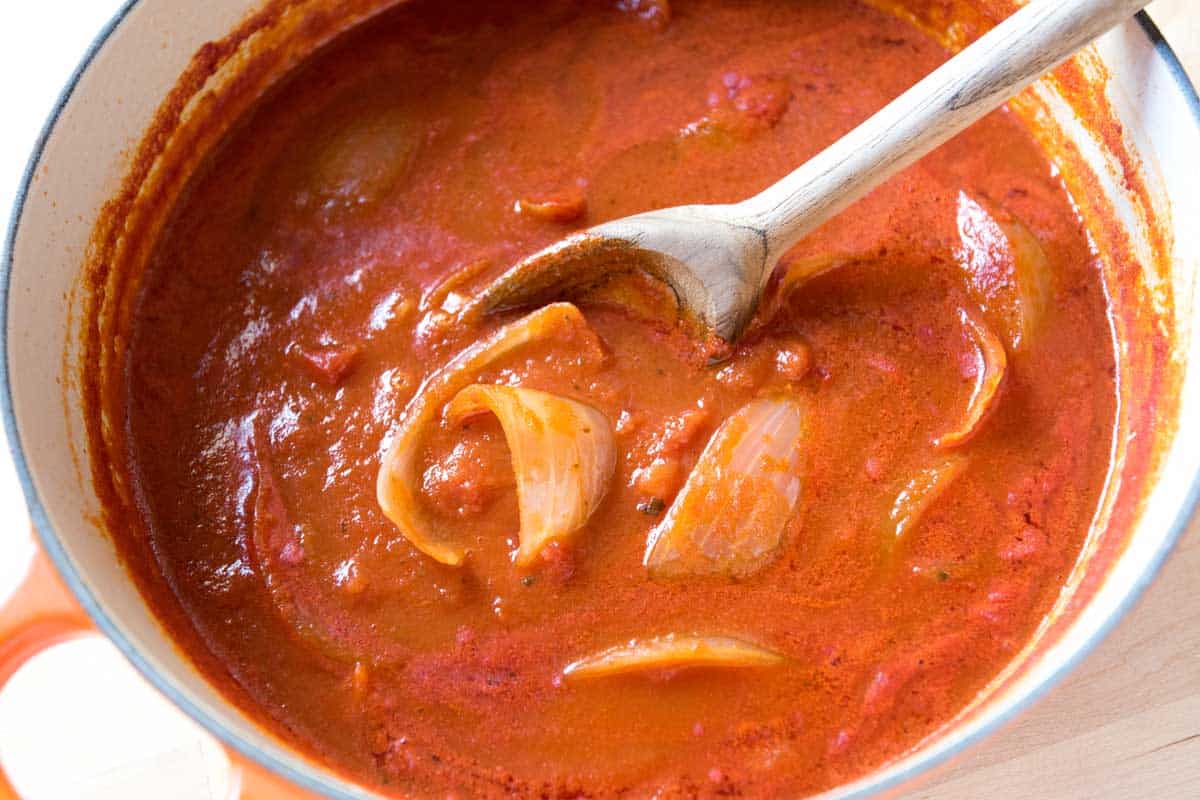
    Tip 2: Simmer on low heat. Bring everything to a low simmer and cook for 40 minutes. The photo and video show that the soup becomes super creamy. That’s thanks to the butter. The onions also soften, which adds to the creaminess of our soup once it is blended.

    Simmering tomato soup

    Tip 3: Blend until smooth. I typically use an immersion blender, but a regular blender works perfectly fine. Adjust the soup with salt and pepper, then grab a bowl and enjoy!

    Serving Suggestions

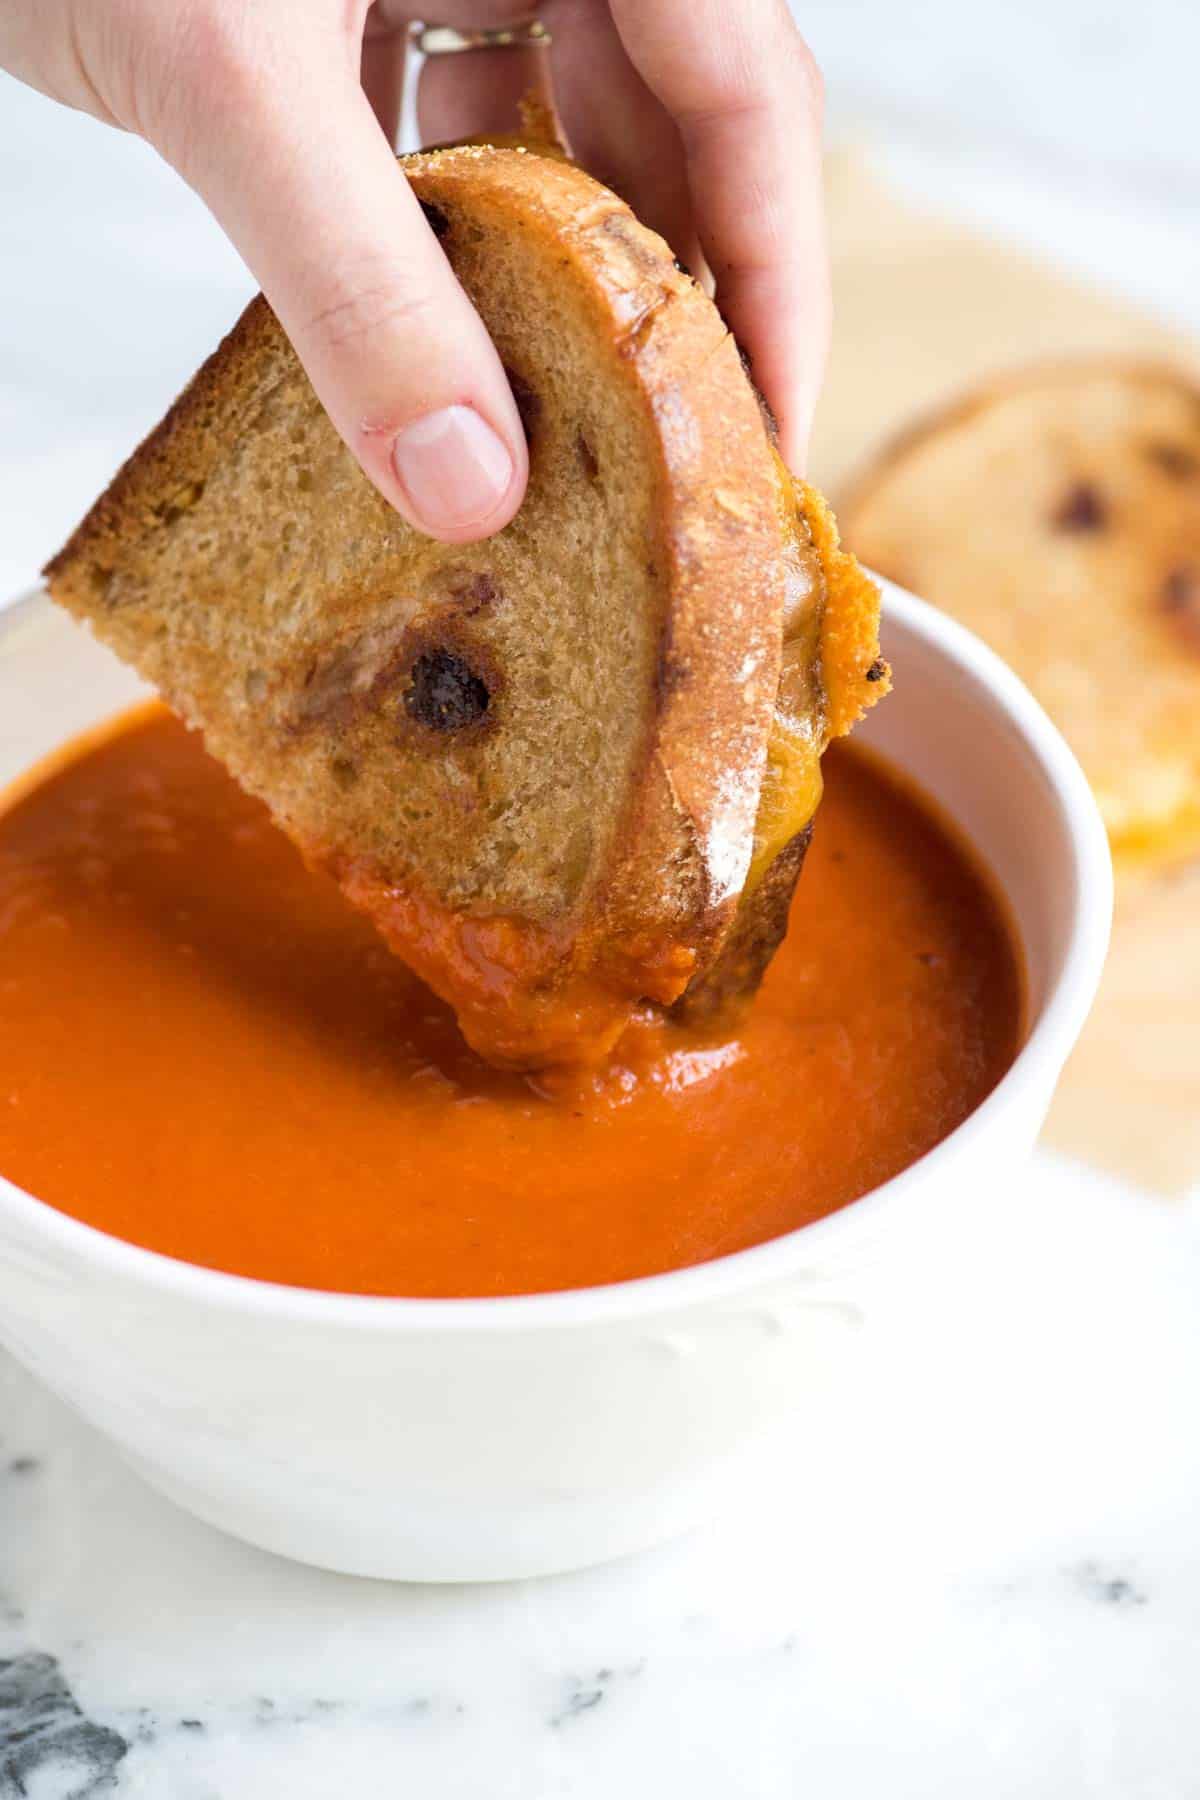
    Our family loves homemade tomato soup with a grilled cheese sandwich, but this soup is also excellent topped with homemade croutons or served next to a slice of homemade focaccia or buttery garlic bread. I also love serving soup next to fresh salads like this easy chopped salad or homemade Caesar salad.

    More Easy Soup Recipes

    Easy Homemade Tomato Soup

    Easy Three Ingredient Tomato Soup

    • PREP
    • COOK
    • TOTAL

    This is the easiest and tastiest tomato soup I’ve made. I love serving with grilled cheese sandwiches, but this is also wonderful with crusty bread or homemade garlic bread on the side.

    2 to 3 Servings

    Watch Us Make the Recipe

    You Will Need

    4 tablespoons unsalted butter (57g)

    ½ a large onion, cut into large wedges

    1 (28-ounce) can tomatoes, we prefer whole peeled tomatoes or crushed

    1 ½ cups water, low sodium vegetable stock, or chicken stock

    ½ teaspoon fine sea salt, or more to taste

    Directions

      1Melt the butter over medium heat in a Dutch oven or large saucepan.

      2Add onion wedges, water, tomatoes with their juices, and 1/2 teaspoon of salt.

      3Bring to a simmer. Cook, uncovered, for about 40 minutes. Stir occasionally and add additional salt as needed.

      4Blend the soup, and then season to taste. The soup doesn’t need to be ultra-smooth; some texture is nice. An immersion blender does make quick work of this, or you can use a blender. When using a regular blender, work in smaller batches, and don’t fill it too high – hot soup expands! For safety, remove the lid’s center insert and cover the opening with a kitchen towel while blending. This releases steam and prevents messy splatters.

    Adam and Joanne’s Tips

    • Storing: Store in an airtight container in the fridge for up to three days or freeze for up to three months.
    • Fresh tomatoes: Use 10 to 12 medium tomatoes (2 pounds). No need to peel them, everything is blended in the end.
    • Vegan tomato soup: Substitute the butter for plant-based butter or extra-virgin olive oil.
    • For tomato basil soup: Add a handful of fresh basil before blending the soup.
    • Make creamy tomato soup: After blending, add a splash of cream for an extra creamy tomato soup.
    • The nutrition facts provided below are estimates. We have omitted salt since you will need to add to your tastes.

    Nutrition Per Serving
    Serving Size
    Half of the recipe
    /
    Calories
    348
    /
    Total Fat
    24.9g
    /
    Saturated Fat
    14.8g
    /
    Cholesterol
    61mg
    /
    Sodium
    1485.4mg
    /
    Carbohydrate
    29.6g
    /
    Dietary Fiber
    4.5g
    /
    Total Sugars
    15.4g
    /
    Protein
    7.8g


    AUTHOR:

    Adam Gallagher

    Adam and Joanne of Inspired Taste

    We are Adam and Joanne Gallagher, the creators of Inspired Taste. Established in 2009, Inspired Taste grew from a childhood dream into one of the internet’s most trusted recipe sites with hundreds of reliable recipes, step-by-step videos, and expert tips.More About Us
    Source link