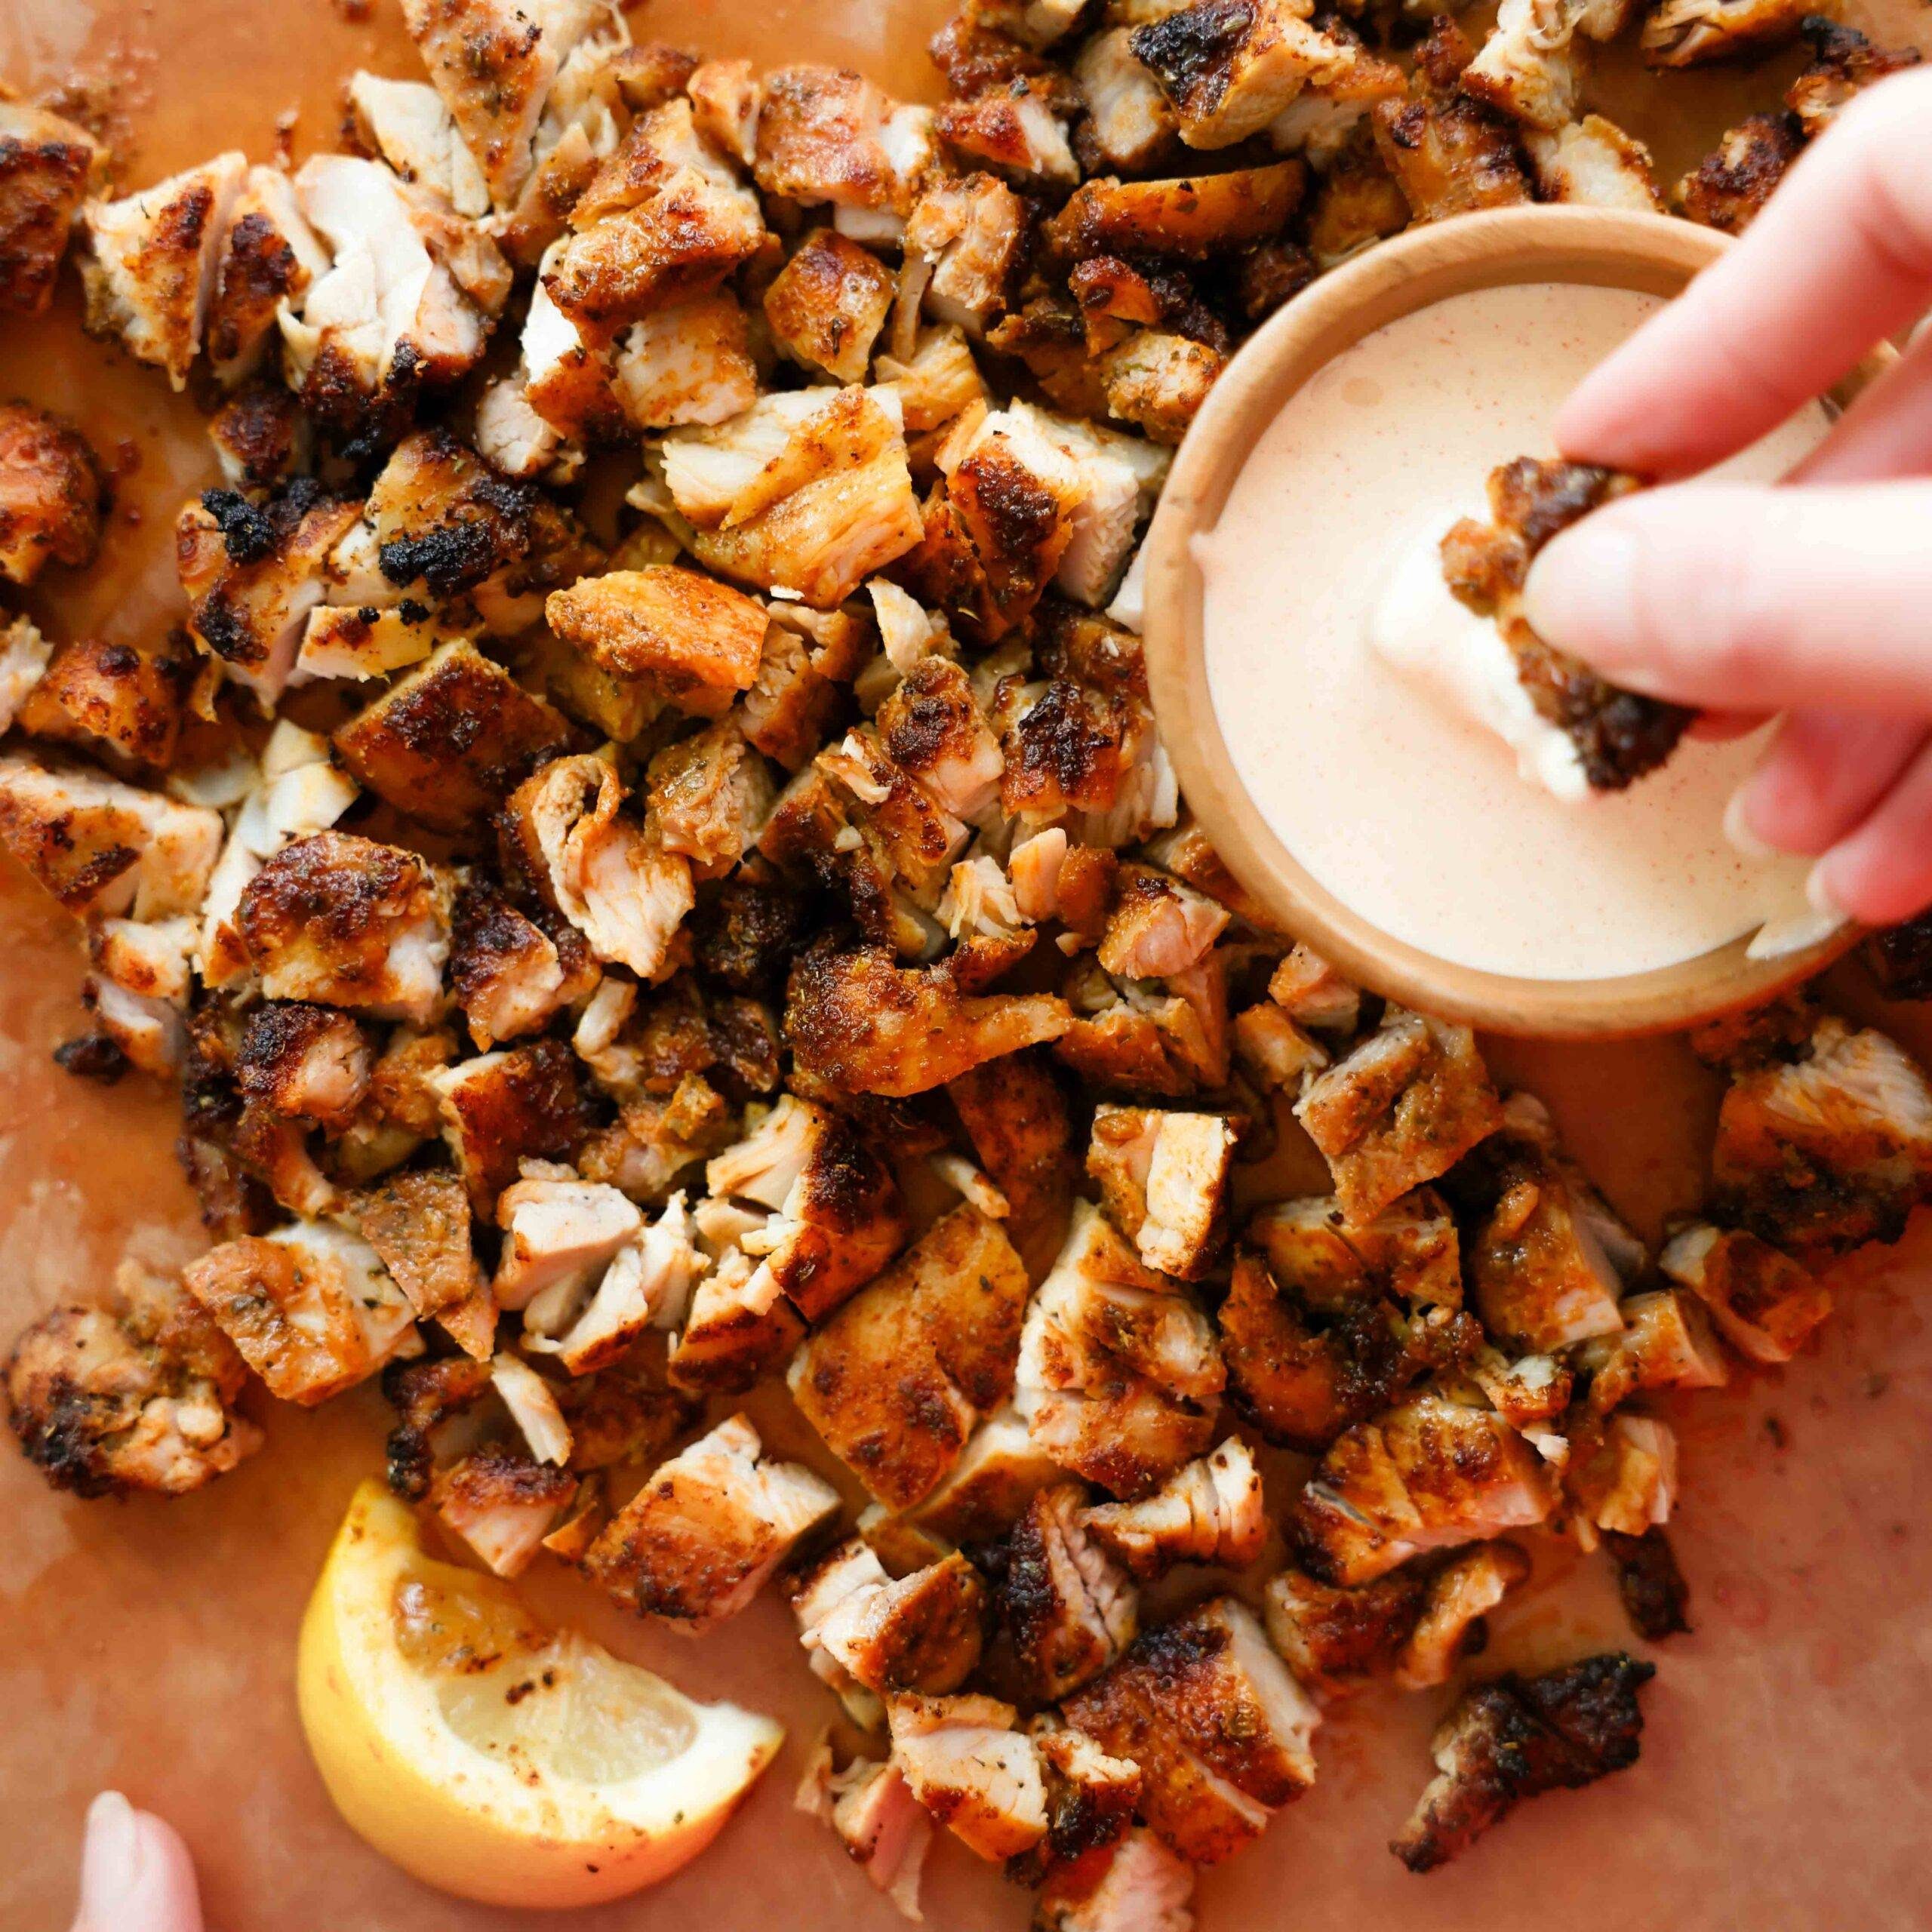
Smoky Paprika Aioli (my current favorite sauce with this): Whisk 1/2 cup mayo, 1/4 cup yogurt, 1 clove freshly grated garlic, 1/2 teaspoon smoked paprika, 2 tablespoons water, 1/4 teaspoon salt (more to taste).
Spice Coverage on The Chicken: Every package of chicken thighs is a slightly different size, so if your package is 1.5 pounds or more (or if you love a lot of spices), you may want to add a few extra shakes of spices to get more complete spice coverage!
Preheating the Air Fryer: I do not preheat my air fryer. I just put the chicken in, turn the air fryer on, and then make sure to use a meat thermometer to check that it’s completely cooked.
Lining the Air Fryer: I also don’t line the air fryer basket with anything. I just put the chicken thighs directly onto the grill grate.
Flipping the Chicken: I also do not flip the chicken thighs halfway through. I’ve tried it, but I like the texture better with just the top being crispy and the underside being a bit juicy. If you think you want both the top and bottom to be crisped up a bit, you can air fry for 8-9 minutes, then flip and cook for another 5 minutes to get both sides a bit crisped.
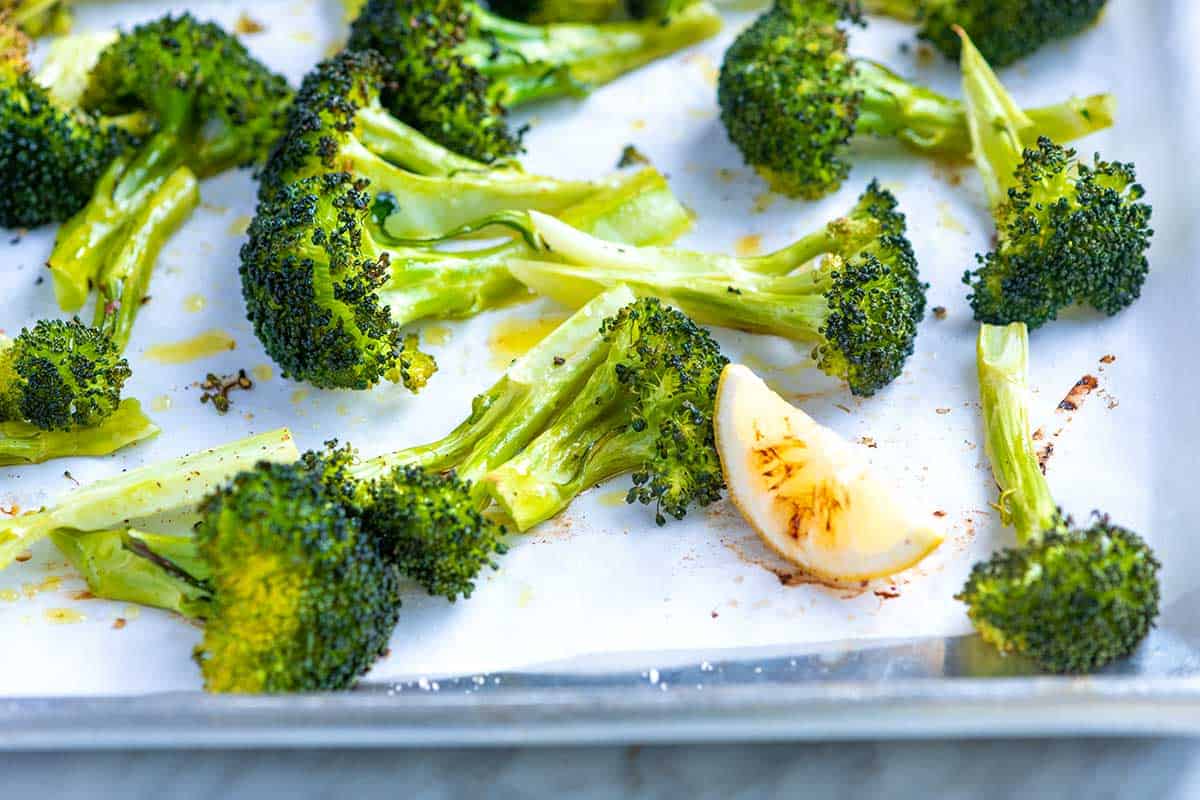
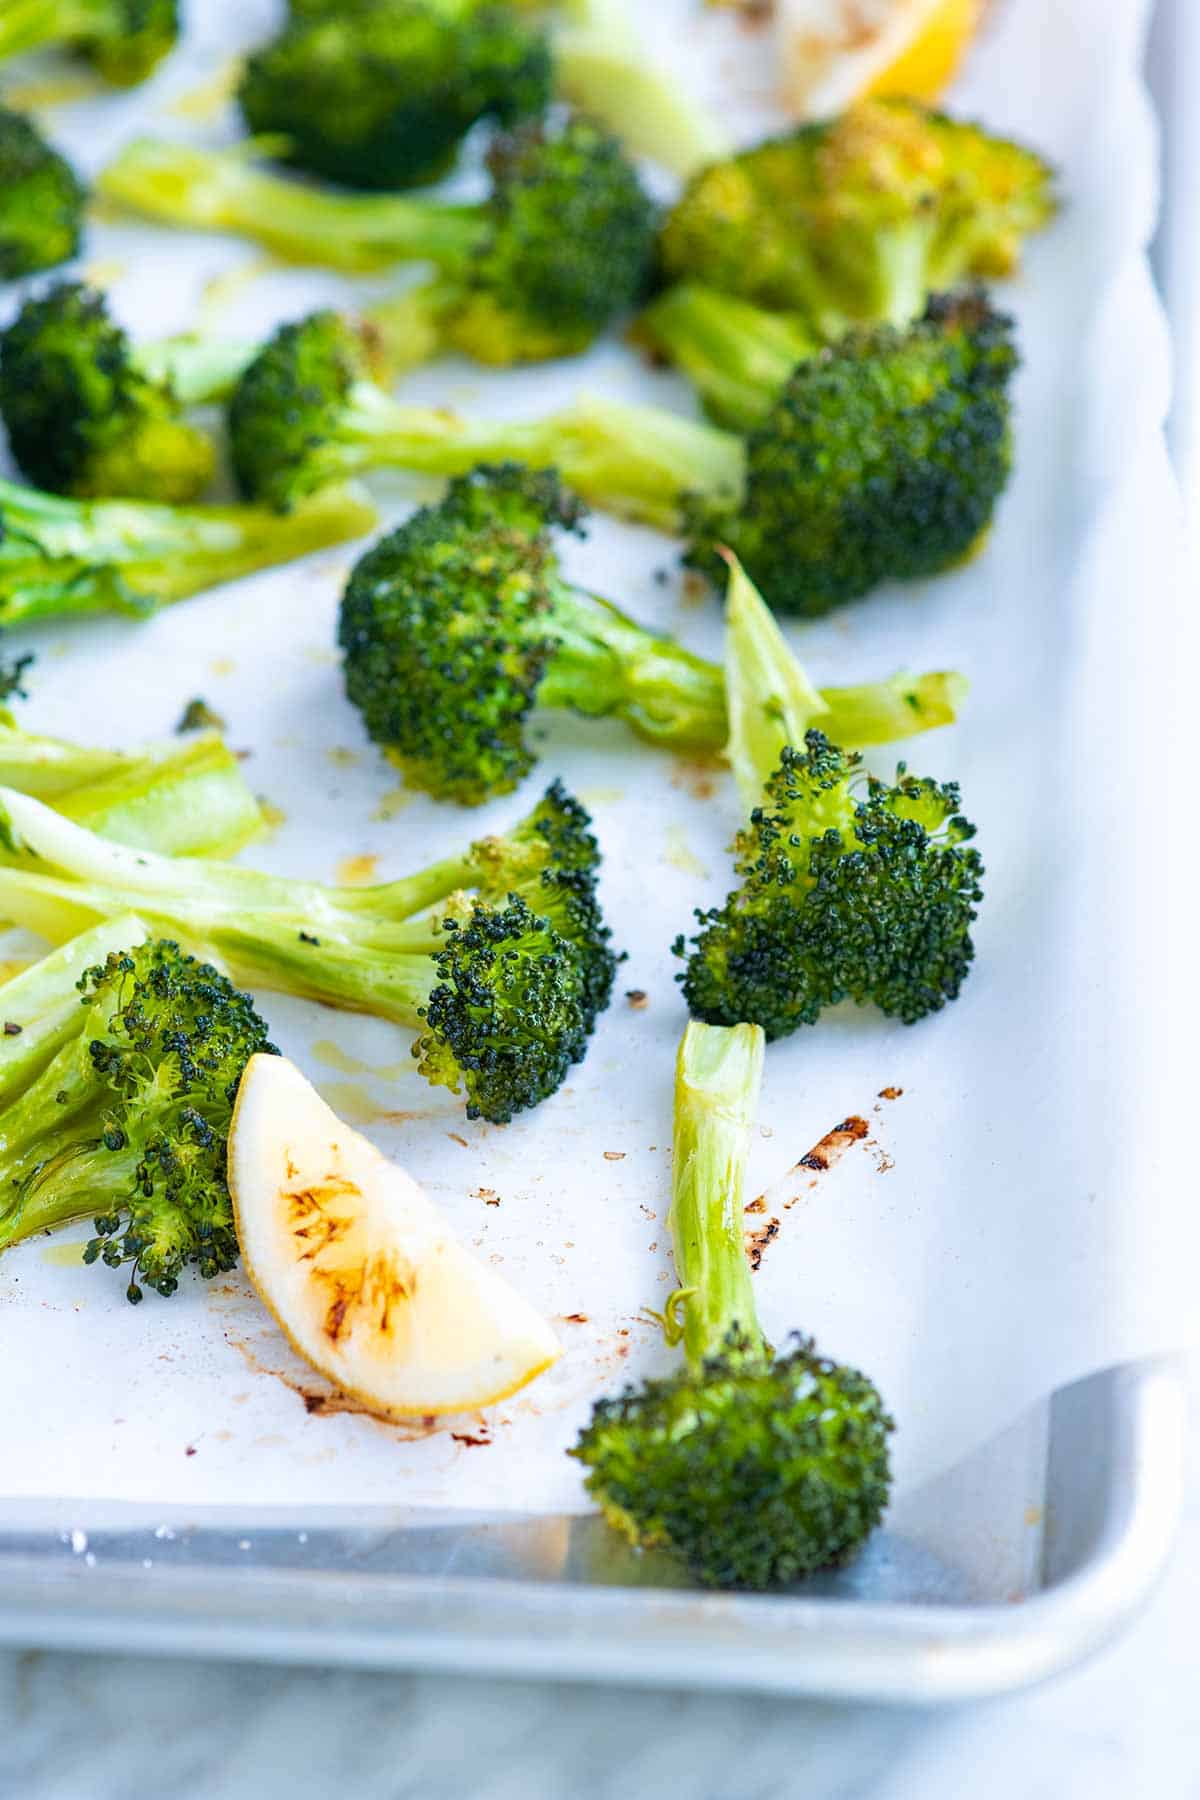
My oven roasted broccoli recipe guarantees perfectly tender florets with the most delicious golden-brown crispy tips. It’s such a simple, perfect side dish!
Our family loves roasting broccoli in the oven, but we’re picky about it. You won’t find any mushy or overcooked broccoli here. My favorite method guarantees tender stems, crisp edges, and most importantly, really tasty broccoli!
The secret to the best roasted broccoli is high heat and a few small tricks we’ve learned over the years. With the right pan, a drizzle of oil, and a bit of patience, you’ll have broccoli so good you’ll want to eat it straight from the sheet pan. For more, see our roasted broccolini recipe!
Key Ingredients
Broccoli: Look for florets that are tightly closed and a deep, vibrant green color. If they appear loose, pale, or have yellowing or small yellow flowers, the broccoli is likely past its peak and can taste bitter. If you only have frozen broccoli, don’t worry. We’ve included tips in the recipe for roasting frozen broccoli so it still turns out crispy and delicious.
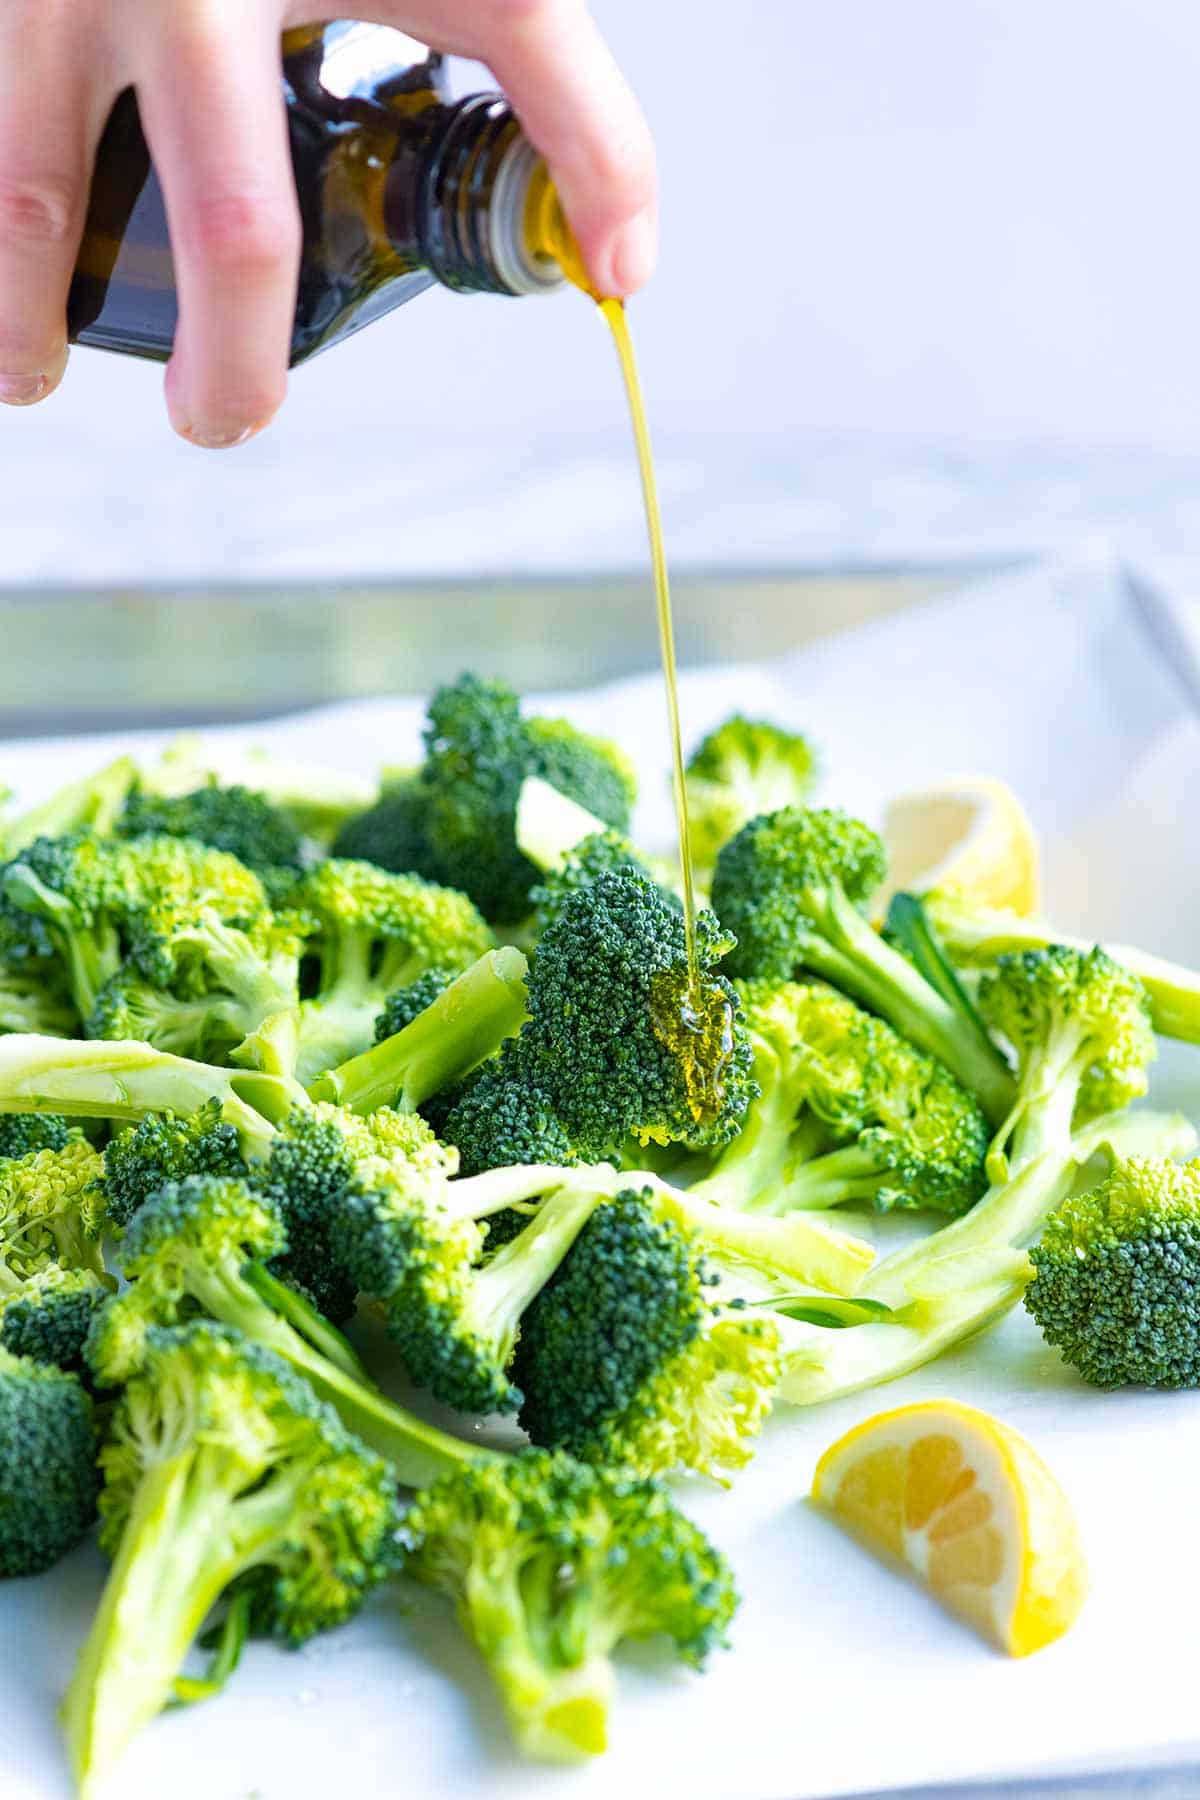
Oil: We like to roast vegetables with olive oil or avocado oil, both of which have great flavor and a higher smoke point. Avoid extra-virgin olive oi; since it burns more easily at high oven temperatures.
Salt and Pepper: As with all of our roasted vegetable recipes, we season generously with salt and pepper. Once roasted, you can add extra flavor with your favorite spice blends or seasoning mixes.
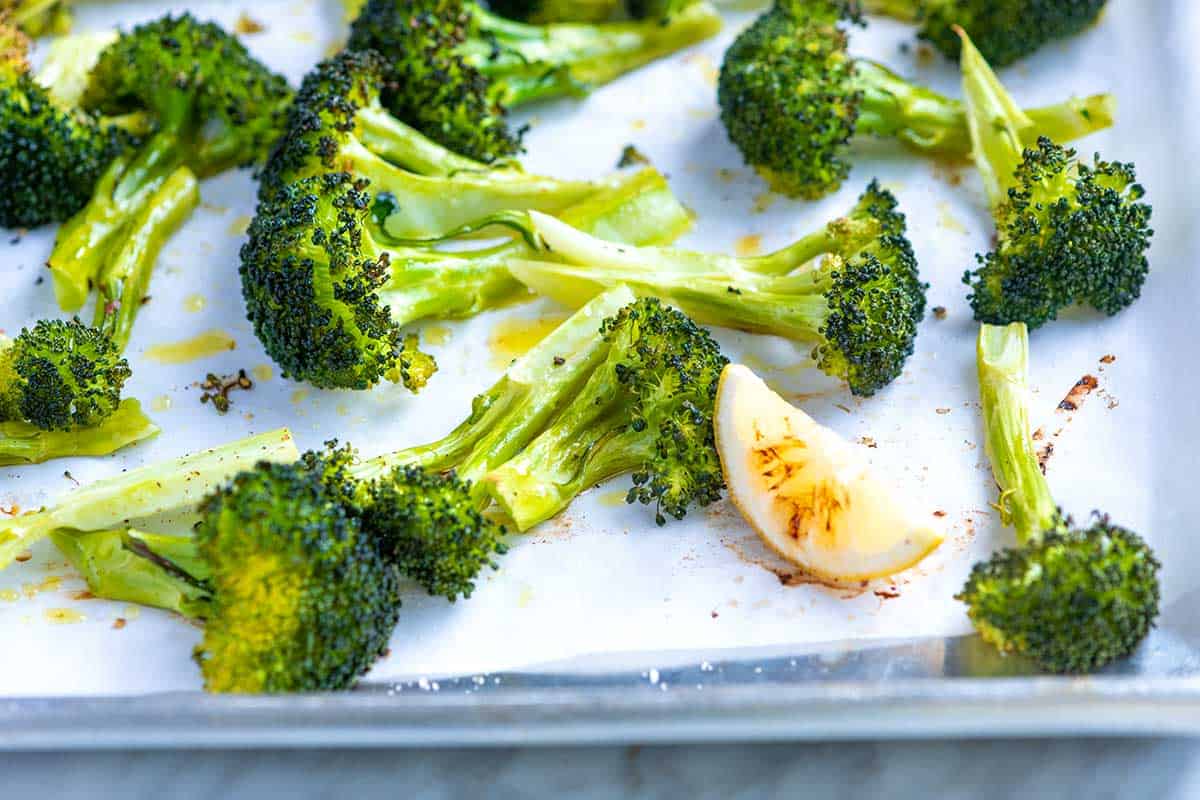
Lemon (Optional): I like to slice a lemon and toss the wedges right onto the baking sheet with the broccoli. The lemons roast and turn slightly sweet, and the broccoli tastes amazing with a squeeze of that roasted lemon juice over the top.
Find the full recipe with measurements below.
How to Make Roasted Broccoli in the Oven
Tip 1: Cut the broccoli into similarly sized pieces. So that all your broccoli roasts at the same speed, try to cut your broccoli into similar sizes. It’s up to you how big they are, but make sure everything in the pan looks similar in size. This way, everything roasts evenly. I use the same tip for roasted cauliflower, too.
Tip 2: Create lots of flat edges. Instead of pulling the florets apart to look like the tops of round trees, slice them in half or quarters to create a flat side. Place the flatter edge down when you arrange the broccoli on the baking sheet. As the broccoli roasts, the flat edge will get nice and brown.
Tip 3: Don’t overcrowd it on the pan. Be careful not to overcrowd the broccoli, and give them some space. Roasting the broccoli too close together causes it to steam rather than roast. This tip also applies to roasted mushrooms!
Tip 4: Use a high oven temperature. For those crispy brown tips and caramelized stems, roast broccoli at 425°F for 20 to 30 minutes. Check the broccoli towards the end of roasting, and don’t take it out until the tips of the florets are browned and crisp and the stems are tender.
Serving Suggestions
This broccoli might be one of the most made veggie sides in our house. We’re happy to serve it next to almost anything. Some of our favorites are next to mac and cheese, chicken nuggets (my son’s request), these lemon chicken thighs, our baked lemon dill salmon, and adding to rice or grain bowls.
I also love adding a dipping sauce to the side, like our tahini sauce, ranch dressing, or this creamy honey mustard.
More Broccoli Recipes
Perfect Roasted Broccoli
PREP
COOK
TOTAL
Roasted broccoli is such a classic side, and for good reason! It goes with almost anything. The lemon in our recipe is optional, but really lovely with the broccoli.
4 Servings
You Will Need
1 bunch broccoli, about 1 ½ pounds
2 tablespoons olive oil or avocado oil
½ teaspoon fine sea salt
¼ teaspoon fresh ground black pepper
3 lemon wedges, optional
Directions
1Prep: Preheat the oven to 425°F (218°C). Line a large baking sheet with parchment paper or a silicone baking mat.
2Prepare the broccoli: Cut the broccoli crown into individual florets, separating them from the main stem. If any florets are really big, cut them in half lengthwise to create flat edges, which helps them roast evenly and brown. Use a vegetable peeler to remove the tough outer layer of the broccoli stems. Cut the peeled stems into bite-sized pieces, about 1 inch long.
3Season: Toss the broccoli florets and stems with the olive oil, salt, and pepper on the baking sheet. Spread them out, facing as many flatter edges down onto the baking sheet so they brown nicely. Then, scatter lemon wedges around the broccoli.
4Bake: Roast the broccoli, without stirring, until the edges are crisp and brown and the stems are tender, 20 to 25 minutes. Serve warm with some juice from the roasted lemon wedges squeezed on top.
Adam and Joanne’s Tips
Storing: Let cool. Transfer the cooled broccoli to an airtight container or resealable bag. Store in the refrigerator for 3 to 5 days, or freeze for up to 12 months. To freeze, spread the broccoli on a baking sheet lined with parchment paper and freeze for about an hour (preventing them from sticking together later). Transfer to a freezer-safe container.
Broccoli stems: I love buying broccoli with long stems that are still attached. The outer layer of the stem can be tough, so I use a vegetable peeler to remove it. Cut 1/2 inch from the end and discard (this can be tough). Slice or dice the rest and throw onto the baking sheet with the florets.
Roasted frozen broccoli: Roast it frozen (do not thaw). Add to a baking sheet and roast at 425°F without oil. After 5 minutes, drizzle the broccoli with oil, then continue to roast for 10 to 15 minutes, or until the edges start to turn crisp. Season with salt and pepper, then serve. The broccoli will turn out softer than when using fresh, but it will still be delicious.
The nutrition facts provided below are estimates.
Nutrition Per Serving Serving Size 1/4 of the baking sheet / Calories 119 / Total Fat 7.6g / Saturated Fat 1.1g / Cholesterol 0mg / Sodium 346.9mg / Carbohydrate 11.6g / Dietary Fiber 4.4g / Total Sugars 3g / Protein 4.8g
AUTHOR:
Adam Gallagher
We are Adam and Joanne Gallagher, the creators of Inspired Taste. Established in 2009, Inspired Taste grew from a childhood dream into one of the internet’s most trusted recipe sites with hundreds of reliable recipes, step-by-step videos, and expert tips.More About Us
This roasted butternut squash soup recipe with a short list of simple ingredients turns out silky, smooth, and incredibly delicious.
In this recipe, you’ll roast butternut squash on top of fresh garlic and thyme, then blend it with broth for one of the easiest soups we’ve shared!
There’s no sautéing, very little simmering, and you don’t need to chop lots of veggies. I love it for an easy fall dinner, but since it turns out so well, it’s actually perfect for the holidays (like Thanksgiving dinner). For a similar soup with even more seasonal vegetables like leeks and carrots, see this Butternut Squash Soup topped with crispy chickpeas.
Key Ingredients
Butternut Squash: I use medium butternut squash, but feel free to swap in winter squash varieties often found during autumn at the farmers market, like honey nut, kabocha, or red kuri squash, or swap it for a small sugar pumpkin like I use when making homemade pumpkin puree.
Herbs:When roasting the squash, we tuck fresh herbs underneath for extra flavor. I use fresh thyme and rosemary most often, but this is also incredible with fresh sage. You can use one of these or all three.
Garlic: In addition to the herbs, we also tuck whole garlic cloves (still in their skins) under the squash. This way, they flavor the squash, and the garlic becomes soft and sweet at the same time. You can then blend the roasted garlic into the soup later on.
Broth: You can use your favorite broth or stock. I love the richness of homemade chicken stock, chicken broth, or bone broth, but this soup is also excellent when you use a flavorful vegetable broth.
Cream: This is optional, but I almost always add a splash of heavy cream to my soup for a silky, velvety texture. To keep it vegetarian or vegan, try coconut milk or coconut cream.
Find the full recipe with measurements below.
My Tips for Making the Easiest Butternut Squash Soup
Tip 1: Cutting butternut squash. My favorite method for cutting butternut squash is the same as I use for spaghetti squash:
To prevent the squash from rolling around, place one half of a kitchen towel under the squash to keep it stable on the counter. Then, use the other half of the towel to hold the squash in place while you cut.
Using a heavy chef’s knife, pierce into the middle of the squash and cut it from end to end. Don’t try to cut through the stem. It is too tough.
Wiggle the knife out and separate the two halves by removing the knife and pulling them apart.
Tip 2: Roast the squash with garlic and herbs. Sneak some herbs and garlic underneath the butternut squash halves before roasting them in the oven until fork-tender and golden on the bottom. The squash becomes fragrant and so flavorful this way.
Tip 3: Blending your soup. When the squash is tender and caramelized, it’s time to blend. Use an immersion blender in a pot or use a stand blender to blend the roasted squash with broth and the soft roasted garlic. (You can squeeze the roasted garlic flesh into the blender and discard the skins.) Season with salt and pepper to taste, then, as a last (optional) step, I love blending in some cream.
Tip 4: Serving this soup. I love this roasted squash soup with a slice of homemade focaccia bread, but it’s also really good with some homemade croutons on top. If you’re feeling fancy, it is also amazing with a grilled cheese made with sourdough and Gruyère cheese!
More Easy Soups
Easy Roasted Butternut Squash Soup
PREP
COOK
TOTAL
This easy butternut squash soup requires a short list of ingredients and minimal effort from you. Since it is so simple, you have some wiggle room with variations. Feel free to substitute other varieties of squash or pumpkin in place of the butternut squash. Or add some roasted apples, onions, or carrots. You can roast them alongside the squash on the same baking sheet. More variations are below the recipe.
6 Servings
You Will Need
1 medium butternut squash, 2 ½ to 3 pounds
1 tablespoon extra-virgin olive oil or melted butter
3 sprigs fresh thyme, rosemary, or fresh sage
4 garlic cloves, with skins left on
4 to 5 cups low-sodium vegetable or chicken stock, try homemade chicken stock (950ml to 1180ml)
¼ cup heavy cream, optional (60ml)
Salt and fresh ground black pepper
Directions
1Prepare oven and pan: Preheat the oven to 400°F (204°C). Line a rimmed baking sheet, roasting pan, or baking dish with foil or parchment paper.
2Prepare the squash: Cut the squash in half, lengthwise, using a heavy chef’s knife. Scoop out and discard the seeds. Brush each half, inside and out, with 1 tablespoon olive oil (or melted butter). Season the squash with ½ teaspoon salt and ¼ teaspoon black pepper.
3Roast the squash: Make a bed of fresh herbs and garlic cloves in the middle of the baking sheet. Place the squash, cut side down, on top. Roast until the squash is completely tender, about 1 hour.
4Blend until creamy: Remove the squash from the oven and let it cool until you can handle it. Scoop out the roasted butternut squash flesh and add it to a large pot. Squeeze the roasted garlic from the skins into the saucepan and throw away the skins. Throw away the herbs.
5Pour 4 cups of stock into the saucepan and bring to a simmer. Using a blender or immersion blender, blend the soup until completely smooth. Add more stock to thin the soup to your desired consistency. Season to taste with salt and pepper. Stir in cream (optional).
Adam and Joanne’s Tips
Storing: Store homemade butternut squash soup in an airtight container in the fridge for up to 3 days or in the freezer for up to 3 months.
Variations: Consider adding some warm spices to this soup, like 1/4 teaspoon ground ginger or finely grated ginger, a pinch of nutmeg, or a pinch of cayenne pepper for some heat.
Serving ideas: I love an extra drizzle of cream, but this soup is also lovely with some toasted pepitas (or roasted pumpkin seeds), crumbled bacon, or crispy fried shallots on top.
Blending hot liquids: When using a regular blender, work in smaller batches, and don’t fill it too high – hot soup expands! For safety, remove the lid’s center insert and cover the opening with a kitchen towel while blending. This releases steam and prevents messy splatters.
The nutrition facts provided below are estimates.
Nutrition Per Serving Serving Size 1 of 6 servings / Calories 287 / Total Fat 11g / Saturated Fat 5g / Cholesterol 20mg / Sodium 546mg / Carbohydrate 45g / Dietary Fiber 7g / Total Sugars 8g / Protein 10g
AUTHOR:
Adam Gallagher
We are Adam and Joanne Gallagher, the creators of Inspired Taste. Established in 2009, Inspired Taste grew from a childhood dream into one of the internet’s most trusted recipe sites with hundreds of reliable recipes, step-by-step videos, and expert tips.More About Us
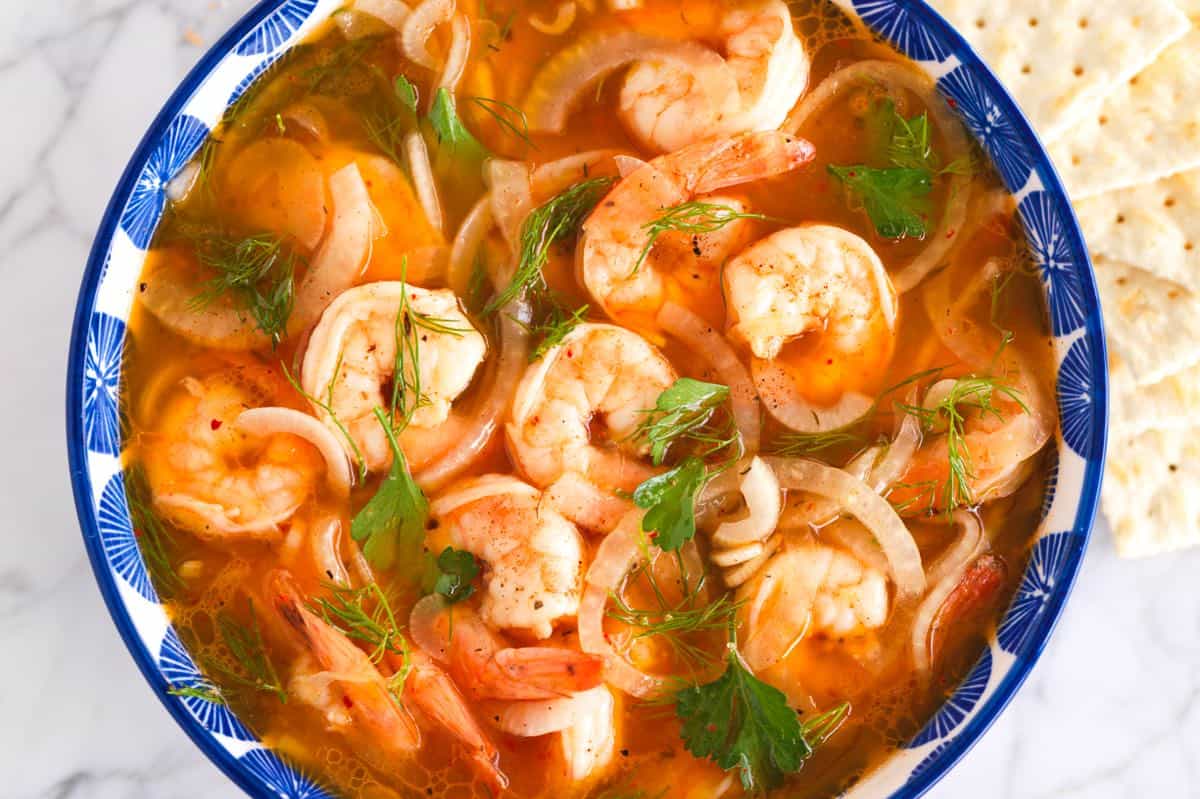
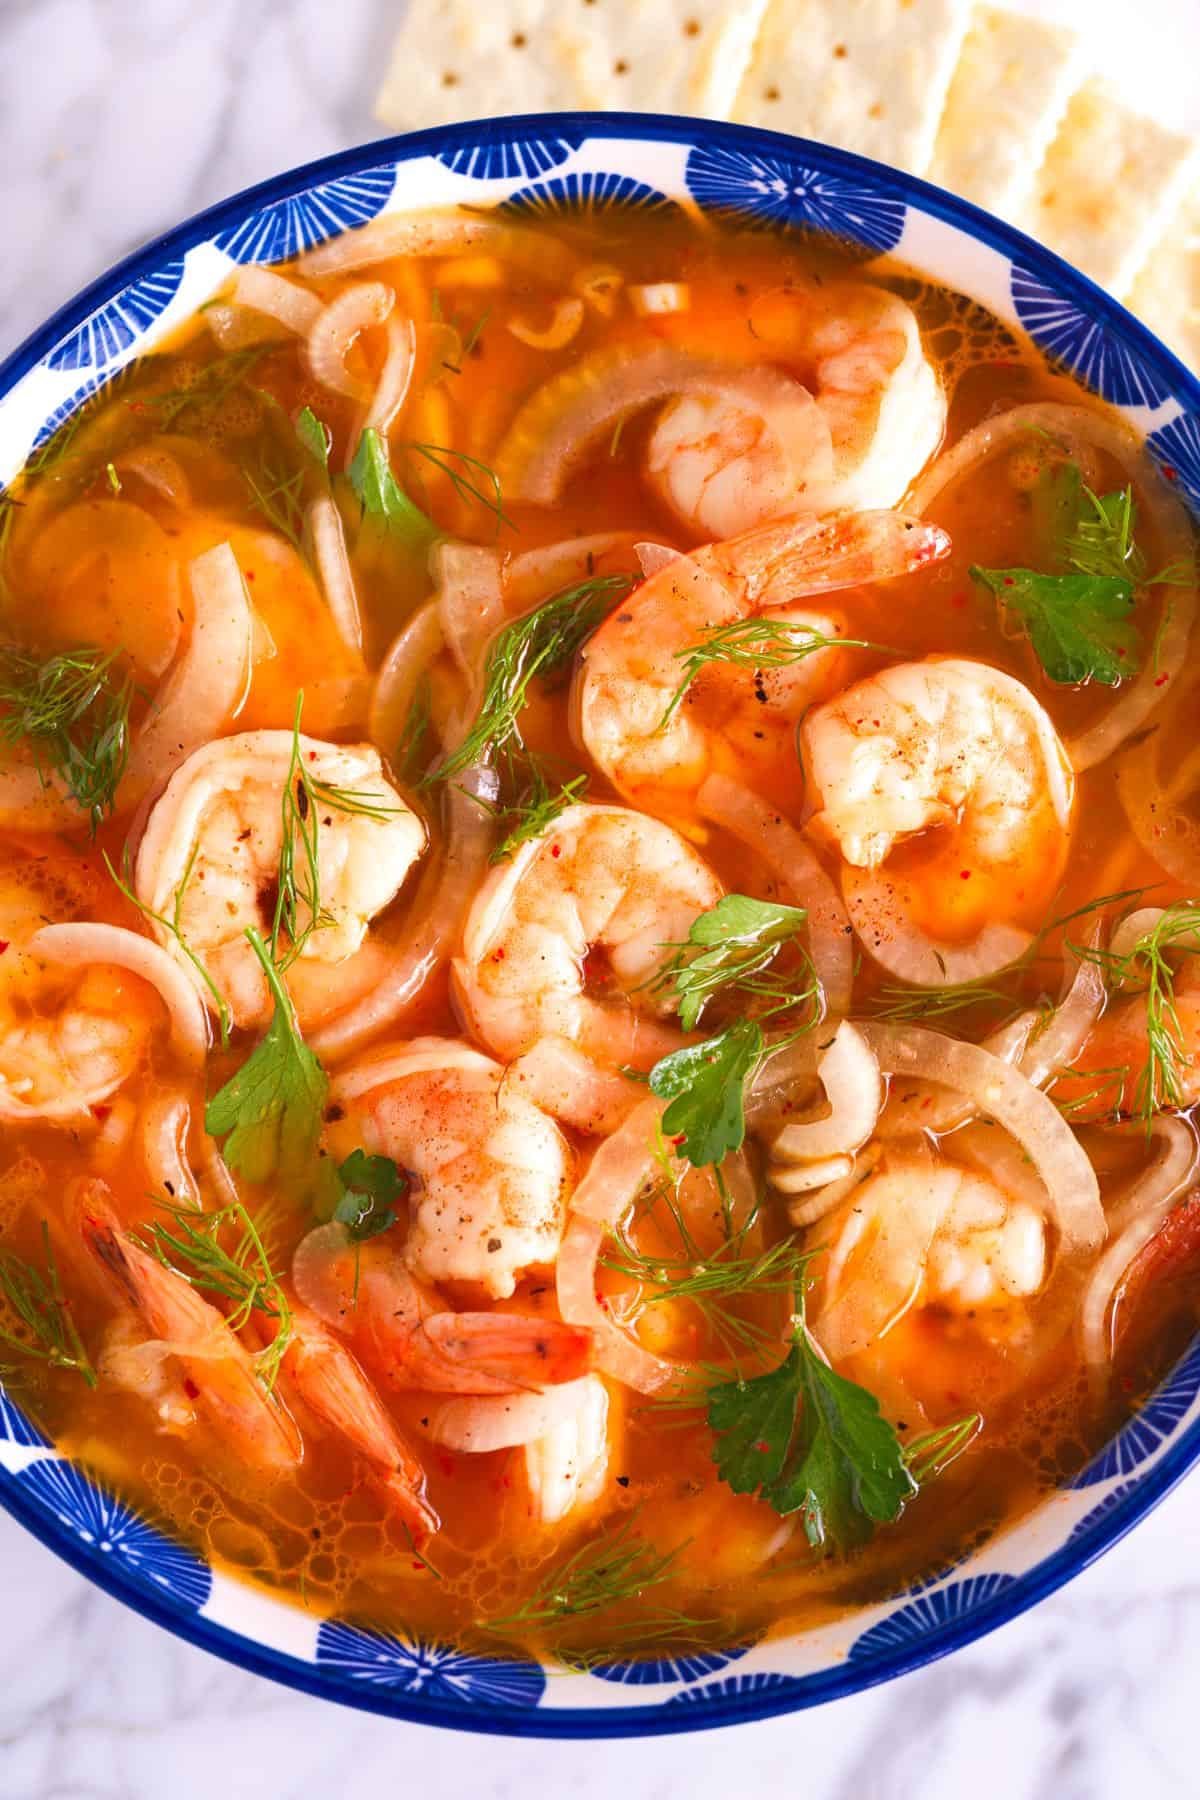
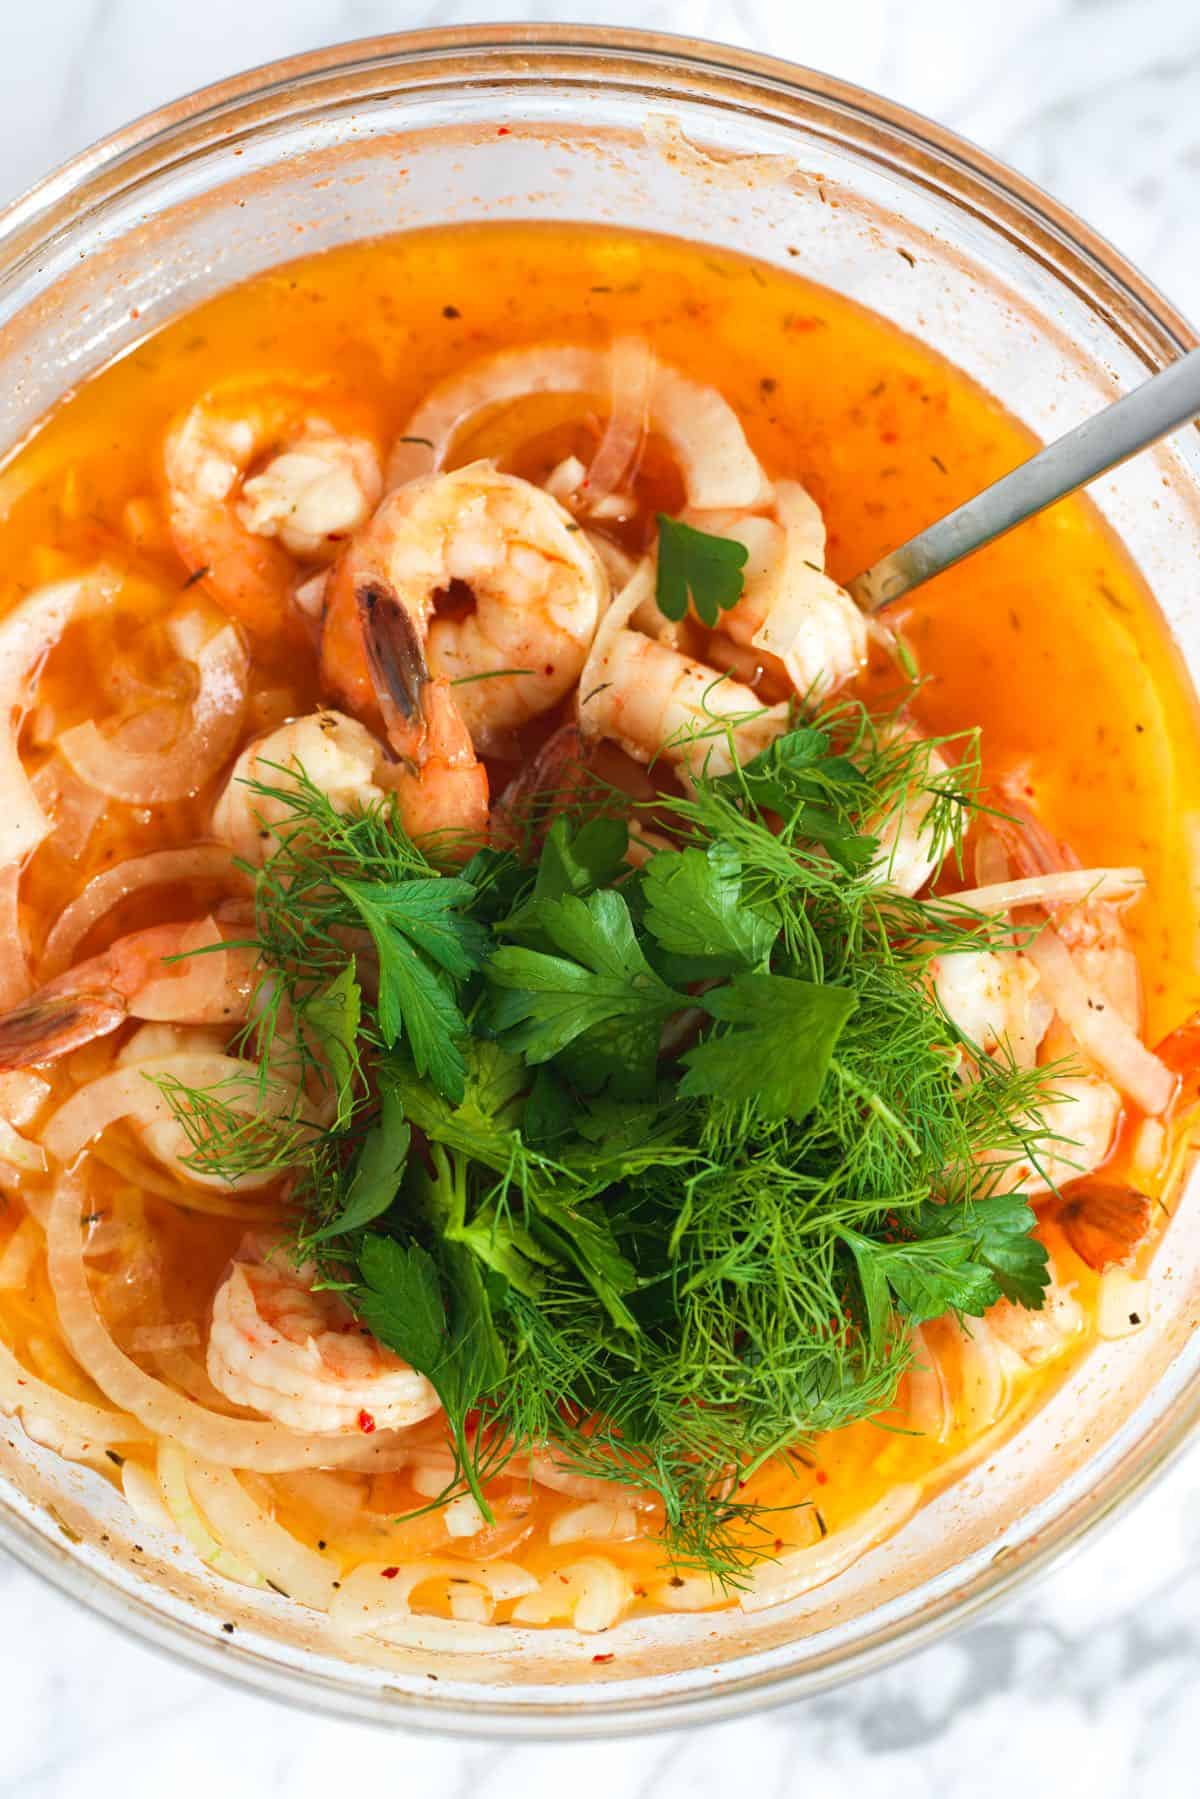
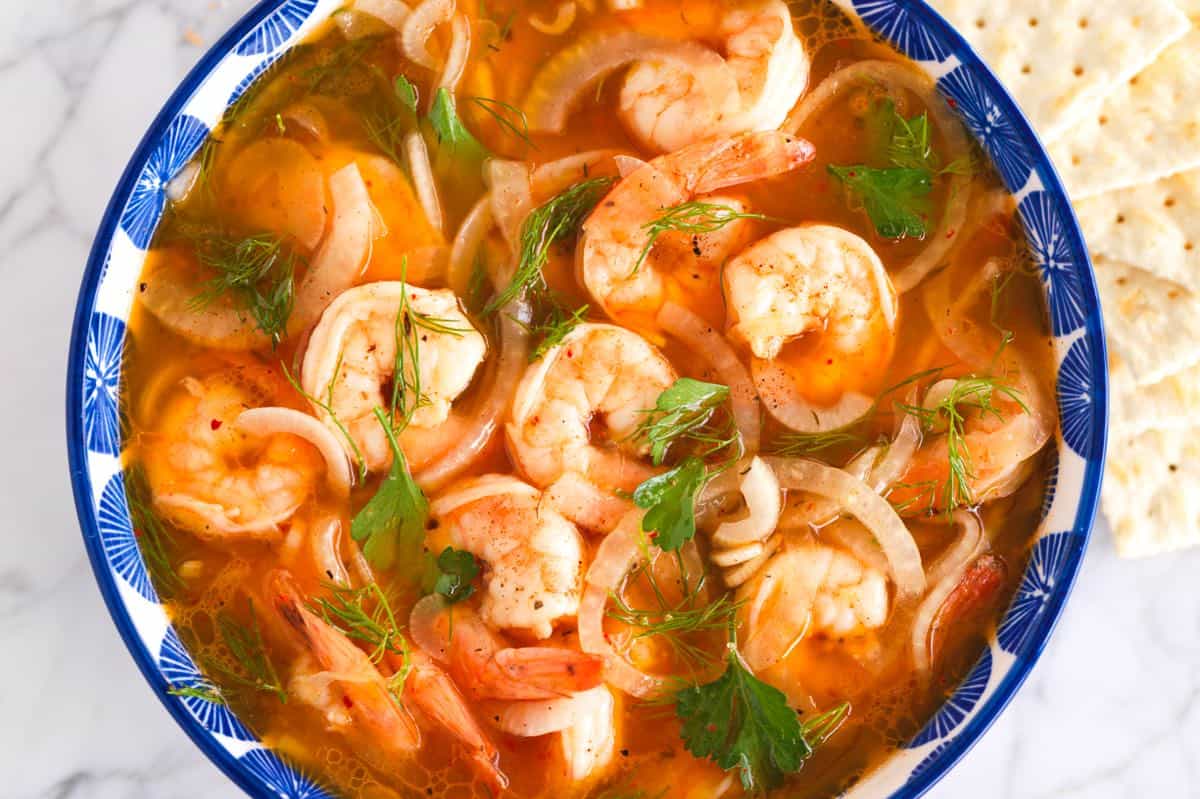
This tangy, herby, lemony pickled shrimp recipe is so good you’ll want to make a double batch!
I love these pickled shrimp as a light dinner and for entertaining (they always go quickly). Serve them with crackers, crusty bread and butter, or make a sandwich. They’re even great added to salads and light pasta dishes (like this orzo pasta salad).
I didn’t know how much I loved Southern-style pickled shrimp until our friend Richard introduced us to them. Now, I can’t get enough. Once you try this easy recipe, you’ll be hooked, too. They are seriously good! For another Southern-inspired shrimp recipe, see our easy shrimp and grits!
Key Ingredients
Shrimp: For the best results, I recommend large or jumbo shrimp. They’re less likely to overcook and dry out. Look for fresh shrimp that feels firm and has a slightly sweet smell. If you’re using frozen shrimp, thaw and drain them before cooking them.
Lemon: I use lemon juice for the pickling liquid and a whole lemon for the shrimp cooking liquid.
Cajun or Creole Seasoning: This adds a ton of flavor to both the cooking liquid and the pickling liquid. I love my homemade Cajun seasoning, but feel free to use what you have. I also like to add a bay leaf to the cooking liquid.
Onion: This might be my favorite part! I love pickled onions, and since we add lots of sliced onion to the pickling brine, you end up with perfect shrimp and pickled onions. I usually use sweet onions, but yellow or red onions work too.
Apple Cider Vinegar and Oil: These are the base of your pickling liquid. Apple cider vinegar keeps things tangy, and the oil adds richness and helps the pickling liquid turn into more of a dressing.
Herbs: I love stirring fresh parsley and dill into the shrimp before serving for a bright, fresh flavor.
Find the full recipe with measurements below.
How to Make the Best Pickled Shrimp
Tip 1: Cook your shrimp first. Just like when making shrimp ceviche, I quickly cook my shrimp before they go into the pickling liquid. This way, we can season them perfectly before they soak up all that tangy brine. A quick poach is all you need for the shrimp.
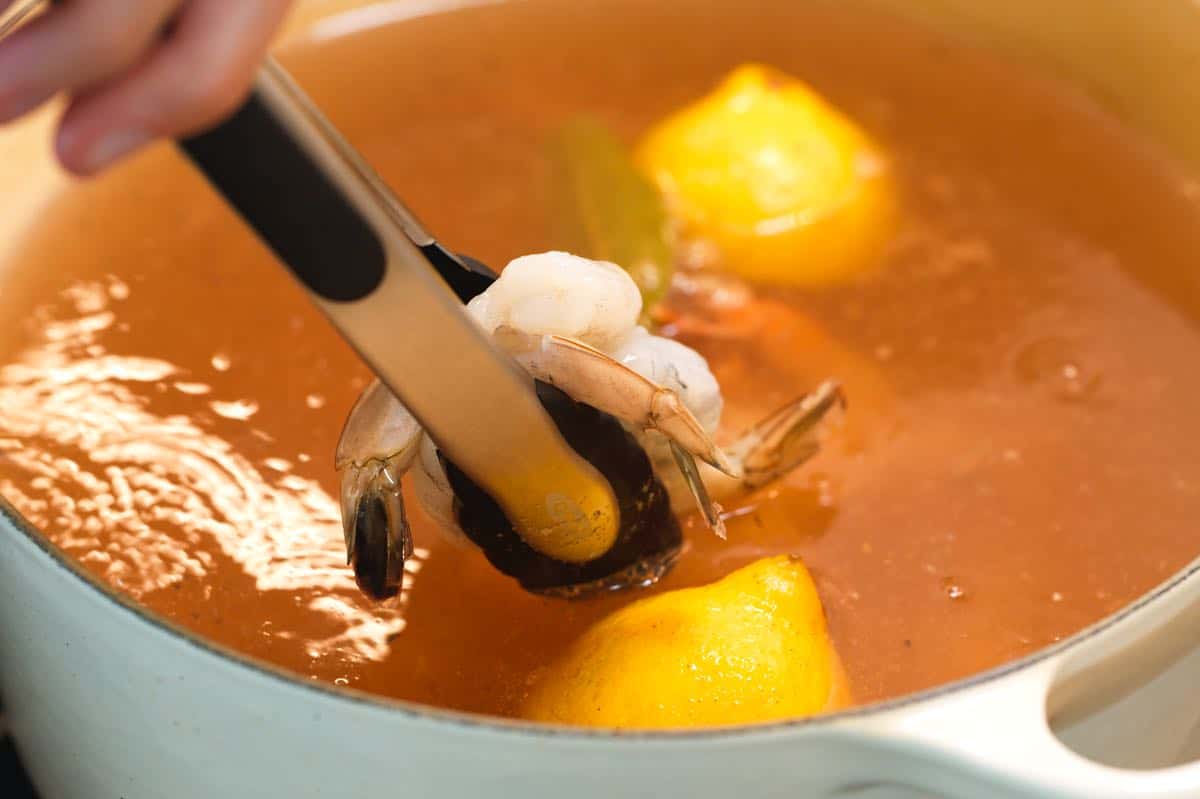
Three minutes in the seasoned water is the sweet spot for plump, juicy shrimp. Once the shrimp are cooked, they go straight into the chilled pickling liquid! Let them hang out in the fridge for at least 20 minutes (or longer if you want).
Tip 2: Use our pickling liquid. The pickling liquid itself is extraordinarily flavorful, made with lemon juice, spices, onion, and herbs. You’ll combine everything in a bowl with ice water to get it nice and cold, then pop it in the fridge while your shrimp cook.
Tip 3: Serving suggestions. When you’re ready to serve, the options are endless! I love them with crackers, buttered toast, or tossed into a salad. And don’t forget about those onions from the brine. They pickle, too, and are seriously delicious!
Seriously Good Pickled Shrimp
PREP
COOK
TOTAL
We cannot get enough of these pickled shrimp. The shrimp turn out tangy, herby, and so delicious! You will quickly cook the shrimp before adding them to the brine. It’s easy and guarantees the perfect texture!
4 Servings
You Will Need
For Cooking the Shrimp
1 pound (450g) large shrimp, peeled and deveined
1 lemon
1 tablespoon fine sea salt
1 teaspoon Cajun seasoning or Creole seasoning
1 bay leaf
1/4 teaspoon fresh ground black pepper
For the Pickling Liquid
2 tablespoons fresh lemon juice from half a large lemon
1 ½ teaspoons fine sea salt
3/4 teaspoon Cajun seasoning or Creole seasoning
1 small sweet onion, thinly sliced
6 tablespoons (88ml) apple cider vinegar
1/4 cup (60ml) avocado oil or vegetable oil
1/2 cup (120ml) ice water
1/8 teaspoon gochugaru Korean red chili flakes or use crushed red pepper flakes
1/4 teaspoon fresh ground black pepper
1/4 cup (15g) fresh parsley leaves, chopped
2 tablespoons fresh dill, chopped
Directions
1Make the pickling liquid. Add the lemon juice, salt, Cajun seasoning, sliced onion, cider vinegar, oil, ice water, chili flakes, and black pepper to a bowl large enough to hold the shrimp once it has cooked.
2Stir until well blended, then chill in the refrigerator while you cook the shrimp.
3Bring 8 cups (1.8L) of water to a boil in a large pot. Cut the lemon in half, squeeze the juice into the boiling water, and add the lemon halves.
4Add the tablespoon of salt, Cajun or Creole seasoning, bay leaf, and black pepper.
5Add the shrimp and cook for 3 minutes, then transfer them to the chilled pickling liquid using a slotted spoon, stirring them around the pickling liquid a few times.
6Refrigerate for 20 minutes.
7Stir in the fresh herbs before serving.
Adam and Joanne’s Tips
Storing: Keep the shrimp in the brine in the refrigerator for up to 3 days. The shrimp do firm up as they sit, but are still delicious!
The nutrition facts provided below are estimates. The brine is included in the calculations, so fat and sodium are higher than what you will likely consume.
Nutrition Per Serving Serving Size 1/4 of the recipe / Calories 236 / Total Fat 14.4g / Saturated Fat 1.7g / Cholesterol 182.5mg / Sodium 1015.3mg / Carbohydrate 3.6g / Dietary Fiber 0.8g / Total Sugars 0.9g / Protein 23.5g
AUTHOR:
Joanne Gallagher
We are Adam and Joanne Gallagher, the creators of Inspired Taste. Established in 2009, Inspired Taste grew from a childhood dream into one of the internet’s most trusted recipe sites with hundreds of reliable recipes, step-by-step videos, and expert tips.More About Us
This website may contain affiliate links and advertising so that we can provide recipes to you. Read my disclosure policy.
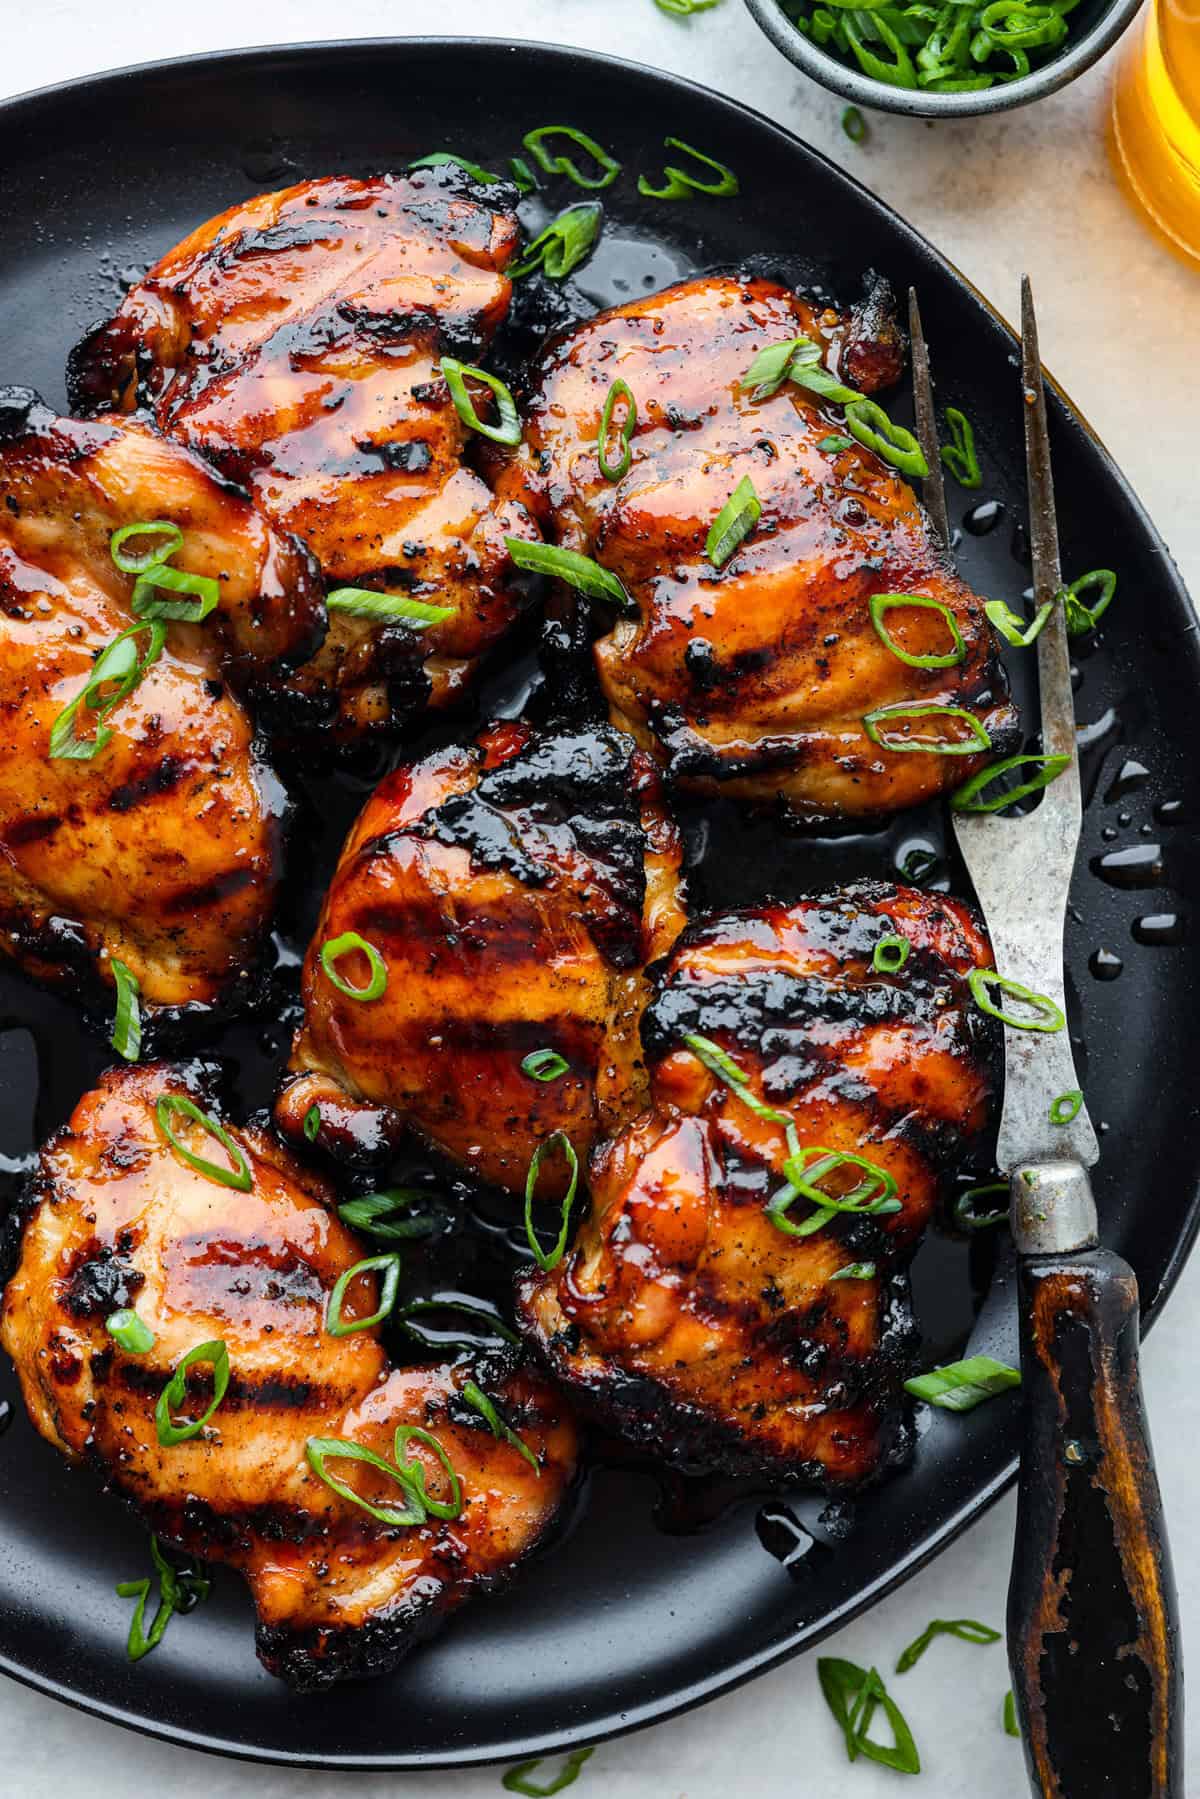
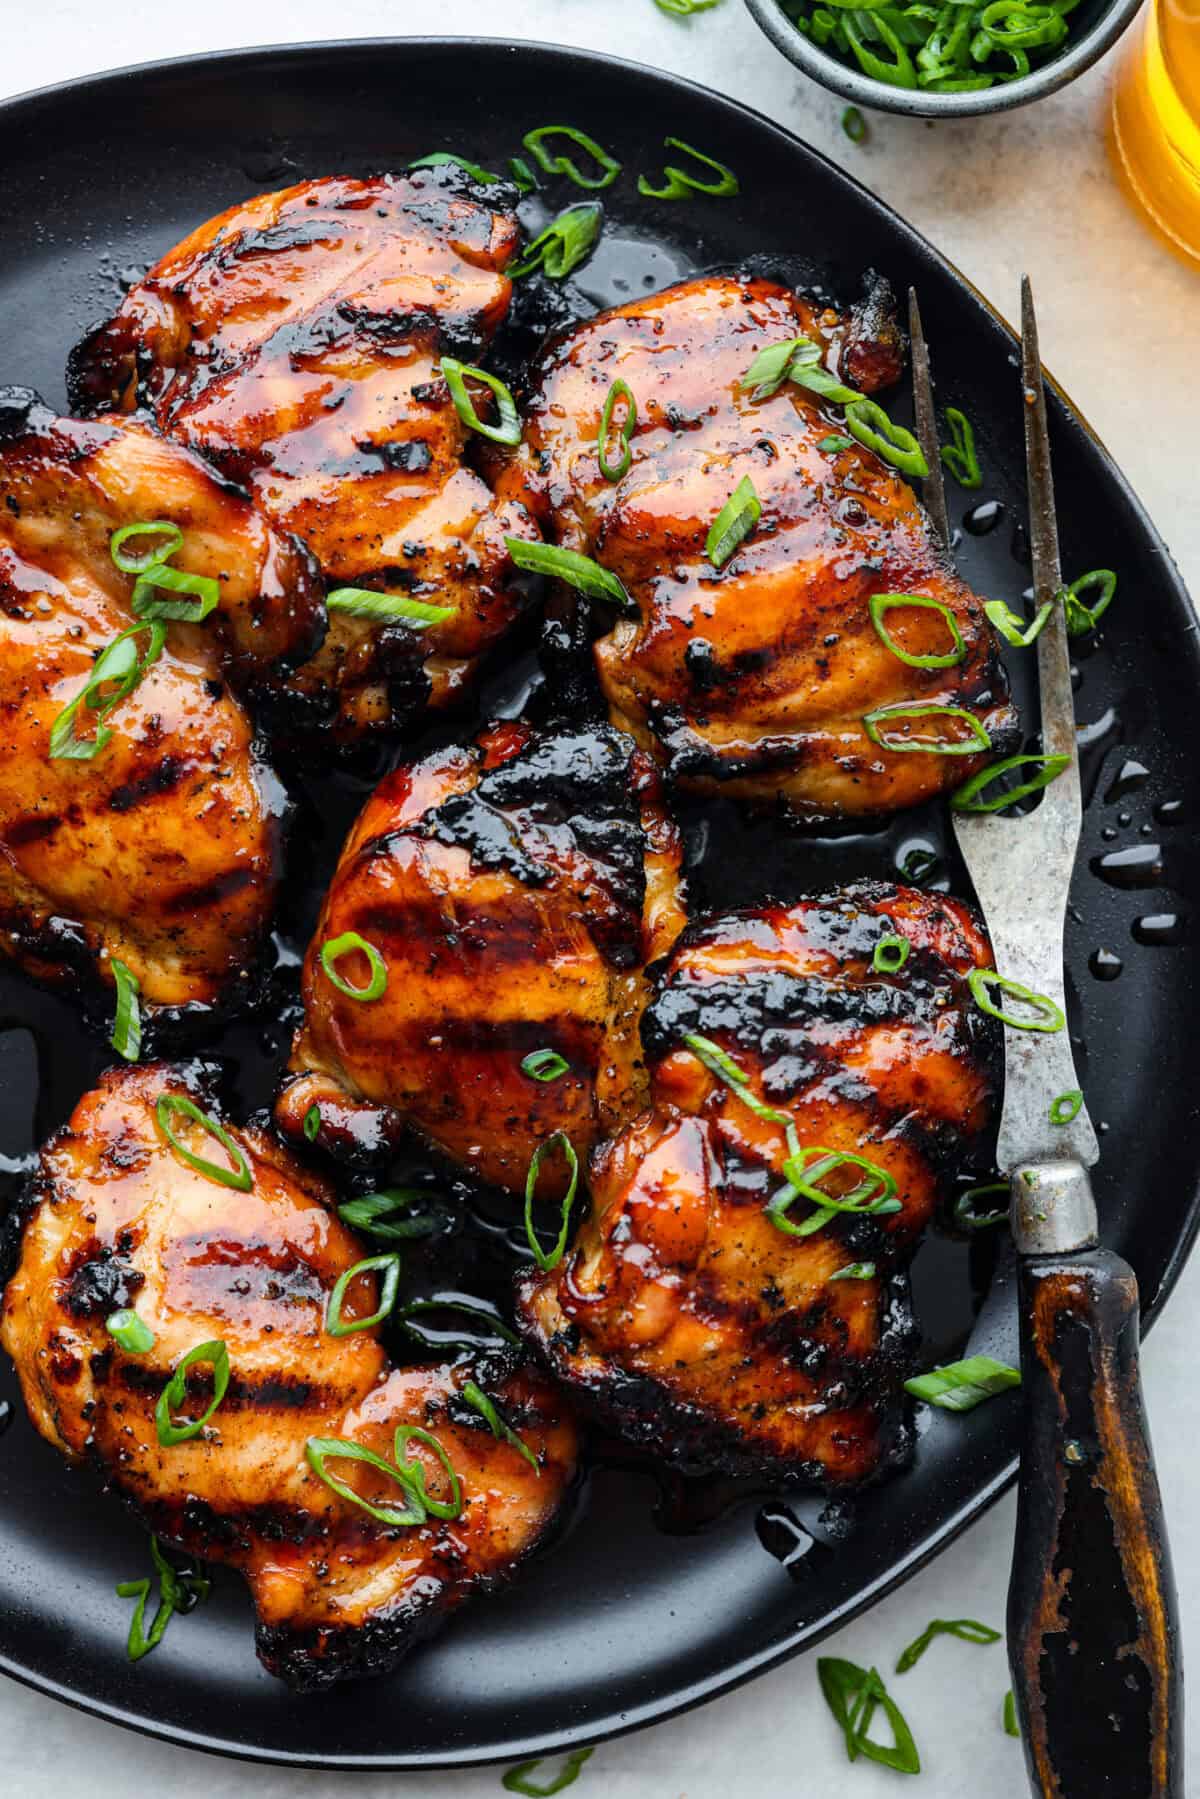
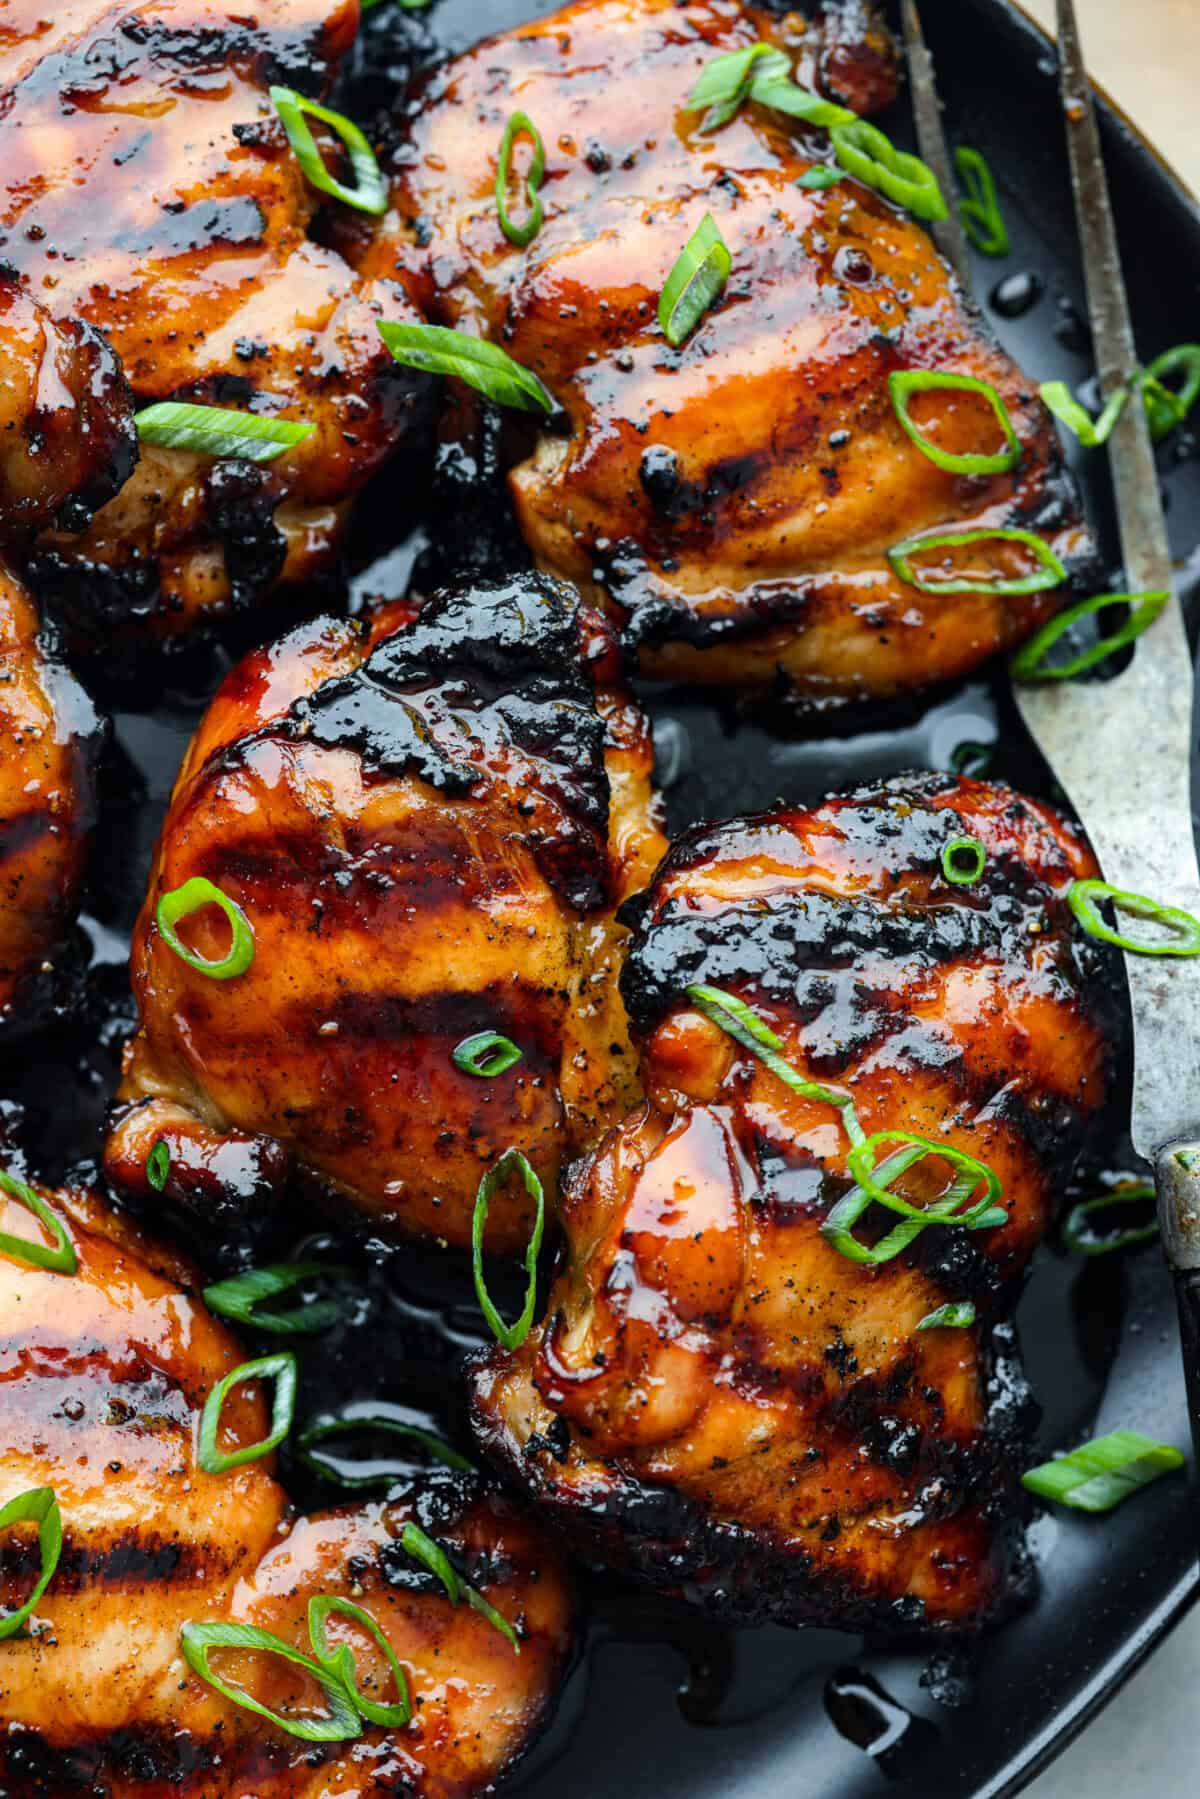
One bite of this grilled bourbon chicken and your tastebuds will be dancing with delight! It’s marinated in a flavorful homemade bourbon sauce that tastes amazing. You will be making it on the regular once you see what a huge hit it is!
Nothing tastes better on a warm summer day than something grilled to perfection. Try these other tried and true grilled recipes like grilled corn, Hawaiian chicken skewers and zucchini for your next BBQ.
Reasons this Grilled Bourbon Chicken is the BEST!
It uses chicken thighs (AKA it’s packed with flavor!): Not only does this make it more affordable, but the FLAVOR is to die for!
Tender and juicy: This marinade will tenderize the meat so that it’s so juicy and incredibly flavorful.
Sweet and tangy: Love both flavors? This recipe is for you! Even if you’re not a fan of drinking bourbon, you will LOVE the marinade with its perfectly balanced sweet, savory and tangy flavor!
Perfect for a BBQ: Serve this with a delicious summer salad, veggies, and some fruit for the perfect backyard BBQ meal!
Ingredients in Grilled Bourbon Chicken
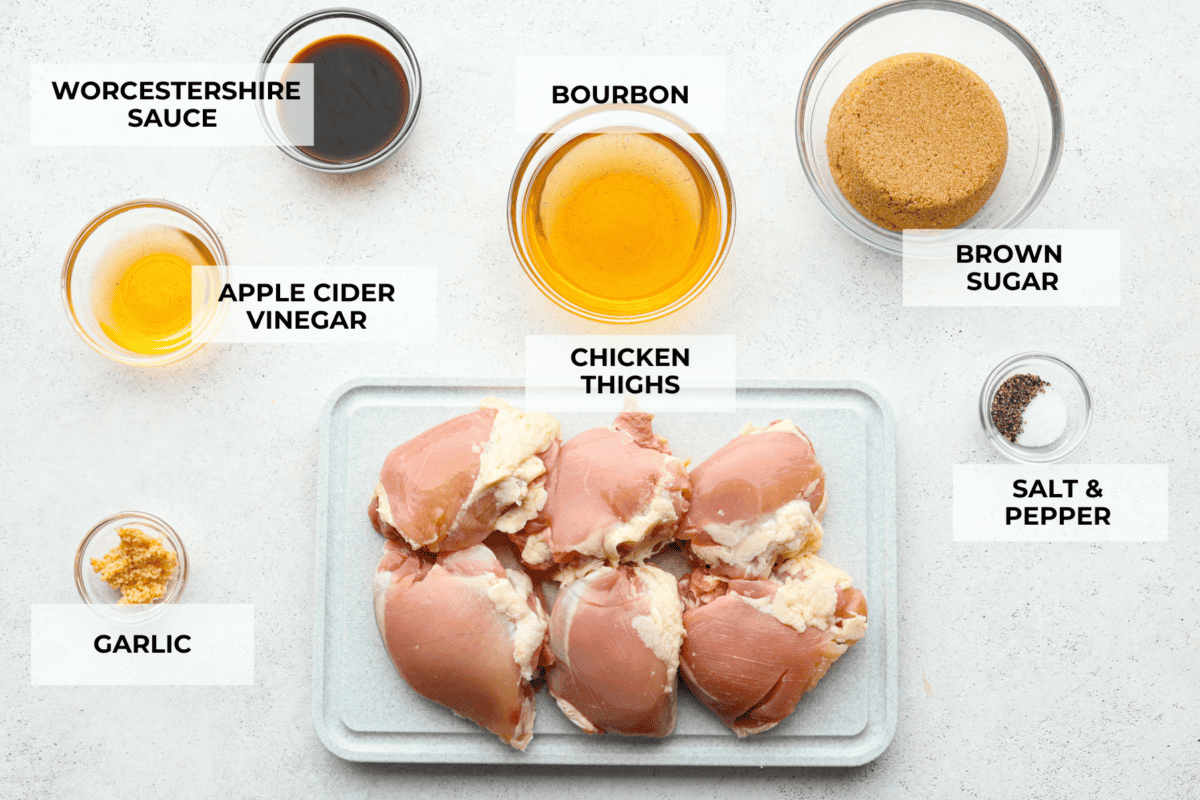
This grilled bourbon chicken recipe only requires a handful of simple ingredients. Once you whip up the marinade and let your chicken sit for about an hour, you’re on your way to juicy, flavorful chicken! Check out the recipe card at the bottom of the post for exact measurements.
Chicken: Boneless skinless chicken thighs will have a richer, more intense flavor than chicken breast, but either can be used.
Bourbon Whiskey: Any brand of bourbon works and will add wonderful flavor. It will also break down the enzymes in the meat, yielding tender, juicy chicken.
Brown Sugar: For a bit of sweetness and caramelization when grilled.
Apple Cider Vinegar: It’s important to include some acid in your marinade to tenderize the meat. Plus, apple cider vinegar has a bright flavor that mellows any harshness from the bourbon.
Worcestershire Sauce: Has a mix of vinegar, garlic, chiles, molasses and more to give the chicken an incredible umami taste.
Garlic: Freshly minced garlic for infusing the meat with wonderful savory flavor!
Salt and Pepper: To season the chicken.
How to Perfectly Grill Bourbon Chicken
Bourbon chicken is easy to make and packs a big punch of flavor! Plan ahead for the marinating time, and you will be eating a delicious meal in no time! Don’t have a grill? Make my bourbon chicken or shrimp in a skillet in no time!
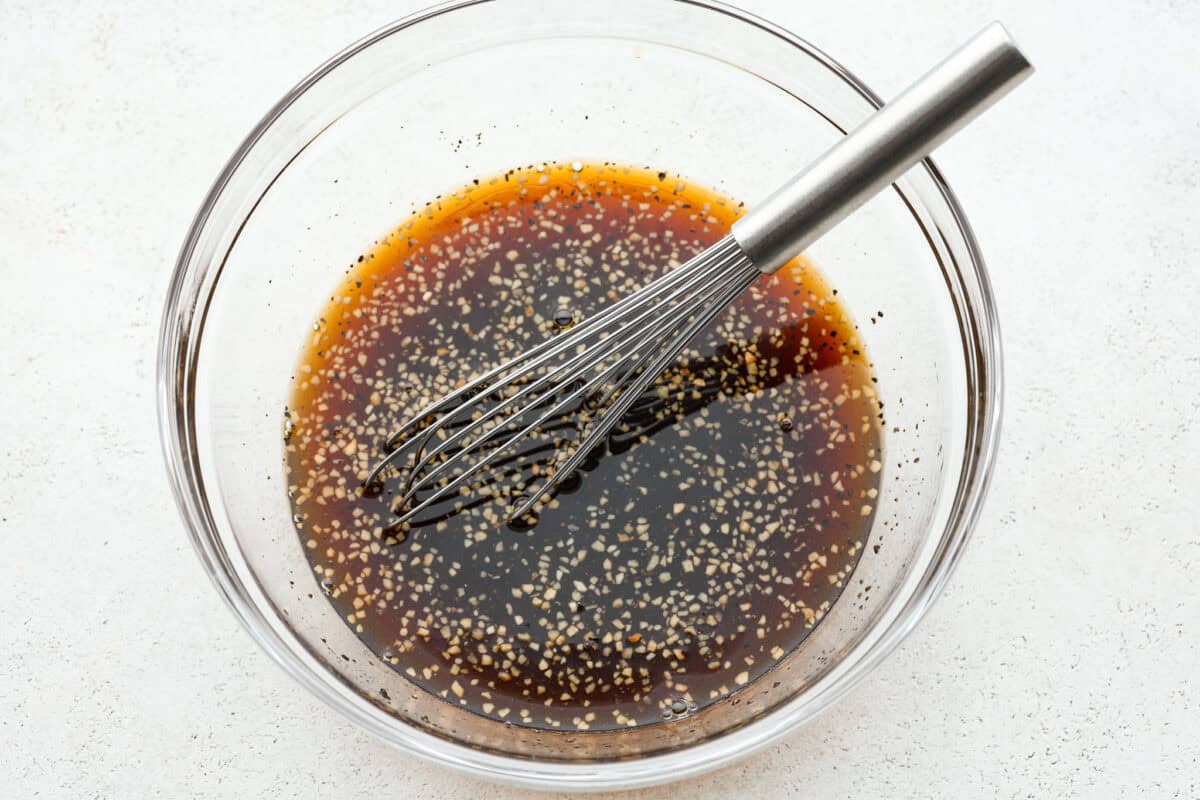
Make the Marinade: In a medium bowl, whisk together the whiskey, brown sugar, vinegar, Worcestershire sauce, garlic, salt, and pepper.
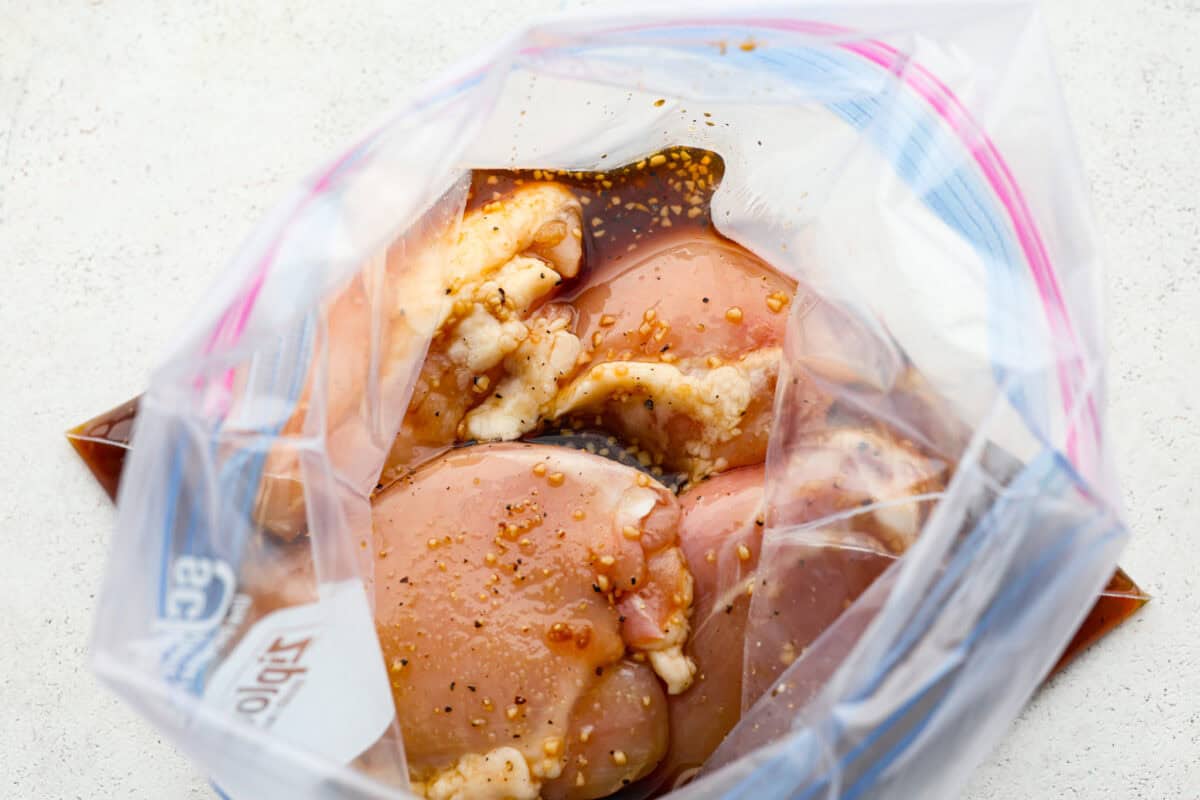
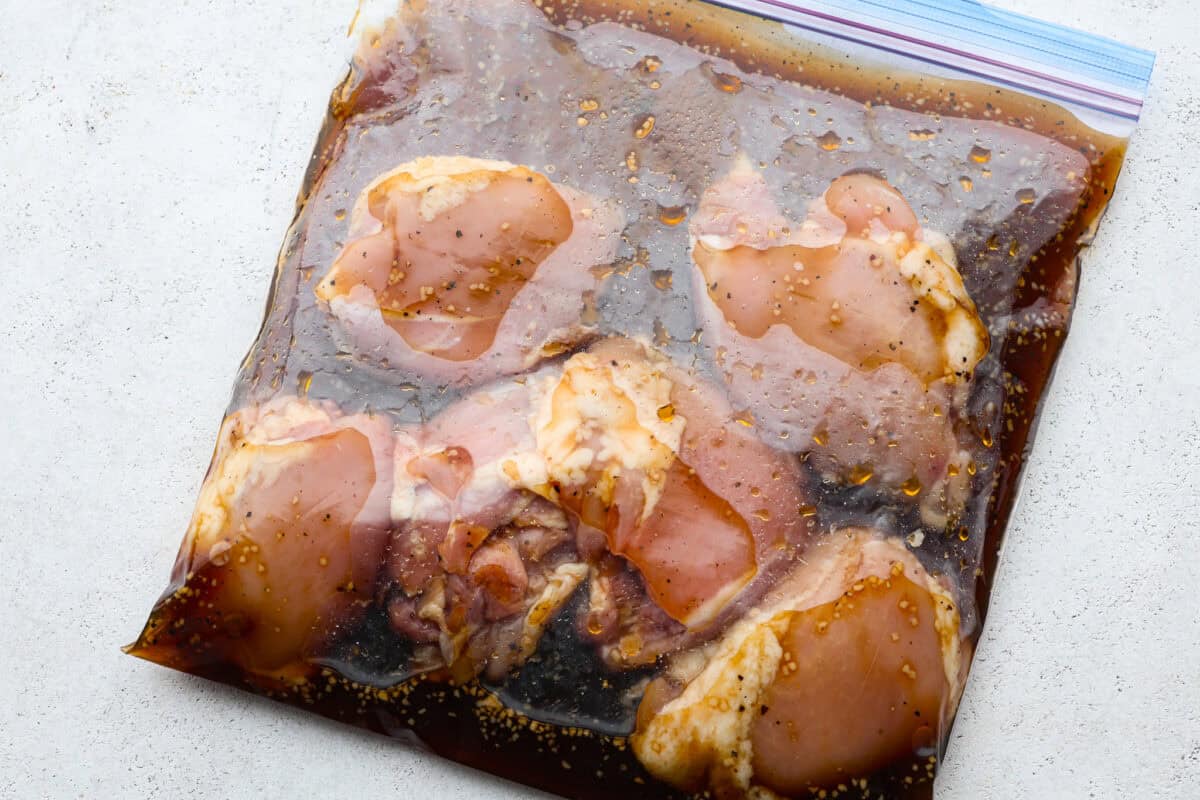
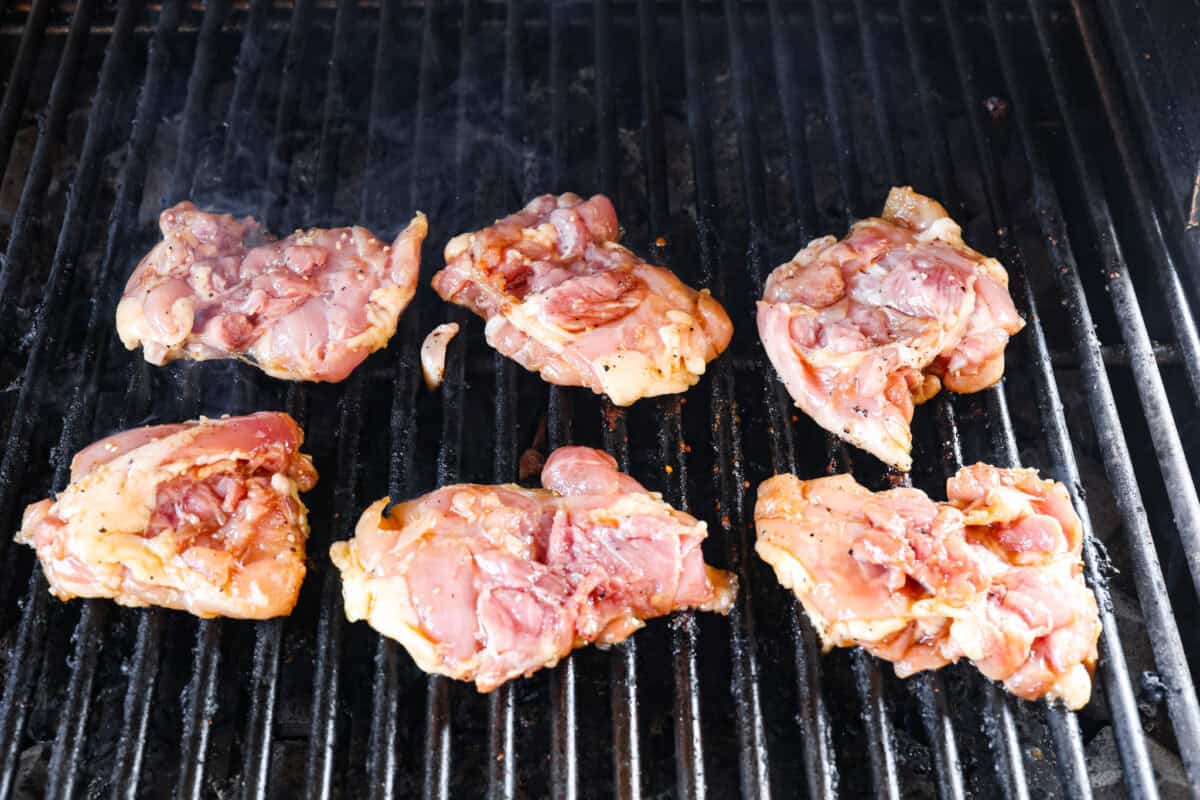
Marinate: Pour the marinade into a sealable bag, add the chicken thighs to the bag, and seal it shut. Allow the chicken to marinate for at least an hour.
Prep: While the chicken is marinating, heat a grill up to 400 degrees Fahrenheit. When the chicken is ready, remove it from the marinade and discard the marinade.
Grill: Brush the grill with oil and grill the chicken breasts for about 3-4 minutes per side. The internal temperature of the breasts should reach 165 degrees Fahrenheit, but don’t overcook the chicken.
Rest: Remove the grilled chicken from the grill and place on a clean plate to cool for at least 5 minutes before serving.
Whisk together the marinade.Add the chicken thighs and marinade to a Ziplock bag.Seal the bag and marinate for 1 hour or longer.Grill the chicken thighs for 3-4 minutes on both sides.
Tips and Variations
Here are some of our top tips for grilling bourbon chicken thighs, so that they’re juicy and cooked to perfection!
Use Chicken Breast: You can use boneless skinless chicken breasts for this recipe, or even chicken wings just be sure to adjust the grill time and make sure the chicken is cooked all the way through before enjoying!
Clean the Grill: We recommend cleaning your grill before starting. Heat it up, and then clean it off using a brush or a grill cleaning spray.
Be Patient: It’s best to leave the meat cooking in one place and then flip it over to finish cooking it through. If the meat is sticking to the grill, then leave it and it will unstick after it is finished cooking.
Don’t Press the Meat: When grilling it is tempting to lay the spatula on top of the meat and press it down. Avoid doing this because all the fat and juiciness that adds flavor will seep out.
Let it Rest: Once grilled, let the chicken rest for at least 5 minutes before cutting into it. This will allow all of the juices to distribute throughout the meat.
Check the Temperature: Use a meat thermometer to check the internal temperature of the chicken before you eat it. You can safely remove it from the grill once the internal temperature reaches anywhere from 155-157 degrees Fahrenheit. As it rests it will continue to cook and reach 160 to 165 degrees Fahrenheit.
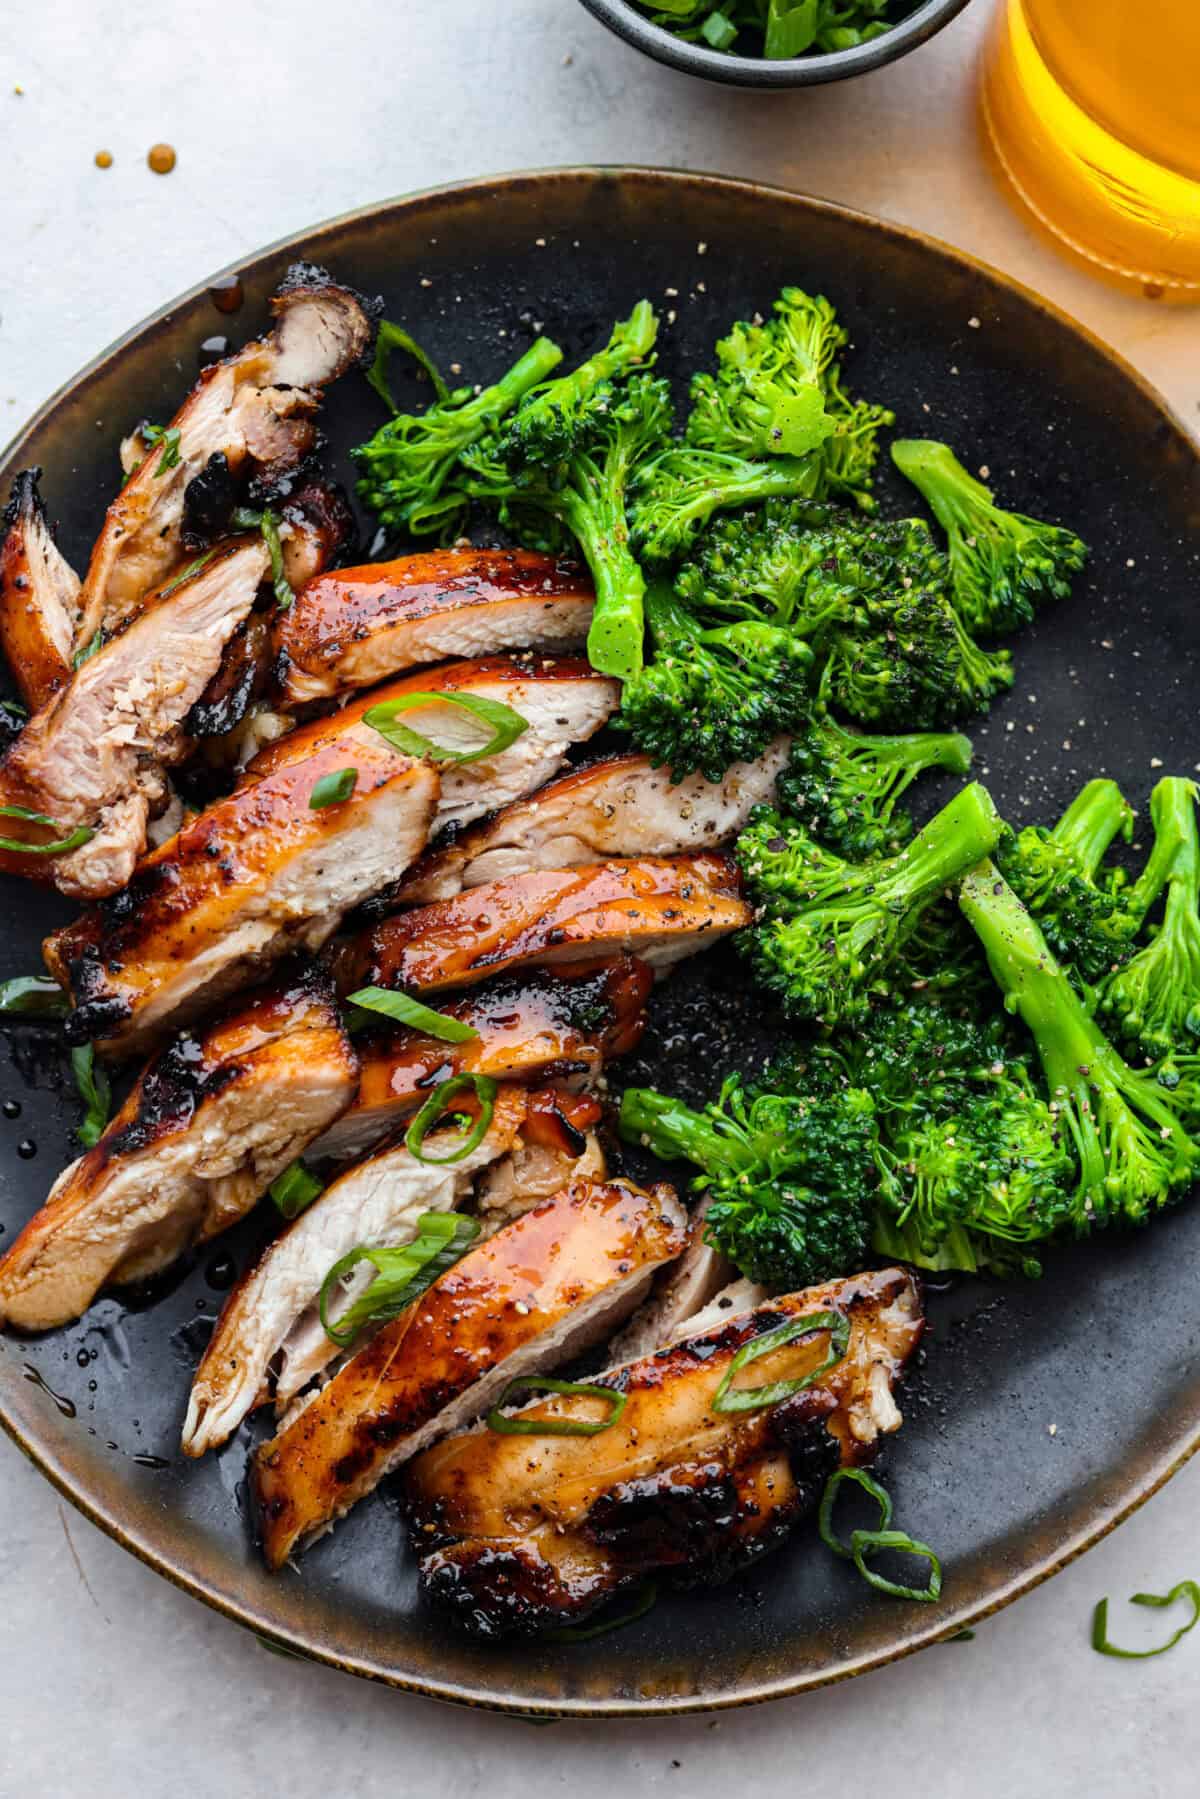
Serving: This grilled chicken is perfect for dicing and adding to a salad like this Teriyaki Spinach Pasta Salad or serve it with your favorite sides like parmesan garlic grilled broccoli or our easy crockpot mashed potatoes and don’t forget the dinner rolls!
Storing Leftovers
If you have leftovers of this grilled bourbon chicken, it stores well and is great for quick lunches and dinners over the next few days! Place it in an airtight container and store it in the fridge for up to 4 days.
More Grilled Chicken Recipes
Grilling season is the best! Grilling adds such a wonderful flavor to foods and it is a great way to keep the heat out of the house! We enjoy grilling everything from steak to fruits and vegetables. Here are some of our other favorite grilled chicken recipes that we make all season long!
This website may contain affiliate links and advertising so that we can provide recipes to you. Read my disclosure policy.
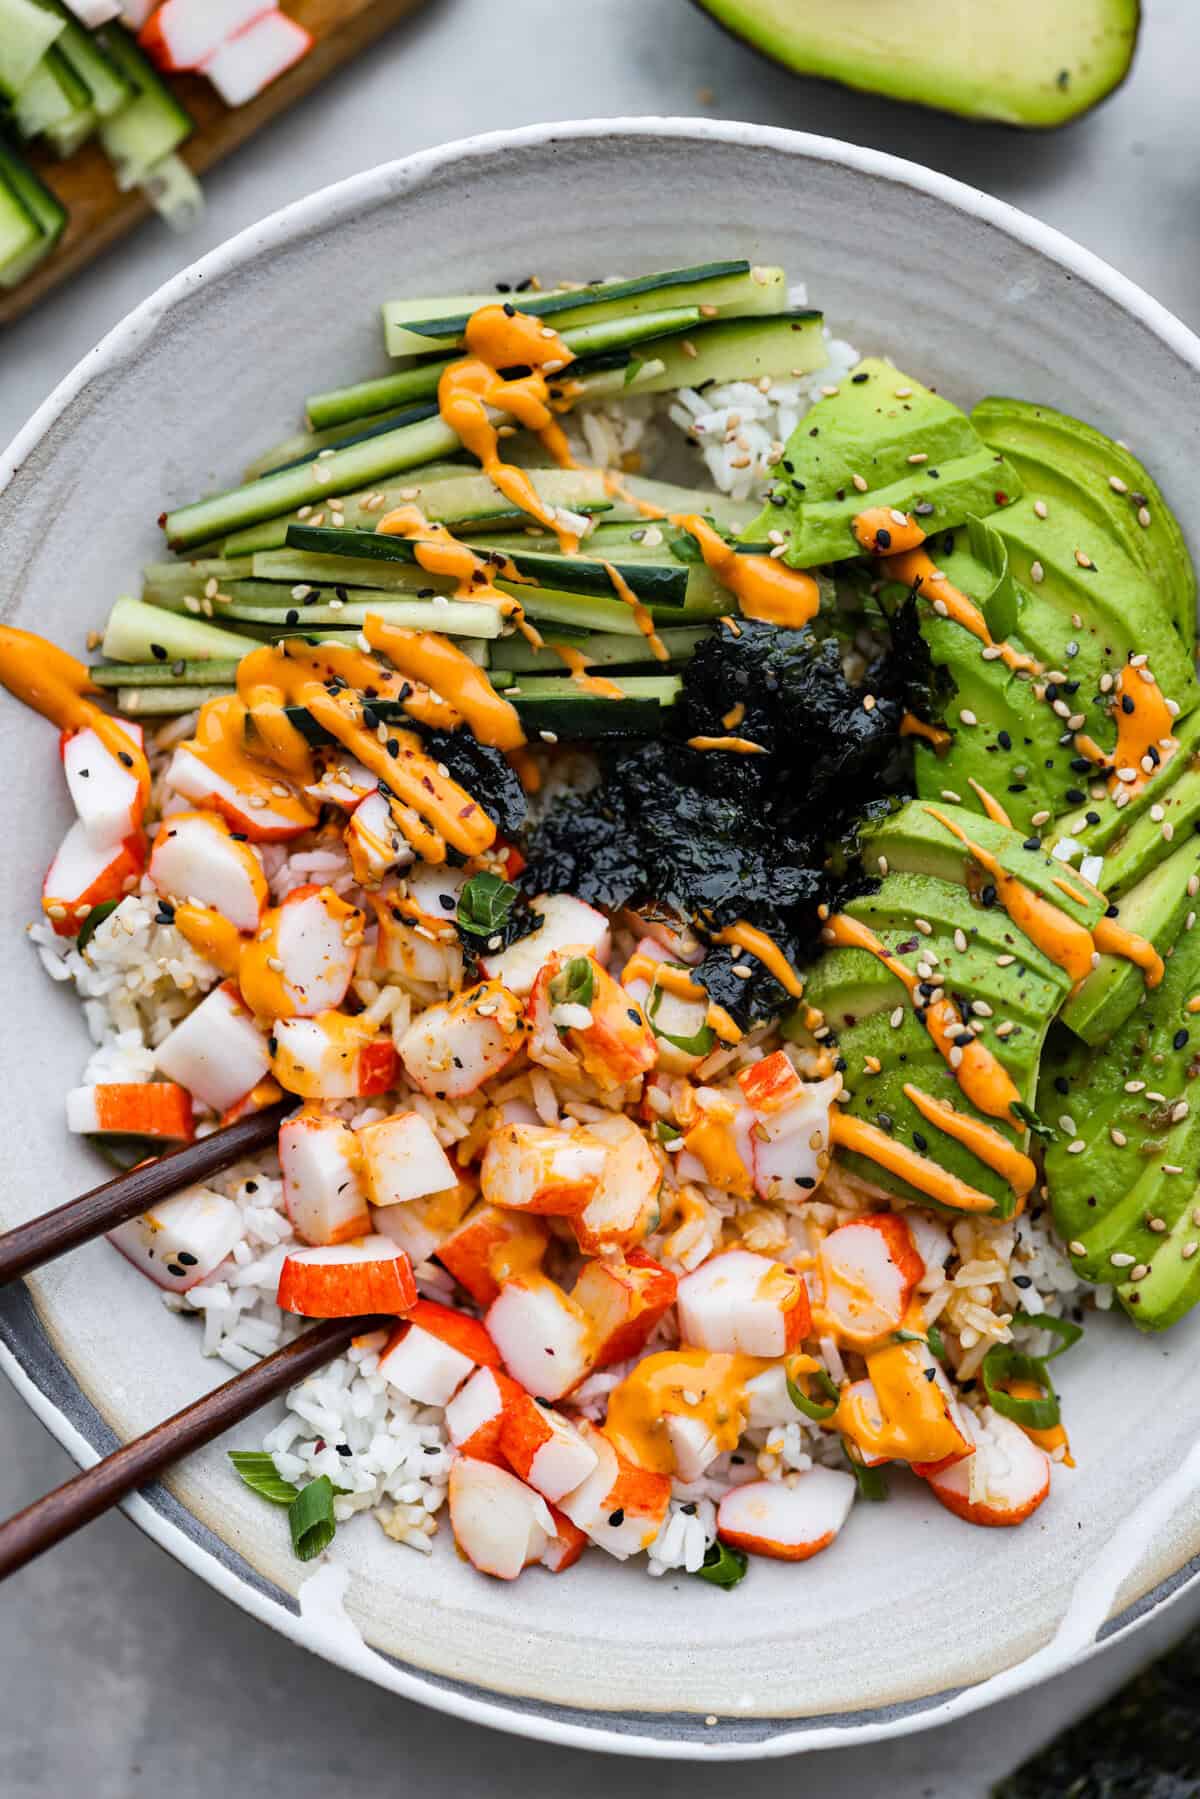
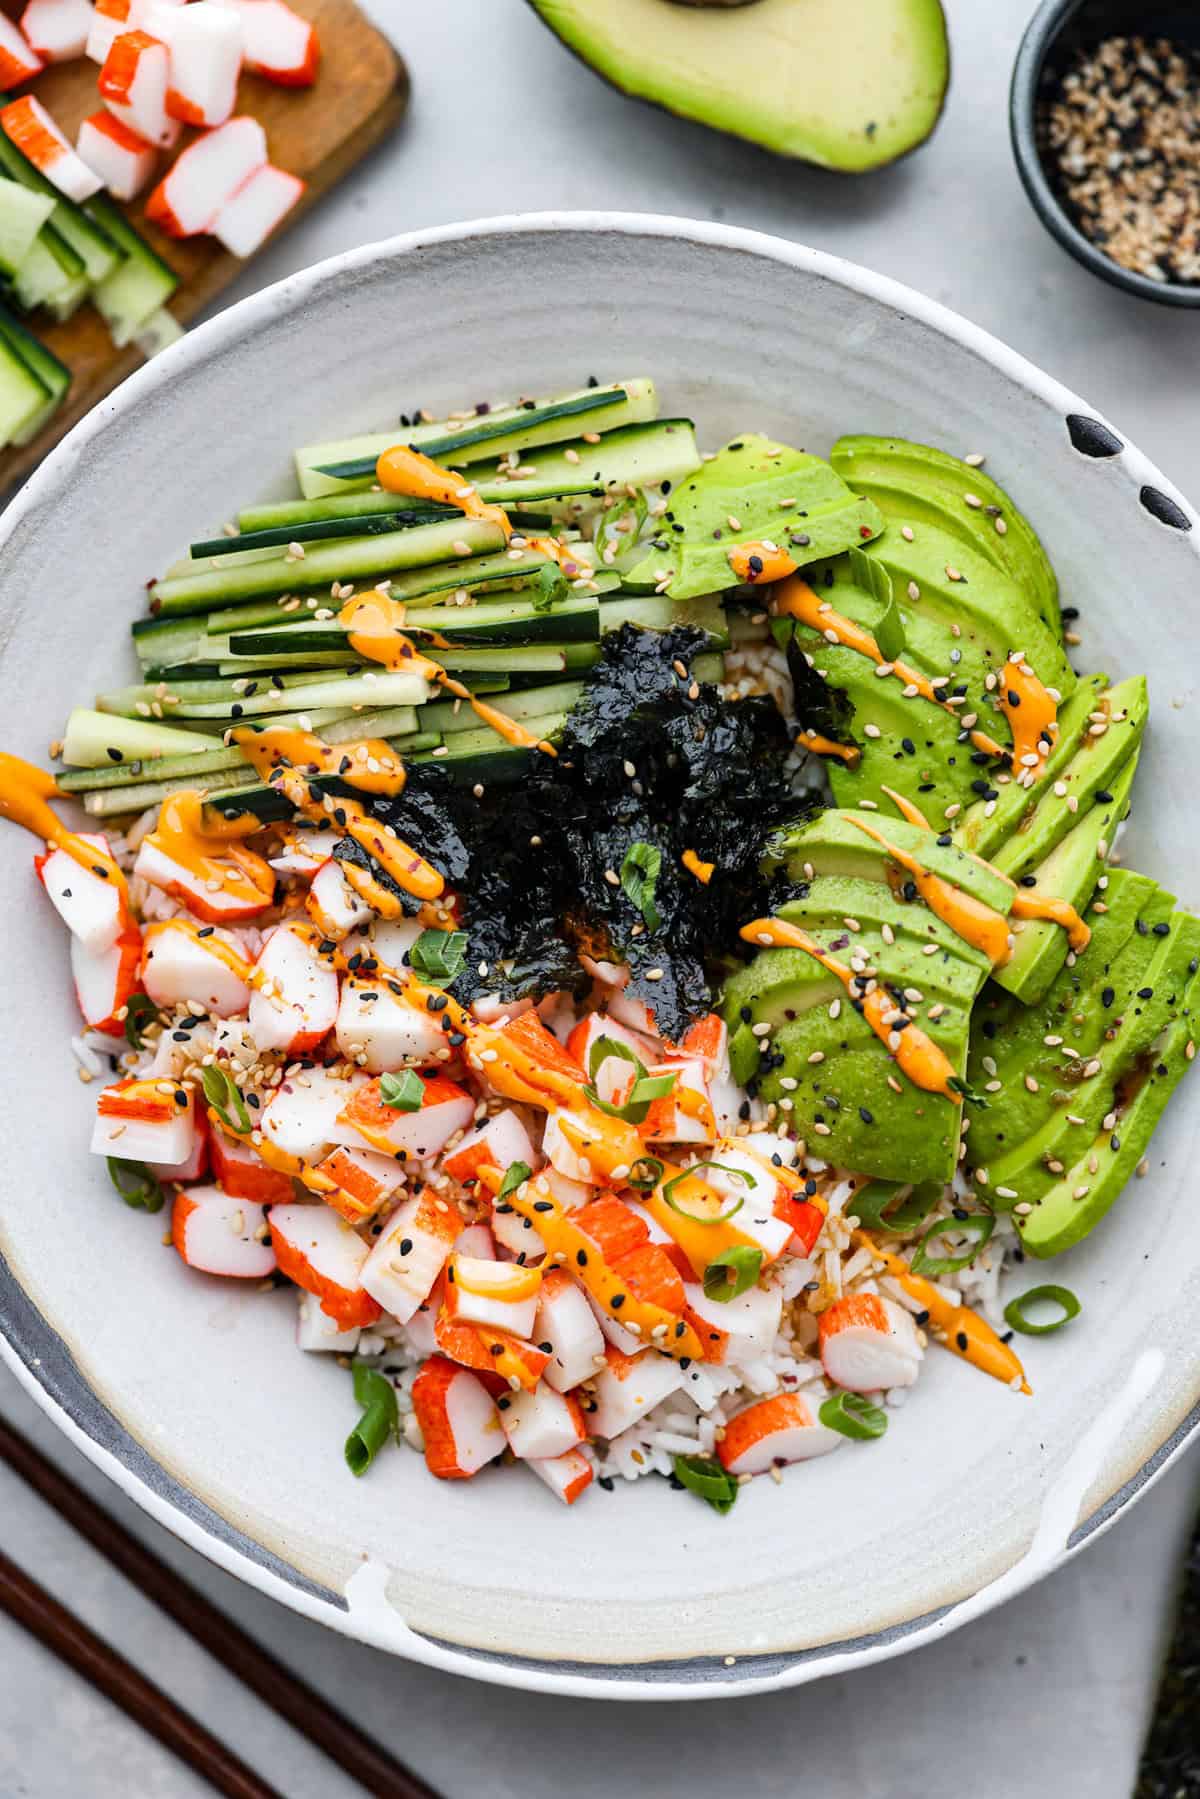
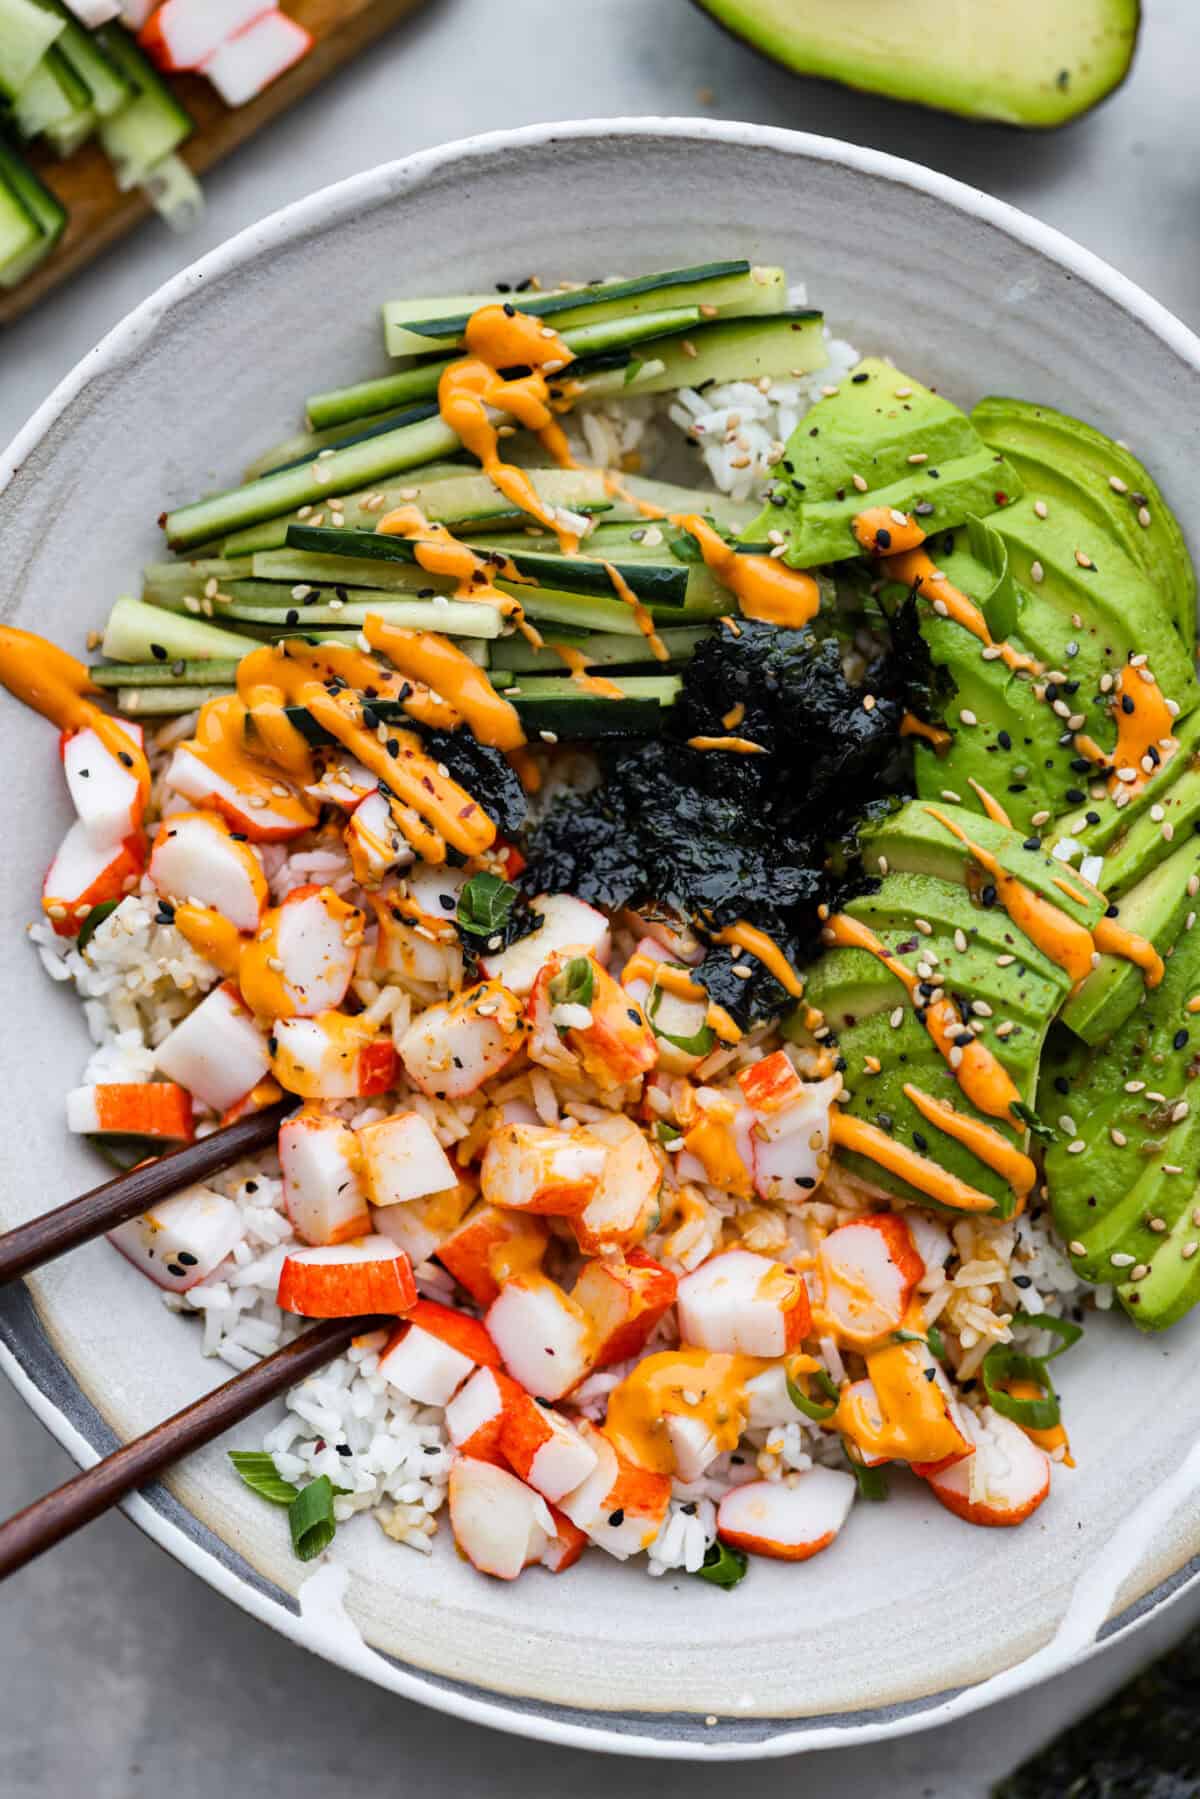
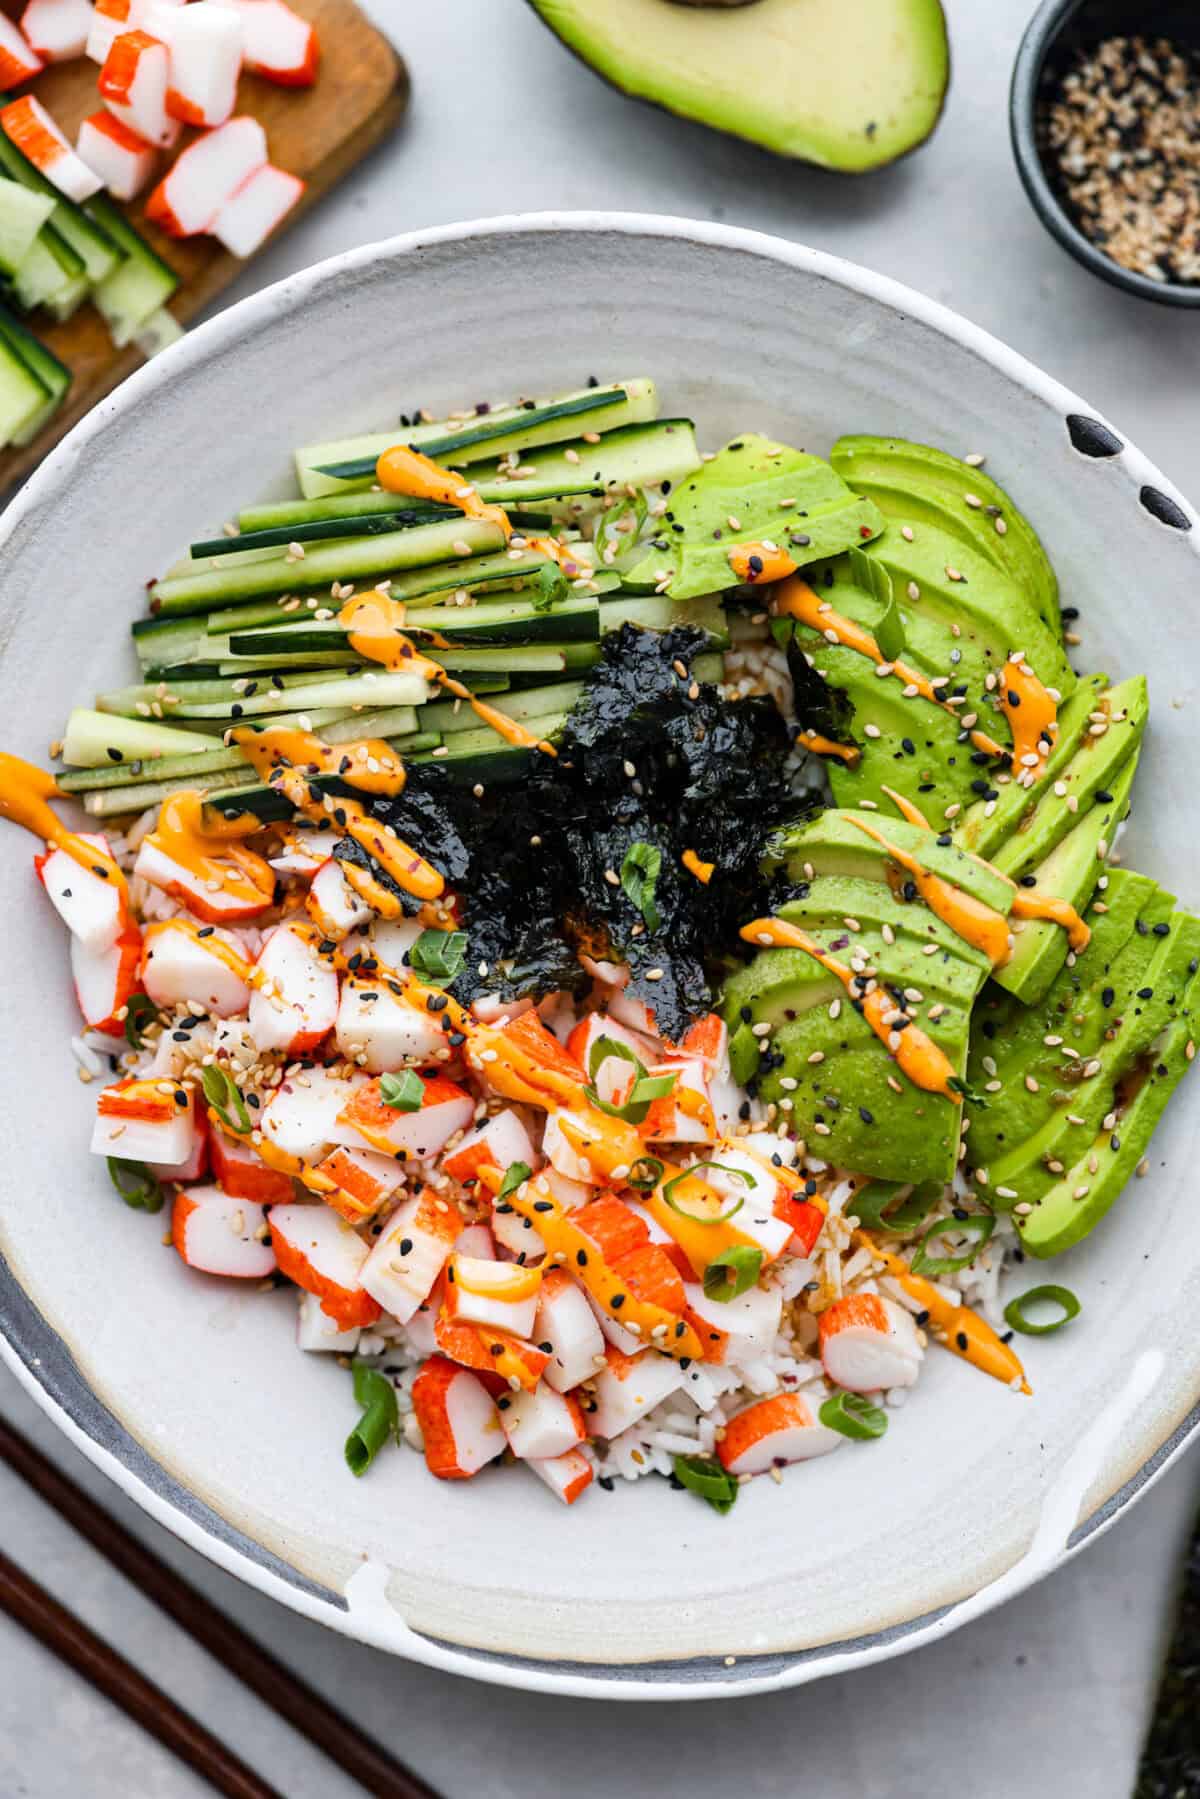
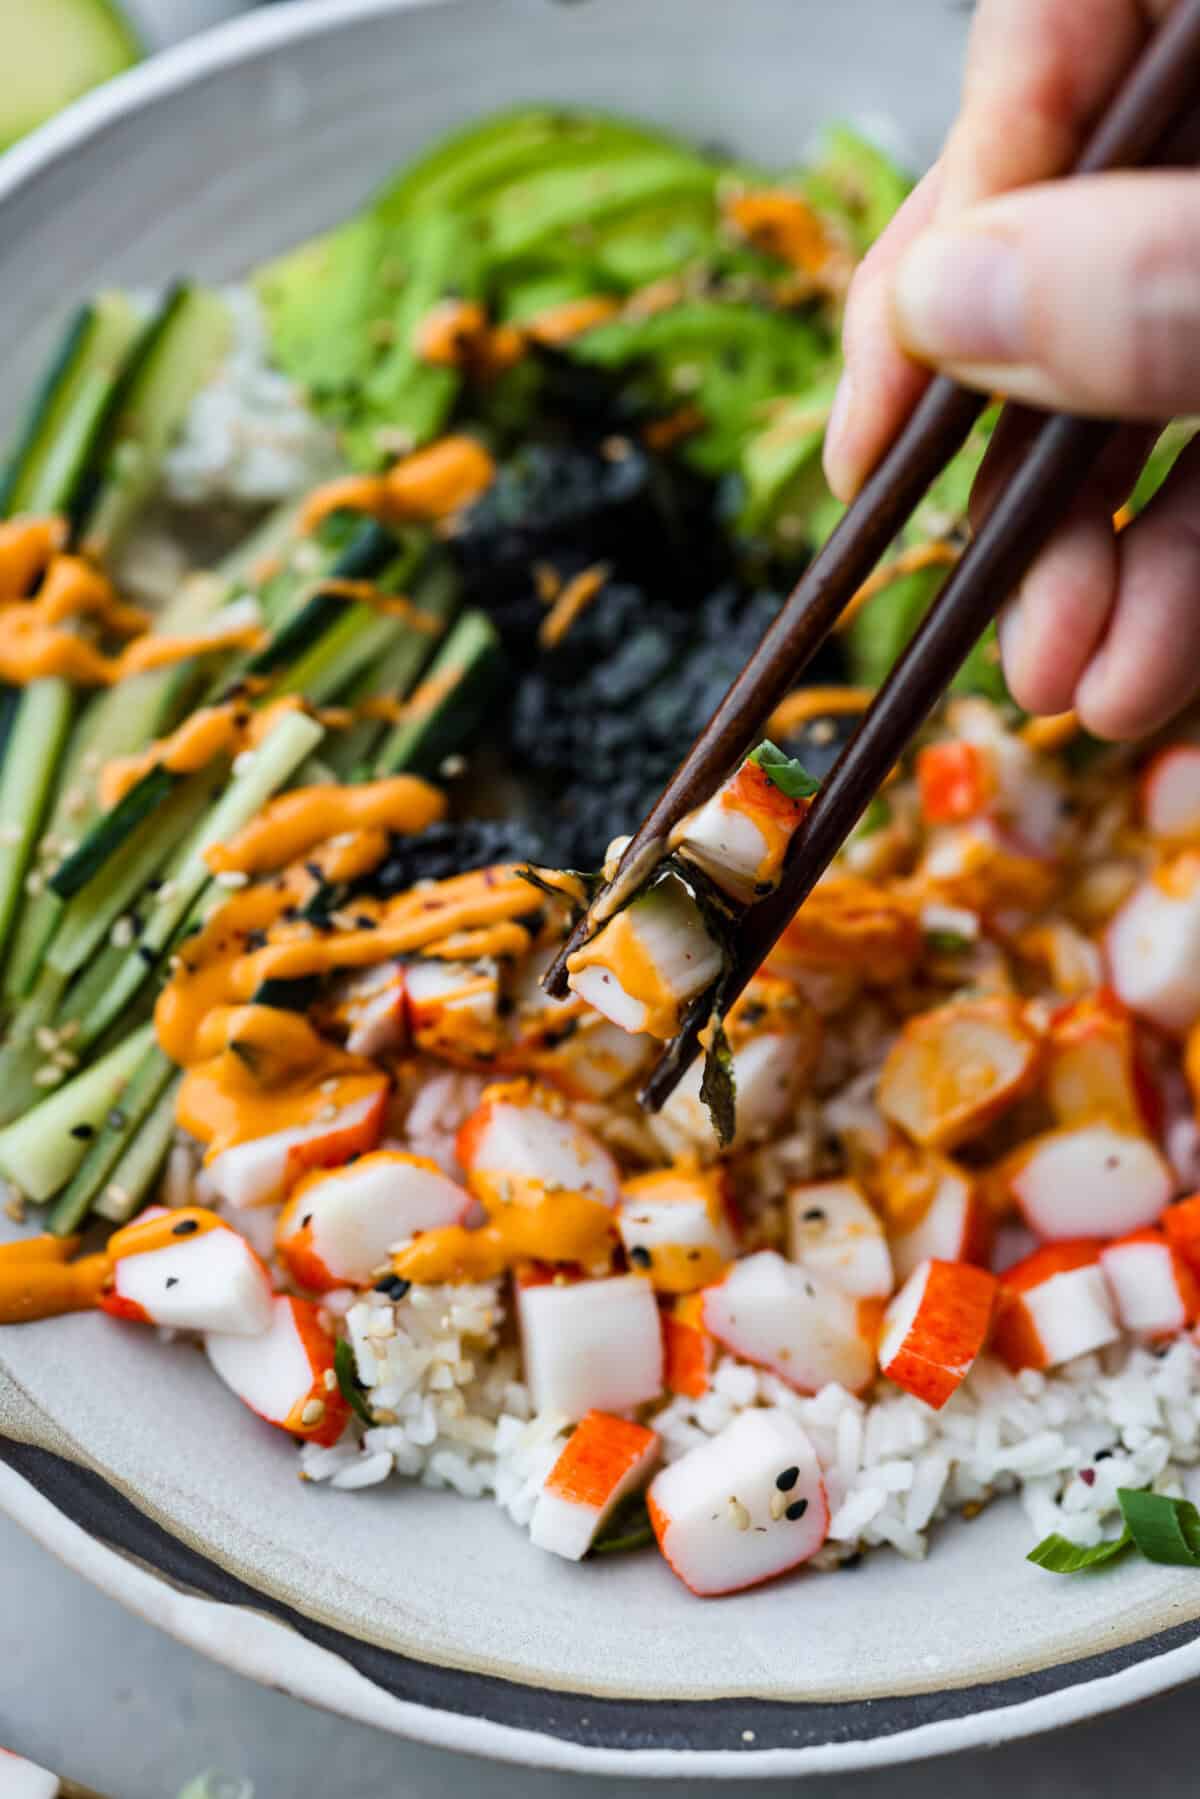
This sushi bowl is a deconstructed California sushi roll loaded with irresistible flavor and all of the best sushi ingredients. It’s layered with sushi rice, crab, cucumber, avocado, a tasty sauce, and more. It’s easy to make and ready to serve in just 20 minutes!
The flavors and textures in this bowl are some of my favorites! If you love them too, try our California rolls, and this sushi bake next!
Reasons to Love This Sushi Bowl
Quick & Easy: This sushi bowl recipe requires less hassle and effort than rolling sushi rolls, but it still delivers amazing flavor!
Versatile: The beauty of this dish is that it’s totally customizable. Want to use something other than crab? Try salmon. Not a fan of roasted seaweed? Leave it out.
Fresh flavor: This is the easiest and tastiest way to satisfy a sushi craving at home! You will love the combination of fresh ingredients paired perfectly with an incredible sauce.
What’s in a Sushi Bowl?
Here’s a list of everything you’ll need for this sushi bowl recipe! First, you can easily mix and match filling ingredients and use your favorite sauce. Moreover, being able to customize it is one of the best things about making it at home. For exact measurements, be sure to scroll to the recipe card below.
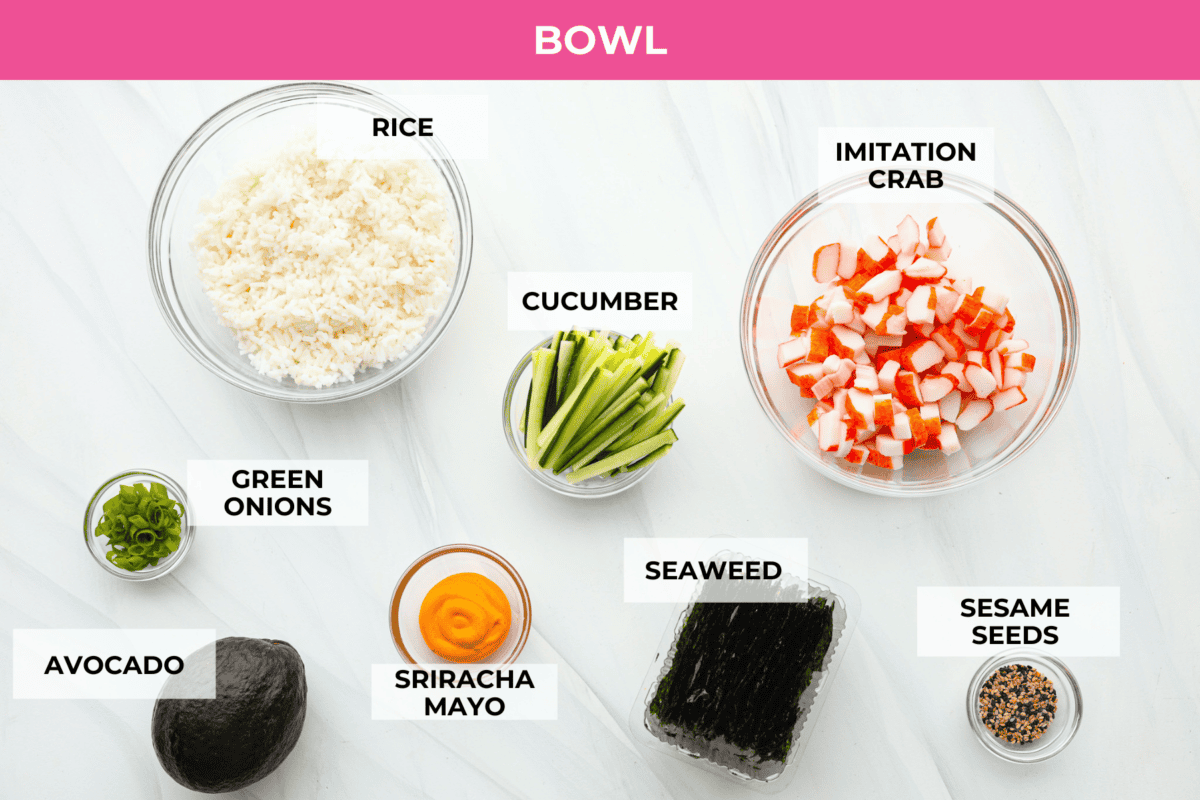
Bowl
Sushi Rice: My recipe for sushi rice is perfectly sticky and delicious!
Avocado: Adds a creamy richness to the bowl.
Imitation Crab Meat: Brings a meaty taste and texture to the bowl. You can also use fresh crab if you’d prefer! Or for a shrimp variation, make my Tempura Shrimp!
Cucumber: Adds a refreshing crunch. You can use English cucumber or whatever variety you like. To change things up, you can swap it with (or add in) carrot sticks, sliced radish, or bell pepper.
Roasted Seaweed: Nori sheets or roasted seaweed make this taste just like real sushi.
Toppings
Green Onions: To garnish and add mild onion flavor, plus extra color and texture.
Spicy Mayo: Try my homemade spicy mayonnaise to add creaminess and a kick of heat. Or simply squeeze on some sriracha
Sesame Seeds: Sprinkle some over the top of your finished bowl for texture and presentation.
Sauce
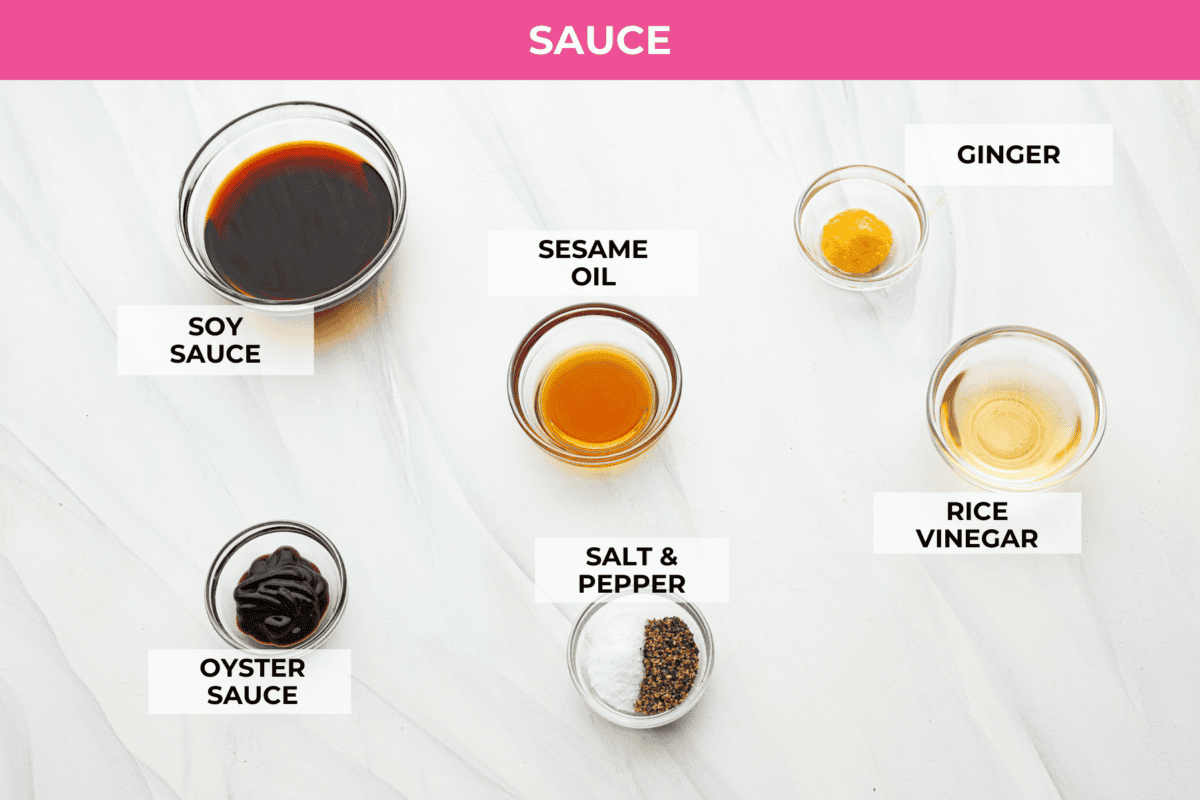
Soy Sauce: Loaded with umami flavor, this will add depth and richness to the sushi bowl sauce.
Oyster Sauce: This adds some brininess with a hint of sweetness but doesn’t taste fishy.
Sesame Oil: For nutty, earthy flavor.
Rice Vinegar: Brightens the flavor with a slight sweetness.
Fresh Ginger: Grated ginger adds a bit of a kick that balances out the other ingredients nicely.
Salt and Pepper: To taste and enhance all of the flavors.
How to Make This Recipe
You’ll love how quickly you can whip up this delicious sushi bowl! In fact, there’s no need to turn on the oven. It’s so refreshing and easy, and the result is irresistible!
Prep and Make the Sauce: Prepare all the ingredients for the bowls and set them aside. Then, in a small bowl, whisk together the soy sauce, oyster sauce, sesame oil, rice vinegar, ginger, salt, and pepper.
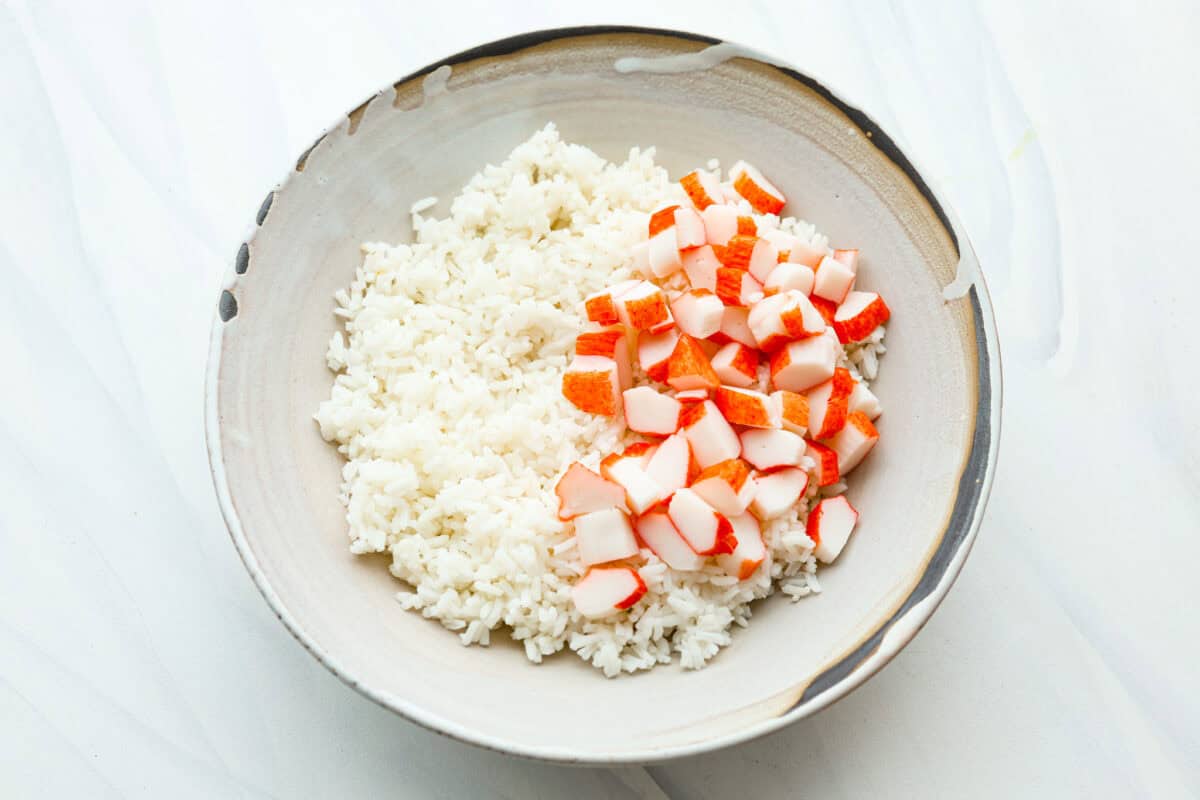
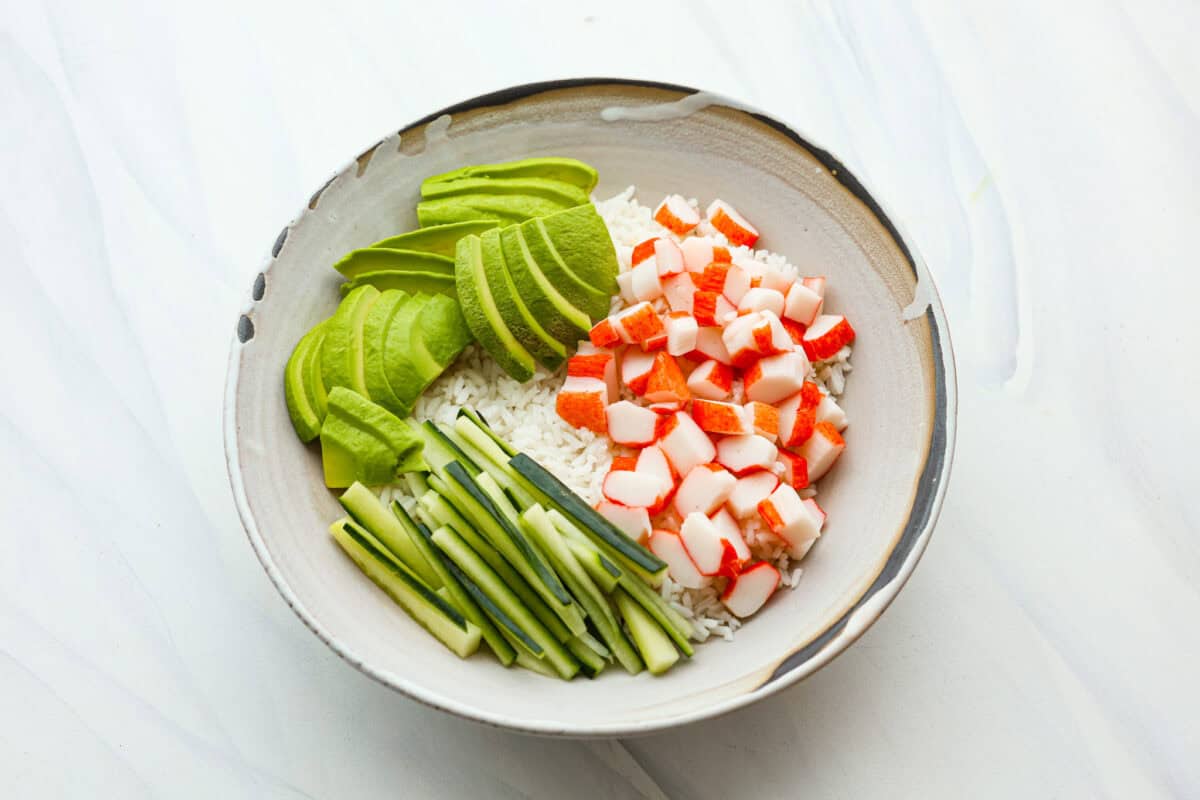
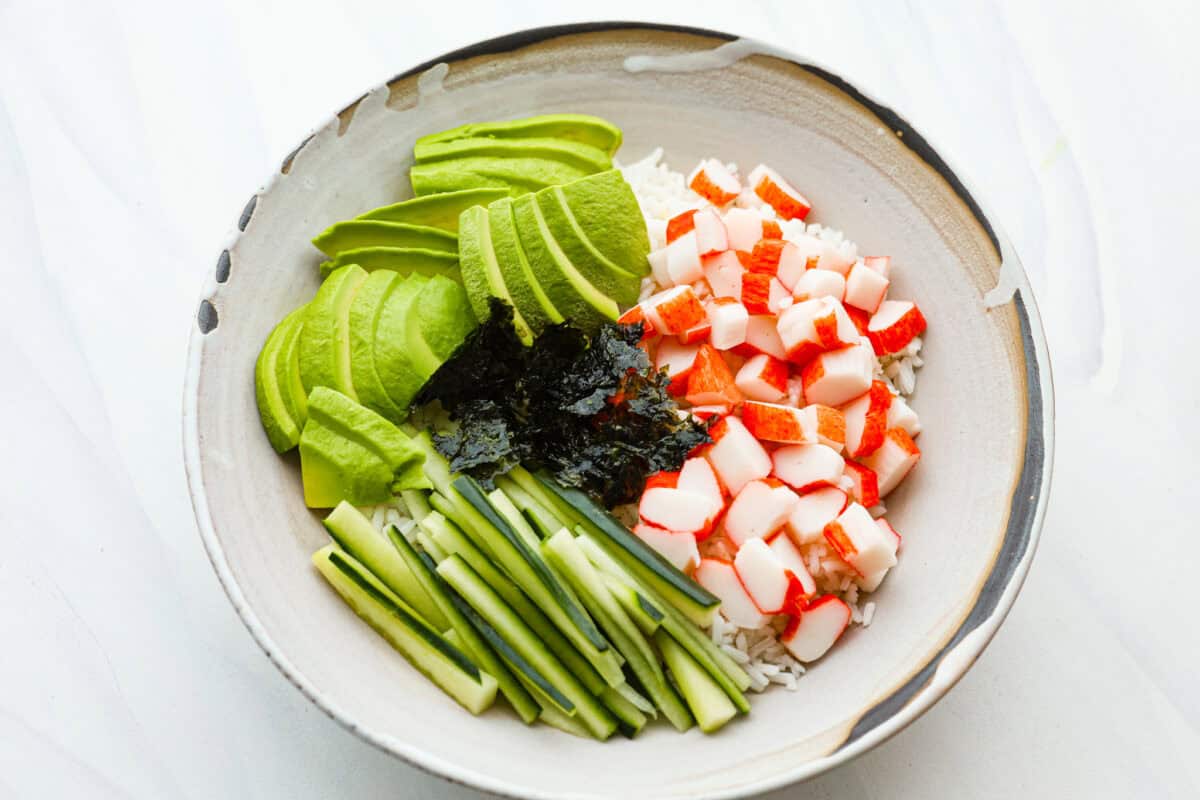
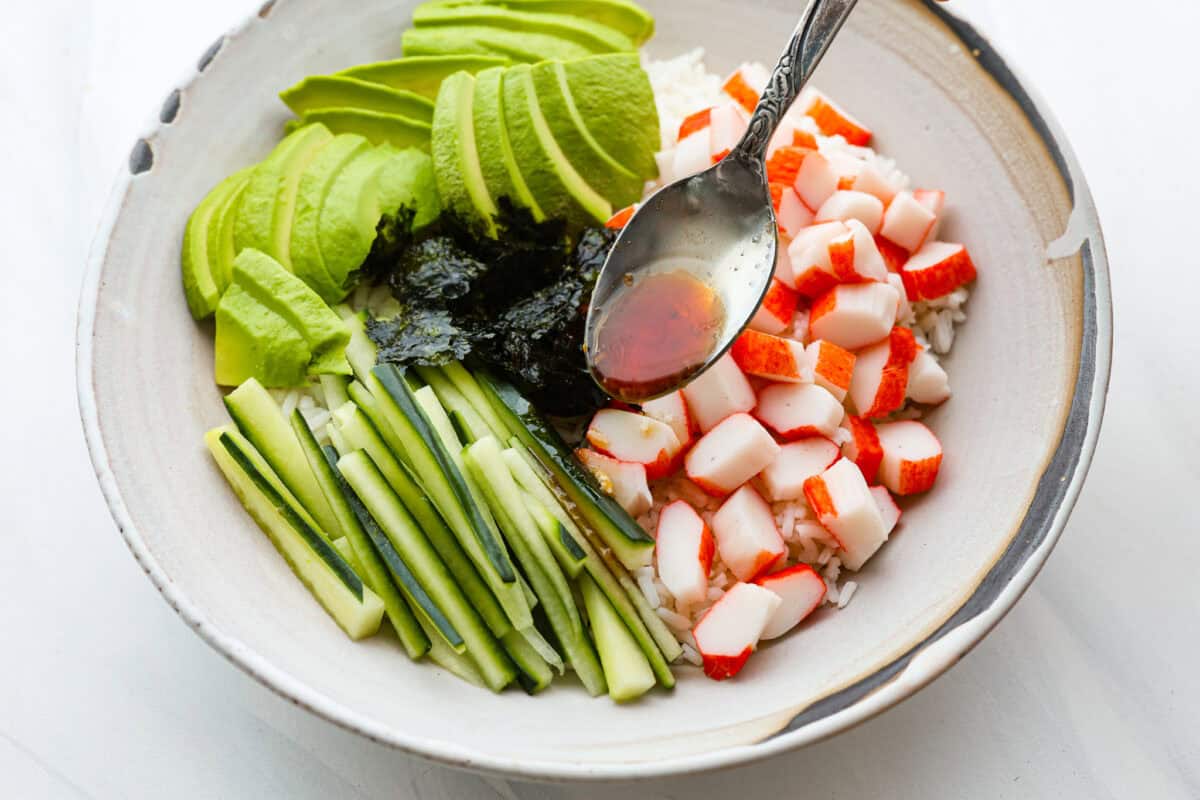
Assemble Bowls: Get two bowls and fill them with ½ cup rice each. Then, add half of the avocado you prepared to each bowl. Then, add ½ cup imitation crab and ¼ cup cucumber to each bowl. Finally, top each bowl with half of the seaweed.
Add Garnish and Mayo: Drizzle half of the sauce over each bowl, then top them with green onions, spicy mayo, and sesame seeds.
Serve: Enjoy fresh!
Add sushi and crab to a bowl.Nest, add avocado and cucumber.Add the seaweed.Drizzle on the sauce and toppings.
Sushi Bowl Suggestions
You can easily customize these California roll bowls based on the ingredients that you like best! Here are some suggestions:
Choose Your Toppings: You can leave off any of the toppings or add more to your liking! I like edamame, fresh lime, pickled carrots, and pickled ginger.
Change the Protein: Other great proteins for a sushi bowl include salmon, tuna, shrimp, and steak. However, if you plan to eat the fish raw, make sure you get sashimi-grade quality.
If you’re a fan of tuna, try this poke bowl next!
Swap the Rice: You can use short grain, calrose rice, or brown rice instead of white sushi rice.
Serving Size: This recipe makes 2 bowls. Feel free to double the recipe if you’re serving a family or more than 2 people.
Storing Leftover Sushi Bowls
I’m not sure if you will have any leftovers to store, but if you do, follow the instructions below.
Refrigerate: I recommend enjoying your sushi bowl fresh, but leftovers can be stored in the fridge in an airtight container for up to 3 days.
Separate: I like to store the individual ingredients separately to keep things from becoming soggy. This way, each component stays fresh and maintains its texture.
Assembly after storing: Additionally, separating the ingredients makes it easier to assemble the sushi bowl when you’re ready to eat, ensuring that every bite is as delicious as the first. Furthermore, this method allows you to customize each serving to your preference, adding or omitting ingredients as desired.
More Asian-Inspired Recipes
Asian dishes are some of my favorites. They have so many delicious flavors and are savory, sweet, and umami all at the same time. They’re also easy to make at home. If you liked this sushi bowl, here are a few of my favorite recipes that I know you’ll love!
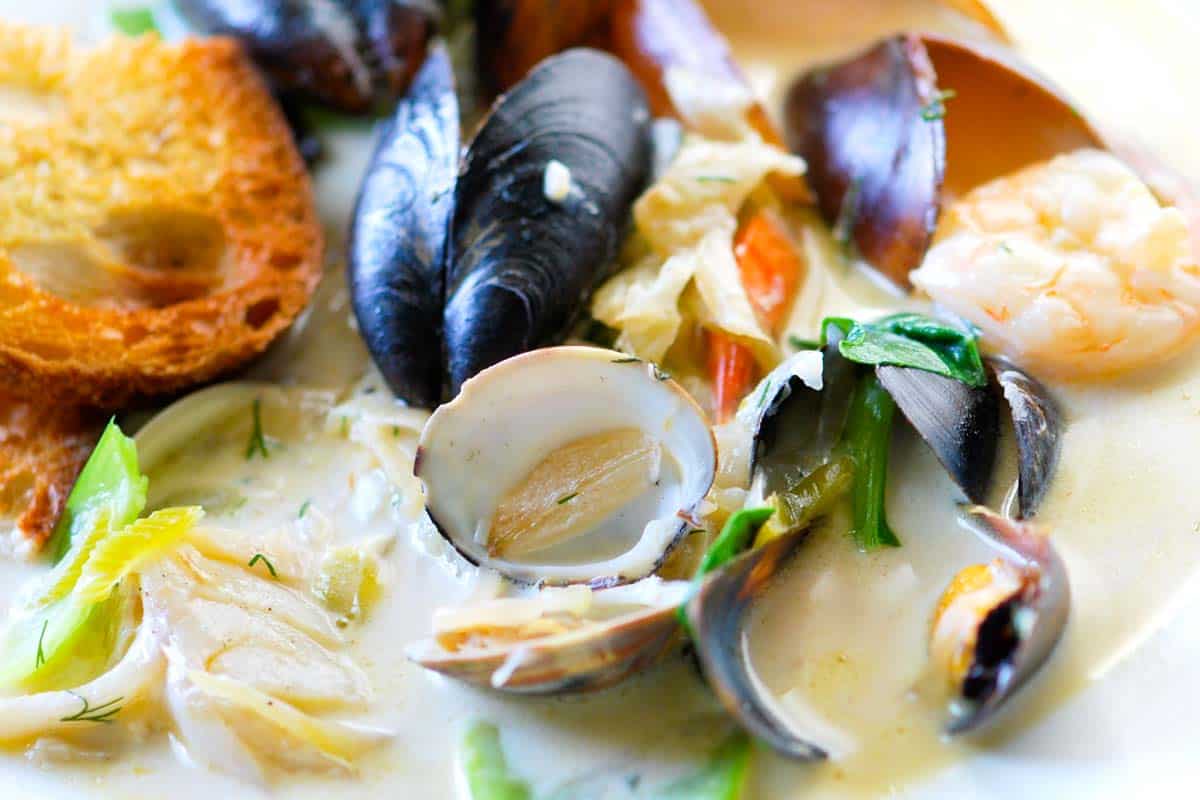
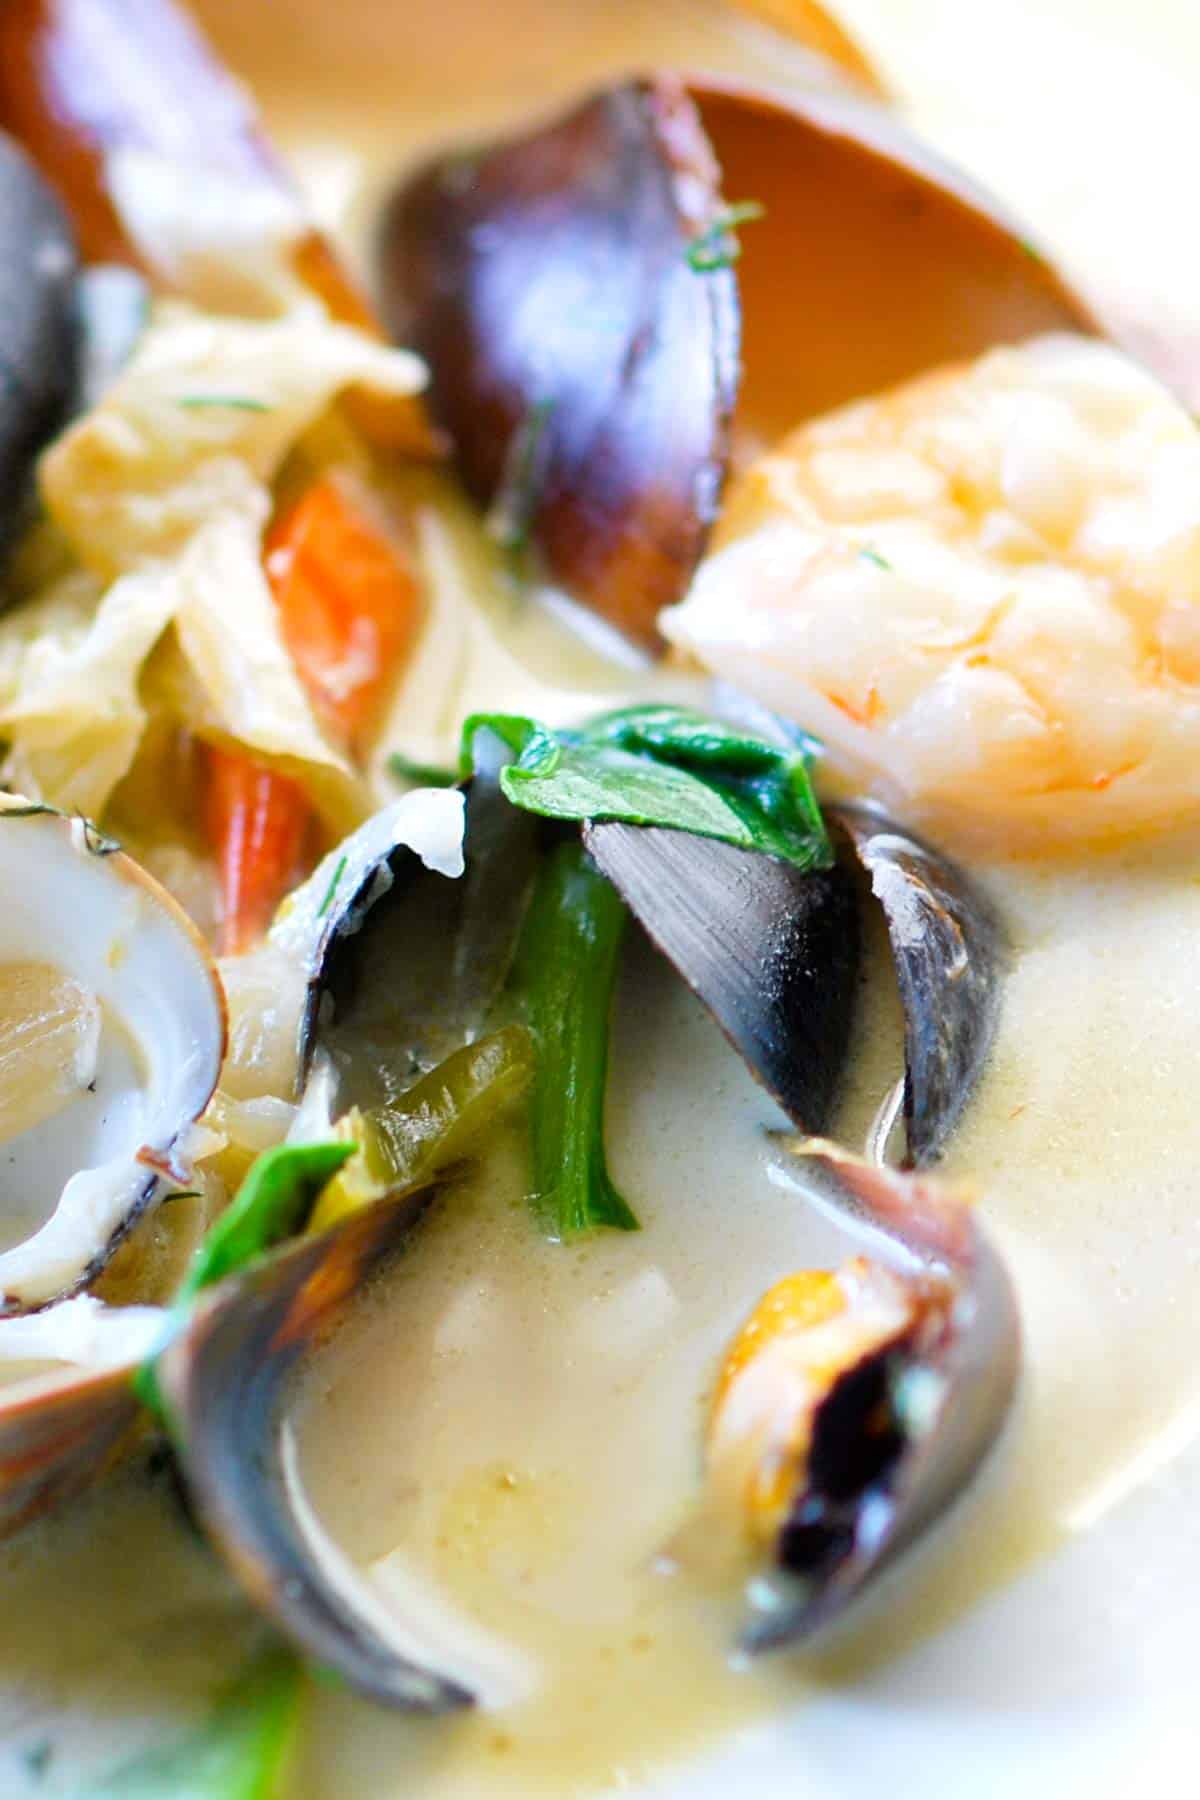
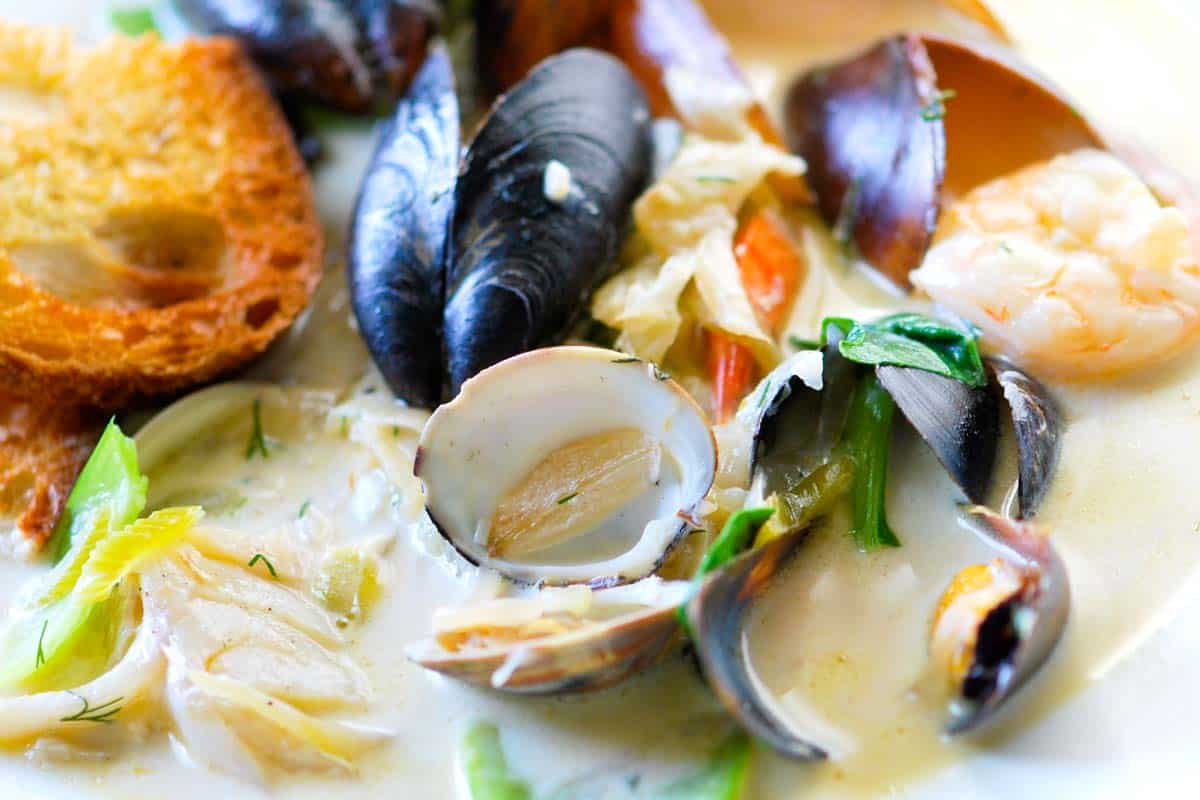
This seafood stew recipe is inspired by French bouillabaisse and has the a delicious light white wine and fennel broth.
If you are a seafood lover, there’s something special about a bowl of seafood stew with perfectly cooked seafood. Our version has no tomatoes and calls on white wine, garlic, and fennel. The broth is similar to our steamed mussels but calls on homemade seafood stock (it’s easy).
When serving this stew, you’ll want a few slices of crusty bread to go alongside so you can soak up all the delicious broth. Homemade focaccia bread would be amazing, too!
Key Ingredients
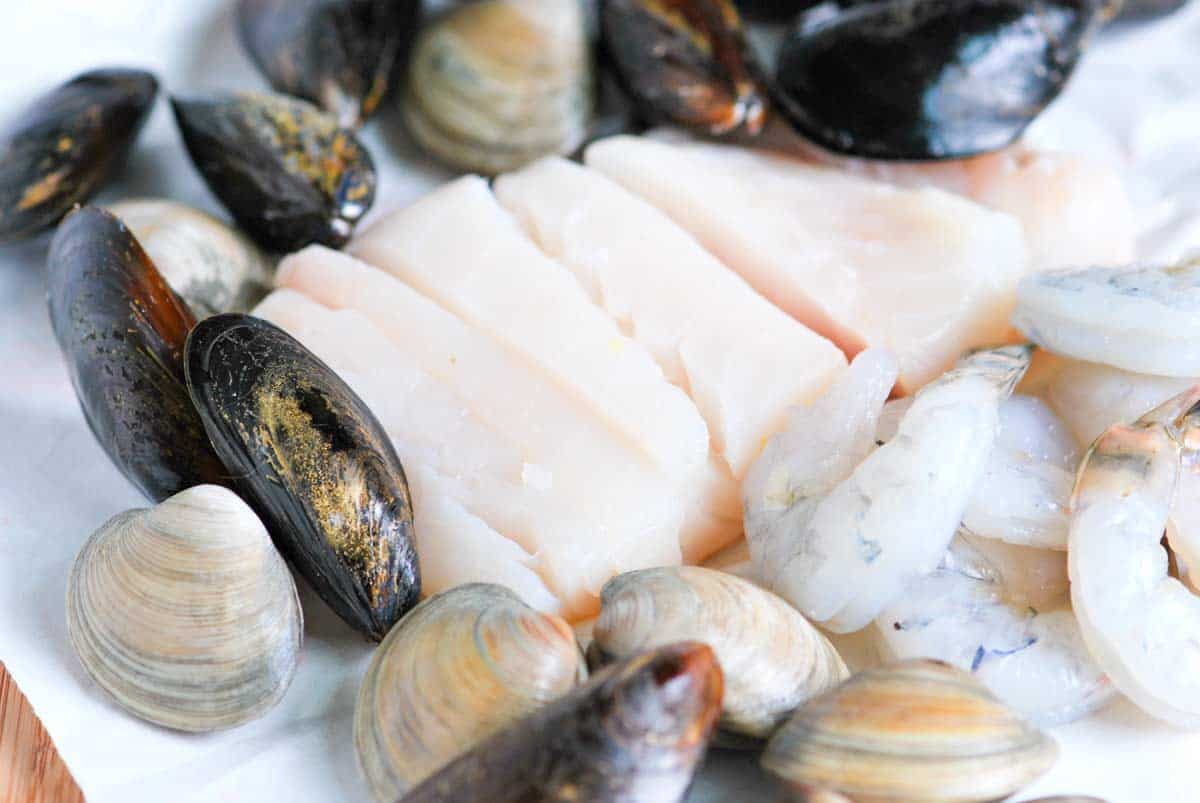
Fish: For this stew, I always choose flaky white fish like cod or halibut. They cook beautifully in the broth and add a delicate flavor.
Shellfish: I love a combination of shrimp, mussels, and clams. I leave the tails on the shrimp and scrub the mussels and clams before cooking them. If they have not already been removed, you will also need to remove the beards from the mussels (see more about that in our steamed mussels recipe).
Aromatics: My go-to aromatics are shallot, fennel, celery, and garlic. This classic combination creates a really delicious base. These are almost identical to my aromatics for poached salmon!
Seafood Stock: While you can certainly buy seafood stock, I prefer making my own. It’s surprisingly easy, and the flavor is unbeatable! You’ll find the instructions below in our recipe. The base is fish bones and the shells from our shrimp. Fish bones are inexpensive and readily available at most seafood counters.
White Wine: I use white wine when making my homemade seafood stock. If you use store-bought stock, check the tips section to see when to add a splash of white wine to the stew. Use a dry white wine like Pinot Grigio, Sauvignon Blanc, or unoaked chardonnay.
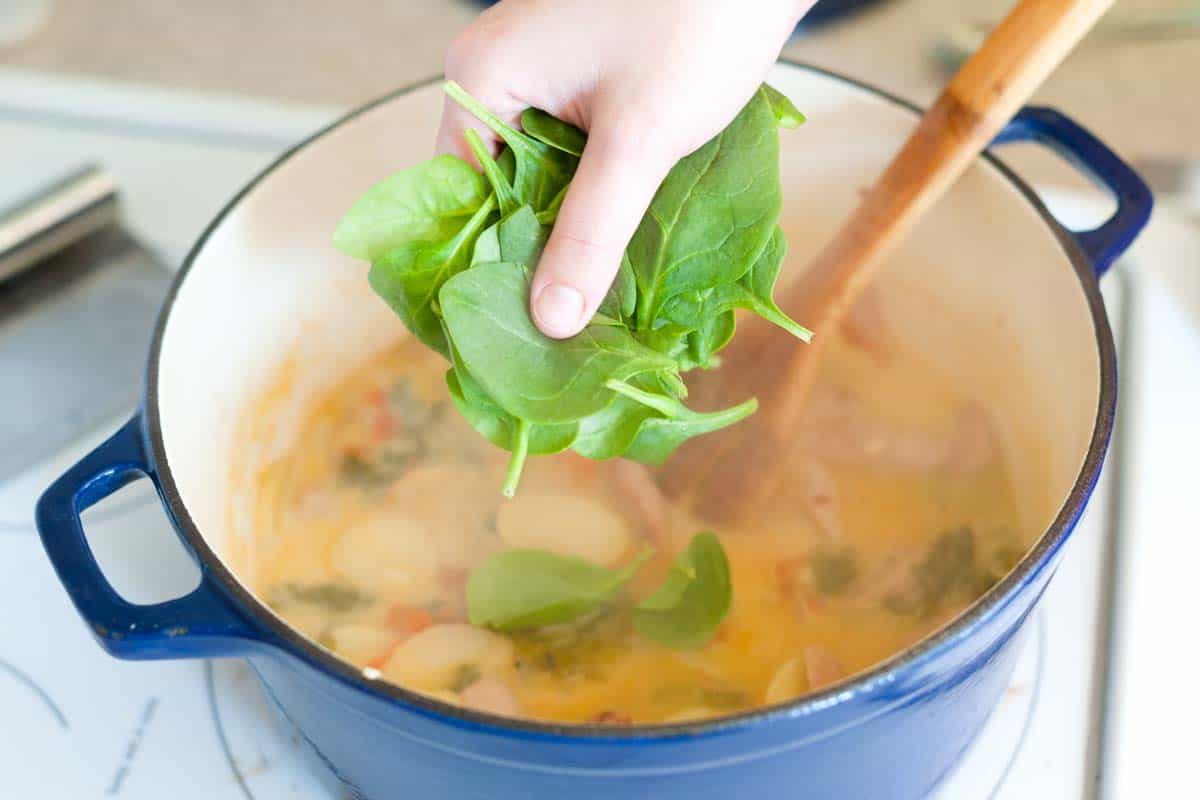
Spinach or Kale: Just before serving, I like to stir in some baby spinach or kale. They wilt quickly in the hot broth and add some nice color.
Cream: Though optional, a splash of cream at the end adds richness and mellows out the flavors of the broth. I love it!
Find the full recipe with measurements below.
How to Make Seafood Stew
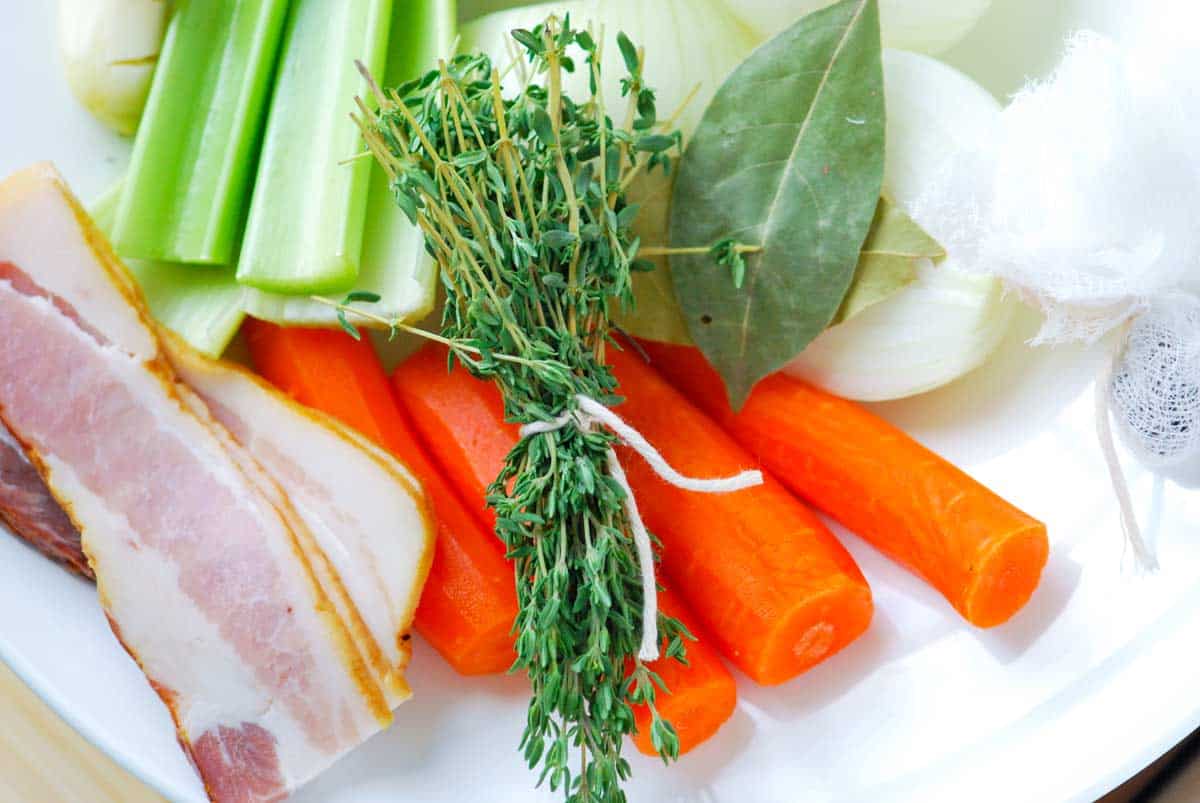
Tip 1: Make homemade fish stock (it’s easy). Store-bought stock works, but if you want extra flavor, making fish stock is simple and takes about 45 minutes. Ask your seafood counter for fish bones (they usually have them).
I cook a little bacon in my pot first, then use the rendered fat to sauté shallot, carrots, and celery until soft. Add the fish bones, any shrimp shells from prepping your shrimp, and a few herbs. Cover with water, simmer for about 30 minutes, then strain. Use this stock as the base of your stew. (Snack on the bacon while you cook.)
Tip 2: Build the stew in layers. Start by softening the aromatics: shallot, fennel, celery, and garlic. Stir in the wine and your seafood stock, and bring to a simmer. Add the clams first since they take the longest to open. Then add the shrimp and mussels, and finally the fish, which cooks quickly. Finish by adding greens and swirling in a bit of cream to make the broth luxurious and silky.
More Easy Seafood Recipes
White Wine Seafood Stew
PREP
COOK
TOTAL
We love this simple, light fennel-infused stew with fish and shellfish. If you have the time, make your seafood stock. It’s much quicker than chicken stock and makes this stew extra special. Our homemade fish stock below makes about 10 cups. You will need 4 cups for the stew. The stock can be made in advance and refrigerated for up to 2 days or frozen for several months.
4 to 6 Servings
You Will Need
For the Stew
3 tablespoons butter
1 large shallot, thinly sliced
1 fennel bulb, thinly sliced
2 ribs celery, thinly sliced
1 garlic clove, thinly sliced
1 pound small clams, cleaned
1/2 pound large shrimp, shelled, use the shells for seafood stock
1 pound mussels, cleaned
1 pound flaky white fish like cod or halibut, cut into 4 portions
1 cup dry white wine
4 cups seafood stock, try homemade (recipe below)
1 pound baby spinach or kale
1/4 cup heavy cream
Salt and fresh ground black pepper
Baguette, sliced and toasted for serving
Lemon wedges for serving
Homemade Seafood Stock (Optional)
2 pounds white fish bones
Shells from 1/2 pound of shrimp
2 slices thick-cut bacon
2 large shallots, chopped
2 medium carrots, chopped
2 ribs celery, chopped
2 crushed garlic cloves
4 sprigs fresh thyme
2 bay leaves
10 black peppercorns
Directions
Make Seafood Stock (Optional)
1In a large soup pot or Dutch oven, cook the bacon over medium heat until the fat renders and the bacon is crisp. Transfer the bacon to a plate, but leave the fat. (You can use bacon in another recipe or as a cook’s snack.)
2Add the chopped onion, carrots, and celery to the bacon fat. Cook, stirring often, until the onions soften, 3 to 5 minutes. Stir in the garlic and cook for 1 minute. Add the wine and cook for 5 minutes, then add the fish bones, shrimp shells, thyme, bay leaves, peppercorns, and 10 cups of water.
3Bring to a simmer. Cook at a low simmer for 30 minutes, removing any scum that rises to the top. Strain, then use immediately or refrigerate in a tightly covered container for up to 2 days or in the freezer for 3 months.
Make Stew
1Melt the butter in a wide pot or Dutch oven over medium heat. Add the onion, fennel, and celery. Add a pinch of salt and cook, stirring often, until softened and sweet, 3 to 5 minutes. Add the garlic and cook for 1 minute, then add the wine and cook for 5 minutes.
2Pour in 4 cups of seafood stock and bring to a simmer. Add the clams, cover, and cook for 3 minutes.
3Meanwhile, season the shrimp and fish with salt and pepper.
4Add the shrimp and mussels. Arrange the fish on top of the stew and scatter the greens around the pot. Cover and simmer until the shellfish opens and the fish and shrimp are firm and opaque, about 5 minutes more.
5Remove the pot from the heat, and then stir in the cream. Taste for seasoning and adjust with more salt and pepper. Serve divided between bowls with bread for dipping and lemon wedges on the side.
Adam and Joanne’s Tips
Stock: Our homemade stock takes 45 minutes and uses the shells from peeling the shrimp and fish bones. I buy fish bones at the seafood counter (they are inexpensive). You can substitute store-bought stock or light chicken broth.
The nutrition facts provided below are estimates.
Nutrition Per Serving Serving Size 1/6 of the recipe / Calories 377 / Total Fat 12g / Saturated Fat 5.7g / Cholesterol 161.9mg / Sodium 1321.3mg / Carbohydrate 13.5g / Dietary Fiber 3.2g / Total Sugars 2.6g / Protein 47.5g
AUTHOR:
Adam Gallagher
We are Adam and Joanne Gallagher, the creators of Inspired Taste. Established in 2009, Inspired Taste grew from a childhood dream into one of the internet’s most trusted recipe sites with hundreds of reliable recipes, step-by-step videos, and expert tips.More About Us
I love this easy Paloma mocktail recipe, made with fresh grapefruit, lime, maple syrup, and sparkling water.
A mocktail is a non-alcoholic drink, usually with a similar flair to popular cocktails. I love a good mocktail and expect it to be as delicious and exciting as a traditional cocktail.
This sparkling mocktail is my go-to non-alcoholic drink to make at home. It’s really easy to make and tastes great. For more mocktail recipes, see our ginger hibiscus mocktail.
Key Ingredients
Grapefruit: I love the fresh taste of freshly squeezed grapefruit juice! One large grapefruit should provide enough juice for 3 refreshing mocktails. As a bonus, adding a grapefruit slice to each glass makes the drink smell amazing.
Lime: This mocktail is inspired by the classic Paloma, which always features fresh lime juice. We’ll follow suit and add a squeeze of lime to this mocktail.
Maple Syrup: For sweetness, I prefer using maple syrup. It adds a lovely, toasty flavor that complements the other ingredients. If you don’t have maple syrup, use homemade simple syrup instead.
Green Tea (Optional): This sounds unusual, but trust me, chilled green tea adds a subtle depth to the mocktail. It provides a bit of backbone, similar to tequila in a traditional Paloma.
Sparkling Water: I usually opt for plain sparkling water or club soda (which has a touch of salt). Feel free to use your favorite type of sparkling water to create your perfect mocktail.
Find the full recipe with measurements below.
How to Make a the Best Paloma Mocktail
Tip 1: Making for one. This really could not be any easier to make. All you need to do is combine fresh grapefruit juice, lime juice, maple syrup, and chilled green tea if you have it. Next, add some ice and top the drink off with sparkling water.
Tip 2: Making for a crowd. You can mix grapefruit, lime, maple syrup, and green tea in advance, making this a quick and easy non-alcoholic drink for parties. Keep the mixture in the fridge for up to 3 days. When you are ready to serve, add the mix to glasses filled with ice and top with sparkling water.
Grapefruit Paloma Mocktail
I love this Paloma mocktail, made with grapefruit, lime, maple syrup, and sparkling water! Think of it as a non-alcoholic version of the Paloma cocktail. It’s refreshing, pretty, and delicious. The green tea is optional but gives the drink a backbone and makes it taste more like a cocktail.
Serves 1
You Will Need
1 ounce (2 tbsp) strong green tea, chilled, optional, see tips
2 ounces (1/4 cup) freshly squeezed grapefruit juice
1 ounce (2 tbsp) fresh lime juice
1/2 ounce (1 tbsp) maple syrup, or more to taste
Sparkling water
Directions
1Combine one ounce of green tea, grapefruit juice, lime juice, and maple syrup in the bottom of an 8-ounce (or larger) glass. Taste and add more maple syrup if the drink needs it.
2Add ice cubes, and then top with sparkling water. Serve with lime slices or grapefruit slices as a garnish.
Adam and Joanne’s Tips
Green tea: This mocktail is delicious without green tea, but if you have some on hand, strong green tea adds a lovely backbone to the drink in the same way strong liquor would. I brew green tea and allow it to cool to room temperature or store it in the refrigerator for up to a week. For strong green tea, we use two tea bags.
To make a pitcher for 6: Combine 6 ounces (3/4 cup) strong green tea, 12 ounces (1 ½ cups) grapefruit juice, 6 ounces (3/4 cup) fresh lime juice, and 3 ounces (6 tbsp) of maple syrup. Chill, and then divide into glasses and top with sparkling water when serving.
The nutrition facts provided below are estimates. We included 1/2 ounce of maple syrup.
Nutrition Per Serving Serving Size 1 Mocktail / Calories 55 / Total Fat 0.1g / Saturated Fat 0g / Cholesterol 0mg / Sodium 2.3g / Carbohydrate 14.3g / Dietary Fiber 0.1g / Total Sugars 6.5g / Protein 0.4g
AUTHOR:
Joanne Gallagher
Previous Post: Greek Pasta Salad Next Post: Easy Egg Salad
This chicken sausage soup recipe is a lifesaver on busy nights. It’s hearty, packed with healthy greens, tastes incredible, and is ready in about 30 minutes!
We devour this chicken sausage soup every time we make it. I think I’ve even caught Adam with the ladle and not a regular-size spoon. I’m not judging (I did the same thing when he wasn’t looking).
Store-bought cooked chicken sausage is the trick to this soup. Since the sausage is already cooked, it’s just about getting everything into your soup pot and heating through. In addition to sausage, we add hearty potatoes, making this soup recipe even more satisfying. For another soup like this one, see our sausage potato soup inspired by Zuppa Toscana!
Key Ingredients
Chicken Sausage: I use cooked chicken sausage with something sweet added (like maple syrup or apples), but use your favorite! I love the sweet sausage with the savory base of the soup.
Onion, Garlic, and Potatoes: Onion and garlic make our base, and potatoes turn this into a hearty, satisfying soup. Any variety of potato works, but I especially love Yukon Gold as they hold their shape in the soup after cooking (Russet potatoes break down a little more).
Tomato: I love chopping one tomato and adding it to this soup. It adds color, a little extra flavor, and some sweetness.
Chicken Broth: Use store-bought or homemade chicken stock. Or, to bump up the protein content of this soup, use bone broth.
Greens: We stir kale and spinach into our soup. I love the combination of textures but feel free to use just one or substitute your favorite greens.
Cream or Coconut Milk: I love adding a splash of something creamy just before serving. Cream is great, or for a dairy-free option, try coconut milk, which adds a lovely faint coconut flavor, too.
Find the full recipe with measurements below.
How to Make Chicken Sausage Soup
Tip 1: Make the soup in one large pot. We cook onions in a bit of oil, then add garlic and a pinch of red pepper flakes. After slicing the sausage, we stir it in. It’s already cooked, so it makes things extra easy. From there, we follow up with chicken stock, kale, potatoes, and tomatoes. So easy!
Tip 2: Finish with splash of cream. When the potatoes are tender, we turn off the heat and stir in some spinach and a splash of cream (or coconut milk). And that’s it! Hearty, simple sausage soup with potatoes and greens. It’s one of our favorites.
More Easy Soup Recipes
Easy Chicken Sausage Soup
PREP
COOK
TOTAL
We love this quick and easy chicken sausage soup. Cooked sausage makes this fast. I love using sausage with maple or apple, which works nicely with this soup’s savory base. I add kale and spinach to this soup, but you can use one or the other (4 cups is perfect).
4 Servings
You Will Need
1 ½ tablespoons extra-virgin olive oil
1 medium onion, thinly sliced into half-moons
2 cloves garlic, minced
1/4 teaspoon red pepper flakes
1 (8oz) package cooked chicken sausage, cut into bite-size pieces
4 medium Yukon Gold potatoes, cut into 1/4-inch slices
1 large tomato, roughly chopped
4 cups (946ml) chicken stock
2 cups torn kale leaves, rinsed with ribs and stems removed
2 cups packed fresh spinach leaves
1/4 cup (60ml) cream or coconut milk
Salt and fresh ground black pepper
Directions
1Heat the olive oil in a large pot over medium heat. Add onions and cook until translucent, about 3 minutes.
2Stir in the garlic, red pepper flakes, and chicken sausage, then cook until the sausage begins to brown, about 2 minutes.
3Add the potatoes, tomatoes, and chicken stock. Bring to a simmer and cook for 5 minutes, then add the kale and cook another 10 minutes until wilted and the potatoes are tender.
4Turn the heat off, then stir the spinach leaves and cream. Cover with a lid for 5 minutes, stir again, and then season to taste with salt and pepper.
Adam and Joanne’s Tips
Storing: Refrigerate in an airtight container for 3 to 4 days. Or freeze for up to 3 months. As the soup sits, the potatoes soak up the broth. When you reheat, add a splash of extra broth or water.
Seasoning the soup: If you feel the soup is missing some zing, add a bit more salt. You can also add a pop of flavor with a dash of fish sauce (we often use this trick for store-bought stocks and broths) or Worcestershire sauce.
Using raw sausage: Before cooking the onions, cook the sausage in the olive oil, breaking it up with a spoon until it’s browned. Remove the cooked sausage from the pan, set it aside, and cook the onions in the rendered fat left at the bottom of the pan. Add the sausage back with the garlic.
The nutrition facts provided below are estimates.
Nutrition Per Serving Serving Size 1/4 of the recipe / Calories 334 / Total Fat 15.7g / Saturated Fat 4.4g / Cholesterol 58.1mg / Sodium 858.1mg / Carbohydrate 29g / Dietary Fiber 3.7g / Total Sugars 7.3g / Protein 19.9g
AUTHOR:
Joanne Gallagher
We are Adam and Joanne Gallagher, the creators of Inspired Taste. Established in 2009, Inspired Taste grew from a childhood dream into one of the internet’s most trusted recipe sites with hundreds of reliable recipes, step-by-step videos, and expert tips.More About Us
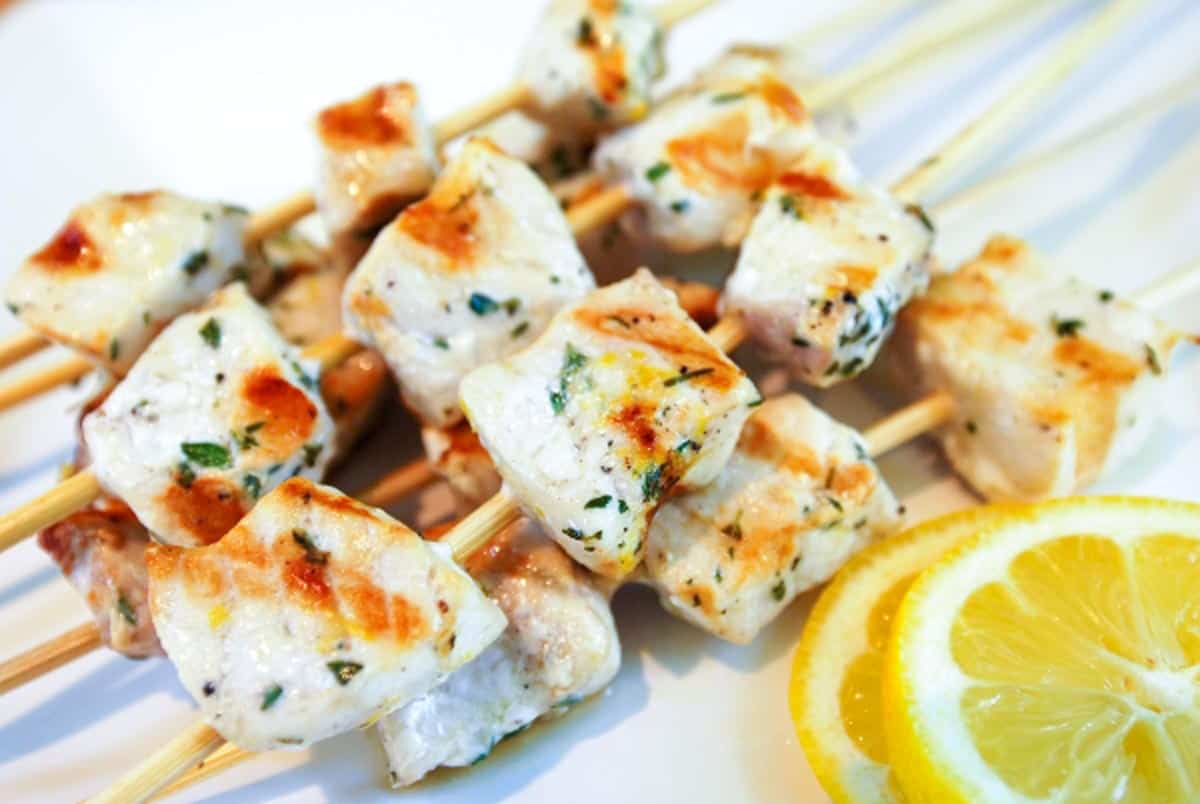
These incredible grilled swordfish kebobs are super flavorful and so easy! With our recipe, you’ll quickly marinate swordfish in a lemon pepper marinade, thread them onto skewers, and grill them to perfection.
My family loves these quick and easy swordfish kabobs! Our simple lemon pepper marinade adds fresh flavor, and thanks to the swordfish’s natural fattiness, you don’t have to worry about it drying out on the grill. Plus, since they’re cut into bite-sized pieces, they cook up in just a few minutes!
Serve these fish kabobs with rice, like our Mexican rice, or on top of a salad, like this homemade Caesar salad. For more swordfish recipes, see our grilled swordfish with coriander and lime.
Key Ingredients
Swordfish: This meaty, fatty fish can be cooked just like a steak and is great grilled. Since it’s more firm than other fish, it’s easy to cut into cubes for kabobs. You can use mahi-mahi, salmon, or tuna if you don’t have swordfish.
Lemon and Pepper: I use the zest from a lemon and then serve the swordfish with fresh lemon wedges to squeeze over the cooked fish. For the pepper, use a pepper grinder on a course setting, so that you see it on the fish.
Anchovy Paste and Thyme: These round out my marinade. I marinate swordfish cubes with olive oil, lemon zest, pepper, anchovy paste, and thyme before skewering and grilling them. The marinade is simple but makes the swordfish taste incredible. If you’d prefer, use finely minced anchovies instead of anchovy paste.
How to Make Grilled Swordfish Kabobs
This swordfish recipe is so simple. It starts with my easy marinade of olive oil, lemon zest, black pepper, anchovy paste, and thyme.
Cut your swordfish steaks into cubes (so they cook quickly and are easy to skewer), and then toss them into the marinade. Let the fish marinate for 30 minutes to an hour (more if you’d like).
While the fish marinate, soak wooden skewers in water so they don’t burn when you are grilling.
When the fish is ready, heat your grill (or a grill pan), slide the swordfish cubes onto your skewers, and then grill. Since you’ve cut them into cubes, they will only need a few minutes on each side. Then, serve with fresh lemon.
Lemon Pepper Grilled Swordfish Kabobs
PREP
COOK
TOTAL
My family loves these quick and easy swordfish kabobs! Marinating the swordfish adds so much flavor. We recommend marinating for 30 minutes. You can marinate for longer, but no longer than 4 hours.
4 Servings or 8 Kabobs
You Will Need
2 swordfish steaks, about 6 ounces each, 1-inch thick
2 tablespoons olive oil
2 teaspoons lemon zest
1/2 teaspoon freshly ground black pepper
1 ½ teaspoons anchovy paste or minced anchovies
1 tablespoon chopped fresh thyme
8 wooden skewers
2 lemon wedges for serving
Directions
1Cut swordfish into 1-inch cubes and add them to a resealable plastic bag.
2Add the olive oil, lemon zest, black pepper, anchovy paste, and thyme to the bag and seal. Gently massage the bag until the marinade is well mixed and the fish is coated. Place the bag onto a plate and refrigerate for 30 minutes.
3Meanwhile, submerge the skewers in water so they soak.
4After 1 hour, heat a grill to medium-high heat (or place a grill pan over medium heat).
5Divide the swordfish cubes between each skewer, then grill until just cooked through, for about 2 minutes per side.
6Transfer to a serving plate and serve with lemon wedges.
Adam and Joanne’s Tips
Swordfish alternatives: You can use mahi-mahi, salmon, or tuna if you don’t have swordfish. I love checking Monterey Bay Aquarium Seafood Watch to see the best options when buying seafood!
The nutrition facts provided below are estimates.
Nutrition Per Serving Serving Size 2 skewers (8 total) / Calories 185 / Total Fat 12.8g / Saturated Fat 2.4g / Cholesterol 56.7mg / Sodium 74mg / Carbohydrate 0.3g / Dietary Fiber 0.2g / Total Sugars 0g / Protein 16.9g
AUTHOR:
Adam Gallagher
We are Adam and Joanne Gallagher, the creators of Inspired Taste. Established in 2009, Inspired Taste grew from a childhood dream into one of the internet’s most trusted recipe sites with hundreds of reliable recipes, step-by-step videos, and expert tips.More About Us