Tag: Recipe

  • Hunan Shrimp Recipe (Better Than Takeout!)

    Hunan Shrimp Recipe (Better Than Takeout!)

    This website may contain affiliate links and advertising so that we can provide recipes to you. Read my disclosure policy.
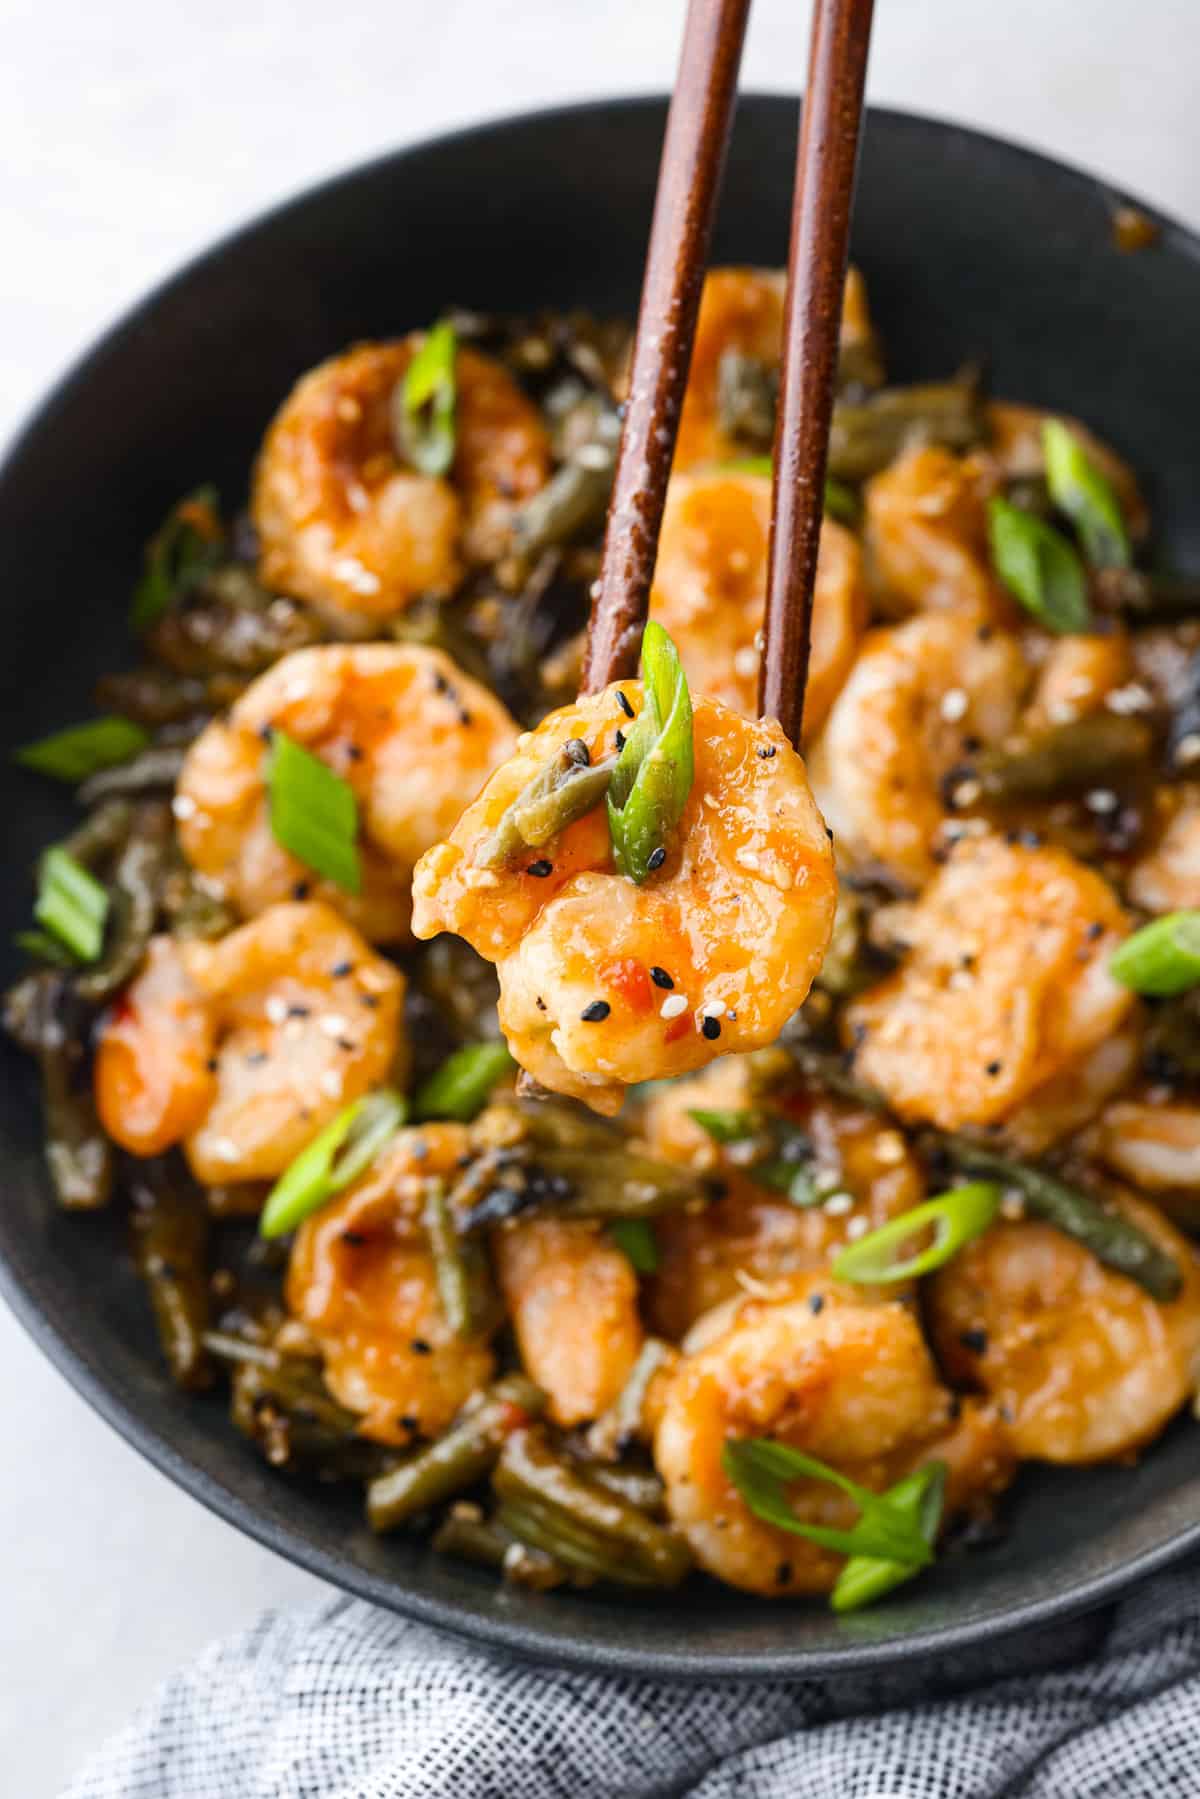
    Crispy coated shrimp gets pan-fried to golden perfection in this better-than-takeout recipe! Tossed with tender veggies in a savory-sweet sauce, Hunan Shrimp is sure to be a new favorite in your dinner rotation.
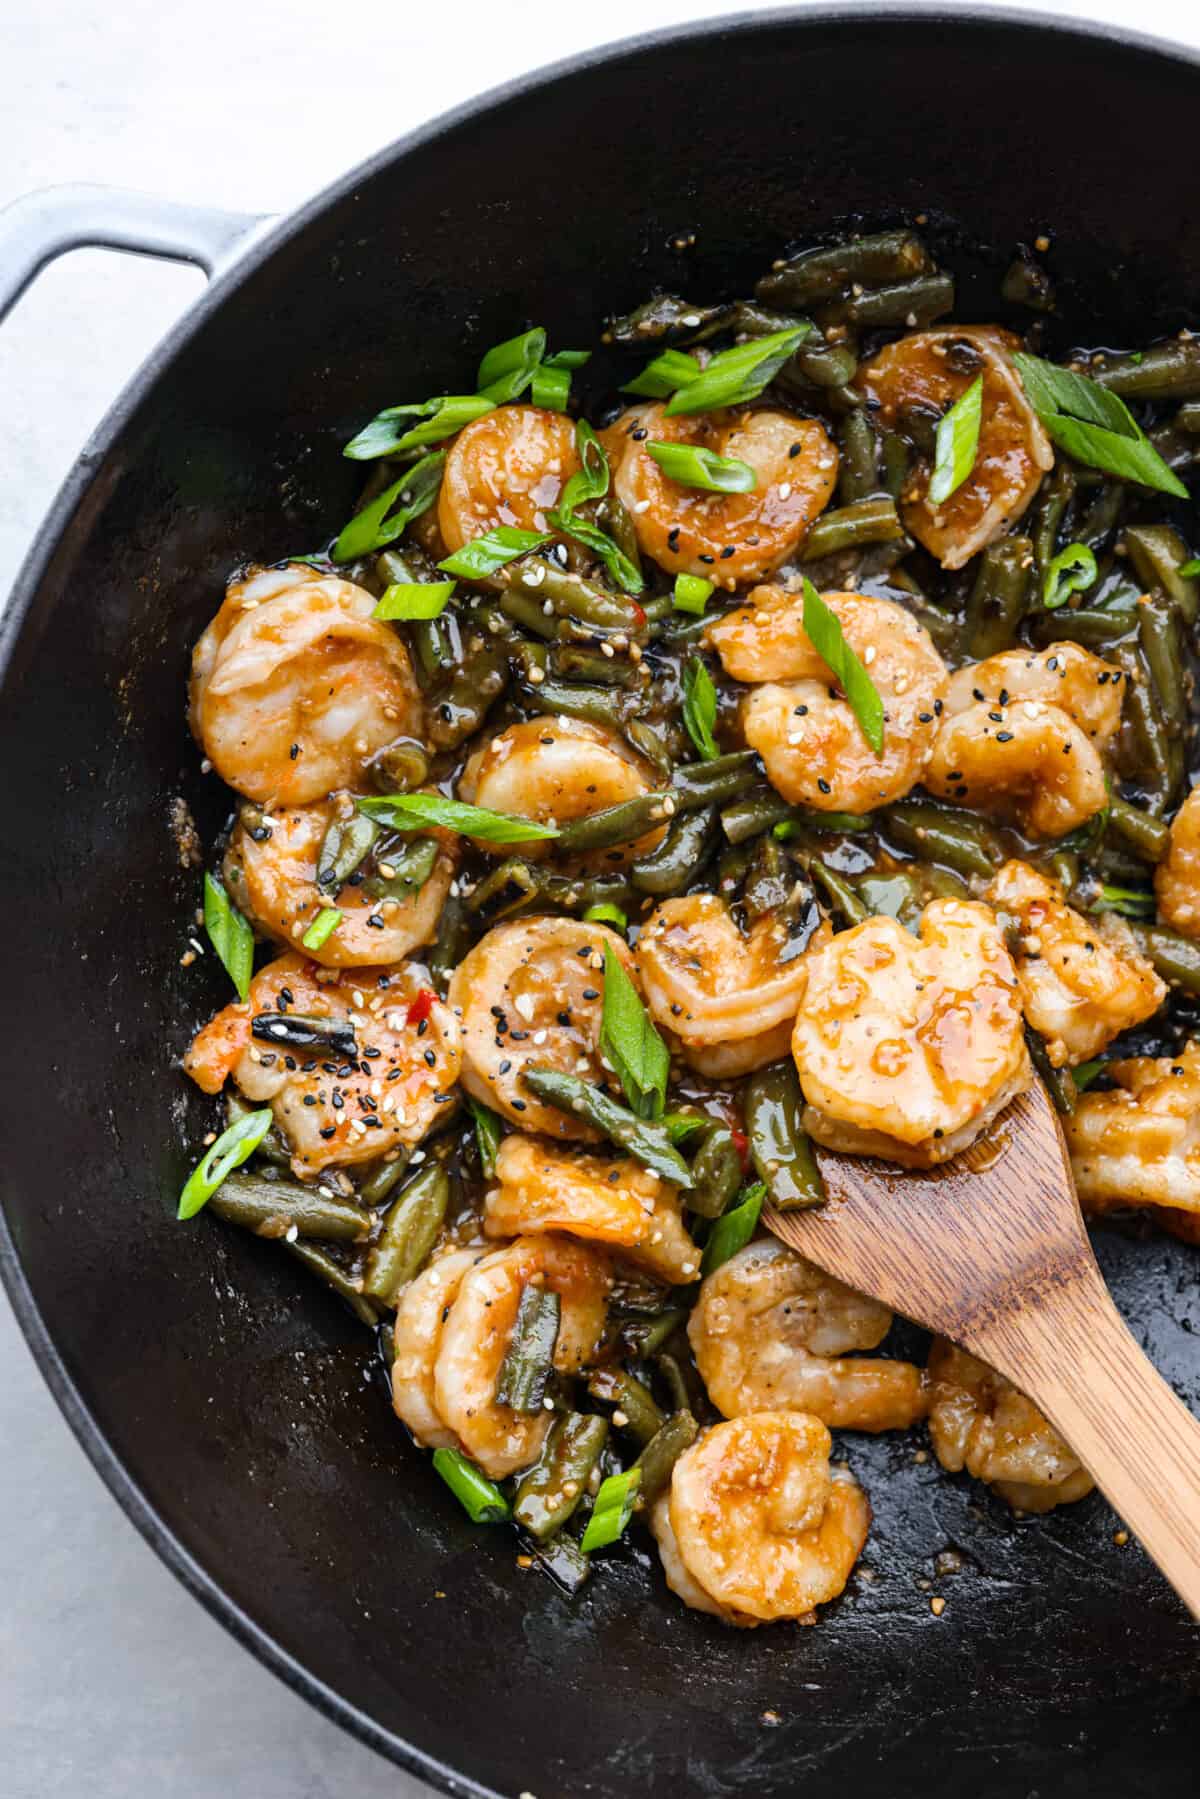
    Cooked Hunan shrimp and green beans in a black skillet.

    Reasons You’ll Love This Recipe

    • Flavor Explosion: Sweet honey meets spicy chili paste, combined with ginger and garlic, to coat the tender shrimp in the most amazing flavor.
    • Easy to Make: This fantastic recipe is so easy to throw together and only takes 30 minutes! It’s way faster than the time it takes for your takeout order to arrive.
    • Takeout at Home: Make it a complete meal similar to takeout with some crab rangoons and easy fried rice.

    Hunan Shrimp Sauce and Stir Fry Ingredients

    With this simple list of ingredients, you’re ready to stir-fry up some Hunan shrimp that’ll leave takeout in the dust. Check out the recipe card below for exact measurements.

    • Shaoxing Wine: Think warm, sweet rice wine. Not a fan? Extra broth works as well.
    • Soy Sauce: Our savory foundation, use low-sodium if you’re salt-conscious.
    • Chili Paste: Spice central! Gochujang or sambal oelek work. Adjust based on your heat tolerance.
    • Garlic & Ginger: Fresh is best, but powdered garlic works in a pinch. Ginger adds a citrusy kick!
    • Honey: A touch of sweetness to balance the heat. Honey also gives the sauce an amazing sticky texture that perfectly coats each shrimp piece.
    • Veggie Broth: To add moisture and flavor.
    • Cornstarch: It makes the sauce silky smooth and thickens it up, so mix it with water first to avoid lumps.
    • Shrimp: Any kind works; thaw and pat them dry before cooking. I like to use shrimp that has already been peeled and deveined for easy prep.
    • Green Beans: Adds crunchy green goodness; swap in broccoli or asparagus if you like.
    • Green Onions: Freshens things up and makes your Hunan shrimp photo-worthy (if it lasts that long!).
    Hunan Shrimp Recipe

    Heat up that wok and get ready to cook up some Hunan shrimp that will make everyone a seafood lover. It’s also great if you’re short on time! Same with my easy teriyaki shrimp recipe.

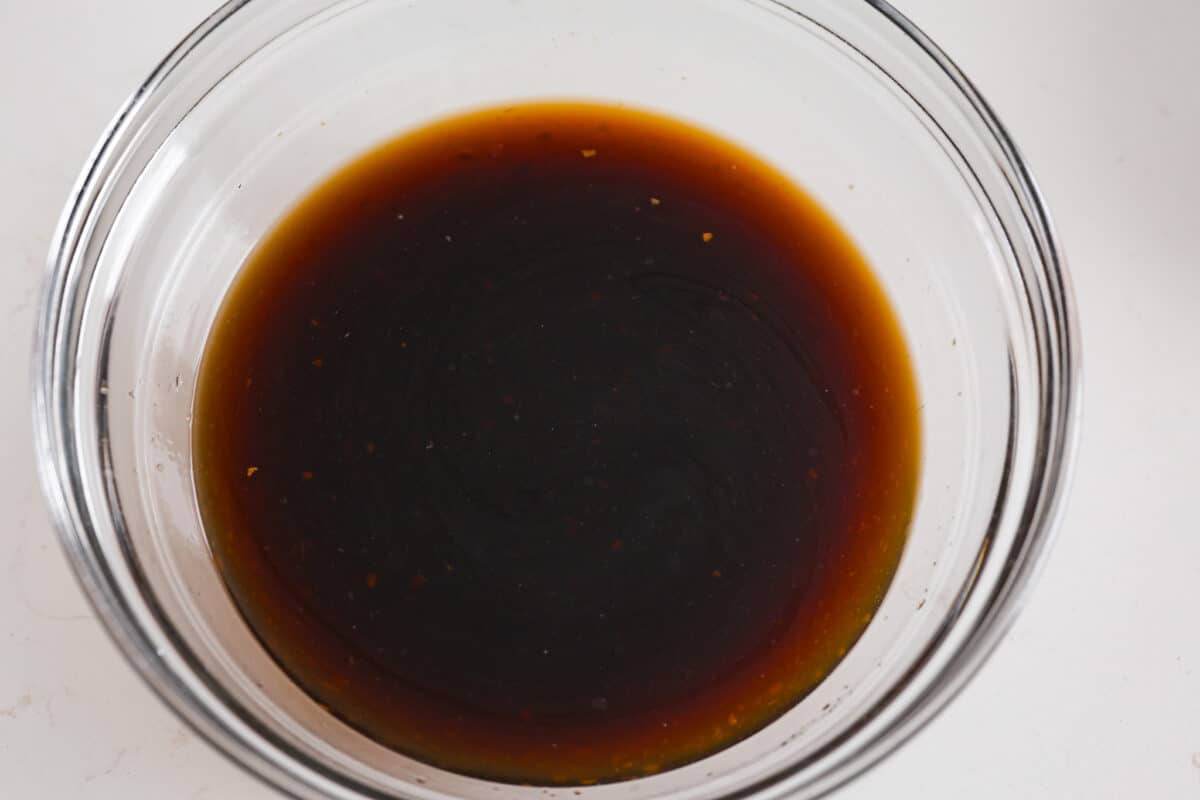
    1. Sauce: In a small bowl whisk together the shaoxing wine, soy sauce, chili paste, garlic, ginger, honey, vegetable broth, and cornstarch. Then set aside.
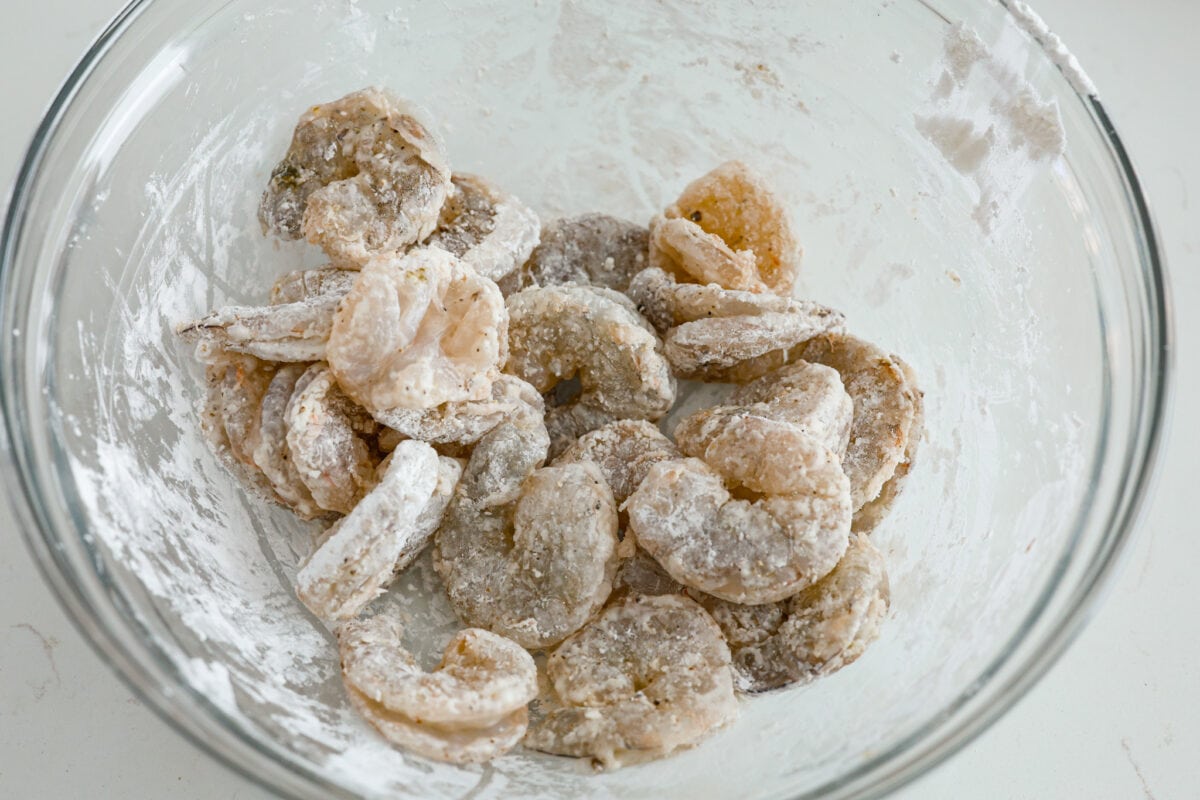
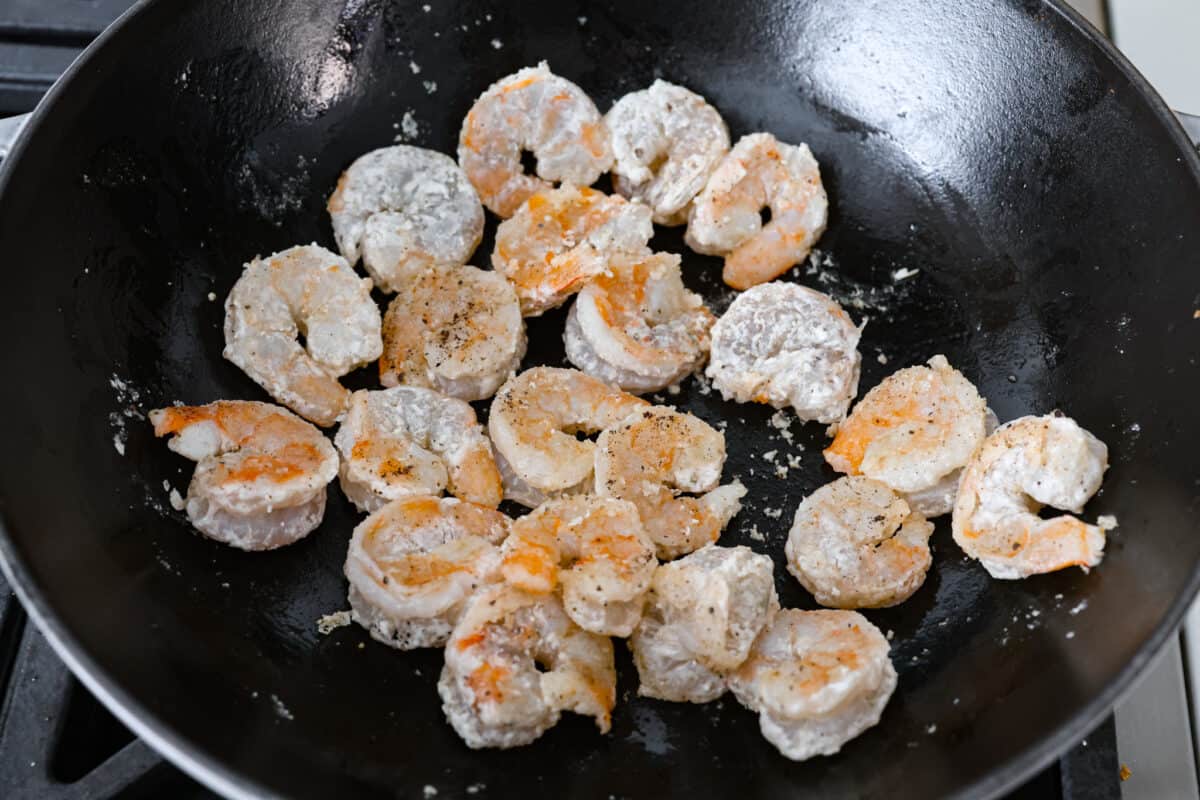
    2. Cook Shrimp: Pat the shrimp dry, then season with salt and pepper and toss in the cornstarch. Heat the vegetable oil in a wok or large frying pan over medium high heat. Then add the shrimp to the pan and fry for 2-3 minutes, tossing frequently to evenly cook.
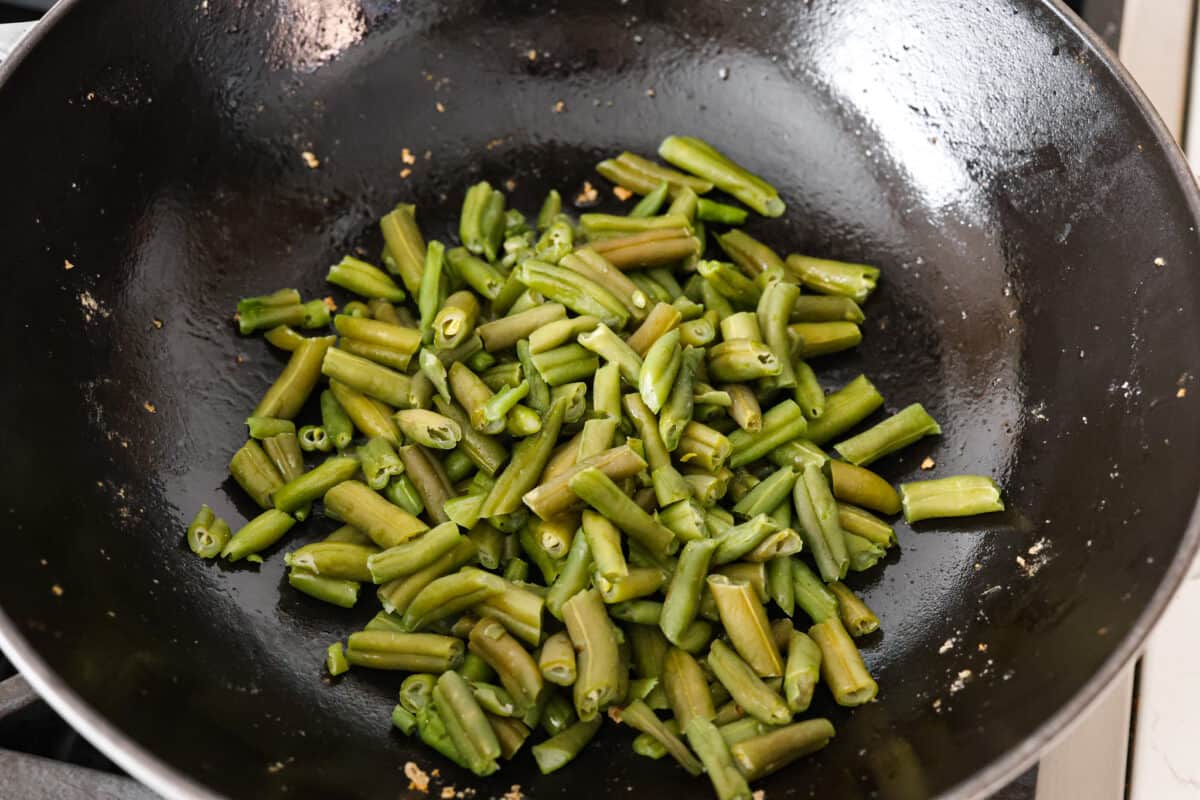
    3. Stir Fry Vegetables: Remove the shrimp from the pan and set aside. Add the green beans to the pan and cook them until they begin to soften and brown.
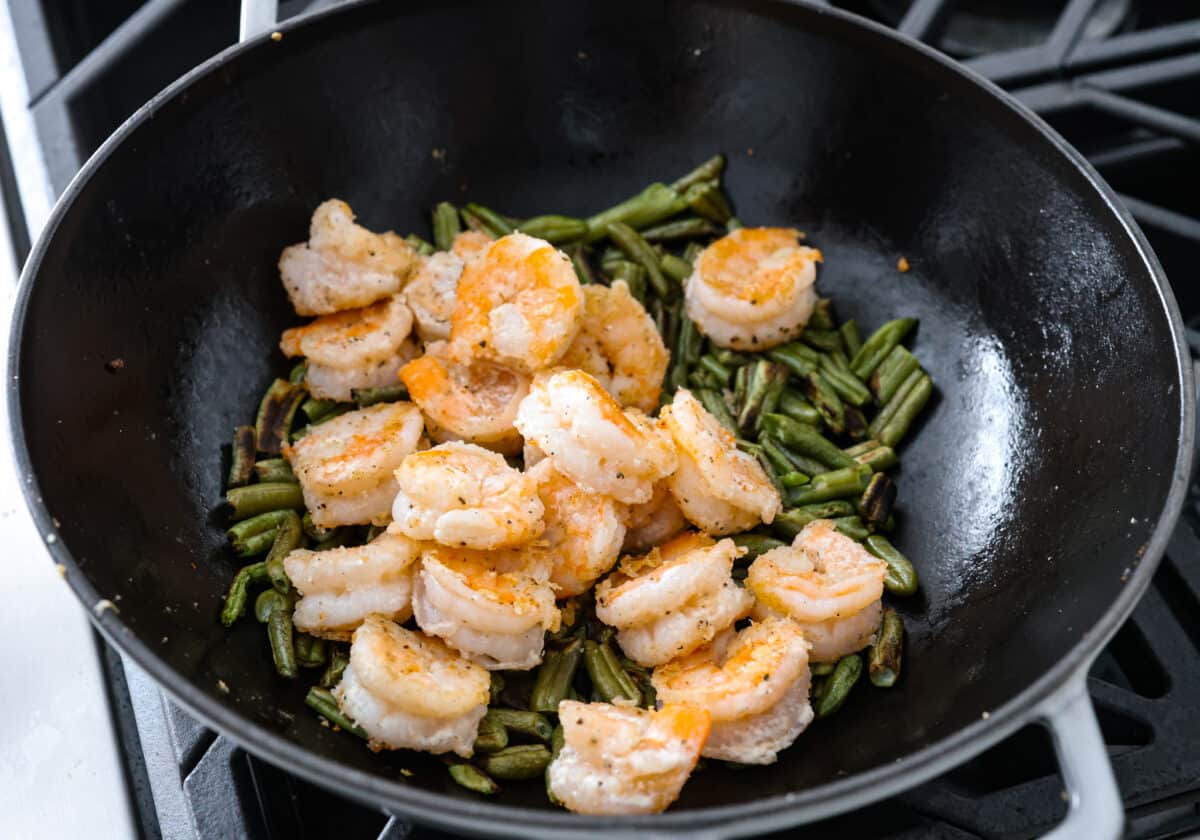
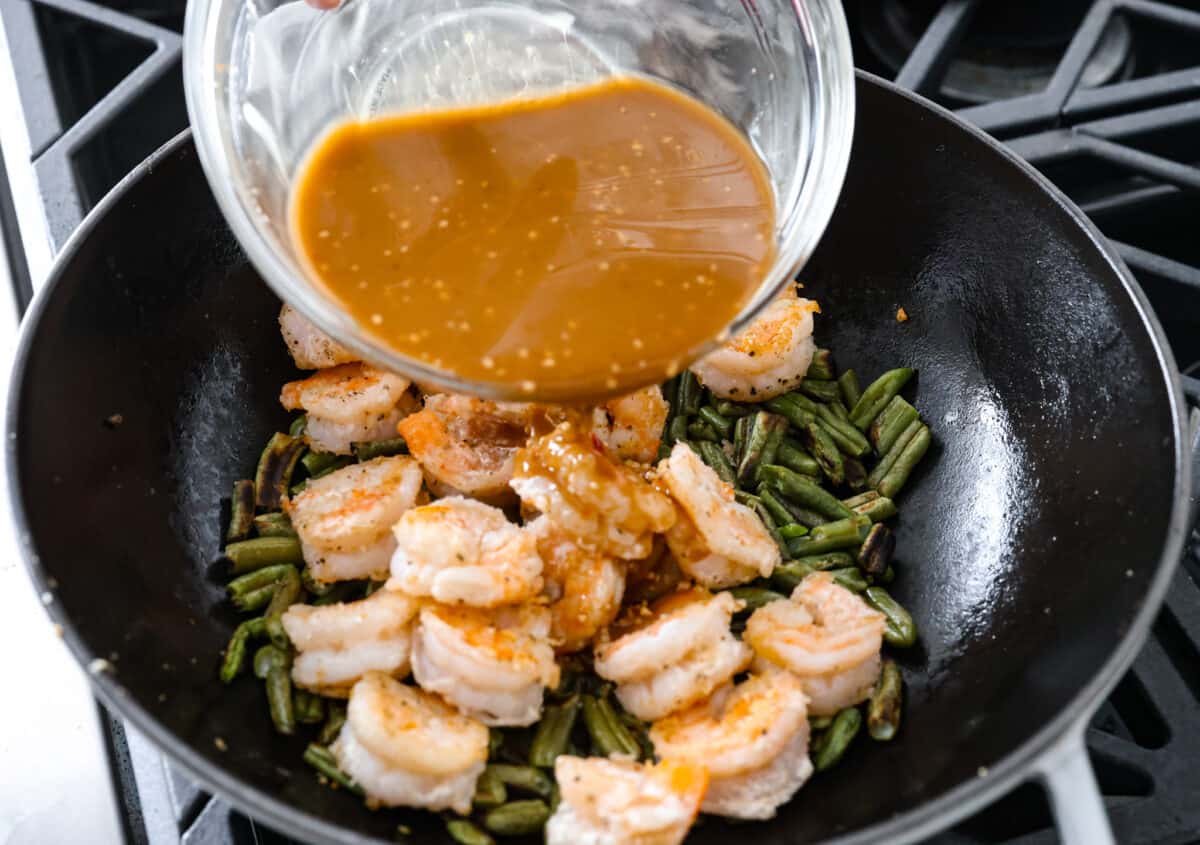
    4. Combine: Add the shrimp back to the pan along with the hunan sauce mixture and green onions. Continue to stir and cook until the sauce thickens.
    5. Enjoy: Serve the hunan shrimp with rice and additional green onions.
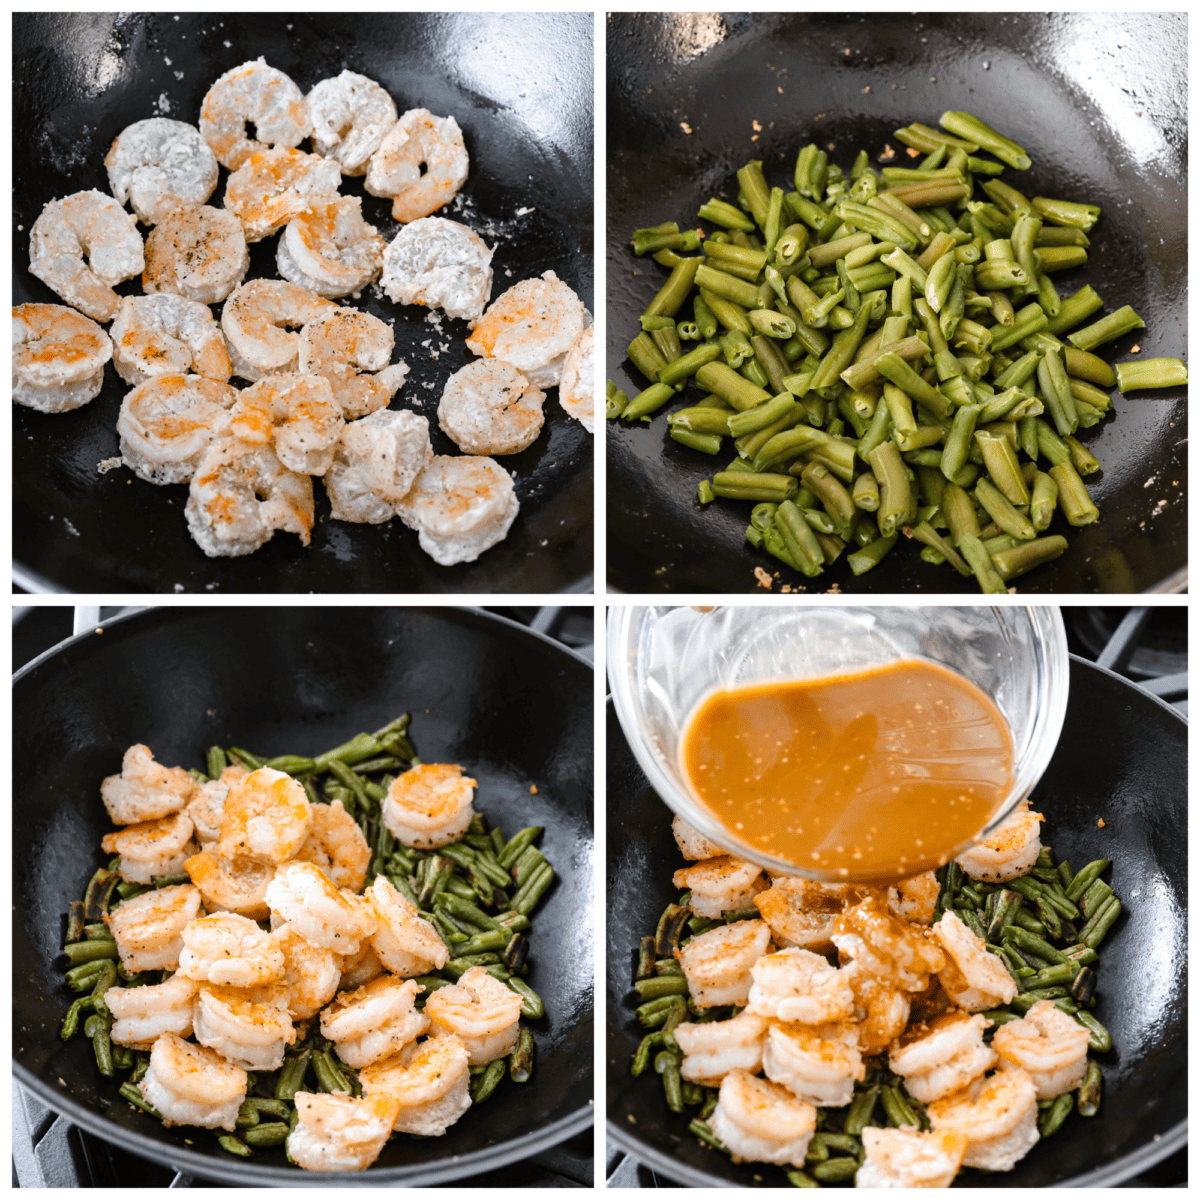
    4-photo collage of the shrimp and vegetables being cooked, then tossed in a homemade sauce.4-photo collage of the shrimp and vegetables being cooked, then tossed in a homemade sauce.

    Hunan Shrimp Tips for Success

    Use these extra tips and tricks to create Hunan shrimp worthy of your favorite takeout spot.

    • Pat Your Shrimp Dry: Wet shrimp = steamed shrimp, not the pan-fried, crispy goodness we’re after. Be sure to pat your shrimp dry with paper towels for maximum crispness.
    • High Heat is Your Friend: Get your wok or skillet nice and hot before adding the shrimp. They should sear instantly, locking in the juicy goodness and preventing a rubbery texture.
    • Don’t Crowd the Pan: Shrimp like their space! Add them in batches if your pan isn’t huge. Overcrowding leads to steaming, which we want to avoid for the best Hunan shrimp.
    • Adjust the Spice: Like it hot? Use more chili paste. If not, use less and then add more to taste if desired.
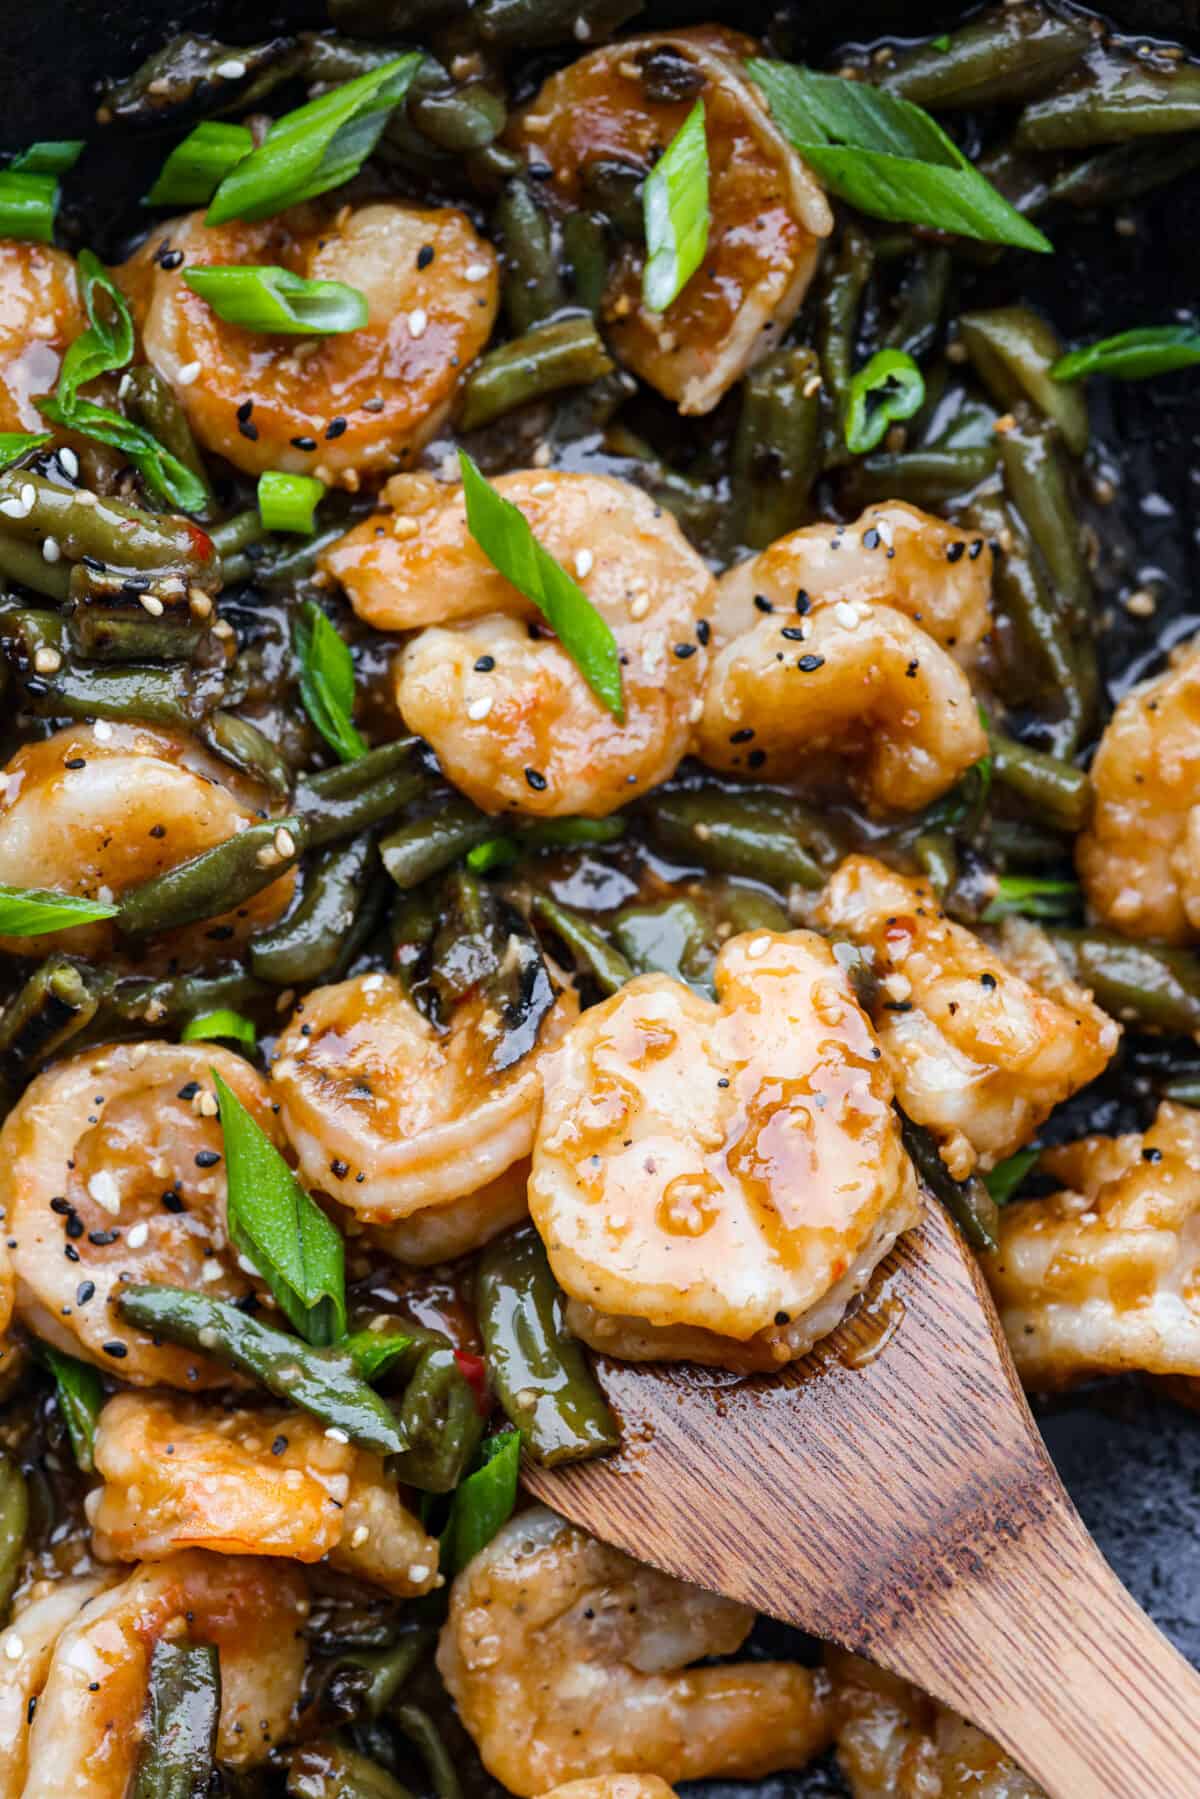
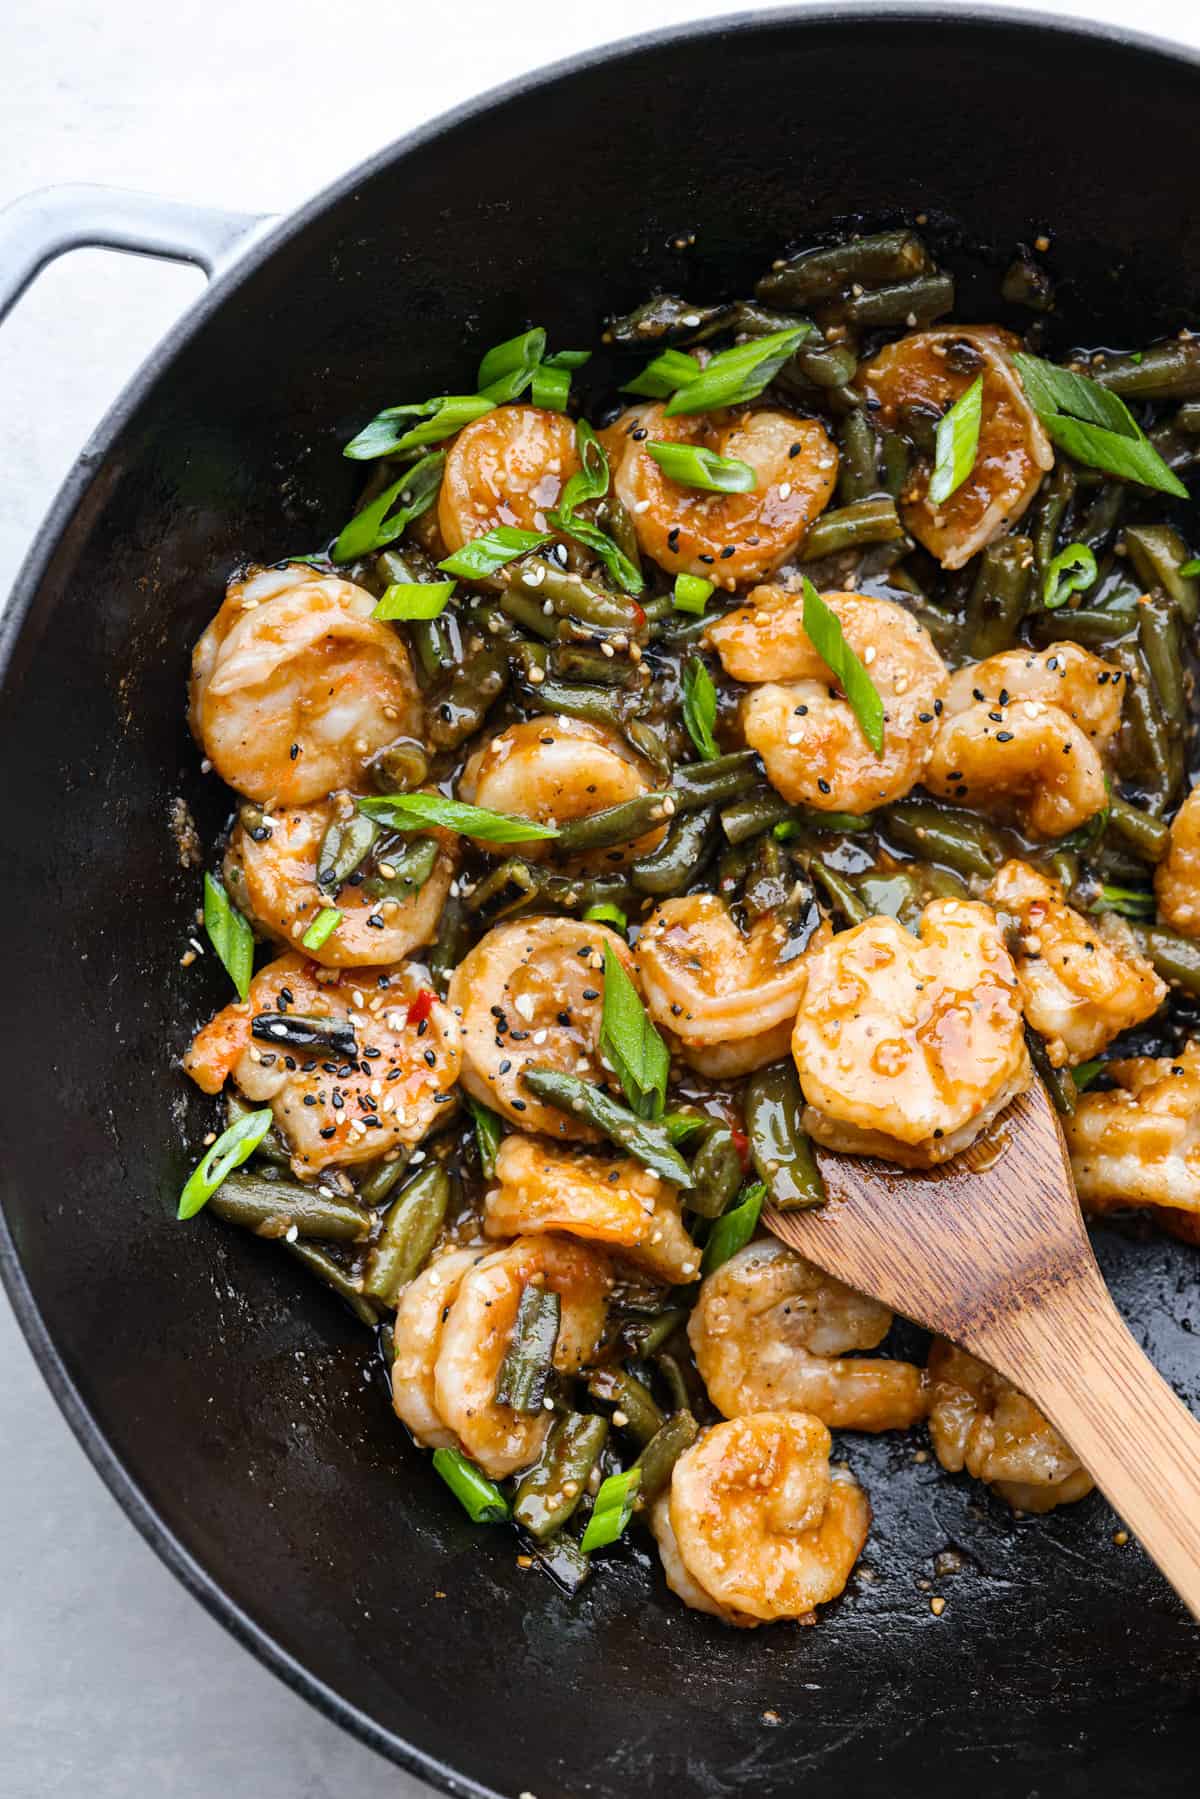
    Closeup of Hunan shrimp being stirred with a wooden spoon.Closeup of Hunan shrimp being stirred with a wooden spoon.

    How Long Does Hunan Shrimp Last?

    • Fridge: Store leftovers in an airtight container for up to 4 days.
    • Reheat: Toss some Hunan shrimp in a hot pan with a splash of water or broth. Stir-fry for a couple of minutes until warmed through, and serve over rice. A tasty meal in a snap!
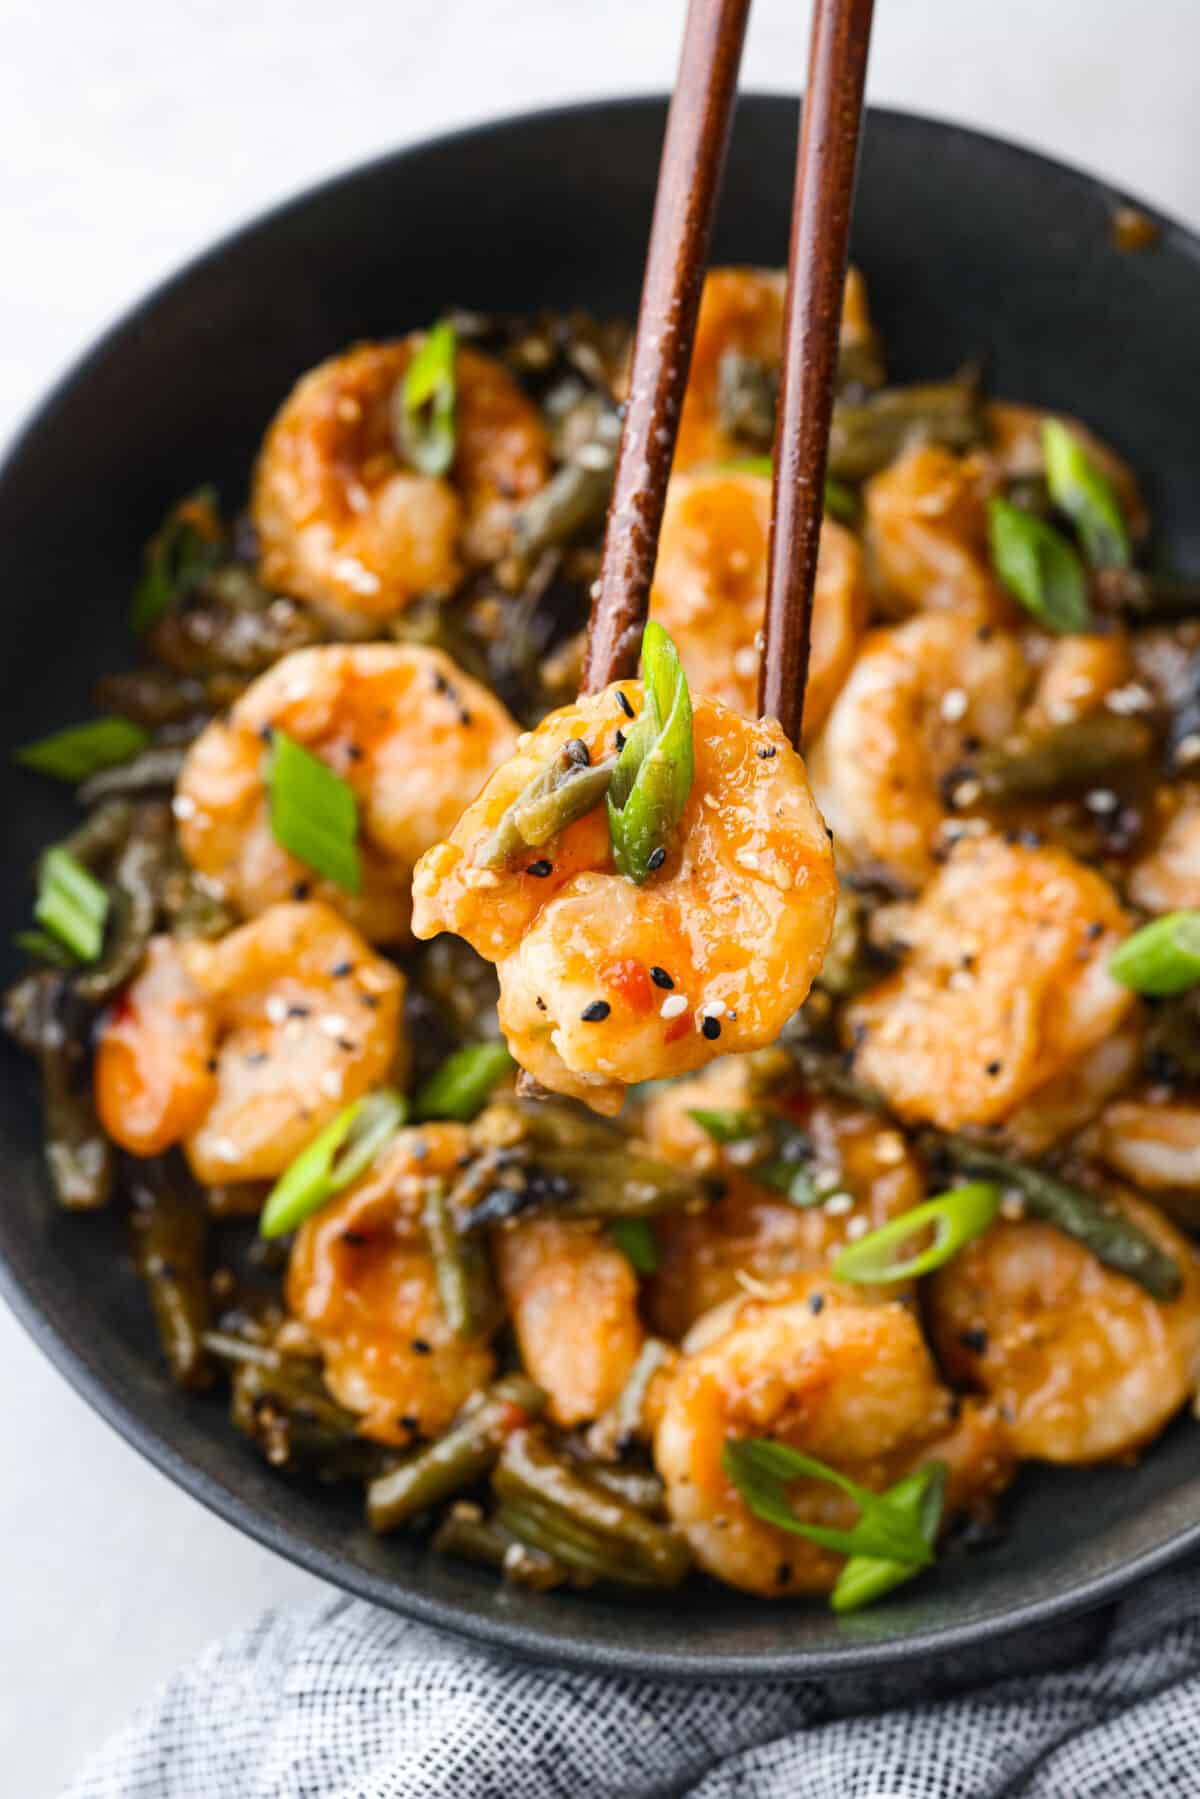
    Picking up a piece of shrimp with chopsticks.Picking up a piece of shrimp with chopsticks.

    Chinese Takeout, Made Fresh in Your Kitchen:

    Pin this now to find it later

    Pin It


    Source link

  • Our Favorite Farro Salad Recipe

    Our Favorite Farro Salad Recipe

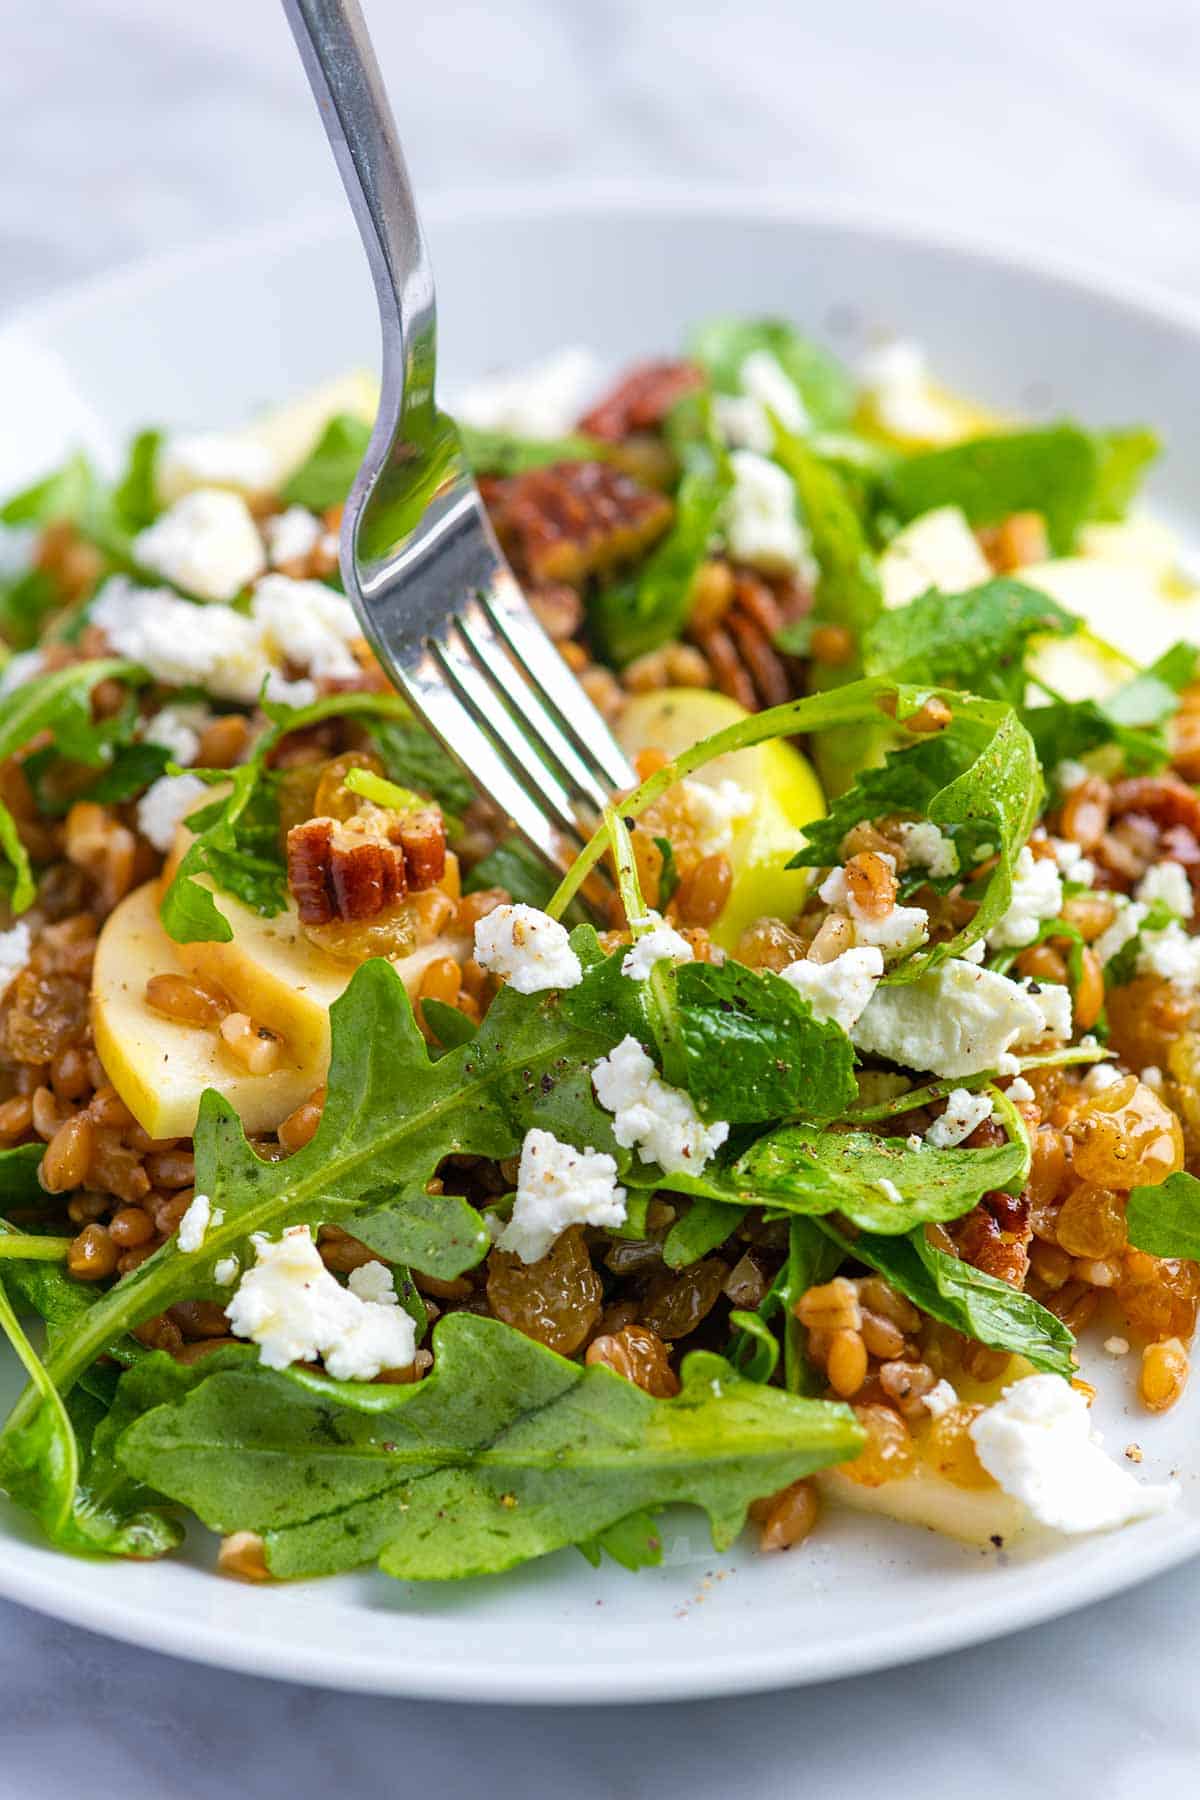
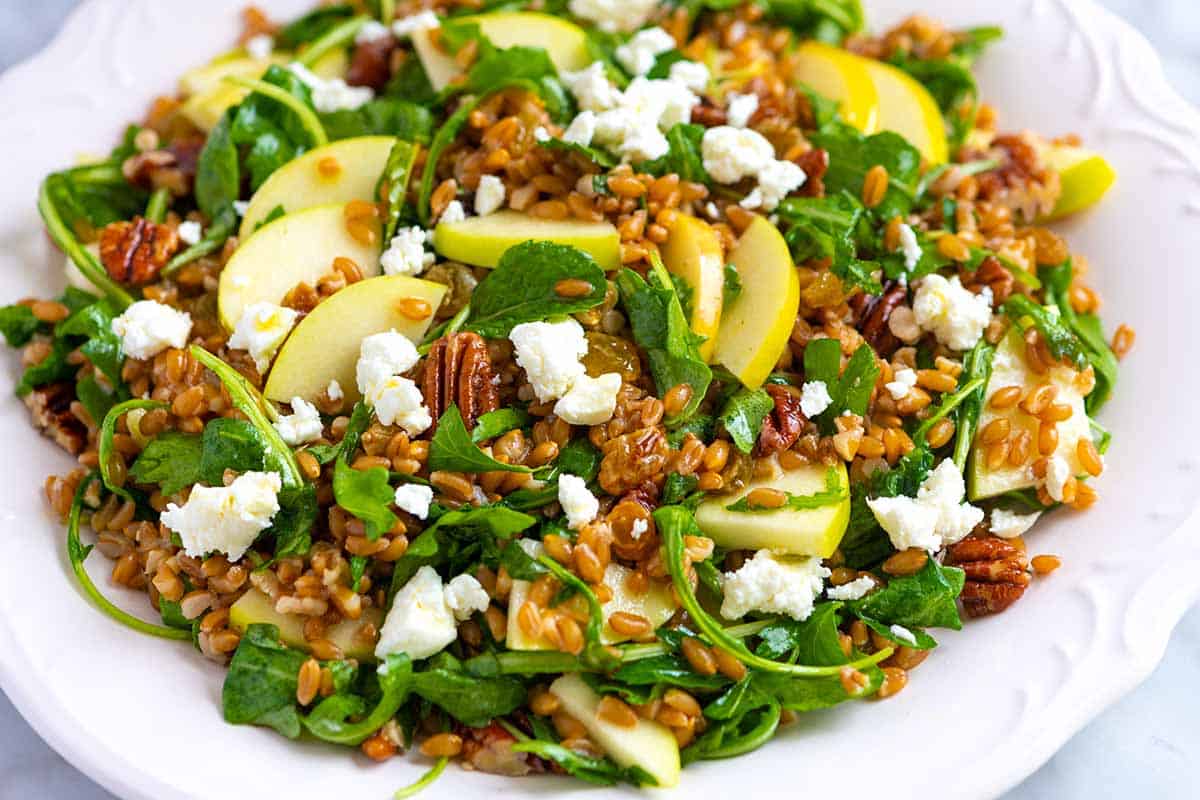
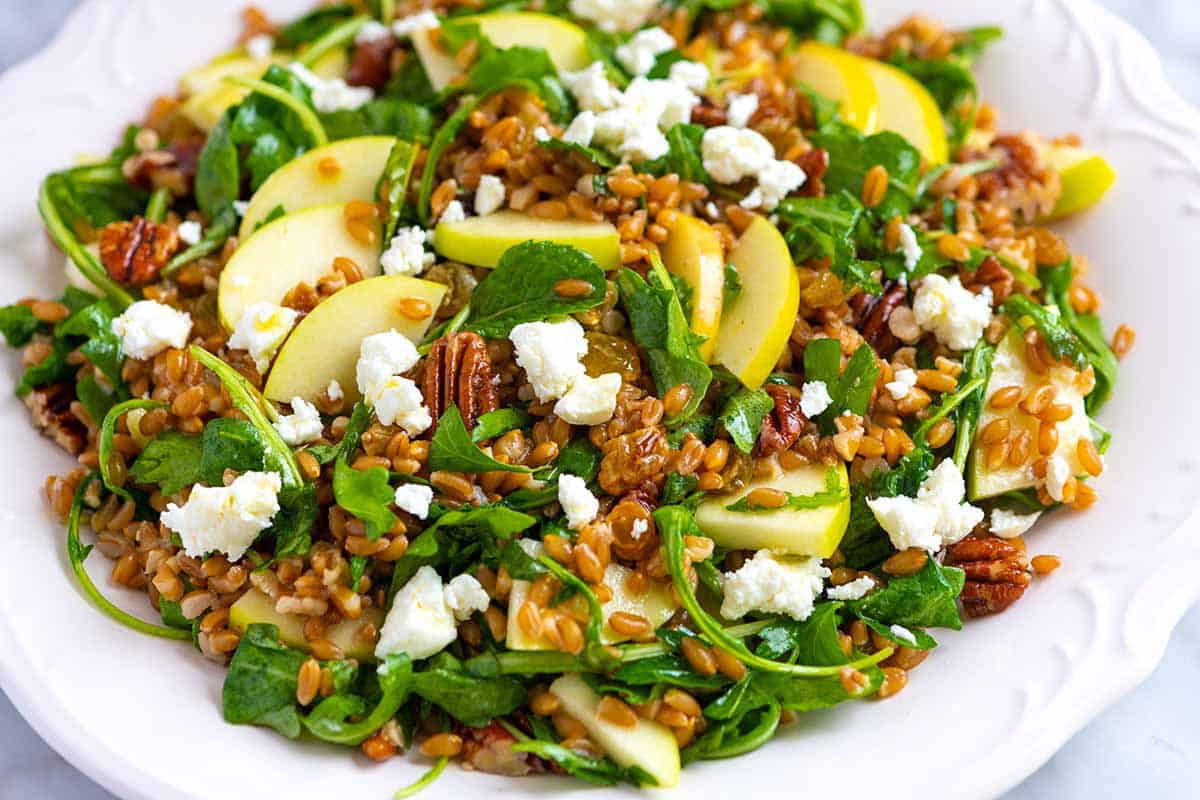
    I’ve fallen hard for this easy farro salad recipe made with cooked farro, sweet apples, arugula, and a zippy lemon dressing.

    Farro salad with cooked farro, sweet apples and arugula

    The lemony dressing for this salad is fresh and bright, which works so well with the nuttiness of the farro and the sweetness of the apples. If you have not cooked with farro much in the past, this easy salad is a great place to start.

    Below, you’ll find all my tips for how to cook farro. If you can cook pasta, you can cook farro. You can also easily substitute the farro for other grains like quinoa (see how to cook quinoa), wild rice, brown rice, or pearl couscous, which we use in our arugula couscous salad.

    Key Ingredients

    • Farro: Farro is an ancient whole grain derived from wheat. It’s not gluten-free, but it’s rich in protein and fiber and has a wonderful nutty flavor. We use whole farro in the recipe below, but see the tips for other varieties like cracked farro. Wild rice, fluffy quinoa, pearl couscous, or orzo pasta are all excellent substitutes.
    • Lemon Dressing: The dressing for this is almost identical to the one we use for our couscous salad. It’s made with fresh lemon juice, Dijon mustard, honey, olive oil, salt, and pepper. It’s zippy, fresh, and perfect with the other ingredients.
    • Apple: Sliced apples really make this salad fresh and delicious. The crunchy apples against the chewy farro is such a great combination. Pear would be lovely, too.
    • Arugula: I love peppery arugula here, but you can swap it with your favorite greens like spinach, bok choy, or kale.
    • Fresh herbs: These are optional, but I love tossing in a handful when I have them. Parsley, mint, basil, and dill are all excellent choices.
    • Nuts and Dries Fruit: I list pecans and golden raisins in the recipe below, but use what you have. The nuts add crunch, and the dried fruit adds a chewy sweetness that makes the salad more interesting. I use the same trick in our arugula couscous salad.
    • Goat Cheese (optional): I love scattering crumbled goat cheese into this salad, but feta, grilled halloumi, or even shaved parmesan are great, too. You can also leave the cheese out to keep this dairy-free.

    Find the full recipe with measurements below.

    How to Make Our Favorite Farro Salad

    Tip 1: Cook the farro. I love whole farro, which is what’s shown in our photos. To cook it, add it to a saucepan with water, a bay leaf, and a pinch of salt, then simmer with the lid partially covering the saucepan until tender. It takes a bout 35 minutes.

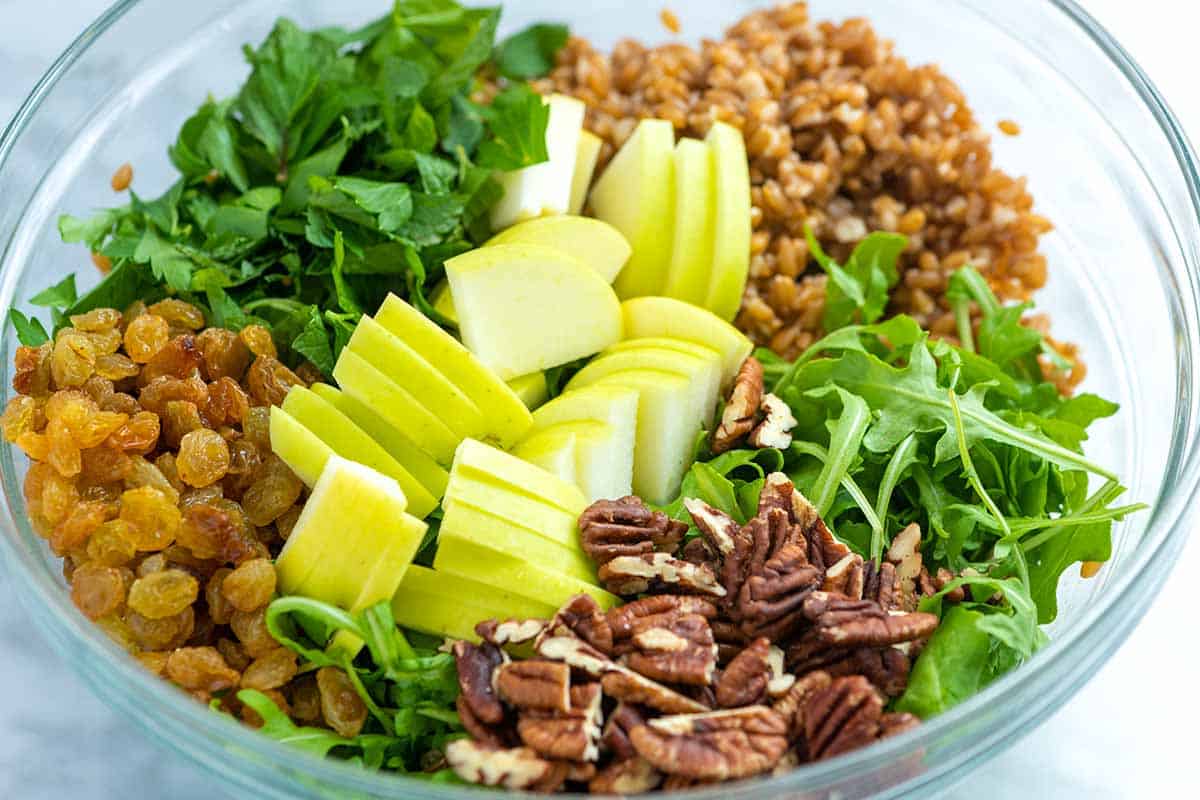
    Tip 2: Make the dressing and salad in the same bowl. To make the salad, I start by whisking my dressing in the bottom of a large bowl. When the dressing is ready, I toss in the cooked farro, apples, nuts, dried fruit, lots of fresh herbs, and some greens. Making your dressing in the same bowl you plan to serve it in saves you dishes!

    Farro salad Ingredients in a bowl ready to be tossed

    Tip 3: Make it ahead. This salad holds well, use an apple variety that doesn’t brown as much, like Honeycrisp and Pink Lady, and choose a heartier green like kale or spinach instead of the more tender arugula. Another option is to keep the greens to the side of the salad and mix them in just before serving.

    More Dinner-Worthy Salad Recipes

    Easy Farro Salad with Apples and Arugula

    Our Favorite Farro Salad

    • PREP
    • COOK
    • TOTAL

    We’ve fallen in love with this delicious salad made with cooked farro, sweet apples, arugula, and a bright salad dressing. You can buy whole farro, cracked, and pearled farro. All will work in this salad, but the cooking time will change depending on what you have. Check the package directions for guidance on actual cook time and liquid requirements.

    4 Servings

    You Will Need

    1 cup uncooked whole farro, rinsed (200g)

    3 cups water, veggie broth, or chicken broth (709ml)

    1 bay leaf

    2 tablespoons fresh lemon juice

    1 teaspoon Dijon mustard

    1 teaspoon honey or maple syrup

    ¼ cup extra virgin olive oil (60ml)

    1 apple, cored and sliced into 1-inch pieces

    3 cups arugula or salad greens

    Handful of fresh herbs like parsley, mint, and dill, roughly chopped

    ½ cup pecan halves, toasted and chopped (50g)

    ½ cup golden raisins or other dried fruit (75g)

    1 ½ ounces crumbled goat cheese, optional (40g)

    Salt and fresh ground black pepper

    Directions

      1Cook farro: Add water or broth, farro, bay leaf, and a big pinch of salt to a medium saucepan. Bring to a boil, and then reduce to a simmer. Cook, partially covered, until the farro is tender, 30 to 40 minutes. Drain.

      2Make dressing: Whisk together the lemon juice, mustard, and honey or maple syrup in a large salad bowl until blended. Gradually add the oil, whisking constantly, until the dressing looks well blended and creamy. Season to taste with salt and fresh ground black pepper.

      3Make the salad: Add the sliced apples, cooked and drained farro, arugula, herbs, nuts, and the raisins. Toss well. Crumble goat cheese on top, and then serve.

    Adam and Joanne’s Tips

    • Storing: Keep the salad for up to 24 hours in an airtight container. Make sure the apples are well coated in the dressing so they do not brown.
    • Types of farro: Whole, cracked, and pearled farro can be used interchangeably in this recipe. Be sure to take note of the cooking instructions on the package you purchased in order to gauge cook time and liquid requirements. The whole farro will take the longest.
    • Toasted nuts: Spread them in an even layer on a sheet pan, and slide them into a 350°F. Toast for 6 to 8 minutes or until they smell toasty, shaking the pan halfway during cooking.
    • Fresh herbs: Fresh herbs are lovely in this salad, but if you do not have any, you can leave them out. When I have them, I love a combination of fresh mint and parsley. Dill and basil are also delicious.
    • The nutrition facts provided below are estimates.

    Nutrition Per Serving
    Calories
    531
    /
    Total Fat
    27.8g
    /
    Saturated Fat
    5g
    /
    Cholesterol
    8.4mg
    /
    Sodium
    224.9mg
    /
    Carbohydrate
    61.5g
    /
    Dietary Fiber
    10.1g
    /
    Total Sugars
    17.6g
    /
    Protein
    11.2g


    AUTHOR:

    Joanne Gallagher

    Adam and Joanne of Inspired Taste

    We are Adam and Joanne Gallagher, the creators of Inspired Taste. Established in 2009, Inspired Taste grew from a childhood dream into one of the internet’s most trusted recipe sites with hundreds of reliable recipes, step-by-step videos, and expert tips.More About Us

    Source link

  • Easy Vegetable Soup Recipe

    Easy Vegetable Soup Recipe

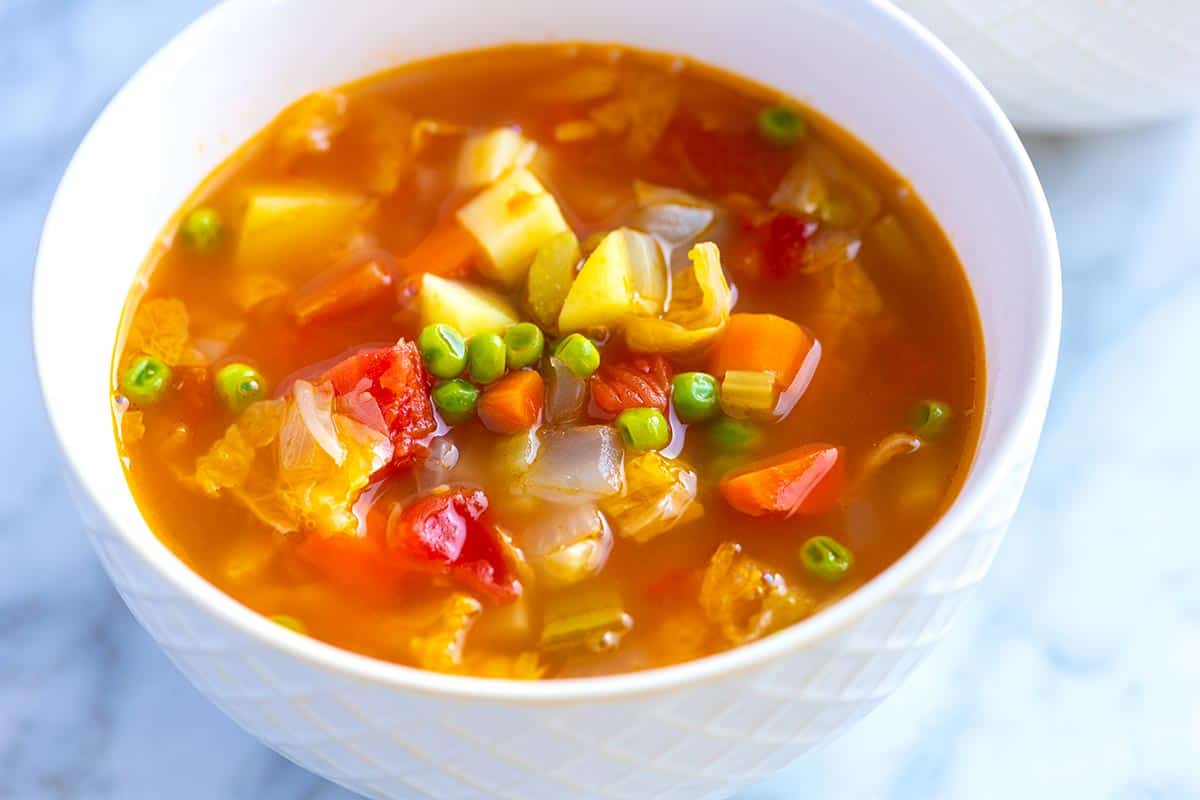
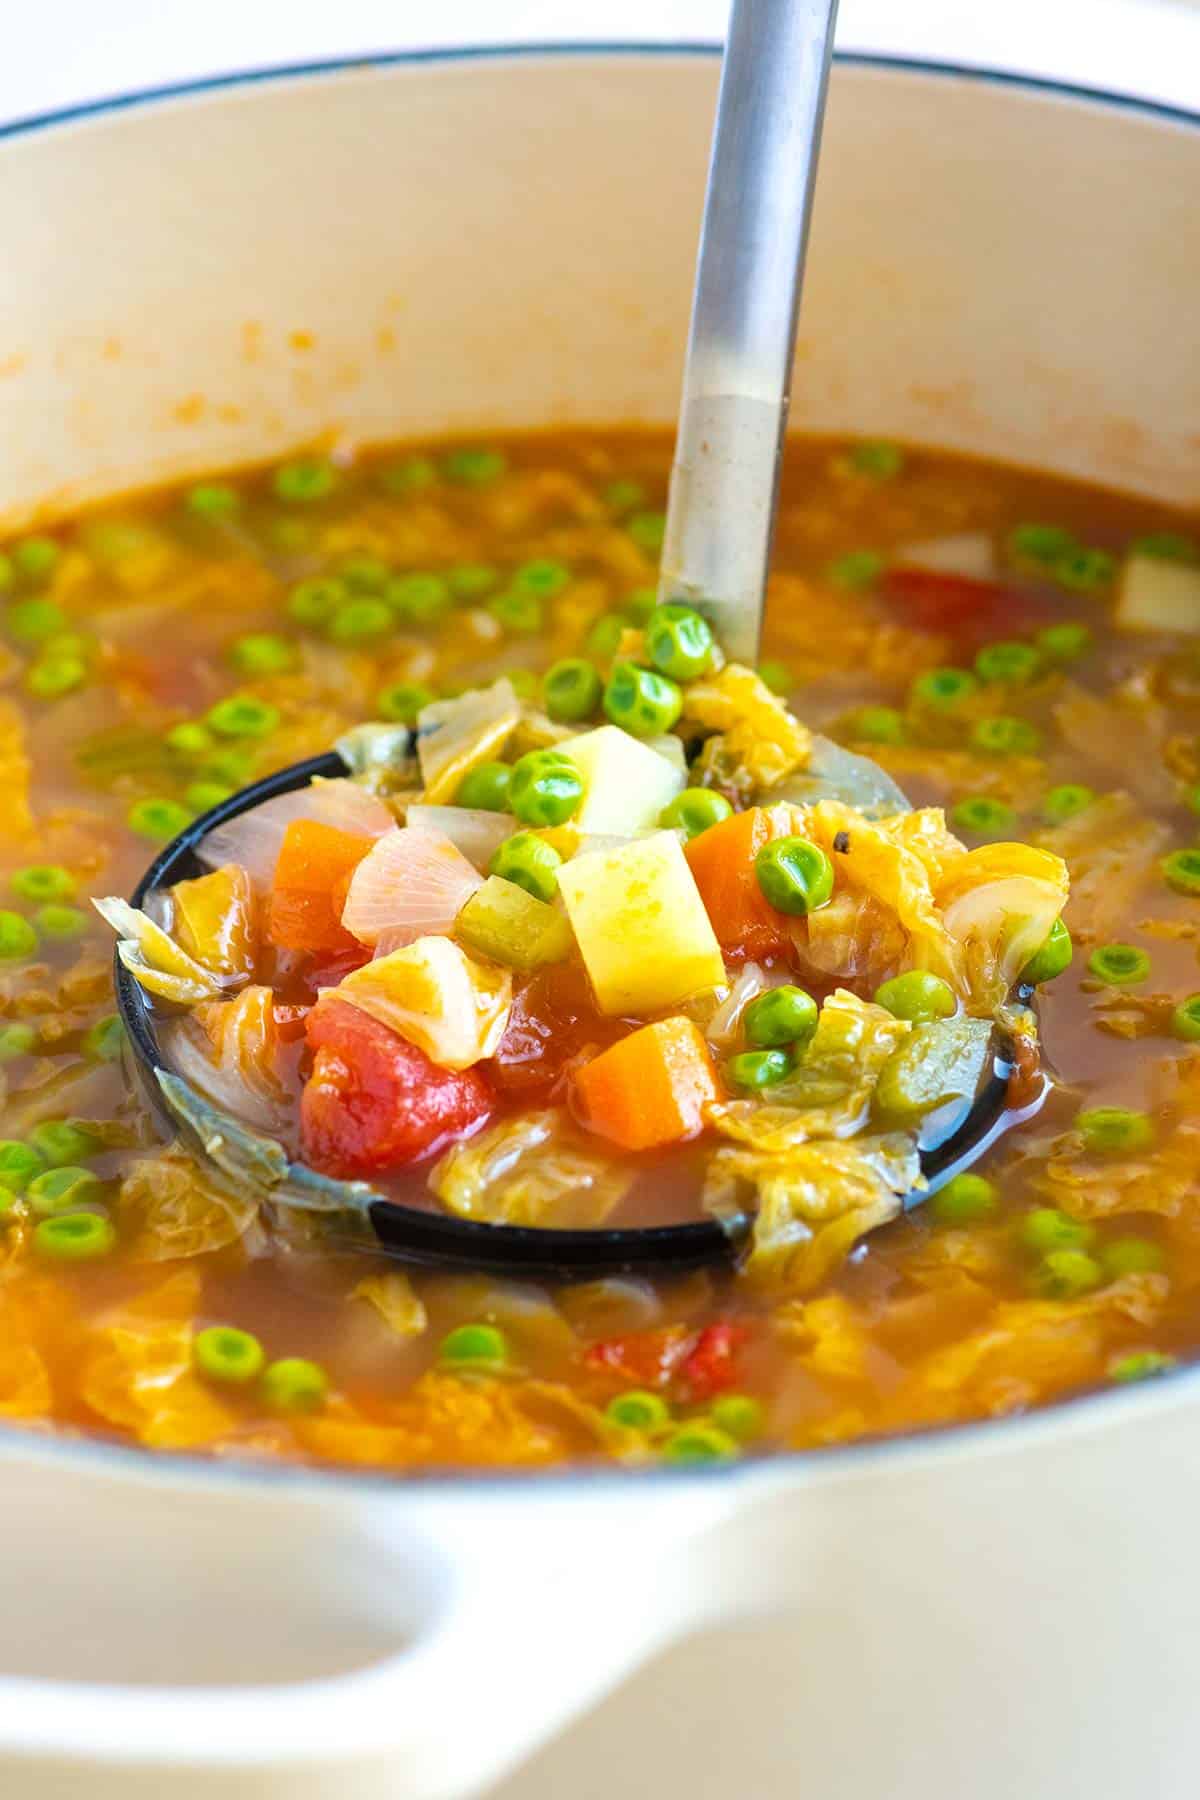
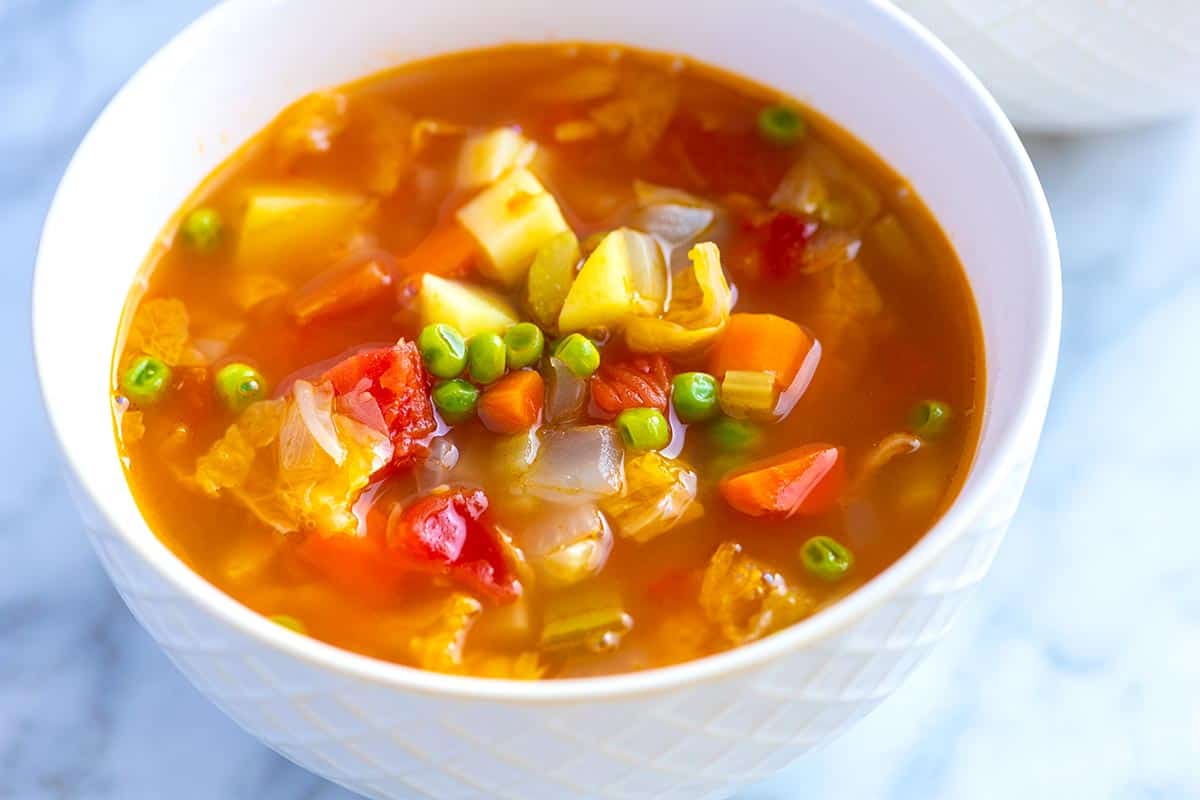
    I love this vegetable soup recipe! It’s made with a light tomato broth and packed with healthy veggies. It’s so comforting and satisfying!

    Vegetable Soup

    I’ve been making this simple recipe for years. It’s light, nutritious, and genuinely makes you feel good! I make it all year round and love that the recipe is adaptable to whatever veggies are sitting in your fridge or the season.

    This cozy soup comes together in just one pot, making it perfect for a fuss-free, flavorful meal. I love making a big batch and keeping it in the fridge for easy lunches or dinners throughout the week! If you love creamy soups, see our creamy vegetable soup.

    Key Ingredients

    • Vegetables: We use a lot of veggies for this soup, but feel free to use what you have on hand. I love onion, carrot, celery, potato or sweet potato, cabbage, and peas. You can customize this recipe with your favorite seasonal vegetables! In the summer, add fresh zucchini or corn. In the winter, try hearty root vegetables like parsnips or turnips. The possibilities are endless! I use a similar list of veggies for this easy cabbage soup.
    • Tomato Paste and Tomatoes: Make the base of our deliciously light broth. If you have fresh tomatoes, use them! I’ve shared how many you’ll need to substitute canned in the tips section of the recipe.
    • Garlic, Fennel Seeds, Bay Leaves, & Red Pepper Flakes: Add a lovely flavor to our soup. I love fennel with vegetables and use either ground or crushed whole fennel seeds in this soup. Pepper flakes add a hint of heat (use as much as you like for your preferred spice level).
    • Broth: You can use your favorite broth in this recipe. I love this homemade vegetable broth when I have it on hand (it also makes this soup vegan and vegetarian). Use chicken broth, homemade bone broth (or store-bought) for a higher protein soup.
    • Apple Cider Vinegar or Lemon Juice: I love adding a bit of vinegar or fresh lemon juice before serving this soup. It brightens all the flavors and makes them pop. Fresh herbs do the same, so if you have some fresh parsley or other green herb in the kitchen, chop and add it just before serving.

    Find the full recipe with measurements below.

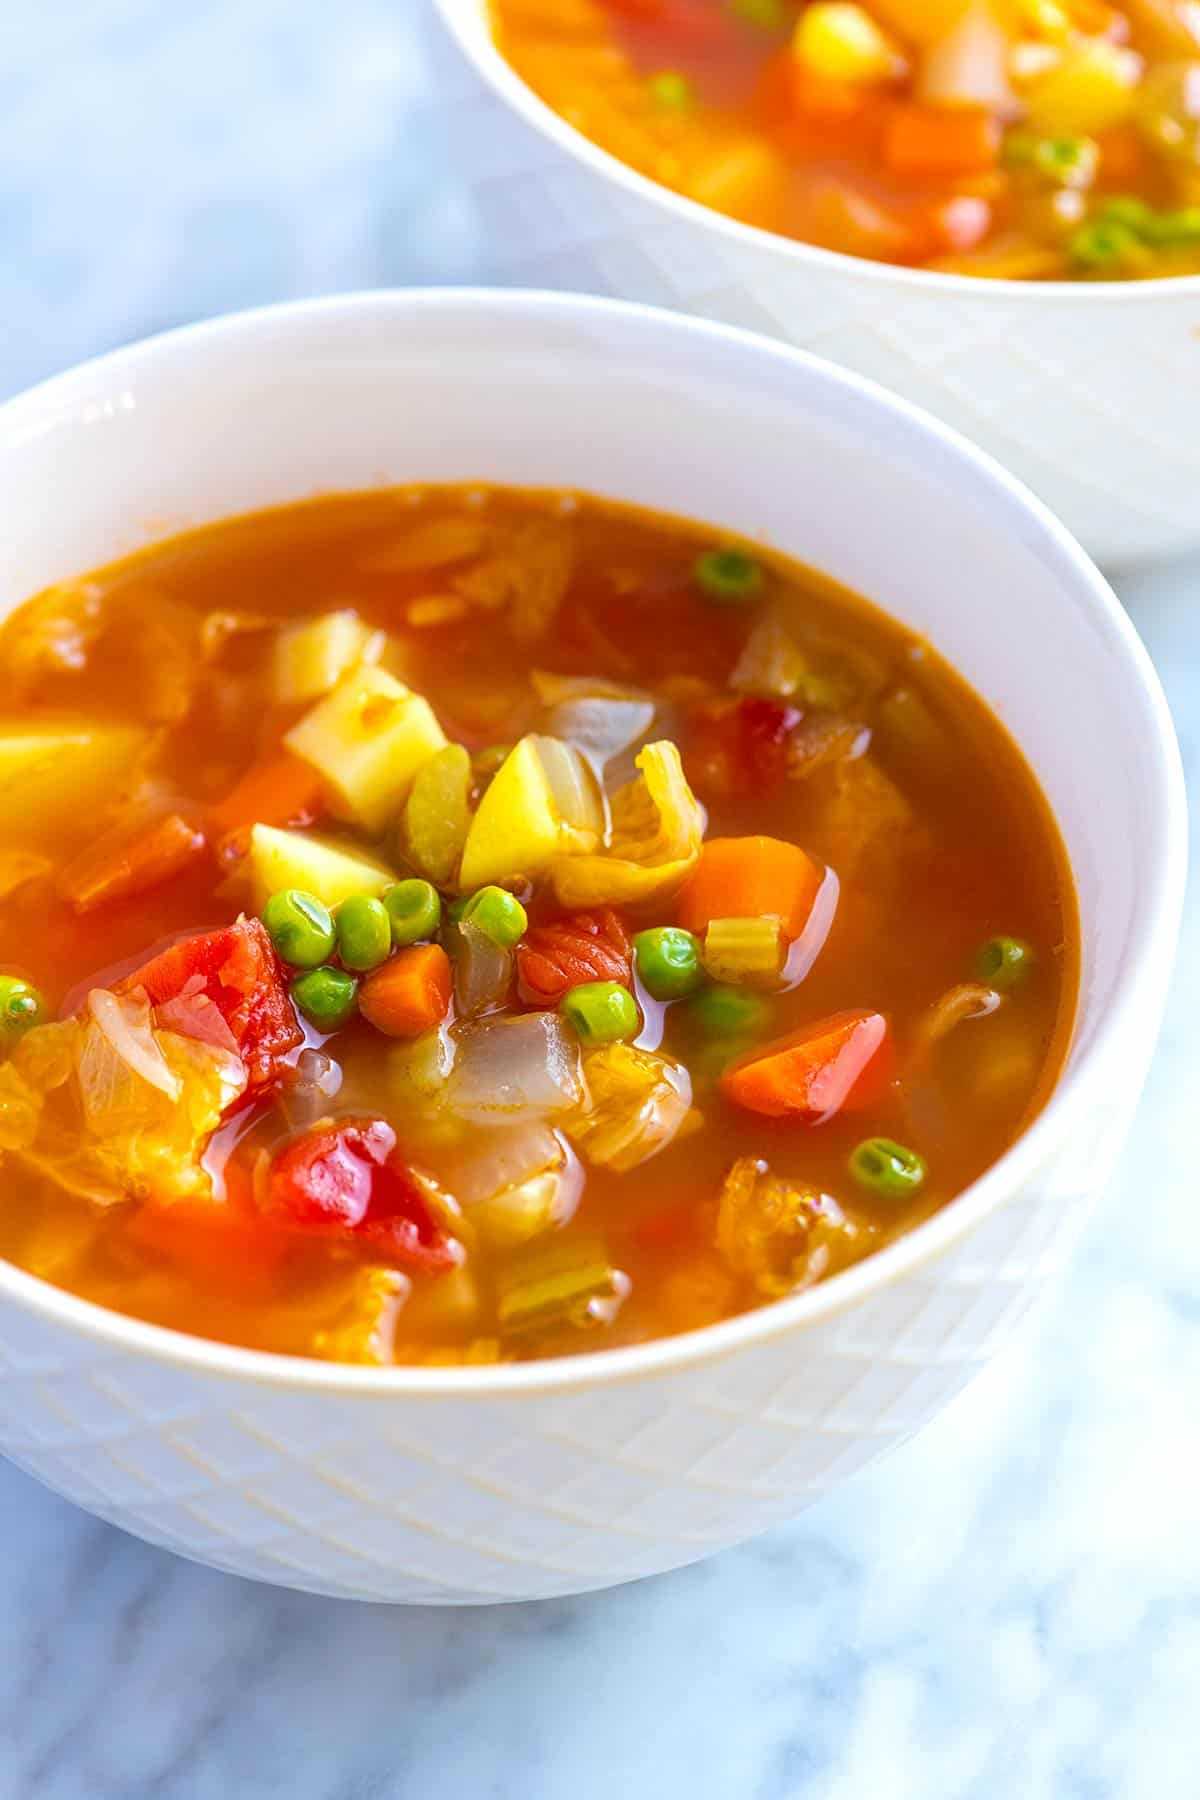
    A pot of homemade vegetable soup

    How to Make Vegetable Soup

    Tip 1: Build a solid flavor base: Start your soup with a classic mirepoix (a mix of sautéed onions, carrots, and celery). Adding tomato paste at this stage helps to deepen the flavor and give your soup a richer color.

    Adding tomato paste to vegetable soup ingredients

    Tip 2: Layer your aromatics: Don’t just dump all your spices in at once. After the initial sauté, stir in aromatics like garlic, fennel, salt, and pepper, and cook for a minute. This way, they get a chance to release their flavor into the soup, but won’t burn before adding the liquid.

    Adding spices to base of soup

    Tip 3: Simmer until tender: Simmering for about 20 minutes is key to getting the vegetables tender. There’s no need to cook much longer than that.

    Tip 4: Add quick-cooking ingredients last: Ingredients that cook quickly, like frozen peas or spinach, should be added at the end to prevent them from becoming mushy and maintain their bright color and texture.

    Adding frozen peas to vegetable soup

    Tip 5: Finish with a pop of flavor: Before serving, taste your soup and adjust the seasonings. A splash of apple cider vinegar or fresh lemon juice at the end can brighten up the flavors and make the soup taste less one-dimensional (a problem I’ve had with veggie soups).

    My Favorite Veggie Soup Variations

    • To add protein, stir in cooked or canned beans. Try white beans, chickpeas, lentils, and black beans. See our lentil soup or this white bean soup with vegetables for inspiration.
    • To add pasta, stir in pasta 10 minutes before the veggies soup has finished cooking. I love smaller pasta shapes like orzo in soup or adding tortellini (like in this veggie tortellini soup).
    • To make it creamy,  add a splash of cream, milk, or unsweetened dairy-free milk at the end. You can also stir in a little bit of unsweetened yogurt or sour cream. Or blend all the ingredients like we do with this creamy veggie soup.
    • Or, add more veggies! You can add as many vegetables as you like to this veggie soup recipe. Feel free to toss in a handful of other vegetables, such as cauliflower, broccoli, summer squash, or corn.

    More Easy Soup Recipes

    Homemade Vegetable Soup

    Easy Vegetable Soup

    • PREP
    • COOK
    • TOTAL

    This hearty vegetable soup recipe is healthy, easy to make, and tastes amazing. It’s also vegan when you use vegetable broth. Since vegetables vary by seasonality, swap or add different vegetables for the veggies listed below. Kale or spinach, for example, is an excellent substitute for cabbage.

    4 to 6 Servings (8 cups)

    Watch Us Make the Recipe

    You Will Need

    3 tablespoons olive oil

    2 cups chopped onion, 1 large

    1 ½ cups chopped carrot, 3 to 4 carrots

    1 ½ cups chopped celery, 2 to 3 stalks

    2 tablespoons tomato paste

    4 teaspoons minced garlic, 4 cloves

    ¾ teaspoon ground fennel seed

    ½ teaspoon ground black pepper

    ½ teaspoon fine sea salt, plus more to taste

    ⅛ to ¼ teaspoon crushed red pepper flakes, optional for heat

    1 (15oz) can diced tomatoes with their liquid

    6 cups stock or broth, see our veggie broth or chicken stock (1.42L)

    2 cups chopped potato, 2 medium

    3 to 4 heaped cups chopped or shredded cabbage

    2 bay leaves

    1 cup frozen peas

    ½ teaspoon apple cider vinegar or fresh lemon juice, optional

    Directions

      1Sauté the vegetables: Heat the olive oil in a large Dutch oven or pot over medium heat. Add the onions, carrots, celery, and tomato paste. Cook, stirring often, until the vegetables have softened and the onions are translucent, 8 to 10 minutes.

      2Add aromatics: Stir in the garlic, fennel, black pepper, ½ teaspoon of salt, and the red pepper flakes. Cook, while stirring, for one minute.

      3Build the soup base: Pour in the canned tomatoes and their juices and the stock/broth. Add the potatoes, cabbage, and bay leaves. Raise the heat to medium-high and bring the soup to a boil. Partially cover the pot with a lid, then reduce the heat to maintain a low simmer.

      4Simmer: Simmer for 20 minutes or until the potatoes and other vegetables are tender. Add the frozen peas and cook for five more minutes.

      5To finish: Remove the pot from the heat and remove the bay leaves. Stir in the cider vinegar (or use lemon juice). Taste and season with more salt, pepper, or vinegar. Serve.

    Adam and Joanne’s Tips

    • Storing: Homemade vegetable soup lasts in an airtight container in the fridge for up to 4 days or in the freezer for up to 3 months. I love freezing individual servings of this soup. To thaw, leave it in the refrigerator overnight and gently reheat the next day.
    • Fresh tomatoes: Substitute about 1 pound (5 to 6 tomatoes) for one 15-ounce can of diced tomatoes.
    • The nutrition facts provided below are estimates. Calculations included vegetable broth.

    Nutrition Per Serving
    Serving Size
    1 cup
    /
    Calories
    137
    /
    Total Fat
    5.7g
    /
    Saturated Fat
    0.8g
    /
    Cholesterol
    0mg
    /
    Sodium
    677.5mg
    /
    Carbohydrate
    20.3g
    /
    Dietary Fiber
    4.9g
    /
    Total Sugars
    7.5g
    /
    Protein
    3.2g


    AUTHOR:

    Joanne Gallagher

    Adam and Joanne of Inspired Taste

    We are Adam and Joanne Gallagher, the creators of Inspired Taste. Established in 2009, Inspired Taste grew from a childhood dream into one of the internet’s most trusted recipe sites with hundreds of reliable recipes, step-by-step videos, and expert tips.More About Us

    Source link

  • Bacon-Wrapped Shrimp Recipe

    Bacon-Wrapped Shrimp Recipe

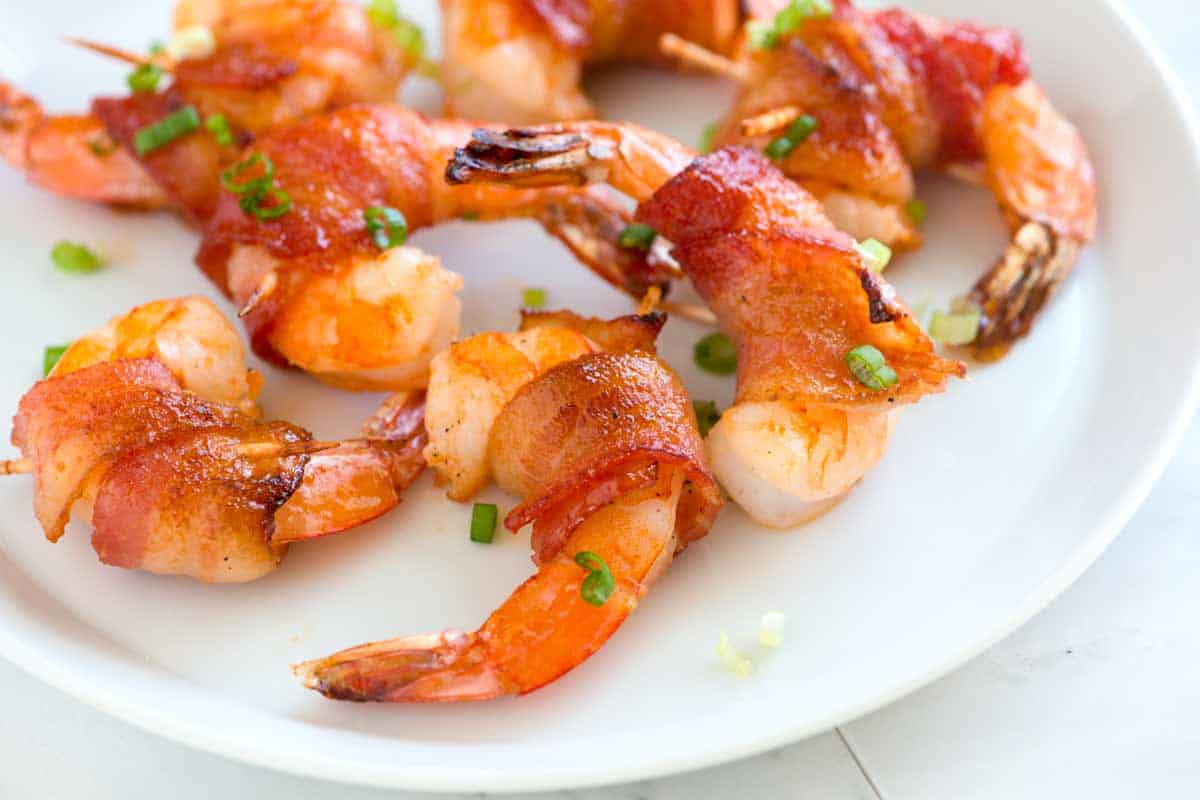
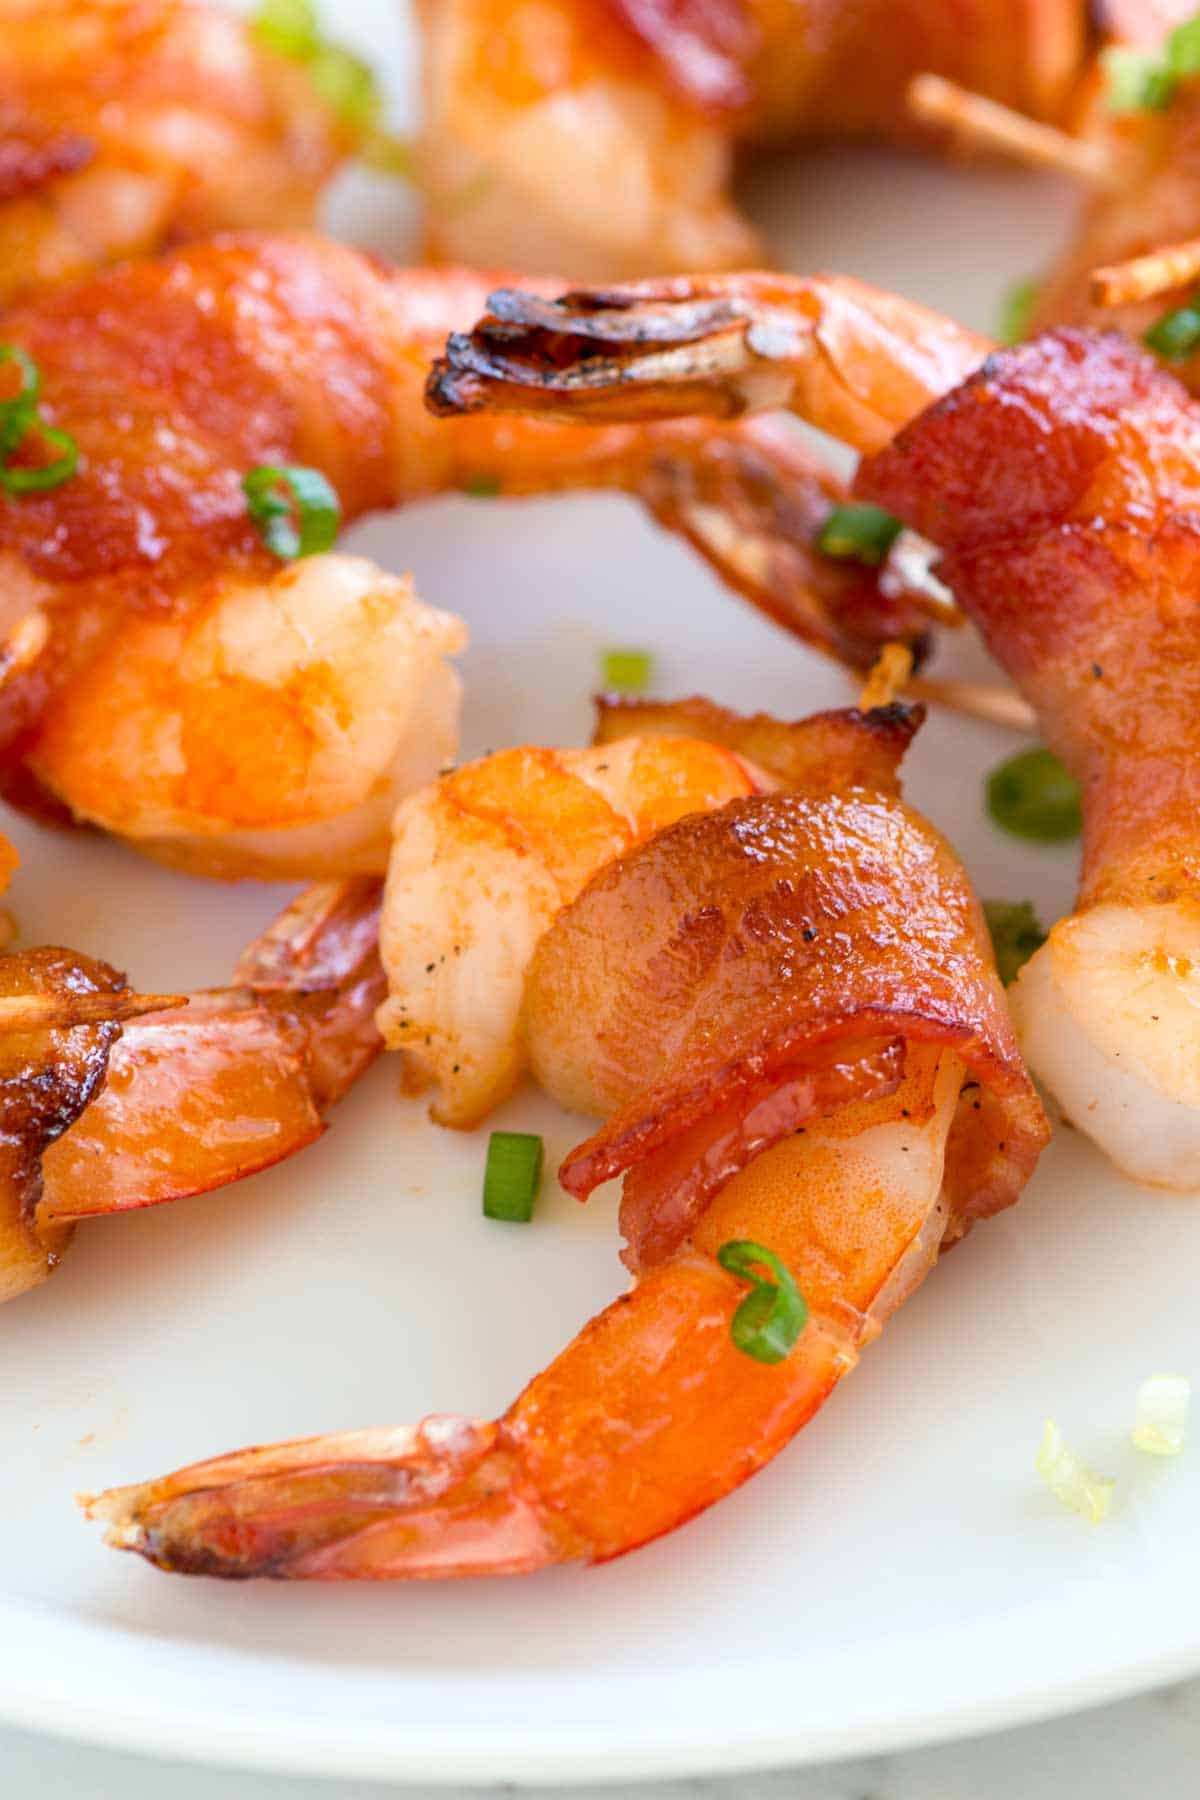
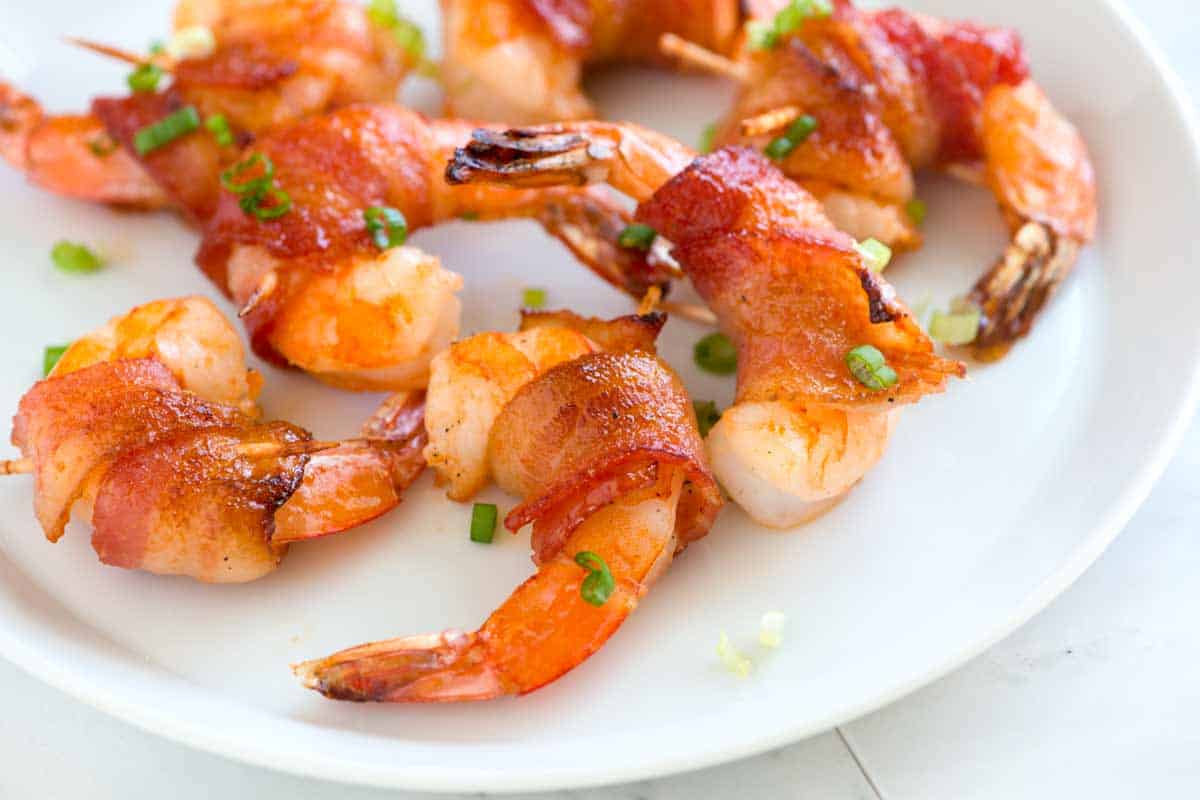
    This bacon-wrapped shrimp recipe is my go-to party appetizer. The spicy maple glaze, combined with a few simple tricks, makes them completely irresistible.

    Bacon Wrapped Shrimp

    There aren’t many things better than shrimp wrapped in bacon, especially when they’re coated in that sweet and spicy maple glaze. With my recipe, the shrimp turn out juicy and flavorful, and the bacon crisps up perfectly.

    Whenever I serve these to friends and family, they fly off the plate. People can’t get enough! For more bacon-wrapped goodness, see our easy jalapeño poppers.

    Key Ingredients

    • Shrimp: Use fresh, high-quality extra-large shrimp for the best flavor and texture. If using frozen shrimp, thaw them overnight in the fridge.
    • Bacon: I’m usually a thick-cut bacon kind of girl, but for bacon-wrapped shrimp, I prefer thin-cut bacon. It cooks more quickly and crisps up beautifully. Since shrimp cook fast, I like to par-cook the bacon before wrapping so it’s crisp by the time the shrimp are done.
    • Maple Syrup and Sriracha: These two ingredients combine to create a sweet and spicy glaze that makes this shrimp recipe so delicious. I also use this combo when making our baked ribs and BBQ chicken wings. If you don’t have Sriracha, Gochujang is an excellent substitute.
    • Skewers: Use wooden toothpicks or metal skewers to secure the bacon around the shrimp. If using wooden ones, soak them in water for about 30 minutes first to prevent burning in the oven.

    Find the full recipe with measurements below.

    How to Make Bacon-Wrapped Shrimp

    Tip 1: Salt, then rinse your shrimp. Before cooking, toss the shrimp with a bit of salt and let them sit in a colander for a few minutes. The salt firms up their texture and lightly seasons them. After rinsing, the shrimp taste cleaner, cook more evenly, and stay plump and juicy.

    Tip 2: Give the bacon a head start. Bake the bacon for about 10 minutes before wrapping the shrimp. Pre-baking the bacon allows some of the fat to render without fully crisping. The bacon should look partially cooked but still floppy. Let it cool slightly before handling.

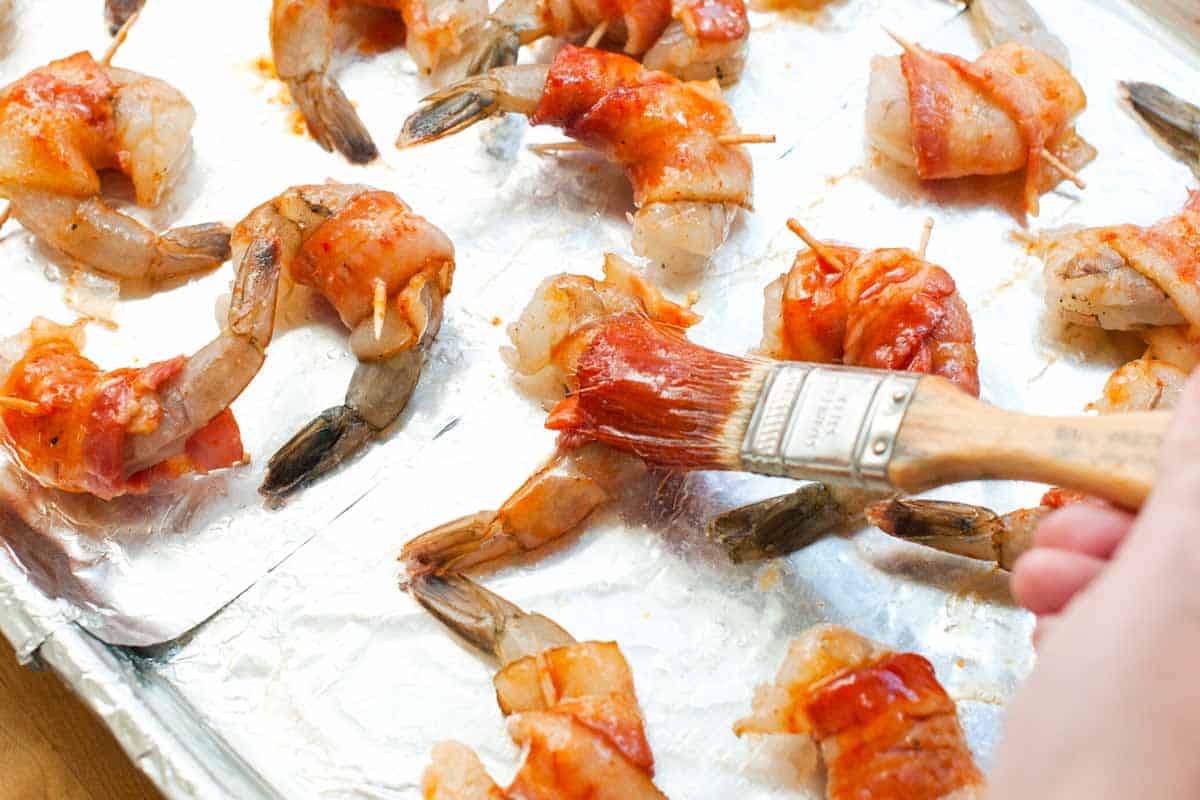
    Tip 3: Brush with maple glaze. Whisk together maple syrup and Sriracha (or Korean Gochujang) to make the sweet and spicy glaze (it’s so good!). Brush both sides of the partially cooked bacon with the glaze so that every strip is well coated. You’ll brush on more after wrapping the shrimp.

    Brushing par-baked bacon with spicy maple glaze before wrapping the shrimp

    Tip 4: Wrap, glaze, and bake. Wrap each shrimp with a piece of bacon and secure it with a toothpick. Brush a little more glaze on top, then bake for about 5 minutes. Switch the oven to broil for another 4 to 6 minutes, until the bacon is crisp and caramelized. Yum.

    Shrimp wrapped in bacon ready for the oven
    Brushing the spicy maple glaze on to the bacon wrapped shrimp before baking in the oven

    More Easy Shrimp Recipes I Love

    Easy Bacon Wrapped Shrimp

    Bacon-Wrapped Shrimp

    • PREP
    • COOK
    • TOTAL

    We love these bacon-wrapped shrimp with the most delicious spicy maple glaze! We par-cook the bacon before wrapping it around the shrimp so both cook perfectly (raw bacon would take too long to cook, and the shrimp will overcook).

    5 Servings (4 to 5 shrimp each)

    You Will Need

    20 extra-large shrimp, shelled with tails left on, about 1 pound

    10 strips thin-cut bacon

    ¼ teaspoon fine sea salt

    2 tablespoons pure maple syrup

    1 tablespoon Sriracha hot chili sauce

    Half a lemon, cut into wedges, for serving

    1 scallion, finely chopped, for serving

    Wooden skewers soaked in water for 30 minutes

    Directions

      1Prep: Preheat the oven to 400°F (200°C). Line a large baking sheet with aluminum foil or parchment paper.

      2Par-bake bacon: Place the bacon slices in a single layer on the baking sheet. Bake until the bacon has rendered some of its fat, is starting to brown on the edges, but is still floppy, about 10 minutes. Remove the bacon from the oven and transfer it to paper towels to drain excess fat. Discard any fat on the baking sheet, but leave the foil intact.

      3Prepare shrimp: Place the shrimp in a colander and toss with ¼ teaspoon salt. Let sit for 1 minute, then rinse and pat very dry with paper towels.

      4Make glaze: Stir the maple syrup and sriracha in a small bowl.

      5Glaze the bacon: Lightly brush both sides of the par-cooked bacon with the glaze, then cut it in half crosswise, making 20 half-strips of bacon.

      6Wrap the shrimp: Wrap each shrimp with a half-strip of bacon and use one of the soaked skewers to secure it in place. Place each shrimp onto the baking sheet. Then, brush or spoon the leftover glaze over the wrapped shrimp.

      7Bake: Bake the shrimp for 5 minutes. Turn the oven to broil, and then broil for 4 to 6 minutes, rotating the shrimp once until the bacon is crispy. Serve shrimp with lemon wedges on the side and scallions scattered on top.

    Adam and Joanne’s Tips

    • Storing: Store leftover bacon-wrapped shrimp in an airtight container in the refrigerator for up to 3 days. To reheat, place them on a baking sheet and warm in a 375°F oven for 5 to 7 minutes, or until the bacon is crisp and the shrimp are heated through. Avoid microwaving, as it can make the bacon chewy.
    • Make-ahead: You can also make them ahead of time by assembling the shrimp and par-baked bacon, then refrigerating for up to 24 hours before baking.
    • The nutrition facts provided below are estimates.

    Nutrition Per Serving
    Serving Size
    4 shrimp
    /
    Calories
    154
    /
    Protein
    16g
    /
    Carbohydrate
    6g
    /
    Dietary Fiber
    0g
    /
    Total Sugars
    5g
    /
    Total Fat
    7g
    /
    Saturated Fat
    2g
    /
    Cholesterol
    111mg


    AUTHOR:

    Adam Gallagher

    Adam and Joanne of Inspired Taste

    We are Adam and Joanne Gallagher, the creators of Inspired Taste. Established in 2009, Inspired Taste grew from a childhood dream into one of the internet’s most trusted recipe sites with hundreds of reliable recipes, step-by-step videos, and expert tips.More About Us

    Source link

  • Longhorn Steakhouse Chicken (Copycat Recipe)

    Longhorn Steakhouse Chicken (Copycat Recipe)

    This website may contain affiliate links and advertising so that we can provide recipes to you. Read my disclosure policy.

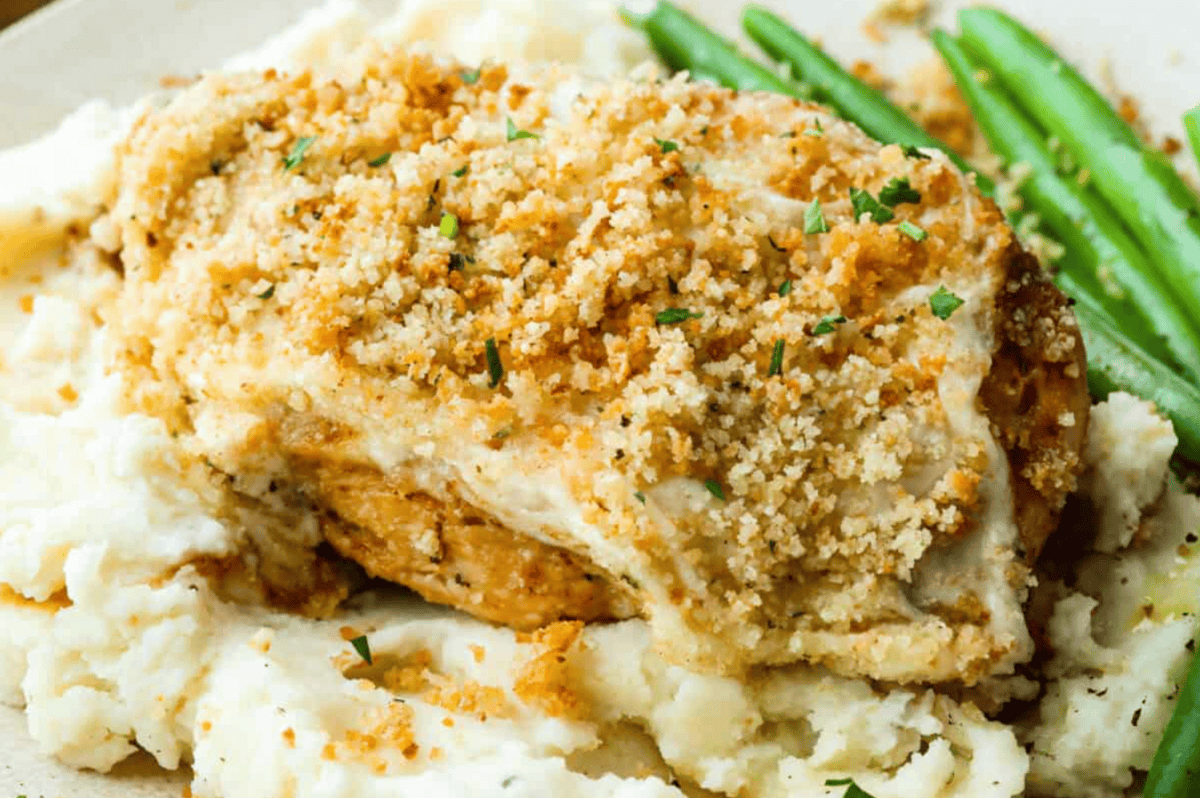
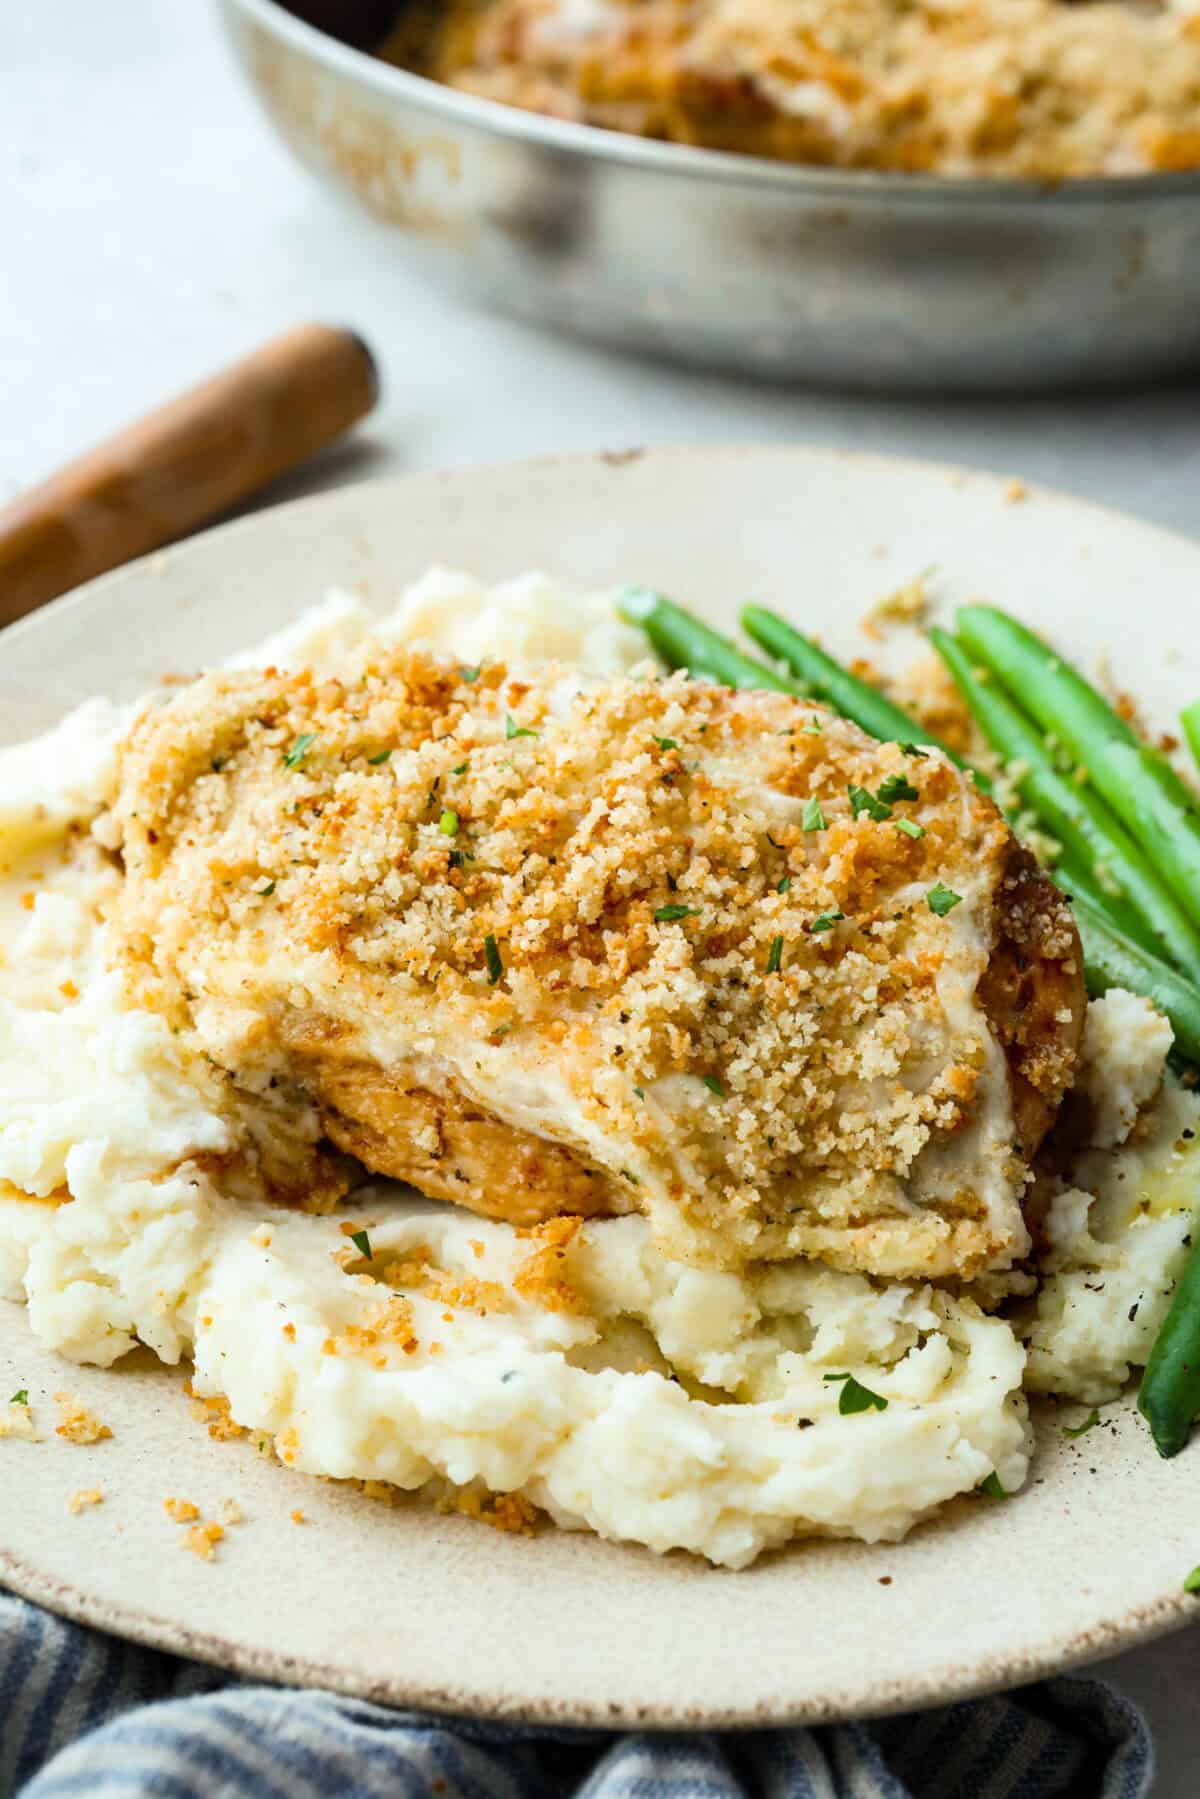
    My copycat LongHorn Steakhouse parmesan crusted chicken brings all the cheesy, buttery goodness from the restaurant straight to your kitchen. Juicy ranch chicken is topped with a creamy cheese sauce and a golden crumb crust.

    Plated copycat longhorn parmesan crusted chicken on mashed potatoes and next to green beans.

    Why This is a Dinner That Wows

    • Restaurant vibes: With my recipe, you’ll get all of the rich, cheesy LongHorn Steakhouse flavor you love, minus the wait!
    • So much flavor in every bite: You’ll love the way the ranch-marinated chicken, melty cheese, and that buttery, crispy topping all work together!
    • Feels fancy, but it’s actually easy: Simple ingredients, easy steps, and you’ll get a dinner that looks like it came from a restaurant!

    Longhorn Parmesan Crusted Chicken Ingredients

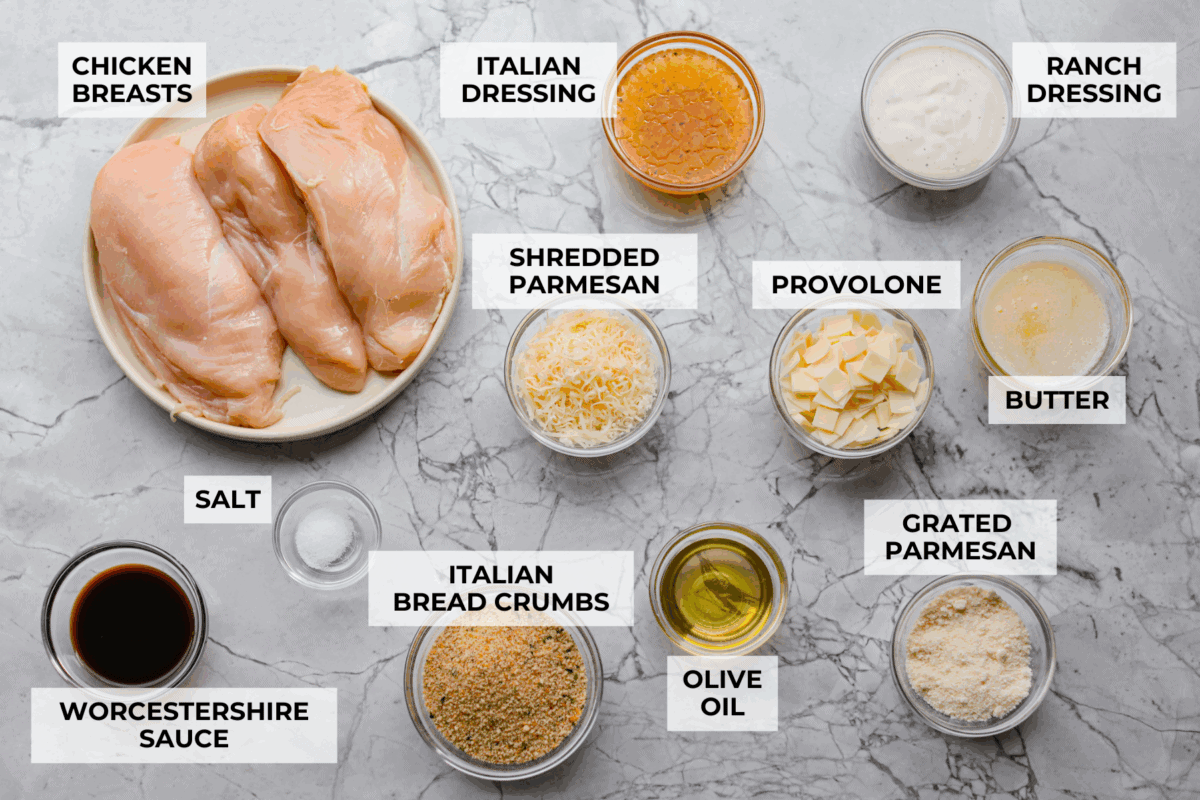
    Overhead shot of labeled longhorn parmesan crusted chicken ingredients.
    • Chicken: You can buy thinly sliced chicken breasts to save time. Or slice regular breasts in half. Chicken tenders also work. Butterfly thick chicken, or gently pound it to about ½–¾ inch thick for even cooking.
    • Parmesan Cheese: Freshly grated Parmesan melts better than pre-shredded cheese.
    • Provolone: Provolone slices are fine to use. Just dice them up.
    • Breadcrumbs: Plain or Panko breadcrumbs work fine. Just add ½ teaspoon garlic powder and ½ teaspoon Italian seasoning to boost the flavor.

    How to Make Parmesan Crusted Chicken

    This comes together fast, even on a busy night. Most of the “work” is just layering everything and letting the chicken cook. Serve it with mashed potatoes, rice, or pasta, with a side of roasted asparagus for a complete meal.

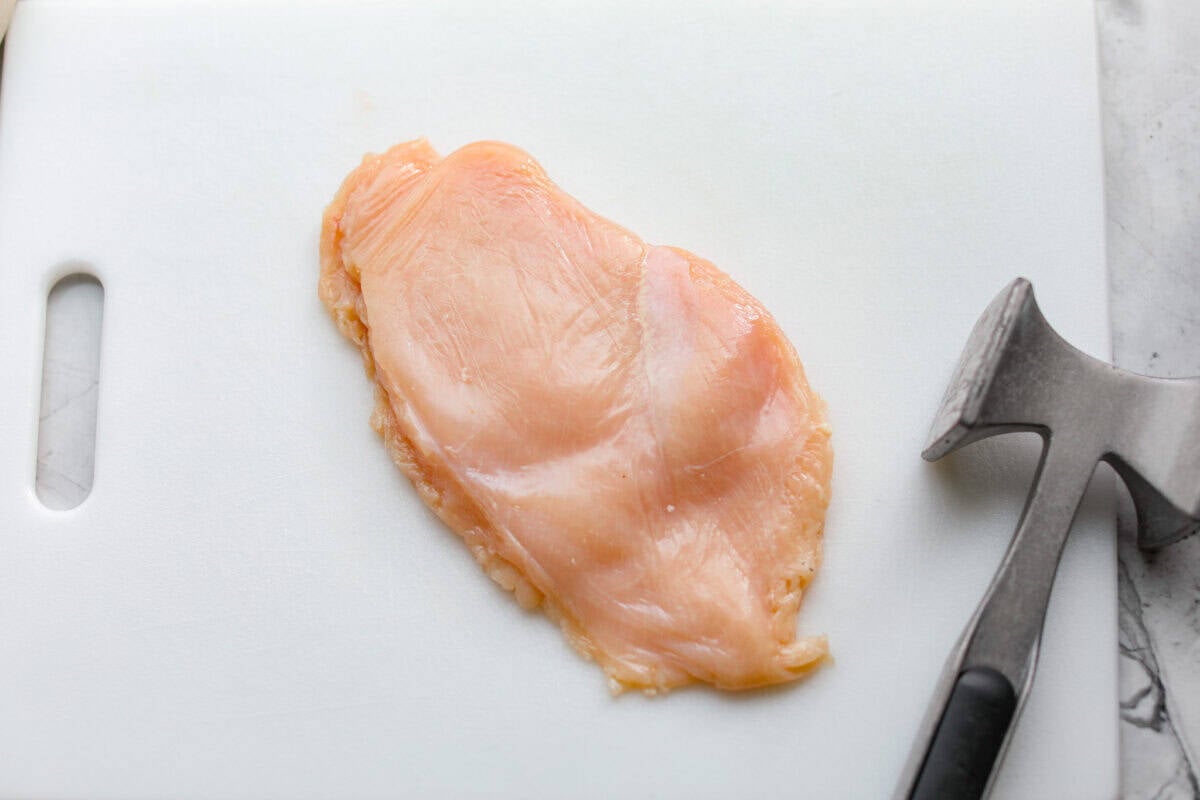
    1. Prep: Pound the chicken with a meat mallet until they are ½-¾ inch thick. Add the chicken to a large ziplock bag.
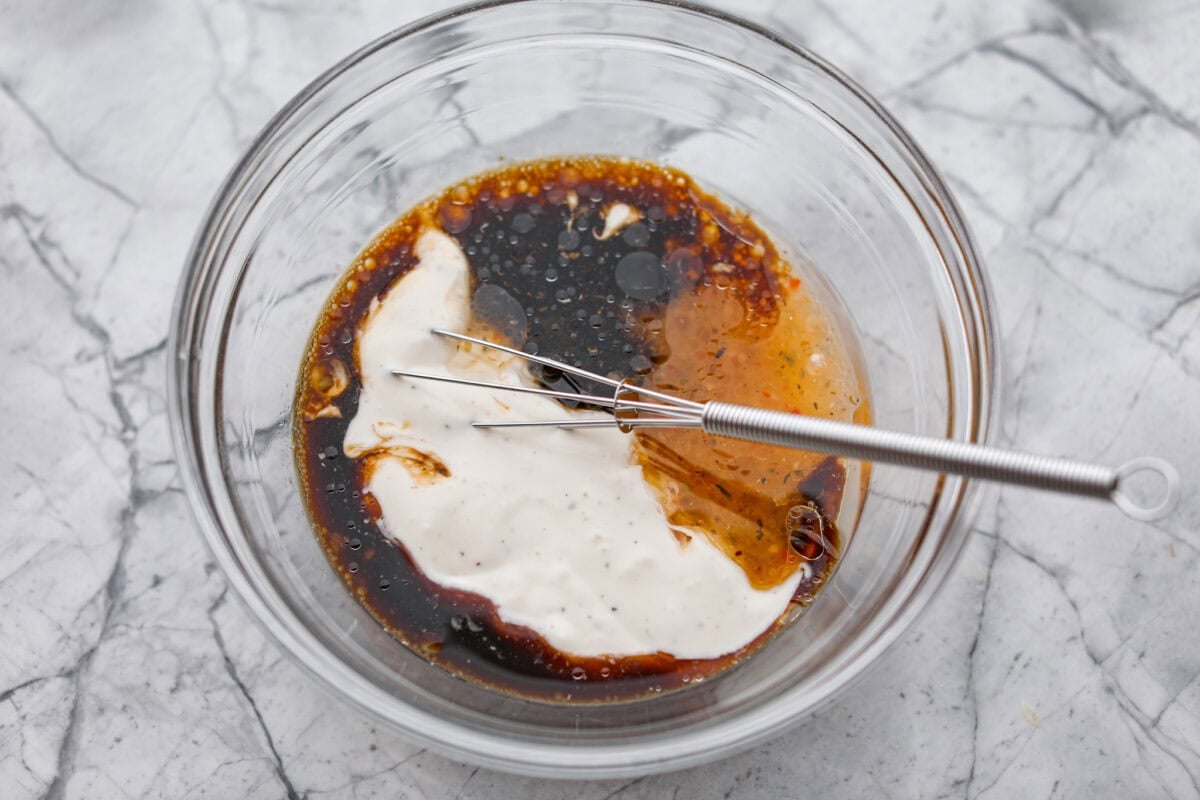
    2. Marinate: Mix the ranch, Italian dressing, and Worcestershire in a small bowl. Add to the bag with the chicken, seal, and massage until coated. Refrigerate for at least 1 hour or up to 12.
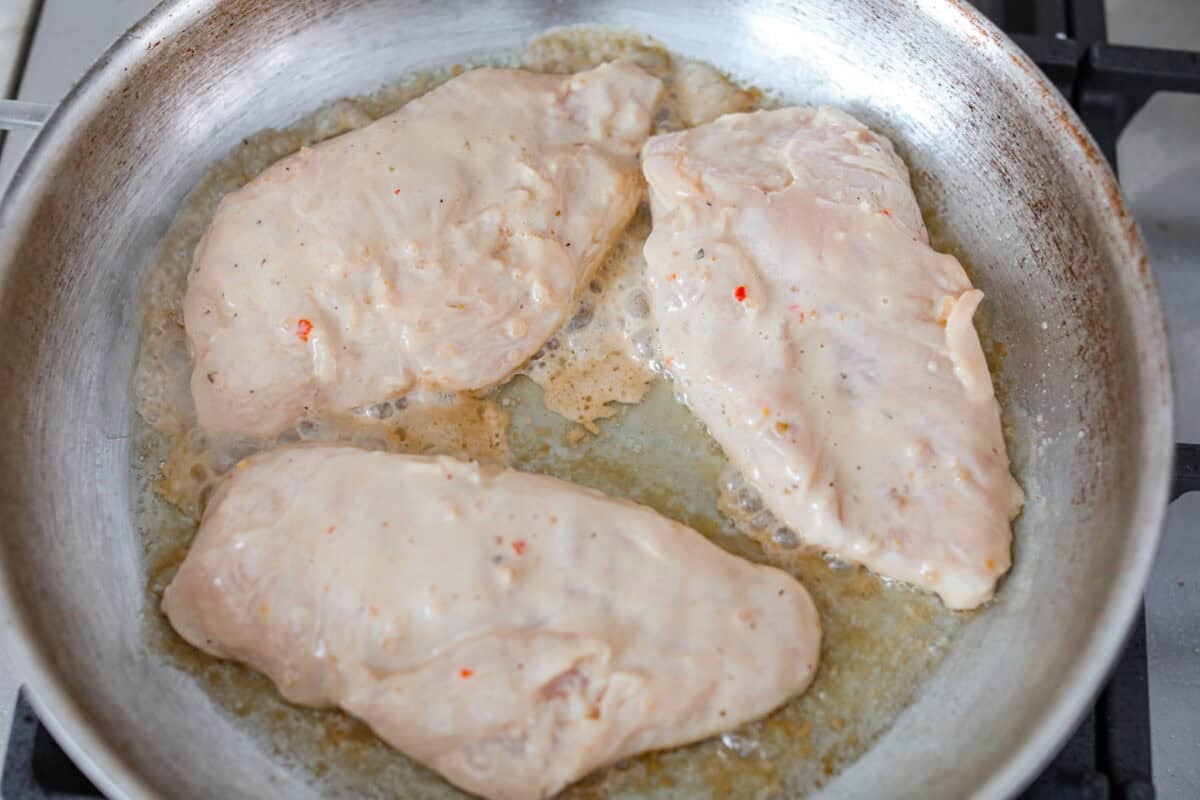
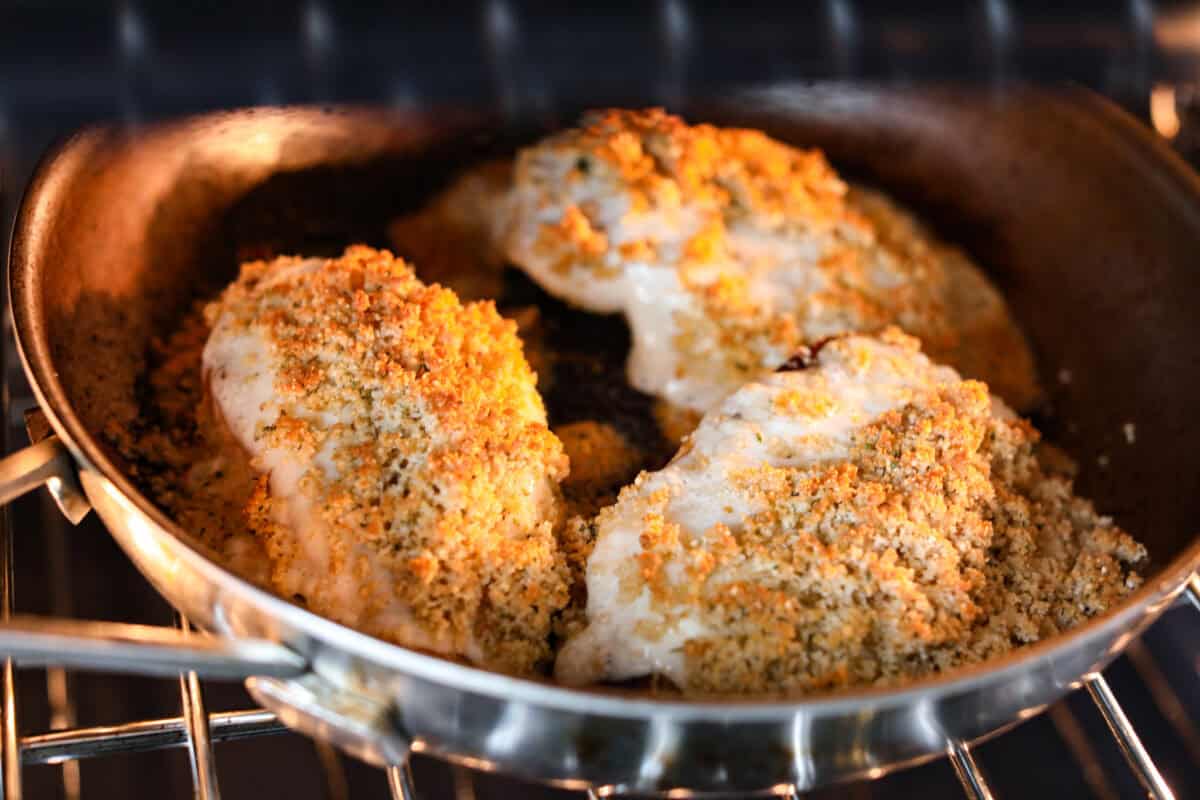
    3. Sear: Once finished marinating, preheat the oven to broil on high and position the rack in the center. Then, heat the olive oil in a large 14-inch skillet over medium heat. Let the excess marinade drip off the chicken before adding them to the skillet. Cook for 5 minutes on both sides, until the internal temperature of the thickest part of the breasts reaches 165ºF.
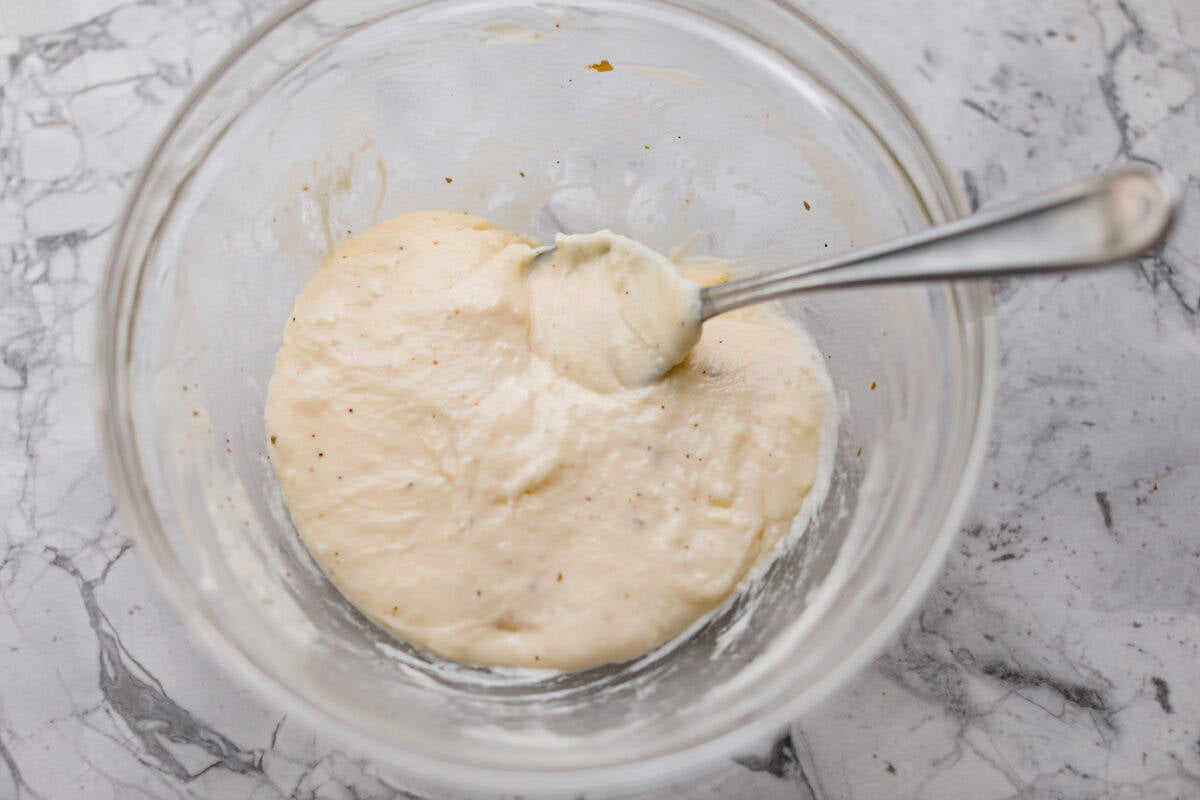
    4. Sauce: Combine ranch dressing, provolone, and Parmesan in a small bowl. Microwave in 30-second intervals until the cheese is almost completely melted. Set aside.
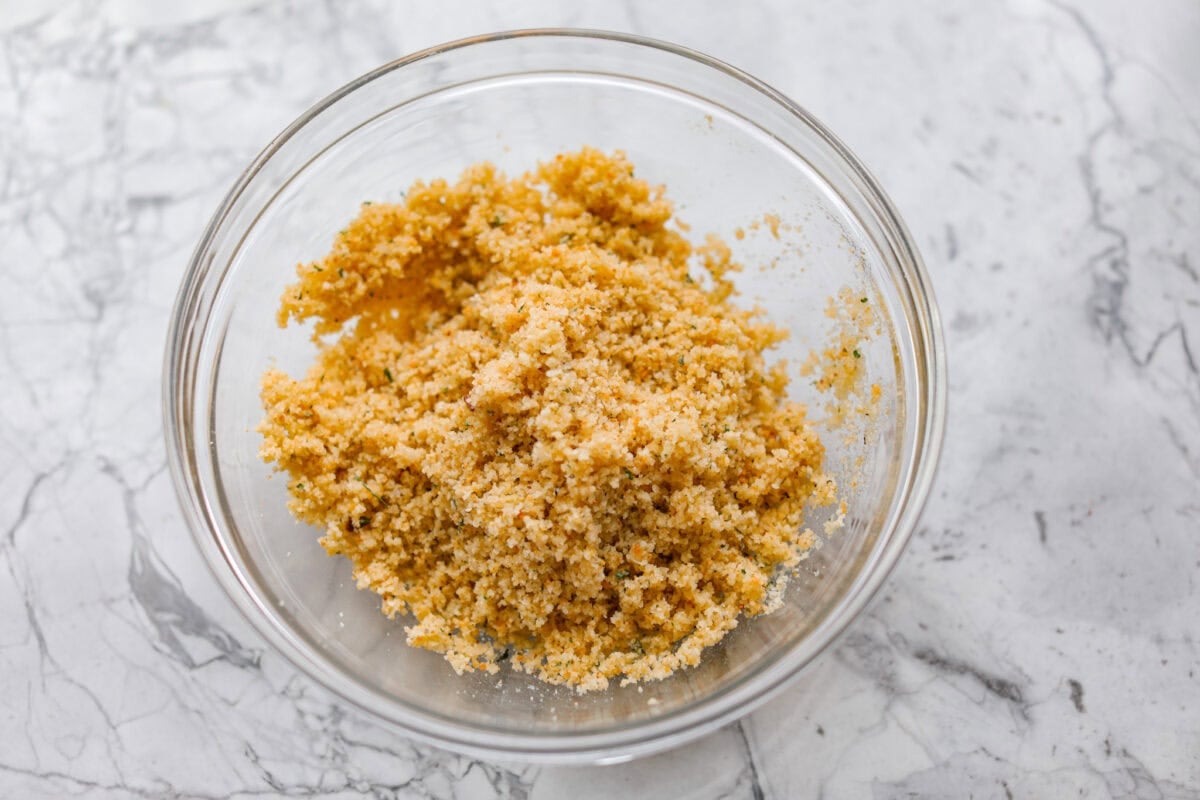
    5. Topping: Combine the breadcrumbs, grated parmesan, melted butter, and salt together in a separate bowl.
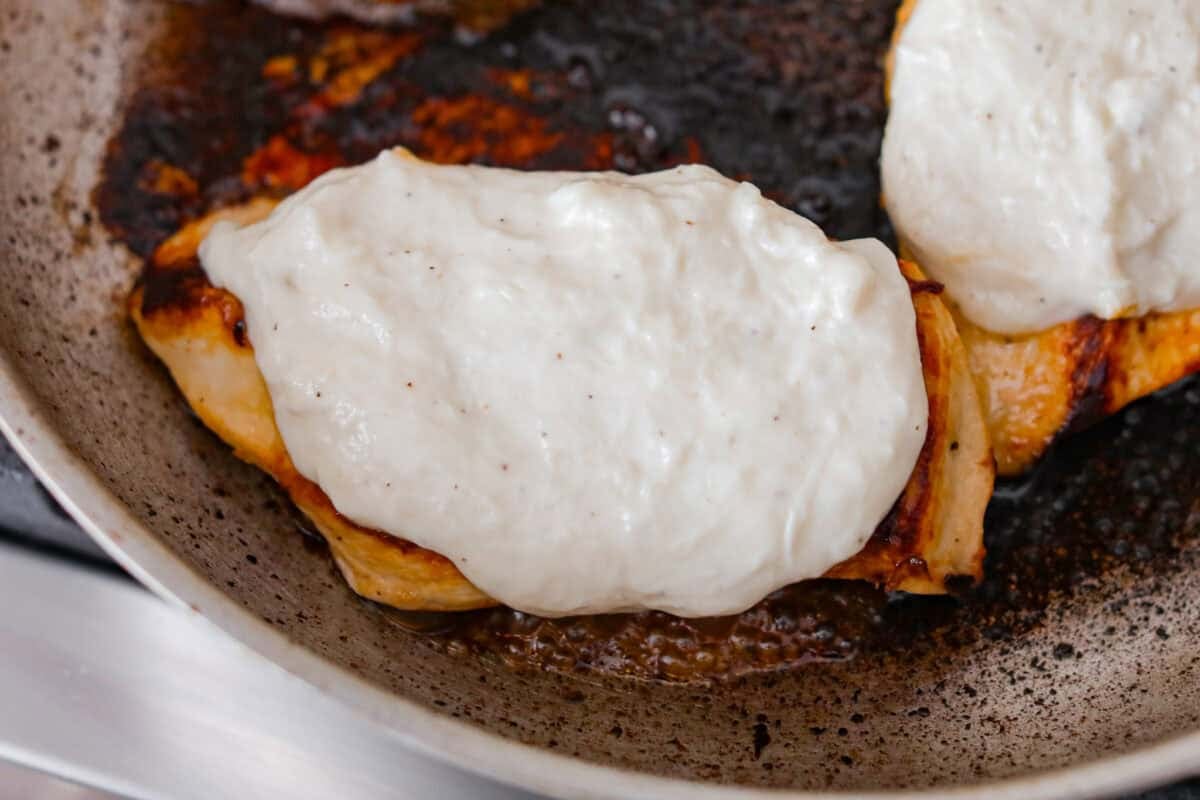
    6. Add the Sauce: Once the chicken is finished cooking, top each breast with an equal amount of the ranch sauce.
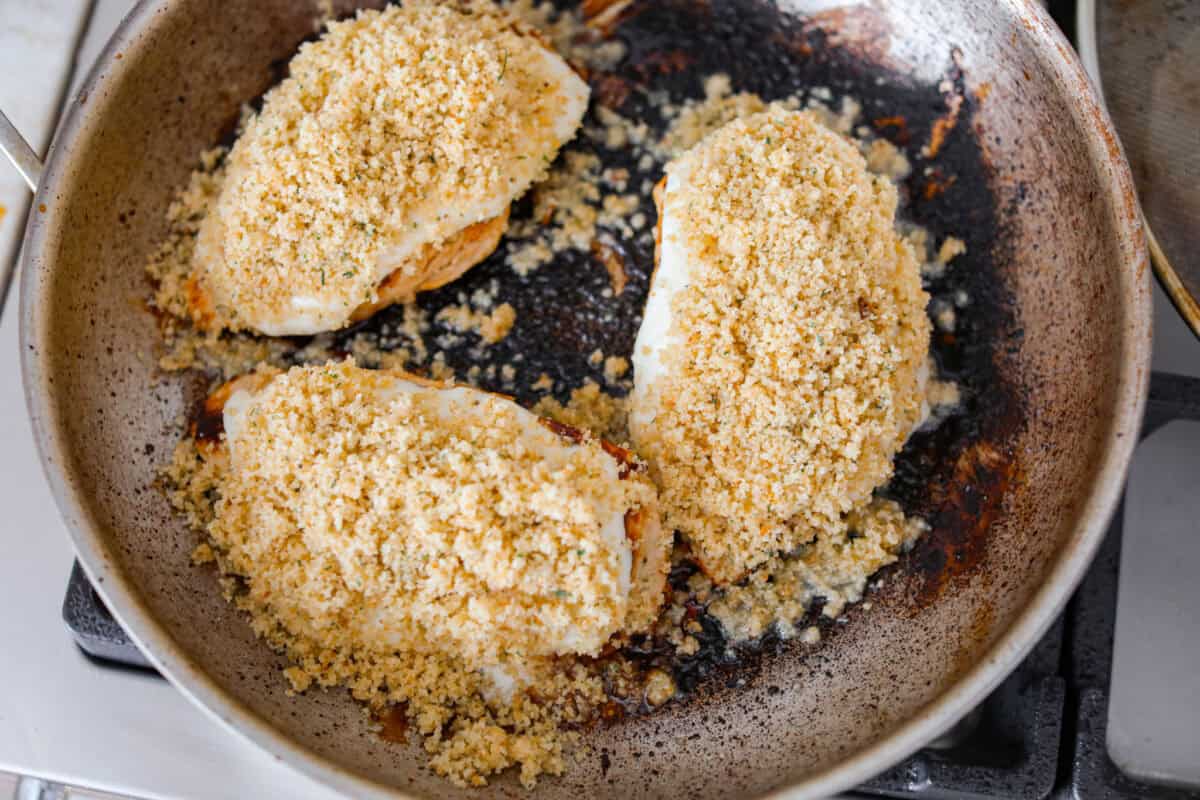
    7. Top: Sprinkle the breadcrumb mixture equally over all the chicken breasts.
    8. Broil: Place the skillet in the oven and broil for about 2 minutes. The ranch sauce should be bubbling, and the bread crumb mixture browned. Serve Longhorn Parmesan crusted chicken immediately.

    Alyssa’s Pro Tip

    Different Cooking Methods: Skip the slow cooker. A hot skillet or the grill gives you the best results, especially when you finish it under the broiler.

    Pin this now to find it later

    Pin It
    More Copycat Recipes

    If you love this copycat Longhorn chicken, you might want to try a few more of my go-to copycat recipes. They’re easy to make at home, yet taste just like the restaurant versions!

    Spicy Chicken Chipotle Pasta (Copycat Cheesecake Factory)

    40 minutes


    Source link

  • Baked Brie Crescent Rolls Recipe

    Baked Brie Crescent Rolls Recipe

    These mini baked brie crescent rolls are super simple and so delicious! They are perfect for the holidays and gatherings. Everyone I’ve served them to loves them!

    Baked Brie Crescent Rolls

    I serve these brie stuffed crescent rolls as appetizers and in my bread basket as a side for holiday meals. They are quick to make and versatile, so if you don’t have brie cheese, substitute it with whatever you love!

    Store-bought crescent dough (like from Pillsbury) makes these easy, but any brand or homemade pizza dough works well! If you love brie, I highly recommend our brie stuffed bread rolls or this brie with hot honey!

    How to Make Baked Brie Roll Ups

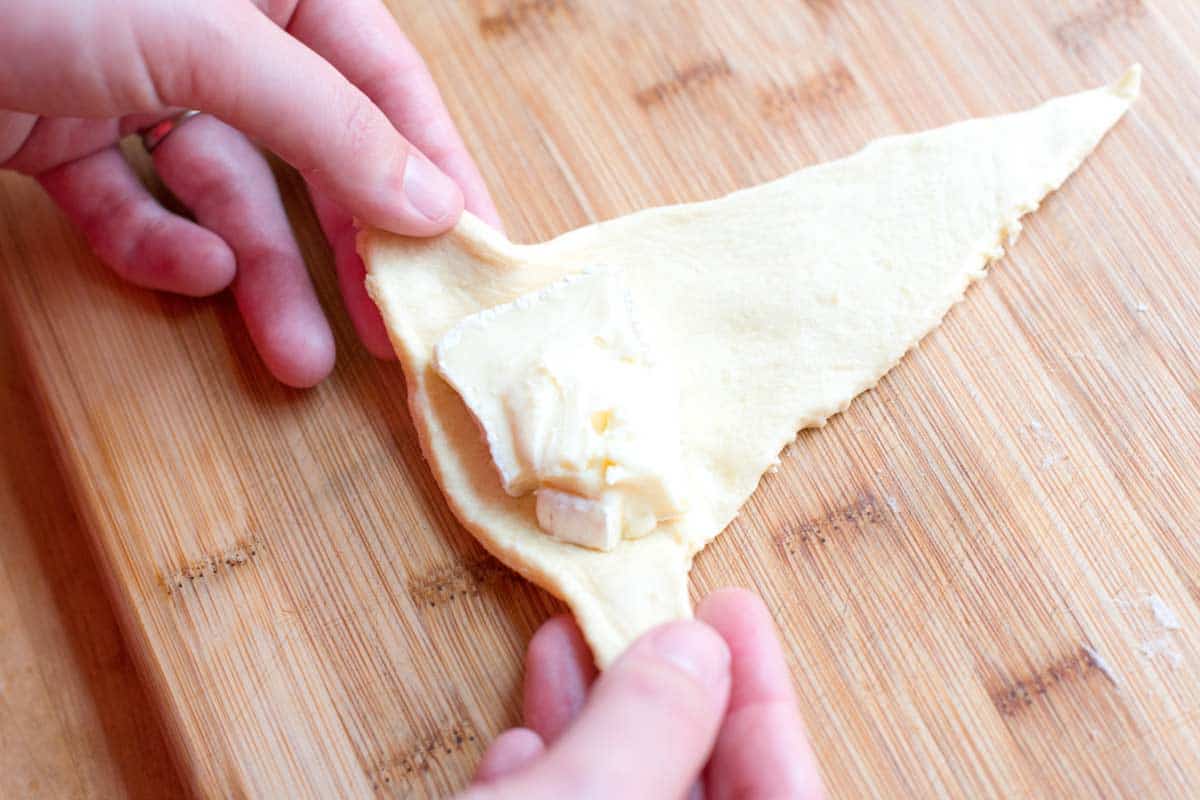
    These crescent rolls really could not get any easier. Place a big piece of brie onto the long end of a crescent dough triangle, tuck in the sides, and roll up. Then brush the tops with egg wash so they turn shiny and golden brown after baking. I also add a pecan half and some sea salt to the top before baking. I love the way it looks.

    How to Make Baked Brie Crescent Rolls: Rolling up the cheese

    The rolls take about 15 minutes to bake and are perfect for parties or as a side dish. A little brie might escape during baking, but the rolls will still taste amazing. See our holiday recipes or appetizer recipes for more recipes like this one.

    Baked Brie Crescent Rolls

    Baked Brie Crescent Rolls

    • PREP
    • COOK
    • TOTAL

    We use store-bought crescent dough for these easy mini baked brie rolls. Brie is excellent, but most cheeses will work as a substitute. Adding more fillings, such as diced olives, ham, or jam, is also great.

    Makes 8 Rolls

    You Will Need

    1 (8oz) can refrigerated crescent dinner rolls

    6 ounces brie cheese

    1 large egg

    1 tablespoon water

    8 pecan halves

    Coarse sea salt for sprinkling on top

    Directions

      1Preheat the oven to 375°F (190°C). Line a baking sheet with parchment paper.

      2Separate the crescent dough into 8 triangles and then slice the brie into 8 pieces.

      3Place one piece of brie onto the wider end of a dough triangle. Fold in the sides, then roll the dough into a tight packet, making sure the ends are closed so the cheese won’t come out during baking. Repeat with remaining dough triangles and place the rolls onto the baking sheet.

      4Whisk the egg and water in a small bowl, then use a pastry brush to lightly brush the tops with egg wash. Press one pecan half onto the top and sprinkle with salt.

      5Bake until golden brown, 12 to 15 minutes. Cool on the baking sheet for 10 to 15 minutes before serving.

    Nutrition Per Serving
    Serving Size
    1 roll
    /
    Calories
    192
    /
    Total Fat
    12.3g
    /
    Saturated Fat
    6g
    /
    Cholesterol
    44.6mg
    /
    Sodium
    411.6mg
    /
    Carbohydrate
    12.4g
    /
    Total Sugars
    3.2g
    /
    Dietary Fiber
    0.2g
    /
    Protein
    7.4g


    AUTHOR:

    Adam Gallagher

    Previous Post: Perfect Roasted Broccoli
    Next Post: Weeknight Homemade Spaghetti Sauce

    Source link

  • Easy Shredded Chicken Recipe

    Easy Shredded Chicken Recipe

    This shredded chicken recipe is quick, simple, and the chicken can be used 100 different ways.

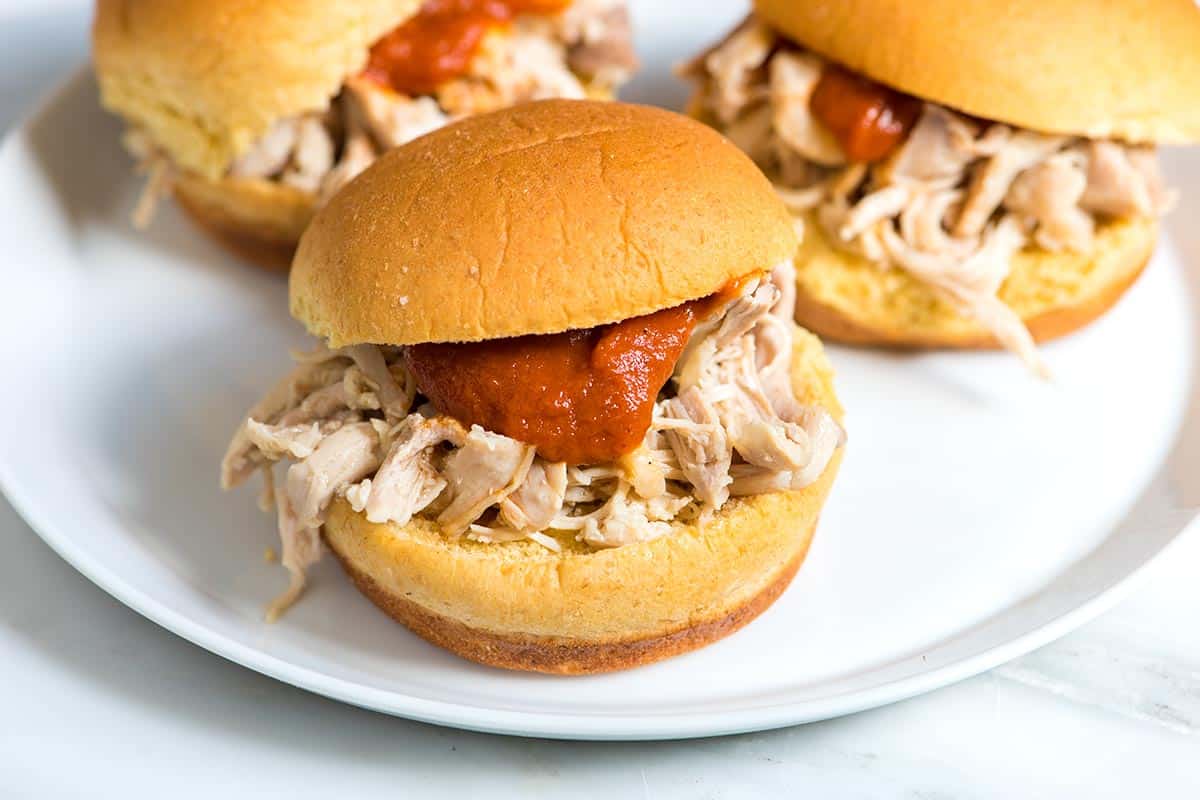
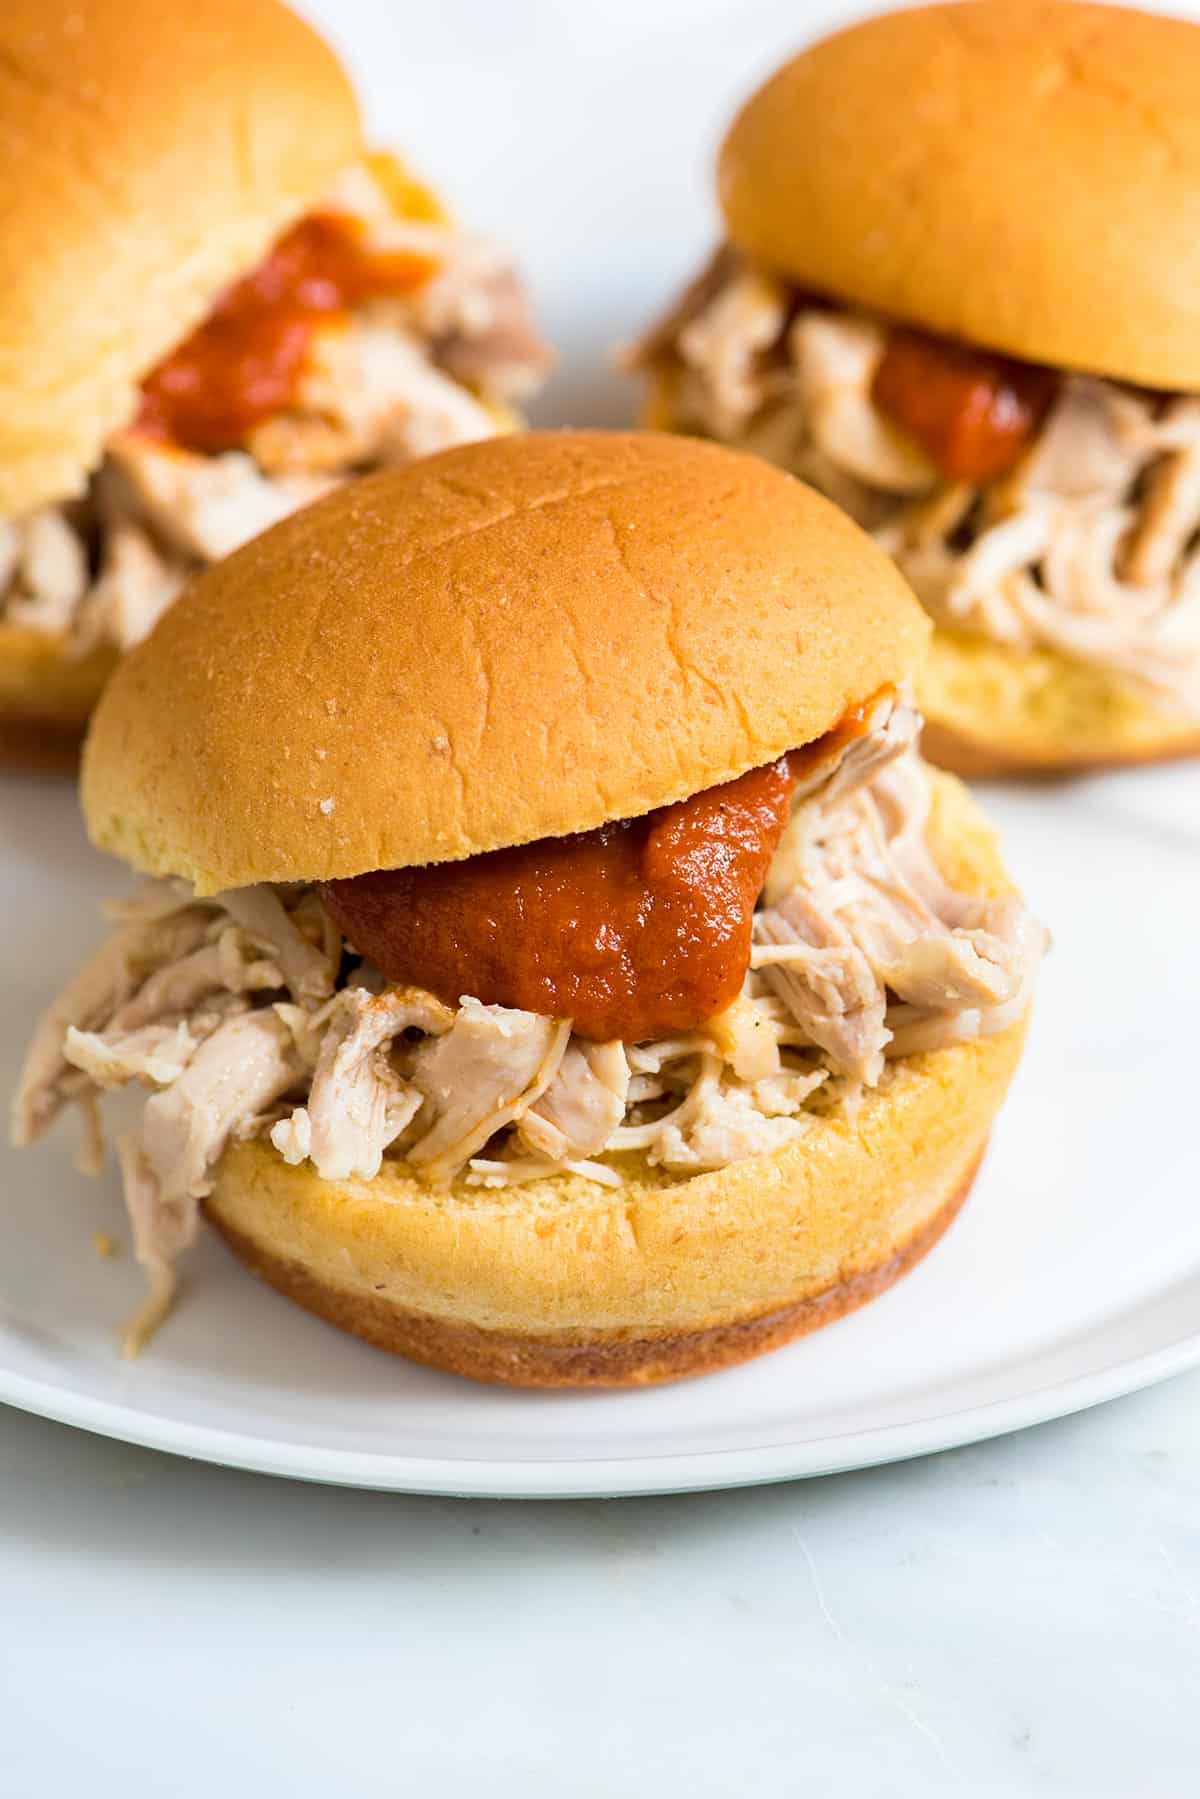
    Shredded Chicken sandwiches

    I love keeping shredded chicken on hand for easy dinners. It’s perfect for chicken salad, tacos, soups, easy chicken pot pie, and my favorite green chicken enchiladas. With my easy stovetop shredded chicken recipe, you’ll have juicy, flavorful chicken ready in under an hour.

    If you prefer a hands-off method, try our slow cooker shredded chicken, but for speed and flavor, this stovetop version is hard to beat.

    Key Ingredients

    • Chicken: The best chicken for shredded chicken is boneless, skinless chicken thighs, as they stay extra tender, but chicken breast works well, too. You can even swap in turkey.
    • Aromatics: Onion, garlic, and a bay leaf add so much flavor as the chicken simmers.
    • Spices: A simple mix of salt, cumin, and black pepper keeps the chicken well-seasoned and versatile for all your favorite dishes.
    • Water or Broth: Water works perfectly (the aromatics and spices add plenty of flavor), but feel free to use chicken broth or vegetable broth for even more flavor.

    Find the full recipe with exact measurements below.

    How to Make the Best Shredded Chicken

    Tip 1: Simmer gently for tender chicken. The best way to make tender shredded chicken is to simmer it gently, similar to poaching chicken.

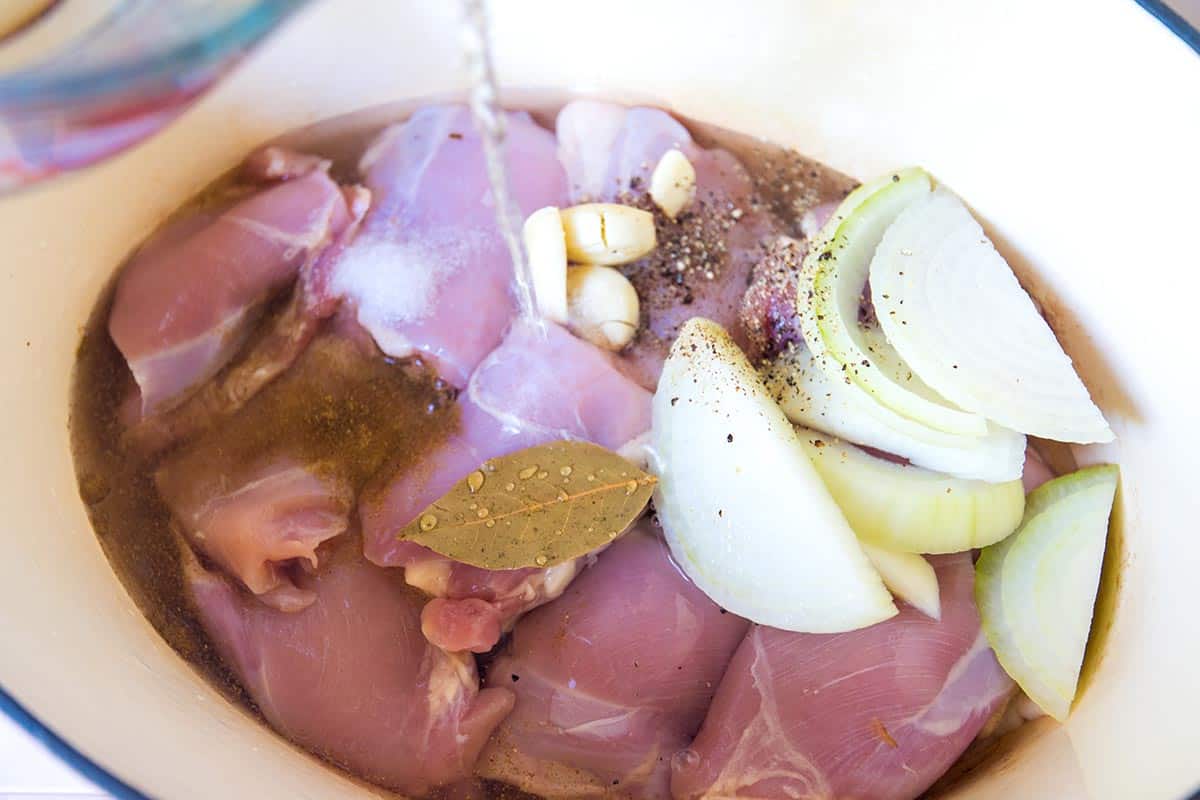
    Place the chicken in a pot with onion, garlic, and spices, then add just enough water (or broth) to cover. Bring to a low simmer and cook for about 30 minutes, or until the chicken is tender enough to shred easily with a fork.

    Simmering chicken thighs with water, onion, garlic, and spices to make shredded chicken

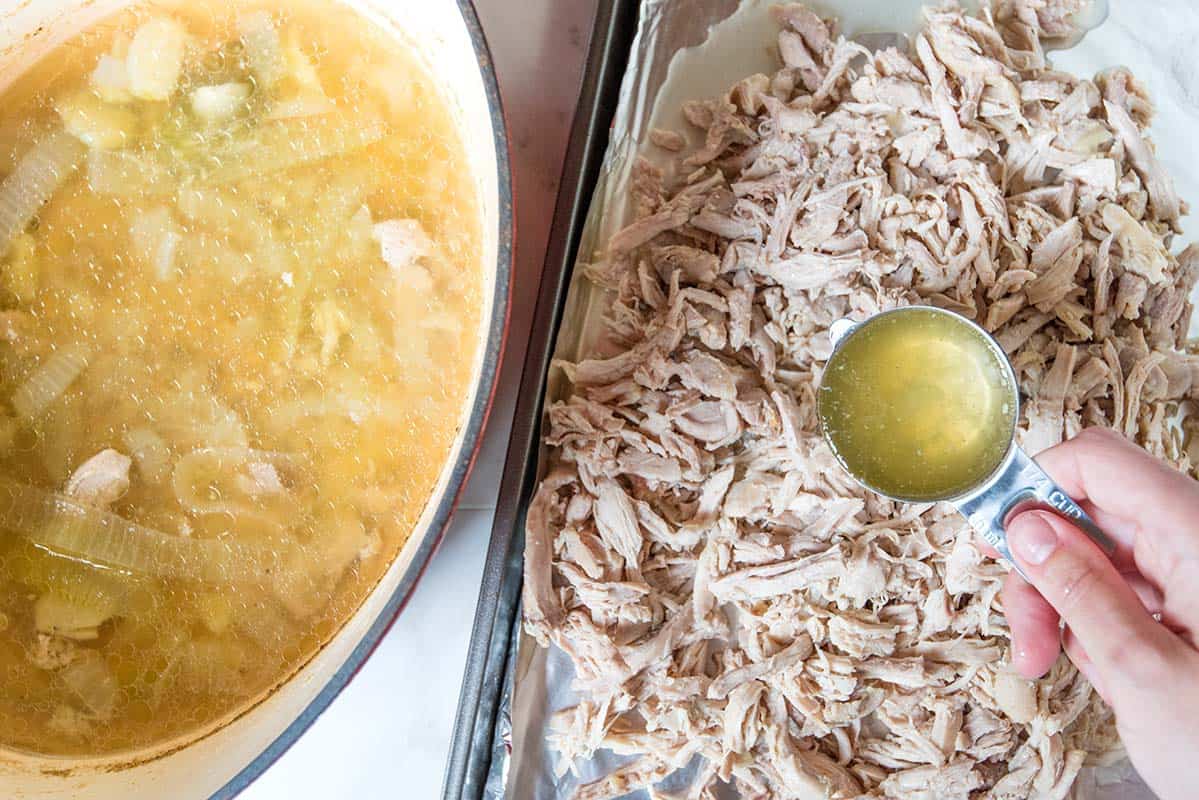
    Tip 2: Reduce the broth for more flavor. After cooking, remove the chicken and let it cool slightly before shredding. Return the cooking liquid to the stove and simmer until it reduces by one-third. Then, you can use some of it to spoon over the shredded chicken, making it extra juicy and flavorful. You’ll have some broth leftover, which I highly recommend saving for a bowl of soup (it’s delicious!).

    Pouring reduced cooking liquid over shredded chicken to make it extra flavorful and juicy.

    Ways to Use Your Chicken

    You can use this so many different dishes. Here are a few of my favorite shredded chicken recipes for inspiration:

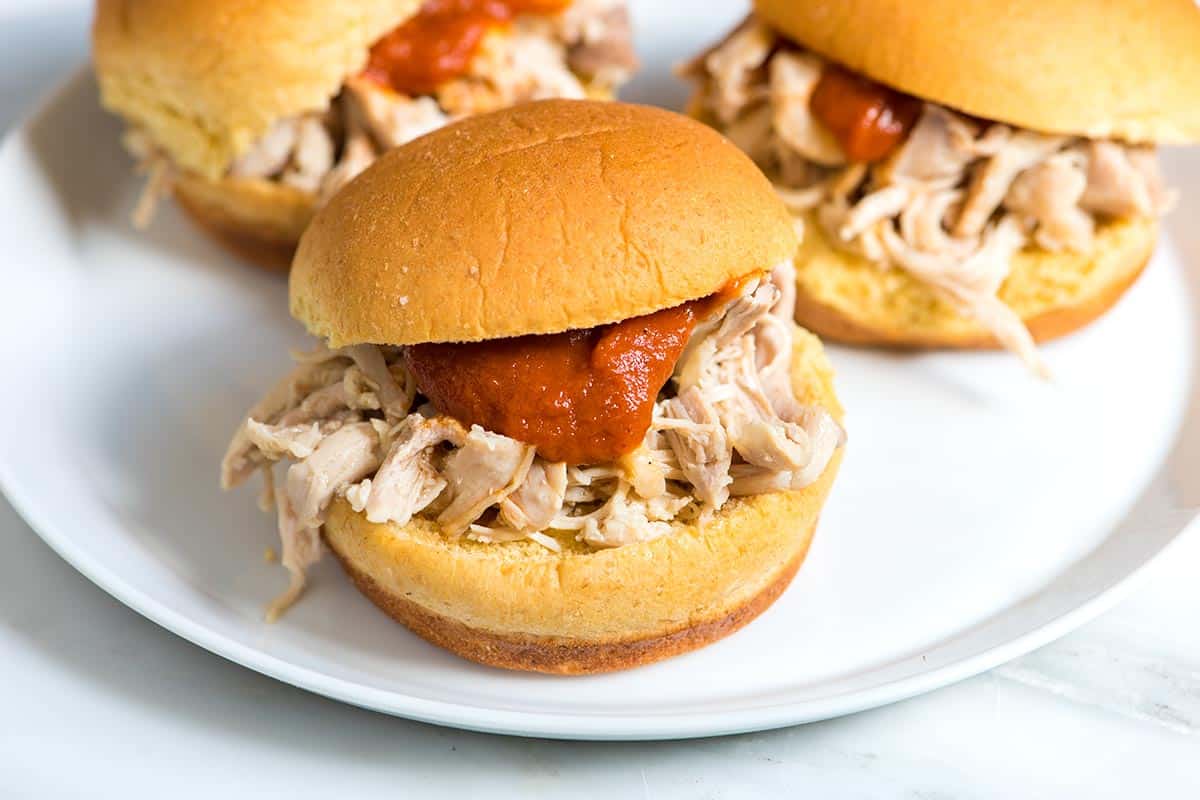
    Shredded Chicken on sandwiches

    Easy Shredded Chicken

    • PREP
    • COOK
    • TOTAL

    This is my favorite method for making shredded chicken. It’s quick and easy, and the chicken turns out tender, juicy, and flavorful. After cooking, we take one extra step and reduce the cooking liquid before spooning some over the shredded chicken. This easy step keeps our chicken moist and adds extra flavor. You’ll have some broth leftover, which I love turning into a soup (it’s really tasty!).

    Makes 5 cups

    Watch Us Make the Recipe

    You Will Need

    3 pounds boneless chicken thighs (1360g)

    1 medium onion, peeled and sliced

    4 cloves garlic, peeled and lightly crushed

    1 bay leaf

    1 teaspoon salt

    1 ½ teaspoons ground cumin

    1/2 teaspoon ground black pepper

    Water

    Directions

      1Combine chicken, onion, garlic, bay leaf, salt, cumin, and pepper in a large heavy-bottomed saucepan. Add just enough water to cover the chicken. Turn heat to high, bring to a boil, then remove any foam or scum that floats to the top.

      2Adjust the heat so that the water simmers very gently around the chicken. Cook until the chicken is very tender, about 30 minutes.

      3Transfer the chicken to a cutting board. When it is cool enough to handle, shred the meat with two forks or your fingers.

      4While the chicken cools, boil the liquid left in the pot until it has reduced by one-third or until its flavor has concentrated.

      5Spoon about 1 cup of the concentrated cooking liquid over the shredded chicken and toss to coat.

    Adam and Joanne’s Tips

    • Storing: The chicken and broth will keep refrigerated up to 4 days and can be frozen for 3 months.
    • Skin-on chicken: We have made this recipe using boneless, skinless chicken thighs and chicken thighs with skin still attached. Both work very well. If you use chicken with skin, simply remove and discard the skin before you shred the chicken. You may also find that you need to skim some of the fat from the cooking broth before spooning it over the chicken.
    • Leftover cooking liquid: You will have cooking liquid leftover. It is quite delicious on its own as a light soup. You can also use it as broth for other recipes. Or, if you’re keeping the chicken more than a day, add a spoonful or two to add a little extra moisture.
    • The nutrition facts provided below are estimates.

    Nutrition Per Serving
    Serving Size
    1/2 cup
    /
    Calories
    139
    /
    Protein
    18 g
    /
    Carbohydrate
    2 g
    /
    Dietary Fiber
    0 g
    /
    Total Sugars
    1 g
    /
    Total Fat
    6 g
    /
    Saturated Fat
    2 g
    /
    Cholesterol
    99 mg
    /
    Sodium
    356 mg


    AUTHOR:

    Adam Gallagher

    Adam and Joanne of Inspired Taste

    We are Adam and Joanne Gallagher, the creators of Inspired Taste. Established in 2009, Inspired Taste grew from a childhood dream into one of the internet’s most trusted recipe sites with hundreds of reliable recipes, step-by-step videos, and expert tips.More About Us

    Source link

  • Crispy Tofu Fingers Recipe

    Crispy Tofu Fingers Recipe

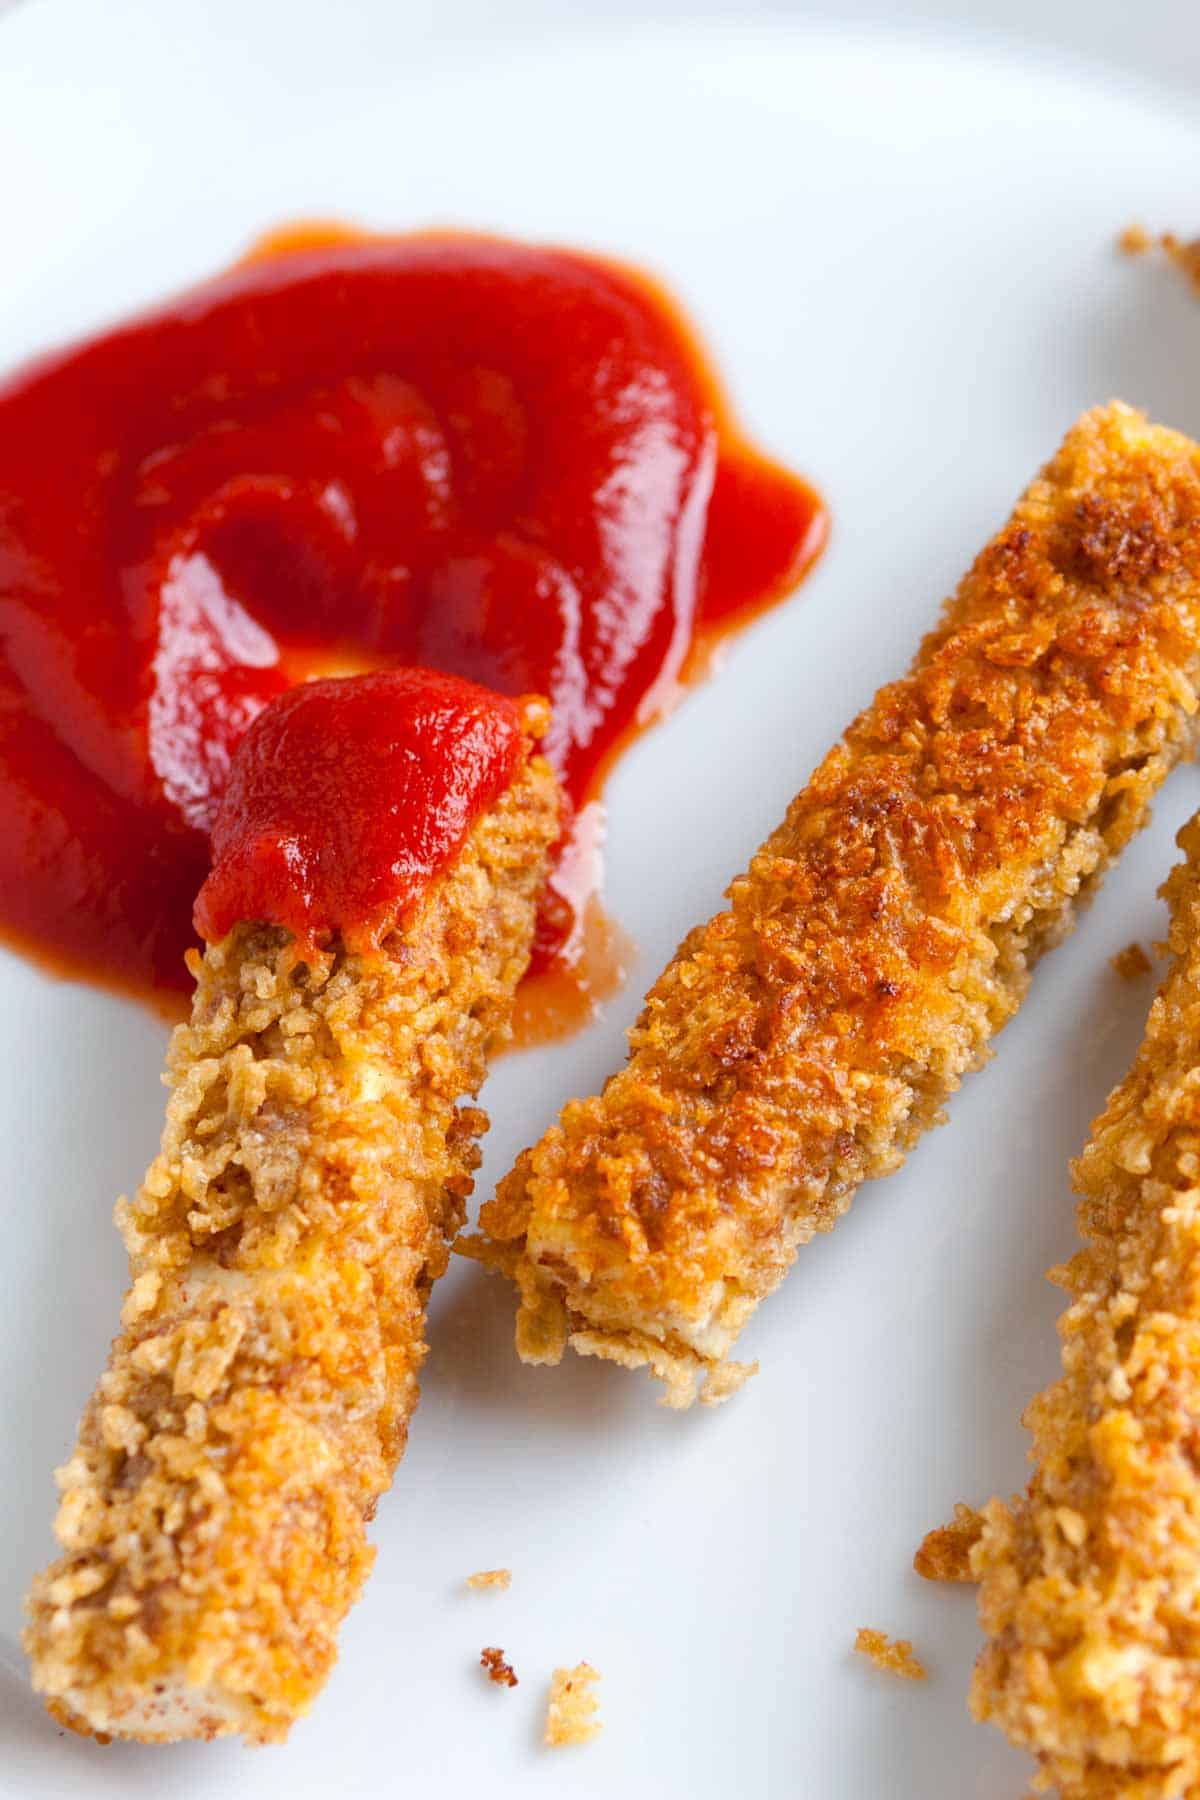
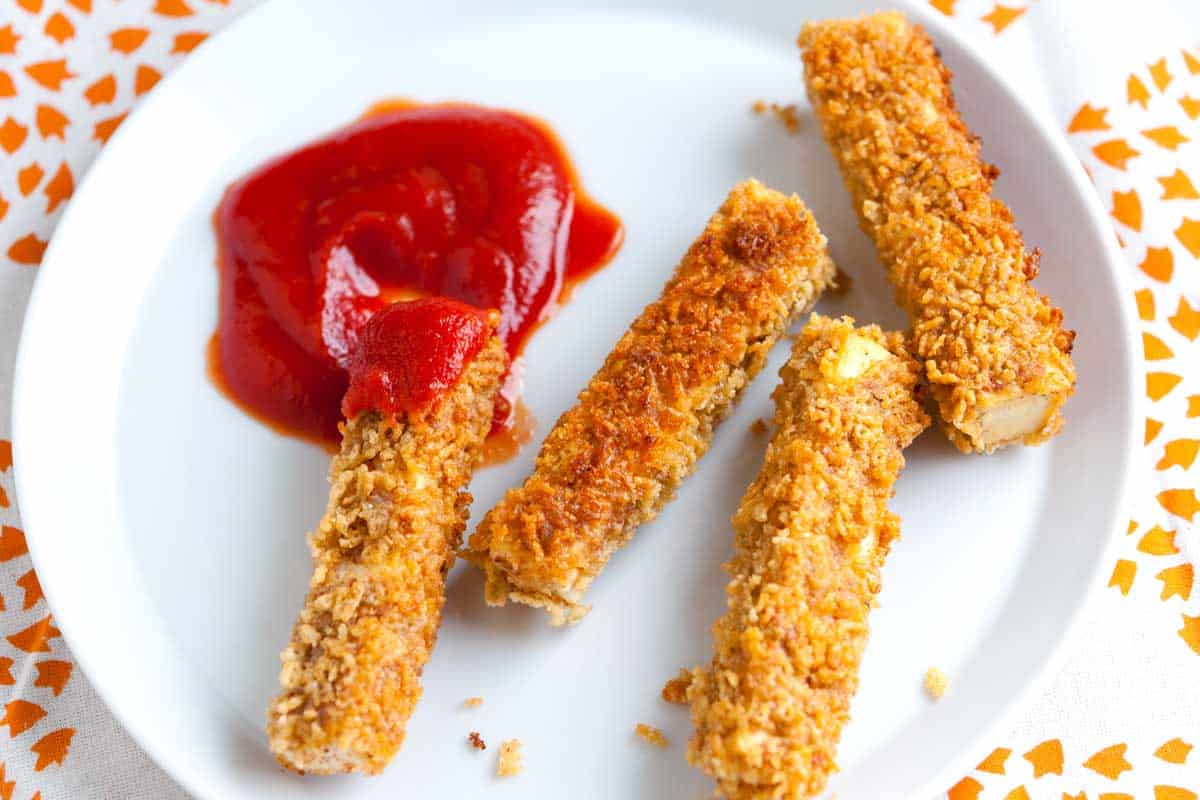
    My family devours these crispy tofu fingers! They’re a simple, kid-friendly snack or meal that even adults love. Easily made gluten-free, too!

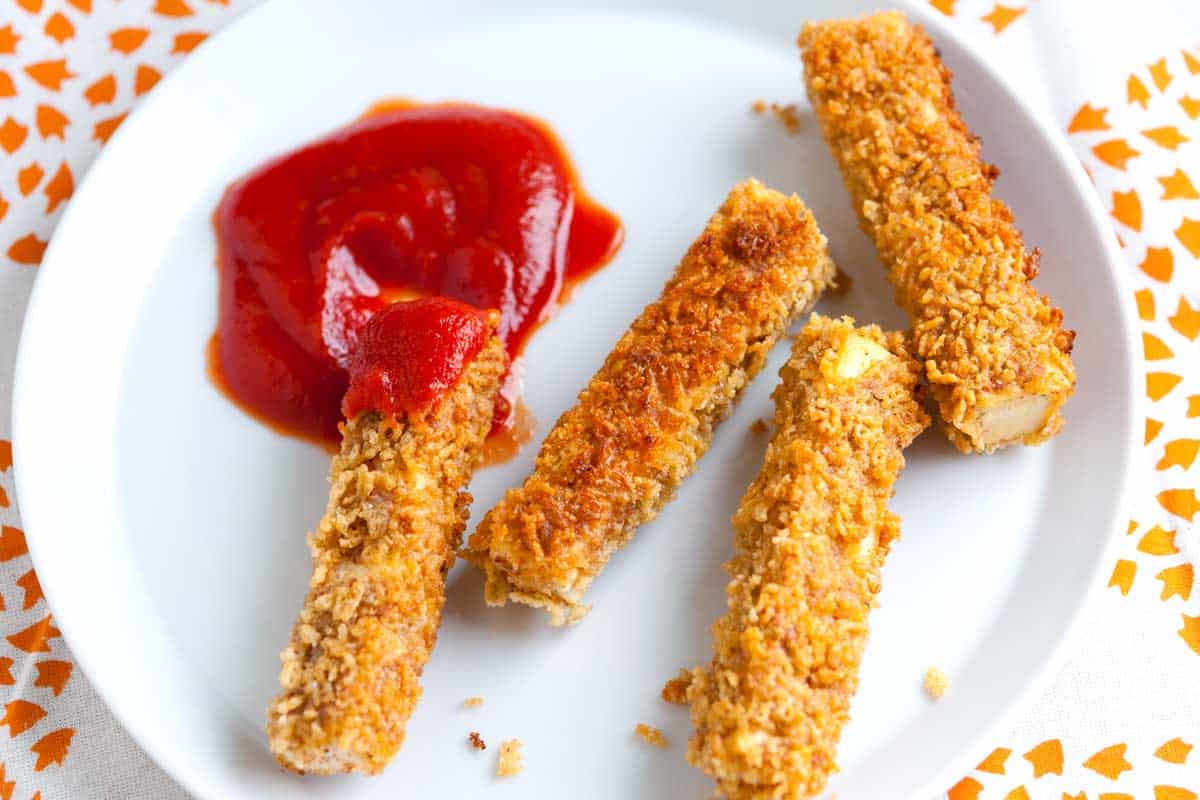
    Crispy Tofu Fingers

    If you want a new way to enjoy tofu, these crispy tofu fingers are a perfect place to start. In addition to our baked tofu, they are one of our family’s most made tofu recipes. I slice my tofu into strips or fingers, but you can always turn these into tofu nuggets by cutting them into cubes.

    Similar to chicken nuggets or popcorn chicken, these are incredible with homemade ketchup or this incredibly good creamy honey mustard sauce. I can’t wait for you to make them!

    Key Ingredients

    • Tofu: Use extra-firm tofu for this recipe as it holds up well to the breading and pan-frying. Firm tofu should be okay if that is all you have.
    • Oil: We pan-fry the breaded tofu fingers in avocado oil since it has a high smoke point. A higher-heat cooking olive oil or vegetable oil is fine, too.
    • Flour: To keep these gluten-free, we use almond flour (sometimes called almond meal), but plain all-purpose flour is fine.
    • Spices: I keep these simple and use garlic powder, salt, and pepper, but you can mix in more spices or spice blends if you’d like more flavor. Any all-purpose seasoning added to the flour would be excellent.
    • Eggs: After rolling the tofu fingers in flour, I dip them in beaten eggs. If you want to make this recipe egg-free, you can substitute lightly beaten aquafaba, plant-based unsweetened yogurt, or vegan mayo.
    • Cereal or Breadcrumbs: We wanted to keep this recipe gluten-free, so we use a gluten-free cereal like rice Chex. If gluten is not a problem, use other crunchy cereals like cornflakes or substitute them with panko breadcrumbs.

    How to Make Crispy Tofu Fingers

    These tofu fingers or nuggets are easy to make at home. You’ll want to press your tofu for 15 minutes first, removing extra moisture. I slice my block of tofu into slabs, cover it with paper towels, and then place a heavy baking sheet on top. The thinner slabs speed up the pressing process so you can get on with dinner!

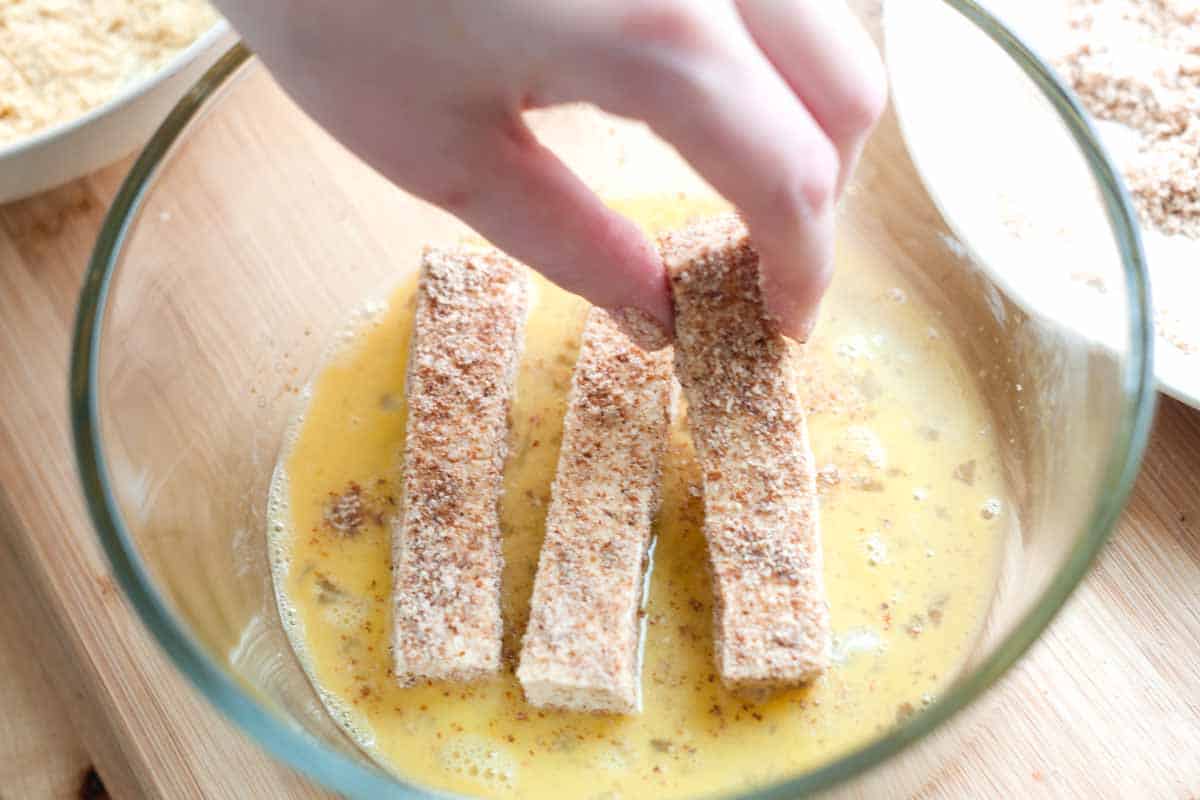
    How to Make Crispy Tofu Fingers: Dipping into egg

    Next, you’ll need a breading station. Flour and spices in one vessel, beaten eggs (or your egg-free substitute) in another, and finally, crushed cereal or breadcrumbs.

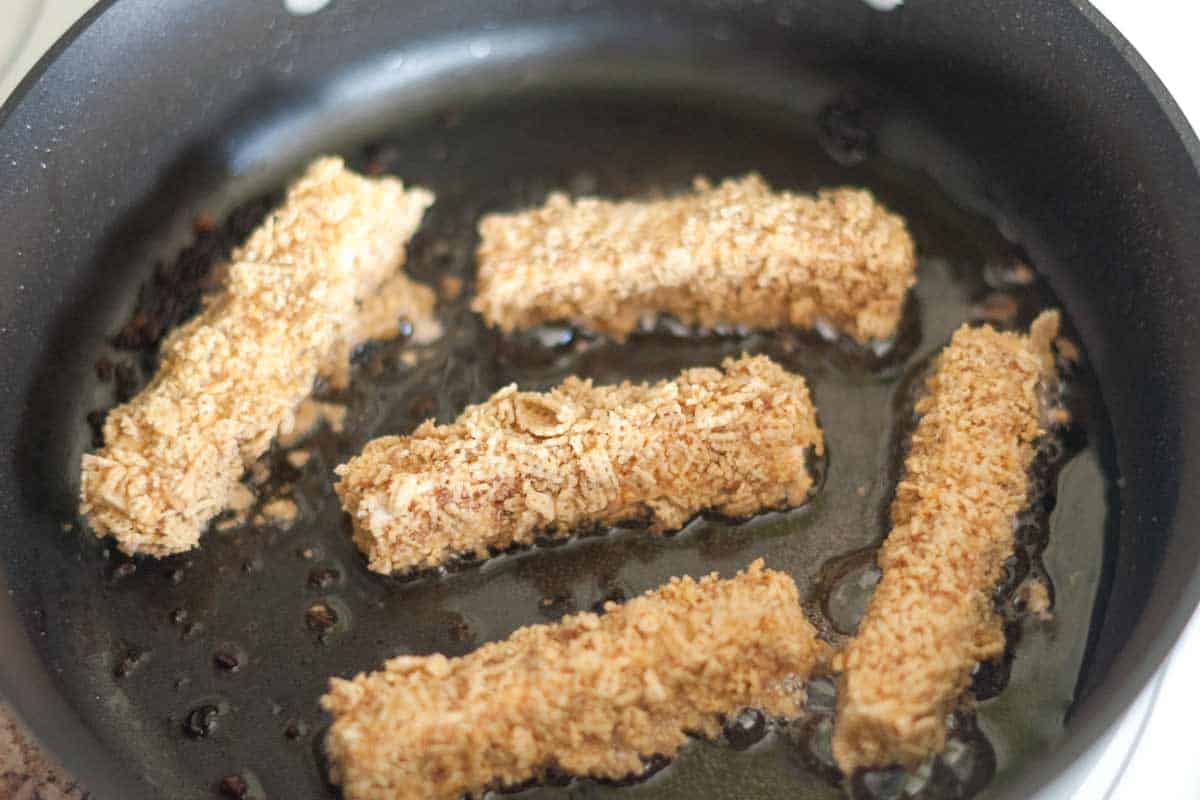
    How to Make Crispy Tofu Fingers: Cooking them in a skillet with oil

    You’ll roll each tofu finger into the flour, dip in the egg, and roll in the crispy cereal (or breadcrumbs). Then, place them into hot oil in a skillet and cook until golden brown and crisp. From there, you can serve with your favorite dipping sauces. For us, that’s homemade ketchup!

    Crispy Tofu Fingers

    Crispy Tofu Fingers

    • PREP
    • COOK
    • TOTAL

    My family devours these crispy baked tofu fingers! We roll tofu in almond flour, dip it in egg, then roll it in crushed rice cereal. Thanks to the almond flour and cereal, this is gluten-free. You can substitute the almond flour for all-purpose flour and the cereal for breadcrumbs.

    4 Servings

    You Will Need

    1 (12oz) package extra-firm tofu

    3 tablespoons avocado oil

    3/4 cup almond flour or all-purpose flour

    1/2 teaspoon garlic powder

    1/2 teaspoon fine sea salt

    1/4 teaspoon fresh ground black pepper

    2 large eggs, see tips for substitute

    3 cups crushed gluten-free cereal like Chex or use panko breadcrumbs

    Directions

      1Slice the tofu into 1-inch slabs. Arrange in one layer onto a few paper towels or clean dish towels. Cover with more paper towels or another clean dish towel. Place a baking sheet with something heavy on top to weigh down the tofu, releasing some liquid. Leave alone for 15 minutes.

      2Slice the tofu into fingers.

      3Set up a breading station: Mix almond flour, garlic powder, salt, and pepper on a plate. Add egg to a bowl and beat well. On a third plate, mix the crushed cereal or breadcrumbs with another pinch of salt and a few grinds of black pepper.

      4Dip each tofu finger into the seasoned flour, the egg, and finally into the crushed cereal so they are well coated on all sides.

      5Heat oil in a large skillet pan over medium-high heat. Add the tofu, 4 to 5 fingers at a time, and cook until golden brown, 30 seconds to 1 minute on each side. Transfer to a plate lined with a paper towel or clean dishcloth. Serve with your favorite dipping sauce.

    Adam and Joanne’s Tips

    • Eggs: You can substitute the eggs in our recipe with non-dairy yogurt, lightly beaten aquafaba, or vegan mayonnaise.
    • Nutrition facts provided below are estimates.

    Nutrition Per Serving
    Serving Size
    1/4 of the recipe
    /
    Calories
    418
    /
    Total Fat
    21.8g
    /
    Saturated Fat
    9.9g
    /
    Cholesterol
    93mg
    /
    Sodium
    494.2mg
    /
    Carbohydrate
    24g
    /
    Dietary Fiber
    2.5g
    /
    Total Sugars
    2.9g
    /
    Protein
    17.5g


    AUTHOR:

    Adam Gallagher

    Adam and Joanne of Inspired Taste

    We are Adam and Joanne Gallagher, the creators of Inspired Taste. Established in 2009, Inspired Taste grew from a childhood dream into one of the internet’s most trusted recipe sites with hundreds of reliable recipes, step-by-step videos, and expert tips.More About Us

    Source link

  • Marry Me Lobster Pasta Recipe

    Marry Me Lobster Pasta Recipe

    This website may contain affiliate links and advertising so that we can provide recipes to you. Read my disclosure policy.

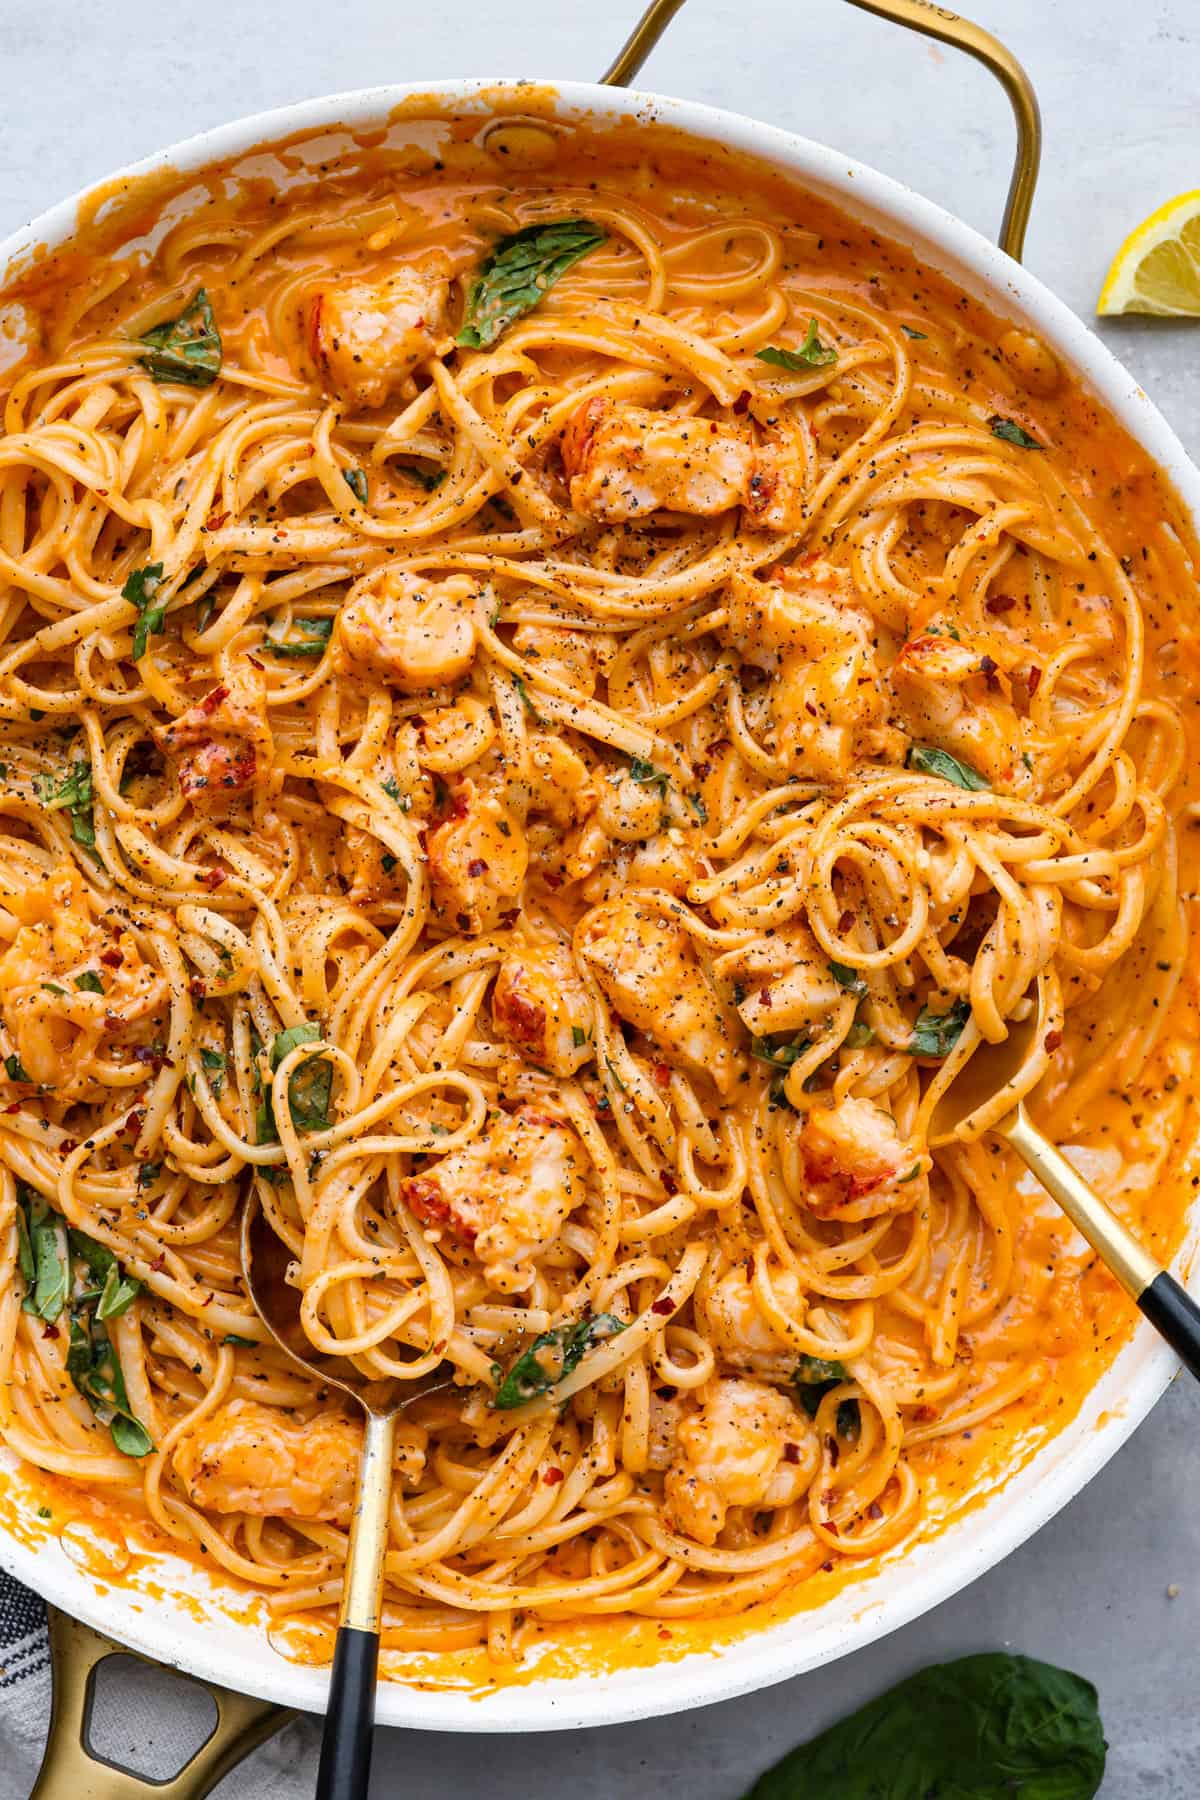
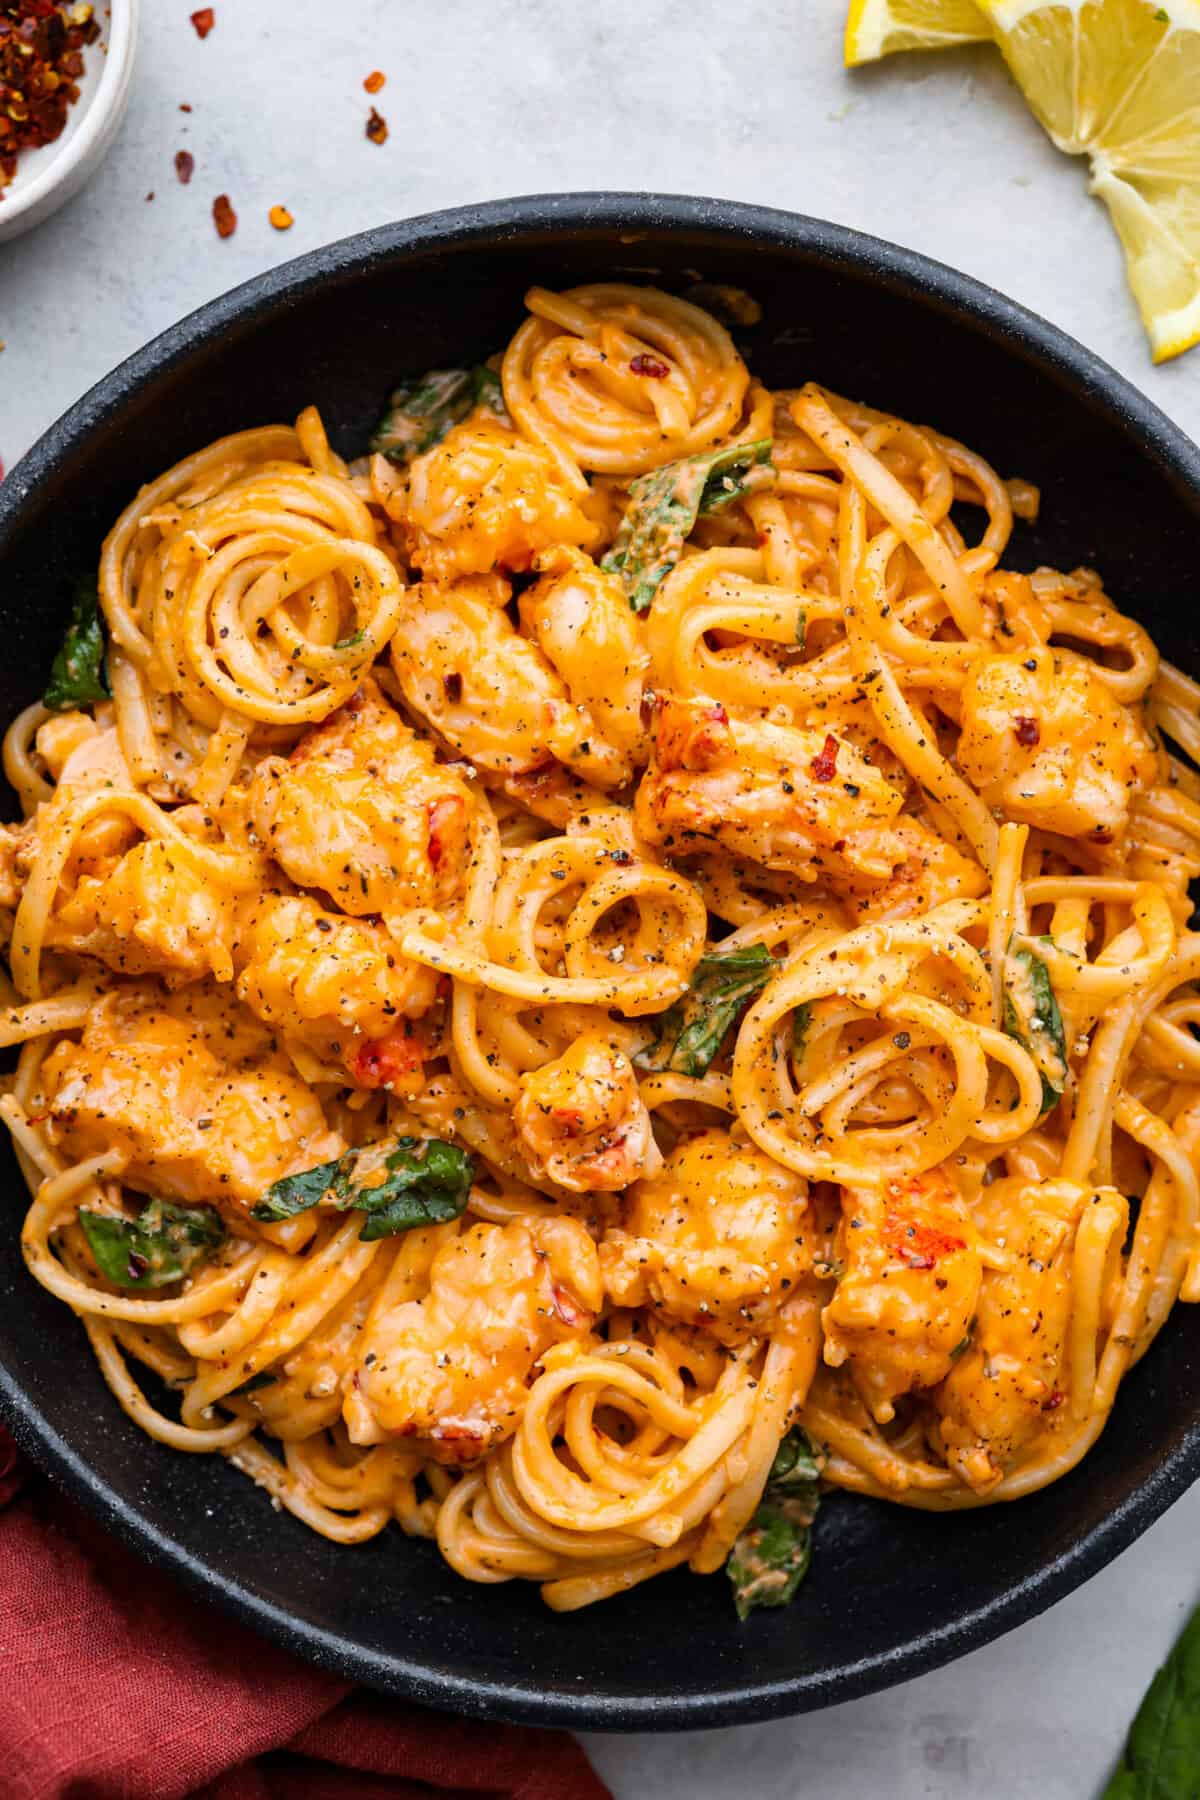
    Tender, juicy pieces of lobster tossed in a creamy tomato sauce with linguine noodles. Prepare to be amazed by this restaurant-quality lobster pasta- each bite is a dream!

    Calling all seafood lovers! If you love this lobster pasta, here are a few more recipes you need to add to the dinner lineup: lobster bisque, seafood lasagna, and reader-favorite lobster tail!

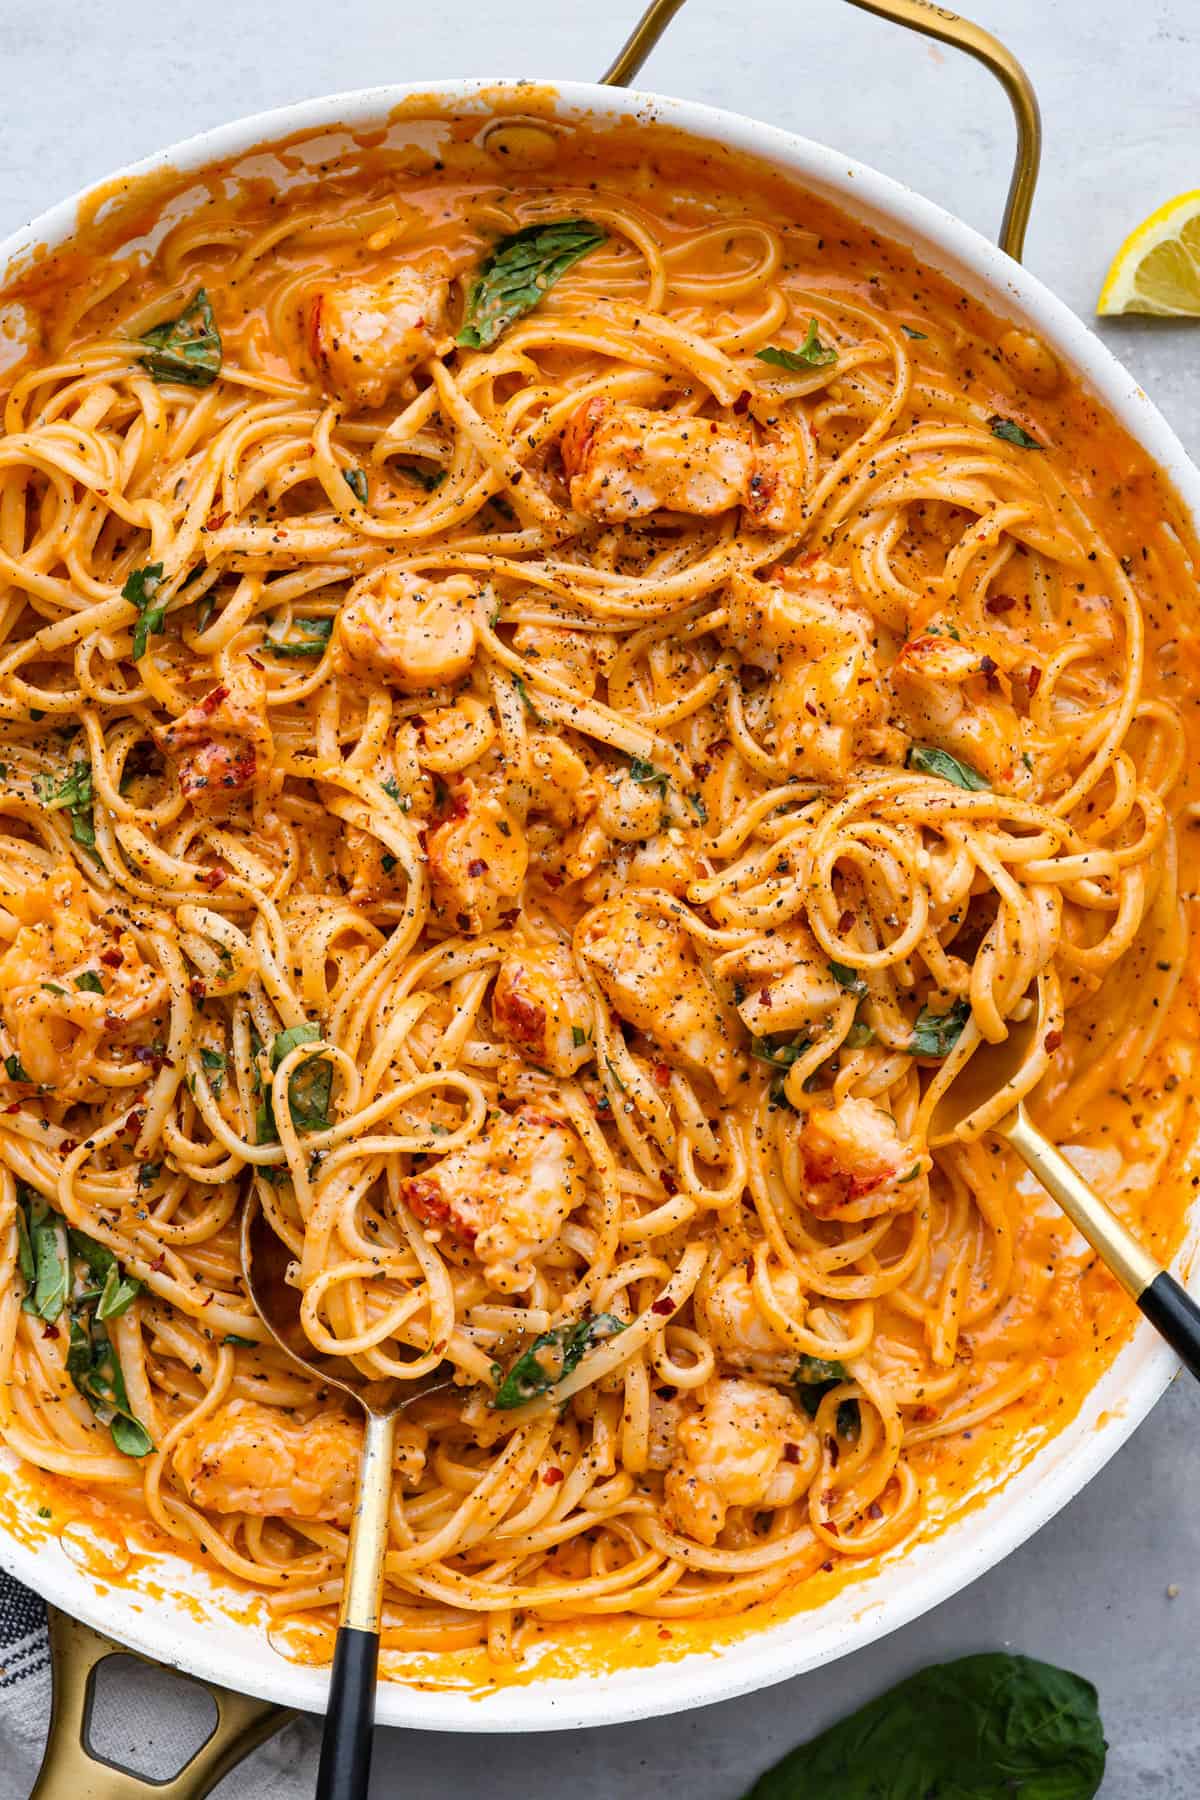
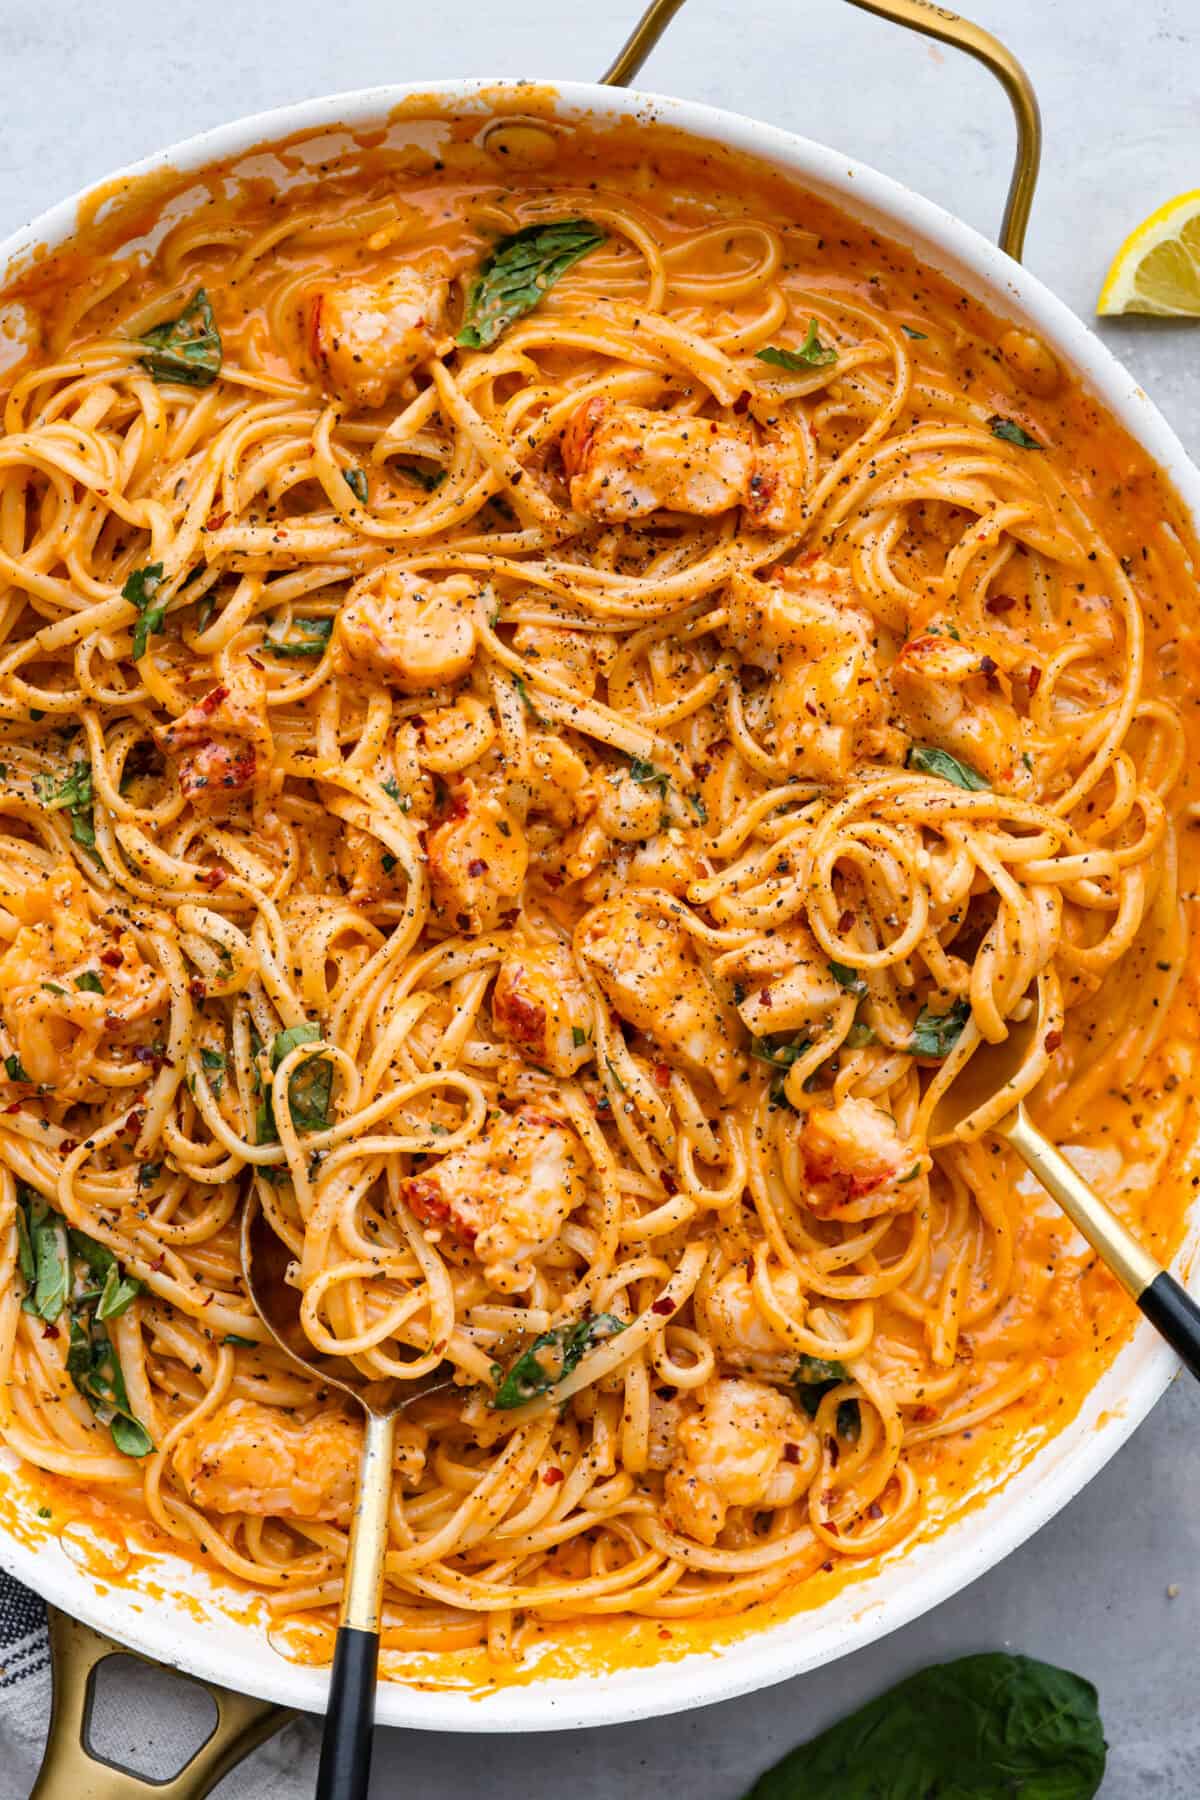
    Top-down view of lobster pasta in a white skillet.Top-down view of lobster pasta in a white skillet.

    Amazing Lobster Linguine

    This lobster pasta is comfort food at its finest. Fresh linguine, a creamy, cheesy tomato sauce, and tender lobster pieces all tossed together. What could be better than that? It’s a blend of flavors and textures that is absolutely dreamy.

    This restaurant-quality lobster pasta is fancy enough for special occasions or date night, but also simple enough to make for a weeknight dinner. Trust me, even the people that aren’t big seafood lovers in your family will be a fan! Words can’t describe how tasty this dish is. You’ve got to try it for yourself! Here is everything you’ll need:

    Ingredient List

    I love that this recipe uses so many simple ingredients, even though it tastes like something you would get from a fancy restaurant! Exact measurements for each can be found in the recipe card at the end of the post.

    • Linguine: This long, thin pasta helps catch the delicious sauce and lobster pieces. Cook it al dente for a perfect bite. Also, reserve some pasta water before draining for the sauce!
    • Lobster Meat: Cooked and cut into bite-sized pieces. Use cooked lobster tails, claws, or knuckles – any part works!
    • Unsalted Butter: Adds richness and depth of flavor.
    • Chopped Shallot: Adds a mild oniony flavor without overpowering the dish. Chop it finely so it’s evenly distributed.
    • Garlic Cloves: Because everything is better with garlic! Fresh minced garlic works best for adding flavor to every bite.
    • Tomato Paste: Concentrated tomato flavor base for the sauce.
    • Heavy Cream: Creates a luxurious, creamy sauce. Full-fat cream will give you the richest flavor, but half and half can also be used for something lighter.
    • Parmesan Cheese: So the sauce has delicious cheesy flavor.
    • Italian Seasoning: A blend of herbs like oregano, thyme, and basil. You can adjust the amount to your preference.
    • Salt and Pepper: For seasoning the lobster pasta to taste.
    • Reserved Pasta Water: This starchy water helps give the sauce a silky texture and also thins it out.
    • Fresh Basil and Red Pepper Flakes: Optional, but these add extra delicious flavor!

    Lobster Pasta Recipe

    Grab that skillet and get ready to make a dinner that everyone will be raving about. If you really want to take things up a notch, try serving it with garlic knots or homemade breadsticks! The sauce is too good not to dip.

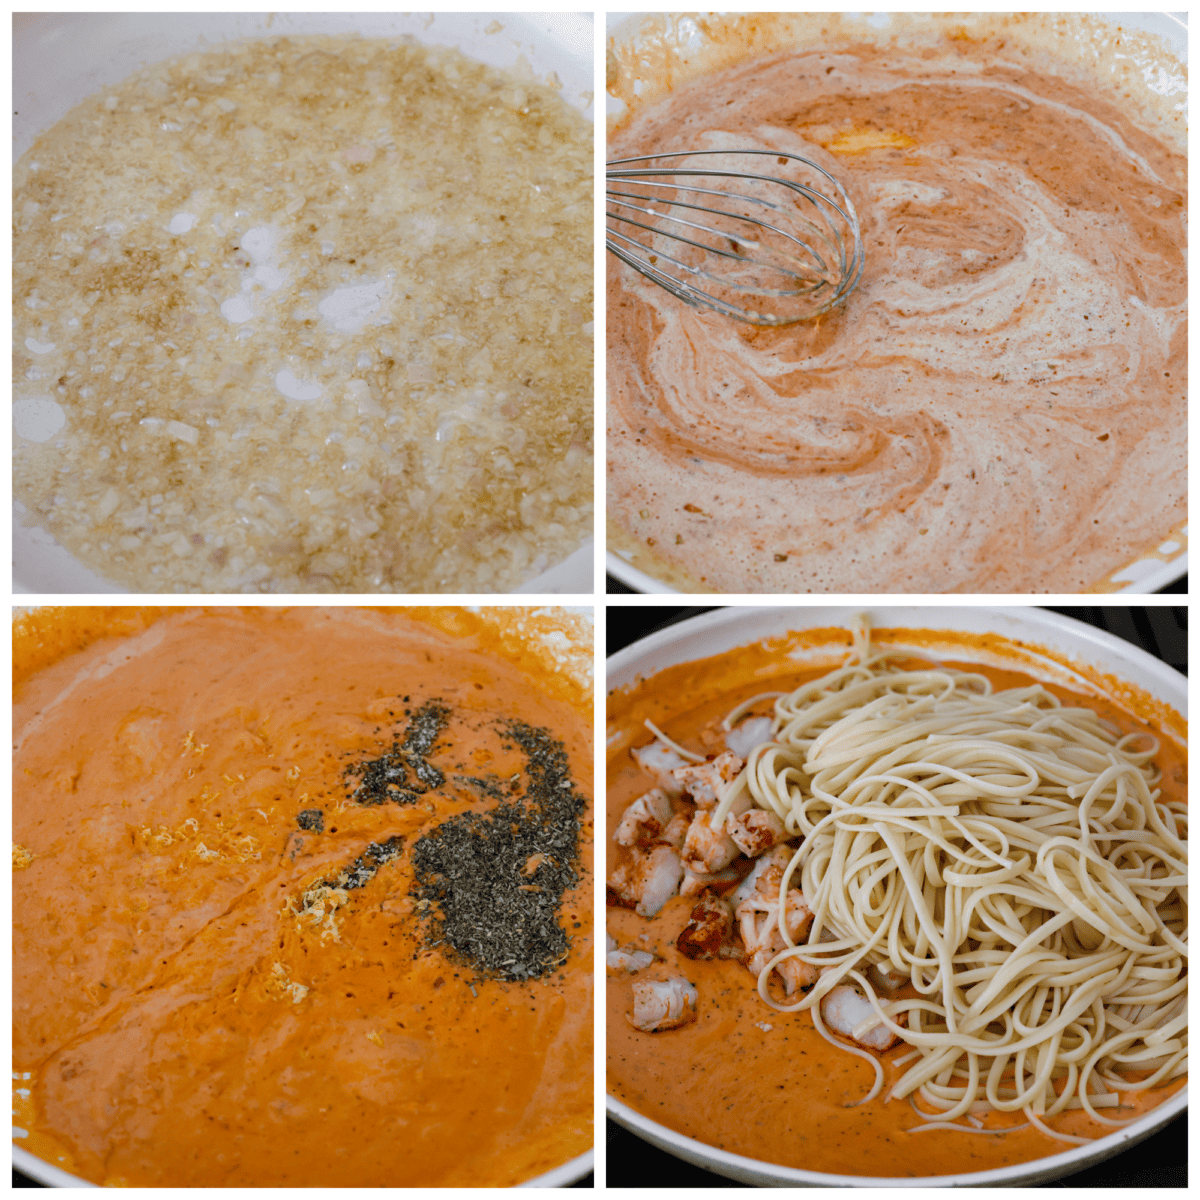
    1. Precook Pasta: Cook the pasta according to package instructions. Cook the pasta to al-dente. Before draining the pasta, save some pasta water for the sauce.
    2. Sauté Vegetables: Heat the butter in a large skillet over medium-high heat. Add the shallot and saute until translucent. Stir in the garlic and cook for another 30 seconds.
    3. Add Tomato Paste: Stir in the tomato paste and then cook for 1 minute.
    4. Mix in Cheese and Cream: Lower the heat and slowly add in the cream and parmesan cheese. Heat through and stir until the cheese is melted.
    5. Add Seasonings and Pasta Water: Add the salt, black pepper, and Italian seasonings, and lemon zest. Add 1/2 cup of pasta water to thin the sauce. Then taste the sauce and add additional seasoning to your liking.
    6. Combine: Add the cooked lobster meat and pasta. Toss to combine with the sauce. 
    7. Serve: Top the pasta with fresh basil, parmesan, and red pepper flakes if desired. Then serve immediately while it’s warm. Enjoy!
    4-photo collage of the creamy red sauce being prepared, and linguine and lobster being added to it.4-photo collage of the creamy red sauce being prepared, and linguine and lobster being added to it.

    Tips and Variations

    Use your imagination and what you have on hand to create this amazing creamy lobster pasta! You’re going to love how it turns out with any of these tips and variations.

    • Pasta: I love using pasta that can really soak up the sauce and hold it in its crevices. For this lobster pasta, you can use almost any pasta you like, even spaghetti if that’s what you have on hand.
    • Al Dente: Cook your pasta al dente. This means the pasta is tender but still chewy and holds its shape with a bit of firmness. This will allow the pasta to absorb the sauce and hold on to the flavor in every bite.
    • Lobster Substitutions: Not a fan of lobster? No problem! You can also use other protein options like chicken, bacon, or sausage.
    • Heavy Cream: You can use half and half instead of heavy cream to also cut a few calories but your sauce won’t turn out quite as rich.
    • Add-ins: Try adding a handful of fresh spinach or sun-dried tomatoes to this lobster pasta. Just stir them in when you add in the lobster. It would be delicious in this recipe!

    A serving of lobster pasta in a black bowl.A serving of lobster pasta in a black bowl.

    Leftover Lobster Pasta

    This lobster pasta is so incredible the next day after the flavors have had time to meld together. Heat your leftovers so you have a quick and satisfying lunch!

    • In the Refrigerator: Keep leftovers tightly covered in an airtight container for up to 4 days.
    • To Reheat: Reheat in the microwave or on the stove. If it needs thinning add a splash of cream as it heats.

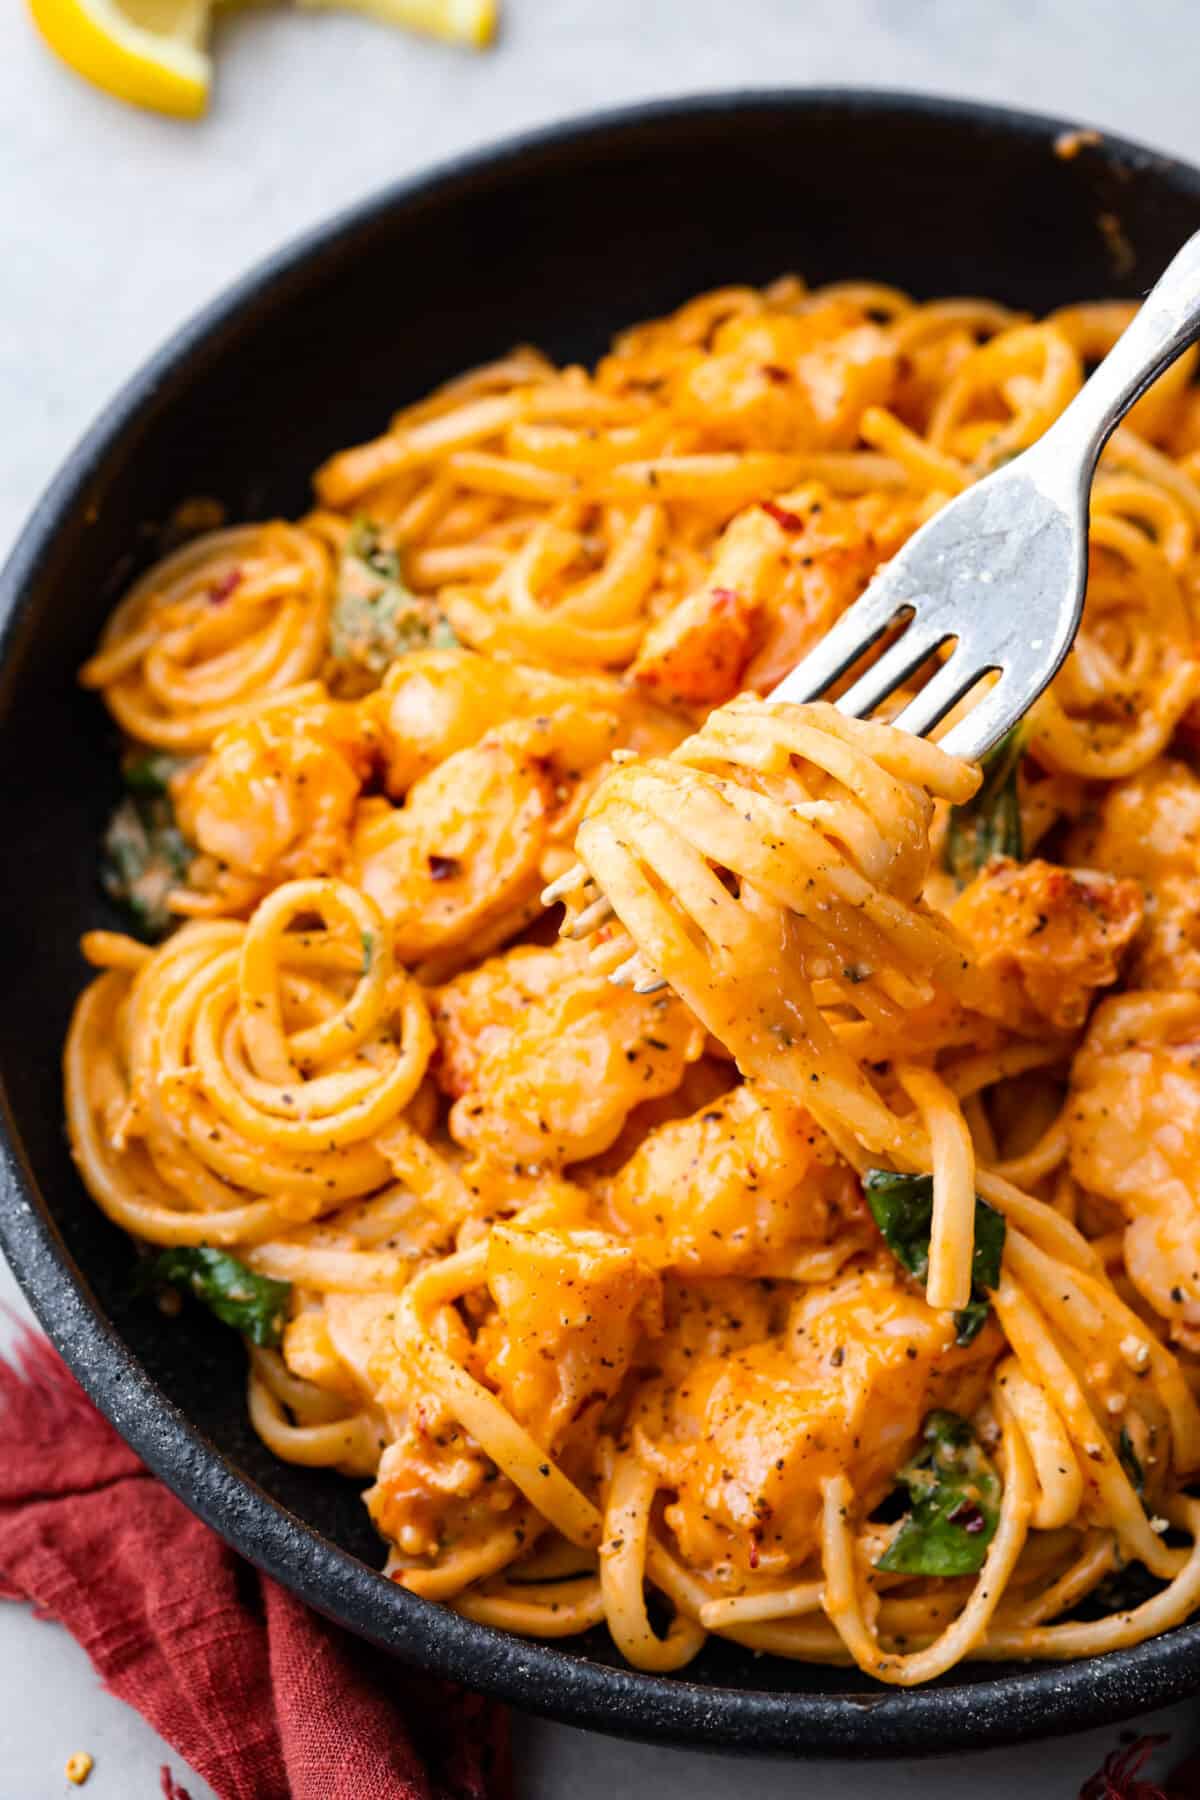
    A bite of pasta twirled around a metal fork.A bite of pasta twirled around a metal fork.

    More Amazing Pasta Recipes to Try

    Pin this now to find it later

    Pin It


    Source link

  • Baked Garlic Basil Chicken Recipe

    Baked Garlic Basil Chicken Recipe

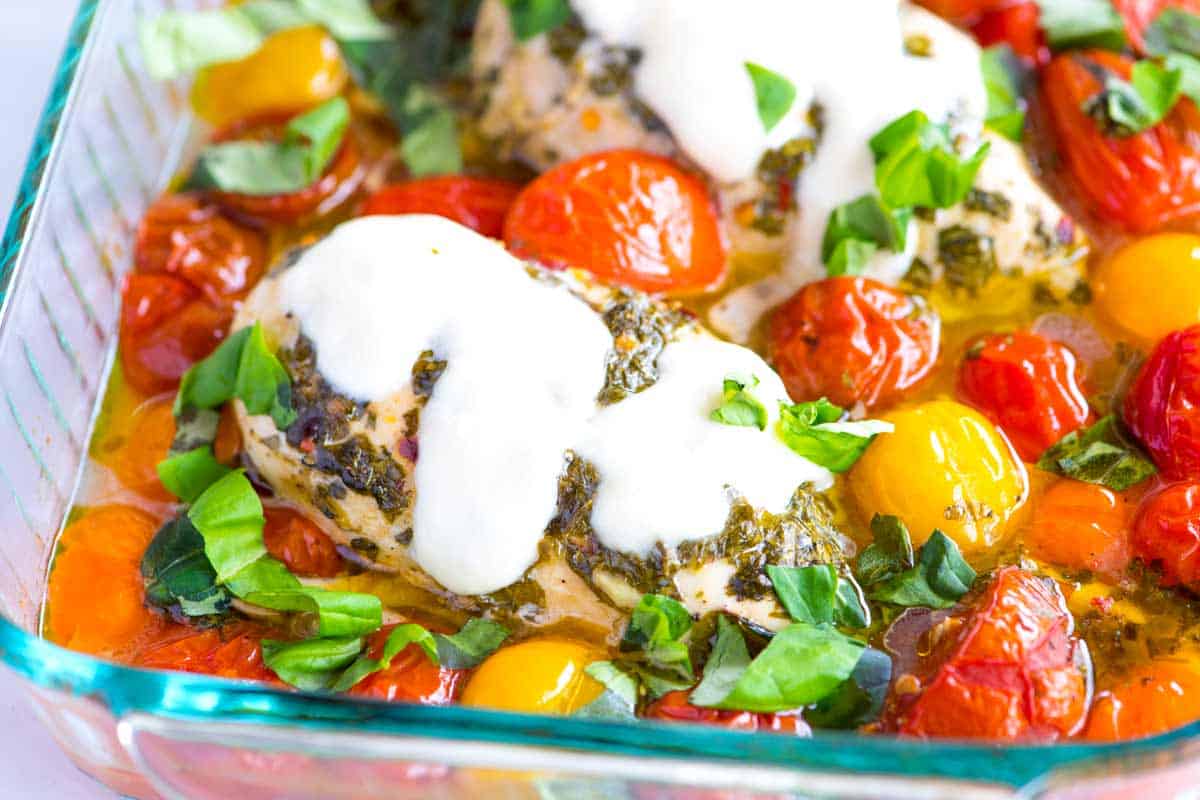
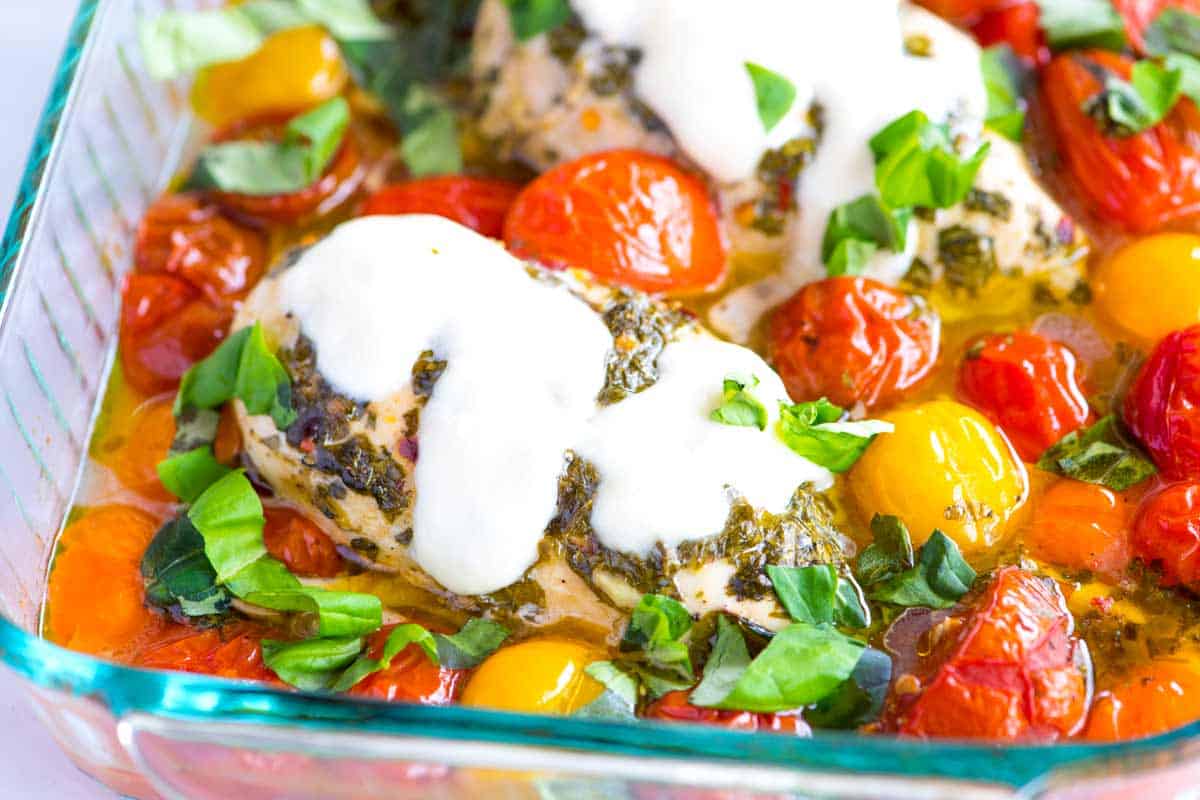
    This garlic basil chicken breast recipe is incredibly juicy and flavorful, thanks to a simple marinade and baking the chicken on a bed of juicy tomatoes.
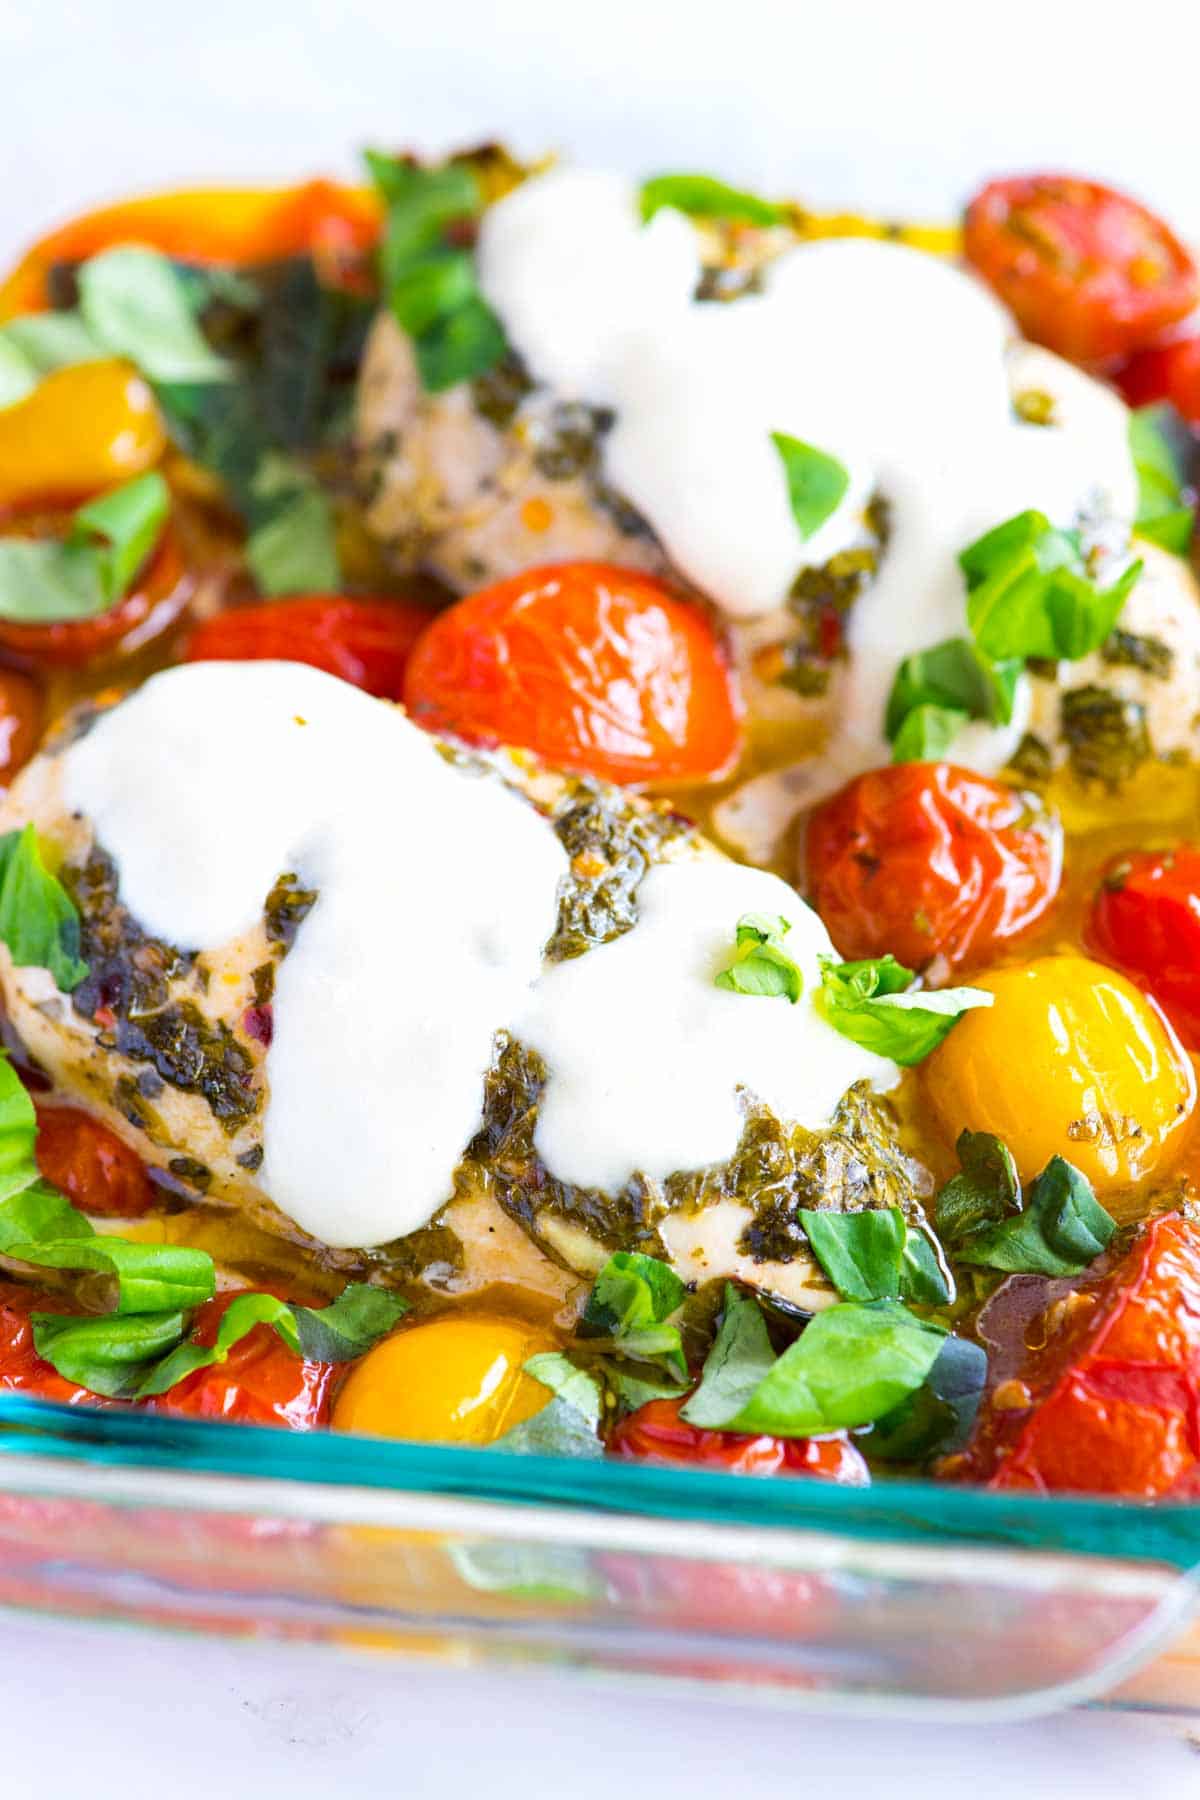
    Baked Garlic Chicken Breasts

    Our family loves this juicy, tender baked chicken breast recipe with the most delicious garlic basil marinade. I love baking the chicken breasts surrounded with tomatoes, which turn into a lovely fresh sauce.

    If you ever struggle with dry chicken breasts, this recipe is for you! For more chicken breast recipes like this one, see our recipe for baked lemon chicken breast or these lemon dill chicken breasts made in a skillet.

    Key Ingredients

    • Chicken Breasts: While this recipe features chicken breasts, you can easily adapt it to use chicken thighs. Thighs may require a slightly longer cooking time.
    • Garlic and Basil: I am generous with the fresh garlic and basil and use them to make the marinade. I also use the basil stalks underneath the chicken breasts to infuse even more flavor. You can substitute the basil for dill, parsley, cilantro, or mint.
    • Olive Oil and Vinegar: Olive oil and vinegar create the base of the marinade, ensuring it coats the chicken beautifully. I love red wine vinegar adds a lovely tang, but champagne vinegar or even lemon juice work well too.
    • Tomatoes: I love tossing lots of tomatoes around the chicken to bake at the same time. As they bake in the oven, they burst and release their juices, making the most delicious sauce at the bottom of the baking dish.
    • Mozzarella Cheese: I add cheese towards the end of the baking time and allow it to melt down over the chicken.

    Find the full recipe with measurements below.

    How to Make Baked Garlic Chicken

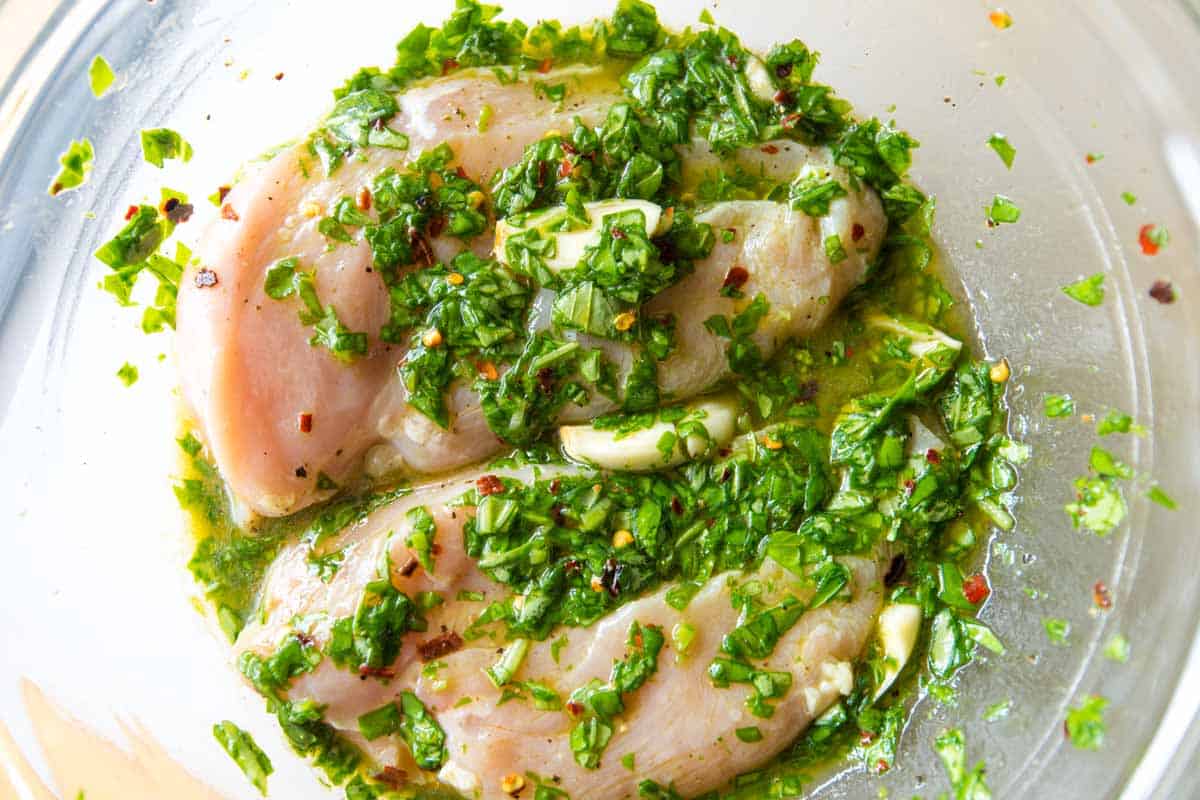
    Tip 1: Use our marinade. It’s a simple combination of red wine vinegar, olive oil, garlic, and basil. We only marinate chicken breasts 1 to 2 hours — you really don’t need to go longer than that. After the chicken has marinated, move on to the tomatoes.

    Marinating the chicken in basil vinaigrette

    Tip 2: Use lots of tomatoes. Use a variety of cut tomatoes and whole small tomatoes. The cut tomatoes give up their juices quickly and the cherry tomatoes stay intact. Add them to a baking dish with basil stalks (we used the leaves to make the marinade). You won’t end up eating the stalks, but they are really fragrant. We also add basil stalks to these slow cooker chicken meatballs.

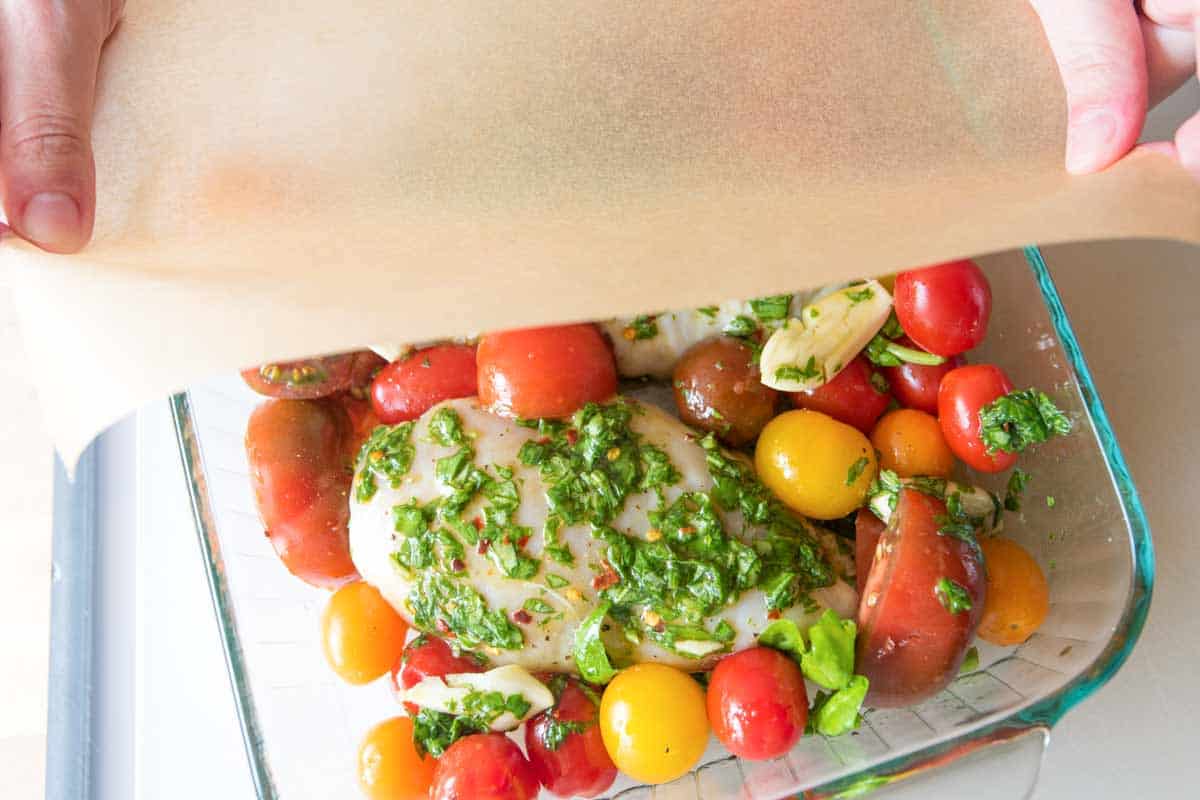
    Tip 3: Cook your chicken covered. Time for the chicken. Just nestle it in to the dish. Then we bake loosely covered with some parchment paper. By loosely covering the chicken, the chicken bakes and braises simultaneously, meaning the chicken bakes in its juices. This method of baking chicken breasts keeps the chicken juicy and so tender.

    Cover with parchment paper before baking.

    Tip 4: Top with cheese and save the liquid. After 35 to 40 minutes the chicken should be done and it’s time to add a little mozzarella on top. Oh, and that liquid at the bottom of the baking dish? It’s pure gold! A big piece of focaccia bread to sop it all up is a great idea!

    Baked Garlic Basil Chicken

    Baked Garlic Basil Chicken

    • PREP
    • COOK
    • TOTAL

    For juicy, tender baked chicken breasts remember these three things: marinate, bake loosely covered, and use a meat thermometer. In our photos, we show baking 2 chicken breasts, but the marinade shared below is enough for 4 chicken breasts. The chicken does not need to be completely immersed in the marinade, just coated by it. If you plan to double the recipe, simply double the amount of chicken, tomatoes, and the mozzarella.

    4 Servings

    You Will Need

    4 boneless, skinless chicken breasts (6 to 8 ounces each)

    1 bunch fresh basil

    Extra-virgin olive oil

    2 tablespoons red wine vinegar

    1/4 teaspoon to 1/2 teaspoon red pepper flakes, depending on how spicy you like things

    3 cloves garlic, crushed with the side of a large knife or minced

    2 cups tomatoes, cut to rough 1-inch chunks and leaving cherry tomatoes whole

    1/4 cup torn fresh mozzarella cheese

    Salt and freshly ground black pepper

    Directions

    • Marinate Chicken
    • 1Remove basil leaves from the stalks and set them aside. Roughly chop the basil leaves so that you have about 1/4 cup. Whisk 2 tablespoons of olive oil, red wine vinegar, red pepper flakes, 1/2 teaspoon salt, and 1/2 teaspoon black pepper together until the salt has dissolved. Stir in the garlic and basil. Refrigerate and use within 1 to 2 hours.

      2Add chicken breasts to the marinade and marinate for at least 1 hour and up to 2 hours in the refrigerator.

    • Bake the Chicken
    • 1Position the oven rack in the middle of the oven and preheat it to 400°F (204°C). Lightly oil one side of a sheet of parchment paper large enough to cover the baking dish. (Aluminum foil can also be used.)

      2Add the basil stalks set aside from earlier to a baking dish large enough to fit the chicken breasts arranged in one layer. Add the tomatoes, then toss with 1/2 a tablespoon of olive oil and a pinch of salt and pepper.

      3Nestle the chicken breasts into the tomatoes, allowing the tomatoes to gather up the sides of each breast. Throw the garlic cloves from the marinade into the baking dish, then cover the dish with parchment paper. Loosely tuck the parchment paper around the chicken.

      4Bake until the chicken is opaque all the way through, and an internal thermometer reads 165°F when inserted into the thickest part of the breast. Check for doneness in around 25 minutes, and then go from there. Most chicken breasts will take 35 to 40 minutes.

      5Scatter mozzarella on top of each breast, then broil on high for about a minute or until the cheese melts. Serve the chicken with the baked tomatoes, juices from the bottom of the baking dish, and more torn basil leaves.

    Adam and Joanne’s Tips

    • The nutrition facts provided below are estimates.

    Nutrition Per Serving
    Serving Size
    1/4 of the recipe
    /
    Calories
    240
    /
    Protein
    28 g
    /
    Carbohydrate
    4 g
    /
    Dietary Fiber
    1 g
    /
    Total Sugars
    2 g
    /
    Total Fat
    12 g
    /
    Saturated Fat
    3 g
    /
    Cholesterol
    89 mg


    AUTHOR:

    Adam Gallagher

    Adam and Joanne of Inspired Taste

    We are Adam and Joanne Gallagher, the creators of Inspired Taste. Established in 2009, Inspired Taste grew from a childhood dream into one of the internet’s most trusted recipe sites with hundreds of reliable recipes, step-by-step videos, and expert tips.More About Us

    Source link