Tag: Recipe

  • The Best Pizza Sauce Recipe

    The Best Pizza Sauce Recipe

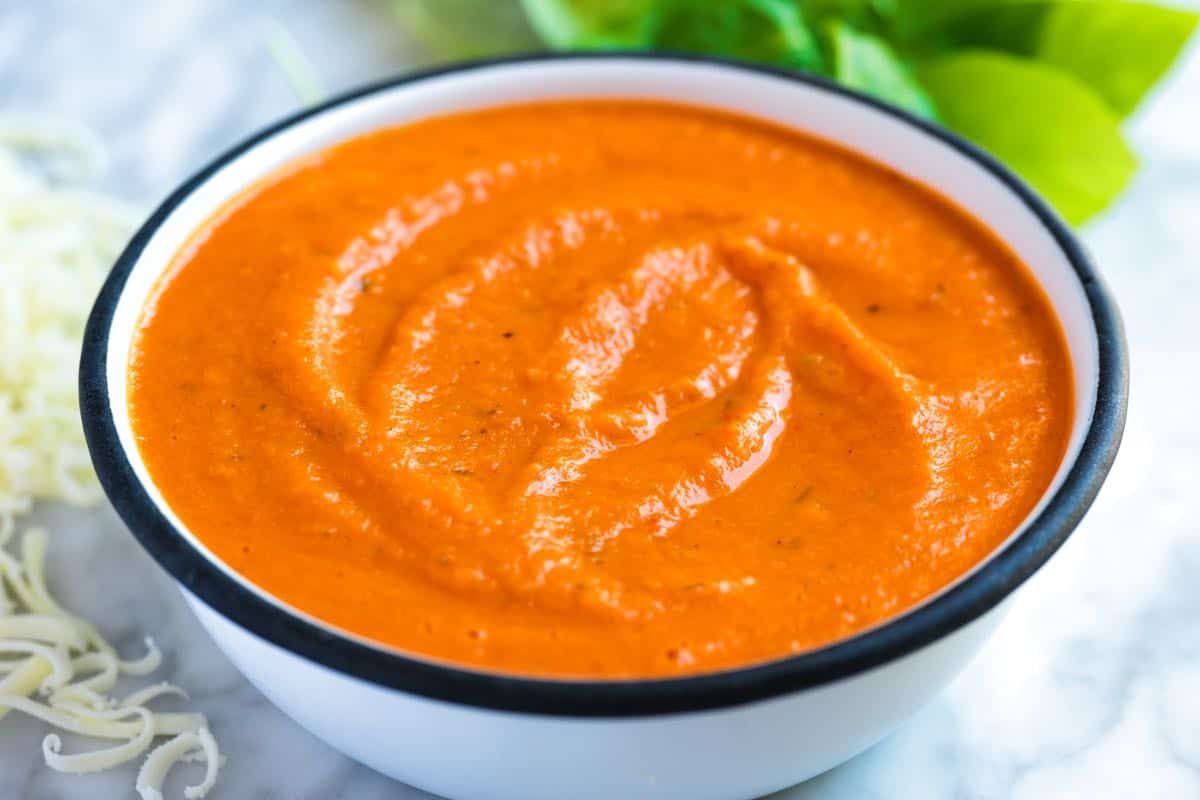
    This easy homemade pizza sauce recipe is made completely from scratch with fresh ingredients! Try this delicious sauce on your next pizza, and you’ll never look back.
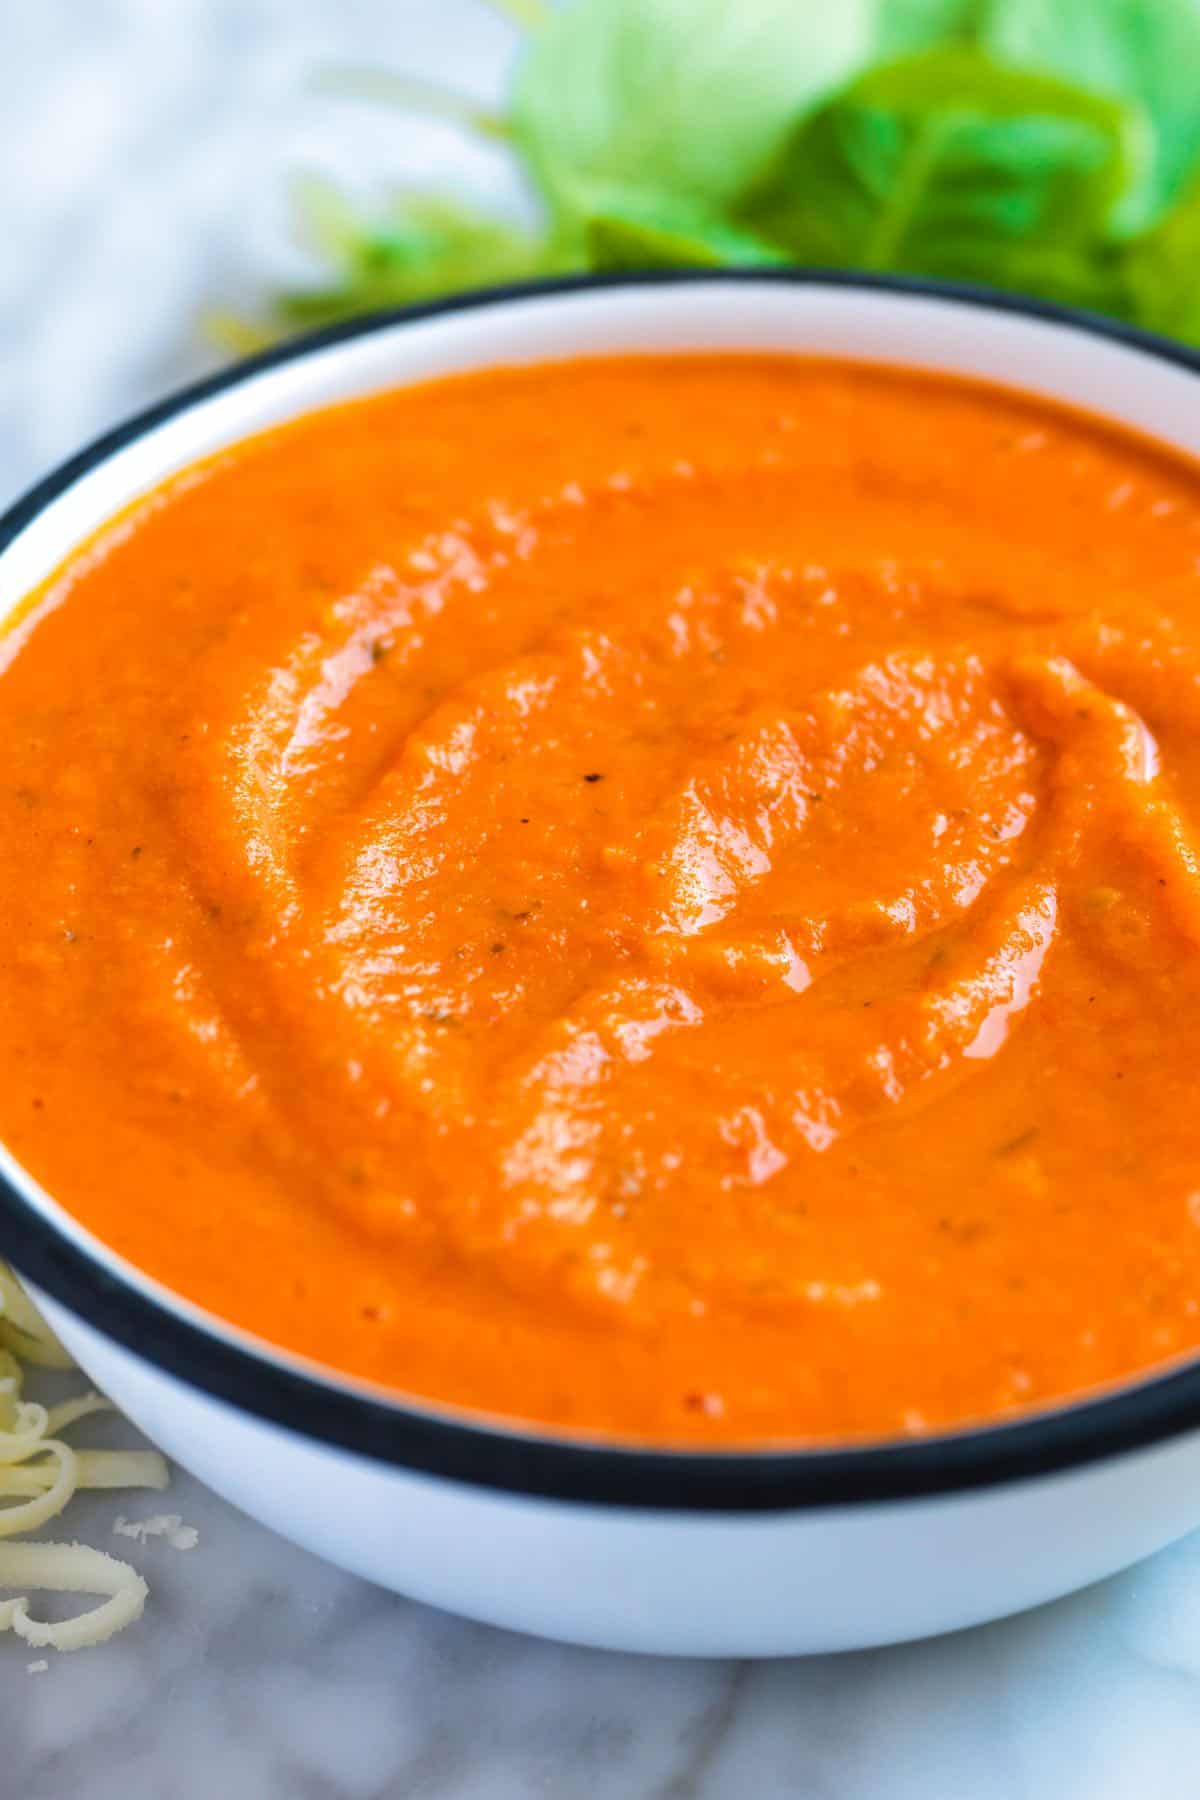
    Homemade Pizza Sauce

    I make a new batch of this pizza sauce every few weeks. I love it that much. I use it to make homemade pizza and have even started tossing it with pasta and gnocchi (so good!).

    If you can put a few ingredients into a pot, you can make this delicious sauce. It is a must-try!

    Key Ingredients

    • Fresh tomatoes: The star of this sauce! Using fresh tomatoes keeps this pizza sauce light on its feet. I find sauces made with tomato paste heavy and rich. I have successfully used cherry, vine-ripened, heirloom, and Roma tomatoes in this recipe. Canned tomatoes should also work, if that is all that you have. We recommend using canned whole peeled tomatoes.
    • Garlic and onion: Add so much flavor. We cook them with fresh tomatoes so they become soft and sweet.
    • Oregano and red pepper flakes: These work so well with pizza! Use crushed red pepper or more flavorful gochugaru (Korean pepper flakes).
    • Olive oil: Makes our pizza sauce velvety and rich (similar to how we use olive oil to make marinara sauce).

    Find the full recipe with measurements below.
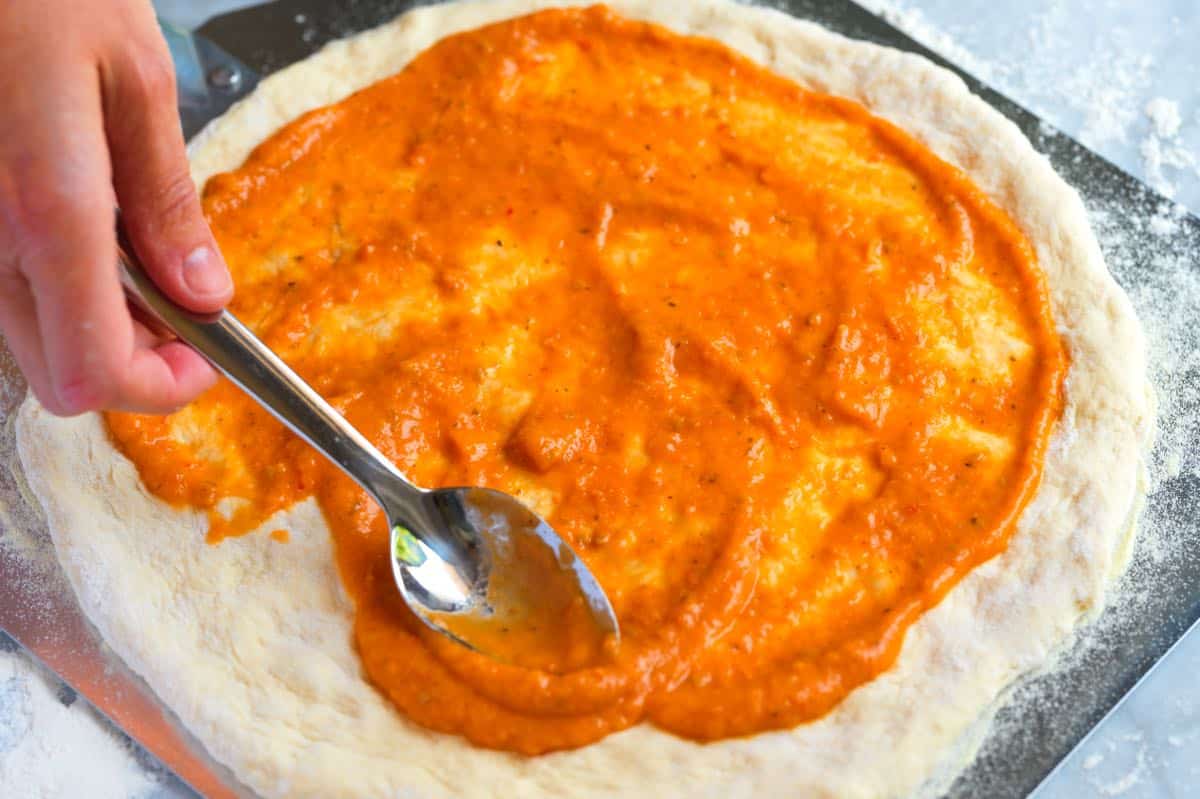
    Spreading homemade pizza sauce over pizza dough

    How to Make Our Favorite Pizza Sauce

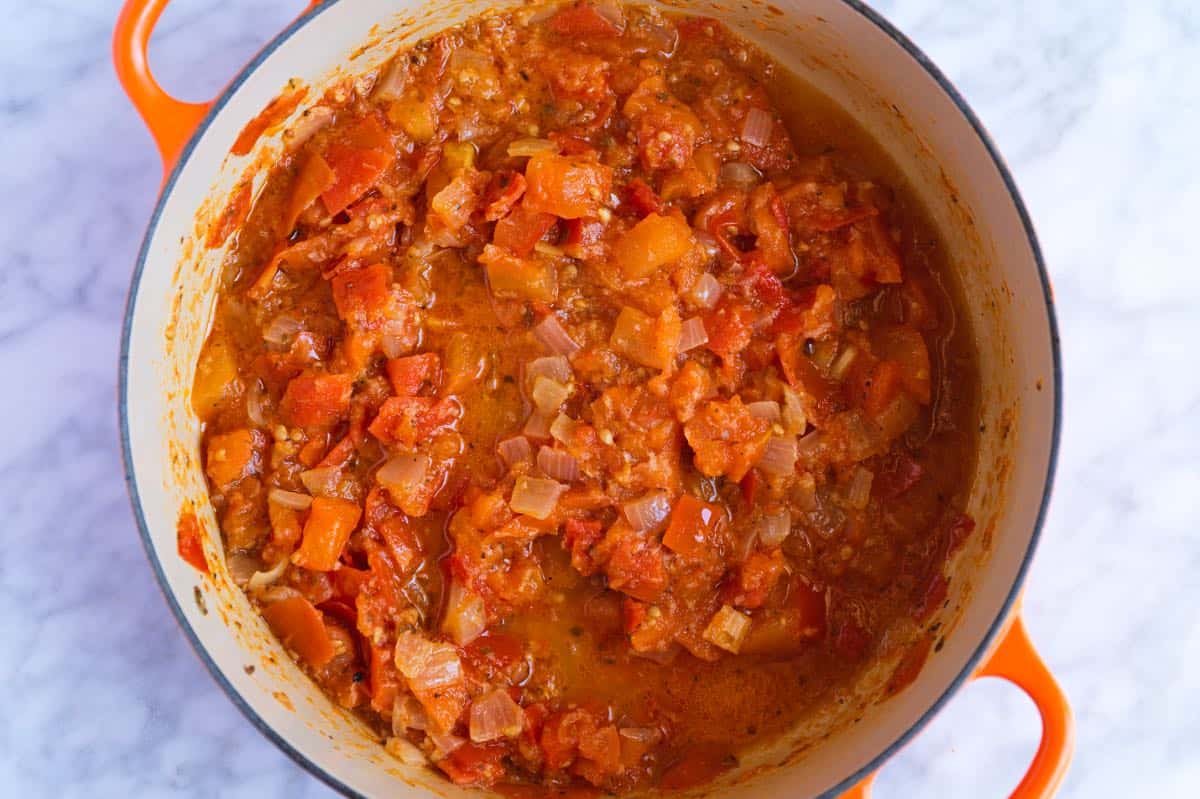
    Tip 1: Start by simmering the sauce covered. To make pizza sauce, you’ll combine fresh tomatoes with olive oil, garlic, onion, pepper, oregano, and salt in a covered saucepan and simmer for 30 minutes. This helps break the tomatoes down into a flavorful sauce.
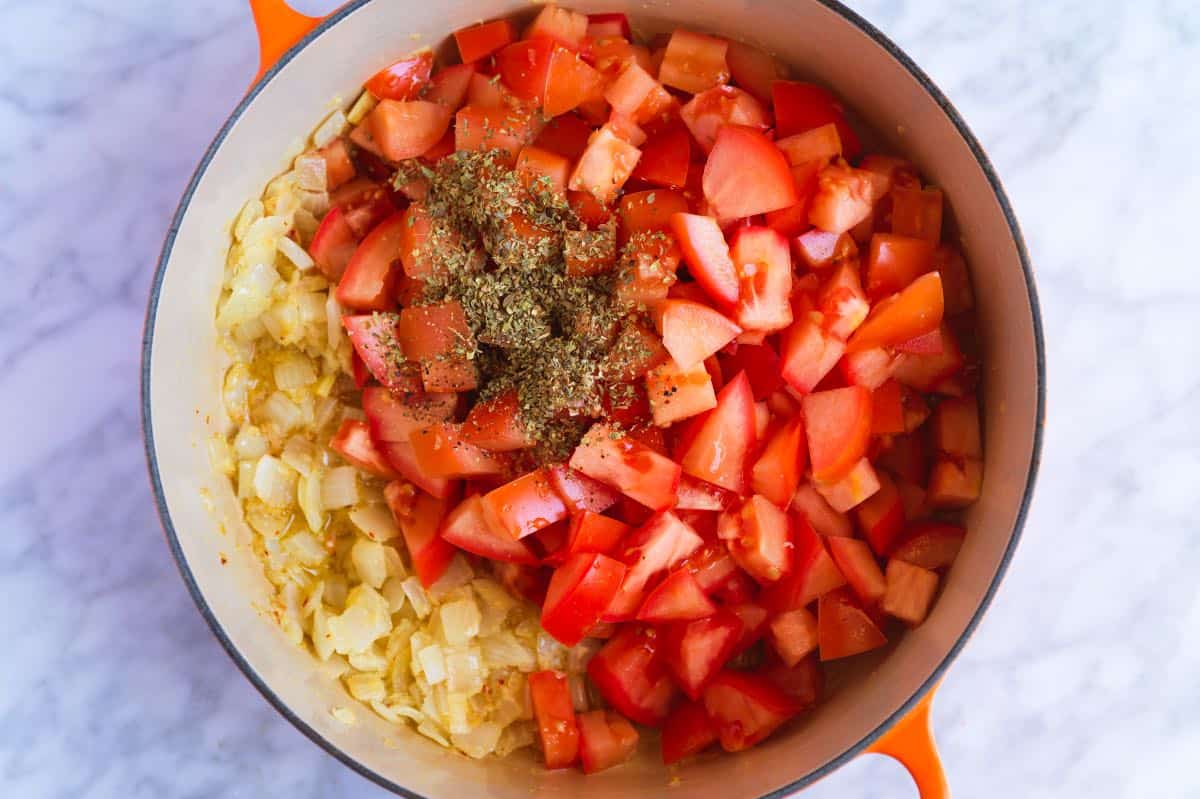
    Making pizza sauce with fresh tomatoes and garlic

    Tip 2: Finish simmering uncovered to thicken. Uncover the pot and continue to simmer for another 30 minutes. During this time, the sauce will concentrate its flavor and become incredibly flavorful. When the sauce is done cooking, blend until your desired consistency.
    Cooked pizza sauce

    Ways to Use Homemade Pizza Sauce

    Make pizza! Stretch your pizza dough and spoon on your sauce. I keep the sauce application pretty light. You should be able to see through the sauce. Here’s our easy pizza dough recipe! I love using this sauce to make our family’s favorite cheese pizza. For an easier option, make flatbread pizza!

    Beyond pizza, this amazing sauce is also great for pasta, lasagna, and gnocchi. Whenever a recipe calls for pasta sauce, use this pizza sauce instead. The garlicky tomato sauce works well in almost any recipe that uses red sauce.
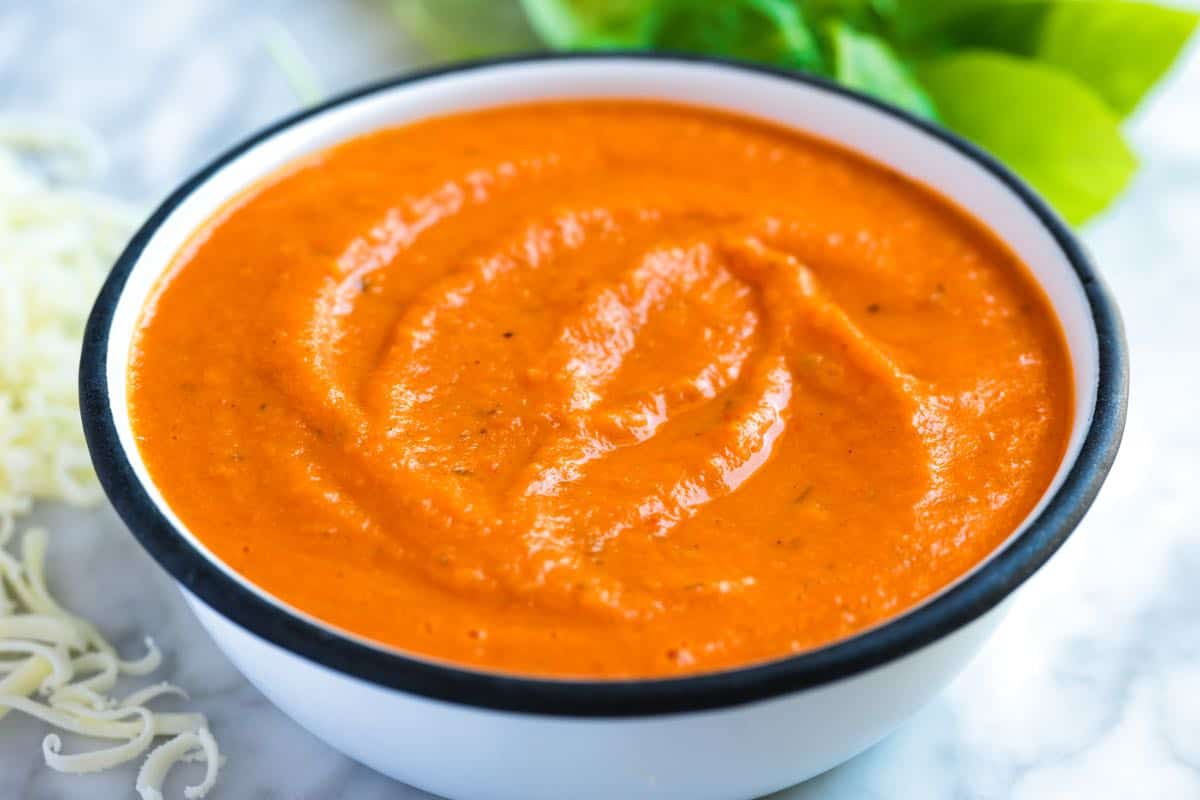
    Homemade Pizza Sauce made with fresh tomatoes.

    The Best Pizza Sauce

    • PREP
    • COOK
    • TOTAL

    This flavorful pizza sauce recipe is made with fresh tomatoes, onion, garlic, and oregano, and it’s completely free of any added sugar. You can use this light and garlicky sauce to make your own homemade pizza or try it with pasta (it’s delicious).

    Makes 2 cups

    You Will Need

    4 cups (760g) chopped fresh tomatoes, 5 to 6 medium

    4 tablespoons olive oil

    3 cloves garlic, minced or finely grated

    3/4 cup (100g) chopped onion

    Pinch red pepper flakes or gochugaru (Korean pepper flakes)

    1 teaspoon dried oregano

    4 twists black pepper

    1/4 teaspoon fine sea salt, plus more to taste

    Directions

      1Over low heat, combine olive oil, garlic, onion, and pepper flakes in a medium saucepan. Cover the pot and cook for 5 minutes.

      2Add the tomatoes, oregano, and black pepper. Simmer, covered, for 30 minutes.

      3Uncover, and continue to simmer for another 30 minutes, stirring every once and a while.

      4Season with salt — start with 1/4 teaspoon and add from there. Use an immersion blender or stand blender to puree the sauce.

    Adam and Joanne’s Tips

    • Canned tomatoes: We love fresh tomatoes for this sauce and have even found that the more lackluster winter tomatoes in stores work perfectly well for this pizza sauce. That said, you can use canned tomatoes. We recommend using drained whole peeled tomatoes.
    • The nutrition facts provided below are estimates.

    Nutrition Per Serving
    Serving Size
    1/4 cup
    /
    Calories
    43
    /
    Total Fat
    3.6g
    /
    Saturated Fat
    0.5g
    /
    Cholesterol
    0mg
    /
    Sodium
    38.8mg
    /
    Carbohydrate
    2.8g
    /
    Dietary Fiber
    0.8g
    /
    Total Sugars
    1.3g
    /
    Protein
    0.5g


    AUTHOR:

    Joanne Gallagher

    Adam and Joanne of Inspired Taste

    We are Adam and Joanne Gallagher, the creators of Inspired Taste. Established in 2009, Inspired Taste grew from a childhood dream into one of the internet’s most trusted recipe sites with hundreds of reliable recipes, step-by-step videos, and expert tips.More About Us
    Source link

  • Lemon Turmeric Lentil Soup Recipe

    Lemon Turmeric Lentil Soup Recipe

    This is the best lentil soup recipe I’ve ever made. This is my go-to soup whenever I need delicious healthy comfort food.

    Lentil Soup

    I make this lentil soup recipe all year round. It’s so good! I love the combination of spices and lemon in this simple soup. It’s so comforting and honestly makes me feel so good!

    I don’t blend my soup like other lentil soup recipes, and I love the brothy texture of whole lentils and veggies. If you prefer blended soups, feel free to blend this one. It will be super creamy. For more about lentils, see my guide to cooking lentils. Or, for another hearty soup, try our easy split pea soup!

    Key Ingredients

    • Lentils: I use brown or French lentils (a type of green lentil) for this soup. They cook up soft and tender, and they’re packed with fiber, B vitamins, iron, and protein, while being low in fat. We love lentils so much, we wrote an entire article about how to cook lentils.
    • Garlic, onion, and carrots: These aromatics add delicious flavor, texture, and color to our soup.
    • Ground cumin, coriander, and turmeric: These spices bring warmth, earthiness, and a vibrant golden hue. If you don’t have them on hand, some readers have substituted curry powder, which creates a different but delicious flavor profile.
    • Broth: For a vegetarian/vegan soup, use vegetable broth. Otherwise, chicken broth works beautifully.
    • Greens: A handful of kale or spinach adds more nutrients, flavor, and color to the soup.
    • Lemon: Fresh lemon juice lifts all the flavors in the soup. I also like adding a few lemon slices to each bowl when serving.
    • Fresh herbs: While optional, fresh dill or parsley adds flavor to the soup.

    Find the full recipe with measurements below.

    How to Make the Best Lentil Soup

    Tip 1: Toast your spices. Like many of the soup recipes on Inspired Taste, this lentil soup recipe is incredibly simple. In a large pot or Dutch oven, cook onions and carrots until they soften and smell sweet. Next, toss in garlic, cumin, coriander, and turmeric and cook them briefly for about 30 seconds. This short cooking time allows the flavors to bloom and intensify.

    Toasting spices to make lentil soup

    Tip 2: Rinse your lentils. Before adding them to the pot, always rinse the lentils under running water. Then, give them a quick check to remove any stray beans, rocks, or grains that may have snuck in during packaging.

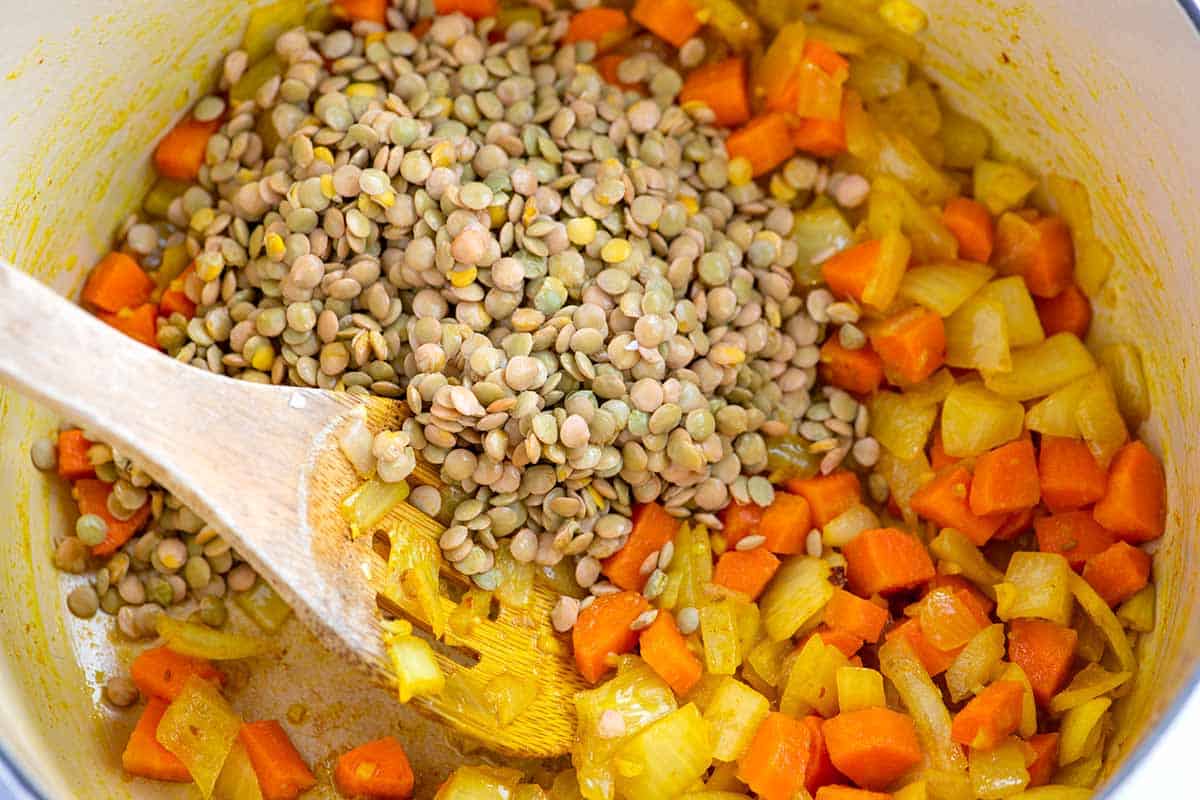
    Uncooked lentils with carrots, onions and turmeric for Homemade Lentil Soup

    Tip 3: Simmer partially covered. Once the lentils are rinsed, add them to the pot along with the broth. Then, bring everything to a simmer and cook, partially covered, until the lentils are soft. This usually takes about 30 to 40 minutes.

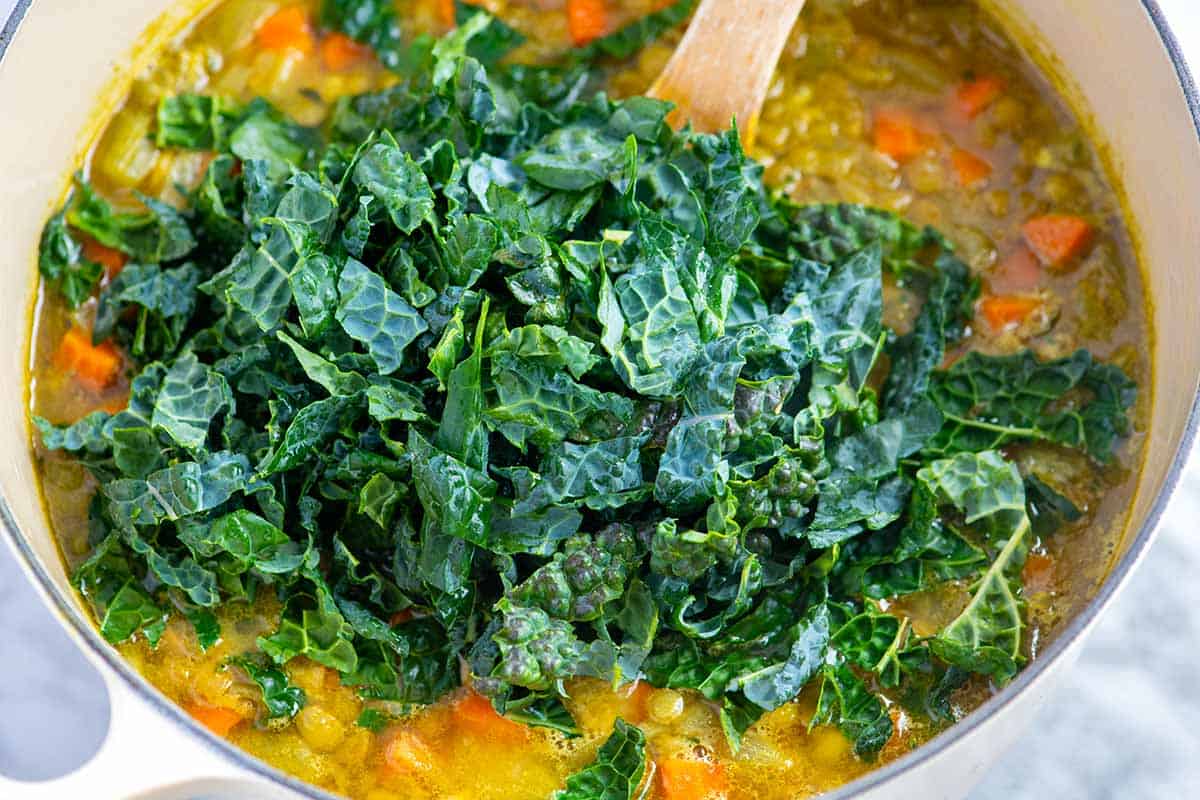
    Tip 4: Finish with greens. Taste the soup a few minutes before serving and adjust the seasoning as needed. Then, stir in some greens and let them wilt slightly.

    Adding kale to lentil soup

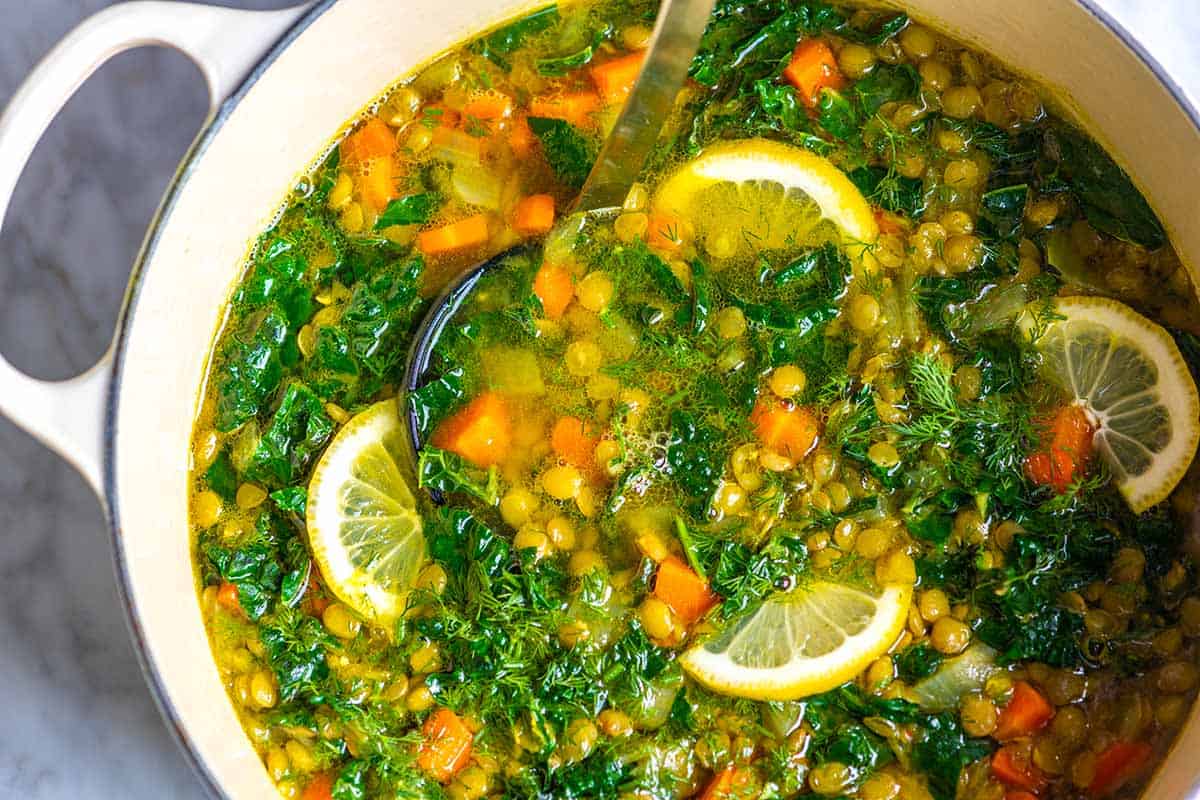
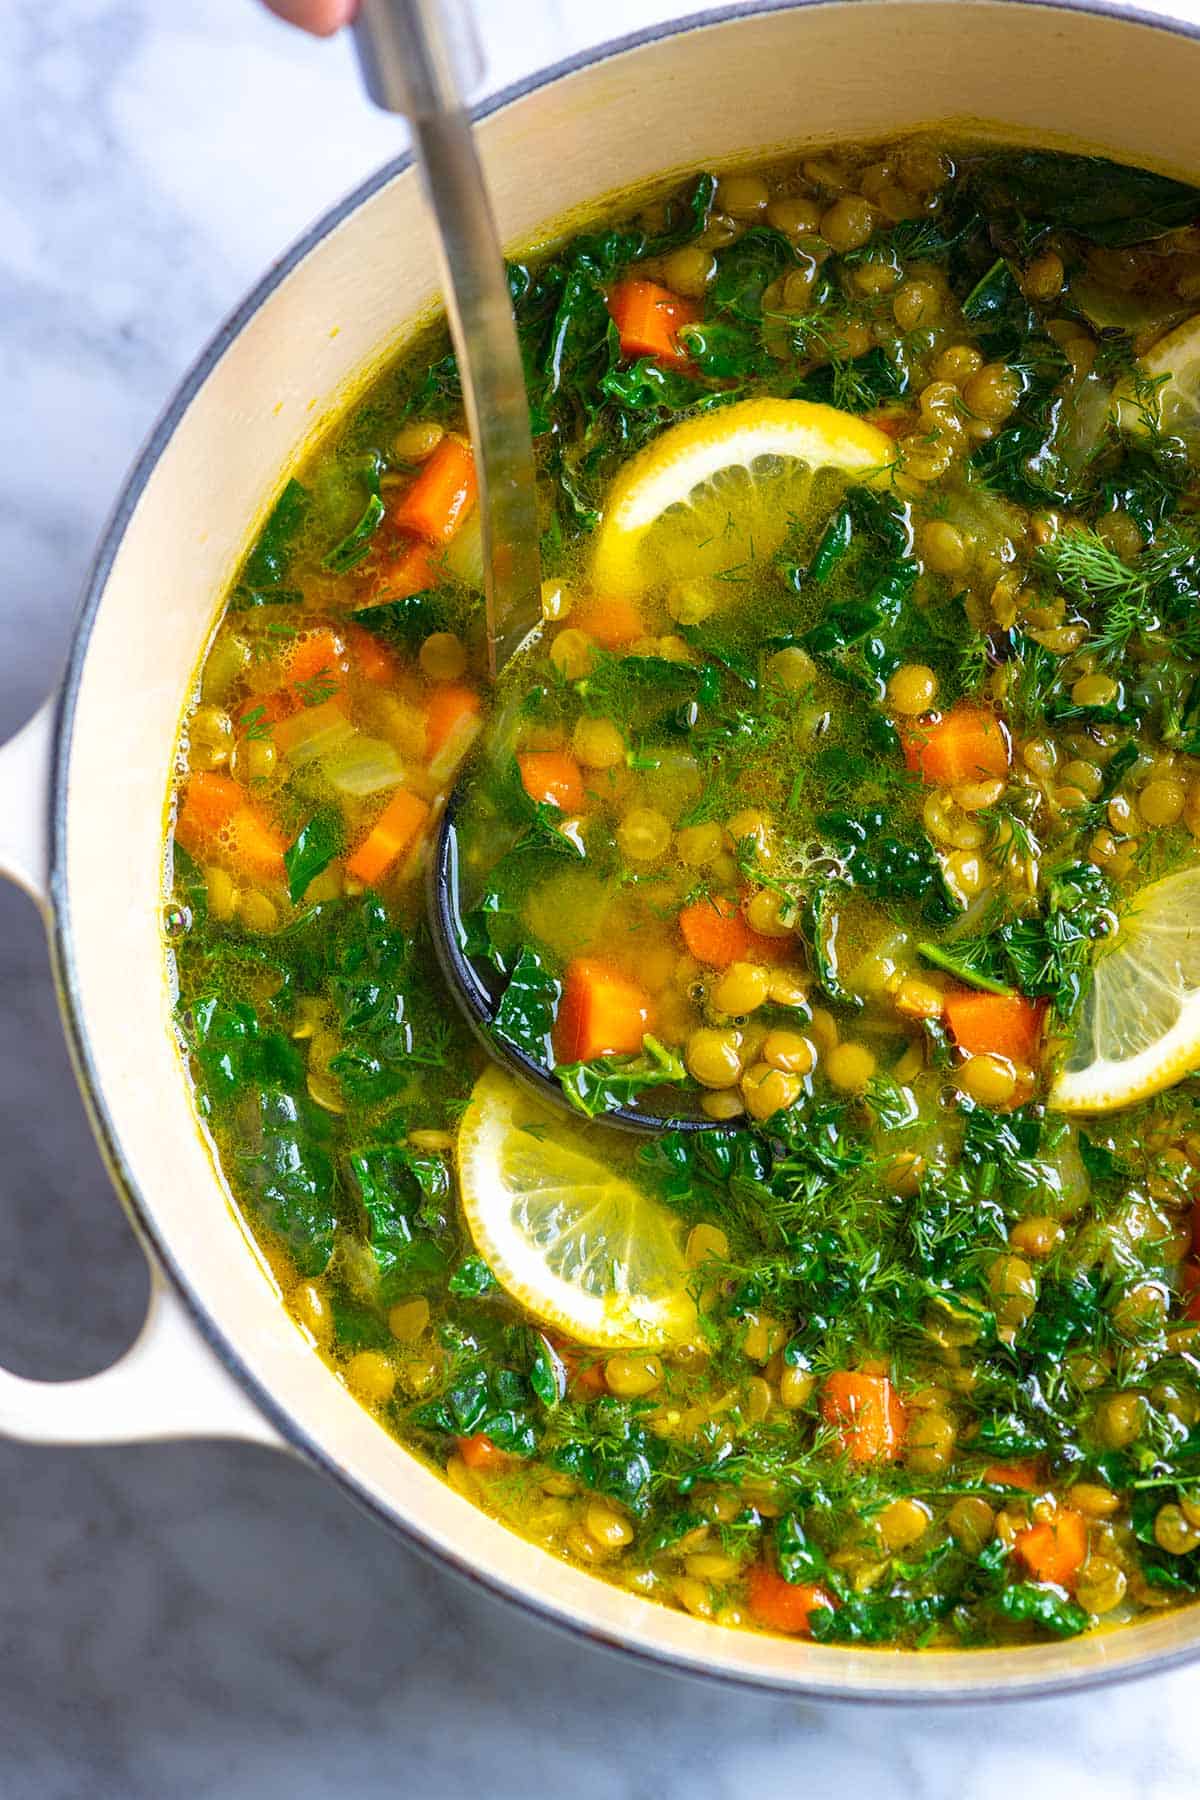
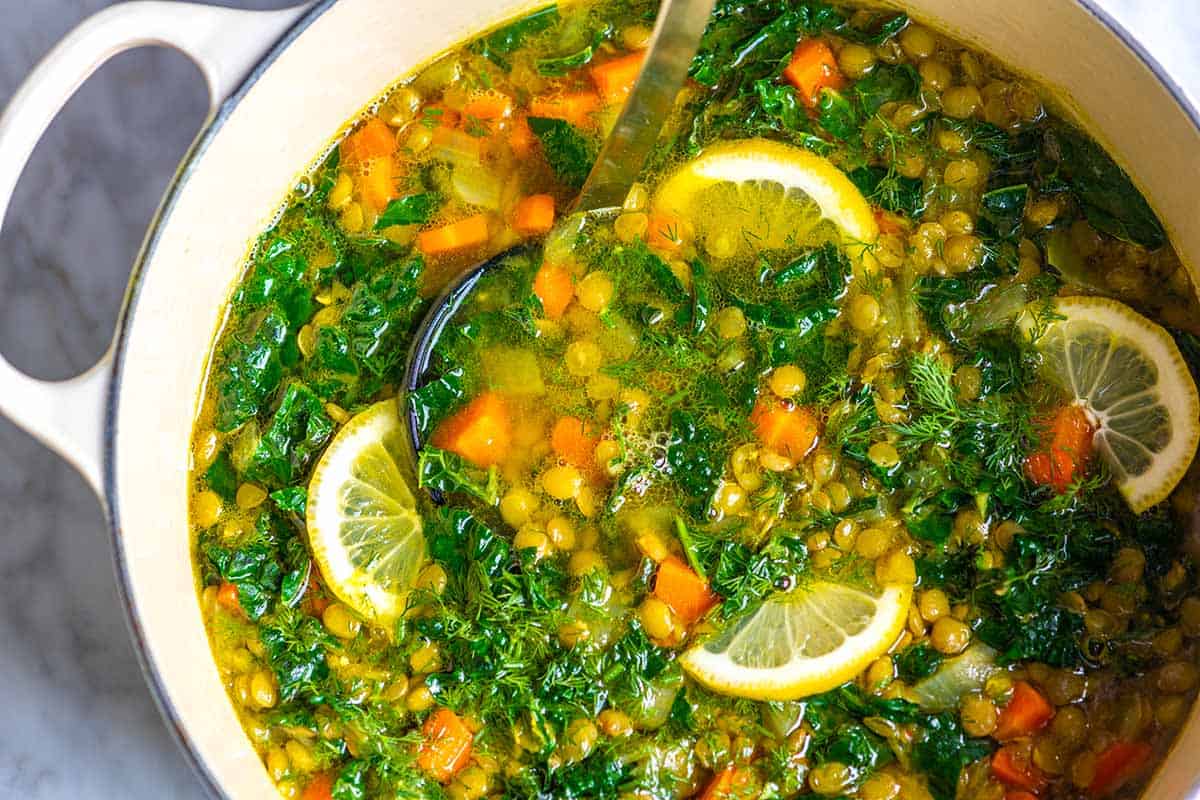
    Tip 5: Serve with lemon slices and herbs. We love to serve the soup with a generous squeeze of fresh lemon juice and a handful of herbs. Add a few lemon slices to each bowl for a little lemony flavor. This is totally optional, but it’s pretty and adds even more lemony flavor.

    What to Serve with Lentil Soup

    Lentil soup is already a hearty and flavorful meal, but you can add a side to round out the meal. I love serving this soup next to a slice of crusty bread, flatbread, or homemade focaccia. Garlic bread would be delicious, too.

    Serve this soup next to a light salad with your favorite dressing. I love this carrot ginger dressing or this green goddess dressing. This lemony arugula salad would be really good, too.

    More Soup Recipes

    Lentil soup with kale, lemon, carrots, and turmeric

    Lemon Turmeric Lentil Soup

    • PREP
    • COOK
    • TOTAL

    This is our favorite lentil soup recipe. I make it whenever we need some healthy comfort food. It’s savory, satisfying, and utterly delicious. I like fresh lemon in this soup and serve it with slices of lemon. You don’t eat the lemon slices. They are there for more flavor and show lemon has been added to the soup.

    6 to 8 servings

    Watch Us Make the Recipe

    You Will Need

    2 cups (340g) brown or green lentils, picked and rinsed

    2 tablespoons olive oil

    2 cups finely chopped onion (1 medium onion)

    1 ½ cups chopped carrot (2 large carrots)

    2 teaspoons minced garlic (3 cloves)

    1 teaspoon ground cumin

    1/2 teaspoon ground coriander

    1/2 teaspoon ground turmeric

    1/2 teaspoon fresh ground black pepper

    8 cups chicken broth or vegetable broth

    2 heaping cups shredded kale or spinach

    1 to 2 lemons

    1/4 cup chopped fresh herbs like parsley or dill, optional

    Fine sea salt, to taste

    Directions

      1Heat the oil in a large pot (like a Dutch oven) over medium heat. Add the onions, carrot, and 1/4 teaspoon of salt and cook, stirring occasionally, until they are soft and starting to smell sweet, about 5 to 7 minutes.

      2Stir in the garlic, cumin, coriander, black pepper, and turmeric, and cook for 30 seconds.

      3Stir in the lentils and broth. Increase the heat to high and bring just to a boil. Taste, then adjust with salt (we add between 1/2 and 1 teaspoon depending on how well-seasoned the broth is).

      4Reduce the heat to a simmer and cook, partially covered, until the lentils are tender, 35 to 40 minutes.

      5Uncover the pot, stir in the kale or spinach, and cook, uncovered, another 5 minutes.

      6Take the soup off the heat and stir in the juice of half a lemon and the fresh herbs. Taste the soup and season with additional salt and/or lemon juice. (I like quite a bit of lemon.)

      7Serve, or if you prefer the soup blended, use an immersion blender to blend until you achieve your desired consistency. For even more lemon flavor, serve with a few lemon slices.

    Adam and Joanne’s Tips

    • Storing: Lentil soup can be stored in an airtight container in the fridge for up to four days. (I actually think it gets better over time.) You might find that the lentils absorb some of the extra liquid as it sits in the fridge. To bring it back to a soup-like consistency, simply add a splash of water or broth before reheating.
    • Freezing tips: You can also freeze the soup. It should keep for several months. Defrost in the fridge overnight and reheat before serving.
    • For some extra flavor, cook bulk sausage or ham with the onions and carrots.
    • The nutrition facts provided below are estimates. Sodium will vary depending on the broth used.

    Nutrition Per Serving
    Serving Size
    1/6 of the recipe
    /
    Calories
    298
    /
    Total Fat
    5.5g
    /
    Saturated Fat
    0.8g
    /
    Cholesterol
    0mg
    /
    Sodium
    1155.9mg
    /
    Total Carbohydrate
    45.3g
    /
    Dietary Fiber
    8g
    /
    Total Sugars
    5.2g
    /
    Protein
    19.5g


    AUTHOR:

    Joanne Gallagher

    Adam and Joanne of Inspired Taste

    We are Adam and Joanne Gallagher, the creators of Inspired Taste. Established in 2009, Inspired Taste grew from a childhood dream into one of the internet’s most trusted recipe sites with hundreds of reliable recipes, step-by-step videos, and expert tips.More About Us

    Source link

  • Easy Baked Wonton Cups Recipe

    Easy Baked Wonton Cups Recipe

    Our easy baked wonton cups are the perfect blank canvas for your favorite fillings! We show you how to transform wonton wrappers into crispy cups, plus delicious filling ideas for them.

    Easy Baked Wonton Cups

    Wonton wrappers are not just for dumplings! We love creating these fun and easy party appetizers using baked wonton cups as the shell. They’re perfect for a swanky cocktail party but easy enough for a casual get-together.

    We’ve been making baked wonton cups for years and have found many ways to fill them. I’ve listed our favorites below. You might also enjoy these chili lime shrimp wonton cups and our mini fish tacos which swap tortillas for baked wonton cups. I also use similar wrappers (just a bit larger) to make our crispy chicken spring rolls!

    Key Ingredients

    • Wonton Wrappers: I use square wonton wrappers to make little cups. Wonton wrappers generally come in a few different thicknesses. If you have the choice, go with thin or medium.
    • Oil: I brush my wonton wrappers with a little oil so they crisp and brown nicely in the oven. Avocado oil or olive oil is great.
    • Salt: This is optional, but I like lightly seasoning one side of the wrappers with a bit of salt.
    • Fillings: There are many options for what to serve inside wonton cups. I have shared a handful of fun and delicious ideas below.

    How to Make Wonton Cups

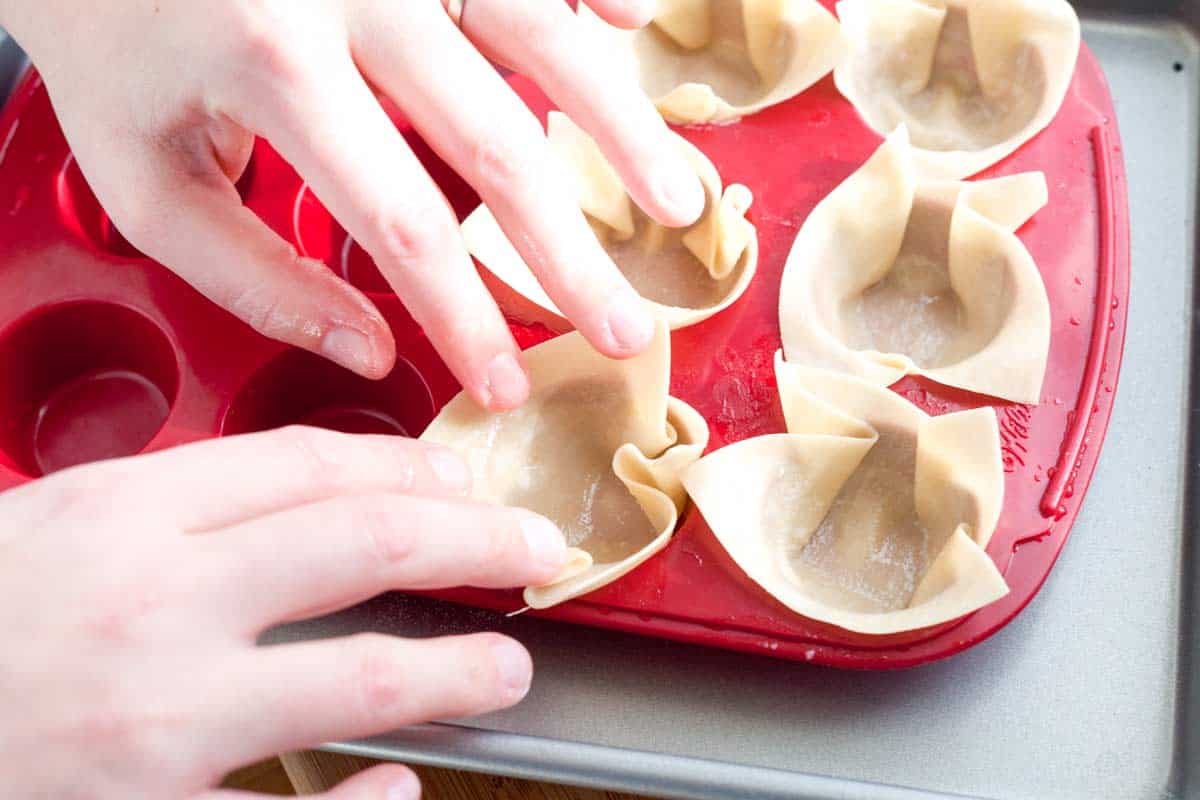
    It’s really easy to transform store-bought wonton wrappers into mini cups. To make the cups, brush wonton wrappers with oil, lightly season with salt, and then press into mini muffin cups. Bake them until golden brown and crisp. They take 8 to 10 minutes in a 350°F oven, but watch them closely as they will burn quickly.

    How to Make Wonton Cups: Pushing wontons into a mini cupcake pan.

    While the wontons bake, you can get the fillings ready. In addition to our mini fish tacos and these easy shrimp wonton cups, I have a few more suggestions for what to add to wonton cups:

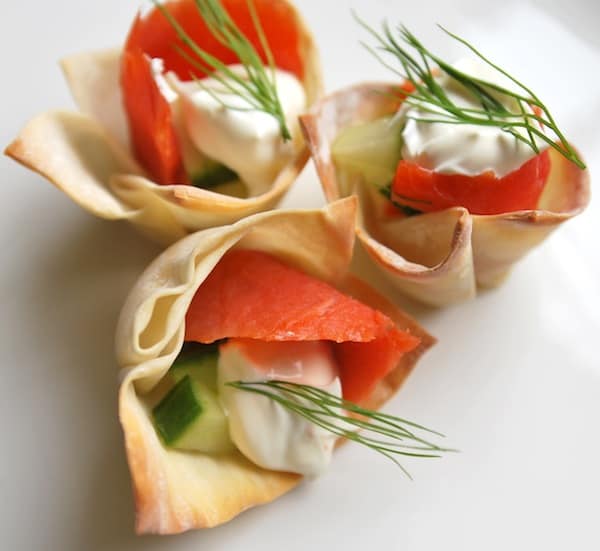
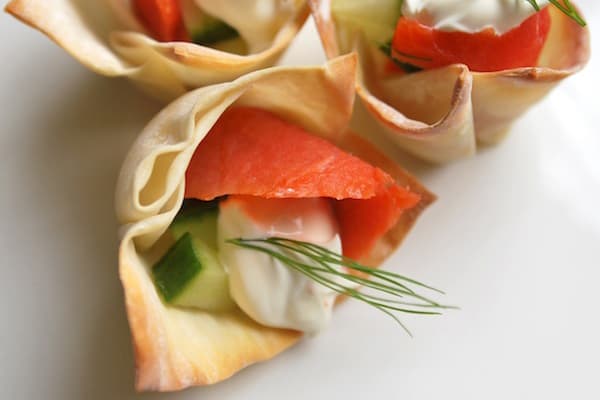
    • Smoked Salmon Wonton Cups: Fill your baked wonton cups with diced cucumber, a little fresh dill, a small spoonful of crème fraîche or sour cream, and smoked salmon.
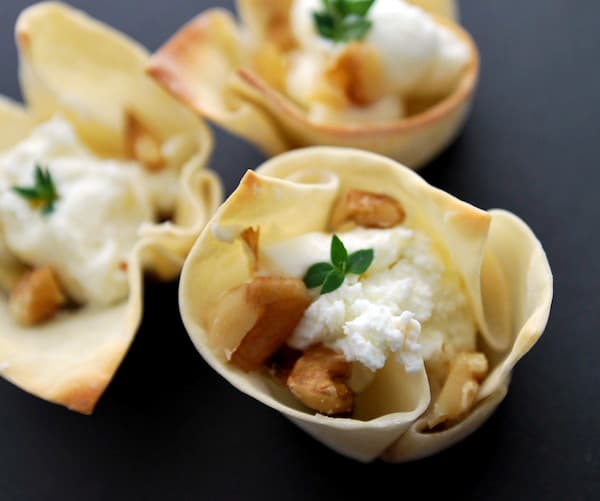
    • Goat Cheese Wonton Cups: Fill your baked wonton cups with whipped goat cheese, a little fig jam, toasted walnuts, and a leaf or two of fresh thyme.
    • Crab Rangoon Cups: Add a spoonful of the creamy filling from our crab Rangoon recipe made with cream cheese and crab meat.
    • Pulled Pork: Add some of our slow cooker pulled pork and then top it with my favorite coleslaw. Add one spinach leaf to the bottom of each cup to prevent the bottom from becoming soggy.
    • Carnitas: Fill them with these crispy carnitas and garnish with diced white onion and lime juice.
    • Spinach and Artichoke Dip: Add a spoonful of our easy spinach and artichoke dip. Since this has a lot of moisture, add one leaf of baby spinach to the bottom of the cup to prevent the bottom from becoming soggy.
    • Buffalo Chicken Dip: Add a spoonful of our hot buffalo chicken dip. Since this has a lot of moisture, add one leaf of baby spinach to the bottom of the cup to prevent the bottom from becoming soggy. You can do the same with our smoked salmon dip or this hot crab dip!
    • Guacamole and Shrimp: Add a spoonful of homemade guacamole to each cup, then top with a roasted shrimp.
    Easy Baked Wonton Cups

    Easy Baked Wonton Cups

    • PREP
    • COOK
    • TOTAL

    These baked wonton cups are the perfect blank canvas for your favorite flavors! To ensure you have enough cups for all your delicious fillings, bake a few extra wonton wrappers. Some may close up during baking, so it’s always good to have a few spares.

    Makes 20 wonton cups

    You Will Need

    24 wonton wrappers

    1 ½ tablespoons avocado oil or olive oil

    Salt

    Directions

      1Preheat oven to 350°F (177°C). Set aside a mini muffin pan.

      2Lightly brush wonton wrappers on both sides with oil. Lightly season one side with salt.

      3Press the wonton wrappers into the cups, spreading back the corners and pressing the bottoms to make a defined cup.

      4Bake until lightly browned, 8 to 10 minutes. Keep a close eye on them as they bake to make sure they are not over-browning.

      5Transfer to a rack and let cool.

    Adam and Joanne’s Tips

    • Storing: Baked wonton cups will keep, unfilled, in an airtight container for up to a week. For the best results, fill them right before serving.
    • Filling tips: If you have a wet filling, consider placing one baby spinach leaf on the bottom to act as a layer between the filling and the wonton cup. This prevents the moisture from making the bottom of the wonton cup soggy.
    • Nutrition facts are estimates.

    Nutrition Per Serving
    Serving Size
    1 wonton cup
    /
    Calories
    31
    /
    Total Fat
    1g
    /
    Saturated Fat
    0.1g
    /
    Cholesterol
    0.7mg
    /
    Sodium
    70mg
    /
    Carbohydrate
    4.6g
    /
    Dietary Fiber
    0.1g
    /
    Total Sugars
    0g
    /
    Protein
    0.8g


    AUTHOR:

    Joanne Gallagher

    Previous Post: Curried Chickpea Bowls
    Next Post: Chili Lime Cauliflower Tacos

    Source link

  • Crispy Parmesan Smashed Potatoes (Oven Roasted Recipe)

    Crispy Parmesan Smashed Potatoes (Oven Roasted Recipe)

    If you love crispy oven-roasted potatoes, these parmesan smashed potatoes are next level: crunchy, cheesy, and ridiculously satisfying. A perfect side dish for a weeknight dinner or the holidays!


    Jump to: ℹ️ Overview | 🛒 Ingredients | 📷 How To Make | 📹 Watch The Video | 👩‍🍳 Recipe Tips | 🥗 Serving Suggestions | 📝Full Recipe Card | 🍽 More Recipes With Potatoes


    At A Glance

    • ⏱ Ready In: 1 hour
    • 🍽 Serves: 6
    • 🌱 Diet: Vegetarian, gluten-free
    • 💪 Nutrition Highlights: Good source of fiber, satisfying, and energy-rich
    • 🥔 Main Ingredients: Baby potatoes, Parmesan cheese, olive oil, spices
    • 🌿 Flavor Profile: Crispy, cheesy, savory, garlicky, lightly smoky
    • 🧊 Meal-Prep Friendly: Best fresh, but reheats well in oven or air fryer
    • 🍽 Best Served With: Roast chicken, steak, grilled veggies, or as a snack with dips

    These crispy Parmesan smashed potatoes are one of those sides that quietly steal the spotlight. You get that perfect contrast of crispy edges with a golden Parmesan crust, and soft, fluffy centers that soak up all the seasoning. The trick is smashing them just enough so the edges get craggy (that’s where the magic happens).

    The Parmesan adds a salty, nutty layer that melts and crisps in the oven, almost like a built-in cheese chip. It’s inspired by classic crispy oven-roasted potatoes, but with a little extra personality thanks to the cheese and spices.

    I like that it feels a bit fancy without actually being complicated. It’s also a very forgiving recipe, great for weeknights or when you’ve got people coming over. And honestly, anything involving potatoes + Parmesan cheese is already halfway to success (no convincing needed).

    👩‍🍳 You might also like my crispy smashed potatoes with minty peas, these Greek roasted potatoes, my sliced potato bake, or these cheesy baked potatoes. Or, try this crispy smashed potato salad.

    What You’ll Need

    Here is what you’ll need for these Parmesan smashed potatoes. Find the full measurements in the recipe card below.

    • White potatoes – I think baby or small potatoes are the best, the perfect size for smashing; creamy inside. No baby potatoes? Use small Yukon Golds or cut larger potatoes.
    • Salt (for boiling) – seasons from the inside out (a small but important step).
    • Olive oil (or oil + butter) – helps everything crisp and adds richness; add a little garlic oil for extra flavor.
    • Garlic powder – easy flavor boost without burning.
    • Smoked paprika – adds subtle smokiness and color; swap smoked paprika for regular paprika or chili powder.
    • Salt and black pepper – balance and seasoning.
    • Parmesan cheese – brings salty, nutty, umami flavor and creates that crispy crust (a classic flavor booster). Use freshly grated Parmesan here.
    • Parsley – at the end, for freshness.
    • Lemon zest – at the end, for brightness (great contrast to the richness).
    • Chili flakes – at the end, for a little heat if you like.

    How To Make Parmesan Smashed Potatoes

    Find the full recipe and nutritional information below. Here are some handy step-by-step photos for how to make crispy roasted Parmesan potatoes.

    • Boil potatoes in well-salted water until fork-tender (15–20 minutes), then drain
    • Preheat oven to 425°F / 220°C and prepare a lined tray with a little oil
    • Place potatoes on tray and gently smash to about ½ inch thick
    • Drizzle with oil and season with garlic powder, paprika, salt, and pepper
    • Roast for 20 minutes until crispy and golden underneath
    • Sprinkle over most of the Parmesan and return to oven for 10 minutes
    • Finish with remaining Parmesan and any optional toppings

    Watch The Video

    Recipe Tips

    • Dry potatoes slightly after boiling – this helps them crisp better
    • Don’t over-smash – you want cracks and edges, not mashed potatoes
    • Use finely grated parmesan – it melts evenly and creates a better crust
    • Extra crispy hack: sprinkle a little Parmesan directly on the tray before adding potatoes
    • Storage & Reheating: Store in fridge up to 3–4 days; Reheat in oven or air fryer for best crispiness; Avoid microwaving (they’ll go soft… still tasty, but not the same)
    • Variations: Add garlic butter instead of plain oil; try rosemary or thyme for a herby version; sprinkle with mozzarella at the end for extra cheesiness

    Serving Suggestions

    These are the kind of potatoes that go with just about anything. I love them alongside roast chicken or a simple steak, but they’re just as good with grilled veggies or even a fried egg on top for a lazy dinner.

    They also make a great party side or appetizer —serve them with a garlicky yogurt dip, bang bang sauce, or a rosemary aioli and watch them disappear fast.

    These are great for Thanksgiving sides, or for your Christmas or Easter table.

    💬 If you’ve tried this crispy Parmesan smashed potatoes or any other recipe on the blog then don’t forget to rate the recipe and let me know how you got on in the comments below, I love hearing from you! You can also FOLLOW ME on Instagram, Facebook, Pinterest, YouTube, and or sign up to my Newsletter to see more of my delicious food.

    Want to Save This Recipe?

    Enter your email & I’ll send it to your inbox. Plus, get great new recipes from me every week!

    By submitting this form, you consent to receive emails from Cooked & Loved

    If you love crispy oven-roasted potatoes, these parmesan smashed potatoes are next level: crunchy, cheesy, and ridiculously satisfying. Find step-by-step photos and more recipe tips above.

    • Add potatoes to a pot of well-salted water. Bring to a boil and cook for 15–20 minutes, until fork-tender. Drain and let sit for a few minutes to dry slightly.

    • Preheat oven to 425°F (220°C). Line a baking tray with parchment paper and drizzle lightly with oil.

    • Place potatoes on the tray and gently smash each one to about ½ inch thick.

    • Drizzle with olive oil and sprinkle with garlic powder, smoked paprika, salt, and pepper.

    • Roast for 20 minutes, until the bottoms are golden and edges are crispy.

    • Sprinkle ⅔ cup of Parmesan over the potatoes. Return to oven for another 10 minutes, until melted and golden.

    • Remove from oven and immediately sprinkle over the remaining Parmesan. Add optional toppings if desired.

    • Why aren’t my potatoes crispy? They may be too wet. Let them dry slightly after boiling and don’t overcrowd the tray.
    • Can I make these ahead of time? You can boil and smash the potatoes ahead, then roast just before serving for best texture.
    • What’s the best potato to use? Baby potatoes or small waxy potatoes work best—they hold their shape and get creamy inside.
    • Can I use pre-shredded parmesan? You can, but finely grated (fresh or microplaned) melts better and gives a crispier finish. It melts evenly and creates a better crust.
    • How do I make them extra cheesy? Add a little parmesan under the potatoes before roasting for a crispy cheese base—highly recommend.
    • Don’t over-smash – you want cracks and edges, not mashed potatoes
    • Extra crispy hack: sprinkle a little parmesan directly on the tray before adding potatoes
    • Storage & Reheating: Store in fridge up to 3–4 days; Reheat in oven or air fryer for best crispiness; Avoid microwaving (they’ll go soft… still tasty, but not the same)
    • Variations: Add garlic butter instead of plain oil; try rosemary or thyme for a herby version; sprinkle with mozzarella at the end for extra cheesiness

    Calories: 251kcal | Carbohydrates: 29g | Protein: 8g | Fat: 12g | Saturated Fat: 4g | Polyunsaturated Fat: 1g | Monounsaturated Fat: 6g | Cholesterol: 15mg | Sodium: 689mg | Potassium: 677mg | Fiber: 3g | Sugar: 1g | Vitamin A: 229IU | Vitamin C: 30mg | Calcium: 167mg | Iron: 1mg

    Keywords: Crispy Parmesan Smashed Potatoes, oven-roasted potatoes

    More Recipes With Potatoes


    Source link

  • Crab Rangoon Dip  Recipe | The Recipe Critic

    Crab Rangoon Dip  Recipe | The Recipe Critic

    This website may contain affiliate links and advertising so that we can provide recipes to you. Read my disclosure policy.

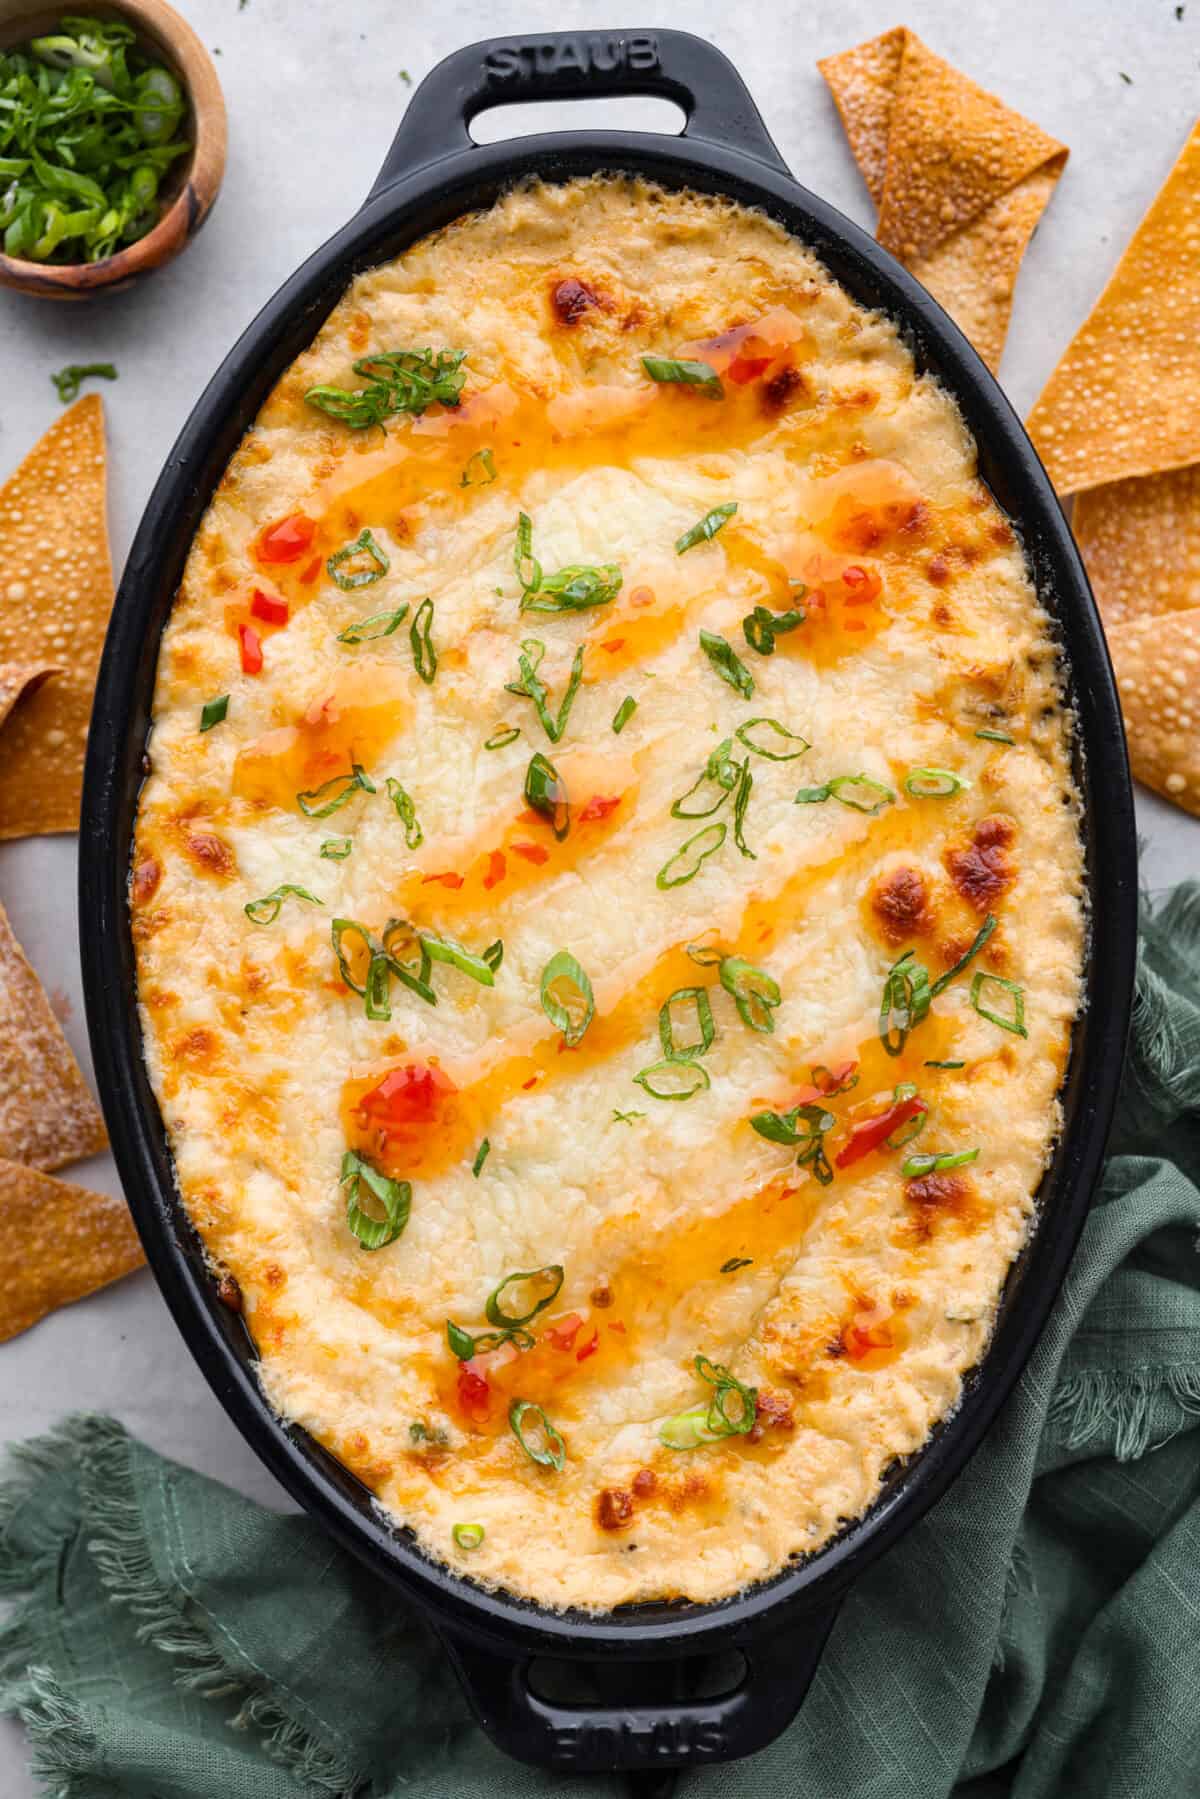
    We are obsessed with this crab rangoon dip! It’s hot, creamy, cheesy and packed with crab and major flavor. It’s sure to become your go-to appetizer when you really want to impress!

    Warm dips are welcome at any party or gathering! If you agree, then you must try these tried and true favorites like this chicken alfredo dip, this spinach artichoke dip or this flavorful hot corn dip. I love them all so much!

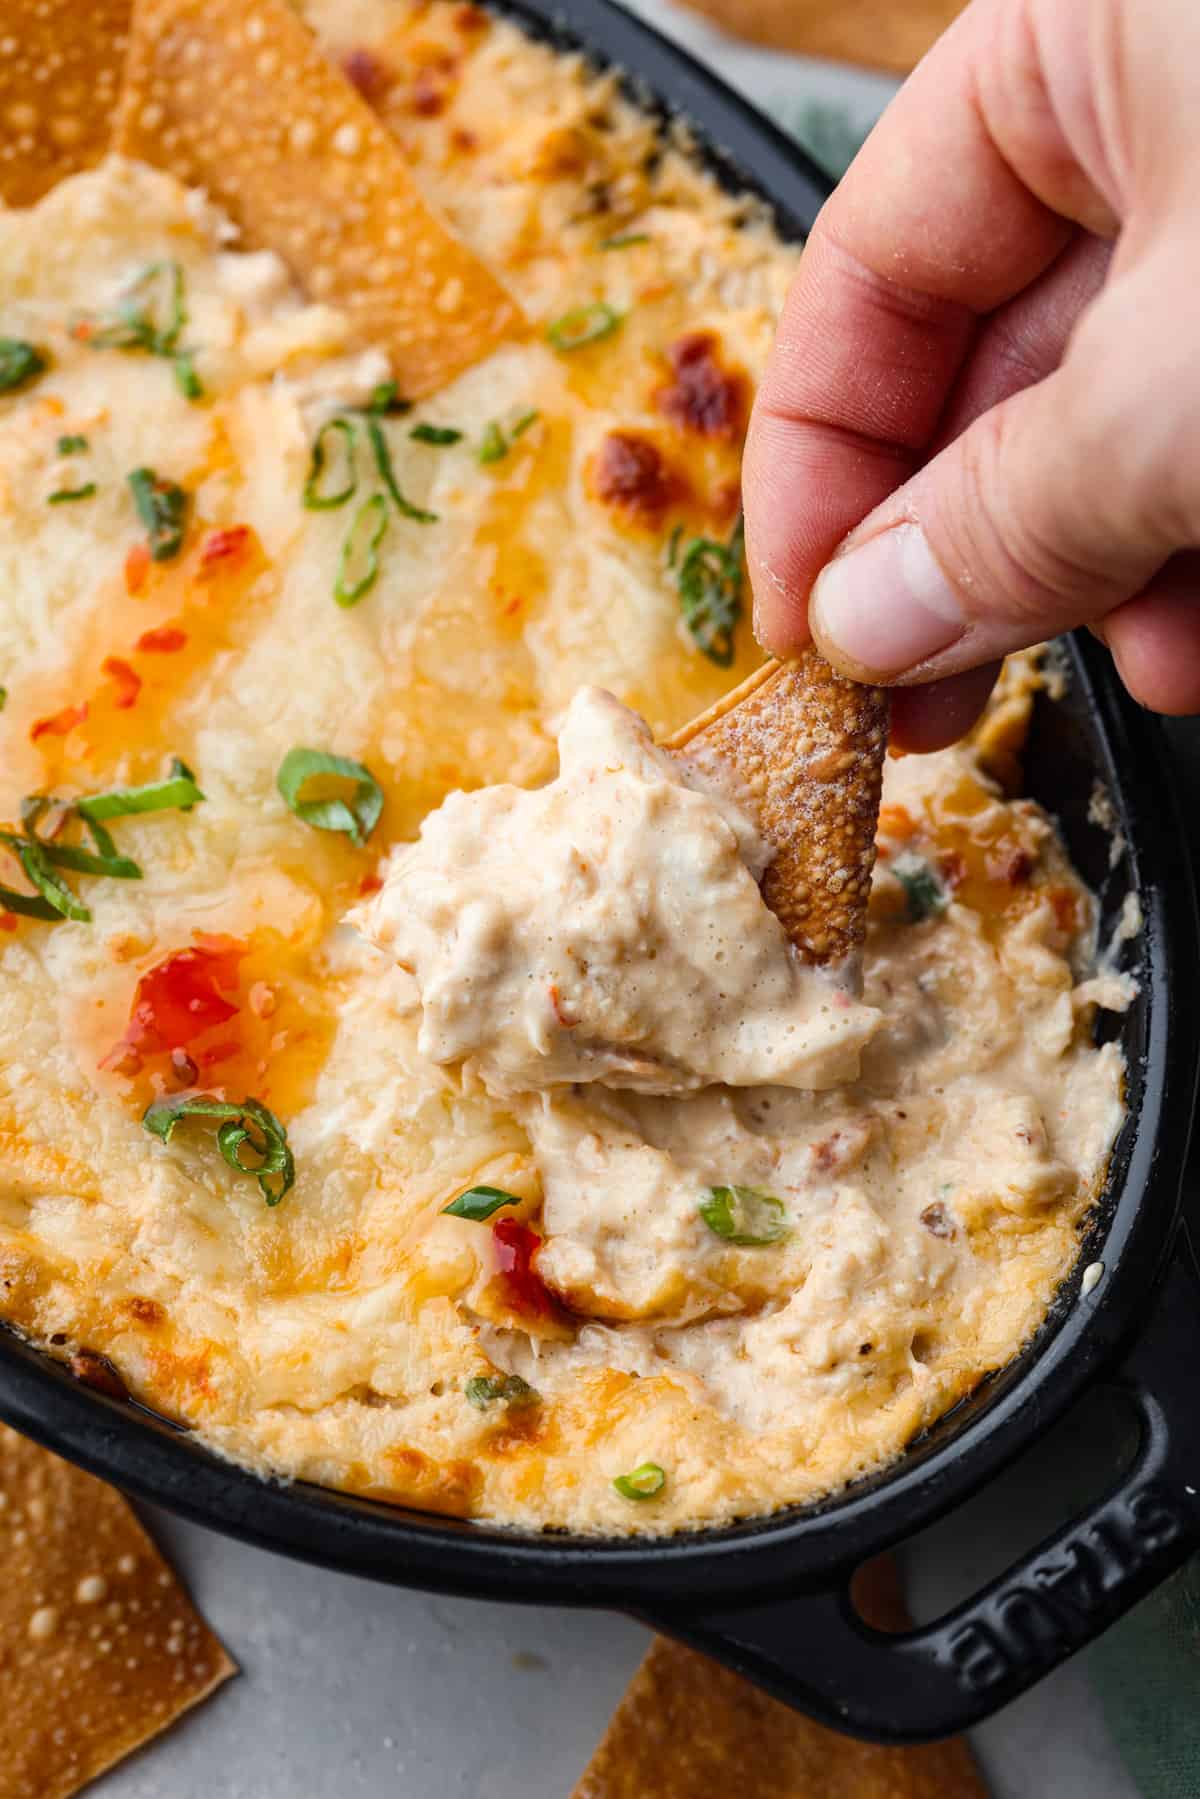
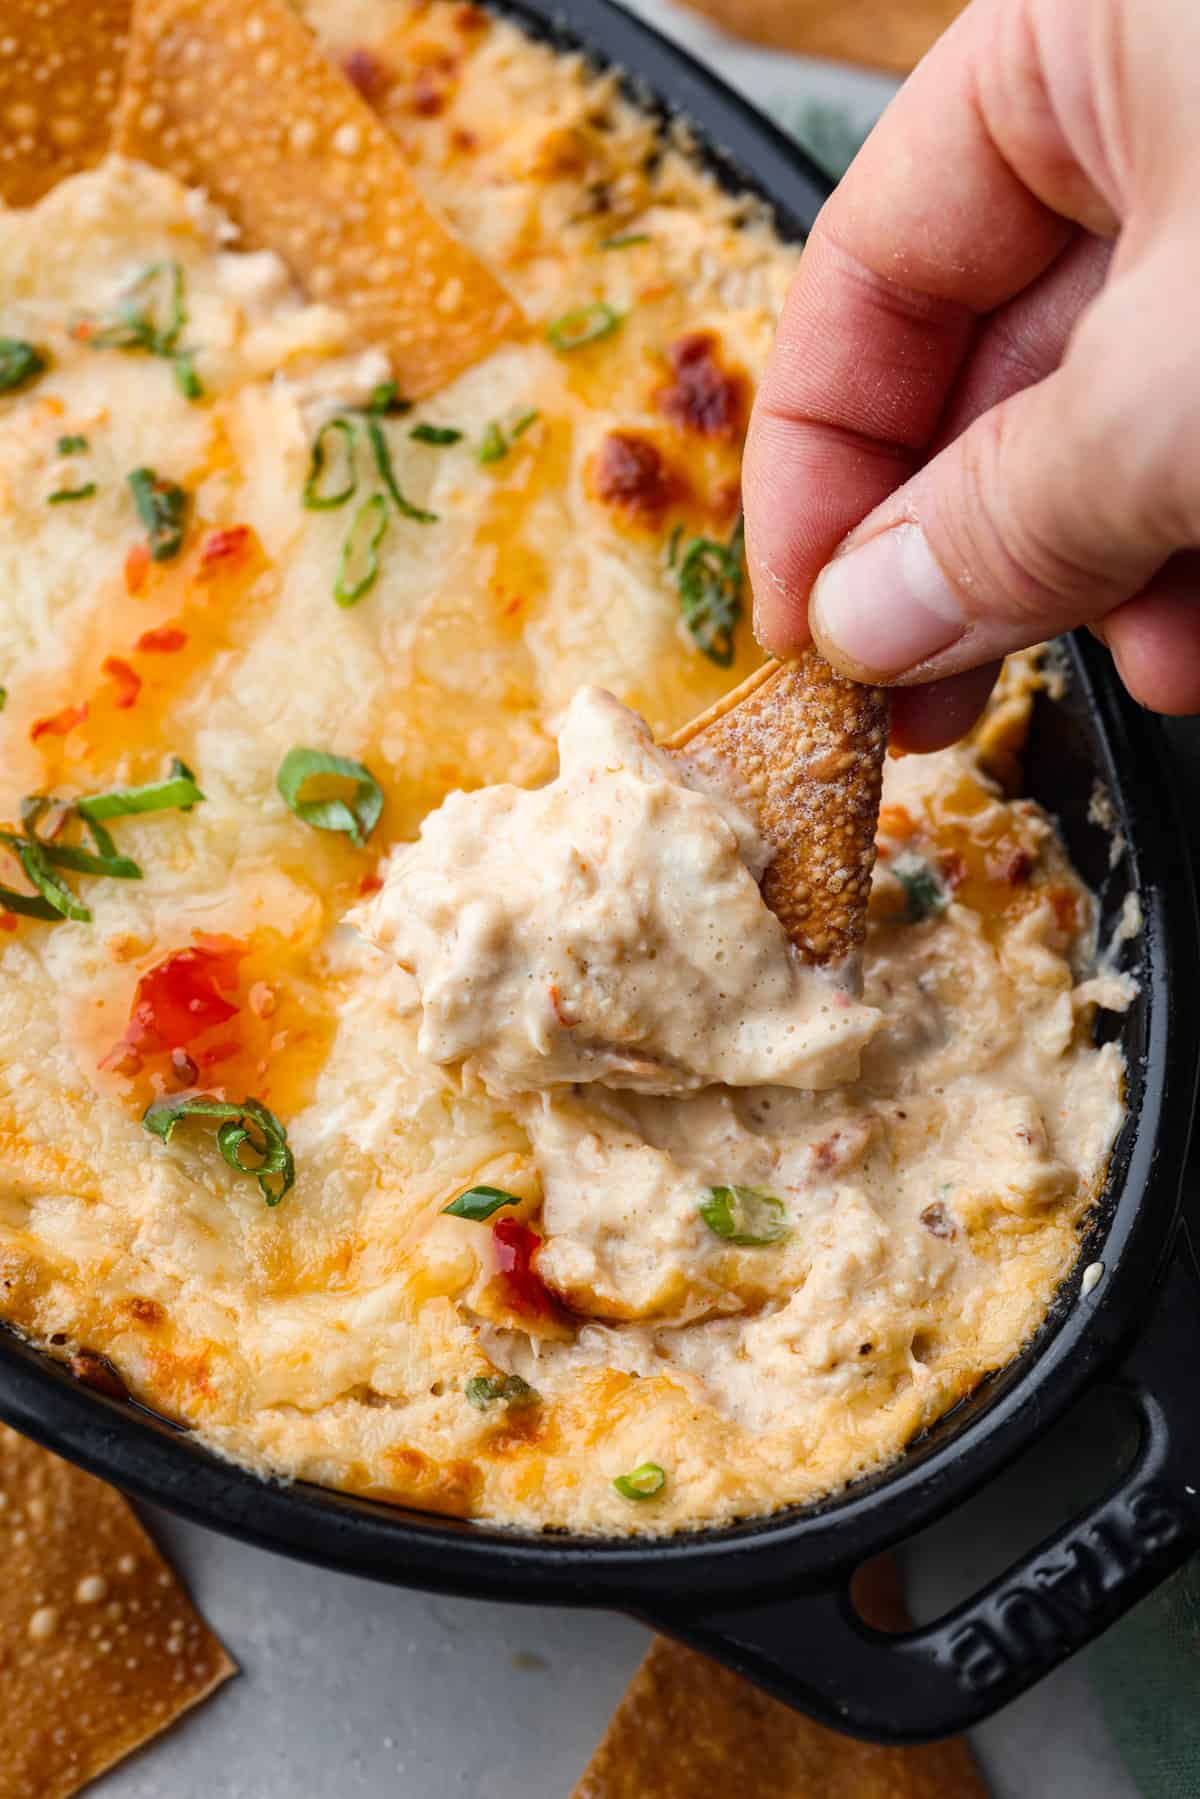
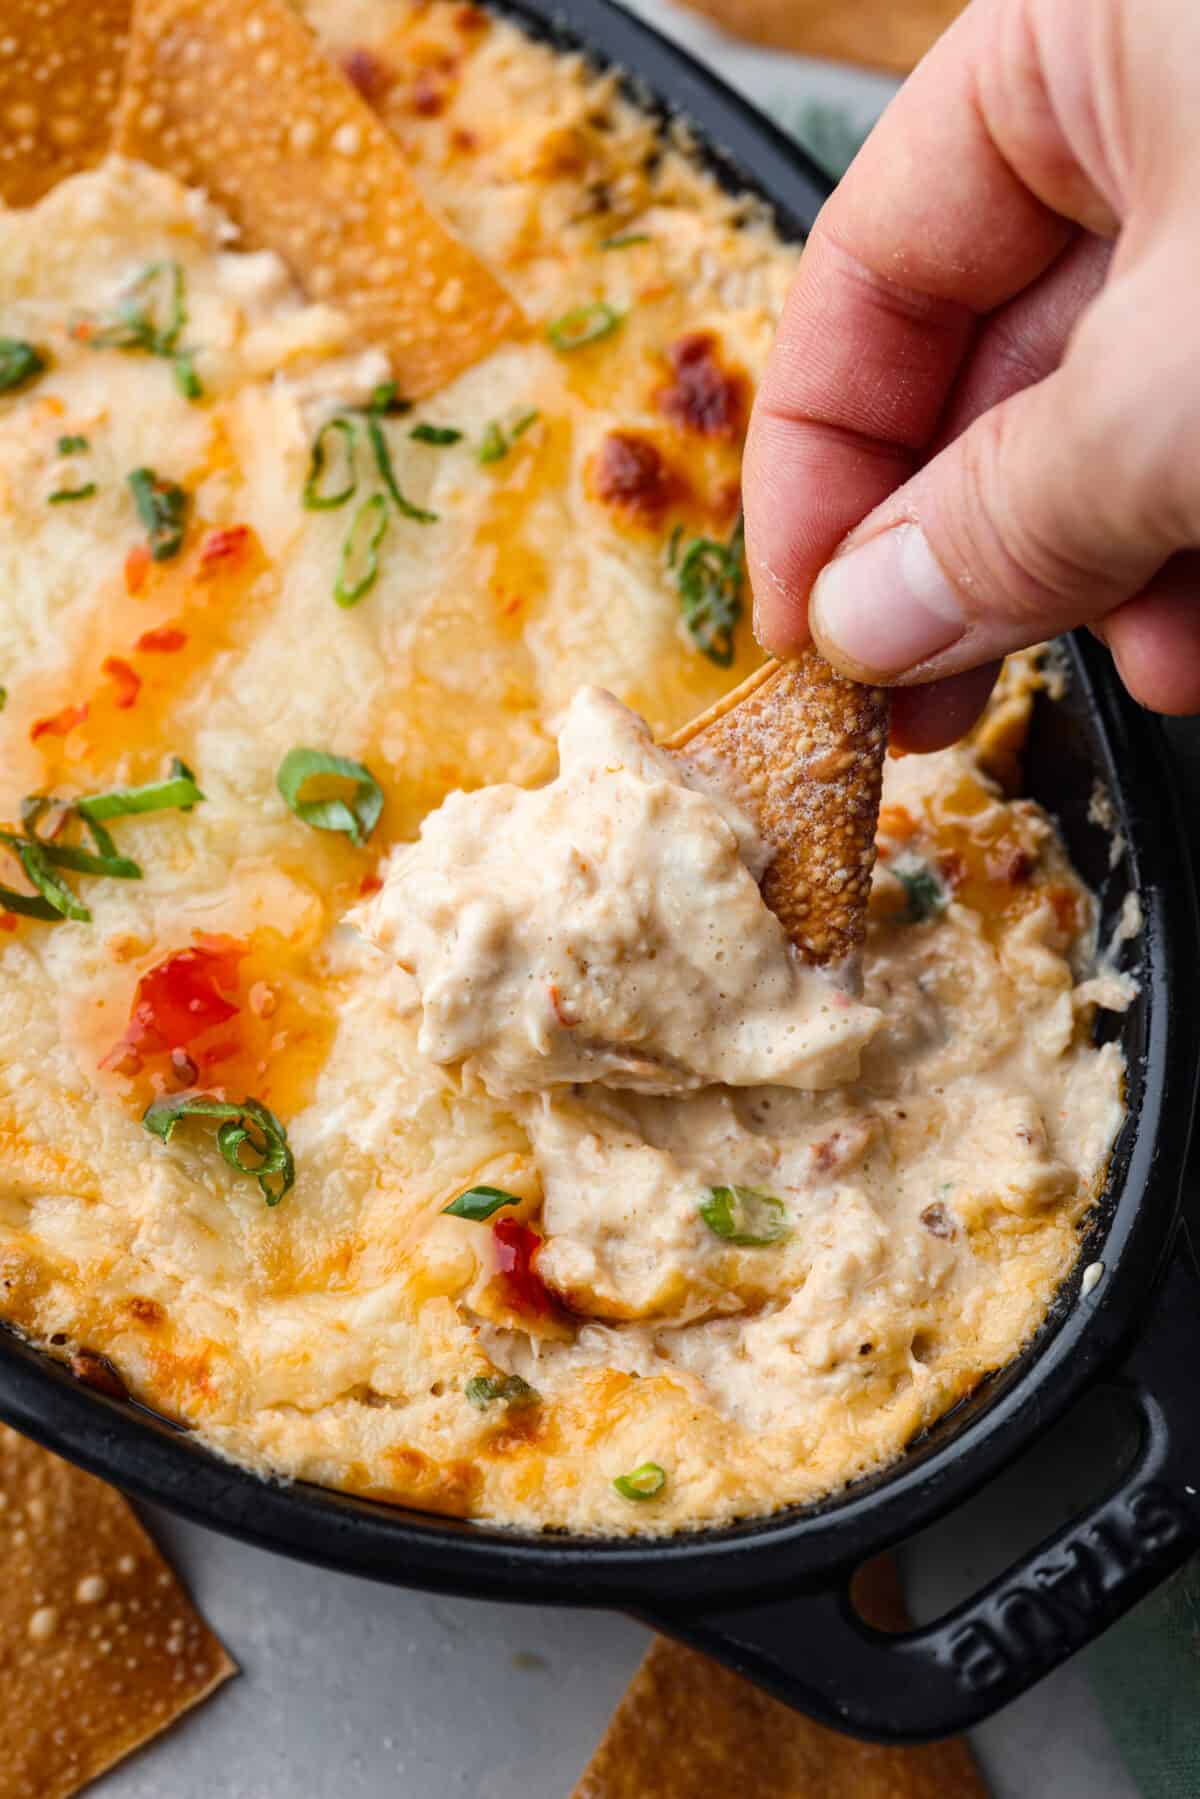
    Closeup of a fried wonton chip being dipped into the hot crab dip.Closeup of a fried wonton chip being dipped into the hot crab dip.

    What is Crab Rangoon Dip?

    Crab rangoon dip is one of the most addicting and delicious dips you could make! This is the ultimate warm, satisfying snack dip to serve at potlucks, family get togethers, game day, holiday celebrations, and parties. It’s easy to make with succulent crab meat, cream cheese, sour cream, mayo, shredded cheese, and a few simple pantry staples. Mix it all together, bake to golden, bubbly perfection, and it will be love at first bite! Love cheesy hot dips? Make my Hot Blue Cheese Dip next!

    Just 10 minutes of prep time is all it takes! You can even prepare it ahead of time, and then pop it in the oven before your big event. Super convenient if you’re hosting a party or other gathering. It’s fabulous with fried wonton chips, crackers, toasted bread or tortilla chips.

    What’s in Crab Dip?

    This crab rangoon dip recipe comes together so effortlessly with simple ingredients. Even though it’s easy to make, it’s super tasty and everyone will be asking for the recipe! See the recipe card at the bottom of the post for exact measurements.

    • Cream Cheese: Soften the cream cheese by leaving it at room temperature for about half an hour or take it out of the package and microwave it for 30 seconds. This will help it combine better with the other ingredients.
    • Sour Cream: Gives the dip a subtle tang and thins out the the thick cream cheese.
    • Mayonnaise: Adds extra creaminess and flavor!
    • Sweet Chili Sauce: For a sweet and sour taste that complements the other savory ingredients. Use my recipe to make your own.
    • Soy Sauce: Adds a rich umami flavor. I just used regular soy sauce, but you can also choose for low-sodium soy sauce.
    • Sriracha Sauce: So your dip has a hint of spice.
    • Garlic Powder: To season the dip with the perfect amount of garlic flavor.
    • Salt and Pepper: Makes everything taste so good!
    • Lump Crab Meat: Look for this in the canned meat aisle by the tuna.
    • Monterey Jack Cheese: If you have the time, shred this yourself directly from a block. It will melt better and have more flavor.
    • Green Onions: Adds freshness and color.
    • Wonton Wrappers: You can bake the wonton wrappers as instructed in this recipe, or make fried wonton chips.

    Let’s Make Some Dip!

    This tasty crab rangoon dip is easy to mix up and comes out of the oven deliciously warm and bubbly. It tastes so good served with crispy wonton chips! You can also pair it with toasty bread or crackers. Here’s how to make it:

    1. Prep: Preheat the oven to 350 degrees Fahrenheit. Prepare an 8X8 baking dish by spraying it with cooking spray, then set aside.
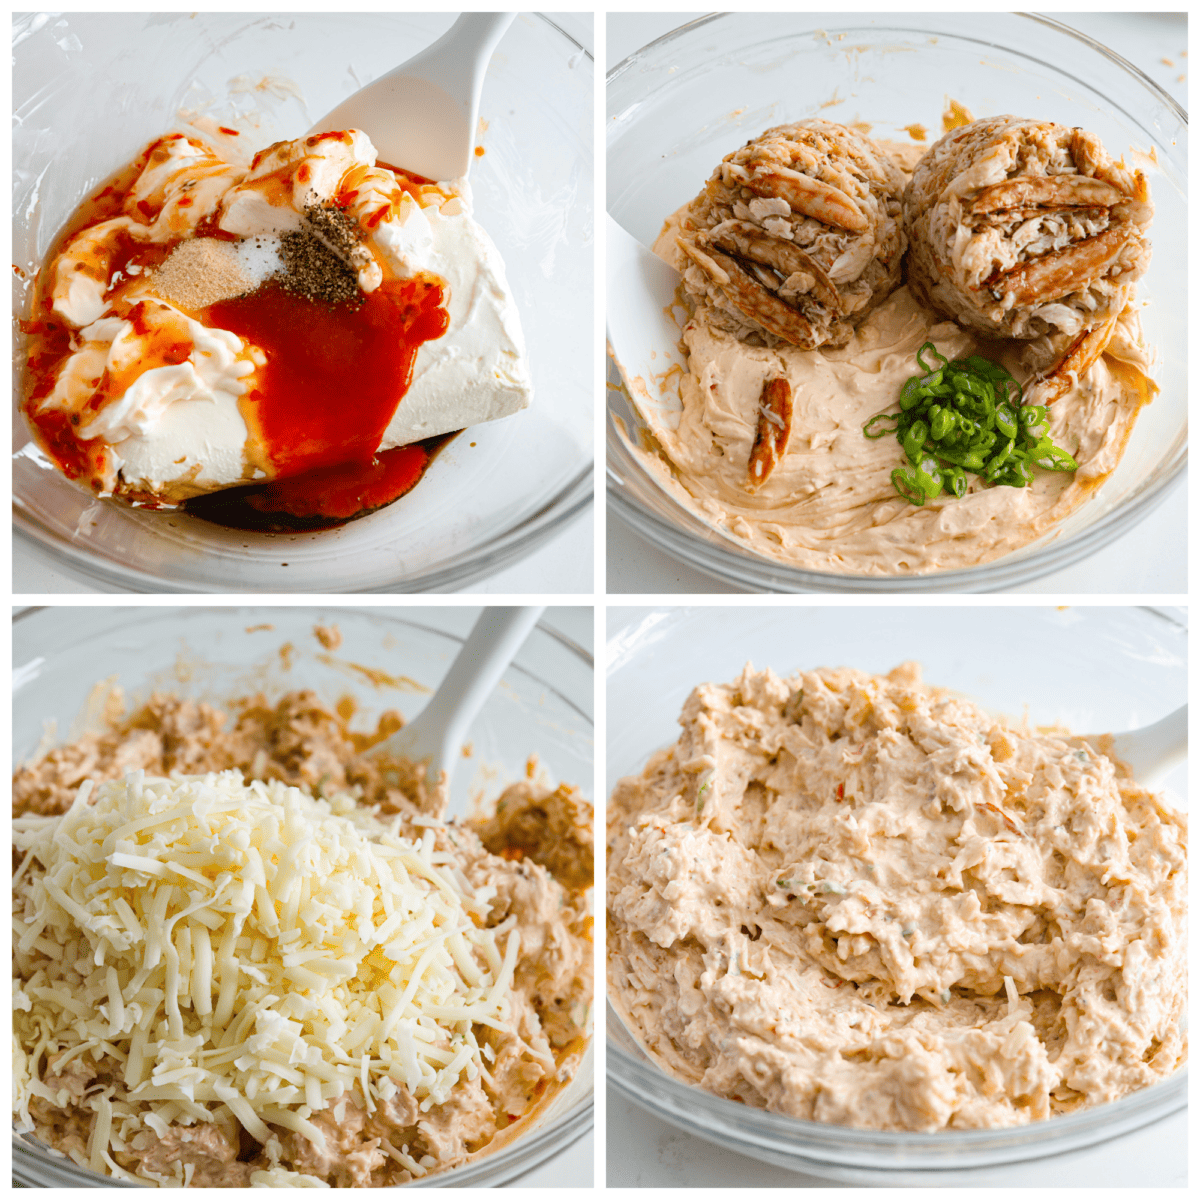
    2. Mix: In a large bowl cream together the cream cheese, sour cream, mayo, sweet chili sauce, soy sauce, sriracha, garlic powder, salt and pepper.
    3. Add Crab: Once the cream cheese mixture is well mixed, fold in the crab meat, ⅔ cup Monterey jack cheese, and 2 tablespoons of the green onions.
    4. Bake: Spread the crab rangoon dip evenly into the baking dish and sprinkle the top with the remaining ⅓ cup Monterey jack cheese. Then bake the dip for 20-25 minutes, the cheese should be bubbling and browning on the top.
    5. Garnish: Remove the hot dip from the oven, allow it to cool at room temperature for 5 minutes, spread some sweet chili sauce over the top of the dip and sprinkle the remaining green onions over the sauce.
    6. Bake Chips: To make the wonton chips, cut each wonton wrapper in half and brush or spray it with olive oil and sprinkle them with salt. Then lay the wrappers out evenly on a baking sheet lined with parchment paper and bake for 5 minutes at 350 degrees Fahrenheit.
    7. Serve: Dip the crispy wonton chips in the hot dip and enjoy!
    4-photo collage of the crab rangoon dip ingredients being mixed together.4-photo collage of the crab rangoon dip ingredients being mixed together.

    Tips for Making Crab Rangoon Dip

    This crab rangoon dip is always a hit, and no one will be able to stop dipping. Here’s some tips and ways to make it your own:

    • Make Ahead: To make this dip ahead, assemble everything into the baking dish, cover and keep it in the fridge until you are ready to bake it. 
    • Make it Spicy: Add more sriracha to taste for a spicier dish. 
    • Crab: You can use imitation crab in place of the canned crab. Fresh crab meat will also work great. It is typically sold in plastic containers over ice at the market. 
    • Wonton Tip: Depending on the size of your wonton wrappers you may want to quarter them.

    Top-down view of the baked dip in a casserole dish.Top-down view of the baked dip in a casserole dish.

    Storing Leftovers

    This hot crab dip is so good, you probably won’t have leftovers! However, if you do, here’s the best way to store them and reheat later!

    • In the Refrigerator: Store dip leftovers in the fridge in an airtight container for up to 5 days. Crispy wonton chips can be kept at room temperature in an airtight container for up to 5 days.
    • To Reheat: To warm this back up, place it in the oven at 350 degrees for 15 minutes. You can also microwave individual servings until heated.

    Closeup of crab rangoon dip.Closeup of crab rangoon dip.

    More Delicious Appetizer Recipes

    With parties, holidays, and games to watch, it’s appetizer season! Make these appetizers for your next get together or just on a lazy weekend. Even if you don’t have a special occasion, all of these recipes are great to enjoy as a hearty snack when you are in the mood. Here are some of our favorite crave-able appetizers.

    Pin this now to find it later

    Pin It


    Source link

  • Sausage Alfredo Pasta Recipe

    Sausage Alfredo Pasta Recipe

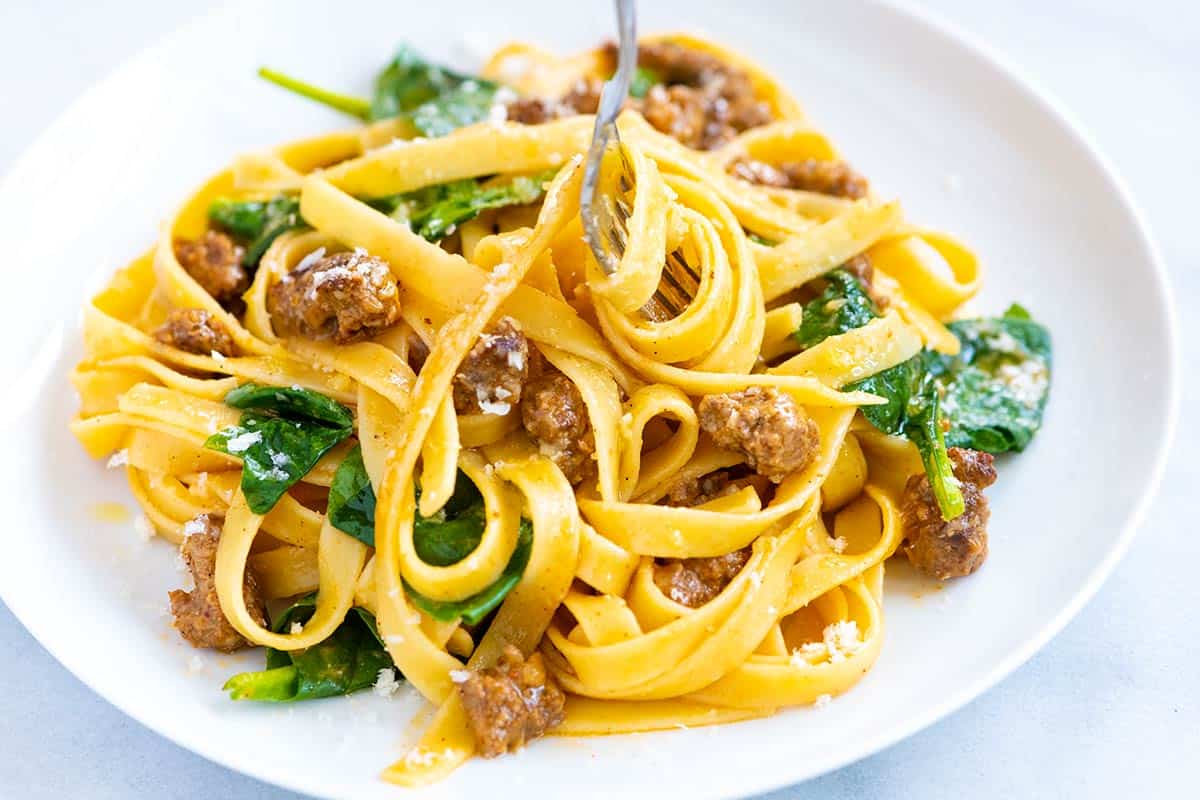
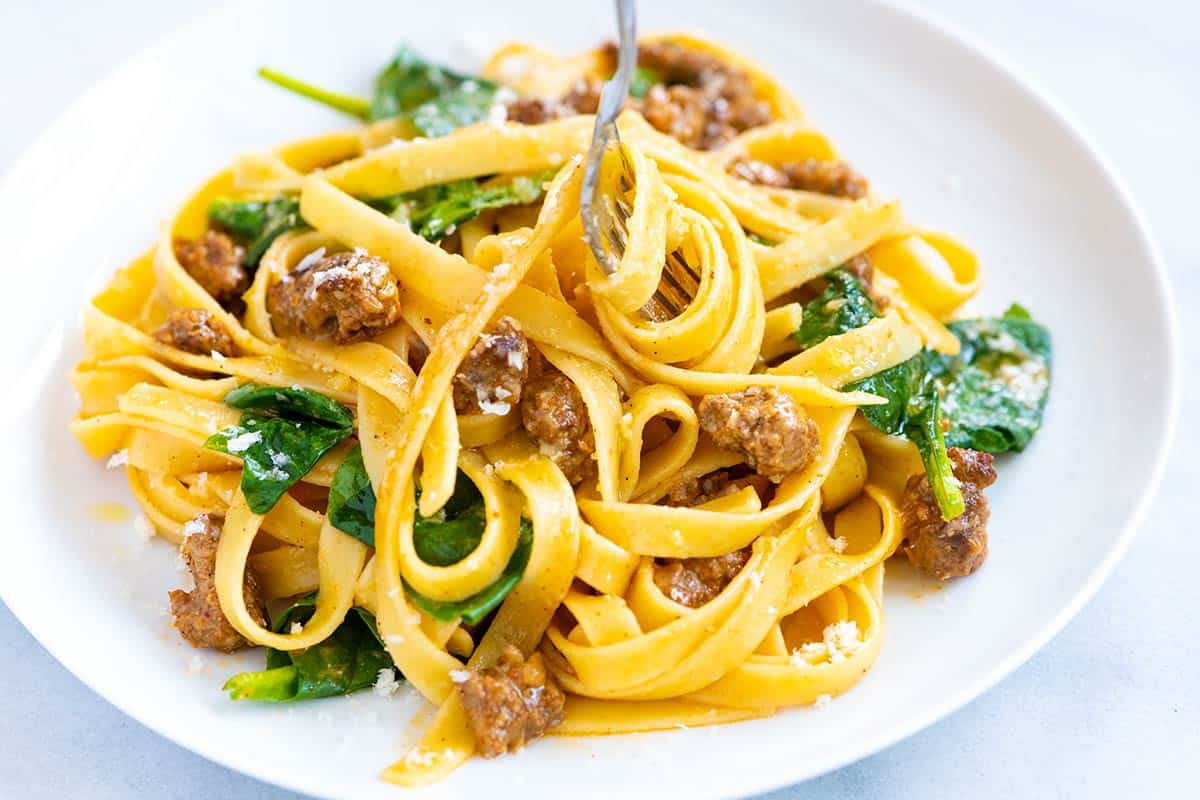
    This sausage Alfredo pasta has the most delicious, silky-smooth sauce made with butter, Parmesan cheese, and a splash of starchy pasta water. No cream needed!

    Sausage Alfredo Pasta

    My family loves classic fettuccine Alfredo, and this version with Italian sausage is right at the top of our favorites list. If you’ve seen my chicken Alfredo recipe, you already know I skip the cream. Instead, our Alfredo sauce comes together with butter, Parmesan, and pasta water. It’s every bit as creamy, just a little lighter, and not at all heavy or goopy.

    The sausage adds so much flavor to this pasta. You’ll brown it in the same skillet you use to make the sauce, so all it soaks up all those flavorful drippings, which means extra flavor, and as a bonus, fewer dishes to clean!

    Key Ingredients

    • Italian Sausage: Choose mild or spicy sausage, depending on what you love. Our family usually sticks with mild, but if you like a little kick, go for spicy! I also use Italian sausage when making this sausage minestrone (it’s so good!).
    • Spinach: I love the pop of green from baby spinach here. It wilts right into the sauce for a fresh, vibrant finish. Baby kale works just as well if that’s what you have on hand.
    • Fettuccine: That’s the traditional choice, but you can substitute what you have on hand. Spaghetti, linguine, or even short pasta like farfalle are all great options. Be sure to save a little pasta cooking water before draining. It’s the secret to a smooth, glossy sauce that clings to every strand. To make this really special, try homemade pasta!
    • Parmesan: Use a good-quality parmesan for this recipe, and grate it finely. I love Parmigiano-Reggiano and find that it melts the best.
    • Butter: I use salted butter, but unsalted is fine (adjust the pasta to taste with a bit of extra salt).

    Find the full recipe with measurements below.

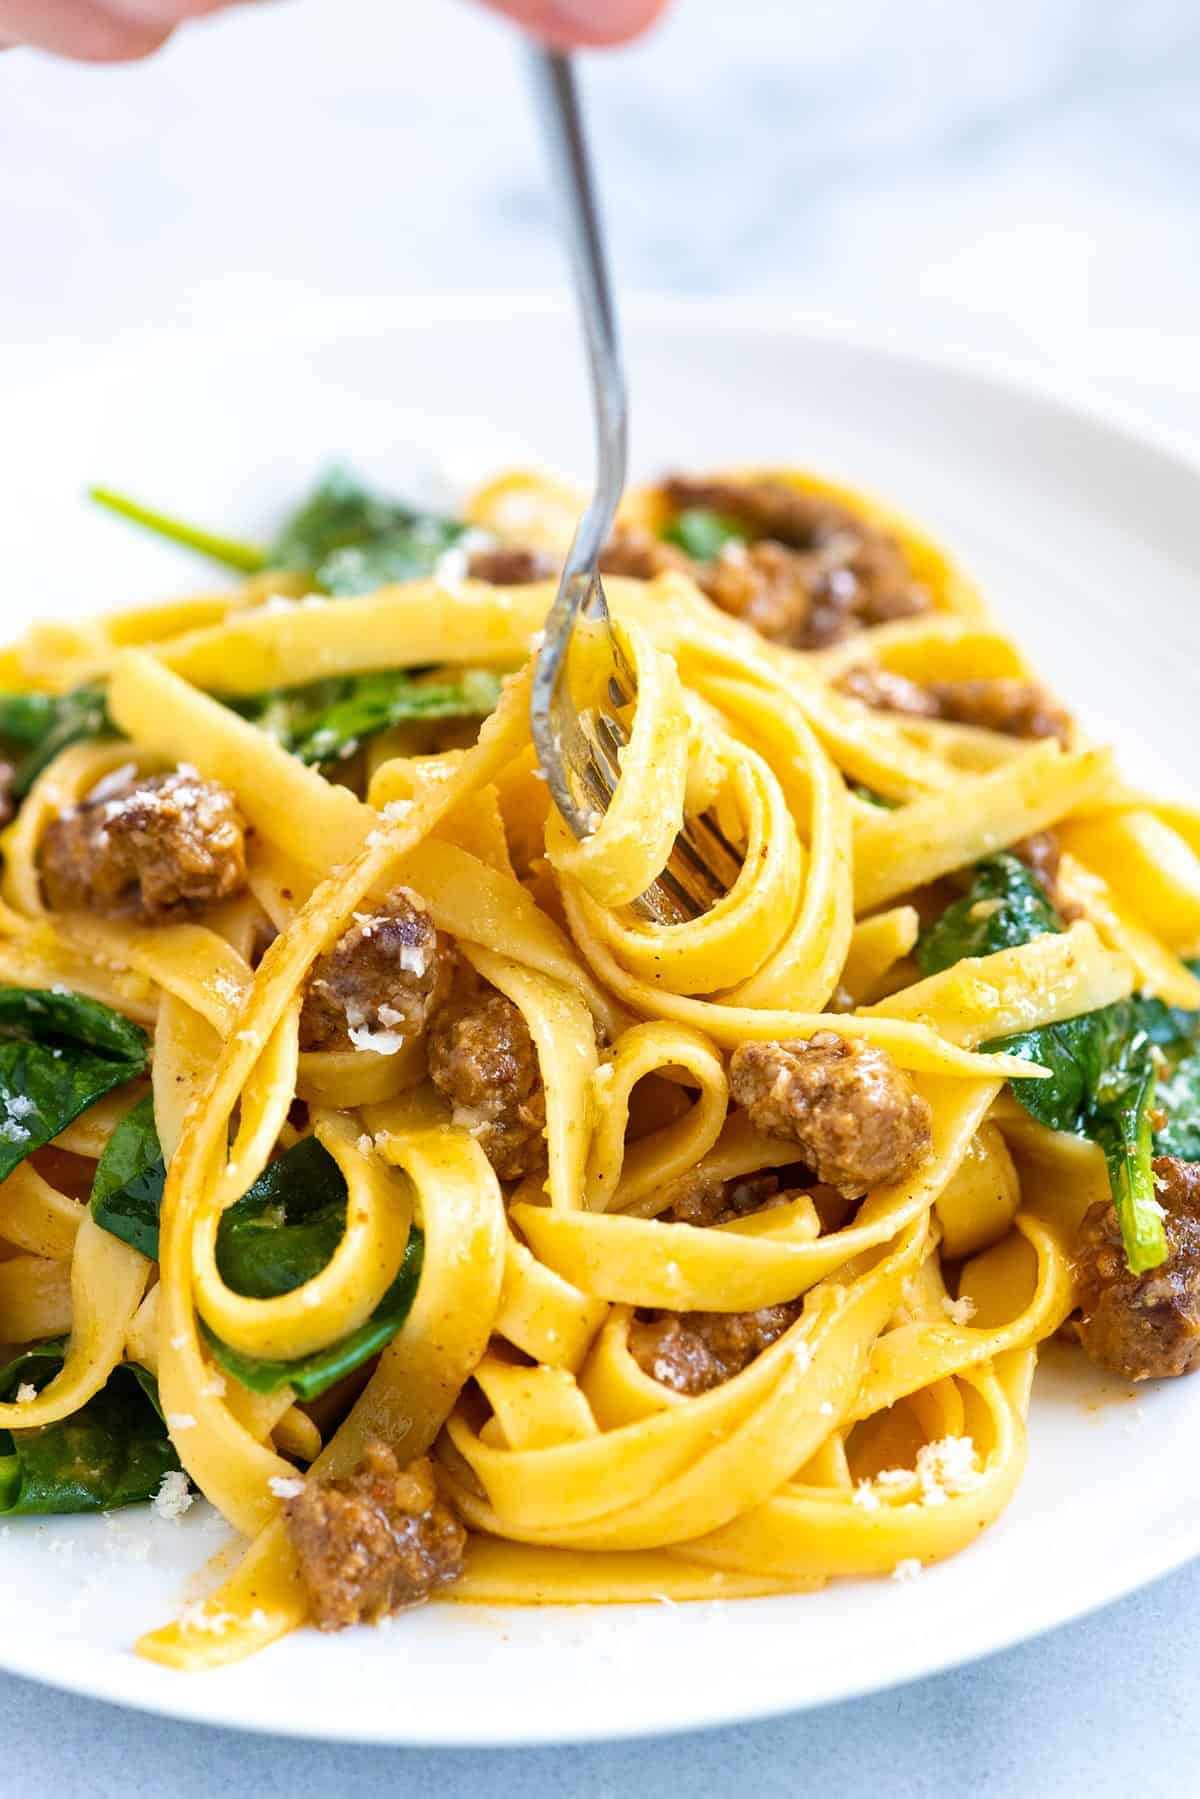
    Sausage Alfredo Pasta

    How to Make Sausage Fettuccine

    Tip 1: Brown the sausage. This sausage Alfredo pasta comes together in about 20 minutes, and the first step is browning the sausage. Do this in the same skillet you’ll use to toss the pasta and sauce. Once browned, you’ll have bits of sausage stuck to the pan, along with some rendered fat that ultimately adds so much flavor to your sauce.

    Tip 2: Make the sauce. You’ll make the sauce right in the skillet with the browned sausage. Add everything (cooked fettuccine, finely grated parmesan, butter, spinach, and some starchy pasta cooking water), then use tongs to toss everything around the skillet until the butter and cheese melt down into a smooth and silky sauce. It’s not all that different from when we make our favorite cacio e pepe recipe.

    More Easy Pasta Recipes

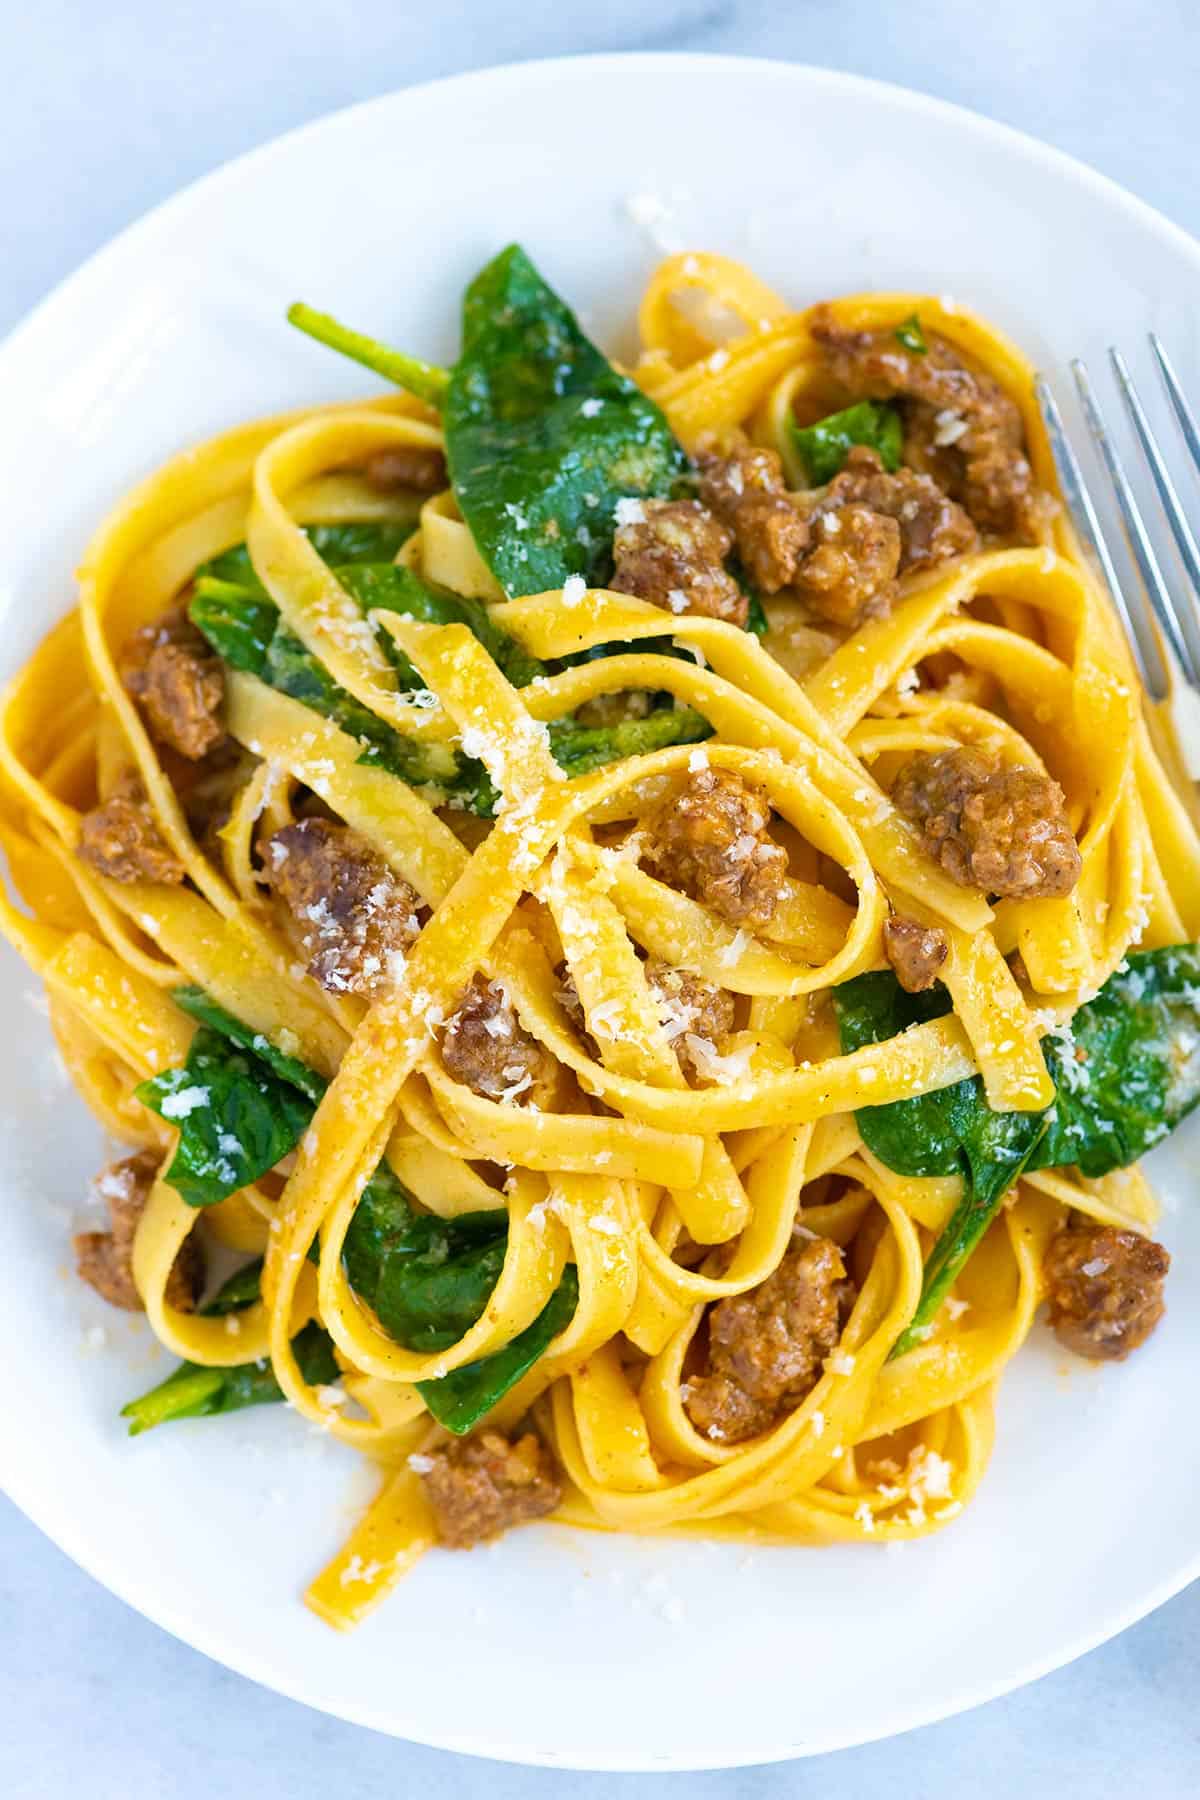
    Sausage Fettuccine Alfredo

    Sausage Alfredo Pasta

    • PREP
    • COOK
    • TOTAL

    This fettuccine is quick, easy, and incredibly delicious thanks to Italian sausage. For the best results, use real Parmigiano-Reggiano and finely grate it yourself (it melts into the sauce better). When cooking your pasta, make sure you salt it well to taste salty like the sea (assume 1 tablespoon of salt for 3 quarts of water). And don’t forget to reserve some pasta cooking water before draining the pasta. It’s the pasta water that brings the sauce together.

    6 Servings

    You Will Need

    6 ounces Italian sausage, casings removed, use hot or mild sausage

    1 pound fettuccine

    4 ounces Parmigiano-Reggiano, finely grated, about 2 cups, plus extra for ­serving

    5 tablespoons butter, cut into 5 pieces

    4 to 5 cups packed baby spinach leaves

    Salt and fresh ground black pepper

    Directions

      1Cook sausage: Add the sausage to a wide skillet with a drizzle of olive oil over medium-low heat. Cook, breaking up the sausage with a wooden spoon until crispy, about 10 minutes. (While the sausage cooks, move on to cooking the pasta.)

      2Cook fettuccine: Meanwhile, bring 3 quarts of water to a boil in a large pot. Add one tablespoon of salt and the fettuccine. Cook, stirring once or twice, for 1 minute less than the suggested cooking time on the package. The pasta finishes cooking when making the sauce. Reserve 1 ½ cups of the cooking water, then drain the pasta.

      3Make the sauce: Add parmesan cheese, butter, spinach, 1 cup of reserved cooking water, and the drained pasta to the skillet with the cooked sausage. Set the skillet over low heat. Use tongs to toss the fettuccine, butter, and cheese around the pan for one minute. Take the pan off the heat, then cover the skillet with a lid. Leave for one minute.

      4Uncover the skillet and toss the pasta a few more times in the sauce. If the pasta looks dry, add a splash of more pasta water. If it looks wet, don’t worry, the pasta absorbs some the extra moisture as it cools. Serve fettuccine with a few grinds of pepper and a sprinkle of extra parmesan cheese over the top.

    Adam and Joanne’s Tips

    • Leftovers: Store leftovers tightly covered in the refrigerator for up to a day. As the pasta sits, it soaks up the sauce so while leftovers taste good, you’ll miss some of the velvety butter cheese sauce. When reheating, add a splash of water to thin the sauce a little.
    • The nutrition facts provided below are estimates.

    Nutrition Per Serving
    Serving Size
    1 bowl (1/6 of the recipe)
    /
    Calories
    544
    /
    Total Fat
    21.8g
    /
    Saturated Fat
    10.9g
    /
    Cholesterol
    59.7g
    /
    Sodium
    562.9mg
    /
    Carbohydrate
    62.2g
    /
    Dietary Fiber
    5.9g
    /
    Total Sugars
    3g
    /
    Protein
    25.7g


    AUTHOR:

    Adam Gallagher

    Adam and Joanne of Inspired Taste

    We are Adam and Joanne Gallagher, the creators of Inspired Taste. Established in 2009, Inspired Taste grew from a childhood dream into one of the internet’s most trusted recipe sites with hundreds of reliable recipes, step-by-step videos, and expert tips.More About Us
    Source link

  • Instant Pot Boiled Eggs Recipe

    Instant Pot Boiled Eggs Recipe

    The Instant Pot makes boiled eggs foolproof! Here’s how to make perfectly hard boiled and soft boiled eggs using your pressure cooker.

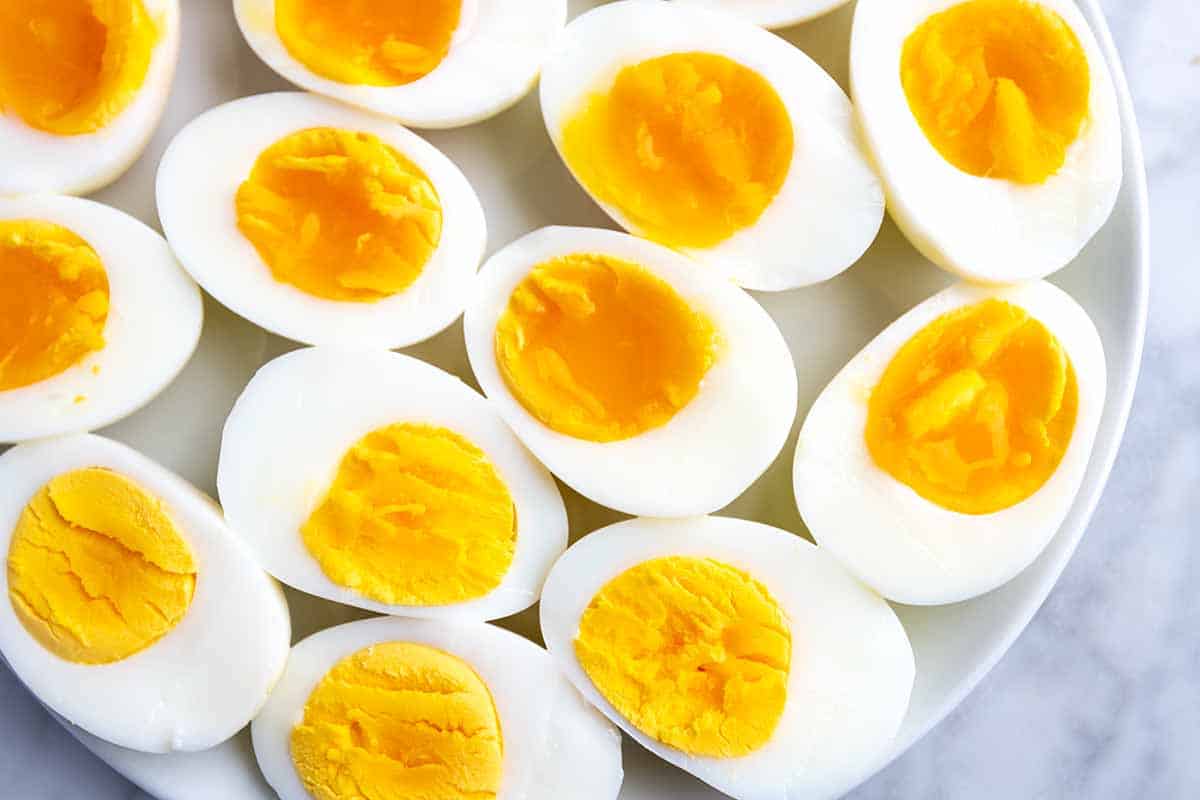
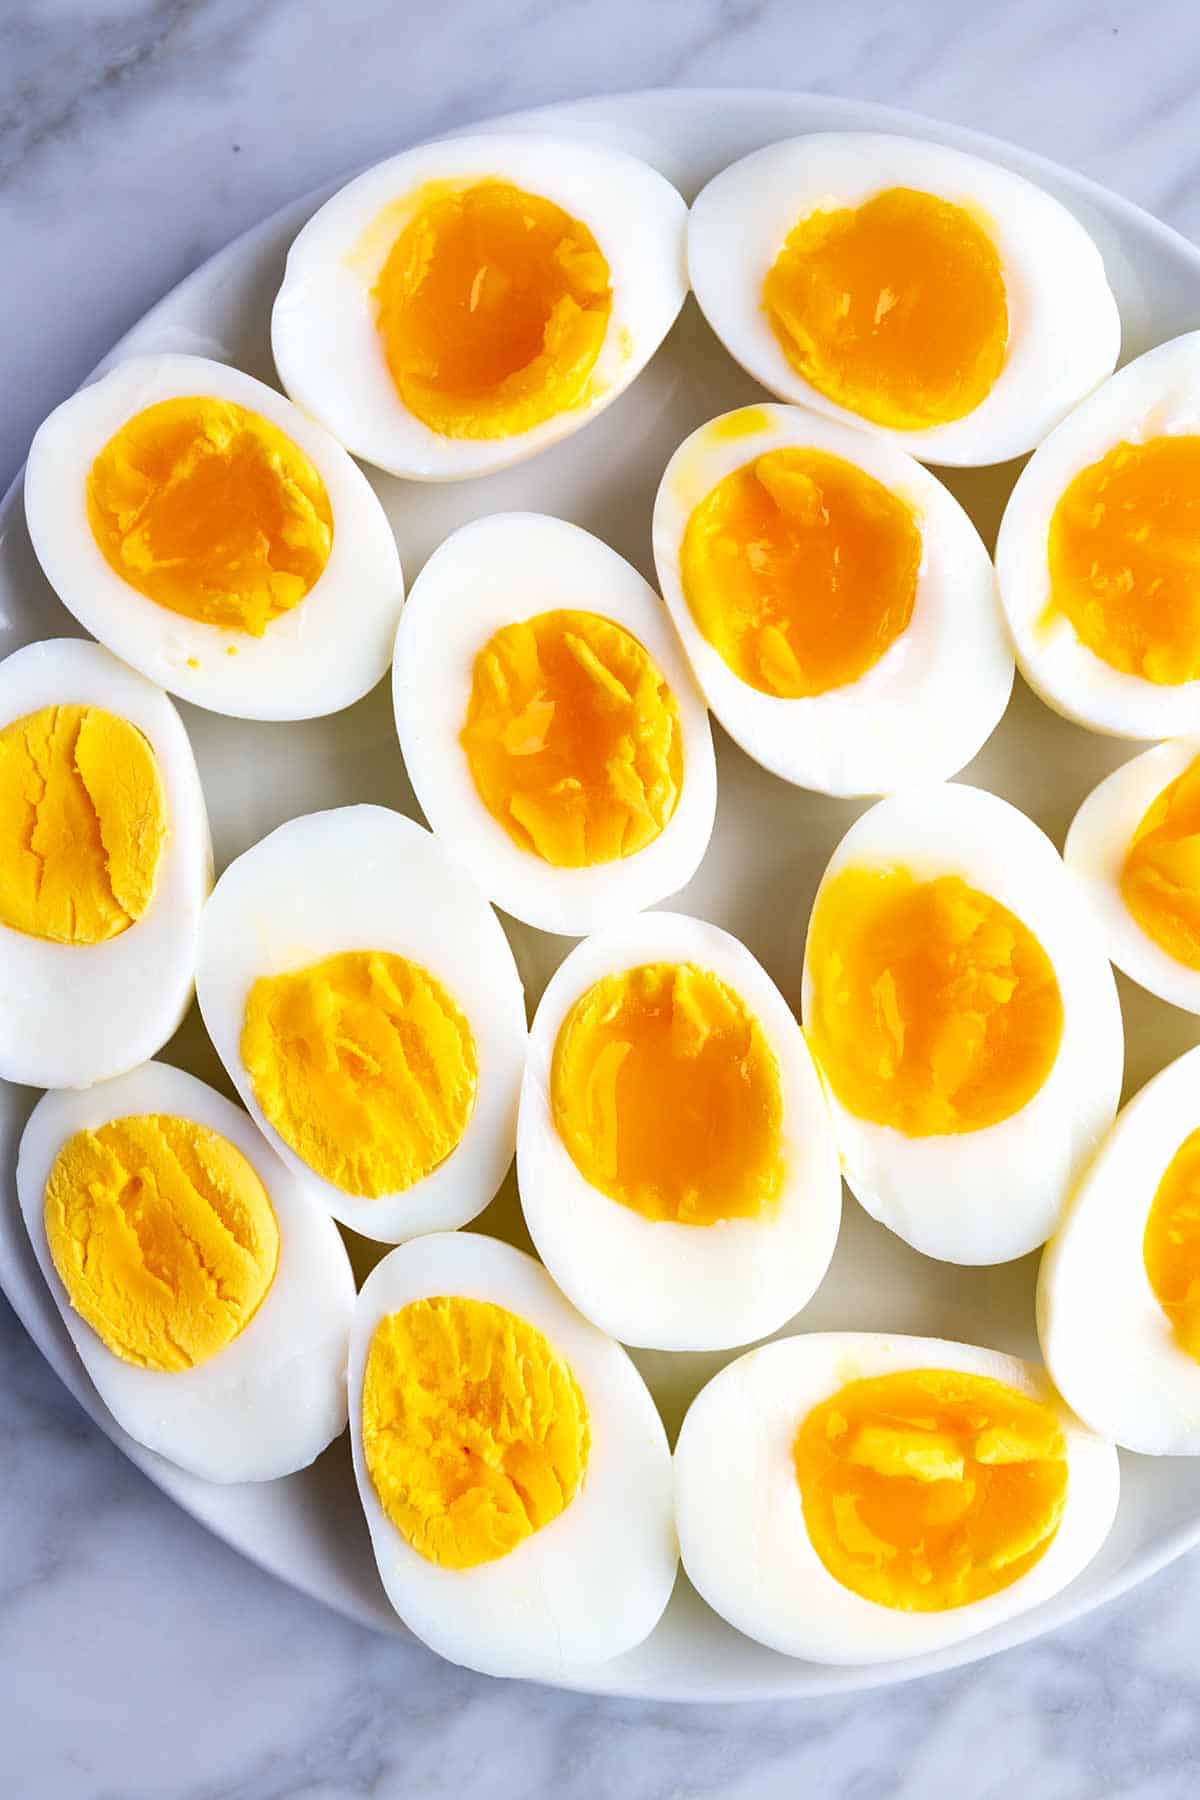
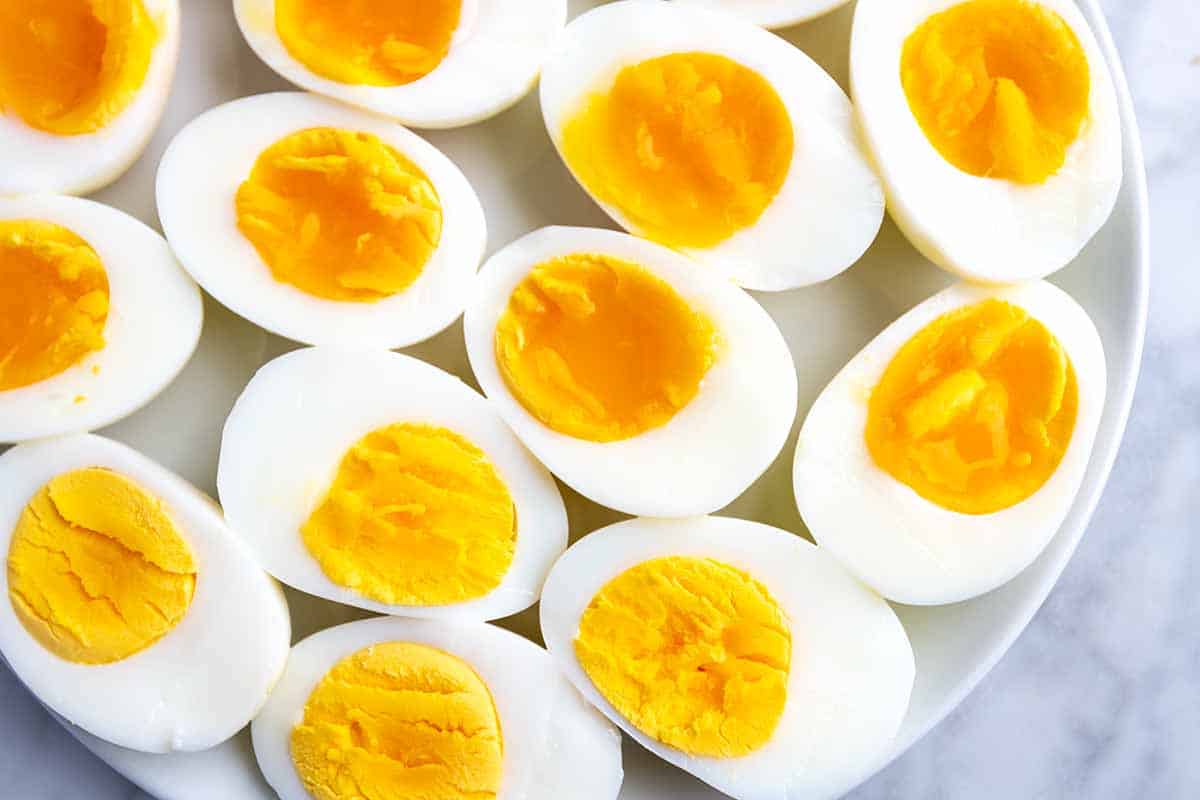
    Instant Pot hard-boiled eggs and soft-boiled eggs cut in half on a plate

    My stovetop boiled eggs are easy, but lately I’ve been reaching for my Instant Pot instead. I especially love it for soft-boiled eggs, which can be a little tricky to get just right on the stove.

    As a bonus, Instant Pot eggs are incredibly easy to peel. The high pressure and temperature help loosen the shells so they practically slide right off.

    Key Ingredients

    • Eggs: Use as many eggs as will fit in a single layer. My 6-quart model fits 10 to 12 large eggs.
    • Water: You’ll need a little water for cooking the eggs and an ice bath for when they are finished.

    Find the full recipe with measurements below.

    Key Equipment

    • Pressure cooker: An Instant Pot or other electric pressure cooker.
    • Trivet or steamer basket: This raises the eggs above the water. Most Instant Pots come with a suitable trivet.
    • Slotted spoon or tongs: To safely transfer eggs to the ice bath.

    How to Make Instant Pot Eggs

    Tip 1: Set up the pressure cooker. Add 1 cup of water to the Instant Pot and place a trivet or steamer basket at the bottom. Then, arrange the eggs in a single layer on top.

    Eggs on a trivet at the bottom of an Instant Pot

    Tip 2: Best cooking times. How long you cook the eggs depends on how soft or firm you want the yolks. Use the Manual or High Pressure setting. Here’s a guide for timing:

    • 3 minutes: Soft, runny yolk with just-set whites. Ideal for dipping toast soldiers!
    • 4 to 5 minutes: Jammy yolk, bright yellow center, firm whites. Great for ramen or salads.
    • 6 to 7 minutes: Mostly set yolk with fully firm whites. Versatile for snacks or egg salad.
    • 8 to 9 minutes: Completely cooked yolk. Perfect for deviled eggs or potato salad.

    Tip 3: Manually release the pressure. Manually release the pressure right after cooking, then transfer the eggs to an ice water bath to stop them from overcooking. Once cool, peel. The shells should slide right off.

    My Favorite Ways to Use Them

    Soft-boiled eggs are all about the jammy, golden yolk. They’re perfect for topping ramen, grain bowls, roasted vegetables, or salads. I also love them on avocado toast or served with buttered toast soldiers for dipping (one of my childhood favorites!).

    Hard-boiled eggs are more sturdy and great for meal prep or quick snacks. Slice them for salads, turn them into deviled eggs, or mix them into potato salad, egg salad, or avocado egg salad.

     Instant Pot boiled eggs on a plate

    Instant Pot Boiled Eggs

    • PREP
    • COOK
    • TOTAL

    These Instant Pot eggs couldn’t be simpler! If you’re looking for a 100% foolproof way to cook eggs, you’ve found it. This recipe works for both hard-boiled and soft-boiled eggs.

    Please read the manufacturer’s instructions for your pressure cooker before following this recipe.

    Makes 2 to 12 eggs

    You Will Need

    2 to 12 large eggs

    1 cup water

    Directions

      1Set up the cooker: Place a steaming rack or metal trivet at the bottom of the pressure cooker (ours came with the 6-quart Instant Pot).

      2Add water and eggs: Pour 1 cup of water into the pot, then place the eggs on the rack in a single layer, making sure they don’t touch the water.

      3Pressure cook: Seal the lid and cook on high pressure for your desired time. Suggested cooking times: 3 minutes for soft-boiled eggs, 5 to 6 minutes for medium-boiled eggs, and 7 to 9 minutes for hard-boiled eggs.

      4Prepare the ice bath: While the eggs cook, fill a medium bowl with ice and water.

      5Release pressure and cool: When the timer goes off, manually release the pressure, keeping your hands away from the steam. Once the pressure is fully released, open the lid and immediately transfer the eggs to the ice bath. Let them sit for a few minutes, then peel and enjoy.

    Adam and Joanne’s Tips

    • Storing unpeeled eggs: Refrigerate in their shells for up to 1 week in a bowl or airtight container. Soft-boiled eggs don’t keep as long, so plan to eat them within 2 days.
    • Storing peeled eggs: Refrigerate right after cooling. To keep them moist, store them in a container of cold water (changing the water daily) or wrap them in damp paper towels and place them inside an airtight container. Eat within 5 days. We don’t recommend storing peeled soft-boiled eggs.
    • Should I use the “Egg” setting? No need! Simply use the High Pressure setting. It’s simple, reliable, and allows you to customize the cook time for soft-, medium-, or hard-boiled eggs.
    • What’s a manual release? A manual or quick-release lets you safely release the built-up steam as soon as the cooking time ends. Check your model’s manual for the specific button or valve to use.
    • The nutrition facts provided below are estimates.

    Nutrition Per Serving
    Serving Size
    1 egg
    /
    Calories
    71
    /
    Protein
    6g
    /
    Carbohydrate
    0g
    /
    Dietary Fiber
    0g
    /
    Total Sugars
    0g
    /
    Total Fat
    5g
    /
    Saturated Fat
    2g
    /
    Cholesterol
    185mg
    /
    Sodium
    62mg


    AUTHOR:

    Joanne Gallagher

    Adam and Joanne of Inspired Taste

    We are Adam and Joanne Gallagher, the creators of Inspired Taste. Established in 2009, Inspired Taste grew from a childhood dream into one of the internet’s most trusted recipe sites with hundreds of reliable recipes, step-by-step videos, and expert tips.More About Us
    Source link

  • Feta Tzatziki Recipe

    Feta Tzatziki Recipe

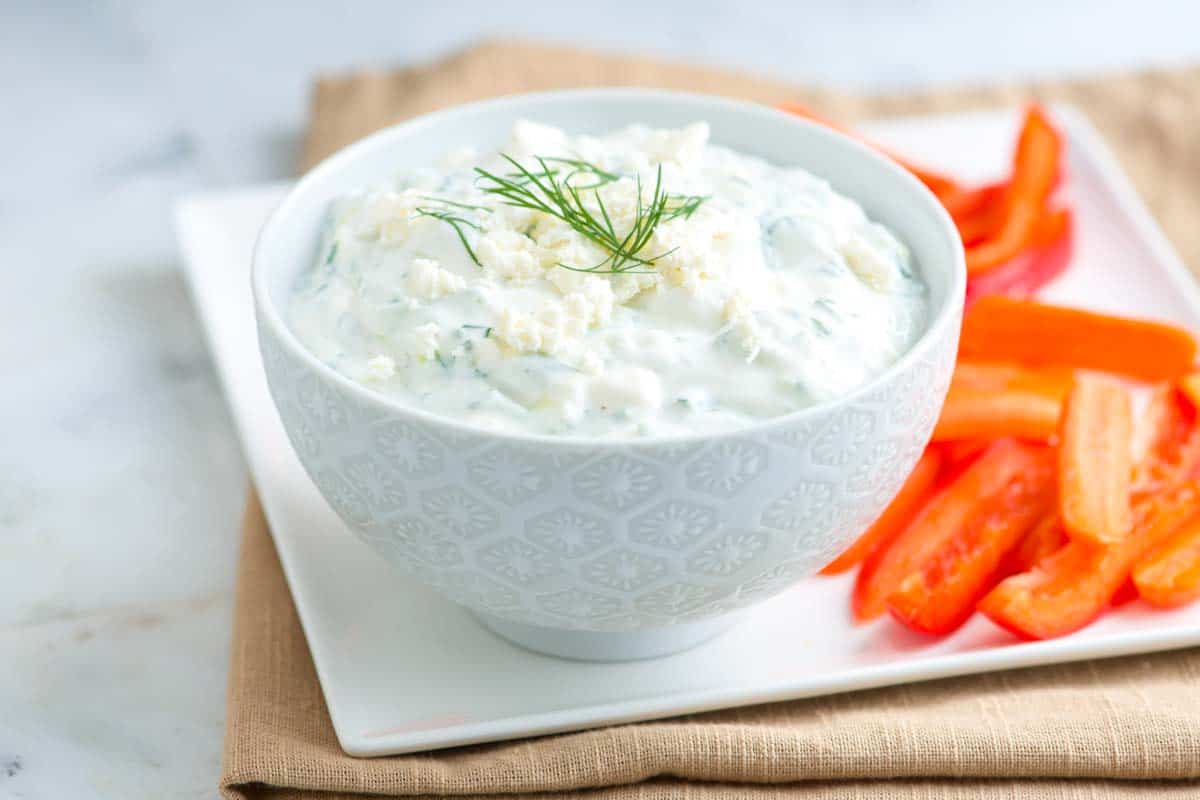
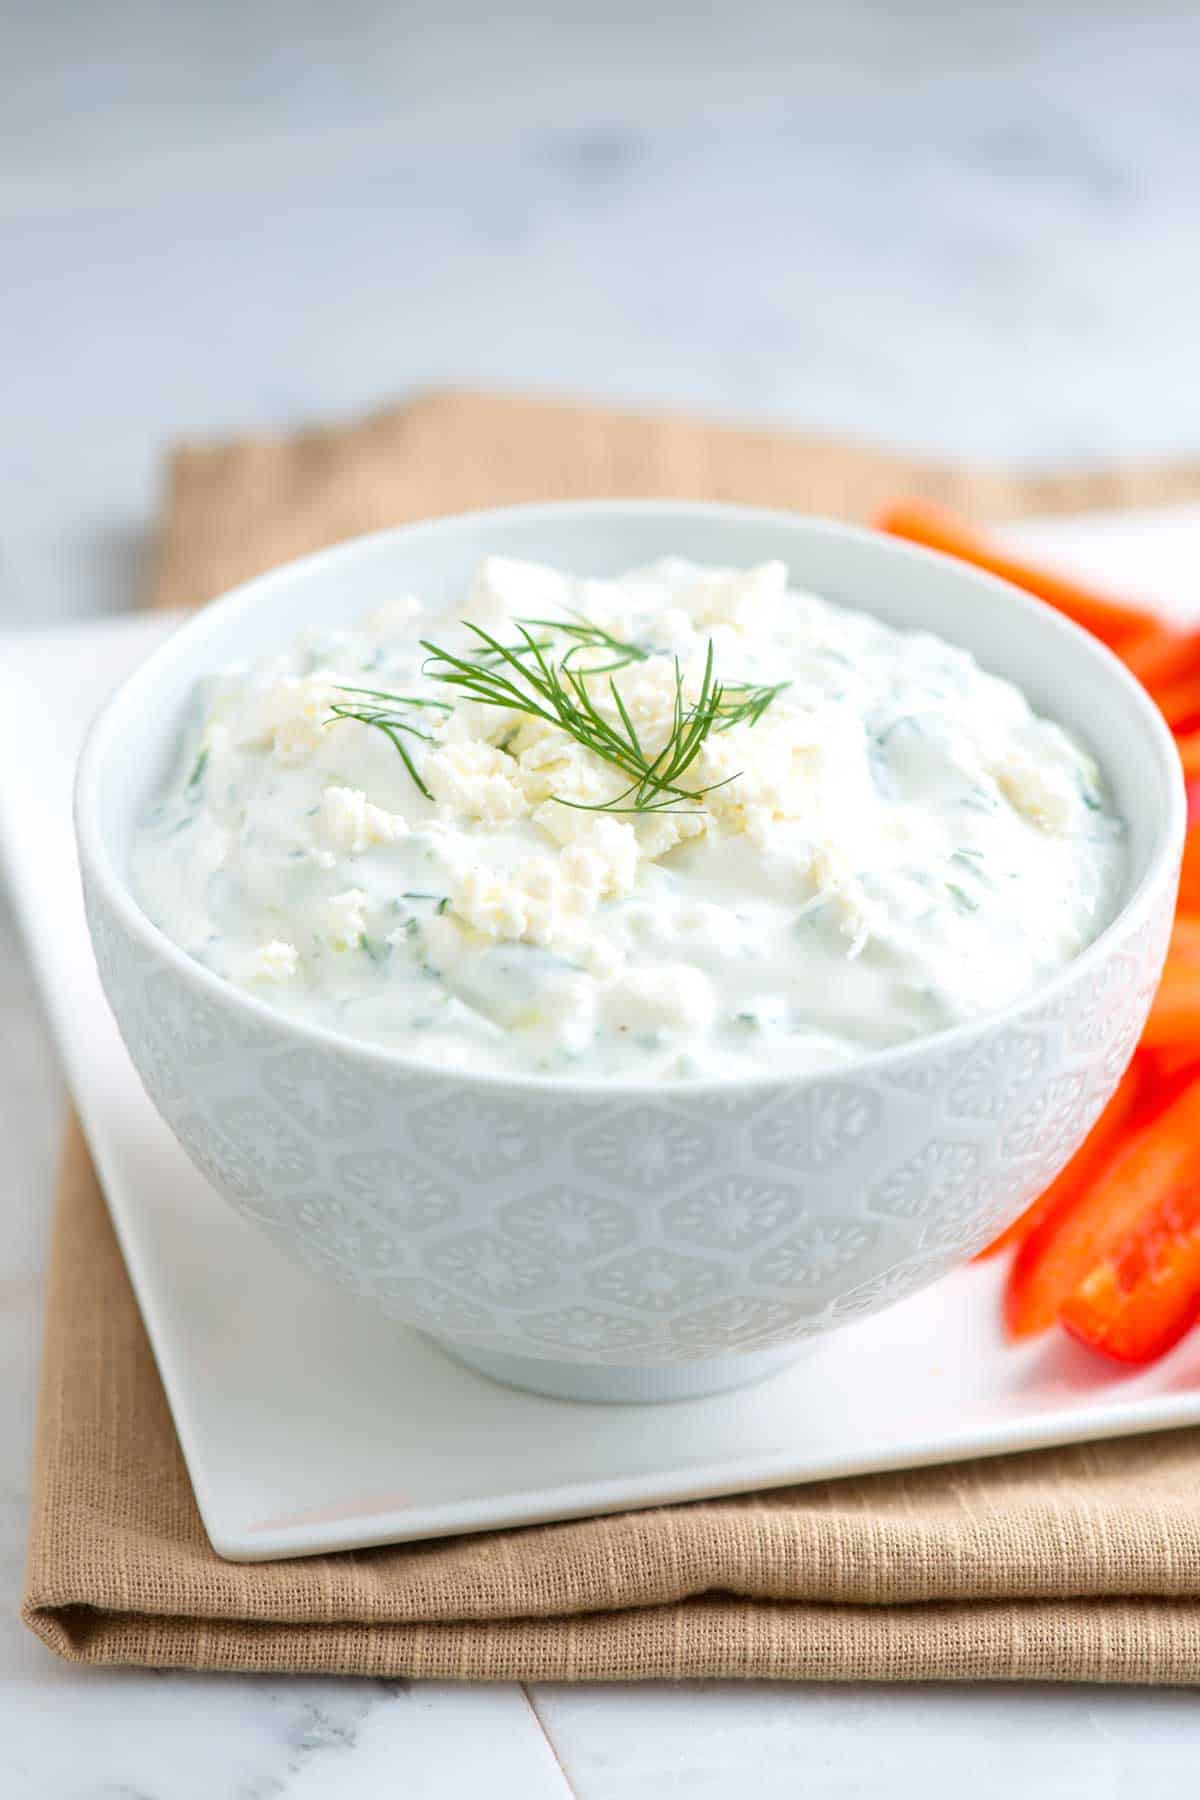
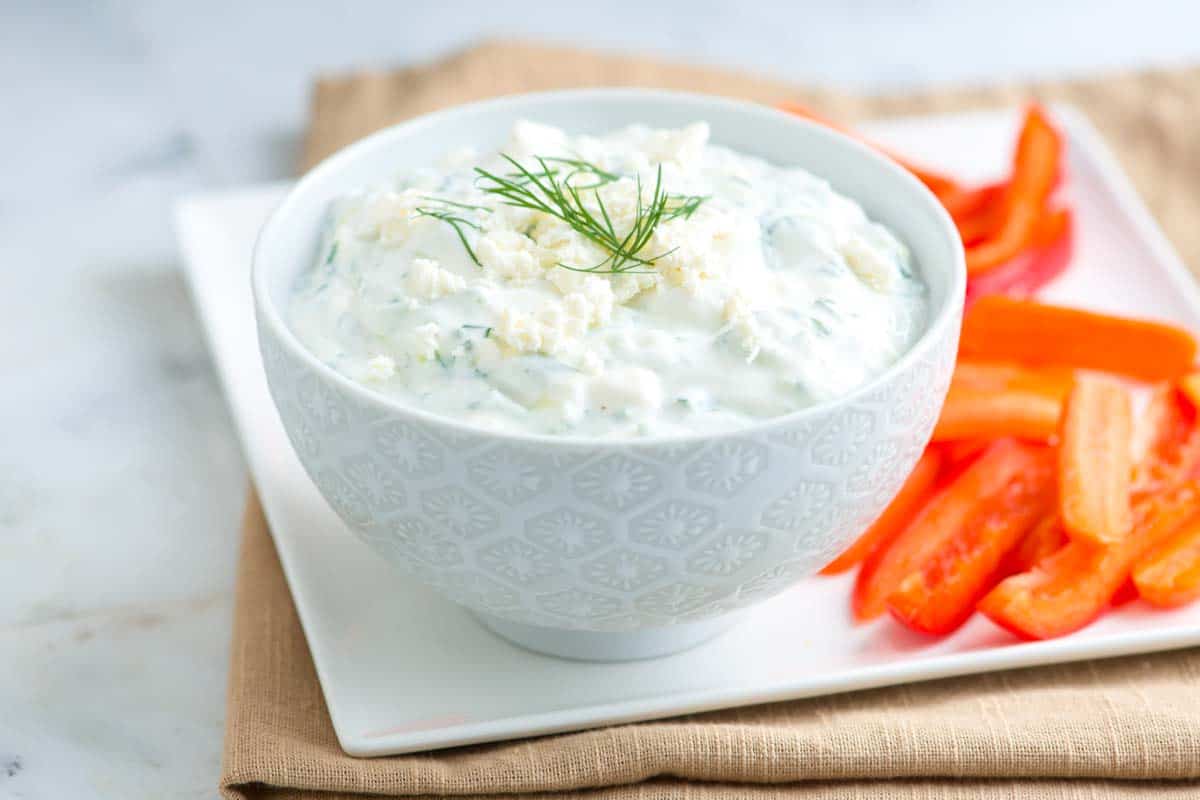
    We love this thick, creamy tzatziki with feta cheese and fresh herbs! It’s delicious as a sauce or dip with veggies, pita chips, grilled meats, and sandwiches.

    Tzatziki with Feta

    We absolutely love tzatziki sauce around here! It’s so versatile, and we’ll happily spoon it onto just about anything. This recipe takes classic tzatziki to the next level by adding tangy feta cheese for extra flavor and creaminess.

    I love this feta tzatziki with homemade pita bread! It’s also incredible with baked chicken breasts, poached salmon, grilled lamb chops, or falafel wraps. Honestly, the possibilities are endless!

    Key Ingredients

    • Cucumbers: For the best tzatziki, use English or hothouse cucumbers. These are the long, thin ones usually sold in plastic wrap. They have thinner skin and fewer seeds, so you can skip peeling and seeding them. Baby cucumbers or Persian cucumbers also work great!
    • Yogurt: For a thick and creamy tzatziki, use full-fat plain Greek yogurt. Icelandic-style yogurt is another good option. If you only have thinner yogurt, strain it in cheesecloth for a few hours to thicken it. (It’s like making labneh!)
    • Feta Cheese: Crumbled feta cheese adds a deliciously salty tang to tzatziki. If you can find feta packed in brine, grab it! You can use a little of the brine to thin out the tzatziki (if you think it needs it).
    • Garlic, Lemon, and Herbs: These ingredients give the tzatziki an amazing flavor. I use one clove of garlic, but feel free to add more. Fresh dill and mint are my favorite herbs.

    How to Make Feta Tzatziki

    Tzatziki is very simple to make. To make the best, remember this: too much moisture is tzatziki’s enemy. It makes things watery and stops all the flavors like lemon, garlic, and dill from mingling.

    We reduce the moisture in two ways: by using thick Greek yogurt and by salting the cucumbers.

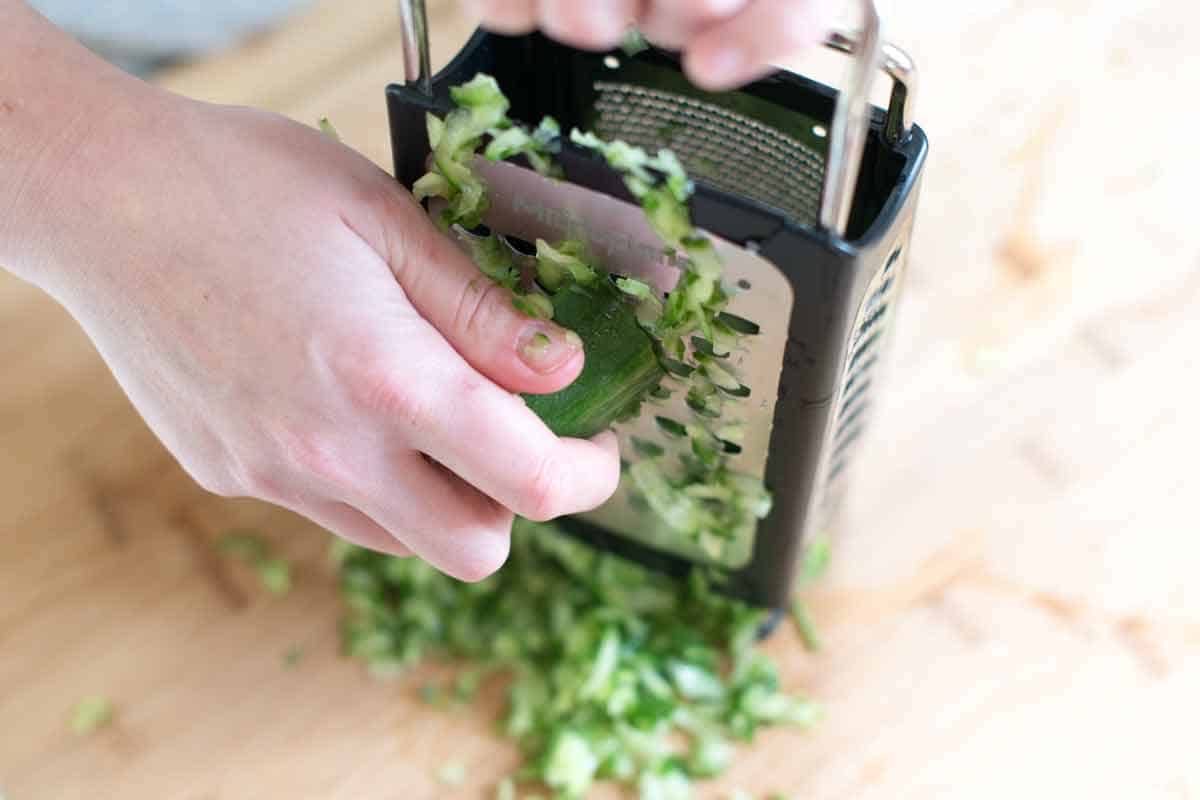
    How to Make Feta Tzatziki: Grating cucumbers

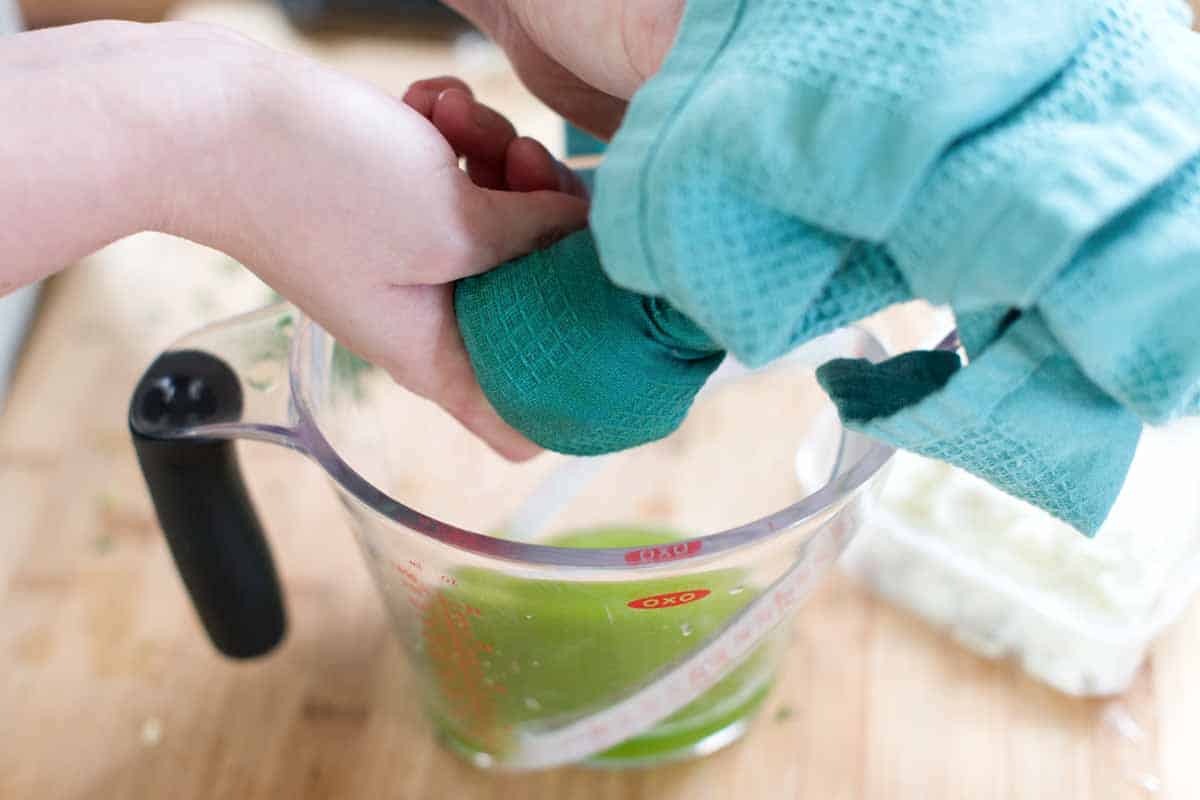
    For the cucumber, we remove the seeds (if there are any ) and grate it. Scatter the grated cucumber over a clean dishcloth and season with salt. The salt does two things: it makes the cucumber taste more like cucumber and helps draw moisture out. Finally, wrap the dishcloth up and squeeze all the liquid out. You’ll be shocked at how much comes out.

    How to Make Feta Tzatziki: Squeeze out the extra moisture from cucumbers

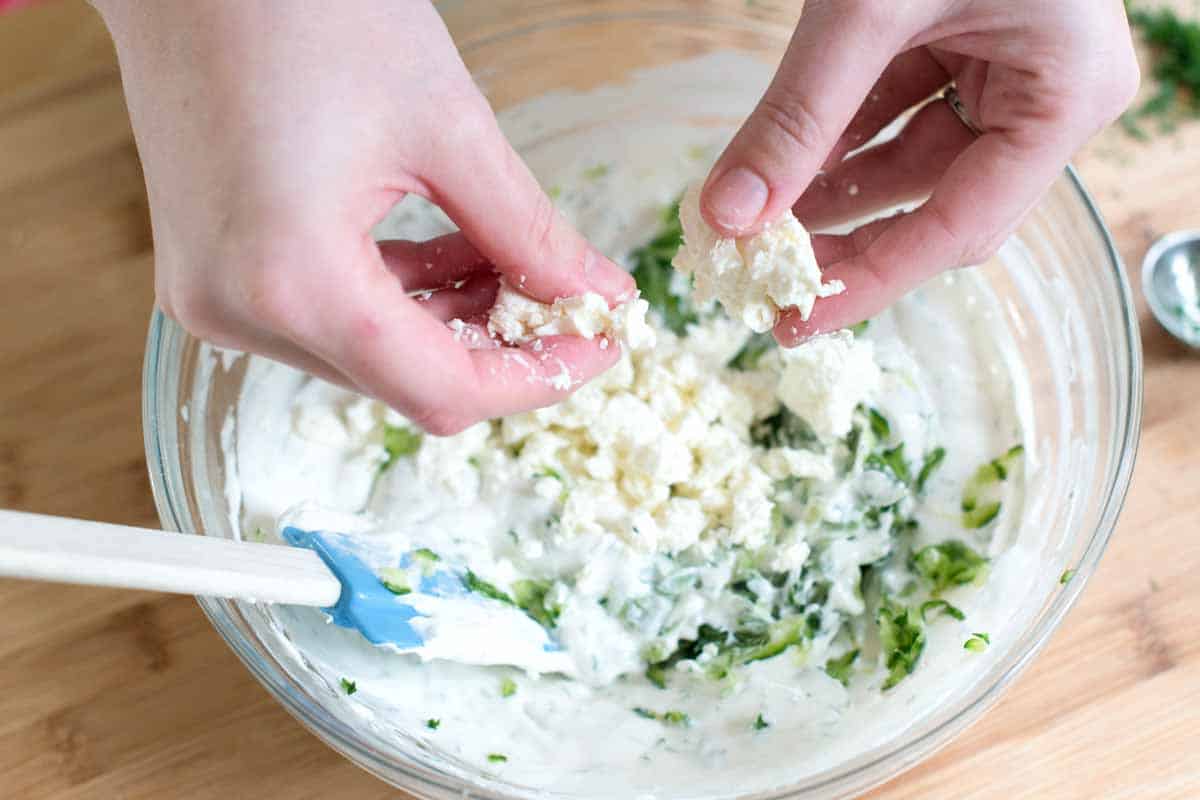
    Then mix the yogurt, cucumbers, and remaining tzatziki ingredients, and last but not least, stir in lots of feta cheese!

    How to Make Feta Tzatziki: Adding the feta cheese to tzatziki

    Spoon this feta Tzatziki onto our lemon dill baked salmon, seriously good turkey burgers and our lemon dill chicken breasts (so good).

    Tzatziki Sauce with Feta

    Feta Tzatziki

    • PREP
    • TOTAL

    We love this thick, creamy yogurt sauce with fresh cucumber, lemon, dill, and feta cheese. It’s brightly flavored and perfect for serving with veggies, pita chips, grilled meats, and even sandwiches. There are two options for the yogurt. The easiest is to use Greek yogurt. However, you can also use strained plain yogurt. To strain yogurt, place it in a fine mesh strainer lined with cheesecloth or paper towels and rest it over a bowl. Place the yogurt into the refrigerator for 3 to 4 hours to drain. Then, discard the liquid.

    Makes 2 cups

    You Will Need

    1 hothouse cucumber, also called English cucumber

    2 (7oz) containers Greek yogurt, we use Fage

    2 tablespoons fresh lemon juice

    1 garlic clove, finely minced (about 1 ½ teaspoons)

    1 tablespoon finely chopped fresh dill

    2 teaspoons apple cider vinegar or substitute white wine vinegar

    2 ounces feta cheese, crumbled

    1 teaspoon salt plus more to taste

    Directions

      1Cut the cucumber in half lengthwise. Use a spoon to scrape out the seeds, then discard them. Grate the cucumber. Scatter the grated cucumber over a clean dishcloth (or paper towels). Sprinkle with 1/4 teaspoon of salt. Let sit for at least 10 minutes. Then, gather up the corners of the dishcloth and squeeze as much liquid from the grated cucumber as possible. Discard the liquid.

      2In a medium bowl, combine the squeezed cucumber with yogurt, lemon juice, garlic, dill, apple cider vinegar, and feta cheese.

      3Season with 1/2 teaspoon of salt, then taste and adjust as necessary with more salt.

      4Serve now, or if you can spare the time, cover the dip with plastic wrap and refrigerate for 2 to 4 hours to develop flavor.

    Adam and Joanne’s Tips

    • The nutrition facts provided below are estimates.

    Nutrition Per Serving
    Serving Size
    1/4 cup
    /
    Calories
    59
    /
    Protein
    3 g
    /
    Carbohydrate
    4 g
    /
    Dietary Fiber
    0 g
    /
    Total Sugars
    4 g
    /
    Total Fat
    3 g
    /
    Saturated Fat
    2 g
    /
    Cholesterol
    14 mg


    AUTHOR:

    Adam Gallagher

    Adam and Joanne of Inspired Taste

    We are Adam and Joanne Gallagher, the creators of Inspired Taste. Established in 2009, Inspired Taste grew from a childhood dream into one of the internet’s most trusted recipe sites with hundreds of reliable recipes, step-by-step videos, and expert tips.More About Us
    Source link

  • Easy Vegan Mac and Cheese Recipe

    Easy Vegan Mac and Cheese Recipe

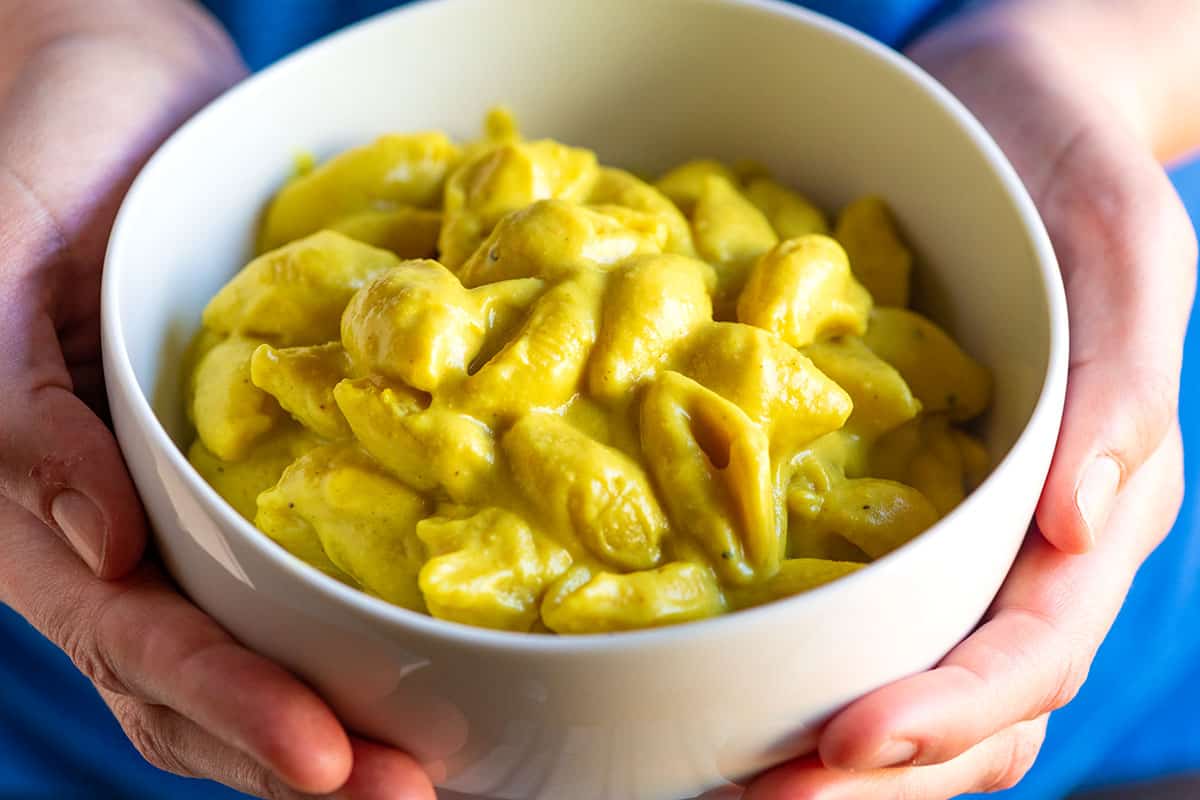
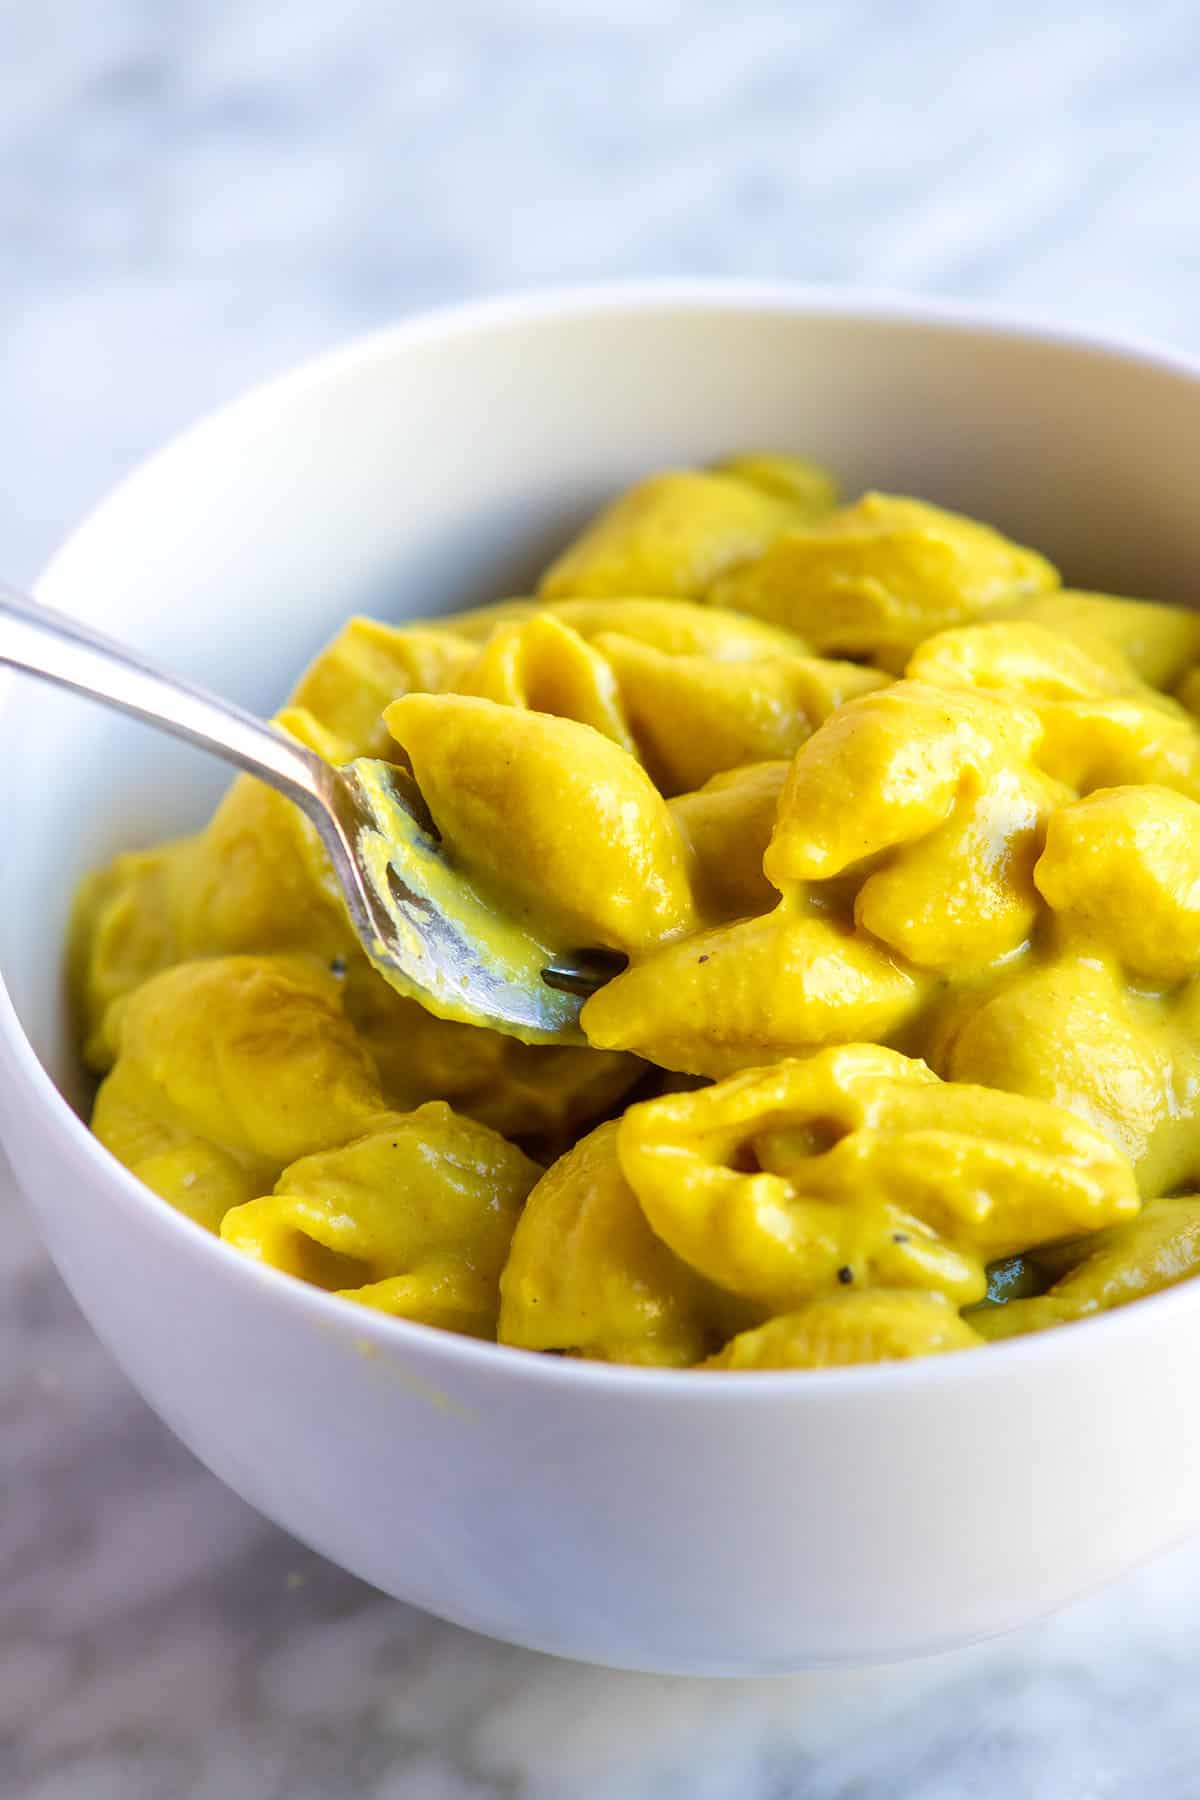
    The whole family will love this creamy vegan mac and cheese recipe. We use plant-based milk, nutritional yeast, and the perfect blend of spices. You can make this as a stovetop or baked mac and cheese!

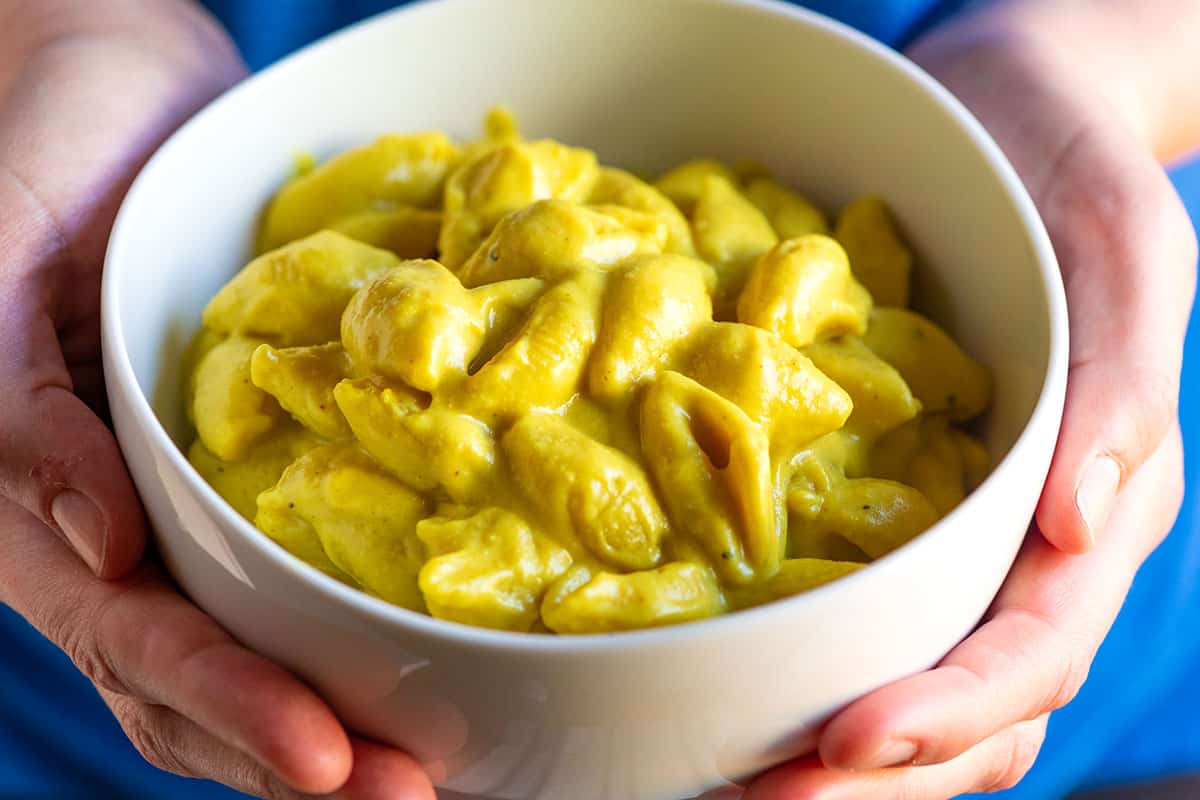
    Creamy Vegan Mac and Cheese

    Our family loves mac and cheese! We’ve shared our traditional dairy-based mac and cheese before, but I’m incredibly excited to finally share our absolute favorite vegan mac and cheese! We went through countless variations, and this recipe is the one that won everyone over. It’s creamy, cheesy, and so satisfying you won’t even miss the dairy.

    I was inspired to create this vegan version because we’re trying to eat more plant-based meals, and my son loves mac and cheese. And honestly, it’s become a new family favorite (as have many of our vegan recipes)! This recipe has two options: enjoy it as a comforting stovetop mac and cheese, or bake it until bubbly and golden brown. I love serving it with a simple green salad or trying it with my lentil-based vegan meatballs.

    Key Ingredients

    • Pasta: Use what you love. I always go for something that will hold on to the sauce really well, like shells or elbows!
    • Vegan Butter and Flour: The combination of butter and flour thickens the sauce. Some recipes start with a base of cashew cream, and while we’ve tried that variation, making a roux and building our vegan cheese sauce from there was our favorite way to make vegan mac and cheese.
    • Plant-Based Milk: I typically use unsweetened soy milk, but non-dairy milk will work. Unsweetened is best.
    • Nutritional Yeast: This makes our mac and cheese taste so cheesy. Nutritional yeast is quite common in vegan recipes. If you are unfamiliar, it’s full of vitamins and minerals and adds a cheesy flavor to dishes. It’s perfect in this mac and cheese. We also use it when making our delicious vegan queso.
    • Dijon mustard: We also use Dijon mustard when making our dairy-based baked mac and cheese. It rounds out the sauce’s flavor and makes it taste even better.
    • Spices: I love adding onion powder, garlic powder, nutmeg, salt, and pepper to make the sauce taste incredible.

    How to Make Vegan Mac and Cheese

    To make my favorite vegan mac and cheese, you’ll first make the creamy sauce. We start with a roux made from melted butter (plant-based) and flour.

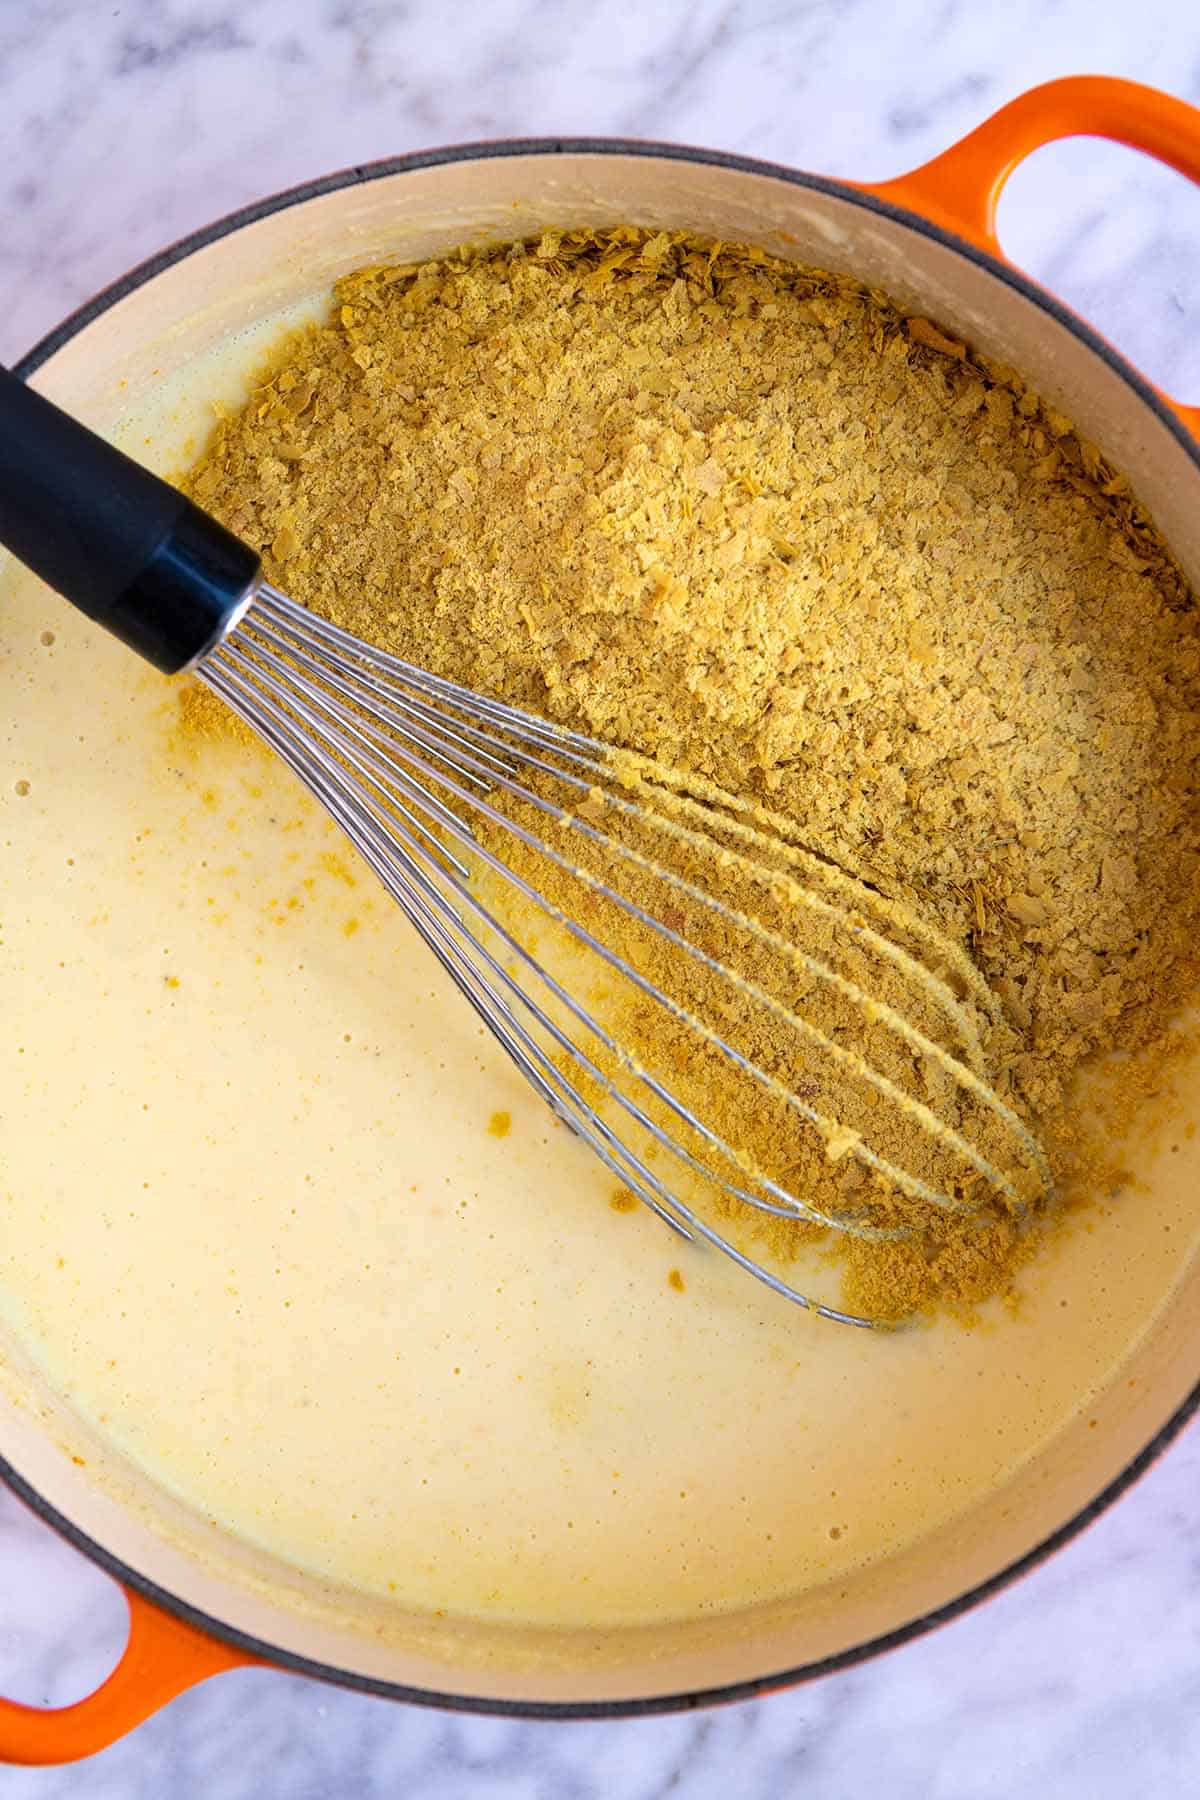
    Once the flour and butter smell toasty, you can pour in non-dairy milk. As it heats up, the milk thickens and turns into the base of our cheese sauce. To make it taste cheesy, we whisk in lots of nutritional yeast, mustard, and spices.

    How to Make Vegan Mac and Cheese: Stirring nutritional yeast into the vegan cheese sauce.

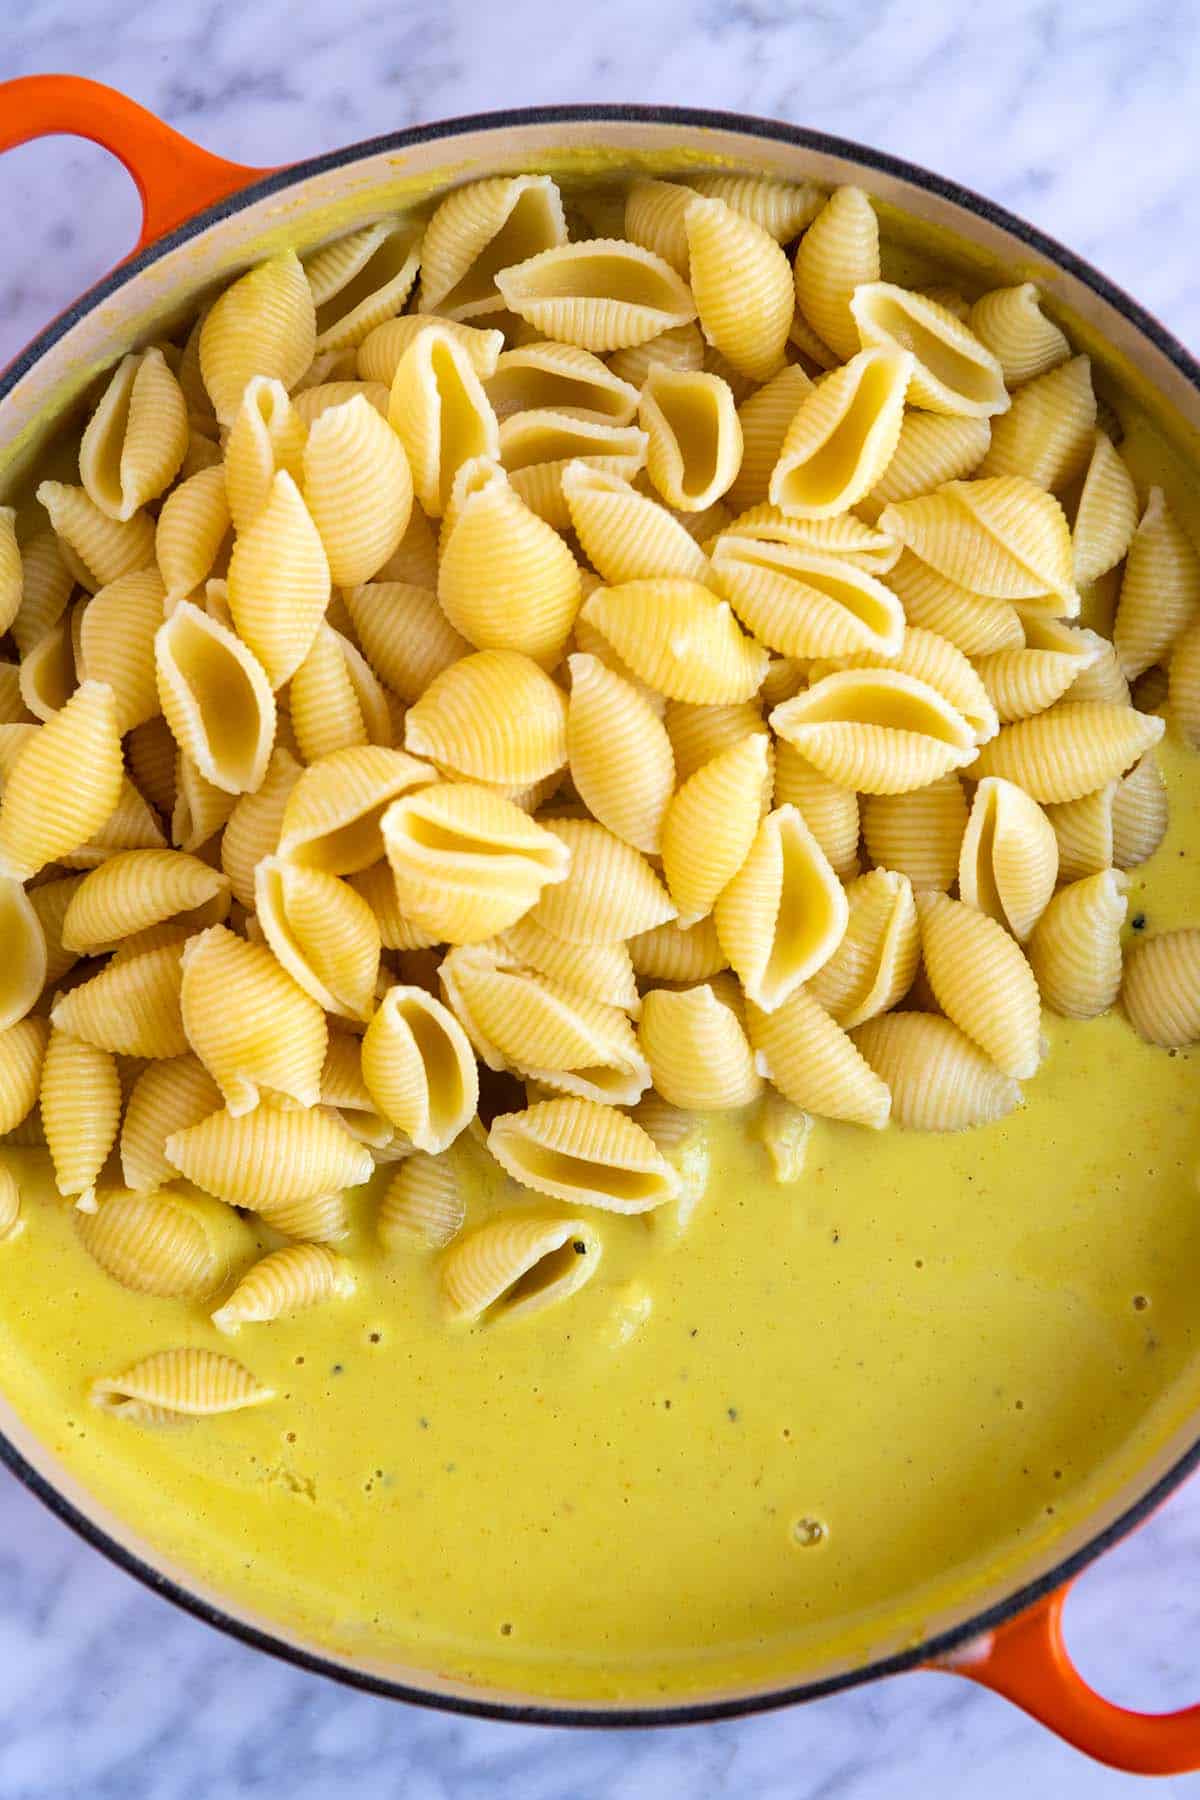
    When the sauce is smooth, you can stir in cooked pasta. Remember choose pasta shapes that hold onto the sauce really well. I like these medium shells because lots of that cheesy sauce gets trapped inside them.

    How to Make Vegan Mac and Cheese: Stirring in the pasta

    You can serve it as a stovetop recipe or pour it all into a baking dish, top it with some breadcrumbs, and bake until the sauce is bubbling and the top gets a little color.

    Easy Vegan Mac and Cheese

    Easy Vegan Mac and Cheese

    • PREP
    • COOK
    • TOTAL

    My family loves this creamy mac and cheese made with non-dairy milk, nutritional yeast, and the perfect blend of spices. You can make this as a stovetop or baked mac and cheese! If you decide to bake this, add some breadcrumbs on top so they brown and turn crisp (I like panko or homemade breadcrumbs).

    6 Servings

    You Will Need

    1 pound (450g) dried pasta like shells, elbows or penne

    6 tablespoons (85g) vegan butter

    6 tablespoons (48g) all-purpose flour

    5 cups (1180ml) unsweetened non-dairy milk, like unsweetened soy milk

    2 tablespoons Dijon mustard

    1 cup (60g) nutritional yeast

    1 tablespoon onion powder

    1 tablespoon garlic powder

    1/8 teaspoon fresh ground nutmeg

    3/4 teaspoon fine sea salt, plus more to taste

    1/2 teaspoon fresh ground black pepper

    1/8 teaspoon cayenne pepper, or more to taste, optional for some spice

    1/4 to 1/2 teaspoon ground turmeric, optional for color

    Directions

      1Bring a large pot of salted water to a boil, add the pasta, and follow the package directions, but cook 1 minute less than the package states. Drain.

      2Meanwhile, make the vegan cheese sauce. Melt the vegan butter in a large, high-sided pot or Dutch oven over medium heat. Sprinkle the flour over the melted butter and whisk it together and around the pan until it smells toasted and looks light brown, 2 to 3 minutes.

      3While whisking, slowly pour in the warm, non-dairy milk. Continue to cook, constantly whisking until the sauce simmers and thickens. (The sauce only thickens after it has reached a simmer.)

      4Turn the heat to low, then stir in the nutritional yeast, mustard, onion powder, garlic powder, nutmeg, salt, and black pepper. For a bit of spice, stir in the cayenne pepper. Add the turmeric for some extra “cheesy” color. Both cayenne pepper and turmeric are optional.

      5When the sauce is smooth and velvety, stir in the cooked pasta. If the sauce looks wet/thin, don’t worry, the pasta absorbs some extra moisture as it cools. Turn the heat off, and then cover with a lid. Leave for 5 minutes, stir once more, and then serve.

      6For baked mac and cheese, after adding the pasta to the sauce, spoon into a large baking dish and scatter breadcrumbs (optional) on top. Bake, uncovered, in a 375°F (190°C) oven until it is bubbling and browned on top, 25 to 30 minutes.

    Adam and Joanne’s Tips

    • Storing: Keep covered in the refrigerator for up to 3 days. To freeze, transfer to a freezer-safe container and freeze for up to 2 months. Then, bake, covered, in a 350°F oven for about an hour. Or, thaw overnight and reheat on the stove (if it seems dry, add a tablespoon or two of extra milk).
    • Broccoli mac and cheese: Stir roasted broccoli or steamed broccoli into the pot before serving.
    • Garlic mac and cheese: Fresh garlic and roasted garlic are excellent in this recipe. Add to the vegan butter just before adding the flour. For fresh, I’d use 2 to 3 cloves. For roasted garlic, you can increase it to 6 cloves or more. Here’s our roasted garlic recipe for reference.
    • The nutrition facts provided below are estimates.

    Nutrition Per Serving
    Serving Size
    1/6 of the recipe
    /
    Calories
    482 calories
    /
    Total Fat
    10.2g
    /
    Saturated Fat
    1.7g
    /
    Cholesterol
    0mg
    /
    Sodium
    624.9mg
    /
    Carbohydrate
    71.6g
    /
    Dietary Fiber
    5.9g
    /
    Total Sugars
    3g
    /
    Protein
    22.4g


    AUTHOR:

    Joanne Gallagher

    Adam and Joanne of Inspired Taste

    We are Adam and Joanne Gallagher, the creators of Inspired Taste. Established in 2009, Inspired Taste grew from a childhood dream into one of the internet’s most trusted recipe sites with hundreds of reliable recipes, step-by-step videos, and expert tips.More About Us
    Source link

  • Easy Sheet Pan Chicken Thighs Recipe

    Easy Sheet Pan Chicken Thighs Recipe

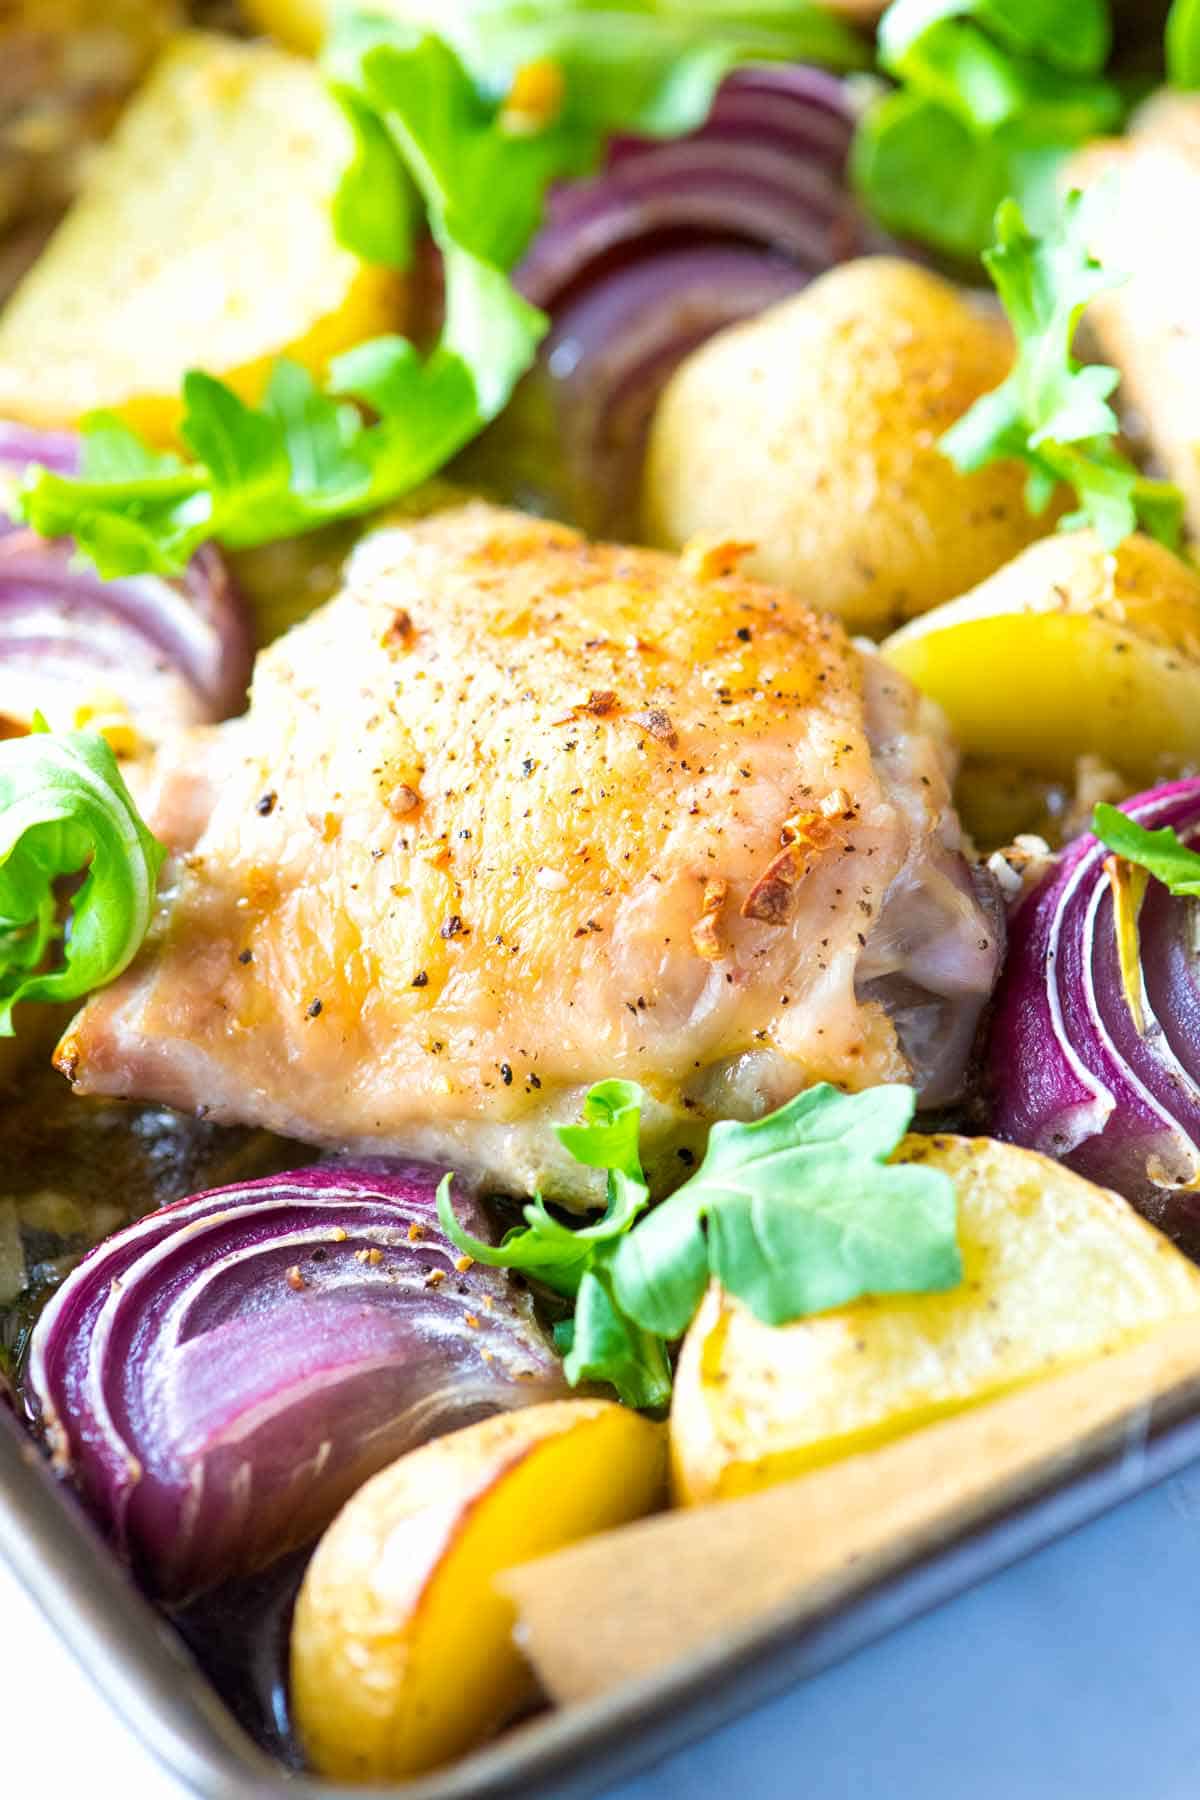
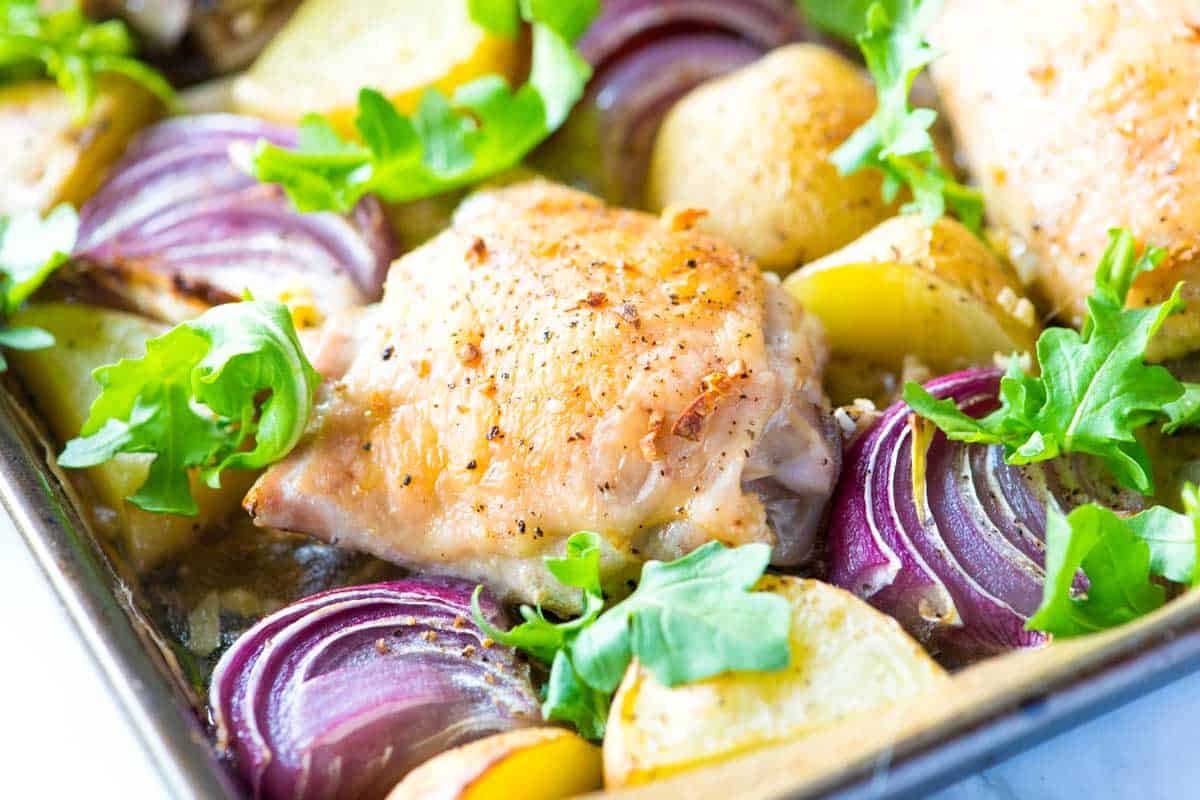
    These easy sheet pan chicken thighs are a guaranteed crowd-pleaser and are ready in under 45 minutes! Crispy chicken thighs, tender potatoes, and caramelized onions are baked together on one sheet pan for maximum flavor and minimal fuss.

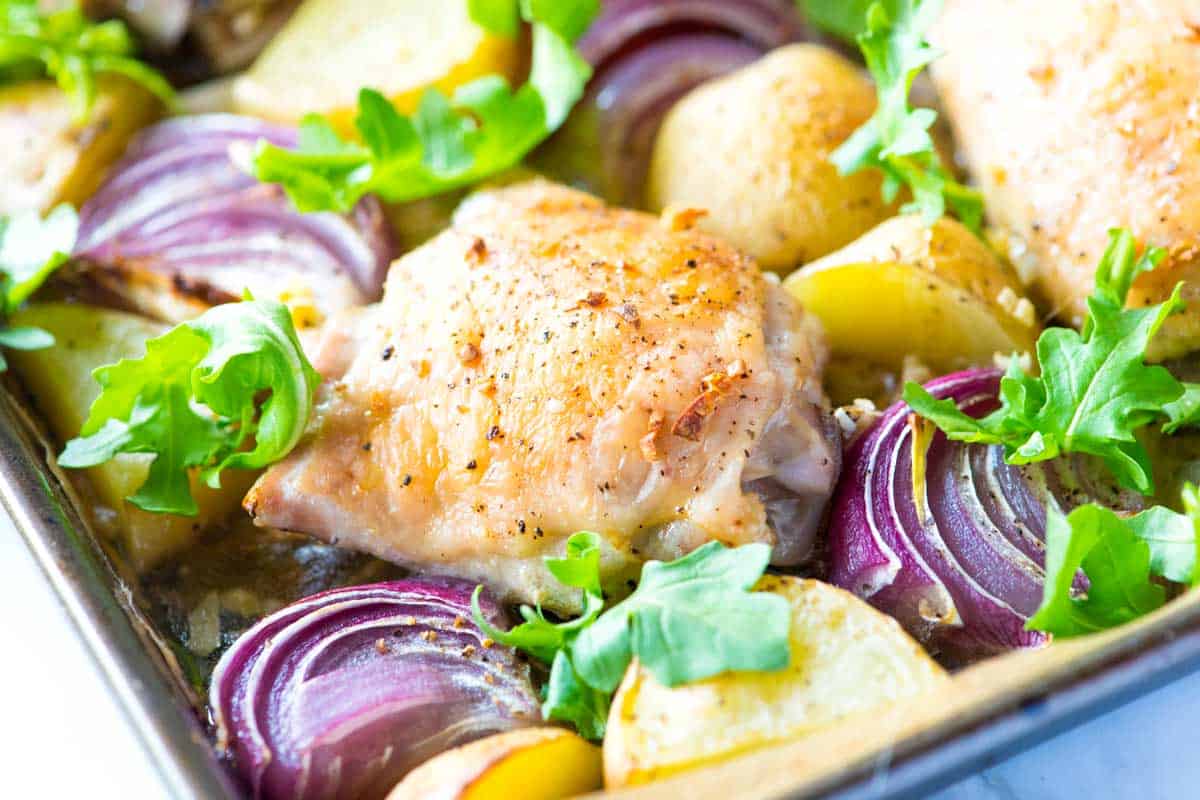
    Easy Sheet Pan Chicken Thighs

    Mid-week chaos calls for easy, delicious meals with minimal cleanup. That’s where this sheet-pan chicken recipe shines! Toss chicken thighs and your favorite veggies onto a baking sheet, pop it in the oven, and let the magic happen. You’ll have a crispy, delicious dinner in no time.

    For more sheet pan dinners, see our brown sugar baked salmon with green beans! Or, if you prefer a hands-off approach, these easy slow cooker chicken thighs are a lifesaver.

    Key Ingredients

    • Chicken Thighs: I use skinless chicken thighs for this recipe. I’ve also made it with drumsticks and chicken breasts with great results. When using skin-on chicken, I prefer searing it before adding it to the baking sheet for a bit of extra color.
    • Potatoes and Red Onion: You can add whatever veggies you like to the sheet pan, but I love potatoes and red onion. The potatoes become tender, and the onion turns soft and sweet. For more inspiration, think about sweet potatoes or cubed winter squash instead of potatoes. I also love roasted cabbage, so adding some chopped cabbage to the sheet pan is also great!
    • Olive Oil and Seasonings: I use olive or avocado oil so the chicken and veggies brown nicely. Then, I keep the seasoning really simple, but you can have a lot of fun here. I use salt, pepper, and garlic in the recipe below, but you can use your favorite spice blends instead. Think Italian seasoning, Cajun seasoning, chili powder, and more!
    • Greens: As the sheet pan comes out of the oven, I toss some baby spinach or arugula around the chicken. They wilt slightly from the heat of the chicken and veggies and get dressed in the pan juices.

    How to Make Sheet Pan Chicken Thighs

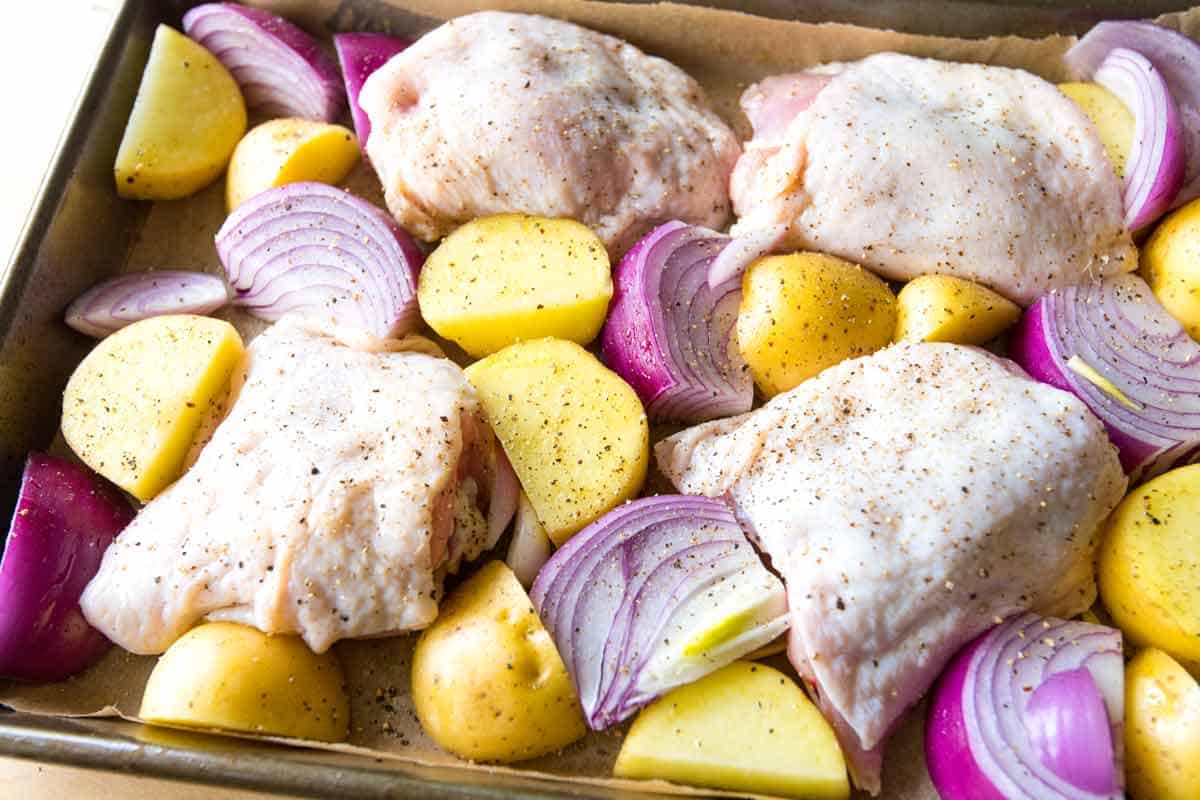
    These sheet pan chicken thighs are quick and easy. You will need about 10 minutes to prep, and then toss chicken thighs, potatoes, and onions onto a baking sheet and bake in the oven until crispy.

    How to Make Sheet Pan Chicken Thighs: Chicken thighs, potatoes, and onions on a sheet pan

    Before baking them, we season the chicken thighs and potatoes with salt and pepper. Then, for extra flavor, we toss in some minced garlic towards the end of the baking time (adding the garlic later prevents it from burning in the oven and turning bitter).

    We bake the chicken thighs in a 425°F oven for about 35 minutes. This bake time is perfect for roasting vegetables along with the chicken.

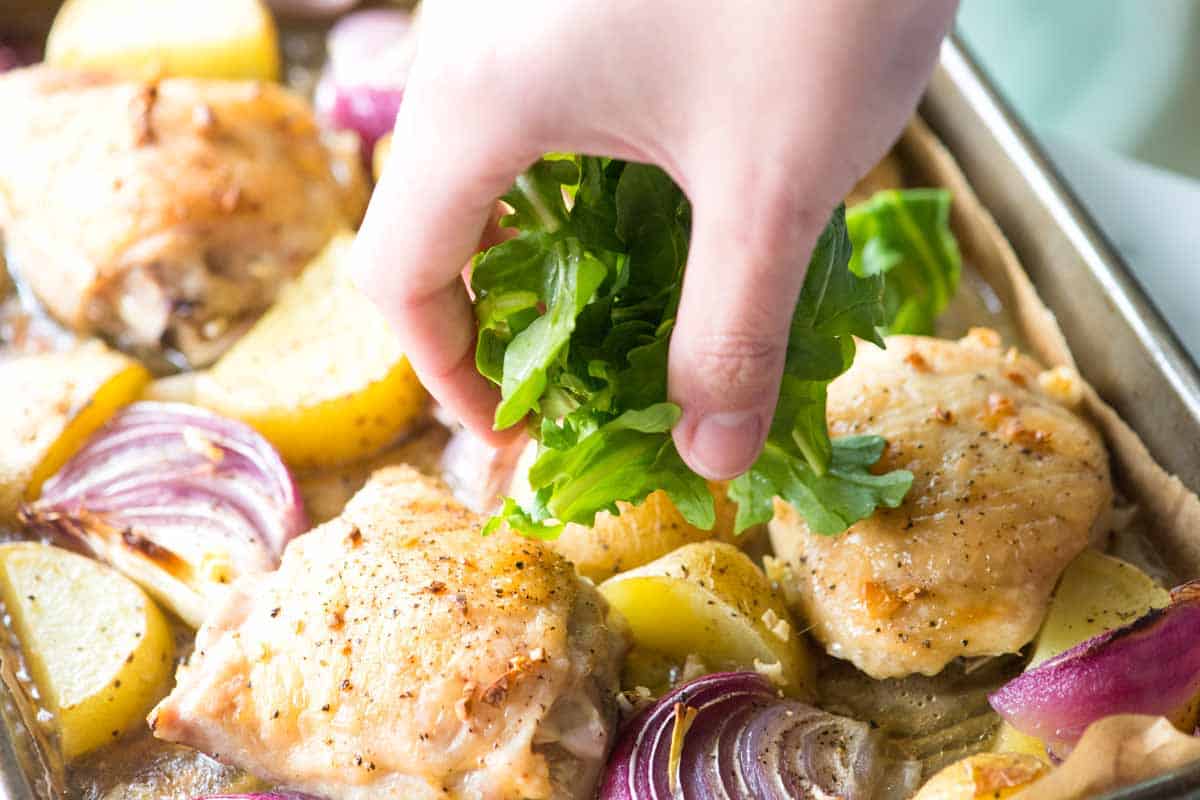
    How to Make Sheet Pan Chicken Thighs: Adding baby arugula to the pan of chicken and potatoes

    Then, I toss some greens onto the sheet pan just before serving. The heat from the baked chicken thighs and potatoes will wilt them down a little. Easy, and dinner is made all in one pan!

    Sheet Pan Chicken Thighs

    Easy Sheet Pan Chicken Thighs

    • PREP
    • COOK
    • TOTAL

    Our easy sheet pan chicken thighs recipe is fuss-free and perfect for busy nights. We keep the seasoning simple, but feel free to throw your favorite spice blend on top of the chicken and potatoes.

    4 Servings

    You Will Need

    4 bone-in, skin-on chicken thighs, about 1 ½ pounds

    8 ounces Yukon gold potatoes, cut into 1/2-inch pieces (2 medium)

    1 medium red onion, cut into 1/2-inch wedges

    2 teaspoons olive oil or avocado oil

    3/4 teaspoon fine sea salt or seasoned salt

    1/2 teaspoon fresh ground black pepper

    2 garlic cloves, minced

    1 ½ cups fresh arugula leaves or baby spinach

    Directions

      1Preheat the oven to 425°F (218°C). Line a rimmed baking sheet (sheet pan) with parchment paper or aluminum foil.

      2Trim excess skin and pat chicken dry, then generously season with a 1/2 teaspoon of salt and 1/4 teaspoon of pepper on both sides.

      3Spread potatoes and onions on the prepared baking sheet and toss with one teaspoon of the oil, 1/4 teaspoon of salt, and 1/4 teaspoon of pepper.

      4Nestle the seasoned chicken thighs, skin-side facing up, between the potatoes and onions. Bake the chicken and potatoes for 15 minutes.

      5Meanwhile, toss minced garlic and the remaining teaspoon of oil in a small bowl. After 15 minutes of baking, scatter the garlic over the chicken thighs, potatoes, and onions. Continue to bake until the chicken is no longer pink in the middle, or an internal thermometer reads 165°F (73°C) when inserted into the thigh, about 20 minutes more.

      6Before serving, scatter arugula leaves over the chicken, potatoes, and onions.

    Adam and Joanne’s Tips

    • Skinless chicken thighs or breasts: Follow the recipe as stated, but rub the skinless chicken with a teaspoon of oil before baking. After adding the garlic, continue to bake until the chicken is cooked through (this will take a bit less time than mentioned above for bone-in chicken thighs).
    • The nutrition facts provided below are estimates.

    Nutrition Per Serving
    Serving Size
    1 thigh plus 1/4 of the veggies
    /
    Calories
    216
    /
    Protein
    16 g
    /
    Carbohydrate
    13 g
    /
    Dietary Fiber
    2 g
    /
    Total Sugars
    2 g
    /
    Total Fat
    11 g
    /
    Saturated Fat
    3 g
    /
    Cholesterol
    81 mg
    /
    Sodium
    716 mg


    AUTHOR:

    Adam Gallagher

    Adam and Joanne of Inspired Taste

    We are Adam and Joanne Gallagher, the creators of Inspired Taste. Established in 2009, Inspired Taste grew from a childhood dream into one of the internet’s most trusted recipe sites with hundreds of reliable recipes, step-by-step videos, and expert tips.More About Us

    Source link