Tag: Recipe

  • Easy Shrimp Cocktail Recipe

    Easy Shrimp Cocktail Recipe

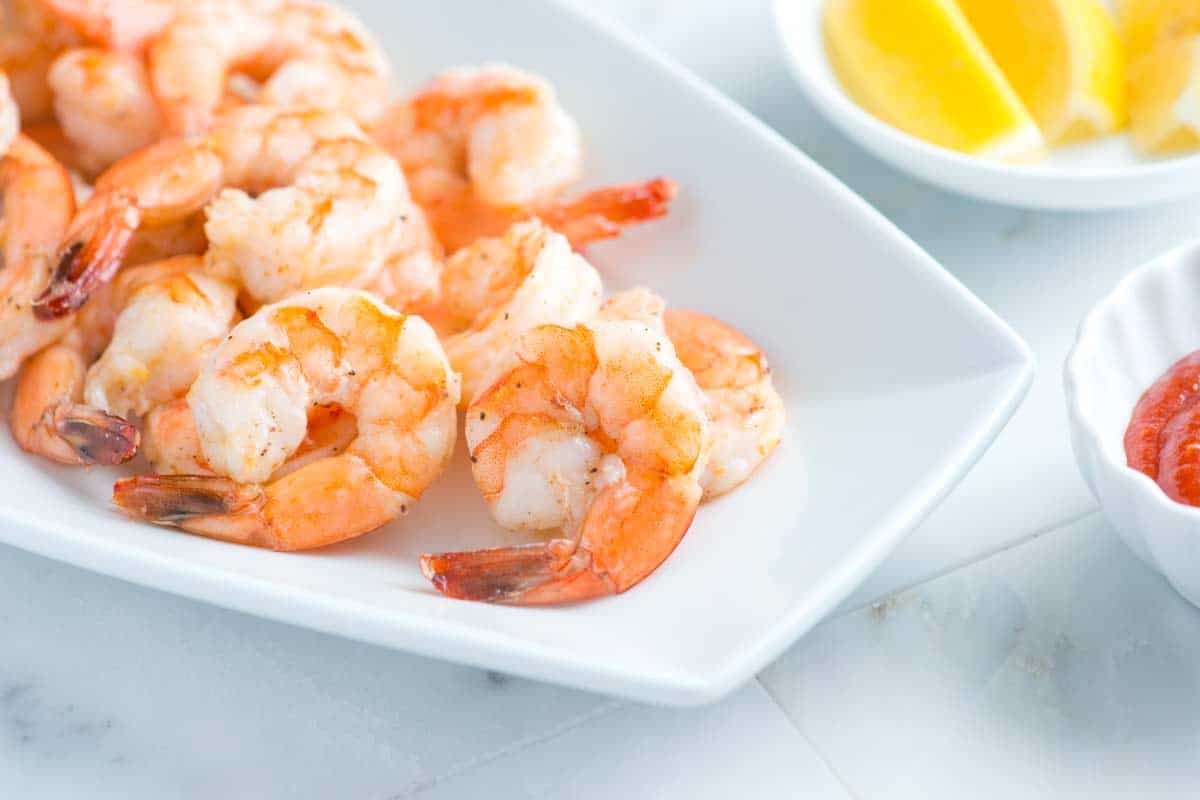
    Our favorite shrimp cocktail recipe skips poaching or boiling and roasts the shrimp instead. It’s easy to make and guarantees juicy, tender shrimp every time.
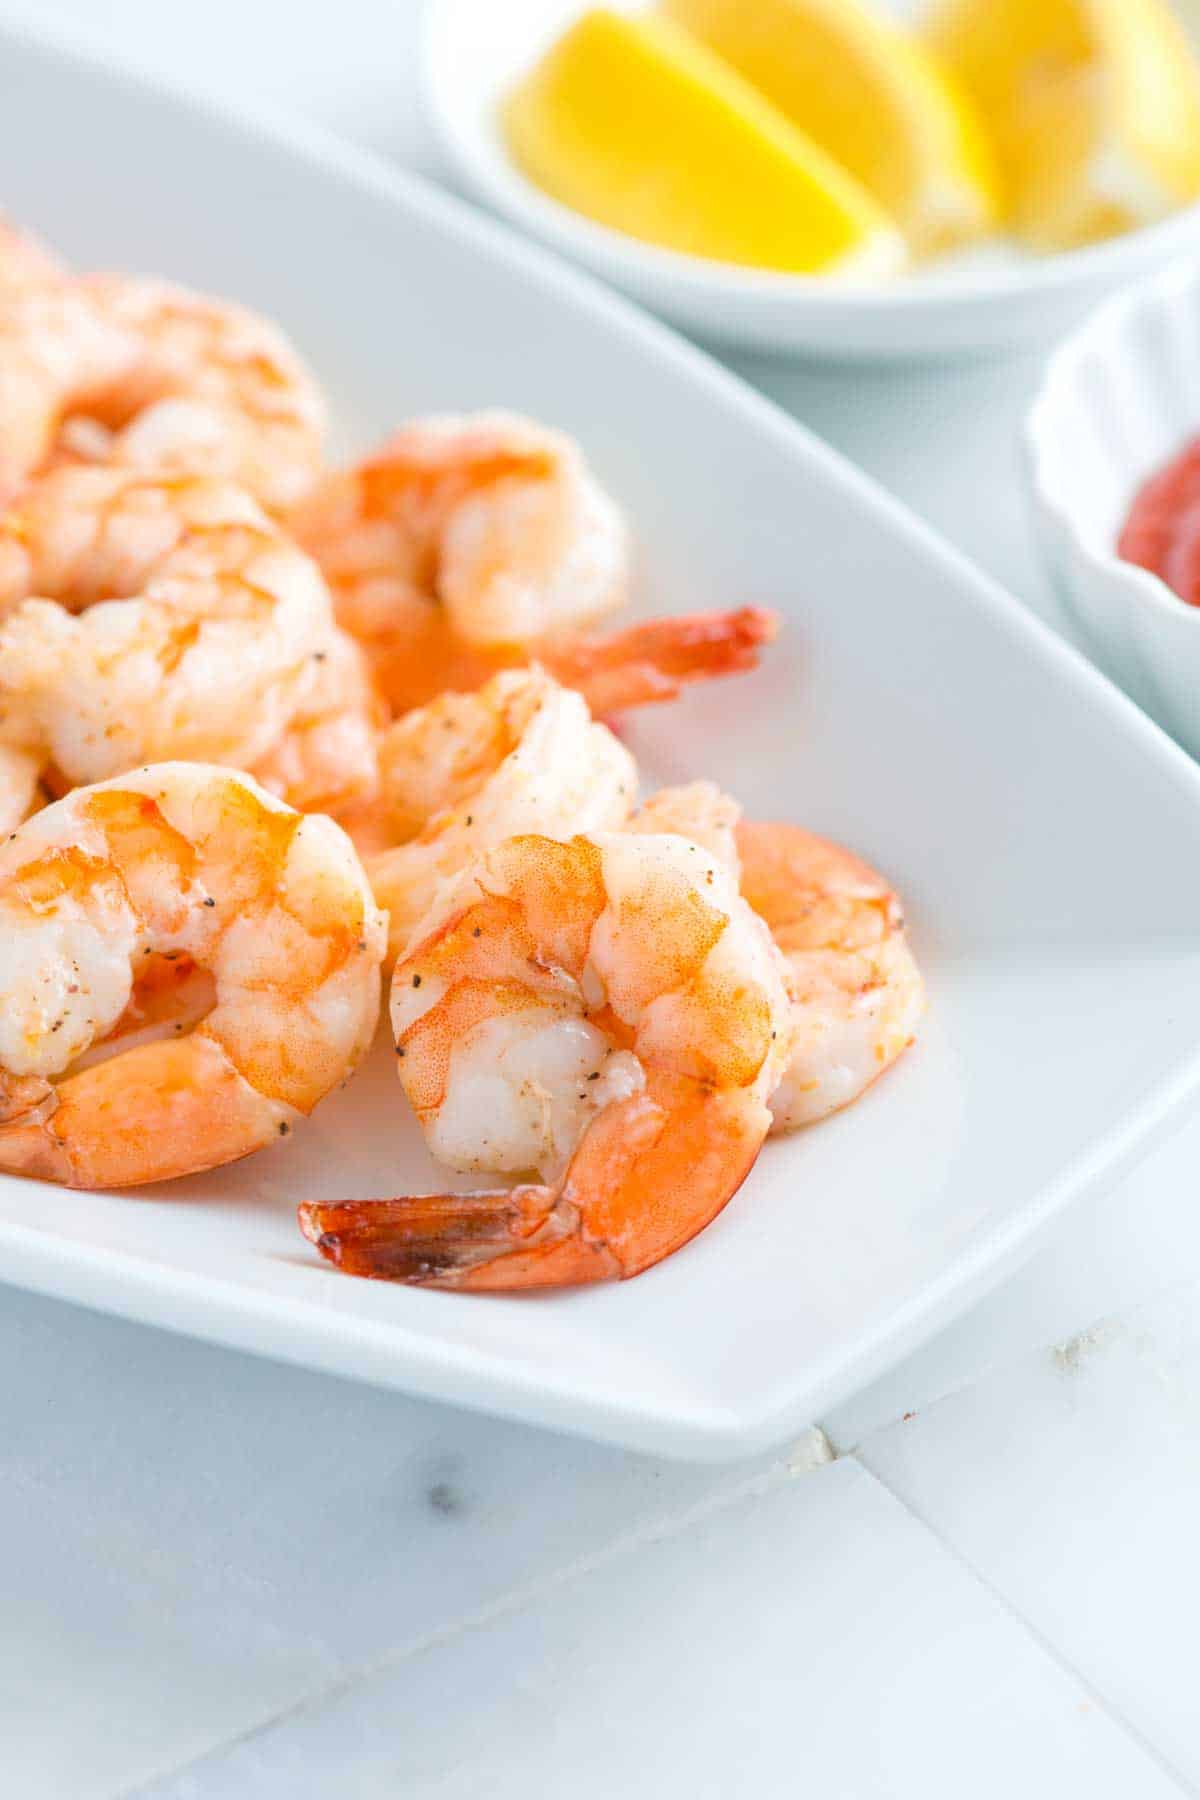
    Shrimp Cocktail

    We both love shrimp cocktail and can never resist ordering it at restaurants. It’s such a simple but impressive appetizer, and I know it will always be a hit with my friends and family. Whenever we make this recipe, it’s one of the first dishes to disappear.

    The secret to the best shrimp cocktail is roasting the shrimp. It’s quick, hard to overcook, and adds extra flavor from the olive oil and lemon. Once you try our method, you’ll never go back to boiling again. That said, if you prefer the classic approach, we also have a great poached shrimp you can try!

    Key Ingredients

    • Shrimp: Use fresh, high-quality jumbo or large shrimp for this. I like to leave the tails on since it makes dipping into the cocktail sauce easier and looks nice for serving. If using frozen shrimp, thaw them overnight in the refrigerator, then pat dry with paper towels before roasting.
    • Olive Oil: I prefer roasting the shrimp with olive oil or avocado oil for their flavor. I save my extra-virgin olive oil for other dishes since it has a lower smoke point.
    • Lemon: For an extra layer of flavor, grate some lemon zest with a microplane and toss it with the shrimp before roasting. You can then use the rest of the lemon for serving!
    • Salt and Pepper: I season generously with salt and pepper, but feel free to add more flavor with your favorite spice blends. Our Cajun seasoning is a particular favorite in my household, but Old Bay, or other seafood blends would be lovely.
    • Cocktail Sauce: You can use a high-quality store-bought cocktail sauce or make our homemade version below with ketchup, horseradish, lemon juice, Worcestershire sauce, and a touch of hot sauce. Tartar sauce is really delicious, too.

    Find the full recipe with measurements below.

    How to Make the Best Shrimp Cocktail

    Tip 1: Pat the shrimp dry. Damp food won’t roast properly, it steams, instead. Before roasting, pat the shrimp really dry with paper towels. Then toss them with olive oil, lemon zest, salt, and pepper.
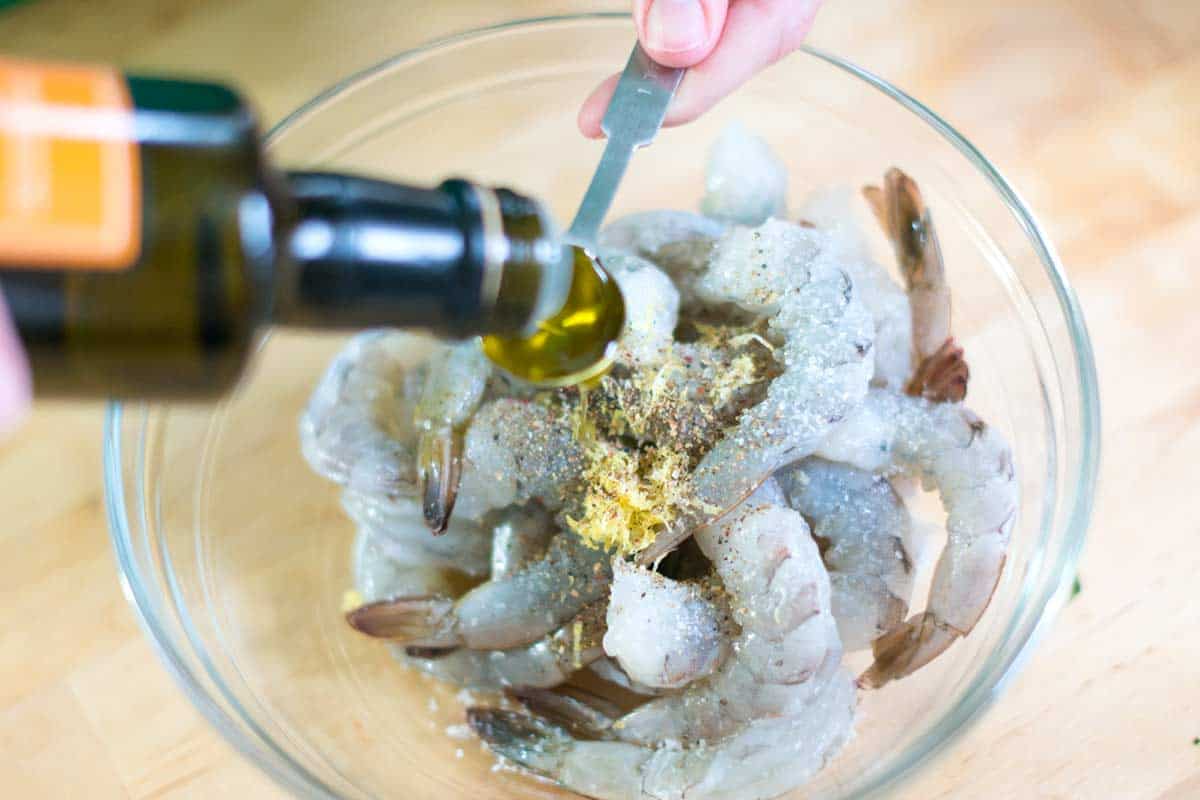
    Tossing shrimp with salt, pepper, lemon zest, and olive oil.

    Tip 2: Roast the shrimp. Spread the seasoned shrimp into a single layer on a baking sheet. Roasting them too close together will cause them to steam and become soggy. Then, roast them until the shrimp are pink, firm, and cooked through (5 to 10 minutes, depending on their size).

    Shrimp on baking sheet to make shrimp cocktail

    Tip 3: Serve warm or cold. While they are usually served chilled, these roasted shrimp are delicious warm, too. To serve cold, transfer the roasted shrimp to a plate and refrigerate for about 30 minutes before serving.

    Serving Suggestions

    I love serving these shrimp alongside lemon wedges and cocktail sauce (recipe below), but they are fantastic served other ways, too. I especially love using these shrimp to make shrimp salad or adding them to my favorite salads. I love them on top of this Greek salad, Caesar salad, our orzo pasta salad, or this hearty quinoa black bean salad!

    More Shrimp Recipes
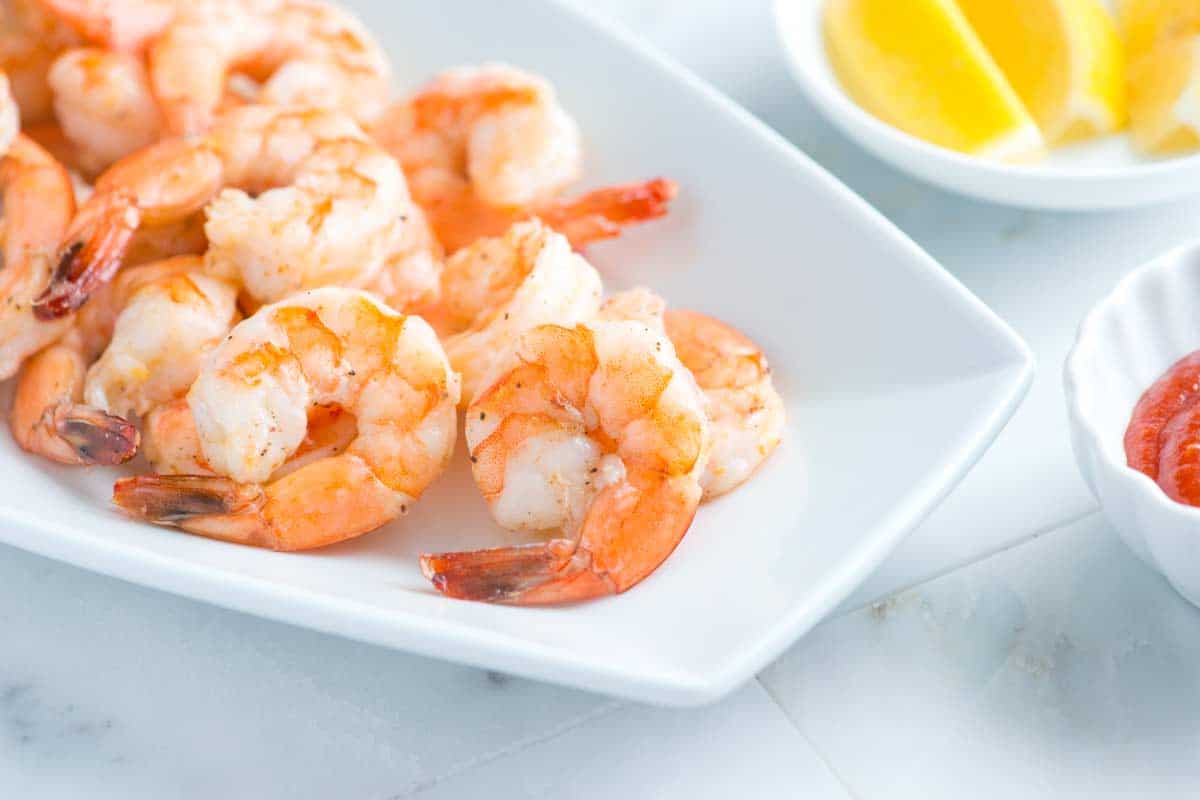
    Shrimp Cocktail

    Easy Shrimp Cocktail

    • PREP
    • COOK
    • TOTAL

    These shrimp are simple and delicious. We’ve used lots of lemon and pepper here, but you can customize it in several ways. Try using Old Bay, Cajun seasoning, garam masala, or another spice blend in place of or in addition to the lemon.

    4 Servings

    You Will Need

    For the Shrimp

    1 pound extra-large shrimp, shelled with tails left on

    1 tablespoon olive oil or avocado oil

    ½ teaspoon fine sea salt

    ½ teaspoon fresh ground black pepper

    1 teaspoon grated lemon zest

    1 lemon, cut into wedges, for serving

    Cocktail sauce, recipe below


    For Homemade Cocktail Sauce

    1 cup ketchup, try homemade ketchup

    2 to 3 tablespoons prepared horseradish, to taste

    1 tablespoon fresh squeeze lemon juice

    ½ teaspoon Worcestershire sauce

    1 to 2 dashes hot sauce, like Tabasco or Crystal

    Directions

      1Prep: Preheat the oven to 400°F (204°C). Line a baking sheet with aluminum foil or parchment paper.

      2Prepare shrimp: Pat the shrimp dry, then toss with oil, salt, pepper, and lemon zest in a bowl.

      3Roast: Place the shrimp on the baking sheet in one layer. Try to leave some space between each shrimp. Roast the shrimp for 5 to 10 minutes until pink, firm, and cooked through. If you are doubling this recipe, you may need two baking sheets.

      4Make cocktail sauce: In a small bowl, whisk the ketchup, horseradish, lemon juice, Worcestershire, and hot sauce together. Taste, and then adjust with more horseradish or lemon. Store in an airtight container for up to 1 week.

      5Serve: Serve the shrimp warm or chilled with lemon wedges, cocktail sauce on the side.

    Adam and Joanne’s Tips

    • Storing: Keep the shrimp in an airtight container in the refrigerator for up to 4 days. The sauce lasts for a week in the fridge.
    • Alternate sauce: Try homemade tartar sauce!
    • Grilled shrimp cocktail: Soak wooden or bamboo skewers in water for 30 minutes, then thread the shrimp onto them. Grill the shrimp skewers over medium heat until pink, firm, and cooked through, for 4 to 5 minutes on each side.
    • The nutrition facts provided below are estimates. We did not include any sauce.

    Nutrition Per Serving
    Serving Size
    1/4 of the recipe
    /
    Calories
    128
    /
    Total Fat
    4.1g
    /
    Saturated Fat
    0.6g
    /
    Cholesterol
    182.5mg
    /
    Sodium
    425.7mg
    /
    Carbohydrate
    0.4g
    /
    Dietary Fiber
    0.1g
    /
    Total Sugars
    0.1g
    /
    Protein
    22.8g


    AUTHOR:

    Adam Gallagher

    Adam and Joanne of Inspired Taste

    We are Adam and Joanne Gallagher, the creators of Inspired Taste. Established in 2009, Inspired Taste grew from a childhood dream into one of the internet’s most trusted recipe sites with hundreds of reliable recipes, step-by-step videos, and expert tips.More About Us
    Source link

  • Paprika Chicken Recipe

    Paprika Chicken Recipe

    My Paprika Chicken Recipe is an easy skillet meal that’s inspired by a famous Hungarian dish, and this is loaded with flavor! And I updated the recipe to make this tasty chicken dish with paprika and sour cream easier and even lower in carbs.

    PIN the Paprika Chicken Recipe to try it later!

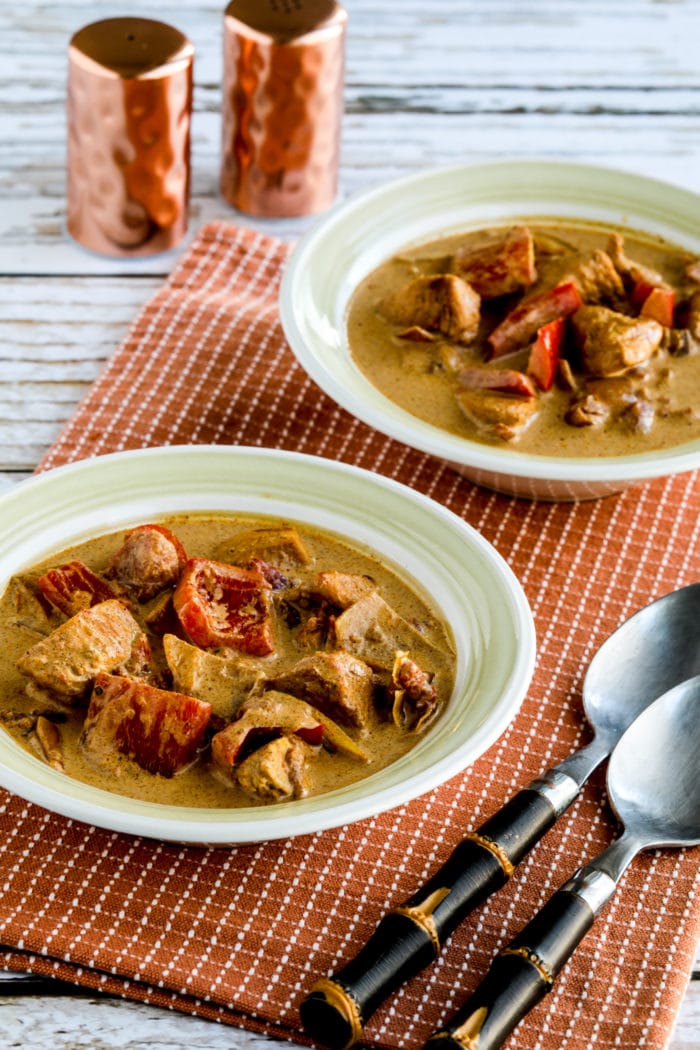
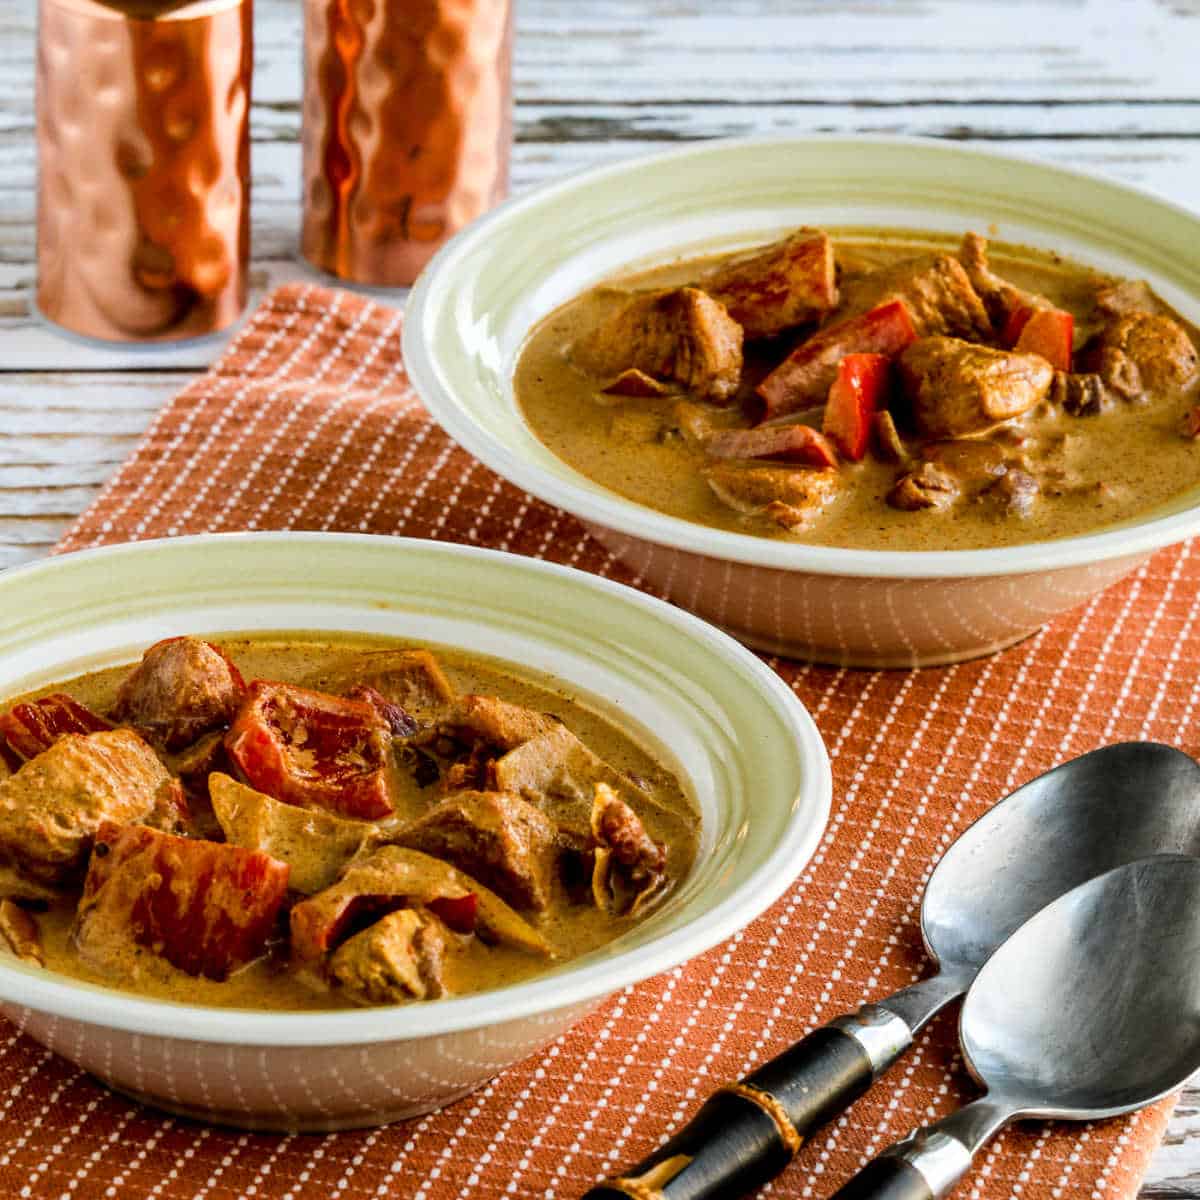
    Paprika Chicken shown in two serving bowls

    This favorite Paprika Chicken Recipe is an easy skillet meal that I’ve loved for years! And food blogs are a work in progress, and I love updating a favorite recipe with better photos so current readers will want to try it. Sometimes I like to improve the recipe as well. So for this updated recipe for Paprika Chicken I made a few changes. (You can see the very old original version here if you’d like.)

    I updated the recipe for Paprika Chicken to make it easier to make to make and also slightly lower in carbs. This recipe is inspired by Chicken Paprikash, a traditional Hungarian dish that includes a roux made of flour and chicken fat or butter. My version doesn’t have flour, and if you like chicken, onions, red peppers, paprika, and sour cream, I bet you’ll enjoy the lower-carb version of Paprika Chicken!

    What ingredients do you need?

    (This is only a list of ingredients; please scroll down for complete printable recipe. Or if you use the JUMP TO RECIPE link at the top of the page, it will take you directly to the complete recipe with ingredient amounts.)

    Is this chicken with paprika an authentic Hungarian Recipe?

    I’m not claiming this is an authentic Hungarian recipe! So if this isn’t the way your Hungarian grandmother used to make it, go ahead and make her version if you still have that recipe!

    Can you use red peppers from a jar for Paprika Chicken?

    For years I did make this Paprika Chicken recipe with roasted red pepper from a jar. But when I decided to update the recipe I tried it with fresh bell peppers, chopped in large pieces and cooked with the onions. Both versions were delicious, so make it the way you prefer.

    Please use Hungarian Paprika for this chicken recipe!

    I want to emphasize the importance of using real Hungarian paprika for this recipe! You can find it sold in nearly every U.S. grocery store, usually in a tin rather than a glass jar. I’m a fan of Szeged Sweet Paprika (affiliate link) and Szeged Hot Paprika (affiliate link). But any Hungarian paprika will be better than the American version from the grocery store. And real Hungarian Paprika is so flavorful that I bet you’ll want to use it regularly once you try it!

    How low in carbs is this Paprika Chicken Recipe?

    This delicious chicken skillet meal with Hungarian flavors only has 7 net carbs and 22 grams of protein per serving!

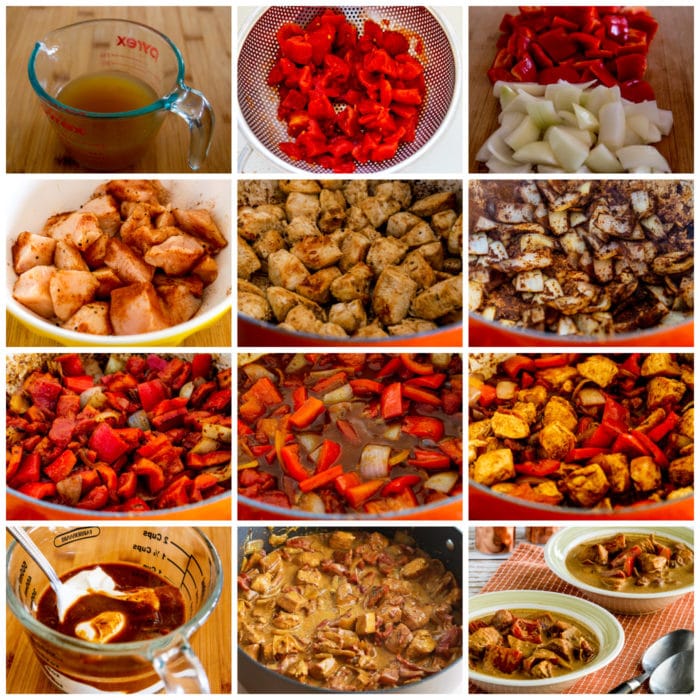
    Paprika Chicken collage showing steps for making the recipe

    How to Make the Paprika Chicken Recipe:

    (This is only a summary of the steps for the recipe; please scroll down for complete printable recipe. Or if you use the JUMP TO RECIPE link at the top of the page, it will take you directly to the complete recipe.)

    1. Simmer chicken broth (or homemade chicken stock) in a small pan until it’s reduced to 3/4 cup. 
    2. Drain tomatoes into a colander in the sink. 
    3. Cut onion and two red bell peppers into pieces.
    4. Trim chicken breasts, and cut chicken into cubes about 1  square.
    5. When ingredients are ready, toss chicken cubes with 1 tsp. sweet paprika, salt, and fresh-ground black pepper.
    6. Heat olive oil and cook chicken over medium-high heat until it’s well browned, about 5 minutes. Remove chicken to a plate.
    7. Add more oil and brown onions. Then add the rest of the sweet paprika, hot paprika, and ground caraway seed (if using) and cook about 1 minute more.
    8. Add red peppers and cook until they’re starting to get soft when you pierce with a fork, then add drained tomatoes and cook about 2 minutes more.
    9. Add the reduced stock and cook 2-3 minutes.
    10. Then add browned chicken pieces and any juice that’s on the plate, turn heat to LOW, and simmer about 2-3 minutes more or until the chicken is hot.
    11. Turn off the heat and let the dish sit for a couple of minutes (to be sure it’s NOT TOO HOT or the sour cream will curdle).
    12. When it’s cooled a little, remove a few tablespoons of liquid from the pan and  and gently stir into sour cream.
    13. Then stir that mixture into the chicken and vegetables. (Blogger fail, I forgot to take a photo of that step so I had to use the old picture, which is why it’s a different pan.) 
    14. Season with a little more salt and fresh-ground pepper if desired and serve immediately.
    15. Paprika Chicken is traditionally served over rice or noodles, but I really enjoyed it served plain as a stew.

    Make it a Low-Carb Meal:

    I’d love this Paprika Chicken with one of these low-carb side dishes:

    Paprika chicken second photo in two serving bowls

    More Recipes using Hungarian Paprika:

    Ingredients

    • one 14.5 oz. can chicken broth (see notes)
    • one 14.5 oz. can diced tomatoes, drained
    • 1 small onion
    • 2 red bell peppers
    • 3 large boneless, skinless chicken breasts
    • 4 tsp. sweet paprika (see notes)
    • 1 tsp. hot paprika, sometimes called sharp paprika (see notes)
    • 1/2 tsp. ground Caraway seed (optional)
    • salt and fresh-ground black pepper (to taste)
    • 1 T + 2 tsp. olive oil
    • 1 cup sour cream

    Instructions

    1. Put the chicken stock or broth into a small pan and simmer over medium heat until it’s reduced to 3/4 cup.
    2. Drain the canned tomatoes into a colander placed into the sink (you can catch the juice and freeze for another use if you’d like.)
    3. Cut onions and red bell pepper into fairly large pieces, about an inch square.
    4. Trim the chicken breasts until all the visible fat is gone.  (I save the scraps to make homemade chicken stock). Cut chicken into large cubes (about 1 inches square).
    5. Season the chicken cubes with 1 tsp. Szeged Sweet Paprika plus salt and fresh-ground black pepper to taste.
    6. Heat 1 T. olive oil in a large non-stick frying pan and cook chicken over medium-high heat until the pieces are nicely browned on all sides and barely cooked through, about 5 minutes.
    7. Remove chicken to a plate.
    8. Add the other 2 tsp. of olive oil and the onions and cook unions about 4 minutes. Add the rest of the sweet paprika, the Szeged Hot Paprika, and the ground caraway seed (if using) and cook about 1 minute more.
    9. Add peppers and cook until they are starting to soften when pierced with a fork, then add the tomatoes and cook about 2 minutes more.
    10. Add the reduced chicken stock and cook 2-3 minutes, or until the stock is bubbling hot.
    11. Then add the browned chicken cubes and any juice that’s accumulated on the plate), turn heat to LOW,  and simmer just until the chicken is heated through, about 2-3 minutes.
    12. Turn off the heat and let the mixture sit for a minute or two. (This is VERY IMPORTANT so it’s not so hot that the sour cream will curdle.)
    13. Remove a few tablespoons of the hot liquid, add to the sour cream, and stir to combine.
    14. Then add the sour cream mixture to the skillet and stir gently to combine. (The mixture should have completely stopped simmering before you add the sour cream.)
    15. Serve hot. I love this dish just served in a bowl like a stew, but you eat it over rice or cauliflower rice if you prefer.
    16. I wouldn’t recommend freezing for the Paprika Chicken Recipe, but it will keep for a few days in the fridge and can be reheated in the microwave or in a pan on the stove (with low heat, don’t let it boil or the sour cream will curdle.)

    Notes

    Chicken broth should be simmered to reduce to 3/4 cup; you can also start with 1 1/2 cups homemade chicken stock instead of canned broth if you have some.

    If possible I’d use a combination of Szeged Sweet Paprika (affiliate link) and Szeged Hot Paprika (affiliate link) for this recipe, but any Hungarian Paprika will be fine.

    This recipe adapted from Paprika Chicken at Epicurious.com, with quite a few changes by Kalyn. That recipe doesn’t seem to be on their website any more.

    Nutrition Information

    Yield

    6

    Serving Size

    1

    Amount Per Serving

    Calories 228Total Fat 12gSaturated Fat 5gTrans Fat 0gUnsaturated Fat 5gCholesterol 75mgSodium 538mgCarbohydrates 10gFiber 3gSugar 6gProtein 22g

    Nutrition information is automatically calculated by the Recipe Plug-In I am using. I am not a nutritionist and cannot guarantee 100% accuracy, since many variables affect those calculations.

    Did you make this recipe?

    Did you make this recipe? Please leave a star rating (under the PRINT button in the recipe) or share a photo of your results on Instagram! THANKS!

    Square image of Paprika Chicken Shown in two bowls with spoons and salt-pepper.

    Low-Carb Diet / Low-Glycemic Diet / South Beach Diet Suggestions:
    When it’s served as a stew without noodles, this recipe for Paprika Chicken is a great dish for Low-Carb and Keto diets and for all phases of the original South Beach Diet.

    Find More Recipes Like This One:
    Use Chicken Recipes to find more recipes like this one! Use the Diet Type Index photo index pages to find recipes suitable for a specific eating plan. You might also like to follow Kalyn’s Kitchen on Pinterest, on Facebook, on Instagram, on TikTok, or on YouTube to see all the good recipes I’m sharing there.

    Historical Notes for this recipe:
    The Paprika Chicken Recipe was updated in 2022 with better photos and an improved easier version of the recipe It was last updated with more information in 2026.

    Pinterest image of Paprika Chicken Recipe

    We are a participant in the Amazon Services LLC Associates Program, an affiliate advertising program designed to provide a means for us to earn fees by linking to Amazon.com and affiliated sites. As an Amazon Associate, I earn from qualifying purchases.


    Source link

  • Creamy Potato Salad with Dill Pickles (Lightened Up Recipe)

    Creamy Potato Salad with Dill Pickles (Lightened Up Recipe)

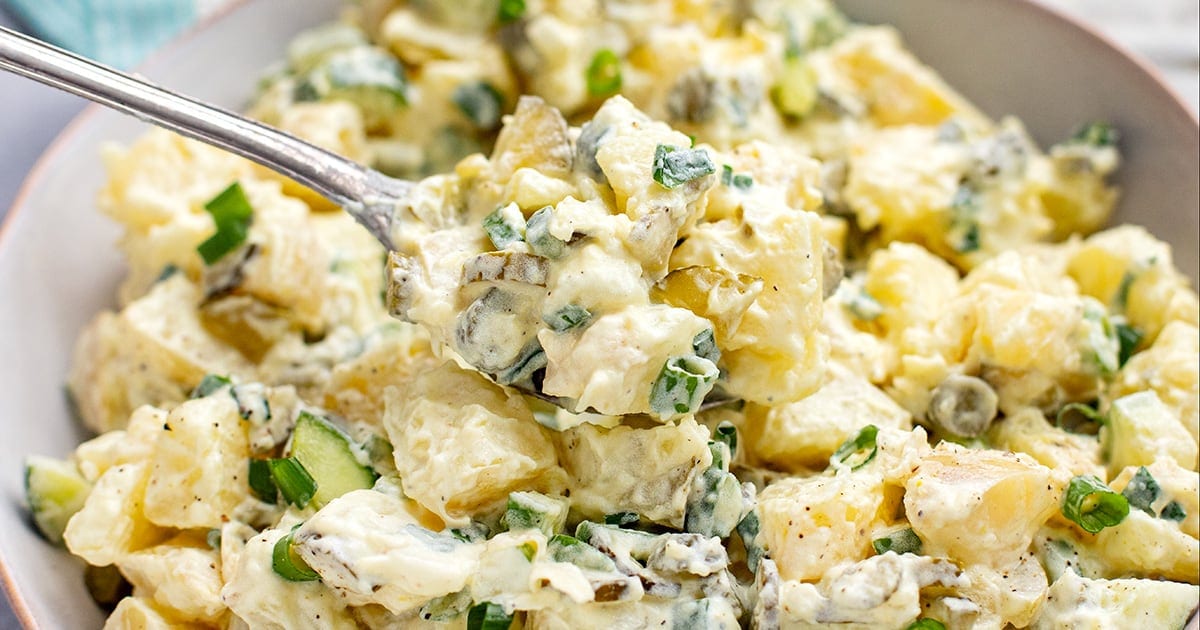
    This creamy potato salad with dill pickles is my go-to easy potato salad for BBQs and weekend dinners—tangy, crunchy and tossed in a lighter creamy dressing.


    Jump to: ℹ️ Overview | 🛒 Ingredients | 📷 How To Make | 📹 Watch The Video | 👩‍🍳 Recipe Tips | 🥗 Serving Suggestions | 📝Full Recipe Card | 🍽 More Salad Recipes


    • ⏱ Ready In: 35 minutes
    • 🍽 Serves: 8
    • 🌱 Diet: Vegetarian, gluten-free
    • 💪 Nutrition Highlights: Lighter dressing using light mayo and sour cream or Greek yogurt
    • 🥕 Main Ingredients: Potatoes, dill pickles, sweet pickles, cucumber, green onions
    • 🔥 Flavor Profile: Creamy, tangy, slightly sweet, crunchy, and fresh
    • 🧊 Meal-Prep Friendly: Keeps well for up to 4 days in the fridge
    • Best Served With: BBQ meats, grilled chicken, burgers, sausages, or roasted vegetables

    This creamy potato salad with dill pickles is the one I end up making the most. It’s simple, quick, and made with just a handful of ingredients, but the flavor is spot on.

    You get little pops of tangy dill pickles, a touch of sweetness from the sweet pickles, and fresh crunch from cucumber and green onions. Everything is coated in a lighter creamy dressing made with light mayo and light sour cream (or Greek yogurt if that’s what you have in the fridge).

    The potatoes stay nice and tender but not mushy, which is key for a good potato salad. The dressing is creamy without feeling heavy, and the pickle juice adds a little tang that really wakes the whole dish up.

    It’s one of those potato salads that people always ask about when I bring it to BBQs or family dinners. It’s also surprisingly great for meal prep — I’ll often serve it with grilled chicken or a couple of boiled eggs for a quick lunch.

    And yes… my 5-year-old happily eats this one too, which is always a good sign.

    🥔🥗 You might also like my other potato salads, such as this crispy smashed potato salad, this Spanish-inspired no-mayo potato salad with Romesco dressing, or this unique potato salad with capers, apple, and crispy bacon. These are all great summer salads, but I make them throughout the year, too.

    What You’ll Need

    Here is what you’ll need for this creamy potato salad. Find the full measurements in the recipe card below.

    Potatoes & Crunchy Bits

    • White potatoes – creamy and hold their shape well for potato salad; I have made this with larger potatoes and baby potatoes; red potatoes will also work and give you a fun color. PS. Leave the skin on if they’re clean for extra texture and fibre.
    • Fresh cucumber – adds freshness and crunch.
    • Dill pickles / gherkins – bring tangy acidity and savory flavor.
    • Sweet pickles – add a little sweetness that balances the tang.
    • Green onions – mild onion flavor and freshness.

    Note: Pickles are a classic flavor booster in creamy salads because they add tang, sweetness, and crunch that balance rich dressings. I love a combination of more savory dill and also sweet (like butter pickles), but you can use one type, just make sure it’s the total amount of both.

    Creamy Dressing

    • Light mayonnaise – the creamy base.
    • Light sour cream or Greek yogurt – adds tang and lightens the dressing.
    • Yellow mustard – a little zing.
    • Pickle juice – subtle acidity and extra pickle flavor.
    • Salt and pepper – to bring everything together.

    How To Make Creamy Potato Salad With Dill Pickles

    Find the full recipe and nutritional information below. Here are some handy step-by-step photos for how to make potato salad with dill pickles and creamy but light dressing.

    • Add potatoes to a pot with cold water and salt. Bring to a boil and simmer until just fork-tender, about 12–15 minutes.
    • Drain and let the potatoes cool slightly, then cut into bite-sized cubes.
    • Dice cucumber, dill pickles, sweet pickles, and green onions.
    • Whisk together mayonnaise, sour cream (or yogurt), mustard, pickle juice, salt, and pepper in a large bowl.
    • Add pickles, cucumber, and green onions to the bowl and follow with potatoes, and gently toss until coated.
    • Taste; add more salt or pepper if needed. Top with extra green onions or chives and a little black pepper.

    Watch The Video

    Recipe Tips

    • Start potatoes in cold water. This helps them cook evenly instead of being mushy outside and undercooked inside.
    • Don’t overcook the potatoes. They should be tender but still hold their shape. Overcooked potatoes will make the salad mushy.
    • Let the potatoes cool slightly before mixing. If they’re too hot, the dressing can separate.
    • Chop everything evenly. Small, uniform pieces make every bite balanced.
    • For extra flavor. Add a little chopped fresh dill or chives.
    • Storage: Store in an airtight container in the fridge for up to 4 days. Stir before serving, as the dressing may settle.
    • Make-ahead tip: This salad actually tastes better after a few hours in the fridge, which makes it perfect for BBQs or meal prep.

    Variations

    • Add hard-boiled eggs for a classic deli-style potato salad.
    • Add crispy bacon for a smoky twist.
    • Swap cucumber for celery if you prefer.

    Serving Suggestions

    This potato salad is basically made for summer meals and BBQs.

    Serve it alongside BBQs kabobs or skewers, grilled chicken tenders, burgers, sausages, or steak. It’s also great with grilled vegetables or baked salmon.

    For a quick lunch, I often pair it with air fryer chicken wings, shrimp skewers, or steak bites. For a quick lunch, you can pair it with canned tuna, boiled eggs, chickpeas, or grilled halloumi. It turns a simple side dish into a pretty satisfying meal.

    💬 If you’ve tried this creamy potato salad with dill pickles or any other recipe on the blog then don’t forget to rate the recipe and let me know how you got on in the comments below, I love hearing from you! You can also FOLLOW ME on Instagram, Facebook, Pinterest, YouTube, and or sign up to my Newsletter to see more of my delicious food.

    Want to Save This Recipe?

    Enter your email & I’ll send it to your inbox. Plus, get great new recipes from me every week!

    By submitting this form, you consent to receive emails from Cooked & Loved

    This creamy potato salad with dill pickles is my go-to easy potato salad for BBQs and weekend dinners—tangy, crunchy and tossed in a lighter creamy dressing. Find step-by-step photos and more recipe tips above.

    • If the potatoes are clean, leave the skin on and trim any blemishes or green spots. Cut into large wedges.

    • Add potatoes to a medium pot and cover with cold water. Stir in 1 teaspoon salt.

    • Bring to a boil, then reduce to a simmer and cook until potatoes are just tender when pierced with a knife, about 12–15 minutes.

    • Drain and allow potatoes to cool slightly, then cut into cubes.

    • While the potatoes cool, dice the cucumber, pickles and green onions.

    • In a large bowl, whisk together mustard, salt, pepper, pickle juice, mayonnaise and sour cream until smooth.

    • Add the diced pickles, cucumber, green onions and potatoes to the bowl.

    • Gently mix until everything is evenly coated in the dressing.

    • Taste and adjust seasoning if needed.

    • Serve topped with extra green onions or chives and a little cracked pepper.

    • Can I make potato salad ahead of time? Yes. It actually tastes better after chilling for a few hours as the flavours meld together, which makes it perfect for BBQs or meal prep.
    • What potatoes work best? Waxy potatoes like white or Yukon Gold hold their shape well.
    • Can I make this healthier? Yes — swap the sour cream for Greek yogurt and use light mayonnaise.
    • Can I skip the sweet pickles? You can, but they balance the tangy dill pickles nicely.
    • Can I add herbs? Fresh dill or chives are fantastic here.
    • Start potatoes in cold water. This helps them cook evenly instead of being mushy outside and undercooked inside.
    • Don’t overcook the potatoes. They should be tender but still hold their shape. Overcooked potatoes will make the salad mushy.
    • Let the potatoes cool slightly before mixing. If they’re too hot, the dressing can separate.
    • Chop everything evenly. Small, uniform pieces make every bite balanced.
    • For extra flavor. Add a little chopped fresh dill or chives.
    • Storage: Store in an airtight container in the fridge for up to 4 days. Stir before serving as the dressing may settle.
    • Add hard-boiled eggs for a classic deli-style potato salad.
    • Add crispy bacon for a smoky twist.
    • Swap cucumber for celery if you prefer.

    Calories: 175kcal | Carbohydrates: 28g | Protein: 3g | Fat: 6g | Saturated Fat: 2g | Polyunsaturated Fat: 3g | Monounsaturated Fat: 1g | Trans Fat: 0.01g | Cholesterol: 8mg | Sodium: 762mg | Potassium: 623mg | Fiber: 3g | Sugar: 4g | Vitamin A: 227IU | Vitamin C: 27mg | Calcium: 55mg | Iron: 1mg

    Keywords: potato salad, Creamy Potato Salad with Dill Pickles, Dill Pickle Potato Salad

    Check Out These Salad Recipes


    Source link

  • Copycat Neiman Marcus Chicken Salad Recipe

    Copycat Neiman Marcus Chicken Salad Recipe

    This website may contain affiliate links and advertising so that we can provide recipes to you. Read my disclosure policy.

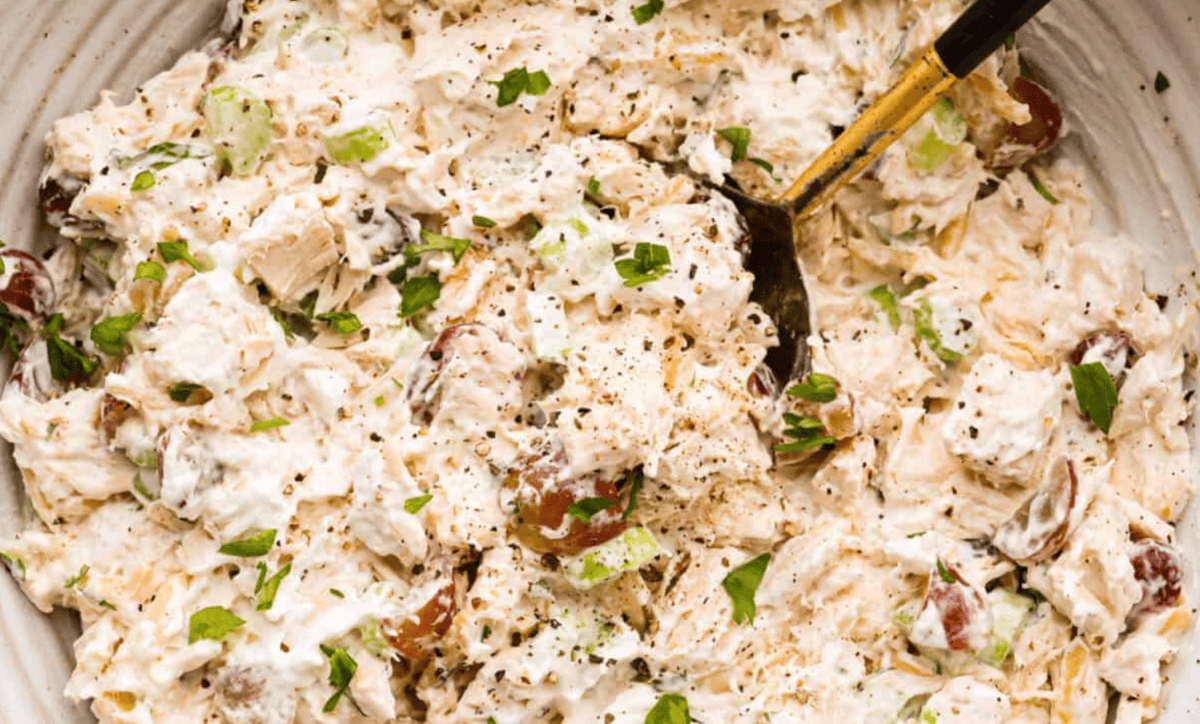
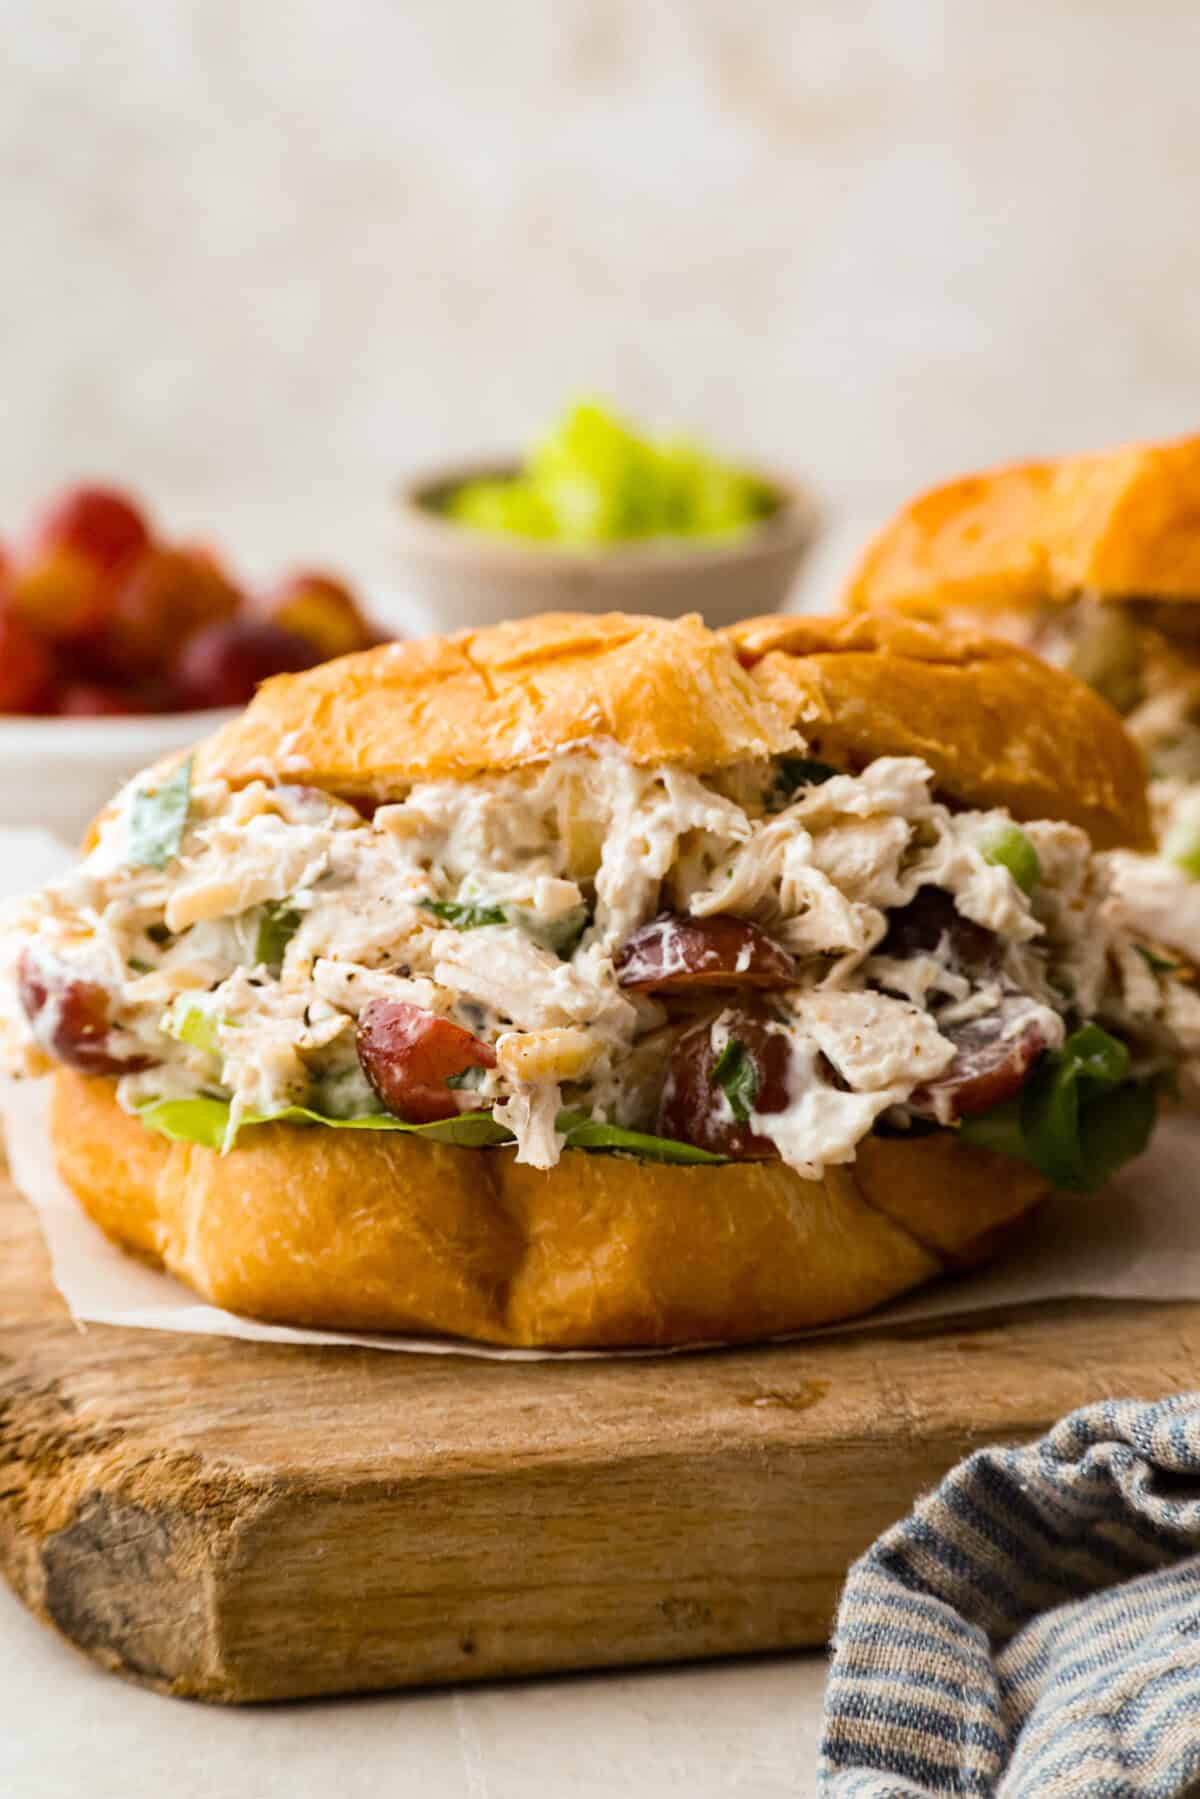
    If you’ve had the Neiman Marcus chicken salad, you know why it’s famous. My copycat version gets the combo of chicken, grapes, almonds, and a smooth dressing perfectly! It’s my go-to for showers, lunches, and everything in between.

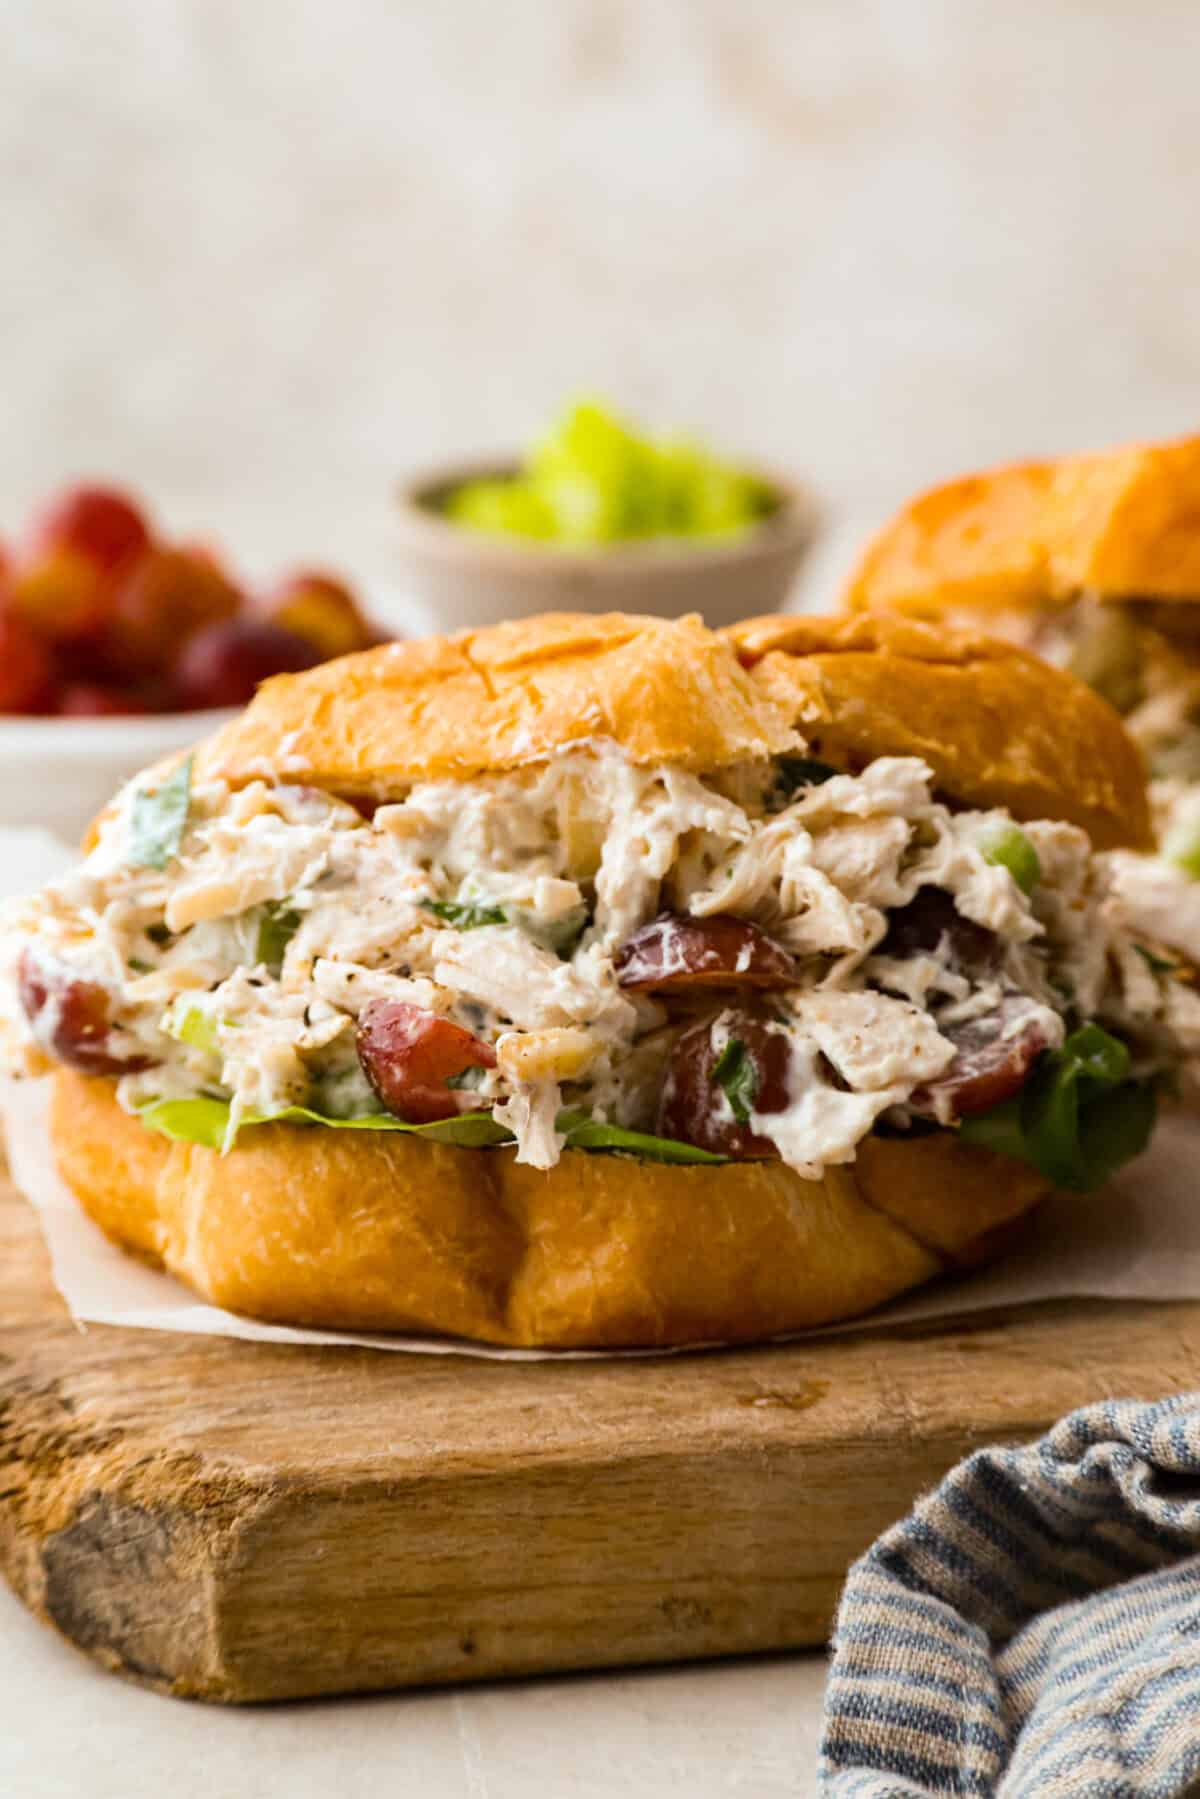
    Image of a croissant with Neiman Marcus chicken salad in it.

    What Makes This Taste Like the Original

    • Tastes Like The Real Thing! The secret ingredient to make it just like the real thing is whipping cream!
    • Make-Ahead Friendly! You can prep it in advance! Check my notes in the recipe card. Make ahead for lunches, showers, and brunches!
    • It Works A Dozen Ways! Scoop it onto croissants, crackers, or lettuce cups, or eat it straight from the bowl!

    Neiman Marcus Chicken Salad Ingredients

    Overhead shot of labeled ingredients.
    • Almonds: I like the slivered almonds, but you can use sliced or chopped if you prefer. Toasting the almonds also adds great flavor!
    • Grapes: Substitute or add diced apples or pineapple.
    • Nuts: You can use your favorite nuts! Pecans and walnuts are great alternatives to almonds.
    • Add-Ins: Stir in sliced green onions or onion powder for added flavor. Or add a tasty texture with dried fruit, such as craisins.

    Neiman Marcus Chicken Salad Recipe

    In the 1950s, Neiman Marcus department stores made chicken salad famous, thanks to Helen Corbitt’s simple, elegant style, so, this is my take on that classic. I like serving it for brunch with fruit salad and cinnamon pull-apart bread!

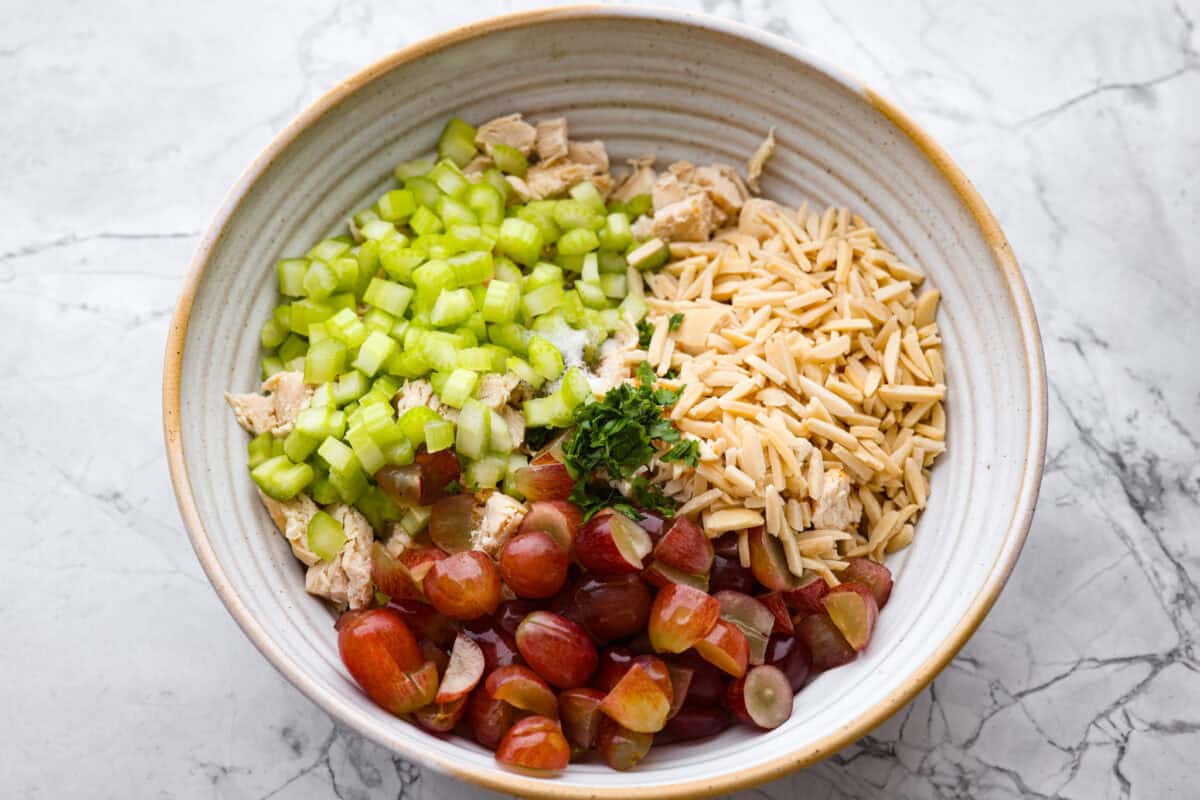
    1. Combine: In a large bowl, combine cooked chicken breast, celery, red grapes, slivered almonds, and fresh parsley.
    2. Stir: Add good quality mayonnaise, then stir to combine.
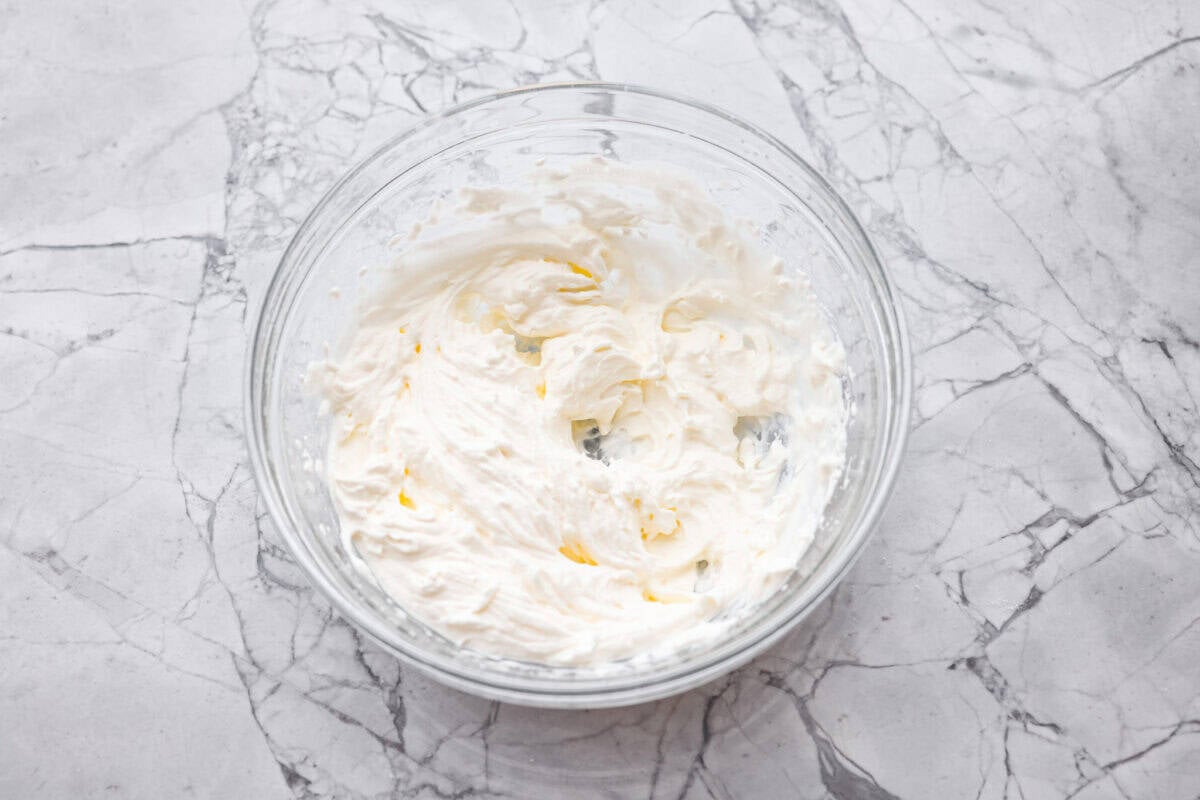
    3. Whip Cream: In a separate bowl, add heavy whipping cream, then mix using an electric hand mixer until soft peaks form.
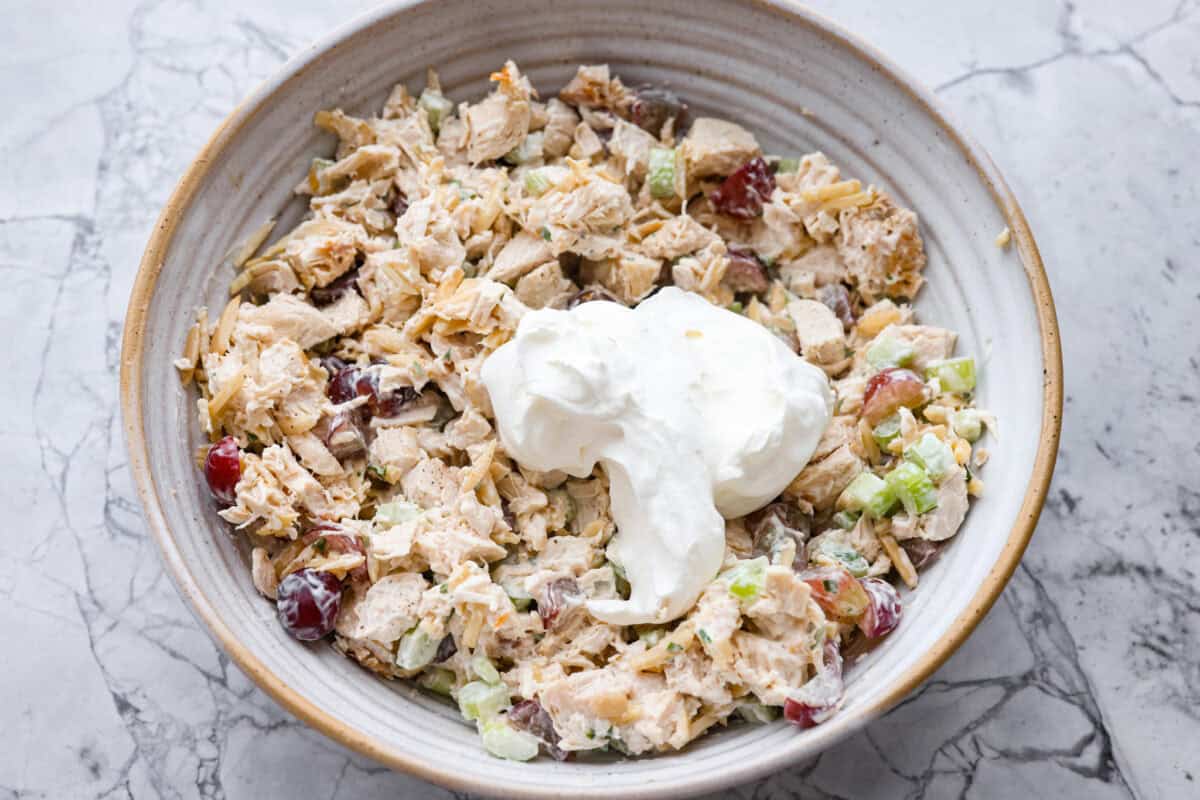
    4. Combine and Season: Gently fold the whipped cream into the chicken mixture until it is fully incorporated. Season Neiman Marcus chicken salad with kosher salt and black pepper to taste.

    Pin this now to find it later

    Pin It

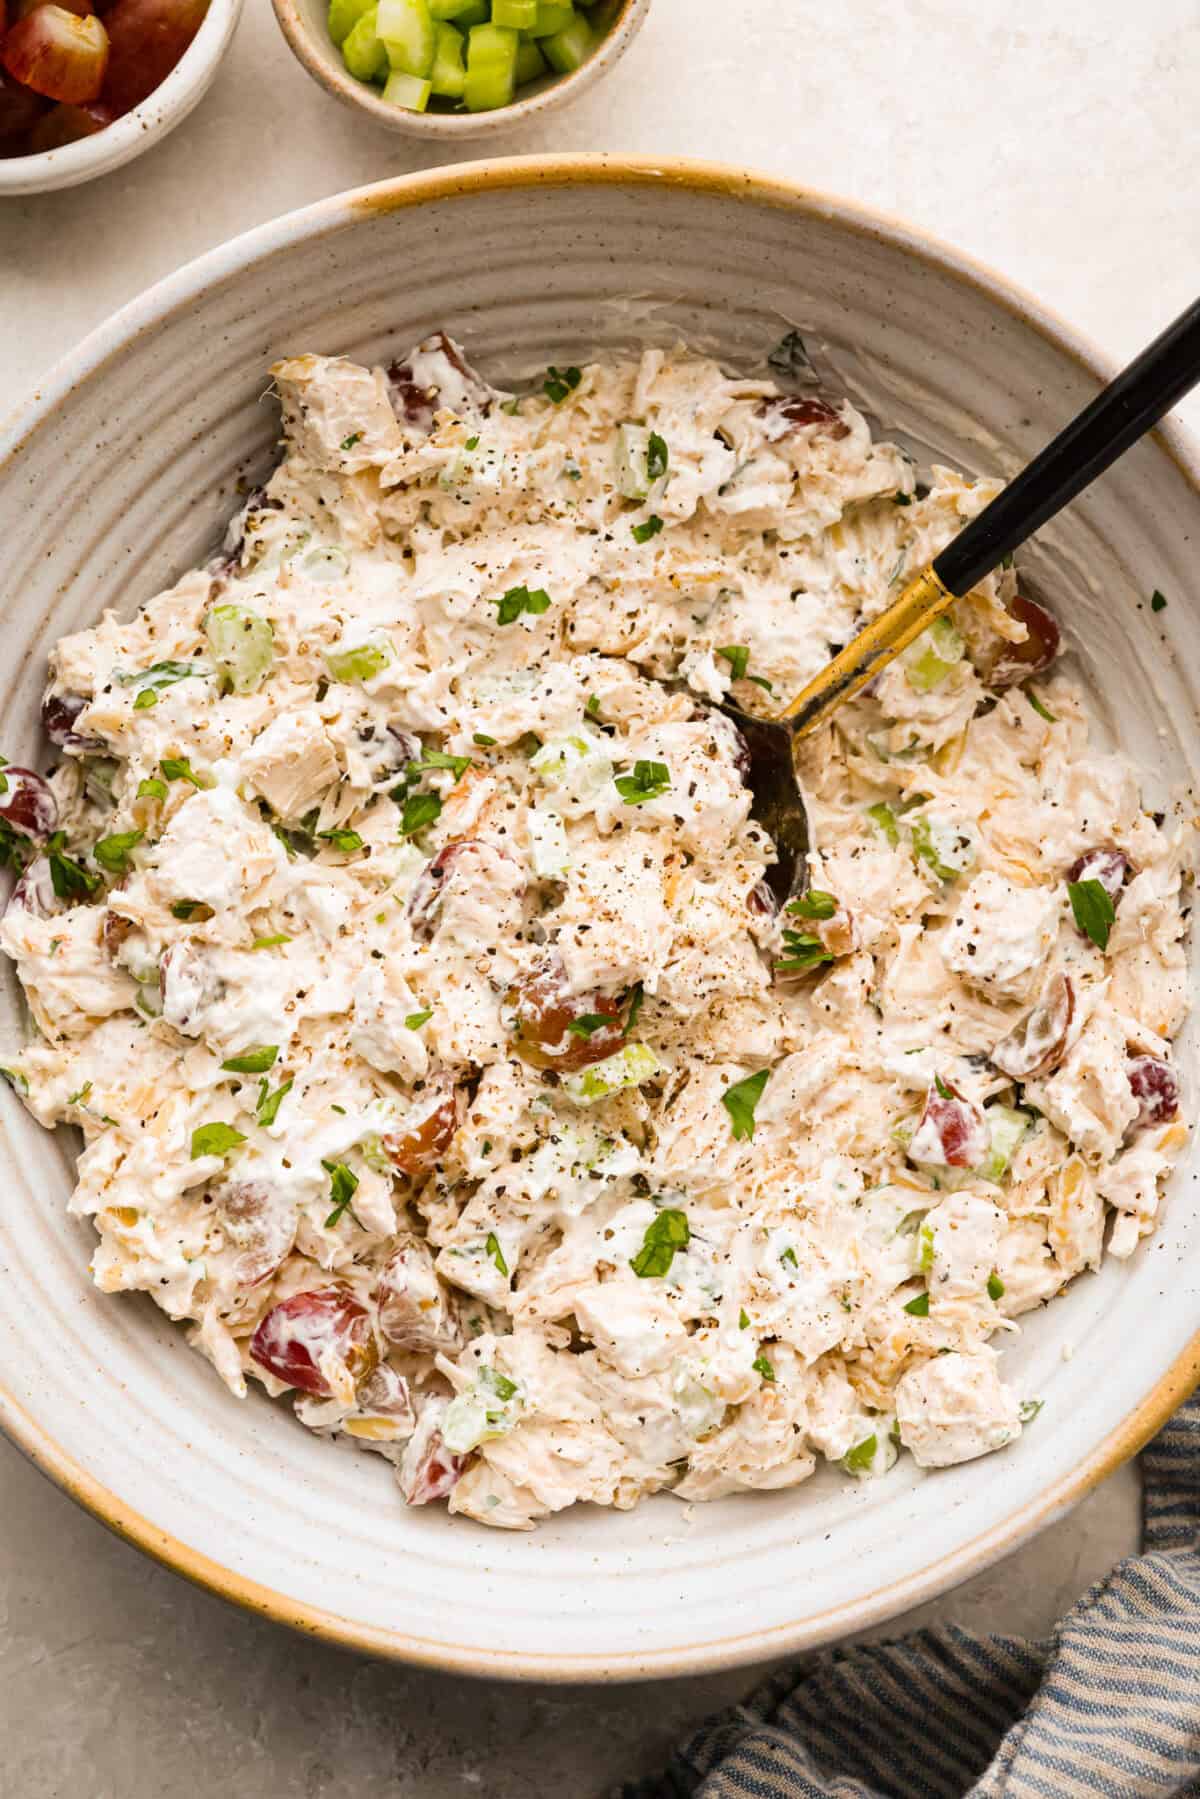
    Large bowl of Neiman Marcus chicken salad.

    More Chicken Salad Recipes


    Source link

  • Homemade Balsamic Vinaigrette Recipe

    Homemade Balsamic Vinaigrette Recipe

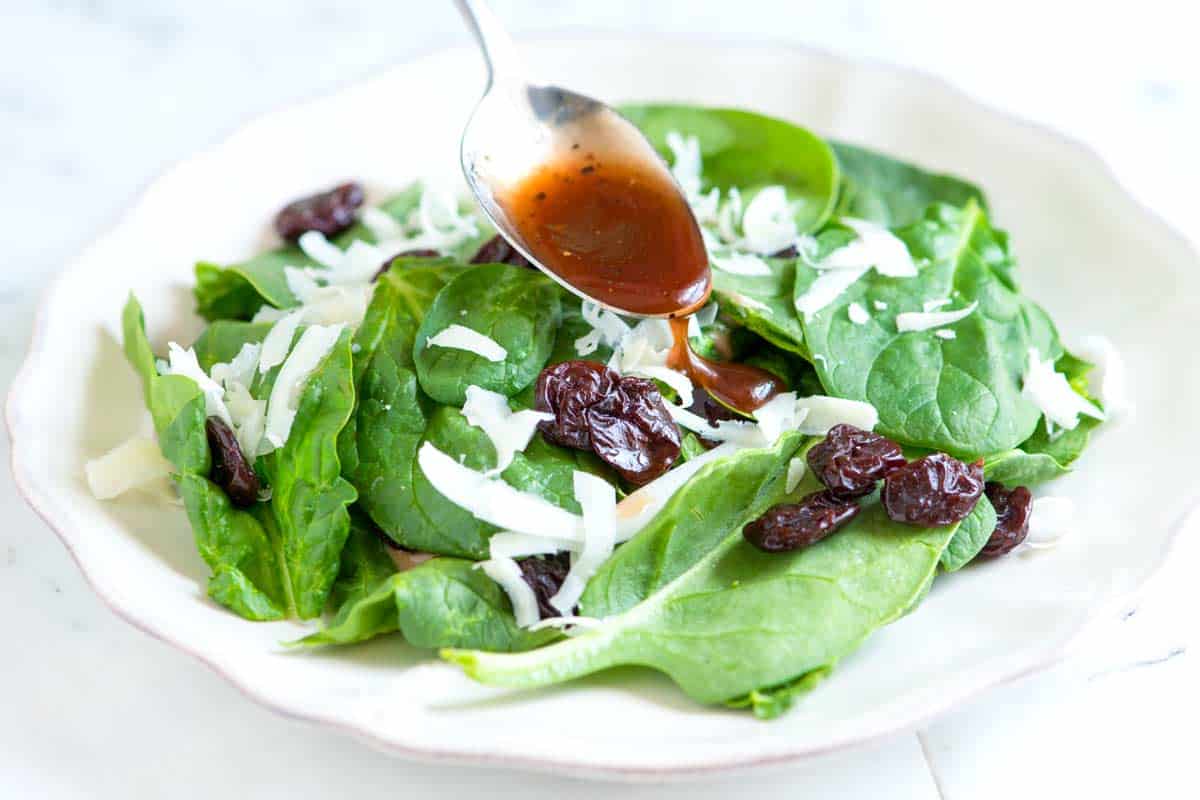
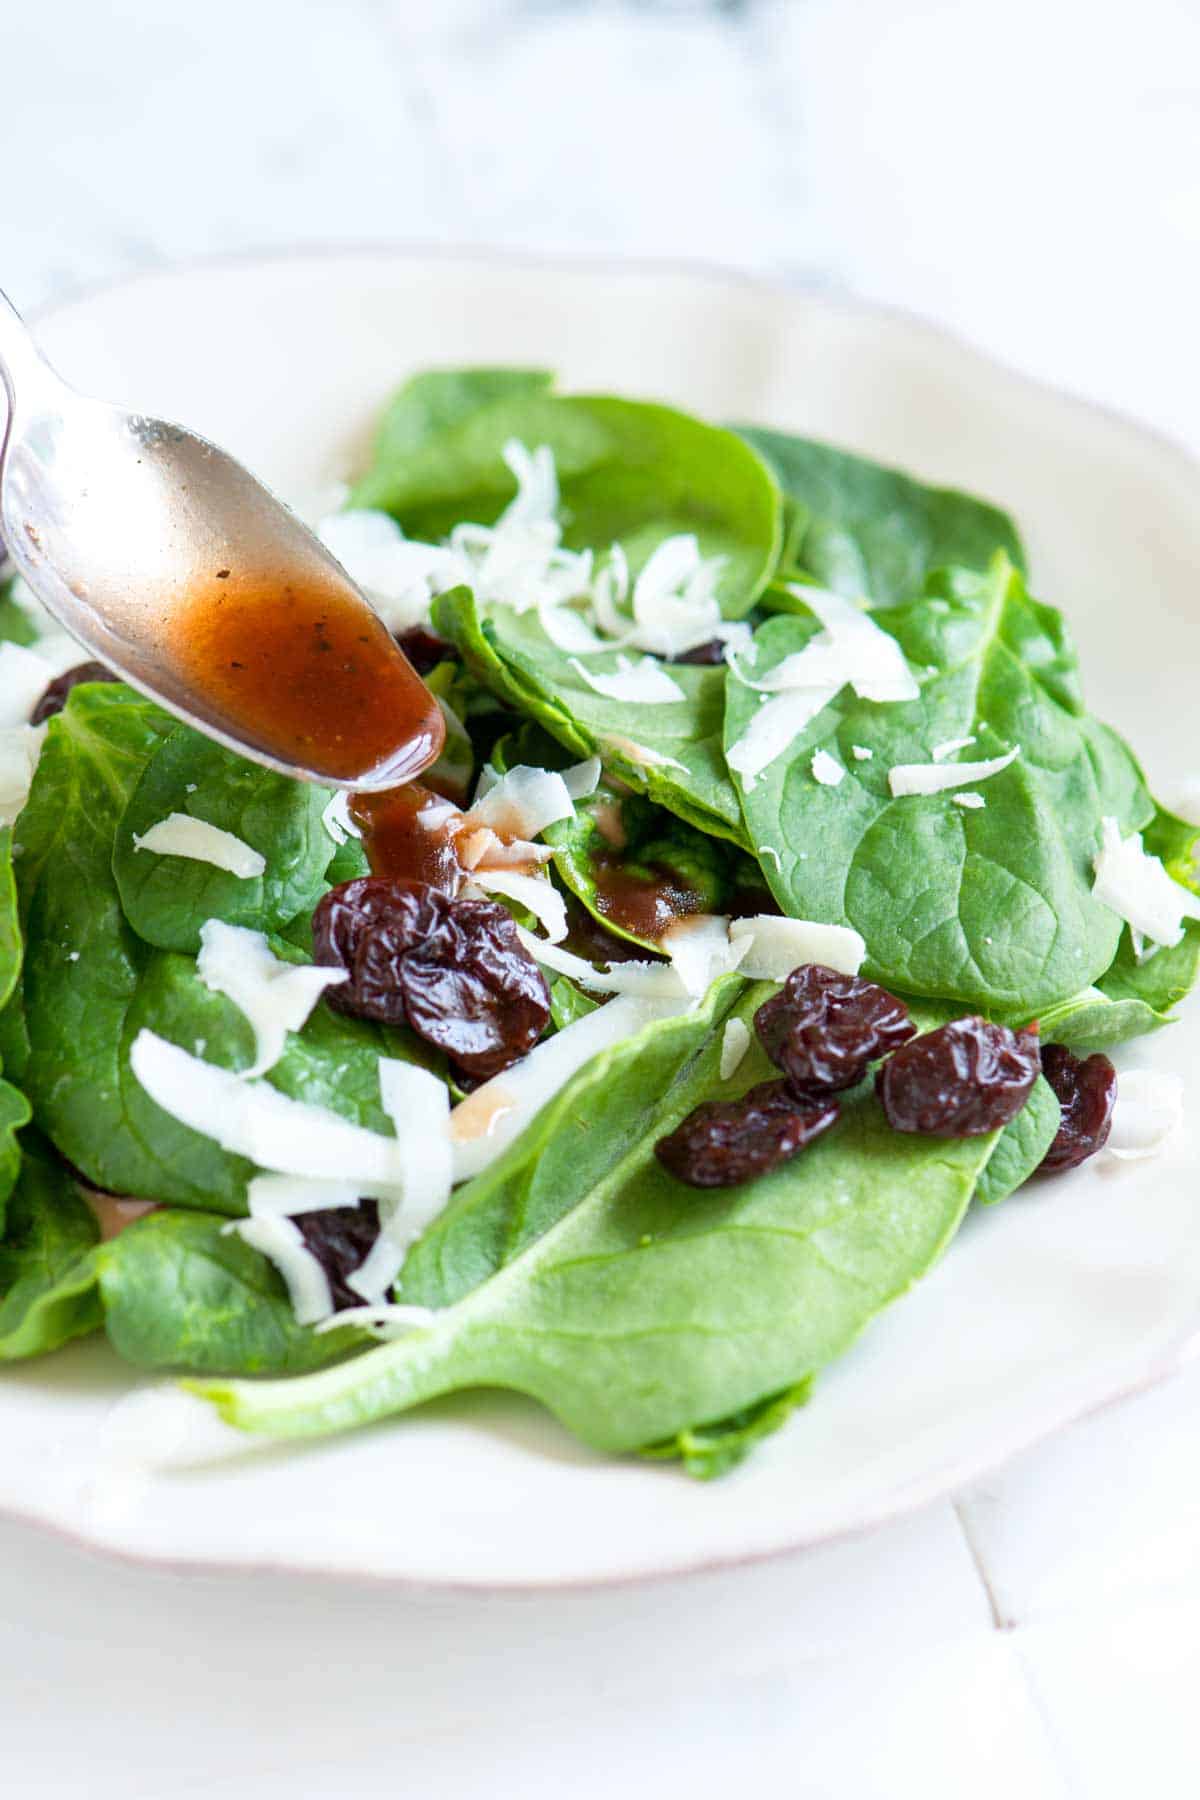
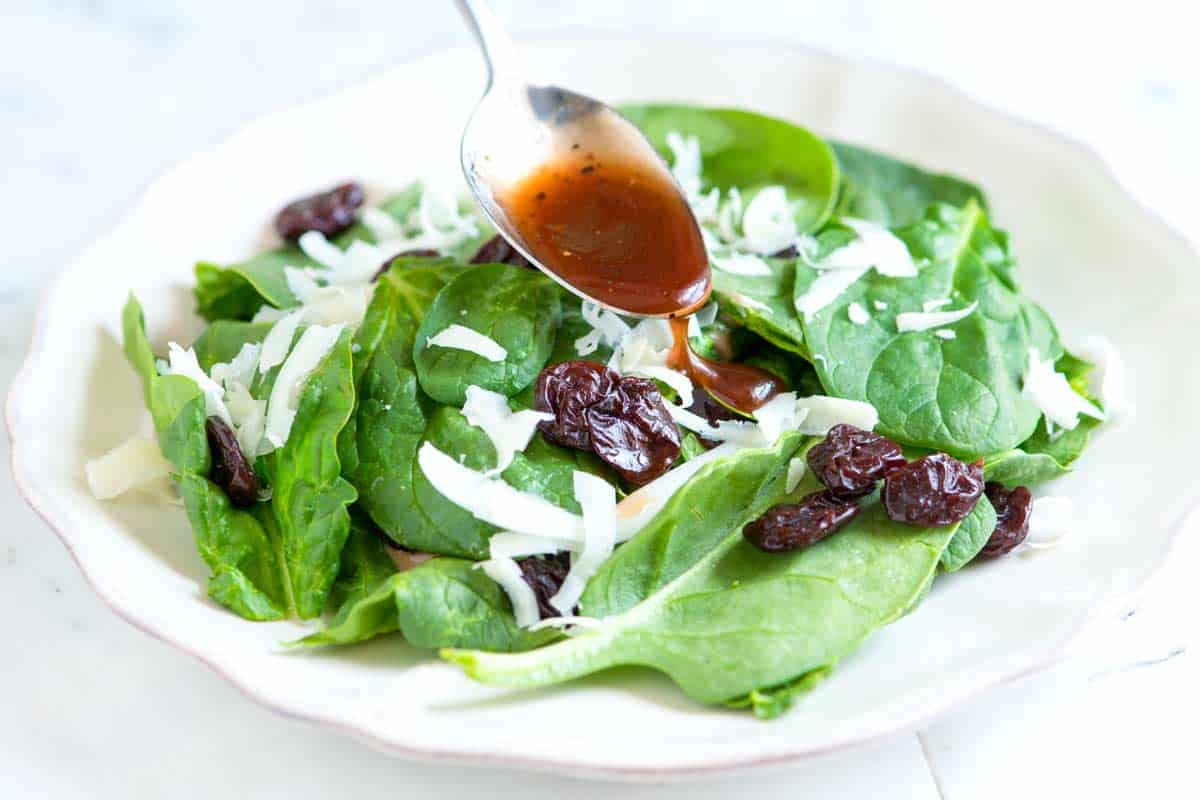
    This balsamic vinaigrette recipe is one of those dressings I always come back to. It’s tangy, a little sweet, and honestly, it is so much better than store-bought!

    Homemade Balsamic Vinaigrette

    I love making salad dressings from scratch, and this balsamic vinaigrette is the one I reach for most. We almost always have everything on hand, and it’s delicious on just about any salad you can think of.

    You’ll find our basic balsamic vinaigrette recipe below, plus two fun variations: a creamy version and a strawberry one. We especially love drizzling it over our balsamic strawberry salad!

    Key Ingredients

    • Balsamic Vinegar: Use what you have. Most of us have the less expensive bottles with thin, pretty tart vinegar inside. That’s what I’ve assumed in our recipe below. If you have thicker, aged balsamic vinegar, it will still be lovely in our recipe. We recommend tasting it before using it to make the dressing. If it already tastes syrupy and sweet, you can probably skip the sweetener. If it’s tart and acidic, you’ll want to add a little sweetness with maple syrup, honey, or jam.
    • Dijon Mustard: We use mustard in many of our salad dressing recipes and love it in this balsamic dressing. It helps the ingredients emulsify and makes it taste more like what you are served in nicer restaurants. Whole-grain mustard is a good substitute.
    • Olive Oil: Use your favorite extra-virgin olive oil. I like fruiter, lighter olive oils, but use what you have or love.
    • Sweetener: Maple syrup and honey are lovely (I only add a little bit) and balance the tartness of balsamic vinegar.

    Find the full recipe with measurements below.

    How to Make the Best Balsamic Vinaigrette

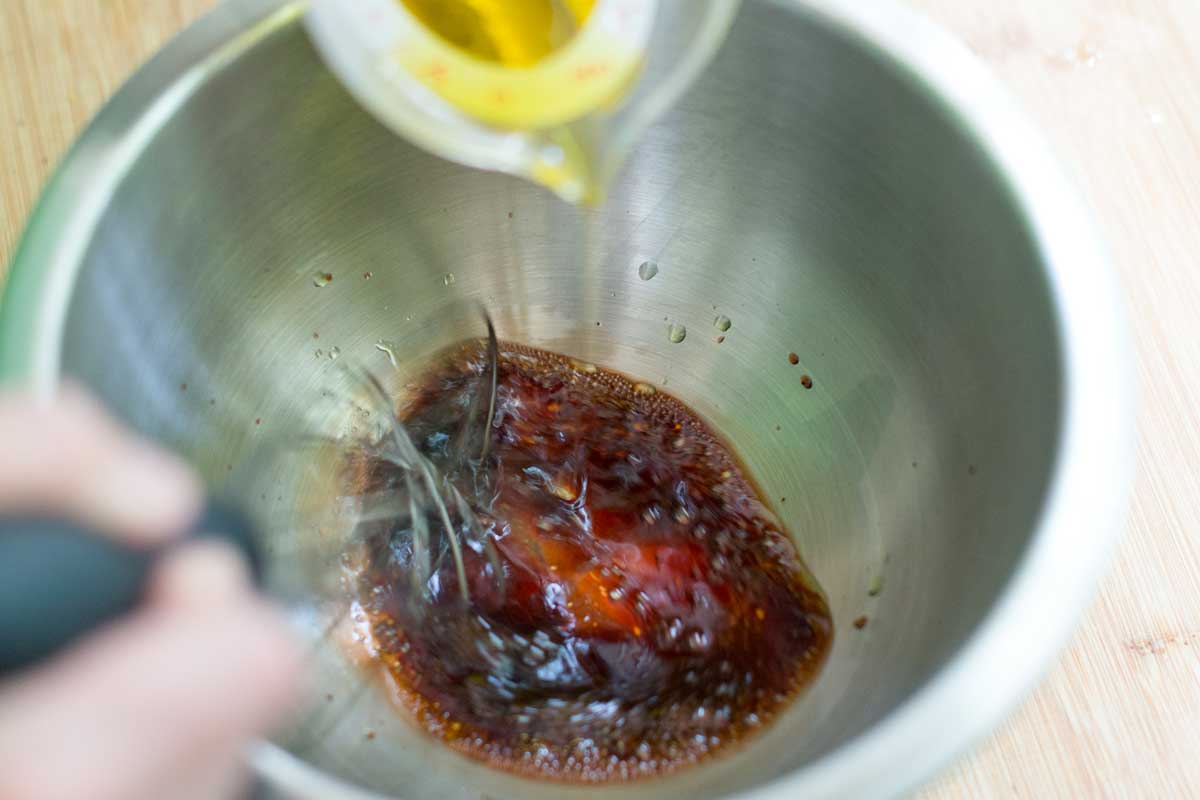
    Tip 1: Whisk everything but the oil first. To get a really nice emulsion, whisk your balsamic, mustard, sweetener, salt, and pepper together until well combined. Then slowly stream in the olive oil, whisking as it is added.

    Slowly whisking oil into a bowl to make balsamic vinaigrette

    Tip 2: Be ready to adjust to taste. Balsamic vinegar varies in sweetness, thickness, and acidity. Less expensive bottles are usually thinner and quite tart, while more expensive bottles can be syrupy and sweet. You can use either in our recipe, but it’s helpful to know what you are starting with before adding your sweetener. If your vinegar is tart, add the sweetener as recommended below. If it’s already sweet, hold off, make the dressing without sweetener, then adjust to taste.

    Recipe Variations

    • Make it creamy. If you prefer creamy dressings, add a spoonful of mayonnaise, sour cream, plain yogurt, or crème fraîche (my favorite).
    • Add jam. Honey or maple syrup are in our basic recipe, but to add more fruity flavor, swap the sweetener with your favorite jam. Strawberry jam is incredible. Fig jam pairs really well with balsamic, and I adore this peach jam!

    More Homemade Salad Dressing Recipes

    Balsamic Vinaigrette

    Homemade Balsamic Vinaigrette

    • PREP
    • TOTAL

    This easy balsamic vinaigrette dressing is a staple recipe in our house. We like vinegary dressings and use twice as much olive oil as vinegar. To make a less vinegary dressing, add more olive oil to taste. I like to add a little sweetener to the dressing. Maple syrup or honey is lovely, or add a little fruitiness with your favorite jam (strawberry jam is especially good). If you are using a thicker balsamic vinegar or one that is aged, it may already taste sweeter, so you may not need to add a sweetener.

    Makes 3/4 cup

    You Will Need

    ¼ cup balsamic vinegar (60 ml)

    2 teaspoons Dijon mustard

    1 teaspoon maple syrup, honey, or strawberry jam

    ¼ teaspoon fine sea salt

    ¼ teaspoon fresh ground black pepper

    ½ cup extra-virgin olive oil, or more to taste (120 ml)

    1 tablespoon mayonnaise, sour cream, or crème fraîche, optional to make creamy

    Directions

      1Whisk balsamic vinegar, mustard, sweetener, salt, and pepper in a medium bowl until well blended.

      2While whisking, slowly stream in the olive oil until completely incorporated and the dressing has thickened and looks creamy. Taste and then adjust with salt, pepper, olive oil, or sweetener as needed.

      3To turn it into a creamy dressing, whisk in mayo (sour cream or crème fraîche).

    Adam and Joanne’s Tips

    • Storing: Keep balsamic vinaigrette in an airtight container or jar for up to 1 week.
    • How to make in jar or blender: Instead of whisking ingredients together, place all the ingredients in a screw-top jar and shake to combine. Or, use a blender. Add all ingredients to blender then blend until thick.
    • Nutritional information are estimates.

    Nutrition Per Serving
    Serving Size
    1 tablespoon
    /
    Calories
    87
    /
    Total Fat
    9.3g
    /
    Saturated Fat
    1.3g
    /
    Cholesterol
    0mg
    /
    Sodium
    71.4mg
    /
    Carbohydrate
    1.3g
    /
    Dietary Fiber
    0g
    /
    Total Sugars
    1.1g
    /
    Protein
    0g


    AUTHOR:

    Adam Gallagher

    Adam and Joanne of Inspired Taste

    We are Adam and Joanne Gallagher, the creators of Inspired Taste. Established in 2009, Inspired Taste grew from a childhood dream into one of the internet’s most trusted recipe sites with hundreds of reliable recipes, step-by-step videos, and expert tips.More About Us
    Source link

  • Easy Egg Salad Recipe

    Easy Egg Salad Recipe

    Our best egg salad recipe calls for just a few simple ingredients. I love it tucked into sandwiches, wrapped in lettuce or tortillas, spooned over greens, or eaten by itself as a quick snack.

    Egg Salad on bread

    We’re a little picky about egg salad, so trust me when I say this is the one. It’s light instead of heavy, perfectly creamy without being too mayonnaisey, and brightened with fresh lemon juice and herbs for amazing flavor.

    It comes together fast, especially if you already have hard-boiled eggs in the fridge (and if not, don’t worry, I’ve shared how to make them below). It also keeps well for up to 4 days, so consider making a double batch for easy lunches or snacks all week.

    Key Ingredients

    • Eggs: You’ll need hard-boiled eggs for this recipe. They’re simple to make, and I’ve shared how in the tips section below.
    • Mayonnaise: Mayonnaise makes egg salad creamy and rich. For a lighter twist, substitute some or all of it with plain yogurt or mashed avocado (like I do in my avocado egg salad). When I have it on hand, I love using homemade mayonnaise for even better flavor.
    • Celery: A little finely chopped celery adds freshness and crunch. You can also experiment with minced onions, chopped dill pickles, or even diced apples (apples may sound unusual, but they are delicious).
    • Fresh Herbs: Chives are my favorite for egg salad, but parsley or dill work beautifully, too. I use chives in my favorite scrambled eggs recipe, too.
    • Lemon: A squeeze of fresh lemon juice brightens everything and balances the richness of the mayo, making the salad taste lighter and fresher.

    Find the full recipe with measurements below.

    How to Make My Favorite Egg Salad

    Tip 1: How to boil eggs for egg salad. I have two favorite methods for making perfectly cooked eggs for egg salad. The first is done on the stovetop (see below), and the second uses the Instant Pot (you can find that method here: Instant Pot Boiled Eggs). Both methods give you tender whites and creamy yolks, perfect for egg salad.

    To cook eggs on the stove:

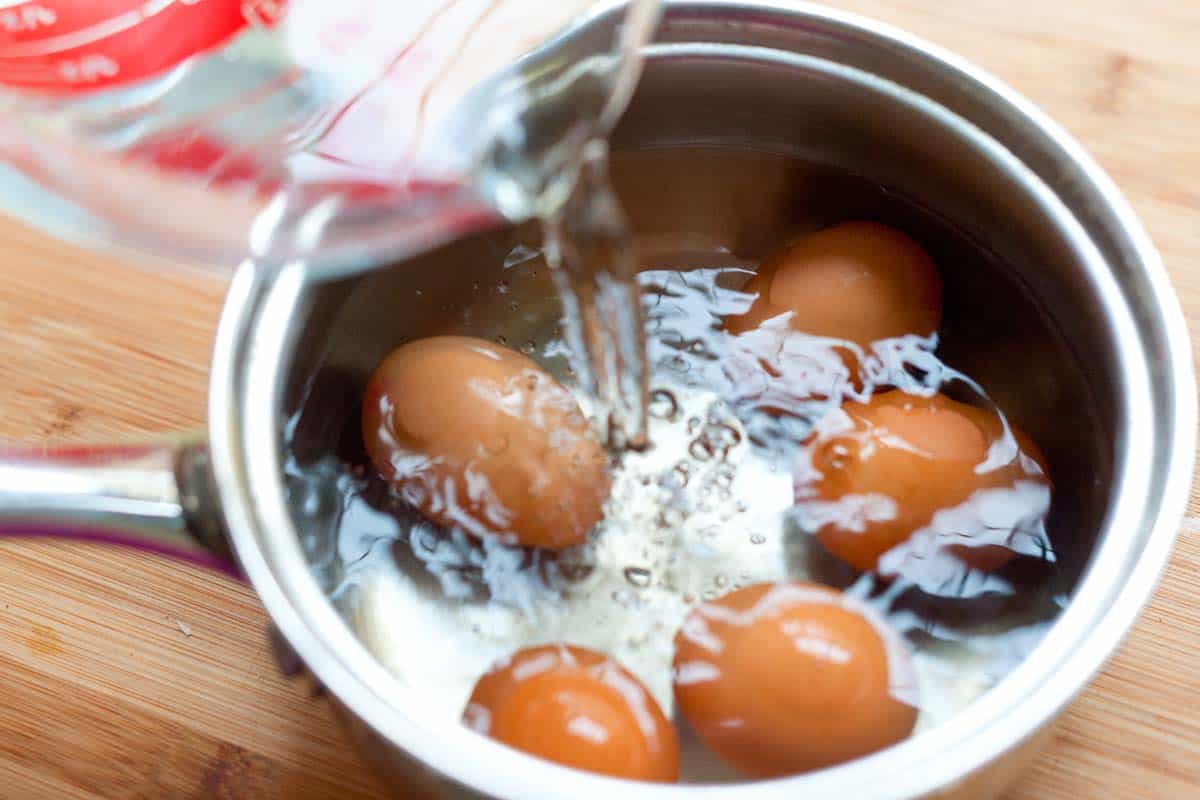
    1. Add the eggs to a saucepan in a single layer and cover with at least an inch of water.
    2. Bring the water to a boil, then let it boil for 30 seconds.
    3. Turn off the heat, cover with a lid, and let the eggs sit for 12 minutes (for large eggs).
    4. Transfer the eggs to an ice water bath to cool, then peel.
    Boiling eggs in a saucepan with water for egg salad
    Placing boiled eggs into a bowl of ice water to stop the cooking before peeling them.

    Tip 2: Make the salad. Once you have cooked eggs, the salad goes quickly. Peel your eggs, then chop them into small pieces. Add them to a bowl and toss with finely chopped celery, chives, a bit of lemon juice, and mayonnaise. Season with salt and pepper, and you’re all set.

    Making egg salad - ingredients ready to be stirred together in a bowl

    Serving Suggestions

    I love this salad for egg salad sandwiches, which I usually keep open-faced on lightly toasted bread spread with a bit of butter. This is also fantastic wrapped, either in flour tortillas or in lettuce cups. I’ll often munch on this all by itself or with some sliced cucumbers or crackers.

    It’s a great topping for salad (especially with this lemon vinaigrette). And, finally, it makes incredible toasts for breakfast. Start with avocado toast, then add the egg salad, some thinly sliced radish, and more fresh herbs. Delicious!

    More Easy Salads

    Classic Egg Salad with visible chunks of egg, diced celery, and a sprinkle of chives.

    Easy Egg Salad

    • PREP
    • COOK
    • TOTAL

    This is my favorite way to make egg salad! I keep it really simple with mayo, herbs, a little crunch from celery, and some lemon juice. I don’t add mustard, but if you love it, add 1/2 to 1 teaspoon. Instructions below include cooking the eggs on the stove. If you have an Instant Pot, see my Instant Pot hard boiled eggs. If you love avocado, I also recommend our avocado egg salad!

    Makes 2 Servings

    You Will Need

    4 large eggs

    2 tablespoons mayonnaise or substitute plain or Greek yogurt, try homemade mayo

    1 medium-length celery stalk, finely chopped

    1 tablespoon finely chopped chives, parsley or dill

    1 teaspoon fresh lemon juice

    Salt and fresh ground black pepper

    Directions

      1Cook the eggs: Place the eggs in a single layer in a saucepan and cover with cold water by 1 to 2 inches. Heat over high heat until the water comes to a rolling boil. Cover the saucepan with a lid, cook for 30 seconds, then remove from the heat and let stand for 11 to 12 minutes. A minute or so before the eggs finish cooking, prepare a bowl of ice water.

      2Cool the eggs: Transfer the cooked eggs to the ice water using a slotted spoon and leave for 5 minutes (or longer).

      3Prepare the eggs: Crack egg shells and carefully peel them away. If the shells are not easily peeling away from the eggs, place them back into the ice water and try again in 5 minutes.

      4Make the salad: Dice the hard-boiled eggs and add them to a bowl. Stir in the mayonnaise, celery, herbs, lemon juice, salt, and pepper. Taste and adjust with more salt or pepper.

    Adam and Joanne’s Tips

    • Storing: Homemade egg salad can be stored in an airtight container in the fridge for up to 4 days. We do not recommend freezing it.
    • Eggs: Instructions for eggs are for large eggs, for medium or extra-large, see this hard boiled eggs tutorial with accurate timing.
    • The nutrition facts provided below are estimates. We assumed mayonnaise and did not include any bread.

    Nutrition Per Serving
    Serving Size
    Half the recipe
    /
    Calories
    241
    /
    Protein
    13 g
    /
    Carbohydrate
    2 g
    /
    Dietary Fiber
    0 g
    /
    Total Sugars
    1 g
    /
    Total Fat
    20 g
    /
    Saturated Fat
    5 g
    /
    Cholesterol
    375 mg


    AUTHOR:

    Adam Gallagher

    Adam and Joanne of Inspired Taste

    We are Adam and Joanne Gallagher, the creators of Inspired Taste. Established in 2009, Inspired Taste grew from a childhood dream into one of the internet’s most trusted recipe sites with hundreds of reliable recipes, step-by-step videos, and expert tips.More About Us
    Source link

  • Fresh Pineapple Avocado Salsa Recipe

    Fresh Pineapple Avocado Salsa Recipe

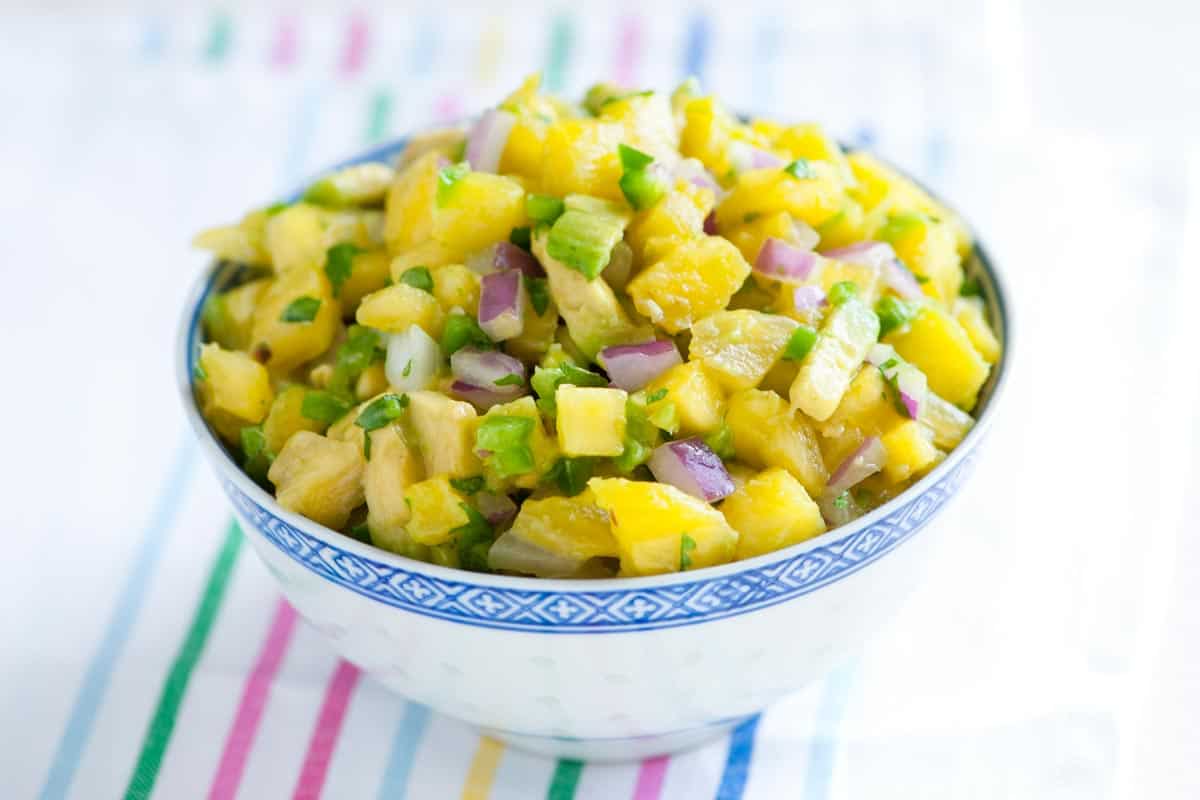
    This fresh pineapple avocado salsa recipe is perfect with tortilla chips and works really well as a topping for tacos, fish, and grilled meats. It’s simple, quick, and absolutely delicious!

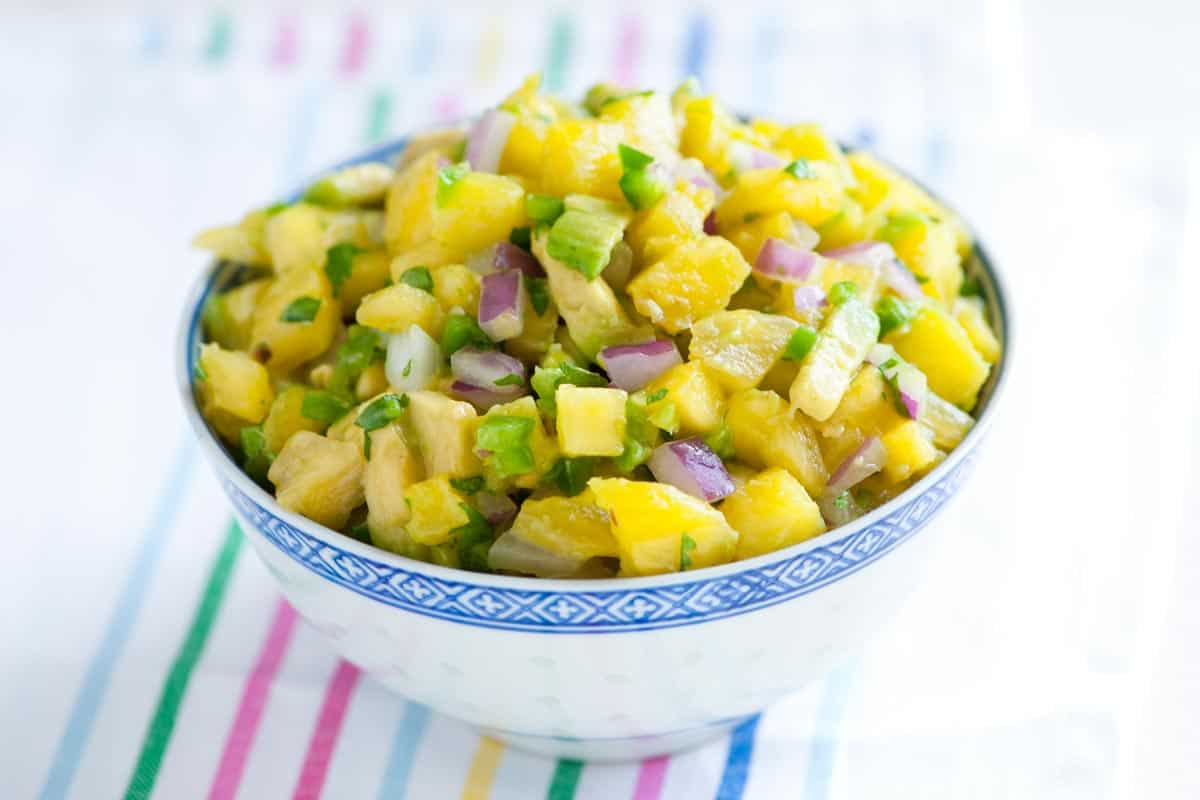
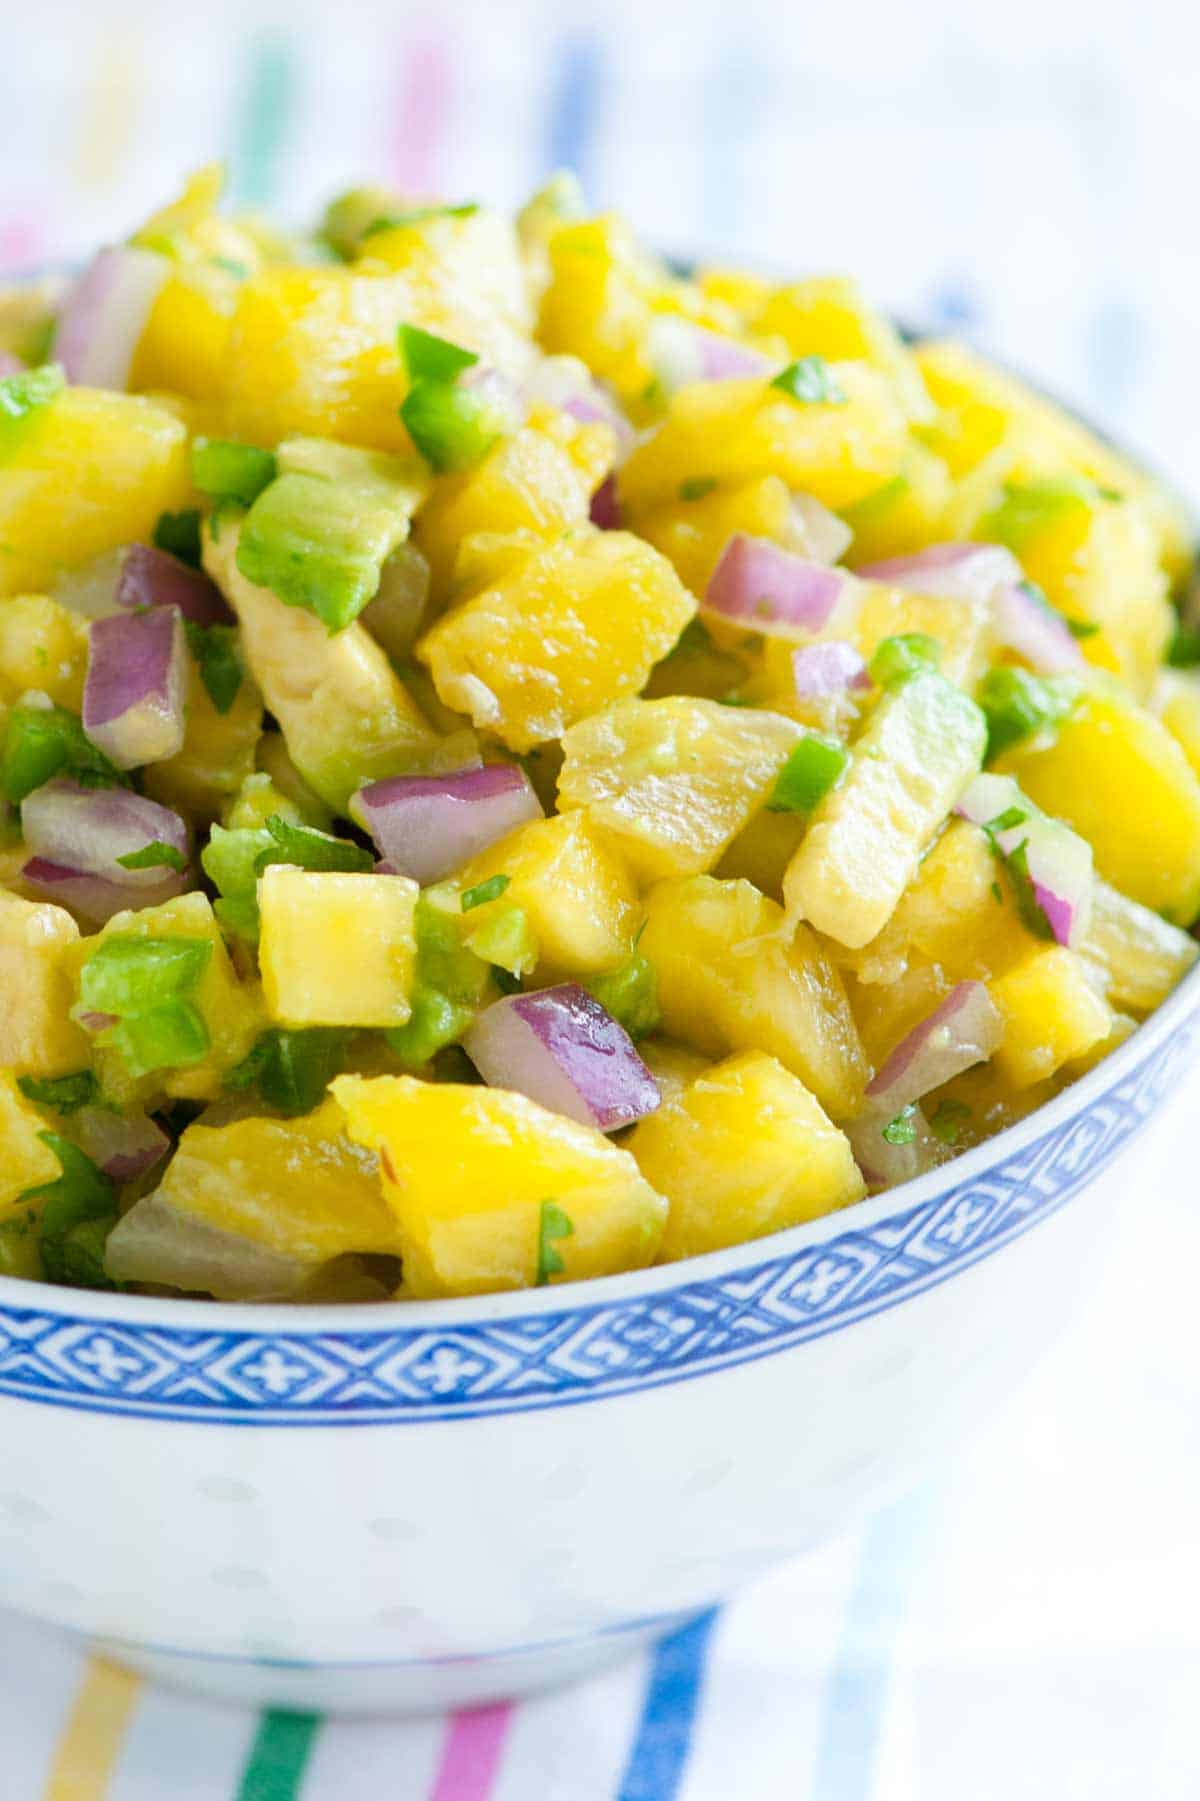
    Fresh Pineapple Avocado Salsa

    This pineapple avocado salsa makes me so happy! I mean, look at it, it’s beautiful. More importantly, it’s really delicious. The pineapple is sweet, the avocado creamy, and there’s just enough heat from jalapeños and lime.

    Many people think of pineapple for sweet recipes like pineapple upside-down cake or carrot cake, but I’m here to tell you that this pineapple salsa is incredible! I love it on top of almost all our favorite taco recipes. It’s wonderful spooned over grilled steak or fish (like this grilled swordfish) and works really well beside a bowl of homemade tortilla chips.

    Key Ingredients

    • Pineapple: I love fresh pineapple for this salsa. Look for a large pineapple with golden or yellow hues on its skin/peel (that means it will be sweet). Another trick is to smell it. You’re on the right track if you smell a hint of sweet pineapple. And lastly, it should be firm, but give just a little when you feel it. Put anything back that’s bruised or soft. If fresh pineapples are out of season for you, pick up canned pineapple in light syrup instead, but drain it before chopping and adding it to the salsa.
    • Avocado: I love the cool, creamy texture of avocado with the pineapple. Here are our tips for choosing avocados if you aren’t sure.
    • Red Onion: I love the look of red onion and think it makes our salsa really pretty. That said, feel free to use sweet or white onion instead. I use the same trick of minimizing the raw bite of the onion in this salsa as I do when making guacamole. I chop them, then cover the onion with cold water for 5 minutes. After a quick drain and rinse, this process cuts the raw bite of the onion a bit.
    • Jalapeños: Since the pineapple is sweet, I like adding some heat with fresh chile. We call for two peppers in the recipe, but you can always adjust to your tastes. Use both peppers for a medium spicy salsa, but remove the seeds and white membrane inside them (that’s where most of the heat comes from). If you love spicy food, leave the seeds in.
    • Lime and Cilantro: I love using the zest and juice of my lime for this salsa, and I am pretty generous with the cilantro, too. The sweetness of the pineapple can take it. If you don’t like cilantro as much as I do, cut back or substitute with something else (mint, basil, and parsley are good options).

    Find the full recipe with measurements below.

    How to Make Pineapple Avocado Salsa

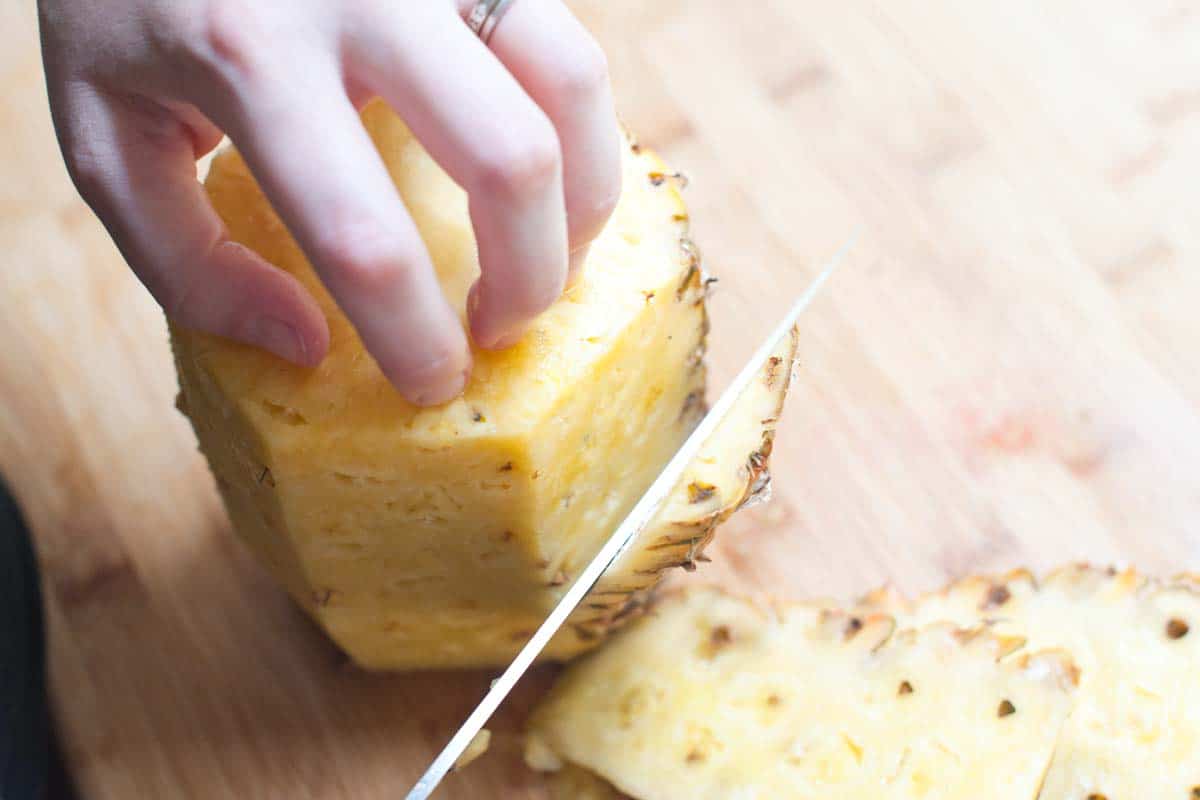
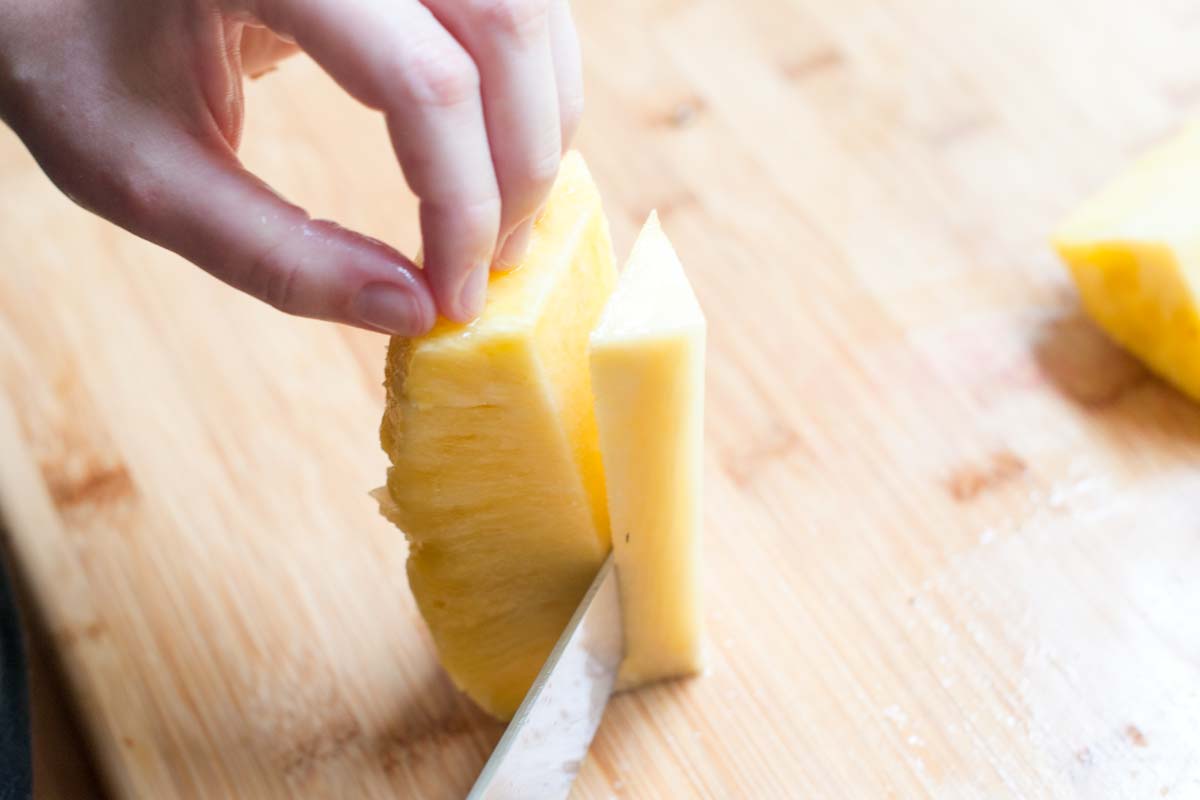
    Tip 1: Prepare the pineapple. Remove each end (the bottom and leafy top). Then, use your knife to cut away it’s peel, following the pineapple’s curve from top to bottom. Then, remove the core. Cut the pineapple into quarters and use a knife to cut away the inner fibrous core. From there, you can cut into small pieces.

    How to cut a pineapple for salsa - Removing the peel
    Removing pineapple core to make salsa

    Tip 2: Tame the onions. I love onions, but do not enjoy them when their raw, pungent flavor overpowers everything else, leaving you with onion breath. My answer is to let the onions sit in cold water for 5 to 10 minutes before draining. This super simple trick cuts down on that strong onion flavor, while retaining their crunch.

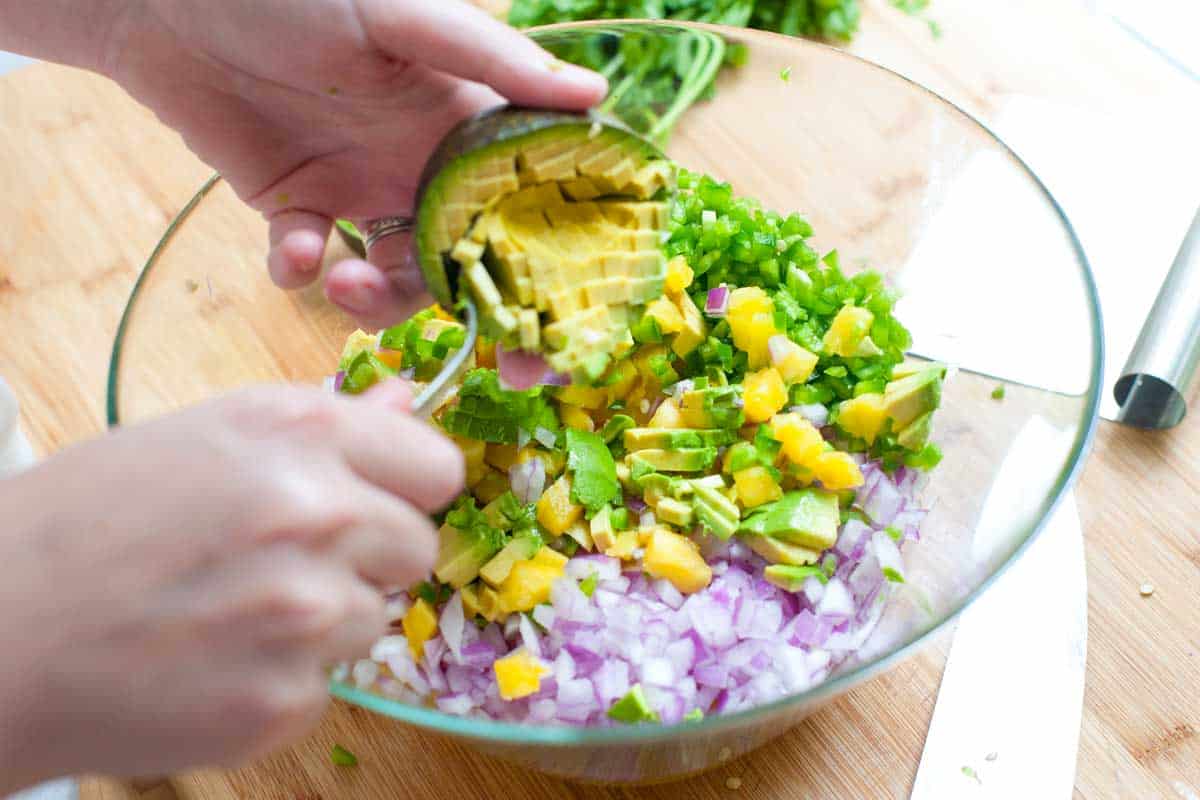
    Tip 3: Make the salsa. The salsa is as simple as tossing everything together and serving. Make sure you taste it before serving to see if it needs a bit of extra salt. Then, enjoy!

    Tossing all salsa ingredients in a large bowl.

    More Salsa Recipes

    Pineapple Avocado Salsa

    Fresh Pineapple Avocado Salsa

    • PREP
    • TOTAL

    We love this easy salsa with pineapple and avocado! I love fresh pineapple for this recipe, but you can use drained canned pineapple if that is all you have access to. Serve this simple salsa next to homemade tortilla chips or with your favorite tacos.

    6 Servings

    You Will Need

    1 medium pineapple, peeled, core removed, and cut into 1/4-inch pieces (about 5 cups)

    1 cup finely chopped red onion, about half an onion

    2 jalapeños, or to taste

    1 medium avocado, peeled and cut into 1/4-inch pieces

    1 lime, zested and juiced

    1/3 cup loosely packed cilantro leaves and tender stems, chopped

    1/4 teaspoon sea salt, or more to taste

    Directions

      1Add the chopped red onion to a small bowl and cover with cold water. Set aside for 5 minutes. Drain, then rinse. This tones down the raw flavor of the onion.

      2For a mild salsa, remove the seeds and white membrane of both jalapeño peppers, and then finely mince. For a spicier salsa, leave some or all of the seeds and membrane.

      3Add the pineapple, drained onion, minced jalapeños, lime zest, lime juice, cilantro, and salt to a large bowl. Toss well, taste, and then adjust with more salt as needed.

    Adam and Joanne’s Tips

    • Storing: Avocado pineapple salsa is best eaten the same day, as the avocado may begin to brown after a night in the fridge. Without the avocado, the salsa lasts in the refrigerator for up to 3 days, but expect a bit more liquid at the bottom of the bowl.
    • Ways to serve it: I love this salsa next to guacamole with a big bowl of tortilla chips, but it is a fantastic taco topping. Try it on our veggie tacos, shrimp tacos, or shredded chicken tacos, or ground pork tacos. It’s also amazing spooned on top of these chicken nachos, grilled swordfish, grilled chicken, and steak!
    • The nutrition facts provided below are estimates.

    Nutrition Per Serving
    Serving Size
    1/6 of the recipe
    /
    Calories
    63
    /
    Total Fat
    3.6g
    /
    Saturated Fat
    0.5g
    /
    Cholesterol
    0mg
    /
    Sodium
    222.8mg
    /
    Carbohydrate
    8.4g
    /
    Dietary Fiber
    2.5g
    /
    Total Sugars
    3.9g
    /
    Protein
    0.9g


    AUTHOR:

    Joanne Gallagher

    Adam and Joanne of Inspired Taste

    We are Adam and Joanne Gallagher, the creators of Inspired Taste. Established in 2009, Inspired Taste grew from a childhood dream into one of the internet’s most trusted recipe sites with hundreds of reliable recipes, step-by-step videos, and expert tips.More About Us
    Source link

  • Weeknight Homemade Spaghetti Sauce Recipe

    Weeknight Homemade Spaghetti Sauce Recipe

    I love this easy homemade spaghetti sauce recipe! It is ready in under 45 minutes, and you can use your favorite ground meat to make it. I love ground beef, turkey, or sausage!

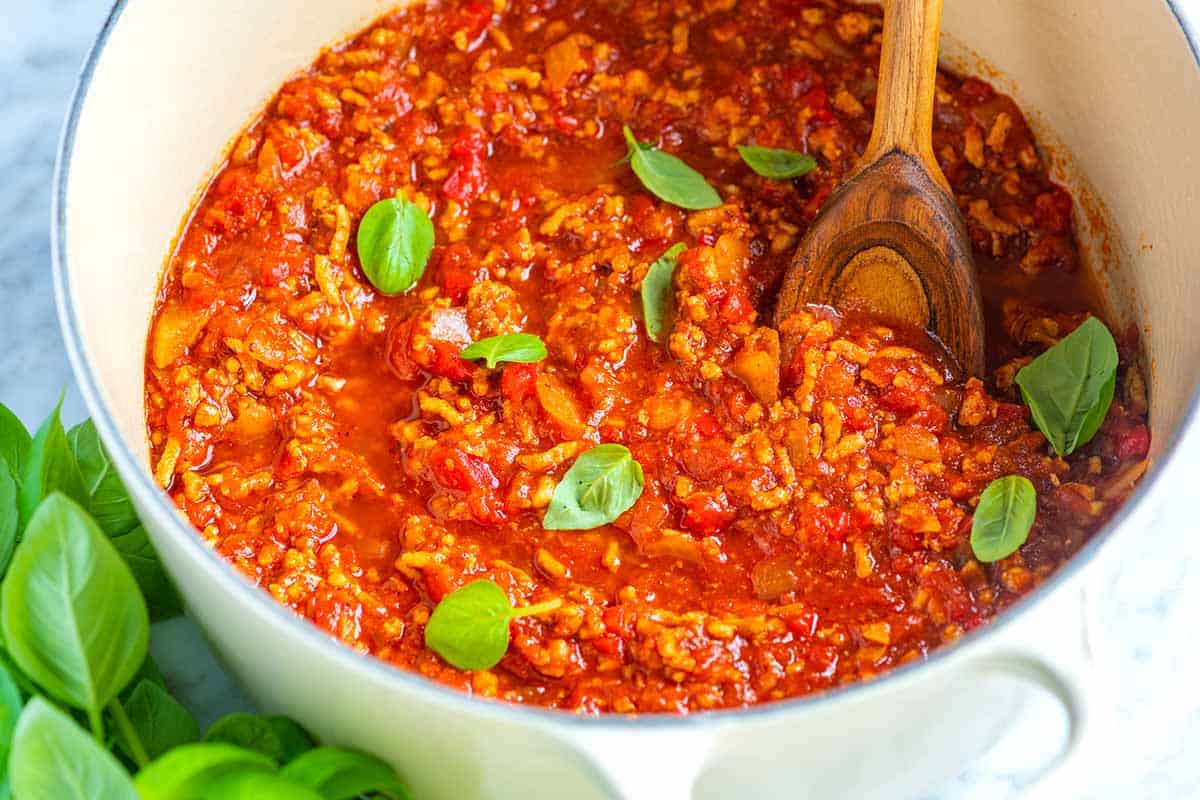
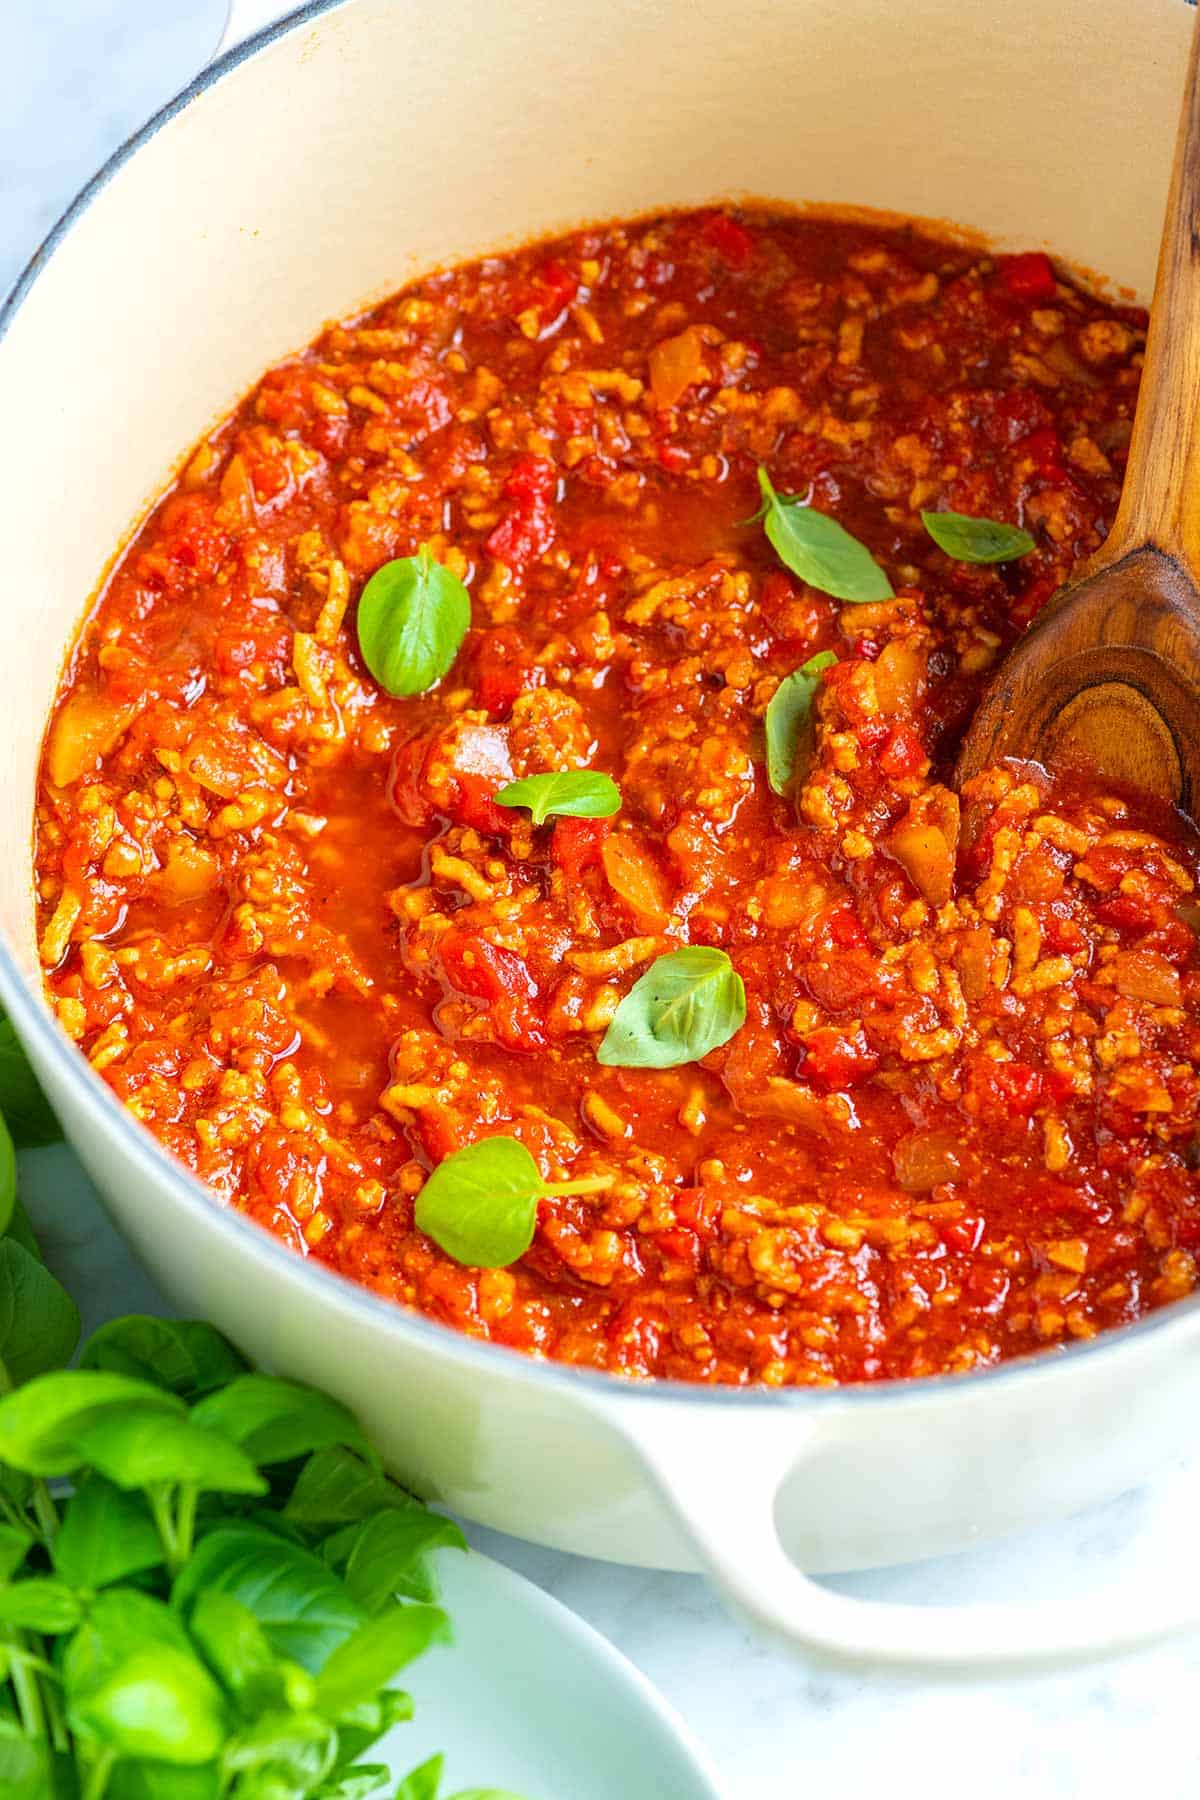
    Pot of Homemade Spaghetti Sauce

    Like you, we live busy lives and need dinner on the table quickly. That’s why I love this easy homemade spaghetti sauce. It’s quick and easy to make, plus it lasts in the freezer for months, which means I have a delicious meal anytime I need it.

    This simple meat sauce can be made in about 45 minutes. We love using this sauce when making our weeknight spaghetti. For a more authentic, slowly cooked meat sauce, try my favorite bolognese recipe with ground beef, milk, white wine, and tomato.

    Key Ingredients

    • Ground meat: You can use any ground meat for this recipe. Ground turkey or chicken are great choices if you prefer a leaner option. Ground beef and pork offer a richer flavor. Choose whichever you like and have available. Check out our veggie spaghetti recipe if you want a meatless option.
    • Tomatoes and tomato paste: Canned crushed tomatoes are the foundation of this spaghetti sauce, and they make it super easy to prepare.
    • Onion, garlic, and spices: We like to keep this recipe simple because it’s a quick and easy weeknight meal. You probably already have most of the ingredients in your pantry.
    • Broth or wine: After browning our meat, we deglaze the pot with a bit of liquid. Water is fine, but for more flavor try chicken broth or your favorite dry wine (red or white will do the trick). I use white wine when making this homemade bolognese.

    Find the full recipe with measurements below.

    Tips for Making Homemade Spaghetti Sauce

    Tip 1: Browning the meat. We make this spaghetti sauce all the time, and it never disappoints. We start by browning ground meat in a little oil. We prefer ground turkey to keep things lean, but any ground meat, such as beef, pork, chicken, or even lamb, works great. Once the meat is browned, we add chopped onion and cook until it softens. Then we toss in garlic, tomato paste, and spices to build even more flavor.

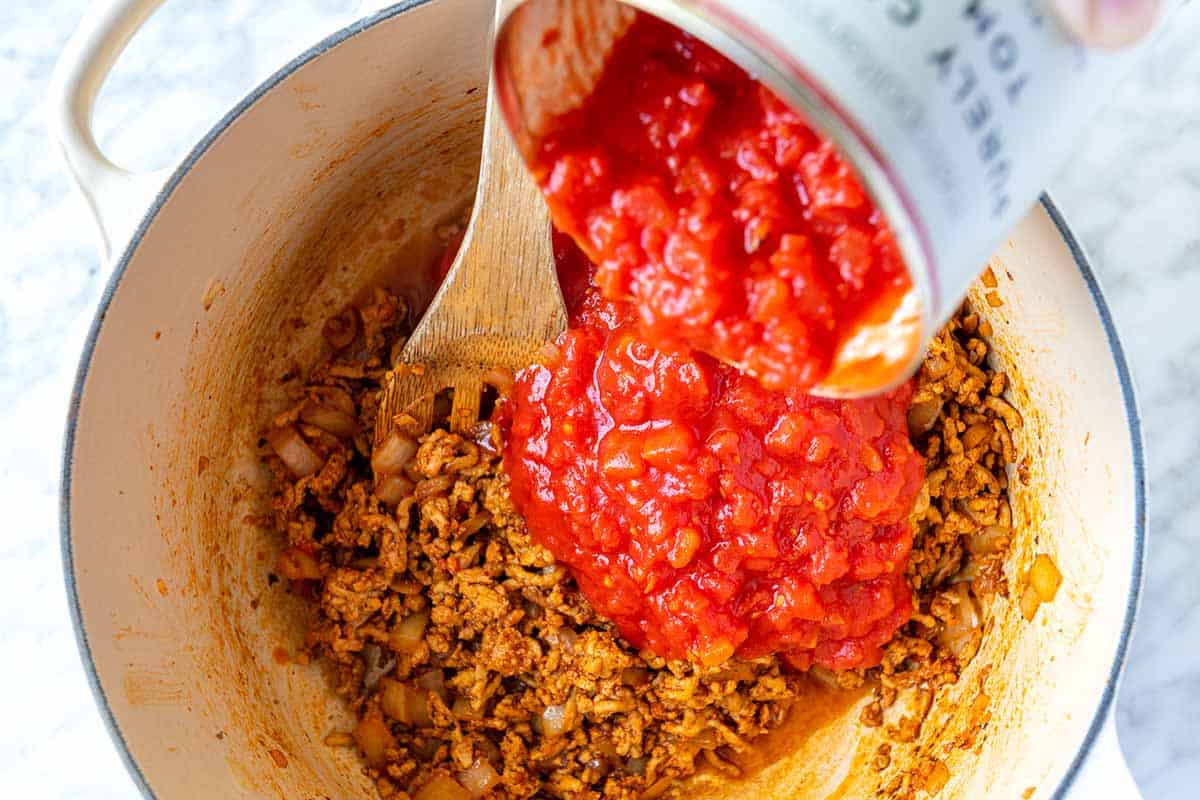
    Tip 2: Deglaze pot for extra flavor. By deglazing the pot with a splash of liquid we capture all those tasty bits stuck on the bottom. You can use water, broth, or even wine (whatever you have on hand). Just be sure to scrape the bottom well! Once the pot is clean, we stir in canned tomatoes and let everything simmer for 20 to 30 minutes or until the sauce thickens.

    How to Make Spaghetti Sauce - Adding tomatoes to the pot with browned meat

    Tip 3: Make it your own. As the sauce simmers, we taste it regularly and adjust the seasoning. Don’t be afraid to add more salt, pepper, or spices. If the sauce tastes too acidic, a pinch of sugar can balance it out. If it seems bland, add a dash of fish sauce, minced anchovies, or even mushroom powder for a rich and savory flavor.

    Ways to Use Homemade Spaghetti Sauce

    We use this homemade sauce in so many ways. It’s perfect tossed with cooked spaghetti (like in this spaghetti recipe) or other pasta shapes. I love it with homemade gnocchi or ricotta gnocchi. It’s also excellent spooned over veggie noodles, like roasted spaghetti squash or zucchini noodles. I also love serving it next to some homemade garlic bread or focaccia bread and a side salad.

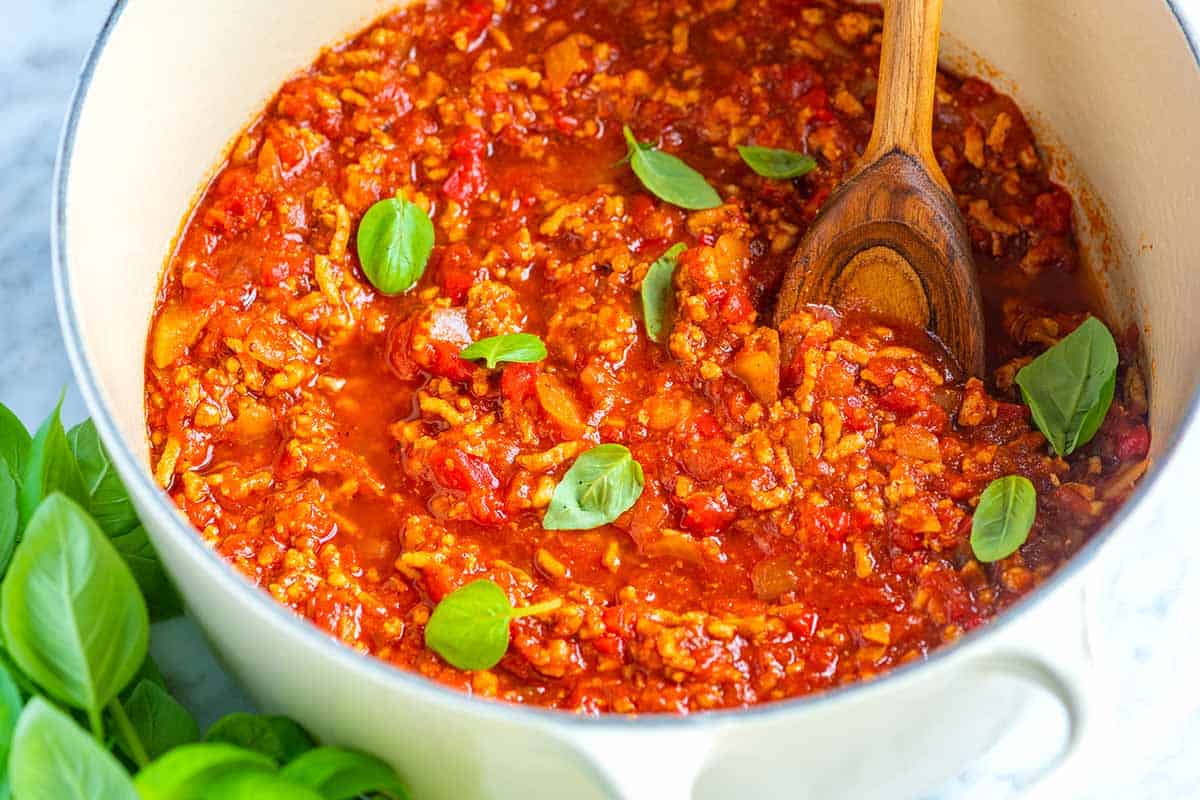
    Homemade Spaghetti Meat Sauce

    Weeknight Homemade Spaghetti Sauce

    • PREP
    • COOK
    • TOTAL

    We’ve made this easy homemade spaghetti sauce countless times and are always happy that we did. The sauce starts with a base of ground meat. We love keeping the sauce on the leaner side and use ground turkey, but any ground meat like beef, sausage, pork, chicken, and lamb will work.

    Makes about 5 cups of sauce

    You Will Need

    1 pound (450g) lean ground meat like ground beef or ground turkey

    3 tablespoons olive oil

    1 cup (130g) chopped onion

    3 garlic cloves, minced (1 tablespoon)

    2 tablespoons tomato paste

    1/2 teaspoon dried oregano

    Pinch crushed red pepper flakes

    1 cup water, broth, or dry red wine

    1 (28oz) can crushed tomatoes

    Salt and fresh ground black pepper

    Handful of fresh basil leaves, plus more for serving


    Optional Ingredients, See Tips

    2 to 3 teaspoons fish sauce

    1 to 2 teaspoons mushroom powder, try homemade mushroom powder

    3 to 4 anchovy fillets, minced with some of their oil or use anchovy paste

    Pinch sugar

    1 leftover rind from a wedge of parmesan

    Directions

      1Heat the oil in a large pot over medium-high heat (we use a Dutch oven).

      2Add the meat and cook until browned, about 8 minutes. Use a wooden spoon to break the meat into smaller crumbles as the meat cooks.

      3Add the onions and cook, stirring every once in a while, until softened, about 5 minutes.

      4Stir in the garlic, tomato paste, oregano, and red pepper flakes and cook, stirring continuously for about 1 minute.

      5Pour in the water and use a wooden spoon to scrape up any bits of meat or onion stuck to the bottom of the pot.

      6Stir in the tomatoes, 3/4 teaspoon of salt, and a generous pinch of black pepper.

      7Bring the sauce to a low simmer. Cook uncovered for 25 minutes. As it cooks, stir and taste the sauce a few times so you can adjust the seasoning accordingly (see notes for seasoning suggestions).

      8Remove the spaghetti sauce from the heat and stir in the basil.

    Adam and Joanne’s Tips

    • Storing: This homemade spaghetti sauce can be made in advance and should last in your refrigerator for up to 3 days and in your freezer for about 3 months.
    • If the sauce’s flavor doesn’t pop, you need more salt.
    • If the sauce is too acidic, a pinch of sugar will do the trick.
    • If the sauce is lacking in flavor, consider adding a few dashes of fish sauce or a few minced anchovies (both add a rich, savory flavor).
    • Adding a leftover rind of a parmesan wedge to the sauce while adding the tomatoes adds richness and extra flavor. It won’t melt all the way. Remove what’s left before serving.
    • The nutrition facts provided below are estimates.

    Nutrition Per Serving
    Serving Size
    2/3 cup sauce
    /
    Calories
    167
    /
    Total Fat
    9.9g
    /
    Saturated Fat
    1.9g
    /
    Cholesterol
    39.1mg
    /
    Sodium
    500.2mg
    /
    Carbohydrate
    8.7g
    /
    Dietary Fiber
    2.1g
    /
    Total Sugars
    4.8g
    /
    Protein
    12.9g


    AUTHOR:

    Joanne Gallagher

    Adam and Joanne of Inspired Taste

    We are Adam and Joanne Gallagher, the creators of Inspired Taste. Established in 2009, Inspired Taste grew from a childhood dream into one of the internet’s most trusted recipe sites with hundreds of reliable recipes, step-by-step videos, and expert tips.More About Us
    Source link

  • Easy Salmon Marinade Recipe | The Recipe Critic

    Easy Salmon Marinade Recipe | The Recipe Critic

    This website may contain affiliate links and advertising so that we can provide recipes to you. Read my disclosure policy.
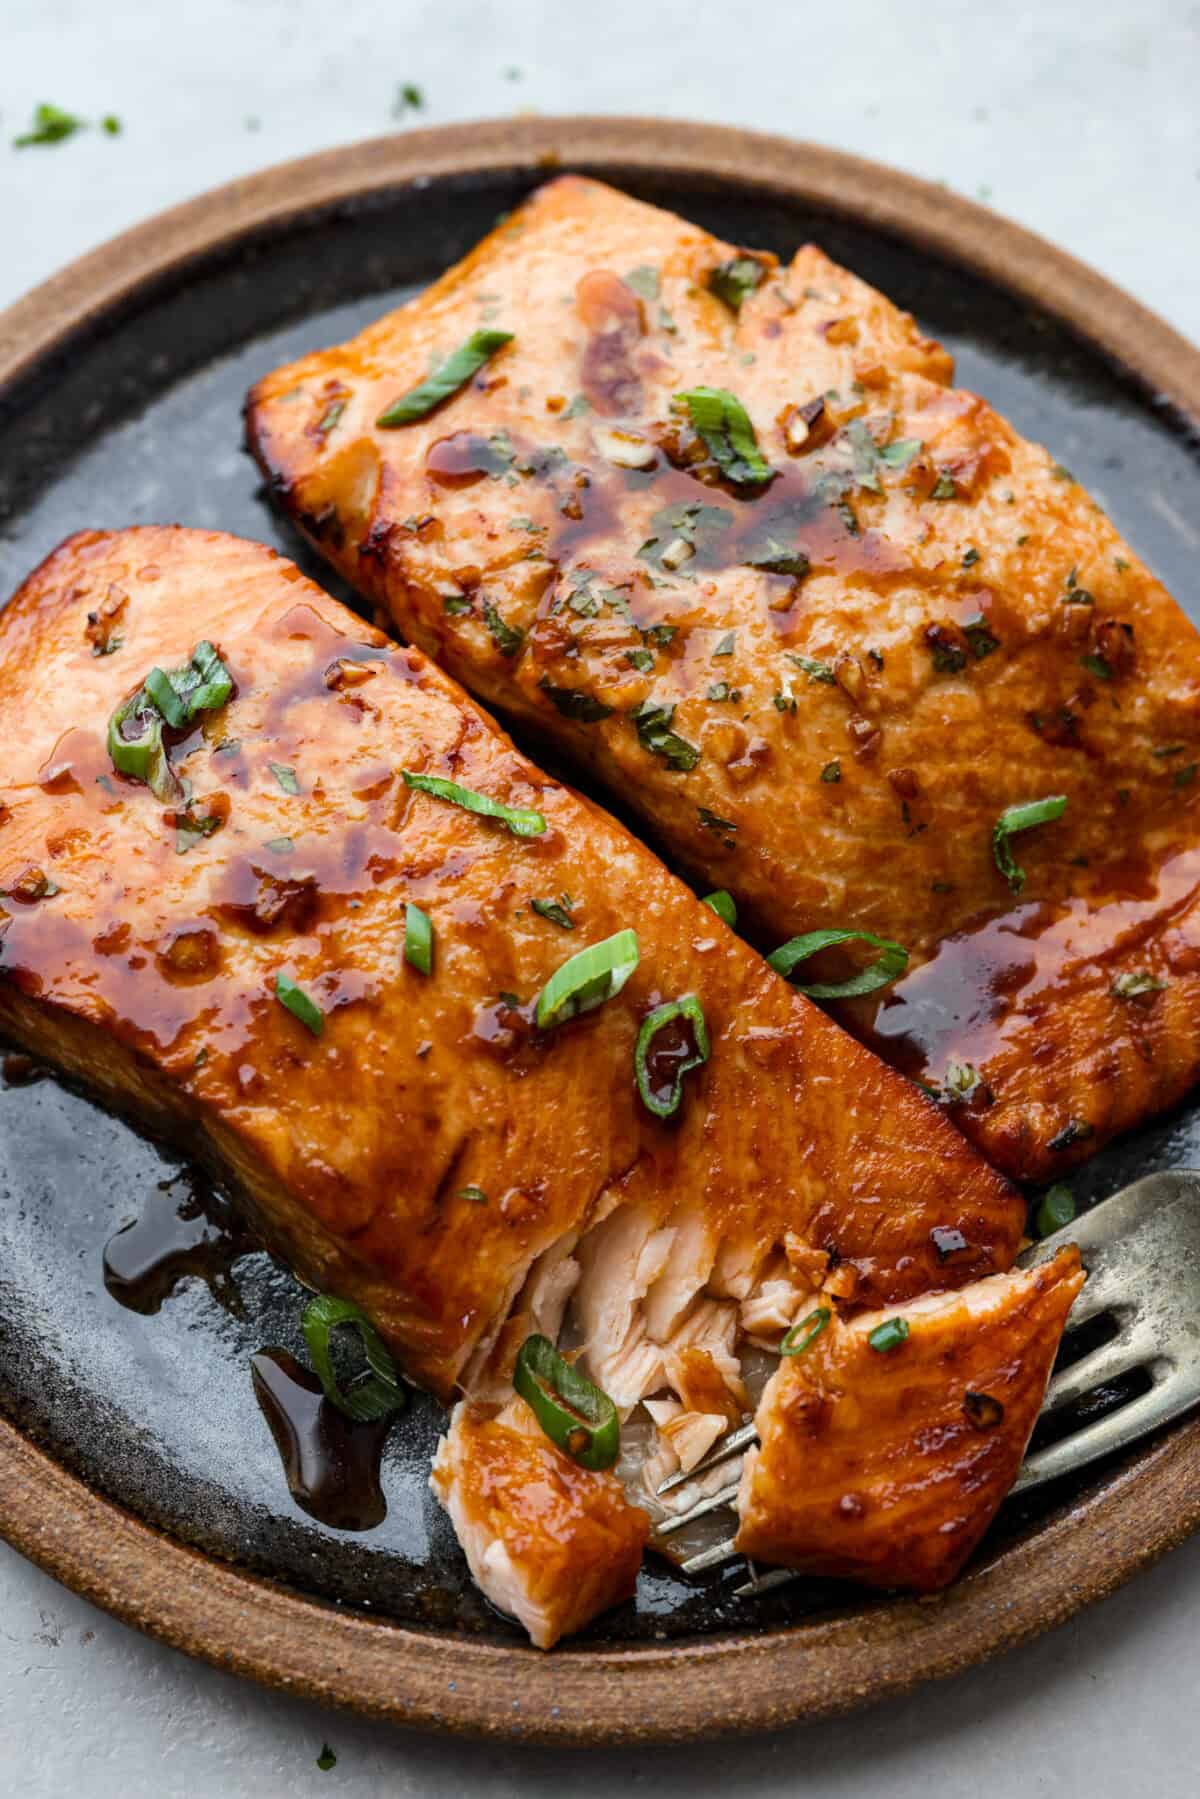
    A great salmon marinade makes your fish flavorful, tender, and juicy! This recipe gives each filet the perfect balance of savory, sweet, and tangy flavors.

    Most of my favorite meat recipes start with a good marinade. And I love experimenting with different ingredients to create new flavors, especially during grilling season! Here are some of our go-to marinades that you’ll definitely want to try: pork chop marinade, shrimp marinade, and chicken marinade!

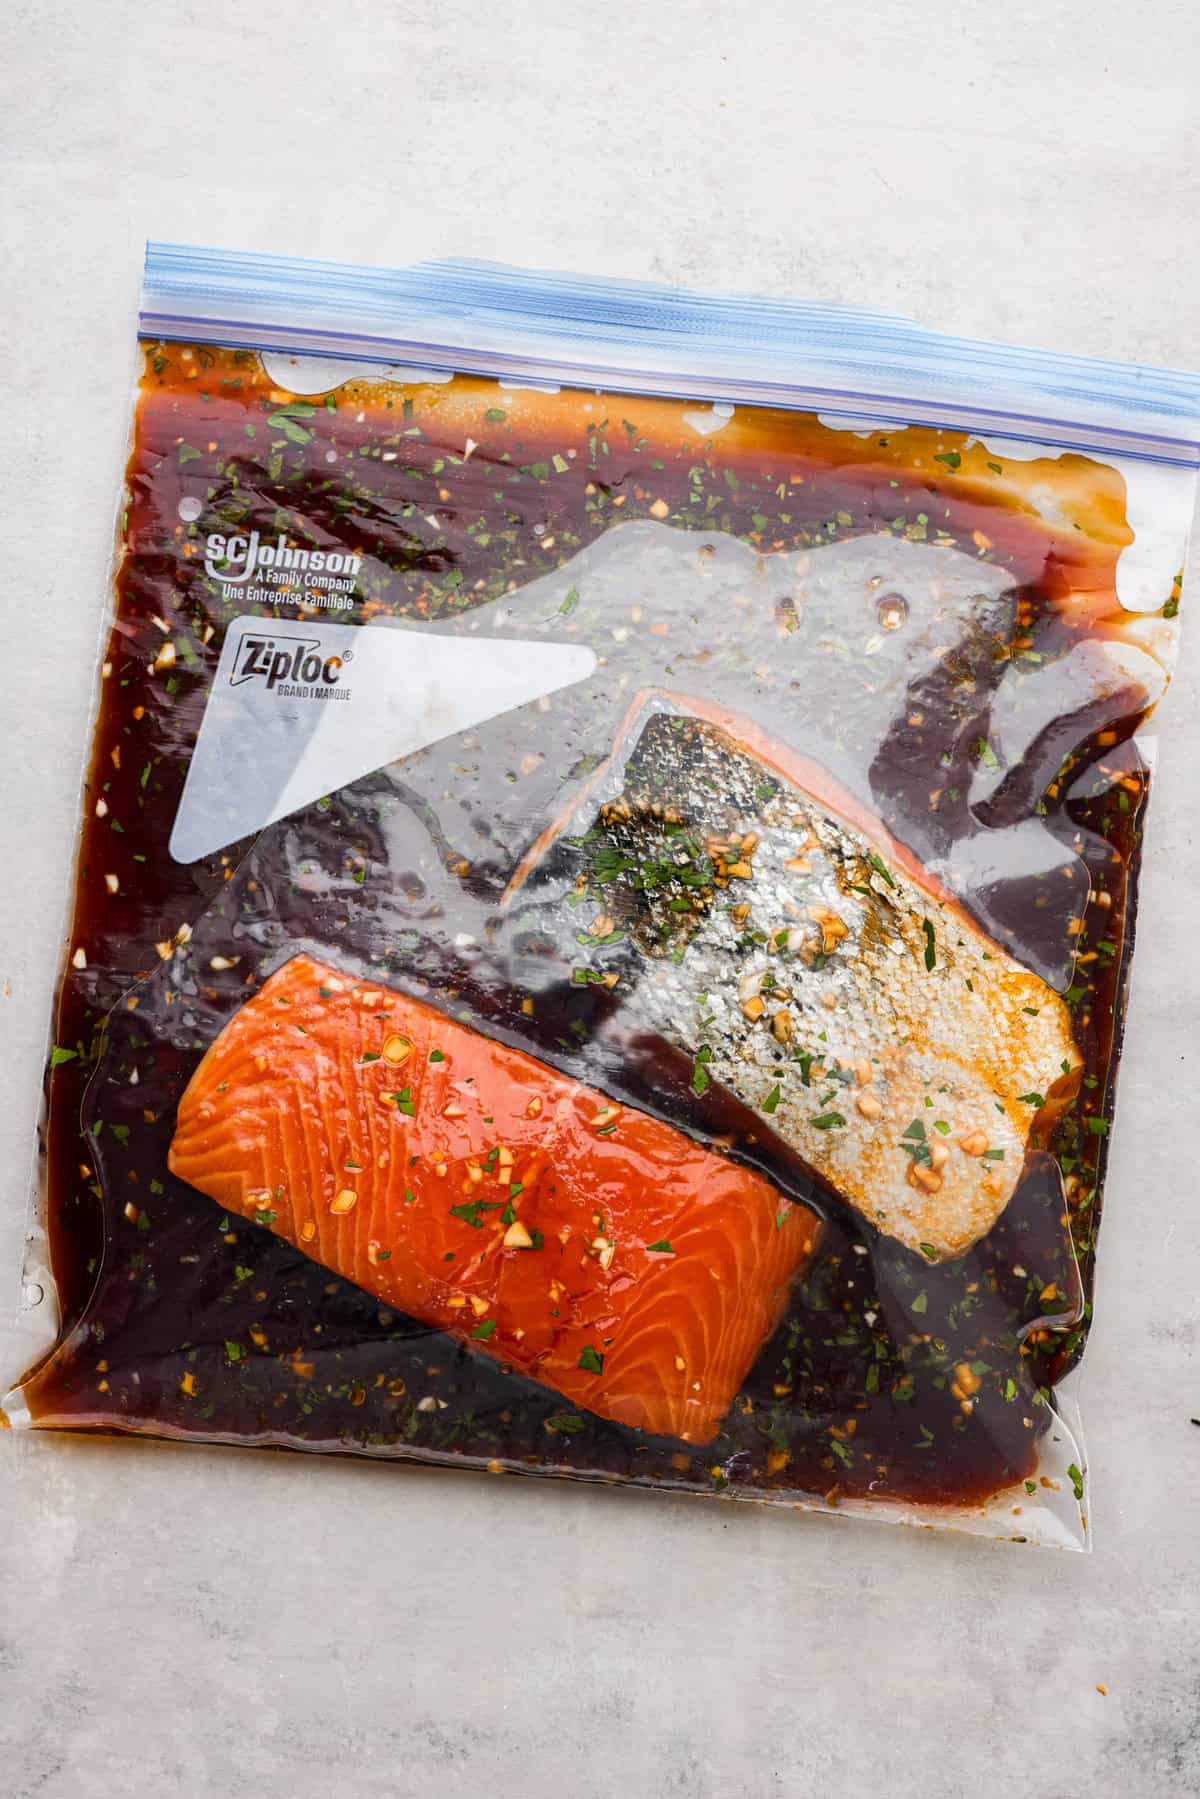
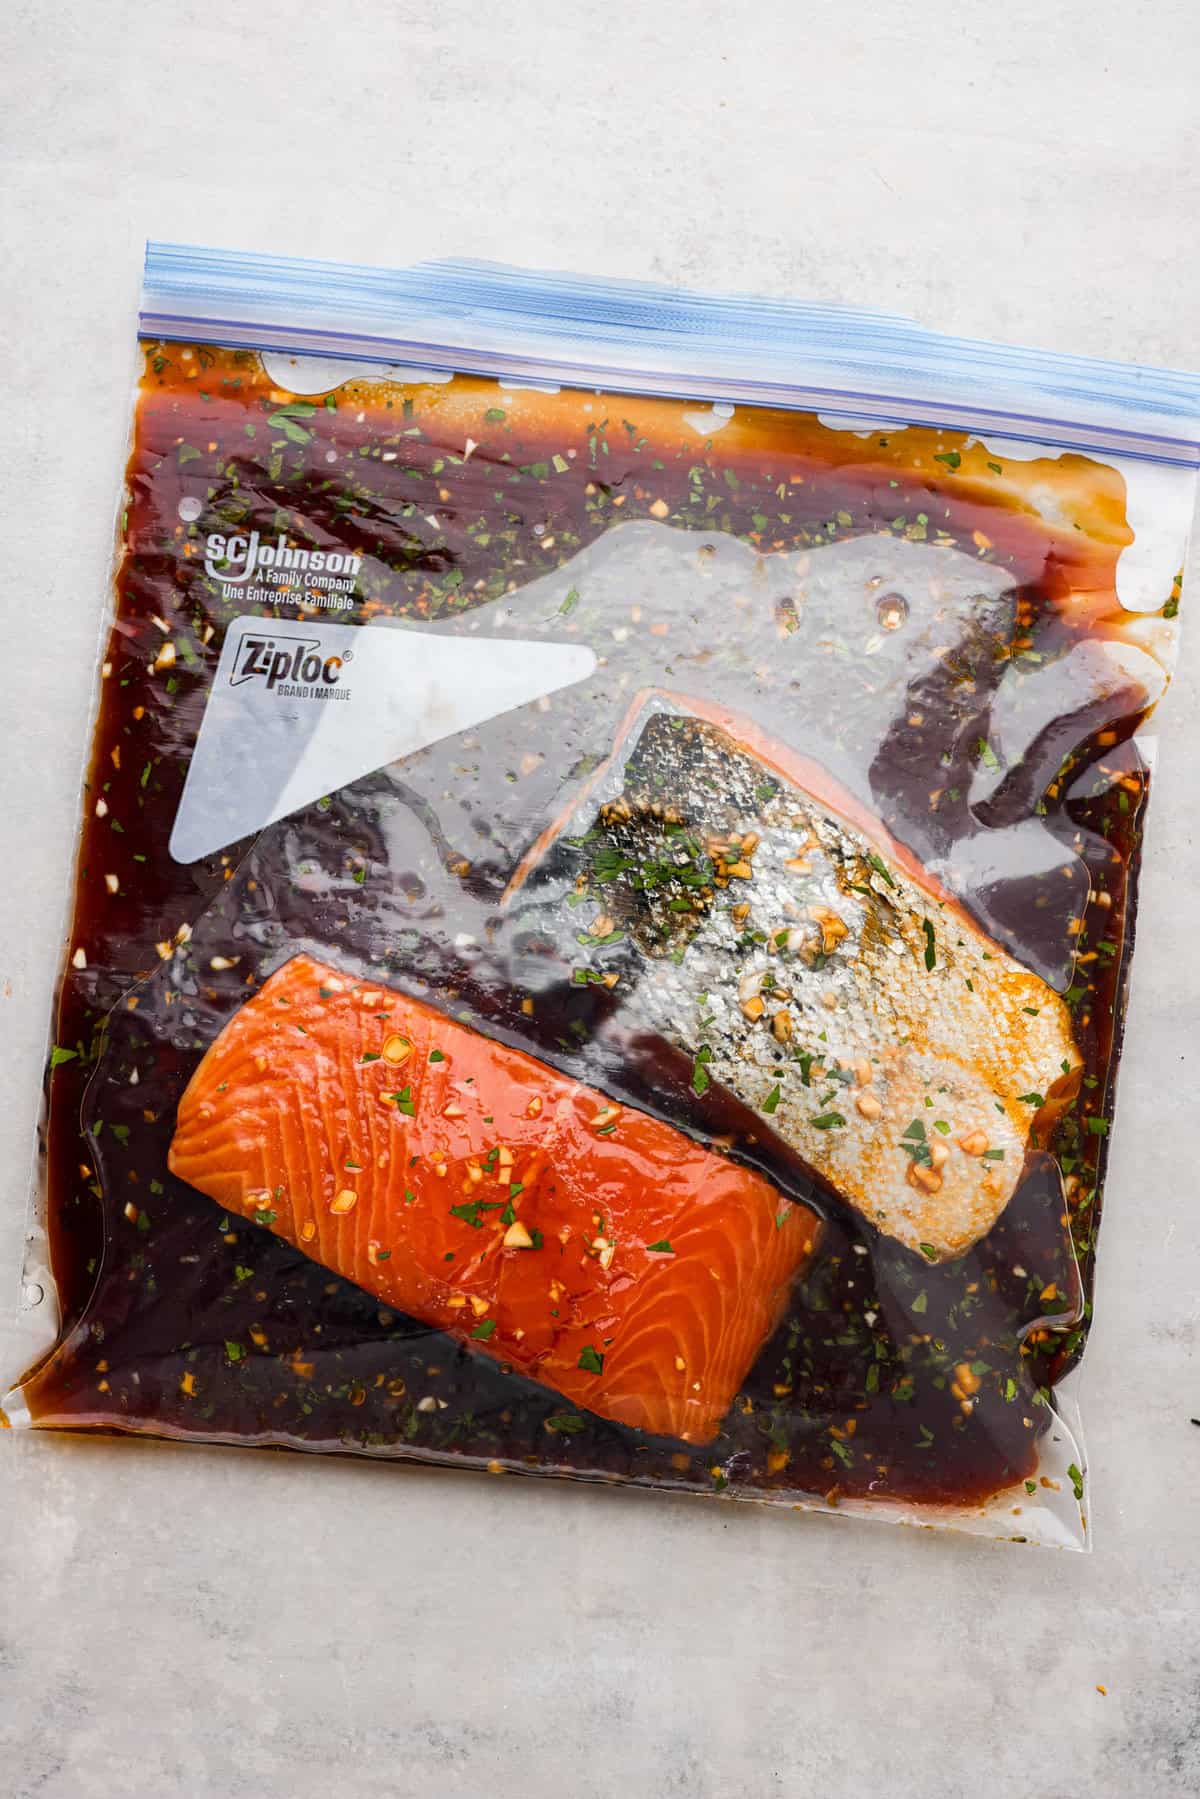
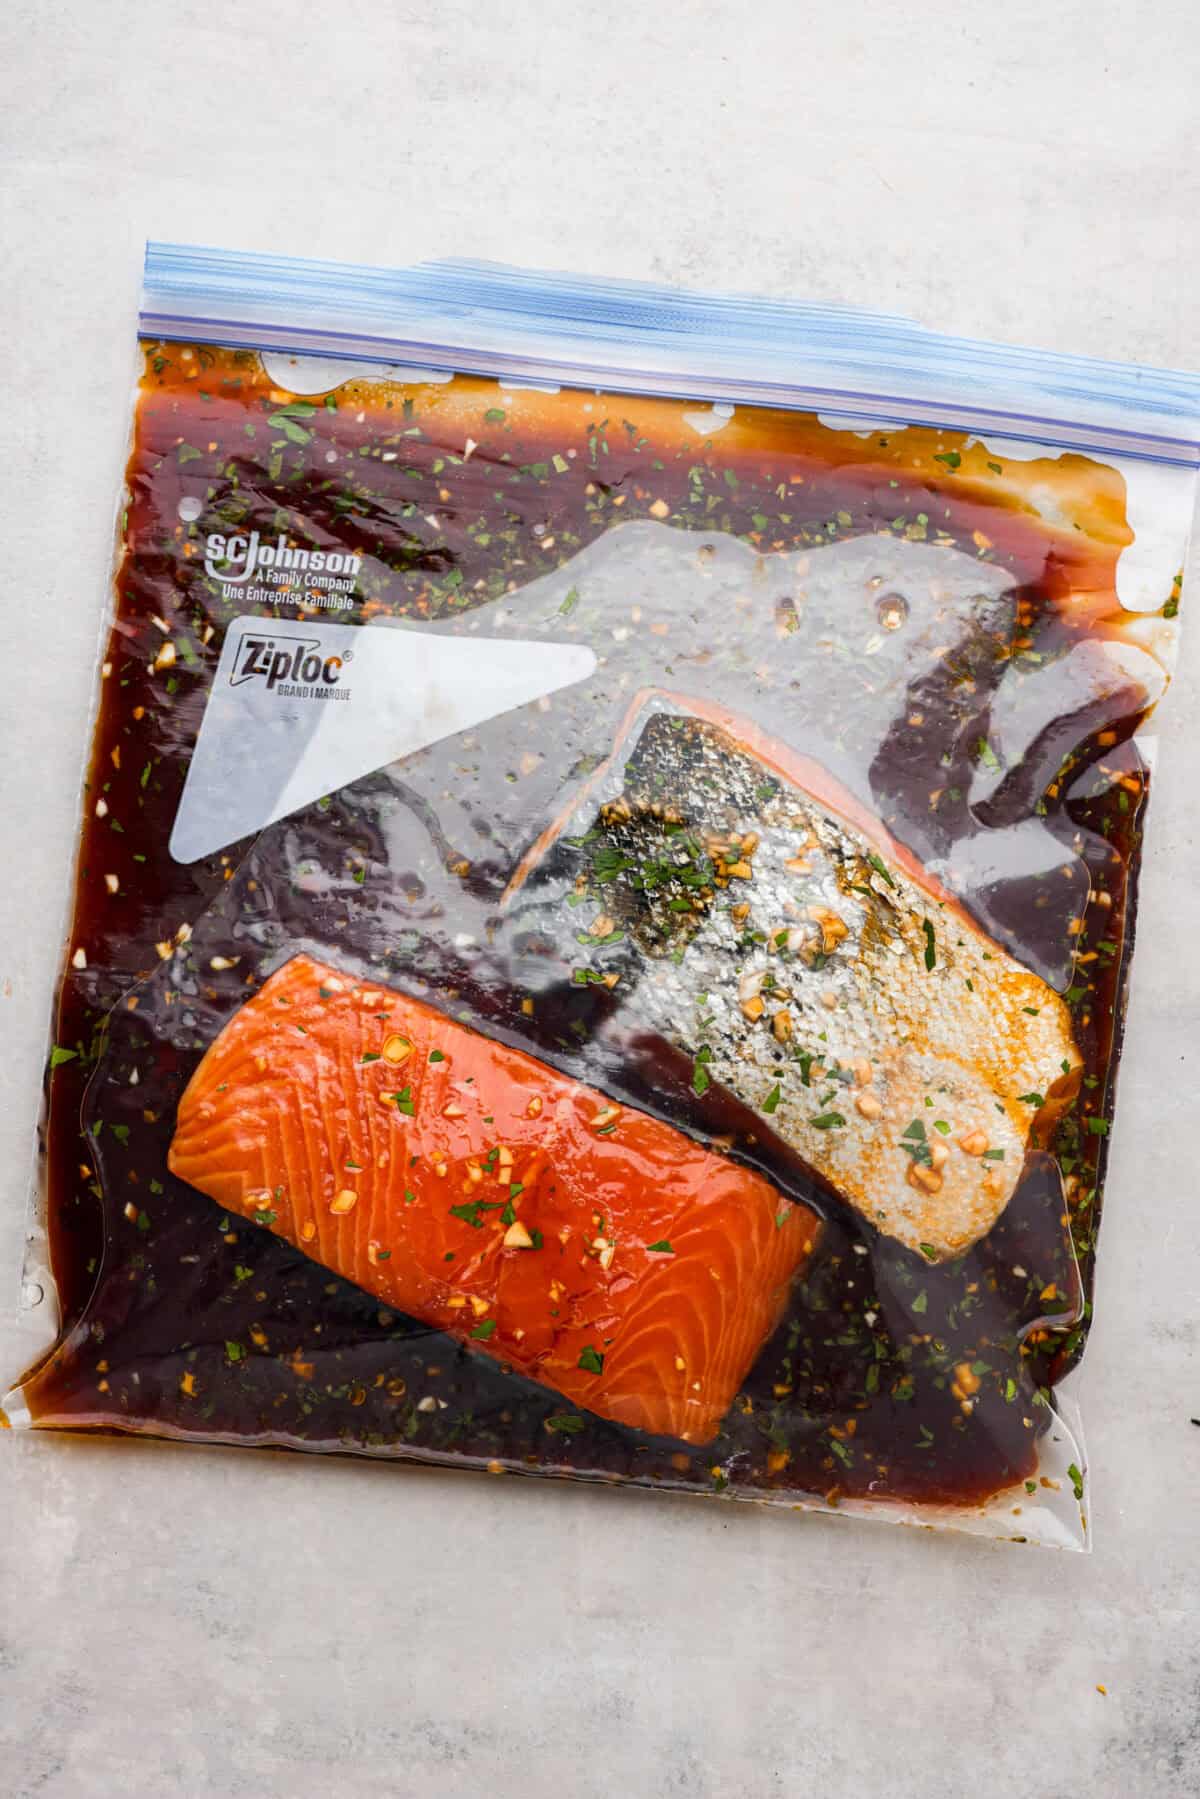
    Salmon filets in a ziplock bag with marinade. Salmon filets in a ziplock bag with marinade.

    Reasons You’ll Love This Marinade Recipe

    • Easy to Prepare: Requires just a few simple ingredients.
    • Delicious: Delivers big flavor with minimal effort. Enjoy tender, juicy salmon that’s perfect every time.
    • Versatile: Ideal for salmon, chicken, or steak. While store-bought marinades are convenient, homemade always tastes better!

    What Ingredients are in Salmon Marinade?

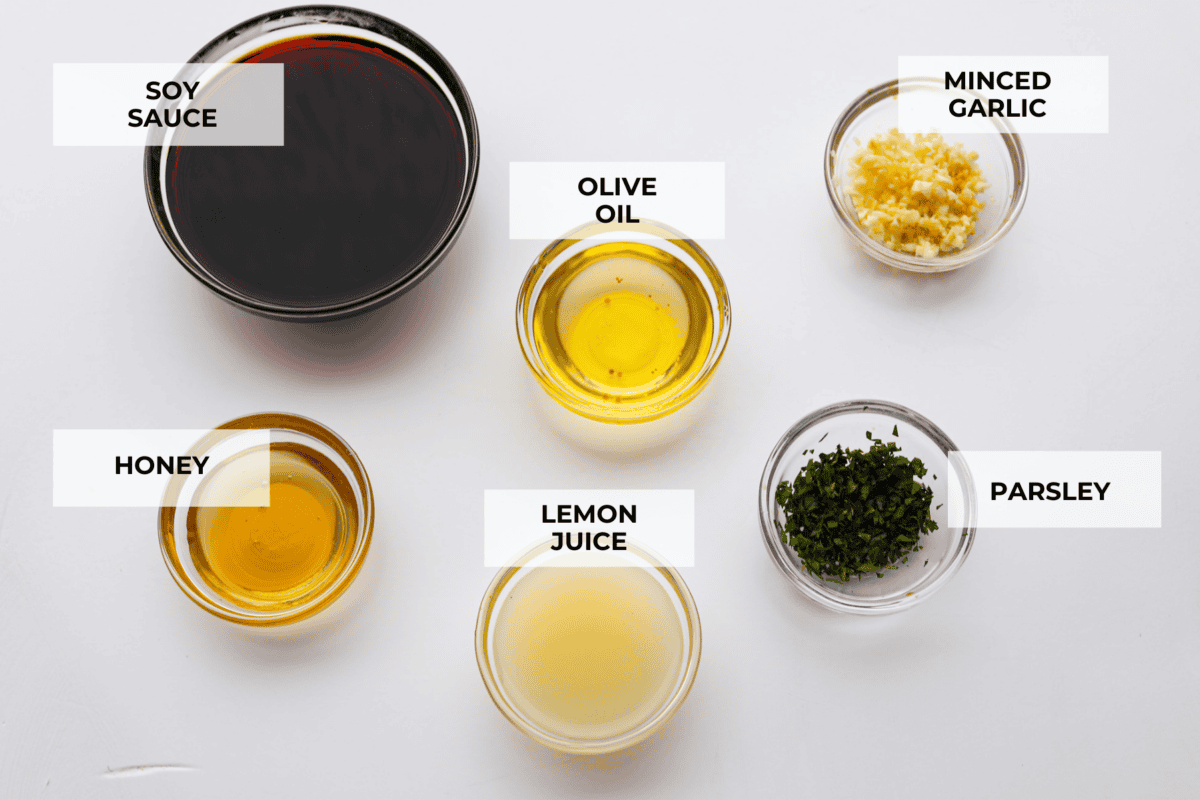
    You’re going to love how easy this salmon marinade recipe is! It’s made with simple ingredients you likely already have in your kitchen. Just check the recipe card below for all the exact measurements.

    • Soy Sauce: Adds a savory and umami flavor to the marinade that enhances the taste of the salmon.
    • Lemon Juice: A little acidity is a must in marinades. It provides fresh flavor and also helps to tenderize the salmon. 
    • Extra Virgin Olive Oil: Ensures the marinade coats the salmon completely while adding plenty of moisture.
    • Honey: The sweetness from the honey balances the savory flavor from the soy sauce.
    • Garlic: Fresh garlic infuses the salmon with an incredible savory taste!
    • Fresh Parsley: Love adding fresh herbs for depth of flavor.
    • Salmon: This marinade makes enough to fully coat 2-3 pounds of fresh salmon.
    The top view of ingredients in glass bowls and individually labeled. The top view of ingredients in glass bowls and individually labeled.

    How to Make Salmon Marinade and Cook Salmon

    Homemade marinade is super simple to make! All you have to do is mix all of the ingredients, and then add everything to a large ziplock bag! Below, you’ll find instructions for making the marinade and also 4 different ways to cook your salmon:

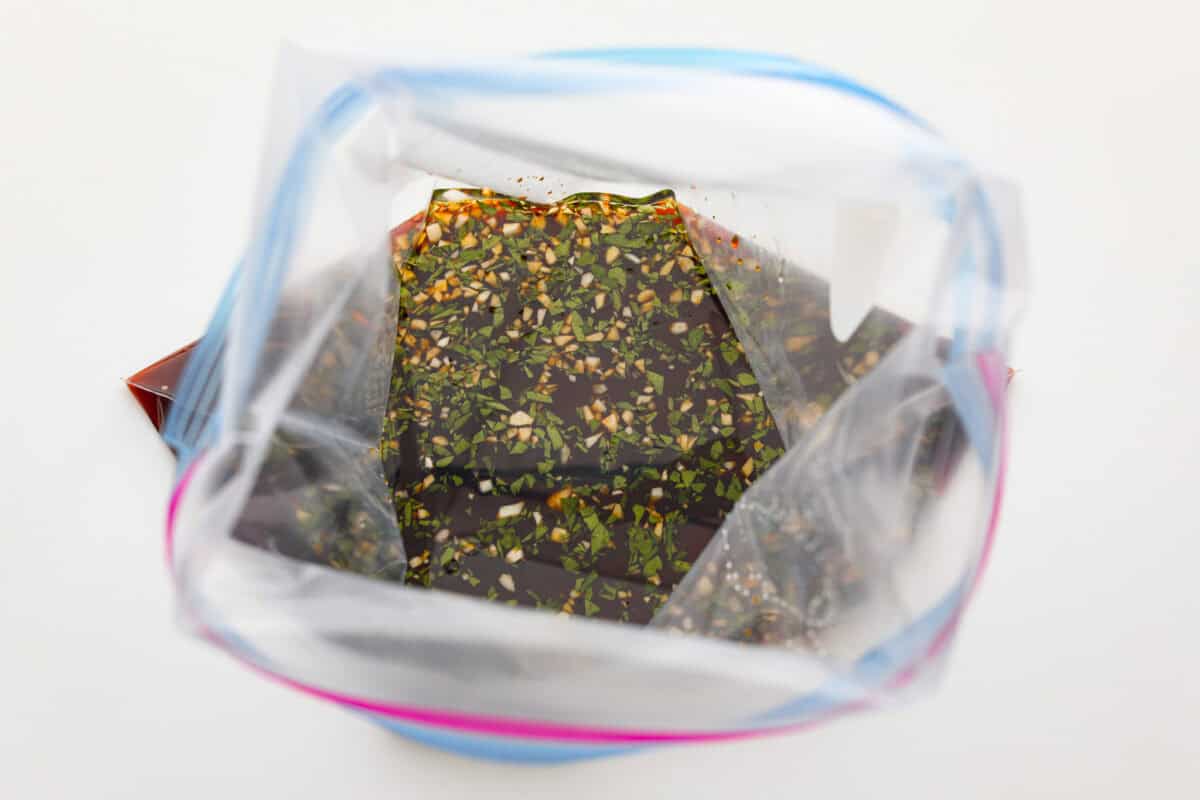
    1. Make the Marinade: Combine all the ingredients in a large ziplock bag or a large bowl.
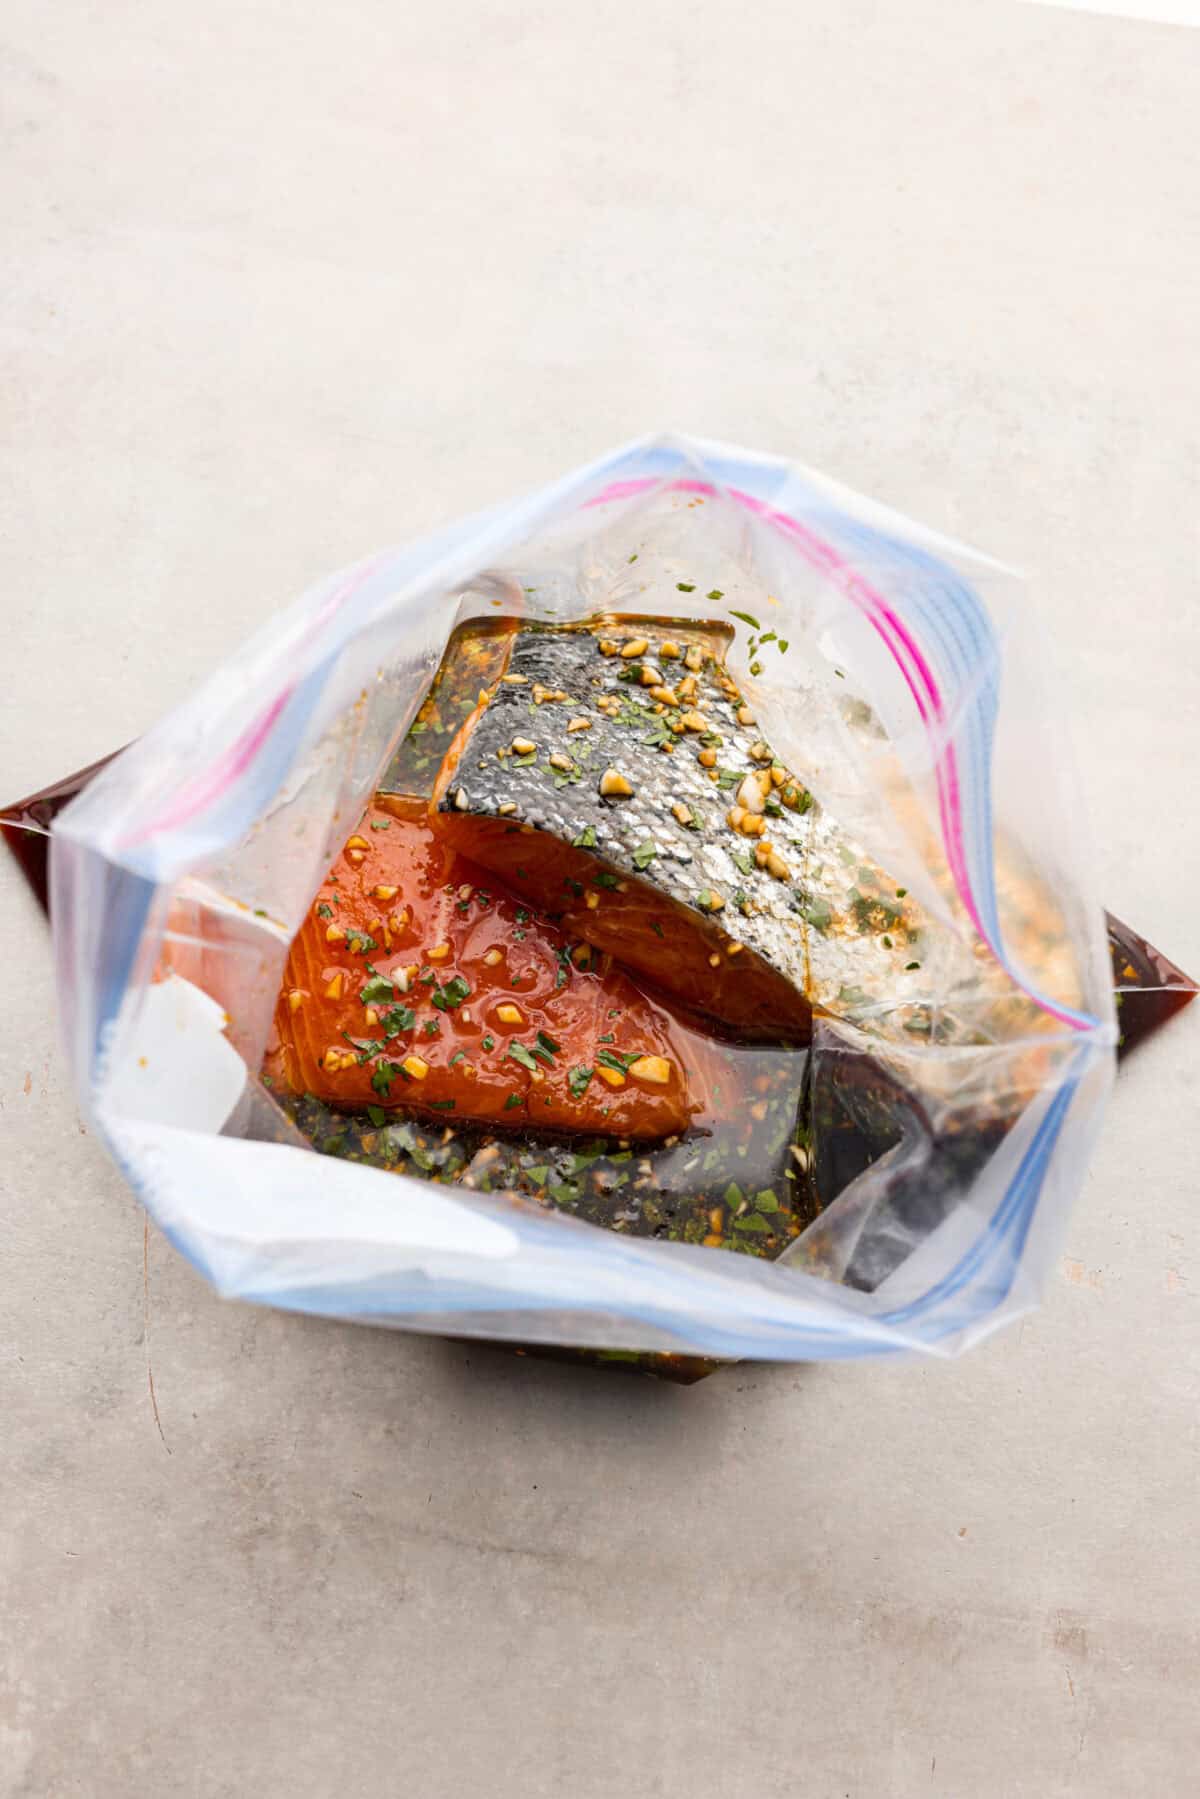
    2. Marinate the Fish: Add the salmon, ensuring the fish is completely covered with the marinade. Let it marinate for 30-60 minutes. Avoid letting it marinate for longer than an hour, as fish can start to break down and become mushy after too long. 

    Choose Your Cooking Method

    1. Air Fryer: Spray the basket of the air fryer with pan spray and place the salmon skin side down. Cook at 400 degrees Fahrenheit for 8-10 minutes, or until the fish reaches 145 degrees Fahrenheit. 
    2. Oven: Preheat the oven to 400 degrees Fahrenheit and line a baking sheet with parchment paper or non-stick foil. Place the salmon skin side down on the baking sheet and bake for 8-10 minutes, or until the fish reaches 145 degrees Fahrenheit. 
    3. Skillet: Heat 1 tablespoon of olive oil in a large skillet over medium-high heat before adding the salmon skin-side up. Let the salmon sear for 4-5 minutes before flipping it skin side down. Cook for an additional 3 minutes. 
    4. Grill: Preheat the grill to 500 degrees Fahrenheit and either brush or spray with oil. Place the salmon skin side down for 6-8 minutes. When it is ready to flip, it should easily release with a fish spatula. Flip the fish and cook over indirect heat for 2-4 minutes, until the fish reaches 145 degrees Fahrenheit.

    Variations and Substitutions

    This sweet and savory salmon marinade is a game-changer, making your fish tender and juicy with incredible flavor. Here are some easy tweaks to tailor it to your taste:

    • Switch up the Citrus: For a fun twist, try swapping the lemon juice with lime or orange juice. Each one adds its own unique zing!
    • Change the Herbs: Feel free to mix in different herbs like rosemary, thyme, cilantro, or dill. Fresh herbs are great, but if you’re using dried, go with 1 teaspoon for every tablespoon of fresh.
    • Alternative for Soy Sauce: If you need to switch out the soy sauce, go for gluten-free or low-sodium soy sauce, or try liquid aminos for a similar taste.
    • Make it Spicy: Craving some heat? Add a pinch or two (or more, if you like it hot) of crushed red pepper to spice things up.
    • Sweetener: Honey does a great job balancing the saltiness of the soy sauce, but you can swap it with brown sugar or agave. If you need to skip the sweetener, that’s okay too—just know it adds a nice touch!

    The top view of salmon filets in marinade in a ziplock bag. The top view of salmon filets in marinade in a ziplock bag.

    How to Store Salmon Marinade

    You can get a head start by whipping up your marinade a day in advance. Just remember, don’t add the fish to it until about an hour before you plan to cook. If you let the fish soak for more than 60 minutes, the marinade will start to break down the fillet’s structure, leaving you with mushy fish.

    • In the Refrigerator: Your homemade marinade will stay fresh for up to 2 weeks if you keep it in an airtight container in the fridge. But be careful! Once the marinade has been in contact with raw meat or fish, you’ll need to toss it out to avoid any food safety issues.
    • In the Freezer: For longer storage, you can freeze your marinade. Just pour it into a freezer-safe ziplock bag, and it will keep for 3-6 months. When you’re ready to use it, let it thaw in the refrigerator or at room temperature.

    Cooked salmon filets on a plate garnished with green onions. Cooked salmon filets on a plate garnished with green onions.

    More Marinade Recipes

    A tasty marinade can take your meal from ordinary to extraordinary! It infuses the protein with flavor, tenderizes it and makes the meat perfectly juicy and tender.

    Pin this now to find it later

    Pin It


    Source link

  • Liz’s Bistro Salad Recipe – Pinch of Yum

    Liz’s Bistro Salad Recipe – Pinch of Yum

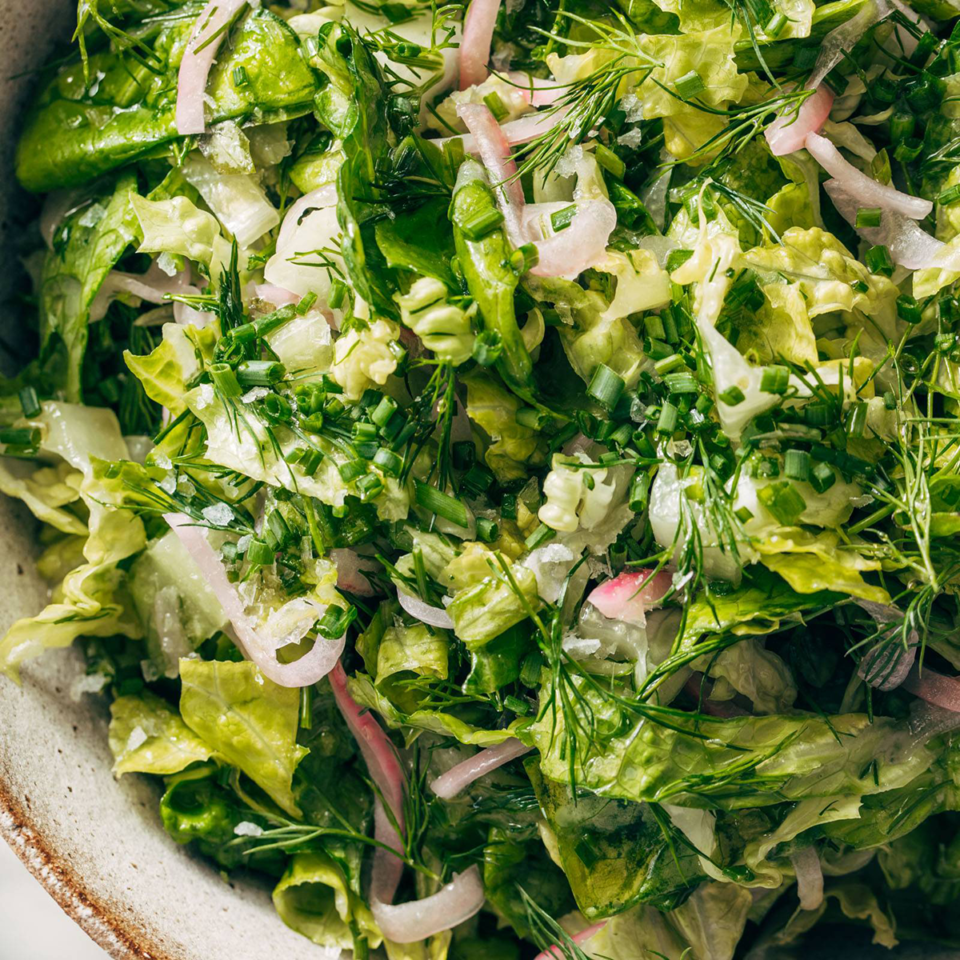
    Crunchy, light, bright, and ultra-fresh. This French-inspired bistro salad is an absolute star as a side for nearly any dinner. Tender greens, fresh herbs, pickled onions, and a delicate vinaigrette on top.

    This salad!

    WOW. I am fully in love with this salad.

    My friend Liz (of Liz’s Roasted Broccoli Salad fame) brought this salad to our dinner club a few weeks ago. We had a French-ish theme – charcuterie, French onion soup, beef bourguignon, creamy potatoes, homemade bread, and creme brûlée. LOL. And then there was Liz’s salad. It was like a little beacon of brightness in a sea of cream, butter, and cheese. I would (and have) eat this as a salad on its own, but the contrast of this with, say, a beef stew, or a really cheesy panini, or a big bowl of luscious mushroom soup – that’s where this salad shines.

    In This Post: Everything You Need For This Bistro Salad

    It’s a study in simplicity. The entire salad is greens, herbs, pickled onions, and vinaigrette. That’s it. It’s like a love song to everything green.

    But here’s why I really love it:

    It is an A+ balance of crunchy and light and delicate – the herbs are ultra-fresh but not bossy, the pickled onions are there but not in your face, and the combination of finely chopped romaine (cronchy) with gently torn butter lettuce (tender) with the lightest, brightest vinaigrette slicked into to every nook and cranny is absolute salad perfection.


    Print

    clock clock iconcutlery cutlery iconflag flag iconfolder folder iconinstagram instagram iconpinterest pinterest iconfacebook facebook iconprint print iconsquares squares iconheart heart iconheart solid heart solid icon

    Description

    Crunchy, light, bright, and ultra-fresh. This French-inspired bistro salad is an absolute star as a side for nearly any dinner. Tender greens, fresh herbs, pickled onions, and a delicate vinaigrette on top. 


    Pickled Onions

    Bistro Salad

    Vinaigrette


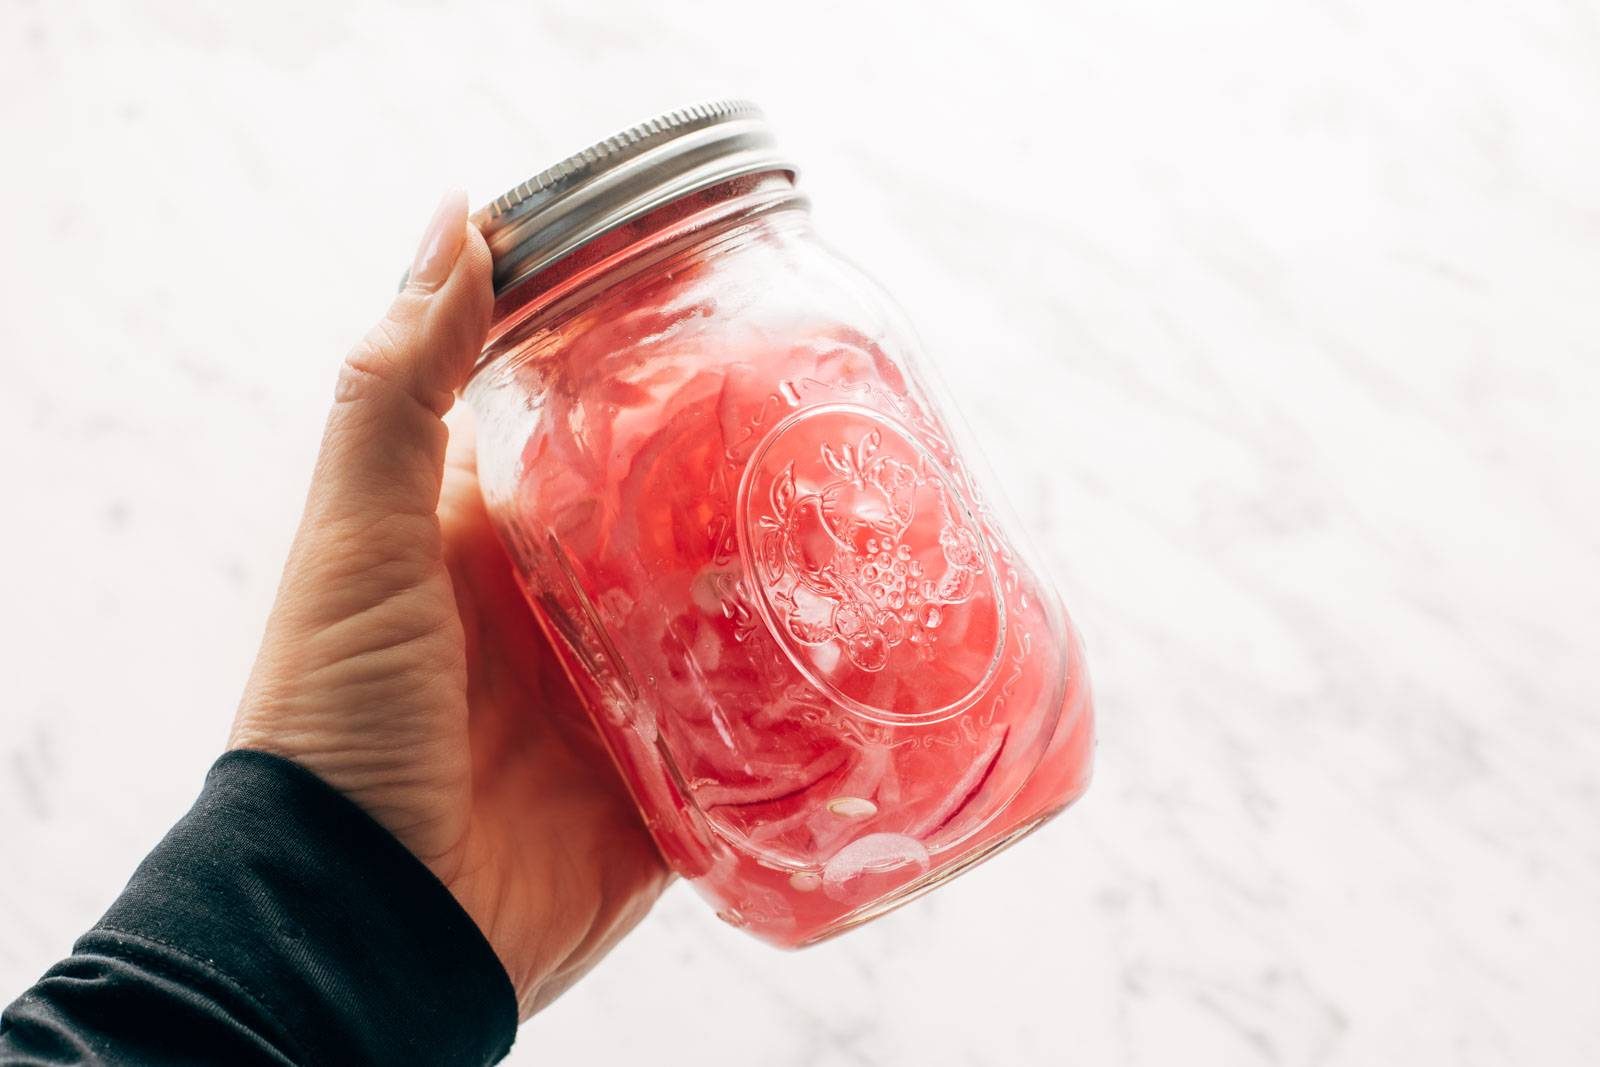
    1. Pickled Onions: Place the onions in a jar; fill the jar about a third of the way with vinegar, then fill to the top of the onions with water. Add salt and sugar, shake, and keep in the fridge for a few hours or a few days. (I’d suggest 30 minutes minimum if you’re short on time.) Pickled onions in a jar.
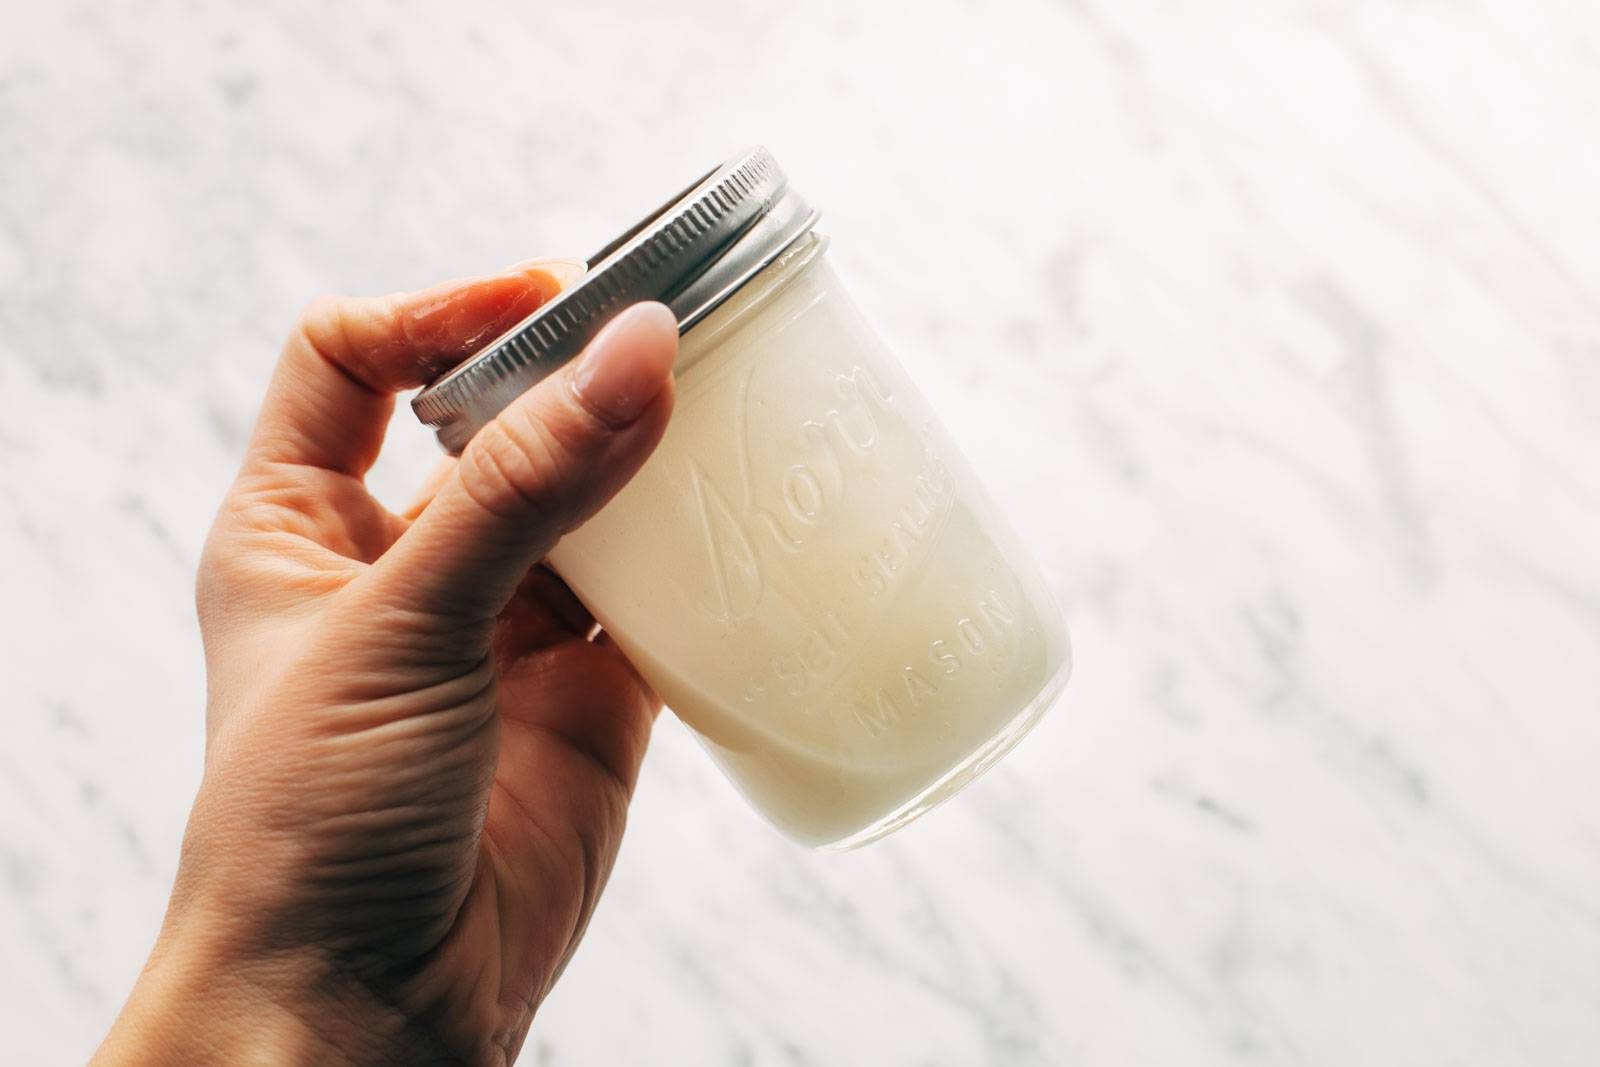
    2. Vinaigrette: Shake all dressing ingredients in a jar. It should be pleasantly bright and mellow – remember we’ll be adding a bunch of onions and herbs to the salad, so it’s okay for this dressing to be pretty chill. Keep this in the fridge if making ahead. Dressing in a jar.
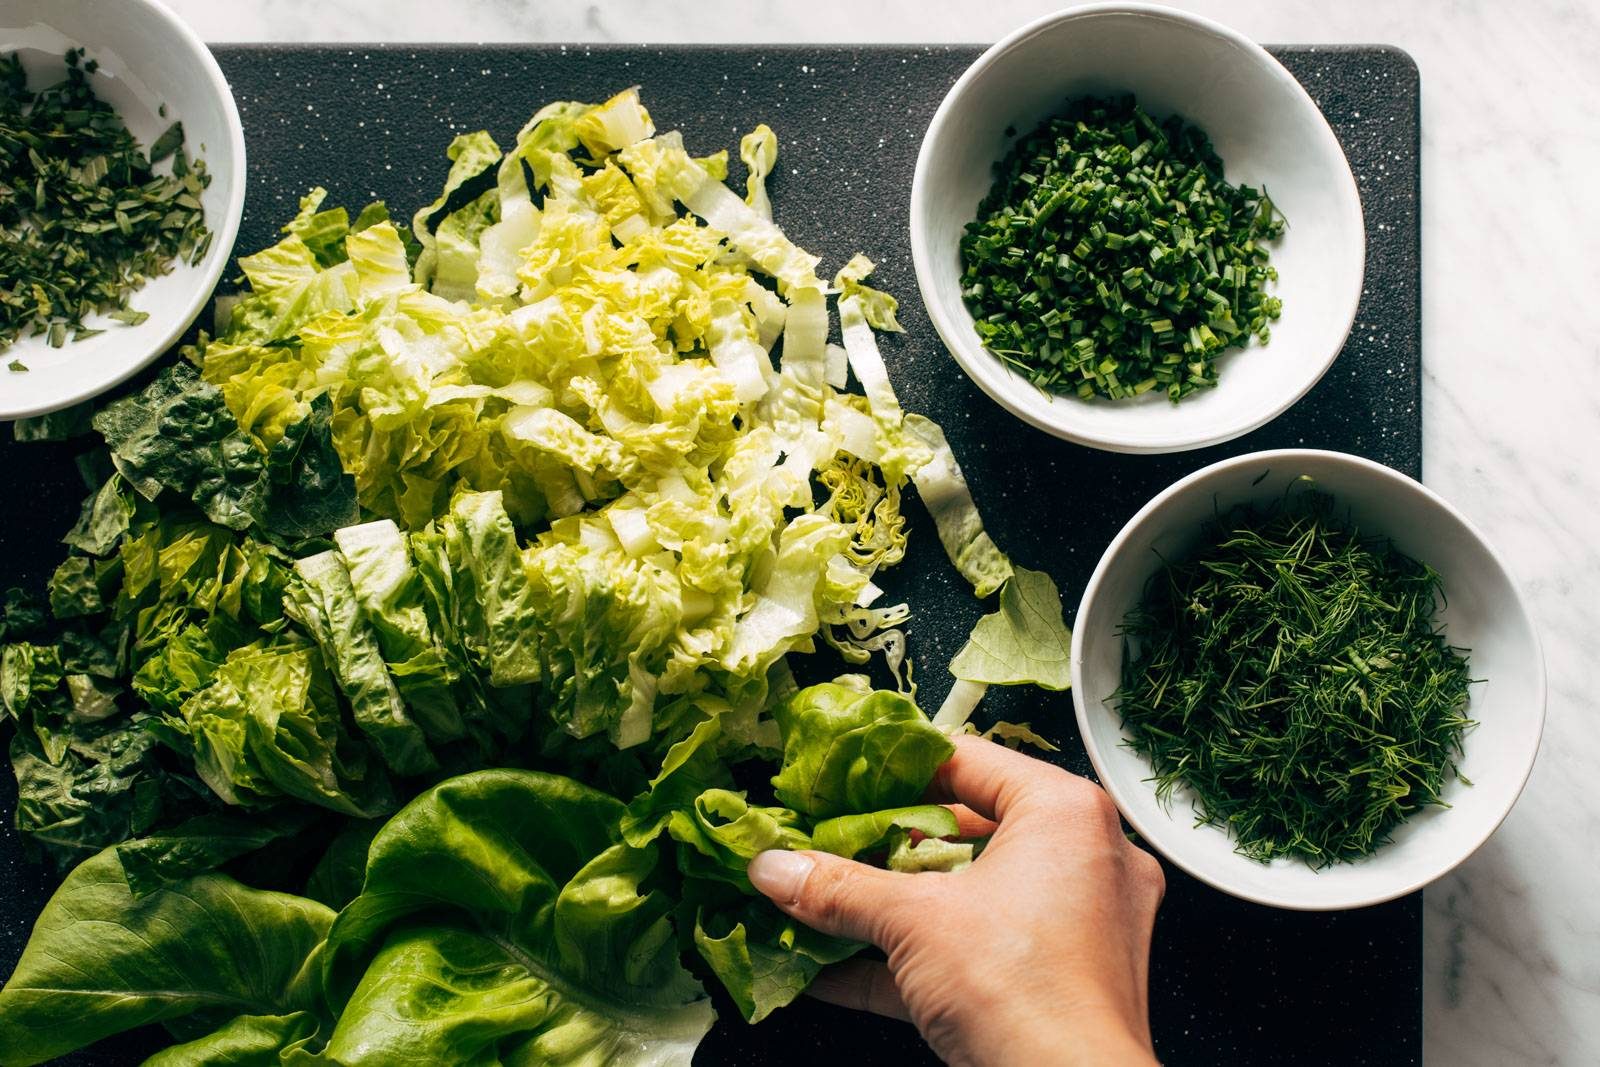
    3. Salad: Prep all your salad greens – chop the romaine and the herbs, and gently tear the lettuce leaves into bite sized pieces. Chopped veggies and herbs on a cutting board.
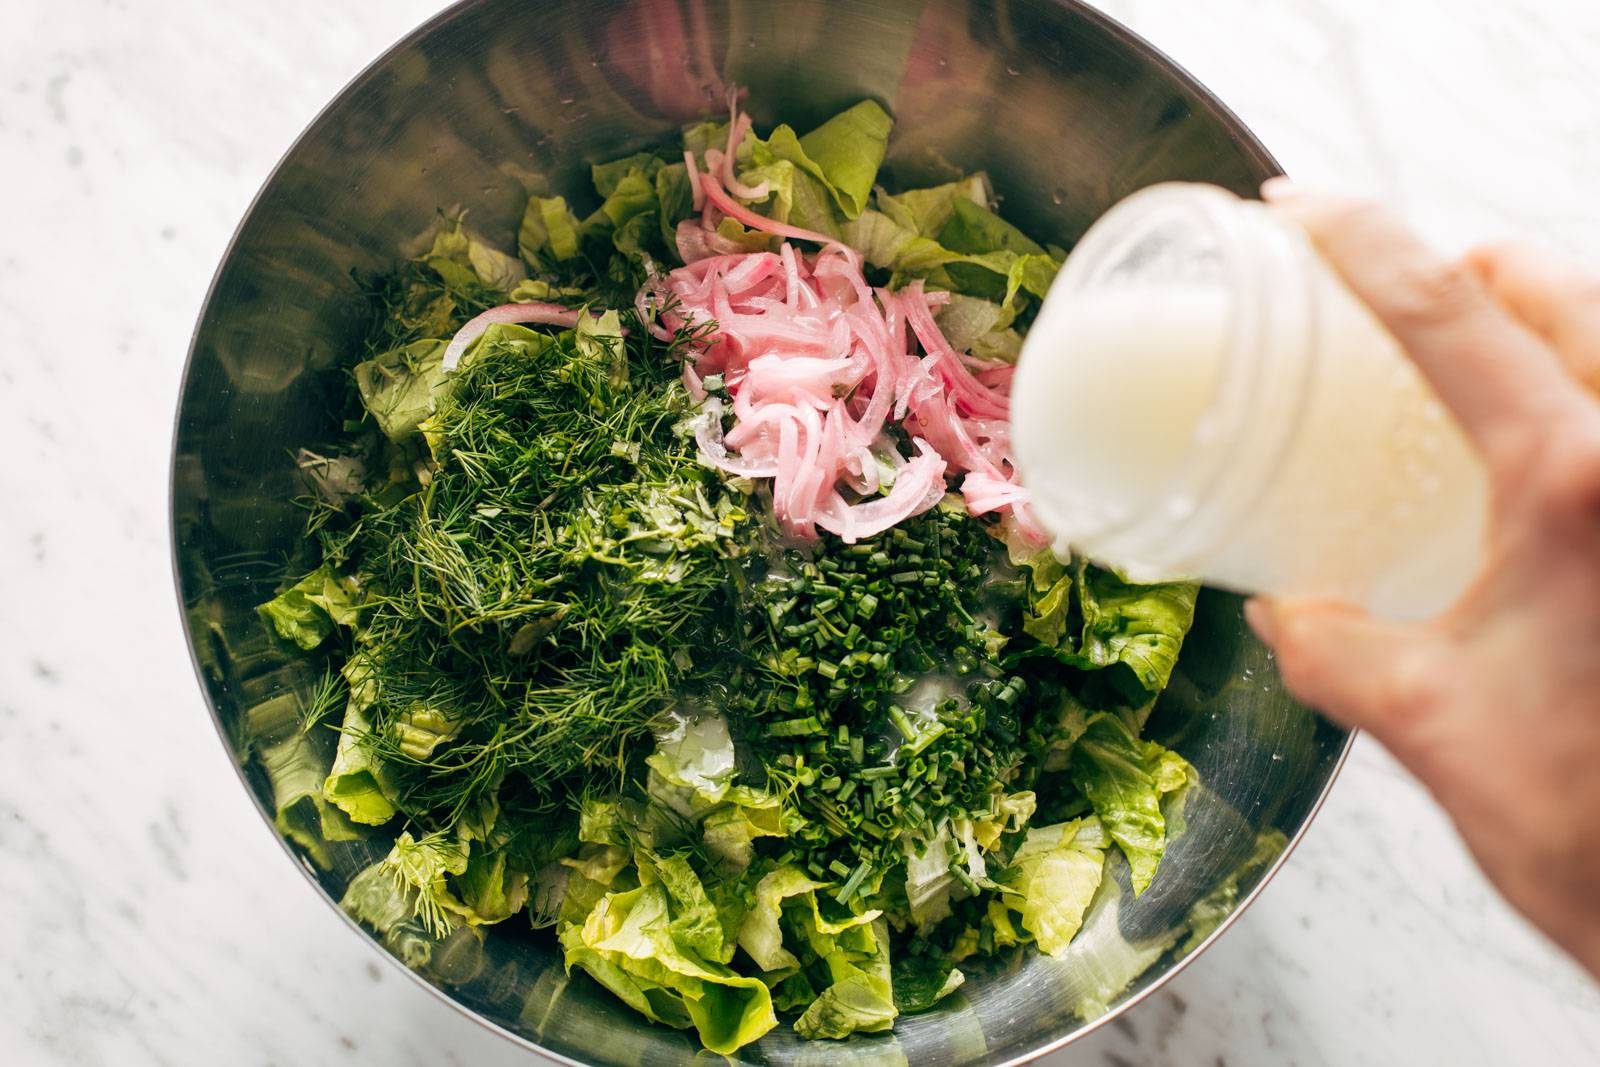
    4. Toss: Just before serving, toss greens, herbs, pickled onions, and dressing together – starting with about half of the dressing that’s in the jar, and adding more as necessary. Pouring salad dressing on a bowl of greens and herbs.
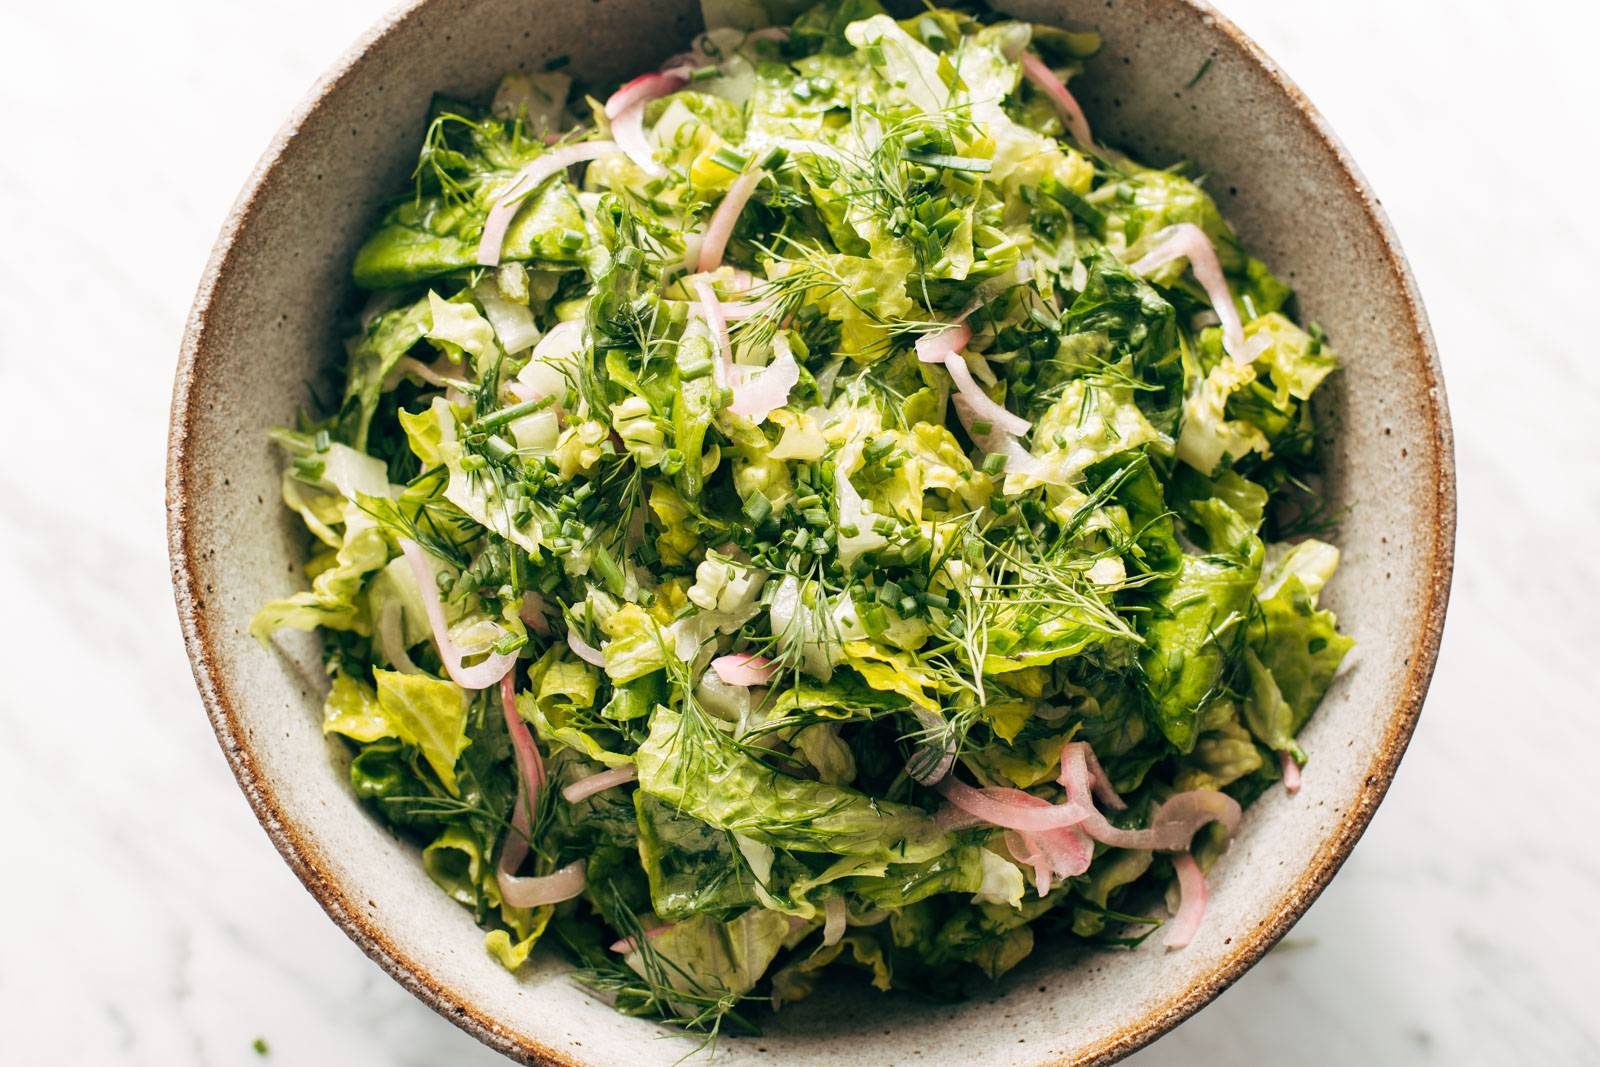
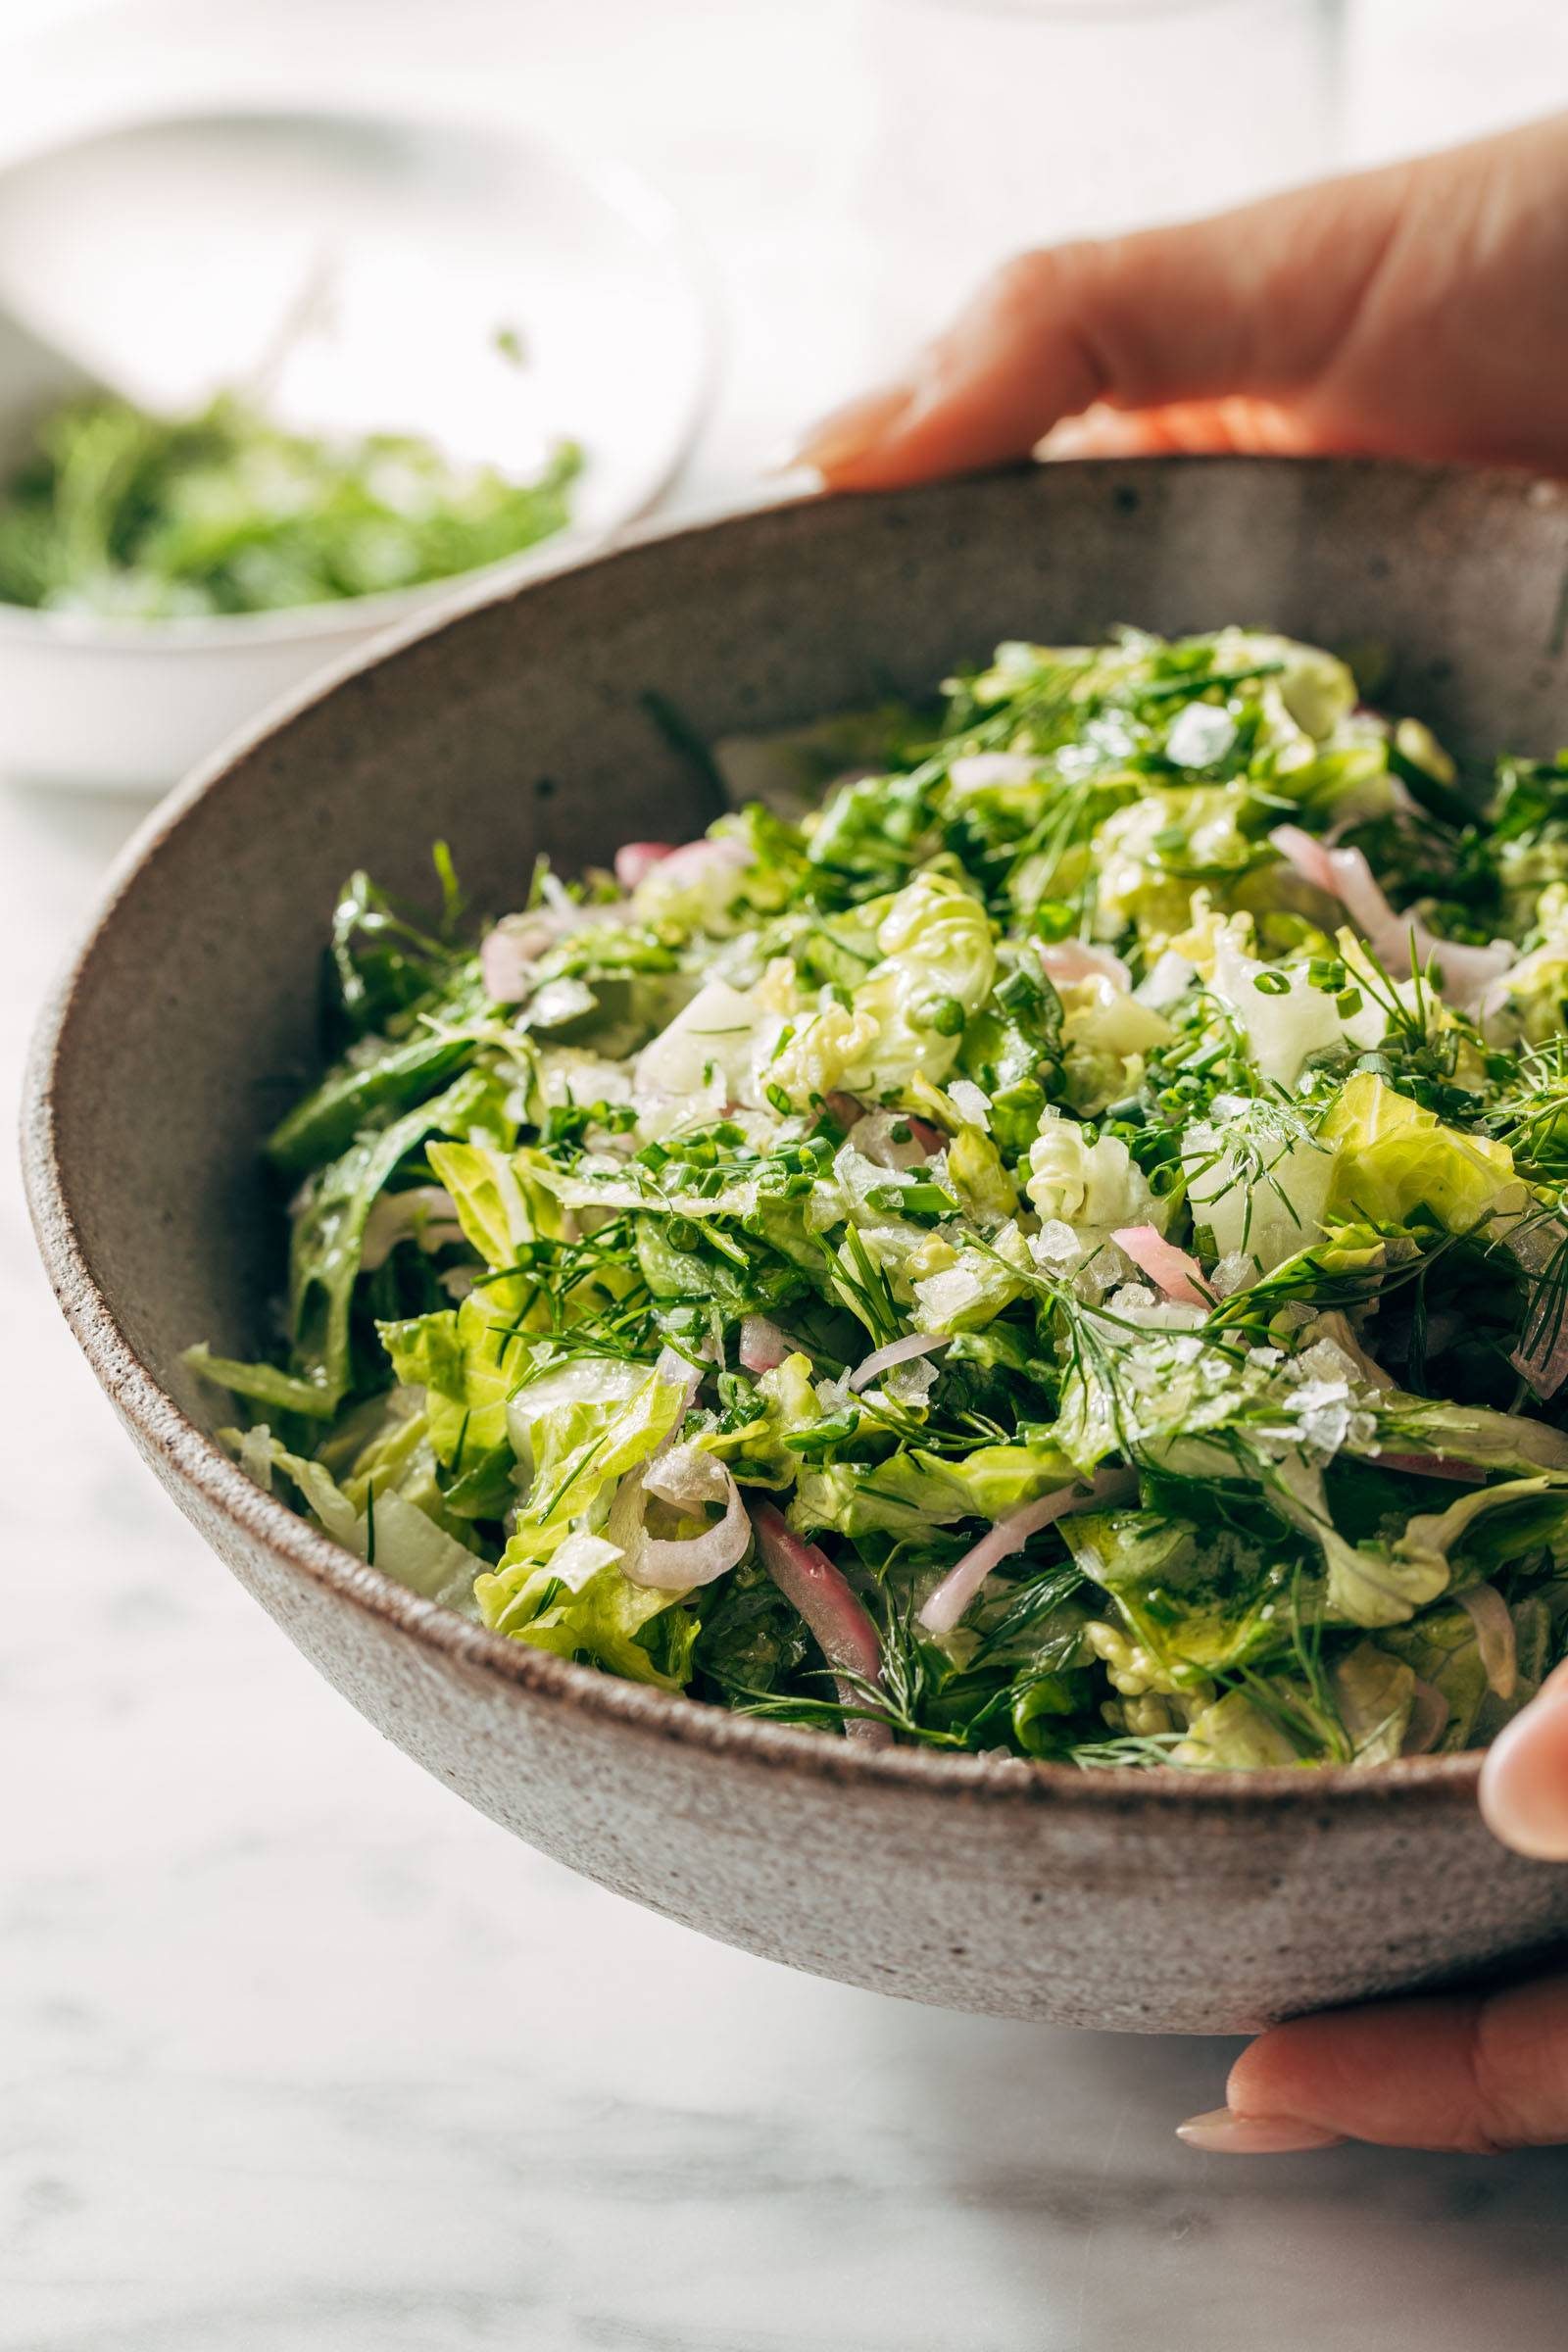
    5. Serve: Taste and adjust; add salt and pepper to taste. It’s tender, bright, a little puckery, and so fresh. I love it. Finished bistro salad in a bowl.

    Notes

    To make ahead: prep the onions and the dressing. Chop the greens. Store everything separately in the fridge, and assemble the amount you need just before serving! This works really well as a make-ahead side salad for dinners throughout the whole week. I would double the dressing and then just buy a bunch of greens and throw my 2-4 person salads together every night throughout the week.

    If you want to scale this up, you should have enough dressing for a 6-8 serving salad; just add another romaine heart and use a full head of butter lettuce instead of half.

    You can use another oil if you want, but I like canola for the neutral flavor – it keeps the dressing very mild.

    • Prep Time: 45 minutes
    • Category: Salad
    • Method: Chop
    • Cuisine: French-Inspired

    Keywords: bistro salad, french salad, side salad

    Other Things To Know About This Bistro Salad

    Salad with lettuce, fresh herbs, and pickled onions in a bowl.

    What Makes This a Bistro Salad?

    To my knowledge, this is generally what I understand to be a French Bistro Salad – or a simple green salad that is served in cafes and bistros around France. Liz brought this as the salad for our French dinner club night! And none of us are French, so we’re just doing our best out here to learn and borrow some French sophistication which is why I’m not necessarily going to call this a “French Bistro Salad” in case we are way off the mark.

    In general, I just like to think of this as a lightly dressed pile of greens that mentally takes you to a much fancier place (BISTRO LIFE!) and complements almost any dish on any plate. If you have more context on French Bistro Salads in general, feel free to pop your thoughts into the comments. 🙂

    What Else Could You Add To This Salad?

    If you’re feeling extra, a couple ideas that seem really solid:

    • toasted nuts like walnuts
    • goat cheese crumbles
    • shaved Parmesan cheese
    • golden crispies (really, just an excuse to make a big batch of these)
    • thinly shaved vegetables or fruits – squash, cucumber, apples

    Do You Have To Use Canola Oil?

    No, you don’t. The reason it’s used here is because it’s a neutral-flavored oil. But I will say, I have made this with olive oil and it’s delicious. My understanding is that part of the key to a French bistro salad is a very light dressing that doesn’t overpower the greens, and of the two versions I made, I definitely preferred the canola oil dressing – the olive oil comes on a bit strong. But personally, I’m not too precious of a cook so I say any kind of oil (where you like the flavor of the oil) could work! Just remember that everything here is pretty delicate (the chives, the lettuce, the dill, etc.) so you don’t want any one thing to really take over the salad.

    How Long Does This Keep?

    Not long, especially after you mix it. Those leaves start to get soggy pretty quickly, so I would recommend tossing the salad up within 5-15 minutes of serving. The elements will all keep individually for several days in the fridge, so keep them separate in the fridge and you’ll be good to go!

    How Great Is Liz?

    VERY GREAT! She is my salad-famous friend, the one we always go to for ideas on making vegetables great. Thanks, Liz! ♡

    Liz’s Bistro Salad: Frequently Asked Questions

    Can I use any salad greens here?

    Tender greens, like butter lettuce and romaine, really work best here so that the salad doesn’t get overpowered in flavor from something like spinach or arugula.

    How long will the pickled onions last?

    Store them for 3-5 days in a sealed jar in the fridge!

    Can this salad be meal prepped?

    Sure! The elements will all keep individually for several days in the fridge, so keep them separate in the fridge, mix things together right before enjoying, and you’ll be good to go!

    Source link