Tag: Recipe

  • Cheese Pinwheels Recipe

    Cheese Pinwheels Recipe

    Our easy cheese pinwheels made with puff pastry, two cheeses, and roasted red peppers are such a delicious appetizer! These cute little pinwheels fly off the plate!

    Cheese Pinwheels

    These puff pastry pinwheels are high on my list of best hors d’oeuvres. They are simple, pretty on the plate, taste incredible, and are perfect for making in advance! In our recipe below, we spread puff pastry with Boursin cheese, add lots of parmesan, and top with roasted red pepper for sweetness and color.

    I love them so much, and based on how quickly these disappear at parties, I can tell you my friends and family love them, too. Serve these alongside other popular appetizers, like red pepper hummus, classic shrimp cocktail, and tomato bruschetta.

    Key Ingredients

    • Puff Pastry: Use 1 sheet of frozen puff pastry, thawed. A standard box usually contains 2 sheets. I used Pepperidge Farm in the photos, but any brand will work! I thaw my puff pastry sheet in the fridge overnight. You can also thaw it on the counter. It should be ready in about 1 hour. I also use puff pastry to make quick and easy chocolate croissants, which would be the perfect way to use that leftover sheet.
    • Cheese: I use two cheeses in these. First, something creamy like garlic and herb Boursin cheese (it’s so delicious). Goat cheese or even herbed cream cheese are good substitutes. Then, I sprinkle grated parmesan cheese over the filling. Pecorino cheese or even a sharp cheddar work, too.
    • Roasted Red Peppers: People eat with their eyes, and rolling up chopped roasted red peppers makes these pinwheels so pretty and appetizing. I grab a few peppers from a jar of store-bought roasted peppers. You can use fresh diced red peppers if you don’t have them. In fact, can roll up just about anything. Think bacon, ham, caramelized onions, or different vegetables.
    • Fresh Herbs: These are optional, but I love adding something fresh and green to the pinwheel filling. Fresh parsley or basil are excellent.
    • Egg: So that the pinwheels bake up to be golden brown and pretty, we brush a little egg wash over them right before sliding them into the oven. It’s simple and made with beaten egg and water.

    How to Make Cheese Pinwheels

    Once your puff pastry is thawed, this recipe goes very quickly. Unfold the sheet, roll lightly to flatten any creases, and then add the filing. You’ll spread the soft Boursin cheese over the whole sheet and then top with parmesan, chopped roasted peppers, and herbs.
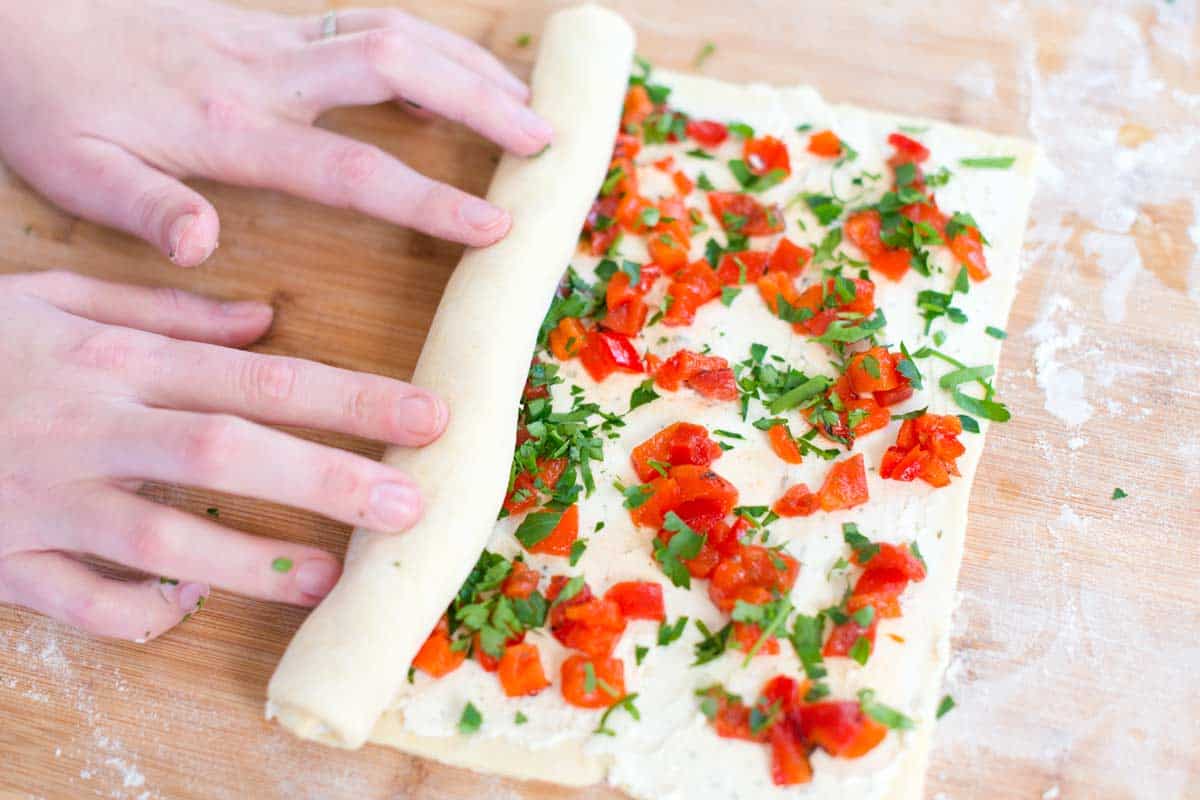
    How to Make Cheese Pinwheels: Rolling up the puff pastry.

    Roll the sheet up like a jelly roll, then slice it into your pinwheels. Place them onto a baking sheet, brush on some egg wash, and bake. They’ll take less than 20 minutes! Serve them hot or at room temperature.

    Cheese Pinwheels

    Cheese Pinwheels

    • PREP
    • COOK
    • TOTAL

    These easy pinwheels are the perfect appetizer or hors d’oeuvres! We use store-bought puff pastry, which makes them so easy! You will need thawed puff pastry, so leave it overnight in the fridge or on the counter for about 1 hour before making the pinwheels.

    Makes 20 Pinwheels

    You Will Need

    1 sheet frozen puff pastry, thawed

    1 large egg

    1 tablespoon water

    1/2 cup garlic and herb spreadable cheese, such as Boursin

    1/4 cup grated Parmigiano-Reggiano cheese

    1/2 cup roasted red peppers, chopped

    2 tablespoons chopped fresh parsley or basil

    Directions

      1Preheat the oven to 400°F (204°C). Line a baking sheet with parchment paper and set it aside.

      2Beat the egg and water in a small bowl with a fork or whisk and set aside.

      3Lightly flour your work surface. Unfold the pastry sheet, then lightly dust the top with flour. Use a rolling pin to roll lightly so the creases are flattened out (you don’t want to make the square much bigger).

      4Brush the square of pastry with egg wash. Evenly spread with the 1/2 cup of garlic and herb cheese, then sprinkle with the Parmigiano-Reggiano, peppers, and herbs.

      5Starting at the side closest to you, roll the puff pastry up like a jelly roll.

      6Cut into 20 slices, about 1/2 inch thick. A serrated bread knife works well for this.

      7Place pinwheel slices onto the baking sheet. Then, lightly brush the tops with egg wash. Bake for 14 to 18 minutes or until light golden brown. Serve warm or at room temperature.

    Adam and Joanne’s Tips

    • Puff pastry: Use 1 sheet of frozen puff pastry, thawed. A standard box usually contains 2 sheets. I used Pepperidge Farm in the photos, but any brand will work! I thaw my puff pastry sheet in the fridge overnight. You can also thaw it on the counter. It should be ready in about 1 hour.
    • Nutrition facts provided are estimates.

    Nutrition Per Serving
    Serving Size
    1 pinwheel
    /
    Calories
    93
    /
    Total Fat
    6.5g
    /
    Saturated Fat
    1.8g
    /
    Cholesterol
    13mg
    /
    Sodium
    83.5mg
    /
    Carbohydrate
    6g
    /
    Dietary Fiber
    0.3g
    /
    Protein
    2.7g


    AUTHOR:

    Adam Gallagher

    Adam and Joanne of Inspired Taste

    We are Adam and Joanne Gallagher, the creators of Inspired Taste. Established in 2009, Inspired Taste grew from a childhood dream into one of the internet’s most trusted recipe sites with hundreds of reliable recipes, step-by-step videos, and expert tips.More About Us

    Source link

  • Easy Margherita Pizza Recipe

    Easy Margherita Pizza Recipe

    My family’s favorite Margherita pizza recipe is simple to make with an authentic no-cook sauce, mozzarella, and fresh basil.

    Homemade Margherita Pizza

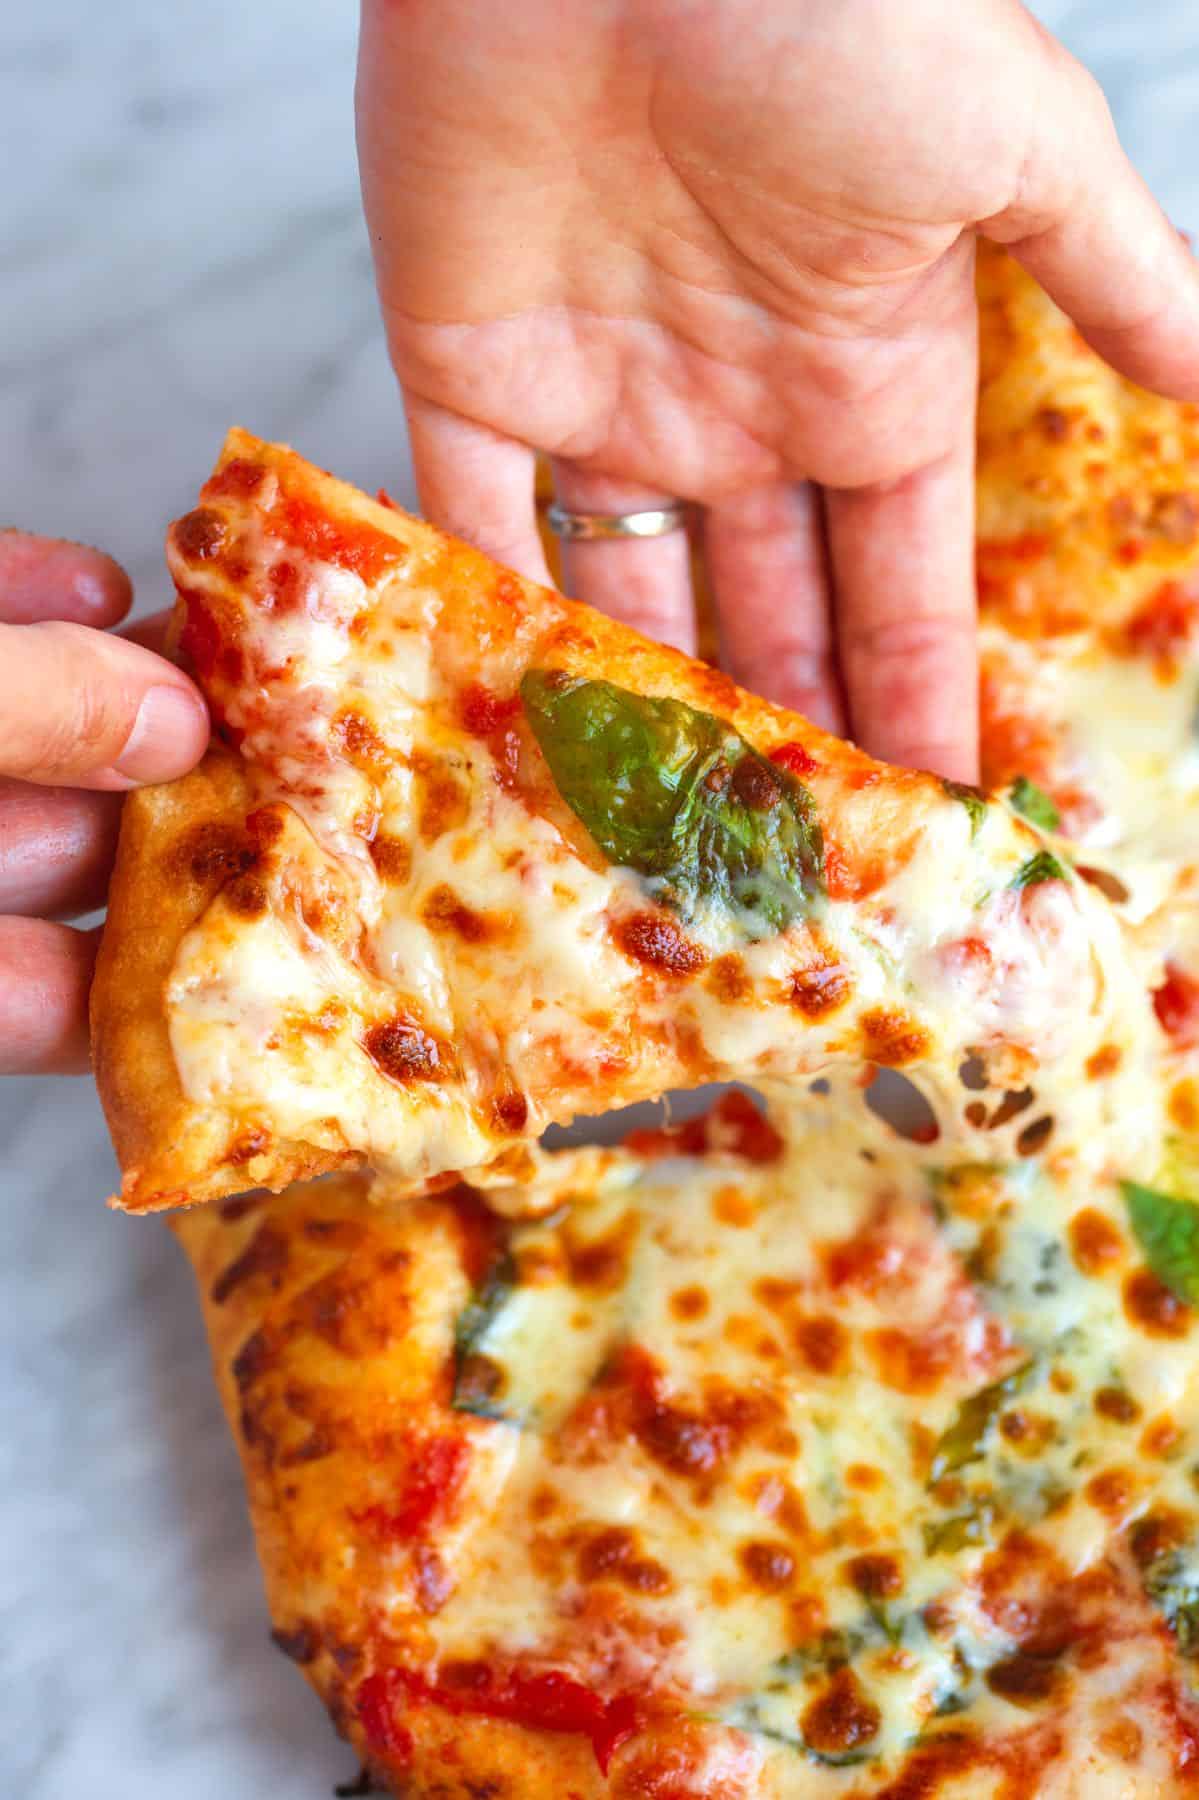
    My family goes bonkers for this homemade Margherita pizza. Like many Italian dishes, Margherita pizza (or pizza Margherita) is simple, fresh, and delicious. We use our favorite homemade pizza dough, but feel free to swap in your favorite or use store-bought dough instead!

    I love the authentic pizza sauce! It’s so simple to make, and you’ll have it ready in 5 minutes! For more pizza recipes, look at our equally simple cheese pizza, American-style pizza sauce, and this balsamic pear pizza, which is a bit different but still delicious!

    Key Ingredients

    • Pizza Dough: We love this bubby homemade pizza dough. It’s easy to make and perfect for home kitchens. Plus, you can whip it up the same day or let it sit overnight for a longer, slower rise. Your favorite store-bought dough will also work.
    • Tomatoes: Unlike American-style pizza sauce, Margherita pizza sauce is no-cooks and as simple as it gets: crush canned San Marzano (or fresh peeled tomatoes) and mix with olive oil and salt. It’s fresh and so delicious with the mozzarella and basil.
    • Mozzarella Cheese: Authentic pizza Margherita has fresh mozzarella. Use fresh, or do what we did in our photos and use shredded mozzarella instead. We love fresh mozzarella on pizza but sometimes find that when cooked in home ovens, it doesn’t melt and brown as quickly and instead releases too much liquid. Shredded mozzarella doesn’t have the same problem.
    • Fresh Basil: This doesn’t really count as Margherita pizza without the basil. I add it before baking and scatter a few extra fresh leaves for serving.

    Find the full recipe with measurements below.

    Margherita Pizza

    How to Make Margherita Pizza

    Tip 1: Use a really hot oven. At least 30 minutes before you bake your pizza, preheat the oven to 450°F. If you have one, place a pizza steel or pizza stone into the oven before preheating.

    Tip 2: Make our no-cook sauce. While the oven preheats, you can make the quick, no-cook pizza sauce. Use your hands or a fork to crush whole peeled tomatoes and stir in olive oil and salt. We use canned San Marzano tomatoes because they taste sweet and flavorful.

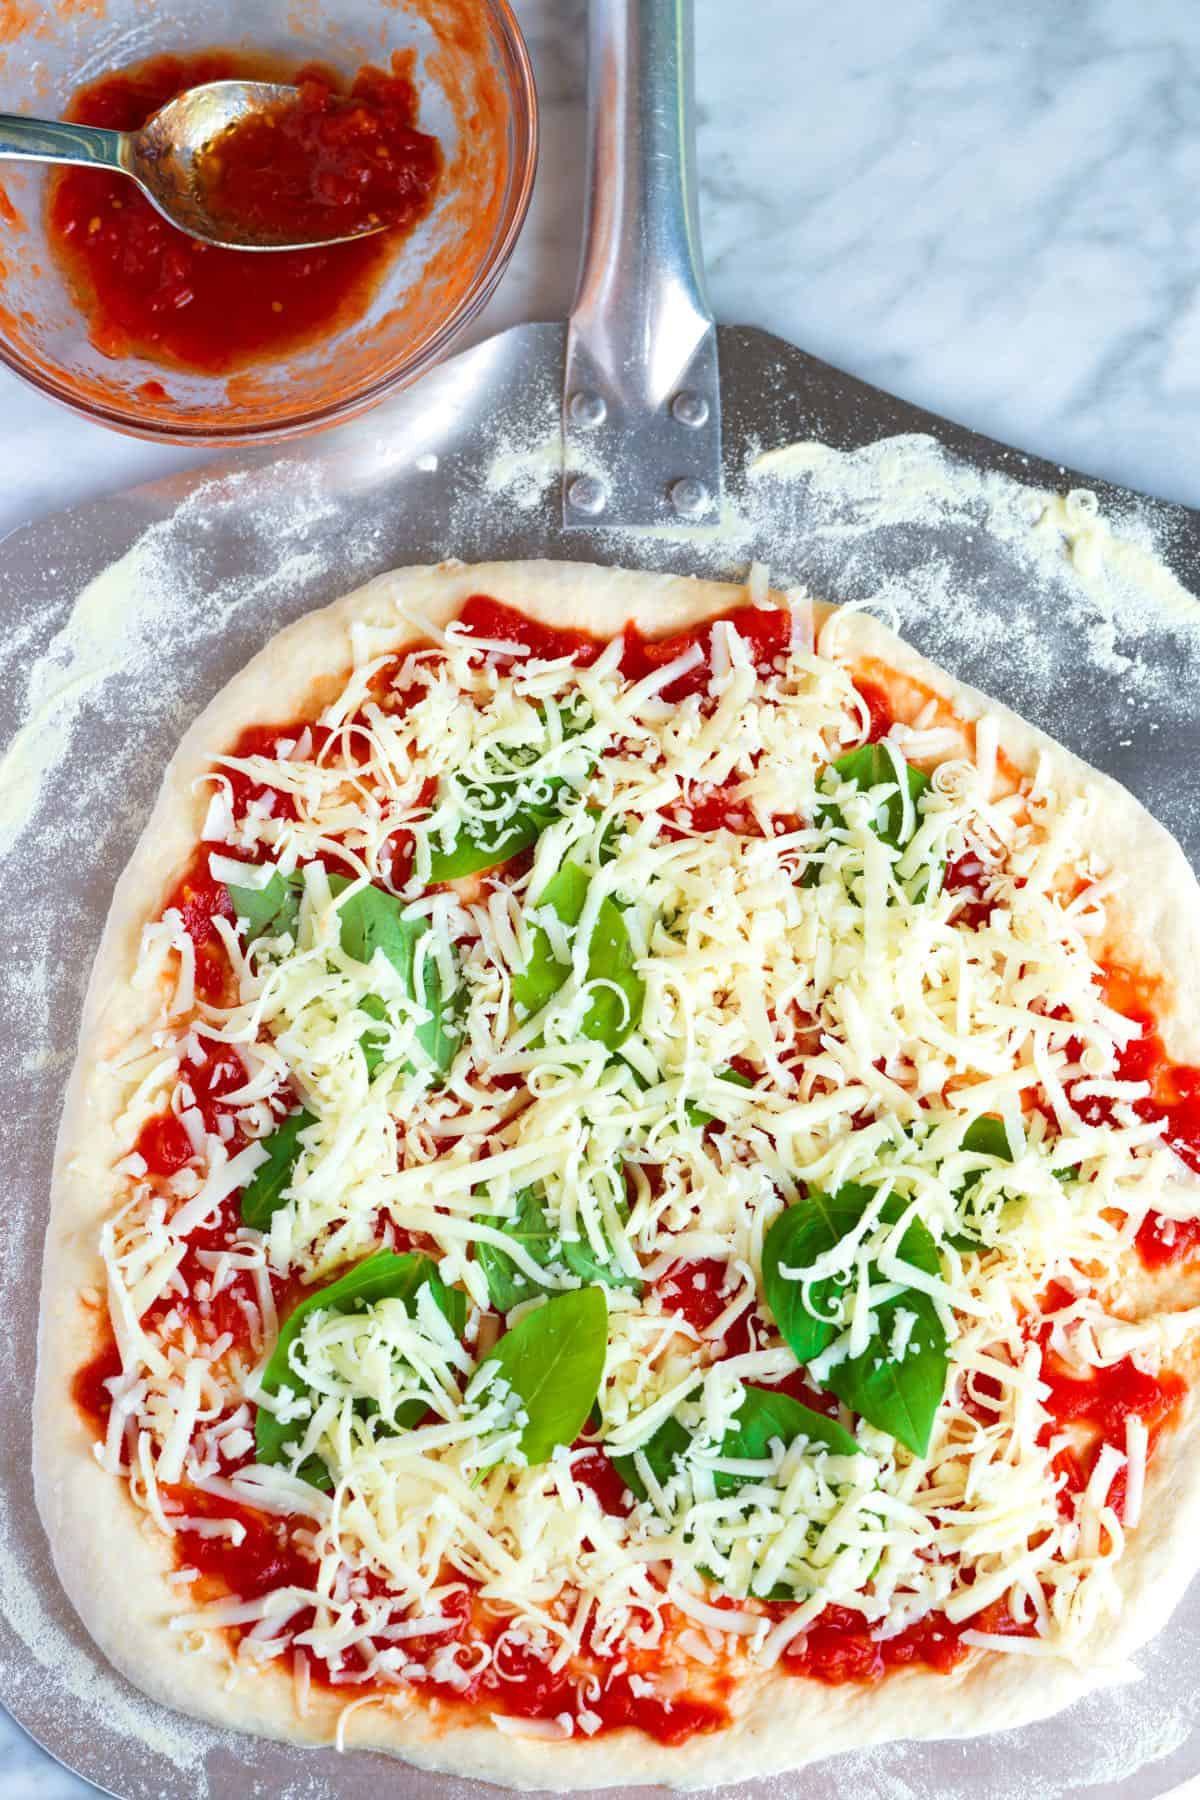
    Assembling margherita pizza with an authentic fresh tomato sauce and mozzarella cheese

    Tip 3: Don’t overdo the toppings. When your oven is ready, form and stretch your pizza dough into a large round, and then place it onto a pizza peel or pizza baking pan. Add a thin layer of Margherita pizza sauce and top with mozzarella cheese and fresh basil. Italian pizza usually has less toppings/cheese than American-style, so hold back a little.

    Tip 4: Serve with olive oil and basil. Bake your pizza until the crust is bubbly and the cheese is beginning to brown. Then, serve with a drizzle of olive oil and fresh basil scattered on top.

    Easy Margherita Pizza

    Easy Margherita Pizza

    • PREP
    • COOK
    • TOTAL

    This is our family’s favorite way to make Margherita pizza at home! We use our favorite homemade pizza dough, an authentic no-cook pizza sauce, mozzarella, and basil. We highly recommend our recipe for homemade pizza dough, but store-bought dough works. Use fresh mozzarella instead of the shredded mozzarella cheese in our recipe for classic Italian pizza. We love fresh mozzarella on pizza but sometimes find that when cooked in home ovens, it doesn’t melt and brown as quickly and instead releases too much liquid. Shredded mozzarella doesn’t have the same problem, so that’s what we end up using instead.

    Makes 1 large pizza

    You Will Need

    1 batch homemade pizza dough or use store-bought dough

    1/2 cup San Marzano whole peeled tomatoes from a can

    2 teaspoons olive oil

    Pinch fine sea salt

    1 cup (57g) shredded whole milk mozzarella or use fresh mozzarella

    Handful fresh basil leaves

    All-purpose flour, for forming dough disc

    Semolina flour, for dusting pan

    Directions

      1At least 30 minutes before you plan to bake your pizza, preheat the oven to 450° Fahrenheit (232°C). If you have one, place a pizza steel or pizza stone into the oven before preheating. Personally, we use a higher temperature, see the tips section for our thoughts on what temperature is best for baking pizza at home.

      2If your pizza dough is cold, allow it to warm at room temperature for 20 to 30 minutes.

      3While the oven preheats, make the sauce. In a bowl, crush the tomatoes with the olive oil and a pinch of salt. Taste, and then season with more salt as necessary.

      4When ready to bake your pizza, prepare a pizza peel or pizza pan by dusting it with semolina flour.

      5Dust a clean work surface with all-purpose flour, and then form your pizza dough into a round, large enough to fit your pizza peel or pan. To stretch the dough, avoid rolling it out, as this can flatten the bubbles that have formed. Instead, use your fingers to make dimples in the dough, starting from the center and working outwards. Carefully stretch and push the dough to fit your pizza pan or peel. Use a light touch to maintain as many air pockets in the dough as possible.

      6Transfer the dough round to your pizza peel or pan, and reform it if it shrinks back a bit.

      7Spread a light layer of pizza sauce over the pizza, leaving a thin edge untouched for the crust. Scatter the cheese and basil over the sauce.

      8Bake until the crust is set and golden brown and the cheese has melted with golden spots all over, 6 to 15 minutes, depending on oven temperature. Remove from the oven, scatter over some more fresh basil, cut, and serve.

    Adam and Joanne’s Tips

    • Oven temperature: We recommend 450° Fahrenheit (232°C) in the recipe, but if you are comfortable with it, increasing the temperature to 550° Fahrenheit (288°C) will provide even better results. If you have a vented hood above your oven, turn it on high. When our oven is heated to such a high temperature, the fire alarm occasionally goes off due to the hot air that escapes when we open our oven door. It’s not a problem, other than the noise, and in our experience, it is remedied with a few fans of a dish towel near the alarm, but it is something to consider. If 550° Fahrenheit (288°C) is too high for you, feel free to use a lower temperature. However, keep in mind that this pizza bakes best between 425° Fahrenheit and 550° Fahrenheit (218°C to 288°C). The lower the temperature, the longer it will take to bake and the less bubbly it will be.
    • The nutrition facts provided below are estimates.

    Nutrition Per Serving
    Serving Size
    1 of 8 slices
    /
    Calories
    158
    /
    Total Fat
    4.7g
    /
    Saturated Fat
    2g
    /
    Cholesterol
    11.1mg
    /
    Sodium
    439mg
    /
    Carbohydrate
    22.2g
    /
    Dietary Fiber
    1.2g
    /
    Total Sugars
    0.7g
    /
    Protein
    6.5g


    AUTHOR:

    Joanne Gallagher

    Adam and Joanne of Inspired Taste

    We are Adam and Joanne Gallagher, the creators of Inspired Taste. Established in 2009, Inspired Taste grew from a childhood dream into one of the internet’s most trusted recipe sites with hundreds of reliable recipes, step-by-step videos, and expert tips.More About Us

    Source link

  • Incredible Turkey Brine Recipe

    Incredible Turkey Brine Recipe

    Use this incredible turkey brine recipe for amazing flavor, soft and tender meat, and crispy skin.

    Making Turkey Brine

    If you’re on the fence about brining turkey, just do it! This turkey brine is a game-changer, adding incredible flavor and making your roasted turkey savory and delicious while tenderizing the meat (trust me on this one).

    We teamed up with our friend, Chef Richard Hattaway, to develop this easy turkey brine recipe, and we couldn’t be more thrilled with the results. I was determined to make sure that brining was truly worth the effort, and I am 100% confident that this brine delivers. It makes the best roasted turkey I’ve ever had, and you can bet I’ll be using it for every Thanksgiving turkey moving forward.

    Key Ingredients

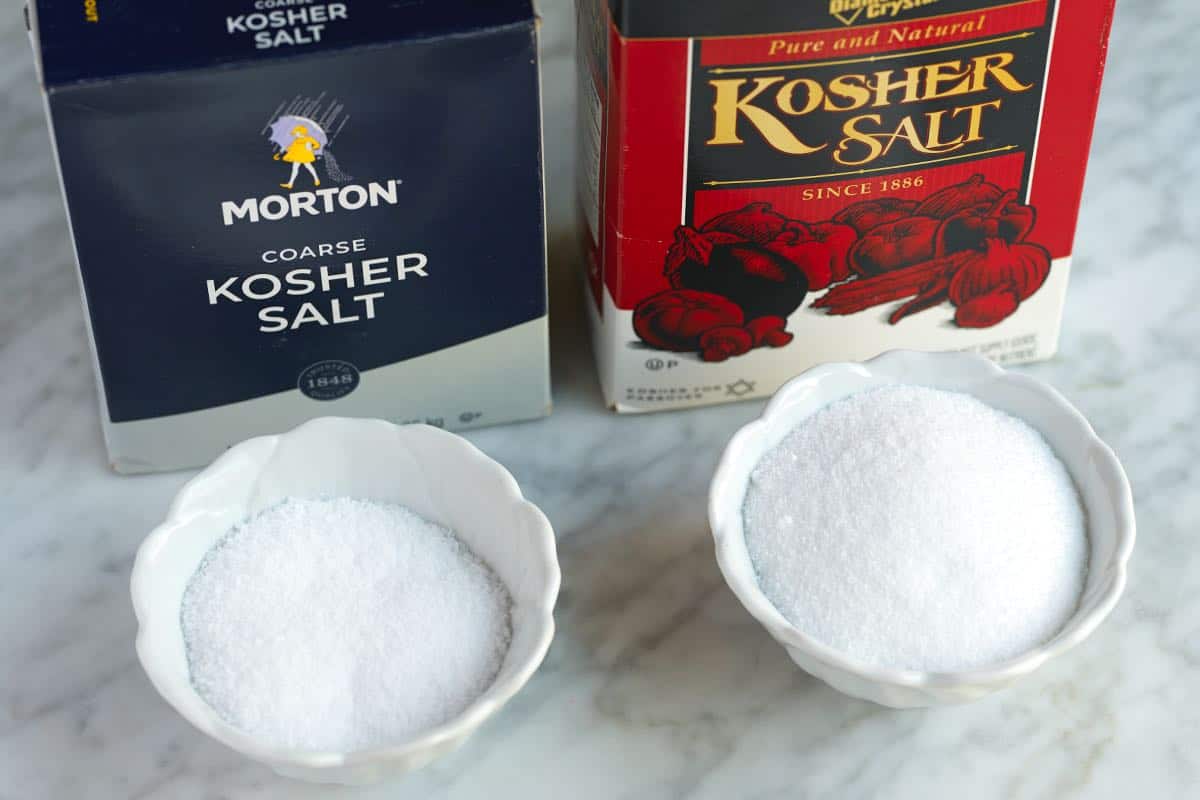
    • Salt: I use kosher or good-quality sea salt for my turkey brine. Avoid using iodized salt, as it can give the turkey a metallic taste. When measuring salt for your brine, use a scale or our specific volume measurements in the recipe below (we have provided them for Morton’s and Diamond Crystal). Look at my photo below. Both bowls are holding 4.5 ounces of salt. The Diamond Crystal salt flakes are fluffier and bigger, taking up more space than Morton’s salt. You don’t need to worry about this if weighing your salt, but if you use volume measurements (cups/tablespoons), you must know about it.
    • Sugar: If I’m going to brine a turkey, I want it to be flavorful. The brown sugar added to our brine recipe helps tremendously with this. The combination of salt and sugar in our brine recipe pulls some liquid from the turkey meat and replaces it with the brine, adding so much flavor.
    • Worcestershire Sauce: This adds a lovely savory, umami flavor to our brine (and ultimately the turkey meat).
    • Pepper: Richard adds a lot of black pepper to his brine, and I love it. Black pepper does a fantastic job of convincing you something is well-seasoned (that’s why so many chefs always season with salt AND pepper when cooking).
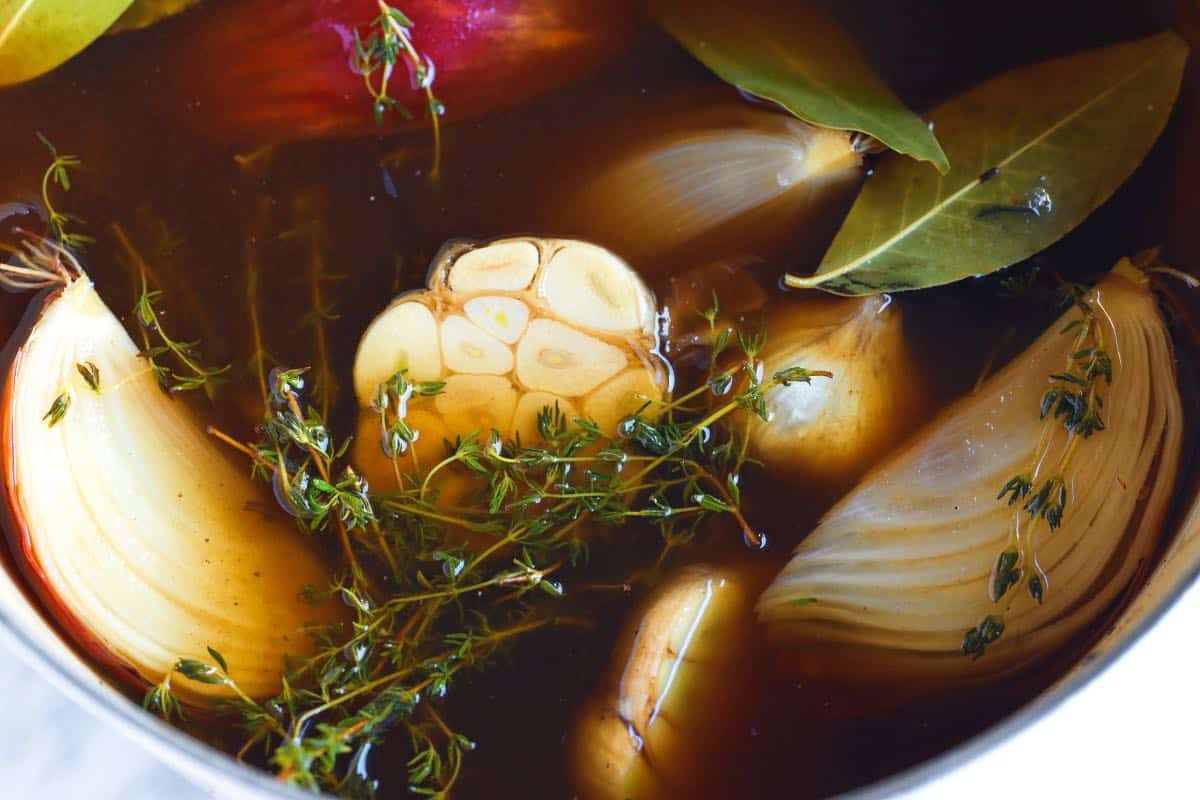
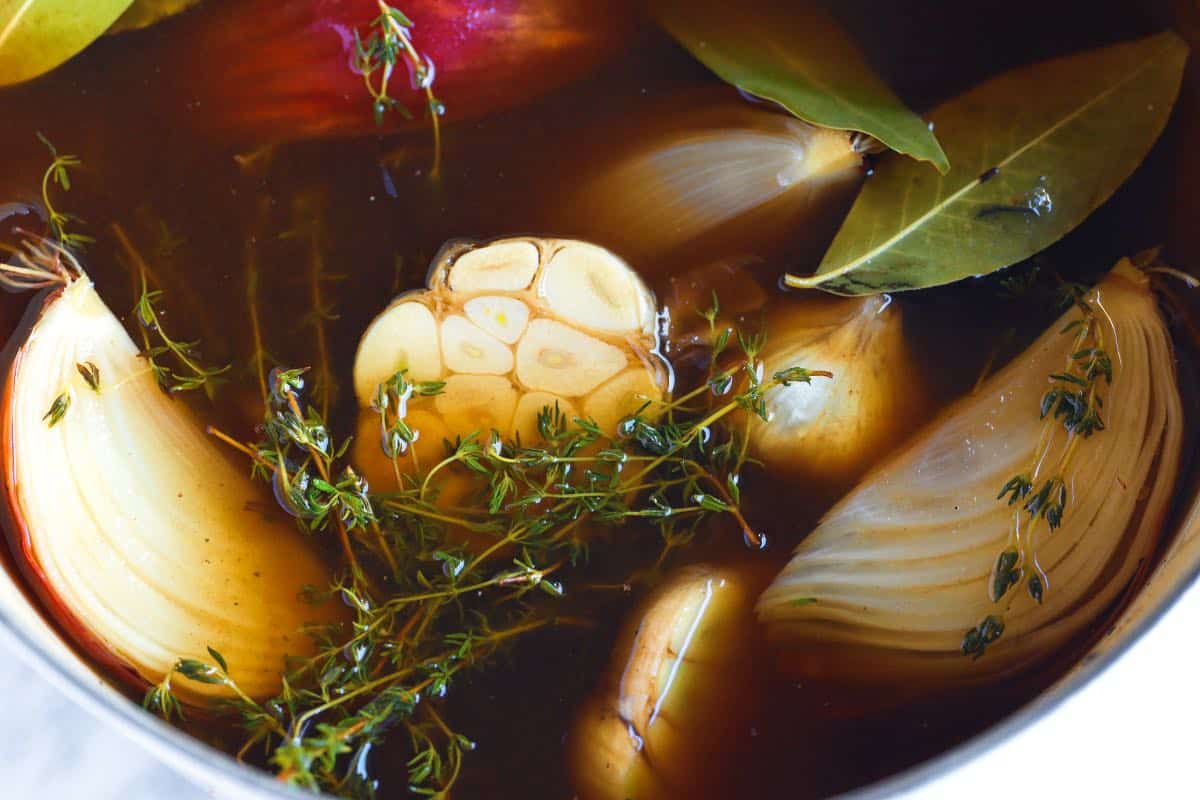
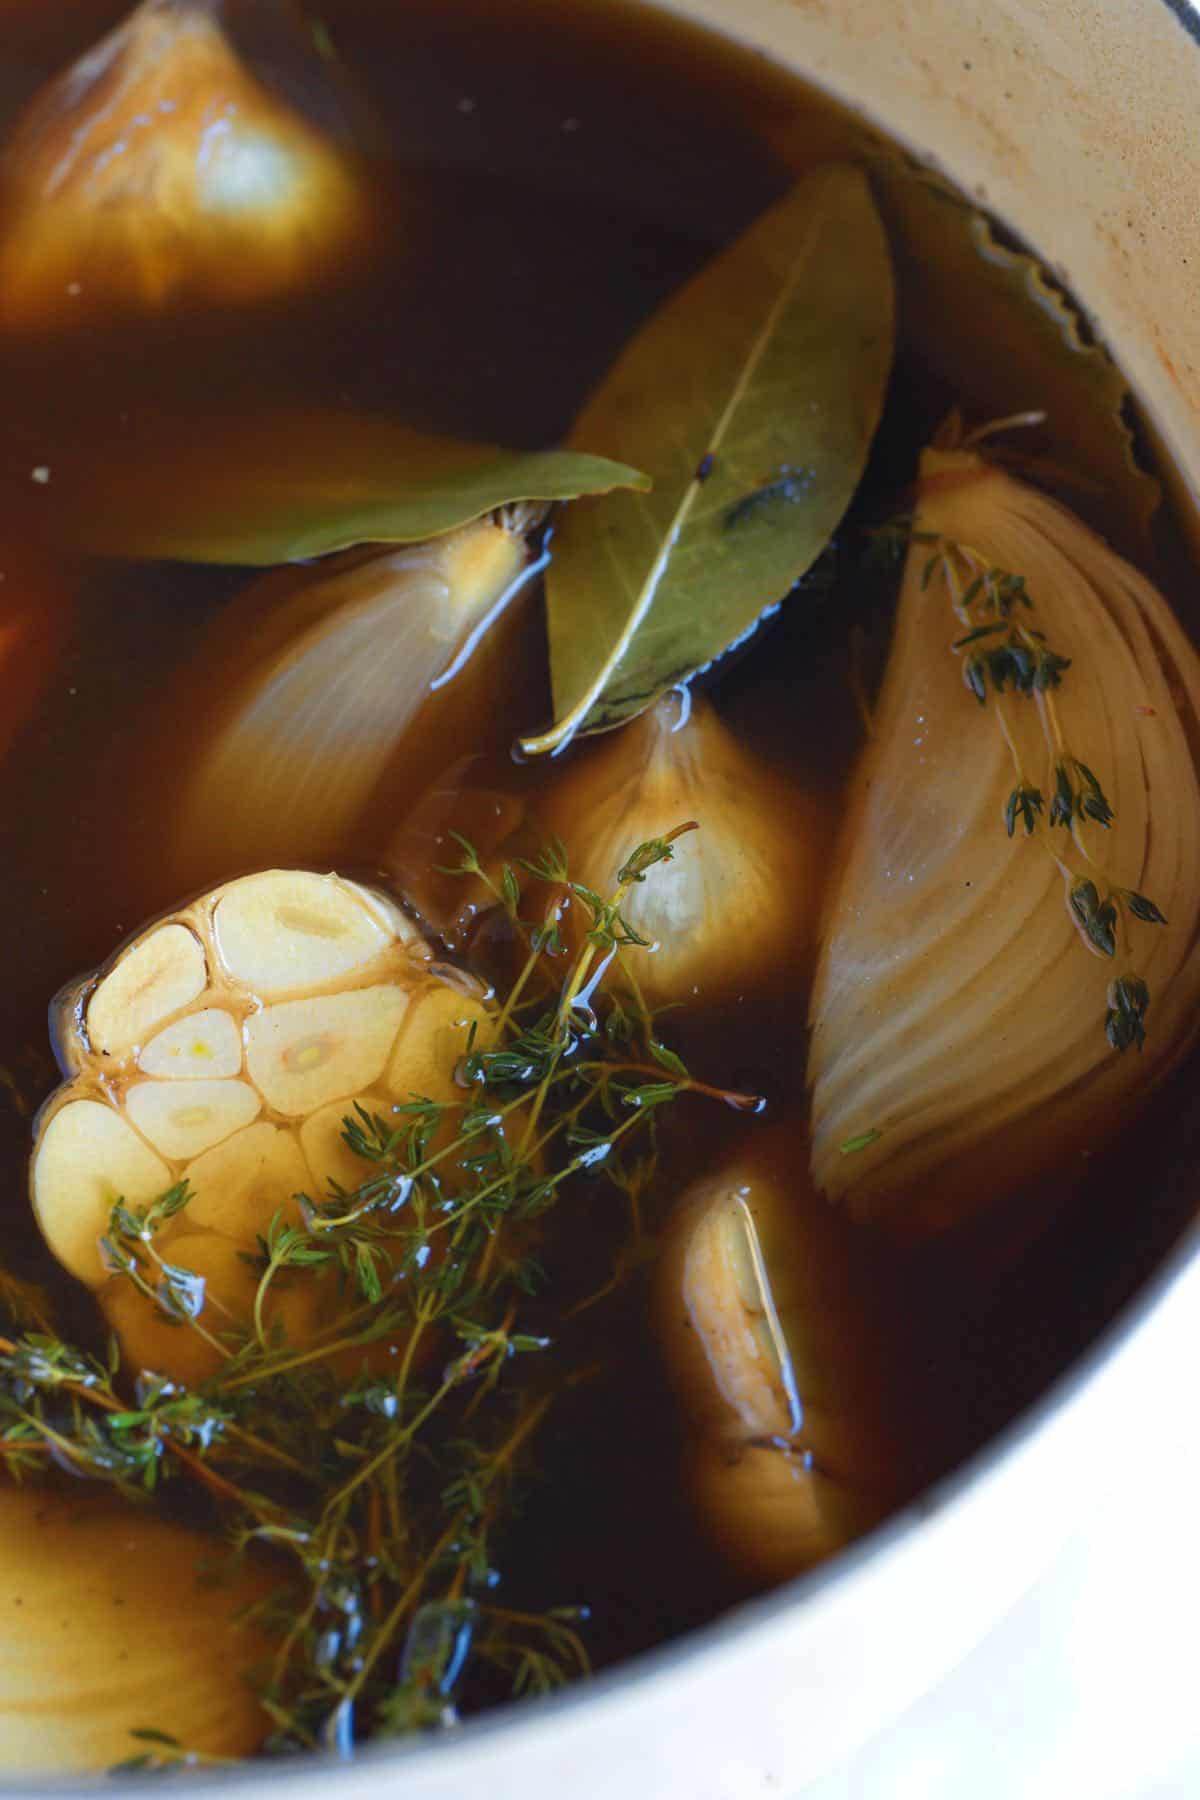
    • Garlic: This brine avoids citrusy flavors and focuses on savory flavors instead. Whole heads of garlic, lots of fresh thyme, and bay leaves make your turkey taste amazing.

    Find the full recipe with measurements below.

    Difference between Morton and Diamond Crystal salt for brine

    How to Brine a Turkey

    Tip 1: Brine turkey for 2 days. Turkeys are large, and the brine needs time to work through the bird. If you do not have 2 days, we still recommend leaving your turkey in the brine for at least 1 day (trust me, 1 day in this brine will produce a more flavorful turkey than not brining at all).

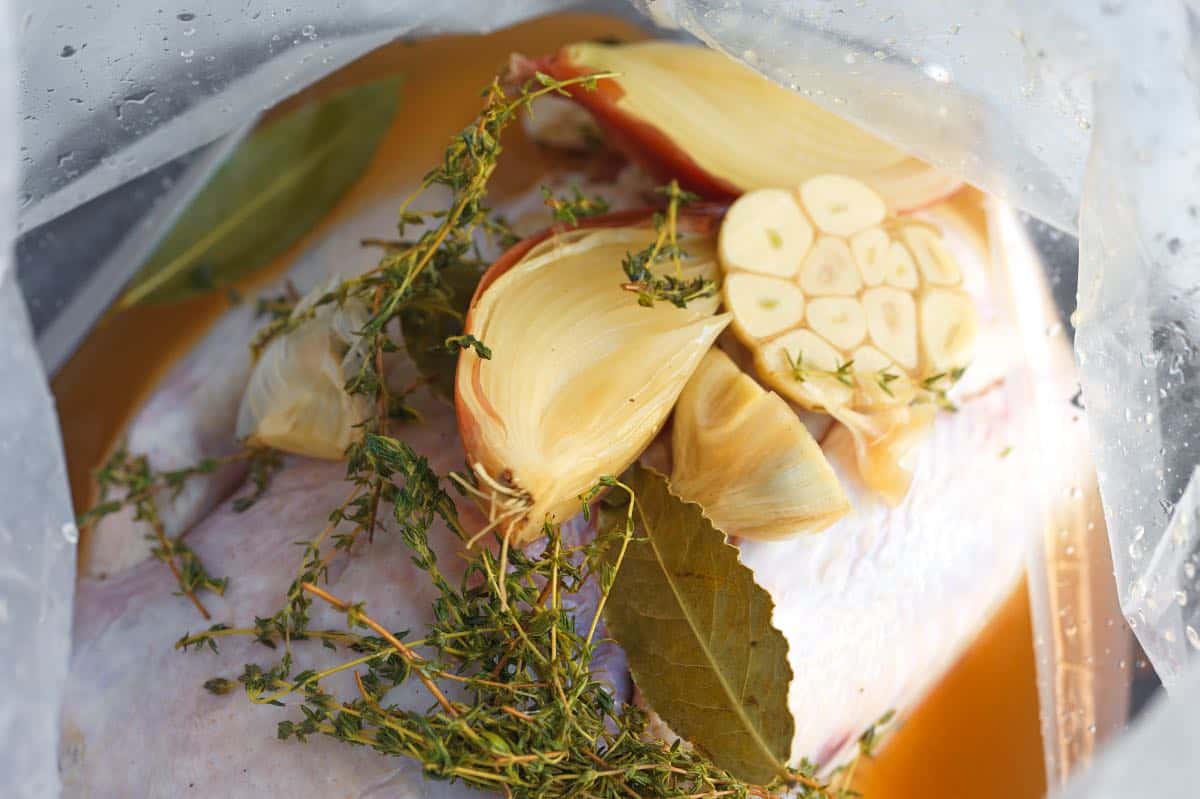
    Tip 2: Use a large, heavy-duty brine bag. These are sold in kitchen stores and online. You can also use a 5-gallon bucket with a food-safe liner. Don’t worry if the turkey is not entirely submerged (ours wasn’t in our video or photo below). If this happens to you, flip the turkey in the brine halfway through brining.

    Adding turkey brine to a brine bag

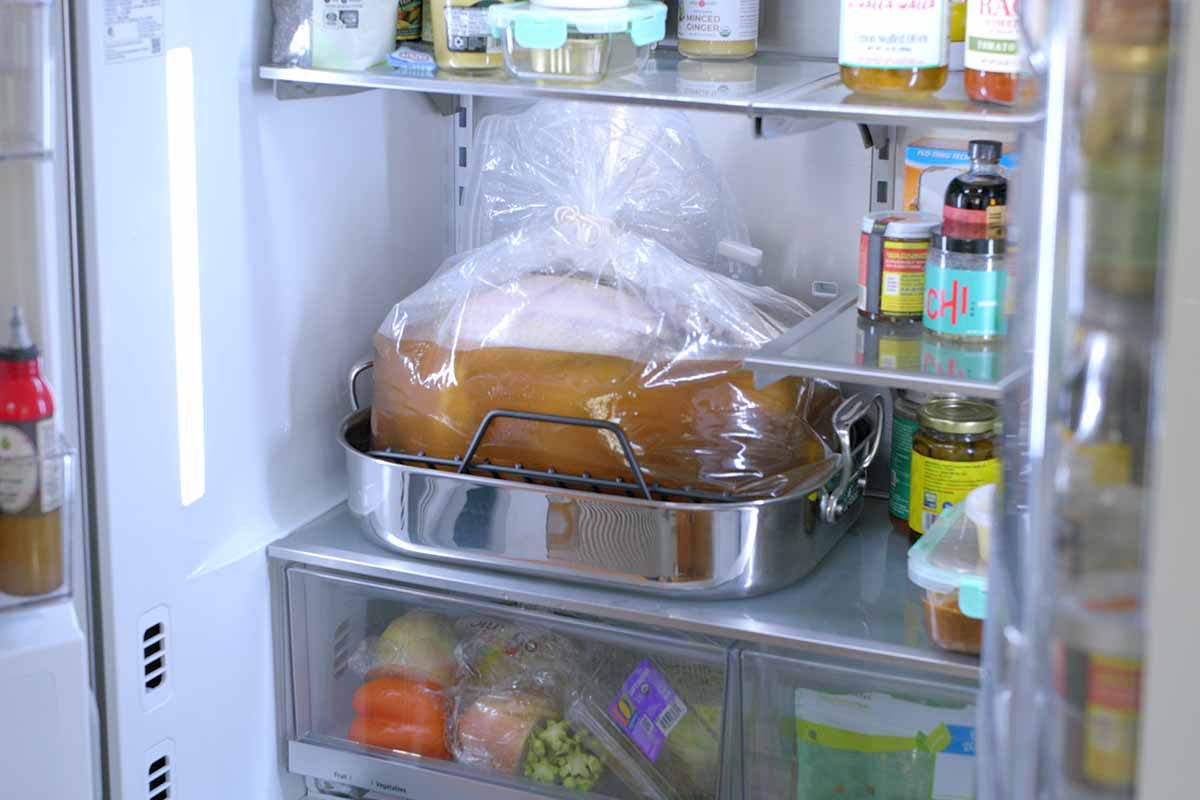
    Tip 3: Store turkey in the brine at or below 40°F (4°C). If you have the space (or a second fridge), you can brine the turkey in your refrigerator. Place your bag or bucket into the fridge. I put my brine bag into a roasting pan. If you do not have enough space, use a brine bag and place it in a well-insulated, ice-filled cooler. If you use a cooler, check the temperature of the ice water regularly to ensure that it stays below 40°F (4°C). Here’s the USDA’s guide for safely brining a turkey.

    While I use my roasting pan to hold my brine bag when using the fridge, the pan doesn’t fit inside my cooler, so I put the bag directly into the ice without a pan underneath. Brine bags are thick, so you should not have any issues with them leaking (just keep something sharp away from them).

    Turkey brining in the fridge

    Tip 4: Don’t rinse the turkey after brining it. You might see some recipes call for rinsing, but it’s not necessary with our recipe below. We’ve done side-by-side taste tests with rinsed and unrinsed turkeys and found no difference in saltiness. I promise your turkey won’t be over-salted!

    Tip 5: Air-dry in the fridge overnight. If you are like me and love crispy turkey skin, after removing it from the brine, let your turkey air-dry in the fridge overnight. I place it on a roasting rack inside a roasting pan or rimmed baking sheet. I love this step because my brine is out of the way, and my turkey is perfectly brined and ready to roast the next day.

    Thanksgiving Turkey Timeline

    If you are like us, you don’t roast many turkeys throughout the year. Most of us really only roast them around the holiday season.

    Here’s our timeline for thawing, brining, and roasting turkey. I will use Thursday as our goal since that’s how Thanksgiving falls in the US, but you can easily move the days around to fit your intended roasting day.

    This timeline assumes a thawed turkey. To safely thaw a turkey, do it in the refrigerator. Plan on 24 hours in the fridge for every four to five pounds of turkey–so a 16-pound turkey will take four days to thaw.

    • Monday: Brine the turkey
    • Wednesday night: Remove turkey from brine, place it onto a rack set inside a roasting pan or rimmed sheet pan, and refrigerate overnight
    • Thursday: Roast the turkey, allowing approximately 14 minutes per pound, in an oven preheated to 325°F (162° C). Here’s our roast turkey recipe and I highly recommend this turkey gravy!
    My Favorite Turkey Brine

    Incredible Turkey Brine

    • PREP
    • COOK
    • TOTAL

    Use this turkey brine for turkey with amazing flavor, soft and tender meat, and crispy skin. We highly recommend it for any turkey you’re preparing, from a whole bird to individual pieces like breasts and legs. For a whole turkey, we recommend brining for two days. If you’re using just turkey parts, a one-day brine is all you need.

    2 gallons, up to 20-pound turkey

    Watch Us Make the Recipe

    You Will Need

    1 (12 to 20 pound) turkey, thawed

    2 gallons (7.5L) cold water

    4.5 ounces (128g) kosher salt or good quality sea salt; see tips for volume measurements

    3/4 cup (160g) packed brown sugar

    1/4 cup (60ml) Worcestershire sauce or Pickapeppa sauce

    1 tablespoon (10g) coarse ground black pepper

    1 onion, quartered

    2 whole bulbs garlic, cut in half

    1 bunch fresh thyme

    5 bay leaves

    Directions

      1Make the brine: In a large pot, combine 2 quarts (8 cups) of water, salt, brown sugar, Worcestershire sauce, black pepper, onion quarters, garlic, thyme, and bay leaves. Bring to a simmer over medium-high heat and cook for 5 to 10 minutes or until the salt and sugar have dissolved completely. Allow the brine to cool to room temperature.

      2Combine turkey and brine: Place the turkey in a lined 5-gallon bucket or a large, food-grade brine bag. Carefully pour the cooled, room-temperature brine over the turkey, then add the remaining 6 quarts (24 cups) of cold water. If using a brine bag, be careful to hold the sides of the bag so they don’t flop down as you pour—another set of hands is very helpful here!

      3Brine for 2 days: Squeeze as much air as possible from the liner or bag and secure it shut to ensure the turkey is as submerged in the brine as possible (if the brine does not completely cover it, it’s okay). Place the bucket or brine bag in the refrigerator or an ice-filled cooler. Brine the turkey for two days. To ensure all areas of the turkey are fully submerged in the brine, flip it halfway through the two-day brining period.

      4Remove and air-dry: After two days, remove the turkey from the brine. Do not rinse the turkey. Instead, pat it dry with paper towels and place it on a roasting rack set inside a rimmed baking sheet. Refrigerate the turkey, uncovered, overnight. This air-drying process is crucial for achieving crispy, golden-brown skin. The next day, roast your turkey in an oven preheated to 325°F (162° C) with our delicious turkey butter for an incredible result (use this turkey recipe).

    Adam and Joanne’s Tips

    • Salt: Diamond Crystal salt flakes are fluffier and lighter than Morton’s kosher salt. For Diamond Crystal kosher salt: use ¾ cup + ½ tablespoon. For Morton’s kosher salt: use ⅓ cup + 2 ½ tablespoons.
    • Brine bag: Place in a roasting pan to prevent spills. We recommend using a heavy-duty brine bag.
    • Cooler: Check ice water temperature regularly to ensure it stays below 40°F (4°C).
    • Crisp skin: For best results, air-dry the brined turkey overnight in the fridge. If you are out of time, pat dry before roasting.
    • Pre-brined turkeys: Some store-bought turkeys are already pre-brined, injected with a solution of water, salt, and other flavorings. While most recipes would advise against brining these turkeys again, ours is different. We’ve intentionally developed a lower-salt brine that allows you to safely re-brine your turkey without the risk of it becoming too salty. You will still benefit from our brine and its savory flavor. If you are concerned, you can reduce your brine time to 1 day and still achieve great results.


    AUTHOR:

    Joanne Gallagher

    Source link

  • Seriously Good Chicken Tortilla Soup Recipe

    Seriously Good Chicken Tortilla Soup Recipe

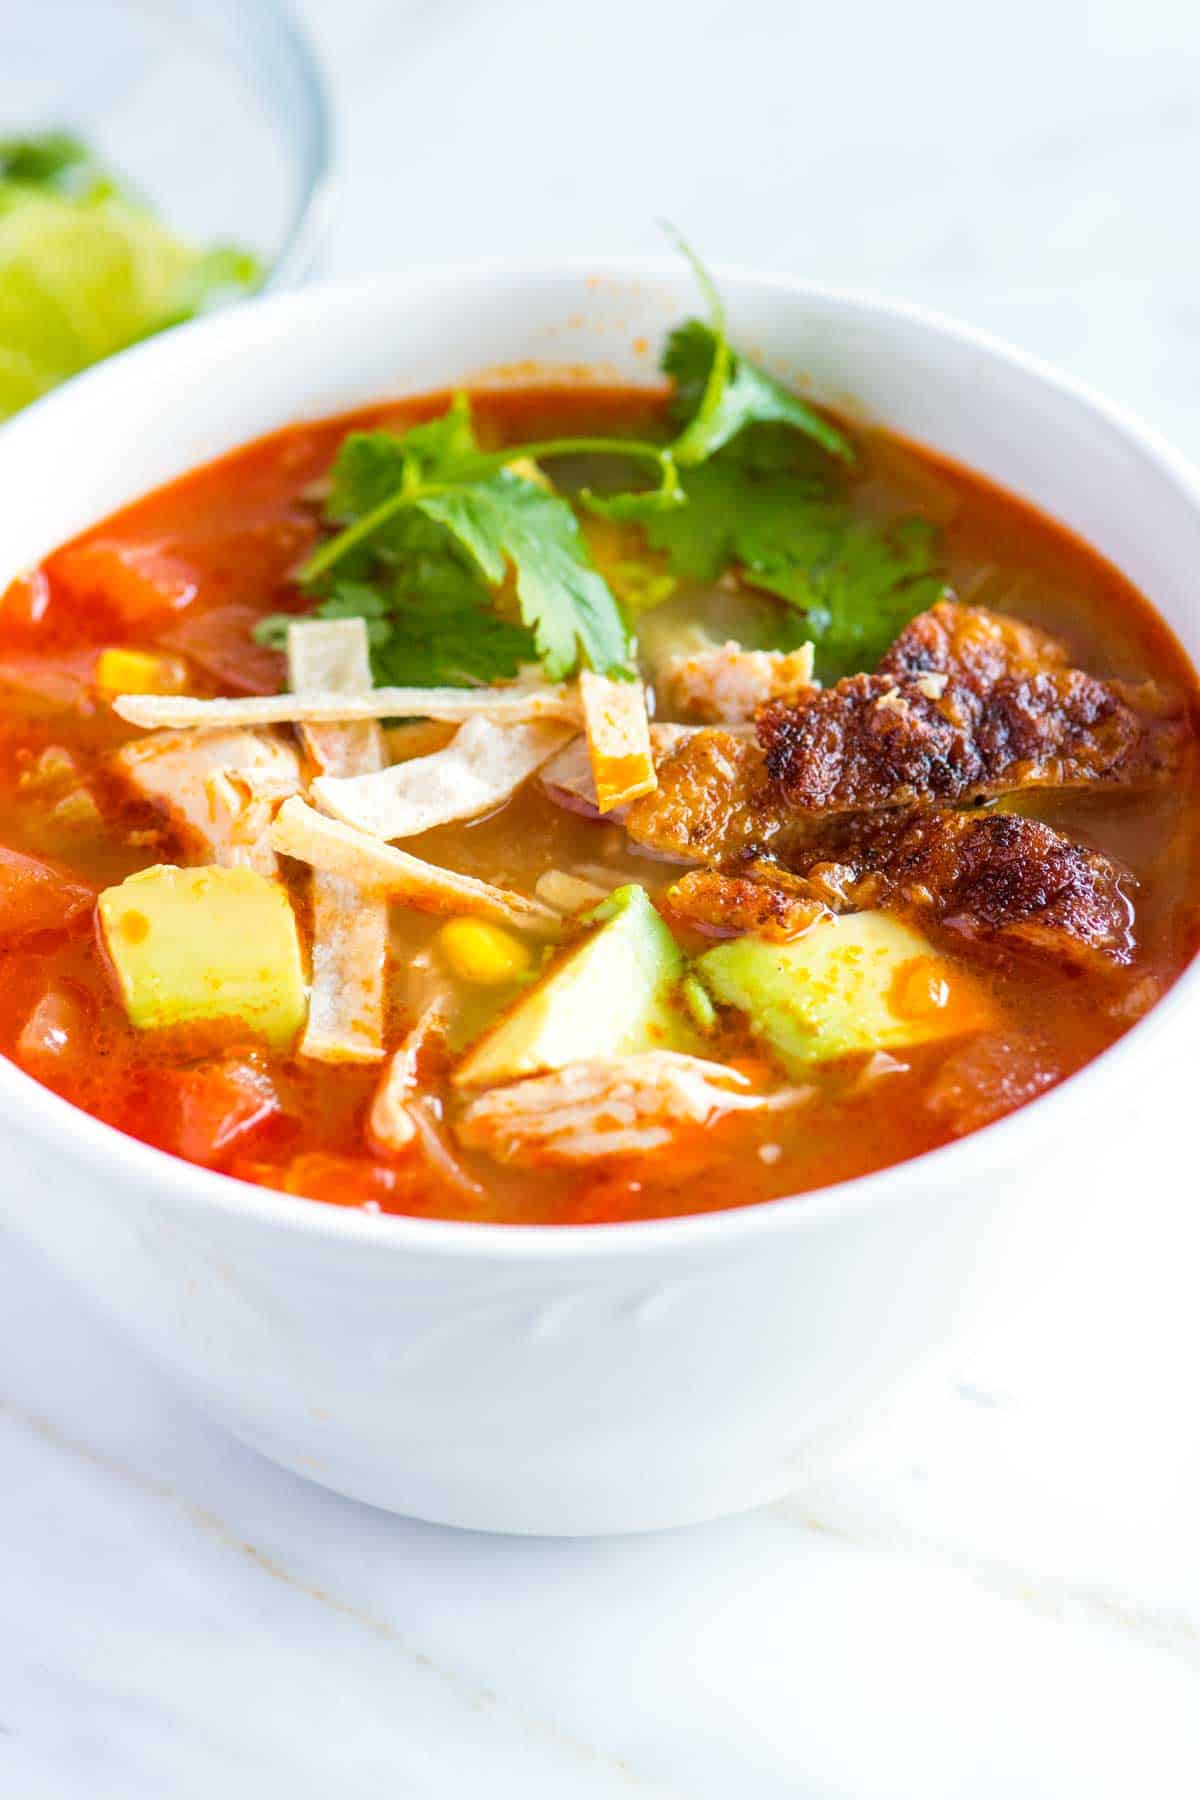
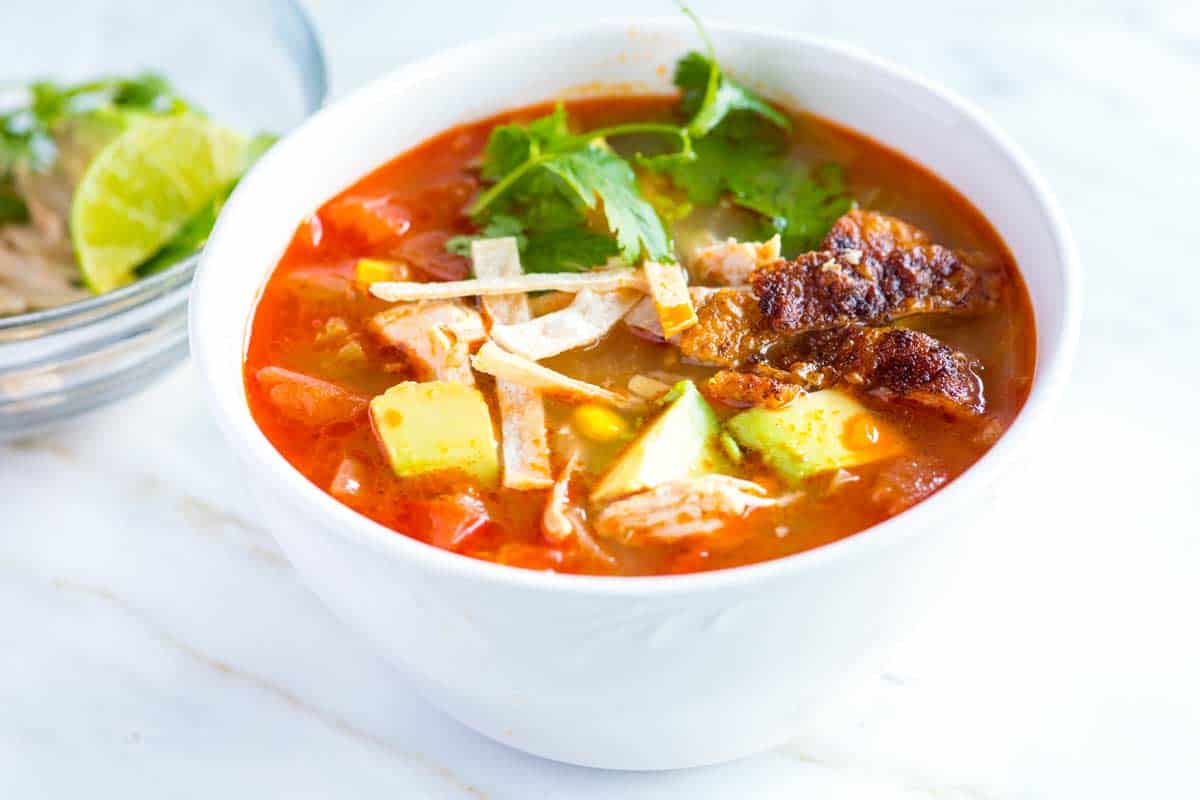
    This is my all-time favorite chicken tortilla soup recipe. Tender chicken thighs, corn tortillas, and the perfect blend of spices make it unbelievably good.

    Homemade Chicken Tortilla Soup

    If you love a hearty, comforting soup, you’re going to love this. Our family has been making it for years, and it always gets rave reviews. Be sure to check out our serving suggestions. The toppings truly make chicken tortilla soup even better. I never skip a big handful of crispy homemade tortilla chips on top.

    The real secret is stirring chopped corn tortillas right into the soup. They break down as the broth simmers, adding body and a rich, warm corn flavor that genuinely makes this recipe one of my favorites!

    Key Ingredients

    • Chicken: Skin-on chicken thighs make the best chicken tortilla soup. If you prefer skinless thighs, chicken breasts, or cooked/rotisserie chicken, I share easy adjustments below.
    • Veggies: The soup starts with a flavorful mix of onion, celery, jalapeño, and garlic. Toward the end, you’ll add corn (fresh or frozen) and tomatoes for sweetness, color, and extra texture.
    • Spices: I love using ancho chili powder or homemade chili powder for this soup. We also add cumin and a bay leaf.
    • Corn Tortillas: These are essential for that classic tortilla soup flavor! You’ll roughly chop corn tortillas and stir them into the soup. As they simmer, they break down, adding flavor and thickening the broth slightly.
    • Broth: I prefer chicken stock, especially homemade chicken stock. But feel free to use your favorite store-bought brand or even vegetable broth.
    • The Extras: This soup is all about the toppings! Set out a variety of options and let everyone customize their bowls. Some of our family favorites include fresh cilantro, extra lime wedges, crumbled queso fresco or other cheeses, tortilla chips or strips, diced avocados, and a spoonful of guacamole.

    Find the full recipe with measurements below.

    How to Make Our Favorite Chicken Tortilla Soup

    Tip 1: Roast the chicken. For my chicken noodle soup, I simmer the chicken right in the pot, but for this soup, I love roasting skin-on chicken thighs in the oven. Once they’re cooked, shred the meat and stir it into the soup just before serving. Since the thighs are skin-on, I take one extra step: crisp the skin in a skillet and crumble it over the bowls. It adds incredible flavor and the perfect crispy topping.

    Before roasting the chicken in the oven, quickly brown the skin in the bottom of your soup pot. This adds color to the chicken, but also renders some chicken fat, which you can use for cooking the vegetables in the next step.

    Cooking chicken for tortilla soup

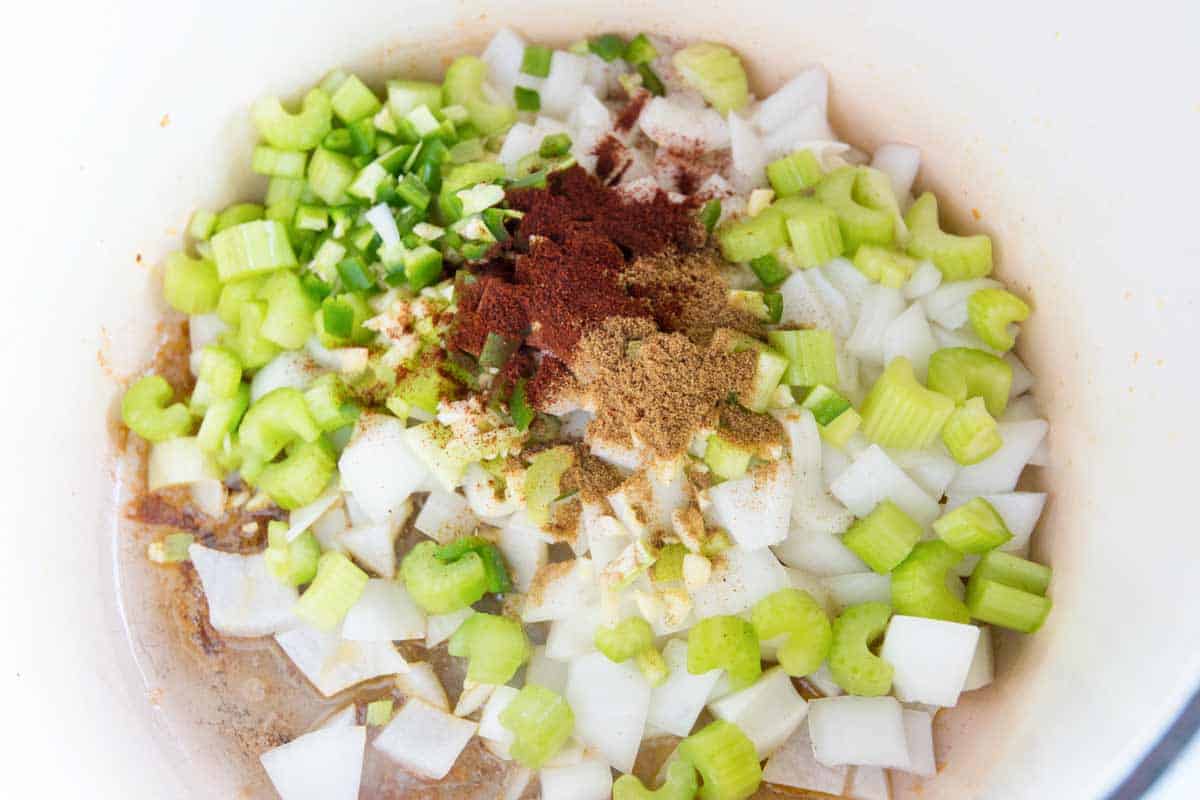
    Tip 2: Cook the veggies in the rendered fat. While the chicken roasts, start the soup base. Because we sear the chicken thighs in the pot first, you’re left with a layer of rich, flavorful chicken fat. Use it. Add the onion, celery, jalapeño, garlic, and spices to that fat, and cook until the onion is soft and sweet. This builds a richer, more savory flavor that makes the whole soup taste better.

    Cooking the veggies and spices in chicken fat.

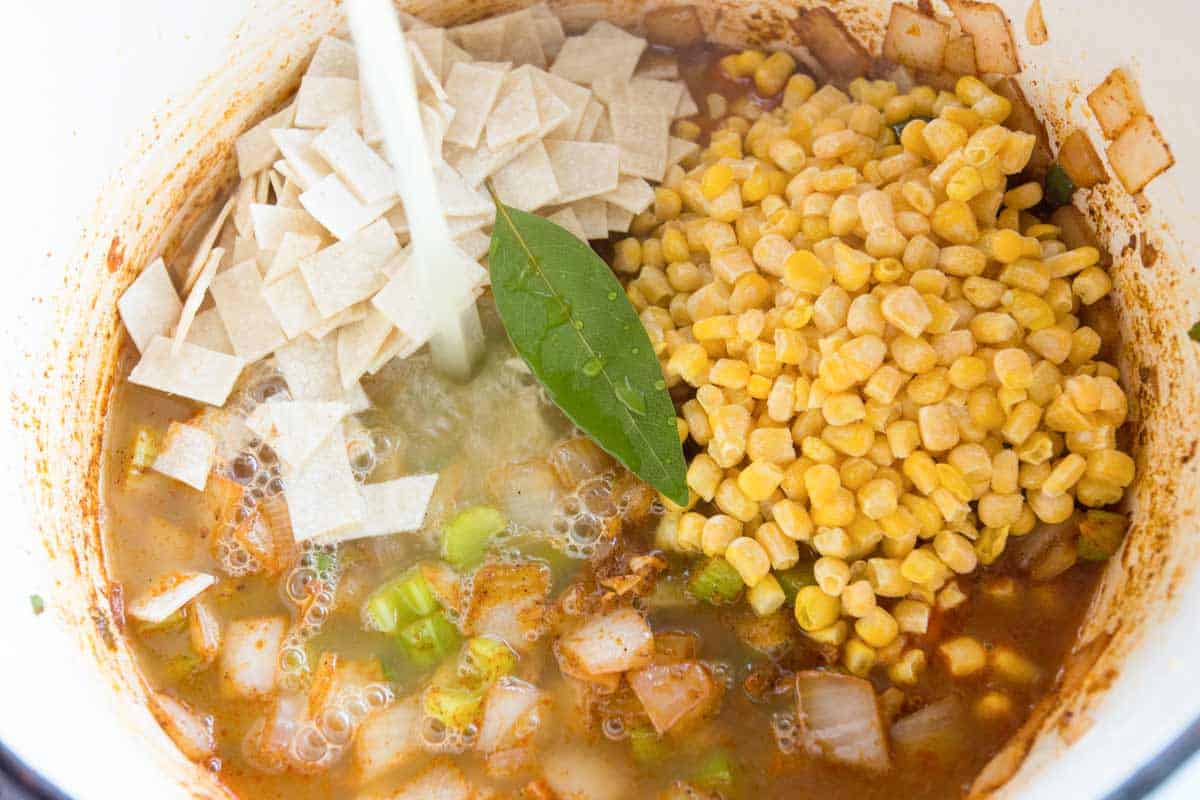
    Tip 3: Simmer with chopped tortillas. Once the onions are soft, pour in the chicken stock and add the corn, a bay leaf, and a generous handful of chopped corn tortillas. Let the soup simmer for about 20 minutes, until the tortillas soften and break down into the broth. This is what gives this soup its signature flavor.

    Adding the chicken stock, tortillas, and corn.

    Tip 4: Finish the soup. Just before serving, stir in chopped tomatoes, the shredded roasted chicken, and a healthy squeeze of lime juice.

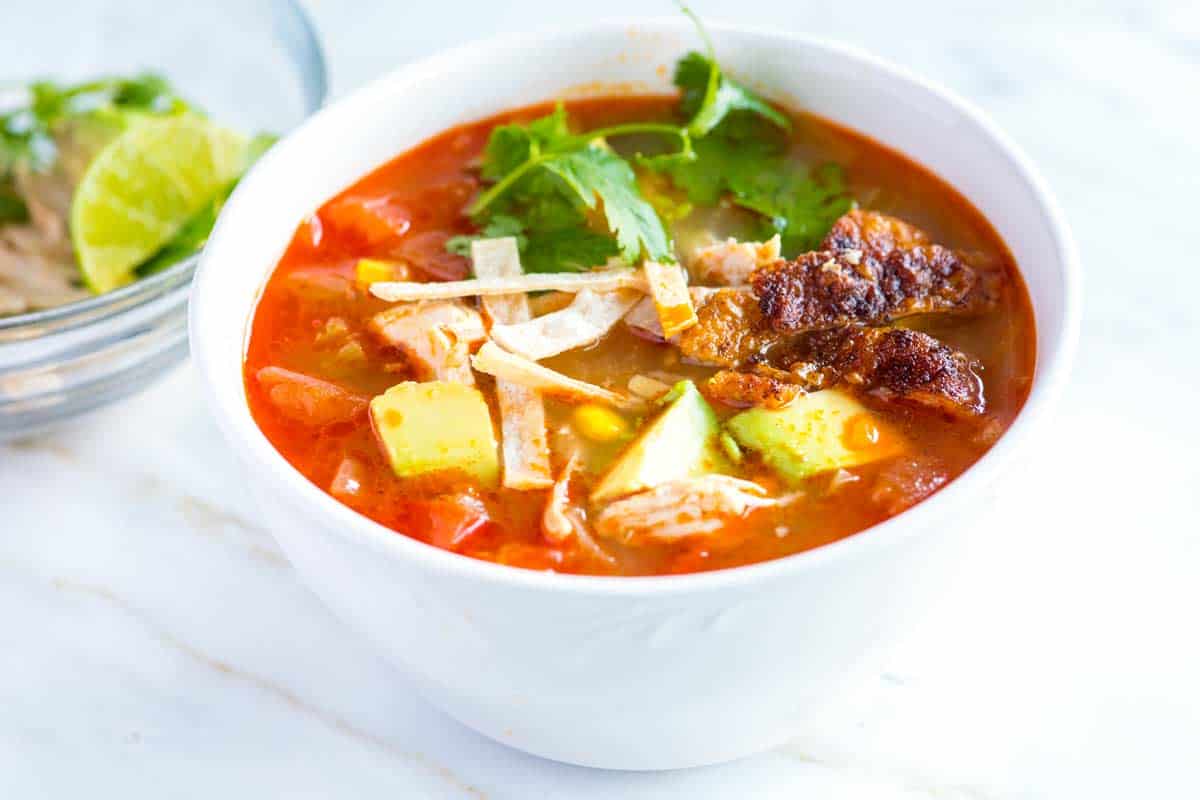
    Tip 5: Serve with your favorite toppings. This soup gets better with toppings. I always crisp the chicken skin in a skillet (instructions are below), then crumble it over my soup. It’s so delicious. Then, you can have fun with more toppings. Here are some ideas:

    More Soup Recipes

    Chicken Tortilla Soup

    Seriously Good Chicken Tortilla Soup

    • PREP
    • COOK
    • TOTAL

    We love this super flavorful tortilla soup! Skin-on chicken thighs are the secret to the most delicious soup. I highly recommend them, but if you are starting with skinless chicken, I have provided tips below! I love ancho chili powder (McCormick has one in most larger stores) or homemade chili powder for this.

    6 Servings

    You Will Need

    1 pound skin-on, bone-in chicken thighs (450g)

    2 teaspoons avocado oil or olive oil

    1 large onion, finely chopped

    5 stalks celery, finely chopped

    1 large jalapeño, finely chopped

    3 garlic cloves, minced, about 1 tablespoon

    1 ¾ teaspoons ancho chili powder, divided, try homemade chili powder

    1 ½ teaspoons ground cumin

    1 bay leaf

    1 ½ cups corn kernels, fresh or frozen

    4 (6-inch) corn tortillas, roughly chopped

    6 cups chicken stock (1.4L)

    1 pound tomatoes, cored and finely chopped, or 1 (14oz) can diced tomatoes

    Juice of half a lime

    Salt and fresh ground black pepper

    For serving: Cilantro, lime wedges, avocado, queso fresco, crispy tortilla strips (see tips)

    Directions

    • Prepare the Chicken
    • 1Preheat the oven to 400°F (204°C). Line a baking sheet with parchment paper. Note: If you do not have skin-on chicken, you do not need to preheat the oven. See our tips below the recipe for using skinless chicken.

      2Pat the chicken thighs dry with a paper towel. Then, season them on both sides with 1/2 teaspoon salt and 1/4 teaspoon ancho chili powder.

      3Heat the 2 teaspoons of oil in a large pot, like a Dutch oven, over medium heat. Add the chicken thighs, skin-side down, and cook, without moving them, until the skin is golden brown, about 12 minutes.

      4Wiggle the chicken thighs to release them from the pot. Place the thighs skin-side up on the prepared baking sheet. It’s okay if some skin sticks to the bottom of the pot. Scrape up the larger pieces and place them on top of the chicken thighs. Leave the smaller bits in the pot.

      5Roast the chicken thighs until cooked through, about 20 minutes. Transfer to a plate and allow to rest for 10 minutes. When they are cool enough to handle, remove the skin from the chicken and shred the meat. Either discard the skin or save it as a topping for the soup.

    • Make Tortilla Soup
    • 1You can make the tortilla soup while the chicken roasts in the oven. Remove all but one tablespoon of the chicken fat left in the pot from browning the chicken thighs, then add the onions, celery, jalapeño, garlic, 1 ½ teaspoons chili powder, and 1 ½ teaspoons cumin. Cook until the onions are soft, about 10 minutes.

      2Stir in the bay leaf, corn kernels, chopped tortillas, and chicken stock. Bring to a boil, lower the heat, season to taste with salt and pepper and simmer uncovered for 20 minutes.

      3Add the tomatoes and simmer uncovered for 10 minutes.

      4Stir in the shredded chicken and the lime juice.

      5If you plan to garnish the soup with crispy chicken skin, just before serving, turn the broiler to high. Then, broil the chicken skin saved from earlier until crisp, for about 1 minute. Watch it closely so that it does not burn. Cut into strips.

      6Divide the soup between bowls and top with your favorite tortilla soup toppings, such as crispy chicken skin, crispy tortilla strips, extra lime, cilantro, and crumbled cheese.

    Adam and Joanne’s Tips

    • Skin-on chicken thighs: Skin-on chicken adds rich flavor to the soup. First, you’ll render the fat from the skin directly in the soup pot, creating a flavorful base for cooking the onions and other vegetables. If you prefer not to use skin-on chicken, see the tip below.
    • Skinless chicken thighs or breasts: You can still make a delicious soup with skinless chicken thighs or breasts, although you might lose some of the richness that the skin/rendered fat provides. Skip the searing and roasting steps and add the raw, skinless chicken directly to the soup pot at the same time as the chicken stock. After simmering for 20 minutes, the chicken will be fully cooked. Remove it from the pot, let it cool slightly, and then shred it. Finally, stir the shredded chicken back into the soup just before serving. When cooking the onions and other veggies, use a little oil in the pot.
    • Using rotisserie chicken: Add 2 to 3 cups of shredded cooked chicken to the soup when you add the tomatoes.
    • Quick homemade tortilla strips: You can buy them or make them yourself. Place a paper towel in the microwave, then arrange thinly sliced corn tortillas in a single layer on top. Microwave for 45 seconds, then check and continue microwaving in 20-second intervals until crisp. Watch them closely to prevent burning. You can also use our homemade tortilla chips recipe as a guide for fried chips.
    • Storing: Refrigerate in an airtight container for 3 to 4 days. Or freeze for up to 3 months.
    • The nutrition facts provided below are estimates.

    Nutrition Per Serving
    Serving Size
    1 bowl (1/6 of the recipe)
    /
    Calories
    367
    /
    Total Fat
    18.4g
    /
    Saturated Fat
    4.7g
    /
    Cholesterol
    81.2mg
    /
    Sodium
    650.8mg
    /
    Carbohydrate
    29.9g
    /
    Dietary Fiber
    3.8g
    /
    Total Sugars
    9.7g
    /
    Protein
    22g


    AUTHOR:

    Adam Gallagher

    Adam and Joanne of Inspired Taste

    We are Adam and Joanne Gallagher, the creators of Inspired Taste. Established in 2009, Inspired Taste grew from a childhood dream into one of the internet’s most trusted recipe sites with hundreds of reliable recipes, step-by-step videos, and expert tips.More About Us
    Source link

  • Perfect Lobster Mac and Cheese Recipe

    Perfect Lobster Mac and Cheese Recipe

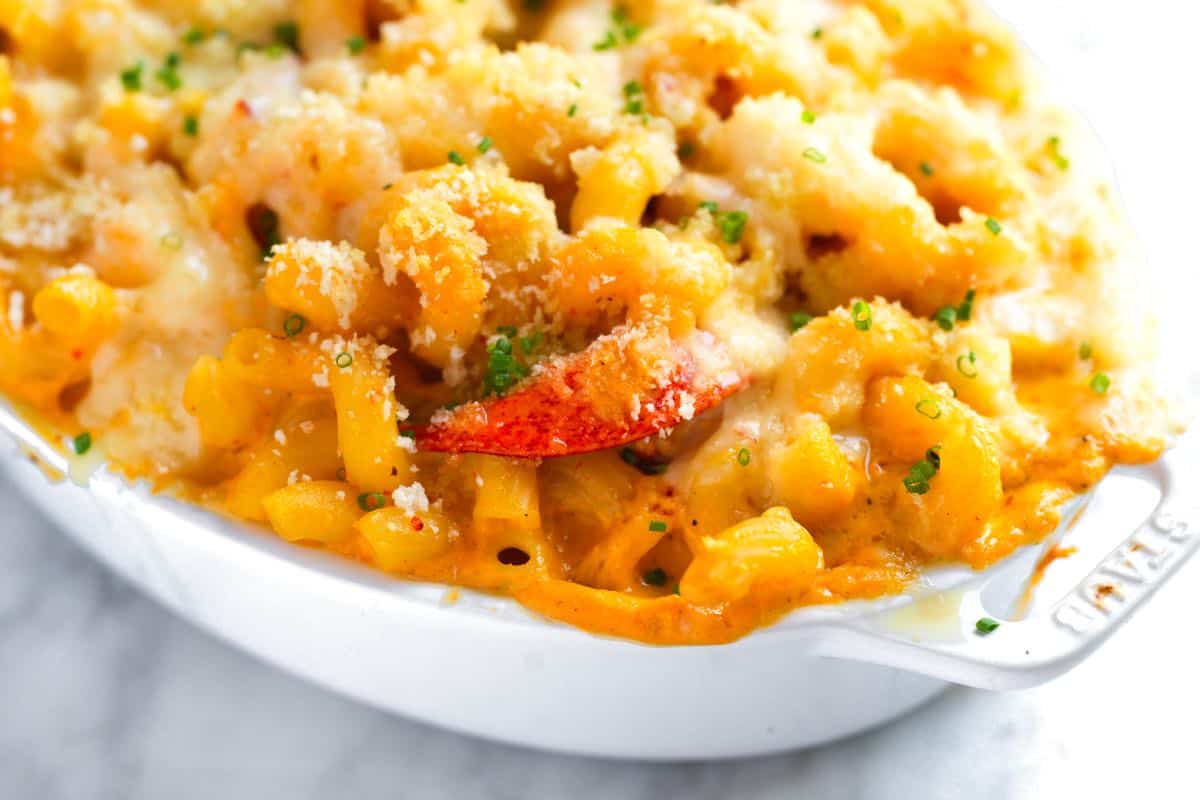
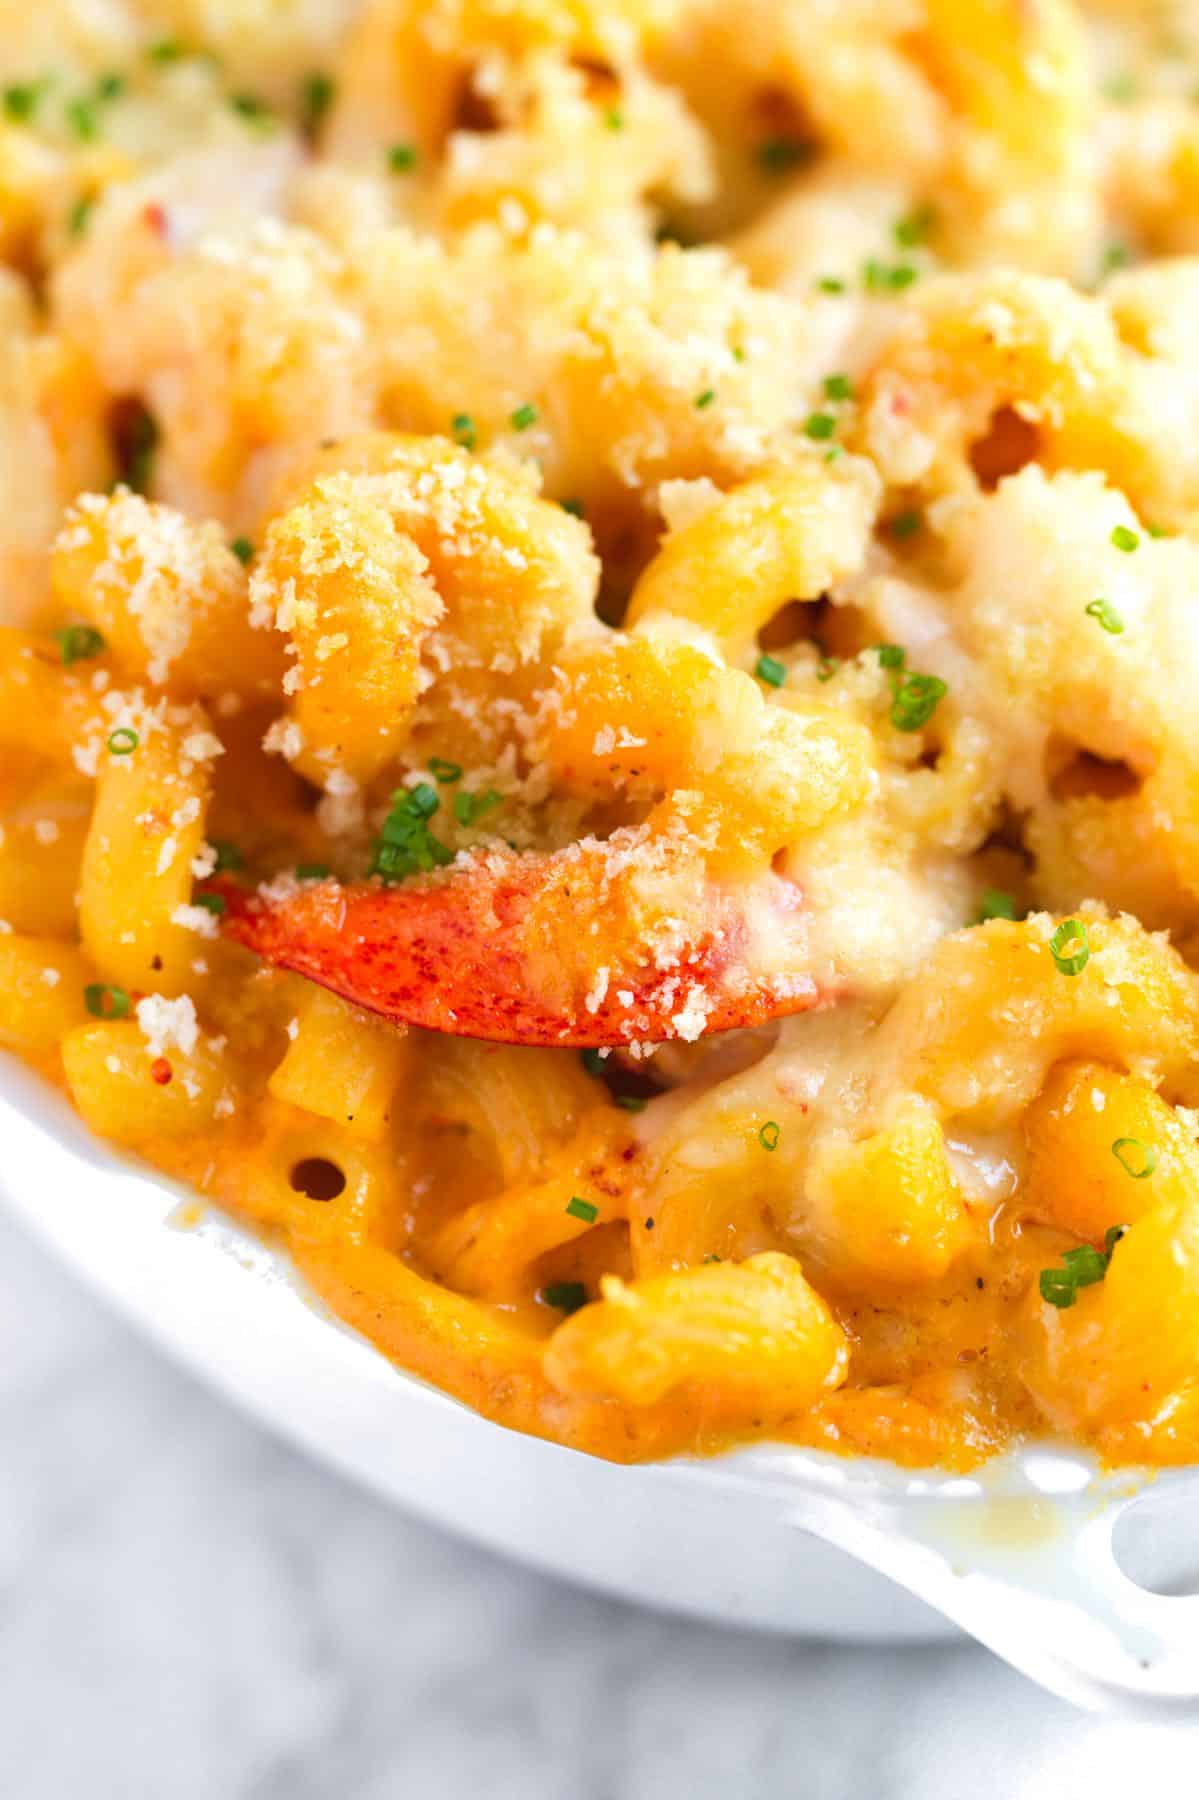
    This lobster mac and cheese is outrageously delicious! The rich lobster cheese sauce is the star of the show, packed with lobster flavor and perfect for any special occasion, from date night to the holidays.

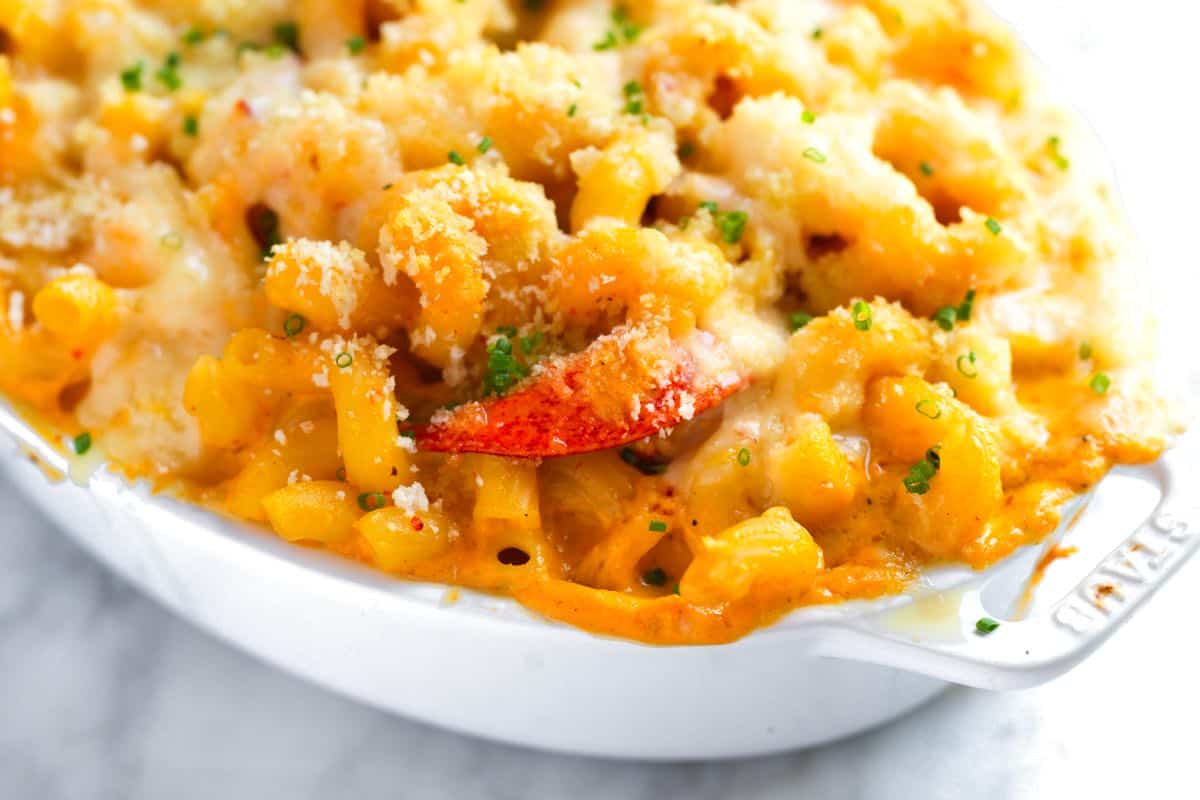
    Lobster Mac and Cheese

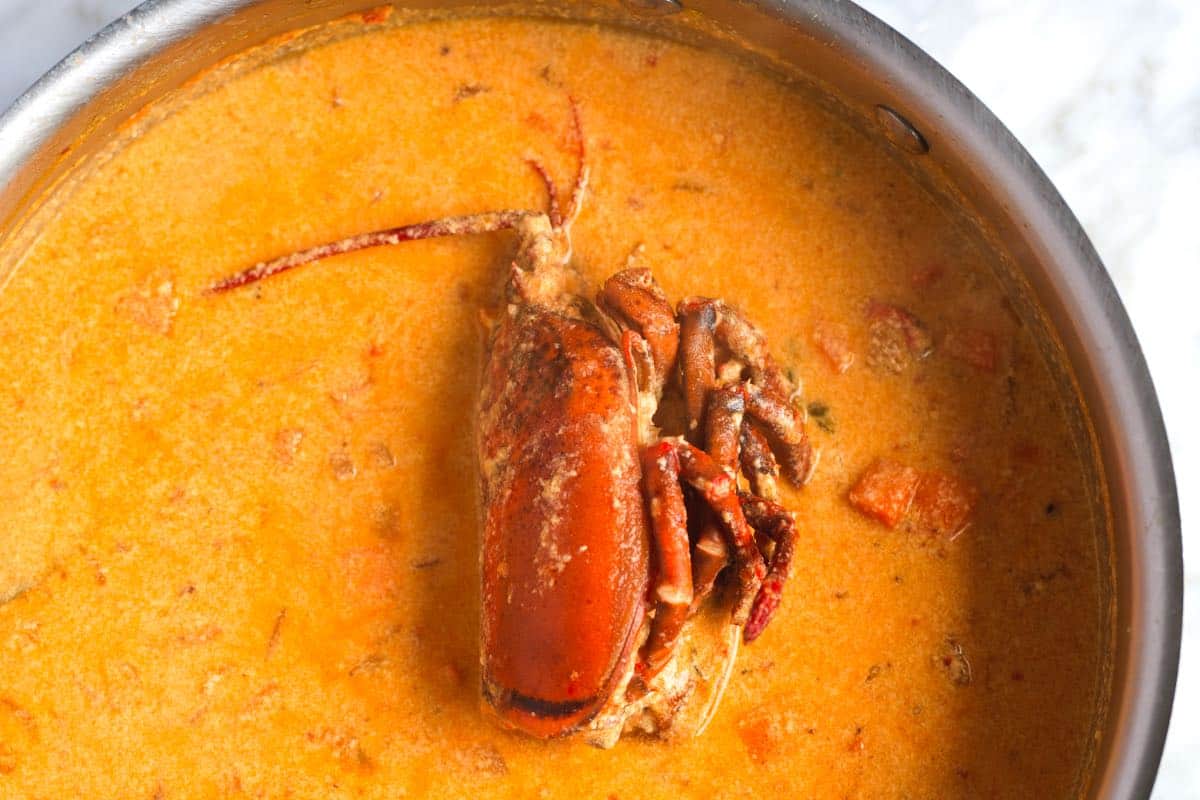
    We don’t skimp on flavor in this lobster mac and cheese. Unlike other recipes that simply add lobster meat to a standard mac and cheese, we take it a step further. We create a deeply flavorful lobster cheese sauce using the lobster bodies, similar to how lobster bisque is made.

    This results in an intensely flavorful mac and cheese, so much so that adding lobster meat is entirely optional! The sauce itself delivers incredible lobster flavor. You can absolutely add cooked lobster meat if you wish, but you might prefer to save it for other delicious dishes like lobster rolls.

    Key Ingredients

    • Lobster: We will start with 2 live lobsters, then cook them so that you have perfectly cooked lobster meat and lobster bodies ready to make our cheese sauce. If you prefer, you can ask your local fishmonger to cook your lobster, but don’t forget to ask for the lobster bodies back (the main shells with the head and tiny legs attached), as this makes our lobster cheese sauce so delicious. Remember, adding lobster meat to the mac and cheese is up to you. The bodies in our sauce add plenty of rich lobster flavor, so you may prefer to use the meat for another lobster recipe instead.
    • Aromatics: Since this is a classy dish, we bring in a few more ingredients than our basic macaroni and cheese. We use onion, carrot, garlic, fresh thyme, bay leaf, and tomato paste in our sauce. When they are all soft and sweet, they are blended into the cheese sauce, adding lots of flavor.
    • Butter and Flour: These help thicken our sauce.
    • White Wine: A dry white wine like Pinot Grigio, Sauvignon Blanc, or unoaked Chardonnay adds complexity. For a non-alcoholic option, substitute vegetable broth.
    • Milk: For the creamiest sauce, use whole milk.
    • Cheese: A high-quality white cheddar, such as Beecher’s or English cheddar, is my favorite for this mac and cheese. Gruyère would also be lovely!
    • Pasta: Use your favorite short pasta shape. Since this is a special recipe, it can take a fancier shape like cavatappi or torchiette.

    How to Make Lobster Mac and Cheese

    Step one for lobster mac and cheese is to prepare your lobsters. I know working with live lobsters might sound overwhelming, but I walk you through everything you need to know in our recipe. You can also learn more about working with live lobsters in our lobster roll recipe!

    Our method for dispatching the lobster is quick and effective. Place the lobster on a cutting board and find the faint cross on its shell where the head and body connect. Quickly and firmly insert a large, sharp knife into this cross, pushing down through the head and between the eyes. This severs the spinal cord, killing the lobster instantly.

    From there, you can separate the bodies from the tail, claws, and legs. We want to keep the bodies uncooked, so we can use them to make our lobster cheese sauce. Then, we will cook the lobster meat in boiling salted water. Once cooked, you can pull the meat from the shells and save it for adding to our lobster mac and cheese or save it for another dish. It keeps in the fridge for up to 4 days.

    How to Make Lobster Mac and Cheese: Simmering lobster bodies in our sauce

    The trick to the best lobster mac and cheese is to cook the lobster bodies with butter, aromatics, and milk for about 30 minutes. In this time, the bodies perfume the mixture with rich lobster flavor (more than any meat ever could). After 30 minutes, you’ll discard the bodies and blend your sauce with some cheese.

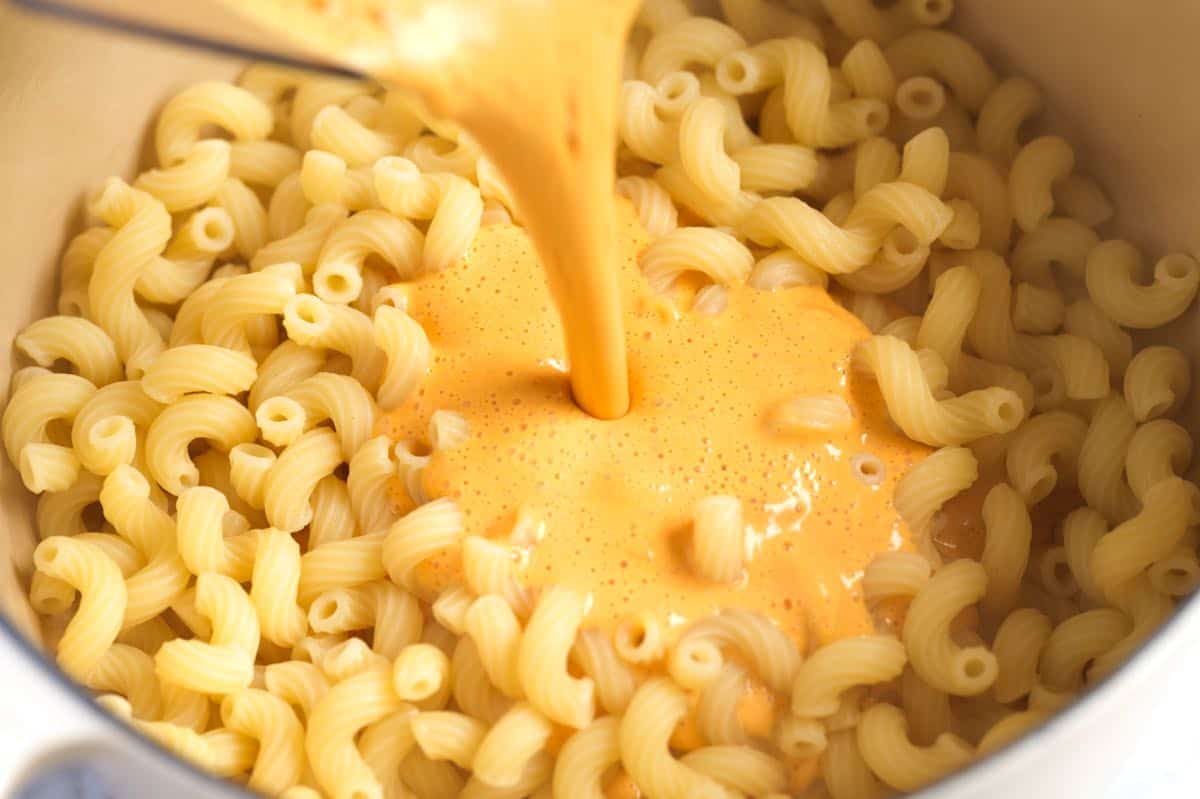
    How to Make Lobster Mac and Cheese: Tossing pasta with the lobster cheese sauce

    Finally, toss the sauce with cooked pasta, add optional lobster meat, and bake in a casserole dish until bubbly. It’s incredible!

    Lobster Mac and Cheese

    Perfect Lobster Mac and Cheese

    • PREP
    • COOK
    • TOTAL

    There are two ways to make lobster mac and cheese: with or without lobster meat. In both cases, you’ll use the lobster shells to create the signature lobster flavor in the sauce. We’ll guide you through each step, from humanely dispatching and cooking live lobsters to making the rich lobster cheese sauce. Then, you can decide whether to fold the cooked lobster meat into your mac and cheese or enjoy it separately (it’s fantastic with melted butter or in lobster rolls!). The lobster bodies (the main shells with the head and tiny legs attached) release a rich, savory lobster flavor into the sauce, making them essential for this recipe.

    Make Ahead Tip: Cooked lobster meat can be refrigerated for up to 3 days, meaning you can prepare the meat in advance. You can also freeze the lobster bodies for up to 6 months. This lets you prepare the lobsters, enjoy the meat in another meal, and save the bodies for later.

    4 to 6 Servings

    You Will Need

    2 whole lobsters, 1 ½ pounds each

    2 tablespoons butter

    Half a sweet onion, finely chopped, about 1 cup

    1 medium carrot, finely chopped, about ½ cup

    2 cloves garlic, roughly chopped

    2 sprigs thyme

    1 tablespoon flour

    1 tablespoon tomato paste

    1/2 cup (60ml) white wine

    2 cups (473ml) whole milk

    1 bay leaf

    12 ounces (340g) white cheddar cheese, grated, about 3 cups

    8 ounces (226g) short pasta like fusilli, cavatappi, or torchiette

    1/4 cup (28g) panko breadcrumbs

    Salt and fresh ground black pepper

    Directions

    • Prepare Lobsters
    • 1If starting with live lobsters, handle them with care. Hold a lobster firmly just behind its head and place it on a cutting board, using a clean kitchen towel to keep it steady. Look for a small, cross-shaped mark on the shell where the head joins the body. Using a large, sharp knife, swiftly and firmly insert the tip into this mark and cut downwards through the head, between the eyes. This method dispatches the lobster quickly. The legs might twitch a little afterward, but the lobster is dead.

      2Separate the lobster parts by size: tails in one pile, large claws in another, and finally, all the small claws together in a third pile. You will cook these in the next step for lobster meat.

      3The lobster bodies (the main shells, including the head and tiny legs) are essential for the sauce. Set them aside. You will use them in our lobster sauce to create its rich flavor.

      4Bring a large pot of water to a boil with two tablespoons of salt.

      5Cook the tails for five minutes and transfer them to a plate to cool. Next, cook the large claws for 5 minutes. Transfer them to a plate to cool, and finish by cooking the small claws for four minutes.

      6Remove the lobster meat from the shells when the tails and claws are cool enough to handle. For the tails, use kitchen shears to cut down the top of the tails, pull them open, crack the back slightly, and then pull out the meat. For the claws, use a knife or mallet to crack open the claws and then remove the meat. Use tweezers or chopsticks to remove smaller bits of meat from legs and knuckles. Store the lobster meat in an airtight container in the fridge. If you plan to add some to the mac and cheese, you will need about 1 cup, which means you will likely have some extra lobster meat, which is never a bad thing.

    • Make Lobster Mac and Cheese
    • 1For lobster mac and cheese, you’ll need 2 lobster bodies and, optionally, 1 cup of cooked lobster meat. Cut the lobster bodies in half with a heavy knife.

      2In a wide pan at least 3 inches deep, like a rondo, melt the butter over medium heat. Ideally, use a pan with a lid, as you will need the lid later on.

      3Add the lobster bodies, onion, carrot, garlic, and thyme to the pan. Cook for about 10 minutes, stirring occasionally. The goal is not to brown the vegetables, just soften them. The lobster bodies will also turn red.

      4Add the flour and stir it around the pan, then do the same with the tomato paste.

      5Pour in the white wine and stir well. Once it begins to stick to the bottom, add the milk and bay leaf. Season with salt and pepper, then cook at a low and gentle simmer, partially covered, for 30 minutes. During this time, check that the milk is not bubbling too much or sticking to the bottom of the pan. Turn the heat down if necessary. The milk may look slightly curdled, but in the next step, we will blend everything, which brings the sauce back together.

      6Remove the lobster bodies and discard them. Then, pour the liquid into a blender. Add 6 ounces of cheese (1 ½ cups), and puree until smooth.  Chill the sauce in the fridge until ready to toss with the pasta. Blending tip: for safety remove the blender lid center insert and hold a kitchen towel over the hole while blending. This releases steam and prevents messy splatters.

      7Bring a pot of salted water to a boil, then cook the pasta until al dente. Strain.

      8Preheat the oven to 350°F (177°C). Lightly grease a casserole dish, that holds at least 2 quarts.

      9In a mixing bowl, combine the hot pasta with the lobster sauce and half the remaining cheese (2 ounces or 1/2 cup). Stir well to combine. If you are adding lobster meat, fold it in.

      10Transfer the pasta mixture to the casserole dish.

      11In a small bowl, mix the panko bread crumbs with the remaining cheese, and then scatter it over the top of the mac and cheese.

      12Bake for 40 to 50 minutes, until the middle is hot and the top is golden brown.

    Adam and Joanne’s Tips

    • Storing: Store baked lobster mac and cheese in an airtight container for up to 4 days.
    • Precooked lobster: If you prefer, you can ask your local fishmonger to cook your lobster, but don’t forget to ask for the lobster bodies back (the main shells with the head and tiny legs attached), as this makes our lobster cheese sauce so delicious. Starting with uncooked bodies adds a bit more flavor to our sauce, but you can still make it with cooked lobster bodies.
    • Nutrition facts are estimates. We included 1 cup of lobster meat and 1/2 teaspoon salt.

    Nutrition Per Serving
    Serving Size
    1/6 of the recipe
    /
    Calories
    530
    /
    Total Fat
    26.5g
    /
    Saturated Fat
    14.8g
    /
    Cholesterol
    109.8mg
    /
    Sodium
    763.9mg
    /
    Carbohydrate
    42.5g
    /
    Dietary Fiber
    2.2g
    /
    Total Sugars
    7.9g
    /
    Protein
    26.4g


    AUTHOR:

    Joanne Gallagher

    Adam and Joanne of Inspired Taste

    We are Adam and Joanne Gallagher, the creators of Inspired Taste. Established in 2009, Inspired Taste grew from a childhood dream into one of the internet’s most trusted recipe sites with hundreds of reliable recipes, step-by-step videos, and expert tips.More About Us

    Source link

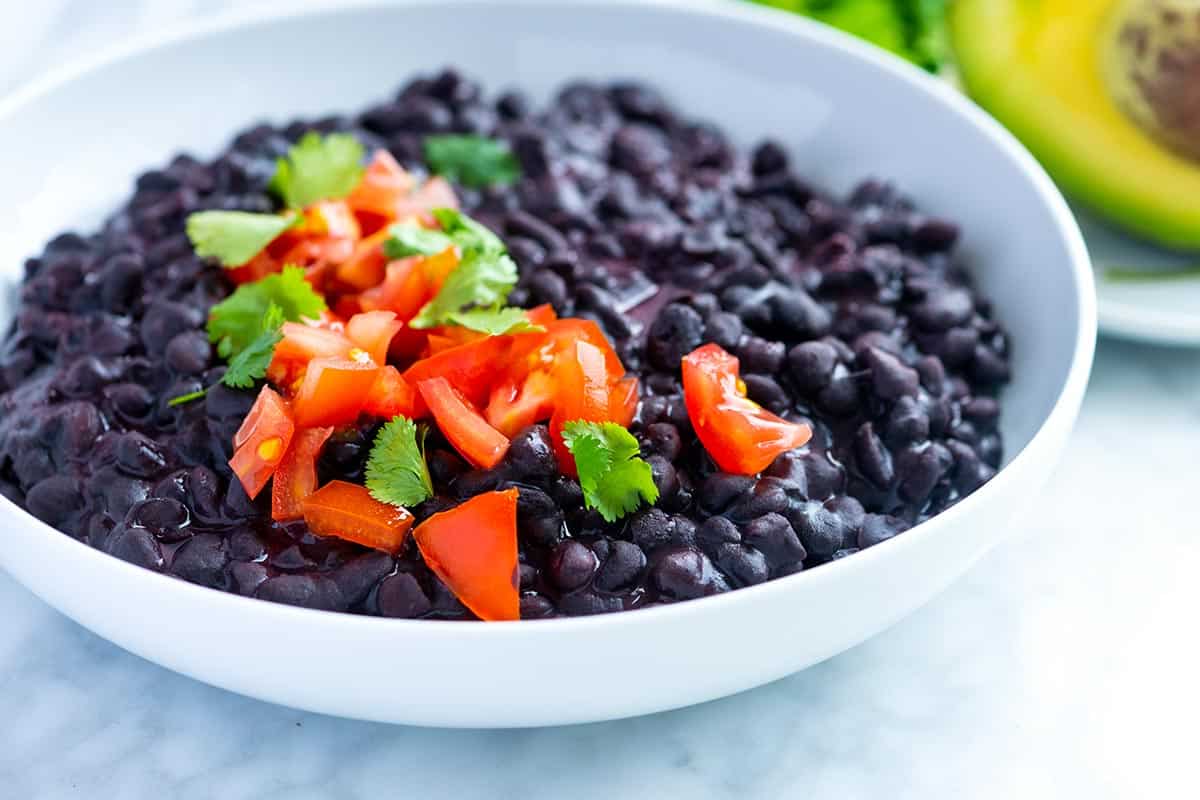
  • Easy Coconut Black Beans Recipe

    Easy Coconut Black Beans Recipe

    These coconut black beans are the creamiest, most delicious beans! Thanks to canned coconut milk, they have a delicate coconut flavor, which is incredibly delicious when you squeeze fresh lime on top.

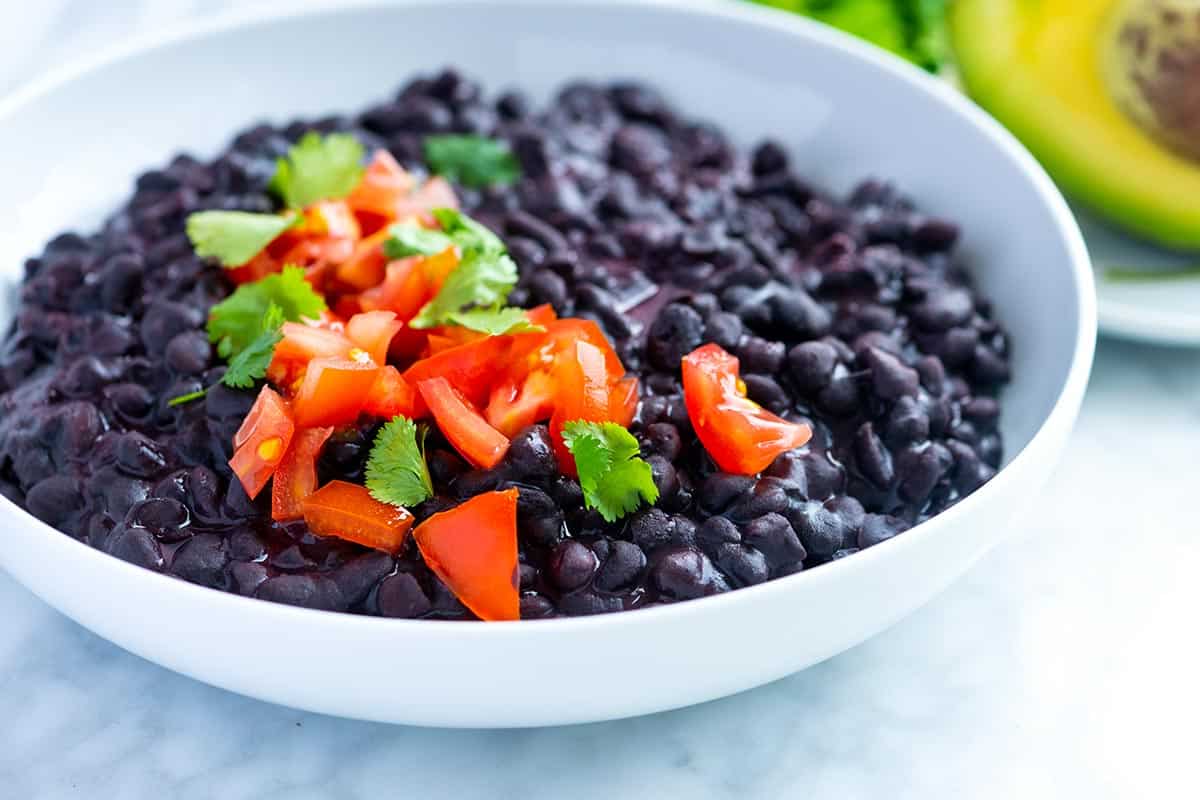
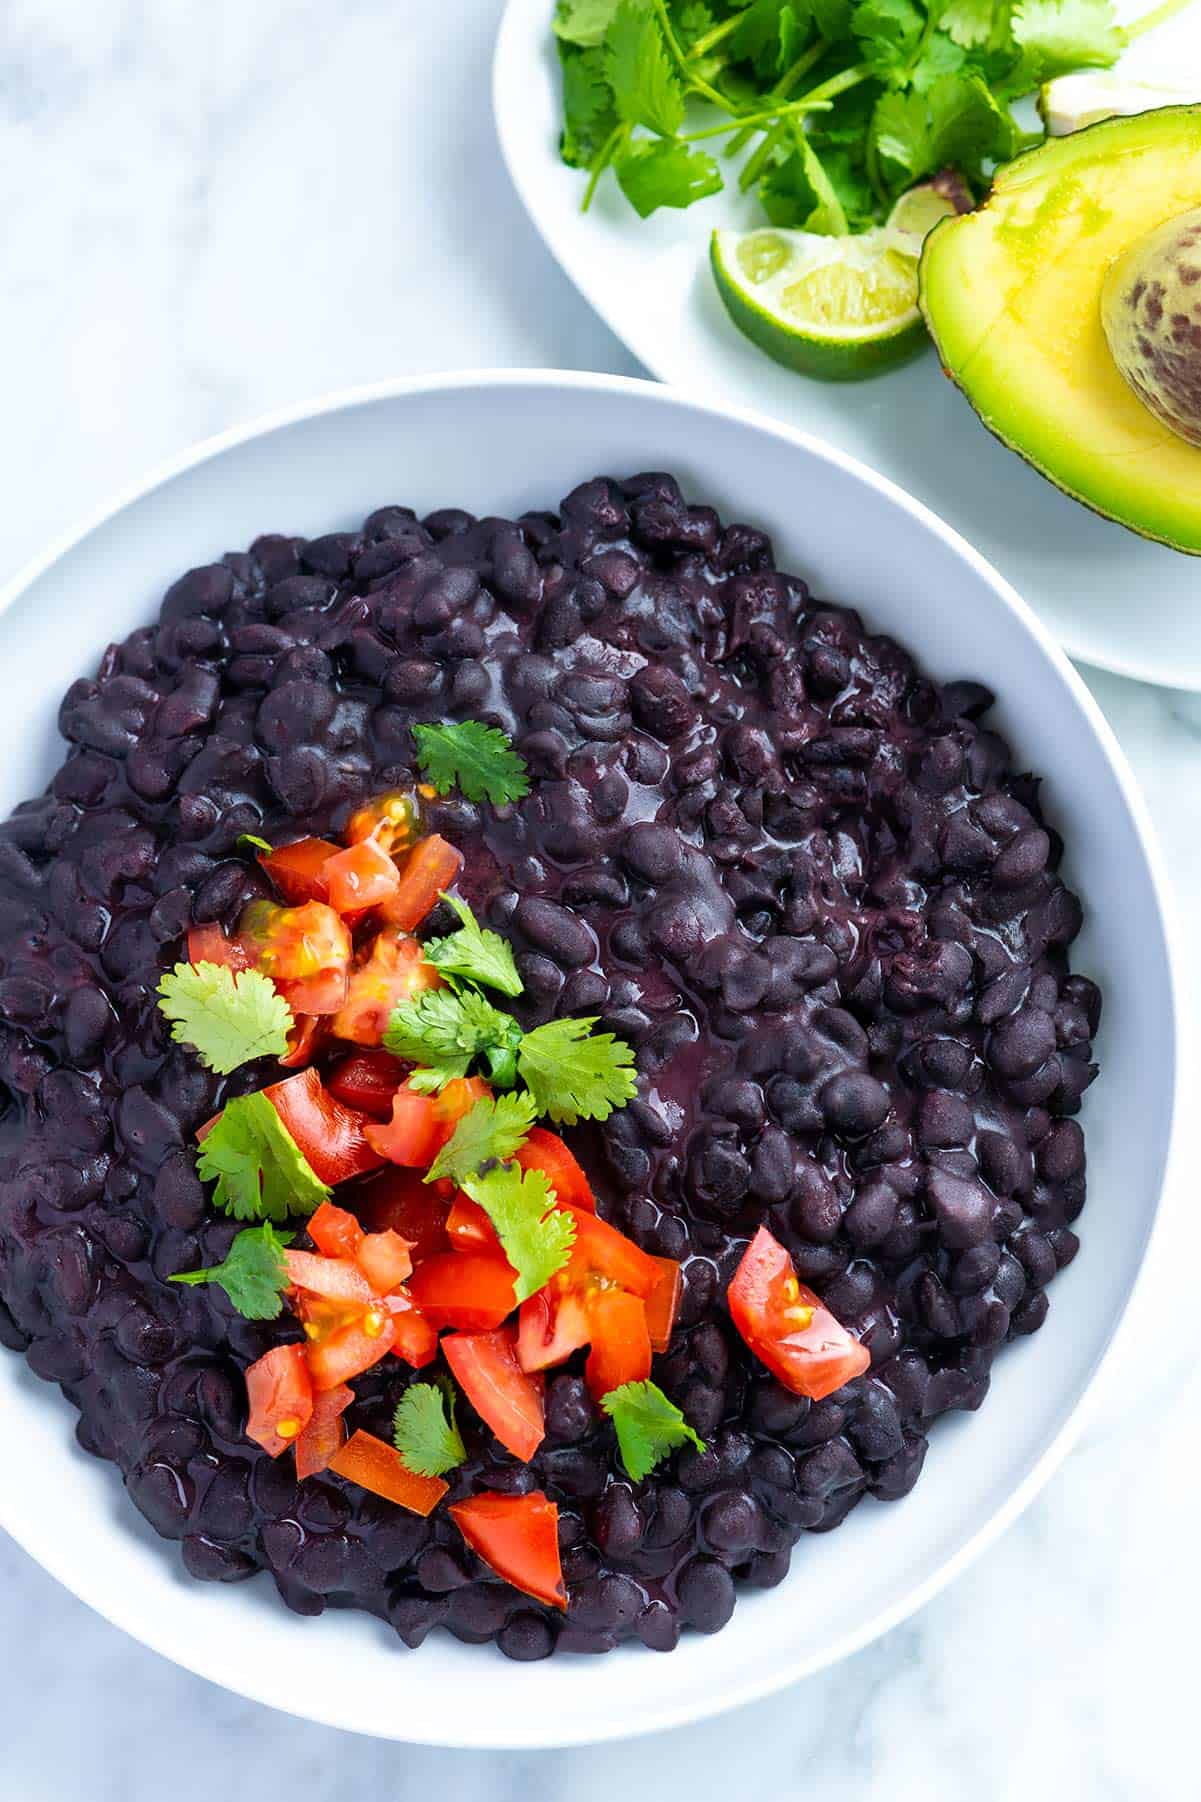
    Coconut Black Beans

    I absolutely love black beans, and these coconut black beans have quickly become a favorite way to cook them. They really couldn’t be any easier! Just toss the beans, coconut milk, garlic, onion, and spices into a large pot and simmer until the beans are tender and creamy and the liquid has thickened slightly.

    I love serving these beans with cilantro lime rice or Mexican rice. They’re also fantastic as a filling for burritos! And as a bonus, unlike many bean recipes, you don’t need to soak the black beans before cooking.

    Key Ingredients

    • Black Beans: This recipe calls for 2 cups of dried beans, which is about 1 pound. Most bags sold in stores are 1 pound.
    • Coconut Milk: For the best results, use a 14-ounce can of full-fat coconut milk. Light coconut milk will still work but will not make the beans as creamy.
    • Garlic and Onion: I toss whole garlic cloves and half an onion into the pot with our beans, adding light garlic and onion aroma and flavor.
    • Spices: This recipe keeps the seasoning simple yet flavorful with a bay leaf, ground cumin, a pinch of cinnamon, salt, and pepper.
    • Cilantro and Lime: Just before serving, top the beans with fresh cilantro and a squeeze of lime juice. Feel free to add other toppings you enjoy, such as chopped tomatoes, onions, pickled onions, or crumbled cojita cheese.

    How to Make Coconut Black Beans

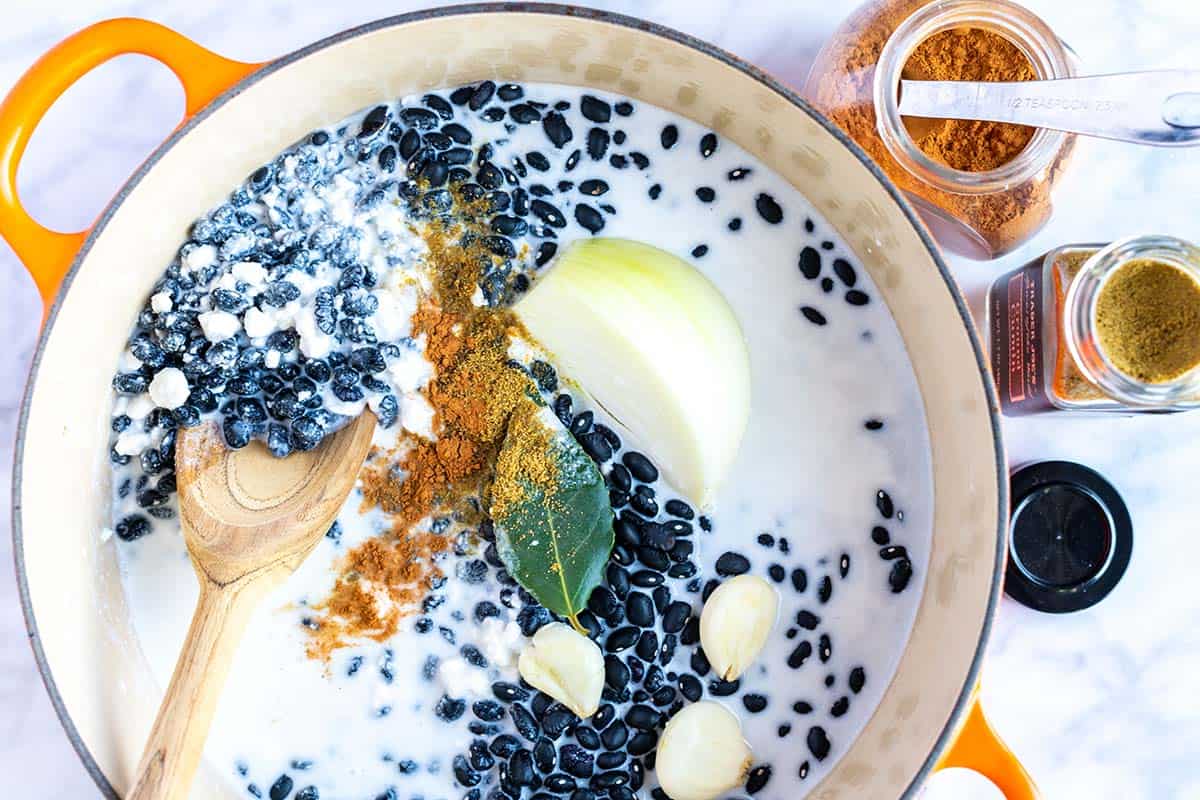
    One of the best things about this recipe is how easy it is! You’ll combine all the ingredients in a pot and simmer until the beans are creamy and tender. You’ll be adding dried black beans, spices, garlic, half an onion, coconut milk, and water to the pot.

    It’s important to use unsweetened coconut milk for this recipe. We experimented with coconut water, but the sugar content made the beans overly sweet and imparted a strong coconut flavor. Unsweetened coconut milk, on the other hand, adds a lovely creaminess and a subtle coconut hint. The spices provide depth, while the onion and garlic enhance the aroma and flavor of the beans.

    How to Make Coconut Black Beans: Ingredients in a pot ready to cook

    After simmering for 1 ½ to 2 hours, the beans will be tender. To achieve a thicker consistency, increase the heat slightly and simmer until the liquid reduces and clings to the beans. These creamy coconut black beans are incredibly versatile. While I enjoy them straight from the pot, they’re also delicious, served over rice, in tortillas, with eggs, or alongside virtually any dish.

    For a complete meal, try these coconut black beans with our easy ground pork tacos, creamy avocado lime sweet potato noodles, or these chicken fajitas.

    Coconut Black Beans

    Easy Coconut Black Beans

    • PREP
    • COOK
    • TOTAL

    These coconut black beans cannot get much easier. You just need a little bit of time. Throw everything into a large pot and simmer until the beans are tender. Using coconut milk for the liquid makes the beans extra creamy. They have a delicate coconut flavor, which is delicious when you squeeze fresh lime on top before serving. When choosing the coconut milk, make sure it is unsweetened. For the creamiest beans, use full-fat canned coconut milk. Reduced-fat canned or refrigerated coconut milk, often found near dairy milk, does work, but the beans will be slightly less creamy and rich.

    Makes 6 cups

    You Will Need

    2 cups dried black beans, picked through, rinsed (about 1 pound)

    3 cloves garlic, smashed and peeled

    1/2 medium onion, peeled, left unchopped

    1 bay leaf

    1 teaspoon ground cumin

    1/8 teaspoon ground cinnamon

    1 (14oz) can unsweetened coconut milk, about 1 3/4 cups

    Water

    Salt and ground black pepper

    Handful fresh cilantro

    1 lime

    Optional toppings: tomatoes, avocado, and cojita cheese

    Directions

      1Add black beans, garlic, onion, bay leaf, cumin, cinnamon, and coconut milk to a large pot. Cover the beans with 2 inches of water.

      2Bring to a boil, stir, and then reduce the heat to a low simmer. Cook uncovered until the beans are tender, 1 ½ to 2 hours. As they cook, stir the beans every once in a while and add extra water if they look dry.

      3Remove the onion, garlic, and bay leaf when the beans are tender. Taste and season with salt and pepper (start with 1/4 teaspoon and go from there).

      4Increase the heat to medium and bring to a rapid simmer. Simmer the beans, stirring often, until the liquid thickens, 5 to 10 minutes.

      5Serve with fresh cilantro and a squeeze of lime. Top with optional toppings.

    Adam and Joanne’s Tips

    • Coconut milk: One 14-ounce can of coconut milk should be close to 1 ¾ cups. If you are slightly under, simply add additional water to make up the missing liquid.
    • Storing: Store coconut black beans covered in the refrigerator up to 5 days and in the freezer up to one month.
    • The nutrition facts provided below are estimates.

    Nutrition Per Serving
    Serving Size
    1/2 cup
    /
    Calories
    191
    /
    Protein
    8 g
    /
    Carbohydrate
    22 g
    /
    Dietary Fiber
    8 g
    /
    Total Sugars
    1 g
    /
    Total Fat
    9 g
    /
    Saturated Fat
    8 g
    /
    Cholesterol
    0 mg
    /
    Sodium
    104 mg


    AUTHOR:

    Joanne Gallagher

    Adam and Joanne of Inspired Taste

    We are Adam and Joanne Gallagher, the creators of Inspired Taste. Established in 2009, Inspired Taste grew from a childhood dream into one of the internet’s most trusted recipe sites with hundreds of reliable recipes, step-by-step videos, and expert tips.More About Us
    Source link

  • Easy Hummus Cups Recipe

    Easy Hummus Cups Recipe

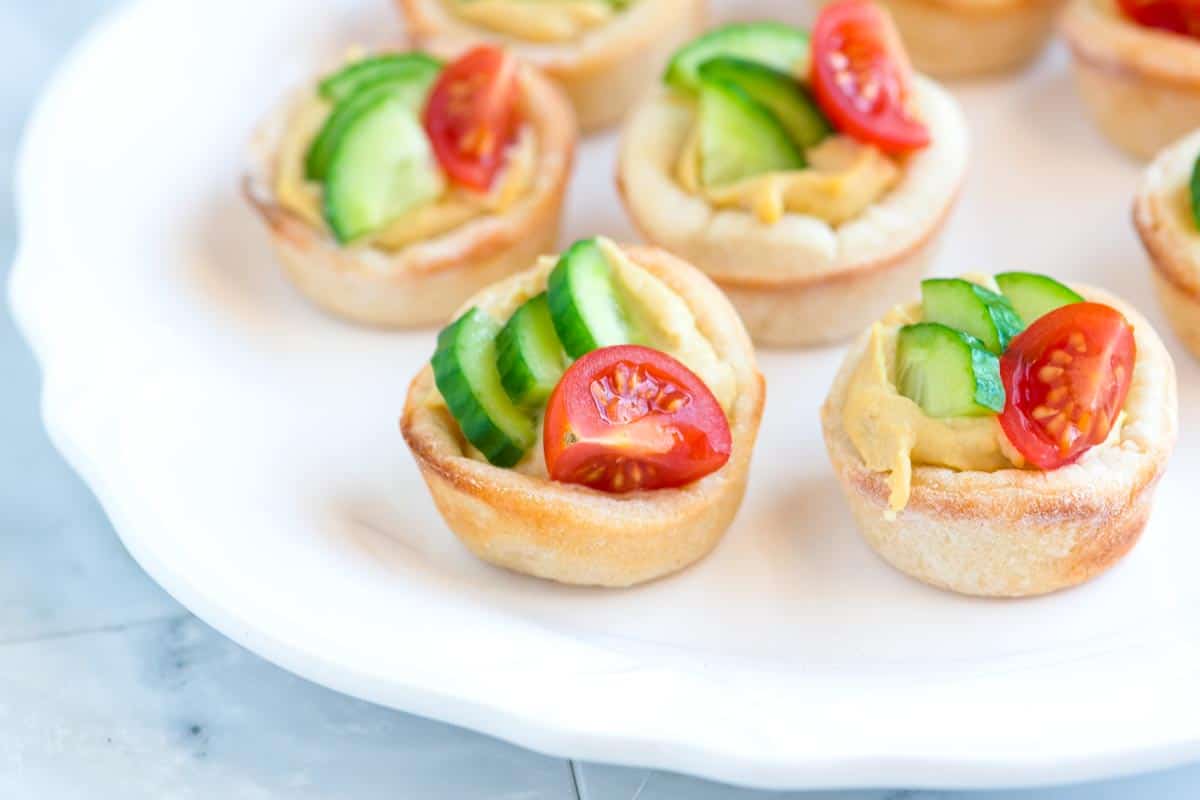
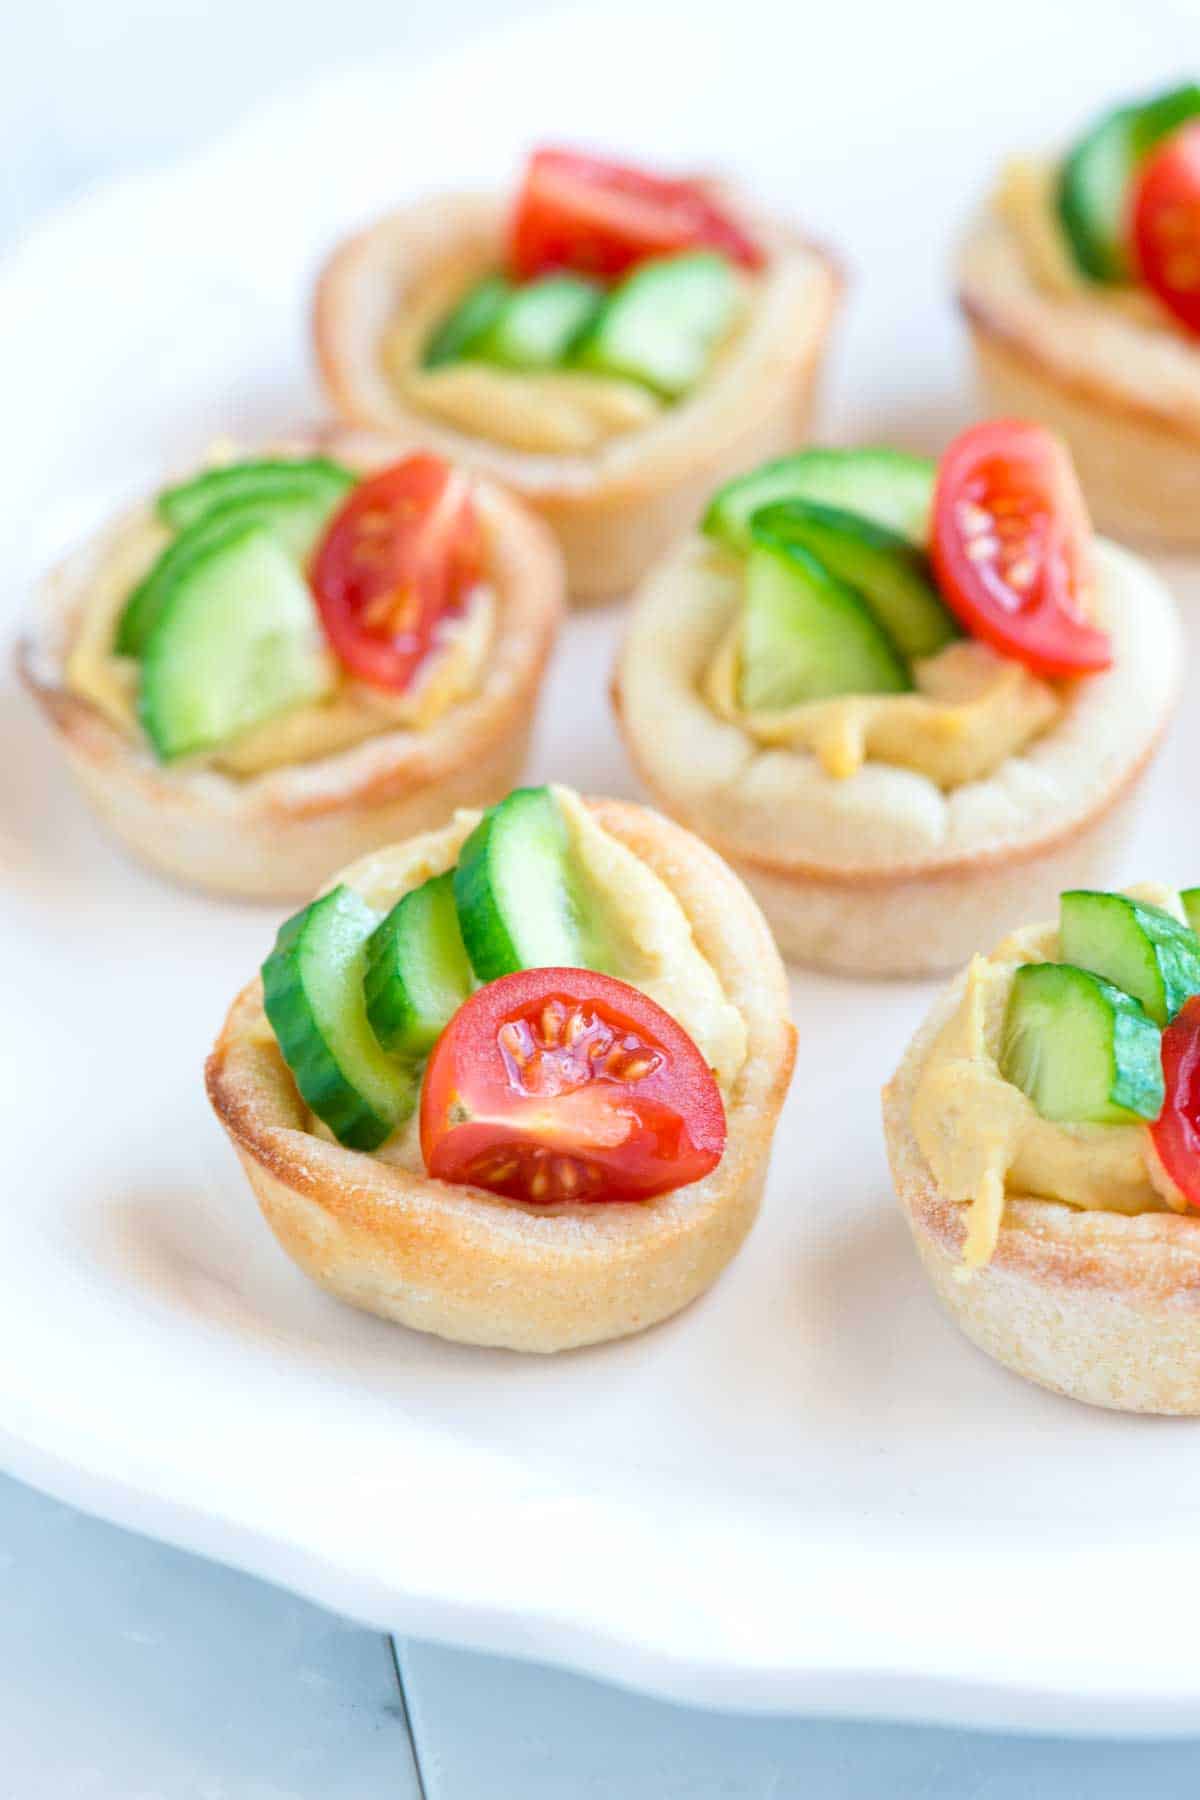
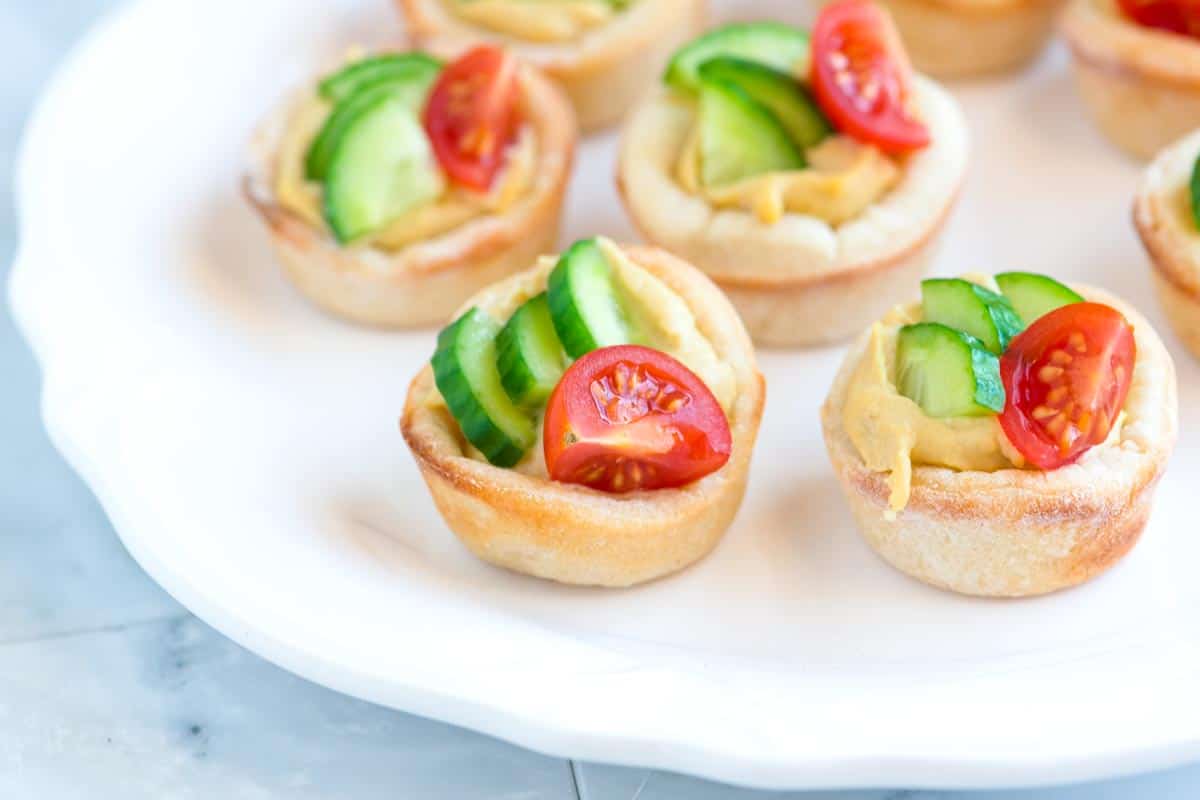
    These cute hummus appetizers are perfect for parties and entertaining! We make mini cups using pizza dough and then fill them with hummus and veggies. They are so much fun!

    Easy Hummus Cups

    If you’re a regular reader, you know how much we adore hummus, especially this simple homemade hummus! We love it so much that we’ve found many ways to serve it. And what better way to enjoy it than with these adorable hummus appetizers made with baked pizza dough cups?

    For more hummus inspiration, check out our roasted red pepper hummus and this hummus with spiced beef. You can also use hummus in our honey dijon chicken lettuce wraps or create a delicious platter with hummus, homemade falafel, tahini sauce, and creamy homemade labneh!

    Key Ingredients

    • Pizza Dough: I’ve experimented with different pizza doughs for these cups, both store-bought and homemade. One thing to keep in mind is that many doughs puff up during baking, which can fill in the cup and leave less room for the hummus. While we have included some tips to minimize this, I’ve found that Pillsbury pizza dough works best. It doesn’t puff up as much as my favorite homemade pizza dough (which I prefer for my pizza recipes because I love a bubbly crust!).
    • Hummus: Use your favorite hummus for these appetizer cups. I love our easy hummus recipe. You can swap the hummus for other dips, too. Think about baba ganoush (roasted eggplant dip), labneh, smoked salmon dip, or onion dip!
    • Cucumber and Tomatoes: I love adding something fresh, and love cucumber and tomatoes with a tiny sprinkle of salt. I’ve also made this chopped cucumber tomato salad and spooned it into the cups, and I loved it!

    How to Make Hummus Cups

    Let’s start by making the pizza cups! It’s super easy, but we’ll use a couple of tricks to make sure the dough bakes up perfectly with plenty of room for the delicious fillings.

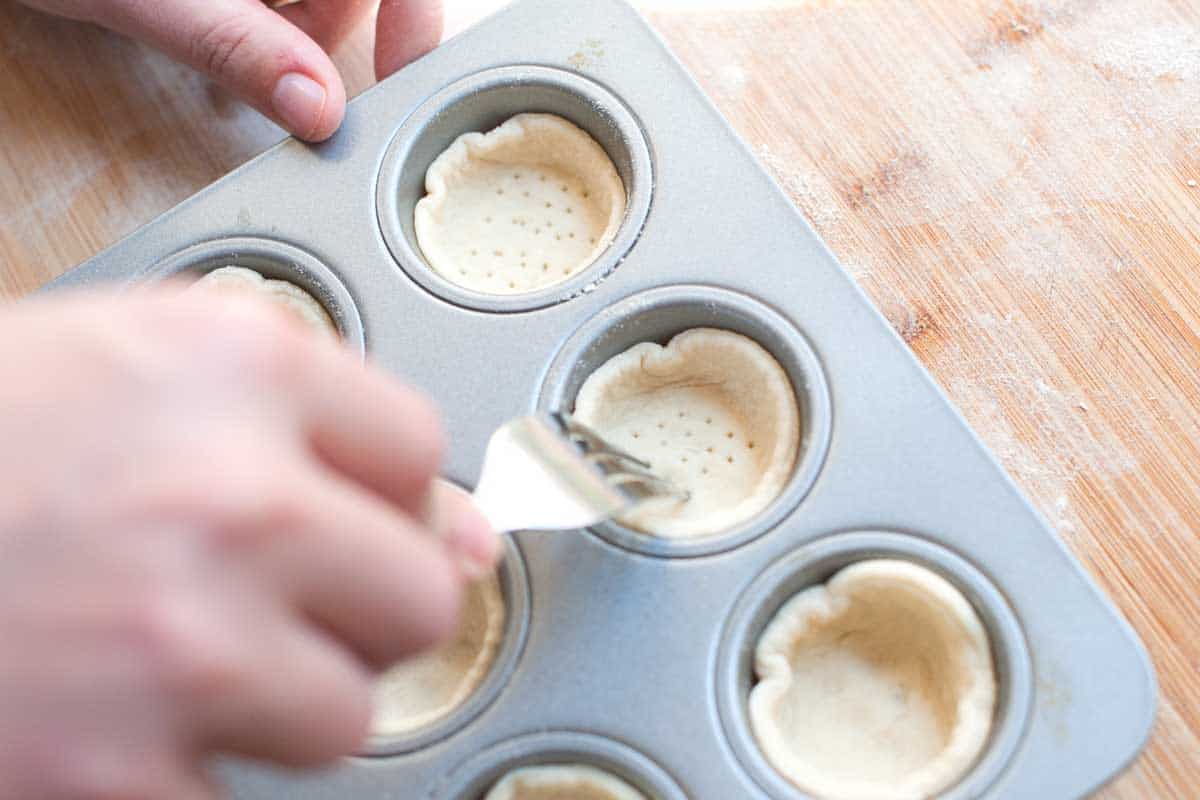
    First, roll the pizza dough into a thin rectangle and use a cookie cutter to cut out rounds. Press each round into a mini muffin cup, then grab a fork and poke a few holes in the bottom. This helps prevent the dough from puffing up too much.

    How to Make Hummus Cups: Pressing pizza dough in to a muffin tin

    For extra insurance, I like to place a mini muffin liner inside each cup and fill it with pie weights (dried rice or beans work great, too!). It’s the same idea as when you par-bake a pie crust.

    Once the pizza cups are baked and cooled, it’s time to fill them with hummus and your favorite veggies! Then, you can enjoy them!

    Easy Hummus Cups

    Easy Hummus Cups

    • PREP
    • COOK
    • TOTAL

    These are such a fun appetizer! You can fill the hummus cups 1 hour in advance. Cover them with plastic wrap and store them in the fridge to prevent the tomatoes, cucumber, and hummus from drying out.

    Makes 20

    You Will Need

    1 (13.8oz) roll Pillsbury Classic Pizza Crust, see tips

    1/2 cup hummus, try homemade hummus

    1/2 cup diced cucumber

    5 cherry tomatoes, quartered

    1/8 teaspoon sea salt

    Directions

      1Preheat oven to 400°F (204°C) and lightly spray 20 mini muffin cups with cooking spray. Set aside 20 mini muffin paper liners, as well as pie weights, uncooked rice, or dried beans for baking the pizza cups.

      2Form pizza dough into a 14-inch by 12-inch rectangle (this doesn’t have to be exact, just close).

      3Use a 2 ½-inch round cookie cutter to cut out 20 circles of dough. Press each circle of dough into the muffin cups. Use a fork to pierce the bottom of each pizza cup. Three to four pricks with a fork should do it.

      4Place a muffin liner inside each pizza cup and fill it with pie weights, uncooked rice, or dried beans.

      5Bake the pizza cups for 8 to 10 minutes or until the edges are light golden brown. Transfer cups to a cooling rack to cool completely.

      6When cooled, fill each pizza cup with a heaping teaspoon of hummus and top with a few pieces of cucumber and a tomato quarter. Finish with a light sprinkle of salt.

    Adam and Joanne’s Tips

    • Pizza dough: While homemade pizza dough is delicious, we’ve found that Pillsbury pizza crust works best for pizza cups. Many doughs, like our homemade dough, puff up in the oven, making it hard to get a deep cup for your hummus. If you want to try your favorite store-bought or homemade dough, here’s a trick: press a cupcake liner into each cup and fill it with pie weights, dried beans, or rice. This will keep the dough from puffing up too much. I’ve added this tip to the recipe instructions so everyone has success.
    • Rolling the dough: If your pizza dough keeps bouncing back on you as you roll it out. Leave it for 5 to 10 minutes on the counter to rest and come to room temperature, and then try again.
    • Nutrition facts provided below are estimates.

    Nutrition Per Serving
    Serving Size
    1 hummus cup
    /
    Calories
    69
    /
    Total Fat
    3.5g
    /
    Saturated Fat
    1.2g
    /
    Cholesterol
    0mg
    /
    Sodium
    78.2mg
    /
    Carbohydrate
    8.6g
    /
    Dietary Fiber
    0.9g
    /
    Total Sugars
    1g
    /
    Protein
    1g


    AUTHOR:

    Adam Gallagher

    Previous Post: Chocolate Toffee Cookies
    Next Post: Easy Pumpkin Cupcakes

    Source link

  • The Best Chicken Quesadillas Recipe

    The Best Chicken Quesadillas Recipe

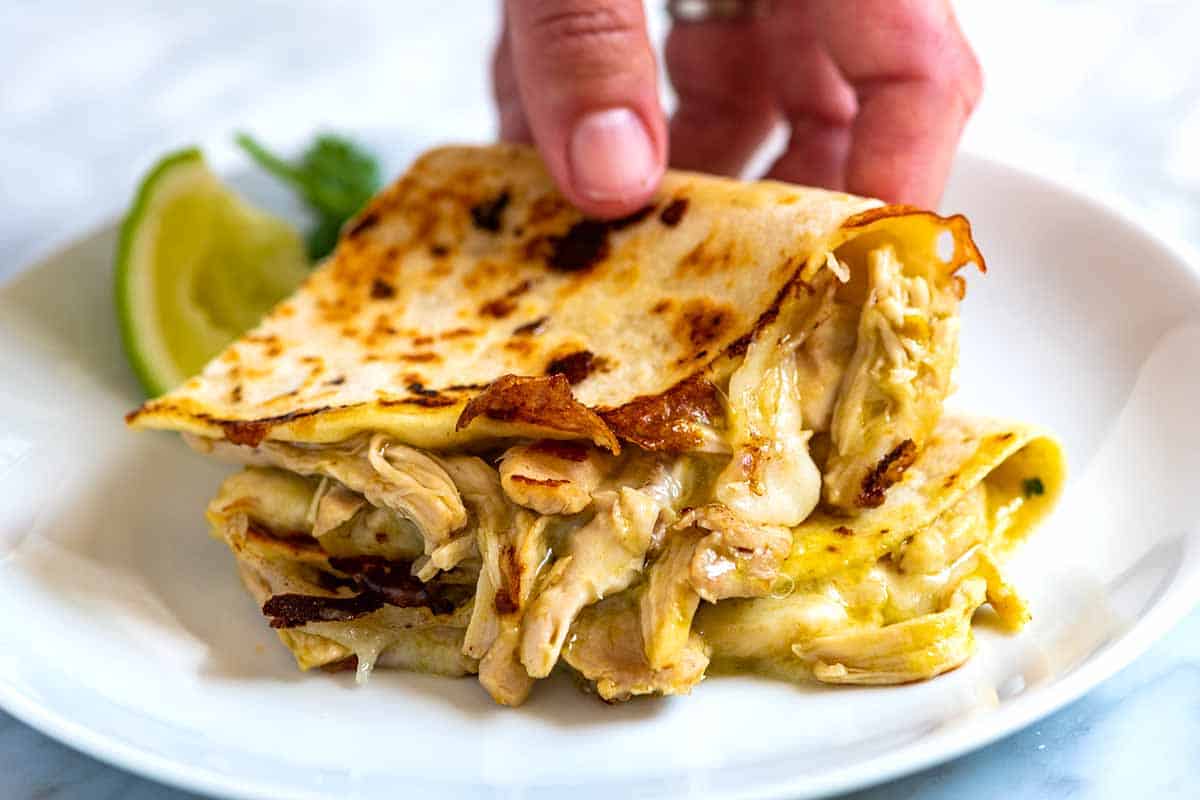
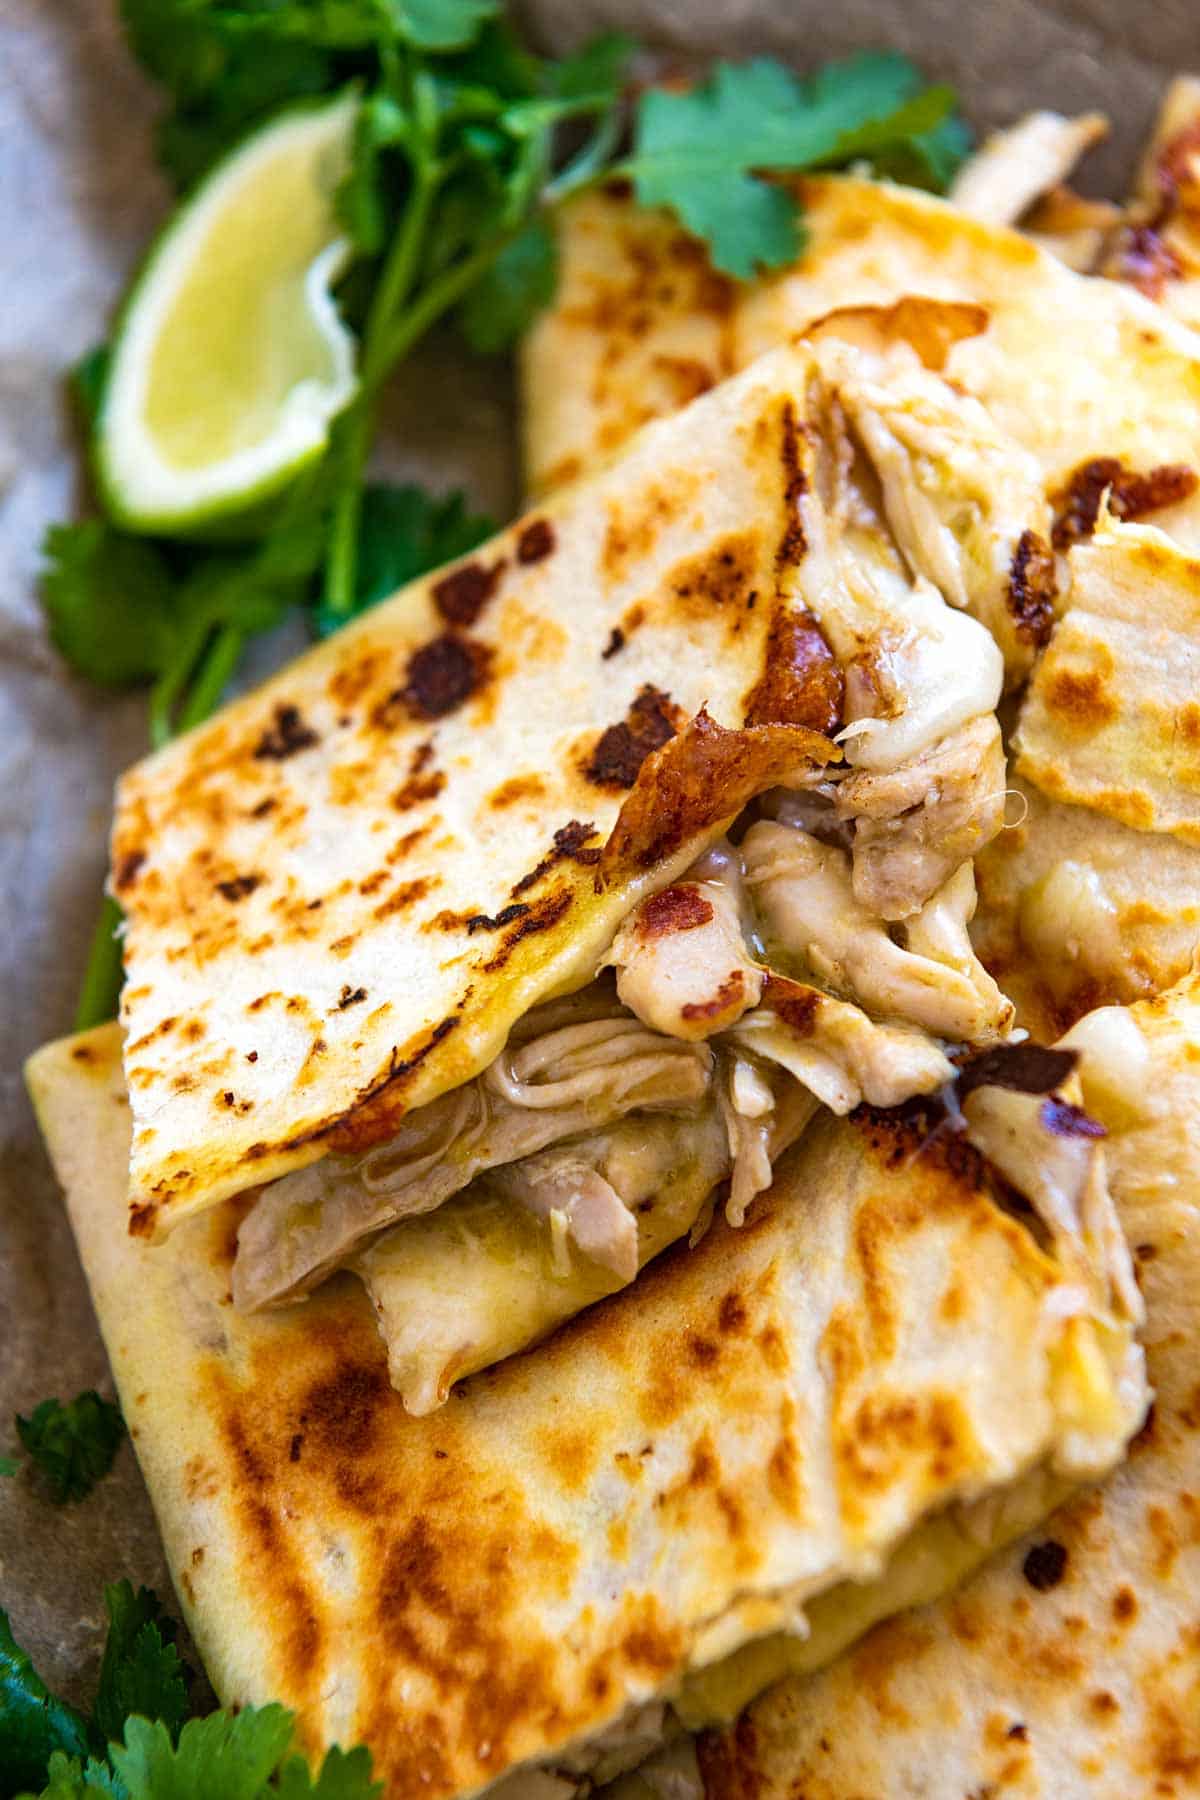
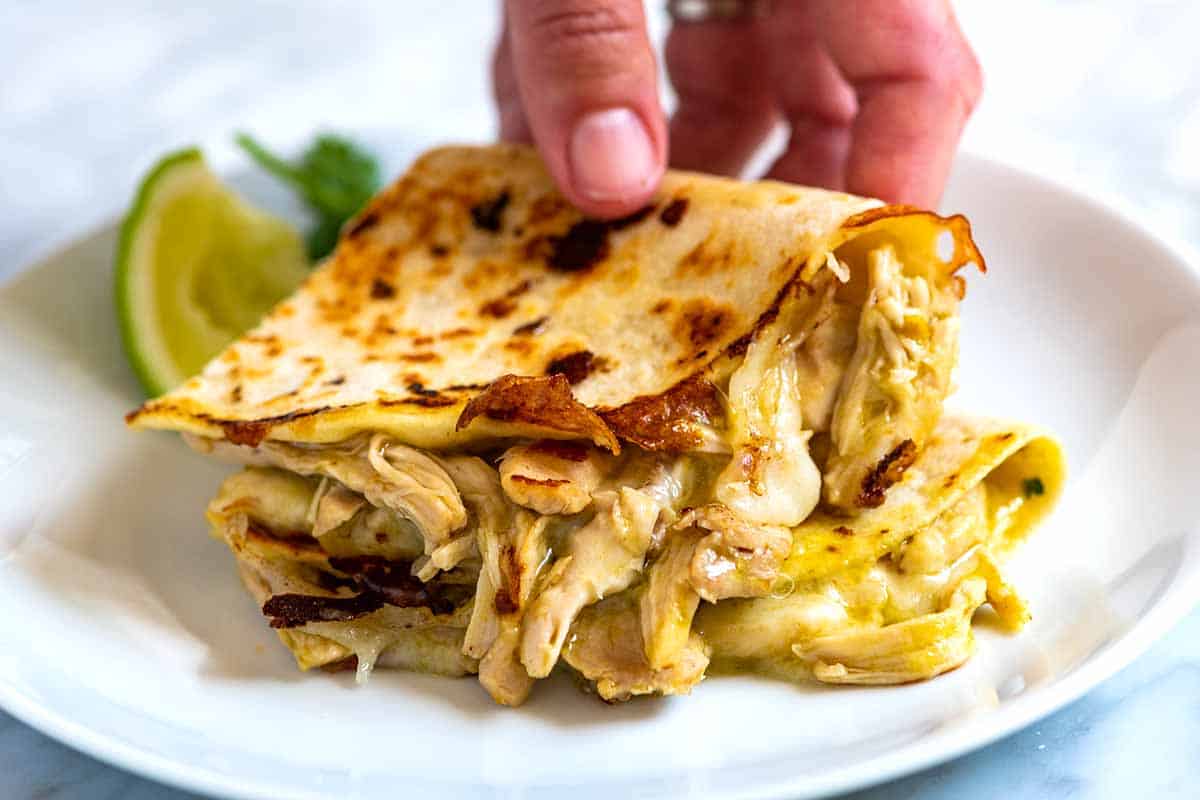
    My favorite chicken quesadilla recipe has gooey cheese and tender chicken cooked in flavorful green chile sauce. They’re so good that it’s hard to eat just one.

    Chicken Quesadillas

    Save this chicken quesadilla recipe for the next time you need a slam dunk, super flavorful, easy meal. Our green chicken enchiladas inspired the chicken inside the quesadilla. It’s juicy, tender, and quick!

    I love using homemade flour tortillas, but if you’re in a hurry, skip that and use your favorite store-bought brand instead. For another easy, really delicious option, try our vegetable quesadillas or these breakfast quesadillas, which are also a personal favorite!

    Key Ingredients

    • Tortillas: I love using these flour tortillas or homemade corn tortillas, but if you’re short on time, store-bought works great. I usually use flour for quesadillas, but my son prefers corn, so use whatever you prefer!
    • Chicken: You can use either chicken breast or chicken thighs for these quesadillas. I cook the chicken using a quick and easy method similar to my shredded chicken recipe, which keeps it juicy and tender.
    • Green Enchilada Sauce: Feel free to use your favorite store-bought enchilada sauce (I recommend Hatch or Fronterra) or try my homemade salsa verde. If you’re not a fan of green chile sauce, you can swap it for red, like this easy enchilada sauce.
    • Cheese: If you add cheese, go for something that melts nicely, like queso de Oaxaca or Monterey Jack. For a dairy-free option, try a spoonful of my delicious vegan queso.

    Find the full recipe with measurements below.

    How to Make Our Favorite Chicken Quesadillas

    Tip 1: Don’t miss the green chile chicken. Tossing your chicken with green enchilada sauce truly makes these the best quesadillas. They turn out so flavorful, and thanks to the sauce, the chicken stays juicy.

    Here are two ways to prepare it: Add your chicken to a saucepan with green enchilada sauce and gently simmer until cooked through, or use our Instant Pot salsa verde chicken recipe.

    Shredded Green Chile Chicken ready for Chicken Quesadillas

    Tip 2: Use a heavy-bottomed pan. For the very best quesadillas that are perfectly browned on the outside, cook them in a heavy-bottomed pan or skillet. Think a cast-iron pan, a heavy stainless steel skillet, or the more traditional comal (a flat griddle used in Mexico, Central America, and parts of South America).

    Serving Suggestions

    Serve these warm with your favorite quesadilla toppings and sides. I love homemade guacamole, pico de gallo, fresh lime wedges, and a little sour cream. To make this a complete meal, consider adding rice and beans. I love our cilantro lime rice or Mexican rice with homemade refried beans or these saucy black beans.

    More Quesadilla Recipes

    A plate with chicken quesadillas

    The Best Chicken Quesadillas

    • PREP
    • COOK
    • TOTAL

    I love this chicken quesadilla recipe with tender chicken cooked in flavorful salsa verde and lots of melted cheese. You can make the chicken in advance and keep it in the fridge or freezer for another day. See our storing tips below the recipe!

    6 Quesadillas

    Watch Us Make the Recipe

    You Will Need

    3 pounds boneless chicken thighs or chicken breasts

    2 cups green enchilada sauce or Mexican salsa verde

    6 medium to large flour or corn tortillas, see homemade flour tortillas

    2 cups mild melting cheese like queso de Oaxaca or Monterey Jack, shredded, 8 ounces

    Spray oil or oil brushed onto the pan

    Fresh cilantro and lime wedges for serving

    Salt, to taste

    Directions

      1Cook the chicken: In a large, heavy-bottomed saucepan, combine the chicken and green enchilada sauce (or salsa). Bring to a boil over high heat, then reduce to a gentle simmer. Partially cover the pan and cook until the chicken is tender and cooked through, 20 to 30 minutes.

      2Shred the chicken: Transfer the chicken to a cutting board. When cool enough to handle, shred the meat with two forks (or your fingers). Return the shredded chicken to the sauce and stir to coat. Taste and season with salt, if needed.

      3Prepare the skillet: Heat a heavy-bottomed skillet over medium heat. Lightly brush or spray the pan with oil, then place one tortilla in the skillet.

      4Cook the quesadillas: Scatter about ⅓ cup of cheese over the tortilla, then spoon ½ cup of shredded chicken onto one half, letting any excess sauce drip off first. Fold the tortilla in half and press gently with a spatula to seal. Cook until the underside is golden and toasted, about 2 minutes.

      5Flip and serve: Flip the quesadilla and cook for 1 to 2 minutes more, until the second side is toasted and the cheese has melted. Transfer the tortillas to a cutting board, slice them in half, and repeat with the remaining tortillas.

    Adam and Joanne’s Tips

    • Make-ahead and storing: This recipe makes about 5 cups of shredded chicken, enough for 6 quesadillas (maybe more). Leftover chicken can be stored in an airtight container in the fridge for up to 3 days or in the freezer for up to 1 month. Add leftover chicken to rice bowls, tacos, or salad.
    • Keep quesadillas warm: Keep them warm on a baking sheet in a 200°F (93°C) oven while you finish making the remaining quesadillas.
    • The nutrition facts provided below are estimates.

    Nutrition Per Serving
    Serving Size
    1 quesadilla
    /
    Calories
    444
    /
    Total Fat
    19.7g
    /
    Saturated Fat
    8.8g
    /
    Cholesterol
    127.7mg
    /
    Sodium
    1003.7mg
    /
    Carbohydrate
    31.9g
    /
    Dietary Fiber
    1.7g
    /
    Total Sugars
    3.9g
    /
    Protein
    34.6g


    AUTHOR:

    Joanne Gallagher

    Adam and Joanne of Inspired Taste

    We are Adam and Joanne Gallagher, the creators of Inspired Taste. Established in 2009, Inspired Taste grew from a childhood dream into one of the internet’s most trusted recipe sites with hundreds of reliable recipes, step-by-step videos, and expert tips.More About Us
    Source link

  • Honey Walnut Shrimp Recipe | The Recipe Critic

    Honey Walnut Shrimp Recipe | The Recipe Critic

    This website may contain affiliate links and advertising so that we can provide recipes to you. Read my disclosure policy.

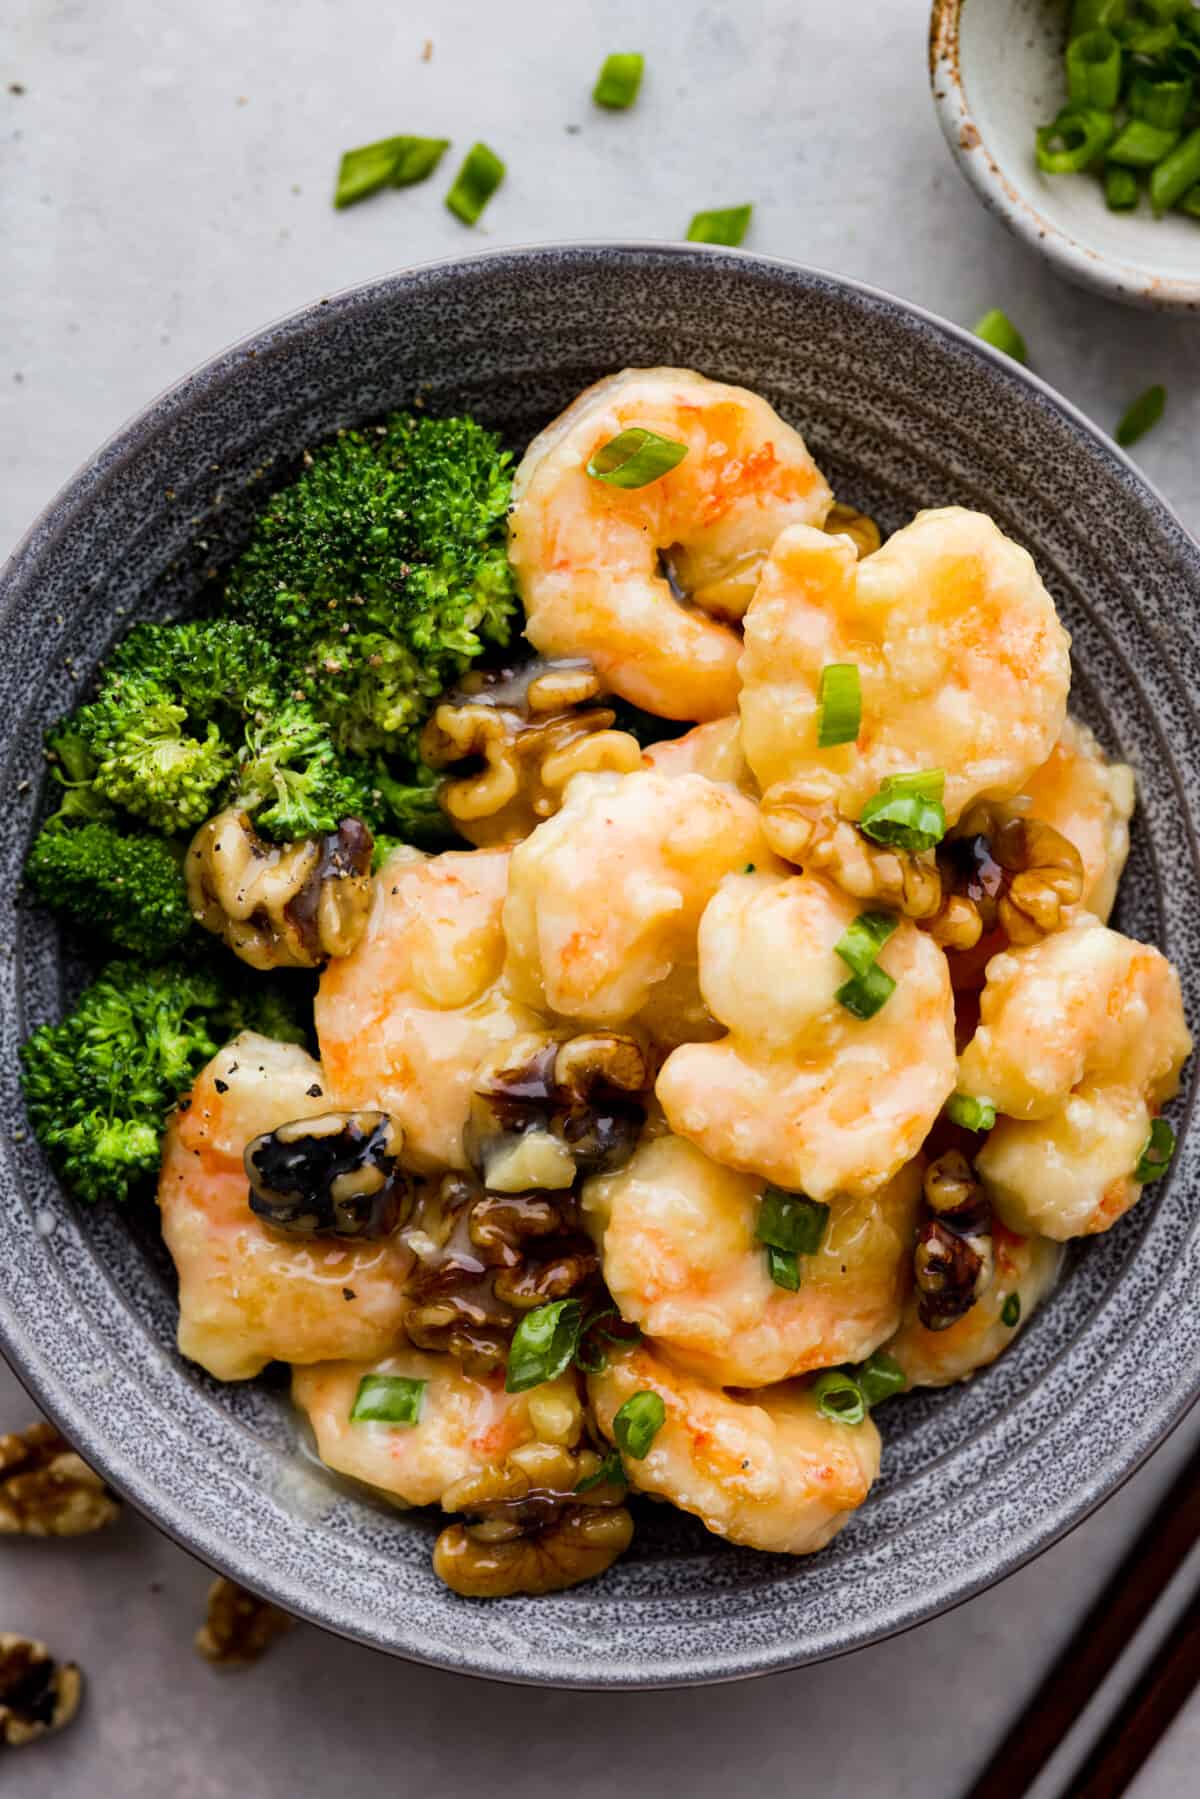
    Crispy shrimp tossed in a creamy sweet sauce with candied walnuts. This honey walnut shrimp is so much better than takeout and one of the best shrimp recipes that you will make!

    Calling all shrimp lovers! Here are more recipes you need to add to the dinner lineup: bang bang shrimp, dynamite shrimp, and Hawaiian-style garlic shrimp!

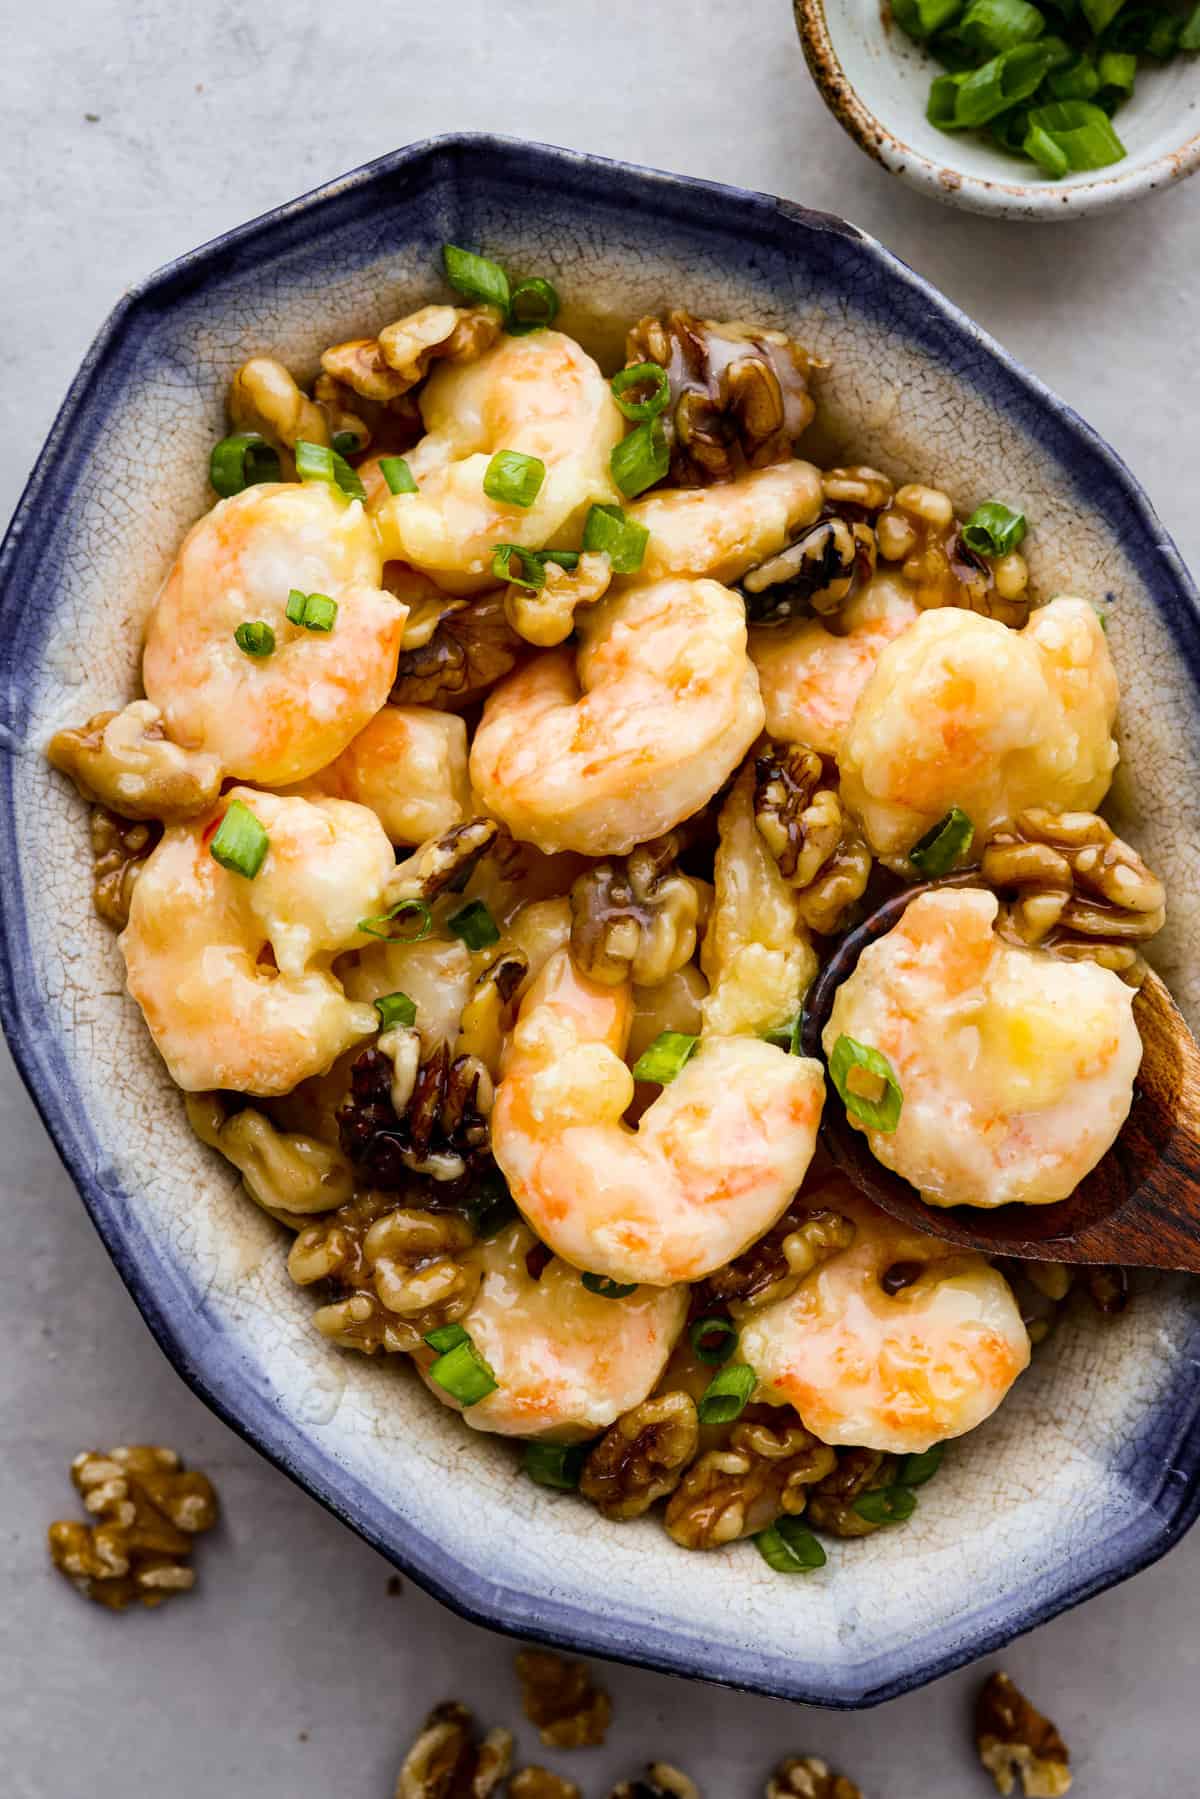
    Hero image of crispy walnut shrimp on a blue and white serving dish.

    A Reader’s Review

    Perfect and delicious! It turned out just as I was hoping, and really hits the mark for those craving the Panda Express version! Cannot recommend enough!

    Scott

    Honey Walnut Shrimp Recipe

    Let’s talk shrimp. Do you love it or hate it? My husband LOVES shrimp! He asks me to make it all the time. I wasn’t the biggest fan of it before, but I am a firm believer in giving things a second try. I’m so happy I did because shrimp is so delicious and versatile! Since honey walnut shrimp is such a popular dish, I decided to try recreating it at home with fresh, simple ingredients. No need to make a trip to Panda Express this time!

    This is a great recipe to start with if you aren’t a huge shrimp fan. (It will make you a believer!) First of all, the walnuts get a crunchy candied outside. Then, you pan fry the shrimp until the outside gets nice and crispy. But this honey glaze you guys… it is out of this world! It’s sweet, savory, creamy, and coats each piece of crispy shrimp perfectly. With honey walnut shrimp this good, you won’t be able to load enough onto your plate.

    Ingredients for Honey Walnut Shrimp

    The sauce is a combination of honey, mayonnaise, and sweetened condensed milk. Yes, you heard that right. Sweetened condensed milk! Just a little of this added to the sauce brings all of the flavors together and adds such a delicious and sweet glaze to the shrimp. And the candied walnuts throughout, so amazing!

    • Water: Adjusts the consistency of the honey glaze.
    • Sugar: Sweetens everything, making the walnuts sugary and giving a sweet taste to the shrimp.
    • Walnuts: Makes the dish crunchy and nutty when coated with sugar, which pairs nicely with the shrimp and sauce.
    • Vegetable Oil: Used to fry the shrimp, making them crispy and golden on the outside while keeping them soft inside.
    • Egg: Helps the cornstarch stick to the shrimp.
    • Cornstarch: The main coating for the honey walnut shrimp.
    • Shrimp: I used large deveined shrimp, but you can use any size you want. You may just need to adjust the cooking times a bit.
    • Mayonnaise: So the sauce is creamy and rich. Regular mayo and Japanese mayo (also known as kewpie mayo) both work!
    • Honey: Adds sweetness to the sauce, making it tasty and blending well with the walnuts.
    • Sweetened Condensed Milk: The secret ingredient! This adds a wonderful creaminess to the sauce.
    • Sliced Green Onions: Adds a little fresh onion taste and makes the dish look nice.

    Let’s Get Cooking!

    Honey walnut shrimp is the perfect 30-minute meal to impress your family with. Make a batch of my General Tso’s Chicken and Beef Chow Mein for the full takeout experience!

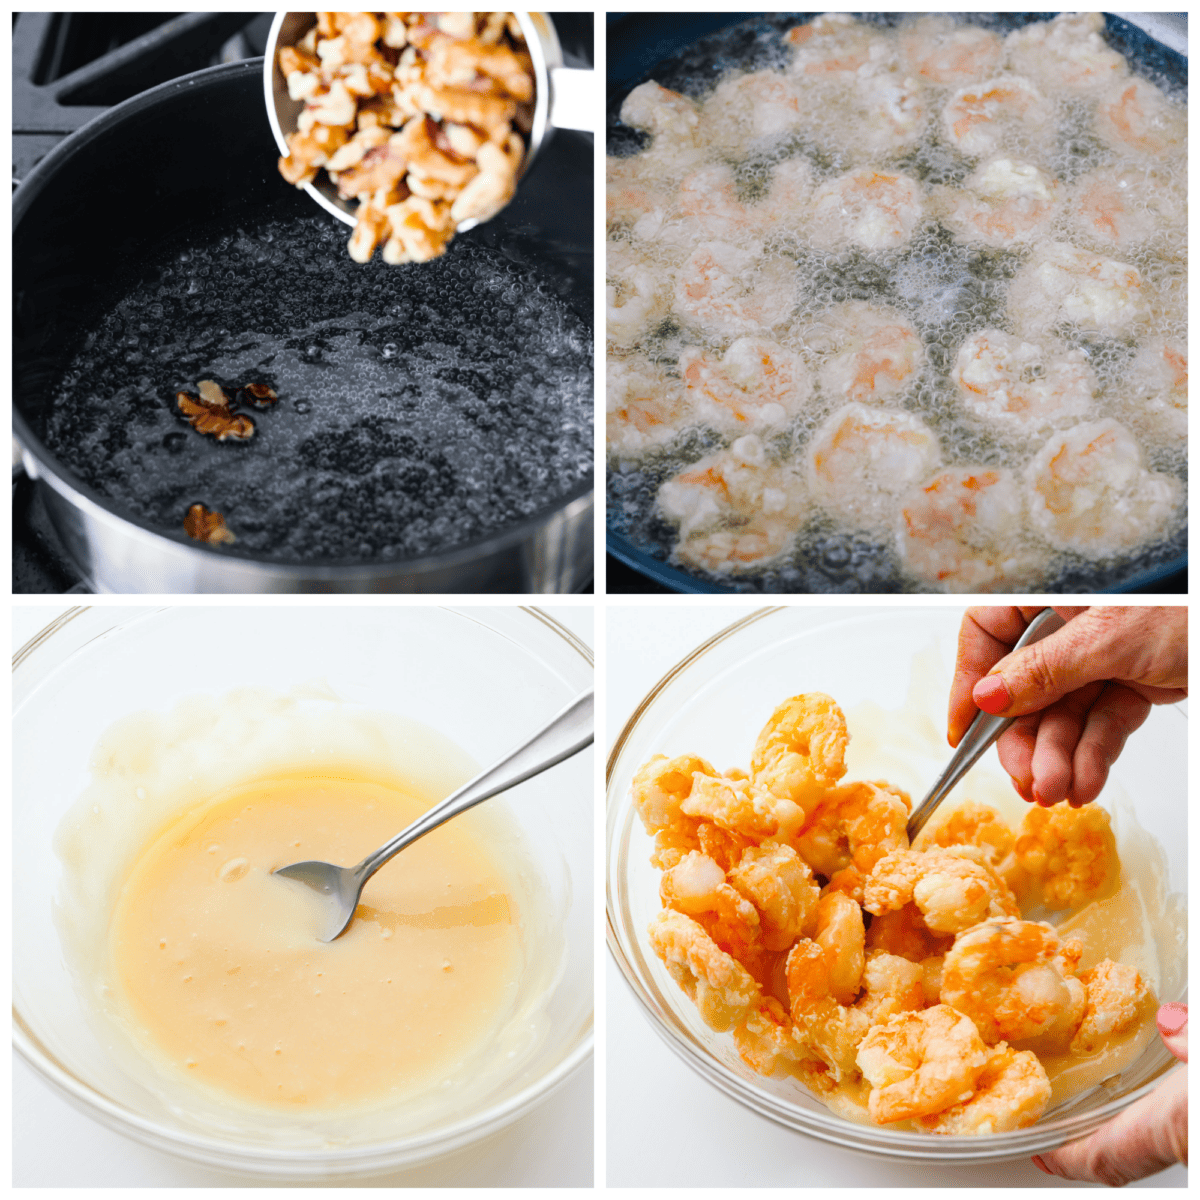
    1. Candy Walnuts: In a small saucepan stir together the water and sugar. Then bring to a boil and add the walnuts. Boil for about 2 minutes then drain and place on a cookie sheet to dry.
    2. Fry Shrimp: Heat the oil in a heavy deep skillet over medium high heat. In a small bowl whisk the egg. Then add the cornstarch to another small bowl. Dip the shrimp into the egg and then the cornstarch. Fry the shrimp for about 5 minutes or until they turn pink and the outside is golden brown. Remove with a slotted spoon and drain on a paper towel.
    3. Sauce Mixture: In a medium bowl whisk together mayonnaise, honey, and sweetened condensed milk. Add the fried shrimp and toss to coat. Sprinkle with candied walnuts and green onions. Serve honey walnut shrimp fresh with fried rice or any of your other favorite Chinese takeout recipes!
    4-photo collage of the shrimp being breaded and fried.

    Cooking Tips

    You are seriously going to love every single bite. Better-than-takeout recipes are the best! I promise that you are going to love this honey walnut shrimp just as much as my family does. Here are a few ways to make sure your dish turns out perfectly:

    • Candy the Walnuts First: Candy the walnuts early on, allowing them to dry properly on a cookie sheet. This ensures they’re crispy and sweet for the final dish.
    • Prep the Shrimp Well: Make sure to peel and devein the shrimp properly before coating with egg and cornstarch. This helps achieve crispy and evenly-coated shrimp.
    • Knowing When the Shrimp are Done: Fry the shrimp until they turn pink and have a golden brown exterior. Be careful not to overcook, as this can result in tough shrimp.
    • Fry Shrimp in Small Batches: To make sure each piece of shrimp gets cooked through properly, work in small batches and don’t overcrowd your skillet.
    • Drain Excess Oil: After frying, place the shrimp on a paper towel to drain any excess oil. No one likes soggy shrimp!
    • Create the Creamy Honey Sauce: Whisk the mayonnaise, honey, and sweetened condensed milk thoroughly to create a smooth sauce that coats the shrimp evenly.
    • Toss Shrimp Gently: When combining the shrimp with the sauce, toss them gently to ensure each shrimp is coated evenly without breaking that crispy outer texture.

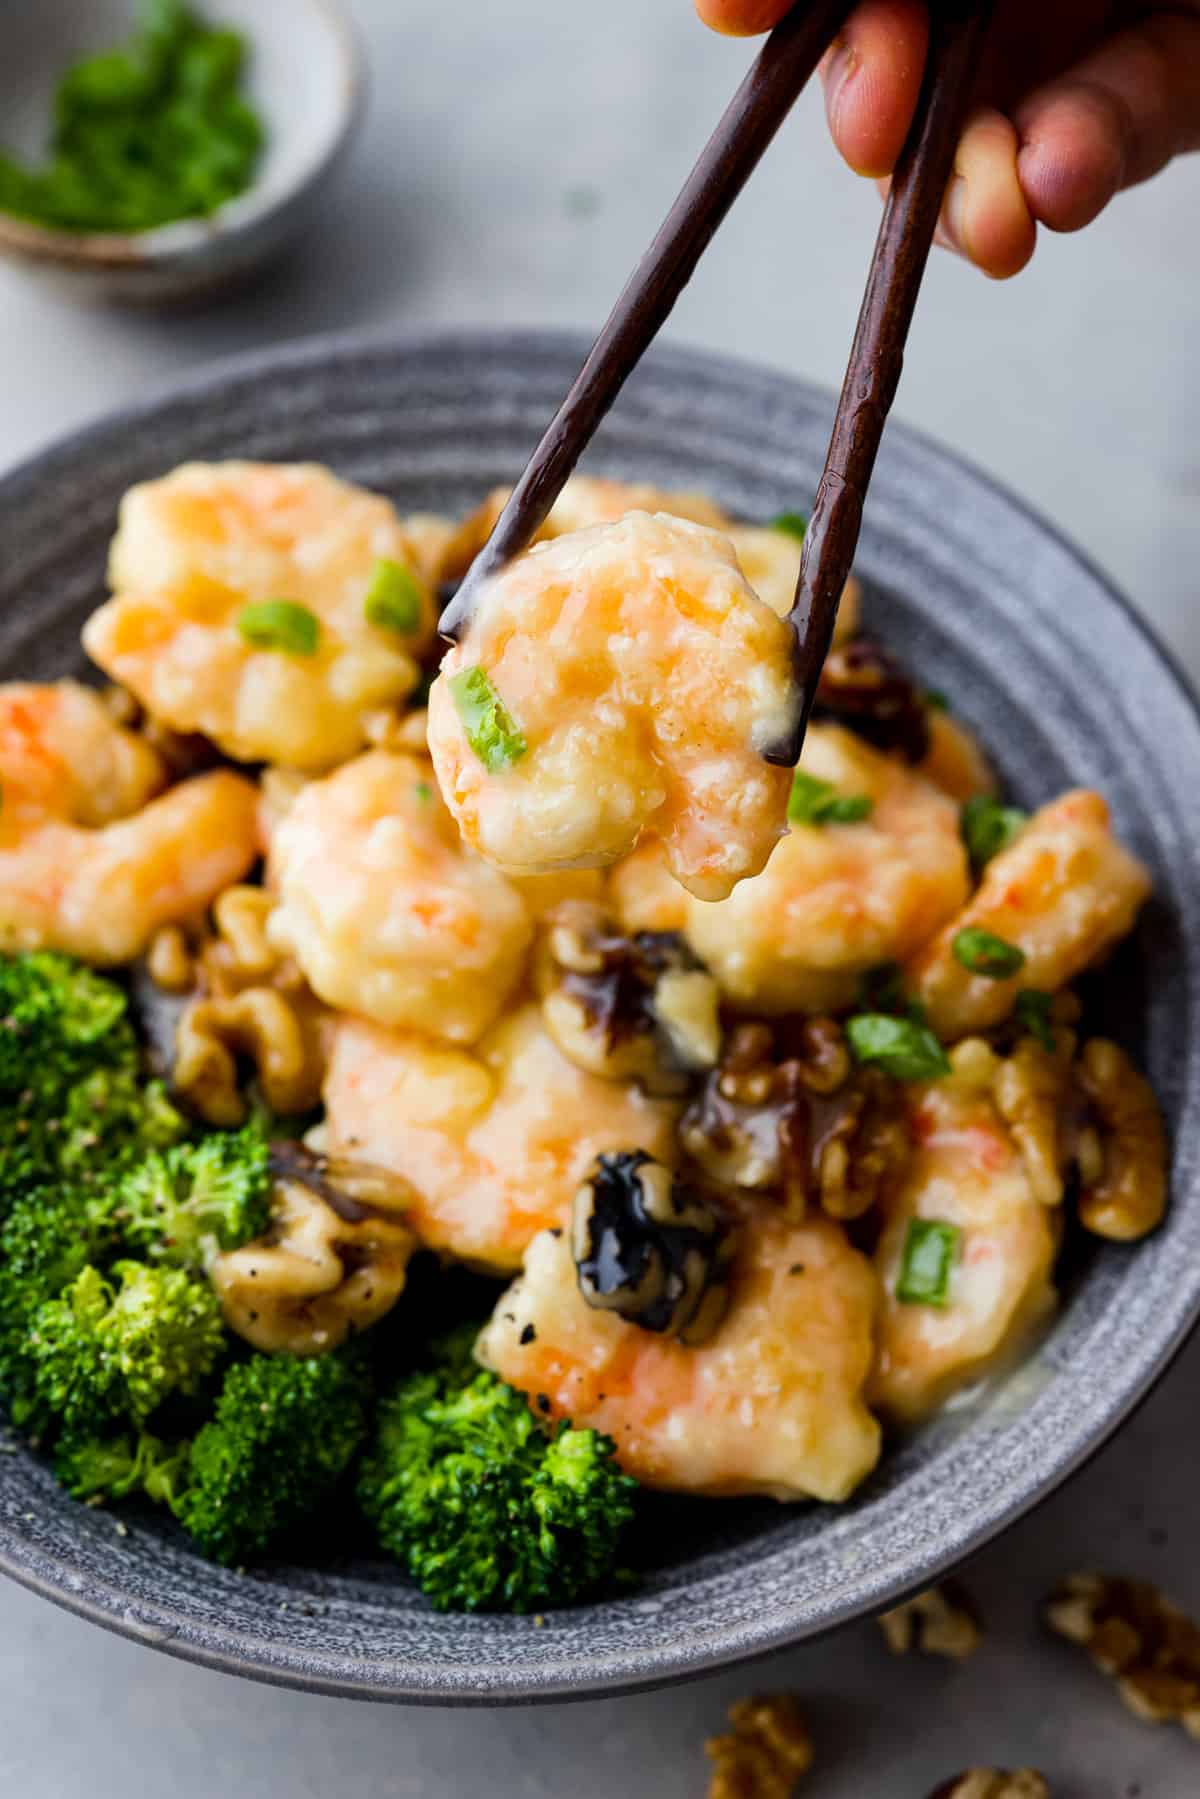
    Shrimp served with broccoli in a gray bowl.

    Storing Leftover Honey Walnut Shrimp

    If you have leftovers of this wonderful shrimp, here’s how to keep it fresh so you can enjoy it later.

    • In the Refrigerator: Transfer shrimp to an airtight container and store for 2-3 days.
    • Reheating: To make sure your shrimp stays crispy on the outside, I recommend reheating it in the oven. Add your honey walnut shrimp to a baking sheet and cook for about 10 minutes at 350 degrees Fahrenheit.

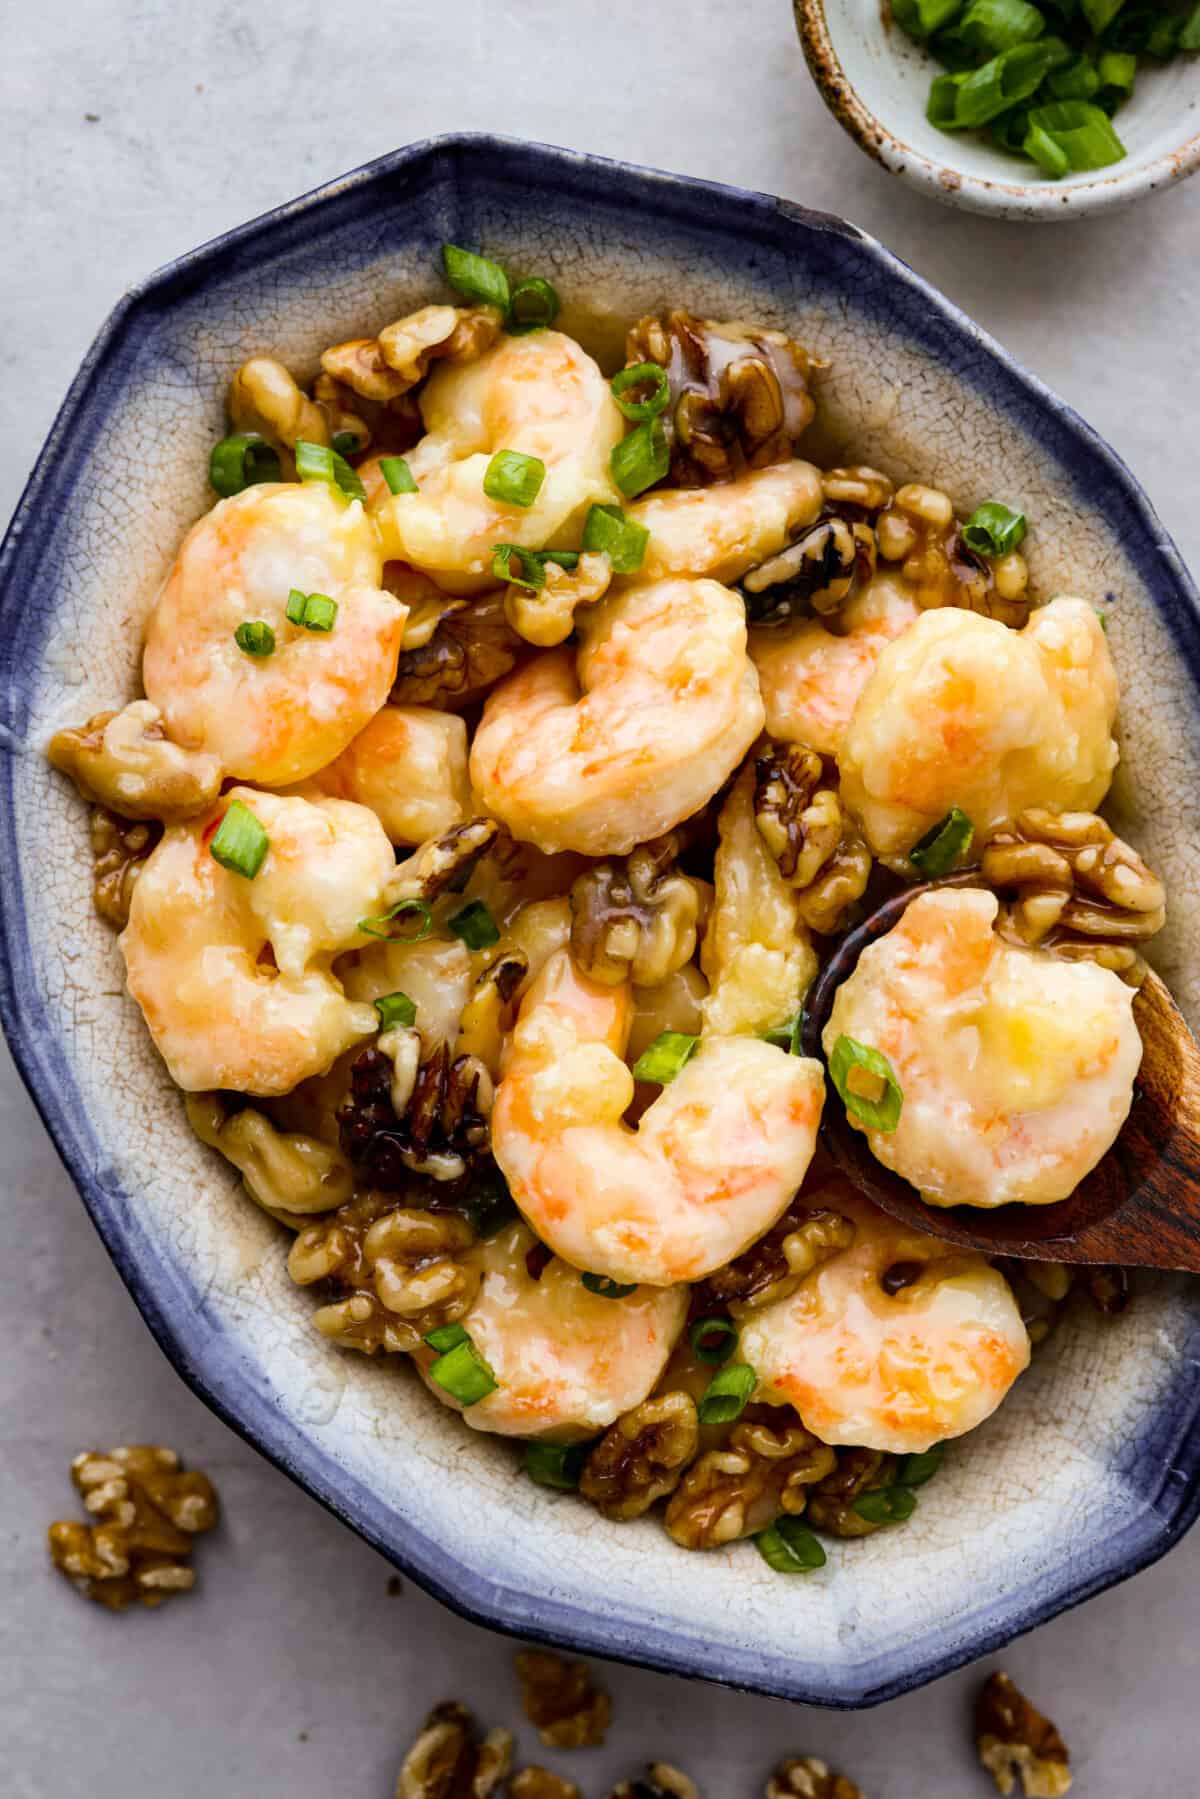
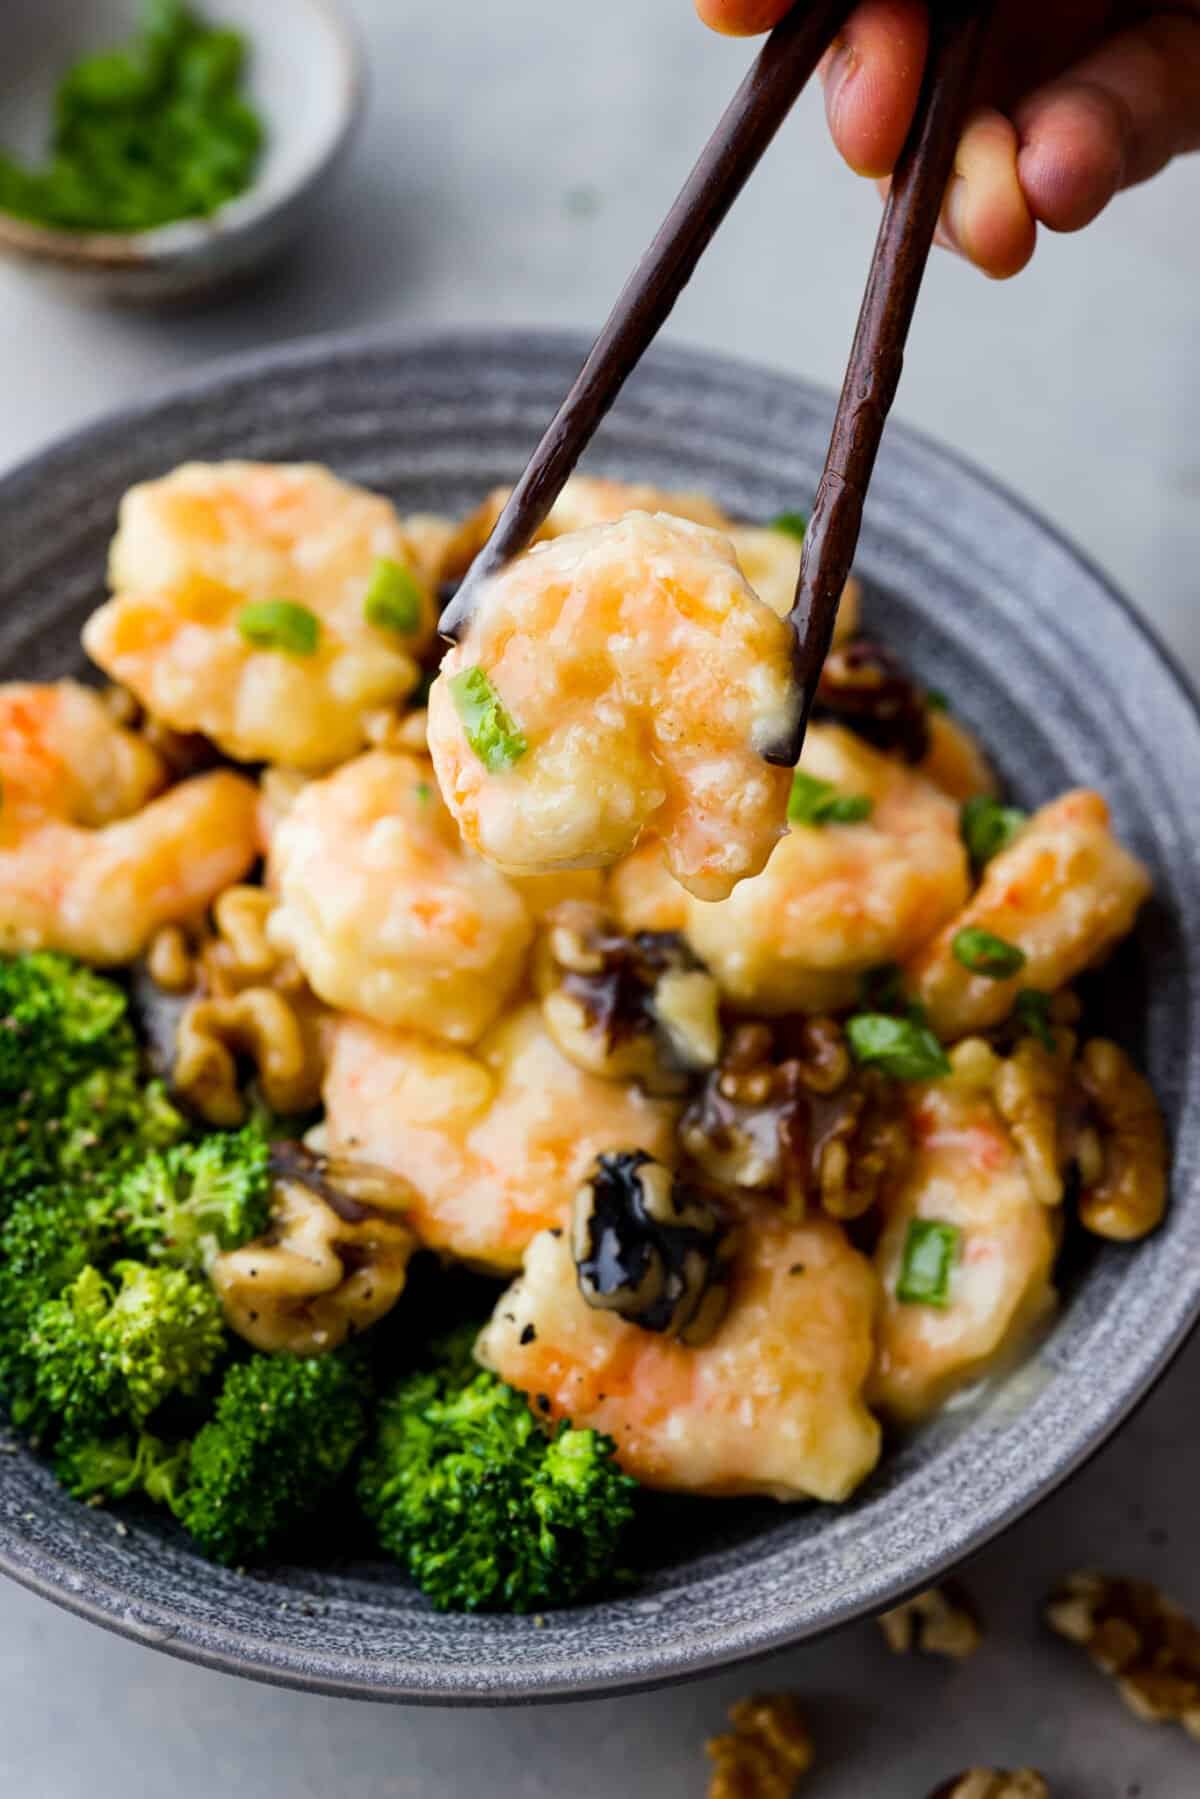
    Picking up a piece of honey walnut shrimp with chopsticks.

    More Better-Than-Takeout Recipes to Try:

    It’s so difficult to only choose four recipes here. I have so many favorites! If you love recreating your favorite Chinese dishes at home, you’ll have to check out my full list of recipes here for more dinner inspiration!

    Pin this now to find it later

    Pin It


    Source link

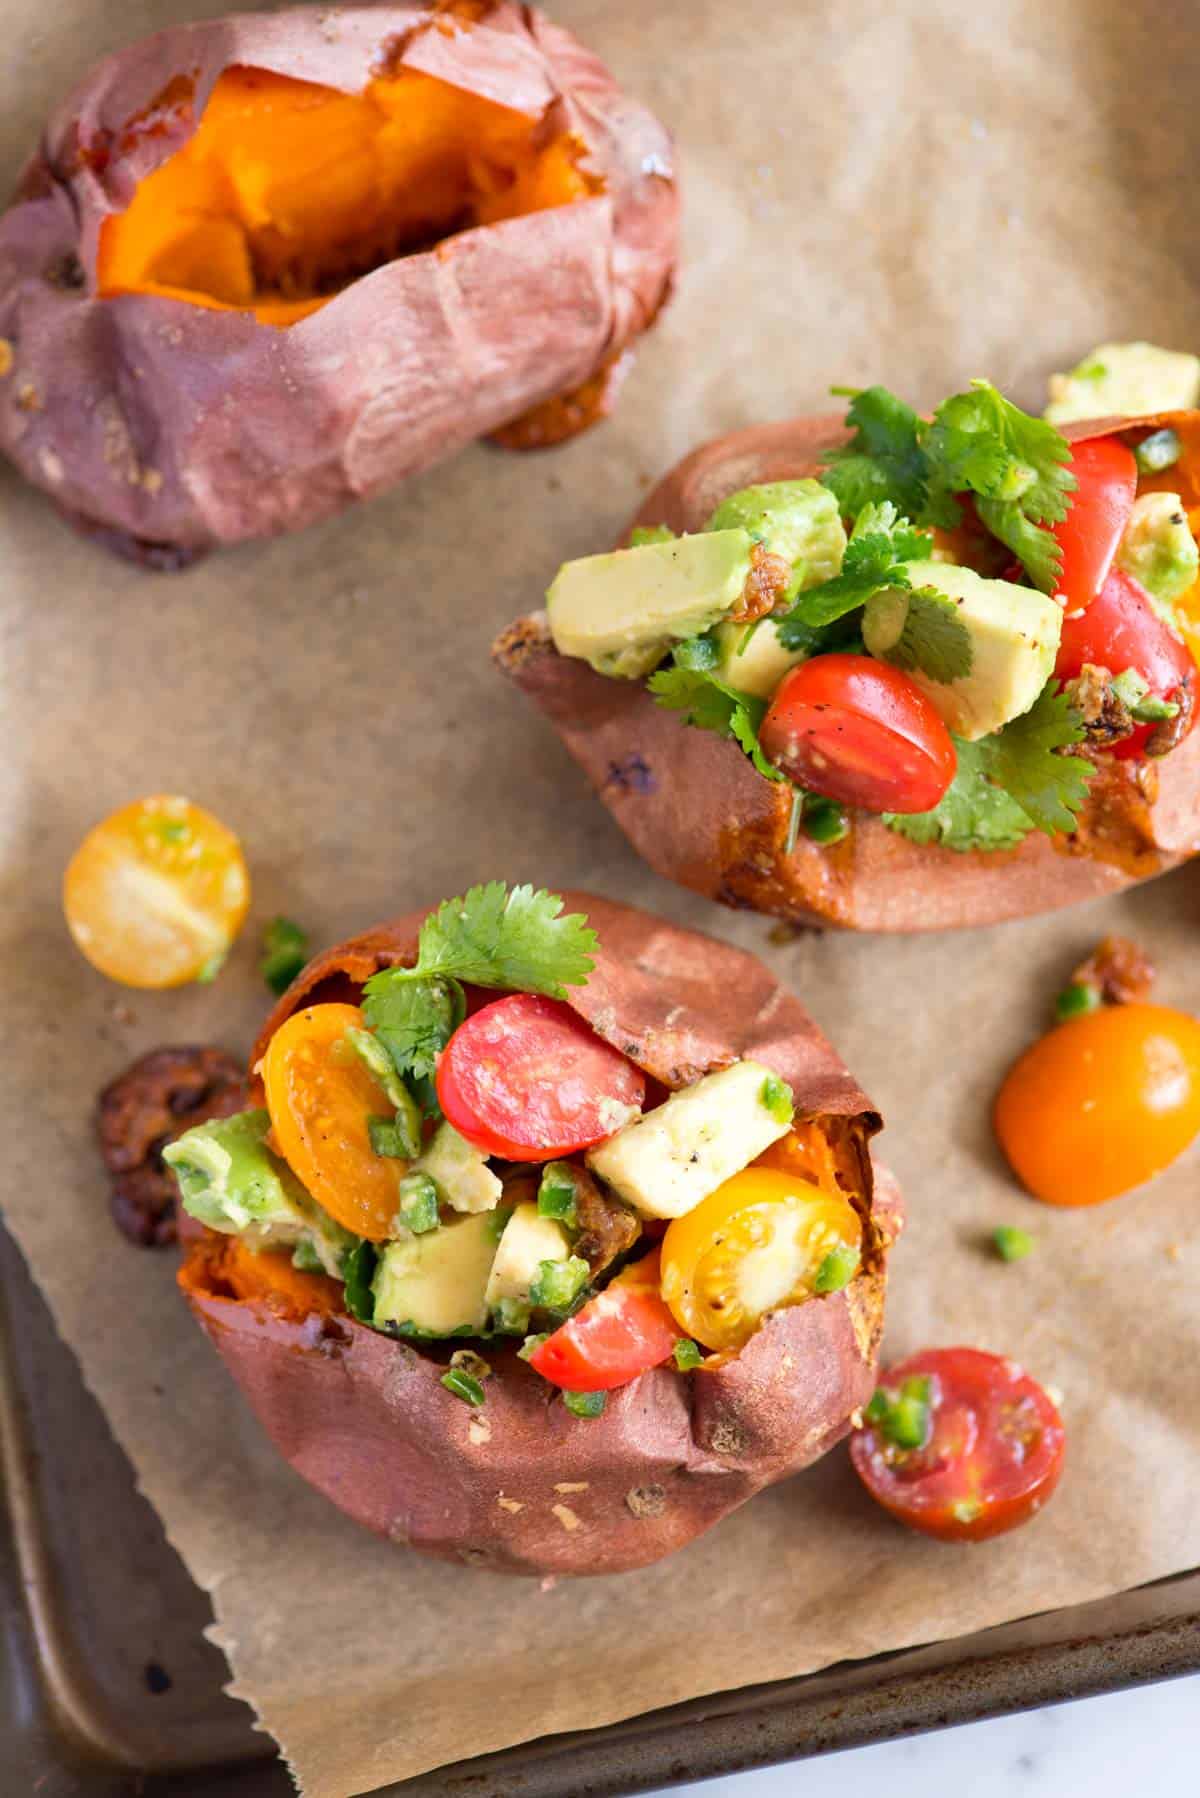
  • Avocado Salsa Stuffed Sweet Potatoes Recipe

    Avocado Salsa Stuffed Sweet Potatoes Recipe

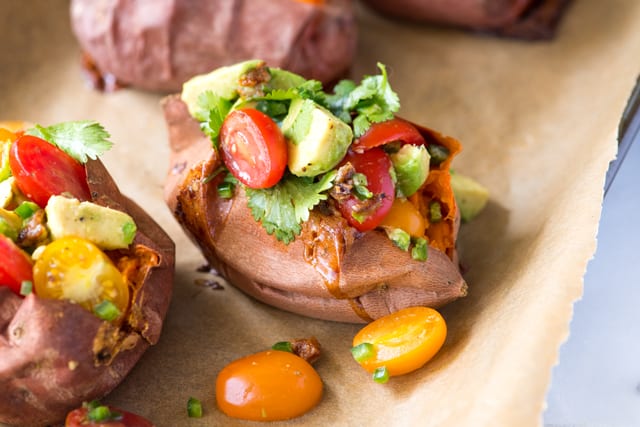
    These outrageously tasty vegan stuffed sweet potatoes are one of my favorite ways to enjoy sweet potatoes! We roast them and then stuff them with our simple avocado and tomato salsa. They are simple and so good!

    Vegan Avocado Salsa Stuffed Sweet Potatoes

    I’m always looking to add to our collection of sweet potato recipes, and these vegan stuffed sweet potatoes are such a great option! We roast the potatoes until soft and tender, then fill them with a zesty, chunky salsa made with avocados, tomatoes, and lime. It’s light and super comforting, perfect for a weeknight meal.

    Roasted sweet potatoes are on regular rotation in our house, so I love throwing in this stuffed version to change things up. This stuffed sweet potato recipe is definitely one you’ll want to make again and again. For more delicious sweet potato inspiration, check out our mashed sweet potatoes, coconut roasted sweet potatoes, or my favorite, sweet potato and black bean tacos!

    Key Ingredients

    • Sweet Potatoes: I look for medium sweet potatoes that are firm and have smooth skin. I also love purple sweet potatoes (ube) for this recipe if you can find them.
    • Garlic: I toss a few garlic cloves onto the baking sheet to roast alongside the sweet potatoes and turn sweet (like roasted garlic). Then, I squeeze the roasted garlic into my avocado and tomato salsa before stuffing the sweet potatoes.
    • Avocado: Use slightly firm, ripe avocados for this so you can chop them into bite-size pieces. To pick them, gently squeeze the avocado with the palm of your hand. If it yields a little when pressed, it’s ready to eat. You can also check under the stem. If the stem pulls away and the area underneath is green, you’ve found an avocado perfect for this recipe.
    • Tomatoes: Use what you love. In the photos, we have used a variety of cherry tomatoes, but any ripe tomato will do.
    • Lime, Jalapeño, and Cilantro: I use this combination when making our avocado salad, which this stuffing is loosely based on. Feel free to leave out the jalapeño or add more, depending on your love of spice.
    Vegan Avocado Salsa Stuffed Sweet Potatoes

    How to Make Stuffed Sweet Potatoes

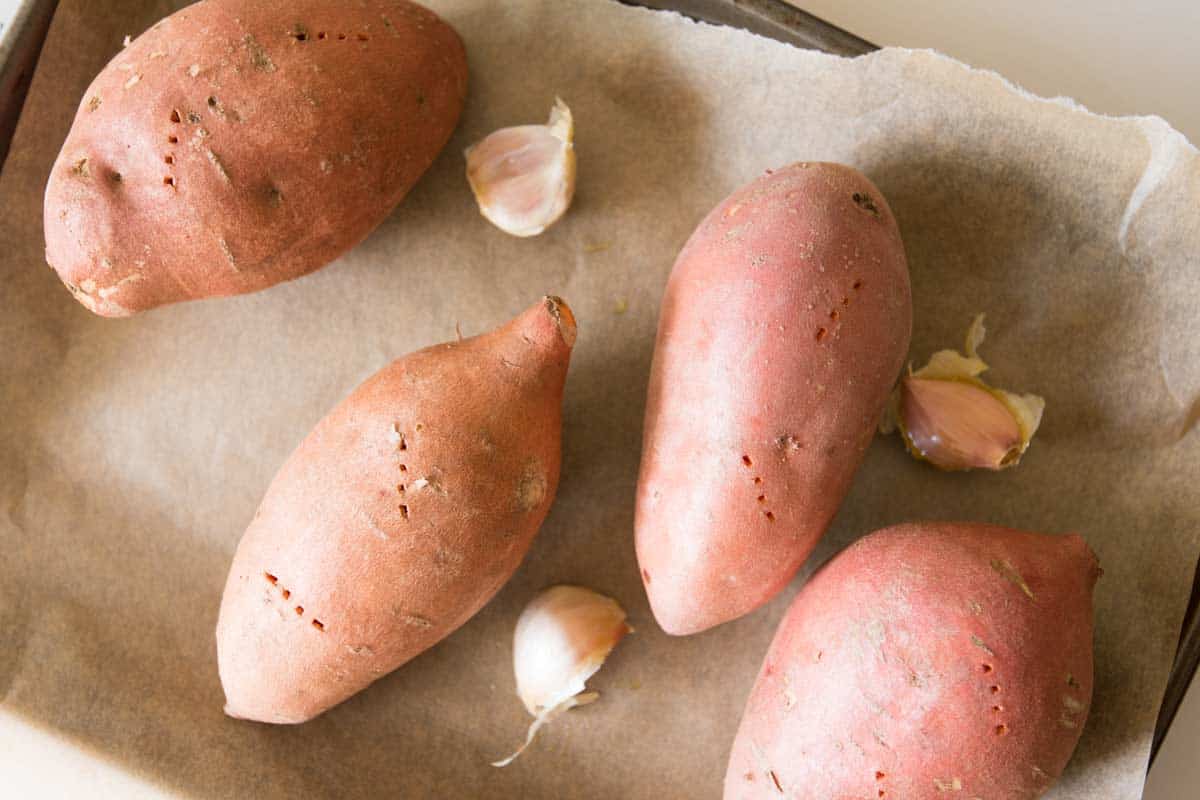
    We roast our sweet potatoes for this recipe, scrub away any dirt, and then use a fork to pierce the potatoes in several places. Place them onto a baking sheet, toss on your garlic cloves (with the peels left on), and then bake in a 400°F oven until they are very sweet and begin oozing (45 to 60 minutes).

    How to Make Stuffed Sweet Potatoes: Roasting the sweet potatoes

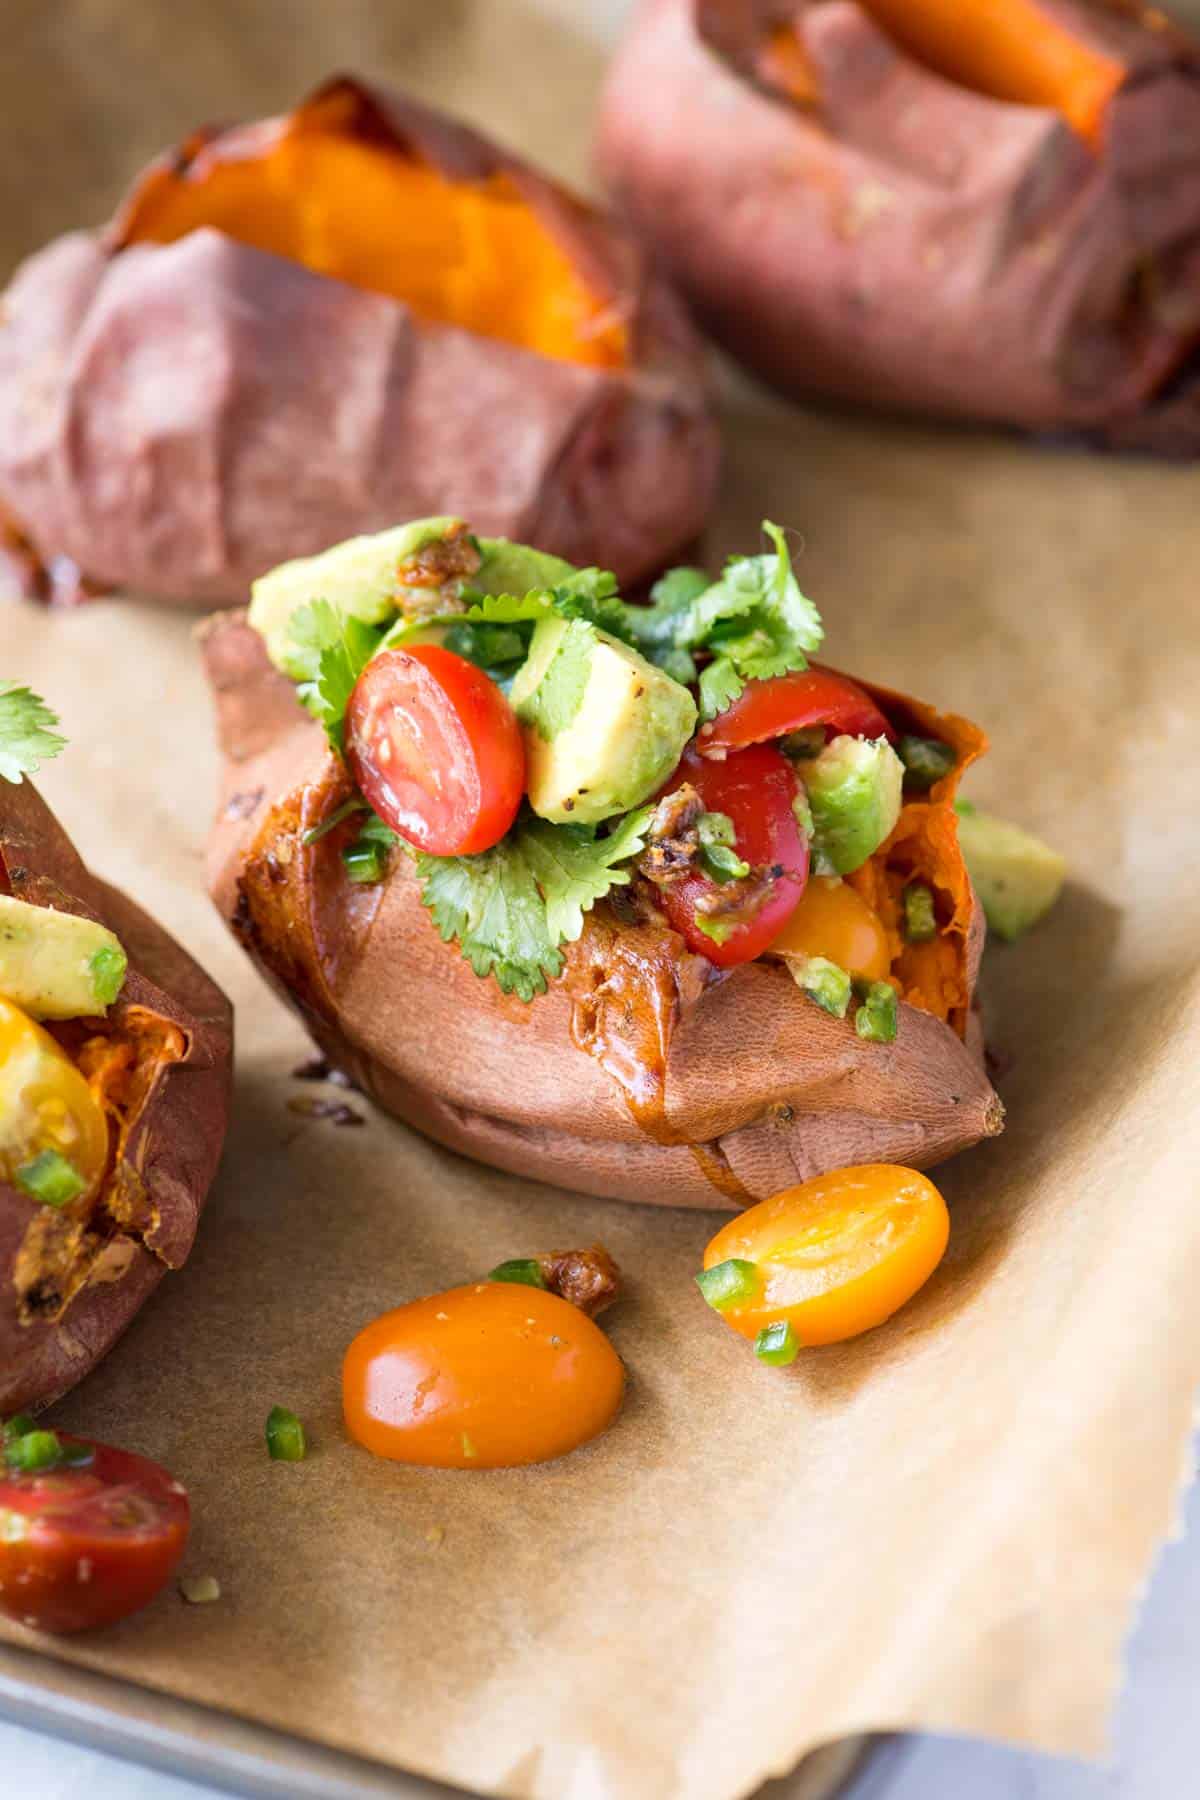
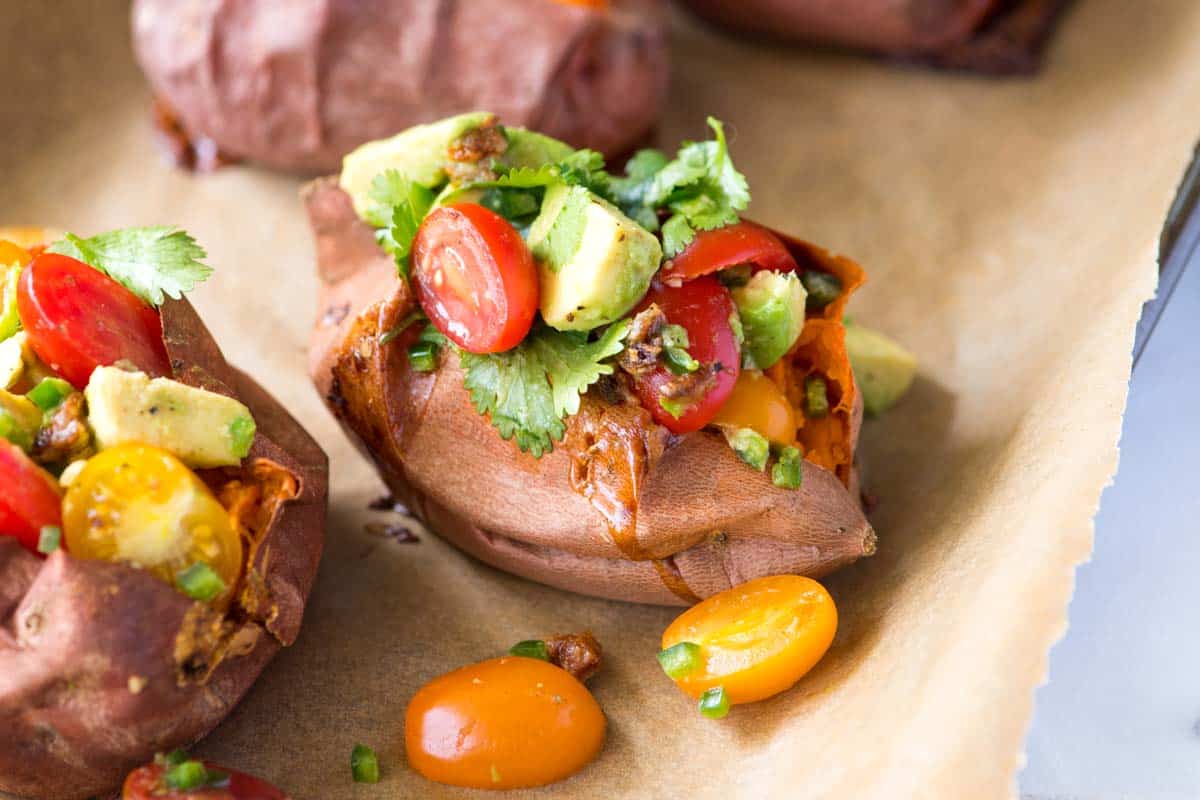
    Make the chunky salsa just as your sweet potatoes are finishing up in the oven. Combine chopped avocado, tomatoes, jalapeño, cilantro, and lime juice, then when they are cool enough to handle, squeeze the soft and sticky roasted garlic into the bowl. Add a pinch of salt and gently toss. Then, make a slit down the middle of your potatoes, and stuff them with as much salsa as you can fit.

    The sweet potatoes are soft and sweet, and the salsa is fresh, bright, and flavorful. We love it!

    Avocado Tomato Stuffed Sweet Potatoes

    Avocado Salsa Stuffed Sweet Potatoes

    • PREP
    • COOK
    • TOTAL

    Our family loves these stuffed sweet potatoes. The sweet potatoes are soft and sweet, and the salsa is fresh, bright, and flavorful. I love this as a light meal or on the side to other dishes. Check our tips below for roasting sweet potatoes in advance and adding protein with beans.

    4 Servings

    You Will Need

    4 medium sweet potatoes

    3 unpeeled garlic cloves

    1 teaspoon olive oil

    1 medium avocado, diced

    2 cups cherry tomatoes, halved

    1/4 cup fresh cilantro leaves

    1 jalapeño

    Salt

    Directions

      1Preheat the oven to 400°F (204°C). Line a baking sheet with parchment paper or foil.

      2Scrub sweet potatoes and pierce in several places with a fork. Place them onto the baking sheet.

      3Toss unpeeled garlic cloves with olive oil and place them around the potatoes on the baking sheet.

      4Bake for 45 minutes to an hour, depending on the size of the potatoes, until very soft and beginning to ooze.

      5While the sweet potatoes are roasting, you can prepare the salsa. Add the chopped avocado, tomato, and cilantro to a medium bowl.

      6Cut the jalapeño in half, lengthwise, and use a spoon to scrape out the white membrane and seeds. The membrane and seeds can be very spicy, so we remove them. Depending on how spicy you like things, you can leave some or all of the membrane and seeds.

      7Finely mince the jalapeño and add to the bowl.

      8When the garlic is cool enough to handle, squeeze the soft, sticky flesh inside the roasted garlic cloves onto your work surface, chop it, and add to the bowl.

      9Squeeze over the juice of one lime wedge, or about 1 to 2 tablespoons, and add a pinch of salt. Gently toss.

      10To serve, cut a slit down the middle of each sweet potato and fill with the tomato avocado salsa.

    Adam and Joanne’s Tips

    • Make ahead: Roast the sweet potatoes, allow them to cool, and store them in an airtight container for up to 4 days. Reheat, make the salsa, stuff them and enjoy. The salsa is best made the day you plan to eat it.
    • Add protein: Add 1 ½ cups drained canned or cooked black beans to the salsa to bump up the protein a bit. Here’s our recipe for how to cook black beans if you need it. Or, stir 2 cups of cooked quinoa into the salsa.
    • The nutrition facts provided below are estimates. We included 1/4 teaspoon of salt.

    Nutrition Per Serving
    Serving Size
    1 stuffed sweet potato
    /
    Calories
    202
    /
    Total Fat
    6.7g
    /
    Saturated Fat
    1g
    /
    Cholesterol
    0mg
    /
    Sodium
    224.8mg
    /
    Carbohydrate
    34.2g
    /
    Dietary Fiber
    7.8g
    /
    Total Sugars
    8.5g
    /
    Protein
    3.7g


    AUTHOR:

    Joanne Gallagher

    Adam and Joanne of Inspired Taste

    We are Adam and Joanne Gallagher, the creators of Inspired Taste. Established in 2009, Inspired Taste grew from a childhood dream into one of the internet’s most trusted recipe sites with hundreds of reliable recipes, step-by-step videos, and expert tips.More About Us
    Source link