Category: Sea Food

  • 30-Minute Bang Bang Shrimp Tacos

    30-Minute Bang Bang Shrimp Tacos

    This website may contain affiliate links and advertising so that we can provide recipes to you. Read my disclosure policy.
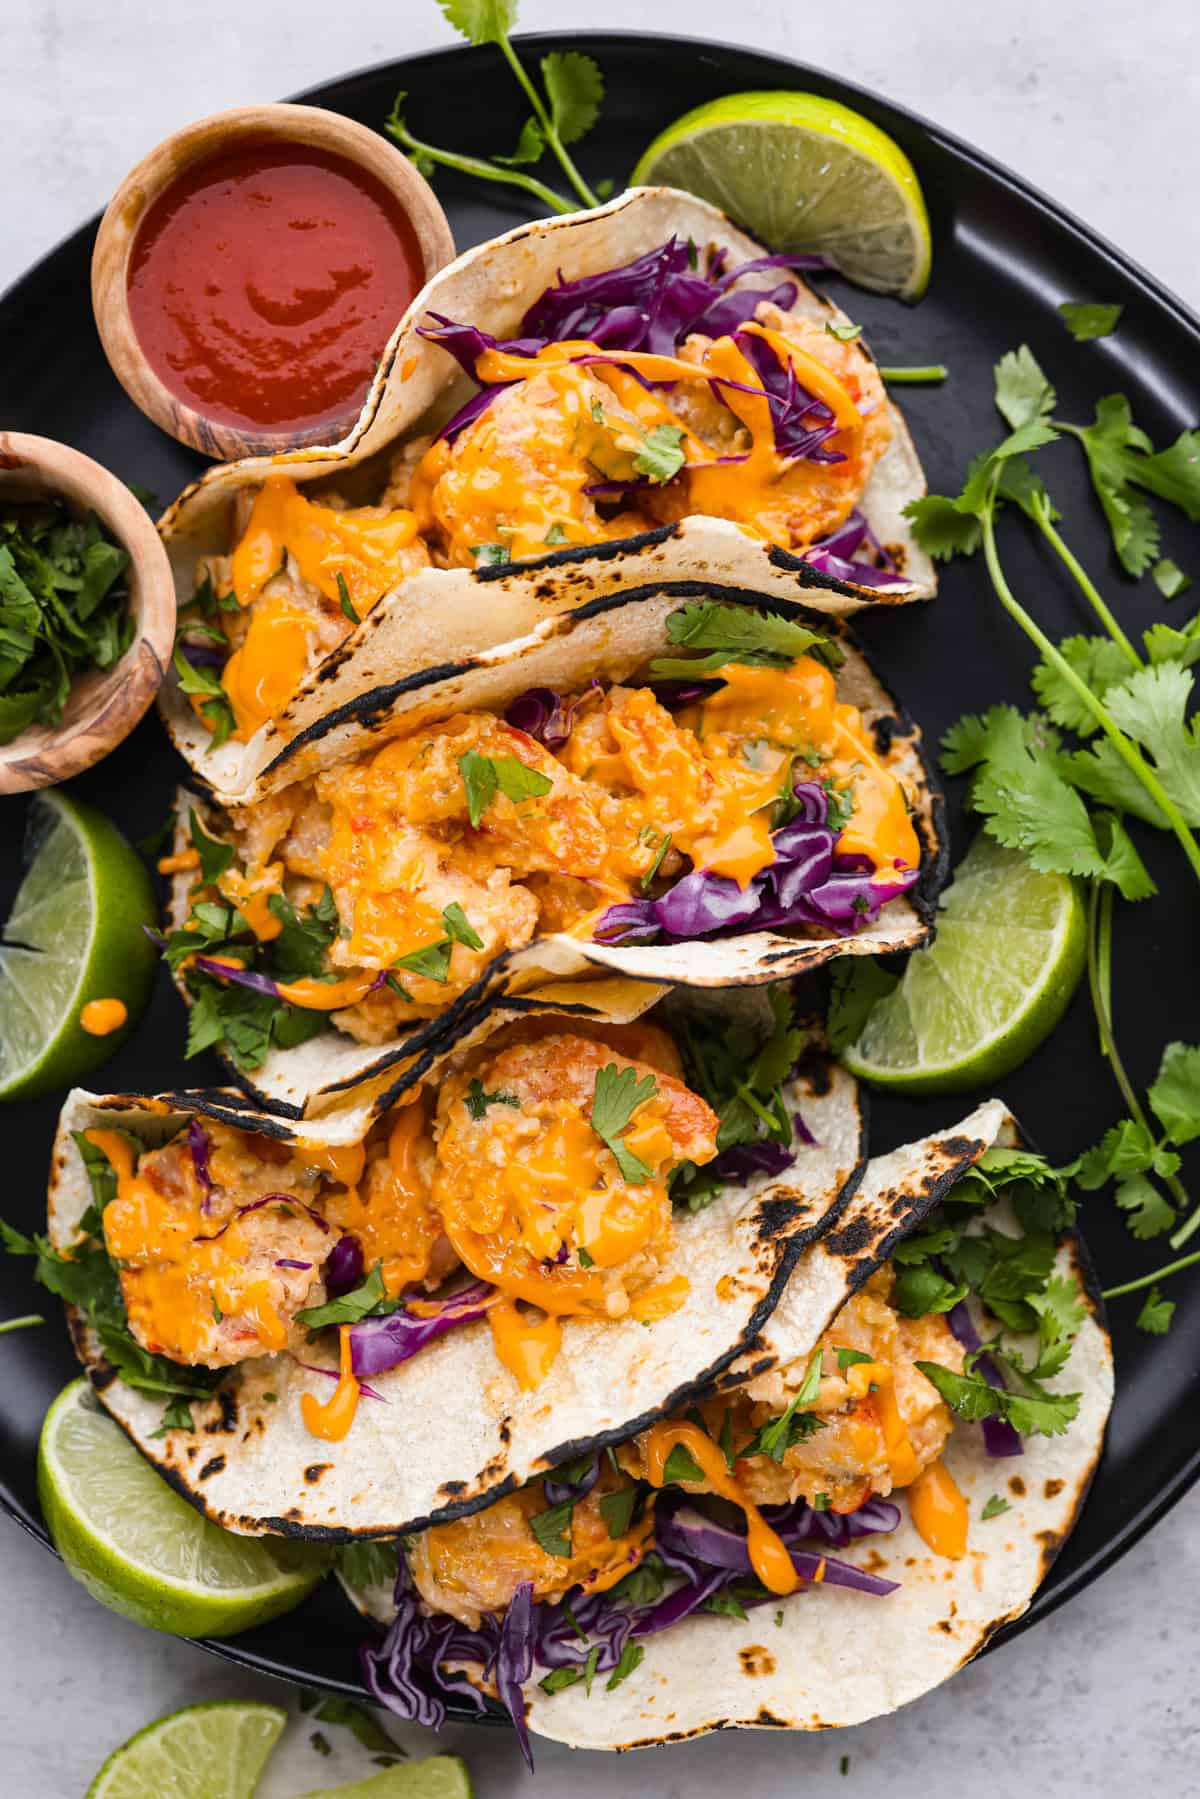
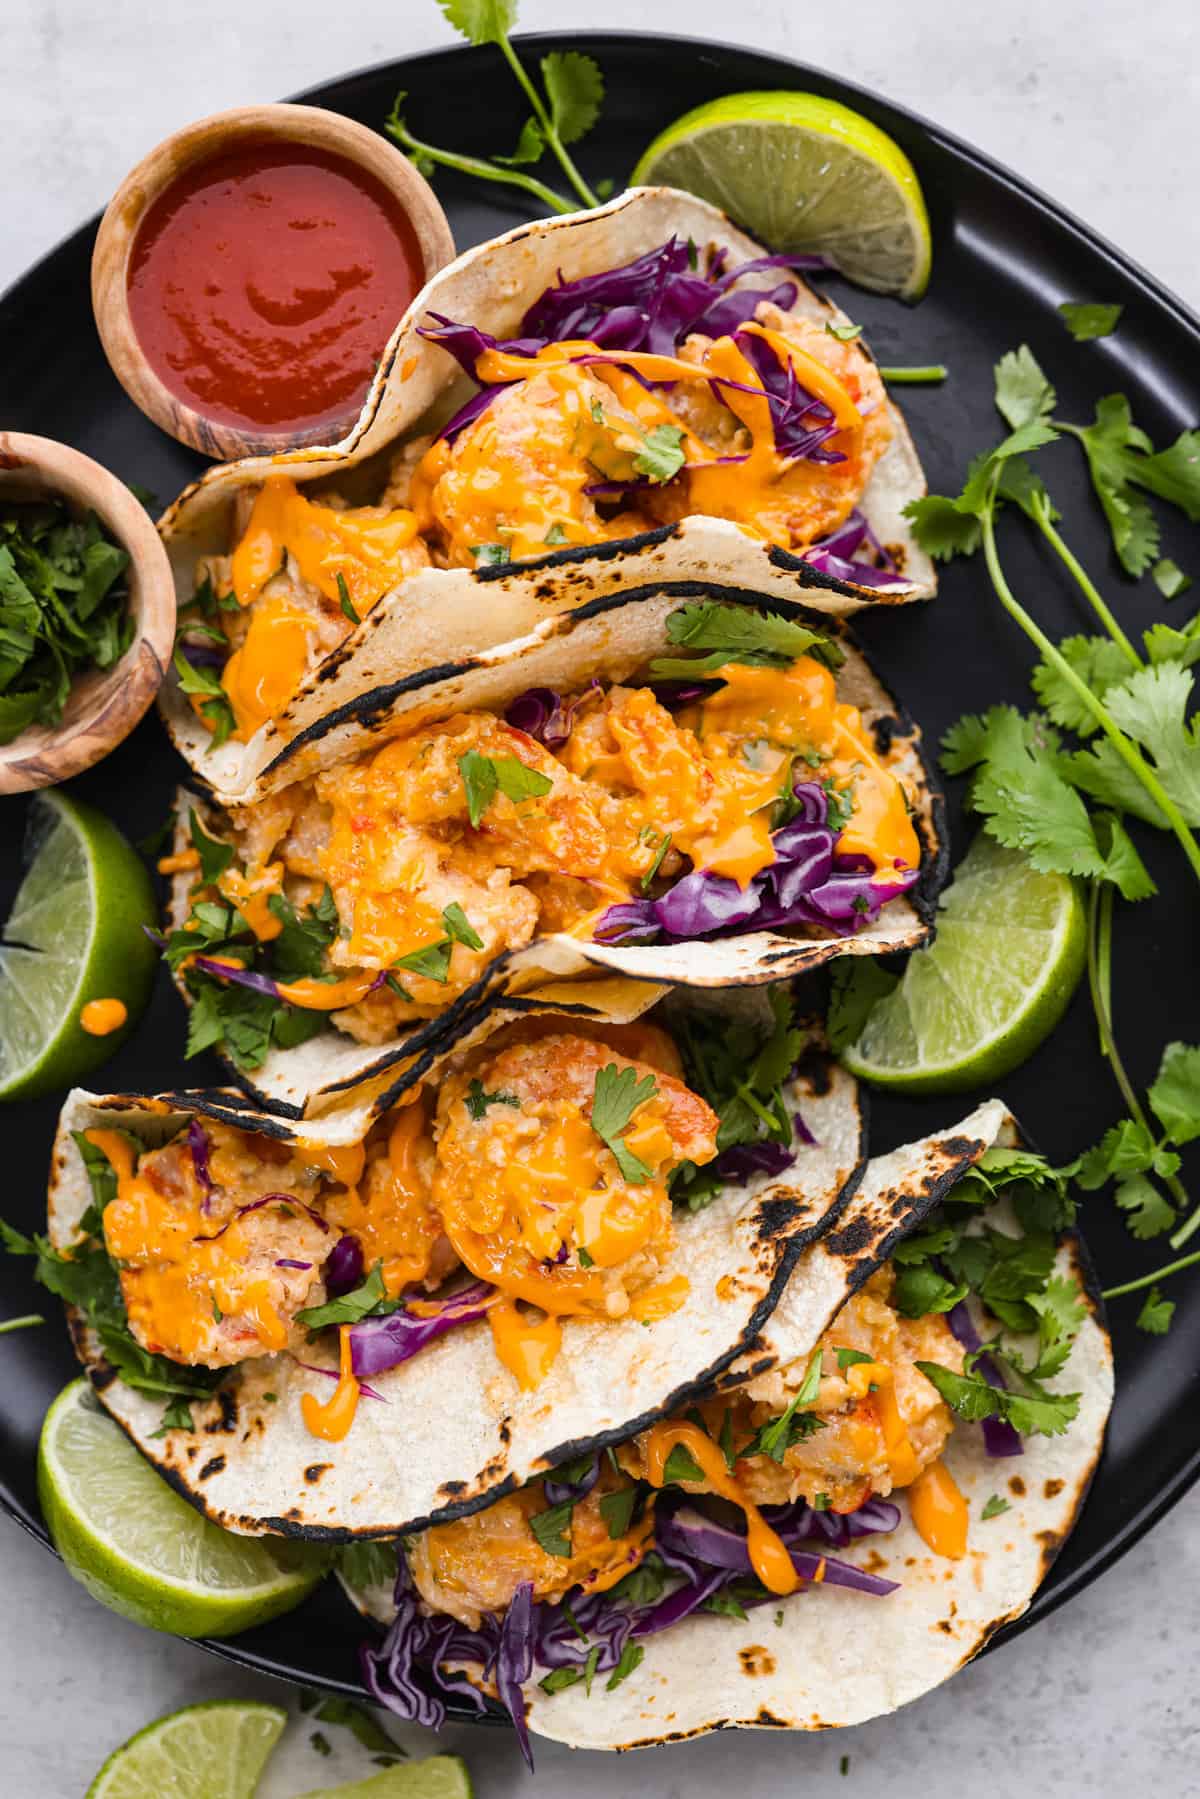
    These Bang Bang Shrimp Tacos are made with deliciously crunchy shrimp cooked to perfection and coated in a special sauce that’s just bursting with flavor! It’s a meal that’s sure to impress.

    Who doesn’t love a delicious shrimp recipe? Check out some other favorites like this Honey Walnut Shrimp or this Hunan Shrimp!
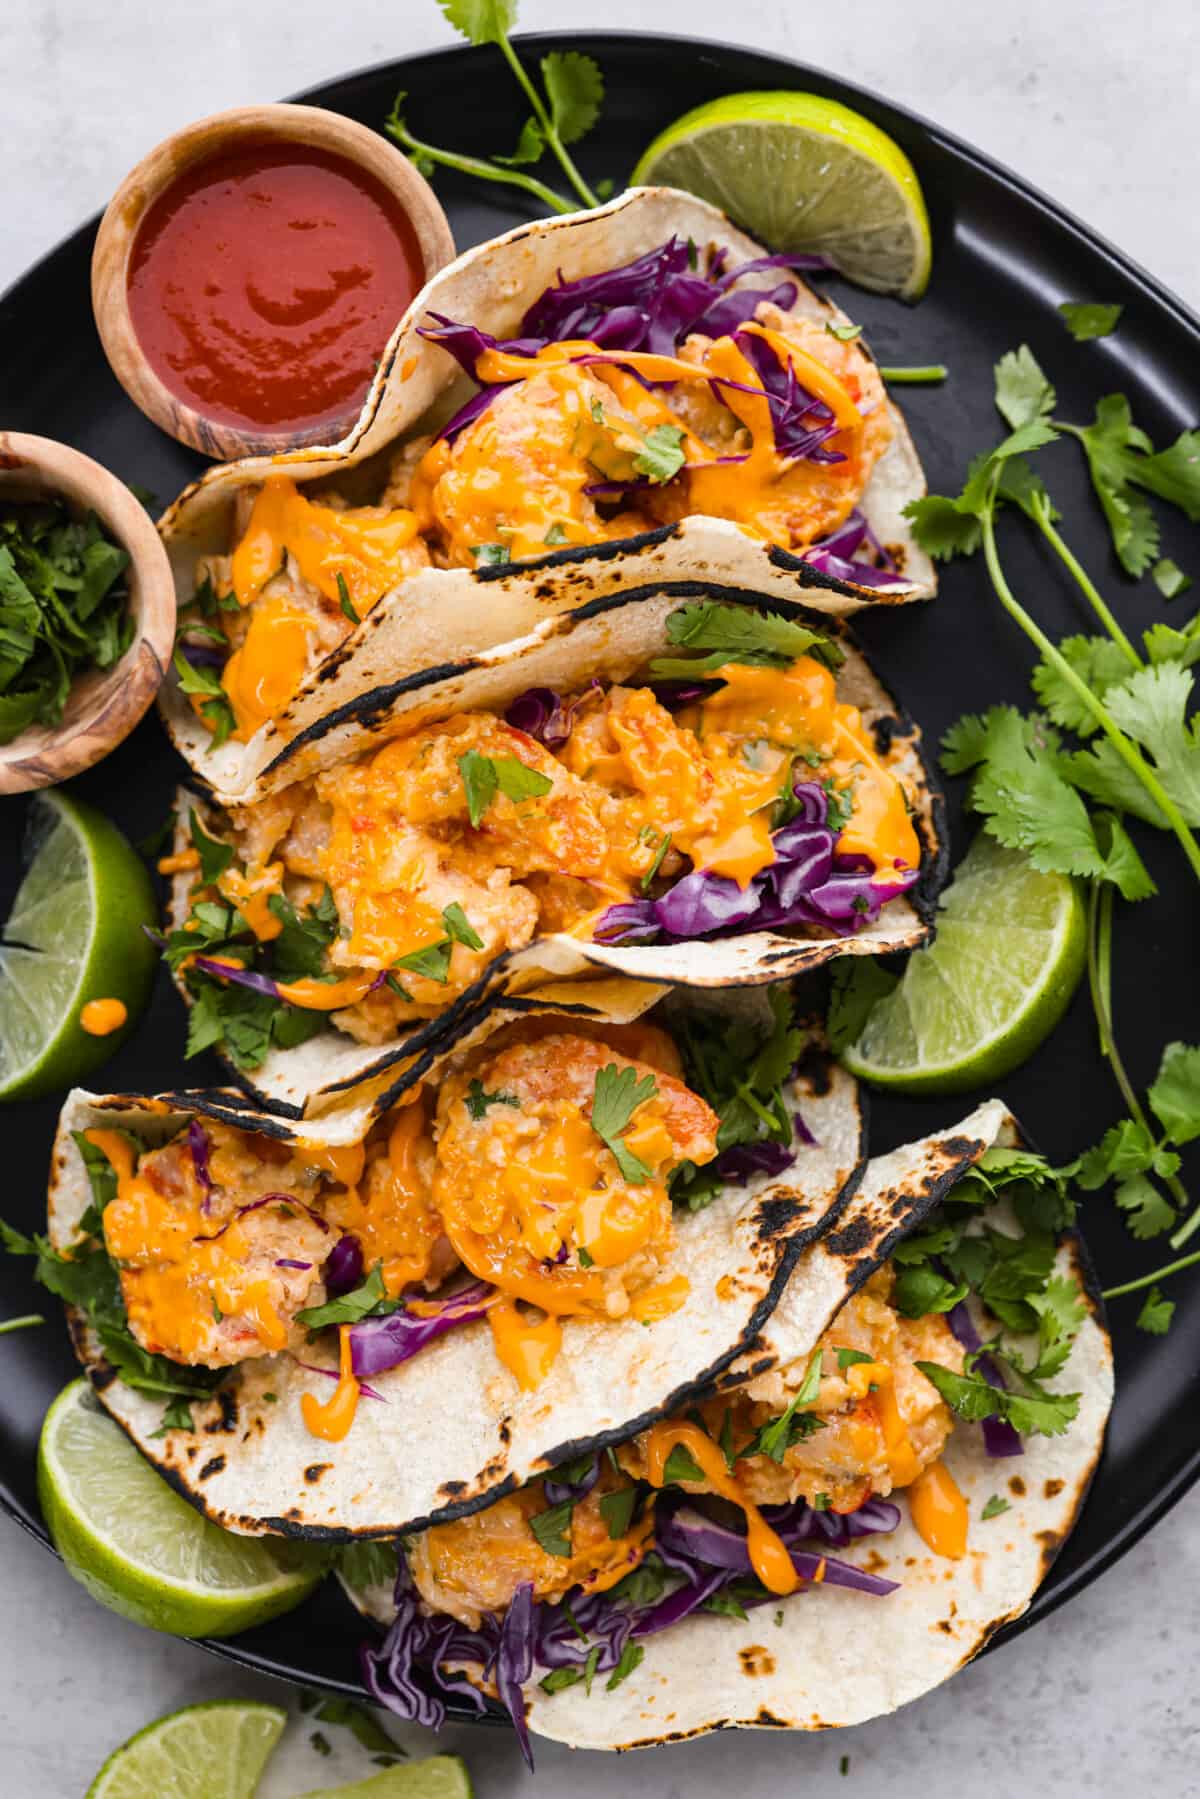
    Bang Bang Shrimp Tacos on a plate. Bang Bang Shrimp Tacos on a plate.

    Reasons You’ll Love Them!

    • You can control the spice! By making these at home, you can crank up the heat or take it down a notch to keep them mild. Just adjust the amount of sriracha sauce!
    • Ready in 30 Minutes: Who doesn’t love a meal that is quick, easy and delicious?!
    • Restaurant Quality: If you have ever had the bang bang shrimp tacos from Bonefish Grill, you are going to be obsessed with this recipe! Just like them (even better in my opinion) and now you can have them at home!!

    Are Bang Bang Shrimp Tacos Spicy?

    Every time one of my recipes has a sauce on it, one of the first questions that I always get asked is, “Is it spicy?”. These tacos have a bit of heat to them but since you are making them at home, thats so easy to adjust! The ingredient that keeps them nice and hot is the sriracha sauce. You can put either more or less of that ingredient in to make these bring on the heat or stay nice and mild.

    What is in Bang Bang Shrimp?

    These tacos get all of their flavor from the bang bang sauce! I make it at home cause it’s so easy! Here are all of the ingredients that you need. Check out the recipe card at the bottom of the post for all of the exact measurements!

    • Large shrimp, peeled, deveined, tails removed: These are big shrimp that are already prepared for cooking, so you don’t have to do any extra work.
    • Salt and pepper: These are just basic seasonings that make your food taste better.
    • Whole milk: This makes the shrimp coating nice and thick.
    • Egg: This makes the coating stick to the shrimp so that the outside can get crispy.
    • Cornstarch: This makes the outside of the shrimp nice and crispy when you fry them.
    • Oil: You can use vegetable oil or canola oil to fry your shrimp in.
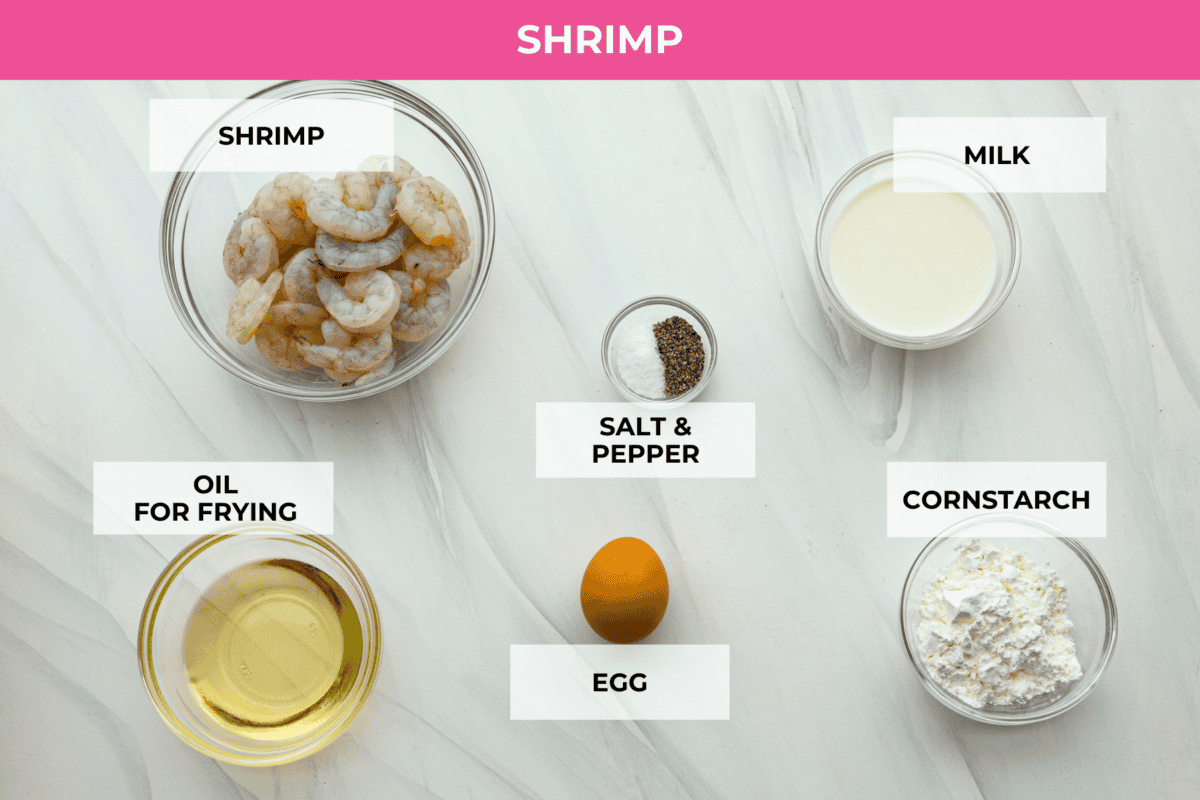
    Shrimp ingredients for bang bang shrimp tacos laid out on a counter and labeled. Shrimp ingredients for bang bang shrimp tacos laid out on a counter and labeled.

    Bang Bang Sauce

    • Mayonnaise: This is what makes the sauce creamy.
    • Honey: It’s a sweetener for the sauce, making it taste nice and balanced.
    • Sweet chili sauce: This adds a bit of sweet and spicy flavor to the sauce.
    • Sriracha sauce: This sauce is spicy and gives the Bang Bang sauce a kick.
    • Salt: This enhances the flavor in the sauce.
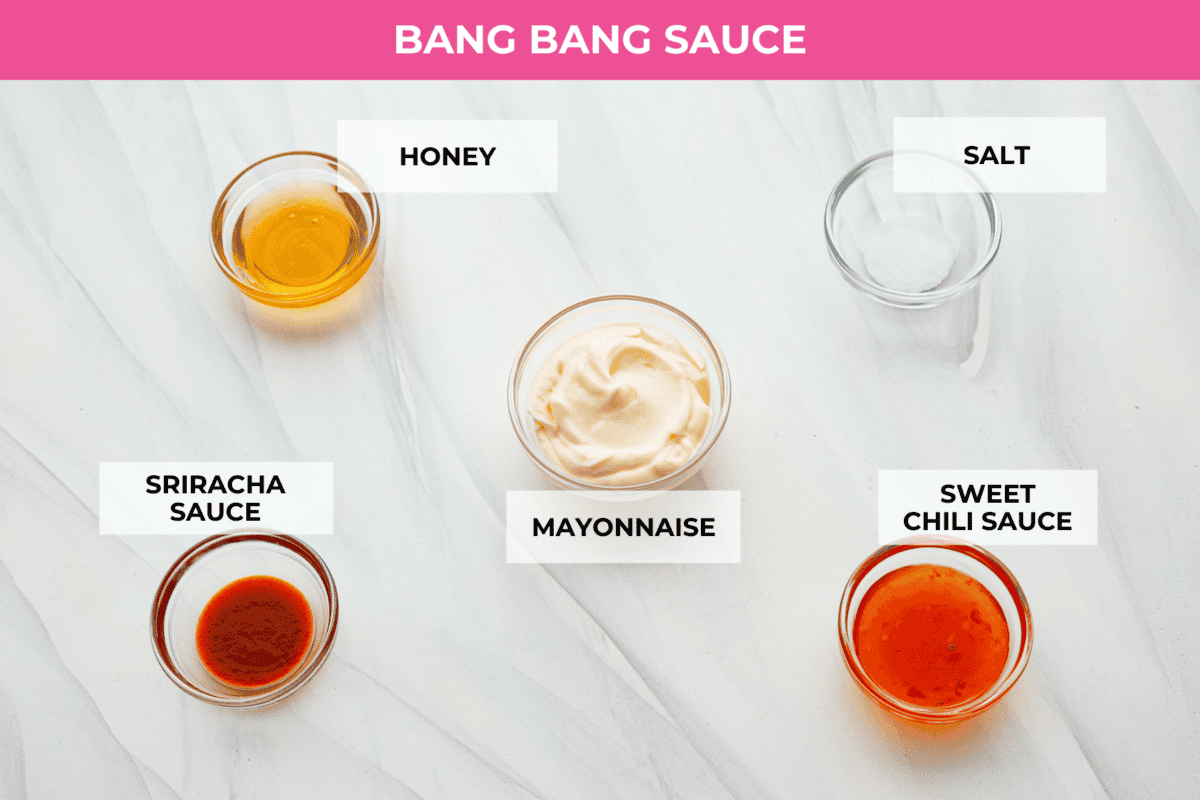
    Ingredients on the counter in separate bowls to make bang bang sauce. Ingredients on the counter in separate bowls to make bang bang sauce.

    Toppings

    1. Corn tortillas: These are soft wraps you can put your shrimp in, kind of like tacos.
    2. Purple cabbage, shredded: It’s crunchy and colorful, adding something extra to your shrimp wraps.
    3. Cilantro: This is a fresh herb that adds a tasty, refreshing flavor to your meal.
    4. Lime wedges: Squeezing these over your shrimp adds a tangy taste, making it even yummier.
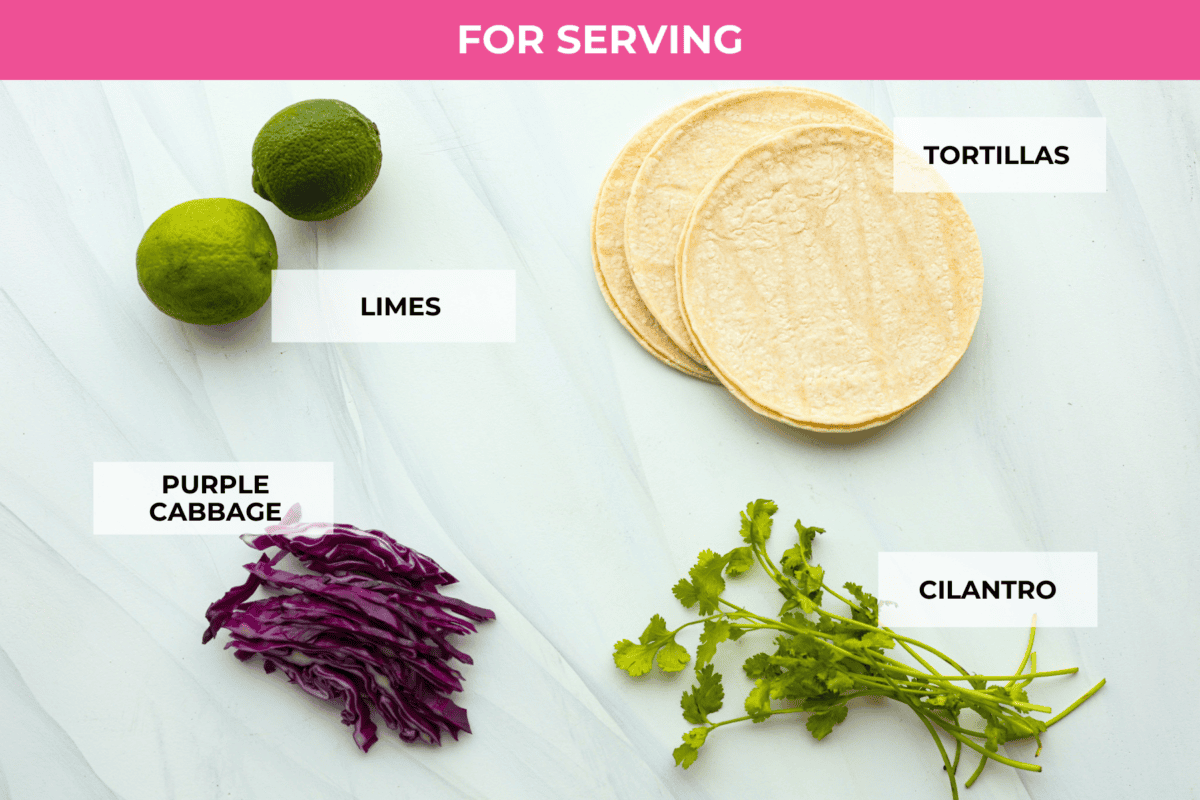
    Toppings for bang bang shrimp tacos. Toppings for bang bang shrimp tacos.

    How to Make Bang Bang Shrimp Tacos

    This recipe is so simple and you will be enjoying this meal in less than 30 minutes!

    1. Make the Sauce: Prepare the bang bang sauce by adding the mayonnaise, honey, sweet chili sauce, sriracha, and salt to a medium bowl. Whisk to combine and set aside. 

    Cook the Shrimp

    1. Whisk: In a large bowl, whisk together the milk and egg.
    2. Toss the Shrimp: Season the peeled and deveined shrimp with salt and pepper. Add the shrimp to the milk and egg mixture then toss to coat.
    3. Heat up the Oil: Heat the oil in a heavy-bottomed deep pot. Add enough oil to come up about 5 inches. Heat to 375 degrees Fahrenheit.
    4. Coat the Shrimp: In a shallow bowl, add the cornstarch. Working in batches, use tongs to remove 1 shrimp from the milk mixture, letting any excess liquid drip off. Coat the shrimp in cornstarch then place in the hot oil.
    5. Cook in Oil: Fry until golden brown and cooked through about 2-3 minutes. Remove the shrimp with a slotted spoon and drain on paper towels. Repeat this process with the remaining shrimp. 
    6. Add the Sauce: Toss the shrimp with the bang bang sauce and serve in tortillas with your favorite toppings!

    Tips and Variations

    These are just a few extra ways to customize your bang bang shrimp tacos. They’re fast and easy and packed with flavor. Your family will love these tacos!

    • Add Spice: Want to make these tacos even spicier? Add red chili flakes to the sauce or a 1/4 teaspoon of cayenne pepper!
    • Toppings: There are so many delicious toppings to add to your tacos to customize the flavors. Try adding sliced jalapenos, pico, mango salsa, or corn!
    • Swap the Tortillas: I used corn tortillas in this recipe, but you can also use flour tortillas if you prefer.
    • Warm Your Tortillas: To heat flour tortillas all at once, I like to wrap them in foil and place them in a 375 degrees Fahrenheit oven while I’m getting everything ready. It’s also easy to warm tortillas individually in the microwave (just put one on a plate) by heating it for 10-15 seconds.
    • Make it a Bowl or Salad: Ditch the tortillas and add the bang bang shrimp to a rice bowl or salad. It’s easy to serve your shrimp just the way you like. Use the same toppings you would for tacos!
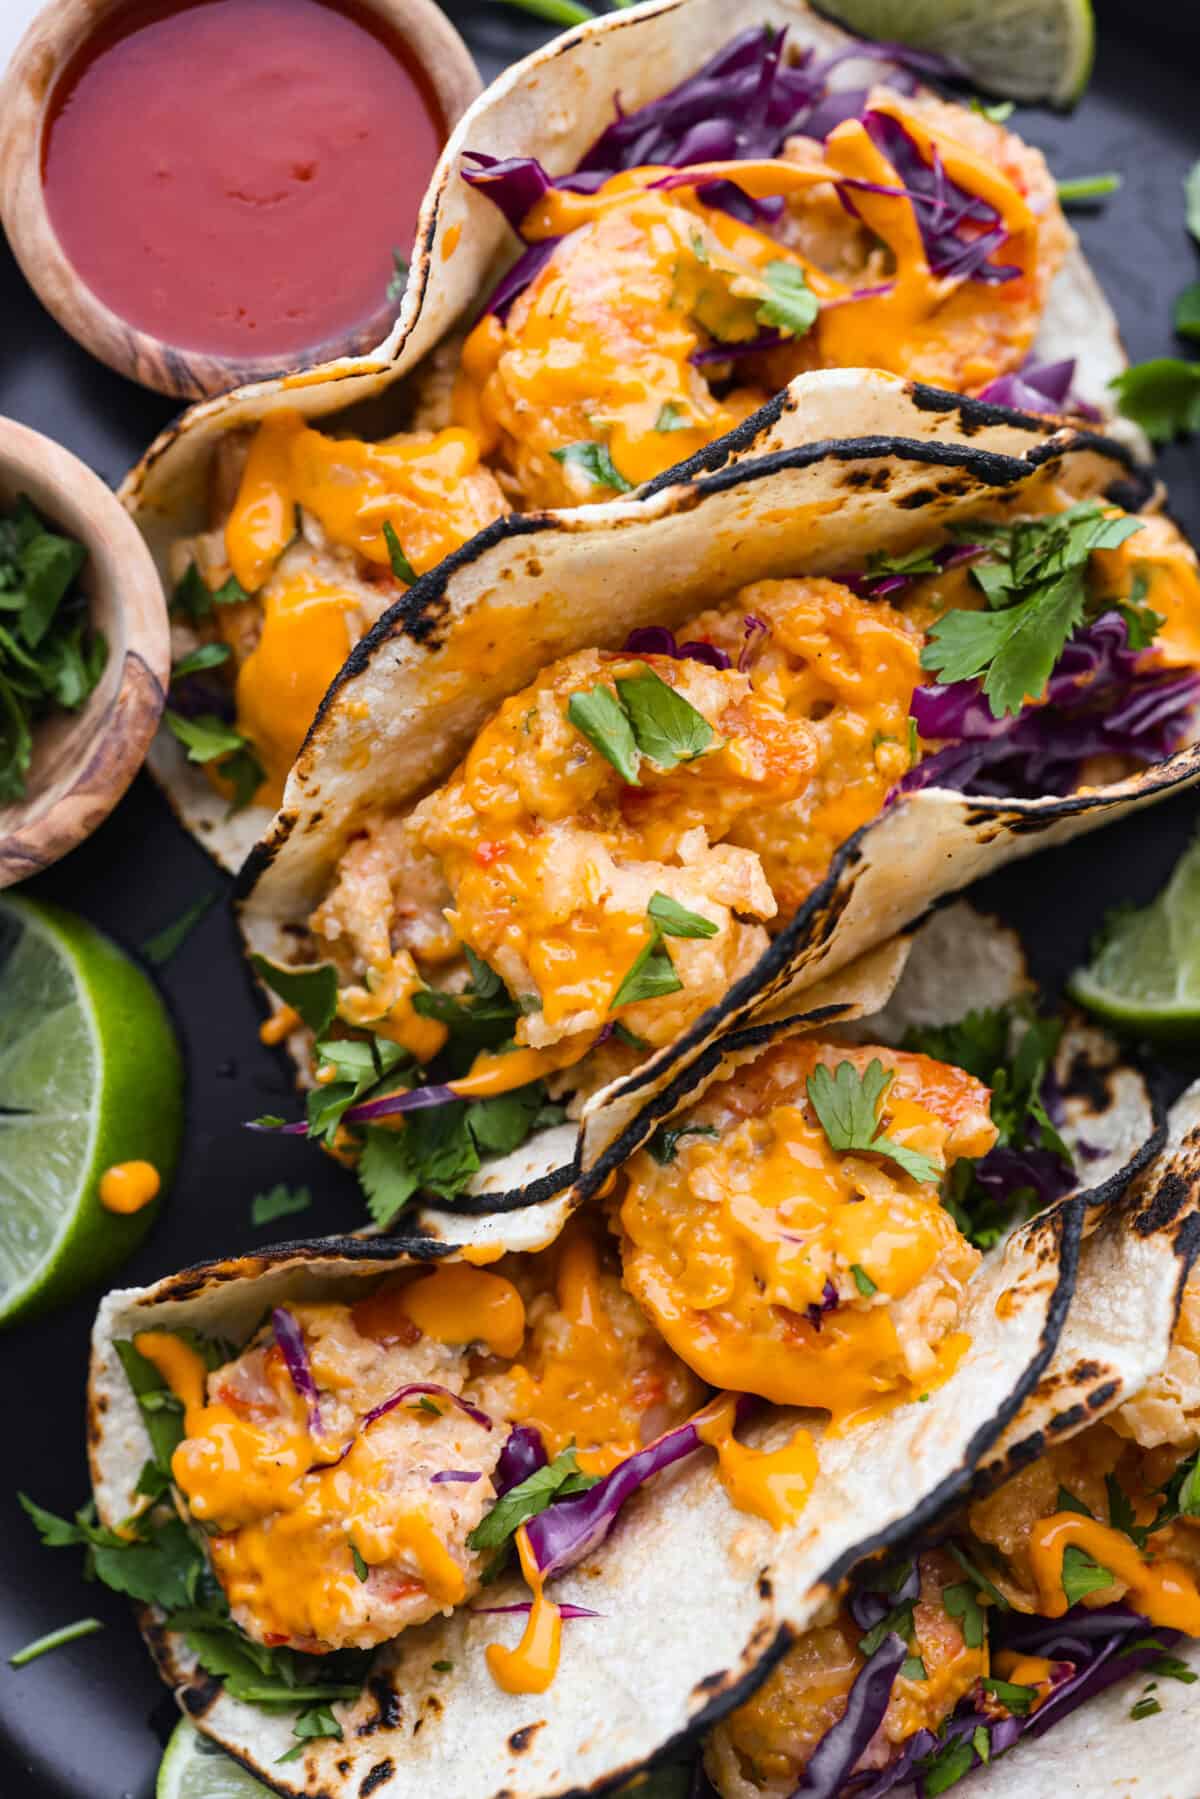
    A close up of bang bang shrimp tacos. A close up of bang bang shrimp tacos.

    Storing Leftovers

    These bang bang shrimp tacos are best eaten fresh but can be stored in the fridge and enjoyed later as well. Make sure to store the shrimp, toppings, and tortillas separately. They are perfect for lunch the next day!

    • In the Refrigerator: Store leftover shrimp in an airtight container in the fridge for up to 3 days. Store toppings and tortillas separately.
    • To Reheat: Heat leftover shrimp in the microwave until warmed through. Assemble the tacos and enjoy!
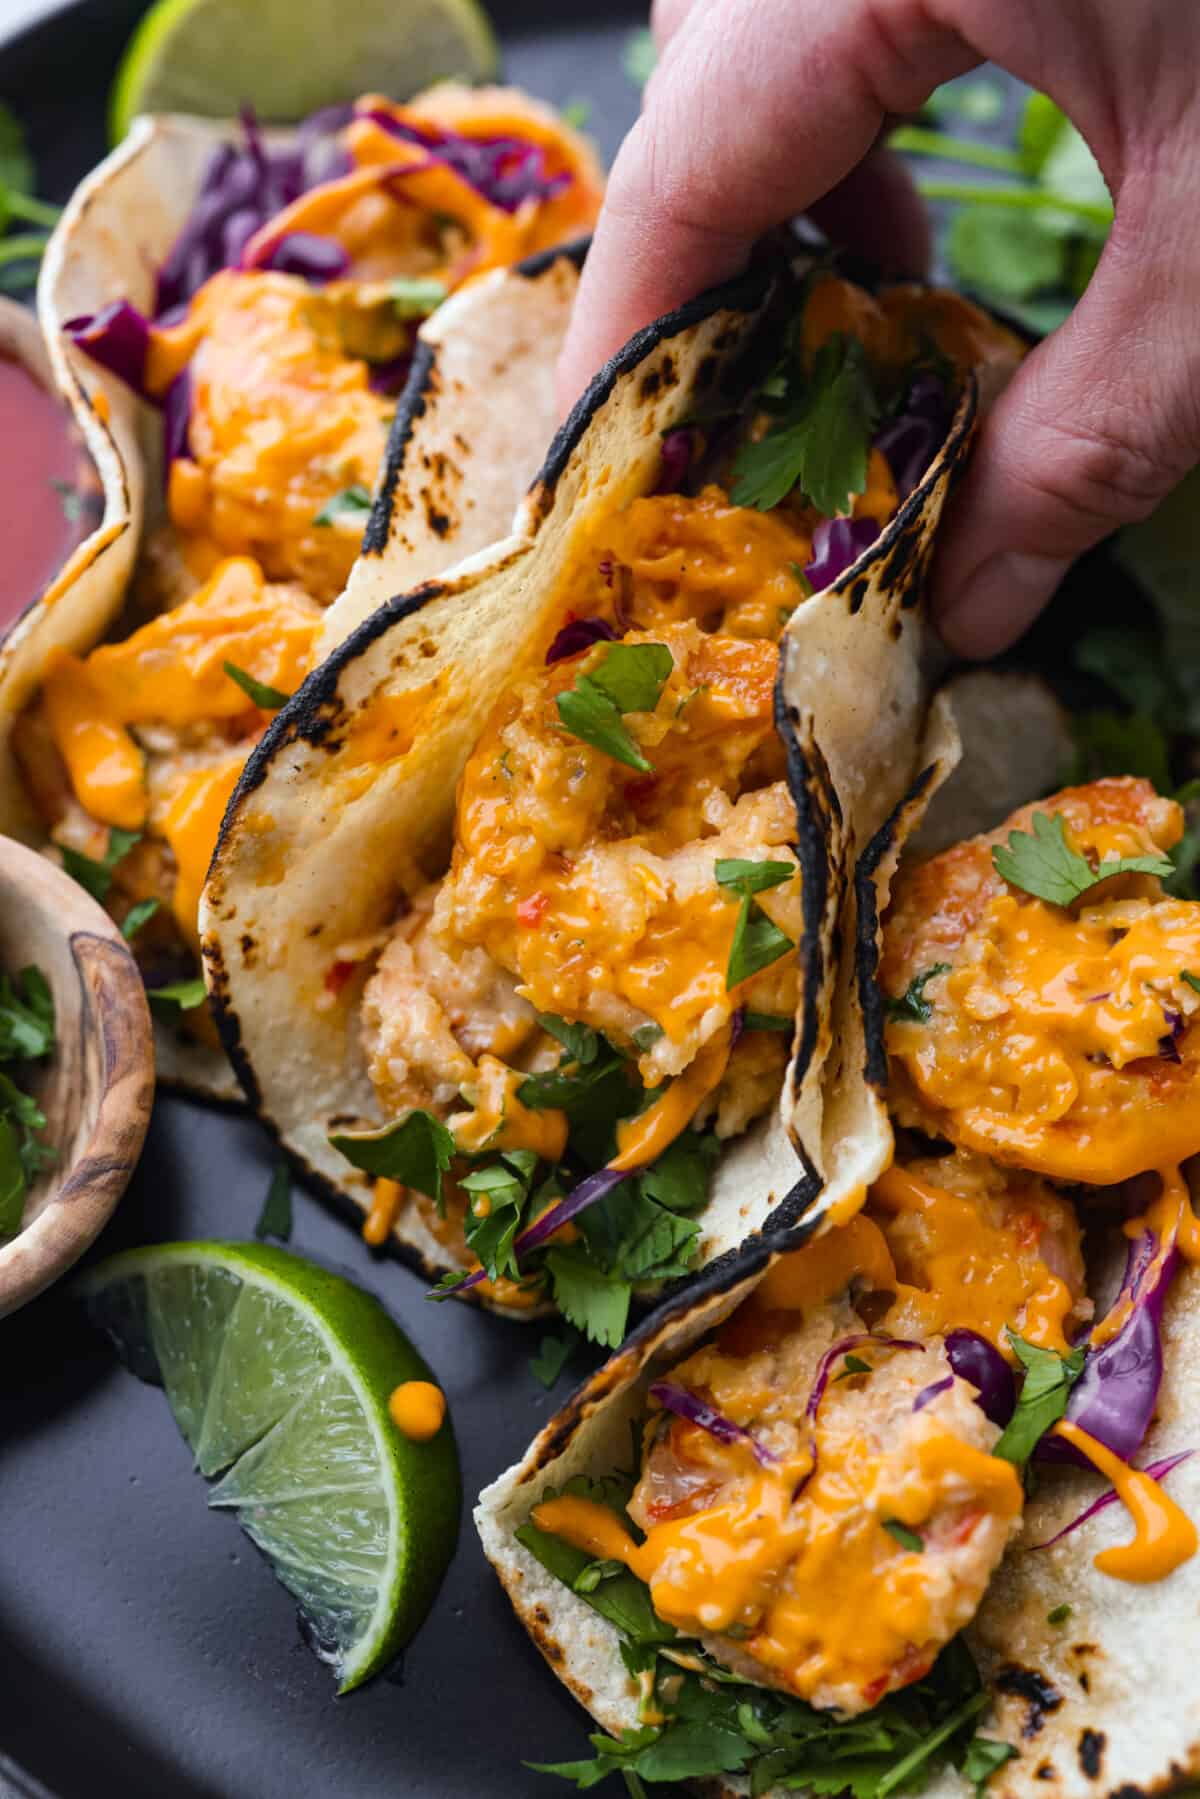
    A hand holding a bang bang shrimp taco. A hand holding a bang bang shrimp taco.

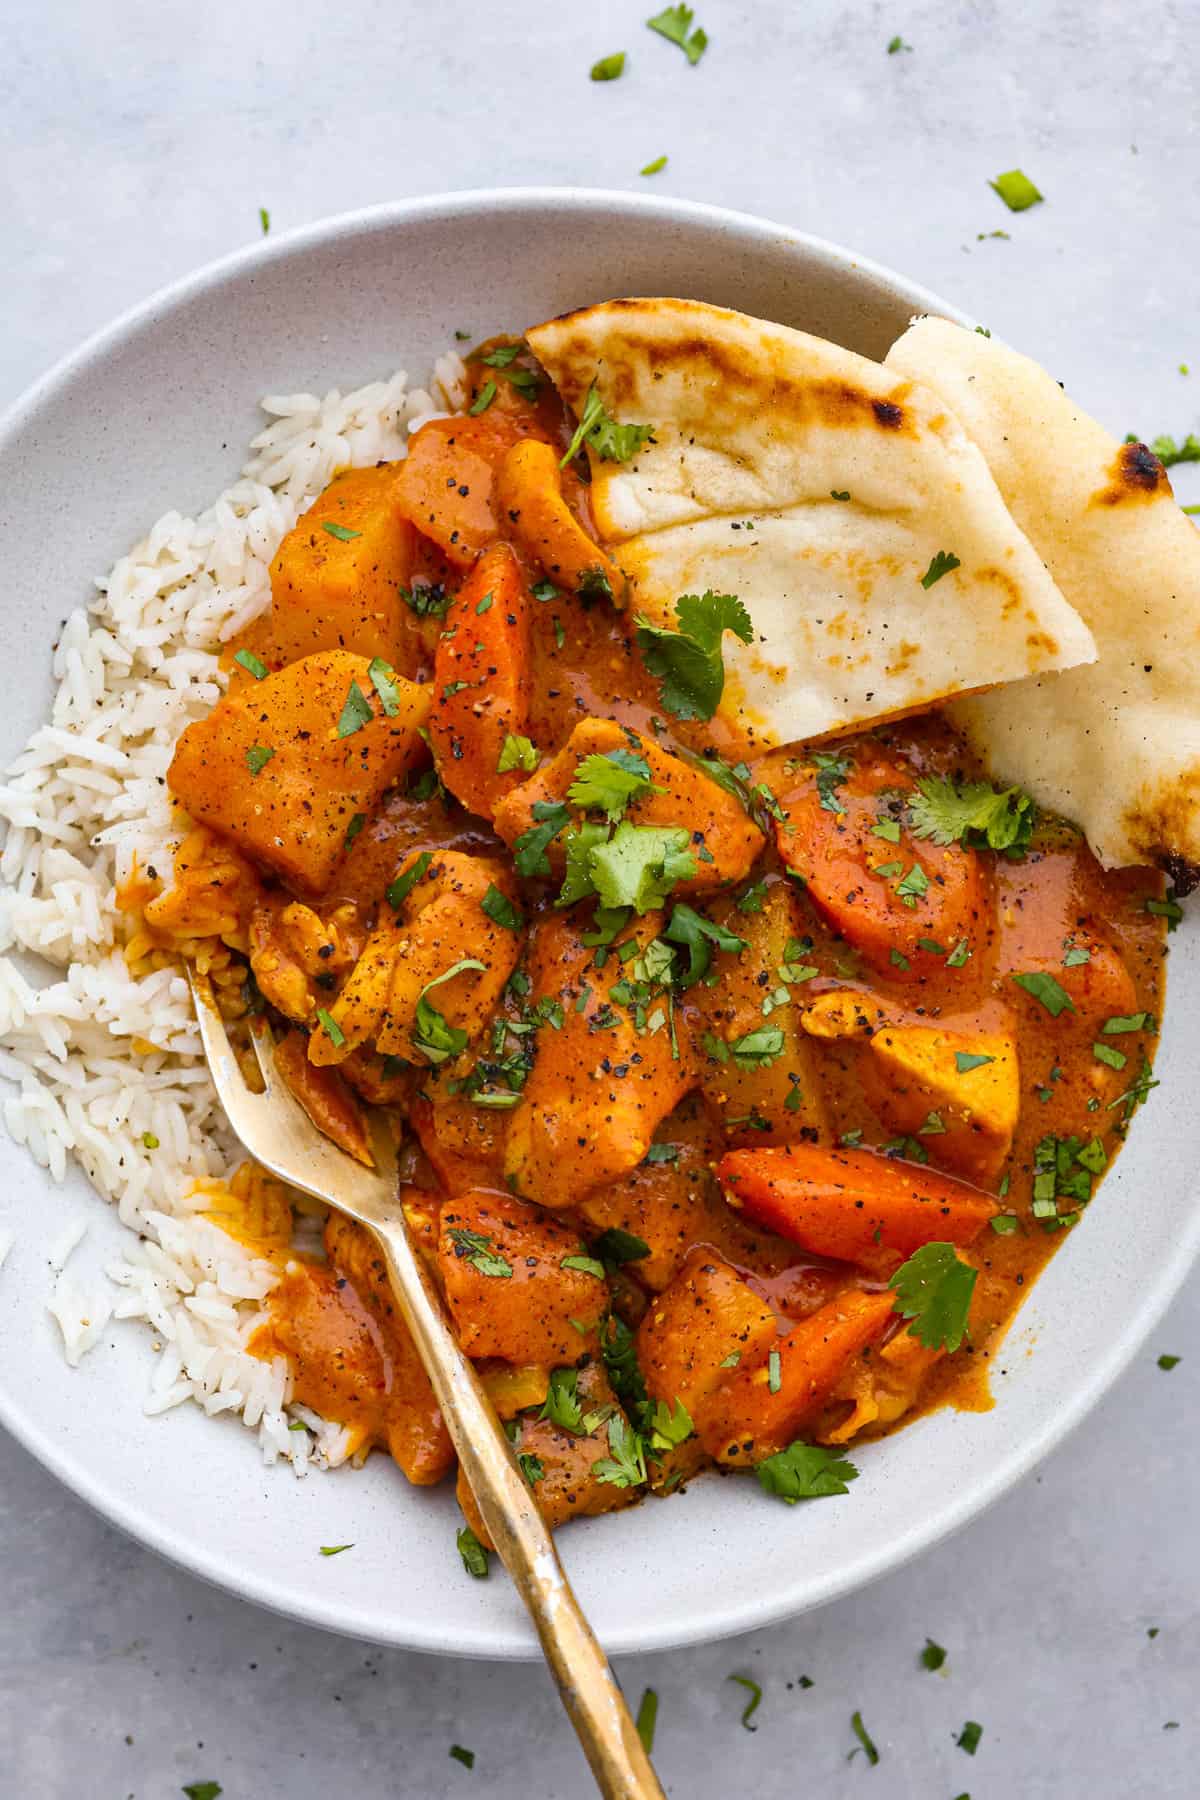
    Coconut Curry Chicken

    4 hours 30 minutes
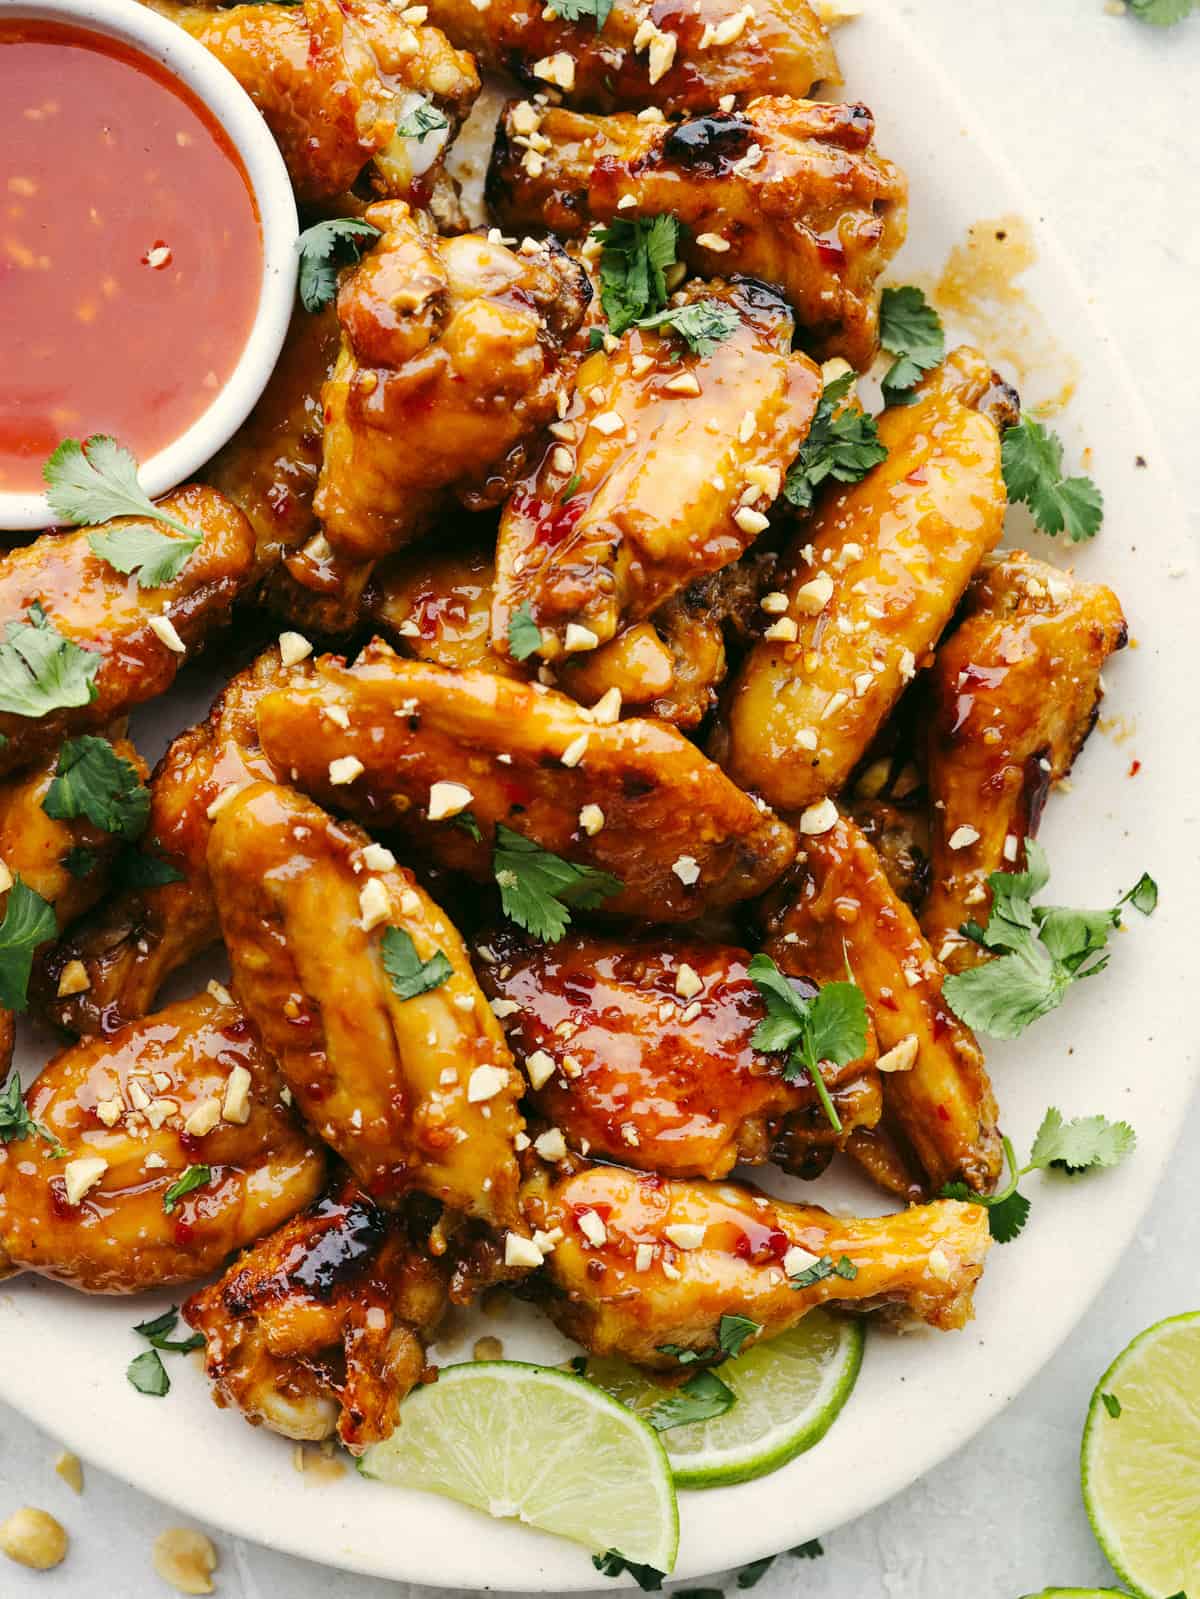
    Thai Glazed Chicken Wings

    55 minutes

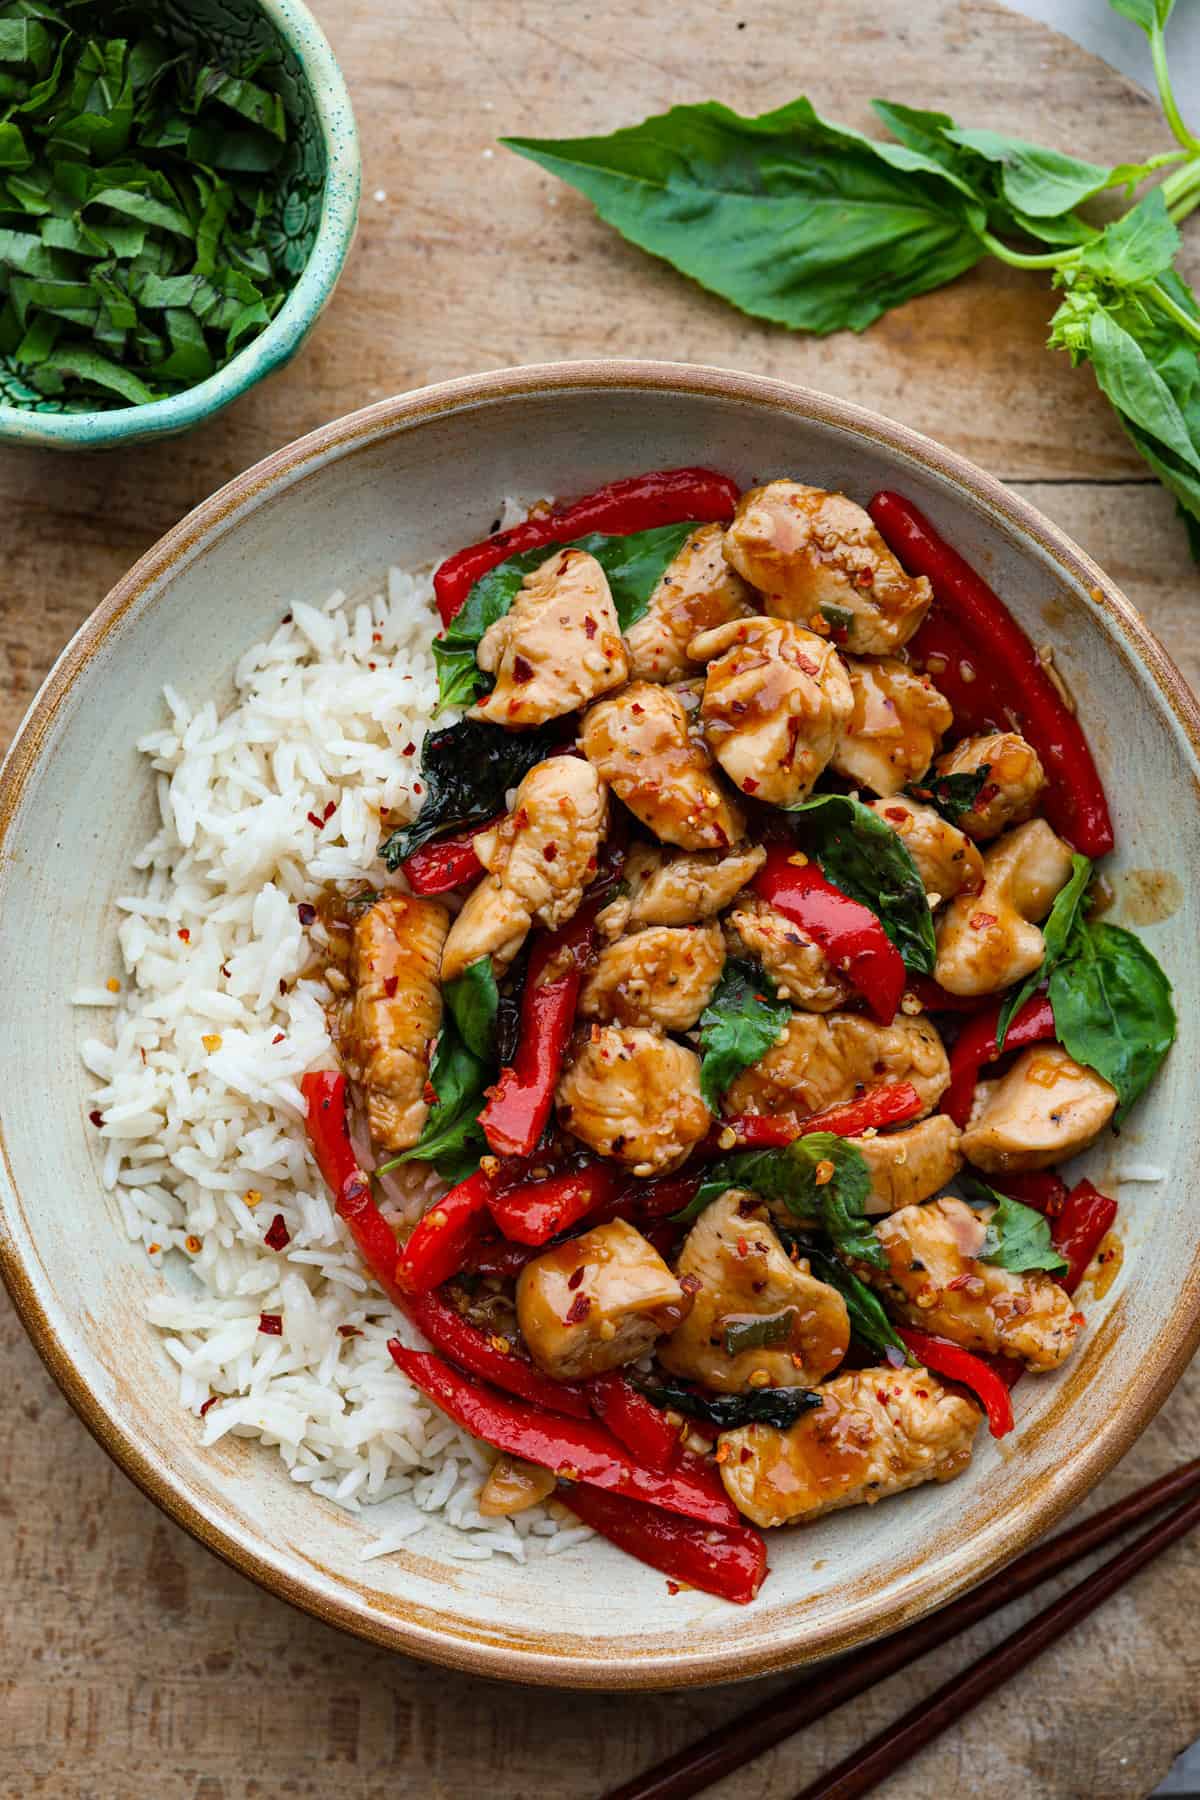
    Thai Basil Chicken

    25 minutes

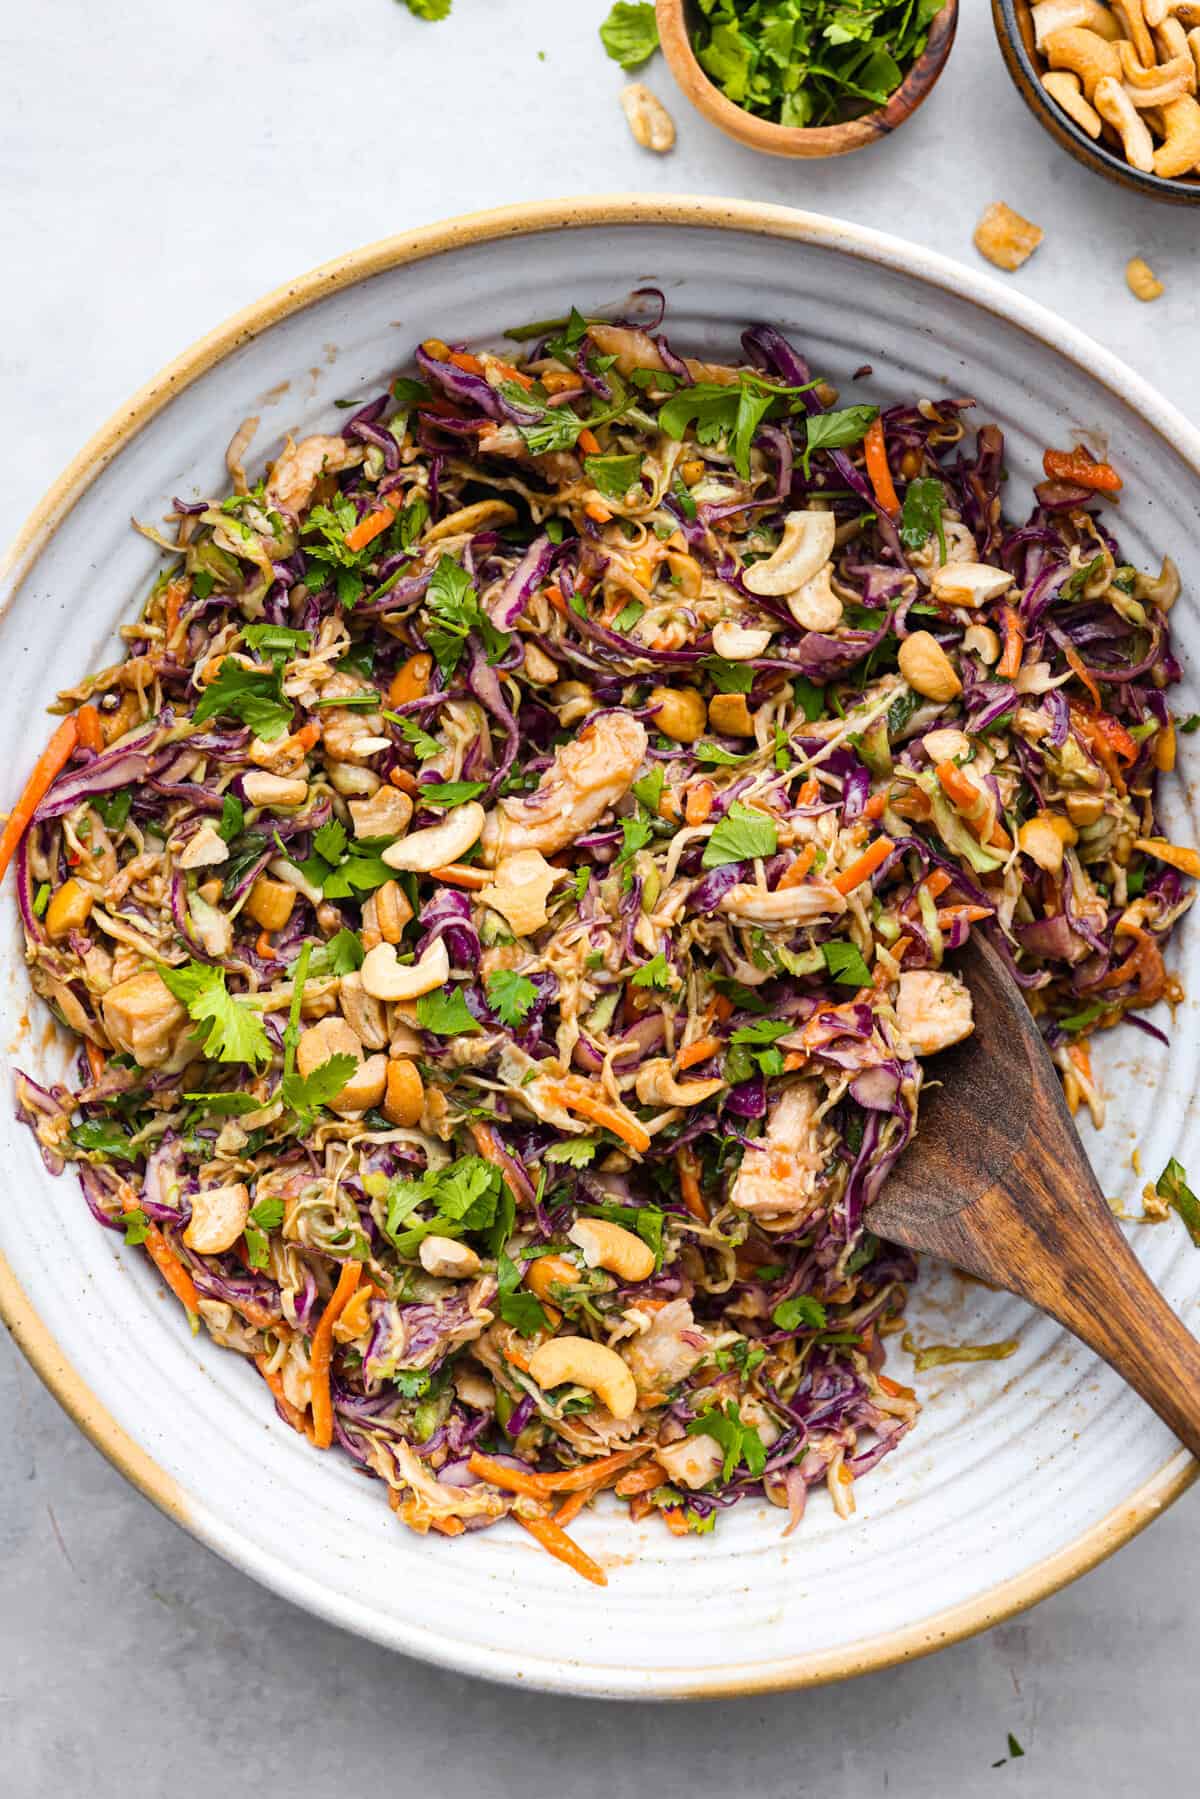
    Thai Chicken Salad

    25 minutes

    Pin this now to find it later

    Pin It


    Source link

  • Easy Shrimp Cocktail Recipe

    Easy Shrimp Cocktail Recipe

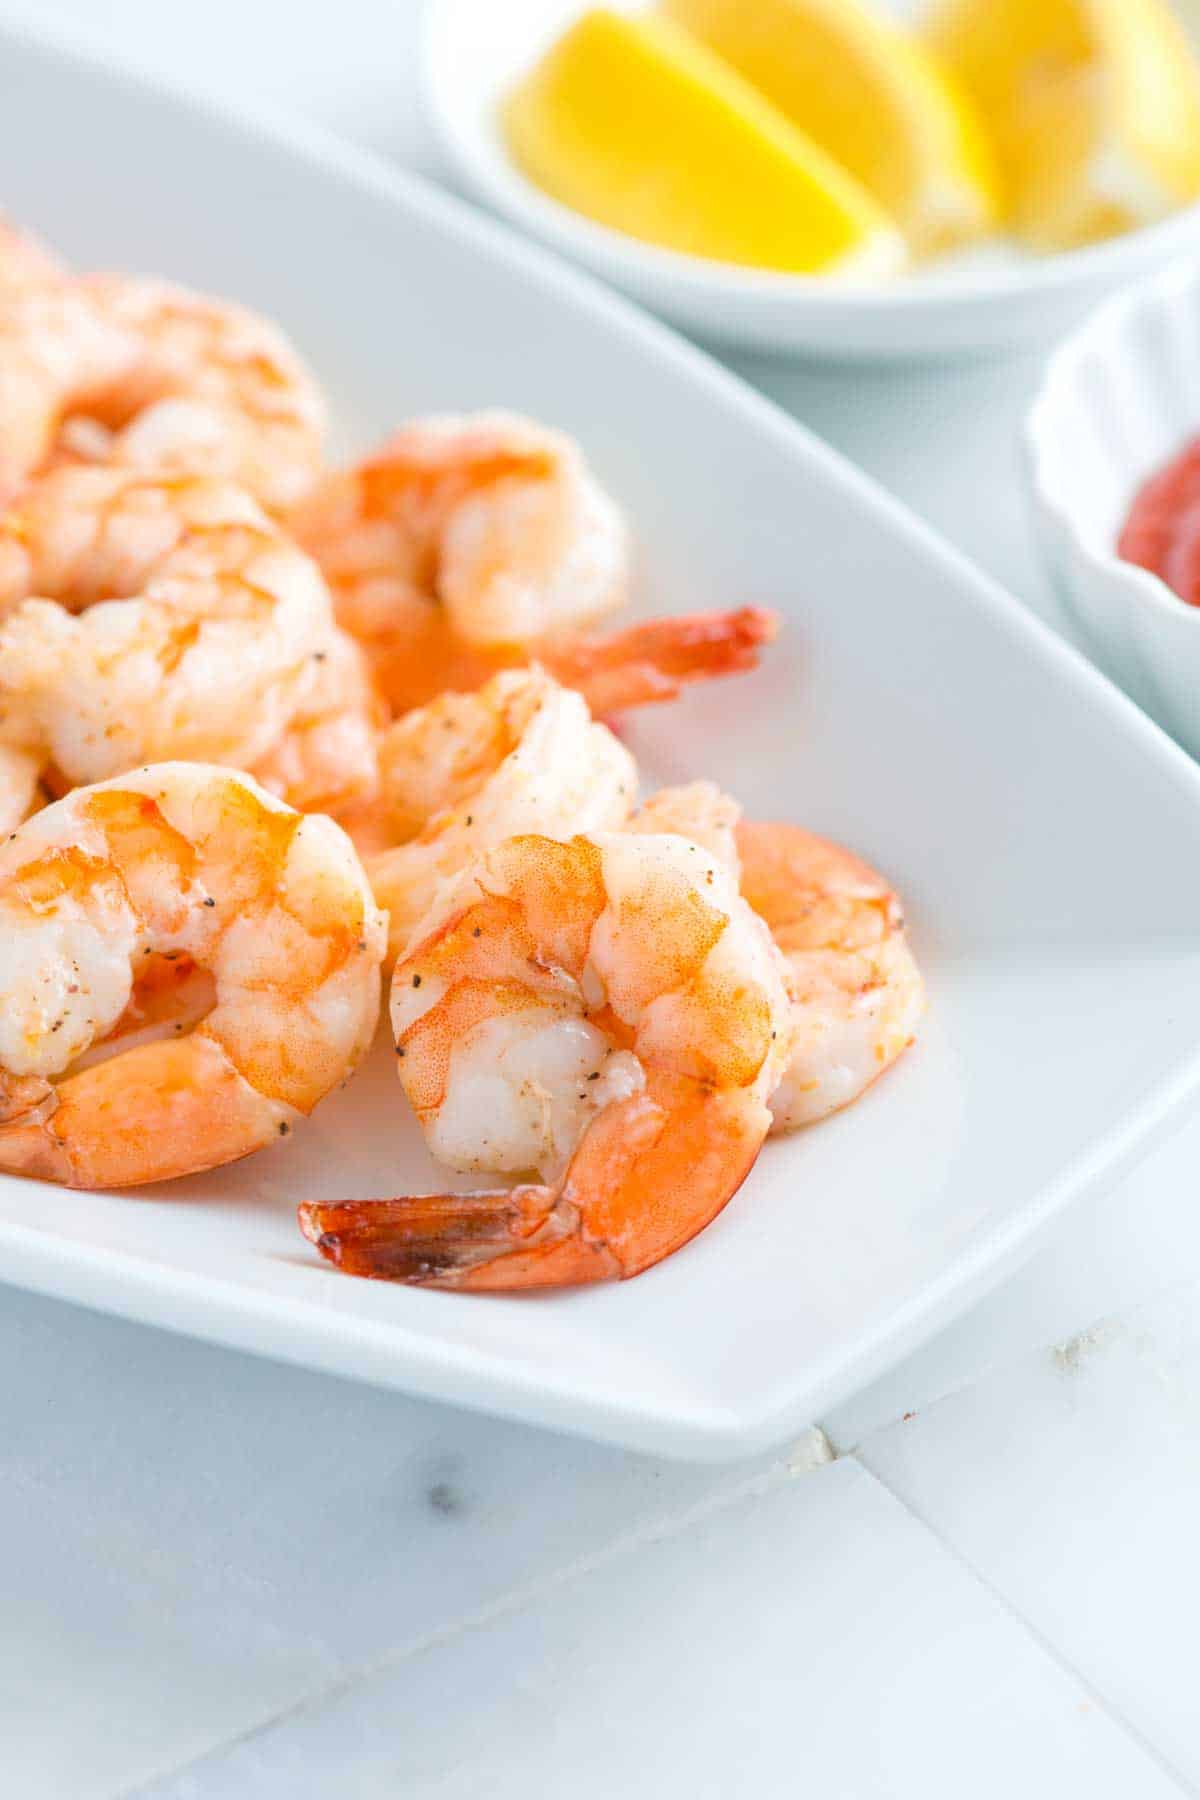
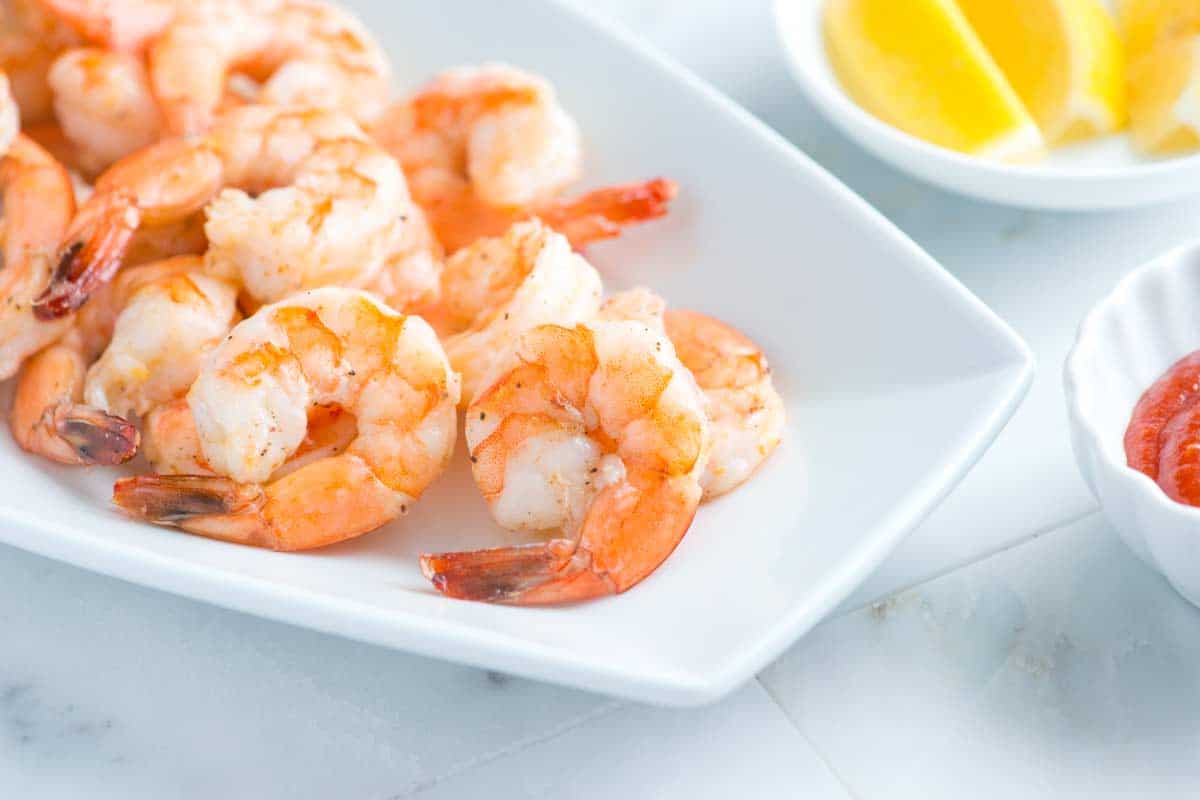
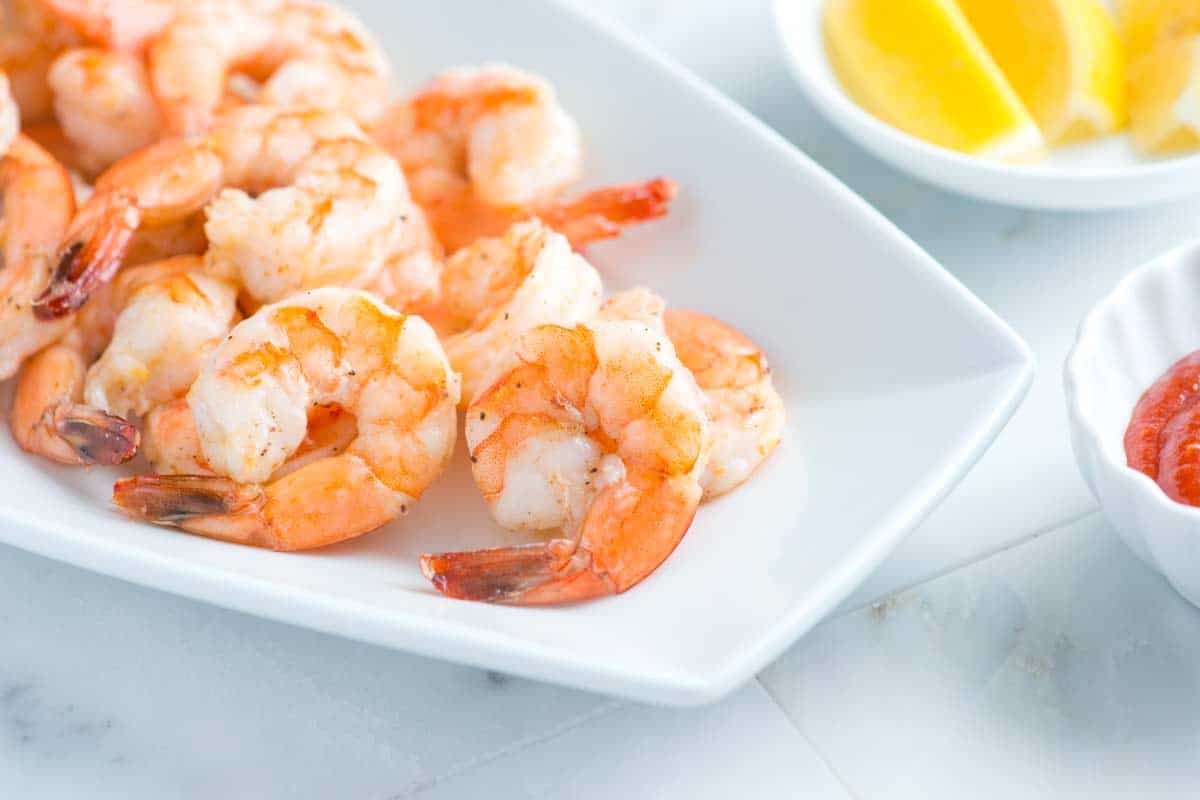
    Our favorite shrimp cocktail recipe skips poaching or boiling and roasts the shrimp instead. It’s easy to make and guarantees juicy, tender shrimp every time.

    Shrimp Cocktail

    We both love shrimp cocktail and can never resist ordering it at restaurants. It’s such a simple but impressive appetizer, and I know it will always be a hit with my friends and family. Whenever we make this recipe, it’s one of the first dishes to disappear.

    The secret to the best shrimp cocktail is roasting the shrimp. It’s quick, hard to overcook, and adds extra flavor from the olive oil and lemon. Once you try our method, you’ll never go back to boiling again. That said, if you prefer the classic approach, we also have a great poached shrimp you can try!

    Key Ingredients

    • Shrimp: Use fresh, high-quality jumbo or large shrimp for this. I like to leave the tails on since it makes dipping into the cocktail sauce easier and looks nice for serving. If using frozen shrimp, thaw them overnight in the refrigerator, then pat dry with paper towels before roasting.
    • Olive Oil: I prefer roasting the shrimp with olive oil or avocado oil for their flavor. I save my extra-virgin olive oil for other dishes since it has a lower smoke point.
    • Lemon: For an extra layer of flavor, grate some lemon zest with a microplane and toss it with the shrimp before roasting. You can then use the rest of the lemon for serving!
    • Salt and Pepper: I season generously with salt and pepper, but feel free to add more flavor with your favorite spice blends. Our Cajun seasoning is a particular favorite in my household, but Old Bay, or other seafood blends would be lovely.
    • Cocktail Sauce: You can use a high-quality store-bought cocktail sauce or make our homemade version below with ketchup, horseradish, lemon juice, Worcestershire sauce, and a touch of hot sauce. Tartar sauce is really delicious, too.

    Find the full recipe with measurements below.

    How to Make the Best Shrimp Cocktail

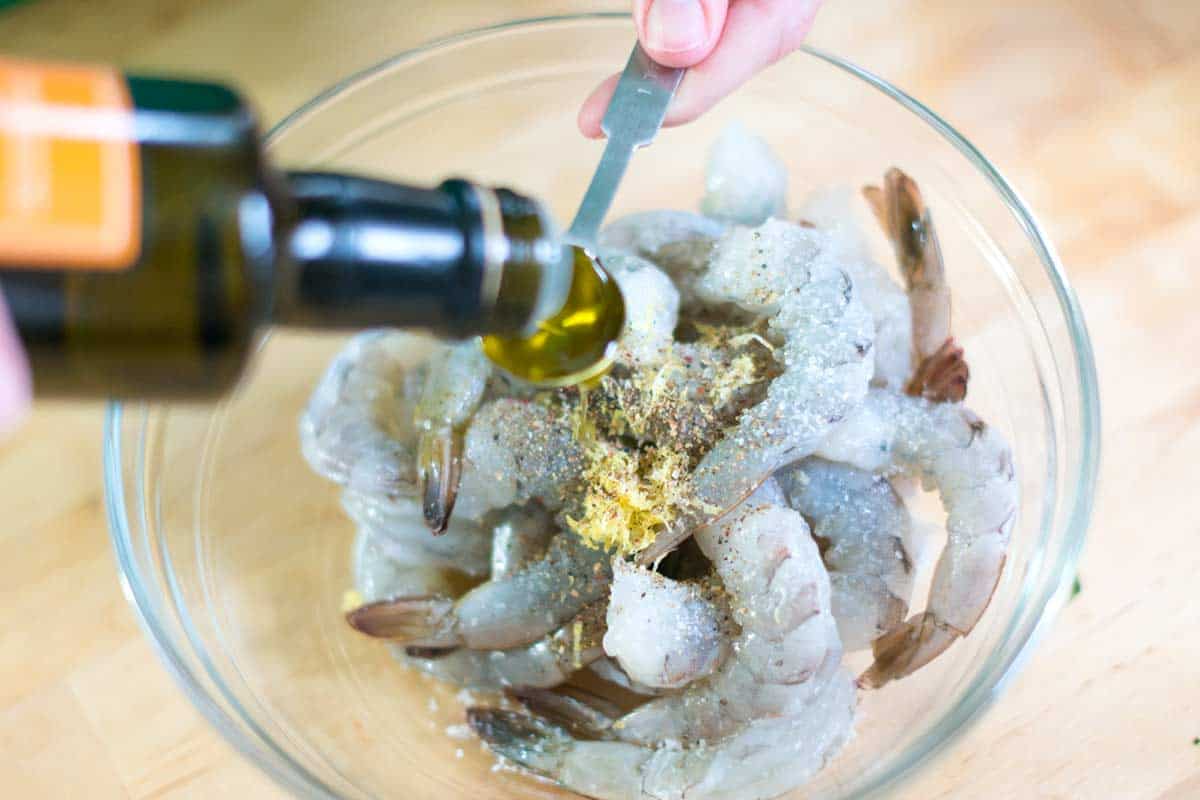
    Tip 1: Pat the shrimp dry. Damp food won’t roast properly, it steams, instead. Before roasting, pat the shrimp really dry with paper towels. Then toss them with olive oil, lemon zest, salt, and pepper.

    Tossing shrimp with salt, pepper, lemon zest, and olive oil.

    Tip 2: Roast the shrimp. Spread the seasoned shrimp into a single layer on a baking sheet. Roasting them too close together will cause them to steam and become soggy. Then, roast them until the shrimp are pink, firm, and cooked through (5 to 10 minutes, depending on their size).

    Shrimp on baking sheet to make shrimp cocktail

    Tip 3: Serve warm or cold. While they are usually served chilled, these roasted shrimp are delicious warm, too. To serve cold, transfer the roasted shrimp to a plate and refrigerate for about 30 minutes before serving.

    Serving Suggestions

    I love serving these shrimp alongside lemon wedges and cocktail sauce (recipe below), but they are fantastic served other ways, too. I especially love using these shrimp to make shrimp salad or adding them to my favorite salads. I love them on top of this Greek salad, Caesar salad, our orzo pasta salad, or this hearty quinoa black bean salad!

    More Shrimp Recipes

    Shrimp Cocktail

    Easy Shrimp Cocktail

    • PREP
    • COOK
    • TOTAL

    These shrimp are simple and delicious. We’ve used lots of lemon and pepper here, but you can customize it in several ways. Try using Old Bay, Cajun seasoning, garam masala, or another spice blend in place of or in addition to the lemon.

    4 Servings

    You Will Need

    For the Shrimp

    1 pound extra-large shrimp, shelled with tails left on

    1 tablespoon olive oil or avocado oil

    ½ teaspoon fine sea salt

    ½ teaspoon fresh ground black pepper

    1 teaspoon grated lemon zest

    1 lemon, cut into wedges, for serving

    Cocktail sauce, recipe below


    For Homemade Cocktail Sauce

    1 cup ketchup, try homemade ketchup

    2 to 3 tablespoons prepared horseradish, to taste

    1 tablespoon fresh squeeze lemon juice

    ½ teaspoon Worcestershire sauce

    1 to 2 dashes hot sauce, like Tabasco or Crystal

    Directions

      1Prep: Preheat the oven to 400°F (204°C). Line a baking sheet with aluminum foil or parchment paper.

      2Prepare shrimp: Pat the shrimp dry, then toss with oil, salt, pepper, and lemon zest in a bowl.

      3Roast: Place the shrimp on the baking sheet in one layer. Try to leave some space between each shrimp. Roast the shrimp for 5 to 10 minutes until pink, firm, and cooked through. If you are doubling this recipe, you may need two baking sheets.

      4Make cocktail sauce: In a small bowl, whisk the ketchup, horseradish, lemon juice, Worcestershire, and hot sauce together. Taste, and then adjust with more horseradish or lemon. Store in an airtight container for up to 1 week.

      5Serve: Serve the shrimp warm or chilled with lemon wedges, cocktail sauce on the side.

    Adam and Joanne’s Tips

    • Storing: Keep the shrimp in an airtight container in the refrigerator for up to 4 days. The sauce lasts for a week in the fridge.
    • Alternate sauce: Try homemade tartar sauce!
    • Grilled shrimp cocktail: Soak wooden or bamboo skewers in water for 30 minutes, then thread the shrimp onto them. Grill the shrimp skewers over medium heat until pink, firm, and cooked through, for 4 to 5 minutes on each side.
    • The nutrition facts provided below are estimates. We did not include any sauce.

    Nutrition Per Serving
    Serving Size
    1/4 of the recipe
    /
    Calories
    128
    /
    Total Fat
    4.1g
    /
    Saturated Fat
    0.6g
    /
    Cholesterol
    182.5mg
    /
    Sodium
    425.7mg
    /
    Carbohydrate
    0.4g
    /
    Dietary Fiber
    0.1g
    /
    Total Sugars
    0.1g
    /
    Protein
    22.8g


    AUTHOR:

    Adam Gallagher

    Adam and Joanne of Inspired Taste

    We are Adam and Joanne Gallagher, the creators of Inspired Taste. Established in 2009, Inspired Taste grew from a childhood dream into one of the internet’s most trusted recipe sites with hundreds of reliable recipes, step-by-step videos, and expert tips.More About Us

    Source link

  • Nicoise Salad With Sardines & Sun-Dried Tomato Dressing

    Nicoise Salad With Sardines & Sun-Dried Tomato Dressing

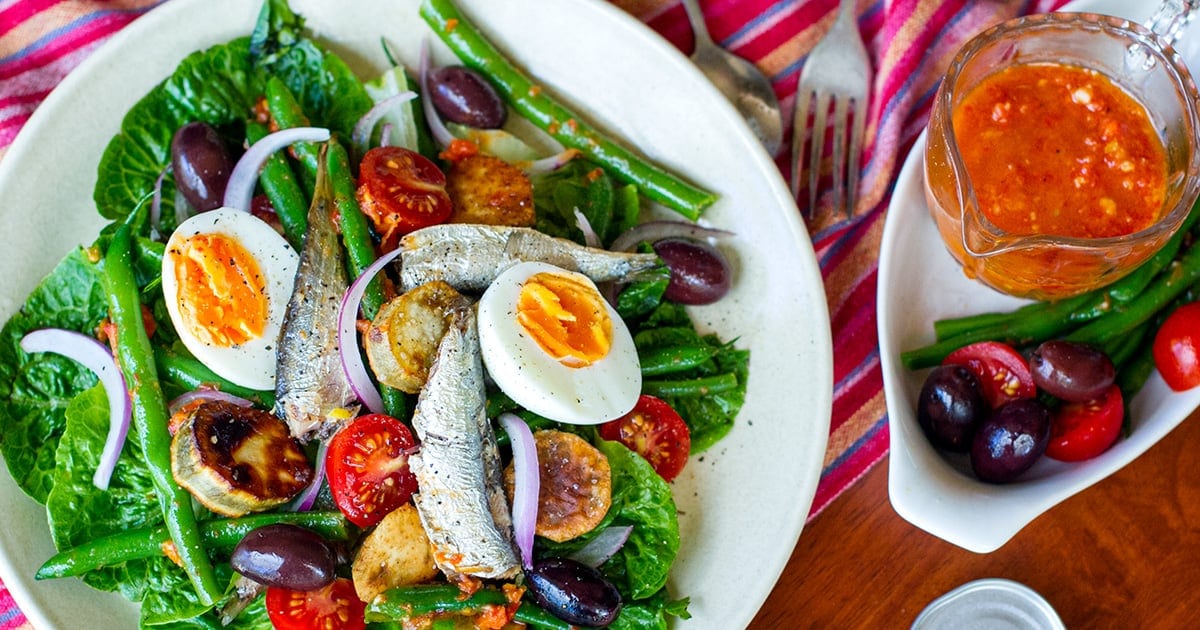
    If you’re looking for more sardine recipes, try this Nicoise Salad Recipe with a twist. Made with sweet potatoes instead of white spuds and canned sardines instead of tuna, this French salad is boosted with extra nutrients for a healthy heart and brain. Served with sun-dried tomato dressing that has a lot of flavour and attitude, which might help those not loving sardines to actually enjoy them a little in this salad. This recipe is gluten-free, paleo, Whole30 friendly and super nutritious. 


    I recently wrote a post about why you should start eating more sardines (hint: superfood!) and adding them to a crispy salad with a tasty dressing is an easy way to incorporate this impressive into your diet. I always think about which salads traditionally feature fish or seafood and if I can swap the protein out with sardines. Nicoise salad was the first that came to mind!

    What Is Nicoise Salad?

    Salad Niçoise is a French dish from the beautiful city of Nice in the south of the country.

    The most classic recipe features tomatoes, hard-boiled eggs, Niçoise olives (similar to Kalamata, I guess) and anchovies or tuna, dressed with olive oil. These will often be piled on top of lettuce. There are many variations and cooked potatoes and greens beans are often included.

    Most of the time, either freshly cooked or canned tuna is used but many fancy versions will serve Nicoise salad with crispy skin salmon or pan-seared tuna tataki. You might also find ingredients like shallots, red peppers, asparagus and so on.

    I have a version with hot smoked salmon Nicoise salad and pickled onions here.

    For this Nicoise salad creation, I pan-fried some sweet potatoes (which can also be boiled or roasted) and used sardines canned in olive oil. I steamed some fin green beans and used regular Kalamata olives, cherry tomatoes and some red onion for a kick.

    Sun-Dried Tomato Dressing

    One of the standout elements in this salad is the sun-dried tomato dressing. As a rule of thumb, when using sardines in a recipe, you might want to disguise their strong flavour with something equally bold. Acidic, sweet, sour ingredients usually do the trick. Things like citrus juice, capers, sun-dried tomatoes, or pickled anything works really well.

    In this case, I blended a few sun-dried tomatoes with olive oil, garlic, lemon juice, mustard and a little chili, which give this dressing a bit of va-va-voom. I recommend making a larger batch as you will want to use it again and again. 

    It goes well as a condiment with grilled or baked fish, chicken or meat and can be used over any grilled or roast veggies to give them freshness and zing. 


    More Sardine Recipes


    Full Recipe 

    Find the full list of ingredients, instructions, and a nutritional breakdown below. If you have questions or cook this recipe, please let me know in the comments, and make sure to rate this recipe so it’s easy for others to find.

    Want to Save This Recipe?

    Enter your email & I’ll send it to your inbox. Plus, get great new recipes from me every week!

    By submitting this form, you consent to receive emails from Cooked & Loved

    If you’re looking for more sardine recipes, try this Niçoise Salad Recipe with a twist. Made with sweet potatoes instead of white spuds and canned sardines instead of tuna, this French salad is boosted with extra nutrients for a healthy heart and brain. This recipe is gluten-free, paleo, Whole30 friendly and super nutritious.

    Sun-Dried Tomato Dressing

    • Preheat oven to 200°C (395°F). Toss diced sweet potato in oil and a few pinches of sea salt. Spread on an oven tray (I put them on parchment baking paper) and roast for 20 minutes.

    • Bring a saucepan of water to the boil. Add the egg and the beans. Cook the beans for 2-3 minutes, remove and rinse. Cook the egg for another 5 minutes, then rinse under cold water.

    • Arrange salad leaves on a plate and top with roasted sweet potato, beans, halved egg, olives, red onion and cherry tomatoes. Drizzle with 2 tablespoons of salad dressing and top with sardines.

    • Make the dressing.Place all ingredients in a blender or a food processor. Process until pureed and well combined. Alternatively, finely dice garlic and sun-dried tomatoes and whisk the other ingredients in a bowl. Store in a clean, air-tight glass jar in the fridge for up to 10 days.
    If you really can’t do sardines, canned tuna, salmon, or another type of fish can be used. For a vegetarian version, add chickpeas or lentils.
    Calorie breakdown below is based on the full salad recipe and 1/4 of the dressing recipe (~2 tablespoons).
    For a lower-carb version, omit or the sweet potatoes and replace with more green beans or asparagus.

    Calories: 906kcal | Carbohydrates: 44g | Protein: 42g | Fat: 63g | Saturated Fat: 9g | Polyunsaturated Fat: 12g | Monounsaturated Fat: 39g | Trans Fat: 0.02g | Cholesterol: 341mg | Sodium: 2747mg | Potassium: 1595mg | Fiber: 8g | Sugar: 13g | Vitamin A: 20874IU | Vitamin C: 49mg | Calcium: 612mg | Iron: 8mg

    Keywords: Dressing, Sardines, Nicoise Salad, Lunch Recipes, Healthy Salads

    [mv_playlist id=”224″ jsonLd=”false” ratio=”16:9″ thumbnail=”https://mediavine-res.cloudinary.com/v1599716598/plqh05ivvby851y7acqo.jpg” title=”WATCH MY TOP 10 HEALTHY VIDEO RECIPES”]

    Save This French Salad With Sardines To Pinterest

    Source link

  • Easy Salmon Marinade Recipe | The Recipe Critic

    Easy Salmon Marinade Recipe | The Recipe Critic

    This website may contain affiliate links and advertising so that we can provide recipes to you. Read my disclosure policy.

    A great salmon marinade makes your fish flavorful, tender, and juicy! This recipe gives each filet the perfect balance of savory, sweet, and tangy flavors.

    Most of my favorite meat recipes start with a good marinade. And I love experimenting with different ingredients to create new flavors, especially during grilling season! Here are some of our go-to marinades that you’ll definitely want to try: pork chop marinade, shrimp marinade, and chicken marinade!

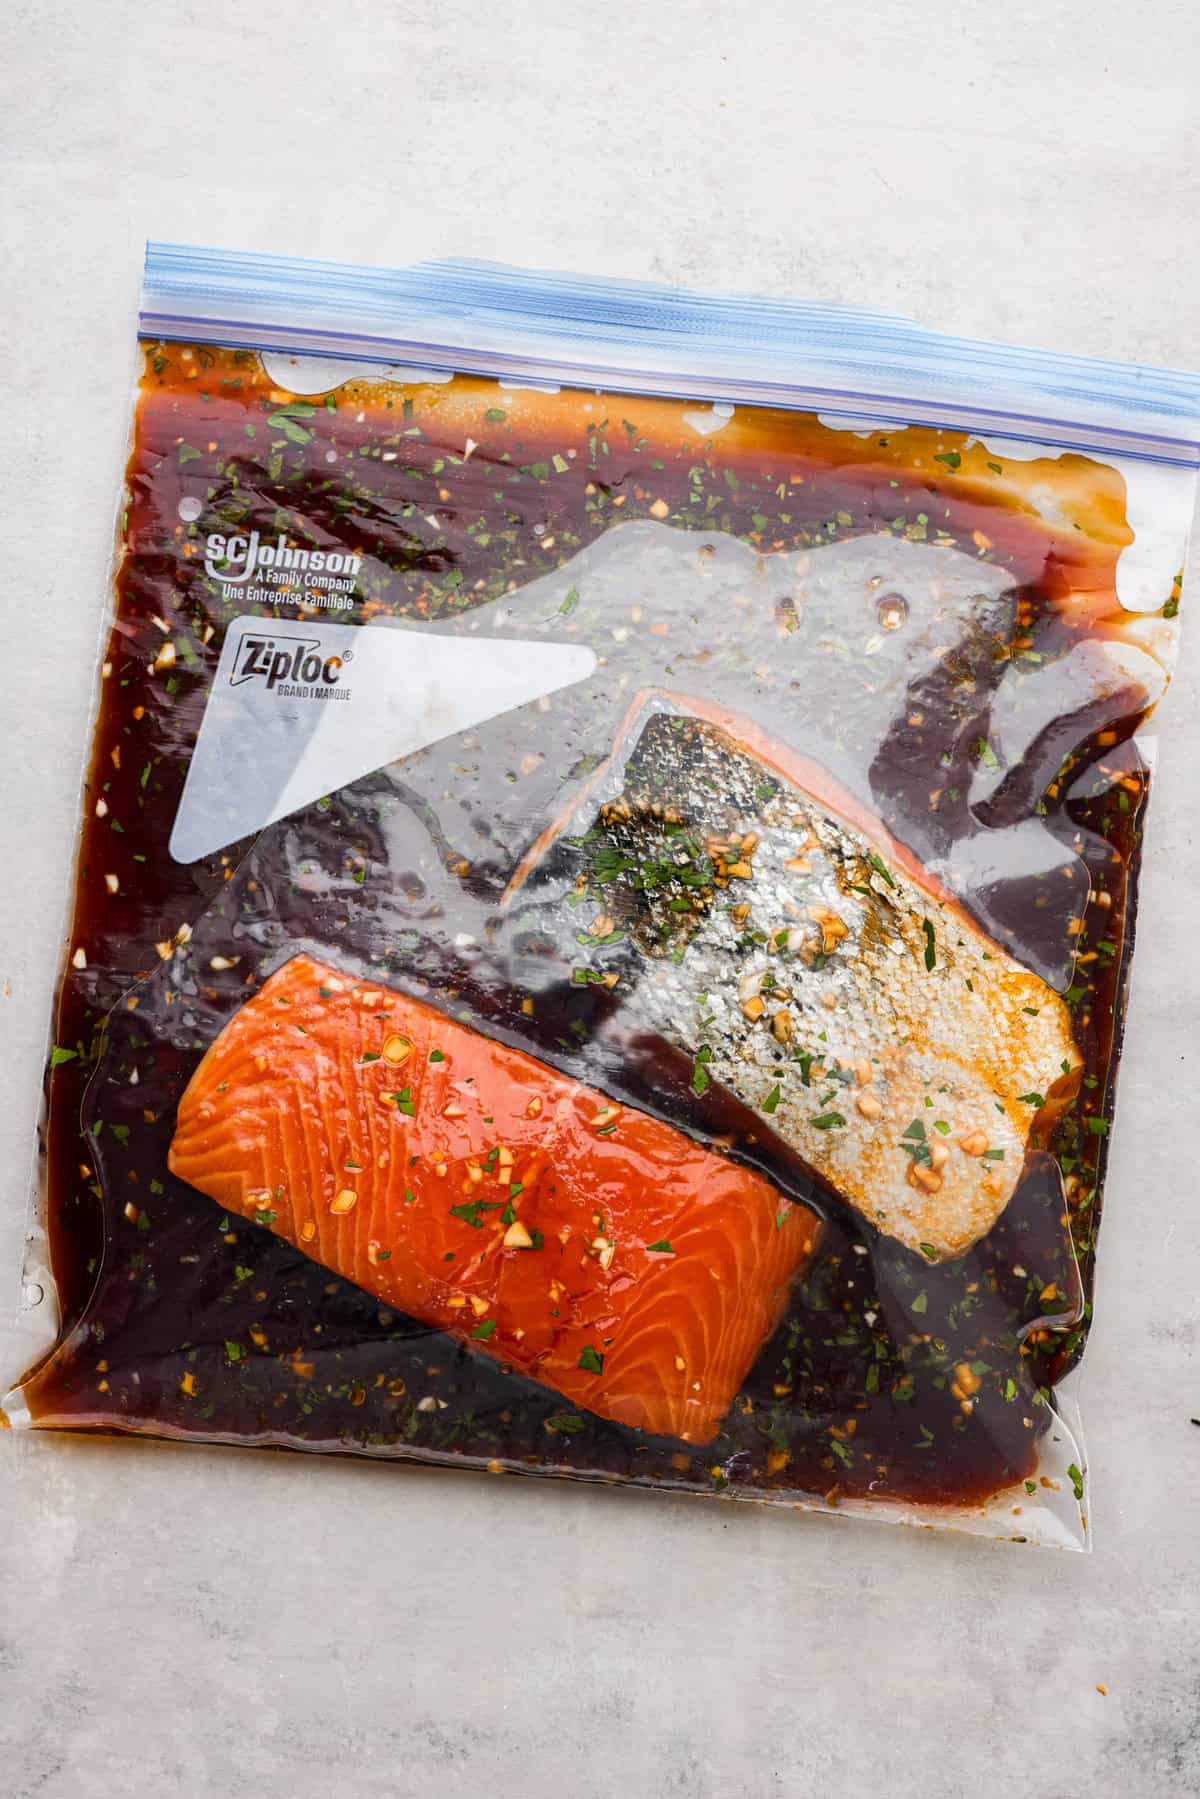
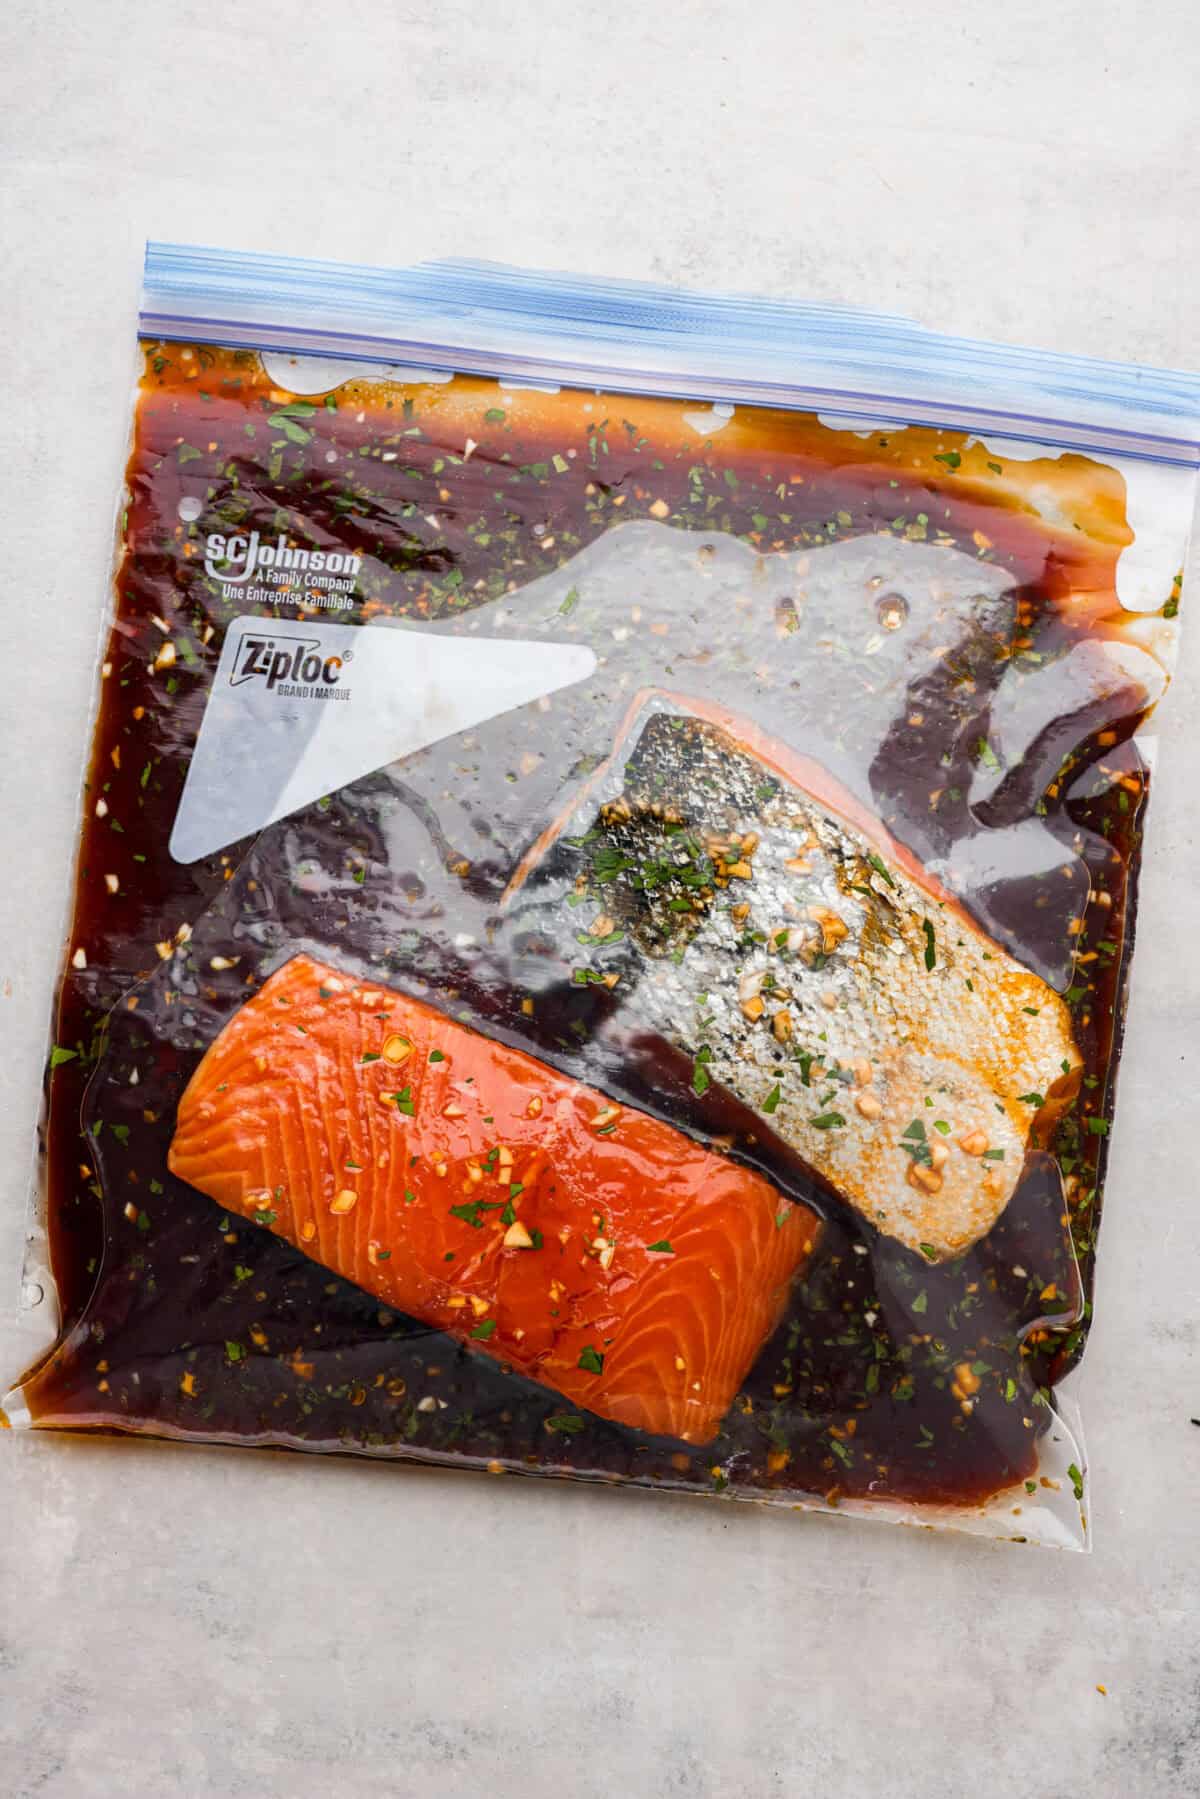
    Salmon filets in a ziplock bag with marinade. Salmon filets in a ziplock bag with marinade.

    Reasons You’ll Love This Marinade Recipe

    • Easy to Prepare: Requires just a few simple ingredients.
    • Delicious: Delivers big flavor with minimal effort. Enjoy tender, juicy salmon that’s perfect every time.
    • Versatile: Ideal for salmon, chicken, or steak. While store-bought marinades are convenient, homemade always tastes better!

    What Ingredients are in Salmon Marinade?

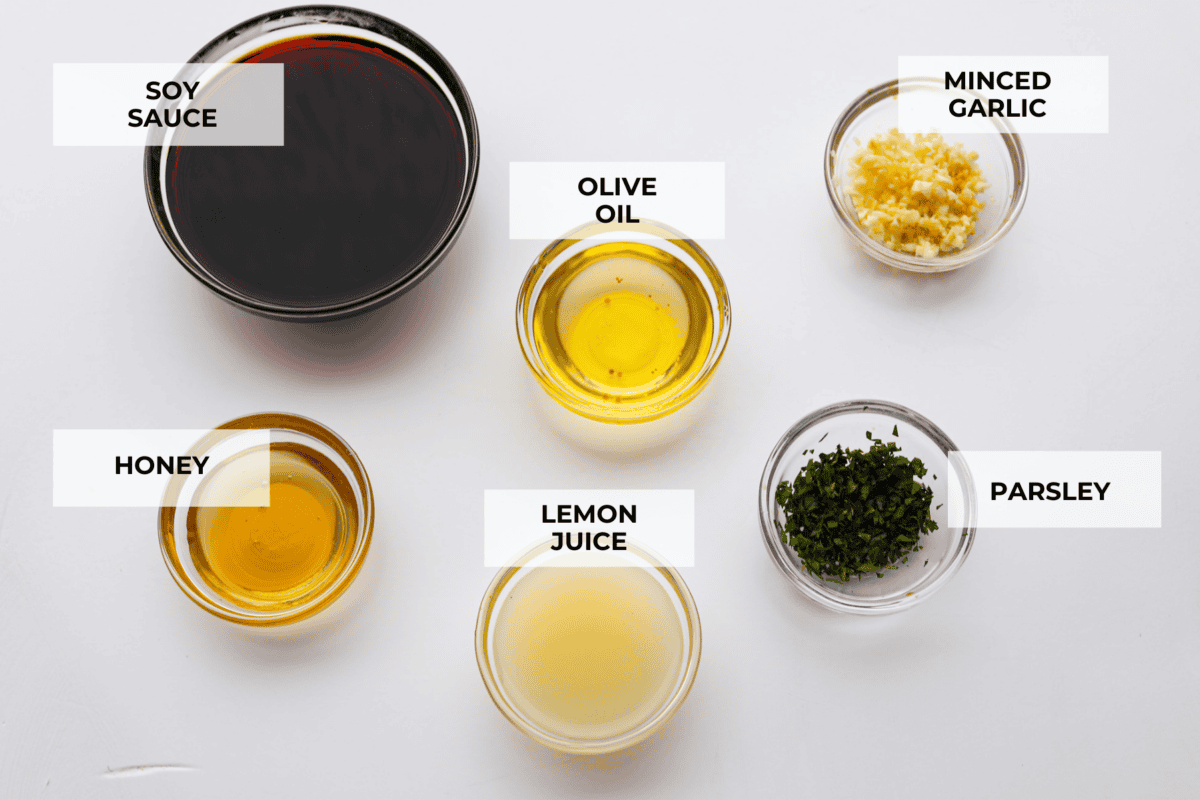
    You’re going to love how easy this salmon marinade recipe is! It’s made with simple ingredients you likely already have in your kitchen. Just check the recipe card below for all the exact measurements.

    • Soy Sauce: Adds a savory and umami flavor to the marinade that enhances the taste of the salmon.
    • Lemon Juice: A little acidity is a must in marinades. It provides fresh flavor and also helps to tenderize the salmon. 
    • Extra Virgin Olive Oil: Ensures the marinade coats the salmon completely while adding plenty of moisture.
    • Honey: The sweetness from the honey balances the savory flavor from the soy sauce.
    • Garlic: Fresh garlic infuses the salmon with an incredible savory taste!
    • Fresh Parsley: Love adding fresh herbs for depth of flavor.
    • Salmon: This marinade makes enough to fully coat 2-3 pounds of fresh salmon.
    The top view of ingredients in glass bowls and individually labeled. The top view of ingredients in glass bowls and individually labeled.

    How to Make Salmon Marinade and Cook Salmon

    Homemade marinade is super simple to make! All you have to do is mix all of the ingredients, and then add everything to a large ziplock bag! Below, you’ll find instructions for making the marinade and also 4 different ways to cook your salmon:

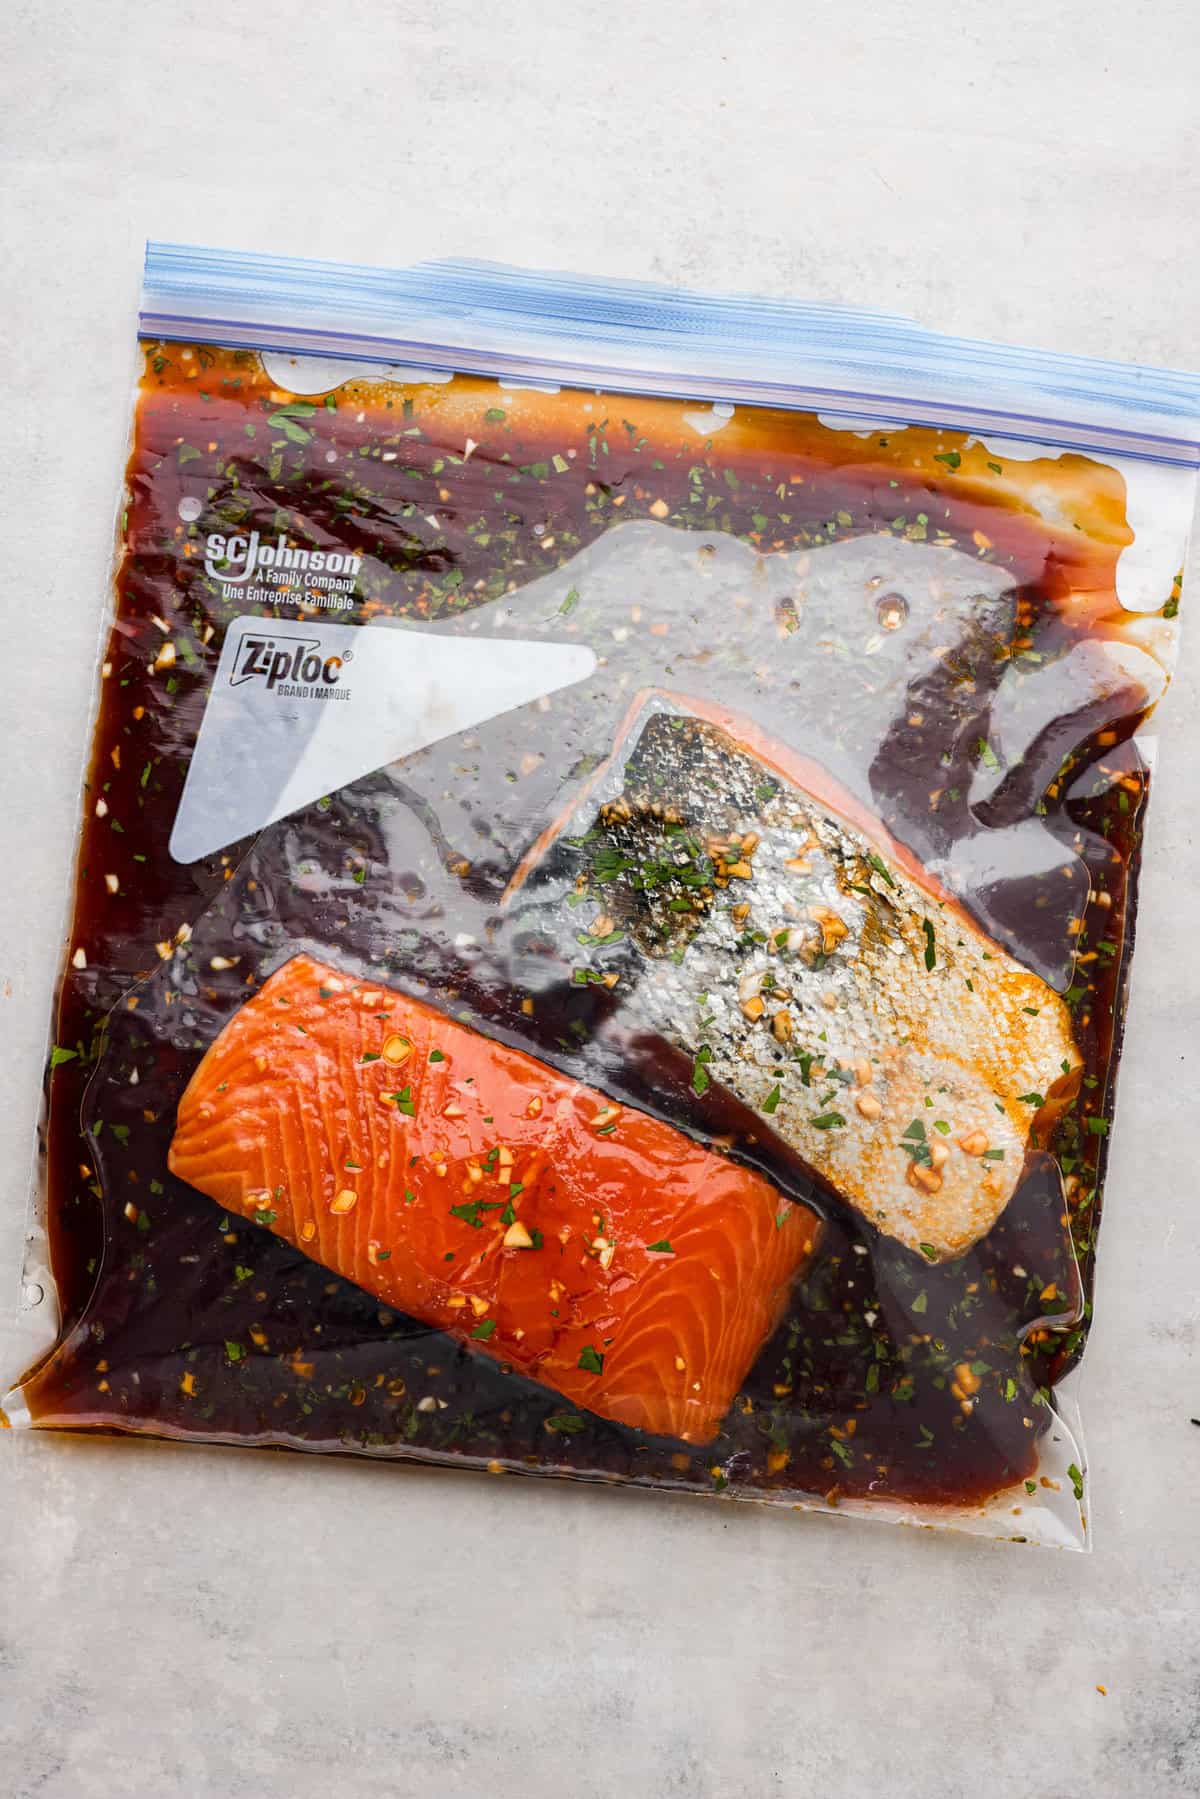
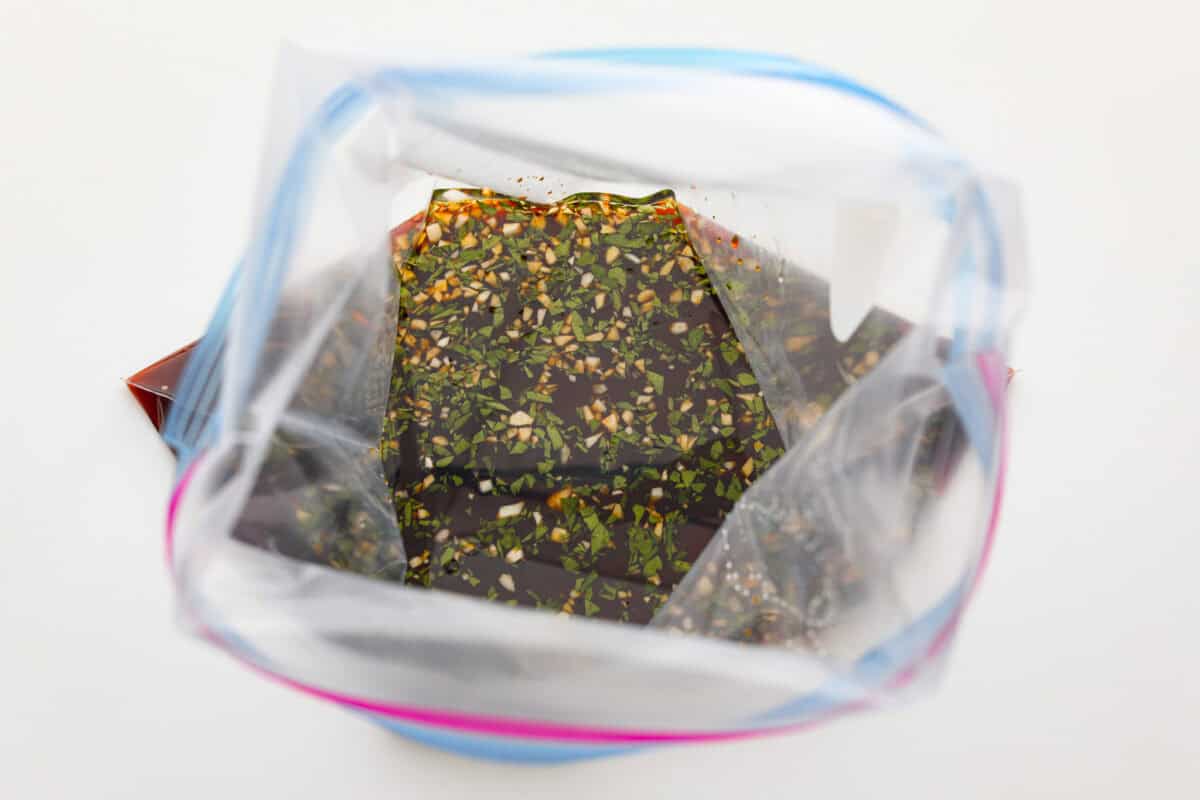
    1. Make the Marinade: Combine all the ingredients in a large ziplock bag or a large bowl.
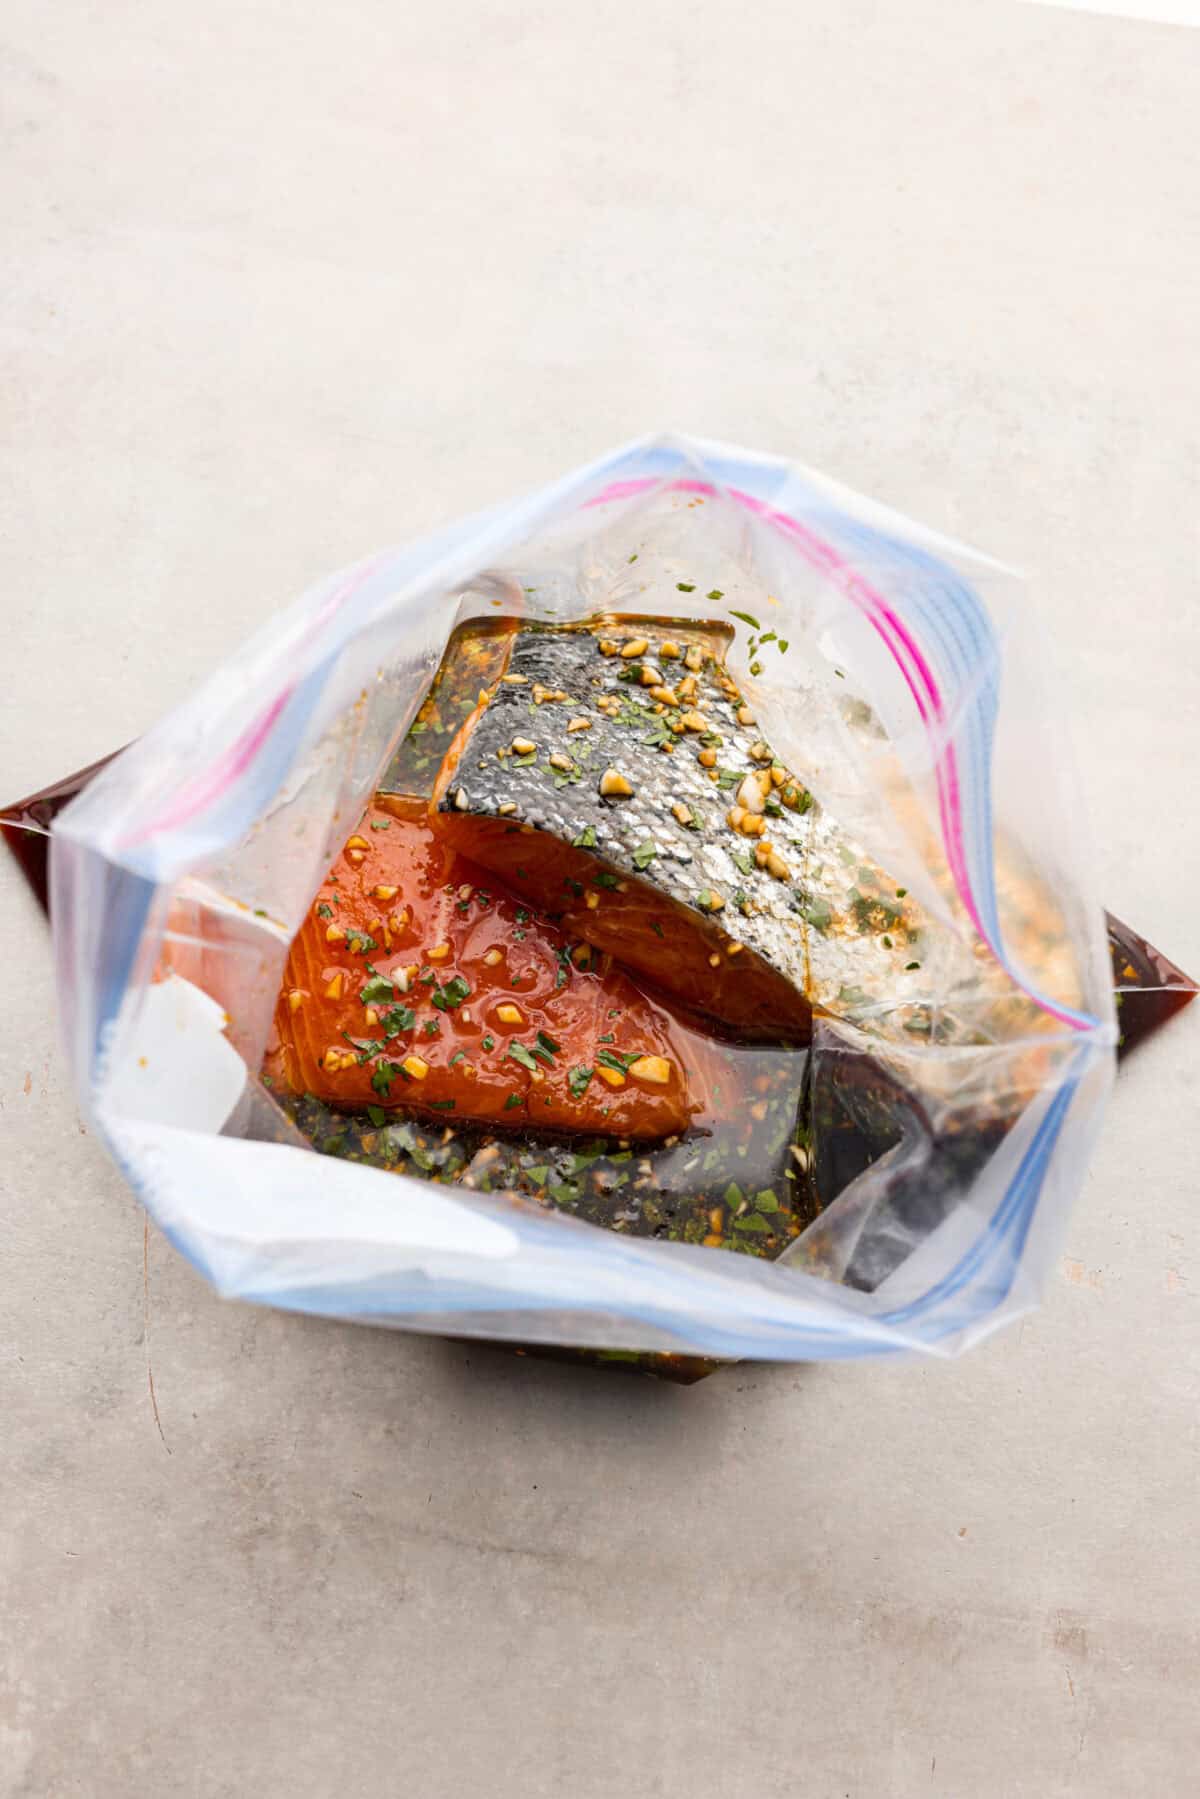
    2. Marinate the Fish: Add the salmon, ensuring the fish is completely covered with the marinade. Let it marinate for 30-60 minutes. Avoid letting it marinate for longer than an hour, as fish can start to break down and become mushy after too long. 

    Choose Your Cooking Method

    1. Air Fryer: Spray the basket of the air fryer with pan spray and place the salmon skin side down. Cook at 400 degrees Fahrenheit for 8-10 minutes, or until the fish reaches 145 degrees Fahrenheit. 
    2. Oven: Preheat the oven to 400 degrees Fahrenheit and line a baking sheet with parchment paper or non-stick foil. Place the salmon skin side down on the baking sheet and bake for 8-10 minutes, or until the fish reaches 145 degrees Fahrenheit. 
    3. Skillet: Heat 1 tablespoon of olive oil in a large skillet over medium-high heat before adding the salmon skin-side up. Let the salmon sear for 4-5 minutes before flipping it skin side down. Cook for an additional 3 minutes. 
    4. Grill: Preheat the grill to 500 degrees Fahrenheit and either brush or spray with oil. Place the salmon skin side down for 6-8 minutes. When it is ready to flip, it should easily release with a fish spatula. Flip the fish and cook over indirect heat for 2-4 minutes, until the fish reaches 145 degrees Fahrenheit.

    Variations and Substitutions

    This sweet and savory salmon marinade is a game-changer, making your fish tender and juicy with incredible flavor. Here are some easy tweaks to tailor it to your taste:

    • Switch up the Citrus: For a fun twist, try swapping the lemon juice with lime or orange juice. Each one adds its own unique zing!
    • Change the Herbs: Feel free to mix in different herbs like rosemary, thyme, cilantro, or dill. Fresh herbs are great, but if you’re using dried, go with 1 teaspoon for every tablespoon of fresh.
    • Alternative for Soy Sauce: If you need to switch out the soy sauce, go for gluten-free or low-sodium soy sauce, or try liquid aminos for a similar taste.
    • Make it Spicy: Craving some heat? Add a pinch or two (or more, if you like it hot) of crushed red pepper to spice things up.
    • Sweetener: Honey does a great job balancing the saltiness of the soy sauce, but you can swap it with brown sugar or agave. If you need to skip the sweetener, that’s okay too—just know it adds a nice touch!

    The top view of salmon filets in marinade in a ziplock bag. The top view of salmon filets in marinade in a ziplock bag.

    How to Store Salmon Marinade

    You can get a head start by whipping up your marinade a day in advance. Just remember, don’t add the fish to it until about an hour before you plan to cook. If you let the fish soak for more than 60 minutes, the marinade will start to break down the fillet’s structure, leaving you with mushy fish.

    • In the Refrigerator: Your homemade marinade will stay fresh for up to 2 weeks if you keep it in an airtight container in the fridge. But be careful! Once the marinade has been in contact with raw meat or fish, you’ll need to toss it out to avoid any food safety issues.
    • In the Freezer: For longer storage, you can freeze your marinade. Just pour it into a freezer-safe ziplock bag, and it will keep for 3-6 months. When you’re ready to use it, let it thaw in the refrigerator or at room temperature.

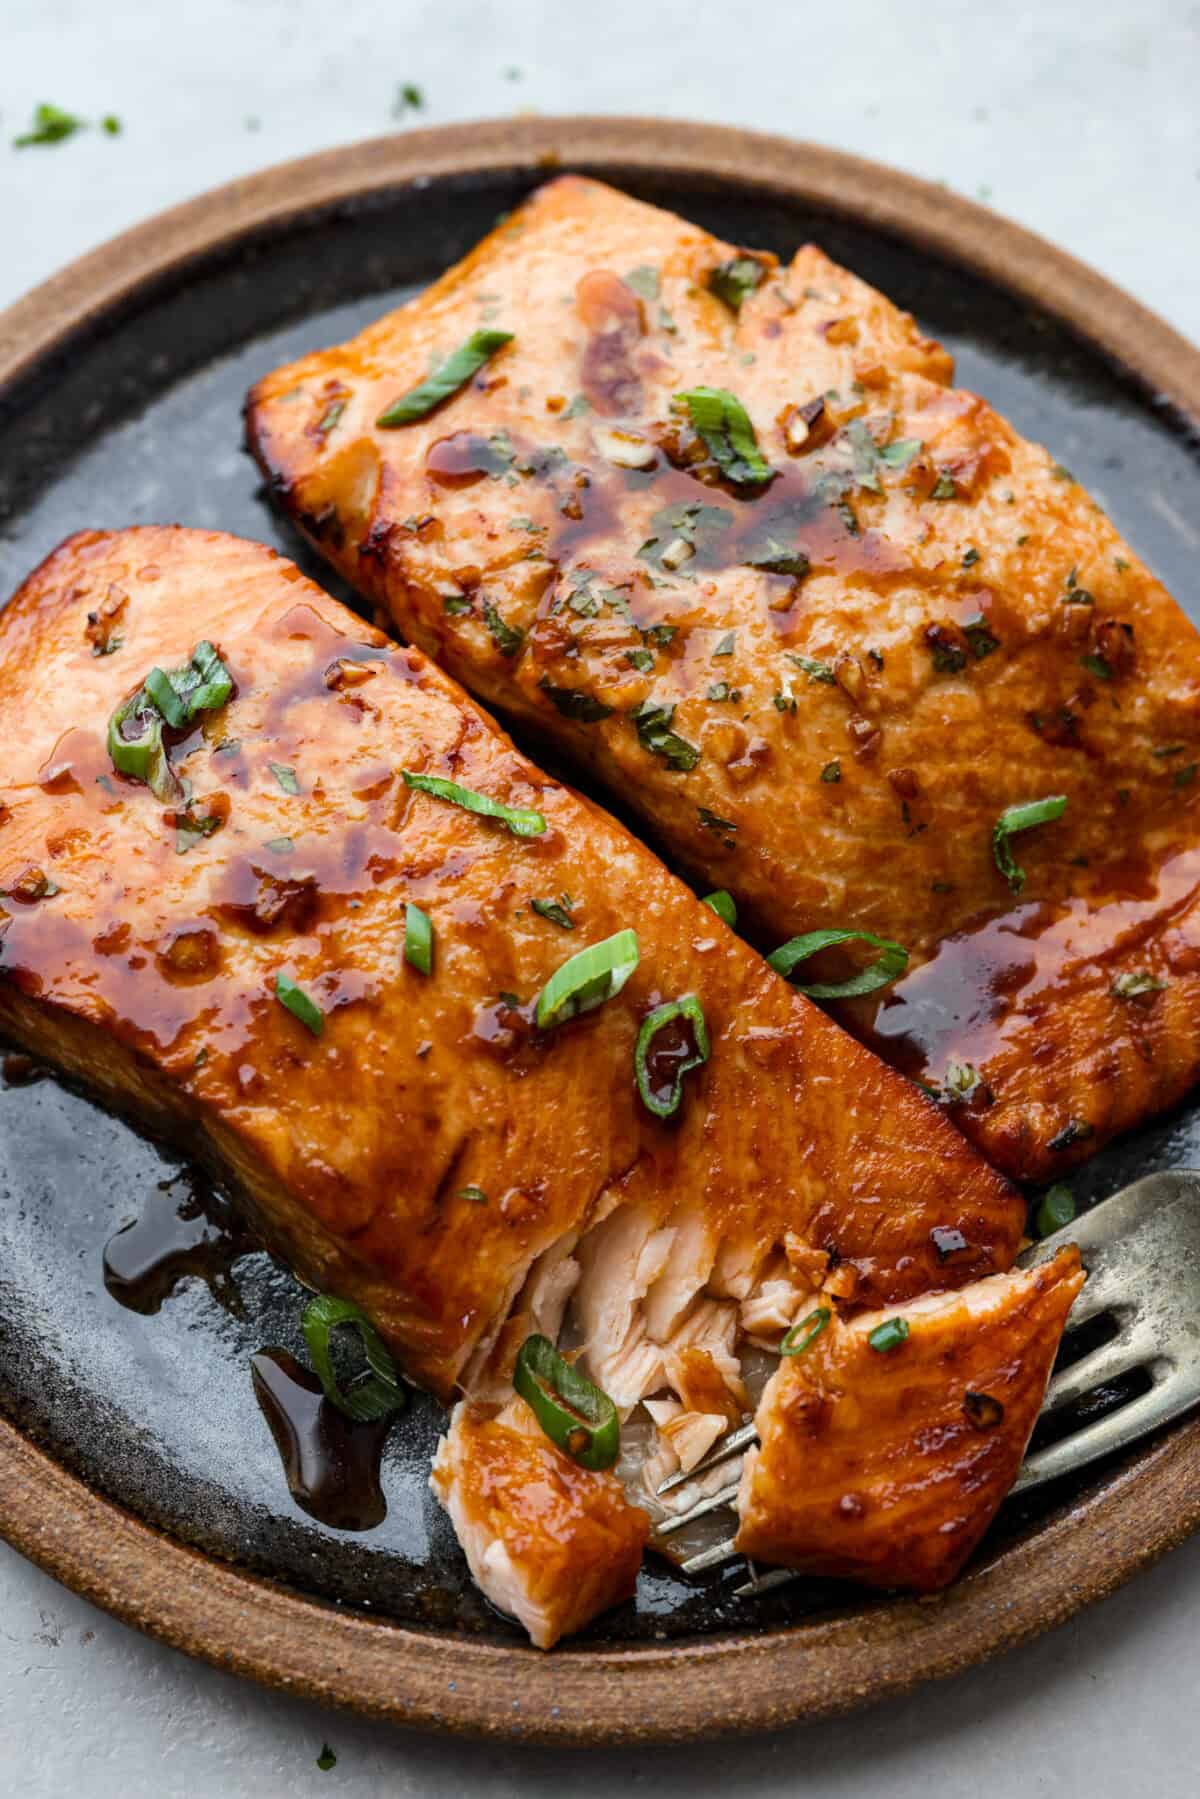
    Cooked salmon filets on a plate garnished with green onions. Cooked salmon filets on a plate garnished with green onions.

    More Marinade Recipes

    A tasty marinade can take your meal from ordinary to extraordinary! It infuses the protein with flavor, tenderizes it and makes the meat perfectly juicy and tender.

    Pin this now to find it later

    Pin It


    Source link

  • Seriously Good Pickled Shrimp Recipe

    Seriously Good Pickled Shrimp Recipe

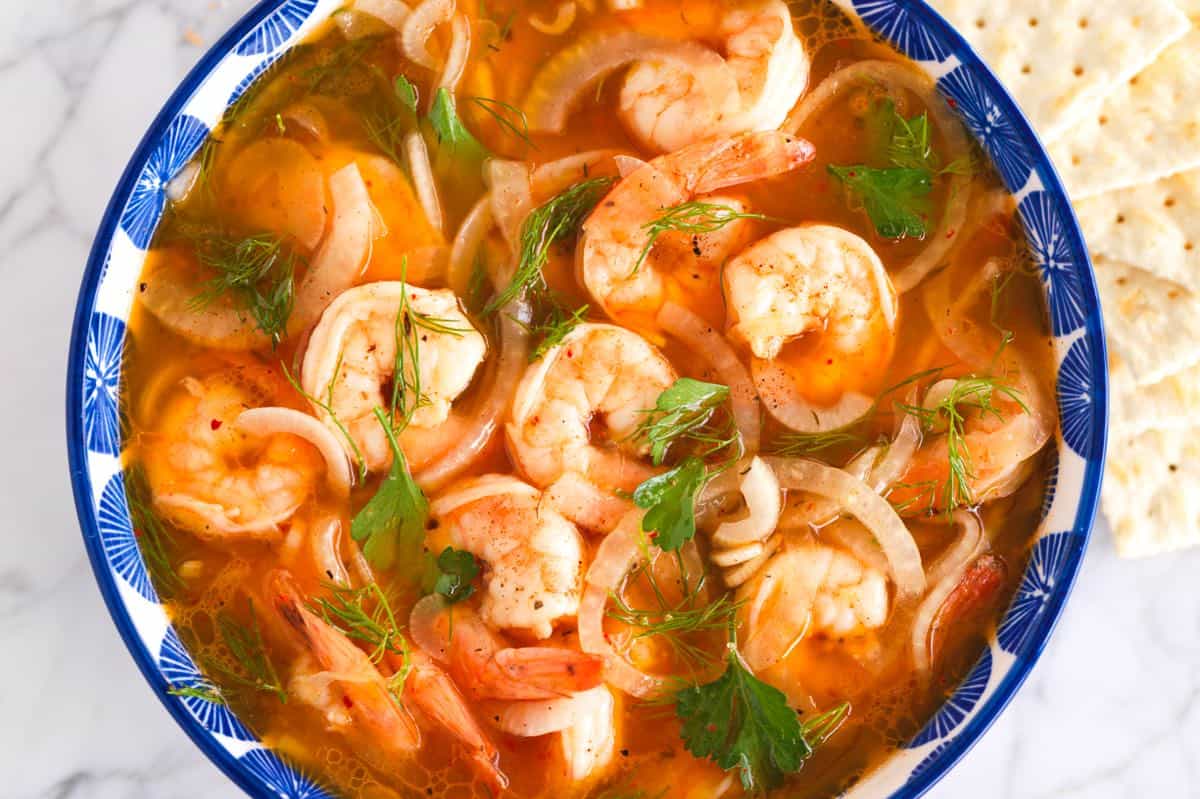
    This tangy, herby, lemony pickled shrimp recipe is so good you’ll want to make a double batch!

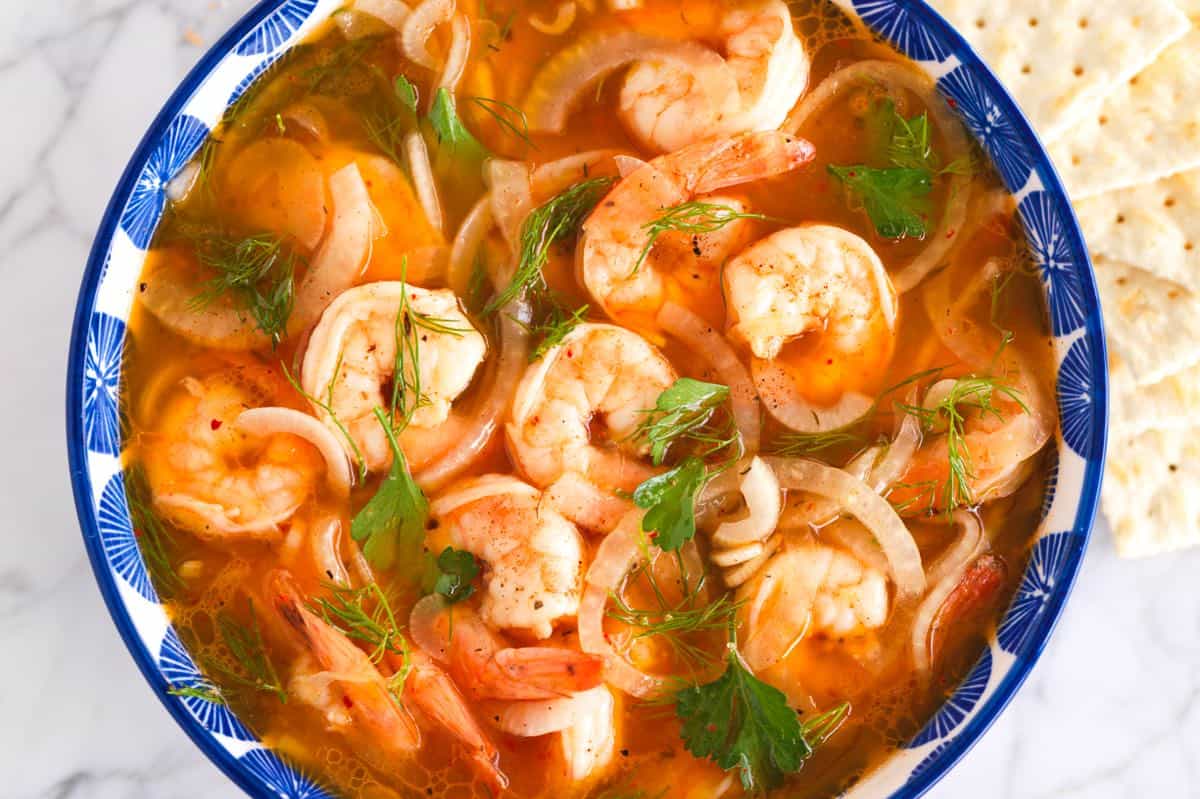
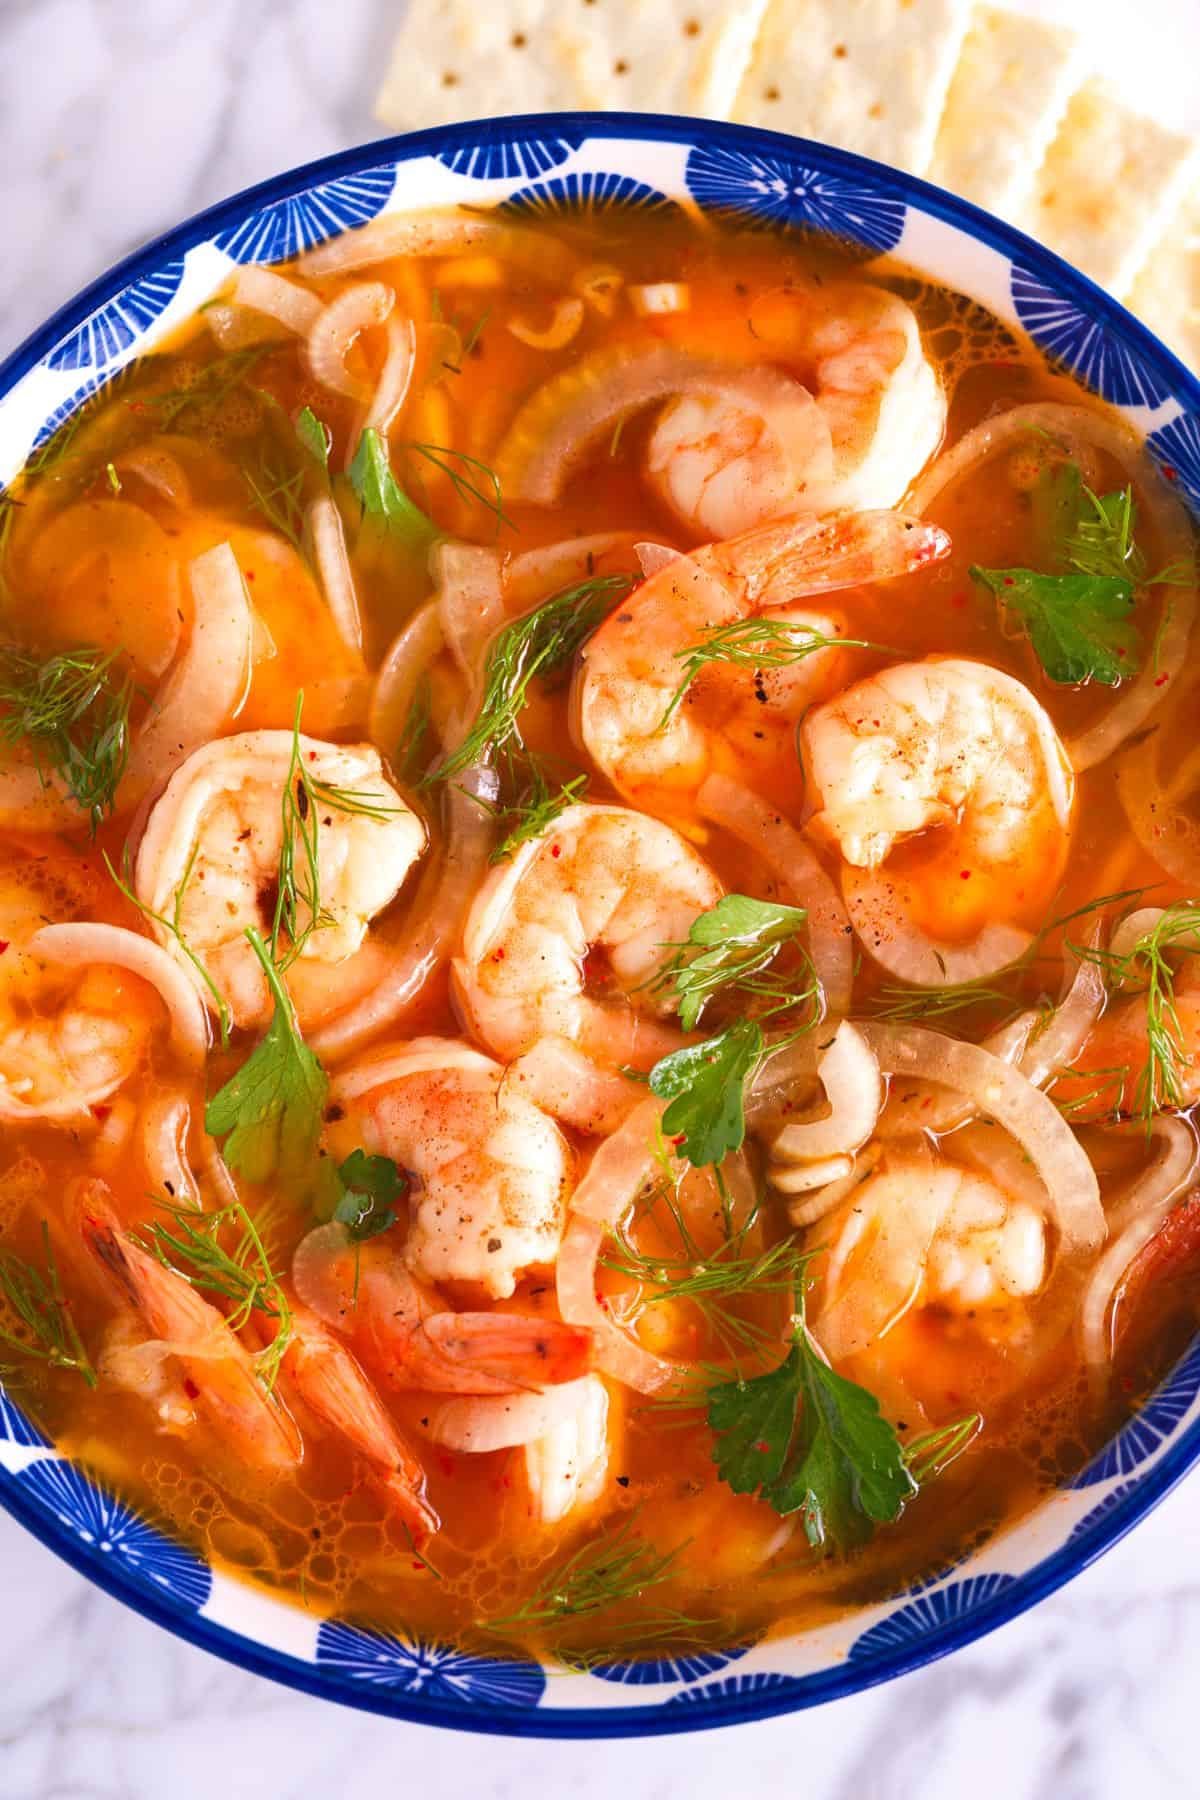
    Pickled Shrimp

    I love these pickled shrimp as a light dinner and for entertaining (they always go quickly). Serve them with crackers, crusty bread and butter, or make a sandwich. They’re even great added to salads and light pasta dishes (like this orzo pasta salad).

    I didn’t know how much I loved Southern-style pickled shrimp until our friend Richard introduced us to them. Now, I can’t get enough. Once you try this easy recipe, you’ll be hooked, too. They are seriously good! For another Southern-inspired shrimp recipe, see our easy shrimp and grits!

    Key Ingredients

    • Shrimp: For the best results, I recommend large or jumbo shrimp. They’re less likely to overcook and dry out. Look for fresh shrimp that feels firm and has a slightly sweet smell. If you’re using frozen shrimp, thaw and drain them before cooking them.
    • Lemon: I use lemon juice for the pickling liquid and a whole lemon for the shrimp cooking liquid.
    • Cajun or Creole Seasoning: This adds a ton of flavor to both the cooking liquid and the pickling liquid. I love my homemade Cajun seasoning, but feel free to use what you have. I also like to add a bay leaf to the cooking liquid.
    • Onion: This might be my favorite part! I love pickled onions, and since we add lots of sliced onion to the pickling brine, you end up with perfect shrimp and pickled onions. I usually use sweet onions, but yellow or red onions work too.
    • Apple Cider Vinegar and Oil: These are the base of your pickling liquid. Apple cider vinegar keeps things tangy, and the oil adds richness and helps the pickling liquid turn into more of a dressing.
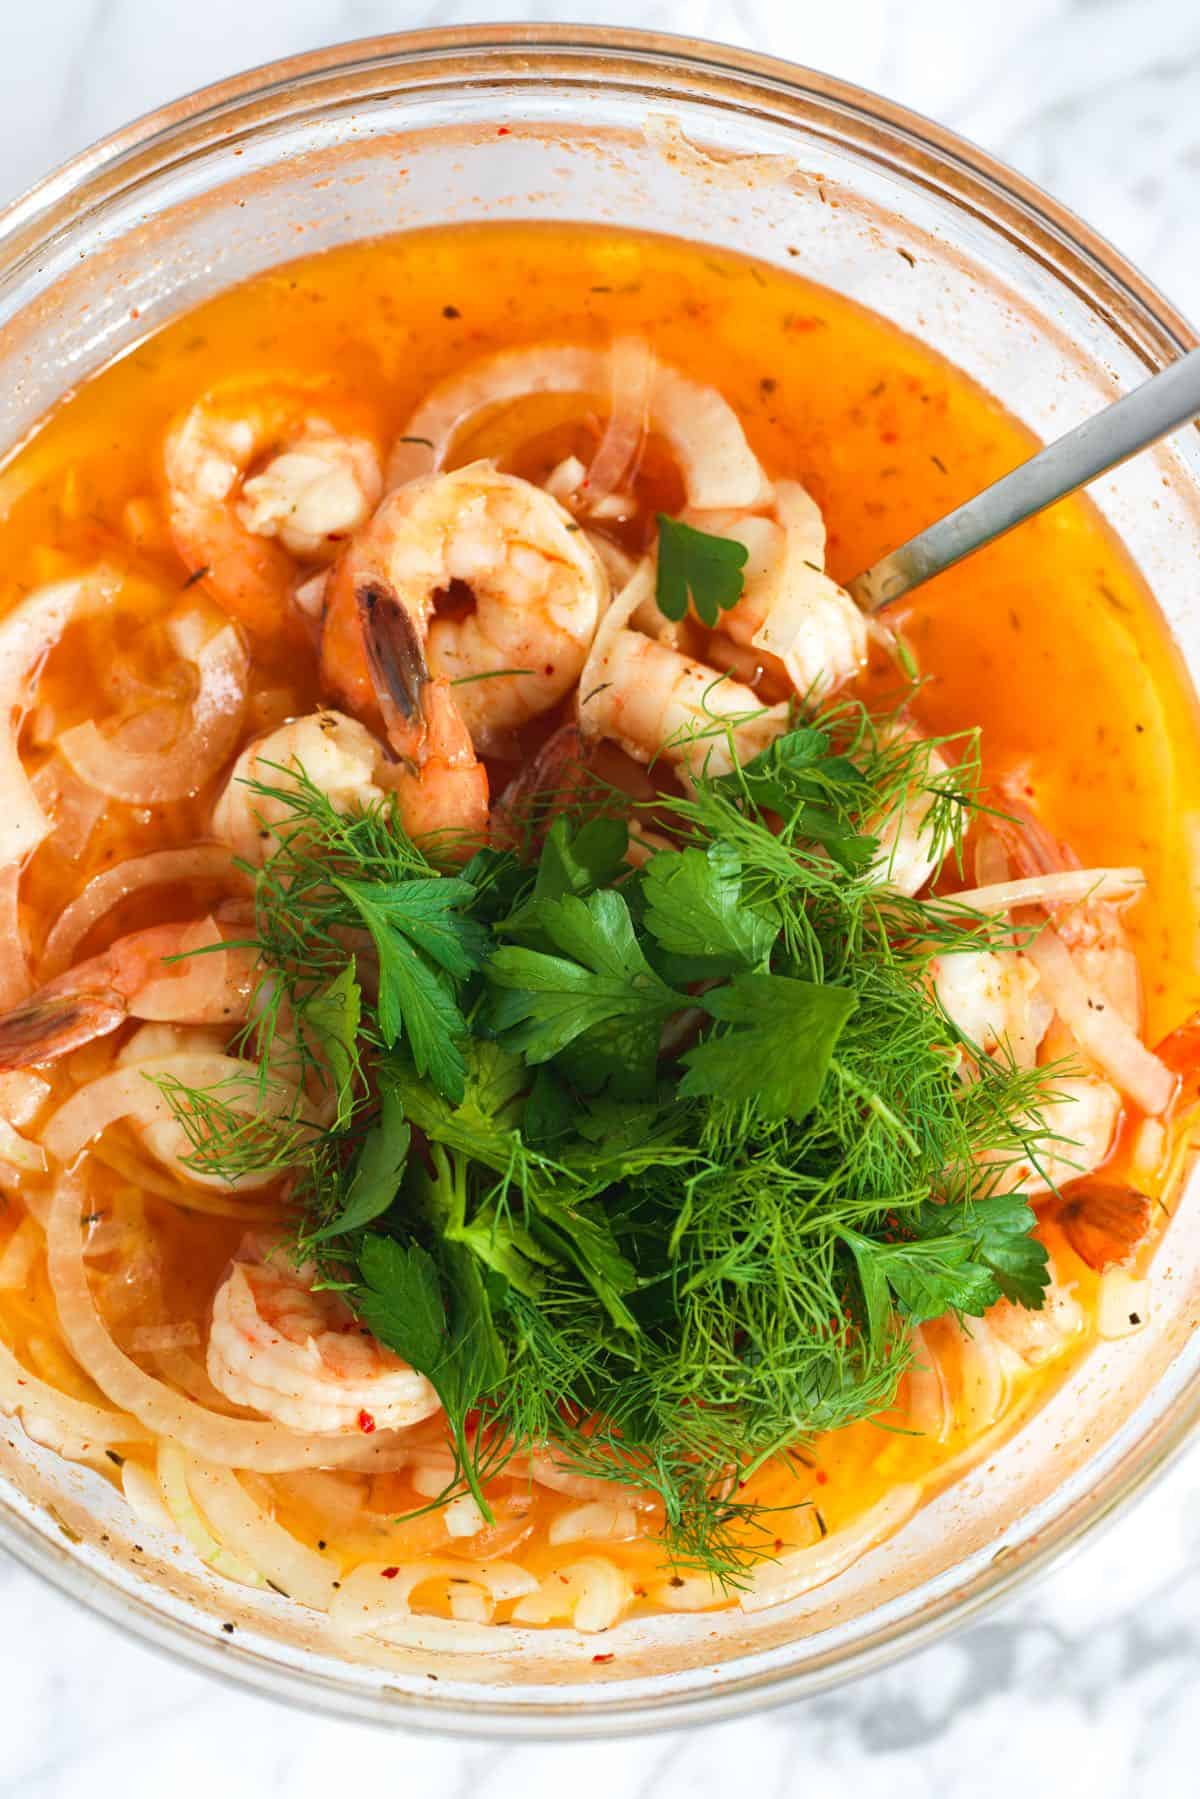
    • Herbs: I love stirring fresh parsley and dill into the shrimp before serving for a bright, fresh flavor.

    Find the full recipe with measurements below.

    How to Make the Best Pickled Shrimp

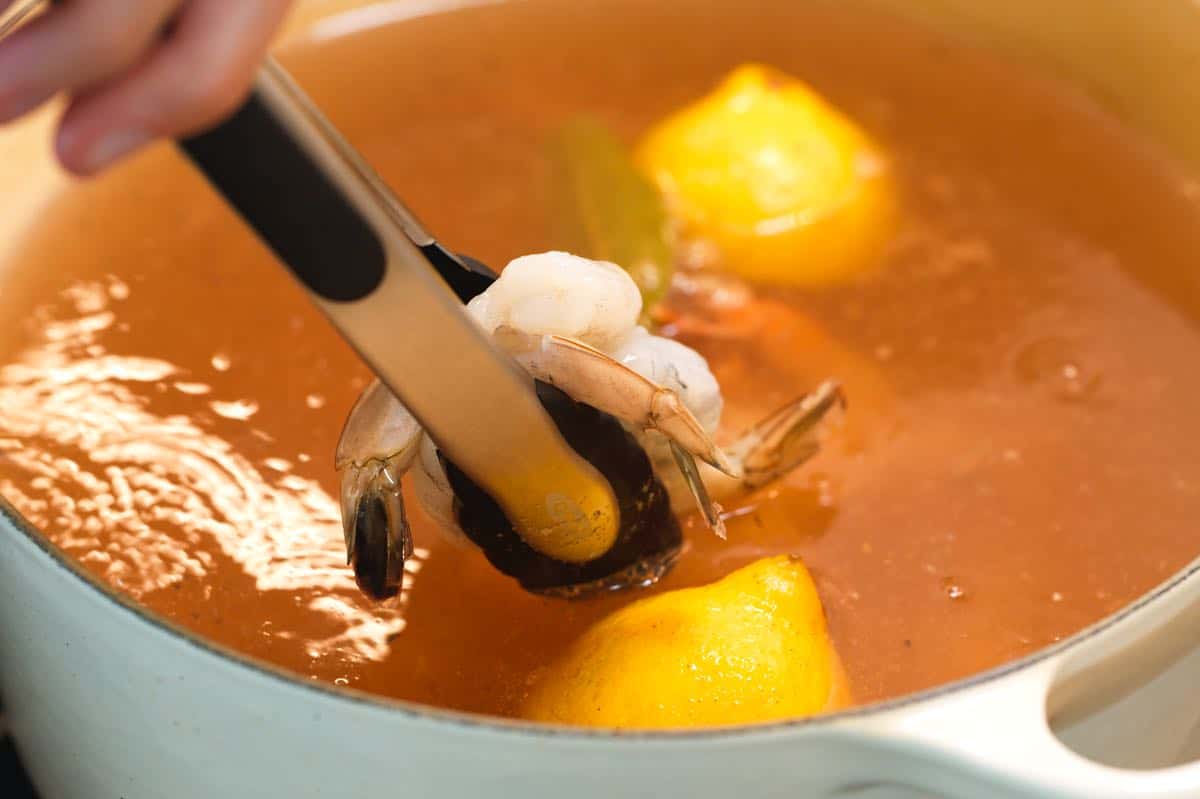
    Tip 1: Cook your shrimp first. Just like when making shrimp ceviche, I quickly cook my shrimp before they go into the pickling liquid. This way, we can season them perfectly before they soak up all that tangy brine. A quick poach is all you need for the shrimp.

    Three minutes in the seasoned water is the sweet spot for plump, juicy shrimp. Once the shrimp are cooked, they go straight into the chilled pickling liquid! Let them hang out in the fridge for at least 20 minutes (or longer if you want).

    Shrimp Boil for pickled shrimp

    Tip 2: Use our pickling liquid. The pickling liquid itself is extraordinarily flavorful, made with lemon juice, spices, onion, and herbs. You’ll combine everything in a bowl with ice water to get it nice and cold, then pop it in the fridge while your shrimp cook.

    Tossing shrimp in pickled shrimp brine

    Tip 3: Serving suggestions. When you’re ready to serve, the options are endless! I love them with crackers, buttered toast, or tossed into a salad. And don’t forget about those onions from the brine. They pickle, too, and are seriously delicious!

    Homemade Pickled Shrimp

    Seriously Good Pickled Shrimp

    • PREP
    • COOK
    • TOTAL

    We cannot get enough of these pickled shrimp. The shrimp turn out tangy, herby, and so delicious! You will quickly cook the shrimp before adding them to the brine. It’s easy and guarantees the perfect texture!

    4 Servings

    You Will Need

    For Cooking the Shrimp

    1 pound (450g) large shrimp, peeled and deveined

    1 lemon

    1 tablespoon fine sea salt

    1 teaspoon Cajun seasoning or Creole seasoning

    1 bay leaf

    1/4 teaspoon fresh ground black pepper


    For the Pickling Liquid

    2 tablespoons fresh lemon juice from half a large lemon

    1 ½ teaspoons fine sea salt

    3/4 teaspoon Cajun seasoning or Creole seasoning

    1 small sweet onion, thinly sliced

    6 tablespoons (88ml) apple cider vinegar

    1/4 cup (60ml) avocado oil or vegetable oil

    1/2 cup (120ml) ice water

    1/8 teaspoon gochugaru Korean red chili flakes or use crushed red pepper flakes

    1/4 teaspoon fresh ground black pepper

    1/4 cup (15g) fresh parsley leaves, chopped

    2 tablespoons fresh dill, chopped

    Directions

      1Make the pickling liquid. Add the lemon juice, salt, Cajun seasoning, sliced onion, cider vinegar, oil, ice water, chili flakes, and black pepper to a bowl large enough to hold the shrimp once it has cooked.

      2Stir until well blended, then chill in the refrigerator while you cook the shrimp.

      3Bring 8 cups (1.8L) of water to a boil in a large pot. Cut the lemon in half, squeeze the juice into the boiling water, and add the lemon halves.

      4Add the tablespoon of salt, Cajun or Creole seasoning, bay leaf, and black pepper.

      5Add the shrimp and cook for 3 minutes, then transfer them to the chilled pickling liquid using a slotted spoon, stirring them around the pickling liquid a few times.

      6Refrigerate for 20 minutes.

      7Stir in the fresh herbs before serving.

    Adam and Joanne’s Tips

    • Storing: Keep the shrimp in the brine in the refrigerator for up to 3 days. The shrimp do firm up as they sit, but are still delicious!
    • The nutrition facts provided below are estimates. The brine is included in the calculations, so fat and sodium are higher than what you will likely consume.

    Nutrition Per Serving
    Serving Size
    1/4 of the recipe
    /
    Calories
    236
    /
    Total Fat
    14.4g
    /
    Saturated Fat
    1.7g
    /
    Cholesterol
    182.5mg
    /
    Sodium
    1015.3mg
    /
    Carbohydrate
    3.6g
    /
    Dietary Fiber
    0.8g
    /
    Total Sugars
    0.9g
    /
    Protein
    23.5g


    AUTHOR:

    Joanne Gallagher

    Adam and Joanne of Inspired Taste

    We are Adam and Joanne Gallagher, the creators of Inspired Taste. Established in 2009, Inspired Taste grew from a childhood dream into one of the internet’s most trusted recipe sites with hundreds of reliable recipes, step-by-step videos, and expert tips.More About Us

    Source link

  • Shrimp Caesar Salad

    Shrimp Caesar Salad

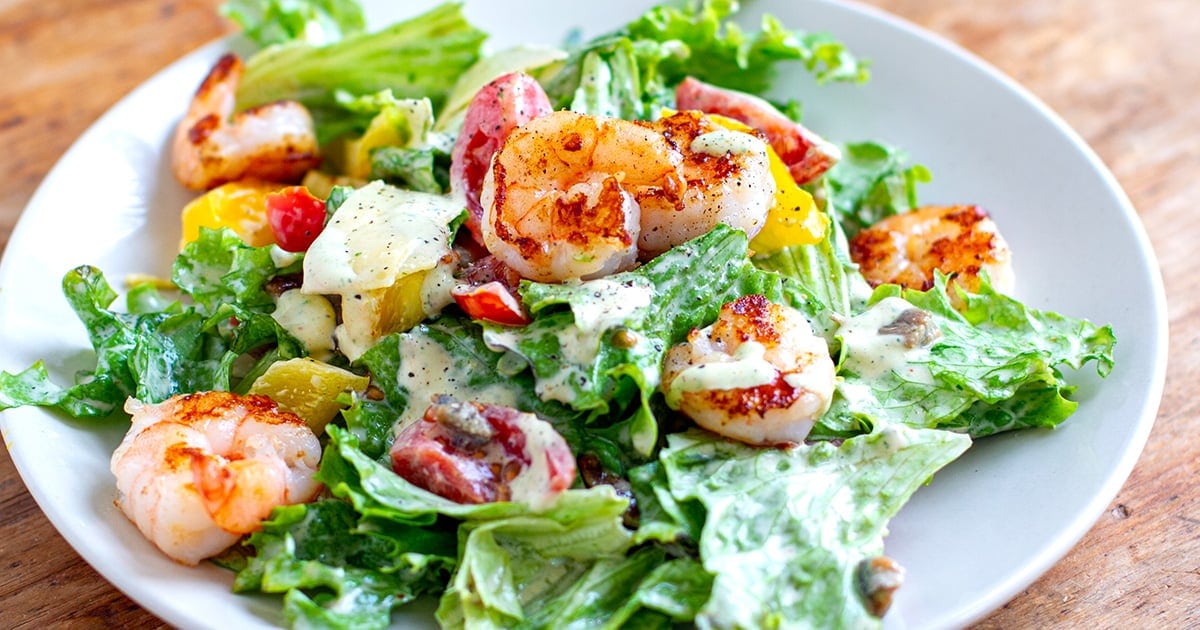
    This nutritious and tasty shrimp Caesar salad recipe nutritious, tasty, quick and easy to make – perfect for a weeknight dinner or lunch. Featuring juicy, sweet prawns/shrimp (chicken could also be used), crispy bacon, fresh lettuce, peppers and cherry tomatoes, this gluten-free and keto-friendly salad is smothered in the most delicious, creamy Caesar dressing. It’s high in protein and nutrients. Paleo & dairy-free modifications provided.


    Shrimp Caesar Salad Notes

    I’ve always loved a good Caesar salad and my favourite thing about it is probably the dressing. If the dressing is done well, then it doesn’t matter what veggies or protein you toss in it.

    I wanted to do a variation of a Caesar salad with grilled shrimp instead of chicken and add some extra colourful veggies like cherry tomatoes and sweet peppers.

    This recipe is for two servings and you simply increase the ingredients for a larger batch. You can use grilled chicken instead of shrimp/prawns or throw in some grilled tofu/tempeh or chickpeas for a vegetarian version.

    Feel free to use any other salad vegetables such as cucumber, radish, fennel or steamed asparagus. As I said, it’s more about the dressing than anything else.

    Recipe Tips

    I often make this shrimp Caesar salad for a quick, high-protein lunch. I make the dressing ahead of time as it keeps for up to 7 days in the refrigerator. I have a couple of bags or containers of pre-washed, pat-dried lettuce ready to go so that saves quite a bit of time.

    I keep a bag of frozen de-shelled shrimp in the freezer, so I take a handful of those out and place in a bowl of hot water 10 minutes before I want to grill or pan-fry them. If I work from home, I will cook the shrimp, cut the vegetables and shave Parmesan at lunchtime.

    If I have to take it somewhere, I will usually do these steps the night before and pack the salad ready to go (mind you, shrimp could be pan-fried in the morning as it only takes a few minutes). I take the dressing in a separate container.

    More Quick & Easy Salad Meals

    Full Recipe 

    Find the full list of ingredients, instructions, and nutritional breakdown below. If you have questions or cook this recipe, please let me know in the comments, and make sure to rate this shrimp Caesar salad recipe so it’s easy for others to find.

    Want to Save This Recipe?

    Enter your email & I’ll send it to your inbox. Plus, get great new recipes from me every week!

    By submitting this form, you consent to receive emails from Cooked & Loved

    Nutritious and tasty, this grilled shrimp Caesar salad is super quick and easy to make. It features crispy lettuce, bacon, grilled prawns, sweet peppers and cherry tomatoes. The best part is the delicious, creamy Caesar dressing! This recipe is gluten-free and low-carb and I provided dairy-free/paleo modifications below.

    • Heat the oil in a large skillet and add the bacon. Cook on both sides until crispy, then remove to a plate and add the prawns. Season with a little pepper and garlic powder and cook for 2 minutes on each side. Set aside.

    • Roughly slice the bacon and prepare other salad ingredients.

    • Whisk the dressing ingredients and toss through the salad in a large bowl. Stir through the bacon and shaved Parmesan if using. Top with the grilled shrimp. 

    Paleo or dairy-free Caesar dressing:

    • 3 tablespoons mayo
    • 1.5 tablespoons almond milk
    • 1 teaspoon Worcestershire sauce
    • 1 garlic clove
    • 2 anchovies
    • 1 tablespoon lemon juice
    • 1 tablespoon nutritional yeast flakes
    • Pinch of pepper

    In the salad, replace parmesan cheese with a sprinkle of nutritional yeast or try this paleo Parmesan cheese option. 

    • Keto modifications: The salad is gluten-free and low-carb but if you want to reduce the carbohydrates intake even further, replace peppers and cherry tomatoes with lower-carb veggies like cucumber, radish, celery, fennel or lightly grilled/blanched asparagus or snow peas.

    Calories: 541kcal | Carbohydrates: 19g | Protein: 25g | Fat: 41g | Saturated Fat: 12g | Polyunsaturated Fat: 10g | Monounsaturated Fat: 16g | Trans Fat: 0.1g | Cholesterol: 128mg | Sodium: 1108mg | Potassium: 796mg | Fiber: 4g | Sugar: 10g | Vitamin A: 3767IU | Vitamin C: 123mg | Calcium: 277mg | Iron: 2mg

    Keywords: Shrimp Recipes, Shrimp salad, Prawn Salad, prawn recipes, Prawn Caesar Salad

    [mv_playlist id=”224″ jsonLd=”false” ratio=”16:9″ thumbnail=”https://mediavine-res.cloudinary.com/v1599716598/plqh05ivvby851y7acqo.jpg” title=”WATCH MY TOP 10 HEALTHY VIDEO RECIPES”]

    Save This Shrimp Caesar Salad Recipe To Pinterest

    Source link

  • Sushi Bowl | The Recipe Critic

    Sushi Bowl | The Recipe Critic

    This website may contain affiliate links and advertising so that we can provide recipes to you. Read my disclosure policy.

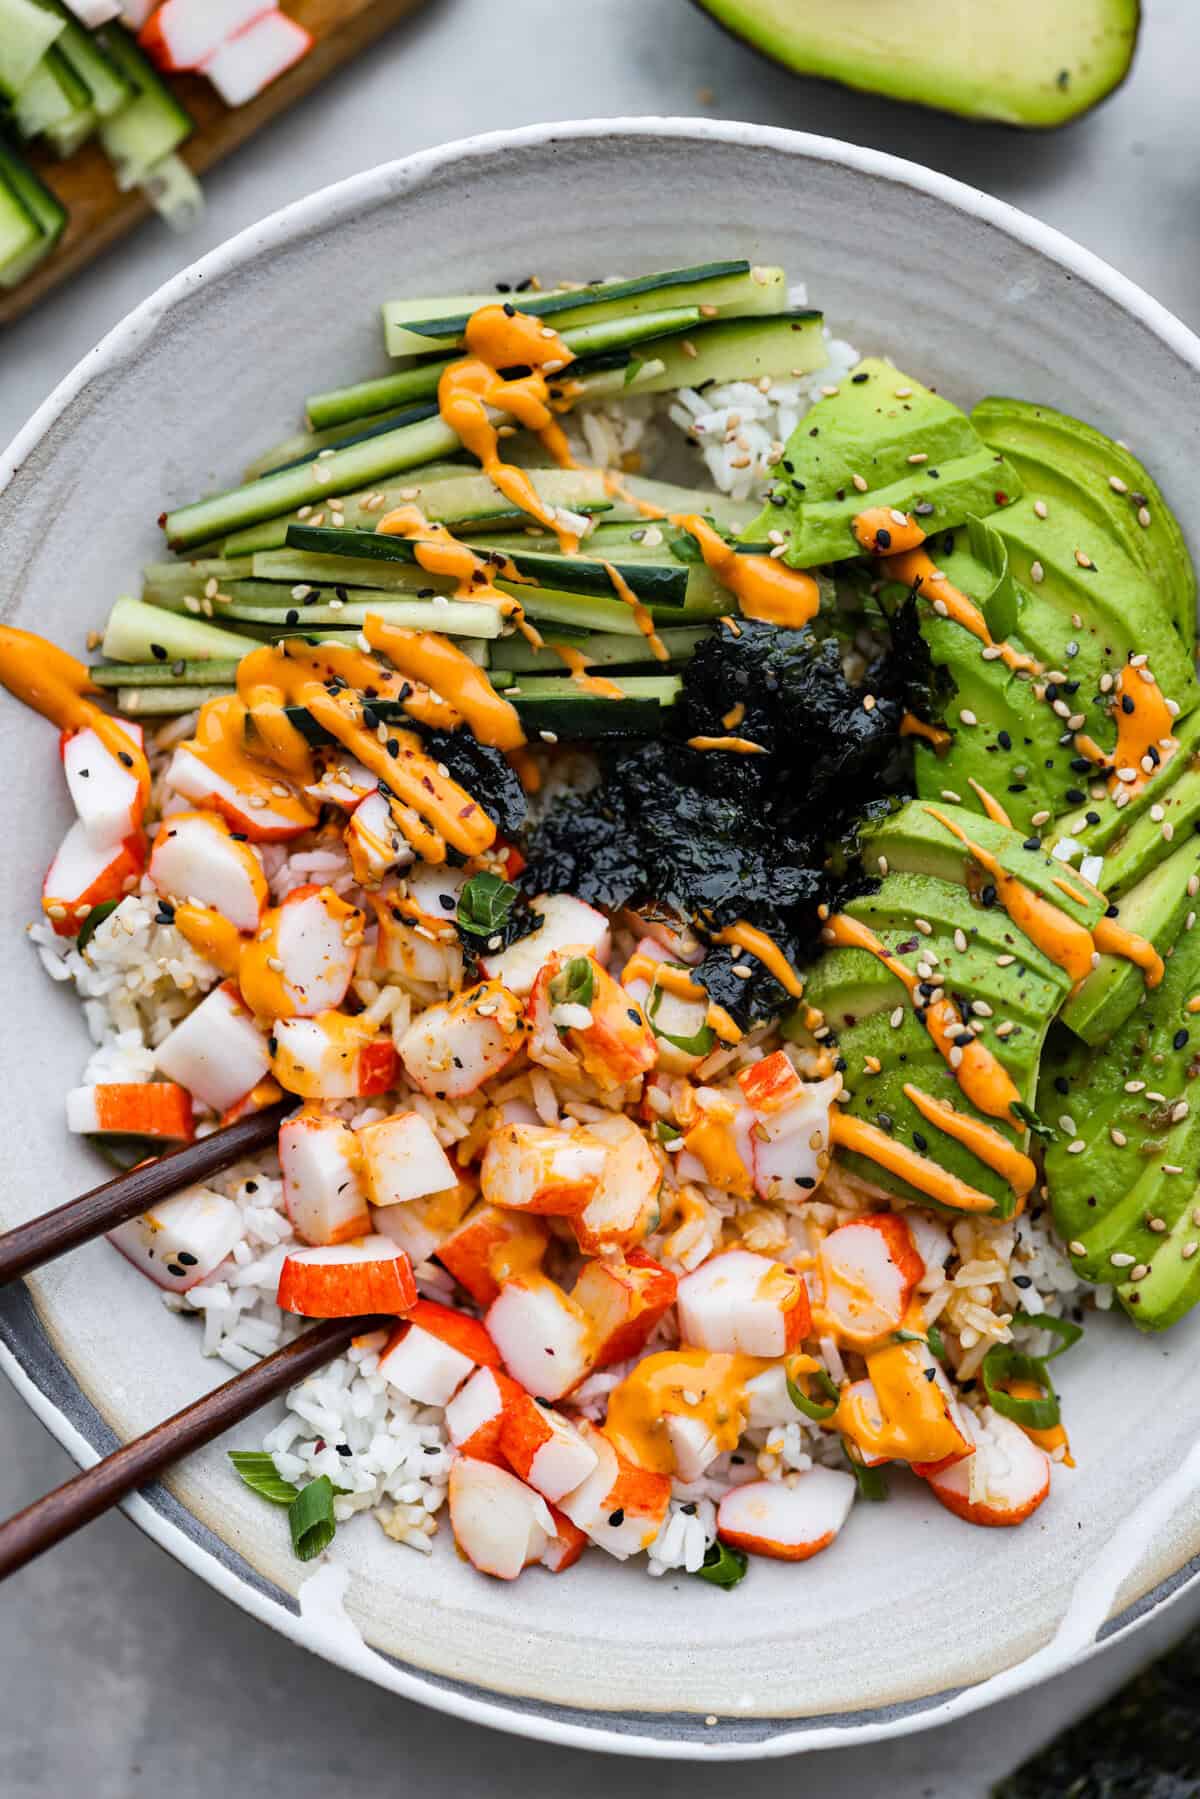
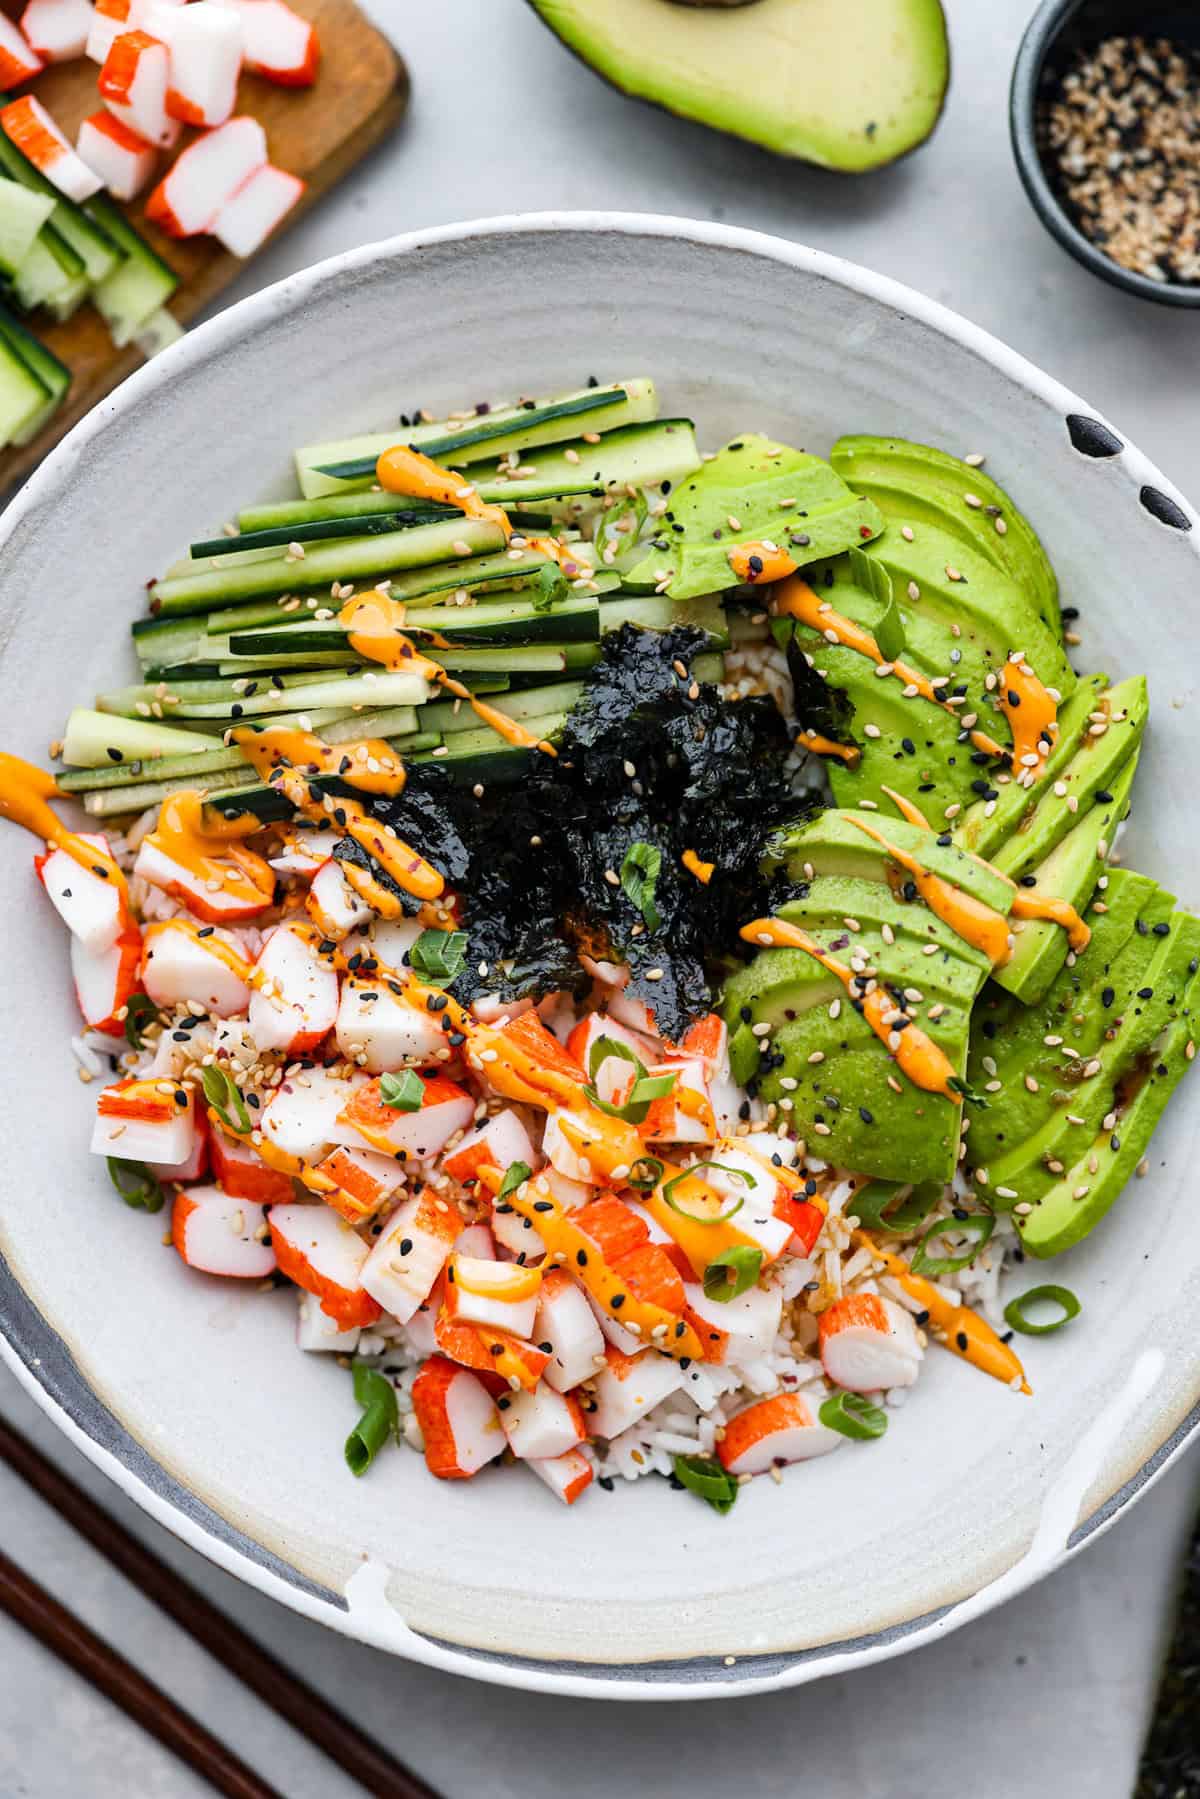
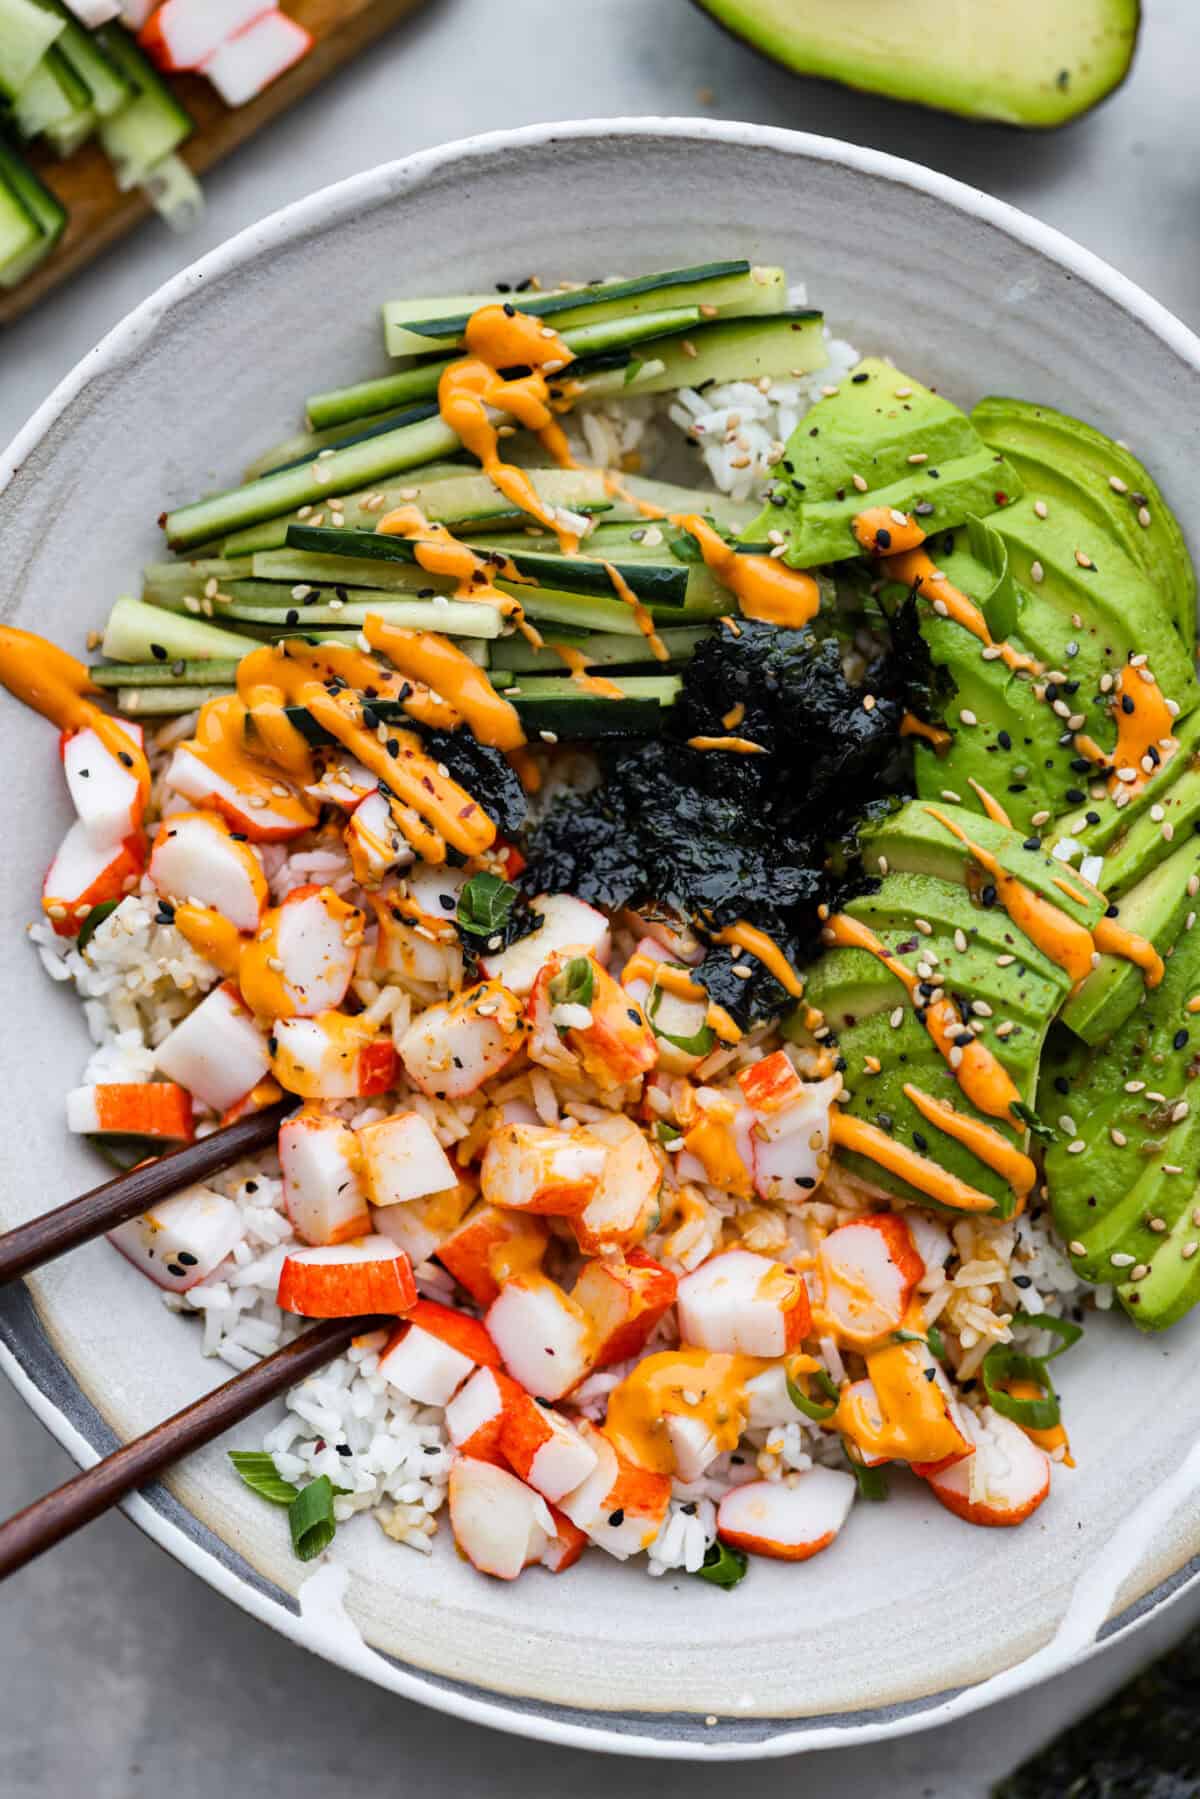
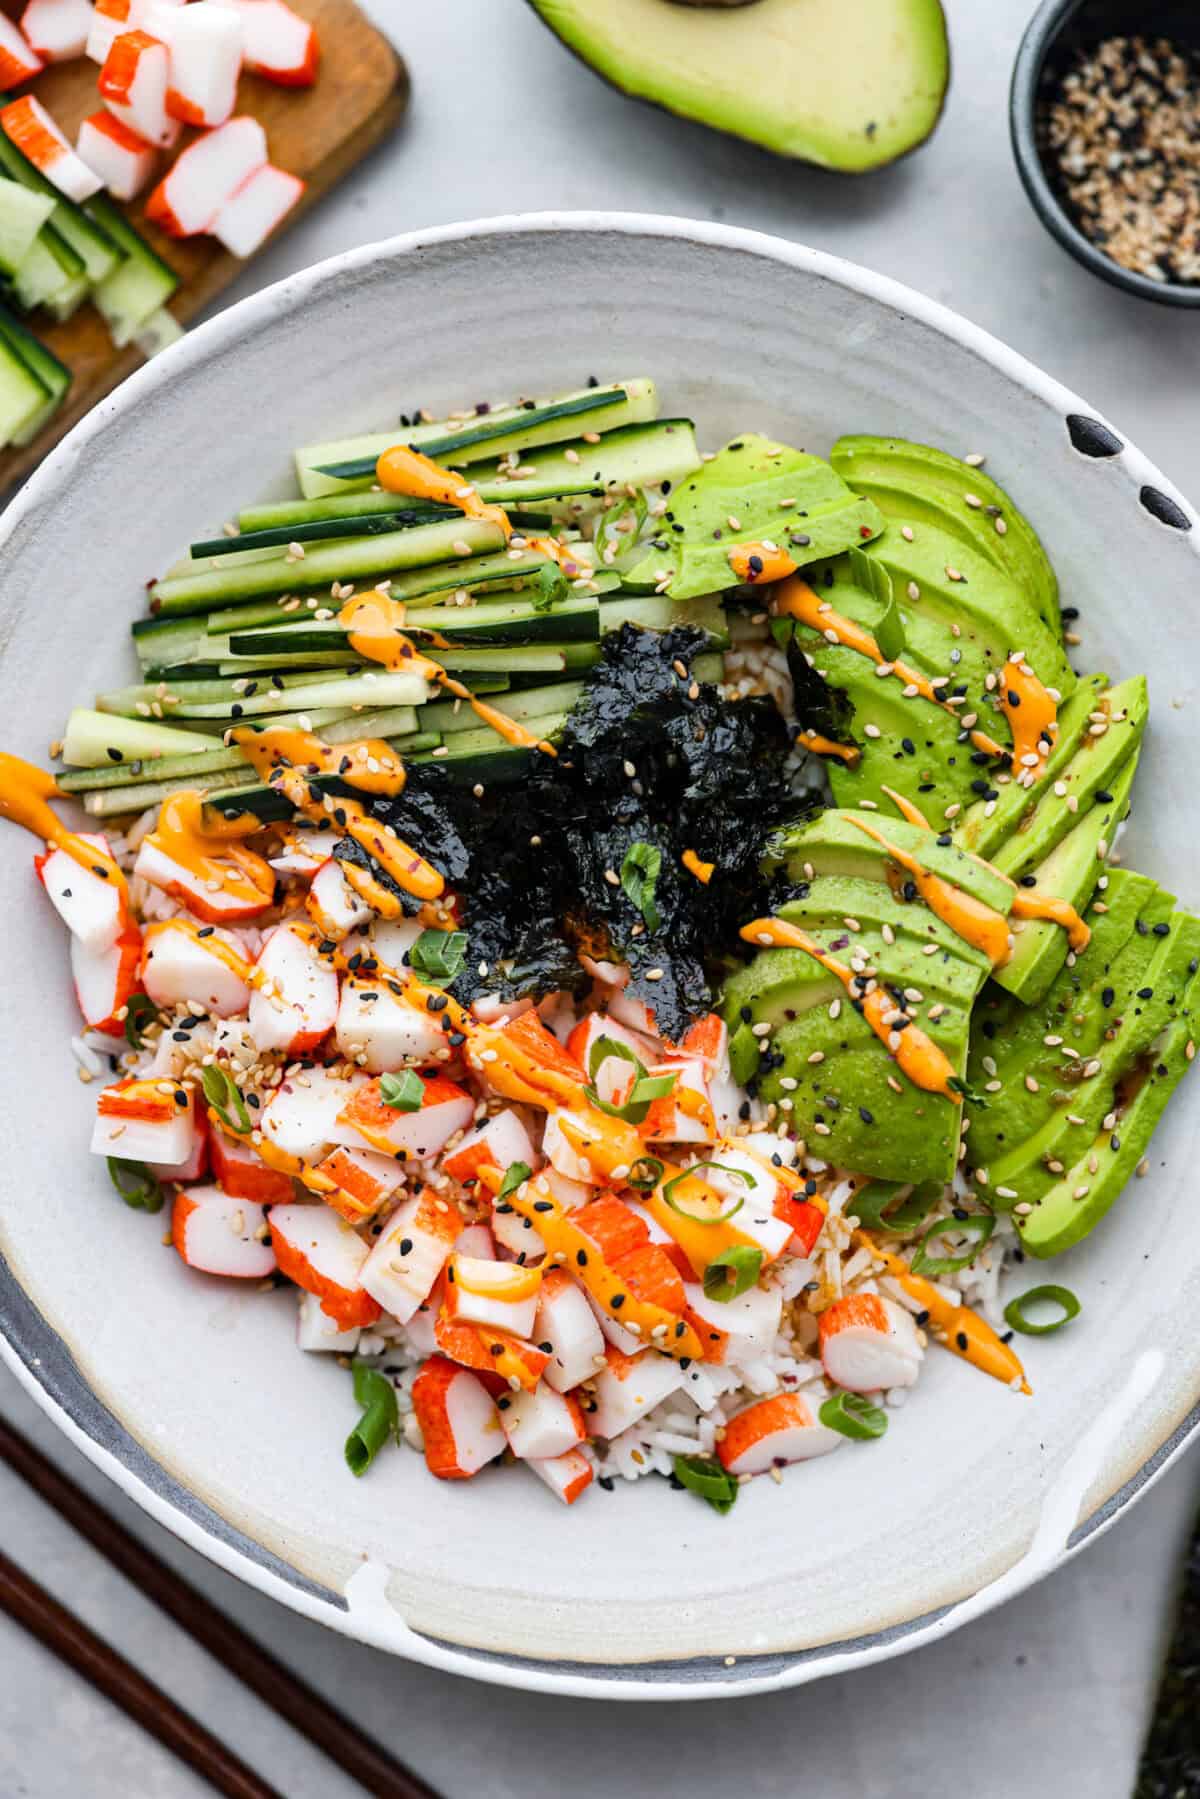
    This sushi bowl is a deconstructed California sushi roll loaded with irresistible flavor and all of the best sushi ingredients. It’s layered with sushi rice, crab, cucumber, avocado, a tasty sauce, and more. It’s easy to make and ready to serve in just 20 minutes!

    The flavors and textures in this bowl are some of my favorites! If you love them too, try our California rolls, and this sushi bake next!

    Overhead shot of sushi bowl with chopsticks. Overhead shot of sushi bowl with chopsticks.

    Reasons to Love This Sushi Bowl

    • Quick & Easy: This sushi bowl recipe requires less hassle and effort than rolling sushi rolls, but it still delivers amazing flavor!
    • Versatile: The beauty of this dish is that it’s totally customizable. Want to use something other than crab? Try salmon. Not a fan of roasted seaweed? Leave it out.
    • Fresh flavor: This is the easiest and tastiest way to satisfy a sushi craving at home! You will love the combination of fresh ingredients paired perfectly with an incredible sauce.

    What’s in a Sushi Bowl?

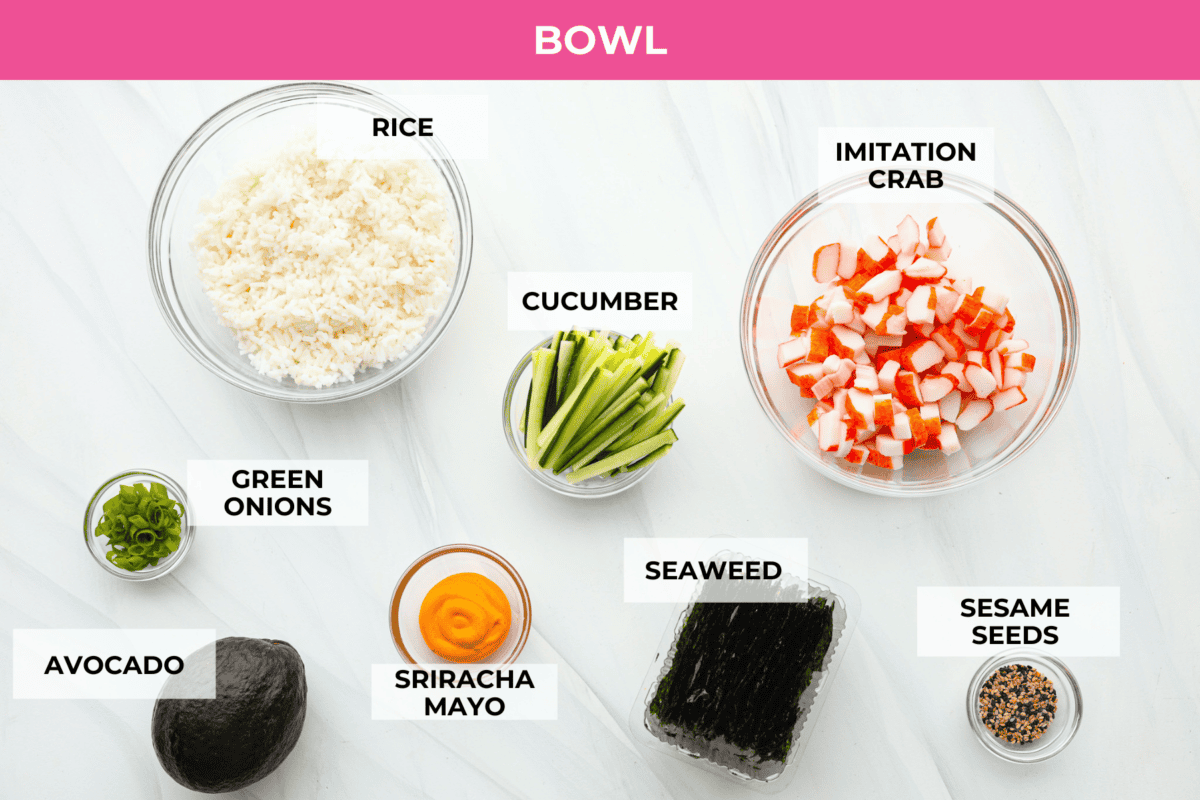
    Here’s a list of everything you’ll need for this sushi bowl recipe! First, you can easily mix and match filling ingredients and use your favorite sauce. Moreover, being able to customize it is one of the best things about making it at home. For exact measurements, be sure to scroll to the recipe card below.

    Bowl

    • Sushi Rice: My recipe for sushi rice is perfectly sticky and delicious!
    • Avocado: Adds a creamy richness to the bowl.
    • Imitation Crab Meat: Brings a meaty taste and texture to the bowl. You can also use fresh crab if you’d prefer! Or for a shrimp variation, make my Tempura Shrimp!
    • Cucumber: Adds a refreshing crunch. You can use English cucumber or whatever variety you like. To change things up, you can swap it with (or add in) carrot sticks, sliced radish, or bell pepper.
    • Roasted Seaweed: Nori sheets or roasted seaweed make this taste just like real sushi. 

    Toppings

    • Green Onions: To garnish and add mild onion flavor, plus extra color and texture.
    • Spicy Mayo: Try my homemade spicy mayonnaise to add creaminess and a kick of heat. Or simply squeeze on some sriracha
    • Sesame Seeds: Sprinkle some over the top of your finished bowl for texture and presentation.
    Overhead shot of labeled ingredients. Overhead shot of labeled ingredients.

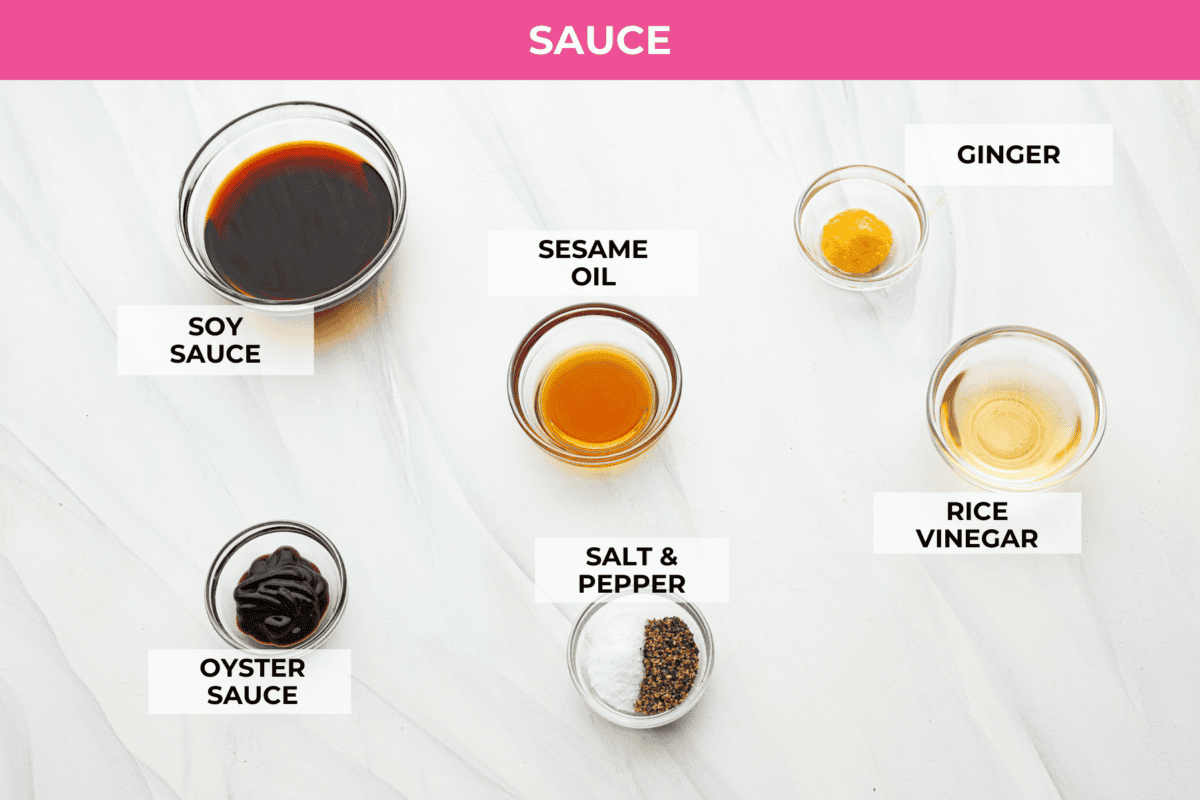
    Sauce

    • Soy Sauce: Loaded with umami flavor, this will add depth and richness to the sushi bowl sauce.
    • Oyster Sauce: This adds some brininess with a hint of sweetness but doesn’t taste fishy.
    • Sesame Oil: For nutty, earthy flavor.
    • Rice Vinegar: Brightens the flavor with a slight sweetness.
    • Fresh Ginger: Grated ginger adds a bit of a kick that balances out the other ingredients nicely.
    • Salt and Pepper: To taste and enhance all of the flavors.

    How to Make This Recipe

    You’ll love how quickly you can whip up this delicious sushi bowl! In fact, there’s no need to turn on the oven. It’s so refreshing and easy, and the result is irresistible!

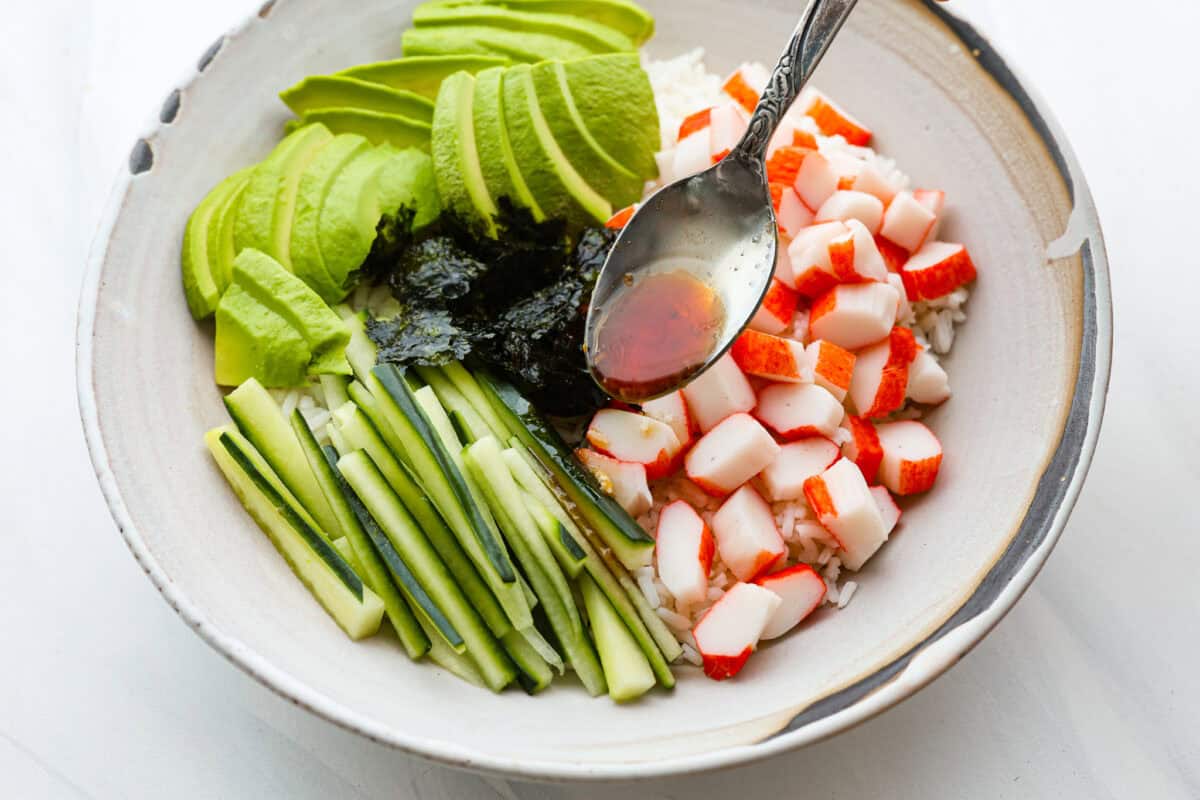
    1. Prep and Make the Sauce: Prepare all the ingredients for the bowls and set them aside. Then, in a small bowl, whisk together the soy sauce, oyster sauce, sesame oil, rice vinegar, ginger, salt, and pepper.
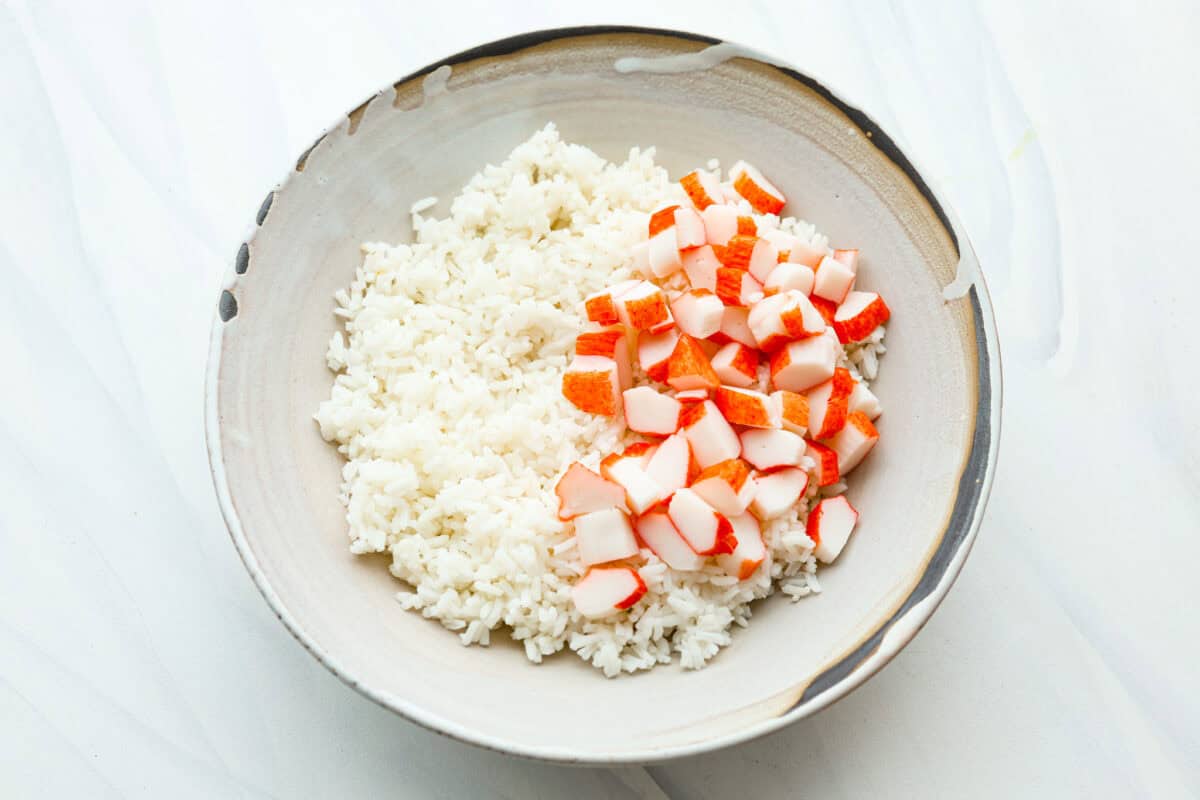
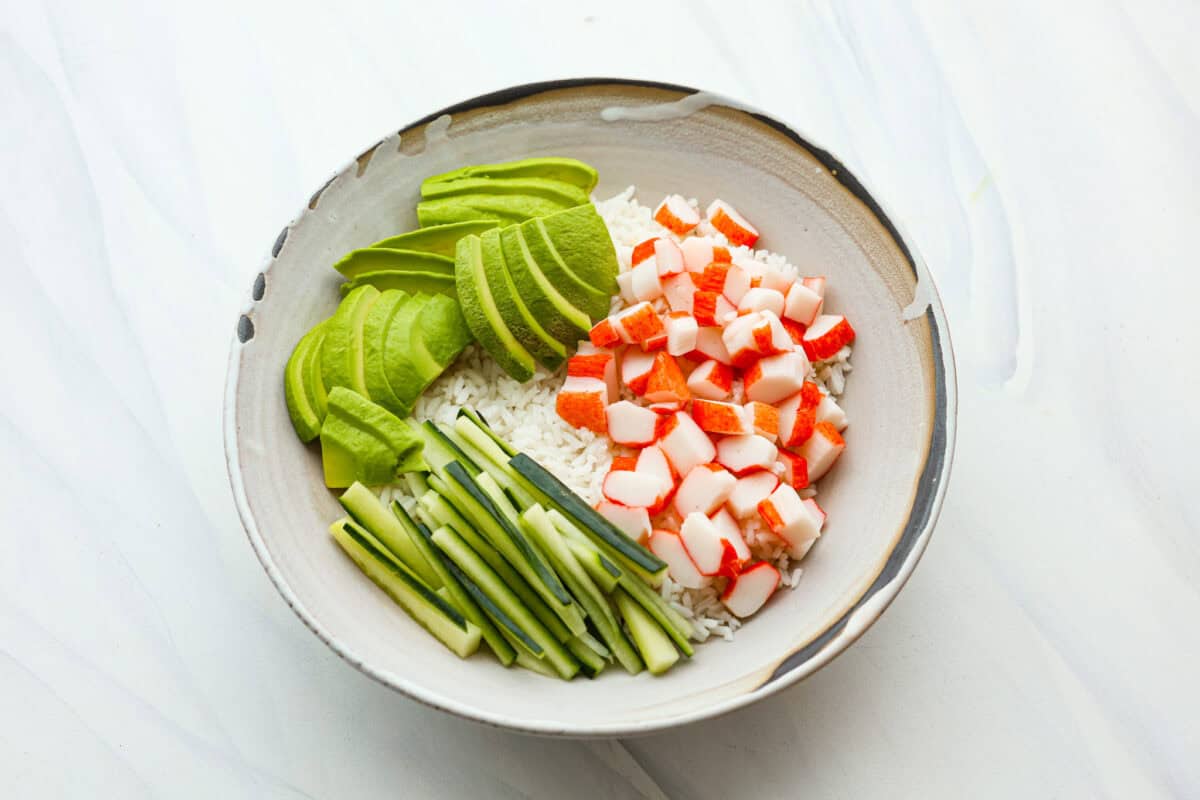
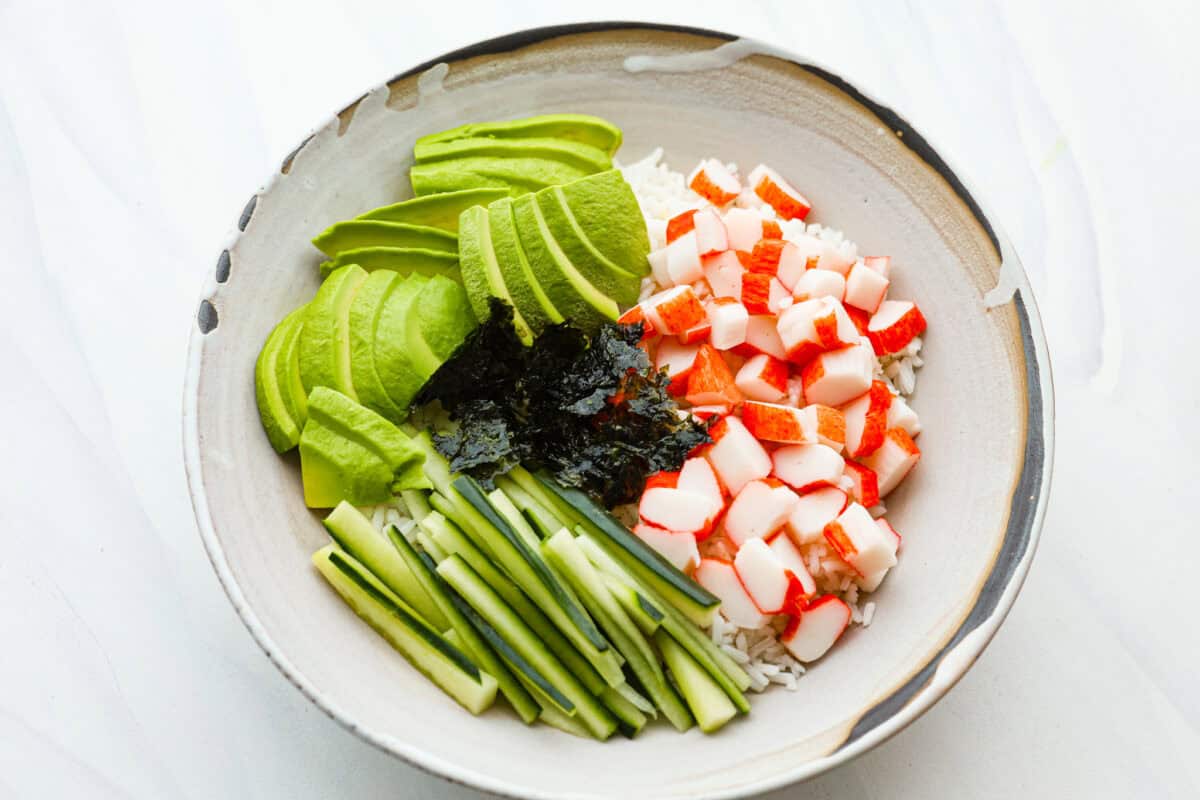
    2. Assemble Bowls: Get two bowls and fill them with ½ cup rice each. Then, add half of the avocado you prepared to each bowl. Then, add ½ cup imitation crab and ¼ cup cucumber to each bowl. Finally, top each bowl with half of the seaweed.
    3. Add Garnish and Mayo: Drizzle half of the sauce over each bowl, then top them with green onions, spicy mayo, and sesame seeds.
    4. Serve: Enjoy fresh!

    Sushi Bowl Suggestions

    You can easily customize these California roll bowls based on the ingredients that you like best! Here are some suggestions:

    • Choose Your Toppings: You can leave off any of the toppings or add more to your liking! I like edamame, fresh lime, pickled carrots, and pickled ginger.
    • Change the Protein: Other great proteins for a sushi bowl include salmon, tuna, shrimp, and steak. However, if you plan to eat the fish raw, make sure you get sashimi-grade quality.
    • If you’re a fan of tuna, try this poke bowl next!
    • Swap the Rice: You can use short grain, calrose rice, or brown rice instead of white sushi rice.
    • Serving Size: This recipe makes 2 bowls. Feel free to double the recipe if you’re serving a family or more than 2 people.

    Overhead shot of plated sushi bowl with sauce green onions and sesame seeds. Overhead shot of plated sushi bowl with sauce green onions and sesame seeds.

    Storing Leftover Sushi Bowls

    I’m not sure if you will have any leftovers to store, but if you do, follow the instructions below.

    • Refrigerate: I recommend enjoying your sushi bowl fresh, but leftovers can be stored in the fridge in an airtight container for up to 3 days. 
    • Separate: I like to store the individual ingredients separately to keep things from becoming soggy. This way, each component stays fresh and maintains its texture.
    • Assembly after storing: Additionally, separating the ingredients makes it easier to assemble the sushi bowl when you’re ready to eat, ensuring that every bite is as delicious as the first. Furthermore, this method allows you to customize each serving to your preference, adding or omitting ingredients as desired.

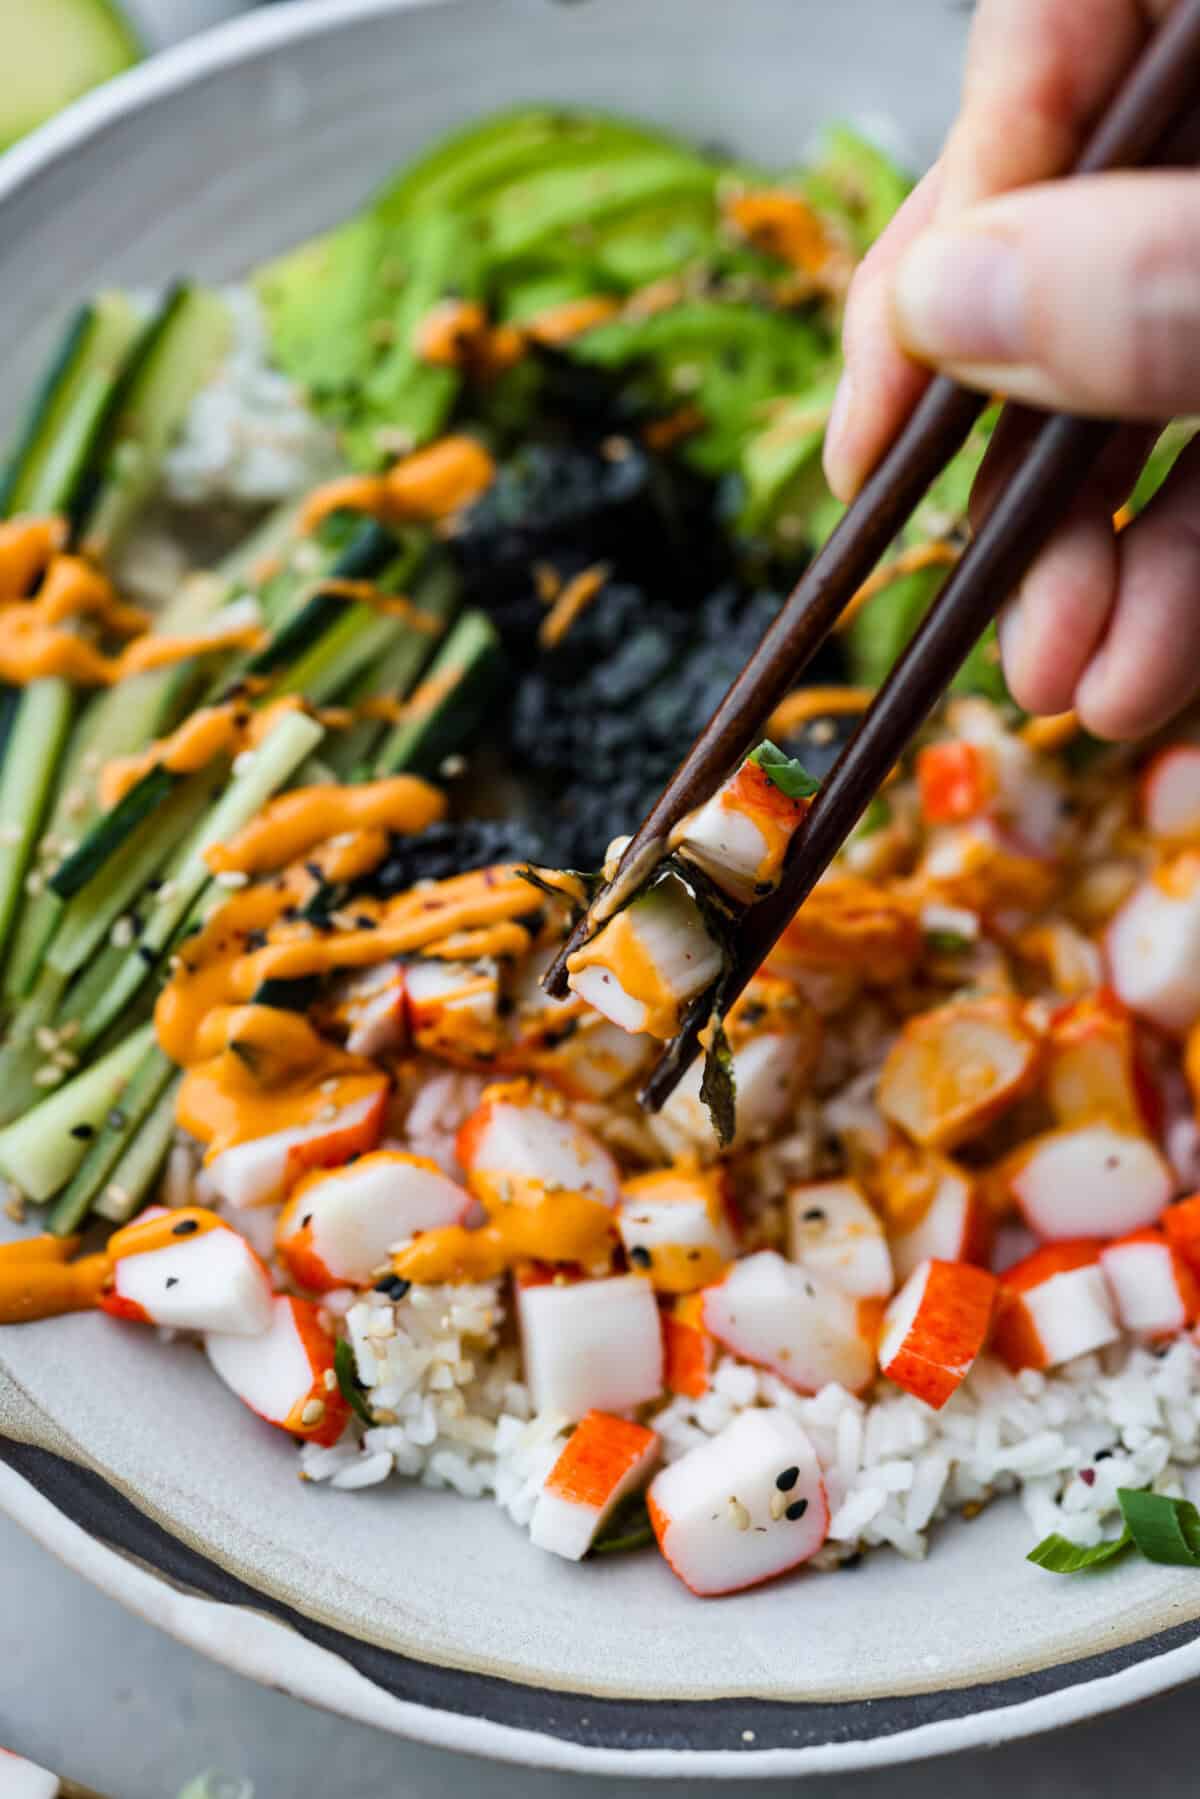
    Close up shot of someone taking a bite of the sushi bowl with chopsticks.  Close up shot of someone taking a bite of the sushi bowl with chopsticks.

    More Asian-Inspired Recipes

    Asian dishes are some of my favorites. They have so many delicious flavors and are savory, sweet, and umami all at the same time. They’re also easy to make at home. If you liked this sushi bowl, here are a few of my favorite recipes that I know you’ll love!

    Pin this now to find it later

    Pin It


    Source link

  • Lemon Pepper Grilled Swordfish Kabobs Recipe

    Lemon Pepper Grilled Swordfish Kabobs Recipe

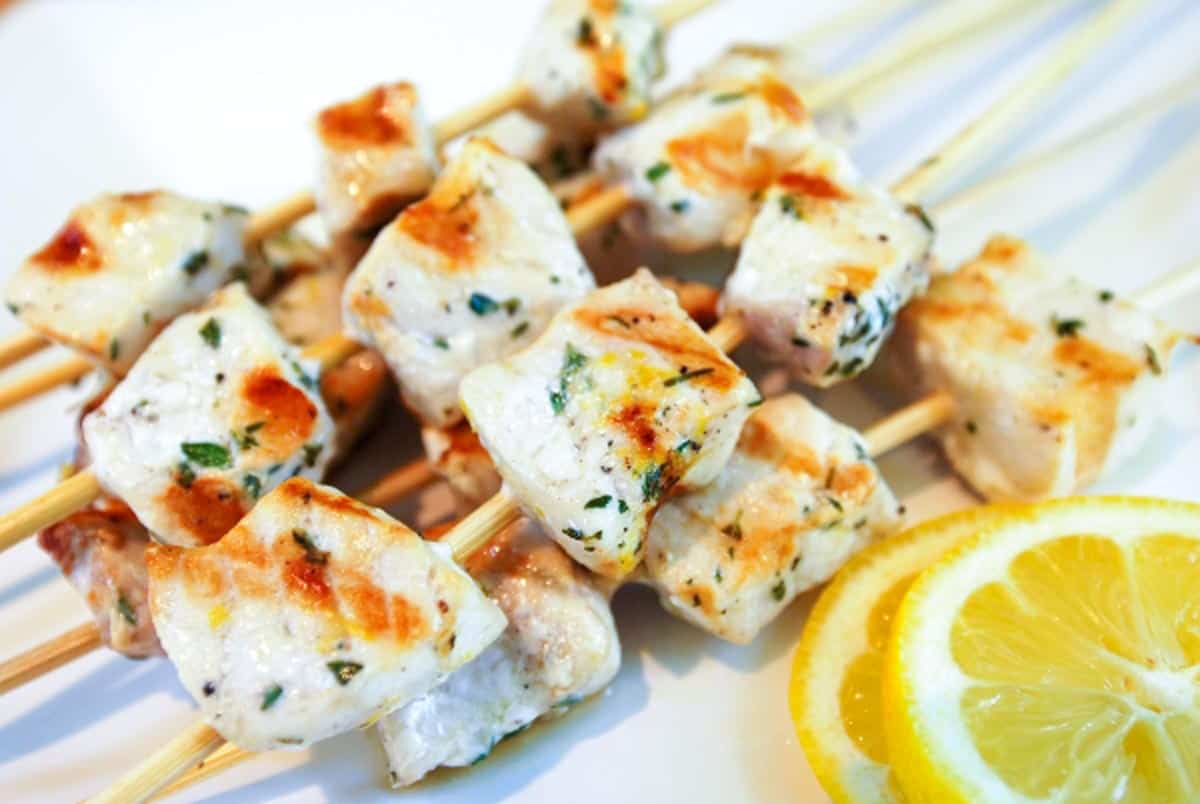
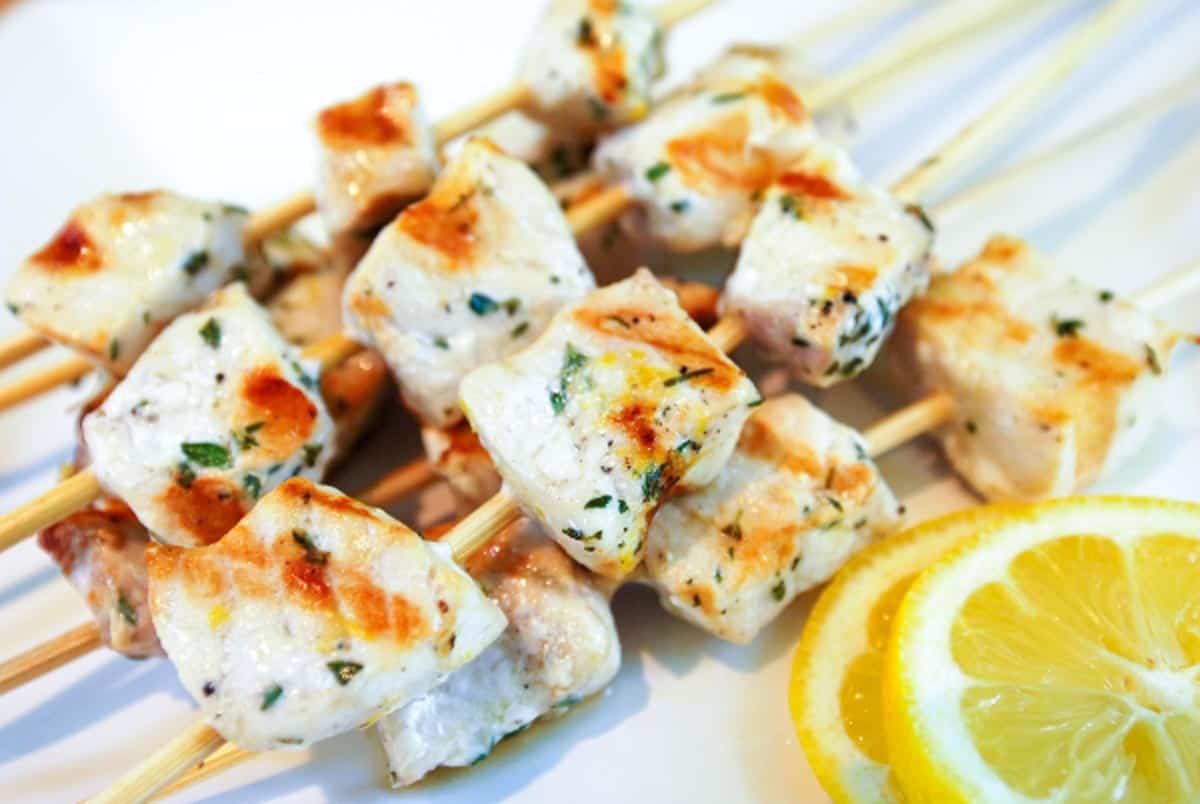
    These incredible grilled swordfish kebobs are super flavorful and so easy! With our recipe, you’ll quickly marinate swordfish in a lemon pepper marinade, thread them onto skewers, and grill them to perfection.

    Lemon Pepper Grilled Swordfish Kabobs

    My family loves these quick and easy swordfish kabobs! Our simple lemon pepper marinade adds fresh flavor, and thanks to the swordfish’s natural fattiness, you don’t have to worry about it drying out on the grill. Plus, since they’re cut into bite-sized pieces, they cook up in just a few minutes!

    Serve these fish kabobs with rice, like our Mexican rice, or on top of a salad, like this homemade Caesar salad. For more swordfish recipes, see our grilled swordfish with coriander and lime.

    Key Ingredients

    • Swordfish: This meaty, fatty fish can be cooked just like a steak and is great grilled. Since it’s more firm than other fish, it’s easy to cut into cubes for kabobs. You can use mahi-mahi, salmon, or tuna if you don’t have swordfish.
    • Lemon and Pepper: I use the zest from a lemon and then serve the swordfish with fresh lemon wedges to squeeze over the cooked fish. For the pepper, use a pepper grinder on a course setting, so that you see it on the fish.
    • Anchovy Paste and Thyme: These round out my marinade. I marinate swordfish cubes with olive oil, lemon zest, pepper, anchovy paste, and thyme before skewering and grilling them. The marinade is simple but makes the swordfish taste incredible. If you’d prefer, use finely minced anchovies instead of anchovy paste.

    How to Make Grilled Swordfish Kabobs

    This swordfish recipe is so simple. It starts with my easy marinade of olive oil, lemon zest, black pepper, anchovy paste, and thyme.
    Cut your swordfish steaks into cubes (so they cook quickly and are easy to skewer), and then toss them into the marinade. Let the fish marinate for 30 minutes to an hour (more if you’d like).

    While the fish marinate, soak wooden skewers in water so they don’t burn when you are grilling.

    When the fish is ready, heat your grill (or a grill pan), slide the swordfish cubes onto your skewers, and then grill. Since you’ve cut them into cubes, they will only need a few minutes on each side. Then, serve with fresh lemon.

    Lemon Pepper Grilled Swordfish Kabobs

    • PREP
    • COOK
    • TOTAL

    My family loves these quick and easy swordfish kabobs! Marinating the swordfish adds so much flavor. We recommend marinating for 30 minutes. You can marinate for longer, but no longer than 4 hours.

    4 Servings or 8 Kabobs

    You Will Need

    2 swordfish steaks, about 6 ounces each, 1-inch thick

    2 tablespoons olive oil

    2 teaspoons lemon zest

    1/2 teaspoon freshly ground black pepper

    1 ½ teaspoons anchovy paste or minced anchovies

    1 tablespoon chopped fresh thyme

    8 wooden skewers

    2 lemon wedges for serving

    Directions

      1Cut swordfish into 1-inch cubes and add them to a resealable plastic bag.

      2Add the olive oil, lemon zest, black pepper, anchovy paste, and thyme to the bag and seal. Gently massage the bag until the marinade is well mixed and the fish is coated. Place the bag onto a plate and refrigerate for 30 minutes.

      3Meanwhile, submerge the skewers in water so they soak.

      4After 1 hour, heat a grill to medium-high heat (or place a grill pan over medium heat).

      5Divide the swordfish cubes between each skewer, then grill until just cooked through, for about 2 minutes per side.

      6Transfer to a serving plate and serve with lemon wedges.

    Adam and Joanne’s Tips

    • Swordfish alternatives: You can use mahi-mahi, salmon, or tuna if you don’t have swordfish. I love checking Monterey Bay Aquarium Seafood Watch to see the best options when buying seafood!
    • The nutrition facts provided below are estimates.

    Nutrition Per Serving
    Serving Size
    2 skewers (8 total)
    /
    Calories
    185
    /
    Total Fat
    12.8g
    /
    Saturated Fat
    2.4g
    /
    Cholesterol
    56.7mg
    /
    Sodium
    74mg
    /
    Carbohydrate
    0.3g
    /
    Dietary Fiber
    0.2g
    /
    Total Sugars
    0g
    /
    Protein
    16.9g


    AUTHOR:

    Adam Gallagher

    Adam and Joanne of Inspired Taste

    We are Adam and Joanne Gallagher, the creators of Inspired Taste. Established in 2009, Inspired Taste grew from a childhood dream into one of the internet’s most trusted recipe sites with hundreds of reliable recipes, step-by-step videos, and expert tips.More About Us

    Source link

  • Baked Lemon Sole With Ginger & Chilli Butter

    Baked Lemon Sole With Ginger & Chilli Butter

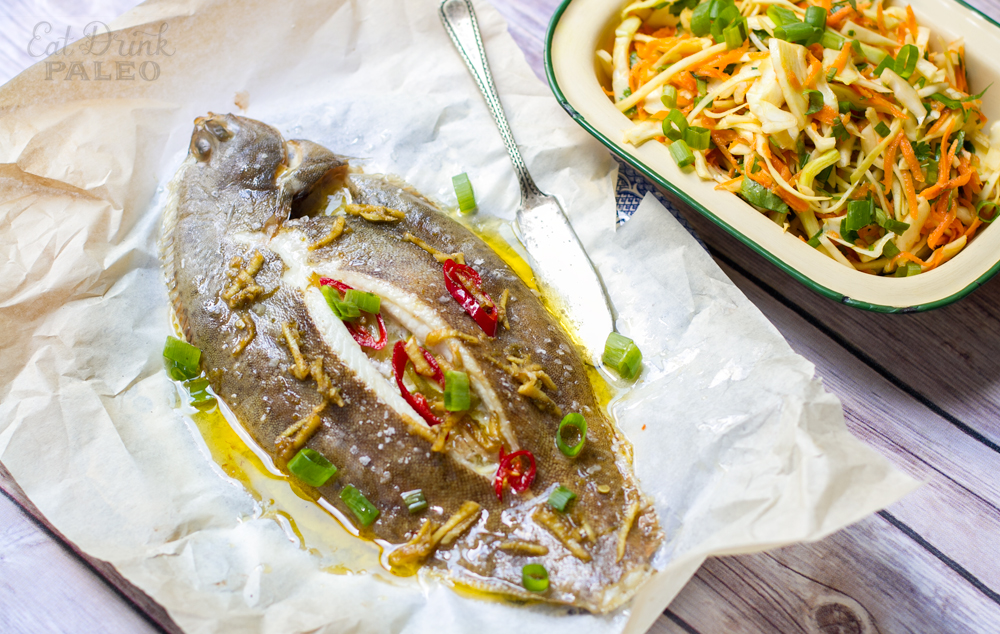
    Baked lemon sole with ginger chilli butter sauce is a savoury, succulent fish packed with complex flavours and just the right amount of kick. Served with a simple Asian slaw salad, this healthy lemon sole recipe is quick and easy to prepare for a midweek meal or your next dinner party.


    Jump to: ℹ️ Overview | 🛒 Ingredients | 📷 How To Make | 🥗Serving Suggestions | 📝 Go To Full Recipe |🐟 More Healthy Fish Recipes


    Baked Lemon Sole Recipe

    Infused with zesty lime and topped with fiery ginger and chili butter sauce, this baked lemon sole dish is sure to awaken your taste buds and leave you feeling satisfied and nourished. 

    And to balance things out, I served this fish dish with a refreshing slaw salad loaded with crisp veggies and tangy dressing. A side of rice or quinoa will make it even more satiating and energy-dense.

    This baked lemon sole recipe is healthy, gluten-free, low-carb, paleo and Whole30 friendly (use ghee instead of butter). 

    What Is Sole Fish?

    Let me tell you about the marvelous fish known as the sole! These fish are typically flat and oval-shaped, with both eyes on one side of their head. They are usually brown or gray in color, with a smooth, slightly slimy skin. 

    They are found in oceans all around the world and highly sought after by chefs and foodies alike for its delicate and sweet taste, and tender texture. 

    There are many different types of sole out there, each with their own unique qualities. You’ve got your Dover sole, lemon sole, petrale sole, and more! These fish are like ninja warriors, sneaking around the ocean floor with their eyes all on one side of their head.

    Sole is a popular ingredient in many different types of cuisine, including French, Italian, and Asian. You can grill it up, bake it, fry it, or poach it to perfection. And when it comes to seasoning, a little bit of butter, lemon, herbs, or white wine can really bring out the best in this tasty fish. 

    Cooking Lemon Sole

    You can buy sole as fillets or a whole fish. I really like cooking the sole fish whole, either pan fried or baked, with some delicious sauce on the side. I am using lemon sole for this recipe.

    I asked my fishmonger to make a deep slit in the middle of the sole so I could stuff it with some ginger and lime. I then used a small sharp knife to cut the flesh on each side of the slit away from the bone, so you have two little pockets. Make sure to ask you fishmonger to clean the scales, unless you know how to do it.

    This recipe is for cooking one large whole lemon sole or 2 small ones or 2 fillets. This is enough for two servings when served with a side dish like salad or/and rice or some qunoa and vegetables. 

    The flesh of the fish is delicate and mild and goes well with some strong flavours like lemon and capers. For this recipe, I am using bold flavours of ginger, chilii and lime to compliment the delicate sole flesh.

    You can use butter or ghee as the base for the sauce, which mellows out those strong ingredients and gives you that gorgeous, rich flavour.

    What To Serve With Lemon Sole

    This lemon sole recipe is inspired by Asian cuisine and uses ingredients like ginger and fish sauce, so it works well with side dishes like rice, noodles, stir-fried vegetables or fresh, herby salad. 

    It would also work well with cooked quinoa, cauliflower rice or sweet potatoes. I’ve included ingredients and instructions for an Asian-inspired slaw salad I served with this fish.


    Want to Save This Recipe?

    Enter your email & I’ll send it to your inbox. Plus, get great new recipes from me every week!

    By submitting this form, you consent to receive emails from Cooked & Loved

    Looking for a simple and delicious lemon sole recipe? Look no further than this baked sole with ginger, chilli and lime-infused butter sauce. With just a few simple ingredients, you can transform this flaky white fish into a flavourful and satisfying meal that’s perfect for any occasion.

    • Preheat the oven to 200ºC / 400ºF.

    • Make a long slit in the middle of the fish and cut inside the flesh, peeling it away from the bone to create a little pocket on each side. See Cooking With Lemon Sole notes above.

    • Grate about half a teaspoon worthh of lemon zest, and cut 2-3 thin slices to insert inside the fish. 

    • Sprinkle the sole with a little sea salt on each side. Stuff the ginger and lime slices inside the flesh pockets on one side of the fish and place it on an oven tray lined with lightly grease baking paper (you can use a little butter/ghee or olive oil).

    • Place fish in the oven and cook for 13-15 minutes, depending on the size of the fish. I think I did mine for 13 minutes at 200ºC

    • In the meantime, add butter to a medium frying pan and bring to medium-high heat. Add ginger and chilli and cook until golden brown and slightly crispy, a couple of minutes. Add lime zest, juice of half a lime, and fish sauce. Stir through and take off the heat.

    • Prepare the Asian slaw by combining all dressing ingredients together and tossing them through the salad.

    • Remove sole from the oven and pour over the butter sauce with ginger and chillies. Sprinkle with diced ghreen onions and a little extra sea salt. You can also drizzle more lime juice or serve a wedge of lime on the side. Serve with the Asian slaw or a side of favourite vegetables.

    Calories: 398kcal | Carbohydrates: 16g | Protein: 18g | Fat: 30g | Saturated Fat: 10g | Polyunsaturated Fat: 3g | Monounsaturated Fat: 15g | Trans Fat: 0.5g | Cholesterol: 88mg | Sodium: 1167mg | Potassium: 472mg | Fiber: 3g | Sugar: 13g | Vitamin A: 4728IU | Vitamin C: 29mg | Calcium: 79mg | Iron: 1mg

    Keywords: Baked Sole, Sole Fish, Butter Sauce, Fish Recipes, Dinner Recipes, Sole Recipe, Lemon Sole

    More Healthy Fish Recipes

    [mv_playlist id=”224″ jsonLd=”false” ratio=”16:9″ thumbnail=”https://mediavine-res.cloudinary.com/v1599716598/plqh05ivvby851y7acqo.jpg” title=”WATCH MY TOP 10 HEALTHY VIDEO RECIPES”]

    Source link

  • Easy Seared Snapper Recipe

    Easy Seared Snapper Recipe

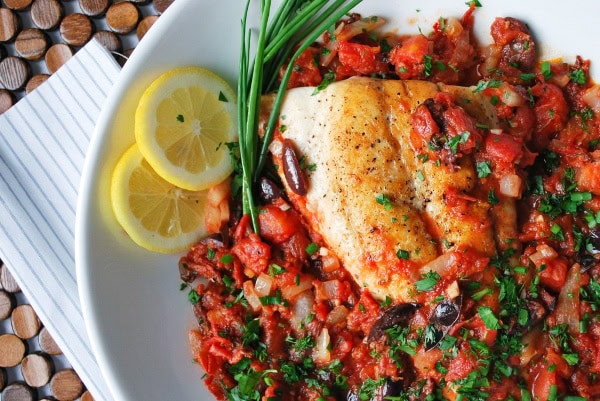
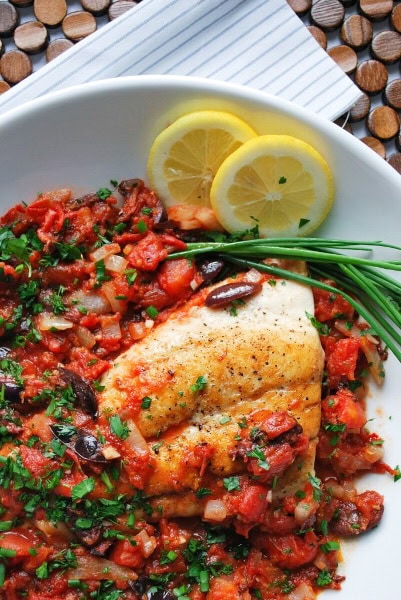
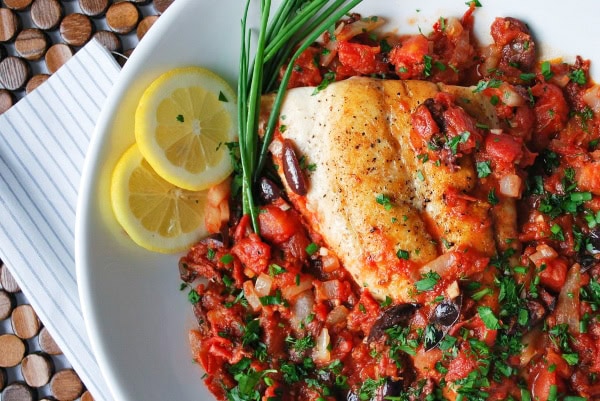
    I love this super flavorful red snapper recipe made with pan-fried snapper and a spicy tomato, olive, and herb sauce. This easy fish recipe is quick to make and full of flavor!

    Seared Snapper Fillets with Spicy Tomato, Olive, and Herb Sauce

    I love how fresh, light, and zesty this snapper recipe is. It’s also all made in one pan, which is always a win in our book. The fish is cooked simply with olive oil, salt, and pepper. Then, we make a quick pan sauce with tomatoes, olives, citrus zest, and red pepper flakes to make it a bit spicy.

    I love serving this snapper dish with a side of bread or flatbread to scoop up all that incredible sauce. I love homemade focaccia or these easy flatbreads, which only take 30 minutes to make!

    Key Ingredients

    • Snapper: I used a red snapper fillet for this recipe. Snapper has a mildly sweet and delicate taste. However, some snapper stocks may be overfished, so I encourage you to check the Monterey Bay Aquarium Seafood Watch website for sustainable options in your area. The good news is that you can easily substitute any firm white fish, like tilapia, Pacific halibut, Pacific cod, or black cod (sablefish), for the snapper in this recipe.
    • Shallot, Garlic, and Red Pepper Flakes: These three ingredients form the flavorful base of our tomato sauce. I prefer shallots for their mild sweetness, but you can also use yellow or sweet onions.
    • Citrus Zest: I use a microplane to add lemon and orange zest to the sauce. The combination of orange, olives, and tomato is simply irresistible!
    • Olives: I toss in Kalamata olives for their briny, salty bite. If you prefer a milder flavor, you can use green Castelvetrano olives, which are buttery and delicate.
    • Tomatoes: While fresh tomatoes work well, I usually opt for canned diced tomatoes for convenience. If you have fire-roasted canned tomatoes on hand, they’ll add even more depth of flavor.
    • Herbs: I always finish this dish with a handful of fresh herbs to enhance the taste. I used parsley, dill, and chives in our photos, but mint or cilantro would also be delicious.

    How to Make Snapper with Spicy Tomato Sauce

    I keep the fish preparation simple and let the spicy tomato sauce be the star of the dish. The trick is to season the snapper fillets with salt and pepper, then pan-fry them until they are almost cooked in the middle.

    I remove the fish from the pan before it’s fully cooked, then make the sauce in the same pan. Once the sauce is ready, I nestle the pan-fried snapper back into the pan, allowing it to finish cooking in the flavorful sauce. This technique keeps the fish moist and helps it absorb all those incredible flavors.

    For more easy fish recipes, see our easy baked trout, maple soy glazed salmon, and this swordfish recipe with lime.

    Easy Pan Seared Snapper Fillets

    Easy Seared Snapper

    • PREP
    • COOK
    • TOTAL

    I love this easy snapper recipe with pan-seared fillets, spicy tomato, and olive sauce. If you cannot find a sustainable red snapper, substitute it with another firm white fish (see tips below for suggestions). The search feature from Monterey Bay Aquarium’s Seafood Watch is very helpful in determining the best, most sustainable choices when it comes to seafood.

    Makes 4 servings

    You Will Need

    1 pound (450g) red snapper fillets, see tips for substitutes

    2 tablespoons olive oil

    Salt and fresh ground black pepper

    1 large shallot, chopped

    2 garlic cloves, minced

    1/4 to 1/2 teaspoon crushed red pepper flakes, depending on how spicy you want the sauce

    1 tablespoon lemon zest

    2 teaspoons orange zest

    1/3 cup kalamata olives, pitted and cut in half

    1 (14oz) can diced tomatoes

    2 tablespoons chopped fresh herbs, try a combination of parsley, dill, and chives

    Lemon wedges for serving

    Directions

      1Season both sides of the snapper fillet with salt and pepper.

      2Heat the skillet over medium-high heat. When it is hot, add the olive oil. Then, carefully place the seasoned fillet in the hot oil and cook for 2 to 3 minutes per side or until lightly browned. The fish should be slightly undercooked in the center. Transfer the snapper to a plate.

      3Reduce the heat to medium. Add the onions to the skillet and cook, stirring occasionally, until softened, about 5 minutes. If the pan seems dry, add a drizzle of olive oil.

      4Stir in the garlic and red pepper flakes and cook for 30 seconds.

      5Add the lemon zest, orange zest, olives, and canned diced tomatoes with their juices to the skillet. Use a wooden spoon to scrape up any browned bits from the bottom of the pan. Bring the mixture to a simmer and cook for 5 minutes, stirring occasionally.

      6Stir in the herbs and taste the sauce. Season with additional salt and pepper, if needed.

      7Gently nestle the snapper fillets back into the sauce, spooning some sauce over the top. Cook until the fish is opaque and easily flakes with a fork, about 3 to 5 minutes more.

      8Transfer the snapper and sauce to a serving platter or individual plates. Garnish with fresh lemon wedges and additional herbs.

    Adam and Joanne’s Tips

    • Snapper alternatives: This recipe works well with any firm white fish. Try tilapia, Pacific halibut, Pacific cod, and black cod (sablefish).
    • The nutrition facts provided below are estimates.

    Nutrition Per Serving
    Serving Size
    1/4 of the recipe
    /
    Calories
    223
    /
    Total Fat
    10g
    /
    Saturated Fat
    1.5g
    /
    Cholesterol
    41.9mg
    /
    Sodium
    659mg
    /
    Carbohydrate
    9.4g
    /
    Dietary Fiber
    2g
    /
    Total Sugars
    4.2g
    /
    Protein
    24.6g


    AUTHOR:

    Joanne Gallagher

    Adam and Joanne of Inspired Taste

    We are Adam and Joanne Gallagher, the creators of Inspired Taste. Established in 2009, Inspired Taste grew from a childhood dream into one of the internet’s most trusted recipe sites with hundreds of reliable recipes, step-by-step videos, and expert tips.More About Us

    Source link