Category: Sea Food

  • Easy Grilled Salmon with Nectarines Recipe

    Easy Grilled Salmon with Nectarines Recipe

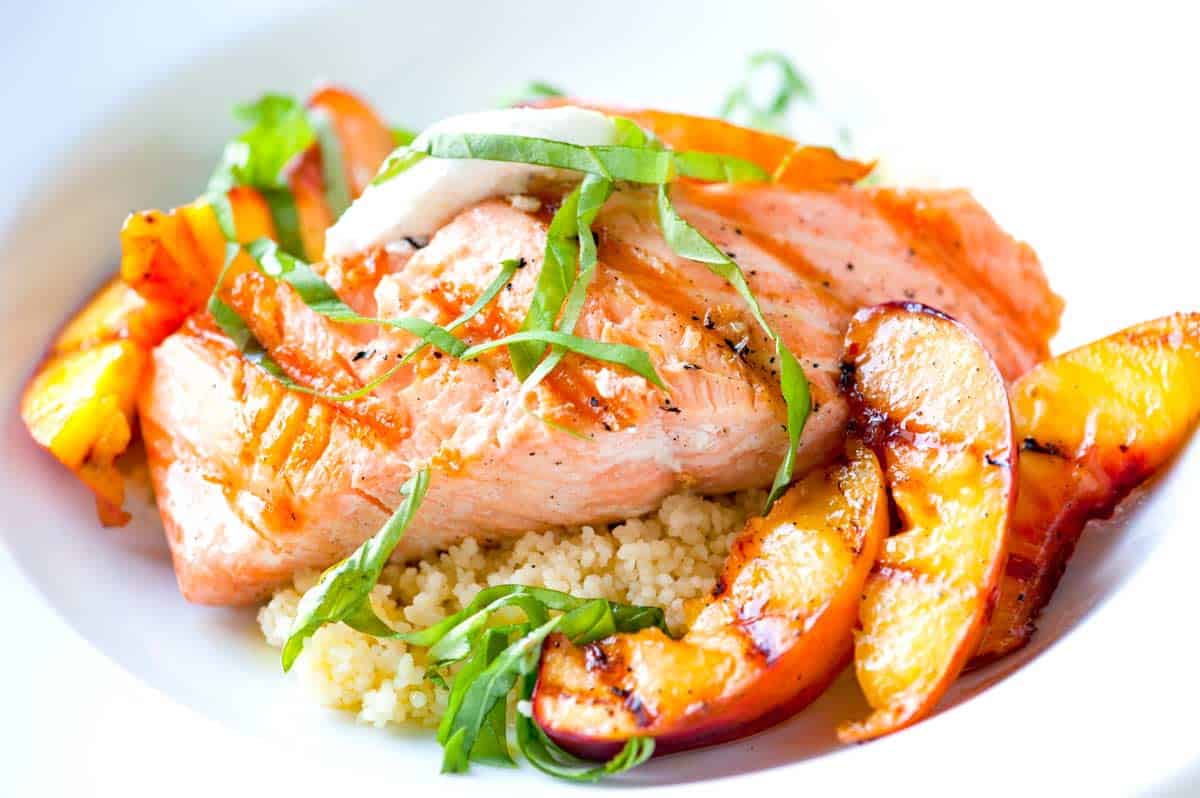
    This grilled salmon with nectarines and goat cheese is such an easy, light dinner, especially during the warmer months!
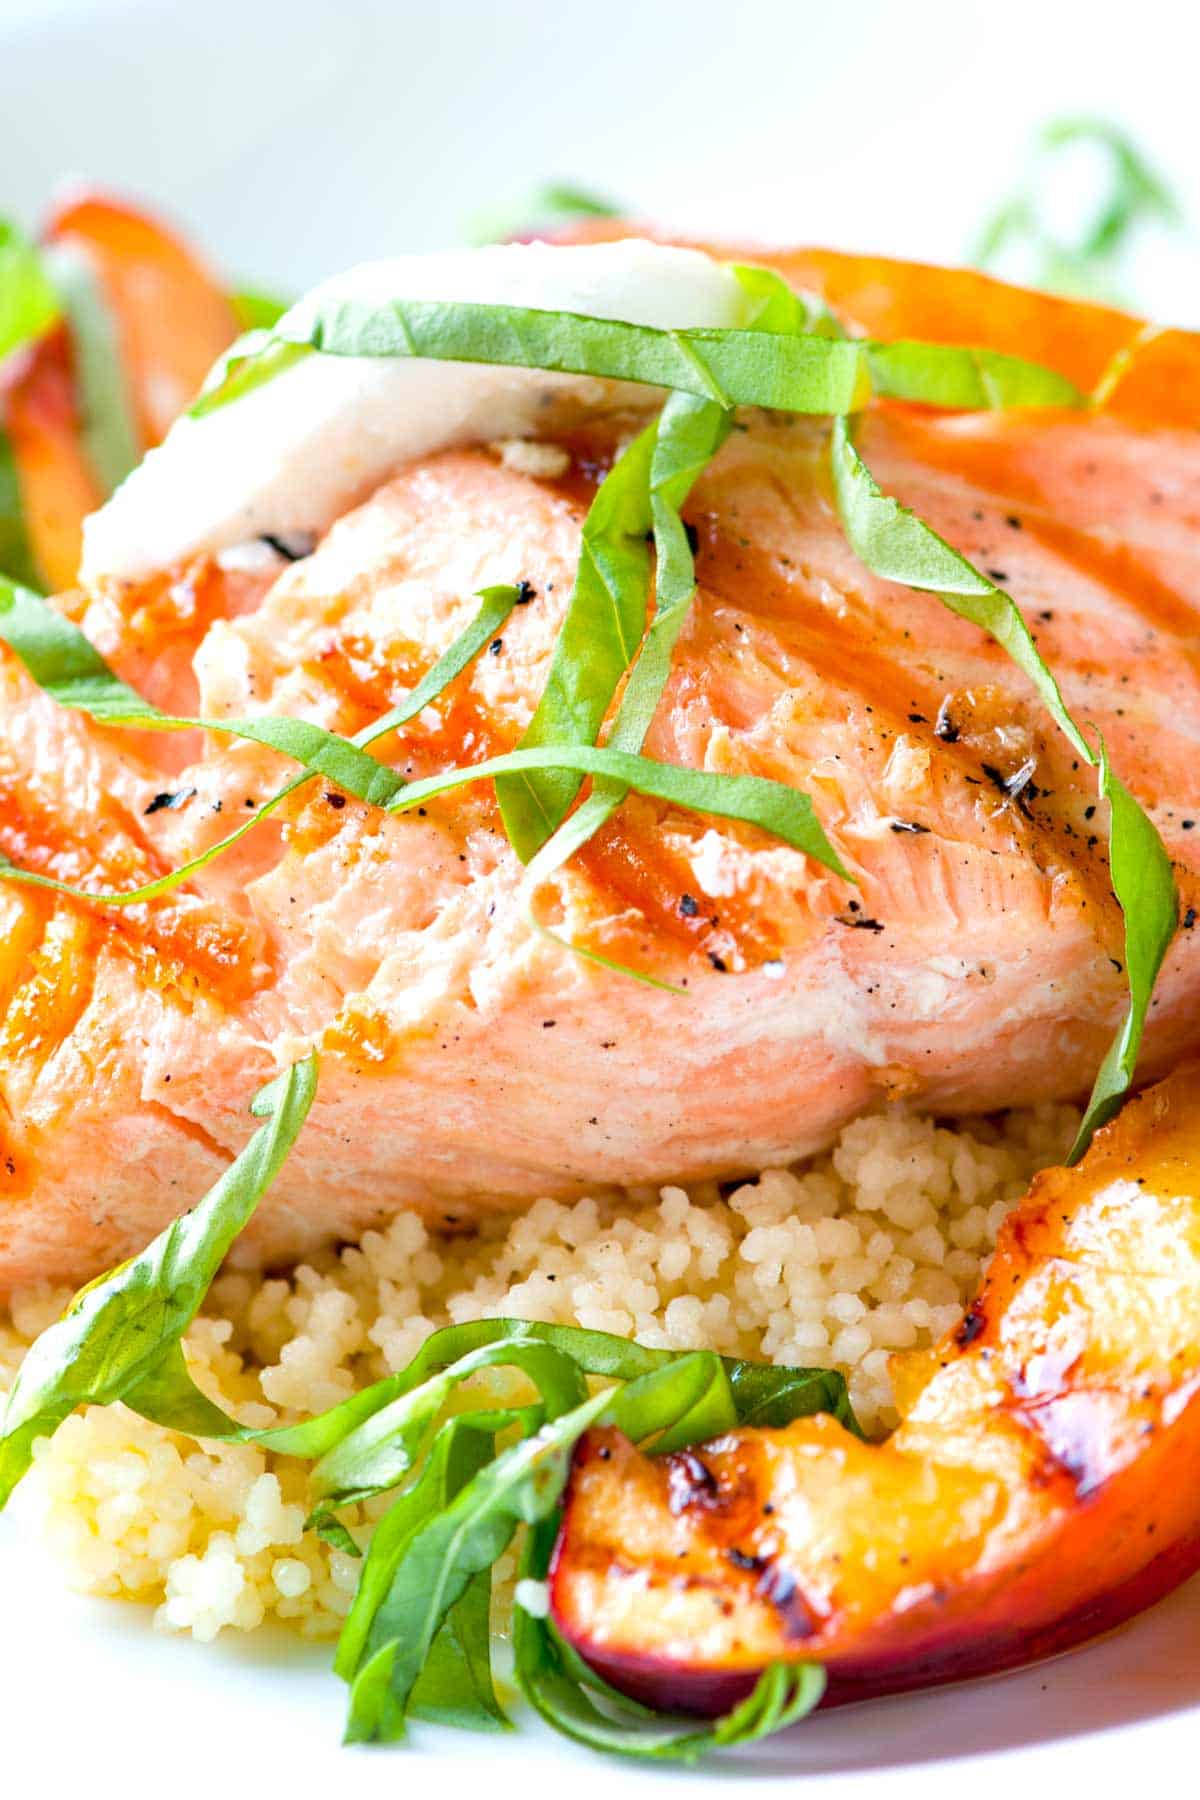
    Grilled Salmon with Nectarines

    If you’ve never grilled nectarines or peaches, consider this your sign to start. We toss nectarine wedges with maple syrup and a pinch of red pepper flakes, then grill them until they are soft, sweet, and absolutely mouthwatering.

    Serve them over a bed of couscous with simply grilled salmon and creamy goat cheese. It’s fresh and gorgeous, and it comes together so quickly. A total winner.

    Key Ingredients

    • Salmon: Any salmon fillet will work for this recipe. We especially love salmon with a higher fat content, like sockeye, king, and coho. Salmon with a higher fat content stays soft and moist after it is grilled.
    • Nectarines: Grilled stone fruit is lovely. In this dish, we grill nectarines, but peaches or apricots would be excellent, too. Look for ripe, but slightly firmer fruit and save the really soft ones for eating fresh.
    • Maple Syrup and Pepper Flakes: Toss the nectarines with these before grilling. The sugars in the maple syrup caramelize on the grill and get a little smoky.
    • Couscous: Any cooked grain or quinoa is perfect here. Couscous, rice, quinoa, or orzo are all great. Before serving, fluff it and stir in a little olive oil, lemon juice, and a pinch of salt.
    • Goat Cheese: Use fresh, soft goat cheese, usually sold in logs.
    • Basil: Fresh herbs add a pop of color and fresh flavor. If you do not have basil, use parsley, cilantro, mint, or dill.

    Find the full recipe with measurements below.

    How to Make Grilled Salmon with Nectarines

    You can make this recipe indoors with a grill pan or outdoors on an outdoor grill. Fish is delicate and can be a little tricky to grill, so I’ll tell you upfront that the most foolproof option is the grill pan on the stove. That said, grilling salmon on an outdoor grill is absolutely doable, so I’ve shared all my best tips below.

    Tip 1: Prepping the grill. If you are staying inside, you’ll need a preheated grill pan over medium heat. If you are using an outdoor grill, preheat it for a good while and make sure the grates are very clean (otherwise the salmon will stick).

    Tip 2: Have a fish spatula ready. When flipping the fish, you might find it sticks to the grates (even if you have oiled it and preheated the grill). A flexible fish spatula is really helpful for wiggling underneath the salmon fillets so you can flip them.

    Tip 3: Keep the salmon skin on and oil the fish. In our photos, the salmon skin was removed. That said, I much prefer to cook my salmon with the skin still on. It acts as a little insulator, helping keep the fish moist and tender inside.

    If you have salmon with the skin still on, keep it that way and place your fillets skin-side down when you start cooking them. Before you grill, rub the salmon all over with oil (adding the oil to the fish instead of the grill grates prevents it from sticking).

    Tip 4: Grill salmon until an internal temperature of 125°F. I realize this is yet another gadget I am recommending for this recipe, but I promise it is worth it. When cooking delicate fish, like salmon, an internal thermometer is really helpful. Pierce it into the thicker part of a fillet for a reading. Remove the fish from the grill when it reaches 125°F, which means it will still be ever-so-slightly undercooked in the middle. That’s okay, though, because carryover cooking will finish it for you.

    Tip 5: Grill the nectarines. After cutting them into wedges, toss the fruit with some maple syrup and a pinch of red pepper flakes. Then, add them to the grill. Look for them to pick up some color and grill marks, then flip.
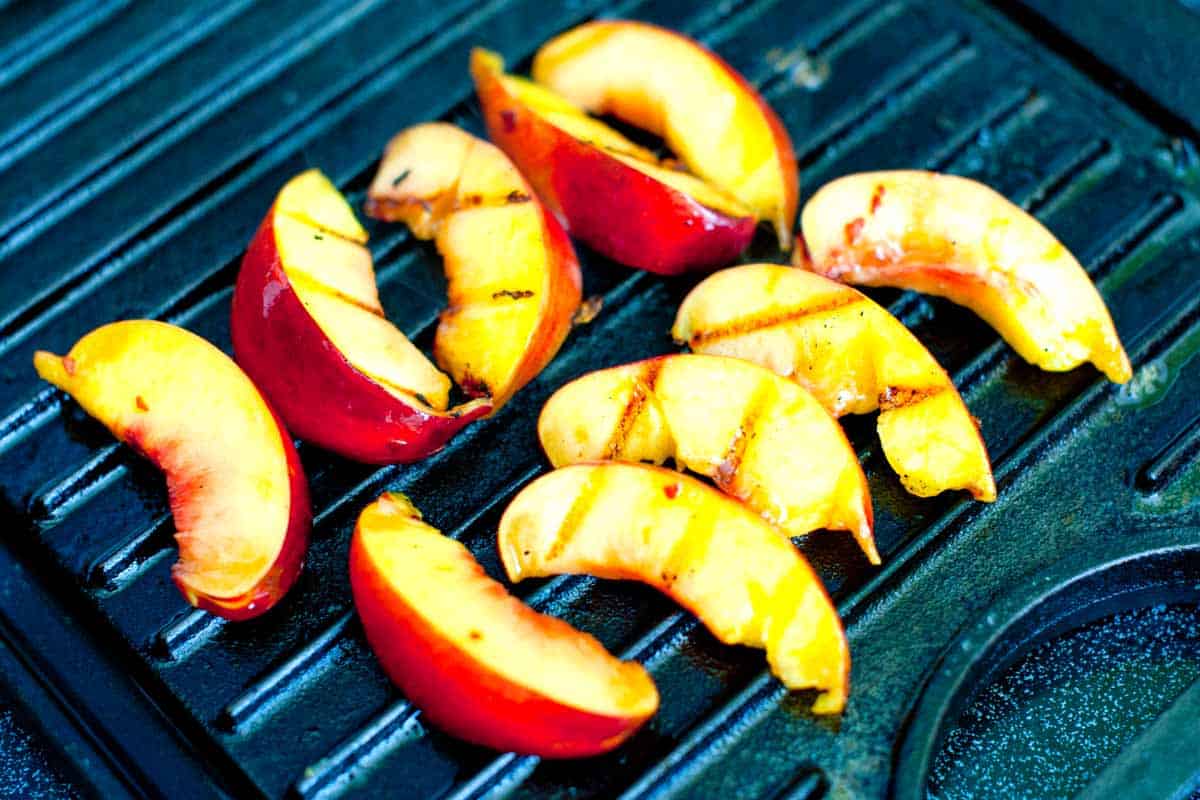
    Grilling nectarines to serve with salmon

    Tip 6: Serve over seasoned couscous. Toss cooked couscous (or rice or quinoa) with a little olive oil, lemon juice, a pinch of salt, and a little fresh basil. It’s a simple step, but it adds so much more interest to the final dish.

    More Summer Dinners
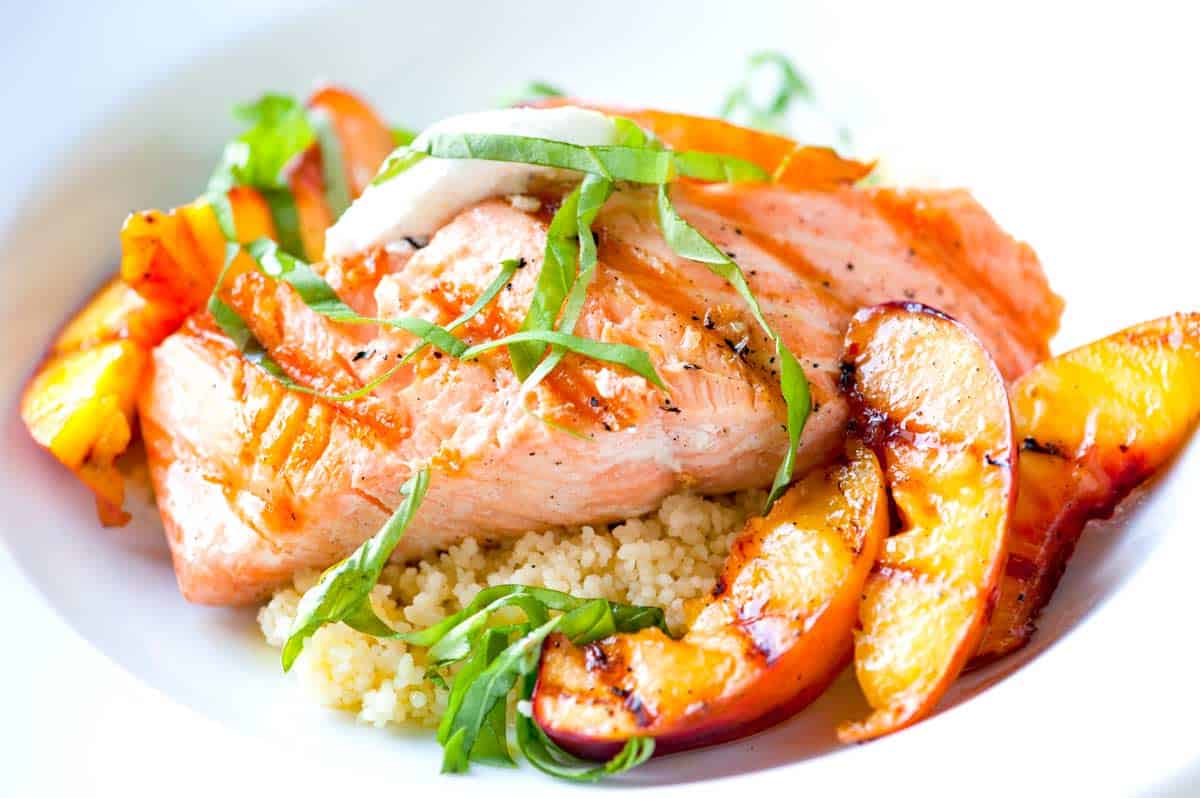
    Grilled Salmon Recipe with Nectarines and Goat Cheese

    Easy Grilled Salmon with Nectarines

    • PREP
    • COOK
    • TOTAL

    We keep the salmon simple with olive oil, salt, and pepper for this recipe, but add flavor with grilled nectarines and creamy goat cheese. We’ve offered tips for grilling the salmon in the recipe below. If using an outdoor grill, make sure your grates are very clean; otherwise, use a grill pan (either on the grill or on the stove). Feel free to swap nectarines with peaches or another stone fruit (apricots would be lovely).

    Serves 4

    You Will Need

    1 ½ pounds center-cut salmon, skin-on, cut into 4 filets, about 6 ounces each

    Extra-virgin olive oil

    Salt and freshly ground black pepper

    2 medium nectarines or peaches, pits removed and cut into wedges

    1 ½ tablespoons maple syrup

    ½ teaspoon gochugaru or crushed red pepper flakes

    3 cups cooked couscous, quinoa, or rice

    ½ lemon, juiced

    4 ounces fresh goat cheese

    Large handful of basil leaves, chopped

    Directions

      1Prepare a grill for cooking over medium heat. If using an outdoor grill, make sure the grates are very clean to help prevent the fish from sticking. If grilling inside, heat a lightly oiled, well-seasoned grill pan over medium-high heat.

      2Pat the salmon fillets dry with paper towels. Brush both sides generously with olive oil and season with salt and pepper (oiling the fish itself, rather than just the grates, is the best way to ensure the salt and pepper adhere and the fish won’t stick).

      3Grill the salmon skin-side down first—leaving the skin on to protect the delicate flesh from the heat—for 5 to 6 minutes per side. When flipping, a thin, flexible fish spatula works best. If you feel resistance when trying to slide the spatula under, do not force it; give it another minute to release naturally from the grates. Cook until it flakes easily with a fork. (If you have one, take the salmon off the heat when an internal thermometer reads 125°F.)

      4Meanwhile, toss the nectarine wedges with 1 tablespoon of olive oil, maple syrup, and crushed red pepper flakes. Place on the grill and cook until warmed through and grill marks appear, about 2 minutes per side.

      5In a medium bowl, toss the warm cooked couscous or rice with a drizzle of olive oil, the juice from half a lemon, a pinch of salt, and half of the chopped basil.

      6Serve the salmon on a bed of seasoned couscous, topped with the grilled nectarines, a few crumbles of goat cheese, and the remaining fresh basil.

    Adam and Joanne’s Tips

    • The nutrition facts provided are estimates.

    Nutrition Per Serving
    Serving Size
    1/4 of the recipe (1 fillet, 3/4 cup couscous)
    /
    Calories
    528
    /
    Total Fat
    19.7g
    /
    Saturated Fat
    6.3g
    /
    Cholesterol
    100mg
    /
    Sodium
    560.9mg
    /
    Carbohydrate
    40.4g
    /
    Dietary Fiber
    2.9g
    /
    Total Sugars
    10.4g
    /
    Protein
    48.4g

    AUTHOR:

    Joanne Gallagher

    Source link

  • Creamy Dill Sauce for Salmon Recipe

    Creamy Dill Sauce for Salmon Recipe

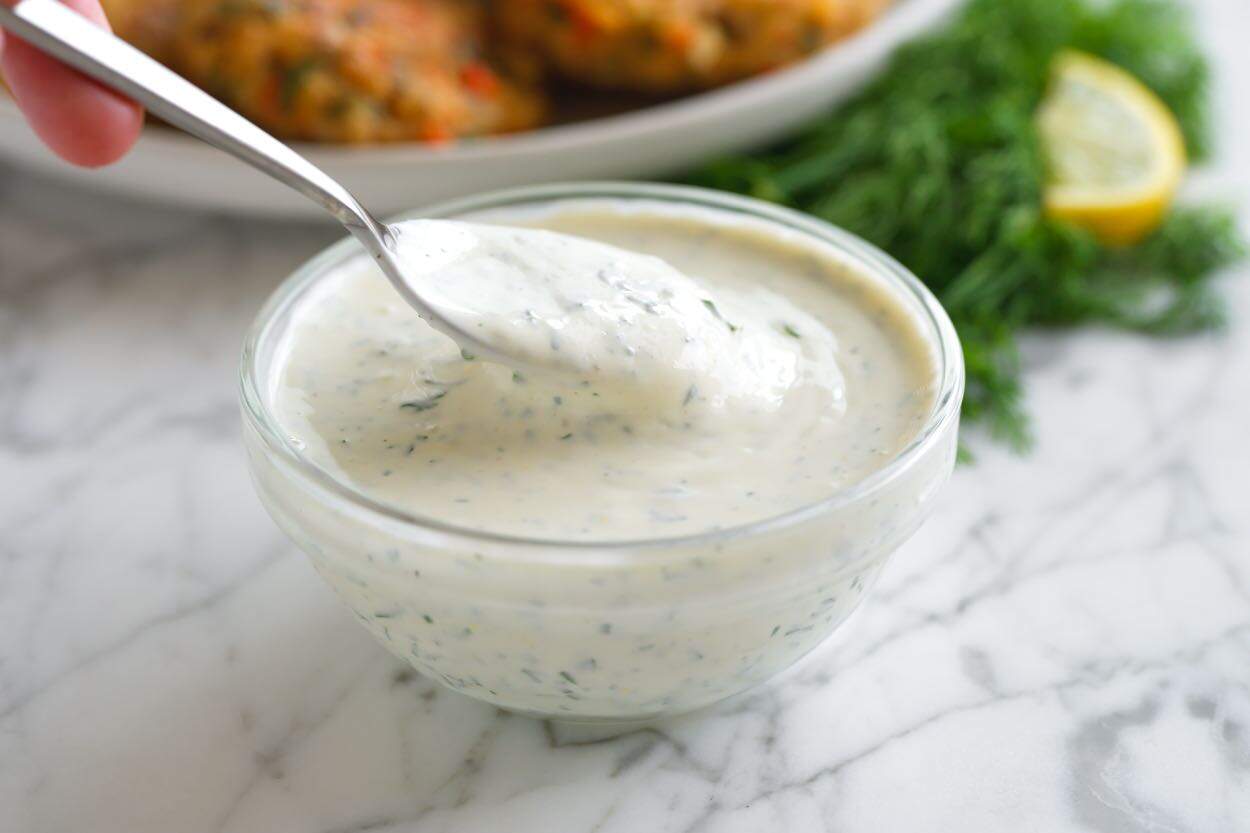
    How to make creamy dill sauce for salmon (or most seafood dishes). This recipe is easy, calls for a short list of ingredients, and lasts in the fridge for a week.

    Dill Sauce for Salmon

    I’ve always been that person who thinks that enough sauce can make just about anything better. We’ve been enjoying this creamy dill sauce recipe over the last week, and we’re obsessed. We created it as a sauce to serve with our salmon patties, but just like our favorite tartar sauce, the serving suggestions go beyond just one recipe for this one (this lemon dill baked salmon or oven baked trout are two that immediately come to mind).

    The ingredient list is short and simple, and the only trick to making it the best is to let it sit for 30 minutes so the lemon, dill, and garlic can meld and permeate the creamy sauce.

    Key Ingredients

    • Sour Cream and Mayonnaise: The base of this sauce is sour cream, with a little mayonnaise for extra flavor. We use this combination of sour cream and mayo for our potato salad dressing and love it. If you’re looking for a yogurt-based sauce, you can substitute the sour cream for plain thick yogurt. I like sticking with a brand that’s less tangy, like Fage or Siggi’s.
    • Dill: This is a dill sauce, after all. We call for fresh dill in our recipe below, but you can use dried dill if that’s all you have on hand. When substituting dried dill for fresh, use 1/3 the amount. So, in the recipe below, you will use 1 tablespoon of dried dill instead of the 3 tablespoons of fresh dill we call for.
    • Lemon: Fresh lemon is best here. We use both zest and juice to boost the lemon flavor. I love our microplane grater for zesting citrus zest, and I always zest my lemon before slicing and juicing it.
    • Garlic Powder: This is my secret ingredient for our homemade ranch dressing, and it works like a charm in this sauce, too.
    • Salt and Pepper: We suggest how much salt and pepper to add, but you really want to taste as you go and add enough to make your palate happy! If the sauce does not pop when you taste it, it probably needs a pinch more salt.

    Find the full recipe with measurements below.

    Dipping Salmon Patties into Dill Sauce

    How to Make Our Favorite Dill Sauce for Salmon

    Tip 1: Use a spoon to stir everything together. This sauce is easy! All you need to do is add all of the ingredients to a bowl and stir them together.

    Ingredients for dill sauce in a bowl ready to stir.

    Tip 2: Let it rest for 30 minutes. This sauce gets better with time. We highly recommend letting the sauce sit in the fridge for at least 30 minutes before serving. If you don’t believe me, taste it before you place it into the fridge, and then again after it’s rested. It’s completely different, and the lemon and dill will have permeated throughout the whole bowl. Worth it!

    Serving Suggestions

    Think of this sauce as a stand-in for times you’d see tartar sauce on a plate. It’s lovely with all kinds of seafood dishes. It’s especially good with salmon recipes, but don’t think you are limited to just salmon. Here’s a list of my top recipes to serve with this sauce:

    Dill Sauce for Salmon

    Creamy Dill Sauce for Salmon

    • PREP
    • TOTAL

    This creamy lemon dill sauce is excellent with fish, especially salmon. When making this, give yourself a head start and stir the sauce ingredients together about 30 minutes before you plan to serve it. This little bit of extra time allows the lemon and dill to really infuse the sauce. I especially love this sauce with our salmon patties, poached salmon, and this lemon dill baked salmon.

    Makes 1 cup

    You Will Need

    ¾ cup sour cream (170g)

    2 tablespoons mayonnaise (30g)

    3 tablespoons chopped fresh dill (12g)

    1 teaspoon lemon zest

    1 tablespoon fresh lemon juice

    ½ teaspoon garlic powder

    Salt and pepper, to taste

    Directions

      1In a medium bowl, combine all of the sauce ingredients, stir well, then taste. Stir in a pinch of salt and pepper, then refrigerate for at least 30 minutes to allow the flavors to meld (it gets much better after 30 minutes). Taste, adjust with more salt and pepper, then serve.

    Adam and Joanne’s Tips

    • Storing: Homemade dill sauce lasts for about a week when stored in an airtight container in the fridge. The fresh lemon and dill start to fade after that, so we recommend enjoying it within the week. Our family loves it, so we often make a double batch to have it on hand!
    • Substituting yogurt: You can use plain thick yogurt as a substitute for the sour cream. When using yogurt for this sauce, I prefer a less tangy option like Siggi’s. Taste the sauce before serving to see if it needs a bit more salt.
    • The nutrition facts provided are estimates.

    Nutrition Per Serving
    Serving Size
    About 2 tablespoons
    /
    Calories
    70
    /
    Total Fat
    6.8g
    /
    Saturated Fat
    2.6g
    /
    Cholesterol
    14.2mg
    /
    Sodium
    103.8mg
    /
    Carbohydrate
    2g
    /
    Dietary Fiber
    0.2g
    /
    Total Sugars
    0.8g
    /
    Protein
    0.8g


    AUTHOR:

    Joanne Gallagher

    Previous Post: Honey Mustard Chicken
    Next Post: Easy Salmon Patties

    Source link

  • Easy Poached Shrimp Recipe

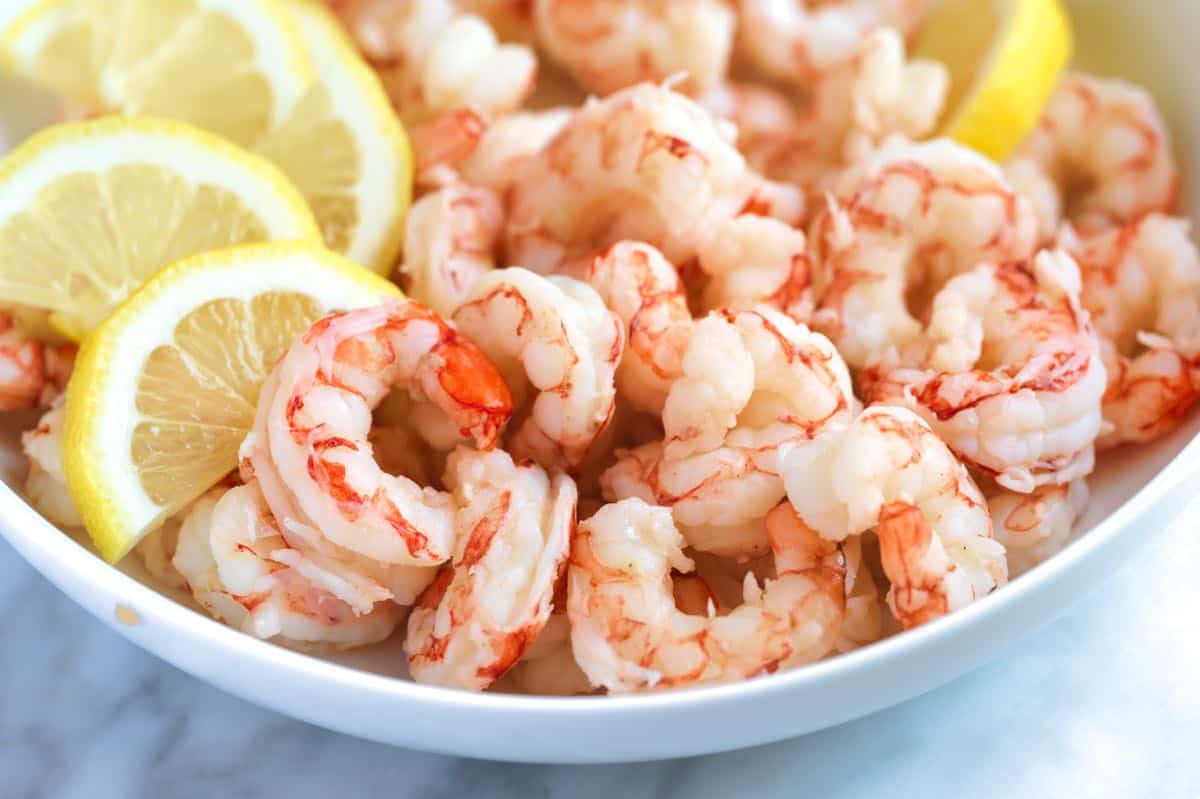
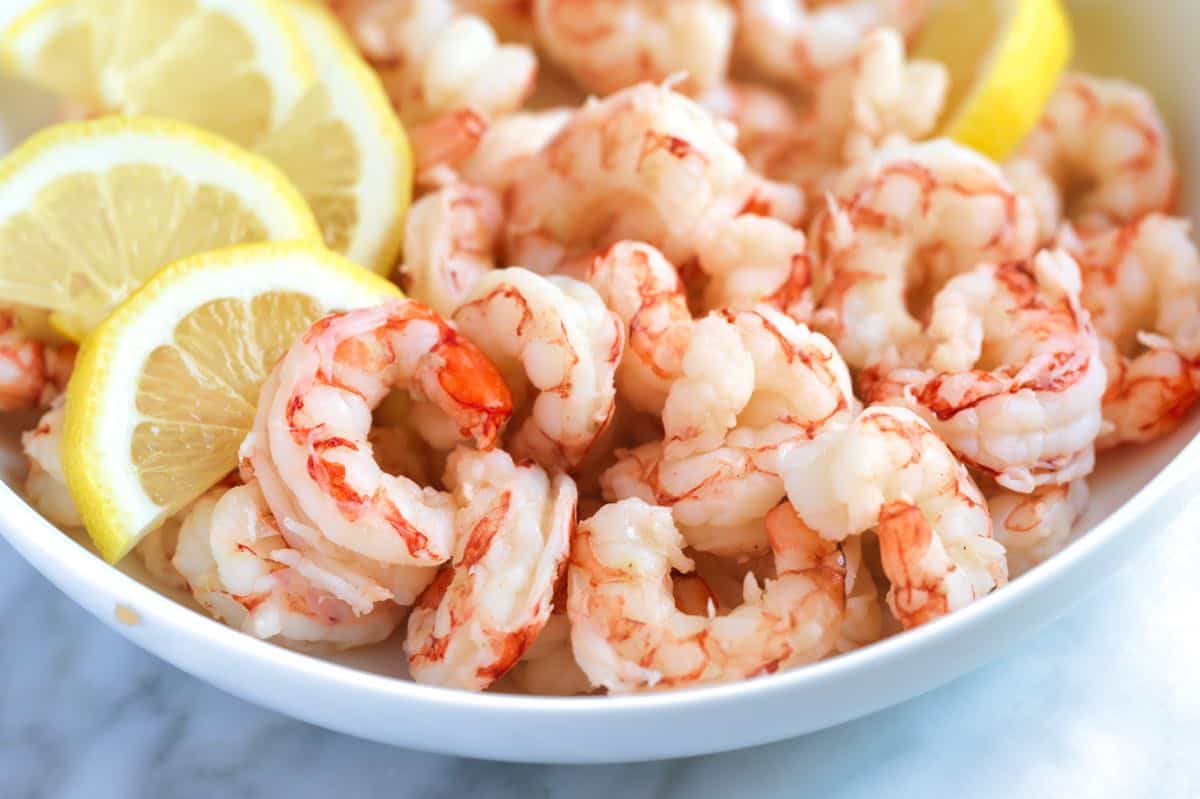
    Easy Poached Shrimp Recipe

    How to poach shrimp! Our gentle poaching method guarantees perfectly cooked and flavorful poached shrimp.

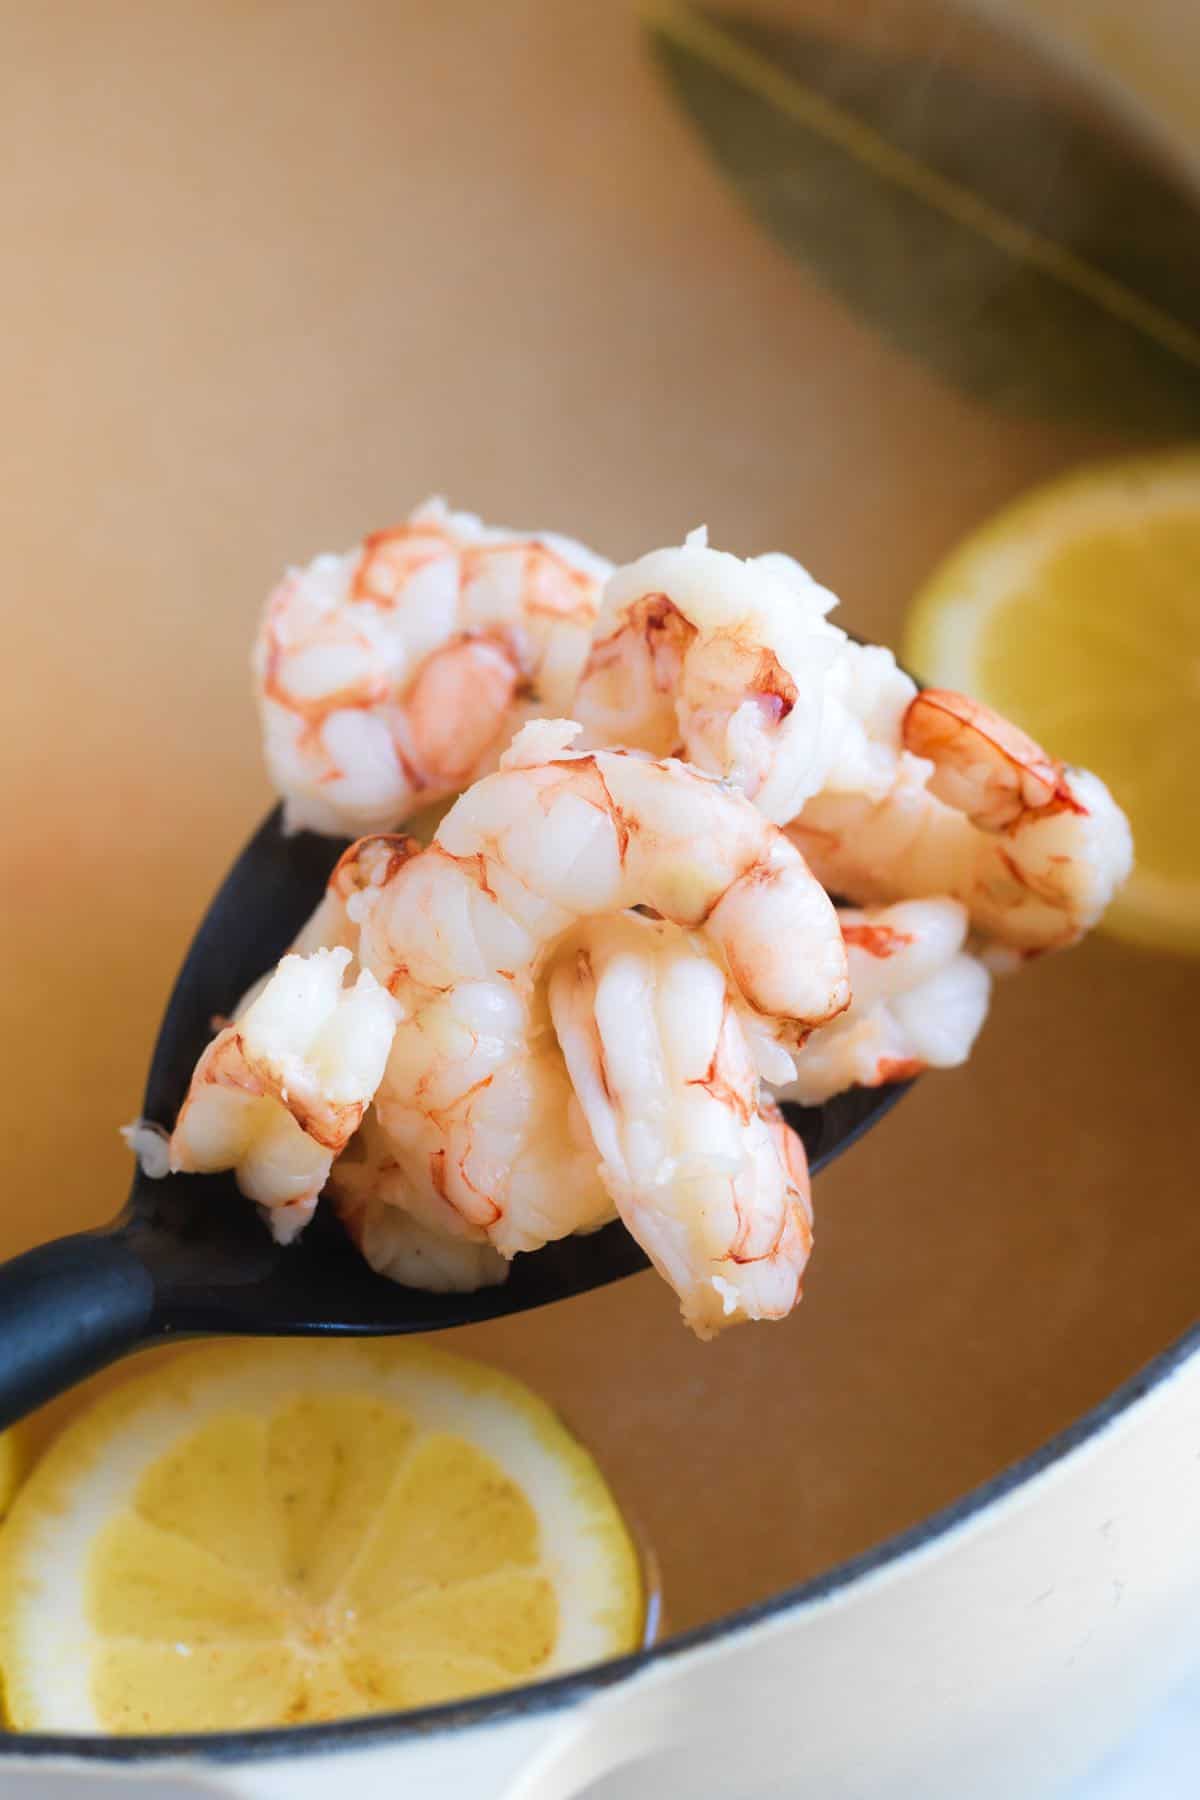
    Poached shrimp coming out of the poaching liquid

    If you have never poached shrimp before, it’s time to start! This quick and easy method is one of my favorite ways to cook shrimp. I use it to cook the shrimp for my favorite shrimp salad, add them to salads, make shrimp cocktail, and more!

    Our method for poaching shrimp is very similar to poaching salmon, chicken, and eggs. You’ll prepare a flavorful poaching liquid with simple ingredients, and then gently poach the shrimp to perfection.

    Key Ingredients

    • Shrimp: In my photos, I’ve poached large shrimp, which take about 3 minutes, but I have included a suggested cooking time below for other shrimp sizes.
    • Water: We use a large pot filled with 8 cups of water to poach shrimp.
    • Lemon: For fresh flavor, cut a lemon in half and toss it into the poaching liquid.
    • Garlic: I love a hint of garlic. Add 2 peeled and gently smashed cloves to the poaching liquid.
    • Bay leaf: Classic with shrimp and add a lovely herbal aroma to the liquid.
    • Salt, pepper, and Cajun seasoning: I season the water really well so that my shrimp are perfectly seasoned when they come out of the poaching liquid. I love salt, pepper, and some homemade Cajun seasoning.

    Find the full recipe with measurements below.

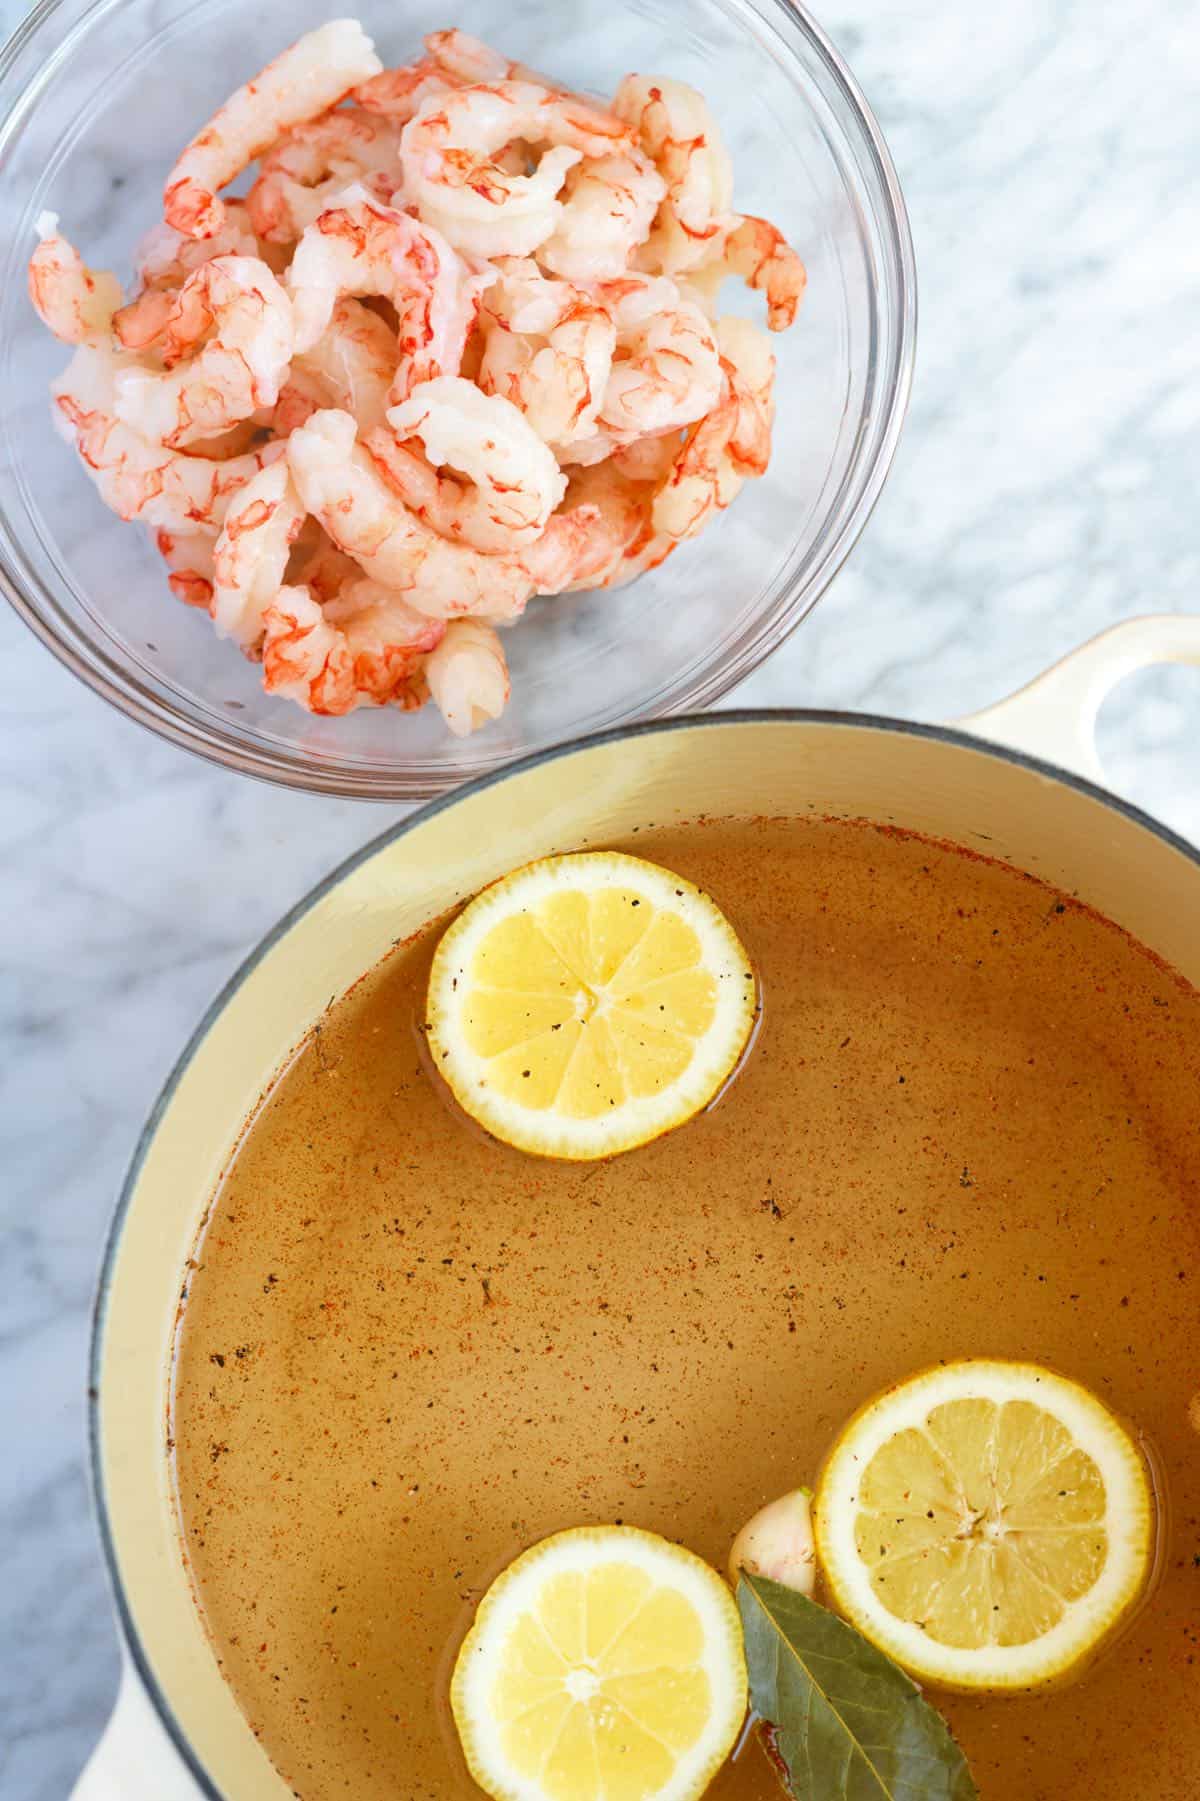
    Raw shrimp with a simple poaching liquid

    Recommended Cooking Times

    The number of shrimp per pound typically indicates shrimp sizes. Here’s a list of standard shrimp sizes and their corresponding count per pound. Please note that these are estimated cooking times; see our tips for telling when the shrimp are ready to come out of the poaching liquid below.

    • Small shrimp (71-90 per pound): 1 to 2 minutes
    • Medium shrimp (41-50 per pound): 2 to 3 minutes
    • Large shrimp (31-40 per pound): 3 minutes
    • Jumbo shrimp (21-25 per pound): 4 to 5 minutes
    • Colossal shrimp (16-20 per pound): 5 to 6 minutes
    • Super Colossal shrimp (8 to 12 per pound): 6 to 7 minutes

    How to tell when the shrimp are done: Shrimp turn from translucent to opaque when cooked. As they cook, many varieties change from a grayish or bluish-gray color to a pink or orange hue. They also curl into a loose “C” shape, while overcooked shrimp take on a “O” shape. They should also feel firm and springy to the touch. If the shrimp is still floppy, it needs more cooking time.

    If you still aren’t sure, take a shrimp out and cut into it to test it. Leave the shrimp in the poaching liquid for 20 to 30 seconds if it seems undercooked.

    More Shrimp Recipes

    Poached Shrimp

    Easy Poached Shrimp

    • PREP
    • COOK
    • TOTAL

    How to poach shrimp so they turn out perfectly cooked and flavorful. Cooking times will vary depending on the size of your shrimp. The recipe below assumes large shrimp, but we have provided guidance for other sizes of shrimp in the article above.

    Keep in mind that our poaching liquid recipe can accommodate multiple pounds of shrimp, but we recommend cooking 1 pound at a time.

    Makes 1 pound

    You Will Need

    1 pound large shrimp (31-40 per pound), see notes for cooking more than one pound

    2 quarts water

    1 lemon, cut in half

    2 cloves garlic, peeled and lightly crushed

    1 bay leaf

    3 twists pepper grinder

    1 ½ tablespoons salt

    1/2 teaspoon Cajun seasoning, optional

    Directions

      1Prepare shrimp: Depending on your serving preferences, you can choose to peel the shrimp or leave the shells intact. For salads, we peel and devein the shrimp before poaching. For a shrimp cocktail, you may want to peel and devein the shrimp while leaving the tails on.

      2Prepare poaching liquid: Add 2 quarts of water to a large pot and place it on the stove over high heat. Squeeze a little lemon juice into the water and drop the lemon halves into the pot. Add the garlic, bay leaf, pepper, salt, and Cajun seasoning. Bring the liquid to a rolling boil.

      3Poach the shrimp: Once the water reaches a rolling boil, remove the pot from the heat and immediately submerge the shrimp into the hot water. Use a timer to set the recommended cooking time: 2 to 3 minutes for medium shrimp, 3 minutes for large shrimp, and 4 to 5 minutes for jumbo shrimp. Shrimp turn from translucent to opaque when cooked. They should also feel firm and springy to the touch. If the shrimp is still floppy, it needs more cooking time.

      4Using tongs or a slotted spoon, carefully transfer the cooked shrimp to a plate. Allow them to cool by placing them in the refrigerator or plunge them into a prepared ice-water bath.

      5If you plan to poach another batch of shrimp, make sure the poaching liquid returns to a rolling boil before adding the second batch.

    Adam and Joanne’s Tips

    • More than 1 pound of shrimp: Our poaching liquid recipe can accommodate multiple pounds of shrimp, but we recommend cooking 1 pound at a time. If you plan to poach more than one pound of shrimp, after poaching the first batch, ensure the poaching liquid returns to a rolling boil before removing the pot from the heat and adding the second batch of shrimp.
    • The nutrition facts provided below are estimates.

    Nutrition Per Serving
    Serving Size
    1/4 pound shrimp
    /
    Calories
    112
    /
    Total Fat
    0.3g
    /
    Saturated Fat
    0.1g
    /
    Cholesterol
    214.2mg
    /
    Sodium
    125.8mg
    /
    Carbohydrate
    0.2g
    /
    Dietary Fiber
    0g
    /
    Total Sugars
    0g
    /
    Protein
    27.2g


    AUTHOR:

    Joanne Gallagher

    Previous Post: Easy Blueberry Mojito
    Next Post: Chewy Oatmeal Raisin Cookies

    Source link

  • Chipotle Salmon Sandwiches Recipe

    Chipotle Salmon Sandwiches Recipe

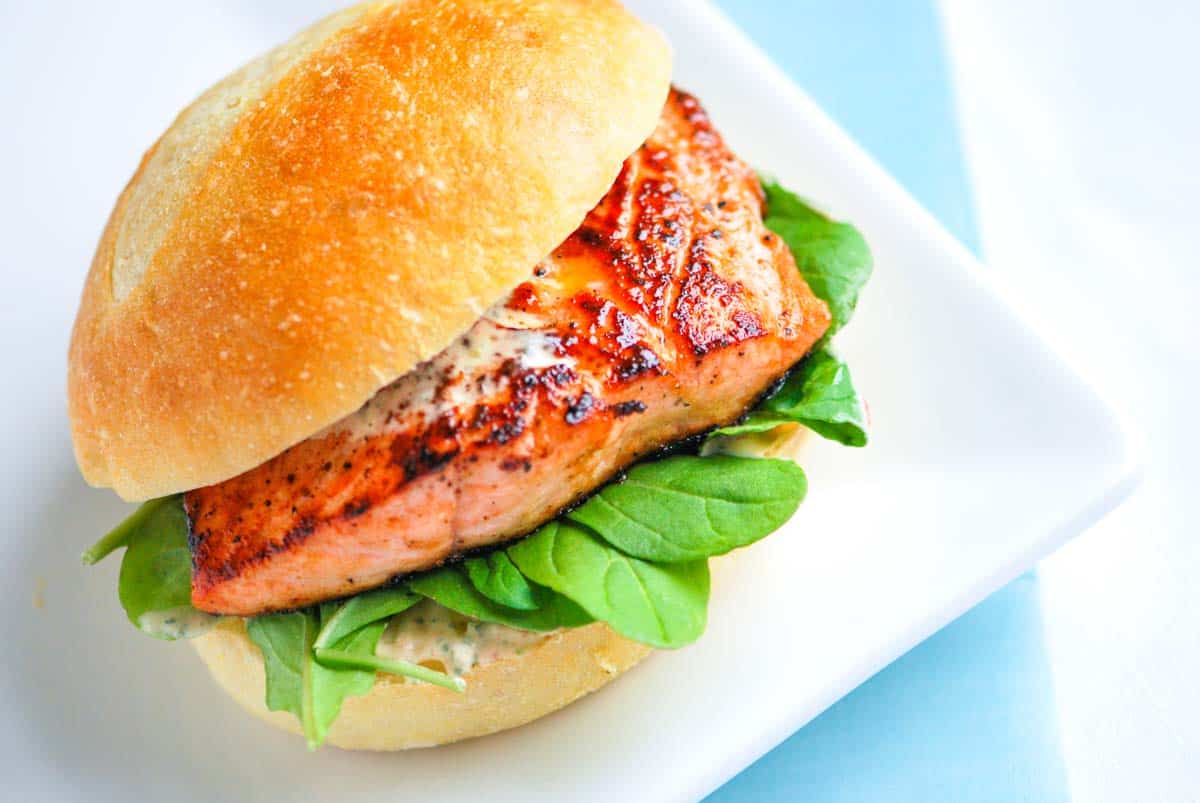
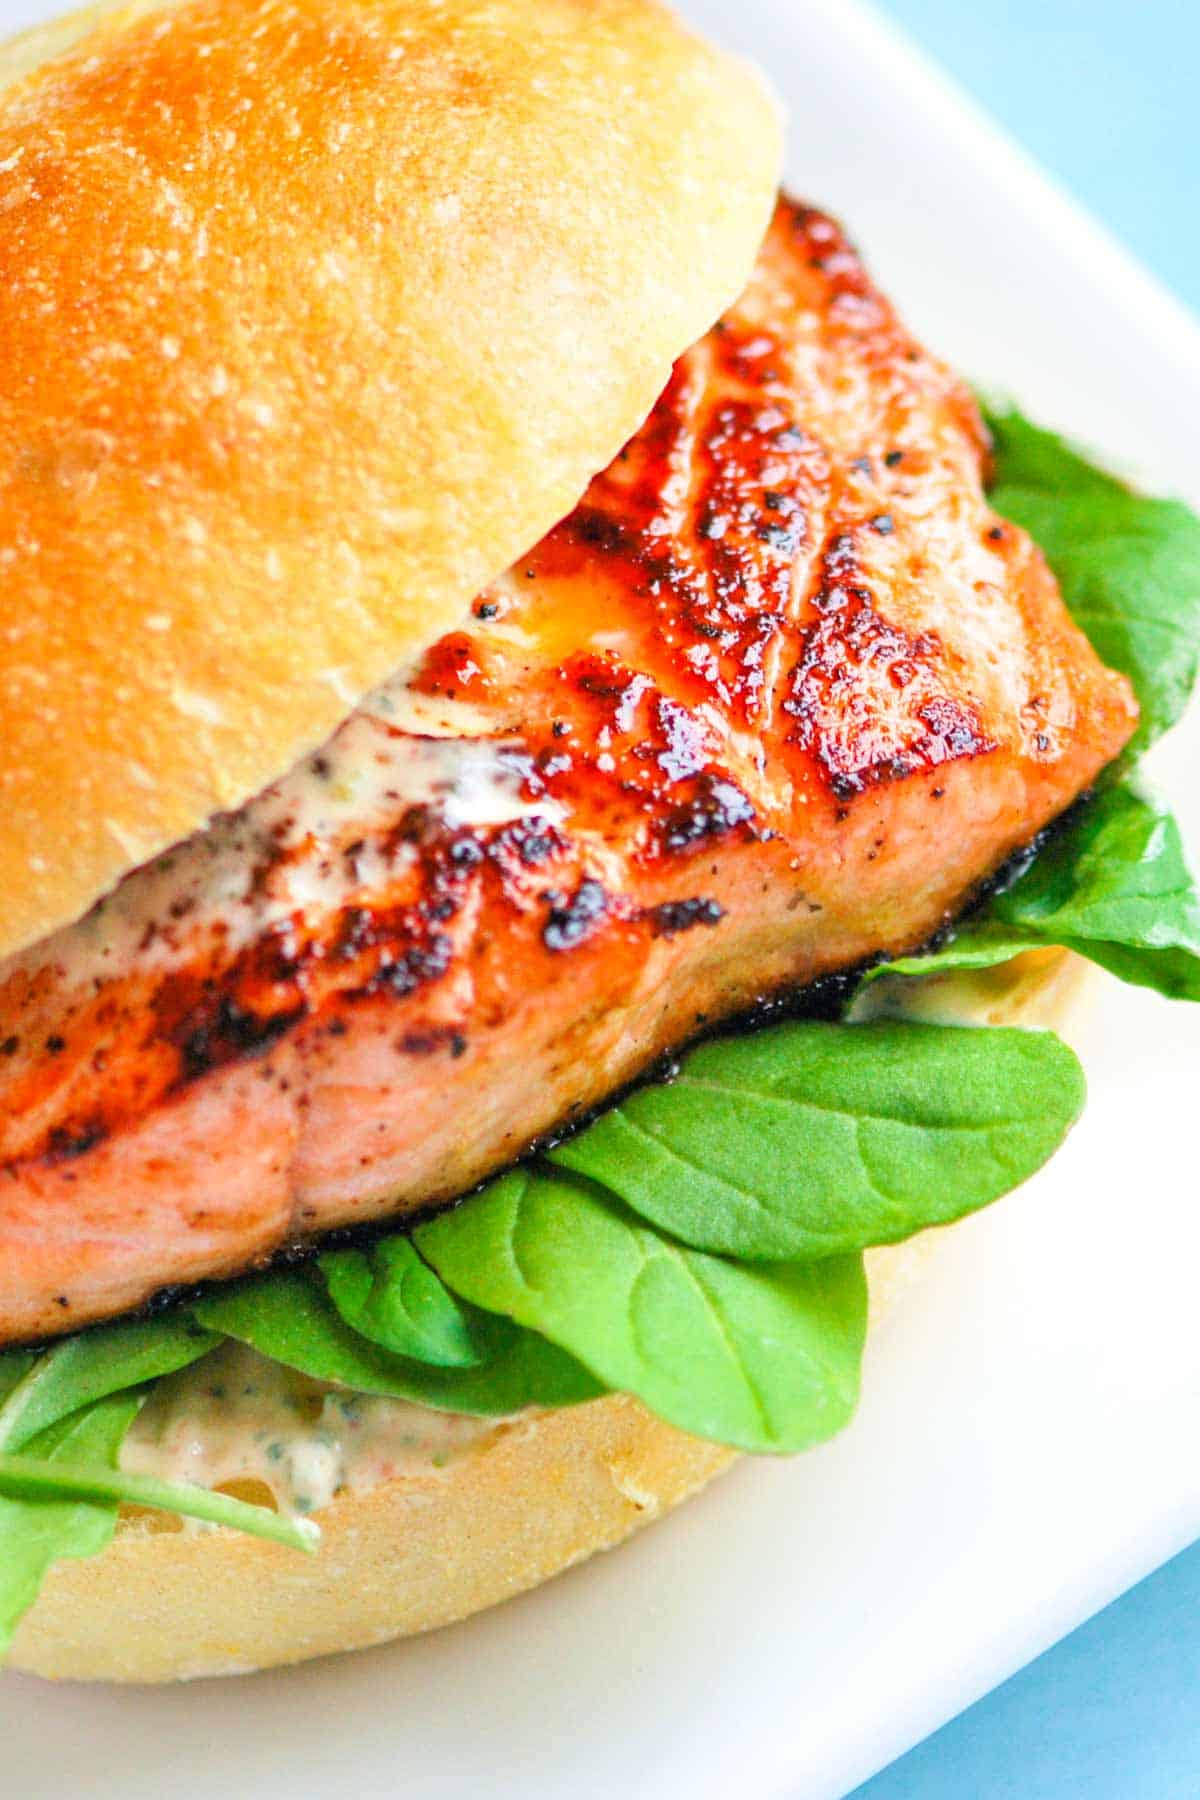
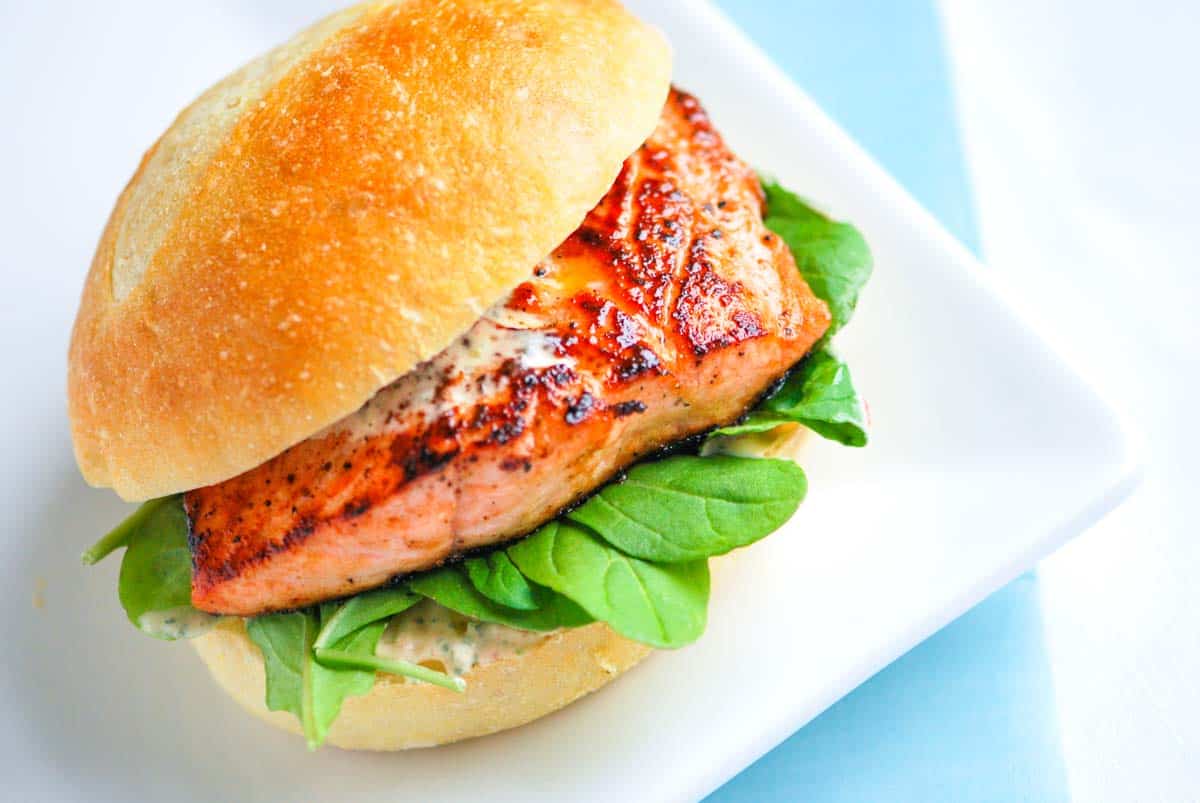
    These easy salmon sandwiches are seriously delicious with pan-seared salmon and a quick homemade mayonnaise. They are a little sweet, a little spicy, and incredibly delicious!

    Salmon Sandwiches

    My family loves salmon (as proven by all the salmon recipes you will find on Inspired Taste!) We are always looking for new ways to enjoy it, which is how these easy salmon sandwiches came to be!

    These sandwiches taste incredible, thanks to a bit of agave nectar brushed onto the salmon fillets before searing them in the pan. Then, we balance the sweet crust of the salmon with a moderately spicy homemade chipotle mayo. I can’t wait for you to try them! For a salmon burger patty, see our salmon burger recipe.

    Key Ingredients

    • Salmon: Any salmon fillet will work for these sandwiches. I especially love salmon with a higher fat content, like sockeye, king, and coho. Salmon with a higher fat content stays soft and moist after it is cooked.
    • Agave Nectar: If you do not have agave, no worries! Substitute with honey or maple syrup. You’ll lightly brush each salmon fillet with a little agave before searing them in the pan, adding a lovely, sweet caramelized crust to the salmon.
    • Greens: I used baby spinach in the photos, but any tender, fresh greens like arugula or baby kale will work.
    • Rolls: Since the salmon is soft, I prefer softer rolls, so when you take a bite, the whole sandwich doesn’t fall apart on you. Use what you love!
    • Chipotle Mayo: Making flavored mayo is really easy and adds so much flavor! To make my chipotle mayo, combine mayonnaise with cilantro, lime juice, salt, pepper, and chipotle in adobo sauce. Chipotle in adobo sauce is smoky and spicy. They are smoked jalapeños preserved in a flavorful adobo sauce made with spices and chili peppers. You can buy them in small cans, usually next to salsas or in your store’s International aisle. I also use them to make our roasted corn with chipotle butter, these mini fish tacos, and our sweet potato tacos.
    Pan Seared Salmon Burger with Chipotle Mayonnaise

    Chipotle Salmon Sandwiches

    • PREP
    • COOK
    • TOTAL

    I love these pan-seared salmon sandwiches. We make a simple chipotle mayonnaise to spread on the bread rolls. You can do this using a food processor, or if you prefer, mince the chipotle pepper and cilantro very small and stir them into the mayonnaise with a spoon. You can usually find canned chipotle peppers in adobo sauce sold near salsas, but if your store does not carry them, try an International or Mexican market.

    4 Servings

    You Will Need

    Salmon Sandwiches

    1 tablespoon grape seed or canola oil

    4 center cut salmon fillets, skin removed, about 6 ounces each

    2 tablespoons agave nectar or substitute honey

    Salt and fresh ground black pepper

    1 cup baby spinach or arugula

    4 bread rolls, lightly toasted


    Chipotle Mayonnaise

    1 cup mayonnaise, see homemade mayonnaise

    1 to 2 small chipotle peppers in adobo, seeded, depending spice level

    1 tablespoon sauce from the canned adobo chile peppers

    1/4 cup fresh cilantro leaves, finely chopped

    Juice of 1 lime

    Salt and fresh ground black pepper

    Directions

      1Make chipotle mayo: Add the mayonnaise, minced pepper, adobo sauce, cilantro and lime juice to a small food processor. Season with about 1/4 teaspoon of salt then blend until mostly smooth. Taste and adjust with more peppers, sauce or salt.

      2Cook the salmon: Heat oil in a heavy-bottomed skillet over medium-high heat. Brush agave nectar onto both sides of the salmon fillets then season with salt and pepper. Add salmon to the skillet and cook 2 to 3 minutes until the agave forms a nice brown crust. Turn the fillets and cook for another 2 to 3 minutes, or until the salmon flakes easily with a fork. Transfer to a plate and rest for 5 minutes.

      3Assemble sandwiches: Spread mayonnaise onto bread rolls then add a handful of arugula to the bottom slice of each roll. Place salmon on top and enjoy.

    Adam and Joanne’s Tips

    • The nutrition facts provided below are estimates. We assumed a ciabatta roll and 6 tablespoons of the mayonnaise for 4 burgers.

    Nutrition Per Serving
    Serving Size
    1 burger
    /
    Calories
    563
    /
    Total Fat
    27.4g
    /
    Saturated Fat
    4.9g
    /
    Cholesterol
    66.6mg
    /
    Sodium
    807.2mg
    /
    Carbohydrate
    46.2g
    /
    Dietary Fiber
    2.1g
    /
    Total Sugars
    9.3g
    /
    Protein
    34.6g


    AUTHOR:

    Adam Gallagher

    Previous Post: Easy Pumpkin Puree
    Next Post: Perfect Baked Tofu

    Source link

  • Easy Shrimp and Grits Recipe

    Easy Shrimp and Grits Recipe

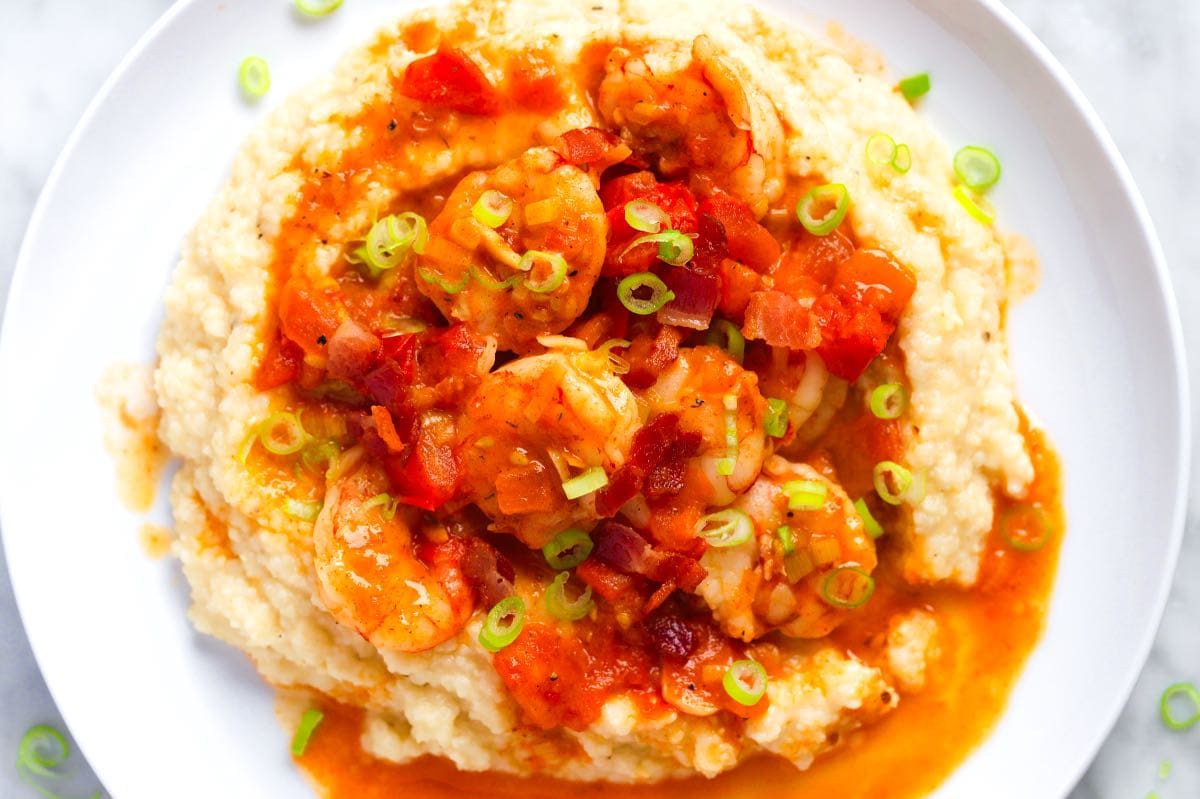
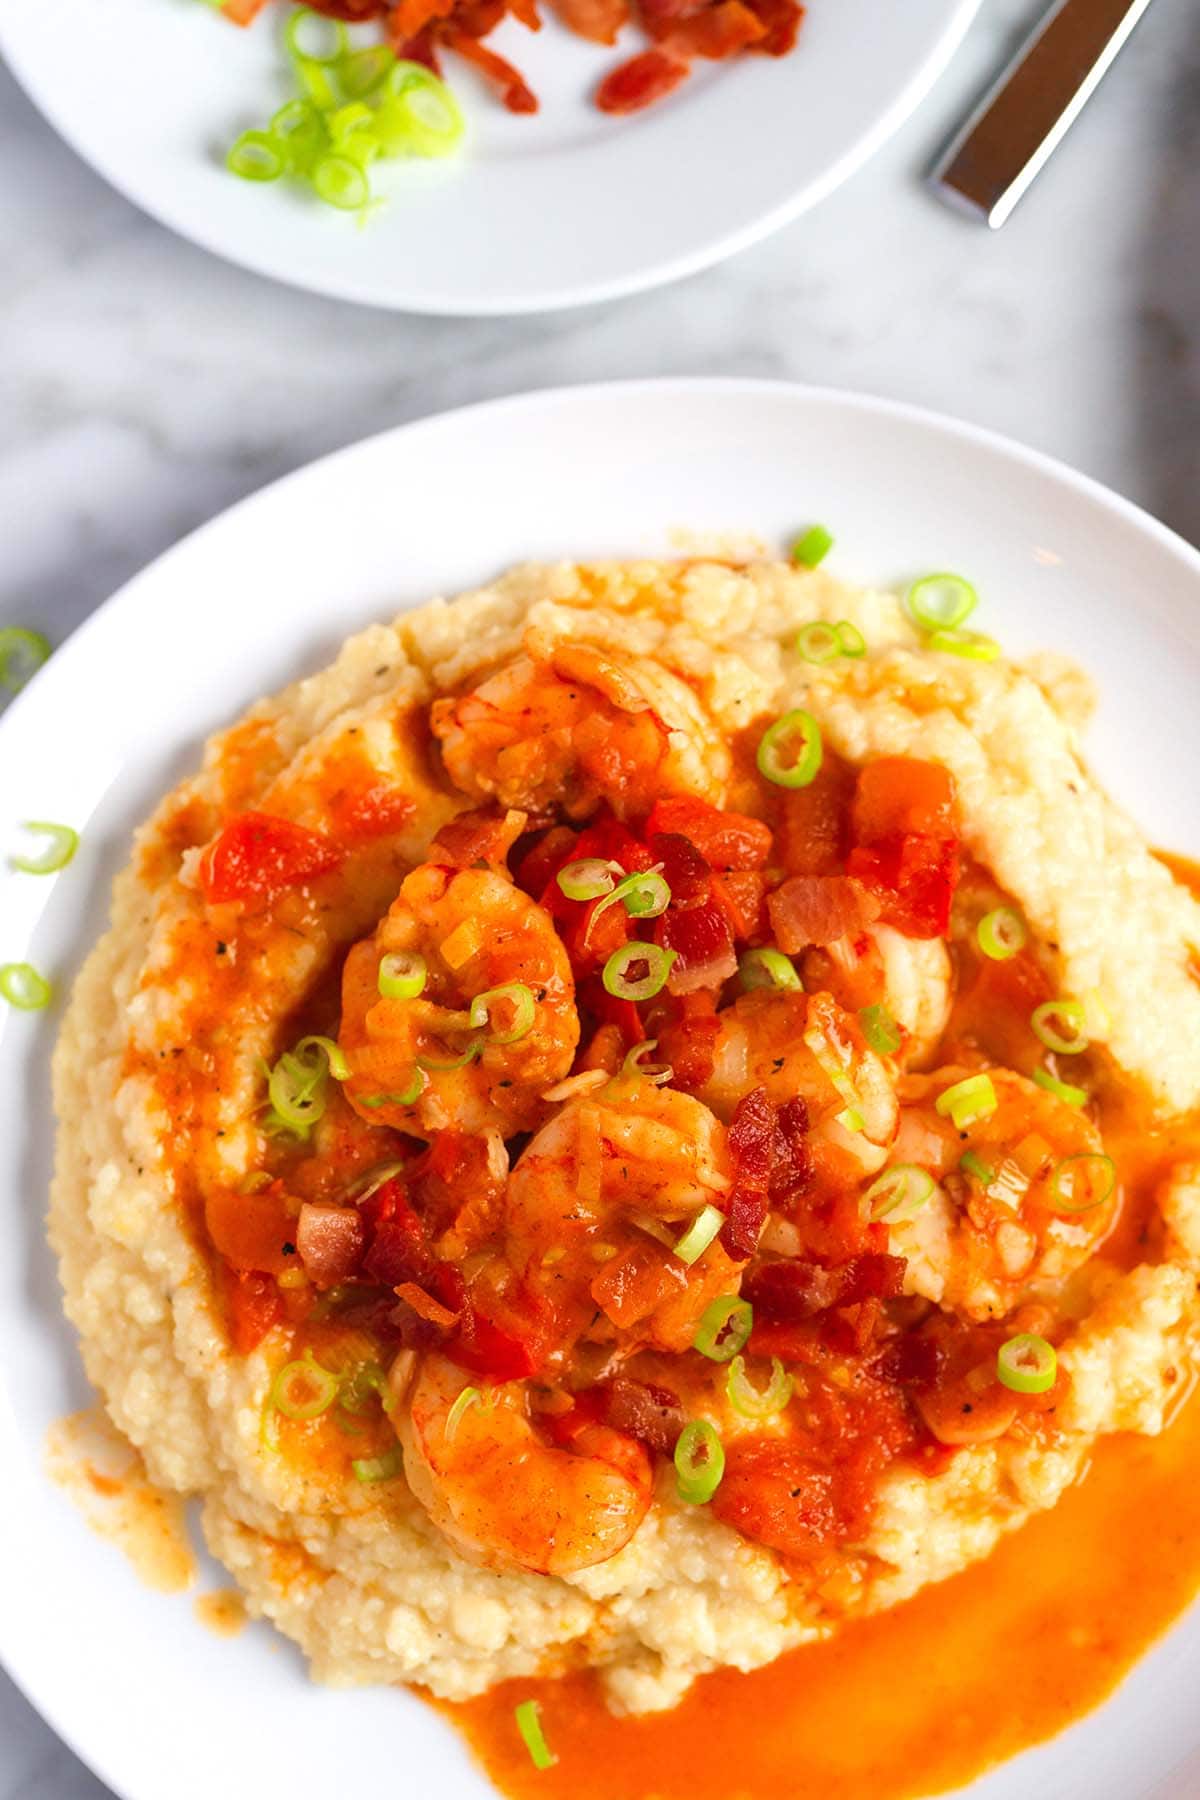
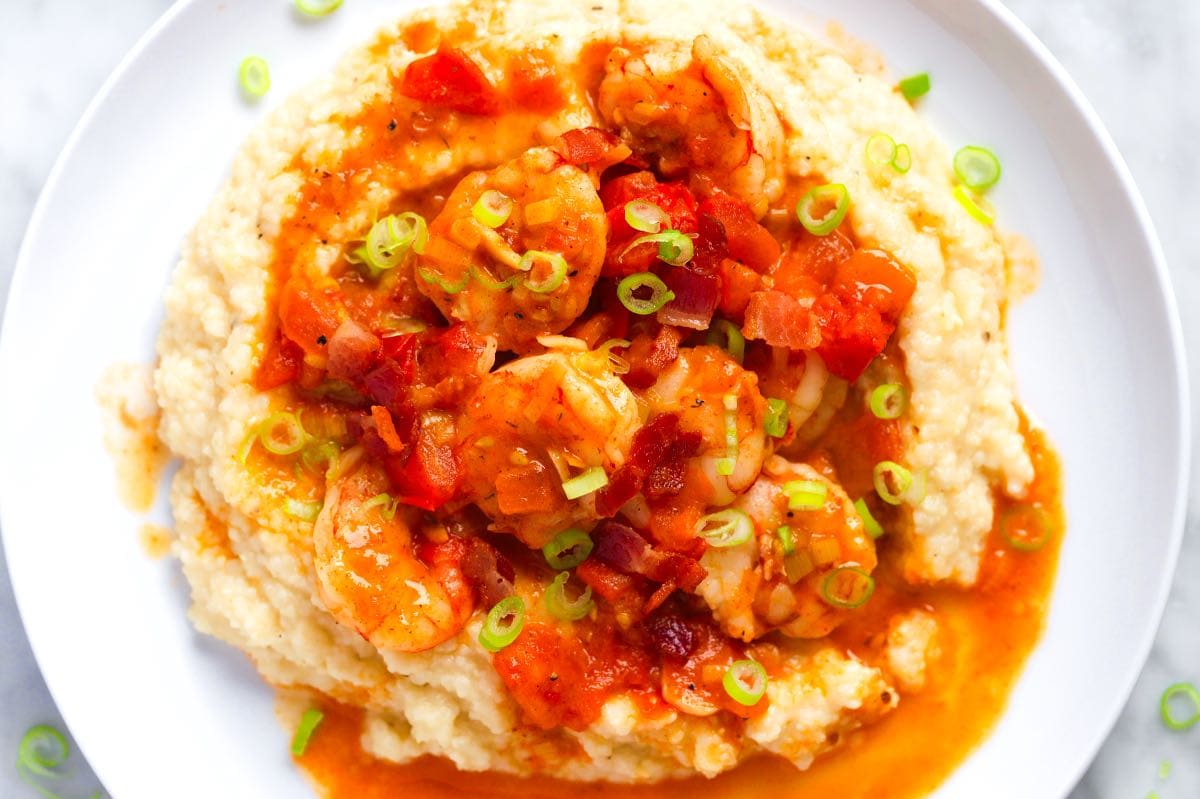
    This shrimp and grits recipe is the best we’ve made! It is incredibly flavorful, the grits are outrageously creamy, and the shrimp sauce is out of this world.

    Easy Shrimp and Grits

    This shrimp and grits recipe comes from our good friend Richard, who grew up in the South and has worked in Southern kitchens for most of his career. The moment I tasted his shrimp and grits, I fell in love and knew we needed to share it with you!

    Richard’s grits are perfectly creamy (readers call them the best ever!), and the shrimp sauce is unbelievably delicious, made with garlic, bacon, and fresh tomatoes. I can’t wait for you to try this incredible recipe!

    Key Ingredients

    • Shrimp: I use large or extra-large shrimp in this recipe, but medium shrimp are okay (they will just take less time to cook in the sauce). If you have frozen shrimp, thaw them in the refrigerator overnight and pat them dry before using them in the recipe.
    • Bacon: I love the smoky flavor bacon adds to our shrimp sauce. We cook it first to render the fat and then use that fat to cook the rest of the sauce ingredients. It’s delicious!
    • Green onions and garlic: These are the aromatics in our sauce, which add flavor and texture. You’ll use the white and light green parts of the green onion in the sauce, and then you can slice and sprinkle the green parts on top of it for serving.
    • Tomatoes: Fresh chopped tomatoes keep our shrimp sauce light and delicious (I love them). You can use canned diced tomatoes if needed, but I highly recommend fresh tomatoes for this recipe.
    • Creole seasoning: Store-bought Creole seasoning works nicely in this recipe. I’ve also used our homemade Cajun seasoning, and I loved it. Creole seasoning is usually more herbal than Cajun seasoning, but both are lovely in this recipe. 
    • White wine: A splash of wine brings our sauce together. Any dry white wine will do. You can substitute a light chicken broth or veggie broth.
    • Grits: We use our favorite grits recipe for the base of our shrimp sauce. We make it with stone-ground grits, stock, butter, cream, salt, and pepper. The recipe is included below.

    Find the full recipe with measurements below.

    How to Make Shrimp and Grits

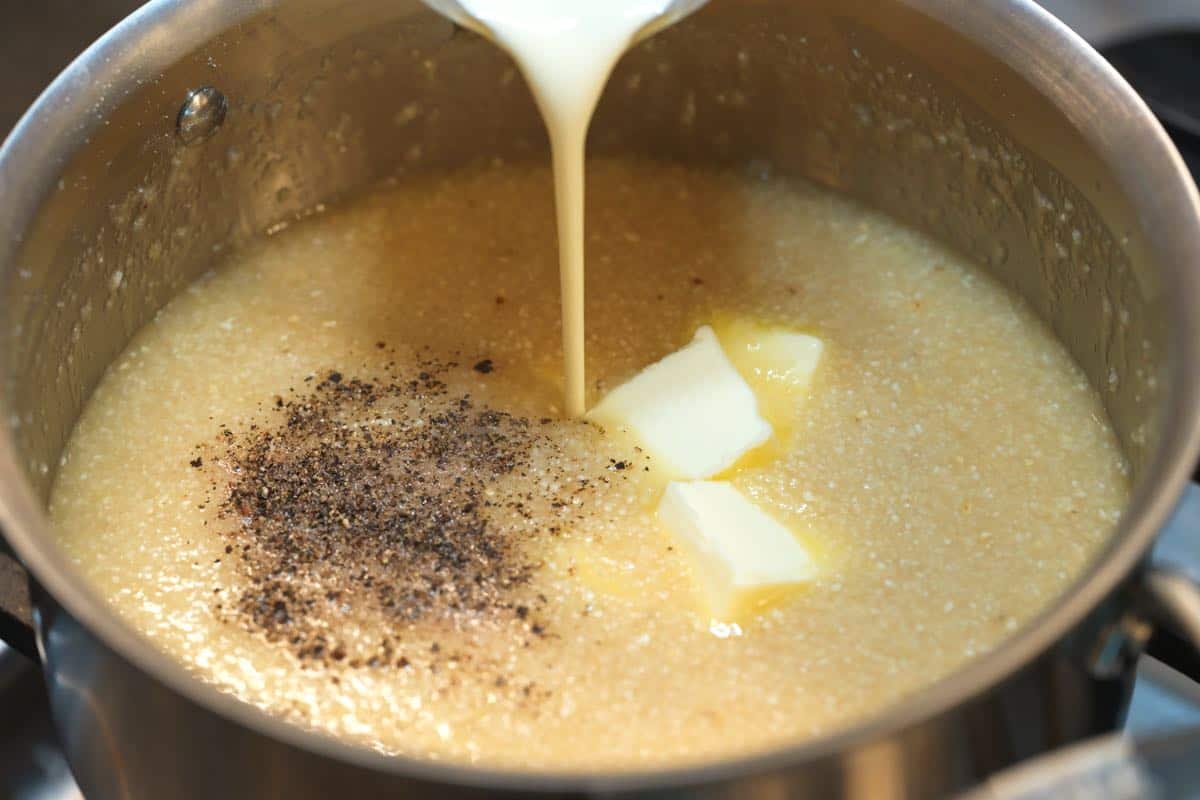
    Tip 1: Make the grits. To make the grits for shrimp and grits, bring the stock to a boil, then stream in the grits while whisking. After 2 minutes, turn the heat to low, whisk in the butter, cream, salt, and pepper, and cook until thick and creamy.

    Depending on the brand, cooking grits takes 20 to 40 minutes. I use Bob’s Red Mill grits in the video, which take closer to 20 minutes.

    Cooking grits in a saucepan

    Tip 2: Make the shrimp sauce. For the shrimp sauce, you’ll need a wide skillet. We will build all the flavors right in there.

    1. Cook the bacon until crisp, then remove it and leave the bacon fat in the skillet. We’ll use that to cook the rest of the sauce ingredients (yum).
    2. Stir in garlic and green onion, then add flour, which will help thicken our sauce later.
    3. Add a splash of white wine, then add Creole seasoning, tomatoes, and any juices collected on the cutting board.
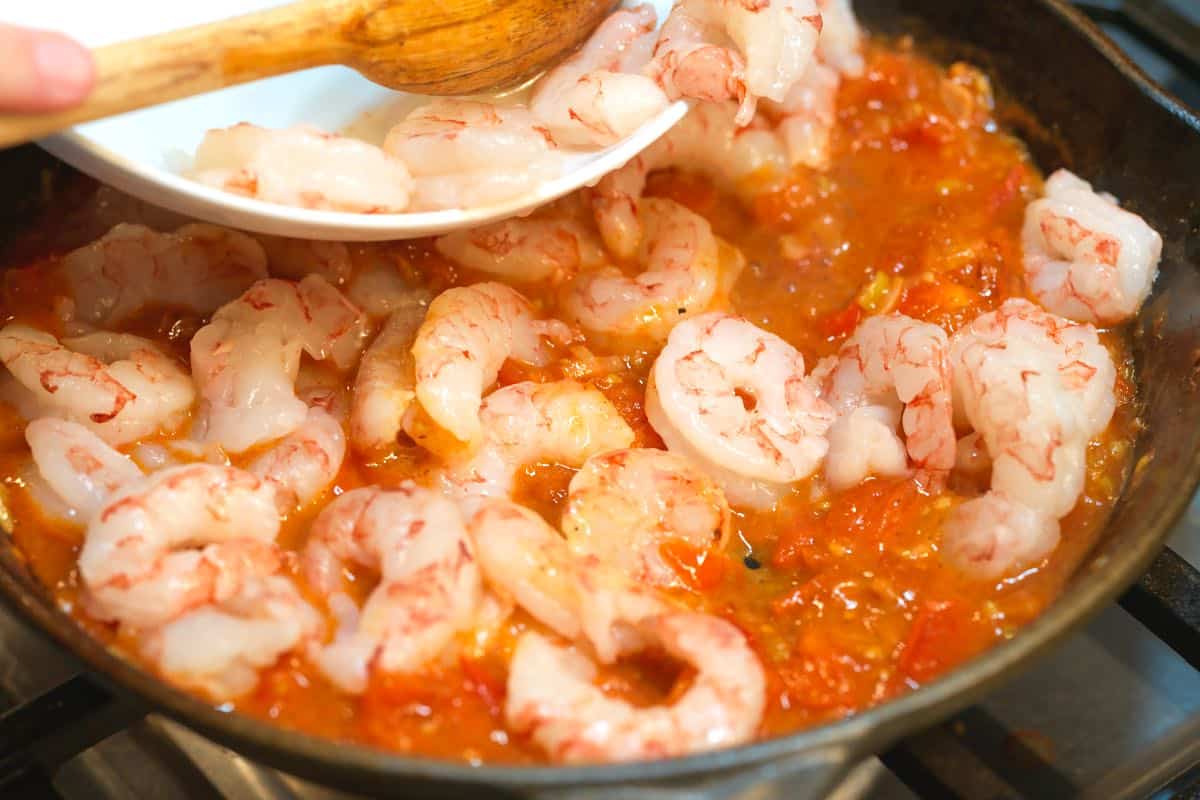
    4. Cook the tomatoes for 10 to 15 minutes or until they become a sauce. Season with salt and pepper, then add your shrimp and let them gently poach in the sauce (poached shrimp turn out perfectly cooked and tender).
    Adding shrimp to the sauce so they gently cook before serving over grits.

    Tip 3: Serve it. Serve the shrimp, with plenty of the sauce, over your grits, and garnish with the reserved cooked bacon and sliced green onion. Delicious!

    Serving Suggestions

    Shrimp and grits do well as a stand-alone dish, but you can always add a few more dishes to the table. I love adding some vegetables. Try collard greens, sautéed spinach, my favorite corn salad, or fried cabbage.

    A fresh salad is nice, too. Toss your favorite salad ingredients into a bowl, and then top with balsamic vinaigrette, honey mustard dressing, or homemade ranch. And, homemade cornbread, fluffy biscuits, or these cheese drop biscuits are also lovely for sopping up any leftover sauce.

    More Favorite Shrimp Recipes

    Easy Shrimp and Grits

    Easy Shrimp and Grits

    • PREP
    • COOK
    • TOTAL

    I love this incredible shrimp and grits recipe with super creamy grits, smoky bacon, fresh tomato, and perfectly cooked shrimp. It’s hard not to go back for more of this classic Southern dish.

    Serves 4

    Watch Us Make the Recipe

    You Will Need

    Shrimp Sauce

    1 pound large shrimp, peeled, deveined, and the tails removed (450g)

    5 slices thick-cut bacon, chopped small (lardons)

    1 bunch green onions, sliced, greens and whites separated

    3 cloves garlic, sliced thin

    1 heaping teaspoon flour

    2 cups chopped tomatoes, 2 large tomatoes (400g)

    1 ¼ teaspoon Creole seasoning or Cajun seasoning, see notes for adjusting for spice level

    2 tablespoons white wine or chicken stock

    ¼ teaspoon fine sea salt

    Pinch fresh ground black pepper

    1 tablespoon butter


    Creamy Grits

    1 cup stone-ground grits (165g)

    4 cups chicken or vegetable stock, try homemade chicken stock or veggie stock (945ml)

    4 tablespoons butter (55g)

    ¼ cup cream (60ml)

    ¾ teaspoon fine sea salt

    ¼ teaspoon fresh ground black pepper

    Directions

    • How to Make Grits
    • 1Bring the stock to a boil in a medium saucepan over medium heat. Stir in the grits, then keep whisking for 2 minutes to avoid clumping. When they begin to thicken, reduce the heat to a low simmer (helps to prevent splattering). Whisk in the butter, cream, salt, and pepper.

      2Continue to cook at a very low simmer until thickened, whisking occasionally. Expect a cooking time of around 20 minutes, depending on the brand and how coarsely your grits are ground (see tips). Continue simmering on low if they need to thicken further. The longer you keep them on the heat, the more they thicken.

    • Make the Shrimp Sauce
    • 1While the grits cook, prepare the shrimp and sauce. In a large skillet over medium heat, cook the bacon until crispy. Use a slotted spoon to remove them, and place them onto a paper towel. Keep the bacon fat in the skillet.

      2Add the garlic and sliced whites of the green onions to the hot bacon fat. Cook for 2 to 3 minutes or until it becomes fragrant.

      3Stir in the flour and mix it well to remove any lumps, then immediately add the wine and stir until smooth.

      4Add the tomatoes, with any juices, and the Creole seasoning. Cook over medium-low heat until the tomatoes break down and you have a more uniform sauce, 10 to 15 minutes.

      5Season the sauce with salt and pepper and melt in the butter. When the butter melts, add the shrimp, spacing them evenly and gently pushing down into the sauce. Poach the shrimp until opaque, 3 to 5 minutes. Serve the shrimp with the sauce over grits and top with bacon and reserved sliced green onion.

    Adam and Joanne’s Tips

    • Seasoning: Creole and Cajun seasonings can vary in spice level. Give yours a taste and adjust the amount you add to the sauce for your preferred heat. Our homemade Cajun seasoning offers a sweet and balanced heat. Store-bought Creole seasonings tend to be more savory.
    • Grits cook time varies by brand: We used Bob’s Red Mill in the photos and video, and they took 20 minutes. Larger ground grits, like Anson Mills will need longer to cook, same with Marsh Hen Mill, formerly Geechie Boy Mill. Watch for them to be cooked and tender with some structure left, if they are mushy, you’ve cooked them too long.
    • Cheese grits: Stir 1/2 cup to 1 cup cheddar cheese into the grits just before serving.
    • The nutrition facts provided below are estimates.

    Nutrition Per Serving
    Serving Size
    1/4 of the recipe
    /
    Calories
    527
    /
    Total Fat
    24.8g
    /
    Saturated Fat
    13.1g
    /
    Cholesterol
    243.3mg
    /
    Sodium
    1039.2mg
    /
    Carbohydrate
    39.2g
    /
    Dietary Fiber
    1.7g
    /
    Total Sugars
    2.8g
    /
    Protein
    37.2g


    AUTHOR:

    Joanne Gallagher

    Adam and Joanne of Inspired Taste

    We are Adam and Joanne Gallagher, the creators of Inspired Taste. Established in 2009, Inspired Taste grew from a childhood dream into one of the internet’s most trusted recipe sites with hundreds of reliable recipes, step-by-step videos, and expert tips.More About Us

    Source link

  • Brown Sugar Baked Salmon Recipe

    Brown Sugar Baked Salmon Recipe

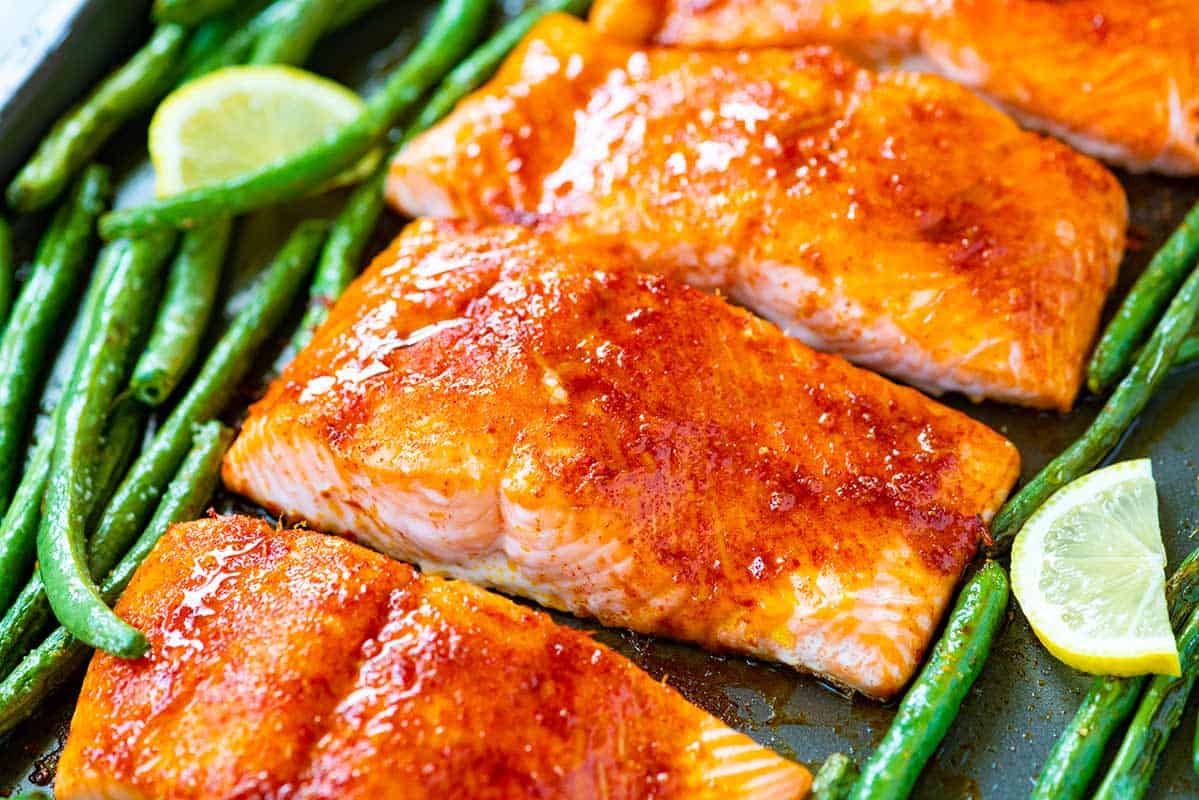
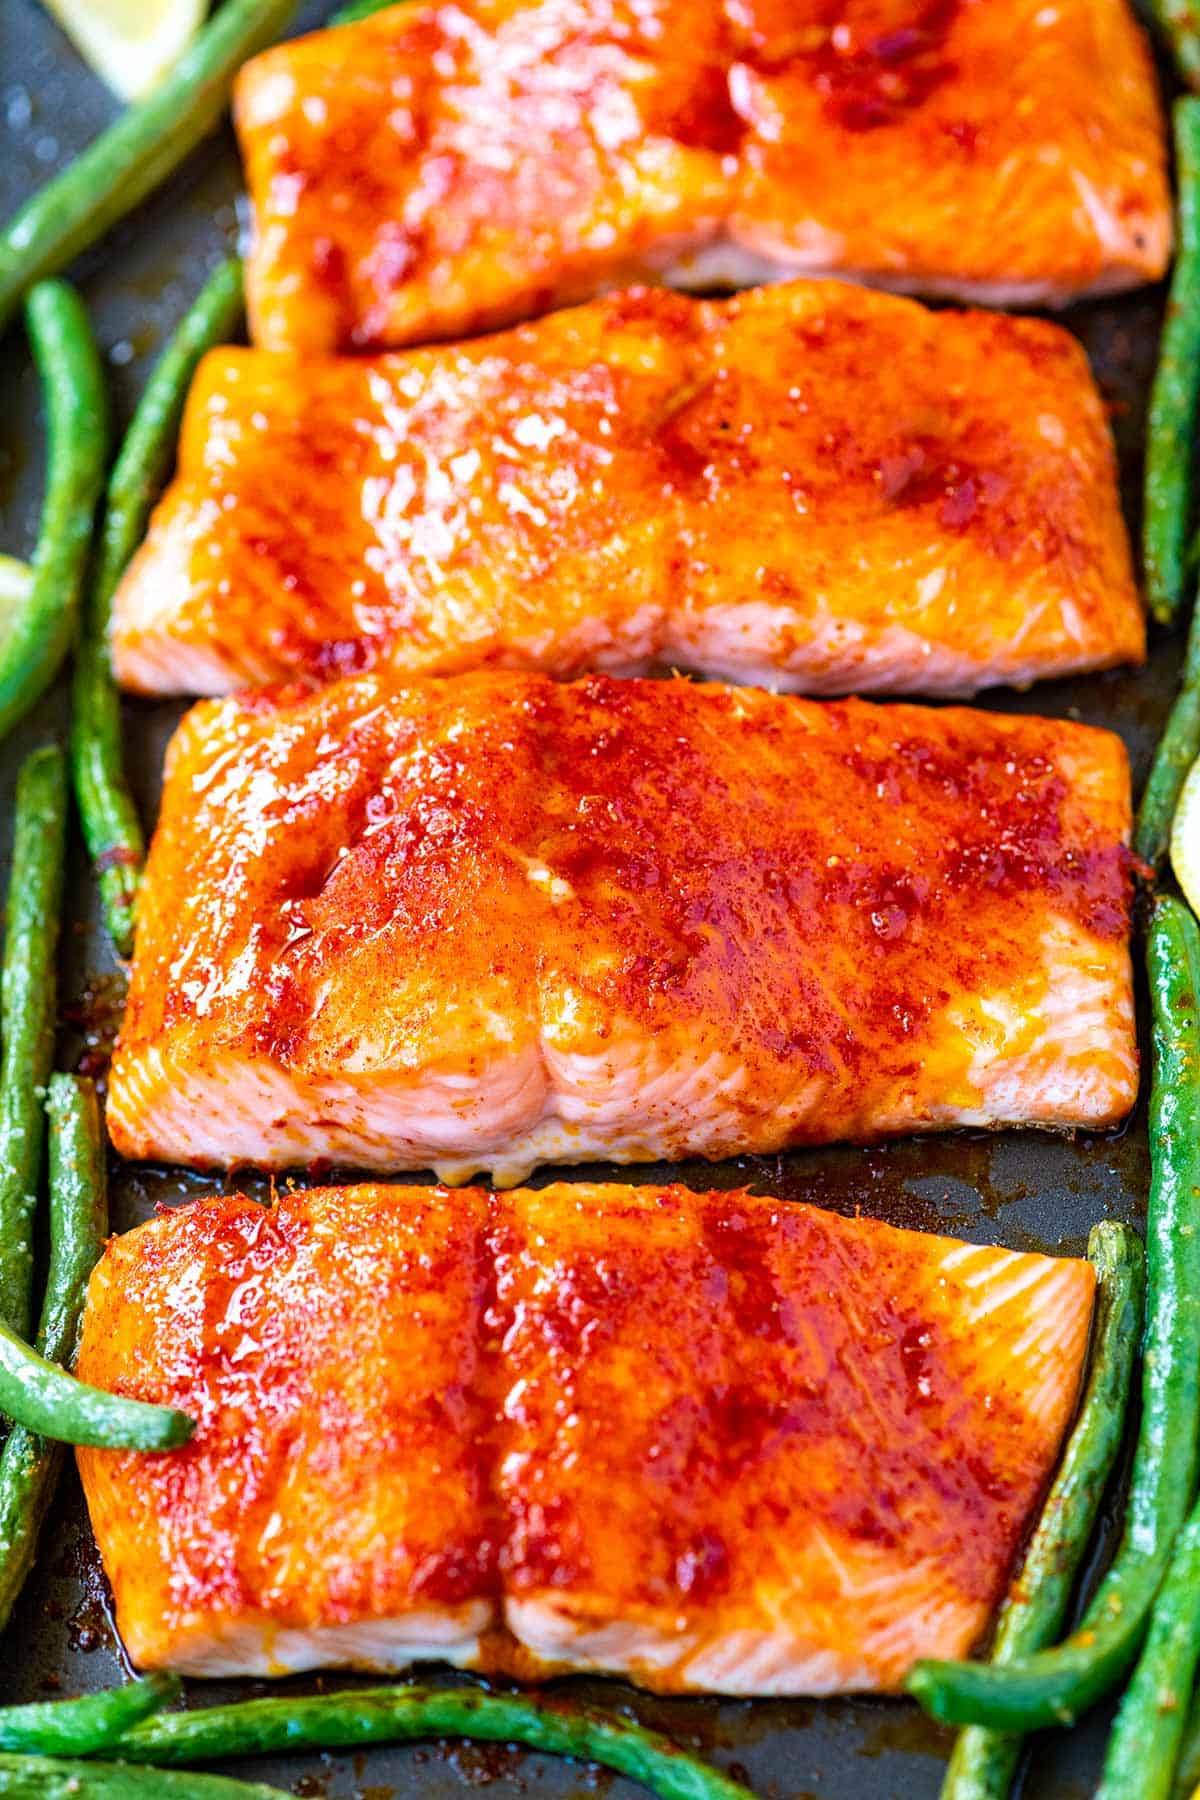
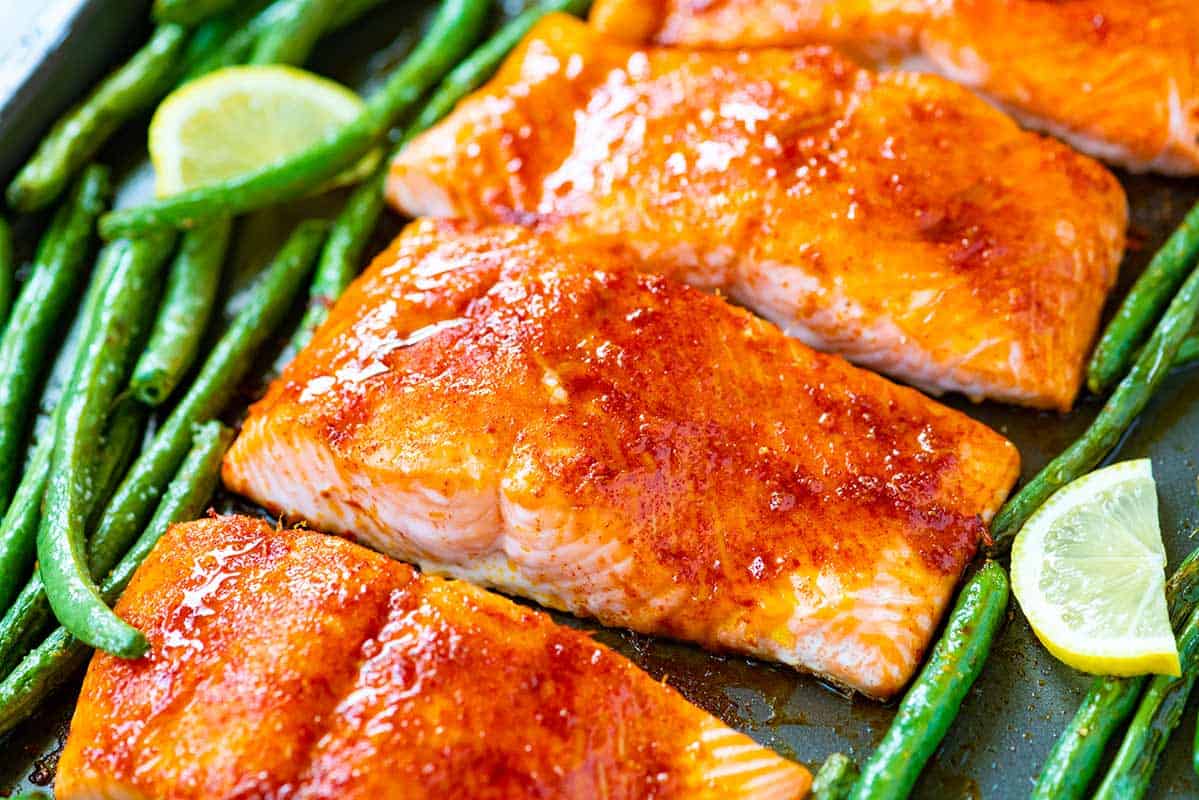
    This brown sugar baked salmon recipe is such a delicious and easy dinner. Our easy brown sugar rub caramelizes and turns into a sweet, smoky glaze in the oven.

    Brown sugar baked salmon with a brown sugar glaze

    My family loves this easy salmon recipe! It only takes a few minutes to prepare, and you’ll love the brown sugar glaze on top. This recipe is perfect for when you are busy or overwhelmed!

    This is one of my favorite salmon recipes on our site, this recipe is easy to turn into a sheet pan dinner. Simply toss a handful of veggies onto the sheet pan and bake them alongside it! I love fast-cooking green beans, but you can substitute what you love. For more recipes like this, see our maple soy glazed salmon or this lemon dill baked salmon.

    Key Ingredients

    • Salmon: Any salmon fillet will work for this recipe. I especially love salmon with a higher fat content, like sockeye, king, and coho. Salmon with a higher fat content stays soft and moist after it is baked.
    • Brown sugar: It adds sweetness, and it lightly caramelizes in the oven. You don’t need a lot — one tablespoon for four large fillets is plenty.
    • Lemon: A bit of lemon zest adds a pop of flavor. We use our microplane to zest the lemon. Then, we use the zested lemon for serving. A squeeze of fresh lemon juice just before serving is a must.
    • Smoked paprika: It adds a smoky-sweet flavor and color to the salmon spice rub. For a spicier rub, try a little chipotle powder or cayenne (1/8 to 1/4 teaspoon should do it).
    • Veggies: Since we bake our salmon fillets on a large baking sheet, we have some space left for veggies. Choose a quick-cooking veggie, such as green beans, zucchini, asparagus, snap peas, broccolini, or cherry tomatoes.

    Find the full recipe with measurements below.

    Tips for Making the Best Baked Salmon

    Tip 1: Use our salmon rub. This salmon is tender, moist, and soft in the middle. Add our brown sugar spice rub, and the outside becomes lightly caramelized, sweet, and a bit smoky. We love it!

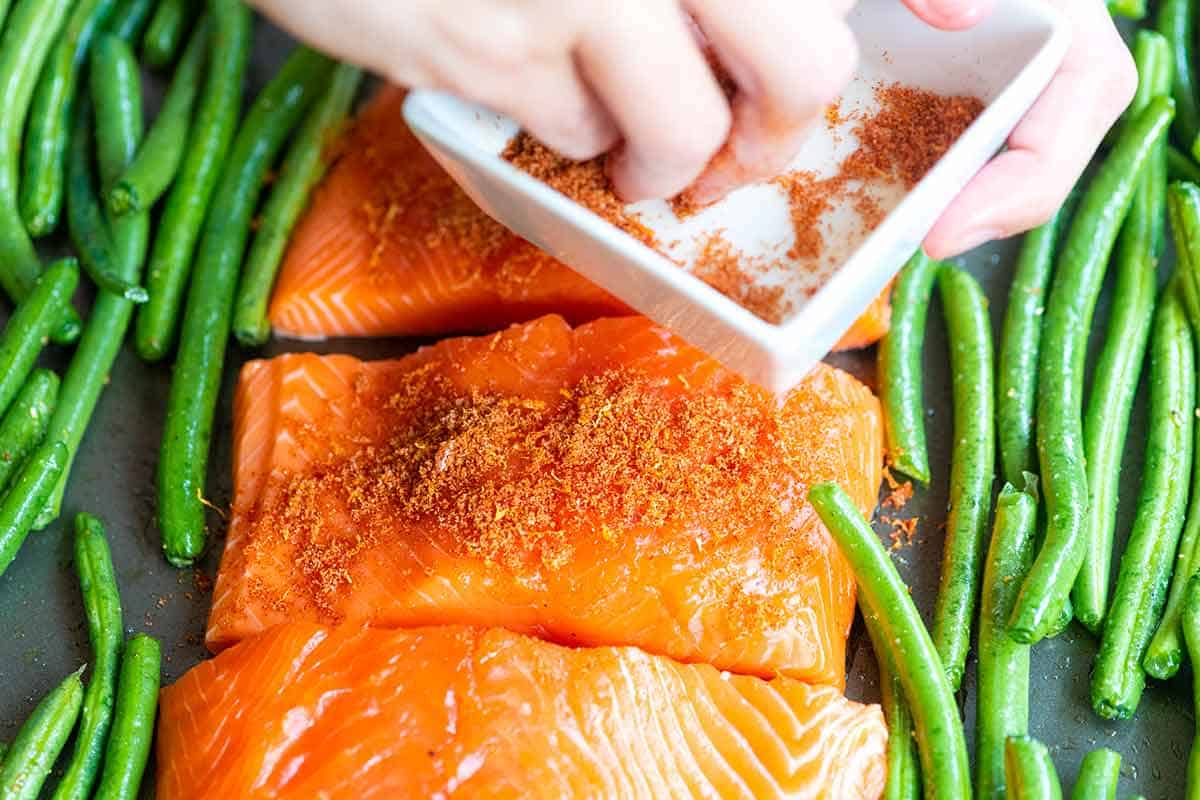
    I use the same salmon rub when making cedar plank salmon and love its simplicity. All you need to do is mix brown sugar with lemon zest, salt, and smoked paprika. Then rub it all over your salmon fillets (I’m pretty generous with it).

    Adding Brown sugar rub to salmon fillets

    Tip 2: Turn this recipe into a sheet pan dinner. Add your salmon to a sheet pan and bake it in the oven until done. I use a 400°F oven for this recipe, which means it usually takes between 15 and 20 minutes. Remember, you can turn this into a sheet pan dinner, and add your favorite veggies to the baking sheet. I’ve shared suggestions below.

    Tip 3: How to tell when your salmon is done. When baking salmon, you can tell it’s ready to come out of the oven when the flesh is somewhat opaque and flakes easily when you insert a fork into it. If you have an internal thermometer, use it! I take my salmon out when it reads 125°F, which means it will be a slightly darker pink in the middle.

    Serving Suggestions

    Since we bake our salmon fillets on a large baking sheet, we have some space left for veggies. I love sheet pan dinners! This salmon recipe needs 15 to 20 minutes in the oven, perfect for green beans, asparagus, zucchini, snap peas, peppers, onions, broccolini, or cherry tomatoes.

    If you prefer heartier vegetables, partially bake them first. Add the salmon for the last 15 to 20 minutes of cooking, adjusting the total baking time based on your chosen veggies. For example, broccoli, cauliflower, and Brussels sprouts take 20 to 25 minutes, while root vegetables and winter squash take 30 to 45 minutes.

    More side dishes you’ll love include corn salad, mashed sweet potatoes, cilantro lime rice, and my favorite quinoa salad.

    Brown Sugar Baked Salmon Fillets

    Brown Sugar Baked Salmon

    • PREP
    • COOK
    • TOTAL

    My family loves this easy brown sugar salmon recipe! As the salmon bakes in the oven, the brown sugar rub melts and caramelizes into a delicious, sweet, smoky glaze. To make this a sheet pan dinner, toss your favorite veggies onto the baking sheet with the salmon. The article above has suggestions for which veggies work well in this recipe.

    Makes 4 servings

    Watch Us Make the Recipe

    You Will Need

    For the Salmon

    4 salmon fillets, preferably wild-caught, about 6 ounces each

    1 teaspoon olive oil

    1 tablespoon brown sugar

    1 teaspoon lemon zest

    1/2 teaspoon smoked paprika or substitute chipotle powder for a spicier version

    1/4 teaspoon fine sea salt

    Half of a lemon, quartered


    For the Beans

    3/4 pound green beans or quick cooking veggie

    1 tablespoon olive oil

    Salt and fresh ground black pepper

    Directions

      1Preheat the oven to 400°F (200°C). Set aside a large rimmed baking sheet.

      2Mix 1 tablespoon brown sugar, 1 teaspoon lemon zest, 1/2 teaspoon smoked paprika, and 1/4 teaspoon of salt in a small bowl.

      3Pat the salmon fillets dry and rub them with olive oil.

      4Scatter the brown sugar rub over the salmon, and gently massage it into the fish. Swipe the skin side of the salmon through any spice rub that’s fallen onto the cutting board. If you have the time, marinate the salmon for 10 to 15 minutes.

      5Add the salmon fillets, skin-side down, to the baking sheet.

      6Toss the beans with a tablespoon of olive oil and 1/4 teaspoon salt, and then scatter them around the salmon on the baking sheet.

      7Bake the salmon until it is cooked through, 12 to 15 minutes, depending on its thickness. We cook salmon until an instant-read thermometer inserted into the thickest part reads 125°F.

      8Serve with lemon wedges on the side for squeezing over the salmon.

    Adam and Joanne’s Tips

    • How to tell when salmon is cooked: Cook salmon to 125°F (51°C), which means it will be soft, tender, and slightly pink in the center. For a visual cue, look for the flesh to be somewhat opaque. Also, when inserting a fork into the salmon, it should flake easily.
    • Baking time: Depending on the type and thickness of the salmon you are baking, cook time will vary. The cook times suggested above are for middle cut fillets, about 1-inch thick. For thinner fillets or end pieces, check the salmon a bit earlier. For thicker fillets, you may need an additional 5 to 10 minutes of bake time.
    • Veggies: Try green beans, chopped zucchini, snap peas, bell peppers, broccoli, asparagus, or cherry tomatoes. Heartier veggies like broccoli will take longer, so partially bake them for 10 to 15 minutes before adding the salmon to the baking sheet.
    • Storing: Baked salmon can be stored in an airtight container in the refrigerator for up to 4 days. You can also freeze it in an airtight container or freezer bag for up to 3 months. Thaw it overnight in the refrigerator before reheating. To reheat, bake in a preheated oven at 325°F (165°C) for 10 to 15 minutes.
    • The nutrition facts provided below are estimates.

    Nutrition Per Serving
    Serving Size
    1 (6-ounce) fillet and 1/4 of the beans
    /
    Calories
    325
    /
    Total Fat
    15g
    /
    Saturated Fat
    2.9g
    /
    Cholesterol
    76.5mg
    /
    Sodium
    374.9mg
    /
    Carbohydrate
    8.7g
    /
    Dietary Fiber
    2.4g
    /
    Total Sugars
    5.1g
    /
    Protein
    38.4g

    AUTHOR:

    Joanne Gallagher

    Adam and Joanne of Inspired Taste

    We are Adam and Joanne Gallagher, the creators of Inspired Taste. Established in 2009, Inspired Taste grew from a childhood dream into one of the internet’s most trusted recipe sites with hundreds of reliable recipes, step-by-step videos, and expert tips.More About Us

    Source link

  • Perfect Seared Scallops Recipe

    Perfect Seared Scallops Recipe

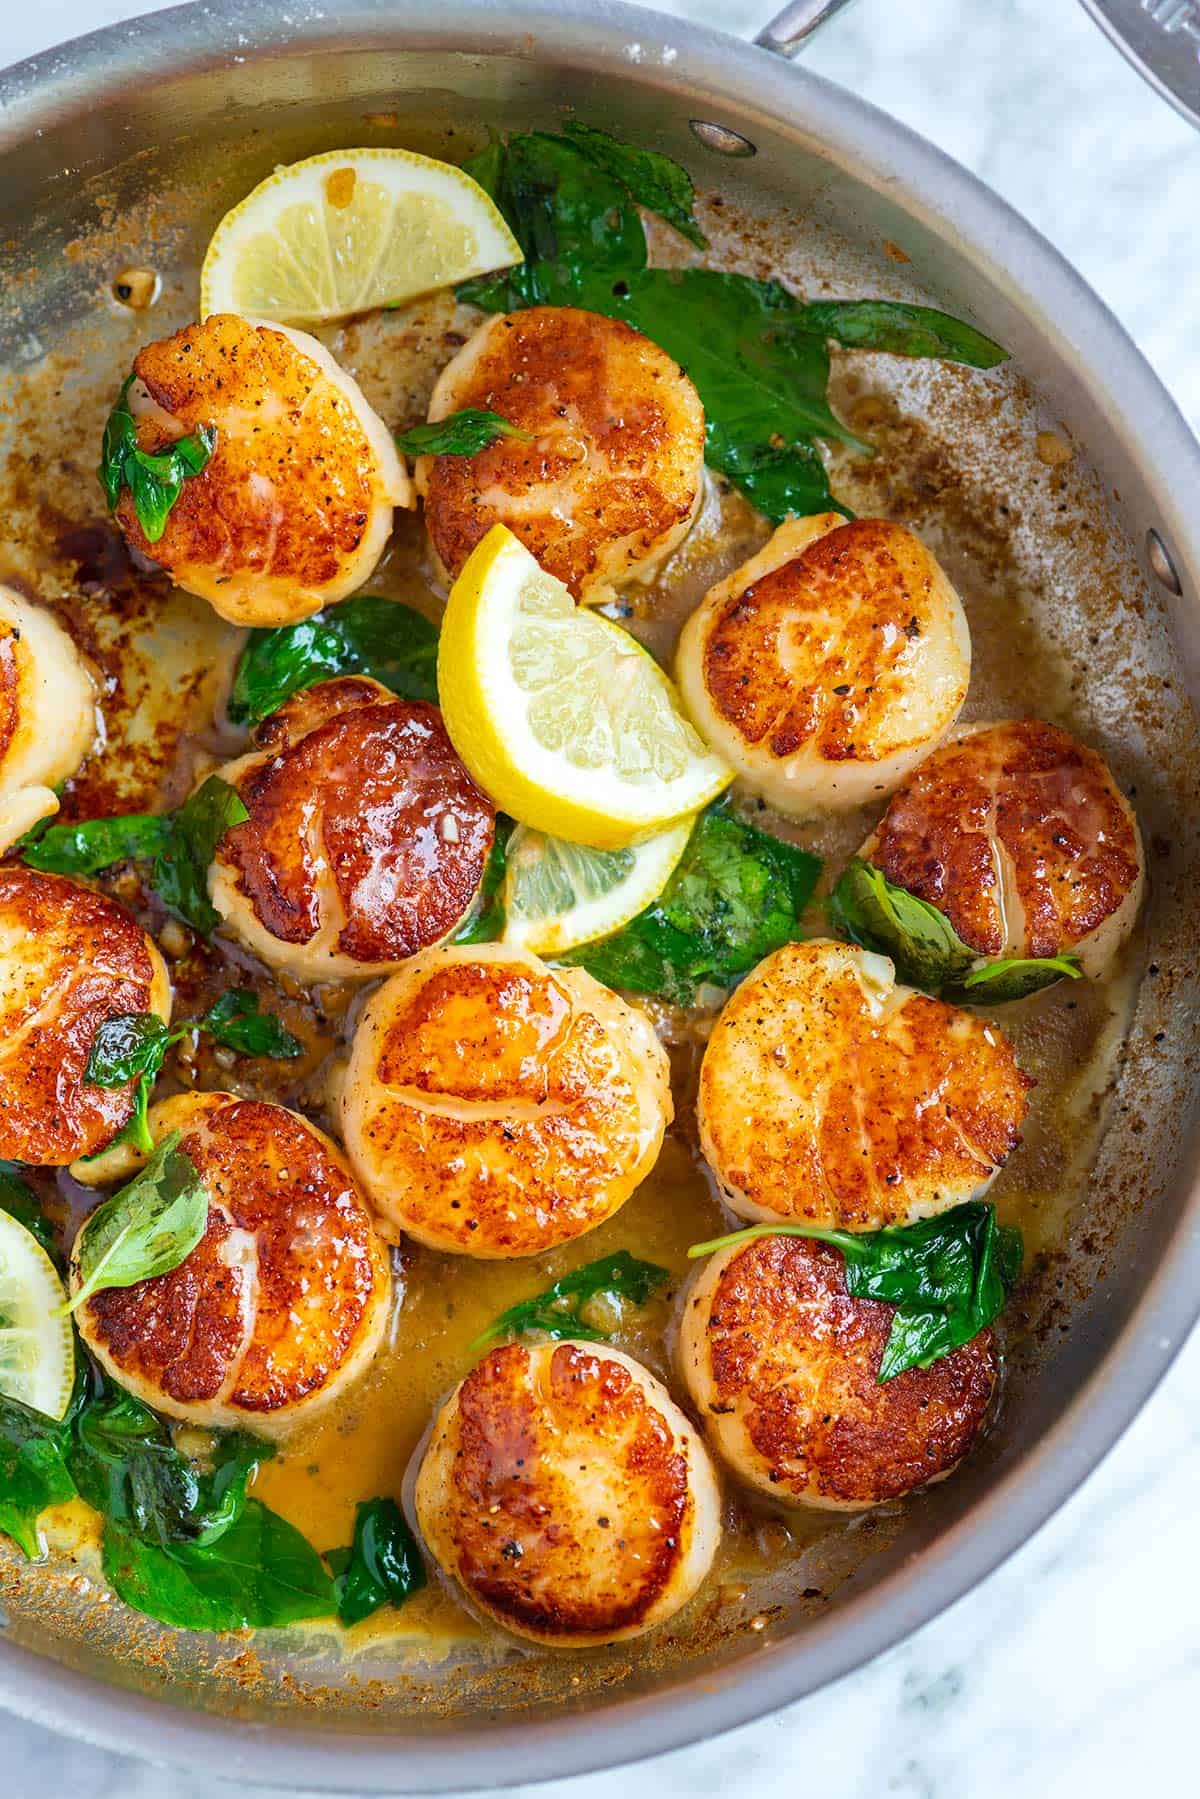
    Learn how to cook restaurant-worthy scallops at home. Our recipe guarantees beautiful golden-brown seared scallops and comes together in 10 minutes!

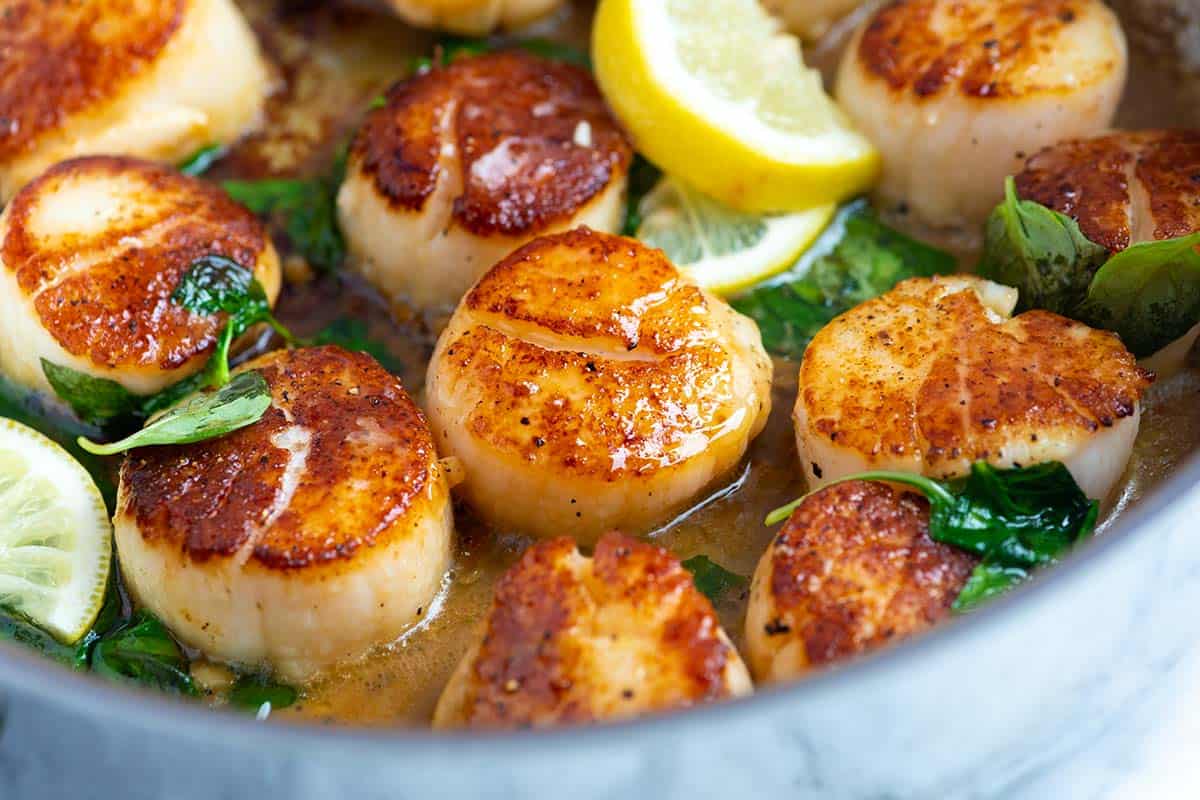
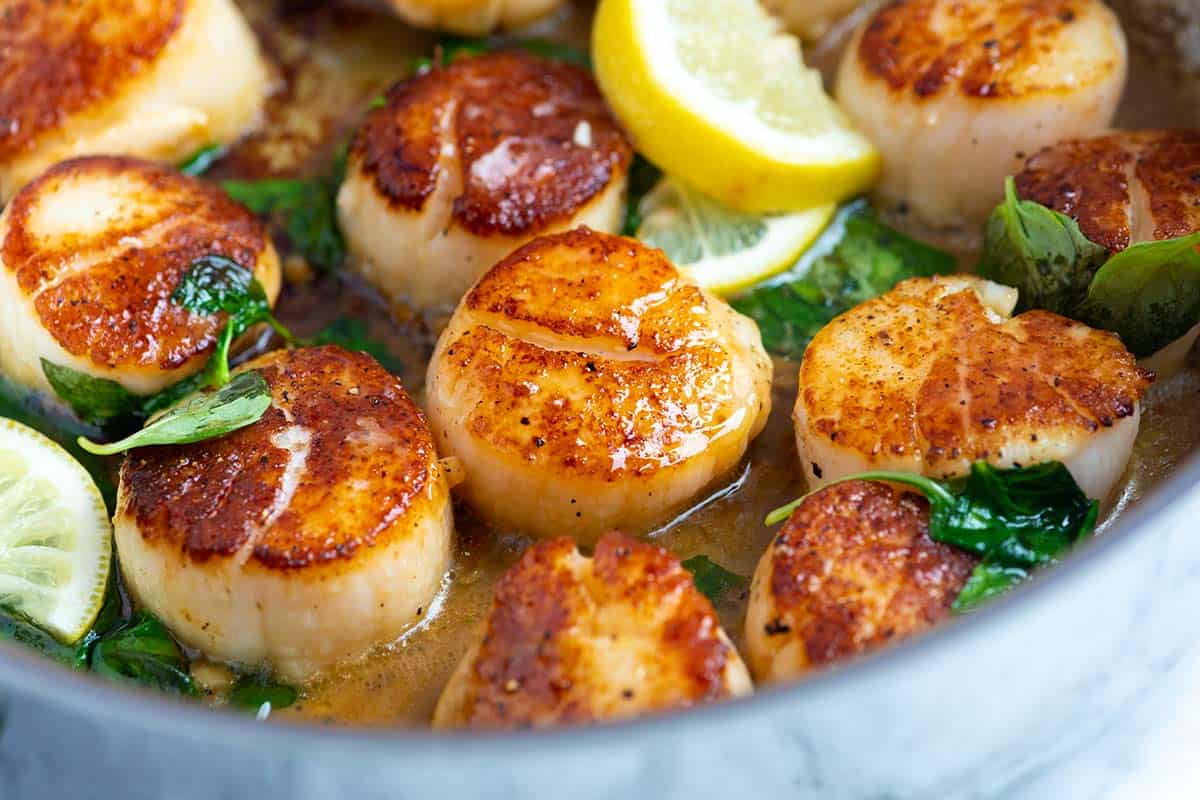
    Pan-seared scallops with butter, lemon, and basil

    Scallops are one of the easiest things you can cook, especially if you sear them in a pan (they’re just as easy as shrimp). This is my go-to scallops recipe, and I’m happy to share it with you!

    There’s no need to be intimidated. Scallops are easy to cook, I promise. With a few tricks, you’ll be cooking them like a pro in no time. Plus, I’ll show you how to make our delicious garlic basil butter to serve with them.

    Key Ingredients

    • Scallops: I look for large sea scallops since they taste sweet. I also prefer fresh. Frozen will work in this recipe, so check the tips section below for tips on thawing them before cooking.
    • Oil, salt, and pepper: I cook them in a hot skillet with some oil. Any high-heat oil works. I especially love avocado oil. You’ll also want to season your scallops liberally before cooking them.
    • Flour: While optional, I love dusting flour over mine before cooking them. The flour absorbs excess moisture and adds a nice golden brown crust. You can skip this step if you don’t have flour or are gluten-free.
    • Butter, garlic, basil, and lemon: It’s hard to describe just how delicious our garlic basil butter is with these seared scallops. I highly recommend it, and it only adds a minute or two of cooking time.

    Find the full recipe with measurements below.

    How to Cook Scallops Like a Pro

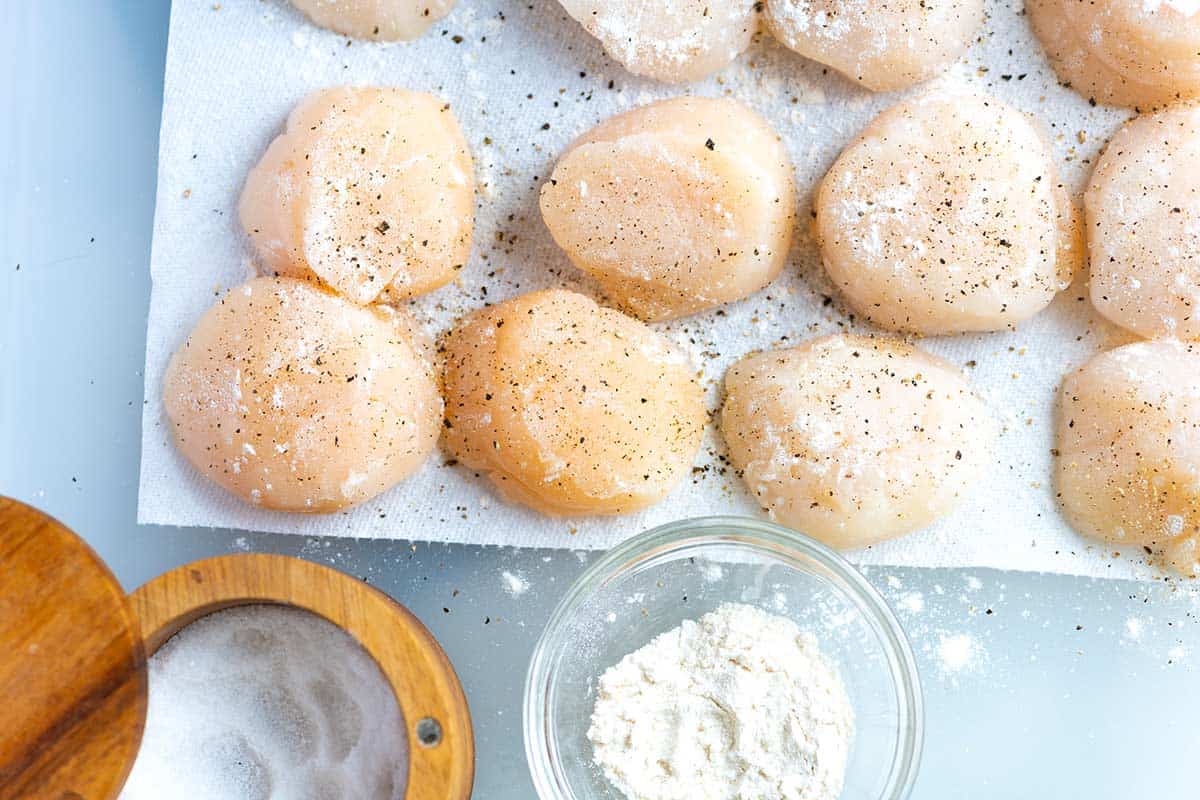
    Tip 1: Pat them dry. I use a paper towel to pat them as dry as possible. Damp scallops don’t sear or brown in the pan. The drier they are, the better they will sear. Frozen scallops will have more moisture, so take extra care when patting them dry.

    Tip 2: Lightly dust flour on each side. The flour absorbs excess moisture and adds a nice golden brown crust. I use the same trick when searing fish, and even pork chops!

    Scallops with a light dusting of flour, salt and pepper

    Tip 3: Season well. I use a generous amount of salt and pepper. I season one side of the scallops out of the pan, place them seasoned side down into the hot pan, and then while that side cooks, I season the other side.

    Tip 4: Use a hot skillet. If they aren’t sizzling when you place them in the pan, it isn’t hot enough. You can always test the heat with one scallop and adjust from there.

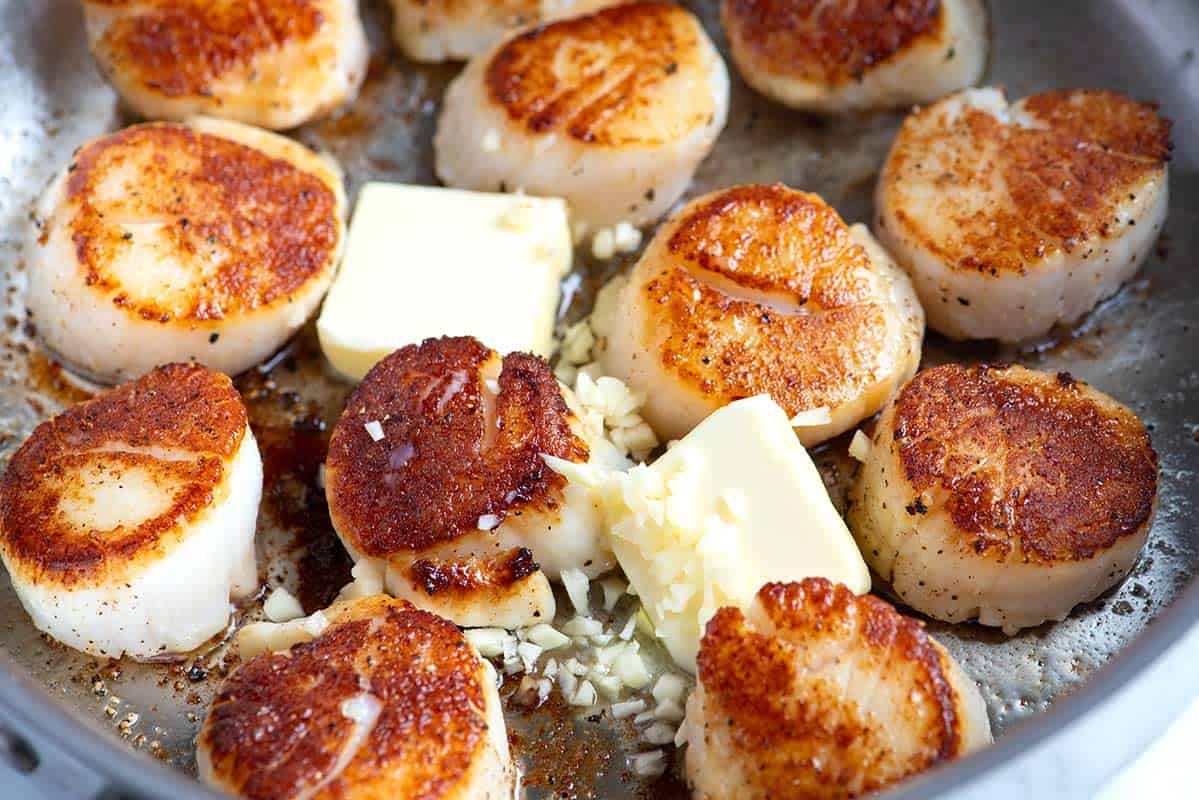
    Tip 5: Finish with our garlic basil butter. To really make these restaurant-worthy, use our garlicky butter. Scallops already taste incredible, but adding a bit of creamy butter, garlic, and fresh herbs at the end of cooking makes them out of this world. I also love using garlic butter when finishing our shrimp scampi recipe and cilantro lime butter shrimp.

    Pan-seared scallops with butter and garlic

    Serving Suggestions

    Many side dishes work well with seared scallops. I love creamy grits, polenta, mashed potatoes, and mushroom risotto. For a lighter, low-carb side, try mashed cauliflower or zucchini noodles.

    For rice, take a look at our saffron rice, coconut rice or this cilantro lime rice. Roasted vegetables are also lovely. Think about roasted asparagus, roasted cabbage, or roasted green beans.

    More Favorite Seafood Recipes

    Seared scallops

    Perfect Seared Scallops

    • PREP
    • COOK
    • TOTAL

    Seared scallops cook quickly (within 5 minutes) and are best when enjoyed immediately. If you’re serving them with pasta, vegetables, or rice, make sure they are ready before cooking the scallops. I highly recommend the garlic basil butter!

    A few favorite sides for these are creamy polenta, mashed cauliflower, and this saffron rice!

    4 Servings, 3 large scallops each

    Watch Us Make the Recipe

    You Will Need

    12 large sea scallops, 1 ¼ to 1 ½ pounds

    2 teaspoons all-purpose flour, optional, see notes

    Salt and fresh ground black pepper

    2 tablespoons avocado oil or vegetable oil


    Garlic Basil Butter

    1 ½ tablespoons butter

    2 garlic cloves, minced

    1 cup fresh basil leaves

    3 to 4 lemon slices

    Directions

      1Pat the scallops dry with a paper towel. Dust one side of the scallops with a small amount of flour, then season with salt and pepper.

      2Heat a wide skillet over medium-high heat. Add the oil to the pan. When the oil is hot and shimmery, carefully place the scallops in the pan, seasoned side down.

      3Cook, without moving them, until browned, about 2 minutes.

      4While the first side is browning, dust the unseasoned side of the scallops with a bit of flour and season them with salt and pepper.

      5Flip the scallops. If any stick to the pan, wait a few more seconds then try again, gently wiggling them side to side to help release them.

      6Add the butter and garlic to the pan, swirling the butter around as it melts.

      7Cook another minute or two, then remove the pan from the heat. Stir in the basil leaves and lemon slices. Serve.

    Adam and Joanne’s Tips

    • Storing: Cooked scallops last in an airtight container in the fridge for up to 3 days. Do your best to store them in the coldest part of your fridge (usually towards the back). While you can technically freeze cooked scallops, you should only freeze scallops that were initially from fresh sources (not previously frozen).
    • Reheating: To reheat, add them to a skillet over medium heat with a small amount of butter or olive oil. Sear for 1 to 2 minutes per side until heated through.
    • Do I need to use flour? If you don’t want to use flour, it’s okay. It helps with even browning, and since some of the flour sticks to the bottom of the pan, it mixes with the butter, helping to thicken the garlic basil butter sauce. If you are gluten-free or don’t want to use flour, make sure the scallops are as dry as you can get them for the best chance at a good sear.
    • Using frozen scallops: The easiest and safest way to thaw them is to place them in the refrigerator the night before cooking them. To quickly thaw scallops, add them to a sealed bag and put them in a large bowl under cold running water. Move the bag around the bowl occasionally until the scallops have defrosted, about 30 minutes. Before cooking them, take extra care when patting them dry.
    • The nutrition facts provided below are estimates.

    Nutrition Per Serving
    Serving Size
    1/4 of the recipe (3 scallops)
    /
    Calories
    267
    /
    Total Fat
    12.6g
    /
    Saturated Fat
    3.7g
    /
    Cholesterol
    69.5mg
    /
    Sodium
    1236.8mg
    /
    Carbohydrate
    9.6g
    /
    Dietary Fiber
    0.2g
    /
    Total Sugars
    0.2g
    /
    Protein
    29.6g


    AUTHOR:

    Adam Gallagher

    Adam and Joanne of Inspired Taste

    We are Adam and Joanne Gallagher, the creators of Inspired Taste. Established in 2009, Inspired Taste grew from a childhood dream into one of the internet’s most trusted recipe sites with hundreds of reliable recipes, step-by-step videos, and expert tips.More About Us

    Source link

  • Easy Shrimp Ceviche Recipe

    Easy Shrimp Ceviche Recipe

    Our favorite shrimp ceviche recipe combines lightly poached shrimp with lime juice, lemon juice, and avocado. It’s fresh, healthy, and delicious.

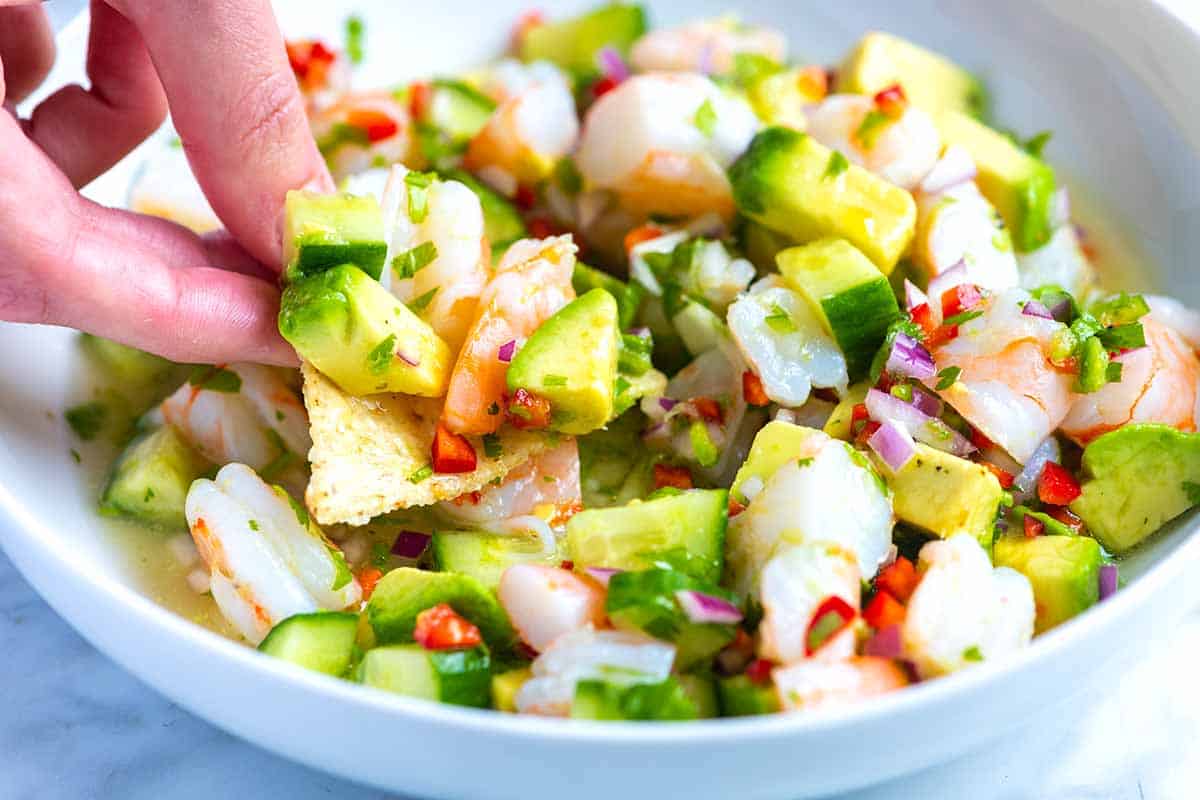
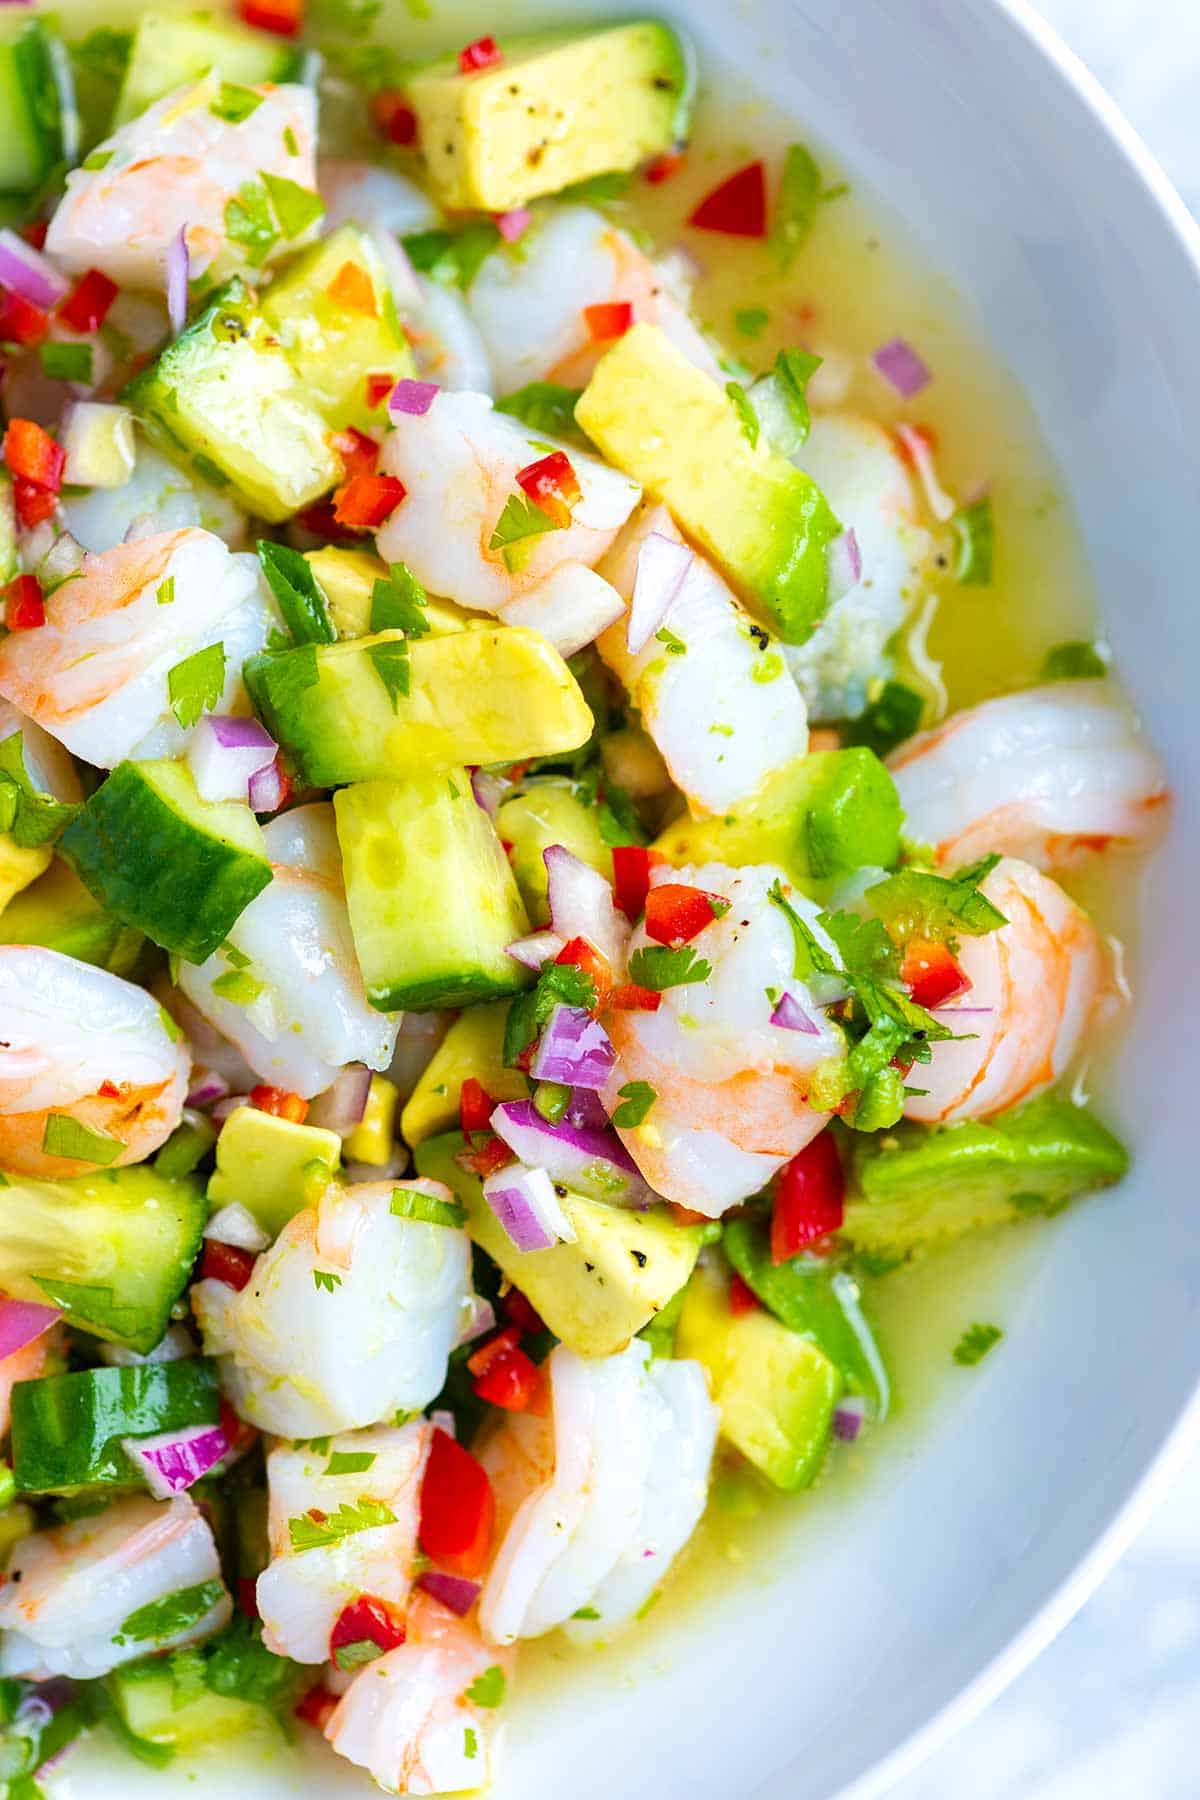
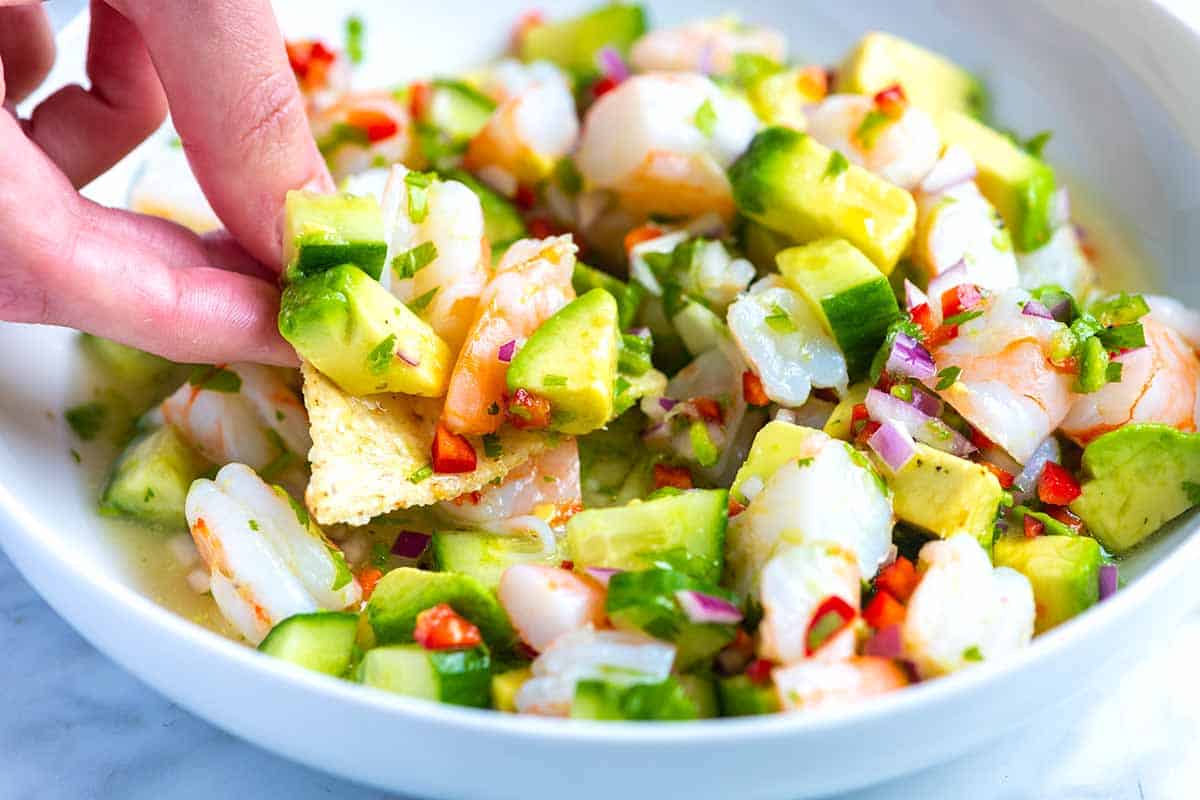
    Best Shrimp Ceviche

    The moment I learned how to successfully make incredible shrimp ceviche at home, I was hooked. Ceviche is a dish popular throughout the coastal areas of Mexico, Central, and South America. It’s made with raw seafood “cooked” in citrus juices.

    This shrimp turns out incredibly fresh and delicious. It’s happy food! We both love it served with homemade tortilla chips or plantain chips. If you love this, don’t miss our pickled shrimp, which takes a similar approach, but calls for more of a tangy, herb, and lemon flavor profile.

    Key Ingredients

    • Shrimp: Fresh-caught shrimp is best, but since it isn’t always accessible, we’ve adapted this recipe to gently poach store-bought or previously frozen shrimp for safety. Your ceviche will still be excellent! (If you do have access to trustworthy fresh-caught or sashimi-grade shrimp, see the tips section below for how to use them raw.)
    • Citrus: I use a mix of freshly squeezed lime and lemon juice. Bottled juice just doesn’t compare here. Fresh really is best!
    • Red Onion: You can use any onion, but red onion adds beautiful color. If you are sensitive to raw onion, don’t worry, the citrus juice “pickles” the onion slightly, toning down the sharpness.
    • Cucumber: This adds a nice fresh crunch. I recommend peeling it and removing any seeds before dicing so your ceviche doesn’t get watered down. Or use a seedless variety, such as Hot House or Persian cucumbers.
    • Chile Peppers: These add heat. Use as much or as little as you like. In our photos, we used a mix of Jalapeño and Fresno peppers. (Tip: For less heat, remove the seeds and white membrane before mincing.)
    • Cilantro: This adds color and fresh flavor. If you aren’t a fan, feel free to substitute with fresh parsley or just leave it out.
    • Avocado: Optional, but delicious! We stir diced avocado in right before serving so it stays creamy and bright green.

    Find the full recipe with measurements below.

    How to Make Shrimp Ceviche

    Tip 1: Poach the shrimp. It may seem odd, but we lightly poach the shrimp before mixing it with the citrus juices. Authentic ceviche often skips this step, but recipes usually assume you are starting with fresh-caught raw shrimp. Since most of us buy shrimp from the store, we include this extra step for safety (poaching eliminates potential bacteria).

    To do it, bring salted water to a boil, add your shrimp, remove the pot from the heat immediately, and let the shrimp poach until just cooked (2 to 3 minutes, tops). Then, spread the shrimp into one layer on a plate to cool.

    Tip 2: Use a non-reactive bowl. Since there is so much citrus juice in this recipe, use a glass, stainless steel, or ceramic bowl (avoid aluminum or copper).

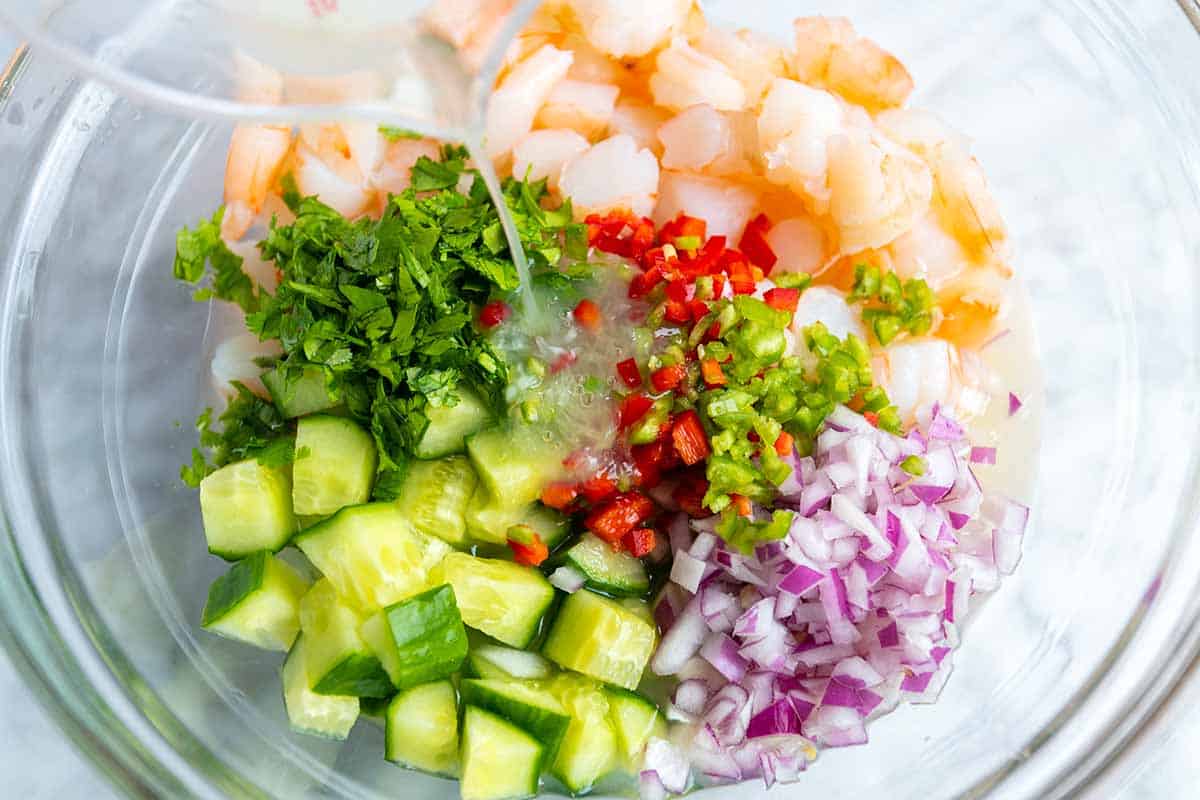
    Whisk the lime juice, lemon juice, and salt together first so the salt dissolves. Then, add the cucumber, onion, chile peppers, cilantro, and poached shrimp. Since the shrimp is already cooked, you only need to marinate them long enough to pick up that fresh, citrusy flavor. We recommend at least 30 minutes, but no more than 4 hours, or the acidic citrus juices will start to toughen the shrimp.

    Marinating the shrimp with citrus juices for ceviche

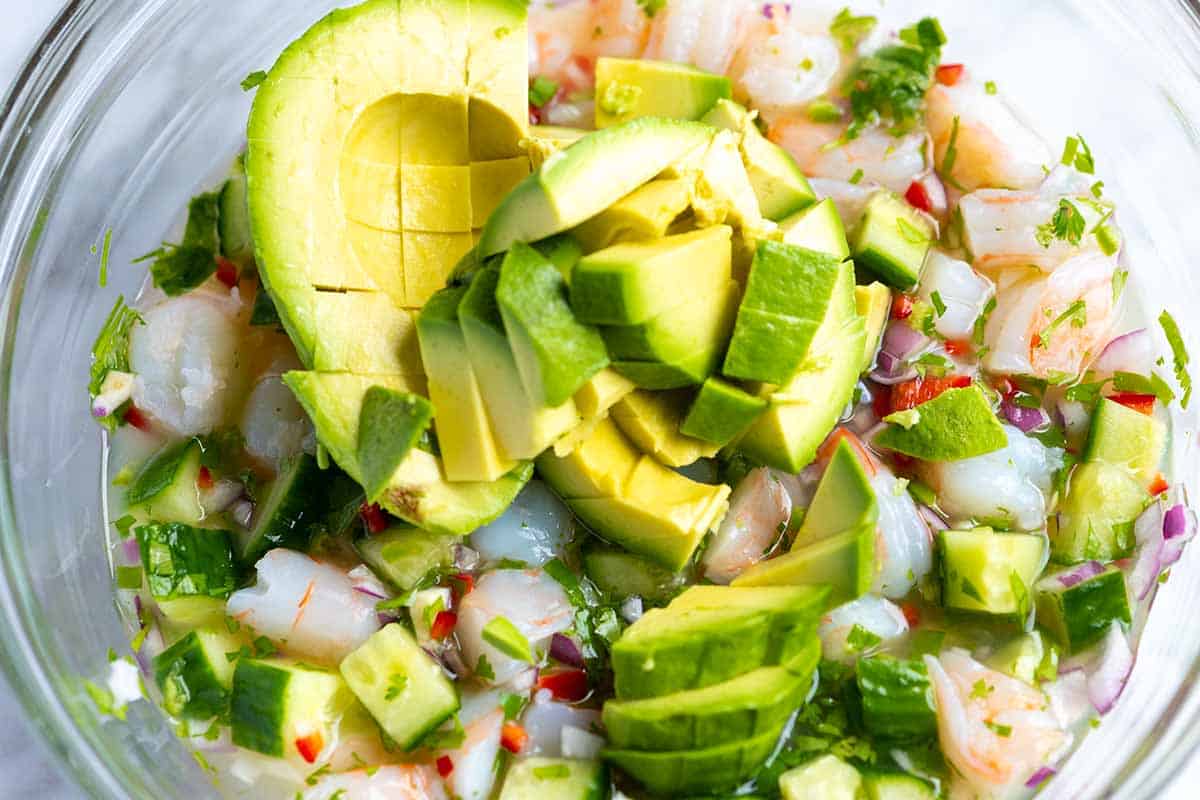
    Tip 3: Add avocado right before serving. When you are ready to serve, fold in diced avocado, add some homemade tortilla chips on the side, and dig in!

    Adding avocado to the shrimp just before serving.

    More Shrimp Recipes

    Easy Shrimp Ceviche

    Easy Shrimp Ceviche

    • PREP
    • COOK
    • TOTAL

    Our favorite shrimp ceviche combines lightly poached shrimp with lime juice, lemon juice, and avocado. The shrimp are best served the day you make it.

    Makes 6 servings as a light appetizer

    Watch Us Make the Recipe

    You Will Need

    1 pound extra-large shrimp, peeled and deveined (450g)

    1 cup diced cucumber

    ¼ medium red onion, finely minced

    2 chile peppers, deseeded and minced, like Fresno, serrano, or jalapeño

    2 tablespoons chopped fresh cilantro

    ¾ cup freshly squeezed lime juice, from 6 to 7 limes (177ml)

    ¼ cup freshly squeezed lemon juice, from 1 to 2 lemons (60ml)

    1 medium avocado, diced

    Directions

      1Poach the shrimp: Fill a pot with 2 quarts of water and add 2 tablespoons of salt. Bring the water to a boil, add the peeled and deveined shrimp, and immediately remove the pot from the heat. Leave the shrimp in the poaching liquid until just cooked through, 2 to 3 minutes. You can tell when the shrimp is cooked when it’s firm and opaque throughout.

      2Cool the shrimp: Use a slotted spoon to transfer the shrimp to a large plate or baking sheet to cool. (Spreading them out helps them stop cooking faster). When the shrimp are cool enough to handle, remove the tails (if there are any) and chop the meat into bite-sized pieces.

      3Make ceviche: Add the cucumber, onion, minced chile peppers, cilantro, and chopped shrimp to a large, non-reactive bowl (glass, stainless steel, and ceramic bowls are perfect). Pour over the citrus juices and a pinch of salt. Toss well, then press the shrimp down into the liquid as much as possible. Cover and refrigerate for at least 30 minutes and up to 4 hours.

      4Serve: Just before serving, stir in the avocado. Taste and season with salt if necessary.

    Adam and Joanne’s Tips

    • Why we poach the shrimp: Since most of us buy shrimp from the grocery store, we incorporate a quick poaching step to eliminate potential bacteria. It’s a simple safety measure that ensures the ceviche is safe to eat without compromising flavor. However, if you have access to very fresh, high-quality shrimp (like fresh-caught or sashimi-grade), feel free to skip the poaching step!
    • Using raw shrimp: If you have very fresh shrimp, you can skip the poaching step and allow the citrus juices to “cook” the shrimp. Cut the shrimp into small pieces (no larger than ½ inch). Cover the shrimp with the citrus juice. Use enough juice to cover the shrimp and allow them to float freely (this might require a bit more juice than called for in our recipe). If there is not enough juice, the shrimp will cook unevenly. Refrigerate for 30 minutes or until the shrimp is “cooked” through.
    • Using precooked shrimp: You can use precooked shrimp if you prefer, but our method for poaching the shrimp is quick and ensures perfectly cooked, seasoned shrimp.
    • Spicy ceviche: You can leave some or all of the chile pepper seeds or add a few dashes of your favorite hot sauce.
    • Non-reactive bowl: Since we are using citrus juice, use a non-reactive bowl (glass, stainless steel, and ceramic are perfect; avoid aluminum or copper).
    • The nutritional information provided are estimates.

    Nutrition Per Serving
    Serving Size
    1/6 of the recipe
    /
    Calories
    121
    /
    Total Fat
    4g
    /
    Saturated Fat
    0.6g
    /
    Cholesterol
    121.6mg
    /
    Sodium
    287.8mg
    /
    Carbohydrate
    7.3g
    /
    Dietary Fiber
    2g
    /
    Total Sugars
    1.9g
    /
    Protein
    16.2g


    AUTHOR:

    Joanne Gallagher

    Adam and Joanne of Inspired Taste

    We are Adam and Joanne Gallagher, the creators of Inspired Taste. Established in 2009, Inspired Taste grew from a childhood dream into one of the internet’s most trusted recipe sites with hundreds of reliable recipes, step-by-step videos, and expert tips.More About Us

    Source link

  • The Best Crab Rangoon Recipe

    The Best Crab Rangoon Recipe

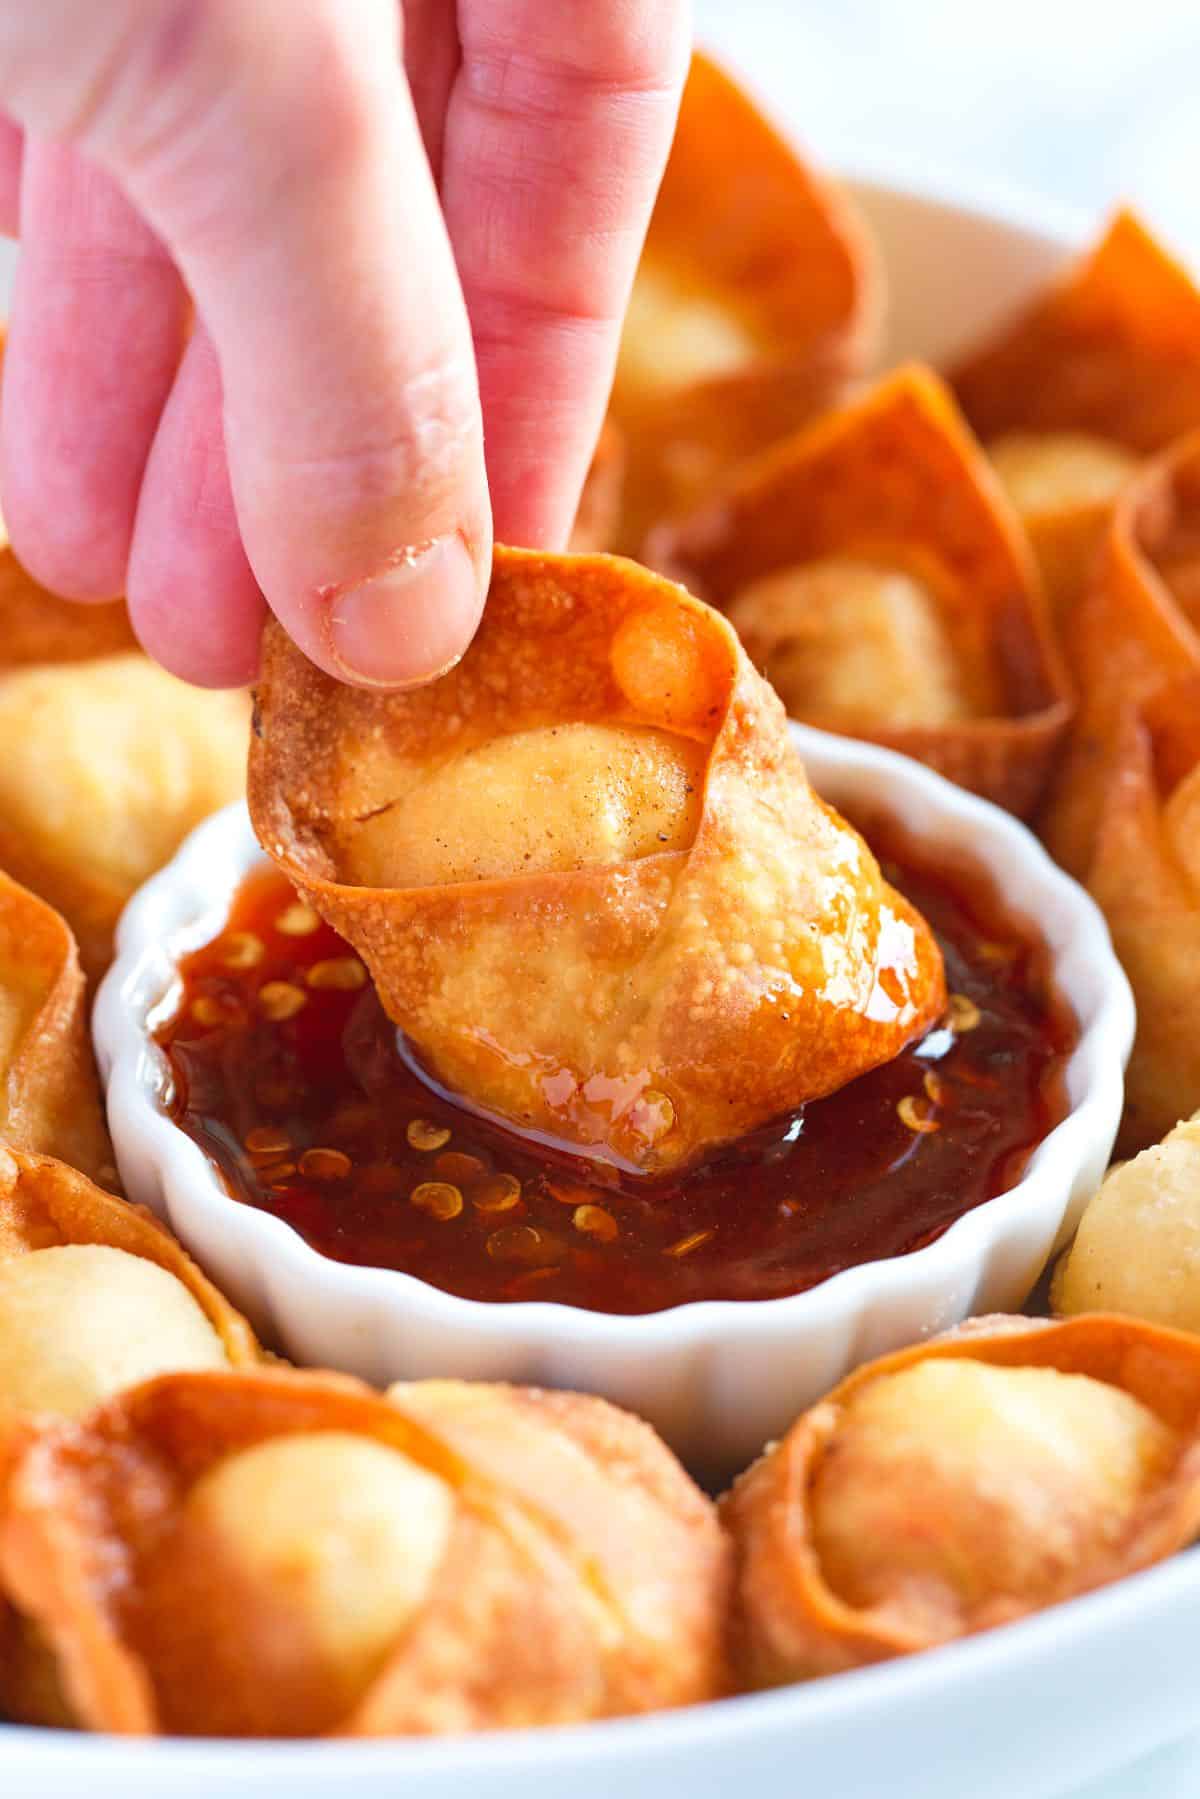
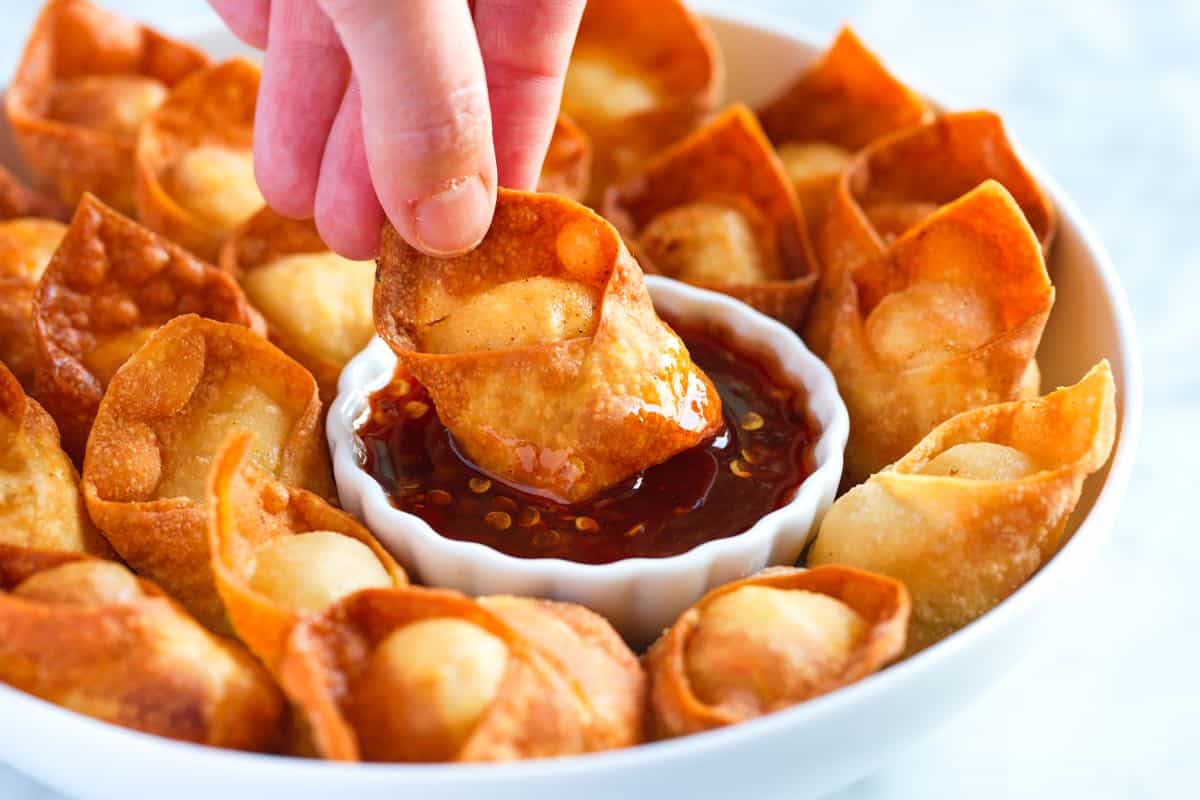
    We love this Crab Rangoon recipe! These crunchy fried wontons have a perfectly creamy filling and taste incredible dipped in the insanely good sweet and sour sauce.

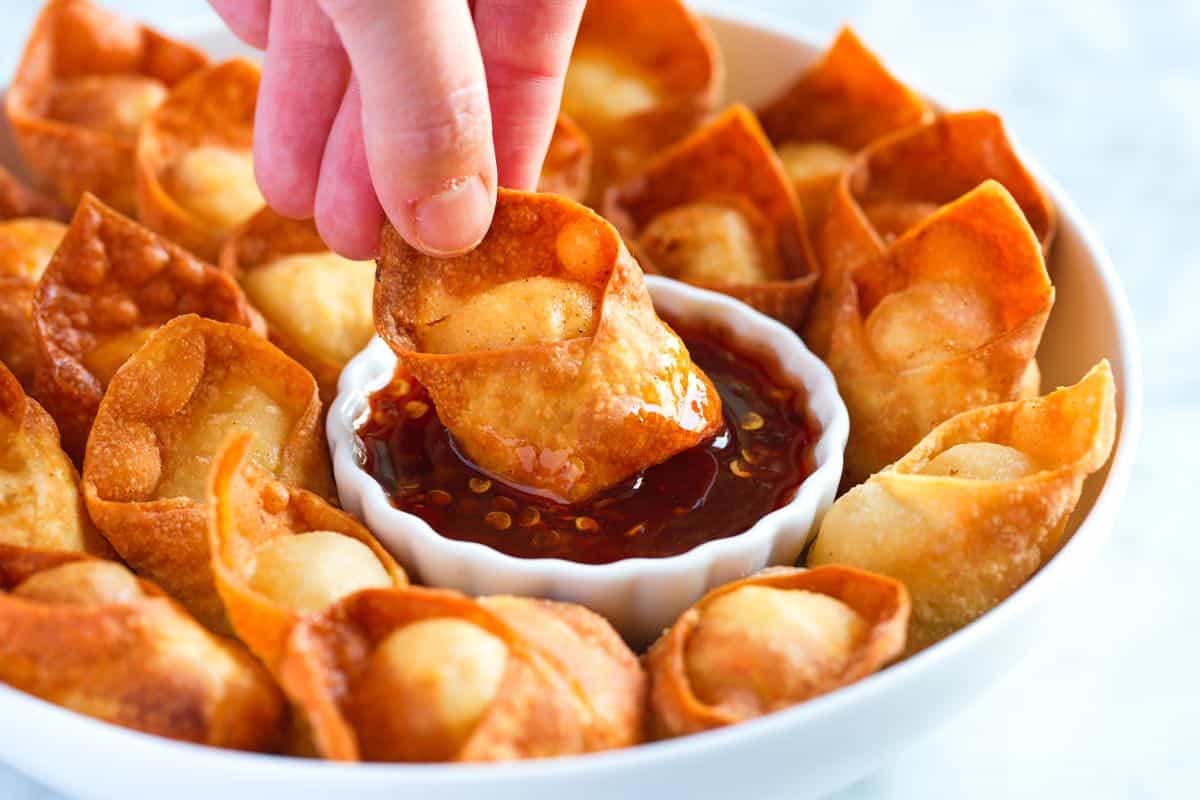
    Homemade Crab Rangoon (cream cheese wontons)

    I’m going out on a limb and saying this easy Crab Rangoon recipe boasts a better filling than what you’ll find at most takeout spots, because if I’m making crab wontons, I want to taste the crab, so we’re extra generous with it! Oh, and that sweet and sour sauce? It’s outrageously good!

    We developed this recipe with the help of Chef Richard Hattaway, and every time we’ve tested it, the wontons disappeared in minutes! For more of our favorite takeout-inspired dishes, check out our crispy chicken spring rolls or our easy fried rice!

    Key Ingredients

    • Wonton wrappers: I use thin square wonton wrappers for crab rangoon. My grocery store sells them in the refrigerated section near tofu, but you’ll find an even better selection at International grocery stores. Consider using leftover wonton wrappers to make these baked wonton cups.
    • Crab: I love using real crab for these. We used Dungeness crab in the photos and video, but blue crabmeat is also excellent. Imitation crab works, too (surimi), but it tastes milder and sweeter than real crab.
    • Cream cheese: This makes our crab rangoon (also known as crab and cream cheese wontons) filling creamy and rich while helping to bind everything together. You might notice that our recipe calls for less cream cheese than other recipes, making these wontons more crab-forward and less heavy.
    • Veggies: For flavor, we stir in sliced green onion, chopped red bell pepper, and a bit of garlic. I highly recommend using all three.
    • Soy sauce: Crabmeat is naturally salty, so you don’t need much seasoning in the filling. I add a teaspoon of soy sauce or tamari to the mix.

    Find the full recipe with measurements below.

    How to Make the Best Homemade Crab Rangoon

    Tip 1: Make little envelopes. There are a few ways to fold your wontons, but making little envelopes is the easiest. You can see me do this in our video (which I highly recommend watching before making this recipe).

    Folding wontons for crab rangoon

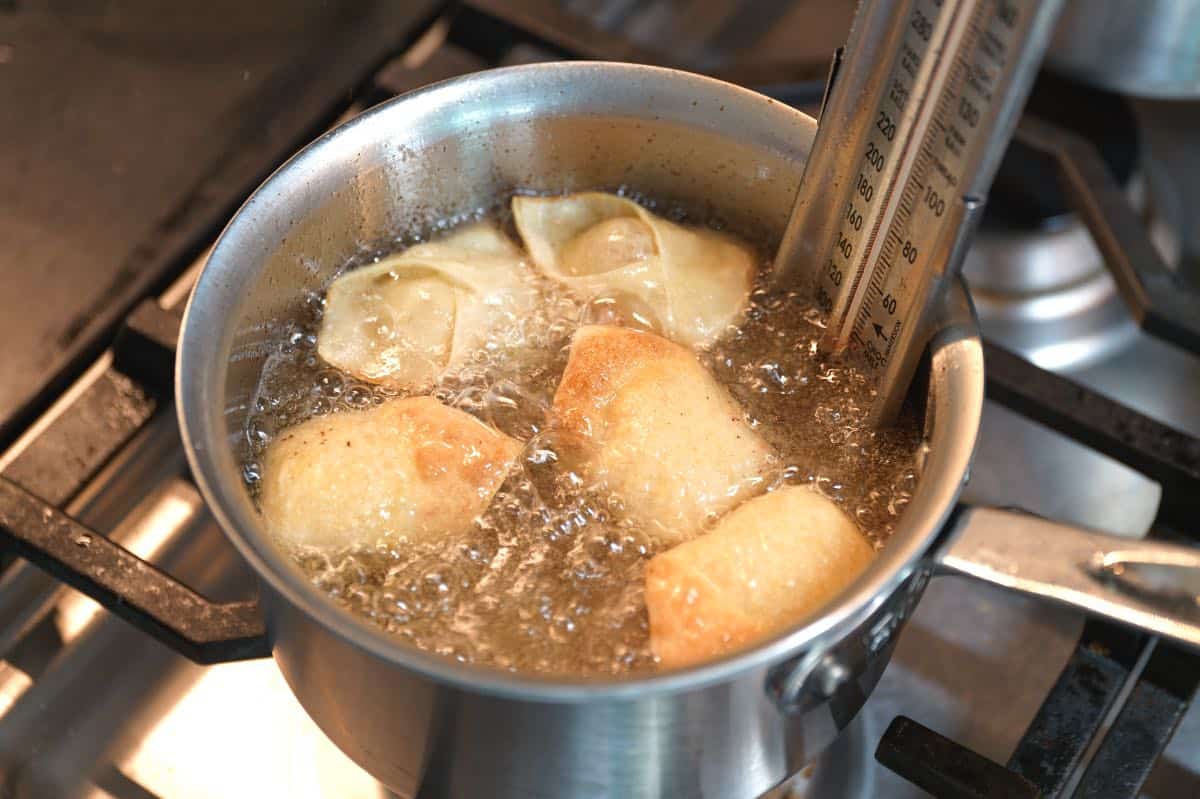
    Tip 2: For the best results, fry them! I’m not someone who fries a lot of food at home, but it’s worth it for these crunchy wontons. I’ve tried them in an air fryer and the oven, and while they absolutely work, the wontons don’t get nearly as crispy (because the filling is so wet from the cream cheese).

    Frying crab rangoon at home

    Tip 3: Use our sweet and sour sauce. Don’t miss our homemade sweet and sour sauce (it’s so good!). It takes less than 5 minutes to make. Once you try it, you’ll understand why I’m pushing you so hard to make it!

    Crab Rangoon (Cream Cheese Wontons)

    The Best Crab Rangoon

    • PREP
    • COOK
    • TOTAL

    Our family absolutely loves these homemade Crab Rangoon. Watch our recipe video to see me folding them. For best results, fry them using a deep saucepan or a Fry Daddy (inexpensive and handy for frying at home). Baking and air fryer tips are below, but since the filling is wet from the cream cheese, the wontons do not get as crisp or golden brown.

    Makes 24 wontons

    Watch Us Make the Recipe

    You Will Need

    Crab Rangoon

    8 ounces (226g) fresh or pasteurized crabmeat, like blue crab or Dungeness crab

    4 ounces (113g) cream cheese, softened

    1 green onion, thinly sliced

    2 tablespoons finely diced red bell pepper

    1 small clove garlic, grated on a microplane or finely minced

    1 teaspoon light soy sauce or tamari

    26 wonton wrappers

    Peanut oil or vegetable oil for frying


    Sweet and Sour Dipping Sauce

    2 tablespoons Sambal Oelek chili paste (we use Huy Fong)

    6 tablespoons (75g) granulated sugar

    2 tablespoons unseasoned rice wine vinegar

    Directions

      1Prepare the crab: Place the crabmeat in a colander and let it drain for at least 5 minutes. Then, pick through the crabmeat for any bits of shell and remove them.

      2Make the dipping sauce: Combine the chili paste, sugar, and rice wine vinegar in a small saucepan over medium heat. Cook, stirring, until the sugar dissolves, about 30 seconds. Remove the pan from the heat, cover, and set aside for serving. If needed, warm the sauce after frying the wontons.

      3Make the filling: In a medium bowl, stir the cream cheese, green onion, bell pepper, garlic, and soy sauce. Fold in the crabmeat.

      4Make an egg wash: Whisk an egg with a tablespoon of water in a small bowl.

      5Fill wontons: Line a large baking sheet with parchment paper and dust with flour. Lay a few wontons out on a lightly floured work surface. Keep the rest under a damp towel or plastic wrap to prevent them from drying out.

      6Place one teaspoon of the cream cheese and crab filling in the middle of each wonton. Moisten the edges with the egg wash, then fold into a triangle, pushing as much air out of the middle as possible. Moisten one of the corners of the triangle, and then bring the two corners together, overlapping the moistened corner on top of the other corner and pressing to seal to make a little envelope. Watch us do this in our video. It is important the edges are sealed, otherwise they will not hold together in the oil.

      7Place filled and folded wontons onto the prepared baking sheet and cover with a clean dishcloth. Repeat with remaining wontons (this recipe makes about 24).

      8Prepare the oil: To avoid using a large amount of oil, use a small, deep saucepan (like in our video). Fill it with 2 to 3 inches of oil, ensuring ample space to fry the crab Rangoons without the oil rising too close to the top. Heat the oil to 350°F (175°C) as registered on an instant-read thermometer.

      9Fry the wontons: Carefully drop 5 to 6 wontons into the oil. Cook, adjusting the heat to maintain close to 350°F (175°C). Use a wire mesh spider to flip them in the oil.

      10When the wontons look crisp and golden brown, carefully transfer them to a paper towel-lined baking sheet to drain. Repeat with the remaining wontons. Occasionally, a wonton will split and cause the oil to spit around it. If you’ve left enough room in your pot, this should not be a problem. If you are worried, place a splatter screen over the pot.

    Adam and Joanne’s Tips

    • Crab substitute: You can use 8 ounces of imitation crab (surimi) cut into 1/2-inch pieces. You can also try cooked and finely chopped shrimp.
    • Baked crab rangoon: These are not as golden brown and crispy. The edges become crisp, but since the filling is so wet, the areas touching the filling stay soft. Lightly brush with cooking oil and bake in a 375°F (190°C) oven until crisp. Check them at 5 minutes, and continue to bake until crisp (5 to 10 minutes more).
    • Air fryer crab rangoon: Crispier than baked, but still not as good as fried. Lightly brush with cooking oil and air fry at 375°F (190°C). Check them at 5 minutes, and continue to air fry until crisp, 5 to 10 minutes more.
    • Save and reuse the oil: After frying the wontons, allow the oil to cool completely (this takes a while), and then save it for another day. I use a fine mesh strainer to remove any bits and pour the oil back into the bottle using a funnel.
    • Keeping fried wontons warm: Preheat the oven to 200°F (93°C). Transfer the fried and drained wontons to a baking sheet in the warm oven and hold until ready to serve.
    • Make-ahead filling: Store the filling in an airtight container in the refrigerator for up to 3 days.
    • Freezing uncooked wontons: Freeze them in a single layer on a parchment paper-lined baking sheet until hard. Once frozen, transfer them to a freezer-safe container or bag and store them for up to 3 months. When ready to enjoy, you can fry them directly from frozen.
    • Freezing cooked wontons: Freeze cooked crab rangoon in a single layer on a baking sheet. Once frozen, transfer them to a freezer-safe container or bag and store them for up to 3 months. To reheat, bake in a 300°F (150°C) oven until crisp, 8 to 10 minutes.
    • The nutrition facts provided below are estimates. Nutrition is difficult with fried foods because we cannot determine how much oil is absorbed. So we have provided nutrition for everything but the oil. We realize this isn’t the most helpful, but it is the best we can do without a laboratory.

    Nutrition Per Serving
    Serving Size
    4 wontons
    /
    Calories
    250
    /
    Total Fat
    7.3g
    /
    Saturated Fat
    4g
    /
    Cholesterol
    58.9mg
    /
    Sodium
    541.5mg
    /
    Carbohydrate
    34.2g
    /
    Dietary Fiber
    0.7g
    /
    Total Sugars
    14.5g
    /
    Protein
    11.5g


    AUTHOR:

    Joanne Gallagher

    Previous Post: Perfect Cheesecake
    Next Post: Ranch Dressing (Better than Store-Bought)

    Source link

  • Garlic Caper Baked Salmon Recipe

    Garlic Caper Baked Salmon Recipe

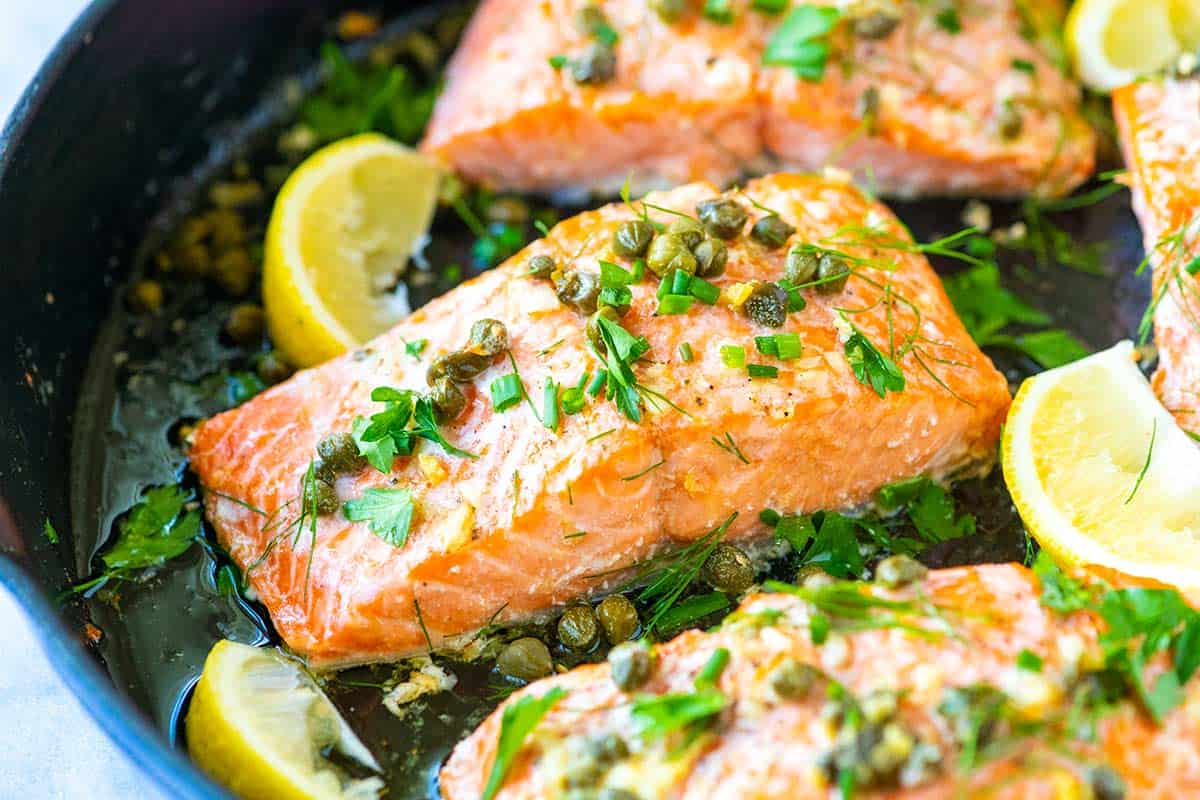
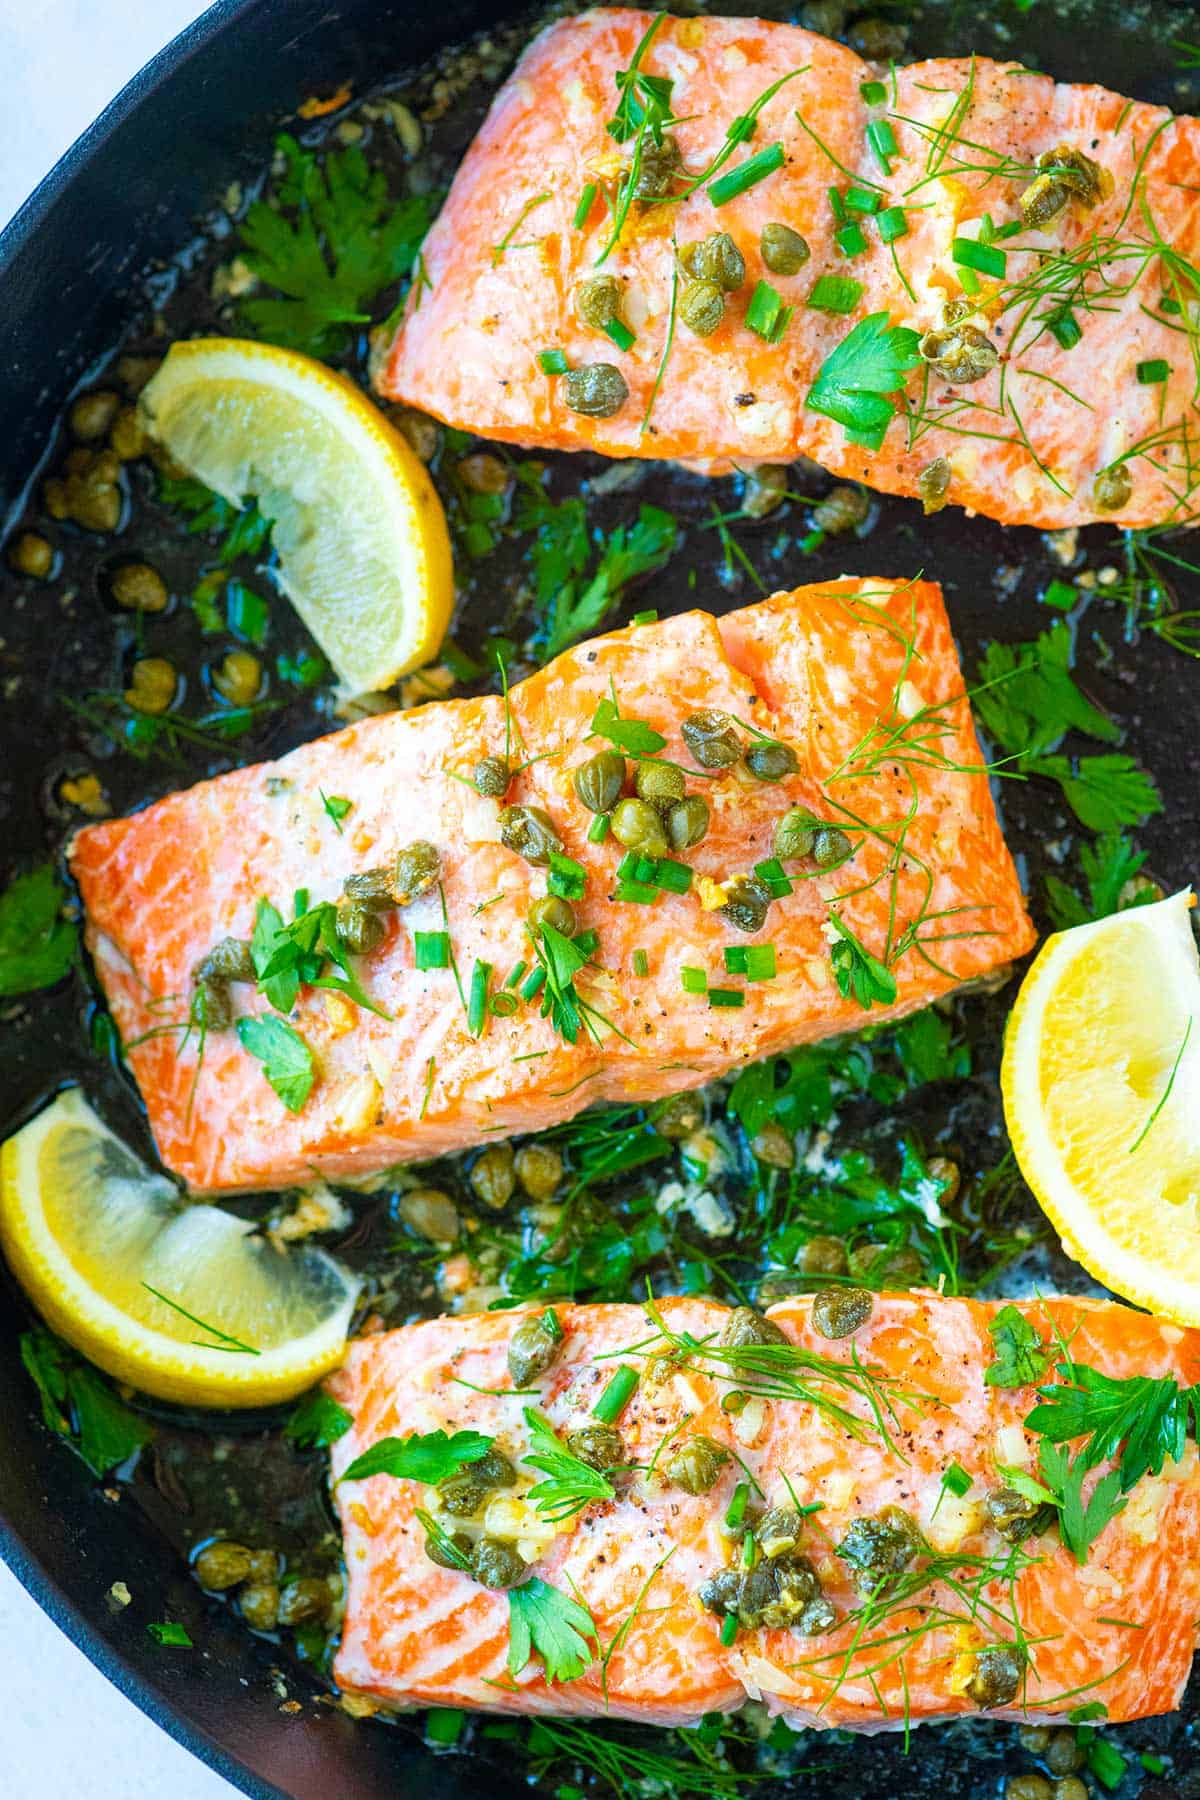
    We love this baked salmon recipe with capers and garlic. It tastes incredible. Tender, flaky salmon, gently cooked in butter with garlic, lemon, and capers. It’s one of the best things we’ve made recently.

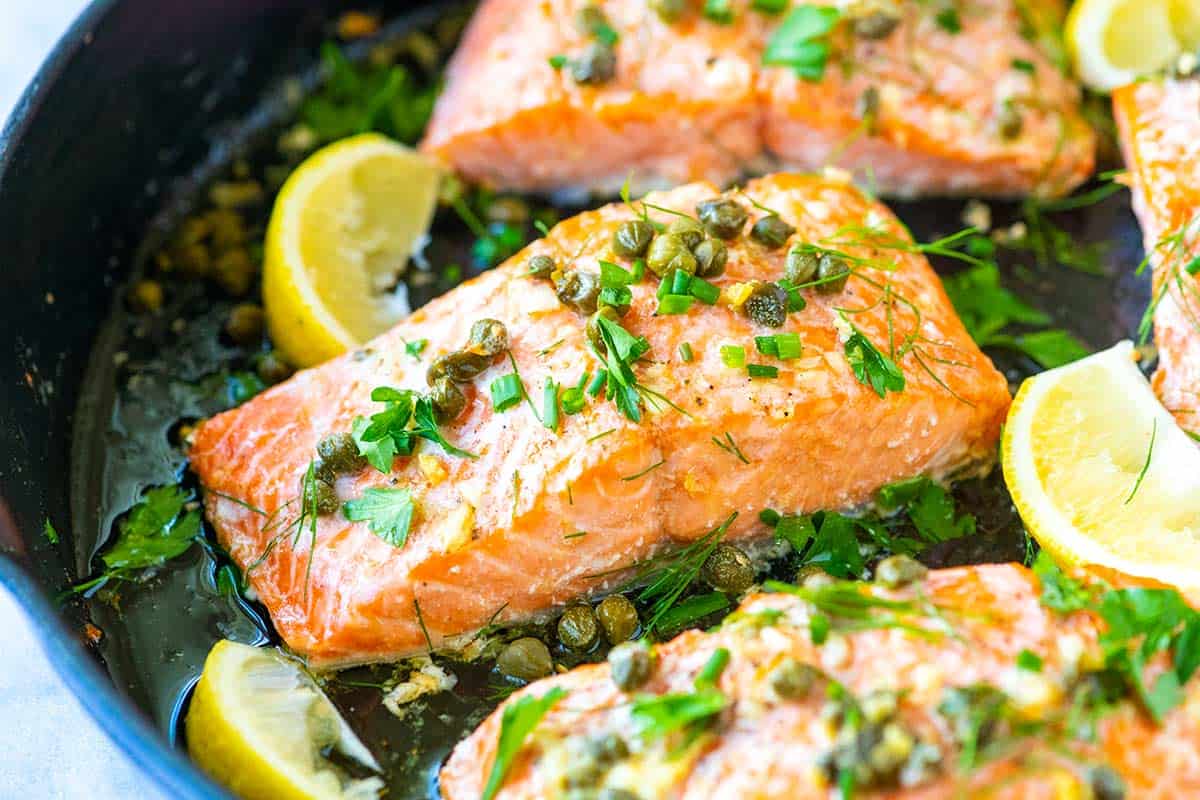
    Garlic Caper Baked Salmon

    We’ve been making a variation of this salmon recipe for ages. The method comes from my Mom, and I know I’m biased on this one, but my Mom’s method for cooking salmon is the best. She gently bakes her salmon, covered at a low temperature with a little liquid in the pan, so it doesn’t dry out.

    In this caper butter version, we use melted butter as the baking liquid, then add lots more flavor with capers, fresh lemon, and garlic. Trust me when I say it’s incredible, or read through the reviews, everyone loves this recipe!

    Key Ingredients

    • Salmon: Any salmon fillet will work for this recipe. However, I especially love those with a higher fat content, like sockeye, king, and coho. When baked, these types of salmon stay soft and moist. I advise the same for most of our salmon recipes including our popular brown sugar baked salmon.
    • Butter: The base of our lemon caper sauce. The salmon gently bakes in the butter, which you can spoon over the finished salmon fillets before serving (it’s incredible).
    • Garlic: I love garlic butter and use a tablespoon of minced garlic to make our butter sauce.
    • Capers: Salmon and capers are such a classic combination! I use drained capers to make this recipe. 
    • Lemon: If salmon and capers are classic, adding lemon makes it even more so! Use fresh lemon for this recipe. It makes a difference.

    Find the full recipe with measurements below.

    How to Make Baked Salmon with Capers

    Tip 1: Use an oven-safe skillet. To make this salmon, we use one pan. (Hello, easy cleanup!) A large, oven-safe skillet is best. I use my cast-iron skillet.

    You’ll melt butter with garlic and capers, then when it is bubbling and smells like garlic butter, take it off the heat and place your seasoned salmon fillets into the pan.

    Making garlic caper butter sauce before adding the salmon.
    Seasoned salmon fillets in an oven-safe skillet in the caper butter ready to bake.

    Tip 2: Covering the pan is key. Spoon a little butter over the fillets, and then cover the skillet with foil or tuck a sheet of parchment paper around the salmon (an oven-safe lid is fine, too). Covering the salmon creates a steamy environment, preventing it from drying out in the oven.

    Tip 3: How to tell it’s ready to come out of the oven. You’ll know the salmon is ready to come out of the oven when it flakes and is a little pink in the middle.

    Once it’s out of the oven, squeeze over lemon juice, and take a moment to gather up all the garlic butter from the bottom of the pan and spoon it back over the salmon (YUM). I can’t wait for you to try this one!

    Serving Suggestions

    Thanks to the butter sauce, this salmon works really well next to many of our side dishes. Some of our family favorites are mashed cauliflower, which is light, or mashed potatoes, which are a bit more hearty. We also love this salmon with saffron rice, homemade grits, or this unbelievably creamy polenta.

    I also love a veggie side like sautéed green beans or roasted green beans, quickly sautéed bok choy, sautéed cabbage, sautéed veggies, or this garlic roasted asparagus.

    And, for a truly special meal, serve this delicious salmon over risotto. Try our easy mushroom risotto or this vegetable risotto.

    More Favorite Salmon Recipes

    Garlic Butter Caper Salmon

    Garlic Caper Baked Salmon

    • PREP
    • COOK
    • TOTAL

    If you save one salmon recipe for life, make it this one. This garlic caper salmon is so flavorful, and I really cannot get enough of the garlic caper butter sauce! The cooking time may vary depending on the type and thickness of the salmon you have, so check the tips below for our tips on telling when the fish is ready to come out of the oven. If you love salmon, we also love this brown sugar baked salmon!

    Makes 4 servings

    Watch Us Make the Recipe

    You Will Need

    1 ½ pounds salmon fillets, 1-inch thick, preferably wild-caught (680g)

    Salt and fresh ground black pepper

    4 tablespoons unsalted butter (56g)

    1 tablespoon minced garlic, 3 to 4 cloves

    3 tablespoons drained capers

    Chopped or torn fresh herbs like parsley, chives or dill

    Half of a lemon, quartered

    Directions

      1Prep: Preheat the oven to 325°F (162°C).

      2Season the salmon: Season both sides of the salmon with salt and pepper (we use 1/2 teaspoon fine sea salt for 1 ½ pounds of salmon). (Optionally, cut the salmon into four 6-ounce fillets.)

      3Make the sauce: Melt the butter in a wide oven-safe skillet over medium heat. When the butter is bubbling, stir in the garlic and capers. Cook, stirring, until warm, about 1 minute. Remove the skillet from the heat.

      4Cook the salmon: Add the salmon fillets, skin-side down, to the skillet. Tilt the pan so butter pools on one side, then spoon garlic caper butter over each fillet. Cover the skillet with aluminum foil or parchment paper, loosely tucking it around the salmon. Bake the salmon in the oven for 15 minutes, covered.

      5Uncover the salmon: Uncover and spoon more of the butter over the salmon. Continue to bake, uncovered, until your desired doneness, 5 to 10 minutes more. The best way to prevent overcooking is to check the temperature of the salmon using an internal thermometer. The thickest part of the salmon should read 125°F.

      6To serve: Squeeze fresh lemon juice over the baked salmon, sprinkle with lots of fresh herbs, and serve with another spoonful of the garlic caper butter on top.

    Adam and Joanne’s Tips

    • No oven-safe skillet: Cook the garlic and capers in butter in a regular skillet, and then add to a baking dish with the salmon.
    • How to tell when salmon is cooked: We cook salmon to 125°F, which means it will be soft, tender and slightly pink in the center. For a visual cue, look for the flesh to be somewhat opaque. You should also be able to flake the salmon with a fork.
    • Cook time: Cook time will vary depending on the type and thickness of the salmon you are baking. The cook times suggested above are for middle-cut fillets about 1 inch thick.
    • The nutrition facts provided below are estimates.

    Nutrition Per Serving
    Serving Size
    1 (6-ounce) fillet
    /
    Calories
    357
    /
    Total Fat
    21.7g
    /
    Saturated Fat
    9.3g
    /
    Cholesterol
    107mg
    /
    Sodium
    524.mg
    /
    Carbohydrate
    1.6g
    /
    Dietary Fiber
    0.4g
    /
    Total Sugars
    0.2g
    /
    Protein
    37.3g


    AUTHOR:

    Joanne Gallagher

    Adam and Joanne of Inspired Taste

    We are Adam and Joanne Gallagher, the creators of Inspired Taste. Established in 2009, Inspired Taste grew from a childhood dream into one of the internet’s most trusted recipe sites with hundreds of reliable recipes, step-by-step videos, and expert tips.More About Us

    Source link