Category: Sea Food

  • The Best Homemade Fajitas Recipe

    The Best Homemade Fajitas Recipe

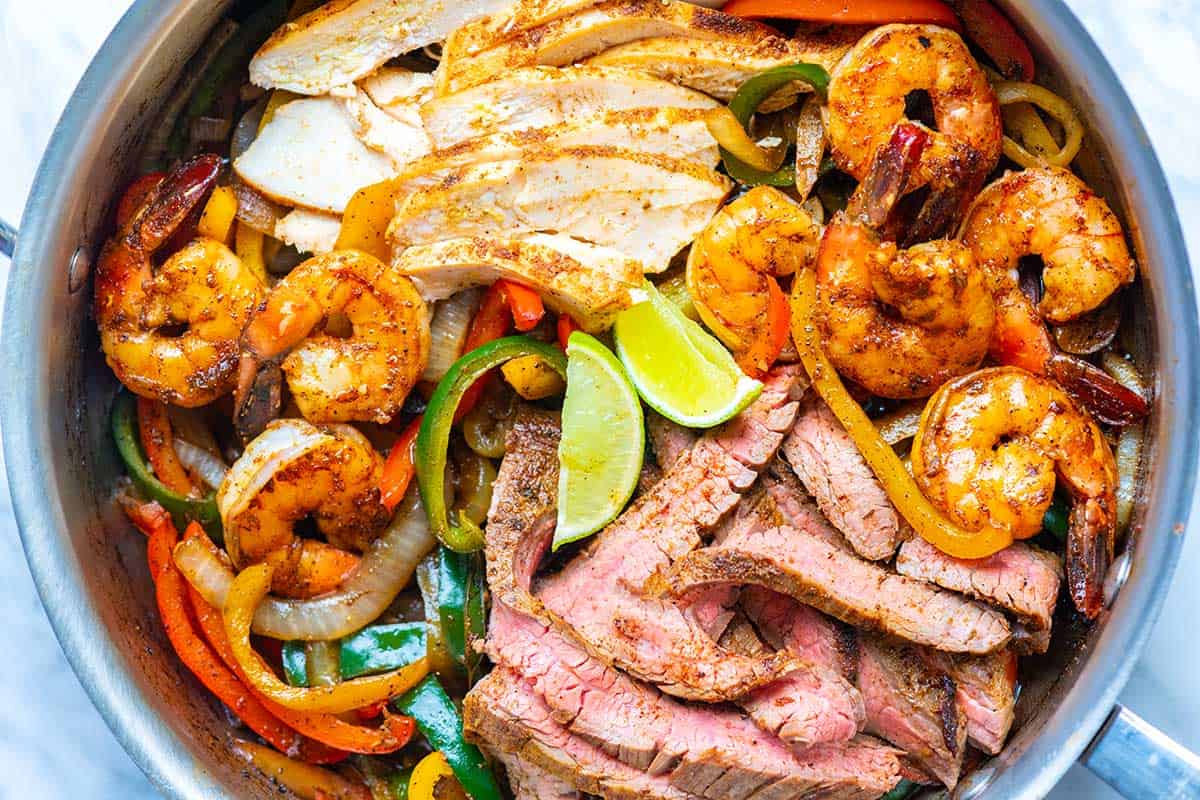
    This fajita recipe is truly restaurant-worthy. The secret is cooking the steak, chicken, and shrimp all in one skillet, which builds incredible flavor.
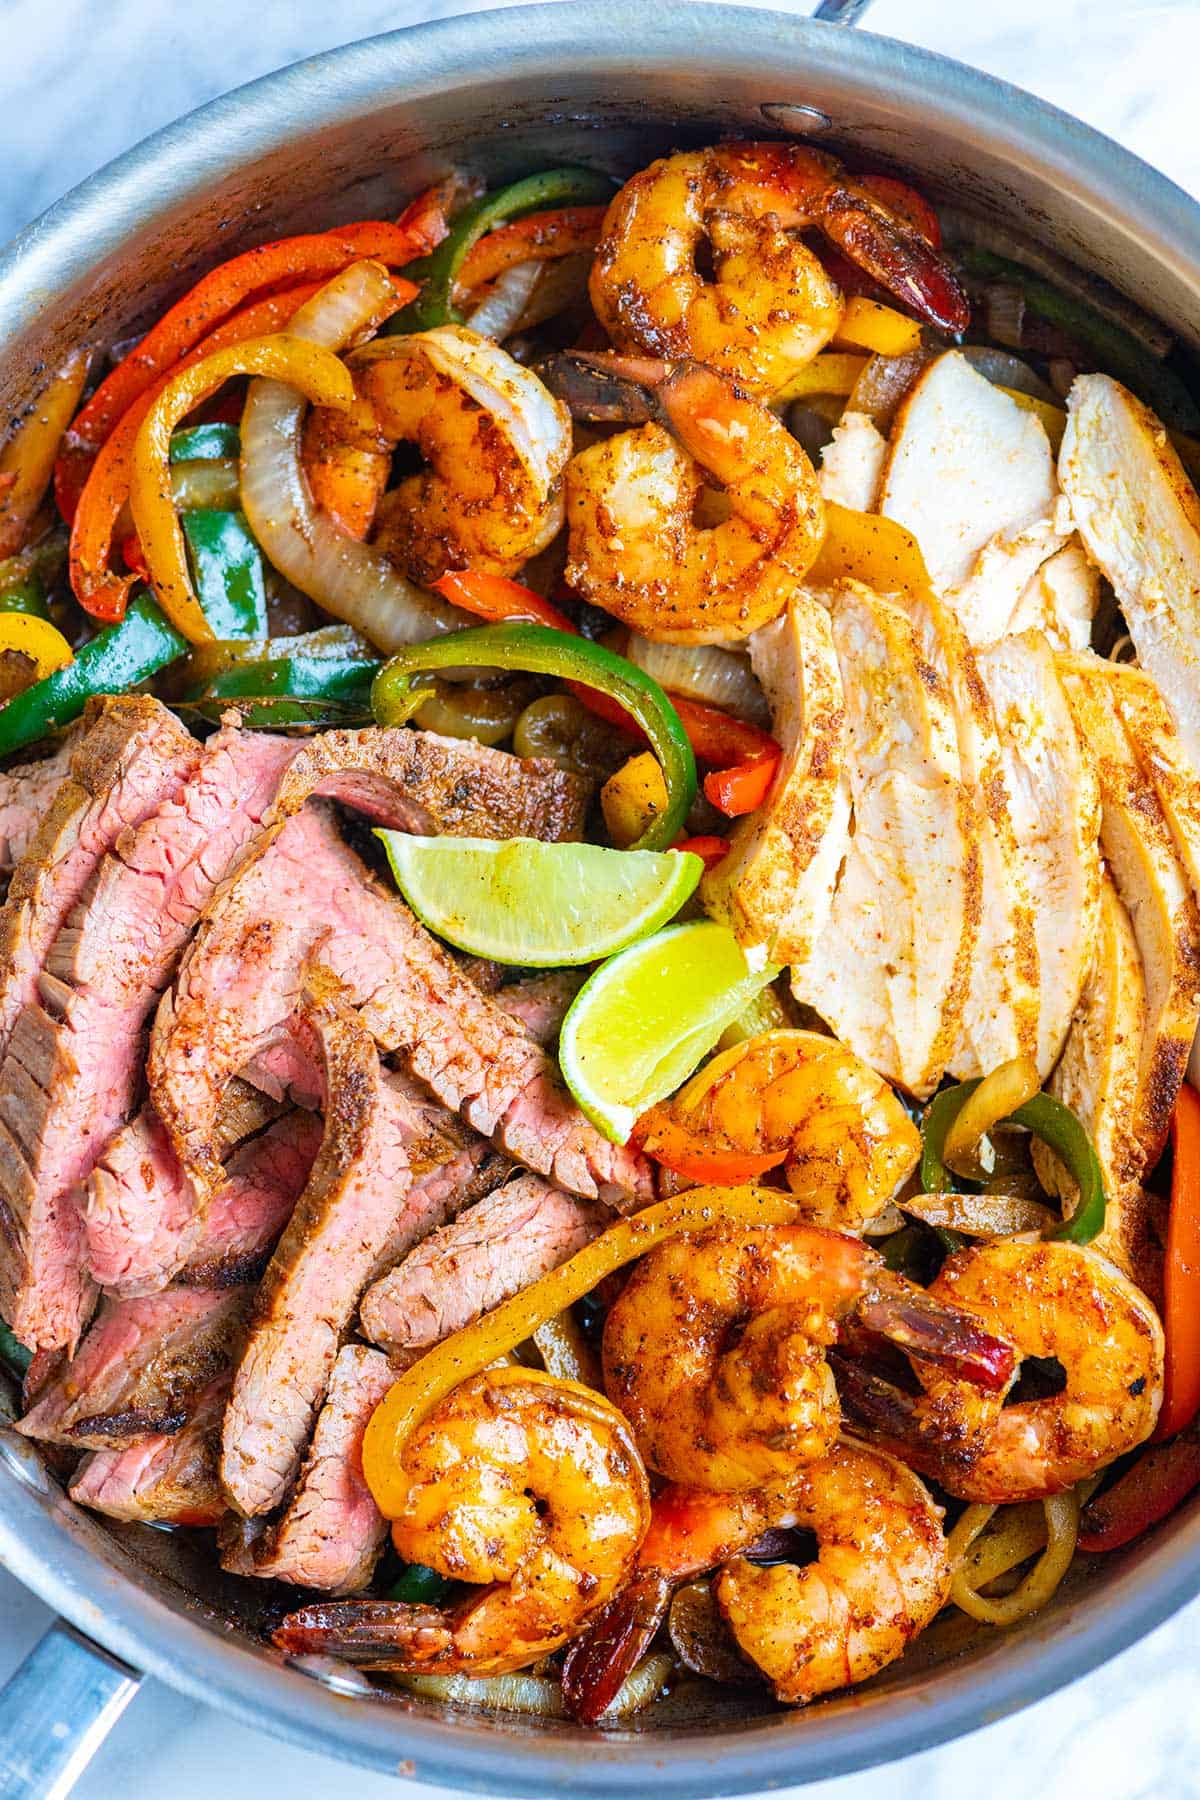
    Steak, chicken, and shrimp fajitas ready to serve.

    We are obsessed with this recipe. Thanks to the combination of steak, chicken, and shrimp, they are just as good, if not better, than what you can get at a restaurant.

    I realize cooking three proteins for dinner seems like a lot, but with our clever recipe, it’s easier than you think. We use the same skillet to cook the steak, chicken, shrimp, and veggies, which means we build so much flavor! You will love it.

    Key Ingredients

    • Steak: I use flank or skirt steak for this recipe because it cooks quickly and becomes incredibly tender when sliced against the grain.
    • Chicken breast: I love chicken breast in this recipe, but you can use chicken thighs with no changes.
    • Shrimp: I love combination fajitas, so I include shrimp. For this recipe, choose large to jumbo shrimp.
    • Veggies: Even though this recipe has steak, chicken, and shrimp, the veggies are still my favorite part. All the juices and spices leftover from cooking the proteins get scooped up by the veggies, which makes them extra delicious. I use onion and bell peppers (or poblano peppers).
    • Fajita seasoning: I love our homemade seasoning! I bet you already have everything in your spice cabinet to make it. You’ll mix chili powder (I love ancho chili powder), cumin, oregano, garlic powder, and smoked paprika.
    • Tequila: Everything for this recipe is cooked in the same skillet, so the bottom of the pan builds in flavor thanks to bits of steak, chicken, shrimp, and spices sticking to it. A generous splash of tequila helps to lift all that flavor from the pan to create a sauce. A Mexican beer or chicken stock is a good substitute.
    • Lime: I squeeze fresh lime into the skillet and serve more lime wedges on the side. With this recipe, you can’t have too much lime.

    Find the full recipe with measurements below.

    How to Make the Best Fajitas

    Tip 1: Marinate using our dry rub. To make them extra flavorful, I marinate the steak, chicken, and shrimp with salt and a simple fajita spice rub (ancho chili powder, cumin, garlic powder, oregano, and smoked paprika) for 30 minutes before cooking.

    Tip 2: Start with chicken. I cook the chicken since it takes the longest. My favorite method for cooking chicken breasts is to sear them in a skillet, then cover and cook over low heat until done. After 10 to 15 minutes, I transfer them to a plate and cover with foil while I cook the steak. For a recipe using just chicken, check out these garlic citrus chicken fajitas.

    Seasoning steak, chicken, and shrimp with fajitas seasoning.

    Tip 3: Use the same skillet for the steak. Cook your steak until browned on both sides and slightly pink inside (I like to cook to medium, around 140°F). Then it joins the chicken to rest.

    Tip 4: Use the same skillet for veggies and shrimp! Sliced onions and peppers go in the pan and cook until softened. They release moisture as they cook, which mixes with the flavorful bits stuck to the skillet from cooking the steak and chicken. I move the veggies aside as they finish and cook the shrimp until firm and opaque.

    Tip 5: Deglaze your skillet. After the chicken, steak, shrimp and veggies are finished, I add a splash of tequila, Mexican beer, or chicken stock to deglaze the pan for extra flavor.

    Tip 6: Reheat chicken and steak for serving. To serve, I slice the steak and chicken and add them back to the pan, helping to reheat. Then, it’s time to build those delicious fajitas!
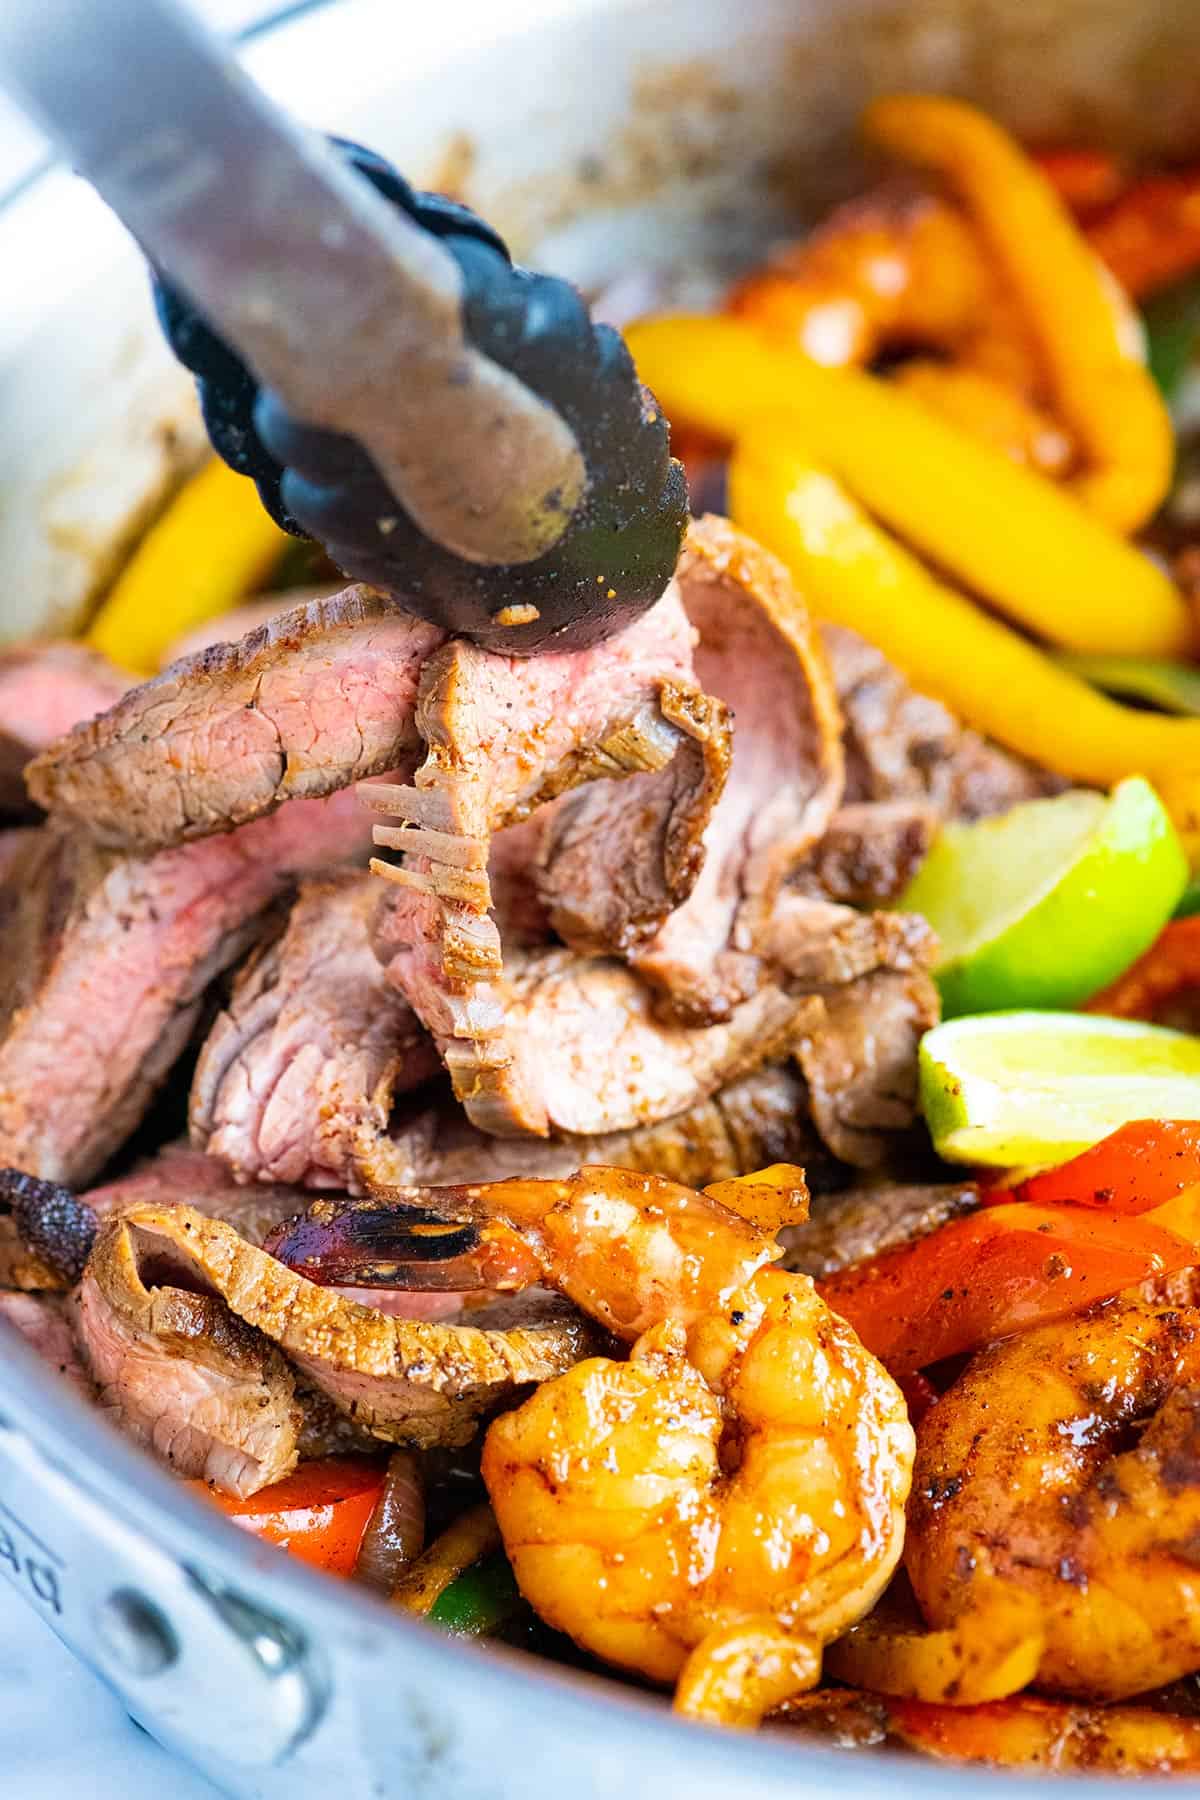
    Steak, chicken, and shrimp fajitas

    Serving Suggestions

    Homemade flour tortillas or corn tortillas take this recipe to the next level! Then, you can load them up with your favorite toppings. I love sliced avocado, guacamole, sour cream, shredded cheese, and pico de gallo. 

    A side of Mexican rice, refried beans, or homemade black beans is always a hit. And, of course, remember the tortilla chips and salsa for the table.

    More Tex Mex Recipes
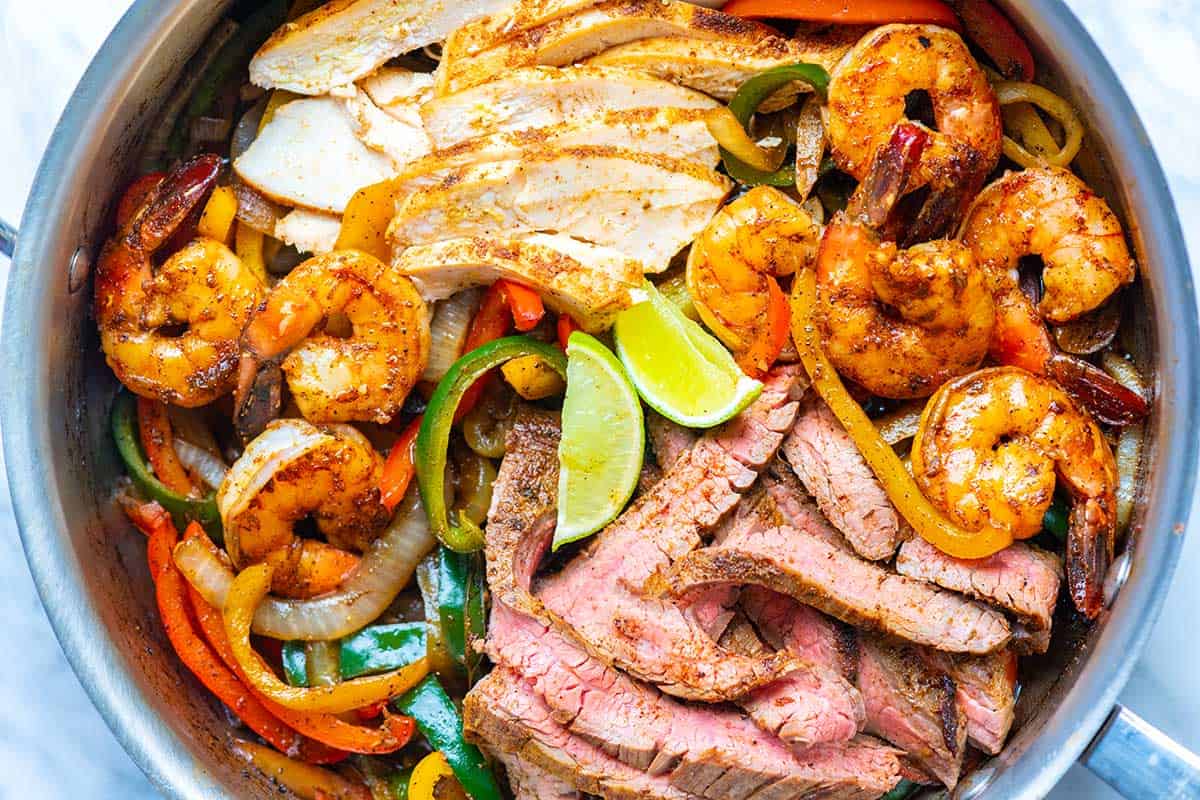
    Fajitas with Chicken, Steak, Shrimp and Veggies

    The Best Homemade Fajitas

    • PREP
    • COOK
    • TOTAL

    Fajitas cook quickly, so I always take 30 minutes to season the steak, chicken, and shrimp with our simple fajita seasoning. Use our recipe as a guide (you can make all three proteins or choose one). Use 2 ½ pounds of protein for 6 people.

    Serves 6 when served with sides

    Watch Us Make the Recipe

    You Will Need

    2 tablespoons olive oil

    Salt and fajita seasoning, recipe below

    1 pound (450g) flank or strip steak

    1 pound (450g) chicken breast (2 medium)

    1/2 pound (225g) large shrimp, deveined with tails left on

    1 pound bell peppers or poblano peppers, sliced (3 medium)

    1 large onion, sliced into half-moons

    1 tablespoon minced garlic, about 3 cloves

    3 tablespoons tequila, light beer, or chicken stock

    2 limes


    Homemade Fajita Seasoning

    1 ½ teaspoons ancho chili powder or homemade chili powder

    1 teaspoon ground cumin

    1 teaspoon dried oregano

    1 teaspoon garlic powder

    1/2 teaspoon smoked paprika

    Directions

    • Season Chicken, Steak, and Shrimp
    • 1Mix the chili powder, cumin, garlic powder, oregano, and smoked paprika in a small bowl.

      2Season the steak, chicken, and shrimp with salt and a generous dusting of fajita seasoning. We use 1/2 teaspoon of salt for the steak, 1/2 teaspoon for the chicken, and 1/4 teaspoon for the shrimp. Set aside for 20 to 30 minutes.

    • Cook Chicken
    • 1You will need a wide skillet with a lid. If you do not have a skillet with a lid, prepare a sheet of foil large enough to cover it.

      2Heat 2 teaspoons of the oil in the skillet over medium-high heat.

      3When the oil is hot and looks shimmery, add the chicken. Cook until golden, 2 to 3 minutes. Flip the chicken so that the seared side is facing up.

      4Reduce the heat to low, then cover the skillet with its lid or use foil. Cook for 10 to 15 minutes or until an instant-read thermometer reads 165°F when inserted into the thickest part of the breast. Transfer chicken to a plate and cover loosely with aluminum foil.

    • Cook Steak
    • 1Pour any liquid left in the pan into a bowl, and use a paper towel to wipe the bottom of the skillet. It is okay if bits of chicken or spices are stuck to the bottom (you can leave them).

      2Put the skillet back over medium-high heat and add two teaspoons of oil.

      3When the oil is hot and looks shimmery, add the steak. Cook for 2 to 3 minutes until brown, then flip to the other side and let cook for another 2 to 3 minutes, or until an instant-read thermometer reads 140°F when inserted into the thickest part of the breast (for medium). Cook longer if you prefer your steak to be more done in the middle.

      4Transfer the steak to the plate with the chicken and cover loosely with aluminum foil.

    • Cook the Vegetables and Shrimp
    • 1Put the skillet back on the heat, increase to medium-high, and add two teaspoons of oil.

      2Add the onions, peppers, garlic, and a pinch of salt. Cook, stirring, until the veggies start to soften and brown a bit, about 5 minutes. As the veggies cook, use tongs or a wooden spoon to scrape up bits of chicken, steak, or spices stuck to the bottom of the pan.

      3When the peppers and onions are ready, pile them on one side of the pan. Add the shrimp to the pan and cook, flipping once, until firm and opaque throughout, 2 to 3 minutes. Transfer the cooked shrimp to a plate.

      4Turn the heat down to low, arrange the vegetables on the bottom of the skillet, stir in tequila, beer, or stock, and cook for 1 minute.

      5Take the pan off the heat. Slice the chicken and steak, then arrange them on the peppers and onions. Finish with a generous squeeze of lime.

      6Serve the fajitas family style with more lime on the side and your favorite side dishes.

    Adam and Joanne’s Tips

    • Leftover fajitas last in an airtight container in the fridge for up to 3 days. Gently reheat in a skillet over medium heat.
    • The nutrition facts provided below are estimates.

    Nutrition Per Serving
    Serving Size
    1/6 of the recipe
    /
    Calories
    314
    /
    Total Fat
    11.1g
    /
    Saturated Fat
    2.8g
    /
    Cholesterol
    161.3mg
    /
    Sodium
    764.3mg
    /
    Carbohydrate
    10.2g
    /
    Dietary Fiber
    2.7g
    /
    Total Sugars
    4.9g
    /
    Protein
    42.4g
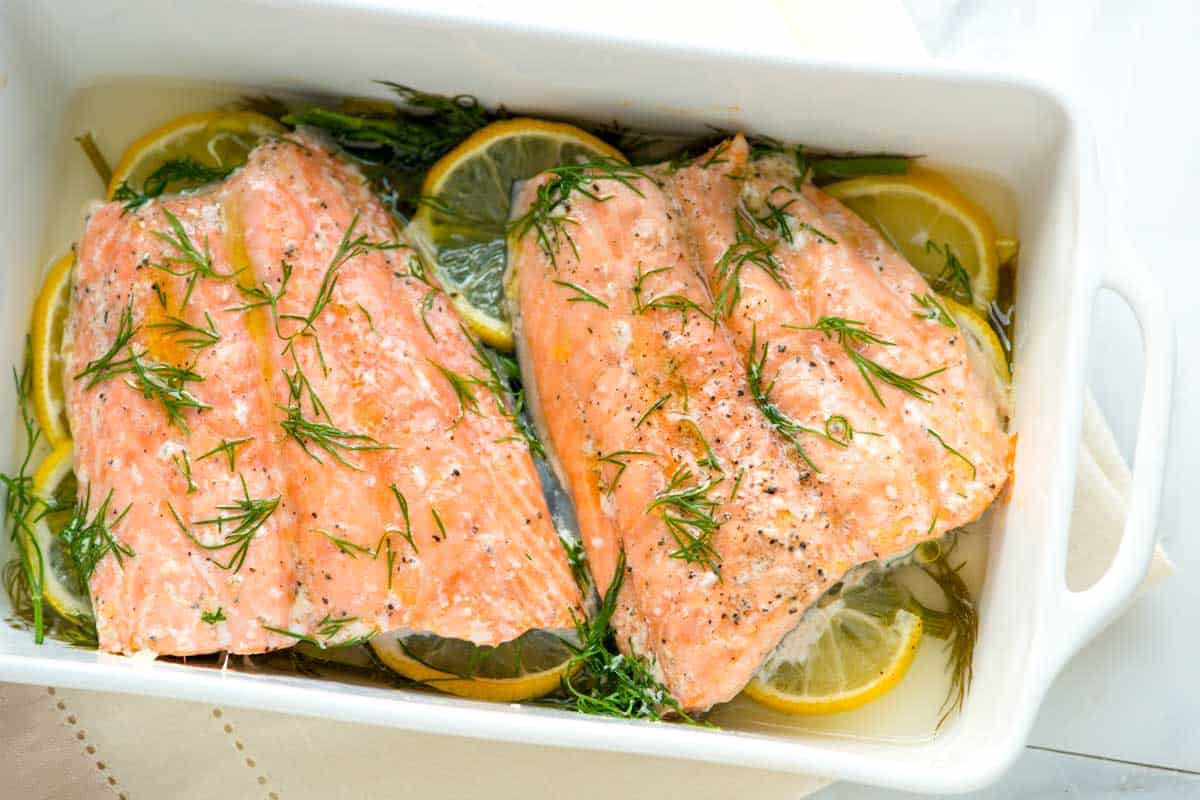

    AUTHOR:

    Joanne Gallagher

    Source link

  • Lemon Dill Baked Salmon Recipe

    Lemon Dill Baked Salmon Recipe

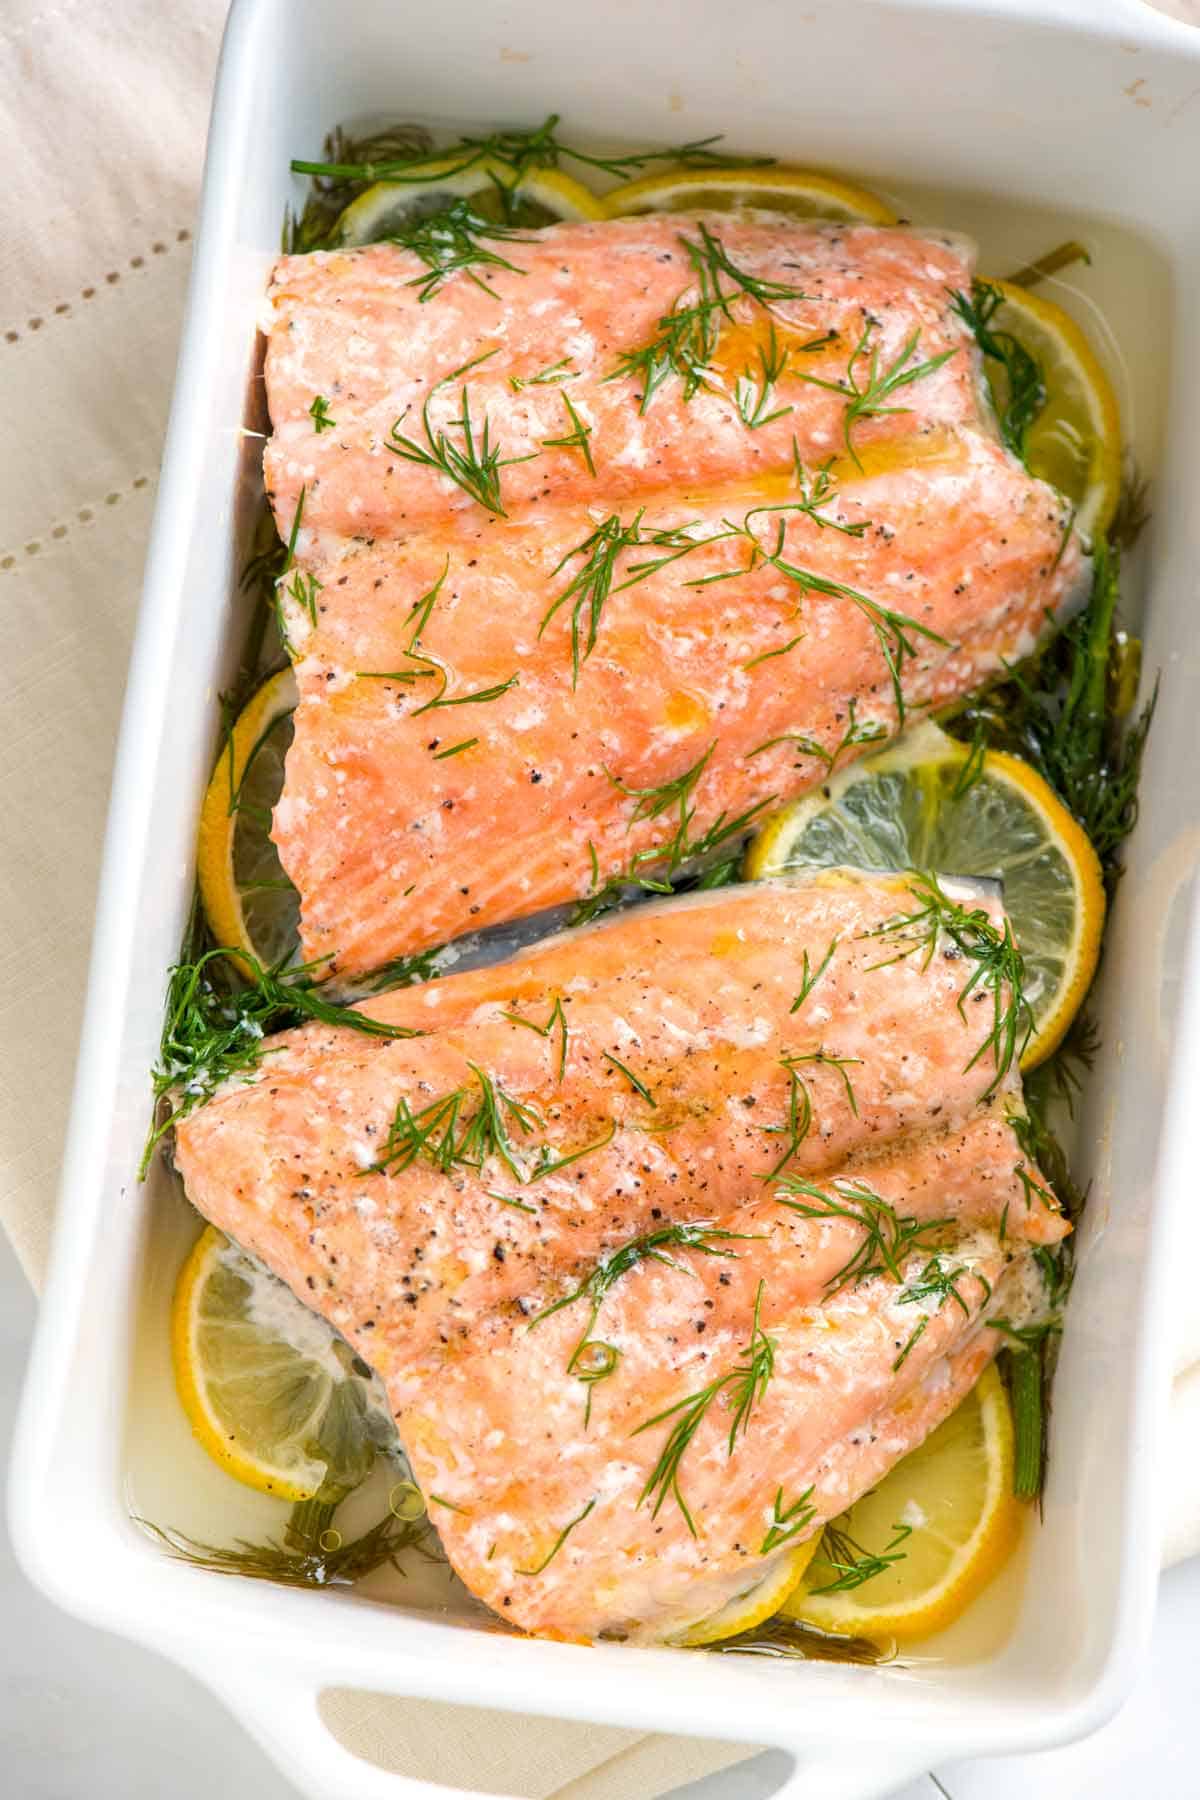
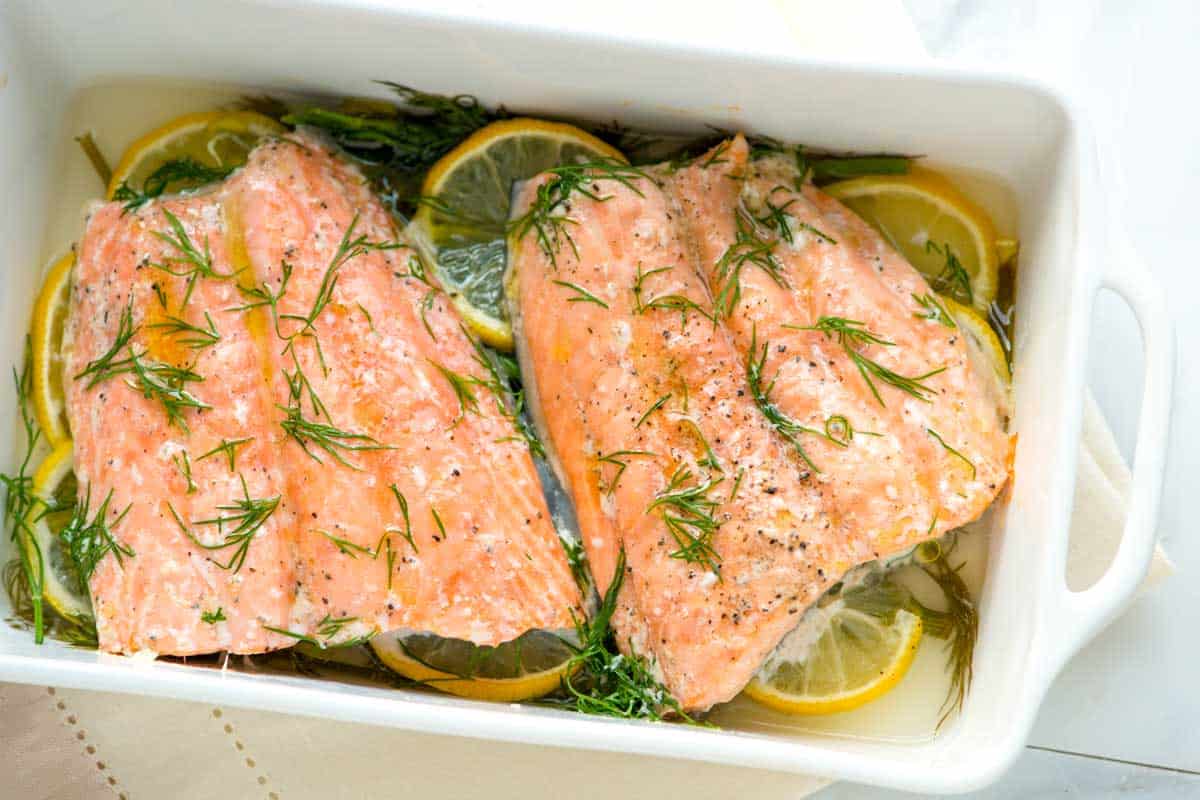
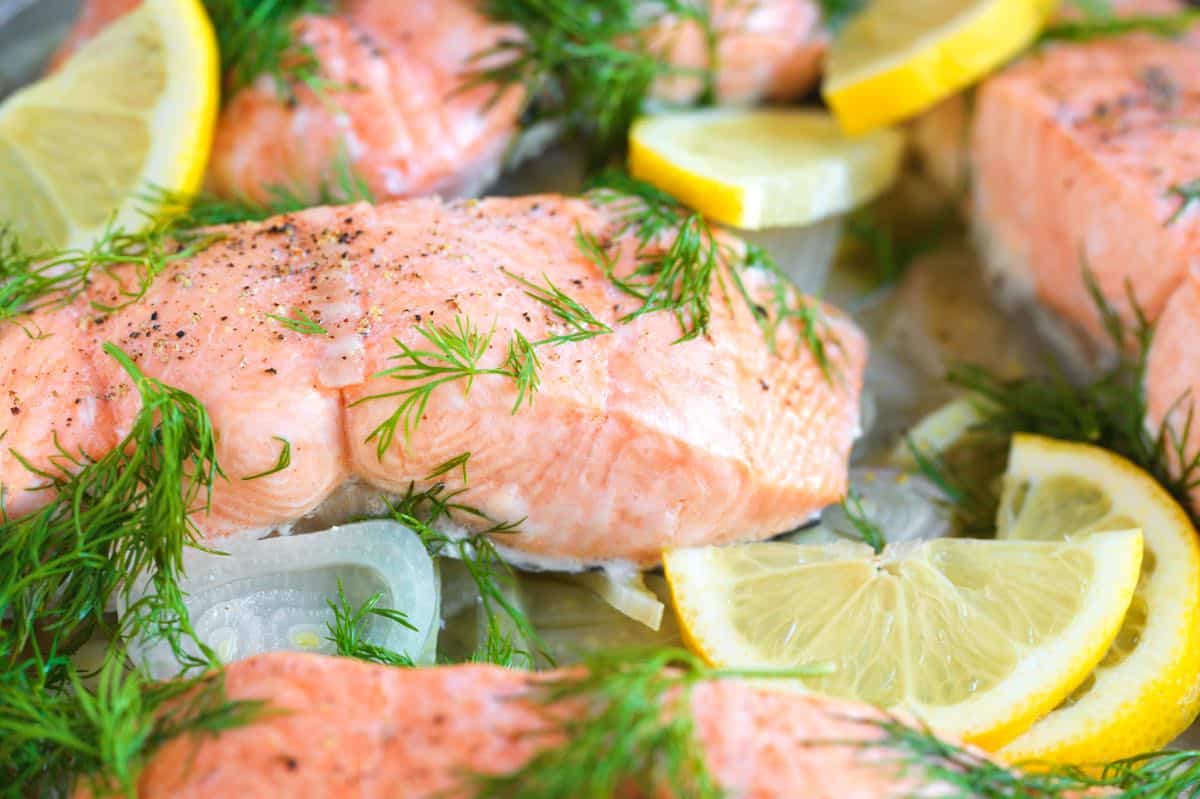
    This lemon dill salmon recipe is my family’s favorite way to cook salmon. Thanks to our easy baking method, the fish stays moist, flaky, and melts in your mouth.

    Lemon Dill Baked Salmon

    My mom makes the best baked salmon! Her secret is adding some liquid to the baking dish and covering it. This gently poaches the fish in the oven (you could even call it oven poached salmon).

    This lemon dill recipe uses her foolproof method, and I’m so excited for you to try it! This salmon is especially delicious served with our creamy dill sauce.

    Key Ingredients

    • Salmon: Any salmon fillet will work for this recipe. However, I especially love those with a higher fat content, like sockeye, king, and coho. When baked, these types of salmon stay soft and moist.
    • Lemon: My mom always places a slice of lemon underneath her fillets, and I do the same. It adds a lovely lemon aroma and flavor to the dish.
    • Dill: Dill and salmon are such a classic pairing. I use fresh dill whenever possible, but you can substitute dried. I’ve shared tips for this below the recipe.
    • White wine: My mom sticks with water (which is totally fine), but I love adding a little extra flavor with dry white wine. Use something light and dry, like sauvignon blanc, pinot grigio, or unoaked chardonnay. I also use white wine for this skillet poached salmon.

    Find the full recipe with measurements below.

    How to Make Lemon Dill Baked Salmon

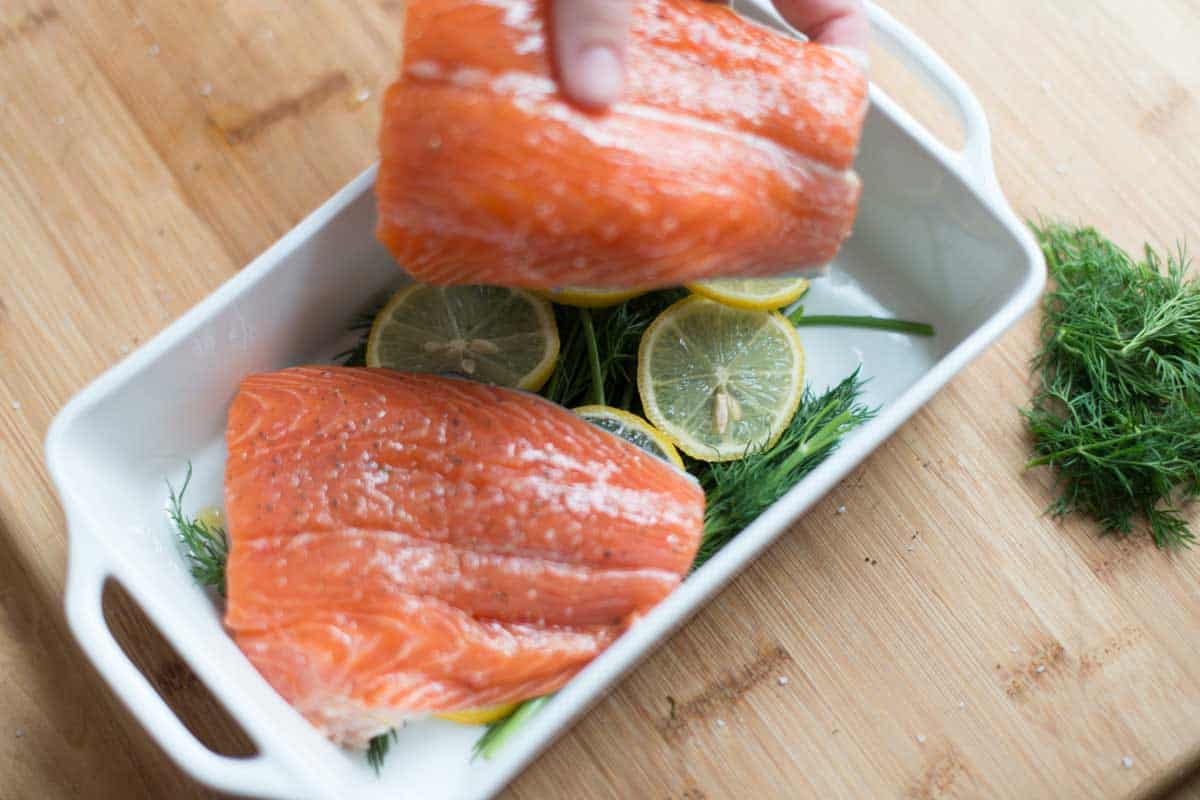
    Tip 1: Place salmon on a layer of fresh dill and lemon slices. Season your fillets with olive oil, salt, and pepper, then place the fillets down on top of the lemon and dill. You can leave the skin on for this recipe (it acts as an extra barrier, protecting the fish from overcooking).

    Placing salmon on top of lemon slices, fresh dill, and add a little liquid.

    Tip 2: Pour wine or water into the baking dish and cover with foil. Bake the salmon in a 325°F oven until it flakes easily with a fork. For 1-inch fillets, expect 10 to 15 minutes. The steamy environment from our poaching liquid keeps the fish super moist in the middle.

    Serving Suggestions

    This recipe is incredibly versatile and pairs well with a variety of side dishes. For a sauce, we highly recommend this dill sauce for salmon (it’s so good!). Then, for sides, I love serving it with cauliflower rice. Adam prefers classic mashed potatoes, while my son enjoys simple buttered noodles.

    Veggies are always a great idea! Try roasted asparagus with a touch of garlic, sautéed zucchini, or my quick and easy sautéed cabbage.

    If you’re looking for a salad, the recipe works wonderfully with a Caesar salad, this lemon orzo pasta salad, or a simple green salad with balsamic vinaigrette. Finally, salmon and cucumber is a classic pairing. Try our tangy cucumber salad or this avocado salad with cucumber.

    More Salmon Recipes

    Baked Salmon with Lemon and Dill

    Lemon Dill Baked Salmon

    • PREP
    • COOK
    • TOTAL

    The trick to perfectly baked salmon is gently baking it in a bit of liquid, like wine, stock, or water. Cover the dish and bake until just cooked through. You can call this recipe oven poached salmon. It’s practically foolproof. If your salmon is thick, expect the cooking time to be a few minutes longer than what we share below.

    4 Servings

    Watch Us Make the Recipe

    You Will Need

    1 ½ pounds salmon fillets, 1-inch thick, preferably wild-caught

    1 tablespoon olive oil

    Salt and fresh ground black pepper

    1 lemon, cut into slices

    4 sprigs of fresh dill, plus more for serving

    1/2 cup dry white wine or water

    Directions

      1Preheat the oven to 325°F (162°C). Set aside a baking dish large enough to fit the fillets in one layer.

      2Lightly oil and season both sides of the fish with salt and pepper. (Optionally, cut the salmon into four 6-ounce fillets.)

      3Arrange lemon slices and dill on the bottom of the baking dish, then place the salmon skin-side down on top.

      4Add wine to the baking dish, and then cover with aluminum foil.

      5Bake until the fish flakes easily with a fork, 15 to 20 minutes, depending on the thickness of your fillets (thicker fillets may require longer). Check after 10 minutes to see its progress. The best way to prevent overcooking is to check the temperature of the salmon using an internal thermometer. The thickest part of the salmon should read 125°F.

      6Take the salmon out of the oven, untuck the foil to cover the dish loosely, and set aside on the counter for 5 minutes. The fish will continue to cook during this time.

      7Serve scattered with chopped fresh dill on top.

    Adam and Joanne’s Tips

    • Dried dill: Use 1 tablespoon dried dill. Add half of the lemon slices at the bottom of the dish, and sprinkle the rest over the top of the salmon.
    • Wine: Use a light, dry wine like sauvignon blanc, pinot grigio, or unoaked chardonnay. Or substitute water.
    • White stuff on cooked salmon: The white stuff around cooked salmon is called albumin. It’s perfectly fine to eat, but since it isn’t the prettiest thing to look at, I quickly scrape it away and spoon a bit of the cooking liquid from the bottom of the dish on top.
    • The nutrition facts provided below are estimates.

    Nutrition Per Serving
    Serving Size
    6 ounces
    /
    Calories
    300
    /
    Protein
    37 g
    /
    Carbohydrate
    1 g
    /
    Dietary Fiber
    0 g
    /
    Total Sugars
    0 g
    /
    Total Fat
    13 g
    /
    Saturated Fat
    2 g
    /
    Cholesterol
    91 mg


    AUTHOR:

    Joanne Gallagher

    Adam and Joanne of Inspired Taste

    We are Adam and Joanne Gallagher, the creators of Inspired Taste. Established in 2009, Inspired Taste grew from a childhood dream into one of the internet’s most trusted recipe sites with hundreds of reliable recipes, step-by-step videos, and expert tips.More About Us

    Source link

  • Easy Sour Cream Baked Salmon Recipe

    Easy Sour Cream Baked Salmon Recipe

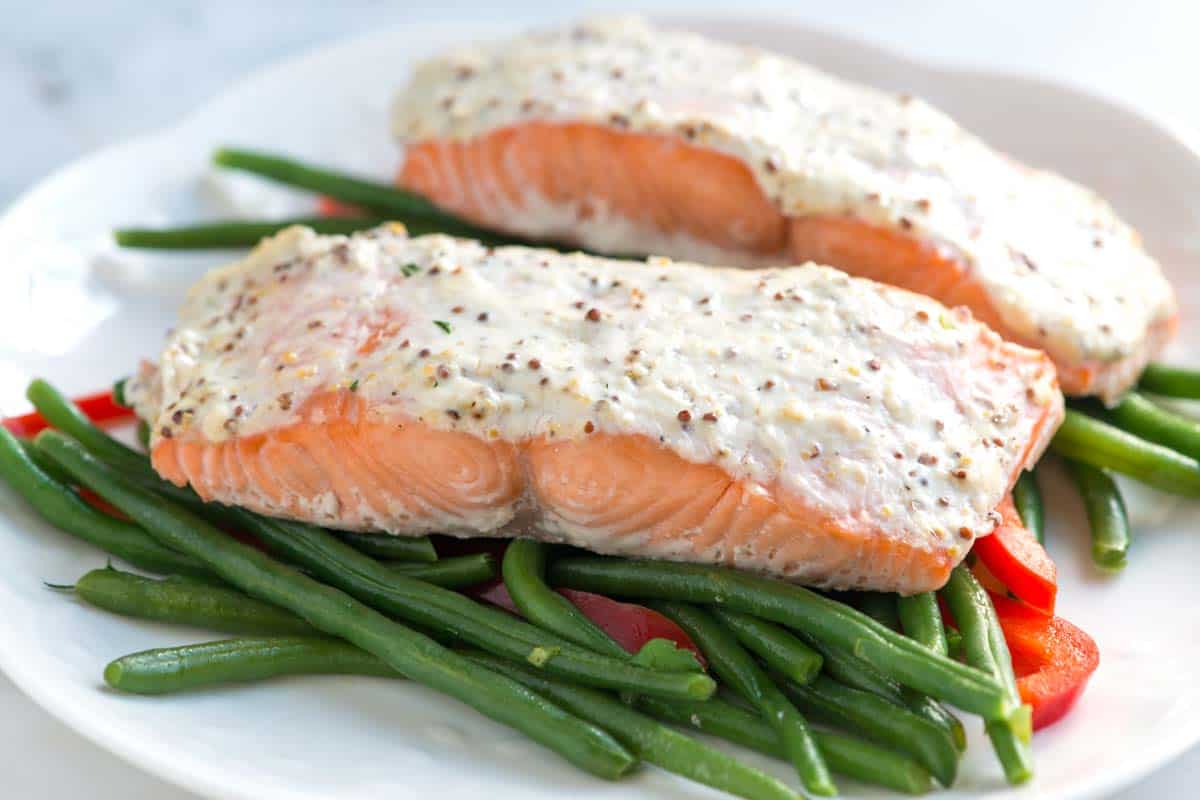
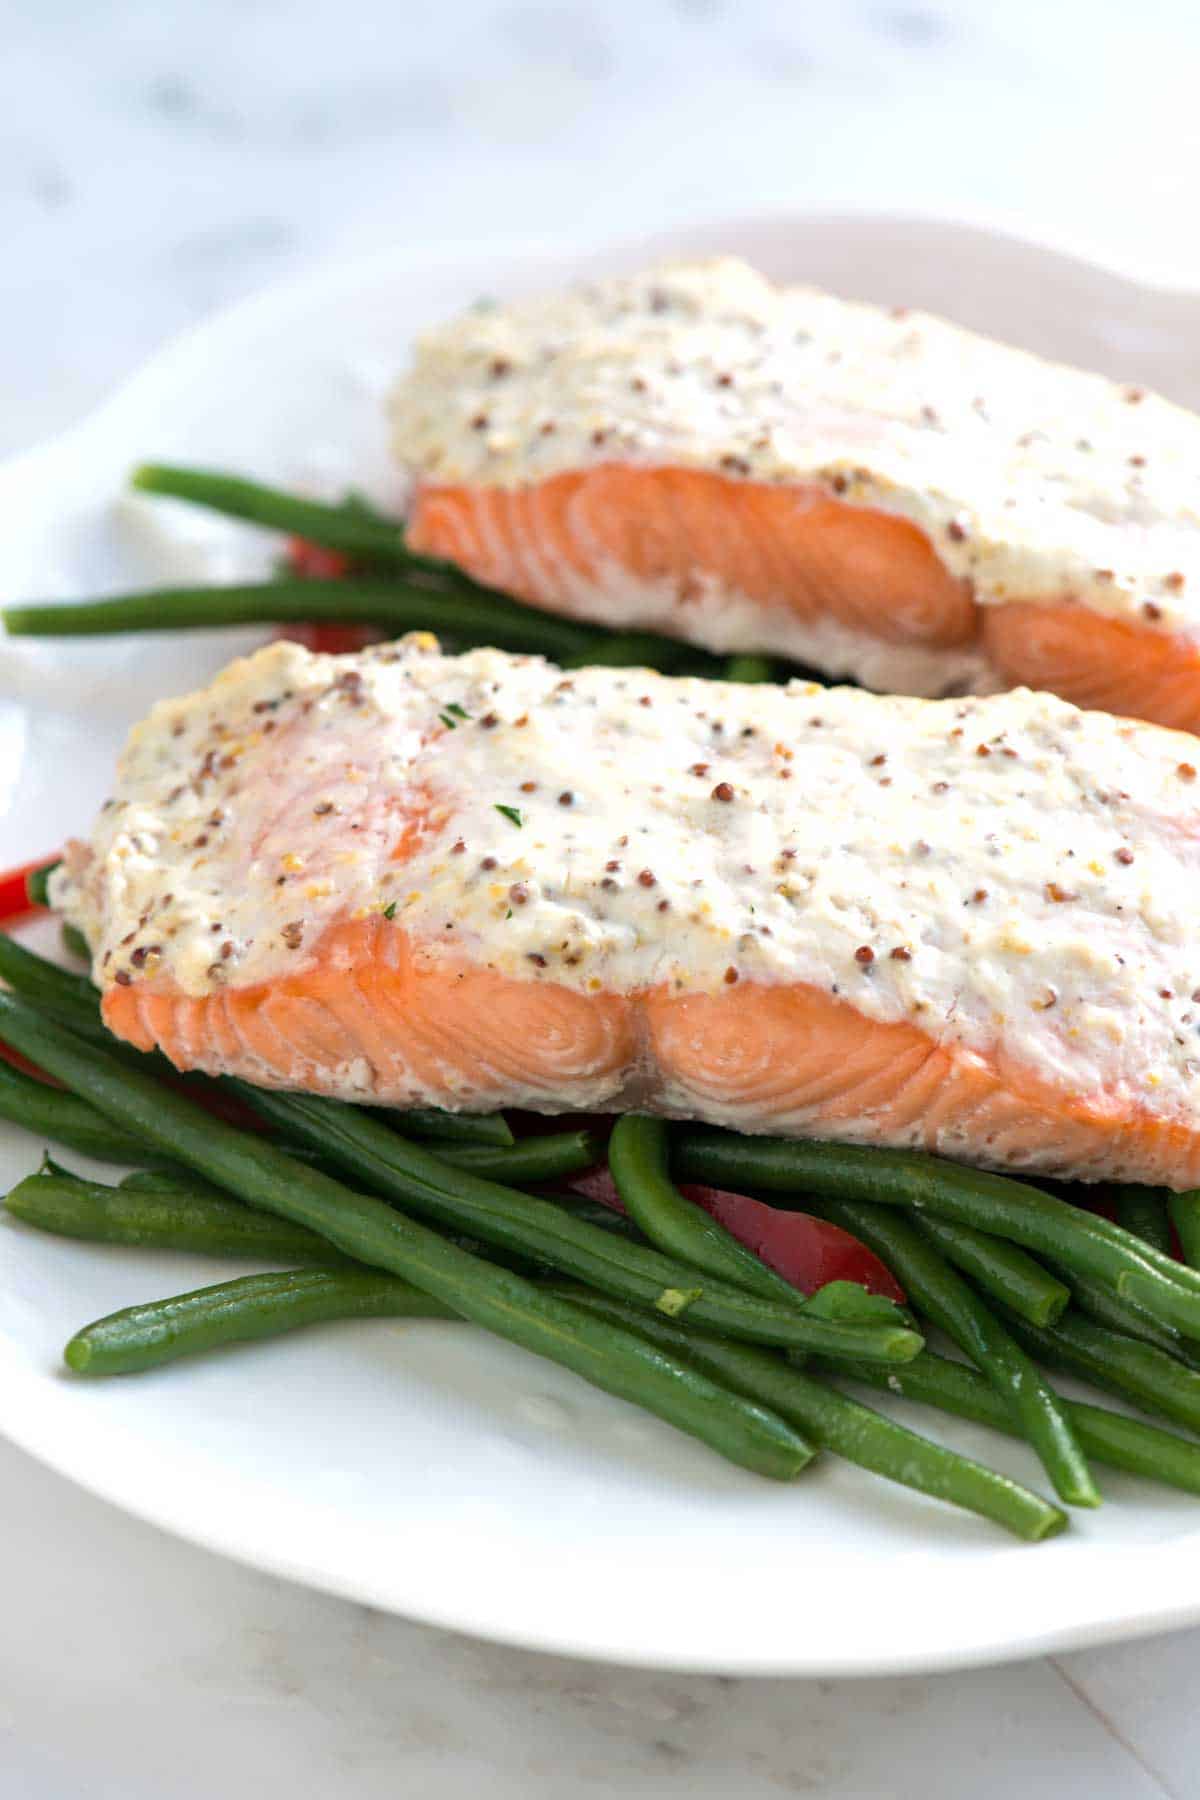
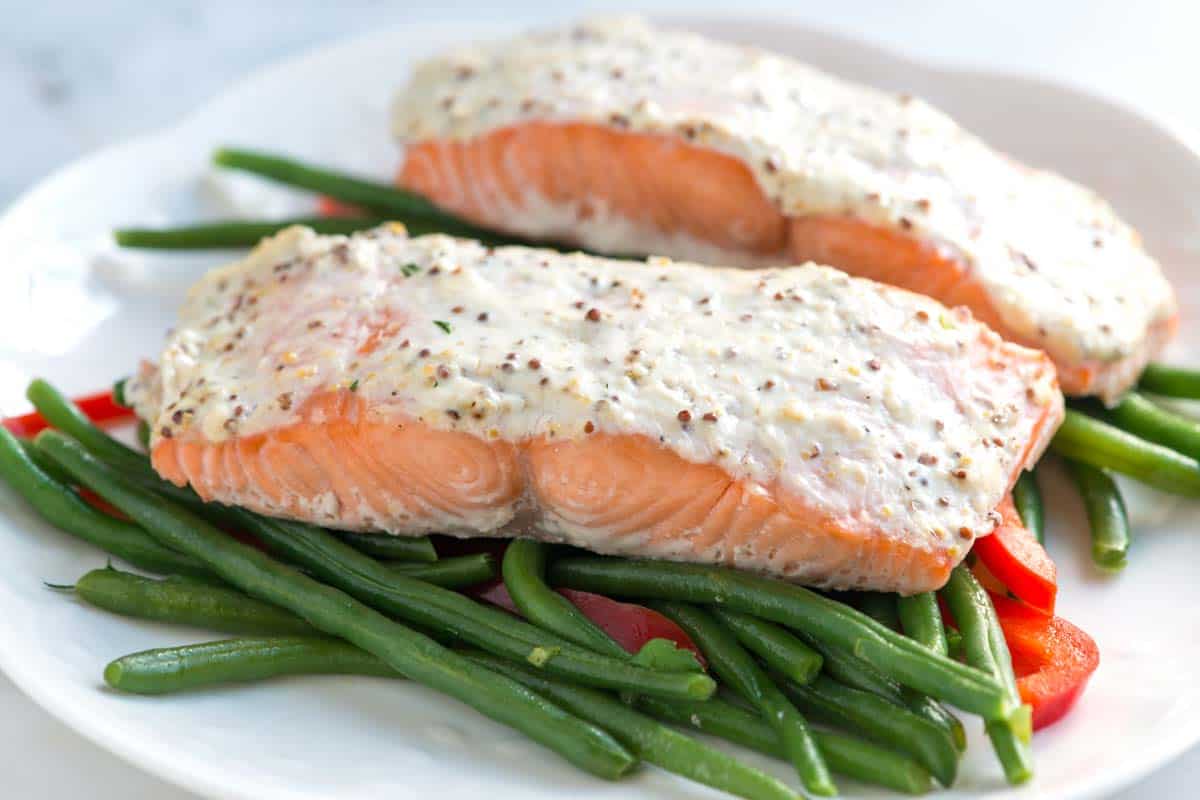
    My easy sour cream baked salmon is quick and so delicious. You’ll spread a simple sour cream and mustard sauce onto salmon fillets and bake until perfectly cooked. I love this easy salmon recipe so much!

    Easy Sour Cream Baked Salmon

    Our family eats a lot of salmon, so we have a long list of delicious salmon recipes. This sour cream and mustard crusted salmon is ridiculously simple to put together.

    Since you bake the salmon with the sour cream sauce, it becomes super moist and flavorful. For another easy recipe, see our brown sugar baked salmon!

    Key Ingredients

    • Salmon: Any salmon fillet will work for this recipe. However, I especially love those with a higher fat content, like sockeye, king, and coho. When baked, these types of salmon stay soft and moist.
    • Sour Cream Sauce: This quick three-ingredient sauce makes our salmon so delicious. You’ll stir sour cream (full fat is best) with whole-grain mustard and grated parmesan cheese. Dijon mustard is a good substitute for whole-grain mustard.

    How to Make Sour Cream Baked Salmon

    We love this salmon recipe! It’s flavorful and takes less than 30 minutes to prepare, which makes it perfect for busy nights. I’ve also served this for a dinner party with rave reviews!

    You’ll bake the salmon in the oven, so place your fillets onto a baking sheet or into a baking dish. Then, generously spread the sour cream sauce all over the top of the salmon fillets.

    Bake the salmon until it flakes easily. For 1-inch salmon fillets, expect 10 to 15 minutes. As it bakes, the sour cream sauce insulates the top of the salmon, so your fish will stay tender and moist inside.

    I love serving this with sautéed veggies, like these sautéed green beans or garlic butter zucchini. Mashed potatoes are a good idea, too!

    Sour Cream Baked Salmon

    Easy Sour Cream Baked Salmon

    • PREP
    • COOK
    • TOTAL

    This easy baked salmon recipe is ideal for a quick weeknight meal but elegant enough to serve for a special occasion. We coat the salmon with a creamy sour cream, mustard, and parmesan cheese sauce. The key to perfectly cooked salmon is to avoid overcooking it. Bake until the salmon is just cooked through at the thickest part, then remove from the oven, loosely cover with foil, and let it rest for a few minutes. This will ensure a moist and flavorful salmon every time.

    4 Servings

    You Will Need

    4 salmon filets, about 6 ounces each

    1/2 (113g) cup sour cream

    1 ½ teaspoons whole-grain mustard

    1/3 cup (20g) finely grated parmesan cheese

    Salt and fresh ground pepper

    Directions

      1Preheat the oven to 425°F (218°C). Lightly oil a rimmed baking sheet or large baking dish (or line with parchment paper).

      2Stir the sour cream, mustard, and parmesan in a small bowl. Season with salt and pepper to taste.

      3Place the salmon on the baking sheet, then spread two tablespoons of the sour cream mixture on top of each filet.

      4Bake for 10 to 15 minutes until barely done in the center at the thickest part of the salmon. The center should be firm, but with a small amount of uncooked salmon in the very center. Depending on how thick your salmon is, it may need a few minutes longer. (We cook salmon to an internal temperature of 125°F).

      5Remove from the oven, cover lightly with aluminum foil, and rest for 5 minutes. Serve.

    Adam and Joanne’s Tips

    • White stuff on cooked salmon: The white stuff around cooked salmon is called albumin. It’s perfectly fine to eat, but since it isn’t the prettiest thing to look at, I quickly scrape it away and spoon a bit of the cooking liquid from the bottom of the dish on top.
    • The nutrition facts provided below are estimates.

    Nutrition Per Serving
    Serving Size
    1 (6oz) fillet
    /
    Calories
    328
    /
    Protein
    40 g
    /
    Carbohydrate
    1 g
    /
    Dietary Fiber
    0 g
    /
    Total Sugars
    1 g
    /
    Total Fat
    17 g
    /
    Saturated Fat
    6 g
    /
    Cholesterol
    111 mg


    AUTHOR:

    Joanne Gallagher

    Previous Post: Perfect Poached Salmon
    Next Post: Lemon Dill Baked Salmon

    Source link

  • Perfect Poached Salmon Recipe

    Perfect Poached Salmon Recipe

    I’m convinced this poached salmon recipe makes some of the most tender, mouth-watering salmon. It’s also ridiculously easy!

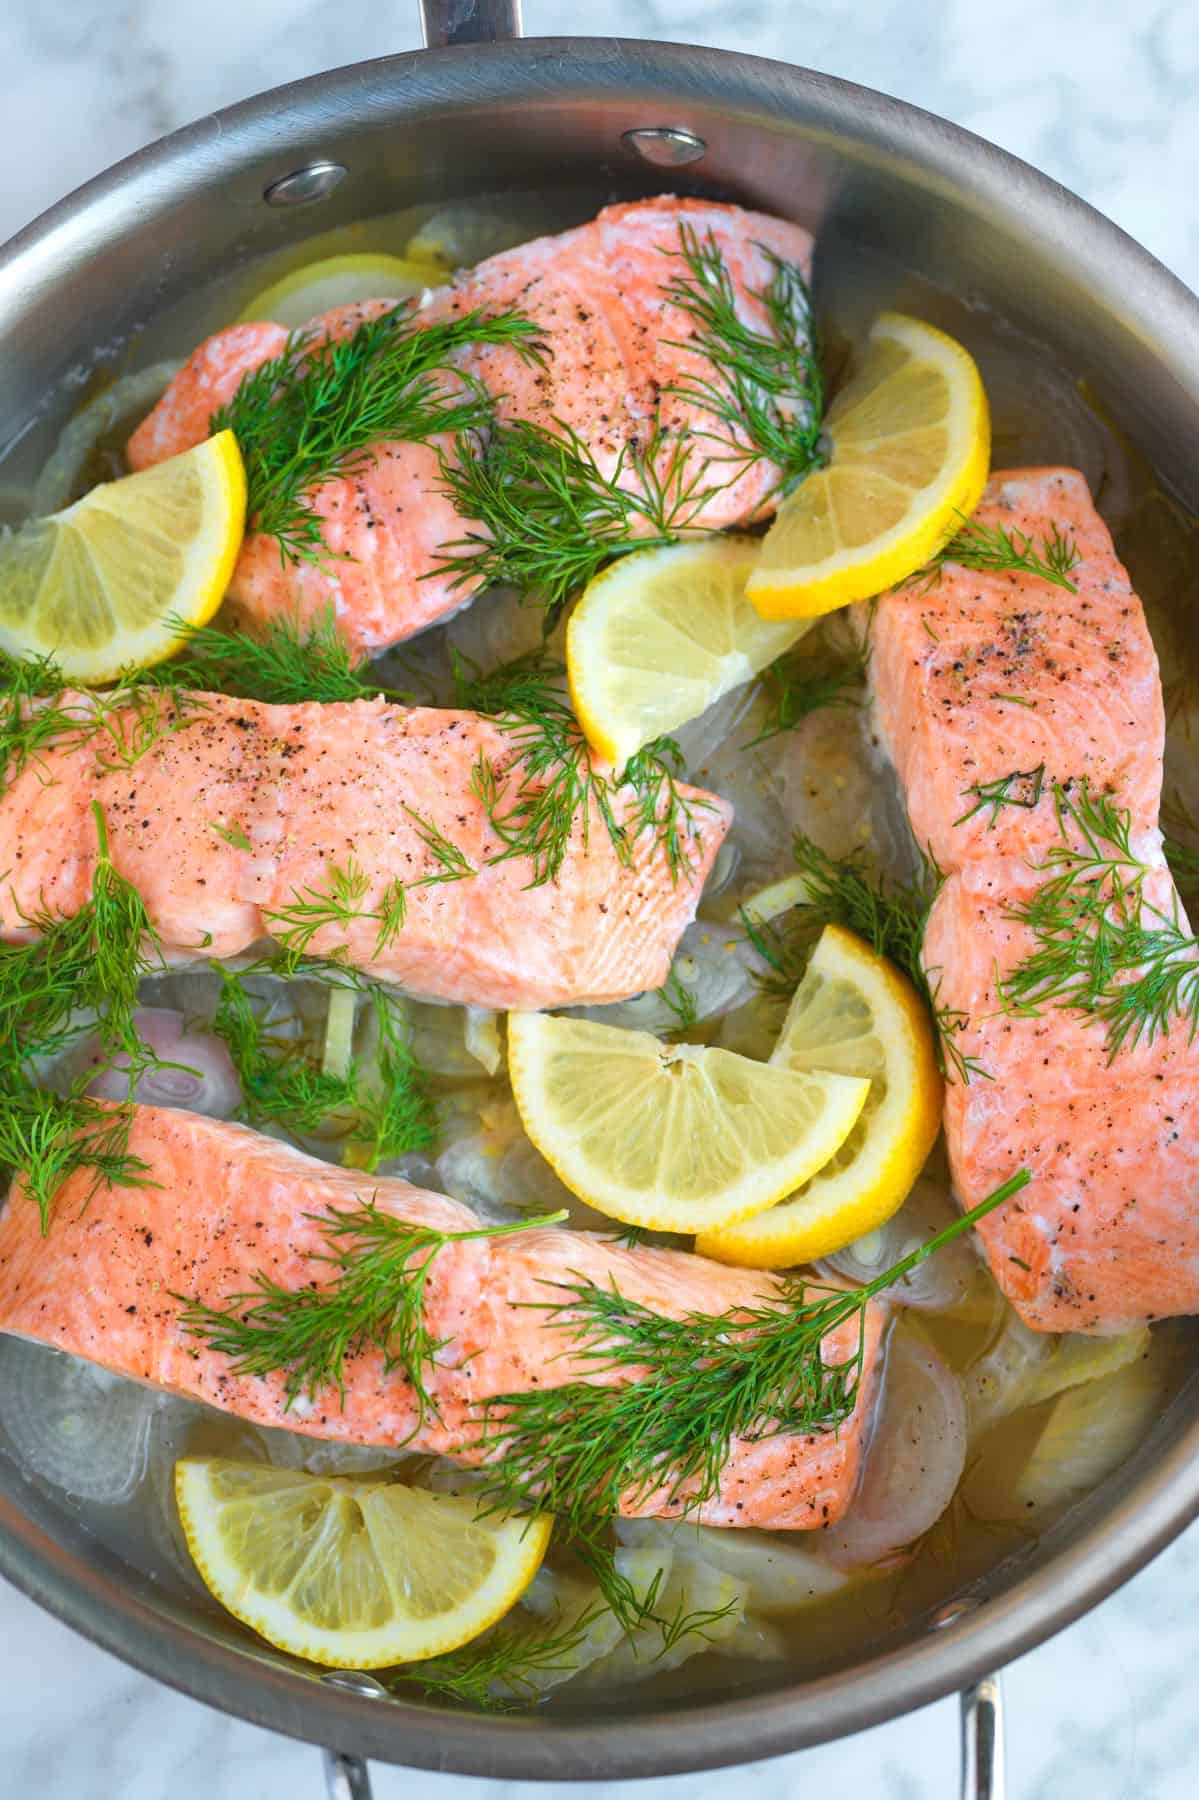
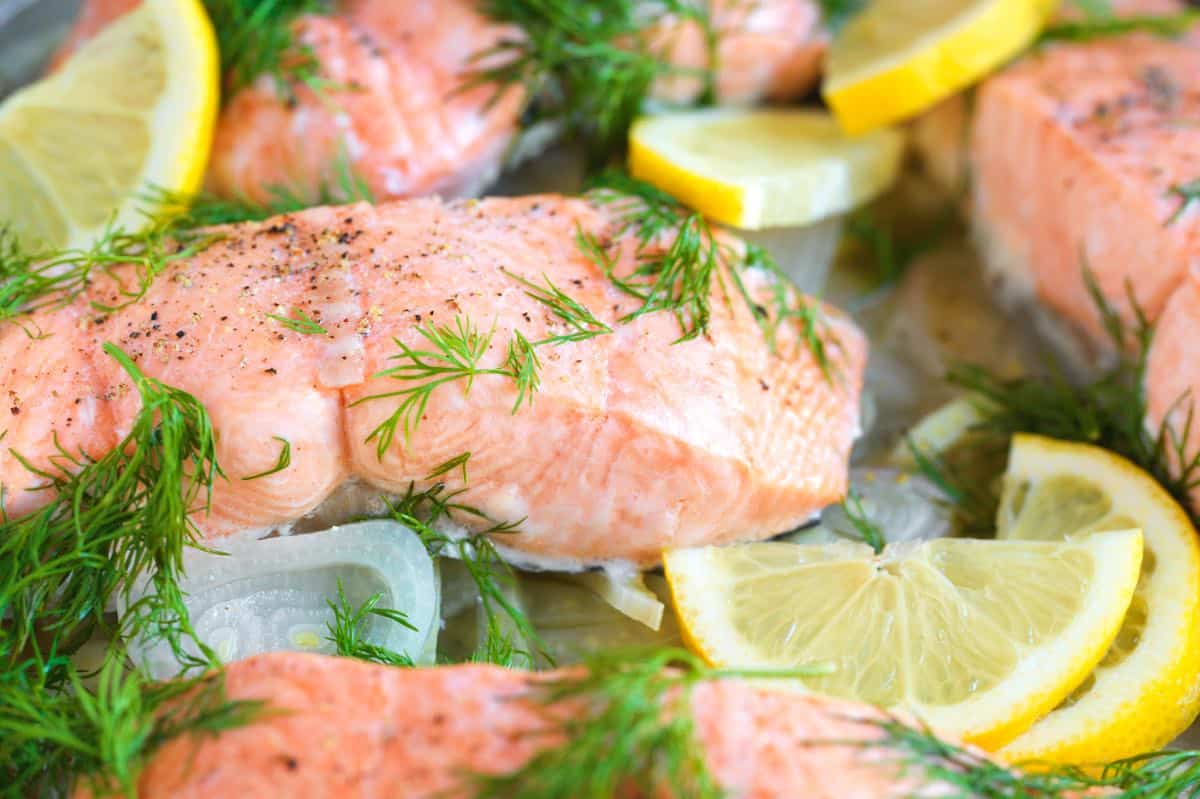
    Perfect Poached Salmon with Lemon and Dill

    Poaching is genuinely one of the best ways to cook salmon. Here’s my go-to recipe, which once you try it, I’m betting you’ll become just as obsessed as I am. And while we are on the subject, I also LOVE poached chicken and poached shrimp!

    This salmon turns out incredibly moist, soft, and not at all fishy. It’s perfect for topping your favorite salad recipes, flaked over toast, on top of creamy polenta and grits, or with veggies like my favorite roasted broccolini. It’s also incredible with a spoonful of hollandaise sauce or this dill sauce.

    Key Ingredients

    • Salmon: I use salmon fillets around 1 inch thick (the thicker fillets stay more tender and succulent). I also like fattier varieties of salmon, such as King, Coho, and Sockeye. We also love Steelhead in this recipe (similar to Atlantic salmon).
    • Wine or Broth: I use a combination of wine and water for this recipe. A splash of white wine adds a lovely flavor. I’ve even used leftover Lillet Blanc with excellent results (I usually have it on hand to make this French onion soup)! If you’re out of wine, broth is a delicious substitute. Vegetable broth or a light chicken broth works well, and seafood stock is even better.
    • Lemon: Sliced lemon is the classic choice for poaching salmon. Try limes or oranges for a fun twist.
    • Shallot: I prefer shallots over onion for poaching. They have a gentle sweetness that works well with the salmon. Smashed garlic cloves or sliced sweet onion are great alternatives.
    • Fennel: My favorite aromatic for salmon! Fresh fennel adds a lovely licorice flavor. I wish more people cooked with fennel. If you’re feeling fancy, toss some extra fennel into your cart to make our fennel and apple salad (it pairs perfectly with this).
    • Fresh dill: Dill and salmon are a match made in heaven! I like scattering a lot of fresh dill into the pan. Other herbs like thyme, bay leaf, mint, and parsley are all great options.

    Find the full recipe with measurements below.

    How to Poach Salmon

    Tip 1: Keep the skin on. I keep the skin on my salmon fillets. The skin is much easier to remove after cooking and is a barrier to heat from below, protecting the salmon from overcooking.

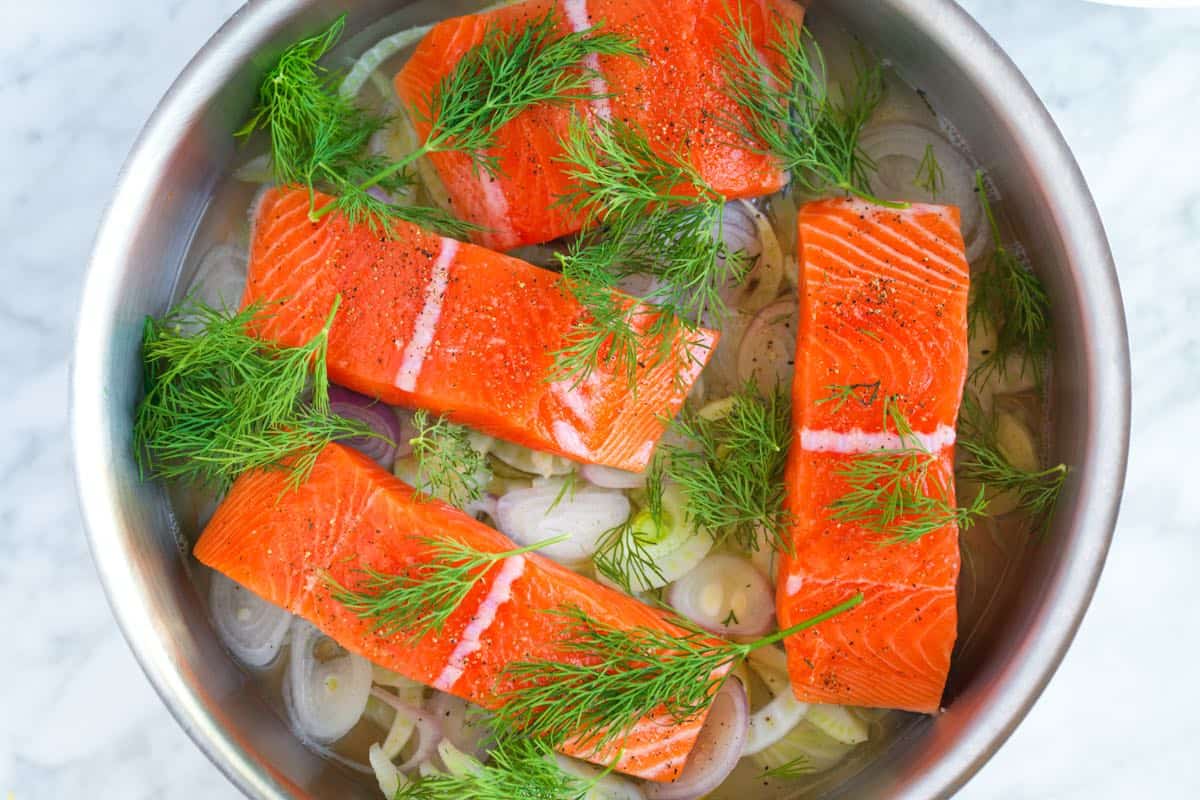
    Skillet with lemon slices, shallot, fennel and salmon fillets almost ready for poaching

    Tip 2: Use a skillet with a lid. You’ll need a skillet with a lid for this recipe. The poaching liquid does not need to cover the salmon. The lid will trap all the moisture in the skillet and help to gently cook your salmon. As the fish cooks, the aromatics will infuse their flavor into the fish. I just love it!

    Adding fresh dill to the salmon in the skillet for poached salmon fillets

    Serving Suggestions

    This salmon is fantastic on salads. Try salads like my broccoli slaw, kale salad, or a classic Caesar. Cucumber and salmon are meant for each other, so I love this creamy cucumber salad, zippy vinegar cucumber salad, or avocado and cucumber salad.

    This is also amazing, added to sandwiches and wraps. Consider this homemade pita, salad greens, and a drizzle of Tzatziki sauce! Leftover poached salmon would also be lovely in our salmon patties recipe (which usually calls for canned salmon).

    More Light Seafood Dishes

    Perfect Poached Salmon with Dill

    Perfect Poached Salmon

    • PREP
    • COOK
    • TOTAL

    Poaching salmon is one of our favorite ways to cook salmon! It cooks quickly and stays moist, flaky, and tender. The aromatics (lemon, shallot, fennel, and dill) are optional but add lots of delicious flavor. You can use water, broth, or a combination of water and white wine for the poaching liquid. If you love this recipe, you may also love my poached chicken and poached shrimp!

    Serves 4

    Watch Us Make the Recipe

    You Will Need

    4 skin-on salmon fillets, 6 ounces each

    1 cup water

    1/2 cup white wine or broth

    1 lemon, sliced

    1 shallot, sliced

    1 medium fennel bulb, sliced

    6 sprigs fresh dill or other fine herb like parsley, cilantro or mint

    Salt and fresh ground black pepper

    Directions

      1Make a bed of lemon slices, shallot, and fennel in the bottom of a wide skillet with a lid.

      2Lightly season the salmon fillets with salt and pepper, then place them, skin side down, on the lemon slices, shallot, and fennel.

      3Scatter fresh dill around the pan and on top of the salmon.

      4Pour in the water and wine. The liquid does not need to cover the salmon. Since we are cooking it with the lid on, the salmon will poach, even if the liquid does not cover them.

      5Place the skillet over medium-high heat and bring to a simmer. When the liquid is aggressively simmering, turn the heat to low and cover the skillet with its lid.

      6Cook until an internal temperature thermometer reads between 125°F to 130°F or when you pierce the thickest part of the salmon with a fork, 5 to 12 minutes, depending on how thick the salmon fillets are. Serve.

    • Storing
    • 1Your salmon will last in an airtight container in the fridge for up to 4 days or frozen for up to 1 month. Thaw in the refrigerator overnight before reheating.

      2To reheat, place it in an oven-safe dish. Add a splash of water or broth for extra moisture. Cover the dish with aluminum foil to prevent drying. Bake for about 15 minutes, or until it reaches an internal temperature of 125°F to 130°F.

    Adam and Joanne’s Tips

    • Skin-on fillets: The skin is much easier to remove after cooking, and it acts as a barrier for heat coming from below the fillets, protecting them from overcooking.
    • Your poaching liquid does not need to cover the fish: Aim for the liquid to come about a quarter of the way up the sides of the salmon fillet. The gentle heat and the lid will create a steamy environment, poaching the salmon beautifully.
    • Seasoning the salmon: I use a simple seasoning of salt and pepper or this seasoned salt and lightly sprinkle it on both sides of the fish. If you have a favorite seafood rub, feel free to add it.
    • The nutrition facts provided below are estimates.

    Nutrition Per Serving
    Serving Size
    1 fillet
    /
    Calories
    280
    /
    Total Fat
    10.1g
    /
    Saturated Fat
    2.2g
    /
    Cholesterol
    76.5mg
    /
    Sodium
    203.6mg
    /
    Carbohydrate
    2.6g
    /
    Dietary Fiber
    0.8g
    /
    Total Sugars
    1.1g
    /
    Protein
    37.1g


    AUTHOR:

    Joanne Gallagher

    Adam and Joanne of Inspired Taste

    We are Adam and Joanne Gallagher, the creators of Inspired Taste. Established in 2009, Inspired Taste grew from a childhood dream into one of the internet’s most trusted recipe sites with hundreds of reliable recipes, step-by-step videos, and expert tips.More About Us

    Source link

  • Easy Oven Baked Trout Recipe

    Easy Oven Baked Trout Recipe

    Learn how to cook moist, flaky trout in the oven. This incredible baked trout recipe is easy and works for rainbow trout but can easily be adapted for larger varieties like steelhead.

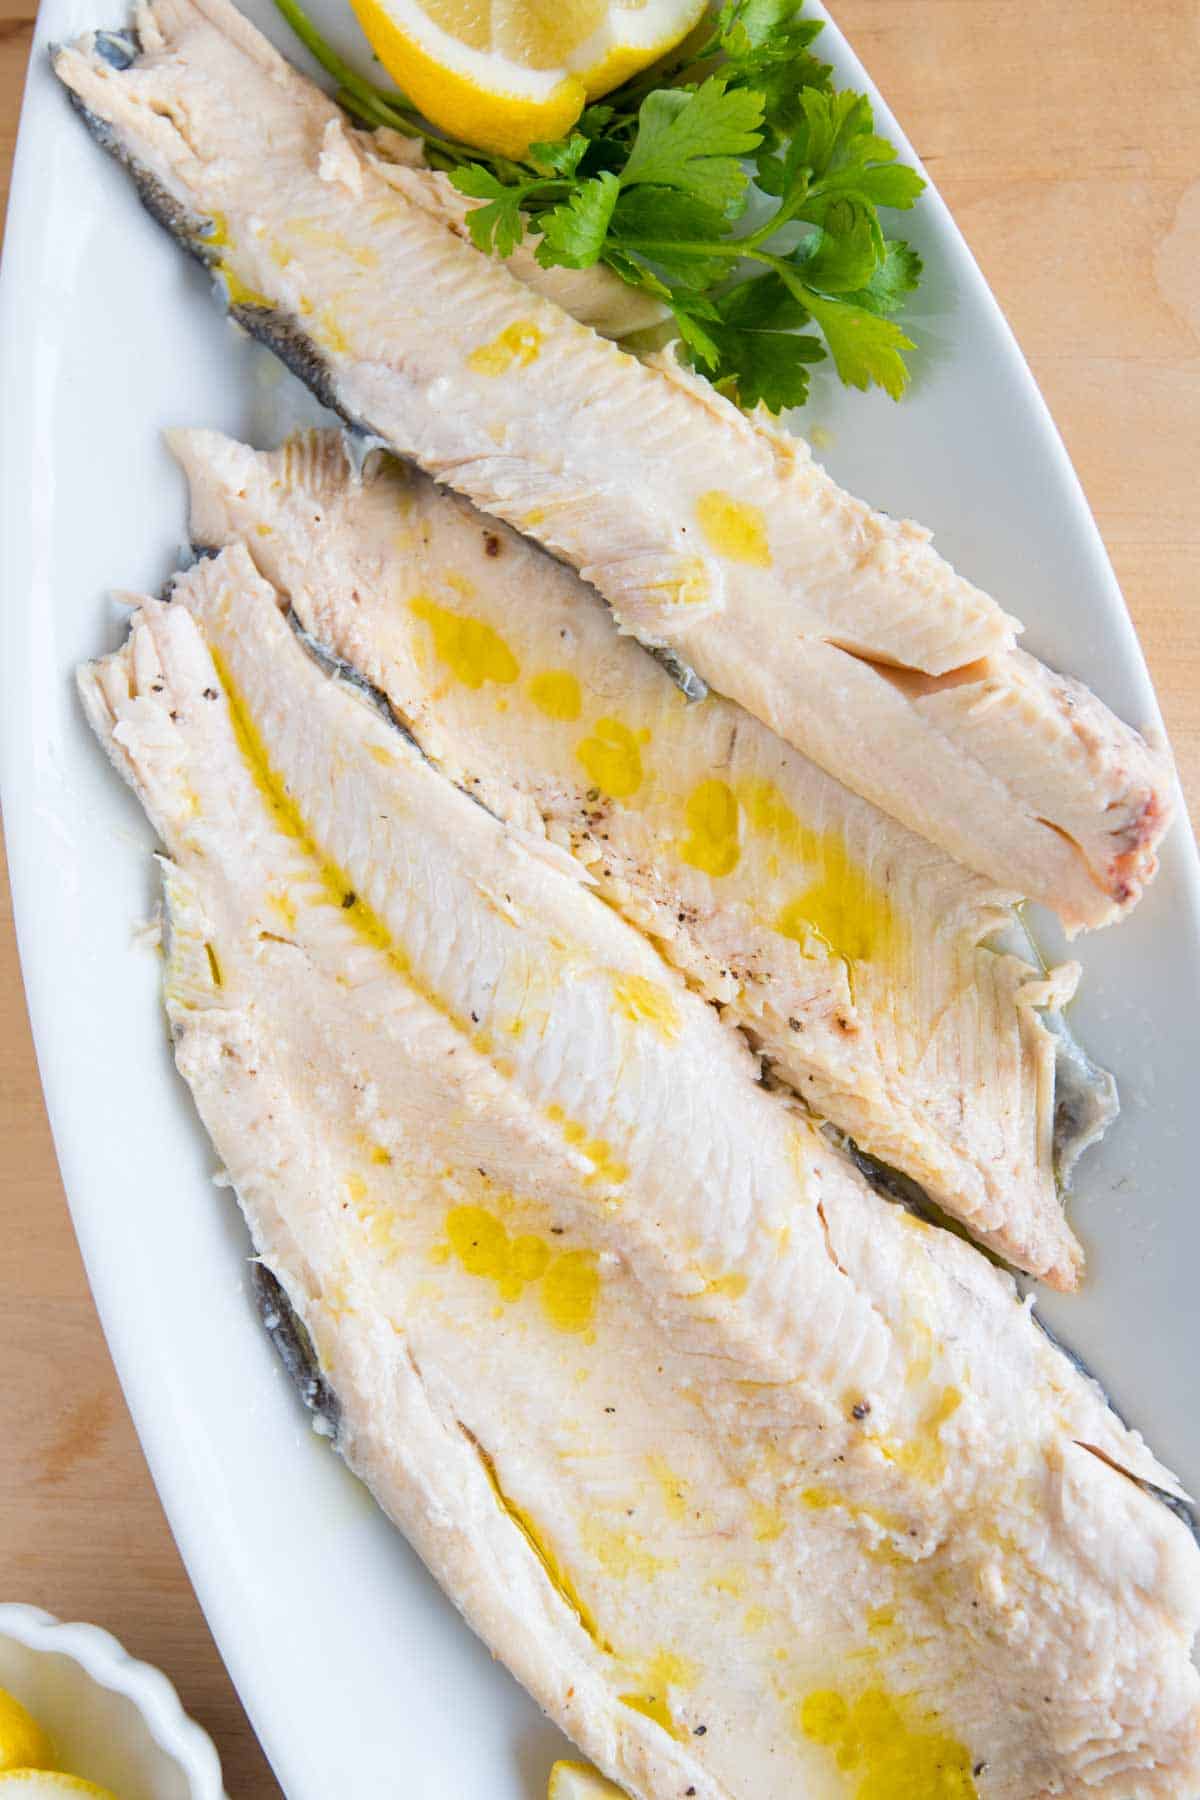
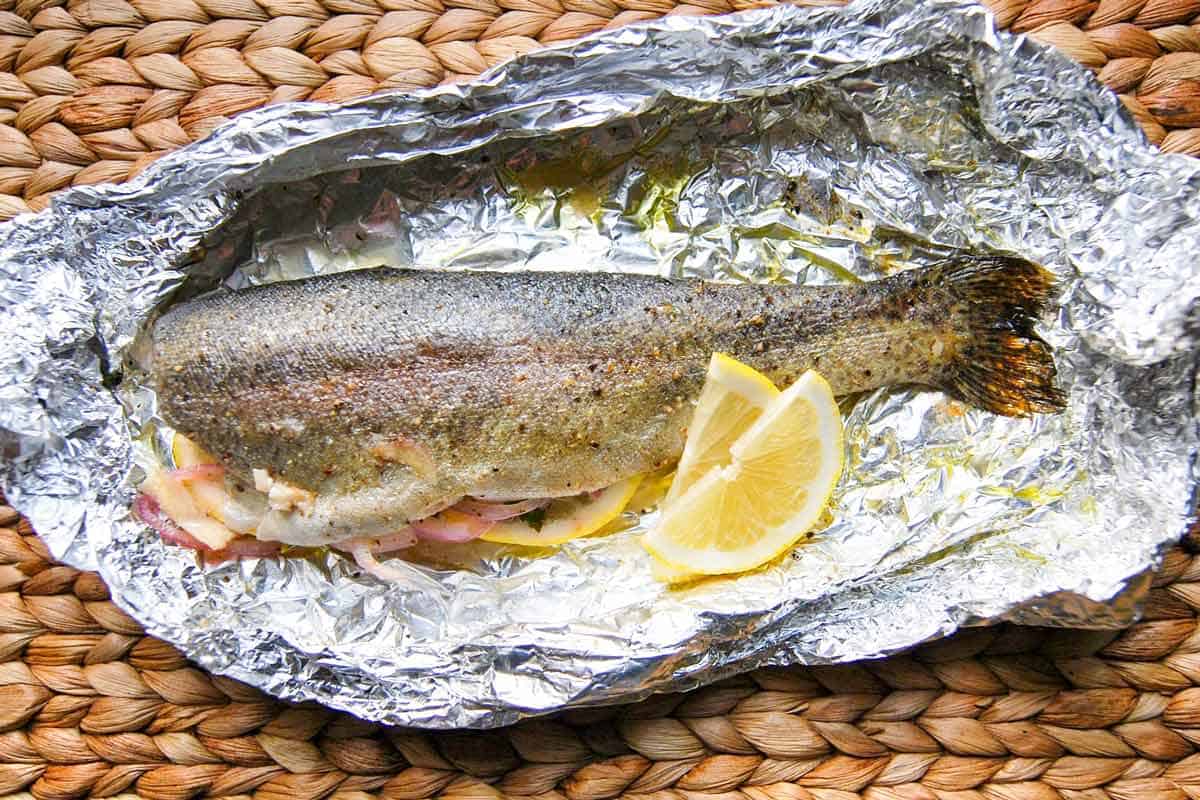
    Baked Trout on serving plate

    Baking whole trout in the oven is genius, especially when you do it in foil or parchment paper packets (called fish cooked en papillote or “paper”). With our easy recipe, your trout stays super moist and dinner will be on the table in about 20 minutes. This truly is one of my favorite trout recipes!

    After sharing this easy baked trout recipe with friends, some were nervous about cooking the whole fish (with the skin, tail, and head still attached). So, if your on the same wavelength, I promise it’s easy and delicious!

    Key Ingredients

    • Trout: You can buy trout as whole fish that has been gutted and cleaned (like in our photos) or as fillets. For this recipe, we’re using whole trout. Look for cleaned and butterflied whole trout. By butterflied, I mean that the fish is slit down the middle but still has the halves attached. I’ve used rainbow trout in our photos, but this recipe works well for larger, saltwater varieties like arctic char, steelhead trout, and even salmon. Check my tips in the recipe for adjusting cooking time.
    • Lemon and Fresh Herbs: Since we use butterflied trout, we can sneak a few aromatics into the middle to infuse the fish while it bakes. I love lemon slices and a handful of fresh herbs like parsley, cilantro, or dill. Thinly sliced garlic or onion are also lovely.
    • Seasoning: I use olive oil, salt, and pepper to season my trout, but you can always use your favorite seafood seasonings instead. I’ve also made a Cajun spiced trout before and loved it. Try my Cajun seasoning if that sounds like something you’d enjoy.

    Find the full recipe with measurements below.

    How to Cook Whole Trout

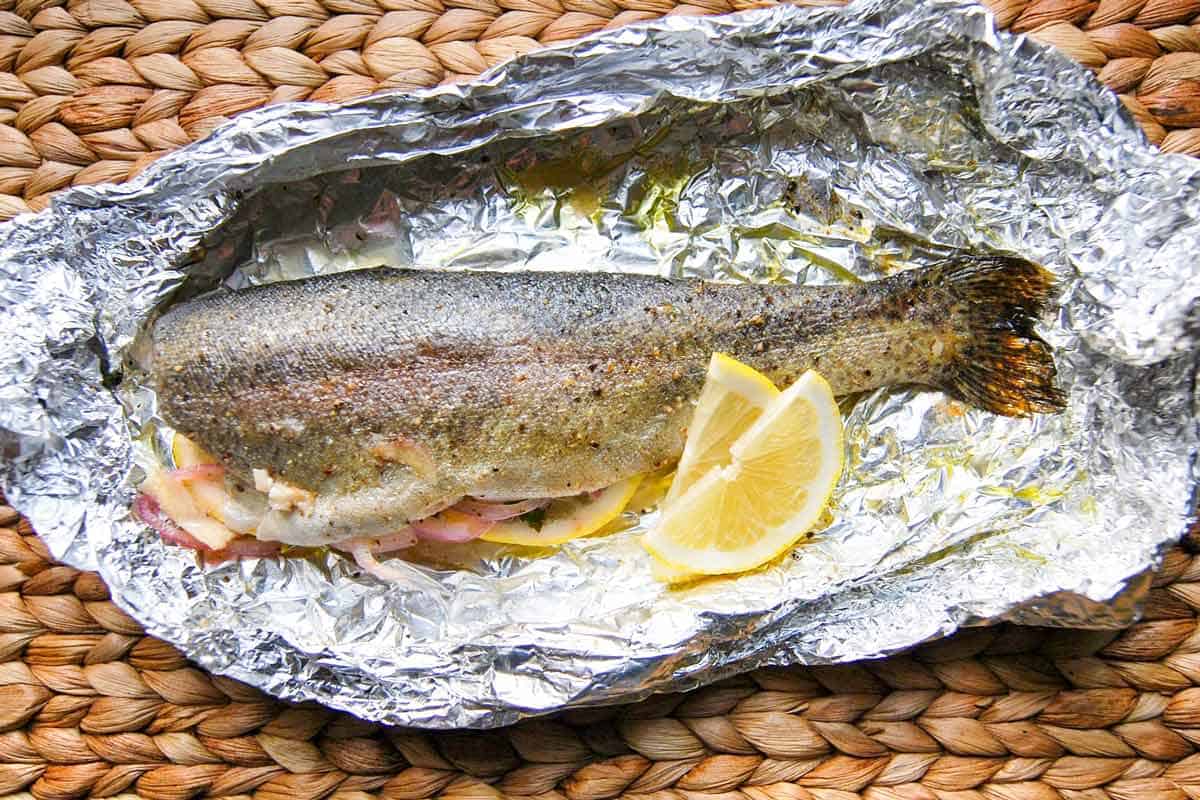
    Tip 1: Bake your fish in packets. We love baking our trout in packets. We used foil in the photos, but parchment paper is a also great option. Place your trout down onto the foil, lightly drizzle with oil, and season the fish inside and out with salt and pepper (note, you can use your favorite seafood seasoning instead).

    Tip 2: Stuff your fish with lemon and herbs. We love stuffing the trout with lemon slices and fresh herbs. Sliced onions are tasty, too! Fold the sides of the packet to secure it and bake the trout in the oven until the flesh flakes easily with a fork.

    Stuffing trout with lemon and herbs

    Tip 3: Bake at the right temperature. The cooking time for your trout will vary depending on how large the fish is and the variety of fish you are baking. A small trout, like the one pictured in our photos, takes about 15 minutes in a 400°F oven. You can serve the fish as-is in the packets or remove them and remove the fillets from the bones.

    How to Debone Trout

    Watch our video to see me debone our baked trout. I’ve also shared my tips below for filleting cooked trout, which I find much easier than when the fish is raw. It’s a simple process. I use a spoon and butter knife to do it. Here are the basic steps I follow. I highly recommend watching the video:

    1. Pull away all the fins. Since the fish is cooked, they come away easily.
    2. Press the knife into the soft flesh just before the head and cut up to the bone. Repeat this with the soft flesh just before the tail.
    3. Use the knife to follow the line down the middle of the trout (this follows the spine). Just cut up to the bone.
    4. Following the line you just made down the spine, use a spoon to carefully pull/push the top and bottom fillet away from the bones.
    5. Pull the tail up and away the fish. By doing this the spine and bones will come away with it.
    6. Clean all the fillets of small bones and transfer to a plate for serving.

    Serving Suggestions

    I love serving this with a Caprese salad or a simple green salad tossed in my favorite balsamic vinaigrette or honey mustard dressing. It’s also excellent alongside red potato salad, corn salad, or creamy mashed potatoes.

    For finishing touches, a drizzle of olive oil is lovely over the trout, or try it with homemade tartar sauce or our garlic aioli.

    More Simple Fish Recipes

    Oven Baked Trout

    Easy Oven Baked Trout

    • PREP
    • COOK
    • TOTAL

    This is the best way to cook trout! I love baking whole trout in packets in the oven (see tips for doing this on the grill). The baked trout turns out succulent and flavorful. While your fish bakes, juices form at the bottom of the packet, which are delicious when spooned over the cooked trout. Other ingredients to consider adding to the middle of the fish are thinly sliced garlic, onion, or greens (like spinach). If you have larger varieties of fish like steelhead trout or even salmon, you can still use our method, but the bake time will be longer.

    2 Servings

    Watch Us Make the Recipe

    You Will Need

    2 small rainbow trout, cleaned and butterflied (opened up with the halves still attached), about 1 pound

    Olive oil

    1 lemon, sliced

    Fresh herbs, such as parsley, dill, tarragon, and thyme

    Salt

    Fresh ground black pepper

    Directions

      1Preheat the oven to 400°F (204°C). Cut two sheets of heavy-duty aluminum foil larger than your fish, or use parchment paper.

      2Place the trout, skin side down, on each piece of foil. Drizzle both sides with olive oil, then season both sides, inside and out, with salt and pepper.

      3Place two parsley (or dill) sprigs and two lemon slices down the middle of each fish.

      4Fold the foil by grabbing at the edges and crimping it together to make a packet.

      5Place the packets of fish onto the baking sheet.

      6Bake, checking one packet after 10 minutes. Depending on the size of your fish, it will take 15 to 25 minutes. When ready to come out of the oven, the flesh will be opaque and flake easily with a fork.

      7Place each packet on a plate. Carefully open the foil packets, taking care not to let the steam burn you.

      8Slide the fish away from the packet and onto the plate, pouring the juices over it. Serve with more fresh herbs and lemon slices.

    Adam and Joanne’s Tips

    • Parchment paper: If you do not have heavy-duty foil, use two sheets of regular foil to make each packet.
    • How to make grilled trout: Follow the directions in the recipe above to make each packet. Heat the grill to medium-high heat. Place the packets over indirect heat. Grill for 10 minutes, check one packet for doneness, and then continue to cook until it is cooked through.
    • The nutrition facts provided below are estimates.

    Nutrition Per Serving
    Calories
    285
    /
    Protein
    32 g
    /
    Carbohydrate
    1 g
    /
    Dietary Fiber
    0 g
    /
    Total Sugars
    0 g
    /
    Total Fat
    16 g
    /
    Saturated Fat
    4 g
    /
    Cholesterol
    87 g


    AUTHOR:

    Adam Gallagher

    Adam and Joanne of Inspired Taste

    We are Adam and Joanne Gallagher, the creators of Inspired Taste. Established in 2009, Inspired Taste grew from a childhood dream into one of the internet’s most trusted recipe sites with hundreds of reliable recipes, step-by-step videos, and expert tips.More About Us

    Source link

  • Perfect Lobster Rolls Recipe

    Perfect Lobster Rolls Recipe

    These are the best homemade lobster rolls we’ve ever had! Our recipe combines perfectly cooked lobster with the most incredible warm butter and mayonnaise dressing. These are almost too good!

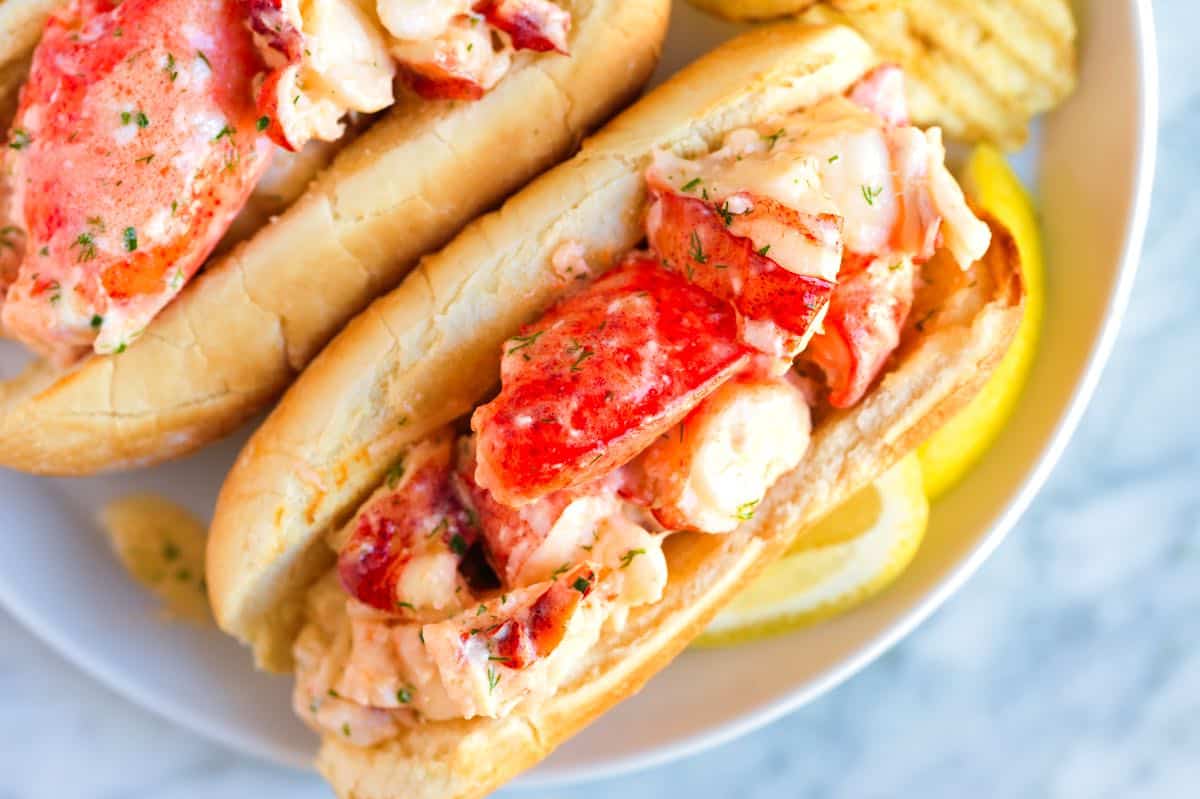
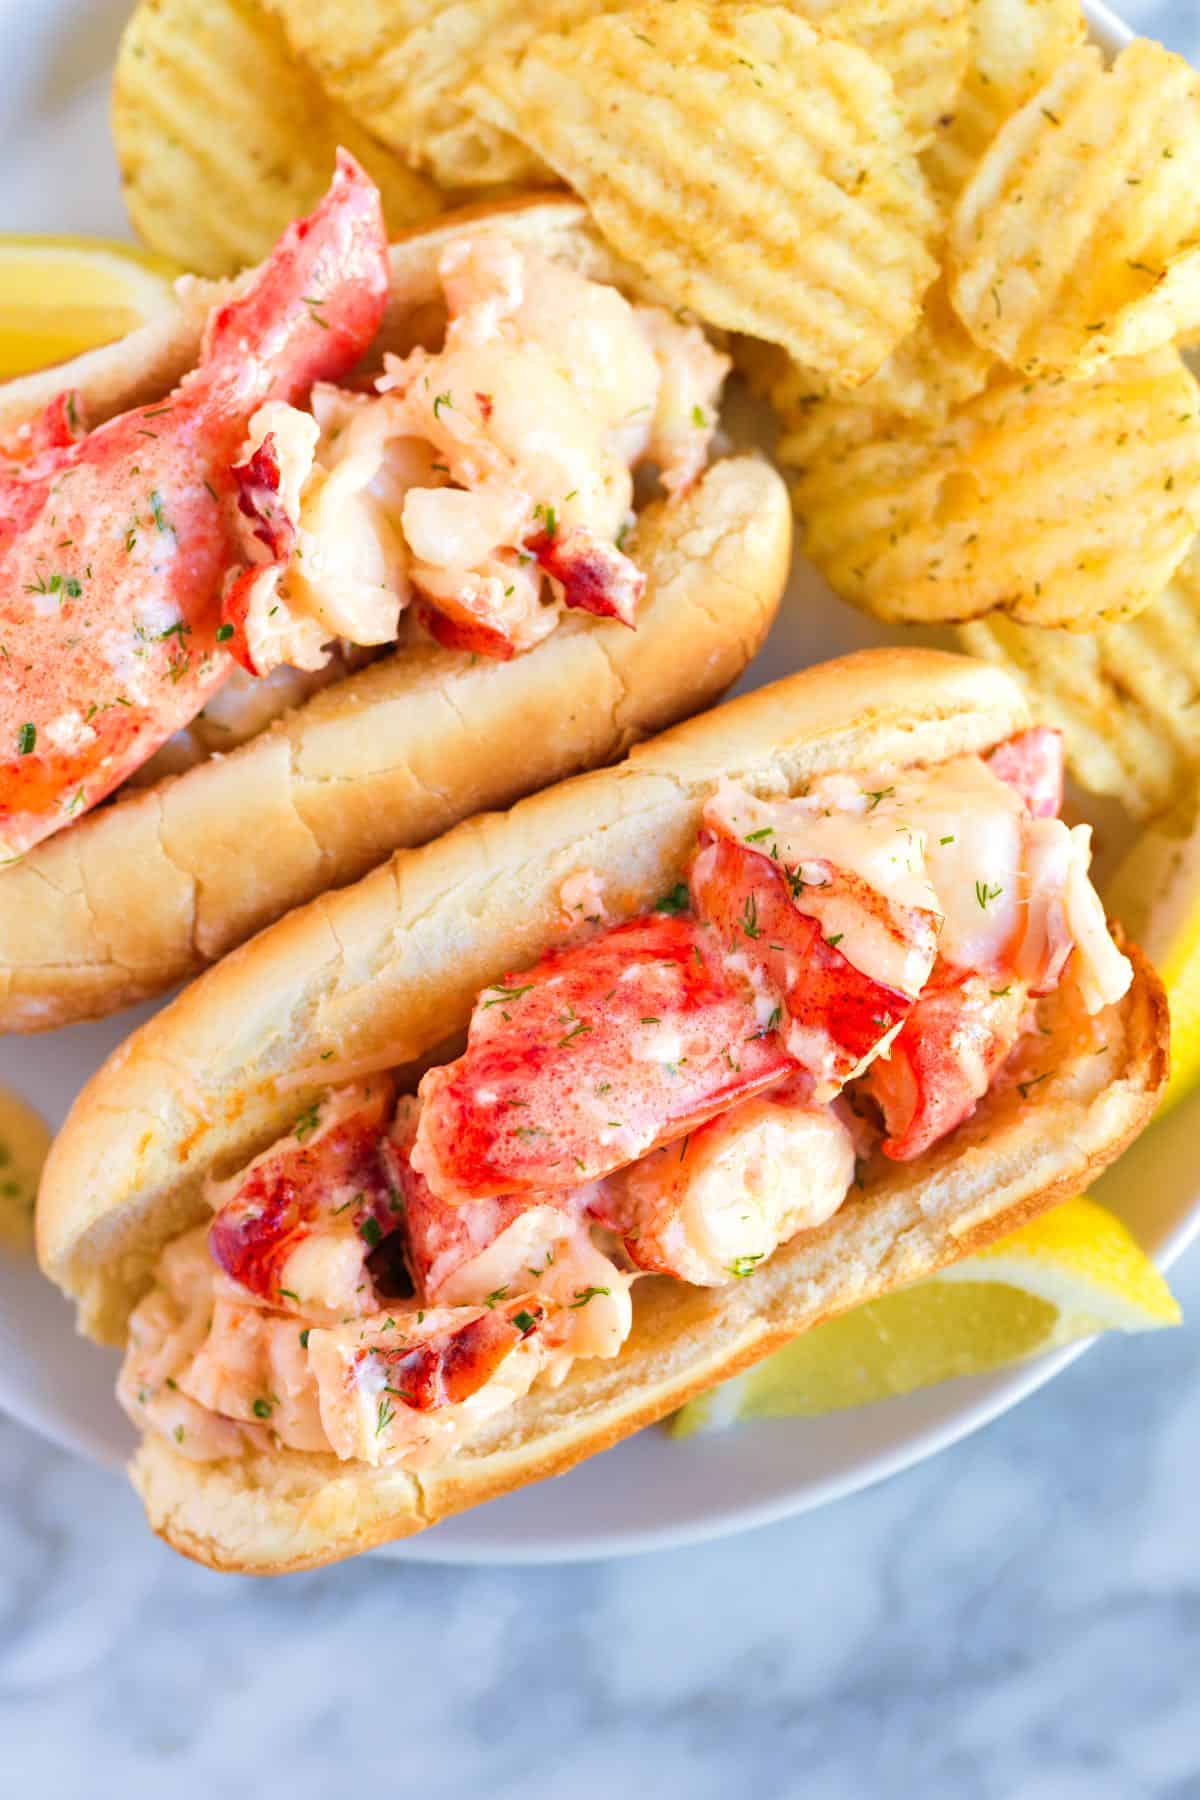
    Best Homemade Lobster Rolls

    Lobster rolls come with a lot of opinions. Mayo, butter, celery, hot, warm, the bun, it goes on. In Maine, you’ll see chilled lobster dressed in mayonnaise, while in Connecticut, it’s common to see the lobster tossed in warm melted butter.

    These homemade lobster rolls are amazing and made with warm melted butter AND creamy mayonnaise. You might also enjoy our easy shrimp salad or these Maryland crab cakes.

    Key Ingredients

    • Lobster: We start with live lobsters and cook them ourselves. For the best lobster roll, you should cook your own lobsters too! I’ve shared Richard’s method below to guide you through it. If you already have cooked lobster meat, you’ll just need to toss it into the butter and mayo sauce.
    • Butter: We toss our perfectly cooked lobster meat into a warm bath of melted butter (yum!).
    • Mayonnaise: To finish the sauce, we add a little bit of mayo to the warm butter. It makes it a bit creamier (it’s so incredibly good!). When I have it on hand, I use homemade mayo.
    • Fresh Herbs: We love the lobster flavor to come through, so we only add a little bit of fresh herbs. I usually stir in a couple of teaspoons of fresh chopped chives and dill.

    How to Make Lobster Rolls

    We highly recommend starting with live lobsters to make the best lobster rolls at home. This way, you have complete control over the cooking process, ensuring the lobster meat is perfectly cooked. If you prefer to skip handling live lobsters, our lobster roll recipe below specifies the amount of cooked lobster meat needed.

    While killing a lobster may seem daunting, it’s a necessary step. Our method is quick and effective. Place the lobster on a cutting board and find the faint cross on its shell where the head and body connect. Quickly and firmly insert a large, sharp knife into this cross, pushing down through the head and between the eyes. This severs the spinal cord, causing instant death. (The legs may still twitch, but this is a natural reflex.)

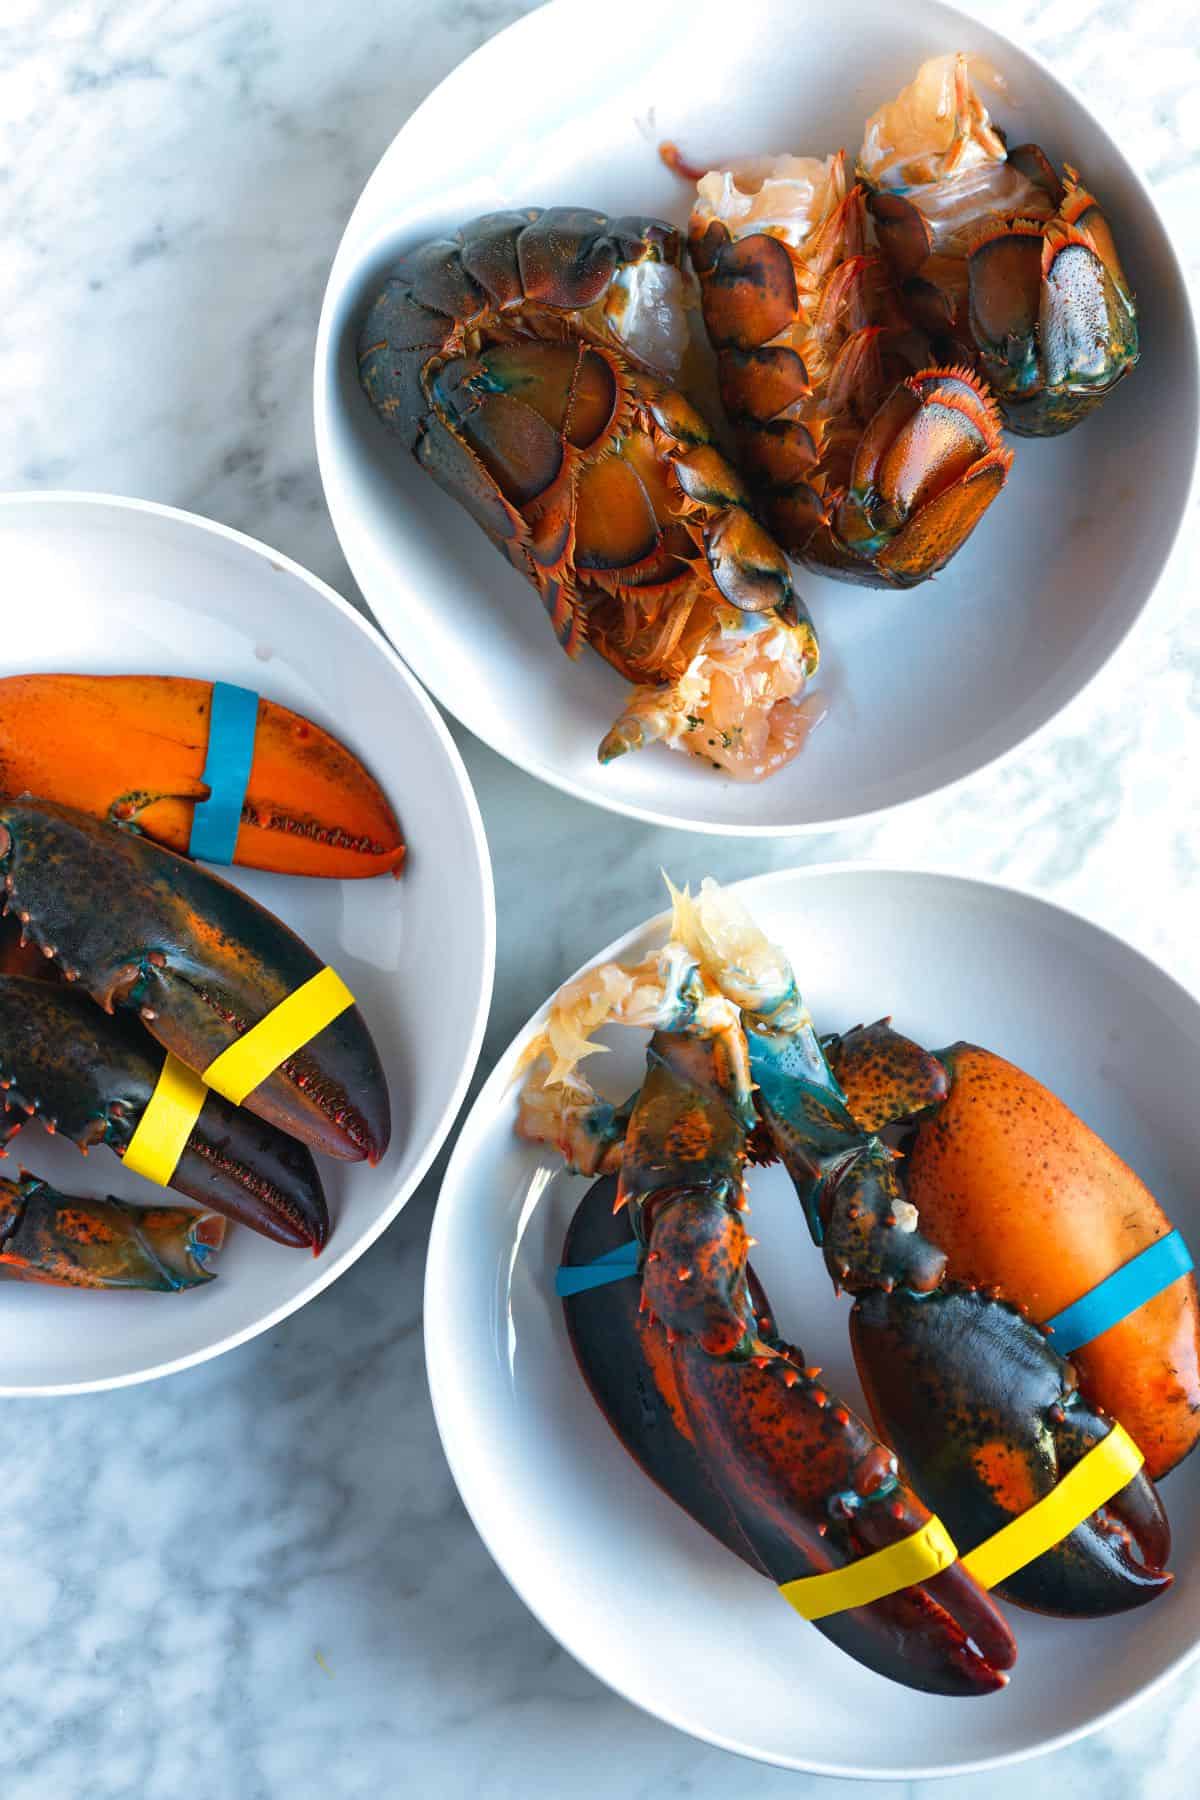
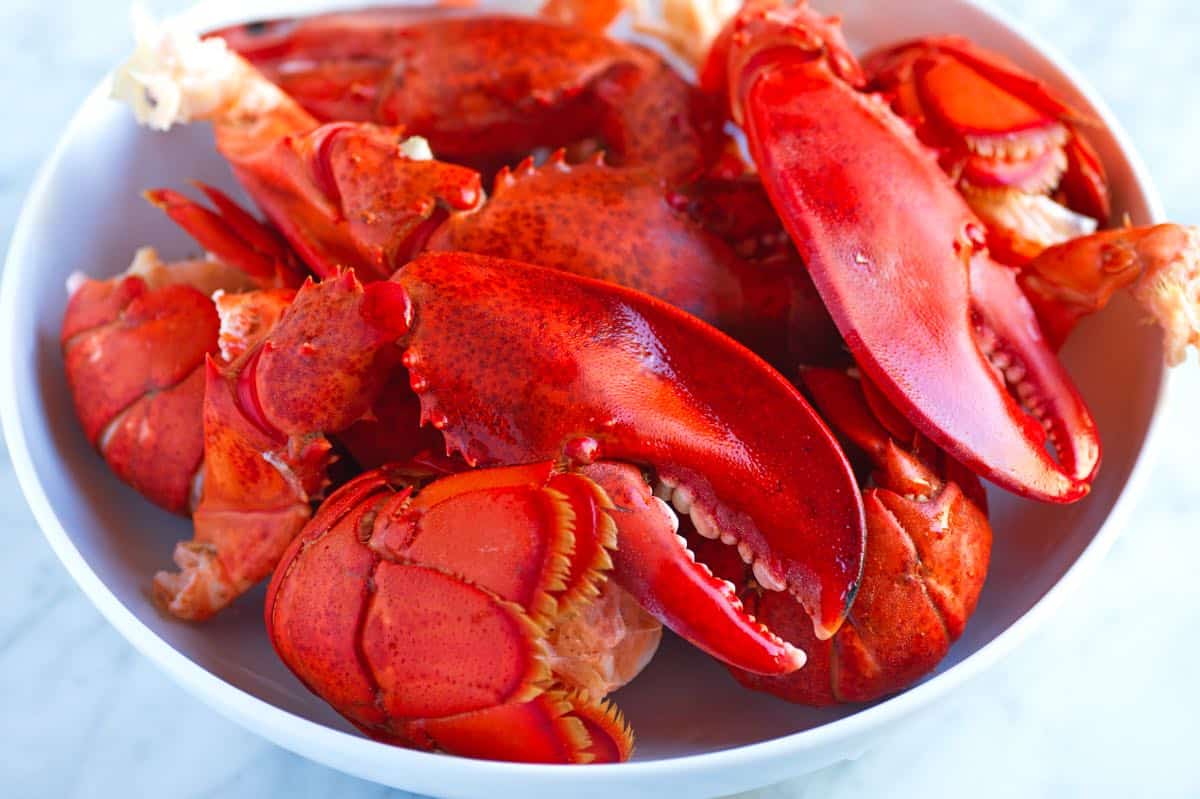
    Lobster tails and claws ready to cook for lobster rolls

    Remove the tails and claws from the body. You can save the bodies for another time for dishes like lobster stock, bisque, or mac and cheese. I freeze them.

    Cooked lobster

    Boil the tails and larger claws for 5 minutes and the smaller claws for 4 minutes. Allow the cooked lobster pieces to cool completely.

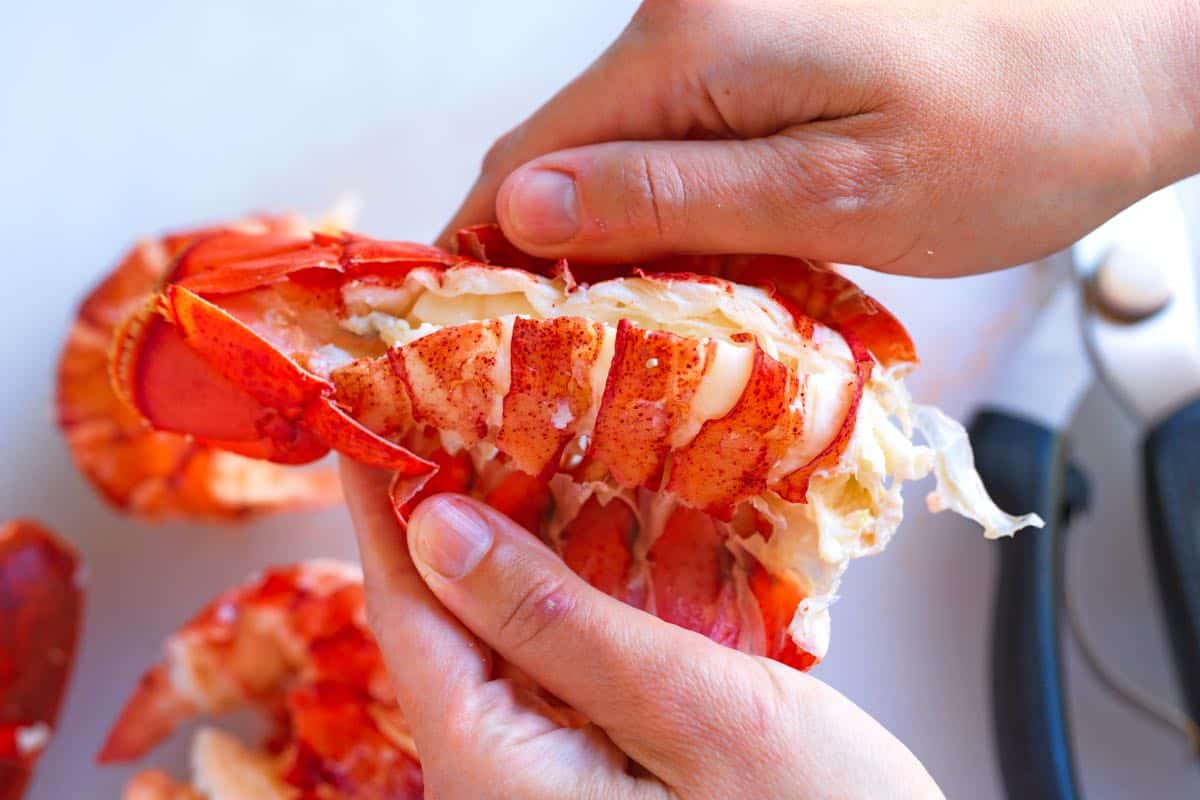
    Removing the Meat from Tails: Use kitchen shears to cut down the top of the tail, then pull back the sides to crack the shell. Gently pull out the tail meat.

    Removing meat from lobster tails

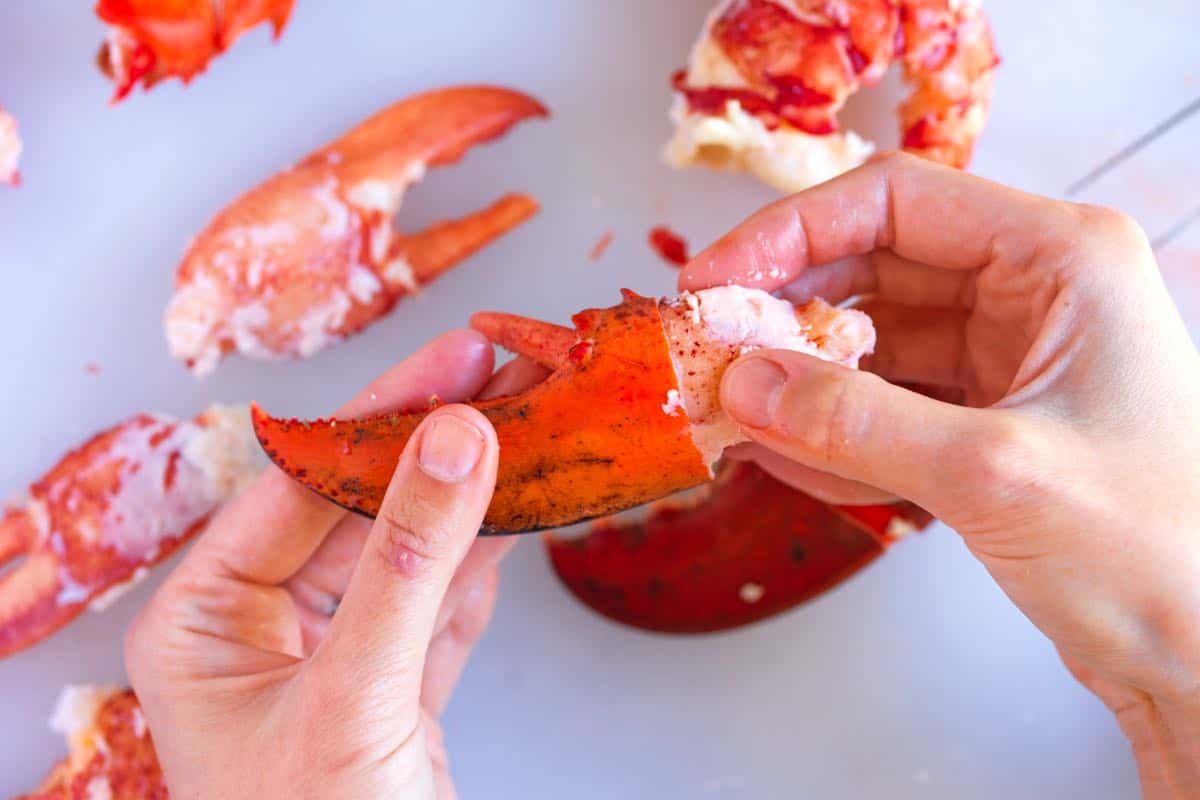
    Removing the Meat from Claws: Twist off the knuckles, then use a knife or mallet to crack the claw shells.

    Removing claw meat from lobsters

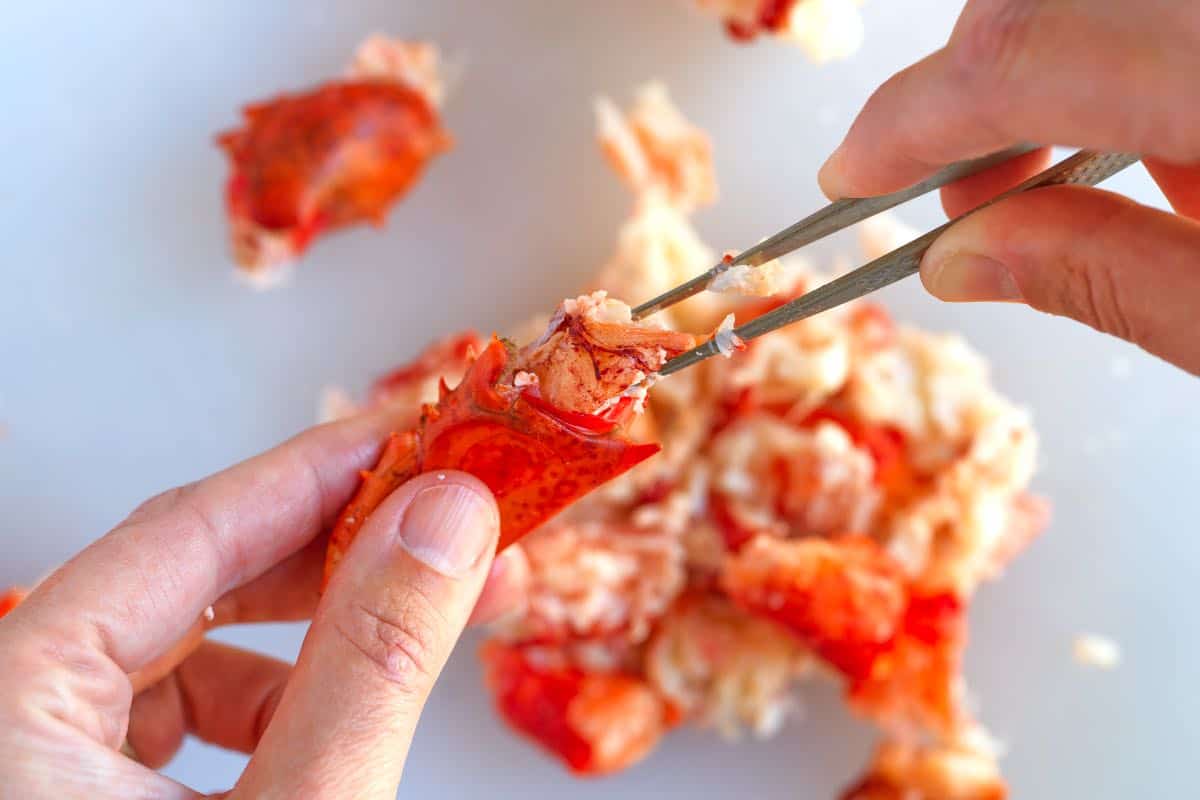
    For smaller legs or pieces, carefully remove the meat, using tweezers or chopsticks if necessary.

    Pulling lobster knuckle meat out of the shells

    Now that you have perfectly cooked lobster meat, you can create mouthwatering homemade lobster rolls!

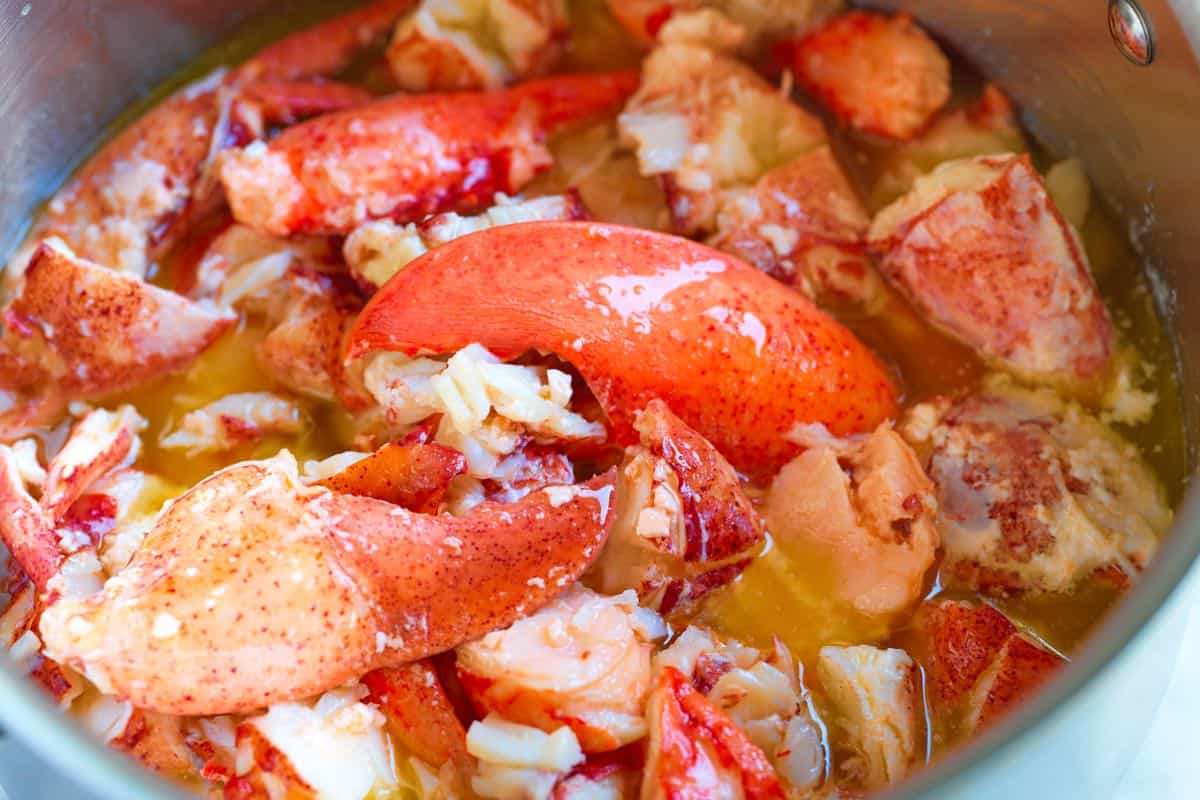
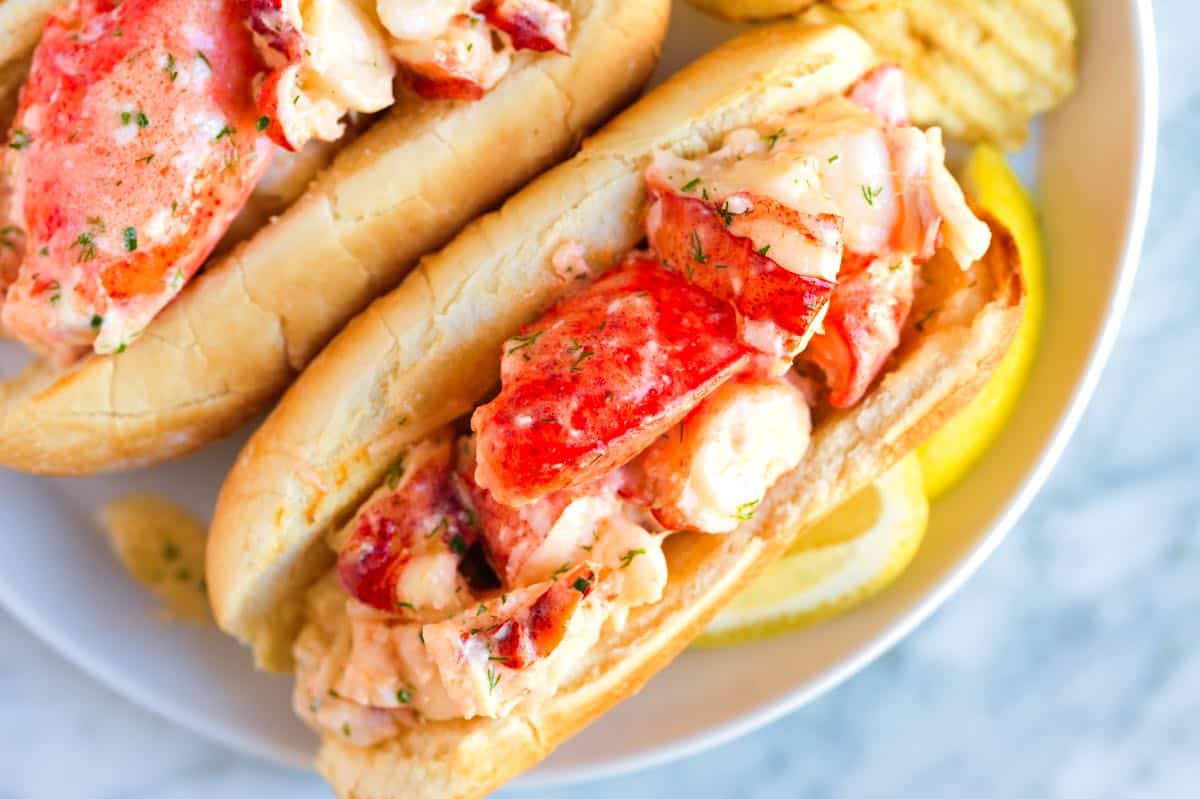
    When you’ve removed all the meat from the shells, toss it into a bath of melted butter (yum). Stop yourself from eating all of the lobster in the butter, and allow it to sit for a few minutes until it’s warmed through. Then, toss the butter-basted lobster meat with some mayonnaise, herbs, and pepper. Then spoon onto lightly toasted rolls and enjoy.

    Lobster in a bath of melted butter ready for lobster rolls

    What to Serve with Lobster Rolls

    I love serving lobster rolls on a soft bun with a summer side like our creamy potato salad, this herb potato salad, or my creamy pasta salad. A handful of potato chips is a good idea, too. For more ideas, try homemade coleslaw or my favorite broccoli slaw.

    Homemade Lobster Rolls with butter and mayo

    Perfect Lobster Rolls

    • PREP
    • COOK
    • TOTAL

    I’m not exaggerating when I say that these homemade lobster rolls with perfectly cooked lobster tossed in a butter and mayo dressing are the best we’ve had. For the most mouthwatering texture, start with live lobsters. Our method for cooking the lobster guarantees perfectly cooked lobster. If you are uncomfortable killing live lobsters, buy whole steamed lobsters or lobster meat.

    For this recipe, we separate the claws and tail from the bodies. We won’t use the lobster bodies in this recipe, but you can save them in the freezer for another day (they make incredibly delicious lobster mac and cheese–coming soon).

    Makes 4 rolls

    You Will Need

    4 whole lobsters, 1 ½ pounds each, or 20 ounces cooked lobster meat

    2 tablespoons salt

    6 ounces salted butter

    1/4 cup mayonnaise, see homemade mayo

    1 teaspoon chopped fresh dill

    1 teaspoon finely chopped chives

    3 to 4 twists fresh ground pepper

    4 hoagie or sausage rolls

    Directions

    • Prepare Lobsters for Cooking
    • 1If your lobsters are live, pick up a lobster by holding it right behind the head, and lay the lobster on a cutting board. To protect your hand, use a clean dish towel to hold the lobster in place.

      2Find the faint cross on the shell (carapace) where the lobster’s head attaches to the body. With a large sharp knife, firmly insert the tip into this cross and push it down through the head, between the eyes. This action severs the spinal cord, instantly killing the lobster. The legs might twitch a little afterward, but the lobster is dead.

      3Remove the claws and tails. Separate the lobster parts by size: tails in one pile, large claws in another, and finally, all the small claws together in a third pile.

      4Discard or save the lobster bodies for another recipe. The bodies can be placed into a freezer-safe container and stored in the freezer for up to 6 months.

    • Cook Lobster
    • 1Bring a large pot of water to a boil with two tablespoons of salt.

      2Cook the tails for five minutes, transfer them to a plate to cool. Next, cook the large claws for 5 minutes. Transfer them to a plate to cool, and finish by cooking the small claws for four minutes.

      3Remove the lobster meat from the shells when the tails and claws are cool enough to handle. For the tails, use kitchen shears to cut down the top of the tails, pull to open, cracking the back slightly, and then pull out the meat. For the claws, use a knife or mallet to crack open the claws and then remove the meat. Use tweezers or chopsticks to remove smaller bits of meat from legs and knuckles.

    • Make Rolls
    • 1Lightly toast four rolls.

      2Melt the butter in a small saucepan over medium-low heat. Reduce the heat to low, then place all of the lobster meat into the warm butter.

      3After five minutes of sitting in the warm butter, spoon the buttery lobster meat into a bowl along with a few spoonfuls of the butter. The remaining butter can be saved in the fridge for other recipes (it’s lovely tossed with pasta).

      4Gently mix in the mayonnaise, dill, chives, and pepper. Divide the lobster between lightly toasted rolls and enjoy.

    Adam and Joanne’s Tips

    • The nutrition facts provided below are estimates. Fat and calories are likely too high since these calculations include all of the butter in the ingredients list. Not all of this butter is actually used in the rolls.

    Nutrition Per Serving
    Calories
    652
    /
    Total Fat
    47.8g
    /
    Saturated Fat
    24.1g
    /
    Cholesterol
    304mg
    /
    Sodium
    1267.5mg
    /
    Carbohydrate
    23.4g
    /
    Dietary Fiber
    1.3g
    /
    Total Sugars
    3.3g
    /
    Protein
    31.9g


    AUTHOR:

    Joanne Gallagher

    Source link

  • Cedar Plank Salmon Recipe with Citrus Rub

    Cedar Plank Salmon Recipe with Citrus Rub

    My family loves this cedar plank salmon made with the easiest citrus and brown sugar rub! The salmon stays soft and juicy in the middle and takes on the most delicious smoky flavor from the cedar plank.

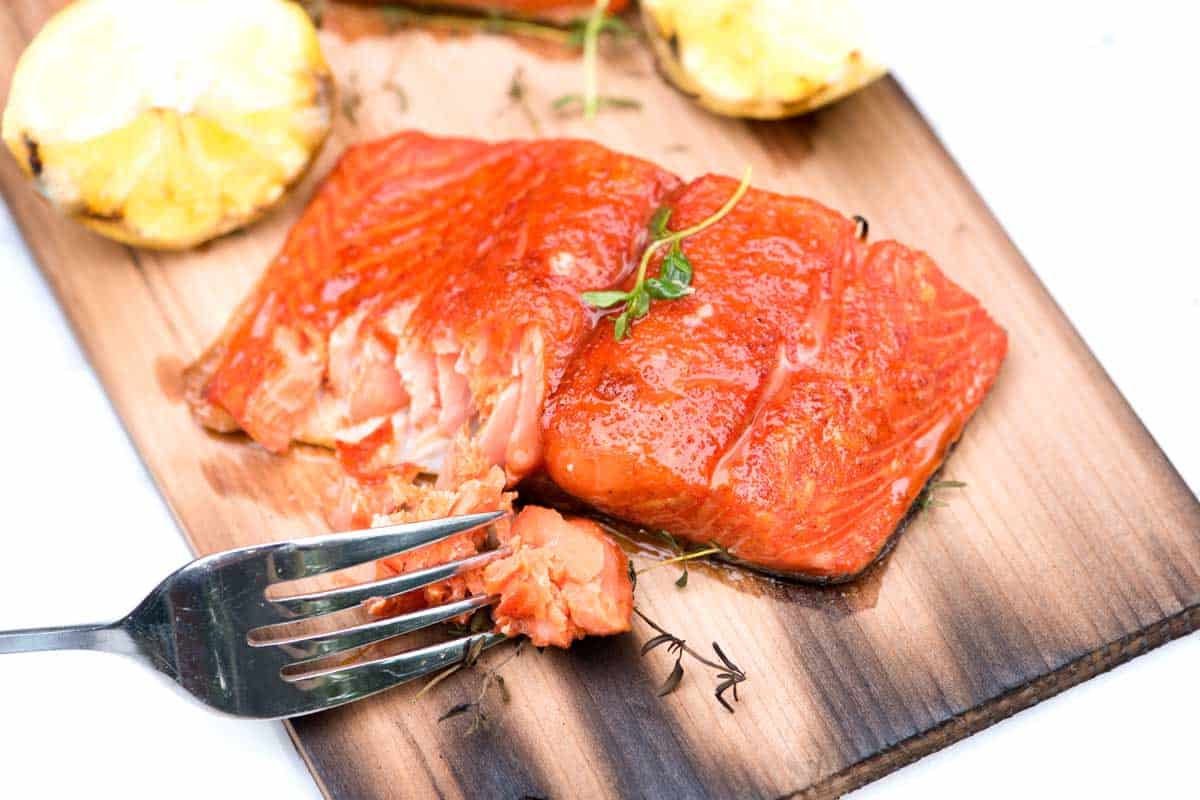
    Cedar Plank Salmon

    I love cooking salmon fillets on cedar planks. They add a delicious smoky flavor and make clean-up so easy! The rub used for this recipe is similar to the one used for our brown sugar baked salmon. It’s fast to put together and works perfectly with salmon!

    I use my outdoor grill for this cedar plank recipe, but you can adapt this recipe for your oven. See my tips below for how to do it! This salmon makes me think of summer, so I love serving it next to some of my favorite summery sides, like this incredible corn salad, our avocado salad, or these roasted fingerling potatoes with a potato salad-inspired dipping sauce.

    Key Ingredients

    • Cedar Plank: When choosing a cedar plank for cooking salmon, make sure it’s untreated, large enough for your fillet, and sold specifically for cooking. It’s essential to soak the plank in water for at least 30 minutes before cooking. This allows the plank to absorb moisture and create the fragrant steam that flavors the salmon.
    • Salmon: Any salmon fillet will work for this cedar plank salmon recipe. I especially love salmon with higher fat content, like sockeye, king, and coho. After cooking, salmon with a higher fat content stays soft and moist. I also prefer using skin-on salmon. The skin acts as an extra barrier to the heat below and easily slides off once the salmon is cooked.
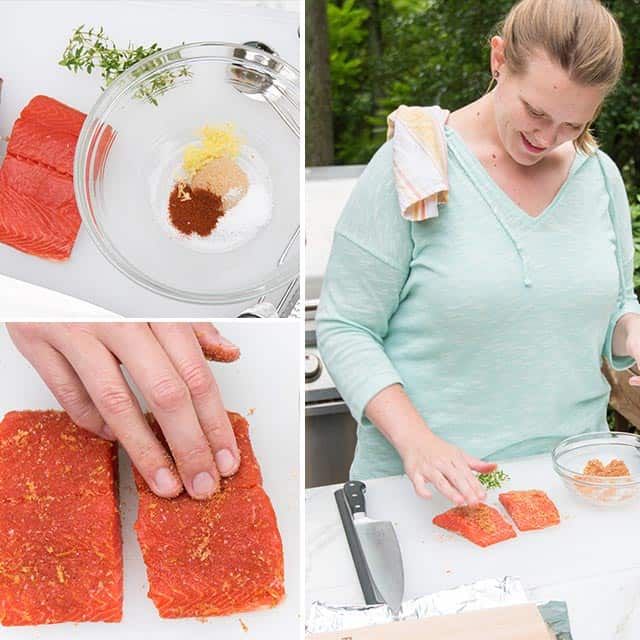
    • Homemade Citrus Rub: I love this easy rub made with brown sugar, lemon zest, salt, and smoked paprika. It’s amazing with the salmon! I like rubbing it all over my salmon and letting it sit for 15 minutes before cooking.
    • Thyme: This is optional, but I love sneaking a few thyme sprigs underneath the salmon. It adds a bit more flavor to the fish and works really well with the flavors in the rub.

    How to Make Cedar Plank Salmon

    Grilled salmon can be tricky, so I am excited to share this practically no-fail way of cooking salmon on the grill. The cedar plank protects the fish from the heat and prevents it from sticking to the grill grates, which, if you’ve experienced it, is a real pain!

    You’ll prepare the cedar plank first. Remember, you really want to soak it before using it. Thirty minutes is a minimum. You need the plank wet inside so it steams and releases all the smoky, cedar flavors.

    How to Make Cedar Plank Salmon: Rubbing the salmon with our sweet citrus rub before the grill

    Add the rub about 15 minutes before you cook your salmon. I use my fingers to massage it into the salmon, then set it aside for 15 minutes to let things marinate a bit. While the salmon sits, get the grill ready. You are looking for medium-high heat.

    How to Make Cedar Plank Salmon: Preparing cedar planks for salmon

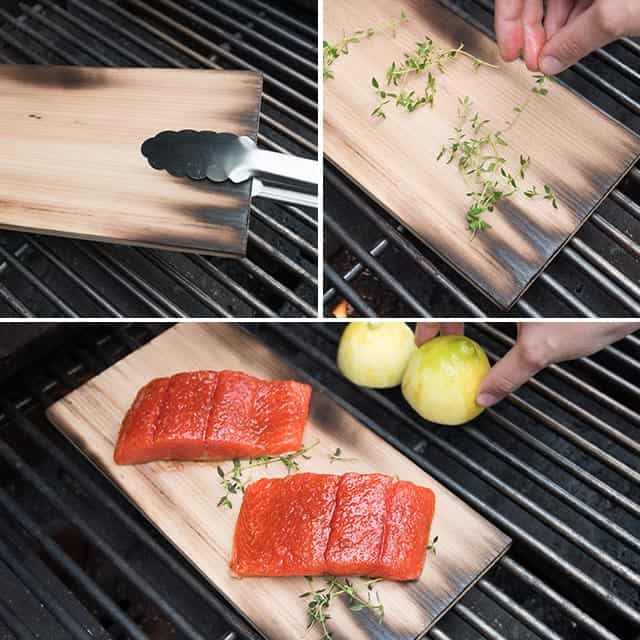
    Since the salmon only takes 15 to 20 minutes to cook, I like putting the previously soaked cedar plank on the grill for a few minutes before adding the salmon. This way, the plank gets a little color and begins to smoke.

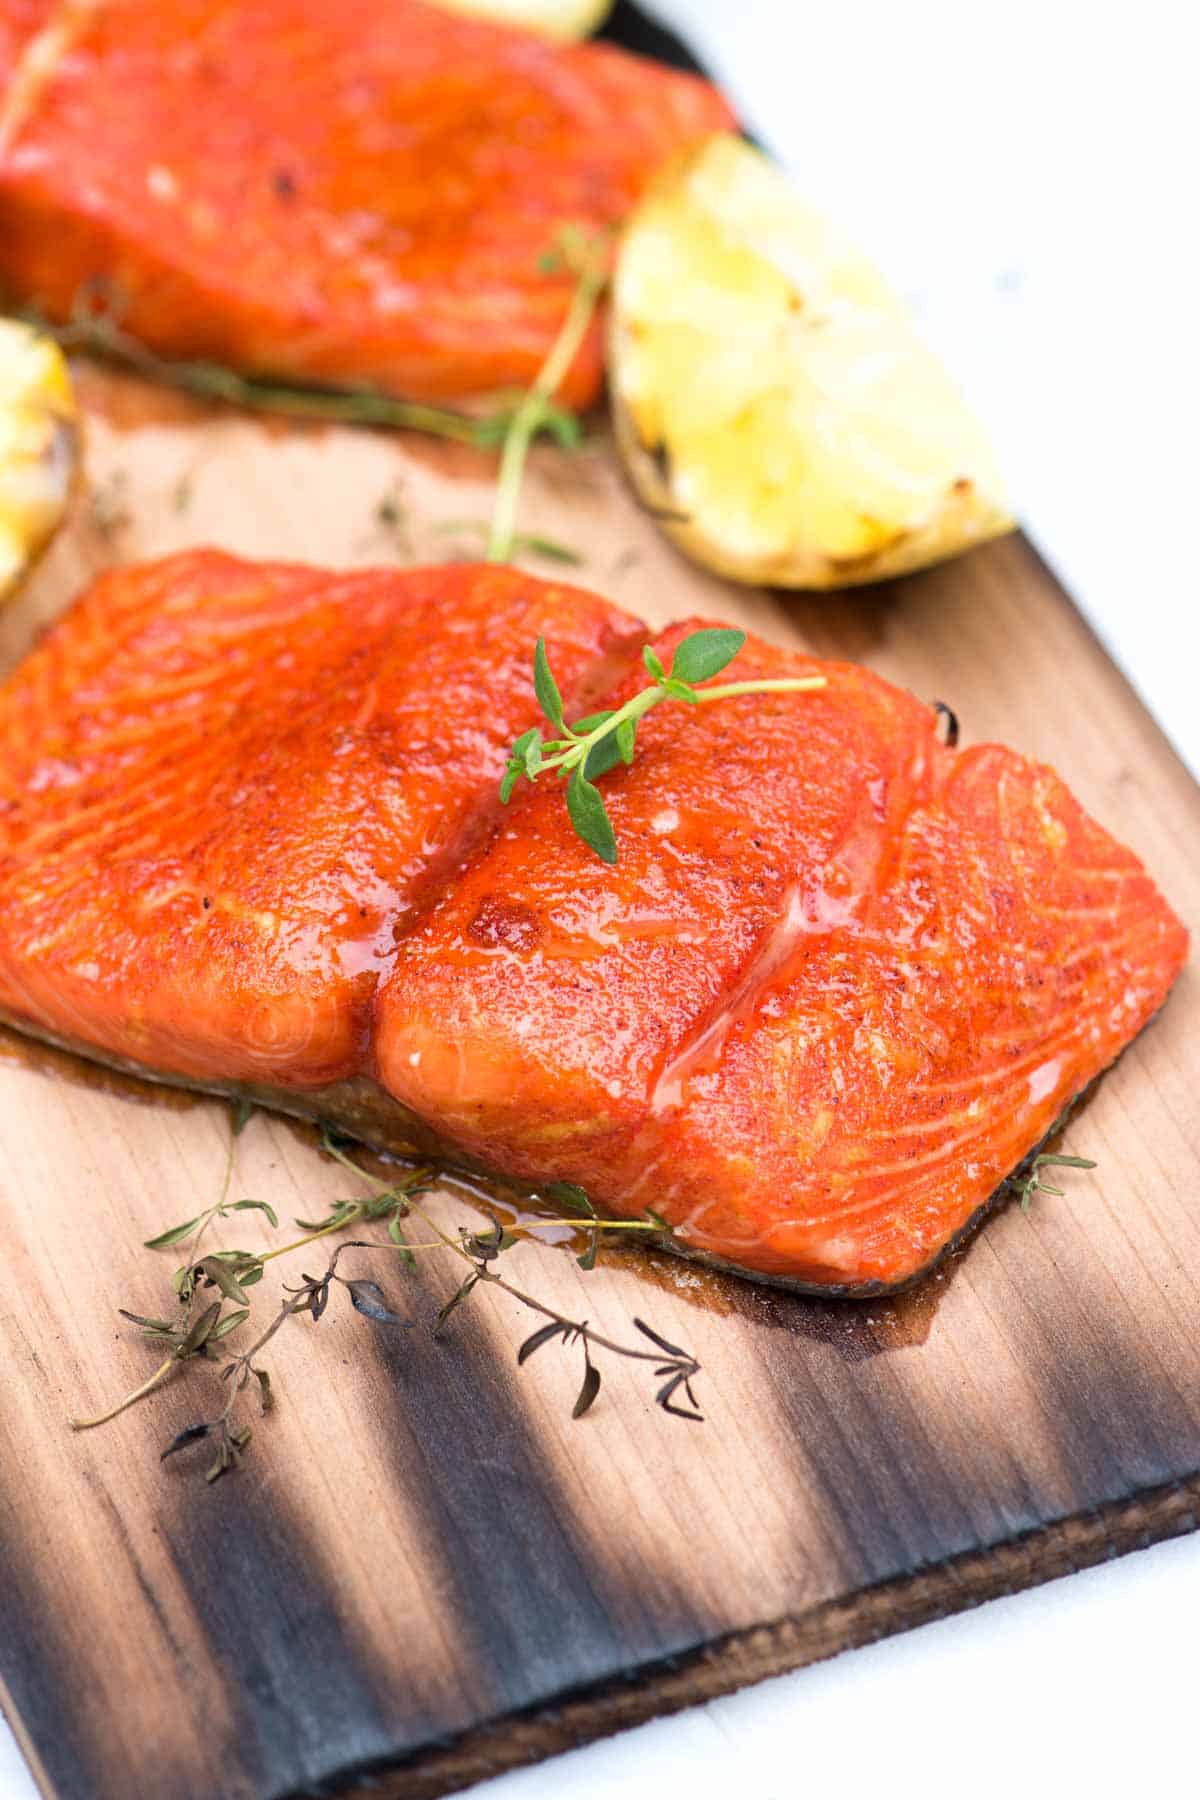
    Once the grill smells like smoky cedar (amazing, by the way), I flip the plank, add a few sprigs of fresh thyme, and then lay the salmon right on top.

    You’ll also notice lemon halves to the side of the plank. If you’ve never roasted or grilled lemon, you are missing out. In the time it takes for the salmon to cook, the lemon halves become lightly charred and sweet. They are perfect for squeezing over the cooked salmon.

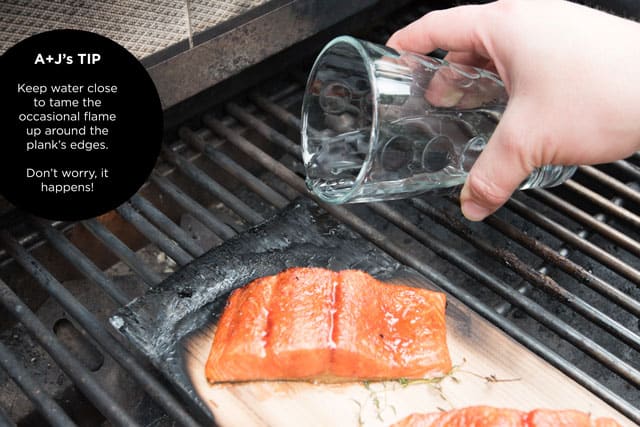
    How to Make Cedar Plank Salmon: Dealing with flare ups, keep a glass of water near by

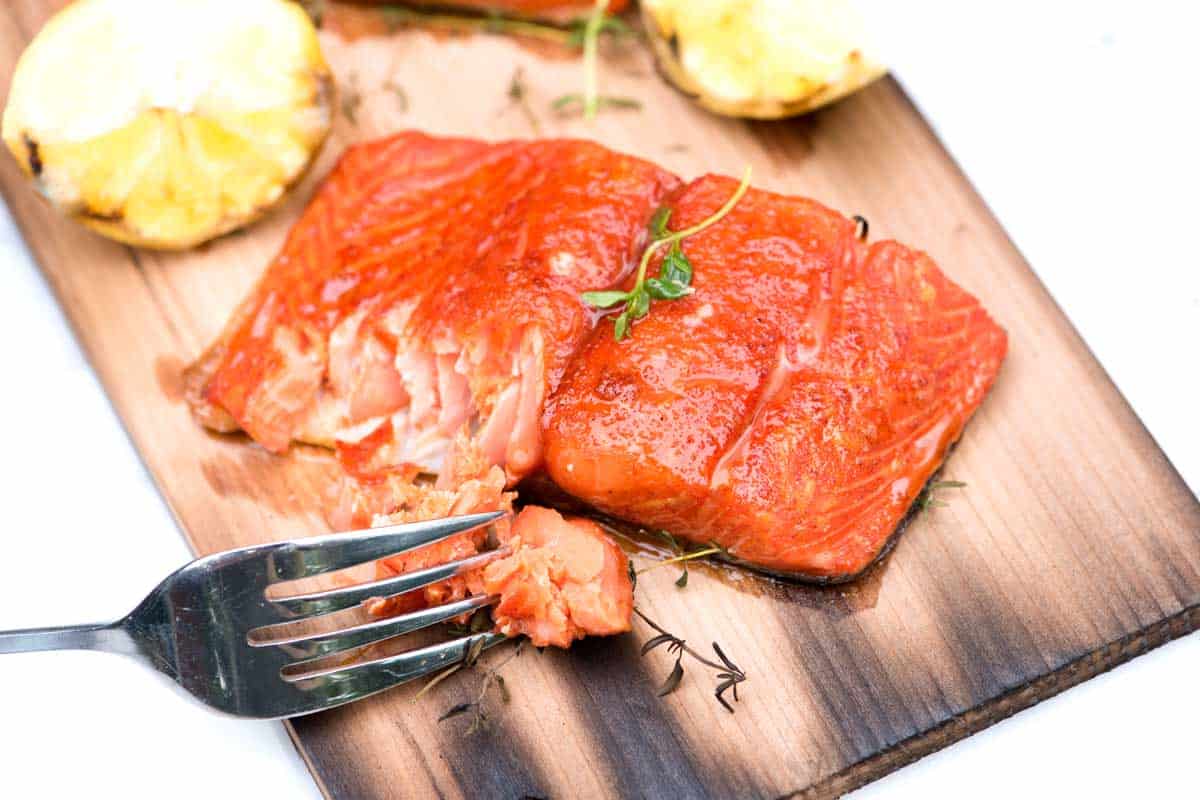
    The salmon should take between 15 and 20 minutes, depending on the type of salmon you choose and the thickness. And that’s it! The salmon is tender, incredibly moist, and so flavorful. The sweet citrus rub on top works so nicely against the woodsy cedar smoke.

    Cedar Plank Salmon with Citrus Rub

    Cedar Plank Salmon with Citrus Rub

    • PREP
    • COOK
    • TOTAL

    Since the salmon cooks slowly, cedar plank salmon is ridiculously tender, moist, and flavorful. We love this sweet citrus rub. It works beautifully with the woodsy cedar smoke the salmon soaks up from the plank below. Hands-on time for this recipe is low, and the extra 30 minutes called for in the prep time are for soaking the cedar plank in water.

    4 Servings

    You Will Need

    1 cedar plank, soaked in water for at least 30 minutes

    1 pound (450g) skin-on salmon, cut into 4 fillets

    1 tablespoon brown sugar

    1 lemon

    1/4 teaspoon fine sea salt

    1/2 teaspoon smoked paprika

    3 to 4 thyme sprigs, optional

    Directions

      1Prepare the rub: zest the lemon to get about 1 teaspoon of zest, then combine it in a small bowl with brown sugar, salt, and smoked paprika. Set the lemon aside.

      2Pat your salmon dry and rub the spice mixture all over it. Let the salmon sit with the rub for 15 minutes.

      3While the salmon marinates, preheat your grill to medium heat.

      4Once the grill is ready, place your soaked cedar plank directly on the grill grates, cover the grill, and let it heat for about 5 minutes or until you can smell the cedar smoking.

      5Flip the plank over, scatter a few sprigs of fresh thyme on top, and then place the salmon skin-side down on the plank. Close the grill lid and cook until the salmon reaches an internal temperature of 135°F, about 15 to 20 minutes, depending on the thickness.

      6While the salmon cooks, cut the lemon in half and place the halves cut-side down on the grill grates. Grill the lemon until it softens and browns slightly. Serve the grilled lemon halves with the cooked salmon.

    Adam and Joanne’s Tips

    • Grilling with a cedar plank: Check the plank occasionally, if the edges start to catch fire, mist with a little water (or, pour a little out of a glass over the singed area of the plank) and move the plank to a cooler part of the grill with more indirect heat.
    • Adapt this recipe for the oven: To bake cedar plank salmon, soak the plank in water for at least 30 minutes. Preheat your oven to 400°F and prepare the rub as directed. Rub the salmon with the spice mixture and let it sit for 15 minutes. Place the soaked plank on the oven rack and arrange the salmon on top. Bake for 12 to 15 minutes or until the salmon reaches an internal temperature of 135°F. Roast lemon halves alongside the salmon if desired.
    • The nutrition facts provided below are estimates.

    Nutrition Per Serving
    Serving Size
    4 ounces (1/4 of recipe)
    /
    Calories
    179
    /
    Protein
    24.7 g
    /
    Carbohydrate
    3.7 g
    /
    Dietary Fiber
    0.5 g
    /
    Total Sugars
    2.6 g
    /
    Total Fat
    6.8 g
    /
    Saturated Fat
    1.5 g
    /
    Cholesterol
    51 mg
    /
    Sodium
    344 mg


    AUTHOR:

    Adam Gallagher

    Adam and Joanne of Inspired Taste

    We are Adam and Joanne Gallagher, the creators of Inspired Taste. Established in 2009, Inspired Taste grew from a childhood dream into one of the internet’s most trusted recipe sites with hundreds of reliable recipes, step-by-step videos, and expert tips.More About Us

    Source link

  • The Best Maryland Crab Cakes Recipe

    The Best Maryland Crab Cakes Recipe

    Our Maryland crab cake recipe is the perfect blend of sweet lump crab meat and just enough binder to hold it all together.

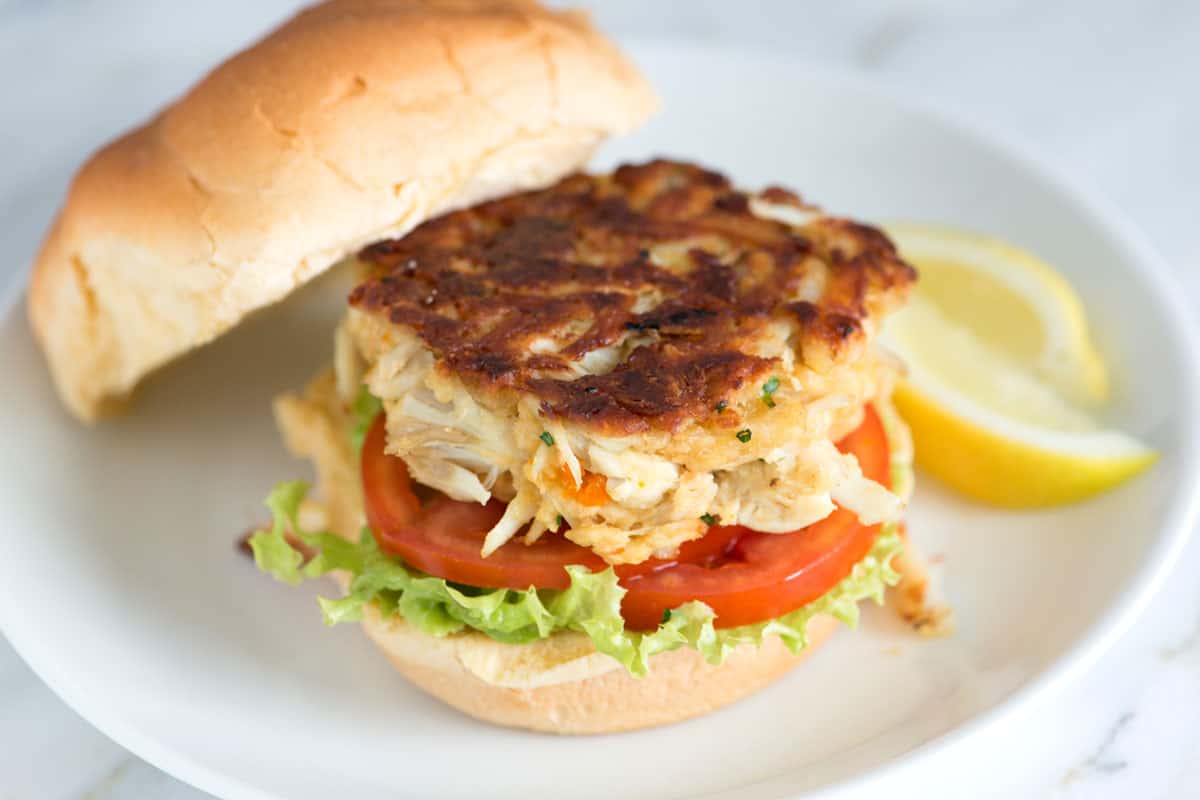
    Homemade Maryland Crab Cakes

    We’re so excited to share our favorite crab cake recipe with you! Growing up on the Chesapeake in Annapolis, MD, we’ve made it our mission to find the absolute best recipe out there, and we finally did.

    This recipe is a true Maryland crab cake: all about the sweet, delicious lump crab meat and very little filler. It’s easy to make with a simple list of ingredients. Use our recipe to make classic crab cakes, a delicious sandwich, or even fun, bite-sized crab balls!

    Key Ingredients

    • Crab: For the best flavor, use fresh, high-quality lump crab meat. I look for it sold in the clear plastic containers in the fresh seafood department. If that’s not available, refrigerated crabmeat (like the cans from Phillips) is a great backup. While blue crab is best for a true Maryland-style cake, I’ve had great results using Dungeness crab, too, which is more available on the West Coast.
    • Saltine Crackers: I prefer crushed saltine crackers over breadcrumbs. They’re very light and already seasoned with salt. If you prefer breadcrumbs, panko breadcrumbs are your best bet. Regular breadcrumbs are too heavy and can make these seem like they have more filler than they do.
    • Mayonnaise and Egg: These both add flavor and bind the mixture together. When I have it in the fridge, I love using homemade mayonnaise.
    • Dijon Mustard: A little Dijon mustard adds a nice pop of flavor.
    • Fresh Parsley: This adds color and a bit of flavor, but you can leave it out if you need to.
    • Worcestershire Sauce: A bit of Worcestershire sauce makes these taste better. I also use it in my crab dip recipe.
    • Old Bay: I don’t add Old Bay to my crab cake mixture, but instead sprinkle it on top after they’re cooked. It reminds me of my childhood, when every restaurant table had a shaker jar of Old Bay. Of course, you can mix it in if you prefer.
    • Crab Cake Sauce: Don’t forget the sauce! My homemade tartar sauce is the perfect pairing for these crab cakes.

    Find the full recipe with measurements below.

    How to Make the Best Crab Cakes

    Tip 1: Minimal filler. In Maryland, fillers and extras are a no-no. All the crab house menus promise “no filler” crab cakes, but honestly, you do need a little bit of filler to help them stay together. We use the absolute minimum, opting for a delicious mixture made from crushed saltine crackers, mayonnaise, and one egg. It works beautifully.

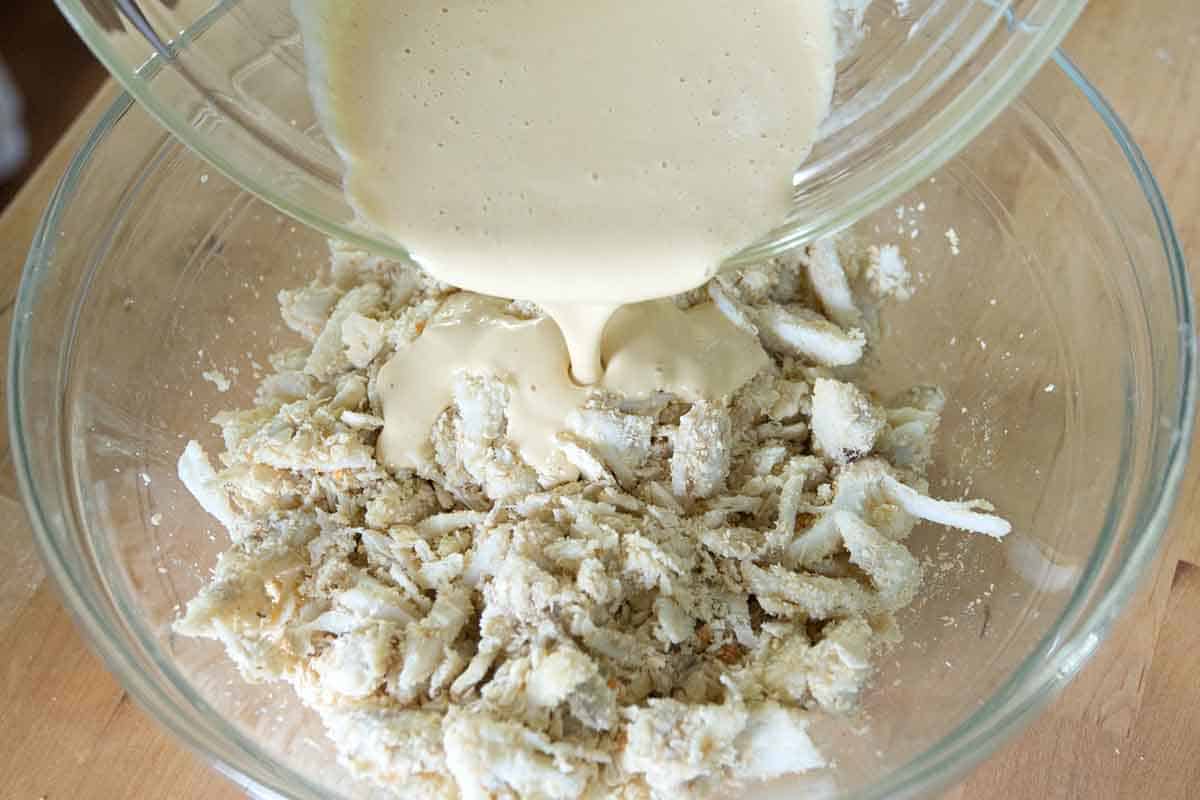
    Tip 2: Toss the crab with crushed saltines first. Before adding your wet ingredients, toss your fresh crab meat with the crushed saltine crackers. As you do this, try to keep the larger lumps of crab intact. As the crushed crackers sit with the crab, they absorb any extra moisture. Then, you can pour over a mixture of mayo, egg, Dijon mustard, and Worcestershire sauce. It’s a simple step, but it makes a huge difference.

    Making crab cake mixture with fresh crabmeat

    Tip 3: Chill the mixture in the fridge. After adding the wet ingredients, the crab cake mixture is pretty loose, so we refrigerate it for an hour. This allows the crackers to absorb the liquid, which ultimately holds them together. After some time in the fridge, you can form the crab cakes. Our recipe makes 6 generous cakes or 24 mini crab balls.

    Tip 4: Cooking them. You have two choices for cooking: pan-fried or broiled. I love both ways, but broiling tends to be my favorite. Here’s the differences:

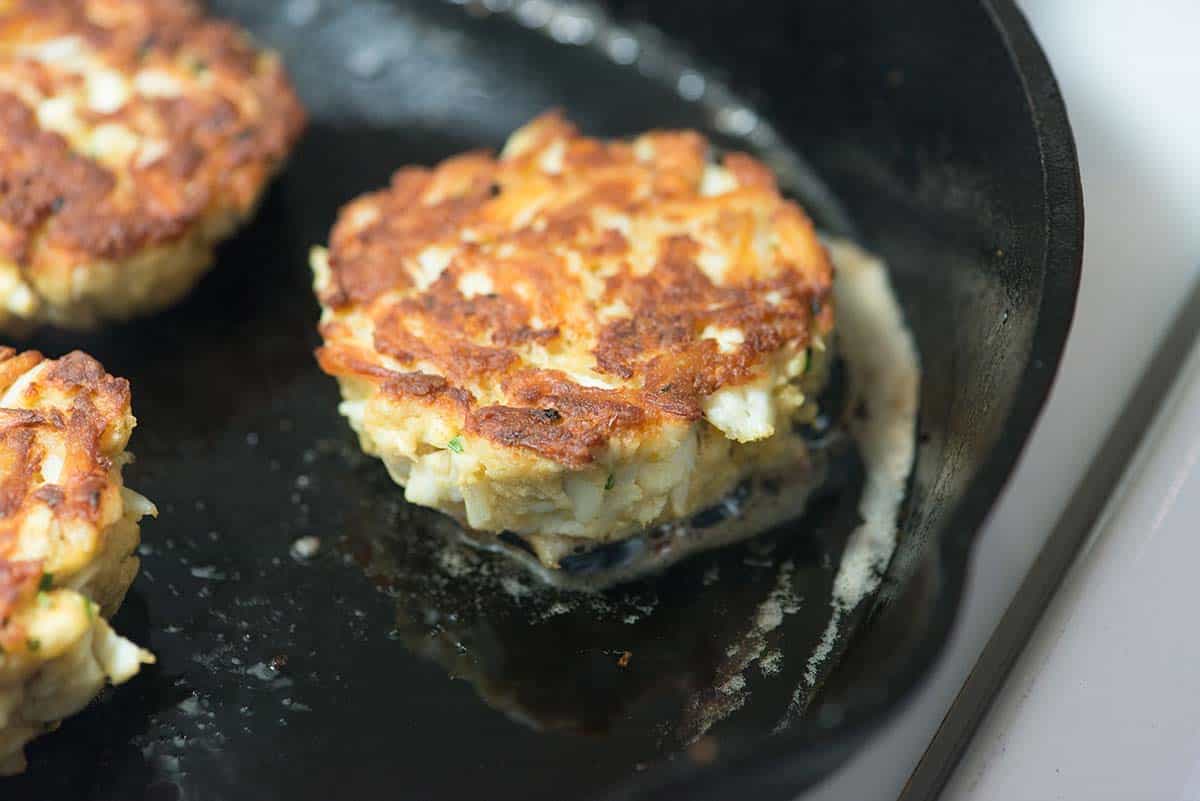
    • Pan-fried are flatter and have a golden crust, as shown in the photo below. I pan-fry them in a bit of butter for that golden crust.
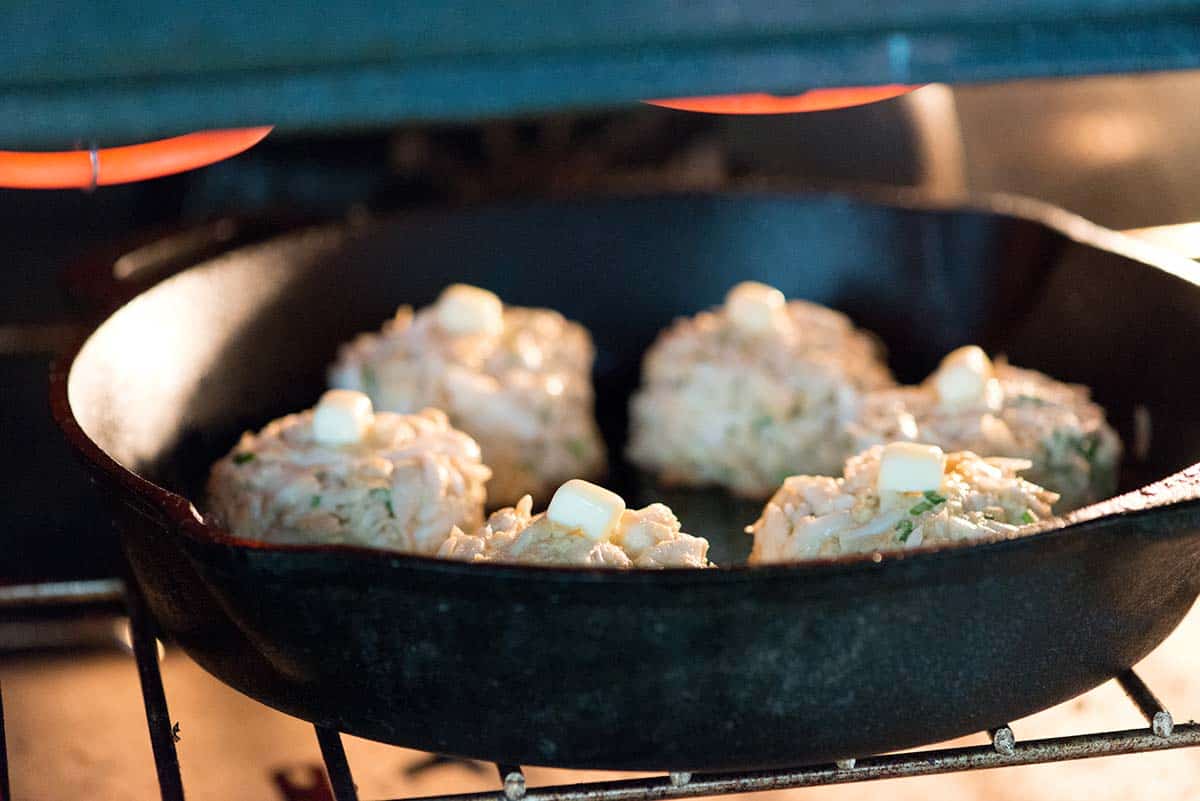
    • Broiled are more domed and have a lighter texture since they aren’t pressed down in the pan. When broiling, I always add a little butter on top so it melts and makes the top a little crispy.
    Cooking Crab Cakes in a Skillet
    How to broil crab cakes

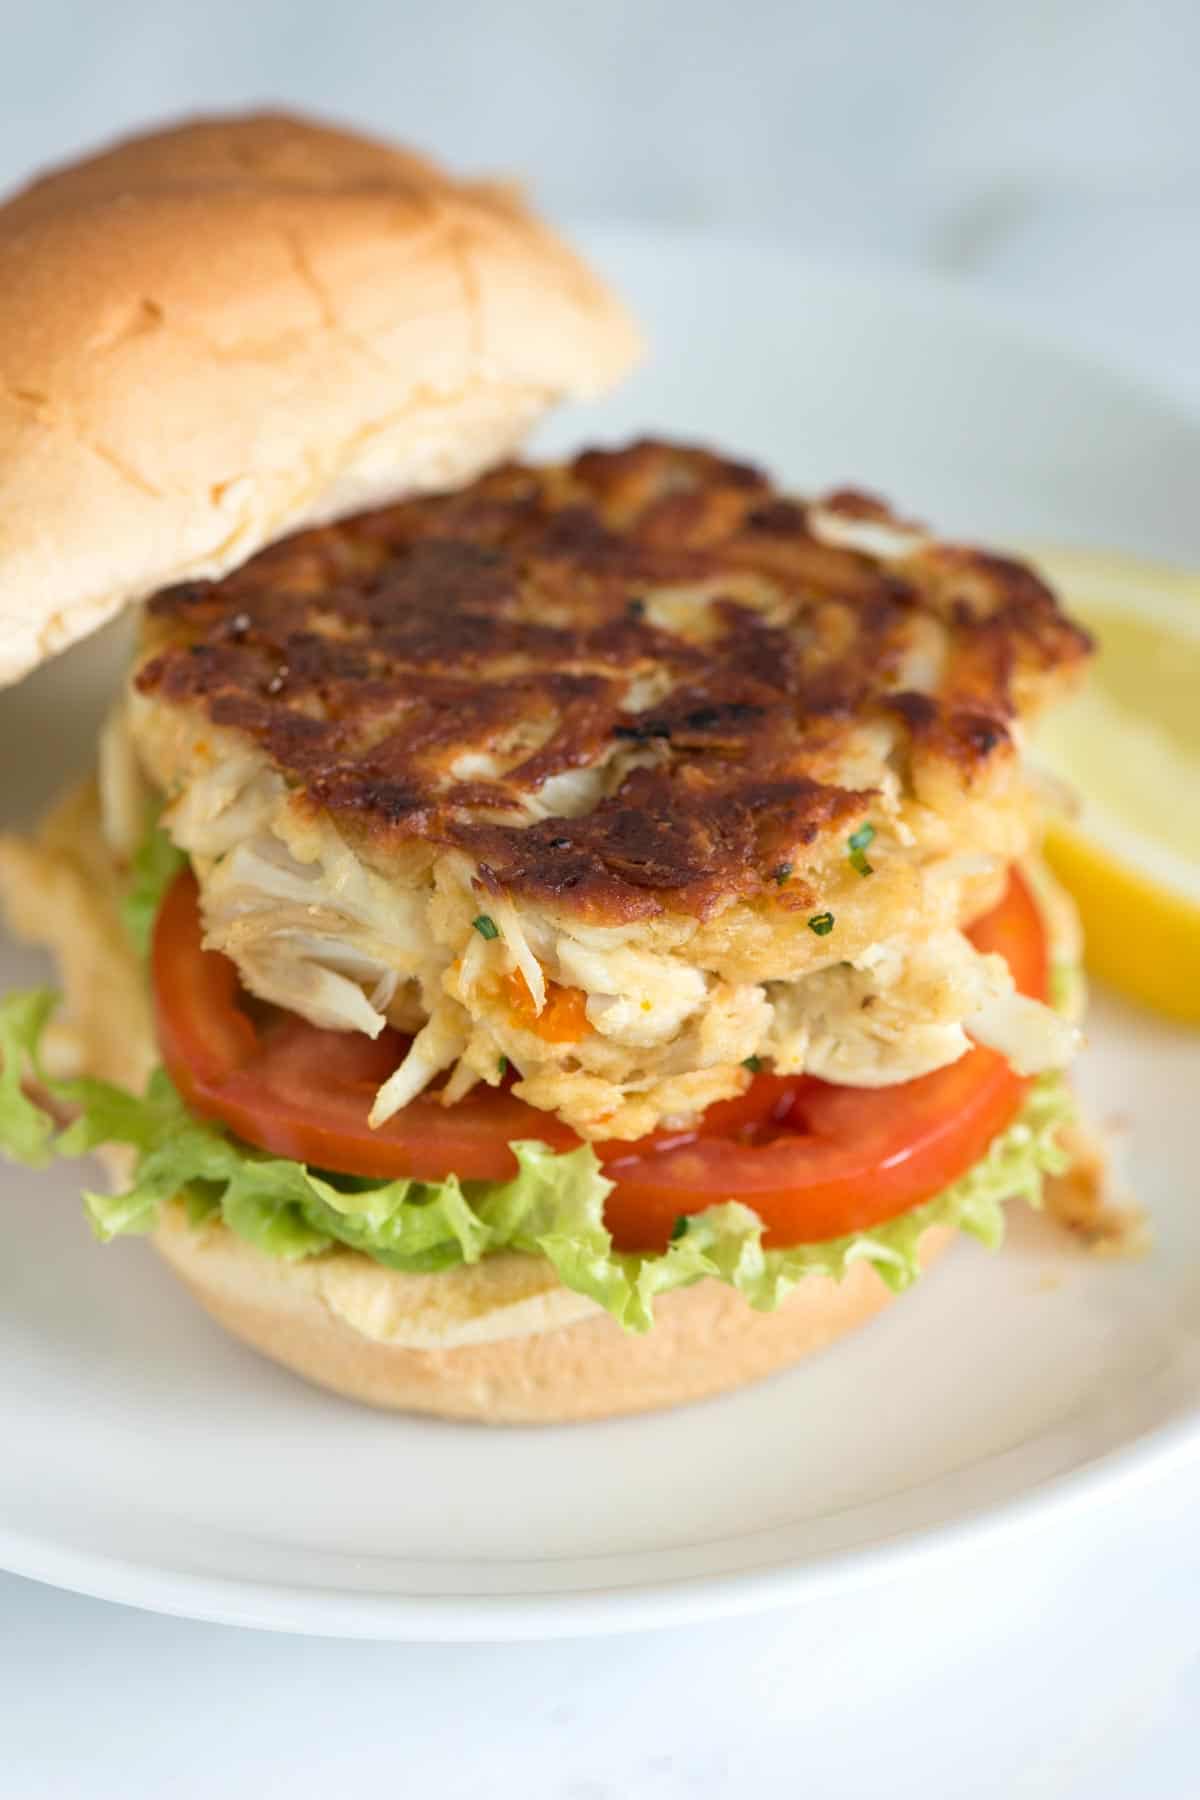
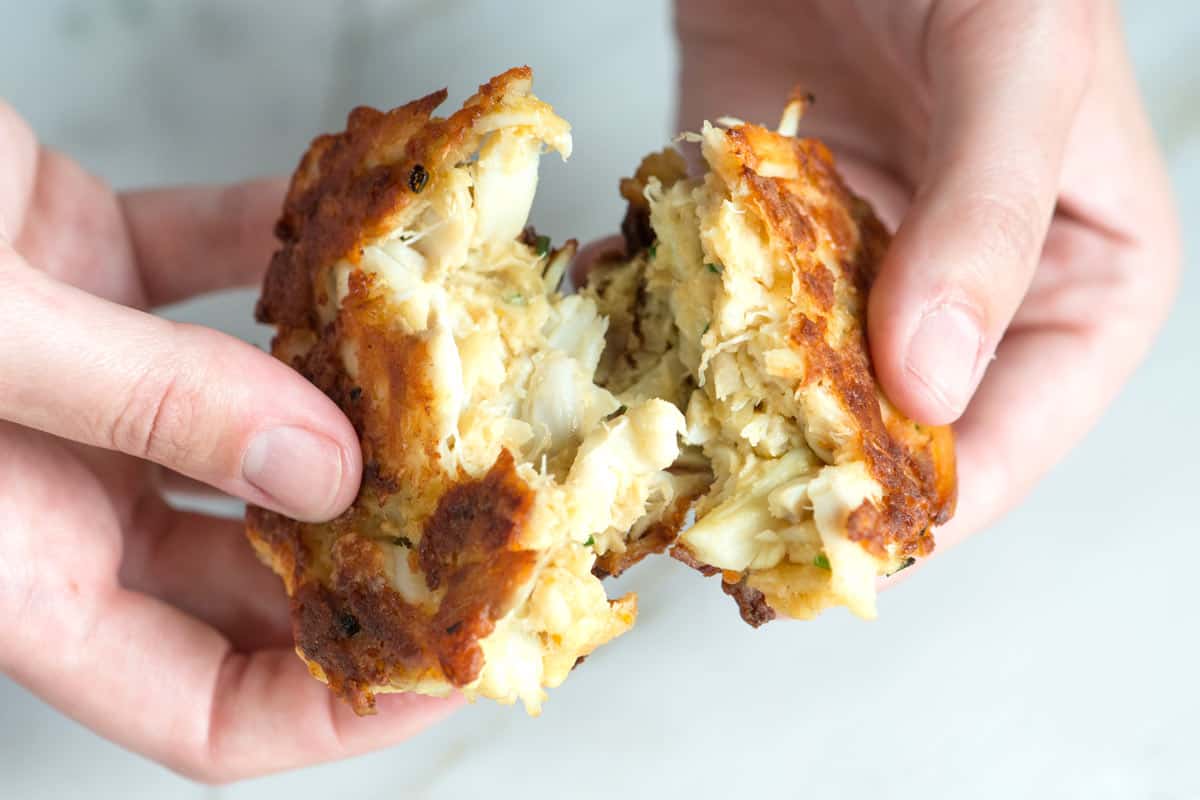
    Ask any Marylander, and they’ll have a preferred cooking method. If you don’t know which you like, try them both! You really can’t go wrong. Either way, these will be some of the best you’ll ever taste. Just look at the photo below!

    No Filler Maryland Crab Cake

    Serving Suggestions

    • Classic Crab Cakes: Serve with a few lemon wedges and tartar sauce on the side.
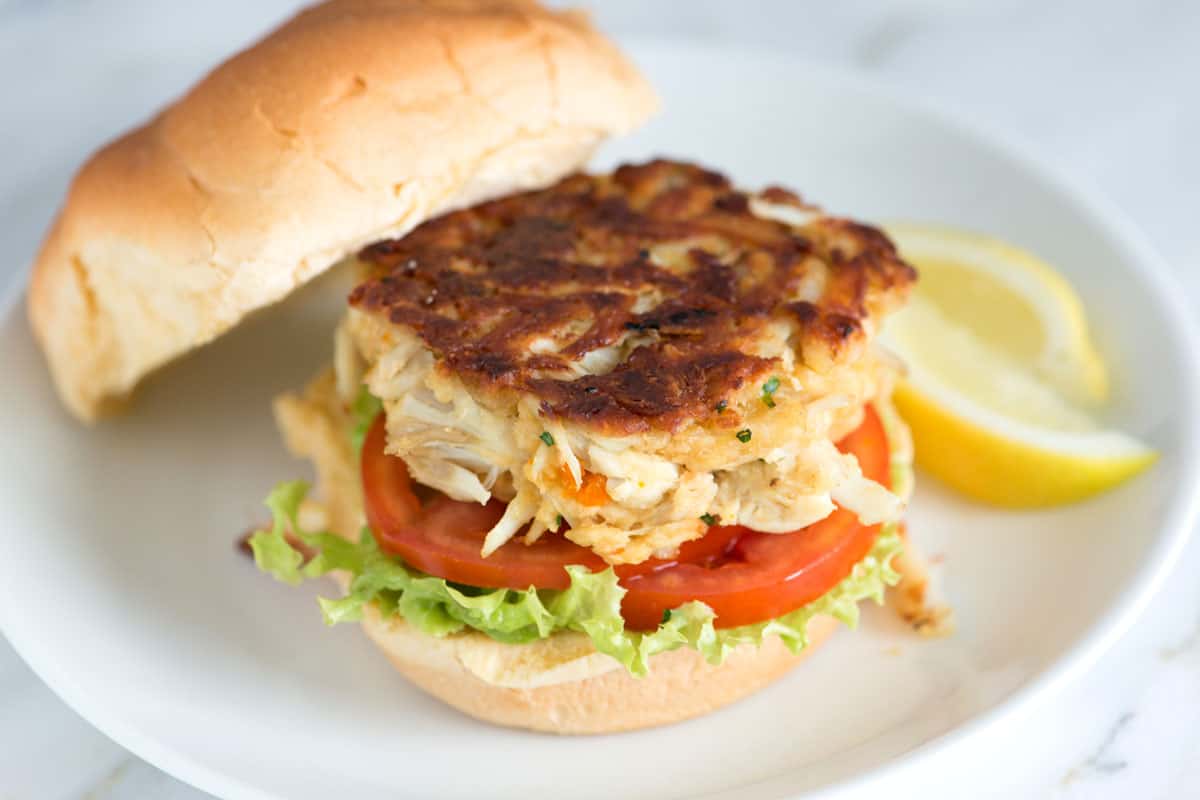
    • Sandwiches: Lightly butter and toast a soft bread roll, spread over some mayo or tartar sauce, a layer of green lettuce, tomato, and the crab cake.
    • For Crab Balls: Serve them on a plate with a big bowl of tartar sauce and cocktail sauce. These make the best appetizer!
    • Crab Cake Benedict: Swap the Canadian bacon for a crab cake in our recipe for Eggs Benedict

    Our Favorite Sides

    As for side dishes, try Cajun butter corn, roasted corn, or this corn salad. Summer sides like creamy potato salad, macaroni salad, or this no mayo potato salad are lovely.

    To mimic our summers on the Eastern Shore, you can serve these next to cornbread, french fries, potato wedges, or sweet potato fries (and don’t forget a side of homemade ketchup!). A side of crab dip is a good idea, too!

    For more ways to use fresh crab, see our crab rangoon recipe.

    The Best Maryland Crab Cakes

    The Best Maryland Crab Cakes

    • PREP
    • COOK
    • TOTAL

    We are in love with these incredible Maryland crab cakes! Our recipe has very little filler for the best texture and flavor. Use blue crab for the most authentic crab cake, although I have made this recipe with Dungeness crab, and it was excellent. We have included two ways to cook the crab cakes. Pan-frying adds a golden crust to both sides, while broiling keeps them more rounded with golden crispy tops.

    Makes 6 large crab cakes or 24 mini crab cakes

    Watch Us Make the Recipe

    You Will Need

    1 pound jumbo lump crab meat or backfin crab meat, fresh or pasteurized (450g)

    20 saltine crackers, crushed into crumbs, just less than 1 cup of crumbs (65g)

    1 tablespoon minced chives or parsley, optional

    1/4 cup mayonnaise, try homemade mayonnaise (55g)

    1 large egg

    1 tablespoon Dijon mustard

    1 tablespoon Worcestershire sauce

    1/4 cup avocado oil (60ml)

    1 tablespoon butter

    Old Bay seasoning, to taste

    Homemade Tartar Sauce, for serving

    Directions

      1Prepare the crab meat: Add the crab meat to a colander to drain, and pick out any rogue shells. Transfer to a large bowl. Toss the cracker crumbs, herbs, and crab meat together, using your fingers to flake apart some of the lumps.

      2Make binder: Whisk the mayonnaise, egg, mustard, and Worcestershire sauce together, then use a rubber spatula to fold the mixture into the crab. It will look loose. Cover with plastic wrap and refrigerate for at least 1 hour.

      3Form the cakes: Scoop the crab mixture into six ½ cup mounds and lightly pack them into patties about 1 ½ inches thick. For crab balls, use a medium cookie scoop and form into 24 mini cakes.

      4To pan-fry: Heat the oil over medium heat in a wide cast-iron skillet. When the oil shimmers, add the crab cakes to the pan. Cook until the underside of the crab cakes is dark golden brown, 4 to 6 minutes. Carefully flip the crab cakes, reduce the heat to medium-low, and add the butter. Continue cooking until the second side is well browned, 4 to 6 minutes.

      5To broil: Position an oven rack 6 to 8 inches from the top of the oven and turn the broiler to high. In a wide oven-safe skillet, heat the oil over medium heat. When the oil shimmers, add the crab cakes to the pan. Cook until the underside of the cakes is golden brown, 3 to 5 minutes. Cut the butter into six pieces, then add one to the top of each crab cake. Slide the pan under the broiler and cook until the tops are lightly browned, 4 to 6 minutes.

      6Serving: Serve crab cakes with lemon wedges, a dusting of Old Bay, and tartar sauce on the side.

    Adam and Joanne’s Tips

    • Storing: Keep leftovers in an airtight container in the refrigerator for up to 3 days. Reheat in a skillet or in the oven.
    • Old Bay: To add it to the crab cake mixture, use 1/4 to 1/2 teaspoon Old Bay seasoning in our recipe above.
    • Mini crab cakes or crab balls: Instead of making six large crab cakes, divide the crab mixture into 24 mini crab cakes.
    • The nutrition facts provided below are estimates.

    Nutrition Per Serving
    Serving Size
    1 crab cake
    /
    Calories
    280
    /
    Protein
    16g
    /
    Carbohydrate
    8g
    /
    Dietary Fiber
    0g
    /
    Total Sugars
    1g
    /
    Total Fat
    20g
    /
    Saturated Fat
    4g
    /
    Cholesterol
    113mg

    AUTHOR:

    Adam Gallagher

    Adam and Joanne of Inspired Taste

    We are Adam and Joanne Gallagher, the creators of Inspired Taste. Established in 2009, Inspired Taste grew from a childhood dream into one of the internet’s most trusted recipe sites with hundreds of reliable recipes, step-by-step videos, and expert tips.More About Us

    Source link

  • The Best Shrimp Salad Recipe

    The Best Shrimp Salad Recipe

    This is my favorite shrimp salad recipe. It’s absolutely delicious, thanks to perfectly cooked shrimp, fresh dill, and an out of this world homemade dressing.

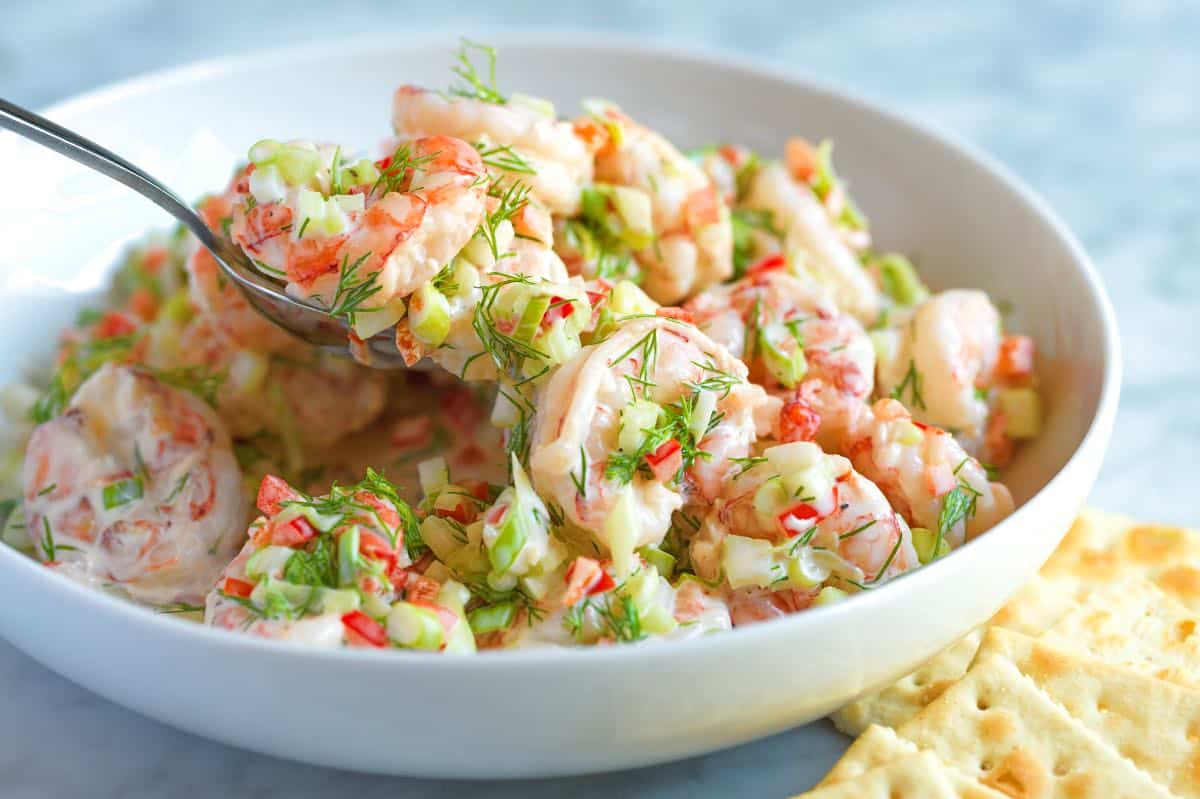
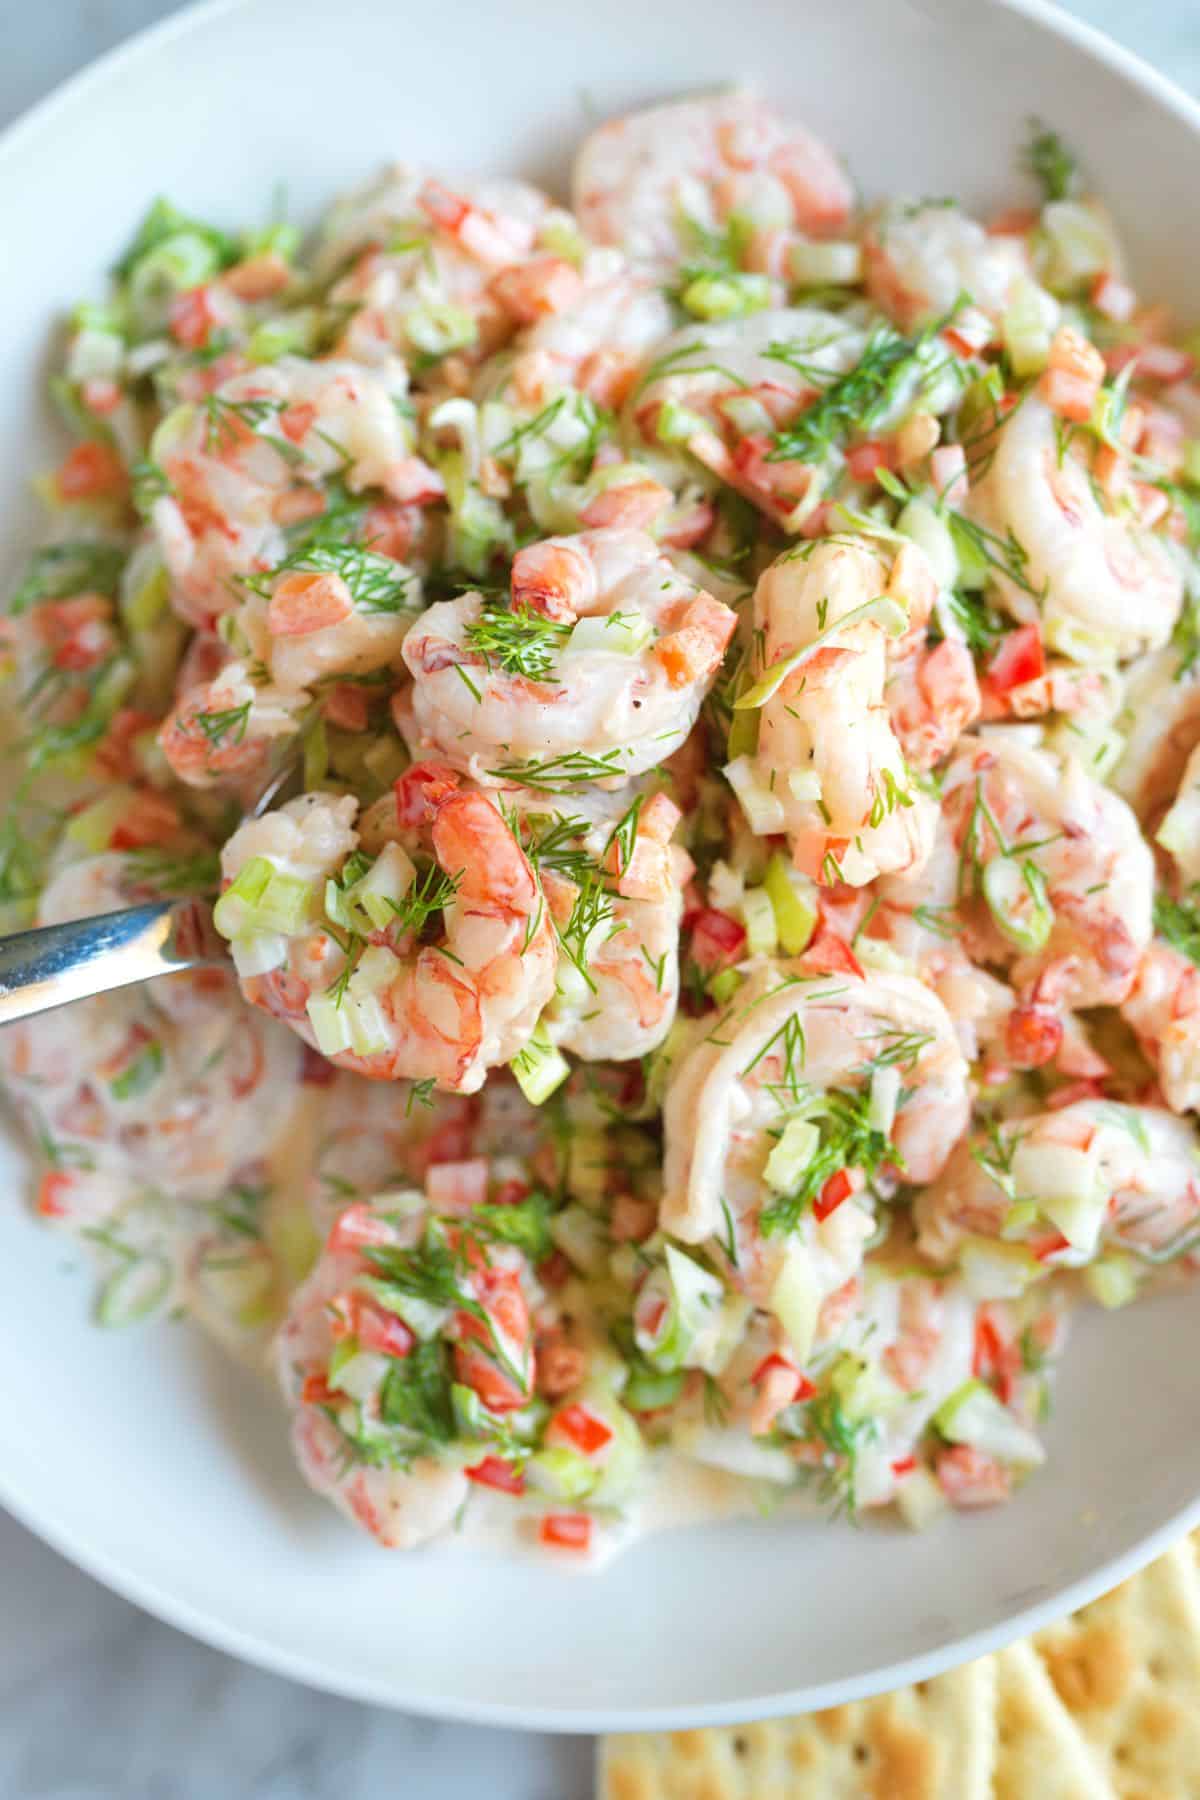
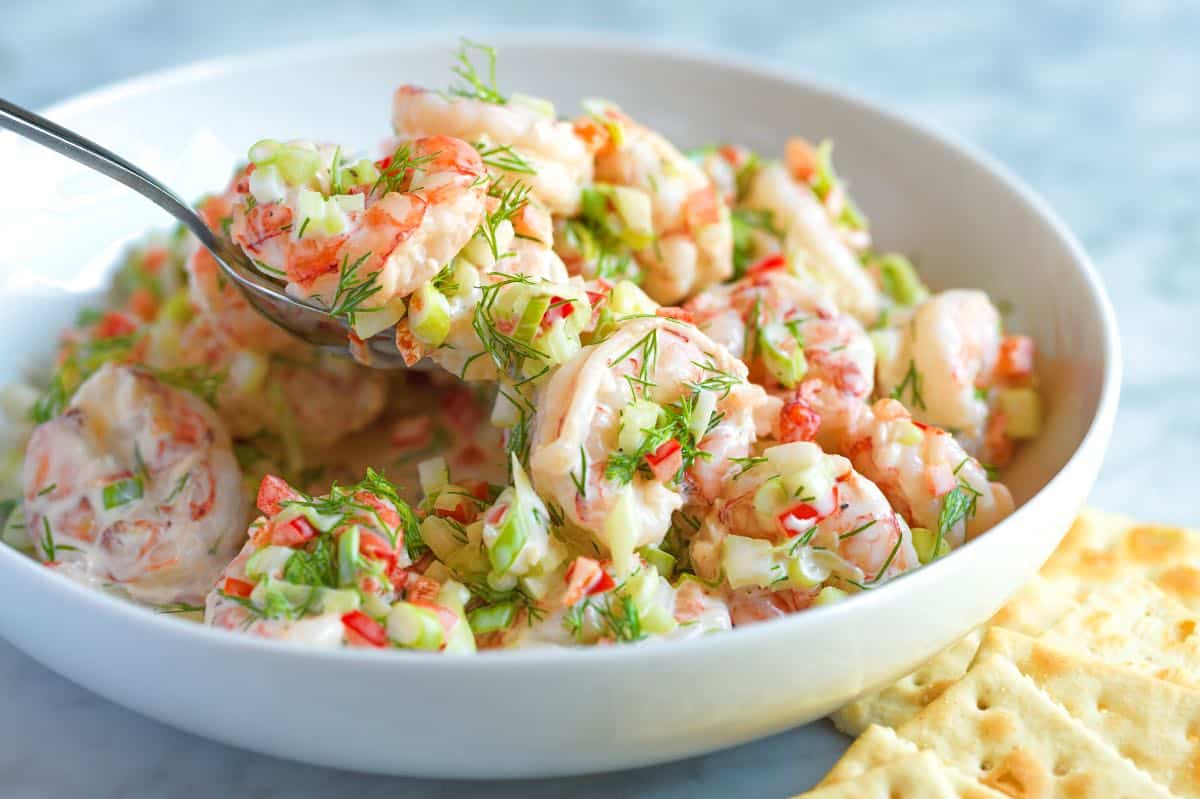
    Shrimp Salad in a bowl.

    This is the best shrimp salad I’ve made in a long time. Our easy poaching method guarantees perfectly cooked shrimp, and the simple lemon and dill dressing makes this salad insanely good.

    This cold shrimp salad keeps in the fridge for three days, which is perfect since it is amazing for lunch the next day! I can’t wait for you to try this recipe. It’s a keeper! For more easy shrimp recipes, see my easy shrimp scampi or this fresh shrimp ceviche.

    Key Ingredients

    • Shrimp: For the best results, cook your shrimp. I poach shrimp for this salad and love how gently poaching keeps the shrimp succulent. I use large shrimp and have shown how to poach shrimp them below. (You can use pre-cooked shrimp, but cooking the shrimp yourself only takes a few minutes.)
    • Bell pepper, celery, and green onion: Add flavor, color, and crunch. I especially love the added sweetness of the bell pepper in this salad.
    • Mayonnaise: Is the base for our creamy shrimp salad dressing. Use a good-quality store-bought brand or make your own (here’s our recipe for homemade mayo).
    • Lemon juice: Keeps our salad fresh and cuts through any heaviness of the mayo.
    • Dill: A classic herb with shrimp. I add a lot of dill to this salad and love it!

    Find the full recipe with measurements below.

    Tips for Making Our Favorite Shrimp Salad

    Tip 1: Poach your shrimp. You can use pre-cooked shrimp or cook them yourself. We highly recommend poaching the shrimp for the most flavorful and perfectly textured salad, it only takes a few minutes. To poach the shrimp, I follow a similar process to poaching chicken:

    1. Bring water to a boil with a few aromatics (garlic, lemon, and salt).
    2. Once it boils, turn off the heat and add the shrimp. The hot water will poach large shrimp, like the shrimp shown in our photos, to perfection in approximately 3 minutes. Note that in the photo below and in our video, I am using Patagonia pink shrimp, which are pink when raw and when cooked.
    Poached shrimp for shrimp salad

    Tip 2: Let your salad sit. You will toss your poached shrimp with mayonnaise, lemon juice, drill, bell pepper, celery, green onion, salt, and pepper. If you are in a rush, enjoy the salad now but if you can wait an hour, the flavors will develop even more (I cover it and store in the fridge).

    Shrimp salad ingredients

    Serving Suggestions

    I love serving shrimp salad with saltine crackers, but you can enjoy it in so many different ways. Add to buttered rolls for a sandwich (like a lobster roll), roll up in flour tortillas, or spoon into lettuce like we do for this shrimp salad on endive.

    More Shrimp Recipes

    Best Creamy Shrimp Salad

    The Best Shrimp Salad

    • PREP
    • COOK
    • TOTAL

    This is the best shrimp salad we’ve made! It’s also very simple to make. You can use pre-cooked shrimp from the store or cook it yourself. We highly recommend cooking the shrimp for the most flavorful and perfectly textured salad, which only takes a few minutes.

    Makes 4 servings

    Watch Us Make the Recipe

    You Will Need

    Shrimp Salad

    1 pound poached shrimp, recipe below

    1/2 cup finely diced red bell pepper (Half of a large pepper)

    1/2 cup finely diced celery (1 large stalk)

    1/2 cup thinly sliced green onion (3 to 4)

    1/2 cup (100 grams) mayonnaise, try homemade mayo

    2 tablespoons fresh lemon juice

    1/4 cup roughly chopped fresh dill

    1/4 teaspoon fine sea salt

    4 twists of pepper grinder


    Poached Shrimp

    1 pound large raw shrimp (31-40 per pound), peeled and deveined

    2 quarts water

    1 lemon, cut in half

    2 cloves garlic, peeled and gently smashed

    1 bay leaf

    3 twists pepper grinder

    1 ½ tablespoon salt

    1/2 teaspoon Cajun seasoning, optional

    Directions

    • Poach the Shrimp
    • 1Add 2 quarts of water to a large pot and place it on the stove over high heat. Squeeze a little lemon juice into the water and drop the lemon halves into the pot. Add the garlic, bay leaf, pepper, salt, and Cajun seasoning. Bring the liquid to a rolling boil.

      2Once the water reaches a rolling boil, remove the pot from the heat and immediately submerge the shrimp into the hot water. Poach them for three minutes.

      3Using tongs or a slotted spoon, carefully transfer the cooked shrimp to a plate. Allow them to cool by placing them in the refrigerator.

    • Make the Salad
    • 1Once the shrimp have cooled, place them in a large bowl with the bell pepper, celery, green onion, mayonnaise, lemon juice, dill, salt, and pepper.

      2Gently mix the ingredients until they are well combined.

      3Allow the salad to sit in the refrigerator for at least one hour before serving, which allows the flavors to marinate and develop.

    Adam and Joanne’s Tips

    • Storing: Shrimp salad lasts up to 3 days in the refrigerator. Store it in an airtight container. I love having this salad ready in the fridge for an easy lunch or dinner! We do not recommend freezing shrimp salad.
    • Bell pepper substitute: If you do not want to add bell peppers, leave them out.
    • The nutrition facts provided below are estimates.

    Nutrition Per Serving
    Serving Size
    1/4 of the recipe
    /
    Calories
    319
    /
    Total Fat
    21.2g
    /
    Saturated Fat
    3.3g
    /
    Cholesterol
    225.8mg
    /
    Sodium
    464.3mg
    /
    Carbohydrate
    4.7g
    /
    Dietary Fiber
    1.2g
    /
    Total Sugars
    1.6g
    /
    Protein
    28.4g


    AUTHOR:

    Joanne Gallagher

    Adam and Joanne of Inspired Taste

    We are Adam and Joanne Gallagher, the creators of Inspired Taste. Established in 2009, Inspired Taste grew from a childhood dream into one of the internet’s most trusted recipe sites with hundreds of reliable recipes, step-by-step videos, and expert tips.More About Us

    Source link

  • Seriously Good Shrimp Carbonara Recipe

    Seriously Good Shrimp Carbonara Recipe

    I’m excited to share this delicious shrimp carbonara recipe which features perfectly cooked shrimp tossed with spaghetti in a silky sauce.

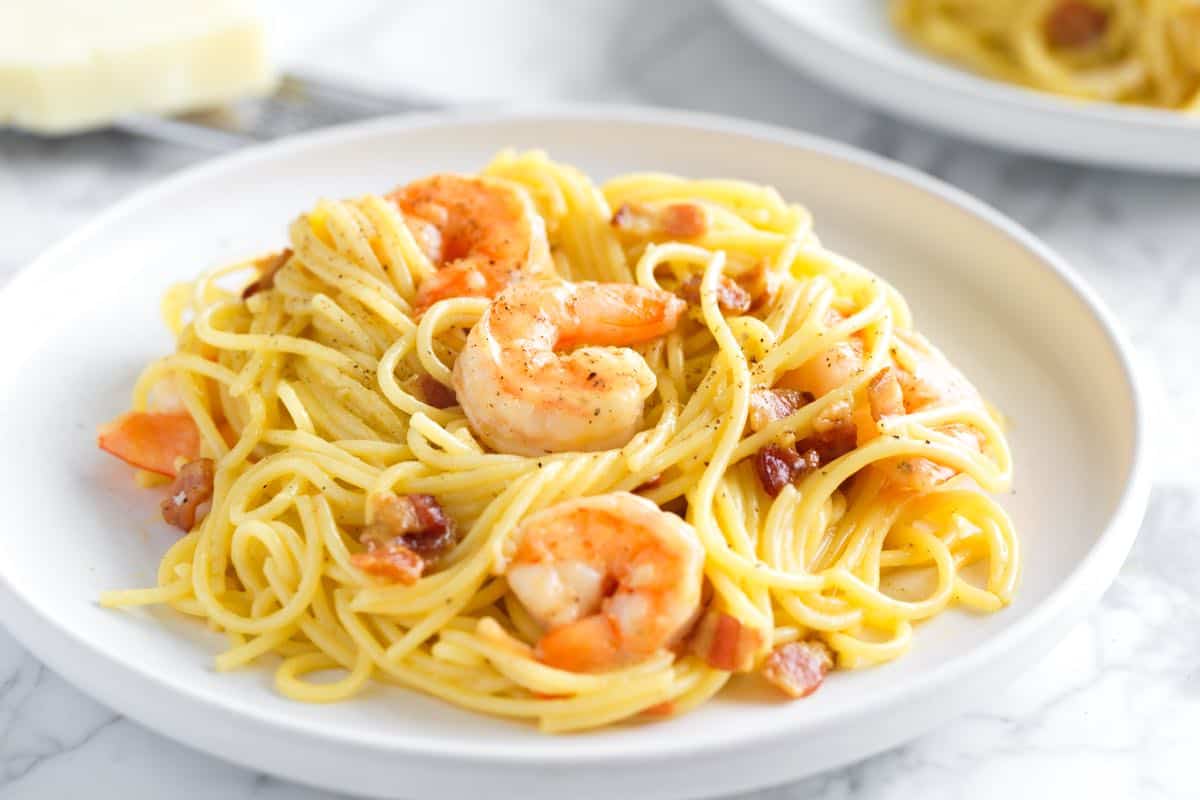
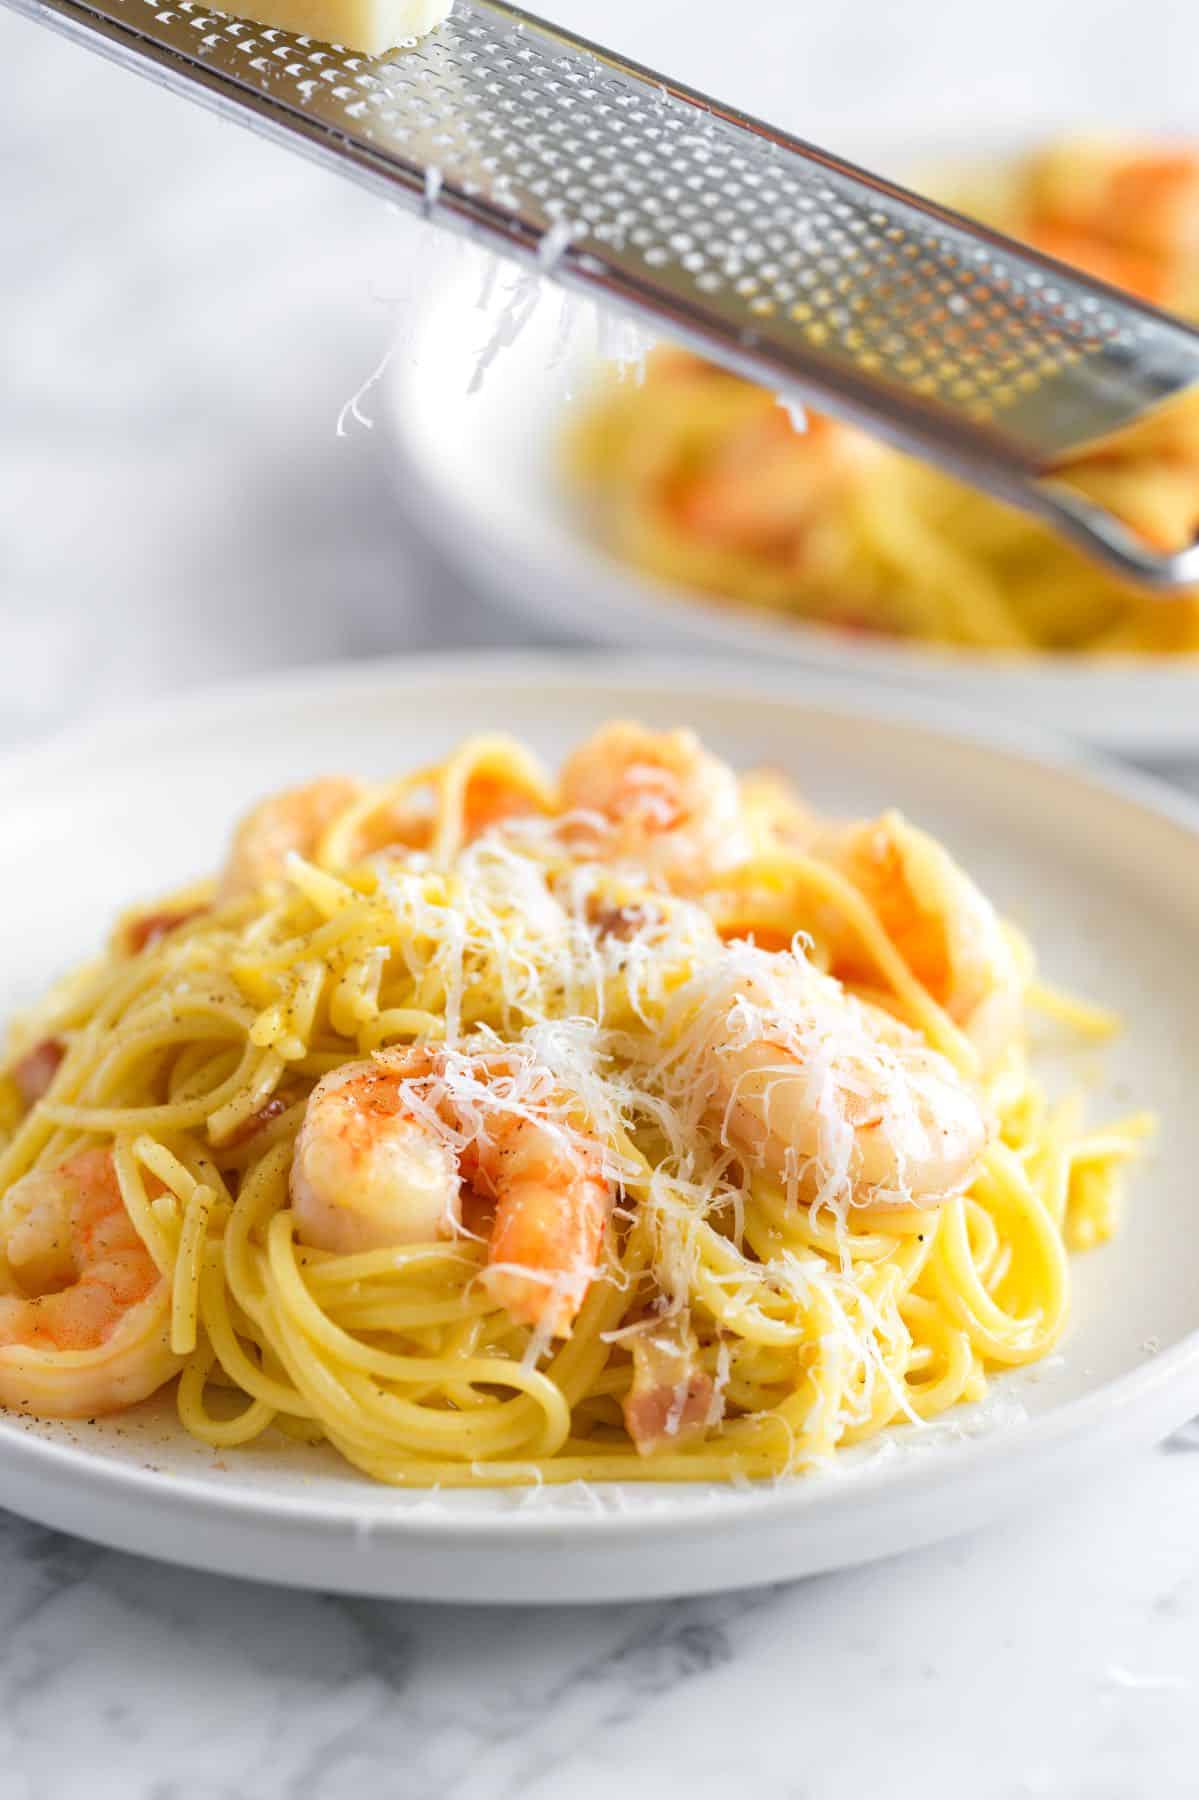
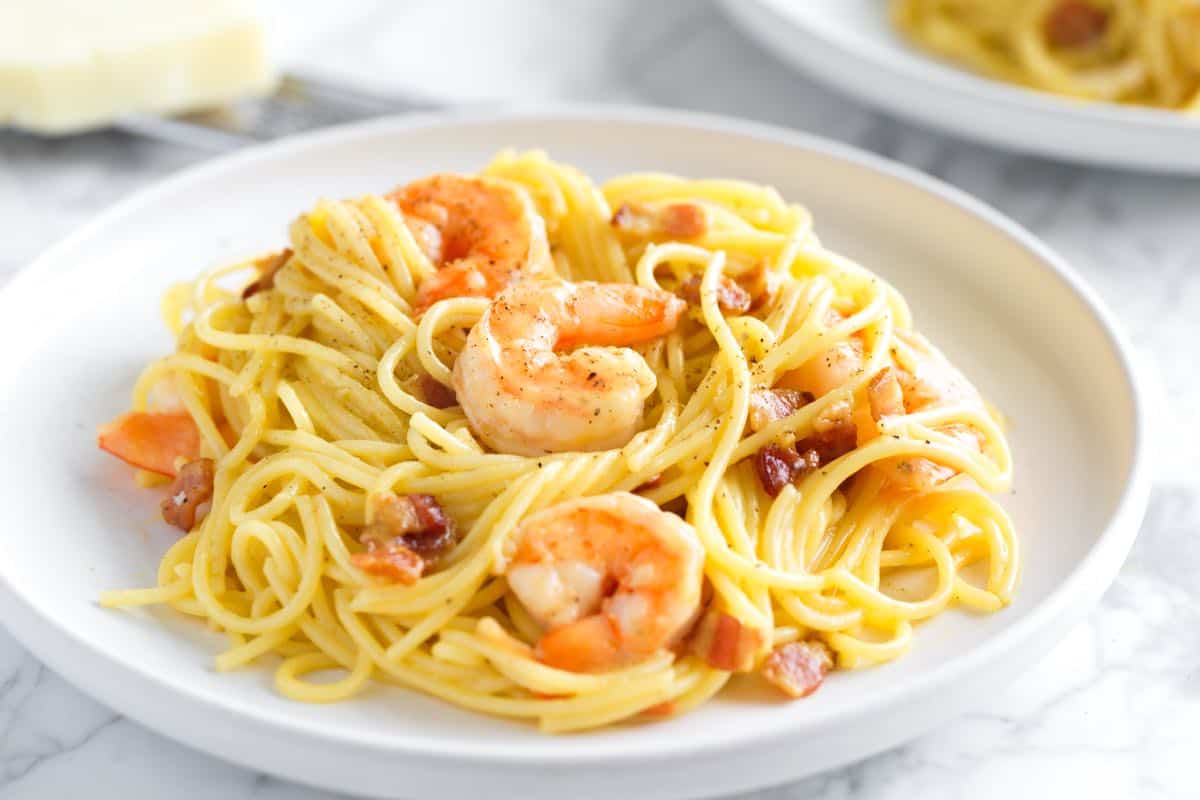
    Shrimp Carbonara

    If you are a pasta traditionalist, look away. If you love seafood pasta and don’t mind bending the rules a bit in the vein of delicious dishes, this recipe is for you! I’ve shared our pasta carbonara before. It’s simple and has the most delightful silky sauce.

    We’re obsessed, and after you try it, you will be too! For this recipe, we’re using all the techniques of traditional carbonara and adding shrimp. It’s easier than you might think, which is why this works as a quick weeknight dinner. And, as a bonus, it hits all the marks for a special dinner, like, say, for date night (see more of our date night recipes).

    Key Ingredients

    • Shrimp: For the best results, I prefer large or jumbo shrimp. They are less likely to overcook and dry out. Look for fresh shrimp that is firm and has a slightly sweet smell. If you have frozen shrimp, thaw and drain them before using. I leave the shrimp whole before tossing it with the pasta, but if you’d prefer to have smaller bites of shrimp throughout, you can cut them into smaller pieces.
    • Pork: You want a form of cured, fatty pork like guanciale (most traditional), pancetta, or thick-cut bacon (easiest to find). We will render this in a skillet, which adds flavor to our dish, and since you’ll have some rendered fat, it makes our sauce much creamier after mixing it with the eggs and cheese.
    • Pasta: My go-to is spaghetti, but bucatini, which looks like spaghetti with a hole down the middle, is also lovely. If you are up for it, this recipe made with homemade pasta is incredible!
    • Room Temperature Eggs: There’s no cream in this recipe. Instead, we combine egg and egg yolk with the rendered pork fat and some starchy pasta water to make the sauce silky and creamy. The eggs heat up but likely don’t hit a temperature that makes them fully cooked (similar to when making homemade tiramisu). We want a creamy, emulsified sauce, not a fully cooked scrambled egg texture. If you are concerned about raw eggs, use pasteurized eggs (they are common at most grocery stores). If you are still worried, add some shrimp to our easy fettuccine alfredo instead, which has no eggs and uses butter and cheese for the sauce. Note: If your eggs are straight from the fridge, you can warm them up quickly by adding them (in their shells) to a bowl of warm water and leaving them for a few minutes.
    • Cheese: I use Parmigiano-Reggiano AND Pecorino Romano and love the combination. If you need to choose one, go with Pecorino Romano (used for authentic cacio e pepe). It’s saltier and tangier than Parmigiano-Reggiano, which works incredibly well in carbonara. For the best results, use a fine grater to grate the cheese, and skip the pre-grated parmesan, as it doesn’t melt down as well into a silky carbonara sauce. Some regions of Italy would never think to combine shrimp and cheese, but as I said above, this recipe bends the rules a bit, and honestly, your taste buds will thank you!
    • Salt and Black Pepper: For perfectly seasoned pasta, you want to season your pasta water, which will season the pasta itself, and since we use some of that starchy water to bring our sauce together, it will also season the sauce. Fresh black pepper is pretty standard in carbonara, and for good reason. I like a fine grind for the pepper, use a lot of it, and love it!

    Find the full recipe with measurements below.

    How to Make Shrimp Carbonara

    Tip 1: Render your pork. While the pasta cooks, add the pork to a skillet with halved garlic cloves, olive oil and black pepper, then cook over medium-low heat. The pork should be sizzling gently, not browning too quickly. Cook until the fat renders and the pork is still slightly chewy in the center (not crunchy/crispy).

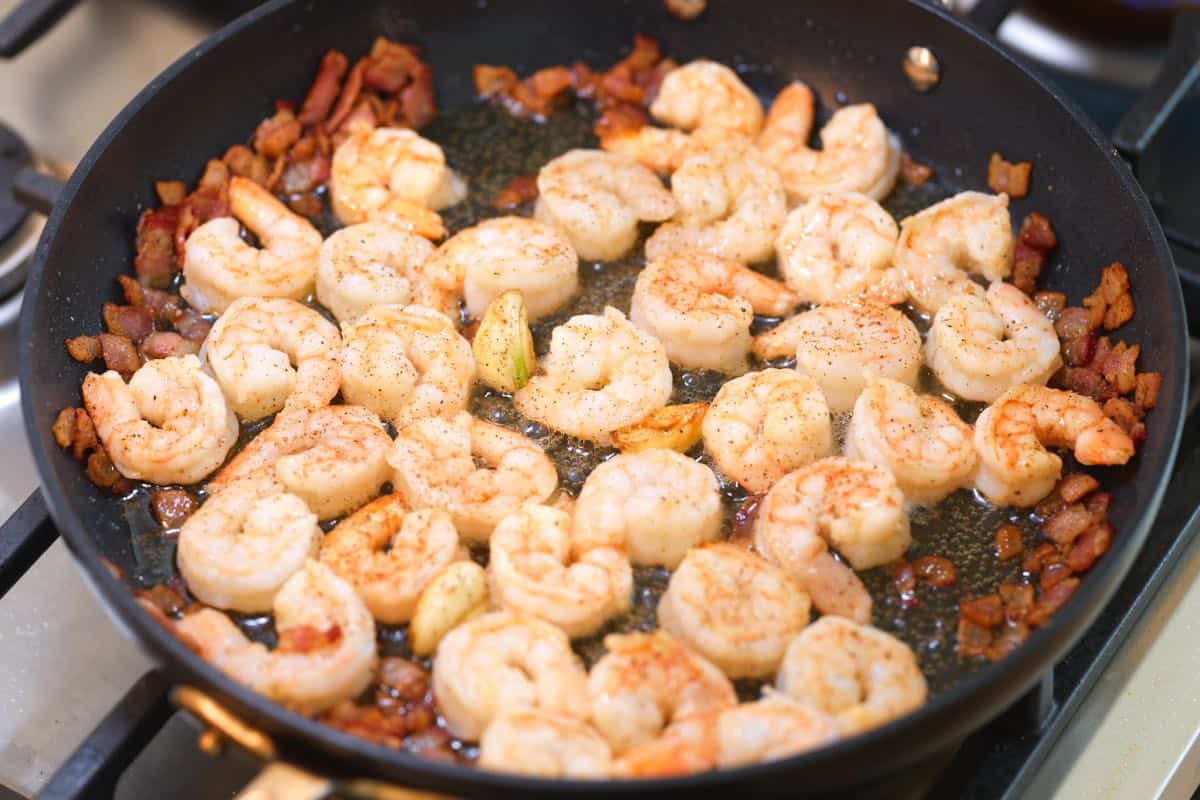
    Tip 2: Cook your shrimp in the same skillet. Next, toss in your shrimp. I like spreading them out in one layer, letting them cook for about one minute, and then flip them and cook another 30 to 60 seconds until they are tender and ever-so-slightly undercooked. Transfer the shrimp to a plate, and then move on to finishing the carbonara sauce.

    Cooking the shrimp with garlic in rendered bacon fat

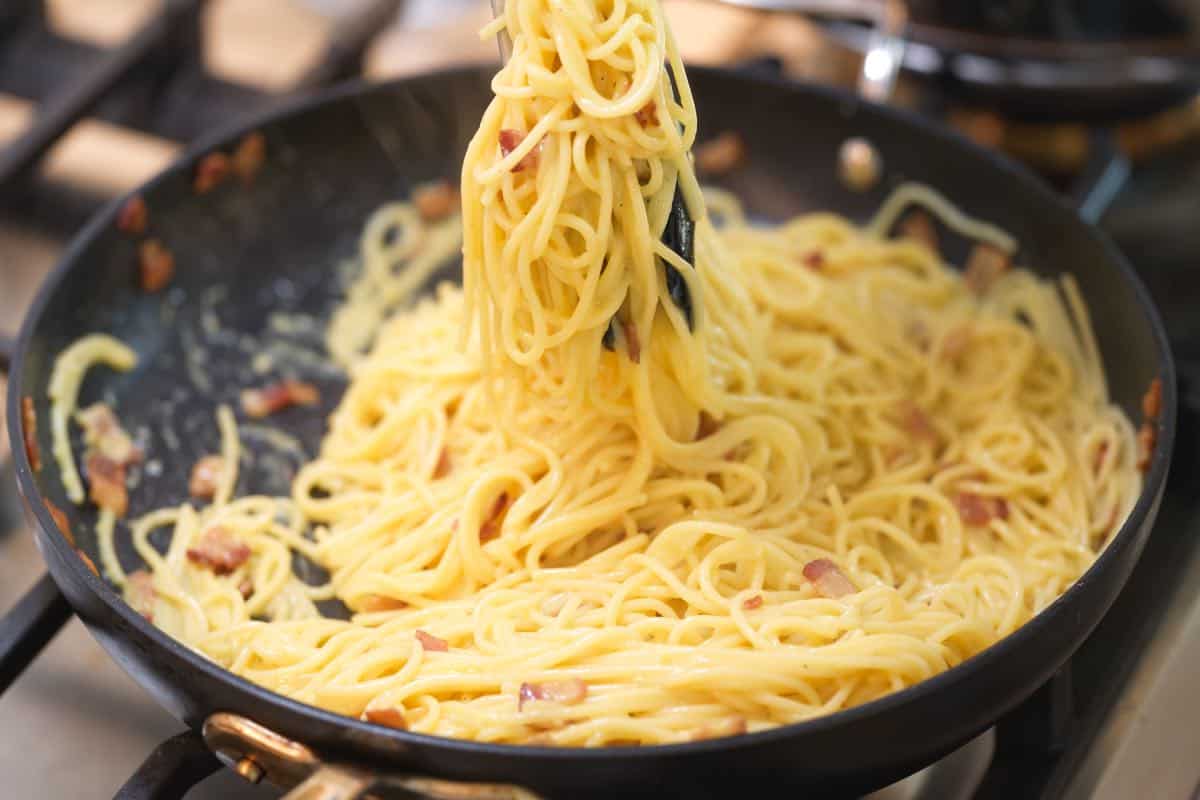
    Tip 3: Toss on low heat. When the pasta is ready, use tongs to toss it into the skillet with the rendered pork and its fat. Toss well for 2 minutes. The heat should stay low, and you’ll be tossing the pasta the whole time, giving the spaghetti a chance to absorb the flavors from the pork, shrimp juices, and rendered fat. (The shrimp is still on the side on a plate, but since you cooked them in the fat, it imparts a seafood flavor to the skillet).

    Tip 4: Turn off the heat. Now, turn off the heat and let the skillet sit for a minute before pouring in a whisked mixture of egg and cheese. Since the skillet sat for a minute, it won’t be so hot that it scrambles the eggs, but it will be hot enough to gently cook the eggs so they turn into that silky smooth sauce.

    Continuously tossing the spaghetti with the carbonara sauce

    Tip 5: Don’t stop tossing. During this step, you want to continuously toss the pasta around the skillet since keeping things moving makes sure you create the sauce without scrambling the eggs. You’ll notice it’s a bit thick as you toss, so loosen it with some pasta water (a couple of tablespoons or more as needed).

    Tip 6: Serve hot. When you are happy with the sauce, toss in the shrimp and serve immediately so it’s hot, topped with freshly grated cheese and more black pepper. It’s seriously good!

    More Simple Pasta Recipes

    Shrimp Carbonara

    Seriously Good Shrimp Carbonara

    • PREP
    • COOK
    • TOTAL

    We’re adding shrimp to our family’s favorite carbonara recipe. This shrimp carbonara relies on eggs for the sauce. We want a smooth, emulsified sauce, not scrambled eggs! Because of this, we don’t make the sauce over direct heat. Instead, we make the sauce in our skillet off the heat. The pan is still quite hot, but not so much it will scramble the eggs. For best results, start with room temperature eggs. If your eggs are cold from the fridge, place them (in their shells) in a bowl of warm water for a few minutes before you begin.

    We call for Parmigiano-Reggiano and Pecorino Romano for this recipe. The combination of both cheeses really makes this simple shrimp pasta delicious. If you need to choose just one, go with Pecorino Romano, which has more of a salty, sharp flavor that’s incredible in carbonara (you would use 2 ounces).

    4 Servings

    Watch Us Make the Recipe

    You Will Need

    12 ounces (340g) spaghetti or bucatini pasta

    1 pound (450g) large or extra large shrimp, peeled and deveined

    2 large eggs at room temperature

    2 large egg yolks at room temperature

    1 ounce (28g) finely grated Parmigiano-Reggiano cheese, 1/2 packed cup

    1 ounce (28g) finely grated Pecorino Romano cheese, 1/2 packed cup, plus more for serving

    1/2 tablespoon extra-virgin olive oil

    4 ounces (113g) thick-cut bacon, pancetta, or guanciale, 1/4-inch thick pieces or cubes

    2 garlic cloves, gently smashed

    1/2 teaspoon finely ground black pepper, plus more to taste, I prefer 3/4 teaspoon

    Salt for cooking the pasta

    Directions

      1Season shrimp: Pat the shrimp dry, then season with 1/4 teaspoon of salt and 1/4 teaspoon of finely ground black pepper.

      2Cook pasta: Bring a pot of salted water to a boil. Add the pasta and cook until al dente (tender, with a nice chew). I add 1 tablespoon of salt to the pasta water. If you’re using fresh pasta, wait to add it to the water until just before the bacon is almost finished rendering, as it cooks much more quickly.

      3Prepare egg mixture: In a medium bowl, thoroughly whisk 2 whole eggs, 2 egg yolks, 1 ounce finely grated Parmigiano-Reggiano, and 1 ounce finely grated Pecorino Romano. Set aside.

      4Render pork: Heat 1/2 tablespoon of olive oil in a wide skillet over medium heat. Add the bacon (or pancetta or guanciale), garlic cloves, and 1/2 teaspoon black pepper. Cook, stirring occasionally, until the fat renders and the bacon begins to crisp but still has a slight chew, 5 to 6 minutes.

      5Cook shrimp: Add the shrimp, in one layer, to the skillet. Cook for 1 minute, flip, and cook until tender and slightly undercooked, about 1 minute. Transfer the shrimp to a plate and loosely cover with foil. Discard the garlic. Turn off the heat, and set the skillet aside until the pasta is ready. Just before the pasta is done, reheat the bacon and rendered fat in the skillet over low heat.

      6Add pasta to skillet: Do not drain the pasta water. Instead, use tongs to transfer the pasta to the skillet with bacon over low heat. Toss the pasta around the skillet for 2 minutes.

      7Create the sauce: Turn off the heat and wait one minute. Now, it’s all about keeping things moving from here. Add the egg and cheese mixture, and immediately begin tossing everything together. Add a splash of pasta water (2 to 3 tablespoons), or more as needed, to thin the sauce until a silky sauce forms. Stopping or a pan that’s too hot will cause the eggs to scramble. Keeping everything moving around will make the sauce turn silky. It takes a minute or two.

      8Taste and season with salt and additional pepper as needed. Toss in the shrimp. Divide between dishes and dust with more cheese and black pepper on top.

    Adam and Joanne’s Tips

    • Room temperature eggs: For best results, start with room temperature eggs. If your eggs are cold from the fridge, place them (in their shells) in a bowl of warm water for a few minutes before you begin.
    • Seasoning your pasta water: I use 1 tablespoon of salt. If you’re unsure, taste the water—it should taste pleasantly salty, like seawater.
    • Grating the cheese: I use a fine microplane grater to grate the cheese for this recipe. The super fine cheese melts into the sauce so nicely. Since it’s so fluffy, it fills a measuring cup quickly, so to measure it, I lightly push the cheese into the cup to pack it down a bit.
    • The nutrition facts provided below are estimates.

    Nutrition Per Serving
    Serving Size
    1/4 of the recipe
    /
    Calories
    668
    /
    Total Fat
    23.4g
    /
    Saturated Fat
    8.3g
    /
    Cholesterol
    399.9mg
    /
    Sodium
    597.1mg
    /
    Carbohydrate
    66.3g
    /
    Dietary Fiber
    2.8g
    /
    Protein
    46.3g


    AUTHOR:

    Joanne Gallagher

    Adam and Joanne of Inspired Taste

    We are Adam and Joanne Gallagher, the creators of Inspired Taste. Established in 2009, Inspired Taste grew from a childhood dream into one of the internet’s most trusted recipe sites with hundreds of reliable recipes, step-by-step videos, and expert tips.More About Us

    Source link