Category: Main Dish

  • Epic Taco Salad Recipe

    Epic Taco Salad Recipe

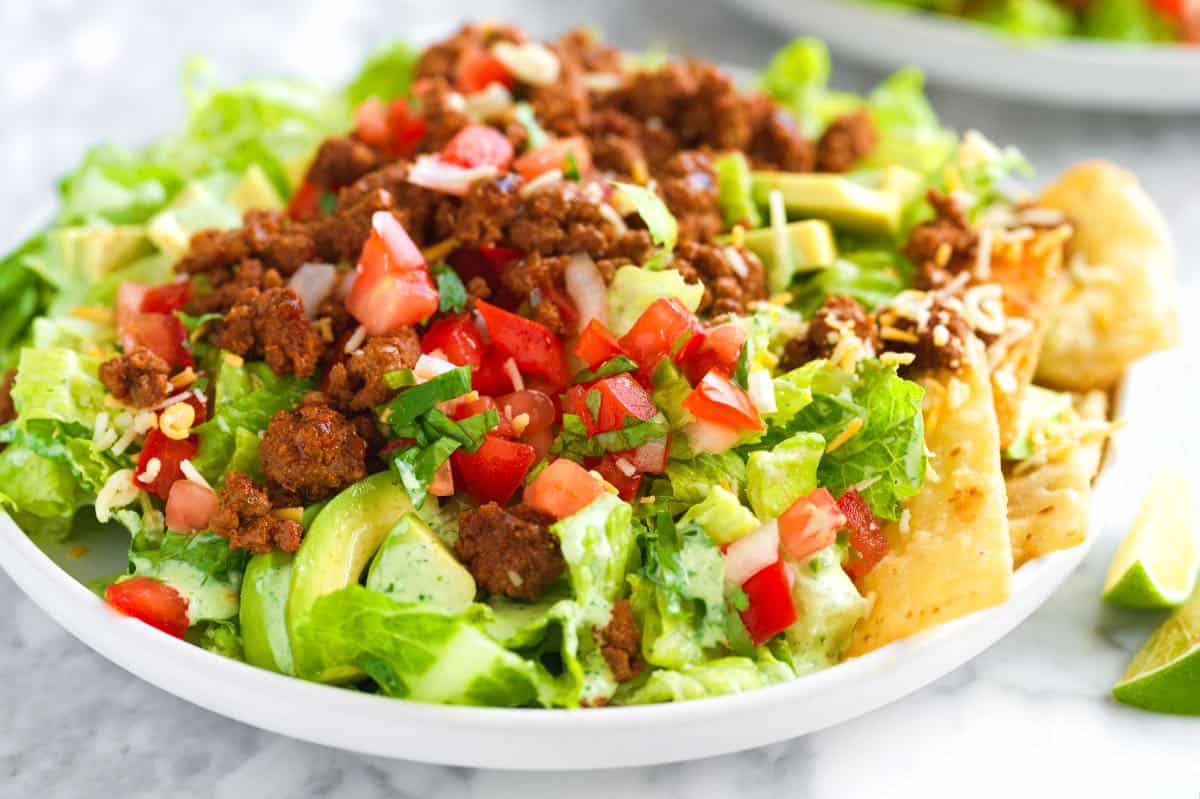
    Our favorite taco salad recipe is an easy weeknight meal with fresh lettuce, tortilla chips, seasoned ground beef, cheese, and a creamy cilantro lime dressing.

    Taco Salad

    We love tacos of all kinds (see all of our taco recipes as proof), but we really love taco salad. It’s fast, fresh, and super easy! You’ve got perfectly seasoned ground beef made with our homemade taco mix, crisp fresh lettuce, and all the best taco toppings.

    You have a lot of play with when it comes to making this taco salad recipe, but I’ll walk you our favorite way to make it! It’s healthy, but doesn’t feel that way, so it feels like a splurge. We love topping this salad with our cilantro lime dressing!

    Key Ingredients

    • Taco Meat: I’ve used lean ground beef (90/10) for my salad in the photos, but you can substitute ground turkey, ground pork, or ground chicken without any changes. Instead of using a store-bought seasoning, we make our own with chili powder, cumin, smoked paprika, garlic powder, dried oregano, and salt. When we cook the meat, we also add a couple of tablespoons of tomato paste, which helps make the meat extra tasty. You can also swap our seasoning below for our homemade taco seasoning, which is equally as delicious. (Here’s more about how to make taco meat if you are interested.)
    • Lettuce: You want crisp, crunchy lettuce for this salad, so Iceberg or Romaine is perfect.
    • All the Toppings: So this is where you get to have fun. Think of your favorite taco toppings, and then add them to this salad. I love pico de gallo, avocado or guacamole, and shredded cheese, but add your favorite toppings as you see fit!
    • Taco Salad Dressing: My favorite dressing for this is our creamy cilantro lime dressing. Still, you can substitute your favorite store-bought dressing or go with another homemade dressing like this easy ranch dressing.
    • Tortilla Chips: So these are optional and take away a little bit from the healthy angle, but I do love them! Make homemade tortilla chips or use some from your favorite store-bought bag, and add them to the top right before digging in. They add that corn tortilla flavor and lots of crunch. Some people prefer Fritos, but to be honest, I like to stick with regular chips. I’m such a fan!

    Find the full recipe with measurements below.

    Homemade Taco Salad with Ground Beef

    How to Make the Best Taco Salad

    Tip 1: Generously season the ground meat. I’m extra generous with the salt and seasonings for my taco meat. It may taste slightly too seasoned on its own, but when you scatter it all over the salad, it works! If you like spicy tacos, add a pinch or two of cayenne pepper to the spice blend.

    Tip 2: Add lots of different textures. My favorite part about this salad is the variety of textures. We want to keep the prep to a minimum since this is very likely something you are making on a weeknight, but that doesn’t mean we can’t pack in lots of goodies. Avocado is creamy, tomato or pico de gallo is fresh, and the chips add some crunch. Think about other fridge staples like sour cream, salsa, guacamole, or pickled red onions. They will all work well in this salad!

    Tip 3: Make the taco meat ahead of time. You can cook the ground beef with the spices, then keep it in an airtight container for up to 4 days. This way, it’s ready for you when you are craving this taco salad. The dressing is great for making ahead, too!

    Taco Salad

    Epic Taco Salad

    • PREP
    • COOK
    • TOTAL

    This easy taco salad recipe with ground beef is such an easy weeknight dinner. Make our recommended cilantro lime dressing recipe (which is sort of like a cilantro ranch) or skip that step and use your favorite store-bought ranch.

    4 Servings

    Watch Us Make the Recipe

    You Will Need

    For the Taco Meat

    1 ½ teaspoons chili powder

    1 teaspoon ground cumin

    ½ teaspoon smoked paprika

    1 teaspoon garlic powder

    ¼ teaspoon dried oregano

    ¾ teaspoon fine sea salt, plus more as needed

    1 ½ tablespoons avocado oil

    1 pound lean ground beef, 90/10 (450g)

    2 tablespoons tomato paste (35g)

    ½ cup chicken stock or water


    For the Taco Salad

    12 cups shredded crispy lettuce, like romaine or iceberg lettuce

    1 cup homemade pico de gallo or chopped tomatoes

    ½ cup Mexican blend shredded cheese (113g)

    1 large avocado, pitted and sliced

    1 cup tortilla chips, try homemade tortilla chips, optional

    Cilantro Lime Dressing, Homemade Ranch, or your favorite store-bought ranch

    Directions

      1Make spice mix: In a small bowl, stir together the chili powder, cumin, smoked paprika, garlic powder, dried oregano, and salt.

      2Cook the seasoned beef: Heat the avocado oil in a medium skillet over medium-high heat. Add the ground beef and sprinkle the spice mixture over it. Use a wooden spoon to break up the meat as it cooks, stirring until it begins to brown. Stir in the tomato paste and cook for 2 more minutes. Add the chicken stock (or water) and let it simmer for a few minutes until the sauce has thickened. Taste, and then add more salt if you think it needs it (since this will top a salad, keeping this well seasoned works really well with the rest of the salad.)

      3Make the salad: In a large salad bowl, toss the lettuce with 4 to 8 tablespoons of the dressing (adjust depending on how dressed you like your salad). Divide the lettuce between four bowls or plates, then top each with a generous ½ cup of the beef mixture, pico de gallo, shredded cheese, and the avocado. Sneak some tortilla chips on the side, then enjoy!

    Adam and Joanne’s Tips

    • More toppings: Feel free to add more of your favorite taco toppings like sour cream, salsa, chopped tomatoes, queso fresco, red onion, black olives, and more!
    • Seasoning: I prefer the spice blend above to your average packet of taco seasoning from the store; however, if you have a favorite, feel free to swap our blend for the packet. Of all the options I have tried, Siete Foods has the tastiest.
    • Lettuce: I usually buy the romaine hearts sold in threes at the store. For 4 servings (12 cups), you will need two 12-ounce bags of romaine hearts.
    • The nutrition facts are estimates.

    Nutrition Per Serving
    Serving Size
    1/4 of the recipe (1/2 cup beef)
    /
    Calories
    534
    /
    Total Fat
    40.7
    /
    Saturated Fat
    10.6g
    /
    Cholesterol
    95.2mg
    /
    Sodium
    1069.8mg
    /
    Carbohydrate
    14.3g
    /
    Dietary Fiber
    6.7g
    /
    Total Sugar
    5.4g
    /
    Protein
    29.7g


    AUTHOR:

    Joanne Gallagher

    Adam and Joanne of Inspired Taste

    We are Adam and Joanne Gallagher, the creators of Inspired Taste. Established in 2009, Inspired Taste grew from a childhood dream into one of the internet’s most trusted recipe sites with hundreds of reliable recipes, step-by-step videos, and expert tips.More About Us
    Source link

  • Thai Fish Curry Recipe

    Thai Fish Curry Recipe

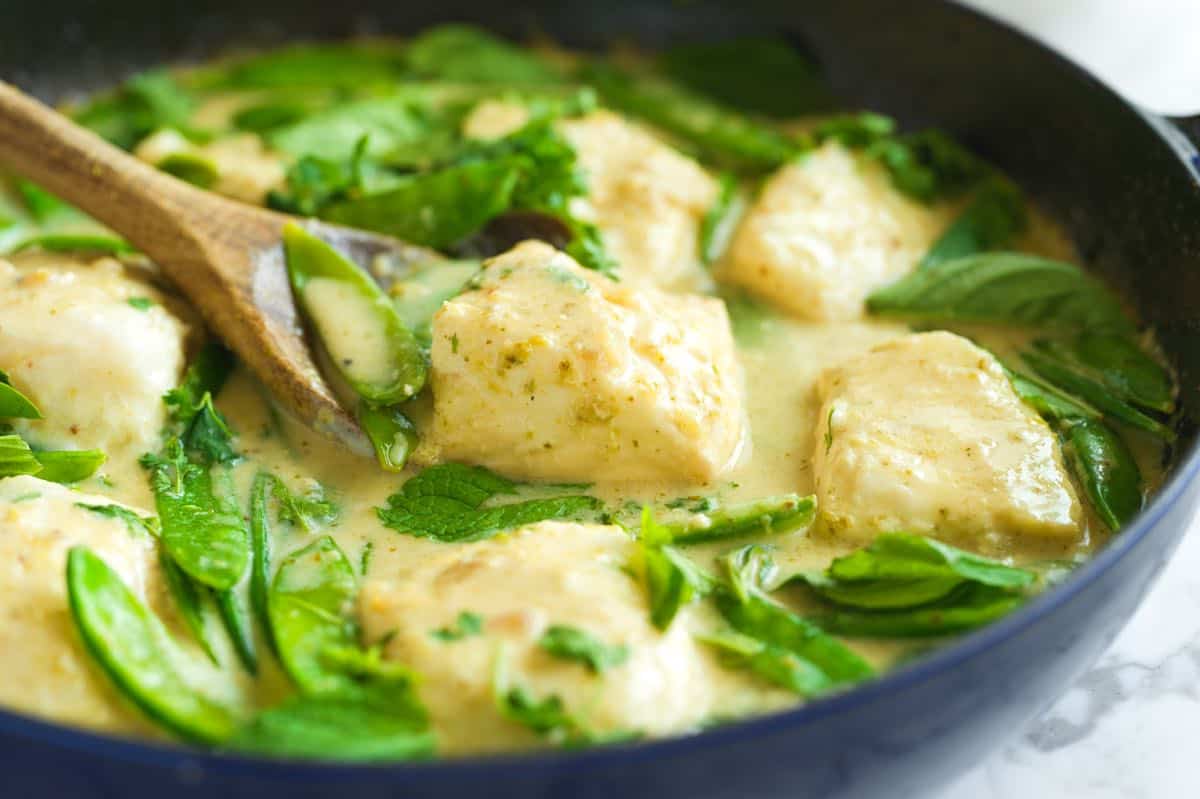
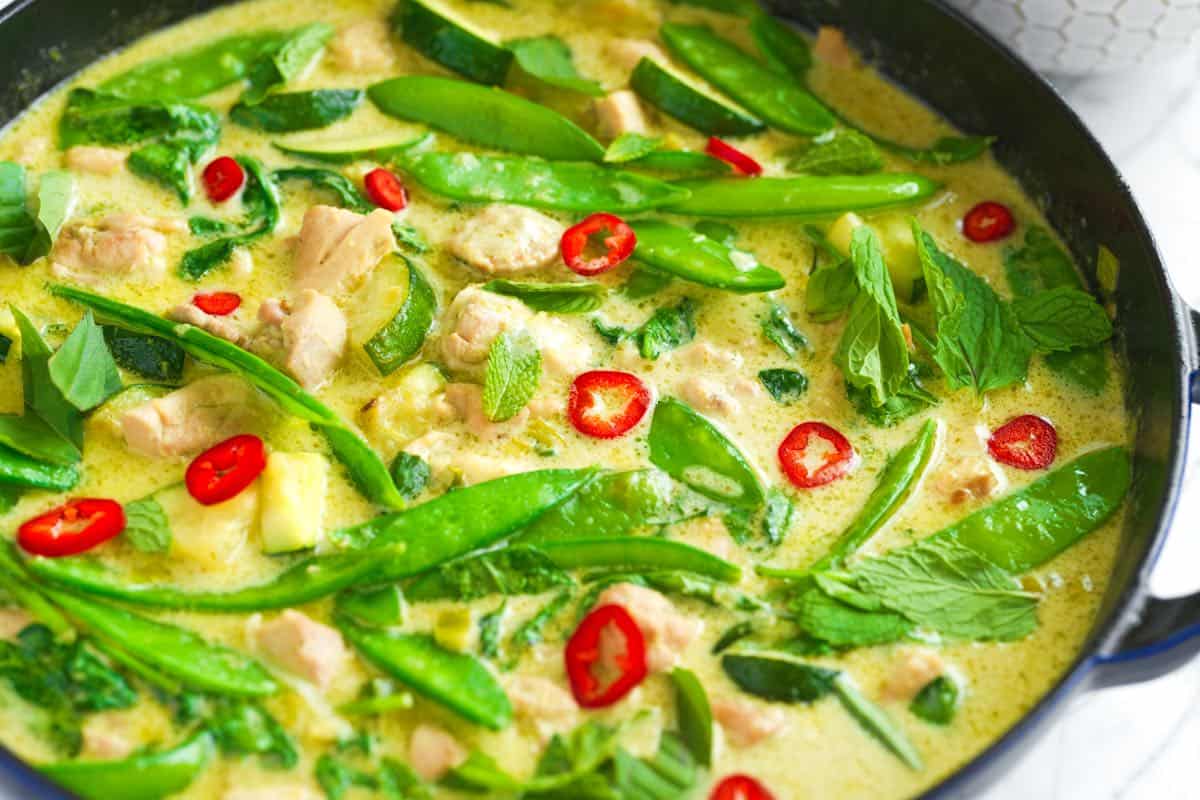
    This incredibly flavorful Thai fish curry recipe with flaky white fish swimming in a creamy coconut green curry broth with veggies is pure magic.

    Thai Fish Curry with Coconut and Green Curry Paste

    If you’ve been following along, you know we’ve been obsessed with our homemade green curry paste. We have already shared our Thai Green Curry with chicken, but we loved the flavor so much, we had to find another way to use it, and this Thai-inspired fish curry was the answer. It’s everything we hoped for and more.

    It’s also really easy to make (I promise!). This saucy green curry fish is perfect for when you’re craving a light, flavorful meal, but you don’t have much time. You’ll gently simmer flaky white fish in a vibrant, aromatic coconut sauce. Then, serve the fish and lots of the creamy green curry sauce over Jasmine rice or rice noodles.

    Key Ingredients

    • White Fish: Choose a flaky white fish for this fish curry. Think cod, halibut, haddock, tilapia, and snapper for a tender, soft texture. Or, go with mahi mahi or sea bass for a slightly firmer texture.
    • Green Curry Paste: I love using our homemade curry paste, which is bright and super herby thanks to chile peppers, garlic, lemongrass, ginger, mint, and basil. With our recipe, you have complete control over the spice level, which is a big bonus. Of course, you can still use a store-bought Thai curry paste. My favorite is from Maesri (sold in cans).
    • Coconut Milk: This is a non-negotiable for a creamy curry, and full-fat coconut milk really is best. A quick tip when you’re shopping: give the can a shake. If it sounds liquidy, skip it. A can that’s not as liquidy has more of that delicious thick coconut cream inside!
    • Fish Sauce: This helps to season the curry. I have two favorites in my pantry, including Red Boat and Three Crabs fish sauce.
    • Vegetables: I always start by cooking some sliced shallots, and then finish the curry with a quick-cooking veggie like snow peas. Zucchini, snap peas, green beans, spinach, asparagus, or small broccoli florets are also great options.
    • Lime and Fresh Herbs: To build off the fresh, herby flavor of the curry paste, I love finishing the curry with a squeeze of fresh lime juice and a handful of fresh herbs like Thai basil and mint (Italian basil works, too).
    • Kaffir Lime Leaves (Optional): These are optional, but they add a lovely aromatic flavor to this curry recipe. They used to be sold in my local grocery store, but they have been harder to find recently. You can buy them online, though! If you do find them fresh, buy a bunch, then freeze them!

    Find the full recipe with measurements below.

    How to Make Thai Fish Curry

    Tip 1: Boost store-bought paste: If you aren’t starting with our homemade green curry paste, you can boost the flavor of store-bought. Store-bought curry pastes range in flavor and spice level. I recommend Maesri (sold in cans). To achieve the fresh, vibrant flavor that homemade paste gives our curry, add the following along with the curry paste in step two of the recipe below: 2 teaspoons minced garlic, 2 teaspoons finely grated fresh ginger, and 2 teaspoons lemongrass paste.

    Tip 2: Cook your curry paste first: Before adding the coconut milk, sauté your curry paste in some oil to bring out the flavors. I do this over medium heat and cook the paste until the color deepens a little, and it just begins to stick to the pan. This step makes a huge difference!

    Making fish curry with coconut milk, Thai green curry paste, and vegetables

    Tip 3: Prepare for some spice: Note! Green curry is supposed to be SPICY. It’s generally the hottest of all the Thai curries. If you are not interested in a spicy dish, you can make our homemade paste and reduce the chili peppers. Or, swap the green curry paste for yellow curry paste, which is much milder and sweeter.

    Tip 4: Don’t forget the rice: This fish curry is extra saucy, so you’ll want a bed of rice or noodles to soak up all the creamy coconut sauce. Jasmine rice, brown rice, coconut rice, cilantro lime rice, or cooked rice noodles are perfect. If you’re trying to keep the carbs down, consider my favorite cauliflower rice.

    More Thai Curry Recipes

    Thai Fish Curry

    Thai Fish Curry Recipe

    • PREP
    • COOK
    • TOTAL

    This Thai fish curry recipe is perfect for an easy weeknight dinner. We love this from scratch curry paste, but check our tips section below the recipe for ways to boost the flavor of store-bought curry paste.

    A quick note on the spice level: traditional green curry is usually quite hot. Our homemade paste is easy to adjust, but be aware that the spice level of store-bought versions will vary. If you’re looking for a good store-bought option, I highly recommend Maesri (sold in cans).

    Serve this curry over steamed Jasmine rice, cilantro lime rice, or cooked rice noodles. It’s also amazing with some crispy fried shallots sprinkled over the top!

    4 to 6 Servings

    You Will Need

    2 tablespoons avocado oil

    2 medium shallots, sliced thin

    6 tablespoons homemade green curry paste (see tips below for using store-bought curry paste)

    1 (15oz) can full-fat coconut milk

    1 tablespoon fish sauce

    4 kaffir lime leaves, optional

    1 ½ pounds skinless, boneless white fish, cut into chunks (680g)

    8 ounces snow peas (225g)

    Juice from half a lime, plus lime wedges for serving

    ½ cup green herbs like Thai basil, mint, and cilantro for serving

    Thinly sliced red chilies for serving, optional

    Directions

      1Cook the shallots: Heat a wide pot or deep skillet over medium heat. Add the avocado oil and shallots, then cook, stirring them around the pot, until translucent, about 4 minutes.

      2Bloom the curry paste: Add the green curry paste and cook, stirring it around, until slightly darker and beginning to stick to the pot, 2 to 3 minutes.

      3Simmer the sauce: Pour in the coconut milk, then swirl about 1 cup of water in the empty can to get any remaining coconut milk, and pour the water into the pot. Scrape any stuck bits from the bottom, then stir in the fish sauce. Add the kaffir lime leaves (optional). Simmer until the sauce thickens slightly, 5 to 6 minutes.

      4Cook the fish and veggies: Add the fish and snow peas, then simmer until the fish is cooked through and flakes easily with a fork, 5 to 8 minutes. As they cook, spoon the coconut sauce over the fish and vegetables. If most of the fish is tender, but the very tops of the fish are still undercooked, turn the heat off, and cover the pot with a lid for a few minutes so they finish cooking.

      5Finish and serve: Turn off the heat, remove the lime leaves, and stir in the lime juice. Taste and season with more fish sauce as needed. Serve over rice, topped with fresh herbs and thinly sliced red chiles (optional).

    Adam and Joanne’s Tips

    • Store-bought curry paste: I like the 4-ounce cans from Maesri (here’s a link to them on Amazon). I use 4 to 6 tablespoons. Commonly sold Thai Kitchen green curry paste is not as flavorful, but the spice is more potent (if this is what you have, start with 2 tablespoons and go from there). It’s a good idea to taste your curry paste before using it to see where it sits on the flavor/spice scale.
    • Making store-bought curry paste better: Add the following ingredients along with the curry paste in step two: 2 teaspoons minced garlic, 2 teaspoons finely grated fresh ginger, and 2 teaspoons lemongrass paste. I buy lemongrass paste in tubes. To learn how to make lemongrass paste from fresh, see the tips section of our green curry paste recipe.
    • Recipe inspired by our Thai Green Curry and Ali Sagle’s Corn and Cod Green Curry (NYT).
    • The nutrition facts provided are estimates.

    Nutrition Per Serving
    Serving Size
    1/6 of the recipe
    /
    Calories
    274
    /
    Total Fat
    17g
    /
    Saturated Fat
    11.3g
    /
    Cholesterol
    52.2mg
    /
    Sodium
    718.5mg
    /
    Carbohydrate
    8.4g
    /
    Dietary Fiber
    2.1g
    /
    Total Sugars
    2.9g
    /
    Protein
    23.3g


    AUTHOR:

    Joanne Gallagher

    Adam and Joanne of Inspired Taste

    We are Adam and Joanne Gallagher, the creators of Inspired Taste. Established in 2009, Inspired Taste grew from a childhood dream into one of the internet’s most trusted recipe sites with hundreds of reliable recipes, step-by-step videos, and expert tips.More About Us

    Source link

  • Pan-Fried Fish

    Pan-Fried Fish

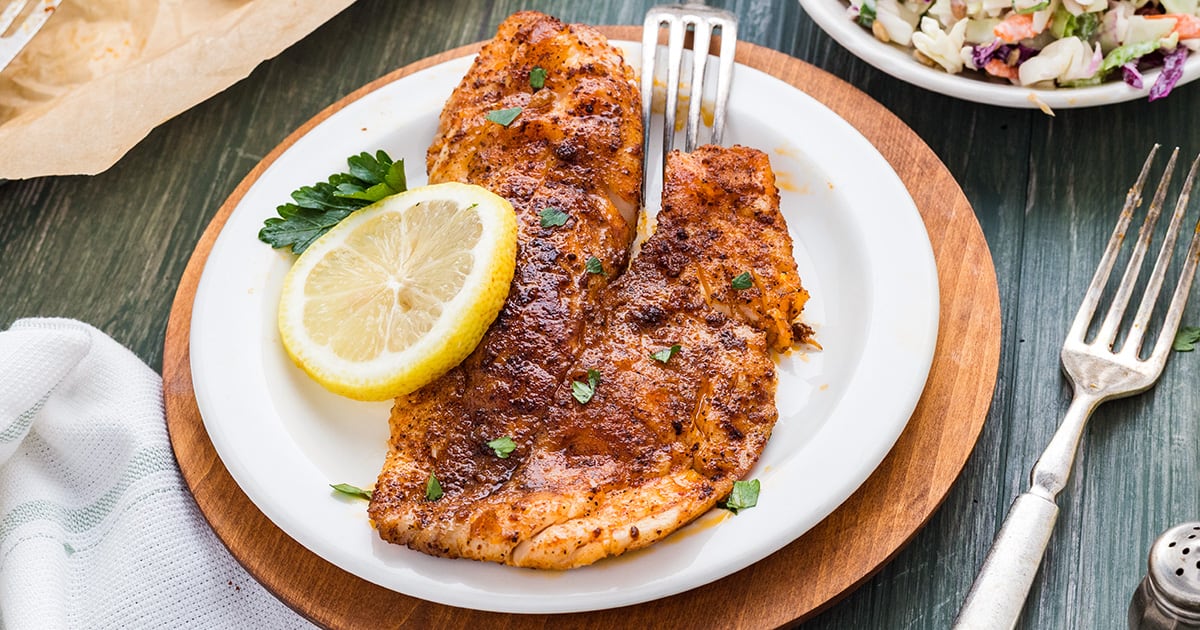
    Sometimes the simplest recipes are the best ones, and this lightly spiced, pan-fried fish is proof. With just a handful of seasonings and 15 minutes, you get a restaurant-quality dinner that’s healthy, quick, and foolproof. You can use most white fish fillets for this recipe.


    Jump to: ℹ️ Overview | 🛒 Ingredients | 📷 How To Make | 👩‍🍳 Recipe Tips | 🥗 Serving Suggestions | 📝Full Recipe Card | 🍽 More Fish Recipes


    At A Glance

    • ⏱ Ready In: 15 minutes
    • 🍽 Serves: 4
    • 🌱 Diet: Gluten-Free, Dairy-Free, Keto, Low-Calorie, Low-Carb, High-Protein
    • 💪 Nutrition Highlights: High in lean protein, low in calories and carbs, excellent source of B vitamins
    • 🥕 Main Ingredients: white fish fillets, paprika, oregano, garlic powder, fresh lemon
    • 🔥 Flavor Profile: Mediterranean-inspired, gently spiced, bright citrus finish, crispy golden exterior
    • 🧊 Meal-Prep Friendly: Keeps 3–4 days in the fridge; can be reheated gently
    • Best Served With: Rice, roasted veggies, potatoes, fresh salad, or in tacos and bowls

    These pan-fried fish fillets are spiced with a simple Mediterranean spice blend—paprika, oregano, and garlic powder—that creates that perfect golden crust while keeping the inside incredibly tender and flaky. The fresh squeeze of lemon at the end is the magic touch that makes it taste restaurant-quality, even though it’s honestly one of the easiest things you can throw together on a weeknight.

    I reach for this recipe whenever I need something healthy and quick, and my family never gets tired of it. The best part? It works beautifully with any white fish—try it with flounder, tilapia, barramundi, red snapper, or whatever your market has that day. It’s proof that you don’t need complicated ingredients to create something genuinely delicious.

    👩‍🍳 You might also like these recipes: this Thai-style easy fish curry, these weeknight grilled fish tacos, this Mediterranean baked fish dinner, or this delicious and easy pan-fried salmon.

    What You’ll Need

    Here is what you’ll need for this pan-fried fish recipe. Find the full measurements in the recipe card below.

    • White fish fillets – The star of the show. Fresh, high-quality fillets make all the difference here. Pat them dry before cooking for that beautiful golden crust. You can use most white fish here: snapper, barramundi, mahi mahi, tilapia, ling, and so on.
    • Olive oil – Any neutral oil works, but I prefer olive oil for its flavor. This helps create the crispy exterior while keeping the fish tender inside.
    • Paprika – Adds a warm, slightly smoky flavor and creates that gorgeous golden color on the outside. Don’t skip it.
    • Oregano – Brings that Mediterranean vibe and pairs perfectly with the garlic and paprika.
    • Garlic powder – Adds depth and savory notes without overpowering the delicate fish.
    • Salt and pepper – Essential for seasoning and bringing out the natural flavors.
    • Fresh lemon – The finishing touch. The bright acidity cuts through the richness and makes it taste fancy without any extra effort.
    • Parsley – Optional, but I love the fresh pop of color and mild herbal note it adds.

    Recipe Tips

    • Don’t crowd the pan: This is the most important tip. If your pan isn’t large enough for all four fillets, cook them in two batches. Divide the oil between batches so each piece gets that beautiful crust.
    • Use fresh fish: When the fish is truly fresh, this recipe tastes exactly like when you eat out. Visit a fishmonger if you can, and cook the fish the same day you buy it.
    • Season fresh, not ahead: While you can season the fillets a few minutes ahead, I prefer to season them right before cooking for the best flavor and texture.
    • Gentle reheating: I’m not a huge fan of reheated fish, but I know some people love it—even cold! If you do reheat, keep it gentle. Since it cooks so quickly the first time, you only want to knock the chill off it. A quick warm-up in a low oven works best.
    • Try other white fish: This method works beautifully with flounder, ling, snapper, or any other mild white fish. The cooking times might vary slightly depending on thickness, so adjust as needed.
    • Don’t flip more than once: Let the first side cook undisturbed to develop that crust. Resist the urge to peek or move the fillets around.

    💬 If you’ve tried this pan-fried fish or any other recipe on the blog then don’t forget to rate the recipe and let me know how you got on in the comments below, I love hearing from you! You can also FOLLOW ME on Instagram, Facebook, Pinterest, YouTube, and or sign up to my Newsletter to see more of my delicious food.

    Want to Save This Recipe?

    Enter your email & I’ll send it to your inbox. Plus, get great new recipes from me every week!

    By submitting this form, you consent to receive emails from Cooked & Loved

    This easy pan-fried fish comes together in just 15 minutes and tastes restaurant-quality every single time. A simple spice blend and fresh lemon are all you need to create a healthy, delicious dinner that works with any white fish. Step-by-step photos and serving suggestions are below the recipe.

    • Pat the tilapia fillets dry with paper towels.

    • In a small bowl, combine the paprika, oregano, garlic powder, salt, and pepper. Rub this spice mixture evenly over both sides of each tilapia fillet.

    • Heat the oil in a large skillet over medium-high heat until it begins to sizzle.

    • Carefully place the fillets in the pan, positioning the thicker parts toward the middle of the pan. Do not crowd the pan; cook in batches if necessary.

    • Cook for 3 minutes without moving the fillets. This allows a golden crust to form on the bottom.

    • Gently flip each fillet and cook for an additional 3–4 minutes until the fish turns from translucent to white and flakes easily with a fork at its thickest point.

    • Squeeze half a lemon over the fillets.

    • Garnish with fresh parsley if desired.

    • Serve immediately.

    • White fish fillets: You can use most white fish fillets for this recipe. Please note that the cooking time might change depending on the thickness of the fillets.
    • Ingredient Tips: Pat the fish completely dry before cooking—this is essential for achieving a crispy exterior. The fresher your tilapia, the better the result. Choose fillets that are firm and smell like the ocean, not fishy.
    • Key Recipe Tips: Don’t crowd the pan, or you’ll steam the fish instead of searing it. If cooking in batches, divide the oil evenly. Flip the fillets only once to develop that golden crust. Resist the urge to move them around while cooking.
    • Storage Tips: Keep cooked tilapia in an airtight container in the refrigerator for 3–4 days. For best texture, serve within the first two days. It can be reheated gently in a low oven, though fresh is always best.
    • Make-Ahead Tips: You can pat the fillets dry and season them a few minutes before cooking, but I prefer to season right before pan-frying for the best results. Prep your sides (rice, veggies, salad) ahead of time, then cook the fish when you’re ready to eat.
    • Can I use frozen tilapia? Thaw completely and pat very dry. The results won’t be quite as restaurant-quality as fresh, but it still works well.
    • What if I don’t have paprika? You can omit it or substitute with cayenne pepper (use less—it’s spicier) or smoked paprika for extra depth.
    • Can I make this ahead? Cook it fresh when you’re ready to eat. Reheated fish loses some of its appeal, though my family disagrees and loves it cold the next day.
    • What other fish can I use? This recipe works beautifully with flounder, red snapper, cod, or any mild white fish of similar thickness. Adjust cooking time if fillets are significantly thicker or thinner.
    • How do I know when it’s done? The fish should turn from translucent to opaque white and flake easily with a fork at its thickest point. Don’t overcook—it cooks quickly and dries out fast.

    Calories: 209kcal | Carbohydrates: 4g | Protein: 28g | Fat: 10g | Saturated Fat: 2g | Polyunsaturated Fat: 1g | Monounsaturated Fat: 6g | Cholesterol: 69mg | Sodium: 364mg | Potassium: 494mg | Fiber: 1g | Sugar: 1g | Vitamin A: 508IU | Vitamin C: 14mg | Calcium: 33mg | Iron: 1mg

    Keywords: fish fillet recipes, healthy fish dinner, keto fish, quick weeknight meals, white fish recipe, gluten-free dinner, white fish recipes, pan fried fish, easy fish recipes

    How To Make Pan-Fried Fish

    Find the full recipe and nutritional information below. Here are some handy step-by-step photos for making these easy pan-fried fish fillets.

    • Pat the fish fillets dry with paper towels. This is the secret to getting that perfect crispy exterior—any moisture on the surface will steam instead of sear.
    • Mix together the paprika, oregano, garlic powder, salt, and pepper in a small bowl. Rub this spice blend evenly over both sides of each fillet.
    • Heat the oil in a large skillet over medium-high heat until it begins to sizzle. You want it hot enough to sear the fish, but not so hot that it smokes.
    • Carefully place the fillets in the pan, positioning the thicker parts toward the middle where the heat is most intense. Don’t crowd the pan—if needed, cook in batches.
    • Cook for 3 minutes without moving them. This is how you get that golden crust.
    • Gently flip each fillet and cook for an additional 3–4 minutes. The fish is done when it’s turned from translucent to white and flakes easily with a fork at its thickest part.
    • Squeeze fresh lemon juice over the fillets and garnish with fresh parsley if desired.
    • Serve immediately while it’s still warm and crispy.

    Serving Suggestions

    This pan-fried fish is incredibly versatile. Serve it over rice with roasted vegetables for a simple, wholesome dinner. Or go lighter and pair it with a fresh salad and roasted potatoes. My family also loves serving it in warm tortillas with a squeeze of lime for casual fish tacos, or over a grain bowl with whatever veggies we have on hand. The beautiful thing about this recipe is that it’s simple enough for weeknights but elegant enough to serve to guests. It gets fish into your diet in the easiest, most delicious way possible.

    More Fish Recipes


    Source link

  • Easy Thai Green Curry Recipe

    Easy Thai Green Curry Recipe

    I’d happily eat this unbelievably flavorful Thai green curry recipe made with chicken, coconut milk, and veggies every week.

    Thai Green Curry

    A great Thai curry recipe starts with a great curry paste. While our homemade green curry paste is my go-to for this recipe, I completely understand that a good store-bought option can save you a lot of time. That’s why I’ve included tips for bumping up the flavor of store-bought curry paste, guaranteeing your curry is as delicious as possible.

    For more of our favorite homemade curries, explore our recipes for Thai red curry paste, Thai fish curry, our easy vegetable curry, the perfect yellow chicken curry, and my family’s favorite Indian-inspired chicken curry.

    Key Ingredients

    • Thai Green Curry Paste: I love using this homemade green curry paste, which you see in our photos. It’s bright and super herby thanks to the mint and basil, and you have complete control over the spice level. While authentic Thai green curry is usually quite hot, you can easily tone it down with our recipe if that’s not your style. Of course, you can still make this green chicken curry with a store-bought paste. My favorite store-bought paste is from Maesri (sold in cans). Even when I use store-bought, I love to add a little extra flavor with some fresh ginger and lemongrass. Be sure to check out my tips below the recipe!
    • Garlic and Green Onions: I find these add a fresh punch of flavor to the curry, and I love the green onions because they’re so quick and easy to prep.
    • Chicken Thighs: When it comes to the chicken, I always choose boneless, skinless chicken thighs. While chicken breast will work, you’ll find that chicken thighs turn out much more tender and flavorful.
    • Coconut Milk: Make sure you use full-fat coconut milk (light won’t make it creamy enough). A quick tip when you’re shopping: give the can a shake. If it sounds liquidy, skip it. A can that’s not as liquidy has more of that delicious coconut cream inside!
    • Fish Sauce: This helps to season the curry. I have Red Boat and Three Crabs fish sauce in my pantry.
    • Veggies: Authentic green curry often has snow peas and Japanese eggplant. I like to swap the eggplant for zucchini and stir in some spinach, but you can use whatever you love.
    • Lime and Green Herbs: Before you serve the curry, I recommend squeezing over some fresh lime juice and scattering over some fresh cilantro, basil and/or mint. I love Thai basil for this, but regular Italian basil will do just fine if that’s all you have on hand.
    • Kaffir Lime Leaves (Optional): While it’s optional, I think kaffir lime leaves (also called makrut lime leaves) add the most lovely aromatic flavor to this curry. They used to be so easy to find at our local grocery store, but I’ve noticed they’re not nearly as common anymore (such a bummer!). You can find them sold as dried leaves online, and if you ever find them fresh, I highly recommend buying a bunch and freezing them so you’ll always have them on hand! We love them so much, we just bought a Kaffir Lime tree (I’m so excited!).

    Find the full recipe with measurements below.

    How to Make Our Favorite Thai Green Curry

    Want to make Thai green curry like a pro, even on a weeknight? Here are our top tips for getting the most flavor and perfect results every time.

    Tip 1: Start with a great curry paste. While our homemade curry paste is full of fresh flavor, you can also boost a store-bought version with a few extra aromatics. We already add extra garlic and green onion to our homemade paste, but if you’re using store-bought, I recommend also adding some finely minced fresh ginger and lemongrass paste.

    Note! Green curry is supposed to be SPICY. It’s generally the hottest of all the Thai curries. If you are not interested in a spicy dish, you can also make our homemade paste and reduce the chili peppers. Or, try our yellow curry, which is intentionally mild.

    Tip 2: Always cook your curry paste first. Before adding the coconut milk, sauté the curry paste in some oil to really bring out the flavors. I do this over medium heat and cook the paste until the color deepens a little and it just begins to stick to the pan. This step makes a huge difference!

    Adding the coconut milk

    Tip 3: Add your veggies towards the end. The chicken needs longer to cook than the vegetables, so give it a head start. This way, your chicken will turn out soft and tender, and your veggies will still have a little bite. If you’re adding zucchini, I like to take a moment at the beginning of the recipe to add a little color to them, then I remove them from the pan (they’ll be a little browned but still raw in the middle) and save them to add to the curry later.

    Adding the vegetables later on

    Tip 4: Serve over rice or rice noodles. This curry is saucy, so you’ll want a bed of rice or noodles for soaking up all the delicious sauce. Jasmine rice, cilantro lime rice, or cooked rice noodles (like what we use for Pho) are perfect.

    More Curry Recipes

    Thai Green Curry

    Easy Thai Green Curry

    • PREP
    • COOK
    • TOTAL

    I crave this Thai green chicken curry recipe all the time! Whether you use our from scratch green curry paste or follow our tips below the recipe for boosting a store-bought version, this recipe guarantees you’ll have a fabulous dinner on your table.

    Just a quick note on the spice level: traditional green curry is usually quite hot. Our homemade paste is easy to adjust, but be aware that the spice level of store-bought versions will vary. If you’re looking for a good store-bought option, I highly recommend Maesri (sold in cans).

    Serve this curry over Jasmine rice, cilantro lime rice, or cooked rice noodles. It’s also amazing with some crispy fried shallots sprinkled over the top!

    4 Servings

    You Will Need

    2 tablespoons avocado oil

    1 medium zucchini, sliced into 1/2-inch thick quarter moons, about 2 cups

    4 green onions, sliced

    2 garlic cloves, minced

    1 ½ pounds boneless, skinless chicken thighs, cut into 1/2 inch pieces

    6 to 8 tablespoons homemade green curry paste, see tips for using store-bought curry paste below

    1 (15oz) can full-fat coconut milk

    2 to 3 teaspoons fish sauce

    4 kaffir lime leaves, optional

    4 ounces snow peas

    2 cups spinach leaves

    Salt, to taste

    1/4 cup torn Thai basil and mint for serving

    1 red chili pepper, like a Fresno chile, thinly sliced for serving

    Directions

      1Brown the zucchini: Heat a wide skillet over medium-high heat. Add 1 tablespoon of the oil, then arrange the zucchini in a single layer. Cook until the underside has a few browned spots, then flip and cook another 30 seconds until the second side is also lightly browned. Transfer the zucchini to a plate to add to the curry later.

      2Brown the chicken: To the same skillet, still over medium-high heat, add another tablespoon of oil. Arrange the chicken in a single layer, season with a few pinches of salt, and cook, tossing occasionally, for 2 to 3 minutes until it picks up a little color.

      3Build the curry base: Stir in the green onion and garlic (and ginger and lemongrass if using store-bought curry paste). Cook, stirring constantly for 30 seconds, then add the green curry paste. Cook and stir for about 1 minute until the paste is fragrant and starts to stick a little to the bottom of the pan.

      4Simmer the curry: Pour in the coconut milk, then fill the empty can halfway with water and pour that in as well. Use a wooden spoon to scrape any stuck curry paste from the bottom of the skillet and bring to a low simmer, lowering the heat as needed. Stir in 2 teaspoons of fish sauce, then taste the sauce. Add more fish sauce and/or curry paste if needed. Add the kaffir lime leaves (if using) then simmer the curry for 10 to 15 minutes, or until the chicken is cooked through.

      5Add the veggies: Stir in the zucchini, snow peas, and spinach. Continue to simmer until the vegetables are crisp-tender, 5 to 8 minutes.

      6To serve: Turn off the heat. Squeeze over a little lime juice, then scatter torn fresh basil and mint over the top. For some extra heat, you can also add sliced red chilies. Serve immediately over rice or rice noodles.

    Adam and Joanne’s Tips

    • Store-bought curry paste: These range in flavor and spice level. I like the 4-ounce cans from Maesri (here’s a link to them on Amazon). I use 6 tablespoons, sometimes a bit more. Commonly sold Thai Kitchen green curry paste is not as flavorful, but the spice is more potent (if this is what you have, start with 2 tablespoons and go from there). It’s a good idea to taste your curry paste before using to see where it sits on the flavor/spice scale.
    • Making store-bought curry paste better: To achieve the fresh, vibrant flavor that homemade paste gives our curry, add 2 teaspoons finely grated fresh ginger and 2 teaspoons lemongrass paste. I buy lemongrass paste in tubes. To learn how to make lemongrass paste from fresh, see the tips section of our green curry paste recipe.
    • Kaffir lime leaves: These add a lovely aromatic flavor to the curry. I used to find them in my local grocery store, but they are becoming harder to find (such a bummer!). You can buy them online or possibly find in International or Thai markets. Use them the same way you would use bay leaves in this recipe (add them to simmer in the curry, then remove them before serving).
    • Storing: Green chicken curry lasts stored in an airtight container in the fridge for up to 4 days. You can also freeze it, but expect the veggies to lose some of their crunch.
    • The nutrition facts provided are estimates.

    Nutrition Per Serving
    Serving Size
    1/4 of the recipe
    /
    Calories
    501
    /
    Total Fat
    32.8g
    /
    Saturated Fat
    18.8g
    /
    Cholesterol
    159.8mg
    /
    Sodium
    904mg
    /
    Carbohydrate
    13.5g
    /
    Dietary Fiber
    3.1g
    /
    Total Sugars
    3.5g
    /
    Protein
    38.3g


    AUTHOR:

    Joanne Gallagher

    Adam and Joanne of Inspired Taste

    We are Adam and Joanne Gallagher, the creators of Inspired Taste. Established in 2009, Inspired Taste grew from a childhood dream into one of the internet’s most trusted recipe sites with hundreds of reliable recipes, step-by-step videos, and expert tips.More About Us

    Source link

  • Homemade Green Curry Paste Recipe

    Homemade Green Curry Paste Recipe

    Making our Thai green curry paste recipe from scratch is easy. The vibrant green color alone is enough to make you smile, but just wait until you take a bite!

    Green Curry Paste

    This green curry paste recipe is perfect for Thai green curry, but it also adds a herby spicy note to fish curry, chicken, and veggies. It’s bright and super herby thanks to mint and basil, and you can easily control the spice level. Thai green curry is usually pretty hot, but if that’s not your style, you can easily tone things down with our recipe. You’ll never go back to store-bought!

    We love Thai curries, but store-bought curry pastes can vary a lot in flavor. That’s why we jumped at the chance to learn how to make our own, and now, after sharing three versions (red curry paste, yellow curry paste, and this green one), we’re so excited for you to join us!

    Key Ingredients

    • Peppers: All of the curry pastes on Inspired Taste are intended to be as close to authentic as possible while using ingredients that are typically available. For this green curry paste, which is traditionally hot and spicy, we’re using jalapeño. You can swap it for serrano or use Thai green chilies (which really pack a punch), but I find the jalapeño does the trick nicely. For a milder curry, remove all the seeds and membranes from the pepper before processing. In addition to the jalapeño, we use a mild Anaheim pepper, which adds even more fresh green flavor.
    • Coriander Seeds, Garlic, Green Onion, and Ginger: These aromatics form the foundation of our curry paste, guaranteeing an absolutely irresistible flavor. For the green onions, look for ones with more green than white.
    • Lemongrass Paste: Thai green curry paste is not complete without lemongrass! I love the convenience of lemongrass paste (sold in tubes), but if you’re working with fresh, check out the tips below the recipe. I also use lemongrass paste to make our sweet and sour meatballs.
    • Fish Sauce and Lime: These bring everything together, adding brightness, umami, and a touch of saltiness. While many curry paste recipes use dried shrimp or shrimp paste, fish sauce is a great alternative that’s much easier to find (if vegetarian, omit the fish sauce). I have Red Boat and Three Crabs fish sauce in my pantry.
    • Brown Sugar and Sesame Oil: We don’t use a lot, but a little bit of sugar and sesame oil balances the brighter, spicier ingredients like lime and peppers.
    • Green Herbs: We use a powerful trio of fresh mint, basil (Thai basil is best, but Italian basil works), and cilantro. For the mint and basil, use the leaves. For the cilantro, use the stems. They add texture to the paste and a rich cilantro flavor.

    Find the full recipe with measurements below.

    Tips for Making the Best Green Curry Paste

    Tip 1: Adjust the heat to your taste. We swap traditional Thai chilies for more common jalapeños. You can, of course, use Thai chilies if you have them, but our recipe guarantees a delicious green curry no matter what.

    • For a milder curry, remove the seeds and white membrane.
    • For a spicy curry paste, use one jalapeño with the seeds left in.
    • For an authentic and very hot curry, increase to two jalapeños or add one to two Thai green chilies (those little green chilies really pack a punch!).
    Making green curry paste in a food processor

    Tip 2: Blend until almost smooth. I use my food processor and let it run, scraping down the sides every so often, until I have an almost smooth paste. A blender works really well, too (and might even get you an even smoother paste). Just keep blending until it looks similar to our photos.

    Tip 3: Using your homemade green curry paste. The most common use for this is with coconut milk to make a classic green curry. I use 4 to 6 tablespoons for one 13.5-ounce can of full-fat coconut milk, but you can adjust this to your liking. Whatever you do, make sure you quickly cook the curry paste in a bit of oil before adding the coconut milk. This quick step “blooms” the spices and aromatics, releasing their full flavor. If you don’t use it for curries, get creative! It adds a fresh, spicy flavor to mayonnaise, meatballs, butter, fish, chicken, and more.

    Green Curry Paste

    Homemade Green Curry Paste

    • PREP
    • TOTAL

    I crave curry made with this homemade green curry paste. Use 4 to 6 tablespoons of the paste for one 13.5-ounce can of full-fat coconut milk. Then, you can adjust from there. See me do this in our Thai green curry recipe. Before adding your coconut milk, cook the curry paste in a little oil to bring out all the flavors (trust me, this makes a big difference). For red curry, use our homemade red curry paste or for a mild curry, see this yellow curry paste.

    Adjusting the heat level: For a milder curry, remove the seeds and white membrane of the jalapeño; for a spicy curry paste, use 1 jalapeño with the seeds left in. For an authentic and very hot curry, increase to 2 jalapeños or add 2 to 3 Thai green chilies (they really pack a punch!).

    Makes 1 cup

    You Will Need

    1 teaspoon coriander seeds

    5 black peppercorns

    1 jalapeño, or more for extra spicy

    1 Anaheim pepper, seeds removed and roughly chopped

    4 cloves garlic, peeled and lightly crushed

    1 thumb-sized piece of fresh ginger, peeled and chopped (1 ½ tablespoons, about 10g)

    4 green onions, the greener the better, roughly chopped

    4 teaspoons lemongrass paste

    1 tablespoon brown sugar

    1 lime, zested and juiced

    2 teaspoons fish sauce

    1/4 cup (5g) packed mint leaves

    1/2 cup (10g) packed basil leaves, preferably Thai basil

    1/2 cup (30g) cilantro stems

    1/2 teaspoon toasted sesame oil

    1/2 teaspoon fine sea salt

    Directions

      1Grind the spices: In a mortar and pestle, grind the coriander seeds and peppercorns. Transfer the ground spices to a food processor bowl. (If you don’t have a mortar and pestle, you can crush them with the back of a heavy pan or the bottom of a can.)

      2Prepare the peppers: For a spicy paste, cut the jalapeño in half and add to the food processor. For a milder paste, cut the jalapeño in half and remove all the seeds and the white membrane before adding it.

      3Make the curry paste base: Add the Anaheim pepper, garlic, ginger, green onions, lemongrass paste, brown sugar, and lime zest to the food processor with the ground spices and jalapeño. Pulse until a rough paste forms.

      4Finish the paste: Add the fish sauce, mint leaves, basil leaves, cilantro stems, sesame oil, salt, and lime juice. Continue pulsing until the mixture becomes a smooth, mostly uniform paste.

    Adam and Joanne’s Tips

    • Storing in the fridge: Add your homemade curry paste to a clean glass jar, add a thin layer of avocado oil on top, and then store it in the fridge for up to 1 week, possibly longer. The green color may dull slightly.
    • Storing in the freezer: You can freeze this for up to 3 months. Portion the paste into small freezer-safe containers or ice cube trays. If using ice cube trays, freeze until frozen, pop them out, and store them in a freezer-safe airtight container.
    • Lemongrass paste: I buy the refrigerated lemongrass paste in a squeezable tube sold near the fresh herbs.
    • Using fresh lemongrass: Cut away the top and bottom of the stalk. Then, peel away the tough outer layers until you reach the tender, pale yellow core. Finally, thinly slice the stalk, then chop it as finely as possible or use a food processor to mince it. If you make a larger batch of homemade lemongrass paste, store in an airtight container in the fridge for a few days or freeze in ice cube trays, transfer to freezer bags, and freeze for up to 3 months.
    • For curries: Start with 3 to 4 tablespoons of curry paste per cup of coconut milk. You can always add more later!
    • For marinades/other dishes: Begin with 1 tablespoon of curry paste per pound of meat.
    • The nutrition facts provided are estimates.

    Nutrition Per Serving
    Serving Size
    1 tablespoon
    /
    Calories
    15
    /
    Total Fat
    0.2g
    /
    Saturated Fat
    0g
    /
    Cholesterol
    0mg
    /
    Sodium
    167.9mg
    /
    Carbohydrate
    2g
    /
    Dietary Fiber
    0.4g
    /
    Total Sugars
    1g
    /
    Protein
    0.3g


    AUTHOR:

    Joanne Gallagher

    Adam and Joanne of Inspired Taste

    We are Adam and Joanne Gallagher, the creators of Inspired Taste. Established in 2009, Inspired Taste grew from a childhood dream into one of the internet’s most trusted recipe sites with hundreds of reliable recipes, step-by-step videos, and expert tips.More About Us
    Source link

  • Sweet and Sour Meatballs Recipe

    Sweet and Sour Meatballs Recipe

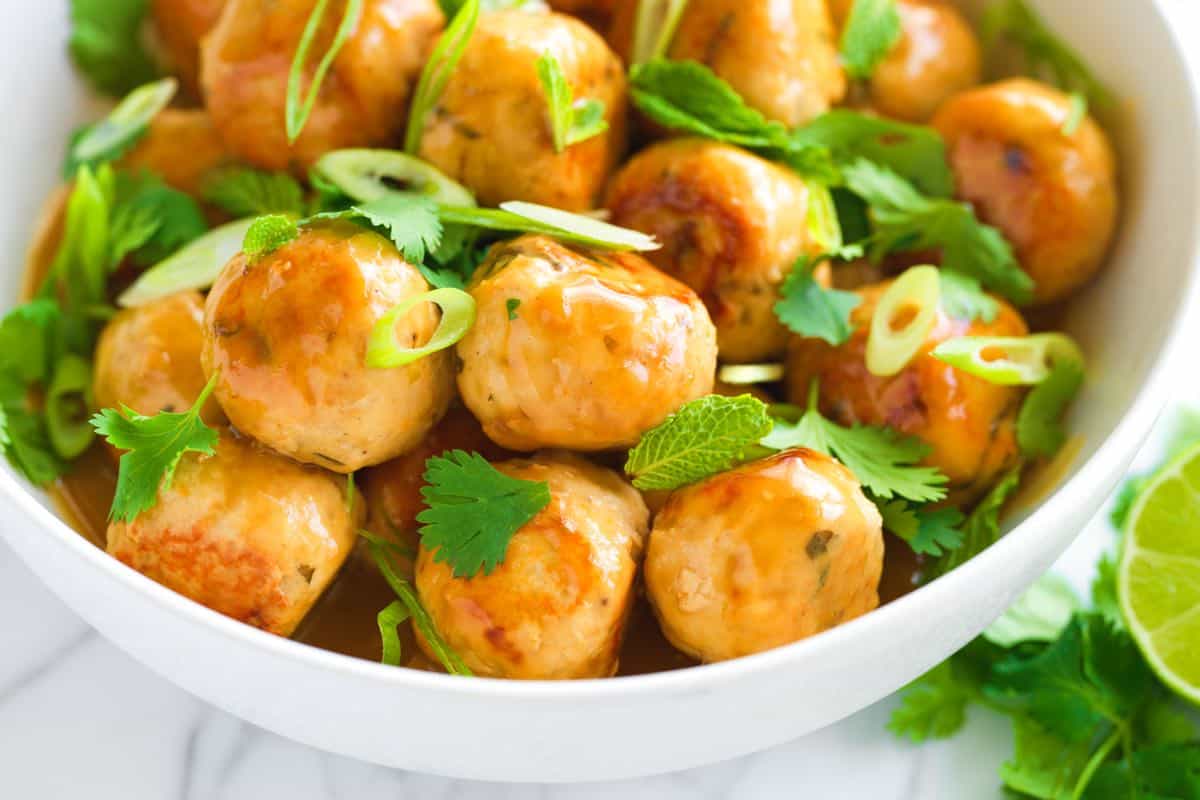
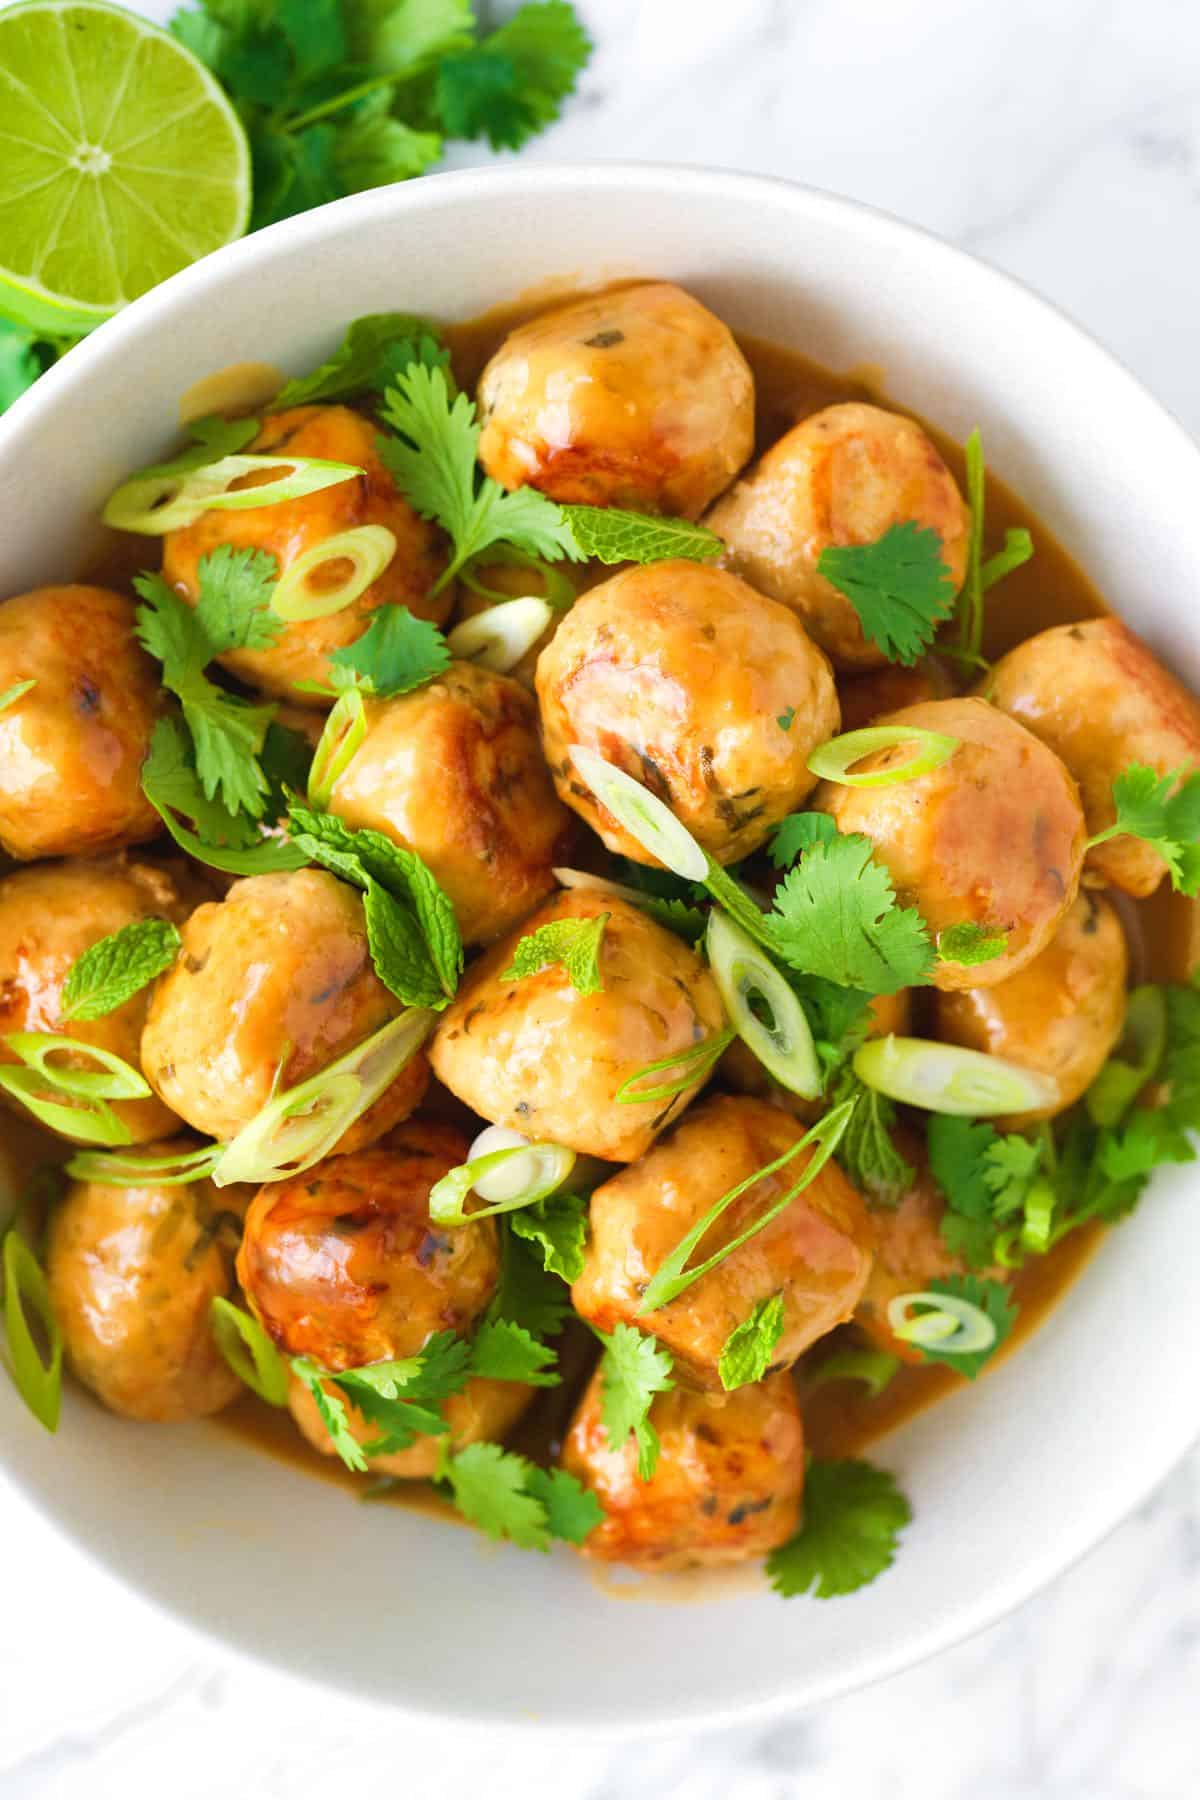
    This is not your typical, overly sweet and sour meatballs recipe. Our fresh twist has juicy, tender chicken meatballs swimming in a perfectly balanced sauce.

    Sweet and Sour Meatballs

    I honestly can’t get enough of these Asian-inspired meatballs. They have an amazing coconut sweet and sour sauce, which gets simmered down until it’s thick and shiny, perfect for coating the meatballs. They’re so good you’ll have a hard time not stealing them out of the pan. These are especially good served over rice (I love this coconut rice) and topped with plenty of that incredible sauce.

    You’ll use full-fat coconut milk and skim a bit of the thick coconut cream at the top of the can to add to the meatball mix itself. This is our secret for making the meatballs incredibly juicy and soft inside. The rest of the can turns into our creamy sauce, which simmers with a bit of broth, the brown sugar, and lime to get that perfect sweet and sour flavor profile.

    Key Ingredients

    • Ground Chicken: Look for ground chicken with some fat (92/8 or close to it is perfect). Skip the leaner options. It’ll just give you tough, dry meatballs. I use the same trick for my classic meatballs, too! Ground pork or turkey are also excellent.
    • Coconut Milk: You’ll want full-fat coconut milk for this recipe. When you’re at the store, give the can a flip and listen. You shouldn’t hear much sloshing liquid; that means you’ve got a good amount of thick coconut cream inside, which is precisely what we want! Once you get it home, don’t shake it. We need that separation of cream and milk. We’ll “steal” 2 tablespoons of that thick cream for the meatball mixture, and the rest of the can will make our sweet and sour sauce.
    • Ginger, Garlic, and Lemongrass Paste: These are our aromatics (I love the combination). Fresh lemongrass can be a bit fussy to prep, so I usually go for the lemongrass paste in a tube (it’s also fantastic for our red curry paste). If you can’t find the paste, don’t worry, I’ve included instructions on how to prepare fresh lemongrass in the tips section below the recipe.
    • Green Onion, Basil, Mint: We’ll add these fresh herbs to both the meatballs and the sauce at the end. It makes this dish taste super vibrant and fresh. I love Thai basil for this, but any variety will do!
    • Brown Sugar: This is what brings the “sweet” to our sweet and sour sauce and balances the sour. Brown sugar works so nicely with the aromatics and fish sauce. If you prefer, coconut sugar would be a great substitute here, too.
    • Lime and Rice Vinegar: These are the “sour” elements of our sauce! Use unsweetened rice wine vinegar and fresh lime (you’ll use both the zest and the juice for maximum sourness).
    • Chinese 5 Spice: We add just a tiny bit (1/4 teaspoon) to the meatball mixture. I love it, but if you don’t want to buy a whole new spice jar for just a quarter teaspoon, you can use an equal amount of Garam Masala. Or, try ground allspice, but reduce it to 1/8 teaspoon instead.
    • Fish Sauce: Oh, how I love fish sauce! As you might’ve seen in our Vietnamese Pho, sesame ginger shrimp marinade, or Thai chicken salad recipes, it adds an incredible salty, umami, and slightly funky flavor that nothing else can replicate. I always have Red Boat and Three Crabs in my pantry (both are excellent choices for this dish).
    • Chicken Broth: Grab your favorite store-bought or homemade chicken broth. Vegetable broth works perfectly fine here, too. We only need a small amount to blend with the coconut milk and create our sauce.

    Find the full recipe with measurements below.

    Tips for Making Our Favorite Sweet and Sour Meatballs

    Tip 1: Use full-fat coconut milk. The secret to these meatballs starts with a can of full-fat coconut milk that hasn’t been shaken. We’ll scoop a couple of tablespoons of that thick coconut cream right from the top of the can and add it to our meatball mixture. The rest of the coconut milk will then form the base of our incredible sweet and sour sauce.

    Tip 2: Chill before forming. I like to form the meatballs and then pop them in the fridge for 5 to 10 minutes. This little trick helps them firm up, so they stay beautifully round when you cook them.

    How to Make Sweet and Sour Meatballs with Coconut Lime Sauce

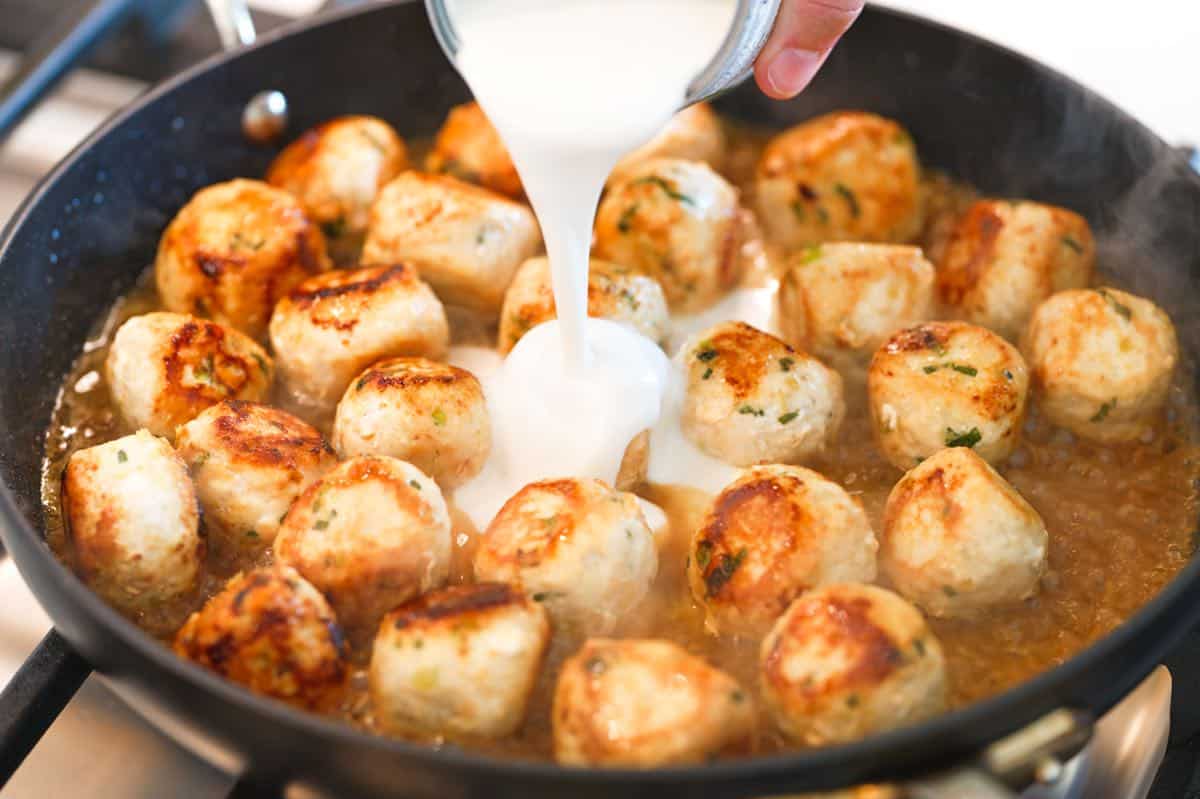
    Tip 3: Make the sauce in the same pan. After browning your meatballs, you’ll build the sweet and sour sauce right in the same pan. Then, simmer the meatballs in the sauce until they’re cooked through.

    Tip 4: Reduce your sauce. At this point, the sauce will be a bit thin. So, we’ll remove the meatballs and let the sauce continue to simmer and reduce down into a thicker, shinier consistency (usually takes about 10 minutes).

    Tip 5: Finish with fresh lime. Finish it off with a final squeeze of lime, then serve your sweet and sour meatballs with plenty of that incredible flavor-packed sauce spooned over the top.

    Sweet and Sour Meatballs

    Sweet and Sour Meatballs

    • PREP
    • COOK
    • TOTAL

    This Asian-inspired sweet and sour meatballs recipe is bursting with flavor. I’m betting once you try them, you’ll add this recipe to your rotation for sure! Remember, we need the coconut cream and coconut milk inside the can separated, so no shaking! You’ll use the cream for the meatball mixture, and the rest of the can for the sauce.

    Try these piled on top of coconut rice, cilantro lime rice, rice noodles, or cooked quinoa.

    6 Servings

    You Will Need

    2 pounds (907g) ground chicken, 92/8

    1 (15oz) can full-fat coconut milk, do not shake

    1 ½ tablespoons minced fresh ginger

    2 teaspoons lemongrass paste, see tips

    3 cloves garlic, minced

    1 green onion, minced

    2 tablespoons chopped fresh basil

    2 tablespoons chopped fresh mint

    5 tablespoons (66g) brown sugar (1 tablespoon for meatballs, 4 tablespoons for sauce)

    1/4 teaspoon Chinese 5 Spice

    1 teaspoon fish sauce

    1 tablespoon toasted sesame oil

    1 tablespoon avocado oil

    3/4 cup (177ml) chicken broth

    3 tablespoons rice vinegar

    1 lime, zested, then cut in half

    Fine sea salt

    Optional topping: sliced green onion, cilantro leaves, chopped basil, chopped mint

    Directions

      1Make the meatball mix: In a large mixing bowl, combine the ginger, lemongrass paste, garlic, green onion, basil, mint, 1 tablespoon brown sugar, 1/4 teaspoon Chinese 5 Spice, 1 teaspoon fish sauce, and 1 ½ teaspoons salt. Give everything a really good mix.

      2Add the chicken and coconut cream: Now, add the ground chicken. Open your can of coconut milk and, using a tablespoon, scoop 2 tablespoons of the thick coconut cream from the top. Add this cream to the chicken, saving the rest of the can for the sauce. Mix the chicken and coconut cream into the rest of the meatball mixture until just combined.

      3Roll meatballs: Roll the mixture into roughly 1 ounce (30g) meatballs. Refrigerate them for 5 to 10 minutes to help them firm up.

      4Brown meatballs: In a wide, deep skillet with a lid, heat the sesame oil and avocado oil over medium heat. Carefully place the meatballs into the hot oil so they’re evenly spaced, and brown them on one side.

      5Build the sweet and sour sauce: Flip each meatball over. Now, add in the chicken broth, coconut milk, rice vinegar, remaining 4 tablespoons of brown sugar, zest from 1 lime, juice from half of the lime, and 1/2 teaspoon of salt. Swirl the pan gently to combine all the ingredients. Cover the skillet with a lid and simmer gently until the meatballs are cooked through, about 10 minutes. An internal thermometer should read 165°F when inserted into the middle of a meatball.

      6Reduce the sauce: Once the meatballs are cooked, remove them from the skillet and place them onto a platter. Keep the lid off, turn the heat to high, and reduce the sauce. You want to reduce it until it’s thickened and just barely coats the bottom of the skillet, which takes about 10 minutes.

      7Serve: Finish the sauce by squeezing in the juice from the second half of the lime and swirling to mix. Then, pour the sauce over the meatballs and garnish with fresh sliced green onion and herbs.

    Adam and Joanne’s Tips

    • Storing: Transfer to an airtight container and refrigerate for up to 4 days or freeze for up to 1 month. Thaw overnight in the fridge before gently reheating.
    • Lemongrass paste: I buy the refrigerated lemongrass paste in a squeezable tube sold near the fresh herbs.
    • Using fresh lemongrass: Cut away the top and bottom of the stalk. Then, peel away the tough outer layers until you reach the tender, pale yellow core. Finally, thinly slice the stalk, then chop it as finely as possible or use a food processor to mince it. If you make a larger batch of homemade lemongrass paste, store it in an airtight container in the fridge for a few days or freeze in ice cube trays, transfer to freezer bags, and freeze for up to 3 months.
    • Best pan to use: We love a rondeau or braiser pan for this dish as it is large, wide, with tall-ish, straight sides, and a lid. A Dutch oven works, as well. If you do not have a pan with a lid, you can cover the skillet with aluminum foil.
    • Leftover ginger, garlic, and green herbs: If you need another way to use up the aromatics purchased for this recipe, try making homemade chili paste like our yellow curry paste or green curry paste (recipe coming soon).
    • The nutrition facts provided are estimates.

    Nutrition Per Serving
    Serving Size
    1/6 of the recipe
    /
    Calories
    415
    /
    Total Fat
    29.1g
    /
    Saturated Fat
    14.8g
    /
    Cholesterol
    130mg
    /
    Sodium
    817mg
    /
    Carbohydrate
    11.1g
    /
    Dietary Fiber
    0.3g
    /
    Total Sugars
    7.6g
    /
    Protein
    28.4g


    AUTHOR:

    Joanne Gallagher

    Adam and Joanne of Inspired Taste

    We are Adam and Joanne Gallagher, the creators of Inspired Taste. Established in 2009, Inspired Taste grew from a childhood dream into one of the internet’s most trusted recipe sites with hundreds of reliable recipes, step-by-step videos, and expert tips.More About Us
    Source link

  • Chile Shrimp Tacos with Slaw Recipe

    Chile Shrimp Tacos with Slaw Recipe

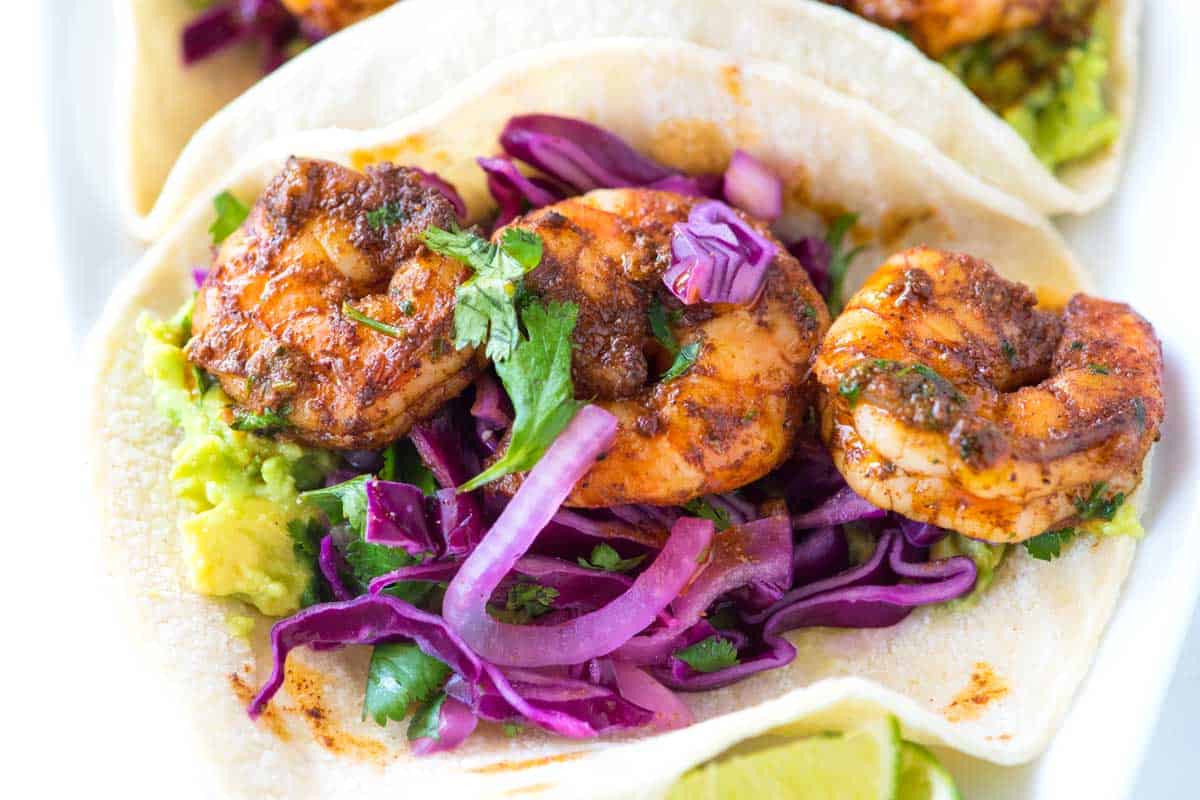
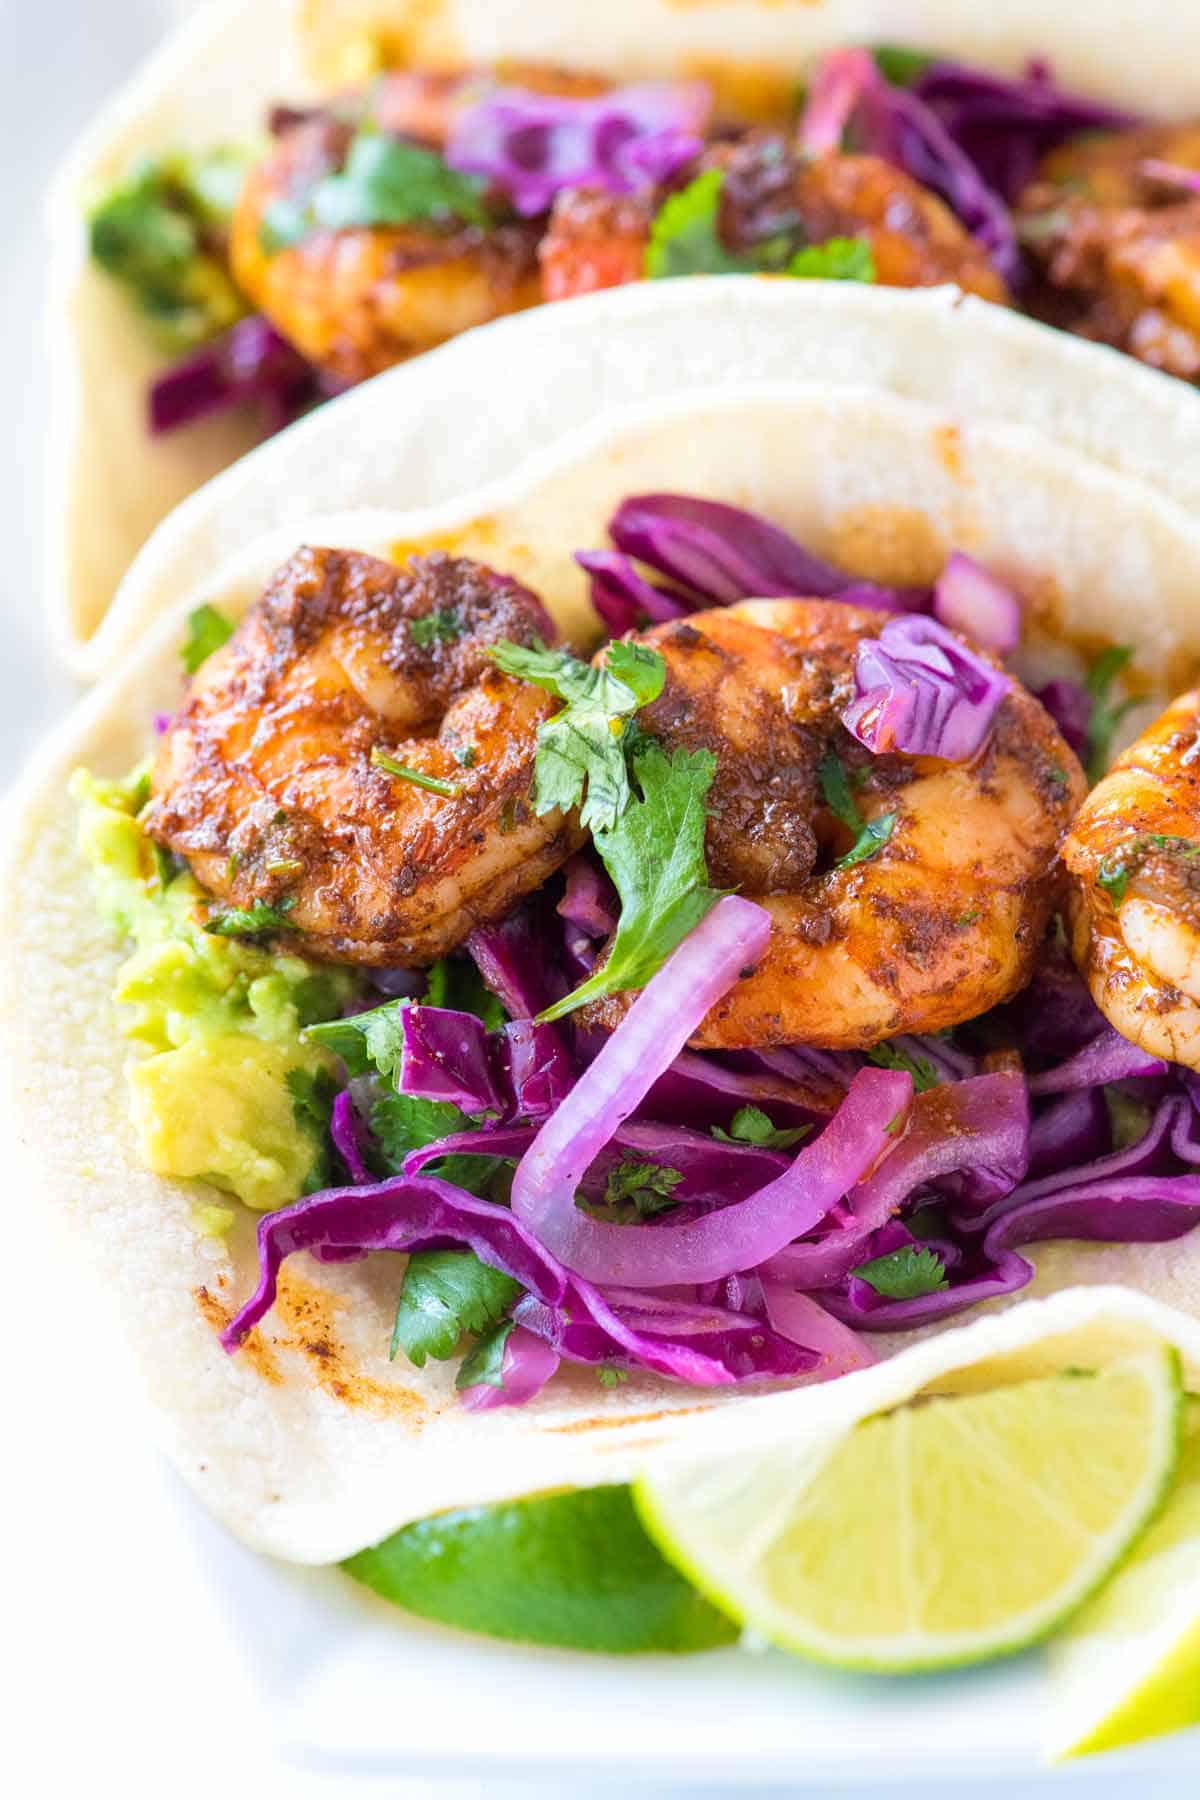
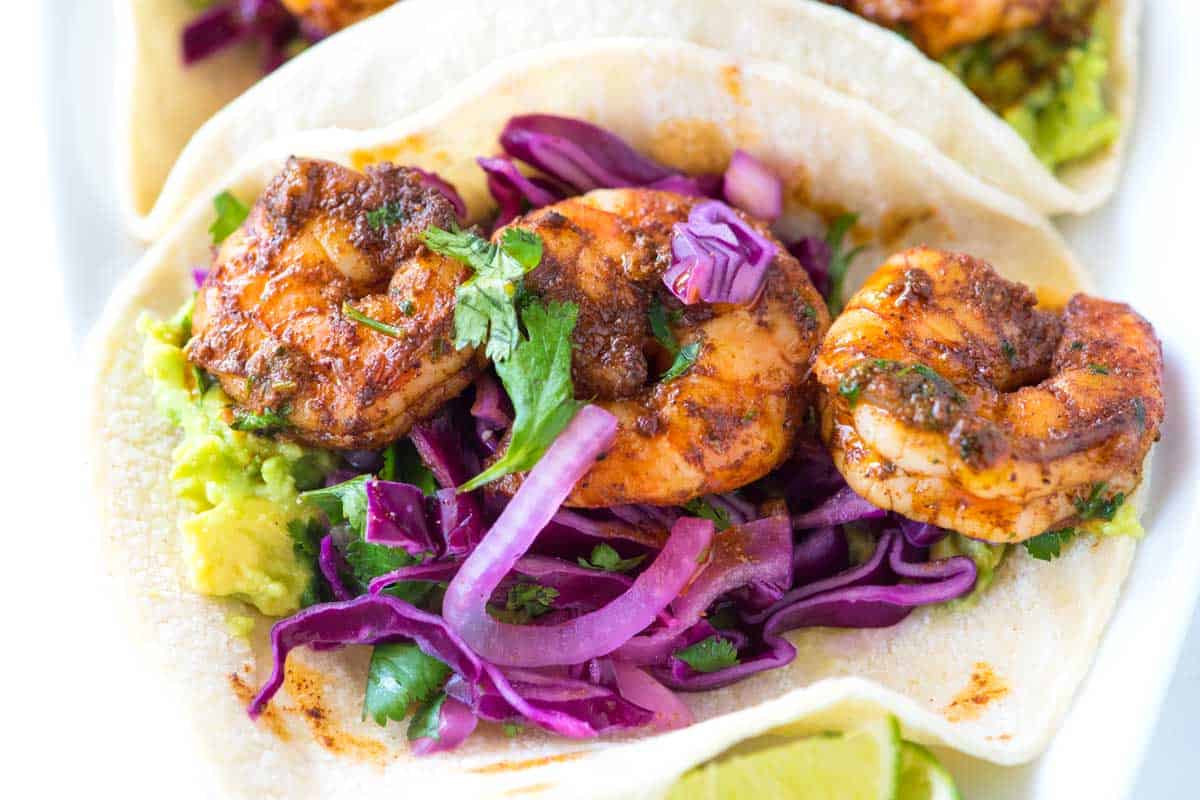
    Here are my new favorite shrimp tacos! There’s tender shrimp cooked with the perfect blend of spices and butter, mashed avocado, and a quick and crunchy slaw!

    Chile Shrimp Tacos with Slaw

    I could happily eat these tacos once a week (maybe more!). We’re especially generous with the spices for the shrimp. You’ll find chili powder, smoked paprika, cumin, coriander, plus my secret ingredient: unsweetened cocoa powder. Trust me on this one! I only add a little bit, but it’s so worth it for the flavor.

    If you want to try a different flavor profile for your next shrimp taco night, consider swapping the chile butter shrimp shown here for our cilantro lime butter shrimp (they are just as tasty). And, I wouldn’t be doing you justice if I didn’t remind you how simple and delicious homemade corn tortillas are to make. They will take these tacos to an entirely new level!

    Key Ingredients

    • Shrimp: Use fresh, high-quality jumbo or large shrimp. I like to remove the tails from my shrimp for these tacos, which makes them easier to eat. I also leave the shrimp whole, though you can certainly chop them if you like.
    • Shrimp Spice Rub: This is where the magic happens! Our shrimp are generously coated in a robust spice rub featuring ancho chile powder (mild and sweet), chipotle powder (for smoky heat), cumin, and coriander. My secret ingredient is a touch of unsweetened cocoa powder. The cocoa powder may seem a little strange, but it works really well with the chile powders (somewhat similar to a mole sauce, which often includes a dark or unsweetened chocolate). If you can’t find chipotle powder, smoked paprika makes an excellent substitute and has a similar smoky flavor. For spicy shrimp tacos, increase the chipotle powder (it packs a punch).
    • Butter: I love to cook our shrimp in butter. It melts down and mixes with the spices to make a little bit of a butter sauce. It’s incredible! If you are opposed to butter, olive oil or avocado oil work perfectly fine.
    • Red Cabbage Slaw: We keep this slaw dairy-free and super simple. To make it, you’ll toss shredded cabbage and onions with fresh lime juice, salt, and cilantro. This crunchy, tangy slaw is the perfect counterpoint to the spiced shrimp and creamy avocado.
    • Avocado: I love adding a layer of mashed avocado with lime and salt to the tortillas before adding my shrimp and slaw. It acts as our taco sauce, and works so nicely with the other flavors.
    • Tortillas: Use corn or flour tortillas. I love corn tortillas for their flavor, but it really is up to you. And if you’re feeling ambitious, I highly recommend trying your hand at making them from scratch! Homemade tortillas truly take these tacos to the next level. You can find recipes for homemade corn tortillas and homemade flour tortillas on the blog!

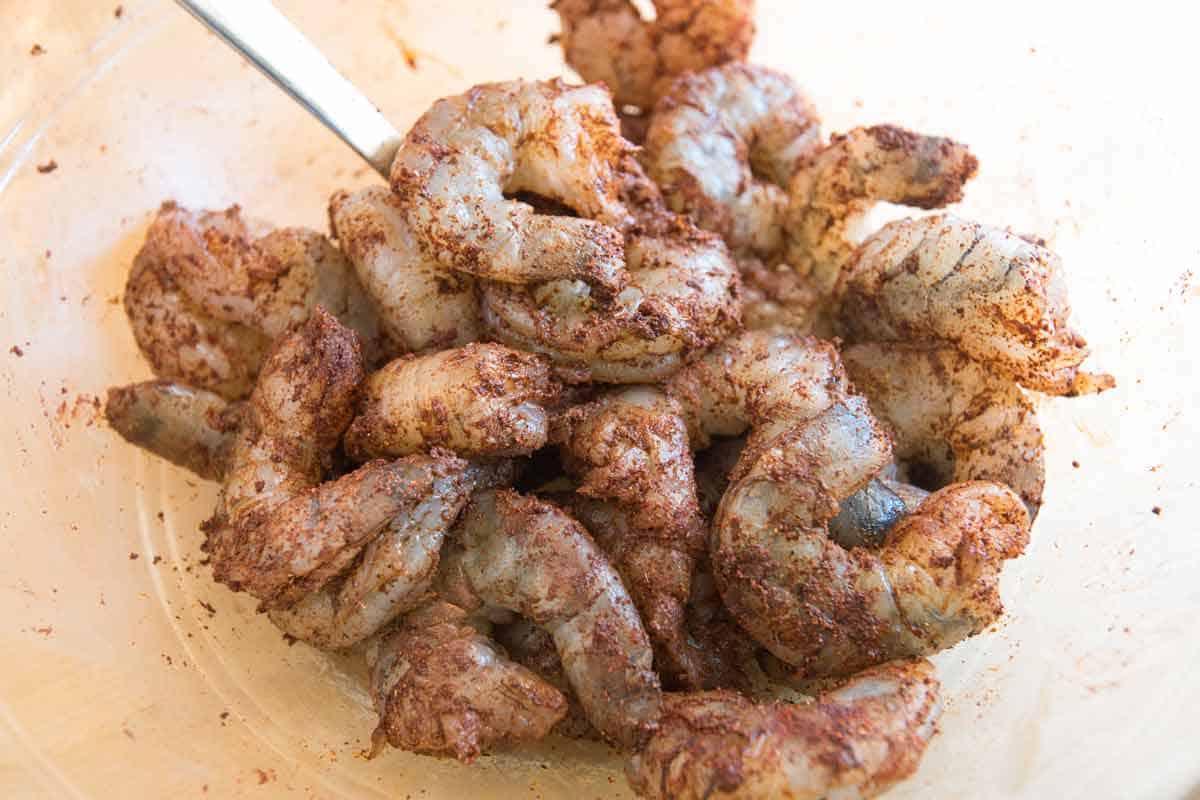
    When making these shrimp tacos, I toss the shrimp with the spices first, then set the bowl aside while I prepare the slaw and mash the avocado. This brief resting time allows the shrimp to really soak in all that incredible flavor from the spice mix.

    How to Make Shrimp Tacos: Shrimp marinating with the spice mix

    The slaw takes minutes to make, so I make that next. The salt and lime help to wilt the cabbage and onion a little, so making it before you cook the shrimp is a great idea.

    Then, for assembly, I love the creamy layer of avocado, the chili butter shrimp, and a generous helping of the slaw. I can’t wait for you to try these tacos. They are easily one of my favorite shrimp recipes on the blog!

    More Shrimp Recipes

    Chile Shrimp Tacos with Slaw

    Chile Shrimp Tacos with Slaw

    • PREP
    • COOK
    • TOTAL

    Meet your new favorite shrimp tacos! This is just as easy to make as it is to eat! You can make the red cabbage slaw in advance, in fact, I prefer it a day old. The shrimp are tossed in a blend of chile powders and spices. Ancho chile is sweet and mild, while chipotle powder is smoky and hot. We use ancho chile powder a lot at home and highly suggest investing in it. The chipotle powder is also delicious and versatile, but you can substitute it for a smoked paprika in a pinch.

    Makes approximately 4 servings

    You Will Need

    1 pound (450g) large shrimp, peeled and deveined

    2 teaspoons ancho chile powder

    1/4 teaspoon chipotle chile powder or smoked paprika

    1 teaspoon unsweetened cocoa powder

    1/4 teaspoon ground cumin

    1/4 teaspoon ground coriander

    1 ½ tablespoons butter

    2 cups shredded red cabbage

    1/2 cup thinly sliced onion

    1/2 cup fresh cilantro leaves and tender stems, about half a bunch

    2 limes

    1 ripe avocado

    Salt and fresh ground black pepper

    8 medium corn tortillas or flour tortillas

    Directions

      1Season the shrimp: Pat the shrimp dry and place them in a medium bowl. Add the ancho chile powder, chipotle chile powder (or smoked paprika), unsweetened cocoa powder, ground cumin, ground coriander, and 1/4 teaspoon of fine sea salt. Toss well to coat. Set aside for 10 to 15 minutes.

      2Make the slaw: In a medium bowl, combine the shredded cabbage, thinly sliced onion, and half of the fresh cilantro. Squeeze the juice from half a lime over the mixture, then season generously with salt and pepper. Toss everything together and set aside.

      3Warm the tortillas: Wrap the tortillas in two stacks of 6 in aluminum foil. Place into a 350°F (177°C) oven for 15 to 20 minutes, or until heated through.

      4Make the avocado mash: Halve the avocado and remove the pit. Scoop the flesh into a medium bowl and use a fork to mash it until smooth. Add the juice from half of a lime and the remaining cilantro. Season with salt and pepper to taste, mixing well.

      5Cook the chile butter shrimp: Melt 1 1/2 tablespoons of butter in a large skillet over medium heat. Add the shrimp and cook until opaque throughout, about 2 minutes on each side. Finish by squeezing the juice from the remaining half lime over the cooked shrimp.

      6Build the tacos: To assemble, spread some of the mashed avocado onto each warmed tortilla. Top with 3 to 4 shrimp and a generous spoonful of the red cabbage slaw (you might have some slaw leftover). Serve immediately with any remaining slaw and lime wedges on the side for squeezing.

    Adam and Joanne’s Tips

    • The nutrition facts provided below are estimates.

    Nutrition Per Serving
    Serving Size
    2 tacos
    /
    Calories
    311
    /
    Protein
    20 g
    /
    Carbohydrate
    34 g
    /
    Dietary Fiber
    8 g
    /
    Total Sugars
    4 g
    /
    Total Fat
    12 g
    /
    Saturated Fat
    4 g
    /
    Cholesterol
    153 mg


    AUTHOR:

    Joanne Gallagher

    Adam and Joanne of Inspired Taste

    We are Adam and Joanne Gallagher, the creators of Inspired Taste. Established in 2009, Inspired Taste grew from a childhood dream into one of the internet’s most trusted recipe sites with hundreds of reliable recipes, step-by-step videos, and expert tips.More About Us

    Source link

  • Baked Red Pepper Chicken Breast Recipe

    Baked Red Pepper Chicken Breast Recipe

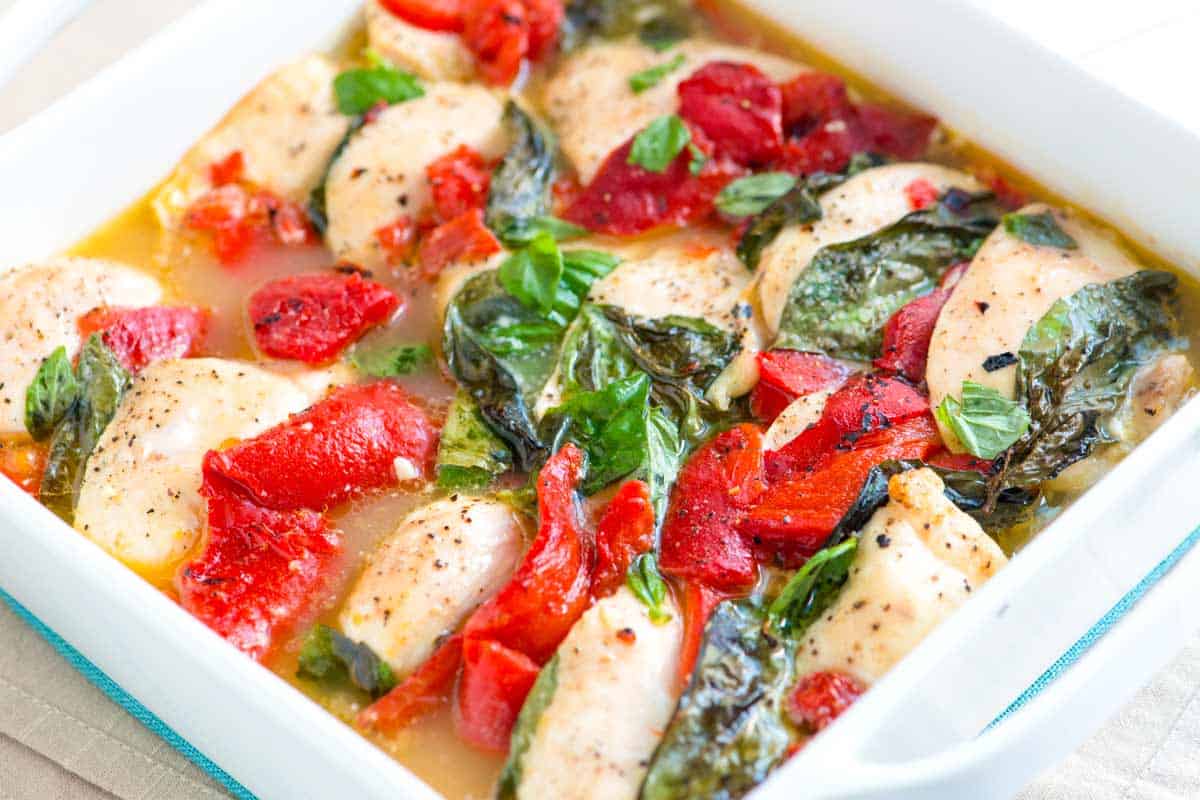
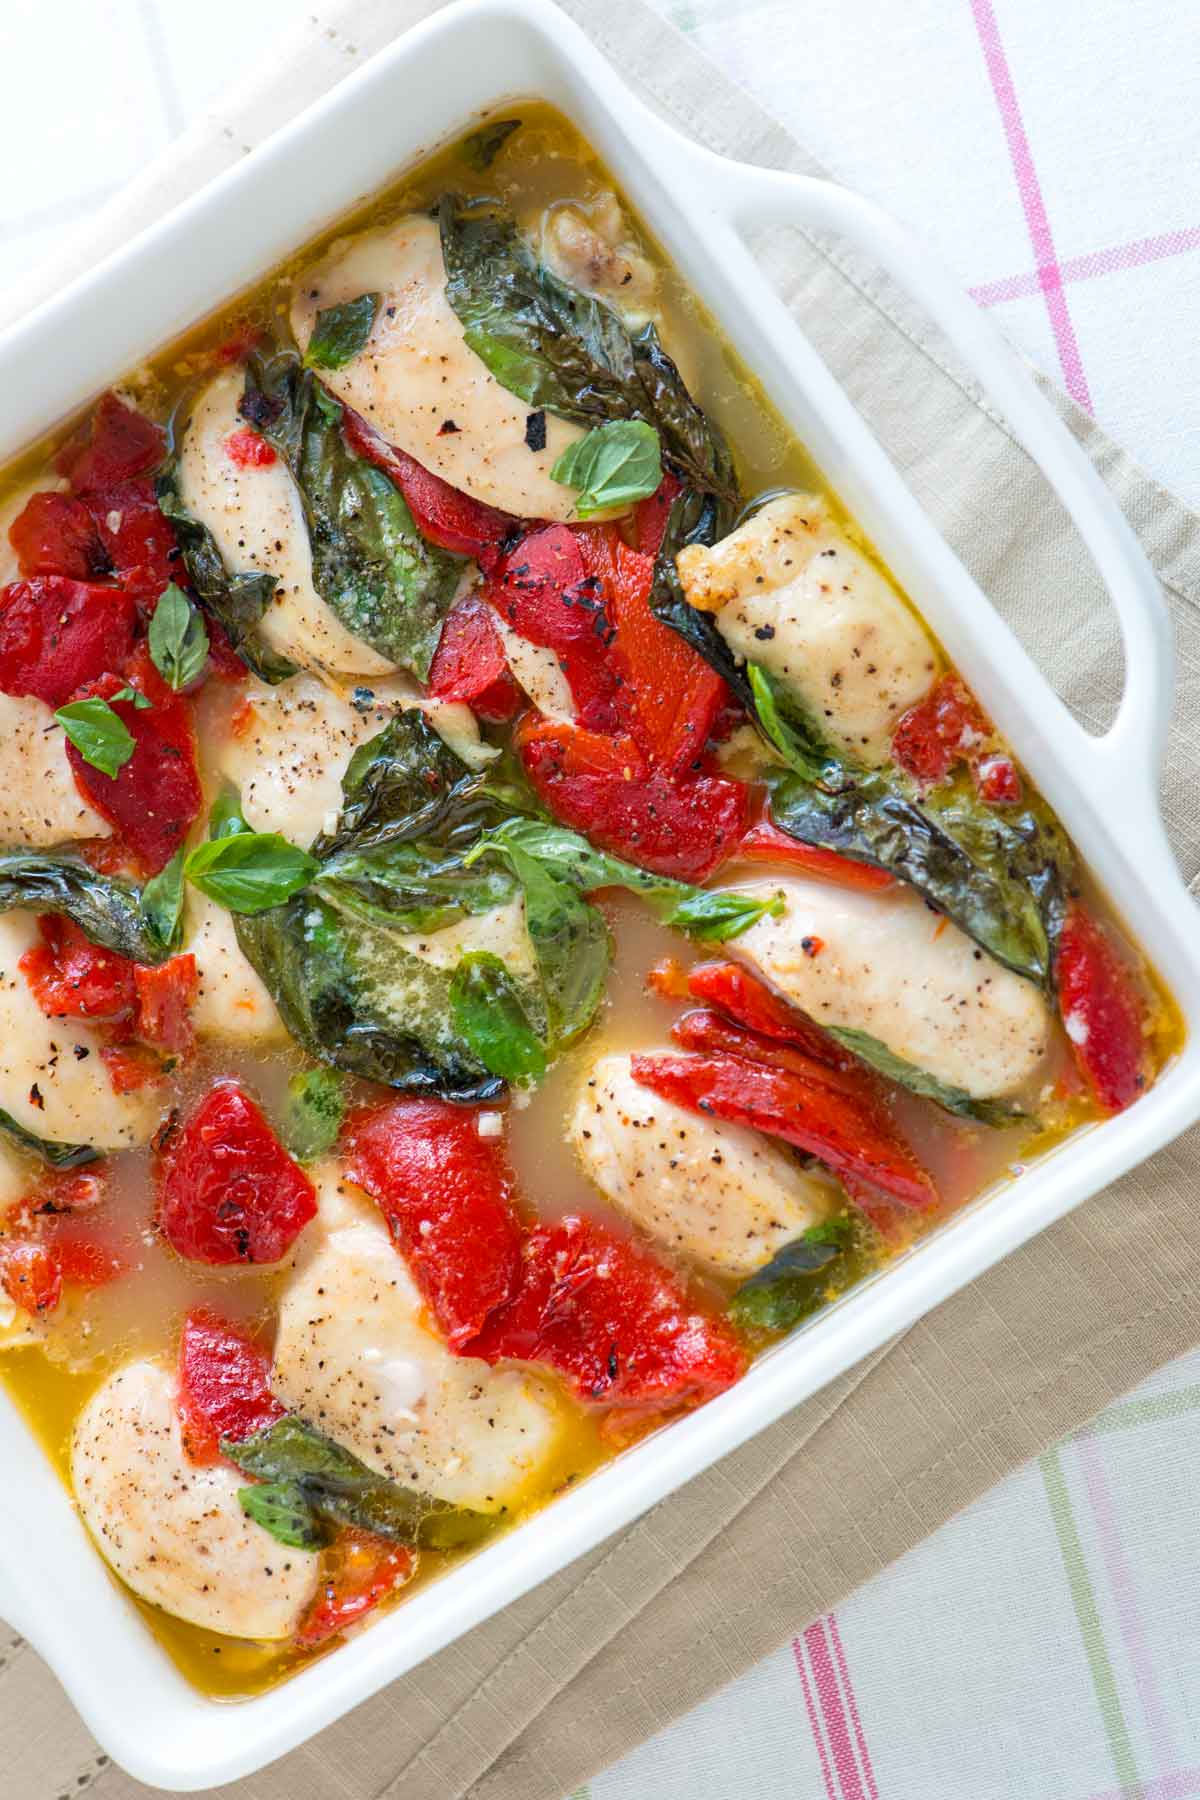
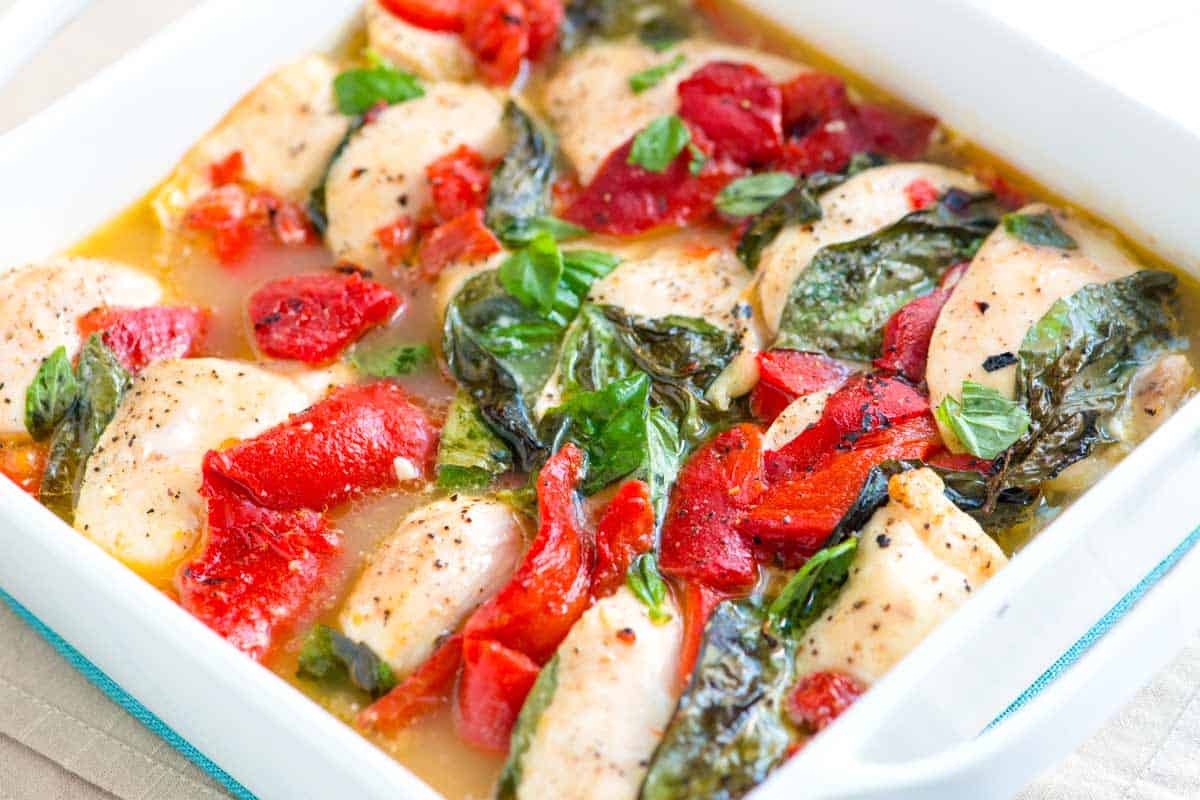
    Our family loves this baked chicken breast with roasted red peppers and basil, all gently cooked in a citrus broth.

    Baked Red Pepper Chicken Breast

    A pantry staple in our home is always a jar of roasted red peppers. They’re so versatile, colorful, and packed with flavor, making them perfect for everything from salads and sandwiches to dips and casseroles. In fact, one of those jars inspired the creation of this recipe. Their bright red color makes the dish truly pop!

    Beyond the peppers, we add fresh basil, orange juice, lemon juice, and garlic. This casserole comes together in minutes and is fantastic served with cilantro lime rice, cooked quinoa, or mashed cauliflower, all of which are great for soaking up the delicious cooking liquid.

    Key Ingredients

    • Chicken Breasts: I use skinless, boneless chicken breasts in this recipe. They work perfectly, staying incredibly juicy because they gently simmer in the citrus broth, almost like poached chicken.
    • Roasted Red Peppers: For convenience, jarred roasted red peppers are a great option. However, if you’re feeling ambitious, you can certainly roast your own (we show you how in our roasted red pepper hummus recipe!).
    • Garlic: We only need one clove, but it perfumes the citrus broth nicely.
    • Orange and Lemon Juice: If you can, use freshly squeezed orange and lemon juice. They will be less sweet.
    • Basil: I love the pop of red from the peppers and the pop of green from fresh basil. It also perfumes the citrus broth, making this a super summery chicken dish. I love it.
    • Butter: This recipe is really light on its feet (and totally works as a high-protein chicken recipe, by the way!). A small amount of butter adds just enough fat to give the citrus broth a wonderfully silky texture. It truly transforms the broth without making the dish heavy.

    Find the full recipe with measurements below.

    How to Make Baked Chicken with Roasted Red Peppers

    Initially, I referred to this as a chicken casserole since we’re using a casserole dish, but I realized that might be confusing, as casseroles are typically heartier than this light and summery dish.

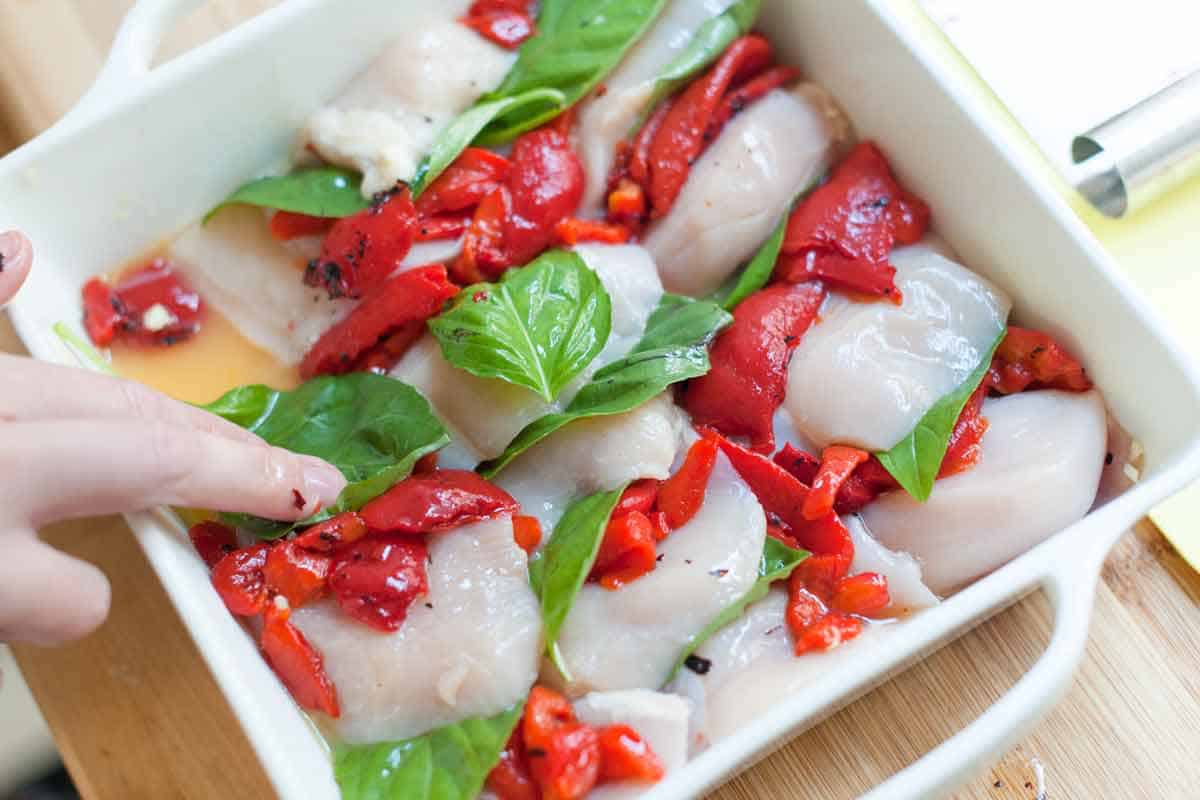
    Assembling the casserole dish to bake chicken breast

    Whatever we call it, you’ll line up sliced chicken breasts, alternating them with roasted red peppers and basil, then pour over your citrus broth and bake. You can see how in our photo above. So easy, and that liquid you see around the chicken is pure gold! Don’t leave it behind. It’s great over rice or just slurped with a spoon.

    Baked Red Pepper Chicken Breast

    Baked Red Pepper Chicken Breast

    • PREP
    • COOK
    • TOTAL

    Our family is always on the hunt for new and interesting ways to cook chicken breasts, and this baked chicken with roasted red peppers, basil, and citrus is a perfect fit. The chicken slowly braises in a mixture of orange and lemon juice, which keeps it nice and juicy, preventing it from drying out. The cooking liquid is also quite delicious spooned over the chicken for serving. I especially love this over rice, like our cilantro lime rice.

    4 Servings

    You Will Need

    1 ½ pounds boneless, skinless chicken breasts

    1 (12oz) jar roasted red peppers

    1 garlic clove, minced

    1/2 cup (120ml) orange juice, freshly squeezed is best

    1/4 cup (60ml) fresh lemon juice

    1 bunch fresh basil, leaves picked off the stems

    2 tablespoons butter

    Salt and fresh ground black pepper

    Directions

      1Prepare oven and baking dish: Preheat the oven to 350°F (177°C) and set aside a 2-quart baking dish.

      2Prepare the chicken: Slice each chicken breast, on an angle, into 1-inch slices and season all over with salt and pepper.

      3Prepare the peppers: Open the jar of roasted red peppers, drain the liquid, and then cut the peppers into smaller chunks, similar in size to basil leaves.

      4Assemble the casserole: Scatter minced garlic in the bottom of the baking dish. Pour half of the orange juice and half of the lemon juice mixture over the garlic.

      5Starting in one corner of the baking dish, alternate chicken slices with pieces of roasted red pepper and basil leaves, then pour the remaining orange and lemon juice over the chicken. Cut the butter into small squares, then scatter them over the chicken.

      6Bake the casserole: Bake the chicken until a thermometer inserted into the chicken reads 165°F, 20 to 30 minutes.

      7Serve the chicken over mashed potatoes, with rice, or vegetables. There will be lots of extra cooking liquid to spoon over the chicken.

    Adam and Joanne’s Tips

    • Roasted peppers: One 12-ounce jar of roasted red peppers usually contains 1 very large or 2 medium peppers. To learn how to roast them yourself, refer to our roasted red pepper hummus recipe for tips.
    • Nutrition facts provided are estimates.

    Nutrition Per Serving
    Serving Size
    1/4 of the recipe
    /
    Calories
    286
    /
    Total Fat
    10.5g
    /
    Saturated Fat
    4.6g
    /
    Cholesterol
    139.4mg
    /
    Sodium
    370.3mg
    /
    Carbohydrate
    6.9g
    /
    Dietary Fiber
    1g
    /
    Total Sugars
    4.6g
    /
    Protein
    39.2g


    AUTHOR:

    Joanne Gallagher

    Adam and Joanne of Inspired Taste

    We are Adam and Joanne Gallagher, the creators of Inspired Taste. Established in 2009, Inspired Taste grew from a childhood dream into one of the internet’s most trusted recipe sites with hundreds of reliable recipes, step-by-step videos, and expert tips.More About Us

    Source link

  • Easy Beer Brats Recipe

    Easy Beer Brats Recipe

    This is our favorite beer brats recipe! Perfectly browned and juicy bratwurst sausages simmered in a rich, flavorful beer and onion gravy, all done on the stove.

    Beer Brats

    If there’s one dish that’s guaranteed to make Adam smile, it’s these beer brats! The method is simple, but it’s perfected with a few clever tricks from Chef Richard, who makes the best beer brats ever (I’m absolutely convinced on this one!).

    The magic of this recipe comes down to two things: the beer you choose (yes, you can choose incorrectly, so check my tips!) and making sure you slowly brown your sausages to build incredible flavor before simmering them in our delicious onion beer gravy. By the way, if you love the pork and onion combination, we also have this pork tenderloin with peppers!

    Key Ingredients

    • Bratwurst: These German-style sausages are typically made with pork and seasoned with milder spices, such as marjoram, coriander, nutmeg, and pepper. Known affectionately as “brats” across the US, their mild flavor makes them perfect for a variety of dishes. For this recipe, we will brown them on the outside and then simmer in beer. Thanks to the fat added to the sausages and the moist cooking environment, they remain incredibly juicy inside. If you can’t find bratwurst, try mild Italian sausage instead.
    • Beer: For the best flavor, use a malty lager or pale lager. Nothing hoppy, as it will make the onion gravy bitter. A standard American lager like Budweiser works in a pinch, but we prefer to steer clear of light beers for this one (they won’t have enough flavor).
    • Onions and Peppers: We love sweet onions (think Walla Walla or Vidalia) and red bell peppers, but yellow onions or other peppers are just fine (or you can leave the peppers out if that’s more your style).
    • Buns: Look for something soft and not too big (you don’t want it to dwarf the sausage). I love a simple hoagie-style roll, brioche-style buns, or a good-quality potato roll.
    • Extras: Some people love a grainy mustard with beer brats and I’ll never turn down a side of sauerkraut! Here’s our quick fresh sauerkraut (not fermented, but delicious) as well as our fermented sauerkraut!

    Find the full recipe with measurements below.

    How to Make Beer Brats

    Tip 1: Brown the sausages. Use medium heat to brown your sausages (don’t sear them on high heat). Our goal is to slowly develop a rich, golden-brown crust before simmering them with the beer.

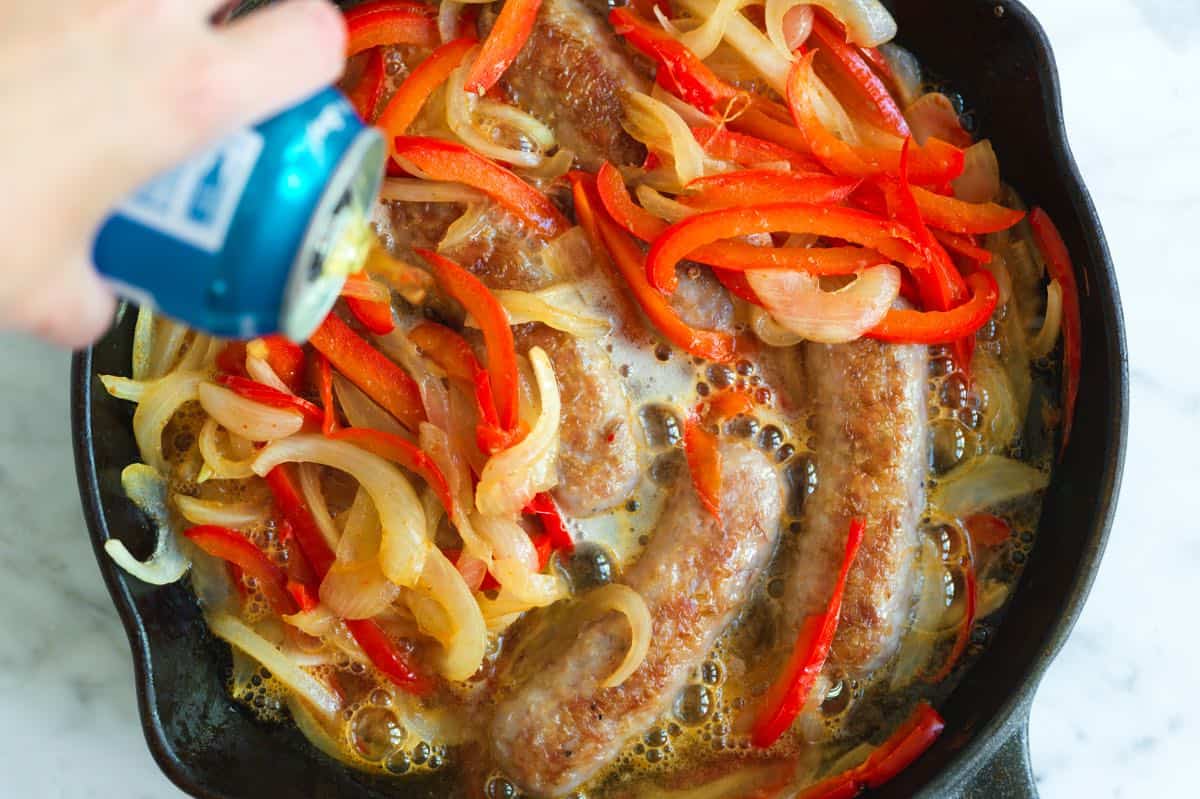
    Bratwurst simmered in beer

    Tip 2: Reduce your gravy. The gravy simmers for 10 to 15 minutes, which means it will reduce by about half. This is why we are so specific with the best beer to use. If you were to use a hoppy or bitter beer, you would be reducing and intensifying that flavor when you simmer, making your gravy bitter.

    More Sausage Recipes

    Beer Brats

    Easy Beer Brats

    • PREP
    • COOK
    • TOTAL

    We start by browning the bratwursts in a skillet on the stove, then finish them by simmering in beer with onions and peppers. I much prefer this method to the common “simmer then grill” approach. It truly keeps the sausages juicier, and you lose far less fat from the middles of the brats.

    5 Servings

    You Will Need

    1 pound (450g) bratwurst, usually 5 links

    1 medium sweet onion, sliced 1/8-inch thick

    1 red bell pepper, sliced 1/8-inch thick

    12 ounces malty lager or pale lager, 1 can or bottle

    1 tablespoon avocado oil

    Salt and fresh ground black pepper

    5 to 6 hot dog or sausage bread rolls, split and toasted

    Optional: ketchup, spicy brown or yellow mustard and sauerkraut on the side

    Directions

      1Brown bratwursts: Heat a cast iron pan over medium heat for a few minutes, and then add the olive oil. Lay the bratwurst links in the pan and cook slowly. You want to brown the sausages but not sear them. Brown them on one side, then flip over and brown the other side.

      2Once both sides are brown, transfer the sausages to a plate.

      3Cook onions and peppers: Add the sliced onions and peppers to the same pan, still over medium heat. Cook, stirring occasionally, for 5 to 7 minutes until they are softened and begin to pick up a little golden color from the pan.

      4Simmer the brats in beer: Nestle the browned bratwurst back into the pan amongst the onions and peppers. Pour in the beer and bring the mixture to a gentle simmer. Continue cooking at a simmer, adjusting the heat as necessary, for about 10 to 15 minutes or until the liquid has reduced by about half, forming a rich, flavorful gravy. If any foam develops during simmering, simply spoon it off.

      5Check the seasoning of the gravy and adjust with salt and pepper as needed.

      6Serve: Serve beer brats in the buns topped with peppers and onions and any extra condiments you like. Spoon a little gravy over the top and enjoy!

    Adam and Joanne’s Tips

    • Make ahead: Make this recipe as written, but hold off on toasting your buns. Store the brats in the beer gravy (with onions and peppers) in an airtight container in the fridge. Keep them this way for up to 3 days. Reheat in the same skillet (either on the stove or on your grill), toast your buns, and serve!
    • Best pan to use: We recommend a well-seasoned cast iron pan or an enamel-coated, heavy skillet. If your cast iron is not well seasoned, it can affect the flavor of the beer.
    • Best beer: For the best flavor, use a malty lager. Nothing hoppy, as it will make the onion gravy bitter. A standard American lager like Budweiser is fine, but we prefer to steer clear of light beers for this one (they won’t have enough flavor).
    • Do I really need the oil? You may not need the oil for browning the sausages. It depends on how fatty your sausages are. Some leaner sausages need a little oil to get started in the pan.
    • Seasoning to taste: We rarely need to add much salt or pepper to the beer gravy. I typically add a small pinch and a few twists of my pepper grinder.
    • The nutritional information provided are estimates. We did not include the buns or optional ingredients.

    Nutrition Per Serving
    Serving Size
    1/5 of the recipe (assumed 5 links and buns)
    /
    Calories
    476
    /
    Total Fat
    23.8g
    /
    Saturated Fat
    5.9g
    /
    Cholesterol
    89.1mg
    /
    Sodium
    739mg
    /
    Carbohydrate
    34.1g
    /
    Dietary Fiber
    4.5g
    /
    Total Sugars
    7.6g
    /
    Protein
    26g


    AUTHOR:

    Joanne Gallagher

    Adam and Joanne of Inspired Taste

    We are Adam and Joanne Gallagher, the creators of Inspired Taste. Established in 2009, Inspired Taste grew from a childhood dream into one of the internet’s most trusted recipe sites with hundreds of reliable recipes, step-by-step videos, and expert tips.More About Us

    Previous Post: Easy Napa Cabbage Salad
    Next Post: Easy Cowboy Candy

    Source link

  • Perfect Ricotta Gnocchi Recipe

    Perfect Ricotta Gnocchi Recipe

    I can’t stop making this ricotta gnocchi recipe! The moment you realize how easy and delicious they are, I don’t think you will be able to stop, either!

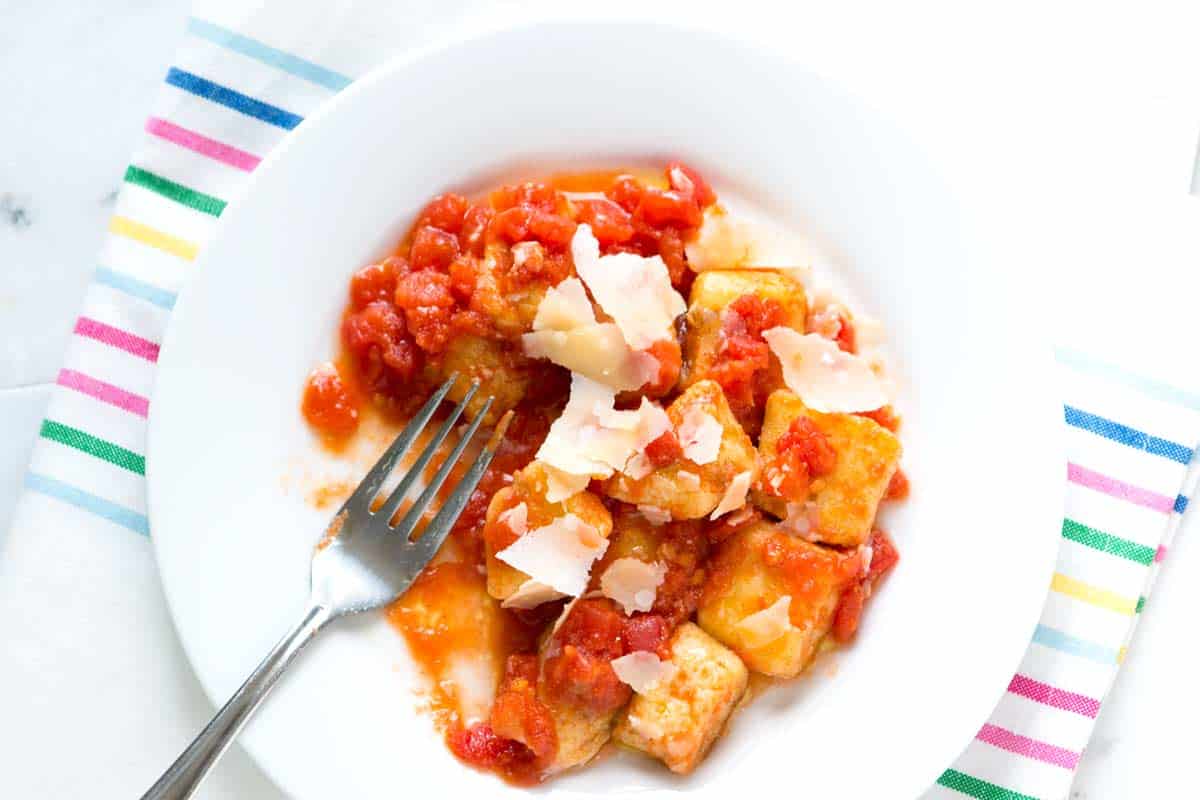
    Ricotta Gnocchi

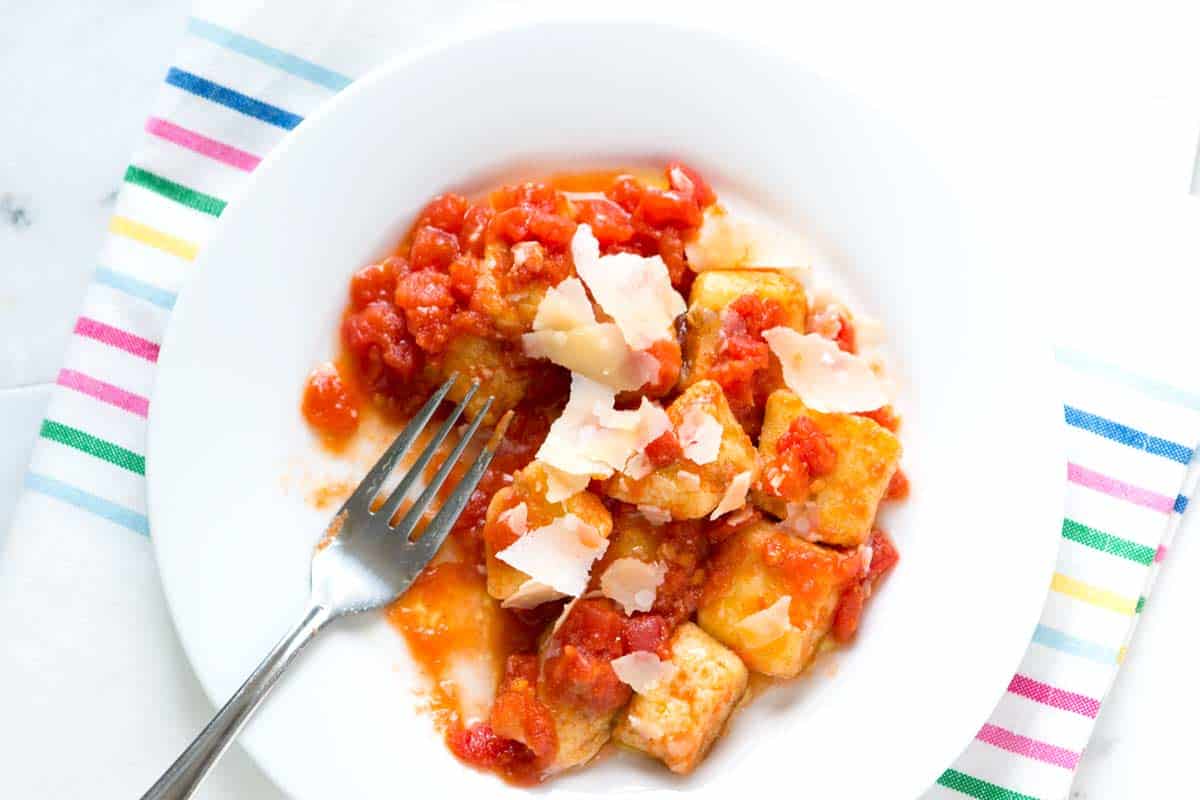
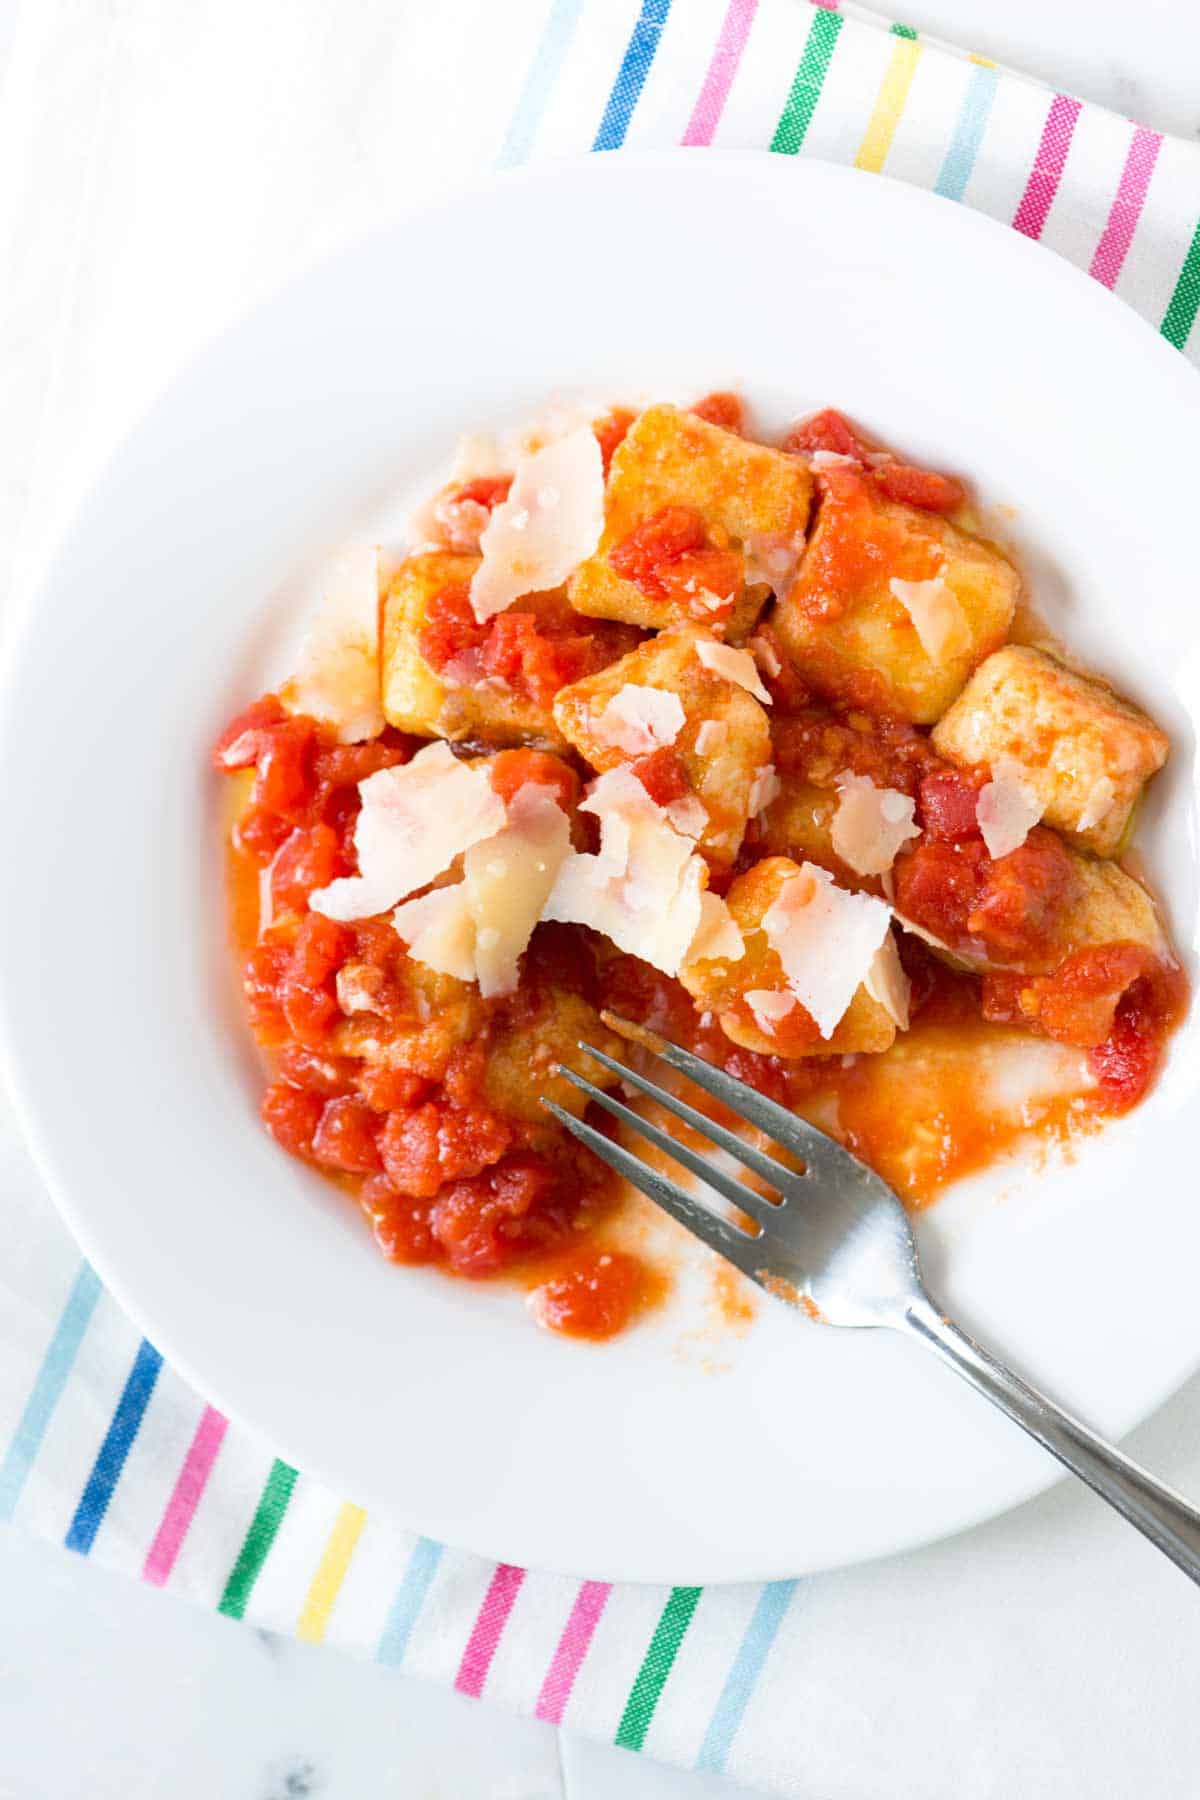
    Making ricotta gnocchi for the first time made me feel like a total rockstar! It’s one of those recipes that seems almost too easy. It’s genuinely so simple, not to mention it turns out just as well as our beloved potato gnocchi recipe!

    Ricotta makes the dumplings unbelievably light, fluffy, and almost cloud-like! About 20 minutes stand between you and delicious homemade gnocchi. You’ll make our simple dough, roll it into ropes, and quickly cut it into little squares. Then, you only need 5 minutes to cook them!

    Key Ingredients

    • Flour: You can use either all-purpose or “00” flour. Many traditional Italian recipes call for “00” flour, but don’t stress if you don’t have it. All-purpose works perfectly well. If you buy “00” flour and have some leftover, I also use it to make homemade pasta and pizza dough.
    • Ricotta: This is the star of our recipe, so use the highest quality you can find. Whole milk is a must for this one, and we want it to be thick. If your ricotta seems watery, add it to a fine mesh strainer and let it sit for 10 minutes to drain any excess water.
    • Egg: One egg helps our dough come together, adds a bit of fat, and keeps it light and fluffy.
    • Parmesan: For the best flavor, use Parmigiano-Reggiano and finely grate it yourself. Pre-grated cheese doesn’t melt as well and won’t be as fine.
    • Lemon: This is optional, but I love adding a little finely grated lemon zest to my ricotta gnocchi dough. If you aren’t into it or don’t have a lemon, don’t worry, the gnocchi will still be excellent without it. As a substitute, you can add finely chopped fresh herbs (like basil, dill, or parsley).

    Find the full recipe with measurements below.

    How to Make Ricotta Gnocchi

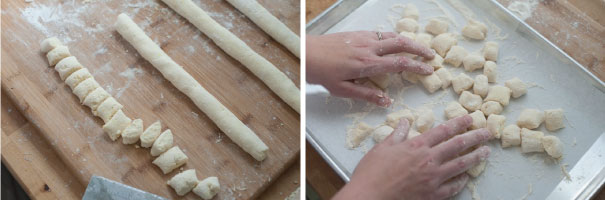
    Tip 1: Make the dumplings. Stir the dough ingredients together with a spoon, shape into a rectangle, and cut into 4 equal(ish) pieces. Then, use your childhood play dough skills and roll them into ropes. From there, cut into little squares. At this point, you can cook them or freeze them (freezing tips are below).

    Making ricotta gnocchi dough
    Cutting gnocchi dough into dumplings

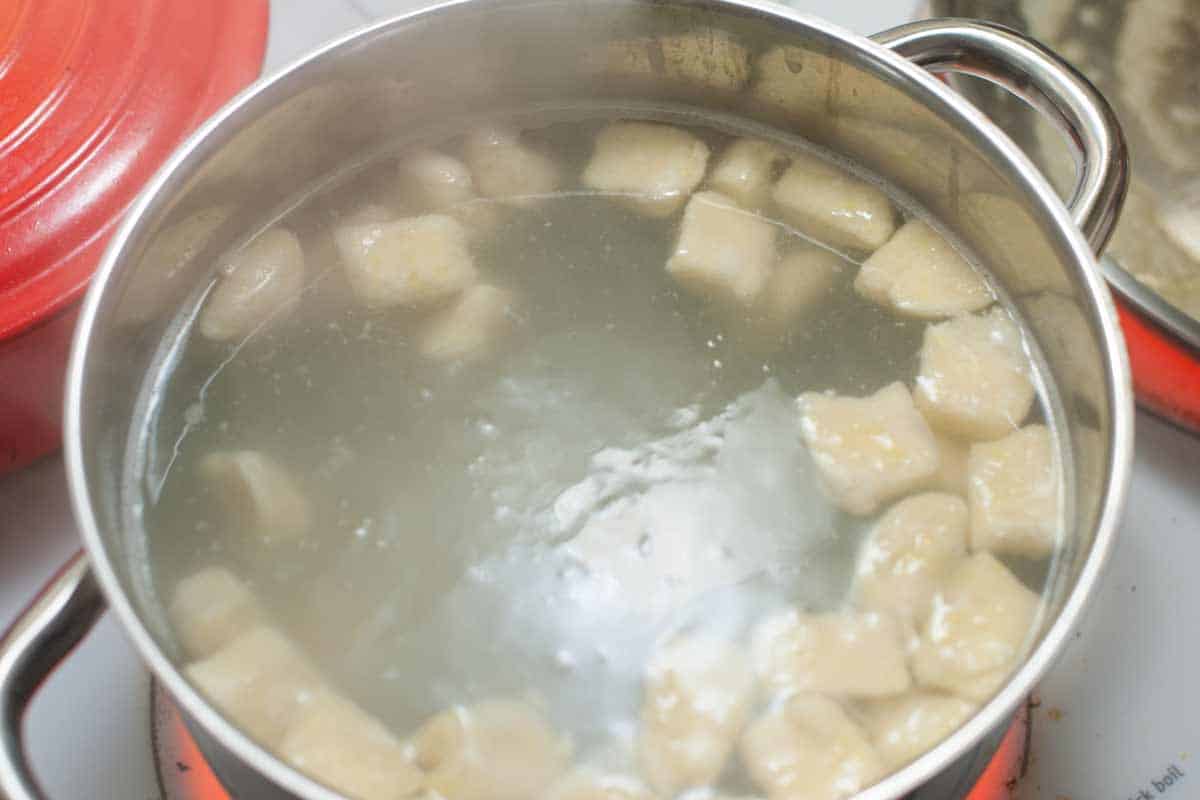
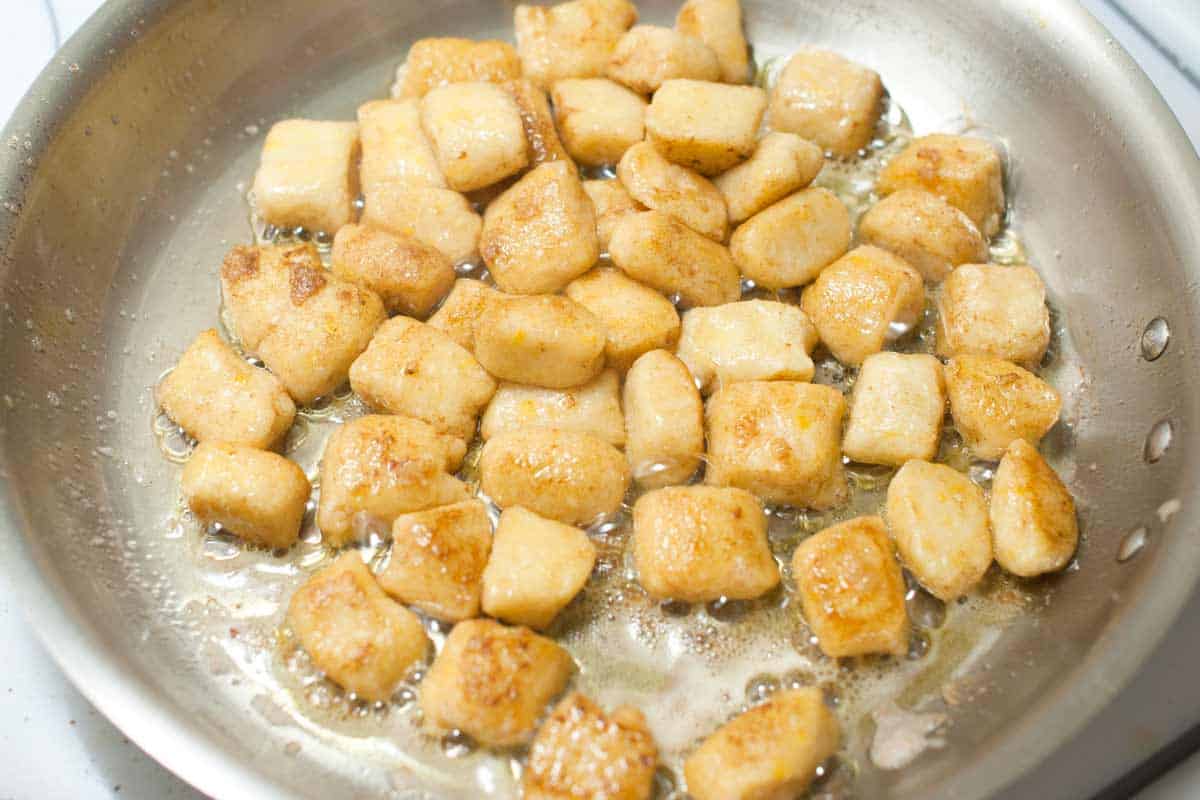
    Tip 2: Cook the dumplings. My favorite way to cook ricotta gnocchi is to boil them in salted water (just like homemade pasta). It only takes 2 to 3 minutes. Then, toss them into a skillet with melted butter to get them a little crispy around the edges.

    Boiling gnocchi dumplings in salted water
    Cooking gnocchi dumplings in melted butter

    Tip 3: Freeze for later. Place a baking sheet lined with parchment paper with the uncooked gnocchi into the freezer and freeze for 1 hour or until the individual pieces are hard. Transfer the semi-frozen gnocchi to airtight freezer-friendly bags. Then, keep in the freezer for up to 3 months.

    When you are ready to cook, remove it from the freezer and cook it from frozen using the directions above.

    Storing gnocchi in freezer.

    Servings Suggestions

    You can serve these with some extra cheese or toss them in your favorite sauce. My favorites are my quick marinara, slightly more decadent red pasta sauce, and basil pesto.

    This is lovely all by itself, but you can always round out your meal with something on the side. We especially love a fresh salad, like this Italian chopped salad, fresh greens tossed with balsamic vinaigrette, or Caprese salad. For something warm, try sautéed spinach or a slice of roasted garlic bread.

    More Pasta Recipes

    Ricotta Gnocchi

    Perfect Ricotta Gnocchi

    • PREP
    • COOK
    • TOTAL

    The dough comes together in under twenty minutes, allowing you to cook it immediately or freeze for later. Serve the gnocchi plain with olive oil, parmesan cheese, and herbs, or elevate it with a buttery crust and light marinara sauce. Follow the instructions below for making the dough, cooking, and freezing.

    Makes 4 servings

    You Will Need

    3/4 cup (98g) all-purpose flour, plus more for baking sheet and workbench

    1 ounce (28g) Parmigiano-Reggiano cheese, finely grated, about 1/3 cup, plus more for serving

    2 teaspoons finely grated lemon zest

    1 cup (250g) whole milk ricotta cheese

    1 large egg

    Salt for cooking

    2 tablespoons butter, optional for cooking

    2 cups warmed marinara sauce, optional for serving

    Directions

      1Line a baking sheet with parchment paper and dust with 1 to 2 tablespoons of flour.

      2Make gnocchi dough: Mix 3/4 cup of flour, 1 ounce of finely grated parmesan cheese, and 2 teaspoons finely grated lemon zest in a large bowl until well blended.

      3Make a well in the center of the flour mixture, and then add 1 cup of ricotta cheese and 1 egg. Using a wooden spoon, stir until the dough comes together. The dough should come together within 20 to 30 strokes of your spoon. Be careful not to overwork the dough to keep the gnocchi light when cooked.

      4Cut the gnocchi: Transfer the dough to a well-floured work bench and pat it together. Shape into a rectangle, then cut into 4 even pieces. If the dough is tacky, add a little more flour.

      5Gently roll each piece into a 12-inch long rope about 3/4-inch thick, adding more flour as necessary to prevent sticking.

      6Cut the ropes into 3/4-inch pieces, then transfer to the prepared baking sheet with flour. Shimmy the baking sheet so that the flour lightly coats each piece. Cook gnocchi or freeze for later (see freezing tips below).How to Make Ricotta Gnocchi

      7Cook gnocchi: Bring a pot of salted water to a boil. Add gnocchi and cook for 2 to 3 minutes or until the gnocchi starts to float to the top. As they finish cooking, use a slotted spoon to remove from the water.

      8If serving with butter and marinara sauce, while the gnocchi cook, melt 2 tablespoons of butter in a wide skillet over medium heat. When the butter is bubbling, add the cooked gnocchi. Cook, shaking the pan occasionally, until the gnocchi has browned on all sides, about 3 minutes. Toss with warmed marinara sauce and serve topped with parmesan cheese.

    Adam and Joanne’s Tips

    • This recipe has been inspired by Michael Symon.
    • The nutrition facts provided below are estimates.

    Nutrition Per Serving
    Serving Size
    1/4 of the recipe
    /
    Calories
    357
    /
    Total Fat
    19g
    /
    Saturated Fat
    11g
    /
    Cholesterol
    102mg
    /
    Sodium
    218mg
    /
    Carbohydrate
    30g
    /
    Dietary Fiber
    3g
    /
    Total Sugars
    7g
    /
    Protein
    16g


    AUTHOR:

    Joanne Gallagher

    Adam and Joanne of Inspired Taste

    We are Adam and Joanne Gallagher, the creators of Inspired Taste. Established in 2009, Inspired Taste grew from a childhood dream into one of the internet’s most trusted recipe sites with hundreds of reliable recipes, step-by-step videos, and expert tips.More About Us

    Source link