Category: Main Dish

  • Korean Short Ribs Recipe (Galbi)

    Korean Short Ribs Recipe (Galbi)

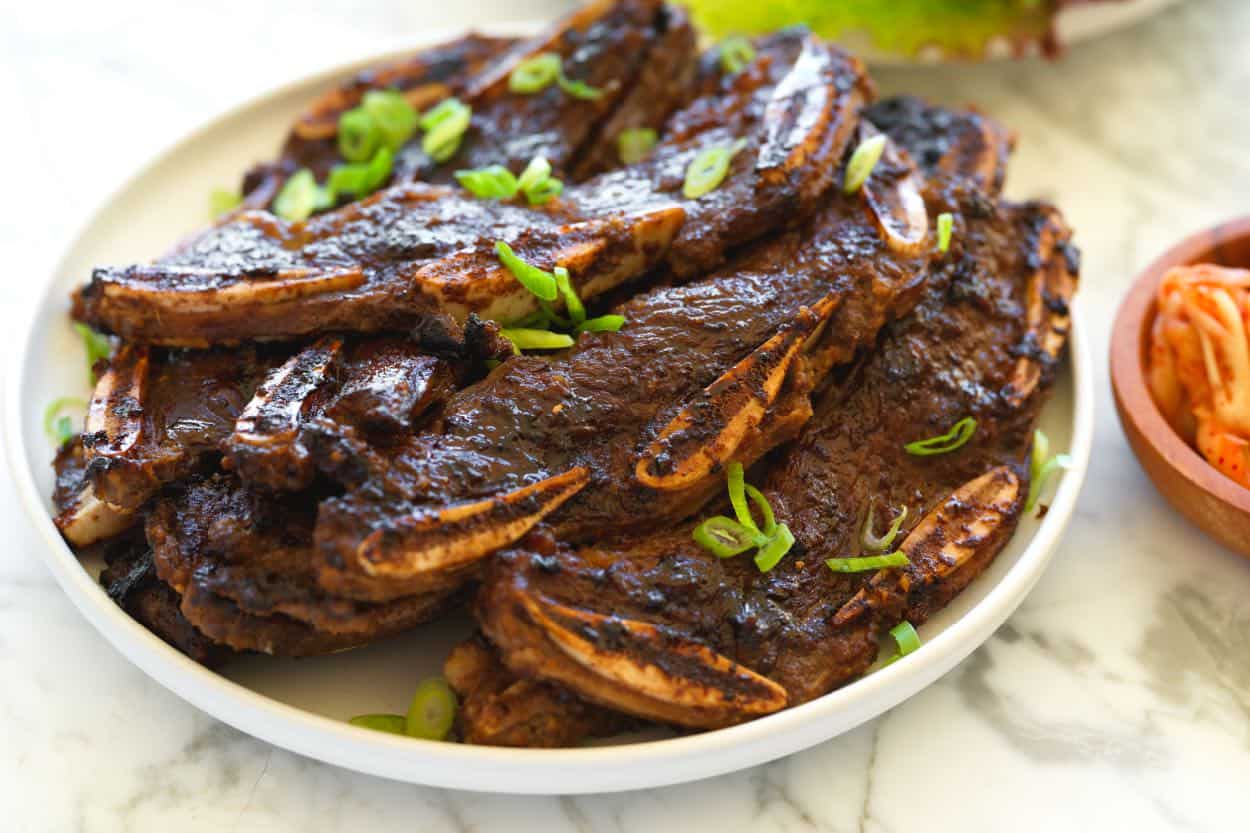
    The trick to this Korean short ribs recipe is to marinate thinly cut beef ribs in our savory-sweet soy marinade, then cook them on a hot grill or grill pan until they’re caramelized and a little bit charred.

    Korean Short Ribs

    Adam is obsessed with Korean-style ribs. Also called beef Galbi, these are thinly sliced beef short ribs that soak up all the flavor from the marinade and cook in just a few minutes on the grill. You get those perfect caramelized, charred edges that we can’t get enough of.

    The Galbi marinade is a lot like our go-to bulgogi marinade, just with a little extra brown sugar, an onion, and more aromatics for an authentic flavor. This is one of our favorite ways to bring Korean BBQ flavors into our own kitchen, and you can totally do it at home, too!

    Key Ingredients

    • Flanken Ribs: For this recipe, you’ll want thinly sliced short ribs. Somewhere between 1/4-inch and 3/4-inch thick is perfect. The thin cut means they grill up super fast. When you’re shopping, look for packages labeled “flanken ribs,” “Korean-style ribs,” or “LA-style beef short ribs.” Just make sure they’re cut across the bone, so you get 3 to 4 little round bones in each piece.
    • Soy Sauce: This is the base of our marinade. We usually go for low-sodium soy sauce, but low-sodium tamari works great, too.
    • Rice Wine Vinegar: Look for unsweetened rice vinegar (usually with a green bottle cap or label).
    • Sesame Oil: Toasted sesame oil adds a lovely, toasty, rich flavor to the ribs.
    • Brown Sugar and Honey: We really love both for this. The combination makes our beef taste more interesting and complex. The honey also caramelizes beautifully. We use the same combination when making beef bulgogi, another Korean-inspired recipe.
    • Black Pepper: We use a lot of black pepper in this recipe. I hand-grind mine, so it has to be worth it. Trust me, it is! One teaspoon is just right.
    • Garlic and Ginger: I always go for fresh garlic. For ginger, you can use fresh ginger root or grab ginger puree from the store (refrigerated or frozen both work).
    • Pear: This is the secret ingredient in a lot of Korean marinades. It adds sweetness and helps tenderize the beef. We look for Asian, Korean, or Nashi pears, but if you can’t find those, a ripe Bosc or Anjou pear works just fine.
    • Lettuce, Rice, and Sides: To make it a full meal, we serve these ribs with steamed rice and lettuce leaves for wrapping. Don’t forget the banchan (little sides) like kimchi or spicy cucumber salad, and a bit of ssamjang, the savory Korean dipping sauce that ties it all together.

    Find the full recipe with measurements below.

    How to Make Korean Short Ribs at Home

    Tip 1: Prepare the ribs. If you have thin-cut flanken ribs that are 3/8-inch or thinner, skip this tip. If, however, you can only find thicker-cut ribs (say 1/2-inch), stick around. The thinner the ribs, the more tender they turn out, so if you are sitting there with a thicker cut, it’s a good idea to grab a meat mallet (a dual-sided one with the spiked teeth on one side). Lay each rib flat, then lightly pound the beef using the pointy side. This helps break up connective tissue, making the meat more tender in the end.

    Note: Ribs thicker than 1/2-inch won’t have the same results, even with the meat mallet.

    Tip 2: Make our galbi marinade. We like using our food processor to make the marinade. If you don’t have one, you can make this marinade by hand, but a food processor makes really quick work of it. Toss everything in and hit pulse until mostly smooth. If you’re doing it by hand, you’ll mince the garlic, finely grate the ginger with a microplane, then grate the pear and onion with a box grater.

    Tip 3: Marinate overnight. If you are short on time, you can cut the marinating time down a bit, but for the best results, we highly recommend leaving the ribs in the marinade overnight.

    Once made, pour the marinade over your ribs, then massage them and move them around in the marinade so all of the beef is well covered. Cover the bowl, then refrigerate. If you have the chance, go back once or twice and move the ribs around a bit to make sure everything is still well coated.

    Marinating Korean Short Ribs in a Galbi marinade

    Tip 4: Grill the ribs. At a Korean barbecue restaurant, there’s often a grill right in the middle of the table where you can quickly sear/grill the ribs. At home, we use our outdoor grill or a heavy-bottomed grill pan over medium-high heat.

    If cooking on a grill pan, add a little oil, then cook the marinated ribs in batches, keeping one layer of ribs in the pan at a time (stacking too many at once will steam the beef rather than caramelize and brown it).

    Our Favorite Way to Serve Korean Ribs

    We love serving these family-style next to rice, big lettuce leaves, kimchi, and ssamjang (a savory dipping sauce — look near gochujang in Korean markets or more internationally friendly grocery stores). Very often, when we’re out at a Korean BBQ place, we’ve seen people using kitchen shears to cut the grilled beef from the bones, then take the meat and build their bite. If you have some on hand, try it! It does make removing the beef from the bones easy. Otherwise, just get in there!

    More of Our Favorite Beef Recipes

    Korean Short Ribs

    Korean Short Ribs (Galbi)

    • PREP
    • COOK
    • TOTAL

    We love making Korean ribs at home, and you can totally do it, too! The key to the best flavor is letting those thinly sliced short ribs sit overnight in our savory-sweet soy marinade.

    We think these ribs are at their best when grilled, on an outdoor grill or in a grill pan, then pulled or cut from the bone and tucked into lettuce wraps. We love serving them with kimchi and ssamjang on the side. You can grab kimchi at the store or make your own with our kimchi recipe. Ssamjang is a spicy dipping sauce you’ll find near gochujang in Korean markets or in the international aisle at bigger grocery stores. It’s also easy to order online.

    6 Servings

    You Will Need

    3 pounds thin-sliced bone-in beef short ribs, ¼-inch to ⅜-inch thick, see tips

    1 Asian pear, peeled, cored, and cut into 1-inch pieces

    1 small onion, cut into 1-inch pieces

    5 garlic cloves

    1 ½ inch piece fresh ginger, peeled and roughly chopped into ¼ inch pieces

    ½ cup low-sodium soy sauce

    ¼ cup brown sugar

    3 tablespoons honey

    2 tablespoons toasted sesame oil

    2 tablespoons rice wine vinegar

    1 teaspoon ground black pepper

    High-heat cooking oil, if using a grill pan

    3 green onions, sliced

    Lettuce leaves, steamed rice, kimchi, and ssamjang (Korean dipping sauce), optional for serving

    Directions

      1Prepare the ribs: If your ribs are on the thicker side, use the pointy side of a meat mallet to gently pound them (this makes them a bit more tender in the end). Place them into a large bowl or resealable zip-top bag.

      2Make marinade: Add the pear, onion, garlic, ginger, soy sauce, brown sugar, honey, sesame oil, rice wine vinegar, and pepper to the bowl of a food processor. Pulse until everything is nice and smooth.

      3Marinate: Pour the marinade over the ribs, massaging them and moving it around so they are evenly coated. Refrigerate overnight. As they marinate, go back once or twice to move them around in the marinade.

      4Cook the ribs: When you’re ready to cook, heat an outdoor grill to medium-high or add a little oil to a grill pan or cast-iron skillet over medium-high heat. Cook the ribs in batches for 2 to 3 minutes per side, until they’re caramelized and a little charred. Pile them onto a platter and scatter sliced green onions over the top. If you’re cooking on the stovetop, just a heads up: the marinade caramelizes fast, so you might want to wipe out the pan between batches.

    Adam and Joanne’s Tips

    • Storing: Keep leftovers in an airtight container in the fridge for up to 4 days. Reheat in a skillet over medium heat.
    • The ribs: These are sometimes called “Korean-style,” “flanken ribs,” “LA-Style beef short ribs,” or “Galbi ribs”, which are just short ribs cut super thin. If you can, ask for ribs that are ¼ to ⅜ inch thick. If you can’t find that exact cut, don’t stress! If you’ve got thin-cut short ribs closer to ½-inch thick, they just need a little pounding with a meat mallet before marinating to help them stay tender. If yours are already thin, you’re good to go.
    • No food processor: No problem! Just peel and grate the pear and onion with a box grater, mince the garlic, and use a microplane to grate the ginger.
    • Pear substitutes: If you cannot find an Asian pear (sometimes called Korean pear or Nashi pear), substitute a ripe Bosc pear or Anjou pear.
    • The nutrition facts provided are estimates.

    Nutrition Per Serving
    Serving Size
    1/6 of the recipe
    /
    Calories
    520
    /
    Total Fat
    26.7g
    /
    Saturated Fat
    10.7g
    /
    Cholesterol
    130mg
    /
    Sodium
    733mg
    /
    Carbohydrate
    24.3g
    /
    Dietary Fiber
    1.2g
    /
    Total Sugars
    19.9g
    /
    Protein
    44.1g


    AUTHOR:

    Joanne Gallagher

    Source link

  • Easy Salmon Patties Recipe

    Easy Salmon Patties Recipe

    This salmon patties recipe, which calls for canned salmon, makes the most delicious salmon cakes we’ve tried. They are budget-friendly, easy, and seriously tasty!

    Salmon Patties

    When we set out to create a recipe for salmon patties, all three of us (Adam, Chef Richard, and I) were a little skeptical. The goal was to create crave-worthy, seriously tasty patties made with canned salmon, and after making these on repeat for a while, we think we did it!

    Richard had the most experience with salmon patties. He grew up in the South with a mom who regularly made salmon patties for dinner. While he appreciates his mom’s efforts, he didn’t have much to say about the patties, so this one was an uphill battle. Well, we told him to go away and make the canned salmon patties (sometimes called salmon cakes) of his dreams. He stayed skeptical at first, but, as usual, he knocked it out of the park. We all fell in love and agreed that these are a must-make for you!

    Key Ingredients

    • Canned Salmon: We’re partial to Wild Alaskan pink salmon, which tastes great and is affordable. Just like when I buy canned tuna for tuna salad, I prioritize sustainability and look for smaller producers or cans with an MSC certification. Wild Planet is widely available and is a brand we’ve tested this recipe (with great results). If you do not have canned, but have leftover cooked salmon, it works nicely in this recipe, too (leftover baked salmon or poached salmon would be lovely in this recipe).
    • Onion and Bell Pepper: These add flavor and texture. The key is to chop them finely so they blend into the patties. I used red bell pepper in the photos, but orange or yellow are great, too.
    • Garlic: One garlic clove is perfect. We like to grate it finely with a microplane. If you do not have a microplane, mince your garlic as finely as you can before adding it to the other ingredients.
    • Mayonnaise: This keeps our salmon moist and acts as a binder. Homemade mayonnaise is lovely, but use what you have on hand.
    • Egg: As the patties bake in the oven, the egg firms up and begins to hold them together.
    • Dijon Mustard: This adds some flavor and cuts through some of the fishy taste in the salmon. Whole-grain mustard would be a good substitute.
    • Spices: The secret to the best patties. You’ll combine Cajun seasoning, smoked paprika, salt, and pepper.
    • Parsley: I love the pop of fresh flavor and green color, but you can leave this out if you’d prefer.
    • Breadcrumbs: Panko is perfect since it is so light. Homemade breadcrumbs work nicely, too. Crushed saltines (like we use for crab cakes) are also great.

    Find the full recipe with measurements below.

    Dipping Salmon Patties into Dill Sauce

    How to Make Salmon Patties

    Tip 1: Drain the salmon. Most canned salmon will come packed in water or oil. Before making these patties, drain the excess liquid from the can, otherwise your mixture will be too wet.

    Tip 2: Mix everything, but the salmon and breadcrumbs first. In a mixing bowl, stir together the onion, bell pepper, garlic, mayonnaise, egg, mustard, spices, and parsley until a mostly smooth sauce forms. It will be pretty wet. We don’t want to overmix the salmon, so holding off on adding it at this point is really helpful.

    Making the base for salmon patties with mayonnaise, spices, egg, onion, garlic, and bell pepper.

    Tip 3: Gently fold in the salmon. Flake the salmon into the bowl and use a large spoon to fold it in. Again, the mixture will seem loose and wet (you may even think it looks too wet).

    Tip 4: Add the breadcrumbs last. Now sprinkle over the breadcrumbs and fold them in. They will begin to absorb some of the moisture in the bowl, but things will still be pretty wet (do you see a pattern here…don’t worry about the moisture).

    The salmon patty mixture before chilling (it looks wet and loose).

    Tip 5: Refrigerate for 30 minutes. So that the breadcrumbs and salmon have a chance to absorb some of the moisture from the other ingredients, place the bowl in the fridge and leave it there for 30 minutes. The chilled mixture is much easier to form into patties. We use the same trick in our crab cake recipe.

    Tip 6: Don’t cook these in a skillet. These are intentionally more moisture-heavy than other recipes, which means cooking them in a skillet is tricky (they fall apart). All of the extra moisture is welcome once you bake the patties, and keeps them tender and delicious. These patties will not turn out dry, promise!

    Instead of cooking these in a skillet, you’ll form them into patties and bake them in the oven. They still brown nicely, but the oven is a more delicate, hands-off way to cook them. You’ll bake them for about 15 minutes, then flip them, and continue baking for 10 to 15 more minutes. The initial 15 minutes are enough to firm them up, so flipping them is really easy, and they won’t crumble on you.

    Tip 7: Trust the process. To make these truly delicious, we need all the extra moisture from the mayo, egg, and mustard. Plus, so they aren’t bready, we don’t want too much breadcrumb filler. These two things combine to make a pretty loose, wet mixture. Forming the patties is a tad messy (nothing a quick hand wash can’t fix, though).

    Keeping the moisture level high means your salmon patties turn out juicy, moist, and really delicious. So, if you’re making these and questioning things, don’t. Once you get them into the oven, they will firm up nicely.

    Serving Suggestions

    These are seriously so tasty. In our photos, we’ve served them with our dill sauce, which is perfect. Our homemade tartar sauce is great, too! If you have kids and they love ketchup, homemade ketchup is always a winner.

    I love these on the side with more summery sides like coleslaw, vinegar coleslaw, red potato salad, corn salad, avocado salad, and macaroni pasta salad. They are also excellent when added to the top of a salad (here’s all of our salad recipes for inspiration). If you’d prefer a more of a hot plate, consider a side of roasted potatoes, roasted broccoli, or sautéed broccoli (all of which would be really delicious dipped into the creamy dill sauce I suggested above).

    More Salmon Recipes

    Salmon Patties

    Easy Salmon Patties

    • PREP
    • COOK
    • TOTAL

    These are the tastiest salmon patties I’ve had, and probably my new favorite way to use canned salmon! The salmon mixture is loose and intentionally wet so that once the cakes/patties bake, they stay moist and tender.

    We do not recommend cooking these on the stovetop (they may fall apart on you). Instead, bake them in the oven. After 15 minutes of baking, they firm up enough to flip, then you can continue baking until they are firm throughout (another 12 to 15 minutes more).

    4 Servings, 8 small patties

    Watch Us Make the Recipe

    You Will Need

    2 (6-ounce) cans wild pink salmon, drained

    ⅓ cup finely chopped onion, ¼ of a large onion (50g)

    ⅓ cup finely chopped bell pepper, ½ of a medium pepper (50g)

    1 garlic clove, finely grated

    ½ cup mayonnaise, see homemade mayonnaise (113g)

    1 large egg

    1 tablespoon Dijon mustard

    1 ½ teaspoons Cajun seasoning

    ¼ teaspoon smoked paprika

    ¼ teaspoon fine sea salt

    ¼ teaspoon fresh ground black pepper

    4 tablespoons chopped fresh parsley

    ½ cup panko or homemade breadcrumbs (42g)

    1 batch creamy dill sauce, for serving, optional

    Directions

      1Make the patty mixture: In a mixing bowl, combine the onion, bell pepper, garlic, mayonnaise, egg, mustard, Cajun seasoning, smoked paprika, salt, and pepper. Stir well to form a smooth sauce. Flake in the drained canned salmon, then fold it into the sauce, doing your best to keep some texture.

      2Sprinkle over the breadcrumbs, then fold them in until combined. Chill in the refrigerator for 30 minutes to firm up. Note that this mixture is intentionally wet and looser than what you may be used to.

      3Heat the oven: About 10 minutes before you are ready to cook, preheat the oven to 400°F (204°C) and line a baking sheet with parchment paper.

      4Form patties: Gently form the salmon mixture into 8 equal-sized balls, then press them into patties, forming the edges into smooth sides. This mixture will be a bit sticky and wet, but you should still be able to form it into patties. Once formed, place them down onto the parchment-lined baking sheet (moving them again is messy).

      5Bake: Bake the patties for 15 minutes, then use a spatula to flip them over and continue baking for 12 to 15 minutes, or until they are lightly browned on both sides and firm in the middle. Let them rest on the baking sheet for 3 to 5 minutes before serving.

    Adam and Joanne’s Tips

    • Storing: Keep baked patties in an airtight container in the fridge for up to 4 days. Reheat in a 350°F (177°C) oven or skillet over medium heat.
    • Canned salmon: We like canned wild Alaska pink salmon and look for the MSC certification for sustainability. If you have leftover cooked salmon, you can use it in this recipe. You will need 12 ounces.
    • The nutrition facts provided are estimates.

    Nutrition Per Serving
    Serving Size
    1 small patty (8 total)
    /
    Calories
    196
    /
    Total Fat
    13.6g
    /
    Saturated Fat
    2.3g
    /
    Cholesterol
    54.1mg
    /
    Sodium
    439.9mg
    /
    Carbohydrate
    6.5g
    /
    Dietary Fiber
    0.7g
    /
    Total Sugars
    1.1g
    /
    Protein
    10.8g


    AUTHOR:

    Joanne Gallagher

    Source link

  • Honey Mustard Chicken Recipe

    Honey Mustard Chicken Recipe

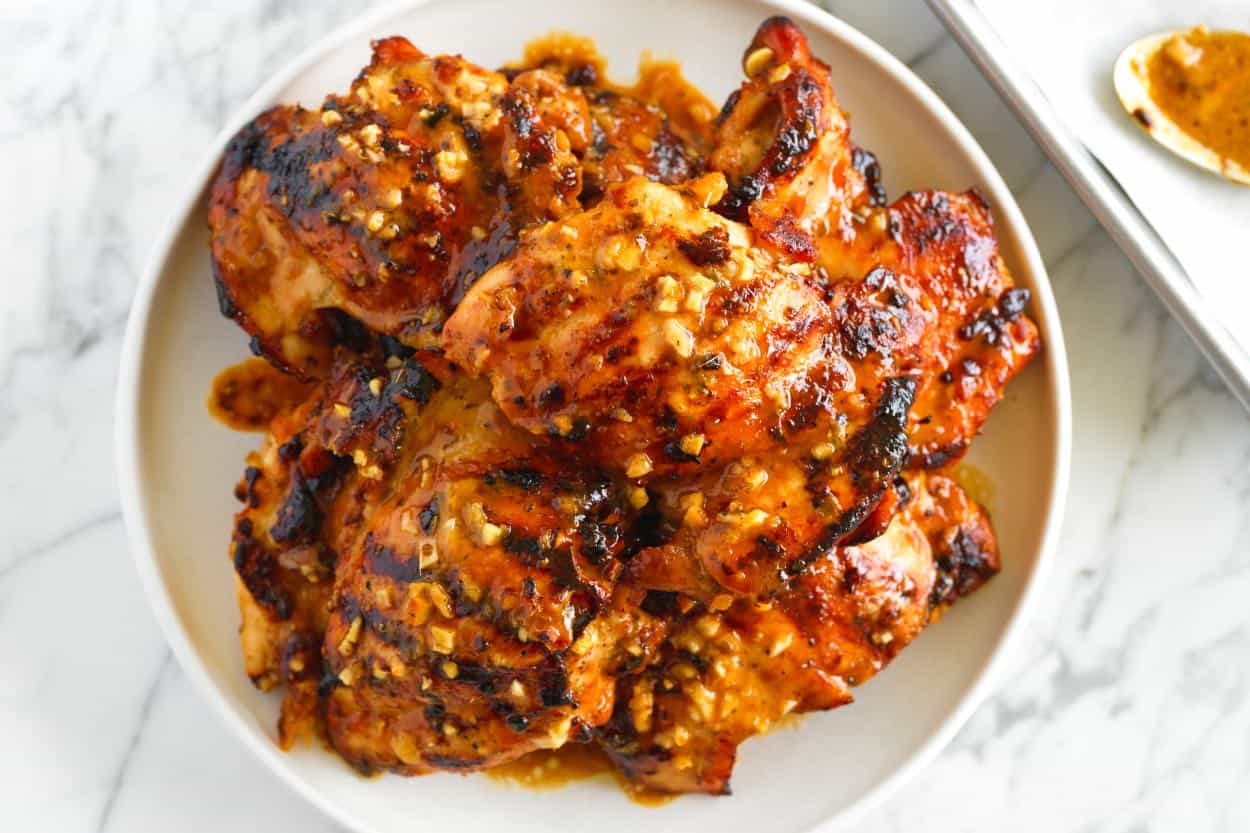
    Our honey mustard chicken recipe packs in so much incredible flavor thanks to an easy honey dijon marinade that doubles as a sauce for serving.

    Honey Mustard Chicken

    Not a week goes by without us being asked to share more chicken recipes. I get it! So many of us toss a package of chicken into our cart before knowing what we are going to do with it.

    This super flavorful honey mustard chicken recipe is your answer! You’ll marinate chicken thighs (or other cuts of chicken if that’s what you have), then cook them with the marinade. The chicken turns out incredibly juicy, saucy, and really delicious. I’ve currently got this recipe on repeat for my family, and I’m excited for you to try it soon!

    Key Ingredients

    • Chicken: I love chicken thighs for this recipe, but our marinade works for pretty much any cut of chicken (boneless, bone-in, skinless, or skin-on). The honey mustard marinade shared below is enough to marinate 2 pounds (probably a bit more), so feel free to adjust the amount based on how much chicken you have on hand.
    • Honey and Mustard: I use a pure, local honey and Dijon mustard. I especially love the fancier mustards for their flavor (they are a bit more punchy). The most common higher end option I see in standard grocery stores is Maille, which is perfect.
    • Mayonnaise: We love using mayonnaise in our marinade recipes (see this pork chop marinade as proof). It adds flavor, tenderizes, and keeps the chicken nice and juicy. If you’d prefer to use a plain thick yogurt, you can. In fact, we use it for our popular Greek chicken marinade (Icelandic or Greek full-fat yogurt are my go-tos).
    • Lemon: We use the juice from one lemon for the marinade, which balances the sweetness of the honey.
    • Garlic and Oregano: This chicken recipe calls for a good amount of garlic (we call for 6 cloves). The honey-and-Dijon mustard combo can take it without the garlic overpowering anything. Originally, this recipe was developed for fresh oregano, which, if you have it, is lovely! I’ve used dried in my photos because it’s more readily available at our local stores. I gave amounts for dried vs. fresh below.

    Find the full recipe with measurements below.

    How to Make Honey Mustard Chicken

    Tip 1: Make our marinade. For the very best flavored chicken, use our honey mustard chicken marinade. It’s pretty simple and works so nicely with the chicken (in our case, chicken thighs).

    To make it, whisk together honey, mustard, mayonnaise (or yogurt), lemon juice, garlic, oregano, salt, and pepper. Then add your chicken and let it marinate in the fridge for a while. We recommend waiting at least 4 hours or even overnight for the best flavor.

    Marinating chicken thighs in a honey mustard marinade

    Tip 2: Start cooking the chicken on the stovetop. I love a little color on my chicken, so I pull out my grill pan, heat it over medium, and add the marinated chicken (saving the marinade left in the bowl for later). We’re not looking to fully cook the chicken all the way through, just add some color.

    I love the grill pan here. The honey in the marinade will brown quickly, helping create those grill marks. If you don’t have a grill pan, a regular skillet works fine, just watch the honey doesn’t get too dark.

    Grilling marinated chicken in a grill pan on the stovetop

    Tip 3: Finish in the oven. Once we have some color, I love transferring the chicken to a baking sheet and pouring the reserved marinade over it before baking in the oven. If you are worried about reusing the marinade, it will bake in the oven long enough to come to a safe temperature.

    Bake the chicken, covered in the marinade, until an internal thermometer reaches 165°F or 175°F-180°F for thighs (they are safe at 165°F, but more tender and succulent when cooked a little longer).

    Pouring marinade over chicken before baking in the oven

    Serving Suggestions

    You have so many options for serving this chicken! It’s perfect with sautéed broccoli and plain steamed rice. I love it for topping salads, served next to roasted potatoes, with sweet potato fries, and so much more.

    For more of a cookout-style meal, consider summery sides like potato salad, creamy pasta salad, or coleslaw. Or, for a fall-ish meal, add some roasted butternut squash, mashed sweet potatoes, or even comforting macaroni and cheese.

    More of Our Favorite Marinades

    Honey Mustard Chicken

    Honey Mustard Chicken

    • PREP
    • COOK
    • TOTAL

    Our easy honey mustard chicken marinade is the secret to juicy, tender, and flavorful chicken. We use chicken thighs in our photos, but this recipe works for all cuts of chicken! To cook them, we recommend using a grill pan to add some grill marks and color, then transferring the chicken, covered with the marinade, to the oven to finish cooking. We are reusing the marinade in this case, but since you will bake the chicken for 20+ minutes, it should reach a safe temperature (165°F).

    5 Servings

    You Will Need

    6 tablespoons honey (125g)

    ¼ cup Dijon mustard (65g)

    ¼ cup mayonnaise (57g)

    1 lemon, juiced

    6 garlic cloves, minced, about 2 tablespoons

    2 teaspoons dried oregano or 2 tablespoons chopped fresh oregano

    1 teaspoon fine sea salt

    ¾ teaspoon fresh ground black pepper

    2 pounds boneless, skinless chicken thighs (907g)

    1 tablespoon avocado oil or olive oil, or more as needed

    Directions

    • Marinate
    • 1Make marinade: Whisk the honey, mustard, mayonnaise, juice from 1 lemon, minced garlic, oregano, salt, and pepper in a large nonreactive bowl (such as a glass or stainless-steel bowl).

      2Marinate the chicken: Add the chicken and toss to coat evenly. Refrigerate, covered, for at least 4 hours and up to overnight.

    • Cook the Chicken
    • 1Prep: Preheat the oven to 375°F (190°C) and prepare a parchment-lined baking sheet.

      2Start in a grill pan: Heat a grill pan over medium heat. Add a bit of oil, then place the chicken into the pan. Cook for 2 to 3 minutes on each side until grill marks appear, but do not cook until the center is cooked through. Watch the heat during this step and turn it down if the honey starts to get too dark.

      3Finish in the oven: Transfer the chicken to the prepared baking sheet and spoon any remaining marinade from the bowl over it. Bake until an internal thermometer inserted into the thickest part of the chicken reads 165°F (73°C), 20 to 30 minutes, depending on the thickness of your chicken. Note that 165°F (73°C) is for safety, but if you are cooking chicken thighs, continue to cook them to 175°F (79°C) to 180°F (82°C) for more tender thighs. Rest for 5 minutes and serve.

    Adam and Joanne’s Tips

    • Alternatives for cooking the chicken: You can grill, bake, or cook the chicken in a skillet or grill pan. My favorite option is to sear the outside for color and finish in the oven. Since honey is in the marinade, it will darken quite a bit so watch for burning when you sear your chicken. This is why we love the grill pan. You’ll get dark grill marks where the honey takes on color, but it won’t be completely blackened over the entire piece of chicken. You can skip the grill pan and go directly to the oven. You will still get a little color. If you use an outdoor grill, use our grilled chicken recipe for tips.
    • The nutrition facts provided below are estimates. We assumed chicken thighs.

    Nutrition Per Serving
    Serving Size
    1 of 5 servings, about 5 ounces
    /
    Calories
    417
    /
    Total Fat
    18.6g
    /
    Saturated Fat
    3.6g
    /
    Cholesterol
    175.1mg
    /
    Sodium
    1021.1mg
    /
    Carbohydrate
    23.3g
    /
    Dietary Fiber
    0.4g
    /
    Total Sugars
    21.2g
    /
    Protein
    36.2g


    AUTHOR:

    Joanne Gallagher

    Source link

  • Tofu Poke Bowl

    Tofu Poke Bowl

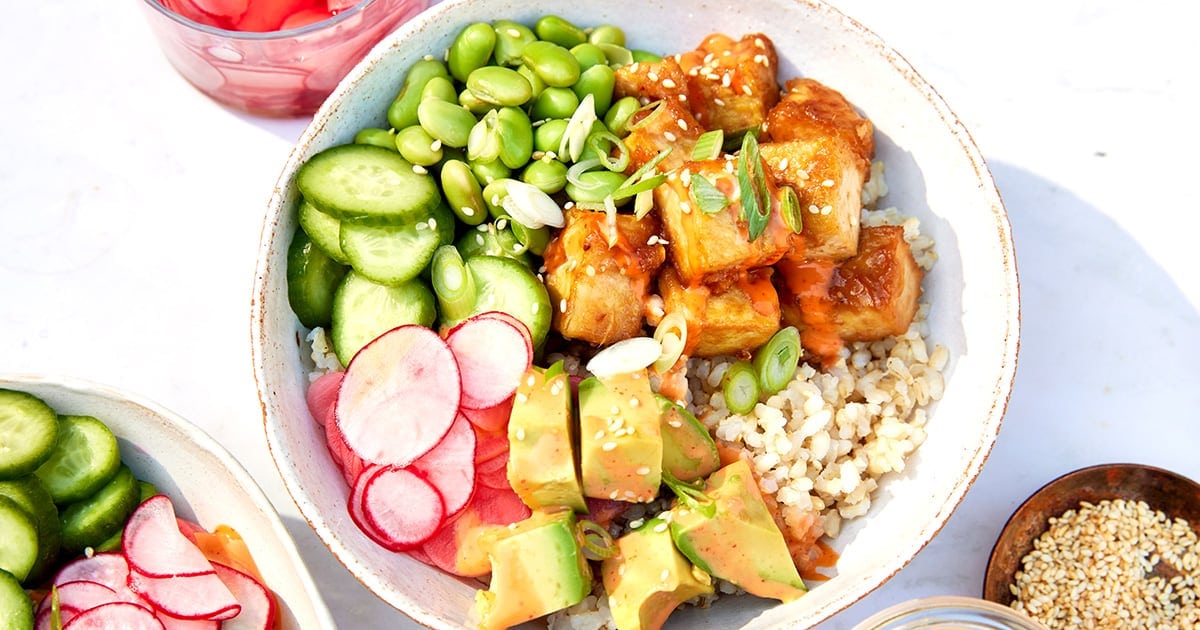
    These tofu poke bowls are fresh, satisfying, ready in about 35 minutes, and honestly pretty to look at. The miso-glazed tofu is the real star here: golden-edged, a little sticky, and full of that deep soy-ginger-sesame flavor that makes you want to eat it straight out of the pan before it even makes it to the bowl.


    Jump to: ℹ️ Overview | 🛒 Ingredients | 📷 How To Make | 📹 Watch The Video | 👩‍🍳 Recipe Tips | 🥗 Serving Suggestions | 📝Full Recipe Card | 🍽 More Recipes You’ll Love


    At A Glance

    • ⏱ Ready In: 35 minutes (plus 15–20 minutes for pickling radish)
    • 🍽 Serves: 4
    • 🌱 Diet: Vegetarian, vegan-friendly (use plant-based mayo), gluten-free friendly (use GF soy sauce/tamari)
    • 💪 Nutrition Highlights: High in plant-based protein and fiber; good source of healthy fats from avocado and sesame
    • 🥕 Main Ingredients: Miso-glazed tofu, brown rice, pickled radish, edamame, avocado, spicy mayo
    • 🔥 Flavor Profile: Savory, umami-rich, a little sweet and spicy, with a fresh, tangy finish
    • 🧊 Meal-Prep Friendly: Tofu, rice, radish, and sauce all keep separately in the fridge for up to 4 days (rice max 48 hours — freeze extra portions in zip-lock bags or use pre-cooked rice pouches)
    • 🥣 Best Served With: A squeeze of fresh lime just before eating — it wakes the whole bowl up

    This tofu poke bowl is one of my favorite vegetarian weeknight meals — fresh, filling, and ready in about 35 minutes. The miso-glazed tofu is the real star: golden-edged, a little sticky, and full of deep soy-ginger-sesame flavor. Around it, quick-pickled radish, creamy avocado, edamame, and cucumber, finished with a drizzle of sweet-spicy mayo that pulls everything together.

    What I love most about this recipe is how genuinely well it works for meal prep — cook the tofu and rice on Sunday, pickle the radish, mix the sauce, and you’ve got lunches or dinners sorted for most of the week with almost no effort at assembly. It’s vegetarian, naturally gluten-free with a small swap, and vegan-friendly too — and honestly, even meat-eaters in my life have come back for seconds.

    👩‍🍳 You might also like these recipes: easy and customizable classic poke bowl recipe, and for more tofu ideas, try this crispy tofu rice bowl with honey garlic soy glaze, or the crispy glazed baked tofu, or coconut tofu curry or this Asian tofu salad with cucumber and edamame beans.

    What You’ll Need

    Here is what you’ll need for these tofu poke bowls. Find the full measurements in the recipe card below.

    For the quick-pickled radish:

    • Radishes — sliced thin, they pickle in just 15–20 minutes and add a bright, tangy crunch that cuts through the richness of the tofu and mayo. You can swap these for thinly sliced cucumber, carrot, or cabbage.
    • Rice vinegar — milder and slightly sweet, perfect for quick pickling. Apple cider vinegar works in a pinch.
    • Maple syrup — balances the vinegar’s sharpness. Sugar works just as well.

    For the brown rice:

    • Brown rice — nutty, a little chewy, and it holds up well in meal prep. White rice or quinoa works perfectly, too, if that’s what you have. Short on time? Pre-cooked rice pouches are your best friend here.

    For the miso-glazed tofu:

    • Extra-firm tofu — you need the firmest tofu you can find so it holds its shape in the pan and gets those golden edges. Soft or silken tofu will not work here.
    • Cornflour (cornstarch) — the secret to those lightly crisp edges before the glaze goes on. Just a light coating does the job.
    • White miso paste — adds deep, savory umami without being too salty. Red miso works but is more intense.
    • Soy sauce — use regular, reduced-sodium, or tamari for a gluten-free version.
    • Maple syrup or honey — gives the glaze that sticky, caramelized quality. Agave works for a fully vegan version.
    • Fresh ginger and garlic — freshly grated here makes a real difference to the depth of flavor; don’t swap for powdered.
    • Sesame oil — just a teaspoon, added last, for that nutty, toasty finish.

    For the sweet & spicy mayo drizzle:

    • Mayonnaise — light mayo keeps it from feeling too heavy. Use vegan mayo to make this fully plant-based.
    • Sweet chili sauce + sriracha — this combo gives you that sweet-heat balance. Adjust the sriracha to your comfort level.
    • Lime juice — optional but highly recommended; it brightens the whole sauce.

    Fresh and crunchy toppings:

    • Edamame — packed with plant-based protein and fiber, they add a satisfying bite.
    • Baby cucumbers — fresh and hydrating, they balance the richness of the bowl.
    • Avocado — creamy and filling; add it just before serving so it doesn’t go brown.
    • Green onions and toasted sesame seeds — for garnish, crunch, and a little extra nuttiness.

    Recipe Tips

    • Press your tofu properly. The drier the tofu, the crispier it gets. Wrap the block in a clean tea towel or a few layers of kitchen paper and press it under something heavy for at least 10 minutes — a cast iron pan works well. If you have time, do this ahead.
    • Don’t skip the cornflour. It’s a light coating, but it makes a real difference to how the tofu edges crisp up before the glaze goes on.
    • Watch the glaze. Once you pour it over the tofu, it can go from sticky and perfect to burned in under a minute. Keep the heat medium and keep stirring.
    • Meal prep tips. All the components store separately in the fridge for 3–4 days: tofu, pickled radish, spicy mayo, and fresh toppings. Rice is best within 48 hours max — freeze portions in zip-lock bags if needed, or use pre-cooked pouches for easy single servings. Slice and add avocado fresh each time.
    • Swap the rice. White rice or quinoa works just as well as brown rice. For a lower-carb version, try cauliflower rice or a simple bed of shredded lettuce.
    • Swap the radish. If you can’t find radish, thinly sliced cucumber, carrot, or even cabbage all work well for the pickled element.
    • Make it vegan. Use plant-based mayonnaise for the drizzle and maple syrup (rather than honey) in the glaze — the rest of the recipe is already plant-based.
    • Make it gluten-free. Use tamari or a certified gluten-free soy sauce, and check that all other ingredients (miso, sweet chili sauce) are also gluten-free.
    • Storage. Assembled bowls don’t store well. Keep everything separate and assemble as needed.

    How To Make Tofu Poke Bowls Step-By-Step Photos

    Find the full recipe and nutritional information below. Here are some handy step-by-step photos for how to make tofu poke bowls.

    • Pickle the radish first. Toss sliced radish with rice vinegar, maple syrup, water, and salt. Set aside for at least 15–20 minutes while you prep everything else. This can be done hours ahead.
    • Cook the rice. Follow your packet instructions (usually 25–30 minutes on the stovetop), or use a pressure cooker to speed things up. Fluff with a fork and let it cool slightly before assembling. Or use pre-cooked pouches — no shame in that at all.
    • Prep and cook the tofu. Slice the pressed tofu into 2cm cubes and pat dry with kitchen paper. Toss with cornflour and a little salt. Pan-fry in oil over medium-high heat for 6–8 minutes, turning occasionally, until golden on most sides.
    • Make the glaze. While the tofu cooks, whisk together the miso paste, soy sauce, rice vinegar, maple syrup, ginger, garlic, and sesame oil.
    • Glaze the tofu. Pour the sauce over the golden tofu and toss to coat. Cook for another 1–2 minutes, stirring a few times, until the sauce turns sticky and glaze-like. Take it off the heat as soon as it looks lacquered — it catches quickly.
    • Mix the mayo sauce. Whisk together mayo, sweet chili sauce, sriracha, water, and lime juice until smooth and just pourable. Taste and adjust heat.
    • Assemble. Divide rice between bowls. Add tofu slightly off-centre. Arrange edamame, cucumber, avocado, and pickled radish around it. Scatter green onions, drizzle with spicy mayo, and finish with toasted sesame seeds. Squeeze of lime optional, but really lovely.

    Watch The Video

    Serving Suggestions

    These bowls are a complete meal on their own — rice, protein, healthy fats, and plenty of vegetables all in one bowl. That said, a simple miso soup on the side is a lovely addition if you want something warming, especially in cooler months.

    If you’re serving a crowd, lay all the components out separately and let people assemble their own bowls — it’s a fun, interactive dinner that works really well for casual entertaining. A good squeeze of lime over the whole thing just before eating is one of those small touches that makes everything taste brighter and fresher, so I always have one ready on the side.

    💬 If you’ve tried this tofu poke bowl or any other recipe on the blog then don’t forget to rate the recipe and let me know how you got on in the comments below, I love hearing from you! You can also FOLLOW ME on Instagram, Facebook, Pinterest, YouTube, and or sign up to my Newsletter to see more of my delicious food.

    Want to Save This Recipe?

    Enter your email & I’ll send it to your inbox. Plus, get great new recipes from me every week!

    By submitting this form, you consent to receive emails from Cooked & Loved

    Fresh, protein-packed, and bursting with flavor — this miso-glazed tofu poke bowl with pickled radish, edamame, avocado, and a sweet-spicy mayo drizzle is the kind of bowl recipe you’ll want to make again and again. Find step-by-step photos below and more recipe tips above.

    Sweet & Spicy Mayo Drizzle

    • Pickle the radish. Toss the sliced radish with rice vinegar, maple syrup, water, and salt in a small bowl. Set aside for at least 15–20 minutes while you prep everything else. This can be done hours ahead of time.

    • Cook the rice. Rinse the rice, then combine it with water and salt in a saucepan. Bring to a boil, reduce the heat, cover, and simmer for 30-40 minutes until cooked through to your liking. Fluff with a fork and set aside. Alternatively, use pre-cooked brown rice pouches for a quick shortcut.

    • Prep the tofu. Slice the tofu into 1–2 cm thick slices and press down firmly with kitchen paper to absorb moisture. Cut into cubes. Toss in a bowl with cornflour and salt until lightly coated.

    • Pan-fry the tofu. Heat 1–2 tablespoons oil in a large non-stick skillet over medium-high heat. Add tofu in a single layer and cook for 6–8 minutes, turning occasionally, until golden on most sides.

    • Make the glaze. While the tofu cooks, whisk together the miso paste, soy sauce, rice vinegar, maple syrup, ginger, garlic, and sesame oil in a small bowl.

    • Glaze the tofu. Pour the glaze evenly over the golden tofu and toss to coat. Cook for another 1–2 minutes, stirring frequently, until the sauce turns sticky and glaze-like. Remove from heat immediately.

    • Mix the mayo drizzle. Whisk together the mayonnaise, sweet chili sauce, sriracha, water, and lime juice until smooth and just pourable. Taste and adjust heat if needed.

    • Assemble the bowls. Divide the rice between bowls. Add a portion of tofu slightly off-center. Arrange edamame, cucumber, avocado, and pickled radish in sections around the tofu. Scatter green onions, drizzle generously with the spicy mayo, and finish with toasted sesame seeds. Squeeze lime over the bowl just before eating.

    Important Ingredient Tips: Use extra-firm tofu only — anything softer won’t hold up in the pan. Press it well before cooking; the drier it is, the crispier it’ll get. White miso gives a mild, sweet umami flavor — red miso is more intense if that’s what you have. Use tamari in place of soy sauce for a certified gluten-free version.
    Key Recipe Tips: Don’t skip the cornflour — it gives the tofu edges that light crispiness before the glaze goes on. Watch the glaze once it hits the pan; it can catch quickly. Stir frequently and take off the heat as soon as it looks sticky and lacquered.
    Storage Tips: Keep all components stored separately in airtight containers in the fridge. Miso-glazed tofu keeps for up to 4 days. Pickled radish and mayo drizzle keep for up to 4 days. Rice is best within 48 hours — freeze extra portions in zip-lock bags or use pre-cooked pouches. Add avocado fresh at assembly.
    Make-Ahead Tips: This recipe is excellent for meal prep. Cook the tofu, rice, and pickled radish ahead of time and store separately. The spicy mayo can be mixed in advance and kept covered in the fridge for up to 4 days. Assemble bowls when ready to eat and add avocado just before serving.
    FAQs:
    Can I use a different protein instead of tofu? Yes — this glaze works beautifully with tempeh, chickpeas, or even salmon if you’re not vegetarian. Adjust cooking time accordingly.
    Can I use white rice instead of brown rice? Absolutely. White rice, sushi rice, or quinoa all work well here. Pre-cooked rice pouches are a great shortcut.
    What can I use instead of radish? Thinly sliced cucumber, carrot, or shredded cabbage all work well in the pickled element if you can’t find radish.
    How do I make this recipe vegan? Use plant-based mayonnaise for the drizzle and maple syrup (rather than honey) in the glaze — everything else is already vegan.
    How do I make it gluten-free? Swap soy sauce for tamari or a certified gluten-free soy sauce. Double-check your miso paste and sweet chili sauce labels too, as these can sometimes contain gluten.
    Do I need to press the tofu? Yes — this step really matters. The drier the tofu, the better it crisps in the pan. Even 10 minutes under a heavy pan makes a noticeable difference.

    Calories: 625kcal | Carbohydrates: 87g | Protein: 22g | Fat: 22g | Saturated Fat: 3g | Polyunsaturated Fat: 6g | Monounsaturated Fat: 10g | Trans Fat: 0.01g | Cholesterol: 2mg | Sodium: 1737mg | Potassium: 1086mg | Fiber: 9g | Sugar: 14g | Vitamin A: 272IU | Vitamin C: 14mg | Calcium: 175mg | Iron: 5mg

    Keywords: tofu poke bowl, vegetarian poke bowl, miso glazed tofu, tofu bowl recipe, vegan poke bowl, crispy tofu poke bowl

    More Recipes You’ll Love


    Source link

  • Beef Bulgogi Recipe (Korean BBQ Beef)

    Beef Bulgogi Recipe (Korean BBQ Beef)

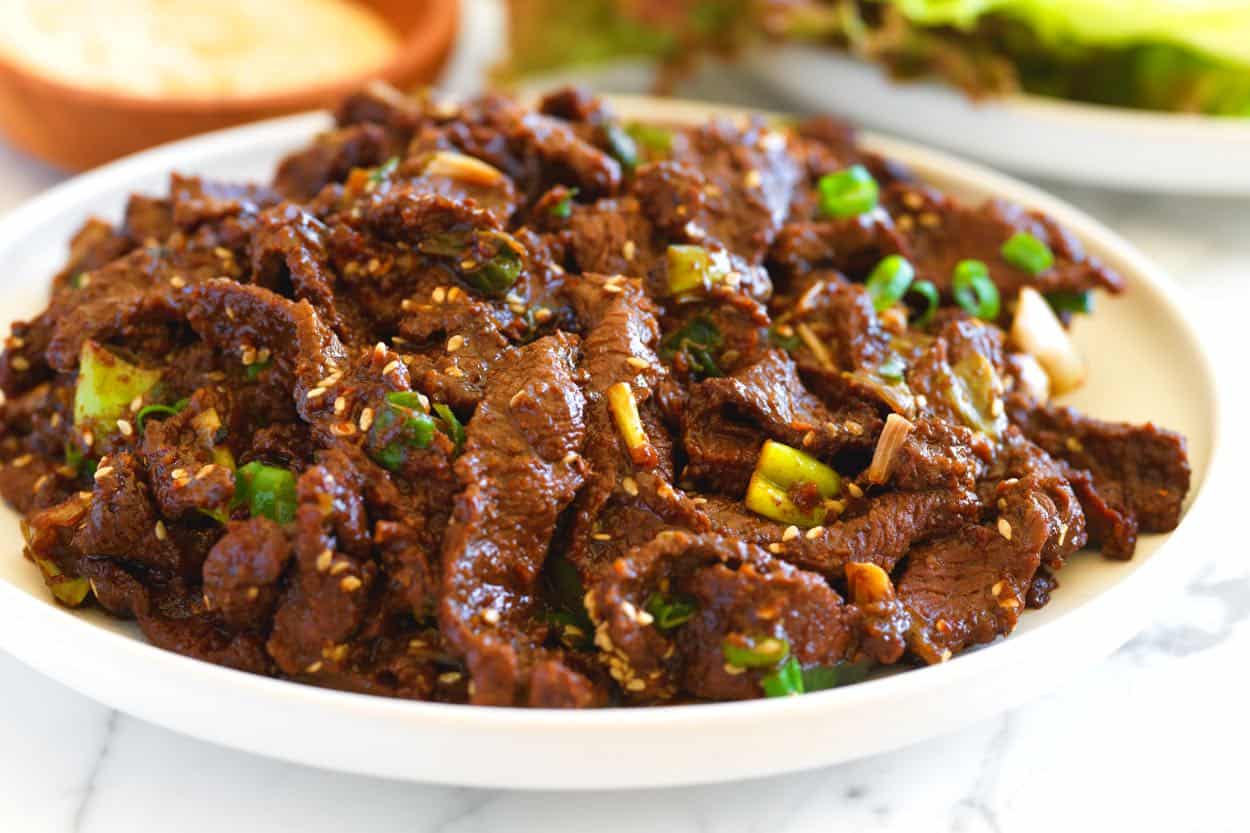
    With our bulgogi recipe, you can easily make incredible Korean barbecue beef at home. Thanks to our bulgogi marinade, the beef turns out perfectly sweet, savory, and melt-in-your-mouth tender.

    Beef Bulgogi (Korean BBQ Beef)

    Our love for Korean food began years ago when Adam’s best friend married a Korean-American who proudly introduced us to his heritage. He cooked for us and took us to authentic restaurants. We fell in love. In the same way we consider pho to be a gateway to Vietnamese food, bulgogi is the perfect entry point for anyone looking to explore Korean cuisine.

    If you’ve not had it before, bulgogi is thinly sliced beef that’s been marinated in a savory-sweet soy-based sauce. Then, it’s quickly seared or grilled (it’s truly delicious!). This easy recipe is our go-to when we want to bring the flavors of a Korean barbecue into our own kitchen, and luckily, it’s completely doable for you, too! For more, see our Korean short ribs (Galbi)

    Key Ingredients

    • Beef: You want thinly sliced beef, which, after marinating, cooks quickly and turns out really tender. Top sirloin, ribeye, or really any prime beef cut works well.
    • Soy Sauce: This is the base of our bulgogi sauce. I like using a low-sodium soy sauce and sometimes substitute low-sodium tamari. Both work well.
    • Rice Wine Vinegar: Look for unsweetened rice vinegar (usually with a green bottle cap or label).
    • Sesame Oil: Toasted sesame oil adds a lovely, toasty, rich flavor to the beef.
    • Brown Sugar and Honey: We really love both for this. You can use either one, but the combination makes our beef taste more interesting and complex. The honey also caramelizes beautifully.
    • Gochugaru and Black Pepper: This brings a little heat – not much though! Bulgogi usually isn’t very spicy. If you are unfamiliar, gochugaru is Korean chili pepper and is sold as ground red pepper, not to be confused with gochujang, which is a paste. We use gochugaru when making homemade kimchi.
    • Garlic and Ginger: I always use fresh garlic. For the ginger, you can buy ginger root, or some stores sell ginger puree (either refrigerated or frozen).
    • Pear: This is the “secret” ingredient. It adds sweetness and contains natural enzymes that tenderize the beef. Look for Asian, Korean, or Nashi pears. If you can’t find them, a ripe Bosc pear or Anjou pear is a good substitute.
    • Sesame Seeds and Green Onions: These provide texture, color, and a bit of freshness at the very end.
    • Lettuce, Rice, and Sides: To make it a full meal, serve with steamed rice and lettuce leaves for wrapping. Don’t forget the banchan (sides) like kimchi or spicy cucumber salad, and ssamjang (a savory dipping sauce that ties everything together).

    Find the full recipe with measurements below.

    Korean Beef Bulgogi

    How to Make Bulgogi at Home

    Tip 1: Thinly slice the beef. The reason bulgogi is so hard to stop eating is that it turns out so wonderfully tender. That’s thanks to the marinade and to the fact that we start with thin slices of beef.

    The best trick for getting perfectly thin slices is to place your beef in the freezer for 20 to 30 minutes to firm up a bit. Then, remove it, set it onto your cutting board, and make thin slices across the grain. Slicing across the grain breaks up tough muscle fibers, helping the beef turn out more tender. You don’t need to be 100% perfect; the slices can be ragged and varying in size.

    Tip 2: Use a food processor to make the marinade. If you don’t have a food processor, you can make this marinade by hand, but a food processor makes really quick work of it. I just toss everything in and hit pulse until mostly smooth. If you’re doing it by hand, you’ll finely grate the garlic and ginger with a microplane, then grate the pear with a box grater.

    Tip 3: Marinate for at least 4 hours. Whenever I marinate beef, I usually do it overnight, which would be perfect for this recipe. That said, if you’re sitting there in the morning and want bulgogi for dinner, you can absolutely make that happen. Four hours gives the pear and other bulgogi sauce ingredients enough time to flavor and tenderize the beef.

    Marinating thinly sliced beef in bulgogi marinade

    Tip 4: Cook it quickly. At a Korean barbecue restaurant, there’s often a grill right in the middle of the table where you can quickly sear/grill the beef. At home, I use a heavy-bottomed pan (cast-iron is ideal) over medium-high heat, add a little oil, then cook the beef in batches so there’s one layer of beef in the pan at a time (stacking lots in all at once will steam the beef rather than caramelize and brown the beef).

    Use tongs to pull the marinated beef out of the marinade, then cook. Some marinade will stick to the outside of the beef, but don’t pour any extra into the skillet. You want to sear and caramelize the beef in batches rather than boiling it in the sauce.

    Cooking beef bulgogi in a skillet

    My Favorite Way to Serve Bulgogi

    The simplest way to serve this is over rice, but I really love making lettuce wraps. Take a piece of lettuce (red leaf or butter lettuce works really well), add a small spoonful of cooked rice, and place a piece of the hot bulgogi on top. Finish with some kimchi and ssamjang (if you have them on hand), fold it up, and enjoy. It’s super flavorful, has a wonderful combination of textures, and really just makes you want to go in for more! This beef also makes incredible tacos (not traditional, but delicious nonetheless!).

    More Delicious Beef Recipes

    Beef Bulgogi

    Beef Bulgogi (Korean BBQ Beef)

    • PREP
    • COOK
    • TOTAL

    Our Korean-inspired bulgogi recipe is absolutely doable for you to make at home. The secret to that mouthwatering, tender beef is to thinly slice it across the grain to break up the connective tissue, then marinate it in our savory-sweet soy-based marinade for at least 4 hours (overnight is even better).

    This is lovely over steamed rice, added to salads, turned into tacos, or made into lettuce wraps. We highly recommend serving a side of kimchi and ssamjang. You can buy kimchi or make it using our kimchi recipe. Ssamjang is a spicy dipping sauce sold near gochujang in Korean markets or more internationally friendly grocery stores. You can also find it online.

    6 Servings

    You Will Need

    2 pounds top sirloin or ribeye (907g)

    ½ cup low-sodium soy sauce or tamari (118ml)

    2 tablespoons brown sugar

    2 tablespoons rice wine vinegar

    1 tablespoon sesame oil

    3 tablespoons honey

    1 teaspoon ground black pepper

    ¾ teaspoon gochugaru (Korean chili powder)

    4 cloves garlic, smashed

    1 ½ inch piece fresh ginger, peeled and roughly chopped into ¼ inch pieces

    1 Asian pear, peeled, cored, and cut into 1-inch pieces

    1 bunch green onions, trimmed and thinly sliced

    1 tablespoon sesame seeds

    3 tablespoons high-heat cooking oil, like avocado oil

    Lettuce leaves, steamed rice, kimchi, and ssamjang (Korean dipping sauce), optional for serving

    Directions

      1Partially freeze the beef: Place the beef in the freezer for 20 to 30 minutes to firm up. This makes thinly slicing it much easier. Do not leave it much longer, or it will become too hard to slice safely.

      2Make the marinade: While the beef chills, prepare the marinade. Add the soy sauce, brown sugar, rice wine vinegar, sesame oil, honey, black pepper, gochugaru, smashed garlic cloves, roughly chopped ginger, and chopped pear to the bowl of a food processor. Pulse until you no longer see large bits of garlic, ginger, or pear.

      3Slice the beef: Remove the beef from the freezer and thinly slice across the grain, no more than ¼ inch thick. If some are thinner or more scraggly, it is fine.

      4Marinate: Add the sliced beef to a nonreactive bowl (glass or stainless steel) and pour the marinade over it. Toss well, then press a sheet of plastic wrap or parchment paper directly onto the meat to prevent oxidation. Cover the bowl with foil or more plastic wrap and refrigerate for at least 4 hours and up to overnight.

      5Cook: Heat a wide, heavy-bottomed skillet over medium-high heat with a tablespoon of oil. Working in batches, lift the beef from the marinade, shaking off any excess liquid, and place it in the pan in a single layer. Sear without moving for 1 to 2 minutes, then flip and cook until caramelized and charred around the edges. Transfer to a plate and repeat with the remaining beef.

      6To finish: Once all the beef is cooked, return it all to the pan. Add the green onions and sesame seeds, tossing for about 30 seconds until the onions just begin to wilt. Serve immediately.

    Adam and Joanne’s Tips

    • Storing: Keep leftovers in an airtight container in the fridge for up to 4 days. Reheat in a skillet over medium heat.
    • No food processor: A food processor makes the marinade come together in seconds. If you don’t have one, just use a microplane for the garlic and ginger and a box grater for the pear.
    • Pear substitutes: If you cannot find an Asian pear (sometimes called Korean pear or Nashi pear), substitute a ripe Bosc pear or Anjou pear.
    • Leftover marinade: Since the marinade has touched raw meat, you either need to discard it or cook it thoroughly. Pour the remaining marinade into a small saucepan. Bring it to a rolling boil. You must keep it at a boil for 2 to 5 minutes (this kills any bacteria from the raw meat and reduces the liquid into a syrupy bulgogi sauce). You are looking for the sauce to reach 165°F (74°C).
    • The nutrition facts provided are estimates.

    Nutrition Per Serving
    Serving Size
    1/6 of the recipe
    /
    Calories
    356
    /
    Total Fat
    15.5g
    /
    Saturated Fat
    3.4g
    /
    Cholesterol
    89.4mg
    /
    Sodium
    650.2mg
    /
    Total Carbohydrate
    18.2g
    /
    Dietary Fiber
    1.3g
    /
    Total Sugars
    14.2g
    /
    Protein
    35.9g


    AUTHOR:

    Joanne Gallagher

    Source link

  • 35 Best Halibut Recipes

    35 Best Halibut Recipes

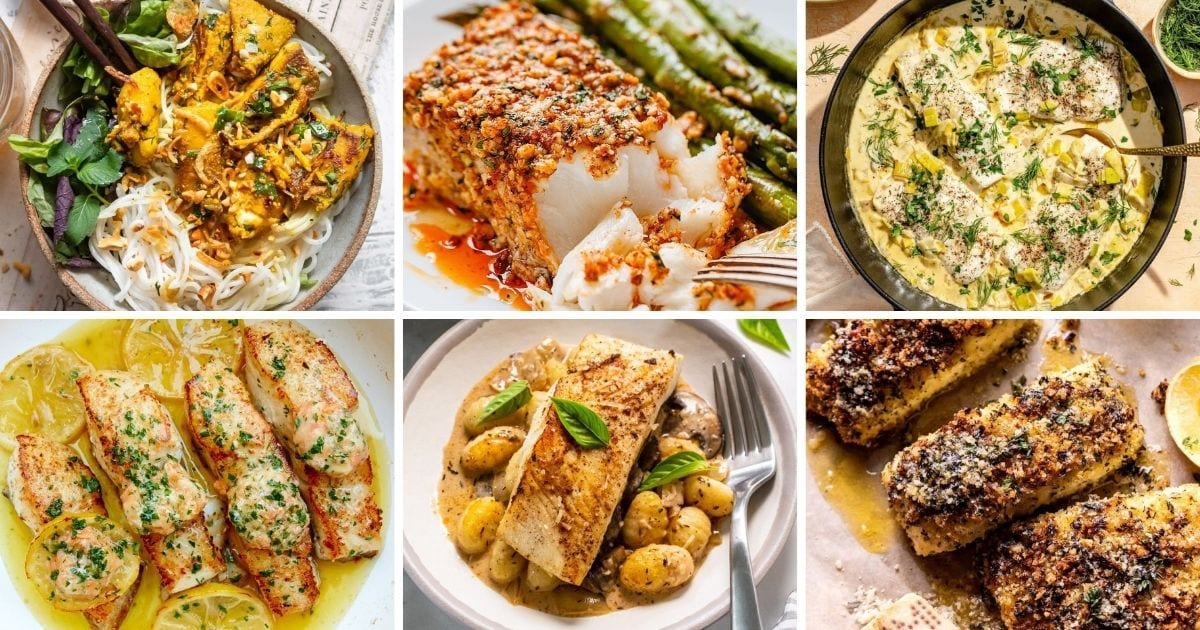
    If you’re looking for fresh, easy, and seriously delicious halibut recipes, you’re in the right place. Whether you want flaky baked halibut, smoky grilled fillets, crispy air fryer dinners, or fish tacos piled high with toppings, this roundup has plenty of dinner ideas worth bookmarking.


    Jump to: ℹ️ Overview | 🐟 Baked |🔥 Grilled | 🍳 Pan-Seared & Skillet | 🍽️ Air Fryer | 🌮 Tacos, Bowls & More Dinner Ideas


    Halibut is the kind of fish that quietly makes everyone at the table happy. It’s mild, buttery, flaky, and sturdy enough to handle just about any cooking method you throw at it. Bake it with lemon and garlic, grill it with smoky spices, pan-sear it until golden, or tuck it into tacos with crunchy slaw and a squeeze of lime — it somehow works every single time.

    That’s why people love cooking with it. It feels restaurant-worthy without requiring restaurant-level effort. Even better, halibut cooks quickly, pairs beautifully with bold flavors, and fits everything from healthy weeknight dinners to summer cookouts and cozy comfort meals.

    In this roundup, you will find:

    • Halibut tacos, bowls, chowders, and lighter dinner ideas
    • Baked halibut recipes with buttery sauces and crispy toppings
    • Grilled halibut dishes perfect for summer dinners
    • Pan-seared halibut with golden crusts
    • Air fryer halibut recipes that are fast and foolproof

    Baked Halibut Recipes

    Baked halibut recipes are perfect when you want an easy dinner with minimal fuss and maximum flavor. From buttery lemon garlic fillets to crispy crusted halibut, these oven-baked dinners are simple enough for weeknights but still feel special.

    Easy Baked Halibut

    This baked halibut is simple, quick, and perfect for busy nights when you still want something fresh and satisfying. The light seasoning really lets the flaky fish shine. Recipe from The Big Man’s World.

    Baked Halibut with Herbed Mayonnaise

    The herbed mayonnaise keeps the halibut extra moist while adding loads of fresh flavor without much effort. This is one of those recipes that feels a little fancy but is surprisingly easy to pull off. Recipe from Downshiftology.

    Simple Baked Halibut

    This is the kind of reliable halibut recipe you’ll come back to again and again. It’s light, healthy, and easy enough for weeknights while still feeling special. Recipe from Kit’s Kitchen.

    Garlic Butter Baked Halibut

    Garlic butter and flaky white fish are always a winning combination, and this recipe keeps things wonderfully simple. Serve it with rice or roasted vegetables for an easy dinner. Recipe from Eatwell101.

    Baked Halibut with Tomatoes

    The juicy tomatoes add freshness and a little sweetness that works so well with mild halibut. This one feels light and summery without requiring much prep. Recipe from Eatwell101.


    Grilled Halibut Recipes

    These grilled halibut recipes are made for warm-weather dinners and backyard cookouts. Halibut holds up beautifully on the grill, soaking up smoky flavors while staying flaky and tender inside.

    Grilled Halibut

    This grilled halibut recipe keeps things clean, simple, and packed with smoky flavor from the grill. It’s a great go-to when you want a healthy dinner that still feels satisfying. Recipe from Wholesome Yum.

    Easy Grilled Halibut

    Perfectly grilled halibut with simple seasoning is hard to beat during grilling season. This recipe keeps the focus on the fish while adding just enough flavor to make it memorable. Recipe from Wild Game & Fish.

    Grilled Halibut Skewers

    Halibut skewers are such a fun way to serve fish, especially for summer cookouts. They cook quickly and pick up plenty of smoky flavor from the grill. Recipe from Parsley & Parm.

    Halibut Pesto Kabobs

    The pesto adds a fresh herby flavor that pairs beautifully with grilled halibut. These kabobs feel colorful, family-friendly, and perfect for warm evenings outside. Recipe from Weelicious.


    Pan-Seared & Skillet Halibut Recipes

    If you love crispy edges and golden crusts, these pan-seared halibut recipes deliver. A hot skillet, a little butter, and a few bold flavors go a long way here. Fast dinner, big payoff.

    Garlic Butter Halibut

    This garlic butter halibut is quick, flavorful, and ideal for a fast weeknight dinner. The buttery sauce keeps the fish tender and pairs with just about any side dish. Recipe from Primavera Kitchen.

    Pan-Seared Halibut

    This recipe gives you beautifully golden halibut with minimal ingredients and fuss. It’s a great reminder that good seafood doesn’t need much to taste amazing. Recipe from Taste and See.

    Perfect Pan-Seared Halibut

    Crispy edges, flaky fish, and a quick stovetop method make this recipe especially appealing for busy nights. It’s straightforward but delivers really great texture. Recipe from Craving Tasty.


    Air Fryer Halibut Recipes

    Air fryer halibut recipes are quick, easy, and surprisingly crispy. They’re perfect for busy nights when you want something lighter that still tastes like proper comfort food.

    Air Fryer Halibut

    The air fryer gives halibut a lightly crisp exterior while keeping the inside tender and flaky. This is such an easy option for quick weeknight dinners. Recipe from Platings and Pairings.

    Easy Air Fryer Halibut

    This recipe keeps things simple with fresh flavors and a fast cooking time. It’s a great reminder that seafood dinners don’t have to be complicated. Recipe from The Dizzy Cook.

    Air Fryer Halibut Cheeks

    Halibut cheeks are incredibly tender, and the air fryer makes them wonderfully crisp around the edges. This recipe is a fun way to try a less common cut of fish. Recipe from Life Currents.

    Air Fryer Halibut with Crispy Coating

    The crispy coating gives this halibut plenty of texture while the air fryer keeps things lighter than deep frying. It’s especially good when you’re craving comfort food without too much fuss. Recipe from JZ Eats.


    Halibut Tacos, Bowls & More Dinner Ideas

    These halibut dinner ideas go beyond the usual fillet situation. Think tacos, rice bowls, chowders, curries, sandwiches, and pasta dishes packed with fresh flavors and plenty of personality.

    Crispy Fish Sandwich

    Cooked & Loved recipe: This fish sandwich looks seriously satisfying with its crispy fish and fresh toppings tucked into a soft bun. It’s the kind of casual dinner everyone gets excited about.

    Ginger Soy Fish

    Ginger and soy sauce give this fish dish loads of savory flavor while still keeping it light and fresh. It’s quick enough for weeknights but tastes beautifully balanced. Recipe from Rasa Malaysia.

    Thai Baked Halibut

    This recipe brings bold Thai-inspired flavors to mild halibut in a really approachable way. It’s fresh, flavorful, and a nice change from more classic fish dinners. Recipe from Silk Road Recipes.

    Vietnamese Turmeric Fish

    Turmeric gives this fish recipe gorgeous color and warm flavor while keeping everything bright and fresh. It’s a really flavorful way to switch up your usual seafood routine. Recipe from Cooking Therapy.

    Easy Fish Tacos

    These fish tacos look fresh, crunchy, and perfect for an easy dinner everyone will happily dig into. Add your favorite toppings, and you’re set for taco night. Recipe from Billy Parisi.

    Nashville Hot Halibut Sandwich

    If you like a little heat, this Nashville hot halibut sandwich sounds seriously fun and packed with bold flavor. The crispy spicy fish paired with a sandwich format makes it extra crave-worthy. Recipe from Epicurious.


    Save These Best Halibut Recipes To Pinterest

    Source link

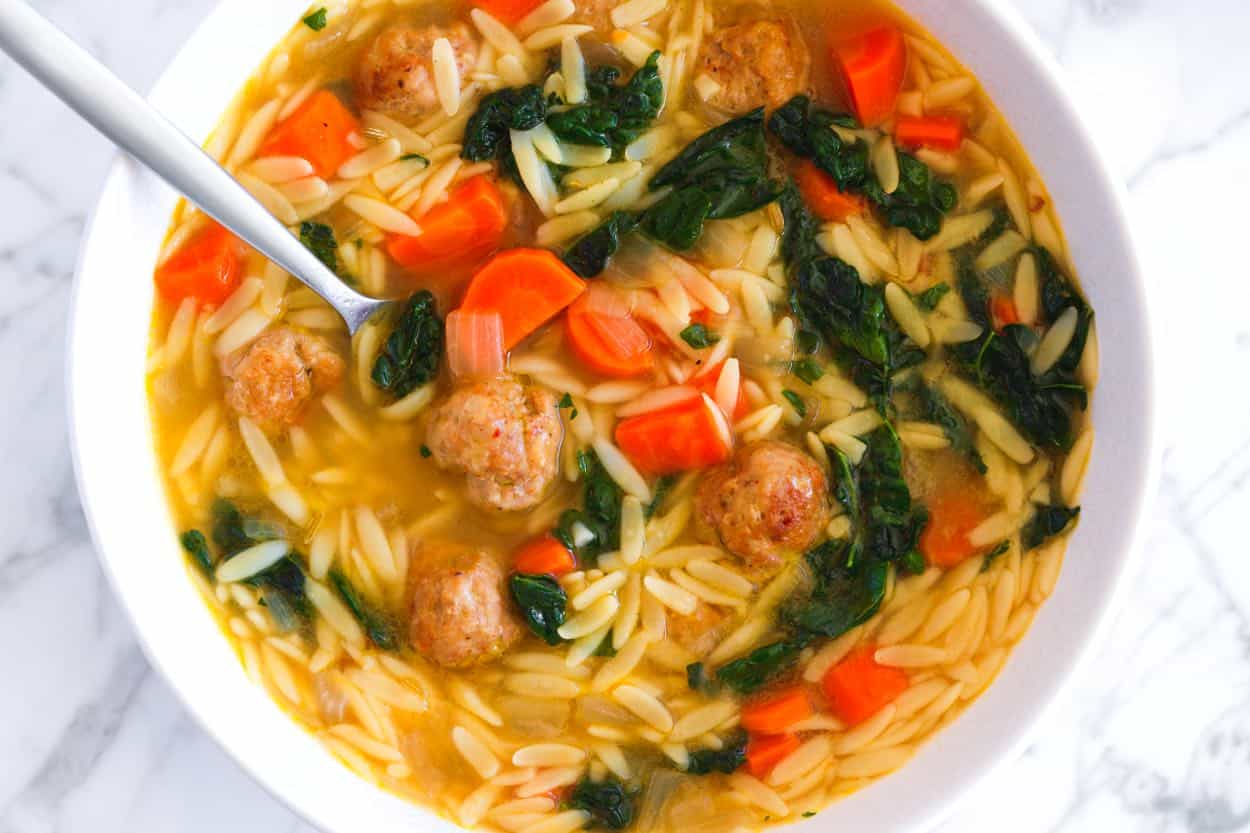
  • Turkey Meatball Soup with Orzo Recipe

    Turkey Meatball Soup with Orzo Recipe

    This light and savory turkey meatball soup recipe is made with tender mini meatballs, orzo, and fresh kale. It’s simple, nourishing, and just delicious.

    Turkey Meatball Soup

    I’m always in the mood for soup. They are comforting, usually one-pot recipes, and since we’re big on hearty soups, they are always satisfying. This turkey meatball soup hits all the right notes, and I am so happy we’ve added it to our ever-growing list of easy soup recipes.

    Thanks to the protein-packed meatballs and orzo, this soup stands entirely on its own, no sides needed. It’s also great for making ahead of time. Just keep in mind that the orzo will continue to absorb the broth as it sits. If you’re reheating it the next day, simply add a splash of extra broth to bring it back to that brothy soup consistency (or don’t, it’s still delicious!).

    Key Ingredients

    • Ground Turkey: For the best results, use ground dark meat or ground turkey that’s at least 7% fat. Any leaner and the meatballs will be dry and crumbly rather than juicy. Ground chicken or ground pork are great substitutes. In fact, I use a combination of chicken and pork in our popular Italian wedding soup recipe.
    • Spices: You’ll mix a little salt, black pepper, smoked paprika, and pepper flakes (I love gochugaru, but crushed red pepper flakes are fine) into the turkey to make the meatballs. Then, the soup has ground fennel and bay leaves. Both make our broth seriously tasty.
    • Onions, Carrots, and Garlic: We wanted this to be a weeknight-friendly soup, which means prep needs to be minimal. So, we keep the base simple with onion (yellow or sweet onion are great), carrots, and garlic.
    • Stock: Use a flavorful chicken or turkey stock. Store-bought is fine, just use something you enjoy. Bone broth is also great and will bump up the protein. For homemade, here’s our chicken stock recipe and here’s our bone broth recipe.
    • Orzo: Any small pasta shape will work, but our family loves orzo in soup. The starch in the pasta helps thicken the soup’s broth a bit, giving it a creamier texture without any added dairy.
    • Kale: We stir an entire bunch of kale into the broth right at the end. If kale is too hearty for you, spinach or cabbage are excellent alternatives.

    Find the full recipe with measurements below.

    How to Make Turkey Meatball Soup

    Tip 1: Make the meatballs. This recipe uses mini meatballs made with seasoned ground turkey, which we pinch off and roll into little balls. These aren’t like our classic meatballs or Italian meatballs, which have breadcrumbs and egg, but are simpler and turn out with an almost bouncy texture in the soup.

    To make them, mix the ground turkey with salt, pepper, smoked paprika, and a bit of pepper flakes. Then pinch off little bits of the meat (around 1/2 tablespoon’s worth), and roll into little balls.

    Tip 2: Brown the meatballs. To build flavor into the base of our soup and add a little color to our meatballs, you’ll brown them in olive oil before making the broth. You aren’t looking to cook them all the way through (that will happen later as the meatballs simmer in the soup). If you have a wide soup pot, you may fit them all in one go; otherwise, consider browning in batches (they take 5 to 7 minutes to brown).

    Browning turkey meatballs before making the soup

    Tip 3: Build the soup base. After browning, you’ll move the meatballs to a plate and set them aside. The pot will be left with some oil and browned, stuck bits at the bottom. This is where a lot of flavor lives, so toss in your onions, carrots, garlic, fennel, and bay leaves, then cook them until they begin to soften. The moisture from the onions will release, helping you scrape up the stuck bits from the bottom of the pan.

    Cooking onions, carrots, garlic, fennel, and bay leaves in the soup pot

    Tip 4: Simmer, but not for long. When the onions and carrots are beginning to turn tender, pour in the stock and add the meatballs back. The broth will taste a bit lackluster at this point, but after simmering the meatballs and adding the orzo later, it will transform into a lovely, savory broth. You’ll simmer for about 10 minutes.

    Tip 5: Add the pasta and cook just until tender. In goes the orzo. You’ll continue to simmer for 5 to 7 minutes (or until the orzo is tender). As it cooks in the soup, it releases flavor and some starch, which thickens the broth nicely, giving it a more luxurious mouthfeel.

    Tip 6: Finish with lots of kale. Once your orzo is tender, stir in lots of greens (that’s kale in our photos). Then, let the soup simmer a few more minutes so it wilts down and becomes tender. Don’t simmer too long, though, you want that bright green color!

    Stirring kale into turkey meatball soup with orzo

    Serving Suggestions

    This soup is fabulous right out of the pot, but if you want to make it even more delicious, consider grating some Parmigiano Reggiano or Pecorino Romano cheese over the top. It’s also lovely with a pop of lemon (I just squeeze a lemon wedge over my bowl).

    More Favorite Soup Recipes

    Turkey Meatball Soup

    Turkey Meatball Soup with Orzo

    • PREP
    • COOK
    • TOTAL

    This simple, hearty soup recipe made with mini turkey meatballs, orzo, and kale is fantastic. It’s my favorite kind of feel good food. When you’re shopping for the ground turkey, look for at least 7% fat, any leaner, and the meatballs will turn out dry and crumbly. I love this soup served with a generous dusting of parmesan cheese, but that’s totally optional.

    6 Servings (or 4 generous servings)

    You Will Need

    1 pound ground turkey, preferably ground dark meat with at least 7% fat (450g)

    1 teaspoon fine sea salt, plus more as needed

    ½ teaspoon fresh ground black pepper, plus more as needed

    ¾ teaspoon smoked paprika

    ¼ teaspoon gochugaru pepper flakes, Aleppo pepper flakes, or crushed red pepper flakes

    2 tablespoons olive oil, plus more as needed

    1 medium onion, chopped

    4 medium carrots, chopped

    1 teaspoon ground fennel

    4 cloves garlic, thinly sliced

    8 cups chicken stock (1.89L)

    2 bay leaves

    1 bunch lacinato kale, stems removed and leaves roughly chopped

    1 ¼ cup dried orzo (6oz or 170g)

    Finely grated Parmigiano Reggiano or Pecorino Romano, for serving, optional

    Directions

      1Make the meatballs: Add the ground turkey to a bowl with 1 teaspoon salt, ½ teaspoon black pepper, smoked paprika, and gochugaru. Mix well, then pinch off quarter-sized balls and roll into mini meatballs (you should get around 35).

      2Brown the meatballs: Heat the olive oil in a large pot over medium heat. Brown the meatballs in batches, cooking them in one layer so they get a little color on all sides. They do not need to be fully cooked. Once browned, transfer to a bowl and set aside.

      3Cook the veggies: Check the pot, if it seems dry, add a little extra olive oil. Then, add the onion, carrots, garlic, fennel, and bay leaves. Cook, stirring everything around the pan for about 4 minutes. Pour in the chicken stock and bring to a simmer.

      4Simmer: Stir in the meatballs, lightly season with salt and pepper, then simmer for 10 minutes. It will taste light on flavor at first, but as the soup simmers, the meatballs will perfume the broth.

      5Add the pasta: Stir in the orzo and cook until tender, 7 to 10 minutes.

      6To finish: Stir in the chopped kale leaves and simmer for 3 to 5 minutes more, or until wilted and tender, but still bright green. Taste, adjust seasoning as needed, then serve.

    Adam and Joanne’s Tips

    • Storing: Keep leftovers in an airtight container in the fridge for up to 3 days. As this soup sits, the orzo absorbs some of the broth. When reheating, add a splash of extra broth (or even a little water) to bring it back to a brothy soup.
    • Smoked paprika and fennel: I like the smokiness when ¾ teaspoon of smoked paprika is added to the meatballs, but you can bump it up a bit for a stronger, smokier flavor. Same goes for the fennel. This soup takes the fennel flavor really well, so if you love it, feel free to add a little more to taste.
    • The nutrition facts provided are estimates.

    Nutrition Per Serving
    Serving Size
    1/6 of the recipe
    /
    Calories
    340
    /
    Total Fat
    13.6g
    /
    Saturated Fat
    3g
    /
    Cholesterol
    56mg
    /
    Sodium
    568mg
    /
    Carbohydrate
    32g
    /
    Dietary Fiber
    2.9g
    /
    Total Sugars
    4.1g
    /
    Protein
    25.4g


    AUTHOR:

    Joanne Gallagher

    Source link

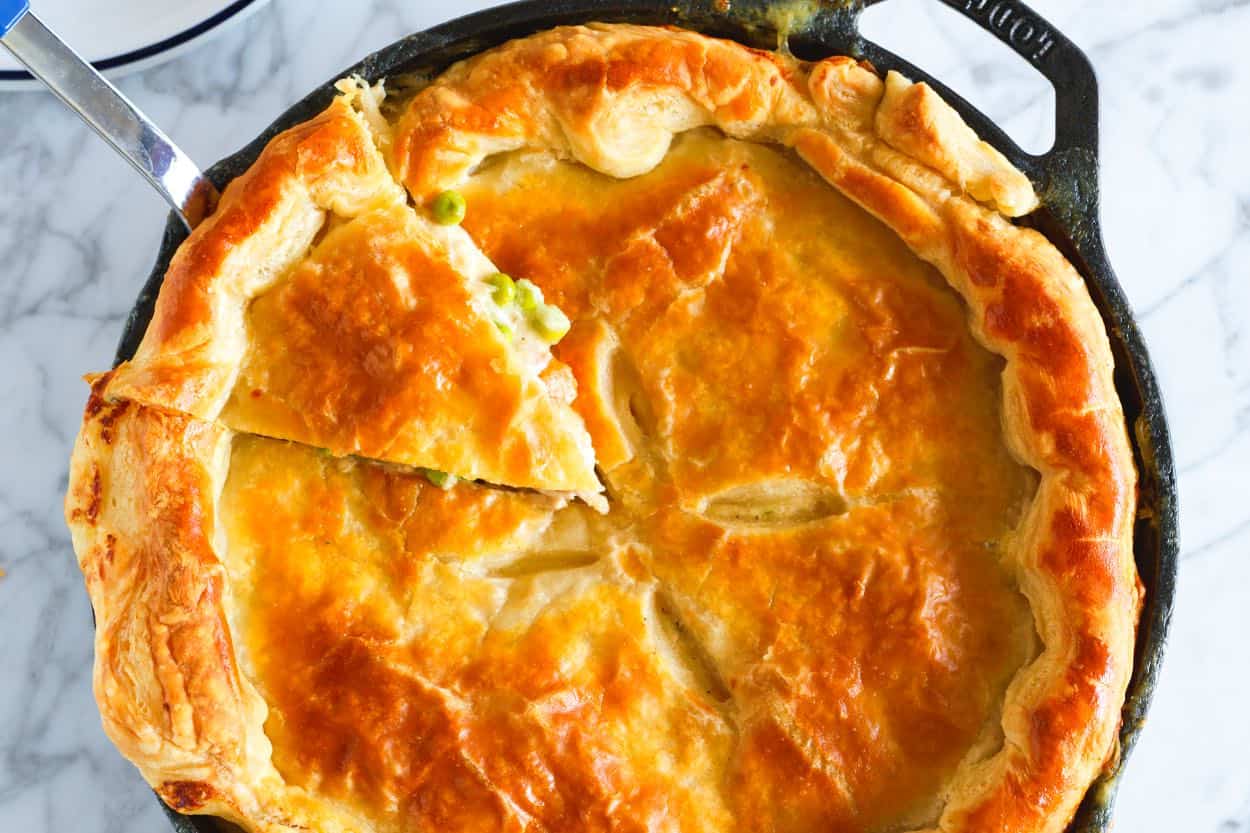
  • Easy Chicken Pot Pie Recipe

    Easy Chicken Pot Pie Recipe

    The most perfect chicken pot pie recipe, made with lots of chicken and classic vegetables, all surrounded by a creamy sauce and baked under a towering puff pastry crust.

    Chicken Pot Pie

    I wasn’t expecting to fall in love with this chicken pot pie recipe this much, but I did, and I genuinely cannot wait for you to try it. It hits all the classic flavors, calls for rotisserie chicken for ease, and skips the double crust for store-bought puff pastry, which means it’s 100% doable for you to make whenever you crave it.

    Oh, and everything happens in one skillet, so you won’t even have that many dishes to clean when you are done.

    Key Ingredients

    • Chicken: This recipe calls for cooked chicken. Rotisserie chicken is incredible, or you can use leftover roast chicken. This shredded chicken would be lovely, too.
    • Vegetables: We keep things really classic for this recipe, using onion, carrots, celery, garlic, and frozen peas.
    • Butter and Flour: You’ll cook the onions, carrots, celery, and garlic in the butter, then stir in flour to make a roux. This is what thickens the gravy.
    • Stock and Milk: These combine to make our creamy gravy. The butter-and-flour roux helps thicken them. Use your favorite store-bought chicken broth or stock, or homemade chicken broth. The salt levels of broths and stocks vary, so be prepared to season a bit more generously as you cook through the recipe if you have a light- or low-sodium option. I love whole milk for the extra creaminess.
    • Sage: Fresh chopped sage gives our sauce a cozy, classic flavor. If you don’t have fresh, you can use dried. We call for 1 tablespoon chopped in the recipe below, which means you’ll want to use 1 teaspoon dried sage.
    • Crust: This pot pie is absolutely perfect with store-bought puff pastry. I love Dufour, but it’s not sold in all grocery stores, so use what you have available. If you do have access to Dufour puff pastry, it’s very much worth the extra cost! You can also use one sheet of homemade pie crust, but it will not turn out as puffed.

    Find the full recipe with measurements below.

    How to Make Our Favorite Chicken Pot Pie

    Tip 1: Use a cast-iron skillet. To keep things easy, we make everything for this recipe in our 10-inch cast-iron skillet. You’ll sauté the onions, carrots, celery, and garlic first, make your roux with flour, build the sauce, and fold in the chicken and peas. Then, simply cover it all with a sheet of puff pastry before baking.

    If you do not have a cast-iron skillet or yours isn’t the right size, you can make the filling, transfer it to a pie dish, top with the pastry, and then bake.

    Tip 2: Make the gravy. All the flavors build for this creamy gravy. After cooking the veggies until soft and sweet, you can add the flour. This will mix with the butter to create your roux, a paste that will help thicken the broth and milk.

    After adding the flour, move it around the pan and let it cook for a minute so any raw flour flavor cooks away. Then, pour in the broth slowly. It might look really thick at first, but it thins as you add more. Pour in the milk next and then simmer until reasonably thick. Finally, taste it and season well with salt and pepper. Remember that broths vary with how seasoned they are, so you may need more than you think. Add it slowly and taste each time. If the flavor doesn’t pop, add a bit more until it does.

    Making chicken pot pie filling with classic vegetables, butter, and flour
    Pouring milk into the gravy to make the pot pie filling creamy

    Tip 3: Make the filling. You can dice or shred the chicken in this recipe. I prefer shredded and love how soft it turns out when added to the pie. Once shredded, carefully fold it into the gravy. The skillet will be at max capacity, so go slow. This is also a good time to add the peas.

    Folding shredded rotisserie chicken and peas into the pot pie filling.

    Tip 4: Add the crust. This skillet pot pie is made extra easy thanks to store-bought puff pastry. You’ll need to roll the sheet out a little to fit the top (at least 11 inches square). Most puff pastry sheets are sold in rectangles, so you’ll have one longer end. I use the excess to build up the edges so they turn out as shown in our photos.

    Tip 5: Add slits and an egg wash. As it bakes in the oven, the middle will get pretty steamy, so you need to add a few slits in the top of the crust to let the moisture escape. Then, before baking, brush over some beaten egg, which turns into that shiny, golden top you see in our photos.

    Brushing egg wash over the top puff pastry crust

    More Classic Chicken Recipes

    Chicken Pot Pie

    Easy Chicken Pot Pie

    • PREP
    • COOK
    • TOTAL

    This skillet chicken pot pie with puff pastry has quickly become one of our favorite chicken recipes on the blog. It’s full of classic ingredients and flavors, but skips the more finicky double crust and pie dish in favor of a cast-iron skillet and store-bought puff pastry. It’s stunning, absolutely delicious, and easy to make whenever you have a craving.

    6 Servings

    Watch Us Make the Recipe

    You Will Need

    5 tablespoons (70 g) unsalted butter

    1 medium yellow onion, finely chopped

    2 medium carrots, finely chopped (about 1 cup)

    1 large rib celery, finely chopped

    2 garlic cloves, minced

    5 tablespoons (40 g) all-purpose flour

    2 cups (470 ml) low-sodium chicken broth or homemade broth

    1 cup (235 ml) whole milk

    1 tablespoon chopped fresh sage

    1 cup (135 g) frozen peas

    4 cups shredded cooked or rotisserie chicken (about 1 pound; 450 g)

    1 sheet store-bought puff pastry, thawed

    1 egg, beaten

    ½ teaspoon freshly ground black pepper

    Fine sea salt, to taste

    Directions

      1Heat the oven to 400°F (204°C). Set aside a large baking sheet.

      2Cook veggies: Melt the butter in a 10-inch cast-iron skillet over medium heat. Add the onion, carrots, celery, and garlic. Cook, stirring occasionally, until the vegetables soften and brown slightly, about 6 minutes.

      3Make the filling: Sprinkle the flour over the vegetables and stir to form a roux. Cook for 1 minute, then slowly pour in the chicken broth, stirring to prevent lumps. Stir in the milk and bring to a simmer. Simmer until the liquid thickens into a gravy.

      4Stir in the sage, peas, and chicken. Season with the pepper and salt to taste. You may need 1 to 1 ½ teaspoons of salt, depending on the broth used. Bring to a simmer, then remove from the heat. Leave to cool for 10 minutes.

      5Prepare the pastry: Unfold the puff pastry onto a lightly floured surface. Roll the pastry into an 11-inch square. Store-bought sheets are often rectangular, so you will likely need to roll one side more than the other.

      6Lay the pastry over the skillet. Trim the edges so they overhang the skillet by about 1 inch. Build up a border by folding the overhanging dough under itself. Cut any trimmed excess dough into strips and press them firmly around the perimeter for a thicker edge.

      7Bake: Cut four 2-inch vents in the center of the pie to allow steam to escape. Brush the top with the egg. Bake for 30 to 40 minutes, turning the skillet halfway through, until the crust is puffed and golden brown. Place the skillet on the baking sheet in the oven to catch any overflow. Cover loosely with foil if the pastry browns too quickly.

      8Remove from the oven and leave to rest for 15 minutes before serving.

    Adam and Joanne’s Tips

    • Pie dish instead of skillet: If you do not have a 10-inch cast-iron pan, make the filling in a regular skillet, then transfer it to a deep pie dish or 9-inch baking dish before topping with the pastry and baking. Smaller cast-iron pans are not large enough for the filling.
    • Puff pastry: Store-bought puff pastry is sold in the freezer section. The most common is Pepperidge Farm and Dufour. Both work well, but if you have the choice, I love Dufour. You will need to remove a sheet from the package and leave it overnight in the fridge so it thaws. Keep it in the fridge until the pot pie filling is ready, then remove it and roll it out so it fits onto the skillet. The shape will likely be a rectangle, leaving you with one longer end. Trim the excess, and then cut into strips to build up the edges to create an edge of thicker dough around the skillet.
    • Storing: Leftover pot pie keeps in the fridge for 2 to 3 days. Note: Cooked chicken is best consumed within 4 days total. Be sure to count from when the chicken was first cooked (or bought), not just from when you baked the pie. Cover the skillet with foil or transfer portions to airtight containers.
    • Reheating: To keep the crust crisp, reheat in a 350°F oven until heated through (about 20 minutes). If you are in a rush, try this hybrid method: Remove the crust and toast it in the oven (or toaster oven) until crisp. Meanwhile, warm the filling in the microwave. Pop the crust back on top to serve.
    • Make-ahead: You can make the filling ahead of time! Let it cool, then refrigerate for up to 2 days (or freeze for up to 3 months). When you are ready to bake, transfer the filling to your dish, top with the crust, and bake. Note: If baking with cold filling, you may need to add a few extra minutes to the baking time.
    • The nutrition facts provided are estimates.

    Nutrition Per Serving
    Serving Size
    1/6 of the pie
    /
    Calories
    591
    /
    Total Fat
    33.7g
    /
    Saturated Fat
    10.9g
    /
    Cholesterol
    99.5mg
    /
    Sodium
    583.7mg
    /
    Carbohydrate
    38.6g
    /
    Dietary Fiber
    4.2g
    /
    Total Sugars
    6.7g
    /
    Protein
    33.1g


    AUTHOR:

    Joanne Gallagher

    Adam and Joanne of Inspired Taste

    We are Adam and Joanne Gallagher, the creators of Inspired Taste. Established in 2009, Inspired Taste grew from a childhood dream into one of the internet’s most trusted recipe sites with hundreds of reliable recipes, step-by-step videos, and expert tips.More About Us

    Source link

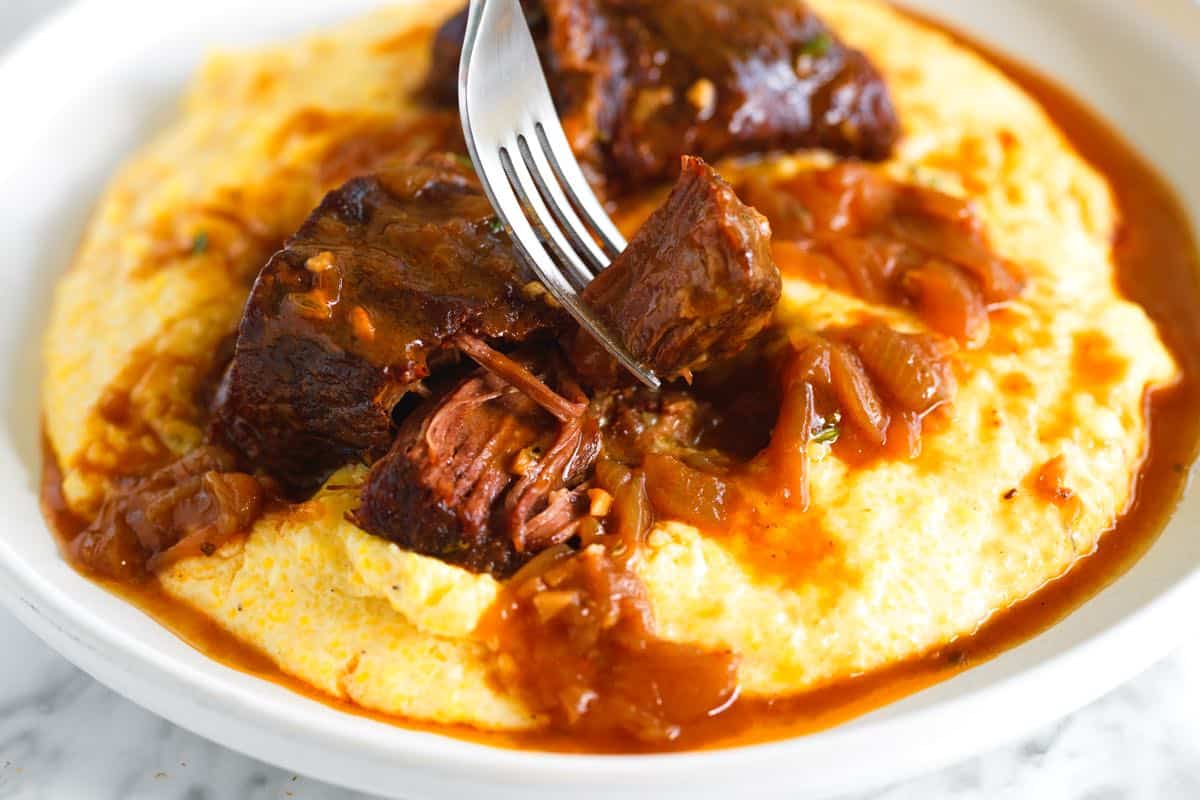
  • Tender Braised Beef Short Ribs Recipe

    Tender Braised Beef Short Ribs Recipe

    This impressive braised short ribs recipe has mouthwateringly tender beef slowly cooked in a caramelized onion and red wine broth.

    Braised Short Ribs

    Think of this dish as French onion soup meets red wine braised short ribs. It’s cozy, it’s rich, and it’s perfect for a cold evening. We’ll caramelize lots of onions for this dish, adding a sweet, rich onion flavor to the braising liquid. Then, to achieve that pull-apart texture, you’ll braise the beef for three hours, but all of that’s hands-off.

    You’ll be left with unbelievably tender and flavorful beef and a thick, rich gravy swimming with caramelized onions. Your best bet is to serve this over something that soaks up all of it, like creamy polenta, grits, mashed potatoes, buttered noodles, or thick, crusty bread.

    Key Ingredients

    • Short Ribs: There are two popular kinds of beef short ribs sold in stores, chuck and plate. If you have the choice, use plate short ribs cut into smaller pieces (3 to 4 inches long), sometimes labeled English-style. They have the best balance of meat and fat and become especially tender when cooked low and slow. Chuck short ribs are smaller and a bit more irregular in shape, but will still work. We also use short ribs for these bbq beef ribs.
    • Onions: Use yellow onions or sweet onions in this dish. Both will caramelize wonderfully.
    • Tomato Paste and Garlic: The tomato paste adds richness. I love the double-concentrated tubes, since the tube and screw on lid make it easy to store what you haven’t used. Fresh garlic is best here.
    • Flour: Use all-purpose flour to help thicken the gravy.
    • Wine: A dry red wine is perfect. Use something you’d drink. We like Chianti, Bordeaux blends, or Merlot.
    • Stock: The short ribs add a lot of beefiness to the gravy, so plain store-bought beef stock works nicely. However, to make this completely from scratch, here is our beef stock recipe.
    • Herbs: We love fresh thyme in this and always add a bay leaf. Rosemary is nice, too, but can be overpowering. If you have it on hand, feel free to add ¼ to ½ teaspoon chopped fresh rosemary to the beef before braising in the oven.

    Find the full recipe with measurements below.

    How to Make Braised Short Ribs

    Tip 1: Brown your short ribs. Before braising the beef, you really want to take the time to brown the short ribs on all sides first. This adds flavor to the pot, which we will use to build the braising liquid, and it adds flavor and texture to the beef.

    Heat a Dutch oven or braiser, add olive oil, then brown on all sides. Since we have a lot of short ribs, you’ll likely need to do this in two batches.

    Browning beef short ribs before braising them.

    Tip 2: Caramelize the onions. If you’ve ever made French onion soup, then you know the beauty of caramelized onions. They take a little time, but I promise it’s worth it for this showy dish.

    To do it, you’ll add a little butter to the rendered beef fat in the pot (yep!). Then add your onions, give them a good stir, and cover the pot. Leave them for 10 minutes. When you uncover them, they will have softened and released some moisture into the pan. From there, uncover and continue cooking, stirring often, until they are deeply browned and smell sweet (30-ish minutes more).

    Caramelizing onions for the beef braising liquid

    Tip 3: Simmer the wine. As you are building the braising liquid, add wine to the pot. It adds so much flavor, and red wine braised short ribs are an absolute classic! Before adding anything else to the pot, simmer the wine for a few minutes to burn off some of the alcohol.

    Tip 4: Cover with a lid and slowly braise in the oven. To get that pull-apart, tender beef, you need to slowly cook the short ribs for around 3 hours. Think of it as similar to making beef stew, where you want the fat and collagen to melt and the connective tissues to soften and become really tender.

    Add the browned beef to the braising liquid, and make sure it’s mostly covered so it does not dry out. Then cook slowly, covered, in the oven for about 3 hours. After 3 hours, the beef will be shockingly tender and so delicious.

    Placing browned beef short ribs into braising liquid
    Short ribs after braising for 3 hours in the oven

    Serving Suggestions

    You’ll be left with a lot of braising liquid. It’s thick, laced with sweet onions, and absolutely delicious (with or without the beef!). I highly recommend skimming the fat at the top of the pot. There’s going to be quite a bit. Once you do, you can serve the beef on or off the bone. A few bones may already have slid off the meat (it’s that tender). We remove the bones, place chunks of tender beef on top of polenta, grits, or mashed potatoes, then spoon a generous amount of the braising liquid over the top. You’ll probably run out of beef before the gravy, but I still think you should save it for spooning over something else for dinner another night.

    This dish is intentionally rich. If you’d like something a little lighter to start or on the side, we love this fennel salad, peppy lemon vinaigrette over greens, classic roasted carrots, or these roasted carrots and parsnips.

    More Mouthwatering, Tender Beef Recipes

    Braised Beef Short Ribs

    Tender Braised Beef Short Ribs

    • PREP
    • COOK
    • TOTAL

    These short ribs turn out incredibly tender, cooked in a rich caramelized onion and red wine sauce. They are absolutely perfect served over our creamy polenta, homemade mashed potatoes, or next to a thick, crusty slice of bread.

    6 Servings

    You Will Need

    8 bone-in beef short ribs (about 3 ¾ pounds), cut into 3-inch pieces

    Salt and fresh ground black pepper

    2 tablespoons olive oil (30ml)

    4 medium yellow onions, thinly sliced, about 6 cups

    2 tablespoons butter (28g)

    2 tablespoons tomato paste (32g)

    4 garlic cloves, minced

    2 tablespoons all-purpose flour (16g)

    1 ½ cups dry red wine, like Chianti, Bordeaux blends, or Merlot (355ml)

    4 cups beef stock (945ml)

    8 fresh thyme sprigs

    1 bay leaf

    Directions

      1Prepare the short ribs: Season them on all sides with salt (we use 2 to 3 teaspoons of fine sea salt). Heat the olive oil in a large Dutch oven or braiser over medium-high heat, then brown the beef on all sides, about 8 minutes. Transfer the browned beef to a plate. You may need to do this in batches.

      2Cook the onions: When all the beef has been removed from the pan, reduce the heat to medium, add the butter and onions, then cover with a lid. Cook for 10 minutes. Uncover the pot and continue cooking the onions, stirring occasionally and scraping up any stuck-on browned bits from the bottom and sides. The onions take 30 to 40 minutes to caramelize. Keep a close eye on them. When you notice they begin to brown, stir them more often to prevent burning.

      3Prepare the oven: Preheat the oven to 325°F (162°C).

      4Build the gravy: Add the tomato paste, garlic, and flour to the caramelized onions. Cook, stirring around the pan for about one minute.

      5Add the wine: Slowly pour in the wine, and bring to a simmer. Stir it around the pan and simmer for about 2 minutes. Continue to the next step when you no longer smell strong alcohol, but instead smell sweet onions with aromas of the wine.

      6Braise: Add the beef stock, thyme, and bay leaf. Taste, and adjust with pinch or two of salt and pepper. Then. place the browned short ribs back into the pan so that they are covered by the liquid. Cover the pot with a lid, then transfer to the oven and cook for about 3 hours, or until the meat pulls easily away from the bone. Check on them about halfway to make sure the beef is mostly covered by the braising liquid.

      7Serve: Remove the pot from the oven. Skim the excess fat from the surface of the sauce. Remove and discard the thyme stems and bay leaf before serving.

    Adam and Joanne’s Tips

    • Leftovers: Store them in an airtight container in the fridge for up to 4 days, or freeze for up to 3 months. When storing these, I prefer to remove them from the bone and then keep them covered with the onion braising liquid. Reheat slowly over low to medium heat.
    • Buying short ribs: Short ribs are cut from larger plates, so their width varies by store. Most often, you will see lengths of 2 to 3 inches, which is what was used in the photos above. There are two popular kinds of beef short ribs sold in stores, chuck and plate. Both work, but plate short ribs have the best balance of meat and fat and become especially tender when cooked low and slow. Do not use beef back ribs for this recipe.
    • The nutrition facts provided are estimates.

    Nutrition Per Serving
    Serving Size
    1/6 of the recipe
    /
    Calories
    705
    /
    Total Fat
    37.8g
    /
    Saturated Fat
    15.5g
    /
    Cholesterol
    177.7mg
    /
    Sodium
    1298.9mg
    /
    Carbohydrate
    20.7g
    /
    Dietary Fiber
    3.2g
    /
    Total Sugars
    7.8g
    /
    Protein
    58.3g


    AUTHOR:

    Joanne Gallagher

    Source link

  • Crispy Chicken Milanese Recipe

    Crispy Chicken Milanese Recipe

    This chicken milanese recipe turns out perfectly crisp and golden on the outside and juicy and tender inside. It’s simple to make and everyone I’ve served it to loves it!

    Chicken Milanese

    We can’t believe we waited this long to share this recipe. The chicken stays incredibly tender, and the crispy breaded coating is so flavorful thanks to the Italian herbs mixed into the breadcrumbs.

    We love this easy breaded chicken served with a handful of greens mixed with our lemon vinaigrette, but you’ll find more ways to serve it below so it fits any night of the week. For more like this, see our crispy pork milanese!

    Key Ingredients

    • Chicken: Use boneless, skinless chicken breasts. Either buy them already cut into thinner cutlets, or slice full-size chicken breasts in half horizontally to make two thinner chicken breasts. Starting with thinner chicken cutlets is the key to this recipe.
    • Flour and Eggs: We use a three-part breading station. Step one is to dredge your chicken in flour, and step two is to dip it in whisked eggs. I use all-purpose flour.
    • Breadcrumbs: After flour and eggs, the third part of the breading is breadcrumbs. I love light and crispy panko breadcrumbs or homemade breadcrumbs.
    • Italian Seasoning: We are really generous with the herbs in our breading, so we mix a good amount of Italian seasoning into the breadcrumbs.
    • Parmesan Cheese: Optional, but highly recommended. Finely grated Parmigiano-Reggiano stirred into the breadcrumb mixture makes the milanese-style breading well seasoned and extra delicious.

    Find the full recipe with measurements below.

    How to Make Chicken Milanese

    Tip 1: Prepare the chicken. Start with thin chicken breast cutlets (see above). Then, pound them even thinner with a meat mallet, rolling pin, or the bottom of a sauce pot.

    Pounding helps the chicken cook quickly and evenly, so your breading turns golden in the same time it takes the chicken to cook. As a bonus, it tenderizes the meat, so your chicken will turn out tender and juicy.

    Pounding chicken breast cutlets thin for chicken milanese

    Tip 2: Set up the breading station. You’ll need three wide, shallow bowls. Add flour to the first. In the second, whisk the eggs and water until smooth. In the third, combine the breadcrumbs, Italian seasoning, parmesan cheese, and a good pinch of salt.

    Tip 3: Bread the chicken. I like to work with one piece of chicken at a time and use a fork to move it around.

    1. Dip it into the flour on both sides, shaking off any excess.
    2. Next, coat it in the egg mixture.
    3. Finally, press it into the breadcrumbs until evenly covered.

    Gently shake off any loose crumbs, then place the breaded chicken on a baking sheet. Continue with the remaining chicken pieces.

    Breading chicken cutlets for milanese

    Tip 4: Cook the chicken. You have two options. My favorite way to cook them is to pan-fry in a skillet with some oil. You can also use an air fryer. Both cooking methods are provided in the recipe below.

    However you cook them, you’ll know they’re perfect when the coating is crisp and golden, and the chicken is firm and cooked through. An internal thermometer should read 165°F when inserted into the middle.

    Serving Suggestions

    The most classic way to serve chicken milanese is with a wedge of lemon and a light salad. In our photos, you can see ours next to a simple arugula salad tossed in our lemon vinaigrette. Or, swap for caprese salad or sautéed greens. We love sautéed spinach or sautéed kale.

    More ideas are to serve with polenta, risotto, or pasta, such as fettuccine Alfredo or buttered noodles. It’s also lovely with roasted vegetables. This roasted cabbage or parmesan roasted cauliflower is my go-to. And finally, you can always turn it into a sandwich on crusty bread, with arugula, tomato, and a little garlic aioli.

    More Chicken Recipes

    Chicken Milanese with Arugula Salad

    Crispy Chicken Milanese

    • PREP
    • COOK
    • TOTAL

    Serve chicken milanese next to a light, fresh salad. I especially love tossing salad greens with this lemon vinaigrette. The bright, tangy dressing is perfect with the chicken. Or, see more serving ideas in the article.

    6 Servings

    Watch Us Make the Recipe

    You Will Need

    3 boneless, skinless chicken breasts, about 10 ounces each (1 ¾ pounds)

    1 cup all-purpose flour (130g)

    2 large eggs

    4 tablespoons water

    1 ½ cups panko or homemade breadcrumbs, crushed a little finer (130g)

    3 tablespoons Italian seasoning

    3 tablespoons finely grated Parmigiano-Reggiano, optional

    Salt and fresh ground black pepper

    Oil, for cooking

    Directions

      1Prepare the chicken cutlets: Place a chicken breast onto the cutting board, then with one hand on top of the breast, use a chef’s knife with the other hand to slice the breast in half horizontally (crosswise), making 2 thinner chicken breast cutlets. Repeat with the remaining chicken breasts.

      2Pound the chicken: Place the chicken cutlets between sheets of plastic wrap or parchment paper and pound to about ⅓ inch thick using a mallet or the bottom of a small pot.

      3Season the chicken: In a small bowl, mix ½ teaspoon salt with ½ teaspoon freshly ground black pepper. Line a large baking sheet with parchment paper, then arrange the chicken on it. Season both sides evenly with the salt and pepper mixture.

      4Set up the breading station: You’ll need three wide, shallow bowls. Add the flour to the first. In the second, whisk together the eggs and water until smooth. In the third, combine the breadcrumbs, Italian seasoning, parmesan cheese, and a good pinch of salt.

      5Bread the chicken: Working with one cutlet at a time, using a fork, dredge it with flour, shaking off any excess. Dip it into the egg mixture, then press it into the breadcrumb mixture so it is well coated. Shake off any excess crumbs, then place the breaded chicken back on the baking sheet. Repeat with the remaining chicken pieces.

      6Cook: Set a large skillet (with sides) over medium heat and let it preheat. Add enough oil to cover the bottom by about ⅛ inch. To test the temperature, drop in a breadcrumb. It should sizzle right away.

      7When the oil is ready, add 2 chicken cutlets at a time, depending on the size of your pan. Cook for 2 to 3 minutes per side, or until golden brown and the internal temperature reaches 165°F. Transfer to a rack, sprinkle lightly with salt, and repeat with the remaining chicken (adding a little more oil to the pan as needed).

    Adam and Joanne’s Tips

    • Leftover breading: You will have some flour, eggs, and breadcrumbs left over. We do not recommend saving them.
    • Air fryer instructions: Spray both sides of the breaded chicken lightly with cooking spray. Place them in a single layer in the air fryer basket (work in batches if needed). Cook at 390°F for 4 minutes, then flip and continue cooking for 3 to 5 minutes more, or until the chicken is golden brown and the internal temperature reaches 165°F.
    • Baking instructions: Preheat your oven to 425°F (218°C). Line a baking sheet with parchment or lightly oil it. Arrange the breaded chicken cutlets on the baking sheet in a single layer, then lightly spray or brush the tops with olive oil. Bake for 14 to 18 minutes, flipping once halfway through, until the breading is crisp and the internal temperature reaches 165°F. For even crispier results, bake the cutlets on an oven-safe wire rack set inside the baking sheet.
    • Arugula salad: Toss 6 cups baby arugula with 4 to 5 tablespoons of this lemon vinaigrette. Add parmesan shavings, then serve on the side of the chicken.
    • The nutritional information provided are estimates.

    Nutrition Per Serving
    Serving Size
    1 chicken cutlet (6 total)
    /
    Calories
    460
    /
    Total Fat
    15.1g
    /
    Saturated Fat
    3.3g
    /
    Cholesterol
    168.1mg
    /
    Carbohydrate
    38.2g
    /
    Dietary Fiber
    2.9g
    /
    Total Sugars
    1.9g
    /
    Protein
    41g


    AUTHOR:

    Joanne Gallagher

    Adam and Joanne of Inspired Taste

    We are Adam and Joanne Gallagher, the creators of Inspired Taste. Established in 2009, Inspired Taste grew from a childhood dream into one of the internet’s most trusted recipe sites with hundreds of reliable recipes, step-by-step videos, and expert tips.More About Us

    Source link