Category: Main Dish

  • Air Fryer Kielbasa

    Air Fryer Kielbasa

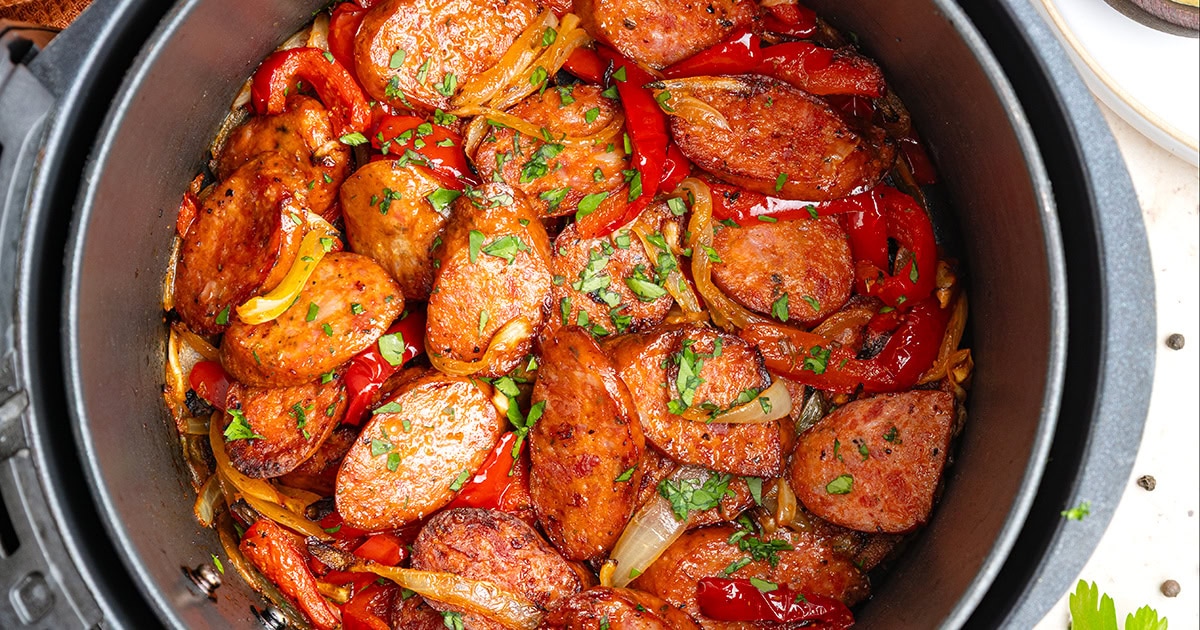
    Smoky, crispy, and done in under 15 minutes, this air fryer kielbasa with onions and peppers is your weeknight dinner (or breakfast!) lifesaver.


    Jump to: ℹ️ Overview | 🛒 Ingredients | 📷 How To Make | 👩‍🍳 Recipe Tips | 🥗 Serving Suggestions | 📝 Full Recipe Card | 🍽 Try These Slavic Recipes


    Kielbasa was a staple in my house growing up — smoky, garlicky, and always the star of a simple, hearty meal. This recipe brings that nostalgic flavor into a modern kitchen using the air fryer for maximum ease and speed.

    Kielbasa is a type of Polish smoked sausage (we have a similar one in Ukraine), already cooked and wonderfully rich, and it pairs perfectly with sweet onions and red bell peppers. The air fryer crisps the sausage just right while caramelizing the veggies, and a simple seasoning blend ties it all together.

    This air fryer kielbasa dish works for everything: weeknight dinners, lazy brunches, even game-day snacks. With around 15 minutes of cooking time and plenty of protein, it’s as practical as it is satisfying.

    👩‍🍳 You might like this smoked sausage, broccoli and shrimp skillet or this chorizo and roast vegetable salad, and also try my air-fried chicken popcorn bites (or bake them) and air fryer BBQ chicken wings.

    What You’ll Need

    Here is what you’ll need for this air fryer kielbasa recipe. Find the full measurements in the recipe card below.

    • Polish kielbasa – smoky, savory, and already cooked. Look for good-quality ones with simple ingredients, usually in the deli section You can use similar smoked sausage, like Kransky sausage.
    • Onion – adds sweetness when cooked, perfect contrast to the sausage.
    • Red bell pepper (capsicum) – sweet and slightly crisp when air-fried.
    • Olive oil – helps everything roast evenly, you only need a little bit.
    • Seasoning mix – smoked paprika (brings that cozy, wood-fired flavor, garlic powder for a quick, punchy flavor without mincing garlic, dried oregano (earthy and herby), plus a little black pepper and optional salt (based on kielbasa’s saltiness)
    • Fresh parsley – a little green to brighten it all up.
    • Dijon or spicy brown mustard – tangy, sharp, and the perfect dipping sauce.

    Swap suggestions: Use yellow or orange peppers instead of red, or add green for more contrast. Turkey kielbasa also works great if you’re looking to lighten it up.

    How To Make Air Fryer Kielbasa

    Find the full recipe and nutritional information below. Here are some handy step-by-step photos for air fryer kielbasa.

    • Preheat air fryer to 375°F (190°C).
    • Toss sliced onions and bell peppers with olive oil and seasonings.
    • Slice kielbasa on a diagonal for crisper edges.
    • Add everything to the air fryer basket in a mostly even layer.
    • Cook for 10–12 minutes, shaking halfway, until sausage is browned and veggies are tender.
    • Garnish with parsley and serve hot with mustard or in sandwich rolls.

    Recipe Tips

    • Make Ahead: Slice everything the night before and store in the fridge. Great for breakfast prep!
    • Storage: Leftovers keep well in the fridge for up to 3 days. Reheat in the air fryer or skillet to crisp things up again.
    • No Air Fryer? You can roast everything at 400°F (200°C) in the oven for 20–25 minutes, flipping halfway.
    • Add Heat: Toss in a pinch of chili flakes or serve with hot mustard if you like a kick.
    • Veggie Boost: Add mushrooms or zucchini for more bulk and nutrients.

    Serving Suggestions

    This kielbasa dish is super versatile. Serve it over buttered noodles, mashed potatoes, or rice for dinner. Or keep it breakfast-y with some scrambled or fried eggs and toast. It also makes a mean sandwich—just pile it into a crusty roll with a smear of mustard and maybe some melted cheese.

    💬 If you’ve tried this air fryer kielbasa or any other recipe on the blog then don’t forget to rate the recipe and let me know how you got on in the comments below, I love hearing from you! You can also FOLLOW ME on Instagram, Facebook, Pinterest, YouTube, and or sign up to my Newsletter to see more of my delicious food.

    Want to Save This Recipe?

    Enter your email & I’ll send it to your inbox. Plus, get great new recipes from me every week!

    By submitting this form, you consent to receive emails from Cooked & Loved

    Smoky, crispy, and done in under 15 minutes—this air fryer kielbasa with onions and peppers is your weeknight dinner (or breakfast!) lifesaver. Find step-by-step photos and more recipe tips above.

    • Preheat your air fryer to 375°F (190°C).

    • In a bowl, toss onion and pepper slices with olive oil, paprika, garlic powder, oregano, pepper, and salt if using.

    • Slice the kielbasa into ½-inch thick diagonal slices.

    • Place kielbasa and seasoned veggies into the air fryer basket in an even layer. Some overlap is fine.

    • Cook for 10–12 minutes, shaking the basket halfway through. The sausage should be browned and the veggies soft.

    • Sprinkle with fresh parsley and serve hot with mustard or in sandwich rolls.

    • Can I use turkey kielbasa? Yes! It works great and is a bit leaner. Just check the seasoning level—it might need a touch more salt.
    • What’s the best mustard for this? Dijon is classic, but spicy brown mustard adds a great kick. Wholegrain mustard is also delicious for texture.
    • Can I make this without an air fryer? Absolutely—roast in the oven at 400°F (200°C) for about 20–25 minutes, tossing halfway through.
    • Is kielbasa already cooked? Most kielbasa is smoked and pre-cooked. You’re just browning it and heating it through here, not cooking it from raw.
    • Make Ahead: Slice everything the night before and store in the fridge. Great for breakfast prep!
    • Storage: Leftovers keep well in the fridge for up to 3 days. Reheat in the air fryer or skillet to crisp things up again.
    • Add Heat: Toss in a pinch of chili flakes or serve with hot mustard if you like a kick.
    • Veggie Boost: Add mushrooms or zucchini for more bulk and nutrients.

    Calories: 331kcal | Carbohydrates: 7g | Protein: 13g | Fat: 28g | Saturated Fat: 9g | Polyunsaturated Fat: 3g | Monounsaturated Fat: 14g | Cholesterol: 60mg | Sodium: 1039mg | Potassium: 325mg | Fiber: 1g | Sugar: 2g | Vitamin A: 1183IU | Vitamin C: 41mg | Calcium: 25mg | Iron: 2mg
    Keywords: Air Fryer Kielbasa, Air Fryer Kielbasa With Onions & Peppers, Air Fryer Smoked Sausage

    Try These Slavic Recipes


    Source link

  • Easy Roasted Cauliflower Soup Recipe

    Easy Roasted Cauliflower Soup Recipe

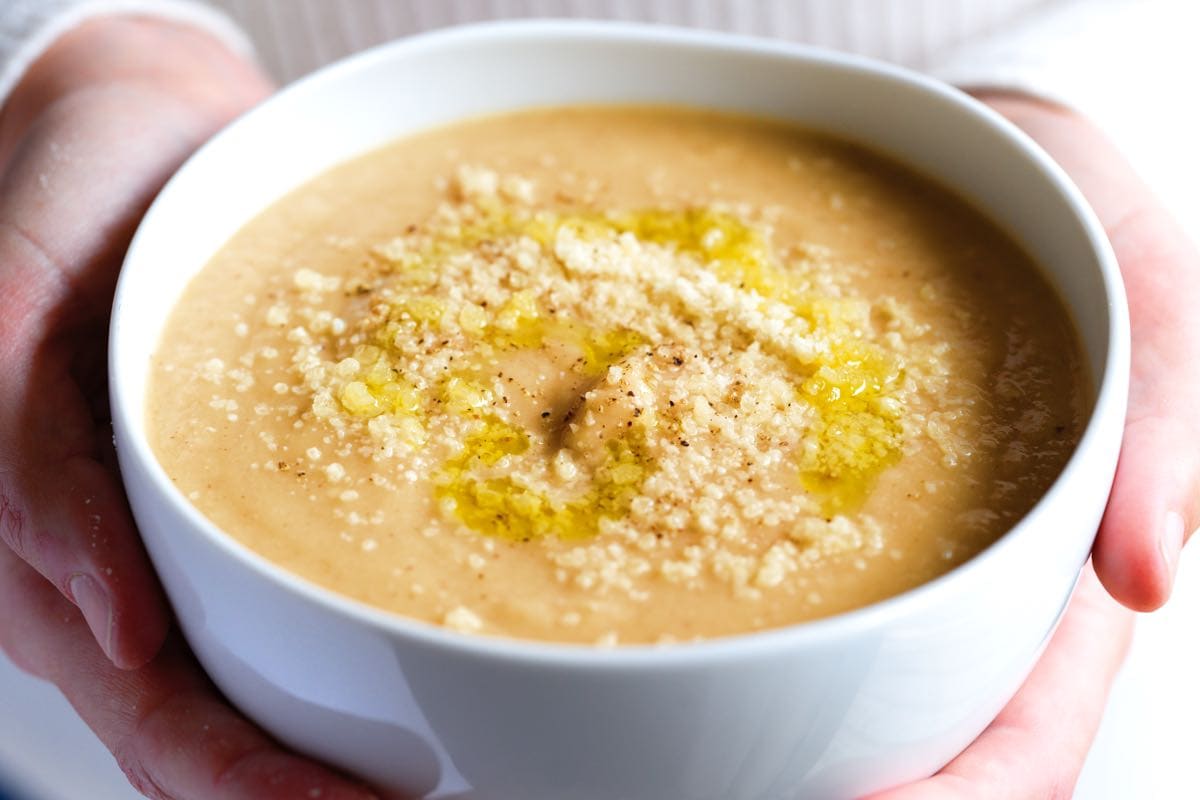
    This roasted cauliflower soup recipe is close to my heart. It’s rich and creamy, super easy to make, and tastes amazing!

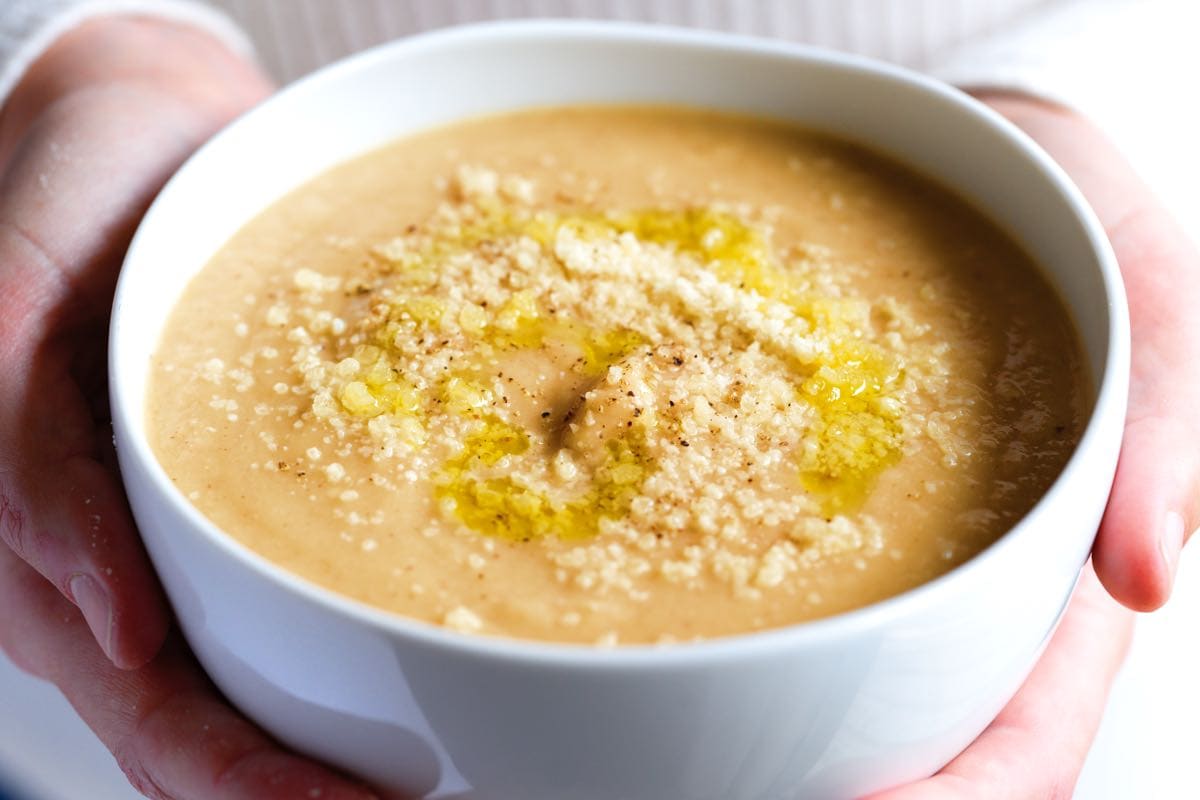
    Roasted Cauliflower Soup with parmesan on top

    For this easy cauliflower soup, we roast a whole head of cauliflower until golden brown and blend with onion, parmesan cheese, and broth until silky smooth.

    We have so many cauliflower recipes on Inspired Taste, and honestly, I love them all, but this soup is the one I go to when I need a little comfort. A big bowl of this soup makes the day melt away.

    Key Ingredients

    • Cauliflower: I use one large head of cauliflower for this soup, which means you’ll get 4 generous servings.
    • Garlic and Thyme: Since I roast the cauliflower for this soup, I take the opportunity to toss a few garlic cloves and fresh thyme onto the baking sheet. They add so much flavor!
    • Onion and Celery: Once the cauliflower has finished roasting in the oven, we cook onion and celery with a pinch of red pepper flakes and salt, adding more nutritious vegetables to the soup and flavor.
    • Broth: I love using a light broth so that the cauliflower shines. I especially love this easy chicken broth and this delicious veggie broth.
    • Butter: I don’t add cream to this cauliflower soup, but I do add butter. Use a good-quality European-style butter or your favorite plant-based butter.
    • Lemon Juice: A squeeze of fresh lemon juice brings this soup together. We highly recommend it.
    • Cheese: I love adding parmesan cheese, but you can substitute it for another kind of cheese or leave it out altogether.

    Find the full recipe with measurements below.

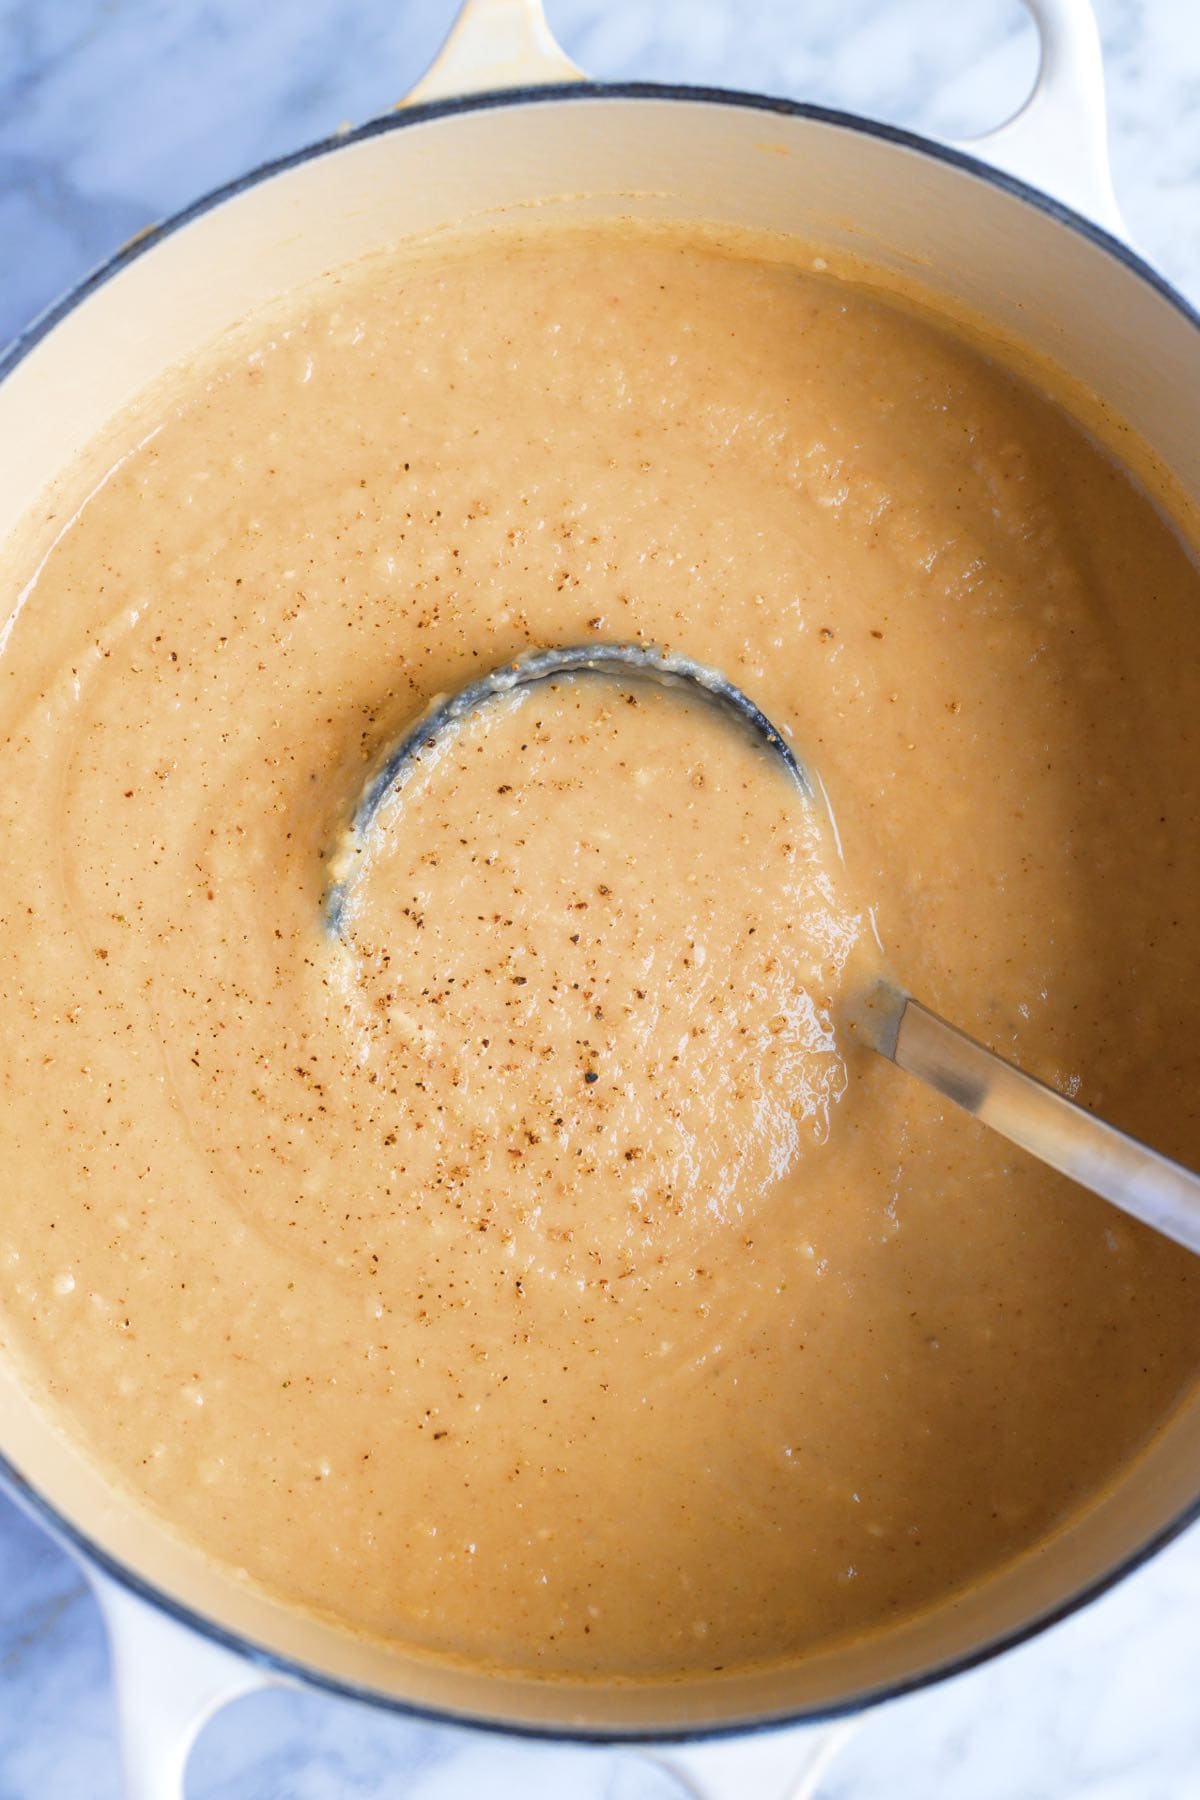
    A Pot of Creamy Cauliflower Soup

    How to Make the Best Roasted Cauliflower Soup

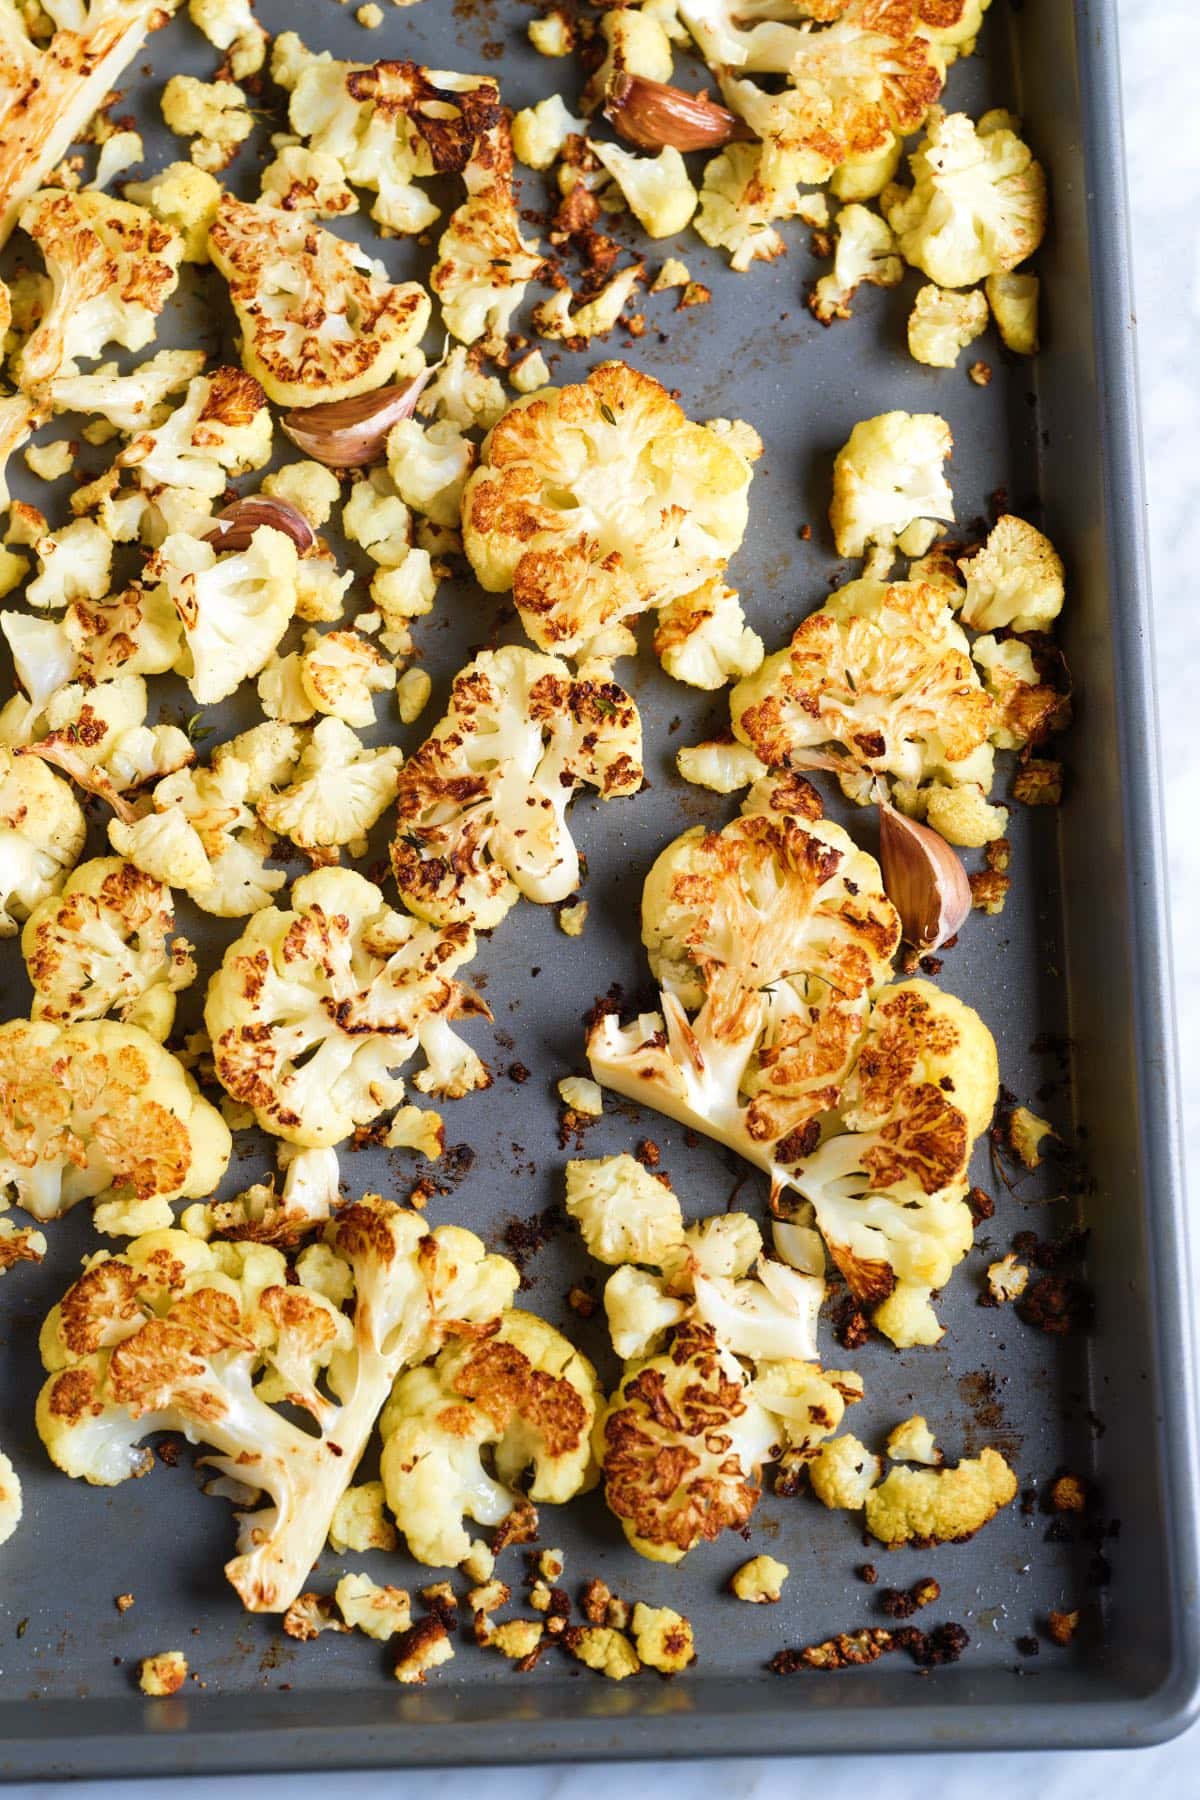
    Tip 1: Roast garlic and cauliflower. This cauliflower soup starts with roasting a whole head of cauliflower. I don’t pay too much attention to how well I chop the cauliflower. Slicing it into cauliflower steaks or slabs is the quickest way. Then we toss them with olive oil, salt, thyme, and whole garlic cloves (you can leave the peel on for now). As the garlic roasts in the oven, it softens and becomes sweet (like in our whole roasted garlic recipe)

    The cauliflower and garlic roast in a hot oven for 20 to 25 minutes, so it’s pretty quick. When it is nearly finished roasting, you can prepare the remaining ingredients.

    Roasted Cauliflower Ready for Cauliflower Soup

    Tip 2: Build flavors. Just as the cauliflower and garlic is finishing in the oven, in a soup pot, cook roughly chopped onion and celery in butter (or olive oil) until soft. The roasted garlic will have softened a lot, so you can easily squeeze the soft garlic cloves to the pot. Then, pour in broth and add the roasted cauliflower. I have two favorite homemade broths for this: veggie broth or chicken broth.

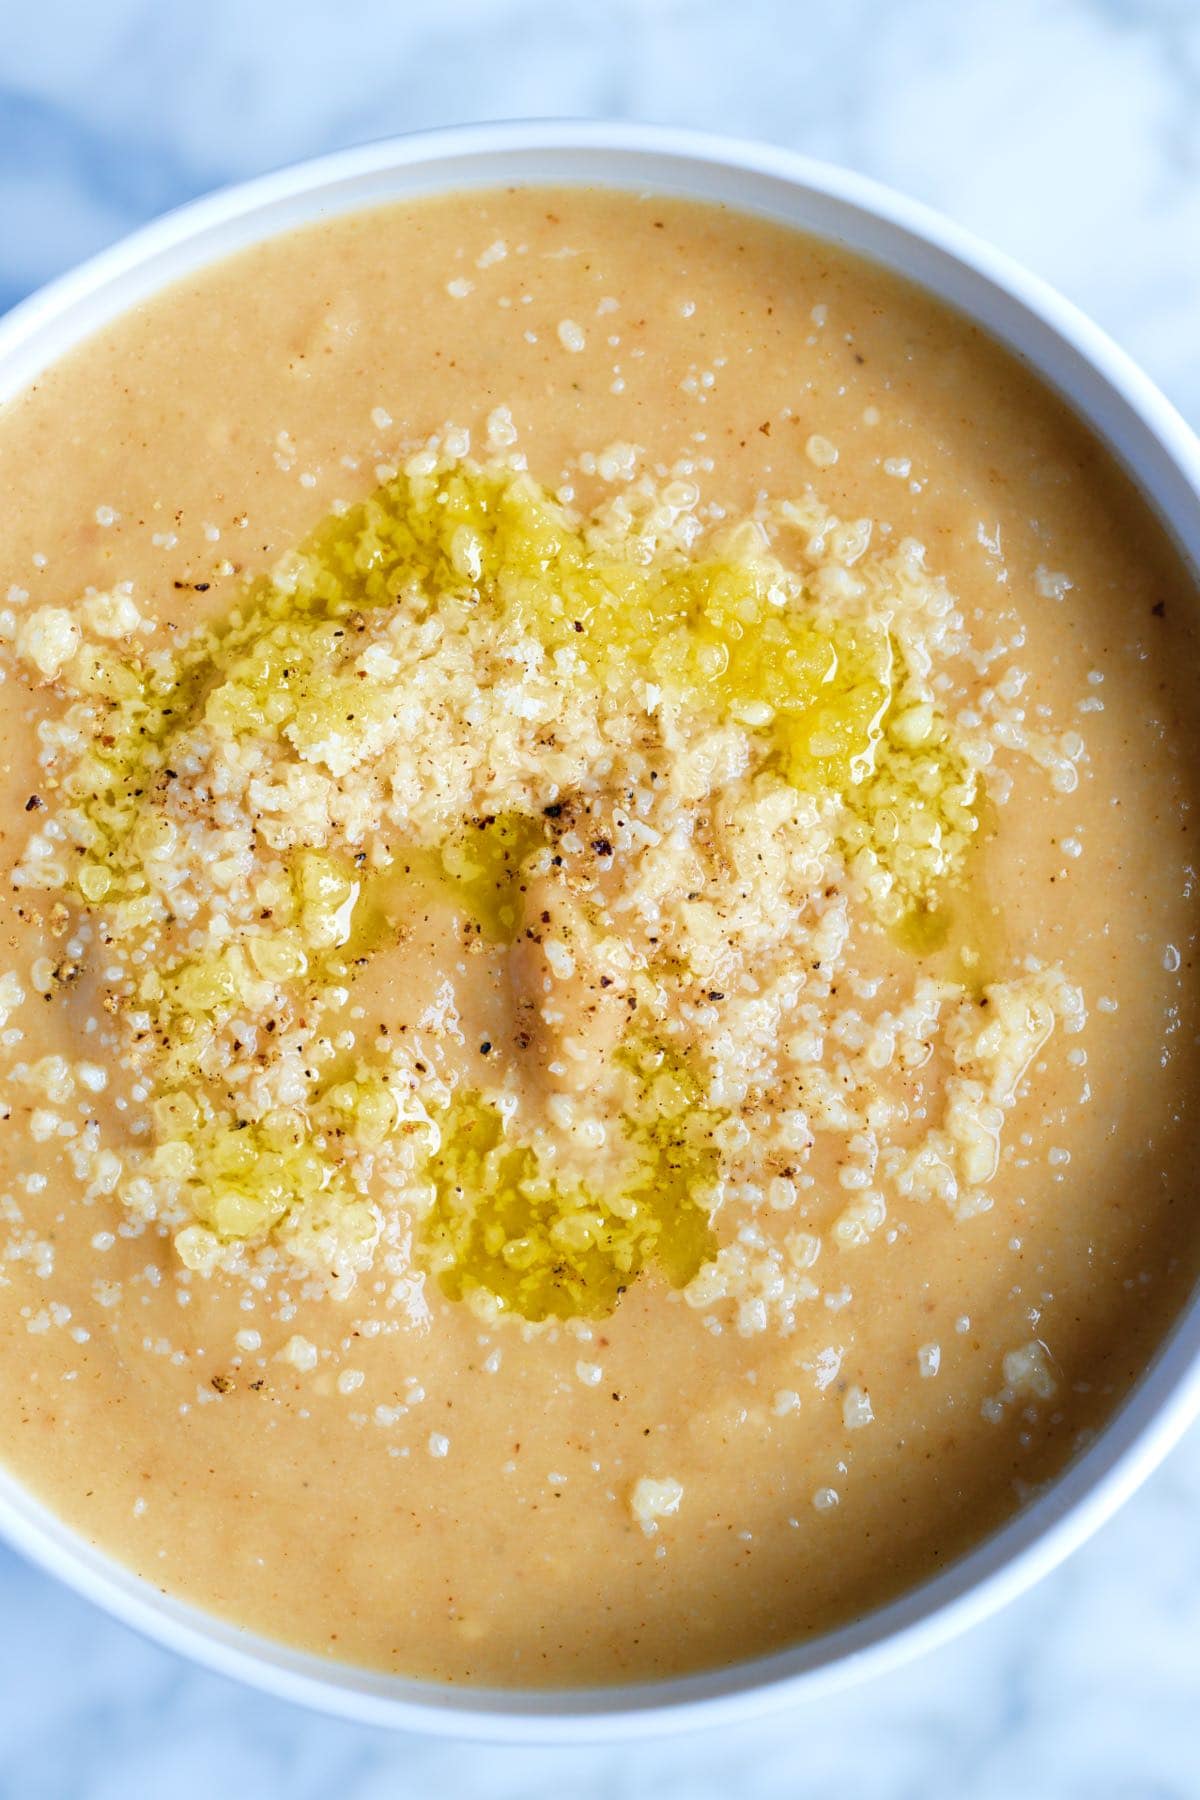
    Tip 3: Blend until creamy. Let the soup simmer for 10 minutes, then blend it into a smooth, decadent soup. I love adding some fresh lemon juice and parmesan cheese, but you can adjust the seasoning with fresh herbs, another kind of cheese, or leave it plain. You can see from the photos that the cauliflower soup is super creamy without having to add any cream!

    More Vegetable Soup Recipes

    More Cauliflower Recipes

    Roasted Cauliflower Soup

    Easy Roasted Cauliflower Soup

    • PREP
    • COOK
    • TOTAL

    For this easy cauliflower soup recipe, we roast a whole head of cauliflower until golden brown and then blend it with onion, parmesan cheese, and broth until silky smooth. This healthy soup is creamy, decadent, and delicious! For more crunch, try serving this soup topped with our homemade garlic croutons.

    4 Servings (makes 6 to 7 cups)

    Watch Us Make the Recipe

    You Will Need

    1 large head cauliflower, about 2 pounds

    4 tablespoons olive oil

    1 teaspoon fresh thyme leaves or 1/4 teaspoon dried thyme

    4 garlic cloves, left unpeeled

    1/2 large onion, chopped, about 1 ¼ cups

    1 celery stalk, chopped, about 1/2 cup

    Pinch crushed red pepper flakes, optional for heat

    4 cups (946ml) vegetable broth or chicken broth

    2 tablespoons butter

    1 tablespoon fresh lemon juice, or more if needed

    1/4 cup grated parmesan cheese, plus more for serving, optional (1/2 ounce)

    Directions

      1Preheat the oven to 425°F (220°C) and prepare a baking sheet. We roast the cauliflower directly on the baking sheet, but for easy cleanup, line it with parchment paper or a silicone baking mat.

      2Remove the larger leaves from the cauliflower and leave the core intact. (You can save the leaves to blend into the soup later.)

      3Slice the cauliflower in half and cut it into 3/4-inch thick slices.
      Drizzle two tablespoons of olive oil onto the baking sheet, then arrange the cauliflower on top of the oil.

      4Add the unpeeled garlic cloves (they will roast in their peels) and the thyme, then drizzle over two more tablespoons of olive oil. Move the cauliflower slices around so they each have a chance to touch some oil.

      5Roast for 20 minutes or until the bottom of each slice looks well browned. Flip each piece, and then roast for 5 minutes more.

      6Melt two tablespoons of butter in a deep soup pot over medium heat. Then, stir in the onions, celery, pinch of red pepper flakes, and 1/4 teaspoon salt. Cook until softened, about 5 minutes.

      7When they are cool enough to handle, squeeze the garlic from inside each clove and place it in the soup pot. Discard the garlic peel.

      8Transfer the roasted cauliflower to the pot and pour in the broth. If you saved any cauliflower leaves from earlier, add them to the pot. Bring to a simmer and cook for 10 minutes.

      9Turn off the heat, and add the cheese and two tablespoons of lemon juice.

      10Blend the soup until smooth. An immersion blender is the easiest, or you can use a blender. If you use a regular blender, it is best to blend in batches and fill the blender less than you usually would since the soup is so hot. We like to remove the lid’s center insert and cover it with a kitchen towel while blending. This helps to release some of the steam and prevents the blender lid from popping off (which can be a big, hot mess).

      11Taste the soup and add more lemon juice, salt, and pepper until the flavor pops (it should make you smile). Serve with more cheese, a few grinds of black pepper, and a drizzle of olive oil on top.

    Adam and Joanne’s Tips

    • Storing: This cauliflower soup lasts in your refrigerator for up to 5 days. It can also be frozen for up to one month, probably longer.
    • Soup is too thick: Add 1/4 cup to 1 cup of water. Add enough water to achieve your preferred thickness. The water will not water down the flavor of your soup, but if you are concerned or have more on hand, you can use stock or broth.
    • Vegetarian adaptations: Use vegetable broth, a vegetarian-friendly cheese or leave it out altogether.
    • Vegan adaptations: Use vegan broth, vegan butter and vegan cheese or a couple tablespoons of nutritional yeast instead (my preference).
    • The nutrition facts provided below are estimates.

    Nutrition Per Serving
    Serving Size
    1/4 of the recipe (1 of 4 servings)
    /
    Calories
    288
    /
    Total Fat
    23.2g
    /
    Saturated Fat
    7.5g
    /
    Cholesterol
    23.4mg
    /
    Sodium
    686.7mg
    /
    Carbohydrate
    18.1g
    /
    Dietary Fiber
    5.2g
    /
    Total Sugars
    7.5g
    /
    Protein
    6.8g


    AUTHOR:

    Joanne Gallagher

    Adam and Joanne of Inspired Taste

    We are Adam and Joanne Gallagher, the creators of Inspired Taste. Established in 2009, Inspired Taste grew from a childhood dream into one of the internet’s most trusted recipe sites with hundreds of reliable recipes, step-by-step videos, and expert tips.More About Us

    Source link

  • The Best Vegetable Broth Recipe

    The Best Vegetable Broth Recipe

    This homemade vegetable broth recipe turns out so hearty, rich, and savory that you can sip it on its own. It’s so much better than store-bought!

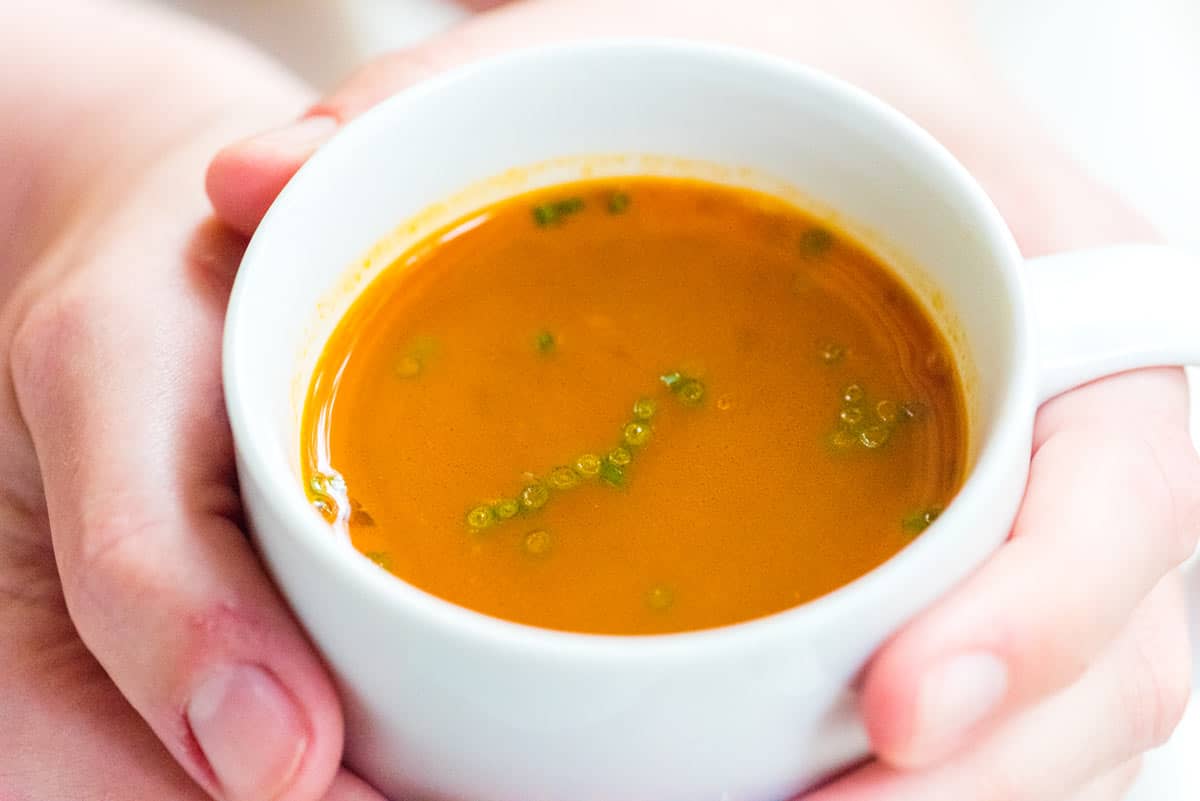
    Vegetable Broth

    After trying our recipe for vegetable broth, you will never want to buy boxed broth again! It’s simple to make, takes much less time to make than chicken stock, and packs in so much flavor.

    This soothing and delicious veggie broth is perfect for all of your recipes. It’s also so flavorful that you can sip it like tea or bone broth. It’s simple to make, and I’m confident you’ll love it.

    Key Ingredients

    • Onion, Carrots, and Celery: This classic trio forms the aromatic base of the vegetable stock.
    • Tomatoes: They add both rich flavor and a beautiful color.
    • Garlic and Dried Mushrooms: These develop even more flavor. I love dried shitakki mushrooms, which I find in my local grocery store in the same aisle as international ingredients like specialty soy sauces.
    • Herbs: I go heavy on the herbs, using fresh parsley, thyme, and bay leaves.
    • Vegetable Scraps: This is the perfect time to use up those scraps you’ve been saving in the freezer, like kale stems, leek tops, carrot peels, and mushroom stems.
    • Salt and Filtered Water: I love sea salt for this, and make sure to use filtered water for the best flavor.

    Find the full recipe with measurements below.

    How to Make the Best Vegetable Broth

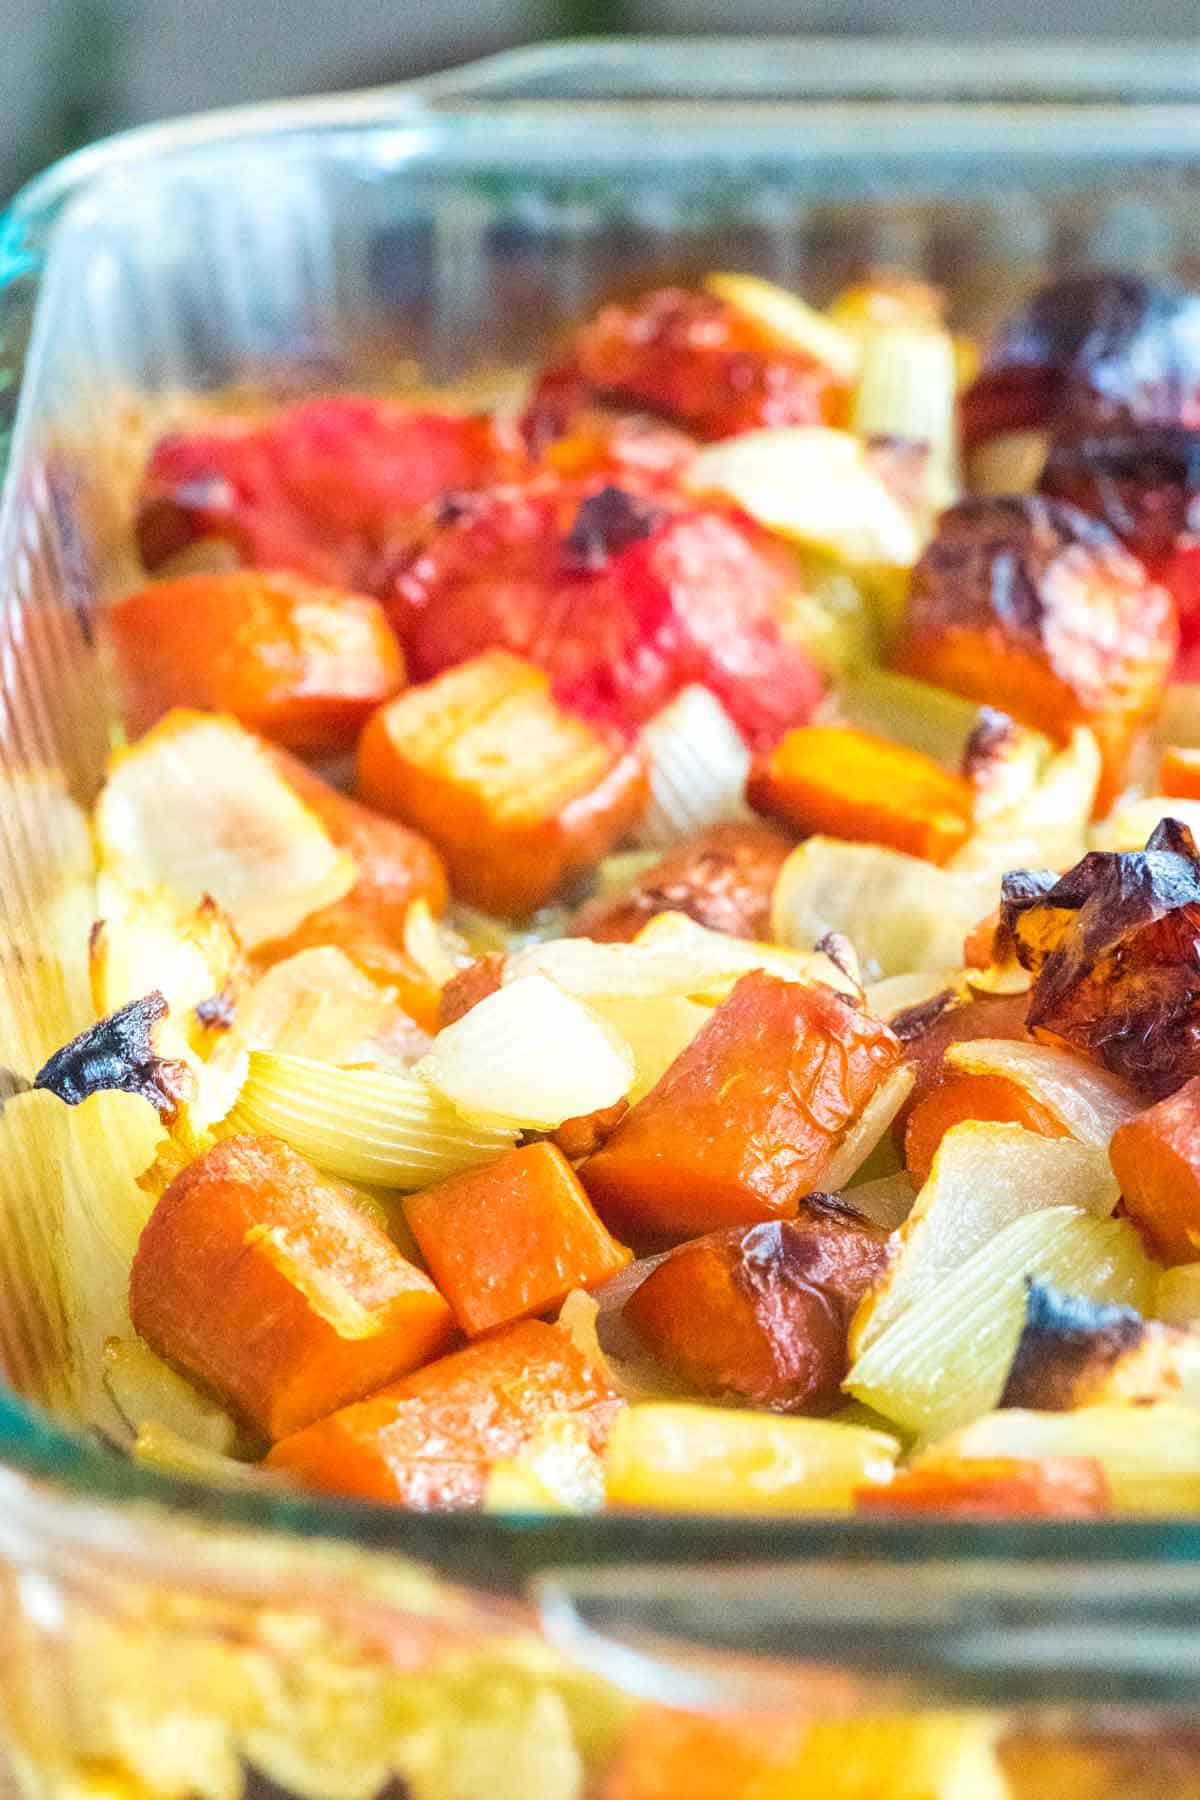
    Tip 1: Roast your vegetables. For the most savory and satisfying broth, roast the onion, carrots, celery, tomatoes, and garlic until nicely browned. This simple step intensifies the stock’s flavor and adds color.

    Roasting vegetables for vegetable broth.

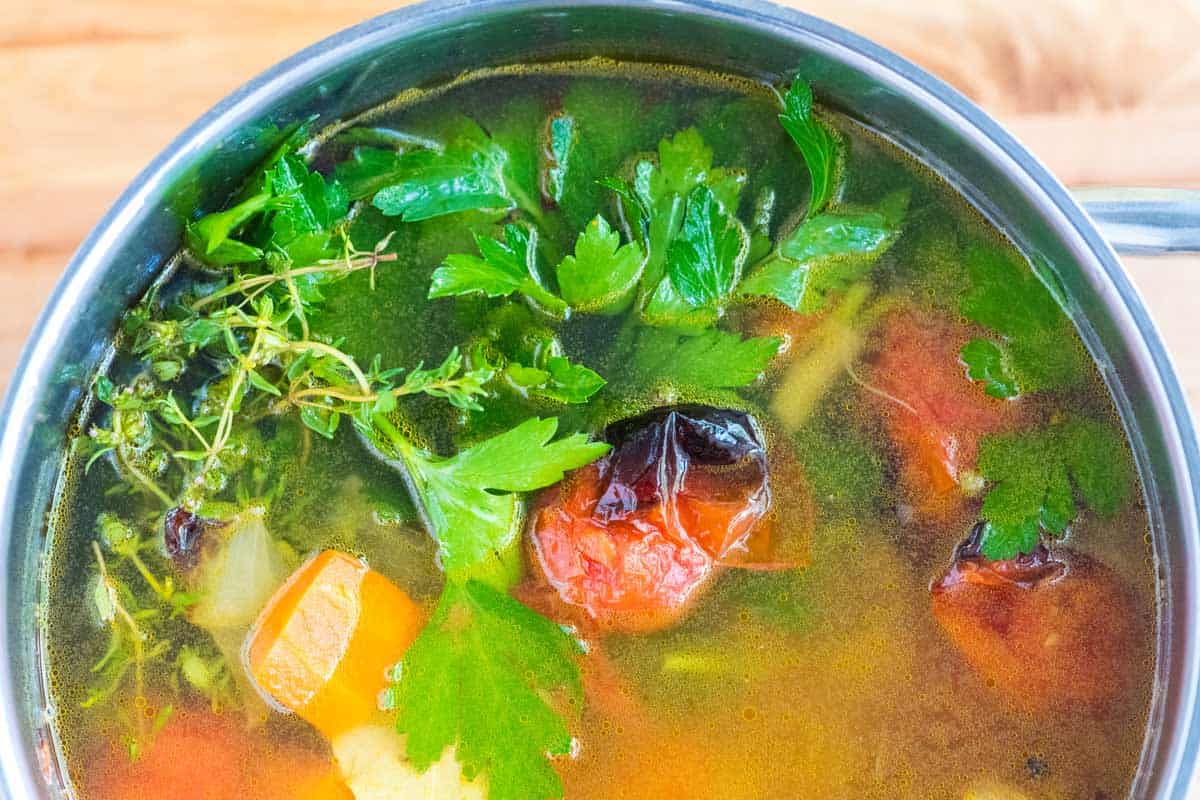
    Tip 2: Don’t leave out the tomatoes. Tomatoes add sweetness, color, and umami to this broth. Tomatoes are naturally high in glutamate, which means they contribute to that “fifth taste” or umami. Simply put, umami makes things taste good, adding that super delicious quality. Using tomatoes makes it rich and crave-worthy.

    Making veggie broth -- adding tomatoes for extra sweetness and umami.Making veggie broth -- adding tomatoes for extra sweetness and umami.

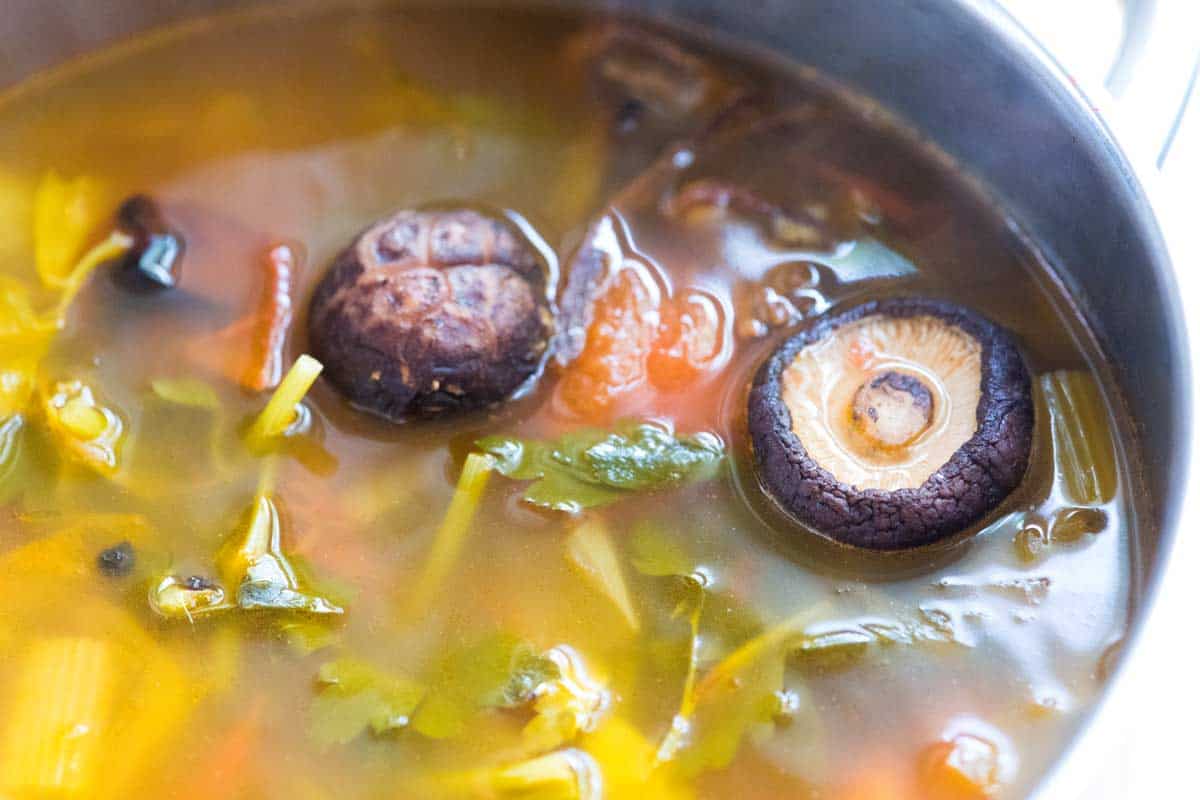
    Tip 3: Use dried mushrooms. Even though we didn’t add any bones or meat to this recipe, we still wanted some “meatiness” in the stock. Mushrooms are the solution. Just one ounce of dried mushrooms transforms this veggie broth from merely okay to something you wonder if it’s even vegetarian.

    Adding dried mushrooms to make homemade vegetable brothAdding dried mushrooms to make homemade vegetable broth

    Tip 3: Use it in your favorite recipes. This is perfect anytime a recipe asks for broth (even if it’s asking for chicken broth or beef broth). I often use it to make the soup recipes on Inspired Taste, like this potato soup, French onion soup, butternut squash soup, lemon turmeric lentil soup, and this veggie tortellini soup. It’s also great for cooking rice or quinoa. Use it in my quinoa recipe or to make this cilantro lime rice.

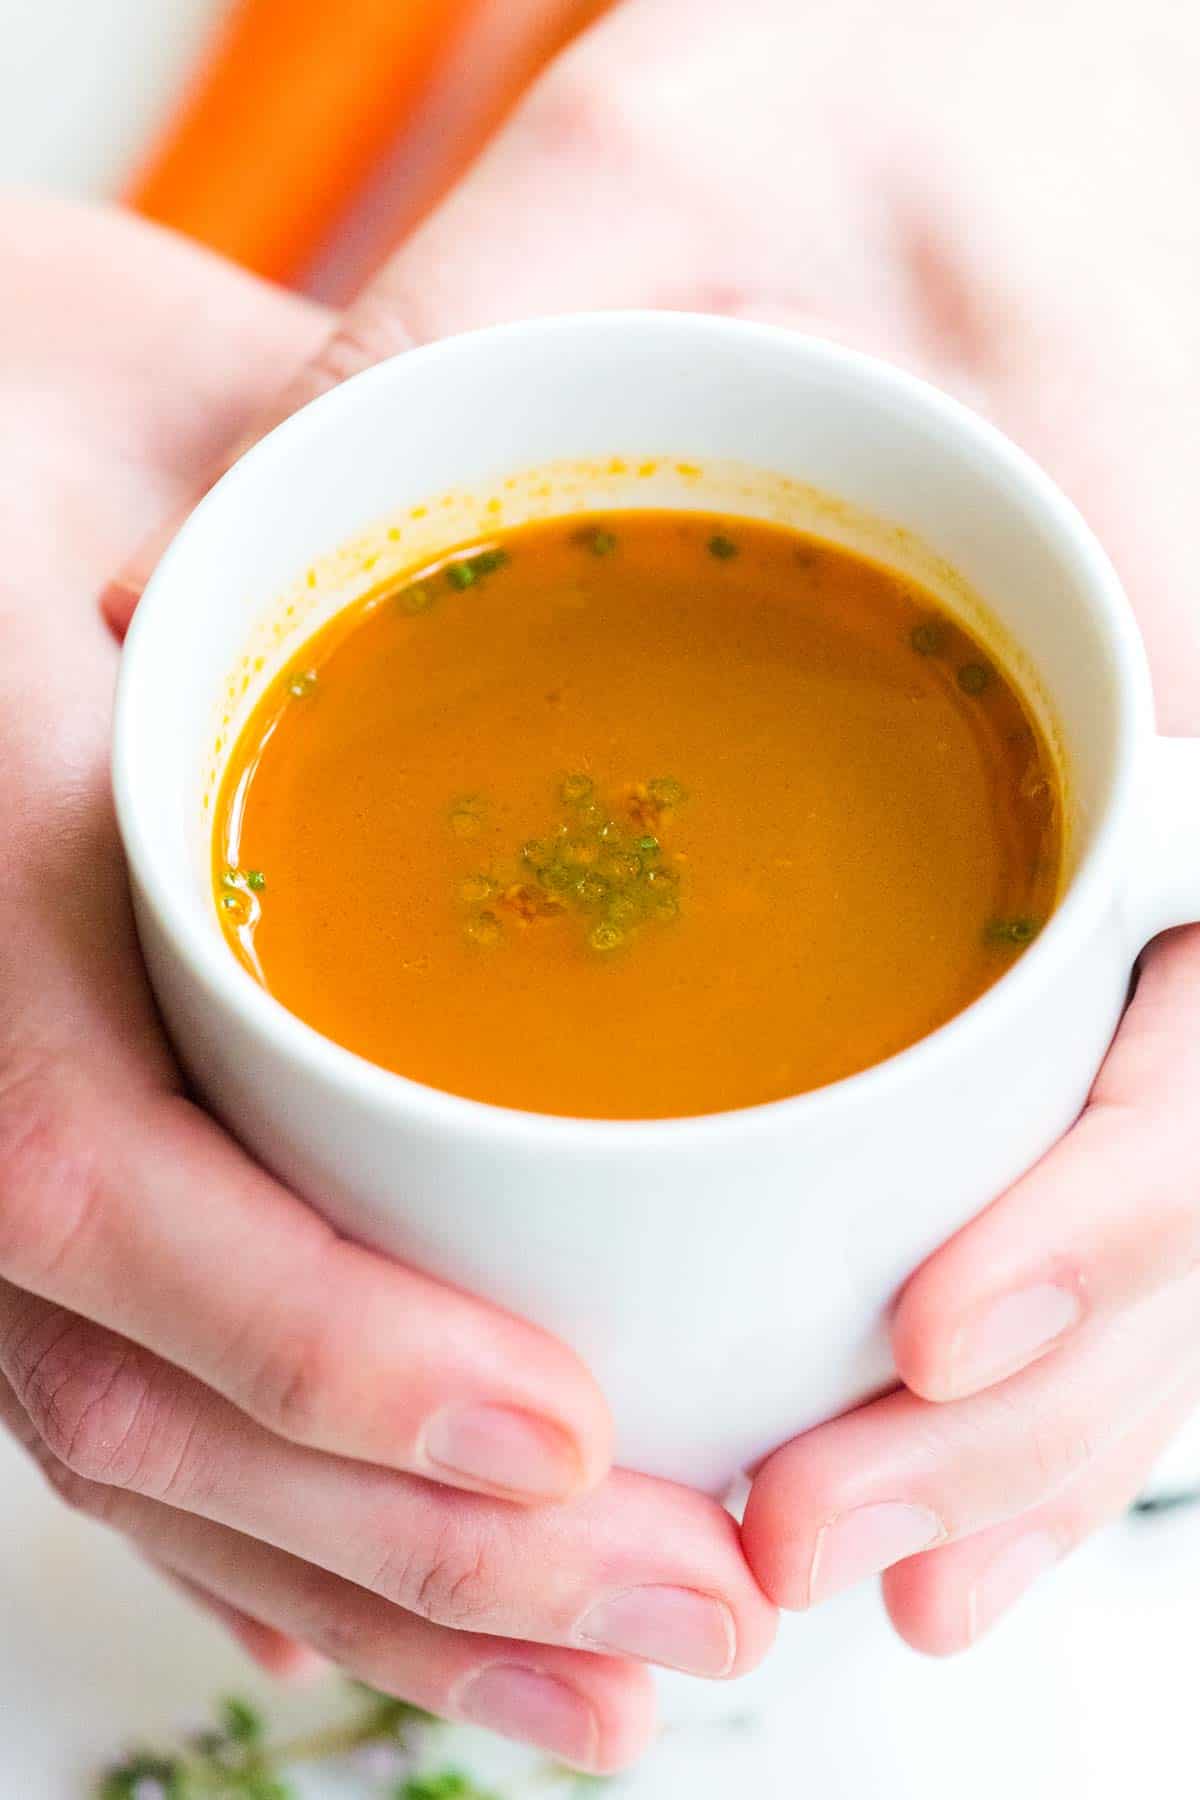
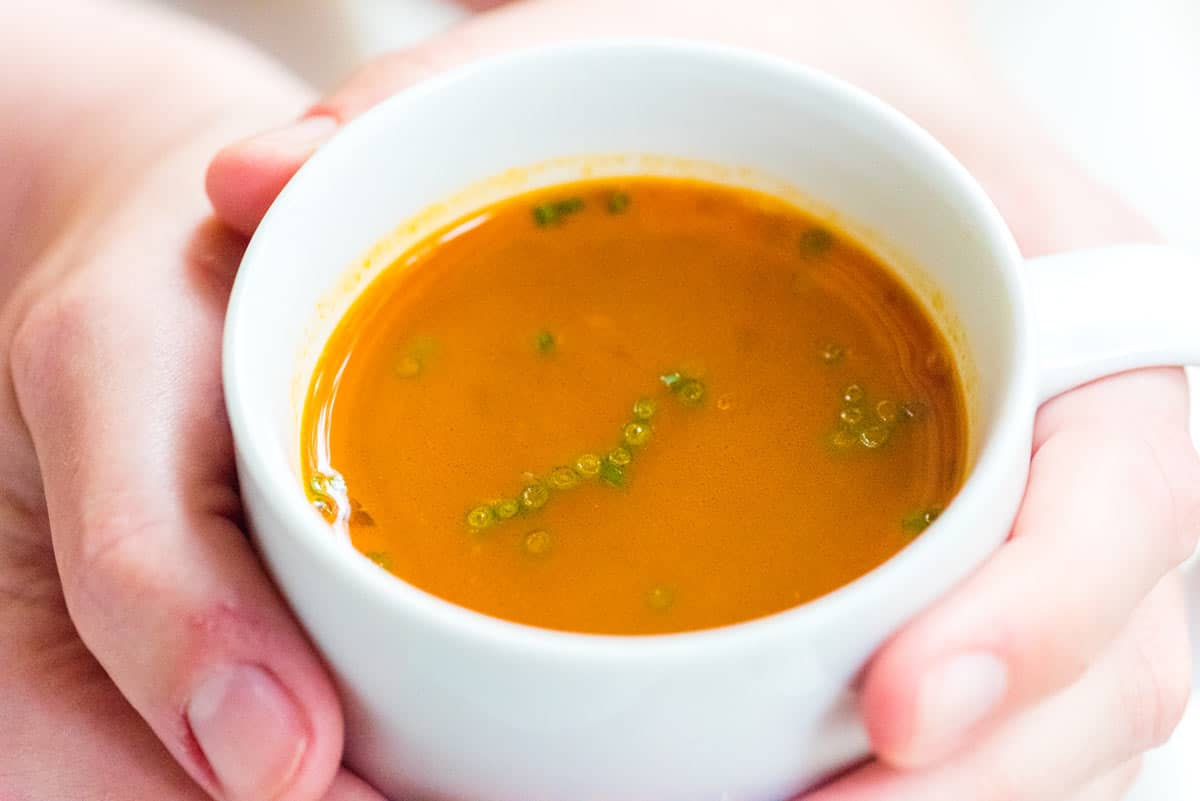
    Tip 4: Sip it like tea. This veggie broth has so much flavor, it’s lovely in a mug and sipped like tea. Any time I’m under the weather, I crave this broth. It’s so comforting. I highly recommend making a double batch of our broth and freezing some for a rainy day! It’s magic.

    Homemade Vegetable BrothHomemade Vegetable Broth

    The Best Vegetable Broth

    • PREP
    • COOK
    • TOTAL

    This homemade vegetable broth is hearty enough to enjoy alone as soup and perfectly replaces boxed stock in your favorite recipes. Roasting is the secret to rich and hearty veggie stock. When seasoned well, we find this veggie broth just as satisfying as bone broth.

    Think of this as a guide, and feel free to add any vegetable scraps in your fridge or freezer. Leeks, turnips, or mushroom scraps are all excellent. For even more richness, we add dried mushrooms, which pack a punch and add a “meatiness” to the stock.

    Makes 10 cups

    You Will Need

    1 pound onion, 2 medium (450g)

    1 pound carrots, 5 medium (450g)

    1/2 pound celery, 4 to 5 (225g)

    1 pound tomatoes, 3 medium (450g)

    4 garlic cloves, smashed and peeled

    2 tablespoons olive oil

    1/2 ounce dried mushrooms such as shiitake or porcini (14g)

    Half a bunch of fresh parsley

    3 sprigs fresh thyme

    2 bay leaves

    1 to 2 cups vegetable scraps from fridge or freezer, optional

    1 teaspoon sea salt, optional

    12 cups water, preferably filtered (2.8L)

    Directions

      • Roast Vegetables

    1Preheat the oven to 425°F (218°C). Set aside a large, rimmed baking sheet or a 9-inch by 13-inch baking dish for roasting the vegetables.

    2Peel the onion and roughly chop it into 1-inch chunks. Scrub the carrots and celery and cut them roughly into 1-inch chunks. Rinse the tomatoes, and if they are large, half or quarter them.

    3Add onion, carrots, celery, tomato, and garlic to the baking sheet. Toss with olive oil and roast for 15 minutes. Stir the vegetables and roast for another 15 minutes. Stir once more and roast until the vegetables are nicely browned and the tomatoes are caving in, another 10 minutes or so.

      • Make Vegetable Broth

    1While the vegetables roast in the oven, cover the dried mushrooms with 1/2 cup of cold water and set aside for 5 minutes.

    2Spoon the roasted vegetables into a tall stockpot. Add 1 cup of water to the baking sheet or pan, then stir it around, scraping up as much of the browned bits stuck to the bottom as possible. Pour over the vegetables in the stockpot.

    3Add the parsley, thyme, bay leaves, vegetable scraps, and salt (if using).

    4Add the partially rehydrated mushrooms, and then pour the water they sit in through a fine mesh strainer to catch any grit. Add the strained mushroom water to the pot with the vegetables.

    5Cover with 11 cups of water. Bring to a boil, then reduce to a simmer. Cook, partially covered, for 45 minutes.

    6Strain broth and use immediately, refrigerate for up to 3 days, or freeze for up to 3 months. When using, taste the broth and adjust the seasoning with additional salt or, if you are okay with using it, a few dashes of fish sauce.

    Adam and Joanne’s Tips

    • Dried mushrooms alternative: If you can’t find dried mushrooms, you can add mushroom scraps or chopped mushrooms to the onions and carrots when they roast. Dried mushrooms will taste stronger, but this will still make a delicious broth.
    • The nutrition facts provided below are estimates. We have omitted salt since you will need to add to your tastes.

    Nutrition Per Serving
    Serving Size
    1 cup
    /
    Calories
    70
    /
    Protein
    2 g
    /
    Carbohydrate
    10 g
    /
    Dietary Fiber
    3 g
    /
    Total Sugars
    5 g
    /
    Total Fat
    3 g
    /
    Saturated Fat
    0 g
    /
    Cholesterol
    0 mg

    Source link

  • Chicken & Brussels Sprouts Skillet

    Chicken & Brussels Sprouts Skillet

    Quick, cozy, and full of lemon-garlic goodness, this 30-minute chicken and Brussels sprouts skillet is my weeknight go-to when I want something hearty but still healthy.


    Jump to: ℹ️ Overview | 🛒 Ingredients | 📷 How To Make | 👩‍🍳 Recipe Tips | 🥗 Serving Suggestions | 📝 Full Recipe Card | 🍽 More Recipes With Brussels Sprouts


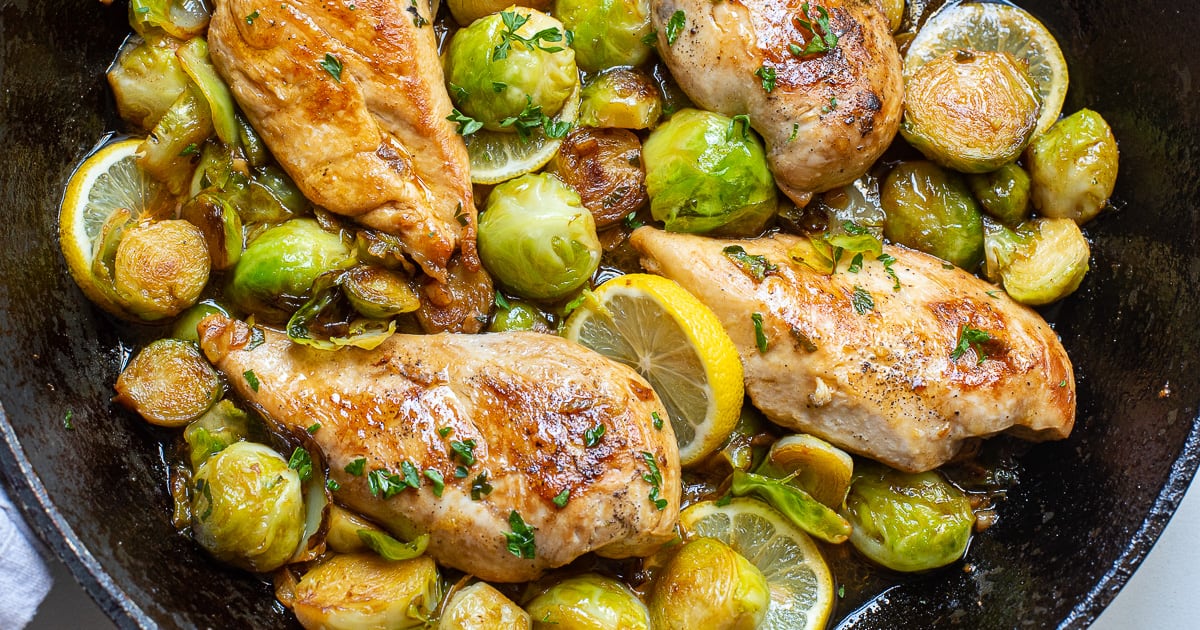
    This chicken and Brussels sprouts skillet is the kind of healthy comfort food I could make on repeat. The chicken comes out juicy and golden, while the sprouts soak up all the lemony, buttery, garlicky goodness from the pan.

    The chicken is seared to get that savory crust, and the Brussels sprouts go all golden and caramelized before being finished in a quick, zesty sauce. It’s high in protein and high in fiber, low-carb (if you skip the mash), and naturally gluten-free — basically weeknight gold. I’ve made this a few times, especially when Brussels sprouts are in season, and each time it hits that sweet spot of easy + flavor-packed + filling.

    👩‍🍳 You might also like these high-protein, high-fiber recipes: pan-fried salmon with pea salad, popcorn chicken bowls (with quinoa), coconut chicken and cauliflower rice, or beef rice and bean burritos.

    What You’ll Need

    Here is what you’ll need for this chicken amd Brussels sprouts recipe. Find the full measurements in the recipe card below.

    For the chicken:

    • Chicken breasts: sliced thin for even cooking. Boneless thighs also work for extra juiciness.
    • Sea salt & black pepper: simple seasoning, but essential. I also like a warm, slightly smoky kick from paprika. You can also add a little chili powder to this.
    • Olive oil: for searing the chicken and Brussels sprouts getting those crispy edges.
    • Fresh Brussels sprouts: halved for maximum surface caramelization. You can swap for broccoli if you’re not a sprout fan (but really, try it with the sprouts first!).
    • Garlic: lots of it. Don’t skimp—it adds real depth.
    • Lemon juice: adds brightness and cuts through the richness.
    • Butter: makes it all silky and indulgent.
    • Chicken broth (or stock): brings moisture and umami to the dish.
    • Parsley: fresh and herby for garnish.

    How To Make Chicken & Brussels Sprouts Skillet

    Find the full recipe and nutritional information below. Here are some handy step-by-step photos for chicken & Brussels sprouts skillet.

    • Season the chicken with salt and pepper.
    • Sear in olive oil for 3 minutes each side. Push aside in the pan.
    • In the same skillet, add more oil and cook Brussels sprouts for about 5 minutes until golden.
    • Stir in garlic, lemon juice, butter, broth, and paprika.
    • Stir and cook everything together for 2–3 more minutes. Flipping chicken again.
    • Sprinkle with parsley and serve.

    Recipe Tips

    • Use a large skillet so the Brussels sprouts get nicely browned instead of steaming.
    • Chicken swaps: Chicken thighs work beautifully and stay juicy but need a few minutes longer.
    • Make it spicy: Add red pepper flakes with the garlic if you like heat.
    • Storage: Keeps well in the fridge for 3 days. Reheat in a skillet or microwave until warm.
    • Make-ahead tip: Slice the chicken and prep the Brussels the day before to save time.

    Serving Suggestions

    Serve this over creamy mashed potatoes or fluffy rice to soak up the buttery lemon sauce. Or go low-carb with cauliflower rice. It’s also great on its own for a lighter meal, maybe with a dollop of sour cream or Greek yogurt on the side.

    💬 If you’ve tried this chicken & Brussels sprouts skillet or any other recipe on the blog then don’t forget to rate the recipe and let me know how you got on in the comments below, I love hearing from you! You can also FOLLOW ME on Instagram, Facebook, Pinterest, YouTube, and or sign up to my Newsletter to see more of my delicious food.

    Want to Save This Recipe?

    Enter your email & I’ll send it to your inbox. Plus, get great new recipes from me every week!

    By submitting this form, you consent to receive emails from Cooked & Loved

    Quick, cozy, and full of lemon-garlic goodness—this 30-minute chicken and Brussels sprouts skillet is my weeknight go-to when I want something hearty but still healthy. Find step-by-step photos and more recipe tips above.

    • Season chicken breasts with salt and pepper on both sides.

    • Heat 1 tablespoon olive oil in a large skillet over medium-high heat. Sear chicken for 3 minutes on each side until golden.

    • Push the chicken to one side of the skillet. Add the remaining tablespoon of oil and toss in the Brussels sprouts. Cook for about 5 minutes, flipping halfway, until they start to brown.

    • Stir in the garlic, lemon juice, butter, chicken broth, and paprika. Let everything simmer together for 2–3 minutes, uncovered.

    • Sprinkle with parsley, serve hot, and enjoy!

    • Can I use frozen Brussels sprouts? I don’t recommend it for this one—fresh gives the best browning and texture.
    • Is this dish spicy? Not at all! But feel free to add a pinch of chili flakes if you like a kick.
    • What can I use instead of butter? You can use ghee or even olive oil for a lighter version, though the butter adds richness.
    • Use a large skillet so the Brussels sprouts get nicely browned instead of steaming.
    • Chicken swaps: Chicken thighs work beautifully and stay juicy but need a few minutes longer.
    • Storage: Keeps well in the fridge for 3 days. Reheat in a skillet or microwave until warm.
    • Make-ahead tip: Slice the chicken and prep the Brussels the day before to save time.

    Calories: 331kcal | Carbohydrates: 8g | Protein: 27g | Fat: 22g | Saturated Fat: 9g | Polyunsaturated Fat: 2g | Monounsaturated Fat: 9g | Trans Fat: 0.5g | Cholesterol: 103mg | Sodium: 786mg | Potassium: 720mg | Fiber: 3g | Sugar: 2g | Vitamin A: 1137IU | Vitamin C: 63mg | Calcium: 46mg | Iron: 2mg

    Keywords: Chicken & Brussels Sprouts Skillet, Chicken With Brussels Sprouts, Lemon Garlic Chicken & Brussels Sprouts

    More Recipes With Brussels Sprouts


    Source link

  • Easy Chicken Stir Fry Recipe

    Easy Chicken Stir Fry Recipe

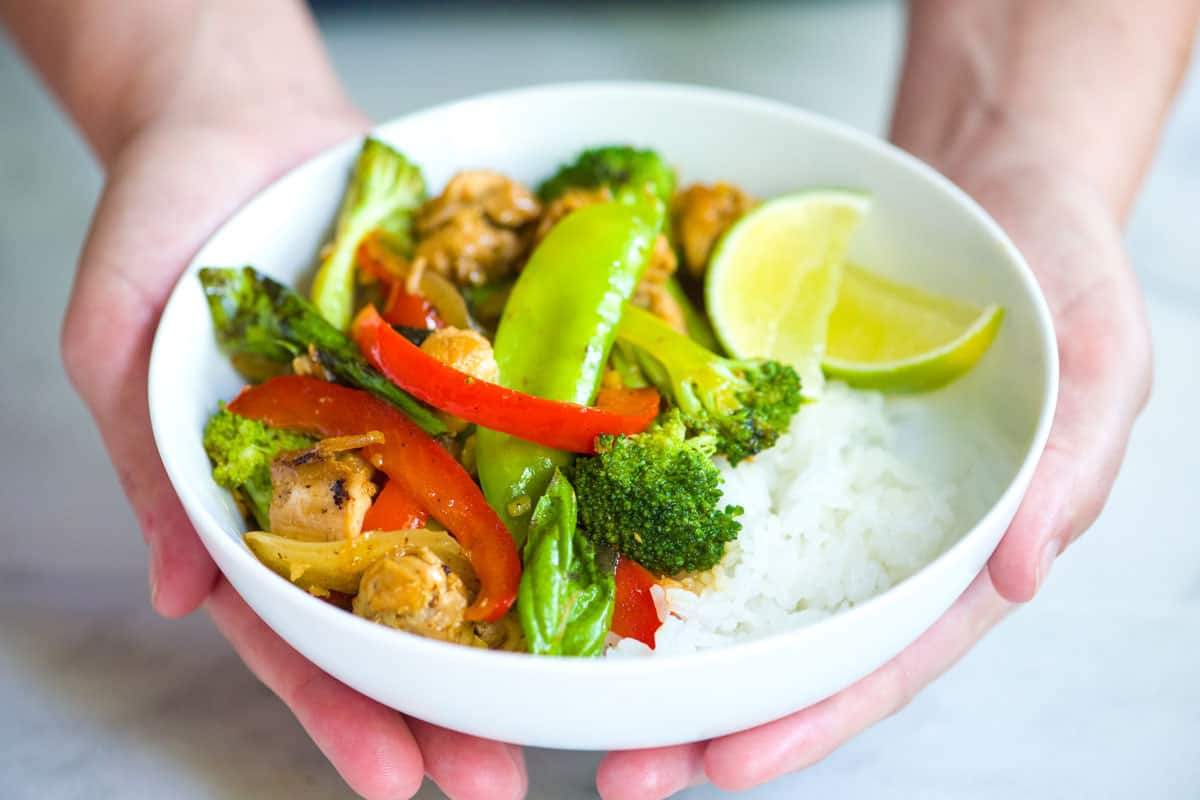
    This chicken stir fry recipe is packed with fresh vegetables and coated with our irresistible homemade sauce.

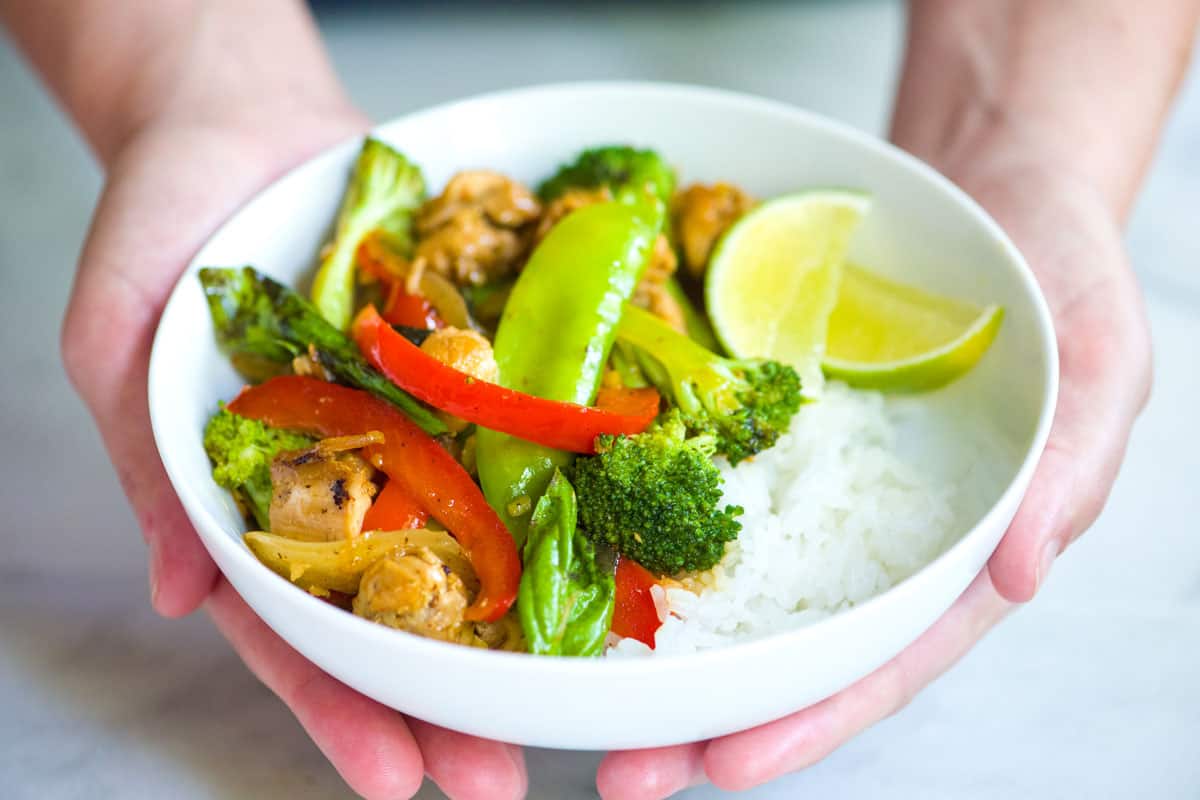
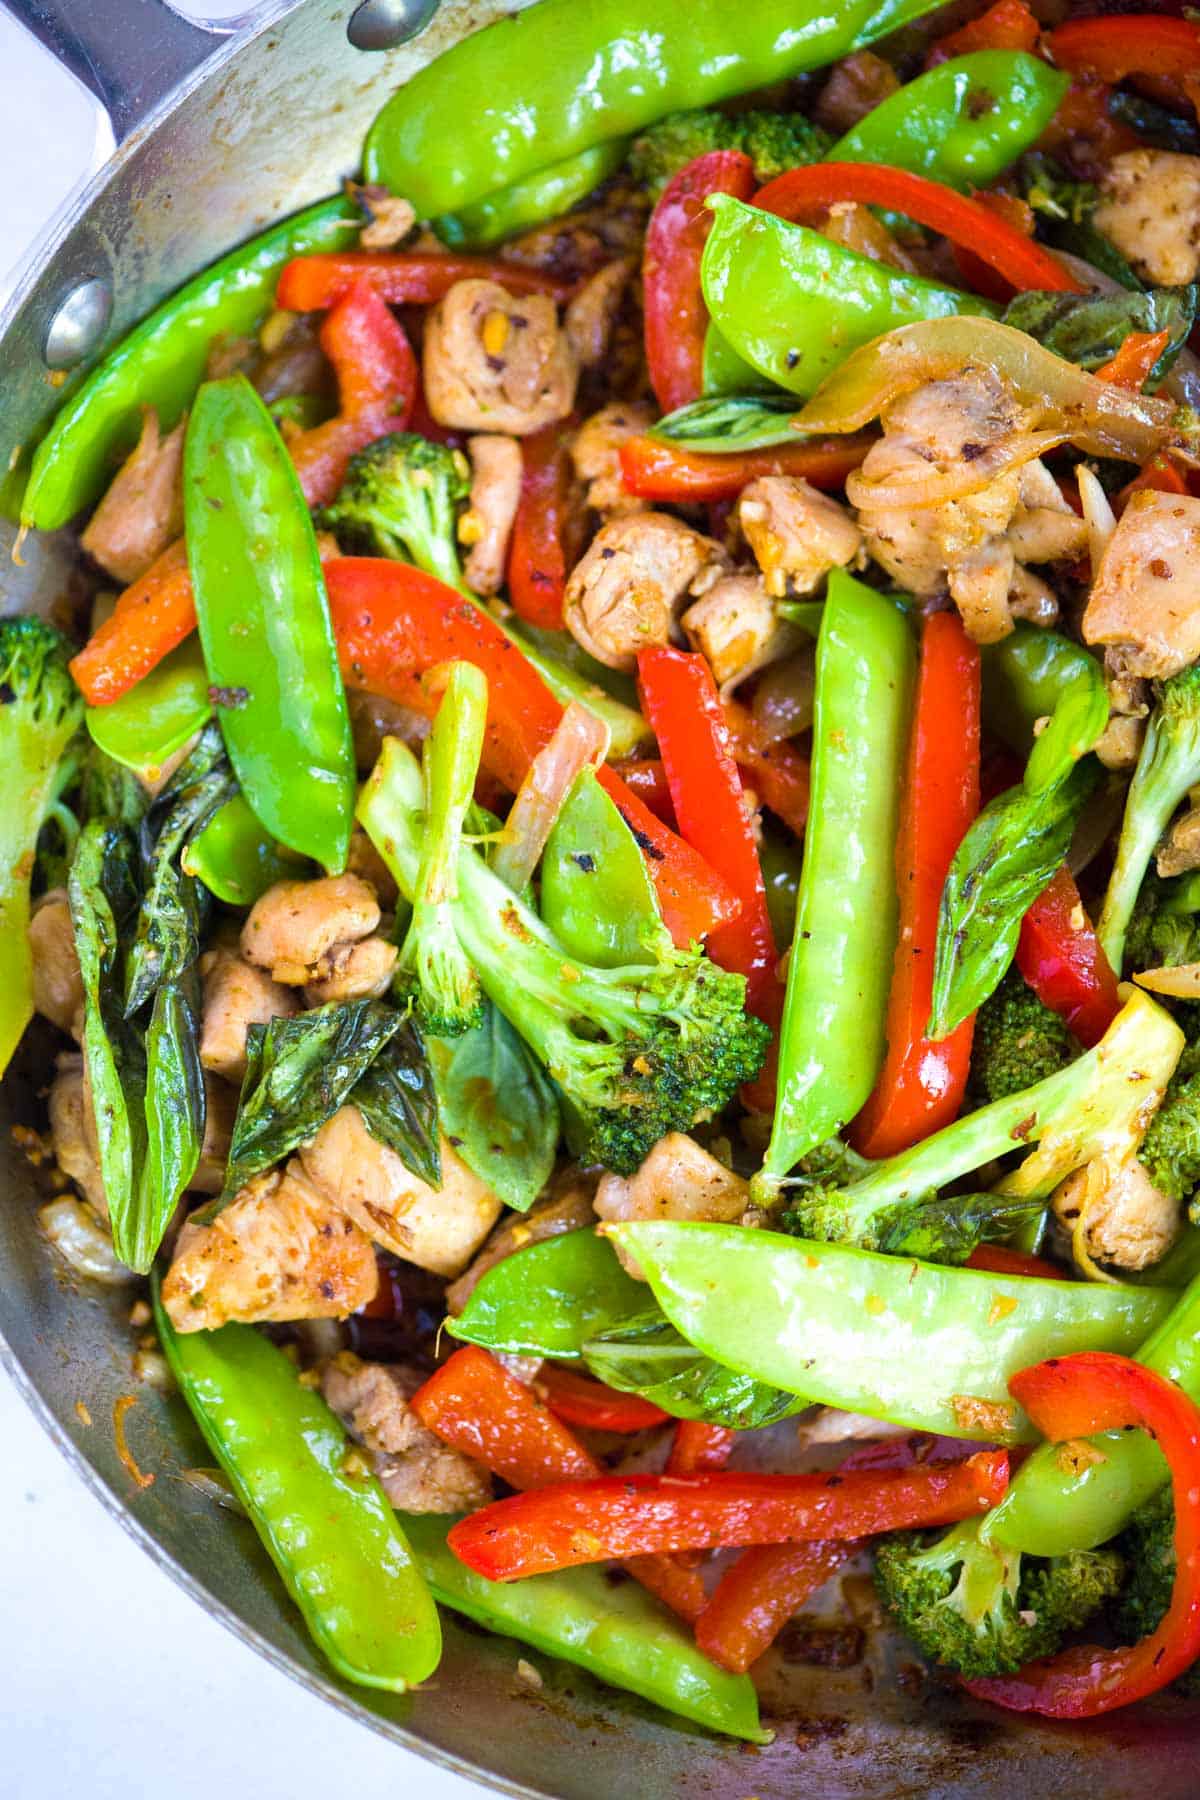
    Chicken stir fry with vegetables

    I love stir fries, especially when I’m short on time. We’ve found ourselves returning to this recipe lately. The sauce is easy and made from scratch with honey, fish sauce, and soy sauce.

    This stir fry can be on the table in about 30 minutes, and if you want to, you can make the stir fry sauce well in advance (it lasts in the fridge for a week).

    Key Ingredients

    • Chicken: I use boneless, skinless chicken thighs in this stir fry recipe, but boneless, skinless chicken breasts work well. Cut the chicken thighs into bite-sized pieces, or if you have chicken breasts, slice them against the grain into 1/4-inch slices.
    • Veggies: Use what you love, but when I make this recipe, I reach for broccoli, onion, bell pepper, and snow peas. The combination is hearty, flavorful, and colorful. Take note of the recipe directions, where I give the heartier veggies (like broccoli) a head start before adding the other vegetables to the skillet/wok.
    • Ginger and Garlic: I love fresh ginger and garlic, and use a tablespoon of each in this stir fry. If you don’t want to buy fresh ginger, look for the fresh ginger paste (sold in squeeze bottles).
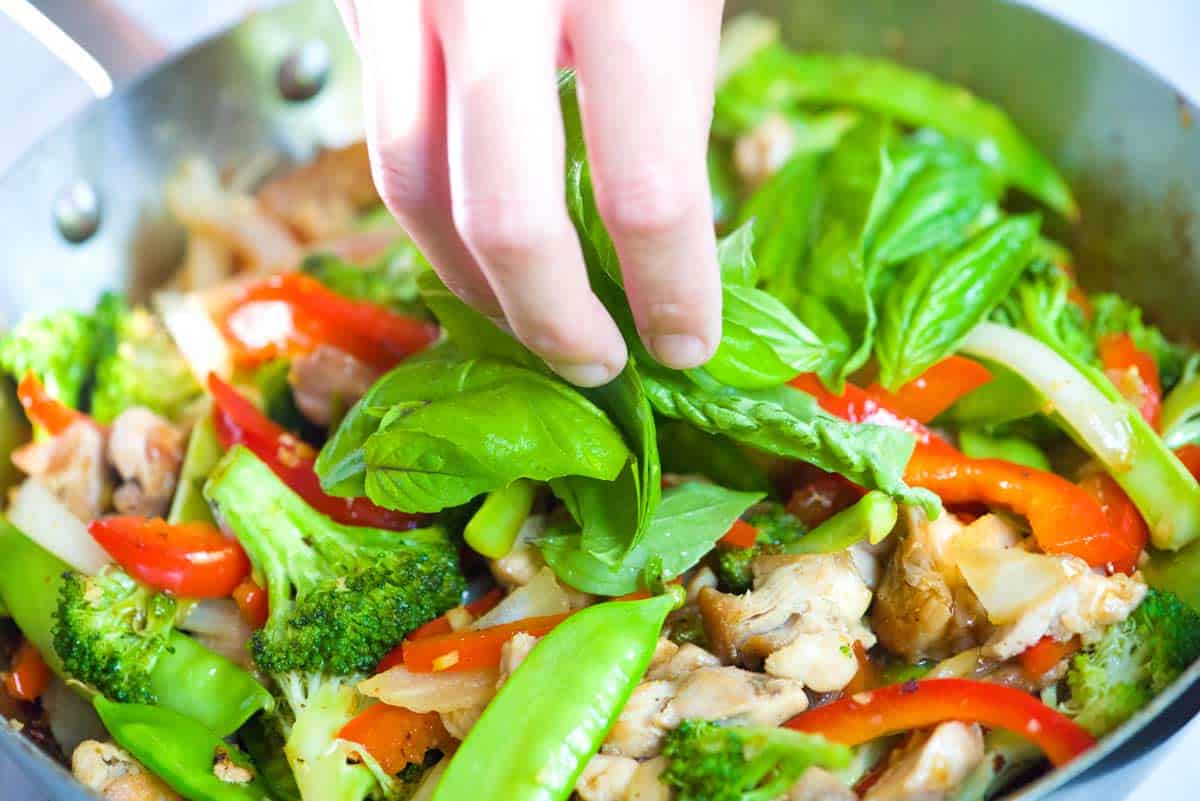
    • Basil: One of my favorite Thai restaurants sells a stir-fried dish with lots of fresh basil and I love it, so I add fresh basil here. Use Italian basil or Thai basil. Mint is also an option.
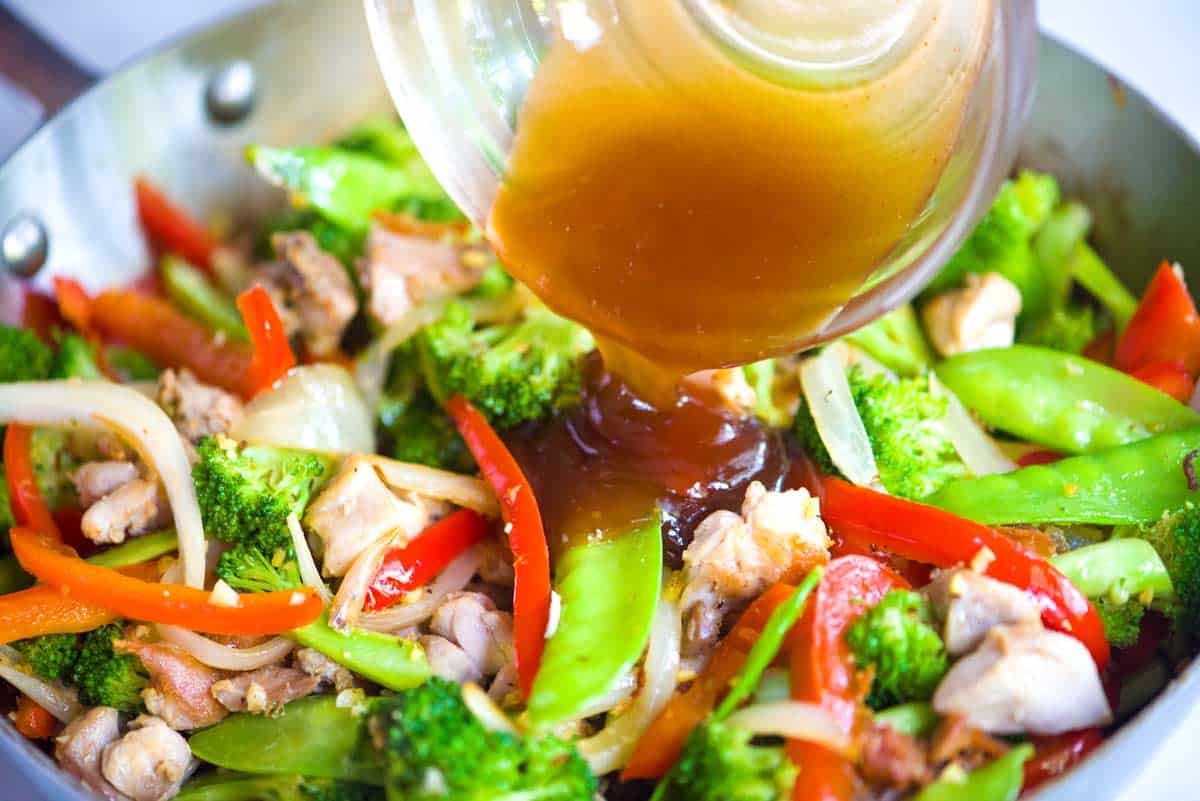
    • Stir Fry Sauce: This homemade sauce is really easy and so flavorful. I combine honey, fish sauce, soy sauce, water (or broth), and cornstarch. The cornstarch thickens the sauce a bit, so it sticks to the chicken and vegetables in the stir fry. I also love this more traditional brown stir fry sauce.

    Find the full recipe with measurements below.

    How to Make the Best Chicken Stir Fry

    Tip 1: A quick guide for making our chicken stir fry. This dish comes together really quickly. For the best results, you’ll want to cook your protein first, then follow up with the veggies. This way the chicken stays perfectly tender and the veggies don’t overcook. Here’s a quick rundown of what you’ll need to do:

    1. Cook the chicken first, then transfer it to a plate.
    2. Toss your broccoli into the pan. Since broccoli is heartier than the other veggies, I like giving it a head start so that by the time everything else is ready, it’s bright green and crisp-tender.
    3. After tossing the remaining veggies, I stir the garlic and ginger. Adding these later guarantees that they stay super fragrant and don’t burn.
    4. Add the chicken and sauce, then reheat everything.
    5. If you have some on hand, toss in some fresh herbs and lime juice. I love basil, but mint is great, too.
    Adding the homemade stir fry sauce to the skillet
    Adding fresh basil to the stir fry

    Tip 2: Serving suggestions. Thanks to all of the hearty veggies, this stir fry is lovely by itself. It’s also great with plain rice, coconut rice, fried rice, noodles or this cilantro lime rice.

    More Asian Inspired Recipes

    Chicken Stir Fry

    Easy Chicken Stir Fry

    • PREP
    • COOK
    • TOTAL

    My family loves this easy chicken and vegetable stir fry. I use chicken thighs, but chicken breast, tofu, pork, or simply replacing the chicken with more vegetables are all options. The key to the best stir fry is to cook the heartiest ingredients first—like the chicken or broccoli, then add less hearty and more delicate ingredients towards the end of cooking. This way, none of the vegetables overcook. Use a nice wide skillet or wok for this recipe. The bigger, the better.

    Makes 4 servings

    You Will Need

    Chicken Stir Fry

    1 ½ pounds boneless, skinless chicken thighs, cut into bite-size pieces

    1 tablespoon avocado oil, peanut oil, or canola oil

    2 cups broccoli florets (1 medium bunch)

    1 small onion, thinly sliced

    1 bell pepper, core removed and thinly sliced

    1 ½ cups snow peas (3 ounces)

    1 tablespoon minced fresh ginger (1-inch piece)

    1 tablespoon minced garlic (3 cloves)

    1/4 cup fresh basil leaves

    Juice of 1 lime, plus extra lime wedges for serving


    Stir Fry Sauce

    1 tablespoon honey

    2 tablespoons fish sauce

    1 teaspoon low sodium soy sauce

    1/3 cup water or chicken broth

    1 ½ teaspoons cornstarch

    1/2 to 1 teaspoon Sriracha hot sauce

    Directions

      1You can make the stir fry sauce up to one week in advance and keep it in an airtight container in the fridge. Whisk honey, fish sauce, soy sauce, water, and cornstarch in a small saucepan over medium-low heat. Continue to whisk as it heats up and thickens, 2 to 3 minutes. When thick and shiny, remove from the heat and stir in Sriracha hot sauce.

      2Heat a large, wide skillet or wok over medium-high heat. Add the oil and swirl it in the pan until the bottom is well coated. Scatter the chicken pieces in one layer. Cook, without moving, until starting to brown on the bottom, about 5 minutes. Stir the chicken and continue to cook until cooked through about 3 minutes. Transfer the chicken to a clean plate.

      3Reduce the heat to medium, then place the skillet back on the burner. Add the broccoli and cook, stirring frequently, until it turns bright green, about 2 minutes.

      4Throw in the onion and bell pepper, and cook, stirring frequently, until the onions begin to sweat, about 2 minutes.

      5Add the snow peas, ginger, and garlic, then cook, tossing frequently until the ginger and garlic are fragrant and the snow peas turn a brighter green, about 2 minutes.

      6Stir in the cooked chicken. When all of the vegetables are crisp-tender and the chicken is reheated, take the skillet off the heat and stir in the stir-fry sauce. As you stir, use tongs or a spoon to scrape the bottom of the pan to lift any bits stuck to the pan and mix them into the sauce.

      7Finish by tossing with fresh basil leaves and the juice of one lime. Serve with extra lime wedges.

    Adam and Joanne’s Tips

    • Chicken breasts: If you substitute chicken breasts in this recipe, slice them against the grain into 1/4-inch slices before cooking them so that they are super tender.
    • Buying fish sauce: We always keep a bottle of fish sauce in our kitchen. It’s truly a magical ingredient. You can use it here and in other Asian-inspired dishes, and it is also excellent for adding to soups, stews, and pasta sauces. We have Red Boat in our kitchen. It has a clean flavor and no water or sugar added. If you cannot find it, go for a mid to high-priced fish sauce sold in a glass bottle instead of in plastic, and look for a light amber or reddish color rather than a very dark color.
    • The nutrition facts provided below are estimates.

    Nutrition Per Serving
    Serving Size
    1 1/4 cups
    /
    Calories
    308
    /
    Protein
    37 g
    /
    Carbohydrate
    16 g
    /
    Dietary Fiber
    3 g
    /
    Total Sugars
    9 g
    /
    Total Fat
    10 g
    /
    Saturated Fat
    2 g
    /
    Cholesterol
    142 mg


    AUTHOR:

    Adam Gallagher

    Adam and Joanne of Inspired Taste

    We are Adam and Joanne Gallagher, the creators of Inspired Taste. Established in 2009, Inspired Taste grew from a childhood dream into one of the internet’s most trusted recipe sites with hundreds of reliable recipes, step-by-step videos, and expert tips.More About Us

    Previous Post: Seriously Good Baked Spaghetti
    Next Post: Easy Cranberry Orange Scones

    Source link

  • Chicken Shawarma With Baked Rice

    Chicken Shawarma With Baked Rice

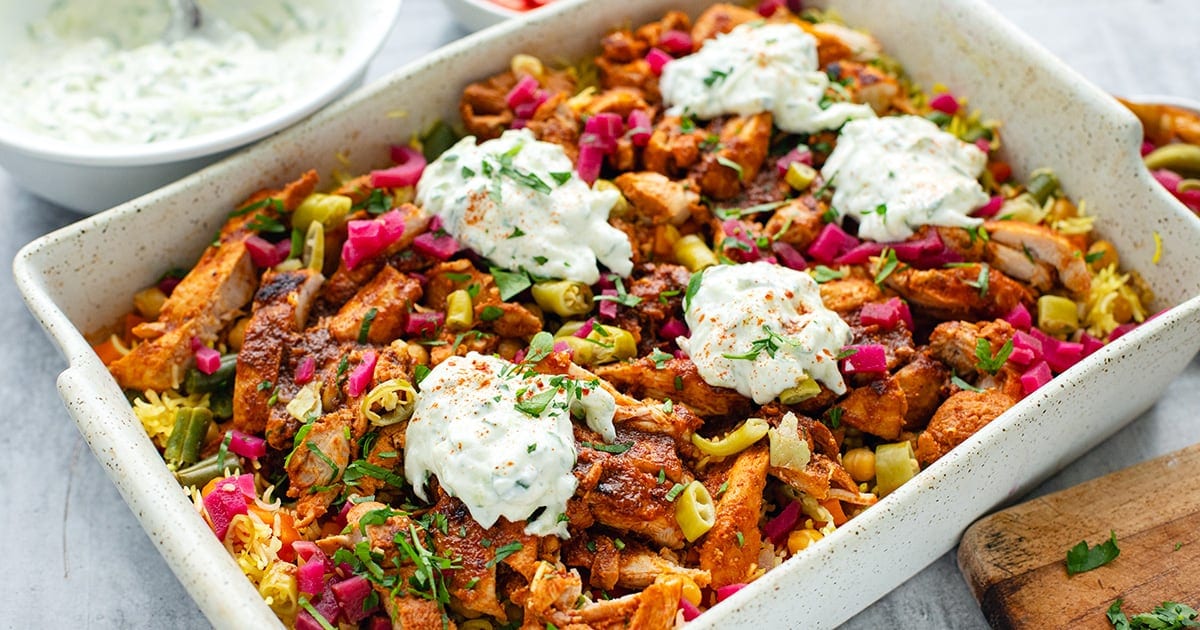
    Chicken shawarma with baked rice and vegetables — a flavorful meal the whole family will love. This is part of my high-protein and fiber meals series.


    Jump to: ℹ️ Overview | 🛒 Ingredients | 📷 How To Make | 📹 Watch The Video | 👩‍🍳 Recipe Tips | 🥗 Serving Suggestions | 📝 Full Recipe Card | 🍽 More


    In this chicken shawarma recipe, tender, spiced chicken sits on a bed of rice that’s baked with chickpeas and colorful vegetables, giving you a balanced, comforting meal. The rice is soft and fluffy with a hint of yellow color from turmeric, the chickpeas add great fiber, and the quick pan‑fried chicken stays juicy with browned edges.

    I also make the shawarma sauce in the same pan as the chicken — it turns into this slightly tangy, savory drizzle that ties everything together. A fresh, creamy tzatziki on the side cuts through the spices beautifully. When served, you get a delicious chicken shawarma bowl that’s high in protein and fiber. This wholesome comfort food has become a weeknight staple in our house.

    Macros highlight (per serving): ~450 cal, ~37 grams protein, ~6-8 grams fiber — so you’re getting good macros and plenty of volume and flavor. See the full nutrition label in the recipe card.

    Get my High-Protein & Fibre Cheat Sheets

    👉 You might also like these recipes from the series: baked chia oats recipe, Asian carrot salad (with chicken and edamame), healthy chicken taco soup, or my high-protein butternut squash soup.

    What You’ll Need

    Here is what you’ll need for this chicken shawarma with baked rice and veggies recipe. Find the full measurements in the recipe card below.

    Chicken Shawarma Marinade

    • Chicken thighs — juicy, flavorful base protein, use skinless and boneless thighs. Swap chicken thighs for breasts if you want leaner meat (just don’t overcook)
    • Garlic, lemon juice, paprika, cumin, coriander seed and tomato paste — shawarma seasoning that builds bold flavor.

    Baked Rice & Veggies

    • Uncooked rice — use medium or long-grain rice here for the hearty carb base.
    • Chickpeas — extra protein + fiber; canned chickpeas are fine.
    • Green beans, bell peppers, carrot, red onion — color, crunch, fiber and nutrients.
    • Chicken stock — infuses the rice with savory flavor.
    • Garlic powder, paprika, lemon, salt and turmeric (optional for color).

    Tzatziki

    • Lebanese cucumber — cool, crisp freshness. No Lebanese cucumber? Regular cucumber works — just squeeze extra moisture out.
    • Greek yogurt (high-protein, low-fat) — creamy and tangy with extra protein.
    • Lemon + garlic — classic tzatziki zing.

    To Serve

    • Pickled turnip + pepperoncini — optional punchy toppings.
    • Parsley + lemon wedges — bright finishing touches.

    How To Make Chicken Shawarma With Baked Rice & Veggies

    Find the full recipe and nutritional information below. Here are some handy step-by-step photos for chicken shawarma with baked rice and veggies. You can bake the rice first or do the chicken first, or in parallel.

    • Marinate the chicken: Cut chicken thighs in half. Toss chicken pieces with shawarma spices, garlic, lemon and tomato paste. Let rest.
    • Cook chicken: Heat oil in a pan over medium‑high heat. Cook chicken 7–8 minutes on one side, flip and cook 2 minutes. Pour chicken stock around chicken and cook 5 more minutes to form a sauce. Remove chicken and slice.
    • Tzatziki: Grate cucumber, squeeze dry and mix with yogurt, garlic, lemon and salt.
    • Dice or slice pickled turnip and pepperoncini or hot pickled peppers (if using).
    • Bake rice & veg: Rinse rice well; combine with chickpeas, vegetables, seasonings and stock in a deep tray. Cover with foil and bake ~35–40 minutes mixing half way through.
    • Assemble: Fluff rice; top with sliced chicken, pour over pan sauce, dollop tzatziki, add pickles + parsley.

    Watch The Video

    Recipe Tips

    • Make‑ahead: Marinate the chicken up to 12 hours ahead — it only gets more flavorful. Tzatziki holds well in the fridge for 24–48 hours; great for meal prep.
    • Storage: Refrigerate leftovers up to 3–4 days. Freeze portions (without tzatziki) up to 2 months. Thaw overnight and reheat covered.
    • Variations: Add cauliflower florets or zucchini for more veg. Swap chickpeas for white beans or lentils. Sprinkle feta on top before serving for extra tang.
    • Timing help: Rice done when liquid’s absorbed and grains are tender. Chicken is best juicy — don’t overcook, and let the pan sauce do its thing.

    Serving Suggestions

    Serve this chicken shawarma rice bake with a squeeze of fresh lemon, a generous dollop of tzatziki and plenty of parsley for brightness. A side salad or warm pita bread makes it feel luxe, or simply enjoy it straight from the tray — it’s one of those meals that’s beautiful either way.

    💬 If you’ve tried this chicken shawarma with baked rice and veggies or any other recipe on the blog then don’t forget to rate the recipe and let me know how you got on in the comments below, I love hearing from you! You can also FOLLOW ME on Instagram, Facebook, Pinterest, YouTube, and or sign up to my Newsletter to see more of my delicious food.

    Want to Save This Recipe?

    Enter your email & I’ll send it to your inbox. Plus, get great new recipes from me every week!

    By submitting this form, you consent to receive emails from Cooked & Loved

    Chicken shawarma with baked rice and vegetables — a flavorful, high-protein and high-fiber meal the whole family will love. This healthy chicken taco soup is part of my high-protein and fiber meals series. Find step-by-step photos and more recipe tips above.

    Chicken Shawarma Marinade

    • Marinate the chicken: Cut chicken thighs in halves and trim excess fat. Combine with garlic, spices, lemon juice and tomato paste. Set aside (or refrigerate if prepping ahead).

    • Prepare rice bake: Rinse rice and add to a deep baking tray. Add drained chickpeas, green beans, peppers, carrots and onion. Stir through salt, garlic powder and paprika. Pour in stock, a bit of lemon juice and turmeric for color. Cover with foil.

    • Bake: Bake at 200°C / 400°F for 35–40 minutes, stirring halfway. Rest 5 minutes once done.

    • Make tzatziki: Grate cucumber and squeeze out excess moisture. Mix with Greek yogurt, lemon juice, garlic and salt. Set aside.

    • Cook chicken: Heat oil in a pan over medium‑high heat. Cook chicken 7–8 minutes on one side, flip and cook 2 minutes. Pour chicken stock around chicken and cook 5 more minutes to form a sauce.

    • Finish sauce & slice: Remove chicken; let sauce reduce a bit. Slice chicken.

    • Assemble: Fluff rice; top with chicken and pour pan sauce over. Add pickled turnip, pepperoncini, parsley and lemon wedges. Serve with tzatziki.

  • Is this gluten‑free? Yes — all ingredients here are naturally gluten‑free as long as your stock and seasonings don’t have additives.
  • What kind of rice works best? Long‑grain or medium-grain white rice bakes more reliably in this one‑pan style. Brown rice is doable — just boost liquid and bake time, veggies will get very soft.
  • Can I skip chickpeas? Sure! Swap for lentils or add extra veg like cauliflower or zucchini.
  • Is this spicy? Not overly — the chili powder is optional. Pickled peppers give heat if you want it.
  • Make‑ahead: Marinate the chicken up to 12 hours ahead — it only gets more flavorful. Tzatziki holds well in the fridge for 24–48 hours; great for meal prep.
  • Storage: Refrigerate leftovers up to 3–4 days. Freeze portions (without tzatziki) up to 2 months. Thaw overnight and reheat covered.
  • Variations: Add cauliflower florets or zucchini for more veg. Swap chickpeas for white beans or lentils. Sprinkle feta on top before serving for extra tang.
  • Timing help: Rice done when liquid’s absorbed and grains are tender. Chicken is best juicy — don’t overcook, and let the pan sauce do its thing.

Calories: 449kcal | Carbohydrates: 50g | Protein: 37g | Fat: 11g | Saturated Fat: 3g | Polyunsaturated Fat: 2g | Monounsaturated Fat: 4g | Trans Fat: 0.02g | Cholesterol: 113mg | Sodium: 1489mg | Potassium: 876mg | Fiber: 6g | Sugar: 9g | Vitamin A: 2645IU | Vitamin C: 87mg | Calcium: 152mg | Iron: 4mg

Keywords: chicken and rice meals, chicken shawarma recipes, Chicken Shawarma With Baked Rice & Veggies

More High-Protein Dinner Recipes


Source link

  • Lentil Mushroom Bolognese

    Lentil Mushroom Bolognese

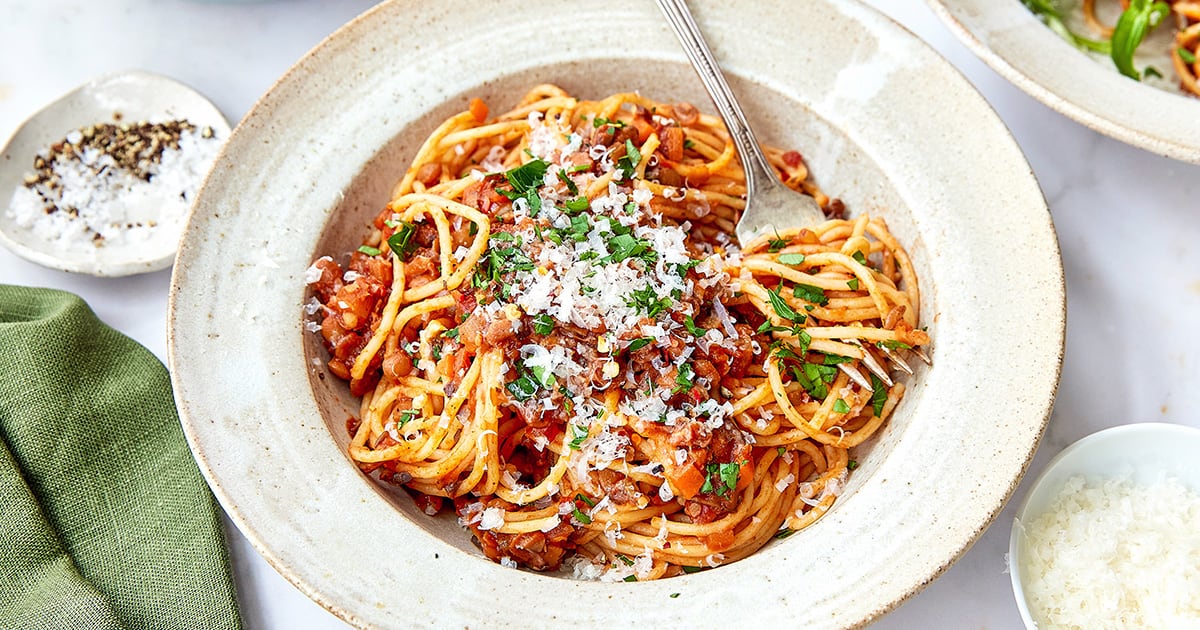
    This vegetarian Bolognese with lentils and mushrooms is hearty, high in fiber, and full of rich, umami-packed flavor—perfect for a cozy, plant-based dinner. This recipe is part of my high-protein and fiber meals.


    Jump to: ℹ️ Overview | 🛒 Ingredients | 📷 How To Make | 📹 Watch The Video | 👩‍🍳 Recipe Tips | 🥗 Serving Suggestions | 📝 Full Recipe Card | 🍽 More Vegetarian Dinner Recipes


    This mushroom and lentil Bolognese-like sauce is the real deal. Deep, rich, and savory with the texture that would rival the original. It’s inspired by the slow-cooked flavor of classic Italian Bolognese, but comes together in under an hour using plant-based pantry staples and a few flavor-packed boosters such as sun-dried tomatoes and Worcestershire sauce. It’s hearty enough to satisfy meat-lovers and cozy enough for cold nights.

    The combo of mushrooms and lentils creates a meaty texture and earthy base, while garlic, smoked paprika, and cinnamon (yes, cinnamon!) layer in that magic depth. It’s loaded with fiber and plant-based protein, supports gut health, and is low in calories. Plus, it’s meal-prep friendly, freezer-safe, and tastes even better the next day.

    Nutrition (per serving with spaghetti, Parmesan and leafy salad): ~595calories | Protein: 26 grams | Fibre: 13 grams

    You might also like these recipes: lentil mushroom Stroganoff, viral cucumber salad (with tofu and edamame), high-protein butternut squash soup, zucchini fritters with zhoug and jammy eggs, or high-protein bircher muesli.

    What You’ll Need

    Here is what you’ll need for this lentil Bolognese recipe. Find the full measurements in the recipe card below.

    • Onion, carrot, celery – classic flavor trio that adds sweetness and depth. Plus, garlic to add a warm, savory base. Don’t skip it.
    • Olive oil – for richness and to carry those flavors.
    • Lentils – canned for convenience, loaded with protein and fiber.
    • Mushrooms – finely chopped for that “meaty” texture.
    • Tomato passata – smooth and rich, the body of the sauce.
    • Spices: smoked paprika, cinnamon, chili flakes, dried herbs – adds complexity and a subtle kick.
    • Umami-Boosters: Sun-dried tomatoes are chewy, tangy, packed with umami, soy sauce & Worcestershire sauce are salty, savory, complex, and stock cube is a sneaky shortcut to richness.

    To Serve:

    • Spaghetti or fettuccine – or your fave pasta.
    • Parmesan – salty, umami magic.
    • Fresh parsley or basil – for brightness.
    • Optional: chili flakes for extra heat.

    How To Make Lentil Bolognese

    Find the full recipe and nutritional information below. Here are some handy step-by-step photos for how to make this vegetarian Bolognese-like sauce.

    • Sauté onion, carrot, and celery in olive oil until soft.
    • Add garlic and chopped mushrooms; cook until moisture evaporates.
    • Stir in sun-dried tomatoes, soy, Worcestershire, spices, and stock cube.
    • Add lentils and tomato passata + water; simmer to thicken.
    • Lightly mash the sauce for a creamier texture.
    • Boil pasta, save some pasta water.
    • Serve pasta with a big spoon of sauce, Parmesan, herbs, and salad.

    Watch The Video

    Recipe Tips

    • Texture Trick: Lightly mash the sauce with a potato masher for a thicker, clingier texture.
    • Make-Ahead: The sauce keeps well in the fridge for 4–5 days and freezes beautifully.
    • Spice It Up: Add more chili flakes or a splash of red wine for extra oomph.
    • No mushrooms? Try finely chopped eggplant or zucchini instead.
    • Vegan-friendly: Skip the Parmesan or use a dairy-free version.

    Serving Suggestions

    Serve it over spaghetti, fettuccine, or even zucchini noodles for a lower-carb option. A simple green salad with lemon vinaigrette is all you need on the side. Crusty bread? Always a good idea for mopping.

    💬 If you’ve tried this lentil mushroom Bolognese or any other recipe on the blog then don’t forget to rate the recipe and let me know how you got on in the comments below, I love hearing from you! You can also FOLLOW ME on Instagram, Facebook, Pinterest, YouTube, and or sign up to my Newsletter to see more of my delicious food.

    Want to Save This Recipe?

    Enter your email & I’ll send it to your inbox. Plus, get great new recipes from me every week!

    By submitting this form, you consent to receive emails from Cooked & Loved

    This vegetarian Bolognese with lentils and mushrooms is hearty, high in fiber, and full of rich, umami-packed flavor—perfect for a cozy, plant-based dinner. This recipe is part of my high-protein and fiber meals. Find step-by-step photos and more recipe tips above.

    For the Lentil Bolognese:

    • Sauté the base: Heat oil in a large pot over medium. Add onion, carrot, and celery. Cook 8–10 minutes until soft. Add garlic, cook 30 seconds.

    • Cook mushrooms: Add mushrooms, cook 5–7 minutes until moisture is gone.

    • Build flavor: Stir in sun-dried tomatoes, stock cube, soy sauce, Worcestershire, spices. Cook for 1–2 minutes.

    • Add lentils & tomatoes: Pour in lentils and passata. Add ½–1 cup water. Simmer 10–15 minutes.

    • Mash sauce: Lightly mash with a potato masher to thicken.

    • Cook pasta: Prepare pasta according to packet. Save ½ cup pasta water, then drain.

    • Combine & serve: Adjust seasoning. Add pasta water if needed. Serve with Parmesan, fresh herbs, and salad.

    • Can I use green or brown lentils instead of canned? Yes! Use about 1.5 cups of cooked lentils. Just make sure they’re soft but still holding shape.
    • Is this vegan? It can be! Just skip the Parmesan or sub with a vegan or dairy-free version.
    • Can I freeze it? Totally. It freezes great for up to 2 months. Thaw and reheat on the stove.
    • What kind of mushrooms work best? Button or cremini are perfect. Avoid large chunky pieces—finer chopping = better texture.
    • What does the cinnamon do? Trust me, just a pinch adds warmth and depth, don’t skip it!
    • Texture Trick: Lightly mash the sauce with a potato masher for a thicker, clingier texture.
    • Make-Ahead: The sauce keeps well in the fridge for 4–5 days and freezes beautifully.
    • Spice It Up: Add more chili flakes or a splash of red wine for extra oomph.
    • No mushrooms? Try finely chopped eggplant or zucchini instead.

    Calories: 592kcal | Carbohydrates: 95g | Protein: 26g | Fat: 13g | Saturated Fat: 3g | Polyunsaturated Fat: 2g | Monounsaturated Fat: 7g | Cholesterol: 9mg | Sodium: 1268mg | Potassium: 1254mg | Fiber: 13g | Sugar: 11g | Vitamin A: 4731IU | Vitamin C: 25mg | Calcium: 171mg | Iron: 6mg

    Keywords: healthy dinner recipes, Lentil Mushroom Bolognese, vegetarian spaghetti bolognese, vegetarian dinner recipes

    More Vegetarian Dinner Recipes


    Source link