Category: Main Dish

  • Creamy Mushroom Risotto Recipe

    Creamy Mushroom Risotto Recipe

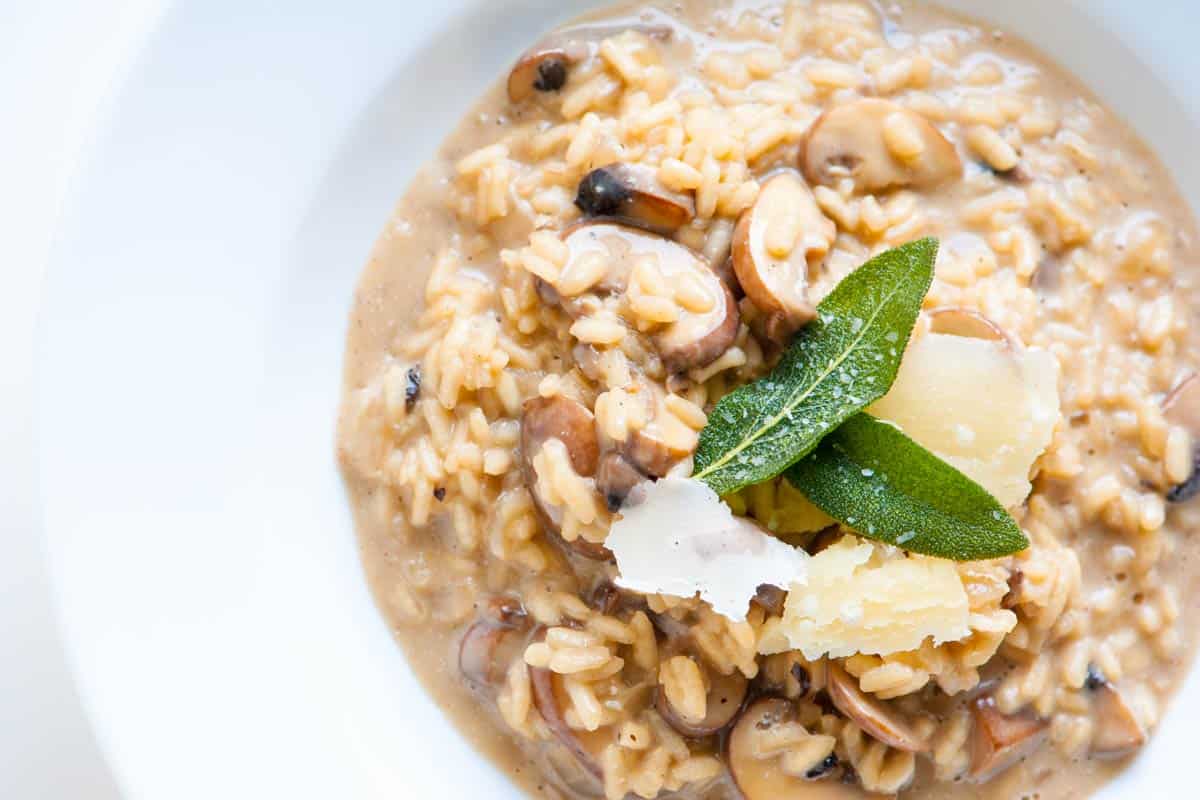
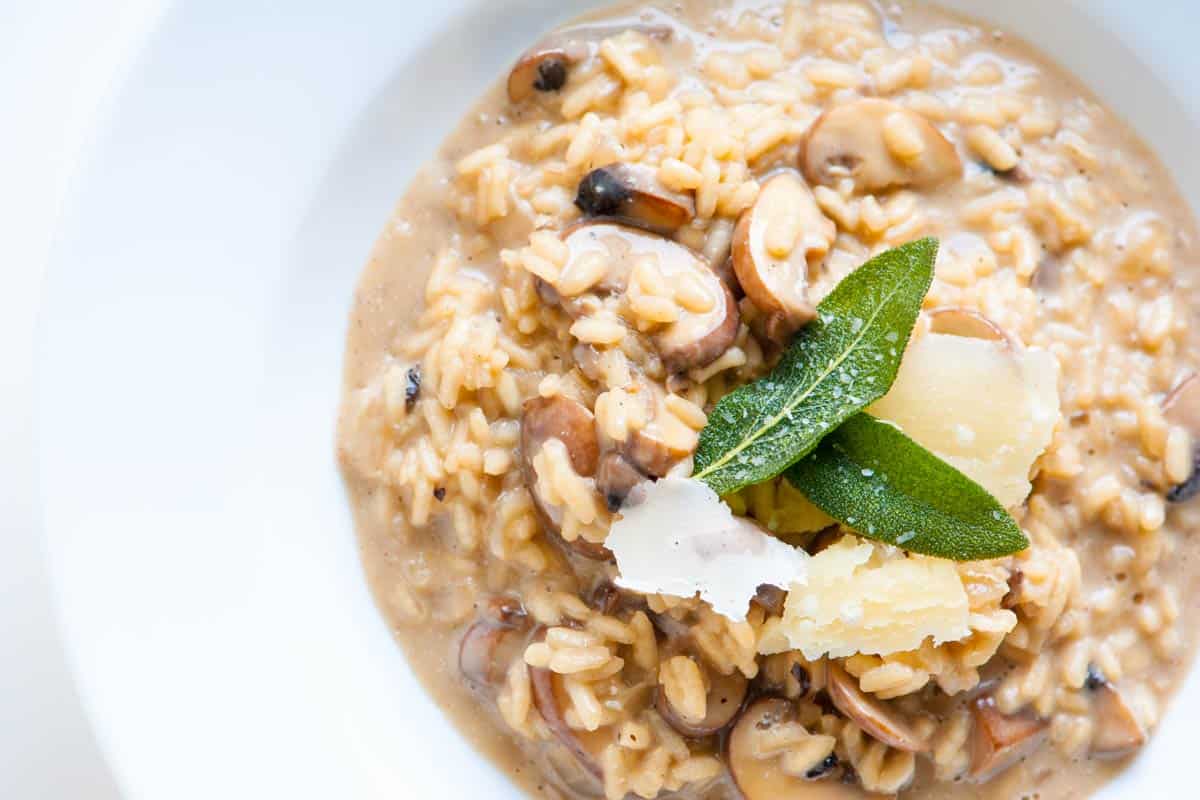
    I love this easy mushroom risotto recipe so much! It’s unbelievably creamy and tastes incredible, thanks to perfectly cooked mushrooms and an easy, umami-packed broth!
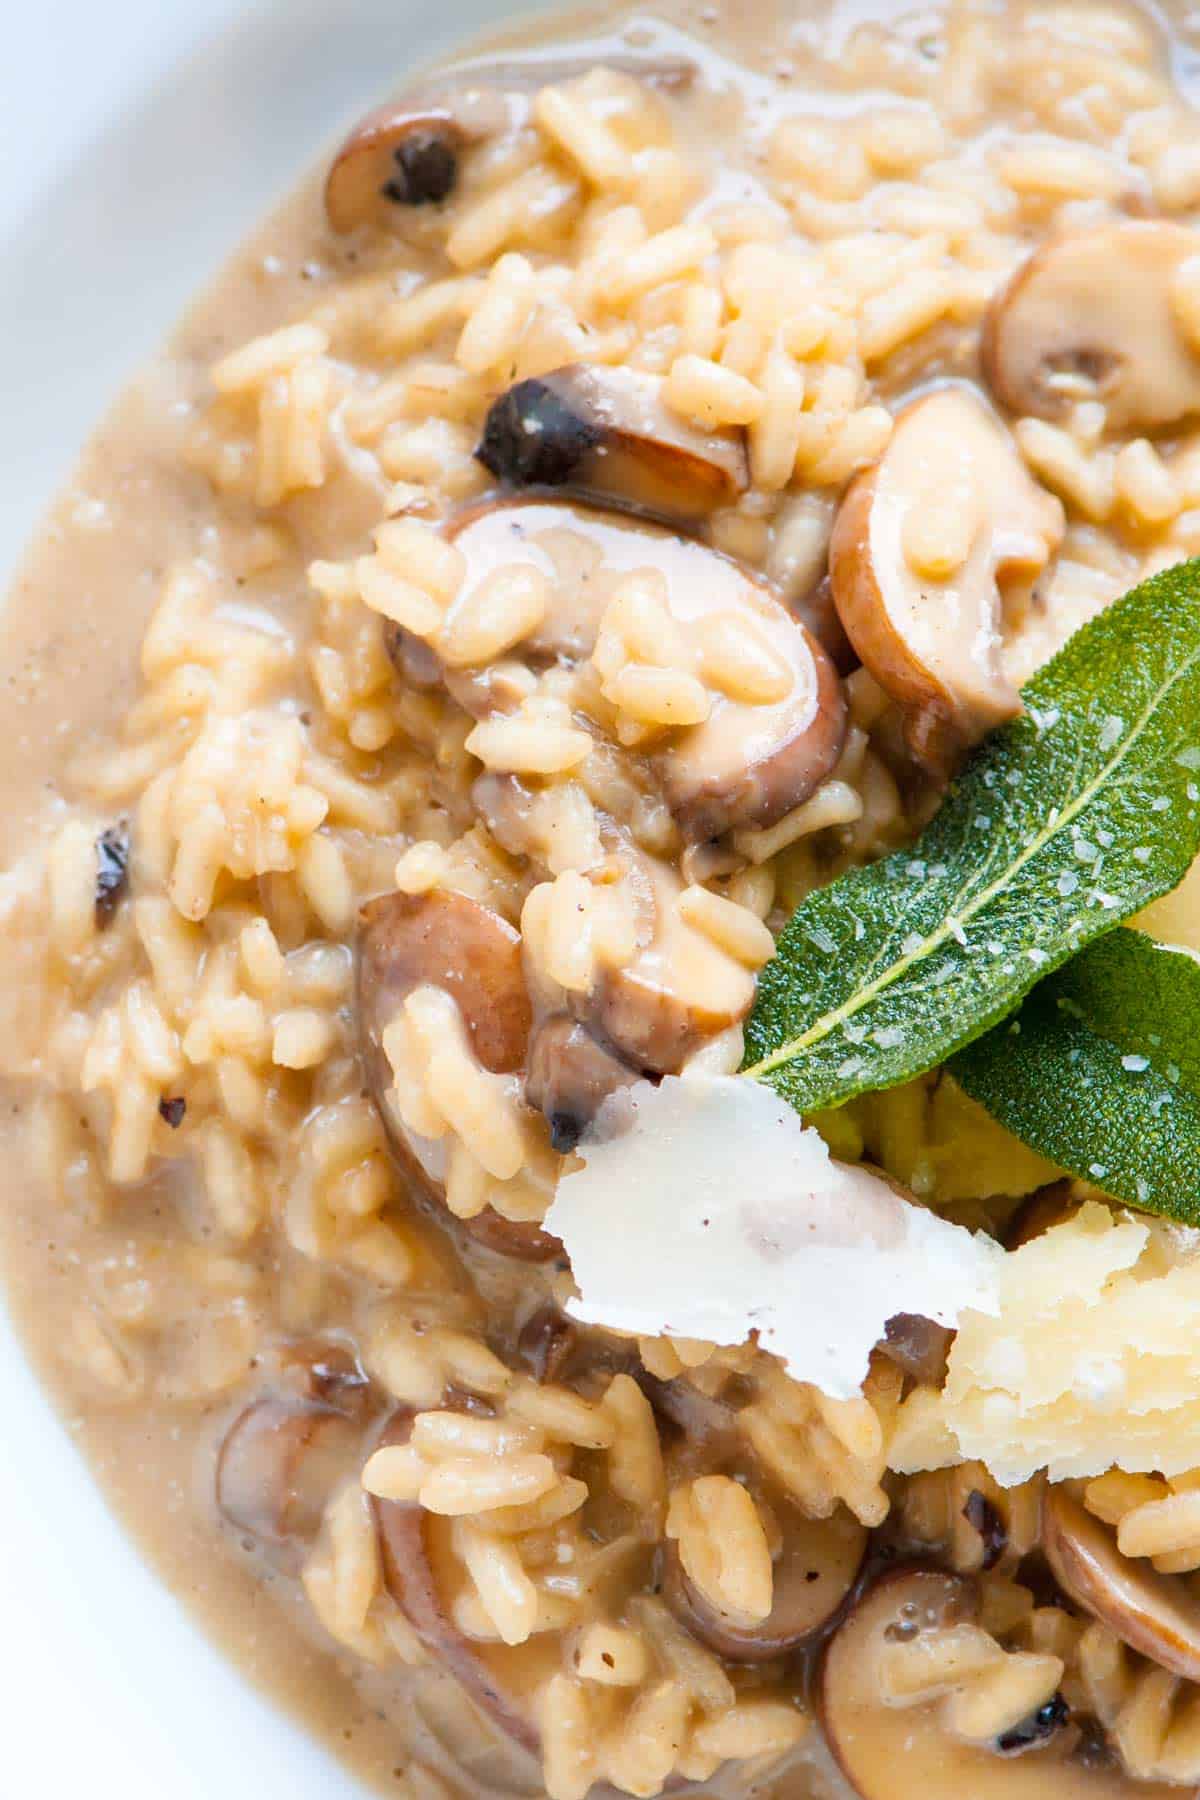
    Creamy Mushroom Risotto

    Mushroom risotto is a labor of love, but this mushroom risotto is totally doable with our easy recipe! It’s not a “throw everything into a pan and walk away” deal, but the steps are simple, and you’ll be rewarded with creamy mushroom risotto rivaling your favorite restaurants.

    For more incredible risotto recipes, I highly recommend our vegetable risotto made with tomato broth and lots of fresh veggies! For a quicker mushroom dish that still wows, try our mushroom pasta!

    Key Ingredients

    • Mushrooms: You can use your favorite mushrooms for this recipe, but I love cremini or wild mushrooms. I remove the stems and then use them to infuse my broth with mushroom flavor. Then, I slice the mushroom caps for the risotto.
    • Rice: The best rice for risotto are Arborio, Carnaroli, and Vialone Nano, all short-grain rice varieties with a high starch content. We use Carnaroli in our kitchen because it makes creamy risotto and is more forgiving of overcooking.
    • Broth: A good vegetable broth or chicken broth works well in this recipe. I love doctoring it up a bit and simmering my broth with the discarded mushroom stems, thyme, a bay leaf, and a bit of soy sauce. These add extra flavor and nicely complement the mushrooms in our risotto.
    • White Wine: Whenever you cook with wine, the most important thing to remember is to use something you enjoy. I use a light, dry white wine like Pino Gris, Albariño, Grüner Veltliner, or Sauvignon Blanc for this mushroom risotto. Wine adds flavor and some acidity. If you prefer to leave it out, replace it with more broth and sprinkle a little fresh lemon juice over the risotto before serving.
    • Cheese: To make this risotto creamy, I stir in mascarpone cheese (or cream cheese) and lots of Parmigiano-Reggiano cheese at the end.

    How to Make Mushroom Risotto

    This mushroom risotto starts with a flavorful base. I enhance store-bought or homemade stock by simmering it with mushroom stalks (saved from prepping the mushrooms!), thyme, a bay leaf, and a bit of soy sauce for richness.
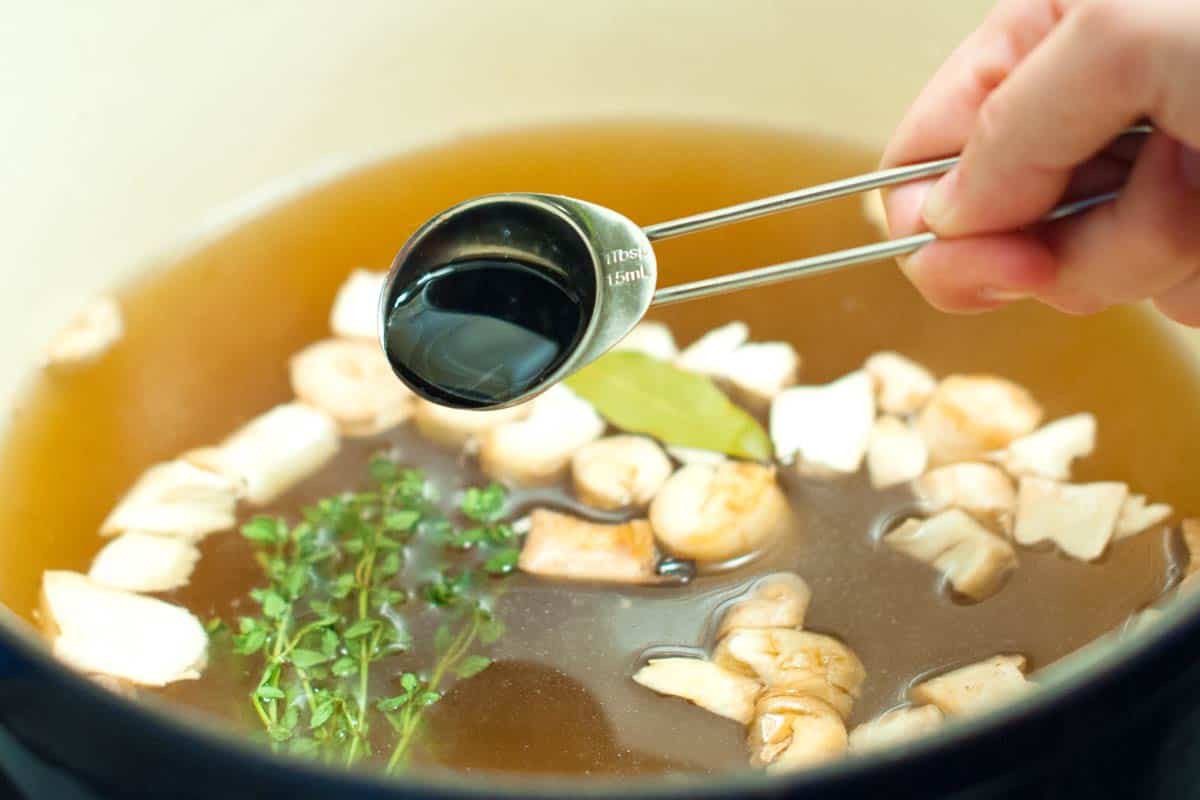
    Making mushroom risotto broth: Seasoning the risotto stock with soy sauce

    Next, I cook sliced mushrooms and onions in butter until they’re soft and golden brown. Then, I add the arborio rice to the pan, stirring to toast it in the butter (yum!).
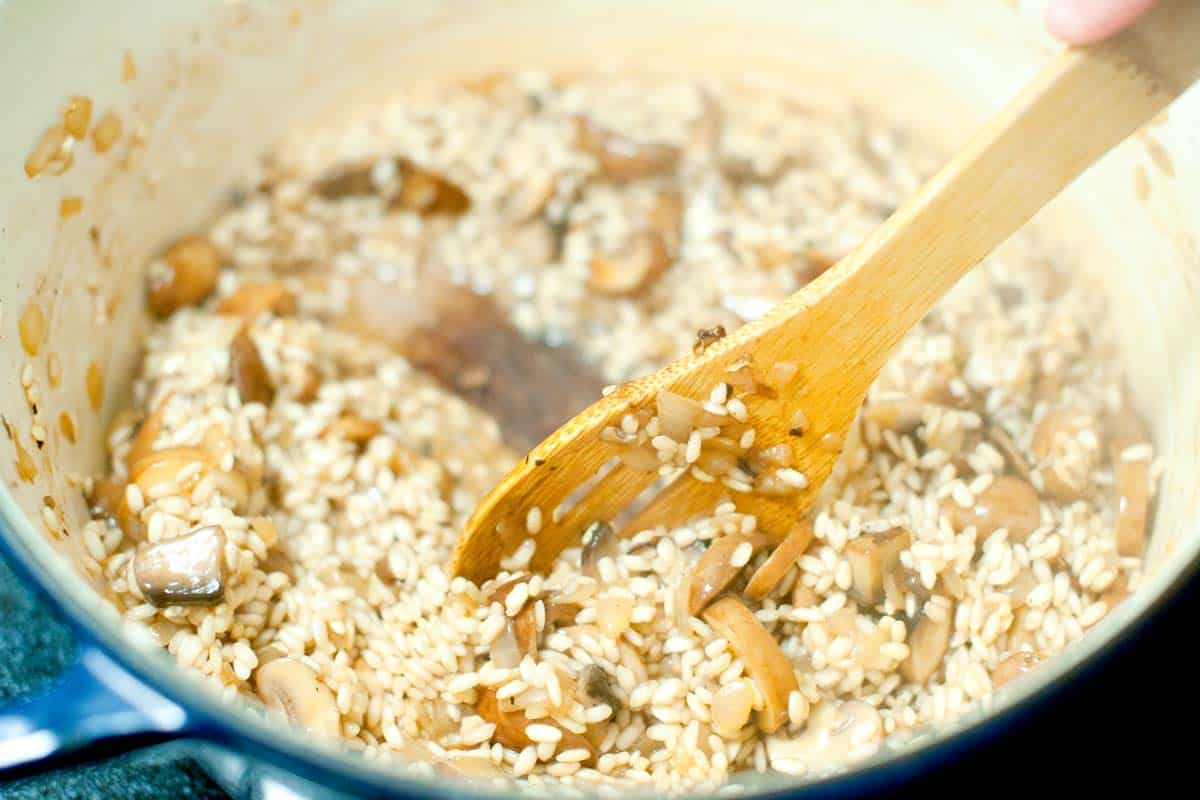
    How to Make Mushroom Risotto: Stirring risotto to make it creamy

    In goes some white wine. I let it reduce, then slowly incorporate the warm mushroom broth. You want to add the broth a little at a time, allowing it to be fully absorbed by the rice before adding more. As you add the broth, remember to stir frequently. Stirring is the key to achieving that luxuriously creamy texture risotto is known for.

    After 20 to 25 minutes of adding stock and stirring, the rice is nearly cooked. So, you can stir in mascarpone cheese and parmesan and season to taste with salt and pepper. Of course, you could stop there, but if you are up to it, fry a few sage leaves in oil to place on top of the risotto. It takes less than a minute (I shared how to make them in the recipe below).
    Creamy Mushroom Risotto

    Creamy Mushroom Risotto

    • PREP
    • COOK
    • TOTAL

    This incredibly creamy mushroom risotto is the perfect dinner for two or to make for your next dinner party. It’s easy to make and can be customized to your liking with different types of mushrooms and stock (try vegetable stock to make this vegetarian).

    For wild mushrooms, clean them (if necessary) and tear or slice thicker mushrooms into smaller pieces. Smaller wild mushrooms can be left whole.

    4 Servings

    You Will Need

    Mushroom Risotto

    4 tablespoons butter

    2 cups mushrooms such as button, cremini, or wild mushrooms

    8 cups chicken broth or vegetable broth

    2 sprigs fresh thyme

    1 bay leaf

    1 tablespoon soy sauce

    1 medium onion, finely chopped

    1 ¾ cups arborio risotto rice

    3/4 cup dry white wine

    1/3 cup mascarpone cheese or cream cheese

    1/3 cup fresh grated Parmigiano-Reggiano cheese, plus more for serving

    Salt and fresh ground black pepper

    Homemade mushroom powder, optional


    Fried Sage Leaves

    1 tablespoon olive oil

    12 sage leaves for garnish

    Directions

      1Clean mushrooms by wiping them with a dry paper towel. Remove mushroom stems, roughly chop them, and set aside. Cut mushroom caps into 1/4-inch thick slices. (If large, cut into bite-sized pieces.)

      2Make the mushroom broth. Pour broth into a 3-quart saucepan. Add chopped mushroom stems, thyme, bay leaf, and soy sauce. Bring to a boil, then reduce to a simmer. Cook at a low simmer, uncovered, for 30 minutes. Strain stock and discard the stems, thyme, and bay leaf. You should have about 6 cups of broth; if not, add water or more broth.

      3In a 3-quart deep heavy saucepan, melt butter over medium-high heat. Add mushroom slices and onion, then cook for 5 minutes. Stir in the rice and cook for 1 minute. Pour in the wine, then cook until reduced by half.

      4Add 1/2 cup of the mushroom-infused stock and cook over medium-high heat, constantly stirring, until the rice has absorbed the liquid. Repeat this until 5 to 5 ½ cups of broth have been added and the rice is cooked but slightly chewy.

      5Stir in the mascarpone cheese and grated Parmesan cheese. Season to taste with salt, pepper, and 1/2 to 1 teaspoon of mushroom powder (optional).

      6Make fried sage leaves. Heat the olive oil over medium-high heat in an 8-inch skillet. Add sage leaves, a few at a time, in a single layer. Fry for 15 seconds, but do not brown. Transfer the leaves from the skillet to paper towels and sprinkle with a pinch of salt.

      7Serve risotto in individual shallow bowls. Top each with a few sage leaves and parmesan cheese shavings.

    Adam and Joanne’s Tips

    • Make-ahead: The mushroom infused stock can be made up to 2 days in advance. Keep it in an airtight container in the refrigerator. Warm before adding to the risotto.
    • Wine to use: Choose a lighter dry white wine like Pino Gris, Albariño, Grüner Veltliner, or Sauvignon Blanc
    • Wine substitution: If you prefer to leave the wine out, replace it with more broth and sprinkle a little fresh lemon juice over the risotto before serving.
    • The nutrition facts provided below are estimates. Sodium will vary based on the which brand of stock you choose.

    Nutrition Per Serving
    Serving Size
    1/4 of the recipe
    /
    Calories
    461
    /
    Total Fat
    25.7g
    /
    Saturated Fat
    14.1g
    /
    Cholesterol
    61.7mg
    /
    Sodium
    592.1mg
    /
    Carbohydrate
    35.9g
    /
    Dietary Fiber
    0.9g
    /
    Total Sugars
    2.7g
    /
    Protein
    17.1g


    AUTHOR:

    Joanne Gallagher

    Adam and Joanne of Inspired Taste

    We are Adam and Joanne Gallagher, the creators of Inspired Taste. Established in 2009, Inspired Taste grew from a childhood dream into one of the internet’s most trusted recipe sites with hundreds of reliable recipes, step-by-step videos, and expert tips.More About Us

    Source link

  • Greek Pasta Salad Recipe

    Greek Pasta Salad Recipe

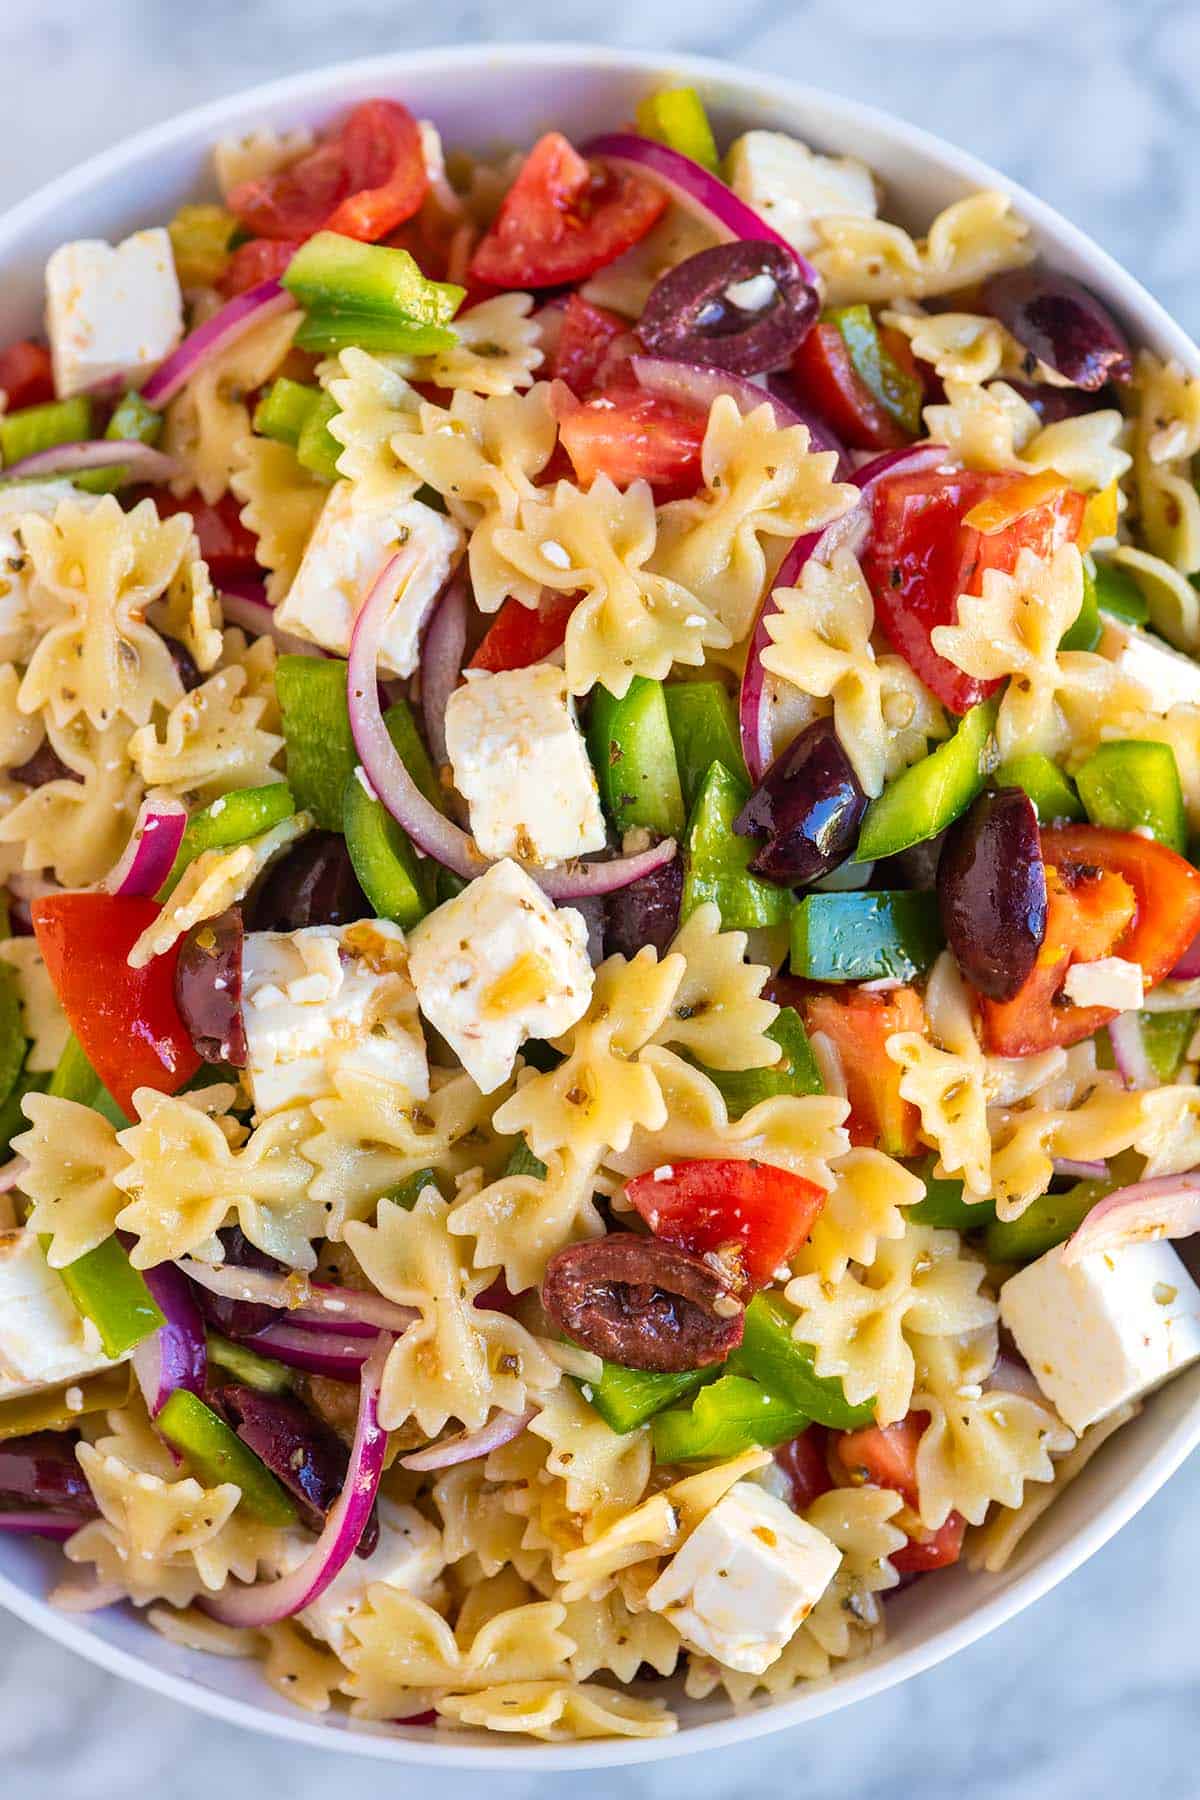
    This Greek pasta salad recipe is fresh, colorful, and made with the most irresistible homemade dressing. Perfect for summer entertaining and potlucks!

    Greek Pasta Salad

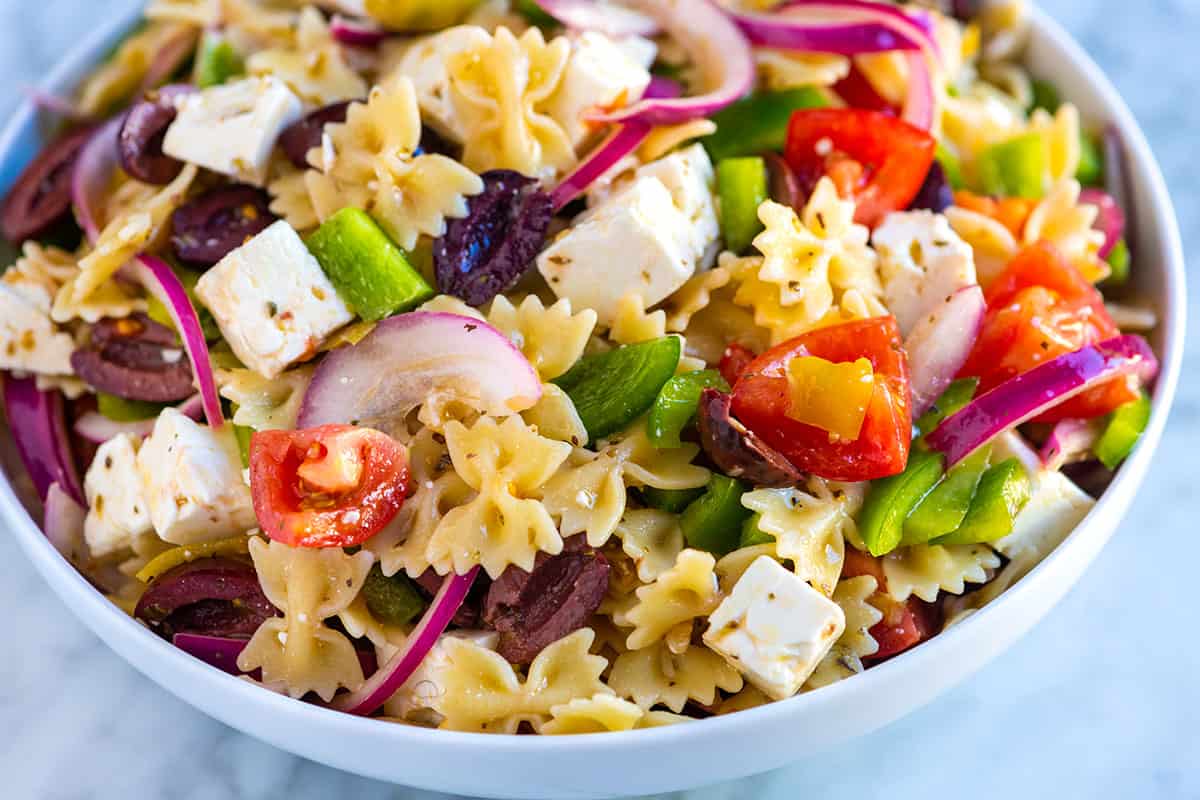
    Inspired by our favorite Greek salad, this easy pasta salad combines fresh tomatoes, red onion, olives, and creamy feta cheese. It’s simple to shop for, comes together quickly, and always tastes like summer.

    Serve it as a side dish, or make it a full meal by topping it with grilled chicken, shrimp scampi, or your favorite protein. For an Italian twist, try our Italian pasta salad with salami. It’s just as easy and just as delicious.

    Key Ingredients

    • Pasta: I used mini farfalle in the photos, but choose a shape that has plenty of nooks and crannies to catch the dressing. Penne, fusilli, rotini, farfalle (bow tie), and orzo are all great options.
    • Veggies: This calls for the same veggies as a traditional Greek salad, except for the cucumber, which doesn’t hold up as well over time. I add tomatoes, red onion, and green bell pepper.
    • Olives: I’ve used pitted Kalamata olives in the photos, but feel free to use your favorite olives instead. Consider black, green, or Castelvetrano olives.
    • Feta Cheese: Choose feta sold in brine if you can. It tastes better than pre-crumbled feta, and you can even add a spoonful of the brine to the dressing for more flavor.
    • Pepperoncini Peppers: These are optional, but I love them. I like to slice them thin and mix them into the salad, plus add a splash of the pepperoncini brine to the dressing for even more flavor. I do the same with our classic pasta salad.
    • Greek Salad Dressing: You’ll make it with olive oil, red wine vinegar, dried oregano, salt, and pepper. I also add a bit of feta brine and pepperoncini brine (trust me, it’s delicious!).

    Find the full recipe with measurements below.

    How to Make Seriously Good Greek Pasta Salad

    Tip 1: Make everything in one bowl. I’m always looking for ways to reduce the number of dirty dishes, so I make this pasta salad directly in the serving bowl. Start by whisking the dressing in the bottom, then add the cooked pasta and other ingredients on top. Toss it all together, and you’re done.

    Greek pasta salad ingredients in a bowl ready to be tossed

    Tip 2: Let it sit. This pasta salad actually gets better as it rests. Let the pasta and veggies sit in the dressing for at least 30 minutes before serving so the flavors have time to mingle. It makes a big difference.

    Serving Suggestions

    This Greek salad is perfect for bringing to your next get-together. It’s fresh, colorful, and tasty. I’ve also been enjoying it myself as a base for something else. Add chickpeas, poached salmon, baked tofu, or juicy chicken breasts for a complete meal.

    Greek Pasta Salad

    Greek Pasta Salad

    • PREP
    • COOK
    • TOTAL

    To make this Greek pasta salad really flavorful, we use brine in two ways. First, we add a few tablespoons of juice from a jar of pepperoncini peppers, which adds a touch of spice. Second, we use feta cheese packed in brine and stir a couple of tablespoons of that cloudy, salty liquid into the dressing.

    6 Servings

    You Will Need

    Greek Pasta Salad

    8 ounces short-cut pasta, such as bow-tie, fusilli, or penne (226g)

    1/2 cup thinly sliced red onion

    3 small tomatoes, chopped, 1 ¼ cups

    1 green bell pepper, chopped

    1 ¼ cups Kalamata olives, pitted and halved

    8 ounces feta cheese, cut into ½-inch cubes (226g)

    4 pepperoncini peppers, thinly sliced, optional


    Salad Dressing

    1/4 cup extra-virgin olive oil (60ml)

    1/4 cup red wine vinegar (60ml)

    2 tablespoons brine from jar of pepperoncini peppers or use fresh lemon juice (30ml)

    2 tablespoons brine from feta, optional (30ml)

    1 ½ teaspoons dried oregano

    1/4 teaspoon fine sea salt plus more to taste

    Directions

      1Place the sliced onion in a small bowl and cover with cold water. Set the bowl aside for 10 minutes so that the raw flavor of the onion calms a little. Drain and rinse the onions before adding them to the salad.

      2Bring a large pot of salted water to a boil. Add pasta and cook until tender, 6 to 10 minutes (check the package for recommended cook time). Drain and rinse well under cold water.

      3While the pasta cooks, in the bottom of a large bowl, make the dressing. Whisk the olive oil, red wine vinegar, pepperoncini brine, feta brine, oregano, salt, and black pepper until well blended.

      4Add the drained and rinsed pasta to the dressing and mix well.

      5Stir in the drained and rinsed red onion, tomatoes, bell pepper, olives, feta cheese, and sliced pepperoncini peppers.

      6Taste for seasoning and adjust with salt and pepper as needed. Serve or, for the best results, cover and refrigerate for at least 30 minutes and up to 5 days.

    Adam and Joanne’s Tips

    • Feta brine: We buy feta cheese that’s packaged in brine. That cloudy liquid is salty, creamy, and delicious whisked into our dressing. If you don’t find feta sold in brine, that’s okay. The salad still tastes great, but if you can find it, buy it. The feta is better, and you can use the brine to season all sorts of things (this pasta salad, included).
    • The nutrition facts provided below are estimates.

    Nutrition Per Serving
    Serving Size
    1/6 of the recipe
    /
    Calories
    381
    /
    Total Fat
    21.2g
    /
    Saturated Fat
    7.5g
    /
    Cholesterol
    33.6mg
    /
    Sodium
    661.4mg
    /
    Carbohydrate
    37.4g
    /
    Dietary Fiber
    4.2g
    /
    Total Sugars
    5.5g
    /
    Protein
    11.7g


    AUTHOR:

    Joanne Gallagher

    Adam and Joanne of Inspired Taste

    We are Adam and Joanne Gallagher, the creators of Inspired Taste. Established in 2009, Inspired Taste grew from a childhood dream into one of the internet’s most trusted recipe sites with hundreds of reliable recipes, step-by-step videos, and expert tips.More About Us

    Source link

  • Popcorn Chicken Bowls

    Popcorn Chicken Bowls

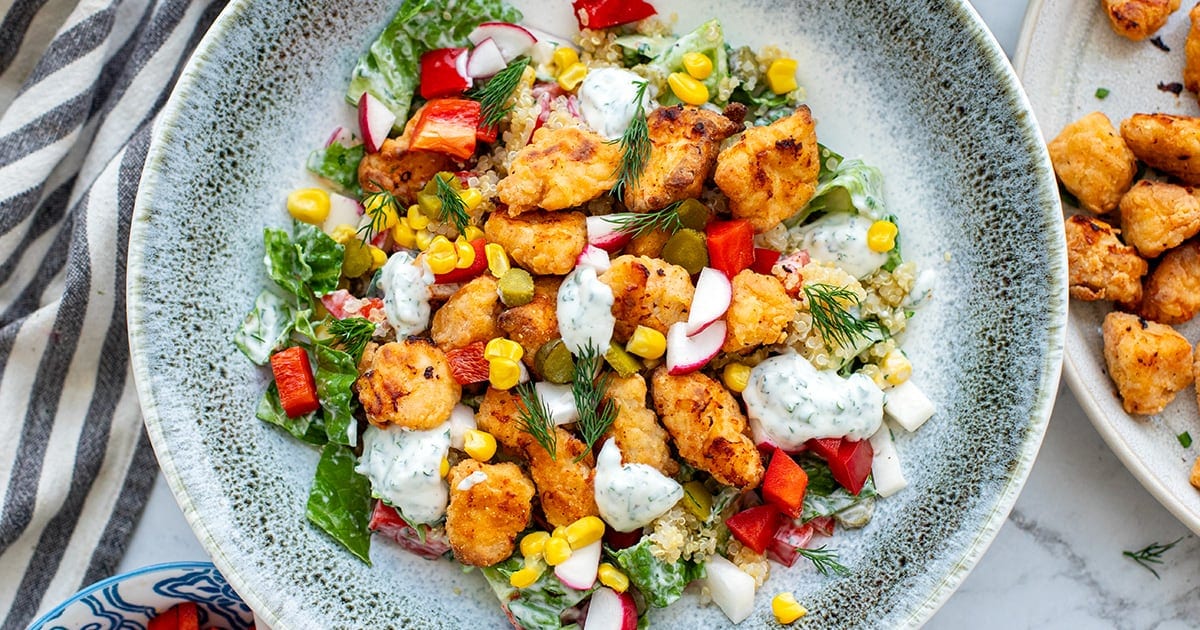
    High-protein popcorn chicken bowls with crispy baked chicken bites, quinoa, salad, and yogurt ranch dressing. Great for meal prep, fresh and healthy!


    Jump to: ℹ️ Overview | 🛒 Ingredients | 📷 How To Make | 📹 Watch The Video | 👩‍🍳 Recipe Tips | 🥗 Serving Suggestions | 📝 Full Recipe Card | 🍽 More Healthy Chicken Recipes


    These popcorn chicken bowls are great for lunch or dinner and they hit all the notes: crispy, creamy, fresh, and filling. You get crunchy, golden baked popcorn chicken bites, tossed over a crisp lettuce salad loaded with colorful veggies, fluffy quinoa, and a zingy yogurt ranch dressing.

    This is a light yet wholesome and satiating meal that’s packed with protein and fibre to keep you full and nourished. I often make a batch of chicken, quinoa, and dressing for meal prep and have it on repeat for lunches (seriously, I’m not sick of it yet and that’s saying something), and this recipe is equally good for dinner.

    Each bowl is about 36 grams protein, 7 grams fiber, and 540 calories.

    👩‍🍳 You might also like these recipes: Mediterranean chicken quinoa bowl, chicken quinoa salad with honey harissa and tahini yoghurt, BLT chicken salad, chipotle chicken Cobb salad, Buffalo chicken salad, or Asian chicken salad.

    What You’ll Need

    Here is what you’ll need for this popcorn chicken salad bowl recipe. Find the full measurements in the recipe card below.

    • For the chicken: Chicken breast – lean and high in protein. Chicken thighs can also be used.
    • For the marinade: Yogurt – tenderizes and adds tang, onion, garlic, paprika powders – flavourful trio, and salt – of course!
    • For the coating: All-purpose or gluten-free flour + cornflour – for that crunchy texture. More of the above seasoning – because bland chicken is not invited. Olive oil spray – makes it crispy without deep frying.
    • Yogurt-Mayo Ranch Dressing: Light yogurt + light mayo for creamy yet light base, pickle juice – a salty, tangy secret weapon that also helps to dilute the creamy ingredients, fresh herbs (chives, parsley, dill) – fresh and punchy, garlic and onion powder – to round it out, and extra optional water to thin – adjust to your liking.
    • Salad Bowl: Quinoa – high in fibre and protein (cook your own or get pre-cooked), lettuce, cucumber, cherry tomatoes, bell pepper – crunchy and hydrating, corn – sweet pop of flavour (I use frozen and defrost in boiling water), pickles for added tang and contrast. Optional: a little Sriracha drizzle on top and extra herbs for topping.
    • Swap Suggestions: Swap quinoa for rice or couscous. Use Greek yogurt for extra protein. No fresh herbs? Sub with dried, but use less. Skip homemade dressing and use store-bought ranch for shortcuts.

    How To Make Popcorn Chicken Bowls

    Find the full recipe and nutritional information below. Here are some handy step-by-step photos for popcorn chicken bowls.

    • Marinate the chicken: Mix yogurt and spices, coat chicken, and let it chill for 30 minutes or overnight.
    • Combine flour with spices and seasoning.
    • Coat the chicken: Toss with flour/cornflour mix until well coated.
    • Bake Chicken: Preheat oven to 410°F / 210°C. Line a baking tray and spray with oil. Arrange chicken in a single layer, spray tops with oil, and bake 15 minutes. Flip, spray again, and bake another 10 minutes until golden and crispy.
    • Air Fryer Option: Preheat air fryer to 400°F / 200°C. Arrange chicken without overcrowding. Spray and cook for 12 minutes, flipping and spraying halfway through.
    • Make the dressing: Chop the herbs finely. Whisk all ingredients until smooth.
    • Cook quinoa: According to packet instructions.
    • Prep veggies: Dice and chop while everything cooks.
    • Assemble bowls: Toss salad with dressing, add quinoa and chicken, top with more dressing and extras.

    Watch The Video

    Recipe Tips

    • Make-ahead: You can make the chicken popcorn bites ahead of time. Quinoa is also easy to store in the fridge for a few days. If you want to prep the whole the day before, just store store the dressing separately.
    • Storage: Store each component separately in the fridge for 3–4 days. Keep chicken crispy by storing without dressing.
    • Shortcuts: Use rotisserie chicken or frozen popcorn chicken if you’re in a rush.
    • Make it spicy: Add cayenne or chilli powder to the coating or a dash of hot sauce to the dressing.
    • Vegetarian option: Use crispy tofu or roasted chickpeas instead of chicken.

    Serving Suggestions

    Serve these bowls warm or cold—seriously, they’re good either way. I like to top mine with a bit of Sriracha for that spicy kick, and maybe a sprinkle of extra herbs if I’m feeling fancy. These bowls are perfect for work lunches, weeknight dinners, or prepping ahead for the week.

    💬 If you’ve tried this popcorn chicken bowls or any other recipe on the blog then don’t forget to rate the recipe and let me know how you got on in the comments below, I love hearing from you! You can also FOLLOW ME on Instagram, Facebook, Pinterest, YouTube, and or sign up to my Newsletter to see more of my delicious food.

    Want to Save This Recipe?

    Enter your email & I’ll send it to your inbox. Plus, get great new recipes from me every week!

    By submitting this form, you consent to receive emails from Cooked & Loved

    High-protein popcorn chicken bowls with crispy baked chicken bites, quinoa, salad, and yogurt ranch dressing. Great for meal prep, fresh and healthy! Find step-by-step photos and more recipe tips above.

    For the Chicken Marinade:

    For the Yogurt-Mayo Ranch Dressing:

    • Marinate Chicken: In a bowl, mix yogurt with onion powder, garlic powder, paprika, and salt. Add chicken and toss to coat. Cover and marinate for at least 30 minutes (or overnight).

    • Coat Chicken: In a large bowl, combine all coating ingredients. Spread half the mix on a plate, lay chicken pieces on top, sprinkle remaining mix, and toss to coat well.

    • Bake Chicken: Preheat oven to 410°F / 210°C. Line a baking tray and spray with oil. Arrange chicken in a single layer, spray tops with oil, and bake 15 minutes. Flip, spray again, and bake another 10 minutes until golden and crispy.

    • Air Fryer Option: Preheat air fryer to 400°F / 200°C. Arrange chicken without overcrowding. Spray and cook for 12 minutes, flipping and spraying halfway through.

    • Make Dressing: Chop herbs and whisk together all dressing ingredients until smooth. Thin with water if needed.

    • Cook Quinoa: Cook according to package instructions, then fluff and let cool slightly.

    • Assemble Salad: Toss lettuce, tomatoes, cucumber, bell pepper, corn, and pickles with dressing. Divide into bowls. Top with quinoa and popcorn chicken. Finish with extra dressing or a drizzle of Sriracha if you like.

    • Can I use chicken thighs instead of breasts? Yes! Thighs will be juicier and slightly more forgiving if you overcook them. Just trim the excess fat.
    • Is the popcorn chicken crispy? Yes, especially if you don’t overcrowd the tray or air fryer. The cornflour is key for that crunch.
    • Can I make this ahead of time? Absolutely. Store everything separately and assemble just before eating for best texture. Marinate the chicken overnight.
    • Can I freeze the chicken? Yes! Freeze after baking and reheat in the oven or air fryer for best results.
    • Is this gluten-free? Not as written, but you can use gluten-free flour blends and double-check your cornflour and mayo.
    • Storage: Store each component separately in the fridge for 3–4 days. Keep chicken crispy by storing without dressing.
    • Shortcuts: Use rotisserie chicken or frozen popcorn chicken if you’re in a rush.
    • Make it spicy: Add cayenne or chilli powder to the coating or a dash of hot sauce to the dressing.
    • Vegetarian option: Use crispy tofu or roasted chickpeas instead of chicken.

    Calories: 537kcal | Carbohydrates: 58g | Protein: 36g | Fat: 18g | Saturated Fat: 4g | Polyunsaturated Fat: 8g | Monounsaturated Fat: 4g | Trans Fat: 0.04g | Cholesterol: 86mg | Sodium: 2315mg | Potassium: 1125mg | Fiber: 7g | Sugar: 9g | Vitamin A: 2690IU | Vitamin C: 66mg | Calcium: 160mg | Iron: 4mg

    Keywords: Popcorn Chicken Bowls, Chicken salad bowls, chicken quinoa salad bowl, baked chicken salad bowl

    More Healthy Chicken Recipes


    Source link

  • Cilantro Lime Butter Shrimp Recipe

    Cilantro Lime Butter Shrimp Recipe

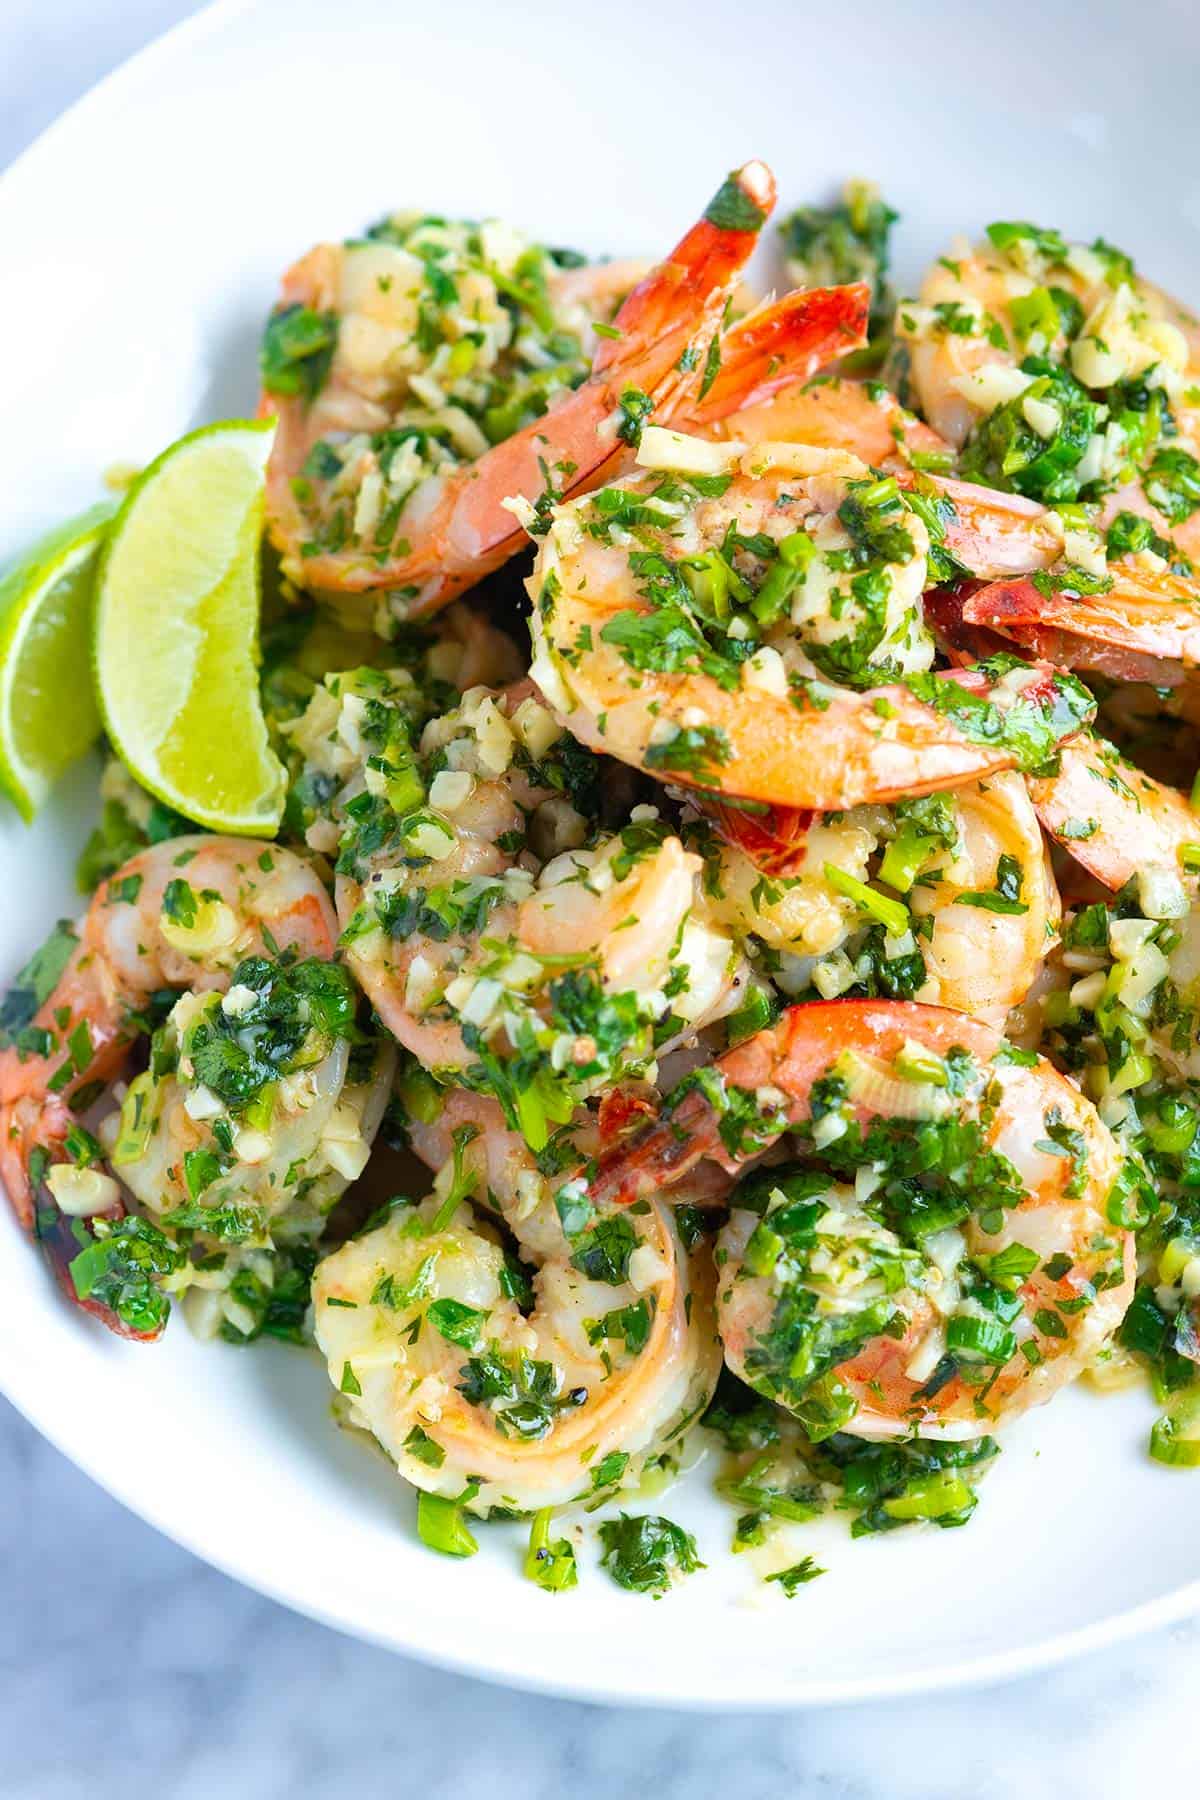
    This delicious cilantro lime shrimp recipe is ready in less than 20 minutes and has easily become one of my family’s favorite shrimp recipes!

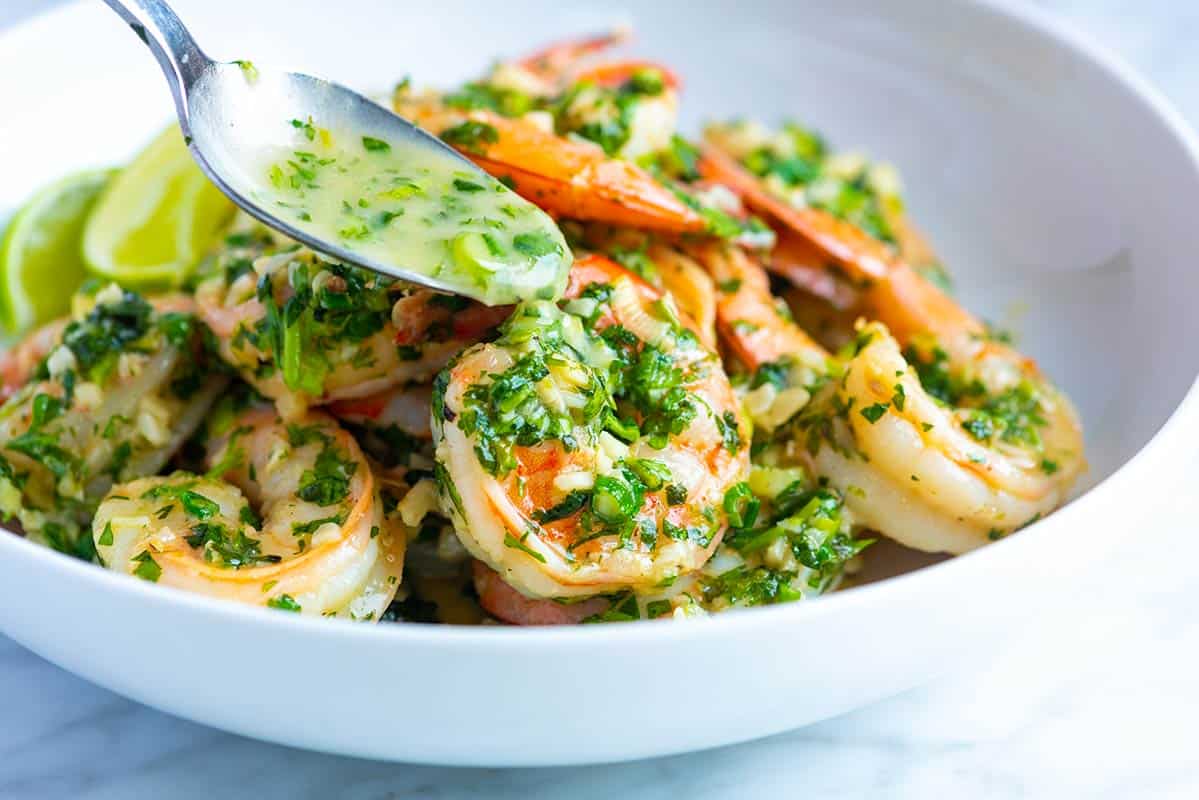
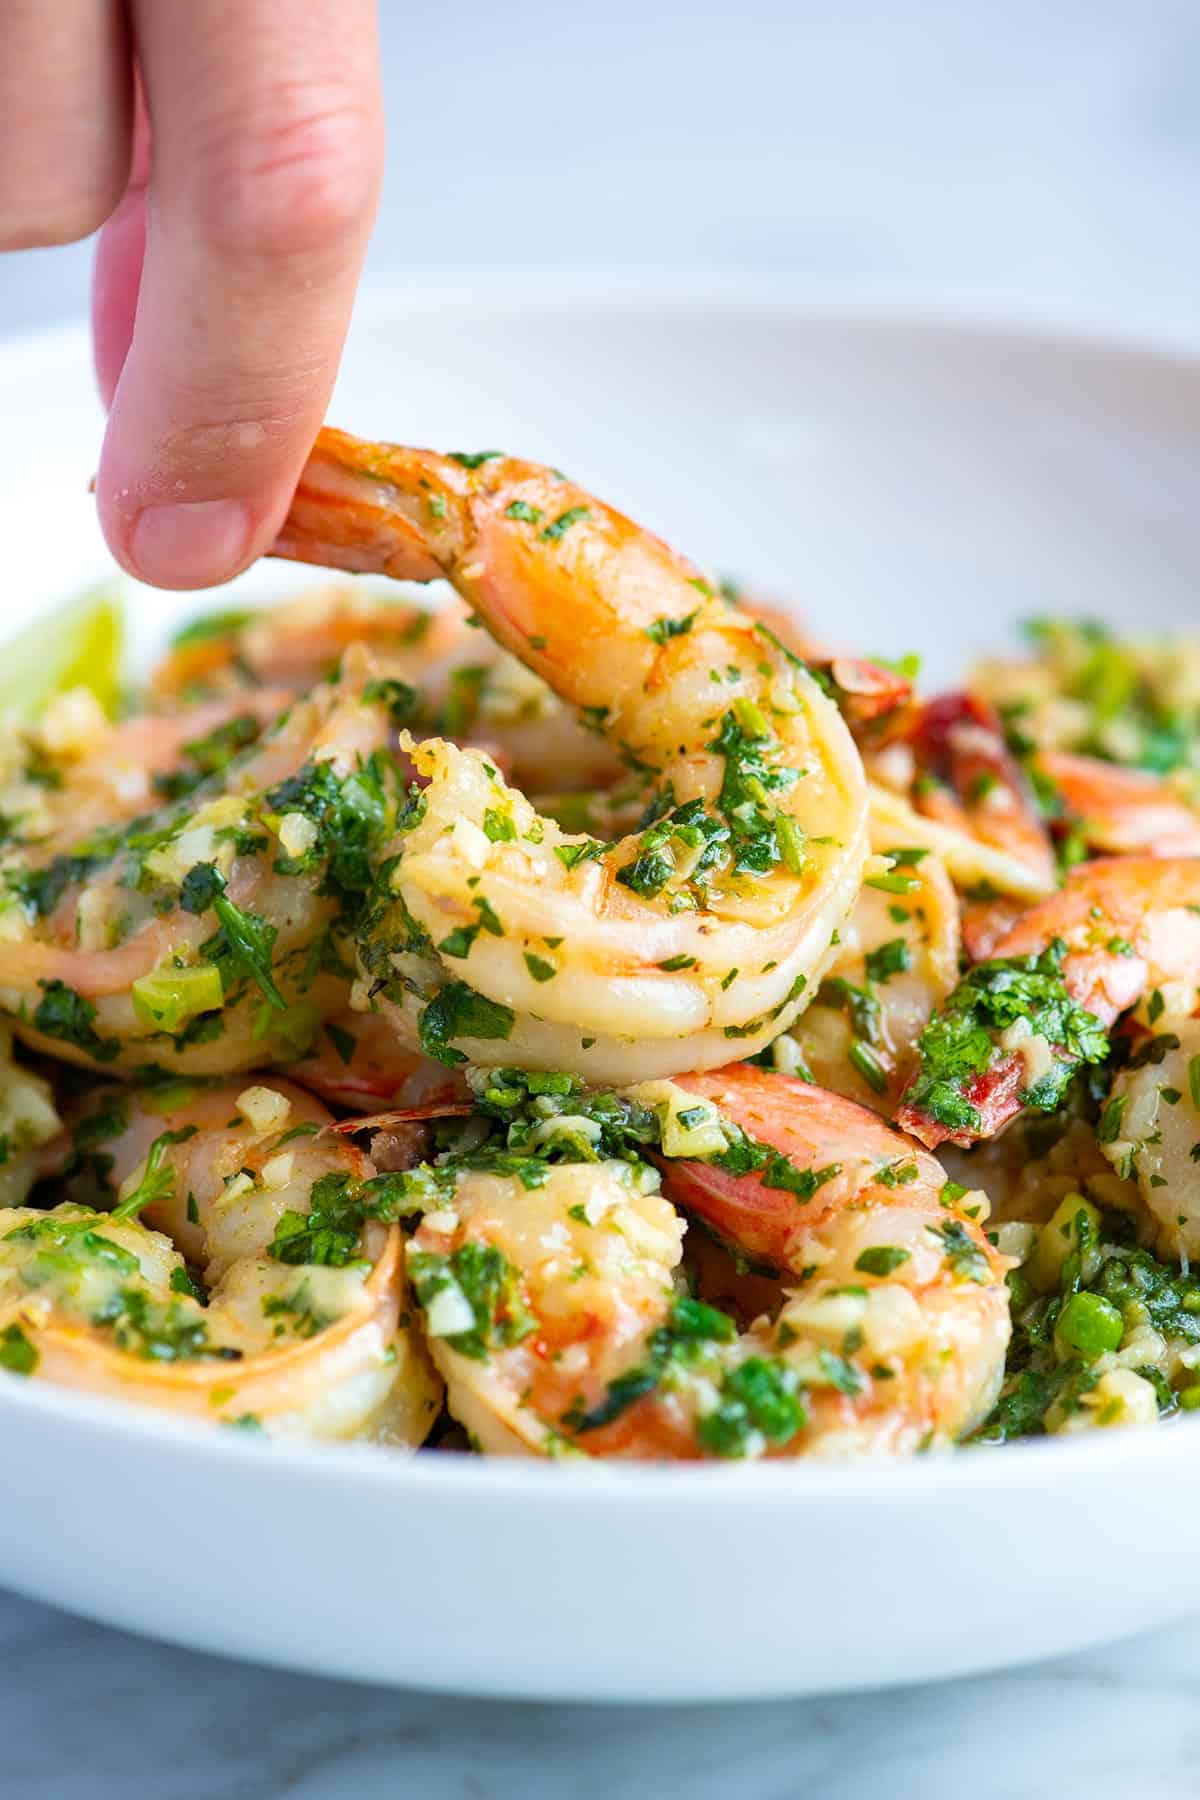
    Cilantro Lime shrimp with lots of garlic piled up on a plate.

    This cilantro lime shrimp is one of my favorite shrimp recipes. I love classic shrimp scampi with lemon, garlic, and butter, but lately, I’ve fallen for this shrimp with a butter sauce made with fresh cilantro and lime.

    This recipe is quick and simple, so you can absolutely make it tonight. It takes less than 20 minutes and requires only a handful of ingredients.

    Key Ingredients

    • Shrimp: Use fresh, high-quality jumbo or large shrimp. You can keep the tails on or remove them, whichever you prefer.
    • Butter: I use butter in two ways in this cilantro lime shrimp recipe. First, I cook the shrimp in it, and then, as it finishes cooking, I swirl in more for a creamy sauce. I do the same when making these seared scallops.
    • Garlic: I use 6 garlic cloves for this recipe and love it!Lime: I use the juice and zest of 1 lime for this recipe.
    • Cilantro: I use a lot of cilantro! I know not everyone loves it, and if that’s you, don’t worry. You can swap the cilantro for any tender fresh herb like parsley or basil.
    • Coriander: It’s optional, but it adds a delicious citrusy flavor to the shrimp. Coriander seeds are the seeds of cilantro.
    • Green Onion: It’s also optional, but I love the extra green and flavor it adds.

    Find the full recipe with measurements below.

    Cilantro lime garlic butter shrimp

    How to Make the Best Cilantro Lime Shrimp

    Tip 1: Use lots of garlic. When we crave garlicky shrimp, we go all in. That means we don’t hold back on the amount of garlic in this recipe. We use 6 garlic cloves (sometimes more) for one pound of shrimp.

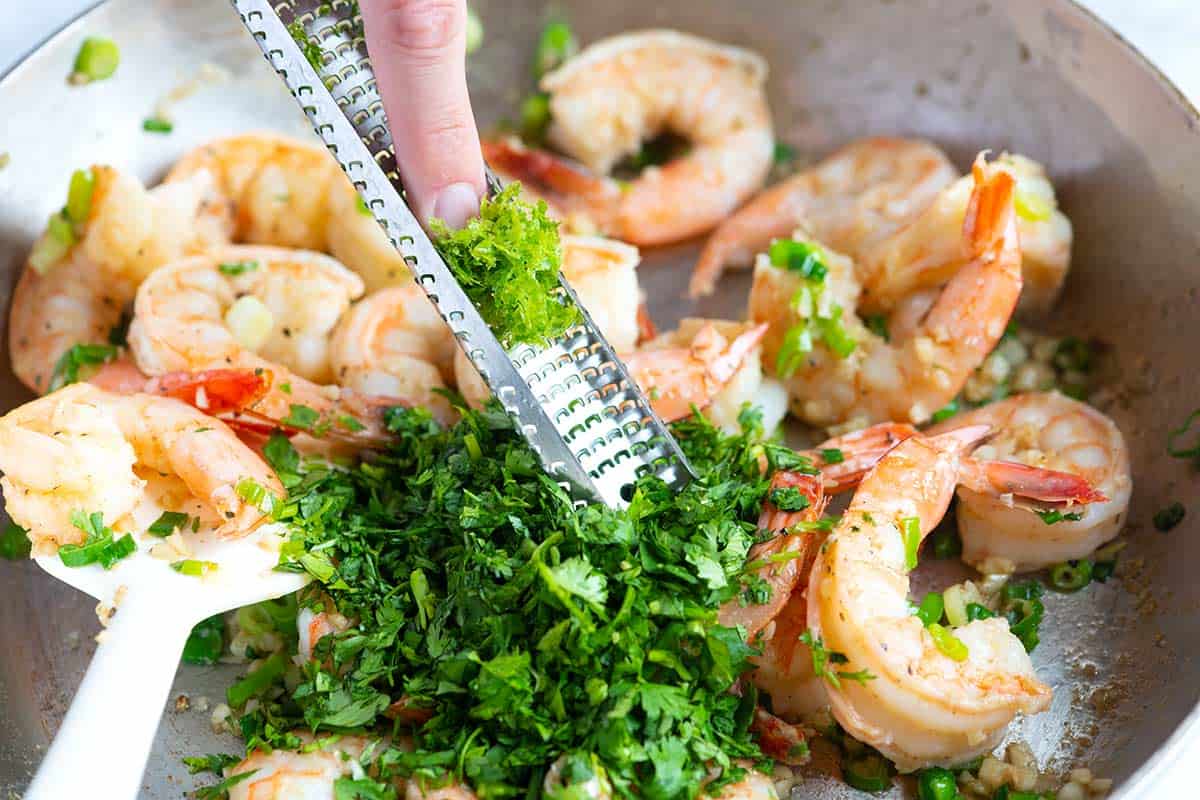
    Tip 2: Use lots of lime. We use the juice and zest of a whole lime. To remove the zest, we use our Microplane (a fine hand grater). It’s quick and easy, plus the tool isn’t expensive.

    Adding cilantro and the zest and juice of a lime to the shrimp

    Tip 3: Make a butter sauce. For the best flavor, cook the shrimp in a little butter, and then as the shrimp finishes cooking, slide the skillet off the heat and swirl in more butter. Since the pan isn’t too hot, the butter melts into a creamy sauce.

    Serving Suggestions

    These cilantro lime shrimp are perfect served family-style. The shrimp are a bit messy, but that’s a good thing in this case. Serve these by themselves, with pasta (hello garlic cilantro shrimp pasta), over cilantro lime rice, coconut rice, Mexican rice, on top of homemade grits, or wrapped in homemade tortillas. I also love them next to this avocado and cucumber salad.

    Recipe Variations

    Our recipe is flexible. Although we use garlic, cilantro, and lime in our photos to make the sauce, you don’t need to. You can always take our method and swap the flavors around a bit. Swap lime for lemon and cilantro for parsley. This lemon parsley version is similar to more traditional shrimp scampi. Or try fresh basil, dill, and tarragon. I also highly recommend our cajun butter shrimp!

    Cilantro Lime Shrimp

    Cilantro Lime Butter Shrimp

    • PREP
    • COOK
    • TOTAL

    I love this garlic shrimp cooked in a creamy cilantro lime butter sauce. Serve this as an appetizer, with pasta, over rice, or in tortillas for tacos. The recipe is easy to adapt. Swap lime for lemon and try other tender herbs like parsley, dill, basil, or tarragon instead of cilantro.

    Makes 4 servings

    You Will Need

    1 pound (450g) extra large shrimp, peeled with tails left on and deveined

    1 lime plus a few extra wedges for serving

    3 tablespoons unsalted butter, divided

    2 tablespoons minced garlic, about 6 cloves

    1/2 teaspoon ground coriander, optional

    2 scallions, chopped

    1/2 cup fresh cilantro leaves and tender stems, chopped

    Salt and fresh ground black pepper

    Directions

    • Cook Shrimp
    • 1Pat the shrimp dry, then season it with 1/4 teaspoon of salt and fresh ground black pepper.

      2Zest the lime using a microplane and set aside. Cut the zested lime in half, ready for the sauce later in the recipe.

      3Add one tablespoon of the butter to a wide skillet. Save the remaining two tablespoons for later.

      4Place the skillet with butter over medium heat, then add the garlic and coriander. Stir the garlic around the pan until the butter melts and bubbles for about 1 minute.

      5Add the shrimp, nestling them into the pan so they are in one layer. A few shrimp stacked on top of each other is okay. Cook until the shrimp starts turning opaque, about 1 minute.

      6Stir in the scallions and lime zest. Continue to cook, stirring, until the shrimp are firm and opaque, another 1 to 2 minutes. Slide the skillet off the heat.

      7Add the cilantro, lime juice, and the remaining two tablespoons of butter. Stir the butter around the pan to melt into the lime juice, making the creamy butter sauce.

      8Taste, then season as needed with salt and pepper. Serve with extra lime wedges on the side.

    Adam and Joanne’s Tips

    • Lemon garlic butter shrimp: Swap lime for lemon and cilantro for parsley, then follow the recipe as written above. Add a splash of dry white wine at the end for extra flavor.
    • How to make spicy cilantro lime shrimp: Add 1/2 to 3/4 teaspoons of crushed red pepper flakes to the pan while adding the garlic.
    • Olive oil instead of butter: While the sauce is not creamy, you can substitute olive oil for the butter. You will need one tablespoon to cook the Shrimp and only a light drizzle at the end (about half a tablespoon).
    • The nutrition facts provided below are estimates.

    Nutrition Per Serving
    Serving Size
    1/4 pound
    /
    Calories
    193
    /
    Protein
    23.6 g
    /
    Carbohydrate
    5.2 g
    /
    Dietary Fiber
    1.2 g
    /
    Total Sugars
    1.4 g
    /
    Total Fat
    9.4 g
    /
    Saturated Fat
    5.5 g
    /
    Cholesterol
    205.4mg
    /
    Sodium
    284.9 mg


    AUTHOR:

    Adam Gallagher

    Adam and Joanne of Inspired Taste

    We are Adam and Joanne Gallagher, the creators of Inspired Taste. Established in 2009, Inspired Taste grew from a childhood dream into one of the internet’s most trusted recipe sites with hundreds of reliable recipes, step-by-step videos, and expert tips.More About Us
    Source link

  • Easy Potato Leek Soup Recipe

    Easy Potato Leek Soup Recipe

    I make this potato leek soup recipe all the time! This easy soup is super creamy and comforting (and I make it without cream!).

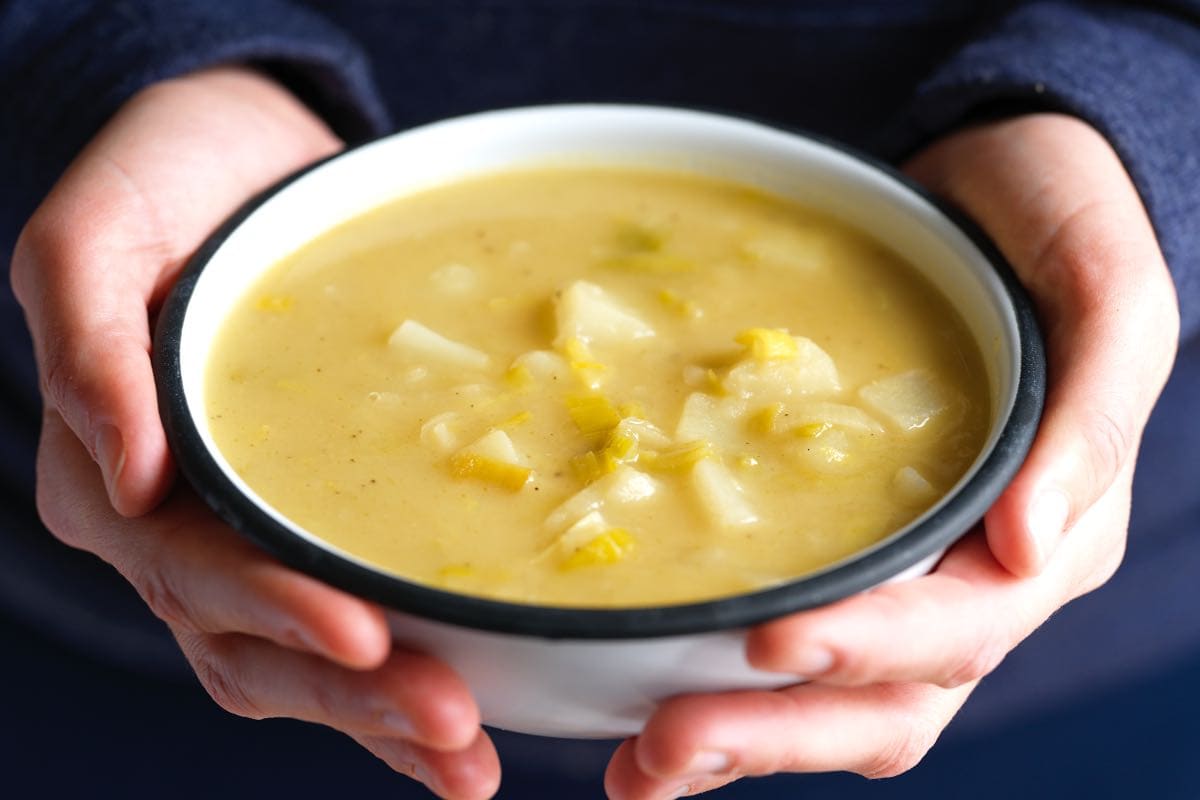
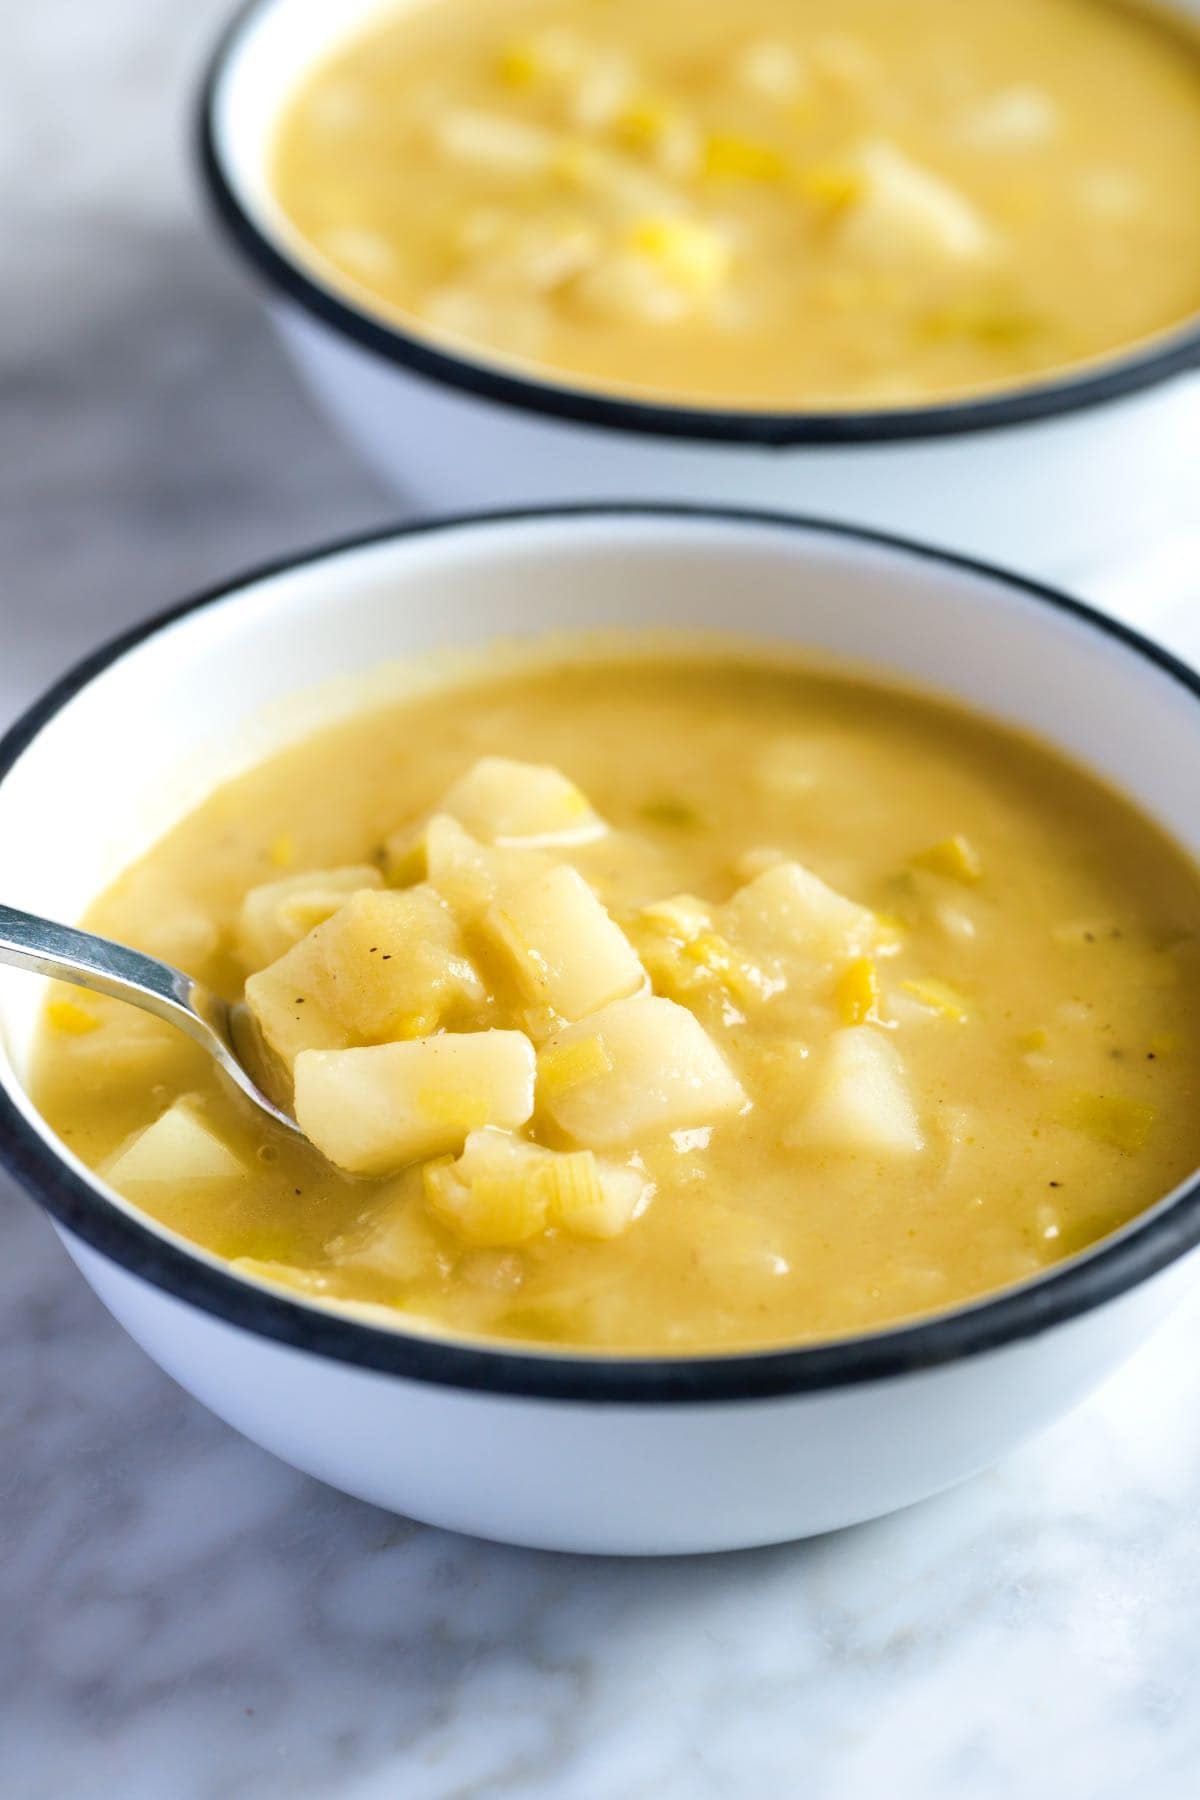
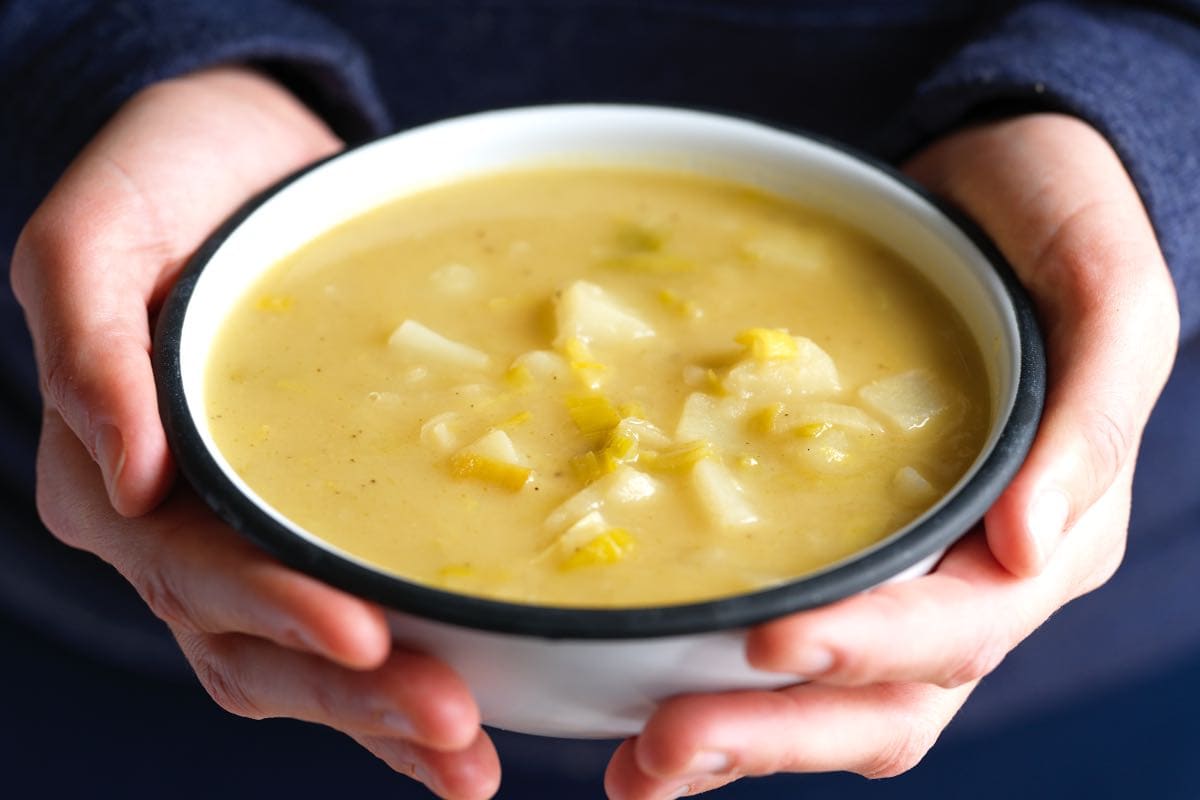
    Two Bowls of Leek and Potato Soup

    I learned how to make potato leek soup from my Mom, who makes it weekly. The ingredient list for this easy soup is pretty short (woohoo!) and super simple to prepare.

    Plus, it keeps well in the fridge or freezer for busy days. We love this soup and hope you’ll give it a try!

    Key Ingredients

    • Butter: I love the creaminess butter adds, especially since this soup has no cream, but olive oil is a good substitute.
    • Leeks: Think of leeks as sweet, mellow onions. We’ll use the white and light green parts, saving the tougher dark green tops for stock. Check out my article about how to clean leeks for more tips!
    • Potatoes: Use any kind you have. Yukon Gold potatoes will make it extra creamy, but russets break down easily for a nice texture, too.
    • Broth: Either chicken broth or vegetable broth works perfectly here.
    • Spices: Don’t be shy with the salt and pepper! A pinch of nutmeg adds a subtle warmth, and half a bay leaf is plenty for flavor.

    Find the full recipe with measurements below.

    How to Make Potato and Leek Soup

    Tip 1: Throughly clean your leeks. Leeks tend to trap sand, so I always clean them thoroughly. My go-to method is slicing them in half lengthwise, which makes it easier to rinse away any hidden grit. If you need a visual guide, check out my article on cleaning leeks.

    Tip 2: Cook the leeks until soft. Once your leeks are clean and chopped, this soup comes together quickly. Start by cooking the leeks in butter until they’re very soft, then add the rest of the ingredients and simmer until the potatoes are tender.

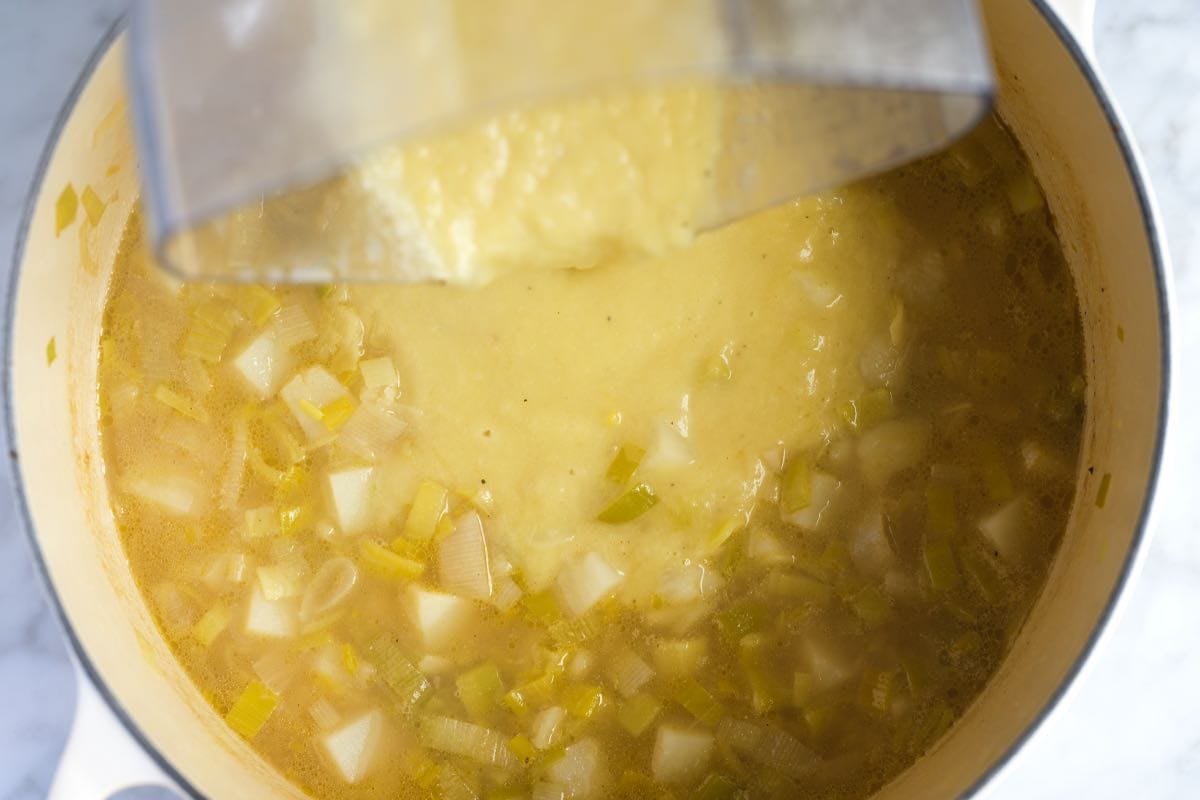
    Tip 3: Blend half of the soup for the best texture. I’m a big fan of textured soups. While many potato leek soup recipes call for blending until silky smooth, I prefer a heartier, more rustic approach. I leave plenty of potato chunks and sliced leeks in the pot. We blend about half the soup to thicken it up and add creaminess while leaving the rest chunky for texture.

    Blending half of the potato and leek soup

    More Potato Soup Recipes

    Homemade Potato Leek Soup

    Easy Potato Leek Soup

    • PREP
    • COOK
    • TOTAL

    We love this potato and leek soup recipe with butter, leeks, potatoes, stock, and spices. This soup is so creamy and comforting. There’s no cream needed, but if you want to make this more decadent, add a little crème fraîche, sour cream, or cream to your bowl before serving.

    Makes 4 servings

    You Will Need

    3 tablespoons butter or olive oil

    3 large leeks

    2 medium-to-large russet potatoes, peeled and chopped into ½-inch cubes

    6 cups stock or broth, see our chicken stock or vegetable broth

    Half of a bay leaf

    Salt and fresh ground black pepper

    Pinch freshly ground nutmeg

    Crème fraîche, sour cream, or cream for serving, optional

    Directions

    • Prepare Leeks
    • 1Cut away the stem and dark green parts of the leeks. Discard the stem and save the green tops for stock or broth. We only need the light green and white parts of the leeks for this recipe.

      2Slice the leeks into half, lengthwise, and then run cold water over them, using your fingers to release any dirt stuck inside the layers.

      3Slice the leeks into 1/4-inch thick half-moons.

    • Prepare Soup
    • 1Melt the butter in a large saucepan or Dutch oven over medium heat.

      2Stir in the leeks and 1/4 teaspoon of salt. Reduce the heat to medium-low, and cook, stirring frequently, until very soft but not browned, 10 to 15 minutes. If the leeks begin to brown, lower the heat a bit more.

      3Stir in the potatoes, stock, and 1/4 teaspoon of fresh ground pepper. Add half of a bay leaf, and then bring it to a boil. Reduce the soup to a low simmer, and cook uncovered for 10 to 15 minutes or until the potatoes are tender.

      4Taste the broth and season with additional salt.

      5Blend one-third of the soup, and then stir back into the pot. Stir in a bit more ground pepper and a pinch of nutmeg. Serve.

    Adam and Joanne’s Tips

    • Storing: Store potato leek soup in airtight containers in the fridge for up to 3 days or in the freezer for up to 3 months.
    • Vegetarian and vegan adaptations: Use vegetable broth. Try our homemade veggie broth.
    • The nutrition facts provided below are estimates.

    Nutrition Per Serving
    Serving Size
    1/4 of the recipe
    /
    Calories
    263
    /
    Total Fat
    11.3g
    /
    Saturated Fat
    6.2g
    /
    Cholesterol
    22.9mg
    /
    Sodium
    418.8mg
    /
    Carbohydrate
    33.7g
    /
    Dietary Fiber
    2.9g
    /
    Total Sugars
    3.8g
    /
    Protein
    10.7g


    AUTHOR:

    Joanne Gallagher

    Adam and Joanne of Inspired Taste

    We are Adam and Joanne Gallagher, the creators of Inspired Taste. Established in 2009, Inspired Taste grew from a childhood dream into one of the internet’s most trusted recipe sites with hundreds of reliable recipes, step-by-step videos, and expert tips.More About Us
    Previous Post: Essential Mignonette Sauce
    Next Post: Easy Apple Crisp

    Source link

  • Buttery Roasted Carrots Recipe

    Buttery Roasted Carrots Recipe

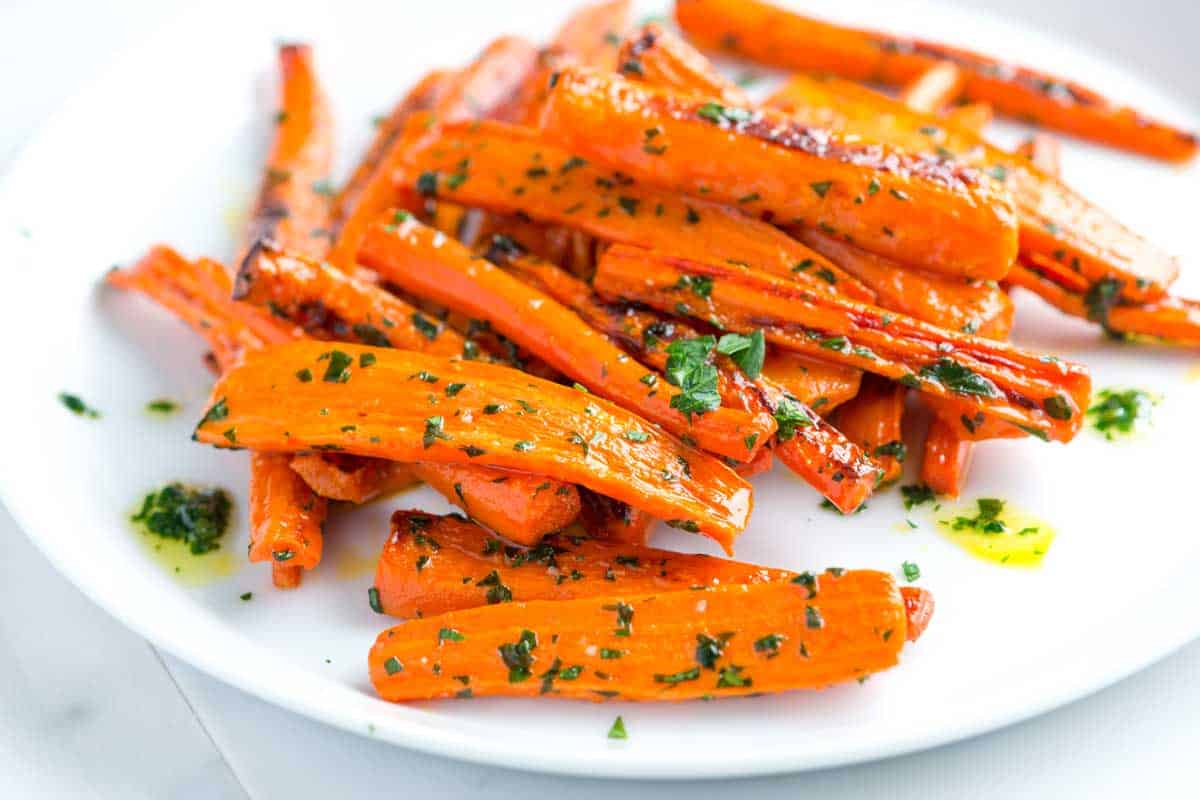
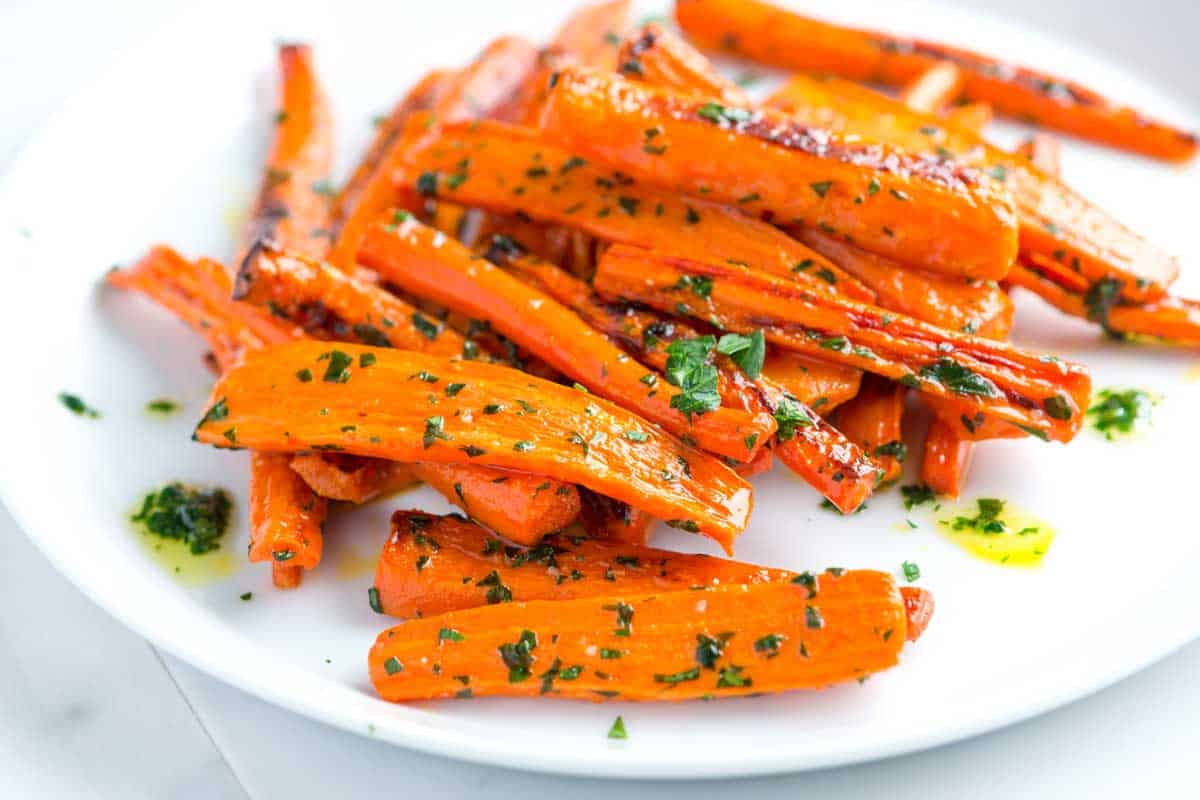
    This roasted carrots recipe has perfectly tender carrots tossed in the most delicious garlic parsley butter.

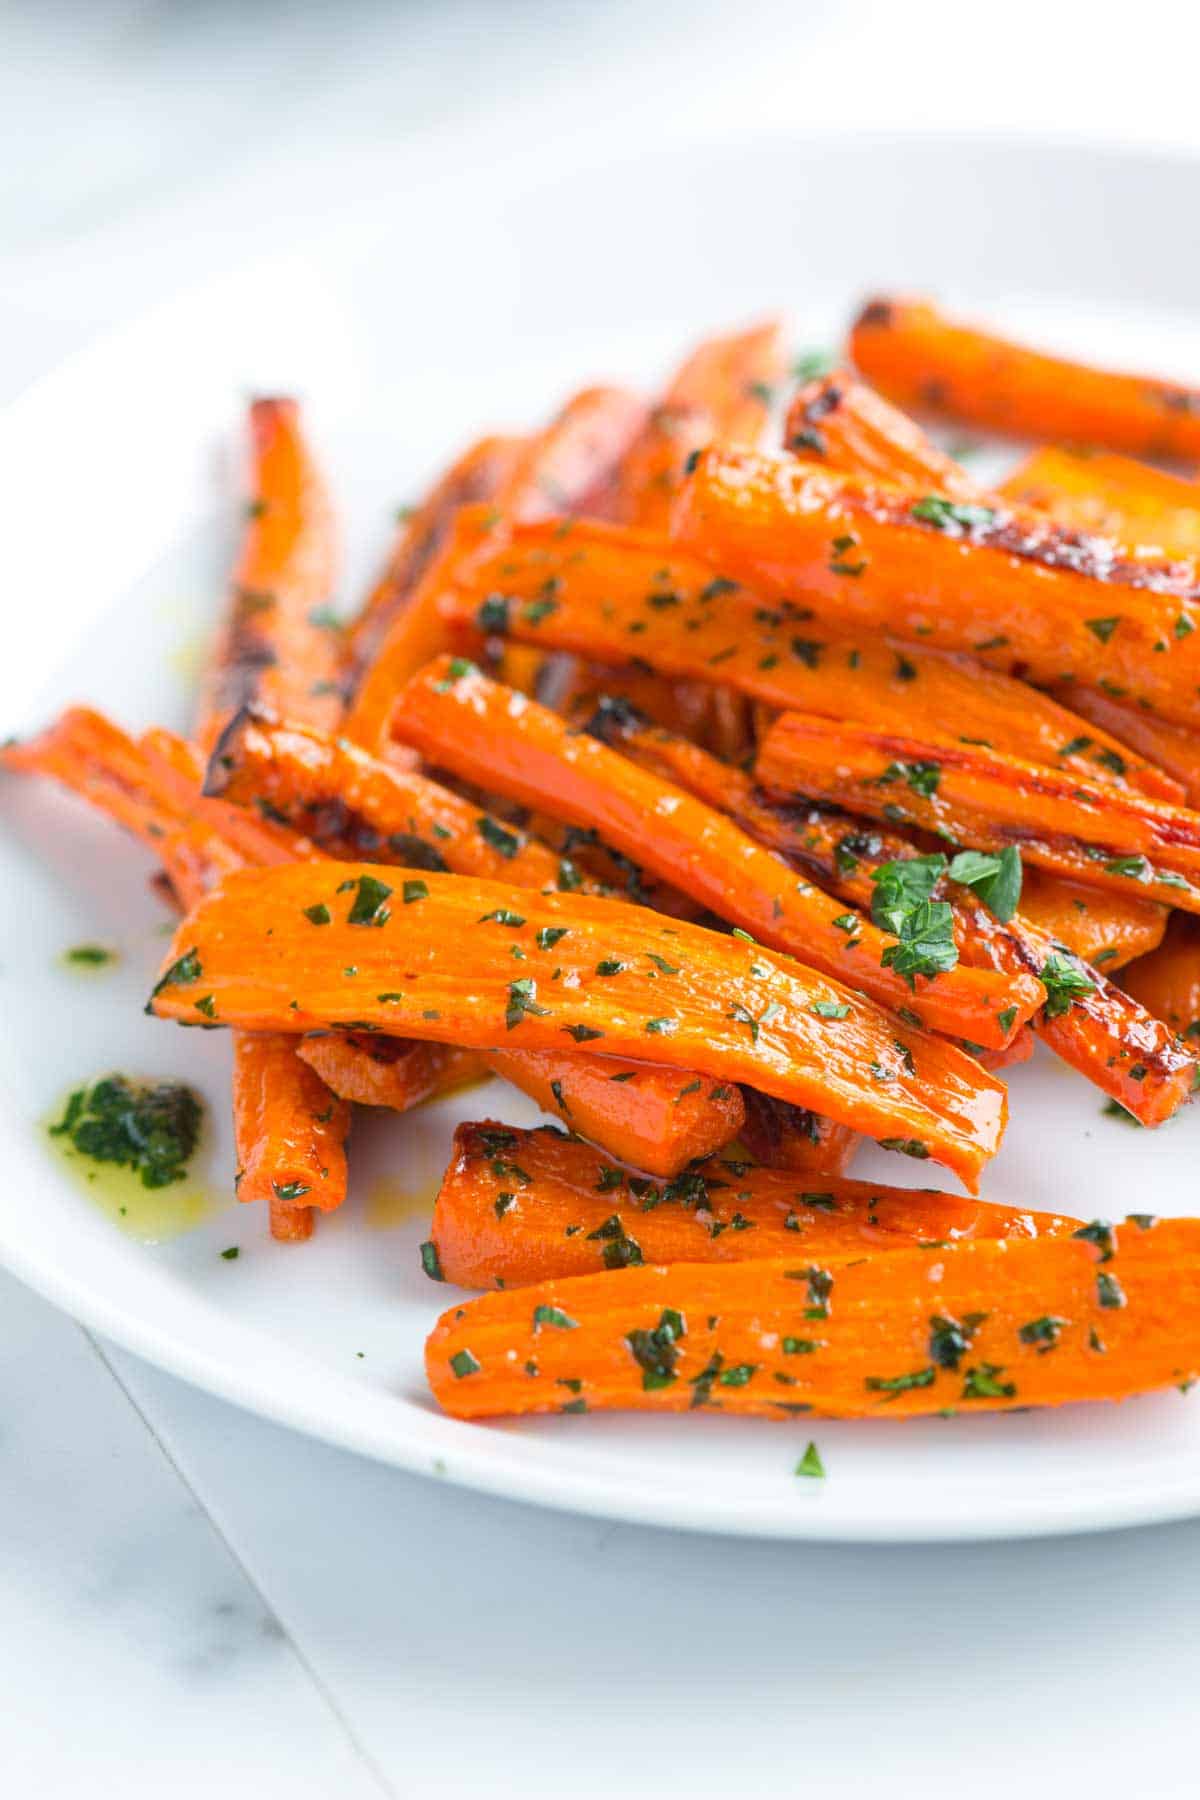
    Roasted Carrots with Garlic Parsley Butter

    Of all the carrot recipes on Inspired Taste, these garlic butter roasted carrots are my absolute favorite!

    I make them for weeknights, special occasions, and even for Thanksgiving! For more carrot recipes, see our honey roasted carrots, and my favorite carrot ginger dressing!

    Key Ingredients

    • Carrots: You can use any kind of carrot for this recipe. I typically buy medium to large ones and give them a good scrub before cutting. Feel free to peel them if you prefer. Baby carrots work, but you might need to adjust the roasting time.
    • Butter: I roast the carrots with olive oil and salt, then toss them with homemade garlic parsley butter once they’re tender and caramelized. You can use salted or unsalted butter or even a plant-based alternative.
    • Garlic and Parsley: You’ll need one small garlic clove and a generous handful of parsley for this recipe. Feel free to experiment with other herbs, such as cilantro, mint, rosemary, or sage. Just remember to use a bit less of the stronger herbs, such as rosemary and sage.

    Find the full recipe with measurements below.

    How to Make Buttery Roasted Carrots

    Tip 1: Roasting carrots. The trick to perfectly roasted carrots is to give them enough room on the baking sheet. You want the sugars to caramelize and brown, not steam. Giving them some room helps a lot. The butter in this recipe comes later, so I roast roast these with olive oil, salt, and pepper. They only take 25-30 minutes.

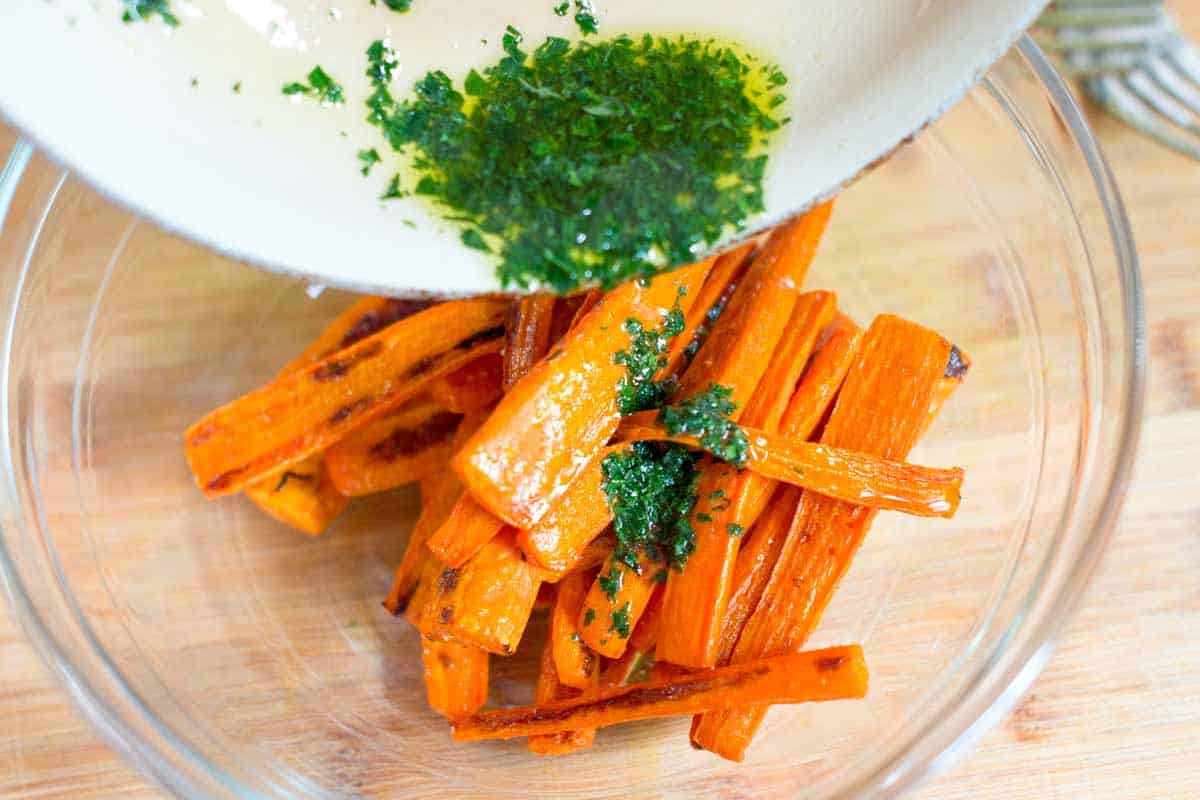
    Tip 2: Make our parsley butter. You can make the flavored butter while the carrots are roasting. Melt butter in a small pan over low heat, then add a smashed garlic clove and some chopped fresh parsley. The butter will gently bubble around the garlic and parsley, infusing itself with their amazing flavors. Once the carrots are done, I remove the garlic clove and pour the garlicky butter over them.

    By the way, this garlic parsley butter isn’t just for carrots! It’s amazing poured over other roasted vegetables, like roasted potatoes, or even drizzled over baked salmon.

    Tossing cooked carrots with garlic butter

    Serving Suggestions

    We love to serve them next to pan roasted chicken, my mother’s baked salmon with lemon and dill, and our roasted pork tenderloin with apples. They are also perfect for topping grain or rice bowls. I love these tahini lemon quinoa bowls.

    Garlic Butter Roasted Carrots

    Buttery Roasted Carrots

    • PREP
    • COOK
    • TOTAL

    You’ll love this easy roasted carrots recipe with our garlic herb butter. I use parsley in our photos, but other herbs work well. Substitute the parsley for cilantro, dill, or mint. Or, use a little less and try sage or rosemary.

    Makes 4 servings

    You Will Need

    1 ½ pounds carrots, peeled with ends trimmed (8 to 9 carrots)

    1 tablespoon extra-virgin olive oil

    1/4 teaspoon kosher salt

    1 tablespoon butter

    1 garlic clove

    1/3 cup loosely packed fresh parsley leaves, chopped

    Directions

      1Heat your oven to 425°F (218°C) and line a baking sheet with aluminum foil or parchment paper for easy cleanup.

      2Chop your carrots into sticks 2 to 3 inches long. If the thicker ends are wide, cut them in half lengthwise for even cooking.

      3Toss the carrot sticks with olive oil and salt and spread them on the prepared baking sheet in a single layer.

      4Roast for 25 to 30 minutes, stirring twice, until tender and lightly browned on the edges.

      5While the carrots roast, melt butter in a small pan over low heat. Gently crush a garlic clove with the back of a knife, remove the skin, and add it to the melted butter and the parsley.

      6Let the butter bubble gently for about 1 minute. Then, slide the pan off the heat and let it sit for 10 to 15 minutes to infuse the flavors. Discard the garlic clove.

      7Transfer the roasted carrots into a bowl with the garlic parsley butter. Toss, then season to taste with additional salt as needed.

    Adam and Joanne’s Tips

    • To make this vegan, swap the butter for vegan butter, coconut oil or olive oil.

    Nutrition Per Serving
    Calories
    118
    /
    Protein
    1 g
    /
    Carbohydrate
    15 g
    /
    Dietary Fiber
    4 g
    /
    Total Sugars
    7 g
    /
    Total Fat
    7 g
    /
    Saturated Fat
    2 g
    /
    Cholesterol
    8 mg


    AUTHOR:

    Adam Gallagher

    Adam and Joanne of Inspired Taste

    We are Adam and Joanne Gallagher, the creators of Inspired Taste. Established in 2009, Inspired Taste grew from a childhood dream into one of the internet’s most trusted recipe sites with hundreds of reliable recipes, step-by-step videos, and expert tips.More About Us

    Source link

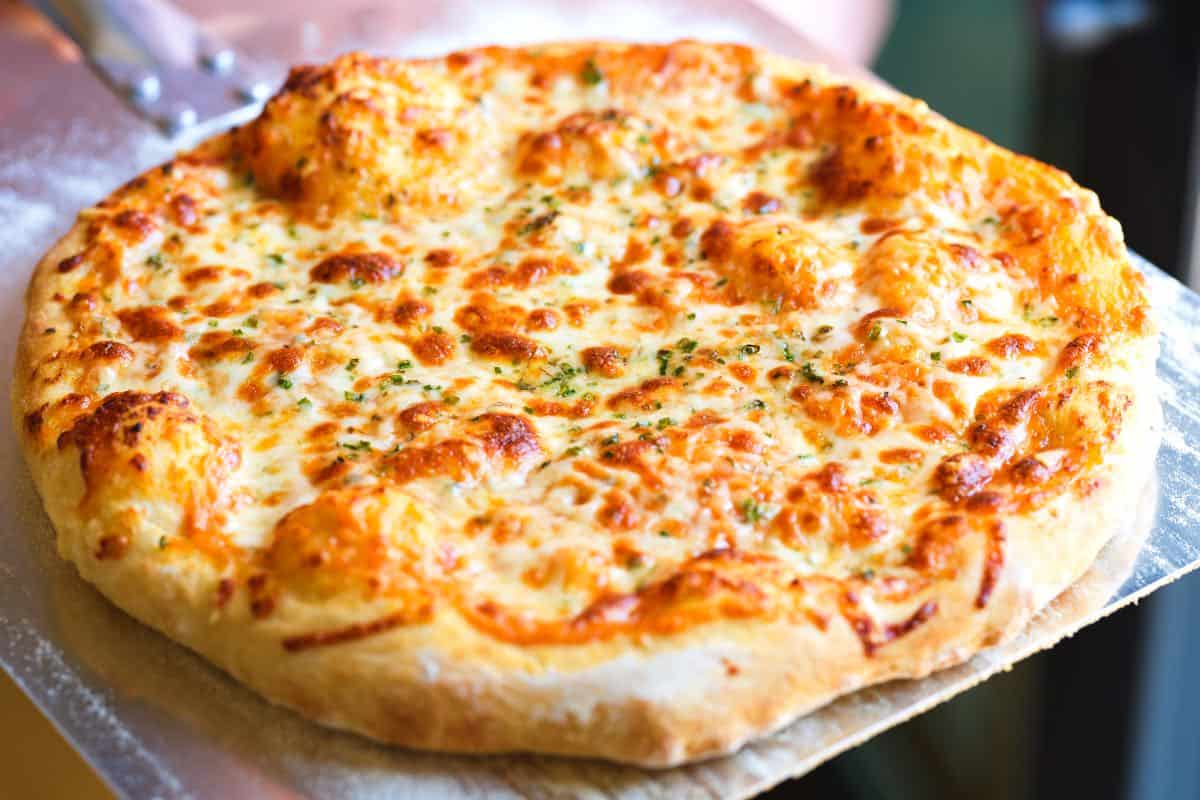
  • Perfect Cheese Pizza Recipe

    Perfect Cheese Pizza Recipe

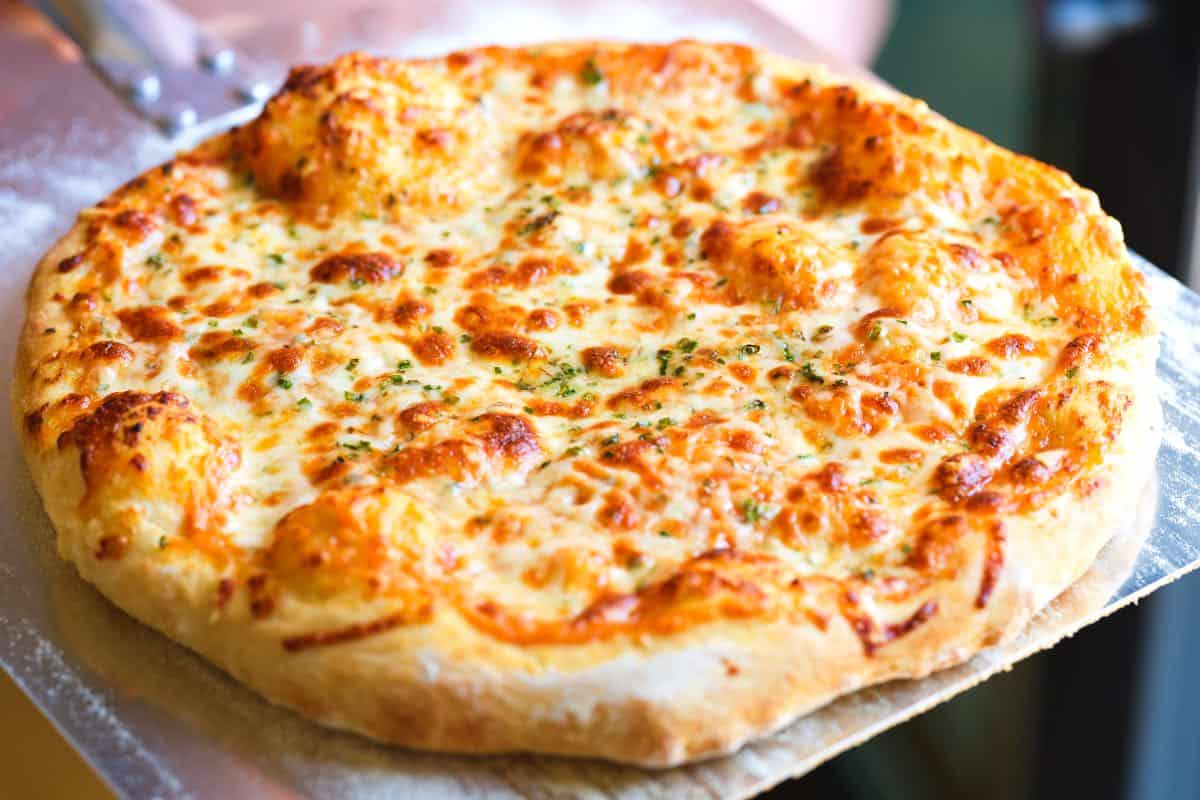
    My family loves this homemade cheese pizza recipe! Made with two types of cheese, it’s been on repeat in our home for years. This extra cheesy pizza is perfect for any pizza lover and occasion.

    Homemade Cheese Pizza

    Are you ready to make the best homemade cheese pizza we have ever made? This recipe has become our family’s go-to homemade pizza. It’s super simple and so good!

    We have lots of pizza recipes on Inspired Taste. Check out our Margherita pizza, this easy flatbread pizza, or if you are looking for homemade dough, this pizza dough.

    Key Ingredients

    • Dough: I love using my homemade pizza dough recipe, but any store-bought dough will work.
    • Sauce: Your favorite store-bought pizza sauce is perfect! In a pinch, I’ve even used spaghetti sauce. This homemade pizza sauce is great, too.
    • Cheese: I use shredded mozzarella (not fresh mozzarella) for that classic pizza melt. A sprinkle of shredded Parmigiano-Reggiano adds a nice salty kick!
    • Toppings: Fresh chives and dried oregano are my go-to toppings for this cheese pizza. Chives add a subtle onion-garlic flavor, while oregano gives it that classic pizzeria taste.

    How to Make Cheese Pizza

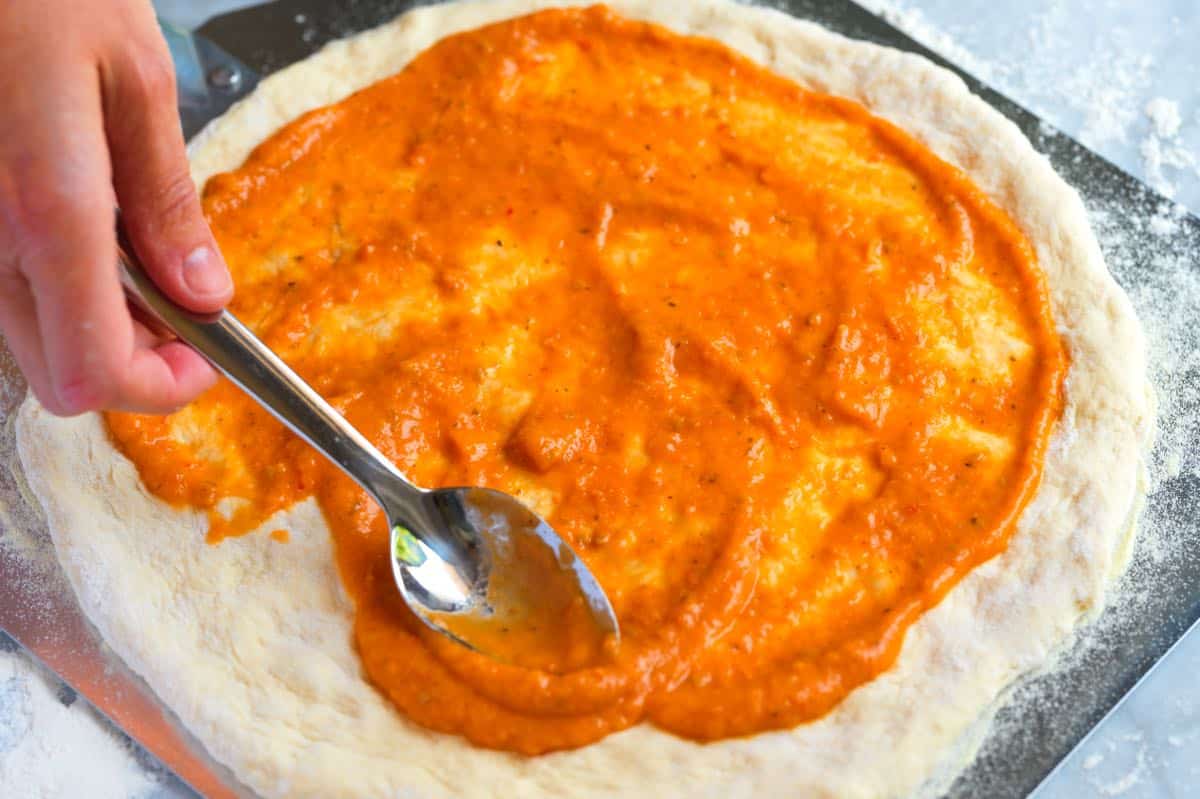
    Here’s how to make my family’s favorite cheese pizza! First, we use a good pizza dough and leave it on the counter to warm up a bit before patting it into a thin disc. Then, I’m pretty generous with my sauce (I love this pizza sauce).

    How to Make Cheese Pizza: Adding sauce to pizza crust

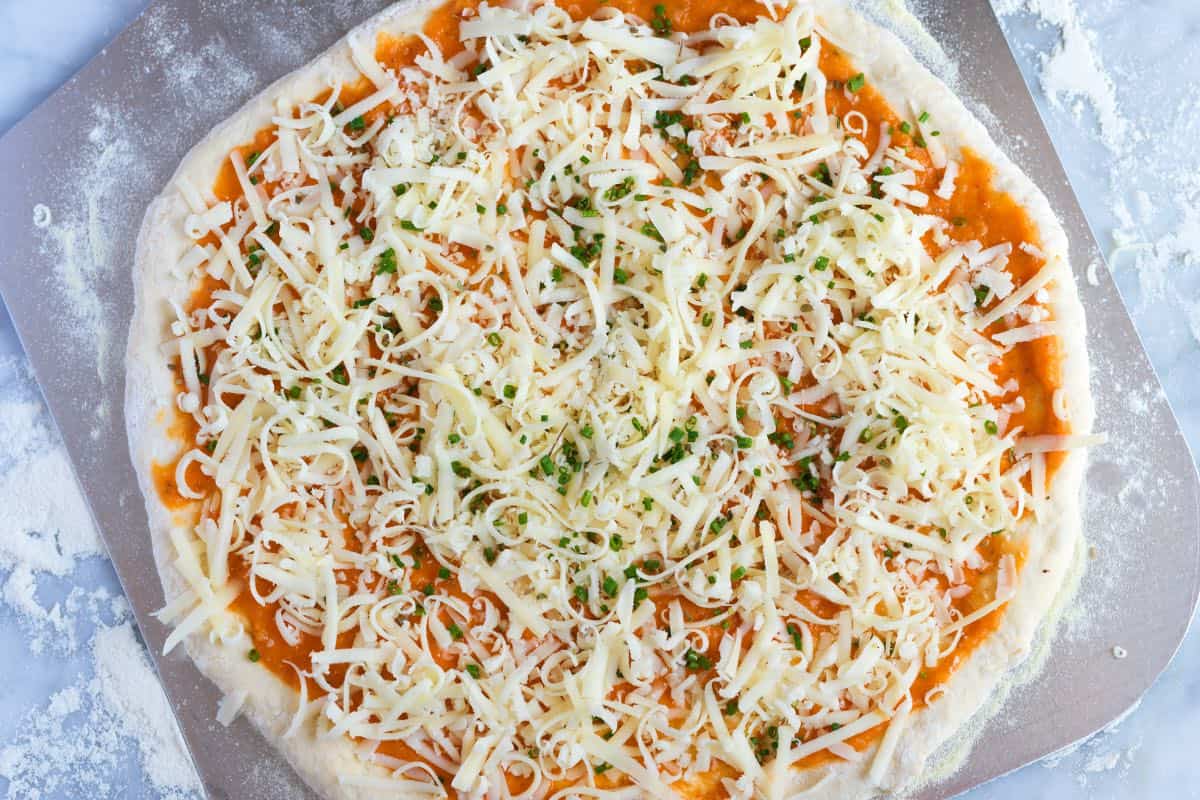
    Now grab a bowl and toss together shredded mozzarella, parmesan cheese, chives, and oregano. Then, generously scatter the mixture all over the pizza. Last but not least, bake it!

    How to Make Cheese Pizza: Cheese pizza ready to be baked

    I bake my pizzas in a very hot oven and use a pizza steel. Since not everyone has one, I’ve included all my tips in the recipe below. By the way, I love this pizza topped with a spoonful of giardiniera (which is an herby pickled vegetable relish-so good!).

    Best Homemade Cheese Pizza

    Perfect Cheese Pizza

    • PREP
    • COOK
    • TOTAL

    Our best recipe for cheese pizza! We use our favorite homemade pizza dough, a garlicky pizza sauce, two types of cheese, and herbs.

    Makes 1 large pizza

    You Will Need

    1 batch homemade pizza dough or use store-bought dough

    4 to 6 tablespoons pizza sauce, try homemade pizza sauce

    1 cup (57g) shredded mozzarella, not fresh mozzarella

    1/2 cup (28g) shredded parmesan

    1 tablespoon chopped fresh chives

    1/4 teaspoon dried oregano

    All-purpose flour, for forming dough disc

    Semolina flour, for dusting pan

    Directions

      1At least 30 minutes before you plan to bake your pizza, preheat the oven to 450° Fahrenheit (232°C). If you have one, place a pizza steel or pizza stone into the oven before preheating. Personally, we use a higher temperature, see the tips section for our thoughts on what temperature is best for baking pizza at home.

      2If your pizza dough is cold, allow it to warm at room temperature for 20 to 30 minutes.

      3When ready to bake your pizza, prepare a pizza peel or pizza pan by dusting it with semolina flour.

      4In a medium bowl, mix the shredded mozzarella, parmesan, chives, and oregano together.

      5Dust a clean work surface with all-purpose flour, and then form your pizza dough into a round, large enough to fit your pizza peel or pan. To stretch the dough, avoid rolling it out, as this can flatten the bubbles that have formed. Instead, use your fingers to make dimples in the dough, starting from the center and working outwards. Carefully stretch and push the dough to fit your pizza pan or peel. Use a light touch to maintain as many air pockets in the dough as possible.

      6Transfer the dough round to your pizza peel or pan, and reform it if it shrinks back a bit.

      7Spread pizza sauce over the pizza, leaving a thin edge untouched for the crust. Scatter the cheese mixture over the sauce.

      8Bake until the crust is set and golden brown and the cheese has melted with golden spots all over, 6 to 15 minutes, depending on oven temperature. Remove from the oven, cut, and serve.

    Adam and Joanne’s Tips

    • Oven temperature: We recommend 450° Fahrenheit (232°C) in the recipe, but if you are comfortable with it, increasing the temperature to 550° Fahrenheit (288°C) will provide even better results. If you have a vented hood above your oven, turn it on high. When our oven is heated to such a high temperature, the fire alarm occasionally goes off due to the hot air that escapes when we open our oven door. It’s not a problem, other than the noise, and in our experience, it is remedied with a few fans of a dish towel near the alarm, but it is something to consider. If 550° Fahrenheit (288°C) is too high for you, feel free to use a lower temperature. However, keep in mind that this pizza bakes best between 425° Fahrenheit and 550° Fahrenheit (218°C to 288°C). The lower the temperature, the longer it will take to bake and the less bubbly it will be.
    • The nutrition facts provided below are estimates.

    Nutrition Per Serving
    Serving Size
    1/4 of the recipe
    /
    Calories
    330
    /
    Total Fat
    9.1g
    /
    Saturated Fat
    5.1g
    /
    Cholesterol
    27.2mg
    /
    Sodium
    934.4mg
    /
    Carbohydrate
    45.5g
    /
    Dietary Fiber
    2.5g
    /
    Total Sugars
    1.7g
    /
    Protein
    15.8g


    AUTHOR:

    Joanne Gallagher

    Adam and Joanne of Inspired Taste

    We are Adam and Joanne Gallagher, the creators of Inspired Taste. Established in 2009, Inspired Taste grew from a childhood dream into one of the internet’s most trusted recipe sites with hundreds of reliable recipes, step-by-step videos, and expert tips.More About Us
    Previous Post: The Best Vegetable Broth
    Next Post: Fluffy Buttermilk Pancakes

    Source link

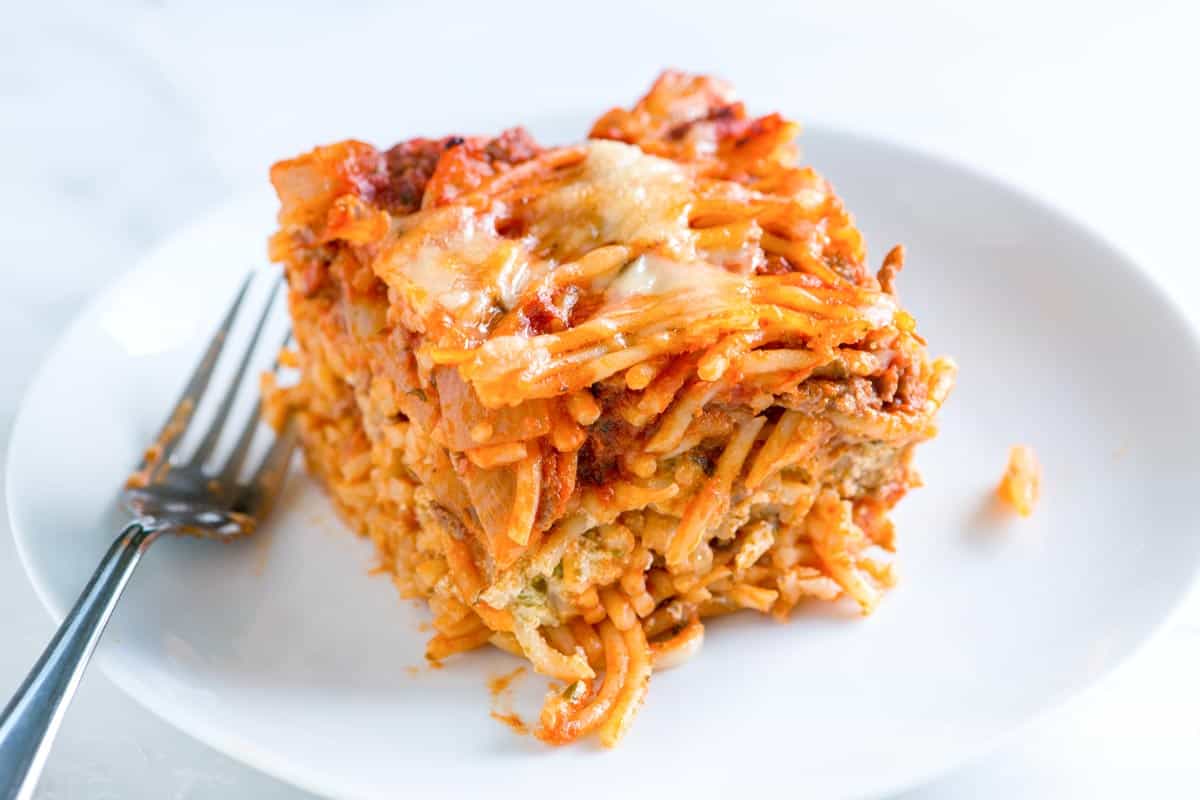
  • Seriously Good Baked Spaghetti Recipe

    Seriously Good Baked Spaghetti Recipe

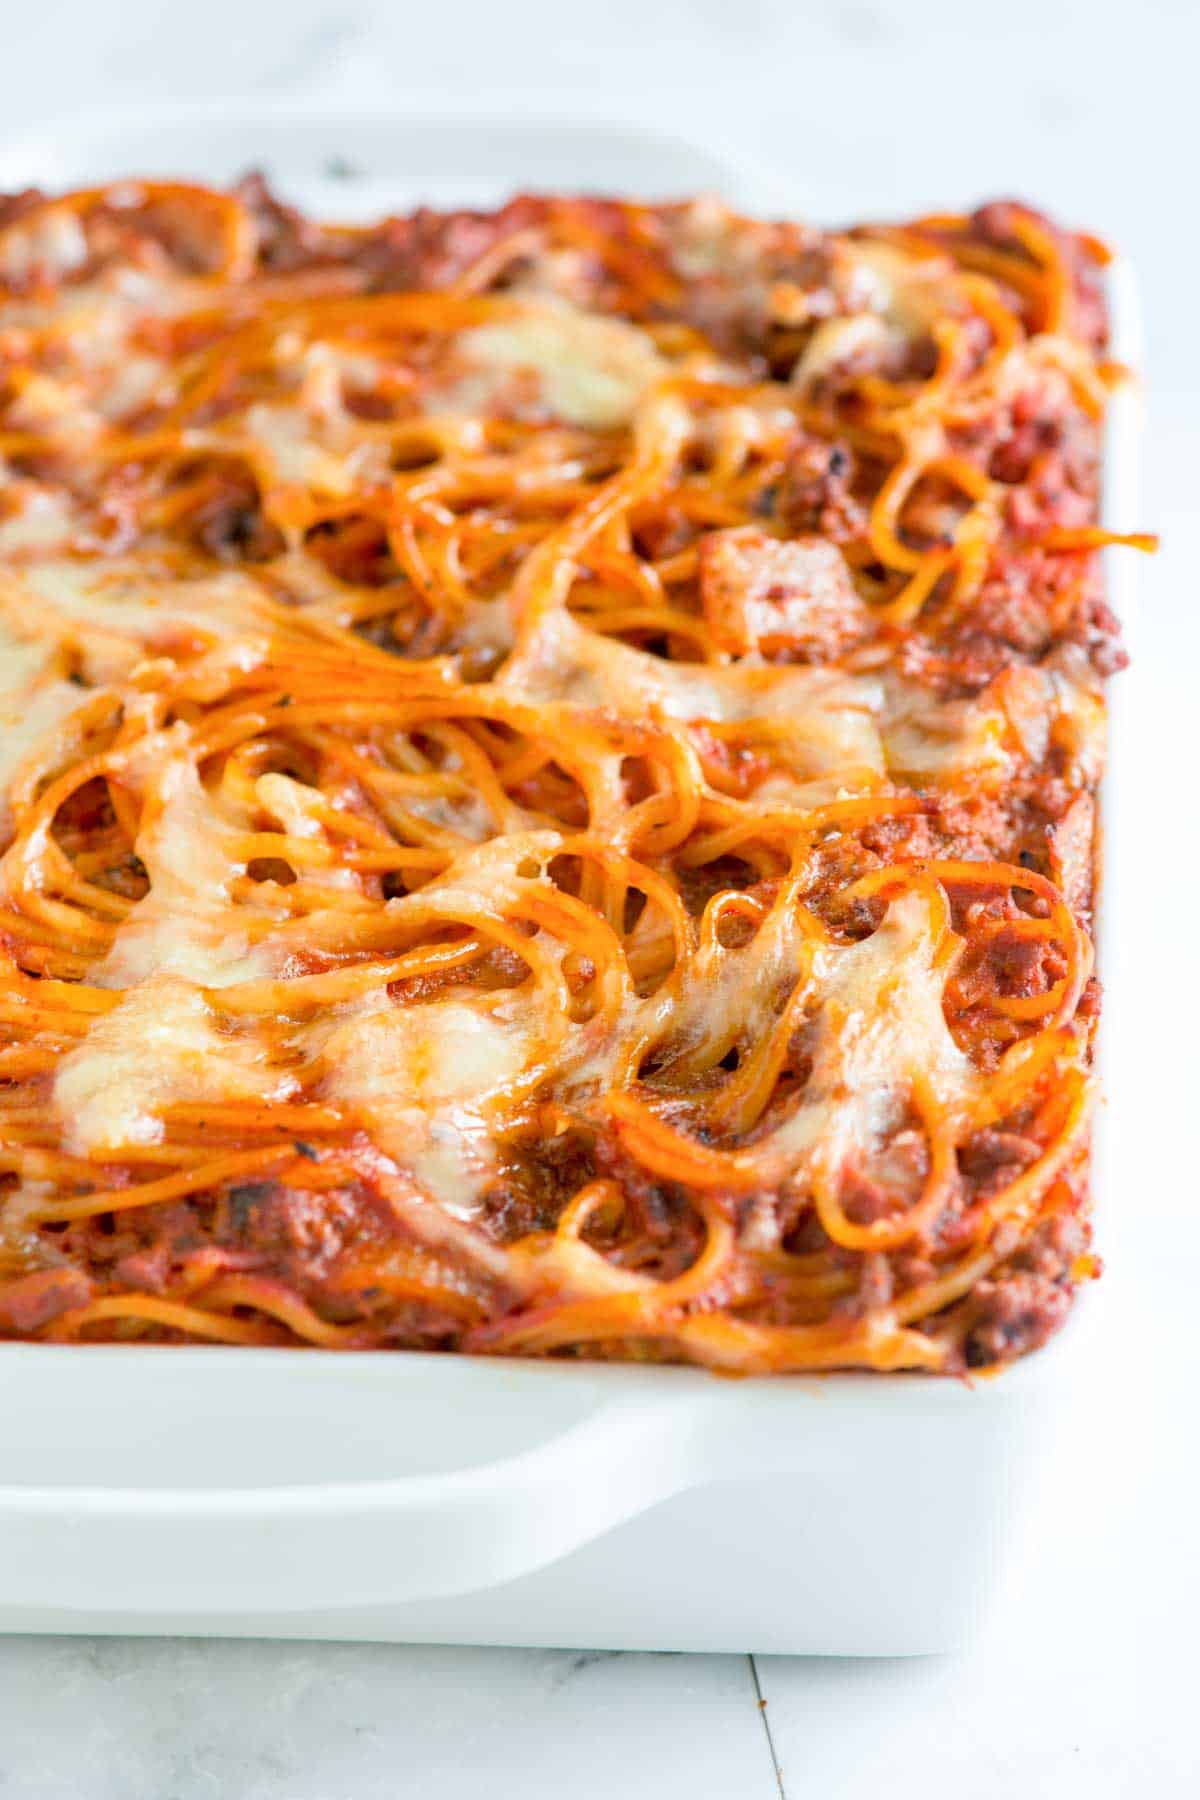
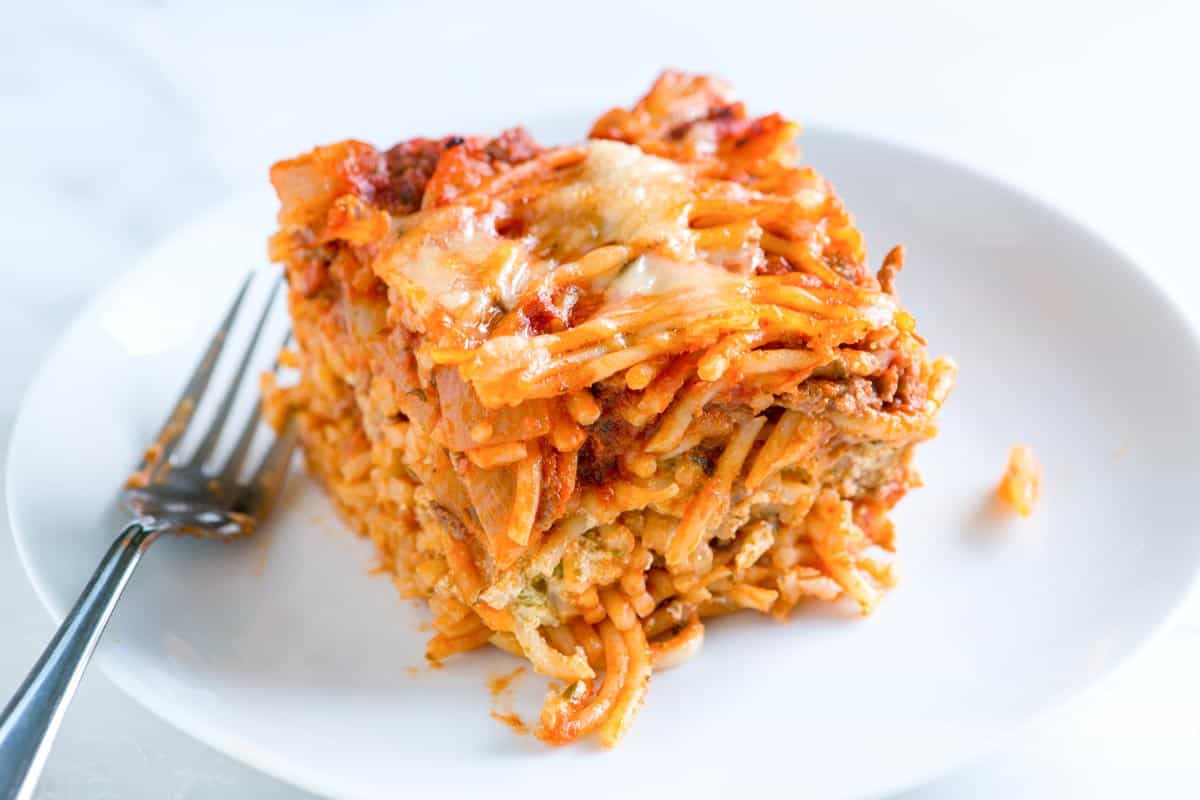
    My baked spaghetti recipe is easy and made with ground beef, marinara sauce, mozzarella cheese, and a hidden layer of creamy pesto sauce. Pure comfort!

    Baked Spaghetti

    This easy baked spaghetti has everything we love about baked pasta. It has noodles, a hearty meat sauce, and lots of cheese. For more spaghetti recipes I love, see our weeknight spaghetti recipe or this veggie spaghetti!

    My favorite part of this baked spaghetti is the creamy pesto layer in the middle. It’s ridiculously simple to make and makes this pasta dish so incredibly delicious!

    Key Ingredients

    • Spaghetti: I use plain spaghetti for this recipe, but other pasta shapes work great. Use what you have! I cook the pasta briefly before tossing it with the sauce and baking. Use the boxed directions as a guide, but cook the pasta for 2 to 3 minutes less. It will continue to cook in the oven.
    • Ground Beef: I usually use ground beef here, but ground sausage, chicken, and turkey are excellent. You can even leave the meat out and add a few extra veggies (see this vegetable spaghetti for suggestions).
    • Marinara Sauce: I use homemade marinara when I have it, but store-bought sauce works nicely in this recipe.
    • Sour Cream and Pesto: This is my favorite part of this baked spaghetti. I stir pesto into sour cream to create a creamy pesto sauce. Then, I add it as a creamy layer into the middle of the baked spaghetti. So good! Store-bought pesto is fine, but if you can, make homemade pesto (I love it!).
    • Cheese: Mozzarella is perfect, but any melty, mild cheese works.

    How to Make Baked Spaghetti

    When I’m not in the mood to assemble a lasagna, I make this baked spaghetti. The flavors are similar, but it’s much easier.

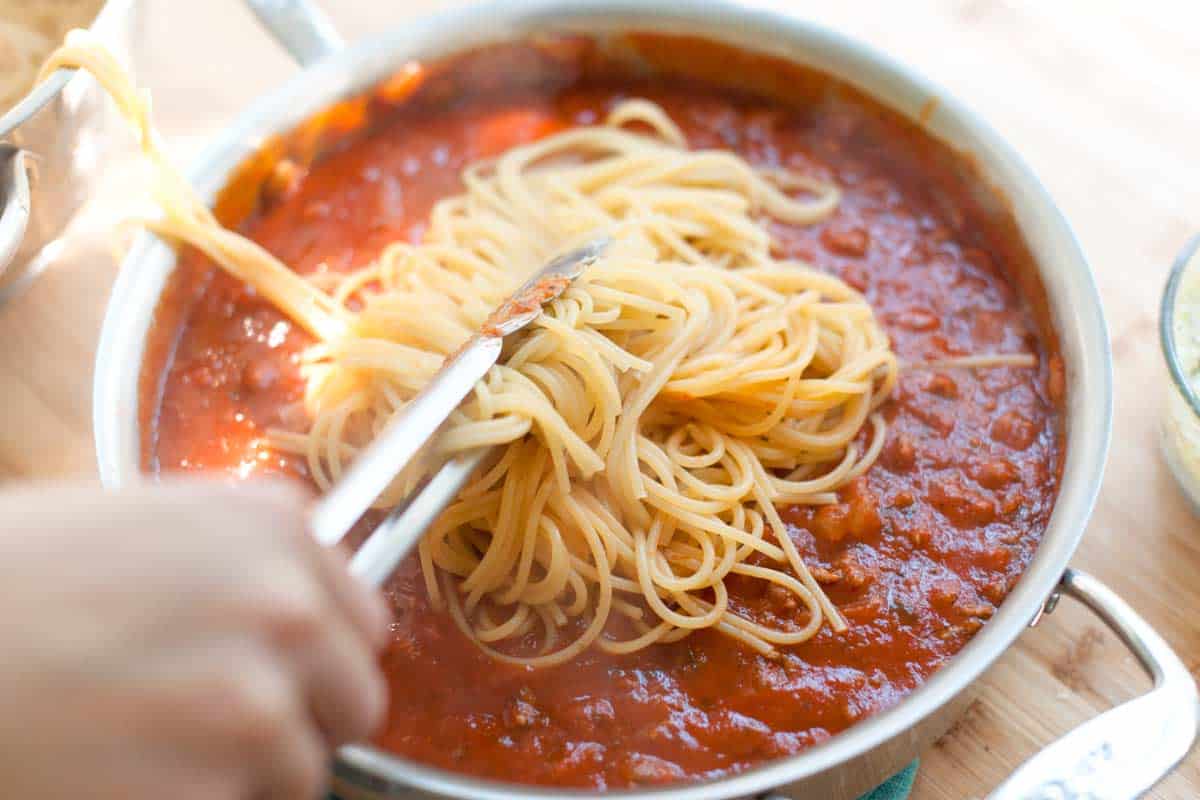
    For the sauce, I cook onions and ground beef, add the marinara sauce, and then toss with partially cooked spaghetti (by undercooking the pasta, it won’t become mushy after baking in the oven).

    How to Make Baked Spaghetti: Toss spaghetti with marinara sauce

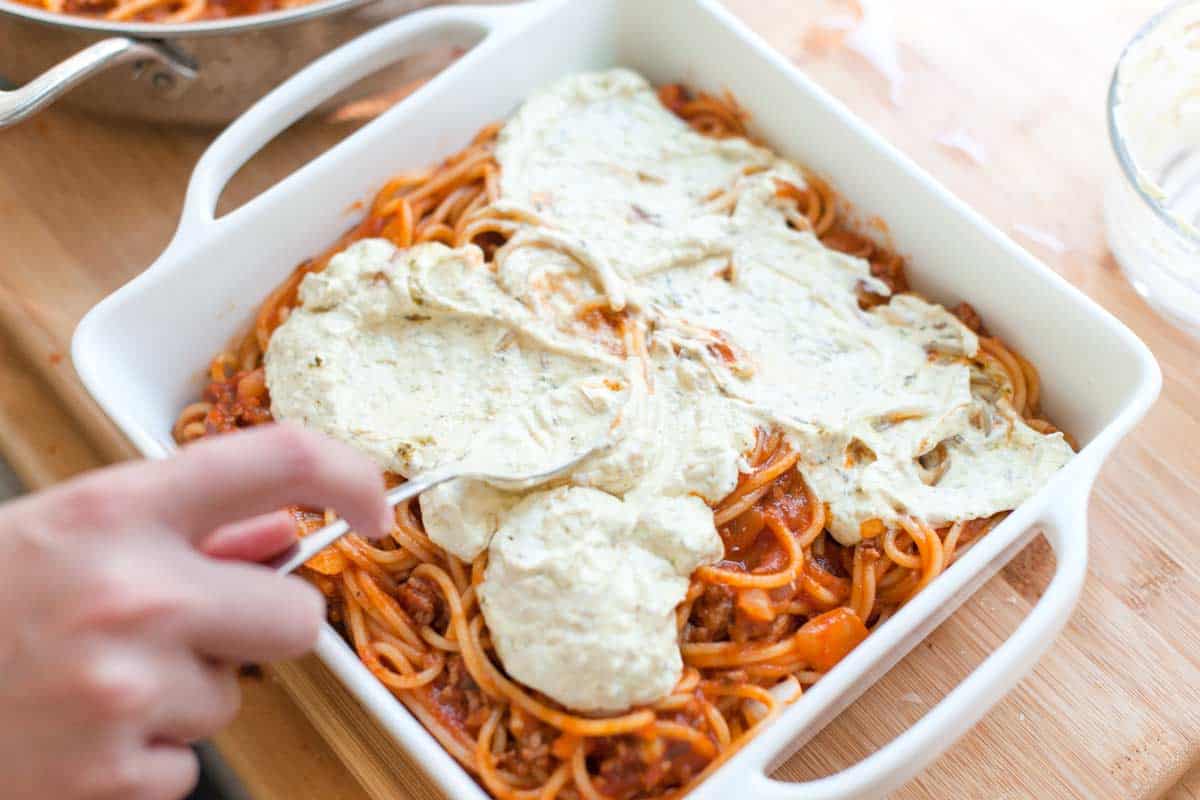
    You can add the spaghetti and meat sauce to a baking dish and top it with cheese, but to make it taste even better, add a creamy pesto layer to the middle.

    How to Make Baked Spaghetti: Add a creamy pesto layer to the middle

    It’s super simple. I mix sour cream with basil pesto. Then, I add about half of my spaghetti to the baking dish, spread a layer of creamy pesto, and layer the remaining spaghetti on top. I do the same when making our baked ziti with spinach, and I love it!

    Baked Spaghetti

    Seriously Good Baked Spaghetti

    • PREP
    • COOK
    • TOTAL

    Our baked spaghetti recipe involves baking spaghetti with a simple meat sauce of ground beef and marinara sauce. We also sneak in a layer of creamy pesto. If you are like us, this will become your new favorite meal! Feel free to swap the ground beef for bulk sausage, ground chicken, or ground turkey. To make this meatless, remove the meat (the spaghetti will still be delicious).

    8 servings

    You Will Need

    1 pound (450g) dry spaghetti

    1 pound (450g) lean ground beef

    1 tablespoon olive oil

    1 medium onion, chopped

    6 cups (1.4L) marinara sauce from 2 (26oz) jars, or see homemade marinara sauce

    3/4 cup (170g) sour cream

    1/4 cup (56g) basil pesto, see homemade basil pesto

    1 cup (113g) grated mozzarella cheese, 4 ounces

    Salt and fresh ground black pepper

    Directions

      1Preheat the oven to 350°F (177°C). Butter a 3-quart baking dish or spray with non-stick cooking spray.

      2Bring a large pot of salted water to the boil. Add the pasta and follow the package directions, but cook for 1 to 2 minutes less than the package calls for. Drain.

      3Meanwhile, make the sauce. Heat the olive oil in a large skillet with sides. Add onions and cook until translucent, about 5 minutes.

      4Add the ground beef and cook until browned, about 10 minutes. As the beef cooks, use a wooden spoon to break it up into small pieces in the pan. Season with 1/4 teaspoon of salt and a few grinds of black pepper. Drain excess fat from the meat.

      5Pour in the marinara sauce and cook until heated through. Take the pan off of the heat and add the cooked and drained pasta. Toss well, taste for seasoning, and adjust with salt and black pepper.

      6In a small bowl, stir sour cream and basil pesto until well blended.

      7Spoon half of the spaghetti into the baking dish. Spread the sour cream and pesto mixture over the pasta and scatter with half of the mozzarella cheese. Top with the remaining pasta, lightly press everything into the baking dish and then scatter the remaining mozzarella cheese.

      8Place the baking dish onto an aluminum-lined baking dish (just in case any sauce drips over the sides of the baking dish). Bake until the cheese has melted and the sauce bubbles, about 30 minutes. Let stand for 10 minutes before serving.

    Adam and Joanne’s Tips

    • Storing: Leftover baked spaghetti can be stored in an airtight container in the fridge for up to 3 days or frozen for up to 3 months. Thaw overnight in the fridge before reheating.
    • Make ahead tips: Assemble, cover with a sheet of parchment paper, and then cover the baking dish with foil. Refrigerate for up to 2 days before baking.
    • The nutrition facts provided below are estimates.

    Nutrition Per Serving
    Serving Size
    1/8 of the dish
    /
    Calories
    540
    /
    Total Fat
    17.8g
    /
    Saturated Fat
    6.4g
    /
    Cholesterol
    60.6mg
    /
    Sodium
    1194.8mg
    /
    Carbohydrate
    61.1g
    /
    Dietary Fiber
    6g
    /
    Total Sugars
    12.3g
    /
    Protein
    32.3g


    AUTHOR:

    Joanne Gallagher

    Adam and Joanne of Inspired Taste

    We are Adam and Joanne Gallagher, the creators of Inspired Taste. Established in 2009, Inspired Taste grew from a childhood dream into one of the internet’s most trusted recipe sites with hundreds of reliable recipes, step-by-step videos, and expert tips.More About Us
    Source link

  • Mediterranean Fish with White Bean Purée

    Mediterranean Fish with White Bean Purée

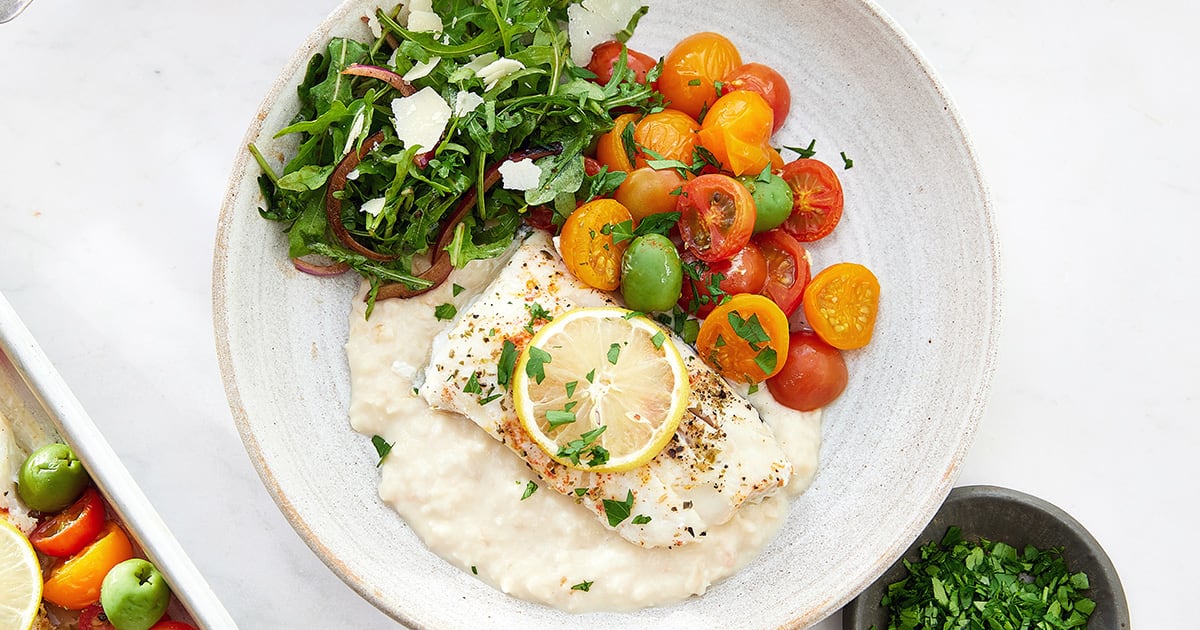
    Try this Mediterranean fish baked with cherry tomatoes, garlic, olives and lemon, served with white bean purée and arugula salad for a bright, feel-good dinner that is packed with protein, fiber and healthy fats.


    Jump to: ℹ️ Overview | 🛒 Ingredients | 📷 How To Make | 📹 Watch The Video | 👩‍🍳 Recipe Tips | 🥗 Serving Suggestions | 📝 Full Recipe Card | 🍽 More Healthy Fish Recipes


    If you’re looking for healthy dinner recipes with a Mediterranean vibe, this tray-baked white fish with juicy cherry tomatoes, briny olives, garlic, lemon, and herbs is easy, vibrant and fresh. It’s paired with creamy, rustic white bean puree and a quick balsamic-dressed arugula salad that brings a little peppery crunch to balance everything out.

    And while it’s essentially a Mediterranean fish recipe, the white bean purée is the unsung hero here — it’s got garlic, lemon, olive oil, and a dollop of Greek yogurt for creaminess, plus it’s loaded with fiber. This whole plate is naturally gluten-free and packed with protein and healthy fats.

    Macros per serving (approx): 540 calories, 45 g protein, 10 g fiber, 46 g carbs, 21 g fat

    👉 This recipe is part of my high-fiber and protein meals. You might also like these recipes: chicken shawarma with baked rice, chicken taco soup, Asian cucumber tofu salad, viral carrot salad with chicken and edamame, and spicy tuna seaweed bites.

    What You’ll Need

    Here is what you’ll need for this Mediterranean fish with white bean purée. Find the full measurements in the recipe card below.

    For the fish:

    • White fish fillets – choose firm, flaky varieties like cod, barramundi, snapper or mahi mahi.
    • Olive oil & lemon juice – adds richness and brightness.
    • Cherry tomatoes & olives – sweet, juicy, salty, and full of flavor.
    • For extra flavor: garlic, dried oregano or thyme for herby vibes, smoked paprika for a hint of smoky depth, salt and pepper – balance and seasoning.
    • Lemon slices & parsley – garnish with freshness.

    For the white bean purée:

    • Canned white beans – high in fiber and protein; rinse and drain well.
    • Garlic, lemon juice, olive oil – for zing and richness.
    • Greek yogurt – makes it super creamy, go for low-fat, high-protein Greek yogurt.
    • Salt & optional splash of water or stock – for seasoning and texture adjustment; you can also use the can liquid from the beans.

    For the balsamic arugula salad:

    • Fresh arugula/rocket – peppery and crisp.
    • Red onion – a little sharpness.
    • Balsamic vinegar & olive oil – classic dressing.
    • Shaved Parmesan – optional, for salty umami (omit if dairy-free).

    How To Make Mediterranean Fish with White Bean Purée

    Find the full recipe and nutritional information below. Here are some handy step-by-step photos for how to make baked fish with with white bean purée and balsamic arugula salad.

    • Preheat oven to 200°C / 400°F.
    • Layer fish in a baking dish, drizzle with olive oil + lemon juice, season.
    • Add garlic, tomatoes, olives around the fish. Sprinkle herbs, paprika, salt, and pepper. Top with lemon slices and bake 15–20 minutes until fish flakes.
    • Blend white bean purée ingredients until mostly smooth but a bit rustic. Thin with water/stock/liquid from the can, if needed.
    • Toss salad ingredients together with balsamic and olive oil.
    • To serve: Spoon purée onto plates, top with fish, tomatoes/olives, drizzle pan juices, add salad.

    Watch The Video

    Recipe Tips

    • Fish swaps: Snapper, barramundi, cod, tilapia — all work beautifully.
    • Don’t over-blend the purée; we want texture.
    • Make ahead: The purée and salad can be prepped earlier (don’t dress the salad!). Just bake fish fresh.
    • Storage: Fish keeps 2–3 days in fridge. Purée up to 4 days or freeze.

    Serving Suggestions

    Serve this as a complete meal — you’ve got protein, fiber, healthy fats, and veggies all on the plate. If you’re extra hungry, crusty sourdough or roasted potatoes on the side wouldn’t be out of place.

    💬 If you’ve tried this Mediterranean fish with white bean purée or any other recipe on the blog then don’t forget to rate the recipe and let me know how you got on in the comments below, I love hearing from you! You can also FOLLOW ME on Instagram, Facebook, Pinterest, YouTube, and or sign up to my Newsletter to see more of my delicious food.

    Want to Save This Recipe?

    Enter your email & I’ll send it to your inbox. Plus, get great new recipes from me every week!

    By submitting this form, you consent to receive emails from Cooked & Loved

    Try this Mediterranean fish baked with cherry tomatoes, garlic, olives and lemon, served with white bean purée and arugula salad for a bright, feel-good dinner that is packed with protein, fiber and healthy fats. Find step-by-step photos and more recipe tips above.

    For the white bean purée:

    For the balsamic arugula:

    • Preheat the oven to 200°C / 400°F.

    • Place fish in a lightly oiled baking dish. Drizzle with olive oil and lemon juice.

    • Add smashed garlic, cherry tomatoes, and olives around the fish. Sprinkle with oregano, paprika, salt, and pepper. Top each fillet with a lemon slice.

    • Bake for 15–20 minutes, until fish is cooked through and flakes easily.

    • While the fish bakes, add beans, garlic, olive oil, lemon juice, and yogurt to a food processor or use a stick blender. Blend until mostly smooth but still a bit textured. Season and thin with water/stock if needed; you can use the liquid from the can as well.

    • In a bowl, toss arugula, onion, balsamic vinegar, olive oil, Parmesan (if using), salt, and pepper.

    • To serve: spoon ½–⅔ cup white bean purée onto each plate, top with a fish fillet, tomatoes, olives, a drizzle of pan juices, and a handful of arugula salad.

    • Can I use frozen fish? Absolutely. Just make sure it’s fully thawed and patted dry before baking.
    • What beans are best? Cannellini or great northern beans work beautifully here — soft and creamy but still hold some texture. You can also try this with black beans for a contrast of colors, or even with chickpeas.
    • Dairy-free option? Skip the Greek yogurt and Parmesan. You can sub with a little extra olive oil in the purée for creaminess.
    • Why not mashed potatoes? White bean purée is higher in fiber and protein and supports blood sugar balance better than starchy mash — plus it’s just so good.
    • Fish swaps: Snapper, barramundi, cod, tilapia — all work beautifully.
    • Don’t over-blend the purée; we want texture.
    • Make ahead: The purée and salad can be prepped earlier (don’t dress the salad!). Just bake fish fresh.
    • Storage: Fish keeps 2–3 days in fridge. Purée up to 4 days or freeze.

    Calories: 540kcal | Carbohydrates: 46g | Protein: 45g | Fat: 21g | Saturated Fat: 4g | Polyunsaturated Fat: 3g | Monounsaturated Fat: 13g | Cholesterol: 73mg | Sodium: 1117mg | Potassium: 1476mg | Fiber: 10g | Sugar: 4g | Vitamin A: 966IU | Vitamin C: 23mg | Calcium: 256mg | Iron: 7mg

    Keywords: baked fish, Mediterranean Baked Fish With White Bean, mediterranean fish recipes, white fish recipes

    More Healthy Fish Recipes


    Source link

  • Sausage Stuffed Shells Recipe

    Sausage Stuffed Shells Recipe

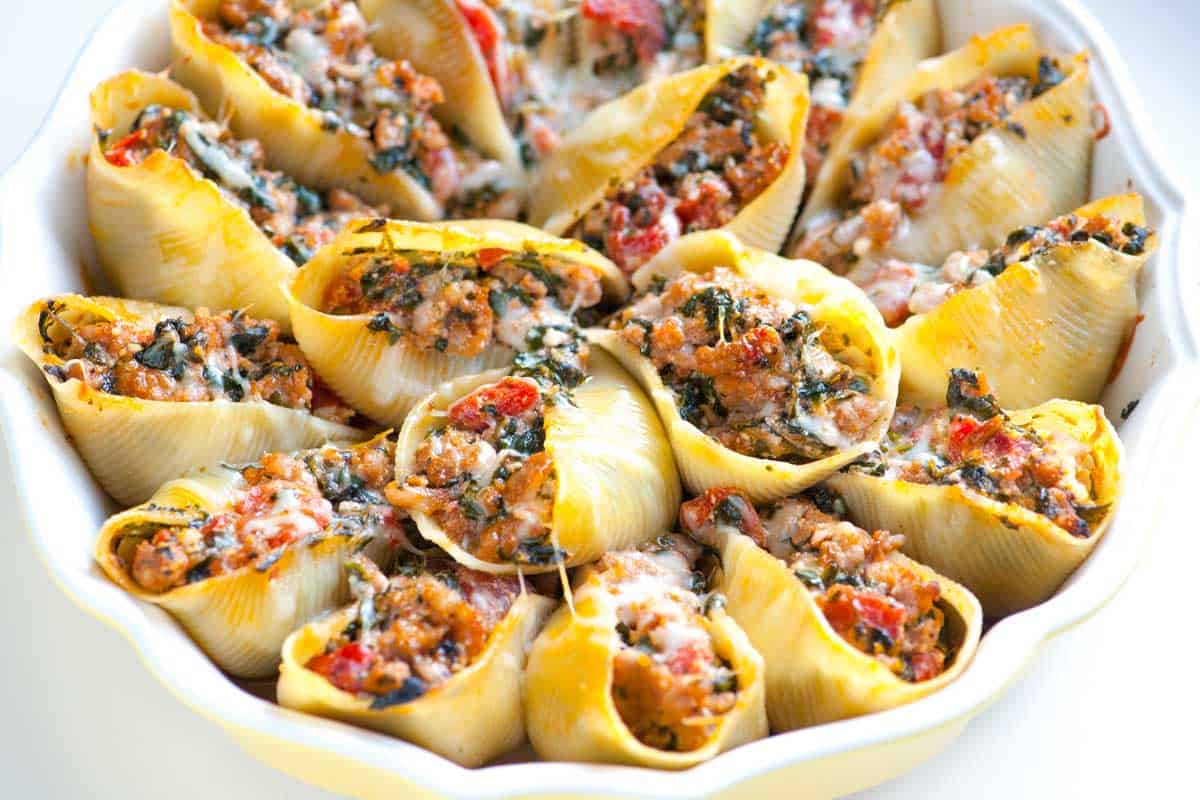
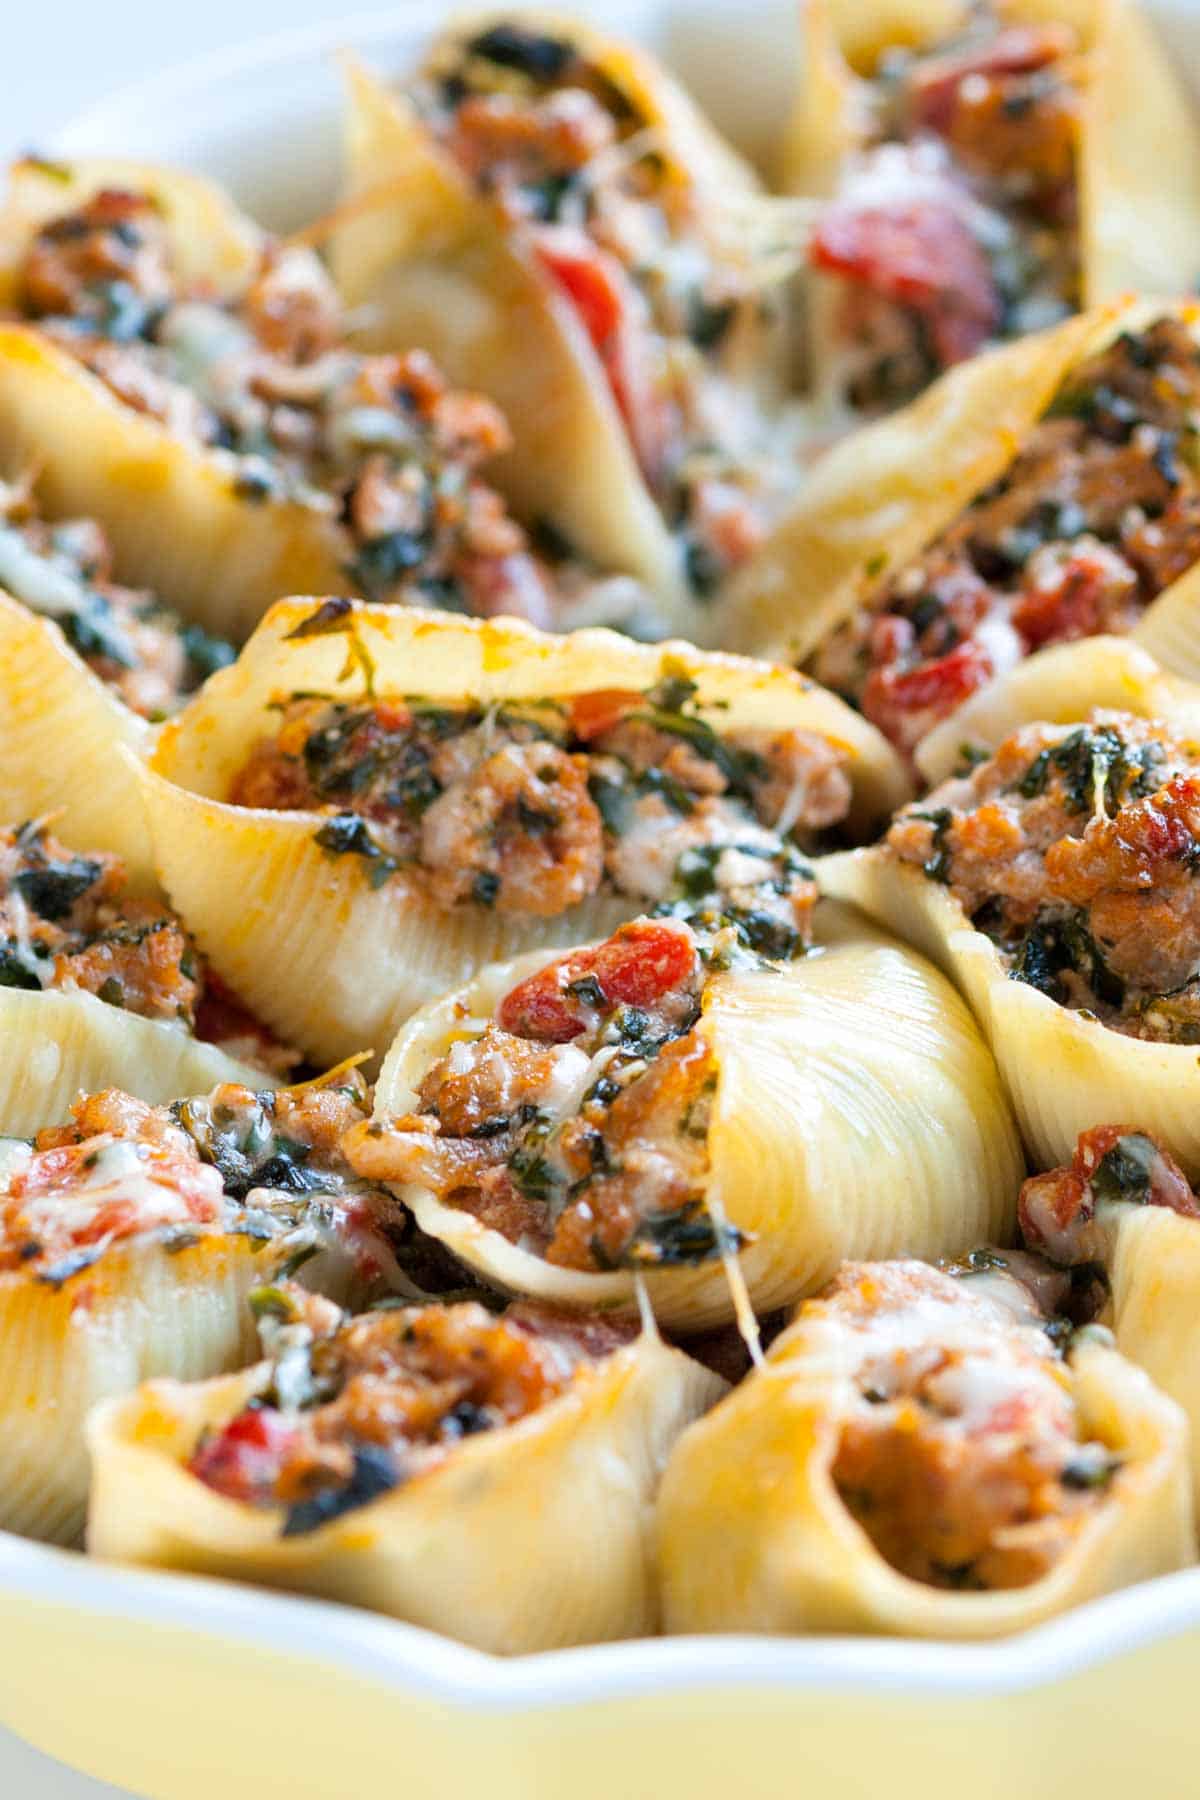
    Our family’s favorite sausage stuffed shells recipe has an incredibly flavorful filling made with sausage, ricotta, and spinach. It’s also surprisingly easy to make.

    Stuffed Shells with Sausage and Spinach

    Everyone I’ve shared these with has loved them. The cheesy, sausage filling tucked inside each shell makes this recipe hard to resist. The first time I made them, I stepped away from the table for just a minute and came back to find that Adam had already eaten half the pan.

    That’s when I knew this one was special. So many of our readers have fallen for these sausage and spinach stuffed shells, and I can’t wait for you to try them too.

    Key Ingredients

    • Pasta Shells: Use large dried pasta shells and cook them in boiling water until al dente before filling.
    • Sausage: Italian bulk sausage is my go-to, but fresh sausage links with the casings removed work just as well. For extra kick, try using hot or spicy sausage.
    • Tomatoes and Spinach: I use canned tomatoes and frozen spinach. Be sure to thaw the spinach and squeeze out any excess moisture before mixing it into the filling.
    • Ricotta and Mozzarella: I like whole-milk ricotta and shredded mozzarella for the creamiest filling. Cottage cheese is a great substitute for ricotta. It’s actually what I use in our popular manicotti recipe.
    • Marinara Sauce: You’ll bake the shells on a layer of marinara sauce. You can use homemade marinara, our easy pasta sauce, or your favorite store-bought pasta sauce.

    Find the full recipe with measurements below.

    How to Make Sausage Stuffed Shells

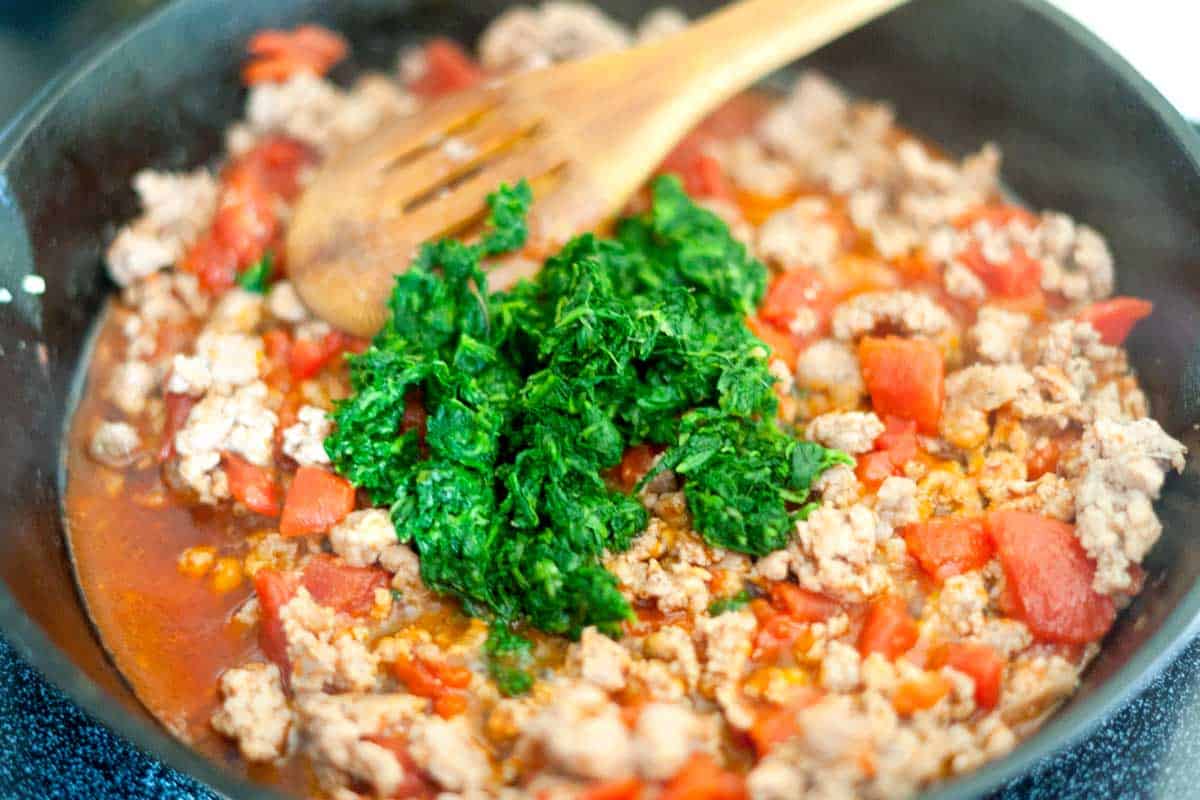
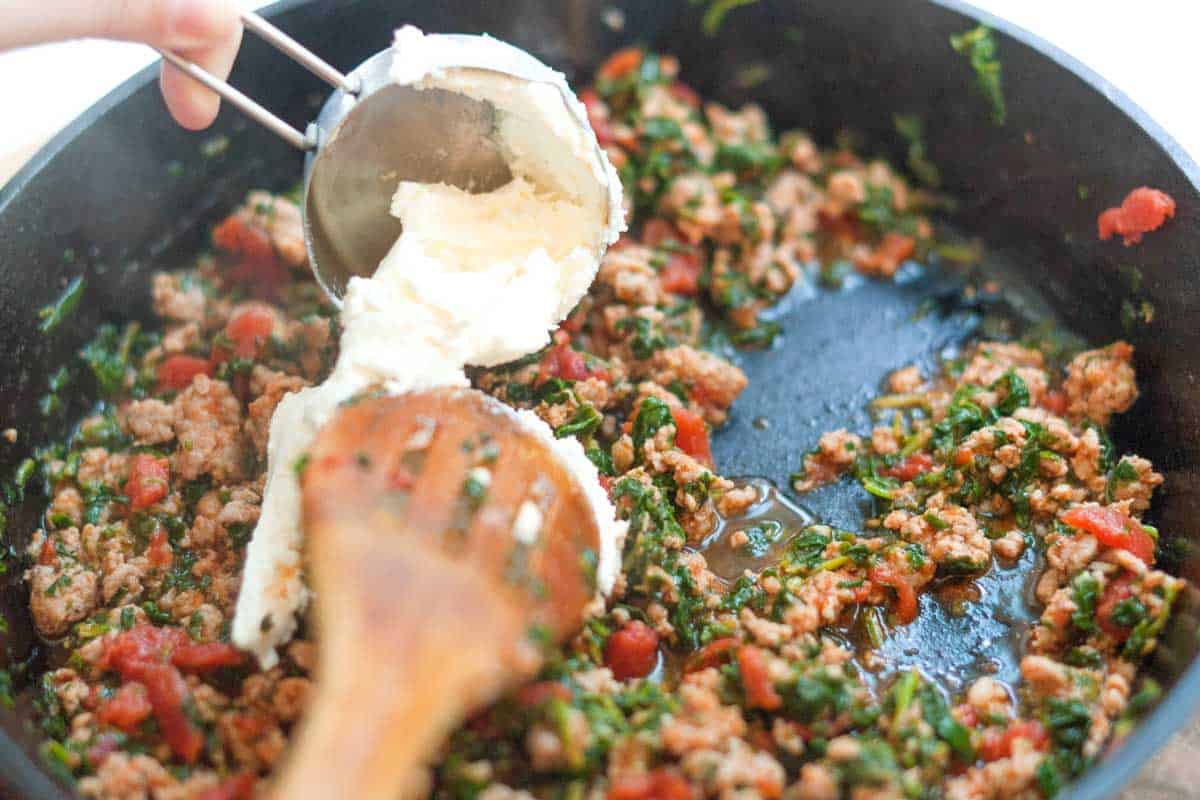
    Tip 1: Make the filling while the pasta shells cook. While the pasta shells cook in boiling water, I make the easy sausage filling. I brown the sausage, then stir in garlic, tomatoes, and spinach. Then, for my favortie part. To make it creamy, I mix in the ricotta cheese.

    Cooking sausage with tomatoes and spinach for the stuffed shells filling
    Adding ricotta cheese to the filling to make it creamy.

    Tip 2: Bake on a bed of marinara. I love how the shells turn a little golden and crisp on top as they bake. Placing them on top of the marinara sauce instead of covering them helps with this.

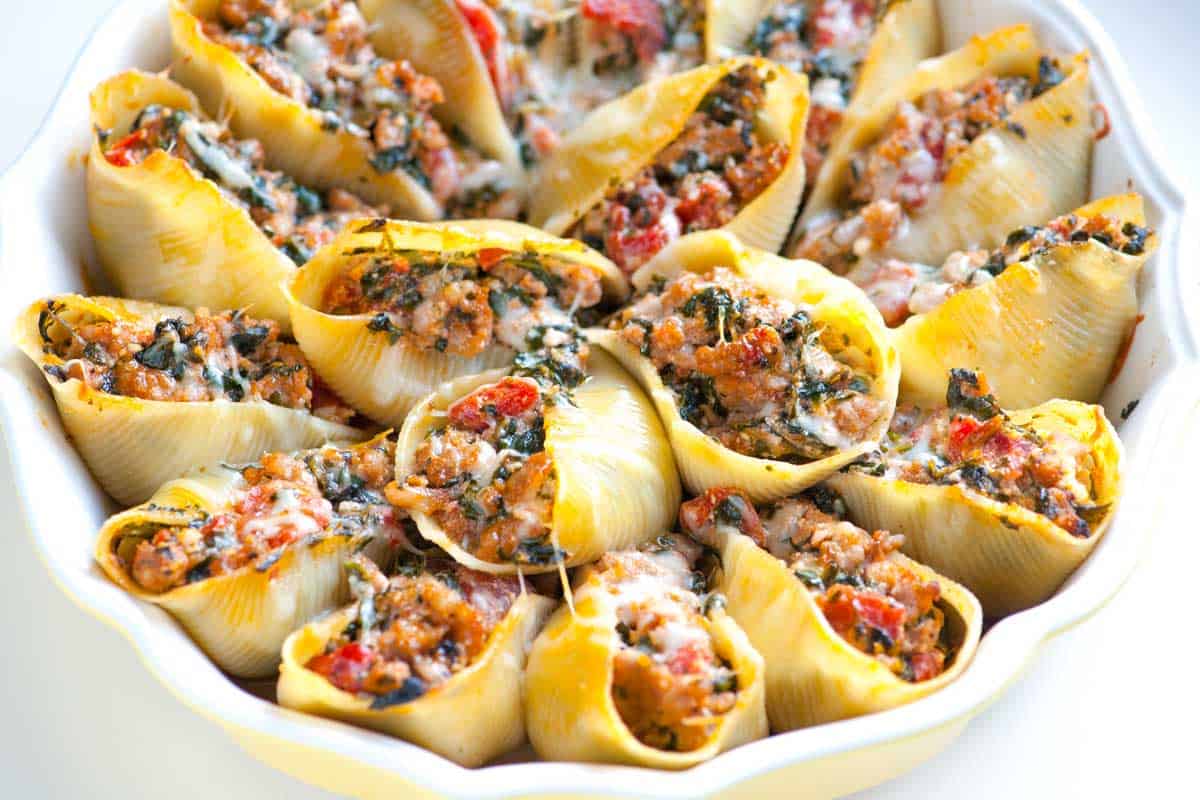
    I stuff the ricotta sausage mixture into the shells, set them on a bed of marinara, sprinkle cheese over the top, and bake until the edges begin to brown and the cheese melts.

    Serving Suggestions

    Serve these with a crisp green salad tossed in a simple vinaigrette, or go classic with our Caesar or Italian chopped salad. Add slices of cheesy garlic bread, homemade focaccia, or a crusty baguette on the side for soaking up the sauce. For a little extra veggies, roasted vegetables like broccoli, zucchini, or asparagus are perfect.

    More Stuffed Shells Recipes

    Stuffed Shells with Sausage

    Sausage Stuffed Shells

    • PREP
    • COOK
    • TOTAL

    The sausage and ricotta filling for these shells holds up beautifully, making them just as perfect for a cozy dinner as they are for serving as finger food. You can use any type of sausage you prefer. If you’re using a leaner sausage, add a drizzle of oil to the pan before browning to keep the filling rich and flavorful.

    When cooking the pasta, add a few extra shells to the pot, as some may tear during boiling. The filling in this recipe makes enough for about 16 filled shells.

    Makes 4 servings

    You Will Need

    20 jumbo dried pasta shells

    20 jumbo dried pasta shells

    1 pound fresh Italian pork sausage, casings removed (450g)

    3 medium cloves garlic, minced

    1 (14 ounce) can diced tomatoes

    1 (10 ounce) package frozen spinach, thawed and squeezed dry, 1 ¼ cups

    ½ cup ricotta cheese (113g)

    ½ cup shredded mozzarella cheese (56g)

    Salt and fresh ground black pepper

    2 cups marinara sauce (470ml)

    Directions

      1Prep: Preheat your oven to 350°F (177°C). Set aside a 3-quart baking dish.

      2Cook the shells: Bring a large pot of salted water to a boil. Add the pasta shells and cook according to the package directions until al dente. Drain and rinse under cold water to stop the cooking.

      3Make the filling: Meanwhile, heat a wide skillet over medium-high heat. Add the sausage and cook until browned, about 10 minutes, breaking it into small pieces with a wooden spoon as it cooks. Stir in the garlic, tomatoes, and the thawed, ringed-out spinach. Cook until heated through and the liquid has reduced by half, about 2 minutes. Remove the pan from the heat and stir in the ricotta cheese. Taste and season with salt and pepper.

      4Assemble: Spread about 1 cup of marinara sauce over the bottom of the baking dish. Fill each shell with the sausage mixture and arrange them in the dish. Sprinkle the top with mozzarella cheese.

      5Bake: Bake until the tips of the shells begin to brown and the cheese has melted, about 25 minutes. Warm the remaining marinara sauce and serve it alongside the shells.

    Adam and Joanne’s Tips

    • Storing: Leftover shells can be stored in an airtight container in the refrigerator for up to 3 days and about 3 months in the freezer.
    • Sausage with casing: If you cannot find bulk sausage, buy sausage formed into links, and then remove the casings by cutting a slit down the sausage and pulling the casing away from the meat.
    • Use fresh spinach: Cook 1 pound of fresh spinach until wilted, squeeze out excess moisture, and add to the filling.
    • The nutrition facts provided below are estimates.

    Nutrition Per Serving
    Calories
    625
    /
    Protein
    33g
    /
    Carbohydrate
    32g
    /
    Dietary Fiber
    7g
    /
    Total Sugars
    8g
    /
    Total Fat
    30g
    /
    Saturated Fat
    13g
    /
    Cholesterol
    86mg


    AUTHOR:

    Joanne Gallagher

    Adam and Joanne of Inspired Taste

    We are Adam and Joanne Gallagher, the creators of Inspired Taste. Established in 2009, Inspired Taste grew from a childhood dream into one of the internet’s most trusted recipe sites with hundreds of reliable recipes, step-by-step videos, and expert tips.More About Us
    Source link