Category: Main Dish

  • Homemade Balsamic Vinaigrette Recipe

    Homemade Balsamic Vinaigrette Recipe

    This balsamic vinaigrette recipe is one of those dressings I always come back to. It’s tangy, a little sweet, and honestly, it is so much better than store-bought!
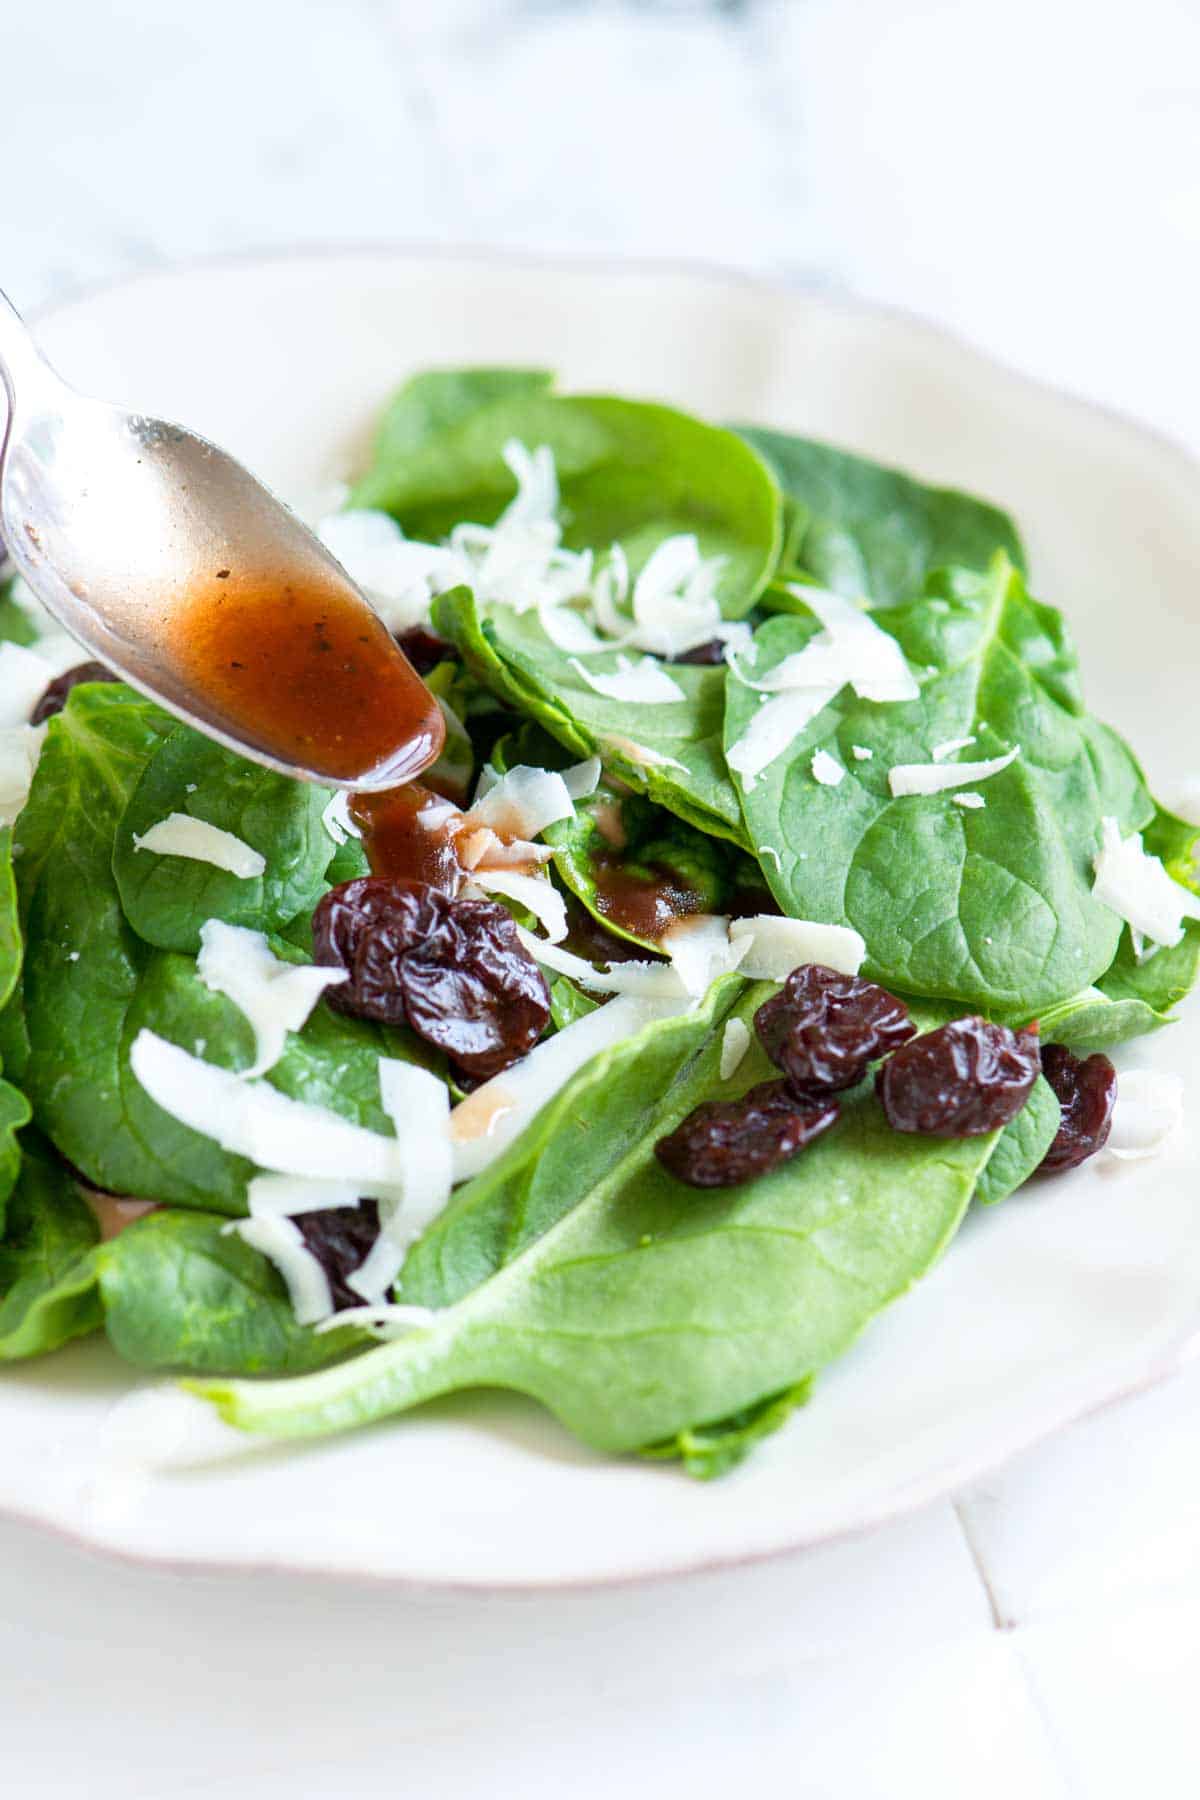
    Homemade Balsamic Vinaigrette

    I love making salad dressings from scratch, and this balsamic vinaigrette is the one I reach for most. We almost always have everything on hand, and it’s delicious on just about any salad you can think of.

    You’ll find our basic balsamic vinaigrette recipe below, plus two fun variations: a creamy version and a strawberry one. We especially love drizzling it over our balsamic strawberry salad!

    Key Ingredients

    • Balsamic Vinegar: Use what you have. Most of us have the less expensive bottles with thin, pretty tart vinegar inside. That’s what I’ve assumed in our recipe below. If you have thicker, aged balsamic vinegar, it will still be lovely in our recipe. We recommend tasting it before using it to make the dressing. If it already tastes syrupy and sweet, you can probably skip the sweetener. If it’s tart and acidic, you’ll want to add a little sweetness with maple syrup, honey, or jam.
    • Dijon Mustard: We use mustard in many of our salad dressing recipes and love it in this balsamic dressing. It helps the ingredients emulsify and makes it taste more like what you are served in nicer restaurants. Whole-grain mustard is a good substitute.
    • Olive Oil: Use your favorite extra-virgin olive oil. I like fruiter, lighter olive oils, but use what you have or love.
    • Sweetener: Maple syrup and honey are lovely (I only add a little bit) and balance the tartness of balsamic vinegar.

    Find the full recipe with measurements below.

    How to Make the Best Balsamic Vinaigrette

    Tip 1: Whisk everything but the oil first. To get a really nice emulsion, whisk your balsamic, mustard, sweetener, salt, and pepper together until well combined. Then slowly stream in the olive oil, whisking as it is added.
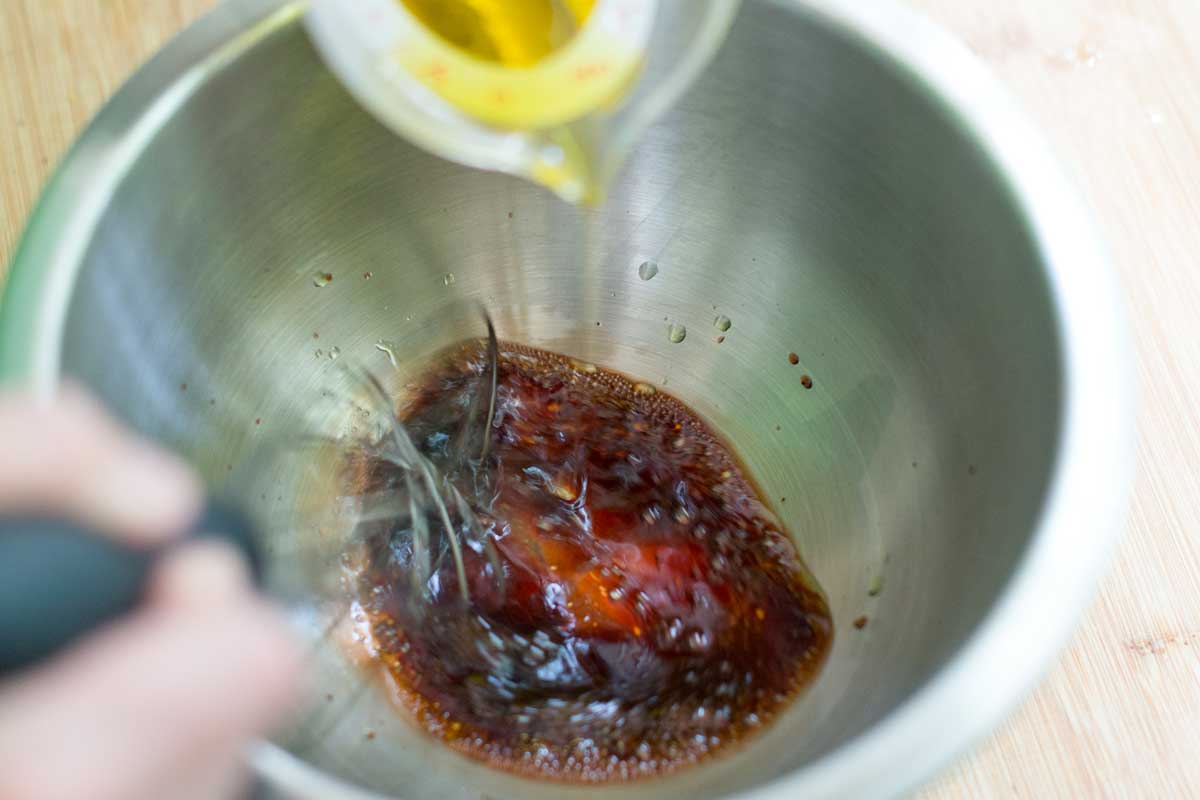
    Slowly whisking oil into a bowl to make balsamic vinaigrette

    Tip 2: Be ready to adjust to taste. Balsamic vinegar varies in sweetness, thickness, and acidity. Less expensive bottles are usually thinner and quite tart, while more expensive bottles can be syrupy and sweet. You can use either in our recipe, but it’s helpful to know what you are starting with before adding your sweetener. If your vinegar is tart, add the sweetener as recommended below. If it’s already sweet, hold off, make the dressing without sweetener, then adjust to taste.

    Recipe Variations

    • Make it creamy. If you prefer creamy dressings, add a spoonful of mayonnaise, sour cream, plain yogurt, or crème fraîche (my favorite).
    • Add jam. Honey or maple syrup are in our basic recipe, but to add more fruity flavor, swap the sweetener with your favorite jam. Strawberry jam is incredible. Fig jam pairs really well with balsamic, and I adore this peach jam!

    More Homemade Salad Dressing Recipes
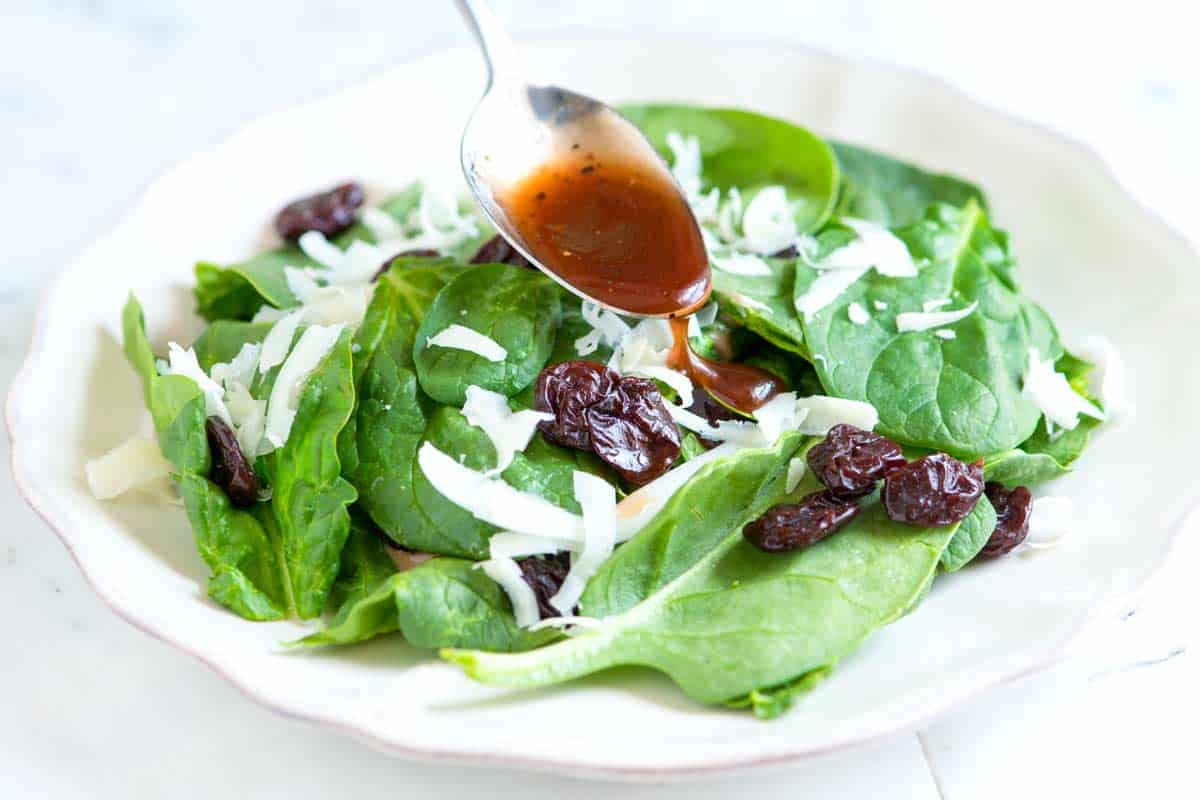
    Balsamic Vinaigrette

    Homemade Balsamic Vinaigrette

    • PREP
    • TOTAL

    This easy balsamic vinaigrette dressing is a staple recipe in our house. We like vinegary dressings and use twice as much olive oil as vinegar. To make a less vinegary dressing, add more olive oil to taste. I like to add a little sweetener to the dressing. Maple syrup or honey is lovely, or add a little fruitiness with your favorite jam (strawberry jam is especially good). If you are using a thicker balsamic vinegar or one that is aged, it may already taste sweeter, so you may not need to add a sweetener.

    Makes 3/4 cup

    You Will Need

    ¼ cup balsamic vinegar (60 ml)

    2 teaspoons Dijon mustard

    1 teaspoon maple syrup, honey, or strawberry jam

    ¼ teaspoon fine sea salt

    ¼ teaspoon fresh ground black pepper

    ½ cup extra-virgin olive oil, or more to taste (120 ml)

    1 tablespoon mayonnaise, sour cream, or crème fraîche, optional to make creamy

    Directions

      1Whisk balsamic vinegar, mustard, sweetener, salt, and pepper in a medium bowl until well blended.

      2While whisking, slowly stream in the olive oil until completely incorporated and the dressing has thickened and looks creamy. Taste and then adjust with salt, pepper, olive oil, or sweetener as needed.

      3To turn it into a creamy dressing, whisk in mayo (sour cream or crème fraîche).

    Adam and Joanne’s Tips

    • Storing: Keep balsamic vinaigrette in an airtight container or jar for up to 1 week.
    • How to make in jar or blender: Instead of whisking ingredients together, place all the ingredients in a screw-top jar and shake to combine. Or, use a blender. Add all ingredients to blender then blend until thick.
    • Nutritional information are estimates.

    Nutrition Per Serving
    Serving Size
    1 tablespoon
    /
    Calories
    87
    /
    Total Fat
    9.3g
    /
    Saturated Fat
    1.3g
    /
    Cholesterol
    0mg
    /
    Sodium
    71.4mg
    /
    Carbohydrate
    1.3g
    /
    Dietary Fiber
    0g
    /
    Total Sugars
    1.1g
    /
    Protein
    0g


    AUTHOR:

    Adam Gallagher

    Adam and Joanne of Inspired Taste

    We are Adam and Joanne Gallagher, the creators of Inspired Taste. Established in 2009, Inspired Taste grew from a childhood dream into one of the internet’s most trusted recipe sites with hundreds of reliable recipes, step-by-step videos, and expert tips.More About Us
    Source link

  • Weeknight Homemade Spaghetti Sauce Recipe

    Weeknight Homemade Spaghetti Sauce Recipe

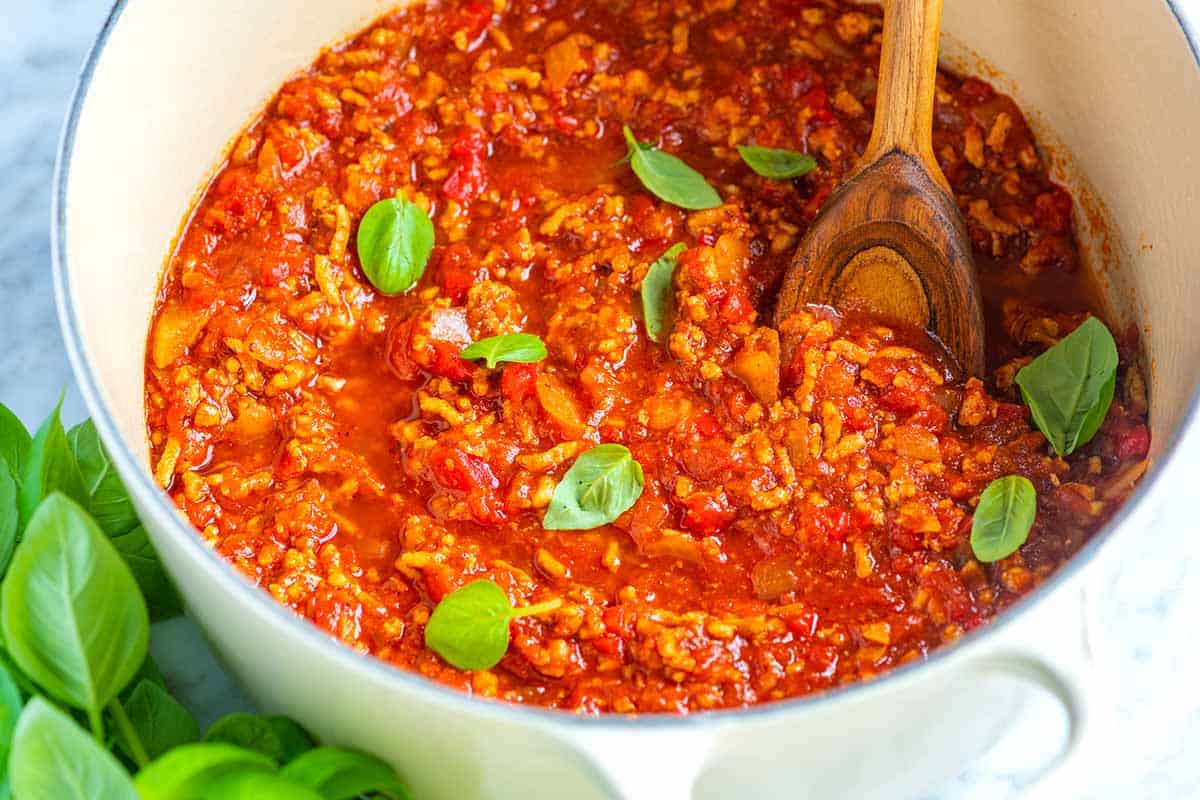
    I love this easy homemade spaghetti sauce recipe! It is ready in under 45 minutes, and you can use your favorite ground meat to make it. I love ground beef, turkey, or sausage!

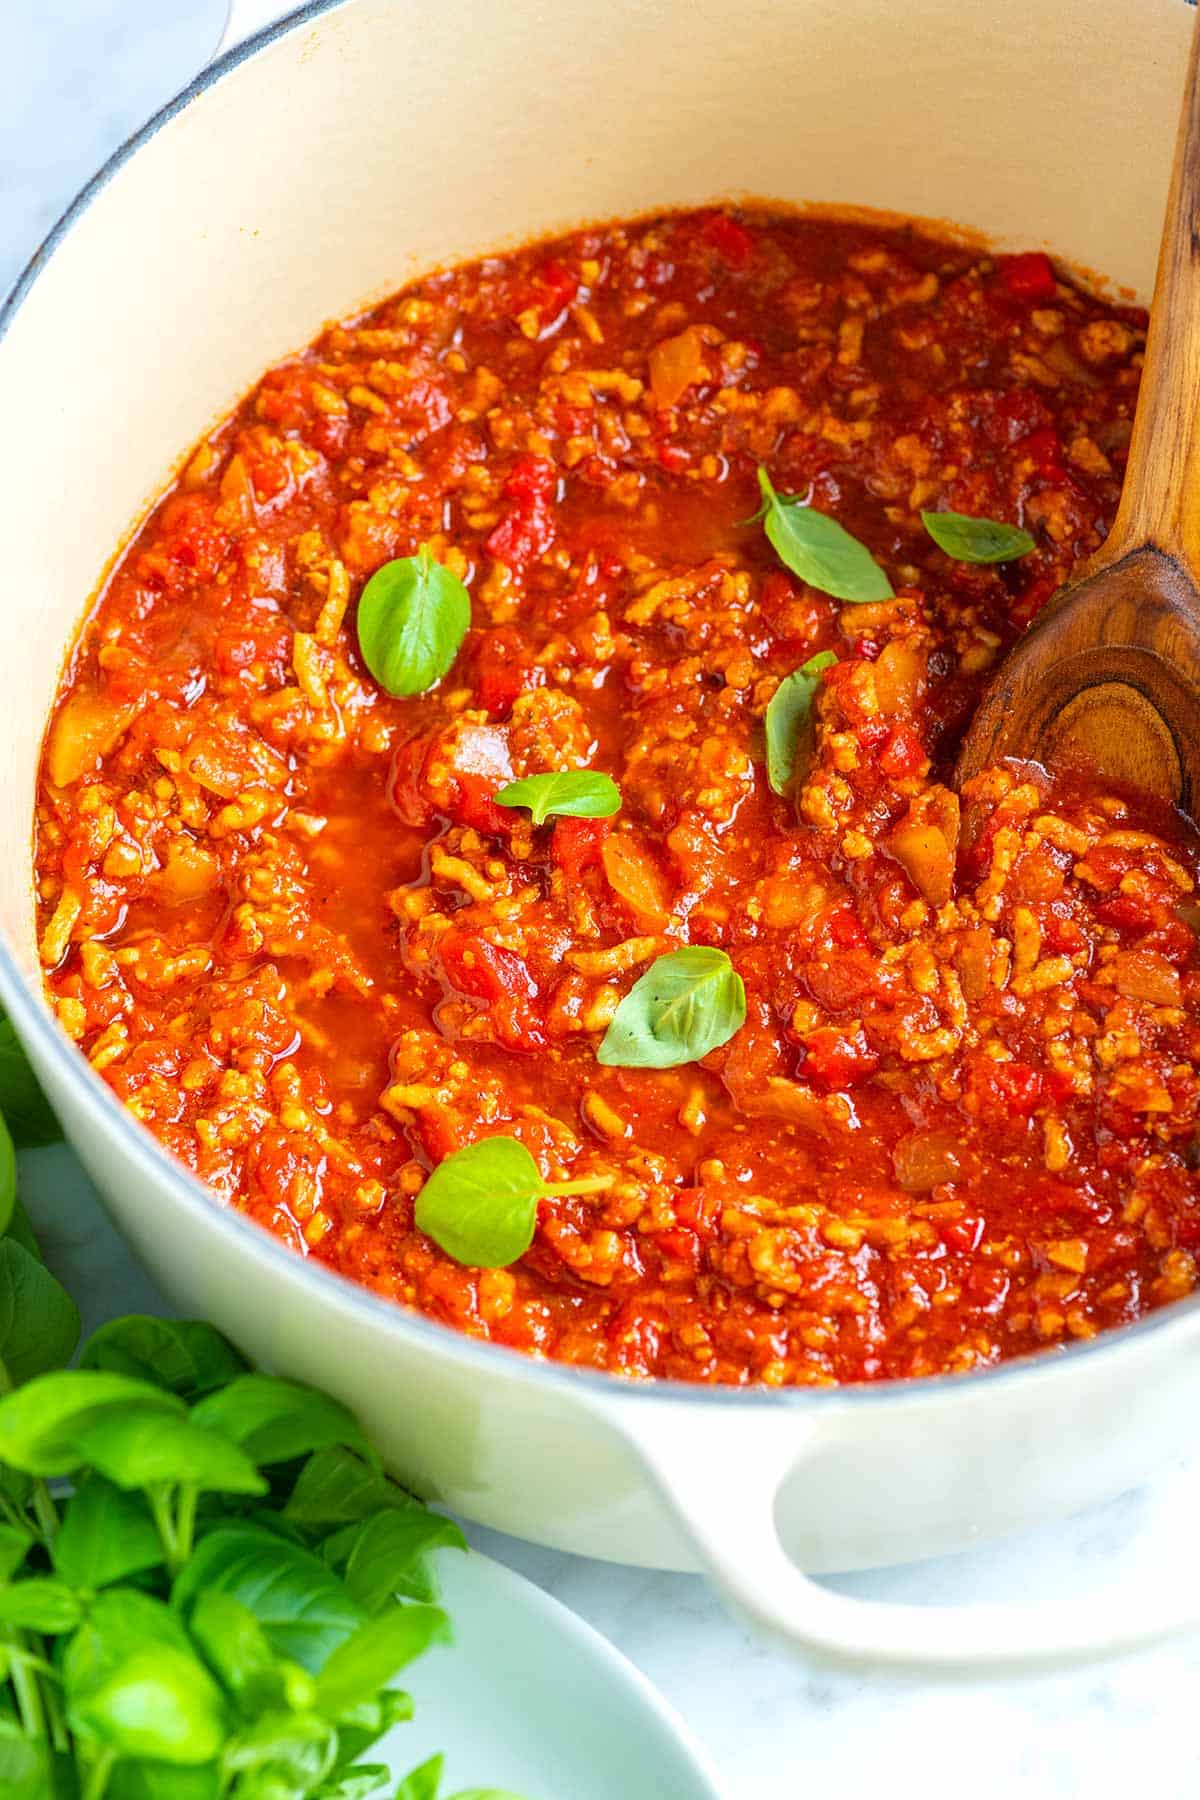
    Pot of Homemade Spaghetti Sauce

    Like you, we live busy lives and need dinner on the table quickly. That’s why I love this easy homemade spaghetti sauce. It’s quick and easy to make, plus it lasts in the freezer for months, which means I have a delicious meal anytime I need it.

    This simple meat sauce can be made in about 45 minutes. We love using this sauce when making our weeknight spaghetti. For a more authentic, slowly cooked meat sauce, try my favorite bolognese recipe with ground beef, milk, white wine, and tomato.

    Key Ingredients

    • Ground meat: You can use any ground meat for this recipe. Ground turkey or chicken are great choices if you prefer a leaner option. Ground beef and pork offer a richer flavor. Choose whichever you like and have available. Check out our veggie spaghetti recipe if you want a meatless option.
    • Tomatoes and tomato paste: Canned crushed tomatoes are the foundation of this spaghetti sauce, and they make it super easy to prepare.
    • Onion, garlic, and spices: We like to keep this recipe simple because it’s a quick and easy weeknight meal. You probably already have most of the ingredients in your pantry.
    • Broth or wine: After browning our meat, we deglaze the pot with a bit of liquid. Water is fine, but for more flavor try chicken broth or your favorite dry wine (red or white will do the trick). I use white wine when making this homemade bolognese.

    Find the full recipe with measurements below.

    Tips for Making Homemade Spaghetti Sauce

    Tip 1: Browning the meat. We make this spaghetti sauce all the time, and it never disappoints. We start by browning ground meat in a little oil. We prefer ground turkey to keep things lean, but any ground meat, such as beef, pork, chicken, or even lamb, works great. Once the meat is browned, we add chopped onion and cook until it softens. Then we toss in garlic, tomato paste, and spices to build even more flavor.

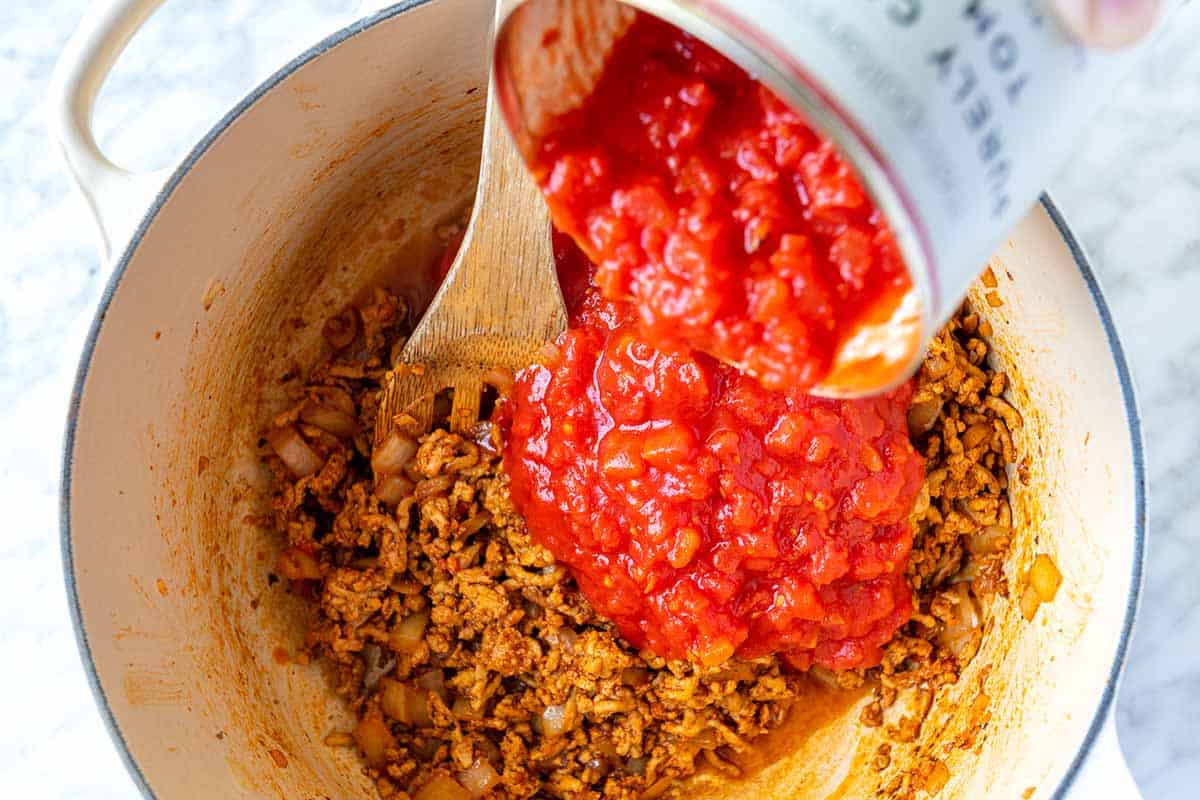
    Tip 2: Deglaze pot for extra flavor. By deglazing the pot with a splash of liquid we capture all those tasty bits stuck on the bottom. You can use water, broth, or even wine (whatever you have on hand). Just be sure to scrape the bottom well! Once the pot is clean, we stir in canned tomatoes and let everything simmer for 20 to 30 minutes or until the sauce thickens.

    How to Make Spaghetti Sauce - Adding tomatoes to the pot with browned meat

    Tip 3: Make it your own. As the sauce simmers, we taste it regularly and adjust the seasoning. Don’t be afraid to add more salt, pepper, or spices. If the sauce tastes too acidic, a pinch of sugar can balance it out. If it seems bland, add a dash of fish sauce, minced anchovies, or even mushroom powder for a rich and savory flavor.

    Ways to Use Homemade Spaghetti Sauce

    We use this homemade sauce in so many ways. It’s perfect tossed with cooked spaghetti (like in this spaghetti recipe) or other pasta shapes. I love it with homemade gnocchi or ricotta gnocchi. It’s also excellent spooned over veggie noodles, like roasted spaghetti squash or zucchini noodles. I also love serving it next to some homemade garlic bread or focaccia bread and a side salad.

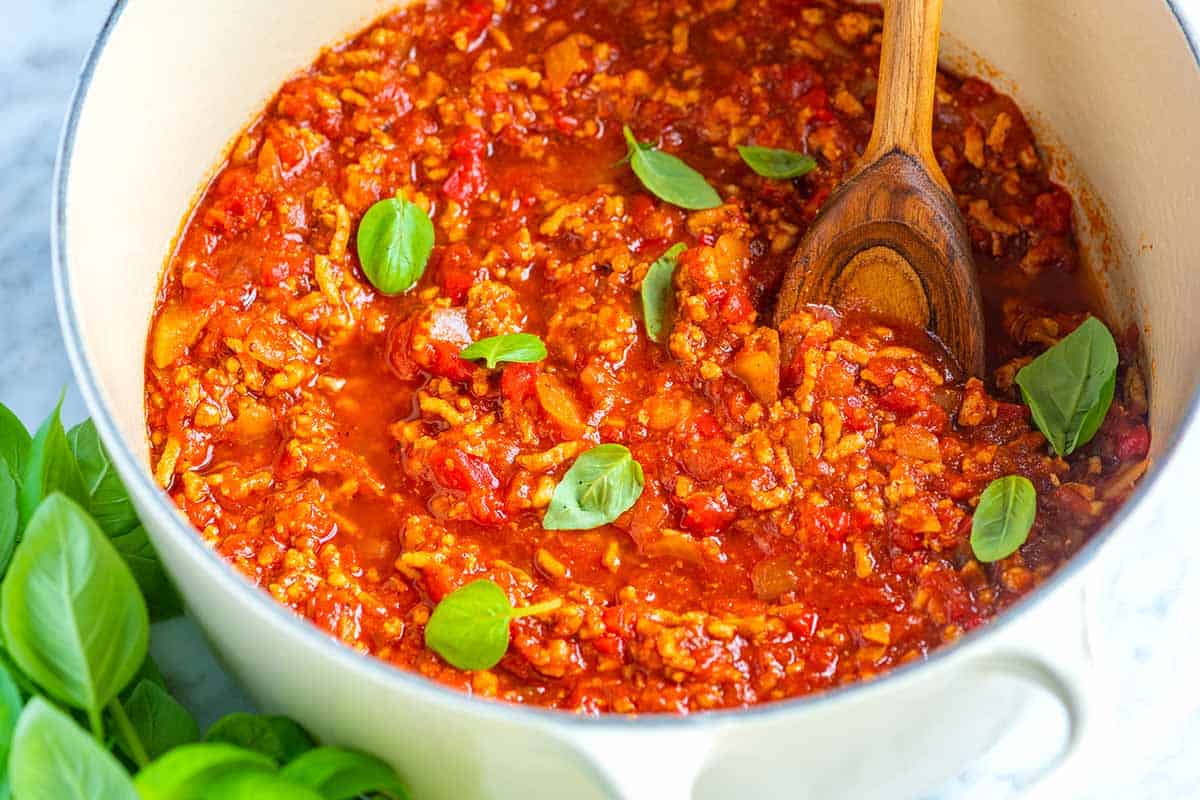
    Homemade Spaghetti Meat Sauce

    Weeknight Homemade Spaghetti Sauce

    • PREP
    • COOK
    • TOTAL

    We’ve made this easy homemade spaghetti sauce countless times and are always happy that we did. The sauce starts with a base of ground meat. We love keeping the sauce on the leaner side and use ground turkey, but any ground meat like beef, sausage, pork, chicken, and lamb will work.

    Makes about 5 cups of sauce

    You Will Need

    1 pound (450g) lean ground meat like ground beef or ground turkey

    3 tablespoons olive oil

    1 cup (130g) chopped onion

    3 garlic cloves, minced (1 tablespoon)

    2 tablespoons tomato paste

    1/2 teaspoon dried oregano

    Pinch crushed red pepper flakes

    1 cup water, broth, or dry red wine

    1 (28oz) can crushed tomatoes

    Salt and fresh ground black pepper

    Handful of fresh basil leaves, plus more for serving


    Optional Ingredients, See Tips

    2 to 3 teaspoons fish sauce

    1 to 2 teaspoons mushroom powder, try homemade mushroom powder

    3 to 4 anchovy fillets, minced with some of their oil or use anchovy paste

    Pinch sugar

    1 leftover rind from a wedge of parmesan

    Directions

      1Heat the oil in a large pot over medium-high heat (we use a Dutch oven).

      2Add the meat and cook until browned, about 8 minutes. Use a wooden spoon to break the meat into smaller crumbles as the meat cooks.

      3Add the onions and cook, stirring every once in a while, until softened, about 5 minutes.

      4Stir in the garlic, tomato paste, oregano, and red pepper flakes and cook, stirring continuously for about 1 minute.

      5Pour in the water and use a wooden spoon to scrape up any bits of meat or onion stuck to the bottom of the pot.

      6Stir in the tomatoes, 3/4 teaspoon of salt, and a generous pinch of black pepper.

      7Bring the sauce to a low simmer. Cook uncovered for 25 minutes. As it cooks, stir and taste the sauce a few times so you can adjust the seasoning accordingly (see notes for seasoning suggestions).

      8Remove the spaghetti sauce from the heat and stir in the basil.

    Adam and Joanne’s Tips

    • Storing: This homemade spaghetti sauce can be made in advance and should last in your refrigerator for up to 3 days and in your freezer for about 3 months.
    • If the sauce’s flavor doesn’t pop, you need more salt.
    • If the sauce is too acidic, a pinch of sugar will do the trick.
    • If the sauce is lacking in flavor, consider adding a few dashes of fish sauce or a few minced anchovies (both add a rich, savory flavor).
    • Adding a leftover rind of a parmesan wedge to the sauce while adding the tomatoes adds richness and extra flavor. It won’t melt all the way. Remove what’s left before serving.
    • The nutrition facts provided below are estimates.

    Nutrition Per Serving
    Serving Size
    2/3 cup sauce
    /
    Calories
    167
    /
    Total Fat
    9.9g
    /
    Saturated Fat
    1.9g
    /
    Cholesterol
    39.1mg
    /
    Sodium
    500.2mg
    /
    Carbohydrate
    8.7g
    /
    Dietary Fiber
    2.1g
    /
    Total Sugars
    4.8g
    /
    Protein
    12.9g


    AUTHOR:

    Joanne Gallagher

    Adam and Joanne of Inspired Taste

    We are Adam and Joanne Gallagher, the creators of Inspired Taste. Established in 2009, Inspired Taste grew from a childhood dream into one of the internet’s most trusted recipe sites with hundreds of reliable recipes, step-by-step videos, and expert tips.More About Us
    Source link

  • 42 Easy Weeknight Dinners

    42 Easy Weeknight Dinners

    From quick 30-minute meals to healthy, family-friendly favorites, these easy weeknight dinner ideas are built for busy nights and empty stomachs.


    Jump to: 🕒 30-Minute Dinners | 🍗 Chicken | 🥗 Healthy | 🥩 Low-Carb | 👨‍👩‍👧 Family-Friendly | 🌱 Vegetarian


    When weeknights get busy, dinner needs to be simple, flexible, and actually doable — without sacrificing flavor. This collection of easy weeknight dinner recipes is designed for real life, featuring quick cooking times, minimal prep, and ingredients commonly found in the grocery store.

    Inside, you’ll find a mix of my own go-to recipes alongside a few trusted favorites from other food blogs, all organized to help you quickly find what suits your night. Whether you need a 30-minute dinner, an easy chicken recipe, something healthy or low-carb, or a family-friendly meal everyone will eat, there’s plenty of inspiration here.

    These are the kinds of dinners I make on repeat — practical, comforting, and adaptable enough to fit whatever your week throws at you.


    What Makes a Good Weeknight Meal?

    • Quick and doesn’t use too many complex ingredients or steps
    • Minimal prep and cleanup
    • One-pan or one-pot cooking
    • Flexible ingredients
    • Uses up pantry and freezer
    • Leftovers that reheat well

    Smart Weeknight Shortcuts

    • Use pre-cut vegetables
    • Store-bought sauces and dressings
    • Precooked grains and legumes
    • Frozen veg and rice
    • Rotisserie chicken
    • Sheet-pan cooking

    🕒 30-Minute Dinners

    When time is tight, these dinners get on the table fast. Every recipe in this section is designed to be ready in around 30 minutes, making them ideal for busy weeknights when you want real food without the wait.


    🍗 Easy Chicken Dinners

    Chicken is a weeknight hero for a reason. These easy chicken dinners are flavor-packed, versatile, and simple enough to make any night of the week — from quick stir-fries to cozy bowls and curries.


    🥗 Healthy Weeknight Dinners

    Looking for lighter, nourishing meals that still feel satisfying? These healthy dinner ideas focus on balanced ingredients, plenty of vegetables, and simple cooking methods that work well for everyday dinners.

    Turkey Bolognese (Greek Style)

    For a lighter twist on a classic, this Greek-style turkey bolognese uses lean mince, warm Mediterranean spices, and tomatoes for a cozy but weeknight-friendly dinner that works just as well over pasta or veggies.


    🥩 Low-Carb Dinner Ideas

    If you’re keeping carbs lower during the week, this section has you covered. These dinners are filling and flavorful, with smart swaps like extra veggies, lean proteins, and lighter sauces.


    👨‍👩‍👧 Family-Friendly Dinners

    These are the dinners that everyone at the table can agree on. From comforting bakes to familiar flavors, these family-friendly recipes are easy to scale, simple to serve, and great for leftovers.


    🌱 Easy Vegetarian Dinners

    Meat-free nights can still be quick and satisfying. These vegetarian dinners use pantry staples, bold flavors, and hearty ingredients to make weeknight cooking easy — even without meat.


    Save These Easy Weeknight Dinners To Pinterest

    Source link

  • Perfect Roasted Broccoli Recipe

    Perfect Roasted Broccoli Recipe

    My oven roasted broccoli recipe guarantees perfectly tender florets with the most delicious golden-brown crispy tips. It’s such a simple, perfect side dish!

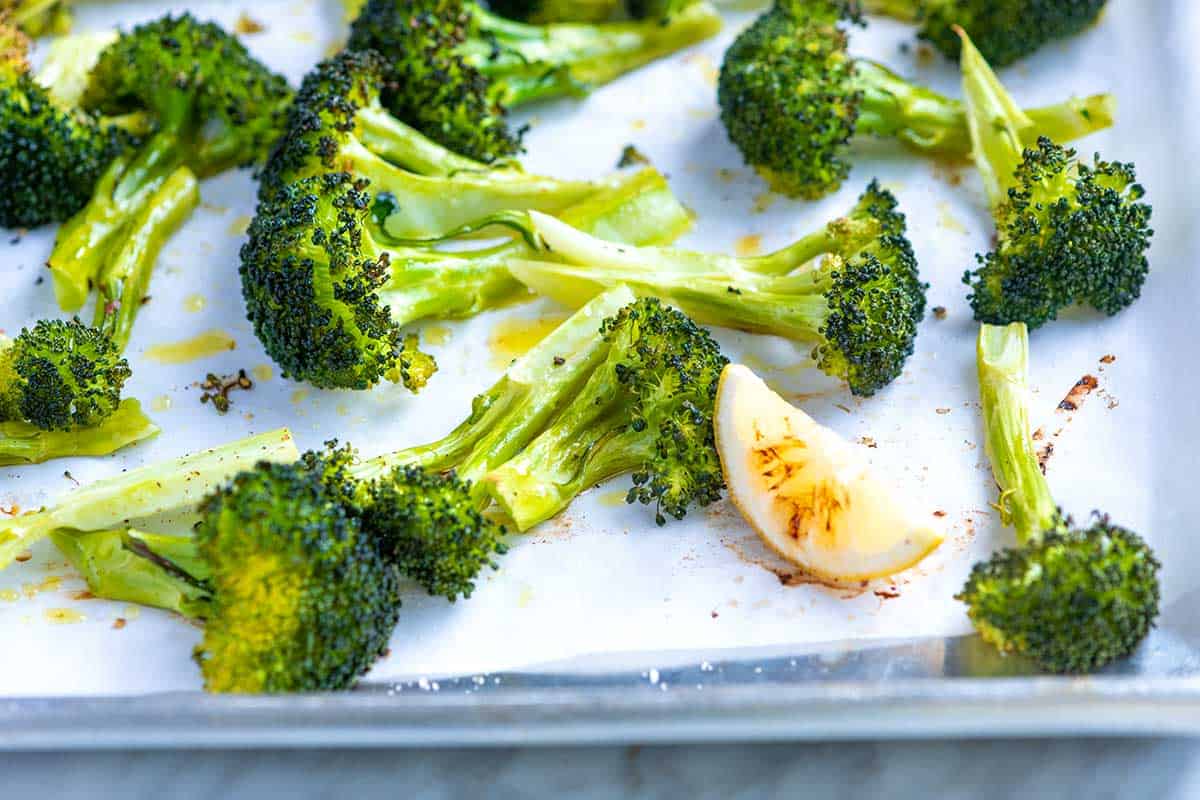
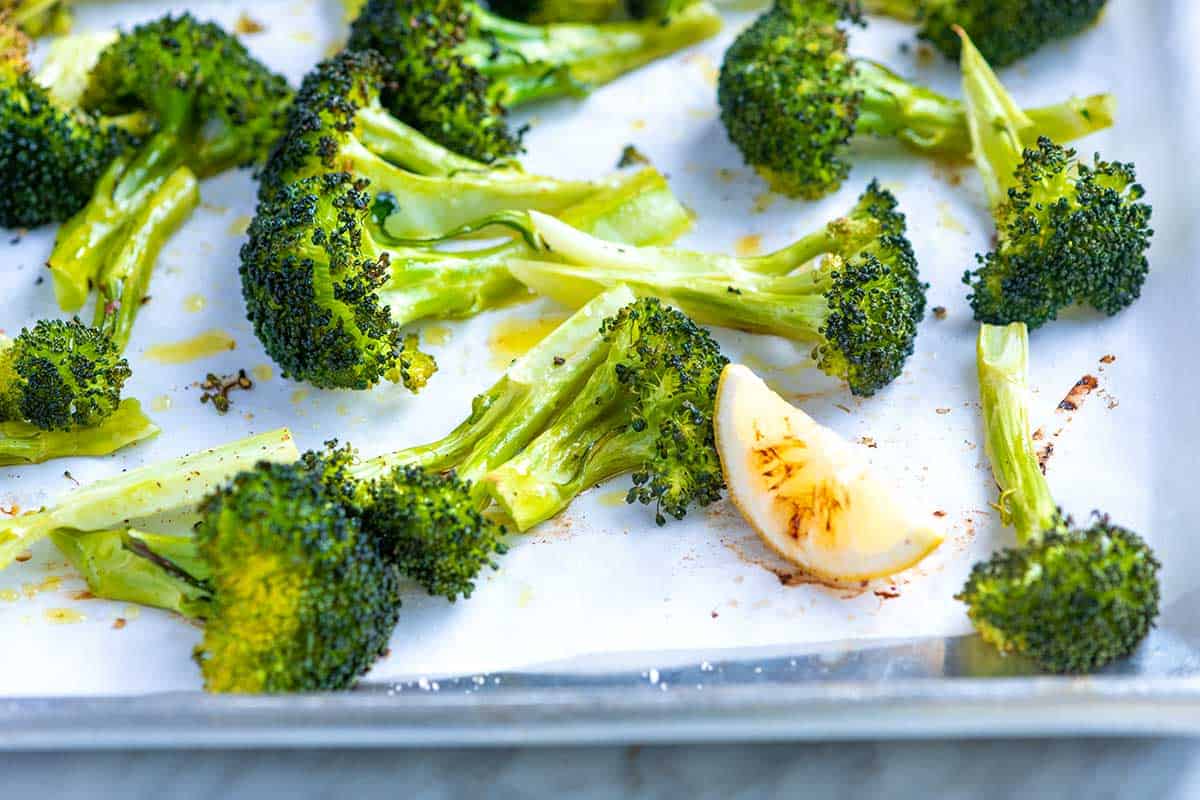
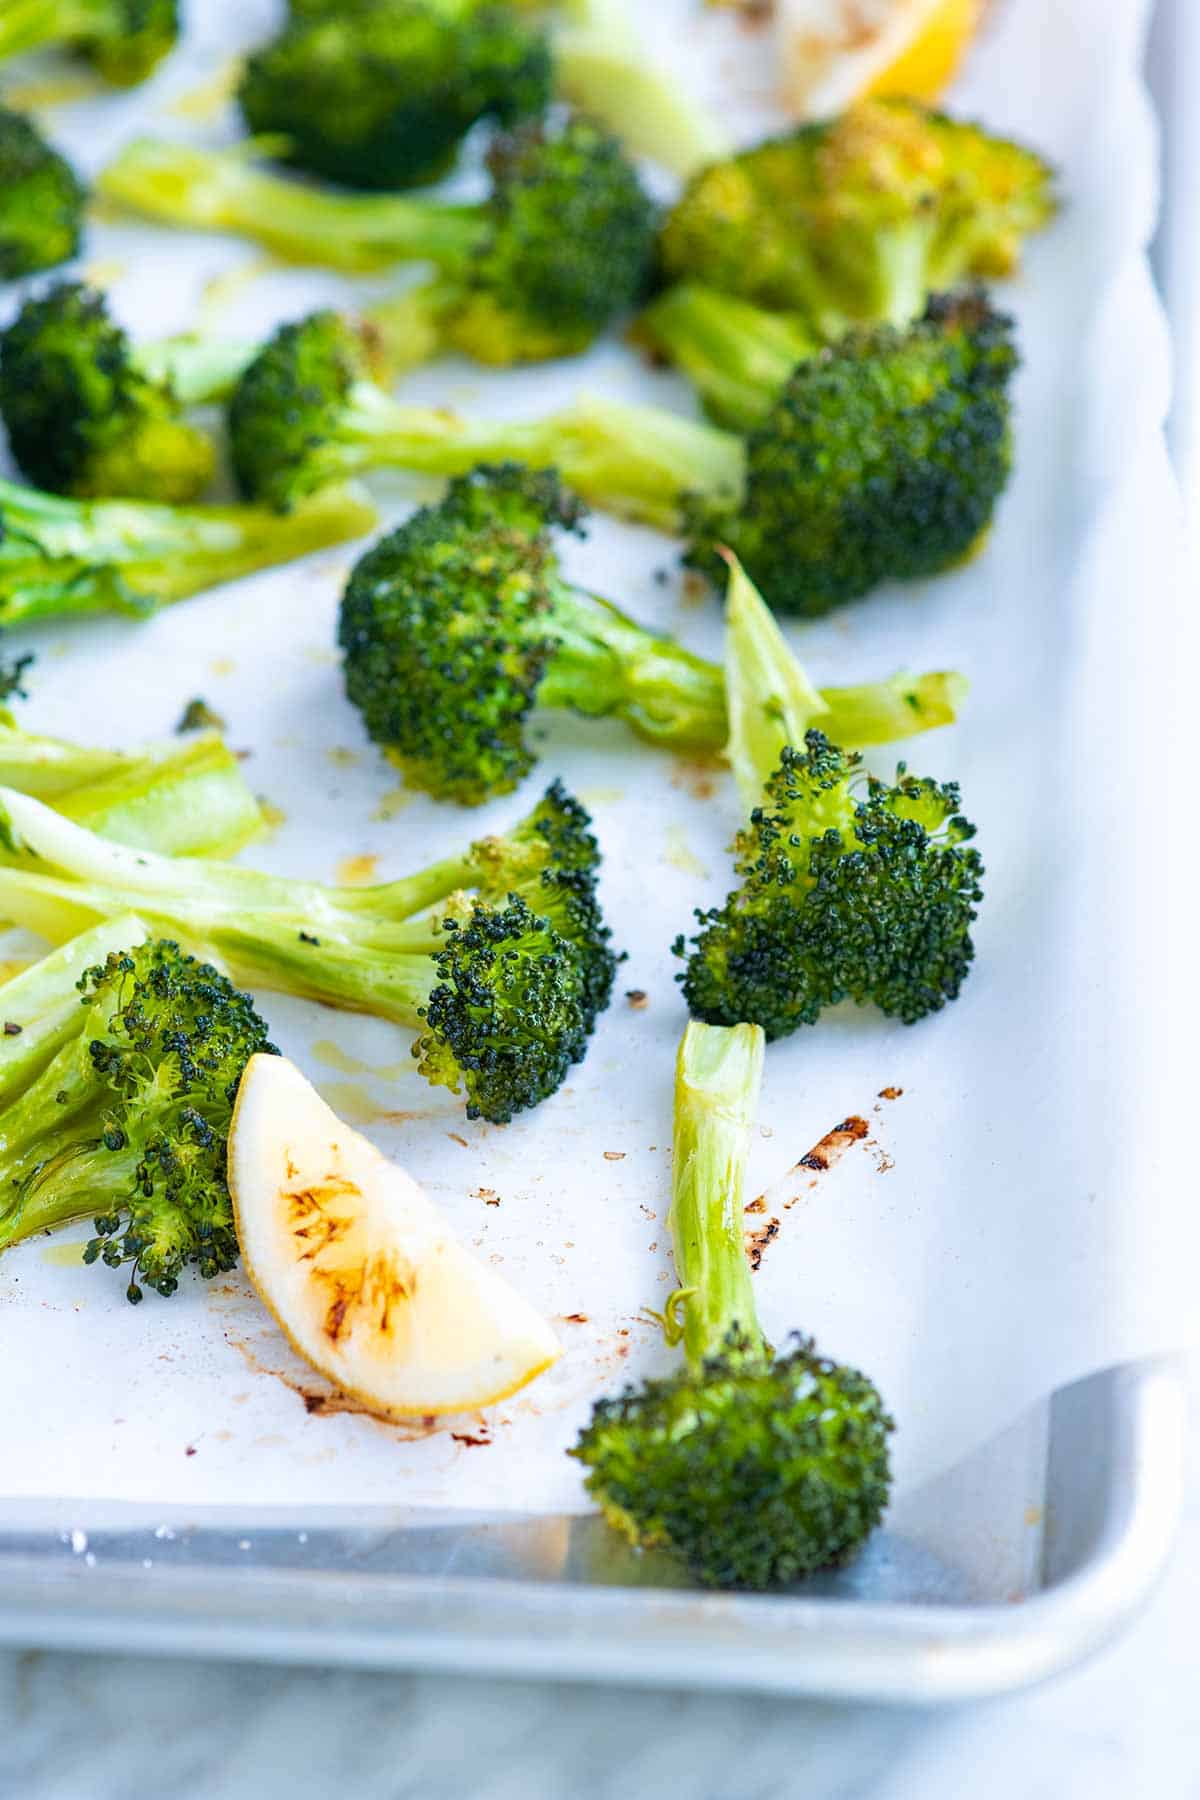
    Roasted Broccoli on a sheet pan

    Our family loves roasting broccoli in the oven, but we’re picky about it. You won’t find any mushy or overcooked broccoli here. My favorite method guarantees tender stems, crisp edges, and most importantly, really tasty broccoli!

    The secret to the best roasted broccoli is high heat and a few small tricks we’ve learned over the years. With the right pan, a drizzle of oil, and a bit of patience, you’ll have broccoli so good you’ll want to eat it straight from the sheet pan. For more, see our roasted broccolini recipe!

    Key Ingredients

    • Broccoli: Look for florets that are tightly closed and a deep, vibrant green color. If they appear loose, pale, or have yellowing or small yellow flowers, the broccoli is likely past its peak and can taste bitter. If you only have frozen broccoli, don’t worry. We’ve included tips in the recipe for roasting frozen broccoli so it still turns out crispy and delicious.
    • Oil: We like to roast vegetables with olive oil or avocado oil, both of which have great flavor and a higher smoke point. Avoid extra-virgin olive oi; since it burns more easily at high oven temperatures.
    • Salt and Pepper: As with all of our roasted vegetable recipes, we season generously with salt and pepper. Once roasted, you can add extra flavor with your favorite spice blends or seasoning mixes.
    • Lemon (Optional): I like to slice a lemon and toss the wedges right onto the baking sheet with the broccoli. The lemons roast and turn slightly sweet, and the broccoli tastes amazing with a squeeze of that roasted lemon juice over the top.

    Find the full recipe with measurements below.

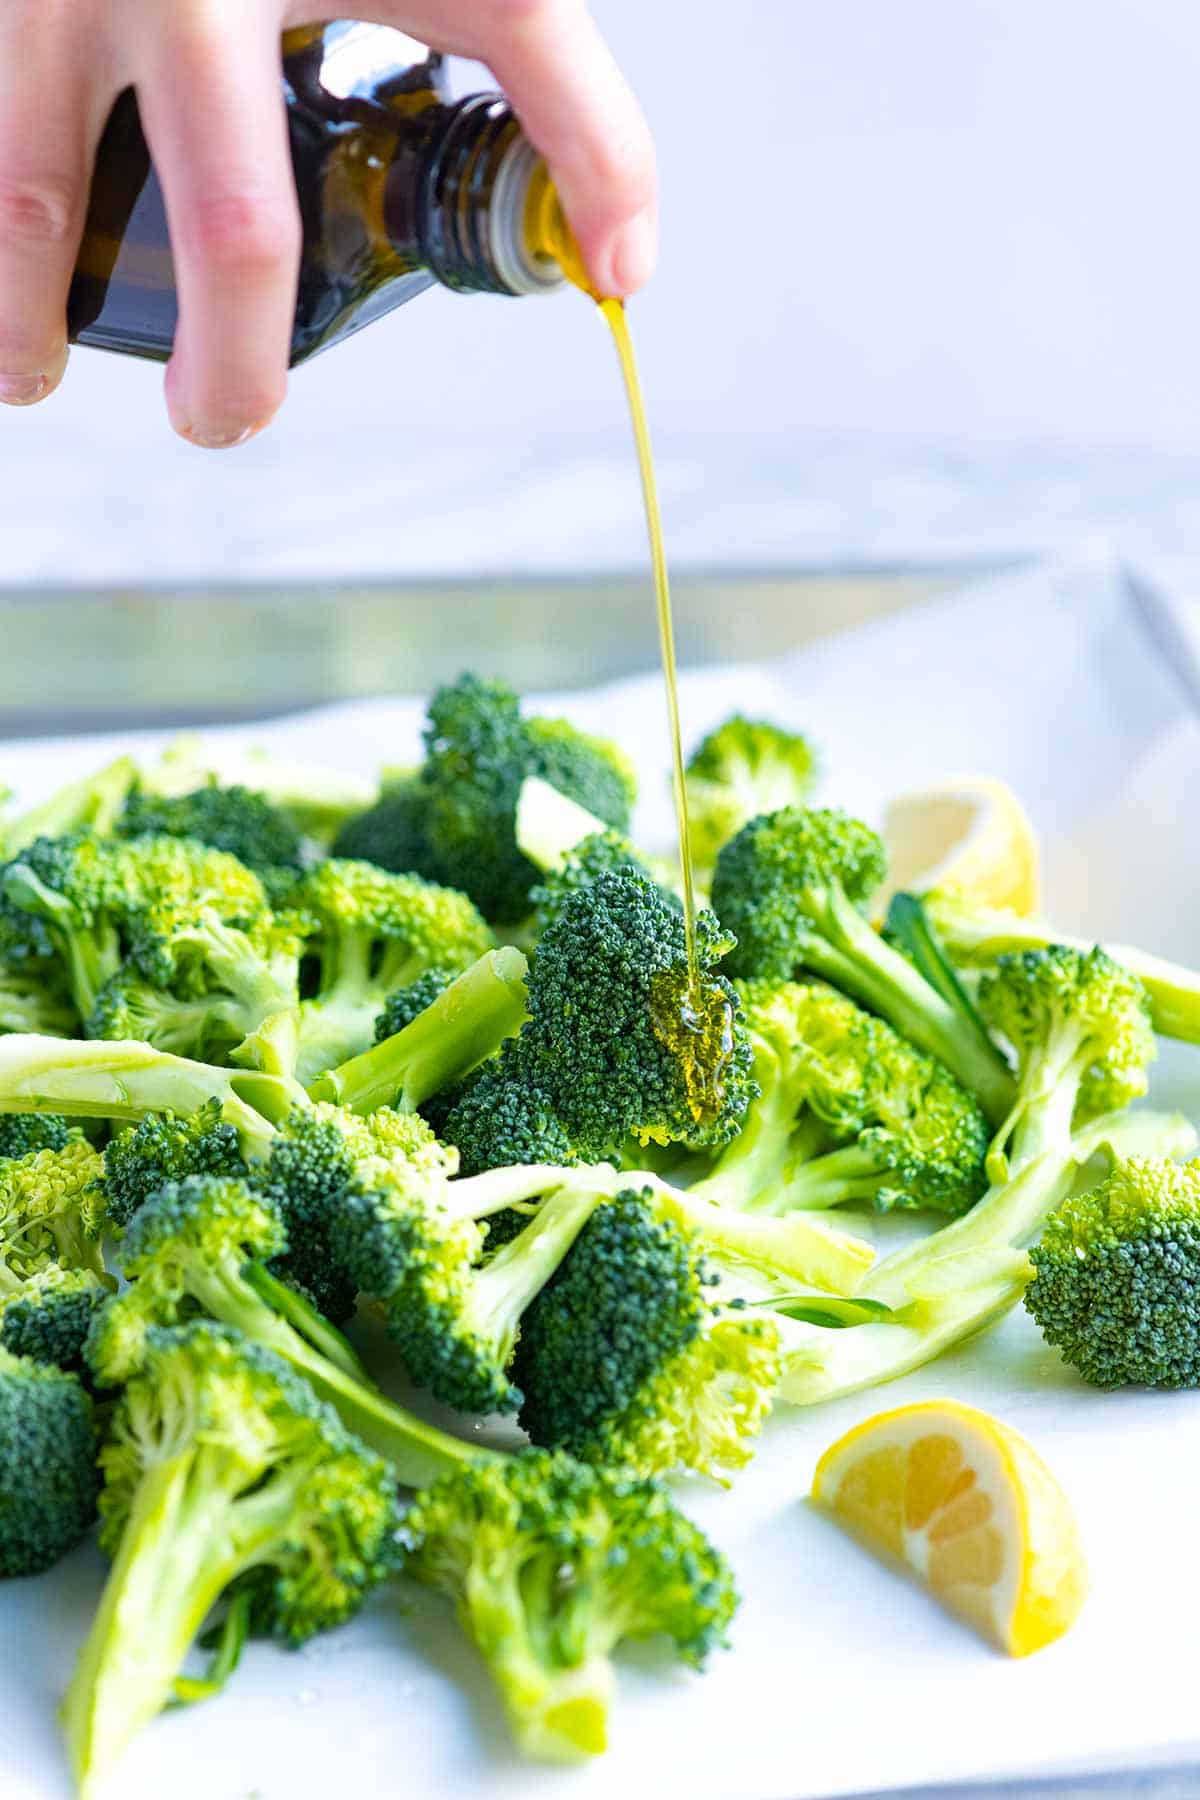
    Adding olive oil to raw broccoli before roasting in the oven

    How to Make Roasted Broccoli in the Oven

    Tip 1: Cut the broccoli into similarly sized pieces. So that all your broccoli roasts at the same speed, try to cut your broccoli into similar sizes. It’s up to you how big they are, but make sure everything in the pan looks similar in size. This way, everything roasts evenly. I use the same tip for roasted cauliflower, too.

    Tip 2: Create lots of flat edges. Instead of pulling the florets apart to look like the tops of round trees, slice them in half or quarters to create a flat side. Place the flatter edge down when you arrange the broccoli on the baking sheet. As the broccoli roasts, the flat edge will get nice and brown.

    Tip 3: Don’t overcrowd it on the pan. Be careful not to overcrowd the broccoli, and give them some space. Roasting the broccoli too close together causes it to steam rather than roast. This tip also applies to roasted mushrooms!

    Tip 4: Use a high oven temperature. For those crispy brown tips and caramelized stems, roast broccoli at 425°F for 20 to 30 minutes. Check the broccoli towards the end of roasting, and don’t take it out until the tips of the florets are browned and crisp and the stems are tender.

    Serving Suggestions

    This broccoli might be one of the most made veggie sides in our house. We’re happy to serve it next to almost anything. Some of our favorites are next to mac and cheese, chicken nuggets (my son’s request), these lemon chicken thighs, our baked lemon dill salmon, and adding to rice or grain bowls.

    I also love adding a dipping sauce to the side, like our tahini sauce, ranch dressing, or this creamy honey mustard.

    More Broccoli Recipes

    Perfect Roasted Broccoli

    Perfect Roasted Broccoli

    • PREP
    • COOK
    • TOTAL

    Roasted broccoli is such a classic side, and for good reason! It goes with almost anything. The lemon in our recipe is optional, but really lovely with the broccoli.

    4 Servings

    You Will Need

    1 bunch broccoli, about 1 ½ pounds

    2 tablespoons olive oil or avocado oil

    ½ teaspoon fine sea salt

    ¼ teaspoon fresh ground black pepper

    3 lemon wedges, optional

    Directions

      1Prep: Preheat the oven to 425°F (218°C). Line a large baking sheet with parchment paper or a silicone baking mat.

      2Prepare the broccoli: Cut the broccoli crown into individual florets, separating them from the main stem. If any florets are really big, cut them in half lengthwise to create flat edges, which helps them roast evenly and brown. Use a vegetable peeler to remove the tough outer layer of the broccoli stems. Cut the peeled stems into bite-sized pieces, about 1 inch long.

      3Season: Toss the broccoli florets and stems with the olive oil, salt, and pepper on the baking sheet. Spread them out, facing as many flatter edges down onto the baking sheet so they brown nicely. Then, scatter lemon wedges around the broccoli.

      4Bake: Roast the broccoli, without stirring, until the edges are crisp and brown and the stems are tender, 20 to 25 minutes. Serve warm with some juice from the roasted lemon wedges squeezed on top.

    Adam and Joanne’s Tips

    • Storing: Let cool. Transfer the cooled broccoli to an airtight container or resealable bag. Store in the refrigerator for 3 to 5 days, or freeze for up to 12 months. To freeze, spread the broccoli on a baking sheet lined with parchment paper and freeze for about an hour (preventing them from sticking together later). Transfer to a freezer-safe container.
    • Broccoli stems: I love buying broccoli with long stems that are still attached. The outer layer of the stem can be tough, so I use a vegetable peeler to remove it. Cut 1/2 inch from the end and discard (this can be tough). Slice or dice the rest and throw onto the baking sheet with the florets.
    • Roasted frozen broccoli: Roast it frozen (do not thaw). Add to a baking sheet and roast at 425°F without oil. After 5 minutes, drizzle the broccoli with oil, then continue to roast for 10 to 15 minutes, or until the edges start to turn crisp. Season with salt and pepper, then serve. The broccoli will turn out softer than when using fresh, but it will still be delicious.
    • The nutrition facts provided below are estimates.

    Nutrition Per Serving
    Serving Size
    1/4 of the baking sheet
    /
    Calories
    119
    /
    Total Fat
    7.6g
    /
    Saturated Fat
    1.1g
    /
    Cholesterol
    0mg
    /
    Sodium
    346.9mg
    /
    Carbohydrate
    11.6g
    /
    Dietary Fiber
    4.4g
    /
    Total Sugars
    3g
    /
    Protein
    4.8g


    AUTHOR:

    Adam Gallagher

    Adam and Joanne of Inspired Taste

    We are Adam and Joanne Gallagher, the creators of Inspired Taste. Established in 2009, Inspired Taste grew from a childhood dream into one of the internet’s most trusted recipe sites with hundreds of reliable recipes, step-by-step videos, and expert tips.More About Us
    Source link

  • Grilled Salmon Salad with Kale, Corn & Parmesan

    Grilled Salmon Salad with Kale, Corn & Parmesan

    Grilled maple salmon salad with kale, corn, apple, and Parmesan. A high-protein, healthy dinner or lunch idea, ready in 30 minutes. It’s sweet, savory, and packed with crunch.


    Jump to: ℹ️ Overview | 🛒 Ingredients | 📷 How To Make | 👩‍🍳 Recipe Tips | 🥗 Serving Suggestions | 📝 Full Recipe Card | 🍽 More Salmon Recipes And More Kale Recipes


    This is a grilled maple salmon salad bowl I make on a regular basis because it’s equal parts yummy and good for you.

    The salmon is simply pan-seared with a little maple syrup and lemon right at the end, so it gets this beautiful sweet-savory glaze that works so well with the rest of the bowl.

    The salad itself is a crunchy, colorful mix of kale, lettuce, red peppers, cucumber, sweet corn, apple, and Parmesan. There’s a real balance of flavors here: creamy, tangy, sweet, salty, and a little umami from the cheese.

    The first time I made this, it was one of those “what do I have in the fridge?” situations. I had a couple salmon fillets and a whole bunch of half-used produce: kale, corn, some crunchy lettuce, and half an apple. I tossed it all together, whipped up a quick dressing, and honestly… it was kind of magic. I loved the combo so much, I made it again a few days later—this time with grilled chicken—and it totally held up.

    This is one of those meals that hits that sweet spot between being really satisfying but not too heavy thanks to the fiber-rich kale and veggies, plus the lean protein in salmon. It’s naturally gluten-free and high in both protein and fiber, which helps support gut health and keep blood sugar levels steady.

    Nutrition (per serving): ~525 calories, 39 g protein and 6 g fiber.

    👩‍🍳 This recipe is part of my high-protein and fibre meals, you might also like these: Mediterranean fish with white bean purée, spicy tuna salad bites, chicken shawarma with baked rice, smashed chicken tacos, or Italian chopped salad with ham. Check out more salmon dinner ideas here.

    What You’ll Need

    Here is what you’ll need for this grilled salmon salad with kale, corn & Parmesan recipe. Find the full measurements in the recipe card below.

    • Salmon fillets – I used salmon fillets with skin off. Great source of protein and omega-3s. Plus, live oil spray for cooking, salt and pepper for seasoning and maple syrup and lemon juice for that glossy, tangy sweet glaze finish.

    For the Salad

    • Kale & lettuce – fiber-packed and crisp, the base of the salad. Swap kale for baby spinach or rocket if preferred.
    • Red pepper, cucumber, carrot, green onions – crunchy, colorful veg.
    • Apple – for a little sweet crunch that pairs surprisingly well with Parmesan.
    • Corn – adds sweetness and heartiness. I use frozen corn which I defrost in boiling water for a couple of minutes.
    • Freshly grated Parmesan – salty, umami, a must! Use feta instead of Parmesan for a tangier vibe. For dairy-free: skip the cheese or use a vegan option.
    • Add cooked quinoa or chickpeas to bulk it up.

    For the Dressing:

    • Lemon juice, maple syrup – bright and balanced.
    • Dijon mustard & balsamic vinegar – tangy depth.
    • Olive oil – richness and body.
    • Salt, garlic powder, black pepper – classic seasoning blend.

    How To Make Grilled Salmon Salad with Kale, Corn & Parmesan

    Find the full recipe and nutritional information below. Here are some handy step-by-step photos for grilled salmon salad with kale, corn & Parmesan.

    • Prep the veggies: Massage kale, chop lettuce, dice all the veg and apple, grate the cheese.
    • Make the dressing: Whisk all dressing ingredients in a big salad bowl.
    • Toss the salad: Add veggies, corn, and Parmesan. Mix well.
    • Cook the salmon: Heat a non-stick pan or a skillet, spray with olive oil, season salmon with salt and pepper. Cook 3–4 minutes on one side, then flip for 2 minutes.
    • Glaze the salmon: Drizzle with maple syrup and lemon juice right at the end of cooking.
    • Assemble: Divide salad between bowls and top with salmon.

    Recipe Tips/Variations

    • Make ahead: The dressing and chopped veggies (except apple) can be prepped a day ahead. Just toss fresh before serving.
    • Storage: Leftovers keep well in the fridge for up to 2 days, but store the salmon and salad separately for best texture.
    • Add crunch: Toasted seeds or croutons work great here.
    • Variations: Add a soft-boiled egg, avocado, or even swap the salmon for grilled chicken or tofu. You can swap veggies and leafy greens depending on what you like.

    Serving Suggestions

    This is a complete meal on its own, but if you want to stretch it out, serve with a slice of crusty sourdough or some roasted baby potatoes on the side. It’s also great cold the next day – perfect for lunch boxes!

    You Might Also Like These Salmon Bowls

    💬 If you’ve tried this grilled salmon salad with kale, corn & Parmesan or any other recipe on the blog then don’t forget to rate the recipe and let me know how you got on in the comments below, I love hearing from you! You can also FOLLOW ME on Instagram, Facebook, Pinterest, YouTube, and or sign up to my Newsletter to see more of my delicious food.

    Want to Save This Recipe?

    Enter your email & I’ll send it to your inbox. Plus, get great new recipes from me every week!

    By submitting this form, you consent to receive emails from Cooked & Loved

    Grilled maple salmon salad with kale, corn, apple, and Parmesan. A high-protein, healthy dinner or lunch idea, ready in 30 minutes. It’s sweet, savory, and packed with crunch. Find step-by-step photos and more recipe tips above.

    • Prepare the salad: Massage kale with a bit of olive oil or lemon juice to soften. Dice all other veggies and apple, grate the Parmesan.

    • Make the dressing: In a large salad bowl, whisk together all dressing ingredients.

    • Toss salad: Add kale, lettuce, chopped veggies, corn, and Parmesan to the bowl. Toss well to coat.

    • Cook the salmon: Heat a non-stick frying pan over medium-high heat. Spray with olive oil. Season salmon with salt and pepper. Cook for 3–4 minutes on one side, then flip and cook for another 2 minutes.

    • Glaze: Right at the end, drizzle each fillet with 1 teaspoon maple syrup and 1 teaspoon lemon juice. Let it sizzle for 30 seconds.

    • Assemble: Serve the salad in bowls and top with the warm maple-glazed salmon.

    • Can I use frozen salmon? Yes! Just make sure it’s fully thawed and patted dry before cooking.
    • What’s a good sub for kale? Spinach or rocket (arugula) work well – just skip the massaging step.
    • Is this good cold? Absolutely. It’s delicious as a cold salmon salad bowl for lunch the next day.
    • Can I bake the salmon instead? Totally. Bake at 400°F (200°C) for about 10–12 minutes, then glaze in the last 2 minutes.
    • Make ahead: The dressing and chopped veggies (except apple) can be prepped a day ahead. Just toss fresh before serving.
    • Storage: Leftovers keep well in the fridge for up to 2 days, but store the salmon and salad separately for best texture.
    • Add crunch: Toasted seeds or croutons work great here.
    • Variations: Add a soft-boiled egg, avocado, or even swap the salmon for grilled chicken or tofu. You can swap veggies and leafy greens depending on what you like.

    Calories: 527kcal | Carbohydrates: 40g | Protein: 39g | Fat: 24g | Saturated Fat: 6g | Polyunsaturated Fat: 5g | Monounsaturated Fat: 10g | Cholesterol: 99mg | Sodium: 1245mg | Potassium: 1339mg | Fiber: 6g | Sugar: 22g | Vitamin A: 8269IU | Vitamin C: 85mg | Calcium: 357mg | Iron: 3mg

    Keywords: salmon bowl recipes, Healthy Salmon Salad Bowl, Grilled Maple Salmon With Kale Salad, Salmon Salad

    More Salmon Recipes

    More Kale Recipes


    Source link

  • White Wine Seafood Stew Recipe

    White Wine Seafood Stew Recipe

    This seafood stew recipe is inspired by French bouillabaisse and has the a delicious light white wine and fennel broth.

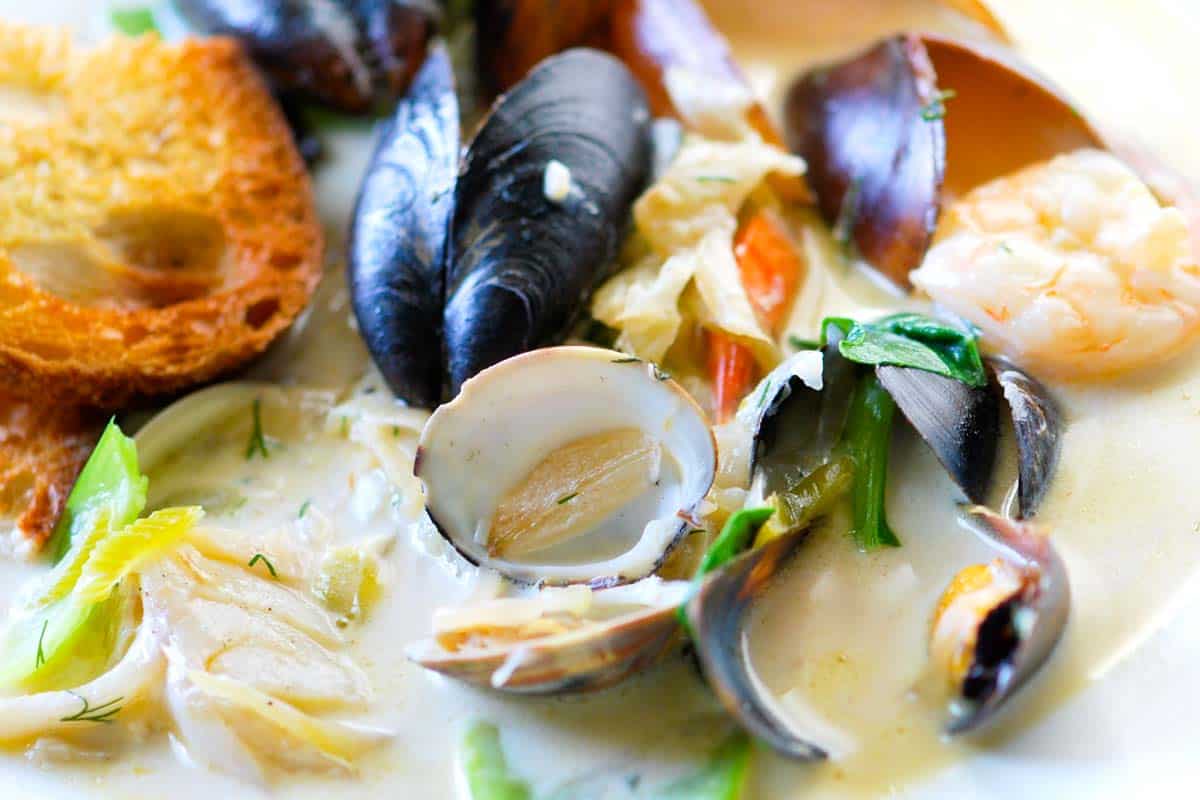
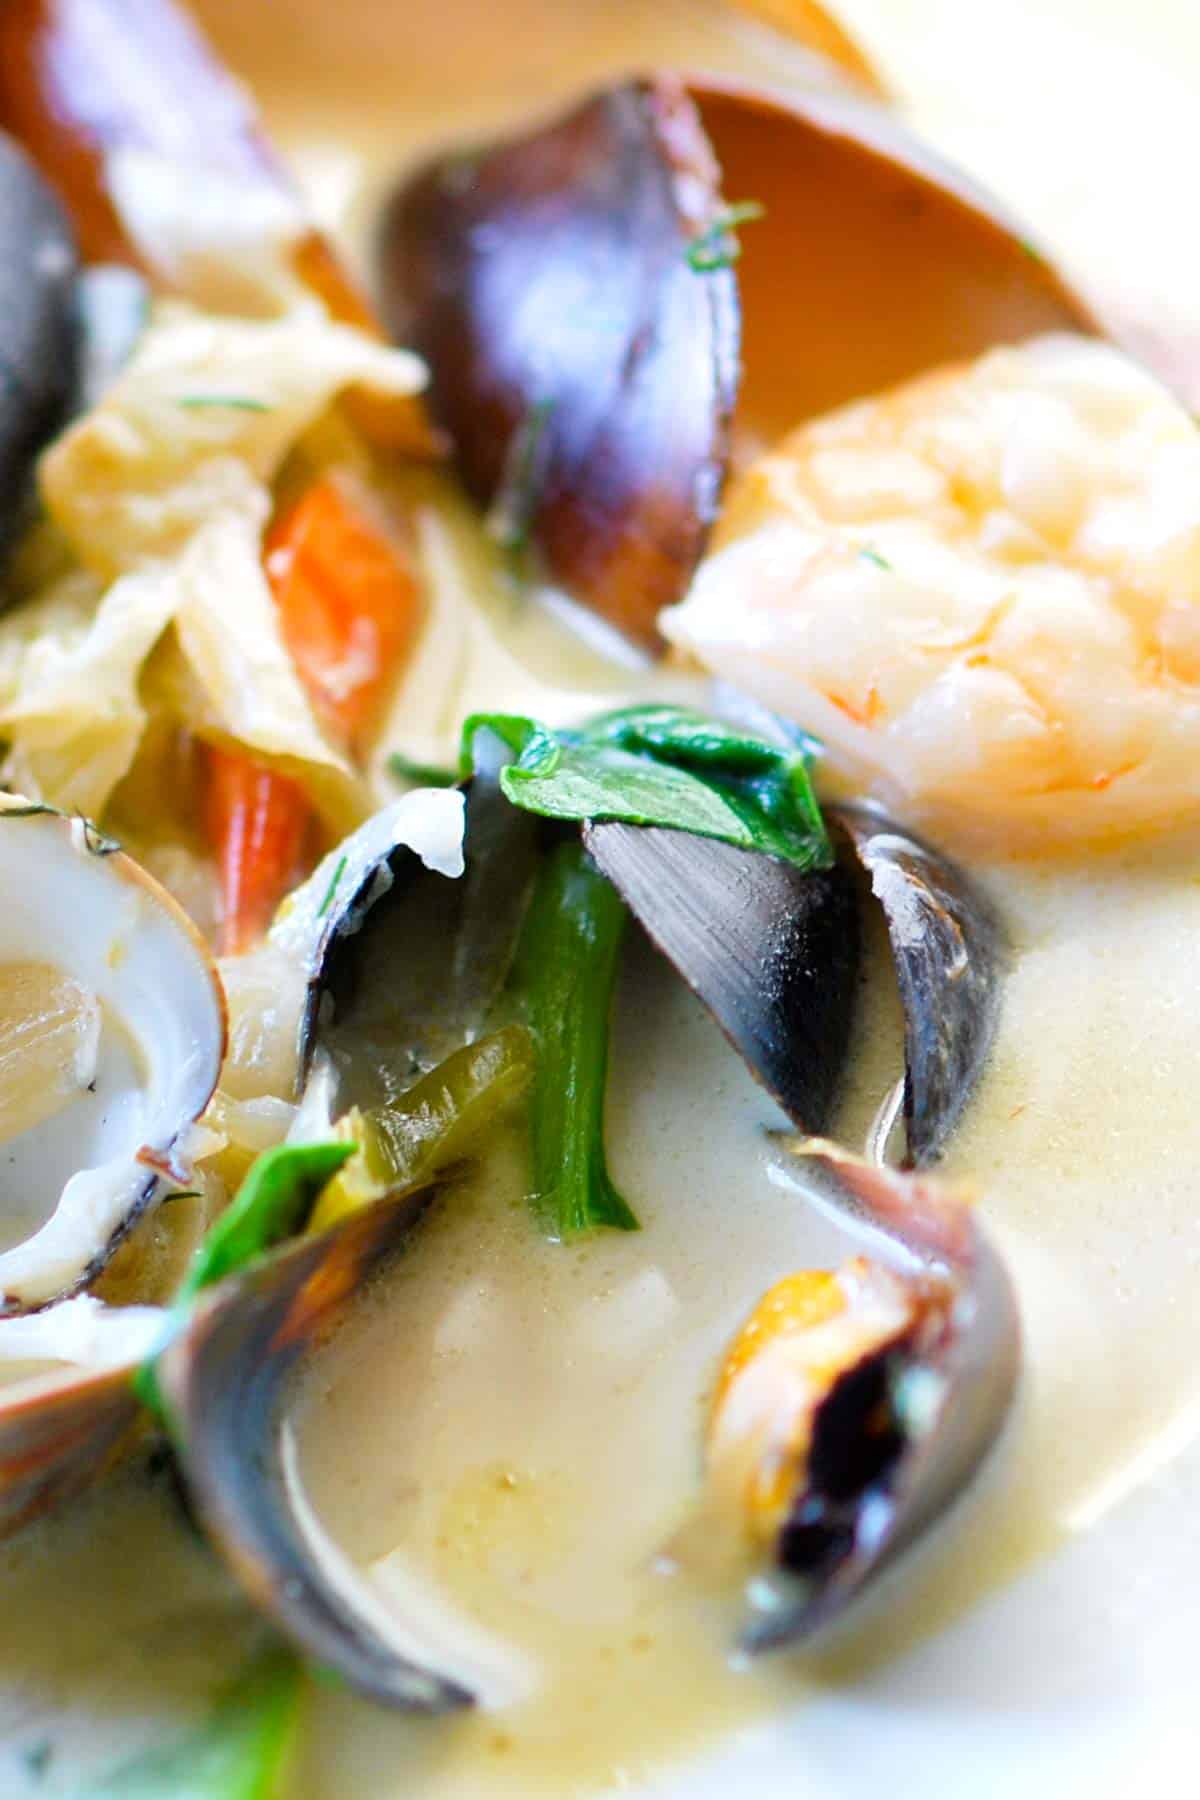
    Homemade Seafood Stew

    If you are a seafood lover, there’s something special about a bowl of seafood stew with perfectly cooked seafood. Our version has no tomatoes and calls on white wine, garlic, and fennel. The broth is similar to our steamed mussels but calls on homemade seafood stock (it’s easy).

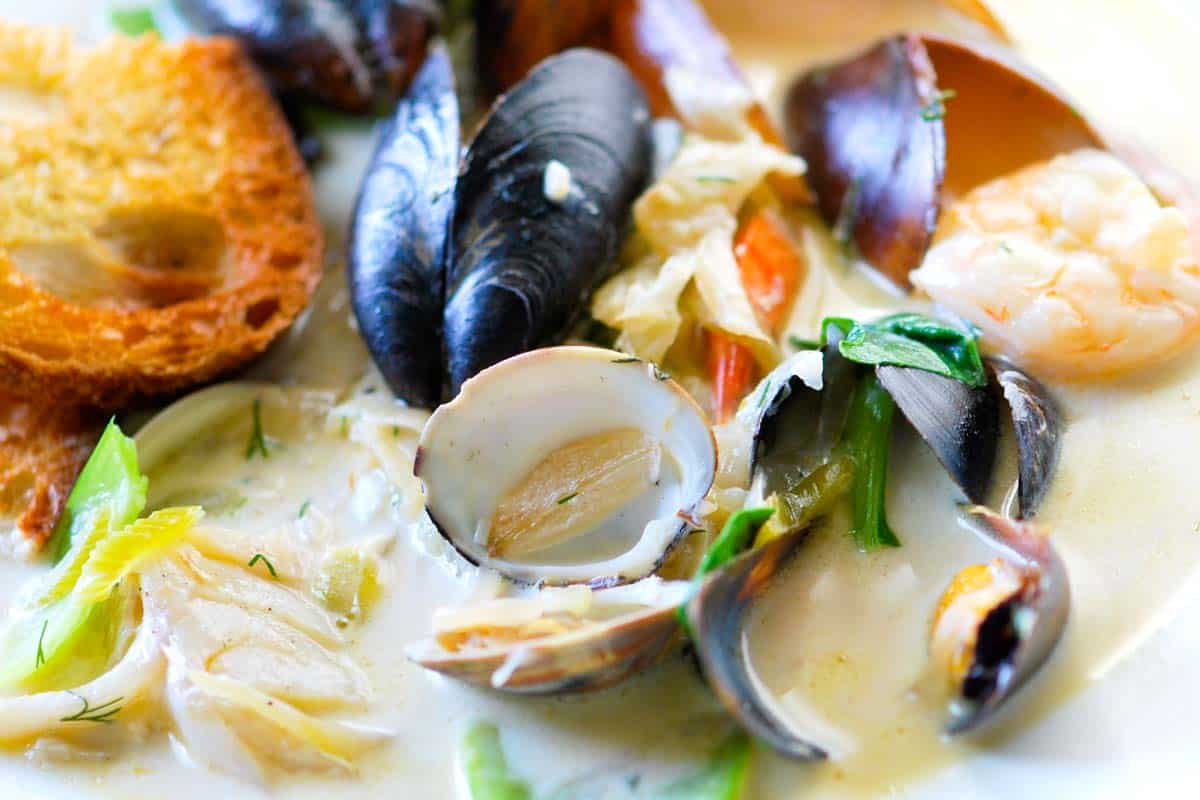
    When serving this stew, you’ll want a few slices of crusty bread to go alongside so you can soak up all the delicious broth. Homemade focaccia bread would be amazing, too!

    Key Ingredients

    • Fish: For this stew, I always choose flaky white fish like cod or halibut. They cook beautifully in the broth and add a delicate flavor.
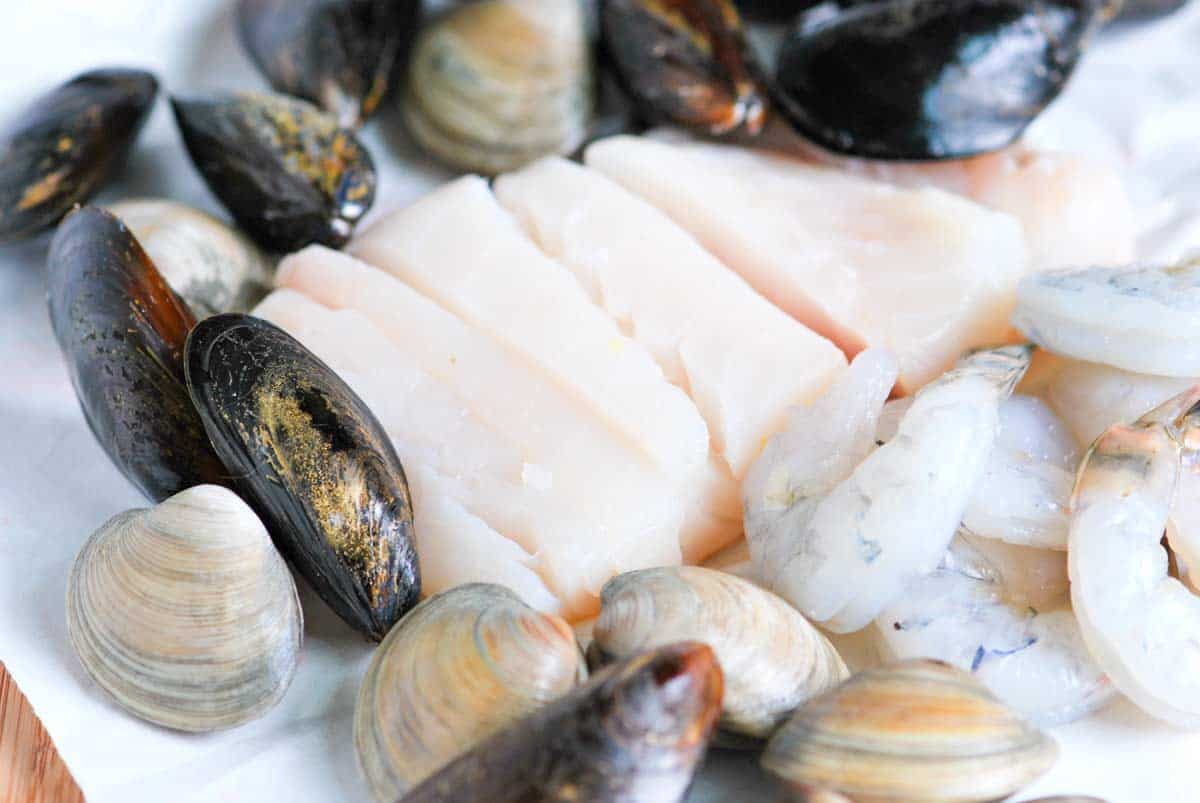
    • Shellfish: I love a combination of shrimp, mussels, and clams. I leave the tails on the shrimp and scrub the mussels and clams before cooking them. If they have not already been removed, you will also need to remove the beards from the mussels (see more about that in our steamed mussels recipe).
    • Aromatics: My go-to aromatics are shallot, fennel, celery, and garlic. This classic combination creates a really delicious base. These are almost identical to my aromatics for poached salmon!
    • Seafood Stock: While you can certainly buy seafood stock, I prefer making my own. It’s surprisingly easy, and the flavor is unbeatable! You’ll find the instructions below in our recipe. The base is fish bones and the shells from our shrimp. Fish bones are inexpensive and readily available at most seafood counters.
    • White Wine: I use white wine when making my homemade seafood stock. If you use store-bought stock, check the tips section to see when to add a splash of white wine to the stew. Use a dry white wine like Pinot Grigio, Sauvignon Blanc, or unoaked chardonnay.
    • Spinach or Kale: Just before serving, I like to stir in some baby spinach or kale. They wilt quickly in the hot broth and add some nice color.
    • Cream: Though optional, a splash of cream at the end adds richness and mellows out the flavors of the broth. I love it!

    Find the full recipe with measurements below.

    How to Make Seafood Stew

    Tip 1: Make homemade fish stock (it’s easy). Store-bought stock works, but if you want extra flavor, making fish stock is simple and takes about 45 minutes. Ask your seafood counter for fish bones (they usually have them).

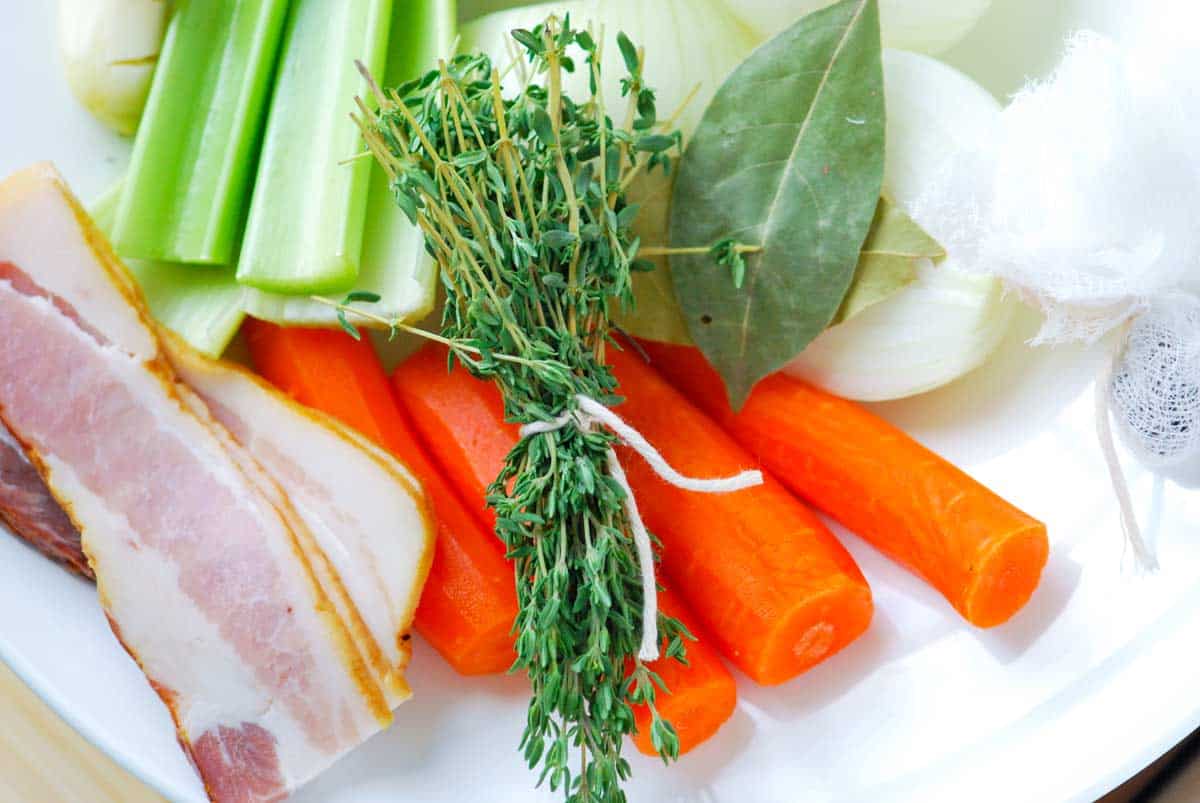
    I cook a little bacon in my pot first, then use the rendered fat to sauté shallot, carrots, and celery until soft. Add the fish bones, any shrimp shells from prepping your shrimp, and a few herbs. Cover with water, simmer for about 30 minutes, then strain. Use this stock as the base of your stew. (Snack on the bacon while you cook.)

    How to Make Seafood Stew: Aromatics for Fish Stock

    Tip 2: Build the stew in layers. Start by softening the aromatics: shallot, fennel, celery, and garlic. Stir in the wine and your seafood stock, and bring to a simmer. Add the clams first since they take the longest to open. Then add the shrimp and mussels, and finally the fish, which cooks quickly. Finish by adding greens and swirling in a bit of cream to make the broth luxurious and silky.

    Seafood for Seafood Stew (halibut, shrimp, mussels, and clams)

    More Easy Seafood Recipes

    White Wine Seafood Stew with Fennel

    White Wine Seafood Stew

    • PREP
    • COOK
    • TOTAL

    We love this simple, light fennel-infused stew with fish and shellfish. If you have the time, make your seafood stock. It’s much quicker than chicken stock and makes this stew extra special. Our homemade fish stock below makes about 10 cups. You will need 4 cups for the stew. The stock can be made in advance and refrigerated for up to 2 days or frozen for several months.

    4 to 6 Servings

    You Will Need

    For the Stew

    3 tablespoons butter

    1 large shallot, thinly sliced

    1 fennel bulb, thinly sliced

    2 ribs celery, thinly sliced

    1 garlic clove, thinly sliced

    1 pound small clams, cleaned

    1/2 pound large shrimp, shelled, use the shells for seafood stock

    1 pound mussels, cleaned

    1 pound flaky white fish like cod or halibut, cut into 4 portions

    1 cup dry white wine

    4 cups seafood stock, try homemade (recipe below)

    1 pound baby spinach or kale

    1/4 cup heavy cream

    Salt and fresh ground black pepper

    Baguette, sliced and toasted for serving

    Lemon wedges for serving


    Homemade Seafood Stock (Optional)

    2 pounds white fish bones

    Shells from 1/2 pound of shrimp

    2 slices thick-cut bacon

    2 large shallots, chopped

    2 medium carrots, chopped

    2 ribs celery, chopped

    2 crushed garlic cloves

    4 sprigs fresh thyme

    2 bay leaves

    10 black peppercorns

    Directions

    • Make Seafood Stock (Optional)
    • 1In a large soup pot or Dutch oven, cook the bacon over medium heat until the fat renders and the bacon is crisp. Transfer the bacon to a plate, but leave the fat. (You can use bacon in another recipe or as a cook’s snack.)

      2Add the chopped onion, carrots, and celery to the bacon fat. Cook, stirring often, until the onions soften, 3 to 5 minutes. Stir in the garlic and cook for 1 minute. Add the wine and cook for 5 minutes, then add the fish bones, shrimp shells, thyme, bay leaves, peppercorns, and 10 cups of water.

      3Bring to a simmer. Cook at a low simmer for 30 minutes, removing any scum that rises to the top. Strain, then use immediately or refrigerate in a tightly covered container for up to 2 days or in the freezer for 3 months.

    • Make Stew
    • 1Melt the butter in a wide pot or Dutch oven over medium heat. Add the onion, fennel, and celery. Add a pinch of salt and cook, stirring often, until softened and sweet, 3 to 5 minutes. Add the garlic and cook for 1 minute, then add the wine and cook for 5 minutes.

      2Pour in 4 cups of seafood stock and bring to a simmer. Add the clams, cover, and cook for 3 minutes.

      3Meanwhile, season the shrimp and fish with salt and pepper.

      4Add the shrimp and mussels. Arrange the fish on top of the stew and scatter the greens around the pot. Cover and simmer until the shellfish opens and the fish and shrimp are firm and opaque, about 5 minutes more.

      5Remove the pot from the heat, and then stir in the cream. Taste for seasoning and adjust with more salt and pepper. Serve divided between bowls with bread for dipping and lemon wedges on the side.

    Adam and Joanne’s Tips

    • Stock: Our homemade stock takes 45 minutes and uses the shells from peeling the shrimp and fish bones. I buy fish bones at the seafood counter (they are inexpensive). You can substitute store-bought stock or light chicken broth.
    • The nutrition facts provided below are estimates.

    Nutrition Per Serving
    Serving Size
    1/6 of the recipe
    /
    Calories
    377
    /
    Total Fat
    12g
    /
    Saturated Fat
    5.7g
    /
    Cholesterol
    161.9mg
    /
    Sodium
    1321.3mg
    /
    Carbohydrate
    13.5g
    /
    Dietary Fiber
    3.2g
    /
    Total Sugars
    2.6g
    /
    Protein
    47.5g


    AUTHOR:

    Adam Gallagher

    Adam and Joanne of Inspired Taste

    We are Adam and Joanne Gallagher, the creators of Inspired Taste. Established in 2009, Inspired Taste grew from a childhood dream into one of the internet’s most trusted recipe sites with hundreds of reliable recipes, step-by-step videos, and expert tips.More About Us

    Source link

  • Honey Soy Chicken & Rice Bowls

    Honey Soy Chicken & Rice Bowls

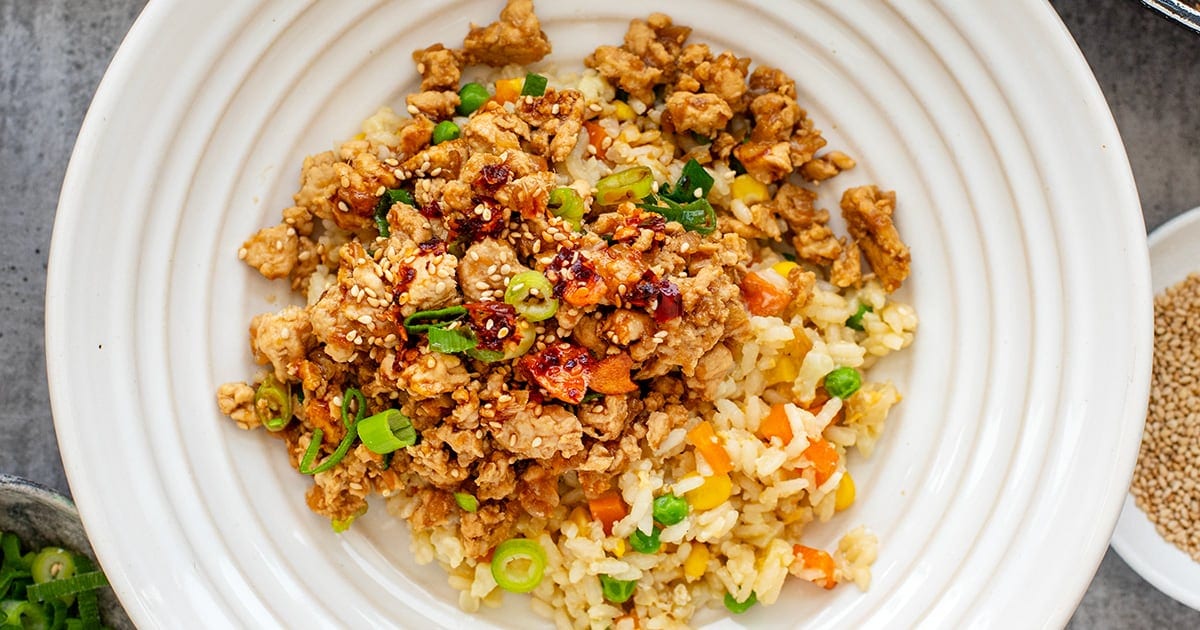
    These honey soy ground chicken rice bowls are sweet, salty, garlicky, and come together fast — perfect for healthy weeknight dinners that don’t taste “healthy” but actually are. This recipe is part of my high-protein, high-fiber meals series.


    Jump to: ℹ️ Overview | 🛒 Ingredients | 📷 How To Make | 📹 Watch The Video | 👩‍🍳 Recipe Tips | 🥗 Serving Suggestions | 📝 Full Recipe Card | 🍽 More Healthy Chicken Dinner Recipes And More Rice Bowls


    This honey soy garlic ground chicken and rice bowl situation is what I call a weeknight win. It’s fast, family-friendly, packed with flavor, and sneaky healthy — the kind of thing you’ll make once and then start craving weekly.

    The chicken is juicy and saucy with that perfect salty-sweet garlic-ginger thing going on, and the rice? It’s kind of like fried rice but a healthy version. It’s a “dump and cook” version that steams right in the pan with veggies and stock, meaning less oil and way less effort.

    It’s giving: takeout vibes but lower in calories, higher in protein and fiber, and way more satisfying. Plus, it uses super accessible ingredients (hello freezer peas and corn, and pantry soy sauce) and makes great leftovers. Basically: healthy dinner gold.

    Nutrition per serving: 550 calories, 32 g protein and 5 g fiber.

    👩‍🍳 You might also like these chicken and rice recipes: chicken shawarma with baked rice, coconut chicken & cauliflower rice, chicken rice bowls, gochujang chicken, or ground chicken stir fry. You might also like my turkey baked meatballs & potatoes with garlic yogurt.

    What You’ll Need

    Here is what you’ll need for this honey soy chicken & rice bowls recipe. Find the full measurements in the recipe card below.

    For the honey soy chicken

    • Ground chicken – Lean but still juicy; loaded with protein.
    • Onion, garlic & ginger – The holy trinity for depth and umami.
    • Light & dark soy sauce – Light for salty goodness, dark for richness and color.
    • Honey – Balances the saltiness and adds that sticky-glaze texture.
    • Sesame oil – A finishing oil that adds major aroma.
    • Chicken stock – Helps create a saucy coating; water will work, too.
    • Green onions – For color and a mild oniony bite.

    For the healthy “fried” rice

    • Butter – Just a tiny bit for richness and flavor.
    • Garlic – For the base of the rice.
    • Medium grain rice – It cooks right in the pan and soaks up all the flavor. I prefer medium grain but long-grain rice will work, too. Brown rice will take much longer to cook, so you could pre-cook it partially separately ahead of time.
    • Carrot & cauliflower – Add texture, fiber, and natural sweetness.
    • Frozen peas & corn – No prep, all the goodness, extra protein and fiber.
    • Chicken stock + water – Steams the rice and veggies without needing to fry.
    • Light soy sauce, oyster sauce, sesame oil – For that fried rice taste, without actual frying.
    • Whisked egg – Adds protein and that classic fried rice finish.

    To serve

    • Toasted sesame seeds, chili crisp, chopped green onions – Optional but highly recommended for extra flavor and crunch.

    How To Make Honey Soy Chicken & Rice Bowls

    Find the full recipe and nutritional information below. Here are some handy step-by-step photos for this ground chicken and rice dinner.

    For the rice

    • Sauté garlic in butter.
    • Add rice, veggies, stock, sauces, and seasoning.
    • Cover and simmer until liquid is absorbed.
    • Add peas and corn, cook a few more minutes.
    • Pour whisked egg over the top, cover briefly.
    • Finish by stirring through on high heat to cook the egg.

    For the chicken

    • Sauté onions until soft.
    • Add garlic and ginger.
    • Add chicken, break it up and cook until browned.
    • Pour in sauces, honey, stock.
    • Simmer until sticky and saucy.
    • Stir in green onions.

    To serve

    • Spoon rice into bowls, top with chicken, and finish with sesame seeds, chili crisp, and green onions.

    Watch The Video

    Recipe Tips

    • Short on time? Use pre-chopped veggies or frozen cauliflower rice.
    • Swap it up: Ground turkey or beef would also work well here.
    • Make-ahead: The chicken keeps great for up to 3-4 days and rice for 1-2 days. Store separately and reheat together.
    • Low-carb option: Swap rice for all cauliflower rice — just reduce the stock and cook for less time.
    • Extra veggies: Throw in chopped spinach or kale at the end.

    Serving Suggestions

    This bowl is a full dinner meal on its own — protein, carbs, veggies, all in one. But if you’re feeling fancy, you could serve it with a quick cucumber salad or some steamed edamame on the side. A fried egg on top wouldn’t hurt either. I always love extra veggies, so you could try one of these side dishes.

    💬 If you’ve tried this honey soy chicken & rice bowls or any other recipe on the blog then don’t forget to rate the recipe and let me know how you got on in the comments below, I love hearing from you! You can also FOLLOW ME on Instagram, Facebook, Pinterest, YouTube, and or sign up to my Newsletter to see more of my delicious food.

    Want to Save This Recipe?

    Enter your email & I’ll send it to your inbox. Plus, get great new recipes from me every week!

    By submitting this form, you consent to receive emails from Cooked & Loved

    These honey soy ground chicken rice bowls are sweet, salty, garlicky, and come together fast — perfect for healthy weeknight dinners that don’t taste “healthy” but actually are. This recipe is part of my high-protein, high-fiber meals series. Find step-by-step photos and more recipe tips above.

    To make the rice:

    • Heat butter in a deep frying pan over medium-high.

    • Add garlic and stir for 30 seconds.

    • Add rice, carrot, cauliflower, chicken stock, water, soy sauce, oyster sauce, sesame oil, and white pepper if using.

    • Bring to a boil, cover, then reduce heat to medium-low and cook for 10 minutes.

    • Uncover, add peas and corn, stir, cover again for 5 more minutes.

    • Pour whisked egg evenly over rice. Cover for 1 minute.

    • Increase heat to medium-high, uncover, and stir through to cook the egg.

    To make the chicken:

    • Heat oil in a pan over medium-high. Add onions and cook until soft.

    • Add garlic and ginger, stir for 30 seconds.

    • Add chicken and increase heat. Break it up as it cooks.

    • Cook for about 6–7 minutes until golden and mostly cooked through.

    • Add soy sauces, honey, sesame oil, and stock. Stir and simmer for 2–3 minutes until saucy.

    • Finish with green onions.

    • Can I use another protein? Yes! Ground turkey, pork, or beef would all work. Just adjust the cooking time slightly if needed.
    • Can I make this gluten-free? Use tamari instead of soy sauce and double-check your oyster sauce (or sub with a gluten-free black bean or stir-fry sauce).
    • Is this spicy? Not at all! It’s very mild and kid-friendly. Add chili crisp or sriracha on top if you like some heat.
    • Can I use leftover rice instead? Absolutely. If using cooked rice, sauté your veggies first, then stir in rice and sauces to warm through.
    • Short on time? Use pre-chopped veggies or frozen cauliflower rice.
    • Swap it up: Ground turkey or beef would also work well here.
    • Make-ahead: The chicken keeps great for up to 3-4 days and rice for 1-2 days. Store separately and reheat together.
    • Low-carb option: Swap rice for all cauliflower rice — just reduce the stock and cook for less time.
    • Extra veggies: Throw in chopped spinach or kale at the end.

    Calories: 558kcal | Carbohydrates: 65g | Protein: 32g | Fat: 19g | Saturated Fat: 5g | Polyunsaturated Fat: 4g | Monounsaturated Fat: 9g | Trans Fat: 0.2g | Cholesterol: 146mg | Sodium: 1371mg | Potassium: 1109mg | Fiber: 5g | Sugar: 12g | Vitamin A: 2857IU | Vitamin C: 33mg | Calcium: 60mg | Iron: 5mg

    Keywords: Honey Soy Chicken & Rice Bowls, Ground Chicken Rice Bowls, ground chicken and rice recipes, honey soy garlic chicken

    More Healthy Chicken Dinner Recipes

    More Rice Bowls


    Source link

  • The Best Steak Marinade Recipe

    The Best Steak Marinade Recipe

    This is the best steak marinade you’ll ever use. It’s rich and savory, creating a thick coating that guarantees an intensely flavorful, juicy steak every time.

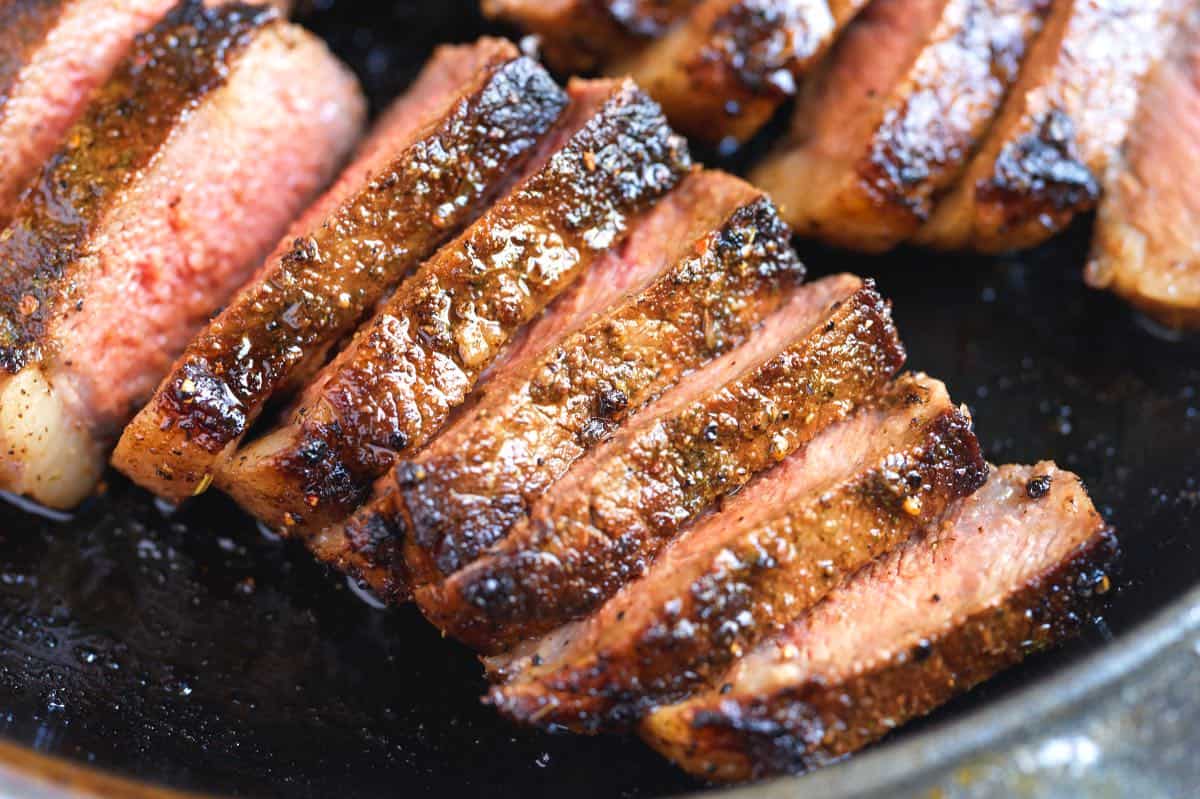
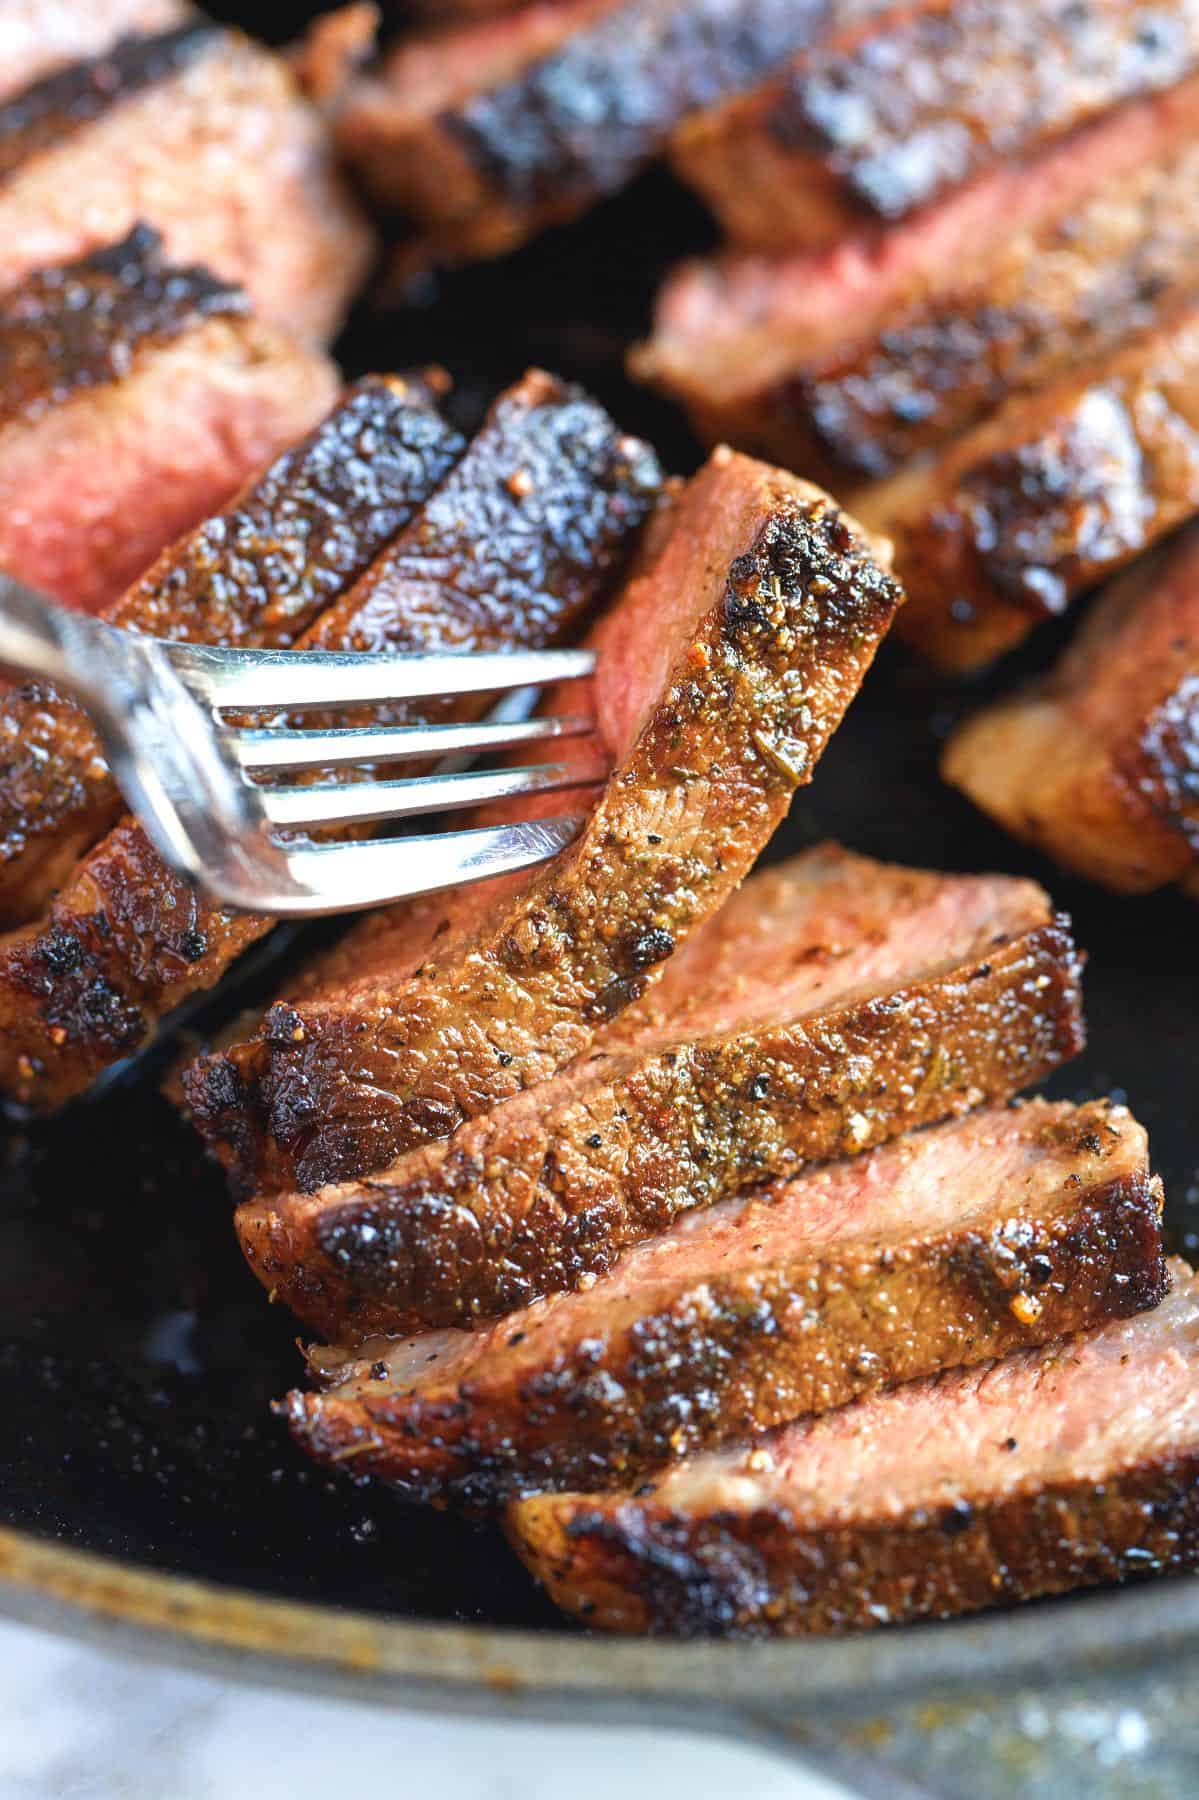
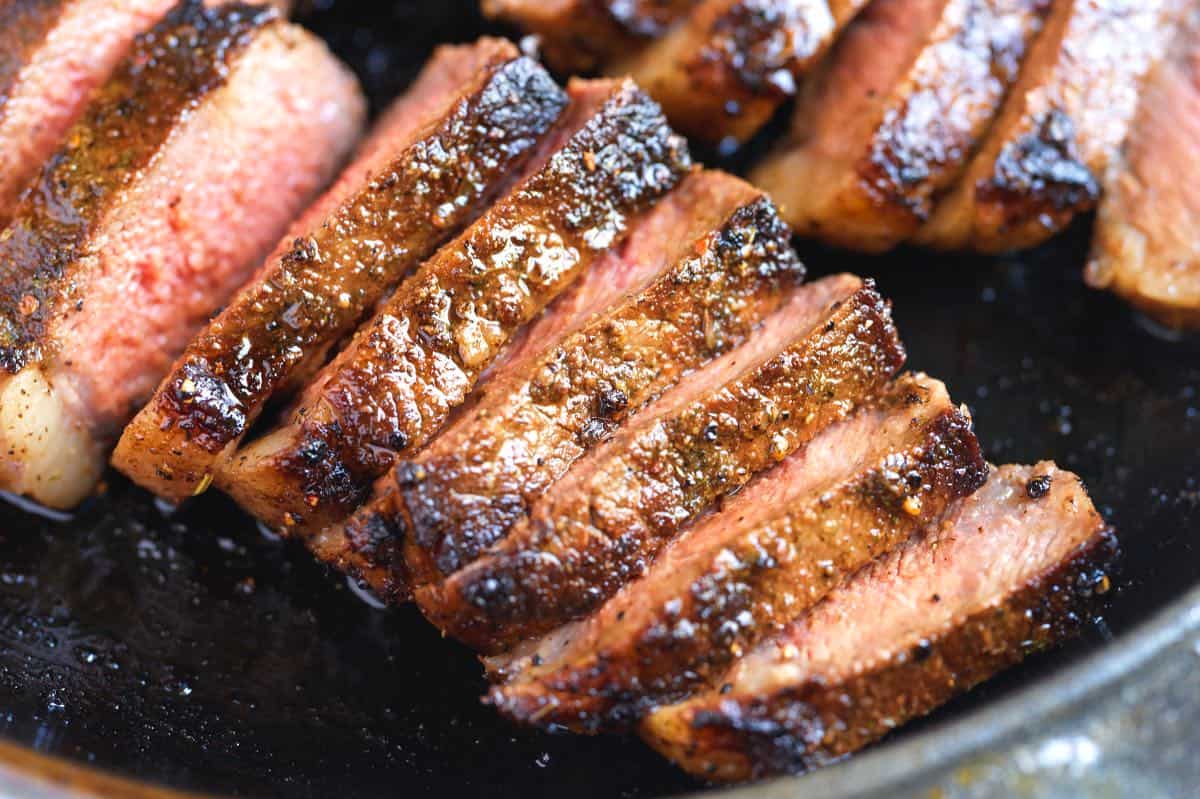
    Cooked steak after using the Best Steak Marinade

    This simple marinade for steak belongs to the “mud” marinades group, so it has a thick consistency that easily sticks to your steak. Every bite is well coated, which is why I’m convinced this is one of the best marinades out there.

    Whether you’re cooking flank steak, sirloin steak, hanger steak, or even a New York strip, this marinade will take your steaks to a new level of deliciousness. I especially love it for grilled steak and steak salad.

    Key Ingredients

    • Steak Seasoning: I use our homemade steak seasoning, but feel free to use your favorite brand.
    • Garlic: I love the fresh garlic in this marinade and prefer to finely grate it so it melts into the mixture. I use the same technique for our pork chop marinade.
    • Lemon: Adds some acidity and brightens the flavors.
    • Soy Sauce and Worcestershire sauce: These add umami, making the steak taste richer and more beefy.
    • Oil: Any neutral oil with a higher heat tolerance works nicely. I usually use avocado oil.

    Find the full recipe with measurements below.

    My Tips for Using This Incredible Steak Marinade

    Tip 1: Why you’ll love it. We recommend this mud-style marinade for steaks for two reasons: First, our umami-rich marinade enhances the natural beefy flavor of the steak, and second, since we spoon extra marinade over the steaks while they cook, it creates a caramelized crust and even juicier results.

    Tip 2: How long to marinate steaks. We recommend marinating the steaks for 1 to 2 hours. This is because the lemon juice in the marinade can break down the steak’s exterior if left for too long. So, we keep the marinating time short to preserve the steak’s texture and flavor.

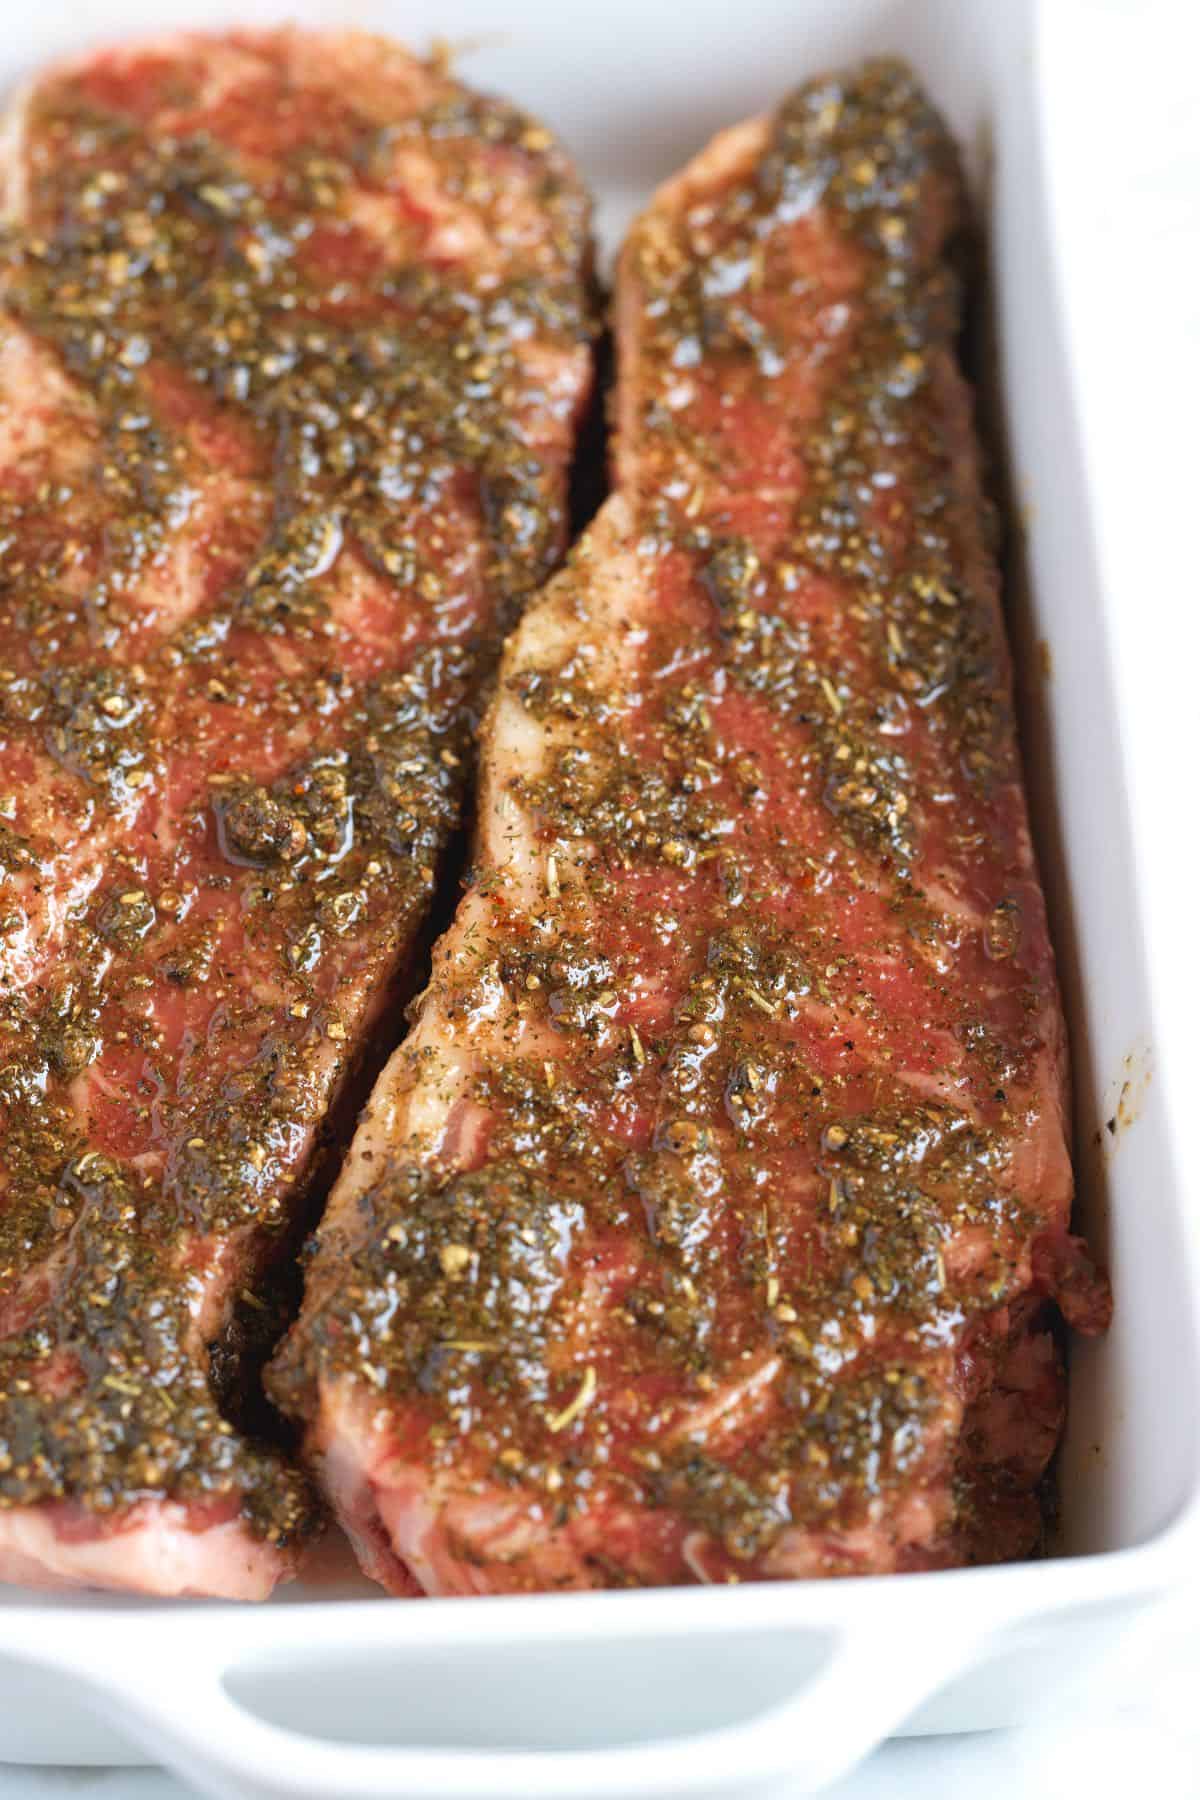
    Marinating Steaks

    Tip 3: Cooking marinated steak. This thicker, mud-style marinade works wonders on the grill or in a grill pan (see our tips on how to grill steak). If you don’t want to grill them, you can cook the marinated steaks in a stainless-steel or cast-iron skillet.

    More Marinade Recipes

    Steaks made with Steak Marinade

    The Best Steak Marinade

    • PREP
    • COOK
    • TOTAL

    This easy steak marinade is a surefire way to enhance the natural flavors of your steaks. We highly recommend our steak seasoning, but you can substitute your favorite store-bought seasoning blend. This marinade has a unique quality often referred to as “mud” due to its thicker consistency, which allows it to cling lovingly to your steaks.

    Makes enough for two large or four small steaks

    You Will Need

    2 tablespoons steak seasoning, we love this homemade steak seasoning

    2 tablespoons high-heat oil like avocado oil vegetable oil, or safflower oil

    2 cloves garlic, grated or finely minced

    2 teaspoons soy sauce

    2 teaspoons lemon juice

    2 teaspoons Worcestershire sauce

    Directions

    • Marinating the Steak
    • 1Combine the marinade ingredients and generously rub the mixture all over the steak. Allow the steak to marinate for up to 1 hour. While marinating for a bit longer is acceptable, we advise against exceeding two hours to achieve the best flavor, color, and texture.

    • Grilling or Using a Grill Pan
    • 1Place the marinated steaks on the grill over medium-high heat and cook until golden brown and slightly charred, 4 to 5 minutes.

      2Turn the steaks over and continue to grill until your desired doneness. Use the suggested internal temperature guide below. As the steaks cook, spoon the leftover marinade over them to enhance the flavors. If using an open flame, watch out for flare-ups.

      3After cooking, let the steak rest for 5 minutes before serving or slicing.

    • Pan-Seared Steaks
    • 1Preheat the skillet over medium-high heat (for 1 to 2 minutes), then add the marinated steaks to the pan. Cook the steaks, flipping them frequently, until they are well browned on all sides, including the edges. You can hold the steak sideways with tongs to sear any fat along the edges.

      2Use the suggested internal temperature guide below to determine your preferred doneness. After cooking, allow the steak to rest for 5 minutes before serving or slicing.

    Adam and Joanne’s Tips

    • Internal temperatures and doneness: Keep in mind that steak continues to cook slightly after being removed from the heat.
    • Steak doneness: Rare: 120-130°F, Medium Rare: 130-140°F, Medium: 140-150°F, Medium-Well: 150-160°F, and Well-Done: 160°F+.
    • Gluten-free: Use certified GF soy sauce or tamari and Worcestershire sauce.
    • The nutrition facts provided below are estimates and are only for the marinade, not the steak. We have used the USDA database to calculate approximate values.

    Nutrition Per Serving
    Serving Size
    1/4 of the recipe, enough for 1 small steak
    /
    Calories
    84
    /
    Total Fat
    7.3g
    /
    Saturated Fat
    1g
    /
    Cholesterol
    0mg
    /
    Sodium
    785.9mg
    /
    Carbohydrate
    5.2g
    /
    Dietary Fiber
    1.5g
    /
    Total Sugars
    0.5g
    /
    Protein
    1g


    AUTHOR:

    Joanne Gallagher

    Adam and Joanne of Inspired Taste

    We are Adam and Joanne Gallagher, the creators of Inspired Taste. Established in 2009, Inspired Taste grew from a childhood dream into one of the internet’s most trusted recipe sites with hundreds of reliable recipes, step-by-step videos, and expert tips.More About Us
    Source link

  • Turkish Baked Meatballs & Potatoes With Garlic Yogurt

    Turkish Baked Meatballs & Potatoes With Garlic Yogurt

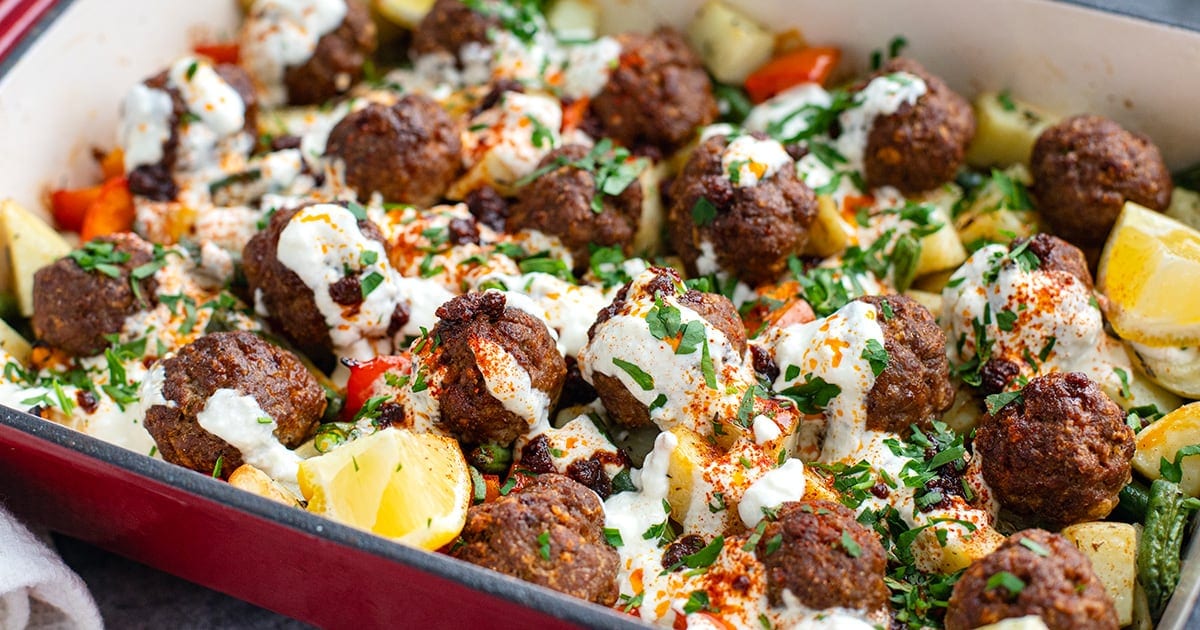
    Spiced baked meatballs with potatoes, finished with garlic yogurt and paprika butter sauce. This one-pan meal is inspired by a viral Turkish pasta recipe, and is hearty, high in protein, and packed with flavor.


    Jump to: ℹ️ Overview | 🛒 Ingredients | 📷 How To Make | 📹 Watch The Video | 👩‍🍳 Recipe Tips | 🥗 Serving Suggestions | 📝 Full Recipe Card | 🍽 More Meatball Recipes And More Recipes With Potatoes


    You might be familiar with Turkish köfte (meatballs) AND you might have seen a viral Turkish pasta with garlic yogurt sauce and paprika chili oil, and if you like the sound of either of those, you will love this dinner meal.

    I wanted to create something more protein-rich and veggie-forward, so I swapped the pasta for crispy potatoes, sweet red peppers, and tender green beans, all baked together with seasoned beef meatballs.

    The whole tray soaks up the savory goodness as it bakes. But the real magic is in the toppings — a creamy, garlicky yogurt sauce and that golden, earthy, slightly sweet paprika butter drizzle. Both are non-negotiable, trust me.

    It’s easy enough for a weeknight dinner and impressive enough to serve guests. It’s not spicy, but the flavors are complex, which some kids might not be used to, in which case you serve the meatballs and potatoes without the sauces.

    Nutrition per serving: 550 calories, 40 grams protein, 8 grams fiber.

    👩‍🍳 This meatballs and potatoes recipe is part of my high-protein and fiber meals series, try some of the dishes: smashed chicken tacos, steak and potatoes with chimichurri salsa, chicken shawarma with baked rice, grilled salmon salad with kale, corn & Parmesan, or honey soy chicken & rice bowls.

    What You’ll Need

    Here is what you’ll need for this Turkish meatballs and potato bake. Find the full measurements in the recipe card below.

    For the meatballs:

    • Lean ground beef – the main protein star, rich and juicy. You can swap for lamb or chicken if needed. I used 5% fat ground beef mince.
    • Breadcrumbs – use GF breadcrumbs to keep it gluten-free.
    • Spices – paprika (both sweet and smoked), cumin, cinnamon, coriander seed, and onion powder. These give it that unmistakable Turkish-inspired depth. If you happen to have some pul biber or Aleppo pepper (Turkish chili), add a bit of that as well.
    • Olive oil & water – for moisture and binding without eggs.

    For the veggies:

    • Potatoes – classic, comforting, and fiber-rich. Use sweet potatoes for extra nutrients or swap for cauliflower if low-carb.
    • Red bell pepper & green beans – for color, texture, and crunch (and fiber). Zucchini or carrots also work.
    • Dried thyme & olive oil – herby and fragrant, bringing it all together.

    Garlic yogurt sauce:

    • Greek yogurt – low-fat, high-protein yogurt is best.
    • Garlic, lemon juice, salt, water – tangy and punchy, this sauce ties everything together. Coconut yogurt can be used for dairy-free.

    Paprika butter sauce:

    • Salted butter – rich and golden. You can use olive oil for a dairy-free version.
    • Paprika (sweet + smoked), chili, honey, lemon juice – buttery, smoky, and slightly tangy-sweet.

    How To Make Turkish Baked Meatballs & Potatoes With Garlic Yogurt

    Find the full recipe and nutritional information below. Here are some handy step-by-step photos for Turkish baked meatballs & potatoes with garlic yogurt.

    • Mix all meatball ingredients and roll into 1 oz (30 grams) balls. Set aside.
    • Bake diced potatoes first with thyme and salt for 15 minutes at 200°C (400°F).
    • Add peppers and green beans, toss with oil and salt.
    • Nestle meatballs on top and bake for another 20 minutes.
    • Meanwhile, mix garlic yogurt sauce.
    • Melt butter and spices for paprika sauce; finish with lemon juice and honey.
    • Once everything is cooked, serve with dollops of garlic yogurt and drizzle with paprika butter sauce.

    Watch The Video

    Recipe Tips

    • Don’t skip the sauces! Seriously. The yogurt and paprika butter are what make this whole thing sing.
    • Batch it – Make double the meatballs and freeze half for later.
    • Low-carb? Use cauliflower or rutabaga instead of potatoes.
    • Meal prep friendly – Store in airtight containers for up to 3 days (keep sauces separately, or I would even make the paprika butter fresh). Reheat gently to keep meatballs juicy.
    • Make-ahead tip – Prep meatballs and chop veggies the night before.

    Serving Suggestions

    Serve this cozy tray bake straight from the oven with a side of fresh greens or a simple cucumber-tomato salad. I also love a bit of crusty bread to scoop up that garlic yogurt + paprika oil situation (but hey, that’s optional if you’re keeping it gluten-free). A glass of chilled ayran or sparkling water with lemon? Chef-style finish.

    💬 If you’ve tried these Turkish baked meatballs & potatoes with garlic yogurt or any other recipe on the blog then don’t forget to rate the recipe and let me know how you got on in the comments below, I love hearing from you! You can also FOLLOW ME on Instagram, Facebook, Pinterest, YouTube, and or sign up to my Newsletter to see more of my delicious food.

    Want to Save This Recipe?

    Enter your email & I’ll send it to your inbox. Plus, get great new recipes from me every week!

    By submitting this form, you consent to receive emails from Cooked & Loved

    Viral Turkish pasta inspired meal of spiced baked meatballs with potatoes, finished with garlic yogurt and paprika butter sauce. This one-pan wonder is hearty, high in protein, and packed with flavor. Find step-by-step photos and more recipe tips above.

    • Preheat the oven to 200°C / 400°F.

    • Make the meatballs: Mix all ingredients in a bowl until just combined. Roll into 1 oz (25–30 grams) balls. You should get about 20.

    • Roast the potatoes: Add diced potatoes to a large baking tray. Toss with ½ tablepsoon olive oil, thyme, and ½ teaspoon salt. Bake for 15 minutes.

    • Add veggies: Toss in bell peppers and green beans with the remaining oil and ¼ teaspoon salt. Nestle the meatballs on top.

    • Bake for another 20 minutes, until meatballs are golden and potatoes tender.

    • Garlic yogurt: Mix yogurt, garlic, lemon juice, salt, and water. Set aside.

    • Paprika butter: Melt butter with paprika, chili, and salt. Let bubble briefly, then add lemon juice and honey. Stir and remove from heat.

    • Serve: Drizzle yogurt sauce and paprika butter over the meatballs and veggies. Enjoy!

    • Can I use a different protein? Yes! Ground chicken, pork (or mix of pork and beef) or lamb would both work beautifully here. Just adjust cooking time slightly if using leaner meat.
    • What if I don’t like yogurt? Try labneh or a dairy-free yogurt. Hummus might work, too, for a totally different spin.
    • Is it spicy? Not really! The paprika butter sauce has flavor but very mild heat — still very family-friendly.
    • Can I make it vegetarian? You could swap in plant-based meatballs or falafel, but you’ll lose the richness from the beef. Still tasty though!
    • Don’t skip the sauces! Seriously. The yogurt and paprika butter are what make this whole thing sing.
    • Batch it – Make double the meatballs and freeze half for later.
    • Low-carb? Use cauliflower or rutabaga instead of potatoes.
    • Meal prep friendly – Store in airtight containers for up to 3 days (keep sauces separately, or I would even make the paprika butter fresh). Reheat gently to keep meatballs juicy.
    • Make-ahead tip – Prep meatballs and chop veggies the night before.

    Calories: 558kcal | Carbohydrates: 57g | Protein: 40g | Fat: 19g | Saturated Fat: 8g | Polyunsaturated Fat: 2g | Monounsaturated Fat: 8g | Trans Fat: 1g | Cholesterol: 96mg | Sodium: 1678mg | Potassium: 1563mg | Fiber: 8g | Sugar: 9g | Vitamin A: 2540IU | Vitamin C: 87mg | Calcium: 185mg | Iron: 8mg

    Keywords: Dinner Recipes, One-Pan recipes, Meatballs, Homemade Meatballs, meatballs and potatoes, Turkish meatballs, garlic yogurt sauce

    More Meatball Recipes

    More Recipes With Potatoes


    Source link

  • Seriously Good Chili Powder Recipe

    Seriously Good Chili Powder Recipe

    Our homemade chili powder recipe uses dried chili peppers and the perfect spice blend to make an intensely flavorful seasoning that’s better than store-bought.

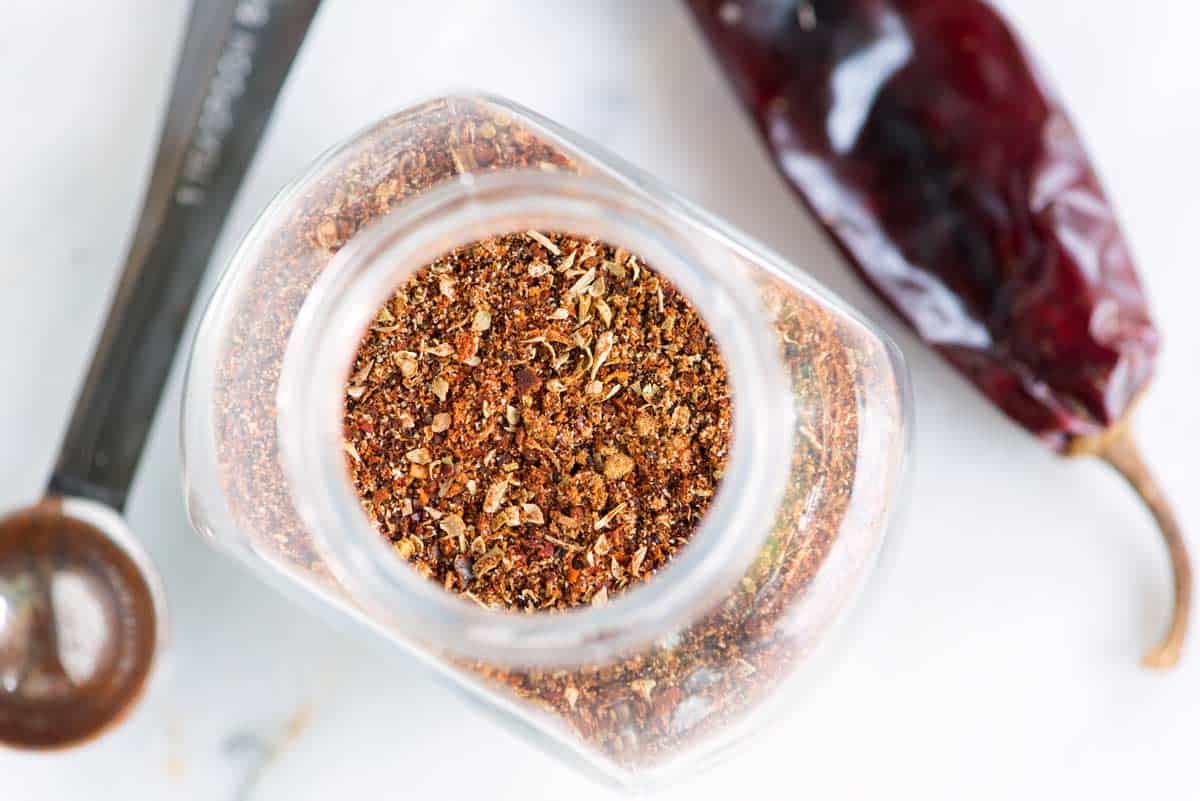
    Homemade chili powder

    After finding so many of the store-bought options flavorless, we decided to learn how to make chili powder, and I am so happy that we did.

    I use this homemade chili powder for many recipes on Inspired Taste, including our homemade beef chili, vegetarian chili, this easy enchilada sauce, and my favorite fajitas. I also use it as a base for this homemade taco seasoning.

    Key Ingredients

    Chiles: For the best blend, start with dried chiles. You can buy them at larger supermarkets, Mexican markets, or online (they are inexpensive and last a while in your pantry). I use three types of peppers in my blend:

    1. Ancho chile peppers, which are mildly spiced but taste rich, sweet, and fruity.
    2. Guajillo peppers, which are more smoky and moderately hot.
    3. New Mexico chile peppers, which smell sweet, clean, and pack a little heat.

    Spices: To round the flavor of our homemade blend, we stir in ground cumin, oregano, and garlic powder. Then, to add a bit more smokiness and color, I love adding smoked paprika.

    Find the full recipe with measurements below.

    How to Make the Best Chili Powder

    Tip 1: Preparing dried chiles. It’s easy! There are three simple steps:

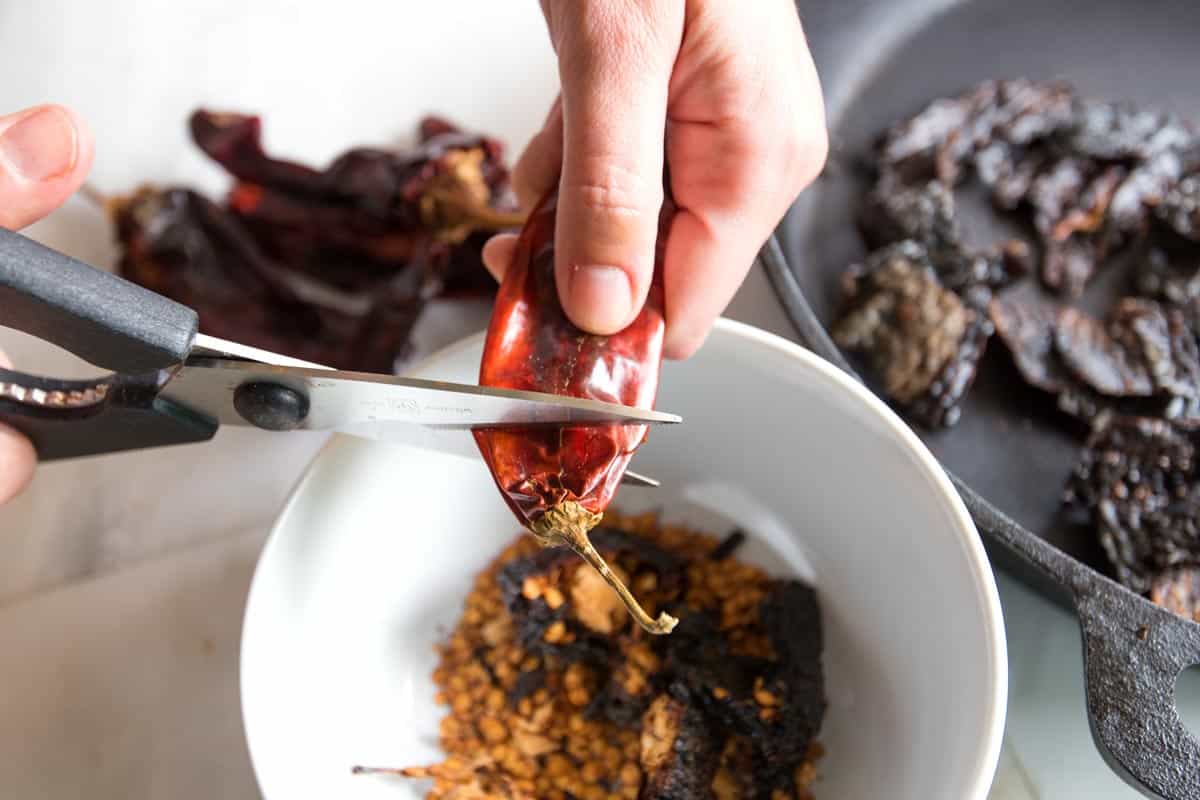
    1. Cut the stem and remove the seeds. The seeds can be bitter, so get rid of them. Use a pair of kitchen scissors to cut the stem away and then shake or scrape the seeds from the inside of each pepper. If you have sensitive skin, wear gloves to prevent the oils from getting on your hands. Also, be careful not to touch your eyes while working with peppers (ouch!)
    2. Cut each cleaned pepper into small pieces, then add them to a dry skillet over medium heat and toast until fragrant. This is my favorite part, the kitchen smells incredible!
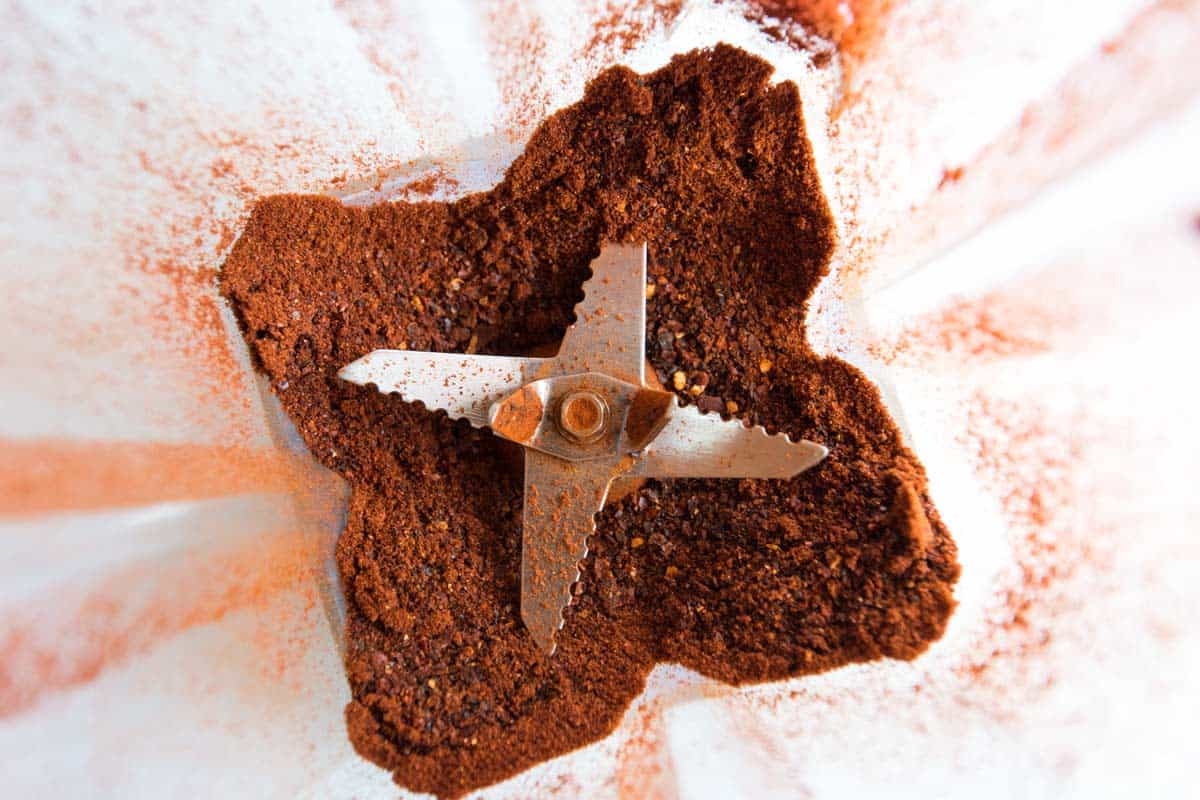
    3. Finally, grind them. Add the toasted chile peppers to your blender and blend until finely ground. Wait to open the lid, though. Let the dust settle for about a minute after blending. You don’t want a cloud of ground chiles in your face.
    Cutting the stems off dried chili peppers
    Toasting dried chilis in a pan
    Blending toasted dried chiles to make chili powder

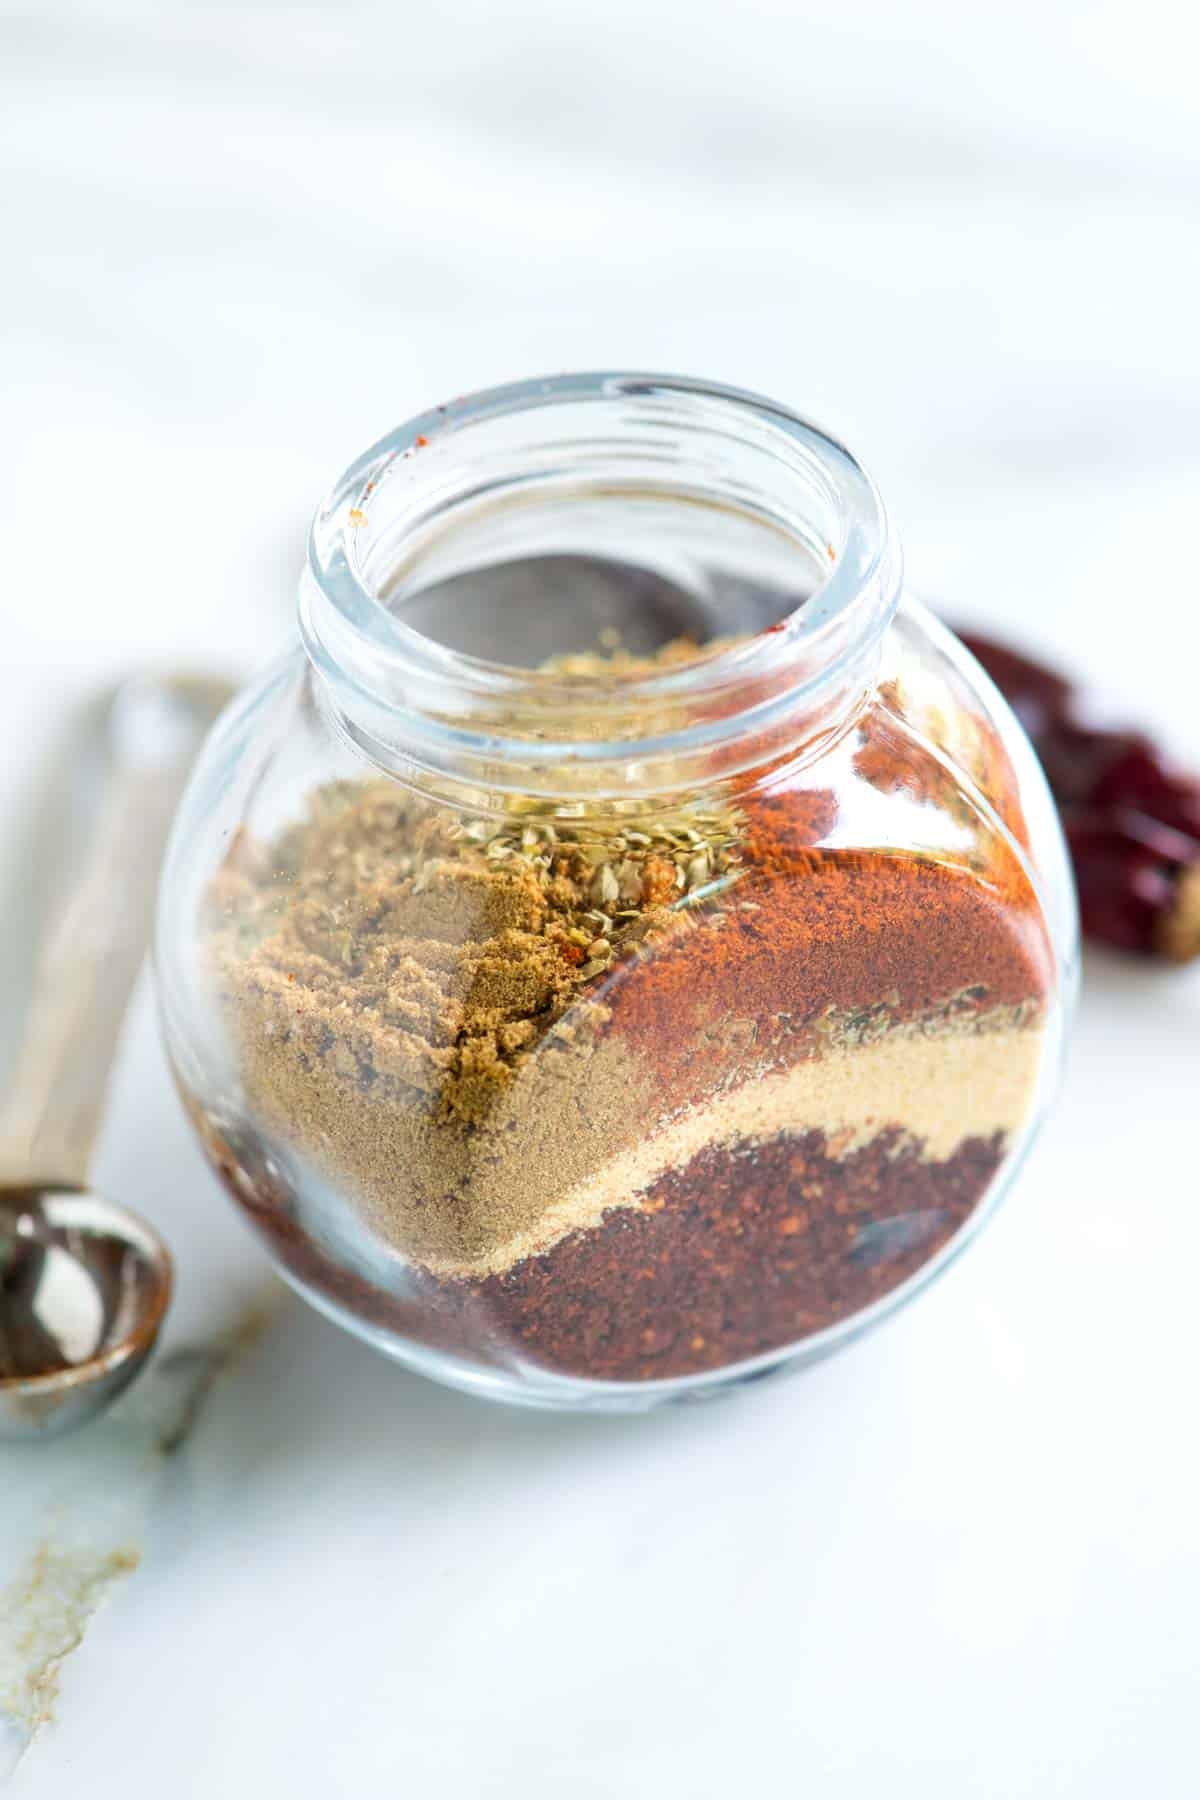
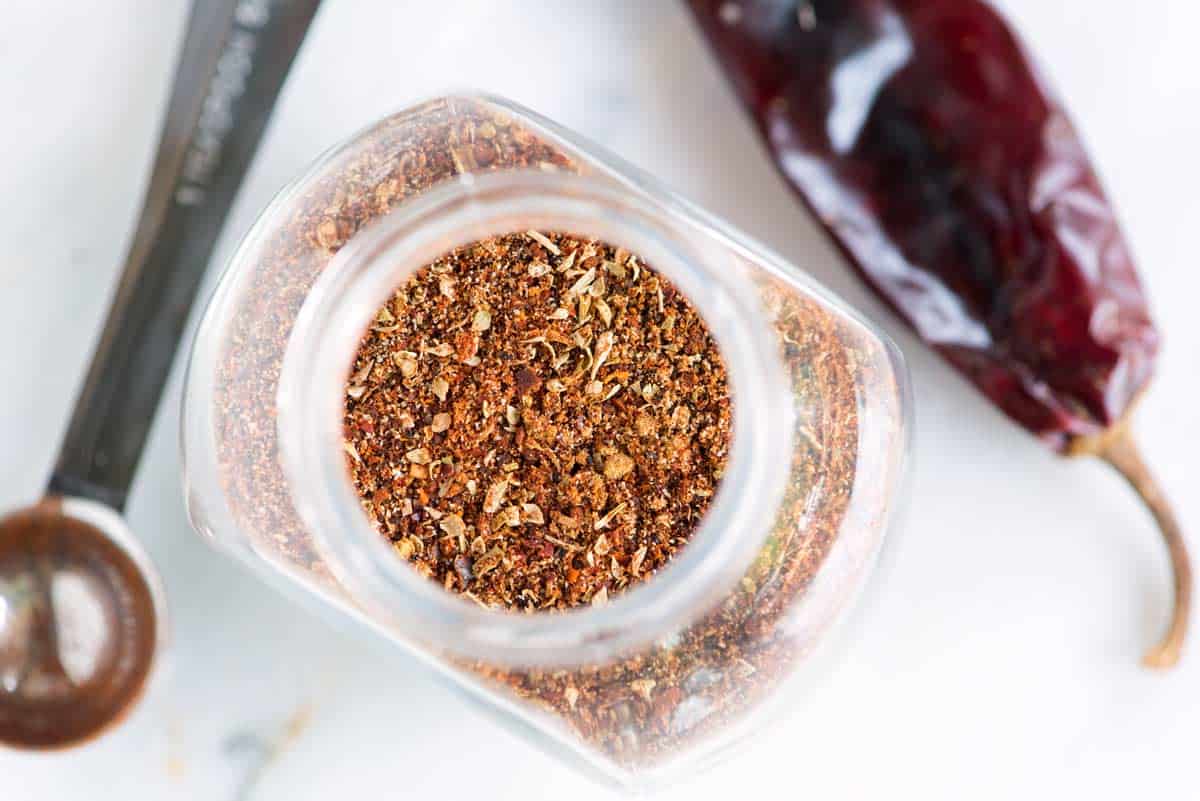
    Tip 2: Add spices. Now, it’s time to add spices to make the chili powder taste even more amazing. We add garlic powder, ground cumin, oregano, and smoked paprika. Add everything to a spice jar, shake it up, and store it in a dark pantry for up to six months.

    More Recipes with Dried Chiles

    Homemade chili powder

    Seriously Good Chili Powder

    • PREP
    • COOK
    • TOTAL

    I’m obsessed with this homemade chili powder made by blending whole dried chiles. You can find dried chile peppers in most large supermarkets and any Latin market. We use three varieties: ancho chile peppers (sweet, fruity, and mild), New Mexico chile peppers (fresh, clean, and moderately hot), and Guajillo chile peppers (smoky and medium hot). You can swap or add other peppers based on what is available. We recommend including something sweet and fruity. They add complexity and flavor (in our case, the ancho pepper).

    Makes 2/3 cup

    You Will Need

    3 dried ancho chiles

    3 dried Guajillo chiles

    3 dried New Mexico chiles

    1 tablespoon ground cumin

    2 tablespoons garlic powder

    1 tablespoon dried oregano

    1 teaspoon smoked paprika

    Directions

      1Use kitchen scissors to cut the stem away and then shake or scrape the seeds inside each pepper. If you have sensitive skin, wear gloves to prevent the oils from getting on your hands. Also, be careful not to touch your eyes during or after working with peppers.

      2Cut each cleaned pepper into small pieces, then add them to a dry skillet over medium heat. Toast them, stirring occasionally, until fragrant, about 5 minutes.

      3Add the toasted chiles to a blender and blend until finely ground. Leave the lid in place until dust settles so you do not get a cloud of ground chile peppers in your face.

      4Add ground chile peppers to a spice jar, then top with cumin, garlic powder, oregano, and smoked paprika. Seal the jar and shake.

      5Store the chili powder in a cool, dry place for 6 months.

    Adam and Joanne’s Tips

    • Spicy chili powder: Use hot smoked paprika or add 1/2 teaspoon or more cayenne pepper or chipotle powder
    • This recipe was inspired by Alton Brown.
    • The nutrition facts provided below are estimates.

    Nutrition Per Serving
    Serving Size
    1 tablespoon
    /
    Calories
    26
    /
    Protein
    1g
    /
    Carbohydrate
    6g
    /
    Dietary Fiber
    1g
    /
    Total Sugars
    2g
    /
    Total Fat
    0g
    /
    Saturated Fat
    0g
    /
    Cholesterol
    0mg


    AUTHOR:

    Adam Gallagher

    Adam and Joanne of Inspired Taste

    We are Adam and Joanne Gallagher, the creators of Inspired Taste. Established in 2009, Inspired Taste grew from a childhood dream into one of the internet’s most trusted recipe sites with hundreds of reliable recipes, step-by-step videos, and expert tips.More About Us
    Source link