Category: Main Dish

  • Easy Cherry Tomato Salad Recipe

    Easy Cherry Tomato Salad Recipe

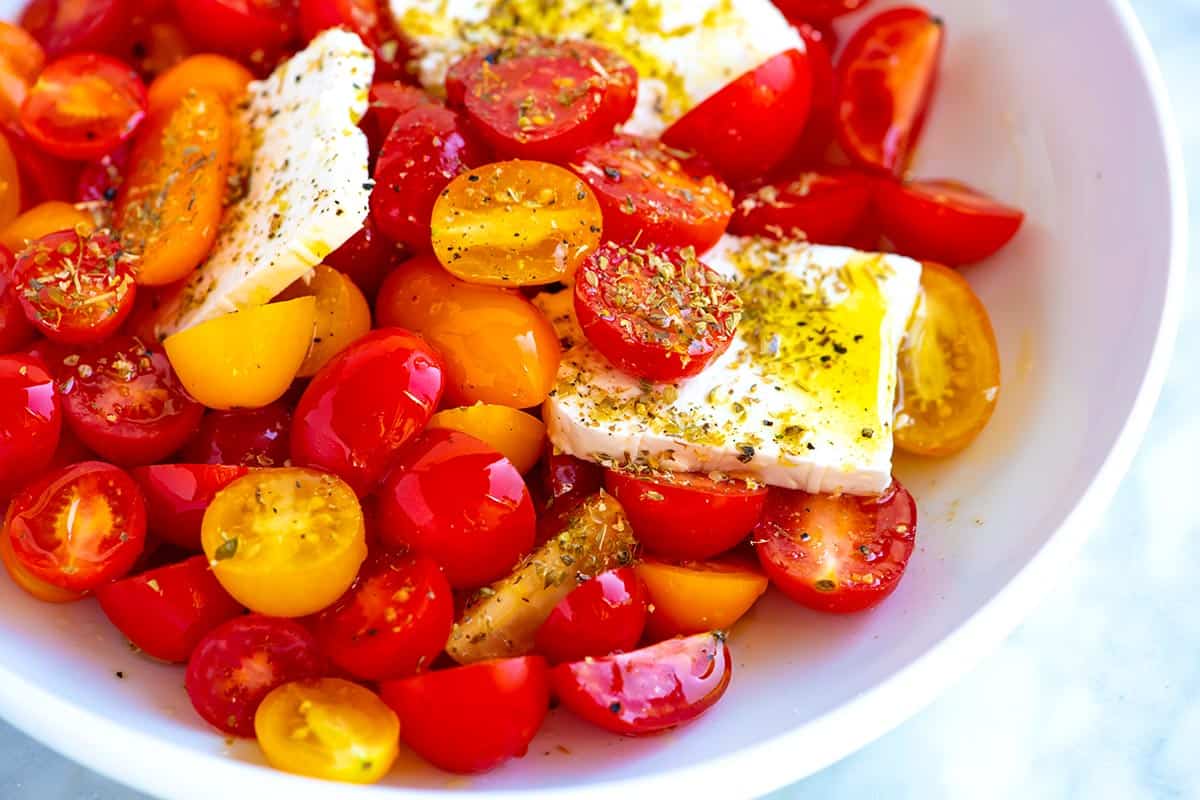
    My favorite cherry tomato salad is made with juicy cherry tomatoes, a simple olive oil dressing, and briny feta cheese! It’s super simple, absolutely delicious, and sure to be a hit!
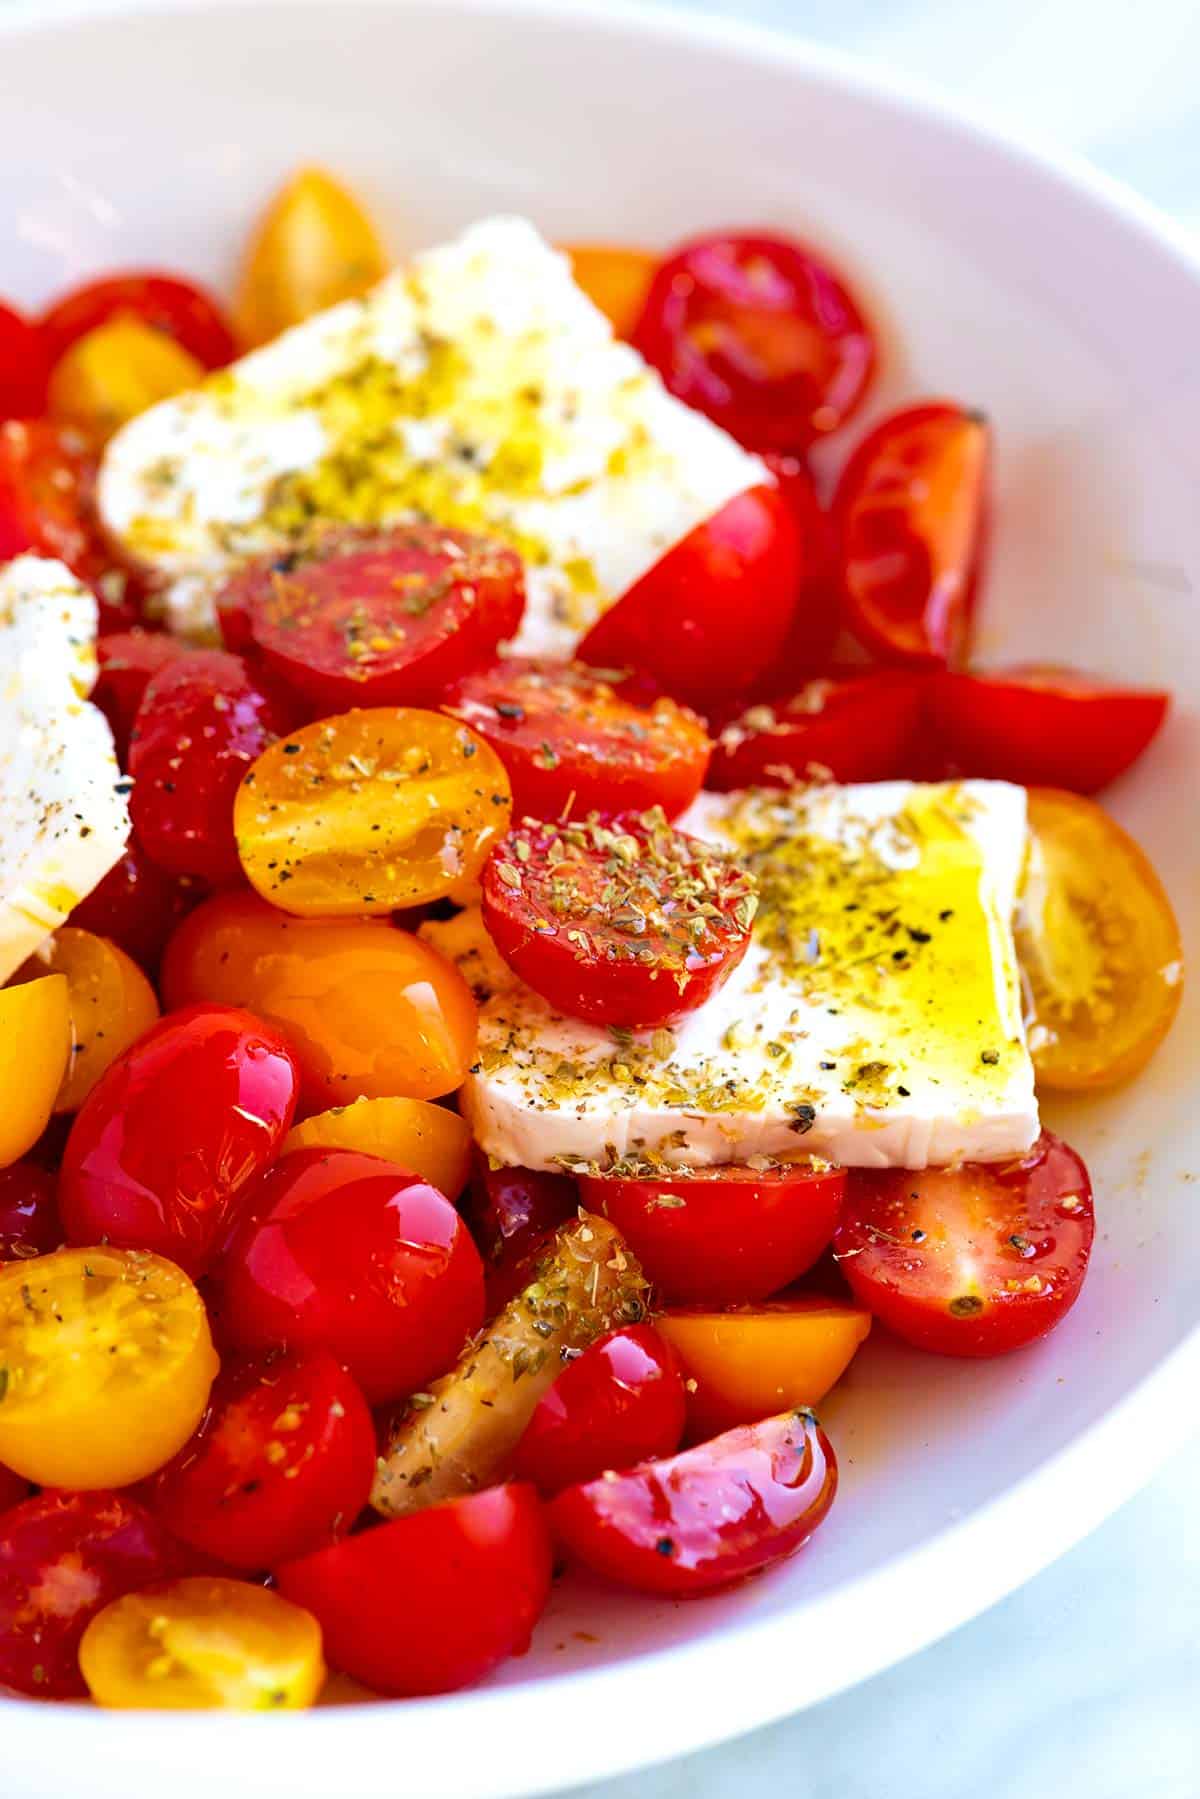
    Easy Cherry Tomato Salad

    Whenever I have cherry tomatoes in the house, I save a handful to make this easy cherry tomato salad. It’s absolutely perfect. I love it so much that I could honestly eat it every day!

    The trick is quickly marinating the tomatoes in salt before adding the other salad ingredients. I use the same trick for this tomato mozzarella salad and our favorite caprese salad!

    Key Ingredients

    • Cherry tomatoes: We designed this as a cherry tomato salad, but you can use any variety of tomato. Make sure that they are ripe, sweet, and juicy.
    • Vinegar: Use red wine vinegar, white wine vinegar, champagne vinegar, or balsamic vinegar. They are all delicious!
    • Oregano: This cherry tomato salad is inspired by our Greek salad recipe, so I use a good amount of dried Oregano. I love it!
    • Olive Oil: Use your favorite kind. It will combine with the tomato juices to make a delicious dressing.
    • Salt and Pepper: The trick to the best tomato salad is to salt your tomatoes ahead of time. You’ll see me say the same thing on all the tomato salad recipes we’ve shared (this caprese salad being one example). The salt draws out the tomato juices, intensifying their flavor. Then, those juices mix with our olive oil to create a simple dressing.
    • Feta: I love adding big slabs of feta cheese to this salad. They crumble and mix into the salad as you push your fork into them. Mozzarella or burrata cheese is also excellent.
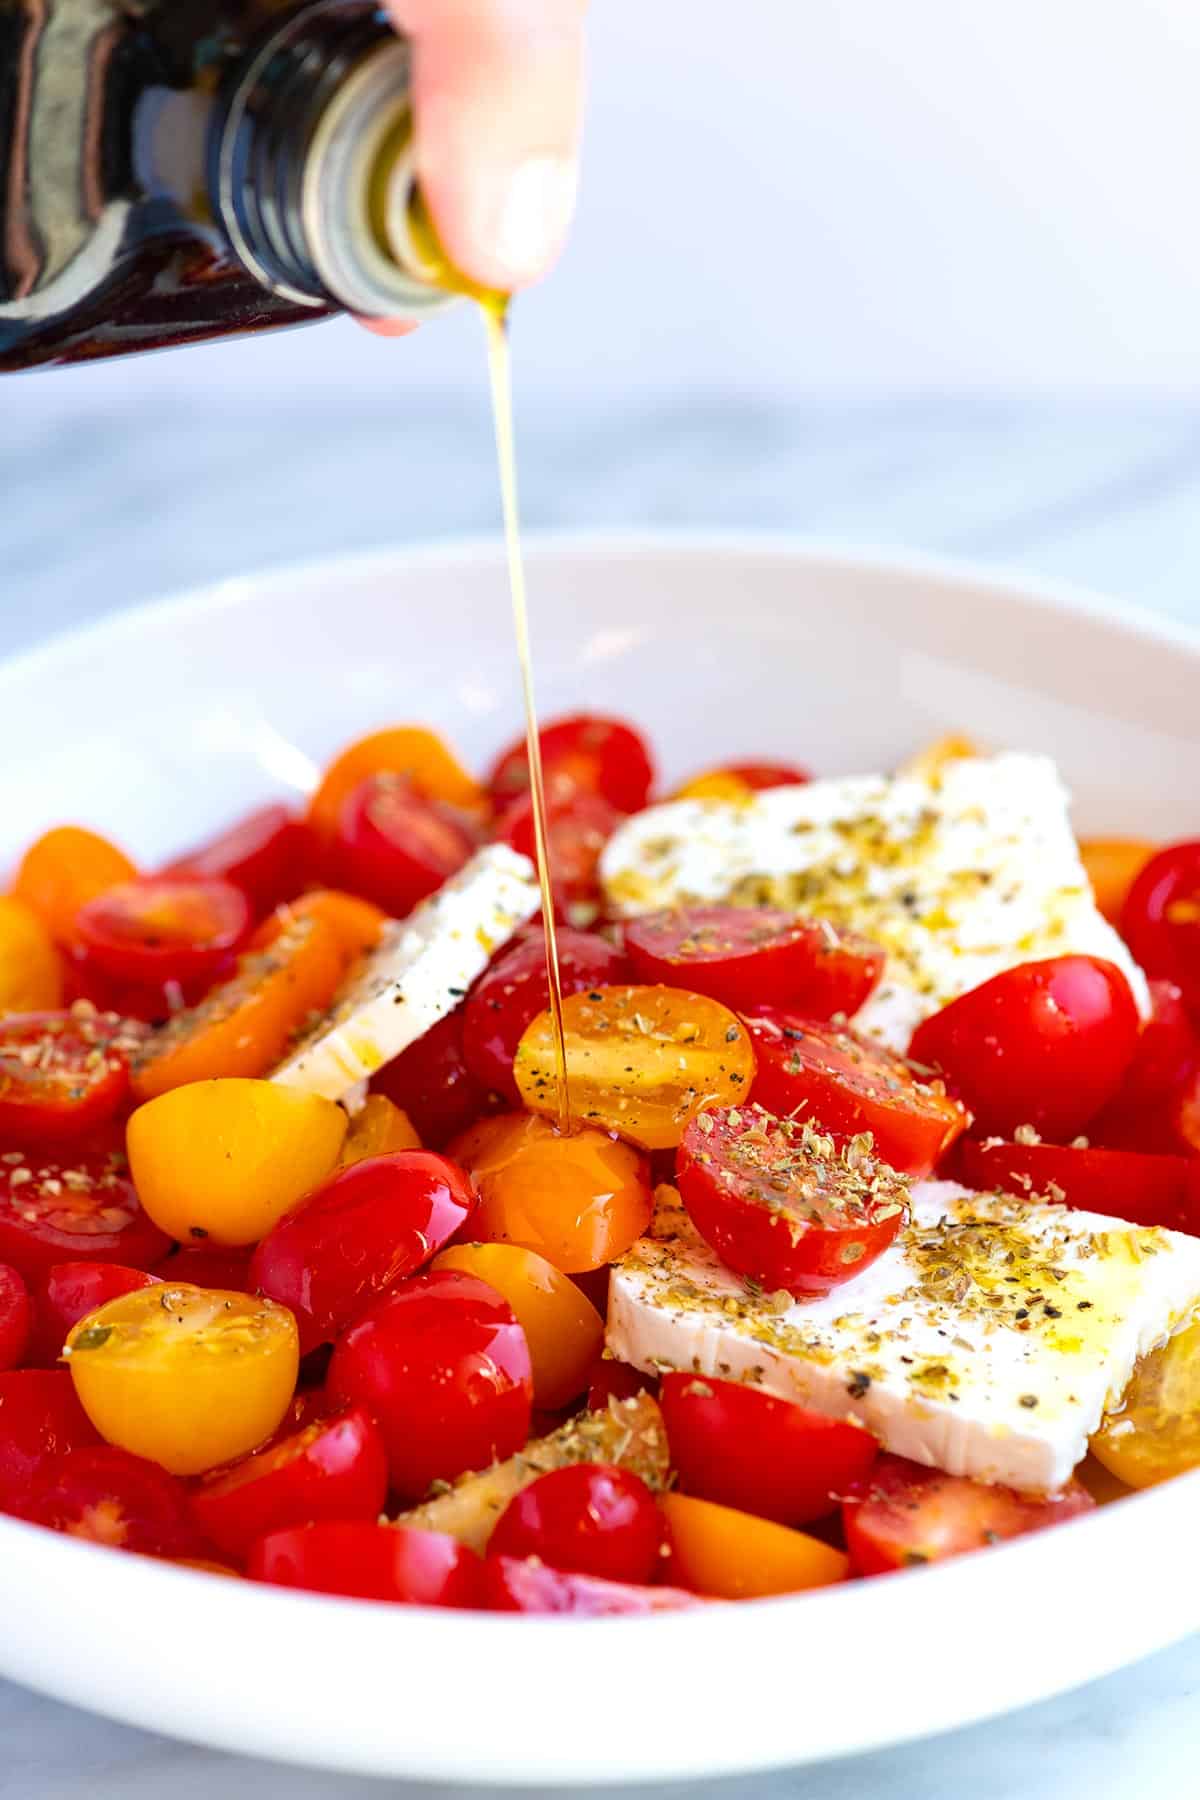
    Drizzling Olive Oil over Cherry Tomato Salad

    How to Make My Favorite Cherry Tomato Salad

    The key to this cherry tomato salad is giving the salt and tomatoes time together before adding anything else. They taste great by themselves, but they are incredible after I allow the tomatoes to marinate in a little salt for a bit. Their sweetness and flavor intensify. (I also use this tip for the best bruschetta!)

    When you’re ready to eat the salad, stir in a bit of acid. I’ve been obsessed with champagne vinegar lately, but red wine vinegar or balsamic vinegar are fantastic with cherry tomatoes.

    As a nod to Greek salad, I add a slab of feta cheese. Then I scatter some oregano and pepper on top and finish with a drizzle of high-quality olive oil. It’s easy, fresh, and delicious. Make this one soon. I know you’ll love it!
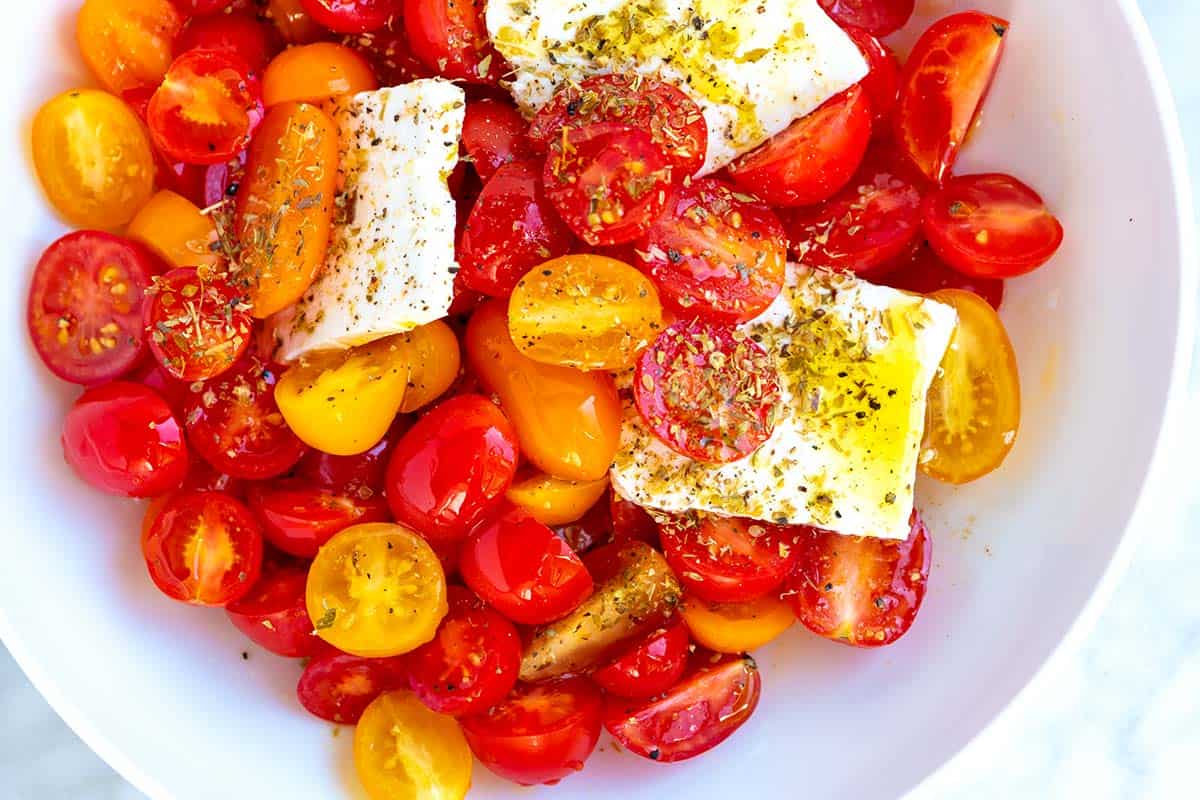
    Easy Cherry Tomato Salad

    Easy Cherry Tomato Salad

    • PREP
    • TOTAL

    This cherry tomato salad recipe is undeniably simple, but that doesn’t mean it won’t blow you away. Salting the tomatoes for at least 10 minutes intensifies their sweetness and flavor. We call for cherry tomatoes, but all varieties, large and small, work.

    Makes 2 servings

    You Will Need

    2 cups cherry tomatoes, about 10 ounces

    1/4 teaspoon fine sea salt

    1 teaspoon vinegar like red wine, balsamic or champagne vinegar or use fresh lemon juice

    2 ounces feta cheese, cut into large slabs

    1/4 teaspoon dried oregano

    Generous pinch of fresh ground pepper

    1 tablespoon extra-virgin olive oil

    Directions

      1Halve or quarter the tomatoes so they are a variety of shapes and sizes.

      2Add to a serving bowl, then toss with salt. Set aside for at least 10 minutes.

      3Stir in the vinegar, and then nestle the feta cheese slabs into the pile of tomatoes.

      4Scatter the oregano and black pepper on top.

      5Finish with a drizzle of olive oil.

    Adam and Joanne’s Tips

    • Storing: This is best eaten the day you make it, but will keep, covered in the refrigerator, for a day or two.
    • The nutrition facts provided below are estimates.

    Nutrition Per Serving
    Serving Size
    1/2 of the recipe
    /
    Calories
    169
    /
    Total Fat
    13.4g
    /
    Saturated Fat
    5.3g
    /
    Cholesterol
    25.3mg
    /
    Sodium
    560.4mg
    /
    Carbohydrate
    8.5g
    /
    Dietary Fiber
    2.3g
    /
    Total Sugars
    5.9g
    /
    Protein
    5.7g


    AUTHOR:

    Adam Gallagher

    Adam and Joanne of Inspired Taste

    We are Adam and Joanne Gallagher, the creators of Inspired Taste. Established in 2009, Inspired Taste grew from a childhood dream into one of the internet’s most trusted recipe sites with hundreds of reliable recipes, step-by-step videos, and expert tips.More About Us

    Previous Post: Easy Ham and Cabbage Soup
    Next Post: Homemade Red Curry Paste
    Source link

  • Creamy Chicken Pasta With Pesto

    Creamy Chicken Pasta With Pesto

    This creamy chicken pasta with pesto is fresh, vibrant, and perfectly comforting. It’s family-friendly, high in protein, satisfying, and everyone at my table gobbled it up (including my 4-year-old).


    Jump to: ℹ️ Overview | 🛒 Ingredients | 📷 How To Make | 📹 Watch The Video | 👩‍🍳 Recipe Tips | 🥗 Serving Suggestions | 📝 Full Recipe Card | 🍽 More Chicken Recipes


    This creamy chicken pasta with pesto is something I make often, and it never fails me. It’s got that gorgeous fresh basil flavor from pesto, balanced with a light cream sauce that clings to every bite of tender chicken and penne.

    Unlike heavier Alfredo-style pastas, this one feels just right — creamy but not overwhelming. A bit of lemon keeps it bright, and a sprinkle of Parmesan ties it all together.

    My kid always asks for seconds, and I secretly love that it packs in protein without feeling too rich. Each serving hits that sweet spot of about 30 grams of protein and enough carbs to keep you full. Honestly, it’s one of those recipes you’ll tuck away and keep coming back to.

    👩‍🍳 You might also like these pasta dishes: creamy Italian sausage pasta, Marry Me chicken orzo bake, chicken pasta Alfredo with broccoli, garlic Parmesan chicken and pasta, lemon chicken orzo pasta, butternut squash pasta, and veggie pasta bake. You may also want to check out these chicken pasta recipes and crock pot Marry Me chicken.

    What You’ll Need

    Here is what you’ll need for this creamy chicken pasta with pesto recipe. Find the full measurements in the recipe card below.

    • Pasta – I like penne pasta, but you could use fusilli or rigatoni — anything that holds sauce nicely.
    • Chicken – Boneless chicken breast (you could use boneless thighs if you prefer juicier meat), and you will need salt and pepper for seasoning and a little olive oil for cooking. PS. For a speedy version, slice up some store-bought rotisserie chicken and skip the chicken cooking step altogether!
    • Basil pesto – Store-bought basil pesto is fine, but homemade makes it special. If buying store-bought, I highly recommend fresh pesto you would get in the refrigerated section, it’s more pungent and vibrant green.
    • Also for creamy pesto sauce – garlic (for that savory backbone), lemon zest and juice (brightens up the cream), chicken stock (adds depth and volume), light cream (or use half-and-half), and Parmesan cheese (for salty, nutty richness).
    • To Serve – Cherry tomatoes (I love the pop of color) and extra Parmesan (never too much cheese).

    How To Make Creamy Chicken Pasta With Pesto

    Find the full recipe and nutritional information below. Here are some handy step-by-step photos for how to make creamy chicken pasta with pesto.

    • Cut chicken breasts horizontally for even cooking, season with salt and pepper.
    • Sear chicken in olive oil until golden and cooked through, about 5 minutes each side; set aside.
    • In parallel, cook pasta until just al dente; set aside.
    • In the same pan, add a little extra oil and sauté garlic and lemon zest gently.
    • Pour in chicken stock, half the pesto, light cream, lemon juice, and Parmesan.
    • Simmer 4–5 minutes until the sauce is slightly thickened.
    • Slice chicken, return to pan with juices (you can also pop the chicken on top of the pasta later).
    • Stir in cooked pasta and remaining pesto.
    • Top with extra pesto, Parmesan, and cherry tomatoes.

    Watch The Video

    Recipe Tips

    • Make it extra creamy: Swap light cream for heavy cream if you want indulgence.
    • Protein swap: Try shrimp or rotisserie chicken (this will make things even easier as you won’t need to cook the chicken). If using shrimp/prawns, pan-fry for 2 minutes each side.
    • Veg it up: Stir in baby spinach or peas at the end. Try adding some sun-dried tomatoes.
    • Pasta water: If your sauce feels too thick, add a splash of pasta cooking water to loosen it.
    • Leftover pesto: Freeze in an ice cube tray for quick flavor boosts.
    • Storage tips: Leftovers keep well in the fridge up to 3 days. Reheat gently on the stovetop with a splash of stock or cream. I don’t recommend freezing—cream sauces can separate.
    • Make-ahead tips: You can cook the chicken and make the sauce a day ahead—just reheat gently before tossing with pasta. Even the pasta can be cooked in advance and lightly oiled to prevent sticking.

    Serving Suggestions

    I like serving this with a simple side salad or a green salad and maybe a hunk of crusty bread to mop up the sauce. A glass of chilled white wine doesn’t hurt either.

    💬 If you’ve tried this creamy chicken pasta with pesto or any other recipe on the blog then don’t forget to rate the recipe and let me know how you got on in the comments below, I love hearing from you! You can also FOLLOW ME on Instagram, Facebook, Pinterest, YouTube, and or sign up to my Newsletter to see more of my delicious food.

    Want to Save This Recipe?

    Enter your email & I’ll send it to your inbox. Plus, get great new recipes from me every week!

    By submitting this form, you consent to receive emails from Cooked & Loved

    This creamy chicken pasta with pesto is fresh, vibrant, and perfectly comforting. It’s family-friendly, high in protein, satisfying, and everyone at my table gobbled it up (including my 4-year-old). Find step-by-step photos and more recipe tips above.

    • Cook Pasta: Cook the penne according to package directions until al dente. Drain and set aside.

    • Prepare Chicken: Cut the chicken breasts horizontally so they cook evenly. Season both sides with salt and pepper.

    • Sear Chicken: Heat 1 tablespoon olive oil in a large sauté pan over high heat. Add chicken, reduce heat to medium-high, and cook about 5 minutes per side. Remove thinner pieces early if needed. Transfer all chicken to a plate and rest.

    • Make Sauce: Lower heat to medium. Add 1 teaspoon olive oil, garlic, and lemon zest. Sauté until fragrant.

    • Build Sauce: Pour in chicken stock, half the pesto, cream, lemon juice, and Parmesan. Simmer for 4–5 minutes until slightly reduced.

    • Finish Chicken: Slice cooked chicken. Return to pan along with any juices. You can also return the juices to the sauce and reserve the chicken to serve on top like I did (for nicer presentation).

    • Combine Pasta: Add pasta and remaining pesto. Toss to coat.

    • Serve: Top with extra Parmesan, cherry tomatoes, and another drizzle of pesto.

    • Can I use jarred pantry pesto rather than fresh? Absolutely! Just look for one with good olive oil and real Parmesan.
    • What’s the best pasta shape? I like penne or rigatoni because they hold the sauce nicely.
    • Does this reheat well? Yes! We always enjoy the leftovers — just warm it gently on the stove with a splash of stock or cream.
    • Make it extra creamy: Swap light cream for heavy cream if you want indulgence.
    • Protein swap: Try shrimp or rotisserie chicken (this will make things even easier as you won’t need to cook the chicken). If using shrimp/prawns, pan-fry for 2 minutes each side.
    • Veg it up: Stir in baby spinach or peas at the end. Try adding some sun-dried tomatoes.
    • Pasta water: If your sauce feels too thick, add a splash of pasta cooking water to loosen it.
    • Leftover pesto: Freeze in an ice cube tray for quick flavor boosts.
    • Storage tips: Leftovers keep well in the fridge up to 3 days. I don’t recommend freezing—cream sauces can separate.
    • Make-ahead tips: You can cook the chicken and make the sauce a day ahead—just reheat gently before tossing with pasta. Even the pasta can be cooked in advance and lightly oiled to prevent sticking.

    Calories: 519kcal | Carbohydrates: 47g | Protein: 31g | Fat: 22g | Saturated Fat: 8g | Polyunsaturated Fat: 1g | Monounsaturated Fat: 6g | Trans Fat: 0.01g | Cholesterol: 92mg | Sodium: 896mg | Potassium: 534mg | Fiber: 2g | Sugar: 3g | Vitamin A: 663IU | Vitamin C: 3mg | Calcium: 123mg | Iron: 1mg

    Keywords: creamy chicken pasta with pesto, chicken pesto pasta, creamy pesto chicken pasta, chicken pesto, creamy chicken pasta

    More Chicken Recipes


    Source link

  • Easy Ham and Cabbage Soup Recipe

    Easy Ham and Cabbage Soup Recipe

    This ham and cabbage soup recipe is hearty, healthy, and tastes incredible! This easy soup is ready in about 30 minutes.

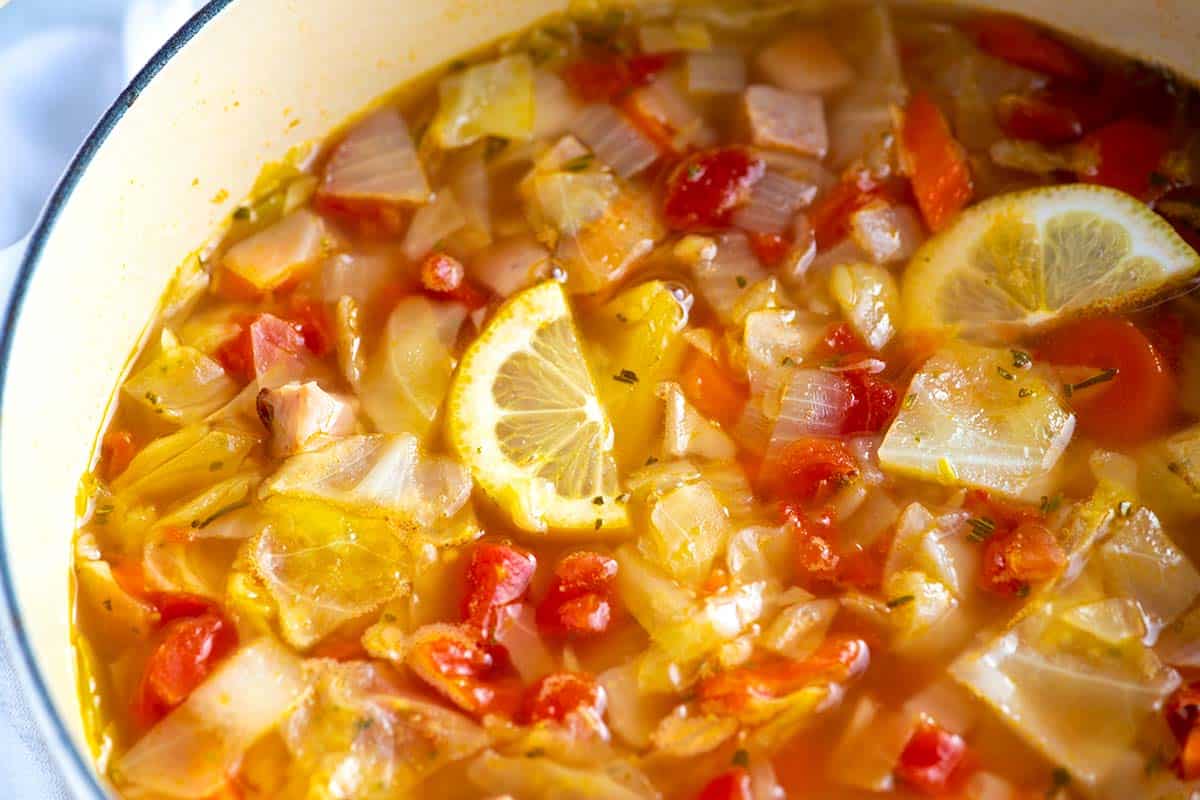
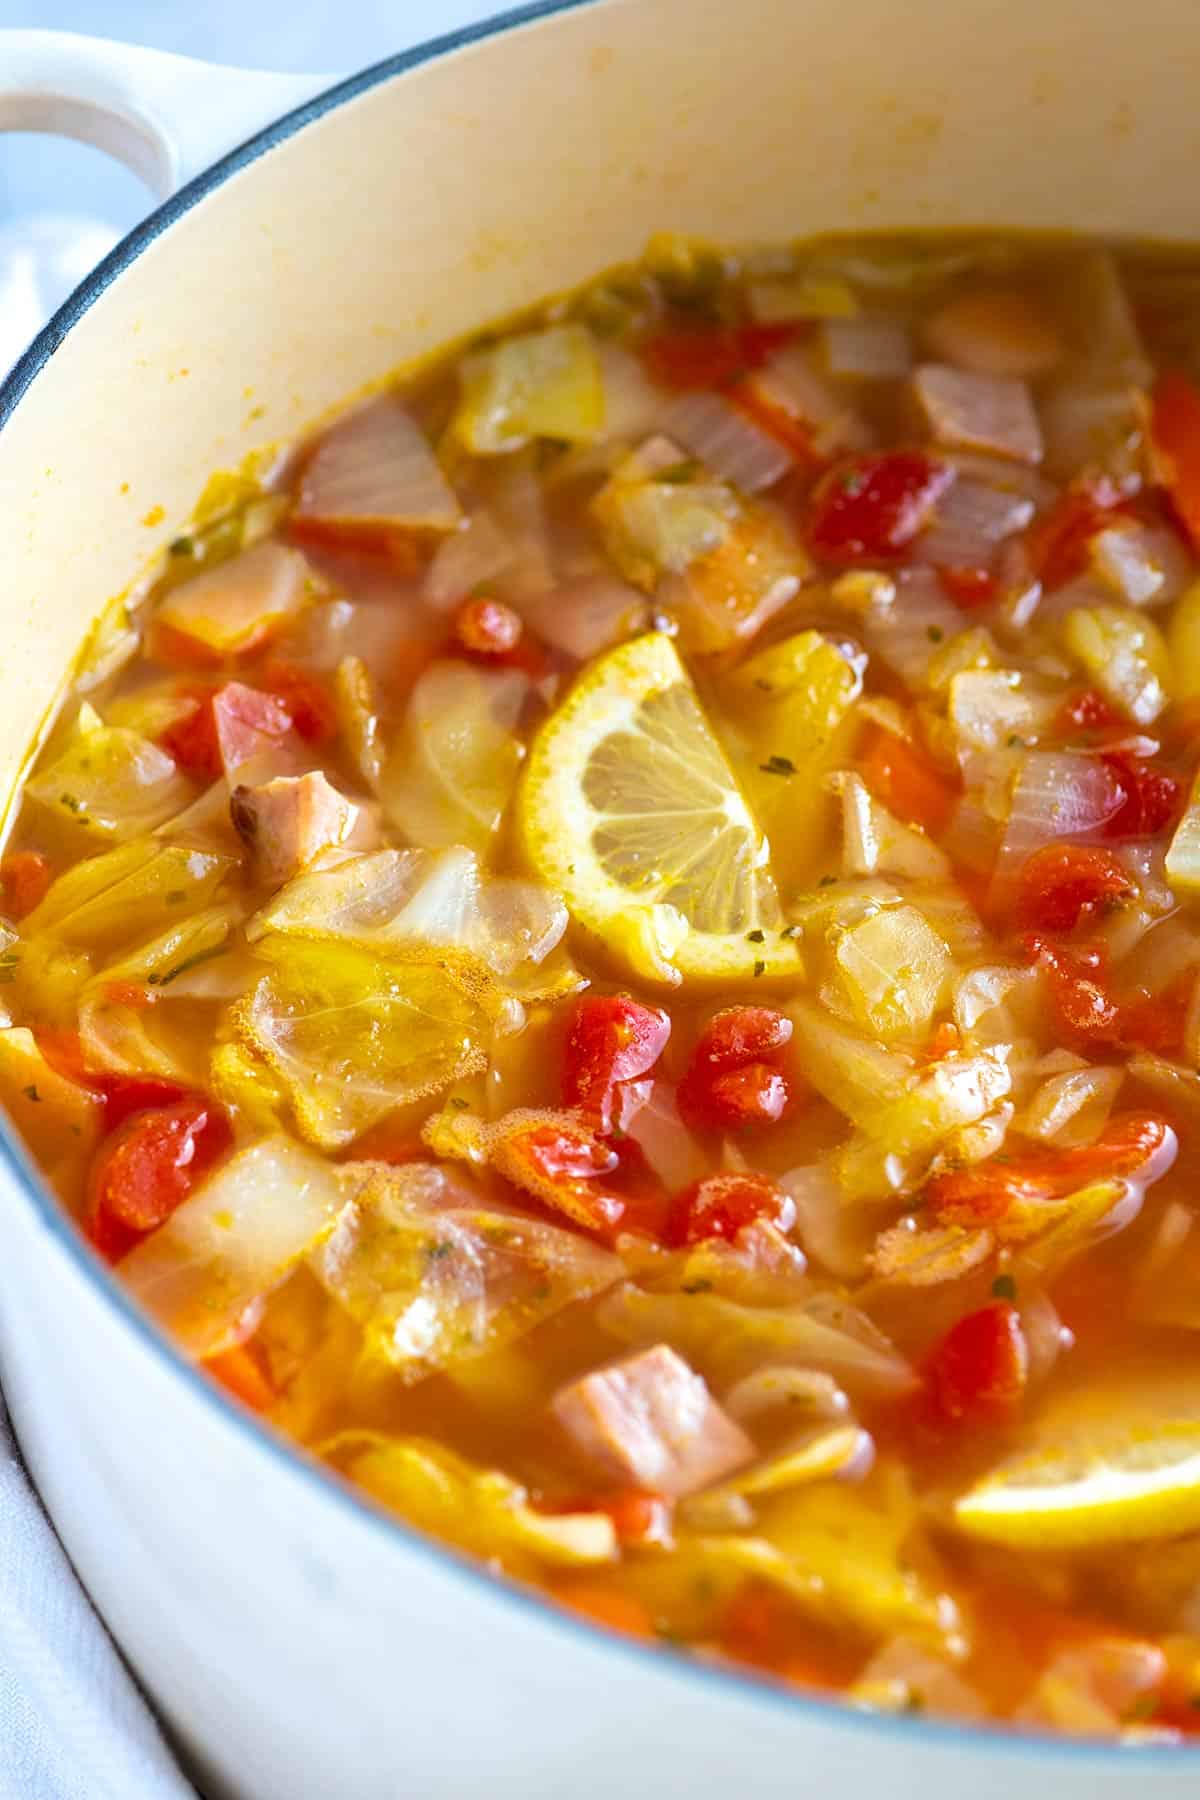
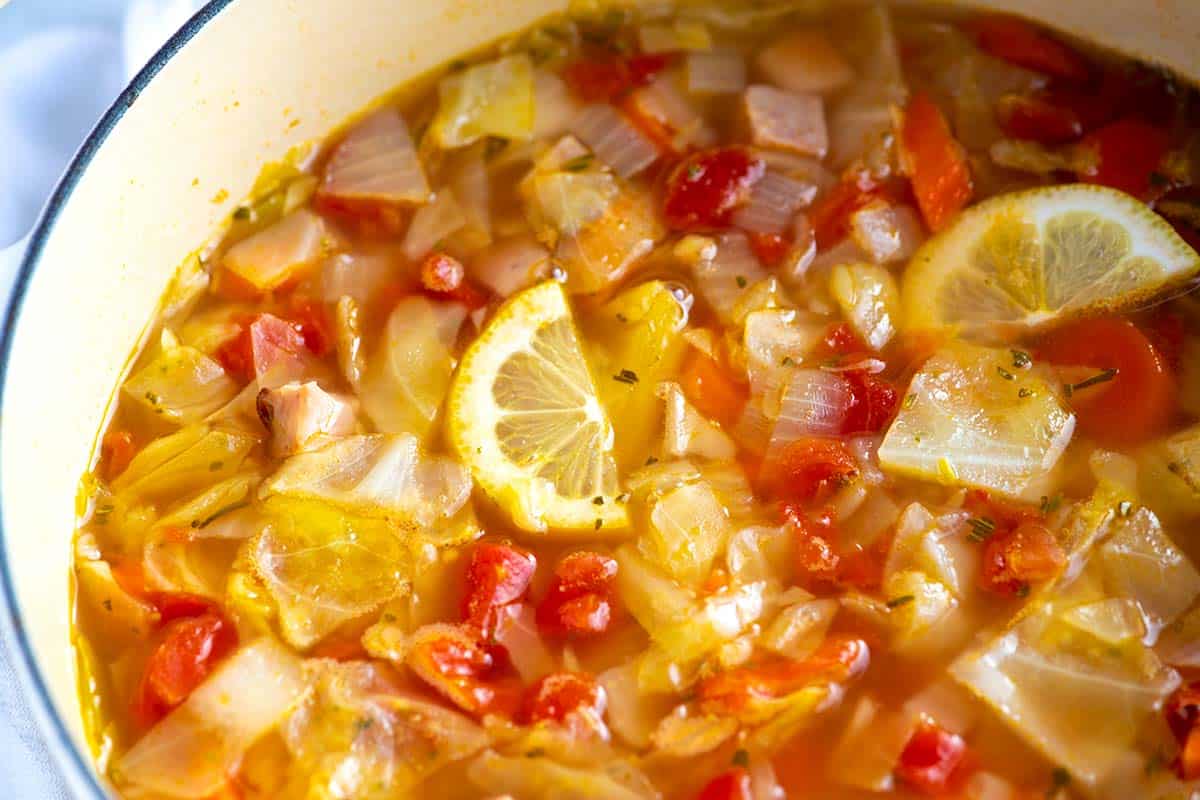
    Ham and Cabbage Soup with tomatoes and lemon

    Cabbage soup may not sound like the most exciting meal, but trust me, this version with ham, carrots, and onions is delicious! Much like many of our cabbage recipes, this soup is nutritious, low-calorie, and tastes fantastic!

    Since cabbage shrinks and softens when cooked, you can add a lot to the pot. In this ham and cabbage soup, we call for eight cups of chopped cabbage, and you could probably stir in quite a bit more. It’s so good! For another soup, try this cabbage soup, or for another recipe with ham, try our easy split pea soup.

    Key Ingredients

    • Ham: I use a boneless ham steak for this soup. If you have bone-in ham, use it! Just cut it away from the bone, then add the bone to the soup as it simmers (it should add a bit more flavor). Remove it before serving.
    • Cabbage: Use regular white cabbage for this soup. I like how it softens as it simmers. If you have leftover cabbage, consider using it in one of our other cabbage recipes!
    • Veggies: In addition to the cabbage, we saute onion, carrots, garlic, and rosemary before adding broth to this soup. They create a flavorful base. Fresh or dried rosemary will work. I’ve given amounts for both in the recipe below.
    • Tomatoes: I add a small can of tomatoes to the soup, but fresh tomatoes work fine. See the tip below the recipe for substituting fresh tomatoes.
    • Broth: Any light broth or stock works in this cabbage soup recipe. My go-to’s are chicken stock, chicken broth, ham stock, and vegetable broth.

    Find the full recipe with measurements below.

    How to Make Ham and Cabbage Soup

    Tip 1: Make the soup in one pot. To make this soup, you’ll cook the onion, carrots, and ham in a big pot and then add the rest of the ingredients. It comes together quickly and only needs to simmer for about 20 minutes before you can dig in.

    Tip 2: Add ham for extra flavor. As the soup simmers, the ham flavors and seasons the broth. The soup becomes rich, hearty, and ultra-flavorful. If you don’t have any ham on hand or do not eat meat, you can leave the ham out. It will still be terrific.

    Tip 3: Use lots of cabbage. Since cabbage shrinks and softens when it’s cooked, you can add lots of it to the pot. We add eight cups of chopped cabbage to this easy cabbage soup, and to be honest, you could probably stir in quite a bit more.

    More Soup Recipes

    Ham and Cabbage Soup

    Easy Ham and Cabbage Soup

    • PREP
    • COOK
    • TOTAL

    This ham and cabbage soup recipe is hearty, healthy, easy to make, and tastes fantastic. Before adding the ham to the soup, taste it to see how salty it is. You may not need to add salt to the soup, depending on the salt level. Taste and adjust the seasoning of the soup a few times during cooking.

    I love this soup with a side of crusty bread or homemade focaccia. Homemade garlic bread would be pretty amazing, too!

    4 to 6 servings (8 cups of soup)

    You Will Need

    3 tablespoons olive oil

    1 medium onion, chopped, about 2 cups

    4 medium carrots, chopped, about 2 cups

    8 ounces boneless ham steak, cubed, about 1 ½ cups

    1 tablespoon minced garlic, 3 cloves

    1 tablespoon chopped fresh rosemary or 1 teaspoon dried rosemary

    1/2 teaspoon fresh ground black pepper

    Pinch crushed red pepper flakes

    8 cups chopped white cabbage, about 1 ½ pounds

    1 (15oz) can diced tomatoes with juices

    6 cups (1.4L) low-sodium chicken stock, ham stock, or vegetable broth

    2 bay leaves

    Salt, to taste

    3 lemon slices or more to taste

    Directions

      1Heat 2 tablespoons of the olive oil in a stockpot or Dutch oven over medium heat.

      2Add the onions, carrots, and cubed ham. Cook, stirring occasionally, until the vegetables have softened and the onions are translucent, 8 to 10 minutes.

      3Add the garlic, rosemary, black pepper, and red pepper flakes. Cook, stirring, for one minute.

      4Stir in the cabbage, and then pour in the canned tomatoes and their juices, as well as the stock. Add the bay leaves.

      5Raise the heat to medium-high and bring the soup to a boil. Taste and adjust the salt. The ham adds some salt to the soup, so you may not need much additional seasoning.

      6Partially cover the pot with a lid, and then reduce the heat to maintain a low simmer. Simmer for 20 minutes or until the cabbage and other vegetables are tender.

      7Remove the pot from the heat and remove the bay leaves.

      8Stir in the lemon slices and the remaining tablespoon of olive oil. Taste and season with more salt and pepper. Serve.

    Adam and Joanne’s Tips

    • Storing: Place the leftover soup in an airtight container in the fridge and store it for up to 3 days or a month in the freezer.
    • Why lemon slices? While we don’t actually eat lemon slices, adding them to the soup brightens up the flavors a bit. You can also squeeze in fresh lemon juice or use vinegar, such as apple cider vinegar or wine vinegar.
    • Use fresh tomatoes: Substitute about 1 pound (5 to 6 tomatoes) for 1 (15oz) can of diced tomatoes.
    • The nutrition facts provided below are estimates.

    Nutrition Per Serving
    Serving Size
    About 1 cup
    /
    Calories
    157
    /
    Total Fat
    7.8g
    /
    Saturated Fat
    1.5g
    /
    Cholesterol
    12mg
    /
    Sodium
    436.4mg
    /
    Carbohydrate
    13.7g
    /
    Dietary Fiber
    4.2g
    /
    Total Sugars
    5.1g
    /
    Protein
    11.1g


    AUTHOR:

    Joanne Gallagher

    Adam and Joanne of Inspired Taste

    We are Adam and Joanne Gallagher, the creators of Inspired Taste. Established in 2009, Inspired Taste grew from a childhood dream into one of the internet’s most trusted recipe sites with hundreds of reliable recipes, step-by-step videos, and expert tips.More About Us

    Source link

  • Sesame Ginger Shrimp Marinade Recipe

    Sesame Ginger Shrimp Marinade Recipe

    This shrimp marinade recipe is perfect for grilling or roasting! Ginger, garlic, fish sauce, sesame oil, and honey combine for a delicious, sweet, sticky glaze.

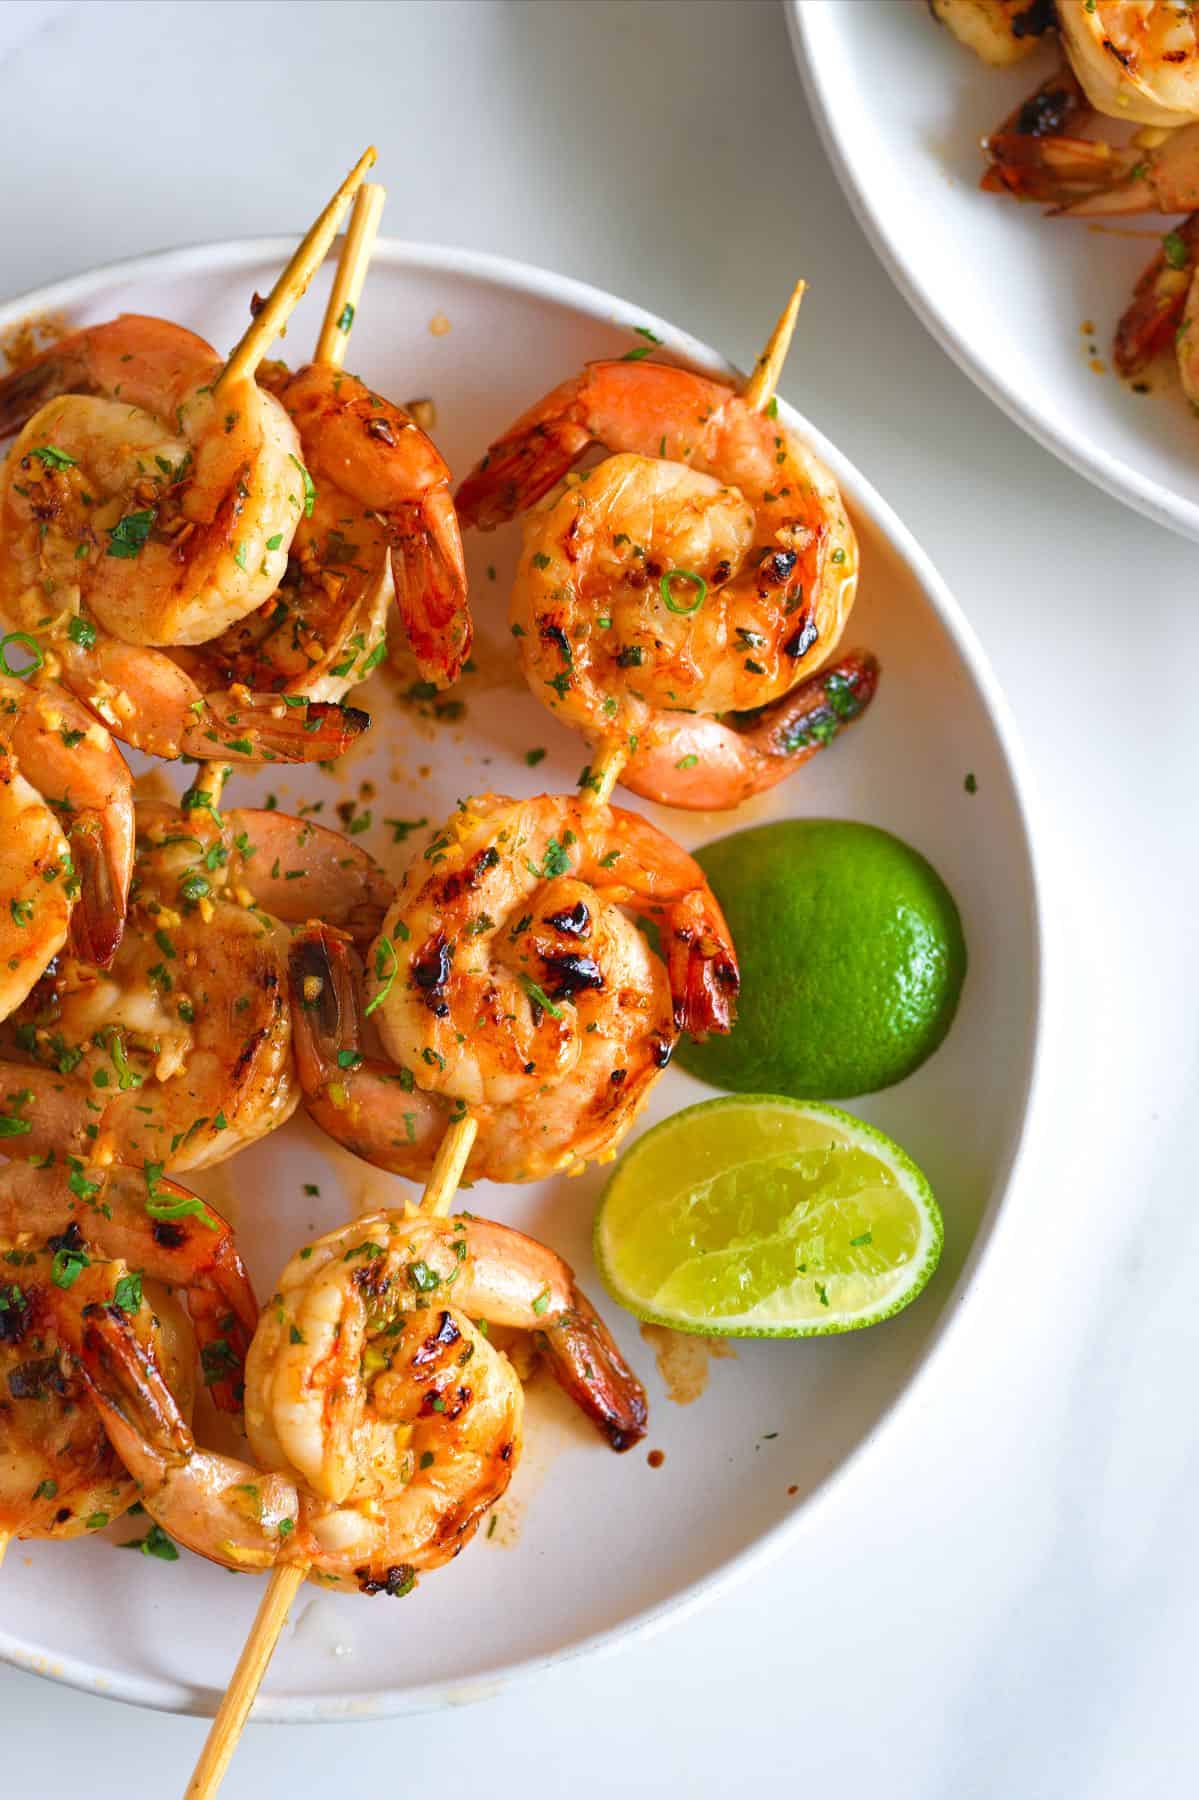
    Marinated Shrimp made with our Asian Shrimp Marinade

    Chef Richard created this easy shrimp marinade recipe. We wanted something bright, zesty, and a bit spicy, and he delivered! It features some of my favorite ingredients: ginger, fresh lime, fish sauce, and toasty sesame oil.

    We let the shrimp marinate for 30 to 60 minutes. No longer, or the acidity will start “cooking” them. This marinade is great for shrimp, chicken, tofu, or beef. It’s quick, easy, and always makes me happy. I love serving this marinated shrimp with coconut rice or cilantro lime rice.

    Key Ingredients

    • Shrimp: For the best results, I prefer large or jumbo shrimp. They are less likely to overcook and dry out. Look for fresh shrimp that is firm and has a slightly sweet smell. If you have frozen shrimp, thaw and drain them before marinating.
    • Fresh Ginger and Garlic: The ginger adds warmth and a subtle spiciness, and the garlic complements all the other Asian-inspired flavors. Fresh is best for these.
    • Cilantro and Green Onion: These will give you a pop of color and freshness. I like using the white and lighter green parts of the green onion for the marinade and saving the darker green tops for slicing and scattering over the cooked shrimp when serving.
    • Soy Sauce or Tamari: Use what you prefer. If gluten-free is a concern, I recommend using gluten-free certified tamari.
    • Lime: This will brighten everything up and add acidity, making everything taste better. I usually buy an extra lime and use it for serving.
    • Honey: After cooking, the honey turns the marinade into a slightly sticky glaze. You can substitute maple syrup.
    • Fish Sauce: This magical ingredient adds a savory, umami flavor to the marinade. I recommend Red Boat Fish Sauce. If it’s unavailable, look for fish sauce in glass jars, which tend to be higher quality.
    • Sesame Oil: The toasted sesame oil will provide a nutty richness and a wonderful aroma.
    • Gochujang: This Korean fermented chili paste adds mild to moderate heat. You can adjust the amount to your liking or substitute it with Sriracha. I also use it to make our homemade hoisin sauce.
    • Dijon Mustard: This adds a subtle tang and makes the marinade more interesting. I love Dijon mustard for marinades and also use it when making this chicken marinade and honey mustard chicken.

    Find the full recipe with measurements below.

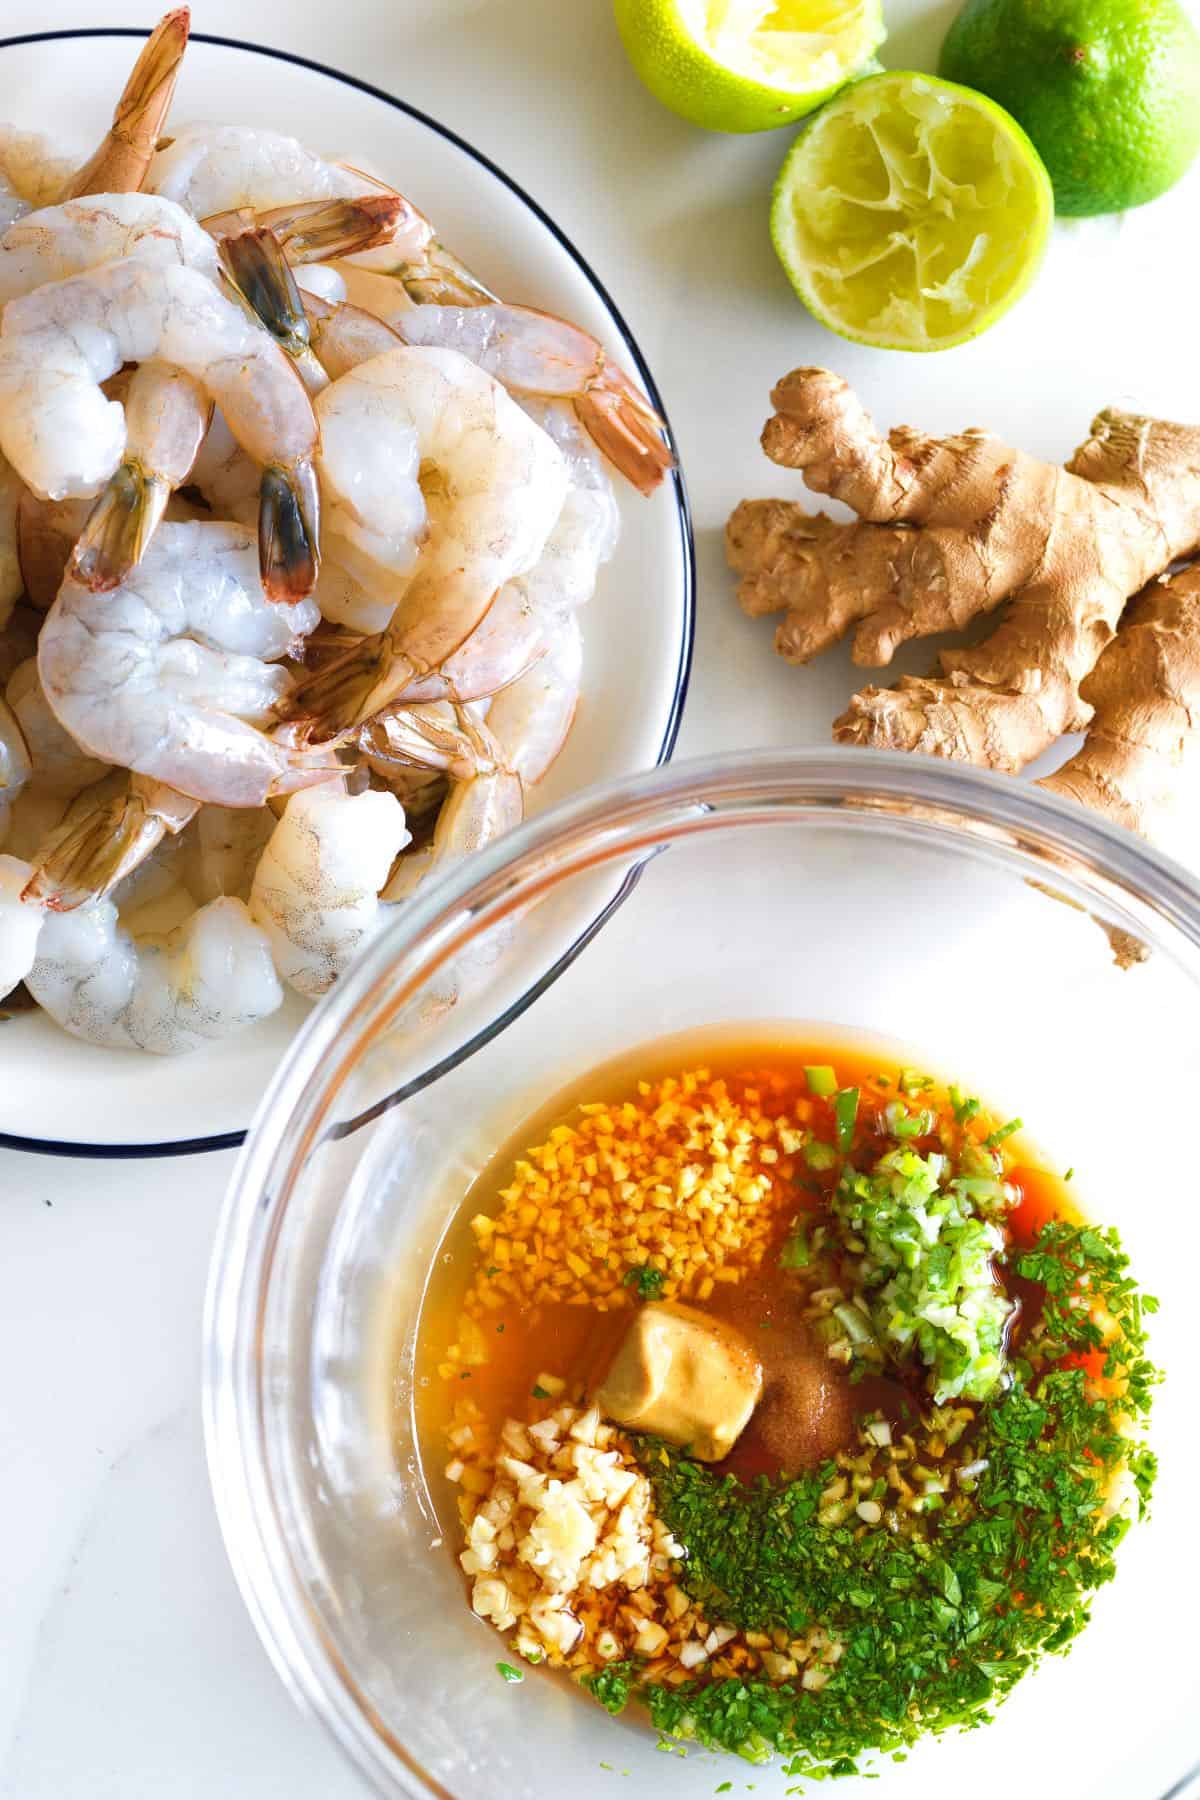
    Shrimp Marinade Ingredients -- Ginger, Lime, Garlic

    How to Make the Best Shrimp Marinade

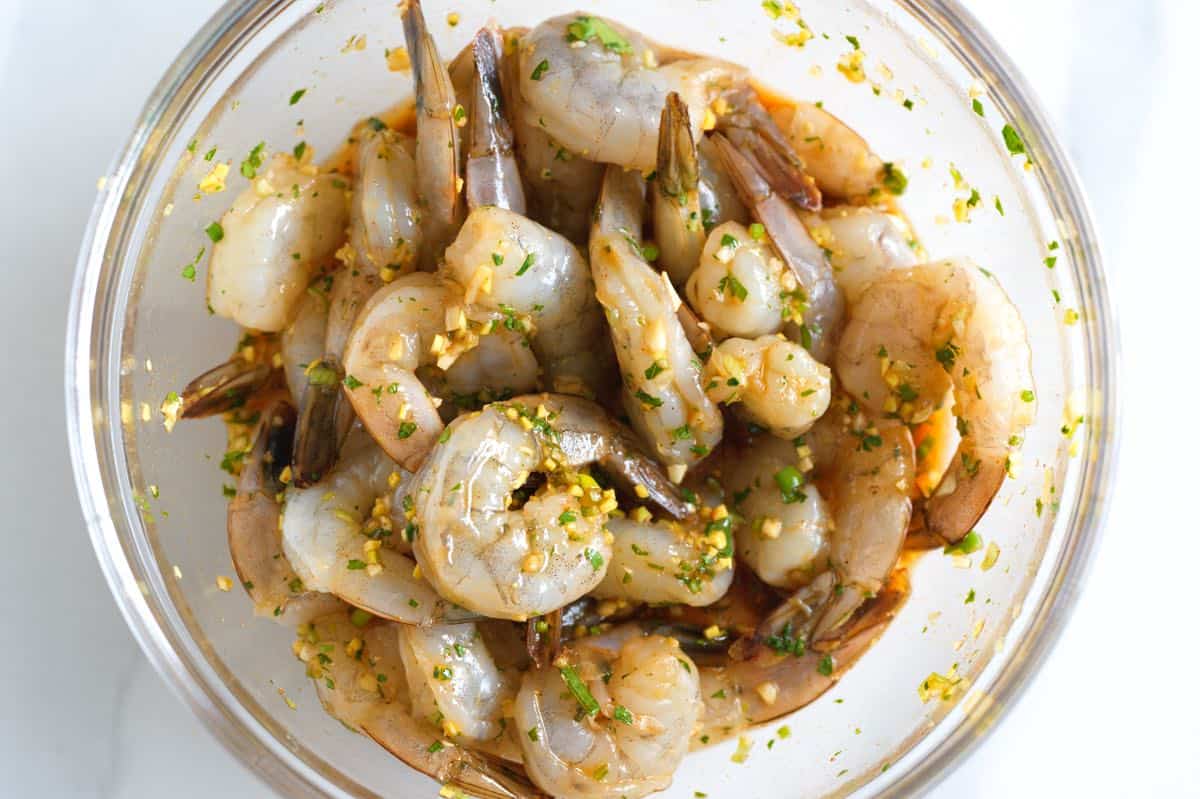
    Tip 1: Perfect for weeknights. This marinade comes together in minutes. Combine all ingredients in a bowl or zip-top bag. Then, add shrimp and let it marinate for 30 minutes to an hour. This timeframe allows the shrimp to absorb the marinade flavors without becoming tough. This is especially important if the marinade has acidic ingredients, like the lime juice in this Asian marinade.

    Marinating the shrimp longer than 60 minutes will begin to “cook” the shrimp which you don’t want in this recipe.

    Marinating Shrimp

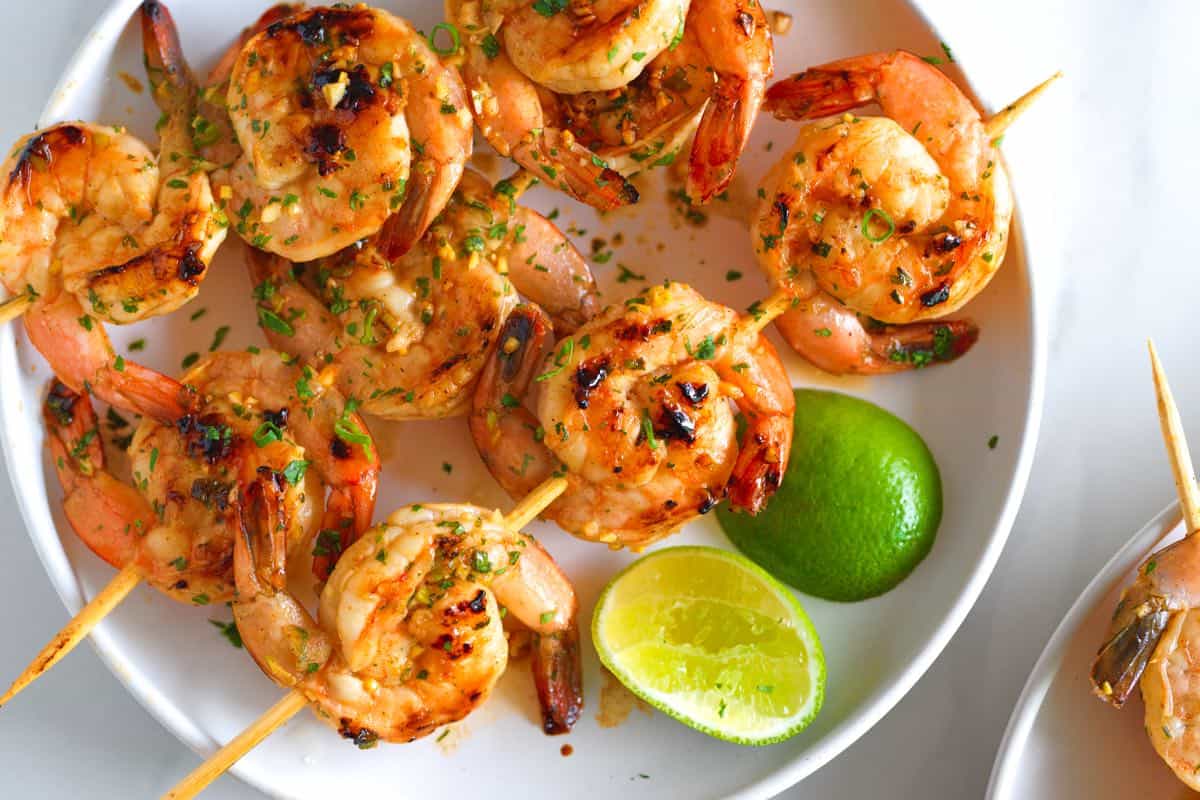
    Tip 2: Cook with high heat. We love this marinade for grilled shrimp, which we cook on an outdoor grill or on the stove using a grill pan. You can also roast the marinated shrimp at high heat in the oven, which caramelizes the honey.

    More Shrimp Recipes

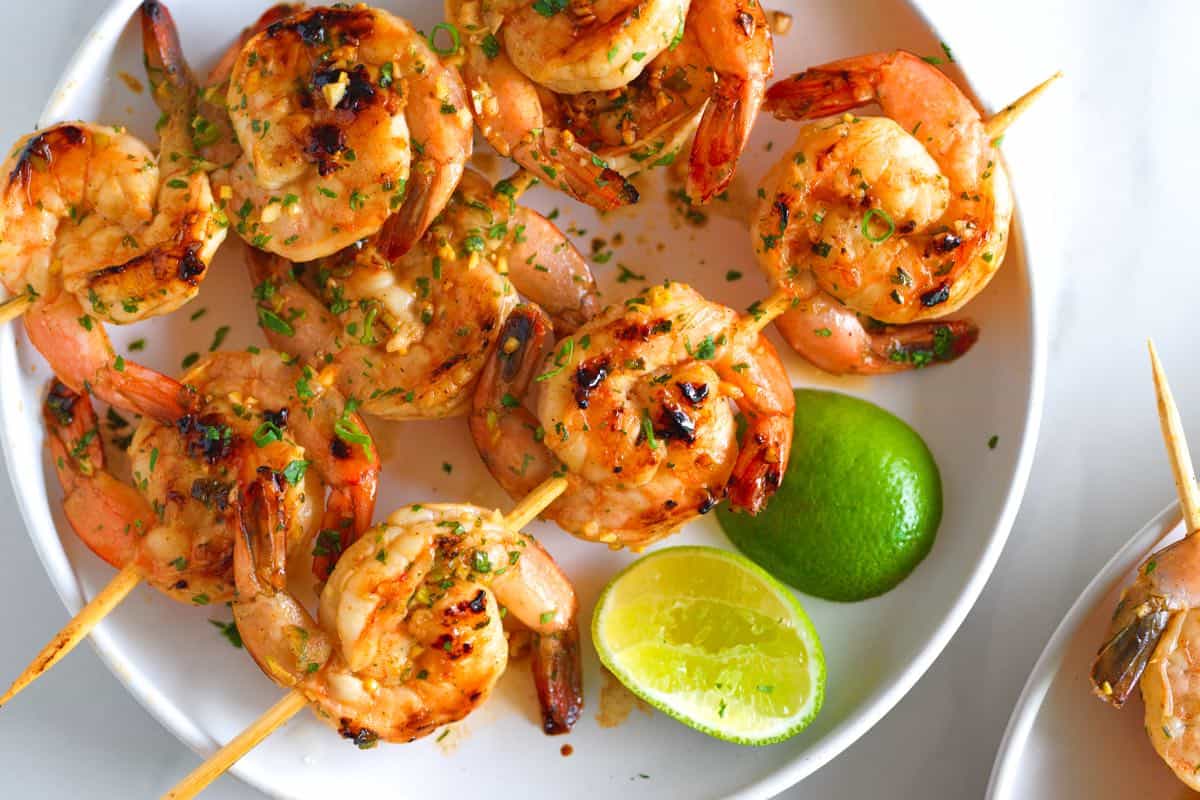
    Grilled Shrimp made with shrimp Marinade

    Sesame Ginger Shrimp Marinade

    • PREP
    • COOK
    • TOTAL

    We love this Asian-inspired shrimp marinade recipe. Quickly marinate your shrimp, 30 to 60 minutes is perfect. Any longer, and the shrimp will begin to “cook” in the lime juice. This marinade is perfect for grilled shrimp, but you can roast them in the oven or cook them in a skillet. Below, we provide tips for all three cooking methods.

    Serves 4

    You Will Need

    1 pound (450g) large or jumbo shrimp, peeled and deveined

    1 tablespoon minced fresh ginger, ½-inch piece

    1 tablespoon minced garlic, 3 cloves

    1 tablespoon finely chopped fresh cilantro

    1 tablespoon finely chopped green onion

    1 tablespoon fresh lime juice

    1 tablespoon toasted sesame oil

    1 tablespoon honey

    1 tablespoon soy sauce or tamari

    1 tablespoon fish sauce

    1 teaspoon Gochujang, see notes

    1 teaspoon Dijon mustard

    1/4 teaspoon fine sea salt

    Directions

    • Marinate Shrimp
    • 1Combine the shrimp marinade ingredients in a bowl or zip-top freezer bag. Let the shrimp marinate for 30 minutes to 1 hour.

      2If using skewers, soak wooden skewers in water while the shrimp marinate so they do not burn on the grill or in the oven.

    • Cook Shrimp
    • 1Grill (Recommended): Preheat your grill or a grill pan to medium-high heat. Thread shrimp onto skewers in opposing directions (heads touching, tails outward) for flat skewers. See our photos for reference. Push the skewer through the head and tail of each shrimp. They will look like an interlocking circle, keeping the shrimp skewers flat.

      2Grill for 2 to 3 minutes per side until opaque and cooked through.

      3Roast: Preheat your oven to 400°F (200°C). Spread shrimp in a single layer on a baking sheet and roast for 5 to 7 minutes or until opaque and cooked through.

      4Skillet: Heat skillet over medium heat. Cook shrimp for 5 to 7 minutes until opaque and cooked. Watch for the honey burning in the pan (keep the heat between medium and medium-high).

    Adam and Joanne’s Tips

    • Frozen Shrimp: Thaw and drain frozen shrimp before marinating.
    • Gochujang: A Korean chili paste, we find Mother-in-law’s Gochujang in stores around us. It can also be found sold in Asian or Korean markets. While it does not taste the same, Sriracha is a good substitute in this marinade recipe. Or leave it out.
    • Best Cooking Method: This marinade works exceptionally well on an outdoor grill or in a grill pan. Roasting in the oven is our second-best method.
    • Gluten-free: Use GF Tamari and ensure all other ingredients (specifically the fish sauce and gochujang) are marked gluten-free.
    • Nutrition facts: The nutrition facts provided below are estimates. We have used the USDA database to calculate approximate values.

    Nutrition Per Serving
    Serving Size
    1/4 of the recipe
    /
    Calories
    156
    /
    Total Fat
    4g
    /
    Saturated Fat
    0.6g
    /
    Cholesterol
    182.5mg
    /
    Sodium
    799.4mg
    /
    Carbohydrate
    6.7g
    /
    Dietary Fiber
    0.2g
    /
    Total Sugars
    5g
    /
    Protein
    23.6g


    AUTHOR:

    Joanne Gallagher

    Adam and Joanne of Inspired Taste

    We are Adam and Joanne Gallagher, the creators of Inspired Taste. Established in 2009, Inspired Taste grew from a childhood dream into one of the internet’s most trusted recipe sites with hundreds of reliable recipes, step-by-step videos, and expert tips.More About Us

    Source link

  • Chicken Livers and Onions

    Chicken Livers and Onions

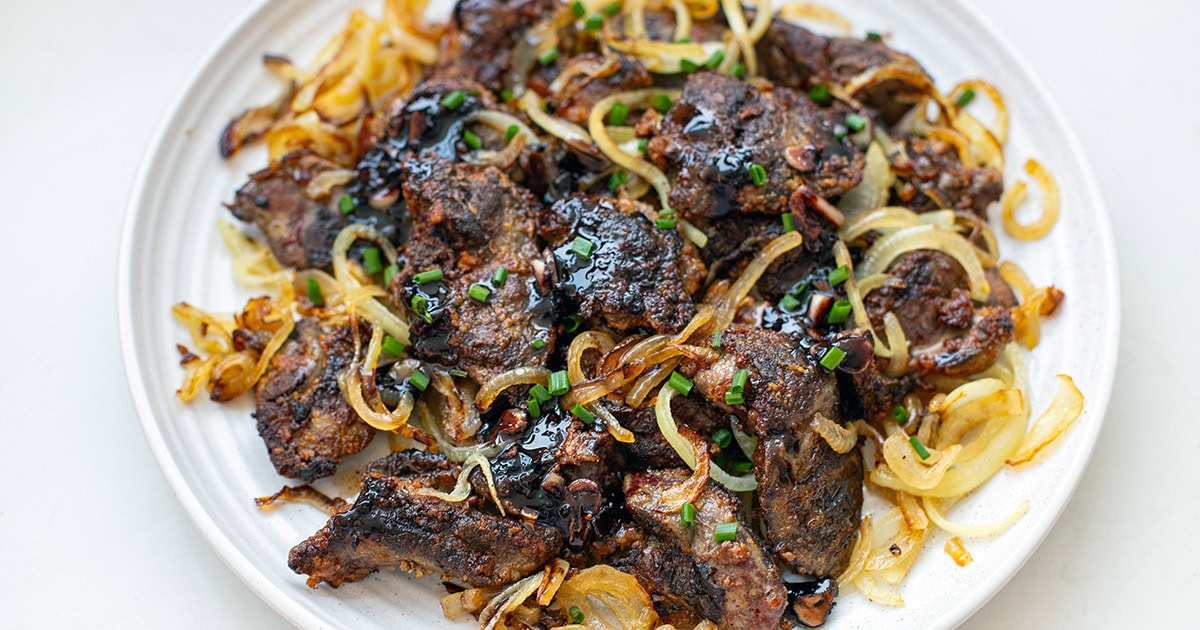
    Pan-fried chicken livers and onions with a sweet and tangy balsamic wine glaze. A simple, nutritious, and surprisingly delicious dinner worth trying.


    Jump to: ℹ️ Overview | 🛒 Ingredients | 📷 How To Make | 📹 Watch The Video | 👩‍🍳 Recipe Tips | 🥗 Serving Suggestions | 📝 Full Recipe Card | 🍽 More Healthy Chicken Recipes


    If you’ve never been big on liver, this is the recipe that might change your mind. This is probably my favorite way to cook chicken livers, and they always come out creamy in the center with a little crispy edge — exactly how they should be.

    The sweet, sautéed onions and the balsamic wine glaze balance the savory, lightly gamey flavor so perfectly that even my partner — who’s definitely not a liver fan — said this dish was delicious.

    Chicken liver is budget-friendly and nutrient-packed (hello, iron and B vitamins!), and this dish comes together in about 30 minutes. Serve it over buttery mash or crunchy toast, and you’ve got yourself an old-school comfort meal that feels a little fancy.

    👩‍🍳 You might also want to check out these liver recipes: Asian-style chicken livers, chicken liver skewers, or beef liver recipes. Learn more about the liver benefits here.

    What You’ll Need

    Here is what you’ll need for this chicken livers and onions recipe. Find the full measurements in the recipe card below.

    • Chicken Livers — the star of the dish, rich in nutrients; I used fresh, but you can thaw out frozen livers. Newbie tip: While chicken livers might look slimy due to their shiny appearance, they are actually quite firm and easy to work with. They feel better than they look.
    • Milk or lemon water — for soaking chicken livers to mellow flavor and tenderize.
    • Plain flour — for a light, crispy crust, can be swapped with gluten-free flour, cornstarch, or tapioca flour.
    • Spices: garlic powder, onion powder, smoked paprika — for savory depth, and salt and pepper for seasoning.
    • Onions — yellow or white onion—sliced thin for caramelized sweetness.
    • Olive oil — for sautéing and frying.
    • For the Glaze: Red wine—adds acidity and richness, garlic for aromatic kick, butter (makes the glaze velvety), aged or regular balsamic vinegar for that tangy-sweet finish, and a little honey to balance out acidity. Red wine can be swapped with chicken broth.

    How To Cook Chicken Livers & Onions

    Find the full recipe and nutritional information below. Here are some handy step-by-step photos for how to make pan-fried chicken livers and onions.

    • Rinse and trim chicken livers; remove some of the visible connective tissue. I like to cut them into 1-inch pieces. Soak in milk 10 minutes, then pat dry. Soaking helps to mellow out the flavor and tenderize the livers.
    • Slice onions and onions until golden, set aside.
    • Season chicken livers with salt, spices, and coat with flour.
    • Heat oil in another pan; cook livers in batches over high heat — about 3 minutes per side, until crispy and golden. Don’t overcook as they can get gritty and rubbery.
    • Remove livers; deglaze the pan with red wine and add butter, garlic, balsamic, and honey. Stir and bring to a simmer, allowing to bubble and caramelize slightly.
    • When it starts to look glossy and thick, return livers and onions, or serve them topped with the glaze.
    • Eat while hot, although I’ve enjoyed snacking on them cold out of the fridge.

    Watch The Video

    Recipe Tips

    • Don’t overcrowd: Cook livers in batches so they brown, not steam. Leave enough space between livers.
    • Use high to medium-high heat: For that lovely crust outside.
    • Soak in milk: It really helps mellow the strong flavor.
    • Try variations: Add crispy bacon, mushrooms, or a splash of cream to the glaze.
    • Test doneness: Cut into the thickest piece—it should be a little pink and creamy.
    • Storage tips: Store leftovers in an airtight container in the fridge for up to 3 days. Reheat gently in a skillet. I don’t recommend freezing—they’ll turn grainy.
    • Make-ahead tips: You can soak and prep the livers (trimmed and coated) a few hours ahead. Keep them in the fridge until ready to cook. Onions can be sautéed in advance and reheated.

    Serving Suggestions

    I love these with my sour cream mashed potatoes or thick slices of crusty bread to mop up all that glaze. They’re also great alongside creamy green beans or a simple cheesy leafy green salad for freshness.

    💬 If you’ve tried this chicken livers and onions or any other recipe on the blog then don’t forget to rate the recipe and let me know how you got on in the comments below, I love hearing from you! You can also FOLLOW ME on Instagram, Facebook, Pinterest, YouTube, and or sign up to my Newsletter to see more of my delicious food.

    Want to Save This Recipe?

    Enter your email & I’ll send it to your inbox. Plus, get great new recipes from me every week!

    By submitting this form, you consent to receive emails from Cooked & Loved

    Pan-fried chicken livers and onions with a sweet and tangy balsamic wine glaze. A simple, nutritious and surprisingly delicious dinner worth trying. Find step-by-step photos and more recipe tips above.

    • Rinse chicken livers if you like. Trim off fat or any green bits. Cut larger pieces in half.

    • Soak in milk for 10 minutes. Drain and pat dry well.

    • While soaking, cook onions: heat 1 tablespoon oil in a skillet, sauté onions with salt for 5–8 minutes until golden. Set aside.

    • Season livers with salt, garlic powder, onion powder, and smoked paprika. Sprinkle with flour and toss to coat evenly.

    • Heat 2 tablespoons olive oil over high heat. Add livers in batches — don’t crowd the pan. Cook about 3 minutes, flip, and cook 2–3 minutes more until browned outside and creamy inside. Transfer to a plate.

    • Deglaze pan with red wine, scraping up browned bits. Add butter, garlic, balsamic, and honey. Simmer 30 seconds until slightly thickened.

    • Serve livers with onions and drizzle glaze over the top (or toss everything in the pan to coat).

    • Enjoy hot (or cold).

    • Newbie tip: While chicken livers might look slimy due to their shiny appearance, they are actually quite firm and easy to work with. They feel better than they look.
    • How do I know when chicken livers are cooked? They should be browned on the outside and a little pink and creamy inside. Overcooked livers turn grainy and dry.
    • Can I skip the milk soak? Technically, yes—but soaking helps mellow the stronger flavor and tenderize them.
    • What if I don’t want to use wine? Use chicken or beef broth instead. The glaze will still be delicious.
    • Are chicken livers good for you? Definitely! They’re one of the most nutrient-dense foods — high in iron, vitamin A, and B vitamins. Check out these 50 nutrient-dense foods.
    • Can I freeze cooked chicken livers? I don’t recommend it; the texture suffers. It’s best eaten fresh or reheated within a day or two.
    • Don’t Overcrowd: Cook livers in batches so they brown, not steam. Leave enough space between livers.
    • Use High to Medium-High Heat: For that lovely crust outside.
    • Try Variations: Add crispy bacon, mushrooms, or a splash of cream to the glaze.
    • Test Doneness: Cut into the thickest piece—it should be a little pink and creamy.
    • Storage tips: Store leftovers in an airtight container in the fridge for up to 3 days. Reheat gently in a skillet. I don’t recommend freezing—they’ll turn grainy.
    • Make-ahead Tips: You can soak and prep the livers (trimmed and coated) a few hours ahead. Keep them in the fridge until ready to cook. Onions can be sautéed in advance and reheated.

    Calories: 344kcal | Carbohydrates: 16g | Protein: 22g | Fat: 20g | Saturated Fat: 6g | Polyunsaturated Fat: 3g | Monounsaturated Fat: 10g | Trans Fat: 0.2g | Cholesterol: 402mg | Sodium: 652mg | Potassium: 410mg | Fiber: 1g | Sugar: 6g | Vitamin A: 12946IU | Vitamin C: 23mg | Calcium: 63mg | Iron: 11mg

    Keywords: chicken livers and onions, balsamic-glazed chicken livers, chicken livers with onions, pan-fried chicken livers

    More Healthy Chicken Recipes


    Source link

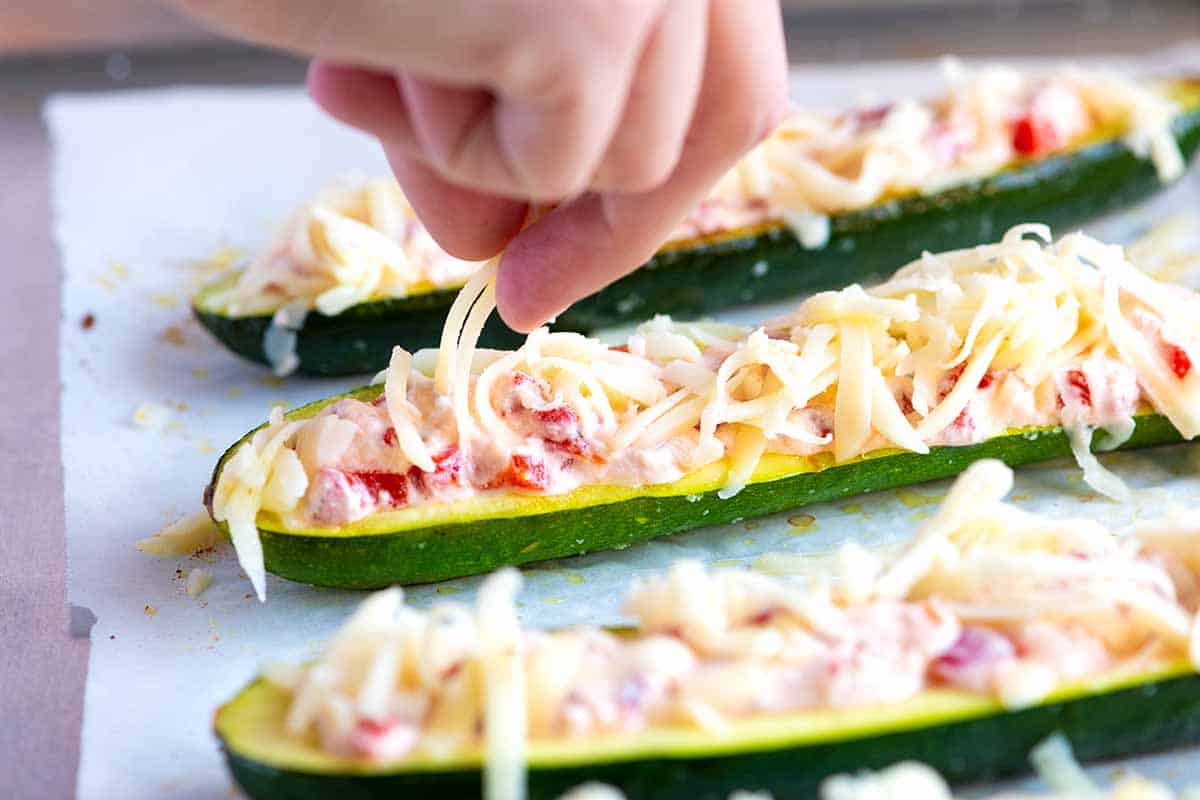
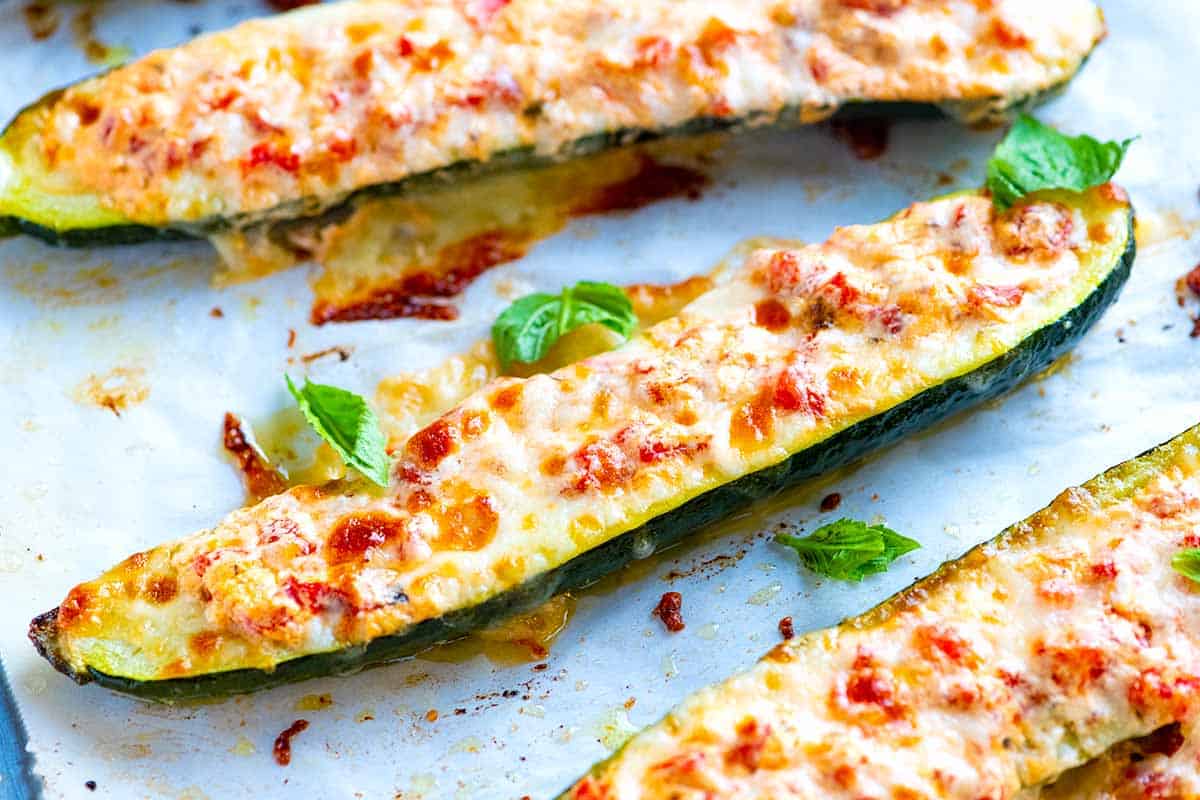
  • Cheese Stuffed Zucchini Boats Recipe

    Cheese Stuffed Zucchini Boats Recipe

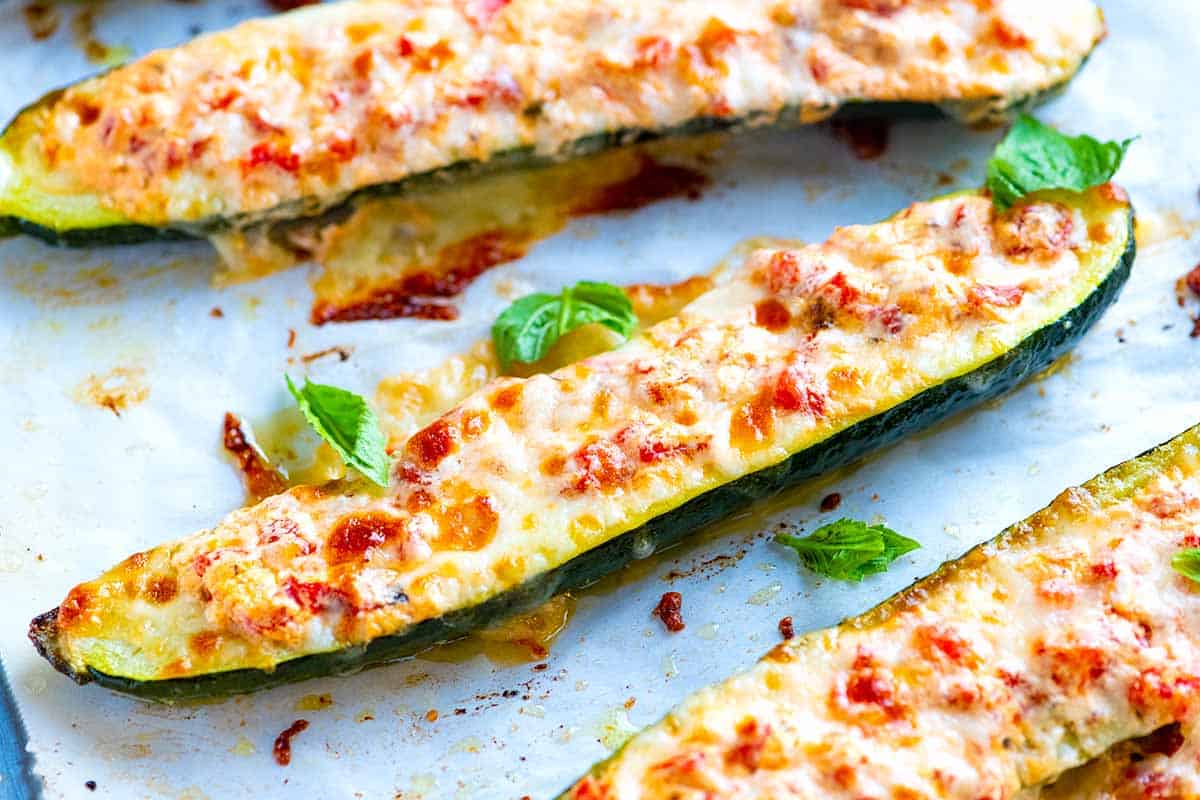
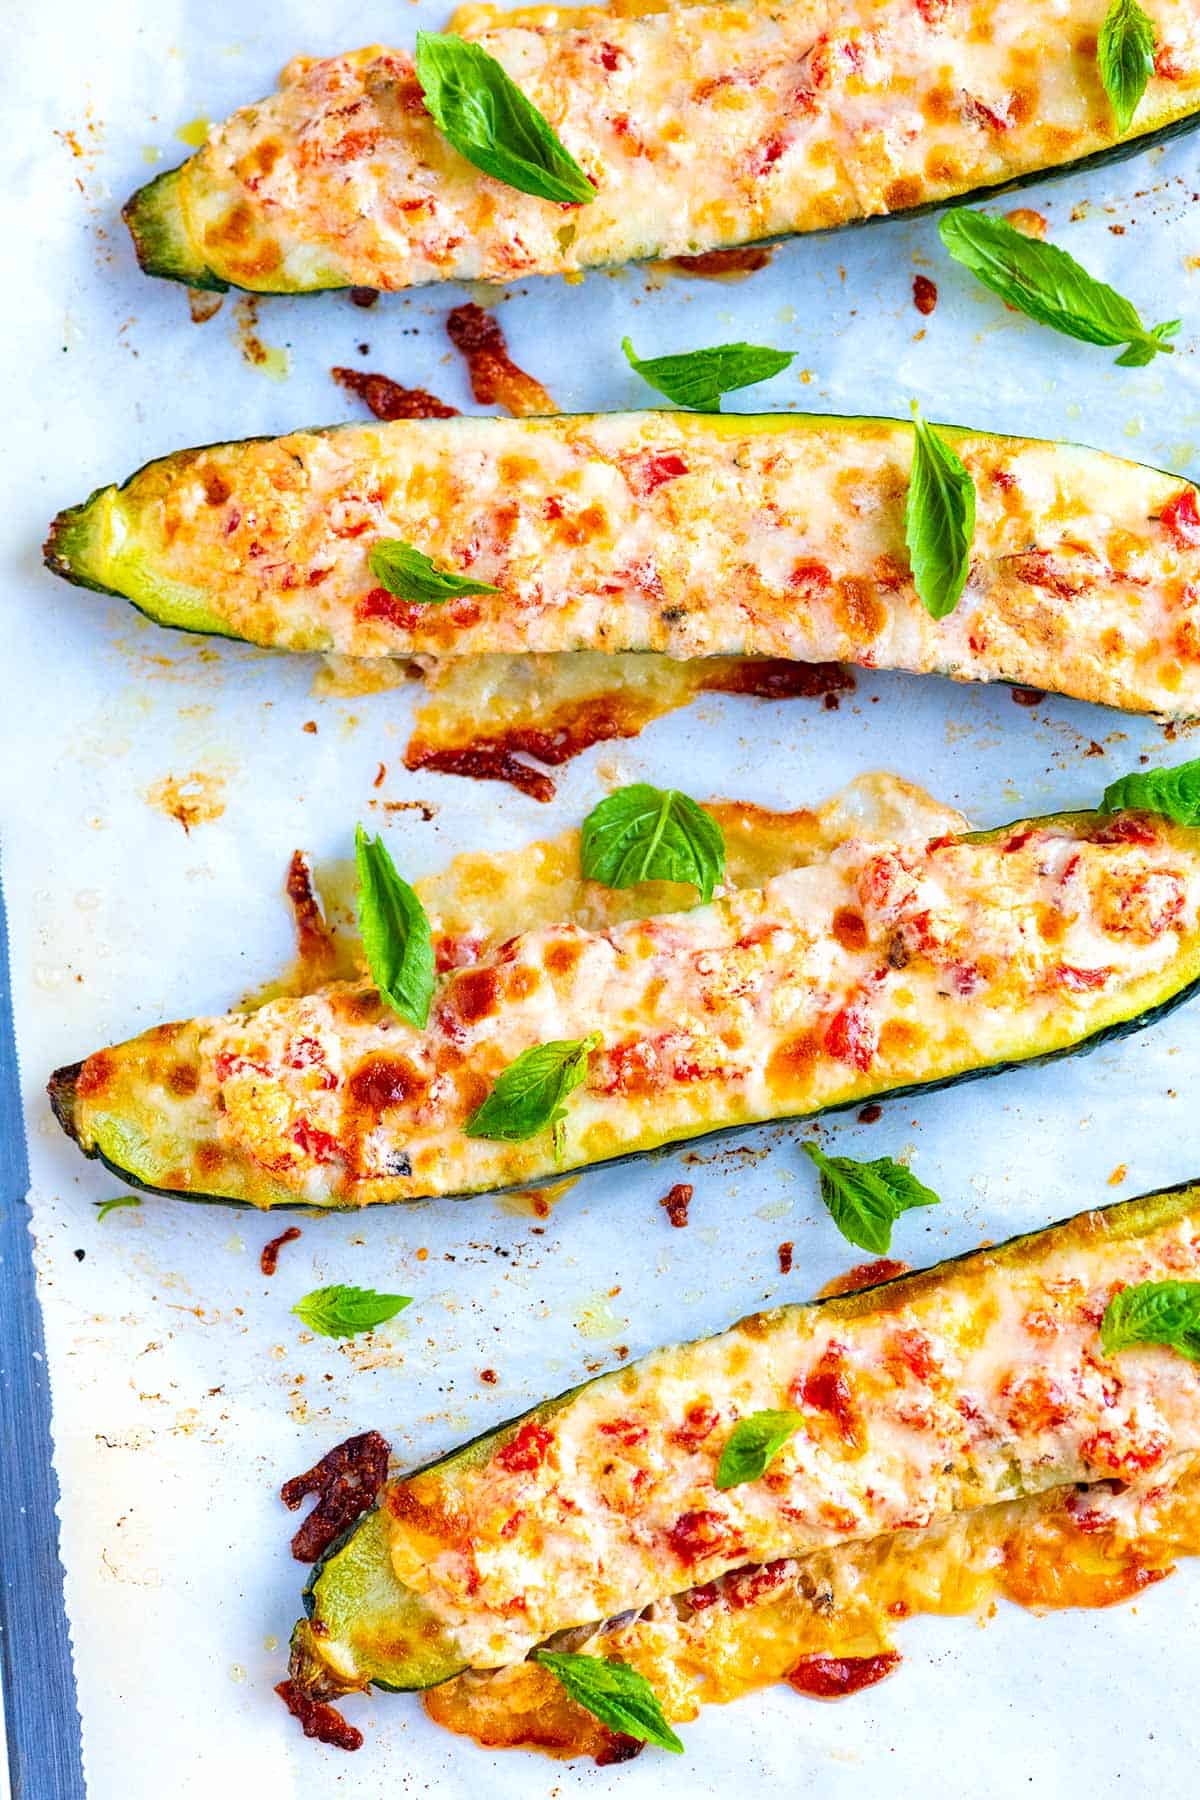
    This stuffed zucchini recipe has three cheeses, roasted red peppers, and basil. These are easy, taste incredible, and perfectly cheesy!

    Cheese Stuffed Zucchini Boats

    This recipe came from the summer we decided to grow zucchini in our garden. We were inundated with them! We needed lots of ways to use zucchini, and these made it to the top of our favorites list. They are easy, quick, and taste amazing.

    The ingredient list for this recipe is inspired by our super popular veggie lasagna, which is made with zucchini, cheese, and a sauce made with tomatoes and roasted red peppers.

    Key Ingredients

    • Zucchini: For this recipe, I look for medium, firm zucchini. You’ll cut them in half and then scoop out some of the middle, so you want them large enough to fit the cheese stuffing. Yellow summer squash is also excellent.
    • Roasted Red Pepper: I love the sweet flavor of roasted red peppers and often keep a jar of them in the fridge. If you would like to roast your own, look at our roasted red pepper hummus recipe, which shows how to roast bell peppers.
    • Cheese: I use three cheeses in this recipe. Ricotta makes the filling creamy, parmesan adds a sharp, cheesy flavor, and mozzarella melts and turns golden brown. Cottage cheese is an excellent substitute for the ricotta. If you are making this vegetarian, use a vegetarian-friendly parmesan cheese or substitute it with another sharp cheese like white cheddar.
    • Basil: We add basil leaves to the for fresh summer flavor before serving. If you only have dried basil, mix 1 teaspoon into the ricotta filling instead.

    Find the full recipe with measurements below.

    How to Make Stuffed Zucchini Boats

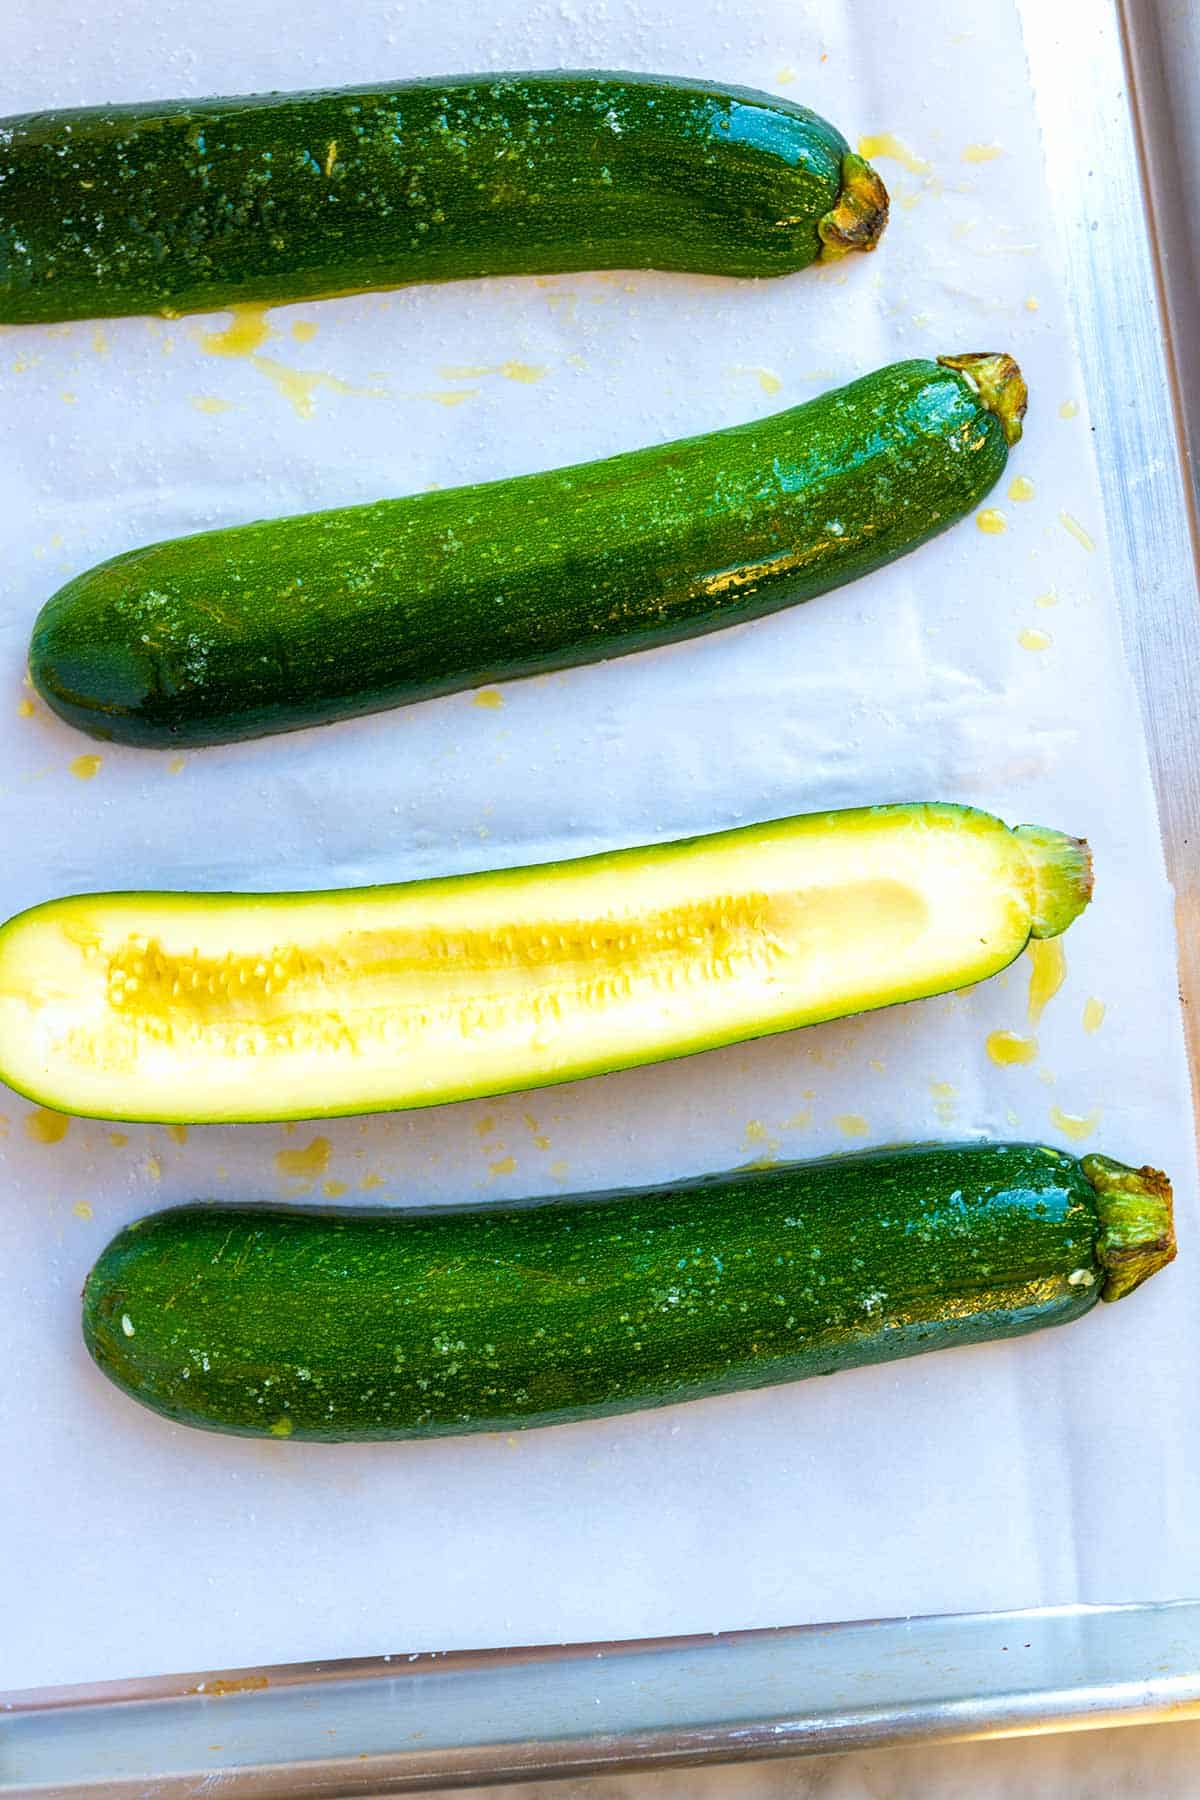
    Tip 1: How to make zucchini boats. All you need to do is slice the zucchini in half lengthwise. Then use a spoon to scoop out a channel down the middle. You don’t need to remove much, just enough to make some room for the ricotta and pepper filling. The channel created by scooping out some of the zucchini makes them look like canoes.

    Turning zucchini into zucchini boats ready for stuffing

    Tip 2: Bake zucchini without the stuffing first. Rub the zucchini halves with olive oil and sprinkle with salt. Place them cut-side down on a baking sheet and roast until tender (about 15 minutes). This is where some other recipes fall short. Zucchini has a lot of moisture, so roasting them unstuffed first lets some extra moisture cook off.

    Tip 3: Stuff the zucchini. I love to stuff the zucchini with a mixture of ricotta cheese, parmesan cheese, and chopped roasted red peppers, top it with mozzarella cheese, and slide it back into the oven to finish cooking.

    For a heartier variation, add some cooked quinoa, rice, or cooked ground turkey or chicken to the stuffing.

    Stuffed Zucchini with ricotta and mozzarella cheese

    More Zucchini Recipes

    Cheese Stuffed Zucchini Boats

    Cheese Stuffed Zucchini Boats

    • PREP
    • COOK
    • TOTAL

    We stuff the zucchini with three kinds of cheese and one of our favorite ingredients: roasted red peppers. The pepper adds color and tastes incredible when mixed with cheese and basil. Enjoy these as your main meal (I’d eat two halves) or as a side next to a big salad. Add protein by stirring some cooked ground turkey or sausage into the ricotta and pepper mixture. Crumbled tofu, quinoa, rice, or even a handful of canned or cooked chickpeas would also make these more substantial.

    Makes 4 small servings or 2 servings as a main meal

    You Will Need

    2 medium zucchini

    1 tablespoon olive oil

    1 roasted red pepper from a jar of roasted peppers

    1/4 cup ricotta cheese (3 ounces)

    1/4 cup finely grated parmesan cheese (1/2 ounce)

    1/2 cup grated mozzarella cheese (2 ounces)

    Handful of torn fresh basil leaves

    Salt and fresh ground black pepper

    Directions

      1Preheat the oven to 425°F (220°C). Line a baking sheet with a silicone mat, aluminum foil, or parchment paper.

      2Cut the zucchini in half, lengthwise. Use a spoon to scoop a channel down the middle of each zucchini half, making boats.

      3Rub the zucchini with olive oil and a generous pinch of salt. Place the zucchini halves, cut side down, onto the prepared baking sheet. Roast for about 12 minutes or until the zucchini is tender but not soft.

      4Meanwhile, chop the roasted red pepper into small pieces and add it to a small bowl. Mix in the ricotta and parmesan cheese.

      5Flip the zucchini so that they are cut side up, and divide the ricotta-pepper mixture between the zucchini boats.

      6Sprinkle mozzarella on top, then place the zucchini back into the oven and bake for another 8 to 10 minutes, until the cheese melts and the zucchini is soft. For some browned cheesy spots, before taking the baking sheet out of the oven, turn the oven to broil and broil until the cheese bubbles and browns, an additional 1 to 2 minutes.

      7Serve with basil, a light sprinkle of salt, and fresh ground black pepper scattered on top.

    Adam and Joanne’s Tips

    • Vegetarian tips: Depending on the brand, parmesan cheese is not vegetarian-friendly. Substitute with a sharp white cheddar, or parmesan-style cheese that advertises they do not use animal rennet to make the cheese.
    • Dried basil: Stir 1 teaspoon of dried basil in the ricotta cheese mixture.
    • The nutrition facts provided below are estimates.

    Nutrition Per Serving
    Serving Size
    1 zucchini half
    /
    Calories
    120
    /
    Total Fat
    9.4g
    /
    Saturated Fat
    4.1g
    /
    Cholesterol
    20.8mg
    /
    Sodium
    289.9mg
    /
    Carbohydrate
    2.8g
    /
    Dietary Fiber
    0.7g
    /
    Total Sugars
    1.5g
    /
    Protein
    6.2g


    AUTHOR:

    Joanne Gallagher

    Adam and Joanne of Inspired Taste

    We are Adam and Joanne Gallagher, the creators of Inspired Taste. Established in 2009, Inspired Taste grew from a childhood dream into one of the internet’s most trusted recipe sites with hundreds of reliable recipes, step-by-step videos, and expert tips.More About Us

    Source link

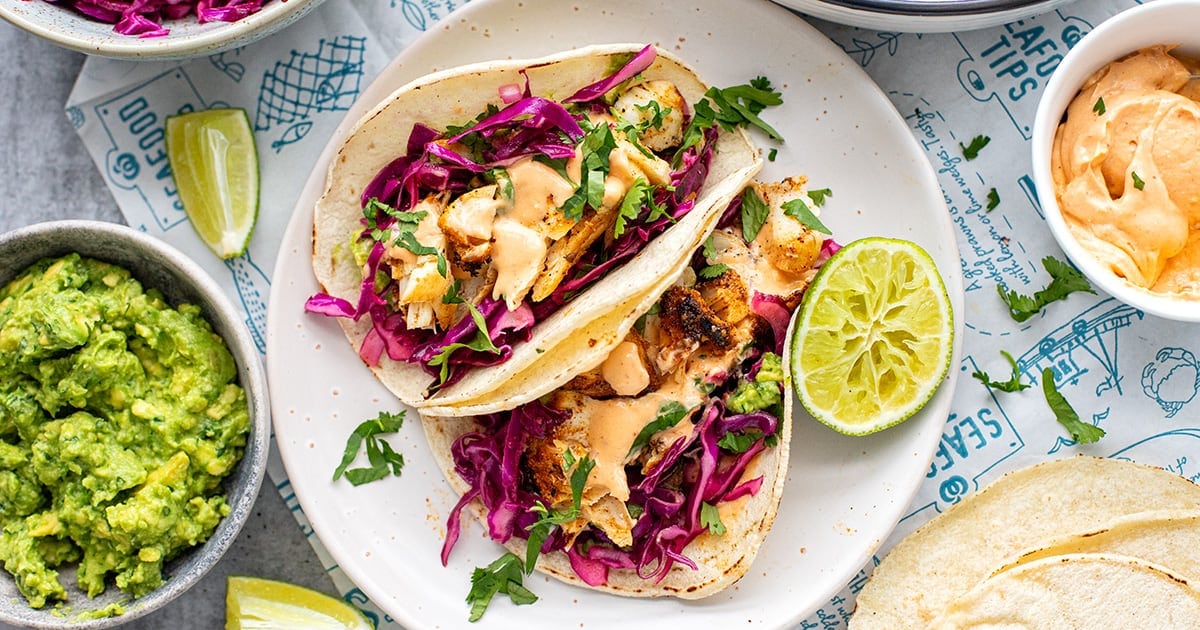
  • Grilled Fish Tacos

    Grilled Fish Tacos

    Healthy, blackened grilled fish tacos with crunchy cabbage slaw, easy guacamole, and creamy chipotle sauce. This is my go-to recipe that I have made many times — easy enough for Taco Tuesday and weeknight dinners, delicious enough for guests! I include air fryer instructions as well.


    Jump to: ℹ️ Overview | 🛒 Ingredients | 📷 How To Make | 📹 Watch The Video | 👩‍🍳 Recipe Tips | 🥗 Serving Suggestions | 📝 Full Recipe Card | 🍽 More Tex Mex Recipes


    These grilled fish tacos are my go-to when I want something fresh, satisfying, and a little smoky. The fish is marinated in a Tex-Mex-style spice blend with lime juice that chars beautifully when cooked—hello, blackened fish tacos magic!

    The other important players are the pickled cabbage slaw and creamy chipotle mayo sauce, which give you that crunchy, creamy, zesty combo every taco needs. And I know guac isn’t traditional in fish tacos, but I love including in, and my family loves it.

    This fish taco recipe is healthy, with good fats from the avocado and fish, and it’s macro-friendly too: high protein, under 500 cals for 3 tacos, and even low-carb if you use low-carb tortillas. I’ve made these tacos a dozen times— they are super reliable and always a hit.

    Tip: No time to marinate or grill the fish? Use this recipe idea for store-bought frozen battered fish fingers, which you can air fry or bake in the oven.

    👩‍🍳 You might also like these Taco Tuesday recipes, my healthy sweet potato and black bean tacos, baked chicken tacos, BBQ ground chicken tacos, or chorizo breakfast tacos. For an appetizer, try my shrimp and avocado taco bites.

    What You’ll Need

    Here is what you’ll need for this grilled fish tacos recipe. Find the full measurements in the recipe card below.

    For the Blackened Fish

    • White fish fillets (like ling, mahi-mahi, cod or whiting): mild and flaky—perfect for tacos. You can use salmon or even prawns if you’re out of white fish.
    • Lime juice + olive oil: tenderizes and adds zing.
    • Tex Mex spices (cumin, smoked paprika, cayenne or chili powder, oregano, garlic & onion powder): for that smoky, earthy, spicy crust.
    • Salt: always essential to bring it all together.

    For other toppings

    • Pickled Cabbage Slaw: Red cabbage and red onion: crunchy and colorful, but you could also use white cabbage. Plus lime juice, olive oil, coriander seed powder, sugar, and salt: adds that quick-pickle tang. Tip: Make this ahead—gets even better after sitting.
    • Chipotle Sauce for Fish Tacos: Light mayo + sour cream or Greek yogurt: creamy base. Chipotle in Adobo sauce: smoky heat. Tomato sauce + water: balance, sweetness and texture. Make it spicier? Add more chipotle or a dash of hot sauce.
    • Easy Guacamole: Ripe avocado, lime, fresh cilantro (coriander), salt, olive oil: creamy, citrusy base layer. Skip if you’re in a rush—but I never do.

    How To Make Grilled Fish Tacos

    Find the full recipe and nutritional information below. Here are some handy step-by-step photos for how to make blackened pan-fried or grilled fish tacos.

    • Marinate the fish in lime juice, oil, and spices for 15-20 minutes (or longer).
    • Grill or pan-fry the fish for 4–5 minutes per side until cooked and blackened. Then flake into smaller pieces.
    • Heat the tortillas and set aside to keep warm.
    • Mix the slaw ingredients and set aside. This can be done while fish is marinating.
    • Mash avocado with lime, salt, coriander, and a splash of oil.
    • Whisk the chipotle fish taco sauce in a small bowl. Set aside. This can also be done in advance.
    • Assemble tacos: guac → slaw → fish → chipotle sauce → fresh coriander and lime juice.

    Air Fryer Method

    If you’re using an air fryer to make fish for fish tacos, preheat it to 400°F (200°C) and lightly spray the basket with oil to prevent sticking. Place the marinated fish fillets in a single layer—don’t overcrowd—and cook for 8–10 minutes, flipping halfway. The fish should be golden and slightly charred on the edges, and it should flake easily with a fork when done. Thinner fillets might only need 7–8 minutes, while thicker ones like mahi-mahi may take closer to 12. Once cooked, let the fish rest for a minute before flaking into chunks for your tacos.

    Watch The Video

    Recipe Tips

    • Fish type: Use any firm white fish, but salmon works too for a richer flavor.
    • Marinate ahead: Up to 24 hours in the fridge.
    • Make ahead: You can prep the slaw, sauce, and guac 1 day ahead. Store separately in airtight containers. Guacamole is probably best fresh, though.
    • Storage: Store cooked fish, slaw, and sauces separately. Eat within 2 days.
    • Taco bar idea: Serve everything separately and let everyone build their own!

    Serving Suggestions

    These fish tacos are perfect as-is, but if you’re feeding a crowd or want a bigger spread, add some tortilla chips, extra guac, and maybe a margarita or two. A side of black beans, Mexican red rice, or grilled corn would also be delish! You can also try my Mexican salad with corn and black beans. For sauce, check out my cilantro lime sauce or my salsa tatemada for a different vibe. And if serving a crowd, try one of these Mexican appetizers, or with my pineapple rum sour.

    💬 If you’ve tried this grilled fish tacos or any other recipe on the blog then don’t forget to rate the recipe and let me know how you got on in the comments below, I love hearing from you! You can also FOLLOW ME on Instagram, Facebook, Pinterest, YouTube, and or sign up to my Newsletter to see more of my delicious food.

    Want to Save This Recipe?

    Enter your email & I’ll send it to your inbox. Plus, get great new recipes from me every week!

    By submitting this form, you consent to receive emails from Cooked & Loved

    Healthy, blackened grilled fish tacos with crunchy cabbage slaw, easy guacamole and creamy chipotle sauce—easy enough for Taco Tuesday and weeknight dinners, delicious enough for guests! I include air fryer instructions as well. Find step-by-step photos and more recipe tips above.

    For the pickled cabbage slaw:

    • Marinate the fish: In a bowl, drizzle the fish with lime juice and olive oil. Sprinkle all spices and salt evenly on both sides. Rub in and set aside for 15–20 minutes (or up to 24 hrs in the fridge).

    • Prepare toppings: Combine slaw ingredients in a bowl, toss and set aside. Mix chipotle mayo sauce ingredients in a small bowl until smooth. Mash guacamole ingredients in another bowl.

    • Cook the fish: Grill, broil, or pan-fry fish. For pan-frying: heat 1 tablespoon olive oil in a skillet over medium-high heat. Cook fish 4–5 minutes each side until blackened/browned and cooked through. Cover with lid after flipping to help it steam. Grill on the BBQ for 5-6 minutes each side or until just cooked through.Rest for 1 minute, then flake with two forks and pour any juices over.

    Air Fryer Method

    • If you’re using an air fryer, preheat it to 400°F (200°C) and lightly spray the basket with oil to prevent sticking. Place the marinated fish fillets in a single layer—don’t overcrowd—and cook for 8–10 minutes, flipping halfway. The fish should be golden and slightly charred on the edges, and it should flake easily with a fork when done. Thinner fillets might only need 7–8 minutes, while thicker ones like mahi-mahi may take closer to 12. Once cooked, let the fish rest for a minute before flaking into chunks for your tacos.

    • Heat tortillas in a dry skillet or oven.

    • Assemble tacos: Spread guacamole on tortilla, then cabbage slaw, then fish, sauce, and extra coriander and lime if you like.

    • Can I use frozen fish? Yes! Just make sure it’s fully thawed and patted dry before marinating.
    • Is the chipotle sauce spicy? It has a mild to medium heat. Add more chipotle or a dash of hot sauce if you want it spicier.
    • What tortillas work best? Small soft corn or flour tortillas are my go-to, but you can also use grain-free or low-carb tortillas here.
    • What’s the best way to reheat leftovers? Fish is best reheated gently in a skillet or microwave at 50% power. Assemble tacos fresh.
    • Fish type: Use any firm white fish, but salmon works too for a richer flavor.
    • Marinate ahead: Up to 24 hours in the fridge.
    • Make ahead: You can prep the slaw, sauce, and guac 1 day ahead. Store separately in airtight containers. Guacamole is probably best fresh though.
    • Storage: Store cooked fish, slaw, and sauces separately. Eat within 2 days.
    • Taco bar idea: Serve everything separately and let everyone build their own!

    Serving: 3tacos | Calories: 490kcal | Carbohydrates: 52g | Protein: 30g | Fat: 20g | Saturated Fat: 4g | Polyunsaturated Fat: 5g | Monounsaturated Fat: 10g | Trans Fat: 0.01g | Cholesterol: 61mg | Sodium: 920mg | Potassium: 958mg | Fiber: 12g | Sugar: 7g | Vitamin A: 1097IU | Vitamin C: 40mg | Calcium: 134mg | Iron: 3mg

    Keywords: Grilled Fish Tacos, Fish Tacos, Healthy Fish Tacos, Blackened Fish Tacos

    More Tex Mex Recipes


    Source link

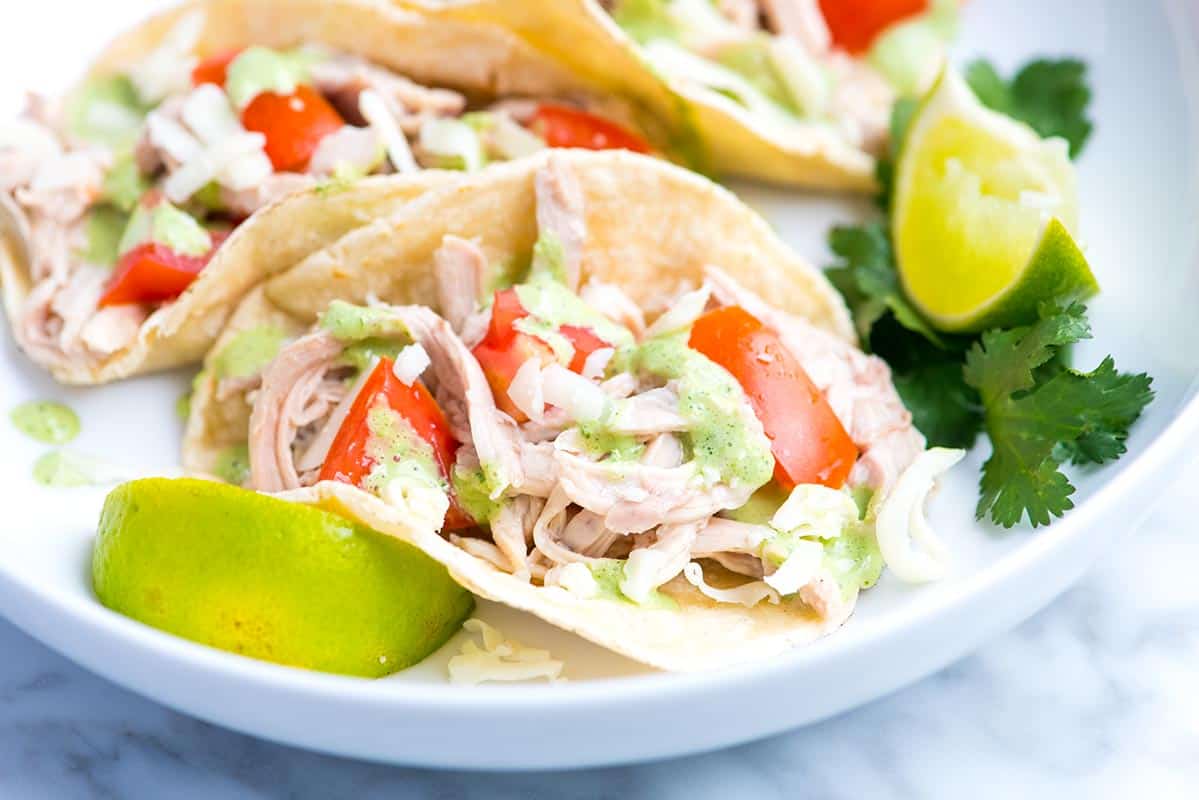
  • Easy Shredded Chicken Tacos Recipe

    Easy Shredded Chicken Tacos Recipe

    This easy shredded chicken tacos recipe is such an easy dinner! They’re fresh, flavorful, and the kind of easy dinner that never feels boring.

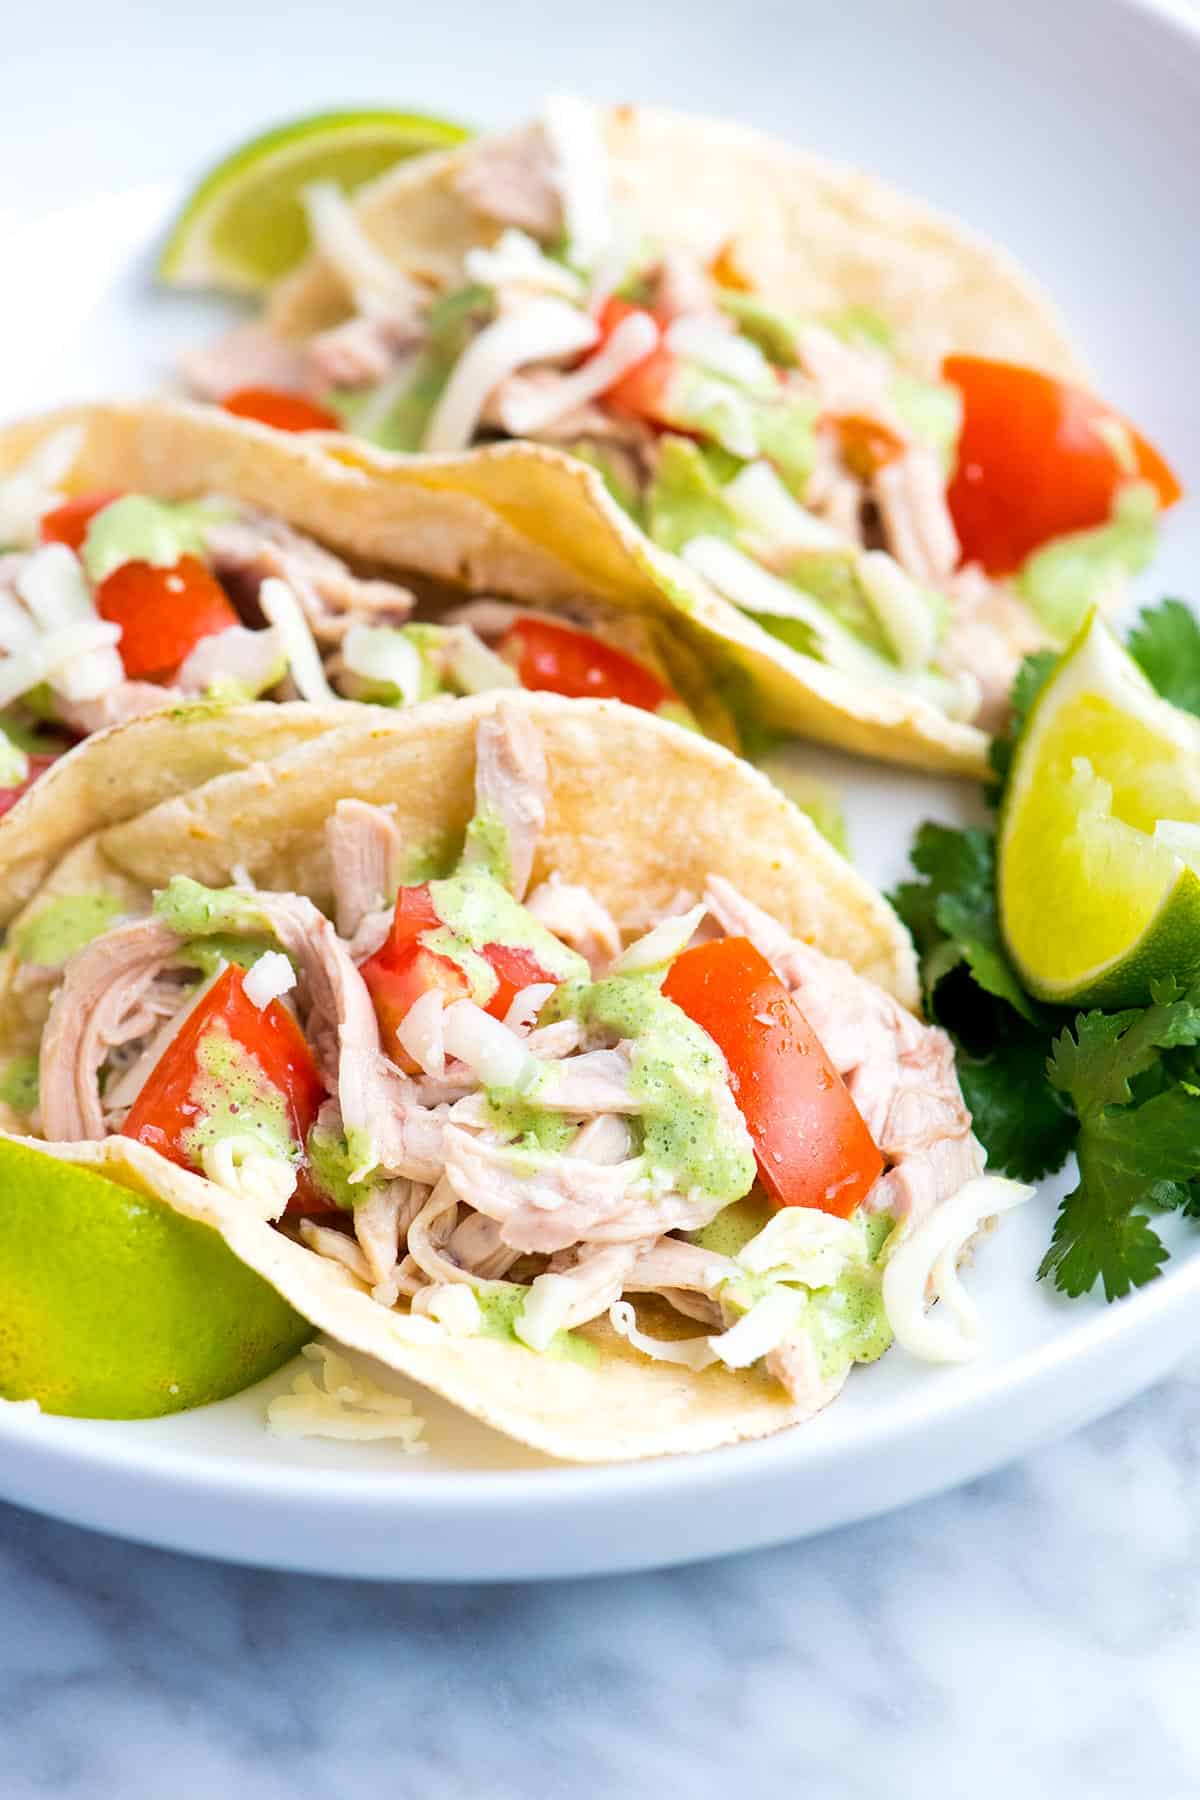
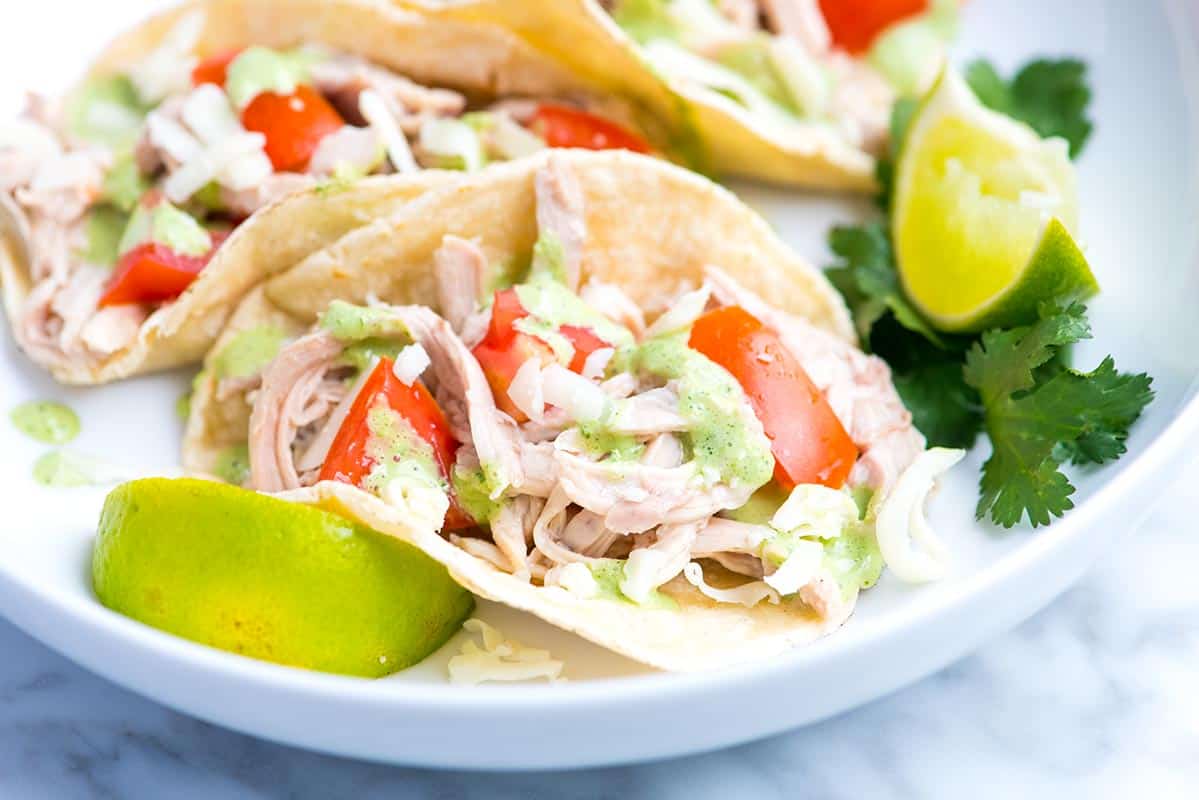
    Shredded Chicken Tacos

    They’re a mash-up of two of our most-loved recipes on Inspired Taste: our tender shredded chicken and the creamy cilantro sauce from our veggie tacos. The combination makes every bite fresh, zesty, and absolutely delicious.

    These tacos come together fast, making them ideal for busy nights. You can even prepare the chicken and sauce in advance, so dinner practically makes itself. For more like this, see our shredded chicken nachos.

    Key Ingredients

    • Chicken: Make chicken for this, use leftover chicken, or use a rotisserie chicken. I love making the chicken by gently simmering chicken thighs or breasts with onion, garlic, bay leaf, cumin, salt, and pepper until they are tender and shreddable. You can do this on the stove, like in our stovetop shredded chicken, or in a slow cooker using our crockpot shredded chicken recipe.
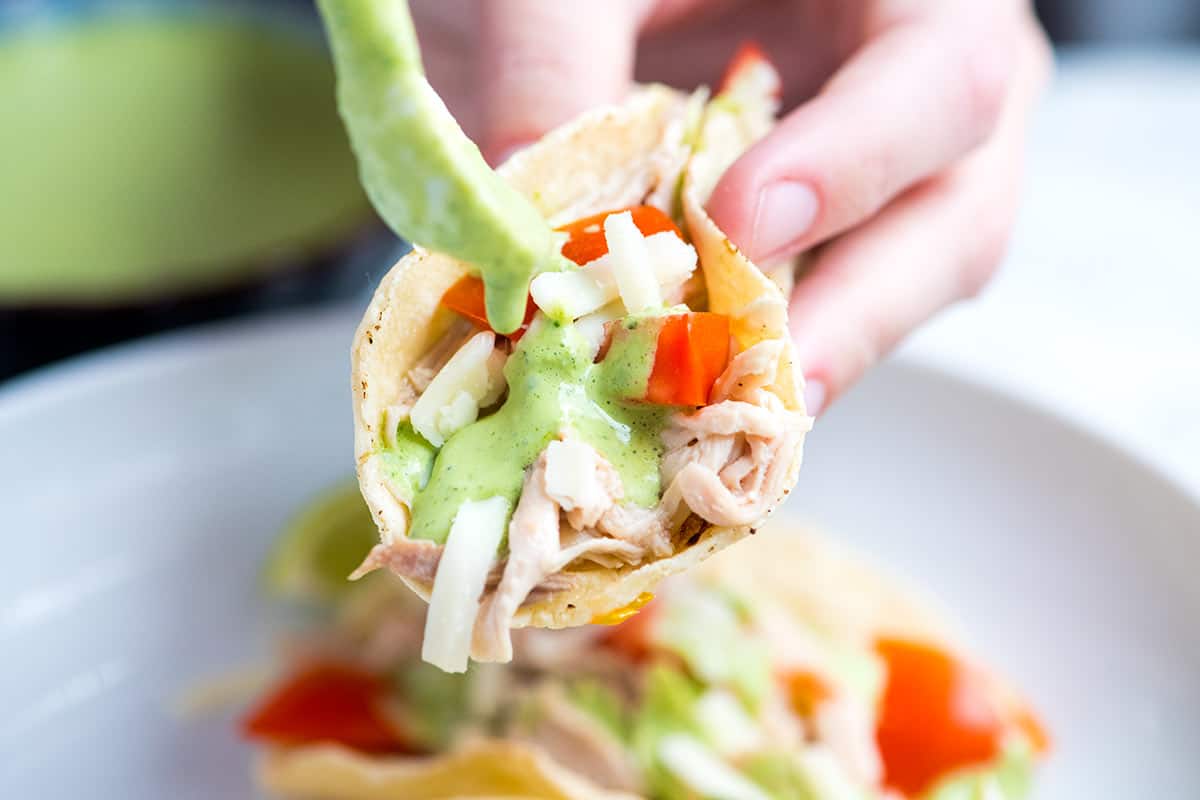
    • Creamy Cilantro Sauce: I love drizzling our creamy cilantro lime sauce over the tacos, which I make with sour cream, lime juice, jalapeño, and cilantro. You can always substitute your favorite store-bought sauce or dressing, but it really does add a lot to the flavor of these tacos. I also use it for these veggie tacos. For more of a cilantro ranch, try this cilantro lime dressing, which I use for our taco salad.
    • Tortillas: Use your favorite tortillas. Corn or flour both work great. When I have the time, I love making my own using our recipes for soft flour tortillas or corn tortillas.
    • Extras: Finish your tacos with your favorite toppings. I love adding extra cilantro, chopped tomato, and crumbled queso fresco. You can also top them with guacamole, pico de gallo, or quick pickled onions for even more flavor.

    Find the full recipe with measurements below.

    How to Make Shredded Chicken Tacos

    Tip 1: The best chicken for tacos. When making shredded chicken for tacos, I love using one of the recipes below. Since the chicken gently cooks in flavorful cooking liquid, it turns out incredibly tender and juicy. Depending on your day, you can choose the quicker stovetop version or the slow cooker option.

    Tip 2: Seasoning the chicken. If you use one of the recipes above, the chicken will already be quite flavorful. For even more flavor, consider tossing it with red enchilada sauce or green enchilada sauce. You can buy them (I love Hatch), or make them with one of our recipes:

    Tip 3: Make-ahead tips. This is one of those dishes I rely on during busy weeks, as it is incredibly easy to meal prep. The cooked chicken will keep in the fridge for up to 3 days and in the freezer for up to a month. The sauce will keep in the refrigerator for about a week.

    Spooning Cilantro Sauce over Shredded Chicken Tacos

    Serving Suggestions

    I’m happy with just tacos on my plate, but if you’d like to add a few more dishes, consider serving these alongside homemade refried beans and Mexican rice, or try this yellow saffron rice. A bowl of tortilla chips and homemade salsa or queso always goes down well, too!

    These easy shredded chicken tacos are full of flavor thanks to well seasoned chicken and a bright and creamy cilantro sauce.

    Easy Shredded Chicken Tacos

    • PREP
    • COOK
    • TOTAL

    These chicken tacos has been a lifesaver for my family. They are quick, delicious, and you can build your tacos however you want. I highly recommend the cilantro sauce, but feel free to customize your tacos with your favorite toppings.

    4 Servings

    You Will Need

    Chicken Tacos

    1 ½ pounds boneless chicken thighs or chicken breasts

    1 medium onion, peeled and sliced

    4 cloves garlic, peeled and lightly crushed

    1 bay leaf

    1 ½ teaspoons ground cumin

    1 teaspoon salt

    1/2 teaspoon ground black pepper

    12 corn tortillas or flour tortillas

    1 medium tomato, chopped

    Cheese such as queso fresco for serving

    1 lime, cut into wedges


    Creamy Cilantro Sauce

    ½ cup sour cream

    2 tablespoons fresh lime juice

    ½ jalapeño, seeds and membrane removed

    ½ cup packed cilantro leaves and tender stems

    Salt to taste

    Directions

      1Cook the chicken: Combine chicken, onion, garlic, bay leaf, salt, cumin, and pepper in a large heavy-bottomed saucepan. Add just enough water to cover the chicken. Turn heat to high, bring to a boil, then remove any foam or scum that floats to the top.

      2Adjust the heat so that the water simmers very gently around the chicken. Cook until chicken is very tender, about 30 minutes. Transfer chicken to a cutting board, and then when it is cool enough to handle, use two forks or your fingers to shred the meat.

      3Reduce cooking liquid: After removing the chicken, boil the remaining liquid in the saucepan until it has reduced by one-third or until its flavor has concentrated. Spoon about 1 cup of the concentrated cooking liquid over the shredded chicken and toss to coat. Use within 2 to 3 days or freeze.

      4Make the sauce: Add sour cream, lime juice, jalapeño, cilantro, and a pinch of salt to a blender. Blend until smooth. Taste, then add more lime juice or salt if needed. Refrigerate for up to a week.

      5Warm tortillas: Wrap tortillas in two stacks with aluminum foil. Place into the oven for 10 to 15 minutes or until warm.

      6Make tacos: Fill each warmed tortilla with chicken and tomatoes. Top with cheese and a drizzle of the cilantro sauce. Serve with extra sauce and lime wedges on the side.

    Adam and Joanne’s Tips

    • Make-ahead tips: The shredded chicken will keep in the fridge for up to 3 days and in the freezer for up to a month. The sauce will keep in the refrigerator for about a week.
    • Double batch of chicken: To make a double batch, increase the chicken to 3 pounds then add more water to the pot. The onion, garlic, and spices do not need to change.
    • Skin-on chicken: We have made this recipe using boneless, skinless chicken thighs and chicken thighs with skin still attached. Both work very well. If you use chicken with skin, just remove and discard the skin before you shred the chicken. You may also find that you need to skim some of the fat from the cooking broth before spooning it over the chicken.
    • Leftover cooking liquid: You will have cooking liquid leftover. It is quite delicious on its own as a light soup. You can also use it as broth for other recipes. Or, if you’re keeping the chicken more than a day, add a spoonful or two to add a little moisture.
    • Slow cooker shredded chicken: add all the ingredients to the slow cooker then cook on LOW until the chicken is cooked and tender, 3 to 4 hours. Shred the chicken and transfer the broth to a saucepan. Simmer the broth until reduced by a third then spoon over the chicken.
    • The nutrition facts provided below are estimates.

    Nutrition Per Serving
    Serving Size
    3 small tacos
    /
    Calories
    313
    /
    Protein
    23g
    /
    Carbohydrate
    22g
    /
    Dietary Fiber
    3g
    /
    Total Sugars
    4g
    /
    Total Fat
    15g
    /
    Saturated Fat
    6g
    /
    Cholesterol
    121mg
    /
    Sodium
    801mg


    AUTHOR:

    Joanne Gallagher

    Adam and Joanne of Inspired Taste

    We are Adam and Joanne Gallagher, the creators of Inspired Taste. Established in 2009, Inspired Taste grew from a childhood dream into one of the internet’s most trusted recipe sites with hundreds of reliable recipes, step-by-step videos, and expert tips.More About Us

    Source link

  • Perfect Vegetable Risotto Recipe

    Perfect Vegetable Risotto Recipe

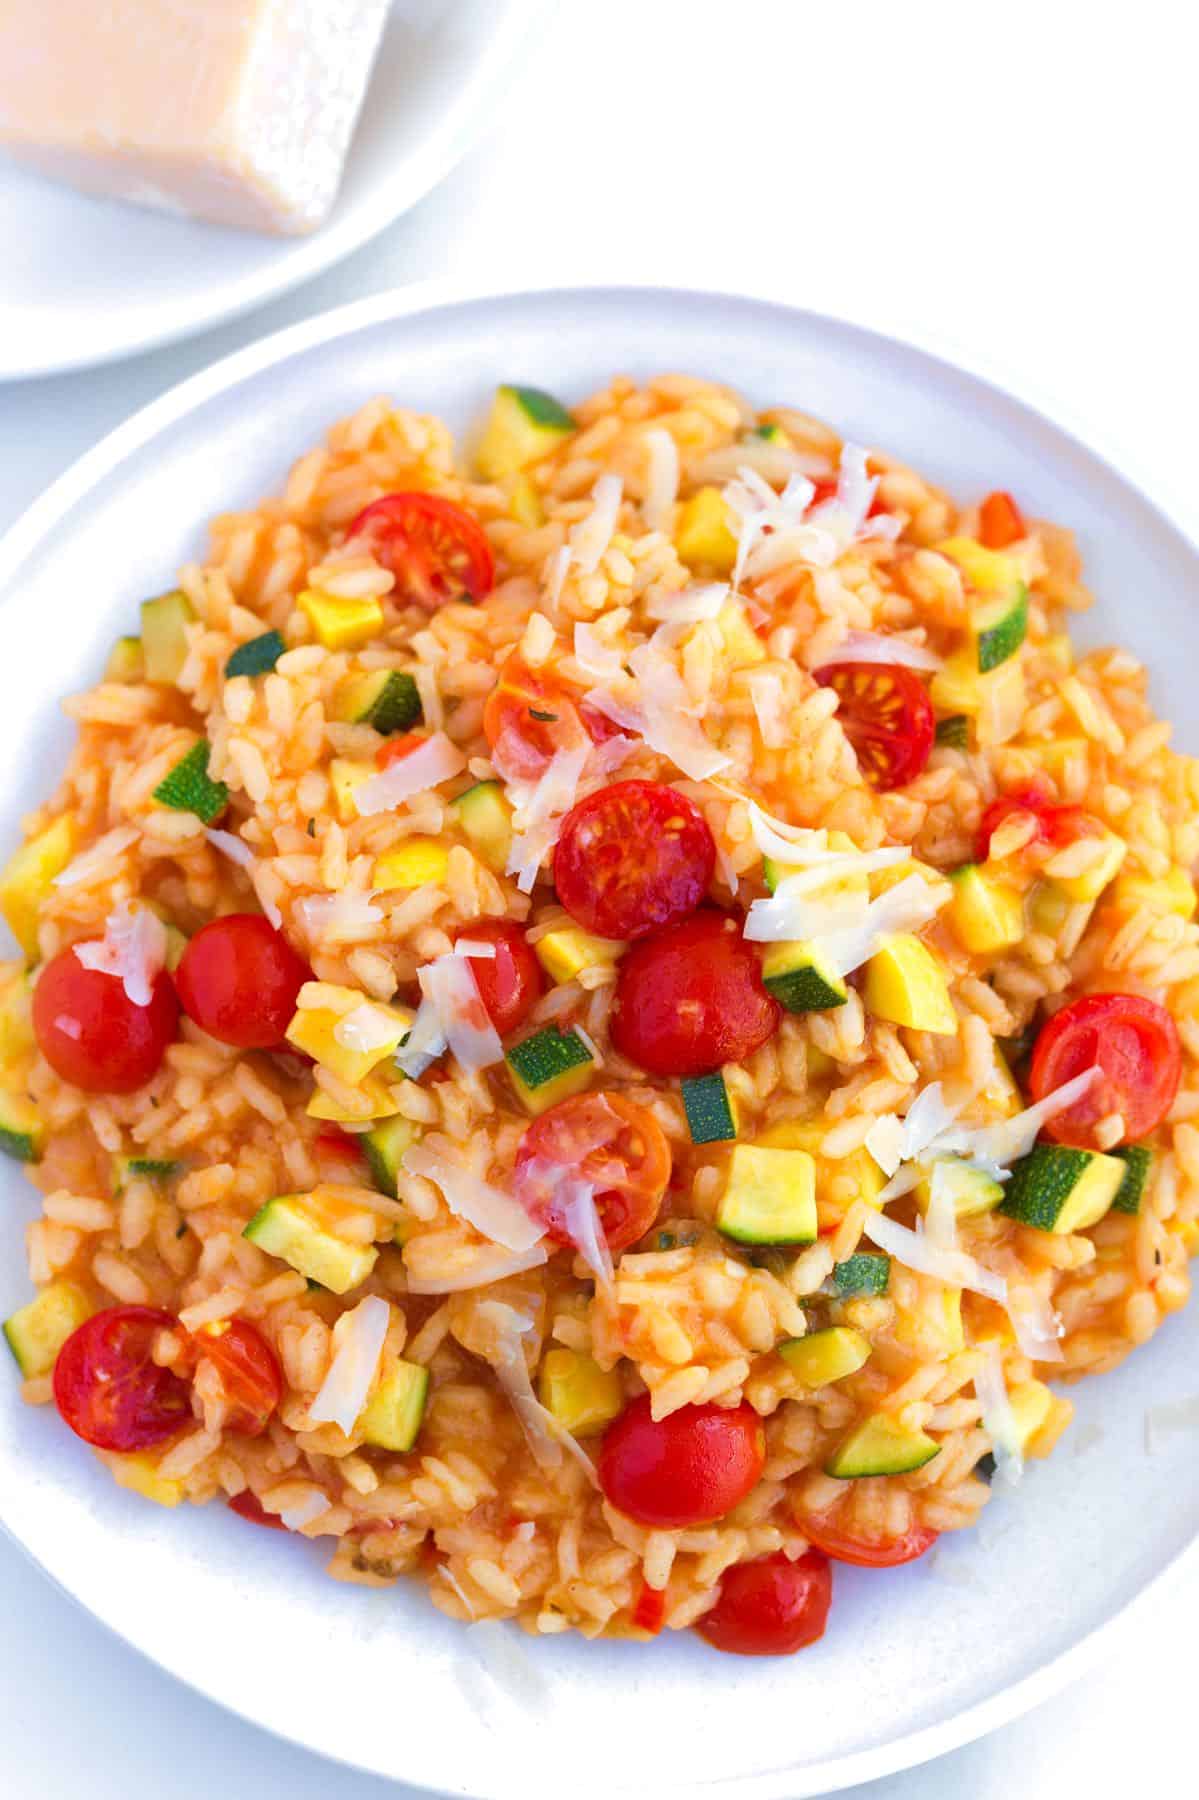
    This vegetable risotto recipe combines two of our favorite things: fresh veggies and super creamy risotto rice. It’s fun to make and with our tips to guide you, it’s easy!

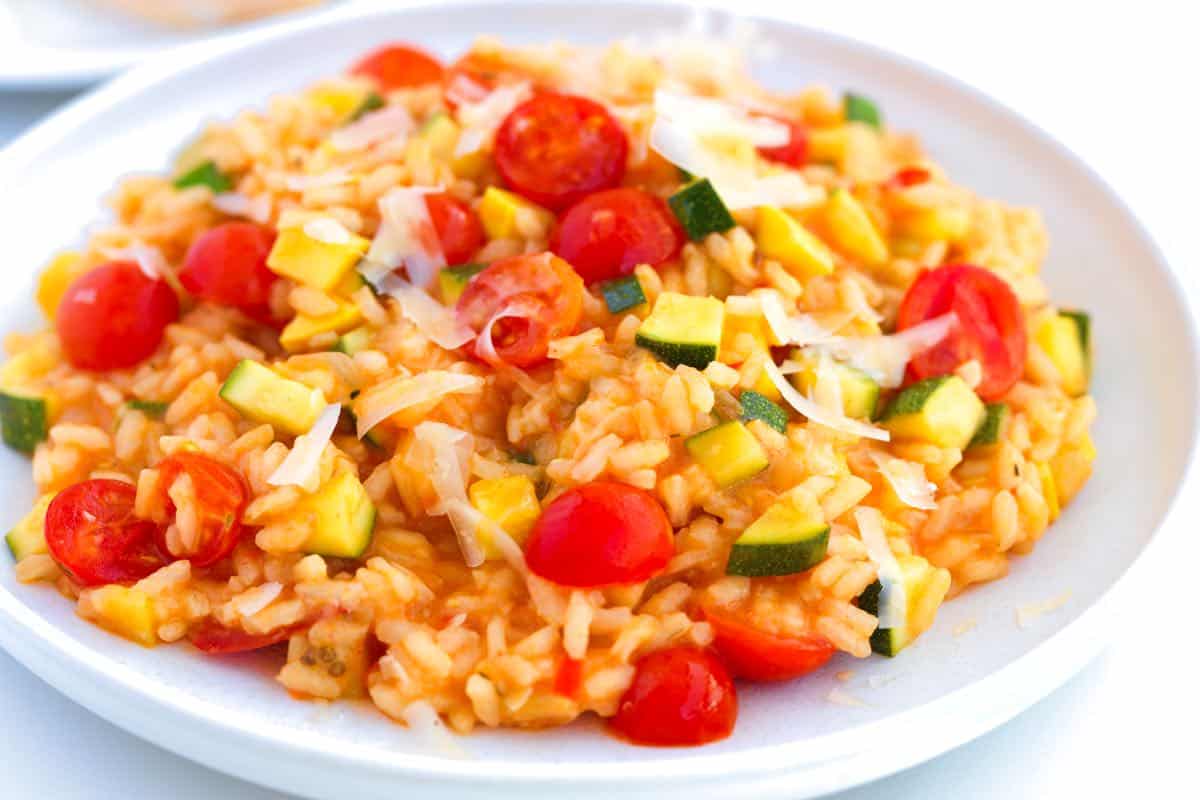
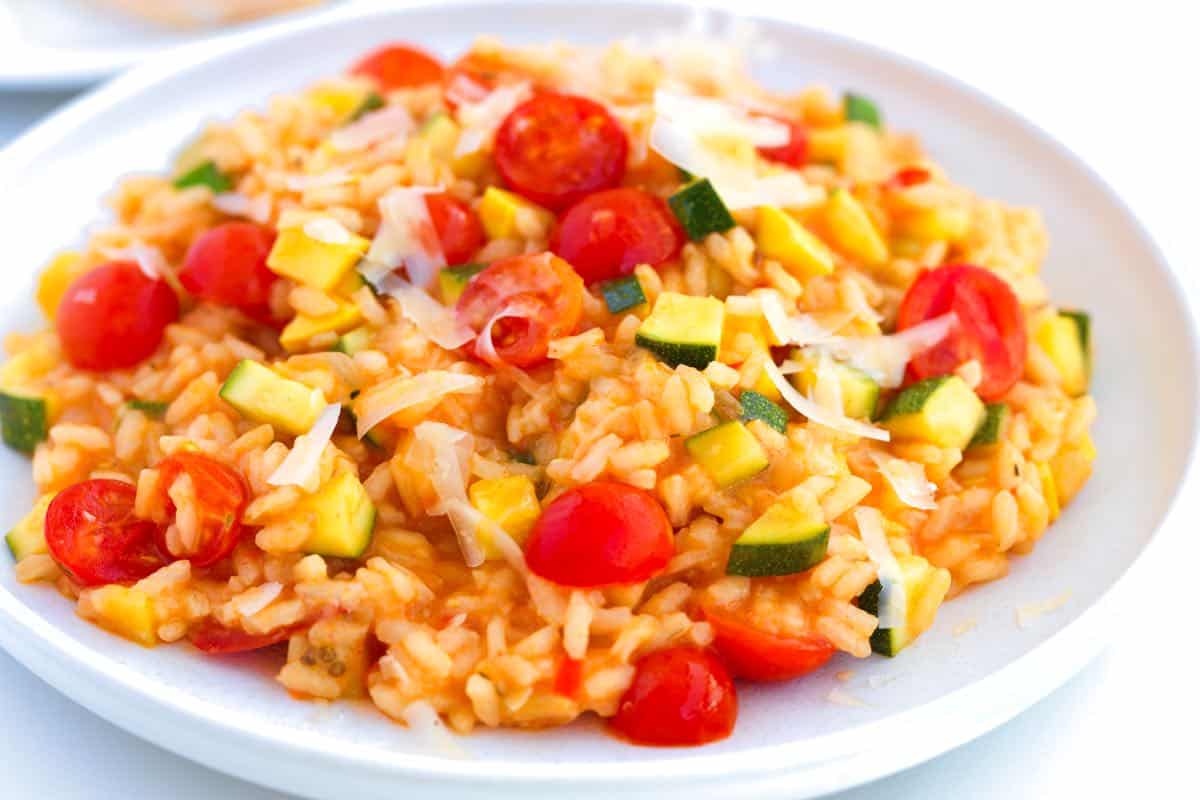
    Homemade Veggie Risotto

    We’re excited to share this recipe developed with our chef friend, Richard Hattaway. Thanks to Richard’s restaurant trick, making risotto at home is now easier than ever. Instead of the usual continuous cooking, this recipe breaks the process into two stages. You can do most of the cooking up to 4 days ahead, then finish it in just 10 minutes right before serving.

    Of course, you can still make the recipe all at once if you prefer, but this two-stage method makes risotto much more convenient for busy schedules. For another risotto recipe, see our mushroom risotto.

    Key Ingredients

    • Rice: The best rice for risotto are Arborio, Carnaroli, and Vialone Nano since they are all short-grain rice varieties with a high starch content. We use Carnaroli in our kitchen since it makes creamy risotto and is more forgiving when it comes to overcooking.
    • Broth: A good vegetable broth and even chicken broth work perfectly well in this recipe, but we love our easy tomato broth for a summery tomato risotto base (that is what we have used in our photos).
    • White Wine: Whenever you cook with wine, the most important thing to remember is to use something you enjoy. We use a light, dry white wine like Pino Gris, Albariño, Grüner Veltliner, or Sauvignon Blanc for this veggie risotto. Wine adds flavor and some acidity. If you prefer to leave it out, replace it with more broth and sprinkle a little fresh lemon juice over the risotto before serving.
    • Veggies: We love risotto with veggies. You have some leeway when it comes to the vegetables. We use yellow squash, zucchini, tomatoes, eggplant, and fresh herbs. These are the same veggies we use to make our reader favorite veggie lasagna.
    • Butter: There’s no cream in this risotto (thanks to the rice, it is creamy enough), but a generous pat of butter adds to the creamy, luxurious texture. For vegan risotto, use plant-based butter.
    • Parmigiano-Reggiano: I’m generous with the cheese and recommend you do the same. For a vegetarian risotto, swap the Parmigiano-Reggiano for a vegetarian-friendly cheese like mozzarella, ricotta, or vegetarian parmesan. For vegan risotto, swap for a bit of nutritional yeast.

    Find the full recipe with measurements below.

    How to Make Vegetable Risotto

    Tip 1: How to make risotto (a quick overview). Making risotto gets a bad rap for being complicated and fussy, but with a reliable method, it’s very doable. Here’s what happens step-by-step:

    1. Cook aromatics (onion, bell pepper, garlic).
    2. Toast the rice.
    3. Add wine and simmer until it reduces.
    4. Add broth gradually, stirring occasionally to prevent the rice from sticking.
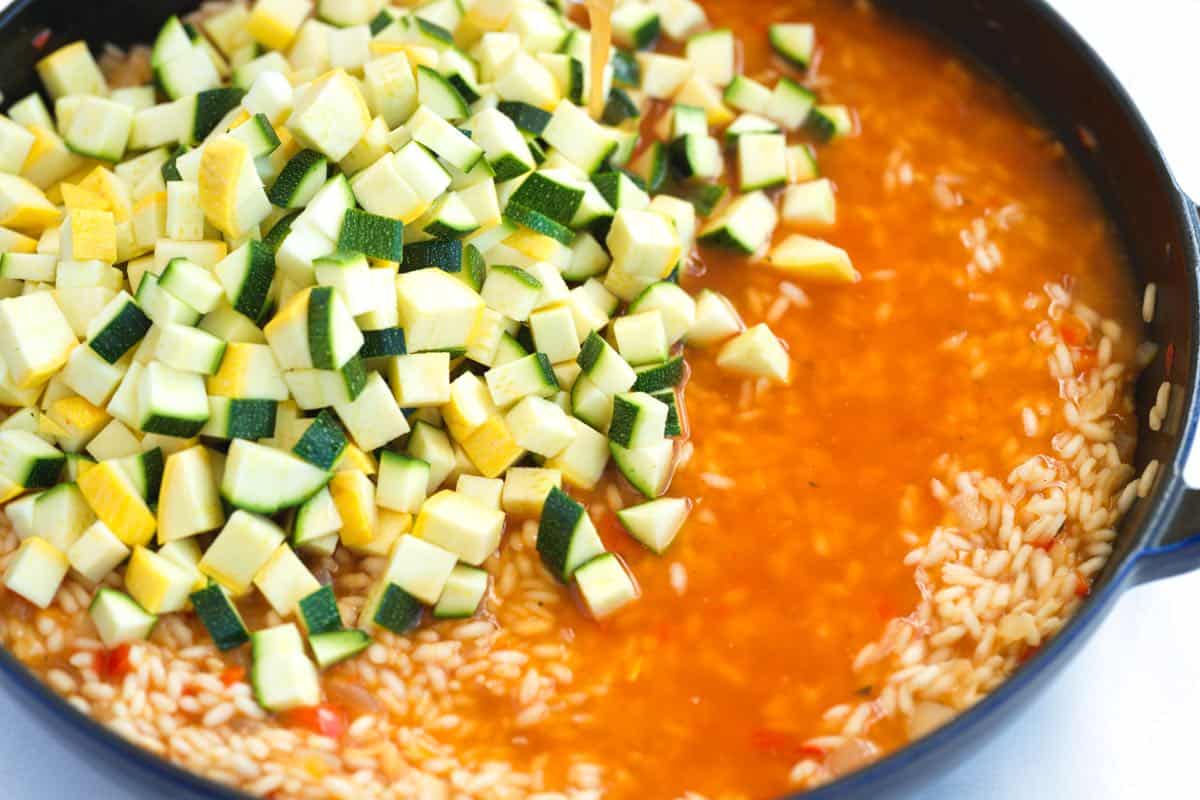
    5. Finish with quick-cooking vegetables (like zucchini and yellow squash).
    6. Stir in butter and cheese, and serve.
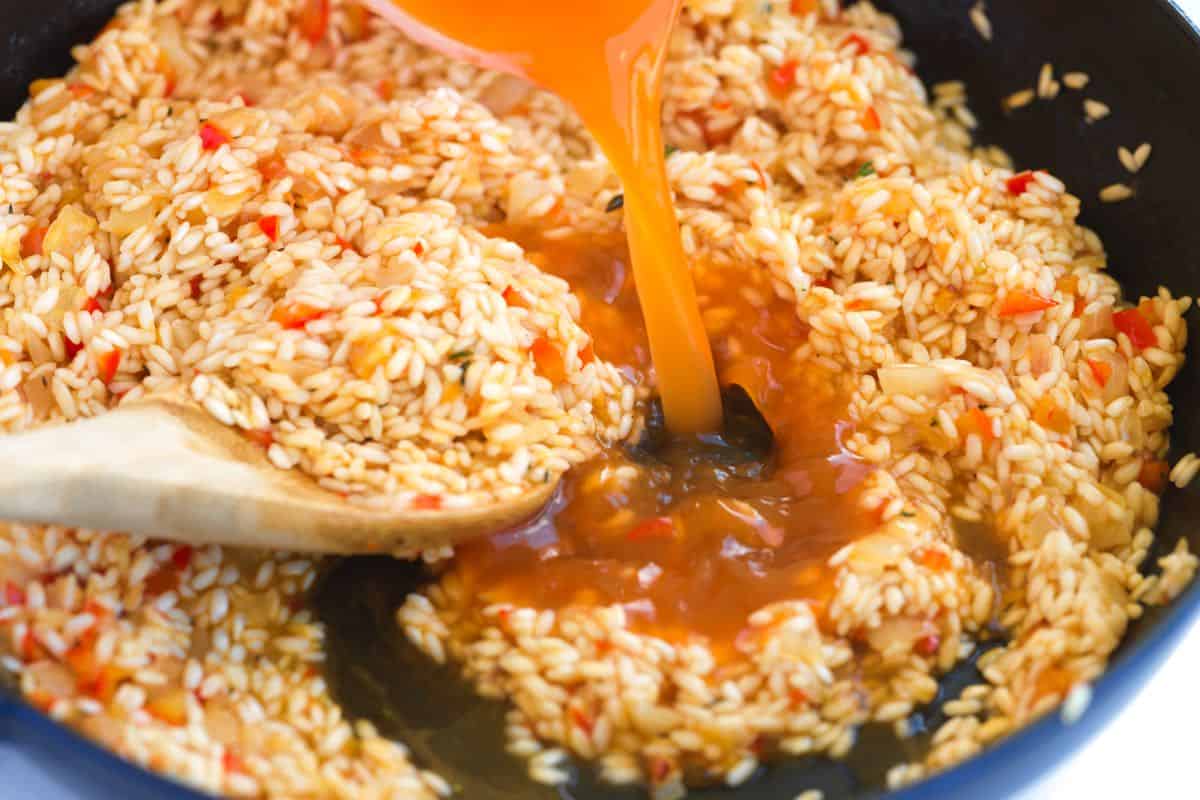
    Adding broth to risotto rice

    Tip 2: Use a heavy-bottomed pan and a wooden spoon. Choose a wide, heavy-bottomed pan so you have room to stir. A wooden spoon is ideal for risotto (a tip from Richard, who says it helps create a creamier texture).

    Tip 3: Continue adding broth as the rice cooks. Let the rice absorb liquid slowly. When the broth is mostly absorbed, add more. Stir occasionally, not constantly. Just enough to keep the rice from sticking. When the rice is almost tender but still firm in the center, it’s about 75% cooked.

    Tip 4: Use the two-part method (excellent for entertaining). When the rice is tender but still firm in the center (about 75% done), you can finish and serve, or pause and store the risotto for later.

    1. Part 1, store for later: Spread the partially cooked risotto on a baking sheet and cool quickly in the freezer. Transfer to containers and refrigerate for up to 4 days.
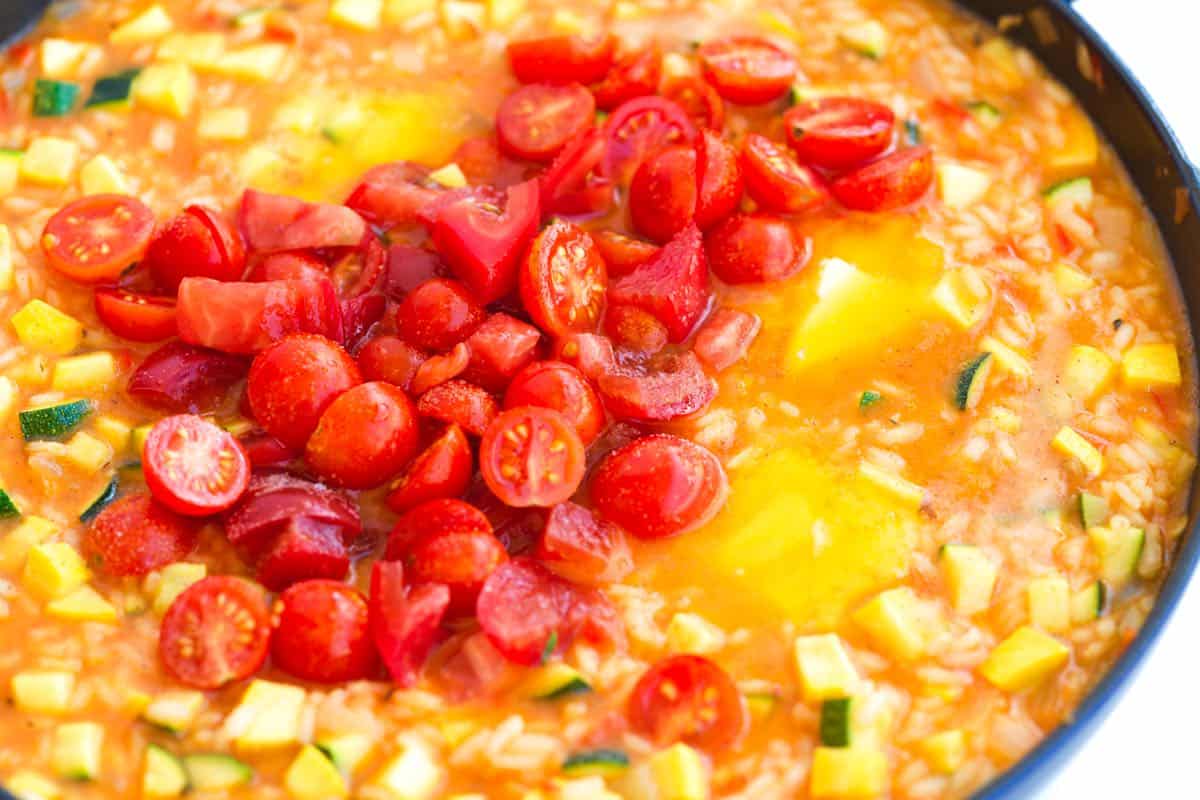
    2. Part 2, finish when ready to serve: Return the rice to your wide pan with chopped zucchini/yellow squash and a splash of broth. Stir often, adding more broth as needed, until the risotto is creamy and the rice is just tender. Season with salt and pepper, stir in chopped tomatoes, then finish with butter and Parmigiano-Reggiano.
    How to Make Vegetable Risotto: Cooking vegetables in risotto
    How to Make Vegetable Risotto: Adding tomatoes to risotto

    Tip 5: Add the optional eggplant puree. Roasted eggplant adds even more savory flavor and extra creaminess. We’ve included instructions below if you’d like to use it.

    Serving Suggestions

    This dish works really well on its own, but you can always add more to round out the meal. Consider a simple green salad with lemon vinaigrette or a homemade Caesar on the side.

    You can add some protein with poached shrimp, simple baked salmon, or these lemon chicken thighs. And, I love a nice slice of roasted garlic bread or focaccia with this olive oil bread dip.

    More Vegetable Recipes

    Vegetable Risotto

    Perfect Vegetable Risotto

    • PREP
    • COOK
    • TOTAL

    This vegetable risotto combines two of our favorite things: fresh veggies and super creamy risotto rice. It’s also fun to make. We use a wide, heavy-bottomed pan and wooden spoon for risotto. A stainless steel rondeau or a wide Dutch oven is excellent. For the broth, we love our tomato broth (it takes 30 minutes), but you can use your favorite homemade or store-bought broth in its place. You will need about 6 cups.

    If you are entertaining, we highly recommend making the risotto in stages. First, cook it until 75% done, cool the rice mixture, and then about 10 minutes before serving, reheat and finish the risotto. This way, you are not standing over a hot stove for 30+ minutes when your guests are there. This method is written into the recipe below.

    Makes 6 servings

    You Will Need

    6 cups vegetable broth, we highly recommend this tomato broth (1420ml)

    2 cups arborio rice or carnaroli rice (380g)

    1 cup dry white wine, see notes (236ml)

    ¼ cup olive oil (60ml)

    1 cup finely chopped onion, half large onion

    ¾ cup finely chopped red bell pepper, half large pepper

    3 cloves garlic, minced

    1 teaspoon fresh thyme leaves, chopped

    1 medium yellow squash, chopped small

    1 medium zucchini, chopped small

    1 ¼ cups cherry tomatoes or use chopped tomatoes, 6 ounces

    3 tablespoons salted butter

    Handful chopped fresh herbs like basil, chives, and green onion

    Parmigiano-Reggiano cheese for serving

    Directions

    • Make Rice Mixture
    • 1Cook aromatics: In a wide, heavy-bottom pan over medium heat, cook the garlic, onion, and bell pepper in olive oil until the onions turn translucent, about 3 minutes.

      2Toast the rice: Add the rice and thyme and cook, stirring for 3 to 5 minutes. When the rice sticks a little, pour 1 cup of white wine into the pot. Stir the rice and wine around the pan with a wooden spoon until mostly dry.

      3Add the broth: This step will take about 15 minutes. Begin by measuring out 3 ½ cups of broth, setting aside the remaining 2 ½ cups for later. Pour one third of the measured broth into the pan and keep the risotto at a low simmer while stirring often to prevent the rice from sticking. Once the pot becomes mostly dry, add another one third of the broth and repeat the process until all of the remaining stock has been added.

      4The rice will be about 75% done and will be somewhat tender while still having a raw bite in the center. This is the end of stage one. Either cool the partially cooked risotto to finish later or move on to finishing the risotto.

    • Cool Rice Mixture (optional for entertaining or making ahead)
    • 1You can skip this step if making the risotto from start to finish. When the rice mixture is 75% done, cool the risotto rice by spreading thin on a baking sheet and placing it in the refrigerator. When it is cool, transfer the risotto rice to a container or resealable bags, and store it in the fridge for up to 4 days. If you have a smaller family, like me, you can divide the rice mixture into two batches.

    • Finish Risotto
    • 1Add the squash and zucchini: About 10 minutes before serving, heat a wide, heavy-bottomed pan over medium heat. Add the cooled rice mixture, chopped yellow squash, and zucchini. If you skipped cooling the rice, simply add the squash and zucchini to your pan with the hot rice mixture.

      2Add the broth: Grab the remaining 2 ½ cups of broth. Pour in a third of the broth. Then, with the wooden spoon, stir the rice mixture constantly, ensuring it doesn’t stick to the pan. Once the pot is mostly dry, add another one third of the broth and repeat the process until all of the remaining stock has been added.

      3Season and add the tomatoes: Season the vegetable risotto with 1 ½ teaspoons of fine sea salt, and stir in the tomatoes.

      4To finish: Grate enough parmesan cheese over the top to cover the rice, add the butter, and finish with 5 twists of black pepper. Stir until the butter melts and the tomatoes are hot. The risotto should be creamy, the squash tender, and the tomatoes heated through. Serve immediately with fresh green herbs, green onion, and extra parmesan cheese on top.

    Adam and Joanne’s Tips

    • Eggplant puree: For even more flavor, stir in 1/2 cup of eggplant puree to the risotto at the same time as the tomatoes. To make eggplant puree, char the outside of a medium eggplant over a gas flame or under the broiler for about 10 minutes. Then, roast the eggplant in a 425°F (220°C) oven for 12 minutes or until the eggplant is completely soft. Remove the eggplant from the oven and let it cool. Scrape the softened eggplant flesh into a blender and puree until smooth.
    • Wine to use: Choose a lighter dry white wine like Pino Gris, Albariño, Grüner Veltliner, or Sauvignon Blanc
    • Wine substitution: If you prefer to leave the wine out, replace it with more broth and sprinkle a little fresh lemon juice over the risotto before serving.
    • Alternate methods: For the best, creamiest result, we do not recommend using a slow cooker or pressure cooker (Instant Pot) for making risotto.
    • The nutrition facts provided below are estimates.

    Nutrition Per Serving
    Serving Size
    1/6 of the recipe
    /
    Calories
    430
    /
    Total Fat
    16.4g
    /
    Saturated Fat
    5.7g
    /
    Cholesterol
    18.8mg
    /
    Sodium
    647.3mg
    /
    Carbohydrate
    57.8g
    /
    Dietary Fiber
    1.3g
    /
    Total Sugars
    4.7g
    /
    Protein
    6.2g


    AUTHOR:

    Joanne Gallagher

    Adam and Joanne of Inspired Taste

    We are Adam and Joanne Gallagher, the creators of Inspired Taste. Established in 2009, Inspired Taste grew from a childhood dream into one of the internet’s most trusted recipe sites with hundreds of reliable recipes, step-by-step videos, and expert tips.More About Us

    Source link

  • Pan-Fried Salmon With Pea Salad

    Pan-Fried Salmon With Pea Salad

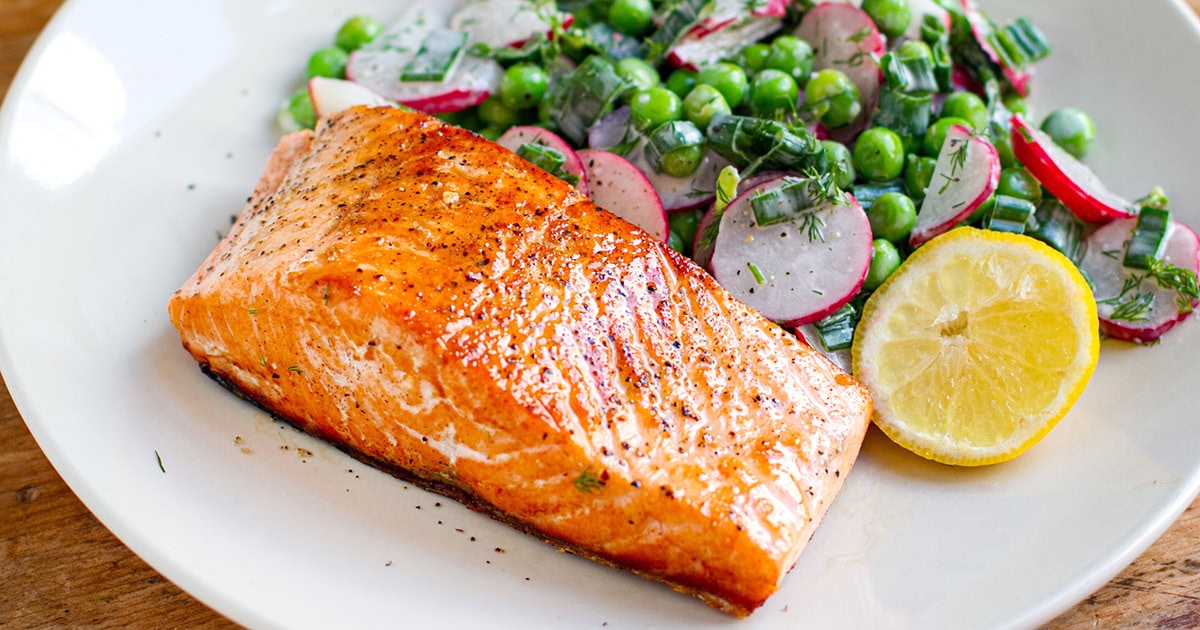
    Crispy skin pan-fried salmon paired with a fresh, creamy green pea and radish salad—this is a healthy dinner recipe that’s quick, flavorful, and perfect any time of year, but especially spring.


    Jump to: ℹ️ Overview | 🛒 Ingredients | 📷 How To Make | 👩‍🍳 Recipe Tips | 🥗 Serving Suggestions | 📝 Full Recipe Card | 🍽 More Healthy Dinner Recipes


    This pan-fried salmon with green pea salad is one of those meals that feels like spring on a plate but works beautifully year-round.

    The salmon is pan-fried until the skin turns super crispy, while the inside stays tender, pink, and flaky. The salad balances it out with crunchy radishes, sweet peas, and a creamy dill dressing that’s like a lighter, fresher ranch.

    I’ve made this plenty of times, and it’s the kind of recipe that makes you feel both satisfied and light at the same time. Packed with protein, healthy fats, and fiber, it’s as nutrient-dense as it is delicious. Plus, the whole dish comes together in under 30 minutes—weeknight win!

    👩‍🍳 You might also like these salmon dinner recipes: teriyaki salmon bowls, Mediterranean salmon bowl, orange teriyaki baked salmon, salmon bites with sweet chili glaze, sheet pan salmon & veggies, or these salmon dinner ideas. For high-protein and high-fiber recipes, check out my Mediterranean fish with white bean purée.

    What You’ll Need

    Here is what you’ll need for this pan-fried salmon recipe. Find the full measurements in the recipe card below.

    Salmon fillets – Choose skin-on for that golden, crispy finish. Plus, olive oil to achieve that perfect sear, salt and pepper for seasoning, and lemon wedges for a final squeeze to lift the whole dish.

    • For the salad: Green peas (sweet and slightly starchy, they add a pop of freshness. Frozen works perfectly here), radishes (peppery crunch for balance), fresh dill & green onions (herbal, fresh, and a little oniony bite).
    • For the dressing: Greek yogurt & mayonnaise (creamy base for the dressing, like a lighter ranch. Swap sour cream if you prefer), lemon juice to brighten things up, salt, and pepper for seasoning.

    How To Make Pan-Fried Salmon With Pea Salad

    Find the full recipe and nutritional information below. Here are some handy step-by-step photos for how to make crispy skin salmon in a frying pan. Plus, that lovely pea and radish salad.

    • Defrost peas in boiling water, then drain and cool.
    • Slice radishes thinly and add to a bowl with peas, dill, green onions, yogurt, mayo, lemon juice, salt, and pepper. Mix and taste.
    • Bring the salmon to room temperature before cooking. Pat dry the salmon fillets, especially the skin.
    • Heat olive oil in a skillet until hot.
    • Cook salmon skin-side down for 5–6 minutes, sprinkle flesh with salt and pepper.
    • Flip and cook for another 3 minutes, then quickly sear the sides.
    • Serve salmon with salad and a squeeze of lemon.

    Recipe Tips

    • Crispy skin secret: Make sure your salmon is patted dry and the pan is hot before adding the fish.
    • Make-ahead salad: You can prep the salad 1 day in advance. Keep dressing separate until ready to serve.
    • Storage: Leftover salmon keeps in the fridge for 2 days. The salad is best fresh but can hold up for 24 hours.
    • Variations: Add cucumber for extra crunch, swap dill for parsley, or mix in a little Dijon mustard for punchier dressing.

    Serving Suggestions

    Pan-fried salmon pairs with so many dishes. While I love it with this vibrant radish and pea salad, you can also serve it with any of these side dishes:

    💬 If you’ve tried this pan-fried salmon with pea salad or any other recipe on the blog then don’t forget to rate the recipe and let me know how you got on in the comments below, I love hearing from you! You can also FOLLOW ME on Instagram, Facebook, Pinterest, YouTube, and or sign up to my Newsletter to see more of my delicious food.

    Want to Save This Recipe?

    Enter your email & I’ll send it to your inbox. Plus, get great new recipes from me every week!

    By submitting this form, you consent to receive emails from Cooked & Loved

    Crispy skin pan-fried salmon paired with a fresh, creamy green pea and radish salad—this is a healthy dinner recipe that’s quick, flavorful, and perfect any time of year but especially spring.

    • Remove salmon from the fridge and let it come to room temperature. Pat dry with some kitchen paper towels.

    • Place peas in a bowl of boiling water for a few minutes to defrost, then drain and rinse under cold water.

    • Slice radishes thinly, halving larger ones. Add to a large mixing bowl with peas, dill, green onions, yogurt, mayo, lemon juice, salt, and pepper. Mix well and adjust seasoning to taste. Set aside.

    • Heat olive oil in a large skillet over high heat. Once hot, place salmon fillets skin-side down. Reduce heat to medium-high.

    • Season the flesh with salt and pepper, and cook skin-side down for 5–6 minutes until crispy.

    • Flip and cook for another 3 minutes, then briefly sear the sides (10–20 seconds) if needed.

    • Serve salmon with the green pea salad and lemon wedges.

    • Can I use fresh peas? Yes! Just blanch them briefly until tender.
    • Do I need skin-on salmon? For the crispiest texture, yes. But skinless will still taste great.
    • How do I know when salmon is done? The flesh should be opaque and flake easily but still slightly pink inside.
    • What’s the best pan for crispy salmon? A cast-iron or stainless steel skillet works best for that golden sear.
    • Crispy skin secret: Make sure your salmon is patted dry and the pan is hot before adding the fish.
    • Make-ahead salad: You can prep the salad 1 day in advance. Keep dressing separate until ready to serve.
    • Storage: Leftover salmon keeps in the fridge for 2 days. The salad is best fresh but can hold up for 24 hours.
    • Variations: Add cucumber for extra crunch, swap dill for parsley, or mix in a little Dijon mustard for punchier dressing.

    Calories: 332kcal | Carbohydrates: 14g | Protein: 30g | Fat: 17g | Saturated Fat: 3g | Polyunsaturated Fat: 7g | Monounsaturated Fat: 6g | Trans Fat: 0.01g | Cholesterol: 72mg | Sodium: 404mg | Potassium: 898mg | Fiber: 5g | Sugar: 5g | Vitamin A: 763IU | Vitamin C: 44mg | Calcium: 60mg | Iron: 2mg

    Keywords: Pan-Fried Salmon With Pea Salad, Pan-fried salmon, crispy skin salmon with green pea salad, Pan-Fried Salmon With Radish Pea Salad

    More Healthy Dinner Recipes


    Source link