Author: admin

  • Slow Cooker Sausage Stew

    Slow Cooker Sausage Stew

    Slow Cooker Sausage Stew also has beans and greens, and this is a tasty slow cooker dinner that’s loaded with Italian flavors! See tips for making a version of this slow cooker stew that’s lower in carbs.

    PIN the Slow Cooker Sausage Stew to try it later!
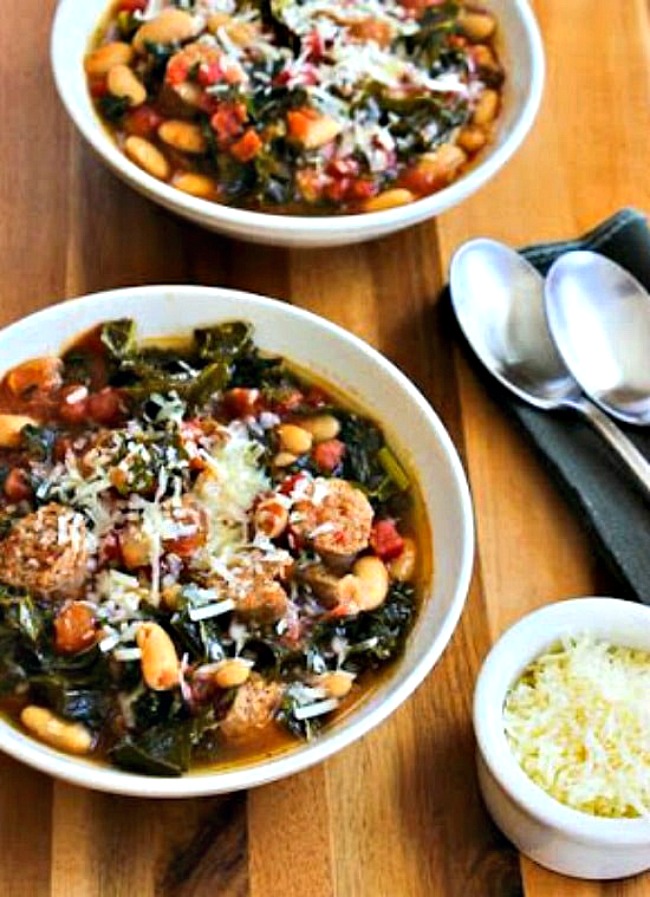
    Slow Cooker Cannellini Bean Soup with Sausage and Kale finished soup in bowls

    This Slow Cooker Sausage Stew has some of my favorite flavors, and this stew with beans and kale is flavorful and comforting. And Italian sausage, beans, and kale is a classic combination in Italian cooking, and I loved how this turned out.

    One thing that was an experiment in this slow cooker stew was adding the kale to the slow cooker after the sausage and beans had cooked for a few hours. And I was so happy with how the raw kale softened perfectly in the slow cooker with just a little more cooking time, and the slightly chewy kale was one of my favorite parts of this dish!

    I know my site has a lot of recipes that use Italian sausage, and I never get tired of it. If you’re also a sausage fan, I hope you give this recipe a try! And personally I’d always eat this kind of stew with Parmesan cheese sprinkled on at the table, but the recipe is dairy-free if you skip the Parmesan.

    What ingredients do you need for this recipe?

    (This is only a list of ingredients; please scroll down for complete printable recipe. Or if you use the JUMP TO RECIPE link at the top of the page, it will take you directly to the complete recipe.)

    What beans can you use for Slow Cooker Sausage Stew?

    I loved the Cannellini Beans (white kidney beans) I use for this bean stew, but if you don’t find those at your store any type of dried white bean such as Great Northern Beans will be fine.

    What other greens can you use for Slow Cooker Sausage Stew?

    As I mentioned, I loved the slightly-chewy kale in this slow cooker stew, but if you’re not a fan of kale you can use other greens like spinach, Swiss chard, mustard greens, or collards. Softer greens will not need quite so much cooking time.

    What size slow cooker did I use for the slow cooker stew?

    I used my Crock-Pot 5-Quart Smart-Pot Slow Cooker (affiliate link) for this recipe, but a slightly smaller slow cooker will work.

    How can you make this Slow Cooker Sausage Stew lower in carbs?

    You can use fewer beans and more sausage and kale to make a tasty lower-carb version of this recipe.
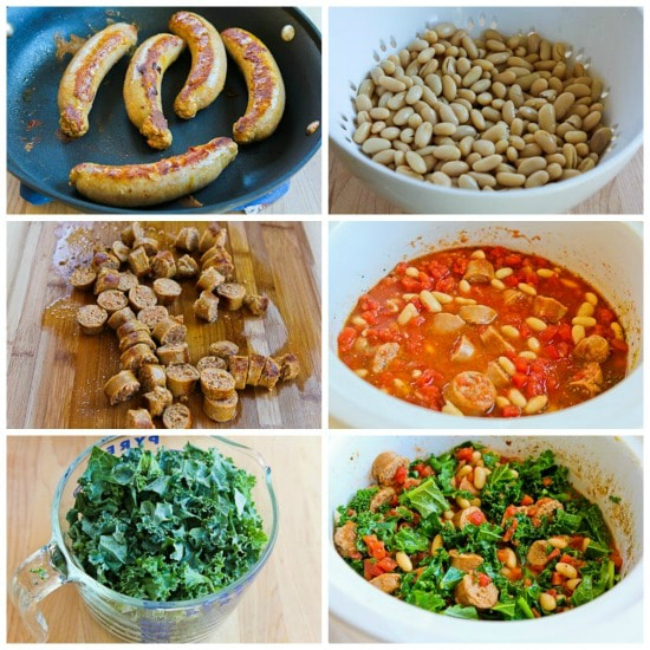
    Slow Cooker Cannellini Bean Stew with Tomatoes, Italian Sausage, and Kale process shots collageSlow Cooker Cannellini Bean Stew with Tomatoes, Italian Sausage, and Kale process shots collage

    How to Make Slow Cooker Sausage Stew:

    (This is only a summary of the steps for the recipe; please scroll down for complete printable recipe. Or if you use the JUMP TO RECIPE link at the top of the page, it will take you directly to the complete recipe.)

    1. Brown the sausages well in a little olive oil  (Don’t skip this step!)
    2. While the sausage browns, dump the Cannellini beans into a colander placed in the sink, rinse, and let them drain.
    3. When the sausage is well-browned slice it into pieces about an inch thick.
    4. Add the beans, sausage slices, tomatoes, spices, and canned chicken broth (affiliate link) to the slow cooker and let it cook for about 2 1/2 hours on high (or 5 hours on low.)
    5. Wash and chop the kale to make 4 cups of chopped kale.
    6. Add the kale to the slow cooker and let it cook 45 minutes longer on high (or twice as long on low.)
    7. I forgot to take a photo when the kale was done, but it was tender but still slightly chewy after 45 minutes.  If you’d like softer kale, let it go a bit longer.
    8. Serve hot with a little Parmesan cheese sprinkled on top.
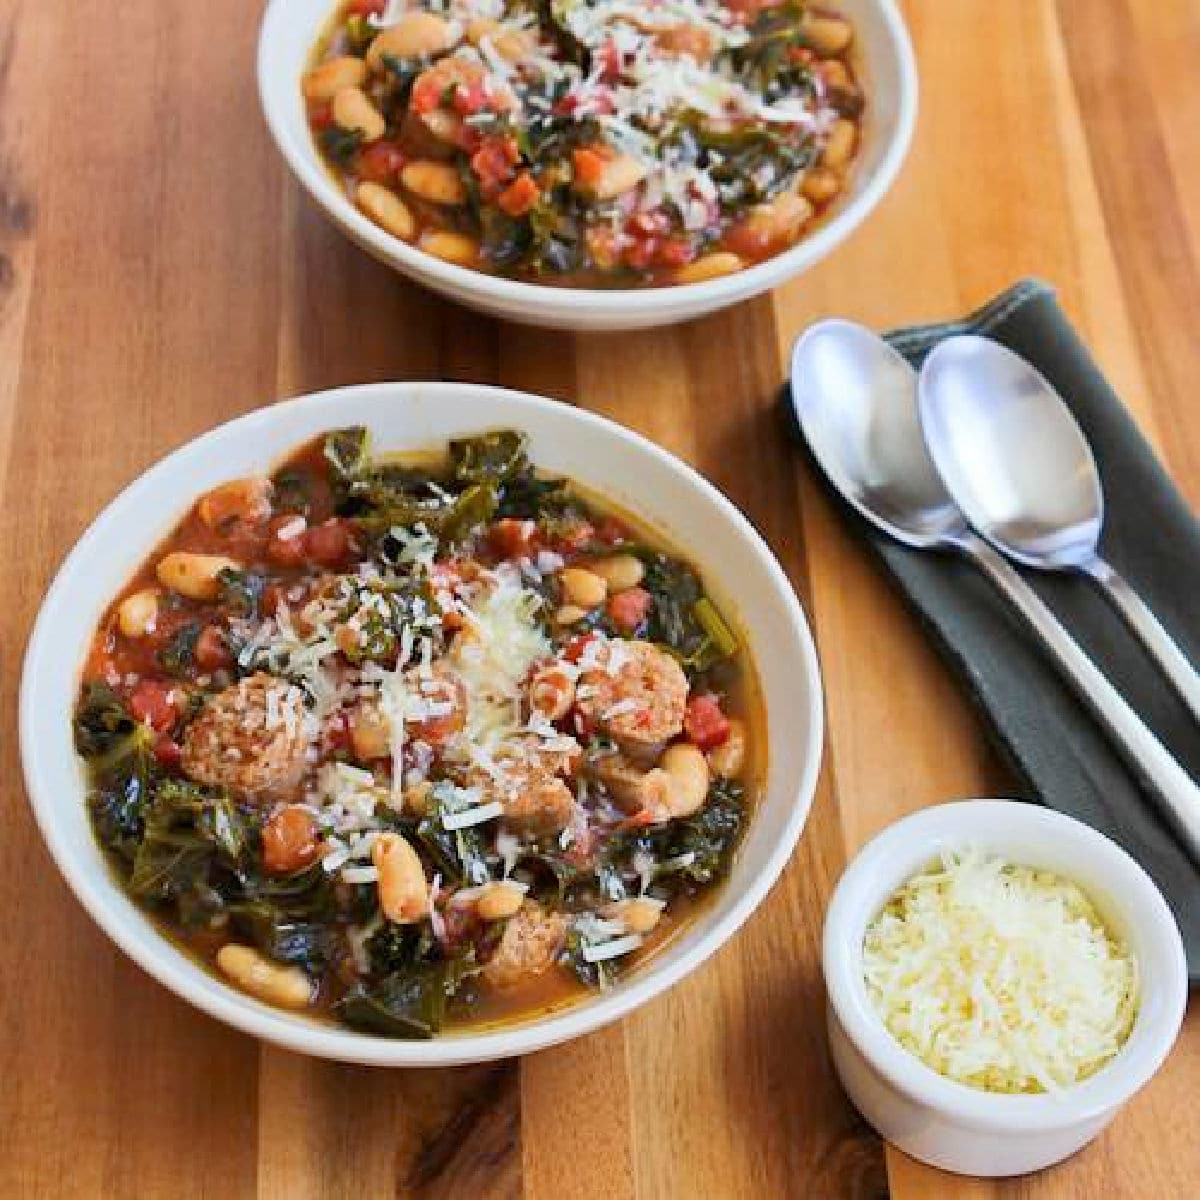
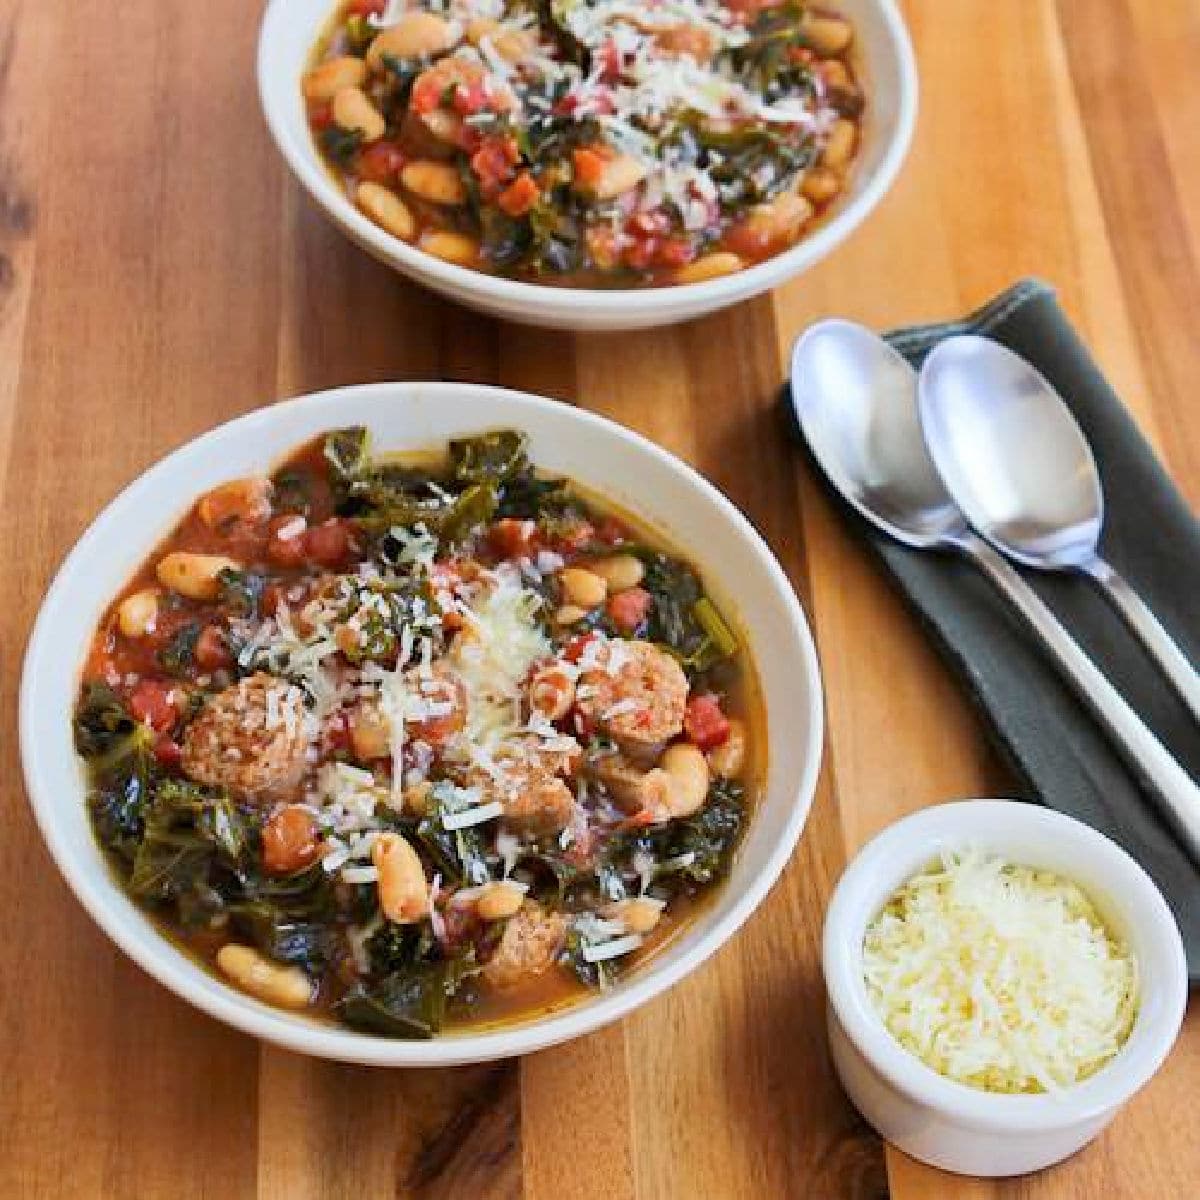
    Square image for Slow Cooker Sausage Stew shown in two serving bowl with spoons and Parmesan cheese on the side.Square image for Slow Cooker Sausage Stew shown in two serving bowl with spoons and Parmesan cheese on the side.

    More Slow Cooker Stew Recipes with Beans:

    Weekend Food Prep:

    This Slow Cooker Sausage Stew recipe has been added to a category called Weekend Food Prep where you’ll find recipes you can prep or cook on the weekend and eat during the week!

    Ingredients

    • one 19.5 oz. package hot turkey Italian sausage (see notes)
    • 2 tsp. olive oil
    • two 14.5 oz. cans petite dice tomatoes, not drained
    • two 15 oz. cans cannellini beans, drained (see notes)
    • 2 T minced garlic
    • 1 tsp. dried basil
    • 1 tsp. dried oregano
    • 1/2 tsp. ground fennel (or more)
    • 1 1/4 cup chicken broth or stock (see notes)
    • 4 cups chopped kale leaves

    Instructions

    1. Heat the oil in a large heavy frying pan, add sausages, and cook turning often, for 10 minutes or until sausage is nicely browned on all sides.
    2. Remove sausage to a cutting board to let it cool.
    3. While sausage cooks, dump the two cans of cannellini beans into a colander placed in the sink and rinse well with cold water (until no more foam appears.)  Let beans drain well.
    4. As soon as the sausage is cool enough to handle, slice it into round pieces about 1 inch thick.
    5. Put sliced sausage, drained beans, tomatoes with juice, garlic, dried basil, dried oregano, ground fennel, and chicken stock into the slow cooker and stir gently.
    6. Let cook for about 2 1/2 hours on high or 5 hours on low.
    7. While the stew is cooking, chop the kale, cutting away and discarding any thick inner ribs.  (Wash kale in a salad spinner if you’re using garden kale.)
    8. After 2 1/2 hours on high (or 5 hours on low), add the kale and stir gently into the stew.
    9. Continue cooking stew about 45 minutes more on high (or 1 1/2 hours on low).
    10. Serve hot, with some Parmesan cheese sprinkled on top if desired.

    Notes

    Use pork Italian sausage if you prefer. You can use a full can of chicken broth, which is going to be slightly more liquid; reduce the broth if you want to keep it a thicker stew.

    I used my Crock-Pot 5-Quart Smart-Pot Slow Cooker (affiliate link) for this recipe, but a slightly smaller slow cooker will work.

    This freezes well and can be reheated in the microwave or in a pan on the stove.

    Recipe created by Kalyn.

    Nutrition Information

    Yield

    8

    Serving Size

    1

    Amount Per Serving

    Calories 336Total Fat 10gSaturated Fat 2gTrans Fat 0gUnsaturated Fat 6gCholesterol 68mgSodium 559mgCarbohydrates 32gFiber 8gSugar 2gProtein 30g

    Nutrition information is automatically calculated by the Recipe Plug-In I am using. I am not a nutritionist and cannot guarantee 100% accuracy, since many variables affect those calculations.
    Did you make this recipe?

    Did you make this recipe? Please leave a star rating (under the PRINT button in the recipe) or share a photo of your results on Instagram! THANKS!

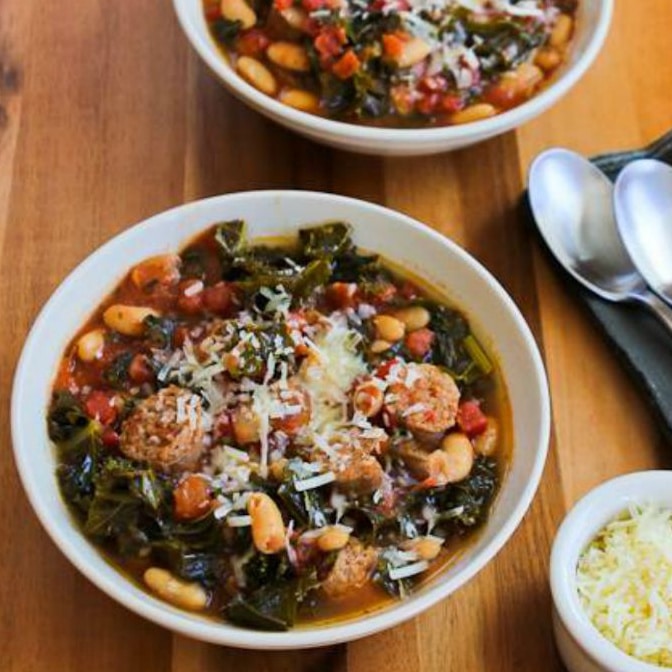
    Slow Cooker Stew with Sausage, Beans, and Kale in two bowls with ParmesanSlow Cooker Stew with Sausage, Beans, and Kale in two bowls with Parmesan

    Low-Carb Diet / Low-Glycemic Diet / South Beach Diet Suggestions:
    Sausage stew with this many beans would be too high in carbs for a traditional low-carb diet plan, but you can make a tasty lower-carb version of this by using more sausage and kale and fewer beans. With lower-fat turkey Italian sausage this Slow Cooker Sausage would be approved for all phases of the original South Beach Diet. Even though dried beans are a low-glycemic ingredient, remember they’re limited to 1/3 to 1/2 cup for phase one of South Beach, so adjust portion sizes accordingly.

    Find More Recipes Like This One:
    Use Slow Cooker Recipes to find more recipes like this one. Use the Diet Type Index to find recipes suitable for a specific eating plan. You might also like to follow Kalyn’s Kitchen on Pinterest, on Facebook, on Instagram, on TikTok, or on YouTube to see all the good recipes I’m sharing there.

    Historical Notes for this Recipe:
    The Slow Cooker Sausage Stew was first posted in 2012, when I was doing lots of experiments in my slow cooker. The recipe was last updated with more information in 2024.
    Pinterest image of Slow Cooker Sausage Stew

    We are a participant in the Amazon Services LLC Associates Program, an affiliate advertising program designed to provide a means for us to earn fees by linking to Amazon.com and affiliated sites. As an Amazon Associate, I earn from qualifying purchases.
    Source link

  • Air Fryer BBQ Chicken Wings

    Air Fryer BBQ Chicken Wings

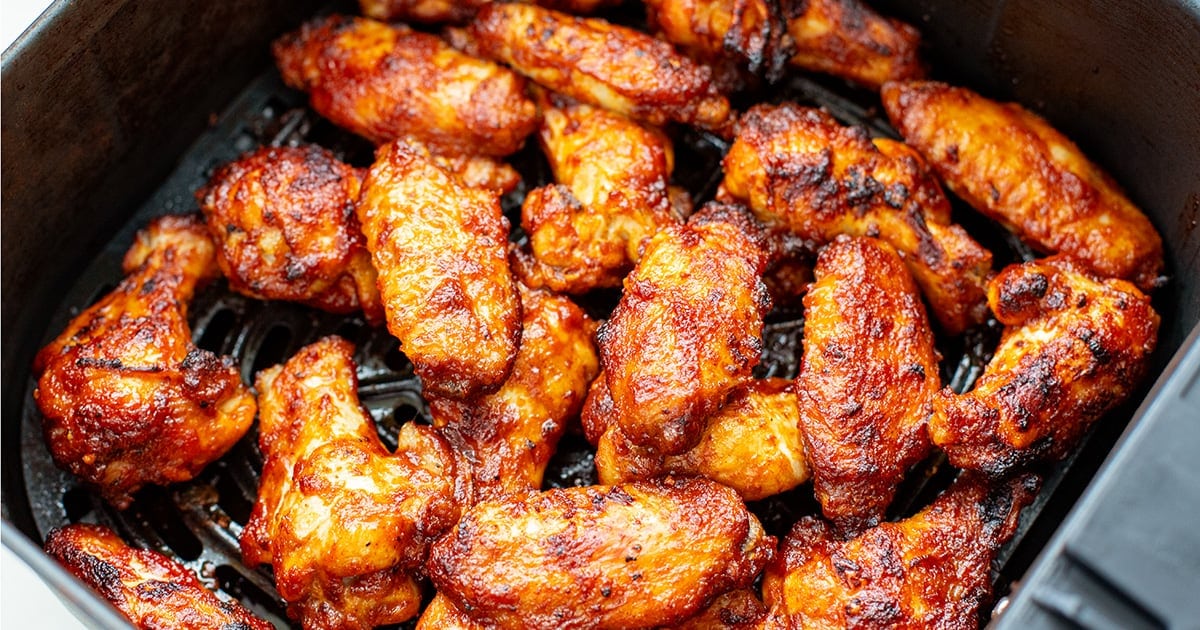
    These air fryer BBQ chicken wings are tender and juicy inside, crispy on the outside, and slathered in the most finger-licking homemade BBQ sauce that clings to every bite. No oven. No deep frying. Just YUM.


    Jump to: ℹ️ Overview | 🛒 Ingredients | 📷 How To Make | 📹 Watch The Video | 👩‍🍳 Recipe Tips | 🥗 Serving Suggestions | 📝 Full Recipe Card | 🍽 More Chicken Recipes


    Every time I make these air fryer BBQ chicken wings, someone asks me for the recipe. They taste indulgent and naughty, but because they’re not deep-fried, you could practically call them healthy.

    The wings get crispy on the outside, stay tender and juicy inside, and then get tossed in a smoky, tangy, slightly sweet BBQ sauce that’s made from scratch (or store-bought if you’re in a rush). It’s ideal for hot summer days when you don’t want to turn on the oven. Oh, and if you want to flex a little, toss them on the grill after saucing for that fire-charred finish.

    Each serving has solid protein and way less fat than fried wings. Trust me, they’re a crowd-pleaser!

    👩‍🍳 You might also like: salt and pepper chicken wings, hot honey chicken wings, dry rub chicken wings, honey soy chicken wings, my healthy Paleo chicken wings, or Portuguese-style spicy sticky chicken wings. Check out this air fryer kielbasa as well.

    What You’ll Need

    Here is what you’ll need for these air fryer BBQ chicken wings. Find the full measurements in the recipe card below.

    • Chicken wings – wingettes and drumettes, the perfect combo of meaty and crispy.
    • Olive oil – helps the seasoning stick and gives that golden crisp. You can use oil spray here.
    • Spice rub – Smoked paprika adds that subtle BBQ smokiness, while garlic and onion powders give you that classic flavor base for savory oomph. Plus, salt and pepper – never skip, flavor starts here.

    For the Homemade BBQ Sauce:

    • Ketchup for the sweet-tangy tomato base (tomato sauce in Australia is a-okay!)
    • Molasses adds rich, smoky sweetness and dark color. Treacle works too. You will find these in the baking sections of the supermarket. No molasses or treacle? Use extra brown sugar.
    • Brown sugar – optional, for a sweeter finish. I add a tablespoon or so. Use only molasses if you want a less sweet, old-school flavor.
    • Vinegar (white wine or apple cider) – gives that signature tang.
    • Worcestershire sauce – for depth and umami (basically magic).
    • Garlic and onion powders, smoked paprika, cayenne – spice it your way.
    • Salt and pepper – again, don’t skip.
    • Speed hack: You can use store-bought BBQ sauce if you’re in a rush.

    How To Make Air Fryer BBQ Chicken Wings

    Find the full recipe and nutritional information below. Here are some handy step-by-step photos for how to make chicken wings in the air fryer.

    • Pat the wings dry (this is THE trick to getting that crisp skin).
    • Toss with oil, spices, salt, and pepper.
    • Air fry at 390°F (200°C) for 20–25 mins, shaking halfway.
    • Meanwhile, simmer all the sauce ingredients in a small saucepan or pan until slightly thickened (about 5–8 mins).
    • Toss the cooked wings in the BBQ sauce.
    • Air fry again for 2–3 minutes to caramelize the glaze.

    Watch The Video

    Recipe Tips

    • Dry your wings well — moisture = sogginess.
    • Don’t sauce the wings before air frying the first time or you’ll end up with burnt sugar.
    • If you’re BBQ-ing: toss the wings in sauce after air frying, then finish on the grill.
    • Use both molasses and brown sugar if you like a thicker, richer sauce. Or skip the sugar entirely for a more savory profile.
    • Storage tips: Store leftovers in an airtight container in the fridge for up to 3 days. Reheat in the air fryer for 5–7 minutes at 350°F (175°C). You can freeze them, but fresh is best for crispiness.
    • Make-ahead tips: The BBQ sauce can be made up to a week ahead — store in the fridge. Wings can be seasoned and refrigerated (uncooked) for up to a day in advance.

    Serving Suggestions

    These wings are the life of the party all on their own, but they’re also great with:

    💬 If you’ve tried these air fryer BBQ chicken wings or any other recipe on the blog then don’t forget to rate the recipe and let me know how you got on in the comments below, I love hearing from you! You can also FOLLOW ME on Instagram, Facebook, Pinterest, YouTube, and or sign up to my Newsletter to see more of my delicious food.

    Want to Save This Recipe?

    Enter your email & I’ll send it to your inbox. Plus, get great new recipes from me every week!

    By submitting this form, you consent to receive emails from Cooked & Loved

    These air fryer BBQ chicken wings are tender and juicy inside, crispy on the outside, and slathered in the most finger-licking homemade BBQ sauce that clings to every bite. No oven. No deep frying. Just YUM. Find step-by-step photos and more recipe tips above.

    • Prep the wings: Pat them dry with paper towels (don’t skip this — it’s key for crispiness).

    • Season: Toss wings with olive oil, smoked paprika, garlic powder, onion powder, salt, and pepper.

    • First fry: Air fry at 390°F (200°C) for 20–25 minutes, shaking halfway through. Check at 15 minutes — air fryers vary.

    • Make the sauce: Combine all sauce ingredients in a saucepan over medium heat. Simmer 5–8 minutes, stirring occasionally, until thickened and glossy. Taste and tweak.

    • Toss & finish: Toss crispy wings in the sauce. Return to air fryer for 2–3 minutes to caramelize the glaze.

    • Molasses adds rich, smoky sweetness, depth and dark color. Treacle works too. You will find both in the baking sections of the supermarket. No molasses or treacle? Use extra brown sugar.
    • Brown sugar – optional, for a sweeter finish. I add a tablespoon or so. Use only molasses if you want a less sweet, old-school flavor.
    • Dry your wings well — moisture = sogginess.
    • Don’t sauce the wings before air frying the first time, or you’ll end up with burnt sugar.
    • If you’re BBQing: toss the wings in sauce after air frying, then finish on the grill.
    • Use both molasses and brown sugar if you like a thicker, richer sauce. Or skip the sugar entirely for a more savory profile.
    • Storage tips: Store leftovers in an airtight container in the fridge for up to 3 days. Reheat in the air fryer for 5–7 minutes at 350°F (175°C). You can freeze them, but fresh is best for crispiness.
    • Make-ahead tips: The BBQ sauce can be made up to a week ahead — store in the fridge. Wings can be seasoned and refrigerated (uncooked) for up to a day in advance.
    • Can I use frozen wings? Yes, but thaw them fully and pat them dry before seasoning.
    • Why do I need to air fry them twice? The first fry gets them crispy. The second caramelizes the sauce without burning it.

    Calories: 273kcal | Carbohydrates: 18g | Protein: 16g | Fat: 16g | Saturated Fat: 4g | Polyunsaturated Fat: 3g | Monounsaturated Fat: 7g | Trans Fat: 0.2g | Cholesterol: 63mg | Sodium: 1081mg | Potassium: 378mg | Fiber: 1g | Sugar: 14g | Vitamin A: 695IU | Vitamin C: 3mg | Calcium: 38mg | Iron: 2mg

    Keywords: Chicken Wings, BBQ chicken wings, air fryer BBQ chicken wings, air fried chicken wings

    More Chicken Recipes


    Source link

  • Baked Lemon Sole With Ginger & Chilli Butter

    Baked Lemon Sole With Ginger & Chilli Butter

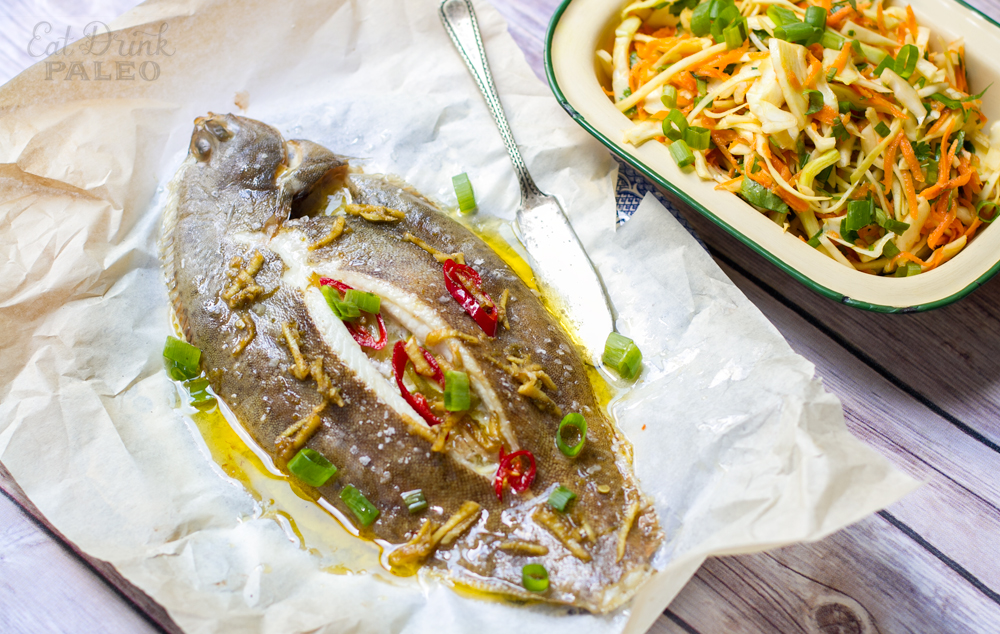
    Baked lemon sole with ginger chilli butter sauce is a savoury, succulent fish packed with complex flavours and just the right amount of kick. Served with a simple Asian slaw salad, this healthy lemon sole recipe is quick and easy to prepare for a midweek meal or your next dinner party.


    Jump to: ℹ️ Overview | 🛒 Ingredients | 📷 How To Make | 🥗Serving Suggestions | 📝 Go To Full Recipe |🐟 More Healthy Fish Recipes


    Baked Lemon Sole Recipe

    Infused with zesty lime and topped with fiery ginger and chili butter sauce, this baked lemon sole dish is sure to awaken your taste buds and leave you feeling satisfied and nourished. 

    And to balance things out, I served this fish dish with a refreshing slaw salad loaded with crisp veggies and tangy dressing. A side of rice or quinoa will make it even more satiating and energy-dense.

    This baked lemon sole recipe is healthy, gluten-free, low-carb, paleo and Whole30 friendly (use ghee instead of butter). 

    What Is Sole Fish?

    Let me tell you about the marvelous fish known as the sole! These fish are typically flat and oval-shaped, with both eyes on one side of their head. They are usually brown or gray in color, with a smooth, slightly slimy skin. 

    They are found in oceans all around the world and highly sought after by chefs and foodies alike for its delicate and sweet taste, and tender texture. 

    There are many different types of sole out there, each with their own unique qualities. You’ve got your Dover sole, lemon sole, petrale sole, and more! These fish are like ninja warriors, sneaking around the ocean floor with their eyes all on one side of their head.
    Sole is a popular ingredient in many different types of cuisine, including French, Italian, and Asian. You can grill it up, bake it, fry it, or poach it to perfection. And when it comes to seasoning, a little bit of butter, lemon, herbs, or white wine can really bring out the best in this tasty fish. 

    Cooking Lemon Sole

    You can buy sole as fillets or a whole fish. I really like cooking the sole fish whole, either pan fried or baked, with some delicious sauce on the side. I am using lemon sole for this recipe.

    I asked my fishmonger to make a deep slit in the middle of the sole so I could stuff it with some ginger and lime. I then used a small sharp knife to cut the flesh on each side of the slit away from the bone, so you have two little pockets. Make sure to ask you fishmonger to clean the scales, unless you know how to do it.
    This recipe is for cooking one large whole lemon sole or 2 small ones or 2 fillets. This is enough for two servings when served with a side dish like salad or/and rice or some qunoa and vegetables. 

    The flesh of the fish is delicate and mild and goes well with some strong flavours like lemon and capers. For this recipe, I am using bold flavours of ginger, chilii and lime to compliment the delicate sole flesh.

    You can use butter or ghee as the base for the sauce, which mellows out those strong ingredients and gives you that gorgeous, rich flavour.

    What To Serve With Lemon Sole

    This lemon sole recipe is inspired by Asian cuisine and uses ingredients like ginger and fish sauce, so it works well with side dishes like rice, noodles, stir-fried vegetables or fresh, herby salad. 

    It would also work well with cooked quinoa, cauliflower rice or sweet potatoes. I’ve included ingredients and instructions for an Asian-inspired slaw salad I served with this fish.


    Want to Save This Recipe?

    Enter your email & I’ll send it to your inbox. Plus, get great new recipes from me every week!

    By submitting this form, you consent to receive emails from Cooked & Loved

    Looking for a simple and delicious lemon sole recipe? Look no further than this baked sole with ginger, chilli and lime-infused butter sauce. With just a few simple ingredients, you can transform this flaky white fish into a flavourful and satisfying meal that’s perfect for any occasion.

    • Preheat the oven to 200ºC / 400ºF.

    • Make a long slit in the middle of the fish and cut inside the flesh, peeling it away from the bone to create a little pocket on each side. See Cooking With Lemon Sole notes above.

    • Grate about half a teaspoon worthh of lemon zest, and cut 2-3 thin slices to insert inside the fish. 

    • Sprinkle the sole with a little sea salt on each side. Stuff the ginger and lime slices inside the flesh pockets on one side of the fish and place it on an oven tray lined with lightly grease baking paper (you can use a little butter/ghee or olive oil).

    • Place fish in the oven and cook for 13-15 minutes, depending on the size of the fish. I think I did mine for 13 minutes at 200ºC

    • In the meantime, add butter to a medium frying pan and bring to medium-high heat. Add ginger and chilli and cook until golden brown and slightly crispy, a couple of minutes. Add lime zest, juice of half a lime, and fish sauce. Stir through and take off the heat.

    • Prepare the Asian slaw by combining all dressing ingredients together and tossing them through the salad.

    • Remove sole from the oven and pour over the butter sauce with ginger and chillies. Sprinkle with diced ghreen onions and a little extra sea salt. You can also drizzle more lime juice or serve a wedge of lime on the side. Serve with the Asian slaw or a side of favourite vegetables.

    Calories: 398kcal | Carbohydrates: 16g | Protein: 18g | Fat: 30g | Saturated Fat: 10g | Polyunsaturated Fat: 3g | Monounsaturated Fat: 15g | Trans Fat: 0.5g | Cholesterol: 88mg | Sodium: 1167mg | Potassium: 472mg | Fiber: 3g | Sugar: 13g | Vitamin A: 4728IU | Vitamin C: 29mg | Calcium: 79mg | Iron: 1mg

    Keywords: Baked Sole, Sole Fish, Butter Sauce, Fish Recipes, Dinner Recipes, Sole Recipe, Lemon Sole

    More Healthy Fish Recipes

    [mv_playlist id=”224″ jsonLd=”false” ratio=”16:9″ thumbnail=”https://mediavine-res.cloudinary.com/v1599716598/plqh05ivvby851y7acqo.jpg” title=”WATCH MY TOP 10 HEALTHY VIDEO RECIPES”]

    Source link

  • Borscht Soup (Vegetarian, Gluten-Free, Paleo)

    Borscht Soup (Vegetarian, Gluten-Free, Paleo)

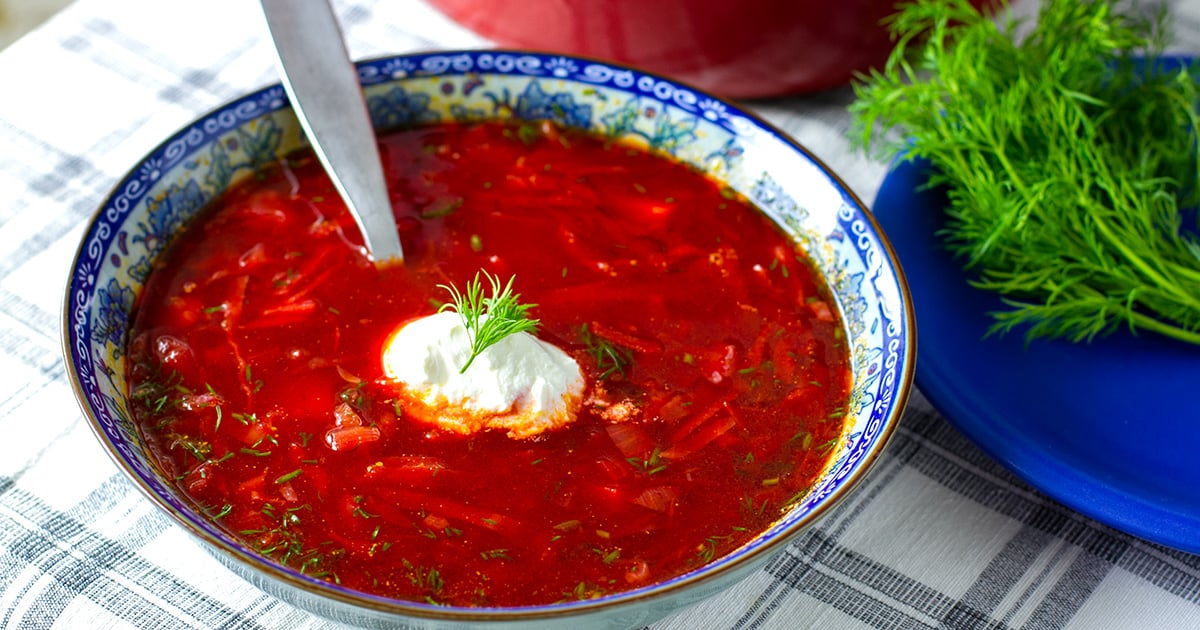
    Made with nutritious beets, cabbage and root vegetables, my Ukrainian borscht soup recipe (also known as borsh, borsht, or борщ) is perfect as a dinner meal or hot lunch. Serve with a dollop with sour cream, dairy-free alternative or without. This is gluten-free, vegetarian, vegan, paleo, and Whole30-friendly.


    What Is Borscht?

    If I had to name one dish that best represents Ukrainian cuisine it would have to be borscht.

    It’s a hearty, hot soup made with beetroot, which gives it a gorgeous burgundy red colour and sweetness. This tasty soup can be made any time of the year but it’s particularly good in autumn and winter when all of the ingredients are in peak season. 

    Borscht is also eaten in many other parts of eastern Europe and there are many cultural variations.

    What Are The Main Borscht Ingredients?

    In its whole form, borscht is a vegetable soup as it features cabbage, carrots, onions, garlic, potatoes, tomatoes and beets. But, if you had to pick the key ingredient for borscht, it’s beets. Don’t have beetroot? Can’t make borscht! They are what gives borscht its beautiful colour and sweet flavour.

    Depending on location, borscht recipes include a variety of other vegetables, spices and condiments served at the table. My recipe is based on the flavours and textures I remember from my childhood when I ate borscht a couple of times a week. I talk about a few borscht variations below.

    Love beets? Check out more recipes using this nutritious veggie here.

    Borscht Soup Nutrition

    This Ukrainian borscht recipe is vegetarian and vegan-friendly so I am only using vegetables and veggie stock. Many traditional recipes also used beef stock or broth and some tender braised beef pieces and bones. As you can imagine, even the simple vegetarian borscht version is super nutritious with lots of vitamins and fibre.

    As a veggie soup, this version is lacking in Vitamins D and B12. Add mushrooms or/and red meat for vitamin D; B12 can be added with red meat or other meat or you can serve some nutritional yeast as a sprinkle on top. These are just small nutritional boosts, of course, and won’t fill in the gap completely. 

    For extra protein, you can add whatever fits your diet: meat or chicken, beans or legumes etc.

    If you can tolerate a little dairy, a dollop of sour cream on top is very traditional (and tasty) but you can easily go without or even try a little coconut cream or coconut yoghurt instead. You can find all my vegetarian recipes here.

    How To Make Borscht Soup

    Borscht is easily made on the stove but can also be cooked in a crockpot slow cooker or the Instant Pot. 

    Start by preparing all of the vegetables as this is what makes the most effort. You can use a food processor to help you grate and chop all of the veggies. I like to start cooking simultaneously as the veggies don’t all go in at the same time. 

    Prepare onions, garlic, beets, celery and carrots first and cabbage and potatoes last. The idea is to saute all the veggies first, then add the seasoning, spices, tomato paste and vinegar (essential as borscht needs some acidity) and stock. Once all ingredients are in, bring everything to a boil and then simmer gently for half an hour until potatoes are soft.

    Important: take the soup off the heat and then add the fresh dill, cover with a lid and let it sit for 10 minutes to set.

    Note, the soup’s flavours will develop even further the next day so make sure to leave some leftovers.

    Can I Use Pickled Beets ?

    Actually, yes! Some traditional Ukrainian recipes call for pickled beets rather than fresh (also because you couldn’t always get fresh vegetables). If you’re using pickled beets, make sure to omit the vinegar as they will add the tang that is essential in this soup. I like using raw beets as they are more nutritious in my opinion.

    Can I Freeze Borscht?

    Yes, this soup is great for freezing and should last for up to 3 months. As it’s vegetarian and vegan borscht, it will also keep well in the fridge (for up to 5-6 days). Reheat well before serving.

    Borscht Variations

    Ah! There are hundreds of variations of this delicious beet soup. Every household has its family recipe that gets passed down through generations. Some differences are based on location and you will find some differences in Russian borscht, Polish borscht and the Ukrainian classic. Here are some famous versions:

    Ukrainian borscht is often made with green peppers and white beans. Adding peppers and/or beans to borscht is quite common and makes for a heartier meal. Many people will also add beef or cook the stock with meat bones. Mushrooms are also often added to the Ukrainian borscht. While the Russian borscht is usually beets, cabbage and potatoes (and some carrots).

    Pureed borscht is another way you can serve this gorgeous soup. Simply add all ingredients to a blender and whiz it all up. This version can also be served cold in summer. 

    Polish borscht (barszcz) is made with beets, carrots, garlic and onion but might not have cabbage and potatoes. Again, this will vary from family to family.


    More Ukrainian Recipes

    Want to Save This Recipe?

    Enter your email & I’ll send it to your inbox. Plus, get great new recipes from me every week!

    By submitting this form, you consent to receive emails from Cooked & Loved

    Borscht soup is a dish that best represents Ukrainian cuisine. It’s a hearty, hot soup made with beetroot, which gives it a gorgeous red colour and sweetness. It’s nutritious and healthy and is suitable to vegan, paleo, Whole30 and gluten-free diets.

    • Heat olive oil in a large saucepan over medium-high heat. Add the chopped onions and celery and sauté on medium heat for 3-4 minutes. Prepare the rest of the vegetables in the meantime.

    • Add the grated carrots, beetroot, garlic and 1 teaspoon of salt. Stir and sauté together for 2-3 more minutes.

    • Add the potatoes, cabbage, and the rest of the ingredients, including the stock. Stir through and heat the heat up to bring to a boil.

    • Once boiling, turn the heat to low and cook, covered, for 25 minutes. Turn the heat off and taste for salt. Depending on the stock used, you might need to add another pinch of salt. The soup should taste a little sweet but still savoury with a little acidity from the vinegar. Potatoes should be nice and soft.

    • Sprinkle a couple of tablespoons of chopped fresh dill and let the borscht rest, with the lid on, for about 10 minutes before serving. I always add a dollop of sour cream when serving, which is then mixed through the soup when eating. You can easily leave the cream out, but it is the traditional way to eat borscht and it rounds out the flavours very nicely.

    White potatoes can be replaced with parsnips, swedes or sweet potatoes.
    Nutritional breakdown is for soup only, not the sour cream or dairy-free cream on top.

    Calories: 233kcal | Carbohydrates: 42g | Protein: 5g | Fat: 6g | Saturated Fat: 1g | Polyunsaturated Fat: 1g | Monounsaturated Fat: 4g | Sodium: 1817mg | Potassium: 1052mg | Fiber: 8g | Sugar: 15g | Vitamin A: 3438IU | Vitamin C: 52mg | Calcium: 76mg | Iron: 2mg

    Keywords: Side Dish, Vegan, Vegetarian, Soups, Beetroot Recipes, Borscht, Ukrainian Food

    Source link

  • Crockpot Poppy Seed Chicken (Easy Slow Cooker Dinner)

    Crockpot Poppy Seed Chicken (Easy Slow Cooker Dinner)

    This website may contain affiliate links and advertising so that we can provide recipes to you. Read my disclosure policy.

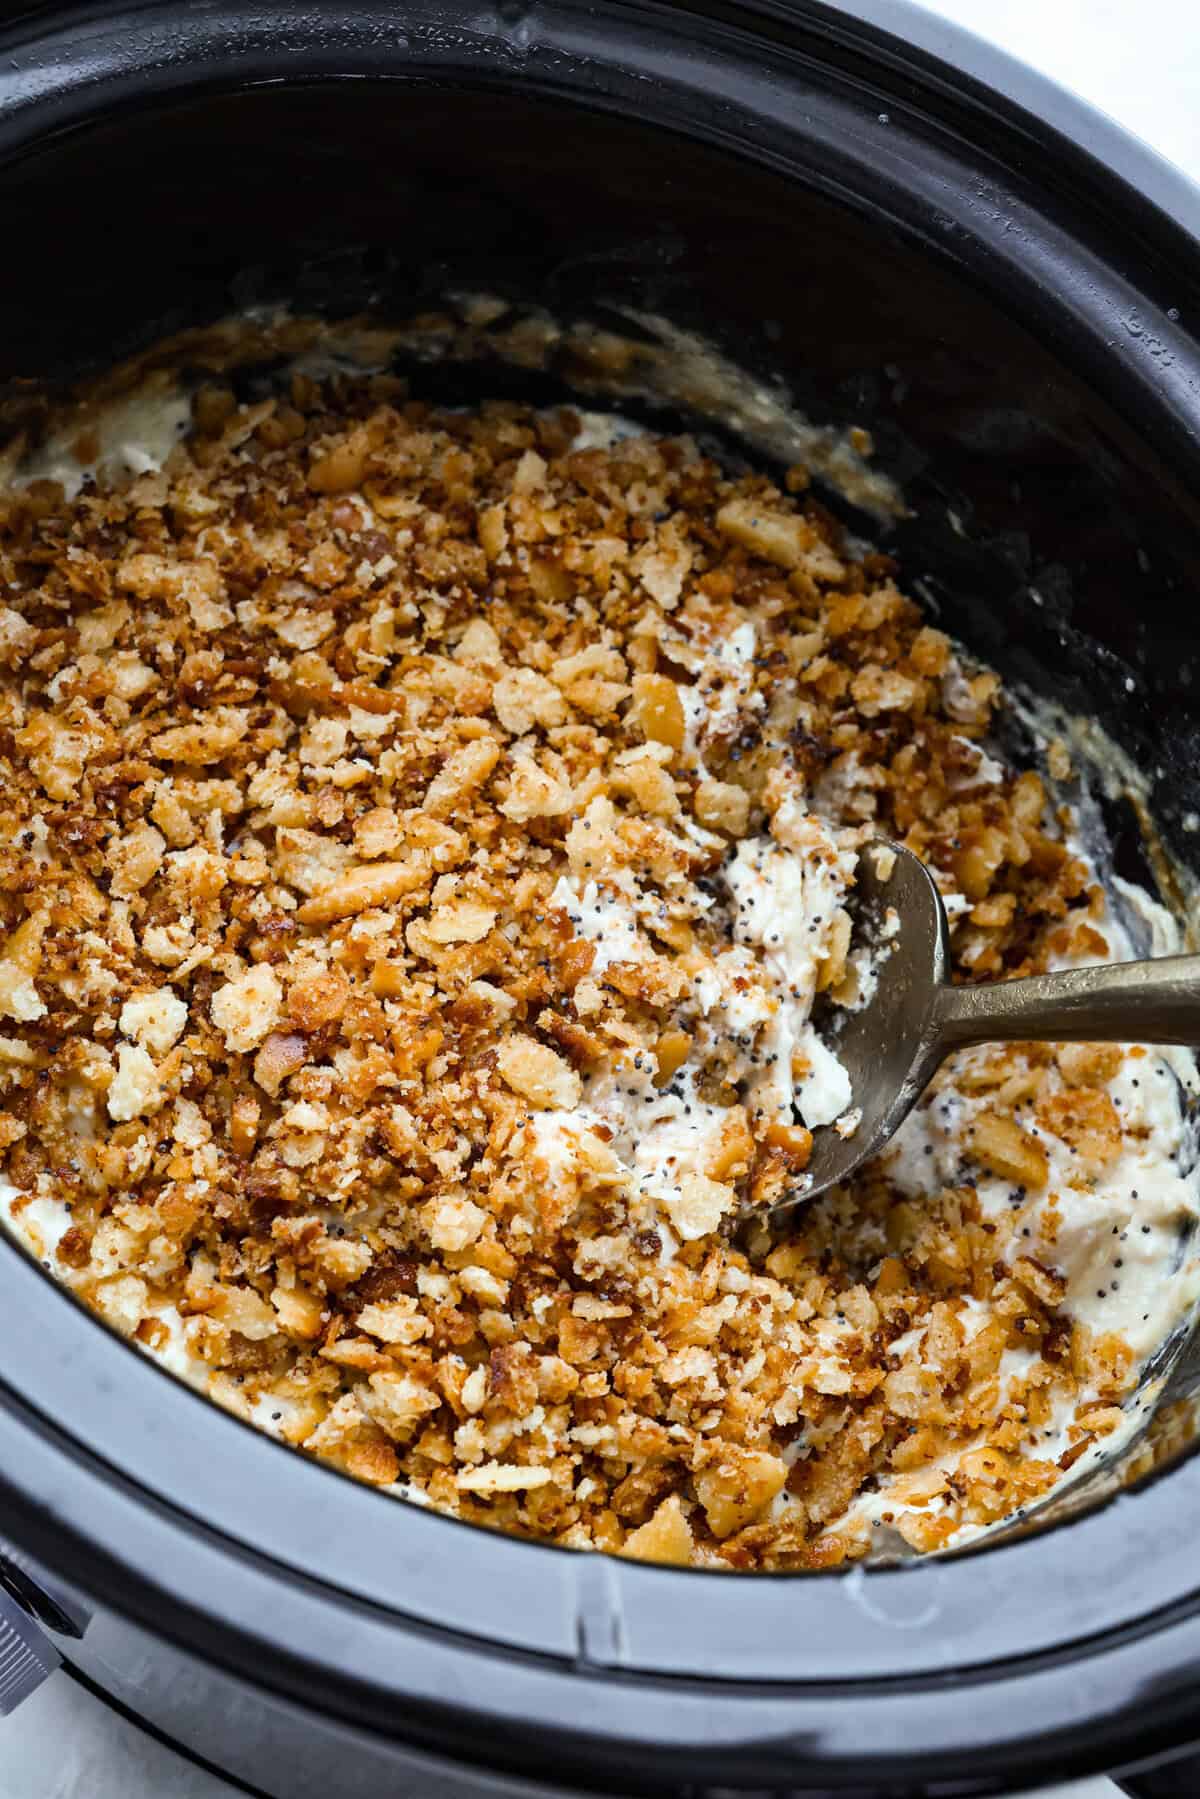
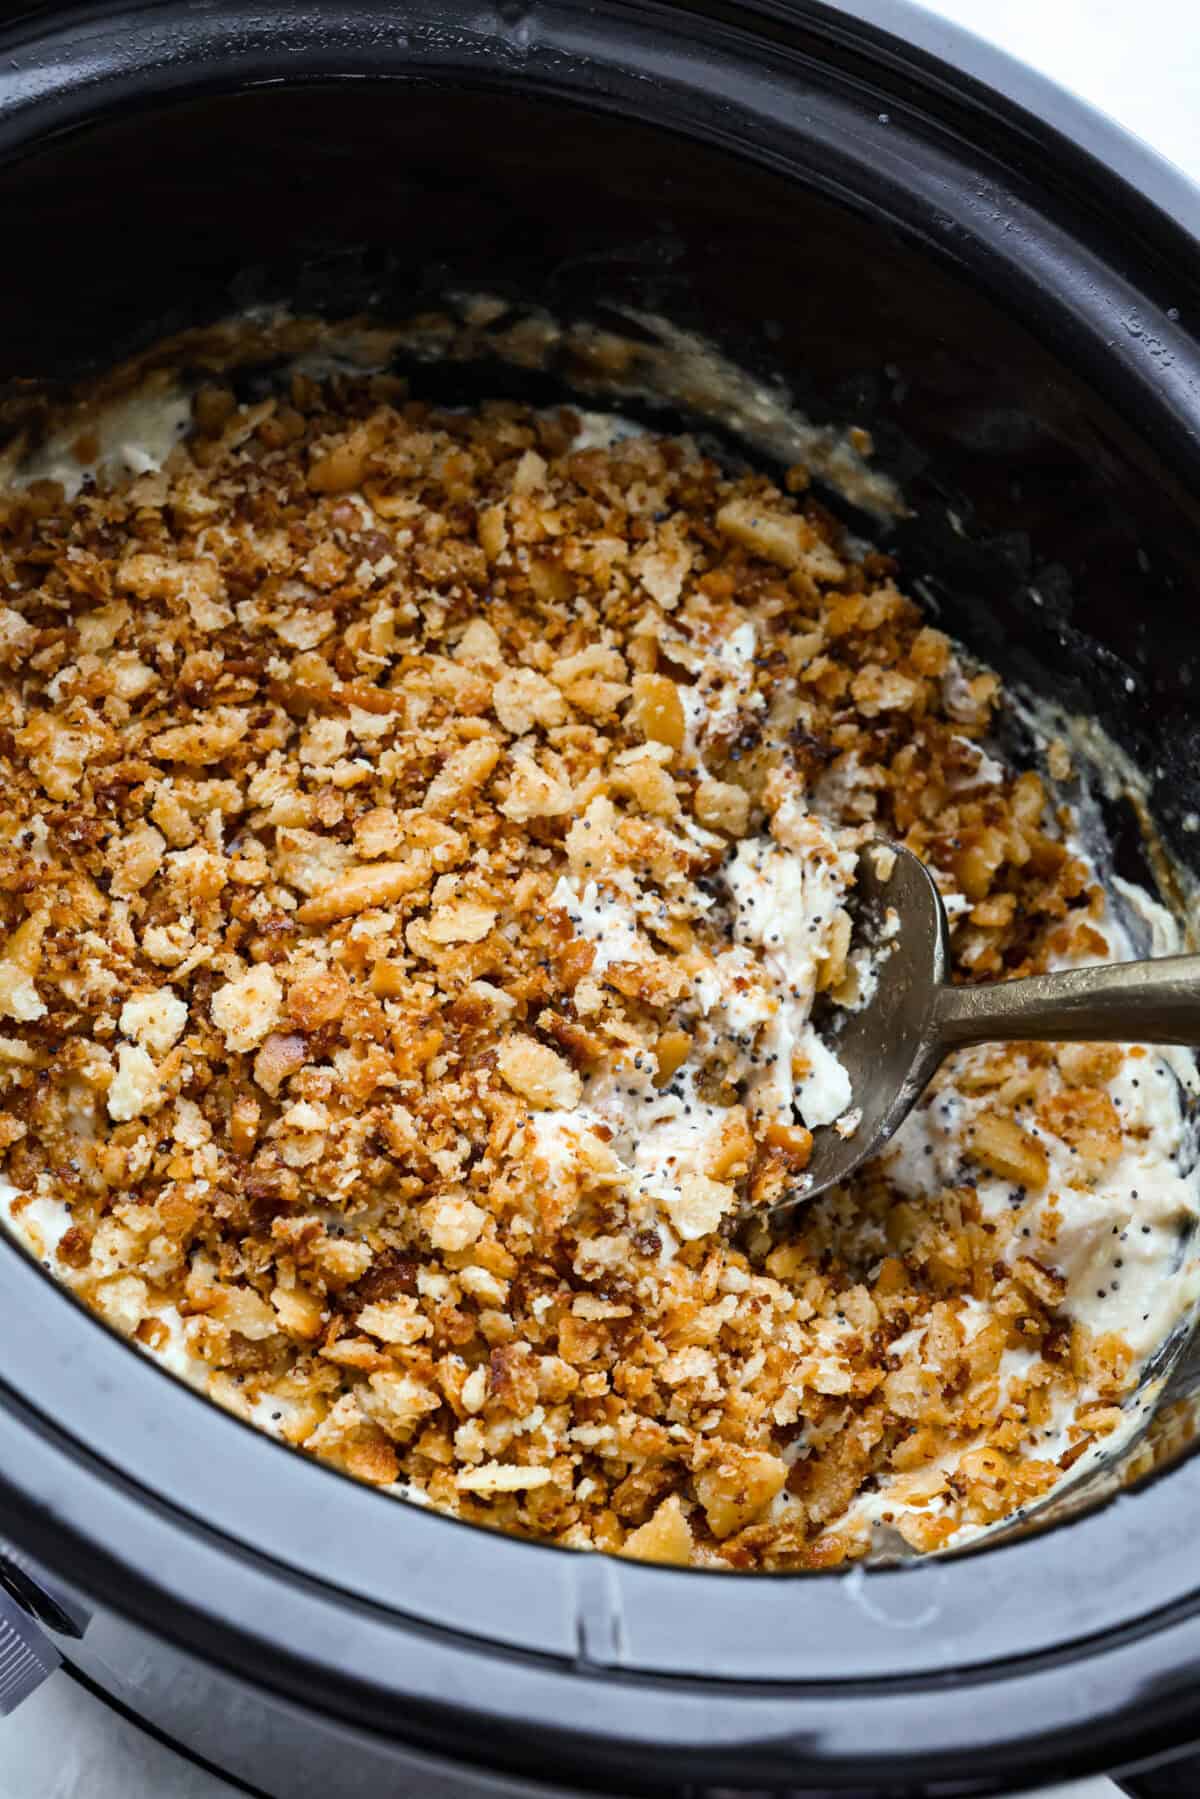
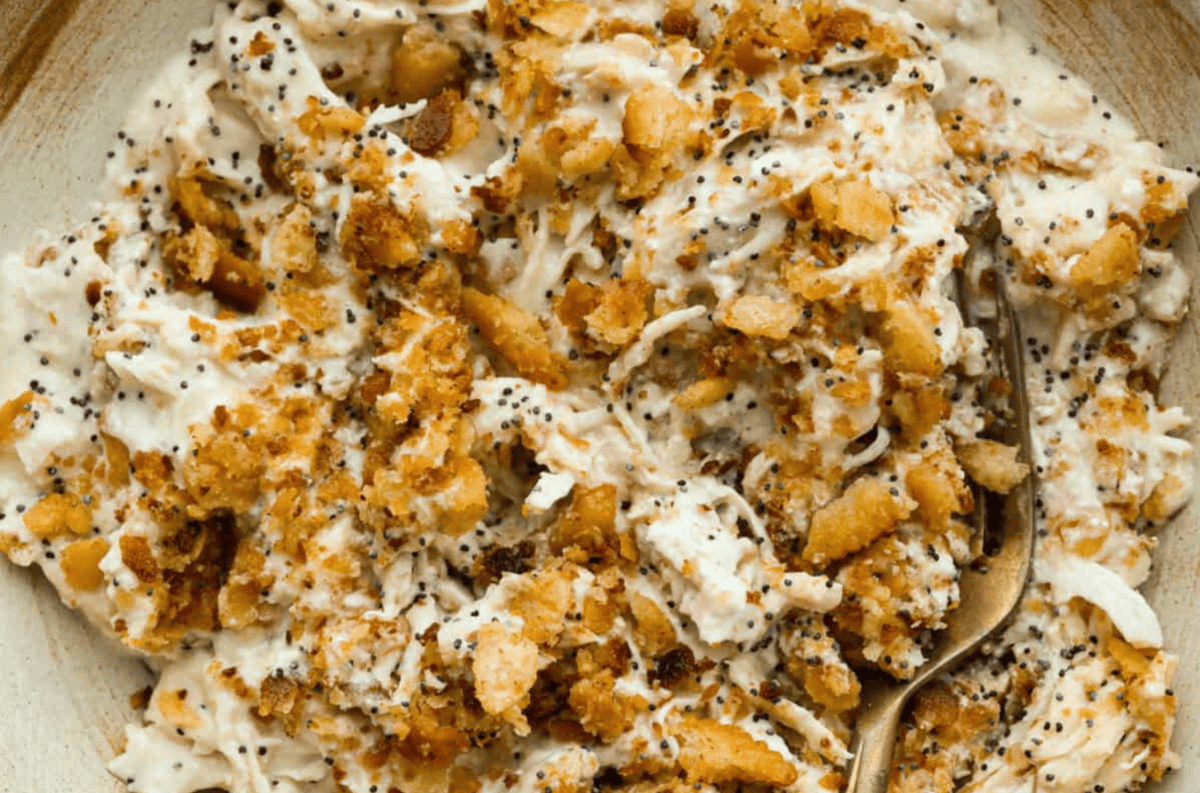
    If you love my classic poppy seed chicken casserole, this crockpot poppy seed chicken is the easiest way to make it. Same creamy, buttery flavor. Same cozy comfort.

    Overhead shot of someone taking a scoop of poppyseed crockpot chicken out of the slow cooker.

    Why My Crockpot Version Is Better

    • The topping is actually crunchy! Most crockpot versions dump crackers on top and call it done. I toast mine so they stay crunchy!
    • Classic Casserole Favor! Creamy sauce, tender chicken, poppy seeds, and that buttery topping. This tastes like the baked version you already love, just made in the slow cooker.
    • It’s still hands-off where it counts! The chicken cooks low and slow while you’re busy. The quick skillet topping only takes minutes.

    Crockpot Poppy Seed Chicken Ingredients

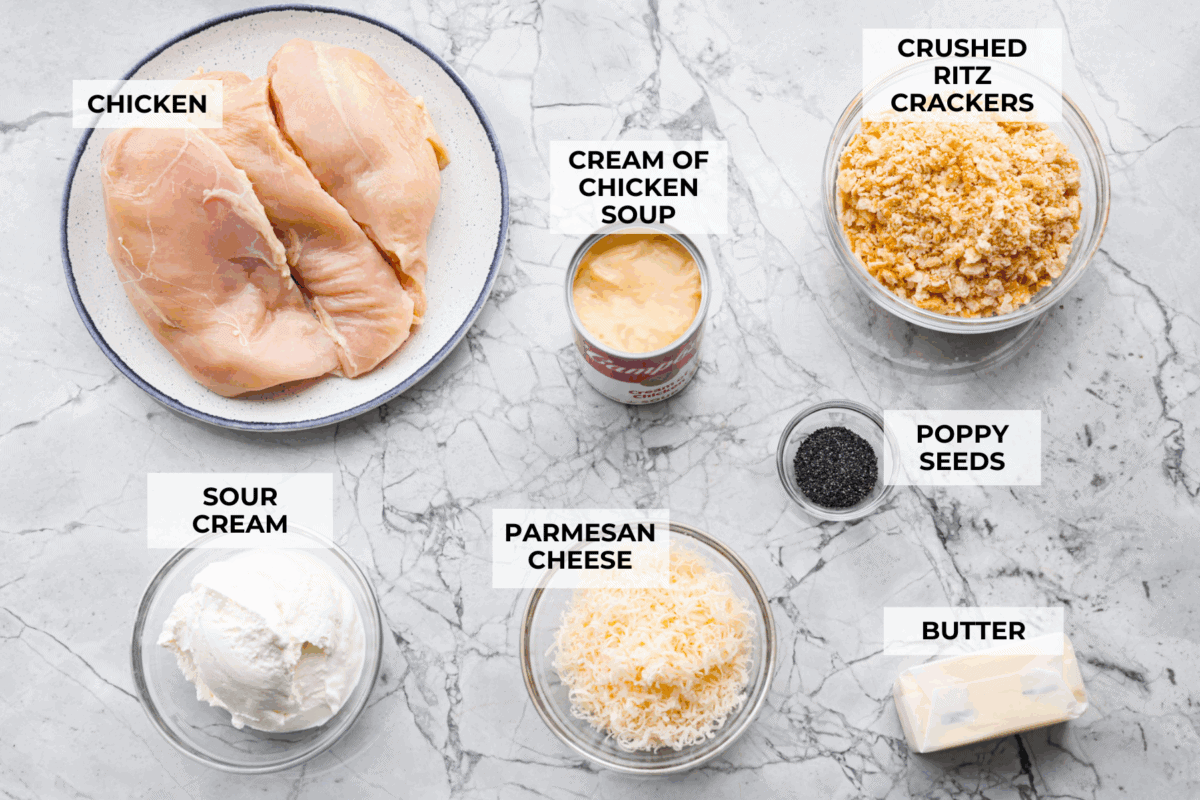
    Overhead shot of labeled crockpot poppyseed chicken ingredients.
    • Ritz Crackers: Buttery crackers like Ritz add a tasty butter flavor and texture as they get toasted!

    Crockpot Poppy Seed Chicken Recipe

    This fan favorite, dump-and-go version of the classic poppy seed chicken is going to become your new go-to weeknight dinner! Make some soft homemade rolls and a fresh salad while the chicken cooks.

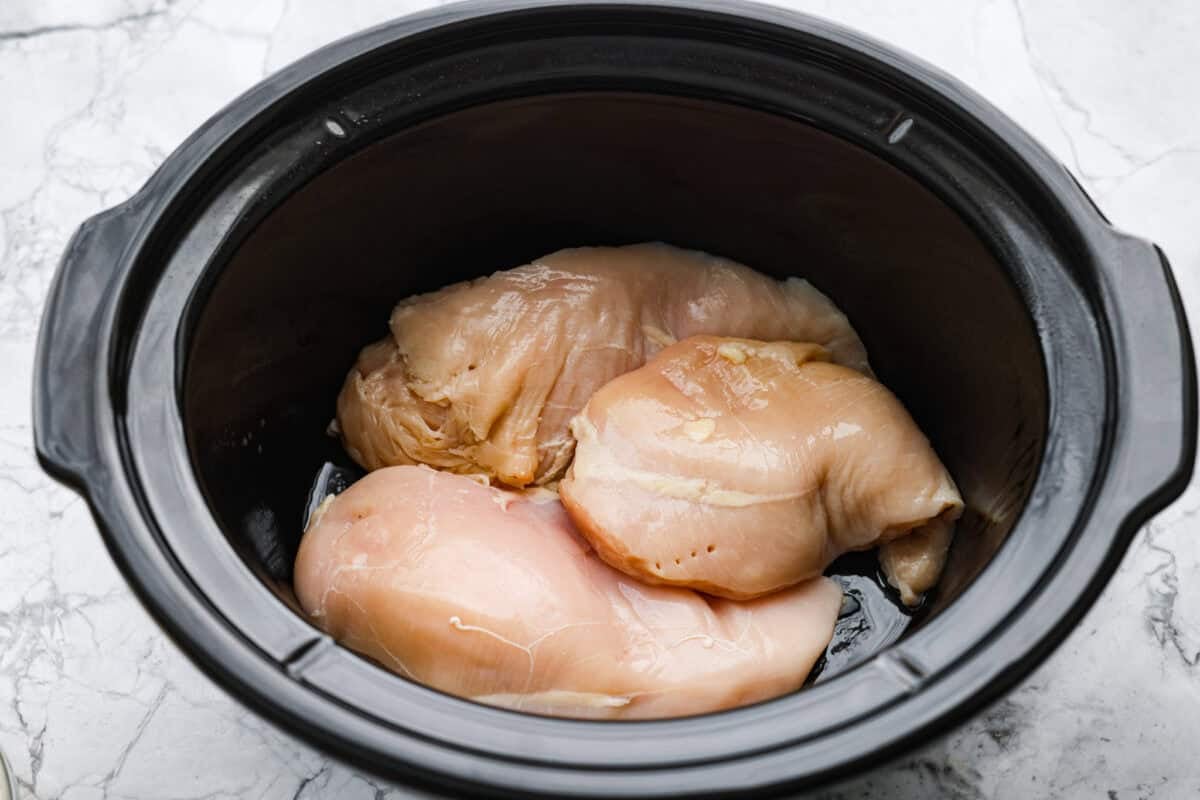
    1. Add the Chicken: Spray the bottom of a slow cooker with nonstick cooking spray and place chicken breasts in the bottom.
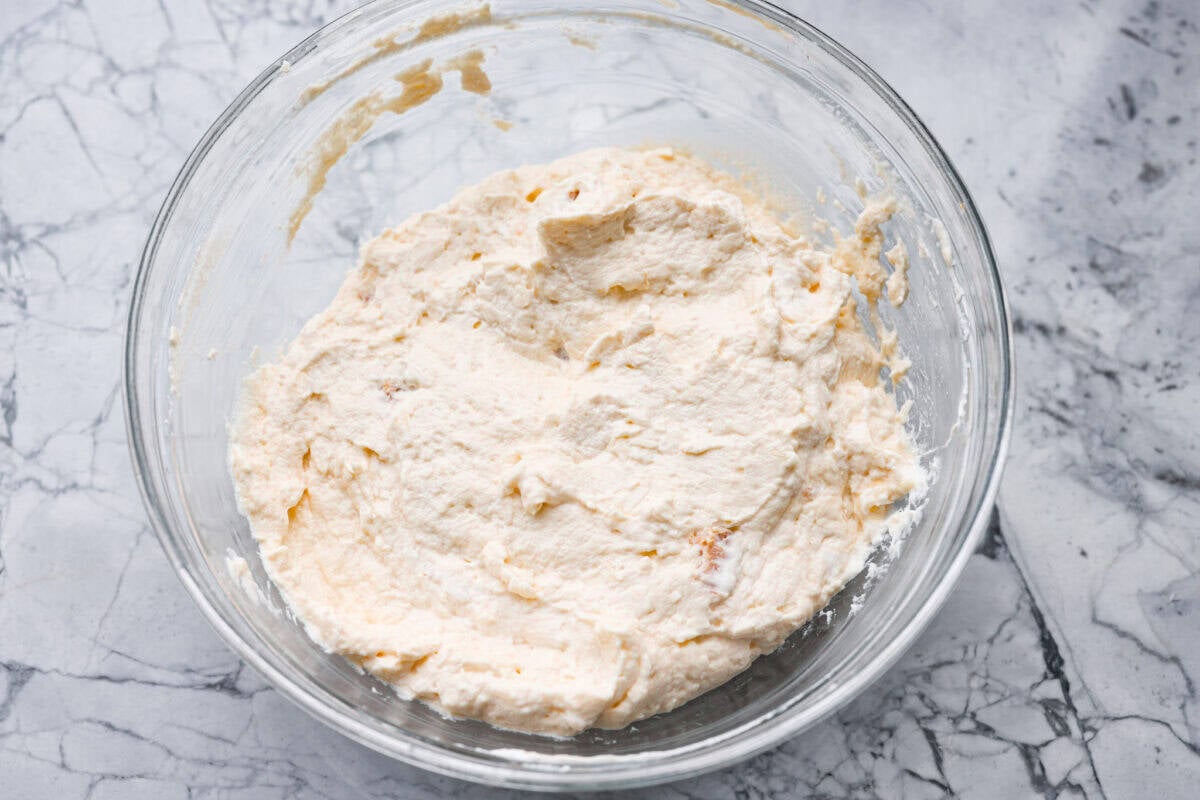
    2. Combine: In a medium bowl, stir together the sour cream, cream of chicken soup, and shredded parmesan cheese. 
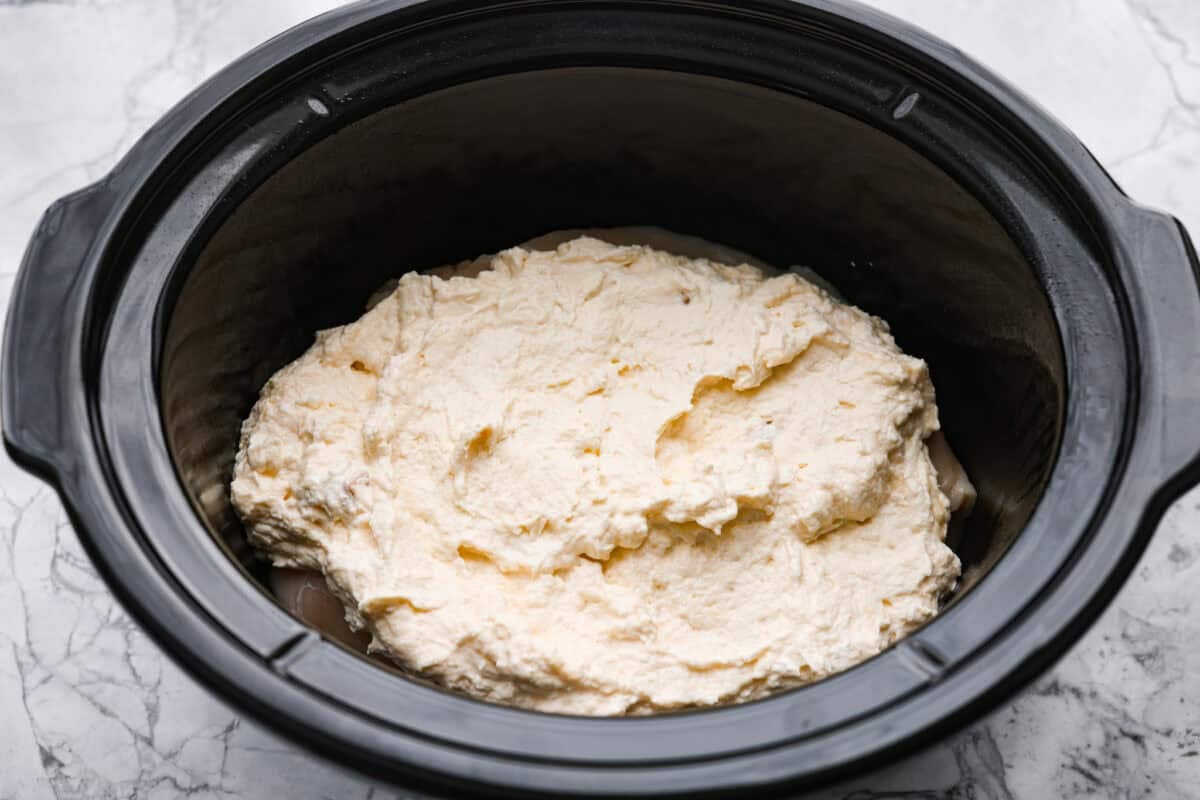
    3. Pour Over the Chicken: Pour the sour cream mixture over the chicken in the crockpot.
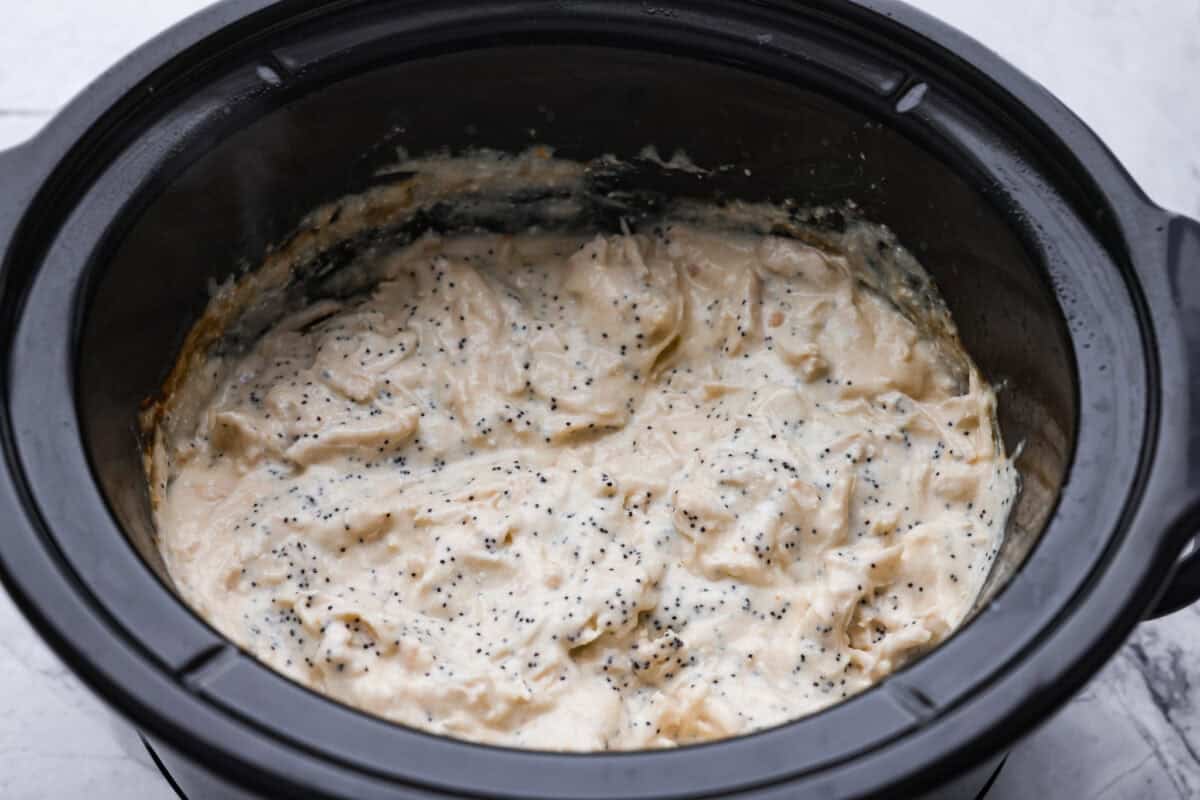
    4. Cook: Place the lid on the crockpot, then cook on LOW for 5-6 hours, or HIGH for 3-4 hours. When it’s done, remove the lid and shred chicken with two forks. Stir in 2 teaspoons of poppy seeds.
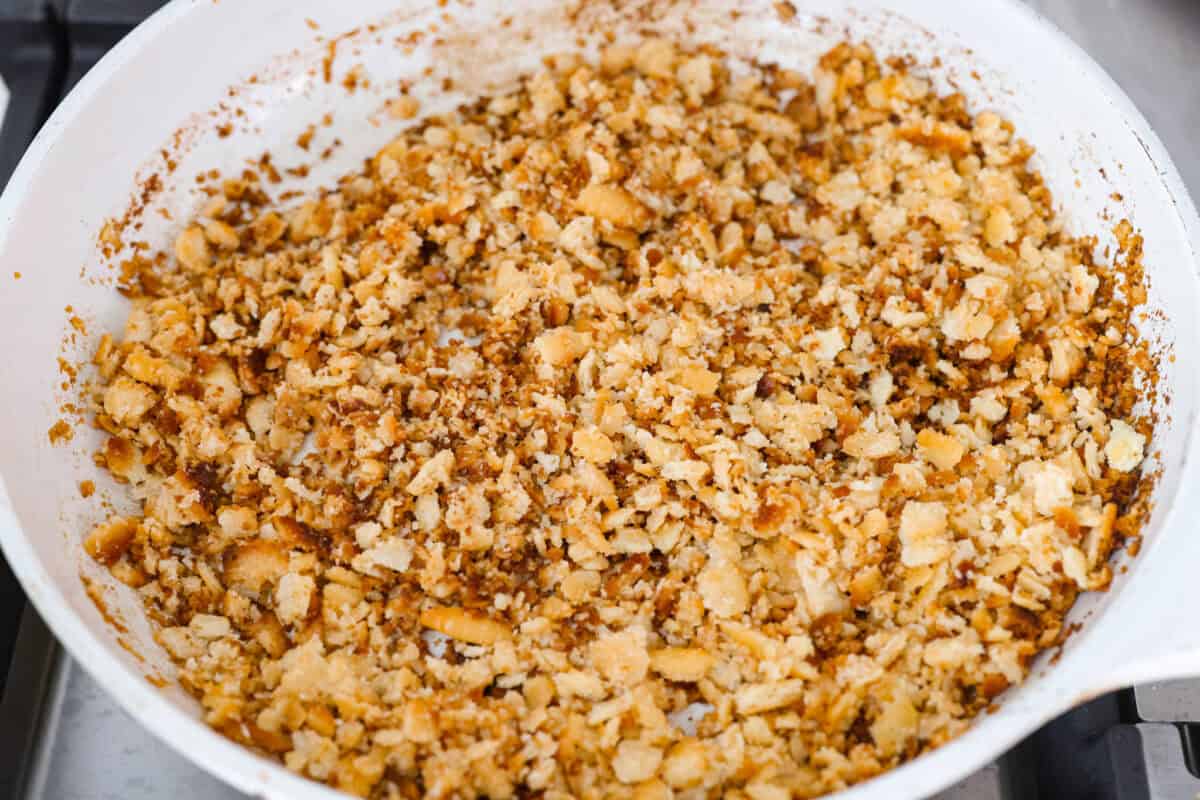
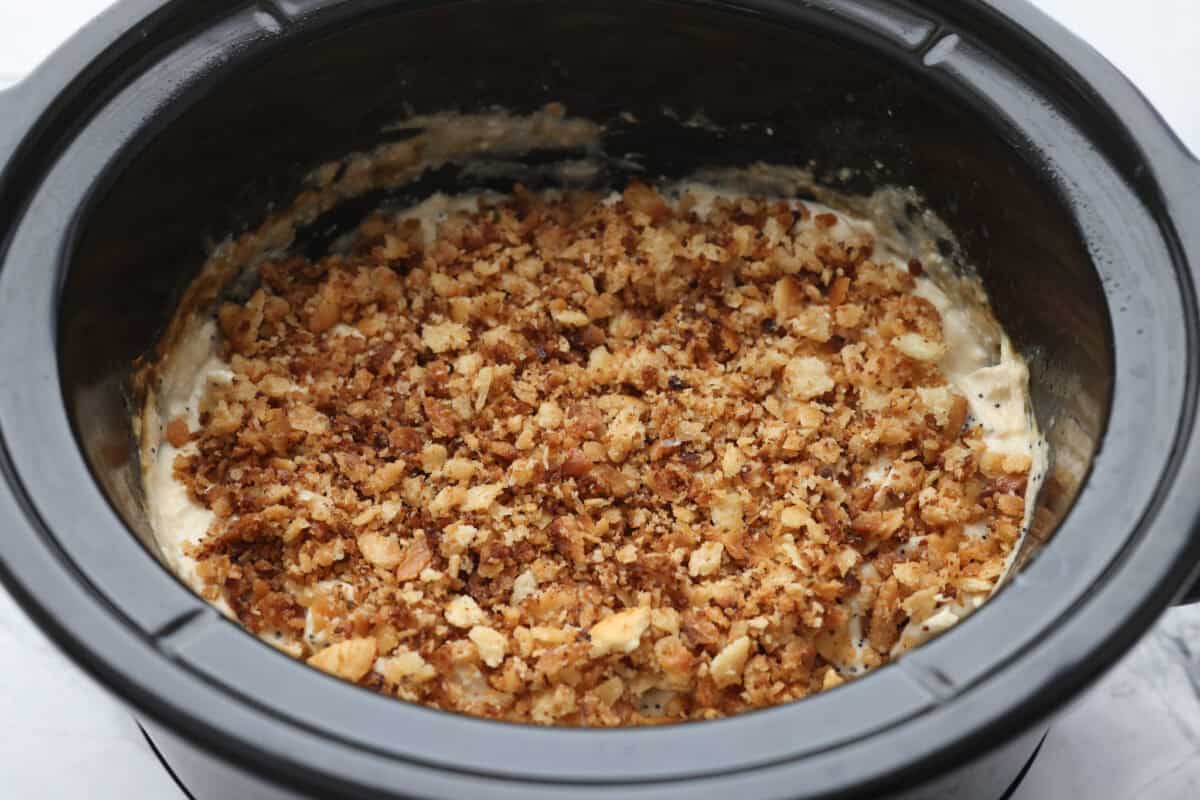
    5. Toast the Crackers: In a large skillet, add the butter and melt over medium heat. Once the butter is melted, add 1 sleeve crushed Ritz Crackers and toss to coat in the butter. Toast the cracker mixture for 2-3 minutes until golden brown.
    6. Topping: Sprinkle the cracker mixture over the top of the chicken mixture. Season with salt and pepper, if needed, and serve over potatoes or rice!

    Perfect for Doubling!

    This recipe is perfect for meal prep or feeding a crowd! Just double all of the ingredients to make a big batch.

    Instructions:

    1. Add & Mix: Add the sour cream, cream of chicken soup, and parmesan cheese to a gallon-sized, freezer-safe, sealable storage bag and mix well.
    2. Coat Chicken & Freeze: Add the chicken to the bag with the sauce and mix to coat the chicken in the sauce. Press out as much air as possible, seal the bag, and freeze it flat for better storage.

    Reheat:

    1. Thaw Slightly: Pull the bag out of the freezer one hour before cooking to let it thaw slightly on the counter before cooking.
    2. Cook: Place the contents of the bag into the crockpot. Cook on LOW for 6  hours or HIGH for 4 hours, until the chicken is cooked through and shreds easily.
    3. Shred & Stir: Remove the chicken from the crockpot and shred it. Return the shredded chicken to the crockpot and mix to coat it in the sauce. Season to taste with salt and pepper, if needed. Stir in the poppy seeds.
    4. Cook Topping: In a large skillet, add ½ cup butter and melt over medium heat. Once the butter is melted, add 1 sleeve crushed Ritz Crackers and toss to coat in the butter. Toast the cracker mixture for 2-3 minutes until golden brown.
    5. Top & Serve: Sprinkle the cracker mixture on top of the chicken mixture. Serve over rice or potatoes! 

    Pin this now to find it later

    Pin It

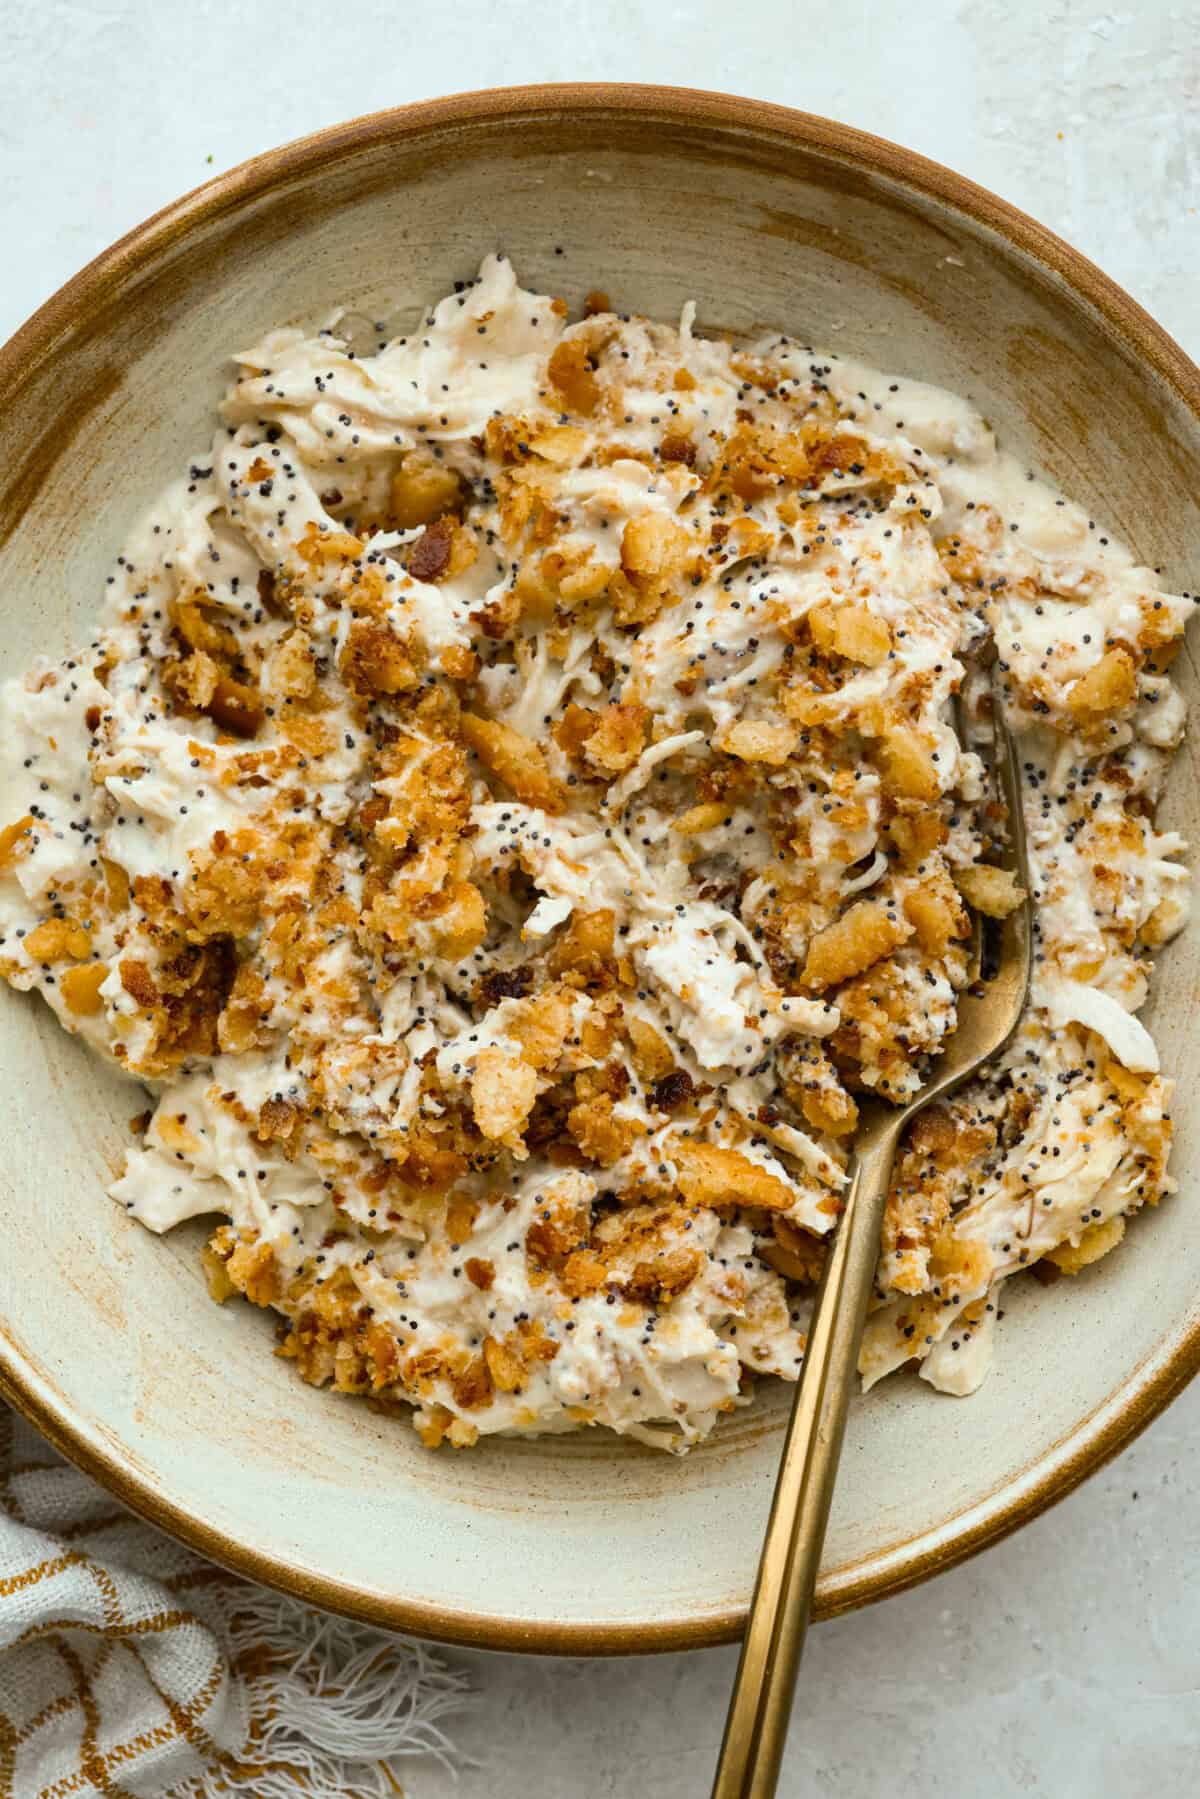
    Serving of crockpot poppyseed chicken in a serving bowl.

    More Easy Crockpot Chicken Recipes

    Crockpot Olive Garden Chicken with Pasta

    6 hours 20 minutes


    Source link

  • Grilled Chicken Caesar Salad | The Recipe Critic

    Grilled Chicken Caesar Salad | The Recipe Critic

    This website may contain affiliate links and advertising so that we can provide recipes to you. Read my disclosure policy.

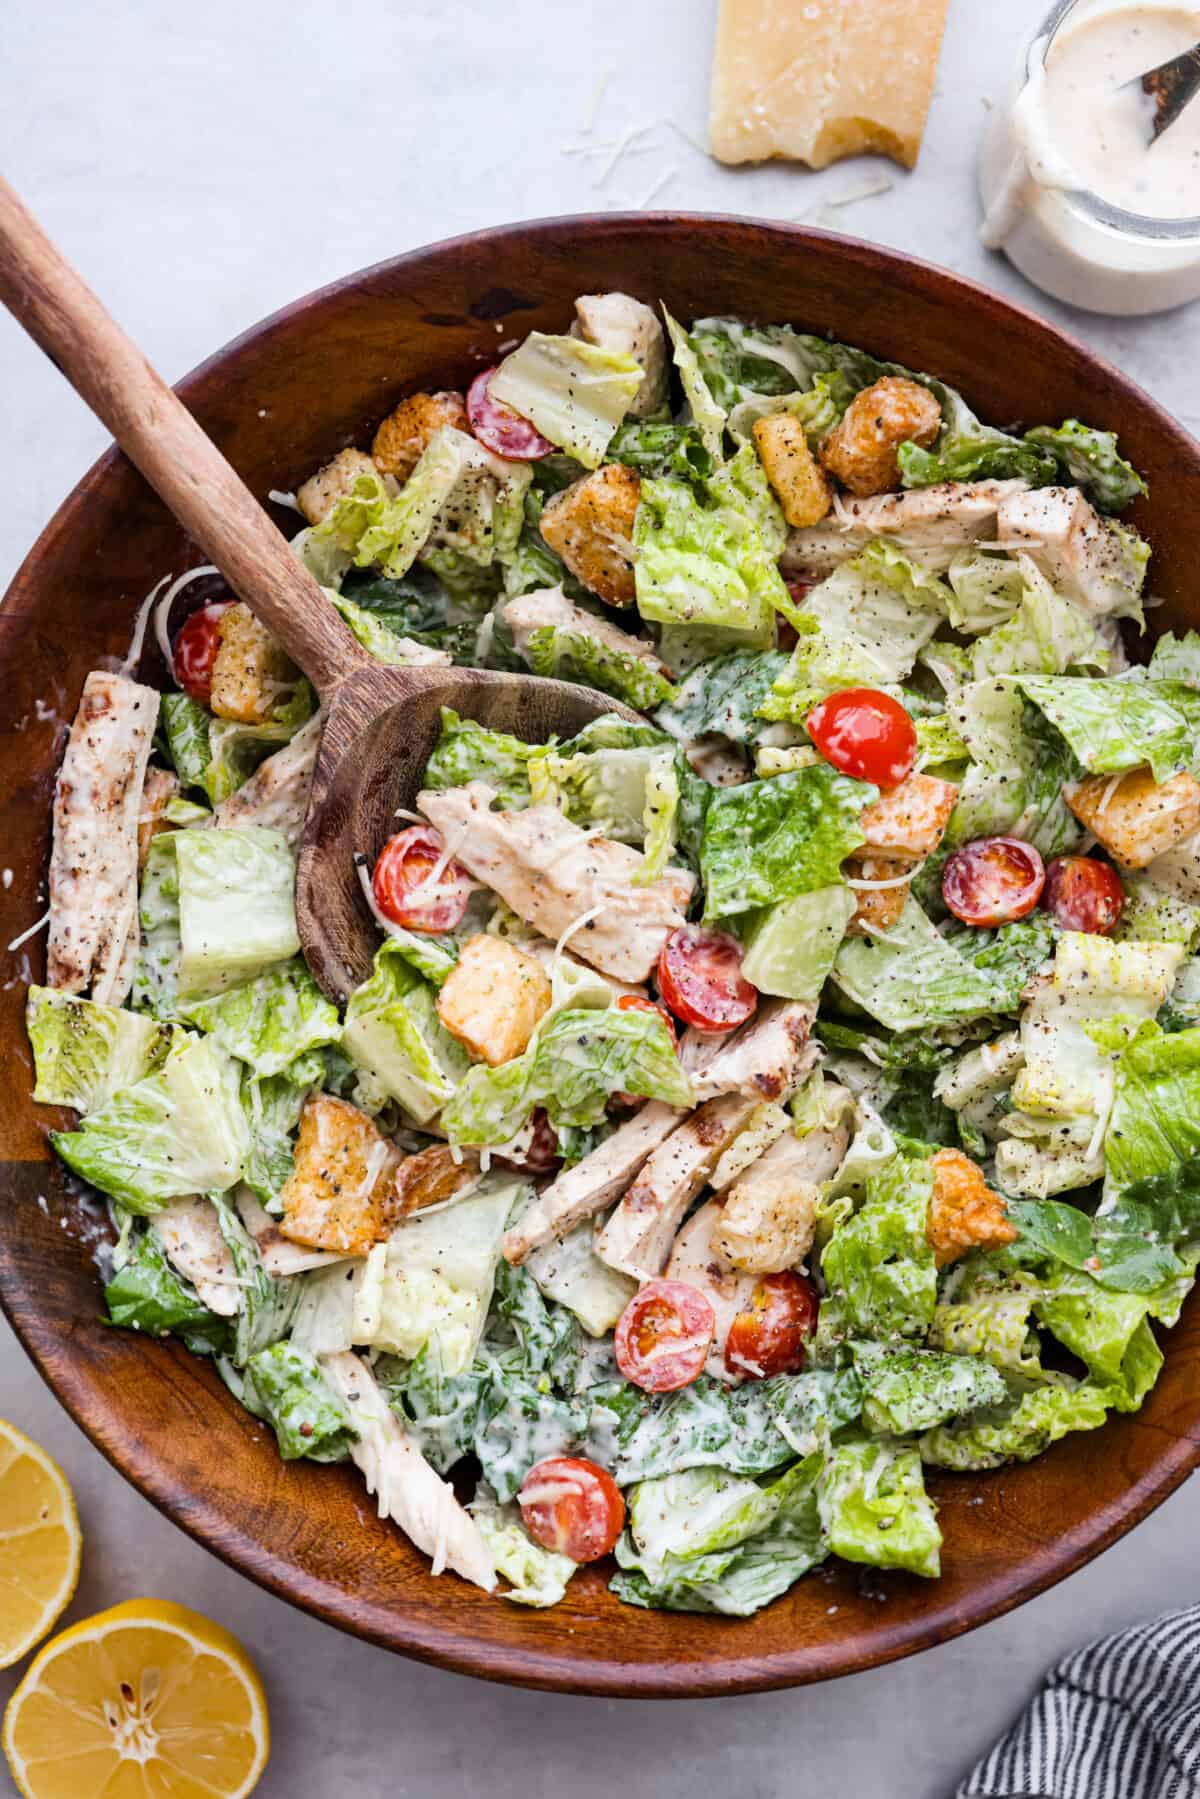
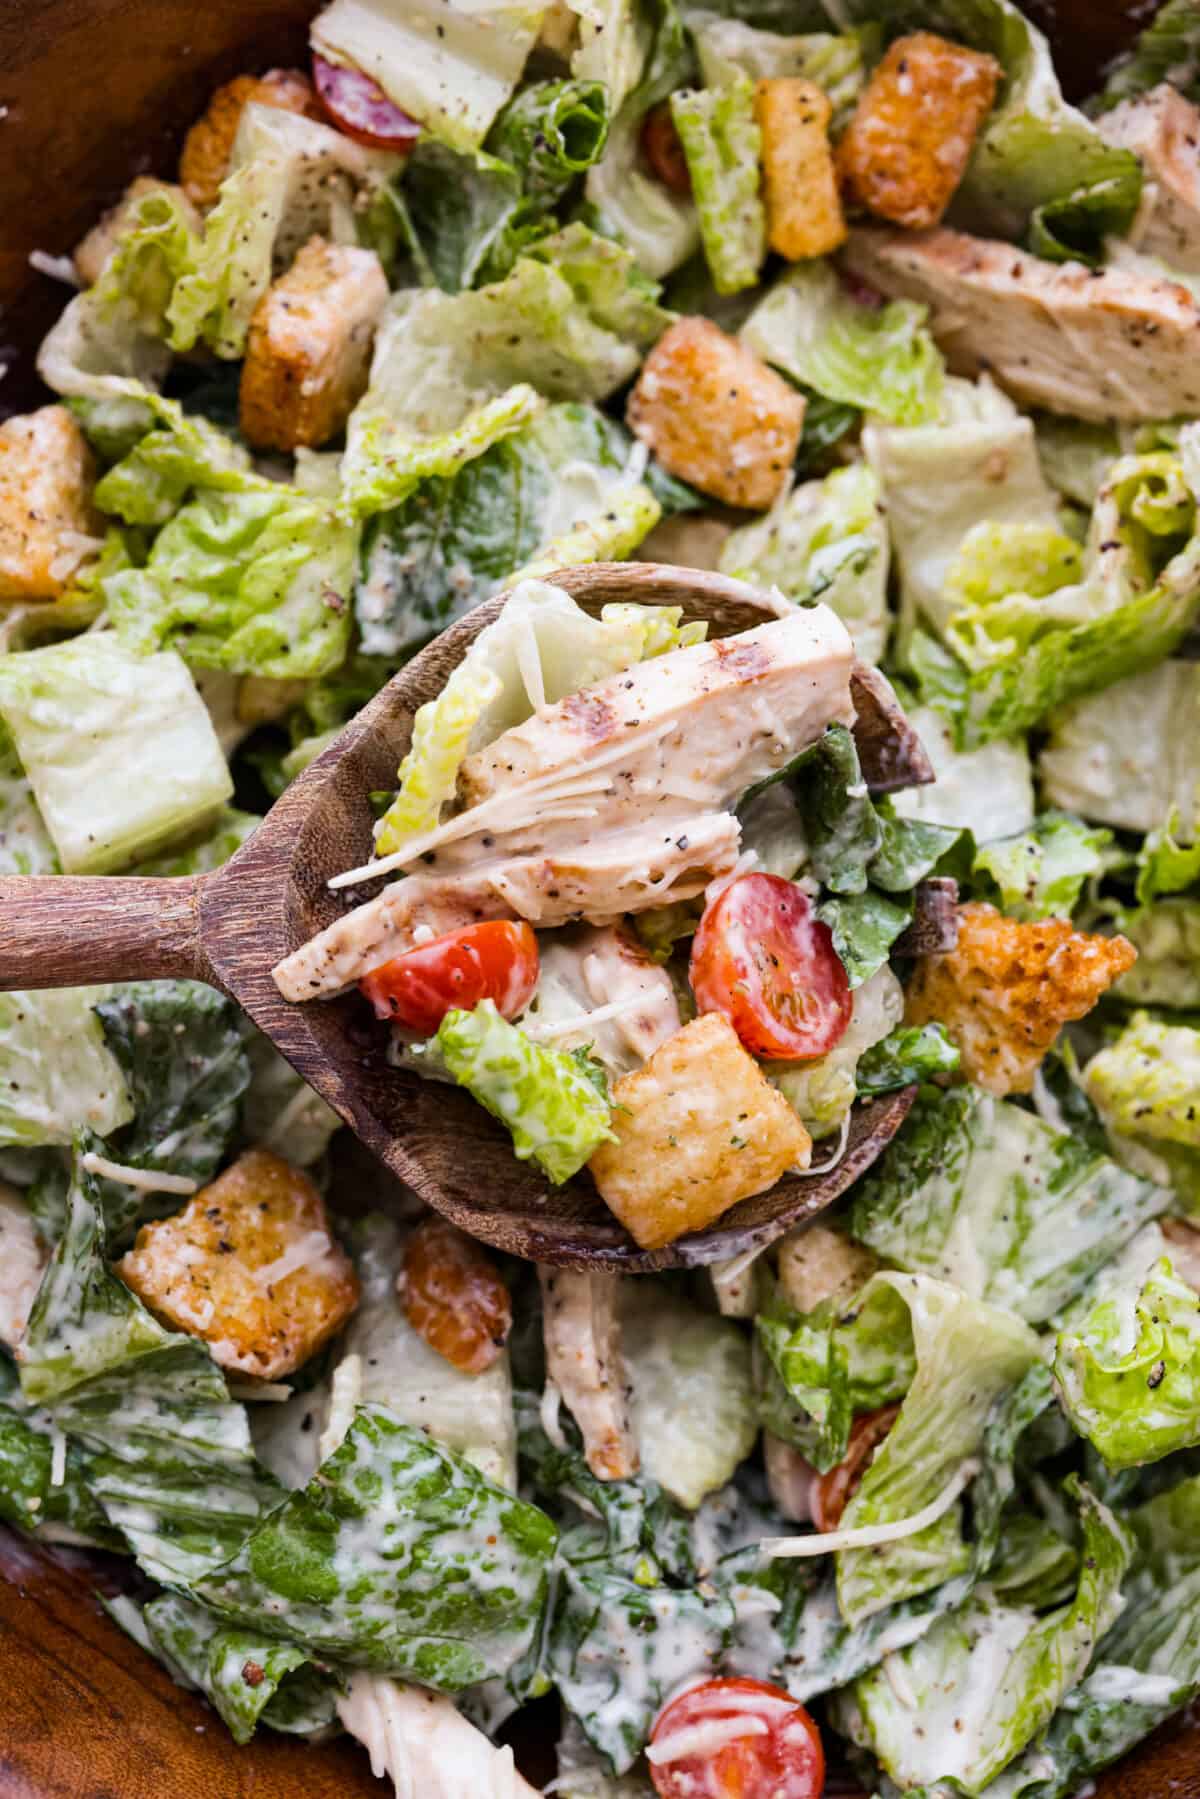
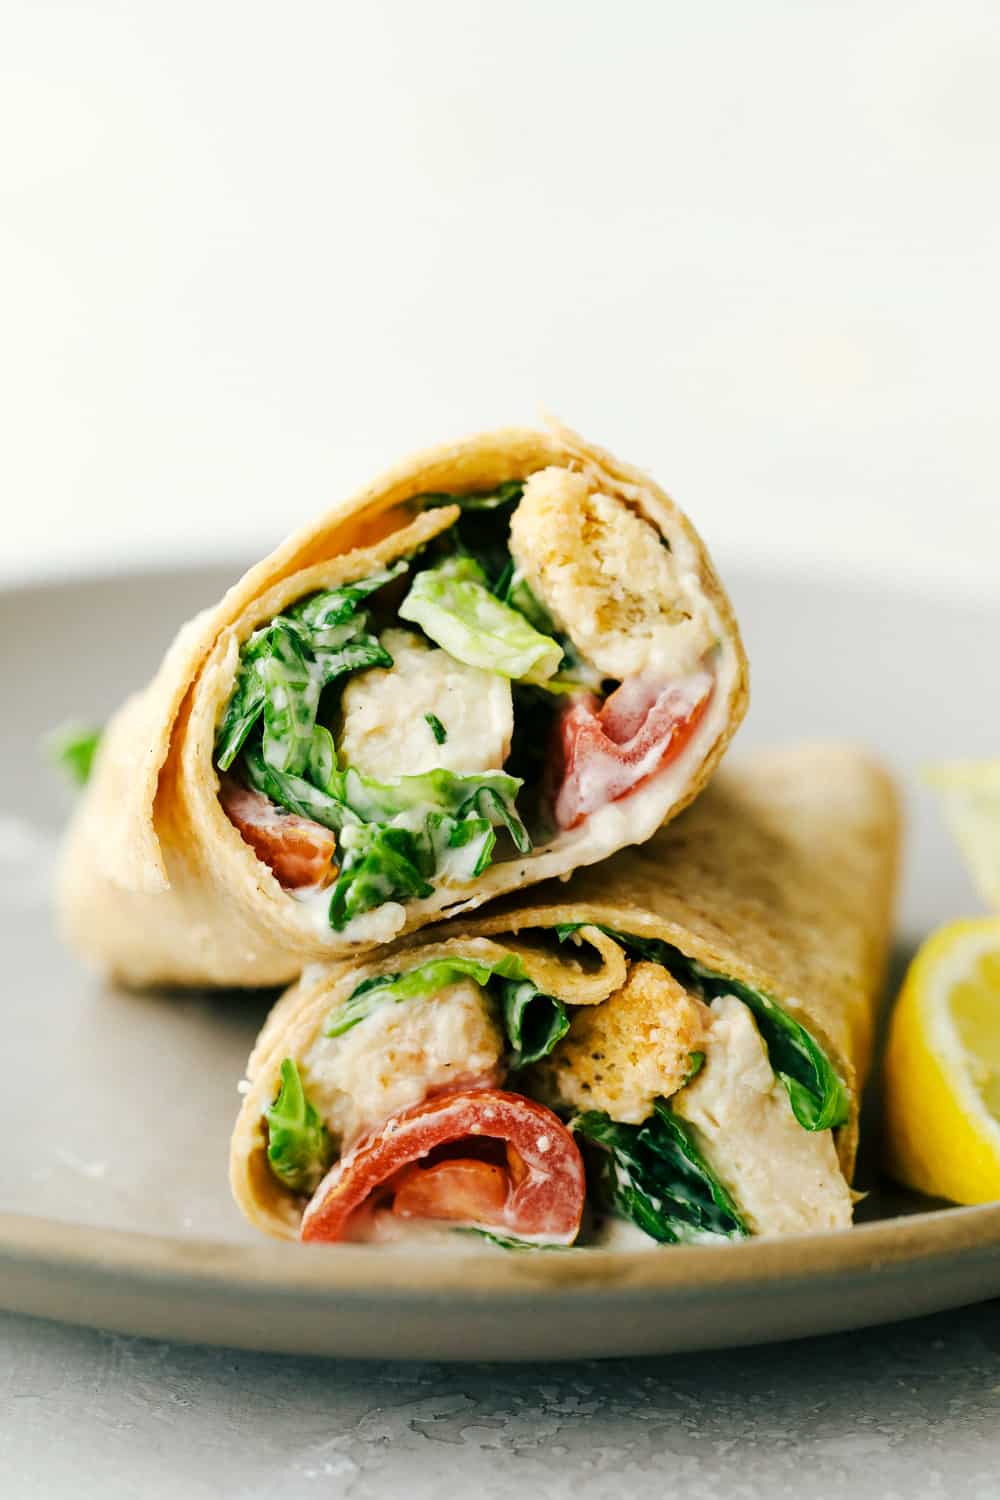
    Fresh and delicious Grilled Chicken Caesar Salad is a crowd-pleasing hearty salad with tender grilled chicken, crisp romaine lettuce, cherry tomatoes, shredded parmesan cheese, and crunchy croutons!

    Satisfying and flavorful salads like this one never go out of style. They make the perfect lunch or light dinner! Try out this greek broccoli pasta salad, this delicious honey mustard chicken salad, and this amazing Portillo’s chopped salad.

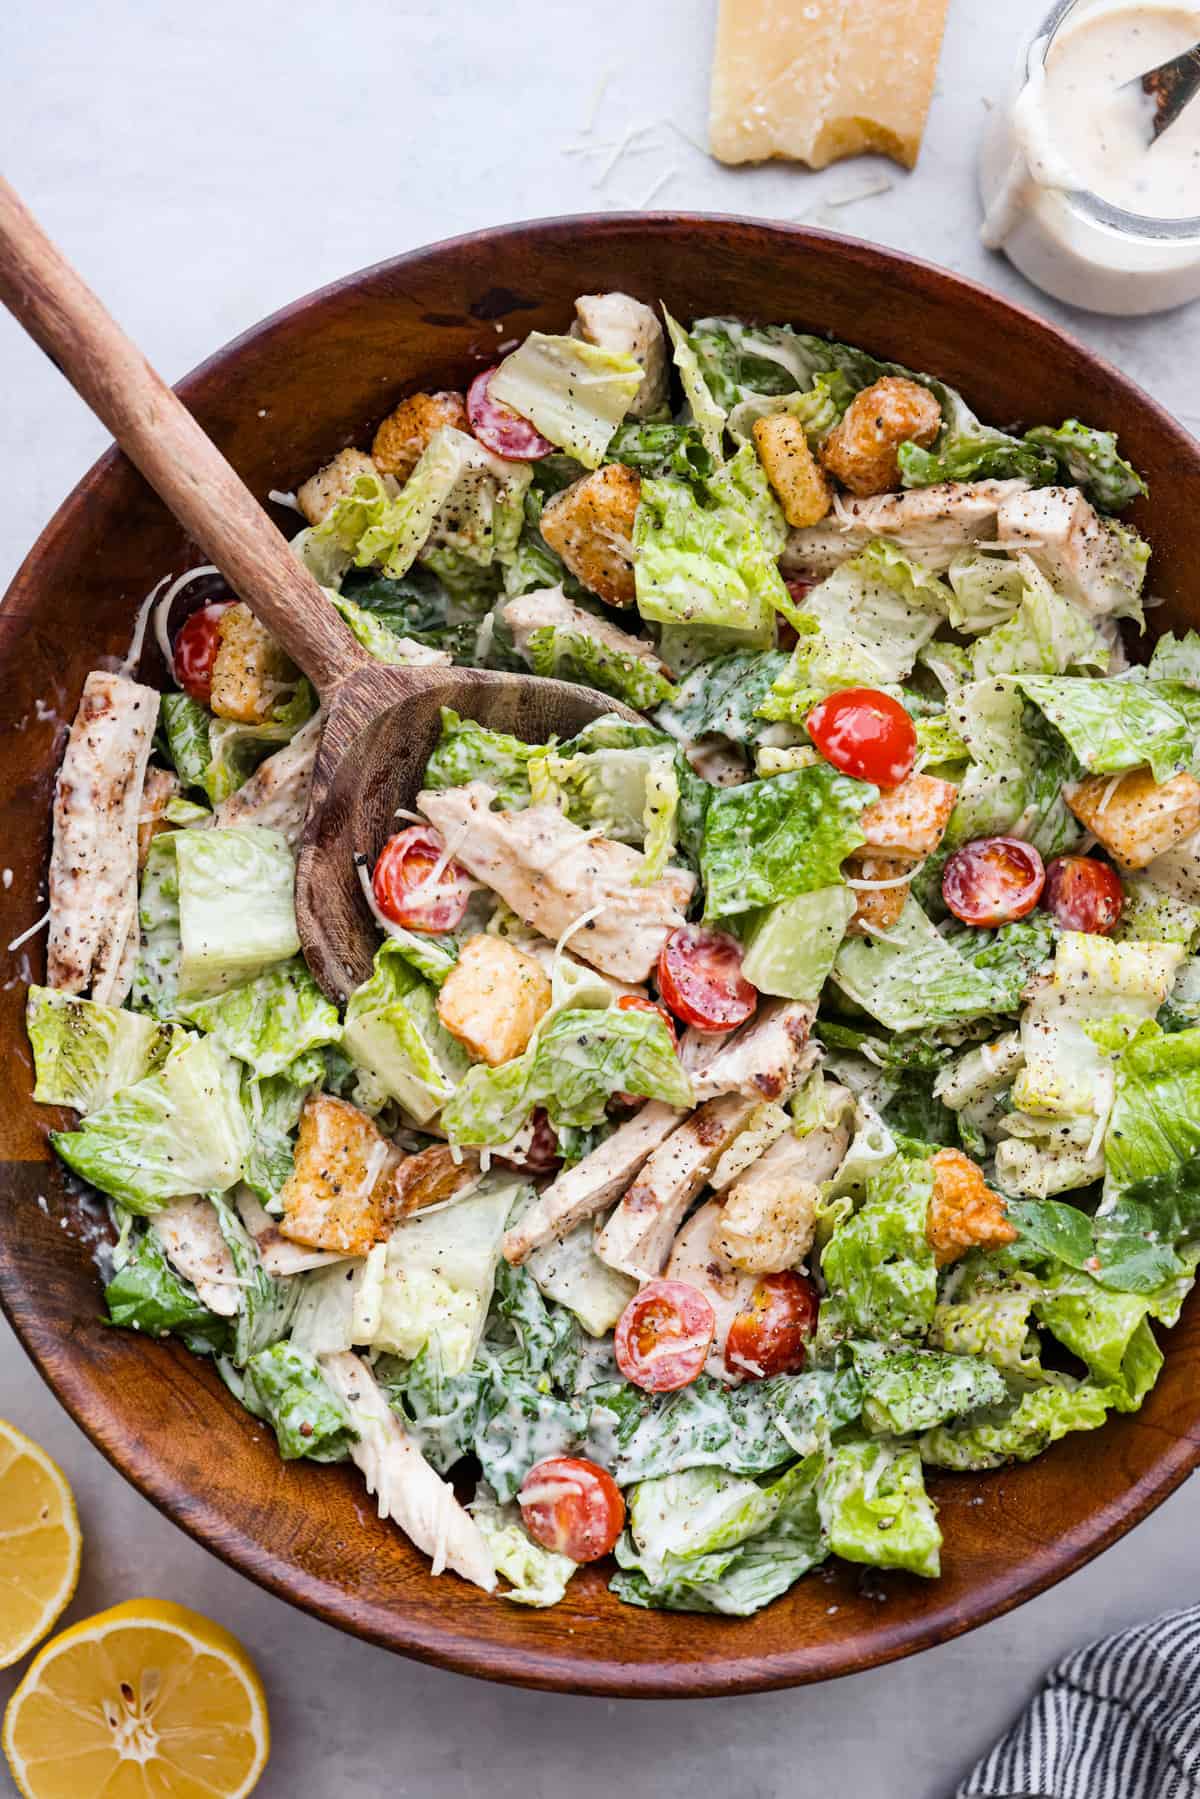
    Top view of a chicken caesar salad in a wooden bowl with a wooden spoon in it.

    Reasons to Make This Salad

    • It’s so filling: This chicken Caesar salad includes vegetables, lean protein, and many essential vitamins and minerals. It’s one of those salads that will fuel you for hours.
    • So delicious: The combination of crisp romaine, juicy tomatoes, flavorful chicken, delicious parmesan cheese, and crunchy croutons creates a mouthwatering flavor profile that’s a hit with almost everyone.

    Grilled Chicken Caesar Salad

    This grilled chicken Caesar salad is my favorite refreshing meal when the weather starts to warm up! I’ve always been a huge fan of a good classic Caesar salad, but this one with juicy, flavor-packed grilled chicken and juicy tomatoes is on a whole new level.

    It’s actually pretty easy to make, too! Let the chicken marinate in Caesar dressing to add plenty of that delicious Caesar flavor. Then, once the chicken is grilled, everything comes together in minutes. Serve it alone or with some crusty buttered sourdough bread on the side.

    Ingredients in Chicken Caesar Salad

    This grilled chicken salad recipe is the absolute best! The ingredients are simple and come together with very little effort. Check out the recipe card at the bottom of the post for exact measurements.

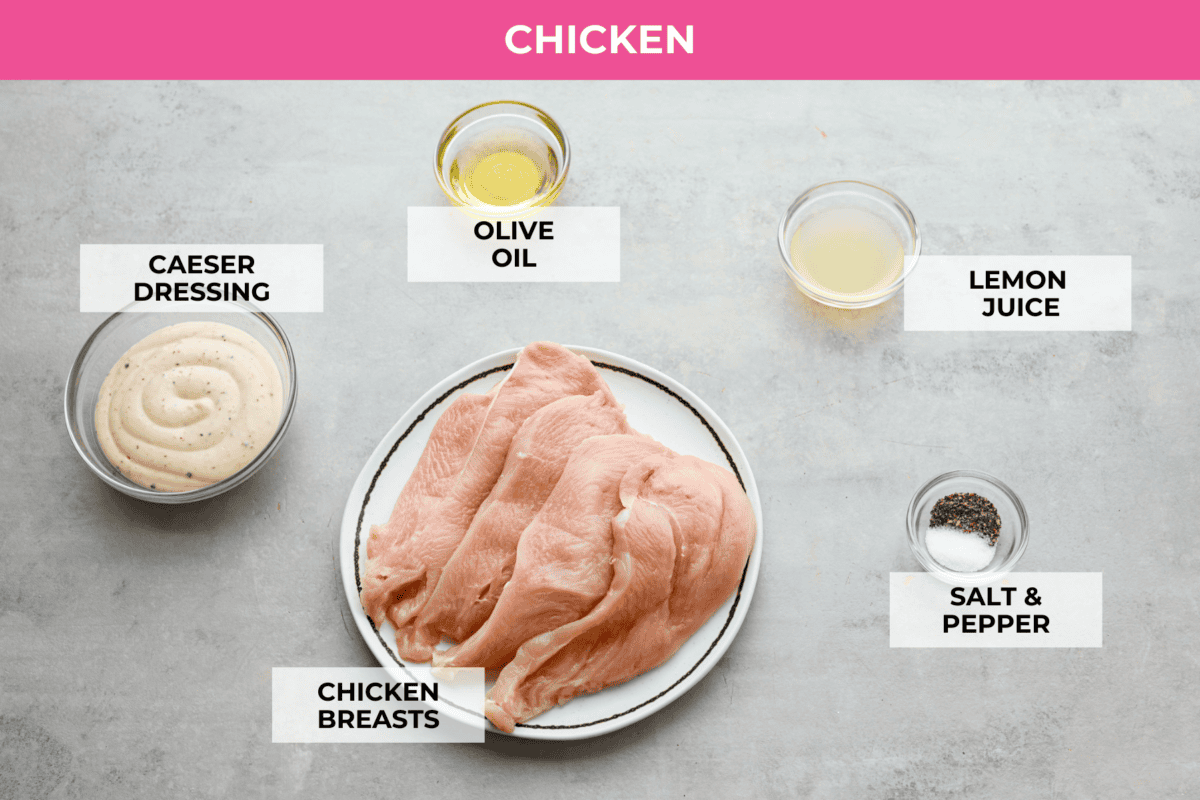
    Chicken

    • Caesar Dressing: You can use store-bought dressing, but we highly recommend this homemade Caesar Dressing. It’s perfectly creamy with incredible flavor!
    • Olive Oil: Smooths out the marinade and adds some necessary fat for juicy grilled chicken.
    • Lemon Juice: All good marinades have just enough acidity to tenderize the meat.
    • Salt & Pepper: Brings out all of the delicious flavor.
    • Chicken Breasts: These will marinate in the dressing for at least 1 hour making them tender, juicy and full of flavor.
    Top view of ingredients for chicken marinade.

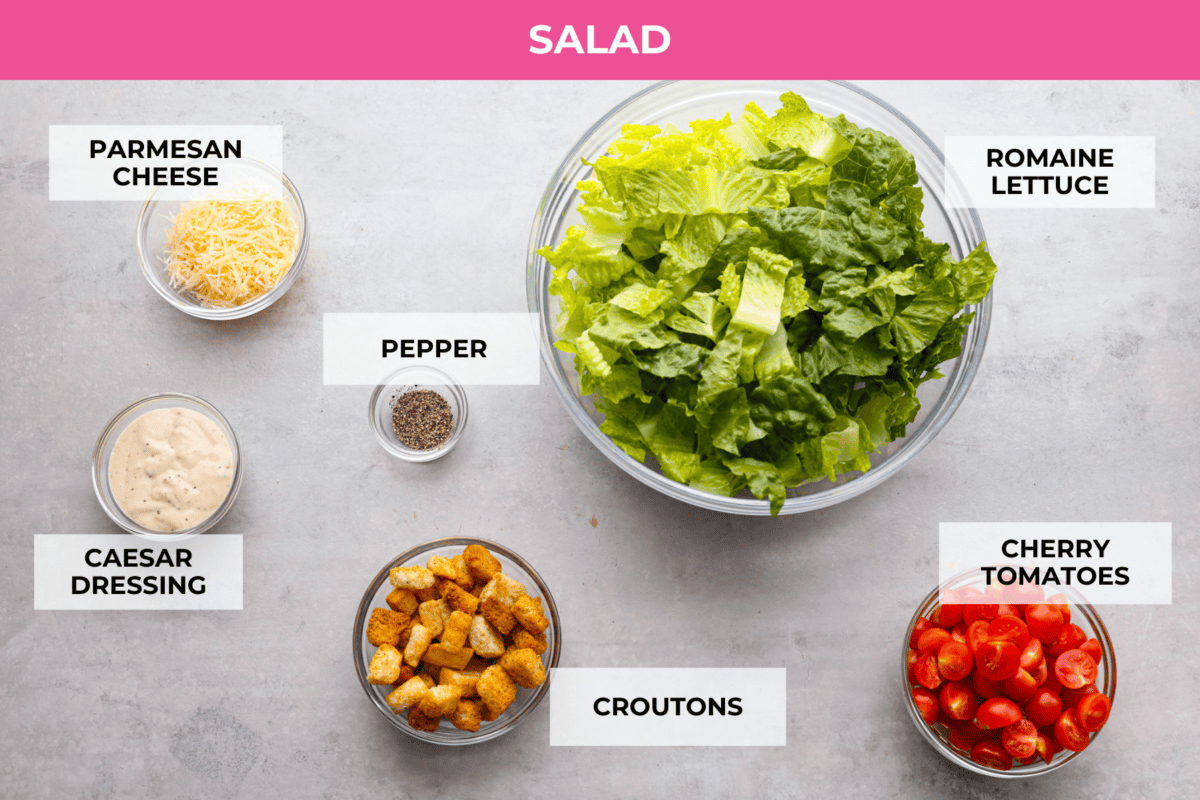
    Salad

    • Romaine: Chopped romaine adds bright green color and makes the salad fresh and crisp.
    • Cherry Tomatoes: For juicy bursts of sweetness.
    • Croutons: I love using my homemade croutons to add plenty of crunchy texture.
    • Parmesan Cheese: Add shredded or shaved parmesan cheese for a bit of nutty sharpness that enhances the flavor of the dressing.
    • Caesar Dressing: You can’t have a Caesar salad without Caesar Dressing! It adds the most wonderful briny, tangy and rich taste.
    • Black Pepper: Freshly cracked black pepper is the perfect finishing touch!
    Top view of labeled ingredients for the salad.

    How to Make a Grilled Chicken Caesar Salad

    Just five simple steps and you’re well on your way to the best salad of your life! This is one of those salads that even the kids will love. It’s that good! Here’s the easy process of how everything comes together:

    For the chicken

    1. Make the Marinade: In a large sealable bag or container, mix together the Caesar dressing, olive oil, lemon juice, and salt and pepper.
    2. Marinate the Chicken: Add the chicken breasts to the bag or container and coat each breast evenly. Place the chicken in the fridge to marinate for at least 1 hour.
    3. Grill: Heat a grill up to 375 degrees Fahrenheit. Once the chicken is ready, remove it from the marinade and grill for about 6-8 minutes on each side. Discard the marinade.

    For the salad.

    1. Slice Chicken: Once the chicken is grilled, let it rest at least 5 minutes before slicing into ½ inch strips.
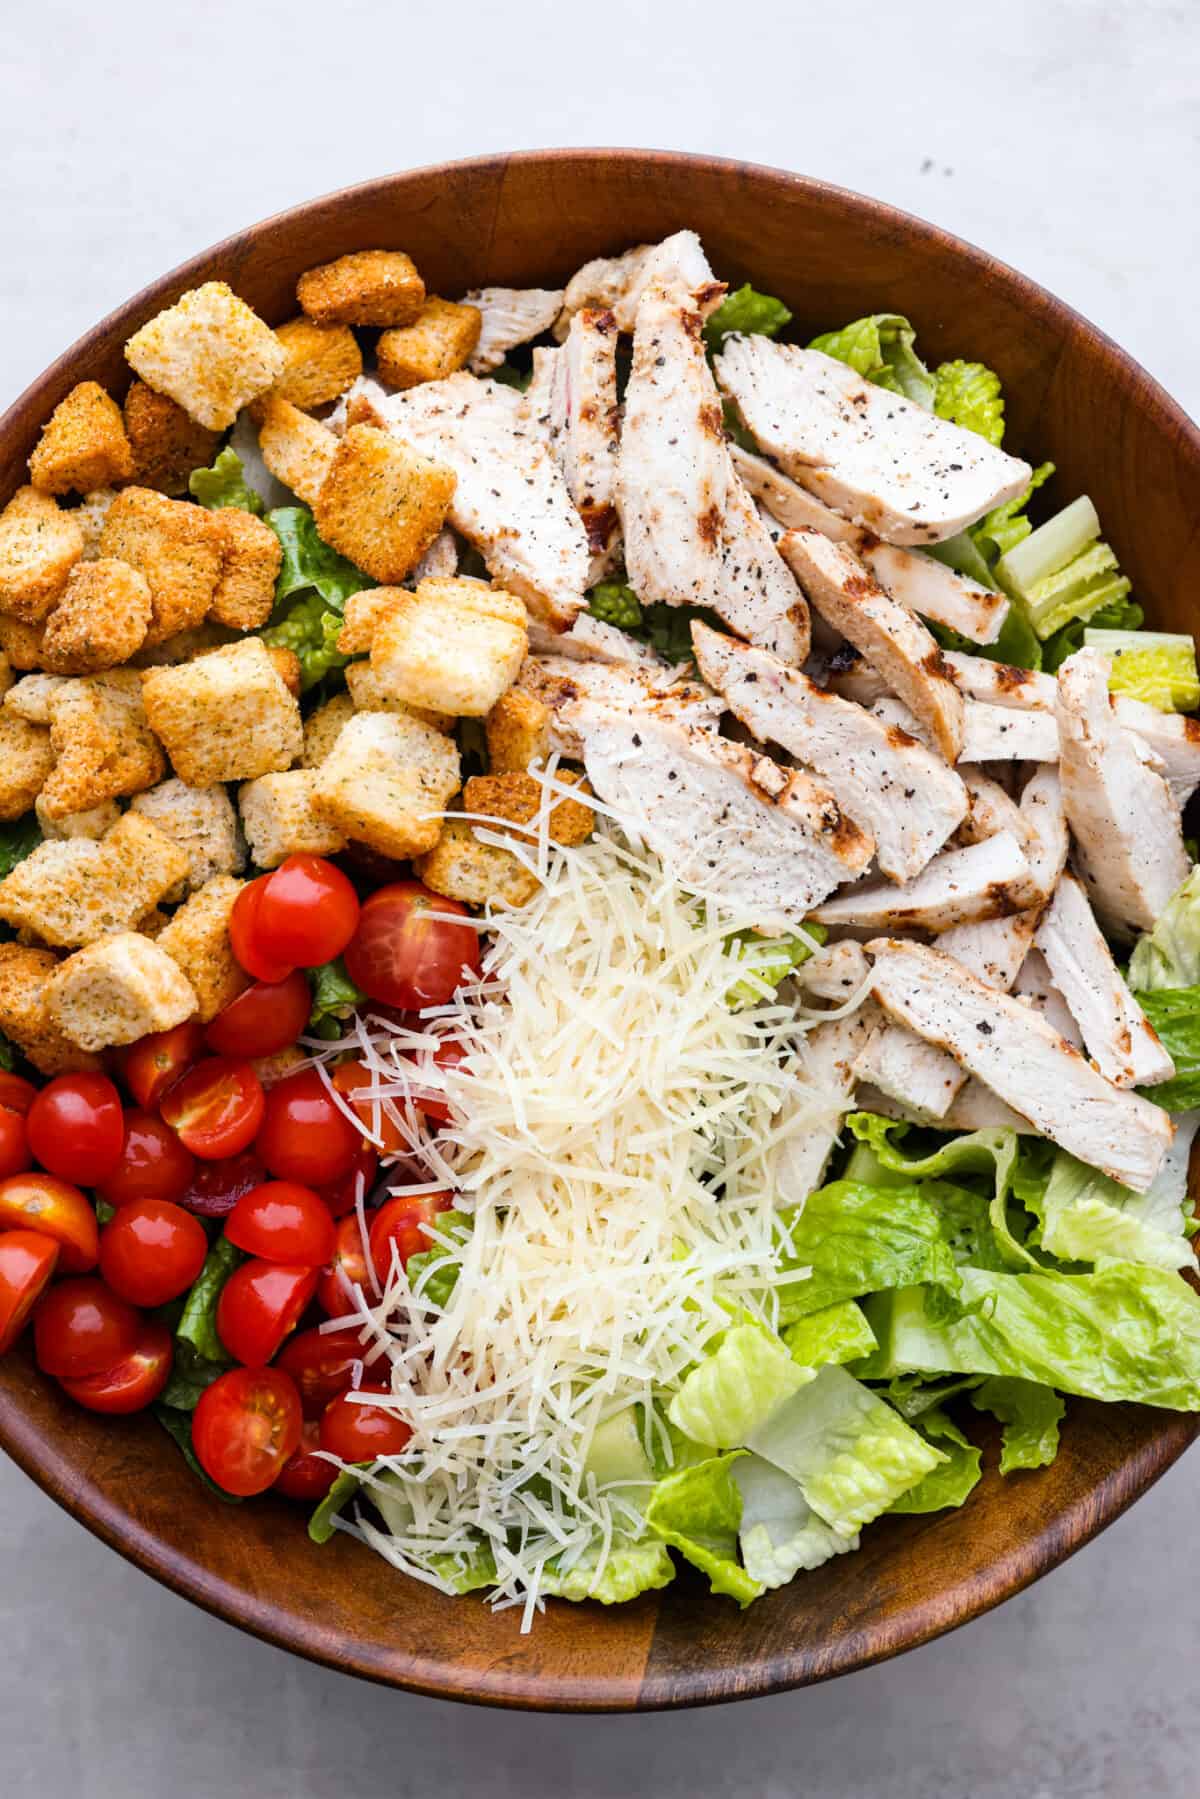
    2. Assemble and Toss Salad: To a large bowl add the chopped romaine, cherry tomatoes, croutons, parmesan cheese, sliced chicken and caesar dressing, top with freshly cracked black pepper and toss.
    Grilled chicken caesar salad in a bowl.  ready to be mixed.

    Tips and Variations

    With a joining of fresh ingredients and a flavorful, creamy salad dressing, this is definitely my new favorite salad recipe! Here are some helpful tips and ways to make it your own!

    • Using Homemade Dressing: I like to use my homemade dressing, but a store-bought dressing works just as well! The same goes for the croutons. 
    • Marinating the Chicken: Your chicken can marinate for up to 4 hours, but 1 hour is sufficient. If you’re in a hurry, even 30 minutes will be okay, but not quite as good.
    • Salad Greens: Romaine is classic in Caesar salads; however, any favorite greens will work. You can even use a combination of several varieties.
    • Precooked Chicken: You can totally use pre-cooked chicken or rotisserie chicken for this recipe, but what makes it special is the marinated grilled chicken.

    A close up of grilled chicken caesar salad in a bowl being scooped with a wooden spoon.

    Make Ahead & Storing Leftovers

    • Make Ahead: Get a head start by making the dressing and grilling the chicken a day or two ahead, and store each separately in airtight containers in the refrigerator. You can also chop the lettuce and tomatoes beforehand. Then, when it comes time to serve, pull everything out of the fridge, assemble, and enjoy!
    • Leftovers: Once the salad is tossed, it’s best enjoyed the day it’s made, but you can keep leftovers in an airtight container in the fridge for up to 3 days. It’s best to store the dressing separately from the salad.

    More Delicious Caesar Recipes

    The garlicky, smoky, salty and lemony flavors that make up that classic Caesar taste we all know and love is one of my favs. Anything with that delicious Caesar flavor and I’m bound to be obsessed!

    Grilled Caesar Salad

    19 minutes

    Pin this now to find it later

    Pin It


    Source link

  • Harissa Meatballs with Whipped Feta Recipe

    Harissa Meatballs with Whipped Feta Recipe

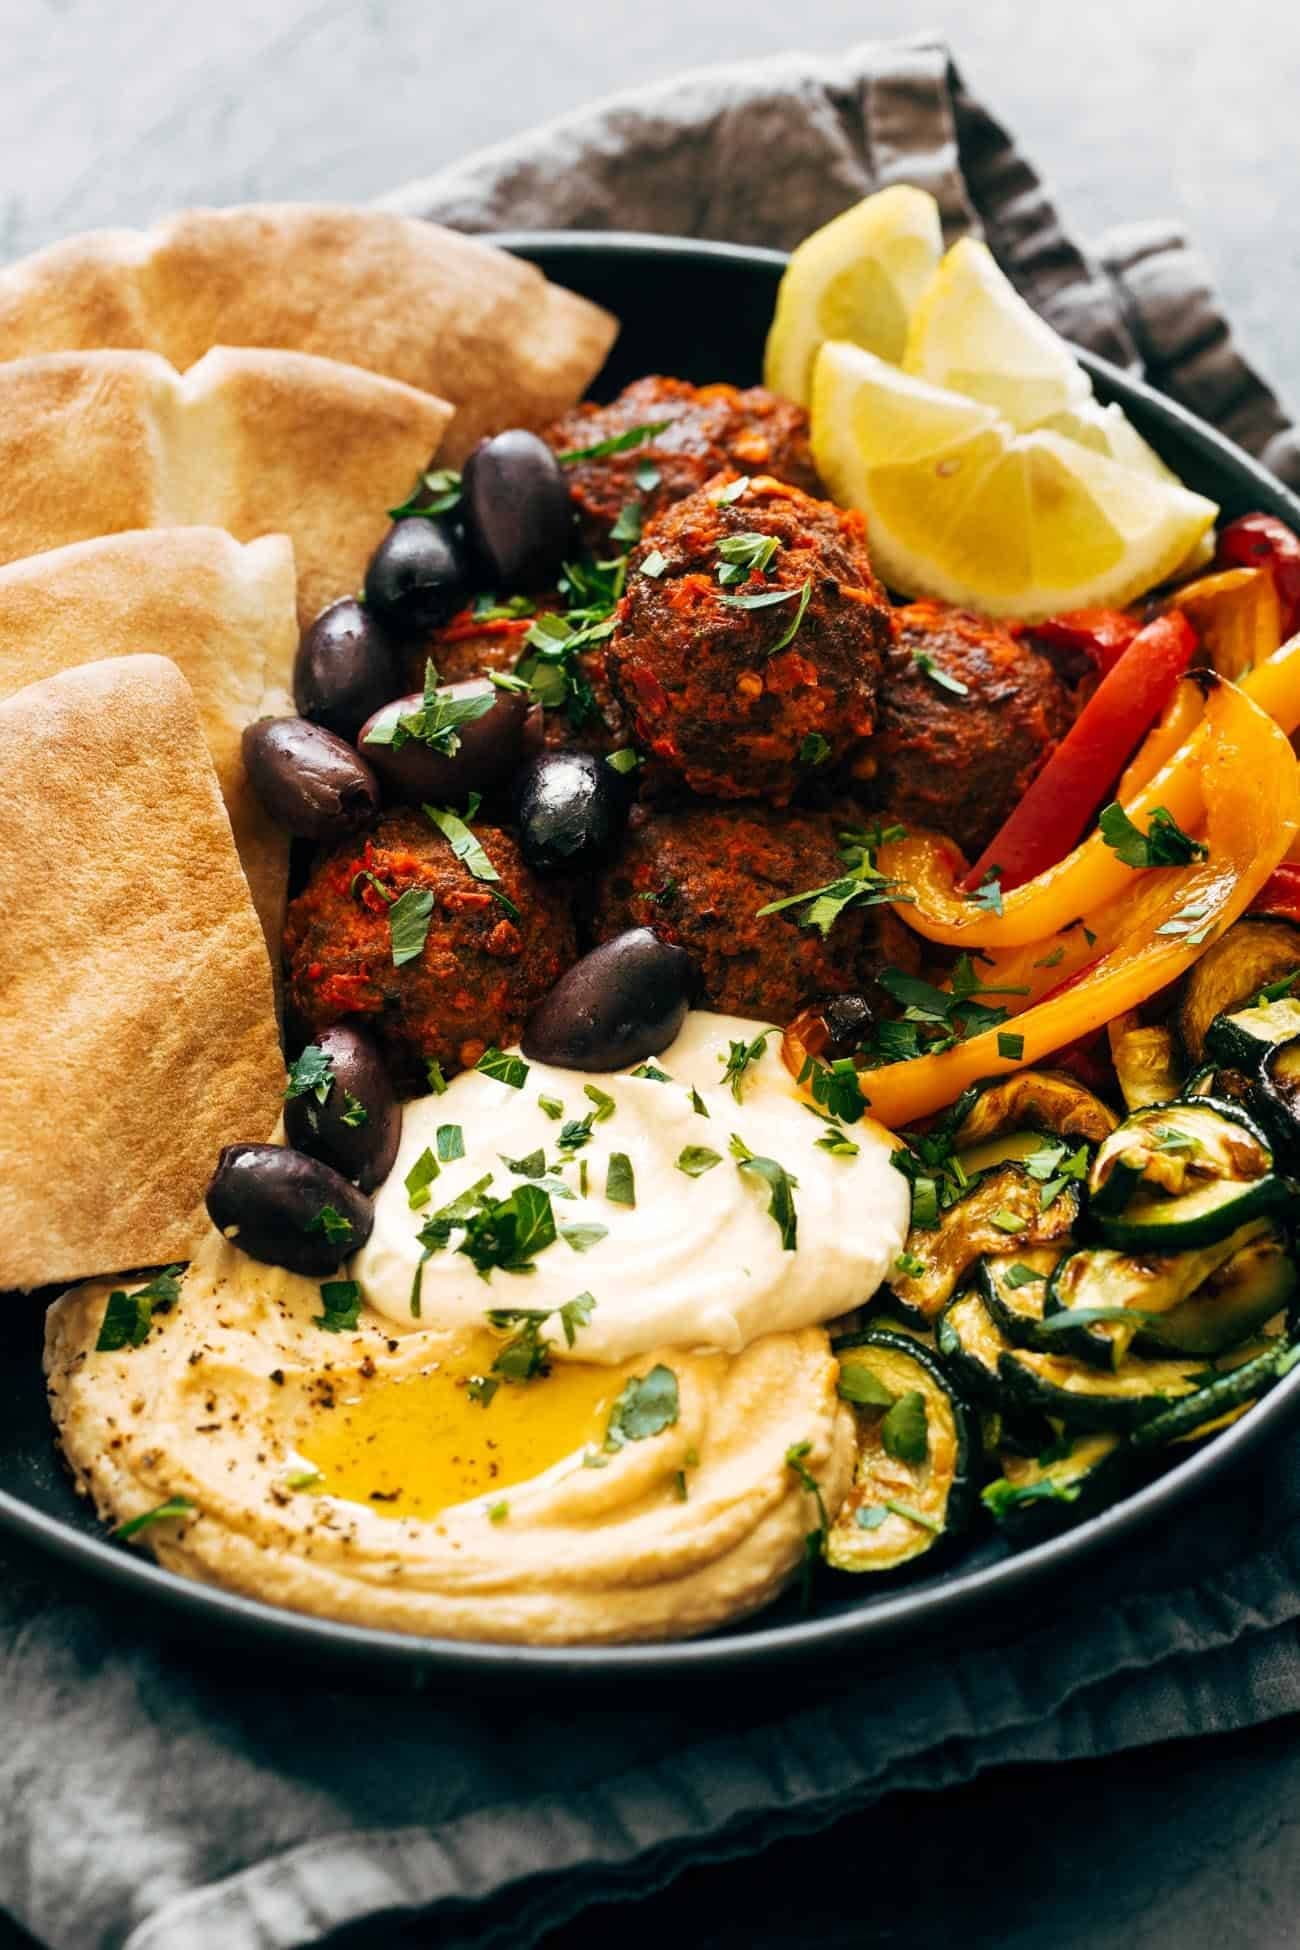
    These Harissa Meatballs with Whipped Feta are perfect for an easy SOS dinner! Store-bought meatballs, bell peppers, zucchini, harissa, and whipped feta all in one bowl. YUMMY!

    This is a fan favorite recipe that’s part of our Fall 2022 SOS Series! View the full series.


    Here’s a stunner for you.

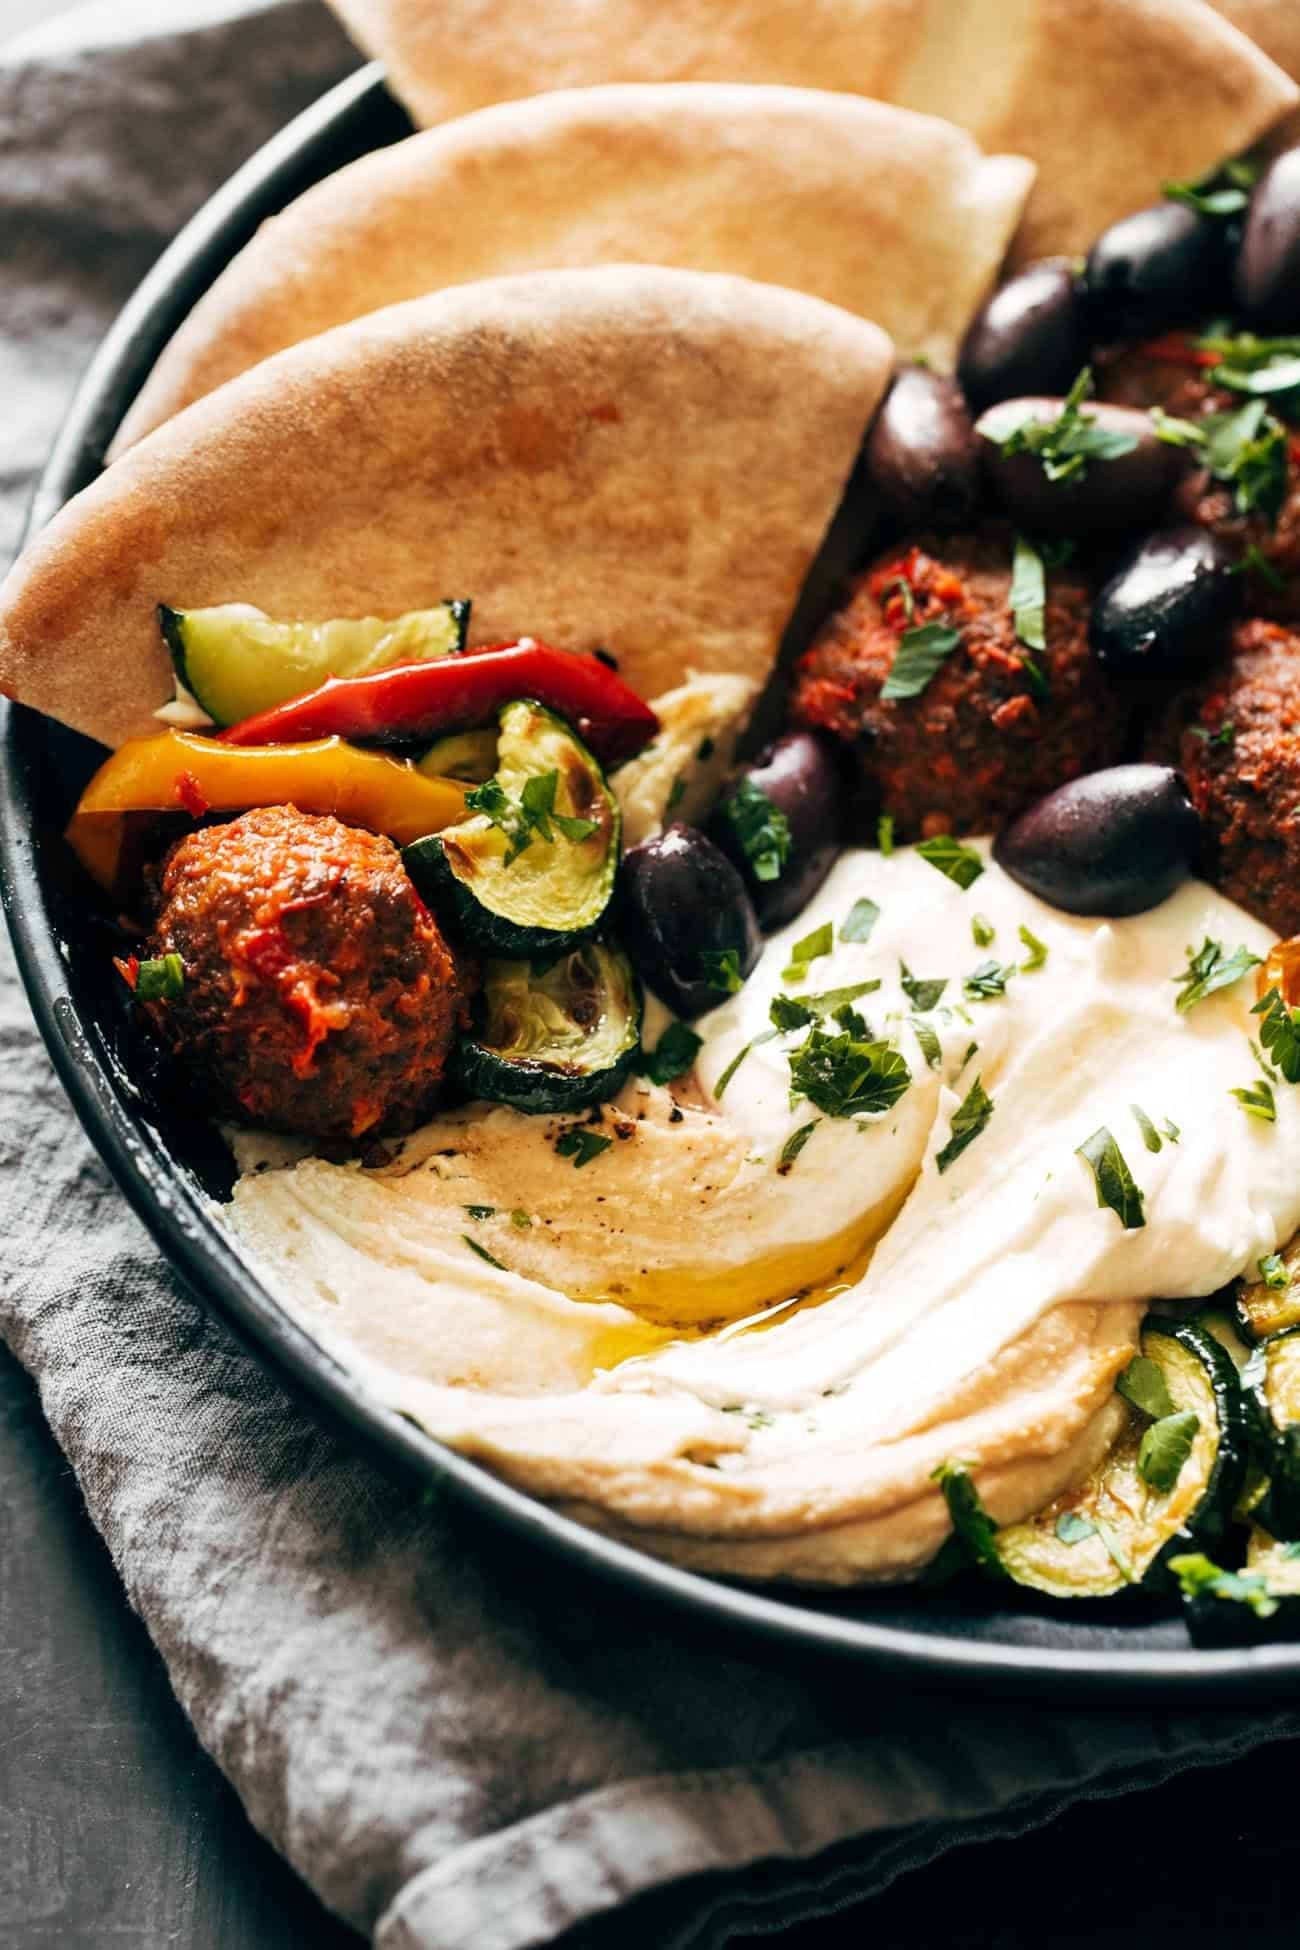
    You are looking at a big ol’ bowl of store-bought wonders such as hummus, olives, and pita bread, topped with a pile of meatballs (also store-bought! SOS life) that have been coated in a quick harissa / lemon / olive oil paste and baked to juicy-crisp perfection, roasted peppers and zucchini, and a super tangy, salty, whipped garlicky feta to add a little creamy punch to every bite.

    It sounds fancy when I write it all out, and actually, every bite really does feel very complex and so delicious. But in reality, almost everything can be store-bought, and then you just have two tasks: roasting a meatball and veggie sheet pan, and whipping up a block of feta.


    In This Post: Everything You Need For This Bowl


    Ingredients You Need To Make This Happen

    Here’s our shortcut-friendly ingredient list:

    • meatballs
    • harissa paste (it usually comes in a jar and is often sold in the “global foods” section at many grocery stores)
    • bell peppers
    • zucchini
    • hummus
    • pita
    • feta

    And assuming you’ve got olive oil, S&P, and garlic…this big bowl of goodness is yours for the taking.

    Close-up of Harissa Meatballs in a bowl

    How To Make This Bowl Come Together

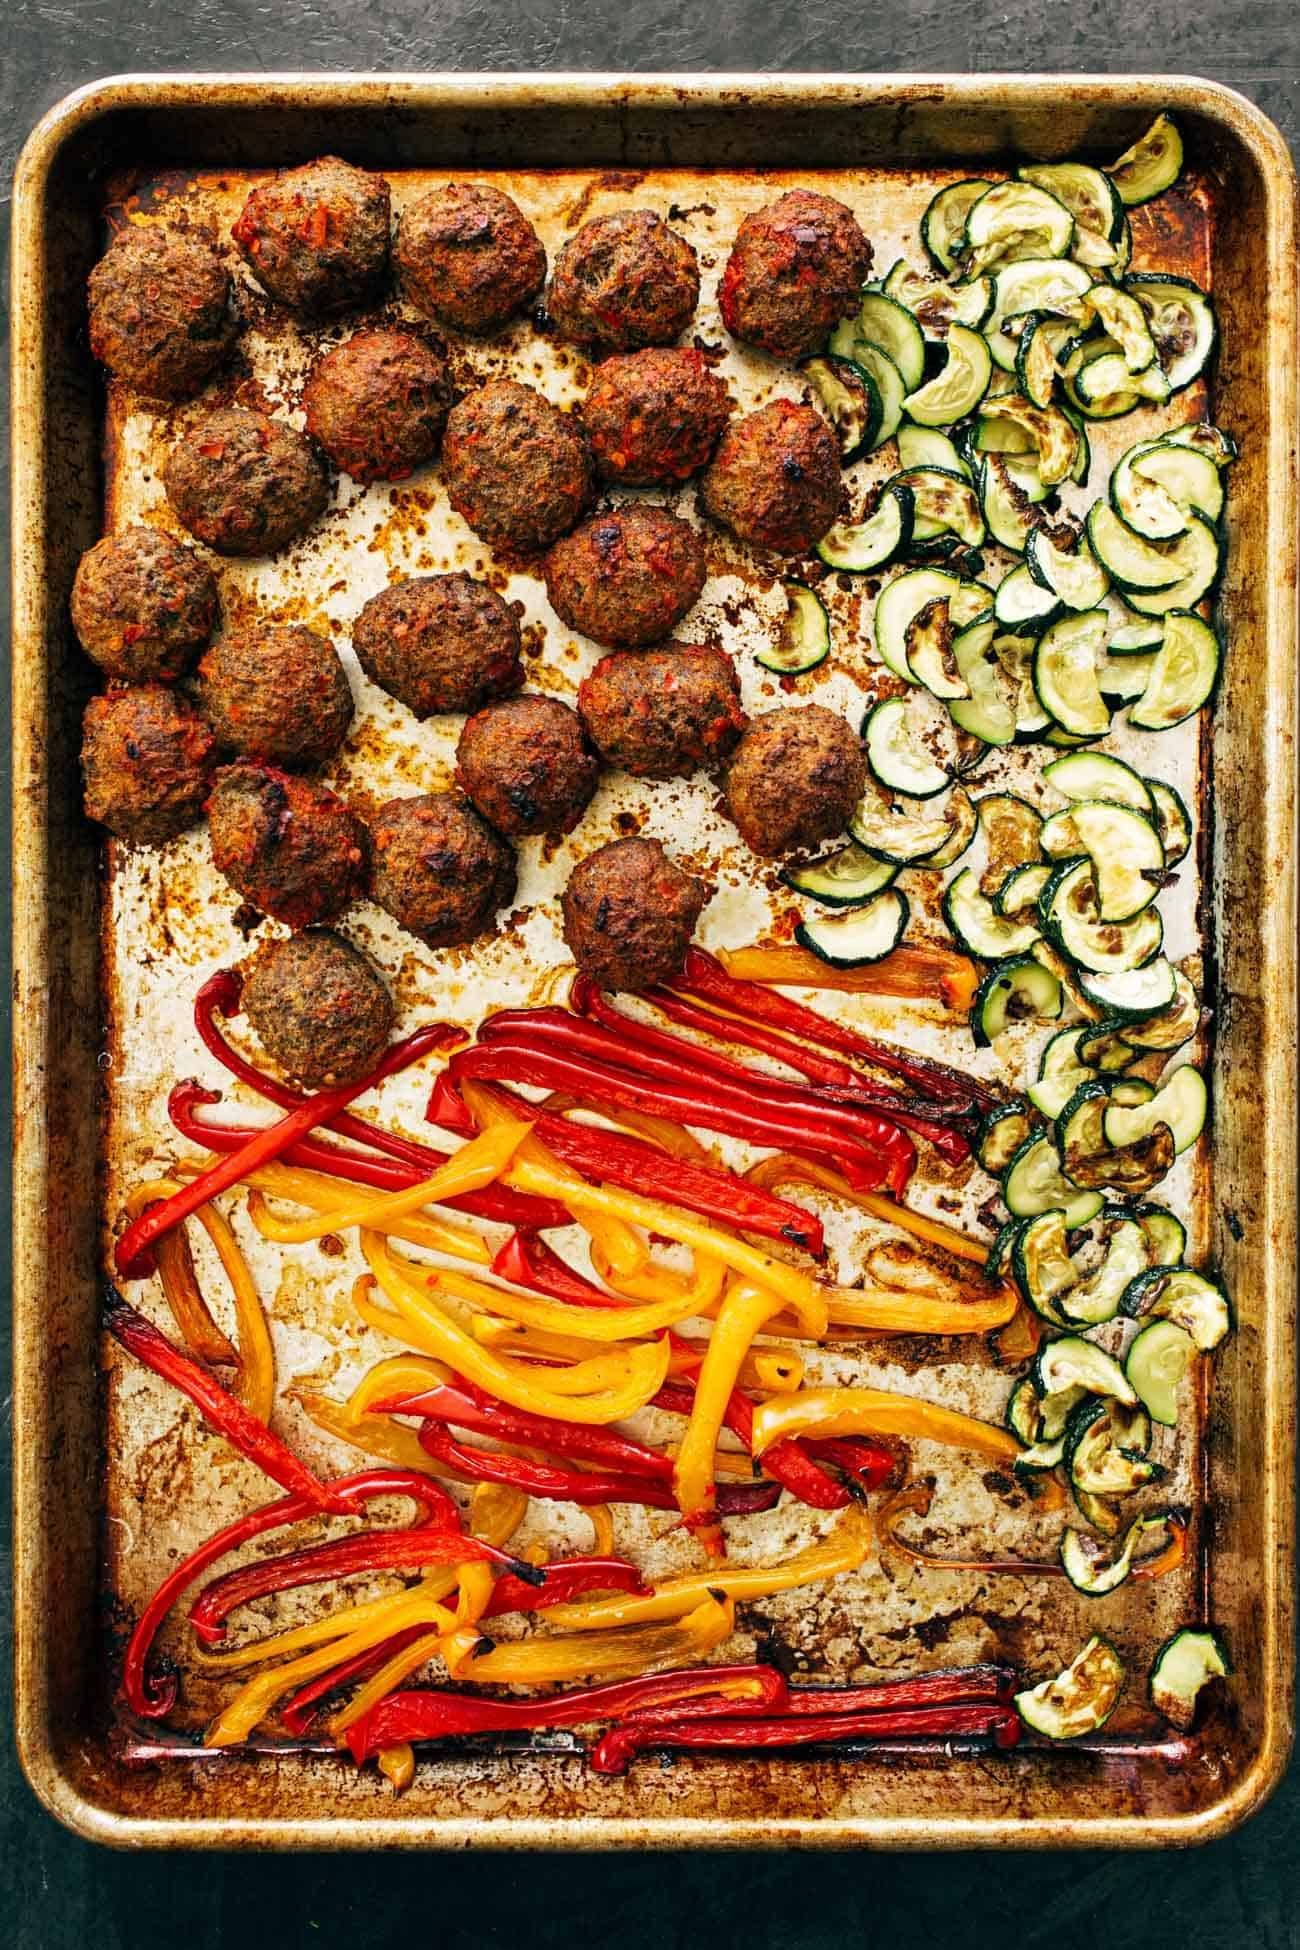
    Essentially what is happening here is the meatballs, peppers, and zucchini get roasted on one single pan.

    I know technically this isn’t the correct way to do it because you want each veggie to be cooked to its own perfection. And if you are particular about your zucchini, feel free to give it its own pan for optimal zucchini-specific roasting. But I found it most efficient (and 100% delicious) to just add the zucchini on the same pan – not for the whole time, but just for the last few minutes of roasting. If there’s an easy way to do something that still gets the same super-yum end results, you know I’m all over that. And in this case, everybody-on-one-pan is the way.

    Cooked ingredients on a sheet pan for Harissa Meatballs with Whipped Feta

    The Whipped Feta Is a Must-Make

    The only other really “active” cooking step here is blitzing up a block of feta cheese in a food processor or mini chopper (I love this one (affiliate link)) until it becomes a creamy, spreadable, dollop-able wonder that you might be tempted to put on, like, everything from here on out.

    This recipe, this combo of flavors, this textural heaven? This one is for those of us who like to go big. Lots of color, lots of puckery zip, lots of salt, and a good amount of heat from that harissa paste… more of all, please.

    In terms of eating this, you can just fork-and-knife it, OR you can get right up in there with your pillowy pita and swoop it directly into the hummus, top with a meatball and some veggies, and do a final dunk into that whipped feta to just take this day right over the top. (10/10 would recommend.)

    Close-up of Harissa Meatballs with Whipped Feta in a bowl

    Harissa Meatballs with Whipped Feta: Frequently Asked Questions

    What type of store-bought meatballs do you recommend?

    Any kind! I’ve tried pork, beef, chicken, and turkey meatballs – and I think veggie meatballs would also work really well as a vegetarian option! This recipe is very forgiving – it can work with meatballs that are pre-cooked, and I’ve also enjoyed this recipe with the pre-made, UNCOOKED meatballs that you can often buy in the meat department. For a specific brand, I really enjoyed these with the ALDI pre-made uncooked Italian style meatballs (I know, wrong flavor profile, but it worked just fine and the meatballs were amazing). I just brushed them with the harissa sauce before baking.

    I have some extra time. Can I make my own meatballs for this recipe?

    Sure can! These baked chicken meatballs are perfect in this recipe, and major bonus – they’re freezer-friendly if you wanted to prep these ahead of time. Doubling the recipe is not a bad idea!

    Is harissa paste spicy?

    It’s not terribly spicy, but harissa paste does pack some heat. I would rate it as mild+ or medium- level heat. I left a few meatballs un-sauced for my toddler just to make sure it wasn’t too spicy for her.

    I can’t find harissa paste. What else can I use?

    Chili oil or even sriracha could work here instead! Just adjust the amounts as necessary so that you don’t make it too spicy.

    Prefer To Watch Instead Of Read?

    Click here to watch step-by-step stories for how to make this recipe!

    Source Notes: Harissa paste is “a Tunisian hot chili pepper paste, the main ingredients of which are roasted red peppers, Baklouti peppers, spices and herbs such as garlic paste, caraway seeds, coriander seeds, cumin and olive oil to carry the oil-soluble flavors.” (definition from Wiki!) It reminds me a little bit of curry paste – it’s packed with flavor and vibrantly red in color. In the US, you can find it at many grocery stores that have a solidly stocked “global foods” section. It’s usually is sold in small jars. If you want to dabble with making your own (and I am actually tempted to after reading Suzy’s description), here is a recipe for homemade harissa paste.


    Print

    clock clock iconcutlery cutlery iconflag flag iconfolder folder iconinstagram instagram iconpinterest pinterest iconfacebook facebook iconprint print iconsquares squares iconheart heart iconheart solid heart solid icon

    Description

    These Harissa Meatballs with Whipped Feta are perfect for an easy SOS dinner! Store-bought meatballs, bell peppers, zucchini, harissa, and whipped feta all in one bowl. YUMMY!


    Meatballs and Such:

    Whipped Feta:

    Extras:


    1. Sheet Pan, Part One: Preheat the oven to 425 degrees. Place the peppers on one side of a large sheet pan. Drizzle with oil and sprinkle with salt. Mix the harissa with a little bit of olive oil, lemon juice, and garlic powder until you have a nice spreadable red paste. Coat your meatballs with the sauce (you can do this by tossing the meatballs in a bowl with the sauce if they’re pre-cooked, or just brushing the meatballs directly on the sheet pan if your meatballs are raw). Add meatballs to the center of the sheet pan. Bake for 15-20 minutes.

    2. Sheet Pan, Part Two: Add the zucchini to the pan with some olive oil and salt. Roast for another 10 minutes. For extra browning on everything, broil for about 5 minutes.

    3. Whip That Feta: In a food processor, chopper, or blender, whip up the feta, cream cheese, and garlic until a thick and creamy sauce forms. 

    4. Serve: Serve meatballs and veggies with a dollop of hummus, your whipped feta, pita wedges, and anything else you like (olives, lemon, etc.). And now DEVOUR. And repeat. And repeat. And repeat.

    • Prep Time: 15 minutes
    • Cook Time: 30 minutes
    • Category: Dinner
    • Method: Sheet Pan
    • Cuisine: American

    Keywords: harissa paste, meatballs, whipped feta

    We Love Sheet Pan Recipes. Here Are More Faves!


    One More Thing!

    This recipe is part of our collection of savory meatball recipes. Check it out!

    Source link

  • Honey Soy Chicken & Rice Bowls

    Honey Soy Chicken & Rice Bowls

    These honey soy ground chicken rice bowls are sweet, salty, garlicky, and come together fast — perfect for healthy weeknight dinners that don’t taste “healthy” but actually are. This recipe is part of my high-protein, high-fiber meals series.


    Jump to: ℹ️ Overview | 🛒 Ingredients | 📷 How To Make | 📹 Watch The Video | 👩‍🍳 Recipe Tips | 🥗 Serving Suggestions | 📝 Full Recipe Card | 🍽 More Healthy Chicken Dinner Recipes And More Rice Bowls


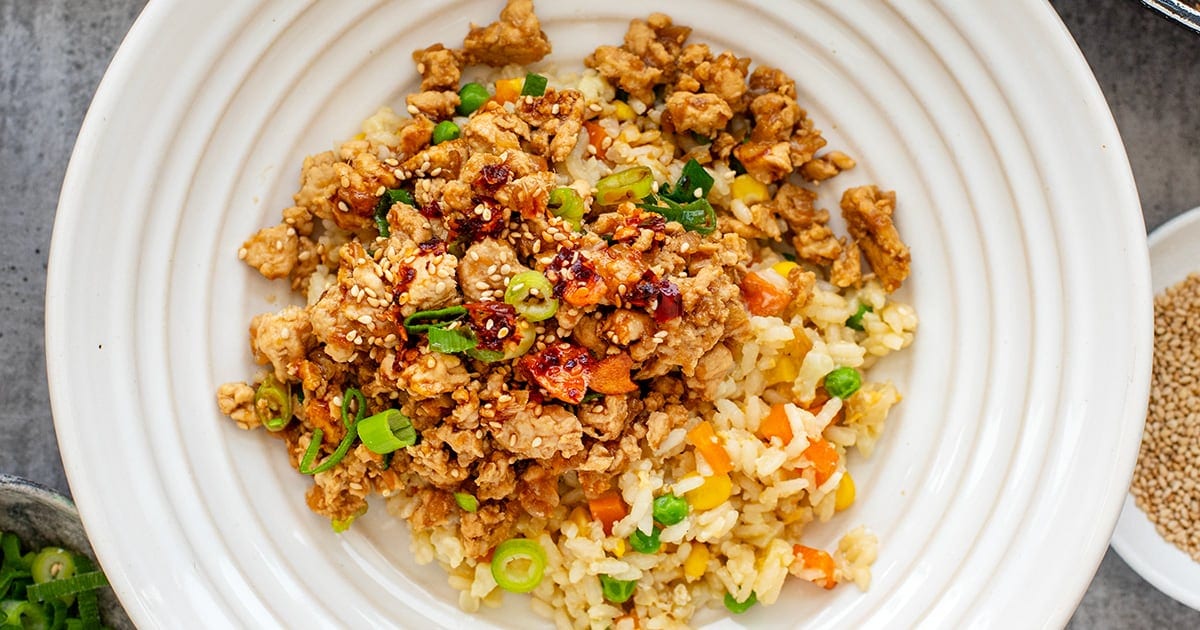
    This honey soy garlic ground chicken and rice bowl situation is what I call a weeknight win. It’s fast, family-friendly, packed with flavor, and sneaky healthy — the kind of thing you’ll make once and then start craving weekly.

    The chicken is juicy and saucy with that perfect salty-sweet garlic-ginger thing going on, and the rice? It’s kind of like fried rice but a healthy version. It’s a “dump and cook” version that steams right in the pan with veggies and stock, meaning less oil and way less effort.

    It’s giving: takeout vibes but lower in calories, higher in protein and fiber, and way more satisfying. Plus, it uses super accessible ingredients (hello freezer peas and corn, and pantry soy sauce) and makes great leftovers. Basically: healthy dinner gold.

    Nutrition per serving: 550 calories, 32 g protein and 5 g fiber.

    👩‍🍳 You might also like these chicken and rice recipes: chicken shawarma with baked rice, coconut chicken & cauliflower rice, chicken rice bowls, gochujang chicken, or ground chicken stir fry. You might also like my turkey baked meatballs & potatoes with garlic yogurt.

    What You’ll Need

    Here is what you’ll need for this honey soy chicken & rice bowls recipe. Find the full measurements in the recipe card below.

    For the honey soy chicken

    • Ground chicken – Lean but still juicy; loaded with protein.
    • Onion, garlic & ginger – The holy trinity for depth and umami.
    • Light & dark soy sauce – Light for salty goodness, dark for richness and color.
    • Honey – Balances the saltiness and adds that sticky-glaze texture.
    • Sesame oil – A finishing oil that adds major aroma.
    • Chicken stock – Helps create a saucy coating; water will work, too.
    • Green onions – For color and a mild oniony bite.

    For the healthy “fried” rice

    • Butter – Just a tiny bit for richness and flavor.
    • Garlic – For the base of the rice.
    • Medium grain rice – It cooks right in the pan and soaks up all the flavor. I prefer medium grain but long-grain rice will work, too. Brown rice will take much longer to cook, so you could pre-cook it partially separately ahead of time.
    • Carrot & cauliflower – Add texture, fiber, and natural sweetness.
    • Frozen peas & corn – No prep, all the goodness, extra protein and fiber.
    • Chicken stock + water – Steams the rice and veggies without needing to fry.
    • Light soy sauce, oyster sauce, sesame oil – For that fried rice taste, without actual frying.
    • Whisked egg – Adds protein and that classic fried rice finish.

    To serve

    • Toasted sesame seeds, chili crisp, chopped green onions – Optional but highly recommended for extra flavor and crunch.

    How To Make Honey Soy Chicken & Rice Bowls

    Find the full recipe and nutritional information below. Here are some handy step-by-step photos for this ground chicken and rice dinner.

    For the rice

    • Sauté garlic in butter.
    • Add rice, veggies, stock, sauces, and seasoning.
    • Cover and simmer until liquid is absorbed.
    • Add peas and corn, cook a few more minutes.
    • Pour whisked egg over the top, cover briefly.
    • Finish by stirring through on high heat to cook the egg.

    For the chicken

    • Sauté onions until soft.
    • Add garlic and ginger.
    • Add chicken, break it up and cook until browned.
    • Pour in sauces, honey, stock.
    • Simmer until sticky and saucy.
    • Stir in green onions.

    To serve

    • Spoon rice into bowls, top with chicken, and finish with sesame seeds, chili crisp, and green onions.

    Watch The Video

    Recipe Tips

    • Short on time? Use pre-chopped veggies or frozen cauliflower rice.
    • Swap it up: Ground turkey or beef would also work well here.
    • Make-ahead: The chicken keeps great for up to 3-4 days and rice for 1-2 days. Store separately and reheat together.
    • Low-carb option: Swap rice for all cauliflower rice — just reduce the stock and cook for less time.
    • Extra veggies: Throw in chopped spinach or kale at the end.

    Serving Suggestions

    This bowl is a full dinner meal on its own — protein, carbs, veggies, all in one. But if you’re feeling fancy, you could serve it with a quick cucumber salad or some steamed edamame on the side. A fried egg on top wouldn’t hurt either. I always love extra veggies, so you could try one of these side dishes.

    💬 If you’ve tried this honey soy chicken & rice bowls or any other recipe on the blog then don’t forget to rate the recipe and let me know how you got on in the comments below, I love hearing from you! You can also FOLLOW ME on Instagram, Facebook, Pinterest, YouTube, and or sign up to my Newsletter to see more of my delicious food.

    Want to Save This Recipe?

    Enter your email & I’ll send it to your inbox. Plus, get great new recipes from me every week!

    By submitting this form, you consent to receive emails from Cooked & Loved

    These honey soy ground chicken rice bowls are sweet, salty, garlicky, and come together fast — perfect for healthy weeknight dinners that don’t taste “healthy” but actually are. This recipe is part of my high-protein, high-fiber meals series. Find step-by-step photos and more recipe tips above.

    To make the rice:

    • Heat butter in a deep frying pan over medium-high.

    • Add garlic and stir for 30 seconds.

    • Add rice, carrot, cauliflower, chicken stock, water, soy sauce, oyster sauce, sesame oil, and white pepper if using.

    • Bring to a boil, cover, then reduce heat to medium-low and cook for 10 minutes.

    • Uncover, add peas and corn, stir, cover again for 5 more minutes.

    • Pour whisked egg evenly over rice. Cover for 1 minute.

    • Increase heat to medium-high, uncover, and stir through to cook the egg.

    To make the chicken:

    • Heat oil in a pan over medium-high. Add onions and cook until soft.

    • Add garlic and ginger, stir for 30 seconds.

    • Add chicken and increase heat. Break it up as it cooks.

    • Cook for about 6–7 minutes until golden and mostly cooked through.

    • Add soy sauces, honey, sesame oil, and stock. Stir and simmer for 2–3 minutes until saucy.

    • Finish with green onions.

    • Can I use another protein? Yes! Ground turkey, pork, or beef would all work. Just adjust the cooking time slightly if needed.
    • Can I make this gluten-free? Use tamari instead of soy sauce and double-check your oyster sauce (or sub with a gluten-free black bean or stir-fry sauce).
    • Is this spicy? Not at all! It’s very mild and kid-friendly. Add chili crisp or sriracha on top if you like some heat.
    • Can I use leftover rice instead? Absolutely. If using cooked rice, sauté your veggies first, then stir in rice and sauces to warm through.
    • Short on time? Use pre-chopped veggies or frozen cauliflower rice.
    • Swap it up: Ground turkey or beef would also work well here.
    • Make-ahead: The chicken keeps great for up to 3-4 days and rice for 1-2 days. Store separately and reheat together.
    • Low-carb option: Swap rice for all cauliflower rice — just reduce the stock and cook for less time.
    • Extra veggies: Throw in chopped spinach or kale at the end.

    Calories: 558kcal | Carbohydrates: 65g | Protein: 32g | Fat: 19g | Saturated Fat: 5g | Polyunsaturated Fat: 4g | Monounsaturated Fat: 9g | Trans Fat: 0.2g | Cholesterol: 146mg | Sodium: 1371mg | Potassium: 1109mg | Fiber: 5g | Sugar: 12g | Vitamin A: 2857IU | Vitamin C: 33mg | Calcium: 60mg | Iron: 5mg

    Keywords: Honey Soy Chicken & Rice Bowls, Ground Chicken Rice Bowls, ground chicken and rice recipes, honey soy garlic chicken

    More Healthy Chicken Dinner Recipes

    More Rice Bowls


    Source link

  • The Best Steak Marinade Recipe

    The Best Steak Marinade Recipe

    This is the best steak marinade you’ll ever use. It’s rich and savory, creating a thick coating that guarantees an intensely flavorful, juicy steak every time.

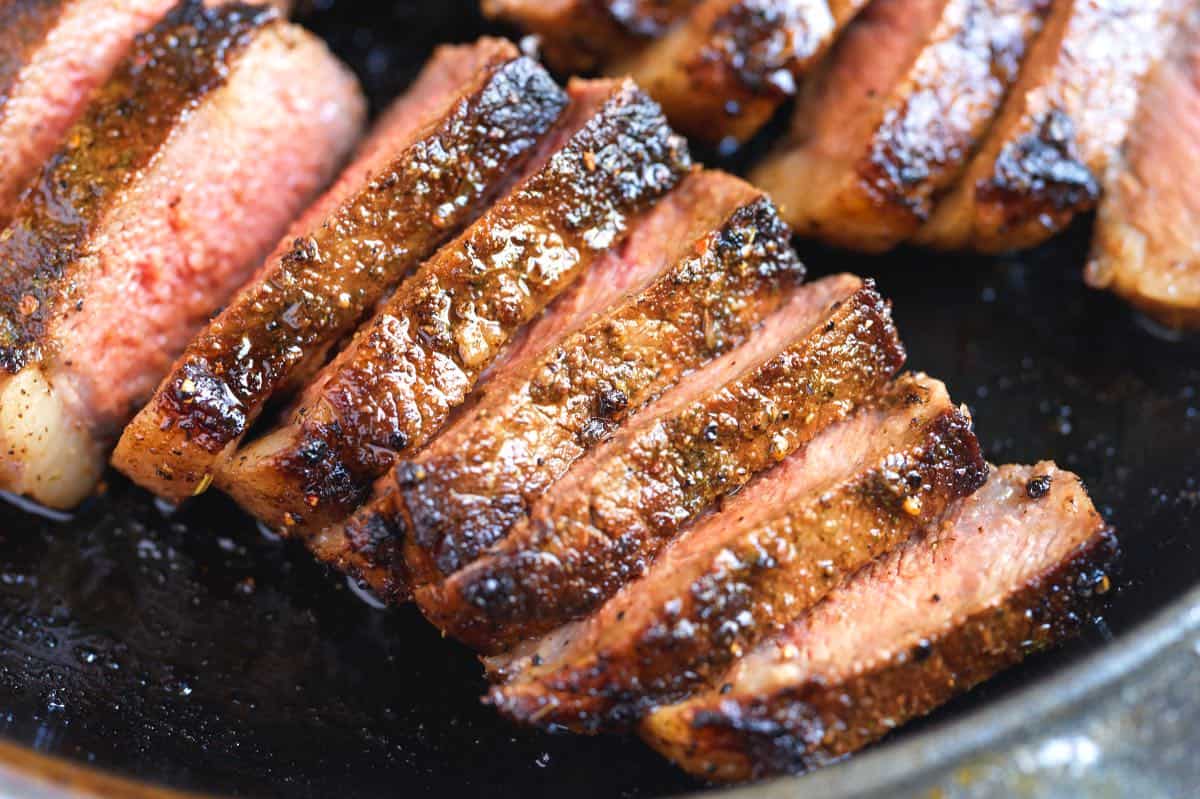
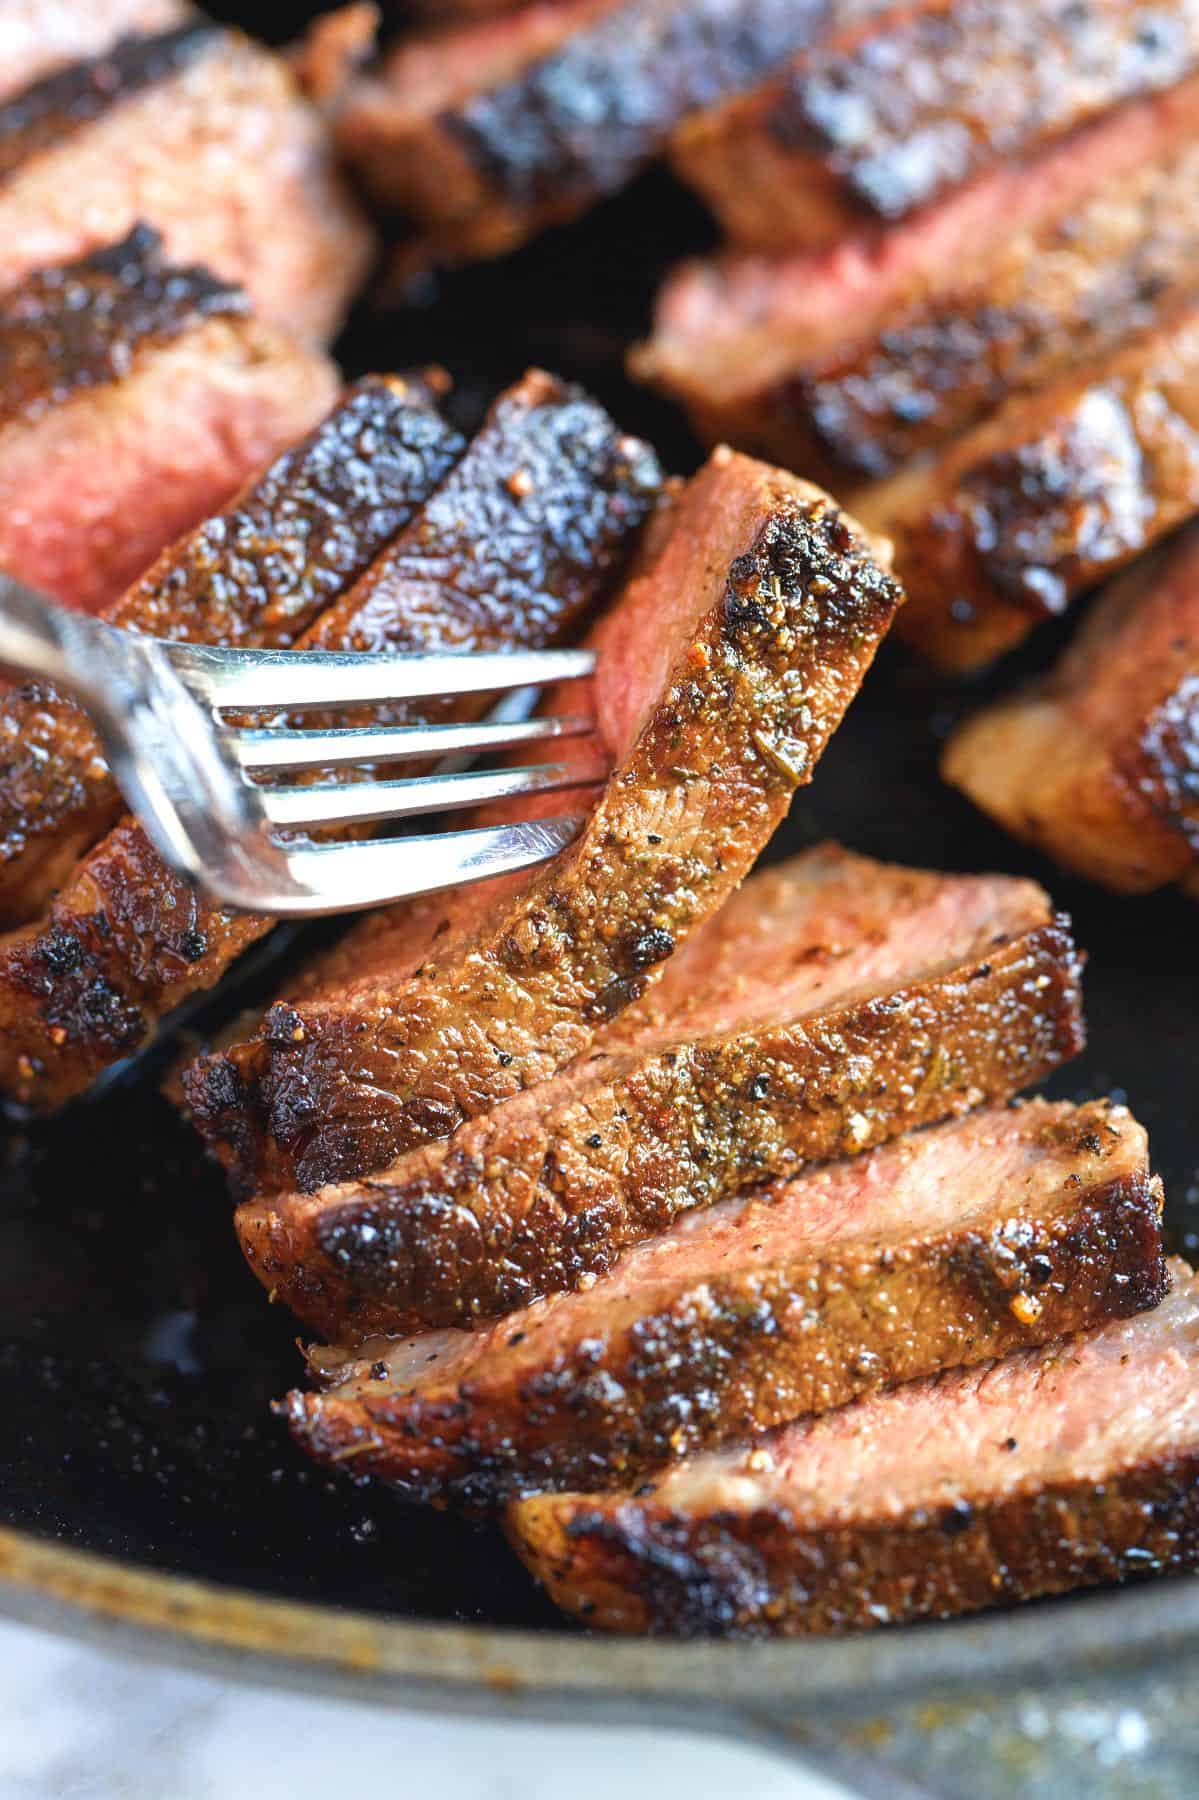
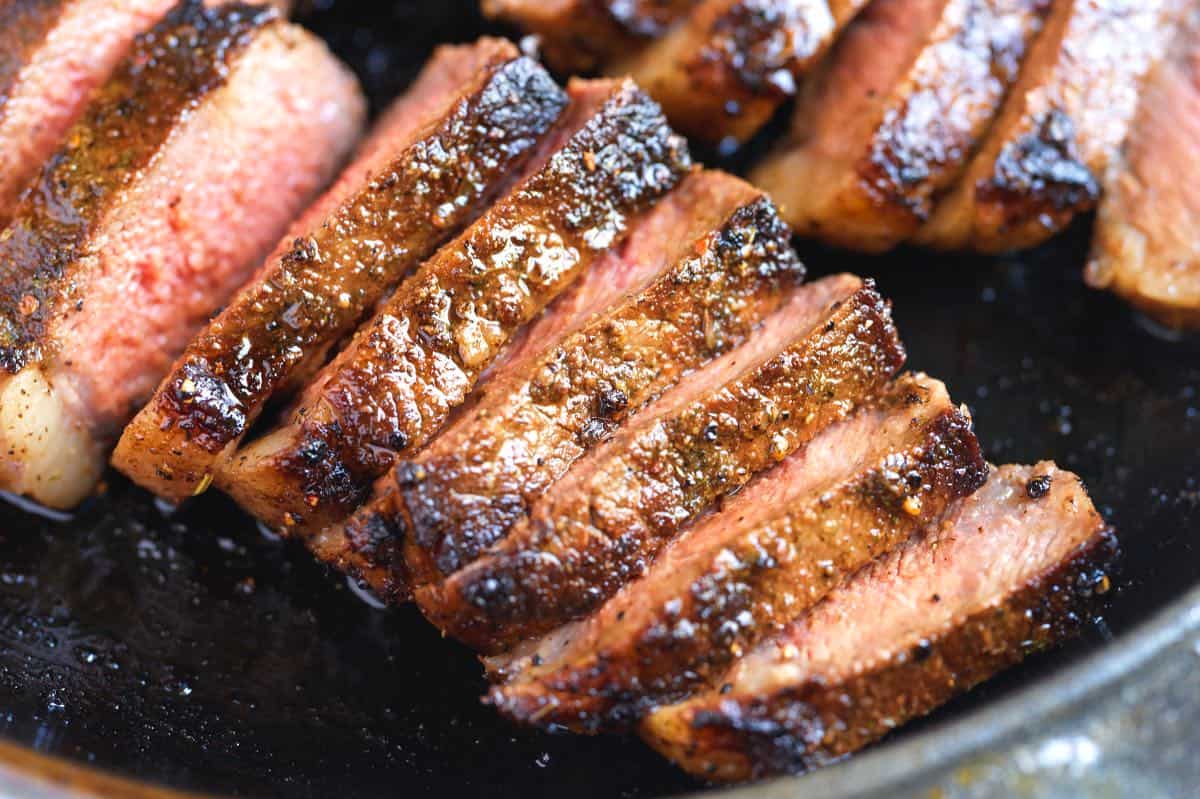
    Cooked steak after using the Best Steak Marinade

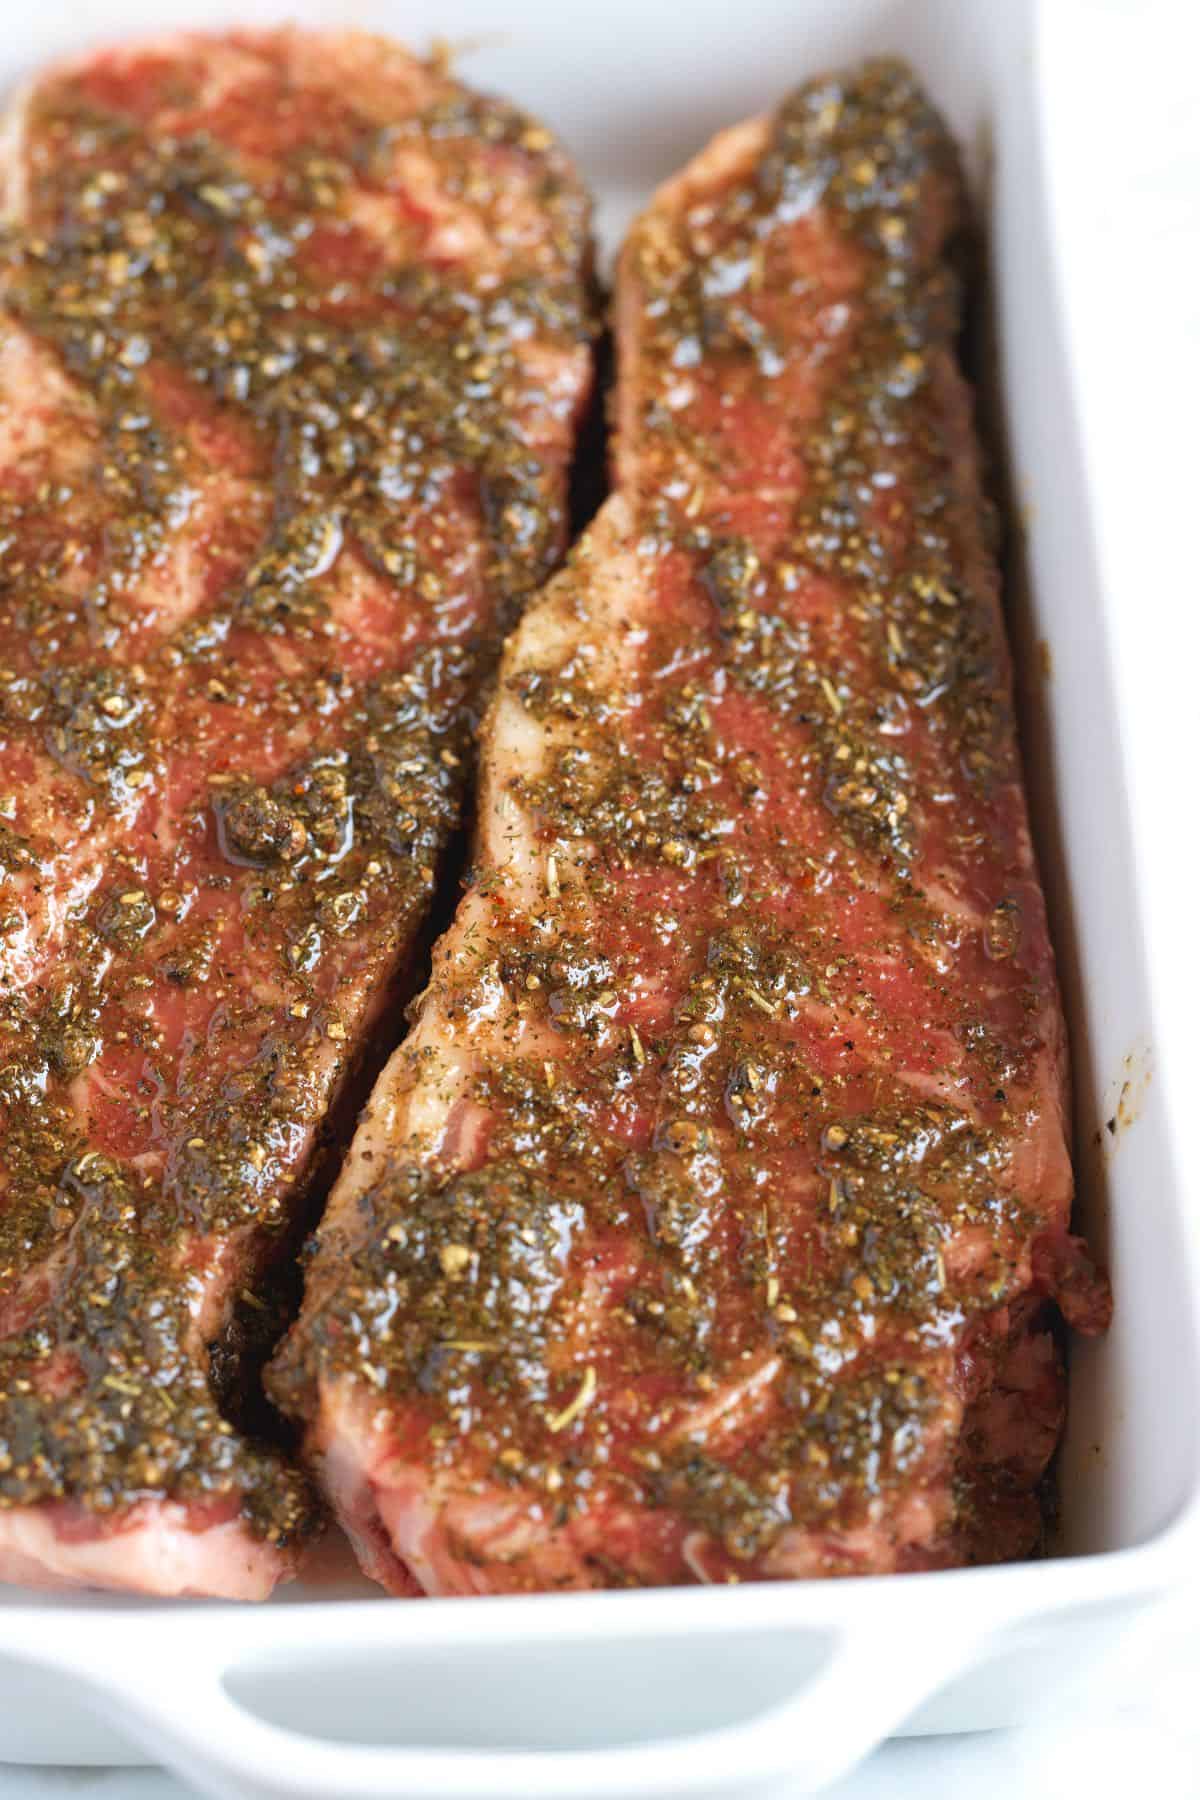
    This simple marinade for steak belongs to the “mud” marinades group, so it has a thick consistency that easily sticks to your steak. Every bite is well coated, which is why I’m convinced this is one of the best marinades out there.

    Whether you’re cooking flank steak, sirloin steak, hanger steak, or even a New York strip, this marinade will take your steaks to a new level of deliciousness. I especially love it for grilled steak and steak salad.

    Key Ingredients

    • Steak Seasoning: I use our homemade steak seasoning, but feel free to use your favorite brand.
    • Garlic: I love the fresh garlic in this marinade and prefer to finely grate it so it melts into the mixture. I use the same technique for our pork chop marinade.
    • Lemon: Adds some acidity and brightens the flavors.
    • Soy Sauce and Worcestershire sauce: These add umami, making the steak taste richer and more beefy.
    • Oil: Any neutral oil with a higher heat tolerance works nicely. I usually use avocado oil.

    Find the full recipe with measurements below.

    My Tips for Using This Incredible Steak Marinade

    Tip 1: Why you’ll love it. We recommend this mud-style marinade for steaks for two reasons: First, our umami-rich marinade enhances the natural beefy flavor of the steak, and second, since we spoon extra marinade over the steaks while they cook, it creates a caramelized crust and even juicier results.

    Tip 2: How long to marinate steaks. We recommend marinating the steaks for 1 to 2 hours. This is because the lemon juice in the marinade can break down the steak’s exterior if left for too long. So, we keep the marinating time short to preserve the steak’s texture and flavor.

    Marinating Steaks

    Tip 3: Cooking marinated steak. This thicker, mud-style marinade works wonders on the grill or in a grill pan (see our tips on how to grill steak). If you don’t want to grill them, you can cook the marinated steaks in a stainless-steel or cast-iron skillet.

    More Marinade Recipes

    Steaks made with Steak Marinade

    The Best Steak Marinade

    • PREP
    • COOK
    • TOTAL

    This easy steak marinade is a surefire way to enhance the natural flavors of your steaks. We highly recommend our steak seasoning, but you can substitute your favorite store-bought seasoning blend. This marinade has a unique quality often referred to as “mud” due to its thicker consistency, which allows it to cling lovingly to your steaks.

    Makes enough for two large or four small steaks

    You Will Need

    2 tablespoons steak seasoning, we love this homemade steak seasoning

    2 tablespoons high-heat oil like avocado oil vegetable oil, or safflower oil

    2 cloves garlic, grated or finely minced

    2 teaspoons soy sauce

    2 teaspoons lemon juice

    2 teaspoons Worcestershire sauce

    Directions

    • Marinating the Steak
    • 1Combine the marinade ingredients and generously rub the mixture all over the steak. Allow the steak to marinate for up to 1 hour. While marinating for a bit longer is acceptable, we advise against exceeding two hours to achieve the best flavor, color, and texture.

    • Grilling or Using a Grill Pan
    • 1Place the marinated steaks on the grill over medium-high heat and cook until golden brown and slightly charred, 4 to 5 minutes.

      2Turn the steaks over and continue to grill until your desired doneness. Use the suggested internal temperature guide below. As the steaks cook, spoon the leftover marinade over them to enhance the flavors. If using an open flame, watch out for flare-ups.

      3After cooking, let the steak rest for 5 minutes before serving or slicing.

    • Pan-Seared Steaks
    • 1Preheat the skillet over medium-high heat (for 1 to 2 minutes), then add the marinated steaks to the pan. Cook the steaks, flipping them frequently, until they are well browned on all sides, including the edges. You can hold the steak sideways with tongs to sear any fat along the edges.

      2Use the suggested internal temperature guide below to determine your preferred doneness. After cooking, allow the steak to rest for 5 minutes before serving or slicing.

    Adam and Joanne’s Tips

    • Internal temperatures and doneness: Keep in mind that steak continues to cook slightly after being removed from the heat.
    • Steak doneness: Rare: 120-130°F, Medium Rare: 130-140°F, Medium: 140-150°F, Medium-Well: 150-160°F, and Well-Done: 160°F+.
    • Gluten-free: Use certified GF soy sauce or tamari and Worcestershire sauce.
    • The nutrition facts provided below are estimates and are only for the marinade, not the steak. We have used the USDA database to calculate approximate values.

    Nutrition Per Serving
    Serving Size
    1/4 of the recipe, enough for 1 small steak
    /
    Calories
    84
    /
    Total Fat
    7.3g
    /
    Saturated Fat
    1g
    /
    Cholesterol
    0mg
    /
    Sodium
    785.9mg
    /
    Carbohydrate
    5.2g
    /
    Dietary Fiber
    1.5g
    /
    Total Sugars
    0.5g
    /
    Protein
    1g


    AUTHOR:

    Joanne Gallagher

    Adam and Joanne of Inspired Taste

    We are Adam and Joanne Gallagher, the creators of Inspired Taste. Established in 2009, Inspired Taste grew from a childhood dream into one of the internet’s most trusted recipe sites with hundreds of reliable recipes, step-by-step videos, and expert tips.More About Us

    Source link

  • Crispy Kale Chips Recipe

    Crispy Kale Chips Recipe

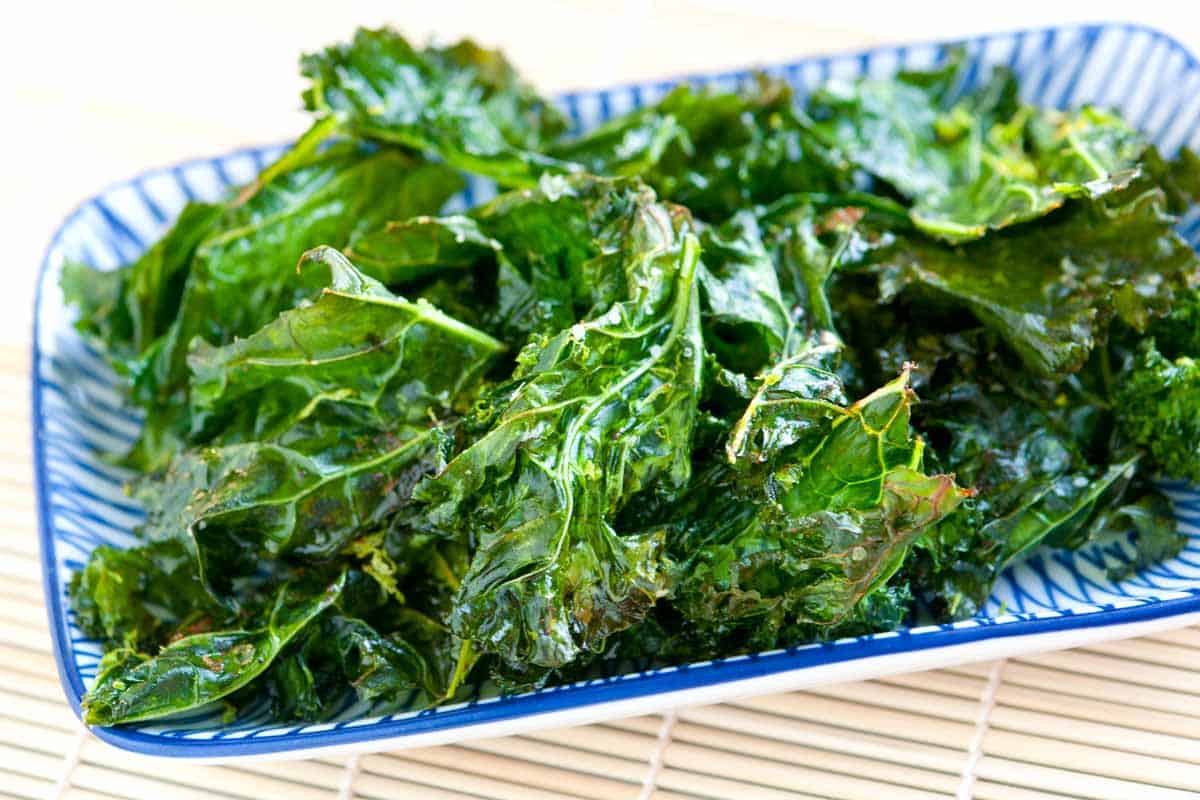
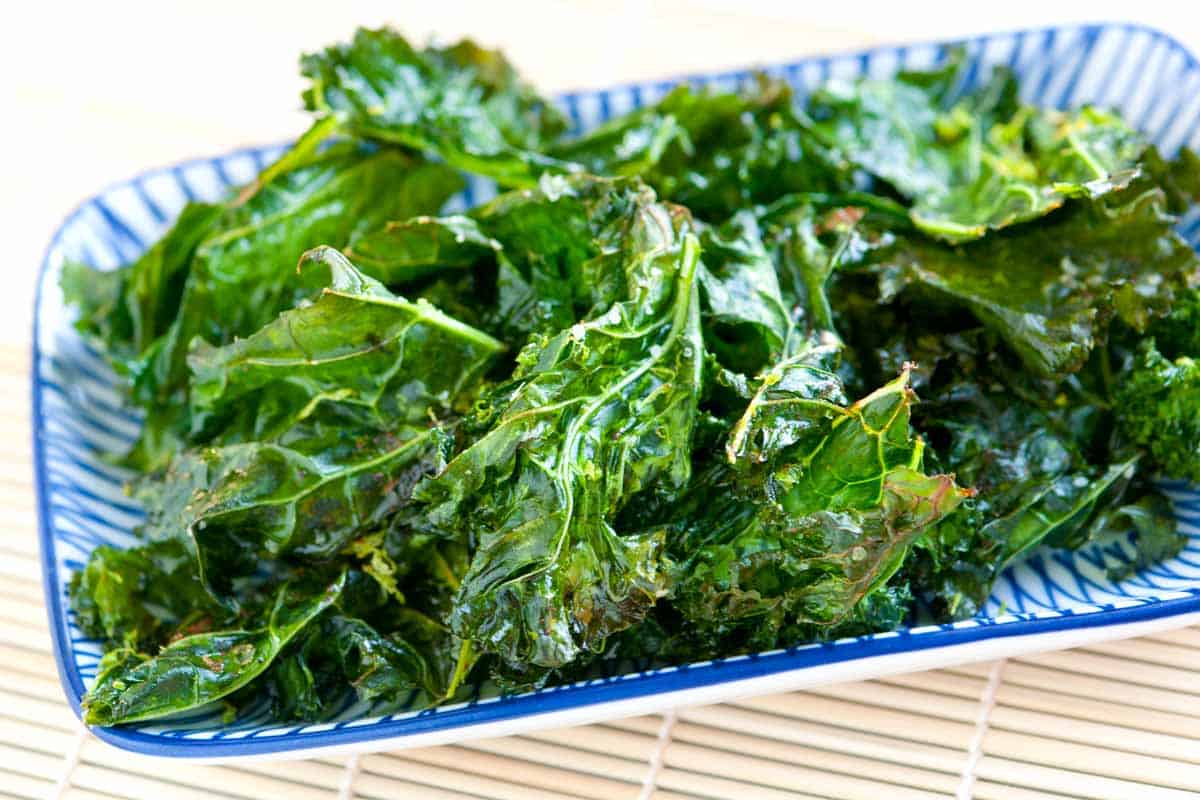
    Our kale chips recipe is so easy to make! They bake up perfectly crisp in just 20 minutes, and you can season them any way you like.

    Crispy Kale Chips

    When I first tried making kale chips in the oven, I couldn’t believe how simple they were. All you need is fresh kale, a baking sheet, and a hot oven. This recipe turned me from someone who wasn’t the biggest fan of kale into someone who makes kale chips all the time.

    What I love most is how fun they are to season. Use your favorite spice blends, or keep things simple with a sprinkle of salt. I’ve shared a few of my go-to flavor ideas below!

    Key Ingredients

    • Kale: You can make kale chips with any variety, but my favorite is curly kale, which is also the most common. I love the curly, ruffled leaves—they crisp up beautifully in the oven. Lacinato kale (also called Tuscan or dinosaur kale) works well, too. It’s a bit thicker, so the chips turn out heartier and slightly less delicate.
    • Olive Oil: I like using extra-virgin olive oil for its flavor, especially since we’re not cooking at super high heat. If you prefer to avoid heating olive oil, avocado oil is a great alternative.
    • Salt and Pepper: Be generous when seasoning with salt (I like fine sea salt) and fresh ground black pepper. Below, I’ve also shared some spices/spice blends that work well for kale chips.
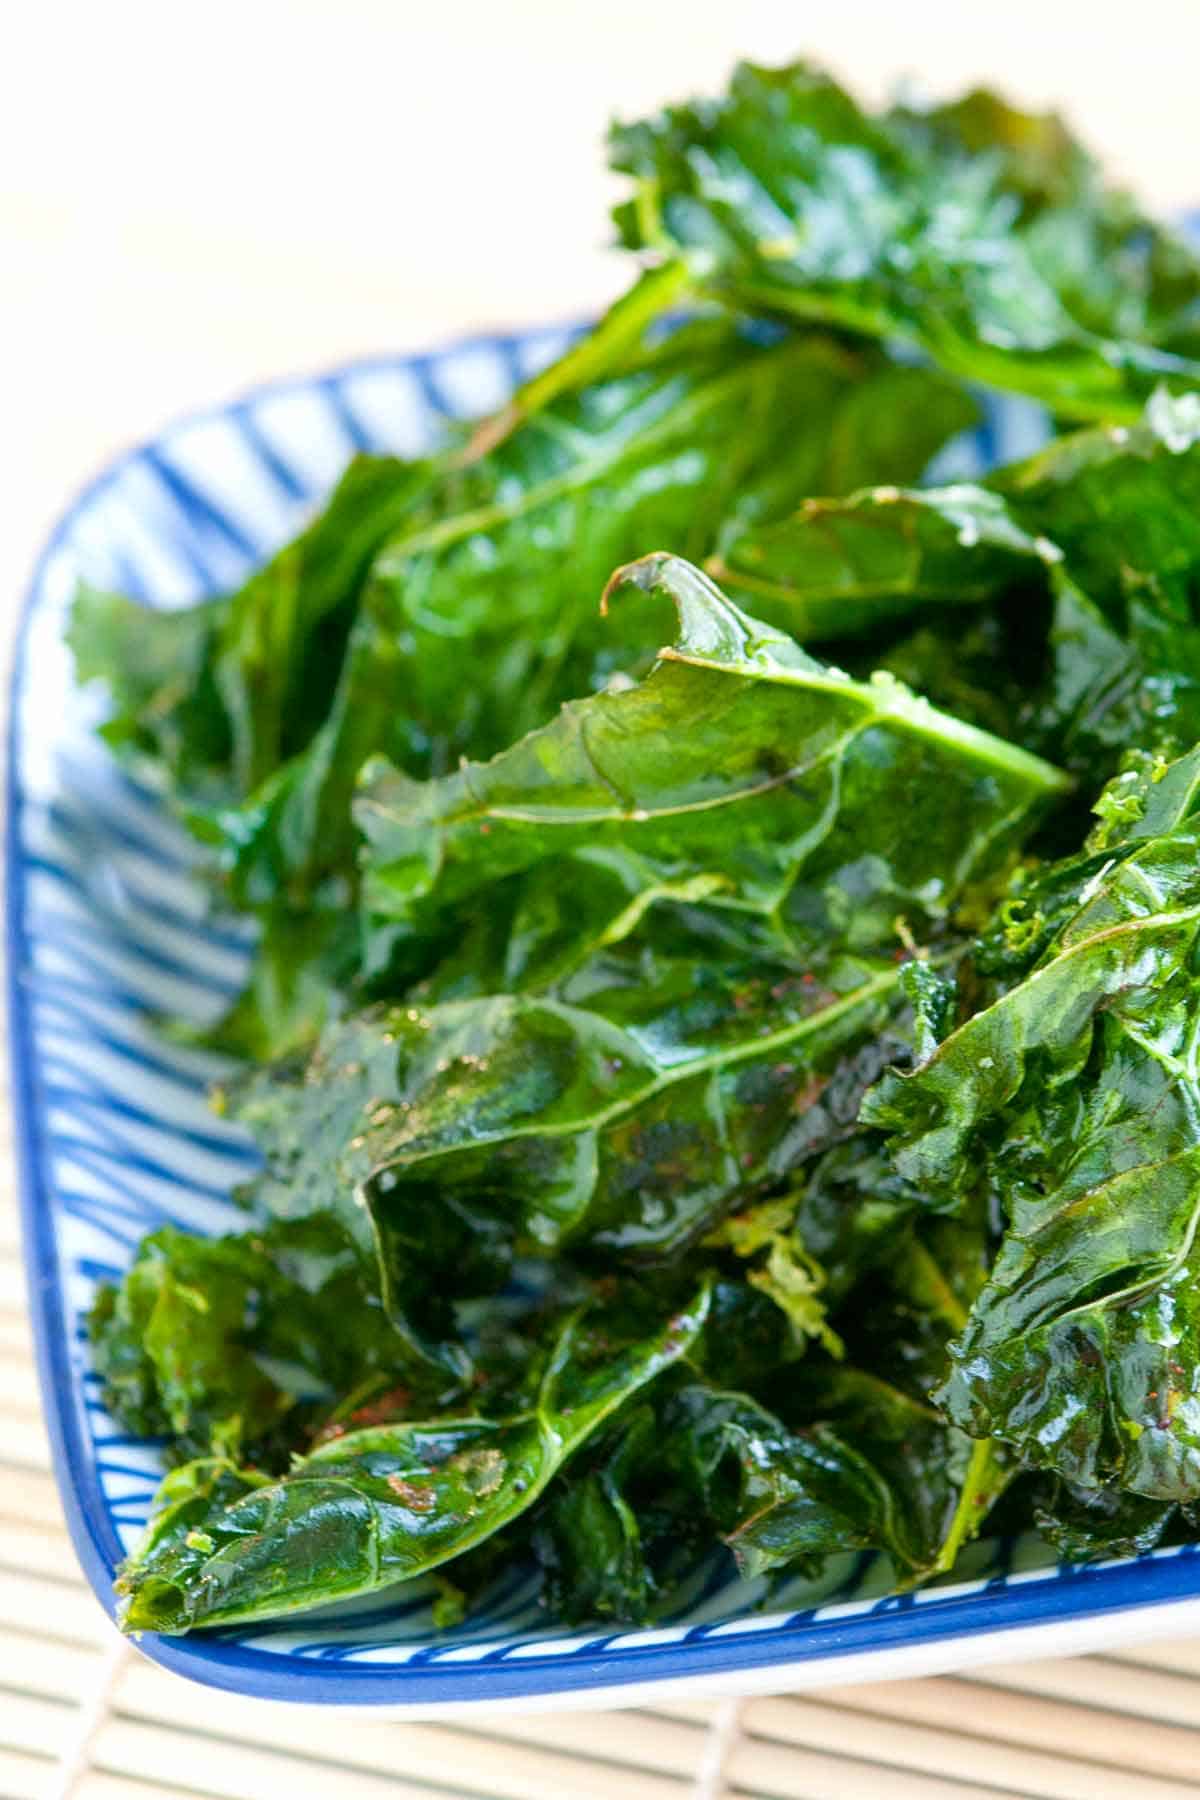
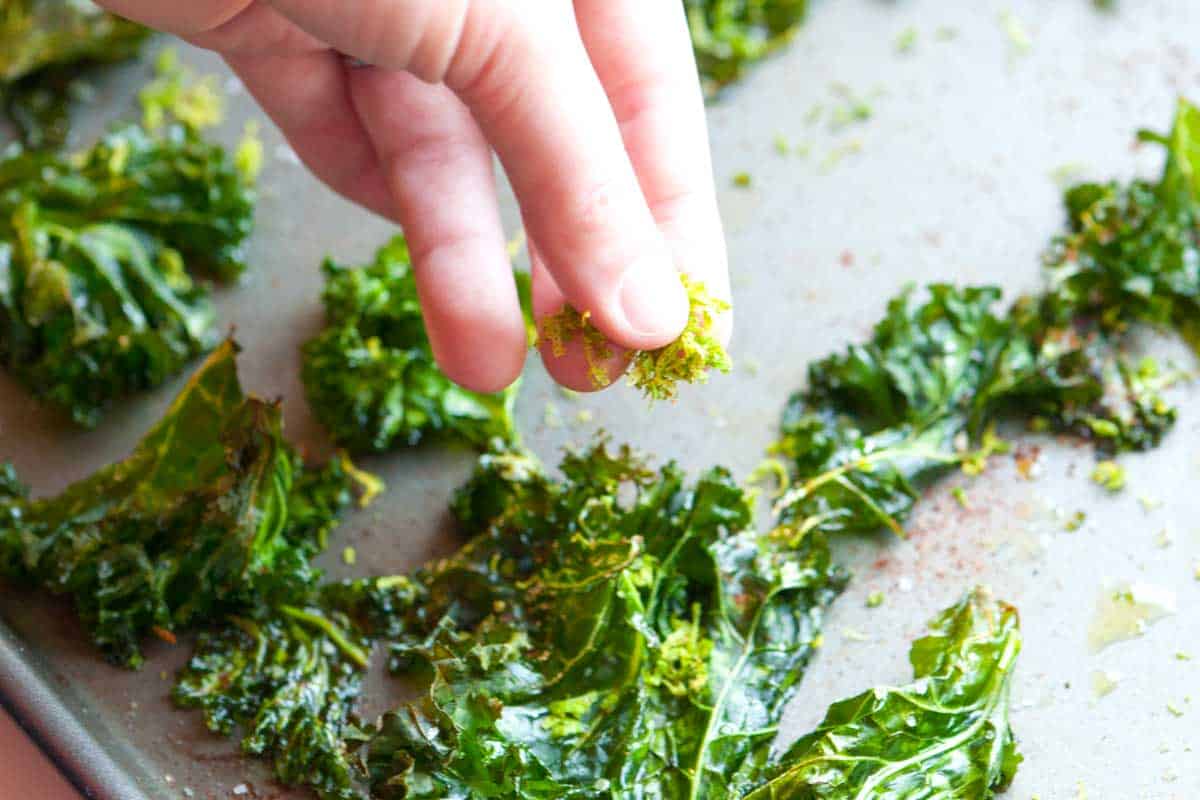
    • Optional Seasonings: Consider spicing up the chips with Cajun seasoning, Old Bay, seasoned salt, curry powder, Togarashi, chili powder, ranch seasoning, mushroom powder, nutritional yeast, sesame seeds, or lime zest. I like to sprinkle extra spices after baking while the chips are still warm. In the photo below, I’ve added lime zest and chili powder for chili-lime kale chips!

    Find the full recipe with measurements below.

    How to Make Kale Chips

    Tip 1: Prep the kale. Start by removing the leaves from the thick, woody stalks. (You can save the stalks for vegetable broth.) Tear the leaves into large pieces, and remember, they’ll shrink a bit as they bake, so make them slightly larger than tortilla chips.

    Tip 2: Rinse and dry well. Rinse the kale thoroughly, then make sure that it is 100% dry. Any leftover moisture will cause the kale to steam rather than crisp. A salad spinner works best, but you can also pat the leaves dry with a clean kitchen towel or paper towels.

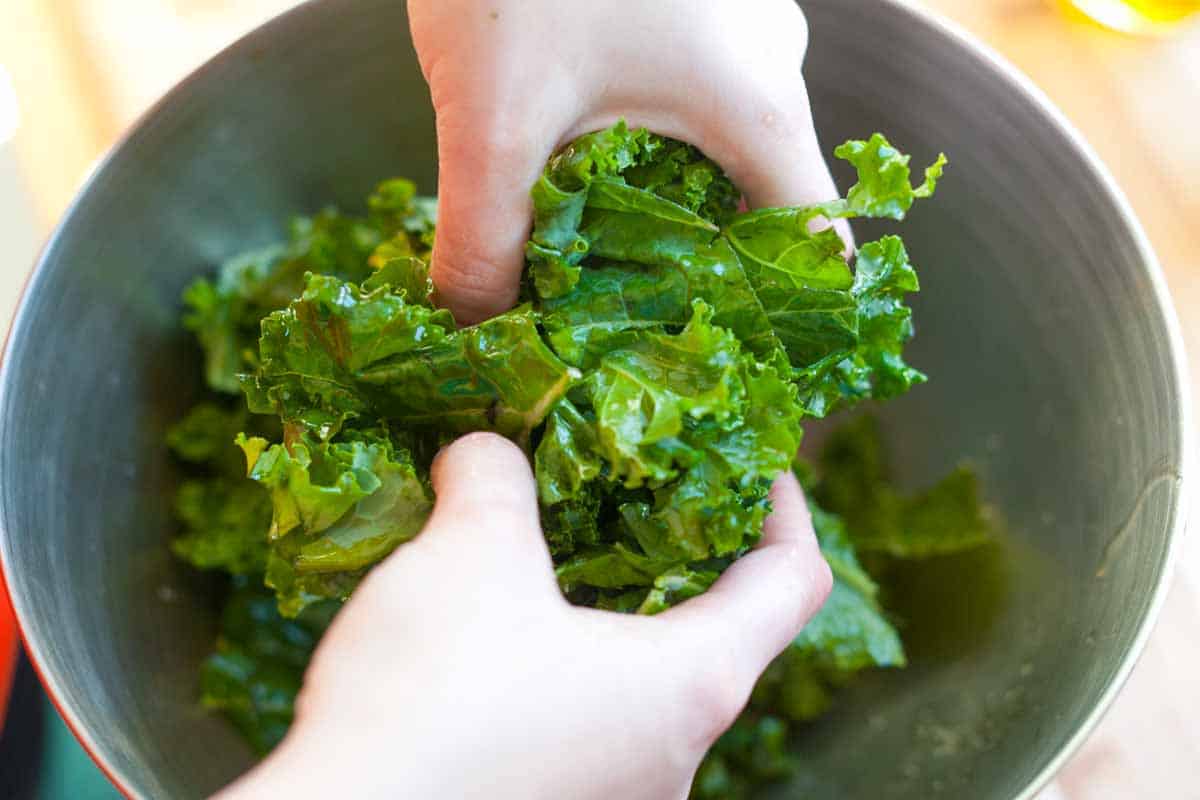
    Tip 3: Add oil and salt. Toss the dry kale with a drizzle of oil and a sprinkle of salt (or seasoned salt), then bake. If you plan to add other seasonings, it’s best to sprinkle them on after baking while the chips are still warm.

    Tossing kale with salt, pepper, and olive oil before baking

    Tip 4: Don’t crowd the pan. Spread the kale out in a single layer on a large baking sheet. Overcrowding traps steam and prevents crisping.

    Tip 5: Bake until crisp. Bake the kale chips at 350°F for 10 to 12 minutes, until crisp and lightly browned. Keep an eye on them near the end, as they can go from perfect to overdone quickly. Once baked, enjoy them as-is or toss with your favorite seasonings.

    Seasoning baked kale chips with chili and lime

    More Kale Recipes

    Crispy Kale Chips

    Crispy Kale Chips

    • PREP
    • COOK
    • TOTAL

    Our kale chips recipe takes 20 minutes, and you can customize the chips however you like. Check the tips for spice suggestions. Remember, for the best, most crispy kale chips, you must dry the kale very well before baking.

    4 Servings

    You Will Need

    1 bunch kale, we prefer curly kale for chips

    2 tablespoons extra-virgin olive oil

    1/4 teaspoon fine sea salt

    1/8 teaspoon ground black pepper

    Directions

      1Preheat the oven to 350°F (177°C). Line a baking sheet with parchment paper or a silicone baking mat.

      2Remove the thick, woody stalks and ribs from kale leaves and tear leaves into smaller pieces. Discard stalks and ribs or save them for another use.

      3Rinse the kale leaves, then use a salad spinner or clean kitchen towel/paper towel to dry them completely. If the kale leaves are not dry, they will steam instead of becoming crisp, so make sure they are as dry as you can get them.

      4Toss leaves with olive oil, salt, and pepper. Arrange kale in one layer on the baking sheet (you may need to work in batches or use two baking sheets.) Keeping a bit of space between the chips helps them crisp better.

      5Bake until the kale is crisp, 10 to 12 minutes. If, after 10 to 12 minutes, the kale is not yet crisp, bake another 2 to 3 minutes. (Stay close to watch for the kale becoming overcooked/browned.) Let cool for 5 minutes, and enjoy!

    Adam and Joanne’s Tips

    • Optional seasonings: Anything goes! We usually add these once the kale chips are baked and crispy. Try Cajun seasoning, Old Bay, curry powder, Togarashi, chili powder, ranch seasoning, mushroom powder, nutritional yeast, sesame seeds, and lime zest. To make chili lime kale chips, sprinkle the baked and crispy chips with 1/2 teaspoon chili powder and 1/2 teaspoon fresh lime zest.
    • The nutrition facts provided below are estimates.

    Nutrition Per Serving
    Serving Size
    1/4 of batch
    /
    Calories
    81
    /
    Protein
    2g
    /
    Carbohydrate
    4g
    /
    Dietary Fiber
    1g
    /
    Total Sugars
    0g
    /
    Total Fat
    7g
    /
    Saturated Fat
    1g
    /
    Cholesterol
    0mg
    /
    Sodium
    175mg


    AUTHOR:

    Adam Gallagher

    Adam and Joanne of Inspired Taste

    We are Adam and Joanne Gallagher, the creators of Inspired Taste. Established in 2009, Inspired Taste grew from a childhood dream into one of the internet’s most trusted recipe sites with hundreds of reliable recipes, step-by-step videos, and expert tips.More About Us

    Source link