Author: admin

  • Grilling Basics (Tips for Beginners)

    Grilling Basics (Tips for Beginners)

    This website may contain affiliate links and advertising so that we can provide recipes to you. Read my disclosure policy.
    Fire up your grill because these grilling basics will give you all the confidence you need! Discover how easy it is to cook and make incredible food on an outdoor grill.

    Grilling isn’t just for burgers and steaks! There are so many delicious ways to use a grill. Try these shrimp skewers, the most incredible grilled pineapple, or simply grill up some zucchini!
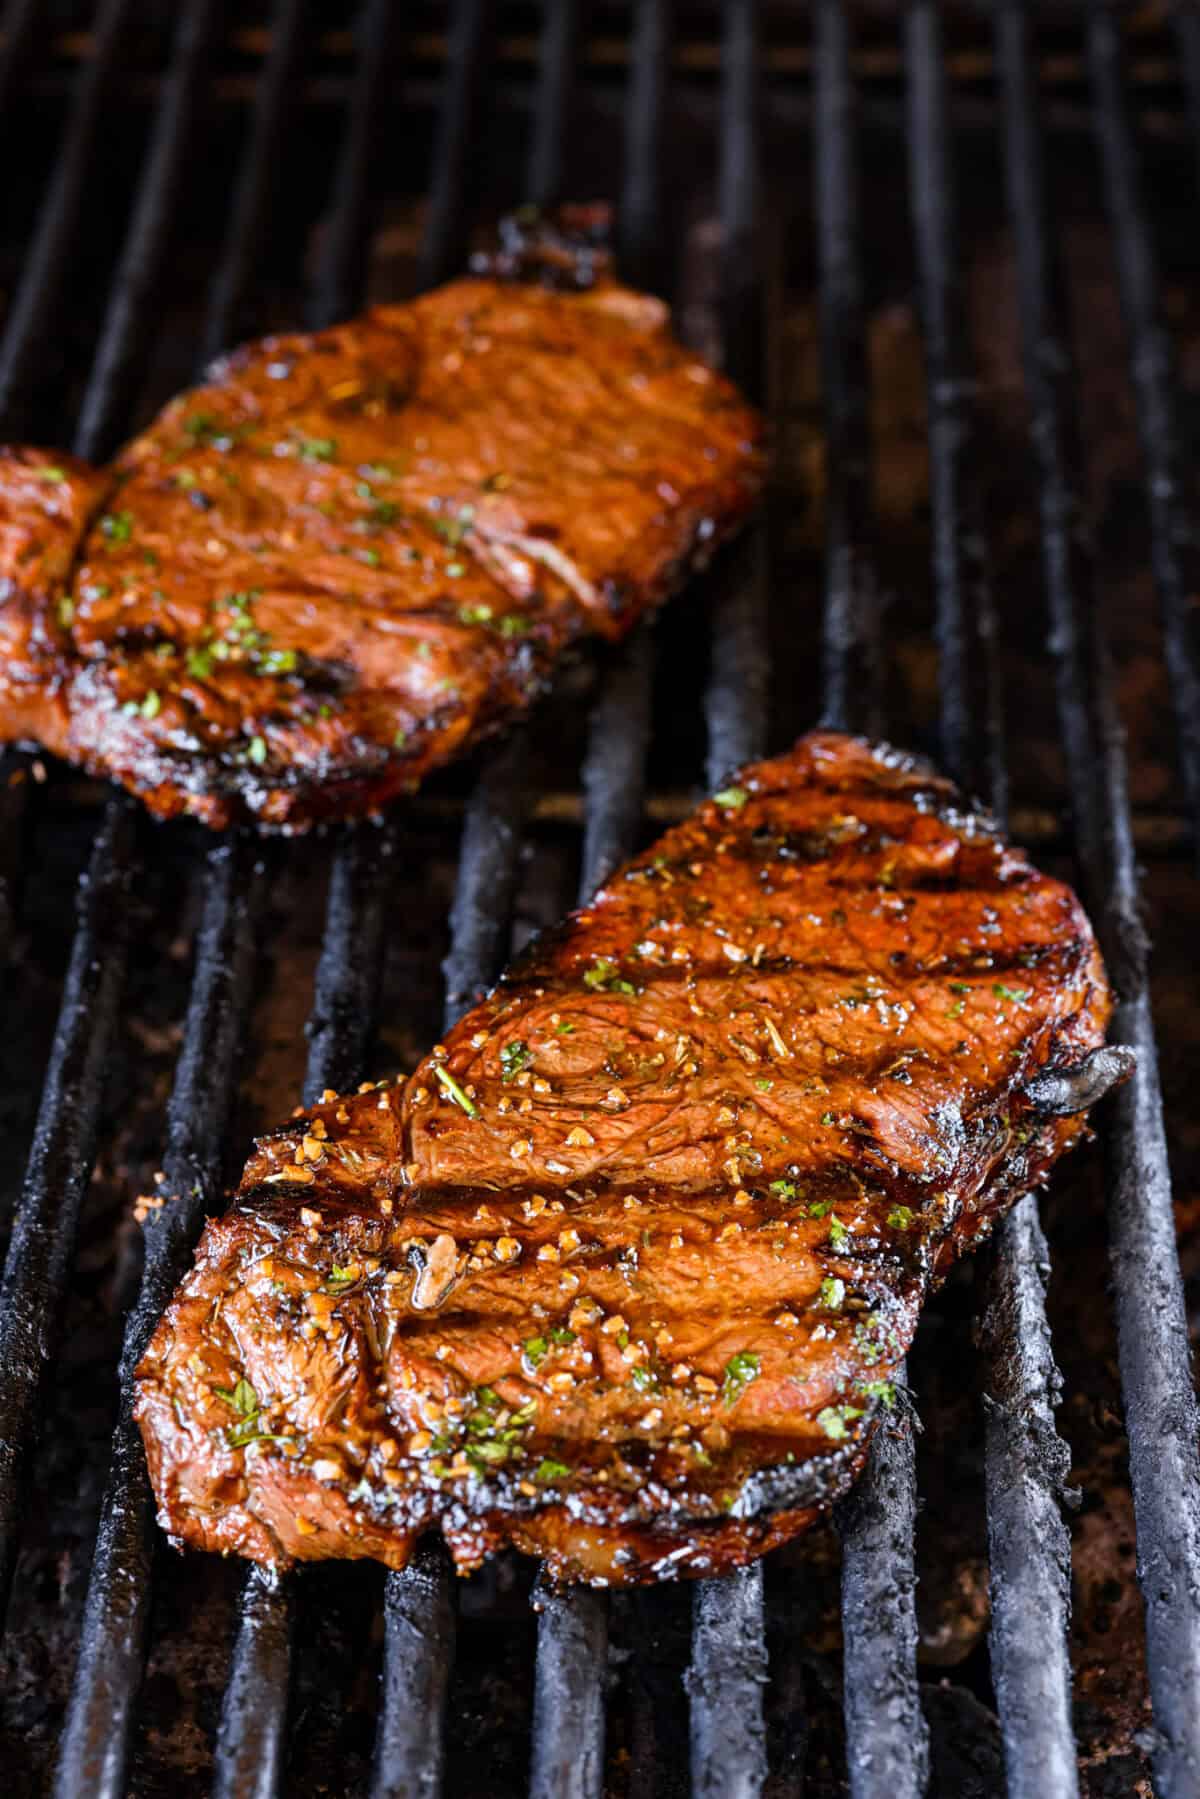
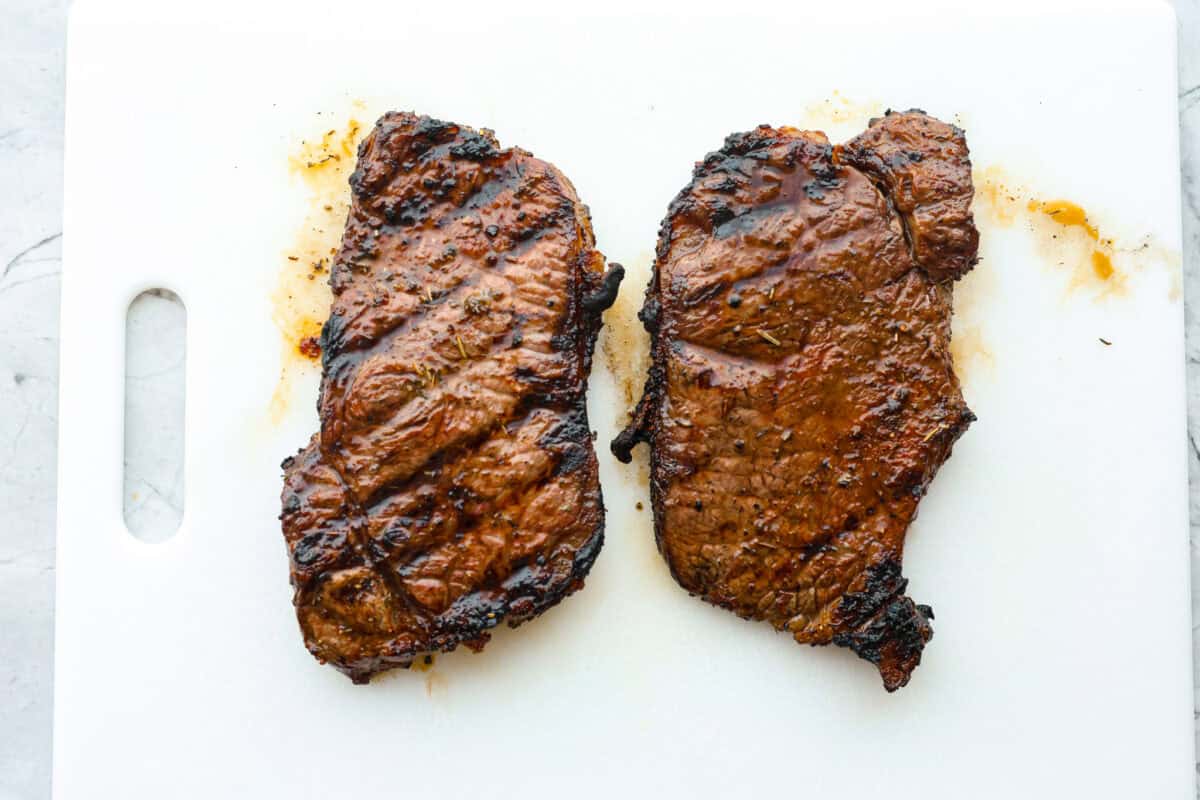
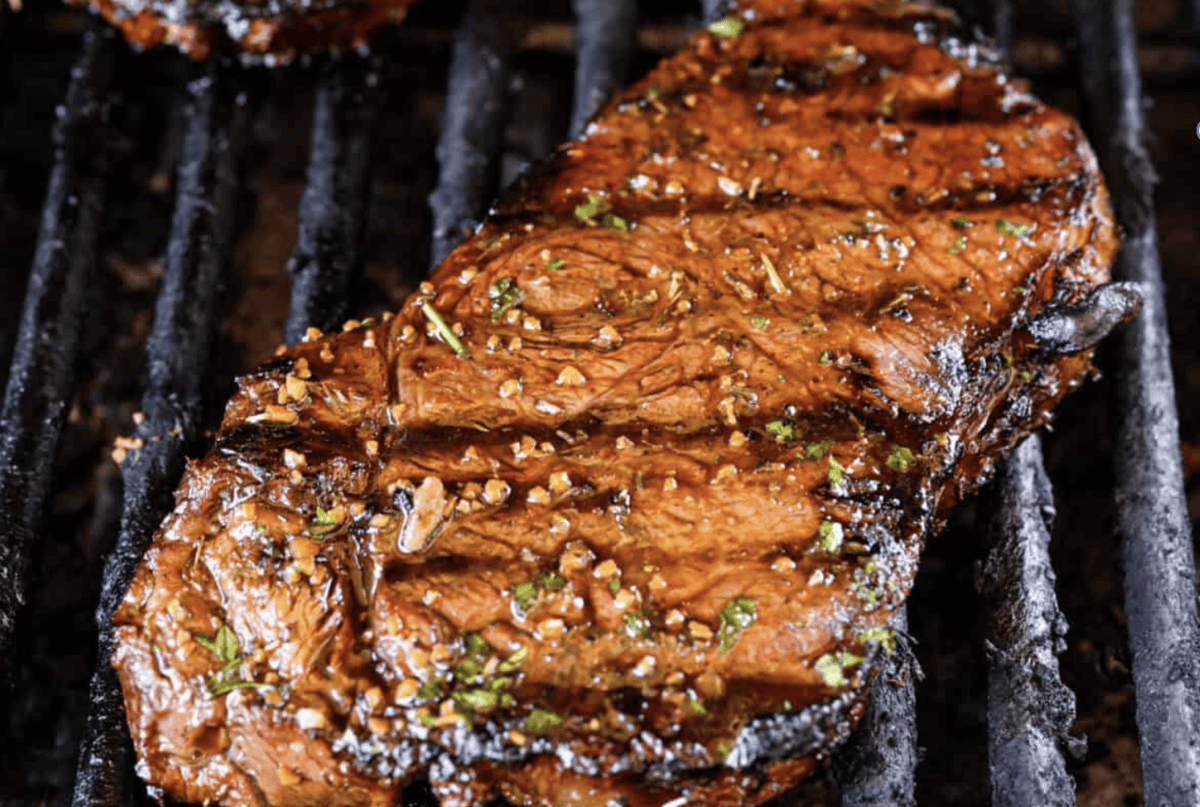
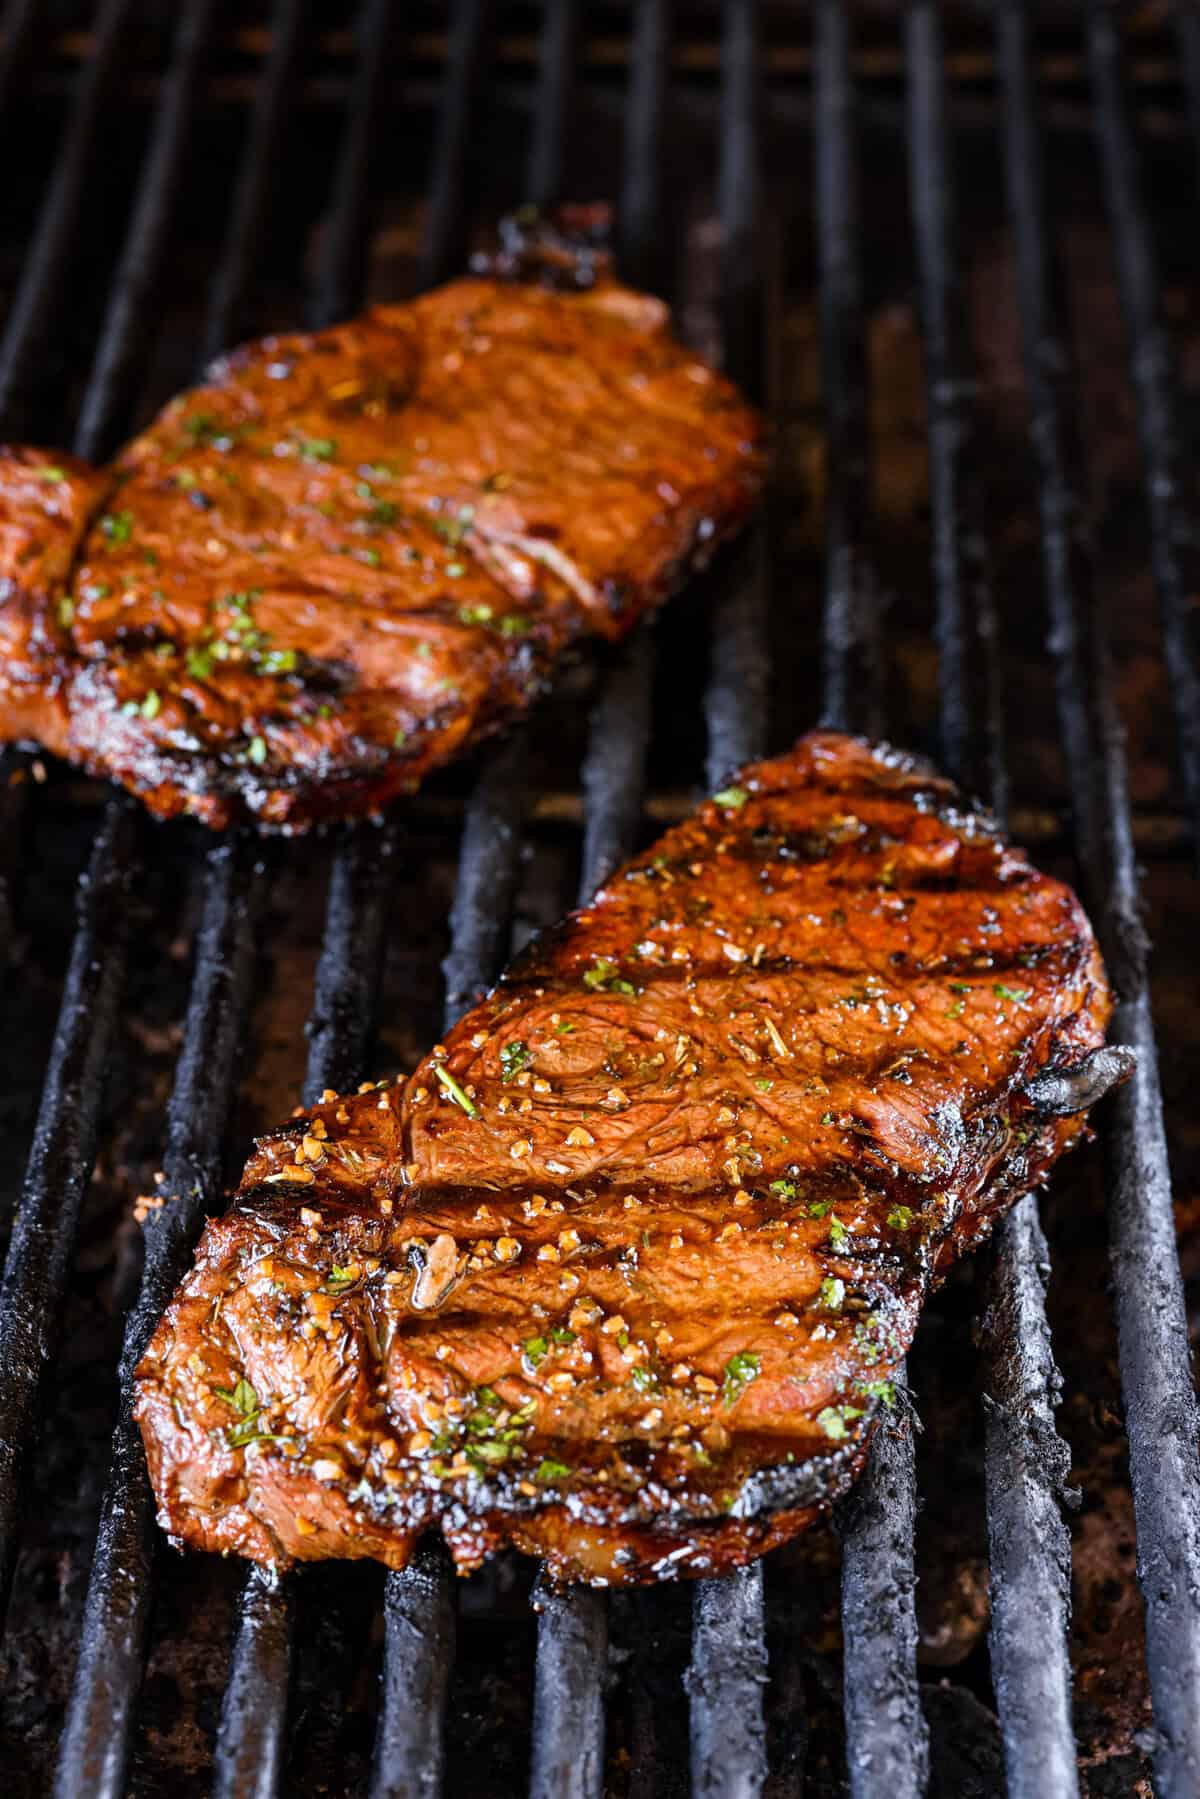
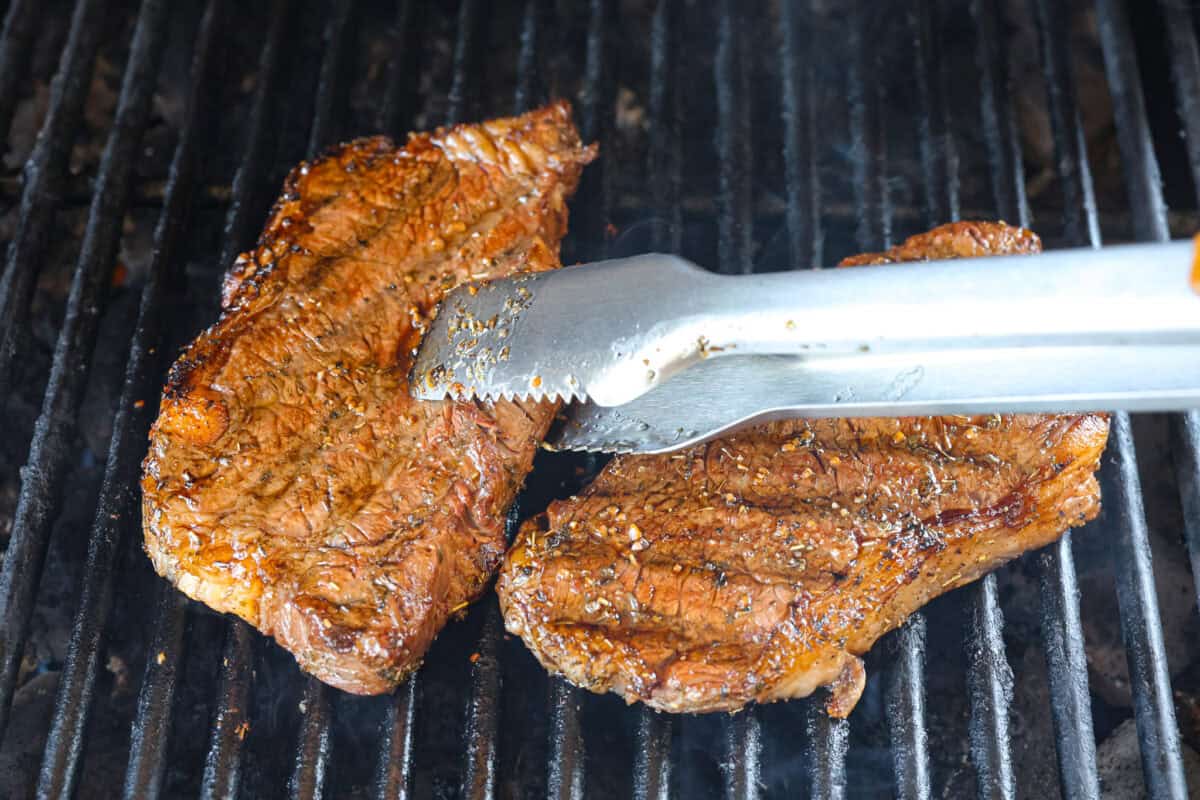
    Close view of a grilled steak on the grill.

    Reasons to Start Grilling

    • You’ll Love This Beginner’s Guide: I’m here to help you feel confident on the grill! I walk you through all the grilling basics you need to know.
    • It’s Tasty: Grilling is one of my favorite ways to cook! It makes meat taste succulent and vegetables super tender. There are SO many recipes that can only be made on a grill.
    • Outdoor Entertaining: Summertime to me means hosting BBQ parties and grilling! I love cooking in the outdoors and enjoying the weather with friends and family.

    What to Know Before You Grill

    Grilling involves cooking food over an open flame, and with so many types of grills available, it’s helpful to know the basics for any grill you use. Here are some essential tips, especially for beginners. We’ll focus on the most common household grills: propane and gas grills.

    1. Prepare the Recipe: Get everything ready before you even think about lighting the grill. If your recipe includes marinating meat, make sure to allow enough time for the flavors to infuse. Form your burger patties, season your chicken, or thread your skewers in advance. Having everything prepped ensures you won’t be scrambling while the grill is hot and ready.
    2. Check the Propane Tank: Before you begin grilling, ensure your propane tank is full and properly connected. If your grill won’t start and the tank is empty, you can exchange it for a full one at most hardware stores or gas stations for a small fee. They typically have filled propane tanks ready for exchange.
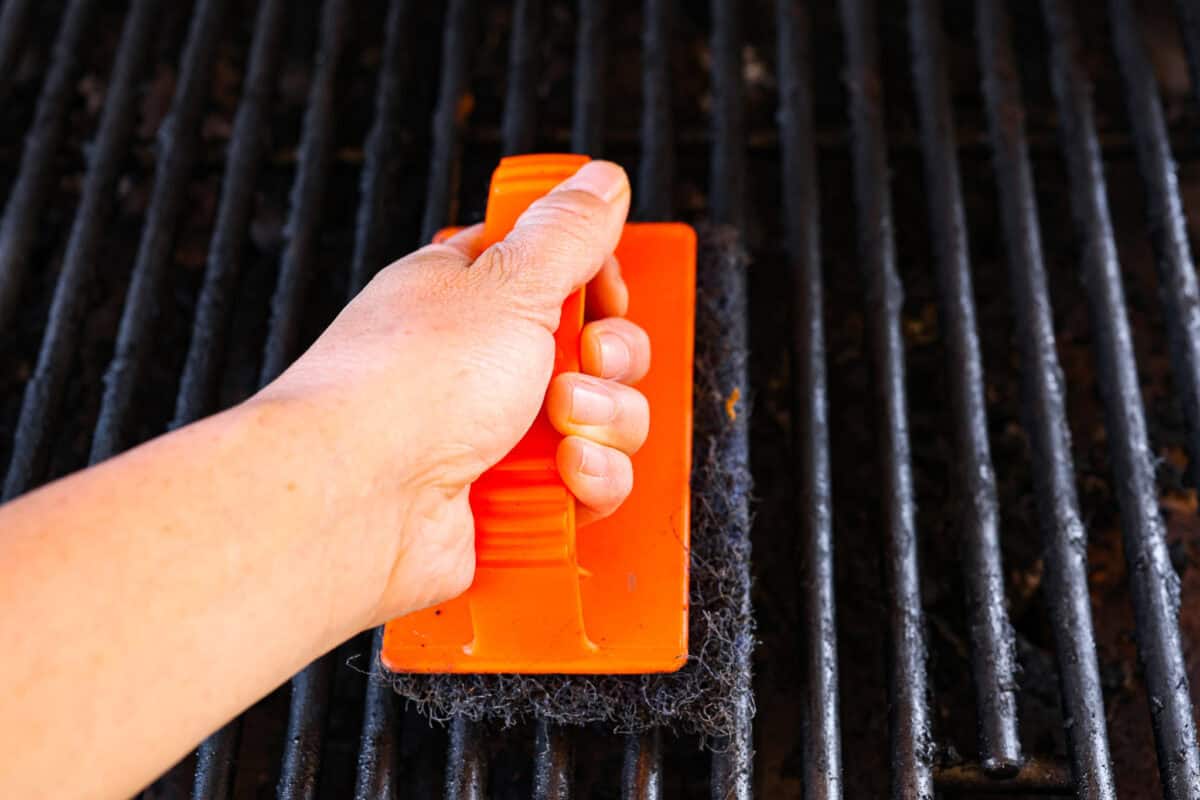
    3. Clean the Grill: For optimal performance, start with a clean grill. Use a grill brush to scrub the grates thoroughly. This not only keeps your food safe but also helps the grill function properly. For detailed cleaning instructions, refer to the manufacturer’s manual.
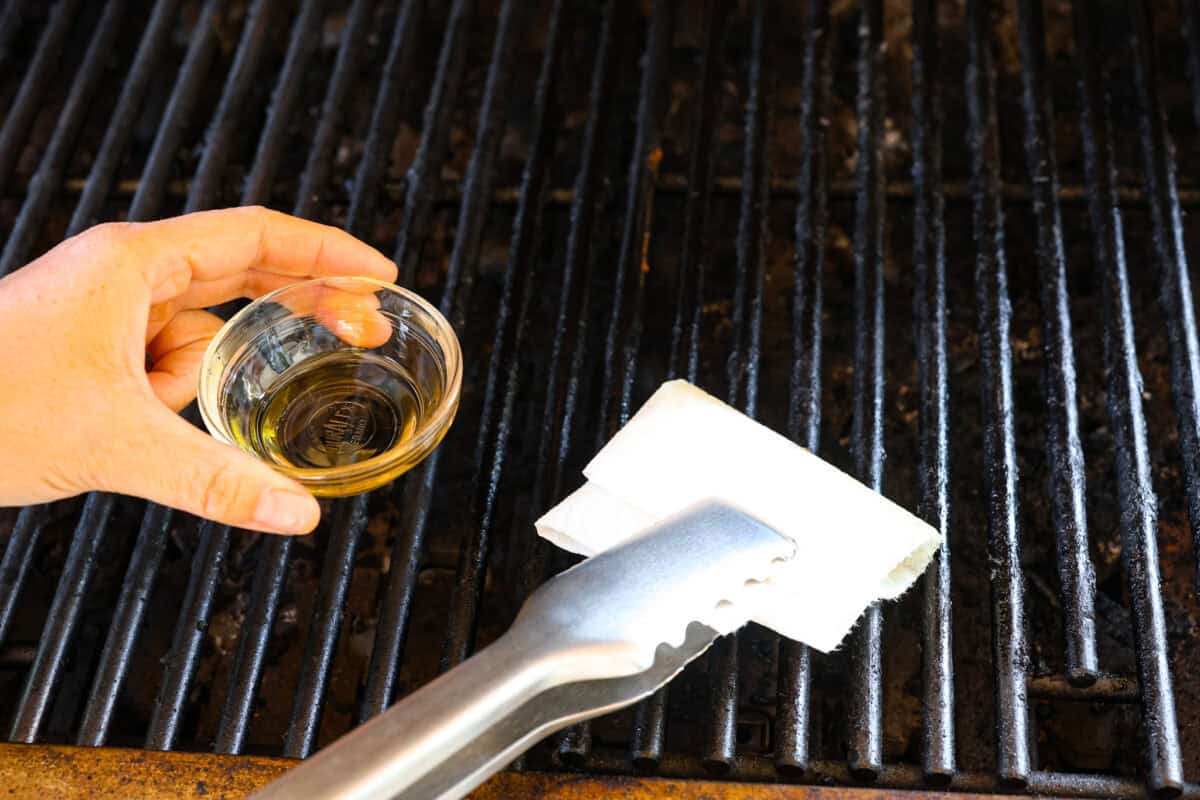
    4. Oil the Grates: To prevent food from sticking, oil the grill grates before you start cooking. Use tongs to hold a paper towel dipped in olive or canola oil and rub it over the grates.
    5. Preheat the Grill: Make sure to preheat your grill with the lid closed before you begin cooking. This ensures the grill reaches the right temperature, allowing your food to cook evenly and efficiently.

    How to Check the Temperature of Your Outdoor Grill

    The hand check for an outdoor grill is a simple method to estimate the grill’s temperature without a thermometer. Here’s how to do it:

    1. Heat the Grill: Preheat your grill to the desired temperature.
    2. Hold Your Hand Above the Grill: Place your hand about 4-5 inches above the grill grate.
    3. Count the Seconds: Count how many seconds you can comfortably hold your hand in place before needing to pull it away.

    Here are the approximate temperatures based on the time you can hold your hand over the grill:

    • 2-3 seconds: High heat (450°F to 550°F or 230°C to 290°C)
    • 4-5 seconds: Medium heat (350°F to 450°F or 175°C to 230°C)
    • 6-7 seconds: Medium-low heat (325°F to 350°F or 165°C to 175°C)
    • 8-10 seconds: Low heat (250°F to 325°F or 120°C to 165°C)

    This method gives you a rough estimate to help ensure your grill is at the right temperature for cooking.
    Before firing up your grill, make sure you have the right tools ready. The type of tool you need depends on what you’re grilling. Here’s a list of the most common tools and when to use them:

    • Skewers: Use wood or metal skewers for grilling. Both work well, but if you use wood skewers, soak them in water for at least 30 minutes before threading meat, veggies, or fruit. This prevents them from burning or becoming brittle.
    • Meat Thermometer: Invest in a reliable meat thermometer to ensure your meat is cooked to the right temperature. Wireless thermometers are especially convenient and easy to use.
    • Tongs: Strong metal tongs are essential for grilling and flipping meats like steak and chicken. They’re also great for handling brats, ribs, and hot dogs.
    • Metal Spatula: A large metal spatula is perfect for flipping burgers.
    • Basting Brush: A basting brush is useful for applying sauces or marinades while cooking. It’s particularly handy for recipes like grilled huli huli chicken.
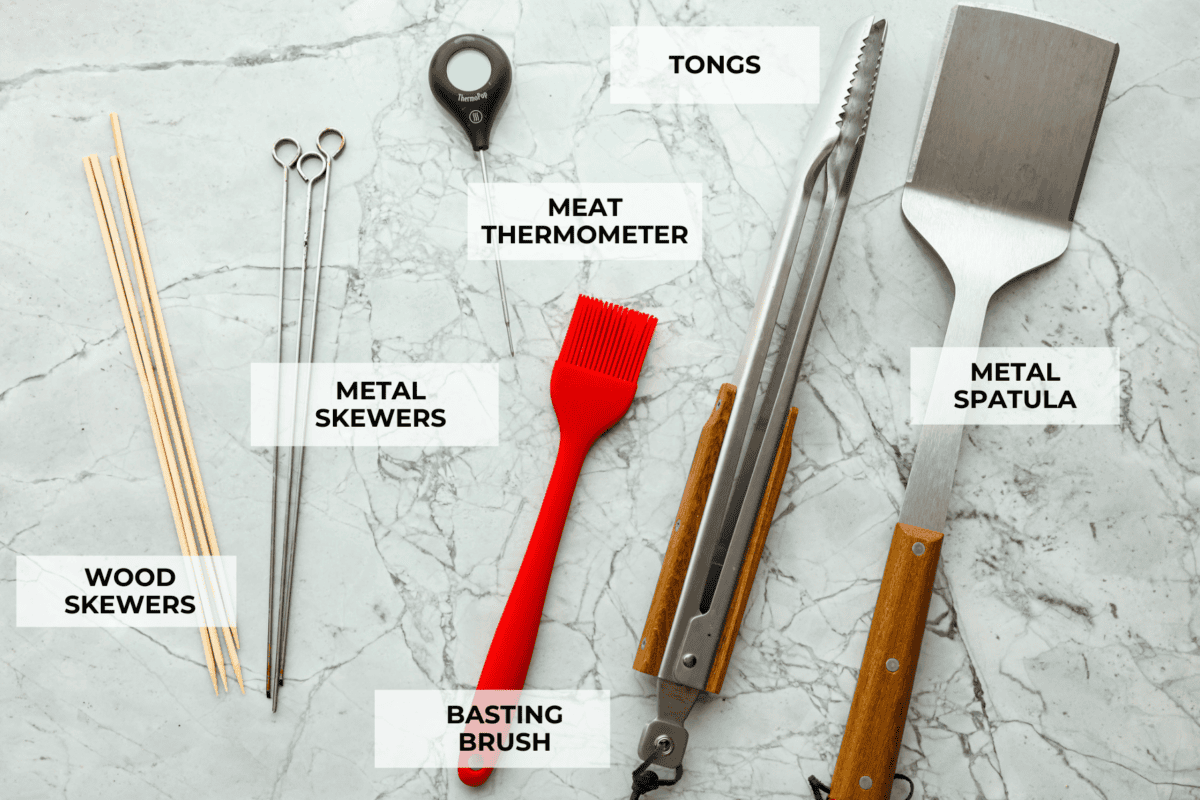
    Labeled tools for using on the grill.

    Grilling Tips For Beginners

    I want you to be successful at grilling so you can enjoy summer dinners outside! Here are my helpful tips for beginners.

    • Don’t Flip Too Often: Be careful not to flip steak too often. You want the grill marks to give the steak the perfect outer crust. I’m also careful when flipping burgers. I find it causes them to shrink more and not cook as evenly. Flipping burgers too much can also cause the beef to crumble.
    • Allow the Meat to Rest: Giving your meat time to rest after it comes off the grill is important. The muscle fibers need time to relax and for the juices to redistribute throughout the meat. Your meat will be so TENDER!
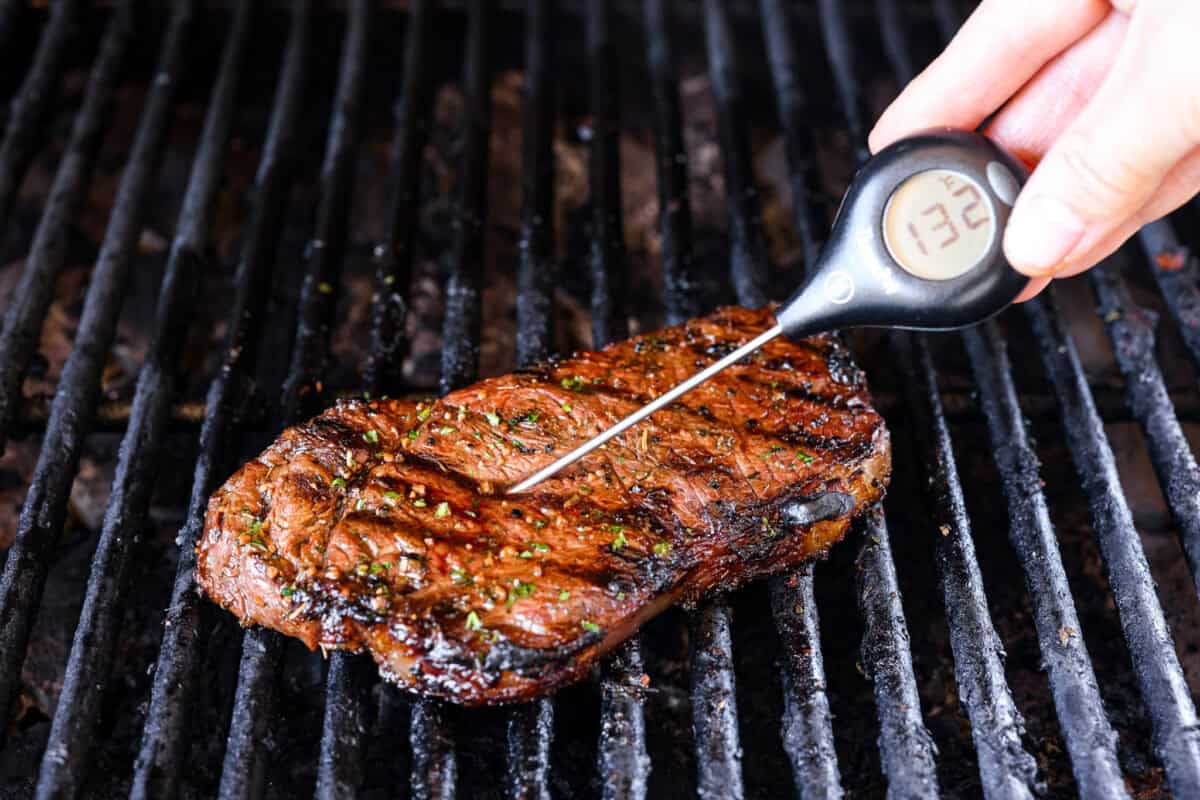
    • Meat Thermometer: Know the temperatures to cook your meat to. Invest in a good meat thermometer that can measure the correct temperature of your meat.
    • Heat Zones on the Grill: Heat a portion of the grill to a higher heat and another zone on medium or low. This creates a hot and cooler zone for cooking. It also creates a place to quickly move the meat to a cooler zone if it’s starting to burn or cook too fast. This is also known as direct heat and indirect heat.
    Marinade vs. Rub (Seasoning)

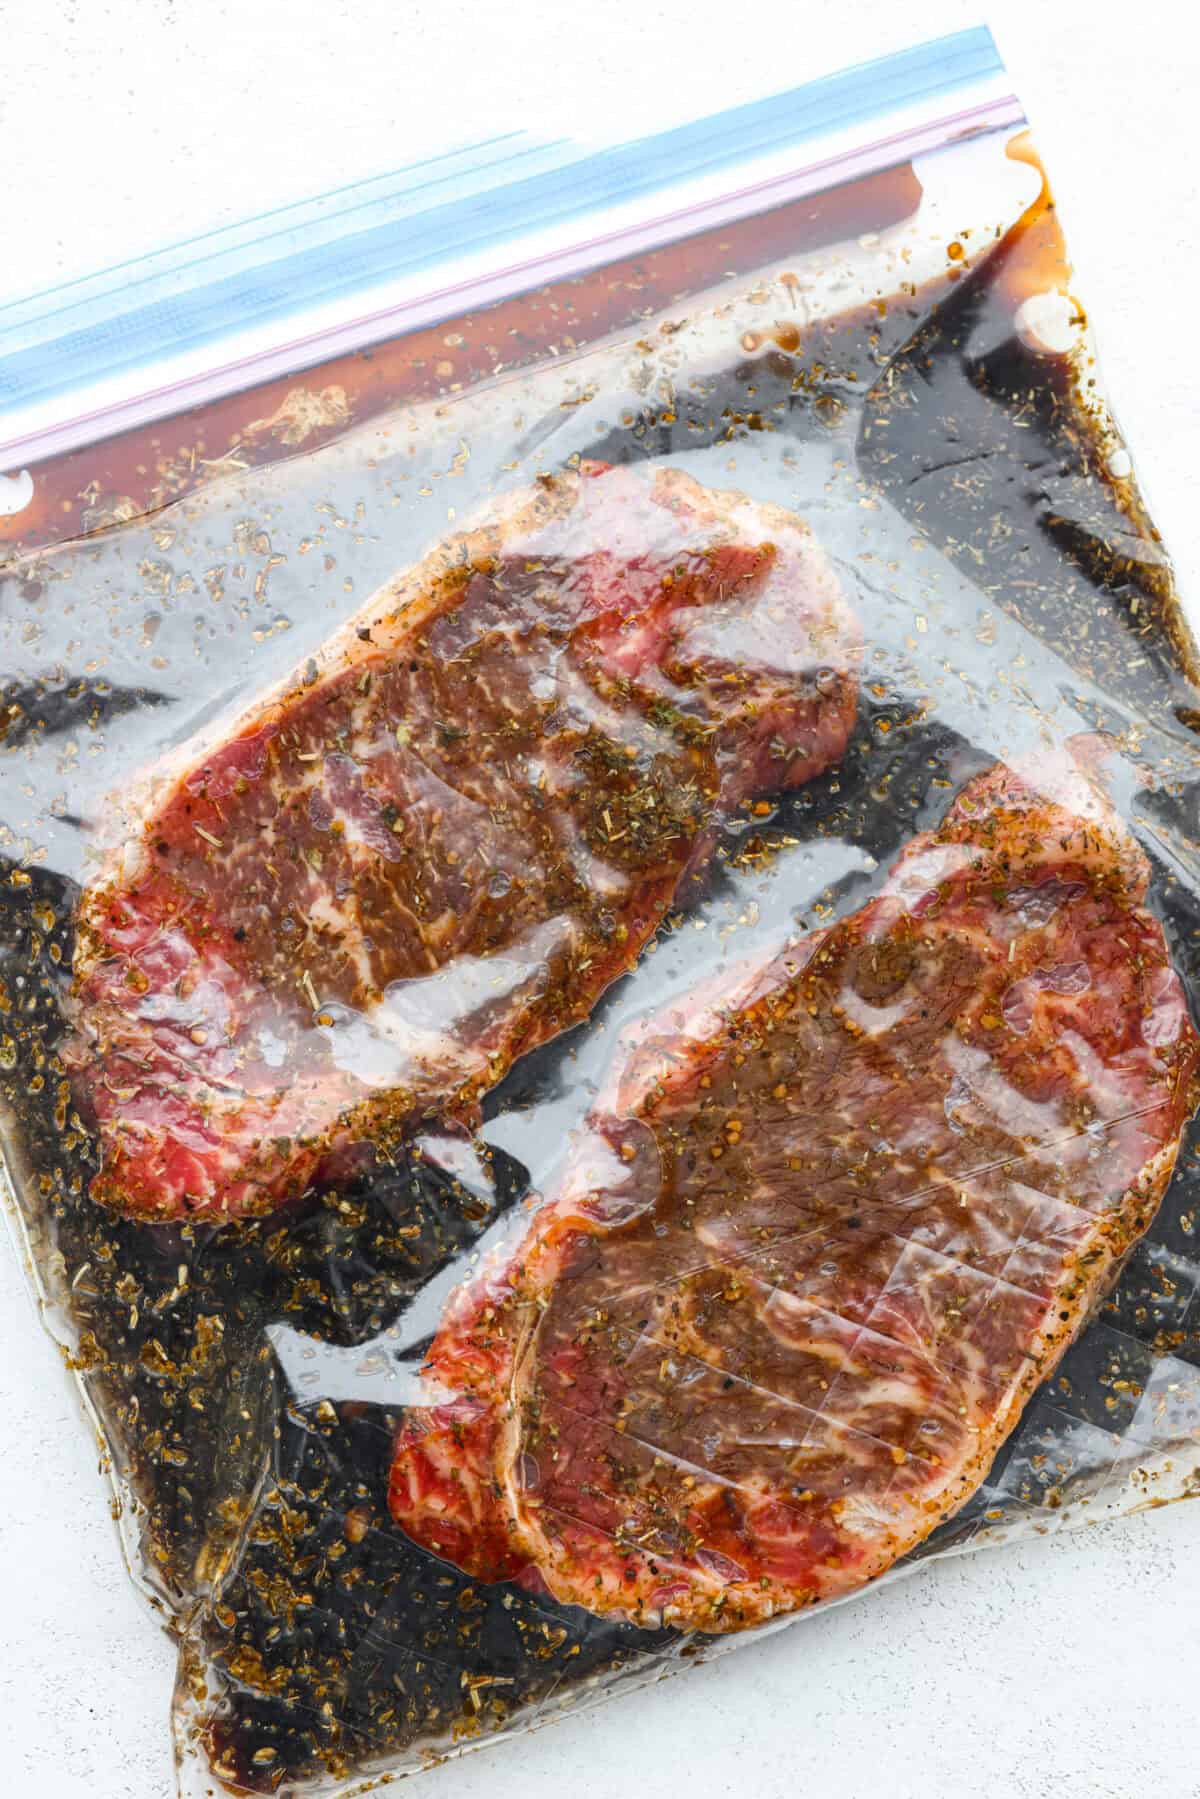
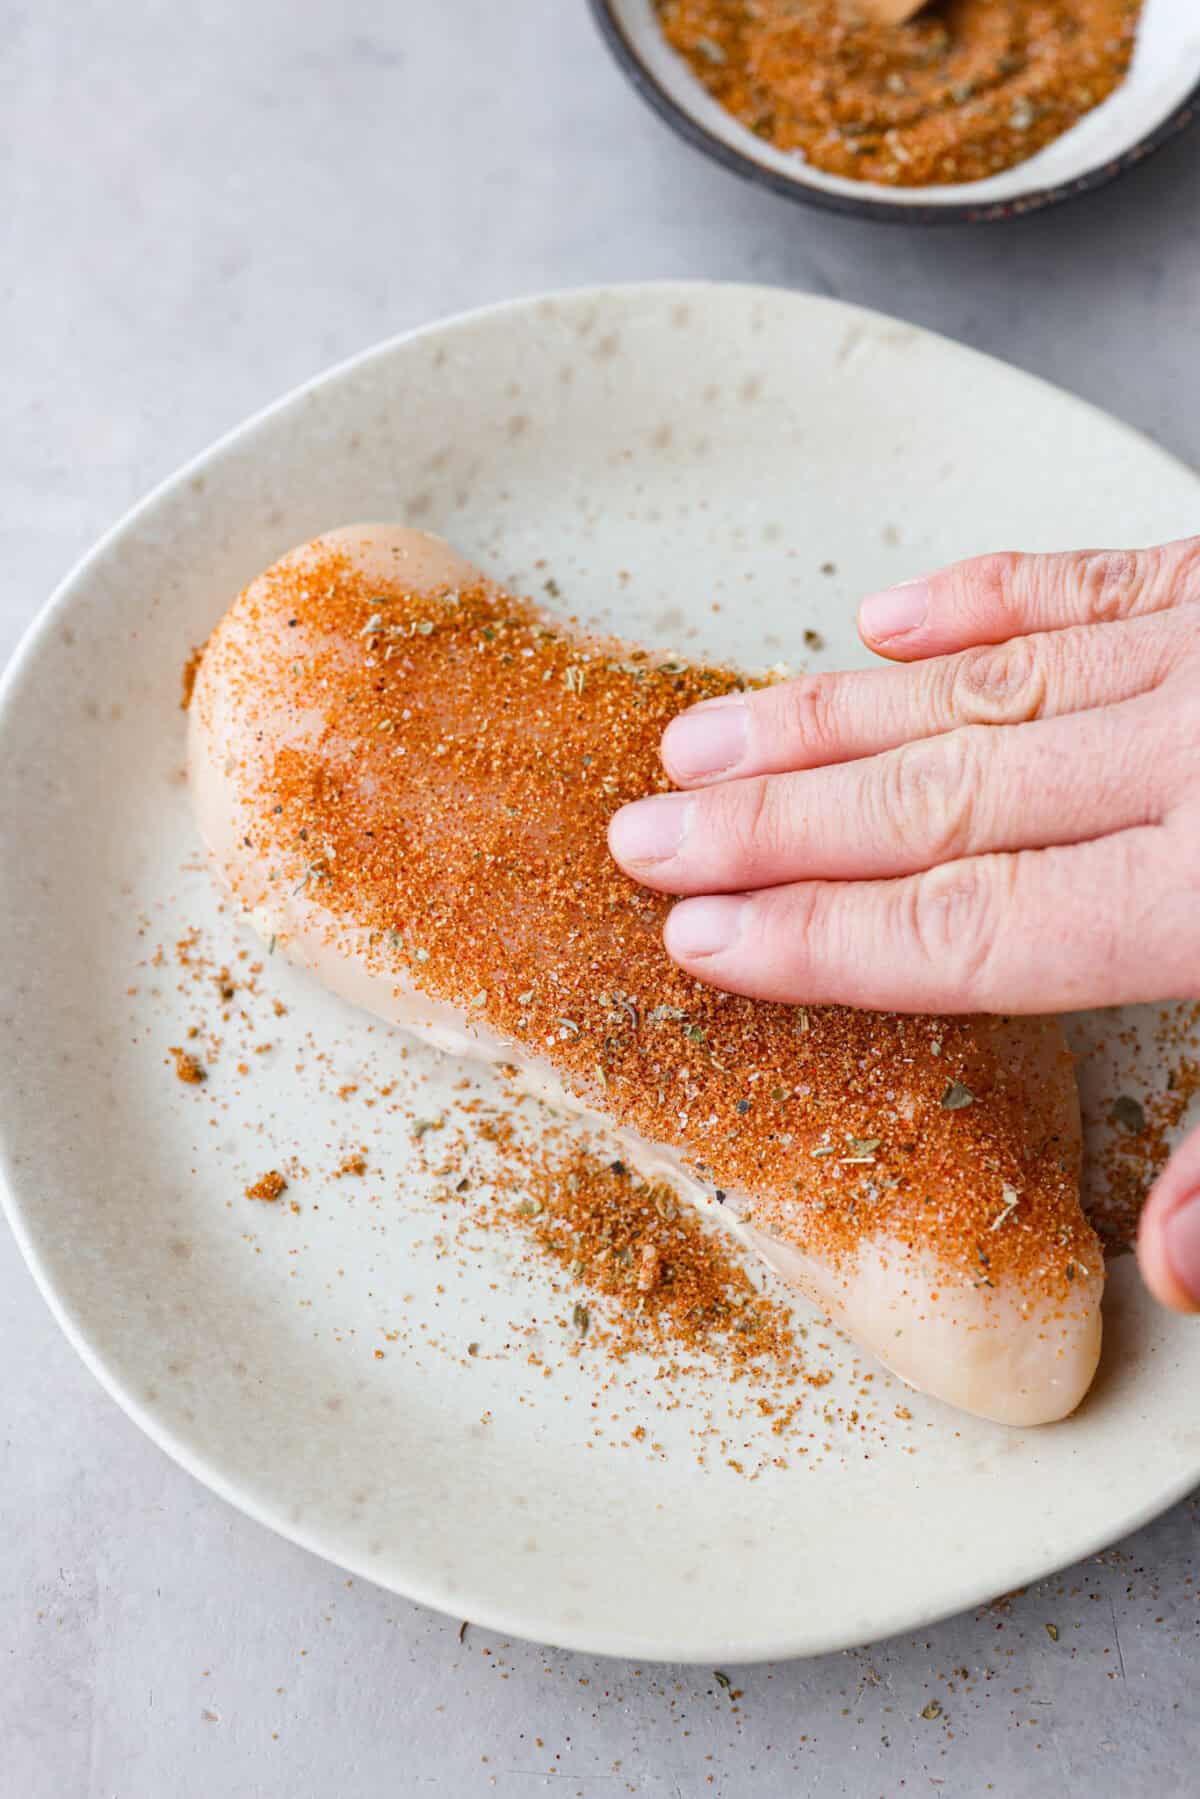
    Grilling meat is a popular way to enjoy your outdoor grill, and how you prepare the meat is entirely up to you! Most people choose between marinating their meat or applying a dry rub. Marinating adds flavor and makes the meat incredibly tender, while a dry rub creates a flavorful crust. Both methods are delicious, and if you want to try both, you have to try my famous steak marinade or this chicken seasoning!
    Meat Temperature and Grilling Time

    Understanding how long to cook your meat is essential for perfect grilling. To help, I’ve created a handy temperature guide for steak that includes cooking times and visual cues for doneness. This makes it easier to achieve your preferred level of doneness. Here are additional recommended temperatures for other meats:

    • Chicken: Cook to an internal temperature of 165°F (74°C).
    • Fish: Cook to an internal temperature of 145°F (63°C).
    • Pork: Cook to an internal temperature of 145°F (63°C) and allow it to rest for at least 3 minutes.
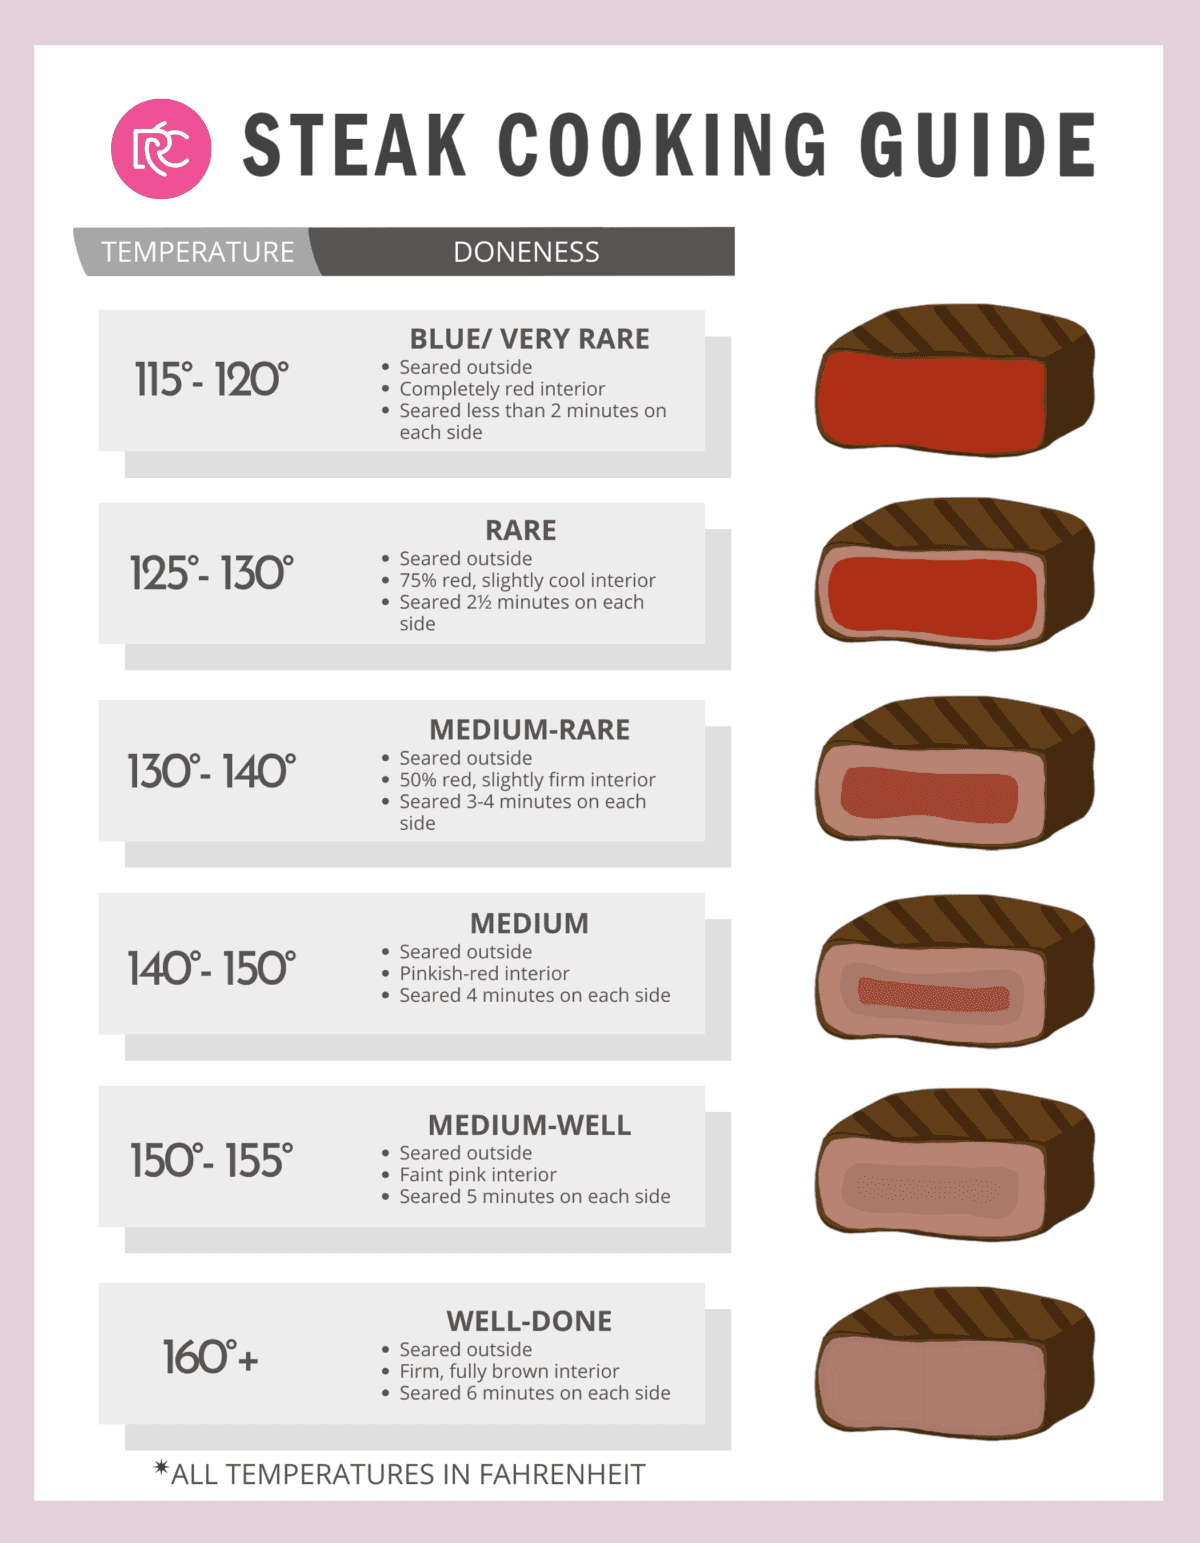
    Chart for steak cooking guide.
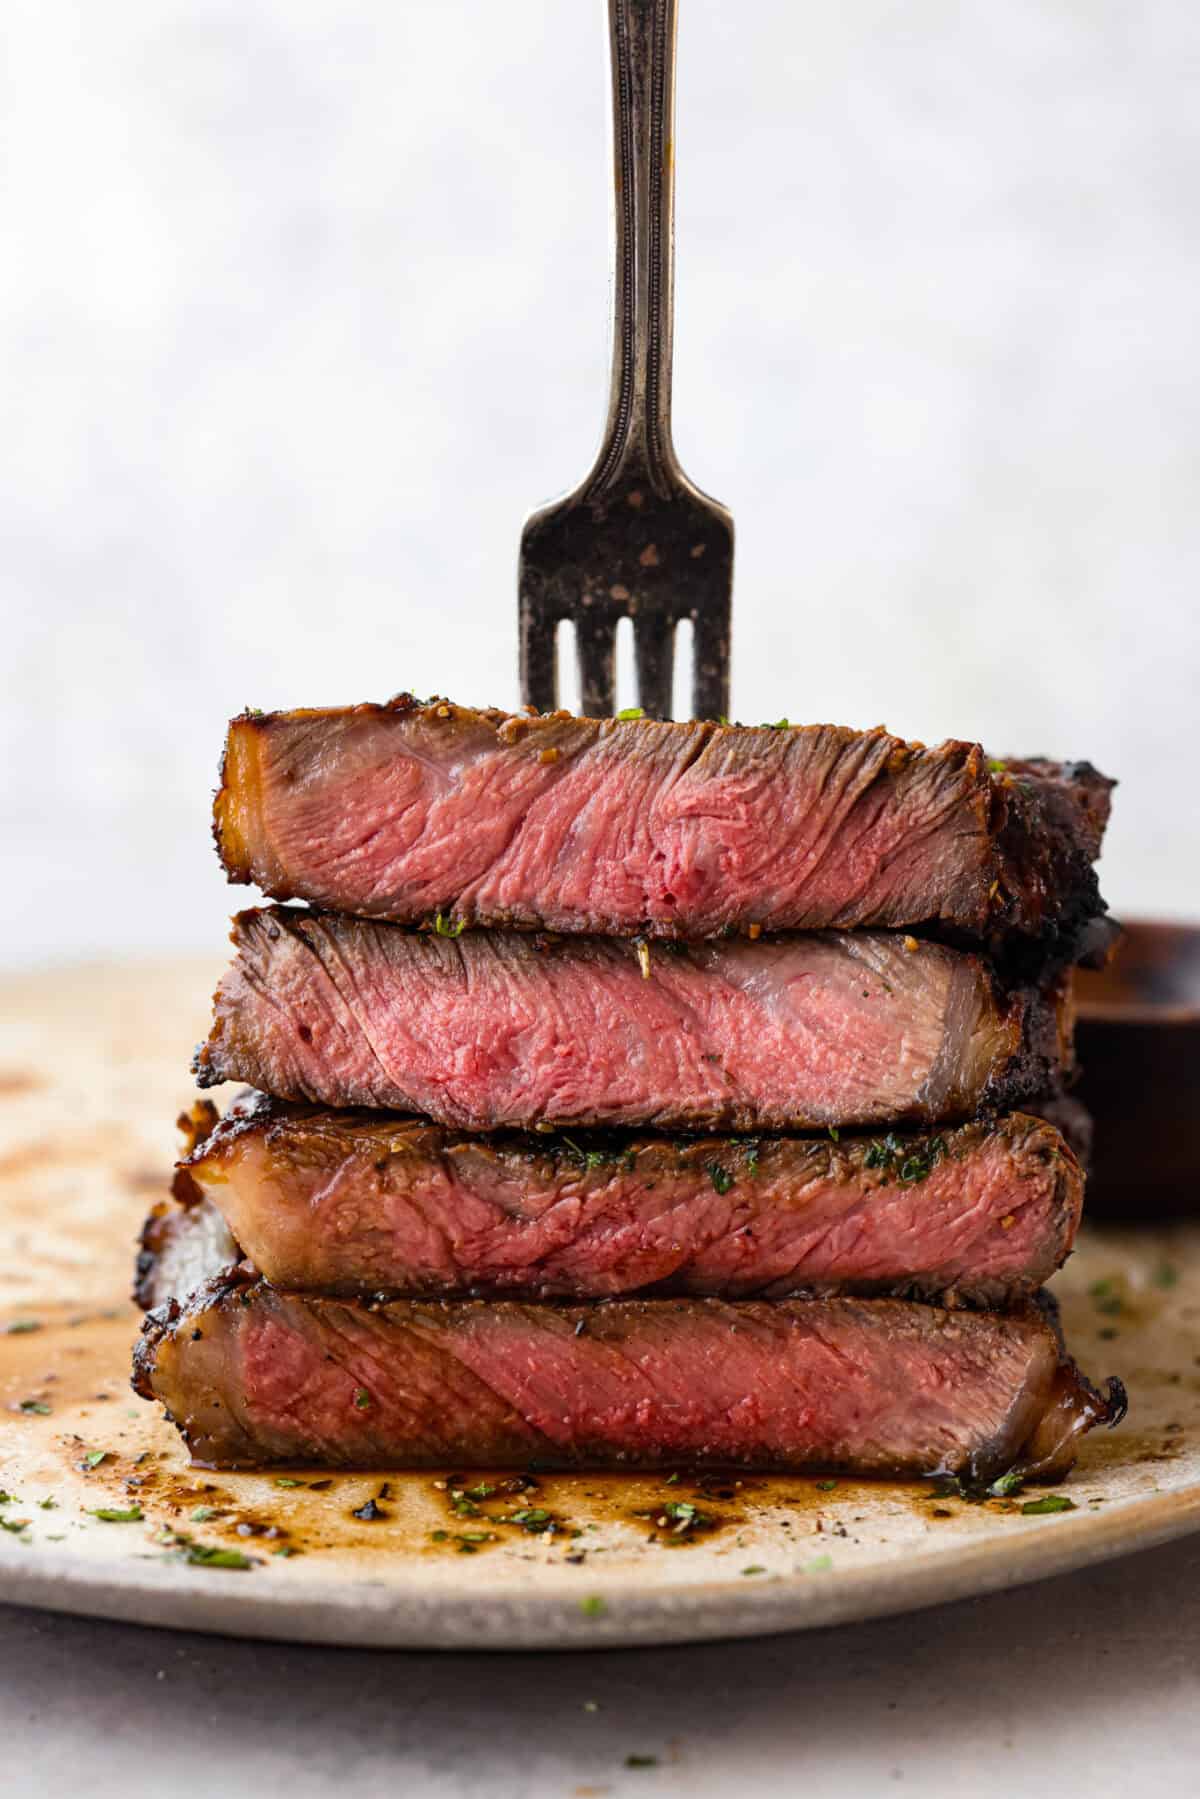
    Close view of cut steak sliced
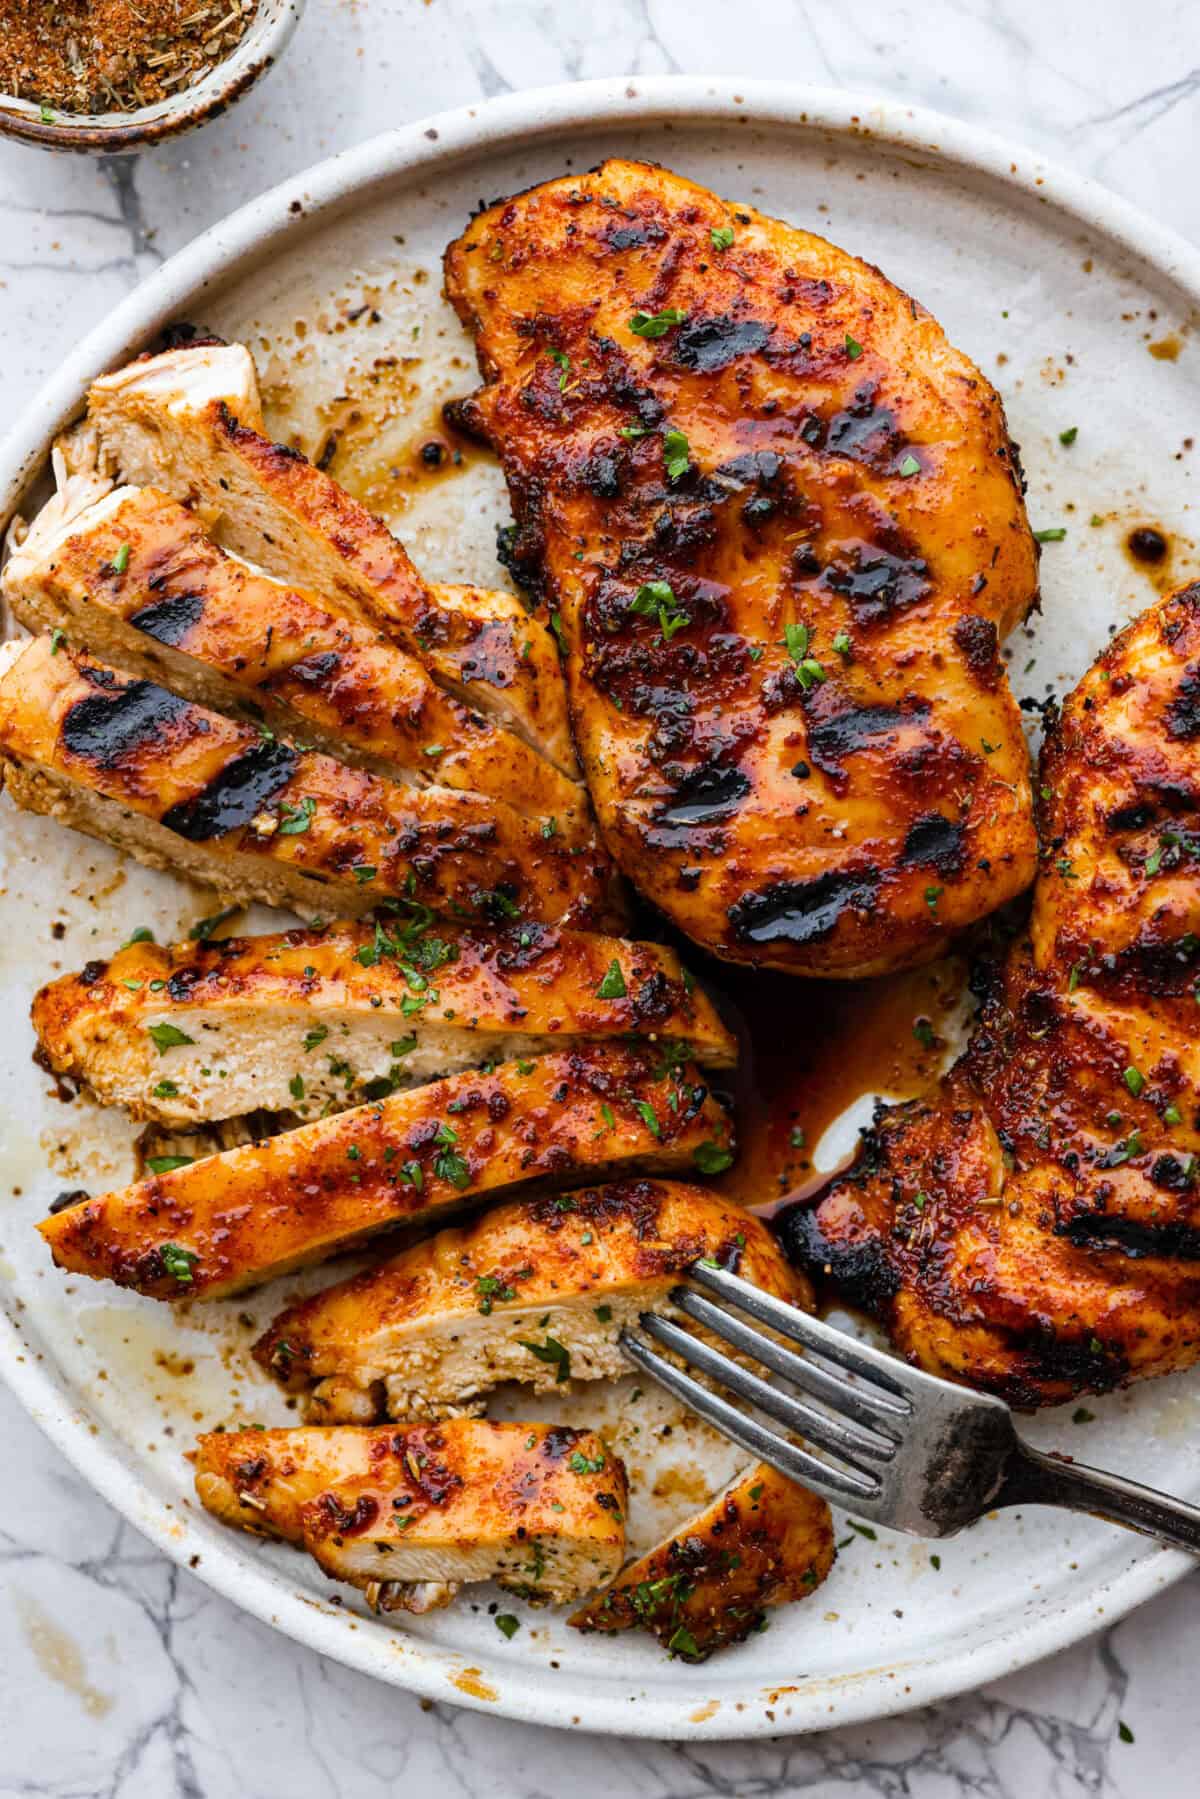
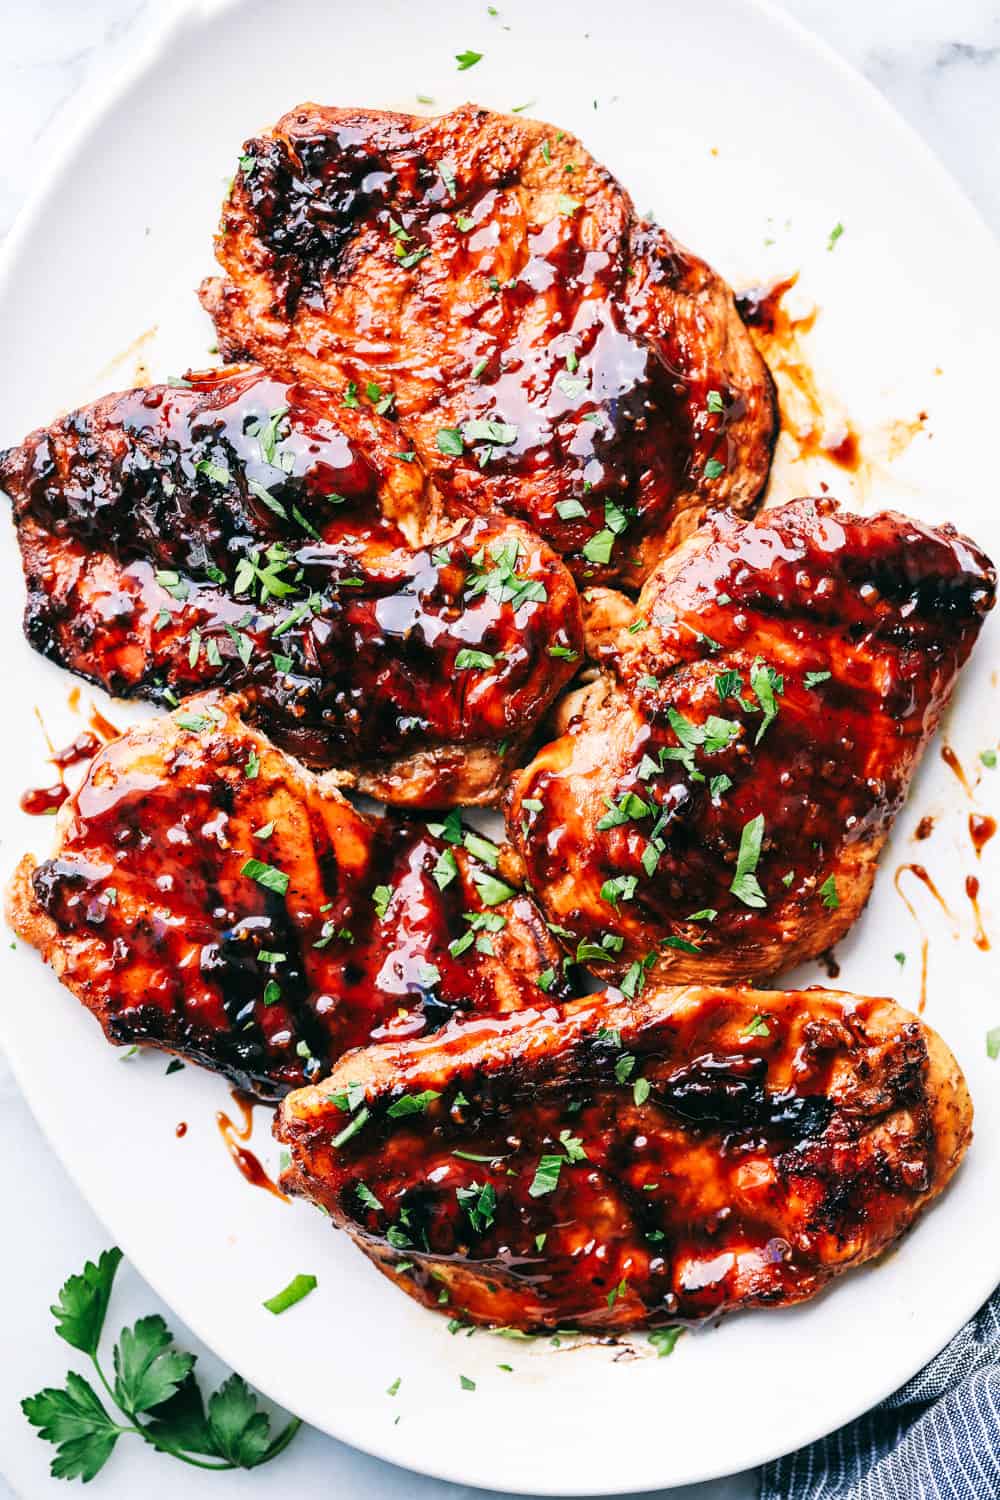
    Top view of grilled chicken on a platter.

    Recipe Ideas to Grill Up!

    Grilling isn’t just for meat! There are so many ways to use your grill and you’re going to love these ideas. I always look forward to these summertime grill recipes!

    • Skewers: Skewers hold meat, veggies, and fruit pieces perfectly! If you use wood skewers, soak them for 30 minutes before using them. This prevents the skewers from burning. Try these steak skewers or our favorite Hawaiian teriyaki skewers!
    • Fruit: Grilling fruit makes it tender and enhances the sweetness. Try grilling this Grilled Pineapple or these peaches and serving them with ice cream!
    • Vegetables: Tender-grilled veggies are my favorite, especially in the summer when my garden is bursting. These vegetables are the perfect side dish and my kids love these fun vegetable kabobs!
    • Foil Packets: We love to make foil packets in the summer! Everyone can make their packet just the way they like it. It’s a perfect dinner for when you don’t want to heat the kitchen with the oven. These shrimp packets or these easy potato foil packets are delicious!

    Summer BBQ Grill Recipes
    Awesome Grilled Salmon with Avocado Salsa

    20 minutes


    Source link

  • Rosemary Salted Pecans – All Day I Dream About Food

    Rosemary Salted Pecans – All Day I Dream About Food

    These Salted Pecans with Rosemary take snacking to new heights! Deliciously toasted and crisp, they pair perfectly with your favorite cheese or charcuterie.

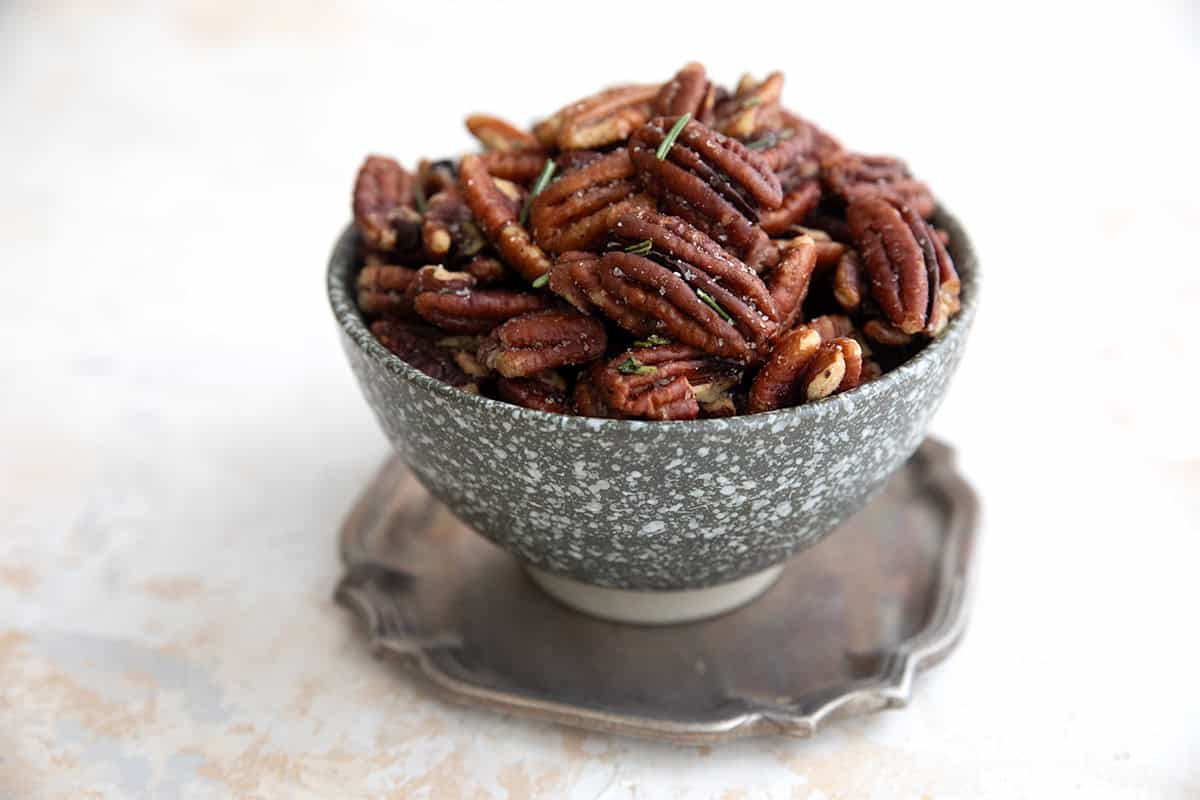
    Salted pecans with rosemary piled up in a speckled gray bowl on a pewter plate.

    Congratulations! You may not realize it quite yet, but have just come across the best keto snack ever. Given how many keto snack recipes I have created over the years, I don’t say that lightly. But these salted pecans with rosemary are one of the most delightful things you will ever put in your mouth.

    I have actually been making this recipe for years now, and my friends all rave about it. Often when I am invited to a gathering, there is a request for my salty rosemary pecans. Everyone always seems amazed by them, asking me how I make them. One young woman recently asked if I sprinkled them with fairy dust, they were that good!

    Salted pecans piled up in a flecked gray bowl on a marble table top.

    The truth is that these salted pecans are ridiculously simple. They take 5 ingredients and 20 minutes to make. I usually don’t even measure anything as I make them, I just go by gut instinct. But I took the time to quantify the recipe so I could share it here with you.
    Fair warning that these are absolutely addictive. I only make them when I have people to share them with. Otherwise I would eat the whole batch on my own in a matter of days!

    Close up shot of salted pecans with rosemary in a flecked gray bowl.

    Why You Will Love This Recipe

    • So simple! In need of a last minute appetizer or snack? This will become your go-to recipe!
    • Amazing flavor: The combination of pecans, truffle salt, and rosemary is so magical, you may actually think they are made with fairy dust.
    • Naturally low carb: Pecans are very low in carbs, with a good amount of fiber. Each serving has only 1.2 grams net carbs.
    • Healthy fats: Between the olive oil and the natural fats in the pecans, this recipe is low in saturated fat.
    • Great for charcuterie boards! My favorite way to serve these is with a soft brie or some homemade Boursin cheese.

    Ingredient Notes

    Top down image of ingredients needed for Salted Rosemary Pecans.
    • Pecan halves: Fresh raw pecans work best for this recipe. See the Tips for Success if you only have roasted pecans.
    • Butter: A little butter helps brown up the pecans really nicely, but watch that it doesn’t burn!
    • Olive oil: I like the combination of butter and oil, but you can do all butter or all olive oil, as you see fit.
    • Truffle salt: This adds another depth of flavor but regular kosher salt or sea salt also works.
    • Rosemary: Use fresh rosemary whenever possible.

    How to Make Salted Pecans

    A collage of 6 images showing the steps for making Rosemary Salted Pecans.
    1. Prep the rosemary: Strip the leaves from the stem of the rosemary sprig and use a sharp knife to chop finely.
    2. Brown the pecans: Add the pecans to a hot skillet and cook 4 to 5 minutes, stirring frequently.
    3. Add the oils: Make a whole in the center of the pecans and add the butter. Let it melt and then add the oil and the salt.
    4. Keep cooking: Continue to cook, stirring frequently, a few more minutes. Turn off the heat but continue to stir so they don’t burn in the pan as it cools down.
    5. Let cool: Allow the pecans to come to room temperature in the pan.
    6. Serve and enjoy!
    Salted pecans on a small cutting board with a chunk of brie, with some spread on one of the pecans.

    Tips for Success

    It’s best to chop the rosemary before you start cooking. The nuts need almost constant attention so they don’t burn, and you don’t want to be distracted in the middle of it.

    If you are using a cast iron skillet (my favorite way to cook them), keep in mind that it holds its heat long after the stove is no longer on. Keep stirring very frequently for 5 minutes or so, to prevent burning.

    The pecans will be quite soft when still warm. I like them best after they have cooled completely.

    Truffle salt is a relatively new addition to my recipe. I added it one day on a whim and it made them utterly irresistible! But these salted pecans are still delicious with regular kosher salt or sea salt. Sometimes I do a mix of both truffle salt and kosher salt.

    Occasionally I have purchased salted pecans, only to be disappointed by the lack of flavor. So I add a little more of my own by heating up a skillet with some butter or oil, tossing the pecans to coat, and adding some additional salt and some rosemary. You don’t really need to cook them very long and they taste so much better!

    Freshly roasted salted pecans in a cast iron skillet.
    Salted pecans with rosemary piled up in a speckled gray bowl on a pewter plate.

    Salted Pecans Recipe

    Servings: 12 servings

    Prep Time 5 minutes

    Cook Time 15 minutes

    Total Time 20 minutes
    These Salted Pecans with Rosemary take snacking to new heights! Deliciously toasted and crisp, they pair perfectly with your favorite cheese or charcuterie.

    • 1 large rosemary sprig, or two smaller ones
    • 3 cups raw pecan halves
    • 1 tbsp butter
    • 1 tbsp olive oil
    • 1 tsp truffle salt, or kosher salt

    Prevent your screen from going dark

    • Heat a 10 to 12 inch skillet over medium heat. Remove the stems from the rosemary and chop finely.

    • Once hot, add the pecans and spread out into an even layer. Cook, stirring frequently for 4 to 5 minutes, until they begin to brown.

    • Create a space in the center of the pan and add the butter. Allow it to melt, then toss to coat the pecans. Stir in the olive oil and sprinkle with the salt.

    • Continue to cook another 2 to 3 minutes, stirring very frequently to keep the nuts from burning.

    • Turn off the heat and sprinkle with the rosemary. Continue to stir frequently, as they will keep cooking for a little while as the pan cools down.

    • Cool to room temperature. Taste and add more salt if desired.

    Storage Information: Store the pecans in a covered container on the counter for up to 10 days. 

    Serving: 0.25cup | Calories: 191kcal | Carbohydrates: 3.8g | Protein: 2.3g | Fat: 19g | Saturated Fat: 2.3g | Fiber: 2.6g

    Frequently Asked Questions

    Are pecans keto friendly?

    Yes, pecans are very keto-friendly! The raw nuts have only about 3.8 grams of carbs and 1.7 grams of fiber per serving (30 grams or about 1/4 cup). They are also high in important nutrients like magnesium and potassium, and contain healthy fats.

    How to you get salt to stick to pecans?

    The best way to get salt to adhere to pecans is to cook them with a bit of oil or butter in a hot pan. Then add the salt and toss well to combine.

    How do you store Rosemary Salted Pecans?

    These nuts are best stored in a covered container on the counter. They will be fine for 10 days or longer, but they are so tasty, it’s unlikely they will last that long!

    Categories:

    Appetizers & Snacks,

    Nutritional Disclaimer

    Please note that I am not a medical or nutritional professional. I am simply recounting and sharing my own experiences on this blog. Nothing I express here should be taken as medical advice and you should consult with your doctor before starting any diet or exercise program. I provide nutritional information for my recipes simply as a courtesy to my readers. It is calculated using MacGourmet software and I remove erythritol from the final carb count and net carb count, as it does not affect my own blood glucose levels. I do my best to be as accurate as possible but you should independently calculate nutritional information on your own before relying on them. I expressly disclaim any and all liability of any kind with respect to any act or omission wholly or in part in reliance on anything contained in this website.

    Free Bonus: Secrets to Keto Baking!

    Sign up for your favorite recipes delivered straight to your inbox plus get our FREE bonus: Secrets to Keto Baking!


    Source link

  • White Bean Soup with Ham

    White Bean Soup with Ham

    This tasty White Bean Soup with Ham is a classic soup to make on the stove and make your house smell amazing! And this ham and bean soup uses a generous amount of ham and celery, so it’s probably a lot lower in net carbs than you think!

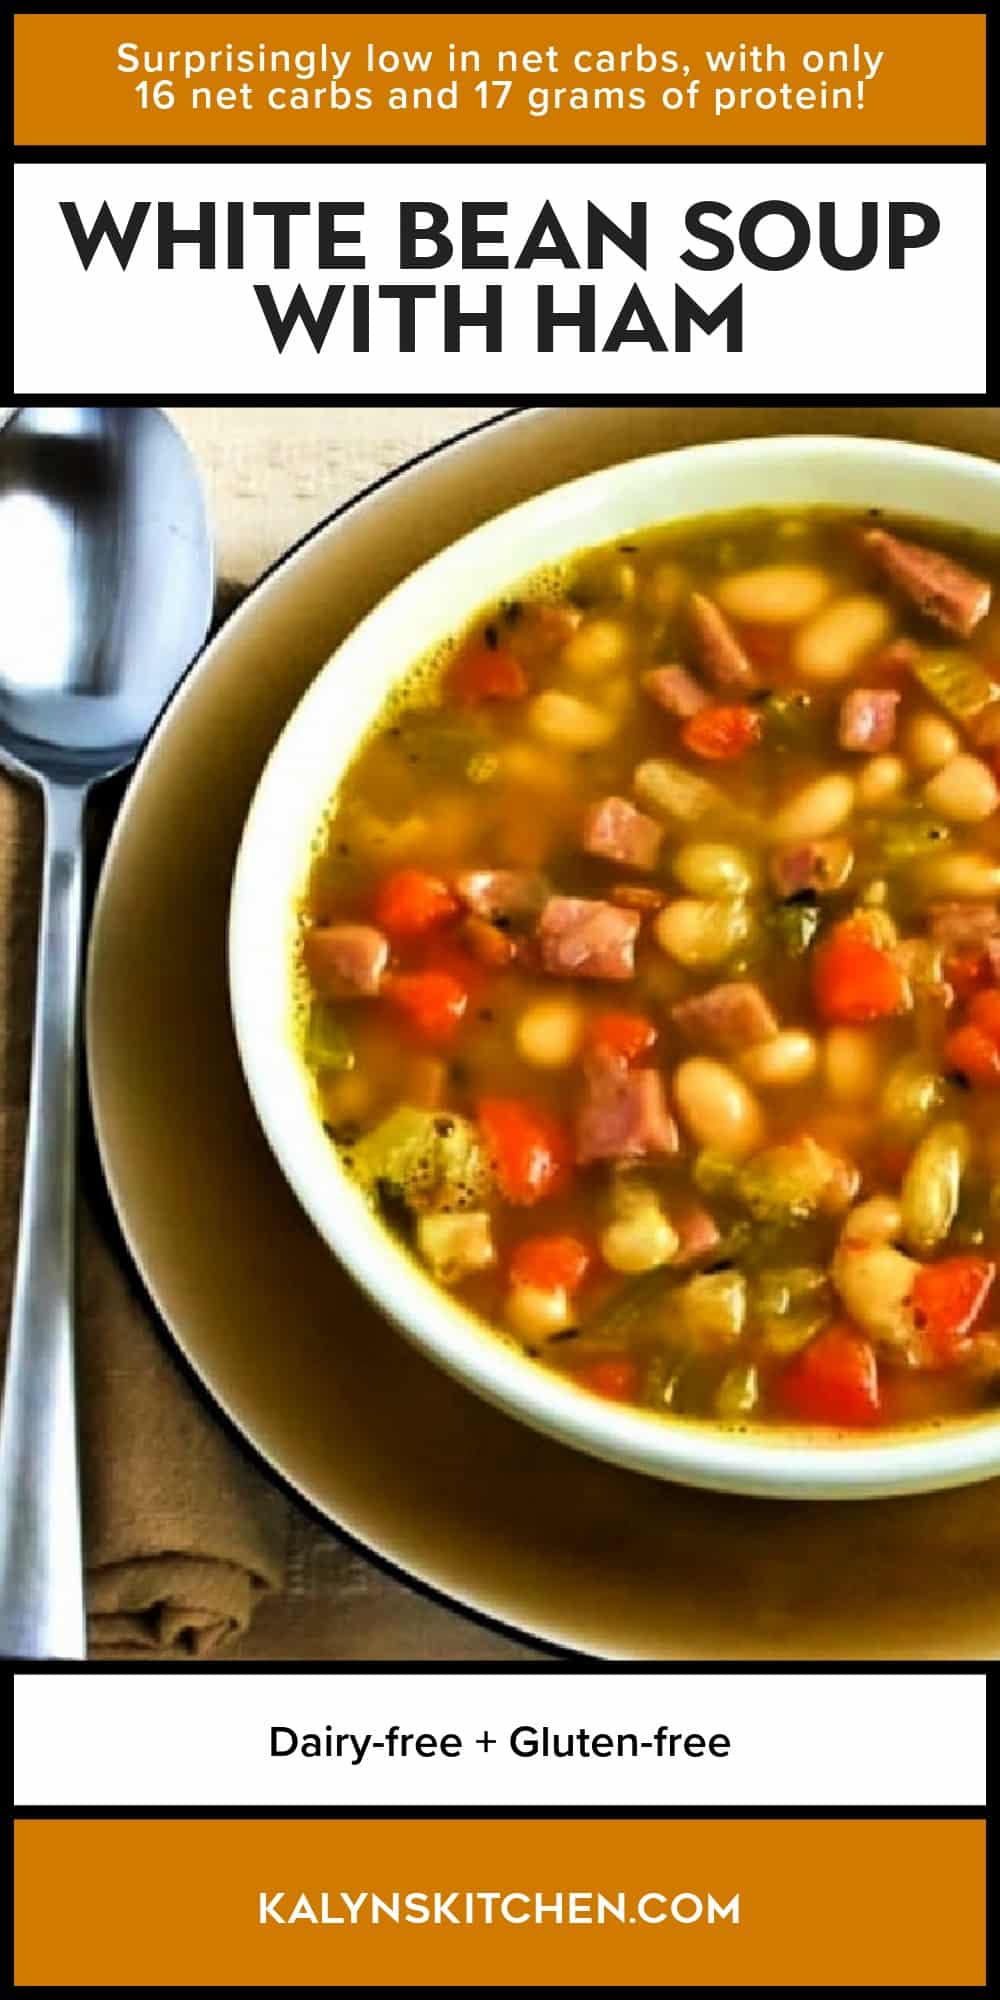
    PIN White Bean Soup with Ham to try it later!

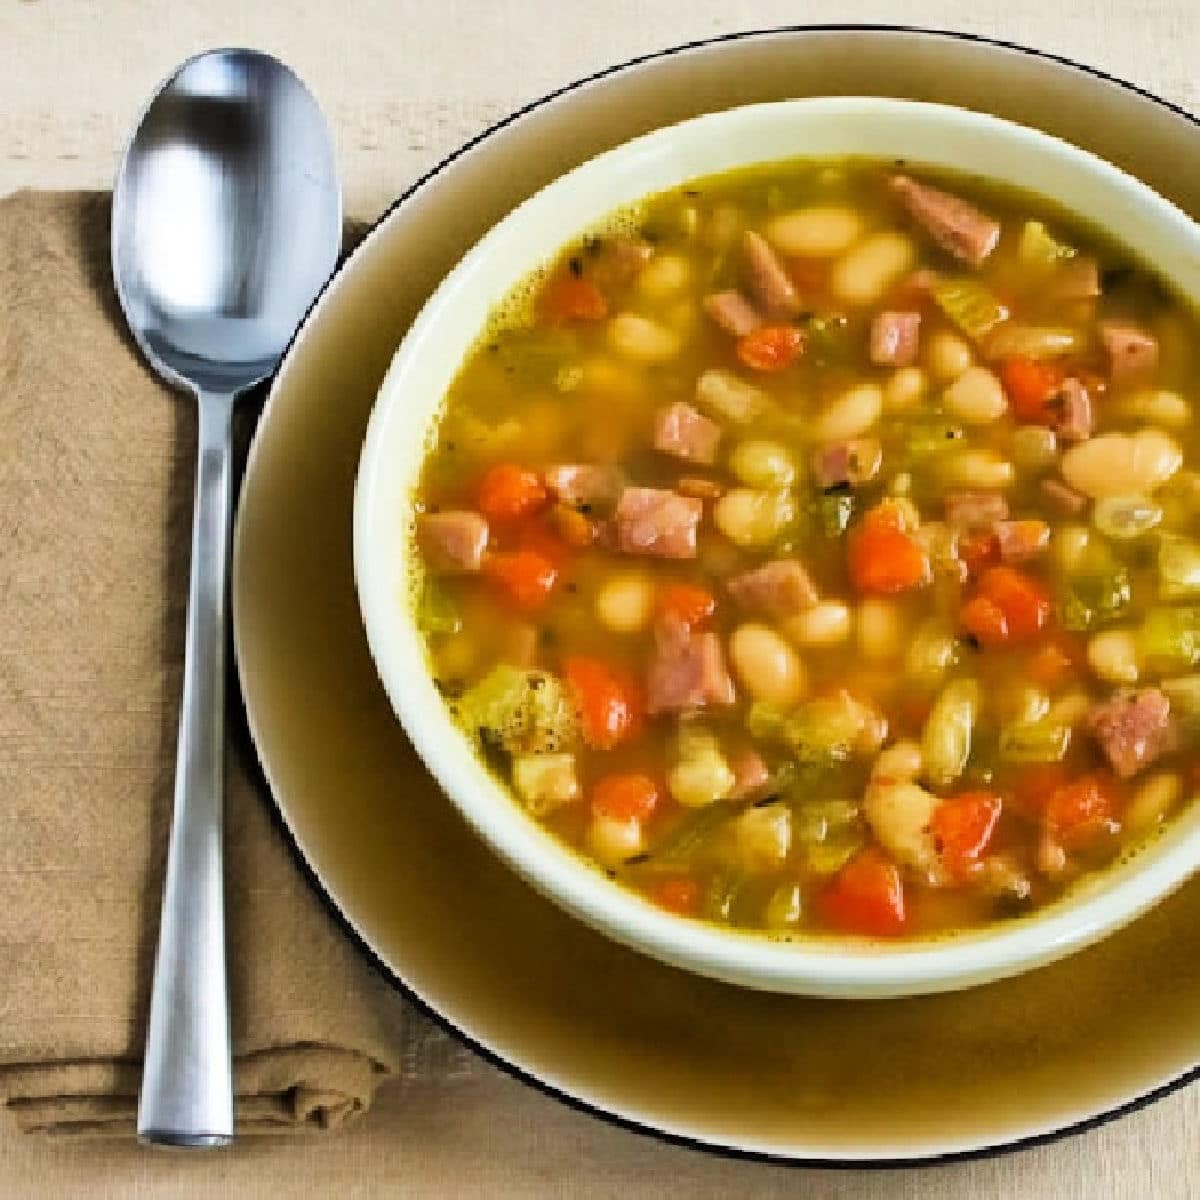
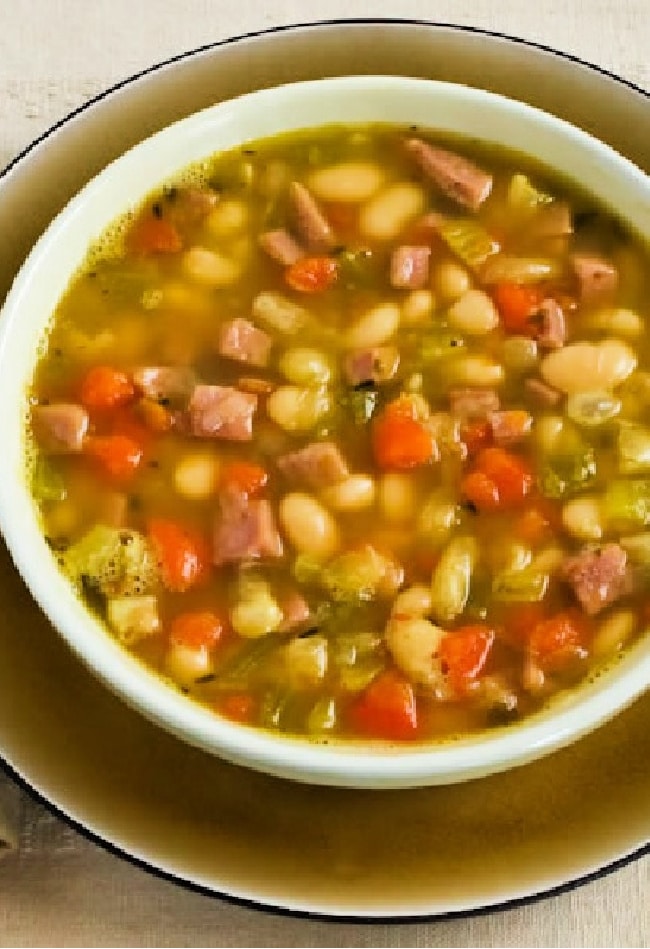
    White Bean Soup with Ham in bowl with spoon and napkin.

    White Bean Soup with Ham is the kind of comforting soup I love to make when Utah gets one of those cold snowy days when winter is almost ending. And when it’s cold outside I love to make soup on the stove, simmering it all day and letting the smells fill my house.

    Last weekend when I woke up to snow on the ground I decided it was a good day to update this favorite soup recipe with better photos! I bumped up the flavor with fresh parsley and some rosemary, and my version of soup with white beans and ham has a lot of ham and celery to make it a bit lower in carbs than other ham and bean soups!

    Of course I don’t even dare hope this is the last snow for this year, but the soup did taste great on a cold spring day. I hope you try it if you’re a fan of these ingredients!

    What ingredients do you need? 

    (This is only a list of ingredients; please scroll down for complete printable recipe. Or if you use the JUMP TO RECIPE link at the top of the page, it will take you directly to the complete recipe with ingredient amounts.)

    How to add flavor to ham and bean soup:

    When I make bean soup I like to use either homemade ham stock or homemade chicken stock if I have some in the freezer. If not I would add a tablespoon or two of Goya Ham Flavor Concentrate (affiliate link) or Better than Bouillon Roasted Chicken Base (affiliate link) to the water. When I’m using ham with a rind, I simmer the rind in the soup for part of the cooking time and then remove it. If you’re sensitive to salt you might want to use low-sodium broth if you use the ham flavor concentrate.

    Can you make White Bean Soup with Ham without fresh rosemary?

    I’m not such a fan of dried rosemary in soup, because it floats to the top and makes dark flecks on the surface of the soup. But I love a pinch of ground rosemary (affiliate link) when I want some rosemary flavor but don’t have any fresh rosemary.

    Is the White Bean Soup with Ham low in carbs?

    Of course white beans have some carbs, but this soup has a lot of ham and celery and fewer high-carb ingredients, so the soup has only 16 net carbs per serving and 17 grams of protein.

    White Bean Soup with Ham and Rosemary found on KalynsKitchen.comWhite Bean Soup with Ham and Rosemary found on KalynsKitchen.com

    How to Make White Bean Soup with Ham:

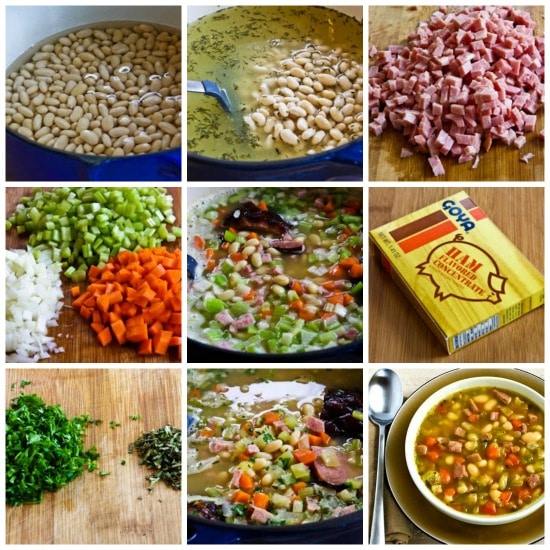
    (This is only a summary of the steps for the recipe; please scroll down for complete printable recipe. Or if you use the JUMP TO RECIPE link at the top of the page, it will take you directly to the complete recipe.)

    1. Soak beans 8 hours or overnight, then drain and rinse.
    2. Put soaked beans, homemade ham stock, homemade chicken stock, or water, and dried thyme into soup pot and start to simmer.
    3. While soup is simmering, dice the ham.  (I like small pieces for meat and vegetables in soup, but you can make them bigger if you prefer.)
    4. If your ham has a rind, add it to the simmering soup.
    5. Also finely dice carrots, celery, and onion.
    6. Add diced ham, carrots, celery, and onions to the soup and simmer at least 30 minutes more.  (Those dark pieces in the photo are the ham rind.)
    7. After soup has cooked for one hour taste for seasoning, adding some ham flavor concentrate (affiliate link) or Better than Bouillon Roasted Chicken Base (affiliate link) if you want more flavor.
    8. Add finely chopped fresh parsley and fresh rosemary (or ground rosemary) to the soup, along with more water if needed.
    9. Continue simmering until the soup is flavorful and beans are well-softened. (This can take more than an hour if you’re using old beans that have been sitting in the pantry. If that happens, you may need to add more water a few times.)
    10. When beans are soft, remove ham rinds (if using), season soup with fresh ground black pepper, and serve hot.
    11. White Bean Soup with Ham freezes well and it’s great to pull out of the freezer and enjoy on a cold winter night without having to cook!

    Make it a complete meal:

    You could eat this ham and bean soup for a one dish meal, but if you’d like to add something more here are some things that would taste great with the soup:

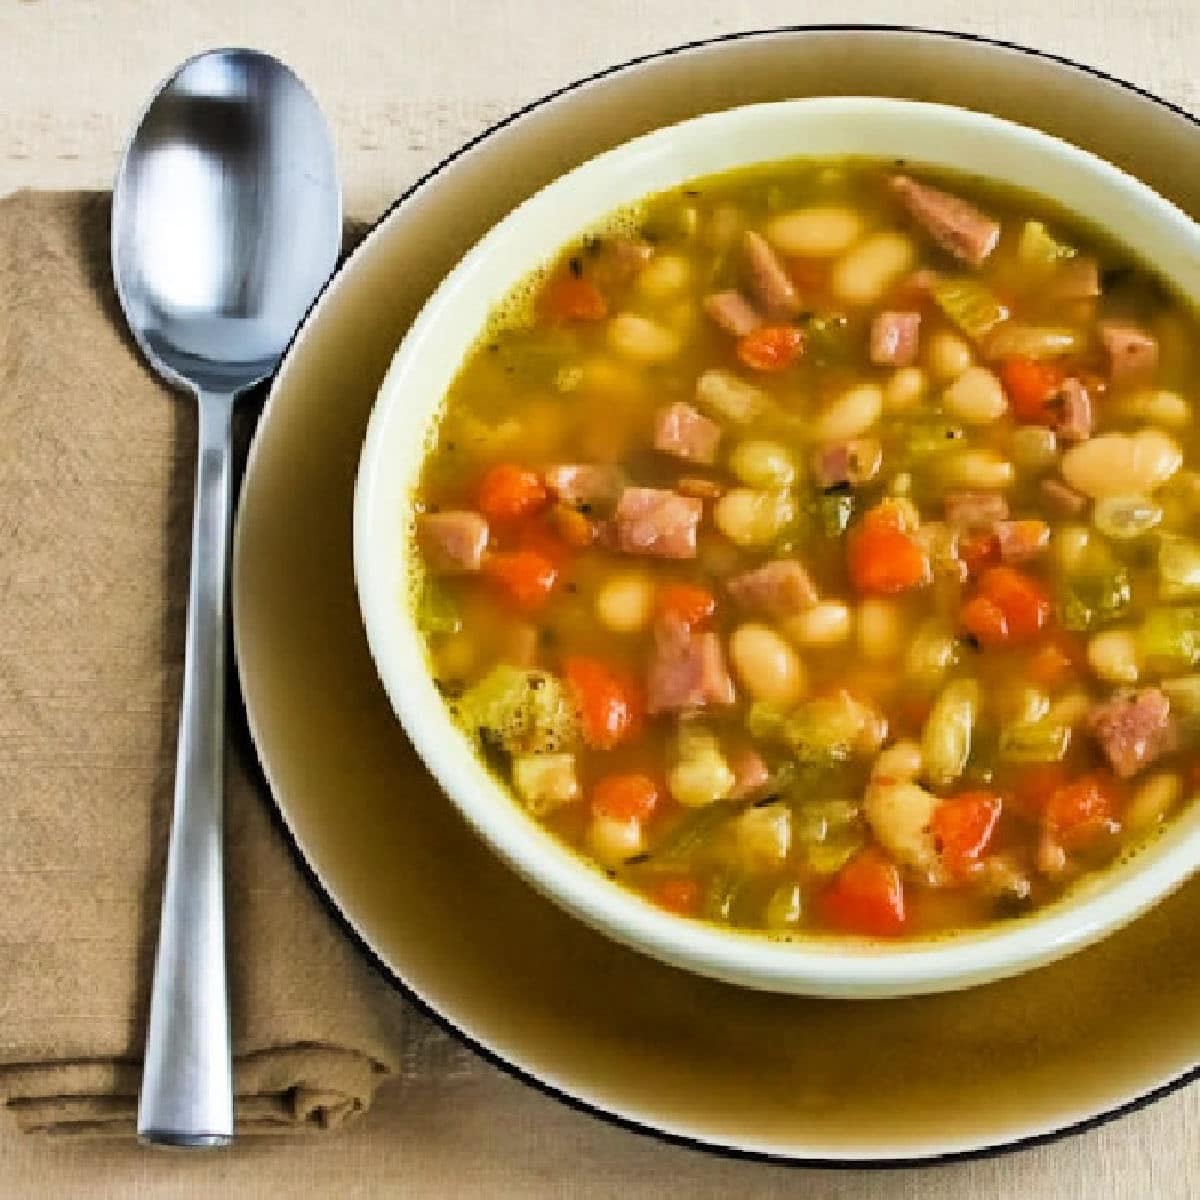
    Square image of White Bean Soup with Ham shown in bowl with spoon.Square image of White Bean Soup with Ham shown in bowl with spoon.

    Wamt more recipes with White Beans?

    You can check out the index for Beans and Legumes if you want to see all my recipes using white beans!

    Ingredients

    • 2 cups dried white beans (soaked 8 hours or overnight, then drained)
    • 2 quarts chicken broth or ham broth (see notes)
    • 1 tsp. dried thyme
    • 2 cups finely chopped celery
    • 1 cup finely chopped carrots
    • 1 cup finely chopped onion
    • 2 cups finely chopped ham
    • 1 envelope Goya brand ham flavor base (optional)
    • about 2 additional cups water
    • finely chopped fresh rosemary or a small amount of ground rosemary
    • 2 T finely chopped fresh parsley (or use 1 T dried parsley)
    • fresh ground black pepper to taste

    Instructions

    1. Soak beans 8 hours or longer in cold water, drain and rinse well.
    2. Put beans, 2 quarts of ham or chicken broth or stock (or water with ham or chicken base), and thyme in large soup kettle.
    3. Simmer 30 minutes.
    4. While soup simmers, chop veggies and ham so that pieces are about 1/4 inch square.  (If you’re using ham with a rind, cut it off and add to the simmering soup.)
    5. Add celery, carrot, onion, and ham to soup pot and simmer 30 minutes more.
    6. Taste soup for seasoning.
    7. Add up to 2 cups more water, ham or chicken base if needed, rosemary (or ground rosemary) and parsley to soup pot.
    8. Simmer one hour on very low heat or until beans are nicely softened and soup is flavorful.  (If you’re using old beans from the pantry the cooking time will be longer, and you may need to add more water more than once.)
    9. When the beans are softened, remove ham rind (if using), season soup to taste with fresh ground black pepper and serve hot.
    10. This freezes well, so you may want to make a double batch and put some into individual containers to take to work for lunch.

    Nutrition Information

    Yield

    8

    Serving Size

    1

    Amount Per Serving

    Calories 187Total Fat 5gSaturated Fat 1gTrans Fat 0gUnsaturated Fat 2gCholesterol 35mgSodium 1582mgCarbohydrates 21gFiber 5gSugar 4gProtein 17g

    Nutrition information is automatically calculated by the Recipe Plug-In I am using. I am not a nutritionist and cannot guarantee 100% accuracy, since many variables affect those calculations.

    Did you make this recipe?

    Did you make this recipe? Please leave a star rating (under the PRINT button in the recipe) or share a photo of your results on Instagram! THANKS!

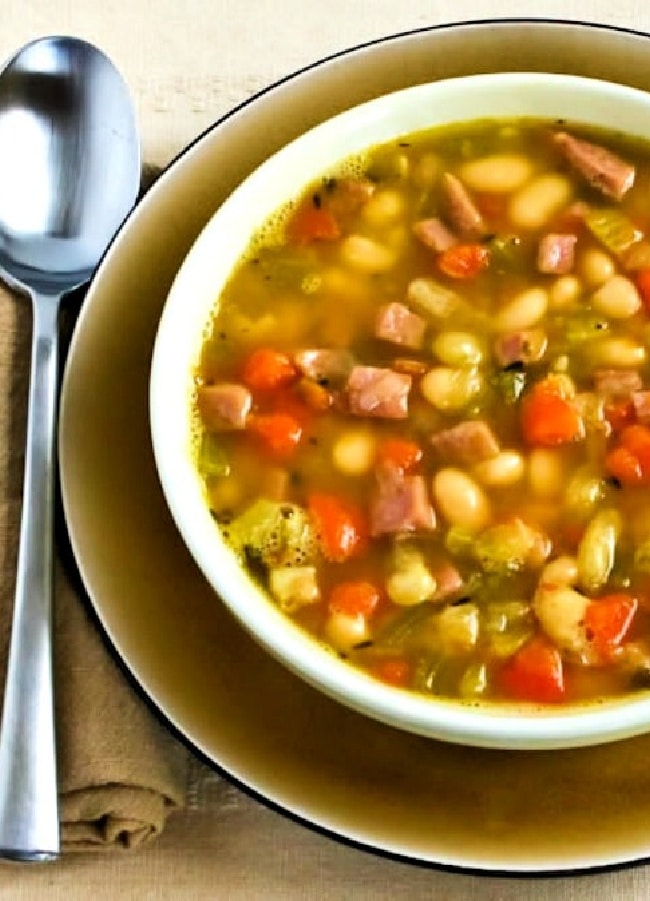
    White Bean Soup with Ham shown in bowl with plate underneath.White Bean Soup with Ham shown in bowl with plate underneath.

    Low-Carb Diet / Low-Glycemic Diet / South Beach Diet Suggestions:
    This White Bean Soup with Ham has a lot of ham and celery for only 16 net carbs per serving, which might work for some people who are limiting carbs. The soup would be a great choice for the original South Beach Diet if you use lean ham or turkey ham. If you want to make it for phase one of South Beach, leave out the carrots and remember that dried beans should be eaten in small amounts for phase one. 

    Find More Recipes Like This One:
    Use Soup Recipes to find more recipes like this one. Use the Diet Type Index to find recipes suitable for a specific eating plan. You might also like to follow Kalyn’s Kitchen on Pinterest, on Facebook, on Instagram, on TikTok, or on YouTube to see all the good recipes I’m sharing there.

    Historical Notes for this Recipe:
    This white bean soup recipe with ham, vegetables, and fresh herbs was first posted in 2011. It was last updated with more information in 2025.

    Pinterest image of White Bean Soup with Ham

    We are a participant in the Amazon Services LLC Associates Program, an affiliate advertising program designed to provide a means for us to earn fees by linking to Amazon.com and affiliated sites. As an Amazon Associate, I earn from qualifying purchases.


    Source link

  • Marry Me Shrimp Pasta | The Recipe Critic

    Marry Me Shrimp Pasta | The Recipe Critic

    This website may contain affiliate links and advertising so that we can provide recipes to you. Read my disclosure policy.

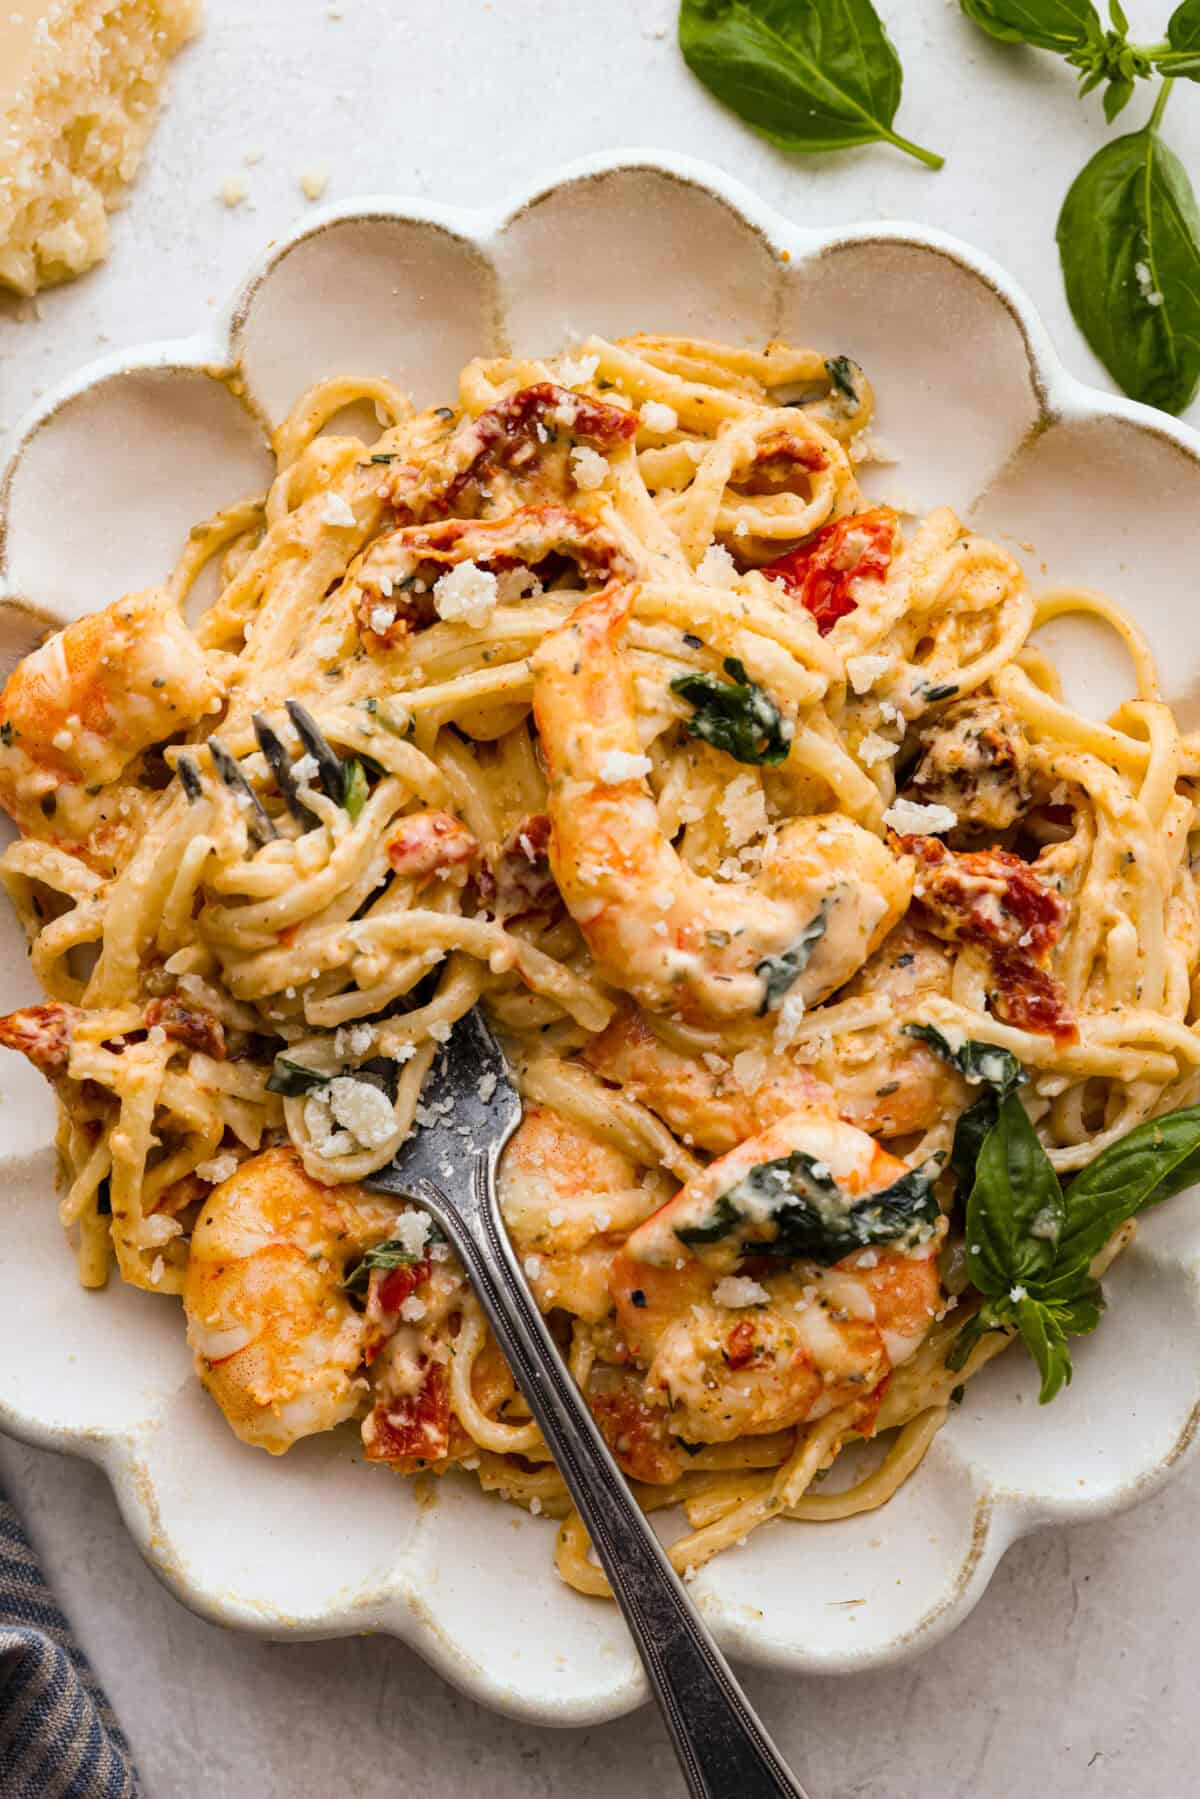
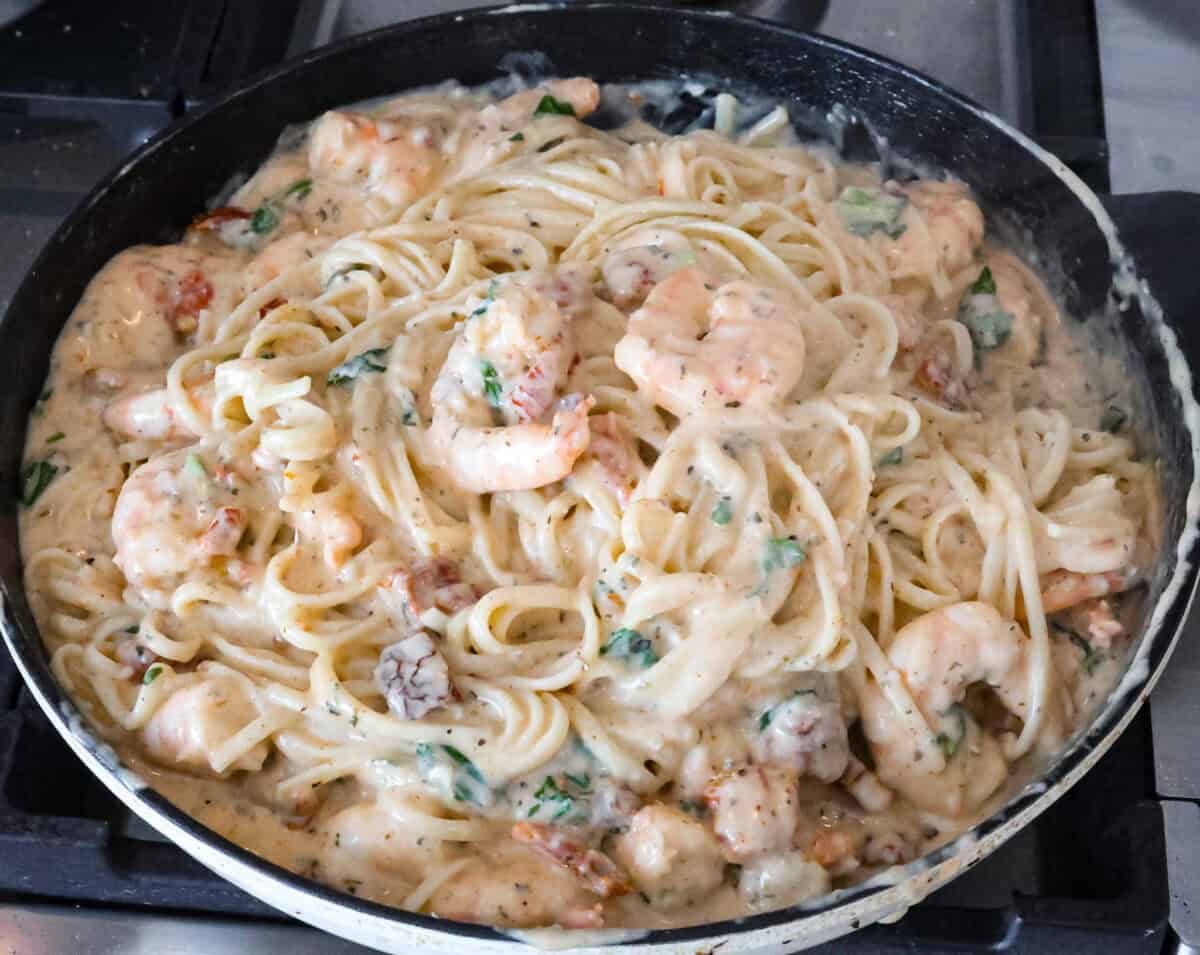
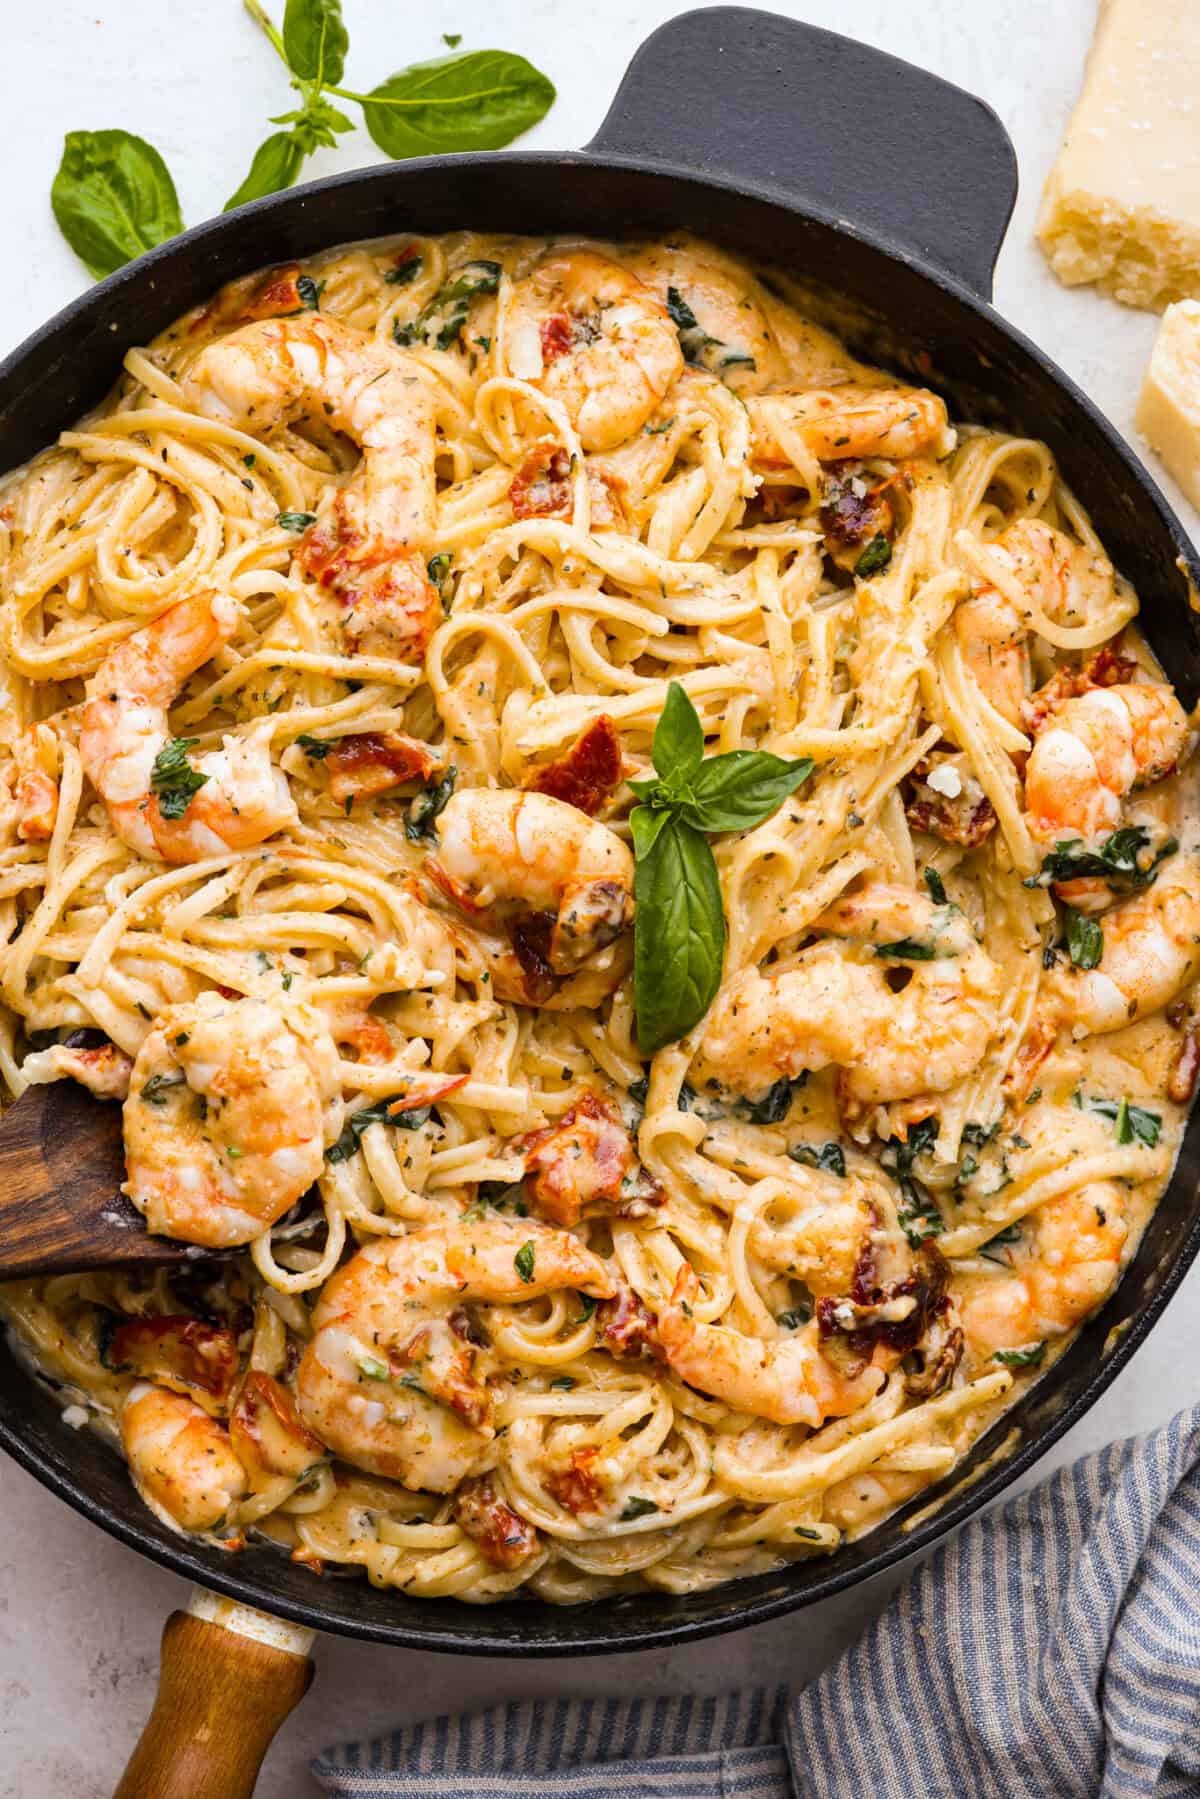
    Marry Me Shrimp Pasta dazzles with robust Italian flavors. It’s ready in just 30 minutes, and the creamy sauce, brimming with fresh herbs and spices, could very well lead to a marriage proposal after your first bite!

    This dish will knock anyone’s socks off. To complete the meal, you should start out with my easy bruschetta recipe as a delightful appetizer. Then serve the pasta with this copycat olive garden salad and the best homemade garlic bread. Dinner is served!

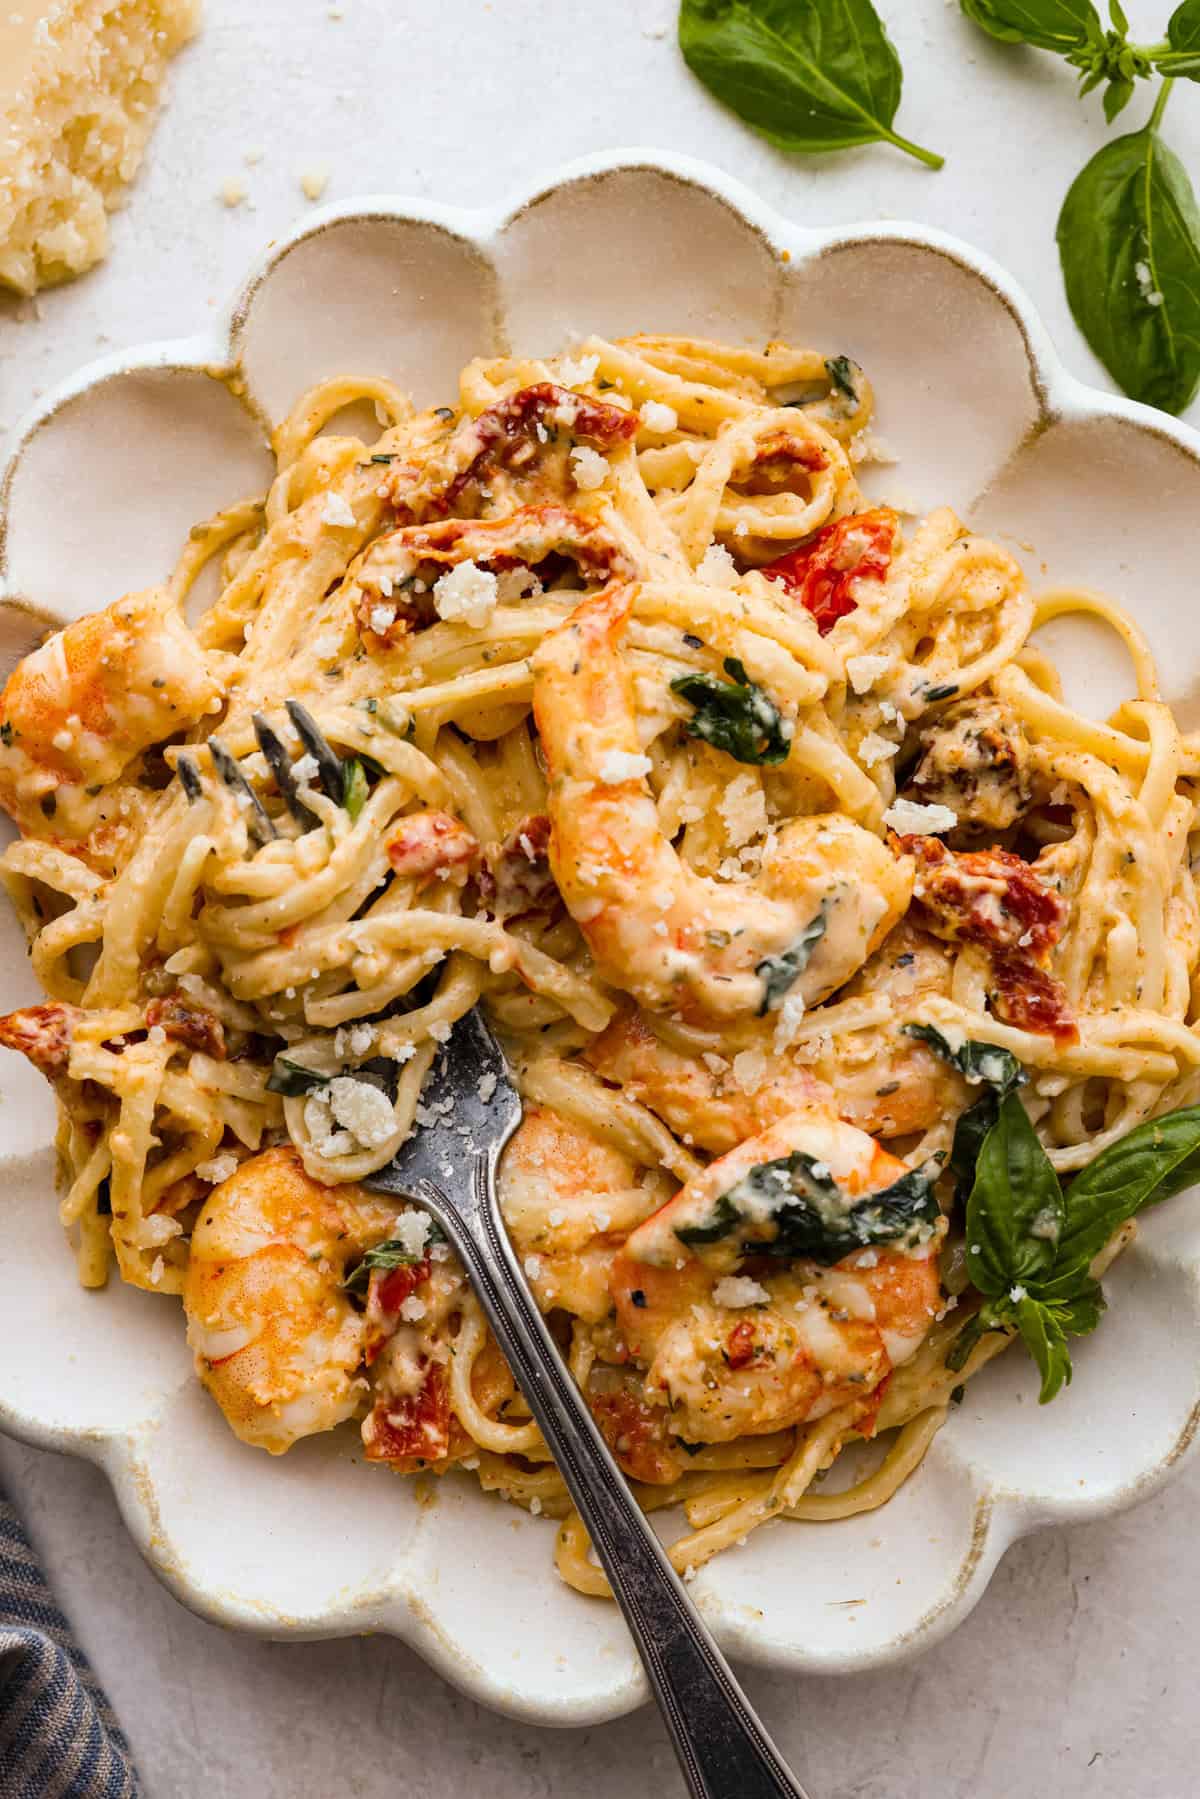
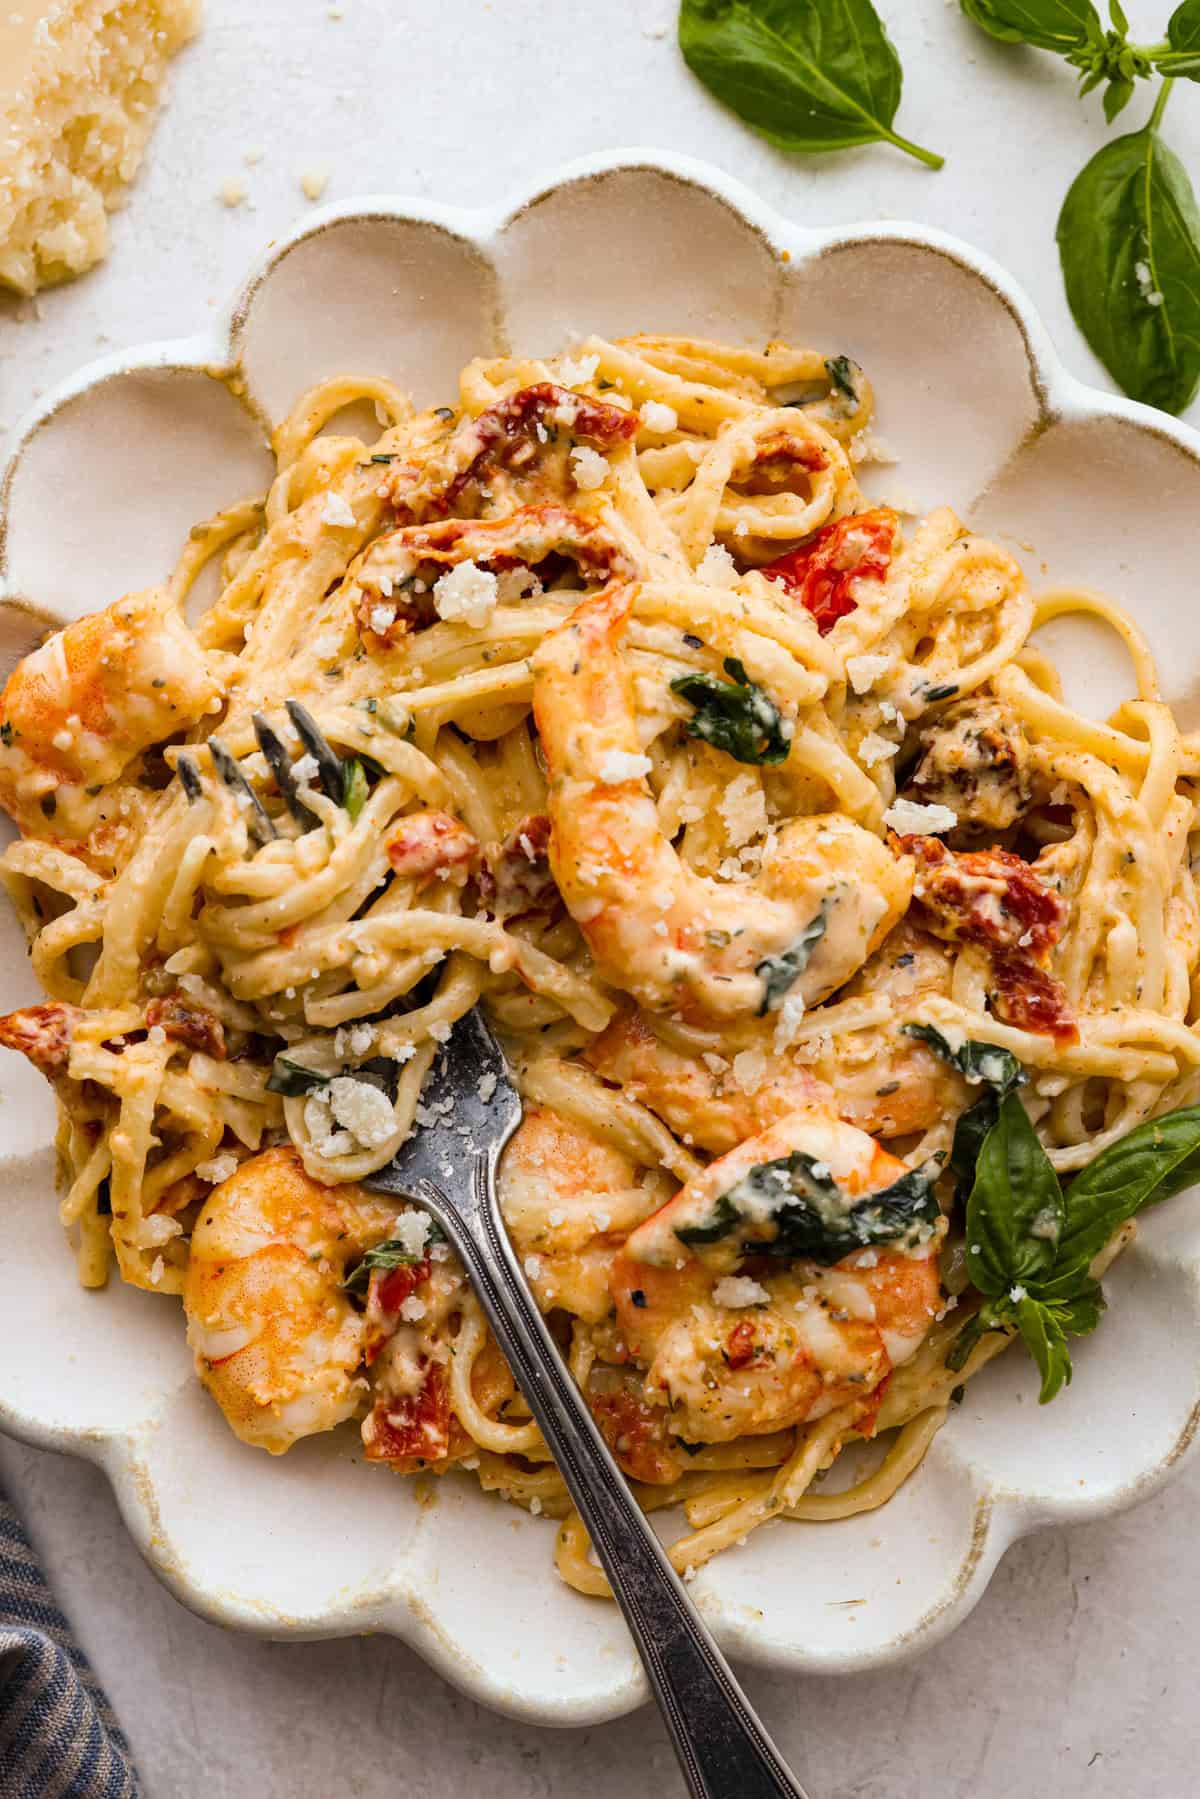
    Overhead shot of plated marry me shrimp with pasta. Overhead shot of plated marry me shrimp with pasta.

    Why You’ll Love This Recipe

    • Ease of Preparation: Even though this tastes like a gourmet meal, it comes together so quickly and easily.
    • Flavor: The flavor profiles of this dish are simply extraordinary! Not only that, but the combination of garlic, grated Parmesan cheese, fresh basil leaves, and rich sun-dried tomatoes will undoubtedly have your taste buds singing with delight!
    • Versatility: You can change up the ingredients to suit your tastes. For example, add some spice with red pepper flakes, or incorporate vegetables such as baby spinach, mushrooms, or peppers.
    • Crowd-pleaser: This recipe will become one of your family’s go-tos. It appeals to both young and old. If your kids don’t like shrimp, you can make this a chicken recipe.

    What is Marry Me Shrimp With Pasta?

    Marry Me Shrimp Pasta puts a delicious spin on the classic Marry Me Chicken recipe. Picture juicy shrimp and tender linguine coming together to transport you to a cozy evening on a Venetian restaurant patio.

    If you’re interested in more Marry Me recipes, I’ve got you covered. Check out my Marry Me salmon, Marry Me chicken pasta, and my Marry Me Chicken. Delicious Marry Me recipes, with their mouthwatering flavors and romantic charm, are perfect for creating memorable and impressive meals.

    Ingredients Needed to Make Marry Me Shrimp with Pasta

    There really aren’t that many ingredients in this pasta. Most items you probably already have in your fridge or pantry. I like to use fresh seafood when making this. Scroll down to the recipe card for exact measurements.

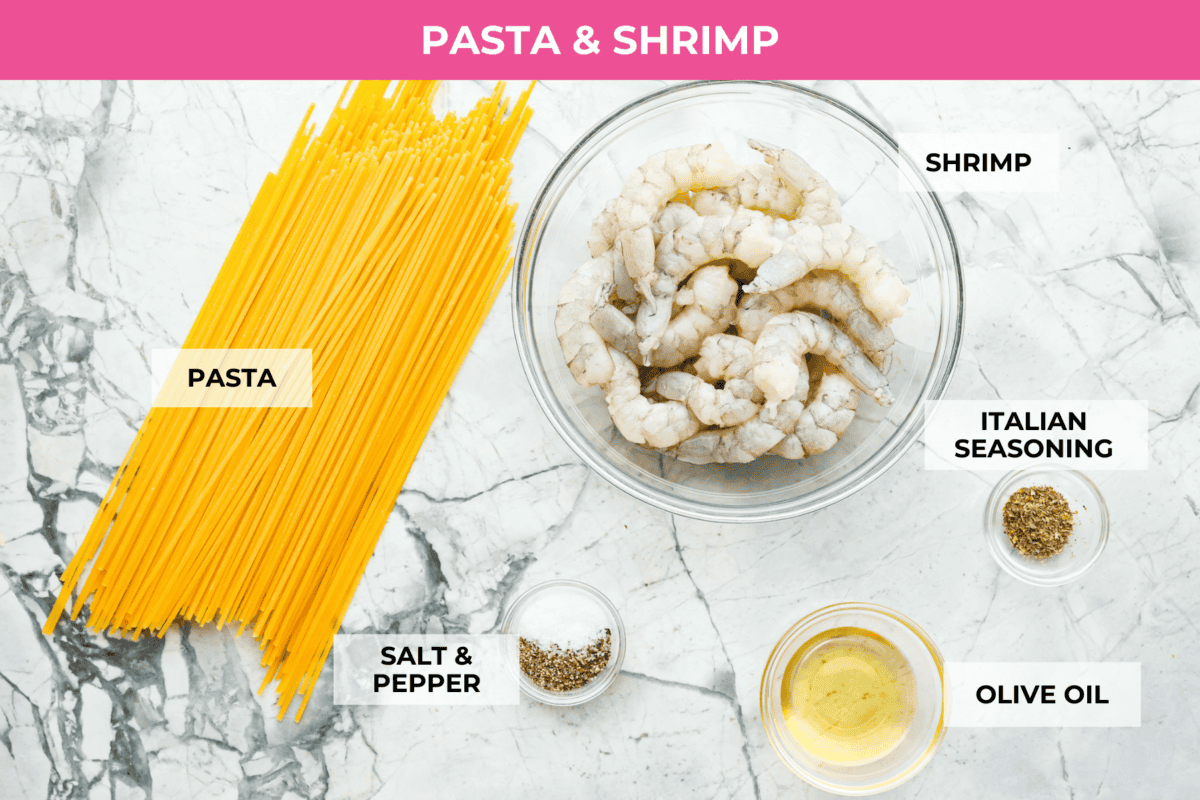
    • Linguine pasta: Provides a hearty base and a chewy texture that compliments the shrimp.
    • Peeled and deveined shrimp: Provides a sweet seafood flavor and is a great source of lean protein.
    • Italian seasoning: Adds depth to the Italian flavor and enhances the overall flavor.
    • Salt: Enhances each individual flavor in the dish.
    • Black Pepper: Gives a peppery bite and enhances flavor.
    • Olive oil: Helps create smoothness in the sauce.
    Overhead shot of labeled pasta and shrimp ingredients. Overhead shot of labeled pasta and shrimp ingredients.

    Sauce

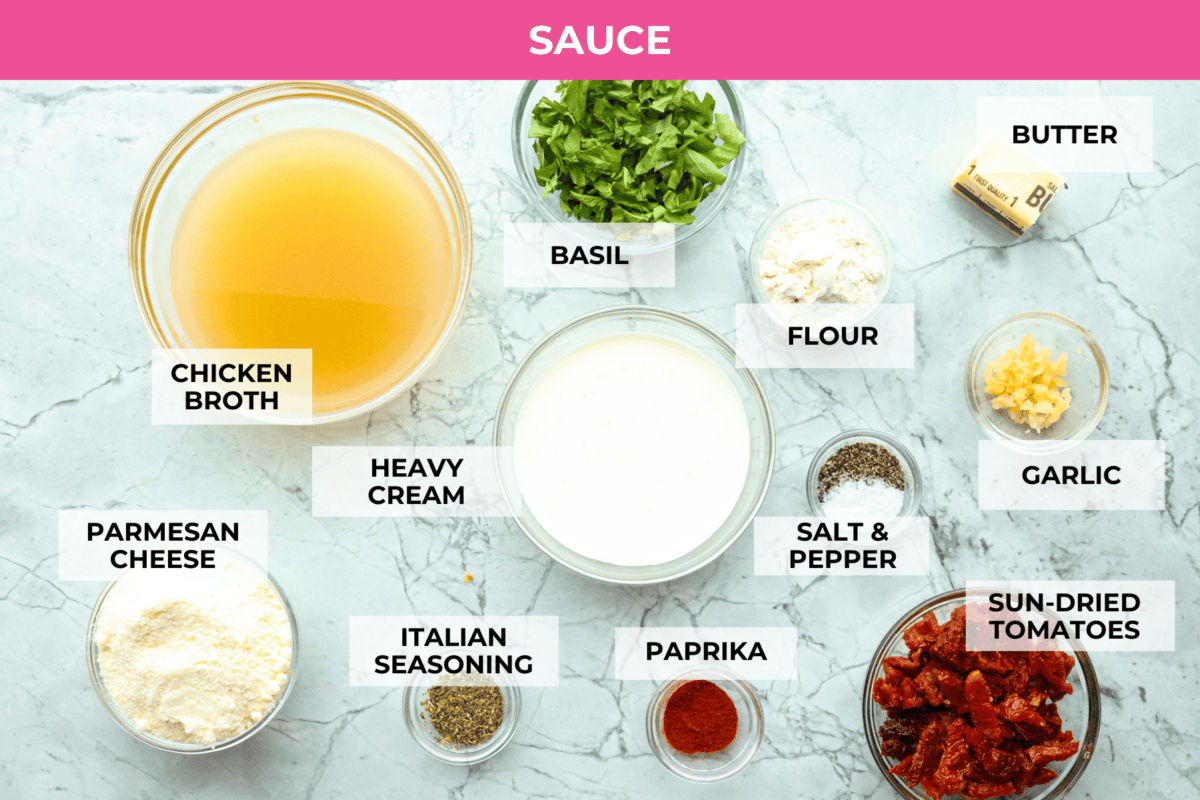
    • Butter: Provides a rich cream base for the sauce.
    • Minced garlic: Infuses the sauce with a robust flavor that compliments the shrimp.
    • Flour: Helps thicken the sauce to get the right consistency.
    • Chicken broth: Adds a depth of flavor and helps to smooth out the sauce.
    • Heavy Cream: Provides a luxuriously creamy texture and flavor.
    • Parmesan Cheese: Helps thicken the sauce and adds a savory, nutty warmth.
    • Drained and chopped sun-dried tomatoes: Add a tangy sweetness and beautiful color to the dish.
    • Fresh Basil: Provides a fresh herbal note and bright green color.
    • Paprika: Adds a slight smokey flavor and makes the sauce a more edible color.
    • Italian Seasoning: Provides a variety of herbs and spices that complement the other ingredients. You can use store-bought or make your own homemade Italian seasoning.
    • Salt & Pepper: To taste
    Overhead shot of labeled sauce ingredients. Overhead shot of labeled sauce ingredients.

    Marry Me Shrimp Pasta Recipe

    This Marry Me Shrimp with pasta recipe comes together quickly. First, cook the pasta, then simmer the ingredients in a pan, and before you know it, dinner is ready! Just remember not to overcook your shrimp. Follow the steps below to create this amazing dish.

    1. Pasta: Cook the linguine according to the package directions, then drain, and set aside.
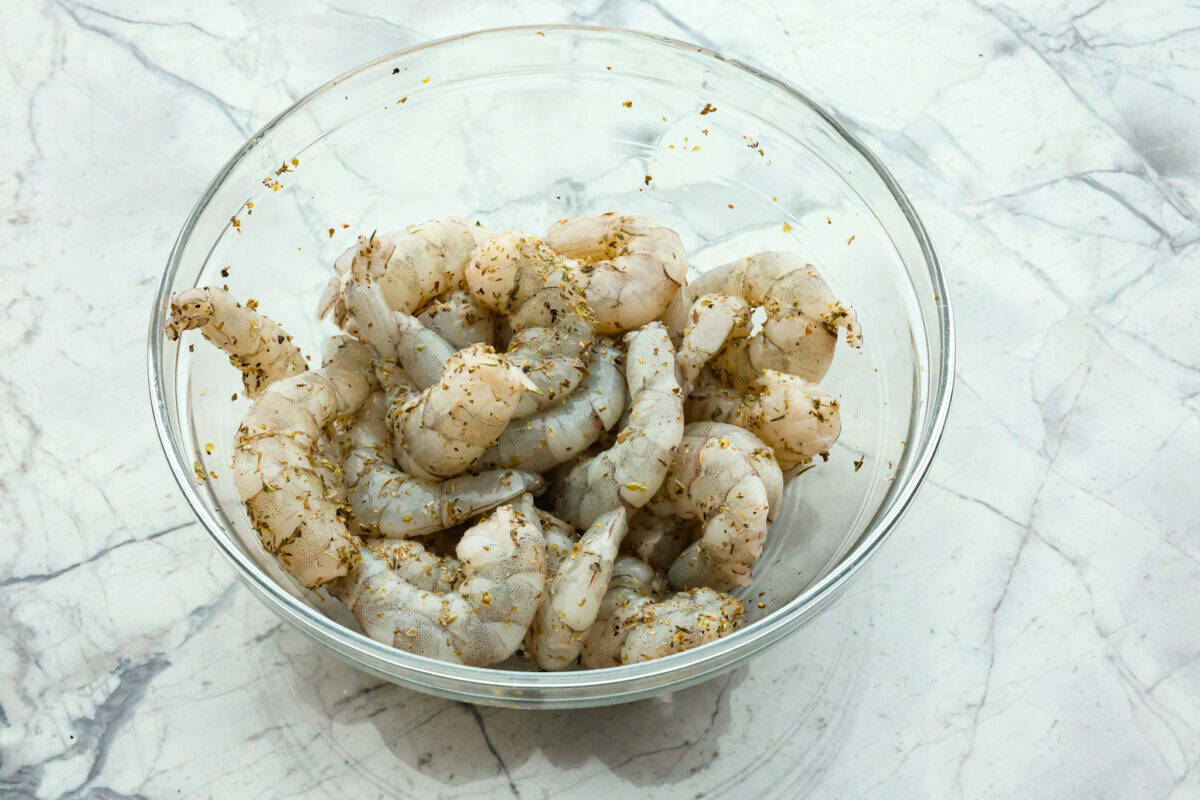
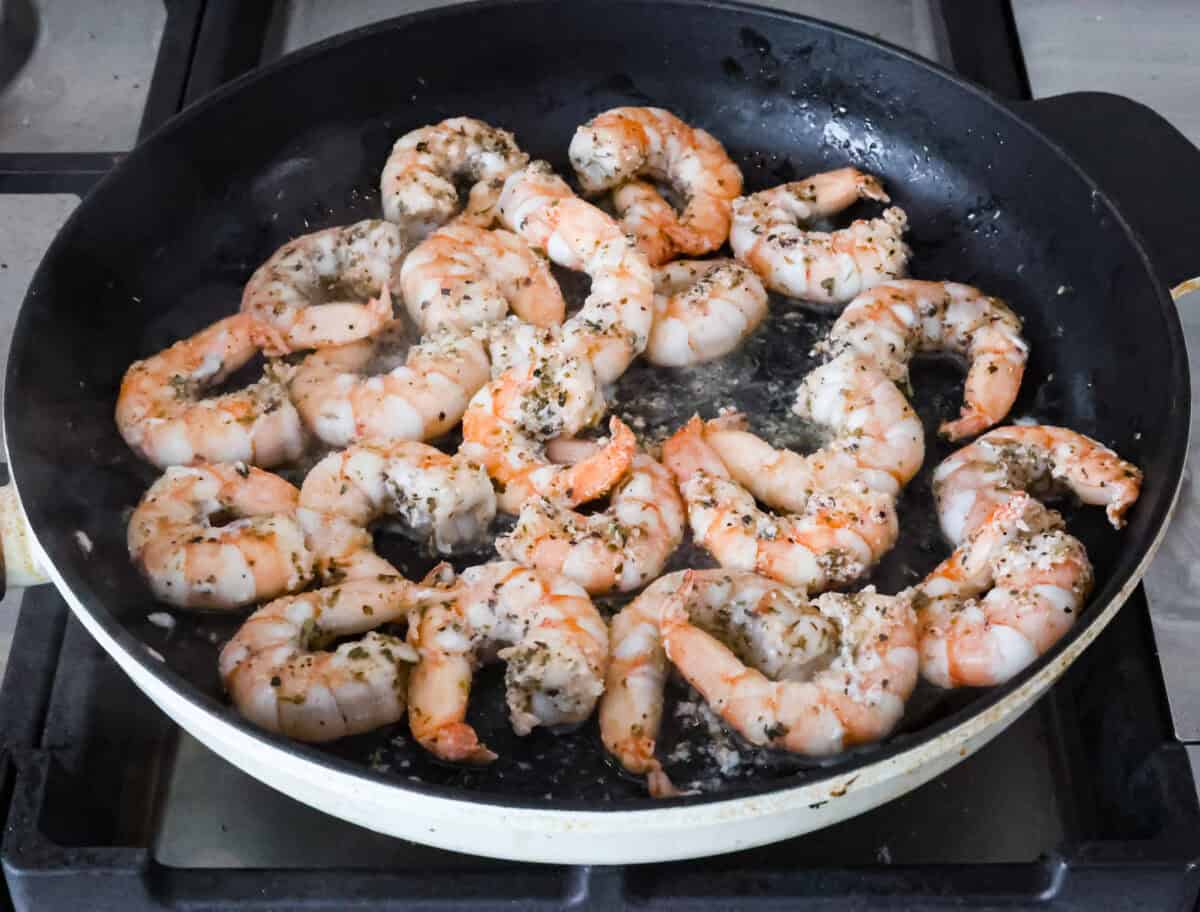
    2. Coat shrimp: Toss the shrimp in the Italian seasoning, salt, and pepper in a bowl. Then, heat the olive oil in a large skillet over medium-high heat.
    3. Cook shrimp: Add the shrimp to the pan and cook until it turns pink, about 6-8 minutes. Don’t overcook the shrimp, or it will be chewy. Remove the shrimp from the pan and set aside.

    Sauce

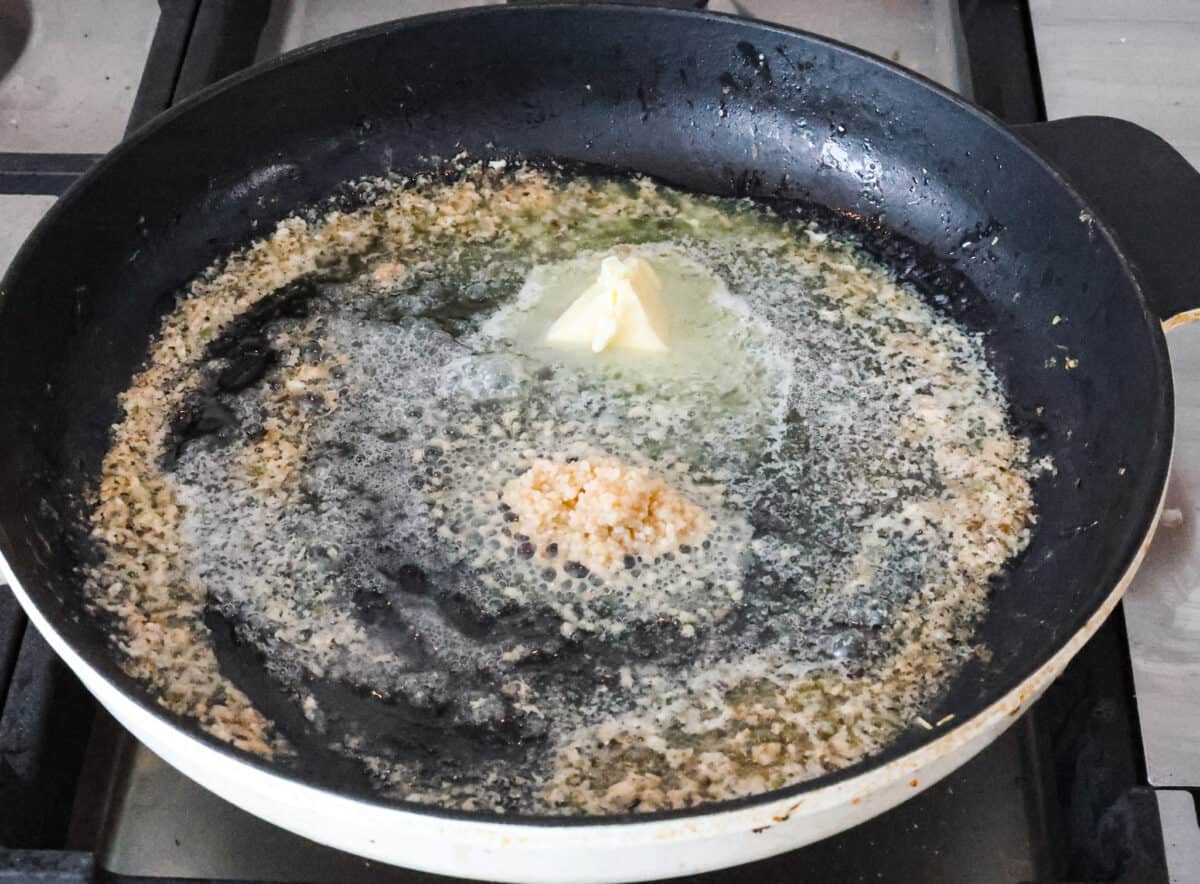
    1. Saute: Melt the butter in the same pan. Saute the garlic for 30 seconds, then whisk in the flour to make a paste.
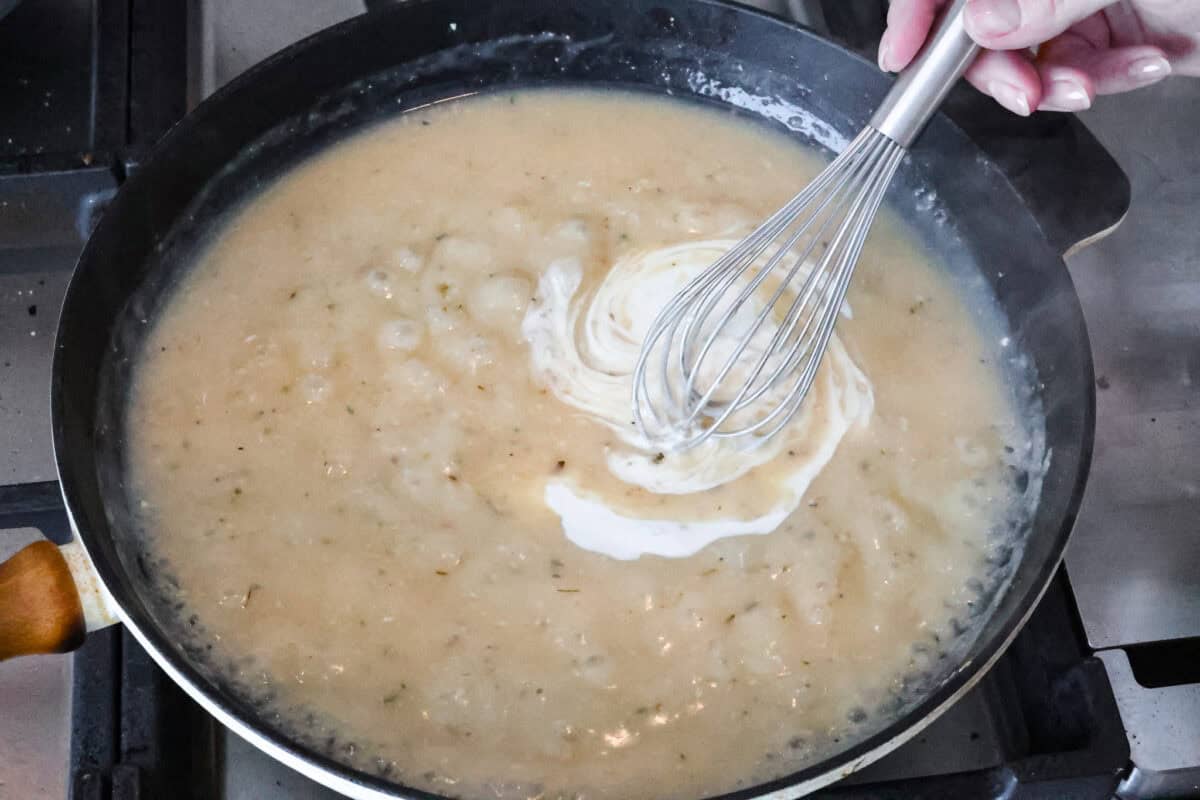
    2. Whisk: Slowly whisk in the chicken broth and heavy cream. Whisk together and heat until the sauce starts to thicken.
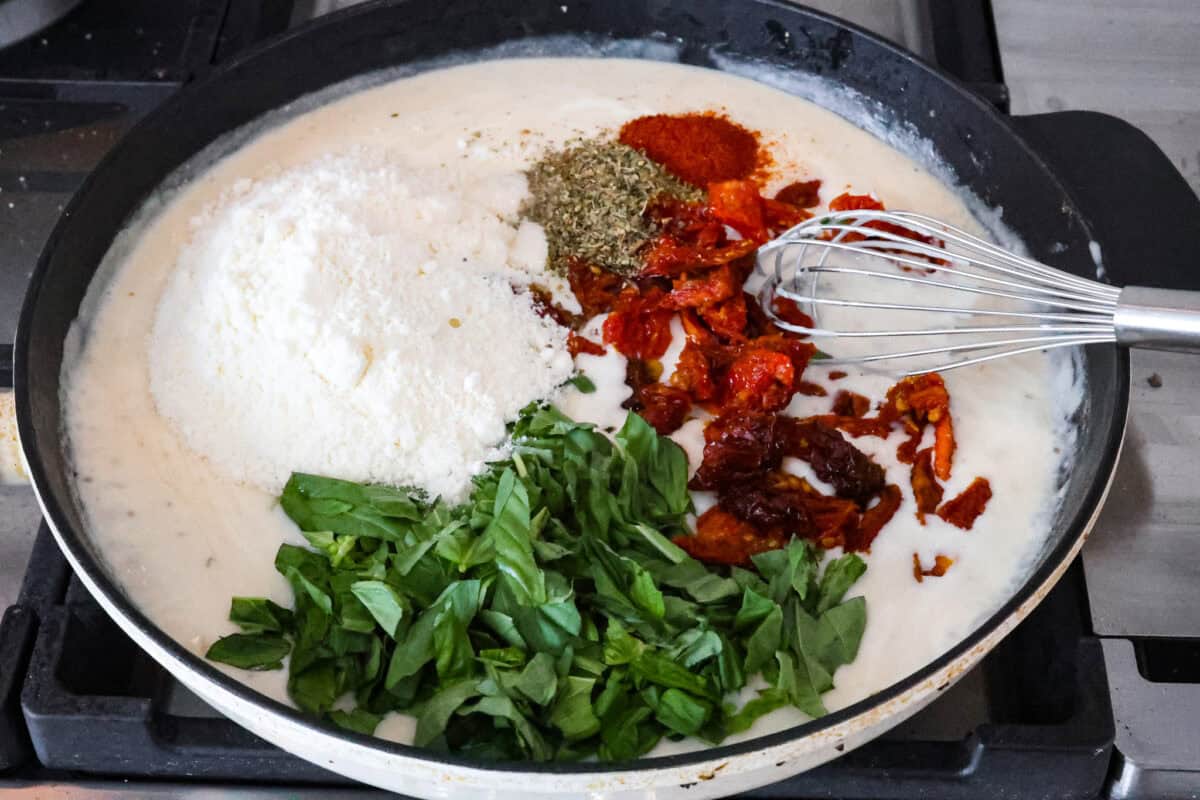
    3. Seasonings: Add the parmesan cheese, sun-dried tomatoes, basil, paprika, Italian seasoning, and salt and pepper. Whisk and heat through until you have a smooth, creamy sauce.
    4. Heat everything: Add the shrimp and pasta to the sauce and toss to coat. Saute everything together for another 3-4 minutes.
    5. Garnish: Top Marry Me shrimp pasta with additional basil, and enjoy fresh!

    Tips to Make Your Marry Me Shrimp Pasta Perfectly

    This Marry Me shrimp with pasta dish is hard to get wrong, but here are some tips and ideas to make it the best it can be!

    • DON’T overcook shrimp: Cook the shrimp until the shrimp just turns pink, not much longer than that; it will finish cooking later in the sauce
    • Pasta trick: I like to toss my cooked pasta in a little olive oil to keep it from sticking together while it waits for the rest of the recipe to come together.
    • Fresh shrimp is superior: I like to use fresh shrimp from the deli if it’s available, but frozen shrimp works just as well. Make sure to thaw it completely before using it.

    Overhead close up shot of garnished marry me shrimp with pasta dish. Overhead close up shot of garnished marry me shrimp with pasta dish.

    Storing Leftover Marry Me Shrimp Pasta

    Luckily you can store any leftovers. Follow the instructions below to store and reheat pasta below.

    • Cool: Make sure the dish has cooled completely before putting it in an airtight container.
    • Refrigerate: Put the container in the fridge; it will last up to 3 days.
    • Reheat: To reheat Marry Me Shrimp Pasta, transfer it to a microwave-safe dish or saucepan. Add a splash of water, broth, or cream to maintain its creamy texture. Microwave covered for 30-second increments, stirring in between, or reheat gently on the stovetop over low heat, stirring occasionally.
    • DO NOT freeze: We do not recommend freezing this dish. It will affect the texture of the shrimp and the creaminess of the sauce.

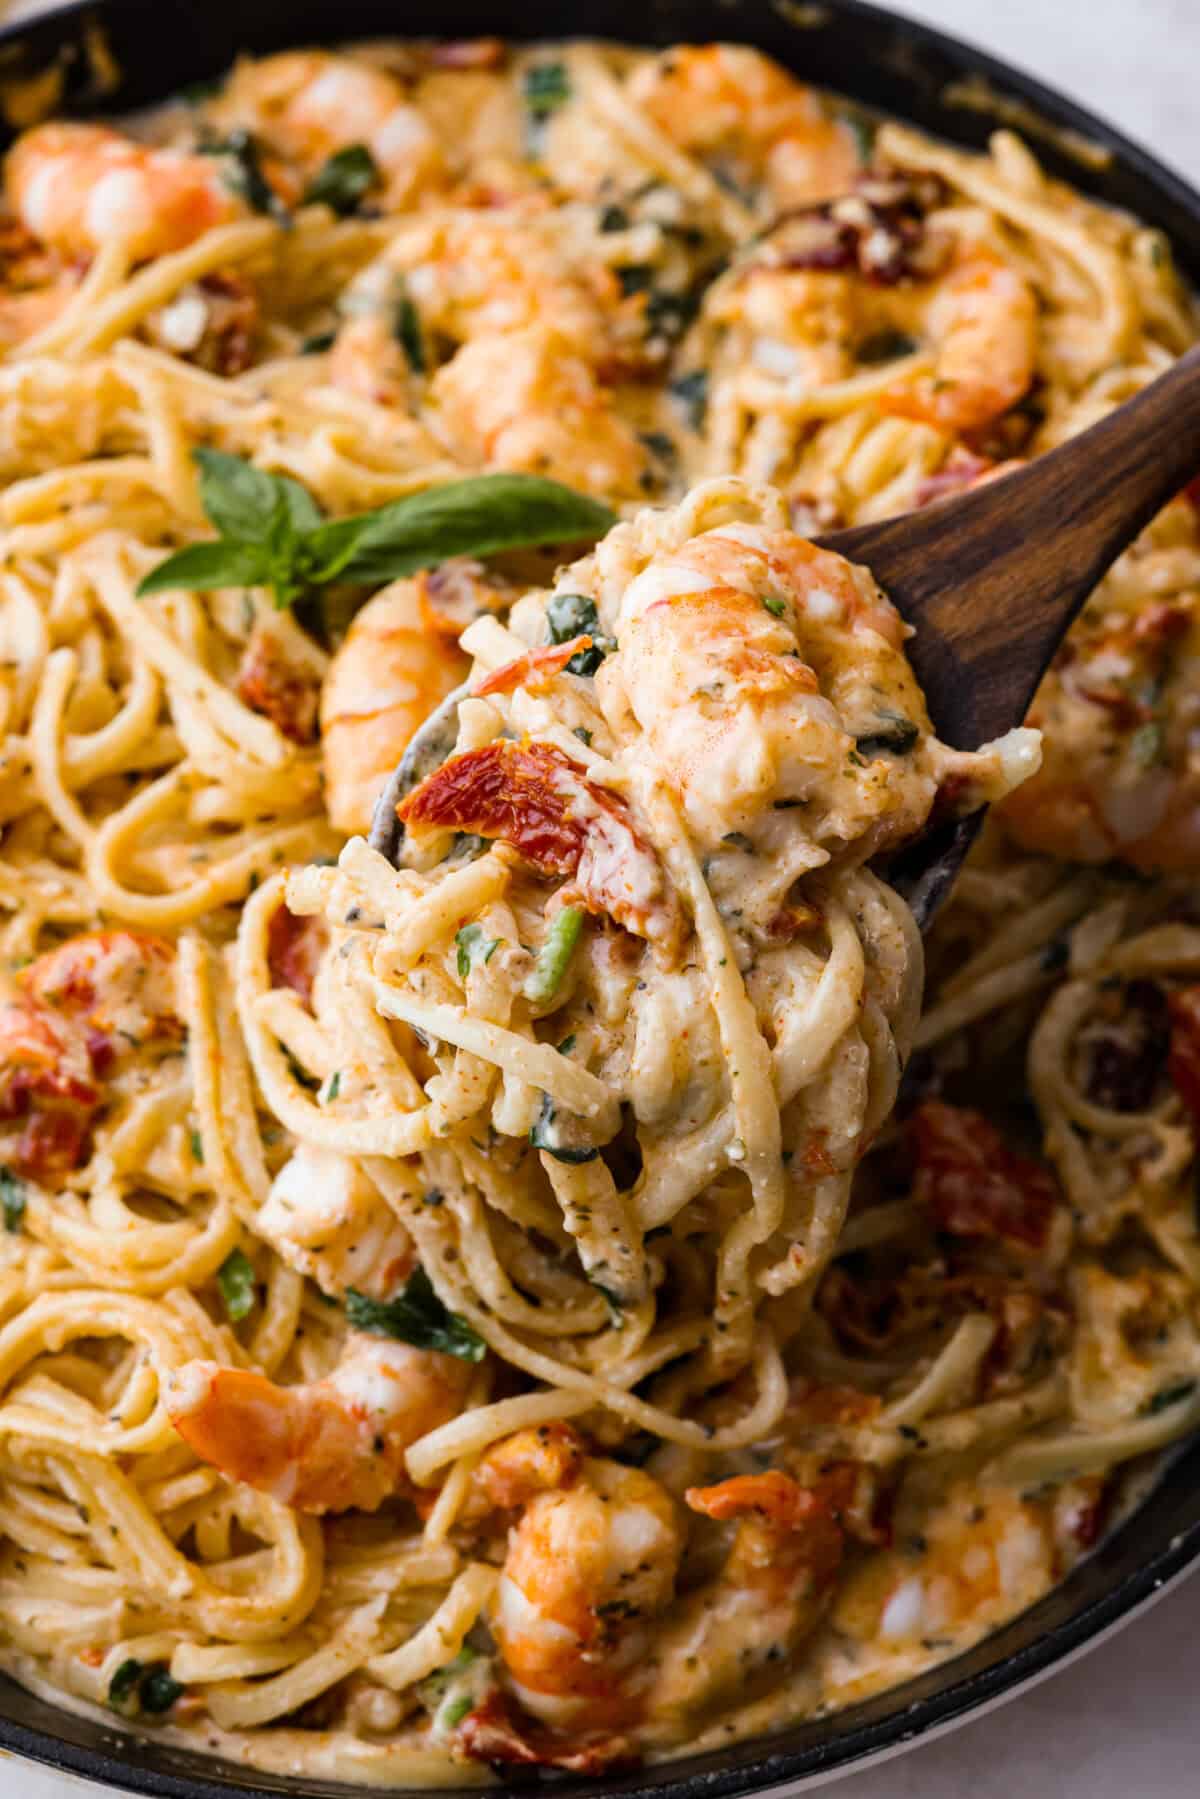
    Angle shot of close up pasta with scoop being taken out of it.Angle shot of close up pasta with scoop being taken out of it.

    More Scrumptious Shrimp Recipes

    I love shrimp! Not only is it good both cold and hot, but it is also a great source of lean protein. If you’re looking for more recipes with shrimp, try my creamy lemon garlic seafood pasta and the recipes below!

    Pin this now to find it later

    Pin It


    Source link

  • House Favorite Roasted Brussels Sprouts Recipe

    House Favorite Roasted Brussels Sprouts Recipe

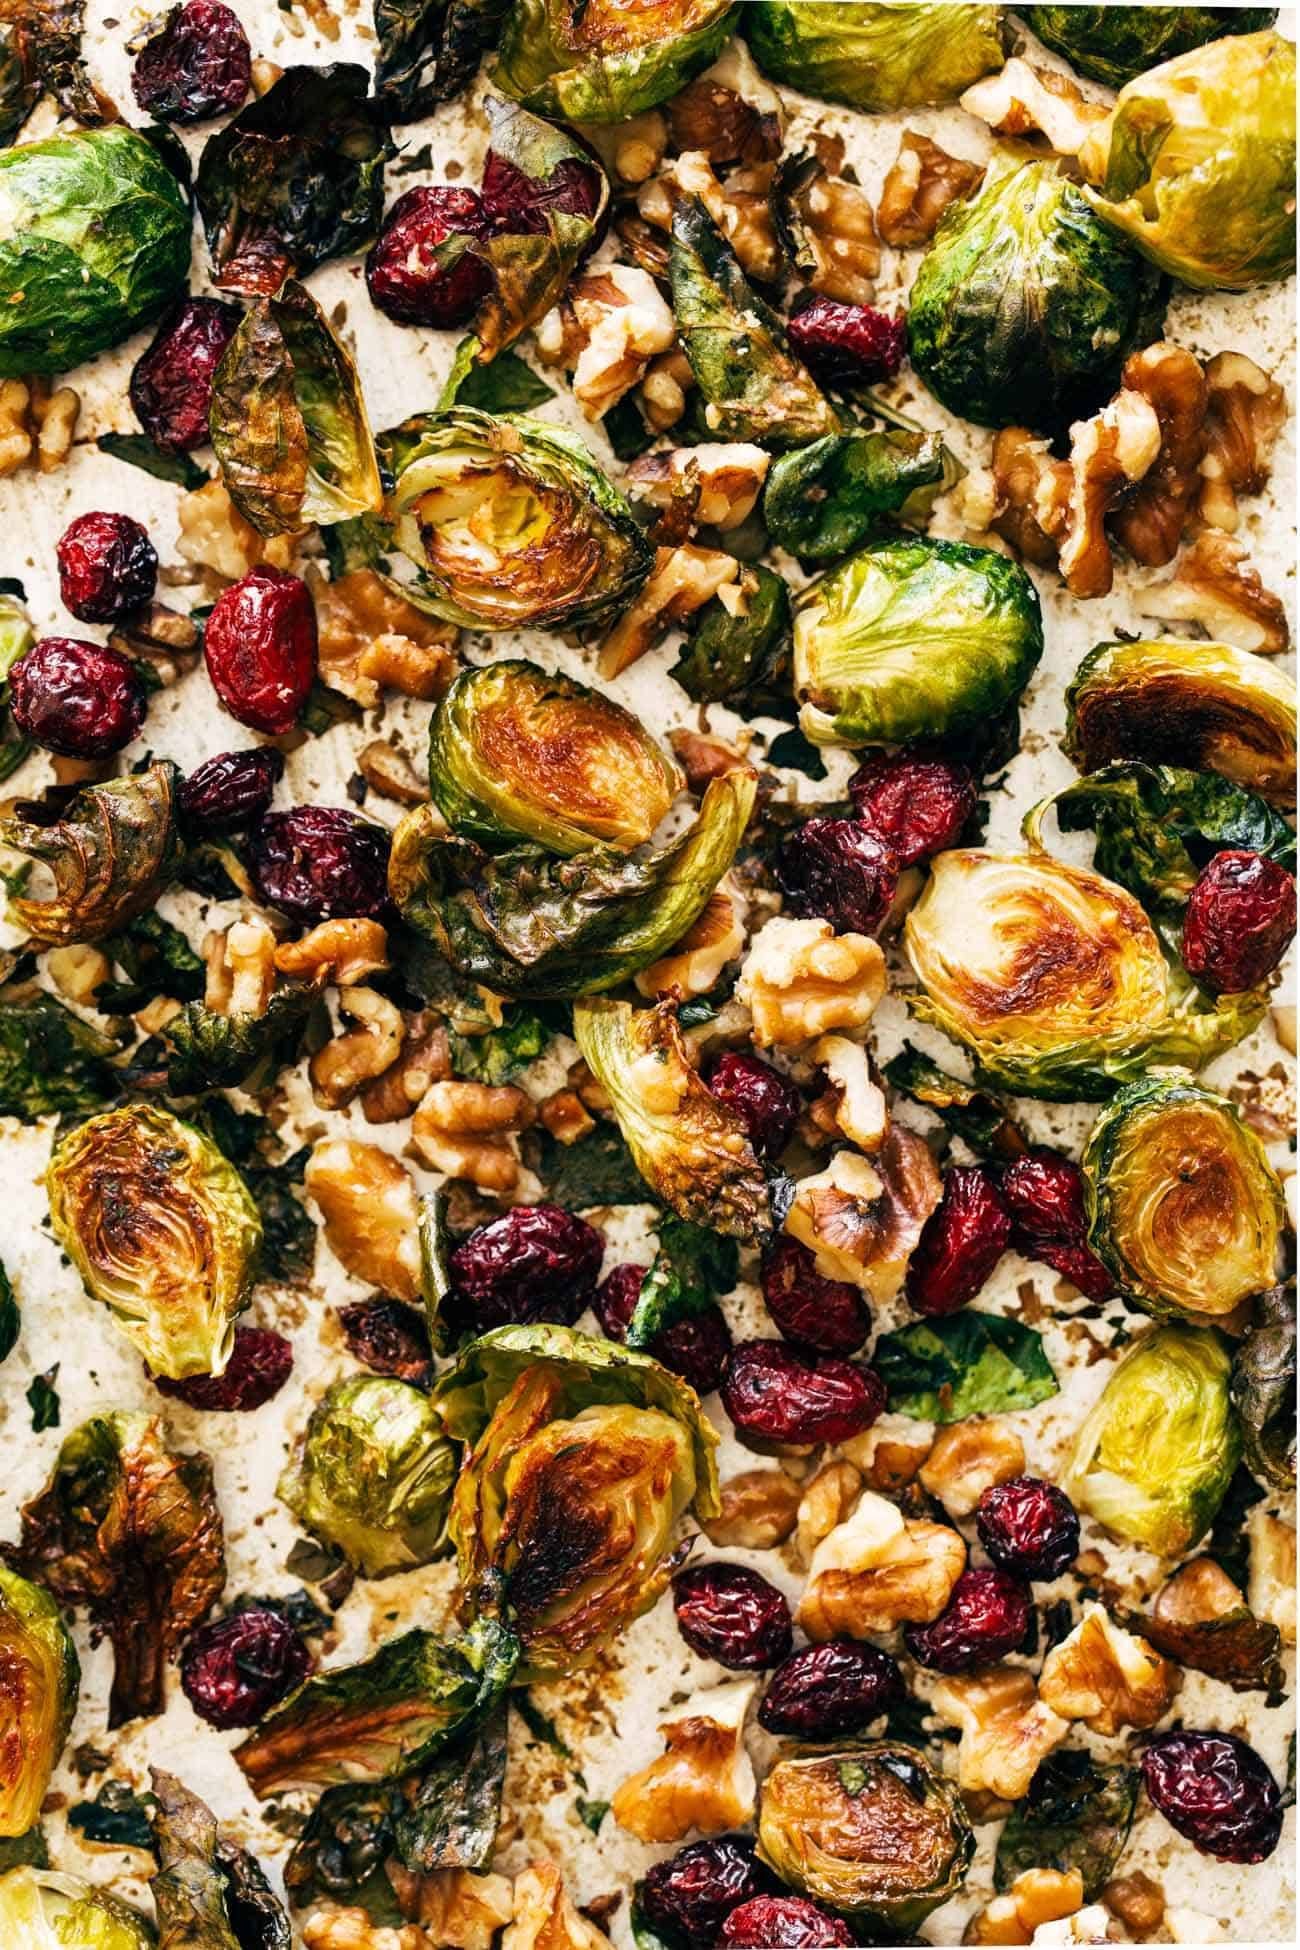
    These House Favorite Brussels Sprouts are the best side veg and are speckled with bright bursts of cranberries and nutty walnuts. The perfect addition to any meal!

    Let’s talk about these roasty, sweet, nutty brussels sprouts that combine those tender-crisp, whole-brussel bites with the ultra thin and crispy leaves, all coated with a lil’ mustard-maple drench and speckled with juicy bites of dried cranberry. Oh my gosh. WHY ARE THEY SO GOOD.

    To be honest, I have very few “house favorites” in our house because I always change it up. Always trying new recipes, always moving on to the next thing. We hardly stay on any one recipe for more than just a few repeats because new! exciting! rah rah rah. But this recipe has been made WEEKLY for… um, the last five months? It has solidly earned its House Favorite status. We make these brussels sprouts all. the. time. We’ve even added a spicy variation to our repertoire and I cannot be stopped.

    Dad loves them, toddler loves them, Mom loves them AND loves that everyone loves them. Also: guests love them, although usually if it’s more than just us, we’re going to need to double the recipe because, yes, in our house, we will for sure finish one pan between the three of us.


    In This Post: Everything You Need For These Brussels Sprouts


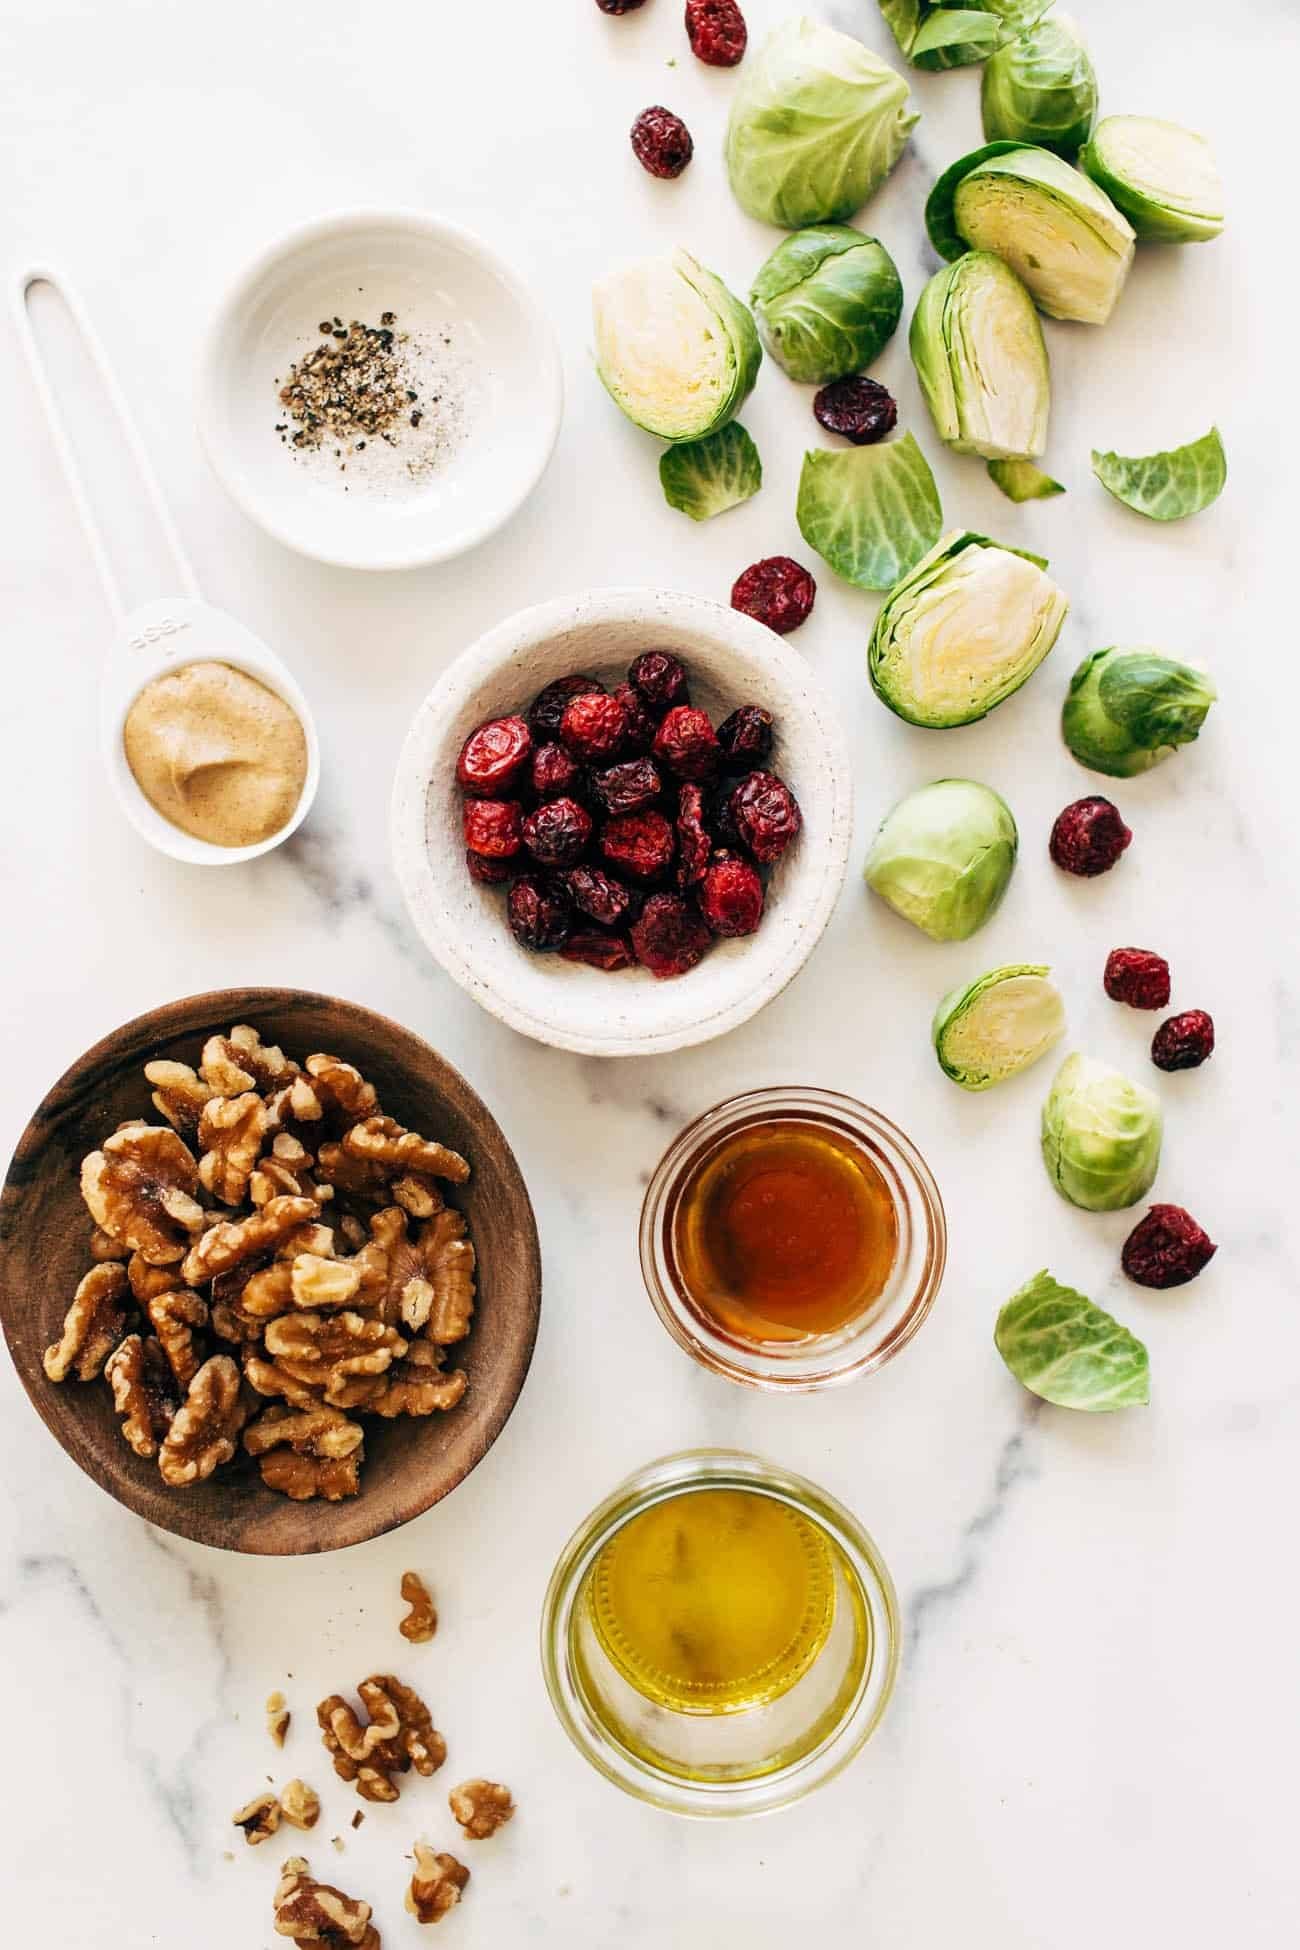
    Ingredients For These Roasted Brussels Sprouts

    This is an SOS series recipe – as in, an excellent back pocket choice for when you just need to get something on the table quickly – so here’s our super short and sweet ingredient list:

    • brussels sprouts
    • walnuts
    • dried cranberries
    • maple syrup
    • Dijon mustard

    And, of course, your standards: olive oil, salt, and pepper.

    Prefer To Watch Instead Of Read?

    Ingredients for House Favorite Brussels Sprouts

    How To Make Brussels Sprouts That Actually Taste Good

    Here we go!

    1. Prep your brussels sprouts. Cut off the base of the brussel sprout, remove the outer leaves, and cut it in half vertically. Turn on some music or a good show and go to town.
    2. Then, the brussels get tossed in olive oil and roast in the oven, cut side down, until they are nice and crispy.
    3. The walnuts get added for the last minute for a little toasting.
    4. The cranberries join the cool-down party.
    5. And finally, the sauce gets added directly to the pan. And by sauce, I mean an eyeballed little squirt of Dijon mustard and a solid drizzle of maple syrup (if you like things tangy, maybe a little balsamic vinegar too?). Get a little more olive oil, salt, and pepper up in there, maybe some red pepper flakes if you like things spicy, and ohhhkay yes.

    That was easy. We are in business.

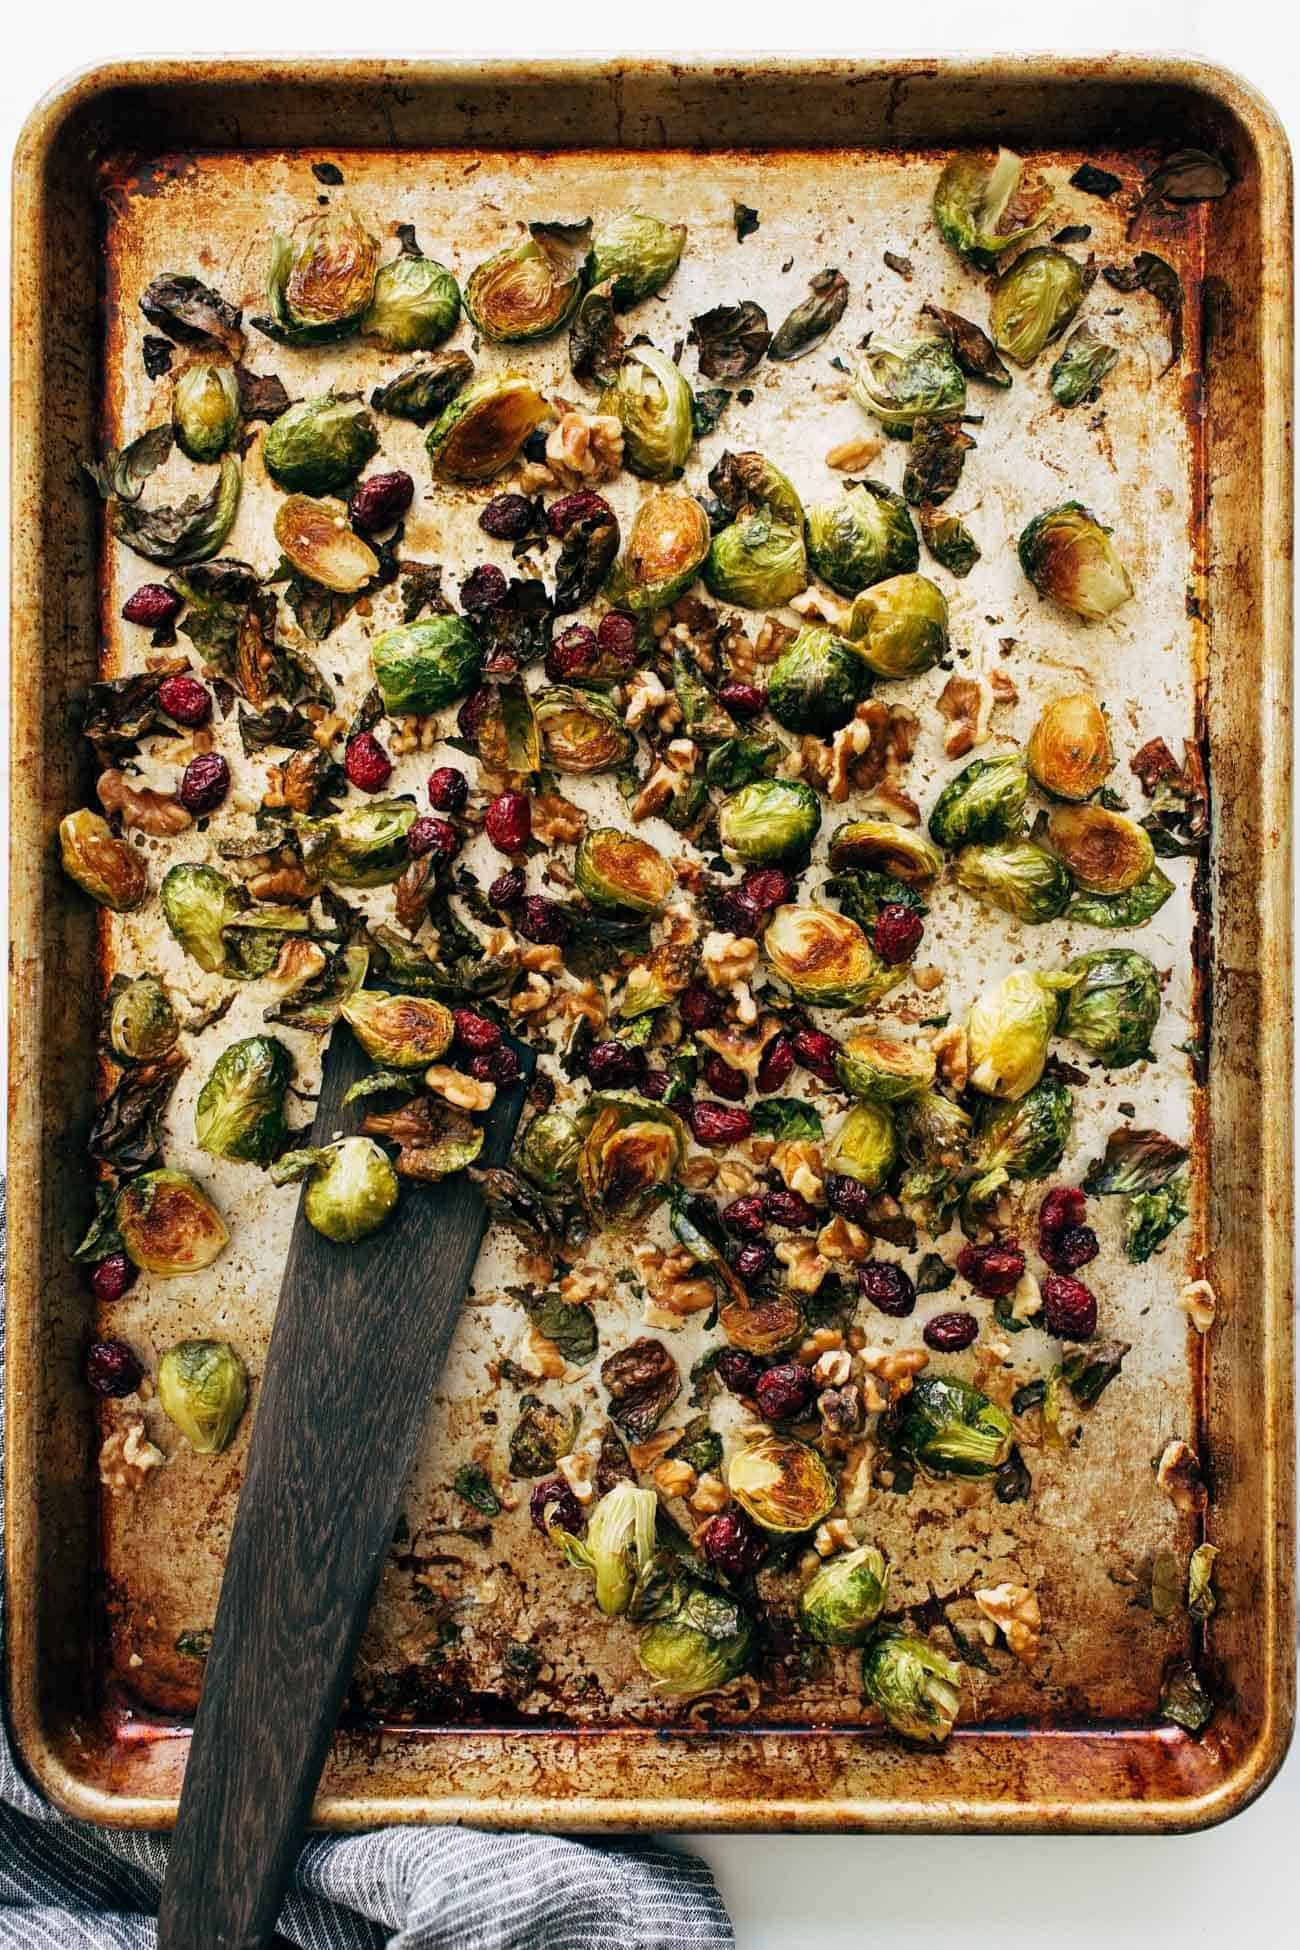
    Roasted Brussels sprouts on a pan with a spatula

    What To Serve with Brussels Sprouts

    The brussels in and of themselves aren’t a meal (although, with the cranberries and walnuts in there…maybe they are?), but here are some ideas for what to serve them with – SOS STYLE.

    The flavors of this recipe can go so many directions with whatever it is you’re eating. And I’m sure you can think of 100 or more fancier ideas to round out the table if you’re going for a more impressive-dinner-party situation, so don’t let me hold you back.

    But for basic nights at home, when you want to really, truly, actually look forward to eating your vegetables, these basic, versatile, saucy, crispy sprouts are where it’s at.

    I’m telling you – HOUSE FAVORITE.

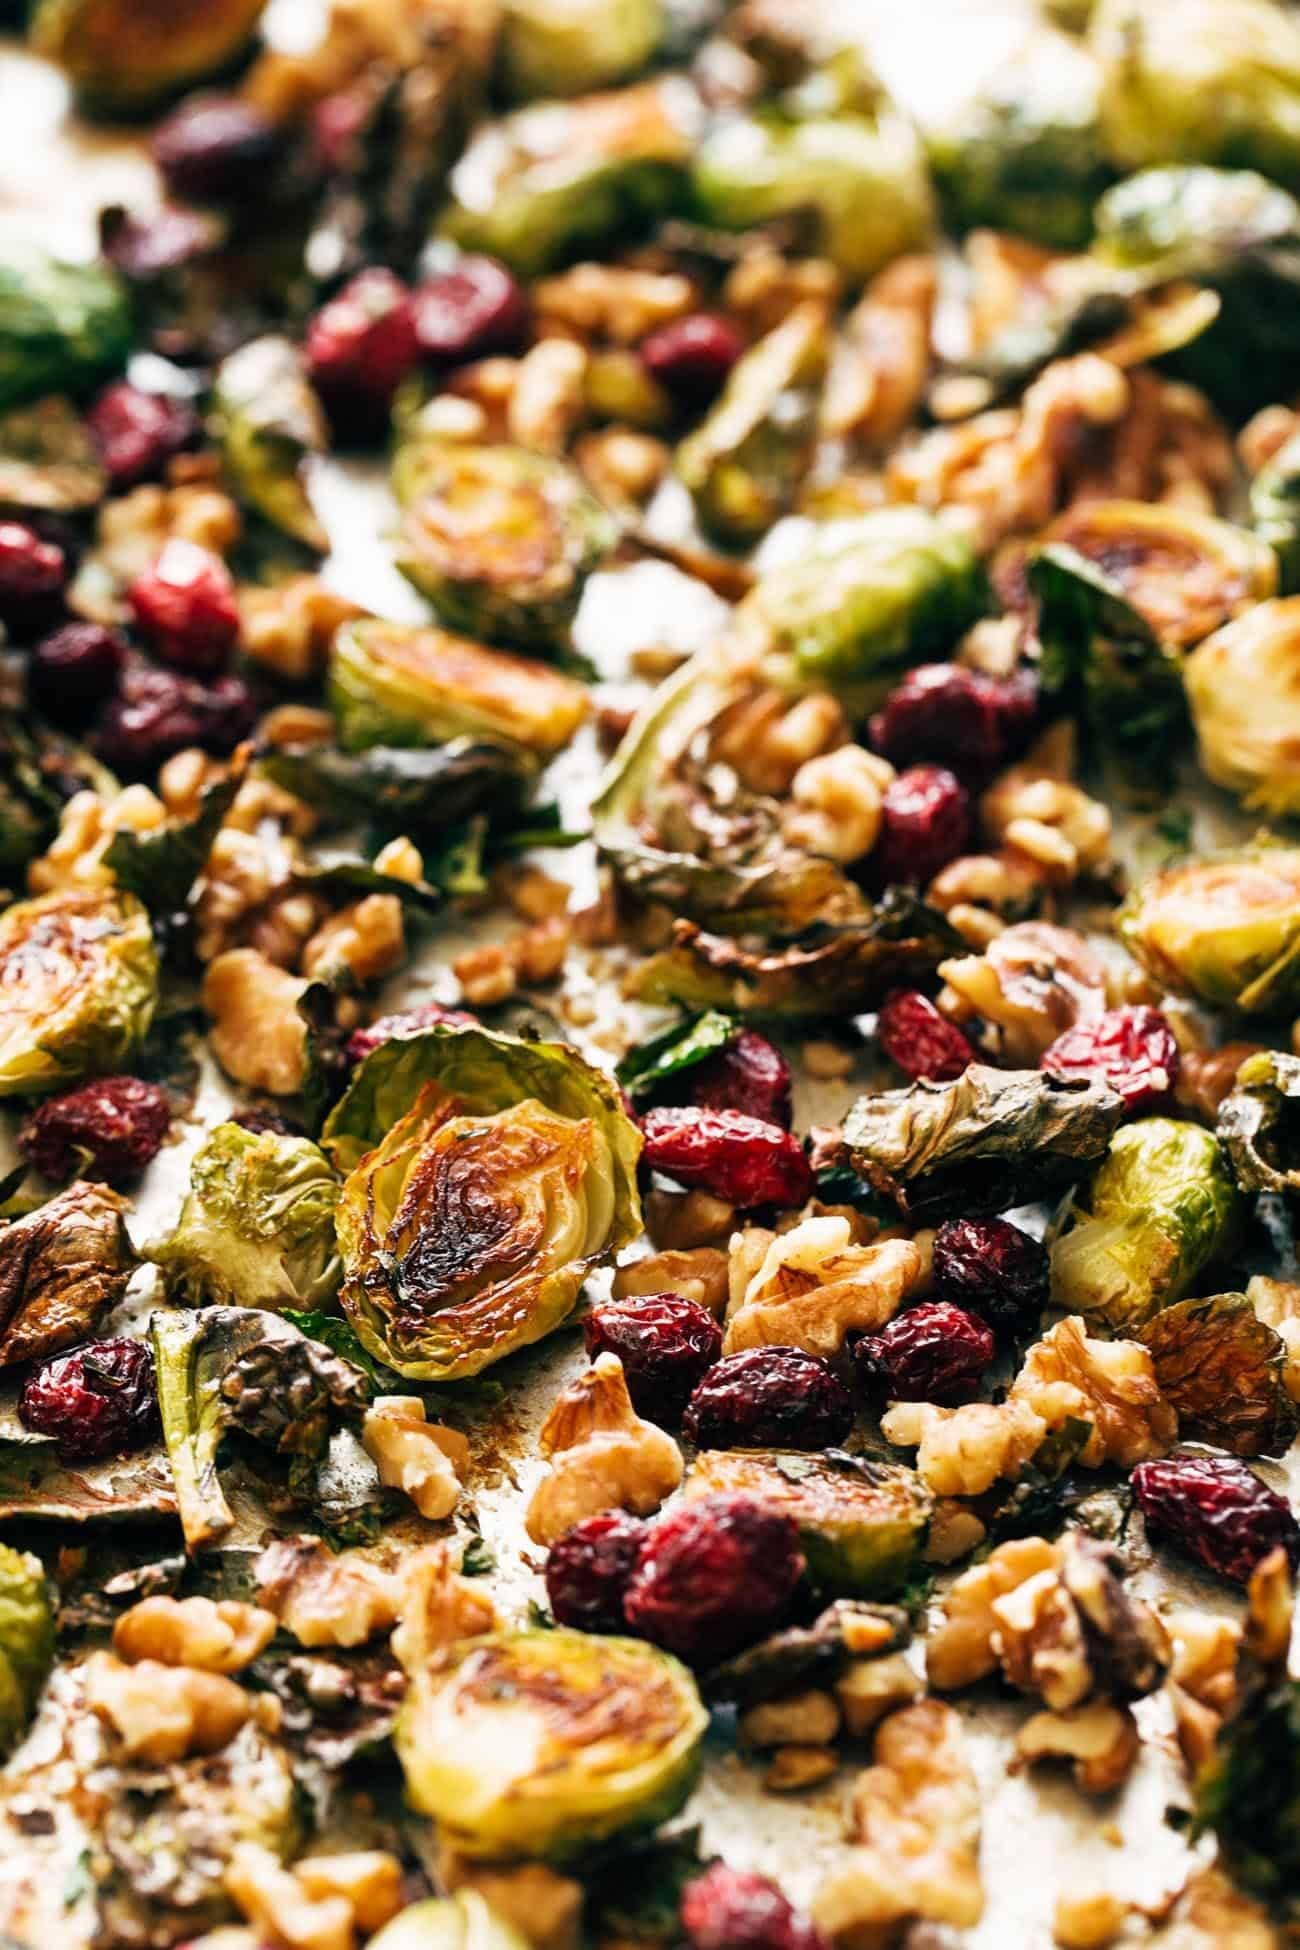
    Close-up of roasted Brussels sprouts on a pan with walnuts and cranberries.

    House Favorite Brussels Sprouts: Frequently Asked Questions

    I’m allergic to nuts. What can I substitute?

    You could leave the nuts out completely or, if you can have seeds, you could add pumpkin seeds here. Once you add the pumpkin seeds, just keep a close eye on things so they don’t burn.

    How could I prep brussels sprouts in advance?

    Brussels sprouts are really best fresh and crispy out of the oven, so for prepping ahead of time, I would recommend just cutting the brussels sprouts so they’re ready to get roasted, and whisk the mustard and maple syrup together so that’s ready to go too!

    Can I add meat to these brussels sprouts?

    Sure! Some diced pancetta or bacon would be great! You could also cook up some salmon to go with this very nicely.

    Are there any herbs I could add to this?

    Absolutely! Thyme and/or rosemary would be lovely additions to this.

    Can I add cheese to this?

    That sounds delicious! Yes. Crumbled goat cheese or feta cheese would be delicious.


    Print

    clock clock iconcutlery cutlery iconflag flag iconfolder folder iconinstagram instagram iconpinterest pinterest iconfacebook facebook iconprint print iconsquares squares iconheart heart iconheart solid heart solid icon

    Description

    These House Favorite Brussels Sprouts are the best side veg and are speckled with bright bursts of cranberries and nutty walnuts. The perfect addition to any meal! 


    1. Preheat the oven to 425 degrees. Place brussels sprouts cut-side down directly on a baking sheet. Drizzle with oil and sprinkle with salt and pepper.

    2. Roast brussels sprouts for 15-20 minutes, until cut sides are very brown and some of the leaves are crispy. Add walnuts, mustard, and maple; return to oven for 5-10 minutes to get the walnuts toasted. (You can choose to either add the sauce now, or when the pan comes out of the oven in step 3. If you add it now, it gets kind of baked into the brussels, but if you add it when they’re done baking, it’ll be a little more saucy. I like it both ways. Your choice!)
    3. Remove from oven. Toss with cranberries directly on the baking sheet. Season and serve immediately. Yumo!

    • Prep Time: 5 minutes
    • Cook Time: 20 minutes
    • Category: Side Dish
    • Method: Roast
    • Cuisine: American

    Keywords: brussels sprouts, walnuts, cranberries

    More Delicious Brussels Sprouts Recipes

    Source link

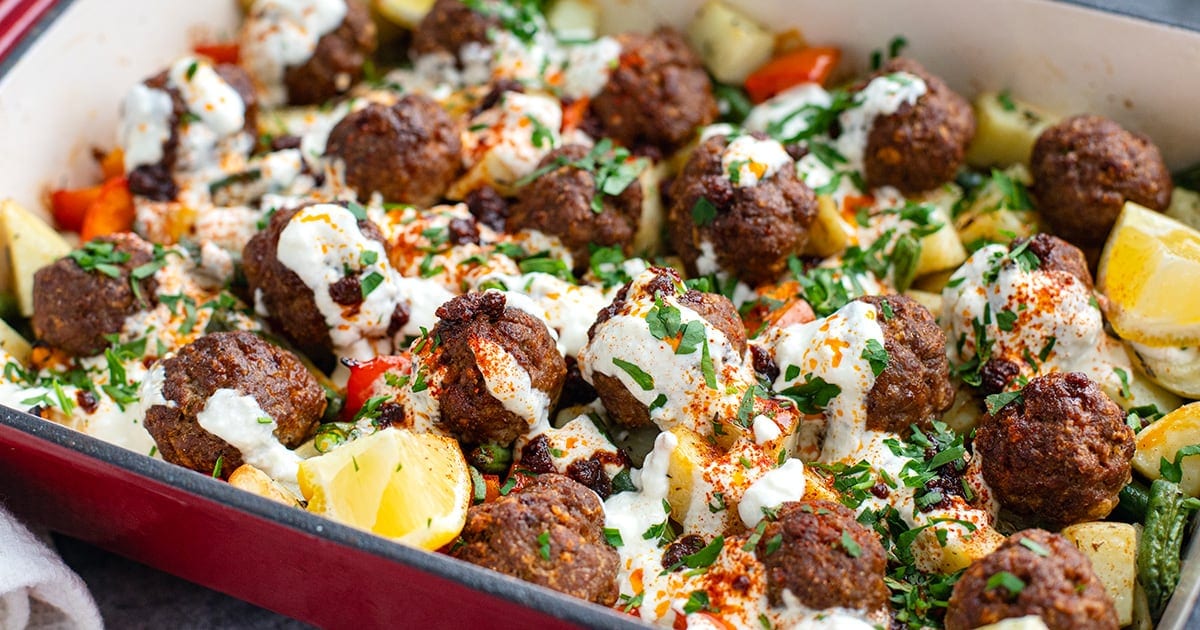
  • Turkish Baked Meatballs & Potatoes With Garlic Yogurt

    Turkish Baked Meatballs & Potatoes With Garlic Yogurt

    Spiced baked meatballs with potatoes, finished with garlic yogurt and paprika butter sauce. This one-pan meal is inspired by a viral Turkish pasta recipe, and is hearty, high in protein, and packed with flavor.


    Jump to: ℹ️ Overview | 🛒 Ingredients | 📷 How To Make | 📹 Watch The Video | 👩‍🍳 Recipe Tips | 🥗 Serving Suggestions | 📝 Full Recipe Card | 🍽 More Meatball Recipes And More Recipes With Potatoes


    You might be familiar with Turkish köfte (meatballs) AND you might have seen a viral Turkish pasta with garlic yogurt sauce and paprika chili oil, and if you like the sound of either of those, you will love this dinner meal.

    I wanted to create something more protein-rich and veggie-forward, so I swapped the pasta for crispy potatoes, sweet red peppers, and tender green beans, all baked together with seasoned beef meatballs.

    The whole tray soaks up the savory goodness as it bakes. But the real magic is in the toppings — a creamy, garlicky yogurt sauce and that golden, earthy, slightly sweet paprika butter drizzle. Both are non-negotiable, trust me.

    It’s easy enough for a weeknight dinner and impressive enough to serve guests. It’s not spicy, but the flavors are complex, which some kids might not be used to, in which case you serve the meatballs and potatoes without the sauces.

    Nutrition per serving: 550 calories, 40 grams protein, 8 grams fiber.

    👩‍🍳 This meatballs and potatoes recipe is part of my high-protein and fiber meals series, try some of the dishes: smashed chicken tacos, steak and potatoes with chimichurri salsa, chicken shawarma with baked rice, grilled salmon salad with kale, corn & Parmesan, or honey soy chicken & rice bowls.

    What You’ll Need

    Here is what you’ll need for this Turkish meatballs and potato bake. Find the full measurements in the recipe card below.

    For the meatballs:

    • Lean ground beef – the main protein star, rich and juicy. You can swap for lamb or chicken if needed. I used 5% fat ground beef mince.
    • Breadcrumbs – use GF breadcrumbs to keep it gluten-free.
    • Spices – paprika (both sweet and smoked), cumin, cinnamon, coriander seed, and onion powder. These give it that unmistakable Turkish-inspired depth. If you happen to have some pul biber or Aleppo pepper (Turkish chili), add a bit of that as well.
    • Olive oil & water – for moisture and binding without eggs.

    For the veggies:

    • Potatoes – classic, comforting, and fiber-rich. Use sweet potatoes for extra nutrients or swap for cauliflower if low-carb.
    • Red bell pepper & green beans – for color, texture, and crunch (and fiber). Zucchini or carrots also work.
    • Dried thyme & olive oil – herby and fragrant, bringing it all together.

    Garlic yogurt sauce:

    • Greek yogurt – low-fat, high-protein yogurt is best.
    • Garlic, lemon juice, salt, water – tangy and punchy, this sauce ties everything together. Coconut yogurt can be used for dairy-free.

    Paprika butter sauce:

    • Salted butter – rich and golden. You can use olive oil for a dairy-free version.
    • Paprika (sweet + smoked), chili, honey, lemon juice – buttery, smoky, and slightly tangy-sweet.

    How To Make Turkish Baked Meatballs & Potatoes With Garlic Yogurt

    Find the full recipe and nutritional information below. Here are some handy step-by-step photos for Turkish baked meatballs & potatoes with garlic yogurt.

    • Mix all meatball ingredients and roll into 1 oz (30 grams) balls. Set aside.
    • Bake diced potatoes first with thyme and salt for 15 minutes at 200°C (400°F).
    • Add peppers and green beans, toss with oil and salt.
    • Nestle meatballs on top and bake for another 20 minutes.
    • Meanwhile, mix garlic yogurt sauce.
    • Melt butter and spices for paprika sauce; finish with lemon juice and honey.
    • Once everything is cooked, serve with dollops of garlic yogurt and drizzle with paprika butter sauce.

    Watch The Video

    Recipe Tips

    • Don’t skip the sauces! Seriously. The yogurt and paprika butter are what make this whole thing sing.
    • Batch it – Make double the meatballs and freeze half for later.
    • Low-carb? Use cauliflower or rutabaga instead of potatoes.
    • Meal prep friendly – Store in airtight containers for up to 3 days (keep sauces separately, or I would even make the paprika butter fresh). Reheat gently to keep meatballs juicy.
    • Make-ahead tip – Prep meatballs and chop veggies the night before.

    Serving Suggestions

    Serve this cozy tray bake straight from the oven with a side of fresh greens or a simple cucumber-tomato salad. I also love a bit of crusty bread to scoop up that garlic yogurt + paprika oil situation (but hey, that’s optional if you’re keeping it gluten-free). A glass of chilled ayran or sparkling water with lemon? Chef-style finish.

    💬 If you’ve tried these Turkish baked meatballs & potatoes with garlic yogurt or any other recipe on the blog then don’t forget to rate the recipe and let me know how you got on in the comments below, I love hearing from you! You can also FOLLOW ME on Instagram, Facebook, Pinterest, YouTube, and or sign up to my Newsletter to see more of my delicious food.

    Want to Save This Recipe?

    Enter your email & I’ll send it to your inbox. Plus, get great new recipes from me every week!

    By submitting this form, you consent to receive emails from Cooked & Loved

    Viral Turkish pasta inspired meal of spiced baked meatballs with potatoes, finished with garlic yogurt and paprika butter sauce. This one-pan wonder is hearty, high in protein, and packed with flavor. Find step-by-step photos and more recipe tips above.

    • Preheat the oven to 200°C / 400°F.

    • Make the meatballs: Mix all ingredients in a bowl until just combined. Roll into 1 oz (25–30 grams) balls. You should get about 20.

    • Roast the potatoes: Add diced potatoes to a large baking tray. Toss with ½ tablepsoon olive oil, thyme, and ½ teaspoon salt. Bake for 15 minutes.

    • Add veggies: Toss in bell peppers and green beans with the remaining oil and ¼ teaspoon salt. Nestle the meatballs on top.

    • Bake for another 20 minutes, until meatballs are golden and potatoes tender.

    • Garlic yogurt: Mix yogurt, garlic, lemon juice, salt, and water. Set aside.

    • Paprika butter: Melt butter with paprika, chili, and salt. Let bubble briefly, then add lemon juice and honey. Stir and remove from heat.

    • Serve: Drizzle yogurt sauce and paprika butter over the meatballs and veggies. Enjoy!

    • Can I use a different protein? Yes! Ground chicken, pork (or mix of pork and beef) or lamb would both work beautifully here. Just adjust cooking time slightly if using leaner meat.
    • What if I don’t like yogurt? Try labneh or a dairy-free yogurt. Hummus might work, too, for a totally different spin.
    • Is it spicy? Not really! The paprika butter sauce has flavor but very mild heat — still very family-friendly.
    • Can I make it vegetarian? You could swap in plant-based meatballs or falafel, but you’ll lose the richness from the beef. Still tasty though!
    • Don’t skip the sauces! Seriously. The yogurt and paprika butter are what make this whole thing sing.
    • Batch it – Make double the meatballs and freeze half for later.
    • Low-carb? Use cauliflower or rutabaga instead of potatoes.
    • Meal prep friendly – Store in airtight containers for up to 3 days (keep sauces separately, or I would even make the paprika butter fresh). Reheat gently to keep meatballs juicy.
    • Make-ahead tip – Prep meatballs and chop veggies the night before.

    Calories: 558kcal | Carbohydrates: 57g | Protein: 40g | Fat: 19g | Saturated Fat: 8g | Polyunsaturated Fat: 2g | Monounsaturated Fat: 8g | Trans Fat: 1g | Cholesterol: 96mg | Sodium: 1678mg | Potassium: 1563mg | Fiber: 8g | Sugar: 9g | Vitamin A: 2540IU | Vitamin C: 87mg | Calcium: 185mg | Iron: 8mg

    Keywords: Dinner Recipes, One-Pan recipes, Meatballs, Homemade Meatballs, meatballs and potatoes, Turkish meatballs, garlic yogurt sauce

    More Meatball Recipes

    More Recipes With Potatoes


    Source link

  • Seriously Good Chili Powder Recipe

    Seriously Good Chili Powder Recipe

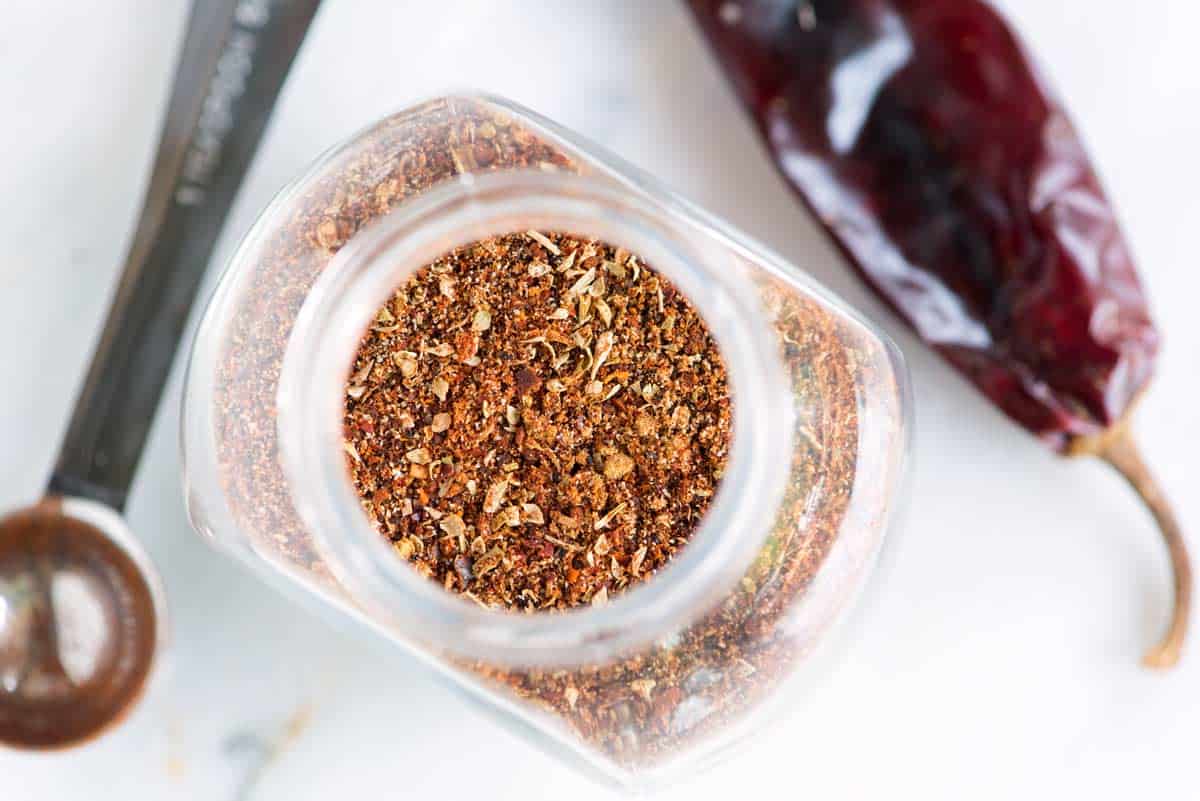
    Our homemade chili powder recipe uses dried chili peppers and the perfect spice blend to make an intensely flavorful seasoning that’s better than store-bought.

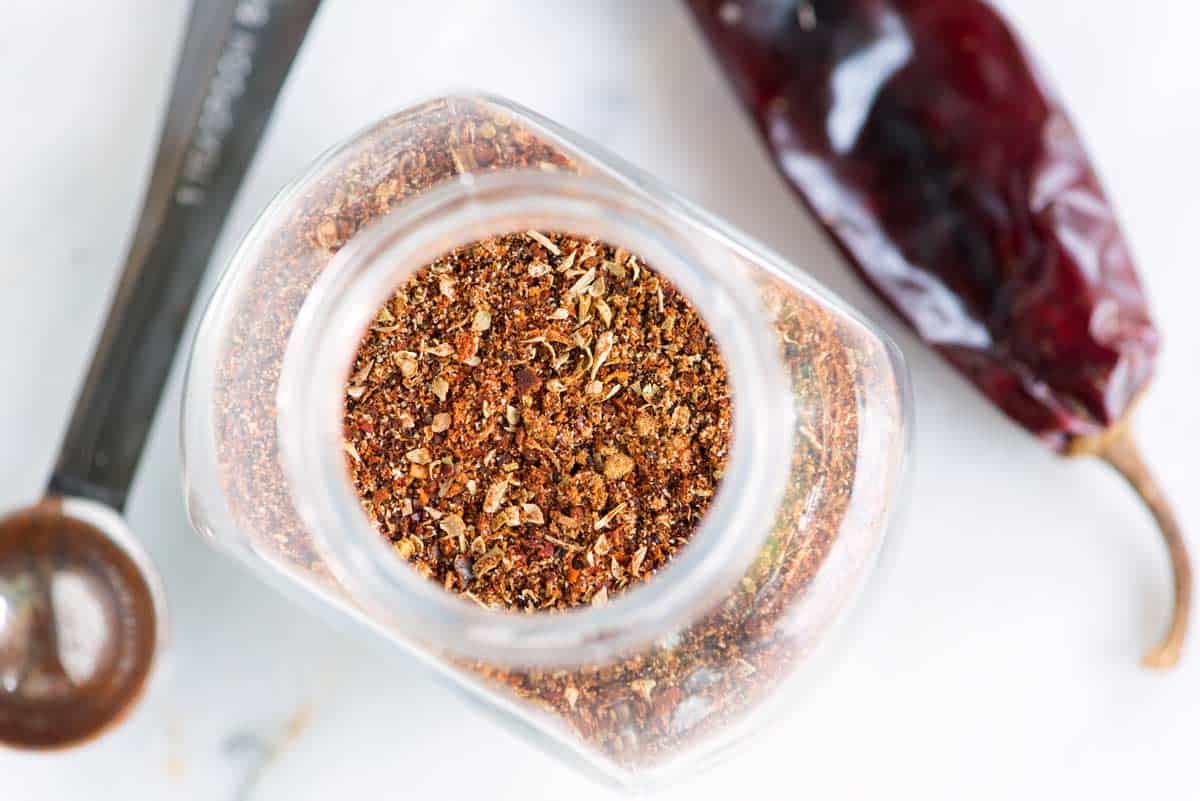
    Homemade chili powder

    After finding so many of the store-bought options flavorless, we decided to learn how to make chili powder, and I am so happy that we did.

    I use this homemade chili powder for many recipes on Inspired Taste, including our homemade beef chili, vegetarian chili, this easy enchilada sauce, and my favorite fajitas. I also use it as a base for this homemade taco seasoning.

    Key Ingredients

    Chiles: For the best blend, start with dried chiles. You can buy them at larger supermarkets, Mexican markets, or online (they are inexpensive and last a while in your pantry). I use three types of peppers in my blend:

    1. Ancho chile peppers, which are mildly spiced but taste rich, sweet, and fruity.
    2. Guajillo peppers, which are more smoky and moderately hot.
    3. New Mexico chile peppers, which smell sweet, clean, and pack a little heat.

    Spices: To round the flavor of our homemade blend, we stir in ground cumin, oregano, and garlic powder. Then, to add a bit more smokiness and color, I love adding smoked paprika.

    Find the full recipe with measurements below.

    How to Make the Best Chili Powder

    Tip 1: Preparing dried chiles. It’s easy! There are three simple steps:

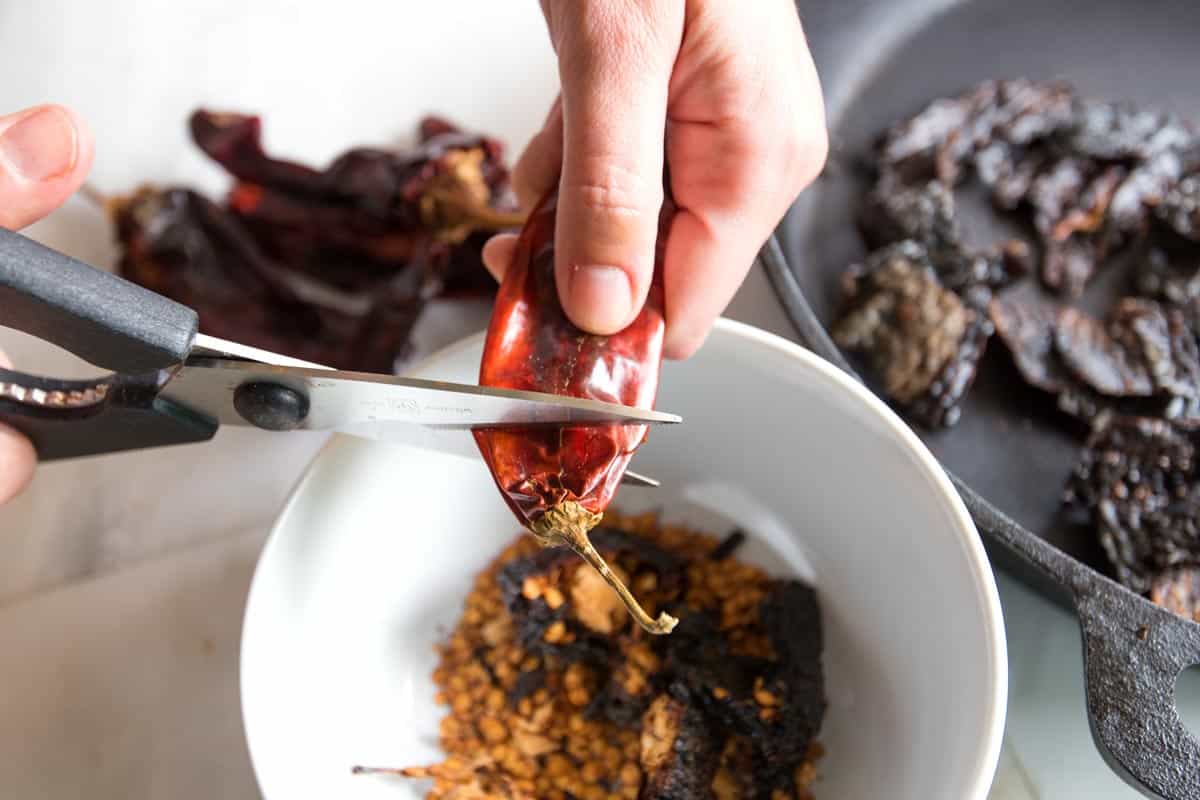
    1. Cut the stem and remove the seeds. The seeds can be bitter, so get rid of them. Use a pair of kitchen scissors to cut the stem away and then shake or scrape the seeds from the inside of each pepper. If you have sensitive skin, wear gloves to prevent the oils from getting on your hands. Also, be careful not to touch your eyes while working with peppers (ouch!)
    2. Cut each cleaned pepper into small pieces, then add them to a dry skillet over medium heat and toast until fragrant. This is my favorite part, the kitchen smells incredible!
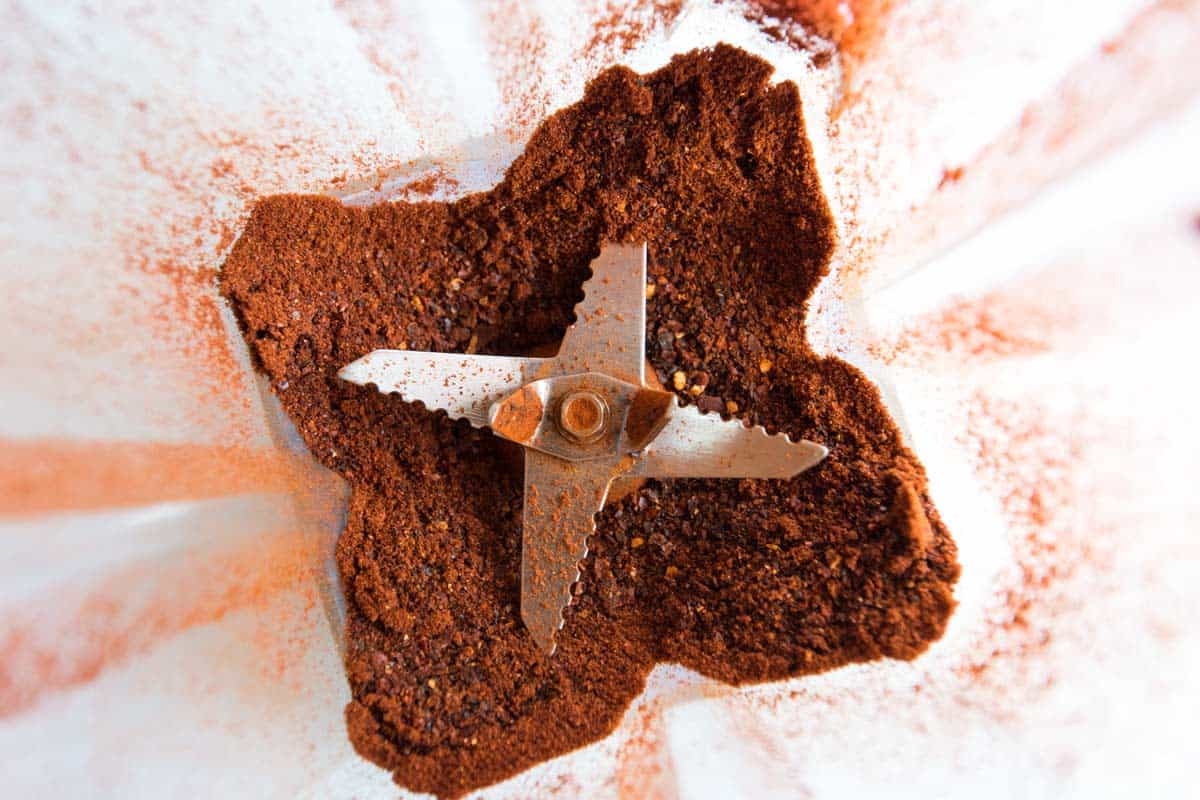
    3. Finally, grind them. Add the toasted chile peppers to your blender and blend until finely ground. Wait to open the lid, though. Let the dust settle for about a minute after blending. You don’t want a cloud of ground chiles in your face.
    Cutting the stems off dried chili peppers
    Toasting dried chilis in a pan
    Blending toasted dried chiles to make chili powder

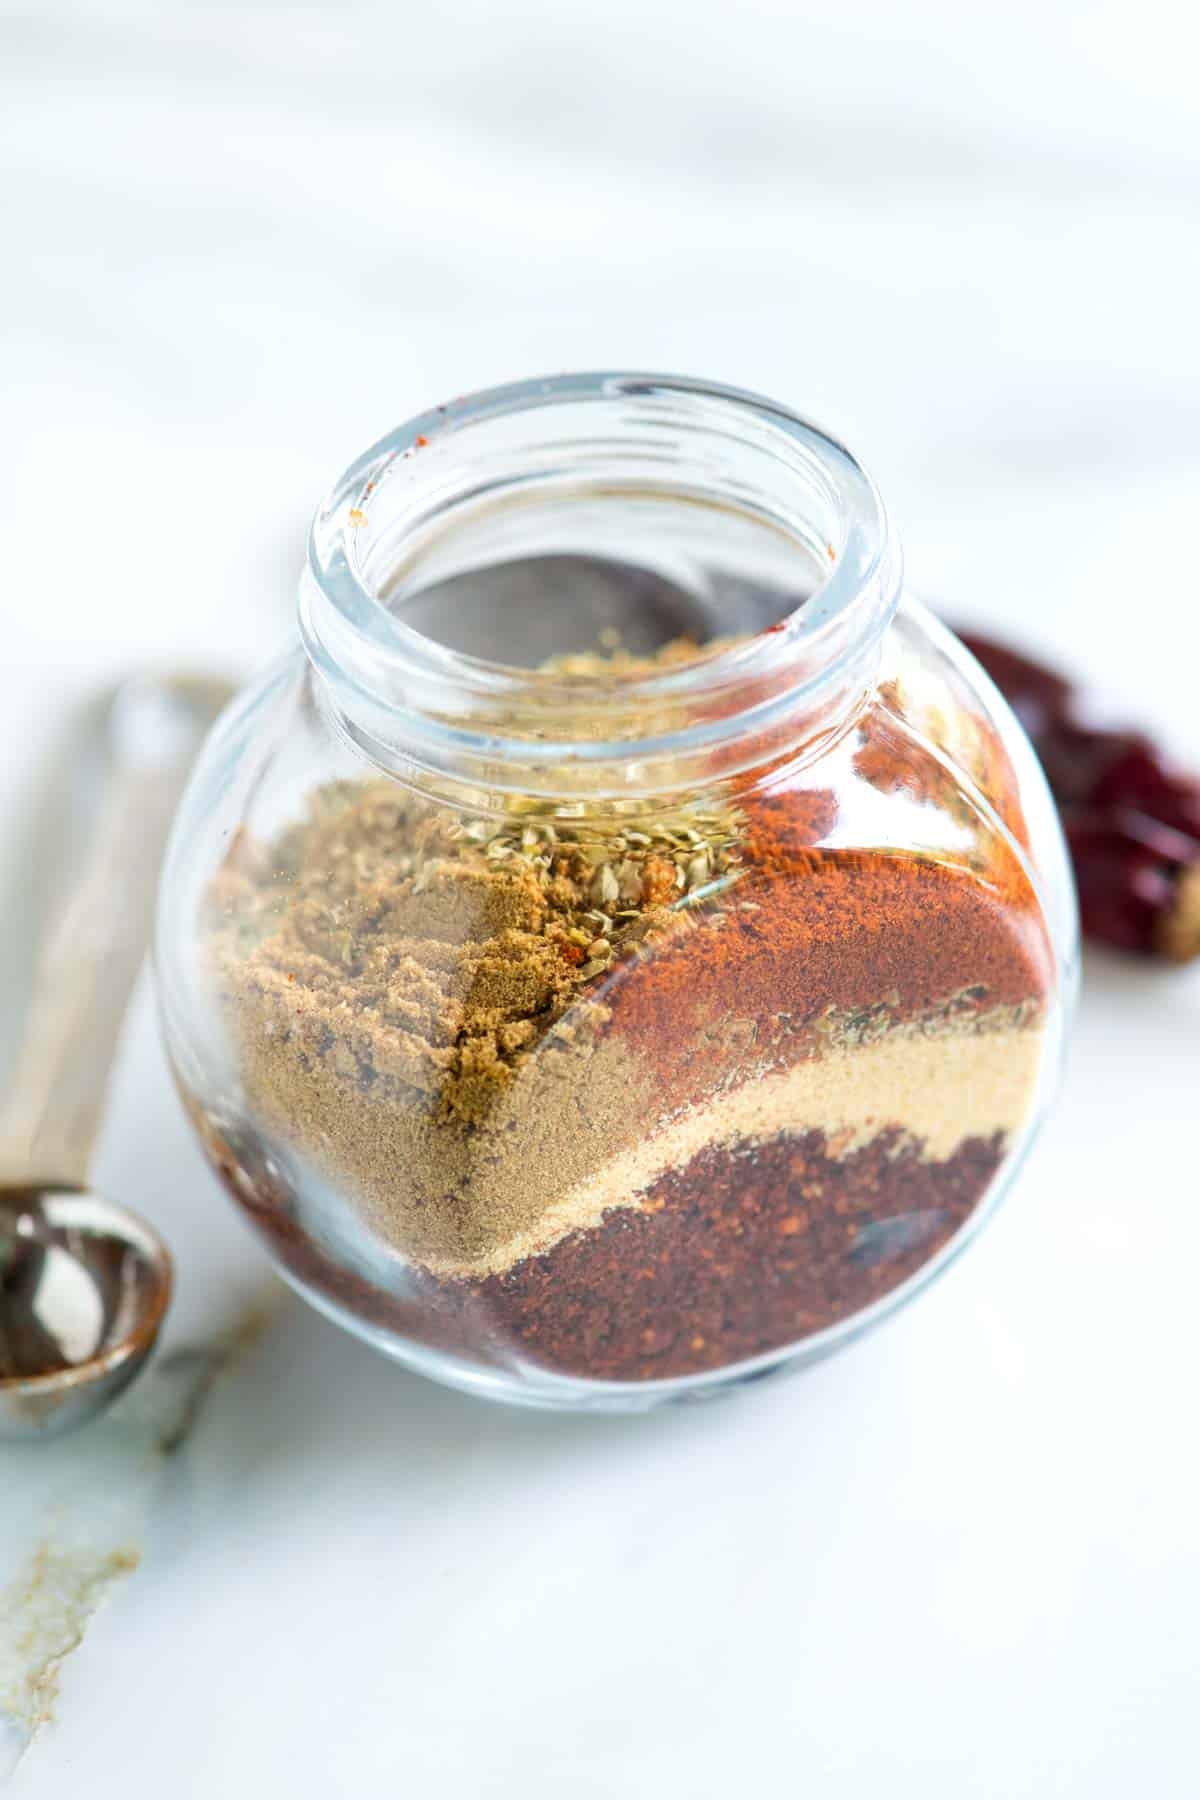
    Tip 2: Add spices. Now, it’s time to add spices to make the chili powder taste even more amazing. We add garlic powder, ground cumin, oregano, and smoked paprika. Add everything to a spice jar, shake it up, and store it in a dark pantry for up to six months.

    More Recipes with Dried Chiles

    Homemade chili powder

    Seriously Good Chili Powder

    • PREP
    • COOK
    • TOTAL

    I’m obsessed with this homemade chili powder made by blending whole dried chiles. You can find dried chile peppers in most large supermarkets and any Latin market. We use three varieties: ancho chile peppers (sweet, fruity, and mild), New Mexico chile peppers (fresh, clean, and moderately hot), and Guajillo chile peppers (smoky and medium hot). You can swap or add other peppers based on what is available. We recommend including something sweet and fruity. They add complexity and flavor (in our case, the ancho pepper).

    Makes 2/3 cup

    You Will Need

    3 dried ancho chiles

    3 dried Guajillo chiles

    3 dried New Mexico chiles

    1 tablespoon ground cumin

    2 tablespoons garlic powder

    1 tablespoon dried oregano

    1 teaspoon smoked paprika

    Directions

      1Use kitchen scissors to cut the stem away and then shake or scrape the seeds inside each pepper. If you have sensitive skin, wear gloves to prevent the oils from getting on your hands. Also, be careful not to touch your eyes during or after working with peppers.

      2Cut each cleaned pepper into small pieces, then add them to a dry skillet over medium heat. Toast them, stirring occasionally, until fragrant, about 5 minutes.

      3Add the toasted chiles to a blender and blend until finely ground. Leave the lid in place until dust settles so you do not get a cloud of ground chile peppers in your face.

      4Add ground chile peppers to a spice jar, then top with cumin, garlic powder, oregano, and smoked paprika. Seal the jar and shake.

      5Store the chili powder in a cool, dry place for 6 months.

    Adam and Joanne’s Tips

    • Spicy chili powder: Use hot smoked paprika or add 1/2 teaspoon or more cayenne pepper or chipotle powder
    • This recipe was inspired by Alton Brown.
    • The nutrition facts provided below are estimates.

    Nutrition Per Serving
    Serving Size
    1 tablespoon
    /
    Calories
    26
    /
    Protein
    1g
    /
    Carbohydrate
    6g
    /
    Dietary Fiber
    1g
    /
    Total Sugars
    2g
    /
    Total Fat
    0g
    /
    Saturated Fat
    0g
    /
    Cholesterol
    0mg


    AUTHOR:

    Adam Gallagher

    Adam and Joanne of Inspired Taste

    We are Adam and Joanne Gallagher, the creators of Inspired Taste. Established in 2009, Inspired Taste grew from a childhood dream into one of the internet’s most trusted recipe sites with hundreds of reliable recipes, step-by-step videos, and expert tips.More About Us
    Source link

  • Easy Fruit Dip Recipe

    Easy Fruit Dip Recipe

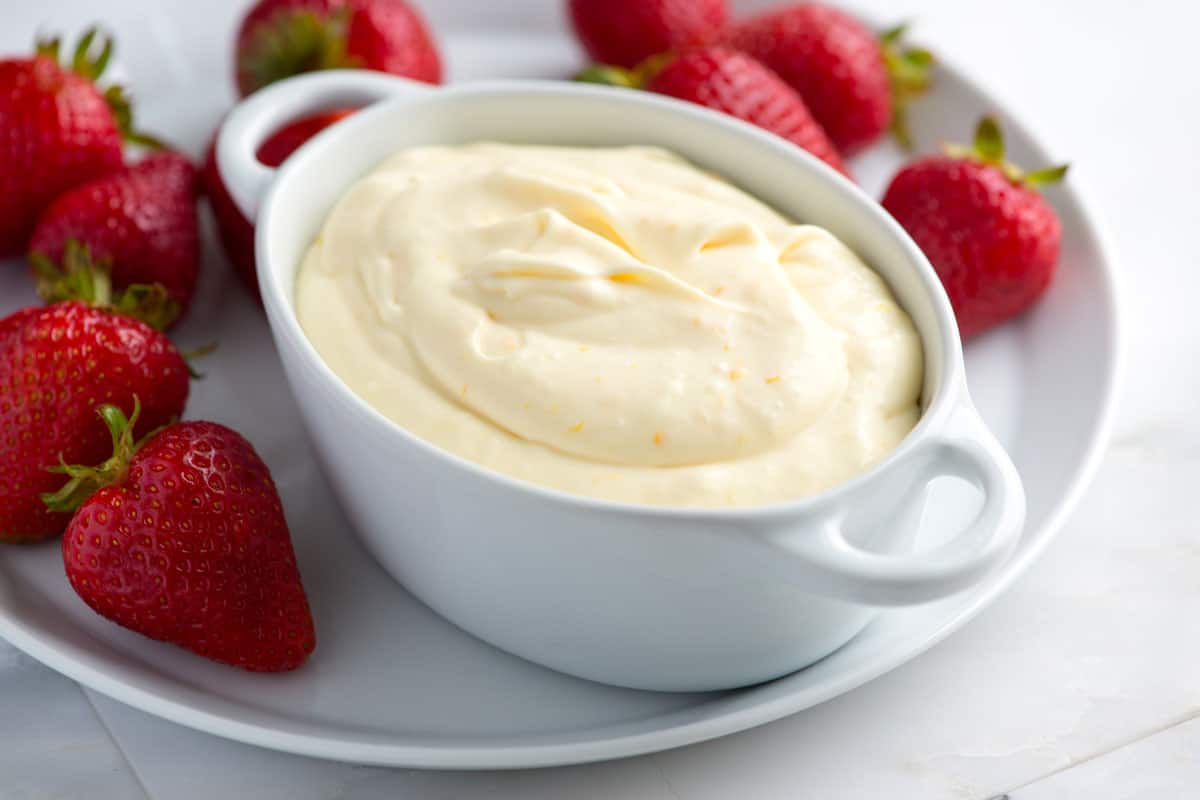
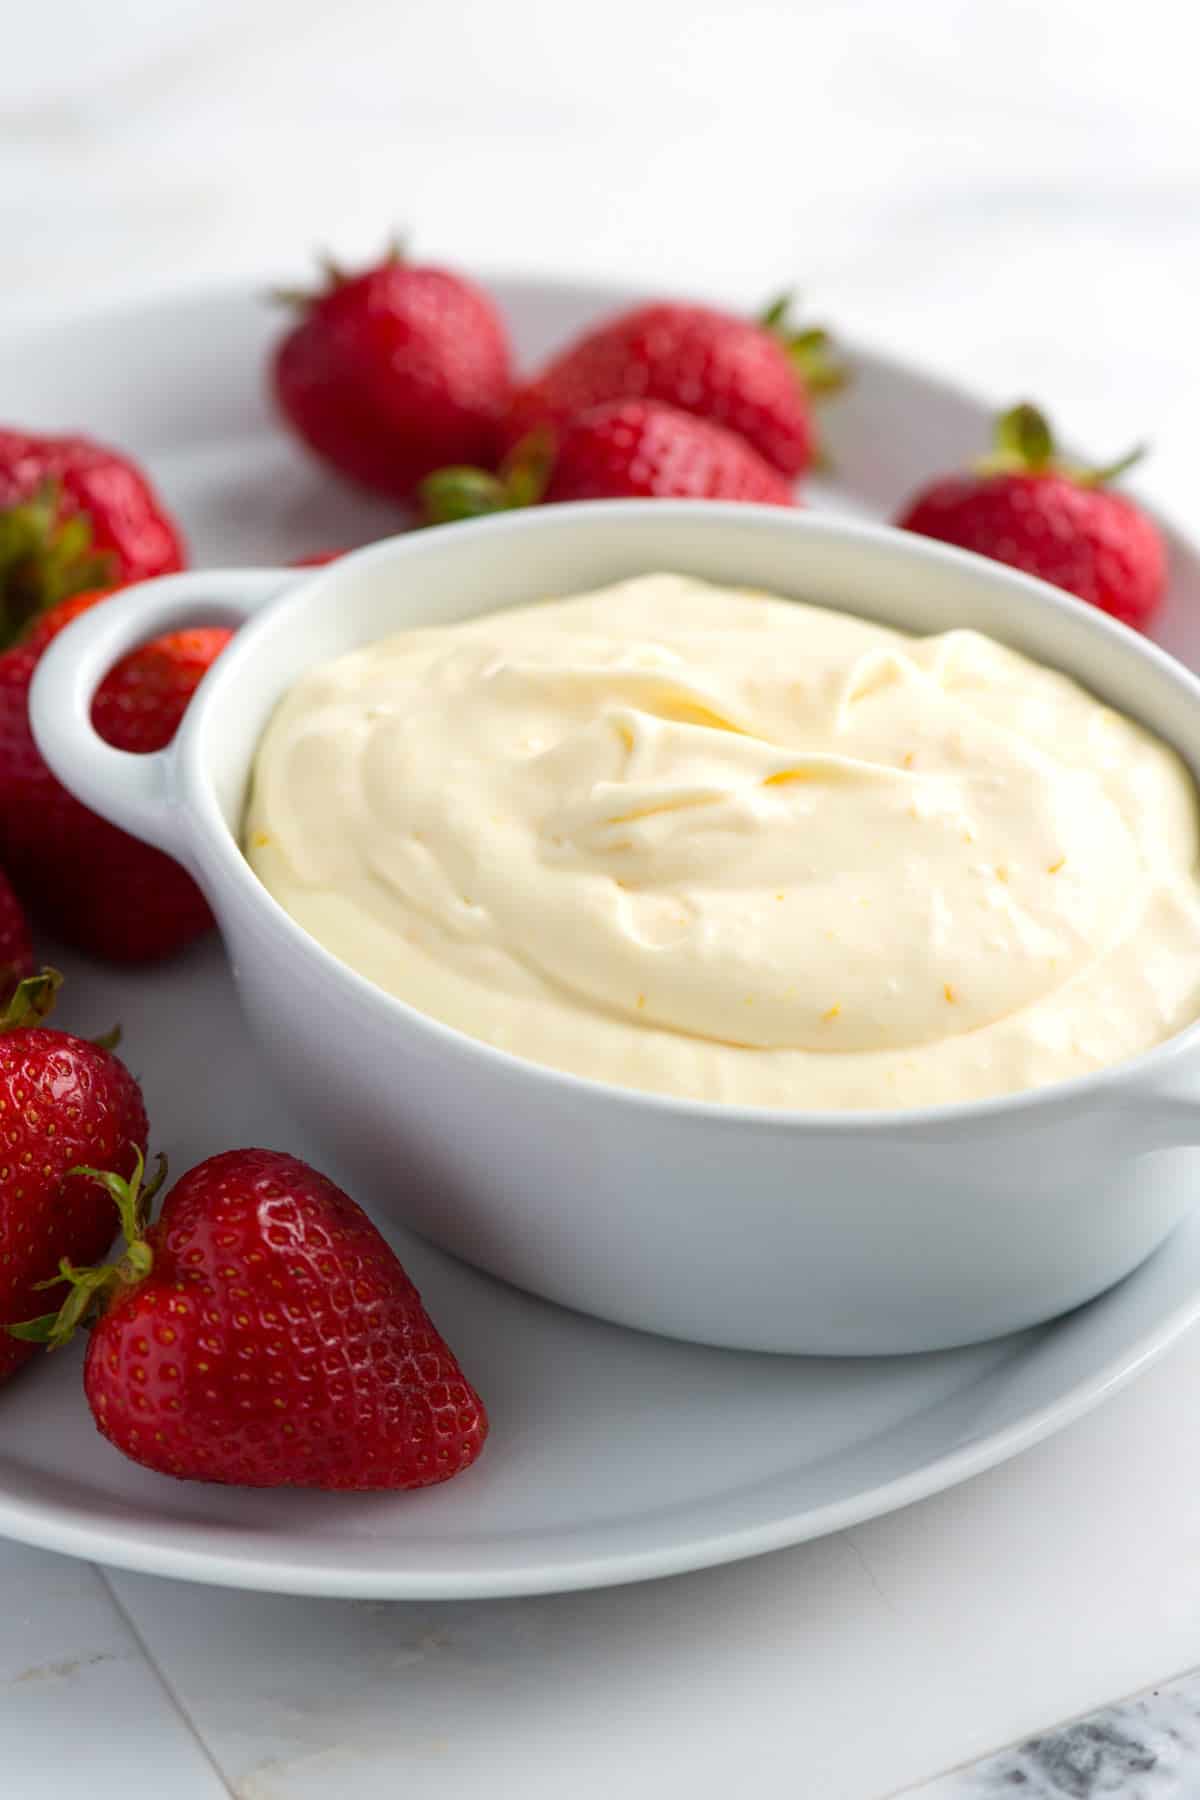
    Our 5-minute fruit dip recipe turns out incredibly delicious thanks to cream cheese, cream, and orange. It’s so good, and reminds me of an orange creamsicle.

    Fruit Dip

    Imagine a party with a table filled with tempting treats. At one end, you see chocolate cupcakes. At the other end, there’s a bowl of this irresistible creamy fruit dip. Where will you find me? I’ll be hovering over the fruit dip, happily devouring it.

    This creamy dip is perfect with fresh fruit, but it works really well with other sweets like graham crackers, shortbread cookies, and biscotti. Although, to be honest, I hardly even need the fruit – this dip is so good that I could eat it with a spoon!

    Key Ingredients

    • Cream Cheese and Cream: I love the combination of cream cheese and heavy cream. I use the same base for the frosting of my favorite carrot cake. It’s so simple, yet so good! You will need softened or room-temperature cream cheese for this recipe, so plan ahead.
    • Orange: Fresh orange is best since it allows you to use some of the zest, which adds an extra pop of orange flavor.
    • Vanilla: Use your favorite vanilla extract or swap in vanilla bean paste.
    • Powdered Sugar: I like using just enough to make the dip slightly sweet, not overly so. If you find it needs a bit more, it’s easy to add to taste. Powdered sugar is best here, as it easily dissolves into the cream cheese mixture.

    Find the full recipe with measurements below.
    How to Make My Favorite Fruit Dip

    Tip 1: Use an electric or stand mixer. Think of this fruit dip as a slightly less-sweet, creamier version of cream cheese frosting. Just like when making frosting, an electric hand mixer or a stand mixer makes things really quick and easy.

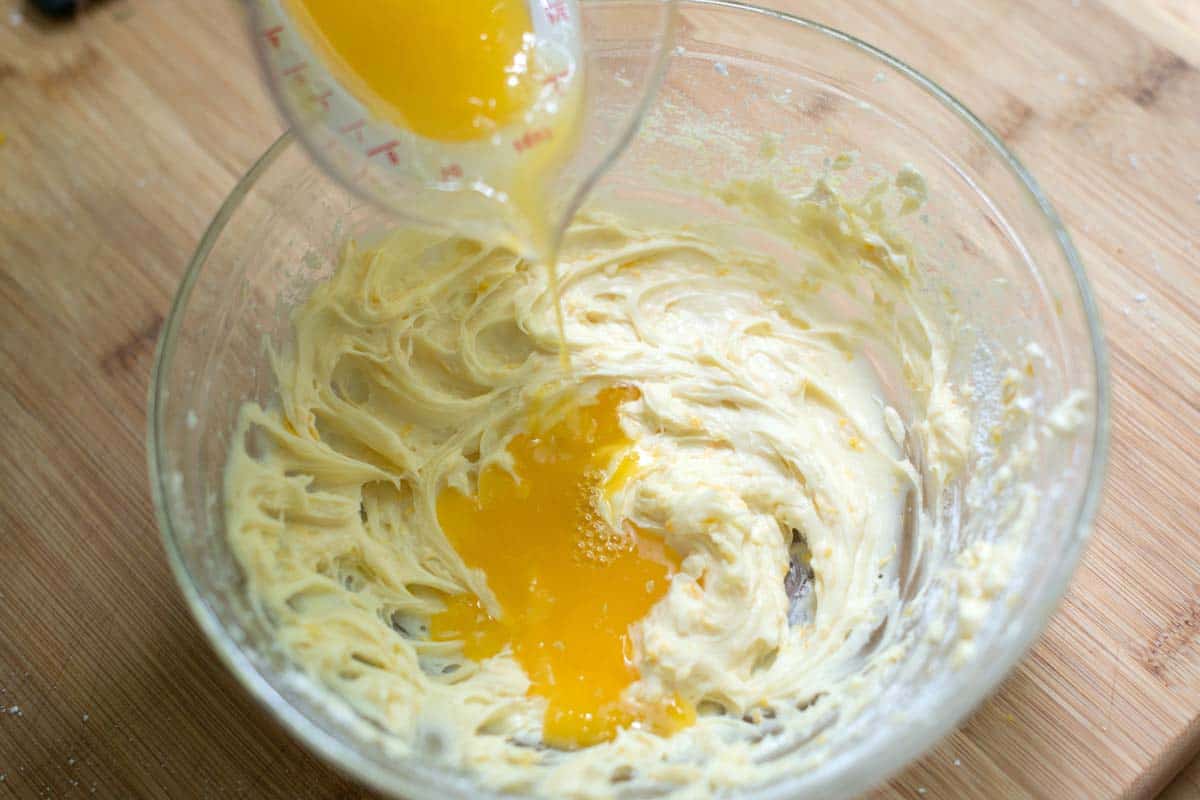
    Combine the cream cheese, cream, vanilla, orange zest, orange juice, and powdered sugar in a bowl. Then use your hand or stand mixer to beat the ingredients until the dip is light, whipped, and creamy.

    Making fruit dip by adding orange juice to whipped cream cheese and cream

    Tip 2: Keep in mind that it firms up when cold. Just like buttercream or frosting, once this dip goes into the fridge, it firms up, which can make dipping a little more difficult. You can absolutely store this in the fridge for a few days. Just remember to take it out and set it on the counter for 20 to 30 minutes before you plan to serve it. Beating it a few times with a spoon softens it up more quickly, too.

    More Easy Desserts

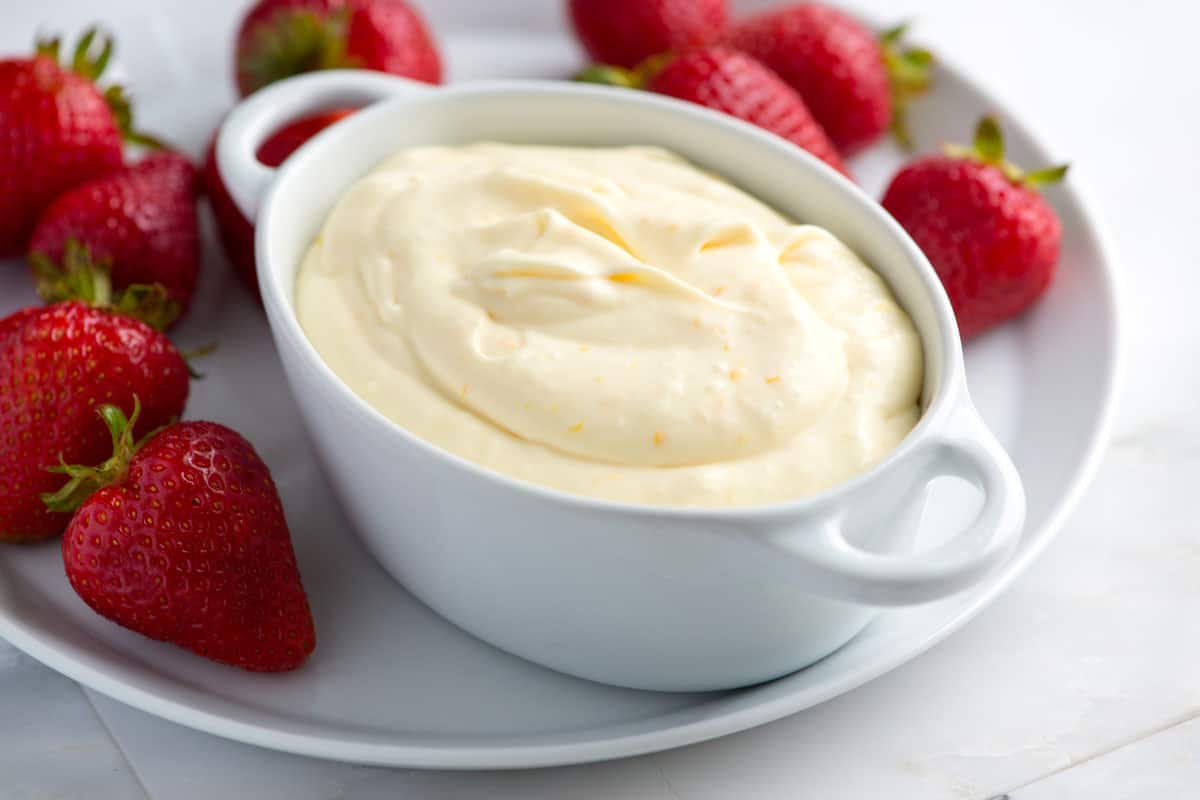
    Fruit Dip with Strawberries

    Easy Fruit Dip

    This super simple fruit dip is perfect served with fresh fruit, but it’s also incredible with cookies or graham crackers.

    Makes 1 1/4 cups

    You Will Need

    4 ounces cream cheese, at room temperature (113g)

    ½ teaspoon vanilla extract

    1 tablespoon orange zest

    ½ cup powdered sugar (55g)

    ¼ cup fresh squeezed orange juice (60ml)

    ¼ cup heavy cream (60ml)

    Directions

      1Add cream cheese, vanilla, and the orange zest to a medium bowl, then beat on medium speed with a hand mixer until smooth (or use a stand mixer with a paddle attachment).

      2Add powdered sugar a little at a time, mixing after each addition. Add the orange juice, then beat until smooth.

      3Pour in the cream and beat with the mixer until thick and creamy, about 1 minute.

    Adam and Joanne’s Tips

    • Storing: Keep tightly covered in the refrigerator for up to 3 days.
    • The nutrition facts provided below are estimates.

    Nutrition Per Serving
    Serving Size
    2 tablespoons
    /
    Calories
    86
    /
    Protein
    1 g
    /
    Carbohydrate
    7 g
    /
    Dietary Fiber
    0 g
    /
    Total Sugars
    7 g
    /
    Total Fat
    6 g
    /
    Saturated Fat
    4 g
    /
    Cholesterol
    21 mg


    AUTHOR:

    Joanne Gallagher

    Adam and Joanne of Inspired Taste

    We are Adam and Joanne Gallagher, the creators of Inspired Taste. Established in 2009, Inspired Taste grew from a childhood dream into one of the internet’s most trusted recipe sites with hundreds of reliable recipes, step-by-step videos, and expert tips.More About Us

    Source link

  • Easy Pickled Peppers Recipe

    Easy Pickled Peppers Recipe

    I’m obsessed with this pickled peppers recipe and find myself adding them to everything! They only take 20 minutes to prep and last in the fridge for a month.

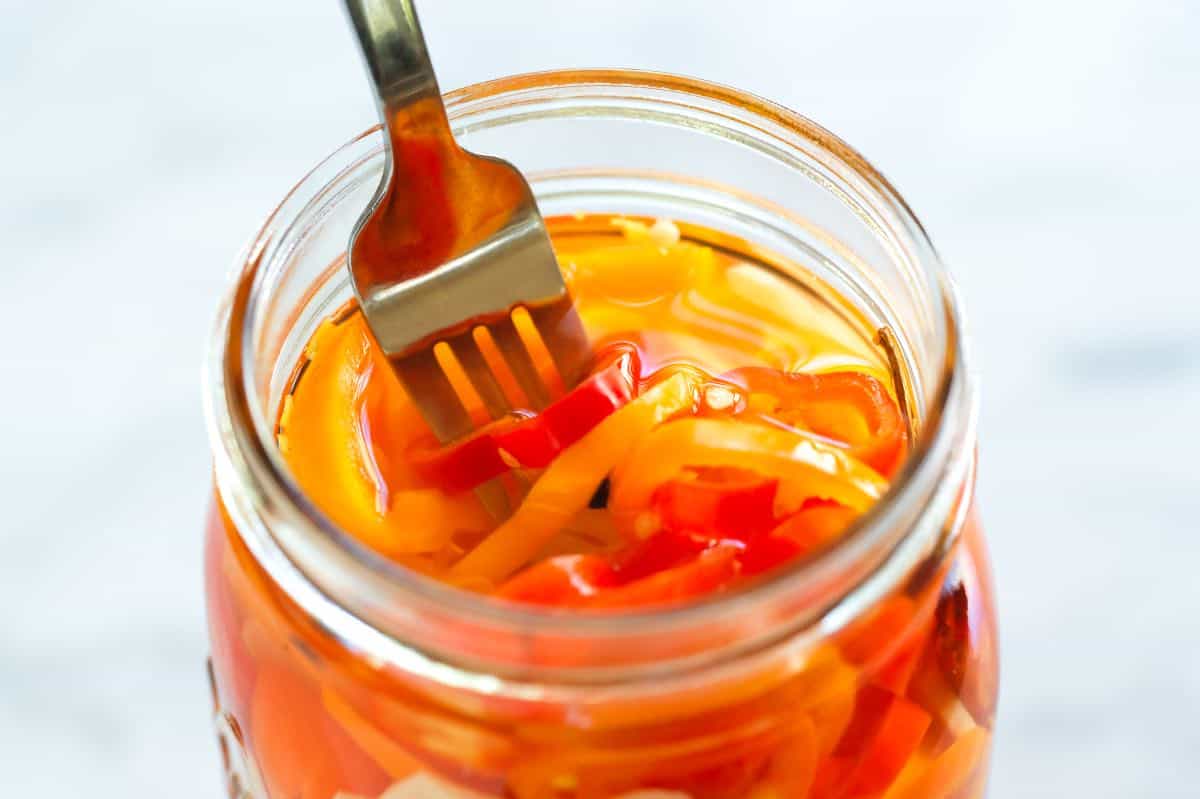
    Pickled Peppers

    I’m convinced these pickled peppers make just about anything taste better. When I’m putting together a dish, I’m always surprised at how much a hint of tanginess (from lemon or vinegar) can take the flavor from simply okay to absolutely excellent. These are my secret for adding crunch and that perfect hint of tanginess to everything from taco recipes and sandwiches to my favorite salad recipes, homemade pizza, and so much more!

    For the photos, I’ve made a batch of sweet pickled peppers, but this recipe is easily adaptable to all sorts of peppers (even the hottest you can find). It truly depends on what you’re looking for! Feel free to experiment with different peppers or a combination of them to achieve the spice level you love.

    Key Ingredients

    • Peppers: I love pickled sweet peppers, but this recipe works with any variety of peppers. It depends on what you are looking for. For sweet peppers, we love using mini peppers (like what I used to make these sweet pepper poppers). They are thinner than regular bell peppers, which makes for a better texture in the end. You can use 100% sweet peppers or mix in some hotter varieties, such as banana peppers, cherry peppers, jalapeños, serrano peppers, or even hotter options like Fresno peppers.
    • Vinegar: We keep the brine for these peppers simple with regular distilled vinegar (5% acidity). It gives the pickles a clean, classic flavor, allowing the sweetness of the peppers and the garlic to come through (it’s also inexpensive!). Feel free to substitute with rice wine vinegar or white wine vinegar if you prefer.
    • Salt and Sugar: These are essential for balancing the brine. Without salt or sugar, our brine would taste too intensely like plain vinegar (we take this approach for most of the pickle recipes on Inspired Taste). For salt, I use sea salt or pickling salt (it’s best to avoid table salt here, as the added iodine can interfere with the pickling process). For the sugar, I use plain granulated sugar as my go-to. You can substitute brown sugar or honey, but this may cause your brine to appear slightly cloudy.
    • Garlic and Spices: For a classic flavor, we love adding sliced garlic to the jars (you can mince it, but be prepared for a slightly more intense garlicky flavor in your brine!). Then, for the spices, we keep it simple with an allspice berry (yep, one is enough) and whole peppercorns.
    • Optional Chile Pepper: When I use 100% sweet peppers, I like adding a hint of heat with a small dried chile (chile de Arbol is perfect). This is optional and won’t make the pickles spicy. They taste more warm than anything else. For more heat, increase to 2 or 3, or mix in some fresh hot peppers instead.

    How to Make Pickled Peppers

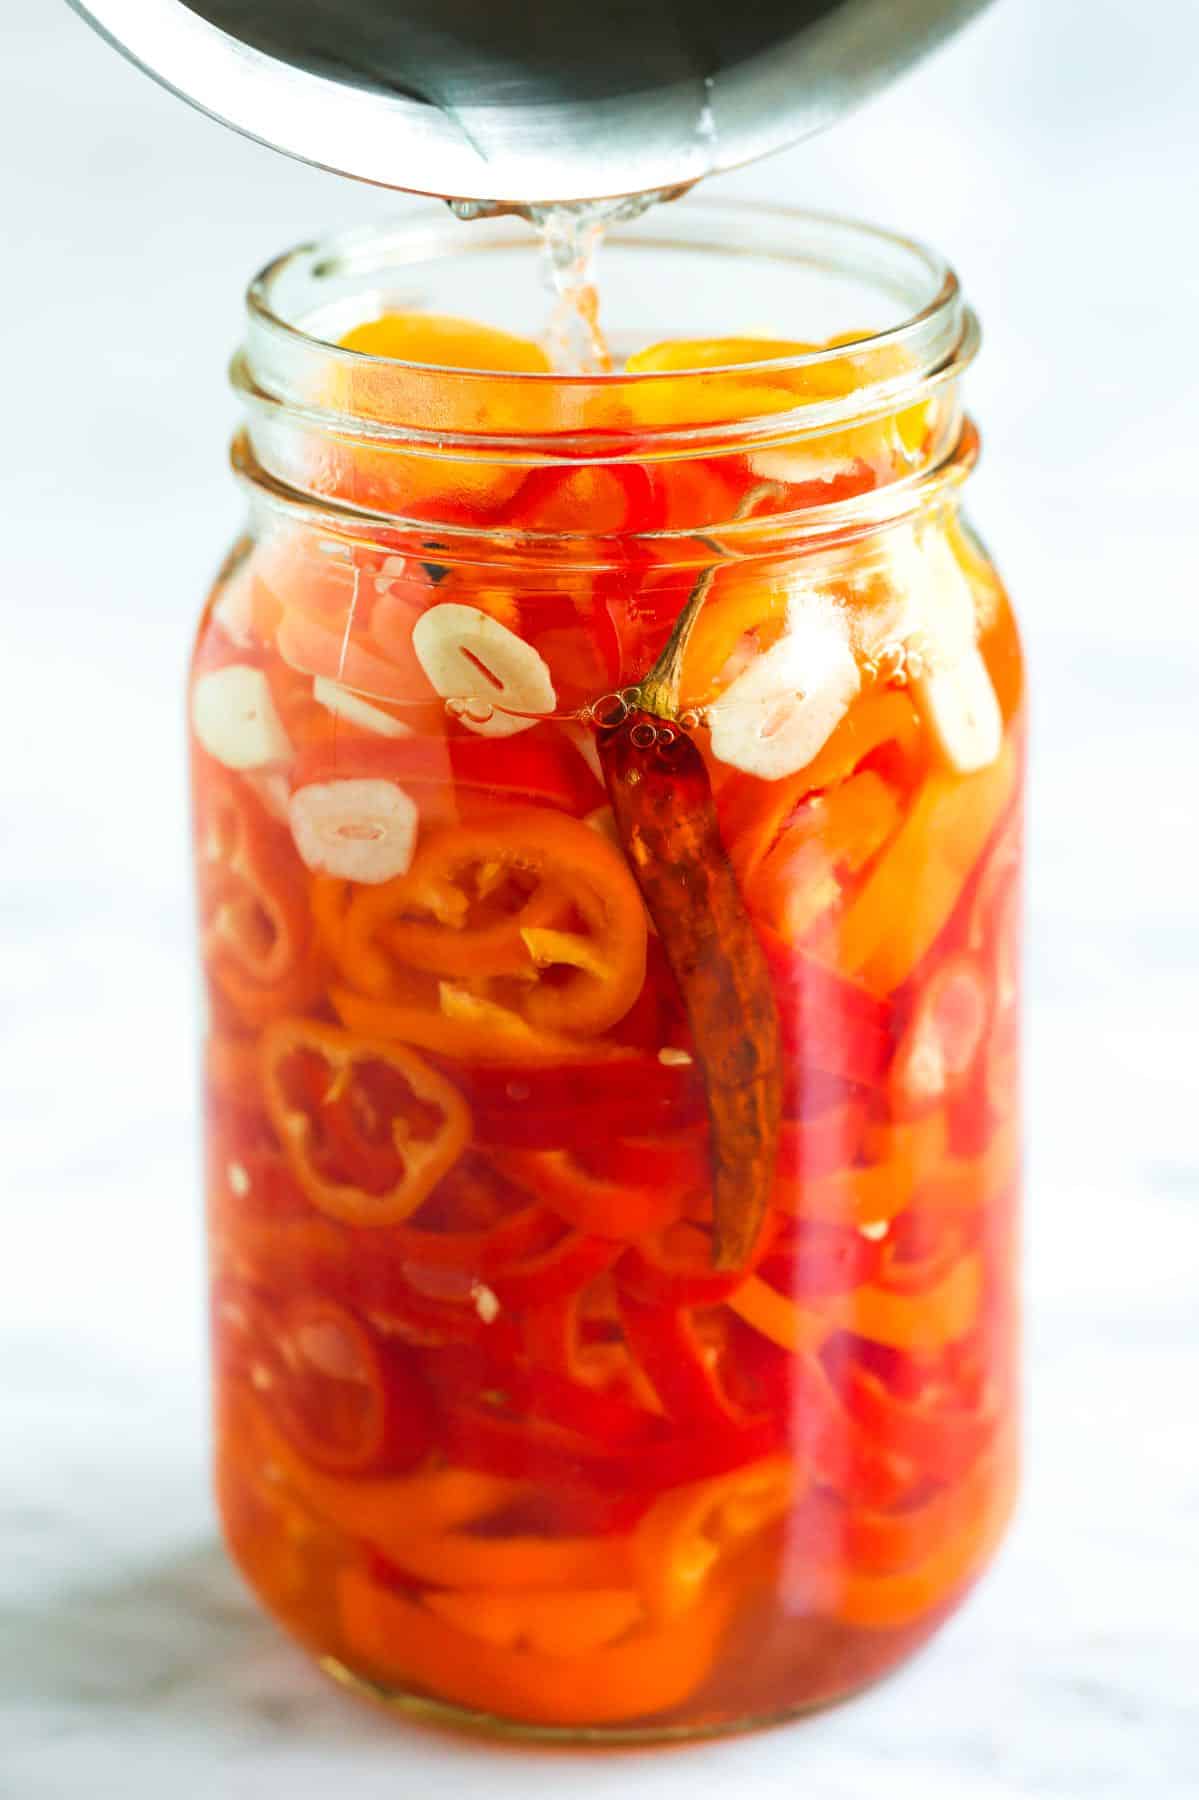
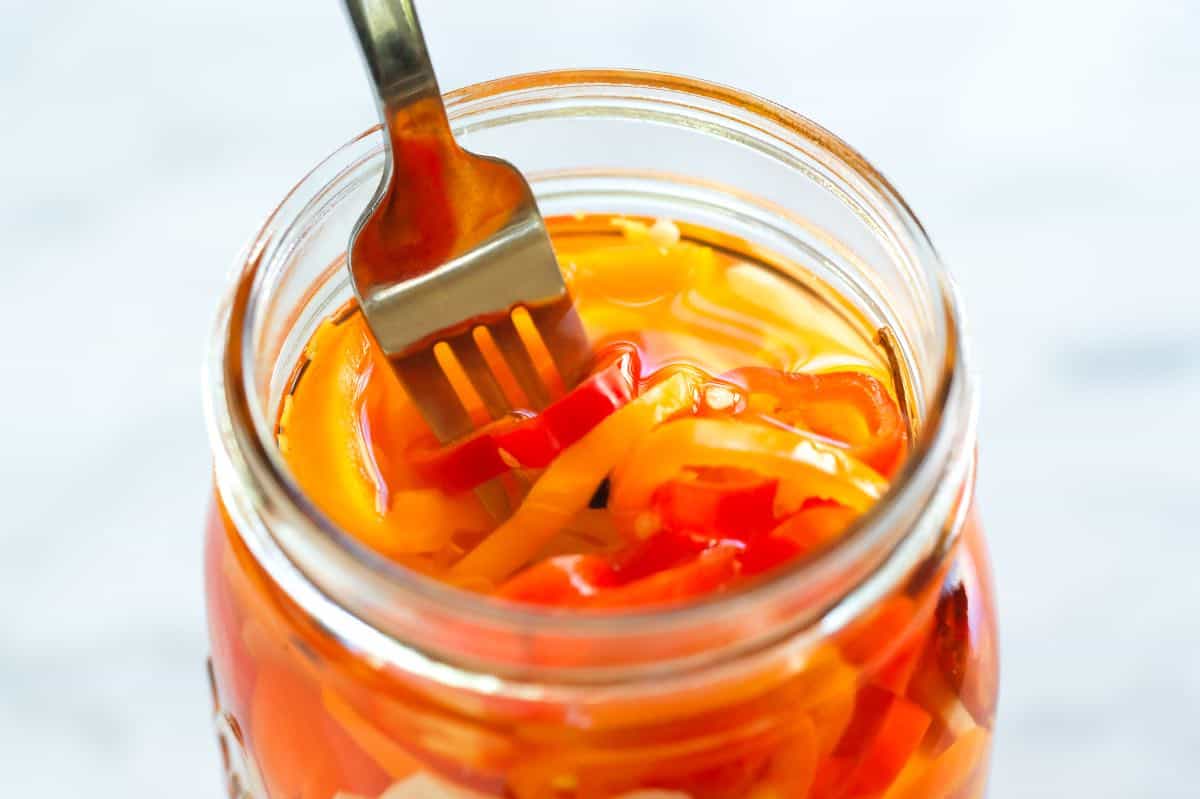
    These peppers get better over time. Pack your peppers into a jar, then pour the hot brine over them. Transfer them to the fridge once they’ve cooled to room temperature. As they sit overnight, they transform into incredibly crunchy, tangy peppers and continue to improve with each passing day, as the garlic has more time to infuse our brine with its flavor. I can’t wait for you to try them!

    More Quick Pickle Recipes

    Pickled Peppers

    Easy Pickled Peppers

    • PREP
    • TOTAL

    These crunchy, quick pickled peppers are a great snack, excellent on meat and cheese boards, added to sandwiches and wraps, scattered over cheese pizza, or used in any recipe where you would typically use bell peppers. They keep their crunch but take on a pickled, bright flavor, adding a nice pop of flavor to just about anything!

    Note: Just like other quick pickles (like our pickled carrots), these peppers are ready after a night in the fridge, but they continue to improve as they sit in the brine. They really light up around day 3!

    Makes One 1-quart jar, 8 Servings

    You Will Need

    1 pound mini sweet peppers

    2 cloves garlic, finely sliced

    1 dried chile de arbol, optional

    16 ounces (470ml) distilled vinegar, 5% acidity

    1 ½ teaspoons fine sea salt or pickling salt

    2 tablespoons granulated sugar

    1 allspice berry

    5 whole peppercorns

    Directions

      1Prepare the peppers: Cut the tops off of the peppers and scrape or tap out the seeds and most of the white membrane. Slice into rings. Place the pepper rings into a clean 1-quart jar.

      2Add the chile and garlic: Place the sliced garlic and chile de arbol (optional) around the peppers in the jar.

      3Make the vinegar brine: In a small saucepan, combine the vinegar, salt, sugar, allspice berry, and peppercorns. Bring to a simmer and cook until the salt and sugar dissolve.

      4Pour the brine into the jar: Pour the vinegar brine over the peppers. Make sure the brine completely covers all the peppers. Secure the lid on the jar until it’s “finger-tight” (meaning snug but not overly cranked).

      5Cool and refrigerate: Set the jar aside on your counter and let it cool completely to room temperature. Once cooled, transfer the jar to your refrigerator. For the best flavor, refrigerate pickled peppers overnight before enjoying them. If you can wait, they get even better after 2 to 3 days! These quick pickled peppers will last, covered in their brine, in the fridge for up to 1 month.

    Adam and Joanne’s Tips

    • The jar: We use a 1-quart wide-mouth mason jar (32 ounces or 946ml).
    • Peppers: We developed this recipe for sweet peppers (the mini, colorful peppers often sold in bags). The chile de arbol adds a little heat, but for more, feel free to use 2 to 3 of them or swap a portion of the sweet peppers for hotter peppers, such as jalapeños, Fresno, or serrano peppers.
    • Allspice berries: These taste like a combination of cloves, cinnamon, and nutmeg. We found whole allspice berries less common in the grocery spice aisle, but we recommend buying a “pickling spice blend” instead. McCormick’s “Mixed Pickling Spice” contains allspice berries, which we purchased and picked out 1 berry for this recipe. We also use it for making sauerkraut.
    • Canning: These pickled peppers have been specifically designed for the refrigerator and are meant to be kept in the fridge at all times. However, if you’re experienced in canning, you could adapt them for long-term shelf stability. This would involve using sanitized jars, new lids, and a pressure canner.
    • The nutrition facts provided below are estimates. Calculating how much salt is in the peppers is difficult, so we have included all of the brine in the calculations.

    Nutrition Per Serving
    Serving Size
    1/8 of the jar (about 2 ounces)
    /
    Calories
    42
    /
    Total Fat
    0.2g
    /
    Saturated Fat
    0g
    /
    Cholesterol
    0mg
    /
    Sodium
    449.3mg
    /
    Carbohydrate
    7.1g
    /
    Dietary Fiber
    1.4g
    /
    Total Sugars
    5.6g
    /
    Protein
    0.7g


    AUTHOR:

    Joanne Gallagher

    Previous Post: Our Favorite Giardiniera
    Next Post: Fluffy Saffron Rice

    Source link

  • Easy White Bean Soup Recipe

    Easy White Bean Soup Recipe

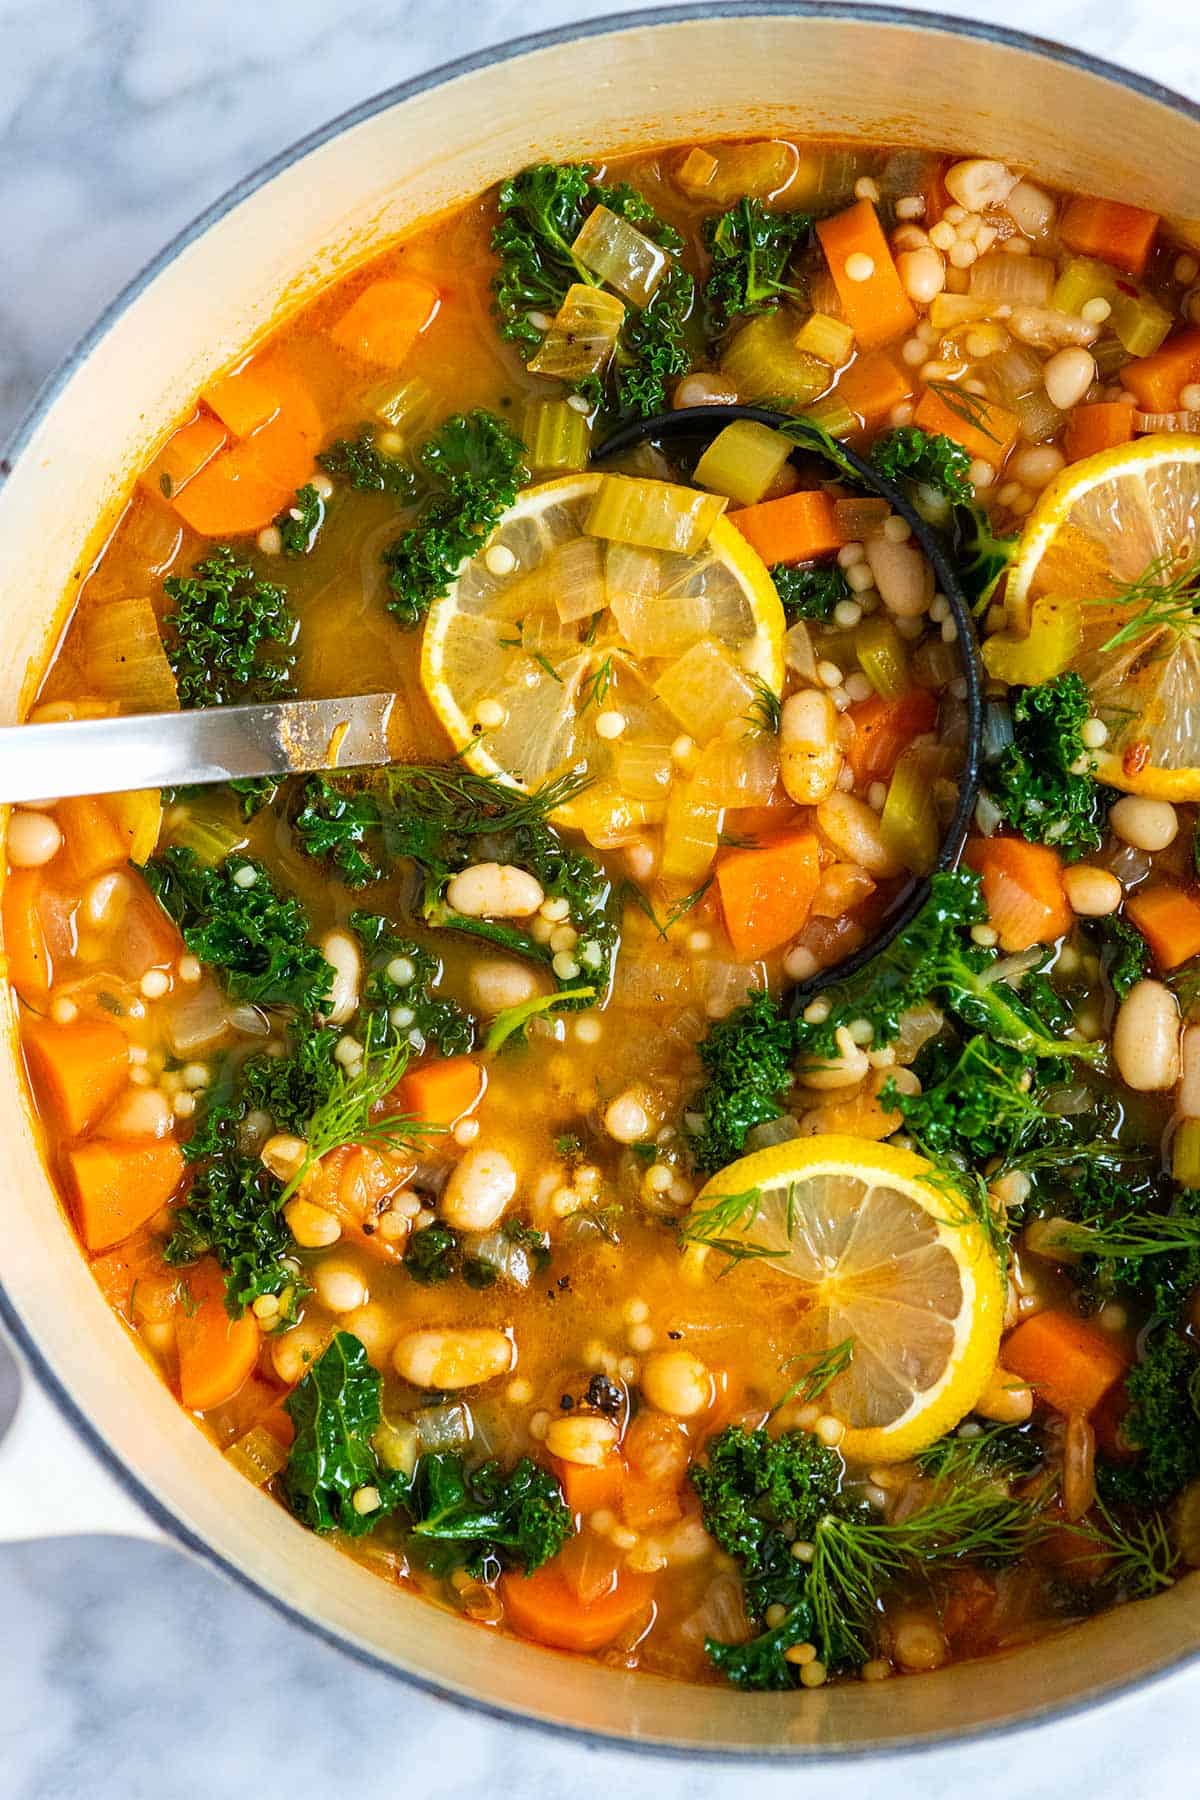
    This easy white bean soup recipe bursts with bright lemon flavor and is packed with protein and fiber. It’s the perfect quick and easy soup for a busy weeknight!

    Easy White Bean Soup

    I created this white bean soup on a chilly evening when I craved something comforting and nutritious but I was in a time crunch. Now it’s become one of our favorites!

    We also love this creamy white bean soup with rosemary and garlic, our white bean chicken chili, and this easy black bean soup. Another must try is our lentil soup, although lentils are not technically beans (still delicious, though!).

    Key Ingredients

    • White Beans: This recipe is one of my favorite white bean recipes. I usually use canned beans, but home-cooked beans would be great! Any variety of white bean will work nicely. I love navy beans, cannellini beans, and great northern beans. You can see how to cook black beans or how to cook chickpeas if you would like to cook the beans from scratch.
    • Veggies: To make this bean soup nice and hearty, I add onion, carrot, celery, garlic, and lots of greens (like spinach or kale).
    • Tomato Paste and Broth: I love the light tomato broth in this soup, which I make by cooking tomato paste in a bit of oil and then adding chicken broth or veggie broth.
    • Pasta: I love pasta in my soups, so I add a small amount of dried pasta about 10 minutes before serving. Use something small like orzo, Ancini di Pepe, or pearl couscous. Dried quinoa or another quick-cooking grain would work, too.
    • Spices: So the soup is well seasoned and spiced, I add salt, pepper, red pepper flakes, fresh thyme, and bay leaves.
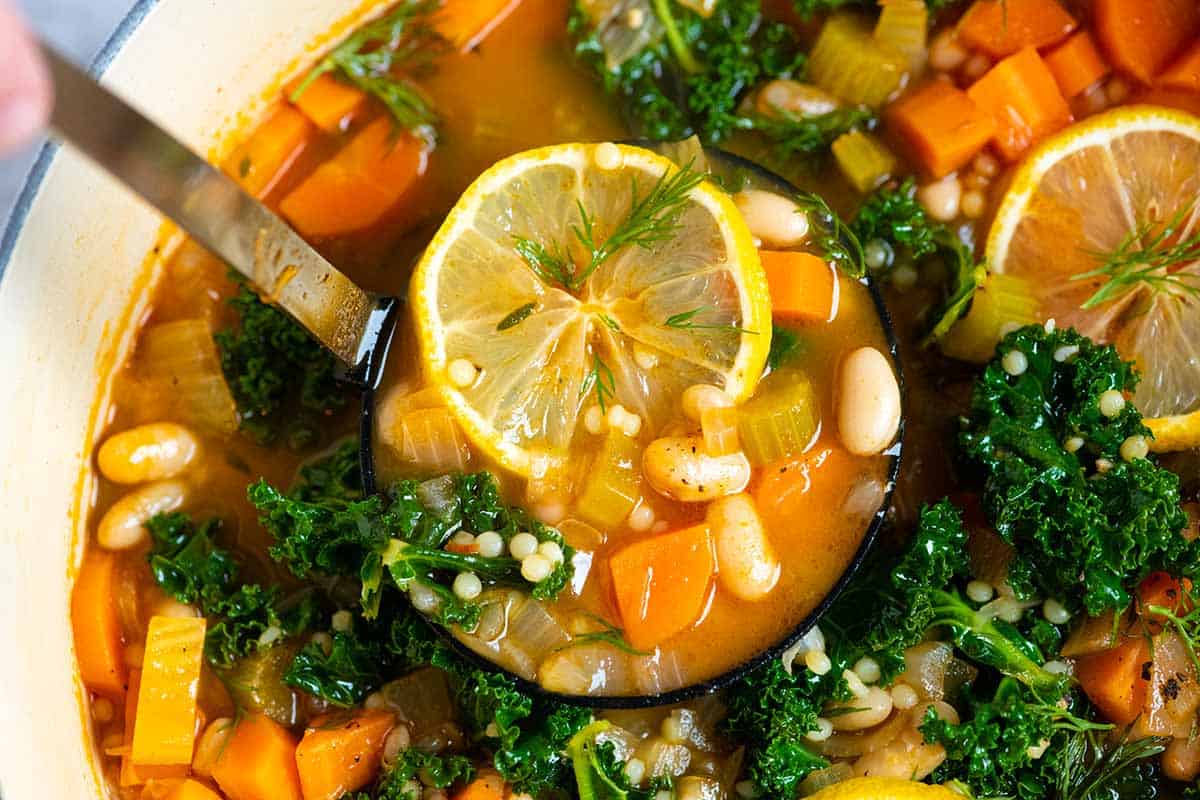
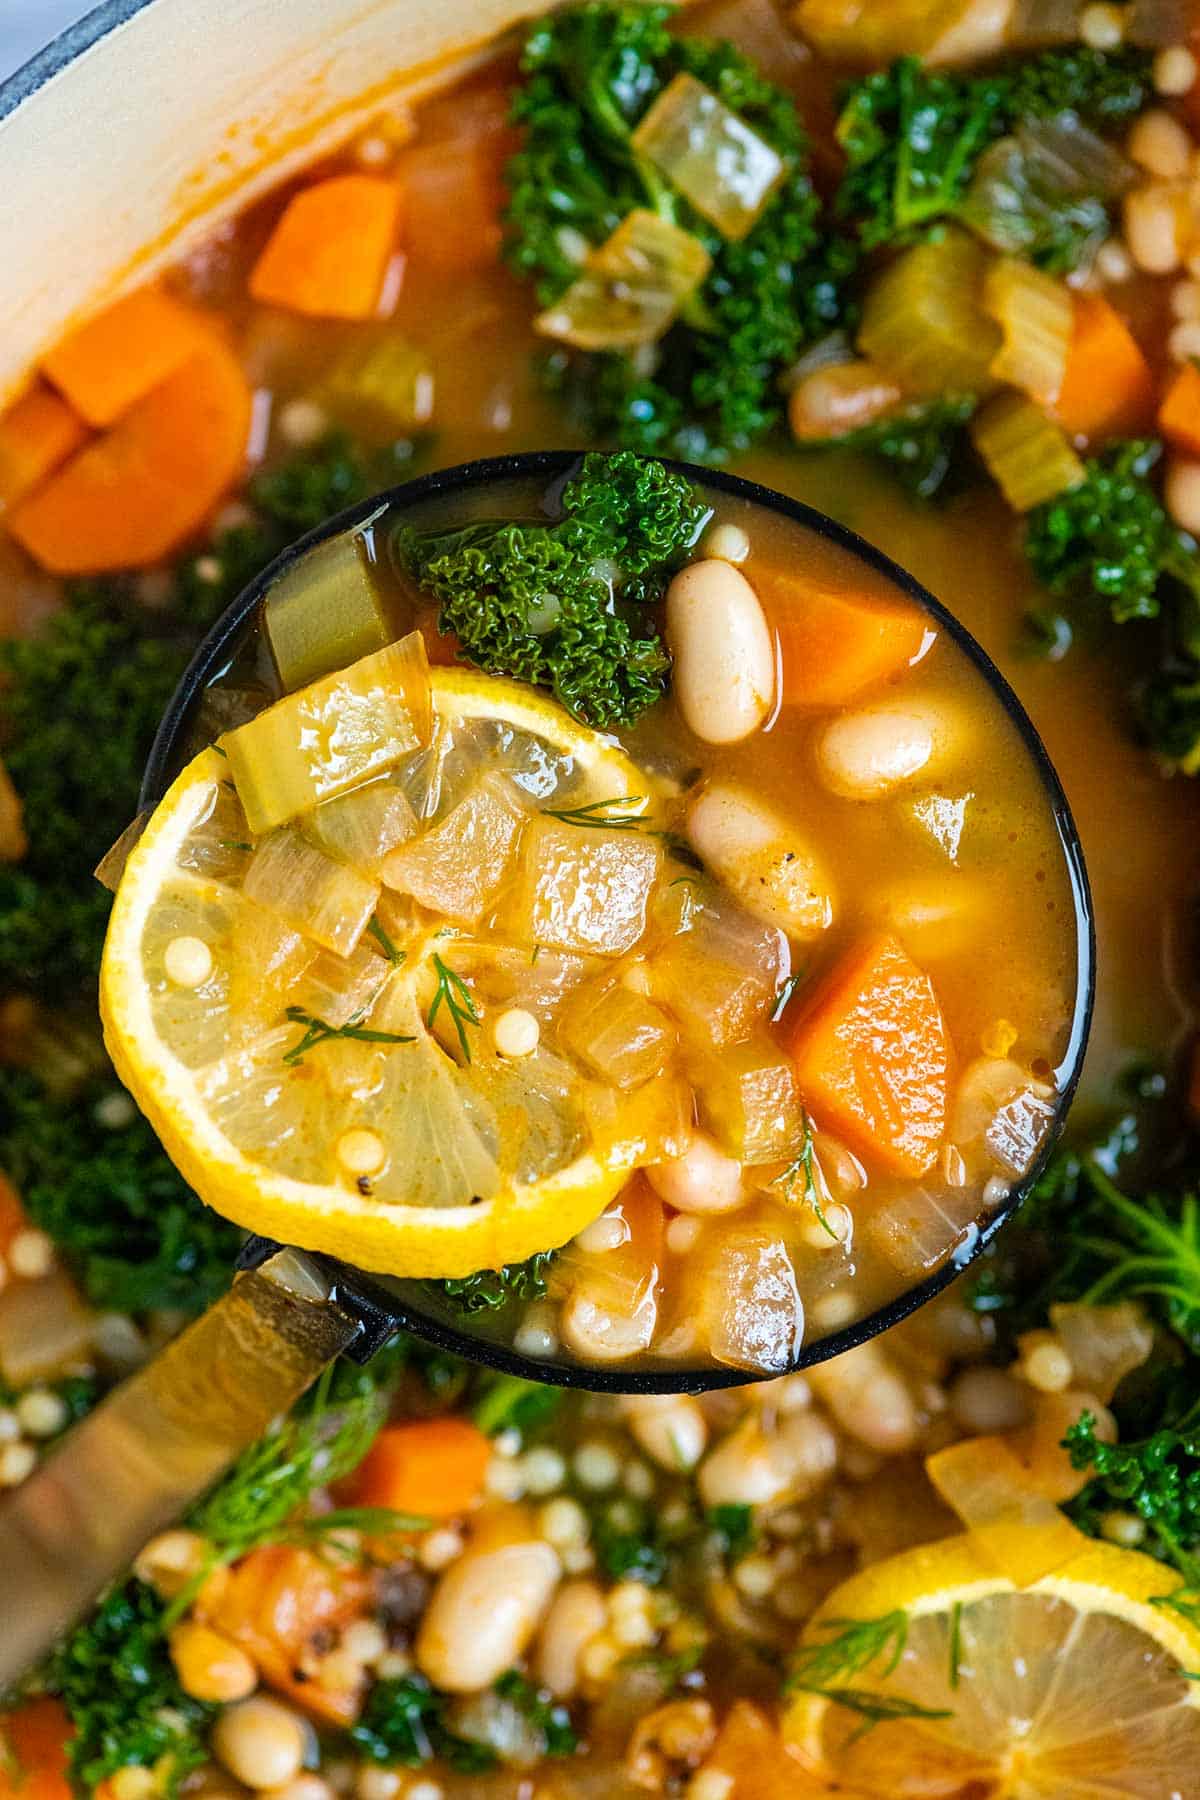
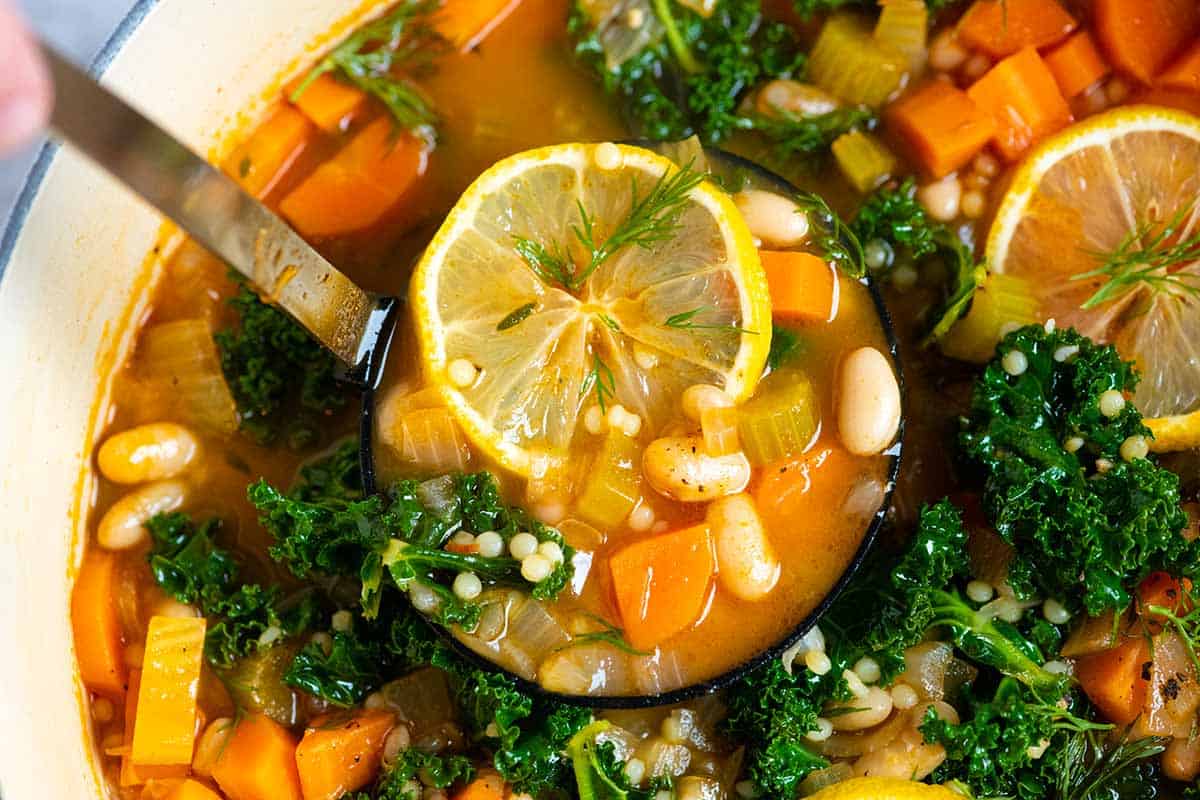
    • Lemon: Right before serving, I slide a few lemon slices into the soup, which brightens the flavors and looks really pretty. You don’t eat the lemon slices. They are there to steep like tea. I do the same in my lentil soup recipe.

    Find the full recipe with measurements below.

    White Bean Soup with vegetables and pasta

    How to Make the Best White Bean Soup

    Tip 1: Use one pot. Making this soup all happens in one pot! You’ll start with the onions, carrots, and celery. Cook them in olive oil and tomato paste until they begin to soften. Then add more flavor with garlic, red pepper flakes, and salt. Pour in your broth, add the beans, and toss in fresh thyme and bay leaves. Simmer everything until the veggies are tender (about 20 minutes), then stir in the pasta and cook until done.

    Tip 2: Serve with lemon slices and fresh herbs. Before serving, slide in a few lemon slices and stir in fresh herbs to perfume the soup. This adds extra flavor and doubles as a beautiful way to serve your soup. By the way, if you have some white beans leftover, try our lemony white bean salad!

    Easy White Bean Soup

    Easy White Bean Soup

    • PREP
    • COOK
    • TOTAL

    This hearty vegetable and white bean soup recipe is healthy, easy to make, and tastes fantastic. It’s also vegan when you use a vegan-friendly broth! Since vegetables vary by seasonality, feel free to swap or add different vegetables for the ones listed below. Both cooked and canned beans can be used in this recipe. When using canned beans, we prefer to drain and rinse them before adding them to the soup.

    4 to 6 Servings

    Watch Us Make the Recipe

    You Will Need

    3 tablespoons olive oil

    1 medium onion, chopped

    4 medium carrots, chopped

    2 celery ribs, chopped

    2 tablespoons tomato paste

    4 cloves garlic, minced, 4 teaspoons

    1/2 teaspoon ground black pepper

    1/2 teaspoon fine sea salt, plus more to taste

    1/8 teaspoon crushed red pepper flakes, optional for heat

    2 (15oze) cans white beans, drained and rinsed, or substitute 3 cups cooked beans

    6 cups (1.4L) chicken stock or vegetable broth

    3 stalks fresh thyme or use 1/2 teaspoon dried thyme

    2 bay leaves

    1/3 cup (127g) small dried pasta like Ancini di Pepe, orzo, or pearl couscous

    4 heaped cups baby spinach or torn kale leaves without stalks

    4 lemon slices

    Directions

      1Heat the oil in a stockpot or Dutch oven over medium heat. Add the onions, carrots, celery, and the tomato paste. Cook, stirring often, until the vegetables have softened and the onions are translucent, 8 to 10 minutes.

      2Add the garlic, black pepper, 1/2 teaspoon of salt, and the red pepper flakes. Cook, while stirring, for one minute.

      3Stir in the beans, broth, thyme, and bay leaves. Increase the heat to medium-high and bring the soup to a boil. Partially cover the pot with a lid, and then reduce the heat to maintain a low simmer.

      4Simmer for 20 minutes or until the vegetables are tender.

      5Add the pasta and cook for 5 minutes more. Then add the spinach or kale and cook until bright green and tender and the pasta is cooked, about 5 minutes more.

      6Take the pot off the heat and remove the thyme sprigs and bay leaves. Stir in the lemon slices. Taste and season with more salt and pepper. Serve. The lemon slices are not intended to be eaten but add a lovely lemon flavor to the soup.

    Adam and Joanne’s Tips

    • Storing: Leftover white bean soup can be stored in the refrigerator for up to 3 days and in the freezer for up to a month.
    • Creamy bean soup: Add a splash of cream, coconut milk, or dairy-free milk just before serving. Or, remove 1 cup of the soup (with some veggies and beans) and blend it until smooth. Stir the blended cup of soup back into the pot to thicken it and add some creaminess.
    • Lentils: When using lentils in this recipe, there is no need to cook them before adding them to the soup. Add them to the broth and cook until tender before adding the pasta, adding 10 minutes to the cooking time.
    • The nutrition facts provided below are estimates. Calculations included vegetable broth.

    Nutrition Per Serving
    Serving Size
    1 cup
    /
    Calories
    196
    /
    Total Fat
    6.4g
    /
    Saturated Fat
    0.8g
    /
    Cholesterol
    0mg
    /
    Sodium
    744.1mg
    /
    Carbohydrate
    30g
    /
    Dietary Fiber
    6.8g
    /
    Total Sugars
    8.1g
    /
    Protein
    6.9g


    AUTHOR:

    Joanne Gallagher

    Previous Post: Easy Sausage Potato Soup
    Next Post: Blue Cheese Salad with Blueberries

    Source link