Author: admin

  • Easy Cowboy Candy Recipe

    Easy Cowboy Candy Recipe

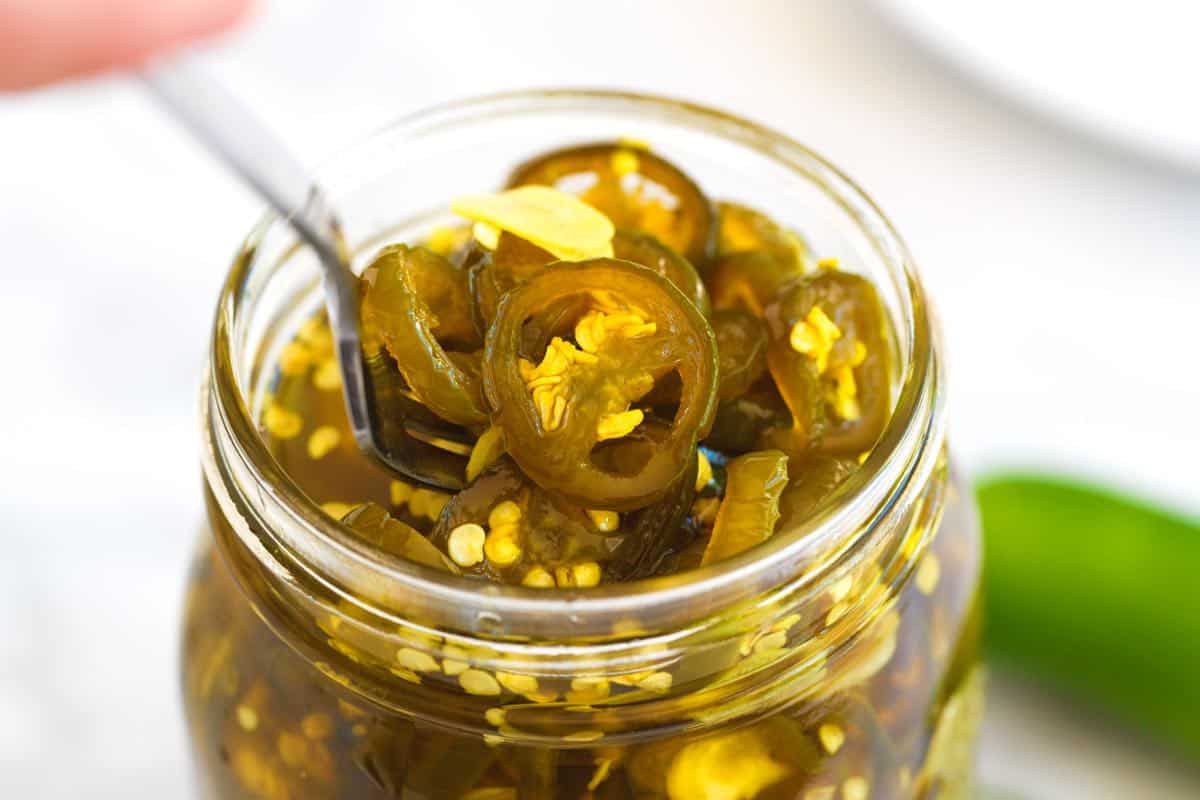
    This easy cowboy candy recipe makes sweet and spicy candied jalapeños that keep for months and taste incredible on everything.
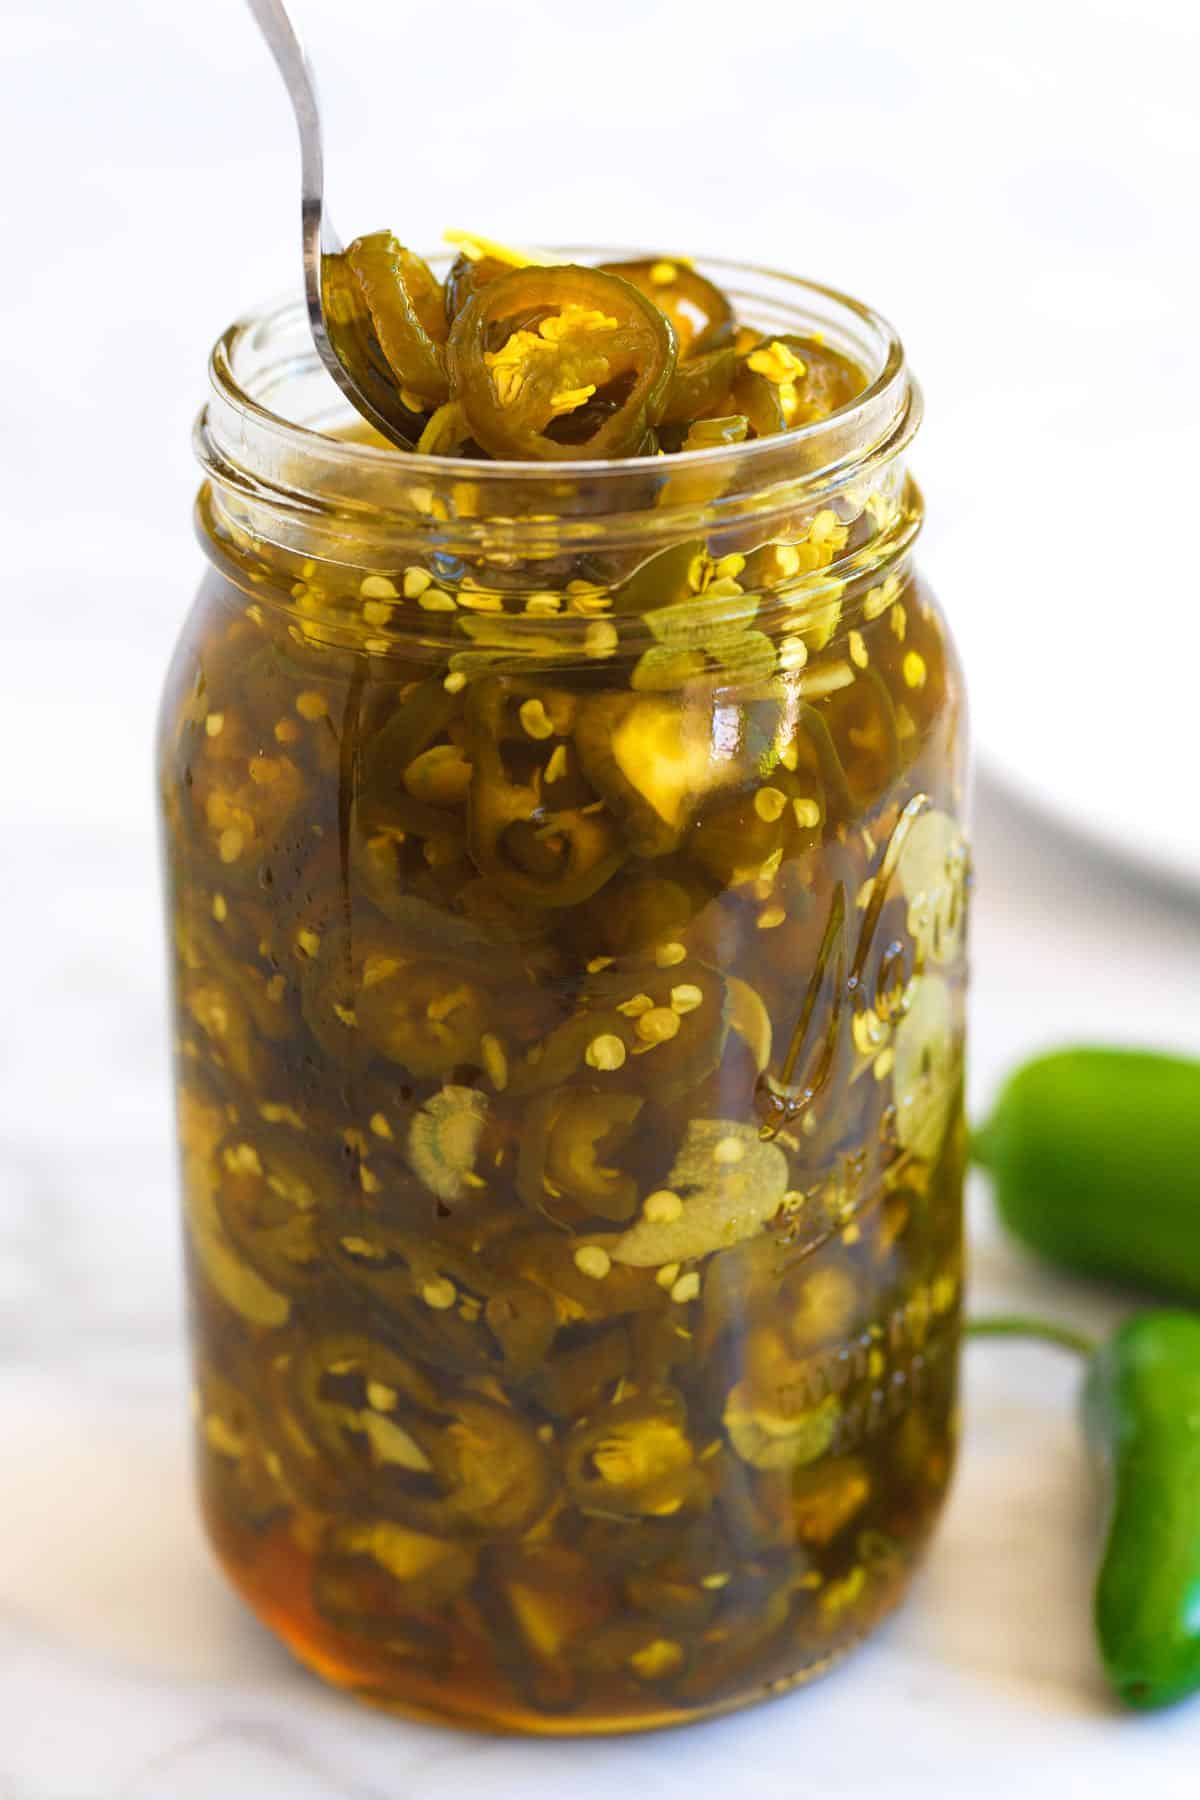
    Homemade Cowboy Candy

    I’ve fallen hard for cowboy candy recipe. With the perfect balance of sweet and spicy, this is the best thing we’ve made in our kitchen lately, and it goes with almost anything!

    I seriously can’t stop sneaking these sweet and spicy peppers onto my plate. The jar has been on the table for every dinner lately. If you’ve never tried candied jalapeños, consider this my gentle nudge to try them. For more of a tangy, pickled version, see our pickled peppers!

    Key Ingredients

    • Peppers: I use fresh jalapeño peppers, but feel free to experiment with other varieties. I leave the seeds and membranes in since the sugar syrup tones the heat of the peppers quite a bit. For extra heat, mix in spicier peppers or swap the jalapeños entirely.
    • Garlic: Thinly sliced raw garlic adds amazing flavor and texture. The candied garlic turns sweet and mellow. I love it as much as the peppers themselves.
    • Vinegar: We use a mix of apple cider vinegar and distilled white vinegar. The combination adds flavor without tasting too much like apples.
    • Sugar: This is a candied jalapeño recipe, so you’ll use a generous amount of sugar. The sugar combines with vinegar to form a syrup that sweetens, preserves, and coats the peppers beautifully.
    • Turmeric: Turmeric enhances both the flavor and color of the jalapeños as they sit. It’s the same trick we use in our bread and butter pickles.

    Find the full recipe with measurements below.

    How to Make Cowboy Candy

    Tip 1: Make the sweet and tangy syrup. The secret to perfectly candied peppers lies in the syrup. You’ll add all the syrup ingredients to a saucepan and heat. Once the sugar dissolves, you can add the sliced peppers and garlic. Then, transfer the peppers to jars, but keep the syrup in the pan to reduce it slightly for extra flavor.
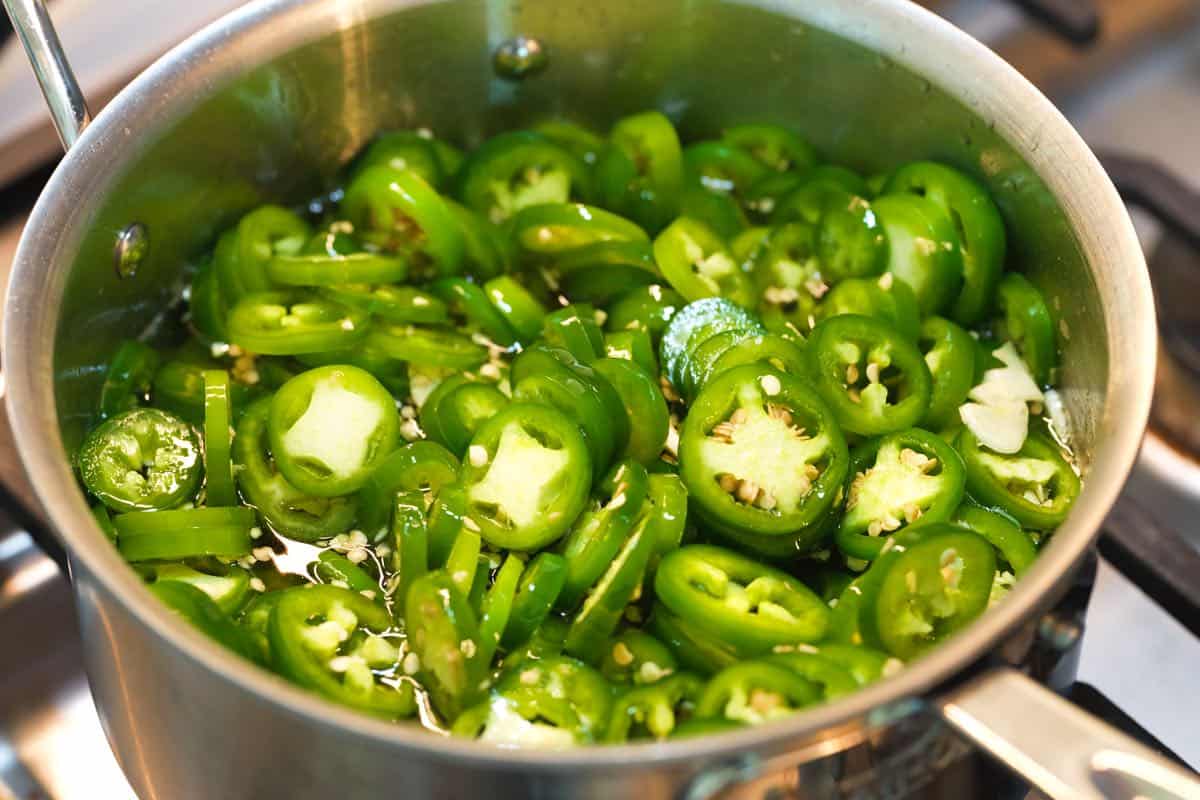
    Making our cowboy candy recipe by cooking jalapeños and garlic in a vinegar sugar syrup

    Tip 2: Save the extra syrup. After reducing the syrup, you’ll pour it over the peppers in the jars. You might have some syrup leftover. Please don’t throw it away! It’s delicious in marinades, dressings, and cocktails, or even drizzled over fruit for a sweet and spicy kick.
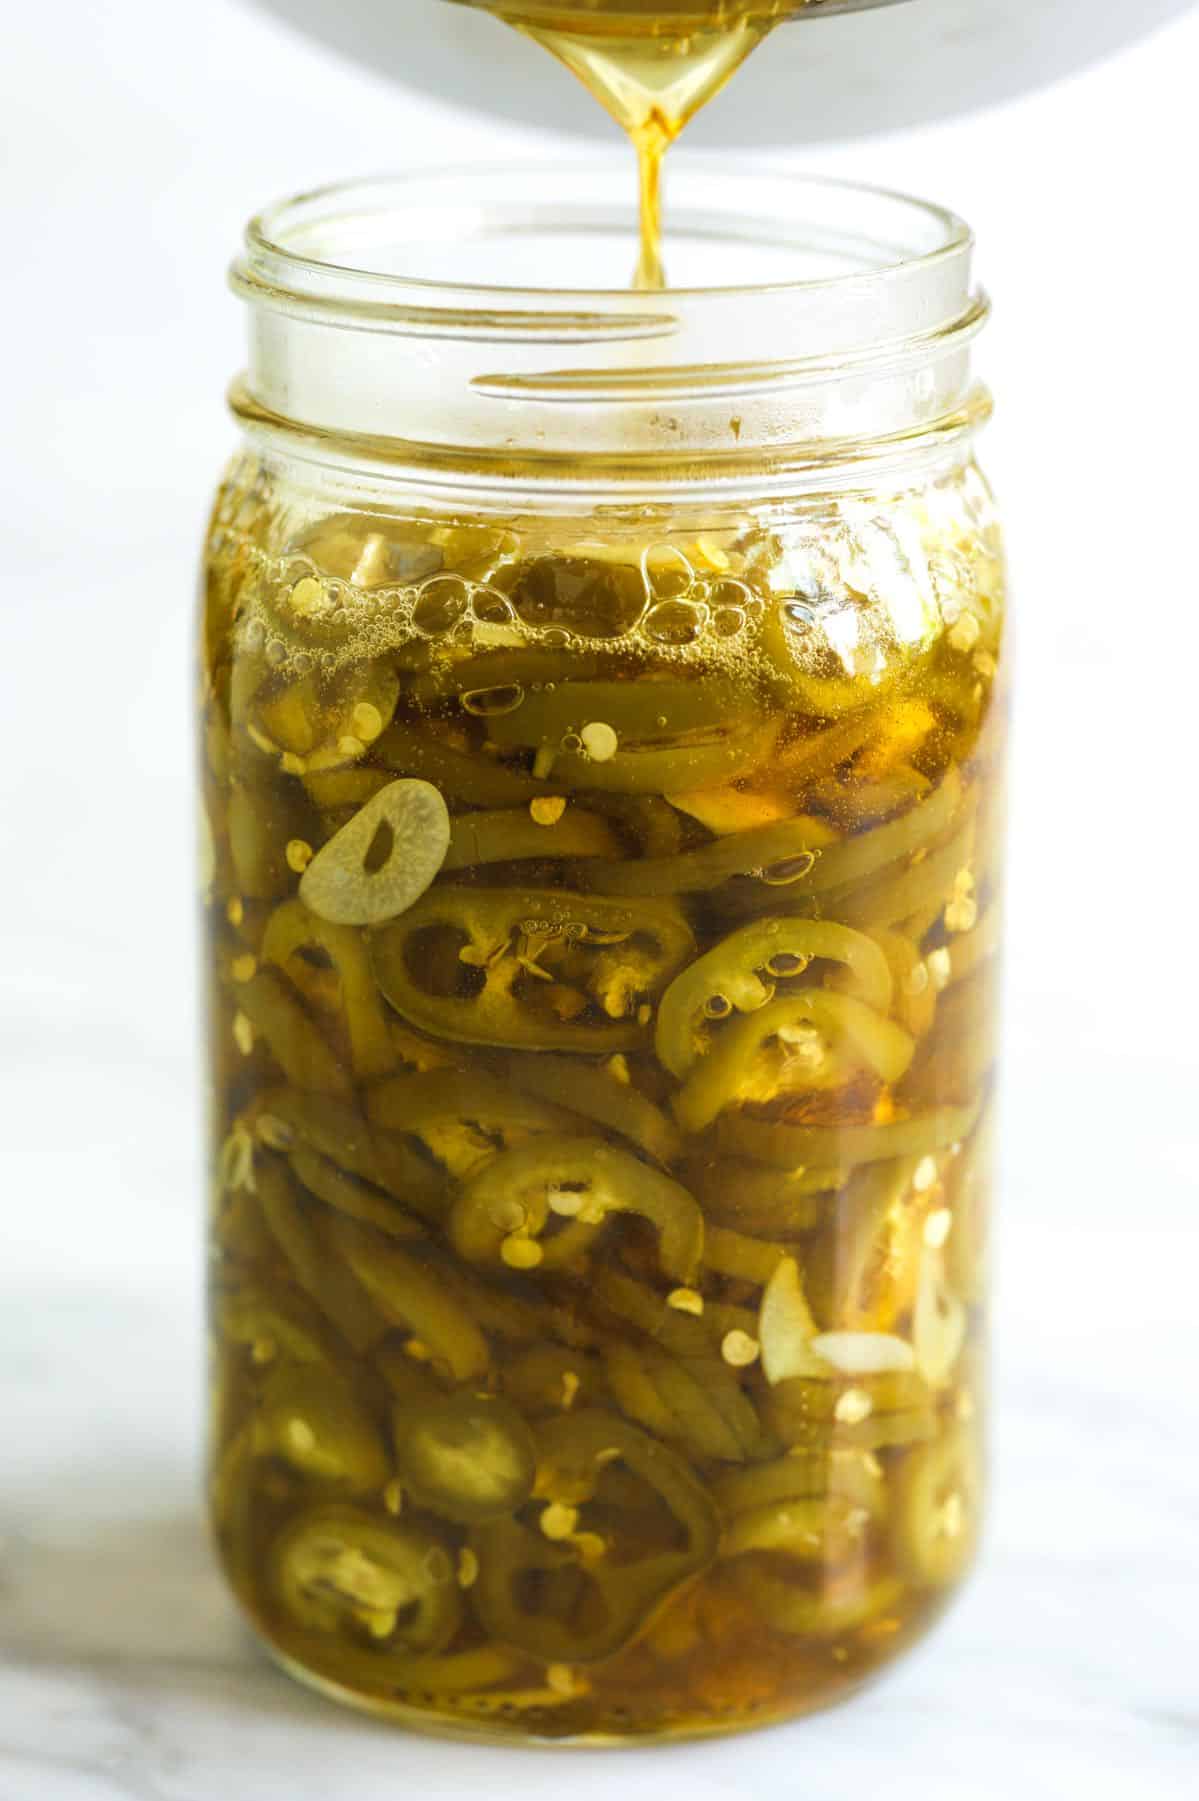
    Pouring a sugar syrup into a jar with jalapeños and garlic.

    Tip 3: Let the flavors develop. Refrigerate the candied jalapeños overnight before eating. They’re good the next day, even better after two days, and downright amazing after a week.

    Ways to Enjoy It

    Cowboy candy goes with just about everything! Once you try these candied jalapeños, you’ll want to add them to everything on your plate. They’re fantastic with sandwiches, hot dogs, burgers, salads, tacos, nachos, and scrambled eggs. They even make potato salad, egg salad, and creamy pasta salad taste better.

    I love adding them to a charcuterie board with cheese and cured meats or layering them onto bagels with smoked salmon and cream cheese. Try them with mac and cheese or chili (see my favorite chili recipe and Texas red chili). And, if that wasn’t enough, you can even stir them into margaritas, cocktails, or mocktails for a sweet-spicy kick.
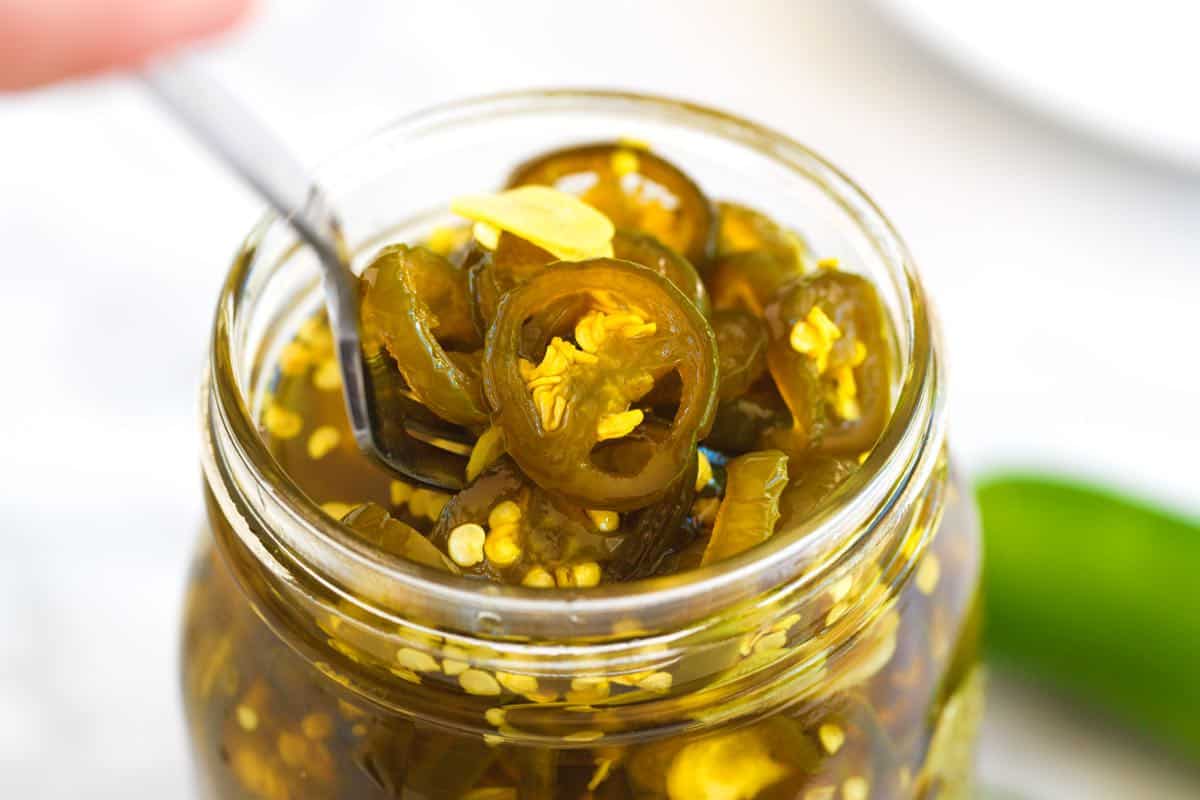
    Easy Cowboy Candy (candied jalapeños)

    Easy Cowboy Candy

    • PREP
    • COOK
    • TOTAL

    Here’s how to make cowboy candy, also known as candied jalapeños. You don’t need to be a master canne. Our recipe is quick, easy, and keeps for months in the fridge. You’ll have some leftover syrup, which is delicious in marinades, dressings, cocktails, or even tossed with fruit (try it with melon!).

    We recommend wearing food-safe gloves when slicing the peppers to protect your hands from the oils. You’ll need about 20 peppers and a 1-quart canning jar or airtight glass container.

    Makes 1 quart jar

    You Will Need

    1 ½ pounds jalapeño peppers, about 20 jalapeños (680g)

    5 garlic cloves, sliced

    ½ teaspoon fine sea salt

    1 cup apple cider vinegar (236ml)

    1 cup distilled white vinegar (236ml)

    3 cups granulated sugar (600g)

    ⅛ teaspoon ground turmeric

    Directions

      1Prepare peppers: Slice the peppers between 1/8″ and 1/4″ thick. Then, place them into a mixing bowl and add the sliced garlic. Sprinkle the salt over the peppers, toss well, and set aside on the counter for 20 minutes.

      2Make syrup: Add apple cider vinegar, white vinegar, sugar, and turmeric to a small saucepan and bring to a boil. Boil the mixture for 3 minutes.

      3Add peppers and garlic: Add the peppers and garlic, and boil for another 3 minutes. With a slotted spoon, scoop out the peppers and garlic and put them into a 1-quart jar.

      4Reduce the syrup: Simmer the vinegar mixture until it reduces to about 1 pint of liquid (2 cups), 5 to 8 minutes.

      5To finish: Pour the reduced vinegar mixture over the peppers and garlic, then add a lid to the jar. Refrigerate overnight, but if you can wait, they are better on day 2 and even better after a week.

    Adam and Joanne’s Tips

    • Storing: Homemade cowboy candy lasts in an airtight jar in the fridge for 3 months, though my family finishes the jar well before that! For longer storage, you can preserve it using a traditional water bath (I recommend reviewing a canning resource for tips).
    • The nutrition facts provided below are estimates.

    Nutrition Per Serving
    Serving Size
    1 tablespoon (includes syrup)
    /
    Calories
    82
    /
    Total Fat
    0.1g
    /
    Saturated Fat
    0g
    /
    Cholesterol
    0mg
    /
    Sodium
    37.8mg
    /
    Carbohydrate
    20.4g
    /
    Dietary Fiber
    0.6g
    /
    Total Sugars
    19.6g
    /
    Protein
    0.2g


    AUTHOR:

    Joanne Gallagher

    Adam and Joanne of Inspired Taste

    We are Adam and Joanne Gallagher, the creators of Inspired Taste. Established in 2009, Inspired Taste grew from a childhood dream into one of the internet’s most trusted recipe sites with hundreds of reliable recipes, step-by-step videos, and expert tips.More About Us
    Source link

  • Easy Chipotle Bean Chili Recipe

    Easy Chipotle Bean Chili Recipe

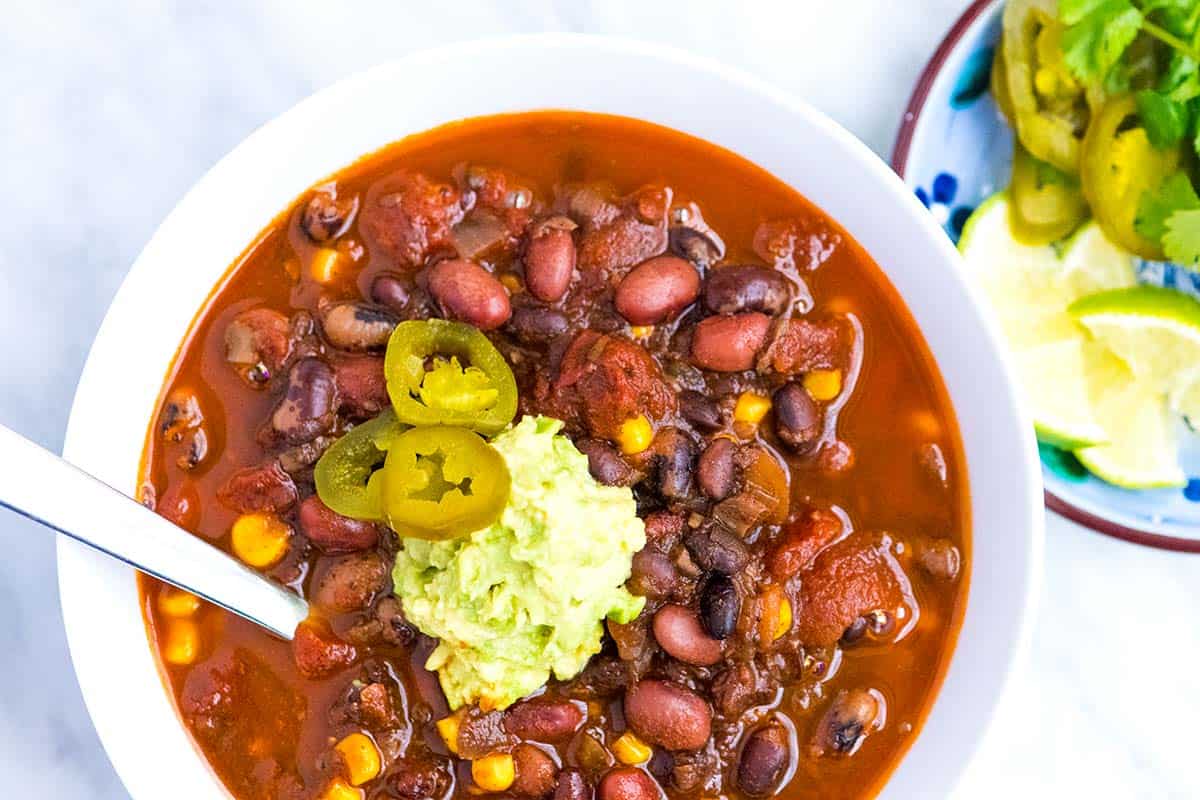
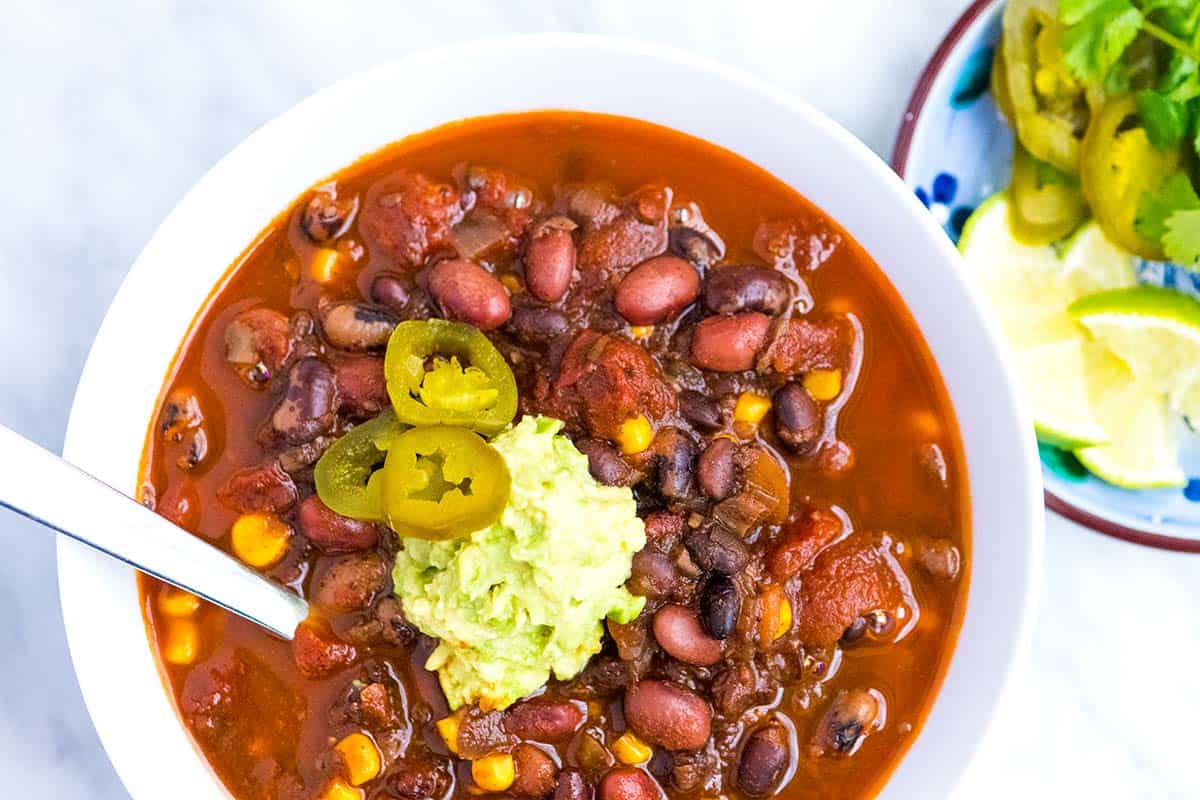
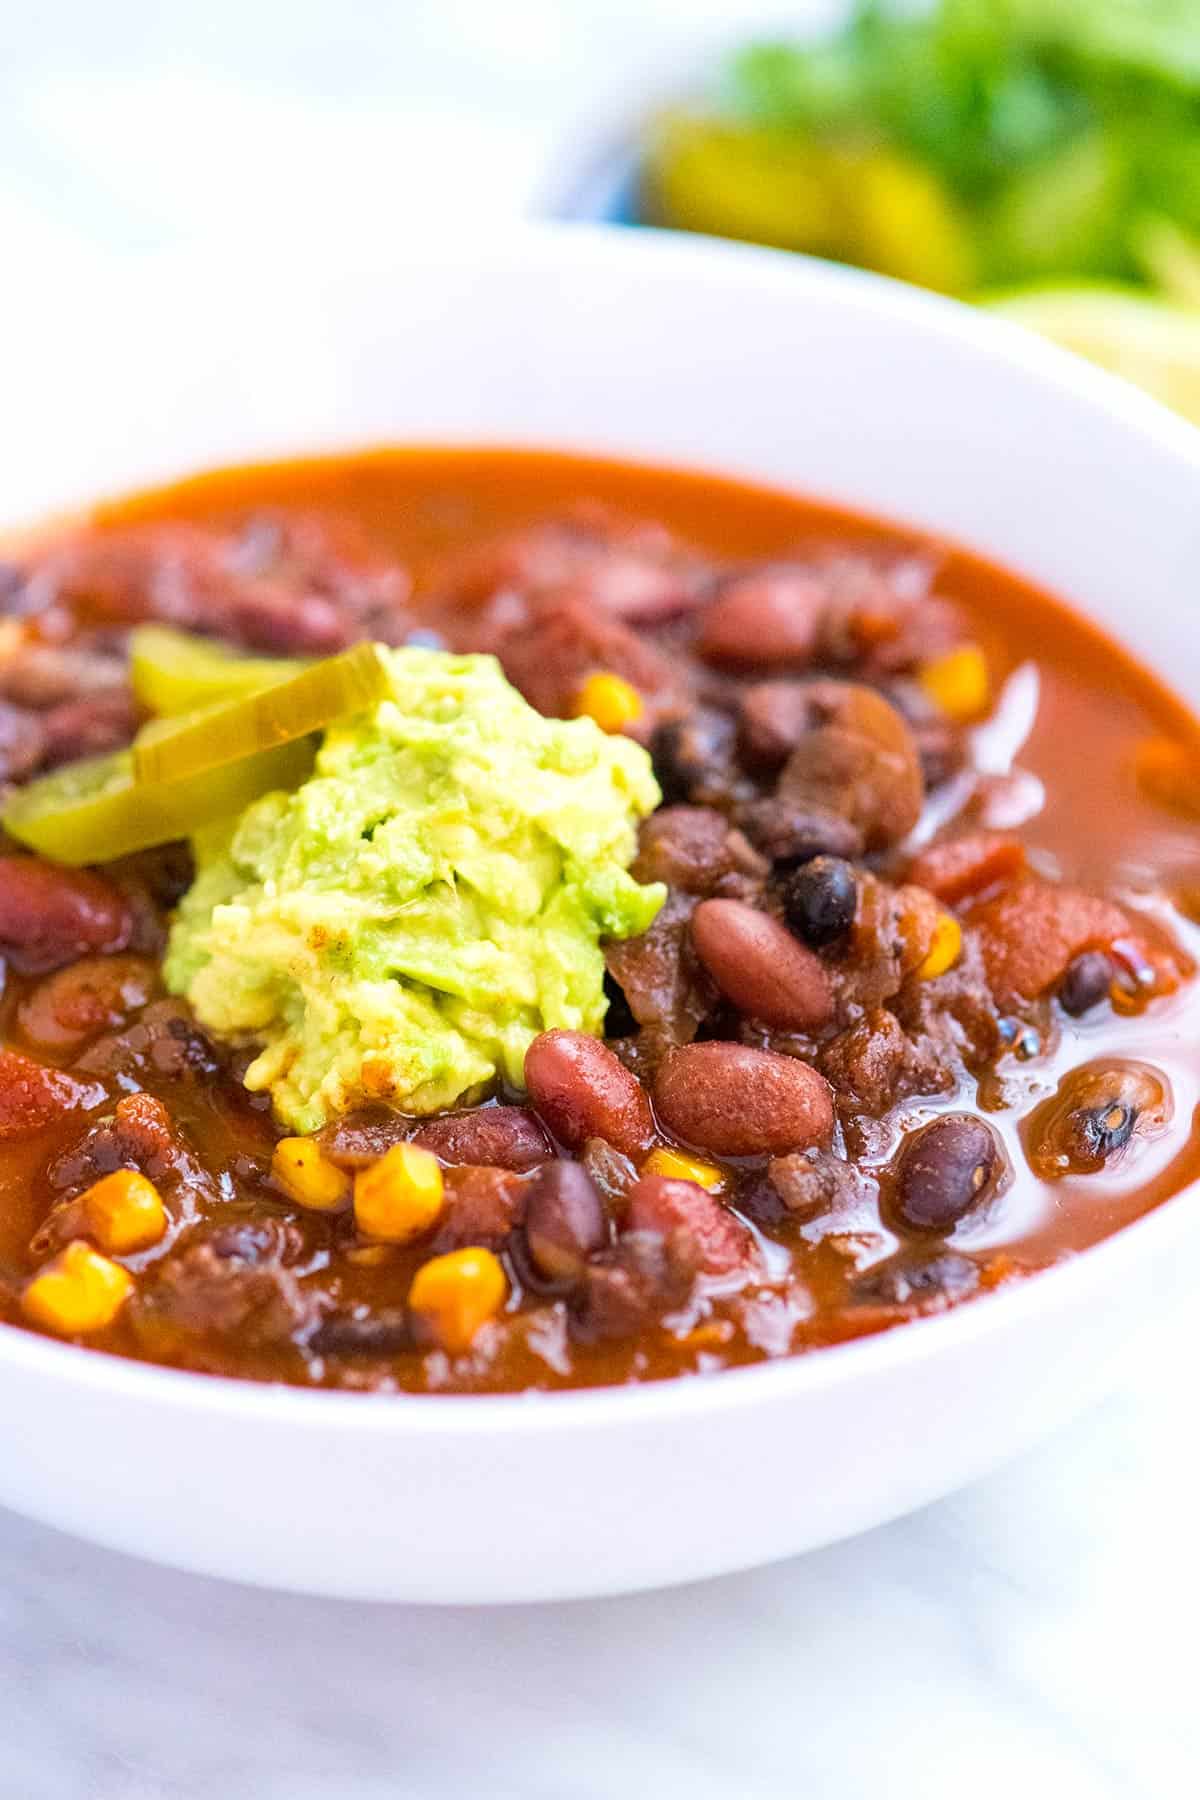
    This vegetarian bean chili recipe is a cozy comfort food dream come true! Whether you cook it on the stovetop or in a slow cooker, it’s easy and mostly hands-off! I can’t wait for you to try it!

    Easy Chipotle Bean Chili

    I am head over heels for this easy bean chili! It’s bursting with flavor, and I love how perfectly the beans turn out. You’ll start with dried beans, but no soaking is required! Just toss dried beans in a pot with all the delicious veggies and spices and let them work their magic. I love this with the dried beans, but tips for using canned are included below, or you can take a look at this vegetarian chili with canned black beans and quinoa.

    This bean chili is pure comfort food, whether you make it on the stovetop or in a slow cooker (instructions for both are below!). Top it with all your favorite toppings! I love mine with guacamole, a sprinkle of shredded cheese, and a tangy kick from pickled onions or jalapeños.

    Key Ingredients

    • Beans: The star of our chili! You can use what you love. I usually combine black beans, kidney beans, and pinto beans. Since we simmer our chili for a while, there is no need to soak the beans. If you’d prefer to soak your beans, I’ve included tips for adjusting the recipe below.
    • Veggies: This chili starts with an onion, mushroom, and garlic base. Towards the end of cooking, we stir in corn. Feel free to add more vegetables!
    • Spices: Beans can take a lot of spice, so we are pretty generous with chili powder, cumin, and salt. When I have it on hand, I love ancho chili powder or this homemade chili powder.
    • Chipotle Peppers in Adobe Sauce: These are usually sold in small 7-ounce cans. They are a flavor powerhouse! Chipotles are smoked dried jalapeños, and in this case, they are packed in adobo sauce, which is a tangy, slightly sweet, spicy sauce made with tomatoes, vinegar, and spices. They pack a punch, and I love them for it. Use as much or as little as you like. You can even add slowly and taste the chili to see if you need more.
    • Tomatoes: I use crushed canned tomatoes, but diced or whole tomatoes are fine. You just need to crush them with a wooden spoon to break them apart as they cook.

    How to Make Bean Chili

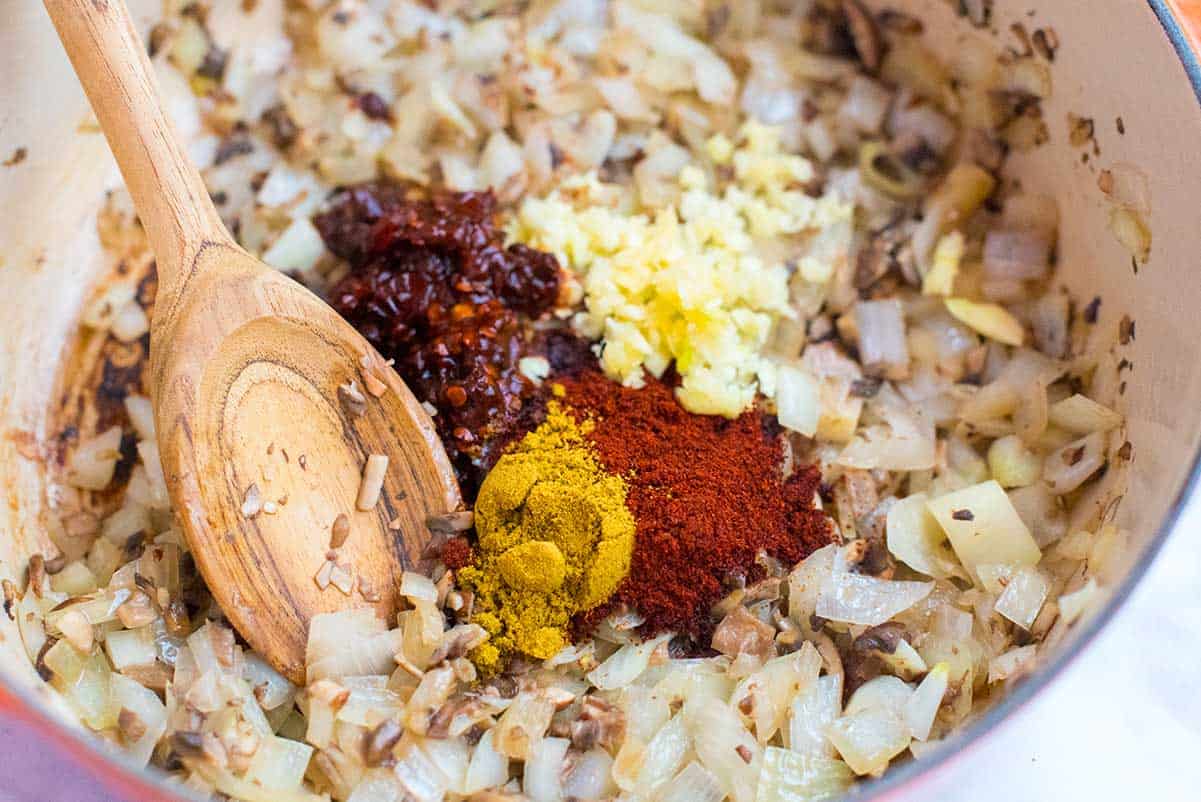
    We pack lots of flavor into this chili, starting with a base of veggies and spices. I love onion and mushrooms for this recipe. The onions add sweetness, and the mushrooms give the chili a rich umami flavor. I use them a lot in vegetarian recipes, like in these lentil meatballs or this veggie burger. Mushrooms are a fantastic way to make something taste meaty and rich while keeping a plant-based dish.

    How to Make Bean Chili: Chili spices, chipotles, onions, and garlic in a pot.

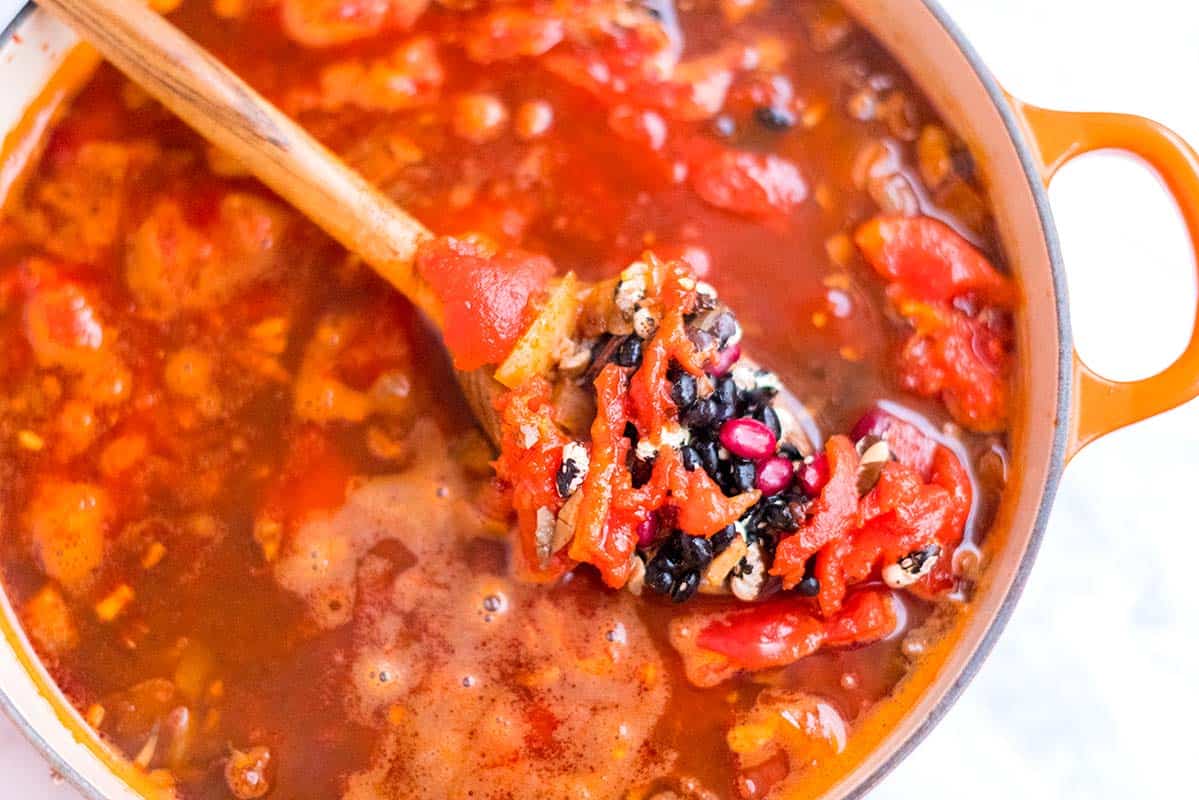
    Once the mushrooms and onions are cooked, we add crushed tomatoes and scrape the bottom of the pan to lift any bits stuck to the bottom (there’s lots of flavor there). Dried beans and some water go in next, and it’s hands-off cooking from there. The chili takes 2 ½ to 3 hours on the stove and 6 to 7 in a slow cooker.

    How to Make Bean Chili: Cooking bean chili on the stove

    For a faster version, use canned beans. By using canned or previously cooked beans, you can dramatically cut the cooking time to 30 minutes. See the recipe tips below for how to do it.

    For more chili recipes, see our best homemade chili (made with beef), easy turkey chili, or this vegetarian chili (made with quinoa and black beans).

    Easy Chipotle Bean Chili

    Easy Chipotle Bean Chili

    • PREP
    • COOK
    • TOTAL

    This vegetarian bean chili is super flexible! You can use either dried or canned beans (see tips below for using canned beans). This recipe is written for cooking with dried beans on the stovetop, but you can easily make it in a slow cooker, too (see below for slow cooker instructions)! We use chipotle peppers in adobo sauce for a delicious smoky heat. You can find small cans of these in the international aisle of most grocery stores. Two peppers make a mild-to-medium chili. Add one or two more peppers for a spicier chili, or use some of the adobo sauce from the can.

    6 Servings

    You Will Need

    Bean Chili

    1 ½ tablespoons avocado oil

    1 medium onion, finely chopped

    4 ounces mushrooms, finely chopped

    4 garlic cloves, minced

    1 ½ tablespoons chili powder, try homemade chili powder

    1 teaspoon ground cumin

    1 teaspoon fine sea salt, plus more to taste

    2 chipotle peppers in adobo sauce, finely minced, use more for a spicier chili

    1 (28oz) can crushed tomatoes

    1 ½ cups dried beans, see below for suggestions

    4 cups water

    1 cup frozen corn

    1 teaspoon red wine vinegar


    Serving

    Lime wedges, mashed avocado, guacamole, sour cream, pickled jalapeños, chopped onion, cilantro, tortillas or tortilla chips

    Directions

    • Stovetop Bean Chili
    • 1Heat the oil in a heavy-bottom pot with a lid (we use our Dutch oven).

      2Add the onion and mushrooms, then cook, stirring occasionally, until the onions are soft and translucent.

      3Stir in the garlic, chipotles, chili powder, cumin, and salt. Cook for about a minute.

      4Add the tomatoes and use a wooden spoon to scrape any bits stuck to the bottom of the pot.

      5Rinse the beans with cool water, drain them, and then add them to the pot with the water. Bring the chili to a boil and cook for one minute. Reduce the heat to a low, gentle simmer then cover with a lid. Cook, stirring occasionally, for 2 ½ to 3 hours. If during cooking the chili seems day, add a little more water.

      6When the chili is done, stir in the corn and red wine vinegar. Add additional salt if needed. Cook until the corn is warmed, about 5 minutes, then serve topped with your favorite chili toppings.

    • Slow Cooker Bean Chili
    • 1Cook the onion, mushrooms, garlic, chipotles, spices, salt, and tomatoes, as shown in the stovetop method above. You can use a skillet instead of a heavy-bottomed pot.

      2Scrape the onion-tomato mixture into a slow cooker. Rinse the beans with cool water, drain, and then add them to the slow cooker along with 3 ½ cups of water.

      3Cook on HIGH for 6 to 7 hours. If the chili seems dry, add a little more water. Add the corn 20 minutes or so towards the end of cooking.

    Adam and Joanne’s Tips

    • Storing: Leftover bean chili can be kept in an airtight container in the fridge for up to 5 days or frozen for up to 3 months.
    • Dried beans: We usually use a mixture of beans when making this chili. Black beans and kidney beans are almost always included. Other varieties, like pinto beans, are great too. I’ve even used orca beans with great success. Since the beans cook for almost 3 hours, it’s unnecessary to soak them beforehand. If you want the beans to be very soft, you can always soak them overnight before cooking. Drain and rinse the soaked beans before adding to the chili. Expect the chili to take less time (1 ½ to 2 hours).
    • Using canned beans: You will need just less than 4 cups of cooked or canned beans (about three 15oz cans). You don’t need to add the water called for in the recipe above. Cook the onions, mushrooms, spices, and tomatoes as mentioned in the recipe. Add about 1/2 cup of water, bring everything to a low simmer, and cook for about 20 minutes. Add the canned/previously cooked beans, then cook for another 10 minutes. If the chili seems dry, add a little more water.
    • The nutrition facts provided below are estimates. We did not include any toppings in the calculations.

    Nutrition Per Serving
    Serving Size
    1 1/2 cups (1 of 6 servings)
    /
    Calories
    244
    /
    Protein
    12 g
    /
    Carbohydrate
    43 g
    /
    Dietary Fiber
    14 g
    /
    Total Sugars
    7 g
    /
    Total Fat
    5 g
    /
    Saturated Fat
    1 g
    /
    Cholesterol
    0 mg
    /
    Sodium
    841 mg


    AUTHOR:

    Joanne Gallagher

    Adam and Joanne of Inspired Taste

    We are Adam and Joanne Gallagher, the creators of Inspired Taste. Established in 2009, Inspired Taste grew from a childhood dream into one of the internet’s most trusted recipe sites with hundreds of reliable recipes, step-by-step videos, and expert tips.More About Us
    Source link

  • Easy Seared Snapper Recipe

    Easy Seared Snapper Recipe

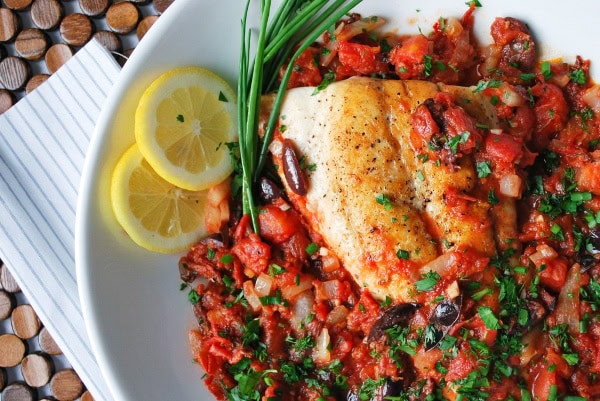
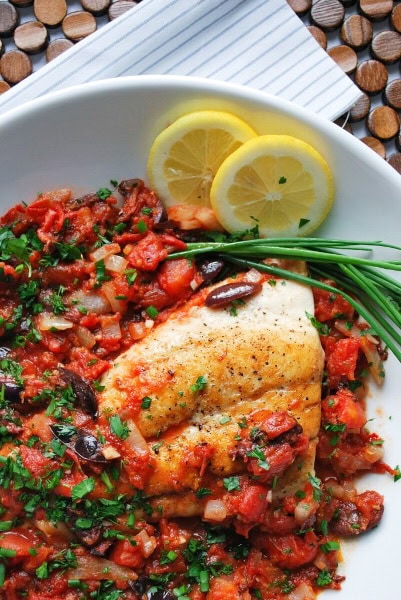
    I love this super flavorful red snapper recipe made with pan-fried snapper and a spicy tomato, olive, and herb sauce. This easy fish recipe is quick to make and full of flavor!

    Seared Snapper Fillets with Spicy Tomato, Olive, and Herb Sauce

    I love how fresh, light, and zesty this snapper recipe is. It’s also all made in one pan, which is always a win in our book. The fish is cooked simply with olive oil, salt, and pepper. Then, we make a quick pan sauce with tomatoes, olives, citrus zest, and red pepper flakes to make it a bit spicy.

    I love serving this snapper dish with a side of bread or flatbread to scoop up all that incredible sauce. I love homemade focaccia or these easy flatbreads, which only take 30 minutes to make!

    Key Ingredients

    • Snapper: I used a red snapper fillet for this recipe. Snapper has a mildly sweet and delicate taste. However, some snapper stocks may be overfished, so I encourage you to check the Monterey Bay Aquarium Seafood Watch website for sustainable options in your area. The good news is that you can easily substitute any firm white fish, like tilapia, Pacific halibut, Pacific cod, or black cod (sablefish), for the snapper in this recipe.
    • Shallot, Garlic, and Red Pepper Flakes: These three ingredients form the flavorful base of our tomato sauce. I prefer shallots for their mild sweetness, but you can also use yellow or sweet onions.
    • Citrus Zest: I use a microplane to add lemon and orange zest to the sauce. The combination of orange, olives, and tomato is simply irresistible!
    • Olives: I toss in Kalamata olives for their briny, salty bite. If you prefer a milder flavor, you can use green Castelvetrano olives, which are buttery and delicate.
    • Tomatoes: While fresh tomatoes work well, I usually opt for canned diced tomatoes for convenience. If you have fire-roasted canned tomatoes on hand, they’ll add even more depth of flavor.
    • Herbs: I always finish this dish with a handful of fresh herbs to enhance the taste. I used parsley, dill, and chives in our photos, but mint or cilantro would also be delicious.

    How to Make Snapper with Spicy Tomato Sauce

    I keep the fish preparation simple and let the spicy tomato sauce be the star of the dish. The trick is to season the snapper fillets with salt and pepper, then pan-fry them until they are almost cooked in the middle.

    I remove the fish from the pan before it’s fully cooked, then make the sauce in the same pan. Once the sauce is ready, I nestle the pan-fried snapper back into the pan, allowing it to finish cooking in the flavorful sauce. This technique keeps the fish moist and helps it absorb all those incredible flavors.

    For more easy fish recipes, see our easy baked trout, maple soy glazed salmon, and this swordfish recipe with lime.

    Easy Pan Seared Snapper Fillets

    Easy Seared Snapper

    • PREP
    • COOK
    • TOTAL

    I love this easy snapper recipe with pan-seared fillets, spicy tomato, and olive sauce. If you cannot find a sustainable red snapper, substitute it with another firm white fish (see tips below for suggestions). The search feature from Monterey Bay Aquarium’s Seafood Watch is very helpful in determining the best, most sustainable choices when it comes to seafood.

    Makes 4 servings

    You Will Need

    1 pound (450g) red snapper fillets, see tips for substitutes

    2 tablespoons olive oil

    Salt and fresh ground black pepper

    1 large shallot, chopped

    2 garlic cloves, minced

    1/4 to 1/2 teaspoon crushed red pepper flakes, depending on how spicy you want the sauce

    1 tablespoon lemon zest

    2 teaspoons orange zest

    1/3 cup kalamata olives, pitted and cut in half

    1 (14oz) can diced tomatoes

    2 tablespoons chopped fresh herbs, try a combination of parsley, dill, and chives

    Lemon wedges for serving

    Directions

      1Season both sides of the snapper fillet with salt and pepper.

      2Heat the skillet over medium-high heat. When it is hot, add the olive oil. Then, carefully place the seasoned fillet in the hot oil and cook for 2 to 3 minutes per side or until lightly browned. The fish should be slightly undercooked in the center. Transfer the snapper to a plate.

      3Reduce the heat to medium. Add the onions to the skillet and cook, stirring occasionally, until softened, about 5 minutes. If the pan seems dry, add a drizzle of olive oil.

      4Stir in the garlic and red pepper flakes and cook for 30 seconds.

      5Add the lemon zest, orange zest, olives, and canned diced tomatoes with their juices to the skillet. Use a wooden spoon to scrape up any browned bits from the bottom of the pan. Bring the mixture to a simmer and cook for 5 minutes, stirring occasionally.

      6Stir in the herbs and taste the sauce. Season with additional salt and pepper, if needed.

      7Gently nestle the snapper fillets back into the sauce, spooning some sauce over the top. Cook until the fish is opaque and easily flakes with a fork, about 3 to 5 minutes more.

      8Transfer the snapper and sauce to a serving platter or individual plates. Garnish with fresh lemon wedges and additional herbs.

    Adam and Joanne’s Tips

    • Snapper alternatives: This recipe works well with any firm white fish. Try tilapia, Pacific halibut, Pacific cod, and black cod (sablefish).
    • The nutrition facts provided below are estimates.

    Nutrition Per Serving
    Serving Size
    1/4 of the recipe
    /
    Calories
    223
    /
    Total Fat
    10g
    /
    Saturated Fat
    1.5g
    /
    Cholesterol
    41.9mg
    /
    Sodium
    659mg
    /
    Carbohydrate
    9.4g
    /
    Dietary Fiber
    2g
    /
    Total Sugars
    4.2g
    /
    Protein
    24.6g


    AUTHOR:

    Joanne Gallagher

    Adam and Joanne of Inspired Taste

    We are Adam and Joanne Gallagher, the creators of Inspired Taste. Established in 2009, Inspired Taste grew from a childhood dream into one of the internet’s most trusted recipe sites with hundreds of reliable recipes, step-by-step videos, and expert tips.More About Us
    Source link

  • Skillet Lemon Parmesan Chicken and Zucchini

    Skillet Lemon Parmesan Chicken and Zucchini

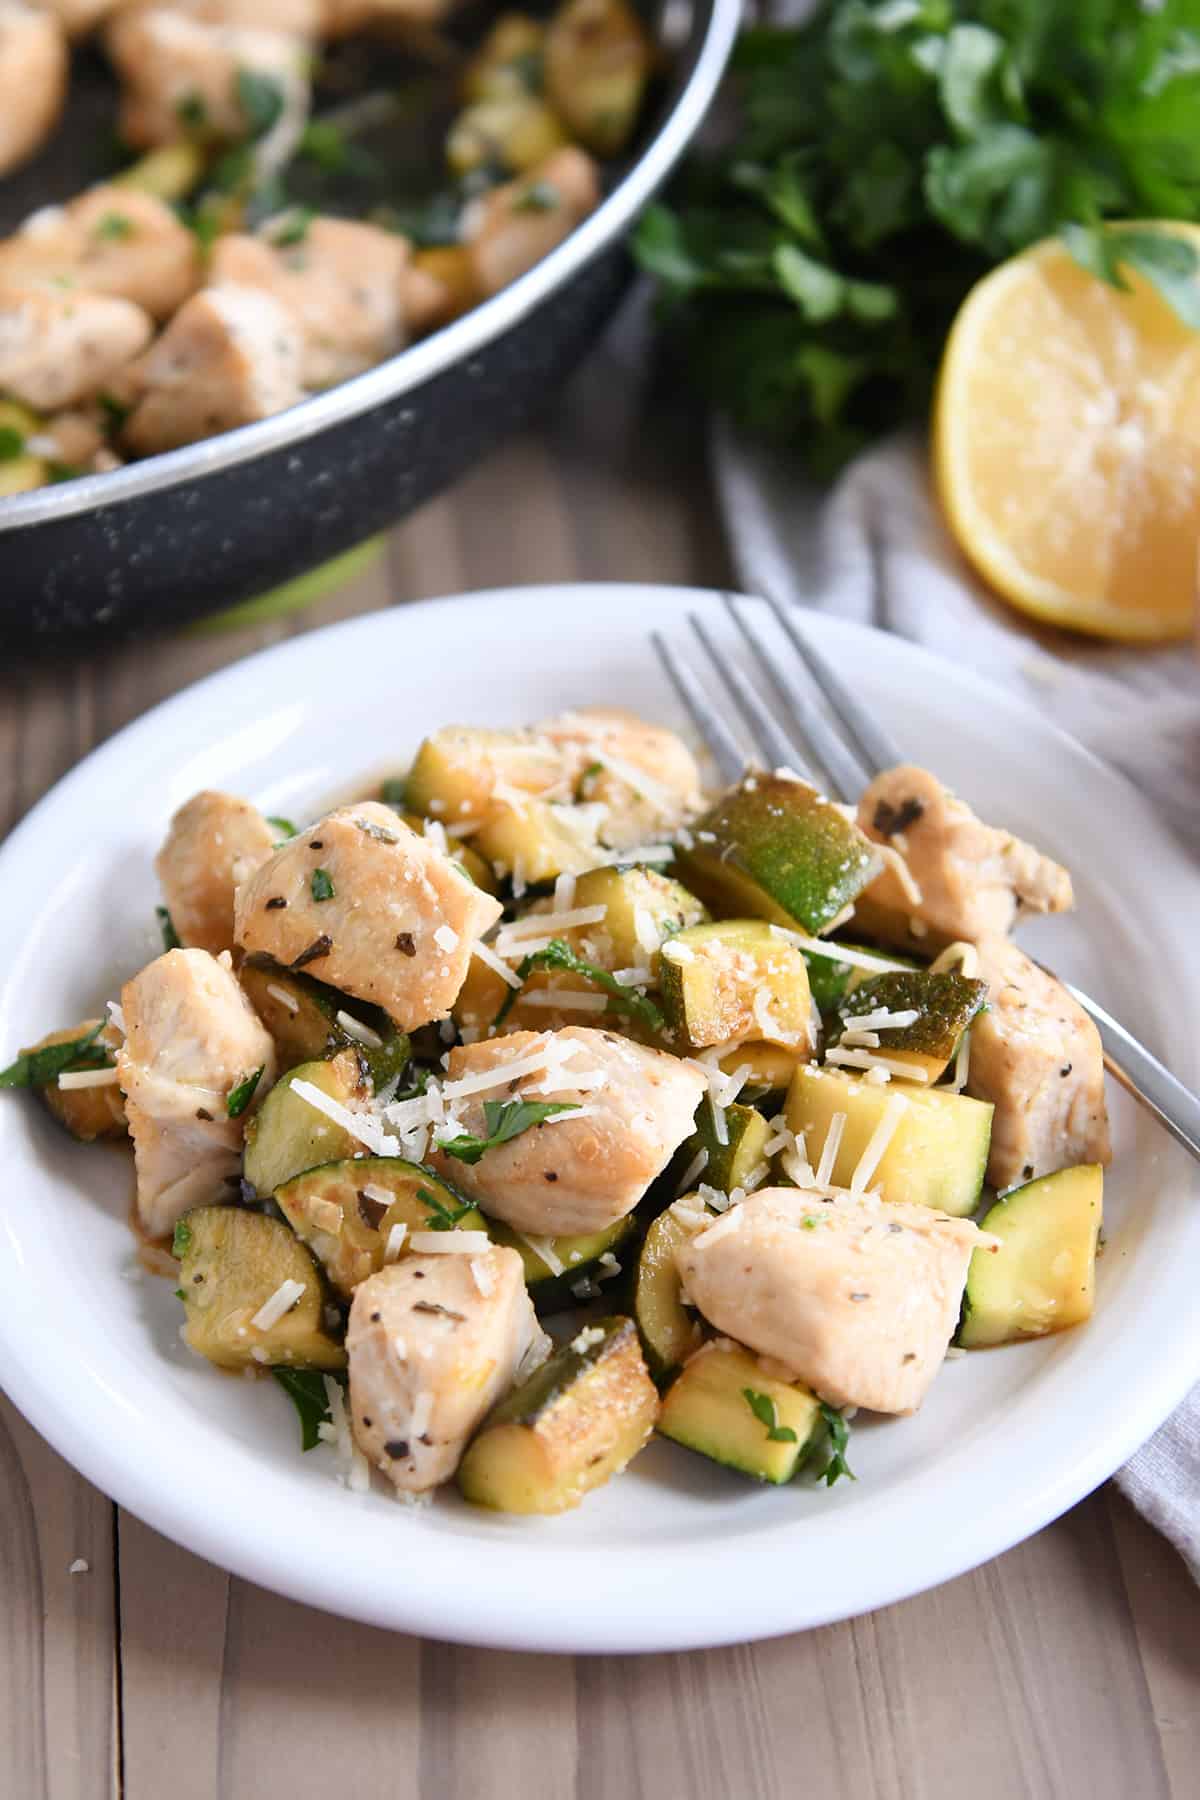
    This quick and light skillet lemon parmesan chicken and zucchini is fantastic! So delicious, the bright lemon and deeper savory flavors are perfect!

    Let me kindly introduce you to the meal I could every day for the rest of forever and still be left wishing I had it on the menu plan again.

    It.is.so.yummy. (And ridiculously easy!)

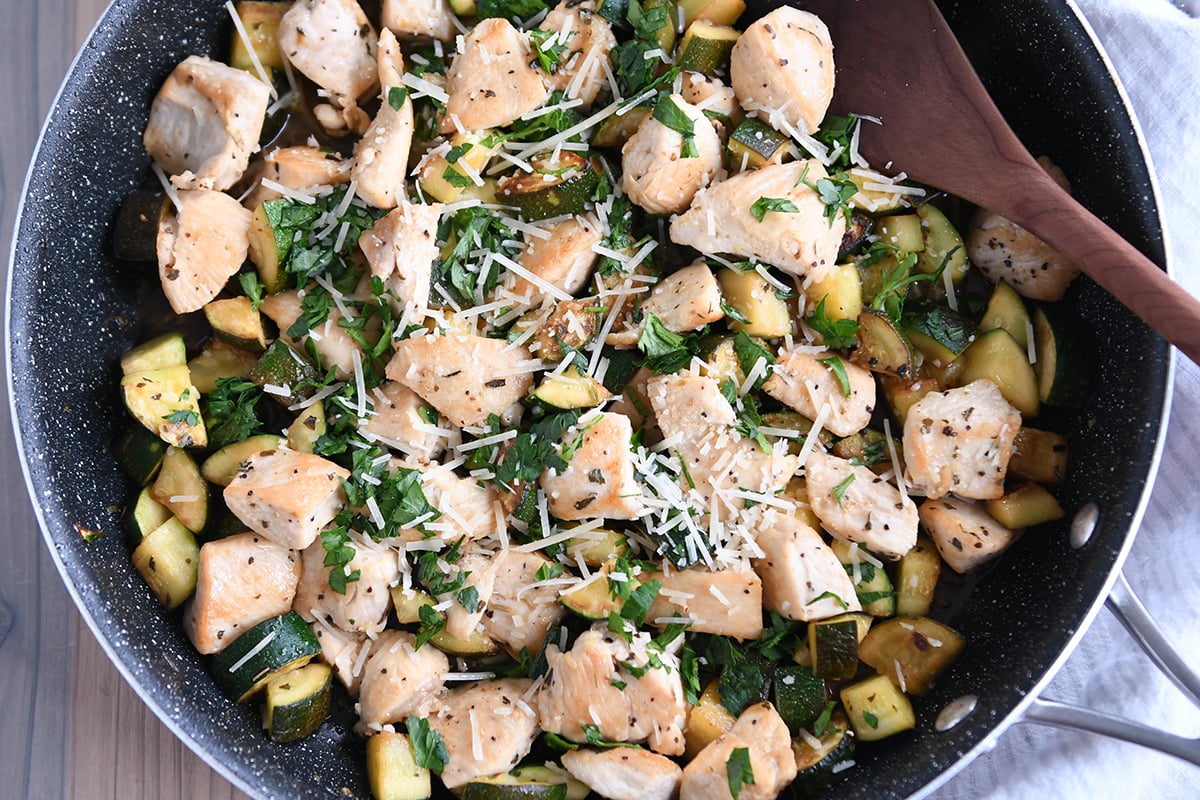
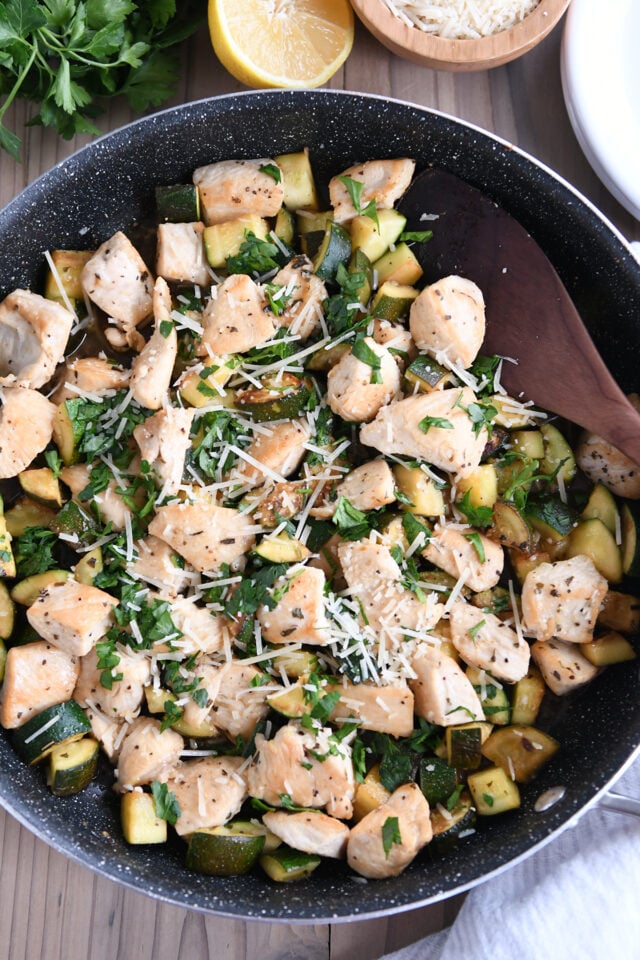
    Top down view of nonstick skillet with chicken, zucchini, parsley and parmesan.

    Tips for Skillet Success

    This recipe relies on a few things for optimum flavor.

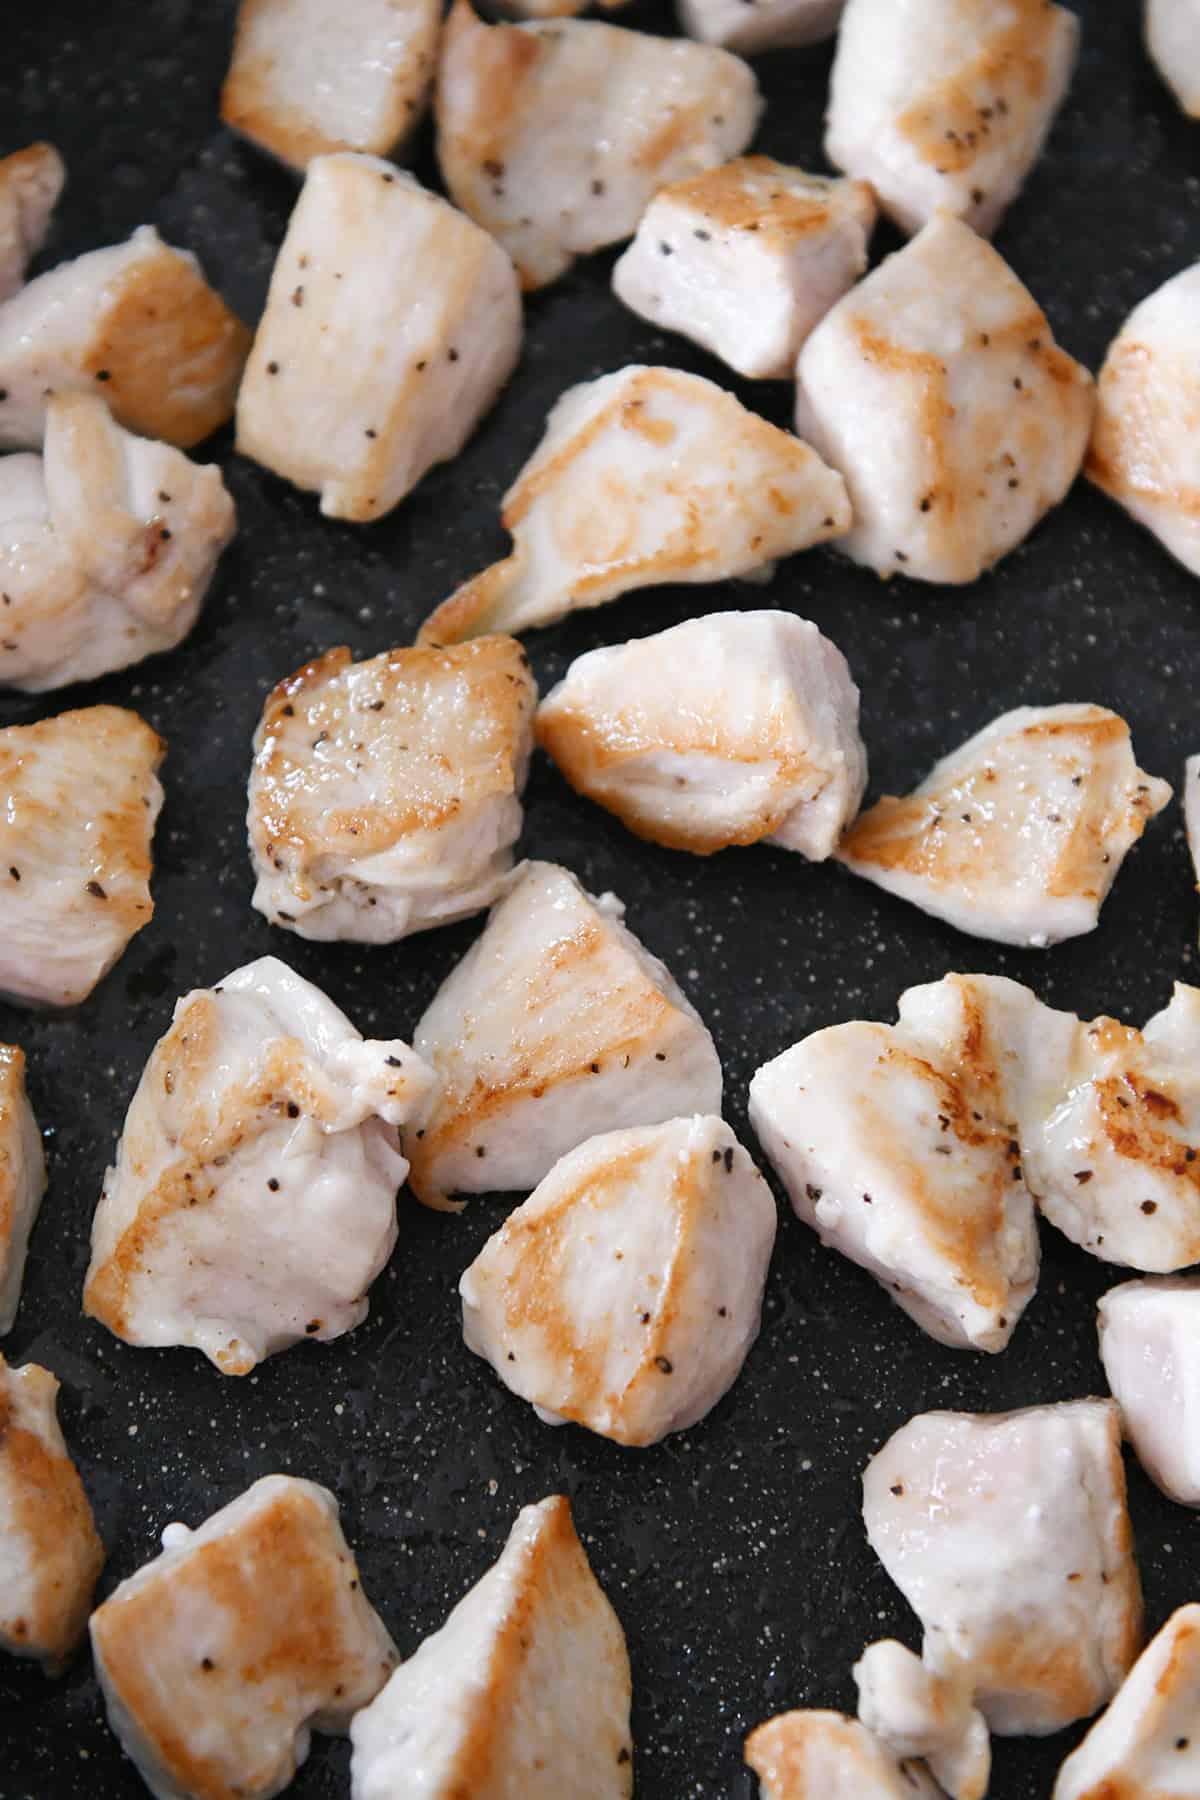
    The first is browning the chicken and zucchini in a hot skillet so they develop that beautiful golden color (and flavor!).

    To do this, heat the oil until rippling and hot and then add the chicken in a single layer. Make sure to pat the chicken dry! It helps the chicken to sizzle and sear instead of steam in liquid.

    Let the chicken cook WITHOUT STIRRING until golden. Flip and cook on the other side.

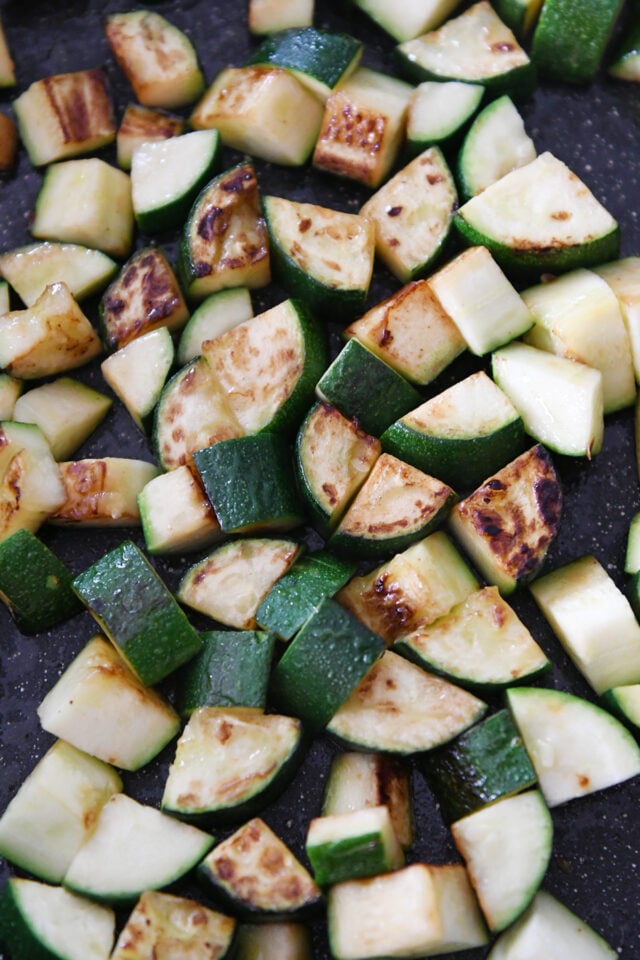
    You’ll do the same thing with the zucchini! The only difference is you can cook the zucchini for less time than the chicken.

    The zucchini is quite delicious cooked until just al dente. Say no to mushy zucchini!

    Golden cooked zucchini pieces in skillet.

    Layers of Flavor

    Once the chicken and zucchini have goldened up to perfection, stir in:

    • fresh lemon juice
    • a little dash of soy sauce (or a gluten-free alternative)
    • dried basil and a tiny bit of dried oregano

    Crank the heat up and let the ingredients sizzle until the liquid thickens slightly.

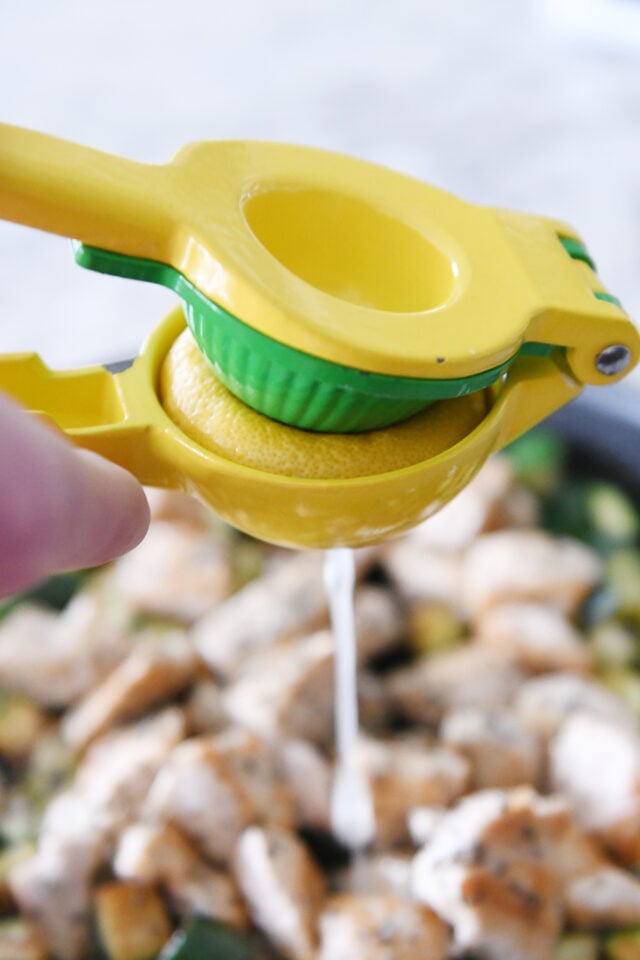
    Squeezing lemon through citrus press.

    At the very end, sprinkle with Parmesan cheese and fresh basil or parsley (optional but ultra-delish).

    And don’t forget to sample a little taste and add additional salt and pepper, if needed!

    This skillet lemon parmesan chicken and zucchini meal is so, so simple, but as tasty as a meal that takes hours!

    I could literally eat it every day.

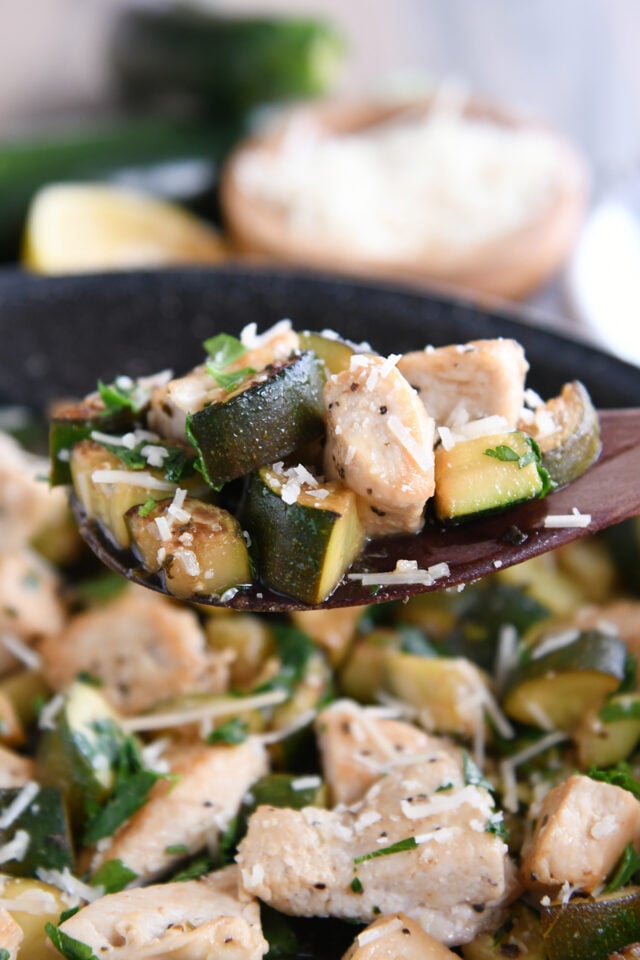
    Wooden spoon with zucchini, chicken and parmesan cheese.

    Low Carb Skillet Meal

    While this recipe is naturally low carb, when I make it for dinner for the family, I usually alter the carb eco-system and serve it alongside jasmine or brown rice or sometimes flatbread.

    For the last few weeks, I’ve been making large batches of this and eating the leftovers for lunch all week with cottage cheese and cherry tomatoes on the side. (And yes, I eat the leftovers cold straight from the fridge because I’m a monster like that. 😂)

    You could easily vary the protein (use ground meat or shrimp, etc) as well as the veggies (yellow squash, broccoli, etc). It’s simple, fast, and amazing!

    One Year Ago: Quick and Easy Chinese Chicken and Broccoli 
    Two Years Ago: Amazing Instant Pot Lemon Curd
    Three Years Ago: Loaded Cheesy Cauliflower Soup
    Four Years Ago: Healthy Egg and Veggie Muffins
    Five Years Ago: Tender Greek Pork Instant Pot or Slow Cooker
    Six Years Ago: Chicken Tortilla Soup Instant Pot, Stovetop, Slow Cooker
    Seven Years Ago: Cashew Chicken Lettuce Wraps 30-Minute Meal
    Eight Years Ago: Korean Beef and Rice Or Quinoa: Simple 20-Minute Meal 
    Nine Years Ago: Tuscan Sausage and White Bean Soup
    Ten Years Ago: Asian Chicken Lettuce Wraps Quick and Delish

    Skillet with chicken, zucchini, parmesan and wooden spoon.

    Skillet Lemon Parmesan Chicken and Zucchini

    • 1 tablespoon olive oil
    • 1 ½ pounds boneless chicken breast or thighs
    • Salt, pepper, and garlic powder
    • 3 small zucchini (about 1 pound total)
    • 2 tablespoons fresh lemon juice
    • 1 tablespoon soy sauce
    • 1 teaspoon dried basil
    • ¼ teaspoon dried oregano
    • ½ cup shredded Parmesan cheese
    • Fresh parsley or basil, chopped (optional)

    Prevent your screen from going dark

    • Pat the chicken dry and cut into bite-size pieces. Toss with a couple pinches of salt, pepper and garlic powder. Chop the zucchini (discarding end with the stem) into 1/2-inch pieces. Set aside.

    • Heat the oil in a 12-inch nonstick skillet over medium heat until hot and rippling. Add the chicken pieces in a single layer. Let them cook WITHOUT STIRRING for 2-3 minutes until golden on one side. Flip and cook for another 2-3 minutes until cooked through. Remove to a plate reserving as much oil/liquid in the pan as possible.

    • Return the skillet to medium heat and add the zucchini in a single layer. Again, let the zucchini cook WITHOUT STIRRING (to maximize that golden color) for 1-2 minutes. Flip or stir and continue cooking for another minute or two until the zucchini is tender (but not mushy – don’t over cook).

    • Add the chicken back to the skillet and add the lemon juice, soy sauce, basil, and oregano. Stir to combine.

    • Increase the heat to medium high and cook until sizzling and the liquid thickens just a bit, 1-2 minutes.

    • Sprinkle with parmesan cheese and fresh herbs, if using. Season to taste with additional salt and pepper, if needed.

    Serving: 1 serving, Calories: 196kcal, Carbohydrates: 3g, Protein: 28g, Fat: 8g, Saturated Fat: 2g, Cholesterol: 78mg, Sodium: 438mg, Fiber: 1g, Sugar: 2g

    Recipe Source: from Mel’s Kitchen Cafe

    Disclaimer: I am a participant in the Amazon Services LLC Associates Program, an affiliate advertising program designed to provide a means for me to earn fees by linking to Amazon.com and affiliated sites. As an Amazon Associate I earn from qualifying purchases.

    Source link

  • High Protein Low Carb Snacks

    High Protein Low Carb Snacks

    Why It Matters

    I will be the first to say that snacking should not be the focus of your diet. You can, and should, get the majority of your protein from well-balanced meals. That said, high protein low carb snacks can be a powerful tool for making the keto lifestyle sustainable.

    Protein helps control hunger hormones, supports stable blood sugar, and plays a key role in preserving muscle as we age. When snacks are built around protein, they stop being “filler” food and start becoming real nourishment. Why not make your snack habit work a little harder for you?

    If you are trying to increase your protein intake, these recipes can help. They are all crafted to be easy, convenient, and delicious. Why not make your snack habit work a little harder for you?


    Source link

  • Slow Cooker Butternut Squash Soup

    Slow Cooker Butternut Squash Soup

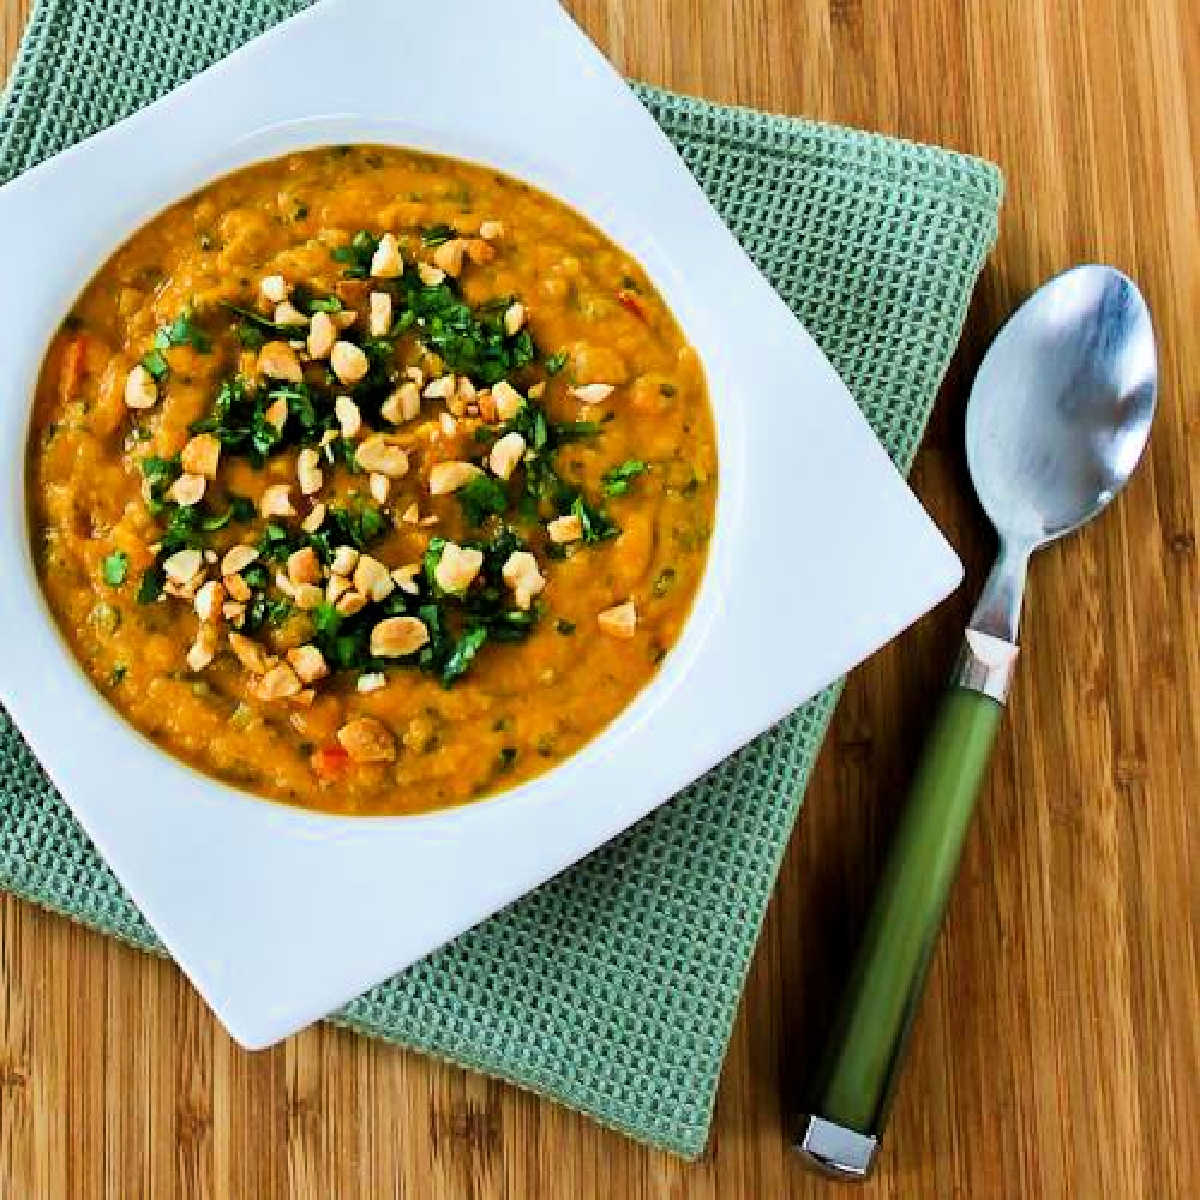
    This Slow Cooker Butternut Squash Soup is loaded with flavor from garlic, ginger, coconut milk, and Thai Red Curry Paste! And this soup that can be vegan has only 17 net carbs per serving, so it’s not that huge of a splurge on carbs.

    PIN Slow Cooker Butternut Squash Soup to make it later!

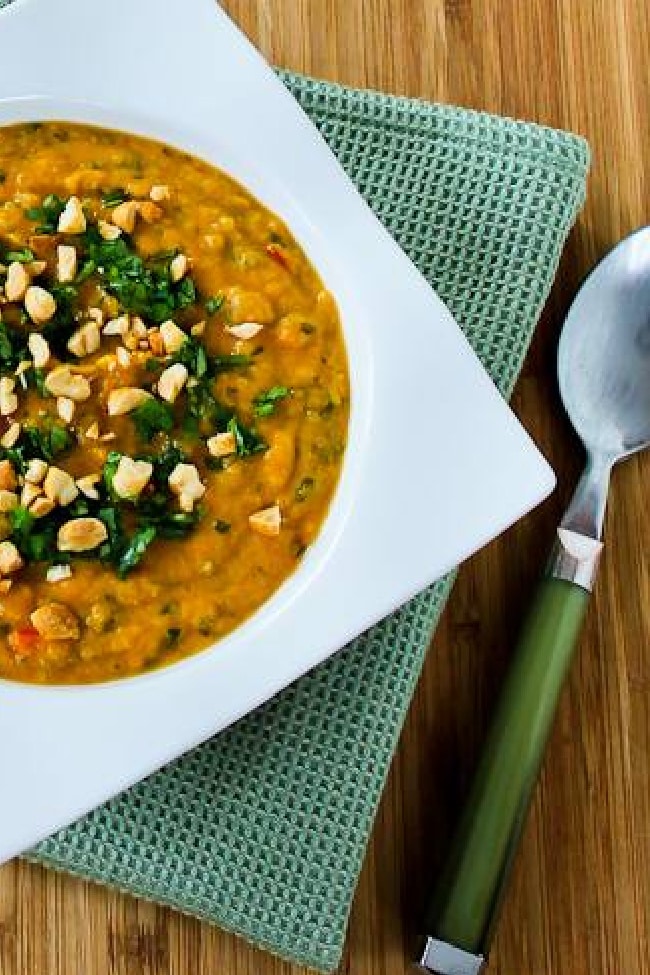
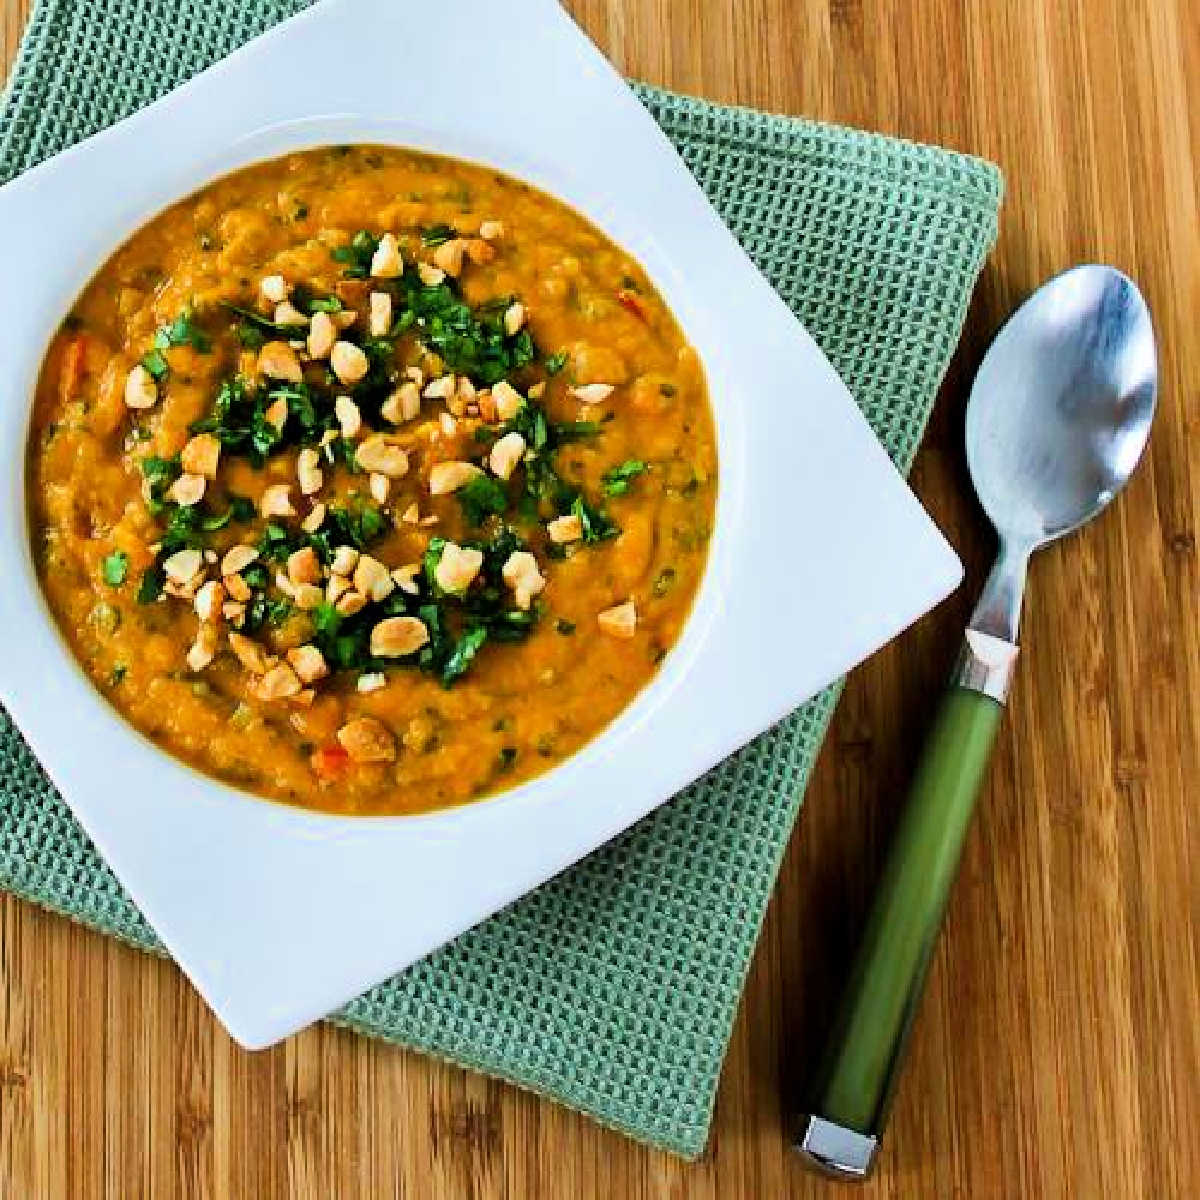
    Slow Cooker Butternut Squash Soup shown in serving bowl on green napkin.

    I love this Slow Cooker Butternut Squash Soup, and there’s a good reason why there are so many butternut squash soup recipes! I think it’s all about the way the slightly nutty flavor of butternut squash gets along well with so many other flavors.

    In this butternut soup recipe, first the cubed squash cooks in the slow cooker in a little vegetable stock until it’s soft. Then it’s pureed and cooked a little longer with onion, garlic, ginger, Coconut milk, Thai Red Curry Paste, and peanut butter, with a tiny touch of fish sauce (or vegetarian fish sauce) and sweetener to complete the Thai flavor notes.

    Even though I adore butternut squash, I haven’t used it in soup that much, but this soup is one I’ll be making over and over again. And my nephew and cooking assistant Jake is not really a winter squash fan, but he gobbled up the soup as well.

    What ingredients do you need?

    (This is only a list of ingredients; please scroll down for complete printable recipe. Or if you use the JUMP TO RECIPE link at the top of the page, it will take you directly to the complete recipe with ingredient amounts.)

    Will pre-cut butternut squash work for this soup?

    I’m not normally a fan of the pre-cut butternut squash (and I even wrote a post about How to Peel and Cut Up a Butternut Squash.) But for this Slow Cooker Butternut Squash Soup, the pre-cut squash is fine and it will help get this into the slow cooker much more quickly.

    Is this Butternut Squash Soup an authentic Thai Recipe?

    I’m not claiming this soup is an authentic Thai recipe, but it does have lots of ingredients used in Thai cooking like garlic, ginger, red bell pepper, coconut milk, red Thai curry pasts, and fish sauce.

    What if you don’t want cilantro in the Slow Cooker Butternut Squash Soup?

    This soup is finished with fresh lime juice and chopped cilantro, which I think is just the right addition, but omit the cilantro or use thinly sliced green onion if you’re not a cilantro fan.

    Can you make Slow Cooker Butternut Squash Soup a vegan recipe?

    If you want a soup that’s vegan, just use vegan “fish sauce” for this recipe. You could also switch out the fish sauce for soy sauce if that’s easier.

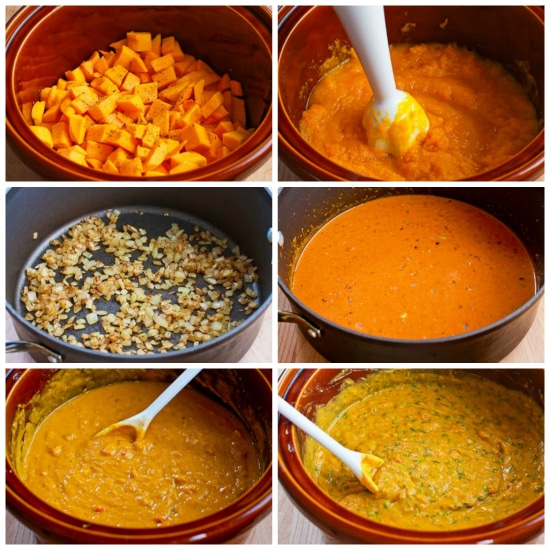
    Slow Cooker Butternut Squash and Peanut Soup process shots collage found on KalynsKitchen.comSlow Cooker Butternut Squash and Peanut Soup process shots collage found on KalynsKitchen.com

    How to Make Slow Cooker Butternut Squash Soup:

    (This is only a summary of the steps for the recipe; please scroll down for complete printable recipe. Or if you use the JUMP TO RECIPE link at the top of the page, it will take you directly to the complete recipe.)

    1. Put 2 lbs. of butternut squash cubes into the slow cooker with 1 cup vegetable stock, season with salt and pepper, and cook on high for 2 hours, or until the squash is soft.
    2. Use a food processor, blender, or IImmersion Blender (affiliate link)to puree the squash. (An immersion blender is by far the easiest; be careful with the hot squash if you use a food processor or blender.)
    3. Heat the oil and saute the onion in a frying pan until it’s well browned. Add the minced garlic, ginger, and diced red bell pepper and cook about a minute more. (Bad blogger; forgot to take a photo of that!)
    4. Then add the coconut milk, Thai Red Curry Paste, and peanut butter, and heat, stirring, just until the peanut butter and curry paste are dissolved into the coconut milk. Add the sweetener and fish sauce (affiliate link).
    5. Stir the coconut milk mixture into the squash, turn the slow cooker to low, and cook about one hour.
    6. Then stir in the chopped cilantro (or green onion) and lime juice and cook about 15 minutes more.
    7. Serve the Slow Cooker Butternut Squash Soup hot, garnished with chopped peanuts, more chopped cilantro, and a dash of Sriracha Sauce if desired.

    More ideas for Butternut Squash:

    You can use My Favorite Winter Squash Recipes to see more of my butternut squash faves!

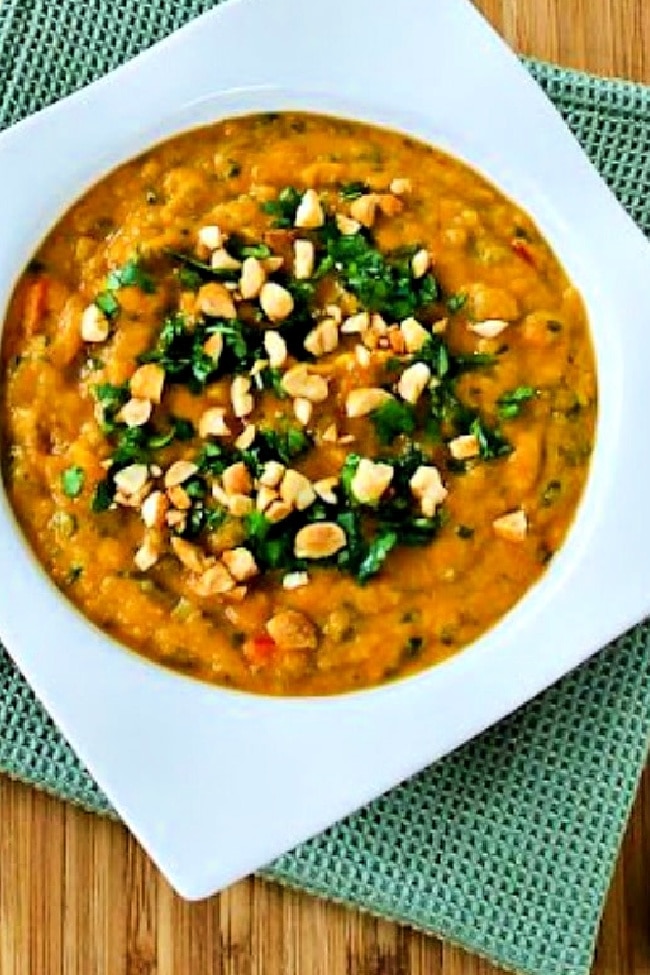
    Cropped image of Slow Cooker Butternut Squash Soup on green napkin with spoon.Cropped image of Slow Cooker Butternut Squash Soup on green napkin with spoon.

    More Meatless Soups You Might Like:

    Ingredients

    • 2 lbs. peeled and cubed butternut squash
    • 1 cup vegetable stock (see notes)
    • salt and fresh ground black pepper to taste
    • 2 tsp. olive oil
    • 1 onion, finely chopped
    • 2 tsp. minced garlic
    • 1 tsp. minced ginger root
    • 1 red bell pepper, seeds removed and finely chopped
    • 1 14 oz. can coconut milk
    • 2 T Thai Red Curry Paste
    • 1/2 cup natural peanut butter (without added sugar)
    • 1 T granulated Monkfruit Sweetener
    • 2 tsp. Fish Sauce (see notes)
    • 2 T fresh-squeezed lime juice
    • 1/3 cup finely chopped cilantro (see notes)
    • extra chopped cilantro and chopped peanuts for serving (optional)
    • Sriracha Rooster Sauce for serving (optional)

    Instructions

    1. Peel the butternut squash and cut into cubes if you’re starting with a whole squash.  (Here’s How to Peel and Cut Up a Butternut Squash if you haven’t done it.)
    2. Put the squash cubes and vegetable stock into the slow cooker, season squash generously with salt and fresh-ground black pepper, and cook on high for 2 hours, or until the squash is soft enough to mash easily.
    3. When it’s soft, use a food processor, blender, or Immersion Blender (affiliate link) to puree the squash, being careful with the hot food.
    4. Heat the oil in a large non-stick frying pan, add onion and saute until well-browned, about 8 minutes. Add the minced garlic, minced ginger, and diced red bell pepper and saute about a minute more.
    5. Then add the coconut milk, Thai Red Curry Paste, and peanut butter and heat just until the curry paste and peanut butter is melted into the coconut milk.  Add the sweetener and fish sauce (affiliate link).
    6. Stir the coconut milk mixture into the pureed squash, turn slow cooker to low and cook for 1 hour more.
    7. Stir in the chopped cilantro and fresh lime juice and cook about 15 minutes more.
    8. Serve hot, garnished with more chopped cilantro and chopped peanuts if desired.  If you’d like more heat, shake in a little Sriracha Sauce.
    9. I am assuming this freezes well.  (I have some in the freezer but haven’t thawed it yet.)

    Notes

    You need about a 5-Quart Slow Cooker (affiliate link) for this recipe, although it can be slightly smaller.

    Vegetable broth from a can is fine for this recipe. For the most carb-conscious version, use a peanut butter without added sugar. I buy Adams 100% Natural Peanut Butter (affiliate link).

    Use thinly-sliced green onion if you’re not a cilantro fan.

    If making a Vegan version use vegan “fish sauce”, or replace with soy sauce if you’re not a fan of fish sauce.

    Recipe created by Kalyn and Jake.

    Nutrition Information

    Yield

    8

    Serving Size

    1

    Amount Per Serving

    Calories 282Total Fat 21gSaturated Fat 11gTrans Fat 0gUnsaturated Fat 8gCholesterol 0mgSodium 523mgCarbohydrates 23gFiber 6gSugar 6gProtein 7g

    Nutrition information is automatically calculated by the Recipe Plug-In I am using. I am not a nutritionist and cannot guarantee 100% accuracy, since many variables affect those calculations.

    Did you make this recipe?

    Did you make this recipe? Please leave a star rating (under the PRINT button in the recipe) or share a photo of your results on Instagram! THANKS!

    Slow Cooker Butternut Squash Soup shown in square bowl with napkin and spoon.Slow Cooker Butternut Squash Soup shown in square bowl with napkin and spoon.

    Low-Carb Diet / Low-Glycemic Diet / South Beach Diet Suggestions:
    This Slow Cooker Butternut Squash Soup recipe has 17 net carbs per serving, so it’s probably not low enough in carbs for strict low-carb eating plans, but not a huge splurge for people who are just trying to be moderate with their carb intake. Butternut squash is limited to Phase 2 or 3 for the original South Beach Diet, and if you’re making  for South Beach they would recommend light coconut milk, natural peanut butter, and using an approved sweetener.

    Find More Recipes Like This One:
    Use Soup Recipes to find more recipes like this one. Use the Diet Type Index to find recipes suitable for a specific eating plan. You might also like to follow Kalyn’s Kitchen on Pinterest, on Facebook, on Instagram, on TikTok, or on YouTube to see all the good recipes I’m sharing there.

    Historical Notes for this Recipe:
    This Butternut Squash Soup made in the slow cooker was first posted in 2013. It was last updated with more information in 2025.

    Pinterest image of Slow Cooker Butternut Squash Soup

    We are a participant in the Amazon Services LLC Associates Program, an affiliate advertising program designed to provide a means for us to earn fees by linking to Amazon.com and affiliated sites. As an Amazon Associate, I earn from qualifying purchases.


    Source link

  • Honey Lime Chicken Thighs (Boneless, Skinless)

    Honey Lime Chicken Thighs (Boneless, Skinless)

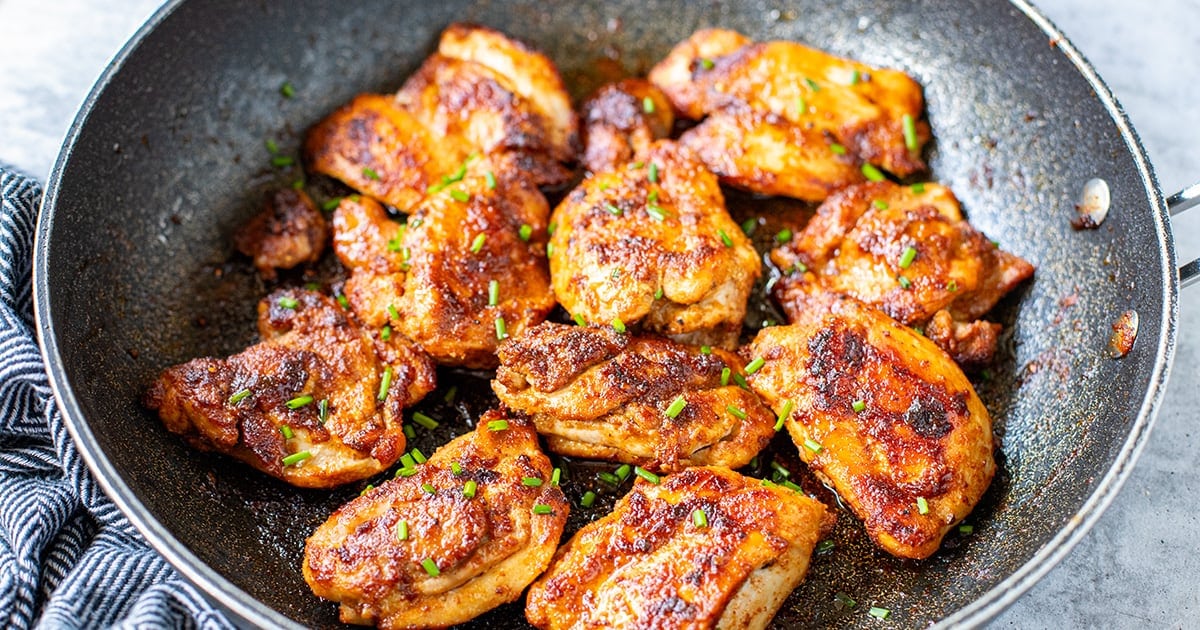
    This recipe is the reason people ask me why my honey lime chicken thighs are so good — bold spices, crispy edges, and that sticky-sweet zingy glaze at the end. Plus, made with boneless, chicken thighs, so this recipe is quick and with a few calories.


    Jump to: ℹ️ Overview | 🛒 Ingredients | 📷 How To Make | 📹 Watch The Video | 👩‍🍳 Recipe Tips | 🥗 Serving Suggestions | 📝 Full Recipe Card | 🍽 More Chicken Recipes To Try


    These honey lime chicken thighs are my weeknight secret weapon. The bold spice rub and pan-frying make the chicken sooo flavorful – tender and juicy on the inside with golden, slightly charred bits on the outside, and then boom — sweet and tangy honey lime glaze at the end to take it all to the next level.

    It’s savory, a bit sweet, a bit spiced, and honestly tastes like something you’d get at a great little bistro. The best part? It’s made with boneless, skinless chicken thighs (so fast and fuss-free), and it’s high-protein, low-carb, gluten-free, and paleo-friendly. I’ve made this chicken thigh recipe more times than I can count and people always ask for the recipe, so I hope you give it a go!

    👩‍🍳 More recipes with chicken thighs: honey lemon garlic pepper chicken thighs, chicken and potato bake, roasted chicken thighs (with oregano garlic marinade), coconut chicken and cauliflower rice, Spanish chicken and rice and baked chicken thighs (with special green sauce).

    What You’ll Need

    Here is what you’ll need for this honey lime chicken thighs recipe. Find the full measurements in the recipe card below.

    • Boneless, skinless chicken thighs – juicy, quick-cooking, and lower in calories than the bone-in kind.
    • Olive oil – for that perfect sear. You can also use avocado oil or ghee. You don’t need a lot!
    • Spices (the flavor bomb rub): Smoked paprika adds a smoky depth, cumin powder is warm and earthy, onion and garlic powder are base flavor magic, and salt and pepper to season.
    • For the glaze: Honey gives that sticky caramelized finish while lime juice is bright and tangy to balance the sweet; you can use lemon if you like.

    How To Make Boneless Skinless Chicken Thighs With Glaze

    Find the full recipe and nutritional information below. Here are some handy step-by-step photos for how to cook the best boneless, skinless chicken thighs with honey lime glaze.

    • Cut chicken thighs in half and trim large bits of fat.
    • Mix all spices with salt and pepper, then rub evenly on both sides of the chicken.
    • Heat a large skillet with olive oil on high, then reduce to medium-high.
    • Cook chicken for 8–10 minutes per side (in batches if needed).
    • Flip, add more oil if needed, and cook through until golden.
    • Drizzle over honey and lime juice, toss to coat, and let the glaze bubble up.
    • Let rest for 1 minute, then serve whole or slice up.

    Watch The Video

    Recipe Tips

    • Don’t overcrowd the pan—space equals better sear.
    • Thin thighs cook faster—watch them so they don’t dry out.
    • If you’re air-frying, they’ll still be great but a little less juicy.
    • Add chili flakes or sriracha to the glaze for a spicy twist.
    • You can double the spice mix and keep some in a jar for next time!
    • Storage Tips: Leftovers will keep in the fridge for 3-4 days. Reheat gently in a skillet or microwave. You can freeze them too—just thaw overnight in the fridge and reheat as above.
    • Make-Ahead Tips: You can season the chicken and store it in the fridge for up to 24 hours before cooking. You can also cook the whole thing and slice it ahead for easy lunch meal prep bowls.

    Serving Suggestions

    Slice it up for chicken rice bowls (my fave!), wrap in tortillas, toss over a salad, or pop it in a sandwich. It also makes a killer protein addition to scrambled eggs (check out my curried scrambled eggs or scrambled eggs with zucchini) or even a breakfast taco (try my chorizo breakfast tacos).

    💬 If you’ve tried these honey lime chicken thighs or any other recipe on the blog then don’t forget to rate the recipe and let me know how you got on in the comments below, I love hearing from you! You can also FOLLOW ME on Instagram, Facebook, Pinterest, YouTube, and or sign up to my Newsletter to see more of my delicious food.

    Want to Save This Recipe?

    Enter your email & I’ll send it to your inbox. Plus, get great new recipes from me every week!

    By submitting this form, you consent to receive emails from Cooked & Loved

    Boneless, juicy chicken thighs pan-fried to crispy perfection and finished with a honey-lime glaze that’s sweet, tangy, and seriously addictive. Find step-by-step photos and more recipe tips above.

    • Cut chicken thighs in half and trim any large fat pieces.

    • Season both sides of chicken evenly with the spices, salt, and pepper. Rub it all in well.

    • Heat 1 tablespoon olive oil in a large skillet over high heat. Lower to medium-high and add chicken without overcrowding.

    • Cook for 8–10 minutes on one side, then flip and add remaining 1 tablespoon oil. Cook for another 8–10 minutes or until nicely browned and cooked through.

    • In the last minute, drizzle over honey and lime juice. Toss the chicken around in the glaze until slightly caramelized.

    • Let it rest a minute, then slice or serve whole.

    • Don’t overcrowd the pan—space equals better sear.
    • Thin thighs cook faster—watch them so they don’t dry out.
    • If you’re air-frying, they’ll still be great but a little less juicy.
    • Add chili flakes or sriracha to the glaze for a spicy twist.
    • You can double the spice mix and keep some in a jar for next time!
    • Storage Tips: Leftovers will keep in the fridge for 3-4 days. Reheat gently in a skillet or microwave. You can freeze them too—just thaw overnight in the fridge and reheat as above.
    • Make-Ahead Tips: You can season the chicken and store it in the fridge for up to 24 hours before cooking. You can also cook the whole thing and slice it ahead for easy lunch meal prep bowls.
    • Can I use chicken breast instead? You can, but thighs stay juicier and have more flavor. If you use breast, be careful not to overcook.
    • Is it spicy? Not really—just a touch of warmth from the paprika and cumin. Add chili flakes if you want heat!
    • Can I cook this in the oven? You can bake at 425°F (220°C) for about 20-25 minutes, then broil for a few minutes to get the caramelization.
    • What oil can I use instead of olive oil? Avocado oil, canola, or even ghee work well.

    Calories: 195kcal | Carbohydrates: 5g | Protein: 22g | Fat: 10g | Saturated Fat: 2g | Polyunsaturated Fat: 2g | Monounsaturated Fat: 5g | Trans Fat: 0.02g | Cholesterol: 107mg | Sodium: 490mg | Potassium: 320mg | Fiber: 0.4g | Sugar: 3g | Vitamin A: 283IU | Vitamin C: 1mg | Calcium: 20mg | Iron: 1mg

    Keywords: honey lime chicken thighs, skinless honey lime chicken thighs, boneless honey lime chicken thighs, honey lime chicken, boneless skinless chicken thighs, pan-fried chicken thighs

    More Chicken Recipes To Try


    Source link

  • Salmon Bites With Sweet Chili Glaze

    Salmon Bites With Sweet Chili Glaze

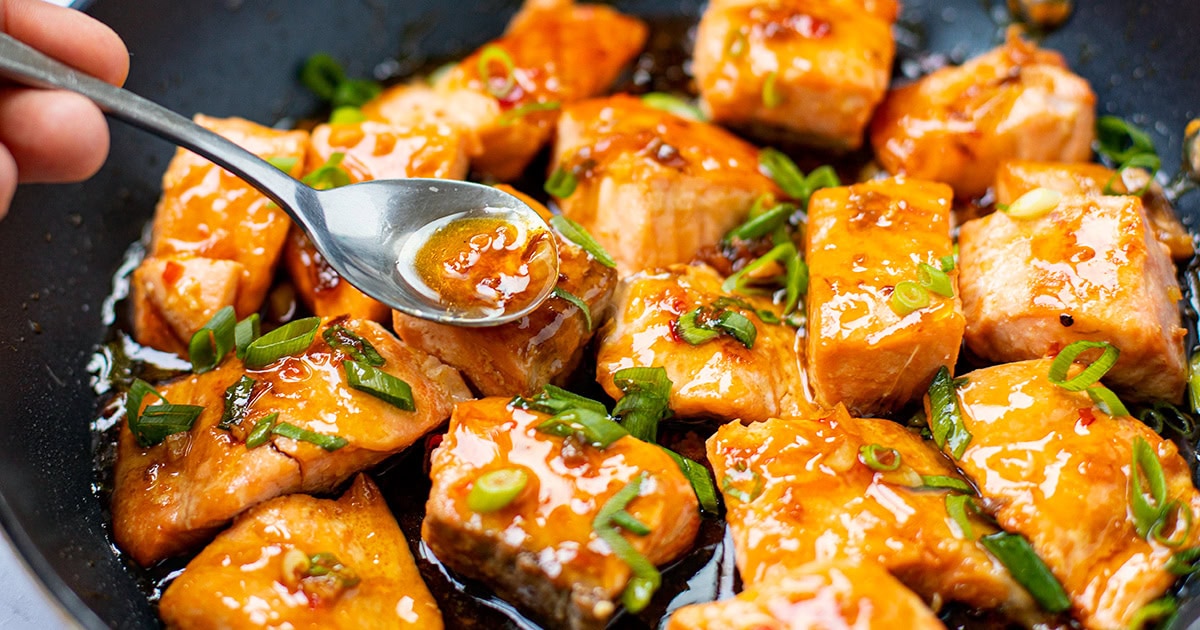
    These sweet chili salmon bites pan-fried and glazed in caramelised, sweet and salty sticky sauce will quickly become your favourite salmon recipe. I make this dish on a weekly basis and the family loves it!


    Jump to: ℹ️ Overview | 🛒 Ingredients | 📷 How To Make | 🥗Serving Suggestions |👨‍🍳 Nutrition Notes | 📝 Go To Full Recipe |🐟 More Salmon Recipes


    Salmon Bites Glazed With Soy & Sweet Chili

    In this recipe, salmon bites or fillets are pan-fried until pink and flaky, then coated in a sticky, sweet chilli, soy and garlic glaze sauce.

    Everyone in my family loves this salmon recipe so much that I cook it weekly. Plus, it’s quick and easy and only needs a handful of accessible ingredients. You can have the whole meal on the table in under 20 minutes. A winning dinner in my book!

    If you like flavours of teriyaki salmon, you will enjoy this one!

    What To Serve With Salmon Bites

    I have a couple of go-to dishes to serve with salmon bites.

    We almost always have it with Basmati rice (or sometimes cauliflower rice) and then either a side of stir-fried green vegetables like Chinese broccoli, bok choy and broccoli OR with an Asian-style slaw salad.

    You can serve sweet chilli salmon with white or brown rice, cauliflower rice, quinoa, rice noodles, any other noodles or even with a side of sweet potato.

    For a stir-fry, I usually cook a bunch of cut-up veggies over medium-high heat for a few minutes and then a few splashes of soy sauce or Tamari and maybe a little lemon juice. I keep these simple because the glazed salmon packs a lot of bold flavours.

    For the slaw salad, I shred red or Wombok/Napa cabbage, carrots, red bell peppers, red onion and coriander and toss through with a dressing made of lime juice, fish sauce, brown sugar or honey, sesame oil and some olive oil. You can also use store-bought Asian dressing to save time.

    What You Will Need

    Find full measurements in the recipe card below.

    • Salmon – I use about 1.1-1.2 lb or 500 grams of salmon fillets for about 4 servings. I like to buy fish fillets without skin as it works better for this particular salmon bites recipe. It’s easier to cut and flip, plus some of my family members don’t eat the skin so I don’t bother.
    • Having said that, I have also made this glazed sweet chilli salmon dish with long fillets rather than bite-size pieces and with the skin on. In this case, I pan-fry it on the skin side first until it’s nice and crispy.
    • Money-saving tip: I often buy frozen salmon fillets and defrost them for a few hours before cooking or in the fridge overnight. Salmon tails or steaks are often cheaper and will work just as well with this sticky sweet chilli sauce.
    • Sauces – I like to use a Thai-style sweet chili sauce like the Ayam brand and premium light soy sauce. I have made the dish with regular soy sauce but it’s a little more full-on and saltier, I prefer a more subtle taste of the light soy sauce in this recipe. Garlic is optional, sometimes I add it in and if I can’t be bothered I only use those two sauces.
    • Dietary Swaps – You can use sugar-free sweet chilli sauce and coconut aminos or Tamari instead of regular soy sauce.

    Watch The Video

    How To Make Salmon Bites With Sweet Chili

    • Pro-Tip: I like making this dish as salmon bites rather than long fillets because it cooks the fish faster and more evenly. You know how the salmon fillets will often have thinner ends and thicker middle, which always seems to be undercooked, so you have to throw the fillets back in the pan and then the thinner bits end up overcooked and dry. Yep, that’s annoying!
    • Another reason I like to cook salmon as bite-size pieces is because you get every bite coated in that delicious caramelised glaze.
    • Step 1. The first thing to do is to cut our salmon into square or rectangular pieces, about 1-1.5 inches long/thick. Sprinkle very lightly with salt and set aside.
    • Step 2. Heat a couple of tablespoons of olive oil in a large frying pan over medium-high heat. Once hot, add the salmon bites and cook for 1 minute over medium-high heat. Then turn the heat down to medium-low and cover the frying pan with a lid. Cook for 3 more minutes. Using a lid speeds up the cooking time significantly!
    • Step 3. Remove the lid and after about 20-30 seconds, turn the salmon pieces over and cook for 1.5-2 more minutes on the other side without a lid. Thinner pieces can be taken out earlier as won’t need as much cooking.
    • Step 4. Remove pre-cooked salmon bites to a bowl and scrape off any stuck, browned flesh bits from the bottom of the pan. Save those bits as they are delicious and crispy.
    • Step 5. Now it’s time to make our caramelised salmon glaze sauce! You can use the same frying pan but I like to switch to a slightly smaller pan for this step.
    • Add another tablespoon of oil and place over medium heat. Add the garlic and cook for 1 minute, stirring a few times, until it starts to get golden brown.
    • Step 6. Now add 1/3 cup of sweet chili sauce and 2 tablespoons of light soy sauce.
    • Stir through and increase the heat to high. Cook for 1 minute and about 20-30 seconds, stirring frequently until the sauce starts to bubble and thicken.
    • Step 7. Once it looks caramelised and semi-sticky, return the salmon pieces and stir through the sauce. Leave in the pan over heat for about 30 seconds to bubble away gently. Remove from heat and sprinkle with green onions to finish the dish.

    Tips For Making Side Dishes

    I like to cook the rice a little bit ahead of time and have my vegetables pre-cut so I can stir-fry them while the salmon is cooking.

    If I make a salad, I also do it either a little ahead of salmon or while it’s cooking. In general, I like to cook in parallell but it can be stressful for some so you can prepare the sides earlier.

    Nutrition Notes

    For me, salmon is the perfect superfood! It’s high in protein and healthy fats, especially Omega-3s, plenty of minerals and fat-soluble vitamins, and it’s delicious.

    • Per serving: 307 calories, 28.4 grams of protein, 20.6 g of carbohydrates, and 13.1 g of fat.
    • Per serving with 2/3 cup of cooked white rice: 489 calories, 31.7 g protein, 60.5 grams carbohydrates and 13.4 grams fat.

    Want to Save This Recipe?

    Enter your email & I’ll send it to your inbox. Plus, get great new recipes from me every week!

    By submitting this form, you consent to receive emails from Cooked & Loved

    Learn how to make delicious glazed salmon bites. You can cook salmon fillets whole or cut them up into bite-size pieces which allows you to cook the fish much quicker and more evenly, plus every piece is coated in the delicious, sticky, sweet chili, and soy sauce glaze.

    For sweet chili soy glaze sauce 

    • I like making this dish as salmon bites rather than fillets because it cooks the fish faster and more evenly.

    • You know how the salmon fillets will often have thinner ends and thicker middle, which always seems to be undercooked, so you have to throw the fillets back in the pan and then the ends end up overcooked and dry. Yep, that’s annoying!

    • Another reason I like to cook salmon as bite-size pieces is because you get more of the fish surface coated in that delicious caramelised sweet chili and soy glaze.

    • So, the first thing to do is to cut our salmon into square or rectangular pieces, about 1-1.5 inches long/thick. Sprinkle very lightly with salt and set aside.

    • Heat a couple of tablespoons of olive oil in a large frying pan over medium-high heat. Once hot, add the salmon bites and cook for 1 minute over medium-high heat. Then, turn the heat down to medium-low and cover the frying pan with a lid. Cook for 3 more minutes. Using a lid speeds up the cooking time significantly!

    • Remove the lid and after about 20-30 seconds, turn the salmon pieces over and cook for 2 more minutes on the other side without a lid.

    • Remove pre-cooked salmon bites to a bowl and scrape off any stuck, browned flesh bits from the bottom of the pan. Save those bits as they are delicious and crispy.

    • The next time is to make our caramelised sweet chili sauce. You can use the same frying pan but I like to switch to a slightly smaller pan for this step.

    • Add another tablespoon of oil and place over medium heat. Add the garlic and cook for 1 minute, stirring a few times, until it starts to get golden brown.

    • Now add 1/3 cup of sweet chili sauce and 2 tablespoons of light soy sauce. Stir through and increase the heat to high. Cook for 1 minute and about 20 seconds, stirring frequently until the sauce starts to bubble and thicken.

    • Once it looks caramelised and semi-sticky, return the salmon pieces and stir through the sauce. Leave in the pan over heat for about 30 seconds to bubble away gently. Remove from heat and sprinkle with green onions to finish the dish.

    • I like to cook the rice a little bit ahead of time and have my vegetables pre-cut so I can stir-fry them while the salmon is cooking. If I make a salad, I also do it either a little ahead of salmon or while it’s cooking. In general, I like to cook in parallel but it can be stressful for some so you can prepare the sides earlier.
    • Nutritional information provided is just for salmon bites.

    Calories: 303kcal | Carbohydrates: 11g | Protein: 23g | Fat: 18g | Saturated Fat: 3g | Polyunsaturated Fat: 4g | Monounsaturated Fat: 10g | Cholesterol: 62mg | Sodium: 1056mg | Potassium: 574mg | Fiber: 0.2g | Sugar: 10g | Vitamin A: 45IU | Vitamin C: 0.2mg | Calcium: 17mg | Iron: 1mg

    Keywords: Salmon Recipes, Thai, Asian, Salmon fillets, Sweet Chilli, Dinner Ideas

    More Salmon Recipes

    Source link

  • Chicken & Prawn Laksa (Paleo, Gluten-Free) –

    Chicken & Prawn Laksa (Paleo, Gluten-Free) –

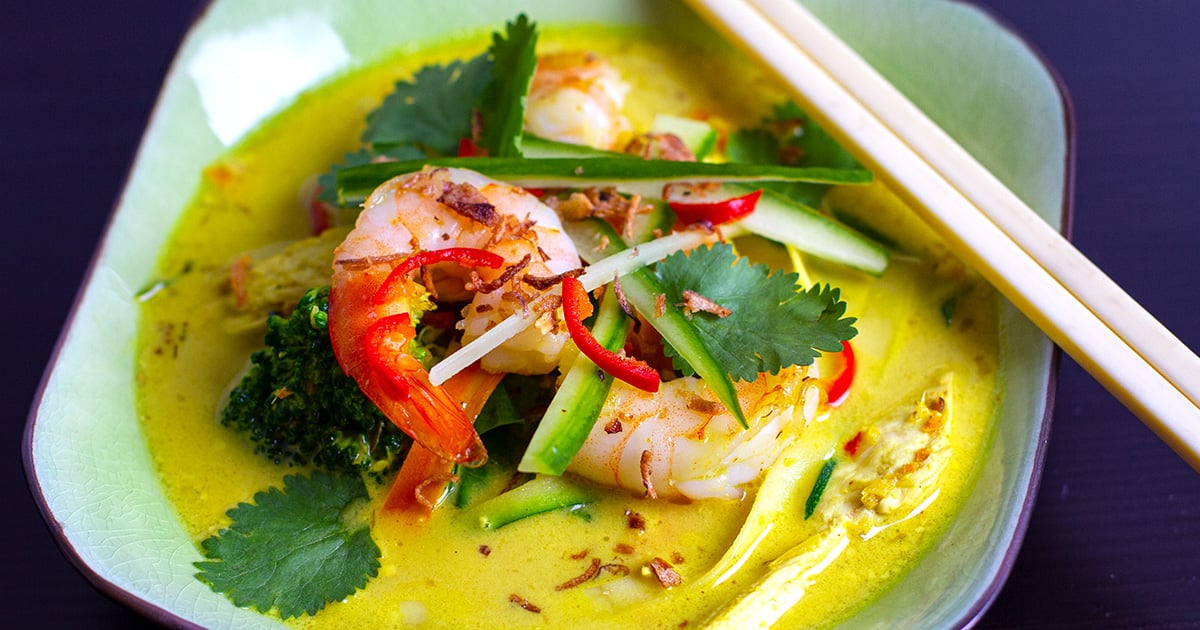
    Adapted from a classic South Eastern recipe, this chicken and prawn laksa soup delivers beautiful Thai flavours and all the nutrients. The aromatic coconut curry broth is served with low-carb zucchini and carrot noodles and healthy protein. This recipe is paleo, gluten-free, and keto-friendly (can be modified for a Whole30 version).


    What Is Laksa?

    If you had to pick your ‘last meal’, what would it be? For me, Laksa would have to be in the top five. If you haven’t heard of or tried Laksa before, it’s a coconut-based curry soup from Malaysia, which fuses Malay, Thai and Chinese flavours and ingredients.

    Very common and popular in Australia, the dish features a handful of noodles, tofu puffs, bean sprouts, crispy vegetables and a selection of meats or seafood served in the most glorious, fragrant, spicy coconut soup.

    I seriously want to sing Hallelujah when I sip a good Laksa broth. I love its rich flavours and the warmth you get from all the spices and the chilli. And although many would argue of what the authentic Laksa should taste like, the truth is that it comes in many varieties and even the most typical Laksa Lemak can be cooked in many different ways. For example, although it’s a Malay dish, I often order it in Thai restaurants.

    The best part is that Laksa is easily adapted to be a paleo, low-carb and gluten-free dish. Swap the noodles and tofu for extra veggies, add some protein and et voilà – you have a delicious meal with the desired ratio of proteins, carbs and fats.

    Sure, it’s much easier to go and get a bowl of Laksa in Chinatown or from your local Thai take away shop, but there is something super cool about making it from scratch. And you know what? It’s actually very easy if you give yourself enough time and you can get the right ingredients.

    Tips For Making Thai Laksa At Home

    The foundation of any Laksa soup is a Laksa curry paste, which I make from scratch and you can find the recipe here. You can also use a store-bought Laksa paste or a mixture of red and green curry pastes, as that’s the closest to Laksa flavours.

    My Laksa paste is not as spicy as some of the imported varieties, so 5 tablespoons of serious red curry paste might blow your head off. Start with 2-3 tablespoons if you’re not sure and always have a little taste of the paste itself. If you can’t find all the ingredients, you can use mild curry powder, some fresh garlic and ginger, and whatever other ingredients from the laksa paste that you can find.

    To use the laksa paste in a curry stew,  simply add coconut milk or cream with just a little bit of stock for a rich, thick gravy.

    Other Laksa Ingredients You Need

    I used a little bit of palm sugar to balance out the salty and sour flavours, it’s the most authentic sweetener. By all means, leave the sugar out if you want, or replace it with honey or coconut sugar, and it will still taste pretty damn good. You can check out this coconut palm sugar.

    I used full-fat coconut oil from a can (look for 55-70% coconut content) and I put one of the cans in the fridge to thicken, and that’s where I scooped out the coconut cream from. The other can is simply shaken, and that’s your coconut milk.

    You will need a large pot or a saucepan to fit all of the soup, plus meat and veggies. I used chicken and prawns in this recipe, but you can easily replace those with beef, scallops and fish.

    I used salt-reduced chicken stock as I like to control how much and what type of salt I add to the dish. Pre-packaged stocks have so much sodium and it is often disguised by sugar and other things, so I would rather use more fish sauce for both saltiness and flavour. 

    Finally, Chinese broccoli can be replaced with collard greens or Swiss chard. You can use a vegetable spiralizer to prepare carrot and zucchini noodles, which would work fabulously in this soup.

    I hope the whole process doesn’t intimidate you too much. It really is a lot of fun to make your own Laksa and you should get your family and friends involved in the kitchen.

    More Healthy Thai recipes:

    Chicken Larb Salad With Red Cabbage
    Spicy Pumpkin Coconut Soup
    Coconut Yoghurt Chicken
    Paleo Satay Sauce
    Roasted Lemongrass Short Ribs

    Want to Save This Recipe?

    Enter your email & I’ll send it to your inbox. Plus, get great new recipes from me every week!

    By submitting this form, you consent to receive emails from Cooked & Loved

    Aromatic, creamy and full of flavour, this chicken and prawn Thai laksa soup is a healthy version of the classic. This recipe is paleo, gluten-free, keto and Whole30 friendly. Omit coconut palm sugar for keto and Whole30 versions.

    • Heat coconut oil in a large saucepan over medium heat. Add the laksa paste and cook over medium heat for about 30 seconds, stirring continuously to prevent sticking or burning. This process toasts the spices and releases all those beautiful flavours and aromas. Add more coconut oil if the mix dries up.

    • Increase the heat to medium-high and add the chicken. Stir through for a minute.

    • Pour in the stock, and add the fish sauce, palm sugar and juice of 1 lime. Bring everything to a boil.

    • After a couple of minutes, turn the heat to low and add the coconut milk and cream. Stir through and turn the heat down to low heat and simmer for 10 minutes, lid on.

    • You can prepare the vegetables and garnishes while the soup is cooking away. Have a few thin slices of chilli and fresh coriander leaves ready for garnish.

    • It’s time to finish off the cooking. Bring the heat back up to medium-high and add the Chinese broccoli, regular broccoli and carrots to the soup. Stir and cook for 1-2 minutes.

    • Add the prawns and zucchini last as they require minimal cooking, about 2 minutes. A good way to tell if the prawns are cooked (besides actually tasting one) is to look for when they start to curl and change to white/pinkish colour. Turn the heat off at this stage.

    • Serve a mix of chicken, prawns and vegetables with a couple of ladles of soup, garnished with fresh cucumber, coriander and chilli on top.

    Calories: 560kcal | Carbohydrates: 22g | Protein: 42g | Fat: 37g | Saturated Fat: 29g | Polyunsaturated Fat: 1g | Monounsaturated Fat: 3g | Trans Fat: 0.02g | Cholesterol: 180mg | Sodium: 2177mg | Potassium: 1377mg | Fiber: 5g | Sugar: 8g | Vitamin A: 6945IU | Vitamin C: 89mg | Calcium: 202mg | Iron: 6mg

    Keywords: Soup, Keto, Paleo, Shrimp, Chicken, Thai, Laksa

    Save This Recipe To Pinterest

    Source link

  • Chicken Alfredo Ravioli Casserole (Easy Cheesy Dinner Bake)

    Chicken Alfredo Ravioli Casserole (Easy Cheesy Dinner Bake)

    This website may contain affiliate links and advertising so that we can provide recipes to you. Read my disclosure policy.

    By the end of the day, I’m wiped and still expected to make dinner. This Alfredo ravioli casserole swoops in and saves the night. Just layer everything, bake it, and dinner is done.

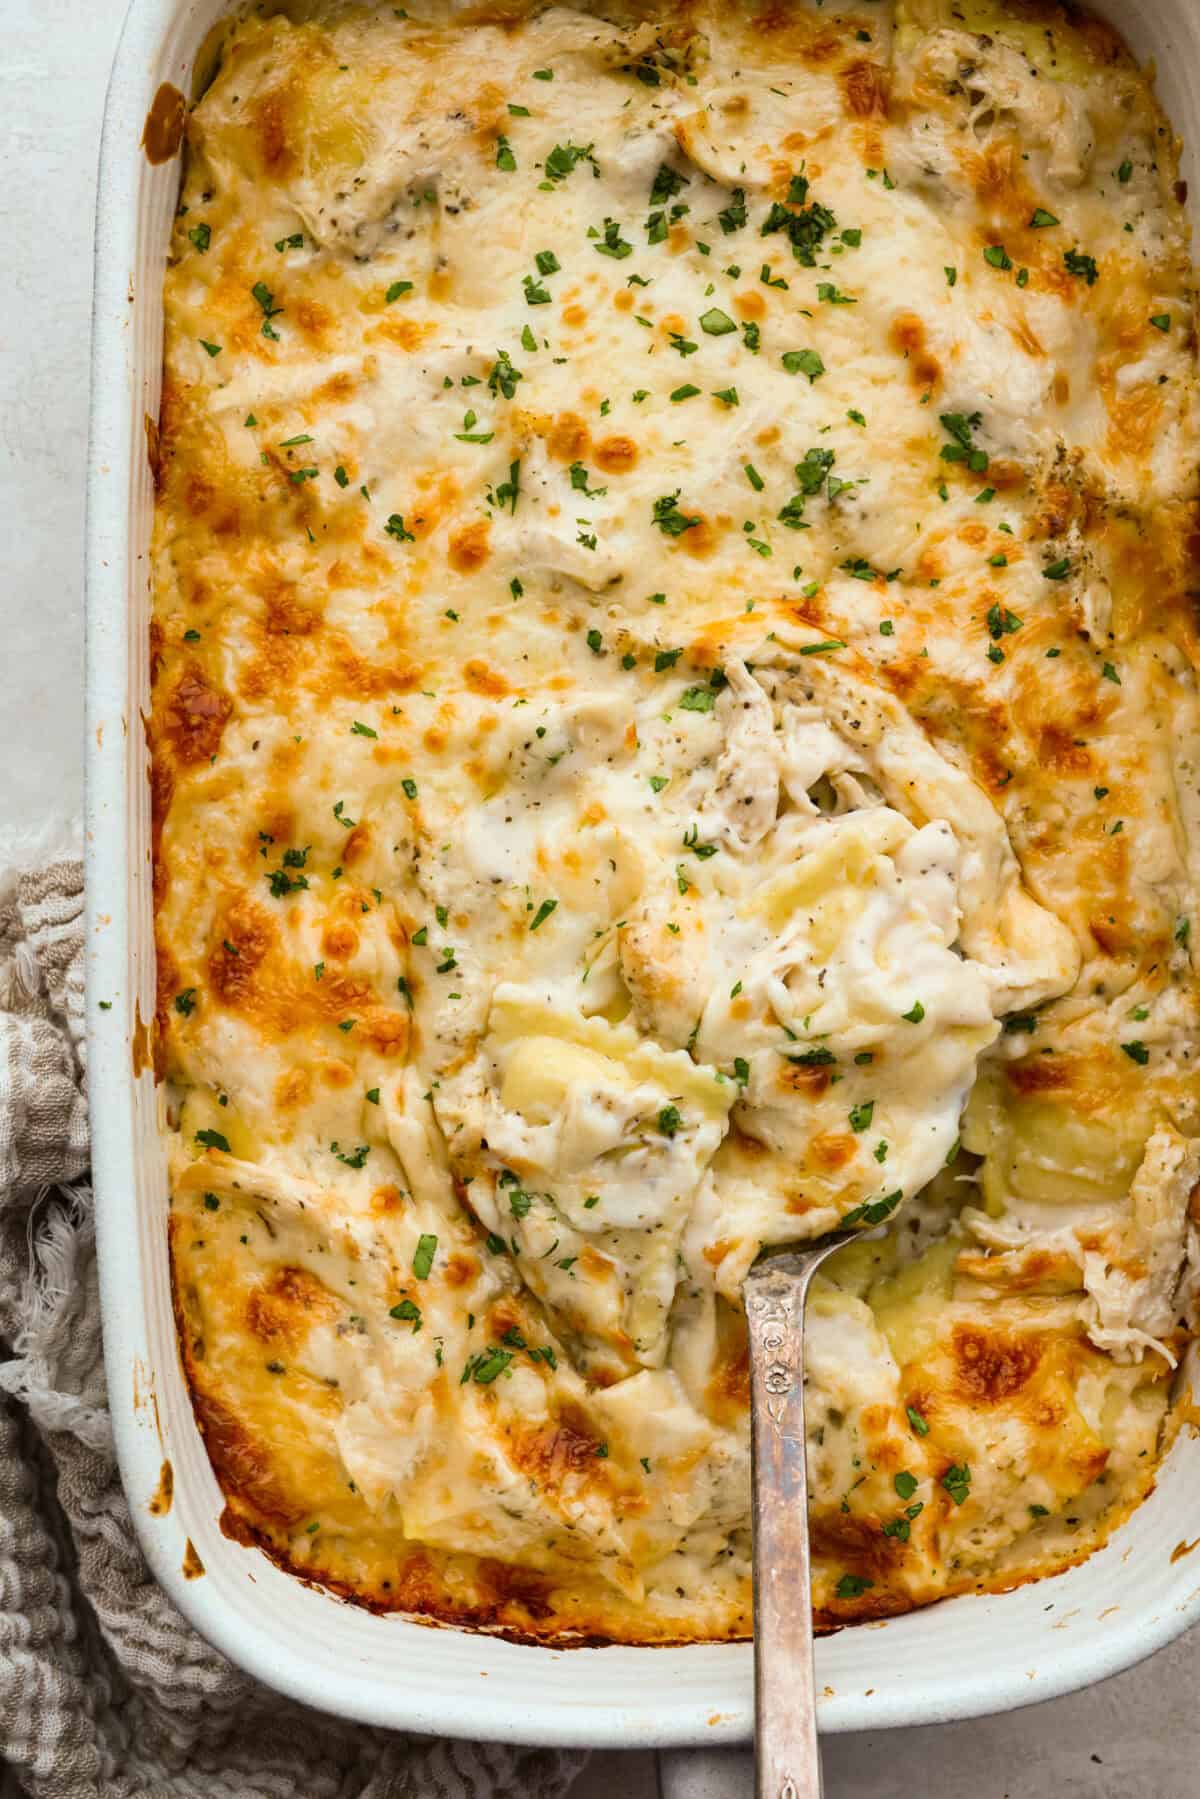
    Top down shot of the baked Alfredo ravioli casserole.

    Why This Recipe Will Save the Day

    • Shortcut Ingredients: Using frozen ravioli, pre cooked chicken, and jarred Alfredo keeps this recipe fast without giving up any flavor.
    • Just Layer and Bake: No boiling pasta, no raw chicken, no homemade sauce. Everything goes straight into the dish, and the oven does the rest.
    • Seasoned for Extra Flavor: The Italian seasoning takes the sauce to a whole new level, so it’s not just straight from the jar like other recipes.

    Alfredo Ravioli Casserole Ingredients

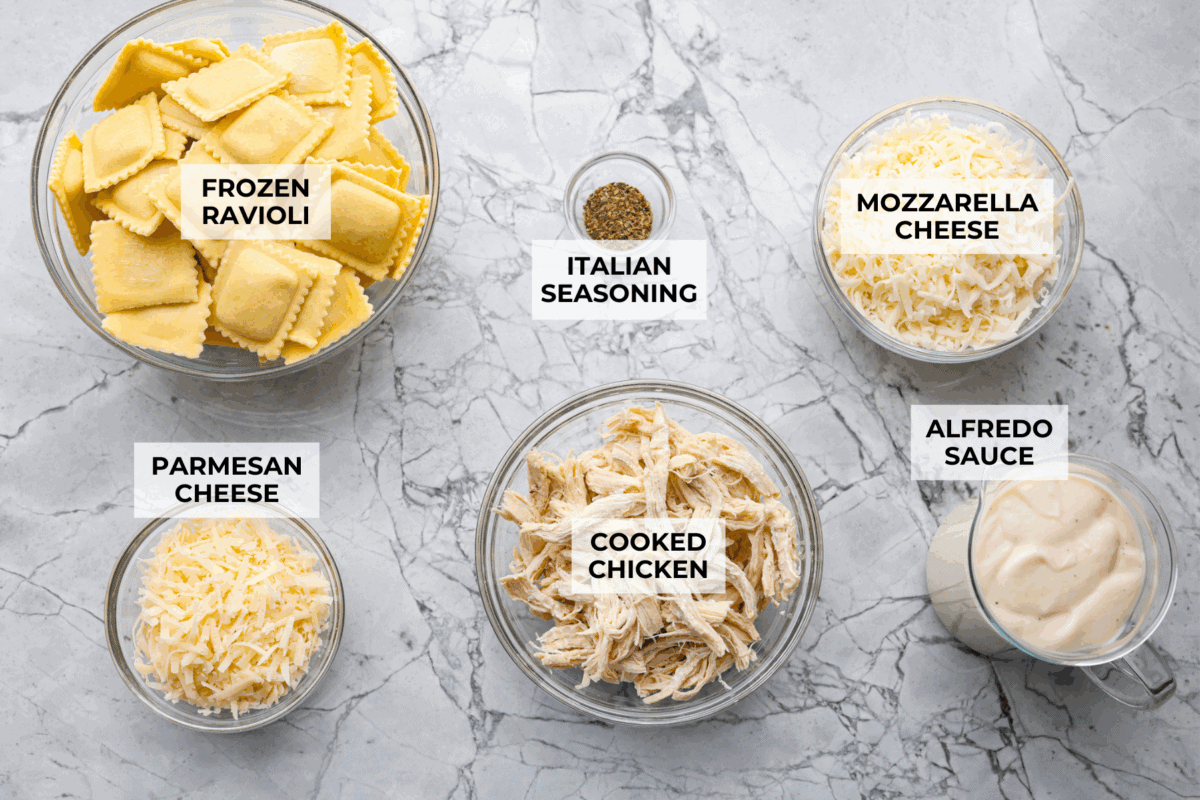
    Overhead shot of labeled ingredients.
    • Alfredo Sauce: Use jarred or homemade.
    • Ravioli: Use one with your favorite filling. I used cheese filled ravioli. Fresh ravioli will work as well.
    • Protein: Rotisserie chicken works, or you can swap it for Italian sausage or leave out the meat and use spinach instead.
    • Seasoning: I love adding Italian seasoning for extra herby flavor. You can also add some fresh herbs or use your favorite blend of dried.

    How to Make Alfredo Ravioli Casserole

    This is one of the easiest recipes to put together when you are short on time. Premade sauce and rotisserie chicken make this come together so easily! While it’s baking, you can make this wedge salad and some garlic bread to go with it!

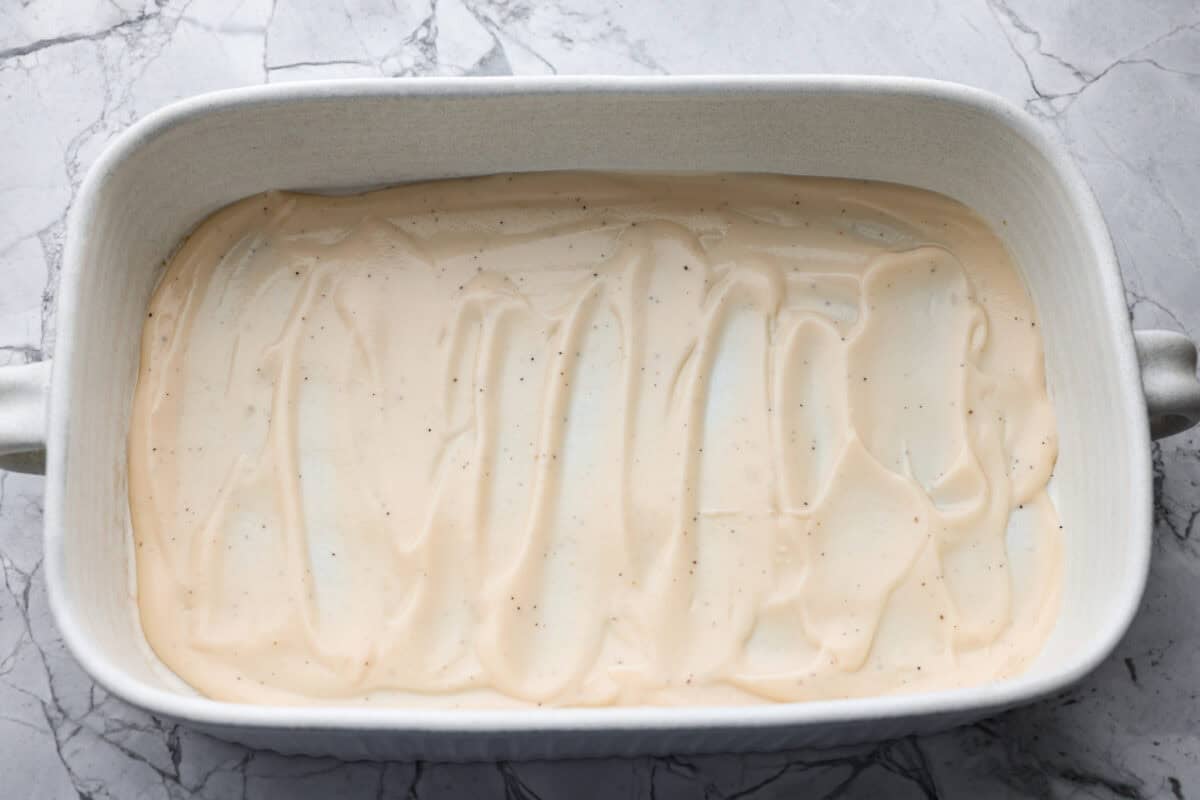
    1. Prep: Preheat the oven to 350°F. Spread ⅓ of the Alfredo sauce on the bottom of a 9 x 13-inch baking dish.
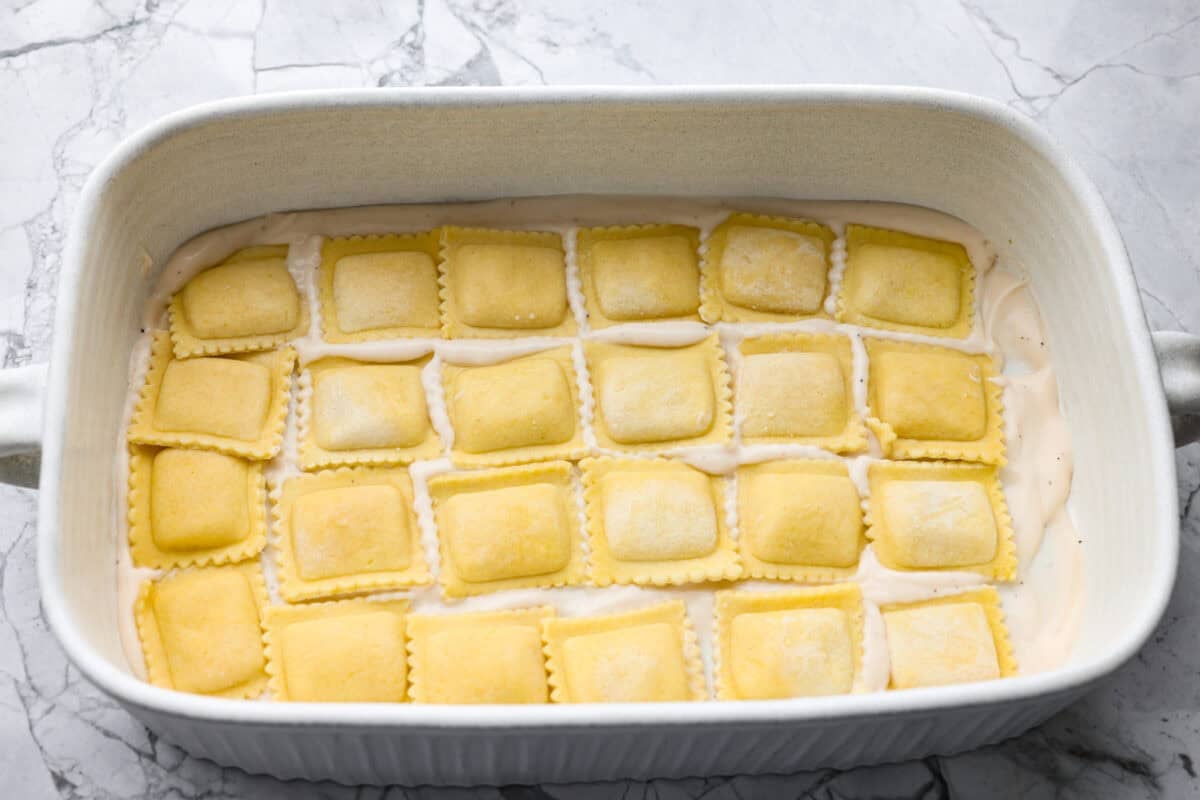
    2. Add: Layer half of the frozen ravioli over the sauce.
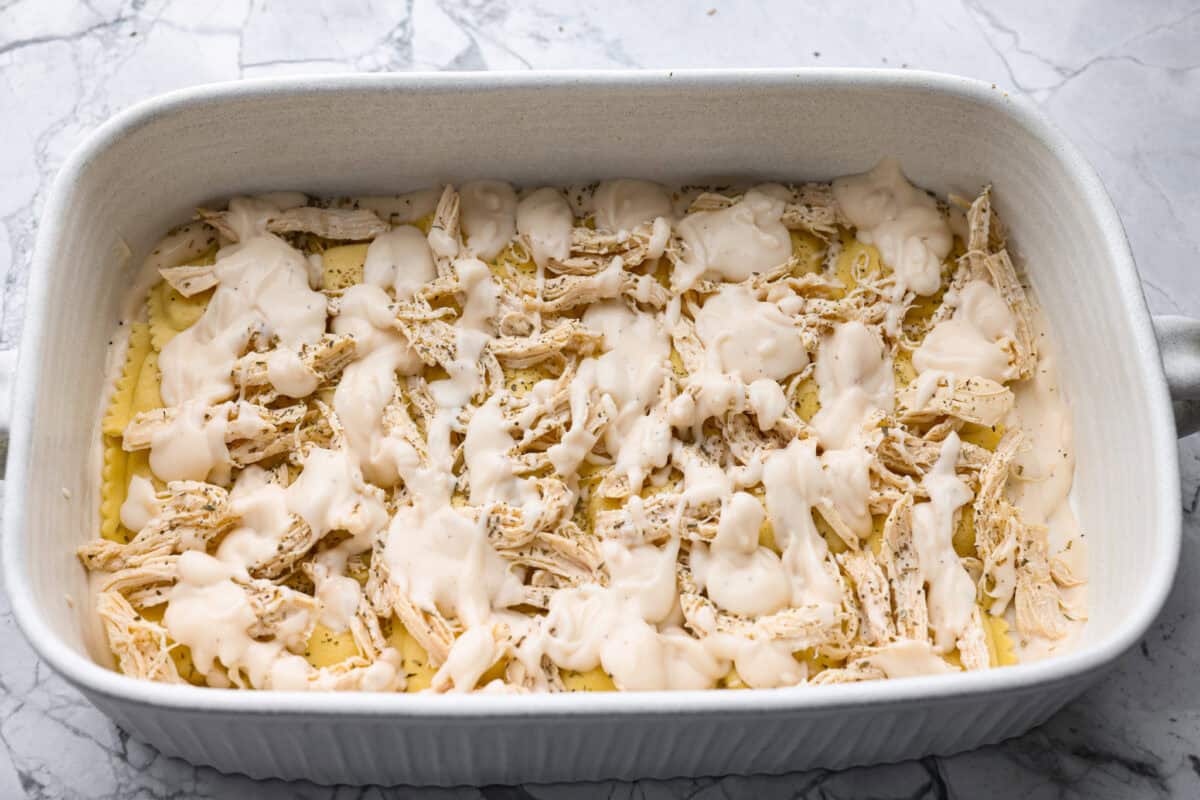
    3. Layer: Add half of the cooked chicken. Sprinkle with half of the Italian seasoning. Drizzle another ⅓ of the Alfredo sauce on top.
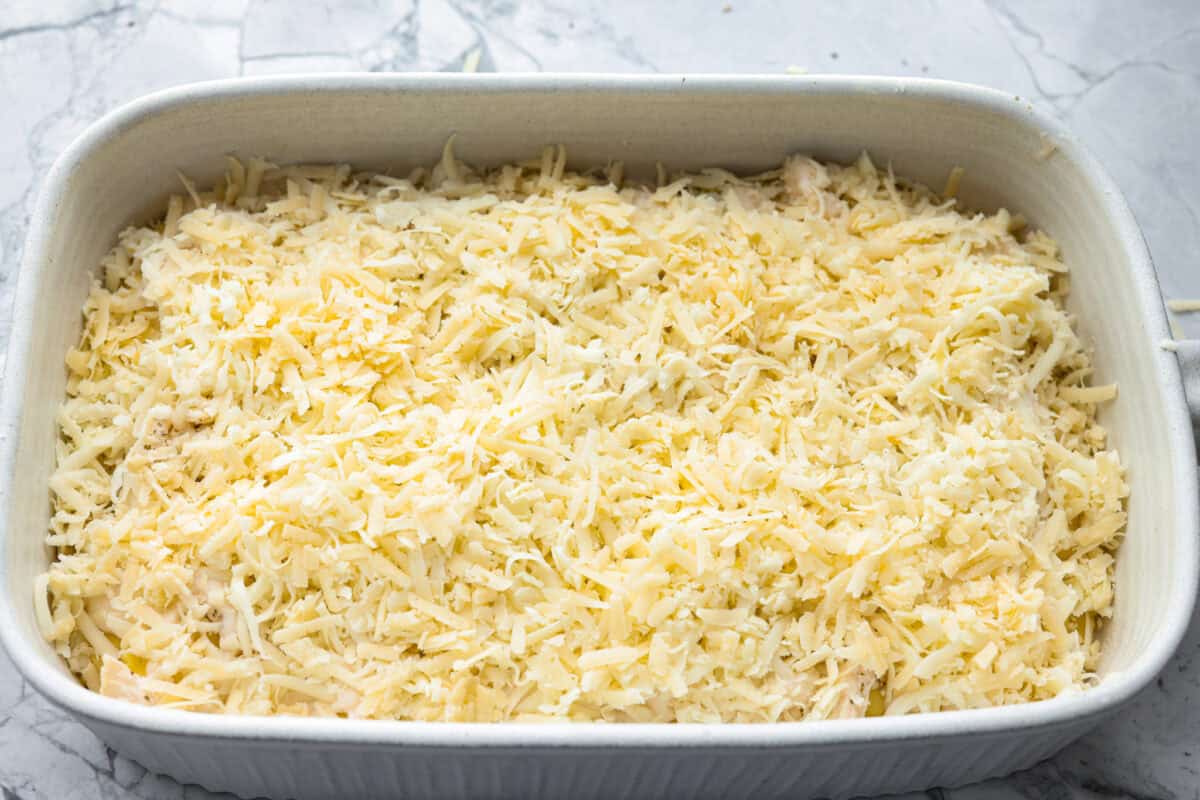
    4. Repeat & Bake: Repeat the layers, starting with the ravioli, then top with mozzarella and Parmesan. Cover with foil and bake for 30 minutes. Uncover and bake for an additional 5-10 minutes, until the top of the alfredo ravioli casserole is golden and bubbly.

    Pin this now to find it later

    Pin It

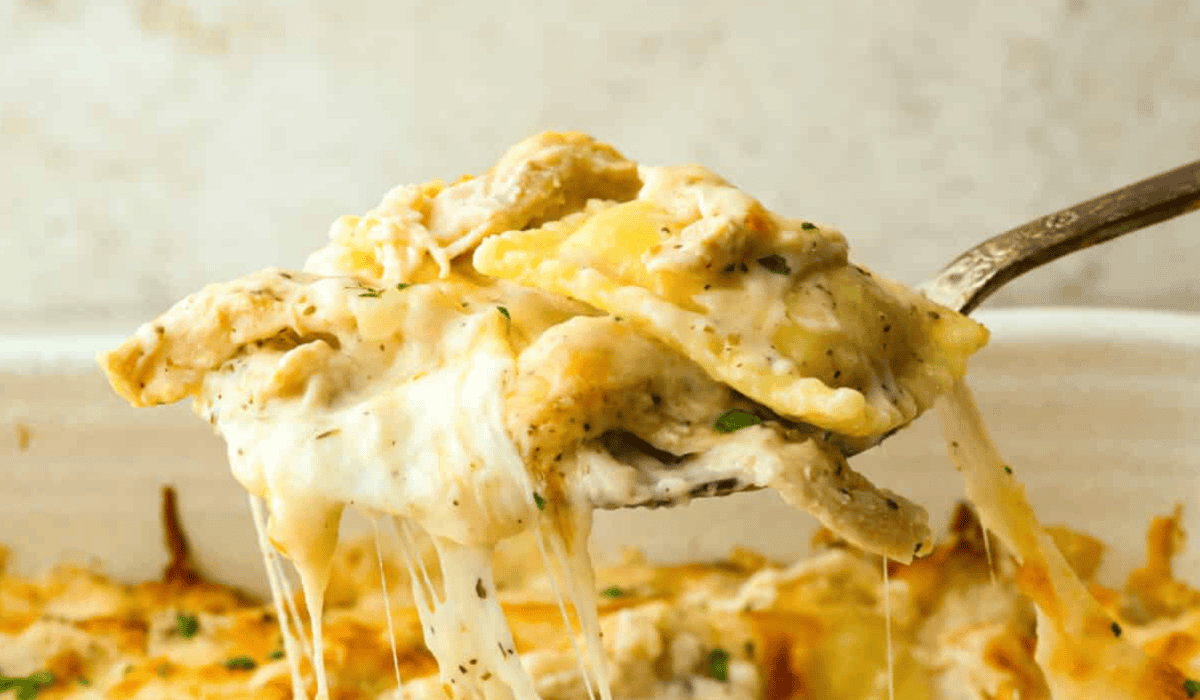
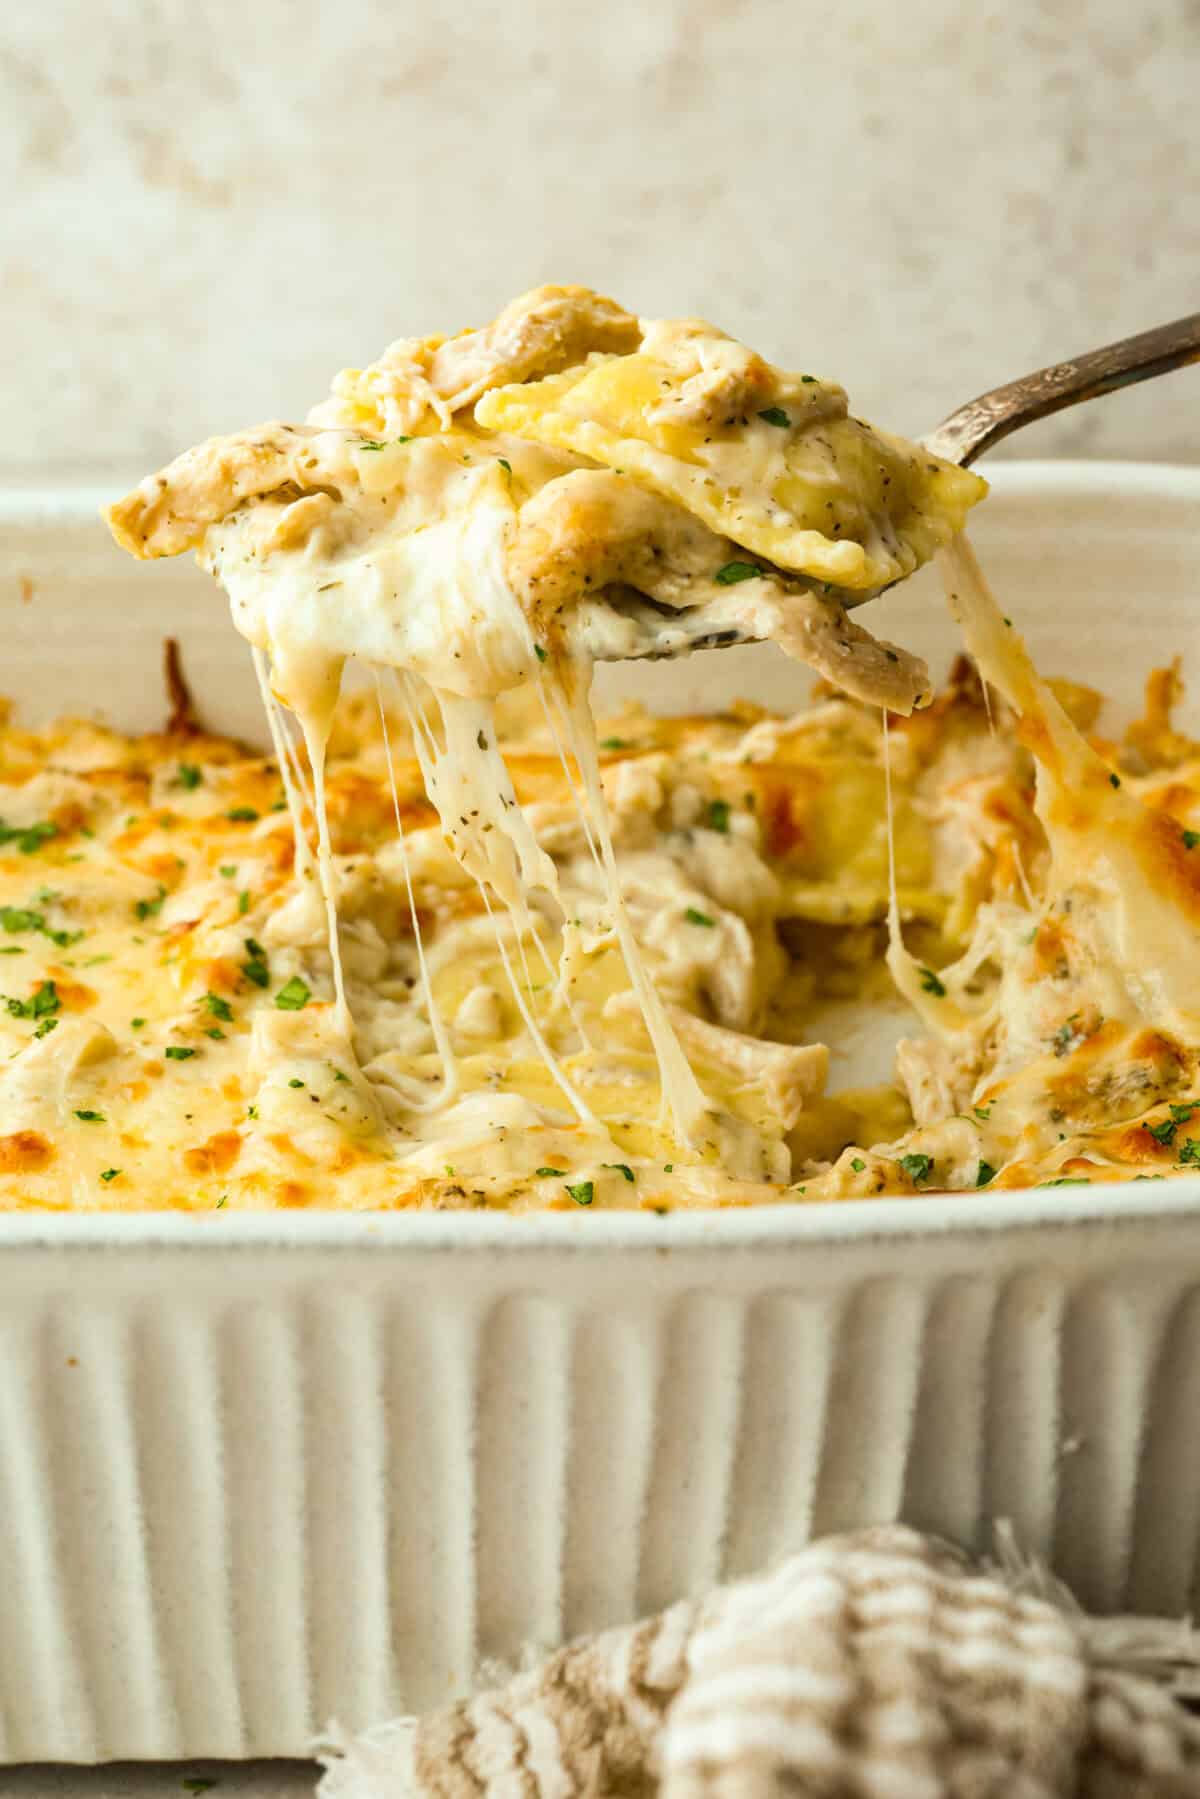
    Someone scooping a portion of alfredo ravioli casserole from the baking dish.

    More Quick & Easy Casseroles

    I am seriously done by the end of the day. Juggling dance and soccer, homework and my work, I need something simple to make for dinner. The best part about a casserole is that I can prep it ahead of time, throw it in the oven, and dinner is on!

    Baked Pierogi Casserole

    50 minutes


    Source link