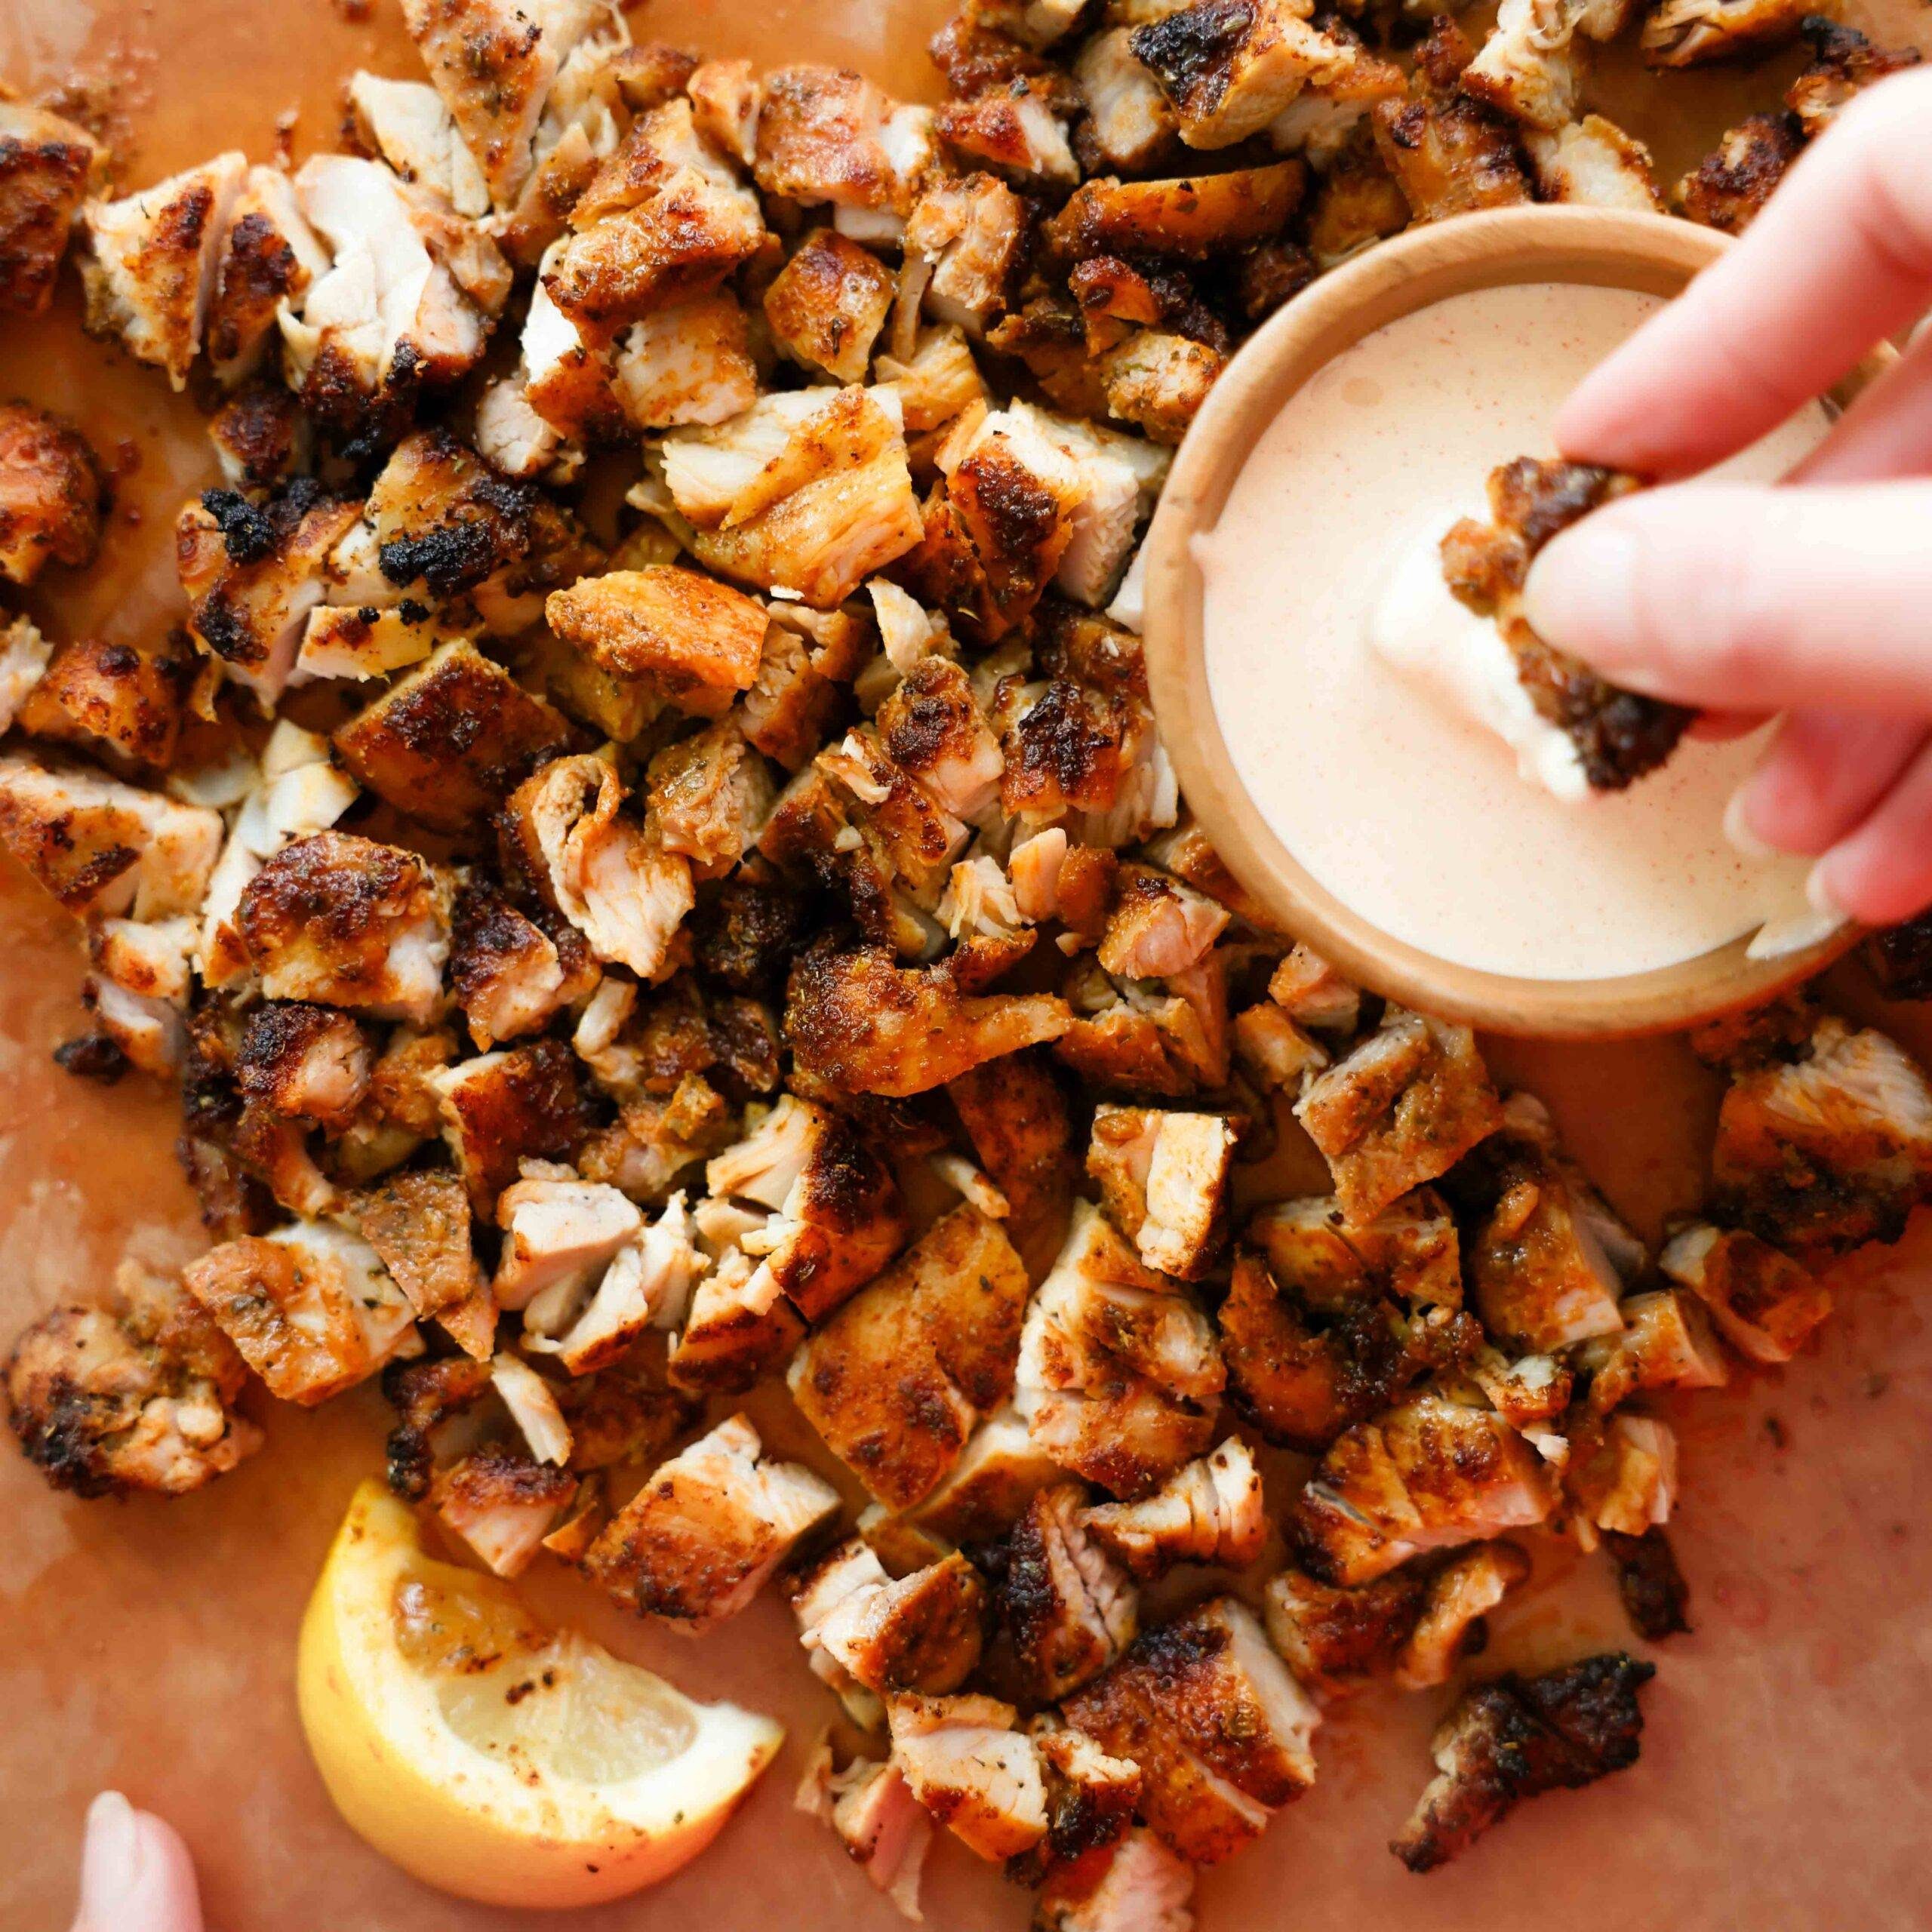
Smoky Paprika Aioli (my current favorite sauce with this): Whisk 1/2 cup mayo, 1/4 cup yogurt, 1 clove freshly grated garlic, 1/2 teaspoon smoked paprika, 2 tablespoons water, 1/4 teaspoon salt (more to taste).
Spice Coverage on The Chicken: Every package of chicken thighs is a slightly different size, so if your package is 1.5 pounds or more (or if you love a lot of spices), you may want to add a few extra shakes of spices to get more complete spice coverage!
Preheating the Air Fryer: I do not preheat my air fryer. I just put the chicken in, turn the air fryer on, and then make sure to use a meat thermometer to check that it’s completely cooked.
Lining the Air Fryer: I also don’t line the air fryer basket with anything. I just put the chicken thighs directly onto the grill grate.
Flipping the Chicken: I also do not flip the chicken thighs halfway through. I’ve tried it, but I like the texture better with just the top being crispy and the underside being a bit juicy. If you think you want both the top and bottom to be crisped up a bit, you can air fry for 8-9 minutes, then flip and cook for another 5 minutes to get both sides a bit crisped.
My oven roasted broccoli recipe guarantees perfectly tender florets with the most delicious golden-brown crispy tips. It’s such a simple, perfect side dish!
Our family loves roasting broccoli in the oven, but we’re picky about it. You won’t find any mushy or overcooked broccoli here. My favorite method guarantees tender stems, crisp edges, and most importantly, really tasty broccoli!
The secret to the best roasted broccoli is high heat and a few small tricks we’ve learned over the years. With the right pan, a drizzle of oil, and a bit of patience, you’ll have broccoli so good you’ll want to eat it straight from the sheet pan. For more, see our roasted broccolini recipe!
Key Ingredients
Broccoli: Look for florets that are tightly closed and a deep, vibrant green color. If they appear loose, pale, or have yellowing or small yellow flowers, the broccoli is likely past its peak and can taste bitter. If you only have frozen broccoli, don’t worry. We’ve included tips in the recipe for roasting frozen broccoli so it still turns out crispy and delicious.
Oil: We like to roast vegetables with olive oil or avocado oil, both of which have great flavor and a higher smoke point. Avoid extra-virgin olive oi; since it burns more easily at high oven temperatures.
Salt and Pepper: As with all of our roasted vegetable recipes, we season generously with salt and pepper. Once roasted, you can add extra flavor with your favorite spice blends or seasoning mixes.
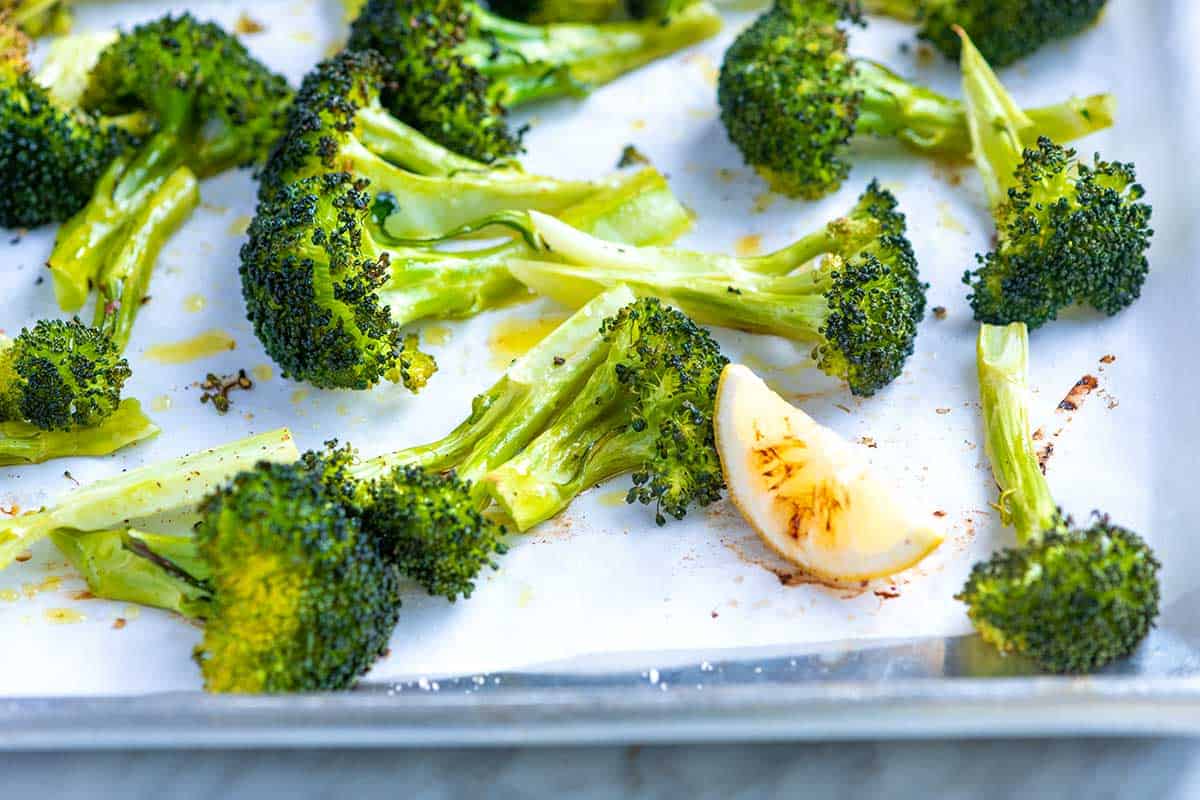
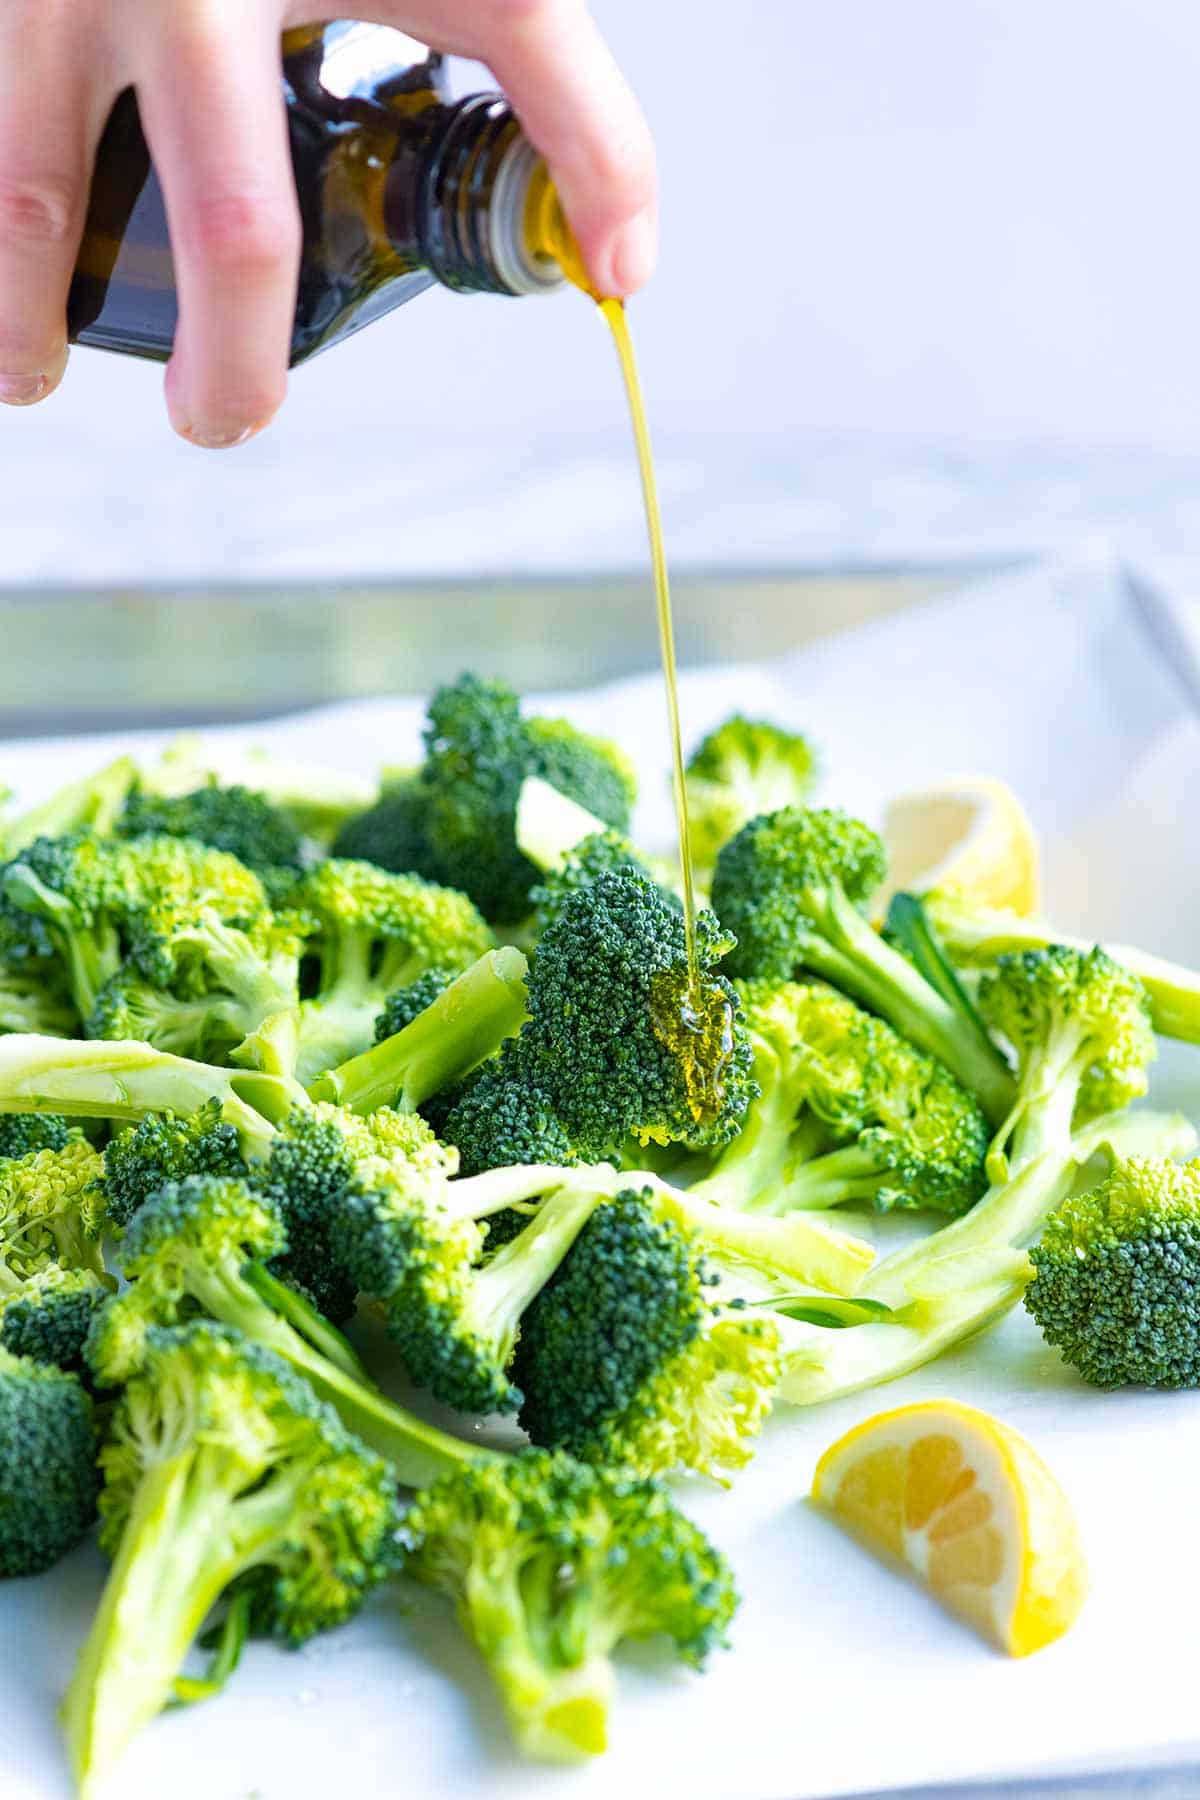
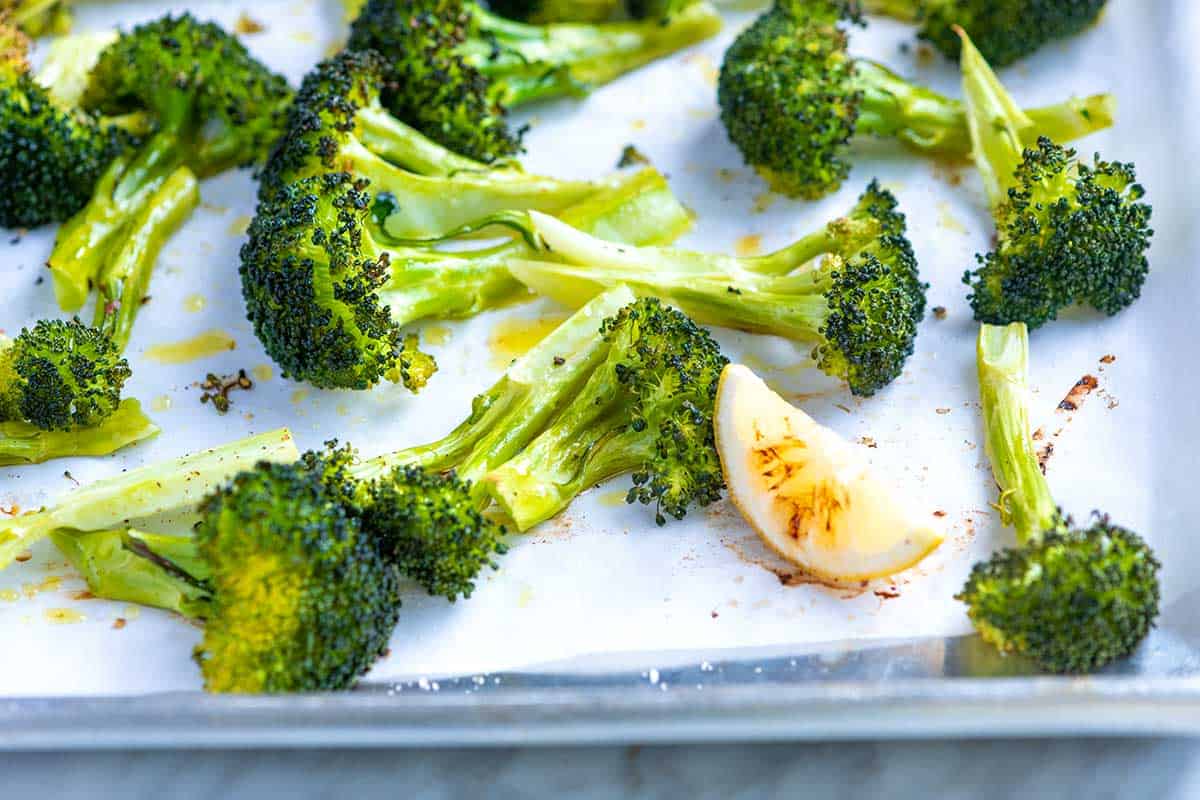
Lemon (Optional): I like to slice a lemon and toss the wedges right onto the baking sheet with the broccoli. The lemons roast and turn slightly sweet, and the broccoli tastes amazing with a squeeze of that roasted lemon juice over the top.
Find the full recipe with measurements below.
How to Make Roasted Broccoli in the Oven
Tip 1: Cut the broccoli into similarly sized pieces. So that all your broccoli roasts at the same speed, try to cut your broccoli into similar sizes. It’s up to you how big they are, but make sure everything in the pan looks similar in size. This way, everything roasts evenly. I use the same tip for roasted cauliflower, too.
Tip 2: Create lots of flat edges. Instead of pulling the florets apart to look like the tops of round trees, slice them in half or quarters to create a flat side. Place the flatter edge down when you arrange the broccoli on the baking sheet. As the broccoli roasts, the flat edge will get nice and brown.
Tip 3: Don’t overcrowd it on the pan. Be careful not to overcrowd the broccoli, and give them some space. Roasting the broccoli too close together causes it to steam rather than roast. This tip also applies to roasted mushrooms!
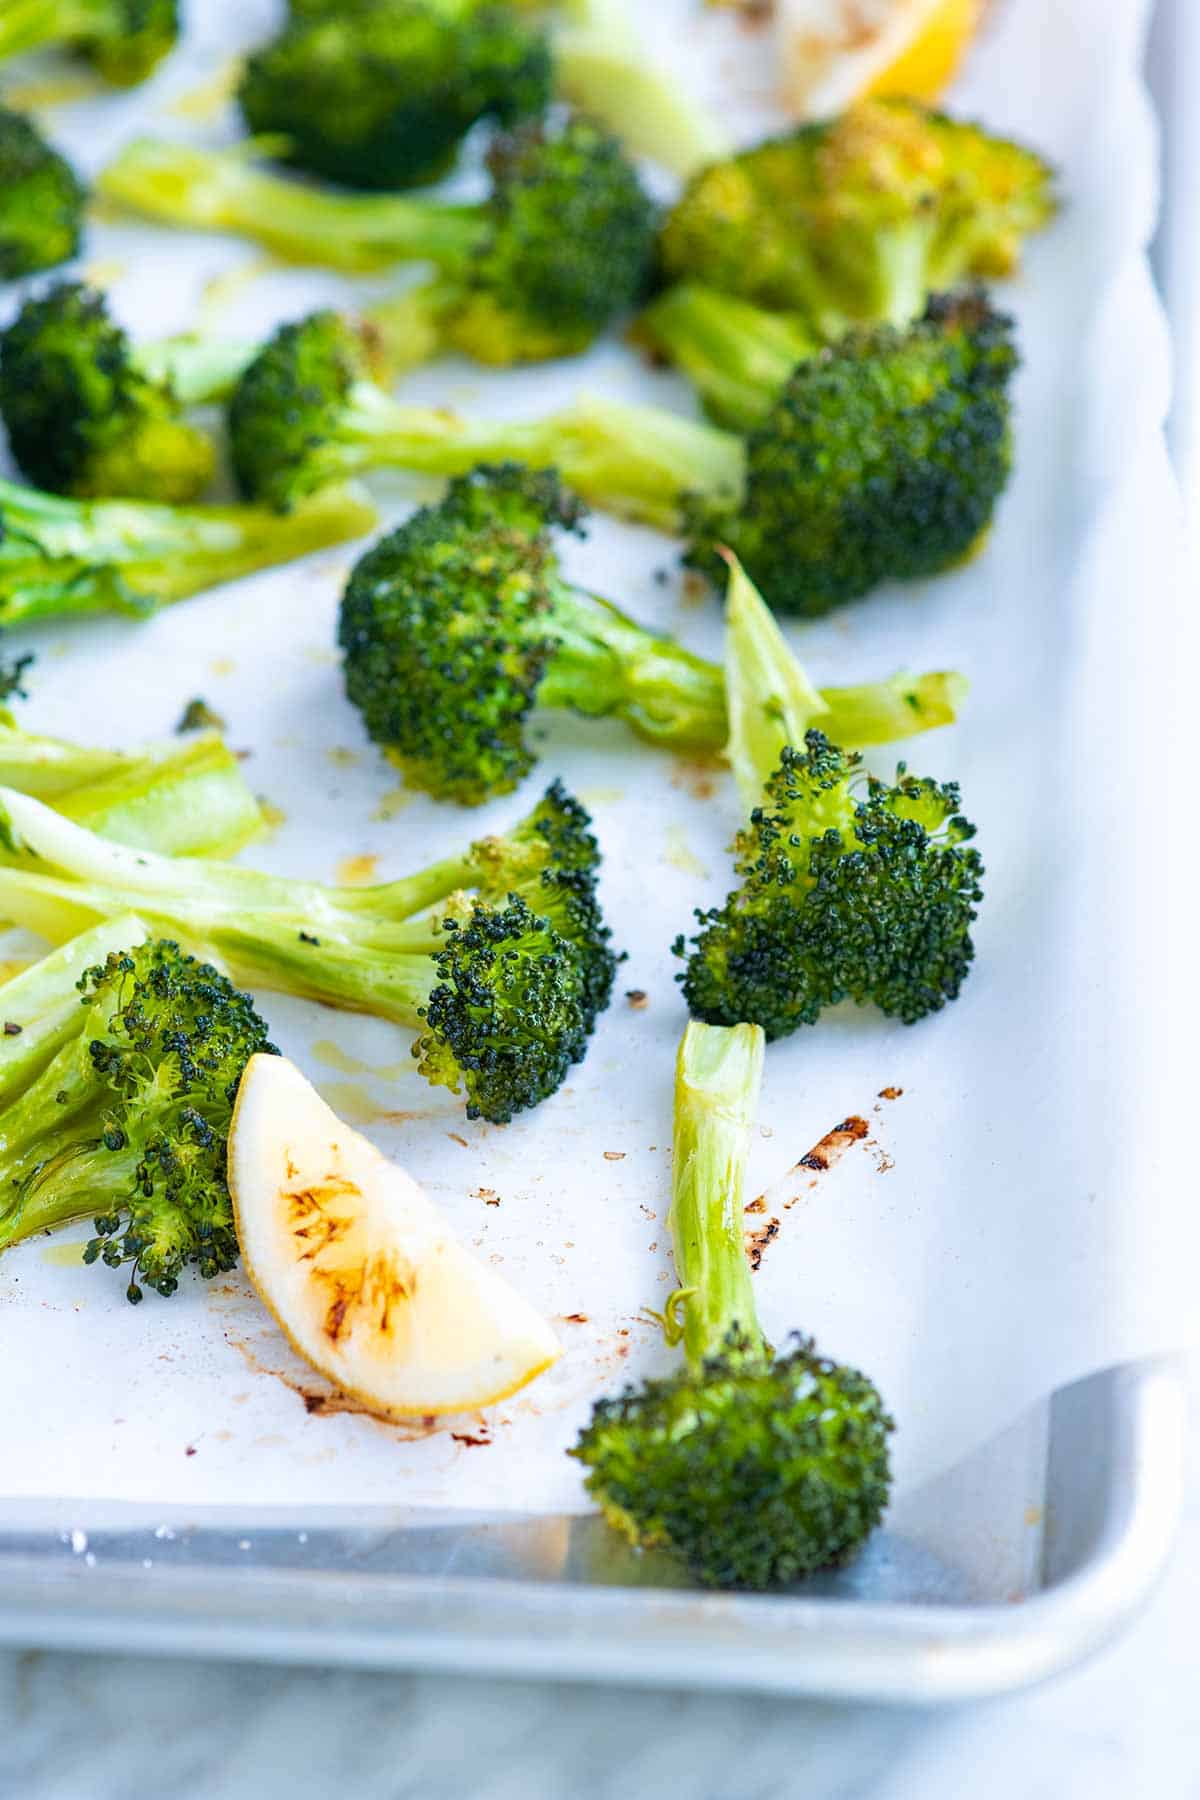
Tip 4: Use a high oven temperature. For those crispy brown tips and caramelized stems, roast broccoli at 425°F for 20 to 30 minutes. Check the broccoli towards the end of roasting, and don’t take it out until the tips of the florets are browned and crisp and the stems are tender.
Serving Suggestions
This broccoli might be one of the most made veggie sides in our house. We’re happy to serve it next to almost anything. Some of our favorites are next to mac and cheese, chicken nuggets (my son’s request), these lemon chicken thighs, our baked lemon dill salmon, and adding to rice or grain bowls.
I also love adding a dipping sauce to the side, like our tahini sauce, ranch dressing, or this creamy honey mustard.
More Broccoli Recipes
Perfect Roasted Broccoli
PREP
COOK
TOTAL
Roasted broccoli is such a classic side, and for good reason! It goes with almost anything. The lemon in our recipe is optional, but really lovely with the broccoli.
4 Servings
You Will Need
1 bunch broccoli, about 1 ½ pounds
2 tablespoons olive oil or avocado oil
½ teaspoon fine sea salt
¼ teaspoon fresh ground black pepper
3 lemon wedges, optional
Directions
1Prep: Preheat the oven to 425°F (218°C). Line a large baking sheet with parchment paper or a silicone baking mat.
2Prepare the broccoli: Cut the broccoli crown into individual florets, separating them from the main stem. If any florets are really big, cut them in half lengthwise to create flat edges, which helps them roast evenly and brown. Use a vegetable peeler to remove the tough outer layer of the broccoli stems. Cut the peeled stems into bite-sized pieces, about 1 inch long.
3Season: Toss the broccoli florets and stems with the olive oil, salt, and pepper on the baking sheet. Spread them out, facing as many flatter edges down onto the baking sheet so they brown nicely. Then, scatter lemon wedges around the broccoli.
4Bake: Roast the broccoli, without stirring, until the edges are crisp and brown and the stems are tender, 20 to 25 minutes. Serve warm with some juice from the roasted lemon wedges squeezed on top.
Adam and Joanne’s Tips
Storing: Let cool. Transfer the cooled broccoli to an airtight container or resealable bag. Store in the refrigerator for 3 to 5 days, or freeze for up to 12 months. To freeze, spread the broccoli on a baking sheet lined with parchment paper and freeze for about an hour (preventing them from sticking together later). Transfer to a freezer-safe container.
Broccoli stems: I love buying broccoli with long stems that are still attached. The outer layer of the stem can be tough, so I use a vegetable peeler to remove it. Cut 1/2 inch from the end and discard (this can be tough). Slice or dice the rest and throw onto the baking sheet with the florets.
Roasted frozen broccoli: Roast it frozen (do not thaw). Add to a baking sheet and roast at 425°F without oil. After 5 minutes, drizzle the broccoli with oil, then continue to roast for 10 to 15 minutes, or until the edges start to turn crisp. Season with salt and pepper, then serve. The broccoli will turn out softer than when using fresh, but it will still be delicious.
The nutrition facts provided below are estimates.
Nutrition Per Serving Serving Size 1/4 of the baking sheet / Calories 119 / Total Fat 7.6g / Saturated Fat 1.1g / Cholesterol 0mg / Sodium 346.9mg / Carbohydrate 11.6g / Dietary Fiber 4.4g / Total Sugars 3g / Protein 4.8g
AUTHOR:
Adam Gallagher
We are Adam and Joanne Gallagher, the creators of Inspired Taste. Established in 2009, Inspired Taste grew from a childhood dream into one of the internet’s most trusted recipe sites with hundreds of reliable recipes, step-by-step videos, and expert tips.More About Us
This roasted butternut squash soup recipe with a short list of simple ingredients turns out silky, smooth, and incredibly delicious.
In this recipe, you’ll roast butternut squash on top of fresh garlic and thyme, then blend it with broth for one of the easiest soups we’ve shared!
There’s no sautéing, very little simmering, and you don’t need to chop lots of veggies. I love it for an easy fall dinner, but since it turns out so well, it’s actually perfect for the holidays (like Thanksgiving dinner). For a similar soup with even more seasonal vegetables like leeks and carrots, see this Butternut Squash Soup topped with crispy chickpeas.
Key Ingredients
Butternut Squash: I use medium butternut squash, but feel free to swap in winter squash varieties often found during autumn at the farmers market, like honey nut, kabocha, or red kuri squash, or swap it for a small sugar pumpkin like I use when making homemade pumpkin puree.
Herbs:When roasting the squash, we tuck fresh herbs underneath for extra flavor. I use fresh thyme and rosemary most often, but this is also incredible with fresh sage. You can use one of these or all three.
Garlic: In addition to the herbs, we also tuck whole garlic cloves (still in their skins) under the squash. This way, they flavor the squash, and the garlic becomes soft and sweet at the same time. You can then blend the roasted garlic into the soup later on.
Broth: You can use your favorite broth or stock. I love the richness of homemade chicken stock, chicken broth, or bone broth, but this soup is also excellent when you use a flavorful vegetable broth.
Cream: This is optional, but I almost always add a splash of heavy cream to my soup for a silky, velvety texture. To keep it vegetarian or vegan, try coconut milk or coconut cream.
Find the full recipe with measurements below.
My Tips for Making the Easiest Butternut Squash Soup
Tip 1: Cutting butternut squash. My favorite method for cutting butternut squash is the same as I use for spaghetti squash:
To prevent the squash from rolling around, place one half of a kitchen towel under the squash to keep it stable on the counter. Then, use the other half of the towel to hold the squash in place while you cut.
Using a heavy chef’s knife, pierce into the middle of the squash and cut it from end to end. Don’t try to cut through the stem. It is too tough.
Wiggle the knife out and separate the two halves by removing the knife and pulling them apart.
Tip 2: Roast the squash with garlic and herbs. Sneak some herbs and garlic underneath the butternut squash halves before roasting them in the oven until fork-tender and golden on the bottom. The squash becomes fragrant and so flavorful this way.
Tip 3: Blending your soup. When the squash is tender and caramelized, it’s time to blend. Use an immersion blender in a pot or use a stand blender to blend the roasted squash with broth and the soft roasted garlic. (You can squeeze the roasted garlic flesh into the blender and discard the skins.) Season with salt and pepper to taste, then, as a last (optional) step, I love blending in some cream.
Tip 4: Serving this soup. I love this roasted squash soup with a slice of homemade focaccia bread, but it’s also really good with some homemade croutons on top. If you’re feeling fancy, it is also amazing with a grilled cheese made with sourdough and Gruyère cheese!
More Easy Soups
Easy Roasted Butternut Squash Soup
PREP
COOK
TOTAL
This easy butternut squash soup requires a short list of ingredients and minimal effort from you. Since it is so simple, you have some wiggle room with variations. Feel free to substitute other varieties of squash or pumpkin in place of the butternut squash. Or add some roasted apples, onions, or carrots. You can roast them alongside the squash on the same baking sheet. More variations are below the recipe.
6 Servings
You Will Need
1 medium butternut squash, 2 ½ to 3 pounds
1 tablespoon extra-virgin olive oil or melted butter
3 sprigs fresh thyme, rosemary, or fresh sage
4 garlic cloves, with skins left on
4 to 5 cups low-sodium vegetable or chicken stock, try homemade chicken stock (950ml to 1180ml)
¼ cup heavy cream, optional (60ml)
Salt and fresh ground black pepper
Directions
1Prepare oven and pan: Preheat the oven to 400°F (204°C). Line a rimmed baking sheet, roasting pan, or baking dish with foil or parchment paper.
2Prepare the squash: Cut the squash in half, lengthwise, using a heavy chef’s knife. Scoop out and discard the seeds. Brush each half, inside and out, with 1 tablespoon olive oil (or melted butter). Season the squash with ½ teaspoon salt and ¼ teaspoon black pepper.
3Roast the squash: Make a bed of fresh herbs and garlic cloves in the middle of the baking sheet. Place the squash, cut side down, on top. Roast until the squash is completely tender, about 1 hour.
4Blend until creamy: Remove the squash from the oven and let it cool until you can handle it. Scoop out the roasted butternut squash flesh and add it to a large pot. Squeeze the roasted garlic from the skins into the saucepan and throw away the skins. Throw away the herbs.
5Pour 4 cups of stock into the saucepan and bring to a simmer. Using a blender or immersion blender, blend the soup until completely smooth. Add more stock to thin the soup to your desired consistency. Season to taste with salt and pepper. Stir in cream (optional).
Adam and Joanne’s Tips
Storing: Store homemade butternut squash soup in an airtight container in the fridge for up to 3 days or in the freezer for up to 3 months.
Variations: Consider adding some warm spices to this soup, like 1/4 teaspoon ground ginger or finely grated ginger, a pinch of nutmeg, or a pinch of cayenne pepper for some heat.
Serving ideas: I love an extra drizzle of cream, but this soup is also lovely with some toasted pepitas (or roasted pumpkin seeds), crumbled bacon, or crispy fried shallots on top.
Blending hot liquids: When using a regular blender, work in smaller batches, and don’t fill it too high – hot soup expands! For safety, remove the lid’s center insert and cover the opening with a kitchen towel while blending. This releases steam and prevents messy splatters.
The nutrition facts provided below are estimates.
Nutrition Per Serving Serving Size 1 of 6 servings / Calories 287 / Total Fat 11g / Saturated Fat 5g / Cholesterol 20mg / Sodium 546mg / Carbohydrate 45g / Dietary Fiber 7g / Total Sugars 8g / Protein 10g
AUTHOR:
Adam Gallagher
We are Adam and Joanne Gallagher, the creators of Inspired Taste. Established in 2009, Inspired Taste grew from a childhood dream into one of the internet’s most trusted recipe sites with hundreds of reliable recipes, step-by-step videos, and expert tips.More About Us
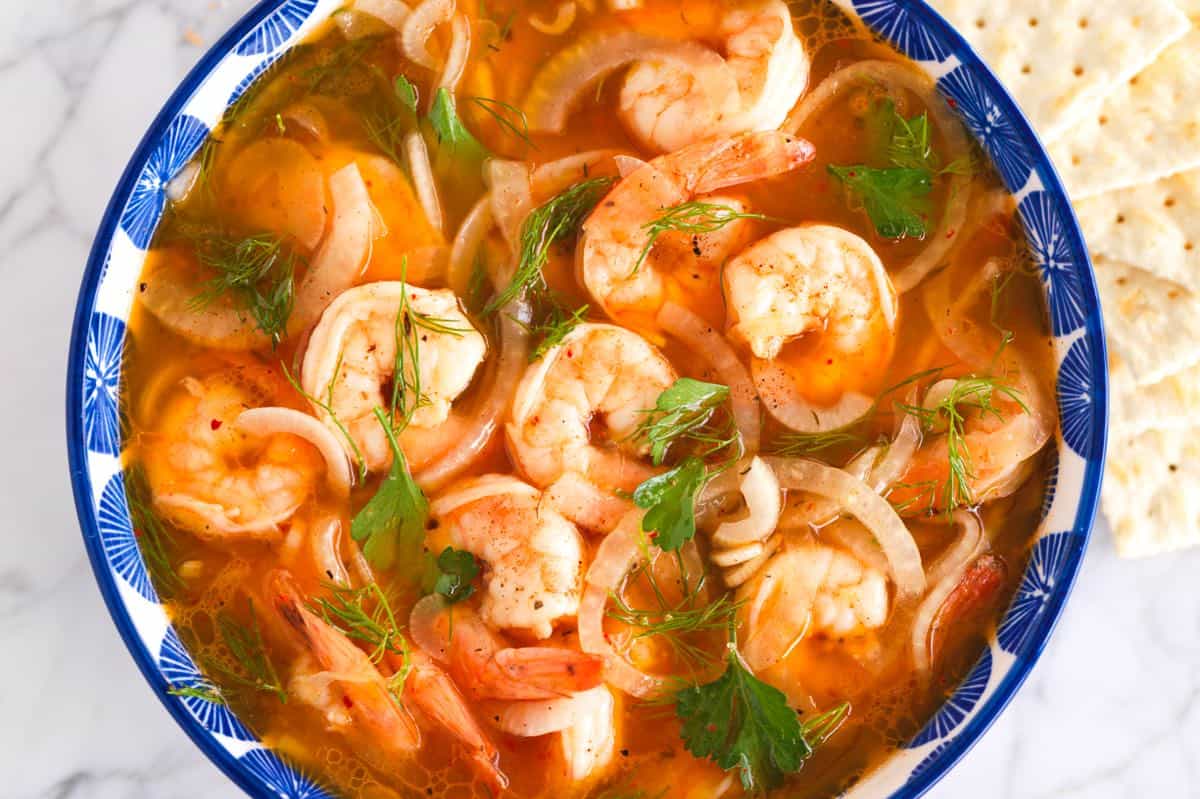
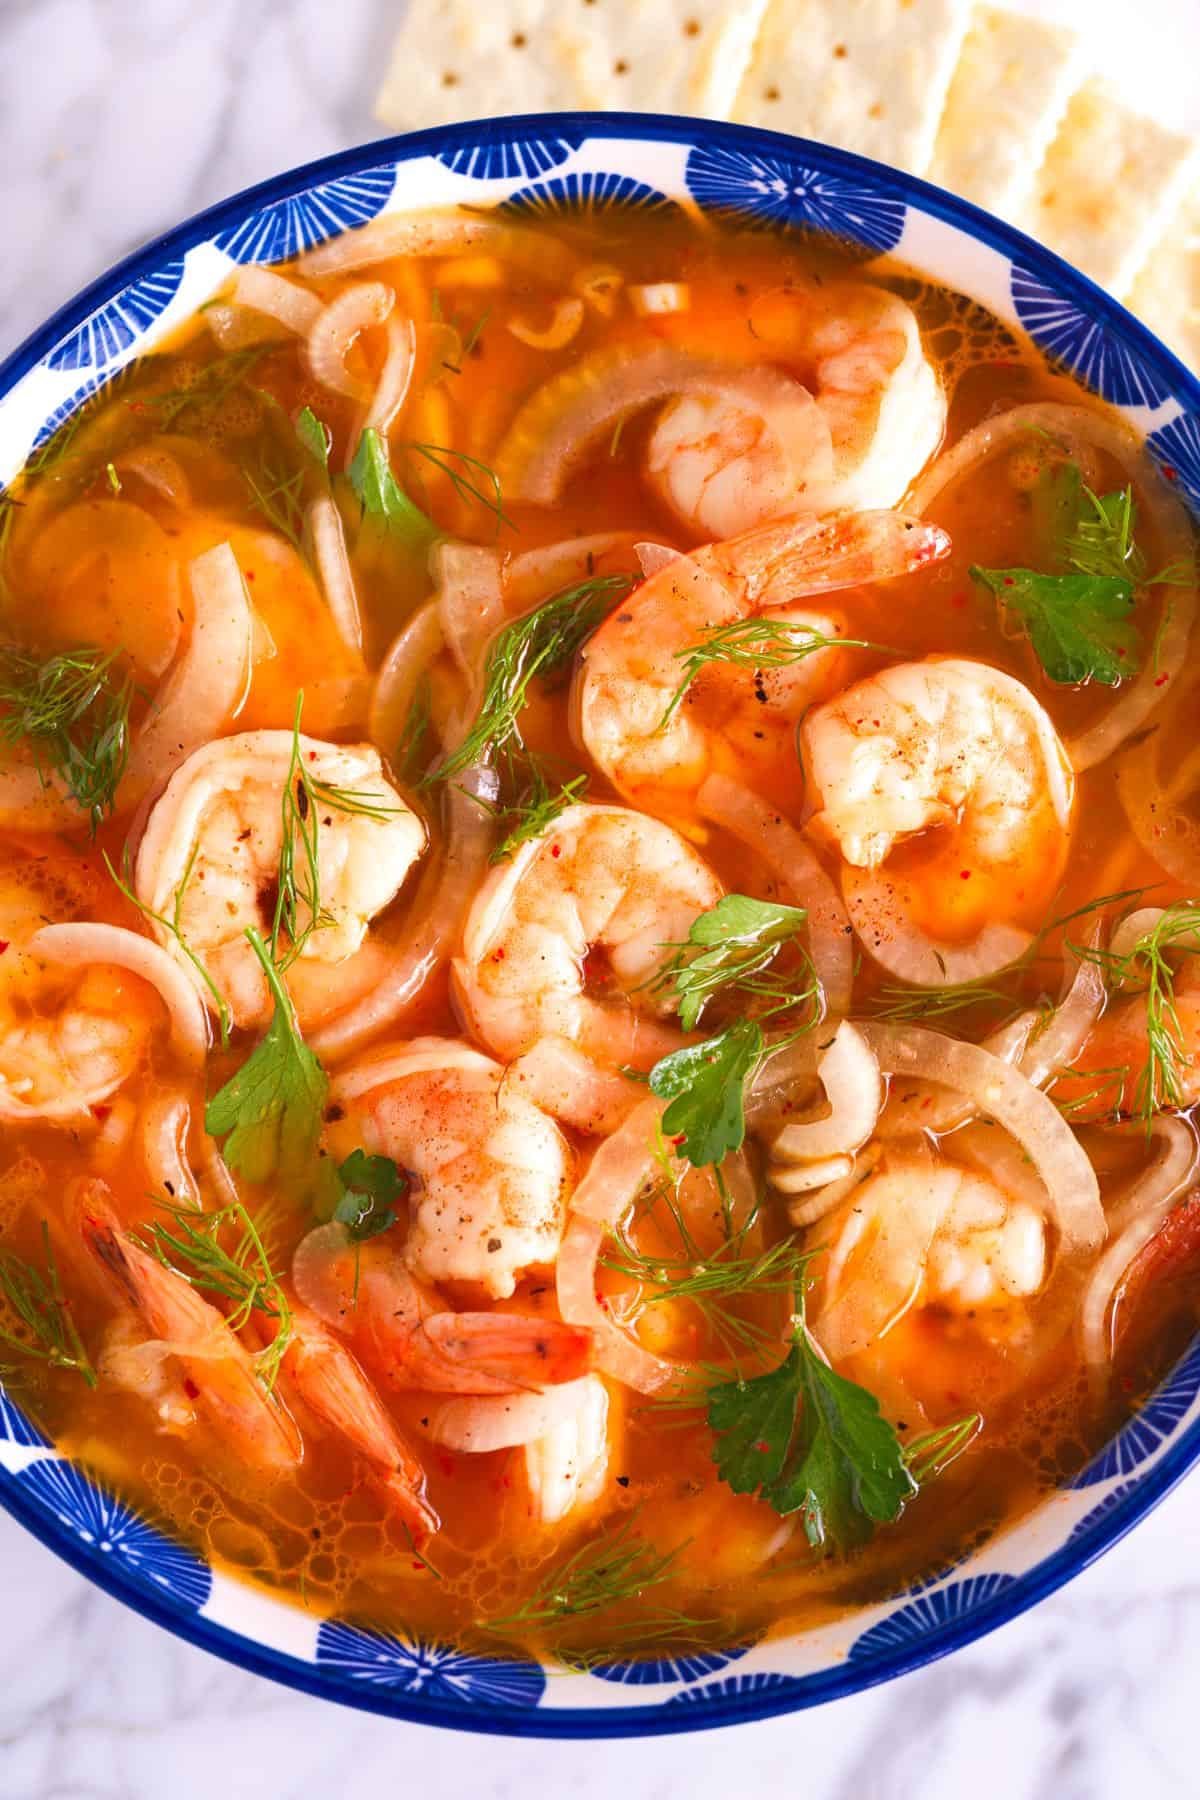
This tangy, herby, lemony pickled shrimp recipe is so good you’ll want to make a double batch!
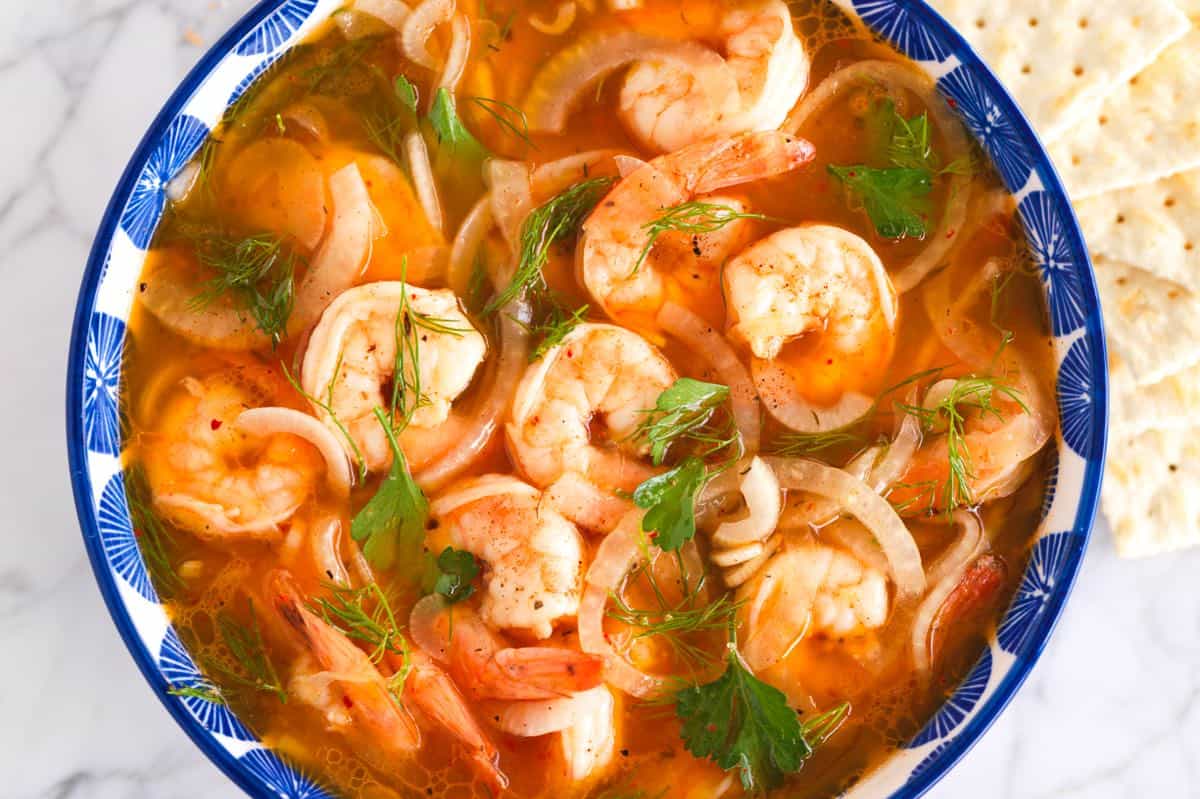
I love these pickled shrimp as a light dinner and for entertaining (they always go quickly). Serve them with crackers, crusty bread and butter, or make a sandwich. They’re even great added to salads and light pasta dishes (like this orzo pasta salad).
I didn’t know how much I loved Southern-style pickled shrimp until our friend Richard introduced us to them. Now, I can’t get enough. Once you try this easy recipe, you’ll be hooked, too. They are seriously good! For another Southern-inspired shrimp recipe, see our easy shrimp and grits!
Key Ingredients
Shrimp: For the best results, I recommend large or jumbo shrimp. They’re less likely to overcook and dry out. Look for fresh shrimp that feels firm and has a slightly sweet smell. If you’re using frozen shrimp, thaw and drain them before cooking them.
Lemon: I use lemon juice for the pickling liquid and a whole lemon for the shrimp cooking liquid.
Cajun or Creole Seasoning: This adds a ton of flavor to both the cooking liquid and the pickling liquid. I love my homemade Cajun seasoning, but feel free to use what you have. I also like to add a bay leaf to the cooking liquid.
Onion: This might be my favorite part! I love pickled onions, and since we add lots of sliced onion to the pickling brine, you end up with perfect shrimp and pickled onions. I usually use sweet onions, but yellow or red onions work too.
Apple Cider Vinegar and Oil: These are the base of your pickling liquid. Apple cider vinegar keeps things tangy, and the oil adds richness and helps the pickling liquid turn into more of a dressing.
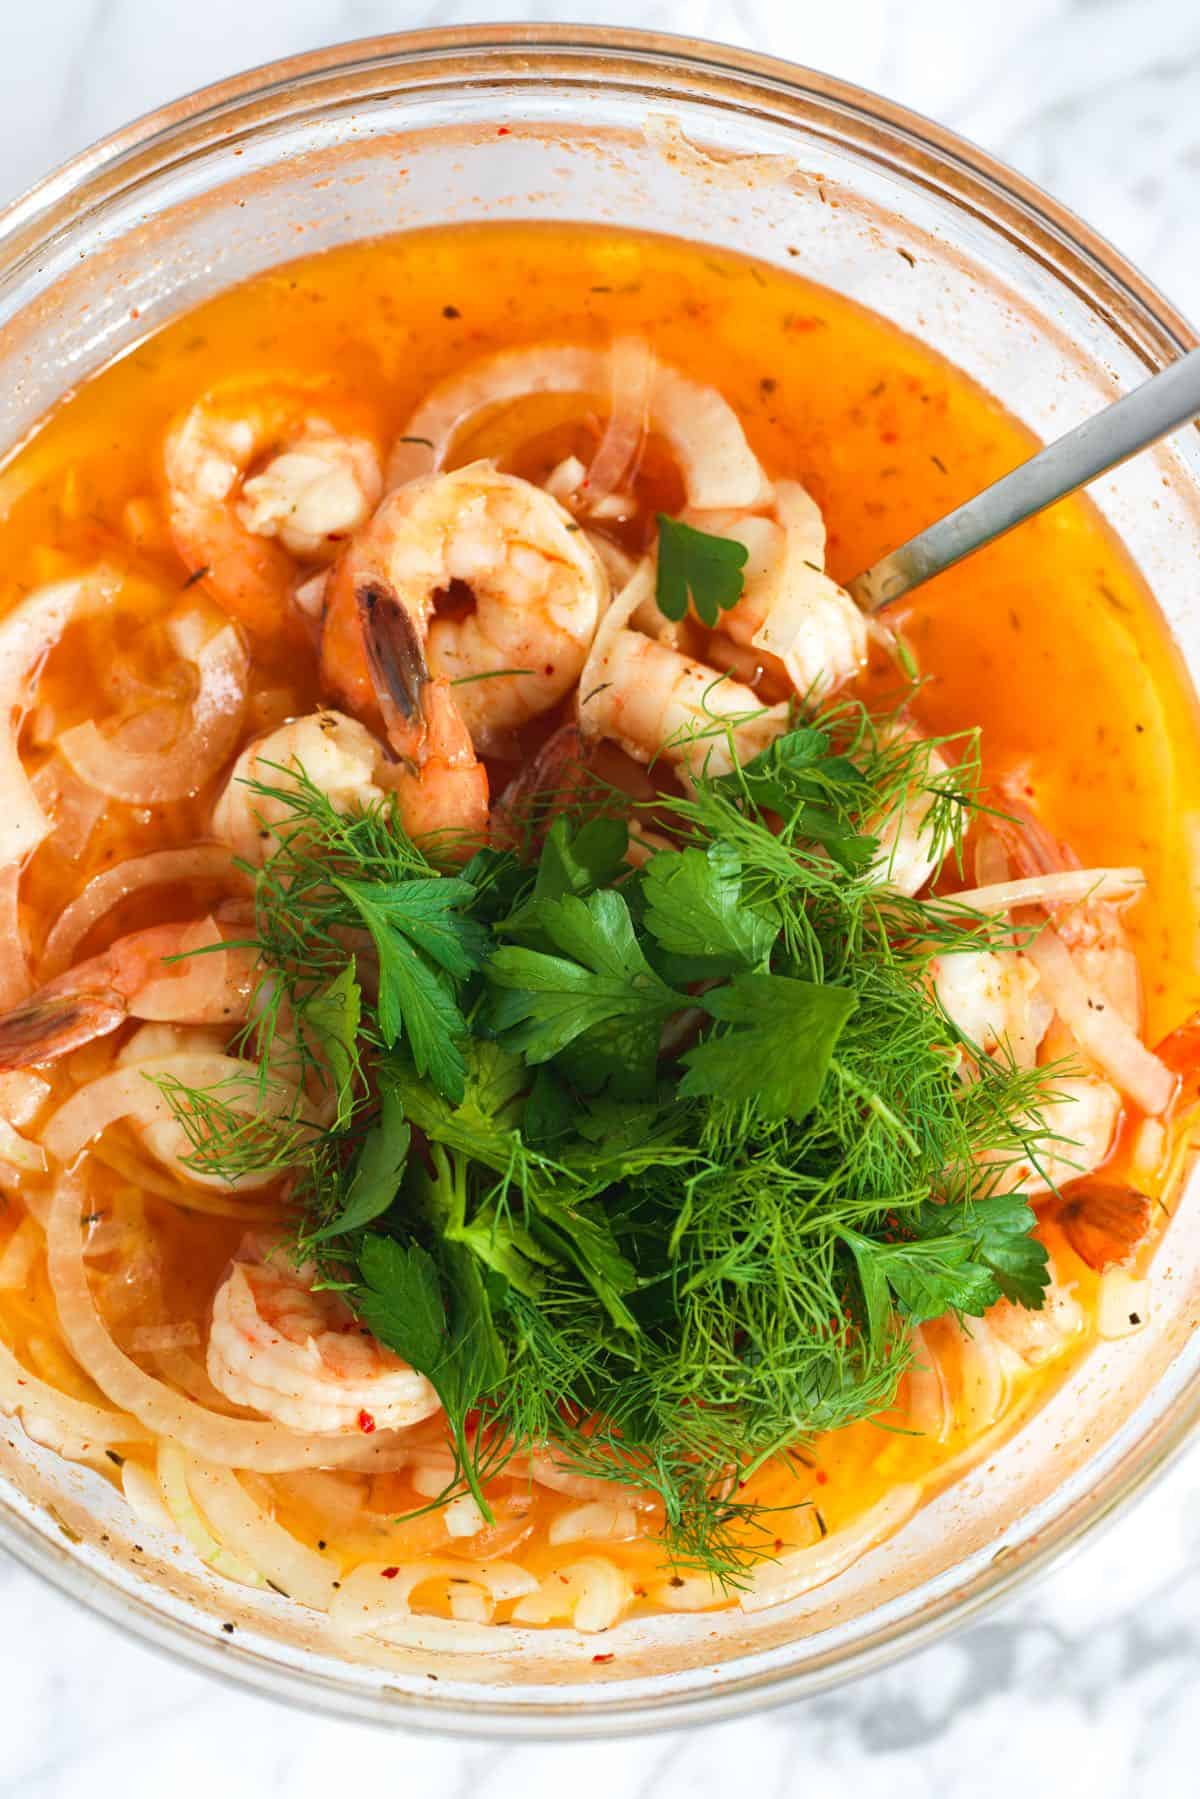
Herbs: I love stirring fresh parsley and dill into the shrimp before serving for a bright, fresh flavor.
Find the full recipe with measurements below.
How to Make the Best Pickled Shrimp
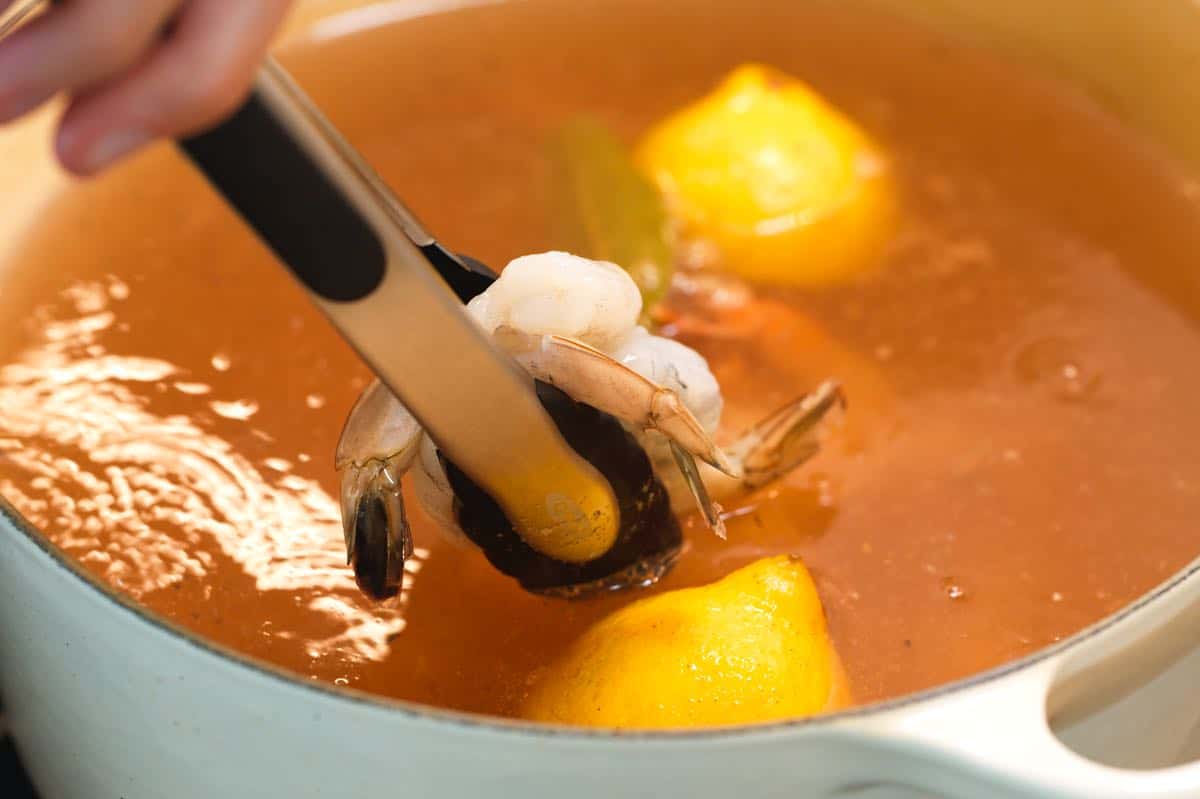
Tip 1: Cook your shrimp first. Just like when making shrimp ceviche, I quickly cook my shrimp before they go into the pickling liquid. This way, we can season them perfectly before they soak up all that tangy brine. A quick poach is all you need for the shrimp.
Three minutes in the seasoned water is the sweet spot for plump, juicy shrimp. Once the shrimp are cooked, they go straight into the chilled pickling liquid! Let them hang out in the fridge for at least 20 minutes (or longer if you want).
Tip 2: Use our pickling liquid. The pickling liquid itself is extraordinarily flavorful, made with lemon juice, spices, onion, and herbs. You’ll combine everything in a bowl with ice water to get it nice and cold, then pop it in the fridge while your shrimp cook.
Tip 3: Serving suggestions. When you’re ready to serve, the options are endless! I love them with crackers, buttered toast, or tossed into a salad. And don’t forget about those onions from the brine. They pickle, too, and are seriously delicious!
Seriously Good Pickled Shrimp
PREP
COOK
TOTAL
We cannot get enough of these pickled shrimp. The shrimp turn out tangy, herby, and so delicious! You will quickly cook the shrimp before adding them to the brine. It’s easy and guarantees the perfect texture!
4 Servings
You Will Need
For Cooking the Shrimp
1 pound (450g) large shrimp, peeled and deveined
1 lemon
1 tablespoon fine sea salt
1 teaspoon Cajun seasoning or Creole seasoning
1 bay leaf
1/4 teaspoon fresh ground black pepper
For the Pickling Liquid
2 tablespoons fresh lemon juice from half a large lemon
1 ½ teaspoons fine sea salt
3/4 teaspoon Cajun seasoning or Creole seasoning
1 small sweet onion, thinly sliced
6 tablespoons (88ml) apple cider vinegar
1/4 cup (60ml) avocado oil or vegetable oil
1/2 cup (120ml) ice water
1/8 teaspoon gochugaru Korean red chili flakes or use crushed red pepper flakes
1/4 teaspoon fresh ground black pepper
1/4 cup (15g) fresh parsley leaves, chopped
2 tablespoons fresh dill, chopped
Directions
1Make the pickling liquid. Add the lemon juice, salt, Cajun seasoning, sliced onion, cider vinegar, oil, ice water, chili flakes, and black pepper to a bowl large enough to hold the shrimp once it has cooked.
2Stir until well blended, then chill in the refrigerator while you cook the shrimp.
3Bring 8 cups (1.8L) of water to a boil in a large pot. Cut the lemon in half, squeeze the juice into the boiling water, and add the lemon halves.
4Add the tablespoon of salt, Cajun or Creole seasoning, bay leaf, and black pepper.
5Add the shrimp and cook for 3 minutes, then transfer them to the chilled pickling liquid using a slotted spoon, stirring them around the pickling liquid a few times.
6Refrigerate for 20 minutes.
7Stir in the fresh herbs before serving.
Adam and Joanne’s Tips
Storing: Keep the shrimp in the brine in the refrigerator for up to 3 days. The shrimp do firm up as they sit, but are still delicious!
The nutrition facts provided below are estimates. The brine is included in the calculations, so fat and sodium are higher than what you will likely consume.
Nutrition Per Serving Serving Size 1/4 of the recipe / Calories 236 / Total Fat 14.4g / Saturated Fat 1.7g / Cholesterol 182.5mg / Sodium 1015.3mg / Carbohydrate 3.6g / Dietary Fiber 0.8g / Total Sugars 0.9g / Protein 23.5g
AUTHOR:
Joanne Gallagher
We are Adam and Joanne Gallagher, the creators of Inspired Taste. Established in 2009, Inspired Taste grew from a childhood dream into one of the internet’s most trusted recipe sites with hundreds of reliable recipes, step-by-step videos, and expert tips.More About Us
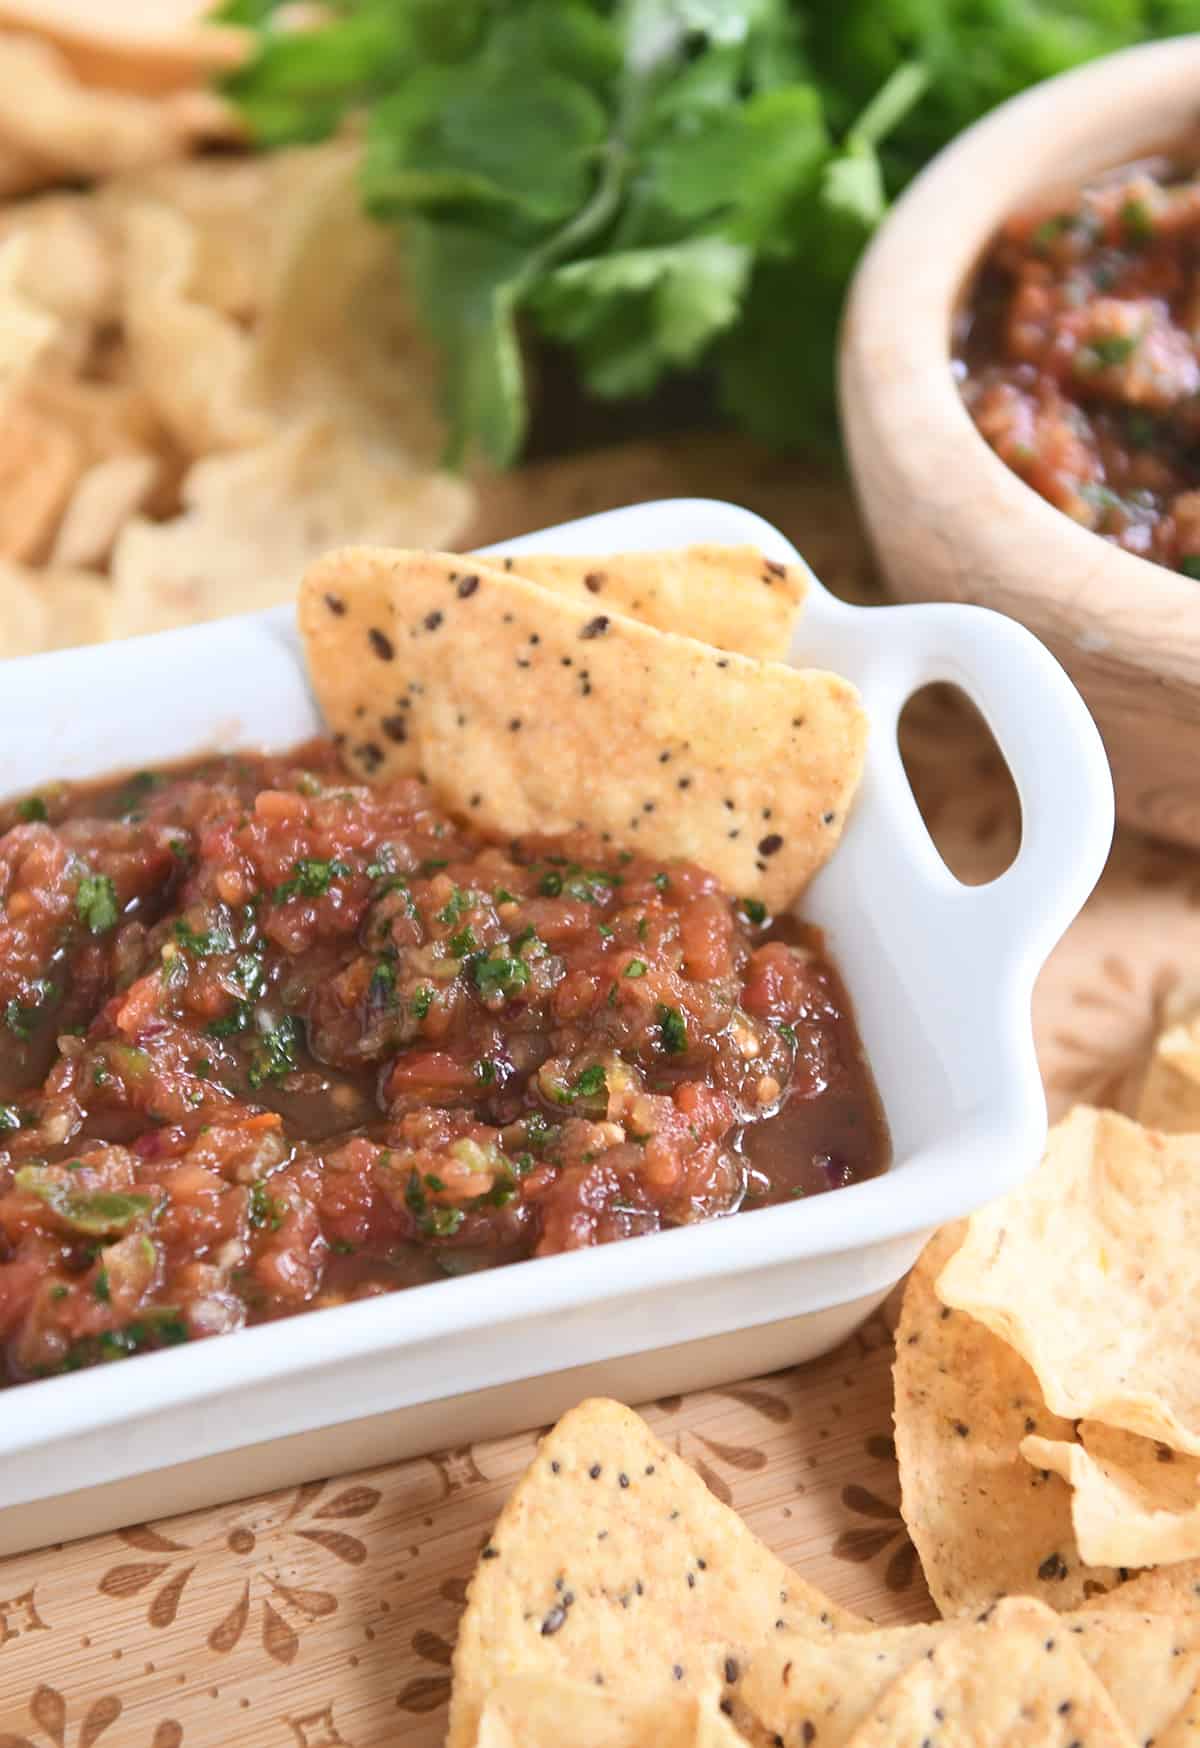
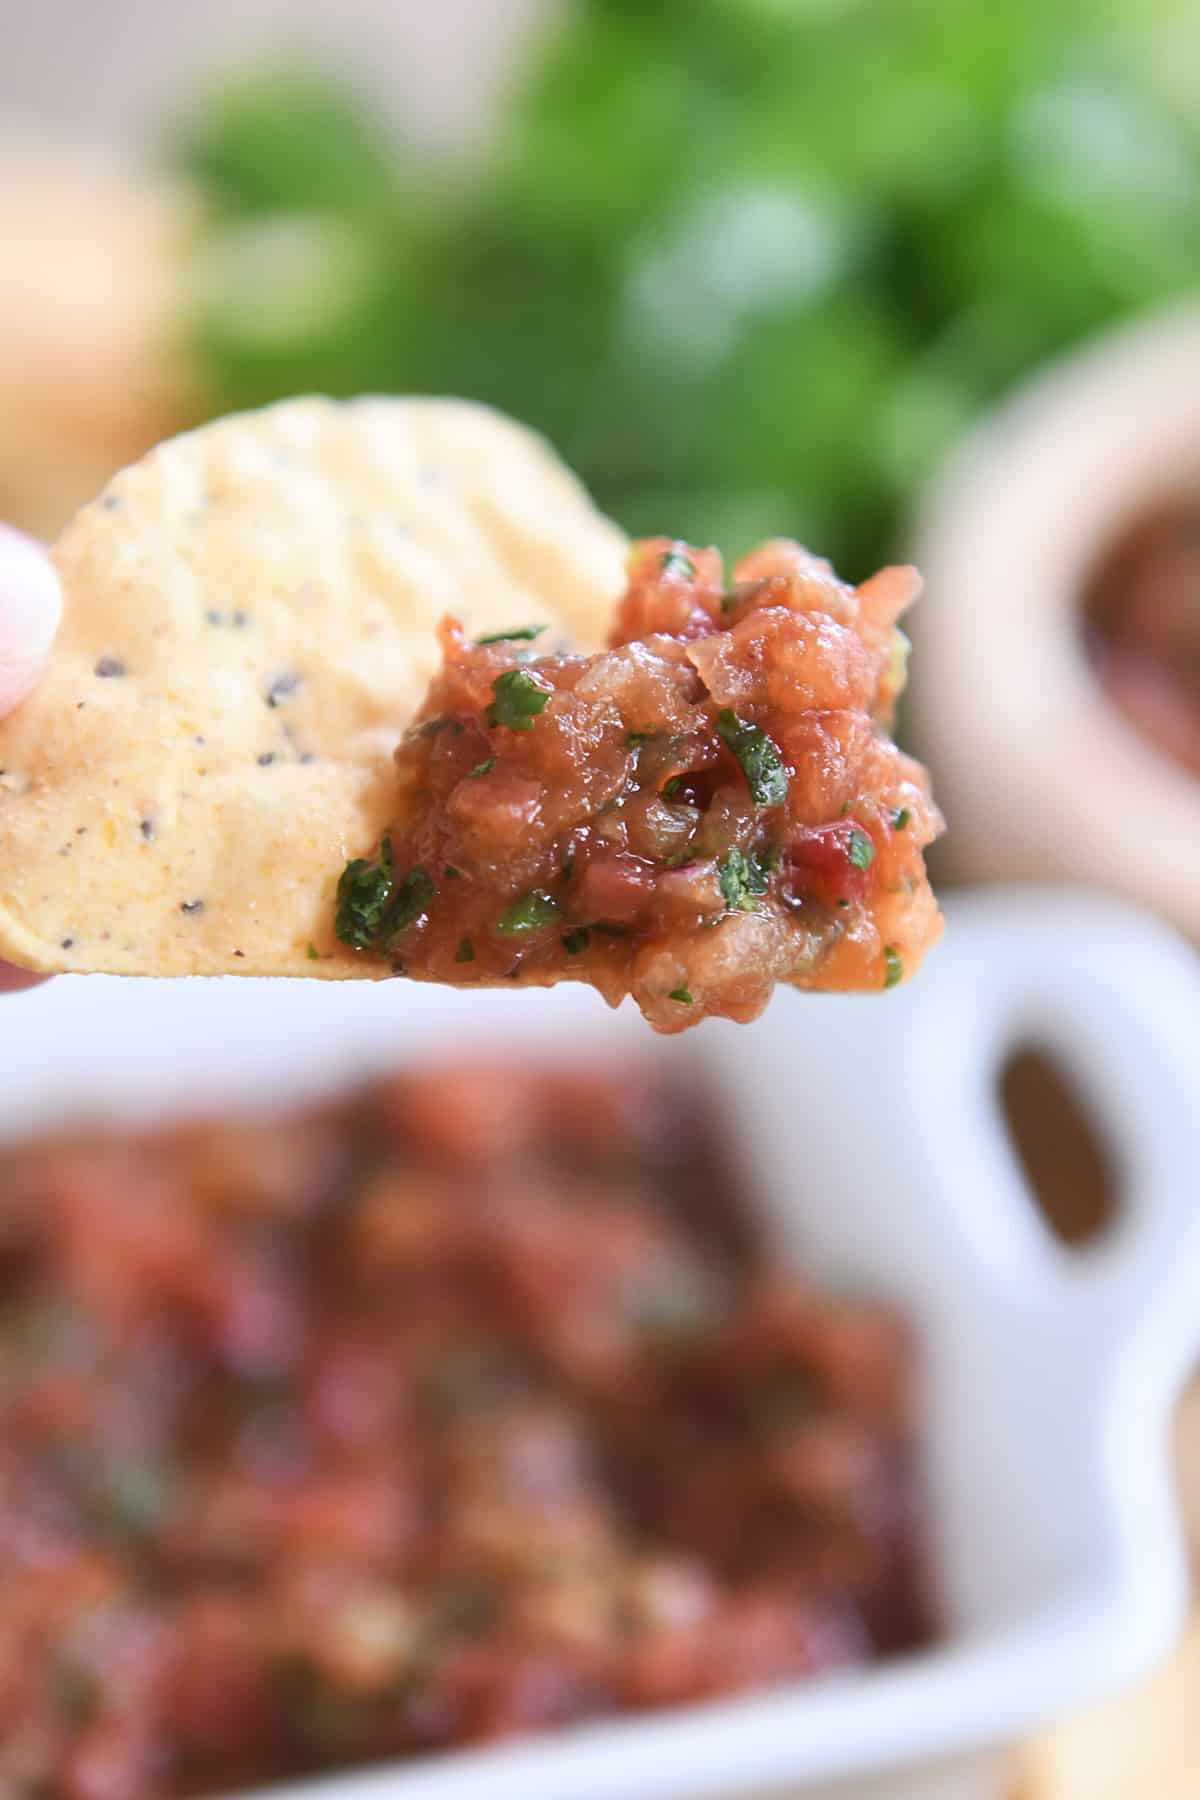
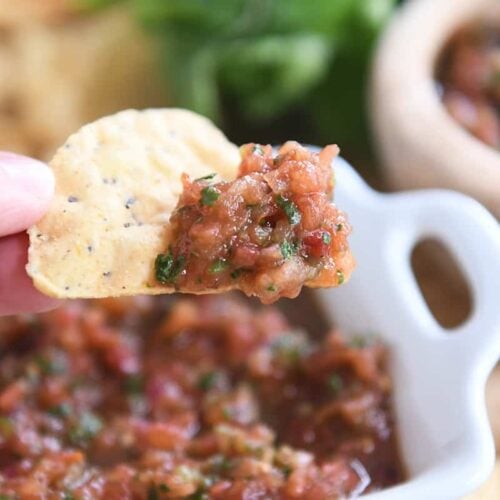
This quick and easy homemade salsa is almost too good to be true. So fast and so simple, this fresh-tasting salsa will be yours in a matter of minutes!
There is definitely a time and a place for real deal homemade salsa that can sit nice and pretty on your pantry shelves all year long.
But when that level of effort is not in the cards (hi. me. most every day lately), this delicious, quick and easy version is for you.
How to Make Salsa in 5 Minutes or Less
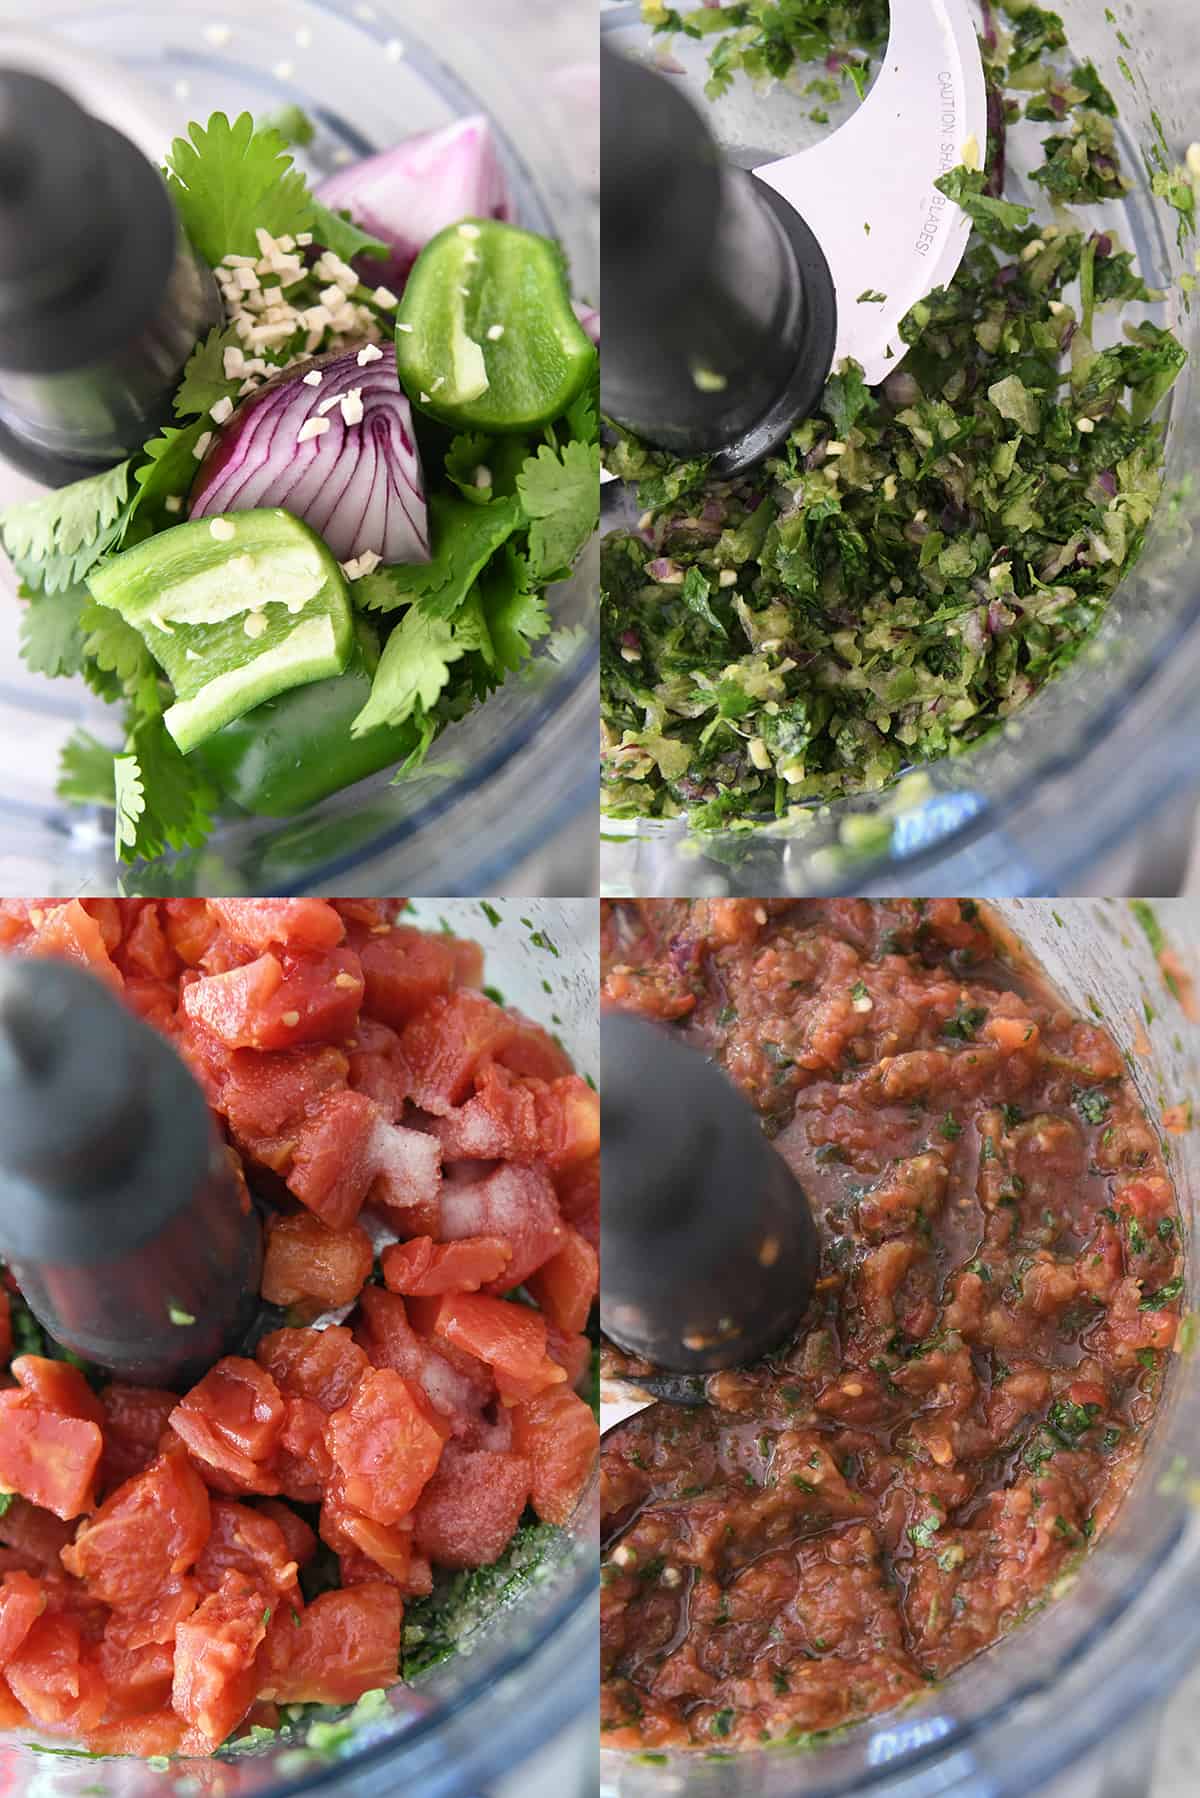
Step 1: chop up the cilantro, jalapeño, onion and garlic in a food processor*
Step 2: add the tomatoes, salt and lime juice
Step 3: pulse until your heart tells you it’s time to stop
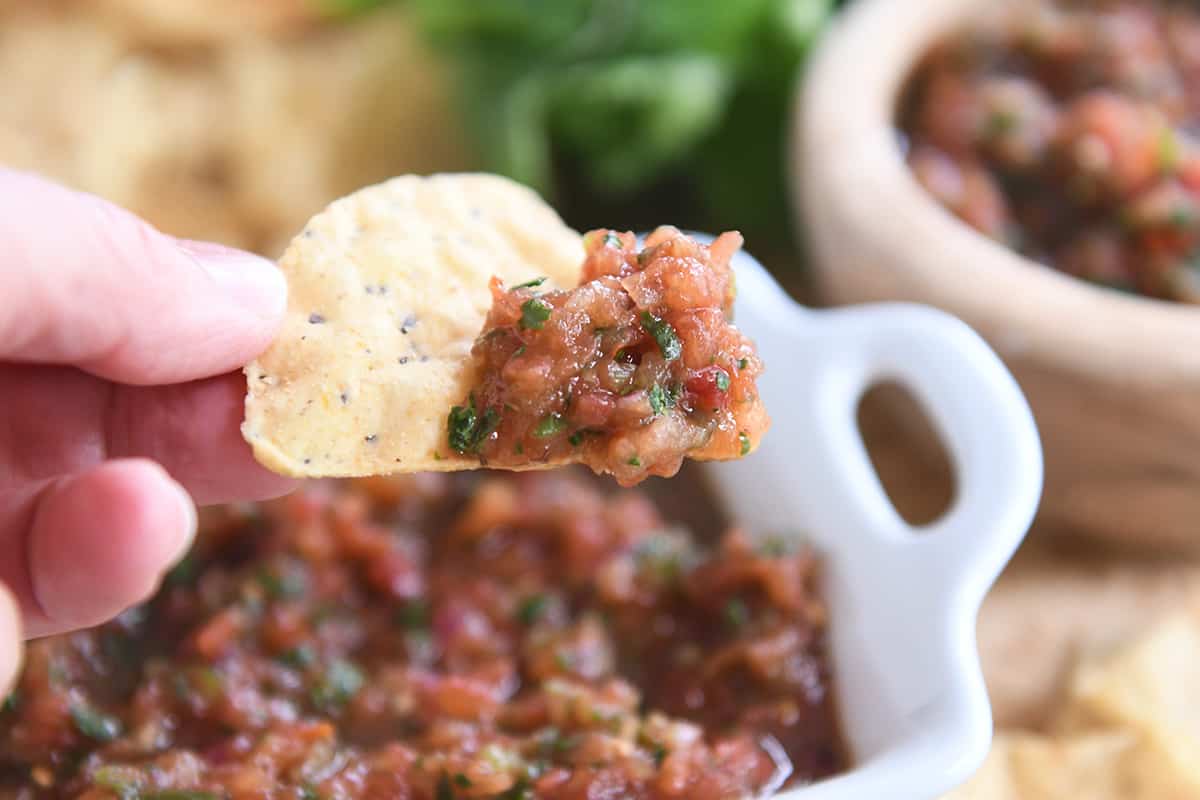
Step 4: grab the chips and dig in
*Equipment Tip: I use a food processor for this recipe. But check out the notes below in the recipe for using a blender.
Fresh and Flavorful
Before you turn your nose up at canned tomatoes, give this salsa a chance. Otherwise, you’ll be missing out.
The fresh flavors of the cilantro, lime juice, onion and garlic transform the canned tomatoes into a salsa worthy of any occasion.
I’ve been making a version of this quick and easy homemade salsa for over ten years. In fact, if you’ve been around long enough you’ll recognize this old recipe.
I took that recipe, plus a few notes from readers over the years, and created a slightly easier (if that’s even possible) and fresher version.
Best Salsa Ever
This salsa is so good that people have a really hard time believing it’s made from canned tomatoes.
All the while, I’m sitting over here smug as a bug in a rug that I didn’t have to put my big pioneer girl pants on and peel fresh tomatoes. And we all still got crazy delicious salsa out of the deal. How ’bout that.
I’ll never, ever turn my back on this epic 5-star homemade salsa recipe, but when I need fabulous, fresh-tasting salsa in a pinch AND want to delegate the making of it to my kids, this quick and easy version is where it’s at.
One Year Ago: Loaded Fresh Basil and Sweet Corn Couscous Green Salad Two Years Ago: Amazing Grilled Pork and Veggie Salad Three Years Ago: Lemon Swig Sugar Cookies with Divine Lemon Frosting {No Rolling or Cutting Out!} Four Years Ago: Instant Pot Spaghetti Five Years Ago: My Go-To Brownie Recipe {One-Bowl Deep, Dark Chocolate Brownies} Six Years Ago: Chicken Taco Salad {InstantPot, Slow Cooker, or Stovetop} Seven Years Ago: Baked Orange-Glazed Meatballs Eight Years Ago: Glazed Lemon Yogurt Sheet Cake Nine Years Ago: Sour Cream Lime Tart {Or Pie!} Ten Years Ago: Broiled Parmesan and Lemon Chicken
Quick and Easy Homemade Salsa
Yield: 8servings
Prep Time: 10 minutesmins
½bunchcilantro (about 1/2 cup packed – see note)
1jalapeño pepper, stem and seeds removed (leave seeds if you want more heat)
¼of a mediumred onion
½ to 1teaspoonminced garlic (about 2-3 cloves)
2cans (15-ounces each) regular or fire-roasted diced tomatoes, well-drained
1teaspoon salt
1teaspoonsugar (optional, but I like how it balances the flavors)
2tablespoonsfresh lime juice
Prevent your screen from going dark
Add the cilantro, jalapeño, red onion and garlic to a food processor (see note for blender). Pulse until the ingredients are finely chopped.
Add the tomatoes, salt and lime juice. Pulse until the salsa reaches desired consistency. I tend to like the tomatoes finely chopped, but you can leave it chunkier.
Add additional salt and lime juice to taste, if needed (important!). Serve immediately or refrigerate for up to a week. Extra liquid can be drained off before serving, if desired.
Cilantro: I don’t usually measure this exactly, I just grab half of the cilantro bunch by the leafy ends and twist off the top part, leaving most of the stems. I throw the leafy bunch into the food processor. Red Onion: 1/4 of a medium onion equates to about a 2- or 3-inch piece of onion. Use more or less to taste. Blender: I haven’t tried this with a blender, but I *think* it should work. The trickiest part will be chopping up the cilantro, onion, and garlic in the first step. If your blender may struggle with that step, finely chop those ingredients before adding them to the blender with the tomatoes, salt and lime juice. Then use the blender to pulse all the ingredients until desired consistency is reached.
Recipe Source: from Mel’s Kitchen Cafe (updated from this old recipe as well as from reader feedback over the years – thanks Heather J. for the inspiration to update this recipe after sending me your famous quick salsa recipe!)
Disclaimer: I am a participant in the Amazon Services LLC Associates Program, an affiliate advertising program designed to provide a means for me to earn fees by linking to Amazon.com and affiliated sites. As an Amazon Associate I earn from qualifying purchases.
This Chili Garlic Shrimp recipe is a savory delight! It takes four simple ingredients and 10 minutes to make, and packs some serious flavor. Serve as an appetizer or turn it into a full meal, and watch it disappear.
When you need a quick but super tasty meal, look no further than this easy Chili Garlic Shrimp. It takes so little effort and time, but it’s an absolute flavor explosion. And it’s one of my all-time favorite low carb-high protein recipes.
I have been making this recipe for decades, and I love pairing it with other easy recipes like keto coleslaw or Keto Sesame Noodles. I finally decided I needed to share it here, so that you too can enjoy the mouthwatering flavors.
Shrimp is a fabulous keto ingredient to have on hand and I almost always have some in my freezer. It’s a wonderful source of protein, and it pairs delightfully with a wide variety of flavors. It can be light and fresh, like Shrimp and Cucumber Salad. Or it can used in hearty comfort food like Keto Shrimp Chowder.
But Chili Garlic Shrimp is perhaps my favorite way to serve it. It’s quick, easy, and always delicious.
Why You Will Love This Recipe
Bold flavor: The combination of chili garlic sauce and cumin is astonishingly good!
Ridiculously easy: You simply toss the shrimp with the seasonings and sauté for less than 5 minutes.
Surprisingly light: Shrimp has very little in the way of fat, so it can serve as a lighter meal when you need one. I love using this shrimp over a fresh green salad.
Low carb: Each serving has less than 1 gram of carbs. So you can pair it with your favorite low carb sides for a keto-approved meal.
High protein: With over 30 grams per serving, this is a great way to max out your protein goals.
Serving options: These tasty shrimp can be served as an appetizer, with a nice dipping sauce, or as part of a main meal.
Ingredient Notes
Shrimp: I recommend using large peeled shrimp. It doesn’t matter whether the tail is on or off, it cooks the same way.
Chili Garlic Sauce: This is not the same as chili crunch or sweet chili sauce, as both of those have sugar. It is a concentrated paste from Huy Fong (the makers of Sriracha) that has no added sugar. A little goes a long way, trust me!
Cumin: I have been making this shrimp recipe for so long, I don’t even remember when I started adding cumin. But it’s a fabulous combo!
Olive oil: Extra virgin olive oil is the best choice for cooking the shrimp, but you can also use avocado oil.
How to Make Chili Garlic Shrimp
Add the seasonings: In a large bowl, toss the shrimp with the chili garlic sauce and cumin until well coated.
Heat the oil: Get the pan nice and hot before adding the shrimp.
Cook the shrimp: Spread them out in a single layer in the hot pan and allow to cook for 2 minutes, then flip them over and cook another minute or two.
Serve: Sprinkle with a little chopped cilantro or parsley. Serve as an appetizer or main dish.
Tips for Success
Patting the shrimp dry prior to cooking helps them crisp up and brown better. Add moisture can make them rubbery. If using frozen shrimp, let them thaw completely in a sieve over the sink, then pat dry.
Chili garlic sauce can be quite spicy so start with 1 teaspoon the first time you try this, unless you know you like it. You can always add more spice, but you can’t take it away once the shrimp are cooked.
Get that pan and oil nice and hot before adding the shrimp. You want to sear them quickly to lock in the moisture. And be sure to use a large enough pan to hold all the shrimp in one layer, so each one is against the hot pan.
More Shrimp Recipes To Love
Chili Garlic Shrimp
Servings: 4servings
Prep Time 5 minutesmins
Cook Time 5 minutesmins
Total Time 10 minutesmins
This Chili Garlic Shrimp recipe is a savory delight! It takes four simple ingredients and 10 minutes to make, and packs some serious flavor. Serve as an appetizer or turn it into a full meal, and watch it disappear.
1 1/3lb(604.79g)large shrimp, tails on or off
1 to 2tspchili garlic sauce
2tspcumin
2tbspolive oil
Salt and pepper
Prevent your screen from going dark
Pat the shrimp dry with a kitchen rag or paper towels.
In a medium bowl, toss the shrimp with the chili garlic sauce and the cumin. Mix well to coat.
In a large skillet over medium high heat, heat the oil until shimmering. Add the shrimp and spread out into a single layer. Cook 2 minutes.
Using tongs, flip each shrimp over and cook the other side, 1 to 2 minutes more. The shrimp will become bright pink when cooked through.
Remove immediately and sprinkle with salt and chopped parsley or cilantro.
Storage Information: Store the shrimp in a covered container in the fridge for up to 3 days. Reheat gently in the microwave or eat cold (great over salad!).
Please note that I am not a medical or nutritional professional. I am simply recounting and sharing my own experiences on this blog. Nothing I express here should be taken as medical advice and you should consult with your doctor before starting any diet or exercise program. I provide nutritional information for my recipes simply as a courtesy to my readers. It is calculated using MacGourmet software and I remove erythritol from the final carb count and net carb count, as it does not affect my own blood glucose levels. I do my best to be as accurate as possible but you should independently calculate nutritional information on your own before relying on them. I expressly disclaim any and all liability of any kind with respect to any act or omission wholly or in part in reliance on anything contained in this website.
Free Bonus: Secrets to Keto Baking!
Sign up for your favorite recipes delivered straight to your inbox plus get our FREE bonus: Secrets to Keto Baking!
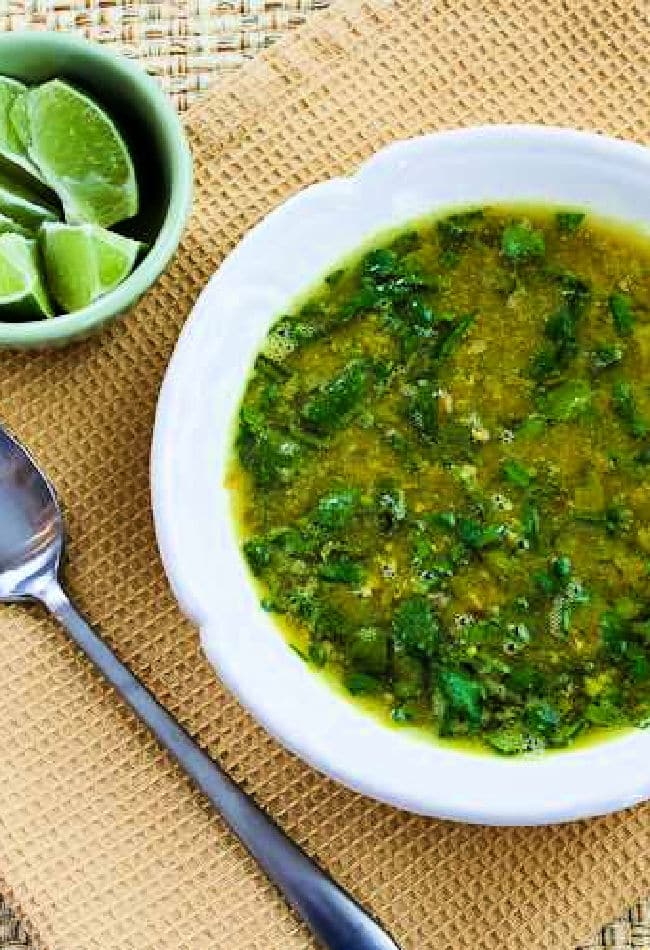
We loved this Indian Lentil Soup with coconut milk and spinach, and this soup with Indian flavors is surprisingly low in net carbs! And this easy Slow Cooker lentil soup has the interesting blend of spices that makes Indian food so delicious!
PIN the Indian Lentil Soup to try it later!
I know Indian Lentil Soup is a recipe some people are going to take one look at and veto it because you think the Indian spices, the red lentils, or the spinach is not going to appeal to you. But that would be sad, because the entire time we were making this easy slow cooker soup, Jake and I couldn’t stop tasting it and remarking on how good it was!
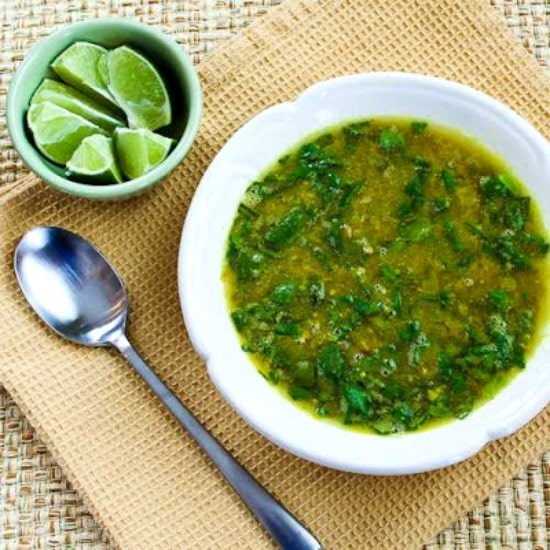
Admittedly Jake is an Indian food lover, and I’m a big fan of red lentils, but still we’re pretty picky about what we consider to be “blog-worthy.” And this delicious lentil soup with Indian flavors more than made the cut. I loved it with a generous squeeze of lime.
The slow cooker Indian Lentil Soup was adapted from a recipe for yellow split pea dal I saw in a cookbook, but truthfully I changed it up a lot for the version you see here. What I didn’t change is the fact that this delicious soup is vegan, making it a perfect choice for a plant-based dinner. I hope you pull out the slow cooker and try it soon!
What ingredients do you need?
(This is only a list of ingredients; please scroll down for complete printable recipe. Or if you use the JUMP TO RECIPE link at the top of the page, it will take you directly to the complete recipe with ingredient amounts.)
What type of lentils are best for Indian Lentil Soup?
I highly recommend using red lentils for this soup! The red lentils will dissolve much more quickly, helping the soup be done sooner in the slow cooker. Red lentils also have a slightly sweeter flavor compared to green or brown lentils.
What slow cooker did I use for Indian Lentil Soup?
I used a 5 Quart Slow Cooker (affiliate link) for this recipe, but any size close to that will work.
Is this Indian Lentil Soup low in carbs?
When I calculated the nutritional information I realized that because there’s a lot of low-carb spinach, vegetable broth, and coconut milk, this tasty soup only has 13 net carbs per serving. If you’d like a soup that’s even lower in carbs, just use more spinach and fewer lentils!
How to Make Indian Lentil Soup in the Slow Cooker:
(This is only a summary of the steps for the recipe; please scroll down for complete printable recipe. Or if you use the JUMP TO RECIPE link at the top of the page, it will take you directly to the complete recipe.)
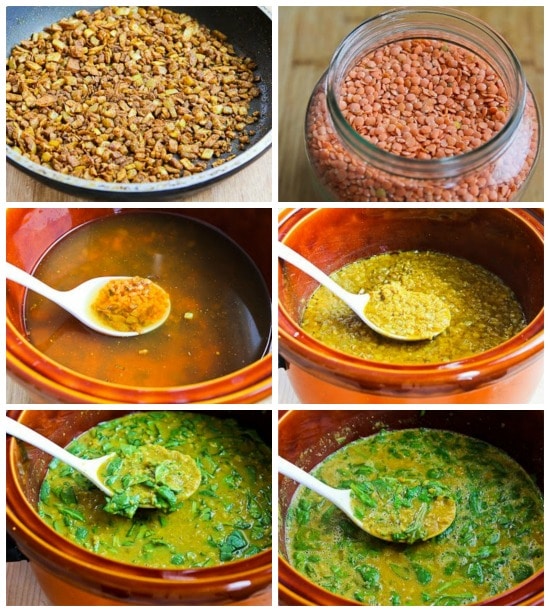
Heat olive oil, then cook the onions until they’re starting to slightly brown.
Add minced garlic, ground cumin, ground coriander, ground turmeric, garam masala, and ground cinnamon and cook 1-2 minutes more.
Put the spiced onions in the slow cooker.
This photo shows the red lentils I love so much for soup. Pick them over and discard any discolored ones, then rinse with cold water before you add them to the slow cooker.
We used canned vegetable broth and added enough water to make 4 cups.
Add the lentils and vegetable broth to the slow cooker with the onions and spices and cook on high for about 2 hours or on low for about 4 hours.
After 2 hours, the ground turmeric had given the lentils a beautiful yellow color and they were starting to dissolve into the soup.
Turn the slow cooker to low and add coconut milk and chopped spinach and cook about 30 minutes more.
Season the soup generously with salt and fresh ground black pepper and serve hot.
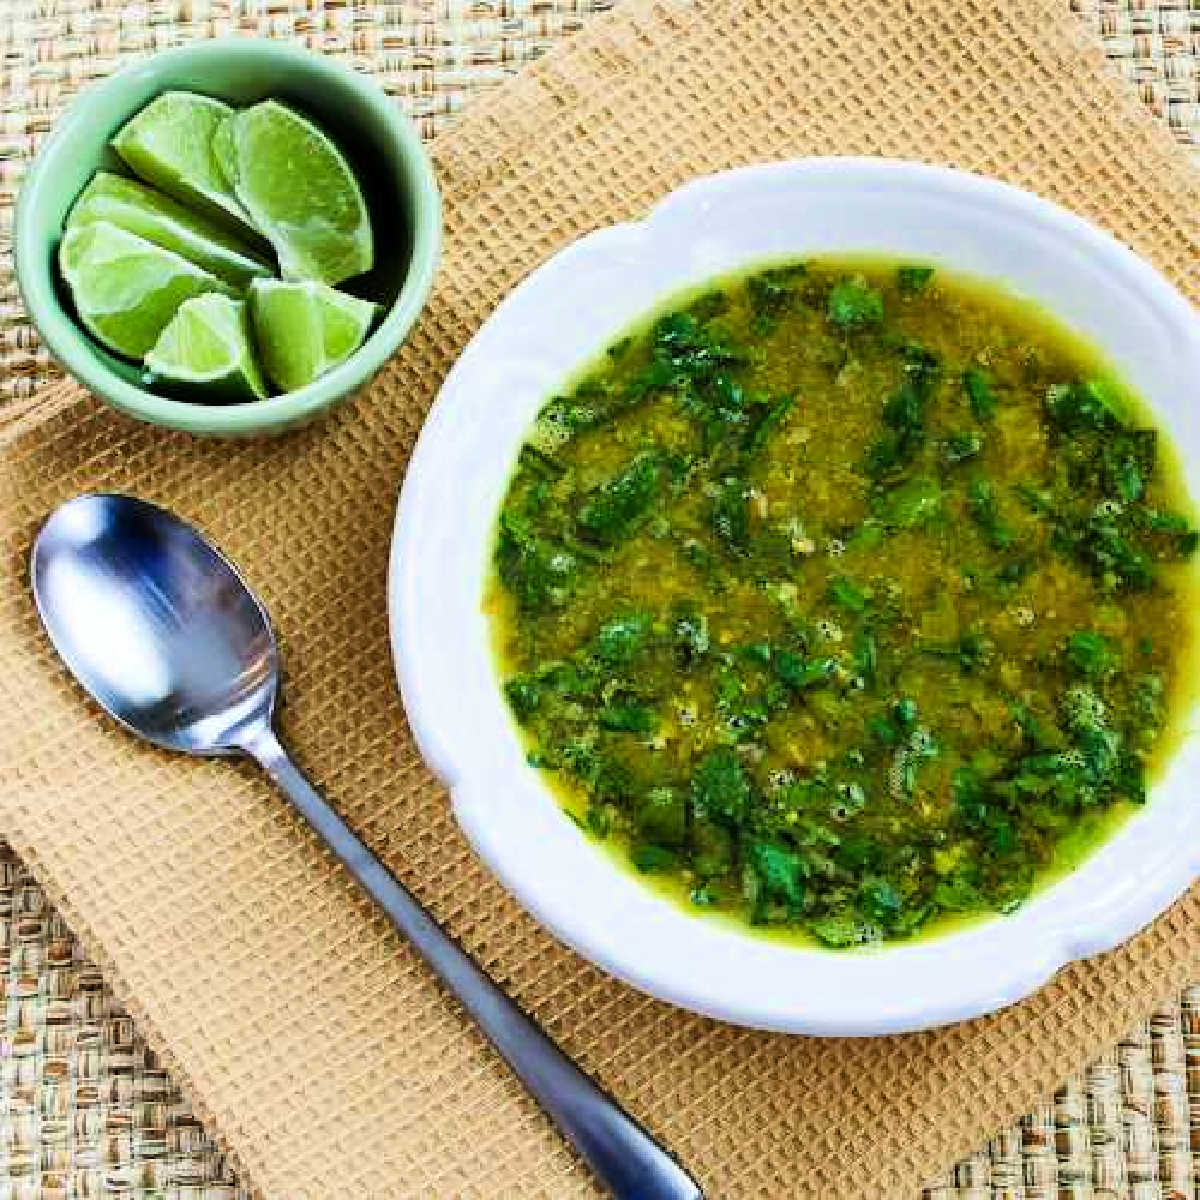
The Indian Lentil Soup is delicious with a squeeze of lime added at the table!
Make it a Meatless Meal:
The lentil soup with Indian flavors would be delicious with any of these vegetarian salads:
Weekend Food Prep:
This Indian Lentil Soup recipe has been added to a new category called Weekend Food Prep where you’ll find recipes you can prep or cook on the weekend and eat during the week!
Ingredients
1 T olive oil
1 large onion, chopped
2 tsp. minced garlic
1 tsp. ground cumin
1 tsp. ground coriander seed
1 tsp. ground turmeric
1/2 tsp. Garam Masala
1 tsp. ground cinnamon
1 1/2 cup red lentils
4 cups vegetable broth (see notes)
1 can (14 oz.) coconut milk
4 cups chopped fresh spinach (or more)
salt and fresh-ground black pepper to taste
Instructions
Heat the oil in a medium-sized frying pan. Add the onion and cook over medium-high heat until it’s starting to brown, about 6-8 minutes.
Add the minced garlic, ground cumin, ground coriander, ground turmeric, Garam Masala , and ground cinnamon and cook 1-2 minutes more. Put the spiced onion mixture into the slow cooker.
Pick over the lentils and remove any discolored ones. Put lentils in a colander and rinse with cold water until the water runs clear.
Add lentils and vegetable stock to the slow cooker and cook on high for about 2 hours or on low for about 4 hours. (The lentils should be softened and starting to fall apart when you add the other ingredients.)
Turn slow cooker to low and add the chopped spinach and can of coconut milk. Cook about 30 minutes more, or until lentils and spinach are done to your liking.
Season with a generous amount of salt and fresh ground black pepper (to taste) and serve the Indian Lentil Soup hot, with sliced lime to add at the table if desired.
Notes
I used a 5-1/2-Quart Slow Cooker (affiliate link) for this recipe, but it could have been a little smaller.
We used 2 cans vegetable broth, 14 oz. each, and added a little water to make 4 cups.
This recipe for Indian Lentil Soup was adapted from a recipe for yellow split pea dal in 50 Simple Soups for the Slow Cooker (affiliate link)
Nutrition information is automatically calculated by the Recipe Plug-In I am using. I am not a nutritionist and cannot guarantee 100% accuracy, since many variables affect those calculations.
Did you make this recipe?
Did you make this recipe? Please leave a star rating (under the PRINT button in the recipe) or share a photo of your results on Instagram! THANKS!
Low-Carb Diet / Low-Glycemic Diet / South Beach Diet Suggestions: Lentils are somewhat high in carbs for low-carb eating plans, but they do have fiber, so the Indian Lentil Soup has only 13 net carbs per serving, You can reduce the carbs by using fewer lentils and more spinach. All types of lentils and split peas are approved for the original South Beach Diet, but serving size is limited for Phase One.
Find More Recipes Like This One: Use Soup Recipes to find more recipes like this one. Use the Diet Type Index to find recipes suitable for a specific eating plan. You might also like to follow Kalyn’s Kitchen on Pinterest, on Facebook, on Instagram, on TikTok, or on YouTube to see all the good recipes I’m sharing there.
Historical Notes for this Recipe: This tasty recipe for Indian Lentil Soup was first posted in 2013. It was last updated with more information in 2026.
We are a participant in the Amazon Services LLC Associates Program, an affiliate advertising program designed to provide a means for us to earn fees by linking to Amazon.com and affiliated sites. As an Amazon Associate, I earn from qualifying purchases.
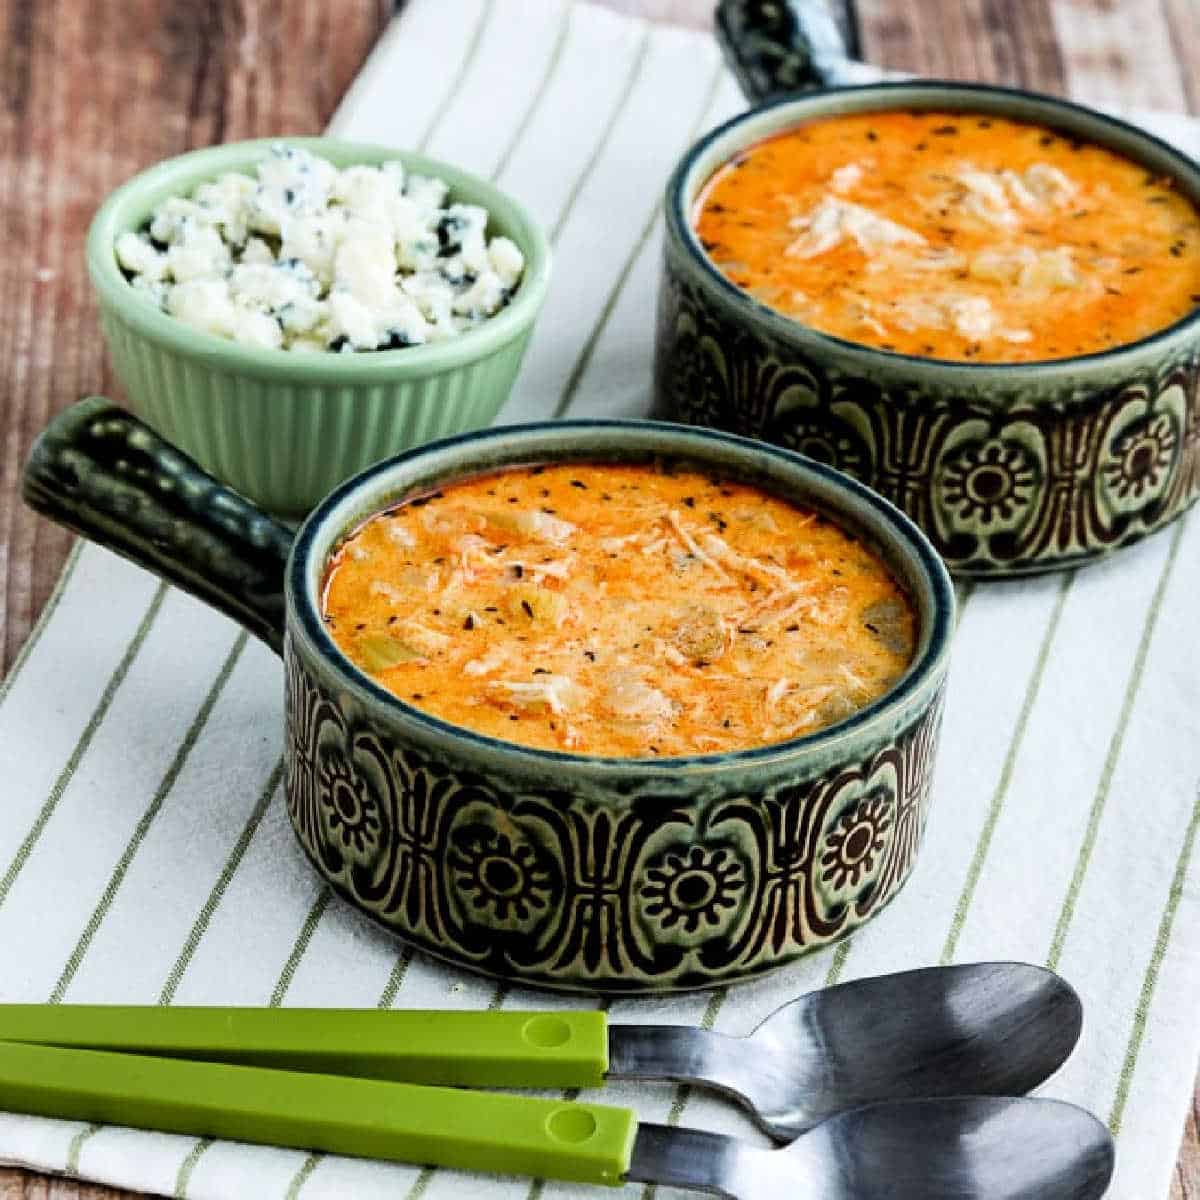
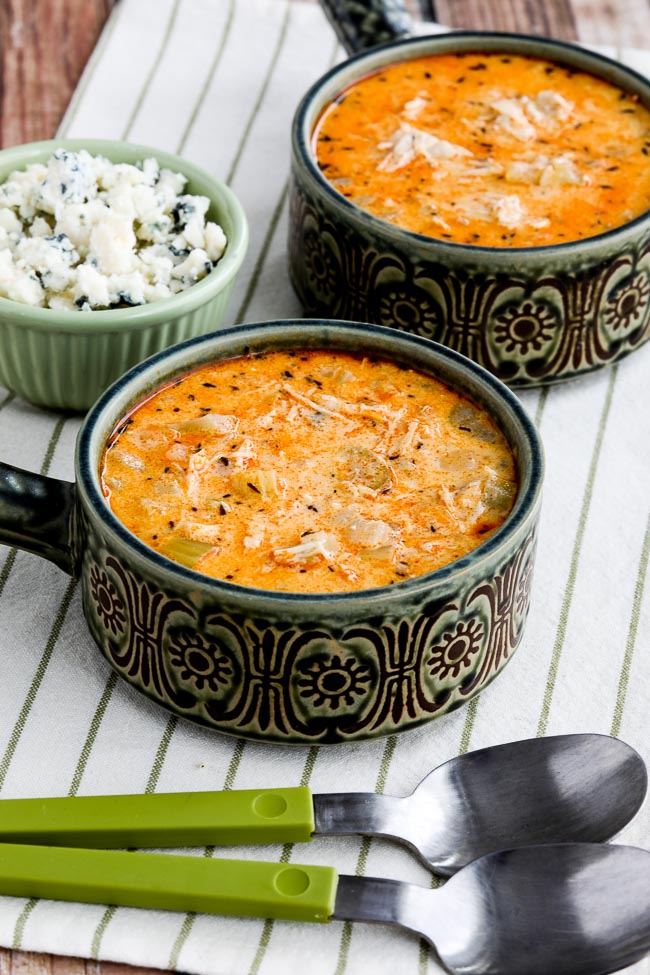
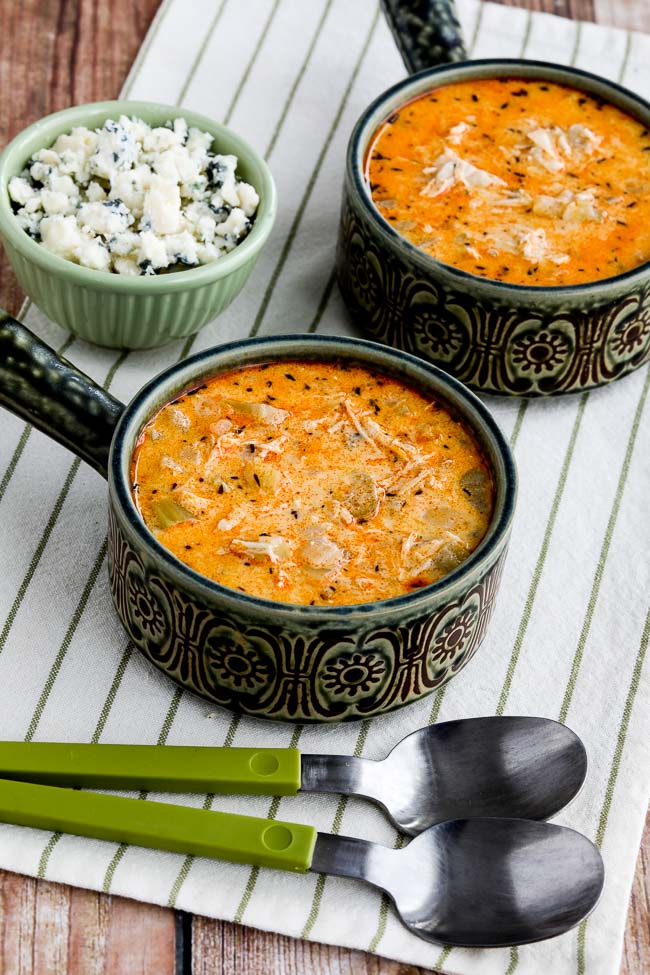
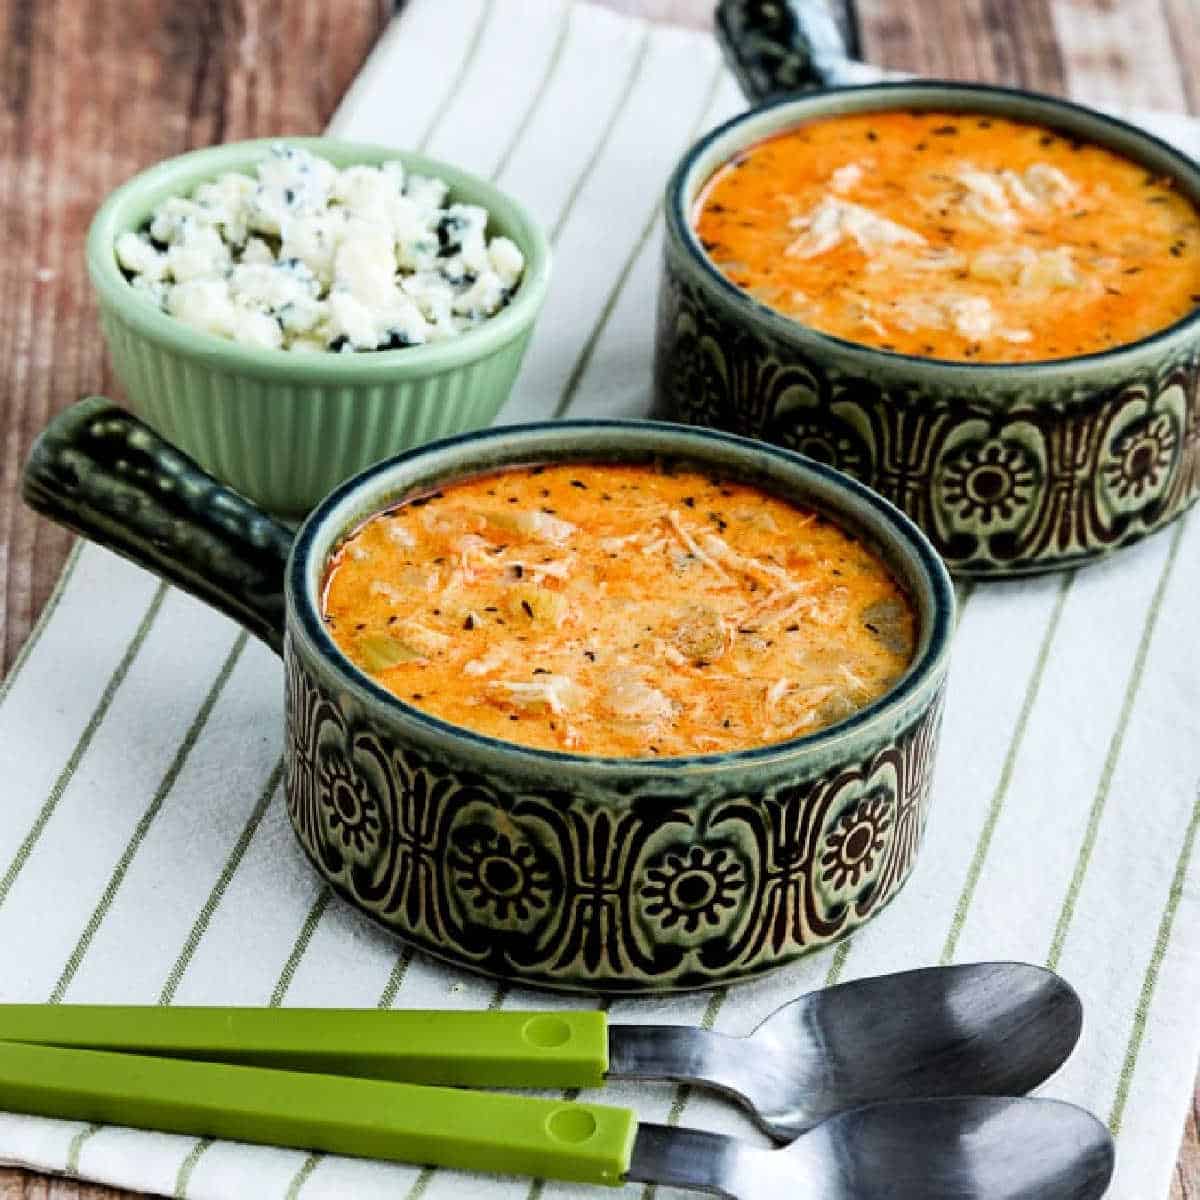
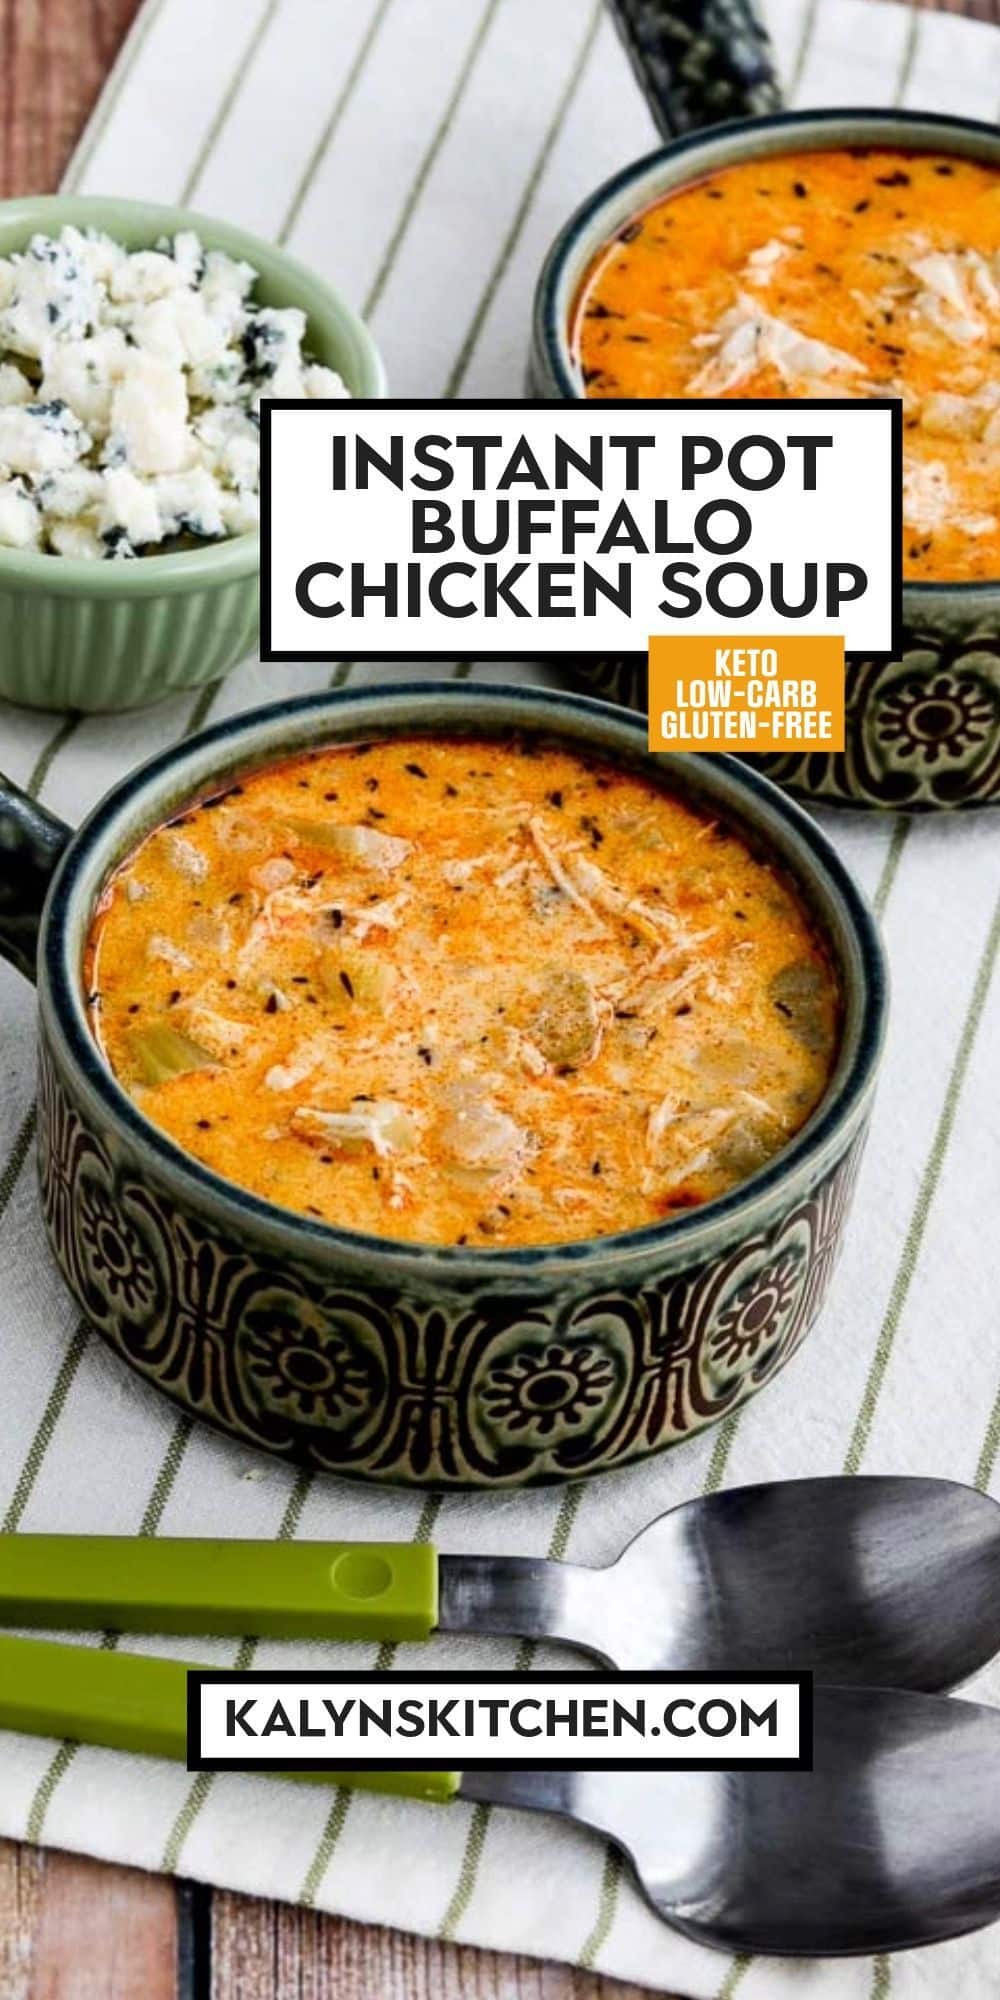
This delicious Instant Pot Buffalo Chicken Soup is topped with crumbled blue cheese, and this soup will warm up your tastebuds! And I’m guessing anyone who likes spicy Buffalo Chicken is also going to enjoy the this tasty soup!
PIN Instant Pot Buffalo Chicken Soup to try it later!
Instant Pot Buffalo Chicken Soup is one of my favorite soup recipes, and this is warm and comforting if it’s cold where you are! This is a soup for people who love the strong flavors of Frank’s Red Hot Sauce and crumbled blue cheese!
If you like hot spicy Buffalo Wings dipped into blue cheese, or any other variation of those Buffalo Chicken flavors, you’re probably going to love this creamy Buffalo Chicken Soup. It did take me a couple of tries testing variations with Jake and Kara to come up with a version of this soup we thought was a total winner. But we loved the final version!
And then after I uploaded the photos, I wished we had ground up the thyme when we added it to the soup. But I decided the flecks of thyme add character to the soup (and the thyme does add wonderful flavor!) So for all the fellow Buffalo Chicken fans, hope you enjoy this soup!
What ingredients do you need for this recipe?
(This is only a list of ingredients; please scroll down for complete printable recipe. Or if you use the JUMP TO RECIPE link at the top of the page, it will take you directly to the complete recipe.)
How spicy is this Buffalo Chicken Soup?
I would say this soup is moderately spicy. But here is my advice: You can always add more Frank’s Red Hot Sauce to the finished soup, but you can’t take it out. The amount we ended up with for the recipe made a tasty soup that we thought was just spicy enough, but feel free to use less Frank’s Red Hot Sauce if you’re not sure how much heat you’ll want.
What if you’re not a fan of blue cheese?
If you enjoy Buffalo Chicken flavors but aren’t so big on blue cheese, just top the soup with Parmesan or any grated or crumbled white cheese that you prefer.
What size Instant Pot did I use for this recipe?
I use a 6 Quart Instant Pot (affiliate link) for all my Instant Pot Recipes. Check out my growing collection of Instant Pot Recipes!
How low in carbs is the Buffalo Chicken Soup?
This slightly spicy tasty soup has only 4 net carbs per serving, with 33 grams of protein!
How to Make Instant Pot Buffalo Chicken Soup:
(This is only a summary of the steps for the recipe; please scroll down for complete printable recipe. Or if you use the JUMP TO RECIPE link at the top of the page, it will take you directly to the complete recipe.)
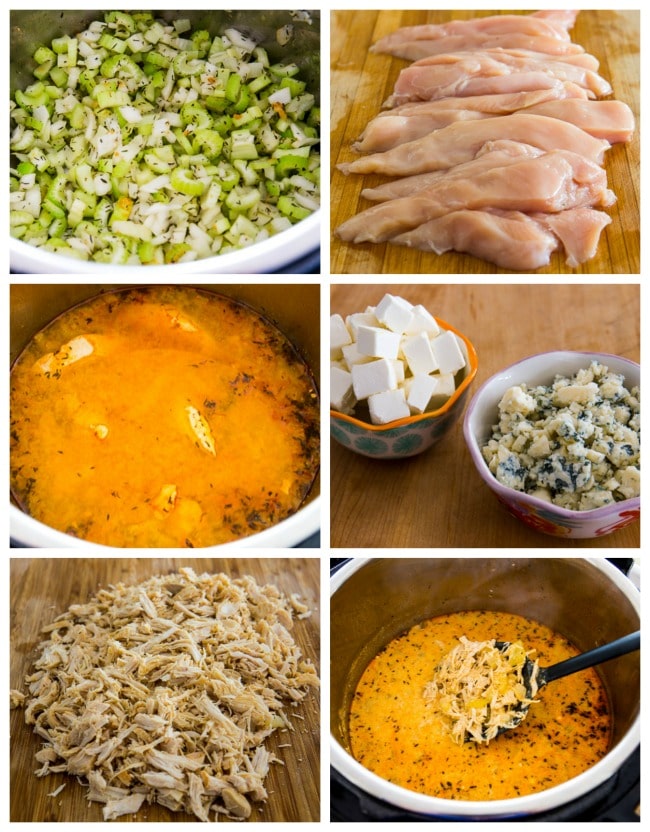
Heat olive oil in the Instant Pot on the Saute/Medium setting, add onions and celery and cook until they’re starting to soften.
Add thyme (preferably ground thyme) and Garlic Powder and cook a minute or two longer. (If you have ground thyme, use a slightly smaller amount.)
While veggies cook, trim the chicken and cut into lengthwise strips.
Add chicken, Frank’s Red Hot Sauce (affiliate link), and chicken broth to Instant Pot.
Lock the lid and set Instant Pot to MANUAL/HIGH PRESSURE for 15 minutes.
After 15 minutes, use NATURAL PRESSURE RELEASE for 10 minutes, then quick release the remaining pressure.
While the soup cooks, cut cream cheese into chunks and crumble the blue cheese.
Use a slotted spoon (affiliate link) to remove the chicken to a cutting board and shred apart (or cut if you prefer chunks.)
After you remove the chicken from the Instant Pot, add the two types of cheese to the hot soup and let it melt while you’re shredding the chicken.
When cheeses have melted, whisk soup together, then add the shredded chicken back into the soup.
Serve the Buffalo Chicken Soup soup hot with plenty of crumbled blue cheese and Frank’s Red Hot Sauce to add at the table!
Make it a Low-Carb Meal:
This creamy spicy chicken soup would be delicious with any of these low-carb breads or muffins:
Want more Buffalo Chicken flavor in your life?
I have a great round-up of Frank’s Red Hot Sauce Recipes that will appeal to people who love the flavor of that spicy Buffalo Sauce that has zero carbs!
Weekend Food Prep:
This recipe has been added to a category called Weekend Food Prep where you’ll find recipes you can prep or cook on the weekend and eat during the week!
Ingredients
1 medium onion chopped small
2 cups chopped celery, chopped small
1 T olive oil
1 tsp. dried thyme
1 tsp. garlic powder (see notes)
4 boneless, skinless chicken breasts, trimmed and cut into lengthwise strips
1/4 cup Frank’s Red Hot Sauce (Use more or less to taste, but remember you can always add more at the table.)
4 cups chicken broth or homemade chicken stock
4 oz. cream cheese, cut into small cubes
1/2 cup crumbled blue cheese, plus more for serving
Instructions
Chop the onion and celery. Heat the oil in the Instant Pot, using the Saute setting with medium heat.
Add the chopped onion and celery and cook until they’re starting to soften, about 5 minutes.
Add the thyme and garlic powder and cook a minute or two longer.
While the veggies cook, trim the chicken and cut into lengthwise strips.
Add the chicken strips, Frank’s Red Hot Sauce (affiliate link), and chicken stock to the Instant Pot.
Lock the lid and set Instant Pot to MANUAL/HIGH PRESSURE for 15 minutes.
After 15 minutes, use NATURAL PRESSURE RELEASE for 10 minutes, then quick release the rest of the pressure.
While the soup cooks, crumble the blue cheese and cut the cream cheese into small cubes.
Use a slotted spoon (affiliate link) to remove the chicken to a cutting board and shred apart (or cut if you prefer chunks.)
After the pressure has released and you’ve removed the chicken to a cutting board, add the two cheeses to the Instant Pot and let them melt while you shred the chicken apart.
When cheeses have melted, whisk soup together, then add the shredded chicken back into the soup. (You can heat it for a minute or two using the Saute setting if needed, but it will probably still be pretty hot.)
Serve the Buffalo Chicken Soup hot, with extra crumbled blue cheese and Frank’s Red Hot Sauce to add at the table if desired.
Notes
If you have Ground Thyme (affiliate link) you can use a slightly smaller amount of that to replace the dried thyme and avoid seeing specks of thyme in the finished soup.
I use a 6 Quart Instant Pot (affiliate link) for all my Instant Pot Recipes.
This recipe created by Kalyn, with help testing a few different versions from Jake and Kara!
Nutrition information is automatically calculated by the Recipe Plug-In I am using. I am not a nutritionist and cannot guarantee 100% accuracy, since many variables affect those calculations.
Did you make this recipe?
Did you make this recipe? Please leave a star rating (under the PRINT button in the recipe) or share a photo of your results on Instagram! THANKS!
Low-Carb Diet / Low-Glycemic Diet / South Beach Diet Suggestions: Buffalo Chicken Soup is a good choice for any low-carb or Keto diet. It’s too high in fat to be officially approved for the original South Beach Diet, but if you used reduced fat cream cheese and go easy on the blue cheese it wouldn’t be bad for a treat.
Find More Recipes Like This One: Use Instant Pot Recipes to find more recipes like this one! Use the Diet Type Index to find recipes suitable for a specific eating plan. You might also like to follow Kalyn’s Kitchen on Pinterest, on Facebook, on Instagram, on TikTok, or on YouTube to see all the good recipes I’m sharing there.
Historical Notes for this Recipe: This recipe for a creamy soup with Buffalo Chicken flavors was first posted in 2018. It was last updated with more information in 2026.
We are a participant in the Amazon Services LLC Associates Program, an affiliate advertising program designed to provide a means for us to earn fees by linking to Amazon.com and affiliated sites. As an Amazon Associate, I earn from qualifying purchases.
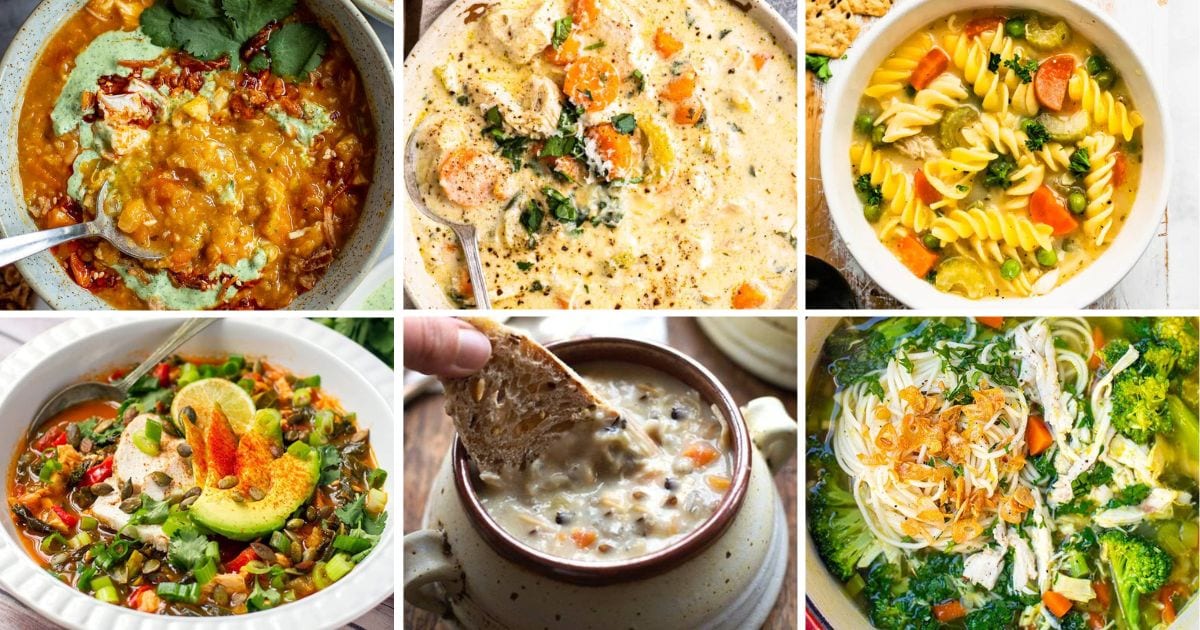
These delicious soup recipes with chicken will make weeknight dinners easier and cozier! From creamy wild rice to zesty tortilla soups, these chicken soup recipes are packed with comforting flavors and wholesome goodness.
When it comes to soup, I can’t go past a good chicken soup. It’s nutritious, comforting and satiating. It’s also one of those dishes that is super versatile and you can get really creative with flavors and textures.
I gathered a few of my favorite soup recipes with chicken ranging from the classic noodle to aromatic Thai curry version and a healthy, grain-free and dairy-free tortilla soup. Chicken soups are my go-to for meal prep, too, and these recipes store and reheat like a dream.
Must-Try Soup Recipes With Chicken
These recipes are not just about comfort; they’re also packed with nutrients and wholesome ingredients, so you can feel good about every spoonful. I hope these inspire your next cozy dinner!
This garlic chicken soup is like a warm hug in a bowl. Loaded with tender chicken, a hearty broth, and plenty of garlic, it’s soothing and rich with flavor. Whether you’re fighting off a cold or just need a little comfort, this one has you covered.
Hearty, nourishing, and packed with protein, chicken lentil soup combines tender chicken and earthy lentils in a spiced broth. Perfect for meal prep, this one’s a weeknight lifesaver.
Creamy, dreamy, and filled with chunks of potato, this chicken potato soup is pure comfort. It’s like your favorite winter sweater but edible—and way tastier.
Bright and zesty, this turmeric chicken soup boasts anti-inflammatory benefits, thanks to turmeric, ginger, and a veggie-packed broth. It’s healthy comfort food at its best. Recipe from Nyssa’s Kitchen.
This creamy crockpot chicken wild rice soup is the lazy-day meal you didn’t know you needed. Toss everything in and let the slow cooker do the work—wild rice adds texture, and the chicken’s melt-in-your-mouth tender. Recipe from Pinch Of Yum.
Zesty and bold, this chicken enchilada soup combines classic enchilada flavors with a cozy, slurpable twist. And it’s ready in no time, thanks to the Instant Pot! Recipe from Instant Pot Eats.
Chicken noodle soup gets a gluten-free makeover in this hearty recipe. With tender chicken, wholesome veggies, and noodles you can feel good about, this bowl is for everyone. Recipe from Cotter Crunch.
Tangy and lightly spiced, this Instant Pot chicken tortilla soup is a flavor-packed fiesta in a bowl. Don’t skip the tortilla strips—they’re the crunchy crown on this easy dish. Recipe from Feasting At Home.
This paleo chicken tortilla soup is grain-free and loaded with smoky spices, juicy chicken, and fresh lime juice. A great spin on a classic!
Light, refreshing, and zippy, lemon chicken orzo soup is like sunshine in a bowl. Orzo pasta and a squeeze of lemon make this a bright, feel-good meal. Recipe from Well Plated.
Asian-inspired chicken noodle soup hits all the right notes—ginger, garlic, sesame, and a rich, umami-packed broth. This one’s as healing as it is tasty. Recipe from I Heart Umami.
This crockpot green chicken chile enchilada soup is creamy, cheesy, and packed with green chile goodness. A set-it-and-forget-it recipe that delivers big flavor! Recipe from Chelsea’s Messy Apron.
Fast and fabulous, this Thai chicken curry soup comes together in 20 minutes! With coconut milk, curry paste, and tender chicken, it’s a weeknight hero. Recipe from Salt & Lavender.
Classic chicken soup gets the royal treatment with bold spices, a rich broth, and plenty of tender veggies. This recipe lives up to its name—boldly. Recipe from Ambitious Kitchen.
This classic chicken soup is the one you’ll want on repeat during chilly nights. Hearty, nourishing, and just what you need when comfort is key. Recipe from The Cookie Rookie.
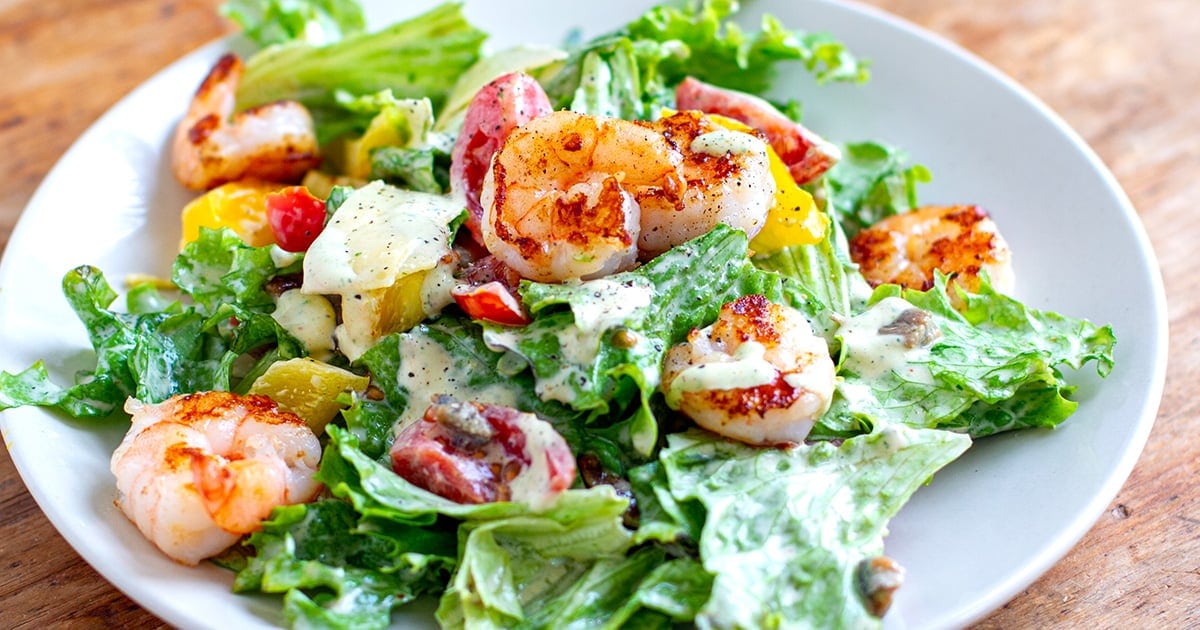
This nutritious and tasty shrimp Caesar salad recipe nutritious, tasty, quick and easy to make – perfect for a weeknight dinner or lunch. Featuring juicy, sweet prawns/shrimp (chicken could also be used), crispy bacon, fresh lettuce, peppers and cherry tomatoes, this gluten-free and keto-friendly salad is smothered in the most delicious, creamy Caesar dressing. It’s high in protein and nutrients. Paleo & dairy-free modifications provided.
Shrimp Caesar Salad Notes
I’ve always loved a good Caesar salad and my favourite thing about it is probably the dressing. If the dressing is done well, then it doesn’t matter what veggies or protein you toss in it.
I wanted to do a variation of a Caesar salad with grilled shrimp instead of chicken and add some extra colourful veggies like cherry tomatoes and sweet peppers.
This recipe is for two servings and you simply increase the ingredients for a larger batch. You can use grilled chicken instead of shrimp/prawns or throw in some grilled tofu/tempeh or chickpeas for a vegetarian version.
Feel free to use any other salad vegetables such as cucumber, radish, fennel or steamed asparagus. As I said, it’s more about the dressing than anything else.
Recipe Tips
I often make this shrimp Caesar salad for a quick, high-protein lunch. I make the dressing ahead of time as it keeps for up to 7 days in the refrigerator. I have a couple of bags or containers of pre-washed, pat-dried lettuce ready to go so that saves quite a bit of time.
I keep a bag of frozen de-shelled shrimp in the freezer, so I take a handful of those out and place in a bowl of hot water 10 minutes before I want to grill or pan-fry them. If I work from home, I will cook the shrimp, cut the vegetables and shave Parmesan at lunchtime.
If I have to take it somewhere, I will usually do these steps the night before and pack the salad ready to go (mind you, shrimp could be pan-fried in the morning as it only takes a few minutes). I take the dressing in a separate container.
More Quick & Easy Salad Meals
Full Recipe
Find the full list of ingredients, instructions, and nutritional breakdown below. If you have questions or cook this recipe, please let me know in the comments, and make sure to rate this shrimp Caesar salad recipe so it’s easy for others to find.
Want to Save This Recipe?
Enter your email & I’ll send it to your inbox. Plus, get great new recipes from me every week!
By submitting this form, you consent to receive emails from Cooked & Loved
Nutritious and tasty, this grilled shrimp Caesar salad is super quick and easy to make. It features crispy lettuce, bacon, grilled prawns, sweet peppers and cherry tomatoes. The best part is the delicious, creamy Caesar dressing! This recipe is gluten-free and low-carb and I provided dairy-free/paleo modifications below.
Heat the oil in a large skillet and add the bacon. Cook on both sides until crispy, then remove to a plate and add the prawns. Season with a little pepper and garlic powder and cook for 2 minutes on each side. Set aside.
Roughly slice the bacon and prepare other salad ingredients.
Whisk the dressing ingredients and toss through the salad in a large bowl. Stir through the bacon and shaved Parmesan if using. Top with the grilled shrimp.
Paleo or dairy-free Caesar dressing:
3 tablespoons mayo
1.5 tablespoons almond milk
1 teaspoon Worcestershire sauce
1 garlic clove
2 anchovies
1 tablespoon lemon juice
1 tablespoon nutritional yeast flakes
Pinch of pepper
In the salad, replace parmesan cheese with a sprinkle of nutritional yeast or try this paleo Parmesan cheese option.
Keto modifications: The salad is gluten-free and low-carb but if you want to reduce the carbohydrates intake even further, replace peppers and cherry tomatoes with lower-carb veggies like cucumber, radish, celery, fennel or lightly grilled/blanched asparagus or snow peas.
[mv_playlist id=”224″ jsonLd=”false” ratio=”16:9″ thumbnail=”https://mediavine-res.cloudinary.com/v1599716598/plqh05ivvby851y7acqo.jpg” title=”WATCH MY TOP 10 HEALTHY VIDEO RECIPES”]