Author: admin

  • Chicken Pasta Salad

    Chicken Pasta Salad

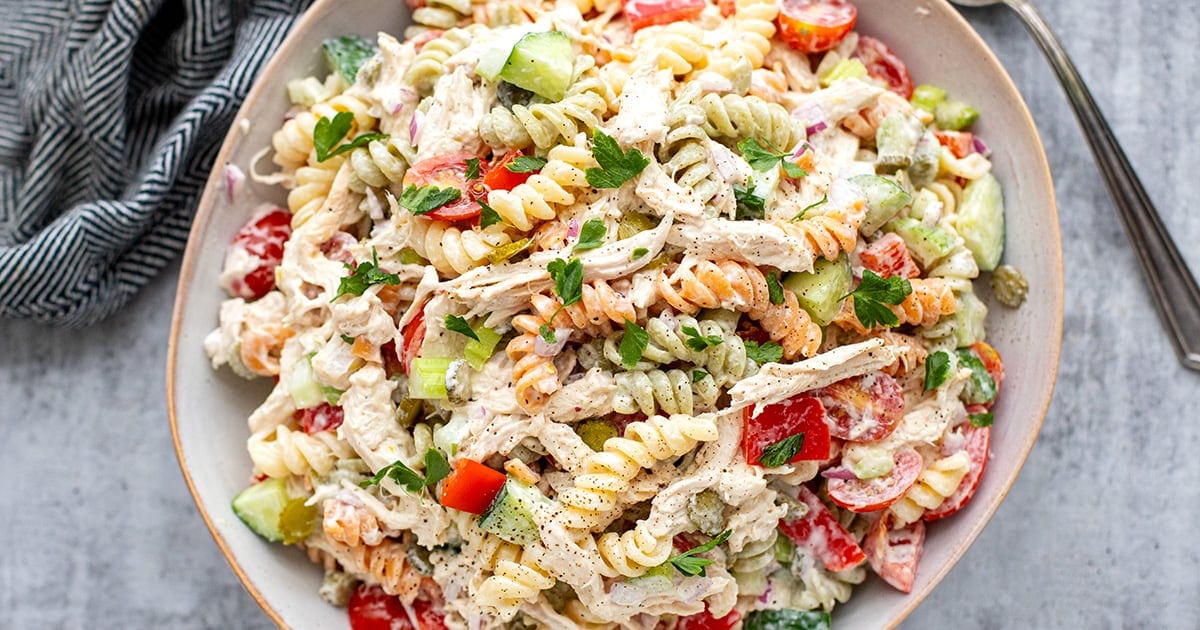
    This creamy chicken pasta salad is fresh, flavor-packed, brightened with lemon, and not overly heavy. It’s perfect for BBQs, meal prep, or an easy chicken and pasta cold salad.


    Jump to: ℹ️ Overview | 🛒 Ingredients | 📷 How To Make | 📹 Watch The Video | 👩‍🍳 Recipe Tips | 🥗 Serving Suggestions | 📝Full Recipe Card | 🍽 More Chicken Recipes


    At A Glance:

    • Ready In: 30 minutes (+ chilling)
    • 🍽 Serves: 6–8 (4 as a main)
    • 🌱 Diet: High-protein, can be gluten-free (with GF pasta)
    • 💪 Nutrition Highlights: High in protein, balanced fats, veggie-packed
    • 🥕 Main Ingredients: Chicken, pasta, Greek yogurt, mayonnaise, fresh vegetables
    • 🔥 Flavor Profile: Creamy, tangy, fresh, slightly zesty, fresh crunch from veggies
    • 🧊 Meal-Prep Friendly: Keeps 3–4 days in the fridge, flavor improves over time
    • Best Served With: BBQ mains, grilled meats, or as a make-ahead lunch, great for potlucks.

    This chicken pasta salad is one of my lunchtime heroes, and it also quietly steals the show at BBQs. It’s creamy, yes, but not heavy. I lighten the dressing with Greek yogurt and fresh lemon so it tastes bright and balanced instead of thick and gloopy.

    The tri-colour fusilli catches all that creamy Dijon dressing in its little spirals, and the rotisserie or shredded chicken makes this weeknight easy. Crunchy celery, cucumber, red onion, and red bell pepper keep every bite fresh, while pickles add that subtle tangy-sweet pop that makes you go back for seconds.

    It’s high in protein thanks to the chicken and yogurt, packed with fibre from the veggies, and perfect for making ahead. The flavor actually improves once it chills — just remember to re-season before serving (cold food needs a little extra love).

    This one sits right between classic comfort and fresh modern salad. Familiar enough for everyone to love, but layered enough to taste intentional.

    👩‍🍳 You might also like these pasta salads: Mediterranean pasta salad, elote pasta salad, tuna and pasta salad, or healthy Rotisserie chicken salad.

    What You’ll Need

    Here is what you’ll need for this shredded chicken pasta salad recipe. Find the full measurements in the recipe card below.

    • Tri-colour fusilli pasta – Holds dressing beautifully and adds visual appeal.
    • Rotisserie chicken (shredded) – Saves time and boosts protein. You can cook your own if preferred, check out my slow cooker shredded chicken here.
    • Cherry tomatoes – Natural sweetness and juiciness.
    • Cucumber – Fresh crunch and hydration.
    • Red onion – Sharpness (soak briefly to mellow).
    • Celery – Classic creamy-salad crunch.
    • Red bell pepper – Sweetness and color.
    • Pickles (finely chopped) – Tangy-sweet bite that balances the creaminess.

    Creamy Dressing

    • Mayonnaise – Creamy base.
    • Parmesan cheese – Salty, nutty depth.
    • Greek yogurt – Lightens the dressing and adds protein.
    • Dijon mustard – Gentle heat and complexity.
    • Lemon juice + zest – Brightness.
    • Red wine vinegar or apple cider vinegar – Extra acidity.
    • Garlic (grated) – Subtle sharpness.
    • Salt & black pepper – Essential seasoning.
    • Water – Loosens dressing without extra oil.

    How To Make Chicken Pasta Salad

    Find the full recipe and nutritional information below. Here are some handy step-by-step photos for how to make this pasta salad.

    • Cook pasta in well-salted water until al dente. Drain and cool completely.
    • Soak sliced red onion in cold water for 10 minutes, then drain.
    • In a bowl, whisk together mayo, Greek yogurt, Parmesan, Dijon, lemon juice, zest, vinegar, garlic, salt, pepper, and a little water until smooth.
    • Toss cooled pasta with shredded chicken, vegetables, and pickles.
    • Fold through dressing. Chill for at least 30 minutes.
    • Taste and adjust salt and lemon before serving.

    Watch The Video

    Recipe Tips

    • Salt your pasta water properly. This is your only chance to season the pasta itself.
    • Re-season after chilling. Cold dulls flavor — add a pinch of salt or squeeze of lemon before serving.
    • Shred, don’t cube, the chicken for better dressing cling.
    • Make ahead: Best made 2–24 hours ahead. Store covered in the fridge.
    • Storage: Keeps well for 3–4 days refrigerated. Stir before serving.
    • Want more crunch? Add toasted almonds right before serving.
    • Variation ideas: Add crispy bacon. Stir in chopped parsley or fresh herbs. Swap pickles for capers. Turn it into a pesto chicken pasta salad (save that for its own post 😉).

    Serving Suggestions

    Serve this chicken pasta salad cold or slightly chilled. It’s perfect alongside grilled a green salad, corn on the cob, or as part of a summer spread. It also works beautifully packed for lunches — just keep it chilled.

    💬 If you’ve tried this chicken pasta salad or any other recipe on the blog then don’t forget to rate the recipe and let me know how you got on in the comments below, I love hearing from you! You can also FOLLOW ME on Instagram, Facebook, Pinterest, YouTube, and or sign up to my Newsletter to see more of my delicious food.

    Want to Save This Recipe?

    Enter your email & I’ll send it to your inbox. Plus, get great new recipes from me every week!

    By submitting this form, you consent to receive emails from Cooked & Loved

    This creamy chicken pasta salad is fresh, flavor-packed, brightened with lemon, and not overly heavy. It’s perfect for BBQs, meal prep or an easy chicken and pasta cold salad. Find step-by-step photos and more recipe tips above.

    • Bring a large pot of water to a boil. Salt generously. Cook pasta until al dente according to package instructions. Drain and rinse briefly with cool water. Let cool completely.

    • If needed, soak sliced red onion in cold water for 10 minutes, then drain.

    • In a medium bowl, whisk together mayonnaise, Greek yogurt, Dijon mustard, Parmesan, lemon juice, zest, vinegar, garlic, salt and pepper. Add water a tablespoon at a time until the dressing is creamy but pourable.

    • In a large bowl, combine cooled pasta, shredded chicken, tomatoes, cucumber, celery, red bell pepper, chopped pickles and red onion.

    • Pour dressing over the salad and toss until evenly coated.

    • Chill for at least 30 minutes before serving.

    • Taste and adjust seasoning with extra salt or lemon juice if needed.

    • Salt your pasta water properly. This is your only chance to season the pasta itself.
    • Re-season after chilling. Cold dulls flavor — add a pinch of salt or squeeze of lemon before serving.
    • Shred, don’t cube, the chicken for better dressing cling.
    • Make ahead: Best made 2–24 hours ahead. Store covered in the fridge.
    • Storage: Keeps well for 3–4 days refrigerated. Stir before serving.
    • Want more crunch? Add toasted almonds right before serving.
    • Variation ideas: Add crispy bacon. Stir in chopped parsley or fresh herbs. Swap pickles for capers. Turn it into a pesto chicken pasta salad (save that for its own post 😉).
    • Can I cook my own chicken? Yes. Season chicken breasts with salt, pepper, and paprika. Bake at 400°F (200°C) for 18–22 minutes until cooked through, then shred.
    • Can I make this ahead? Absolutely. It tastes even better after a few hours in the fridge. Just re-season before serving.
    • Can I use a different pasta? Yes — bowtie, penne, or rotini work well. Choose a shape that holds dressing. 
    • Is this gluten-free? Use gluten-free pasta and check labels on mustard and pickles.

    Calories: 381kcal | Carbohydrates: 36g | Protein: 32g | Fat: 12g | Saturated Fat: 3g | Polyunsaturated Fat: 2g | Monounsaturated Fat: 1g | Trans Fat: 0.01g | Cholesterol: 87mg | Sodium: 764mg | Potassium: 251mg | Fiber: 2g | Sugar: 4g | Vitamin A: 539IU | Vitamin C: 21mg | Calcium: 83mg | Iron: 1mg
    Keywords: healthy pasta salad, Chicken salad, pasta salad, cold pasta salad, shredded chicken

    More Chicken Recipes


    Source link

  • Chili Butter Head On Shrimp Recipe

    Chili Butter Head On Shrimp Recipe

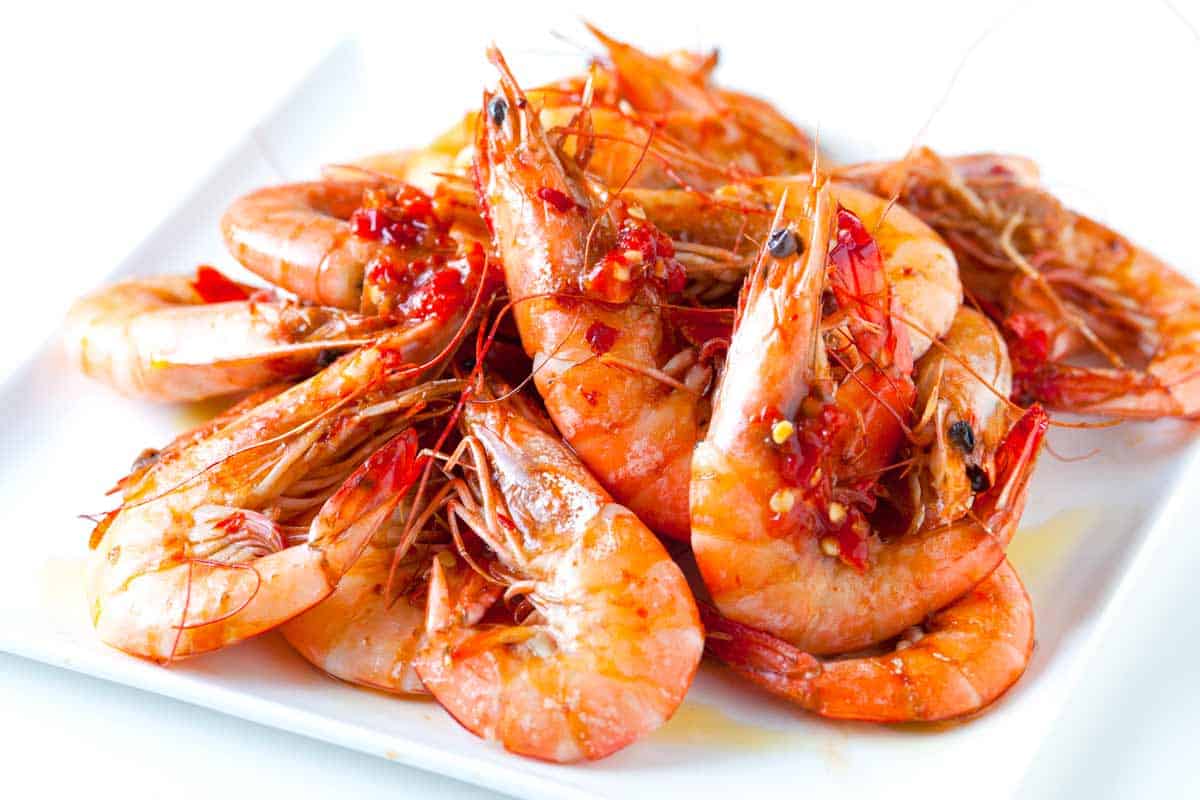
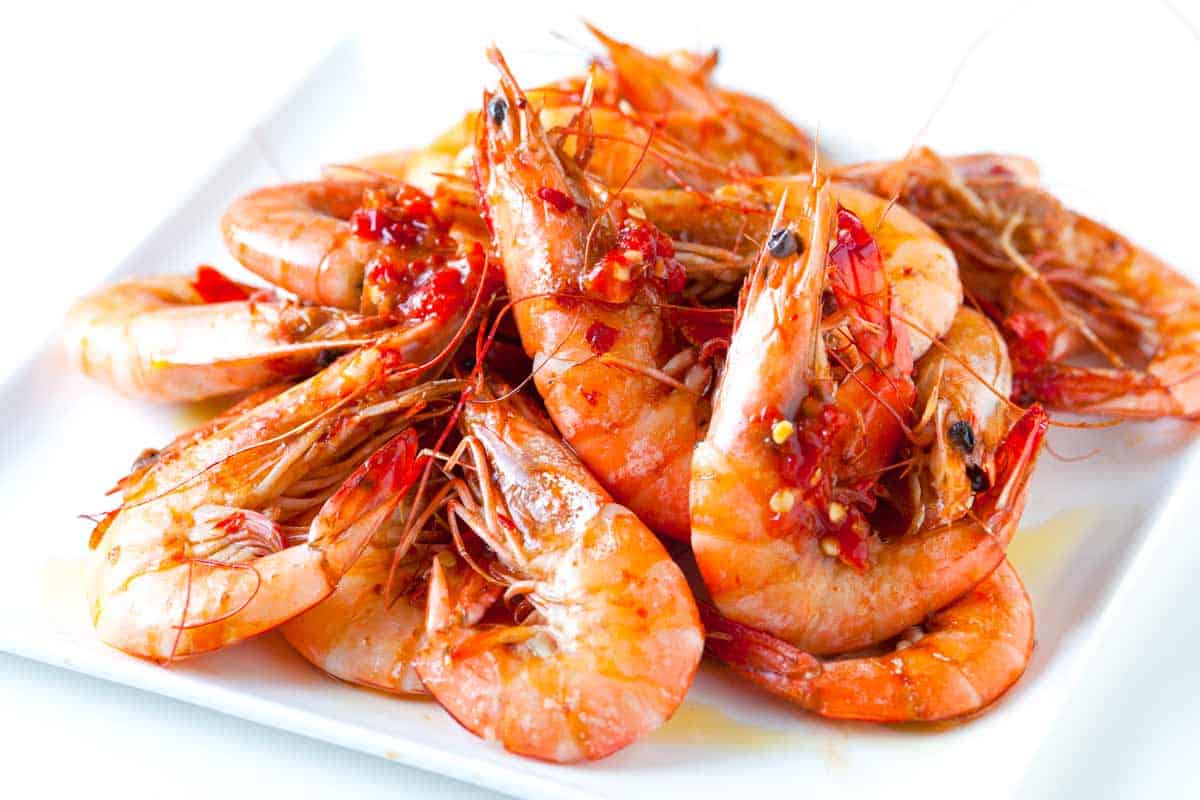
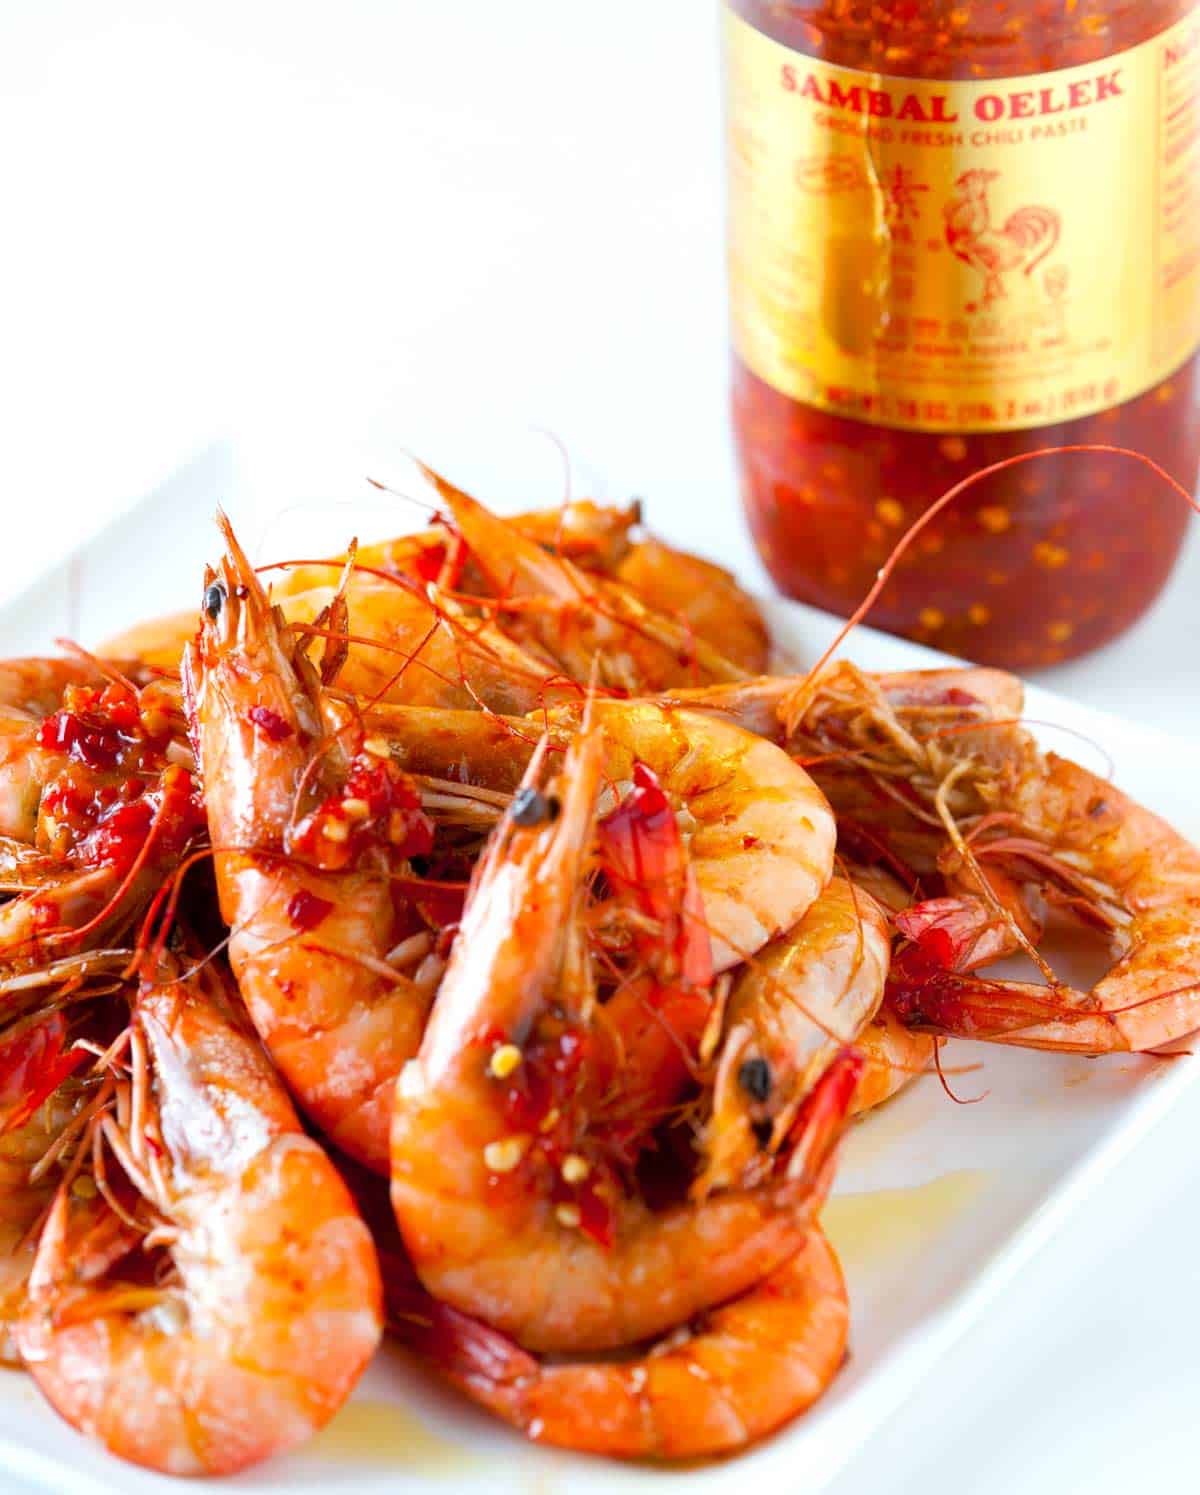
    This head on shrimp baked with butter and chili paste is incredibly delicious and super easy to make. You’ll have dinner ready in under 20 minutes!

    Head on Chili Shrimp

    If cooking shrimp with heads scare you, don’t let them! They are really easy to cook at home, and they taste incredible, thanks to the shells being left on. As shrimp cook in their shells, they take on even more of a rich, shrimpy flavor, which is why seafood lovers highly covet them.

    Our recipe calls for baking the shrimp in a simple mixture of melted butter, soy sauce, chili paste, and sesame oil.

    Key Ingredients

    • Shrimp: If you can find them, use fresh extra-large head on shrimp (or prawns). If not, use fresh or thawed shrimp without the head.
    • Butter: I use salted butter, but unsalted is fine. If you use unsalted butter, add a pinch of salt to the mixture.
    • Soy Sauce: I use light soy sauce or light tamari. It adds a little funkiness and seasoning.
    • Chili Paste: I love Sambal Oelek. It’s made with crushed raw red chiles, a little vinegar, and salt. It’s sold in most grocery stores. Check the grocery aisle where you’d buy soy sauce, and it should be there. If you can’t find it, Sriracha or Gochujang are good alternatives. I also use sambal oelek when making our spicy garlic ginger edamame.
    • Sesame Oil: I love the flavor of toasted sesame oil. You only need a little bit. It just makes the shrimp more interesting. If you do not have it on hand, you can leave it out.

    Find the full recipe with measurements below.

    How to Cook Chili Butter Head On Shrimp

    I suggested that our recipe calls for a pound of shrimp serves two, but that’s as a dinner portion. These also make an incredible appetizer for entertaining or parties!

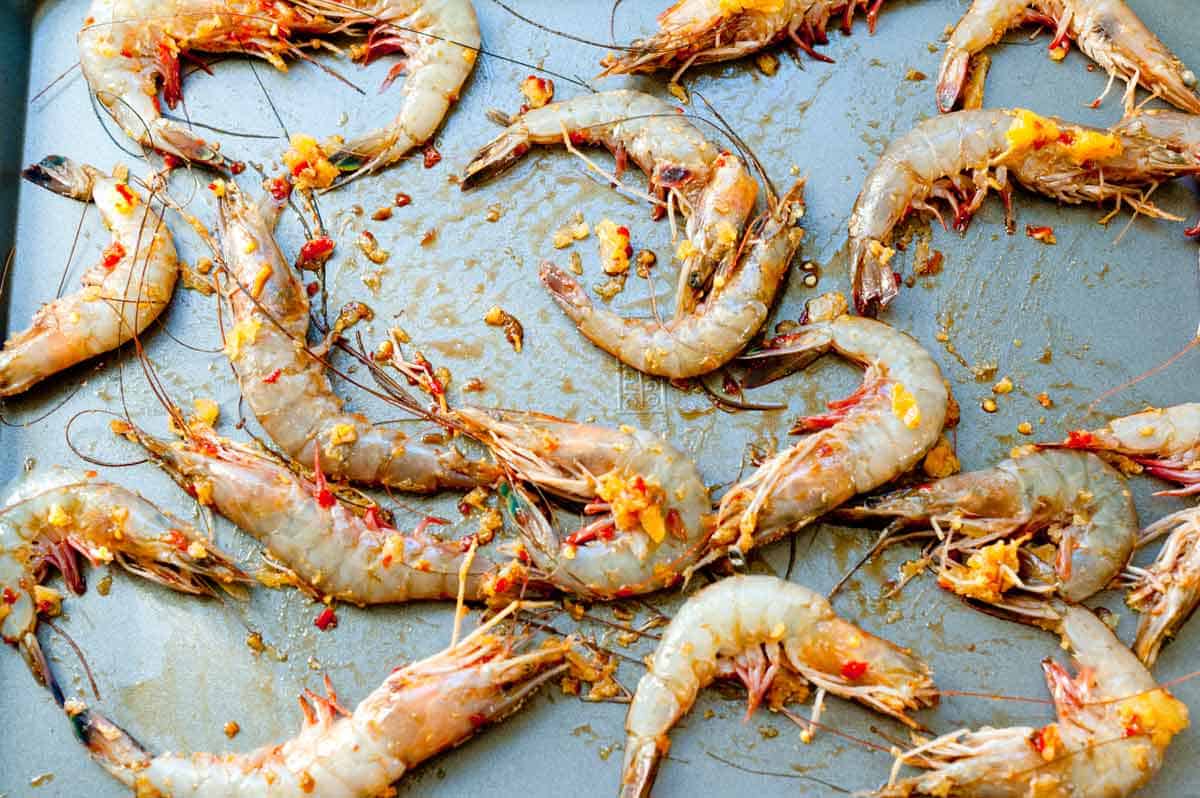
    Tip 1: Make our chili butter. You’ll mix melted butter with soy sauce, chili paste, and sesame oil, then toss that with your shrimp. You might find that the butter starts to solidify again (especially if your shrimp are straight from the fridge). Don’t worry too much about it, and spread the shrimp onto a baking sheet.

    How to Make Chili Butter Head On Shrimp: shrimp on a baking sheet.

    Tip 2: Use a high oven temperature. We want to bake our shrimp quickly, so I like to use a high oven temperature, like 400°F. At this temperature, the shrimp will take around 8 minutes. You’ll know when they are done when the shells look bright red and the shrimp feel firm. From there, serve them quickly as they continue to steam in their shells.

    Tip 3: How to eat them. To eat these shrimp, I pull off the heads and suck the juices from inside (it’s really tasty), then I peel the shrimp as usual and eat them as I do peel and eat shrimp.

    More Shrimp Recipes

    Chili Butter Head On Shrimp

    Chili Butter Head On Shrimp

    • PREP
    • COOK
    • TOTAL

    Baking the shrimp in their shells with the head still left on adds more flavor. It also insulates them a little, helping to prevent overcooking. To eat these, rip the head off and suck out any juices from the head (it’s delicious). Then peel the shrimp as usual and enjoy! If you cannot find head-on shrimp or aren’t as much a fan as we are, you can follow this recipe using shrimp without the head. This recipe works well with head-on shrimp and head-on prawns.

    2 Servings

    You Will Need

    4 tablespoons butter, melted

    1 tablespoon low-sodium soy sauce

    1 tablespoon fresh chili paste, like sambal oelek

    1 teaspoon toasted sesame oil

    1 pound large head-on shrimp

    Directions

      1Preheat the oven to 400°F (204°C). Set aside a baking sheet. For easier clean-up, line it with parchment paper or foil.

      2Melt the butter, then stir in the soy sauce, chili paste, and sesame oil.

      3Toss with the shrimp until well coated. If your shrimp are straight from the fridge, the butter might begin to re-solidify. Don’t worry about this.

      4Bake until shrimp shells turn bright red and feel firm, 8 to 10 minutes.

    Adam and Joanne’s Tips

    • Nutritional information provided are estimates.

    Nutrition Per Serving
    Serving Size
    1/2 the recipe
    /
    Calories
    403
    /
    Total Fat
    24.2g
    /
    Saturated Fat
    14.6g
    /
    Cholesterol
    426mg
    /
    Sodium
    654.6mg
    /
    Carbohydrate
    1.1g
    /
    Dietary Fiber
    0g
    /
    Total Sugars
    1.9g
    /
    Protein
    46.4g


    AUTHOR:

    Adam Gallagher

    Adam and Joanne of Inspired Taste

    We are Adam and Joanne Gallagher, the creators of Inspired Taste. Established in 2009, Inspired Taste grew from a childhood dream into one of the internet’s most trusted recipe sites with hundreds of reliable recipes, step-by-step videos, and expert tips.More About Us

    Source link

  • Easy Steel Cut Oats Recipe

    Easy Steel Cut Oats Recipe

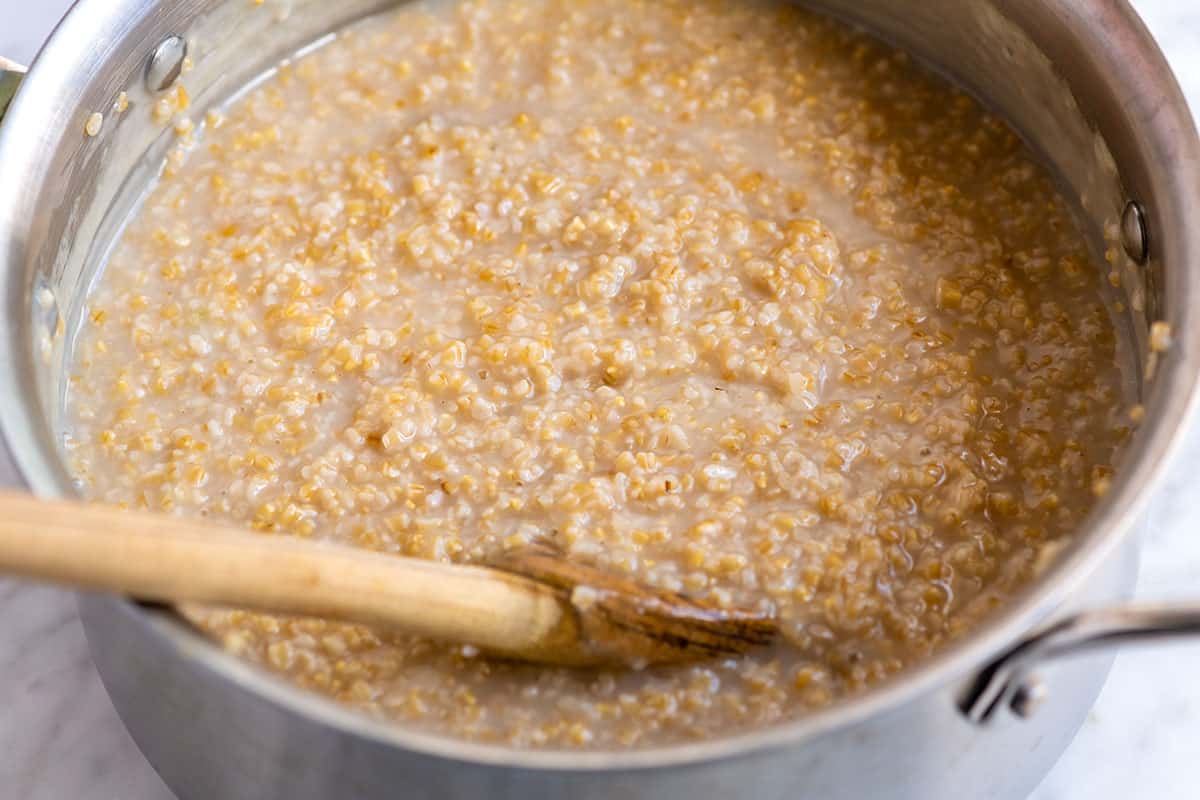
    This is my family’s favorite steel cut oats recipe! I make it on the stovetop, but I have also included tips for cooking steel cut oats in a slow cooker or pressure cooker (like an Instant Pot).

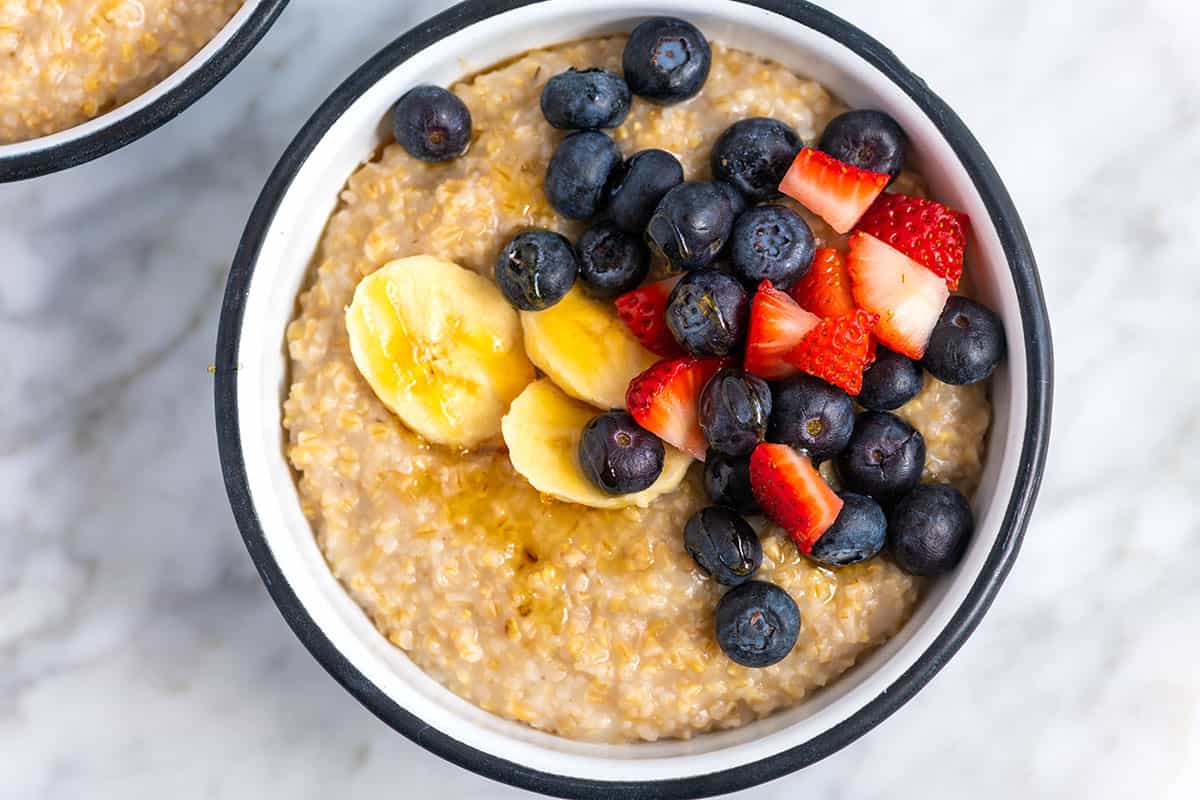
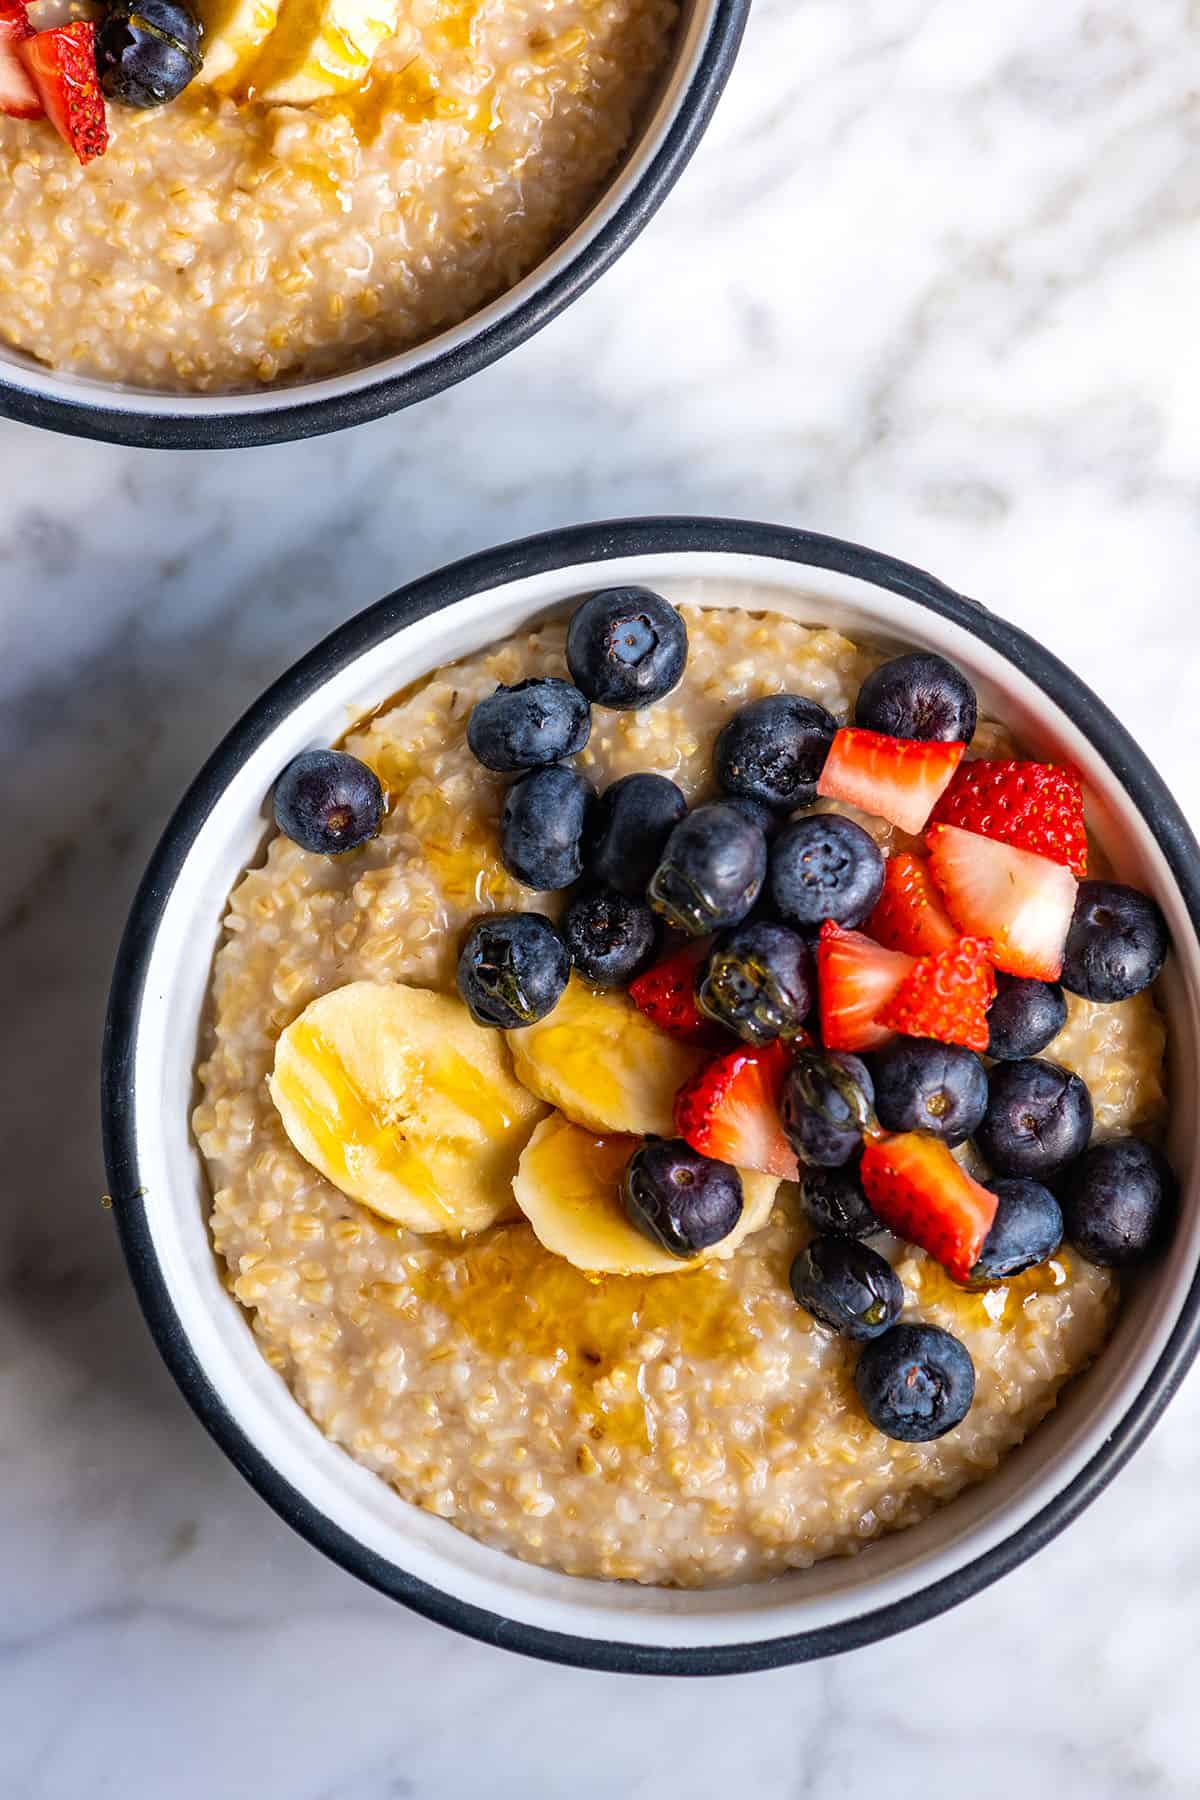
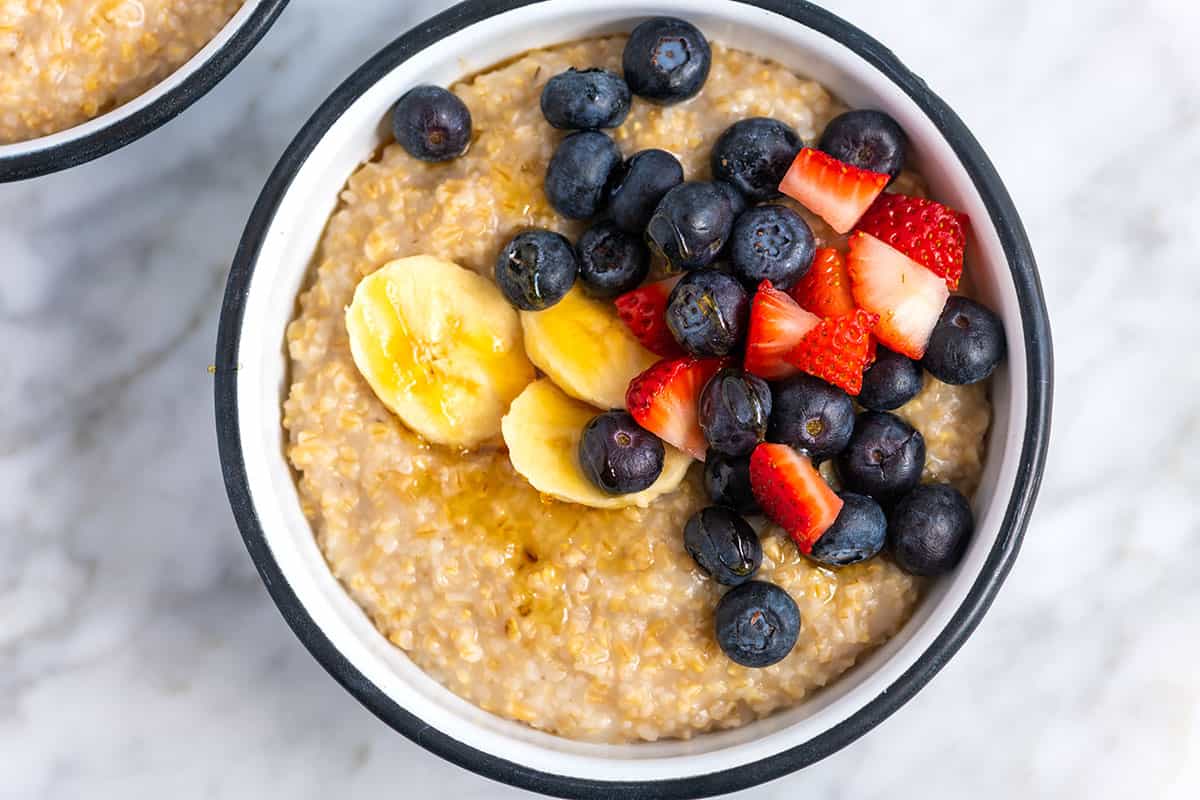
    Creamy Steel Cut Oats with berries and banana on top

    My family often eats oatmeal for breakfast. We love it almost any way we can get it, like this easy oatmeal recipe with rolled oats, our baked oatmeal, and even turned into energy balls with peanut butter and honey. We call steel cut oats “fancy oats” in our home and absolutely love them.

    Steel cut oats are whole oat groats cut into small bits (instead of rolled into flat discs like with rolled oats). They take slightly longer to cook than rolled oats but are delicious. My method for cooking them is super simple, too! I can’t wait for you to try it.

    How to Make Steel Cut Oats

    I love cooking steel cut oats on the stovetop. However, if you prefer a hands-off approach, you can absolutely make them in a slow cooker or Instant Pot! You’ll find detailed instructions for those methods in the recipe below. (Just a heads up: we don’t recommend cooking steel cut oats in the microwave. If you need a super quick oatmeal recipe, check out our easy oatmeal with tips for microwave cooking.)

    When cooking steel cut oats on the stovetop, I stick to a simple ratio: one part oats to three parts liquid, guaranteeing perfectly cooked, creamy oats every time. Keep in mind that the liquid ratio might vary slightly when using a slow cooker or pressure cooker. You’ll find specific tips for those appliances in the recipe below.

    Cooking steel cut oats

    To make steel cut oats, start by toasting them in a tablespoon of butter, coconut oil, or vegan butter for about 2 minutes, adding a lovely nutty flavor to the oats. Then, pour in the water and bring it to a gentle simmer, uncovered. Cook for 20 to 25 minutes, stirring occasionally, until the oats are tender and have absorbed most of the water.

    For extra creaminess, stir in 1/2 to 1 cup of milk. Finally, customize your bowl with spices, a pat of butter, and a touch of sweetness like maple syrup or honey. More topping suggestions are below!

    How to Serve Steel Cut Oats

    You can stir just about anything you love into cooked oatmeal, but here’s a bit of extra inspiration for you:

    • Mashed or sliced fruit. I love bananas, strawberries, and blueberries
    • Toasted nuts and seeds like walnuts, pecans, hazelnuts, or roasted pumpkin seeds.
    • Nut butter like peanut butter, almond butter, or cashew butter
    • Chia seeds, hemp seeds, or ground flax
    • Splash of cream, milk, buttermilk, yogurt, or non-dairy milk (like homemade oat milk)
    • Vanilla extract or spices like cinnamon, nutmeg, or pumpkin pie spice
    • Brown sugar, honey, or maple syrup
    • Dried fruit like cranberries, mulberries, or raisins
    • Sautéed spinach or kale and a poached egg or soft boiled egg
    Steel Cut Oats

    Easy Steel Cut Oats

    • PREP
    • COOK
    • TOTAL

    Steel cut oats are whole oat groats cut into small bits (instead of rolled into flat discs like with rolled oats). They take slightly longer to cook than other oat varieties but are delicious. When cooked, steel cut oats have a creamy, chewy texture. We love them topped with fruit and nut butter, but take a look at our article above for topping suggestions.

    For a quicker cooking time, consider soaking the oats in water the night before you plan to make them. Soaking them will reduce the cooking time by about half.

    4 Servings

    You Will Need

    2 tablespoons butter or vegan butter

    1 cup steel cut oats

    3 cups water

    Pinch salt

    1/2 to 1 cup milk, dairy or non-dairy

    1/4 teaspoon ground cinnamon

    1 tablespoon sweetener like brown sugar, honey, or maple syrup

    Optional oatmeal toppings like nut butter, fruit, nuts, and seeds

    Directions

    • Stovetop Steel Cut Oats
    • 1Melt 1 tablespoon of butter in the bottom of a medium saucepan over medium heat. Add the oats and stir them in the butter for a minute or two or until they smell nutty.

      2Combine the oats with the water and bring to a simmer. Reduce the heat so that the water is just barely simmering. Cook for about 20 minutes, stirring once or twice to lift any oats stuck to the bottom of the pan.

      3Stir in the milk, butter, cinnamon, and honey. Cook for 5 to 10 minutes or until the oats are soft with a slight chew. If the oatmeal seems dry, add a splash of more water or milk. Serve with your favorite oatmeal toppings.

    • Slow Cooker Steel Cut Oats
    • 1Slow cooker steel cut oats are much creamier than when cooked using other methods (think creamy, delicious oatmeal pudding). To cook steel cut oats in the slow cooker, combine 1 cup steel cut oats with 4 cups water. Add whatever seasonings you love (I add 1 tablespoon butter, 1/2 teaspoon ground cinnamon, and a pinch of salt). Cover the slow cooker and cook on LOW for 7 to 8 hours or on HIGH for 3 to 4 hours. Stir the oats before serving. For extra creamy oatmeal, stir in 1/2 to 1 cup of milk.

    • Instant Pot Steel Cut Oats
    • 1To cook steel cut oats in a pressure cooker like an Instant Pot, combine 1 cup steel cut oats with 3 cups water, a pinch of salt, 1/4 teaspoon ground cinnamon, and 1 tablespoon butter (or vegan butter). Stir the oats, secure the lid, and then cook on the manual or pressure cooker setting for 3 minutes at high pressure. When the cooking time is complete, allow the cooker to naturally release the pressure. Stir well before serving. For creamier oats, add 1/2 to 1 cup milk.

    Adam and Joanne’s Tips

    • Storing: Store cooked steel cut oats in the refrigerator for up to 5 days and freeze for up to 3 months. Steel cut oats thicken as they sit, so you might need to add a splash of water or milk when reheating them to achieve the perfect consistency again.
    • Soaking steel cut oats: You do not need to soak steel cut oats before cooking them. However, if you soak steel cut oats in water (usually 8 hours or overnight), they will soften slightly. Since the oats are softer, they cook quicker the following day. Soaking also may help unlock some of the nutrients in the oats, making them more available to us to absorb. If you plan on soaking steel cut oats, the stovetop cook time will be reduced by about half.
    • For gluten-free oatmeal, make sure that the oats and any toppings that you plan to use are certified gluten-free.
    • The nutrition facts provided below are estimates. We did not include any toppings in the calculations. We assumed whole milk in the calculations.

    Nutrition Per Serving
    Serving Size
    1/4 of the recipe
    /
    Calories
    215 calories
    /
    Total Fat
    9g
    /
    Saturated Fat
    4.5g
    /
    Cholesterol
    18.3mg
    /
    Sodium
    60mg
    /
    Carbohydrate
    28.7g
    /
    Dietary Fiber
    3.9g
    /
    Total Sugars
    5.9g
    /
    Protein
    5.6g


    AUTHOR:

    Joanne Gallagher

    Adam and Joanne of Inspired Taste

    We are Adam and Joanne Gallagher, the creators of Inspired Taste. Established in 2009, Inspired Taste grew from a childhood dream into one of the internet’s most trusted recipe sites with hundreds of reliable recipes, step-by-step videos, and expert tips.More About Us

    Source link

  • Slow Cooker Chicken Meatballs Recipe

    Slow Cooker Chicken Meatballs Recipe

    This slow cooker chicken meatballs recipe is easy and delicious. Serve them on top of pasta, spiralized noodles, vegetables, or bread. They are so good!

    Slow Cooker Chicken Meatballs

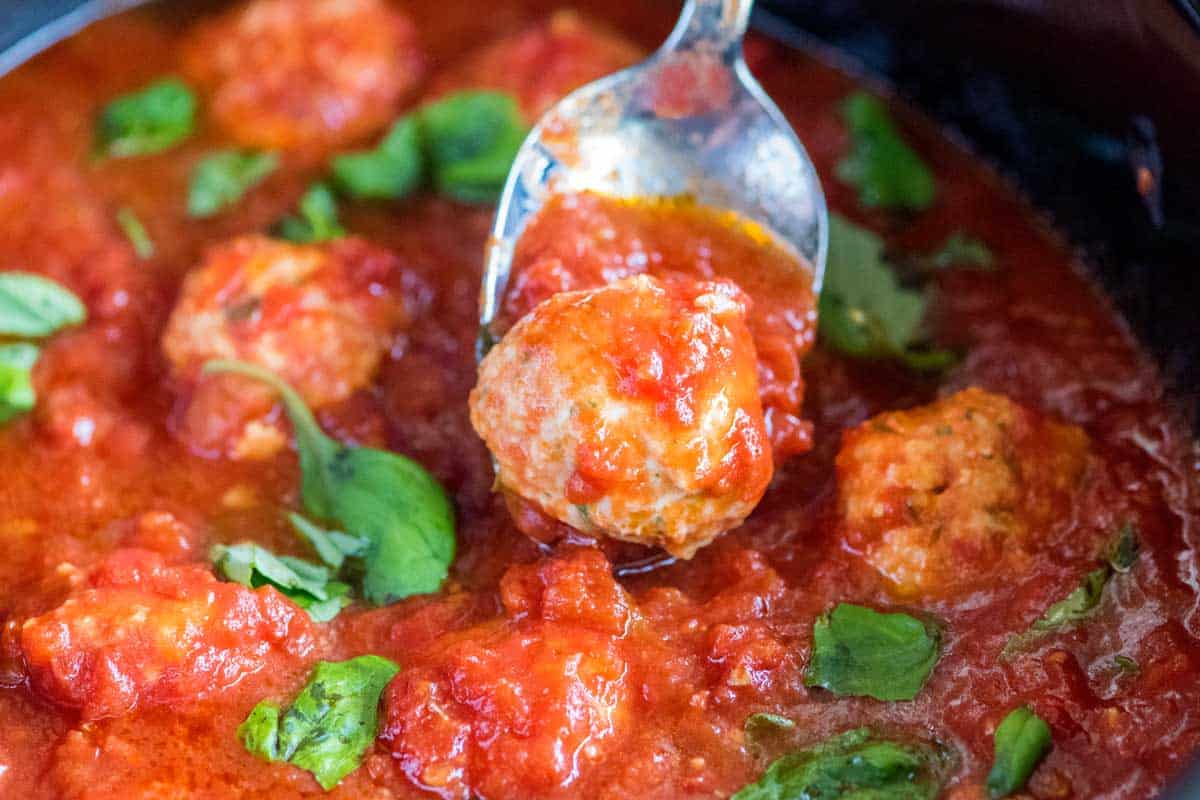
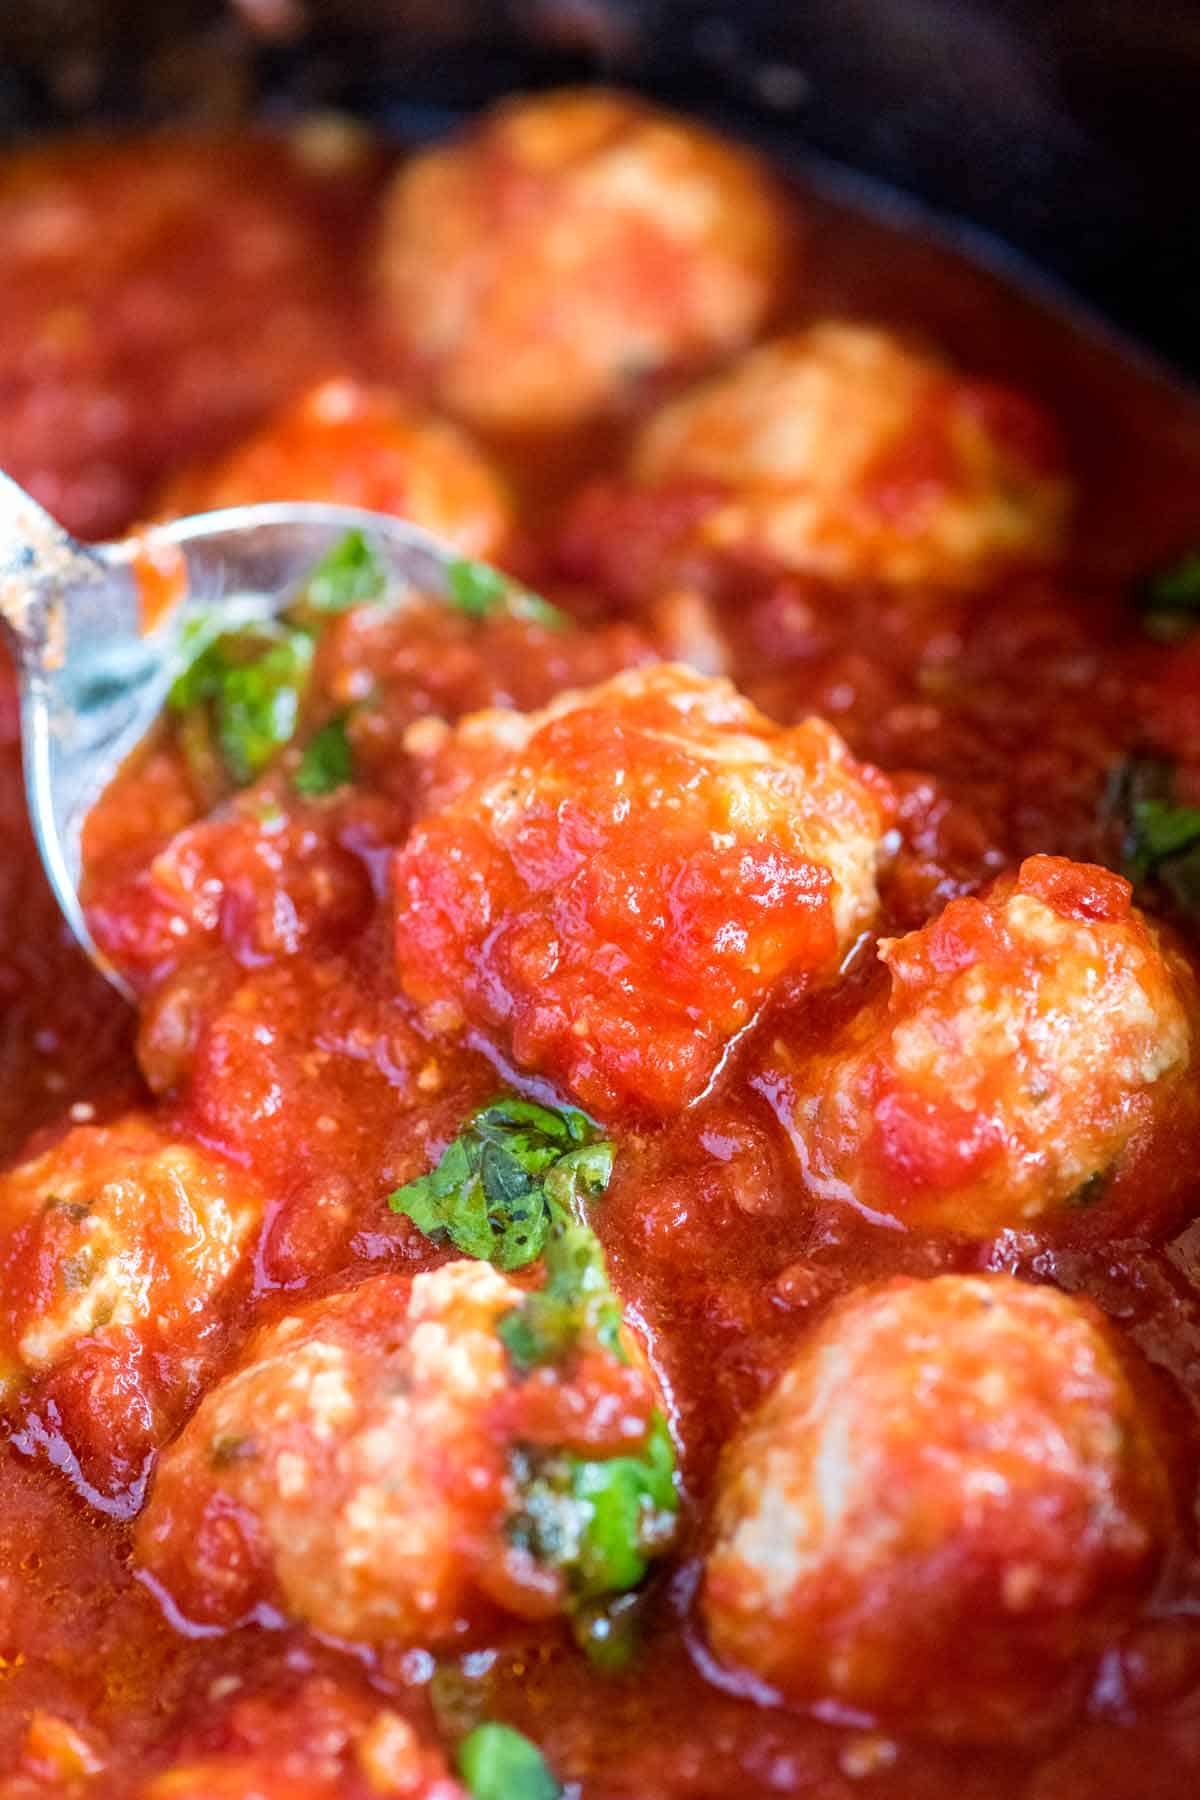
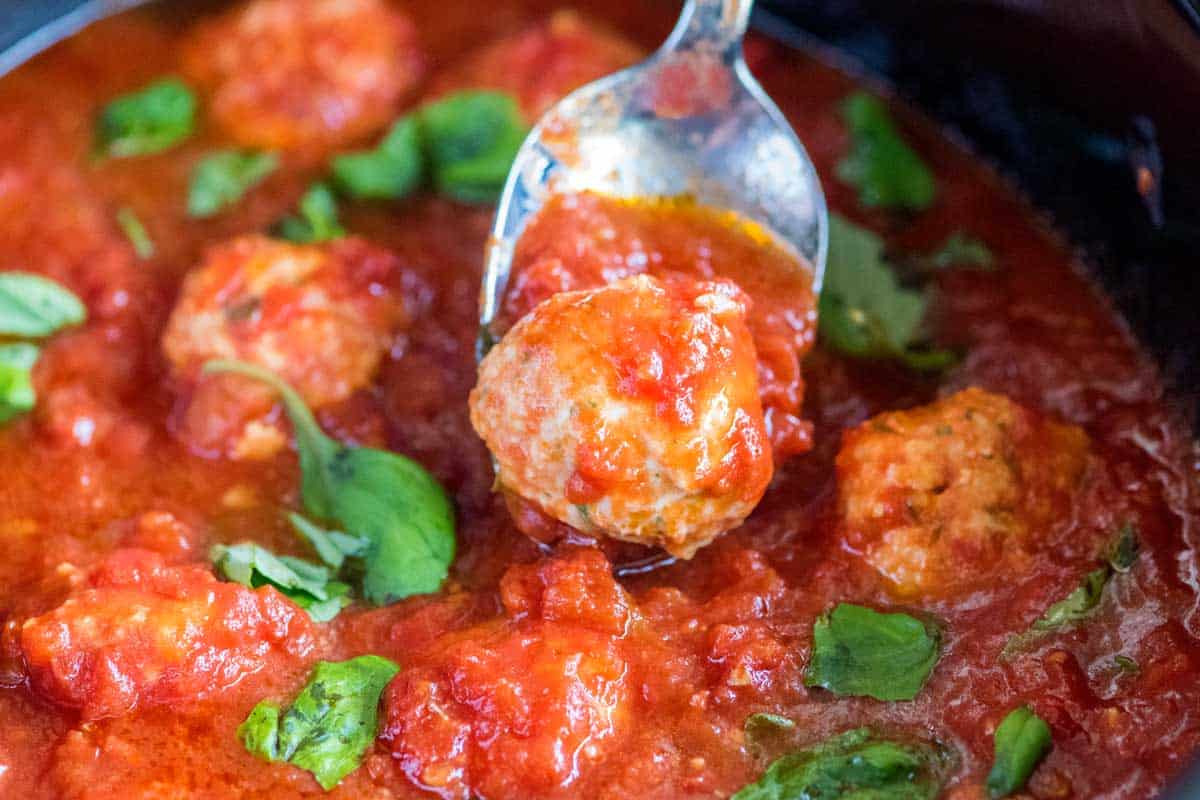
    My family loves this slow cooker chicken meatball recipe. The sauce is from scratch and gets better and better as it slowly cooks in a crockpot. Then, you’ll drop in the meatballs and let them cook for about 1 hour.

    Since they gently poach in the sauce, the meatballs become extra tender and stay juicy inside. These chicken meatballs are similar to our turkey meatballs, but in that recipe, we cook the sauce and meatballs on the stove instead of in our slow cooker. For something totally different, look at our sweet and sour chicken meatballs made with a coconut lime sauce.

    Key Ingredients

    • Ground Chicken: I use 93% lean ground chicken when making these meatballs (leaner ground chicken makes less juicy meatballs). The extra 7-10% fat helps keep our chicken meatballs moist and juicy in the middle. Ground turkey, pork, or beef are all great substitutes.
    • Milk, breadcrumbs, and egg: Help to keep our meatballs together and soft and tender in the middle.
    • Parmesan: For really flavorful meatballs, add some shredded parmesan cheese to the mixture. I also use parmesan cheese when making these Italian meatballs with beef and pork.
    • Spices: I love fresh parsley in these, and I stir in a little dried oregano and salt.
    • Tomato basil sauce: I make the easy homemade tomato sauce with crushed canned tomatoes, tomato paste, onion, garlic, olive oil, and fresh basil. If you want a shortcut, use 2 jars of your favorite store-bought spaghetti sauce in this recipe.

    Find the full recipe with measurements below.

    How to Make Slow Cooker Chicken Meatballs

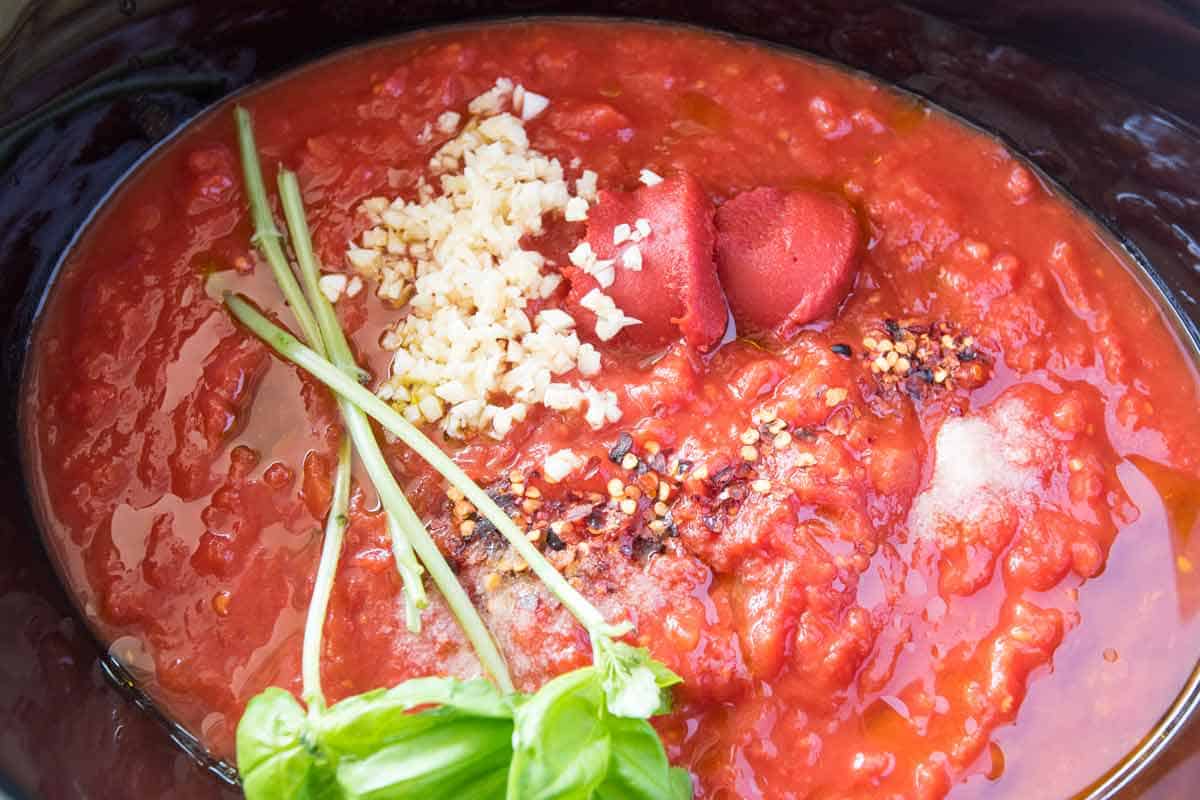
    Tip 1: Make our easy tomato sauce. To make the slow cooker marinara sauce, you’ll add canned tomatoes, tomato paste, olive oil, a small onion cut in half, lots of garlic, and spices to the slow cooker. If I’m in a hurry, I turn it to HIGH and cook for 3 hours. If I’ve got more time, I use LOW and cook for 6 hours.

    Slow cooker Marinara Sauce

    Tip 2: Cooking the meatballs. Make your meatball mixture and form it into balls. I use wet hands when forming them, which keeps them from sticking too much. Drop the chicken meatballs into the sauce in the slow cooker and cover the tops with sauce by gently pushing the sauce over each meatball. Cook on HIGH for 1 hour or until the meatballs are cooked through. Then serve however you like.

    Serving Suggestions

    These meatballs are great on their own, with some veggies on the side (I love roasted cabbage or sautéed cabbage). They are also excellent with pasta or slices of focaccia bread to soak up that amazing sauce.

    Slow Cooker Chicken Meatballs

    Slow Cooker Chicken Meatballs

    • PREP
    • COOK
    • TOTAL

    We love these crock pot chicken meatballs. We cook them in our simple slow cooker marinara sauce, which you will make first, then drop the meatballs into later an hour before you plan to serve them. Serve these meatballs with pasta, spiralized noodles, vegetables, bread, or as an appetizer.

    6 Servings (18 meatballs)

    You Will Need

    Tomato Basil Sauce

    2 (28oz) cans crushed tomatoes

    2 tablespoons tomato paste

    1 medium onion, cut in half

    4 garlic cloves, minced (about 1 ½ tablespoons)

    2 tablespoons extra-virgin olive oil

    1 bay leaf

    1/4 teaspoon crushed red pepper flakes

    1 small bunch fresh basil

    Salt, to taste


    Chicken Meatballs

    1 pound (450g) ground chicken

    1/2 cup (50g) panko breadcrumbs or homemade breadcrumbs

    1/2 cup (118ml) milk

    1 large egg

    6 tablespoons (1.5oz) finely grated Parmigiano-Reggiano cheese

    1/4 cup fresh parsley leaves and tender stems, chopped

    1/2 teaspoon dried oregano

    3/4 teaspoon salt

    1/4 teaspoon fresh ground black pepper

    Directions

    • Make Slow Cooker Marinara
    • 1Remove the leaves from the basil sprig and save them for later. You will add the basil sprig to the sauce to infuse it with basil flavor, then serve it with the leaves later.

      2Add the tomatoes, tomato paste, halved onion, garlic, olive oil, bay leaf, red pepper flakes, and basil sprig to a slow cooker. Stir, then add salt to taste—we use between 1/2 teaspoon and 1 teaspoon of salt, depending on the tomatoes. It will be cold, but you will get a good idea of whether or not the sauce is well-seasoned.

      3Cover and cook on LOW for 6 hours or on HIGH for 3 hours. Remove the onion, bay leaf, and basil sprig. Taste, then add additional salt as needed.

    • Prepare Chicken Meatballs
    • 1The meatballs can be shaped and kept refrigerated for up to a day ahead. Arrange them on a baking sheet, cover them, and then refrigerate for up to 1 day.

      2Combine the panko breadcrumbs and the milk in a large bowl. Wait 3 to 5 minutes until the breadcrumbs have absorbed most of the milk, then whisk in the egg. Whisk in the parmesan cheese, parsley, oregano, salt, and pepper.

      3Add the ground chicken and use a fork or your hands to blend the chicken and the egg mixture. The meatball mixture will be pretty moist. Shape into one-inch meatballs, pressing no more than necessary. This recipe makes approximately 18 meatballs.

      4Once the marinara sauce has finished cooking, add the chicken meatballs. To add them, gently lower them into the sauce with a spoon or two forks. Cover the tops of the meatballs by gently pushing sauce over each meatball. Cook on HIGH for 1 hour or until the meatballs are cooked through.

    Adam and Joanne’s Tips

    • Make-ahead sauce: The sauce can be made ahead and kept refrigerated for 2 to 3 days and 3 to 4 months in the freezer.
    • Freezing uncooked meatballs: Shape and arrange meatballs on a baking sheet lined with aluminum foil or parchment paper. Freeze until solid, transfer them to a freezer-safe container or bag, and freeze for up to 1 month. Add the frozen meatballs to the simmering sauce and expect them to take longer to cook through (1 ½ to 2 hours).
    • The nutrition facts provided below are estimates.

    Nutrition Per Serving
    Serving Size
    1/6 of recipe (3 meatballs)
    /
    Calories
    304
    /
    Protein
    21.7g
    /
    Carbohydrate
    26.6g
    /
    Dietary Fiber
    5.6g
    /
    Total Sugars
    13.3g
    /
    Total Fat
    14.2g
    /
    Saturated Fat
    3.8g
    /
    Cholesterol
    99.7g
    /
    Sodium
    1029.8mg


    AUTHOR:

    Joanne Gallagher

    Adam and Joanne of Inspired Taste

    We are Adam and Joanne Gallagher, the creators of Inspired Taste. Established in 2009, Inspired Taste grew from a childhood dream into one of the internet’s most trusted recipe sites with hundreds of reliable recipes, step-by-step videos, and expert tips.More About Us

    Source link

  • Black Bean and Rice Soup

    Black Bean and Rice Soup

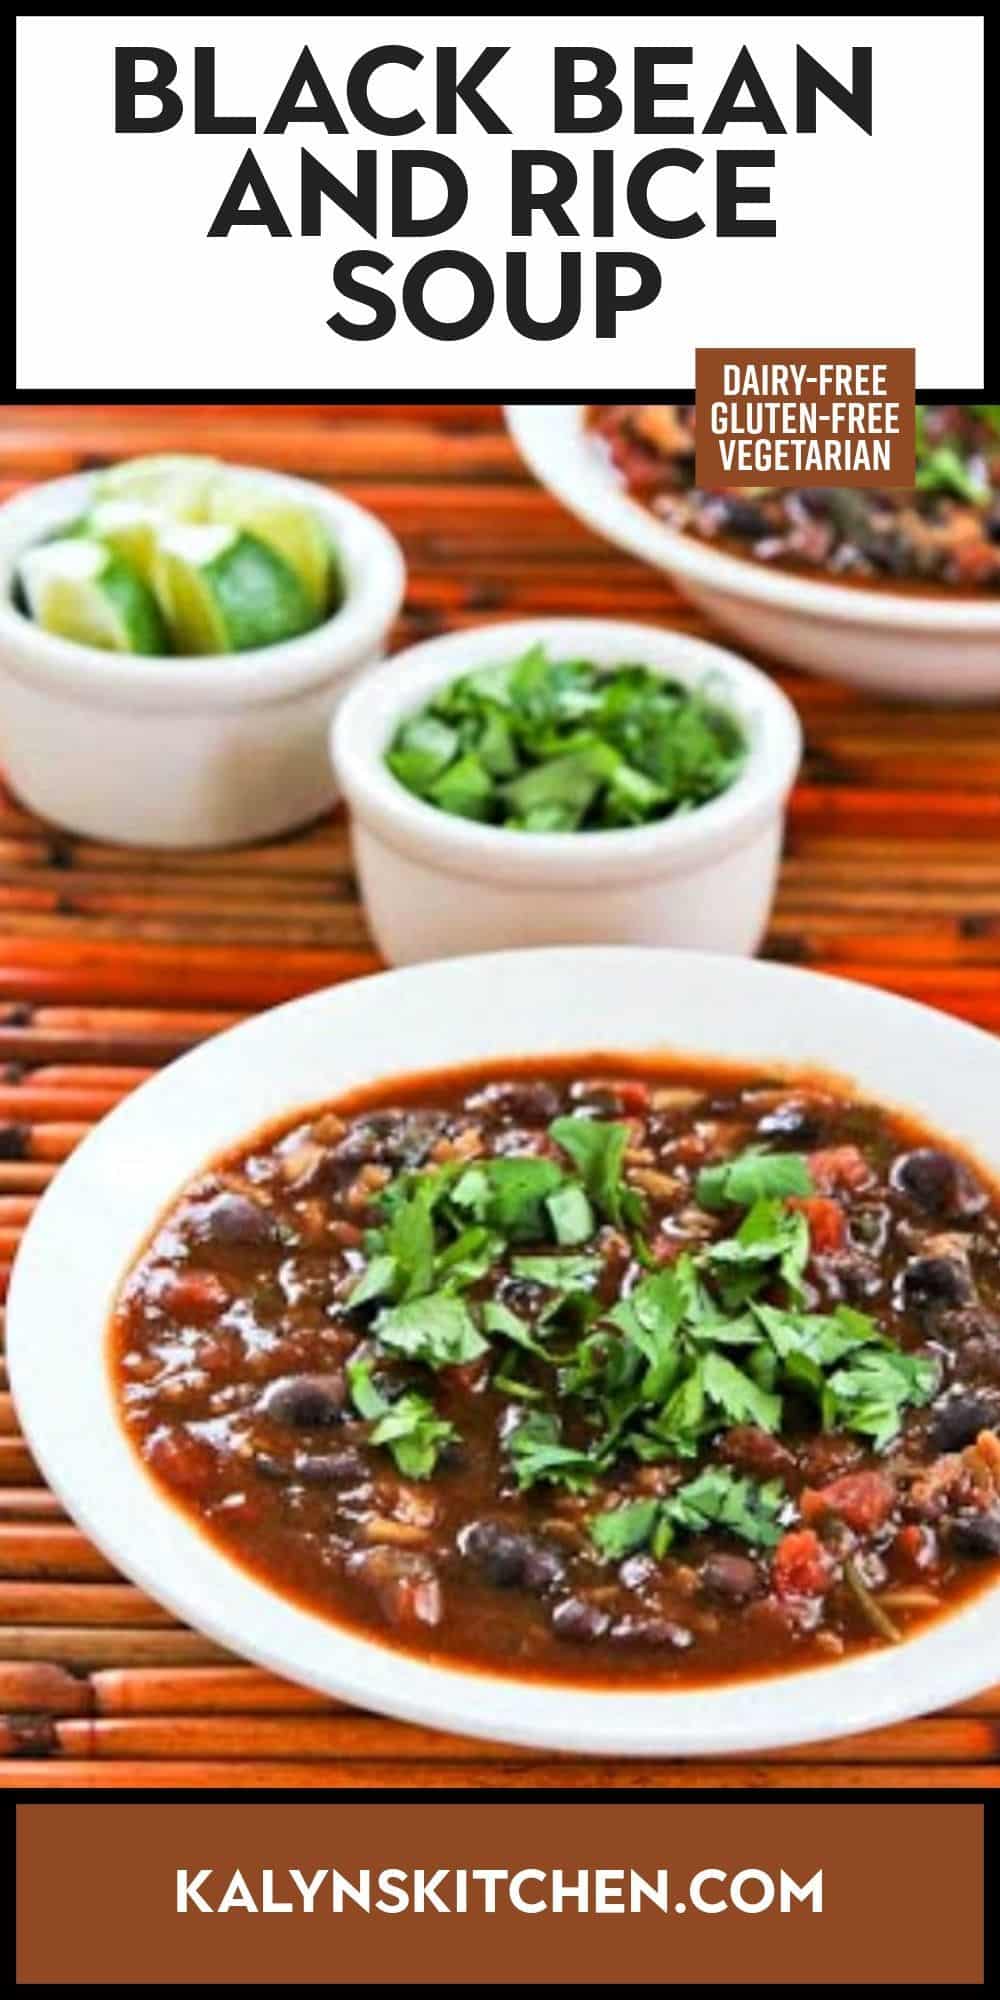
    Black Bean and Rice Soup can be made in the slow cooker or on the stove, and this tasty vegetarian soup has been a hit. The soup only has a small amount of rice, and the addition of lime and cilantro makes it extra tasty!

    PIN Black Bean and Rice Soup to try it later!

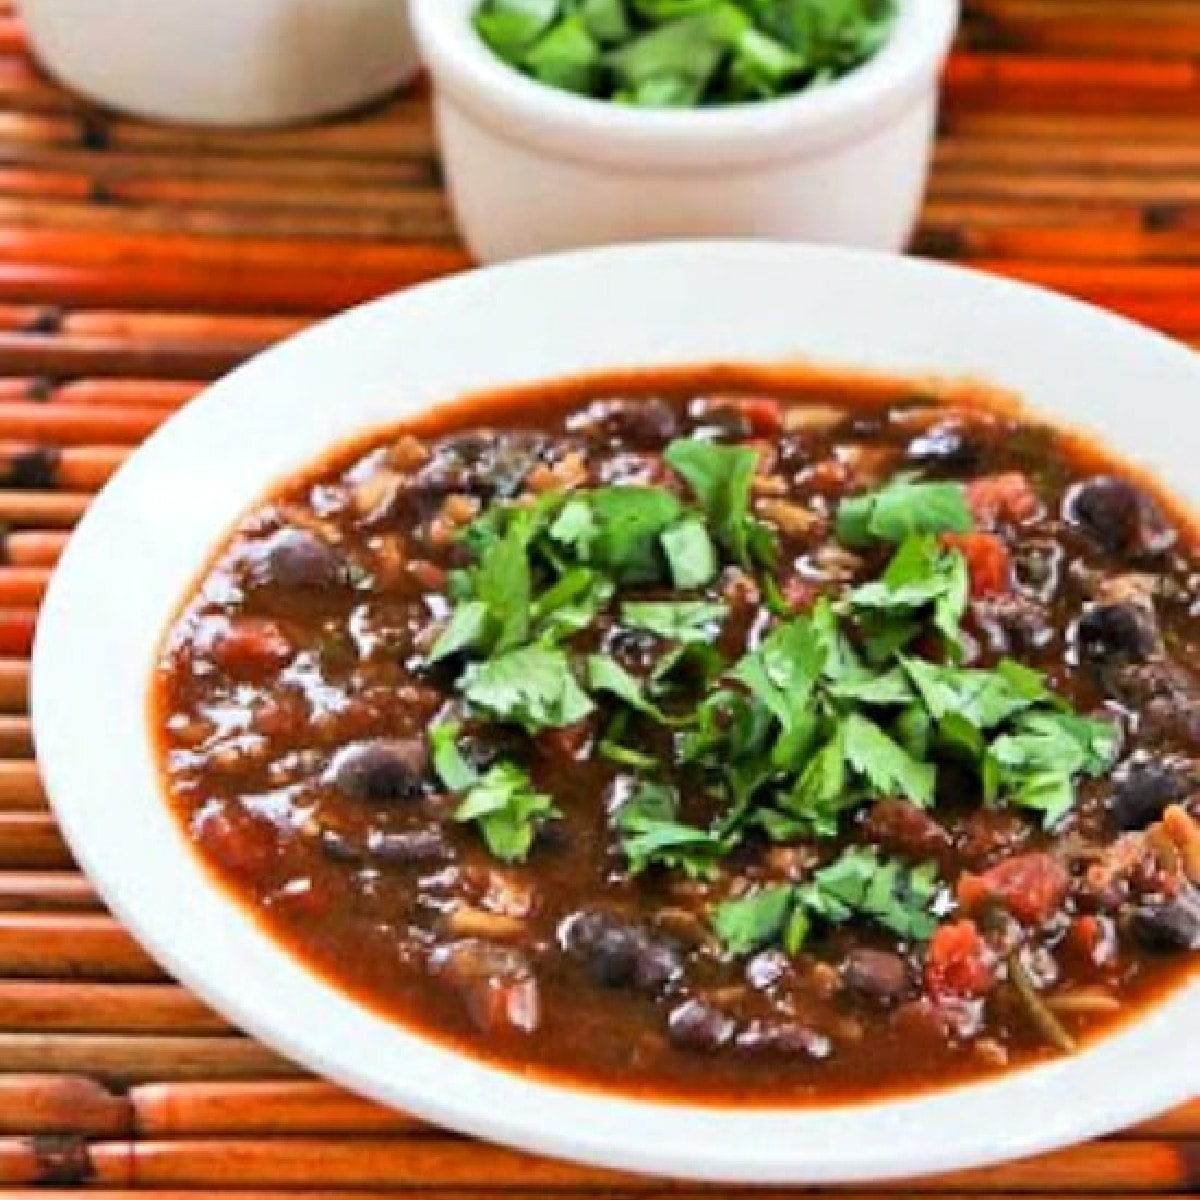
    Slow Cooker Black Bean and Rice Soup with Lime and Cilantro [KalynsKitchen.com]

    I first made this Black Bean and Rice Soup in the slow cooker, and this recipe was one of those intuitive ones that swirled around in my brain for a few days and then suddenly I found myself in the kitchen making it. This happened to me for years, but luckily when I started blogging I learned to write the recipes down!

    The soup was flavorful and delicious, with earthy beans, sour lime juice, and spicy cilantro all combined in a healthy soup without a drop of fat or gluten. I used chicken broth, but it could easily be vegetarian or vegan if you used vegetable stock.

    I’ve made this recipe so many times for parties when I wanted a vegetarian option and it’s always been a hit. And now there are also stovetop instructions if you prefer to make Black Bean and Rice Soup on the stove. I hope you will try it!

    What ingredients do you need for this recipe?

    (This is only a list of ingredients; please scroll down for complete printable recipe. Or if you use the JUMP TO RECIPE link at the top of the page, it will take you directly to the complete recipe with ingredient amounts.)

    What if you’re not a cilantro fan?

    If you’re someone with the tastebuds that make cilantro not appealing, just use more thinly-sliced green onion in this soup instead of cilantro.

    Do you prefer to use dried beans instead of canned?

    If you prefer not to use canned beans, just cook dried black beans in the slow cooker or in the Instant Pot for this recipe. You can also follow package instructions and cook them on the stove. Two cans of beans is equal to 3.5 cups of cooked beans.

    How high in carbs is the Black Bean and Rice Soup?

    Soup with these ingredients can’t ever be extra low in carbs of course. But this tasty soup has only 21 net carbs per serving, with 10 grams of protein!

    Slow Cooker Black Bean and Rice Soup with Lime and Cilantro [KalynsKitchen.com]Slow Cooker Black Bean and Rice Soup with Lime and Cilantro [KalynsKitchen.com]

    How to Make Black Bean and Rice Soup:

    (This is only a summary of the steps for the recipe; please scroll down for complete printable recipe. Or if you use the JUMP TO RECIPE link at the top of the page, it will take you directly to the complete recipe.)

    1. In a 3.5 Quart Slow Cooker (affiliate link) or similar size, combine beans, tomatoes, chicken or vegetable stock, onions, garlic, cumin, oregano, Ancho chile powder, and Chipotle chile powder.
    2. Cook on low 6-8 hours (or on high 3-4 hours.)
    3. When beans and tomatoes are very well done (even starting to fall apart), it’s time to add the rice. You might be tempted to use more rice, but trust me, 1/4 cup will be perfect. 
    4. If you were cooking on low, turn the slow cooker to high.
    5. Cook on high for about 30 minutes, or until the rice is tender.
    6. Then stir in the fresh lime juice and chopped cilantro (or green onion) and cook about 5 minutes. 
    7. Serve the Black Bean and Rice Soup hot, with more lime and cilantro to add at the table.
    8. Check the complete recipe below to see the stovetop instructions.

    Make some low-carb bread to go with the soup:

    This soup would be amazing with any of these breads or muffins:

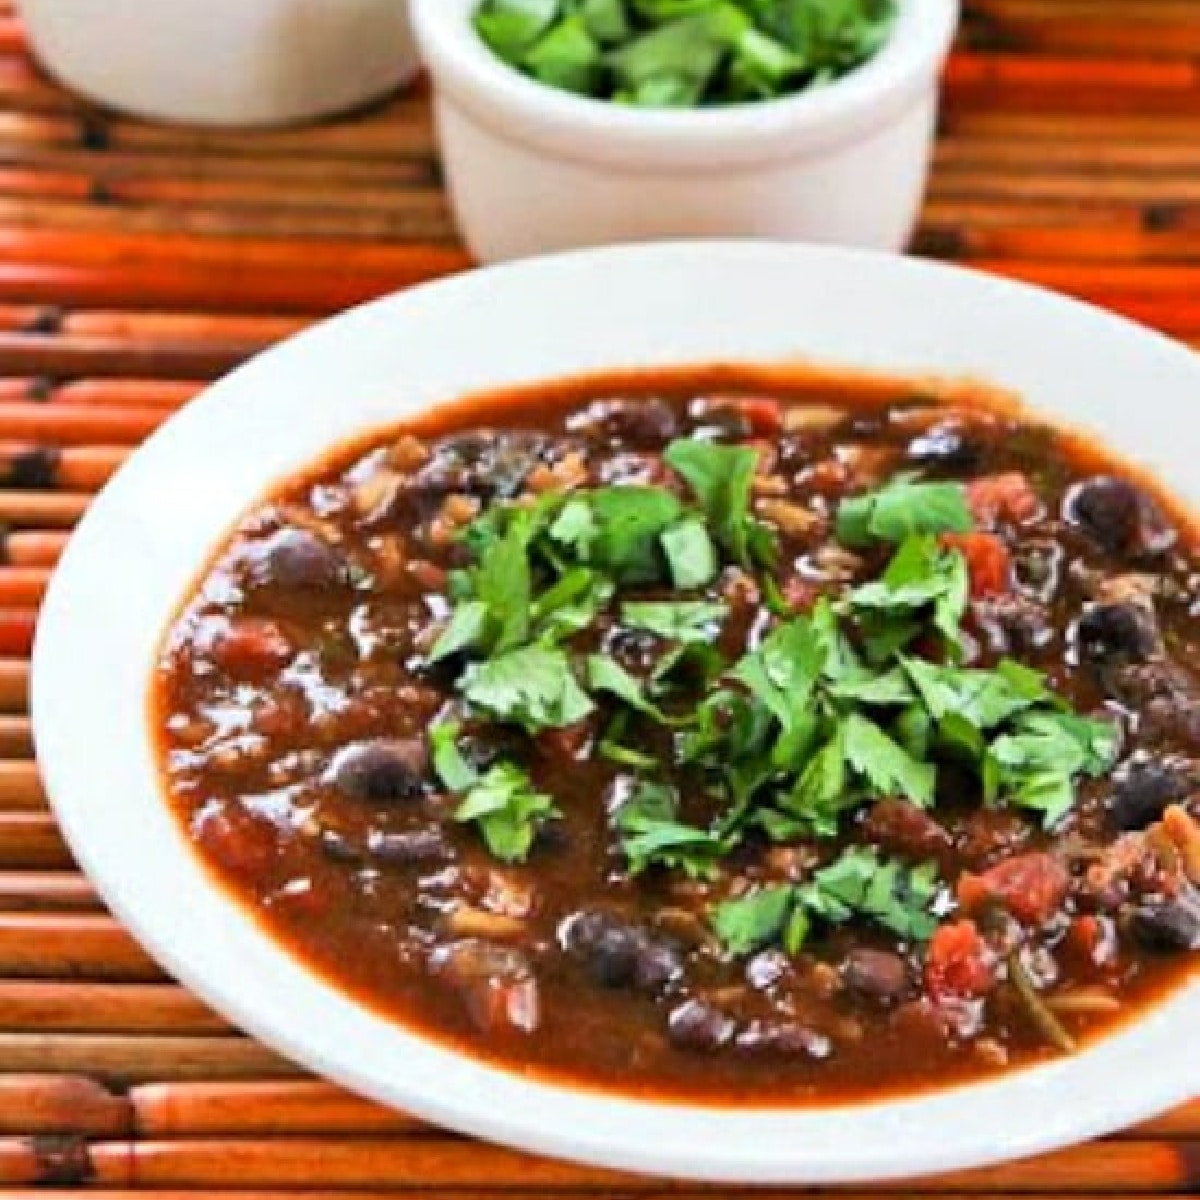
    Square image black bean and rice soup in bowl.Square image black bean and rice soup in bowl.

    Want tasty soups that are lower in carbs?

    Check out Amazing Low-Carb Soup Recipes to see some delicious soups that are low in carbs.

    Ingredients

    • two 15. oz. cans black beans with liquid
    • two 14.5 oz. cans petite diced tomatoes
    • 1 1/2 cups chicken broth (see notes)
    • 1/4 cup finely chopped onion
    • 1 tsp. minced garlic (or more)
    • 1 T ground cumin
    • 1 T dried oregano (preferably Mexican oregano)
    • 1 tsp. ground Ancho chile powder (see notes)
    • 1/4 tsp. ground Chipotle chile powder (see notes)
    • 1/4 cup white long-grain rice (see notes)
    • 1/4 cup fresh lime juice (see notes)
    • 1/2 cup chopped fresh cilantro (or more)
    • additional fresh limes to squeeze on at the table (optional)

    Instructions

    1. In small Crockpot, combine beans, tomatoes, chicken or vegetable stock, onion, garlic, cumin, oregano (affiliate link), Ancho chile powder and Chipotle chile powder.
    2. Cook on low for 6-8 hours (or 3-4 hours on high), until tomatoes are disintegrating and beans are starting to fall apart.
    3. When soup has reached the consistency you want, turn Crockpot to high if you were cooking on low. Add 1/4 cup rice and cook until rice (affiliate link) is done, about 30 minutes.
    4. Add fresh lime juice and cilantro and cook 5 minutes more.  Serve hot, with additional fresh lime pieces for each person to squeeze into soup and more cilantro if desired.

    Stovetop Directions:

    1. Increase the stock to 2 1/2 cups.  Combine beans, tomatoes, chicken or vegetable stock, onion, garlic, cumin, oregano (affiliate link), Ancho chile powder and Chipotle chile powder in a 3-4 quart saucepan and simmer on low for about 60 minutes (or until the tomatoes and beans are well done.)
    2. If the liquid has reduced quite a bit, add 1/2-1 cup water, then add the rice and simmer for 30 minutes more, or until rice is tender.
    3. Add fresh lime juice and cilantro and cook 5 minutes more.  Serve hot, with additional fresh lime pieces for each person to squeeze into soup and more cilantro if desired.

    Notes

    Use homemade chicken stock if you prefer. Use vegetable stock or broth to make this recipe vegetarian or vegan.

    If you don’t have ground Ancho chile (affiliate link), use any chile powder or mild ground chile you have on hand. If you don’t have ground Chipotle chile pepper (affiliate link) use any spicy ground chile you have on hand, or a dash of hot sauce.

    I use Uncle Ben’s Converted Rice (affiliate link) which is the lowest-glycemic type of white rice.

    I used my new favorite Crock-Pot 3.5 Quart Slow Cooker (affiliate link) for this recipe.  Any slow cooker that’s 3-4 quarts will work.

    Recipe created by Kalyn.

    Nutrition Information

    Yield

    6

    Serving Size

    1

    Amount Per Serving

    Calories 174Total Fat 1gSaturated Fat 0gTrans Fat 0gUnsaturated Fat 1gCholesterol 1mgSodium 869mgCarbohydrates 33gFiber 12gSugar 4gProtein 10g

    Nutrition information is automatically calculated by the Recipe Plug-In I am using. I am not a nutritionist and cannot guarantee 100% accuracy, since many variables affect those calculations.

    Did you make this recipe?

    Did you make this recipe? Please leave a star rating (under the PRINT button in the recipe) or share a photo of your results on Instagram! THANKS!

    Low-Carb Diet / Low-Glycemic Diet / South Beach Diet Suggestions:
    This Black Bean and Rice Soup with just a little rice is a perfect choice for Phase 2 or 3 of the original South Beach Diet. Use Uncle Ben’s Converted Rice (affiliate link) or brown rice to keep this South Beach friendly. Soup with beans and rice would be too high in carbs for a low-carb diet plan.

    Find More Recipes Like This One:
    Use Soup Recipes to find more recipes like this one. Use the Diet Type Index to find recipes suitable for a specific eating plan. You might also like to follow Kalyn’s Kitchen on Pinterest, on Facebook, on Instagram, on TikTok, or on YouTube to see all the good recipes I’m sharing there.

    Historical Notes for This Recipe:
    Black Bean and Rice Soup was updated February 2013 with better photos and instructions. The recipe was last updated with more information in 2026.

    Pinterest image for Black Bean and Rice soup showing soup in bowls with limes and cilantro.

    We are a participant in the Amazon Services LLC Associates Program, an affiliate advertising program designed to provide a means for us to earn fees by linking to Amazon.com and affiliated sites. As an Amazon Associate, I earn from qualifying purchases.


    Source link

  • Arugula Couscous Salad Recipe with Feta

    Arugula Couscous Salad Recipe with Feta

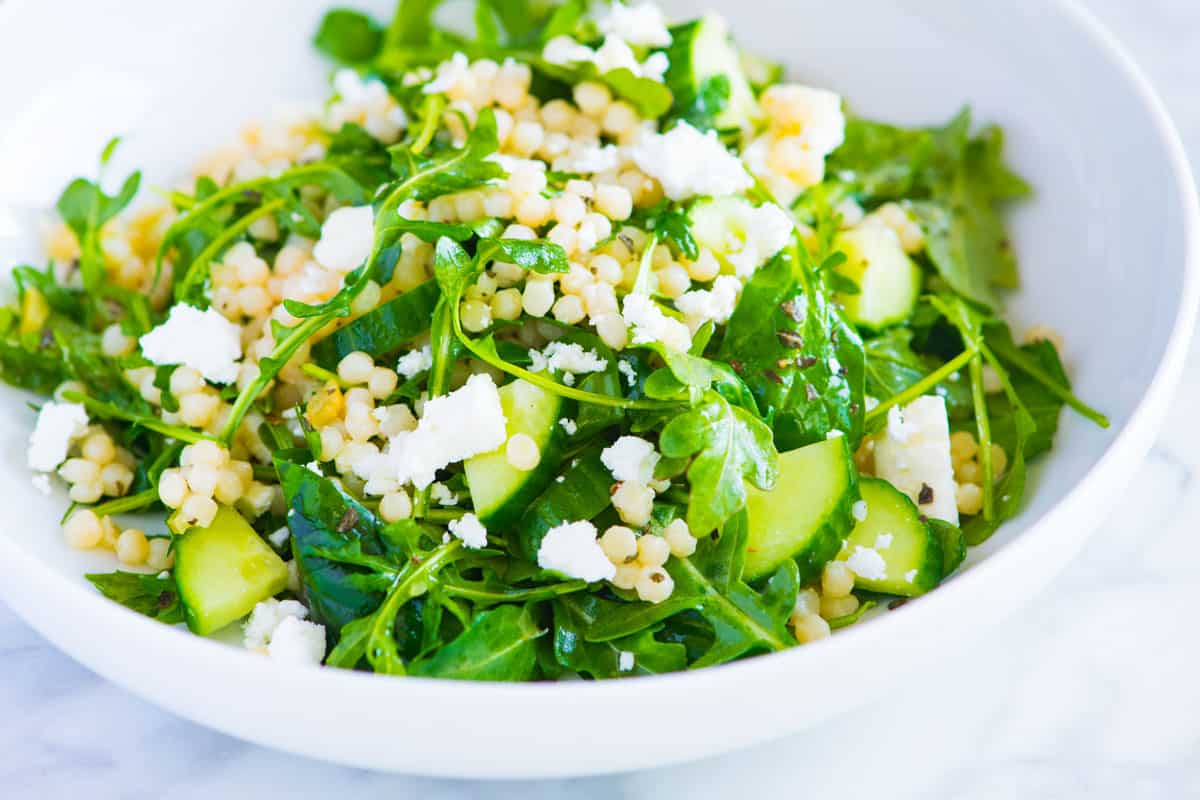
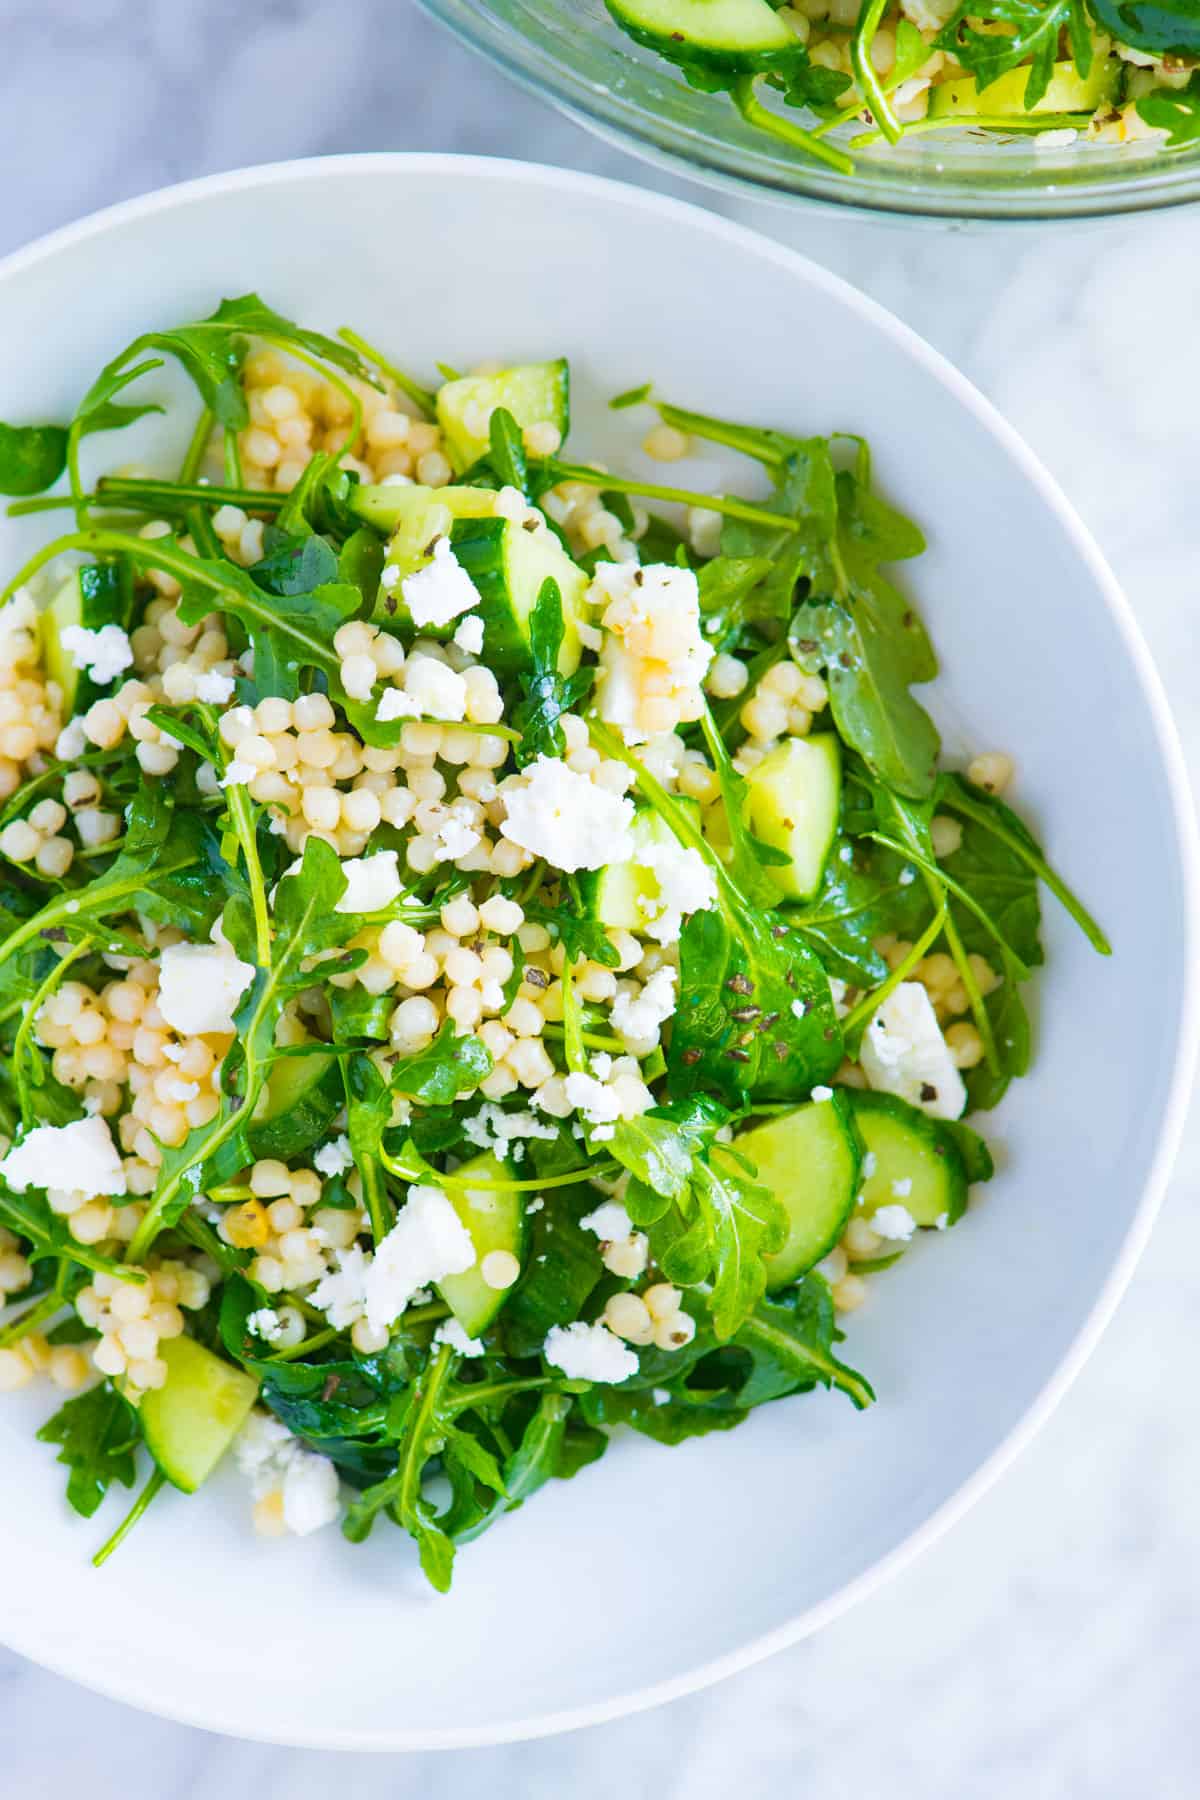
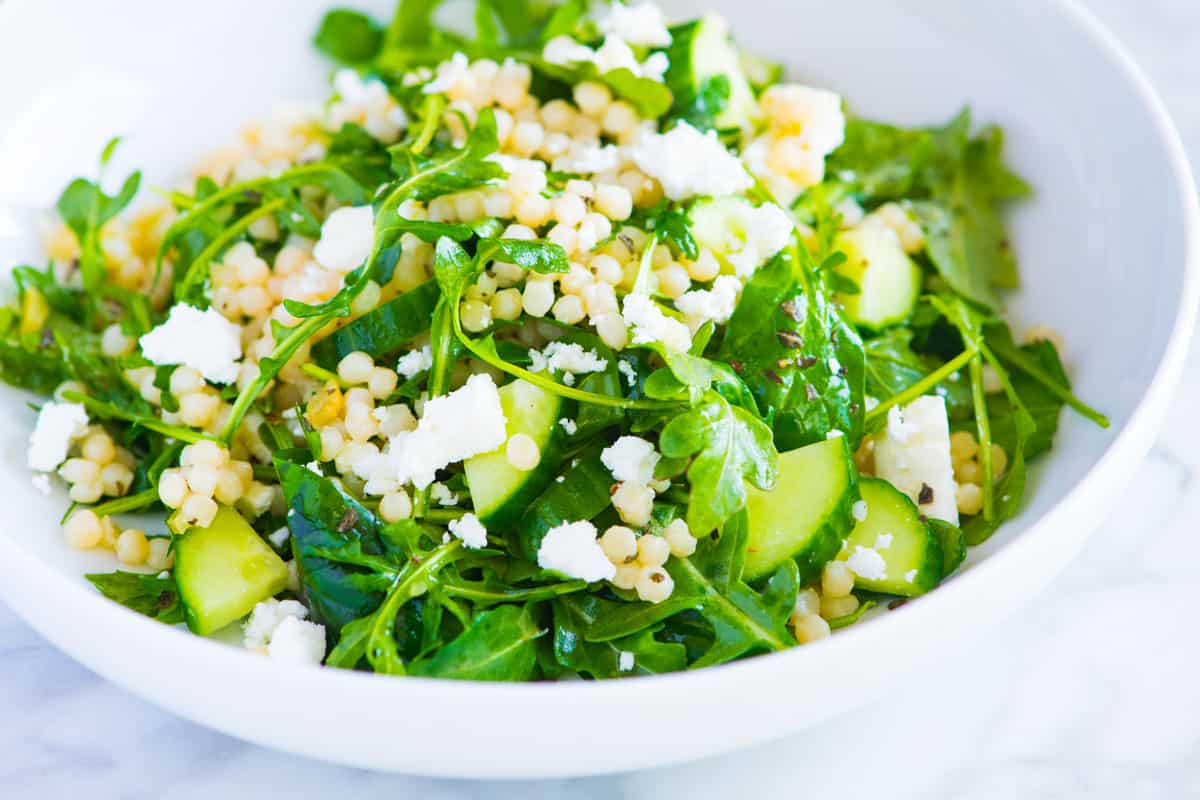
    My arugula salad with couscous, easy lemon vinaigrette, cucumbers, and feta cheese is one of my favorite arugula recipes. It’s unbelievably simple and tastes incredible. Once you try it, you’ll find yourself making it again and again!

    Lemon Arugula Couscous Salad with Feta

    It’s funny how specific recipes sneak their way into your weekly rotation. This arugula and couscous salad has done just that. We make it for dinner, eat the leftovers for lunch, and have served it to friends more times than I can count.

    This arugula salad is simple, fast, and tastes like it came from a fancy restaurant. For more ways to use arugula, see our white bean salad or this fennel and arugula salad. For another salad with couscous, see our easy couscous salad!

    Key Ingredients

    • Arugula: I find it slightly bitter with a peppery bite, so I love it with lemon. Younger arugula tends to be milder, so I usually go for the smaller, young green leaves. If you’re not a fan, substitute it with your favorite tender greens like spinach, bok choy, or baby kale.
    • Couscous: For this recipe, I prefer pearl couscous (also known as Israeli couscous) because it looks like tiny pearls and cooks up like pasta in about 10 minutes in boiling salted water. If you don’t have pearl couscous on hand, regular couscous or your favorite grain or small pasta shapes like quinoa, farro, or orzo will work, too. I also love using pearl couscous in my couscous salad with tomatoes!
    • Cucumber: Seedless cucumbers, like hothouse or Persian cucumbers, are my go-to for salads, but you can definitely use regular peeled garden cucumbers with most of the seeds removed.
    • Feta Cheese: I’m a big fan of briny feta cheese, but if you prefer something different, creamy goat cheese, cotija cheese, or shaved Parmigiano-Reggiano are great substitutes.
    • Easy Lemon Vinaigrette: This lemon vinaigrette is my favorite for fresh salads because it perfectly complements the peppery arugula and briny feta! You’ll need lemon juice, olive oil, honey or maple syrup, basil, salt, and pepper. For an extra boost of lemon flavor, consider adding minced preserved lemon (store-bought or homemade!). I’m currently working on a preserved lemon recipe to share, but in the meantime, you can use my lemon confit, which is equally delicious.

    Find the full recipe with measurements below.

    How to Make Arugula Couscous Salad

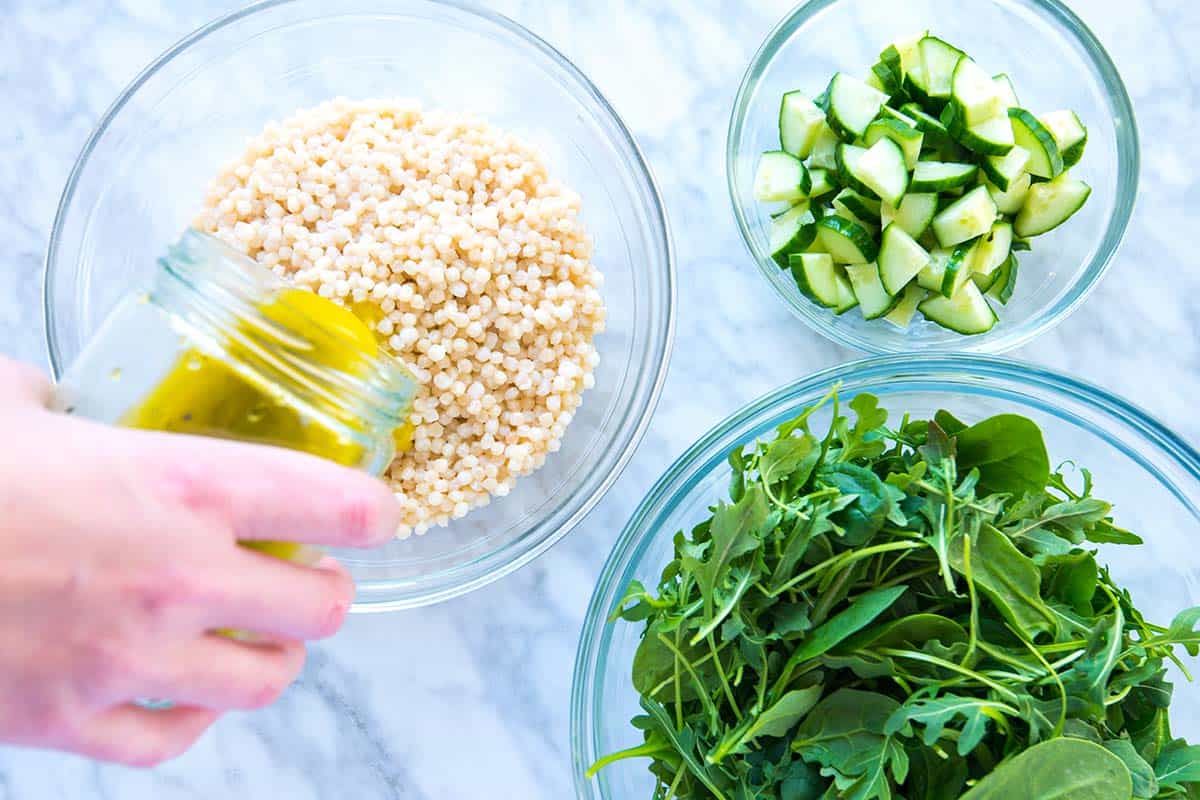
    The real trick to this arugula salad is assembling it. Make the lemon vinaigrette while your couscous cooks (which takes 10 minutes).

    How to Make Arugula Couscous Salad: Adding lemon vinaigrette to couscous for the salad

    Then, toss it with the vinaigrette while the couscous is still warm. The warm couscous will soak up all the delicious flavors of the dressing, which makes the salad taste incredible (I use the same trick for potato salad).

    After letting the couscous cool a bit, add the remaining salad ingredients and toss well. I love this easy salad by itself or on the side to lemon baked chicken breasts, my Mom’s lemon dill baked salmon, and our turkey burgers!

    Arugula Couscous Salad with Feta

    Arugula Couscous Salad with Feta

    • PREP
    • COOK
    • TOTAL

    Our arugula salad, made with an easy lemon vinaigrette, pearl couscous, cucumbers, and feta, is crave-worthy. Once you make it, you’ll be itching to make it again. For this salad, we particularly love pearl couscous (often called Israeli couscous). It cooks quickly and gives the salad enough substance to stand on the plate by itself. You can substitute the couscous for pasta, quinoa, or other cooked grains like barley or wheat berries.

    4 Servings (or 6 Small Servings)

    Watch Us Make the Recipe

    You Will Need

    For the Salad

    1 ½ cups dried pearl couscous, about 3 cups cooked

    3 ounces baby arugula or tender salad greens, about 4 cups

    Half of a hothouse (seedless) cucumber, chopped

    2 ounces feta cheese, crumbled, about 1/2 cup


    For the Dressing

    2 tablespoons fresh lemon juice, about 1/2 large lemon

    4 tablespoon extra virgin olive oil

    1/2 teaspoon honey or maple syrup

    1 tablespoon minced preserved lemon, optional

    1 teaspoon dried basil or a handful chopped fresh basil leaves, optional

    Sea salt and fresh ground black pepper

    Directions

      1Bring a medium saucepan of salted water to a boil. Add couscous and cook until tender, 8 to 10 minutes. Drain, then add to a large bowl.

      2Meanwhile, make the lemon vinaigrette. Whisk lemon juice, olive oil, honey, preserved lemon, and basil until it looks thick and blended. Season to taste with salt and fresh ground black pepper (we add a generous pinch of each).

      3Toss the cooked and drained couscous with the dressing, then set aside for 5 minutes, stirring occasionally, until cooled slightly. Finish the salad by adding the arugula, cucumbers, and feta. Toss well, then serve.

    Adam and Joanne’s Tips

    • Storing: The salad will keep overnight in the fridge. As it sits, the arugula may wilt slightly, but still will taste great.
    • Couscous: If you cannot find pearl couscous (also called Israeli couscous), substitute with a regular couscous, small pasta shape such as orzo or cooked grains like quinoa, wheat berries and barley.
    • The nutrition facts provided below are estimates. We assumed 1/2 teaspoon of added salt.

    Nutrition Per Serving
    Serving Size
    1/4 of the recipe
    /
    Calories
    404
    /
    Protein
    11 g
    /
    Carbohydrate
    49 g
    /
    Dietary Fiber
    3 g
    /
    Total Sugars
    3 g
    /
    Total Fat
    18 g
    /
    Saturated Fat
    5 g
    /
    Cholesterol
    17 mg
    /
    Sodium
    479 mg


    AUTHOR:

    Joanne Gallagher

    Adam and Joanne of Inspired Taste

    We are Adam and Joanne Gallagher, the creators of Inspired Taste. Established in 2009, Inspired Taste grew from a childhood dream into one of the internet’s most trusted recipe sites with hundreds of reliable recipes, step-by-step videos, and expert tips.More About Us

    Source link

  • Lentil Soup with Ground Beef

    Lentil Soup with Ground Beef

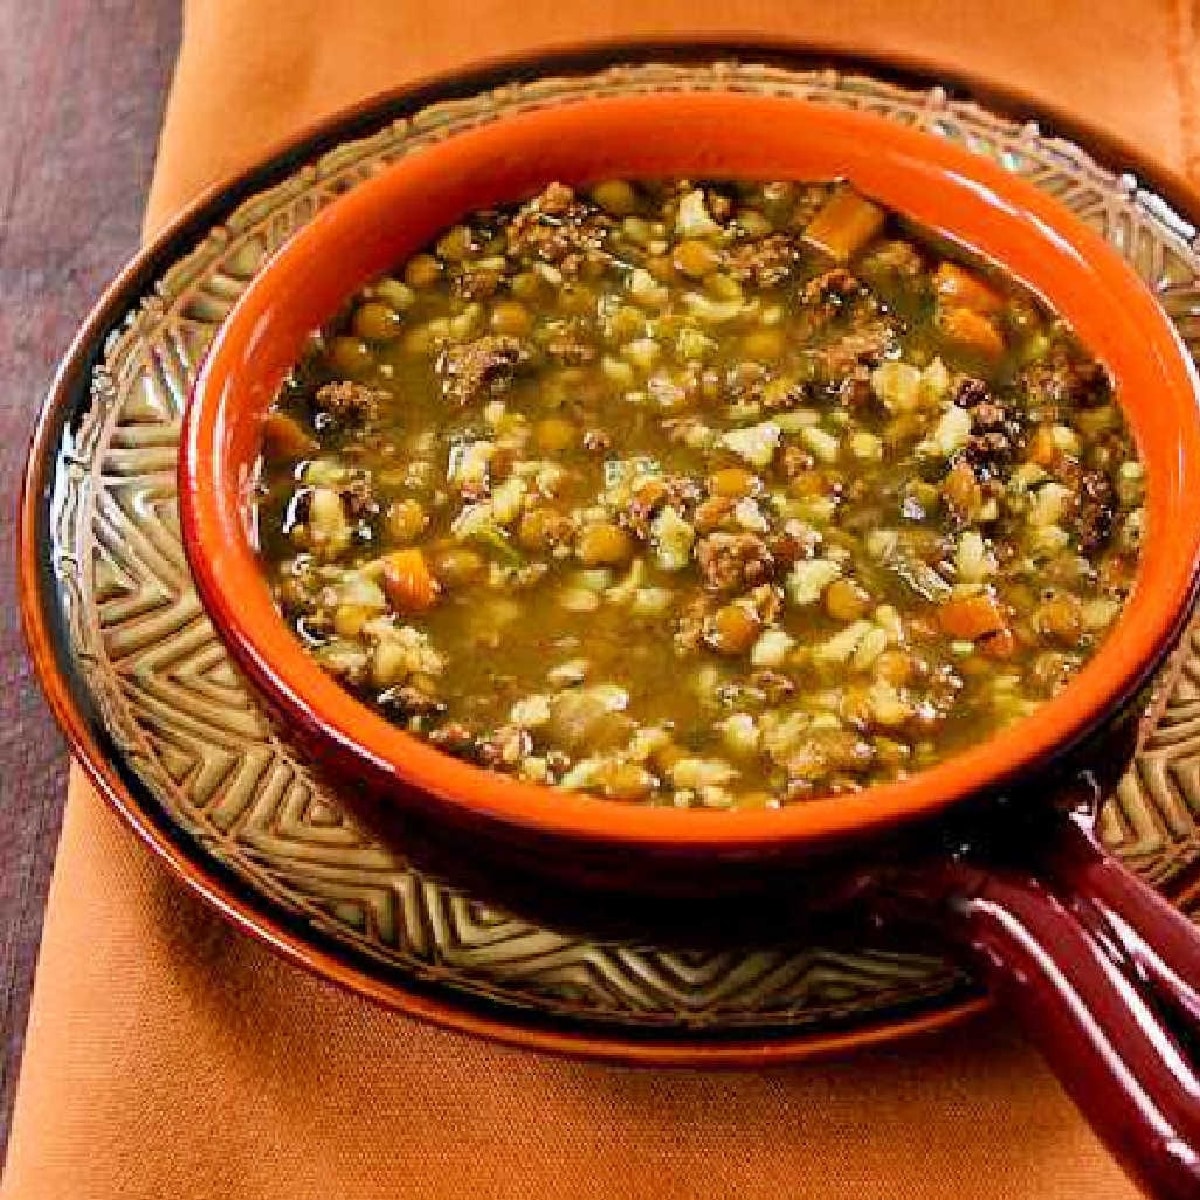
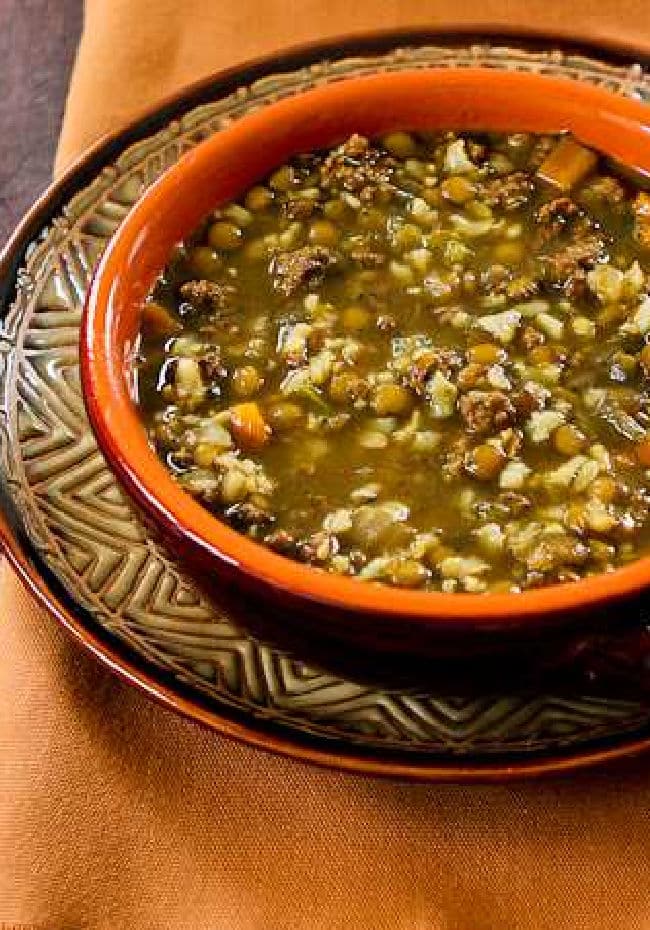
    Lentil Soup with Ground Beef is a tasty soup that’s made with brown rice and it’s easy enough to make for a work-night dinner! If you prefer a lower-carb soup, make this soup with cauliflower rice or check out Instant Pot Hamburger Soup (with Cauliflower)  for a low-carb soup with similar flavors.

    PIN Lentil Soup with Ground Beef to try it later!

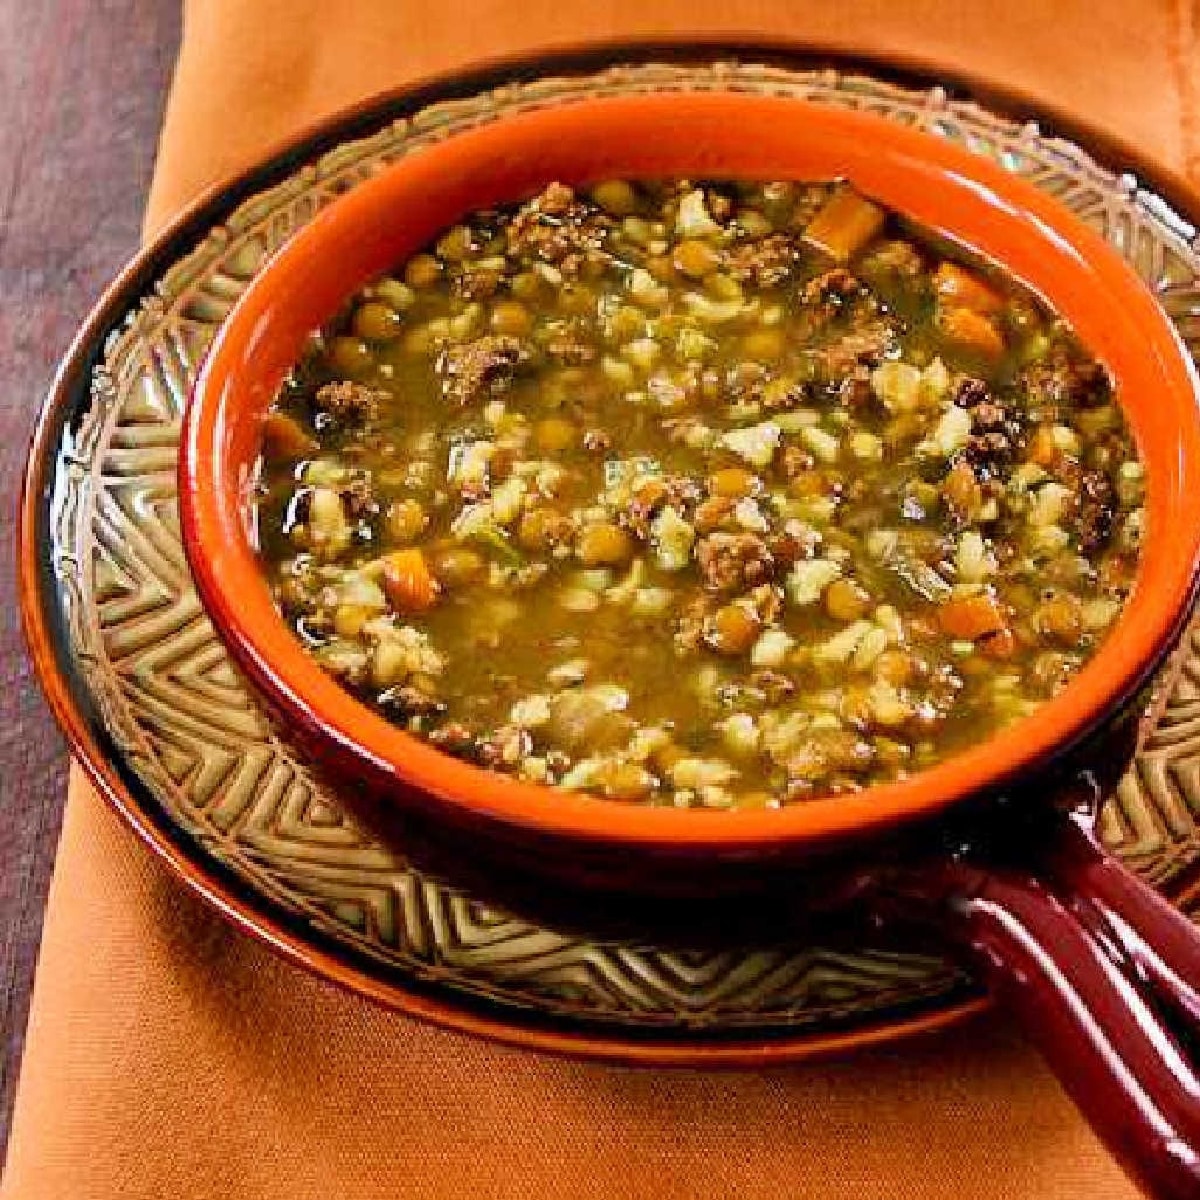
    Lentil Soup with Ground Beef in serving bowl.

    I first made this Lentil Soup with Ground Beef years ago on a day I was too sick to go the store, and I don’t think there’s anything that tastes as good or as comforting as soup when you’re not feeling great and it’s cold outside. Then on a day that was soup weather again, I made this soup, took some better photos, and enjoyed it that night for dinner.

    A lot of the good flavor in this lentil soup recipe comes from the homemade beef stock and homemade chicken stock I always try to have in the freezer, but even if you use canned beef broth and canned chicken broth this will still be delicious. Use the low salt version if you used canned broth, and don’t get in too much of a hurry and shorten the simmering time, because that’s another step that builds flavor.

    I did add some balsamic vinegar to the finished soup this time, and I loved the way it perked up the flavor so I’m updating the recipe to include that. And this soup uses the kind of ingredients many people always have in the pantry, so it might become one of your favorites.

    What ingredients do you need for this recipe?

    (This is only a list of ingredients; please scroll down for complete printable recipe. Or if you use the JUMP TO RECIPE link at the top of the page, it will take you directly to the complete recipe.)

    What are lentils?

    Lentils (also called pulses in some parts of the world) are the dried seeds of the lentil plant, and they are a legume. They’re never eaten fresh but always dried after ripening. Here is more information about lentils, including examples of different types.

    What kind of lentils did I use in the Lentil Soup with Ground Beef?

    I used ordinary brown lentils (affiliate link) for this recipe, which are probably the most common kind. However in some soups I love to use red lentils that will dissolve more into the soup, and I think various types of lentils are pretty interchangeable in recipes.

    How to make a ground beef lentil soup that’s lower in carbs?

    You might be surprised if you check the nutritional information because this soup only has 11 net carbs per serving. But if a soup with both lentils and brown rice seems too high in carbs for you, just replace the brown rice with about 1 1/2 cups frozen cauliflower rice.

    More Lentil Soups To Try

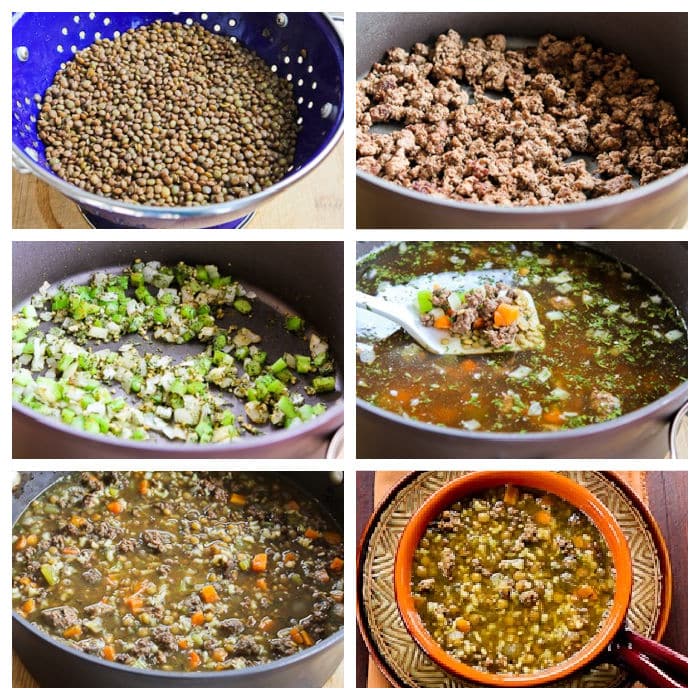
    Lentil Soup with Ground Beef collage of recipe steps.Lentil Soup with Ground Beef collage of recipe steps.

    How to make Lentil Soup with Ground Beef:

    (This is only a summary of the steps for the recipe; please scroll down for complete printable recipe. Or if you use the JUMP TO RECIPE link at the top of the page, it will take you directly to the complete recipe.)

    1. If you buy lentils in bulk, they may need to be rinsed.
    2. Heat a small amount of olive oil and cook the ground beef until it’s nicely browned.
    3. Move ground beef to soup pot.
    4. Heat more olive oil and cook the onions and celery until they’re starting to soften.
    5. Then add the garlic, dried thyme, ground cumin, and dried parsley and saute a couple of minutes more.
    6. Add the vegetables to the soup pot with the ground beef and rinse out the frying pan with 2 cups water and add to the soup.
    7. Add beef stock or broth, chicken stock or broth, lentils, and chopped carrots and let the soup cook at a very low simmer for about 60 minutes, or until lentils are tender.
    8. When the lentils are tender, add a bit more water if needed and then add the rice (or cauliflower rice) and cook 30-40 minutes more, or until the rice is done.
    9. Season to taste with salt and fresh ground black pepper, stir in balsamic vinegar if desired, and serve hot.

    Make it a Carb-Conscious Meal:

    You could eat this soup with lentils and ground beef with any of these tasty breads or muffins:


    Weekend Food Prep:

    This recipe for lentil soup that has ground beef, lentils, carrots, and rice (or cauliflower rice) has been added to a category called Weekend Food Prep  to help you find recipes you can prep or cook on the weekend and eat during the week!

    Ingredients

    • 1 lb. ground beef
    • 2 tsp. olive oil (or more, depending on your pan)
    • 1/2 cup finely chopped onion
    • 1/2 cup finely chopped celery
    • 1 T minced garlic or garlic puree (or less if you don’t like garlic as much as I do)
    • 1 T dried parsley
    • 1 tsp. dried thyme
    • 1/2 tsp. ground cumin
    • 4 cups beef broth (see notes)
    • 2 cups chicken broth (see notes)
    • 2 cups water, plus more as needed
    • 2/3 cup brown lentils
    • 1/2 cup finely chopped carrots
    • 1/2 cup brown rice
    • salt and fresh ground black pepper to taste
    • 2 T balsamic vinegar (optional)

    Instructions

    1. Heat 1 tsp. olive oil in heavy frying pan, add ground beef and cook until meat is well browned, using a turner to break up into small pieces.
    2. Remove meat to heavy soup pot.
    3. Add another tsp. olive oil to frying pan and add onions and celery and cook 3-5 minutes, until vegetables are starting to soften.
    4. Add garlic, dried thyme, ground cumin, and dried parsley and saute 1-2 minutes more.
    5. Add vegetables to soup pot with meat, and rinse out frying pan with the 2 cups of water and add to soup pot.
    6. Add beef stock, chicken stock, lentils, and chopped carrots to pot and cook at a very low simmer about 60 minutes, or until lentils are quite soft.
    7. Taste soup and decide whether to add a small amount of water. (There should be quite a bit of liquid, and the broth should be flavorful but not too strong tasting. If there isn’t very much liquid or broth seems too strong add more water at this point.)
    8. Add brown rice and continue to simmer soup 30-40 more minutes, or until rice is done but still a bit chewy.
    9. Season to taste with salt and fresh ground black pepper (I did not add salt.)
    10. Stir in balsamic vinegar if desired.   Serve hot.

    Notes

    I would always use homemade beef stock and homemade chicken stock in soup if I have some, but canned broth will also be delicious.

    This soup freezes well. You may need to add more liquid when the soup is reheated, because some will be absorbed by the rice.

    Recipe created by Kalyn.

    Nutrition Information

    Yield

    6

    Serving Size

    1

    Amount Per Serving

    Calories 304Total Fat 16gSaturated Fat 5gTrans Fat 1gUnsaturated Fat 8gCholesterol 69mgSodium 1095mgCarbohydrates 14gFiber 3gSugar 3gProtein 26g

    Nutrition information is automatically calculated by the Recipe Plug-In I am using. I am not a nutritionist and cannot guarantee 100% accuracy, since many variables affect those calculations.

    Did you make this recipe?

    Did you make this recipe? Please leave a star rating (under the PRINT button in the recipe) or share a photo of your results on Instagram! THANKS!

    Square image of Lentil Soup with Ground Beef shown in soup bowl on decorative plate.Square image of Lentil Soup with Ground Beef shown in soup bowl on decorative plate.

    Low-Carb Diet / Low-Glycemic Diet / South Beach Diet Suggestions:
    This soup doesn’t have that much lentils or brown rice so it only has 11 net carbs per serving, but use cauliflower rice if you prefer. If you’re a South Beach Dieter, be sure to use low fat ground beef, and the use of carrots and brown rice would make this Lentil Soup with Ground Beef limited to phase 2 or 3 of the original South Beach Diet.

    Find More Recipes Like This One:
    Use Soup Recipes to find more tasty recipes like this one. Use the Diet Type Index to find recipes suitable for a specific eating plan. You might also like to follow Kalyn’s Kitchen on Pinterest, on Facebook, on Instagram, on TikTok, or on YouTube to see all the good recipes I’m sharing there.

    Historical Notes for This Recipe:
    Lentil Soup with Ground Beef was originally posted in 2007! The recipe was updated in 2021 with the option to use cauliflower rice, and was last updated with more information in 2024.

    Pinterest image of Lentil Soup with Ground Beef

    We are a participant in the Amazon Services LLC Associates Program, an affiliate advertising program designed to provide a means for us to earn fees by linking to Amazon.com and affiliated sites. As an Amazon Associate, I earn from qualifying purchases.


    Source link

  • Balsamic Pear Pizza Recipe

    Balsamic Pear Pizza Recipe

    I love this sweet and savory pear pizza with mozzarella, onions, and our homemade balsamic glaze. It’s also easy, and you can make it with homemade or store-bought pizza dough!

    Balsamic Pear Pizza

    We love playing around with savory and sweet. This easy pear pizza recipe has a little of both. The pear becomes sweet and tender, onions are savory with thyme, and a simple balsamic syrup adds a pop of flavor. It might sound odd to add fruit to pizza, but trust me, this pizza is delicious!

    This is perfect for an easy weekday dinner since it takes just over 30 minutes. It can even double as an easy appetizer for the next time you entertain (just cut the slices a little smaller). I use my homemade pizza dough to make it, but your favorite store-bought pizza dough will work! For more pizza recipes, see our ultimate cheese pizza, Margherita pizza, and this butternut squash pizza!

    Key Ingredients

    • Pizza Dough: I’ve made this with great success with store-bought and homemade pizza dough. The dough shown in our photos is a generic store-bought dough. When I have the time, I love this homemade pizza dough, but use what you have!
    • Pear: Choose a juicy and ripe pear. Apples are a great substitute if you don’t have access to pears.
    • Onion and Thyme: I saute the onions with olive oil and fresh thyme, which enhances the savory flavors of this pizza. Fennel or shallot would be amazing, too.
    • Mozzarella: I love the block mozzarella for this pizza because it melts so nicely. However, you can substitute fresh mozzarella if you prefer it.
    • Pecans: These are optional, but I love the crunch they add. Walnuts would be really good, too.
    • Balsamic Glaze: You can buy balsamic glaze, so if you have some, use it! If not, our recipe below shares how to make it using plain balsamic vinegar and brown sugar.
    Balsamic Pear Pizza

    Balsamic Pear Pizza

    • PREP
    • COOK
    • TOTAL

    I love this sweet and savory pear pizza with mozzarella, onions, and our homemade balsamic glaze. The balsamic syrup adds a pop of flavor and acid.

    4 Servings

    You Will Need

    1 recipe homemade pizza dough or 12 ounces store-bought pizza dough

    2 tablespoons extra-virgin olive oil

    1 medium onion, thinly sliced

    1 teaspoon chopped fresh thyme

    1 pear

    1 tablespoon lemon juice

    1 cup (113g) shredded mozzarella cheese, 4 ounces

    1/2 cup pecan halves

    1/4 cup balsamic vinegar

    2 tablespoons brown sugar

    Directions

      1Preheat the oven to 400°F (204°C). Spray a rimmed baking sheet with cooking spray.

      2Form the pizza dough into a 15-inch by 10-inch rectangle (it doesn’t have to be exact, just close). Place the dough on a baking sheet and bake for 8 minutes.

      3Meanwhile, add 1 tablespoon of olive oil to a large skillet over medium heat. When the oil is hot, add the sliced onions, thyme, and 1/2 teaspoon of salt. Cook, stirring occasionally, for 3 to 5 minutes or until the onions are translucent and begin to brown around the edges.

      4Core and thinly slice the pear. Sprinkle the lemon juice over the cut pear and toss.

      5Drizzle the remaining tablespoon of olive oil over the baked pizza crust, then scatter the onions, mozzarella cheese, pear slices, and pecan halves on top.

      6Bake the pizza for 6 to 10 minutes until the cheese has melted and starts to bubble.

      7While the pizza bakes, add the balsamic vinegar and brown sugar to a small saucepan over medium heat, then bring to a simmer. Cook for 2 to 3 minutes until thickened to the consistency of a thin syrup.

      8Drizzle the balsamic syrup over the baked pear pizza and serve.

    Adam and Joanne’s Tips

    • Balsamic glaze: Depending on where you shop, you may be able to find a balsamic glaze. If you have this, there is no need to make the balsamic and brown sugar syrup.
    • The nutrition facts provided below are estimates.

    Nutrition Per Serving
    Serving Size
    1/4 of the recipe
    /
    Calories
    487
    /
    Total Fat
    31.8g
    /
    Saturated Fat
    5.6g
    /
    Cholesterol
    5.1mg
    /
    Sodium
    450.1mg
    /
    Carbohydrate
    38.7g
    /
    Dietary Fiber
    5.1g
    /
    Total Sugars
    12.4g
    /
    Protein
    13.5g


    AUTHOR:

    Adam Gallagher

    Adam and Joanne of Inspired Taste

    We are Adam and Joanne Gallagher, the creators of Inspired Taste. Established in 2009, Inspired Taste grew from a childhood dream into one of the internet’s most trusted recipe sites with hundreds of reliable recipes, step-by-step videos, and expert tips.More About Us

    Previous Post: Easy Sweet Potato Pie
    Next Post: Easy Fry Sauce

    Source link

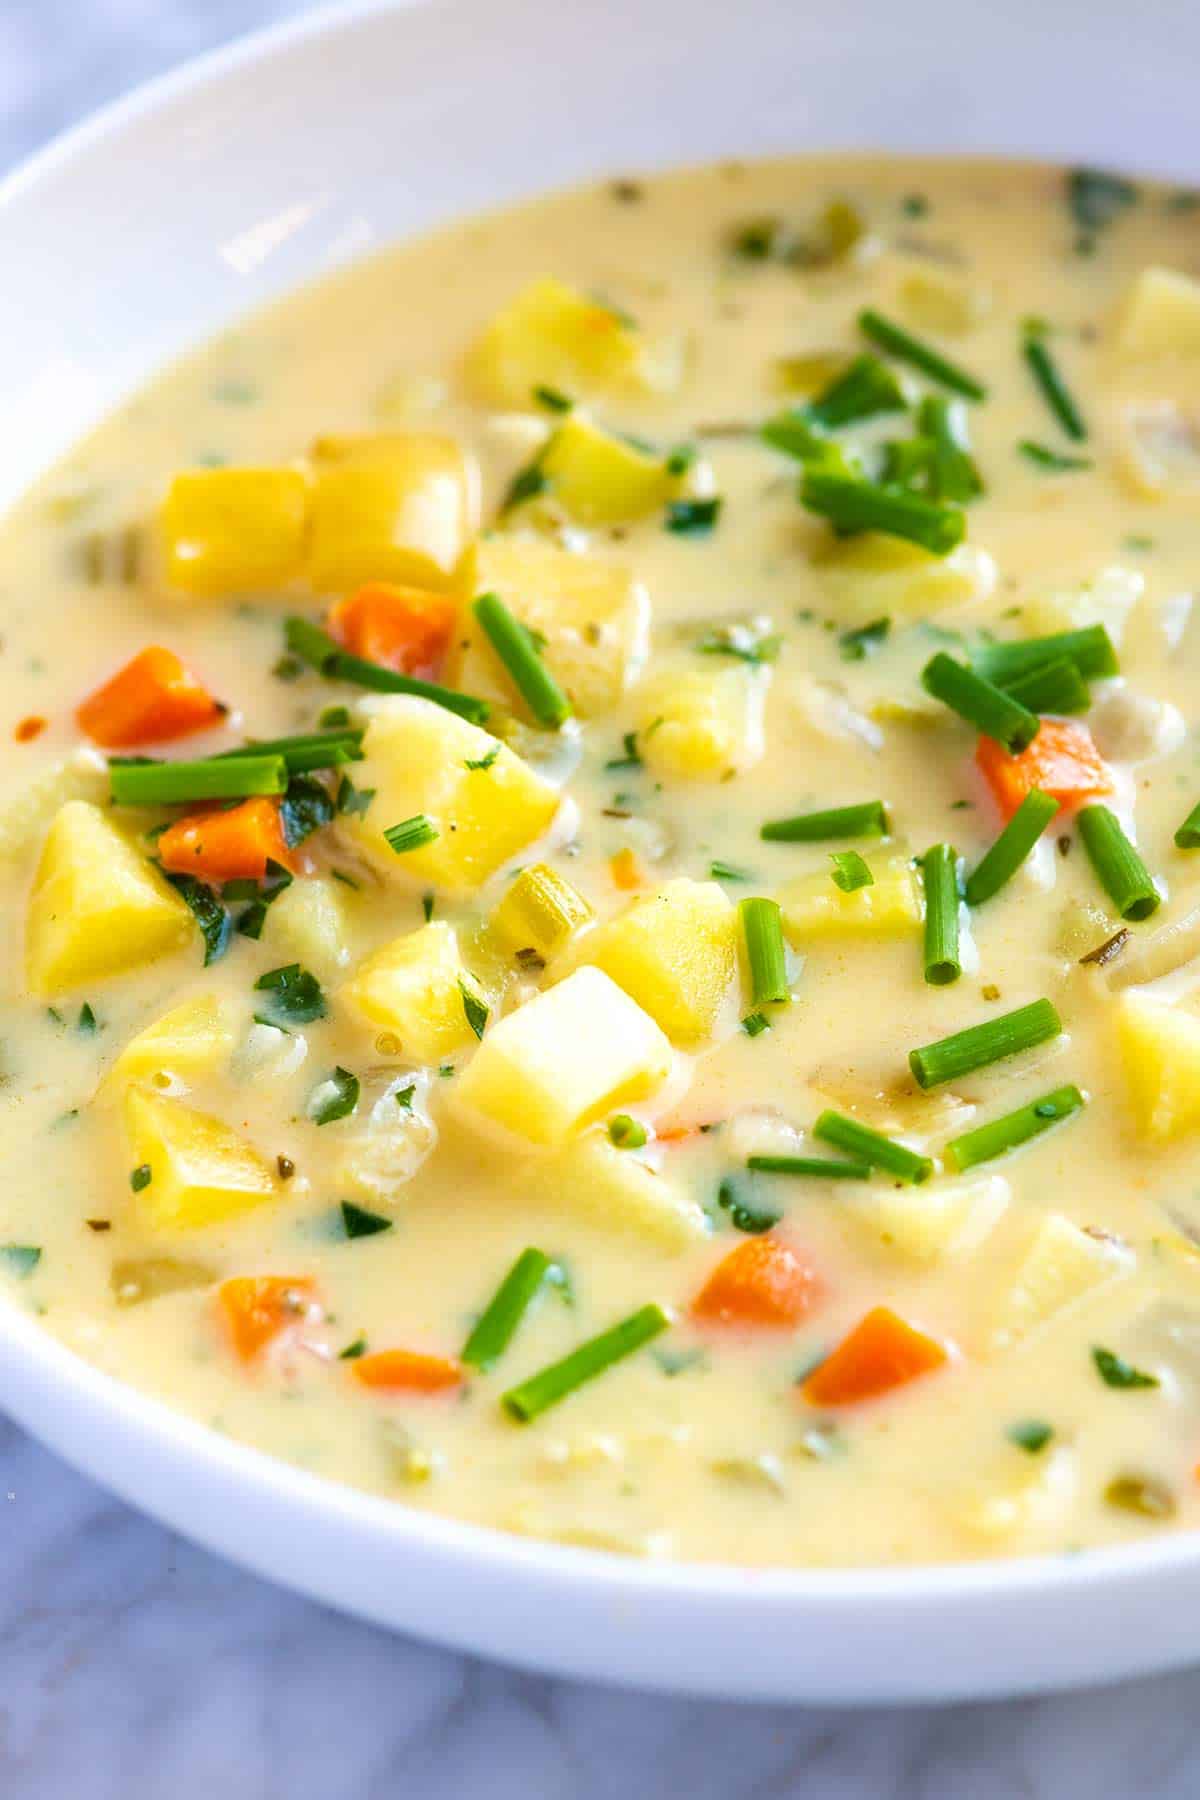
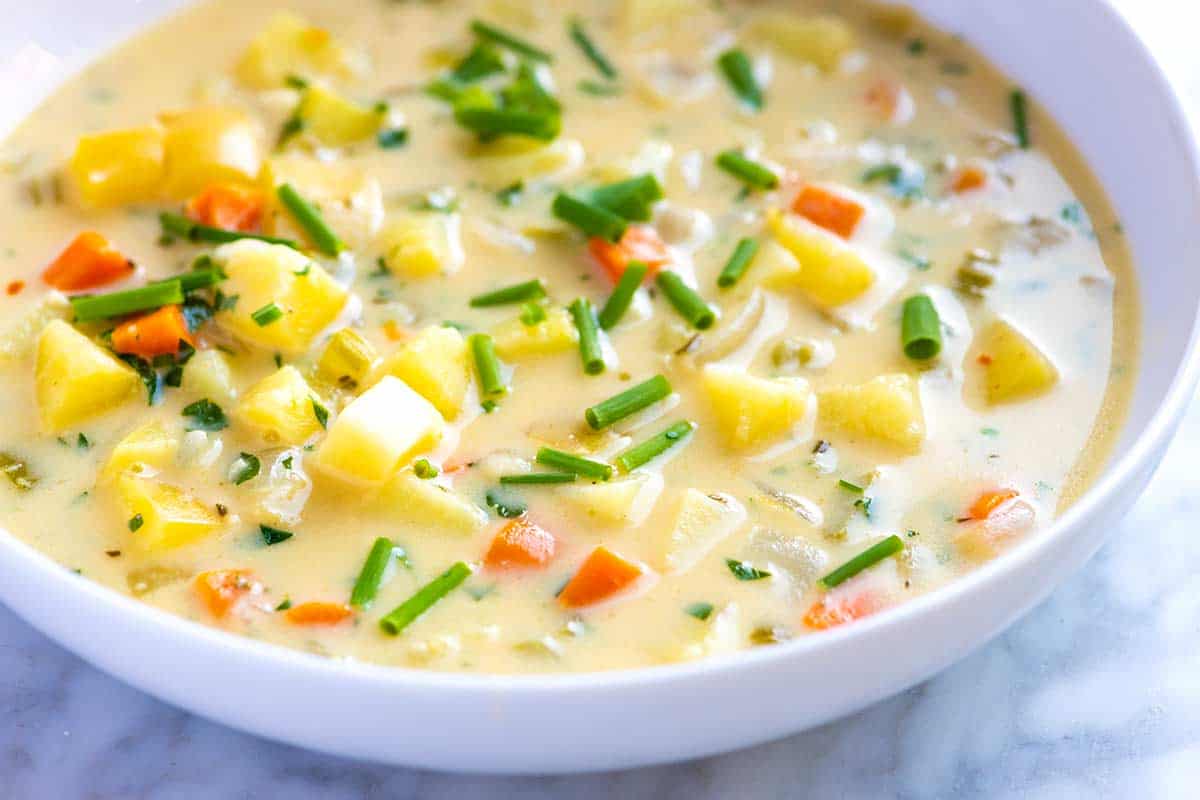
  • Easy Creamy Potato Soup Recipe

    Easy Creamy Potato Soup Recipe

    This homemade potato soup recipe makes the creamiest, most delicious soup. It’s easy, loaded with potatoes and veggies, and the broth is so creamy!

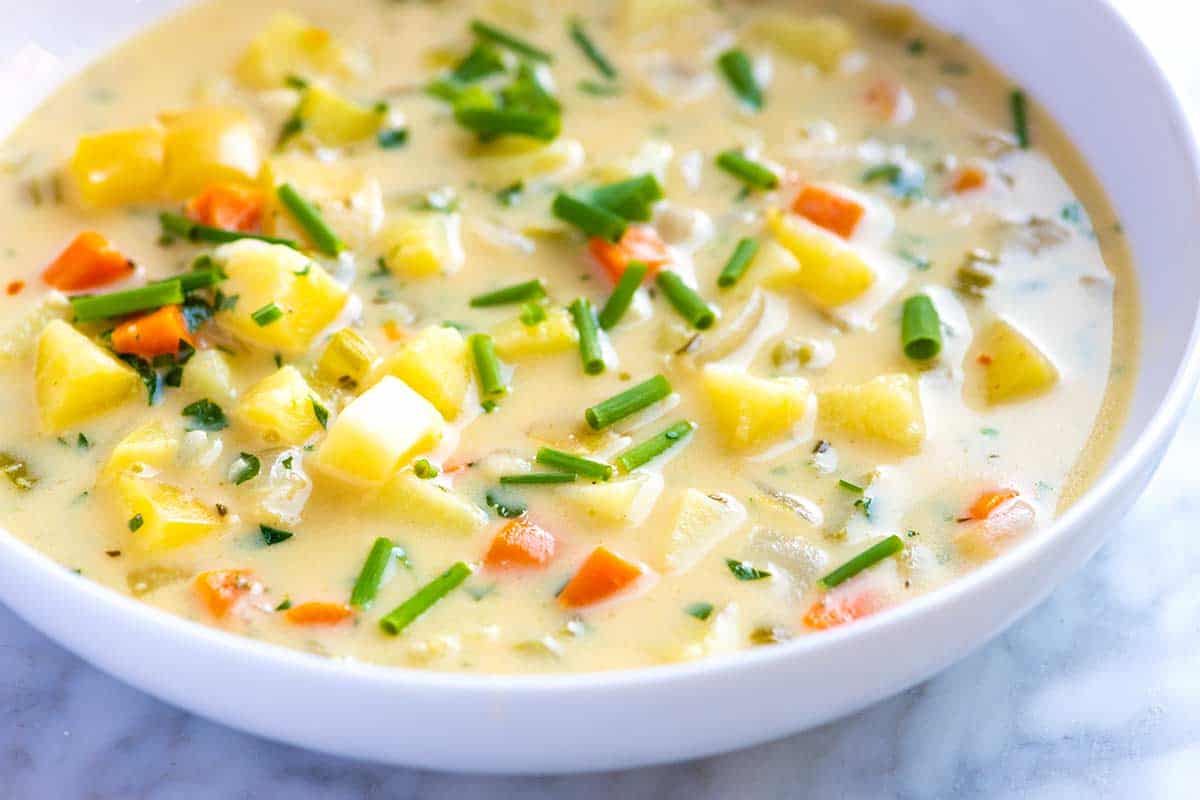
    The Best Creamy Potato Soup from Scratch

    This is my favorite potato soup because it is pure comfort food, but not so rich that you can’t enjoy it regularly. Joanne is a major fan of this soup! We like to make this all year around and it is ridiculously easy to whip up for a quick tasty dinner.

    I also love that you have two options for serving. You can keep it on the brothy side (like our photos) or blend it for a thick, creamy soup. If you love this here are two other favorites, see our sausage and potato soup or this potato and leek soup.

    Key Ingredients

    • Potatoes: You can use any potato in our recipe, but I highly recommend Yukon Gold potatoes. There’s no need to peel them, and when cooked, they are buttery and almost melt in your mouth.
    • Veggies: This is potato soup, but we love adding a few cups of extra veggies. Onions are a must, carrots add color and some sweetness, and chopped celery adds flavor and texture.
    • Garlic and rosemary: Make this the tastiest potato soup I’ve made. I’ve found some potato soup recipes too rich or lacking in flavor, but that’s not a problem with this easy potato soup. I love rosemary, garlic, and potato together.
    • Butter and flour: The combination of butter and flour thickens our soup. Unsalted butter or salted butter works just fine for this recipe. You will need to season with salt to taste. I’ve added tips for omitting the flour in the recipe below for gluten-free potato soup.
    • Stock or broth: For the best potato soup, use good-quality chicken stock from the store or homemade. When reaching for store-bought broth, we go for low sodium. We also look for a store-bought broth that’s darker in color (usually means more flavor), and since it usually has more of a backbone, we like to buy boxed bone broth (we use homemade bone broth sometimes, too).
    • Cream: We add a little cream to this soup. The chicken stock adds flavor, and the cream makes the broth creamy and more luxurious. You can also try half-and-half, sour cream, or plain yogurt.
    • Cheese: This is optional, but if you have some on hand, it adds a lovely richness to the soup. Use sharp cheddar for cheesy potato soup that rivals cheesy baked potatoes. We also love stirring in Gruyère or parmesan.

    Find the full recipe with measurements below.

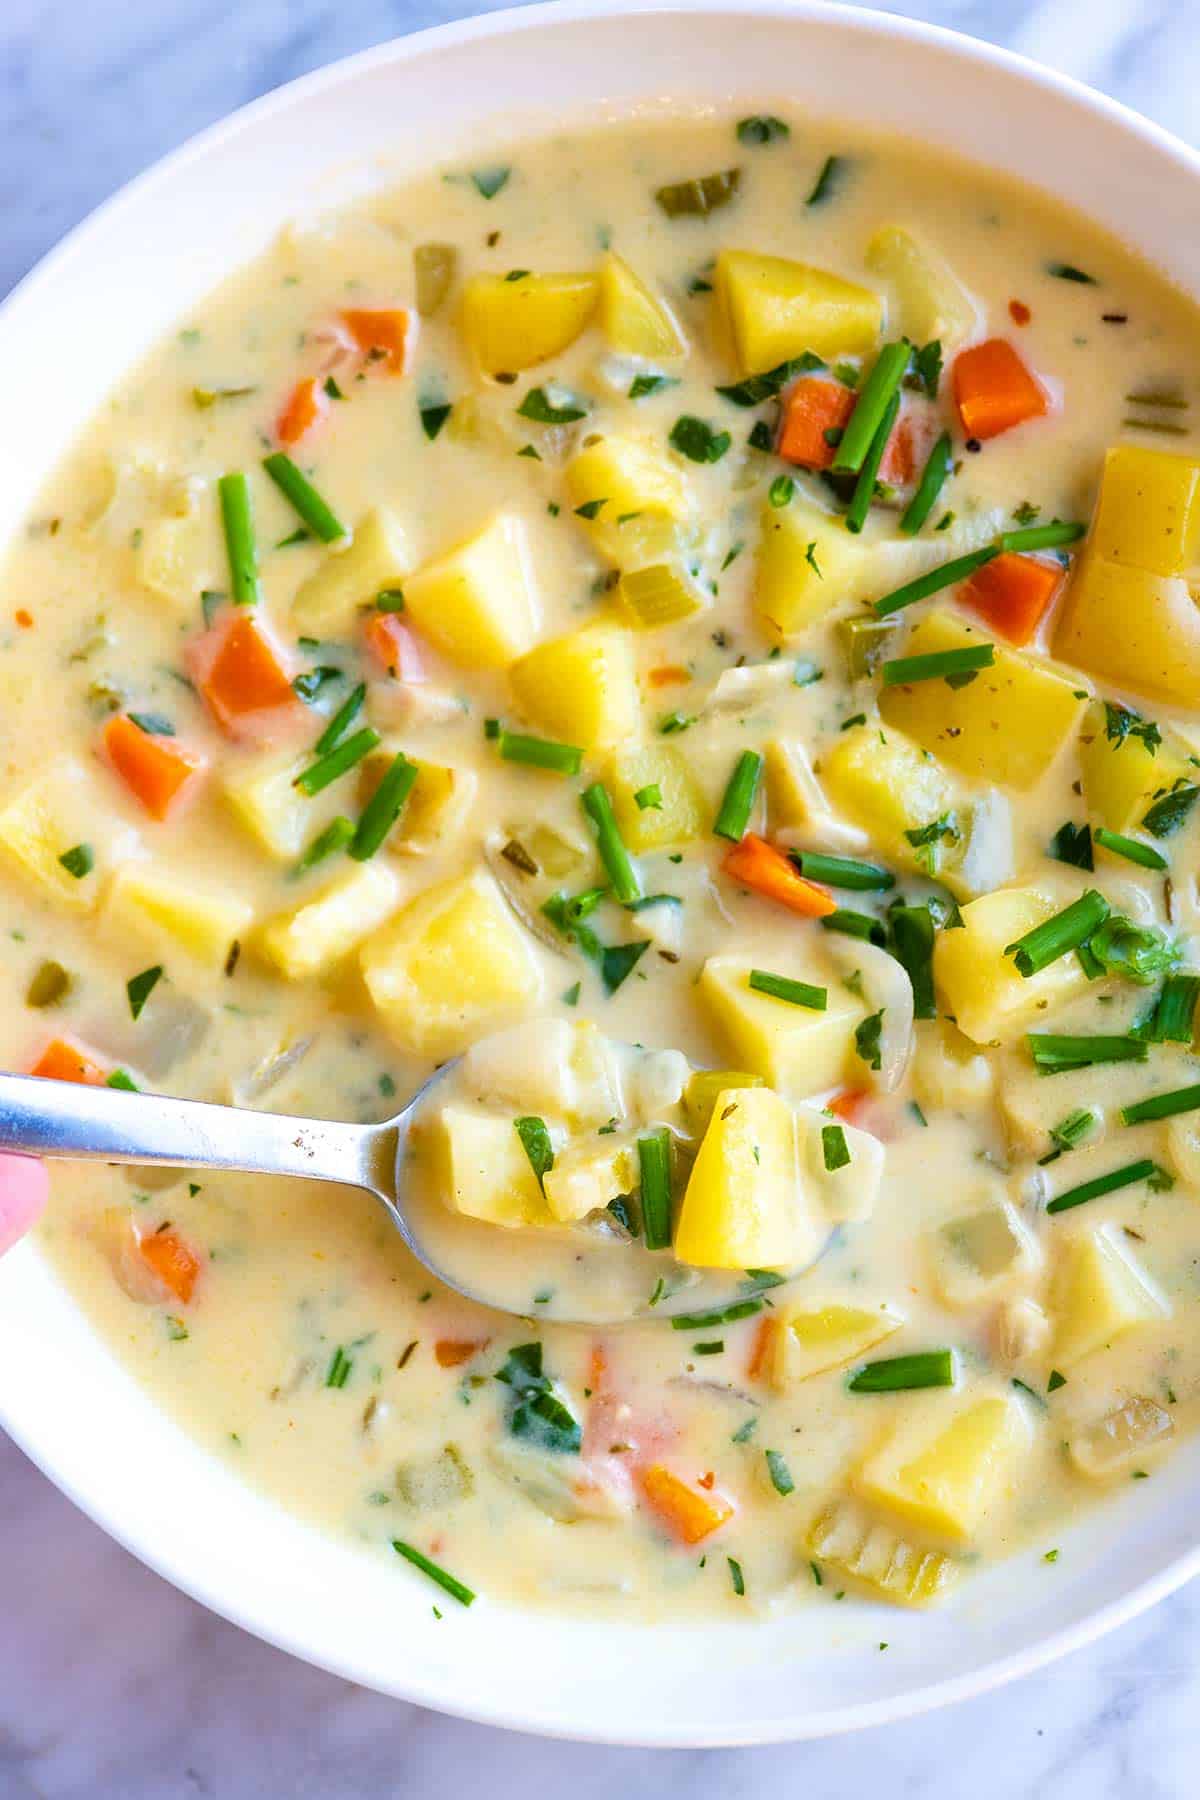
    Creamy Potato Soup from Scratch

    How to Make the Best Potato Soup

    Tip 1: Cook veggies in flavored butter. We love to cook our vegetables with garlic and rosemary in butter. The kitchen will smell incredible and this adds so much flavor.

    Tip 2: Thicken with a little flour. So that our soup thickens nicely, you’ll stir in some flour and cook until toasty. The mixture of butter and flour helps thicken the soup. Then, it’s time to add the broth and potatoes and simmer until tender, which takes about 20 minutes.

    Tip 3: Finding the perfect blend. Finish by stirring in cream and some cheese if you plan to add it. You can serve the brothy soup or blend some to thicken it even more. I like to blend a portion of the soup (about 2 cups). Then, I add the blended mixture back into the soup.

    What to Serve with Potato Soup

    I love serving this potato soup with bread for dipping. A few favorites from the blog are this homemade focaccia bread, this roasted garlic bread, and our beer bread! Consider a light salad on the side to balance the soup’s richness. I love this strawberry balsamic salad or this easy chopped salad.

    As for topping potato soup, I love scattering over fresh herbs (especially chives), but you can add more cheese, cooked bacon, sour cream, or crispy fried shallots.

    Easy Homemade Potato Soup

    Easy Creamy Potato Soup

    • PREP
    • COOK
    • TOTAL

    We love this easy potato soup recipe with potatoes and veggies simmered in a creamy broth. For the best potato soup, use Yukon Gold potatoes. They have thin skins, so it is not necessary to peel them. They also become buttery and soft when cooked.

    Makes about 7 cups of soup or 4 to 6 servings

    Watch Us Make the Recipe

    You Will Need

    1 ½ pounds (680g) potatoes, peeled and chopped, 4 cups

    1 medium onion, chopped, 2 cups

    2 medium carrots, chopped, 1 cup

    2 stalks celery, chopped, 1 cup

    1 tablespoon minced garlic, 3 to 4 cloves

    3 tablespoons butter or olive oil

    1 teaspoon chopped fresh rosemary or 1/4 teaspoon dried

    1/4 teaspoon crushed red pepper flakes

    3 tablespoons all-purpose flour

    4 cups chicken stock or vegetable broth

    1 bay leaf

    Salt and fresh ground black pepper

    1/4 cup cream, half and half, sour cream, or plain yogurt

    1 cup (2 ounces) shredded cheese, optional

    For serving (optional): Chives or scallions, sour cream, crumbled cooked bacon, fried shallots, hot sauce

    Directions

      1Melt the butter over medium heat in a large, heavy-bottomed pot (like a Dutch oven). When the butter melts, stir in the onions, carrots, and celery. Cook, stirring occasionally, until they begin to soften, 5 to 6 minutes.

      2Stir in the garlic, rosemary, red pepper flakes, 1/2 teaspoon of salt, and 1/4 teaspoon of black pepper, and then cook, stirring everything around the pot, for 30 seconds.

      3Scatter the flour over the vegetables and cook, stirring, until it looks medium blonde in color, about 1 minute. It will smell toasty, like browned butter.

      4Slowly whisk in 2 cups of the stock, ensuring no lumps of flour remain. It will be thick.

      5Pour in the remaining stock and whisk until blended. Increase the heat to a boil, then reduce to a simmer.

      6Add the potatoes and bay leaf, then cook, partially covered, until the potatoes are fork-tender, about 20 minutes.

      7Turn the heat down to low, remove the bay leaf, and stir in the cream and cheese.

      8Taste for seasoning, then adjust with more salt and pepper as needed.

      9Serve with fresh herbs on top. For a thick and blended soup, use a potato masher to mash or an immersion blender to blend about half of the potatoes, and then stir back into the soup.

    Adam and Joanne’s Tips

    • Storing: Potato soup lasts stored in an airtight container in the fridge for up to 4 days. You can also freeze potato soup for up to 3 months. Thaw the soup overnight in the refrigerator before reheating. When you reheat potato soup, it might look a bit separated. Don’t worry. Just use a whisk to blend it back together.
    • Make it gluten-free: Do not use the flour and instead whisk a tablespoon of cornstarch into the cream (or use milk) and add it to the soup (the cornstarch acts as a thickener). Or leave out flour and the cornstarch and blend about half of the soup to thicken it.
    • Vegan potato soup: Use plant-based butter or olive oil, veggie broth, and skip the cream at the end.
    • The nutrition facts provided below are estimates.

    Nutrition Per Serving
    Serving Size
    About 1 cup
    /
    Calories
    224
    /
    Total Fat
    11.8g
    /
    Saturated Fat
    6.9g
    /
    Cholesterol
    30.7mg
    /
    Sodium
    302.2mg
    /
    Carbohydrate
    23.9g
    /
    Dietary Fiber
    3.6g
    /
    Total Sugars
    3.9g
    /
    Protein
    7.4g


    AUTHOR:

    Adam Gallagher

    Adam and Joanne of Inspired Taste

    We are Adam and Joanne Gallagher, the creators of Inspired Taste. Established in 2009, Inspired Taste grew from a childhood dream into one of the internet’s most trusted recipe sites with hundreds of reliable recipes, step-by-step videos, and expert tips.More About Us

    Source link

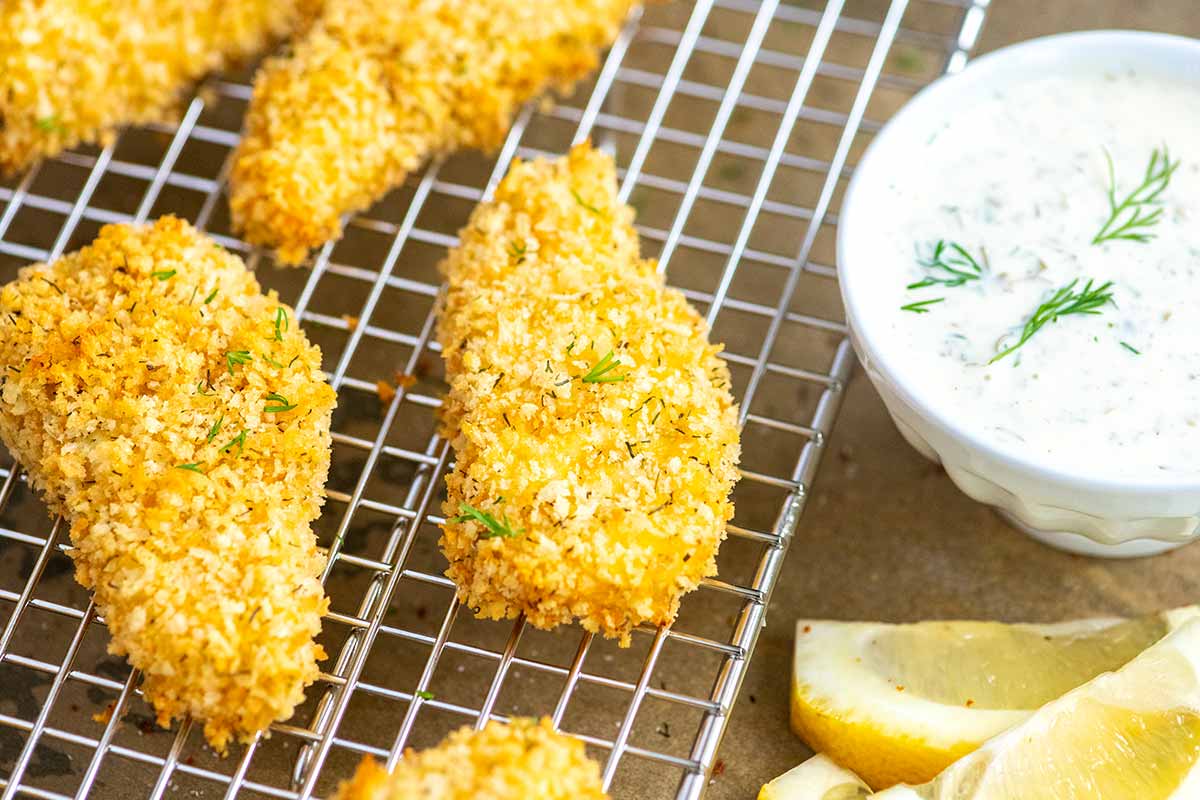
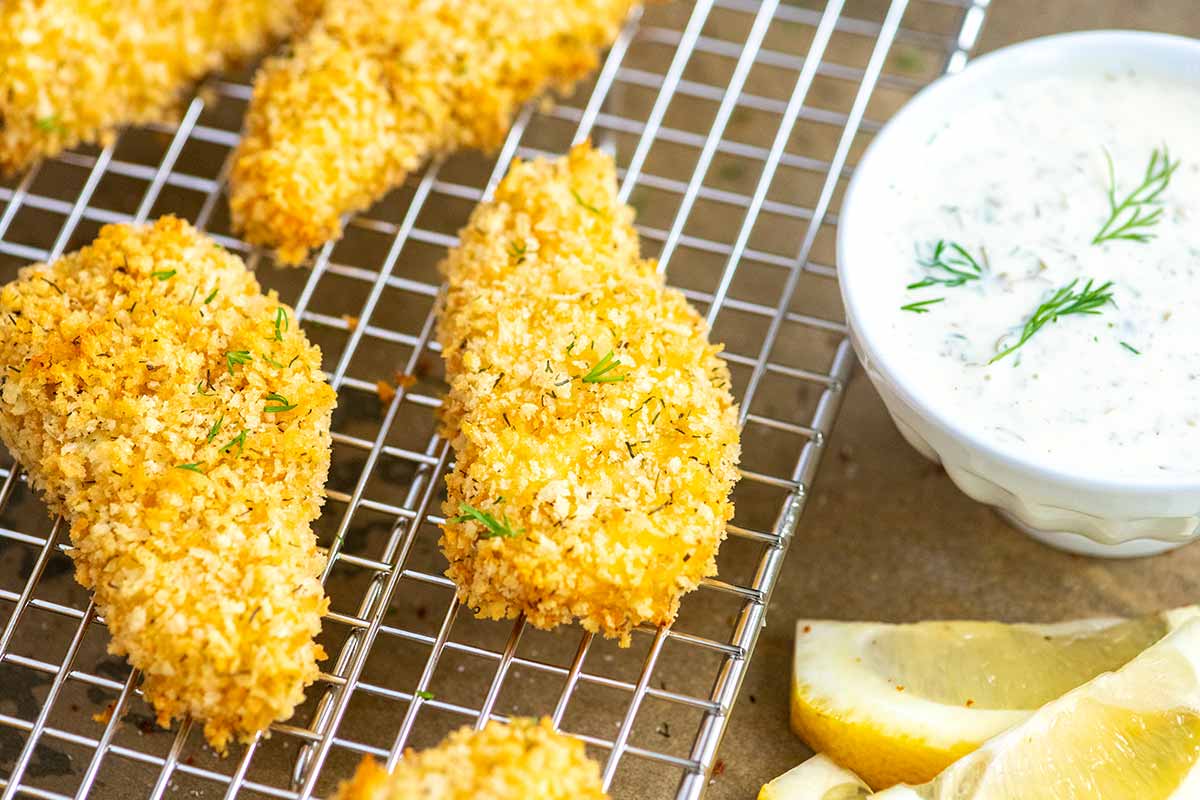
  • Easy Homemade Fish Sticks Recipe

    Easy Homemade Fish Sticks Recipe

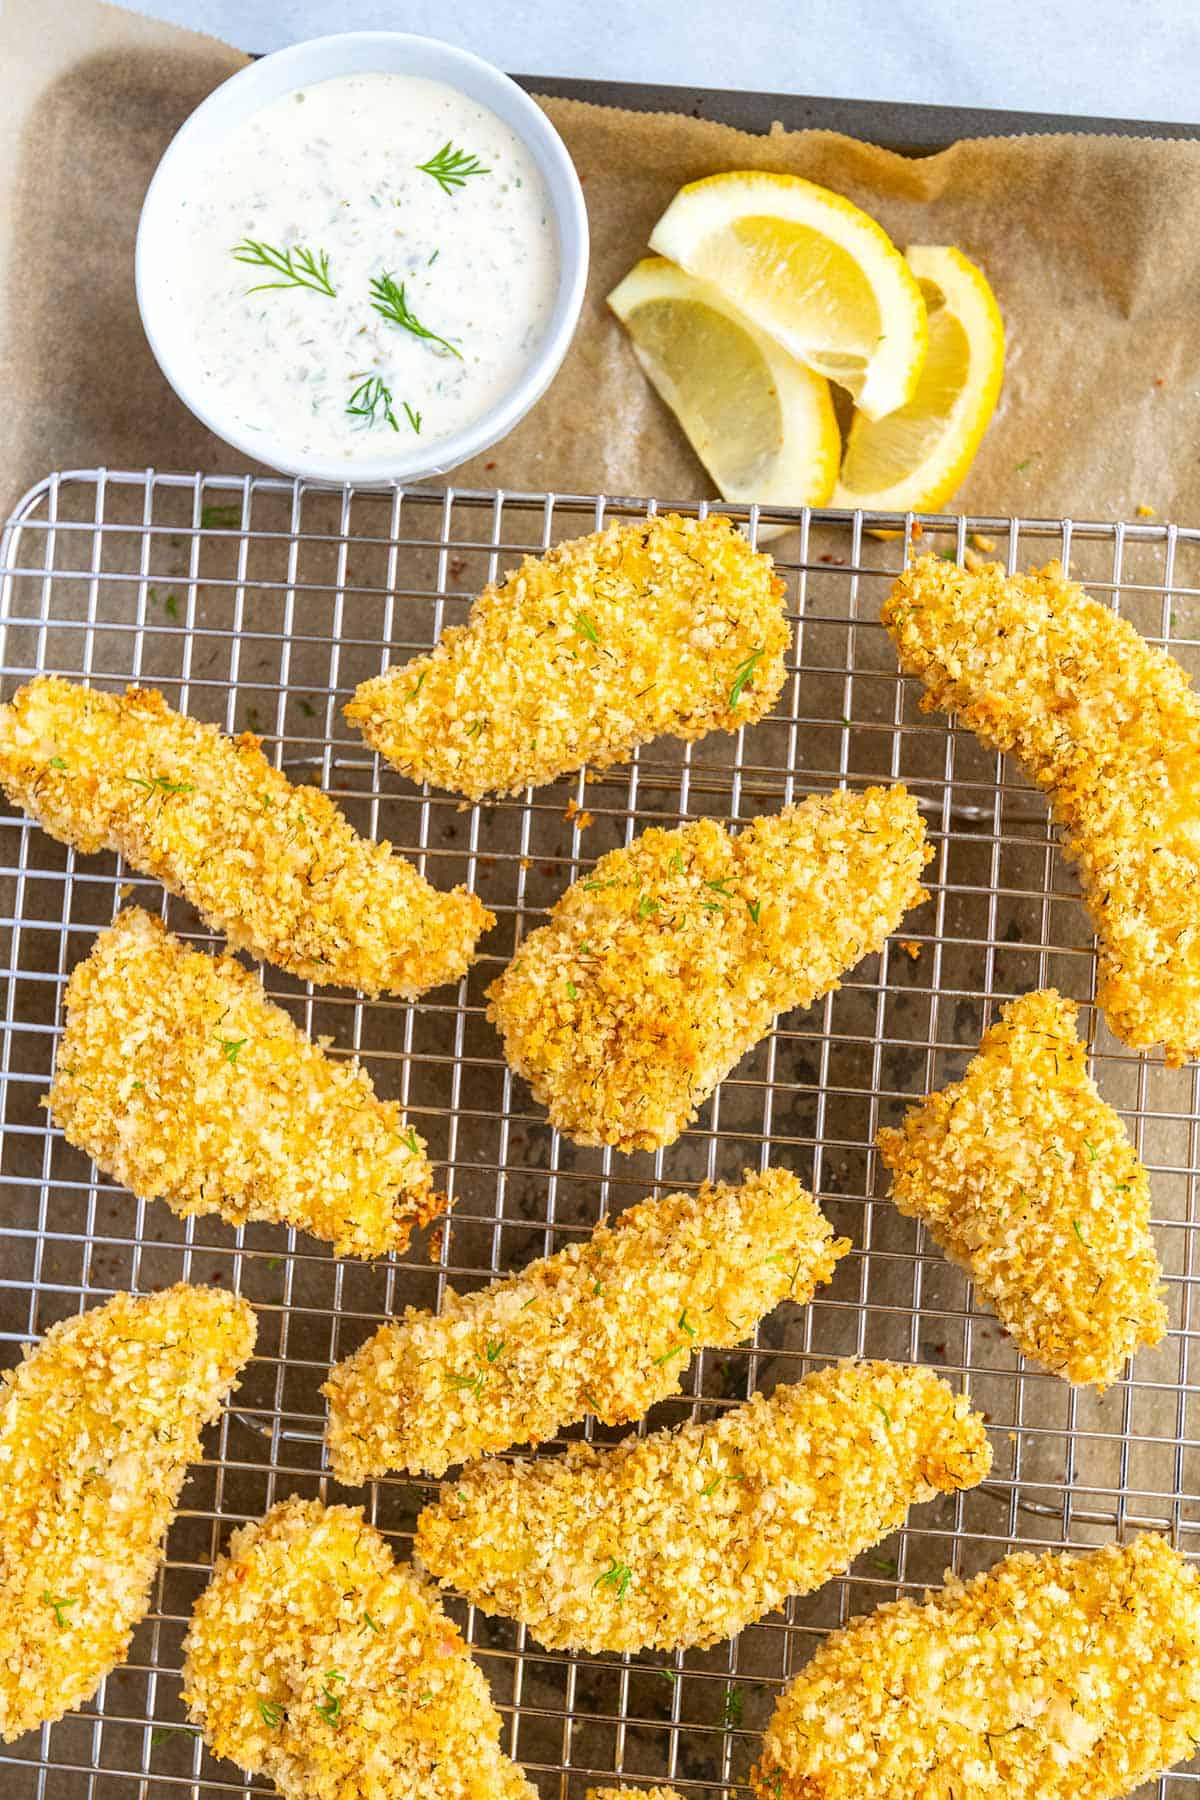
    Our family loves these homemade fish sticks! They are flaky and tender on the inside and crispy on the outside. These are baked, not fried, and call for a handful of real, simple ingredients.

    Homemade Fish Sticks

    These homemade fish sticks are way better than anything sold in the freezer section of your local grocery store. Just like our homemade chicken nuggets, adults and kids go crazy for them, thanks to our simple seasoning blend. Plus, since we bake them in the oven, they are healthier, too.

    I cannot wait for you to make these fish sticks. The ingredient list is simple, and you probably already have most of what you need in your kitchen! I love them served next to fresh lemon slices and homemade tartar sauce. We also love this homemade ketchup and our creamy honey mustard sauce!

    Key Ingredients

    • Fish: Use any firm white fish like Pacific cod, mahi-mahi, or tilapia. The trick is to cut the fish into similar sizes so the fish sticks all bake in the same amount of time.
    • Flour, Eggs, and Breadcrumbs: We use a three-part breading. First, all-purpose flour is mixed with spices. Second, beaten eggs and a little hot sauce, and third, breadcrumbs mixed with a little oil and dill. For gluten-free fish sticks, use gluten-free flour and crushed gluten-free certified cereal or potato chips for the breadcrumbs. For egg-free, try substituting the egg for cream (or a plant-based cream).

    How to Make Fish Sticks

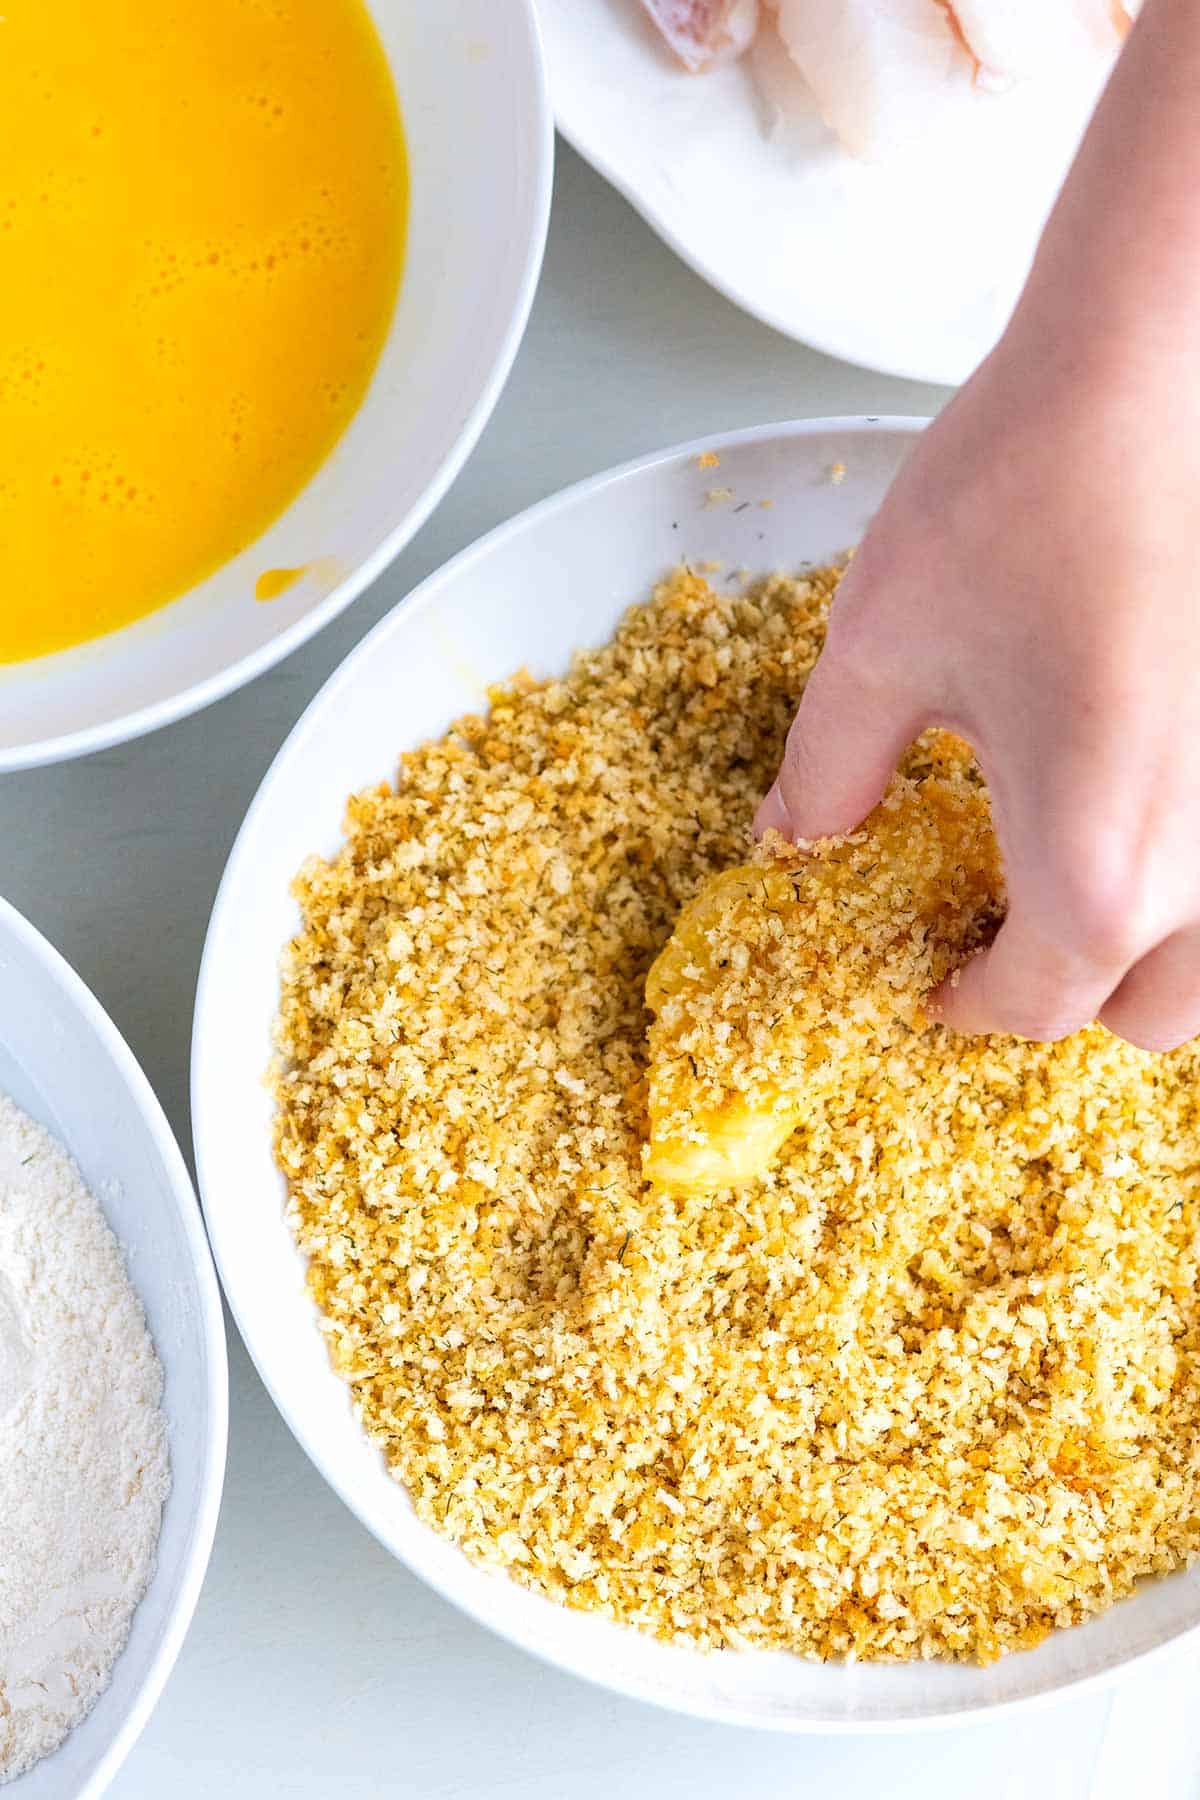
    To bread the fish, we use a traditional three-part breading process, which is the best way to make sure the breading stays on the fish and becomes crisp. It’s a simple process. Add flour and spices to one dish, beat eggs in a second dish, and then mix breadcrumbs and a few more seasonings in a third dish.

    After cutting the fish into thin strips, roll them into the flour, dip them into the egg, and then coat them in the breadcrumbs.

    How to Make Fish Sticks: Breading fish with flour, egg and breadcrumbs

    As I mentioned above, we bake our fish sticks. You can also fry them in a deep skillet with oil or use an air fryer (we haven’t tried this yet, but I bet they would be amazing).

    You have two options when baking them: First, you can bake them directly on a parchment paper-lined baking sheet. You will need to flip the fish sticks halfway through baking. Or, follow my favorite method and bake them on an oven-safe wire rack set inside a rimmed baking sheet. The rack allows air to circulate around the fish, which makes them extra crispy.

    Homemade Fish Sticks

    Easy Homemade Fish Sticks

    • PREP
    • COOK
    • TOTAL

    Our family loves these homemade fish sticks! They are flaky and tender on the inside and crispy on the outside. We highly recommend baking the fish on top of an oven-safe rack inset into a rimmed baking sheet, which helps to make the fish sticks extra crispy. If you do not have one, bake the fish sticks directly on a baking sheet lined with parchment paper or a silicone baking mat and turn once during baking.

    4 Servings (about 16 fish sticks)

    You Will Need

    1 pound (450g) cod fillets, sliced crosswise into 1-inch strips

    1/3 cup (43g) all-purpose flour

    1 teaspoon onion powder

    1/2 teaspoon garlic powder

    2 large eggs

    2 to 3 dashes hot sauce, optional

    1 ⅓ cup (150g) panko breadcrumbs or homemade breadcrumbs

    1 teaspoon dried dill or 1 tablespoon chopped fresh dill

    Olive oil or non-stick cooking spray

    Salt and fresh ground black pepper

    Directions

      1Preheat the oven to 375°F (190°C) and line a baking sheet with parchment paper or a silicone baking mat. If you have one, place an oven-safe wire rack on the baking sheet and spray with nonstick cooking spray. This will make the fish sticks extra crispy.

      2Prepare three shallow bowls. Whisk the flour with onion powder, garlic powder, and 1/2 teaspoon salt in the first bowl. In the second bowl, whisk the eggs and hot sauce together until blended. In the final bowl, stir the breadcrumbs and dill together. Drizzle one tablespoon of olive oil over the breadcrumbs and mix well. (Or spray with nonstick cooking spray).

      3Pat the fish dry, then roll a piece of fish into the flour with one hand. Shake off excess flour and then dip into the egg mixture. Shake the excess egg off, and then with your other hand or a fork, roll the fish into the breadcrumbs and place onto the prepared baking sheet (or onto the rack). Repeat with the remaining pieces of fish.

      4Bake for 15 to 20 minutes, turning once during cooking. (If you are using a rack, turning it is unnecessary.) The fish sticks are done when the breading is golden brown, and the fish flakes easily with a fork.

      5Serve with a very light sprinkle of salt and fresh ground black pepper over the top.

    Adam and Joanne’s Tips

    • Gluten-free fish sticks: Substitute gluten-free certified flour blend or almond flour for the all-purpose flour and crushed gluten-free certified cereal or potato chips for the breadcrumbs.
    • Egg-free fish sticks: Cook’s Illustrated suggests using heavy cream as a substitute for eggs when breading fish, vegetables, and chicken. You can also try olive oil.
    • For even more golden brown color and crispiness, before breading the fish, toast the breadcrumbs mixed with a little olive oil until light brown. In a 375 degree oven, this will take a minute or two. Make sure you check on the breadcrumbs and stir every 30 seconds so that they do not burn. You can also toast the breadcrumbs in a skillet over medium heat.
    • The nutrition facts provided below are estimates.

    Nutrition Per Serving
    Serving Size
    4 fish sticks
    /
    Calories
    333
    /
    Total Fat
    8.1g
    /
    Saturated Fat
    1.7g
    /
    Cholesterol
    145.1mg
    /
    Sodium
    448mg
    /
    Carbohydrate
    35.4g
    /
    Dietary Fiber
    2.2g
    /
    Total Sugars
    2.5g
    /
    Protein
    29.1g


    AUTHOR:

    Joanne Gallagher

    Adam and Joanne of Inspired Taste

    We are Adam and Joanne Gallagher, the creators of Inspired Taste. Established in 2009, Inspired Taste grew from a childhood dream into one of the internet’s most trusted recipe sites with hundreds of reliable recipes, step-by-step videos, and expert tips.More About Us

    Source link