Author: admin

  • Green Goddess Dressing Recipe

    Green Goddess Dressing Recipe

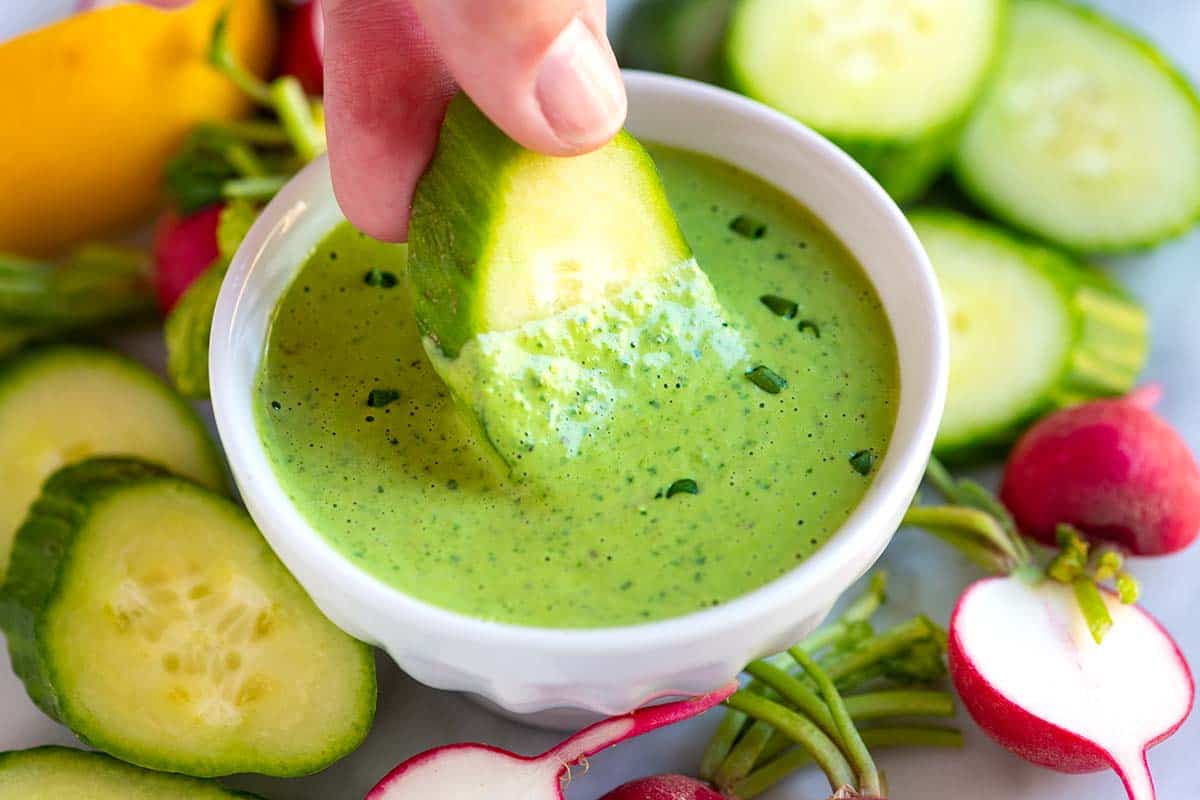
    This green goddess dressing recipe uses two cups of fresh herbs! It’s fantastic for salads, roasted vegetables, fish, meats, and also makes a great veggie dip.

    Green Goddess Dressing

    Green goddess dressing is a delicious creamy dressing made with lots of fresh green herbs. Make it once, and you’ll be wanting a jar of it in your fridge from here on out.

    It’s wonderful tossed with greens, spooned over roasted vegetables, served as a sauce for meats and seafood, or set out as a dip with fresh vegetables. When I have lots of fresh herbs on hand, I jump at the chance to make this creamy green goddess dressing!

    Key Ingredients

    • Fresh Herbs: I use roughly 2 cups of fresh herbs, almost half of which is parsley. We love the combo of parsley, basil, chives, and a smaller amount of tarragon (it’s stronger!), but feel free to add cilantro, mint, dill, or scallions, too.
    • Mayonnaise and Sour Cream: Mayonnaise forms the base of our dressing, but I mix in some sour cream to lighten it up a bit (I do the same when making ranch). If you don’t have sour cream, Greek yogurt or buttermilk work well. For a vegan dressing, try my homemade vegan mayo, cashew cream, or this homemade tahini, and skip the sour cream.
    • Anchovies: Anchovies add a salty kick that salt alone can’t match! If you don’t eat fish, substitute with chopped capers.
    • Lemon and Vinegar: Fresh lemon juice adds brightness, and a splash of rice wine vinegar really makes this herb dressing pop (optional, but yummy!).

    Find the full recipe with measurements below.

    How to Make Green Goddess Dressing

    Tip 1: Use a food processor or blender. I take a moment to get out my food processor for this recipe since it does such a great job of blending all those fresh herbs. If you don’t have a blender, you can always finely mince the herbs and anchovies, then mix them into the mayo and sour cream.

    Green Goddess Ingredients in a food processor

    Tip 2: Taste, and season well. Before serving your dressing, give it a taste. If it isn’t popping for you, it probably needs more salt and lemon juice. If it’s too thick, thin it with a bit of water, milk, or buttermilk.

    Ways to Use This Dressing

    Green goddess dressing is incredibly versatile. While we usually use it as a salad dressing, it almost always ends up as a sauce for whatever we’re cooking the rest of the week. Here are some of our favorite ways to use it:

    More Salad Dressing Recipes

    Green Goddess Dressing

    Green Goddess Dressing

    • PREP
    • TOTAL

    Green goddess dressing is a delicious creamy dressing made with lots of fresh green herbs. It’s wonderful tossed into salads, spooned over roasted veggies, fish, or meats and even doubled as a vegetable dip.

    *You can make this recipe vegan. See our tips section and substitutions for guidance.

    Makes 1 cup

    Watch Us Make the Recipe

    You Will Need

    ½ cup mayonnaise, see our homemade mayonnaise

    ⅓ cup sour cream, Greek yogurt, or well-shaken buttermilk

    2 to 3 anchovy fillets or substitute 1 tablespoon capers

    ¾ cup packed fresh parsley leaves and tender stems

    ½ cup packed fresh basil leaves

    2 tablespoons fresh tarragon leaves or 2 teaspoons dried tarragon

    ¼ cup chopped chives cut into 1-inch pieces or substitute scallions

    2 tablespoons fresh lemon juice

    1 tablespoon rice wine vinegar, optional, adds extra tanginess

    ¼ to ½ teaspoon fine sea salt

    ½ teaspoon fresh ground black pepper

    Directions

      1Add mayonnaise, sour cream, 2 anchovy fillets, parsley, basil, tarragon, chives, lemon juice, vinegar, salt, and pepper to the bowl of a food processor or blender. Process, stopping and scraping down the sides a few times until the dressing is well blended.

      2Taste the dressing. If it needs a bit more pop, add the last anchovy and an extra squeeze of lemon juice. If the dressing is too thick, thin it out with a little water, milk or buttermilk.

    Adam and Joanne’s Tips

    • Vegan green goddess dressing: Use 1 ⅓ cups vegan mayonnaise or cashew cream instead of the regular mayonnaise and sour cream, and then use 1 tablespoon of capers instead of the anchovy fillets. You may need to play around with a little more lemon juice or herbs to get the flavors just right.
    • Avocado variation: Avocado adds a creamy element to the dressing. Add the flesh from one medium avocado.
    • To make this by hand: Finely chop all the herbs and anchovies, then stir into the rest of the ingredients.
    • The nutrition facts provided below are estimates.

    Nutrition Per Serving
    Serving Size
    2 tablespoons
    /
    Calories
    120
    /
    Total Fat
    12.4g
    /
    Saturated Fat
    2.6g
    /
    Cholesterol
    12.7mg
    /
    Sodium
    221.4mg
    /
    Carbohydrate
    1.5g
    /
    Dietary Fiber
    0.3g
    /
    Total Sugars
    0.6g
    /
    Protein
    1.1g


    AUTHOR:

    Joanne Gallagher

    Adam and Joanne of Inspired Taste

    We are Adam and Joanne Gallagher, the creators of Inspired Taste. Established in 2009, Inspired Taste grew from a childhood dream into one of the internet’s most trusted recipe sites with hundreds of reliable recipes, step-by-step videos, and expert tips.More About Us
    Source link

  • Maple Soy Glazed Salmon Recipe

    Maple Soy Glazed Salmon Recipe

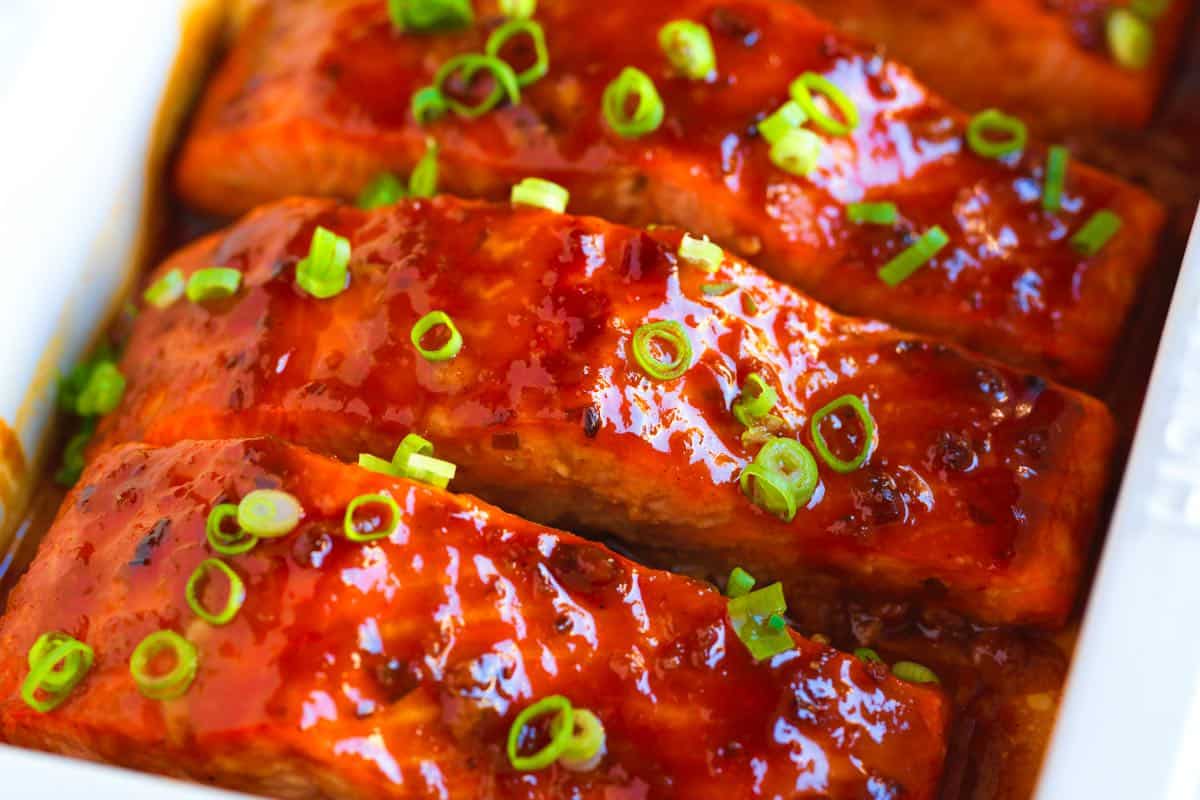
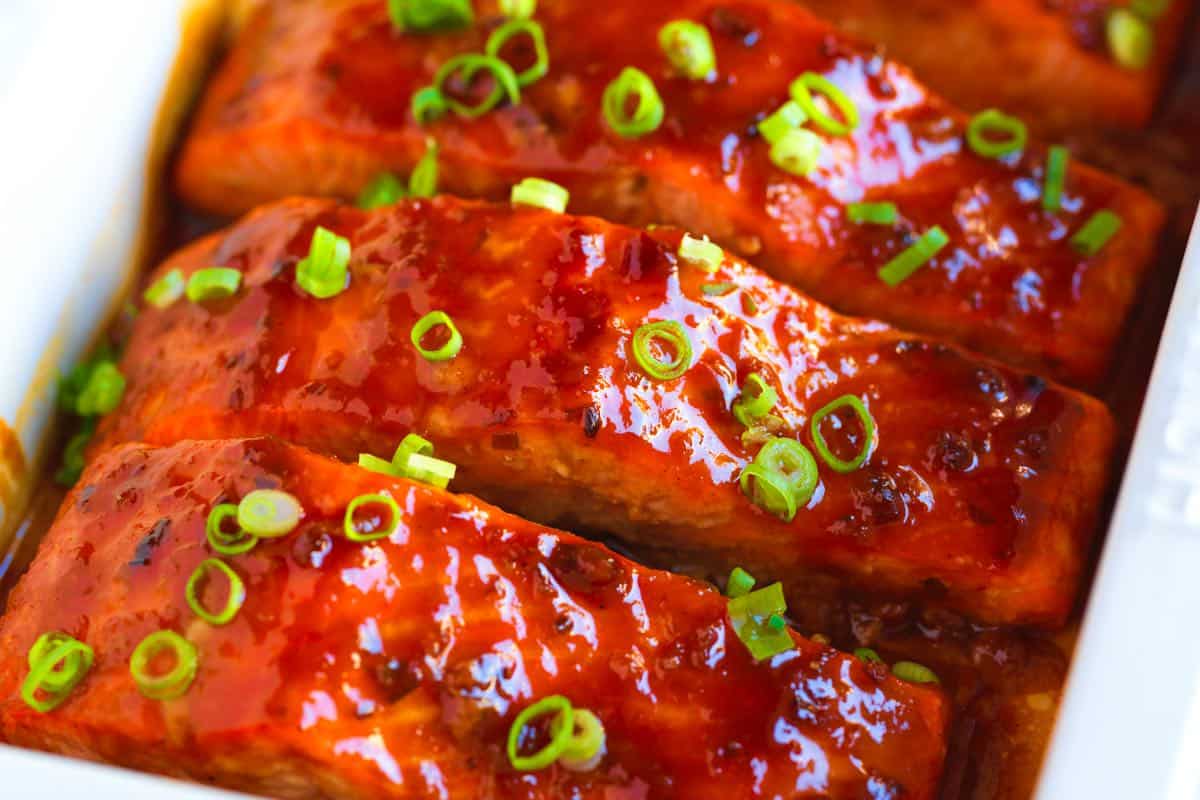
    This sticky, sweet glazed salmon recipe is about to become your new favorite way to cook salmon.

    Glazed Salmon

    It’s quick to make, really flavorful, and perfect for weeknights or when you want something a little special without much effort. The glaze, made with maple syrup, soy sauce, and hoisin, doubles as a marinade.

    As the salmon bakes, the glaze thickens and caramelizes into a glossy, sticky coating while the fish stays tender and moist inside. I really can’t recommend this enough.

    Key Ingredients

    • Salmon: Any salmon fillet will work, but I especially love baking varieties with a higher fat content, such as sockeye, king, or coho. The extra fat helps the fish stay soft and moist (something I recommend for most of our salmon recipes).
    • Maple Syrup and Brown Sugar: This combination creates the perfect sticky-sweet glaze. I always use pure maple syrup for the best flavor, but honey makes a great substitute if that’s what you have on hand.
    • Soy Sauce: A splash of soy sauce (or tamari for a gluten-free option) seasons things.
    • Hoisin Sauce: Hoisin adds rich, complex flavor. You can use store-bought or our homemade hoisin sauce, made with garlic, ginger, and pantry staples like peanut butter. If you make a batch, save the extra for our hoisin sticky ribs (it’s so good!).
    • Dijon Mustard and Garlic: Dijon mustard adds a little tang that cuts through the sweetness of the syrup, while finely grated garlic melts into the glaze for a bit of spice.

    Find the full recipe with measurements below.

    How to Make Glazed Salmon

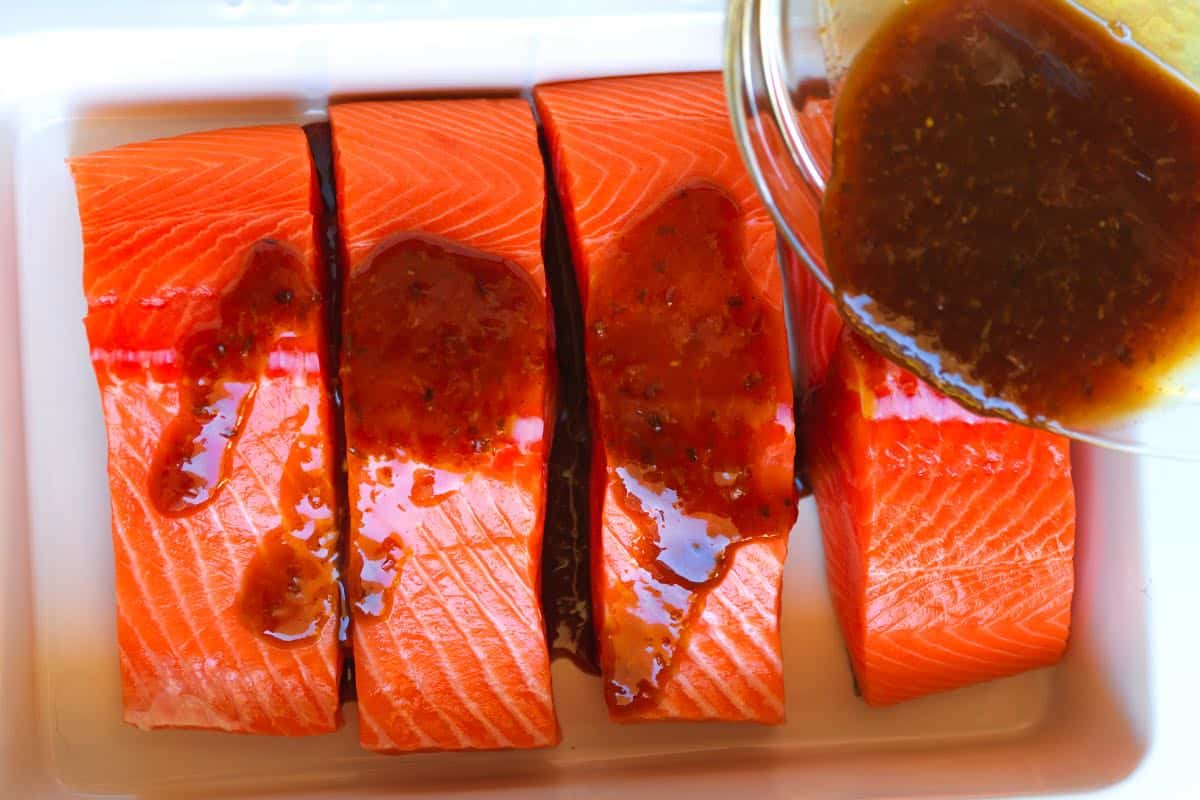
    Tip 1: Marinate. If you have the time, this salmon glaze works beautifully as a marinade. I like to mix it up in the morning, pour it over the fillets, and refrigerate it until dinnertime. The flavors soak in, making the salmon even more delicious. That said, if you’re in a rush, don’t worry, it will still be really flavorful without marinating.

    Pouring the salmon glaze over salmon fillets in a baking dish

    Tip 2: Bake the salmon. When you’re ready to cook, this recipe takes just 15 to 20 minutes in the oven, depending on the thickness of your fillets (or a few minutes longer if the salmon is very thick or cold from the fridge).

    Tip 3: Spoon the glaze over the salmon as it bakes. Here’s the secret to that perfectly sticky, sweet top: as it bakes, tilt the pan slightly so the glaze pools in one corner, then spoon it back over the fish. Do this a few times while it’s baking, and you’ll be rewarded with a glossy, caramelized coating that tastes incredible.

    Serving Suggestions

    Serve this delicious salmon with a side of rice, such as our cilantro lime rice or coconut rice, and a side of something green, like ginger green beans or steamed cabbage.

    It’s also fantastic with something fresh and crunchy. Try our broccoli slaw or my new favorite, Napa cabbage salad. I’ve even flaked this over salad for lunch. It’s so delicious!

    More Favorite Salmon Recipes

    Maple Glazed Salmon

    Maple Soy Glazed Salmon

    • PREP
    • COOK
    • TOTAL

    This recipe has become a new family favorite! The glaze is sweet, delicious, and a little sticky. Marinating is optional but guarantees the best flavor. Just 30 minutes in the glaze will help, but you can marinate the salmon in the glaze for up to 8 hours.

    4 Servings

    Watch Us Make the Recipe

    You Will Need

    4 salmon fillets, 6 ounces each, preferably skin on

    2 tablespoons hoisin sauce, try our homemade hoisin sauce

    2 tablespoons maple syrup

    1 tablespoon brown sugar

    2 teaspoons soy sauce

    1 teaspoon Dijon mustard

    1 clove garlic, finely grated or minced

    1/4 teaspoon fine sea salt

    Sliced green onion for garnish, optional

    Directions

      1Make the glaze: In a small bowl, whisk together the hoisin sauce, maple syrup, brown sugar, soy sauce, Dijon mustard, garlic, and a pinch of salt until smooth.

      2Marinate (optional): Place the salmon fillets in a shallow dish, zip-top bag, or airtight container. Pour the glaze over the salmon, making sure each piece is well coated. Cover and refrigerate for at least 30 minutes and up to 8 hours.

      3Preheat the oven: When you’re ready to cook, preheat your oven to 400°F (204°C).

      4Bake: Arrange the salmon fillets, skin-side down, in a baking dish. Pour or spoon any remaining marinade over the top. Bake until the salmon flakes easily with a fork, 15 to 20 minutes, depending on thickness. We cook to 125°F (51°C), which means it will be soft, tender, and slightly pink in the center. For a visual cue, look for the flesh to be somewhat opaque.

      5Glaze as it bakes: Every 3 to 5 minutes, tilt the dish slightly to gather the glaze that’s pooled at the bottom and spoon it back over the salmon. This step helps you achieve that beautifully sticky, caramelized finish. Top with sliced green onions and serve.

    Adam and Joanne’s Tips

    • Skin-on: The skin acts as an insulator for the bottom of the fish so that it cooks through perfectly while staying moist. When serving, we gently slide a knife between the skin and the salmon to remove it. It comes away easily.
    • What’s the white stuff? The white stuff around cooked salmon is called albumin. It’s perfectly fine to eat, but since it isn’t the prettiest thing to look at, I quickly scrape it away and spoon a bit more glaze from the bottom of the dish on top.
    • The nutrition facts provided below are estimates.

    Nutrition Per Serving
    Serving Size
    1 (6-ounce) fillet
    /
    Calories
    279
    /
    Total Fat
    8.3g
    /
    Saturated Fat
    1.4g
    /
    Cholesterol
    86.9mg
    /
    Sodium
    513.9mg
    /
    Carbohydrate
    13g
    /
    Dietary Fiber
    0.2g
    /
    Total Sugars
    10.6g
    /
    Protein
    38.3g


    AUTHOR:

    Joanne Gallagher

    Adam and Joanne of Inspired Taste

    We are Adam and Joanne Gallagher, the creators of Inspired Taste. Established in 2009, Inspired Taste grew from a childhood dream into one of the internet’s most trusted recipe sites with hundreds of reliable recipes, step-by-step videos, and expert tips.More About Us
    Source link

  • Butter Bean Soup

    Butter Bean Soup

    We loved this tasty Butter Bean Soup that has lots of ham and cabbage plus onion and celery for amazing flavor! This soup can be made with dried or canned beans, or make it with Lima Beans if you can’t find butter beans. 

    PIN the recipe for Butter Bean Soup to try it later!

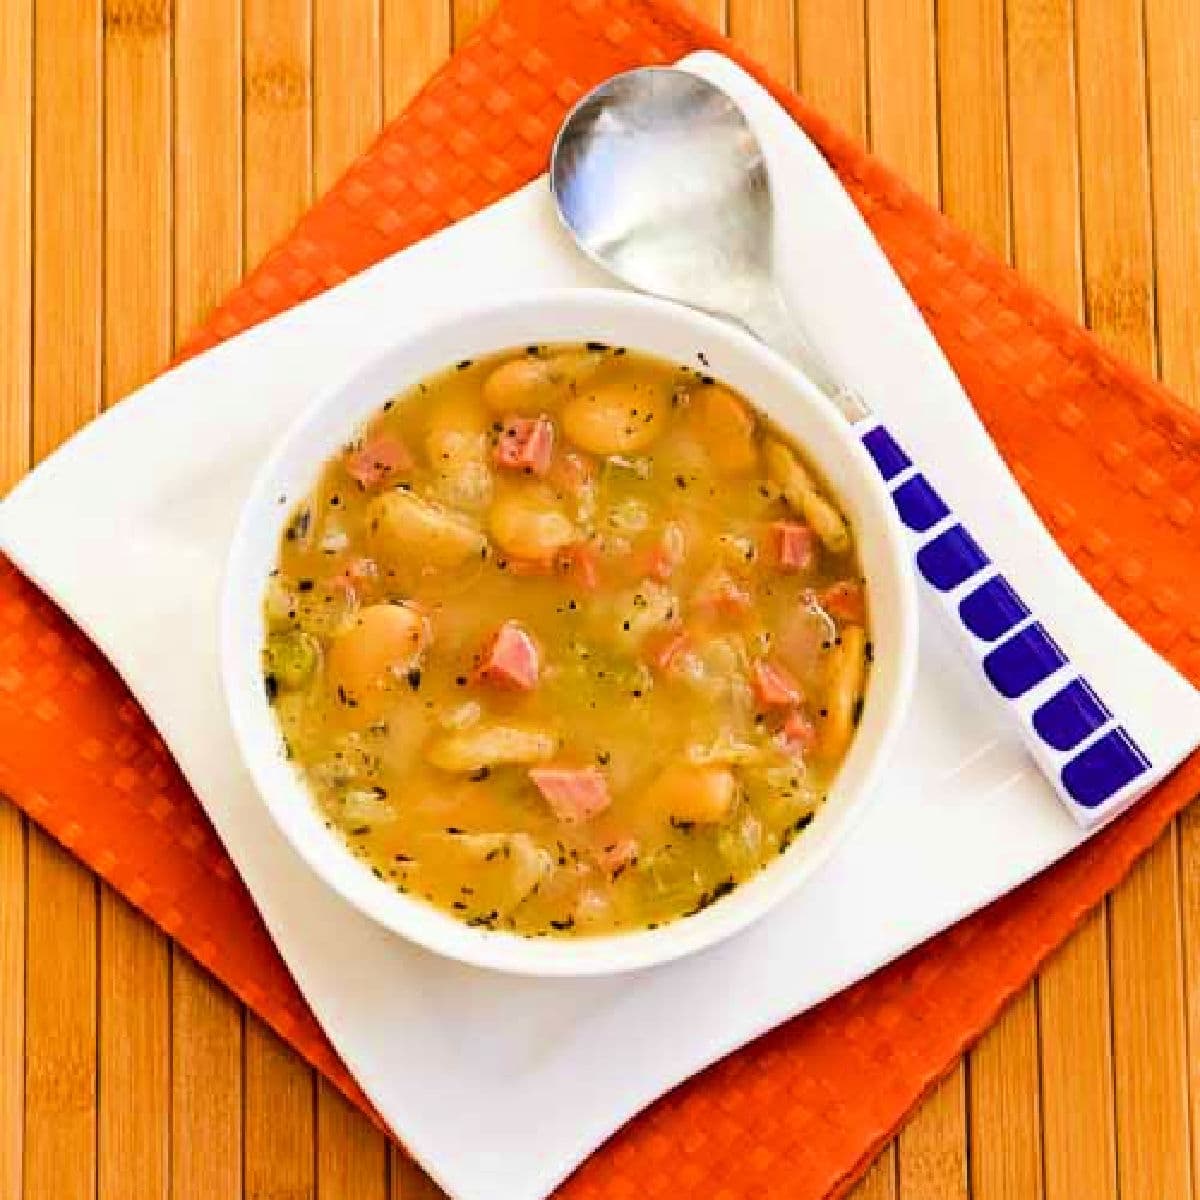
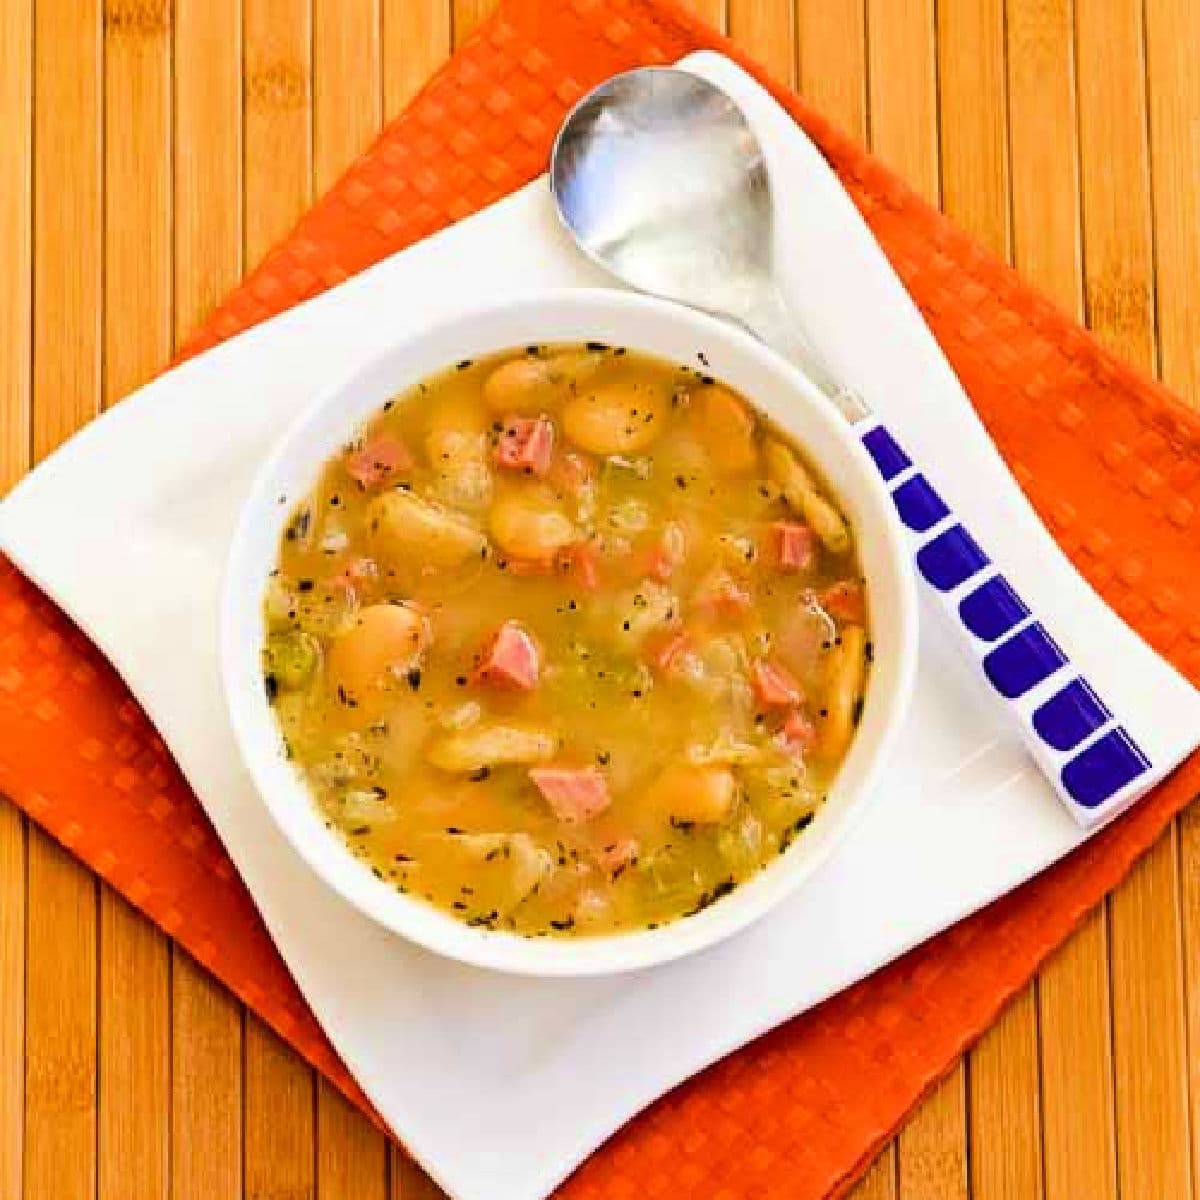
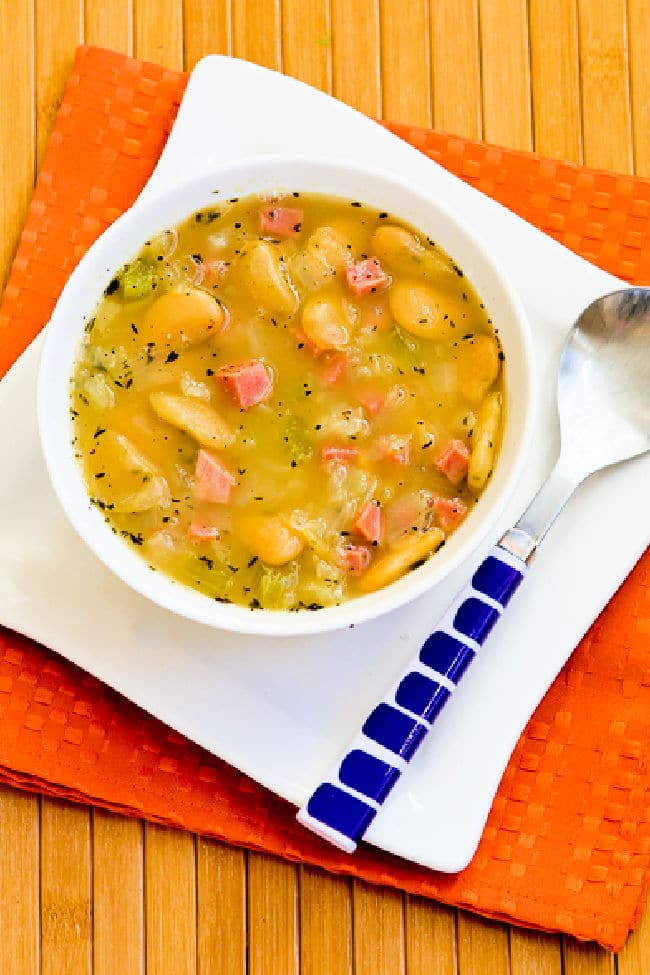
    Butter Bean Soup in bowl with blue spoon and orange napkin.Butter Bean Soup in bowl with blue spoon and orange napkin.

    If Butter Bean Soup is something you’re not sure about, I hope you’ll stay with me for a minute. I wasn’t that familiar with them when I made this soup using Florida Butter Beans, and I discovered that they’re creamy and delicious!

    If you can find them (or something similar) I highly recommend starting with dried butter beans that you’ve soaked overnight. That’s what I used when I first made this soup. But when I decided the soup desperately needed a photo update, I tried it with canned butter beans from the supermarket. And I was very happily surprised how good it was!

    I first made Butter Bean Soup when I had a bad cold that hung on for weeks and needed some comfort food. But it was just as delicious when I made it again recently on one of those cold winter days where nothing sounds better than soup! I hope you try the recipe!

    What ingredients do you need for this recipe?

    (This is only a list of ingredients; please scroll down for complete printable recipe. Or if you use the JUMP TO RECIPE link at the top of the page, it will take you directly to the complete recipe.)

    What type of beans did I use for Butter Bean Soup?

    I made this soup the first time with dried Florida Butter Beans, (a type of heirloom baby lima bean) that I bought in San Francisco from Rancho Gordo Beans. I used canned butter beans when I updated the photos, and both those were delicious in this soup.

    Are Butter Beans the same as Lima Beans?

    According to many sources, butter beans and lime beans are the same type of legume. However, there is a difference. The name lima beans refers to the small green variety of these beans, that originated in Lima, Peru. The larger white and slightly creamier beans are often called butter beans, especially in the Southern part of the U.S.

    Can you use a different type of bean?

    If you’re still not sure about butter beans or lima beans, try the soup with a different type of white bean! I think Cannellini beans or pinto beans would both be a good choice.

    How high in carbs is the Butter Bean Soup?

    A soup recipe that starts with a pound of dried beans is not going to be low in carbs of course. This soup recipe as written has 29 net carbs and 21 grams of protein.

    How to make this soup recipe lower in carbs:

    If you want a version of Butter Bean Soup that’s lower in carbs, use fewer beans with more ham and cabbage.

    Butter Bean (or Lima Bean) Soup with Ham and Cabbage found on KalynsKitchen.comButter Bean (or Lima Bean) Soup with Ham and Cabbage found on KalynsKitchen.com

    How to Make Butter Bean Soup:

    (This is only a summary of the steps for the recipe; please scroll down for complete printable recipe. Or if you use the JUMP TO RECIPE link at the top of the page, it will take you directly to the complete recipe.)

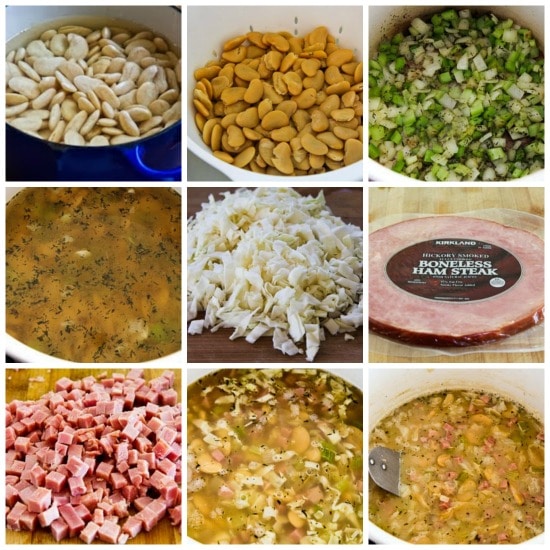
    1. If you’re lucky enough to have dried Florida Butter Beans or another type of dried butter beans or large white beans, soak them at least 8 hours, then drain the beans.
    2. If you’re using canned butter beans, drain them into a colander and rinse well with cold water, until no more foam appears.
    3. Heat the oil in a heavy soup pot and saute the onion and celery a few minutes; then add the Dried Thyme (affiliate link) and cook a couple of minutes more.
    4. Add the beans and 2 quarts water (for dried beans ) or 6 cups water (for canned beans.) 
    5. For dried beans, simmer on low until the beans are tender, probably at least an hour or more. 
    6. For canned beans, simmer about 20 minutes. (Add more water as needed while the beans are cooking.)
    7. While the beans cook, finely chop the cabbage.
    8. I used this boneless ham steak from Costco for the ham. Cut up enough ham to make about 2 cups of diced ham.
    9. Depending on how flavorful your ham is, you may want to add ham bouillon to the soup. Goya Ham Flavored Concentrate (affiliate link) is my favorite, but there are other good brands.
    10. When the dried beans are nearly soft, add ham and cabbage and cook about 30 minutes more at a low simmer (or maybe a little longer for dried beans).
    11. Cook until the beans are quite soft and the cabbage is completely soft and almost dissolving into the soup.
    12. And the last photo shows how my Butter Bean Soup looked after it had simmered long enough and was ready to eat.
    13. Serve hot and enjoy!

    Make it a Meal:

    The Butter Bean Soup would be great with one of these low-carb breads to dip into the soup, and they won’t add many carbs:

    Square image for Butter Bean Soup in white bowl on white plate with orange napkin.Square image for Butter Bean Soup in white bowl on white plate with orange napkin.

    Another way to cook Butter Beans:

    If you like Butter Beans and want another way to use them, I love them in this Salad with tomatoes, olives, Feta, and basil!

    Weekend Food Prep:

    This Butter Bean Soup recipe has been added to a new category called Weekend Food Prep where you’ll find recipes you can prep or cook on the weekend and eat during the week!

    Ingredients

    • 1 lb. dried butter beans (see notes for canned beans)
    • 1 T olive oil
    • 1 medium yellow onion, chopped small
    • 1 cup chopped celery
    • 1 tsp. dried thyme (or less, to taste)
    • 2 quarts water
    • Goya Ham Bouillon, to taste (optional, but recommended)
    • 2 cups finely chopped green cabbage
    • 2 cups finely diced ham (see notes)
    • fresh ground black pepper to taste

    Instructions

    1. Soak dried beans for about 8 hours, then pour into colander, rinse, and let drain. (I think the best way to cook beans is to soak them all day while you’re at work, then cook at night.)
    2. For canned beans, drain them into a colander placed in the sink and rinse well with cold water (until you don’t see any more foam.)
    3. In heavy soup pot, heat olive oil, saute onion and celery 3-4 minutes, until starting to soften, then add thyme and saute 1-2 minutes more. Add beans and 2 quarts water (for dried beans) or 6 cups water (for canned beans).
    4. Cook dried beans at a low simmer until they are starting to soften, adding a little more water occasionally if needed. (This could take an hour or more, depending on how fresh the beans are.)
    5. Cook canned beans about 20 minutes at a low simmer.
    6. When beans feel like they are about 3/4 soft (when you bite down on one) add ham flavor base (affiliate link) if using, finely chopped cabbage, and finely diced ham.
    7. Cook about 30 minutes more (or maybe a little longer for canned beans), until beans are very soft, soup broth is very flavorful, and most of the cabbage has disintegrated into the soup.
    8. Season to taste with fresh ground black pepper and serve the soup hot.

    Notes

    Use Rancho Gordo Florida Butter Beans, other dried butter beans, or baby lima beans to make this soup. Or use three or four 15-oz. cans of butter beans if you can’t find dried beans.

    If you have a ham bone or some pieces of rind, by all means use them and remove when you serve the soup.

    This recipe was created by Kalyn when she had Rancho Gordo Florida Butter Beans.

    Nutrition Information

    Yield

    8

    Serving Size

    1

    Amount Per Serving

    Calories 272Total Fat 4gSaturated Fat 1gTrans Fat 0gUnsaturated Fat 3gCholesterol 21mgSodium 485mgCarbohydrates 41gFiber 12gSugar 7gProtein 21g

    Nutrition information is automatically calculated by the Recipe Plug-In I am using. I am not a nutritionist and cannot guarantee 100% accuracy, since many variables affect those calculations.

    Did you make this recipe?

    Did you make this recipe? Please leave a star rating (under the PRINT button in the recipe) or share a photo of your results on Instagram! THANKS!

    Low-Carb Diet / Low-Glycemic Diet / South Beach Diet Suggestions:
    Butter Bean Soup will be too high in carbs for a low-carb diet plan, but you can make a version that’s lower in carbs by using fewer beans and more ham and cabbage. Dried beans are approved for all phases of the original South Beach Diet, but the serving size is limited for phase one. Since this soup has other things besides beans, you could eat a small bowl for phase one or a larger bowl for phase two or three.

    Find More Recipes Like This One:
    Use Soup Recipes to find more tasty soups like this one! Use the Diet Type Index to find recipes suitable for a specific eating plan. You might also like to follow Kalyn’s Kitchen on Pinterest, on Facebook, on Instagram, on TikTok, or on YouTube to see all the good recipes I’m sharing there.

    Historical Notes for this Recipe:
    The Butter Bean Soup recipe was first posted in 2007, after I had gotten the beans at Rancho Gordo Beans in the Ferry Building. The recipe was updated with better photos in 2014 and last updated with more information in 2026.

    Pinterest image of Butter Bean Soup

    We are a participant in the Amazon Services LLC Associates Program, an affiliate advertising program designed to provide a means for us to earn fees by linking to Amazon.com and affiliated sites. As an Amazon Associate, I earn from qualifying purchases.


    Source link

  • Grilled Chicken with Pepperoncini Garlic Butter Recipe

    Grilled Chicken with Pepperoncini Garlic Butter Recipe

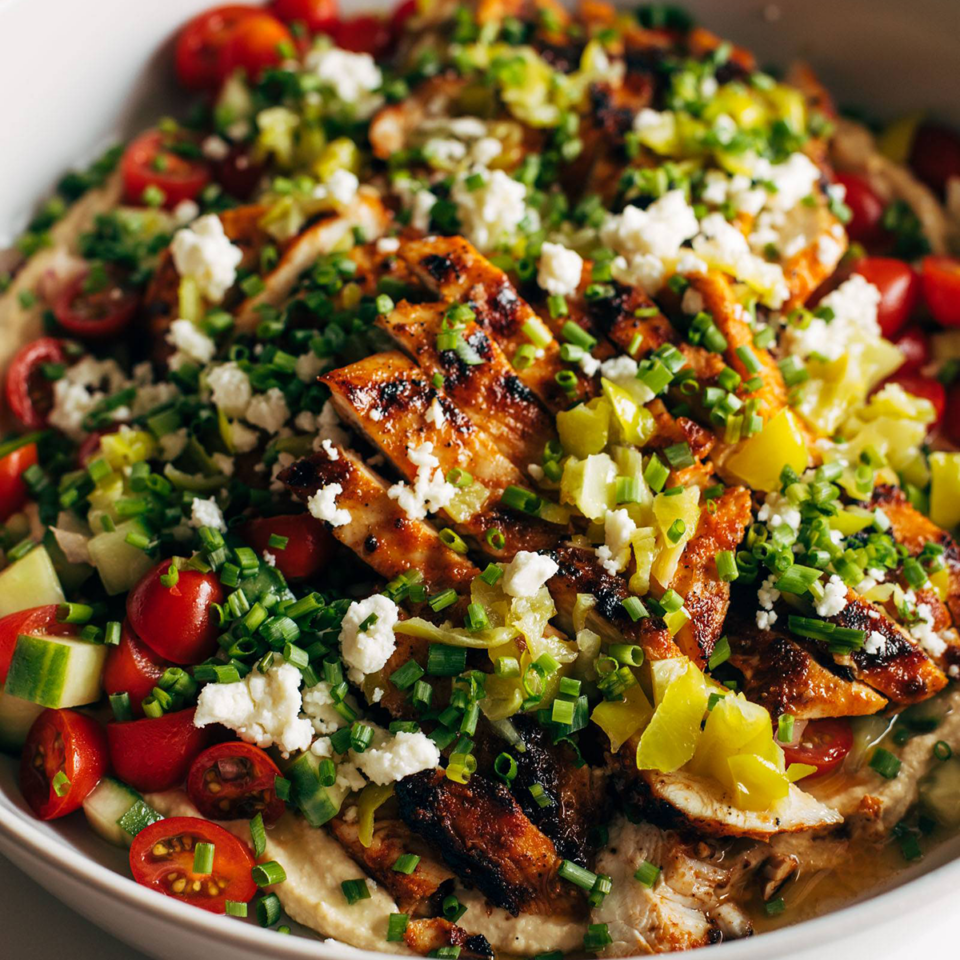
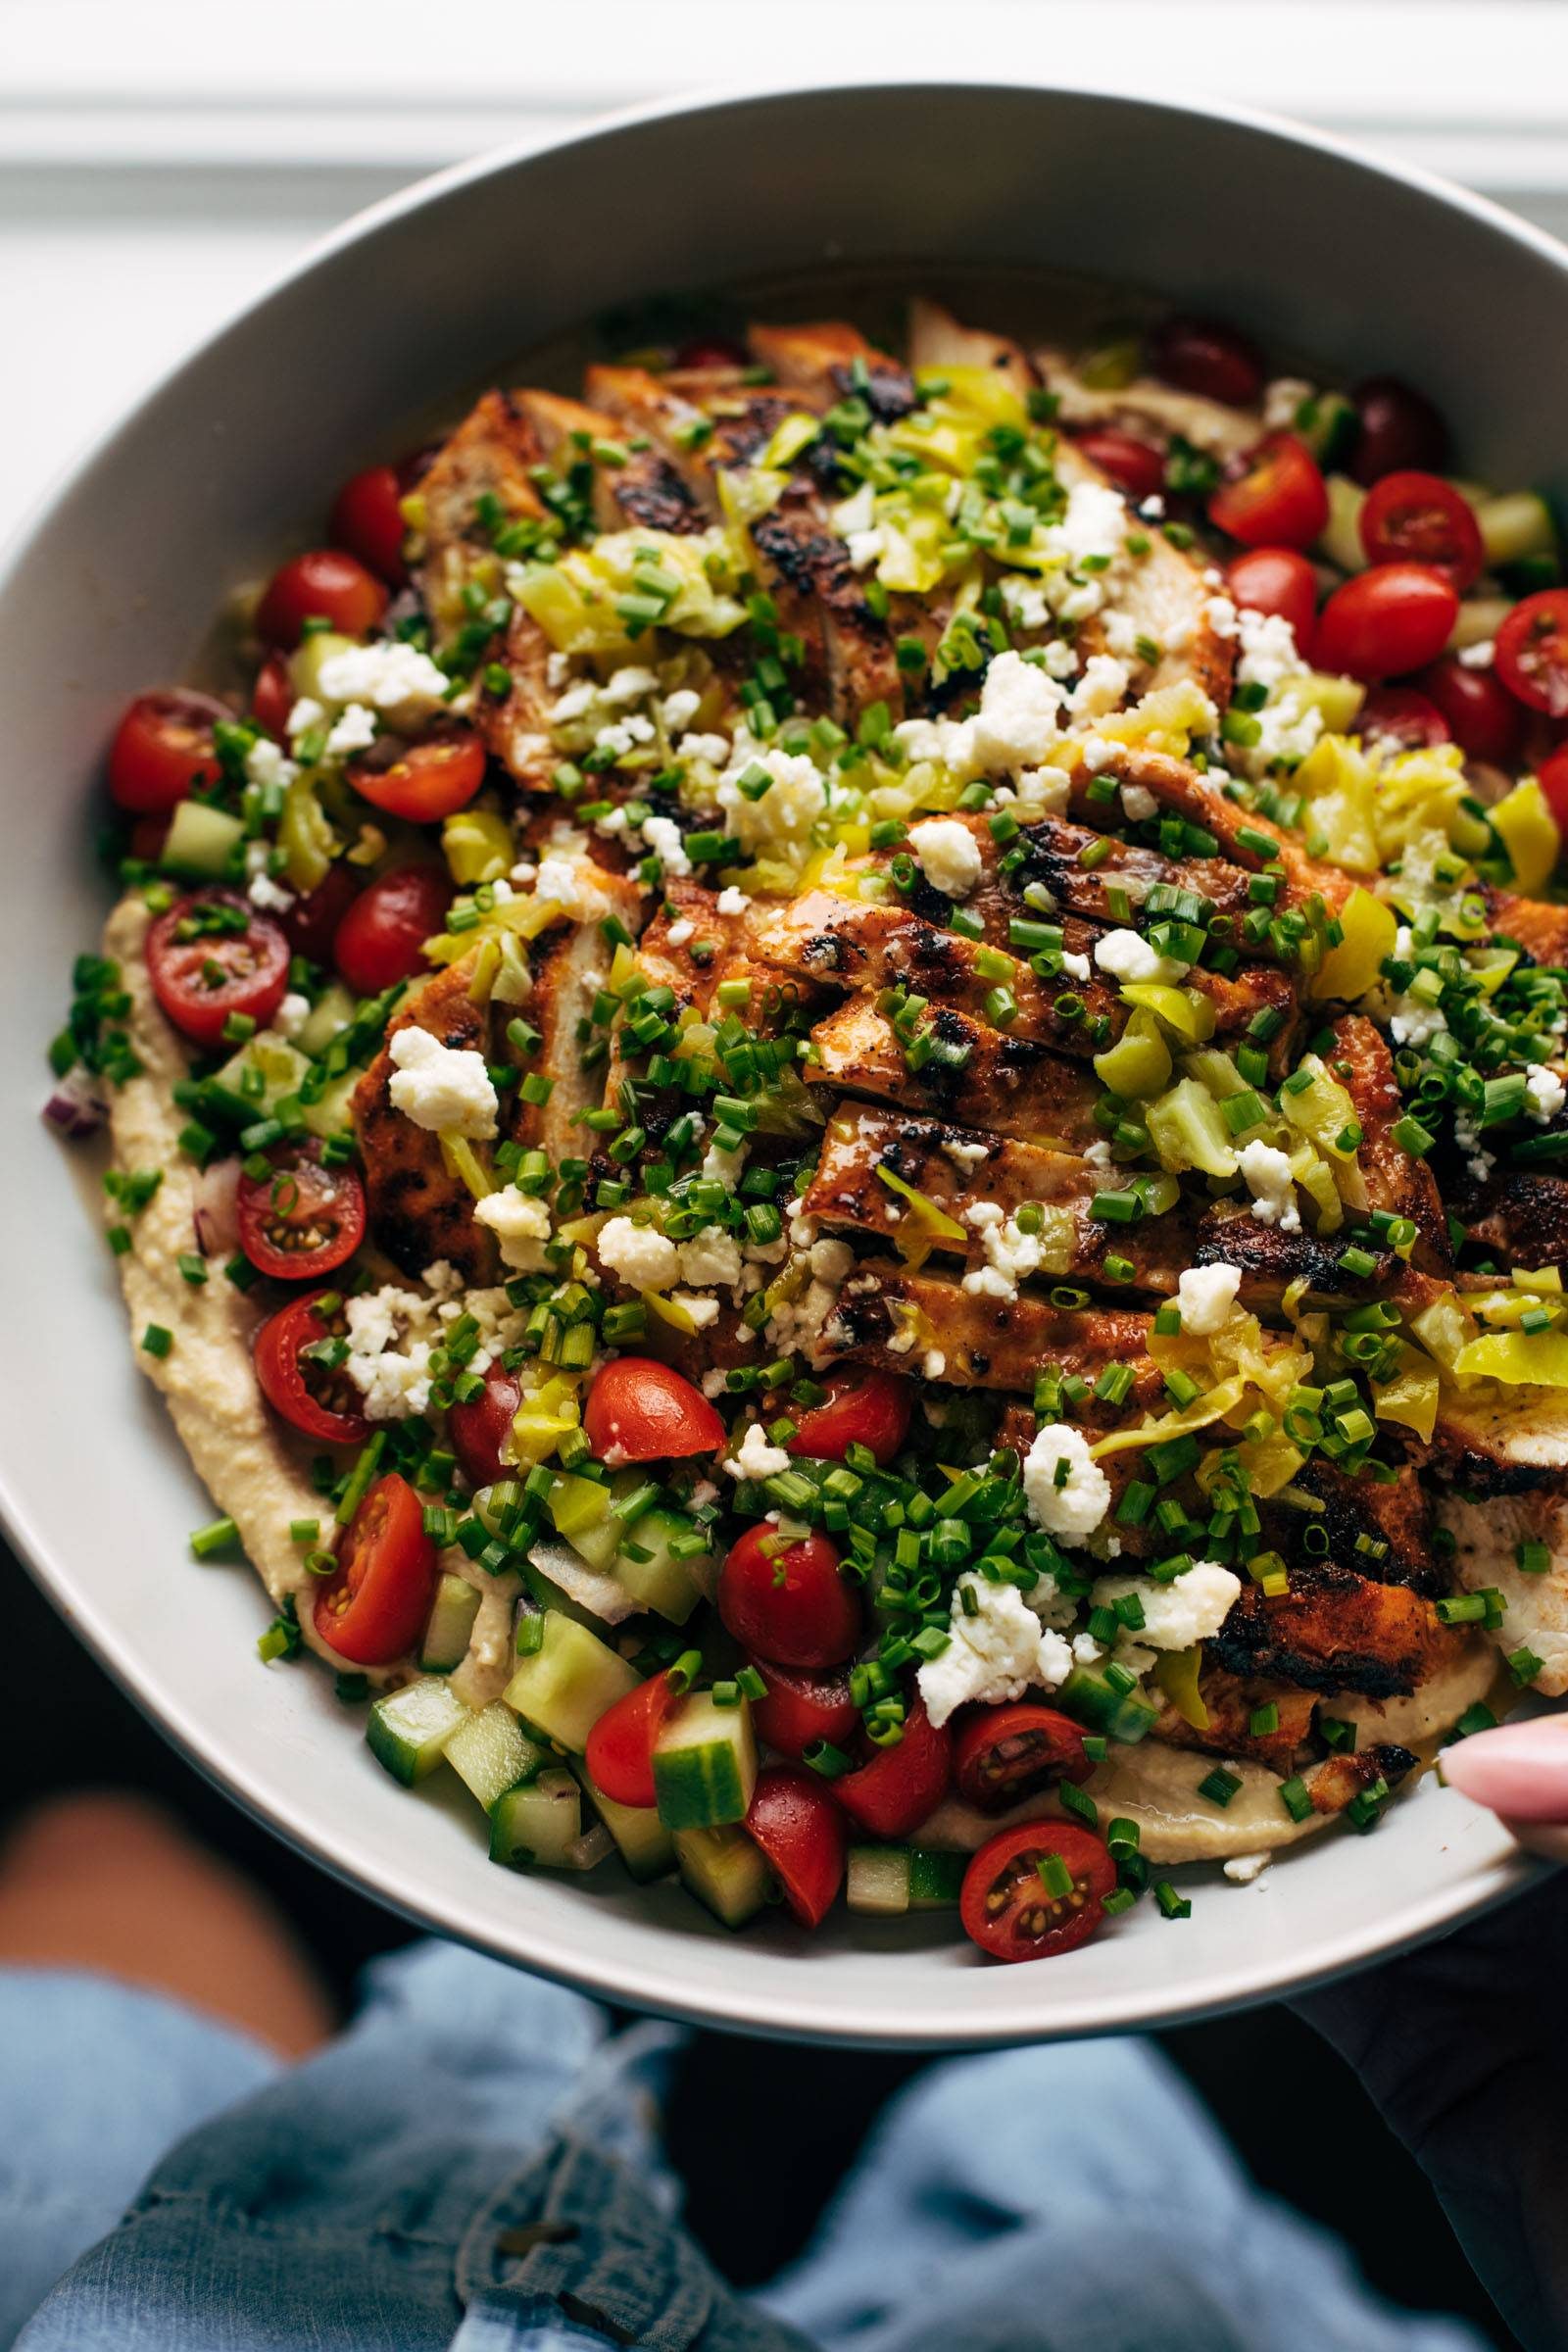
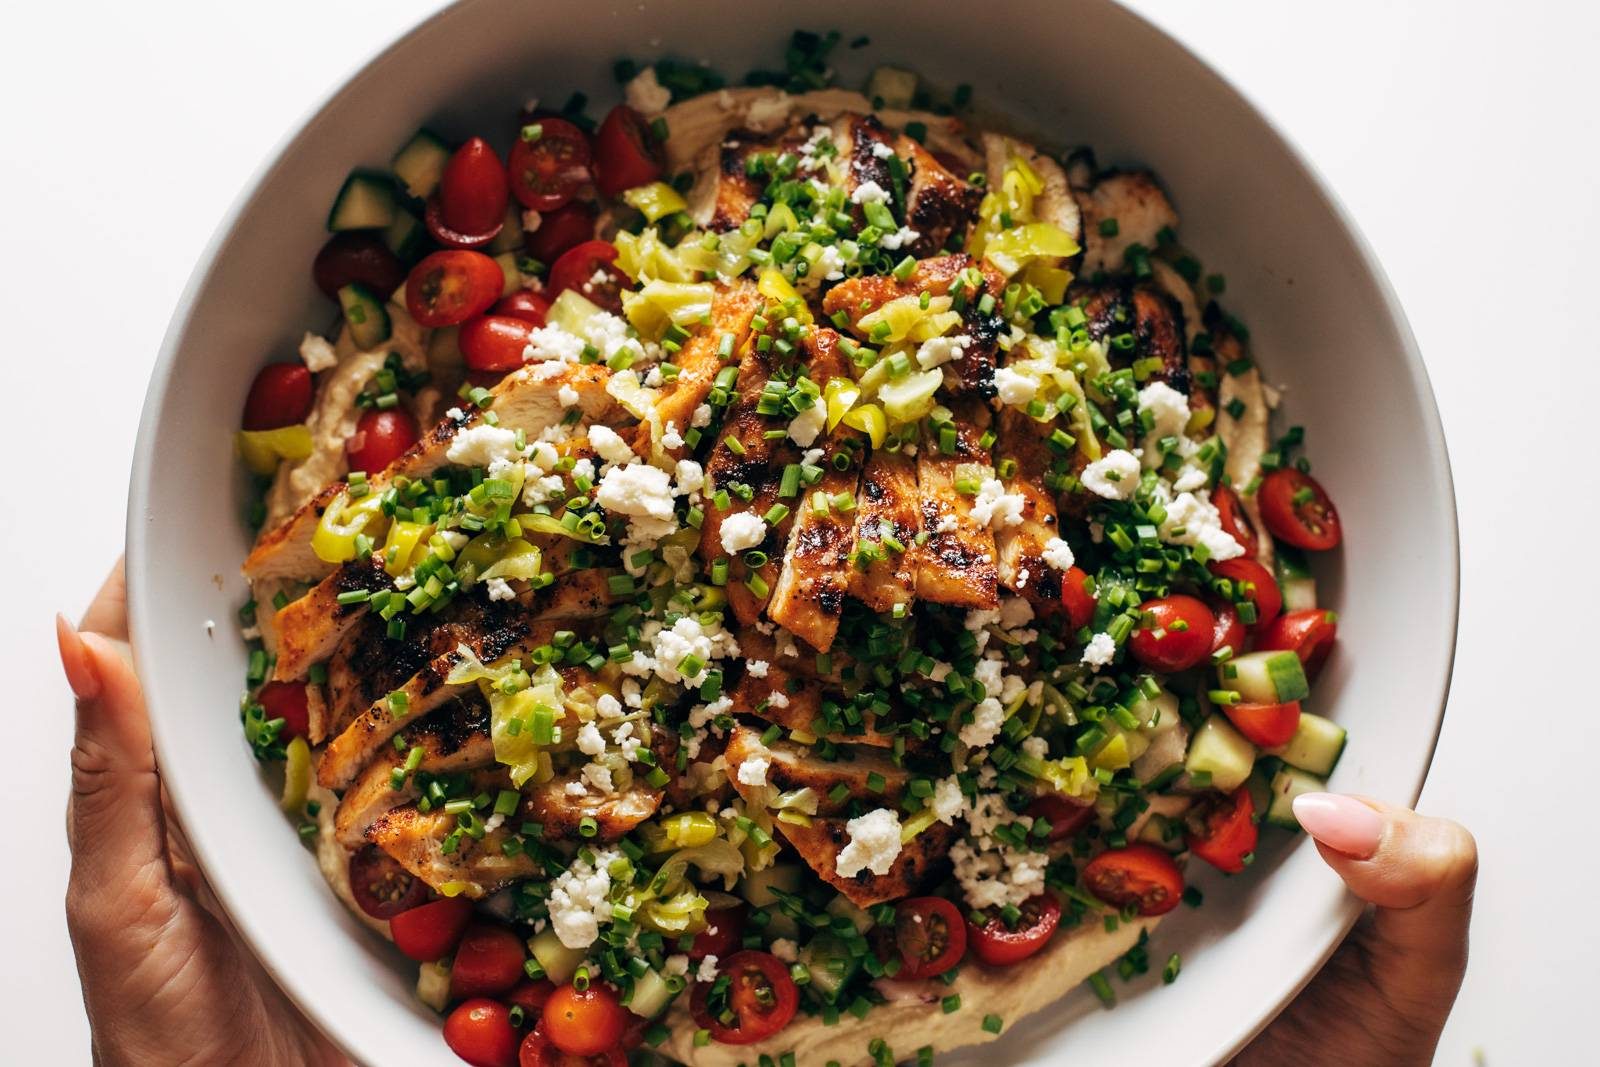
    This is such a fun one! Grilled marinated chicken, a quick tomato cucumber salad, tangy bits of feta, and a zippy pepperoncini garlic butter sauce poured over the whole thing.

    Grilled marinated chicken, cucumber tomato salad, hummus, feta, and a pepperoncini garlic butter sauce. What a showstopper! This is hands-down my new favorite meal!


    In This Post: Everything You Need For Grilled Chicken with Pepperoncini Garlic Butter


    White hand holding a plate of pepperoncini chicken

    How To Make This Chicken

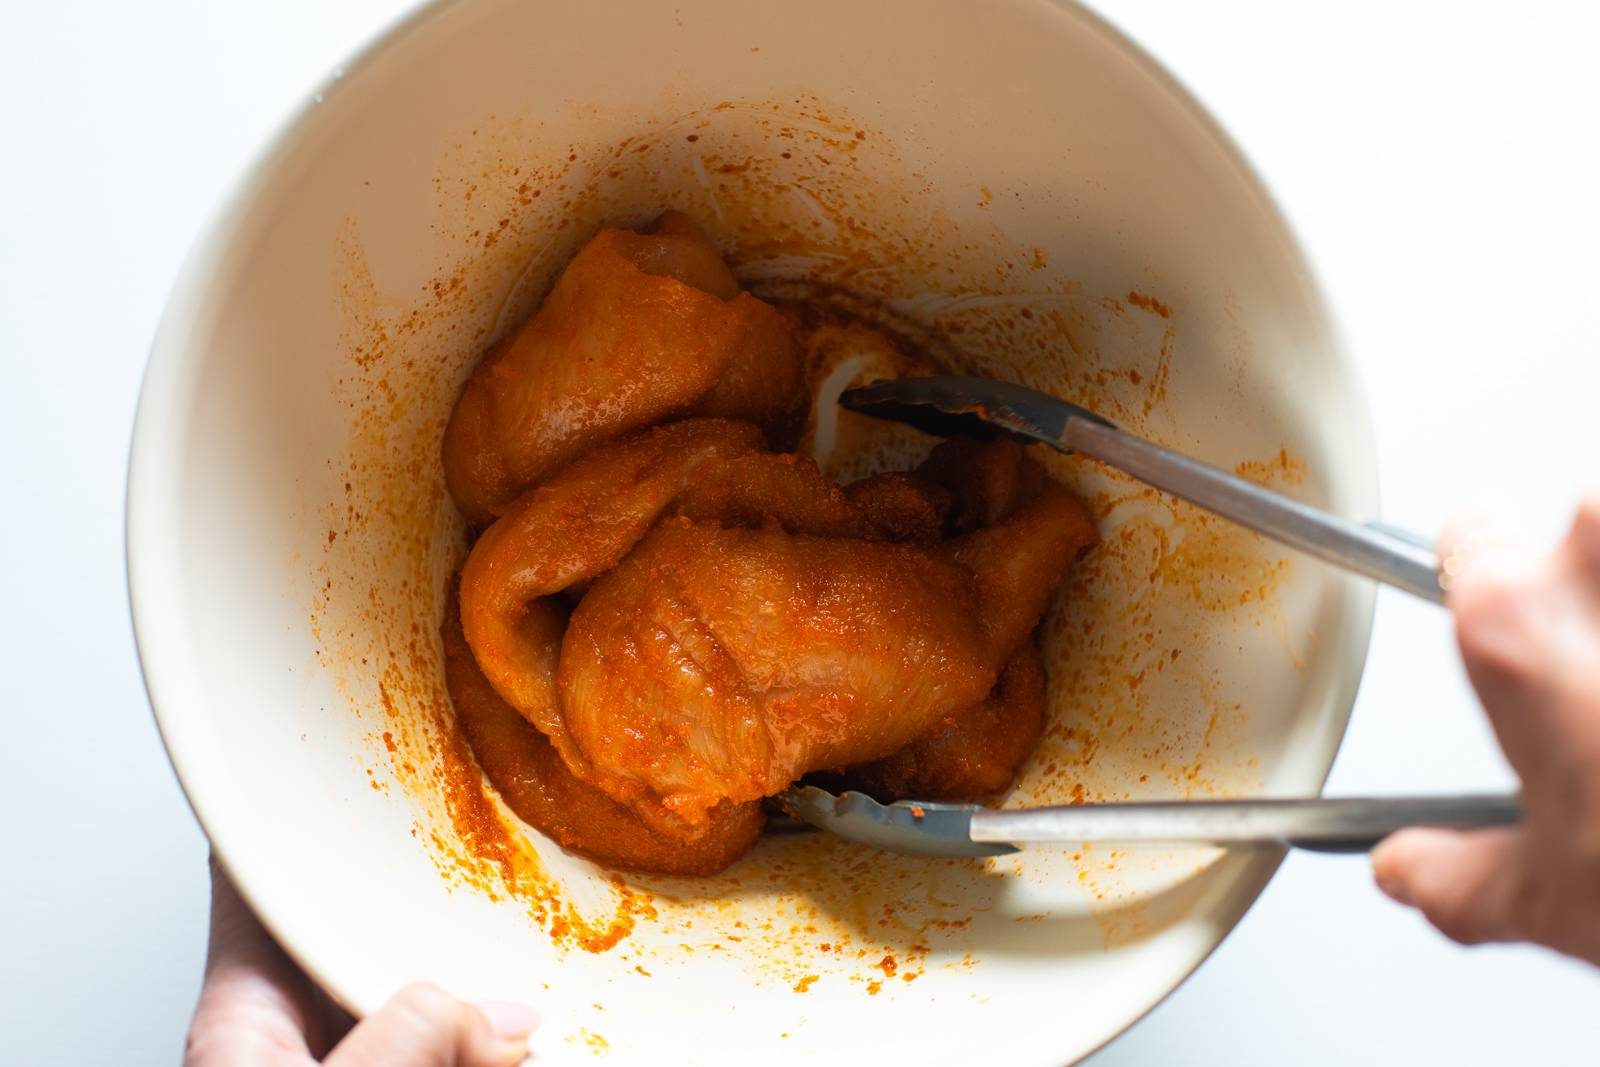
    Step 1: Marinate the Chicken

    Paprika, onion powder, garlic powder, salt, and olive oil. Let it hang out while you prep the other stuff.

    Raw chicken being tossed with spices in a bowl.

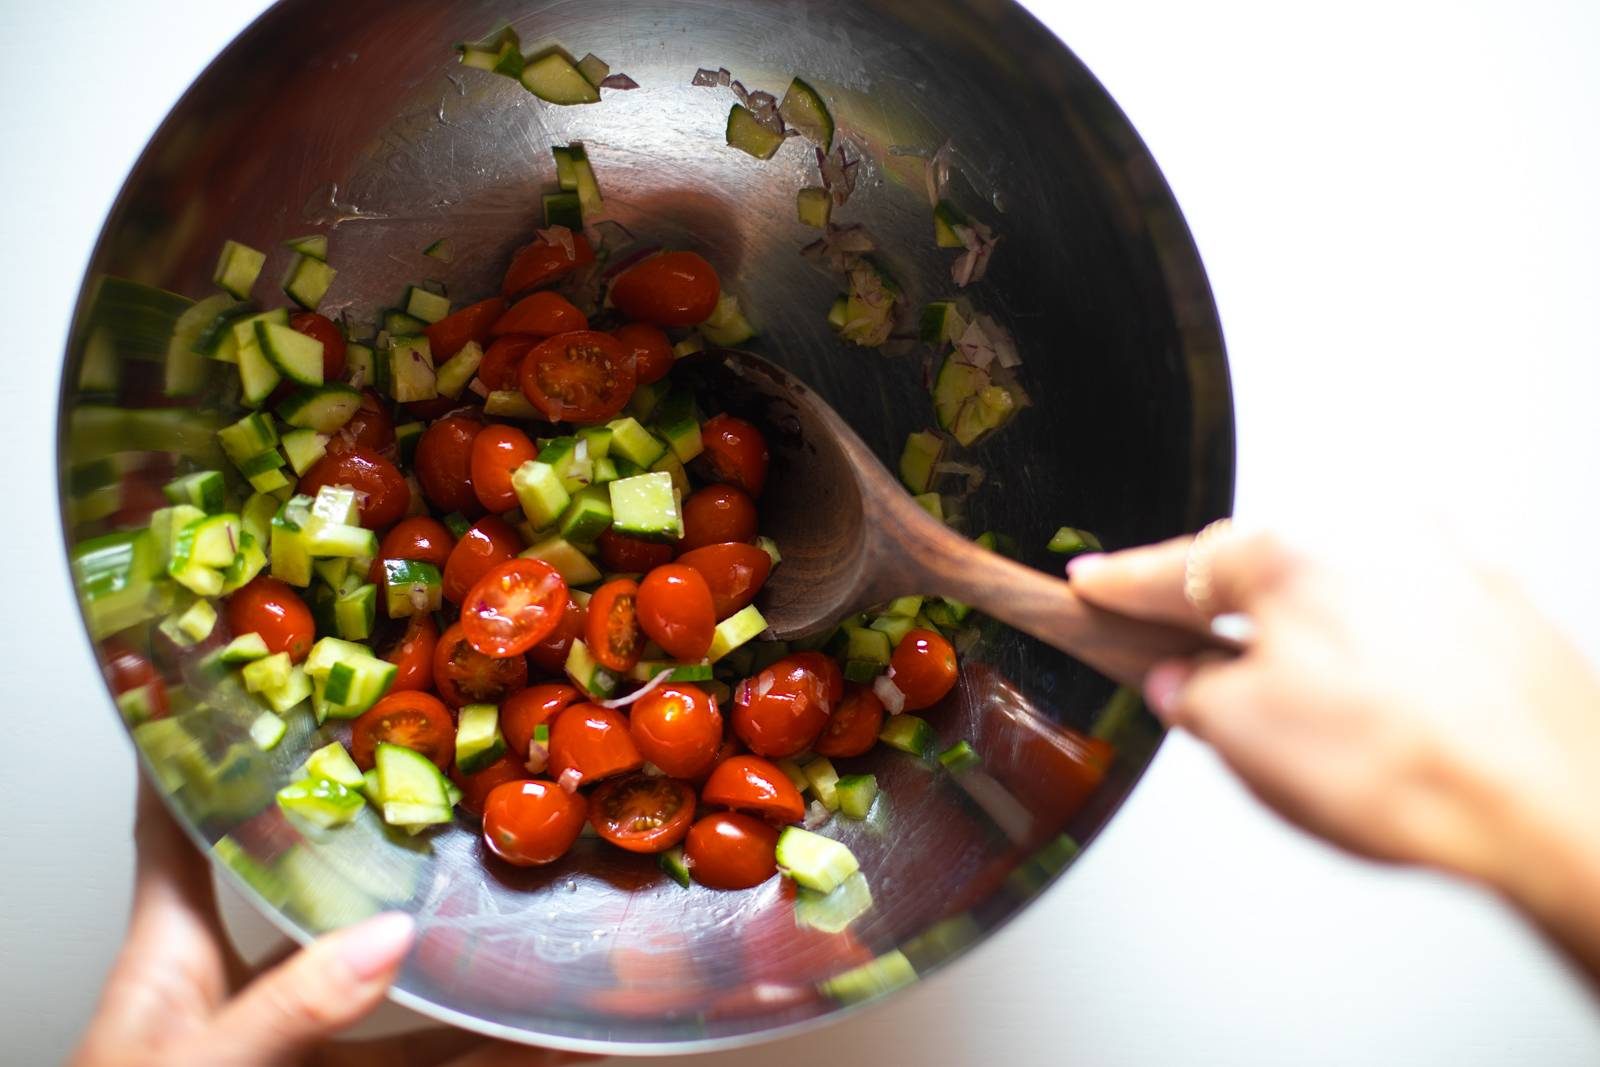
    Step 2: Make a Cucumber Tomato Salad

    Cucumbers, tomatoes, red onion, and a tiny bit of olive oil, salt, and vinegar.

    Cucumber and tomato salad being tossed in a bowl.

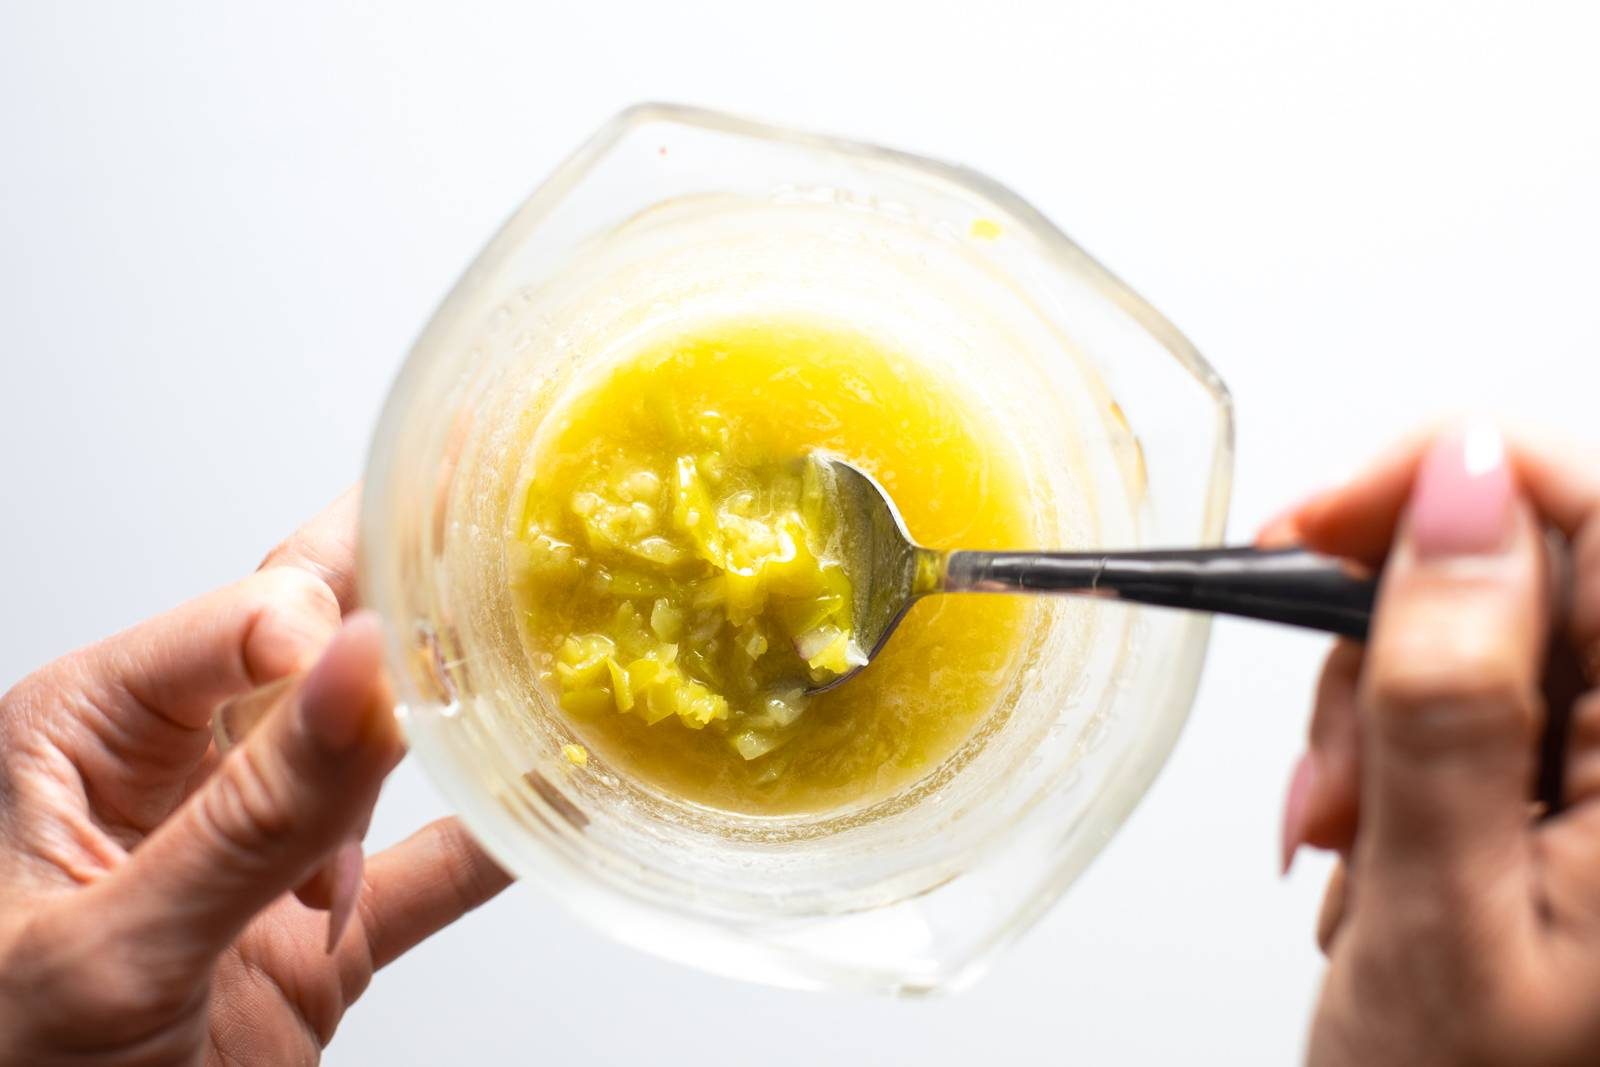
    Step 3: Make Pepperoncini Garlic Butter Sauce

    Garlic, melted butter, pepperoncini brine, and some pepperoncini peppers get mixed up to make a sauce.

    White hand mixing up pepperoncini butter

    Step 4: Grill the Chicken

    I usually use a grill pan because I’m too lazy to get my grill out. But an actual grill (or a regular skillet) will work perfectly.

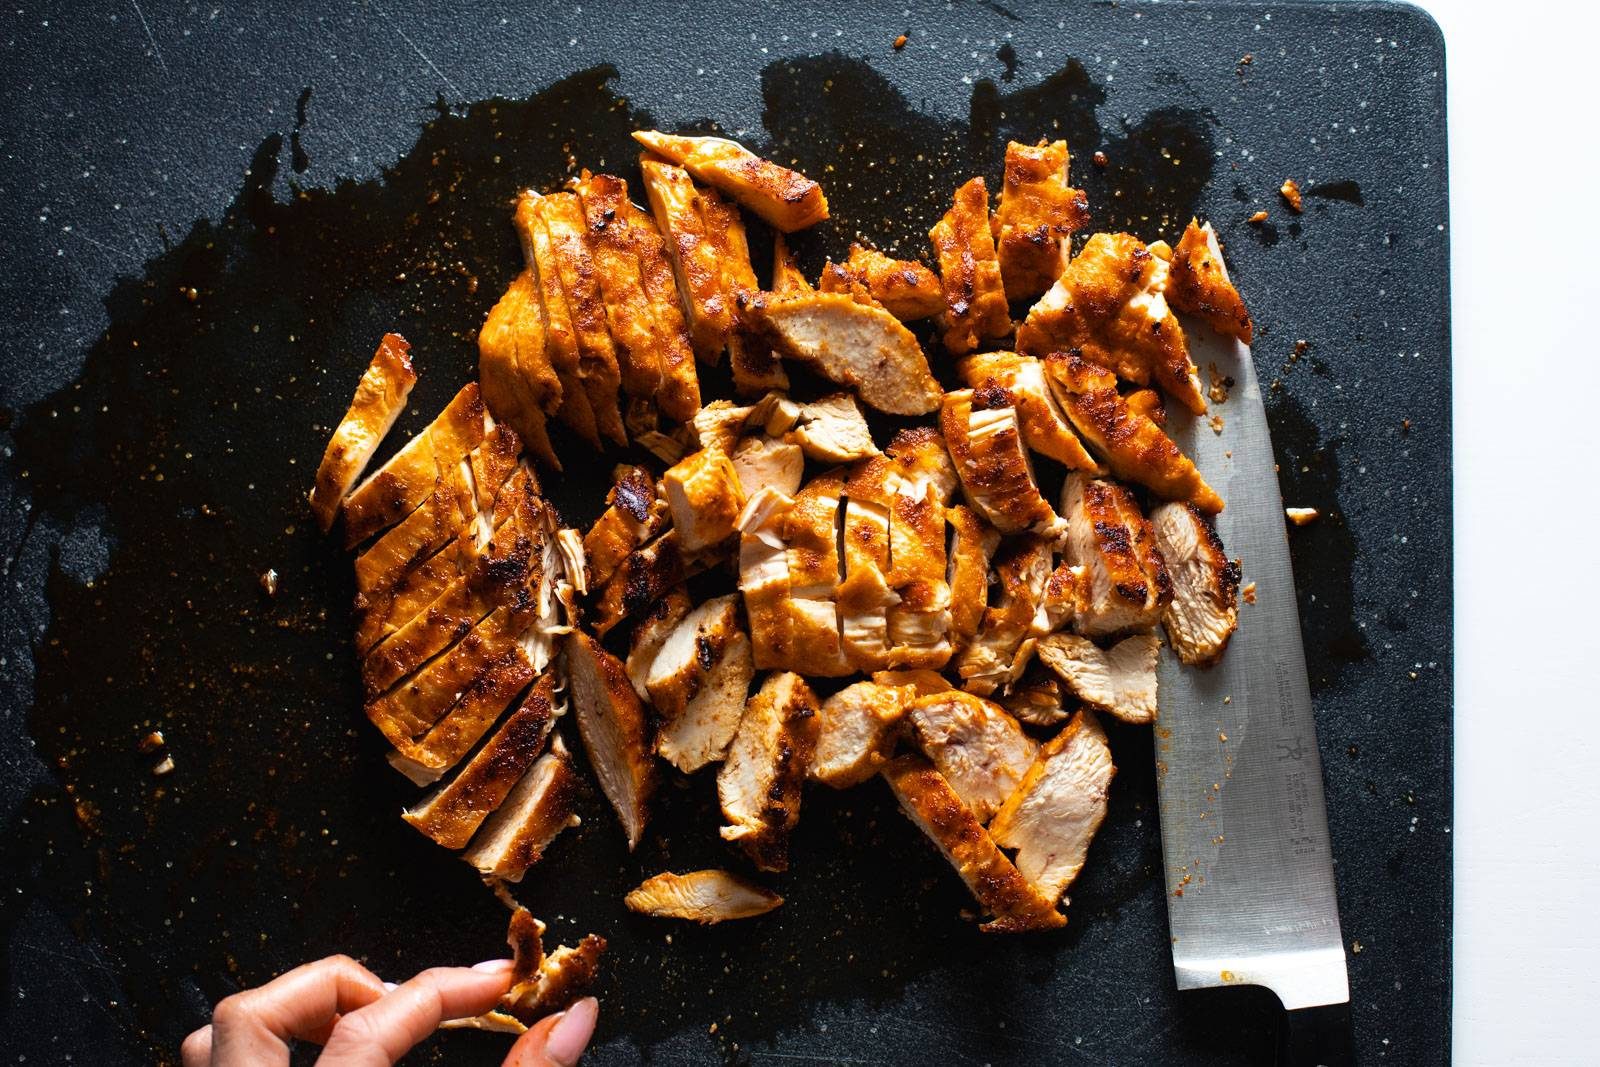
    Grilled chicken chopped up on a cutting board

    Step 5: Assemble

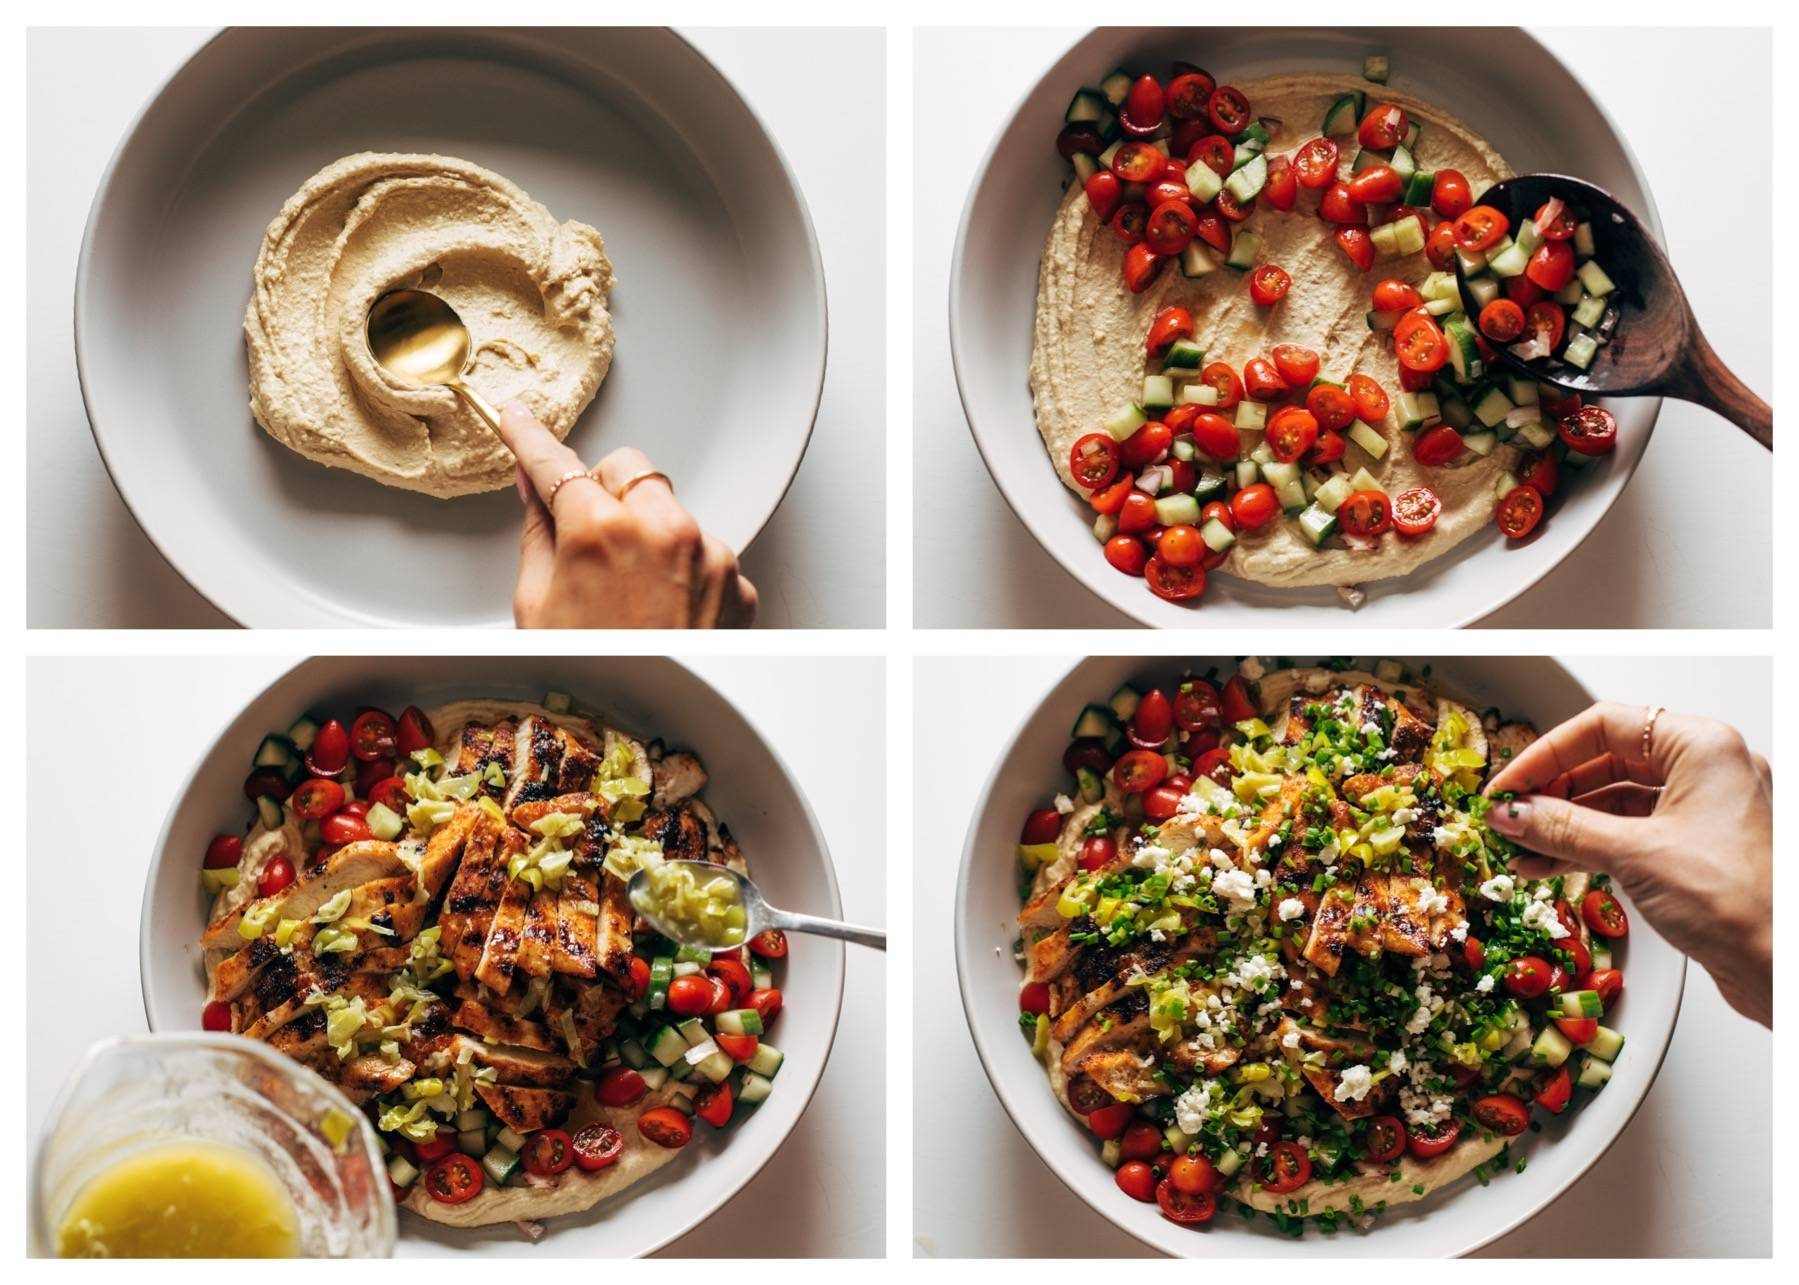
    This is the fun part! Hummus goes first, then tomato cucumber salad, then chicken and sauce.

    Finish it off with feta and chives!

    Collage of the pepperoncini chicken platter being built in steps

    Lindsay’s Notes

    Grilled marinated chicken, tomato cucumber salad, feta, hummus, and a pepperoncini garlic butter sauce. OH BABY, I love this recipe!

    I got the idea for this from Sara Tane – got to her site randomly via Threads (okay Threads! coming in clutch with recipe inspo!) and immediately knew it was going to be a banger.

    This particular grilled marinated chicken is so simple (just dry spices and olive oil) and yet somehow so good. I honestly think the biggest challenge of this recipe is trying not to eat all of the chicken before it makes its way onto the plate.

    And as if that wasn’t enough, get it all laced up with some freshly grated garlic, melted butter, and pepperoncini brine and you’ve got one killer combo.

    White hand holding platter of pepperoncini chicken

    Watch How To Make This Grilled Chicken with Pepperoncini


    Print

    clock clock iconcutlery cutlery iconflag flag iconfolder folder iconinstagram instagram iconpinterest pinterest iconfacebook facebook iconprint print iconsquares squares iconheart heart iconheart solid heart solid icon

    Description

    This is such a fun one! Grilled marinated chicken, a quick tomato cucumber salad, tangy bits of feta, and a zippy pepperoncini garlic butter sauce poured over the whole thing.


    Grilled Chicken: 

    Pepperoncini Butter Sauce:

    Cucumber Salad:

    Extras:


    1. Marinate the Chicken: Place the chicken, spices, and olive oil together in a large bowl or plastic bag. Mix until well-coated; set aside in the fridge while you prep the other elements (30 minutes up to several hours).
    2. Make the Cucumber Salad: Toss veggies with a small amount of salt, pepper, olive oil, and vinegar. (If you add too much it becomes watery, so use a light hand!)
    3. Make the Pepperoncini Butter Sauce: Melt the butter (I just do this in the microwave). Stir in the garlic, brine, and pepperoncini pieces. Set aside.
    4. Grill the Chicken: Using a grill, grill pan, or skillet, cook the chicken until cooked through and golden brown on both sides. If you have a meat thermometer, I highly recommend using it so you don’t overcook the chicken! We’re looking for 160 degrees. Let it rest for a moment, then cut into slices.
    5. Assemble: If you want to serve it as a family-style meal – layer the hummus on a large platter. Add the cucumber salad in 3-4 little mounds around the outside of the plate. Add the chicken right in the middle and drizzle with the pepperoncini butter sauce. Add feta, chives, and s&p to finish. Scoop onto plates or dip into the whole thing with pita bread. SO good!

    Notes

    The garlic butter will start to congeal as it rests, so I would suggest warming that right before serving (if it’s been sitting out for a while) so it’s nice and silky, and then enjoying the whole thing while the butter and chicken are still warm for best mouthfeel! *texture nerd smile*

    Nutrition facts do not include extras. 

    For tips on how to cook chicken, see our guide here!

    • Prep Time: 20 minutes
    • Cook Time: 15 minutes
    • Category: Dinner
    • Method: Grill
    • Cuisine: Mediterranean-Inspired

    Keywords: pepperoncini chicken, grilled chicken, garlic butter pepperoncini sauce

    Frequently Asked Questions For Grilled Chicken with Pepperoncini Garlic Butter

    What can I use instead of chicken?

    Shrimp would be awesome!

    How do you serve this?

    As written, the recipe will serve like a family-style platter! It is a gloriously beautiful thing to set down on a table for a group meal. I put scoops of everything on individual plates and we dip into it with bread and eat it with forks. For individual servings, I would do the same thing, but just layer it onto a plate with amounts for one person.

    What else would you serve with this?

    To me, this is a complete meal! Veggies, protein, carbs, fiber, and FLAVOR! But if you wanted to throw something else on the table to round it out even more, this bistro salad would be amazing with all the fresh herbs in there! Yum. And of course, the simple green salad never fails me. We make it weekly!

    How long do the leftovers last?

    The chicken will last for 2-3 days in the fridge. If you’re making this for meal prep, I would suggest storing each element separately until just before serving so it doesn’t all get soggy in the hummus.

    Can you make this vegetarian / meatless?

    Yes! I think cauliflower would be delicious – just coat the cauliflower florets with the same spices that are written here and roast at 425 for 20 minutes or so.

    How do you make this gluten-free and/or dairy-free?

    This recipe is naturally gluten-free! To make this dairy free, omit the feta cheese and use vegan butter.

    Three More Of My Favorite Chicken Recipes

    Source link

  • Easy Pumpkin Mac and Cheese Recipe

    Easy Pumpkin Mac and Cheese Recipe

    This pumpkin mac and cheese recipe is the ultimate fall dinner! Pumpkin puree makes the cheese sauce extra creamy and delicious.

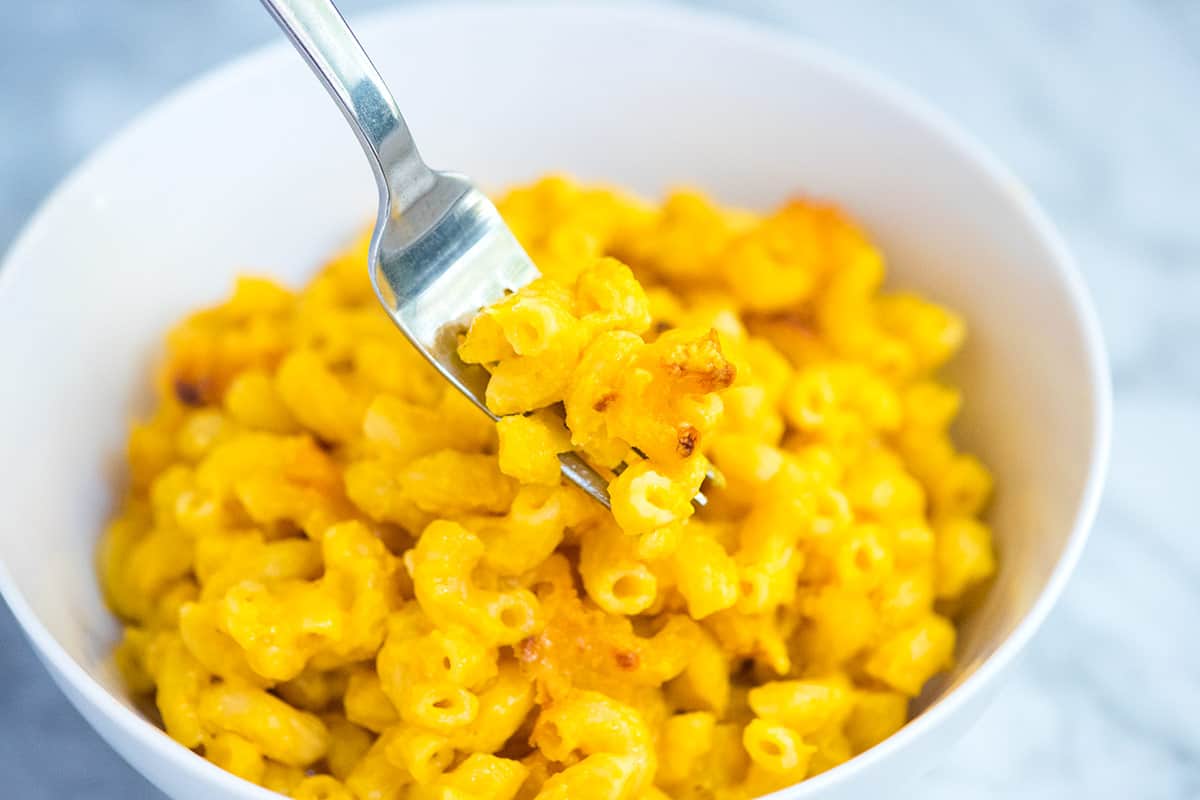
    Creamy pumpkin mac and cheese

    If you haven’t tried it yet, adding pumpkin puree to mac and cheese is truly delicious. I remember being surprised the first time I tried it, but it makes the sauce silkier, creamier, and just a little bit richer.

    You can use homemade pumpkin puree or canned pumpkin puree. I often turn to this recipe when I have leftover pumpkin from baking a batch of pumpkin scones or making pumpkin spice lattes.

    Key Ingredients

    • Pasta: Choose pasta with nooks and crannies that hold onto the sauce. Elbow macaroni or shells are perfect.
    • Pumpkin: Use pure pumpkin puree (not pumpkin pie mix, which has added spices). Libby’s and Whole Foods 365 are great store-bought options, or try our pumpkin puree recipe.
    • Butter and Flour: These form a simple roux that thickens the cheese sauce once you add the milk.
    • Milk: Whole or reduced-fat milk both work beautifully.
    • Cheese: Sharp cheddar melts really well and has a classic flavor. For the creamiest sauce, grate the cheese yourself rather than using pre-shredded cheese.
    • Extras: A bit of Dijon mustard, black pepper, and nutmeg improves the flavor of the sauce, making the pumpkin mac and cheese incredible.

    Find the full recipe with measurements below.

    My Tips for Making Pumpkin Mac and Cheese

    Tip 1: Start with a roux. Start the sauce by cooking the flour in melted butter until it smells nutty and turns a light golden color. This step creates the base that thickens the milk and gives your cheese sauce a rich flavor. We use the same method when making classic baked mac and cheese and this creamy mac and cheese.

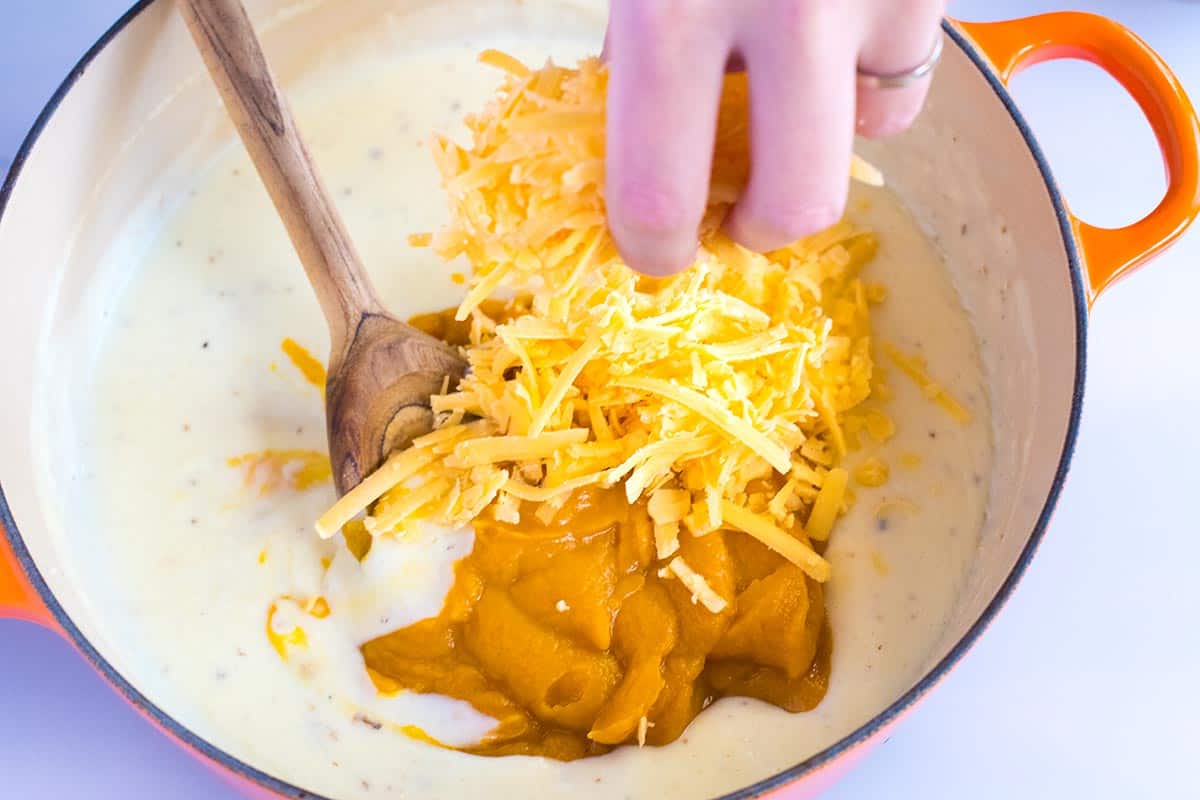
    Tip 2: Make the pumpkin cheese sauce. After whisking in the milk, the mixture will thicken. Stir in your seasonings, pumpkin puree, and most of the cheese. I highly recommend tasting the sauce before adding the pasta. If it seems flat, add a pinch more salt and pepper. The flavor of pumpkin will be there, but it will be subtle. I love it!

    Making the cheese sauce for pumpkin mac and cheese

    Tip 3: Decide how you’ll serve it. For a creamier, looser mac and cheese, serve it straight from the stovetop. For a golden, bubbly topping, transfer to a baking dish, sprinkle on extra cheese, and bake. I love it served both ways!

    Serving Suggestions

    I love richer dishes like this one with something fresh on the side. A crisp green salad with honey mustard dressing, or roasted vegetables like roasted green beans or Brussels sprouts, work really well. I also love this tahini kale and white bean salad!

    For a heartier meal, you can serve it as a side to pork chops, roast chicken, garlic herb roasted turkey breast, or sausages, like beer brats. You can add toppings, too! Consider crumbled bacon or sausage. And of course, a side of garlic bread or focaccia is always welcome.

    Pumpkin Mac and Cheese

    Easy Pumpkin Mac and Cheese

    • PREP
    • COOK
    • TOTAL

    My family loves this pumpkin mac and cheese recipe! Pumpkin puree makes a velvety, rich cheese sauce. Use pure pumpkin puree, not the canned mix labeled “pumpkin pie mix,” which has spices added to it. You can also swap pumpkin for another pureed squash, such as butternut squash.

    8 Servings

    Watch Us Make the Recipe

    You Will Need

    1 pound pasta, such as macaroni or shells (450g)

    Salt, as needed

    4 tablespoons unsalted butter (55g)

    1/4 cup all-purpose flour (30g)

    2 cups milk, whole or 2% are best (470ml)

    1 teaspoon Dijon mustard

    1/2 teaspoon fresh ground black pepper

    1/4 teaspoon finely grated nutmeg

    1 cup pure pumpkin puree, try homemade pumpkin puree (227g)

    2 cups grated sharp cheddar cheese, 8 ounces (226g)

    Directions

      1Preheat the oven to 350°F (177°C). Butter a 3-quart casserole dish or spray with nonstick cooking spray.

      2Bring a large pot of salted water to a boil. Cook pasta as directed on the package. (Usually 7 to 10 minutes). Drain.

      3Melt the butter in a large, high-sided pan over medium heat. When it begins to bubble, add the flour. Cook, whisking constantly for 2 to 3 minutes until the butter smells fragrant and nutty. The color of the butter-flour mixture will turn light brown.

      4While whisking, slowly pour in the milk. Continue to cook, whisking constantly until the sauce bubbles and thickens.

      5Reduce the heat to low, and then season the sauce with a 1/2 teaspoon of salt, pepper, nutmeg, and mustard.

      6Add the pumpkin puree and three-quarters of the grated cheese. Stir until the cheese has melted and the sauce is smooth. Taste the sauce for seasoning and adjust with more salt or pepper.

      7Stir the cooked pasta into the sauce until well coated, then spoon into the prepared baking dish and top with remaining cheese.

      8Bake uncovered until golden brown on top, for about 25 minutes. Let stand 5 minutes before serving.

    Adam and Joanne’s Tips

    • Storing: Keep covered in the refrigerator for up to 3 days. To freeze, transfer to a freezer-safe container and freeze for up to 2 months. Bake, covered, in a 350°F oven for about an hour. Or thaw overnight and gently reheat on the stove (if it seems dry, add a tablespoon or two of extra milk).
    • Dutch oven: If you have one, make the sauce in an oven-safe Dutch oven. This way, there is no need to dirty a baking dish. Instead, mix the pasta and sauce in the Dutch oven and bake.
    • The nutrition facts provided below are estimates.

    Nutrition Per Serving
    Calories
    474
    /
    Protein
    19g
    /
    Carbohydrate
    57g
    /
    Dietary Fiber
    4g
    /
    Total Sugars
    5g
    /
    Total Fat
    19g
    /
    Saturated Fat
    11g
    /
    Cholesterol
    51mg


    AUTHOR:

    Joanne Gallagher

    Adam and Joanne of Inspired Taste

    We are Adam and Joanne Gallagher, the creators of Inspired Taste. Established in 2009, Inspired Taste grew from a childhood dream into one of the internet’s most trusted recipe sites with hundreds of reliable recipes, step-by-step videos, and expert tips.More About Us
    Source link

  • Easy Tortellini Soup Recipe

    Easy Tortellini Soup Recipe

    We love this cozy tortellini soup recipe! It’s filled with tender veggies, store-bought tortellini, and a garlicky broth that’s ready in just 30 minutes.

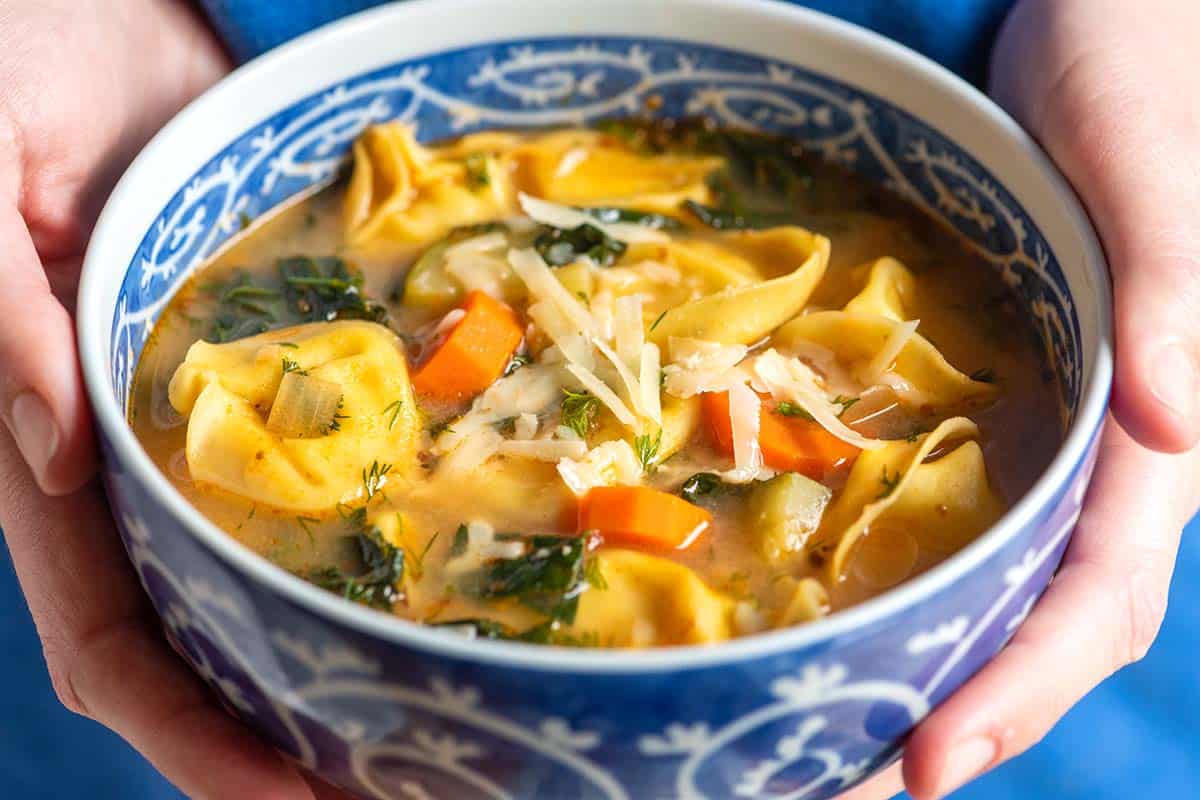
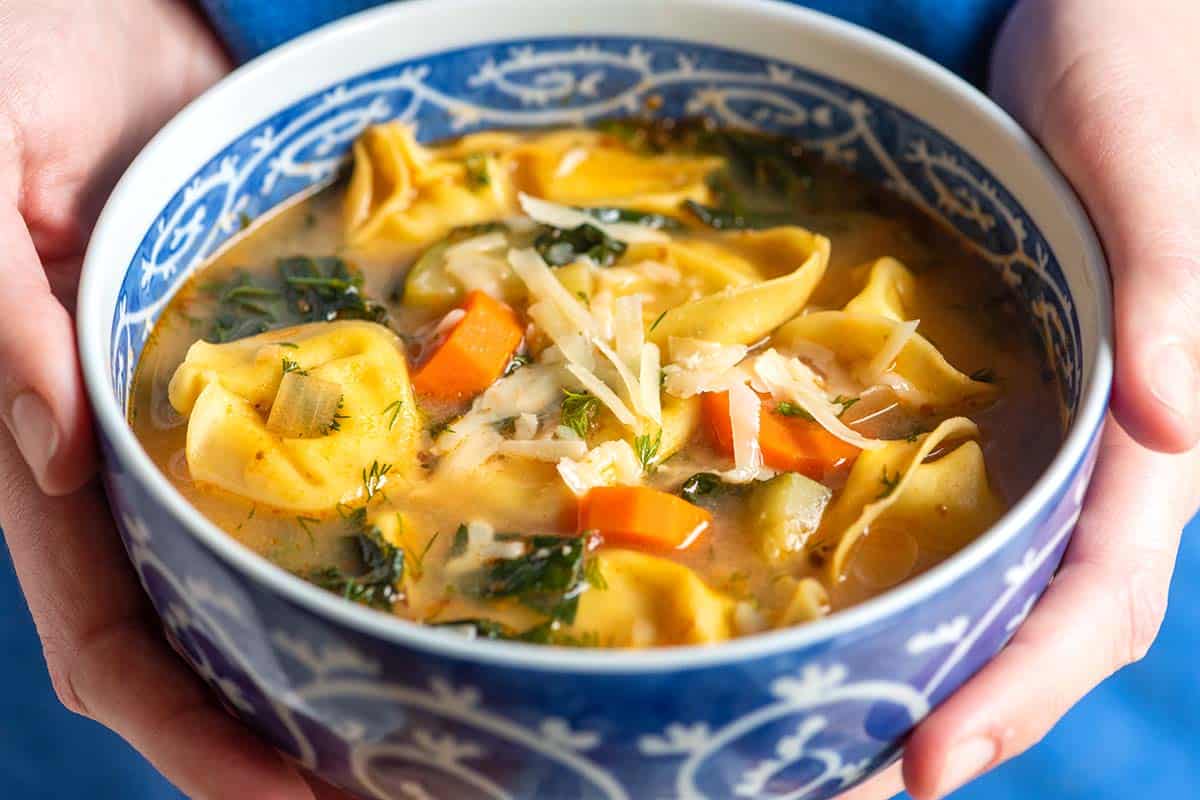
    Tortellini Soup

    I’m always happy when this vegetable tortellini soup is for dinner. It’s one of my favorite ways to use a package of store-bought tortellini. I enjoy so many of the soup recipes on Inspired Taste, but this one truly delivers on the comfort food front! It’s hearty, delicious, and quick.

    Feel free to use your family’s favorite tortellini in the soup, which means you can try out different fillings to find what you love most.

    Key Ingredients

    • Tortellini: I’m a fan of cheese-filled tortellini, but feel free to use your favorite kind. You’ll find plenty of options at the store, including spinach, chicken, and even vegan tortellini. Small ravioli is a great substitute! And if you don’t have tortellini, regular pasta works just fine. The soup itself is still delicious.
    • Veggies: I pack this hearty soup with onion, carrot, zucchini, garlic, and kale (or substitute spinach).
    • Tomato Paste and Spices: Tomato paste adds a bit of color and richness, while the spices add incredible flavor. I use Italian seasoning and crushed red pepper flakes. The pepper flakes are optional, but they add a nice little kick.
    • Broth: For a vegetarian tortellini soup, use vegetable broth. If that’s not a concern, chicken broth works great.
    • Fresh Herbs: I love finishing the soup with fresh herbs. Parsley and dill are my favorites.

    Find the full recipe with measurements below.

    How to Make My Favorite Tortellini Soup

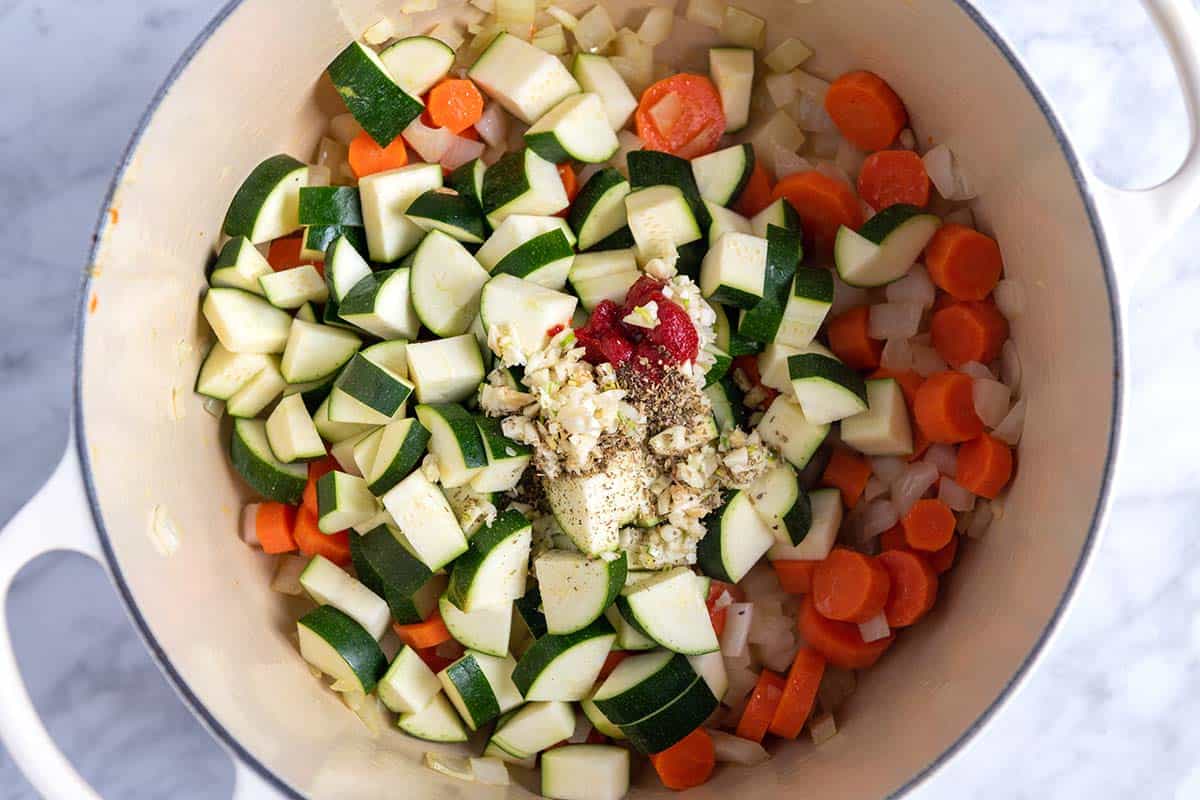
    Tip 1: Start with the aromatics. Cook chopped onions and carrots in a small amount of oil until they begin to soften. This simple step builds the base flavor for the soup. Then, layer in more flavor with minced garlic, tomato paste, Italian seasoning, and chopped zucchini.

    Cooking veggies with garlic, tomato paste and herbs for tortellini soup

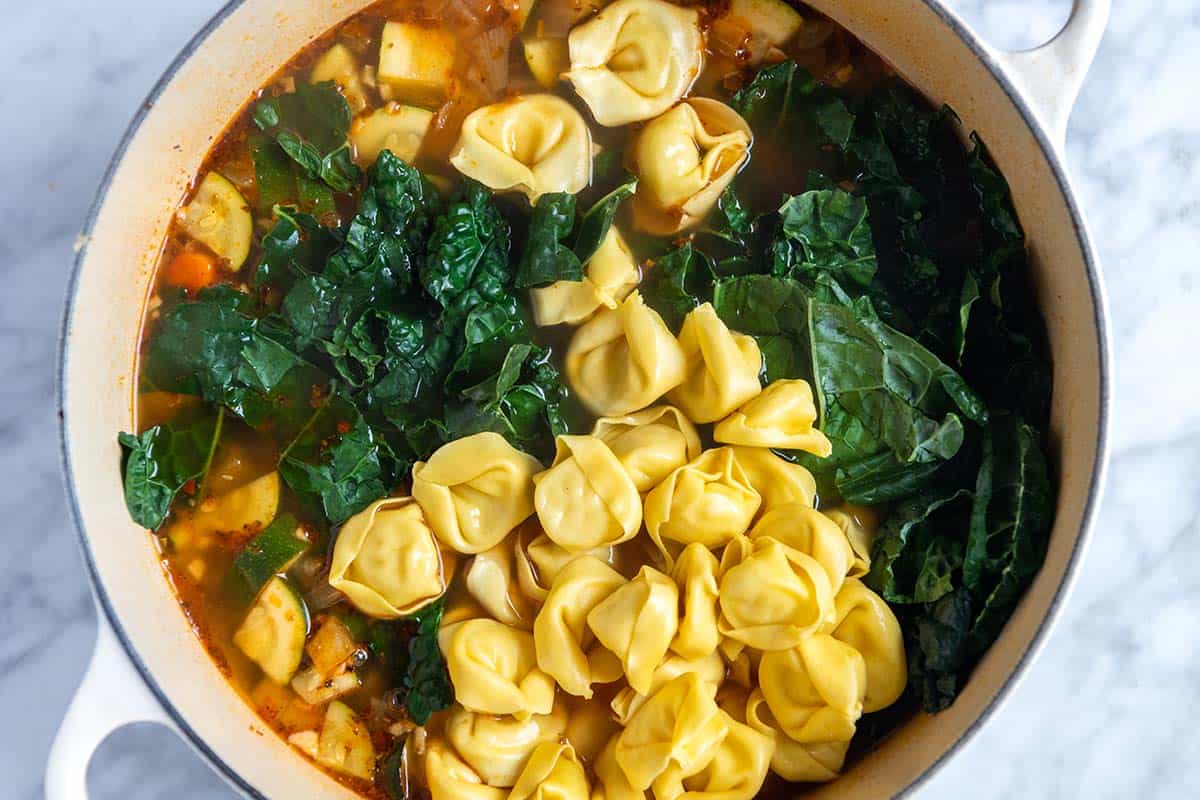
    Tip 2: Add the tortellini and kale at the end. Pour in the broth and simmer until the vegetables are tender. Then stir in the tortellini and a handful of torn kale (or spinach) in the soup. Cook for just a few minutes more, until the greens are wilted and the pasta is tender.

    Adding tortellini and kale to the soup pot

    Tip 3: Make it creamy. Season the soup to taste, and if you’d like a creamy broth, add a splash of cream or non-dairy milk. I also love stirring in chopped fresh herbs, such as dill or parsley, right before serving for an extra pop of color and fresh flavor.

    More Easy Soup Recipes

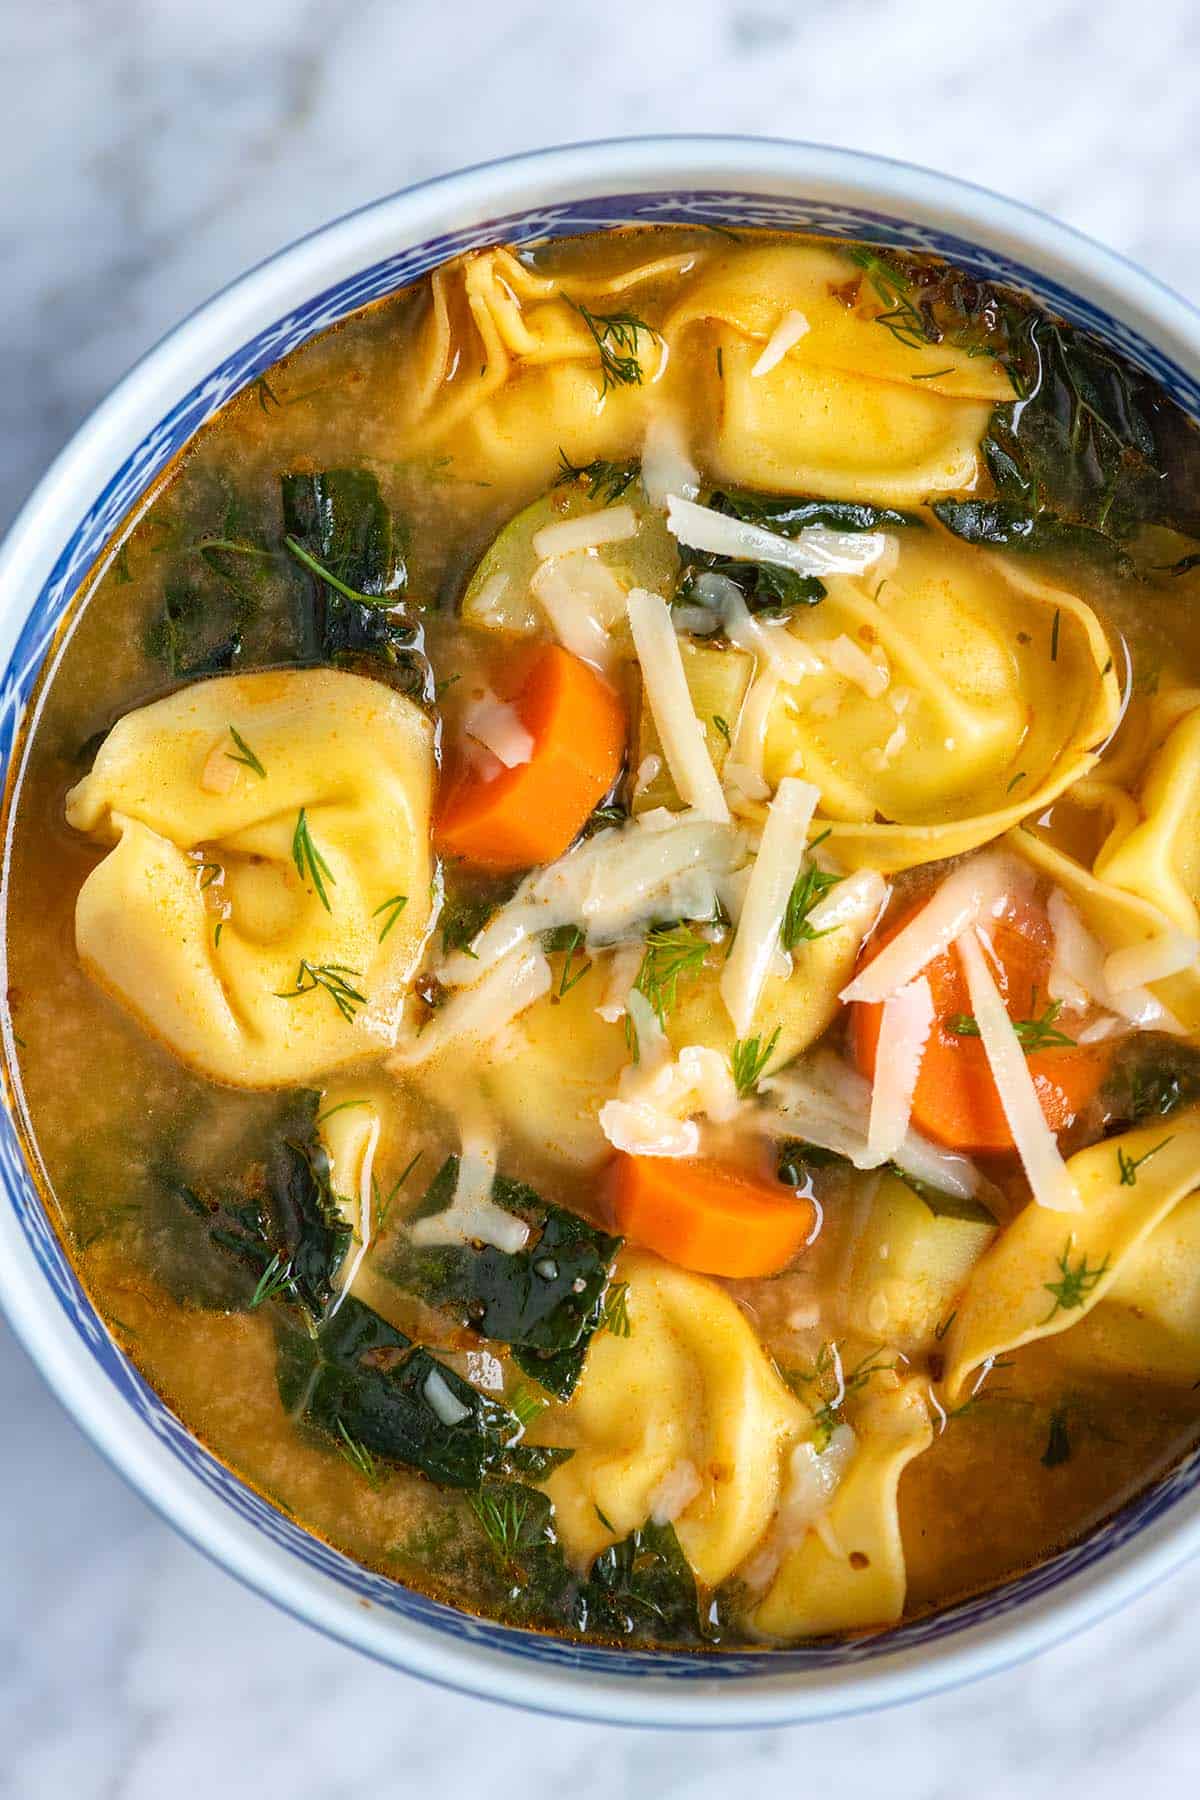
    Tortellini Soup with Vegetables

    Easy Tortellini Soup

    • PREP
    • COOK
    • TOTAL

    We love this quick and easy tortellini soup recipe made with store-bought pasta, a garlicky broth, and plenty of veggies. I usually keep it vegetarian and use cheese tortellini, but you can use whatever you love (spinach, sausage, chicken, or even vegan fillings). Most varieties are easy to find in larger grocery stores across the US.

    4 Servings

    Watch Us Make the Recipe

    You Will Need

    1 tablespoon olive oil

    1 medium onion, chopped

    2 medium carrots, sliced

    2 medium zucchini, chopped

    4 medium cloves garlic, minced, 1 heaping tablespoon

    1 tablespoon tomato paste

    1 ½ teaspoons Italian seasoning

    ¼ teaspoon crushed red pepper flakes, omit if sensitive to spice

    8 cups vegetable broth or chicken broth (1.8L)

    1 package tortellini, 8 to 10 ounces

    1 small bunch kale, thick stems removed and chopped

    Splash cream or non-dairy milk, optional

    Handful chopped fresh herbs like parsley or dill

    Dash fish sauce, optional

    Parmesan for serving, optional

    Directions

      1Cook onions and carrots: Heat the oil in a large pot, such as a Dutch oven, over medium heat. Add the onions and carrots, then cook, stirring occasionally, until they soften, about 5 minutes.

      2Add zucchini and spices: Stir in the zucchini, garlic, tomato paste, Italian seasoning, and crushed red pepper flakes, and cook for one minute.

      3Simmer: Pour in the broth, bring to a boil, and then reduce to a simmer. Cook the soup at a low simmer until the vegetables are tender, 10 to 15 minutes.

      4Add tortellini and kale: Stir in the tortellini and kale, and cook for 5 to 10 minutes. Turn the heat to low and stir in the milk/cream (this adds a creamy texture to the broth, but you can skip it if you prefer a plain broth).

      5To finish: Taste the soup and season with additional salt as needed. For extra flavor, add a few dashes of fish sauce (optional). Serve with chopped fresh herbs and grated parmesan cheese scattered on top (optional).

    Adam and Joanne’s Tips

    • Storing: Keep leftover soup in an airtight container and refrigerate for up to 4 days.
    • Vegan tortellini soup: To make this soup vegan, look for a vegan tortellini (Kite Hill makes one) and omit the cheese and fish sauce.
    • Fish sauce: This is optional but adds a lovely flavor to sauces and soups like this tortellini soup. Two to three dashes season the soup nicely. Think of fish sauce as salt on steroids. It doesn’t make the soup taste fishy but makes the flavor pop.
    • The nutrition facts provided below are estimates. We did not include optional ingredients and assumed regular (not low-sodium) vegetable broth.

    Nutrition Per Serving
    Serving Size
    1/4 of the recipe
    /
    Calories
    268
    /
    Total Fat
    8.1g
    /
    Saturated Fat
    2.6g
    /
    Cholesterol
    23.7mg
    /
    Sodium
    1369.4mg
    /
    Carbohydrate
    41.3g
    /
    Dietary Fiber
    3.3g
    /
    Total Sugars
    7.9g
    /
    Protein
    9.3g


    AUTHOR:

    Joanne Gallagher

    Previous Post: Easy Creamy Vegetable Soup
    Next Post: Best Veggie Burger We’ve Ever Made

    Source link

  • The Best Shrimp Salad Recipe

    The Best Shrimp Salad Recipe

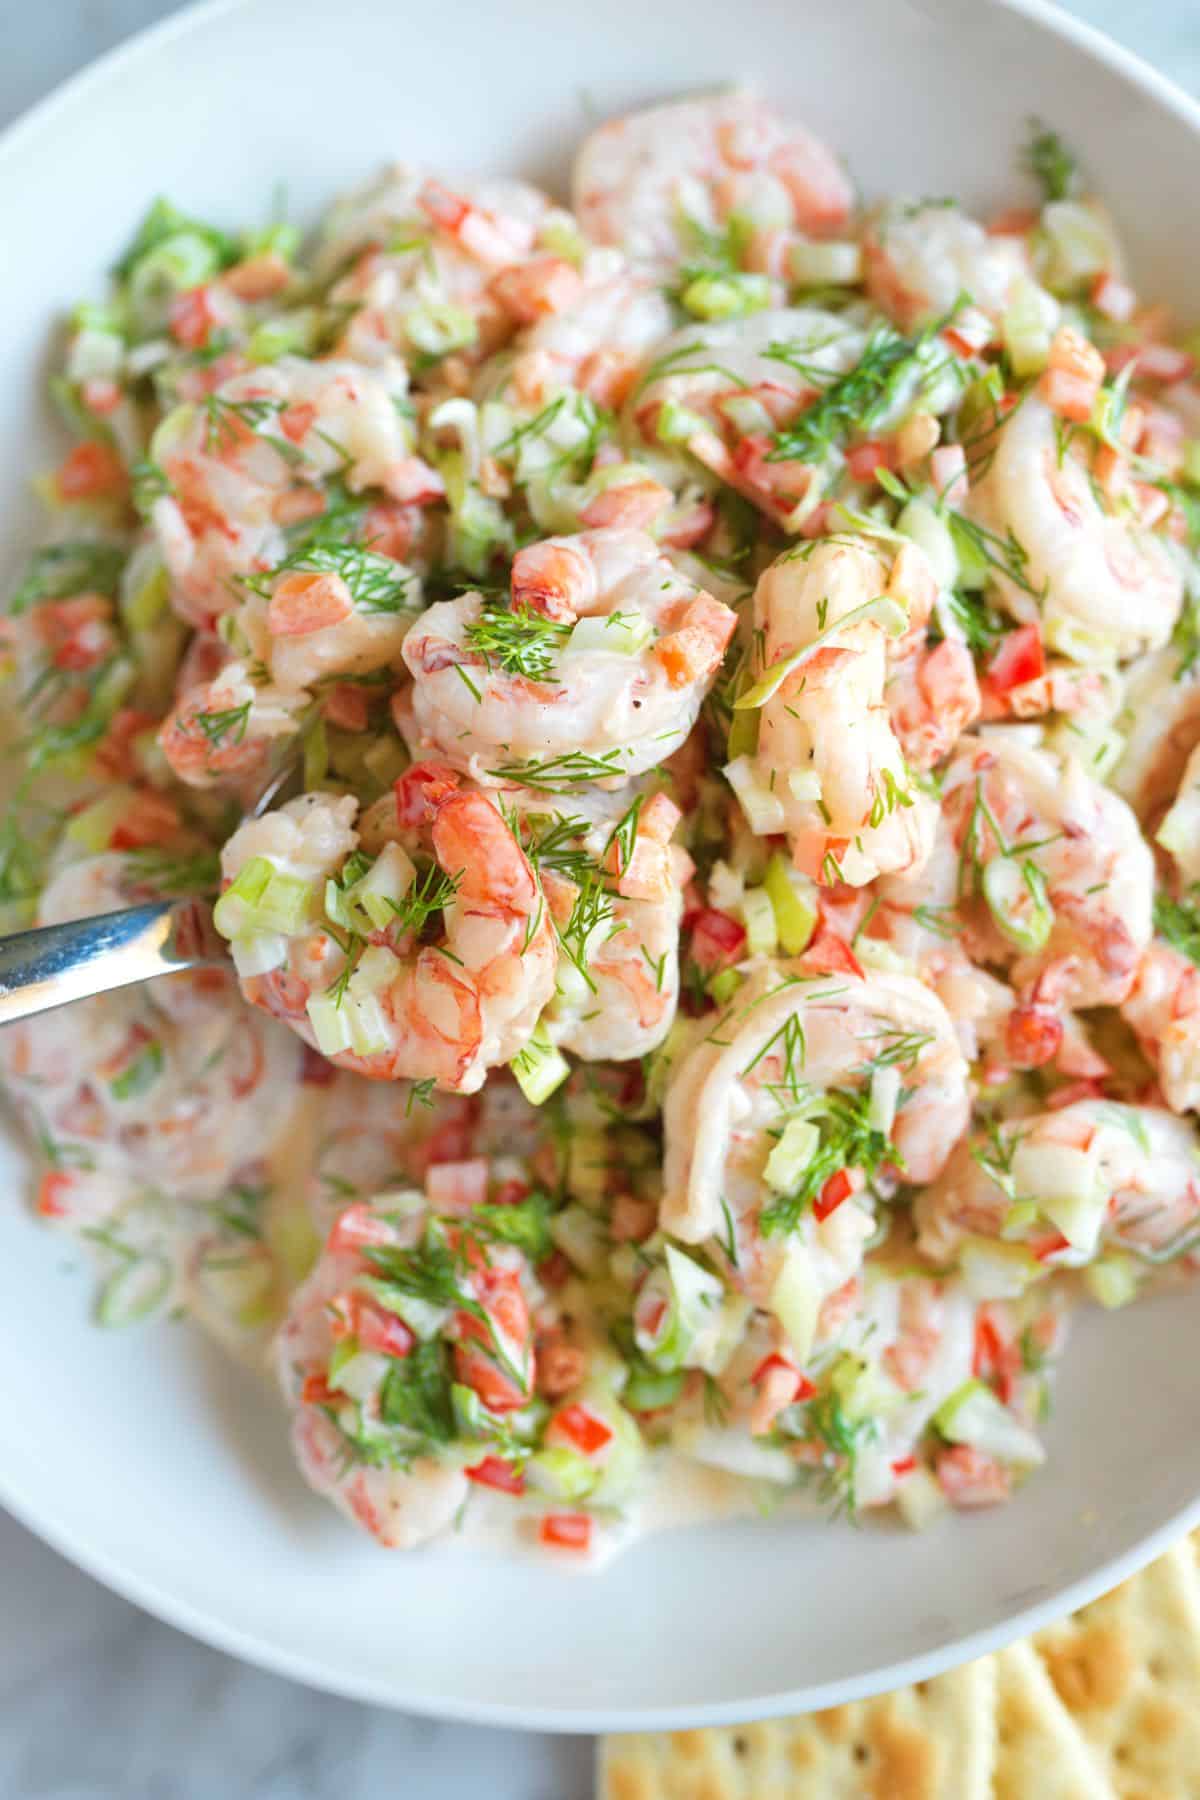
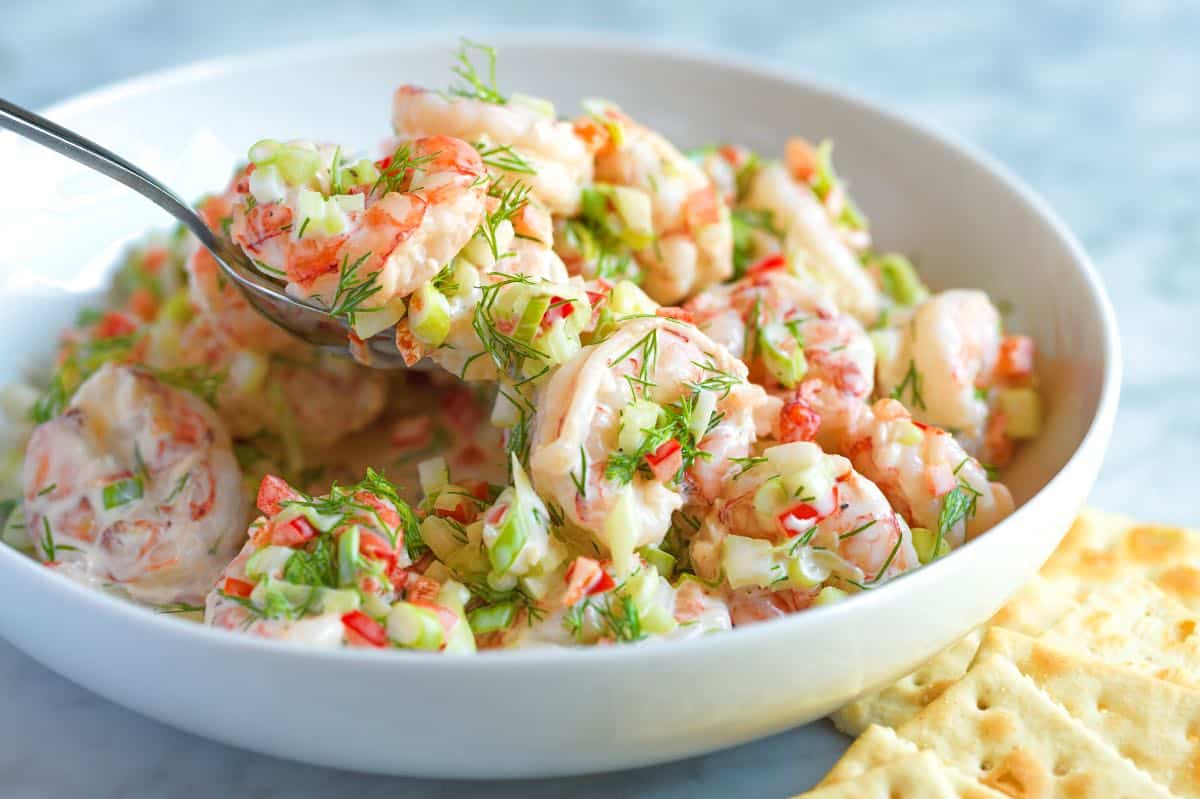
    This is my favorite shrimp salad recipe. It’s absolutely delicious, thanks to perfectly cooked shrimp, fresh dill, and an out of this world homemade dressing.

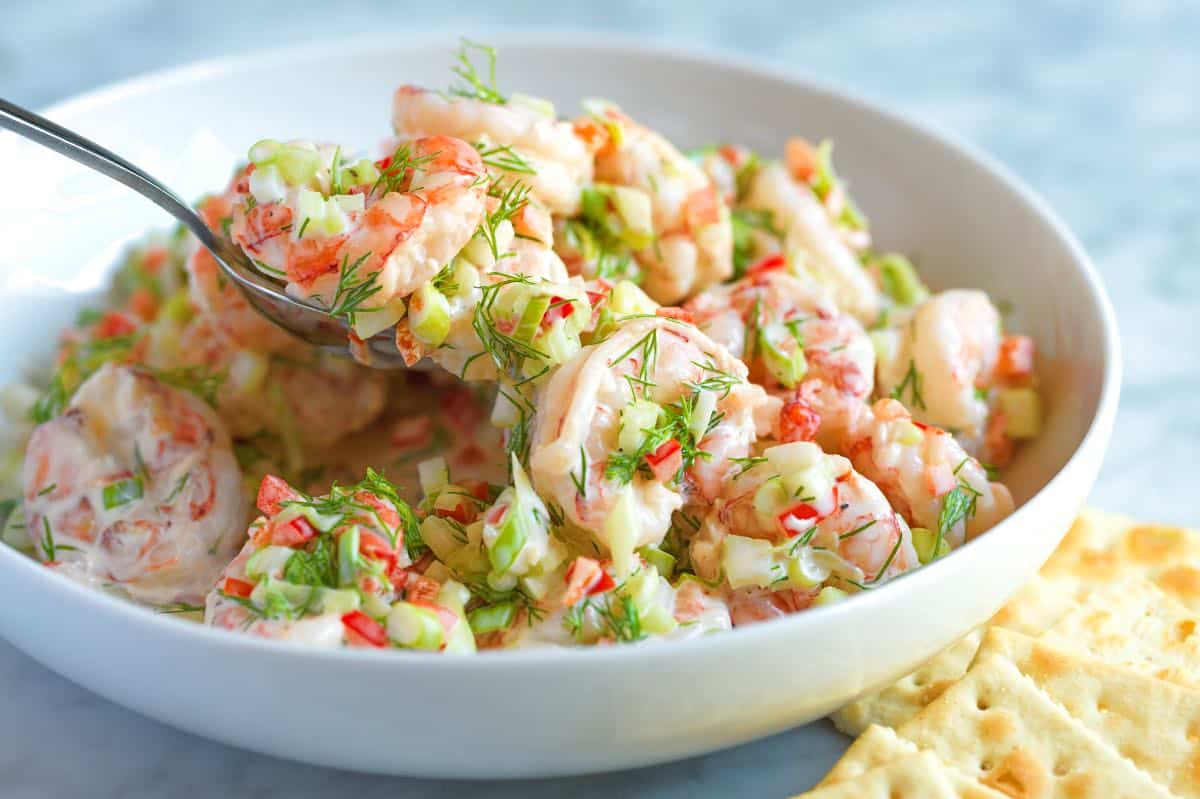
    Shrimp Salad in a bowl.

    This is the best shrimp salad I’ve made in a long time. Our easy poaching method guarantees perfectly cooked shrimp, and the simple lemon and dill dressing makes this salad insanely good.

    This cold shrimp salad keeps in the fridge for three days, which is perfect since it is amazing for lunch the next day! I can’t wait for you to try this recipe. It’s a keeper! For more easy shrimp recipes, see my easy shrimp scampi or this fresh shrimp ceviche.

    Key Ingredients

    • Shrimp: For the best results, cook your shrimp. I poach shrimp for this salad and love how gently poaching keeps the shrimp succulent. I use large shrimp and have shown how to poach shrimp them below. (You can use pre-cooked shrimp, but cooking the shrimp yourself only takes a few minutes.)
    • Bell pepper, celery, and green onion: Add flavor, color, and crunch. I especially love the added sweetness of the bell pepper in this salad.
    • Mayonnaise: Is the base for our creamy shrimp salad dressing. Use a good-quality store-bought brand or make your own (here’s our recipe for homemade mayo).
    • Lemon juice: Keeps our salad fresh and cuts through any heaviness of the mayo.
    • Dill: A classic herb with shrimp. I add a lot of dill to this salad and love it!

    Find the full recipe with measurements below.

    Tips for Making Our Favorite Shrimp Salad

    Tip 1: Poach your shrimp. You can use pre-cooked shrimp or cook them yourself. We highly recommend poaching the shrimp for the most flavorful and perfectly textured salad, it only takes a few minutes. To poach the shrimp, I follow a similar process to poaching chicken:

    1. Bring water to a boil with a few aromatics (garlic, lemon, and salt).
    2. Once it boils, turn off the heat and add the shrimp. The hot water will poach large shrimp, like the shrimp shown in our photos, to perfection in approximately 3 minutes. Note that in the photo below and in our video, I am using Patagonia pink shrimp, which are pink when raw and when cooked.
    Poached shrimp for shrimp salad

    Tip 2: Let your salad sit. You will toss your poached shrimp with mayonnaise, lemon juice, drill, bell pepper, celery, green onion, salt, and pepper. If you are in a rush, enjoy the salad now but if you can wait an hour, the flavors will develop even more (I cover it and store in the fridge).

    Shrimp salad ingredients

    Serving Suggestions

    I love serving shrimp salad with saltine crackers, but you can enjoy it in so many different ways. Add to buttered rolls for a sandwich (like a lobster roll), roll up in flour tortillas, or spoon into lettuce like we do for this shrimp salad on endive.

    More Shrimp Recipes

    Best Creamy Shrimp Salad

    The Best Shrimp Salad

    • PREP
    • COOK
    • TOTAL

    This is the best shrimp salad we’ve made! It’s also very simple to make. You can use pre-cooked shrimp from the store or cook it yourself. We highly recommend cooking the shrimp for the most flavorful and perfectly textured salad, which only takes a few minutes.

    Makes 4 servings

    Watch Us Make the Recipe

    You Will Need

    Shrimp Salad

    1 pound poached shrimp, recipe below

    1/2 cup finely diced red bell pepper (Half of a large pepper)

    1/2 cup finely diced celery (1 large stalk)

    1/2 cup thinly sliced green onion (3 to 4)

    1/2 cup (100 grams) mayonnaise, try homemade mayo

    2 tablespoons fresh lemon juice

    1/4 cup roughly chopped fresh dill

    1/4 teaspoon fine sea salt

    4 twists of pepper grinder


    Poached Shrimp

    1 pound large raw shrimp (31-40 per pound), peeled and deveined

    2 quarts water

    1 lemon, cut in half

    2 cloves garlic, peeled and gently smashed

    1 bay leaf

    3 twists pepper grinder

    1 ½ tablespoon salt

    1/2 teaspoon Cajun seasoning, optional

    Directions

    • Poach the Shrimp
    • 1Add 2 quarts of water to a large pot and place it on the stove over high heat. Squeeze a little lemon juice into the water and drop the lemon halves into the pot. Add the garlic, bay leaf, pepper, salt, and Cajun seasoning. Bring the liquid to a rolling boil.

      2Once the water reaches a rolling boil, remove the pot from the heat and immediately submerge the shrimp into the hot water. Poach them for three minutes.

      3Using tongs or a slotted spoon, carefully transfer the cooked shrimp to a plate. Allow them to cool by placing them in the refrigerator.

    • Make the Salad
    • 1Once the shrimp have cooled, place them in a large bowl with the bell pepper, celery, green onion, mayonnaise, lemon juice, dill, salt, and pepper.

      2Gently mix the ingredients until they are well combined.

      3Allow the salad to sit in the refrigerator for at least one hour before serving, which allows the flavors to marinate and develop.

    Adam and Joanne’s Tips

    • Storing: Shrimp salad lasts up to 3 days in the refrigerator. Store it in an airtight container. I love having this salad ready in the fridge for an easy lunch or dinner! We do not recommend freezing shrimp salad.
    • Bell pepper substitute: If you do not want to add bell peppers, leave them out.
    • The nutrition facts provided below are estimates.

    Nutrition Per Serving
    Serving Size
    1/4 of the recipe
    /
    Calories
    319
    /
    Total Fat
    21.2g
    /
    Saturated Fat
    3.3g
    /
    Cholesterol
    225.8mg
    /
    Sodium
    464.3mg
    /
    Carbohydrate
    4.7g
    /
    Dietary Fiber
    1.2g
    /
    Total Sugars
    1.6g
    /
    Protein
    28.4g


    AUTHOR:

    Joanne Gallagher

    Adam and Joanne of Inspired Taste

    We are Adam and Joanne Gallagher, the creators of Inspired Taste. Established in 2009, Inspired Taste grew from a childhood dream into one of the internet’s most trusted recipe sites with hundreds of reliable recipes, step-by-step videos, and expert tips.More About Us
    Source link

  • Healing Asian Soup with Ginger

    Healing Asian Soup with Ginger

    I first made this healing Asian Soup with Ginger for a food blogging friend who was going through chemotherapy, and it’s warm and comforting.

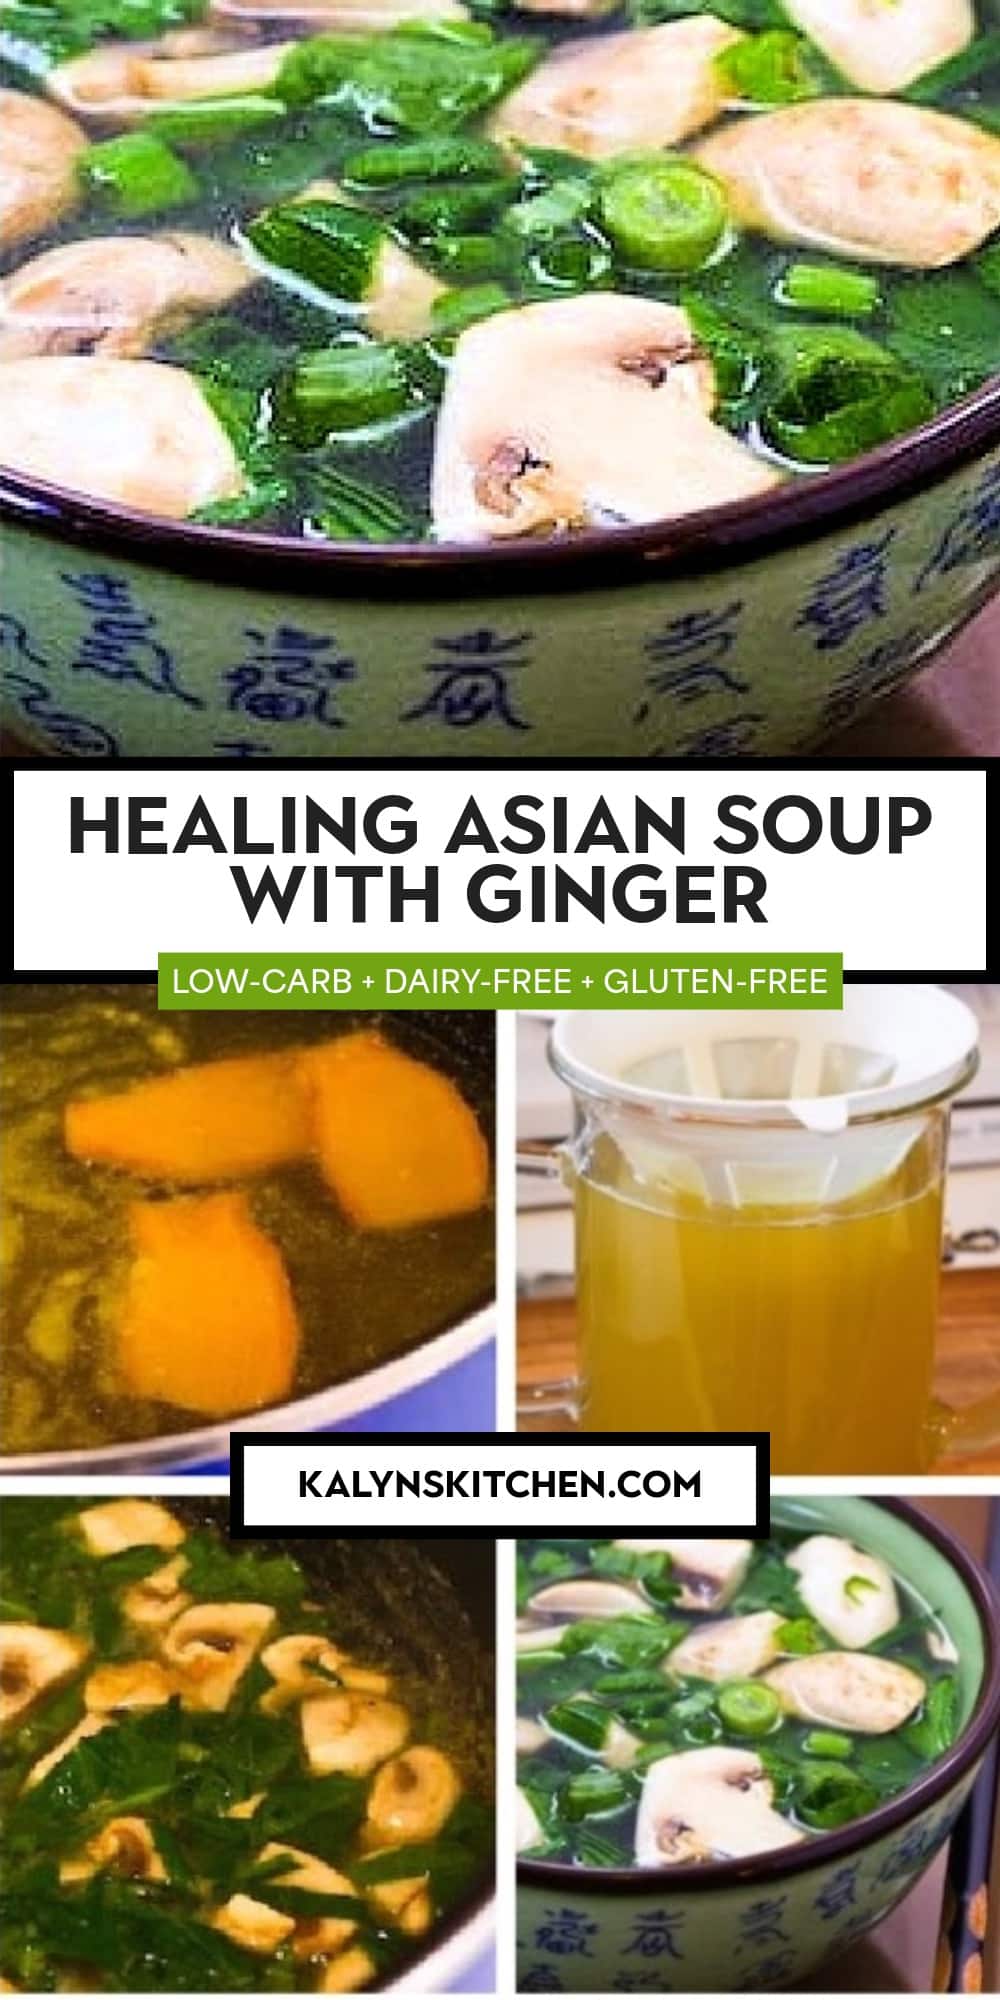
    PIN Healing Asian Soup with Ginger!

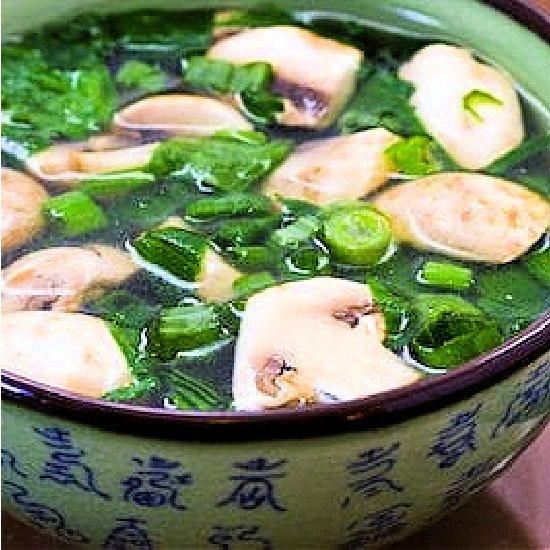
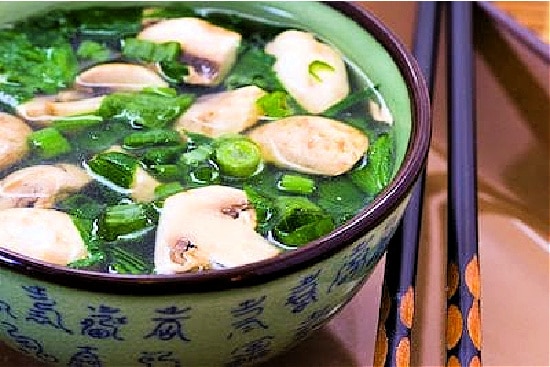
    Healing Asian Soup with Ginger finished soup in serving bowl

    This Healing Asian Soup with Ginger is a recipe I created when a lovely food blogging friend was going through chemotherapy, and it’s a wonderful tummy soothing soup whenever you need something like that. Of course chicken broth is a well-used treatment for all kinds of sicknesses, so the soup has that for the base.

    But the most important thing about the soup is lots of fresh ginger, simmered in the broth to bring out all the ginger flavor and healing properties! Ginger is known to help with stomach issues. And this soup is easy to make, because of course you don’t want to cook much when your stomach feels queasy. And while I hope you don’t need to make a soup like this one too often, it will be soothing and also tasty if you need it!

    What ingredients do you need?

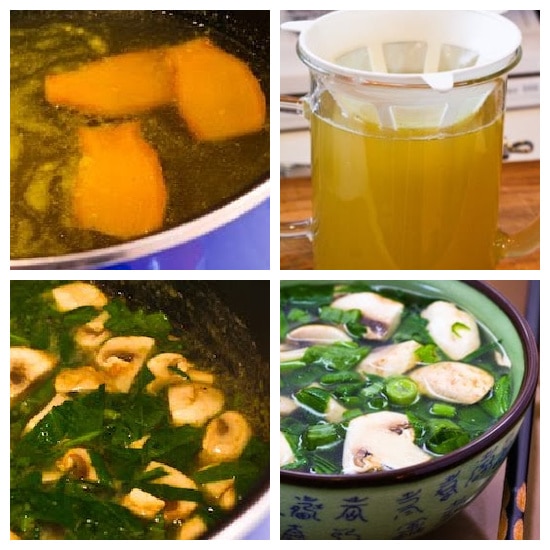
    Healing Asian Soup process shots collageHealing Asian Soup process shots collage

    Easy Steps for Making Healing Asian Soup with Ginger:

    (Scroll down for complete recipe with nutritional information.)

    1. Nothing sounds more healing to me than soup with lots of ginger to soothe the tummy. You can change the rest of this recipe any way you wish, but don’t skip the step of simmering the thick slices of ginger root in chicken stock.
    2. For a clear soup, strain the chicken broth after you’ve simmered the ginger. (You can skip this step, but definitely the soup will be prettier and more appetizing if it’s strained. A coffee filter works well if you don’t have a yogurt strainer like the one I used above.)
    3. Once you’ve infused the chicken stock with ginger and then strained it, add mushrooms, and cook one minute, then spinach and cook one minute more.
    4. Then add just the slightest bit of green onion for another few seconds. This is a soup that’s healing, soothing, and easy to make.

    Healing Asian Soup with Ginger, finished soup in bowl horizontal imageHealing Asian Soup with Ginger, finished soup in bowl horizontal image

    Ingredients

    • 4 cups chicken broth
    • 4 thick slices fresh ginger root (or more)
    • 1 cup sliced mushrooms
    • 1 cup spinach leaves, sliced into thin ribbons
    • 1 green onion, very thinly sliced

    Instructions

    1. In medium saucepan, bring chicken stock to a low simmer. (If you’re starting with canned chicken broth, I would simmer an additional 15-20 minutes to reduce the broth and make it more flavorful before you add the ginger.)
    2. Add ginger slices and let simmer at least 15 minutes or longer. (Taste to see if you have as much ginger flavor as you’d like.)
    3. If you’d like a clear soup, use a yogurt strainer or coffee filter to strain the ginger-infused chicken stock, then rinse pan and put strained stock back into pan. You can add a small amount of water if you feel the stock has reduced too much.
    4. While ginger simmers in stock, wash and slice mushrooms and thinly slice spinach leaves.
    5. Clean green onion and slice into very thin slices.
    6. Bring infused stock back to a low simmer, then add mushrooms and simmer 1 minute.
    7. Add sliced spinach and simmer one minute more.
    8. Turn off heat and add green onions, then serve soup hot, with chopsticks to eat the veggies after you drink the broth.

    Notes

    I used my homemade chicken stock for this soup, but if you don’t have homemade stock just use three cans of chicken broth and simmer to concentrate the flavor.

    This recipe created by Kalyn with inspiration from several Asian cookbooks.

    Nutrition Information

    Yield

    4

    Serving Size

    1

    Amount Per Serving

    Calories 37Total Fat 1gSaturated Fat 0gTrans Fat 0gUnsaturated Fat 0gCholesterol 5mgSodium 957mgCarbohydrates 5.1gFiber 2gSugar 2.3gProtein 3.8g

    Nutrition information is automatically calculated by the Recipe Plug-In I am using. I am not a nutritionist and cannot guarantee 100% accuracy, since many variables affect those calculations.

    Did you make this recipe?

    Did you make this recipe? Please leave a star rating (under the PRINT button in the recipe) or share a photo of your results on Instagram! THANKS!

    Low-Carb Diet / Low-Glycemic Diet / South Beach Diet Suggestions:
    This healing and tasty soup is low in carbs and suitable for all phases of the original South Beach Diet, and it’s also gluten-free, Paleo, and Whole 30 approved.

    Find More Recipes Like This One:
    Use the Recipes by Diet Type photo index pages to find more recipes suitable for a specific eating plan. You might also like to Follow Kalyn’s Kitchen on Pinterest to see all the good recipes I’m sharing there.

    Historical Notes for this Recipe:
    Barbara from Winos and Foodies was one of those wonderfully genuine and positive people that everyone loved, even those of us who lived halfway around the world from her and could only enjoy her spirit through the internet. When Barbara courageously shared the news that her cancer had returned, Ilva and Bron organized a giant virtual hug for Barbara to let her know how much healing energy was being sent her way. This soup was my contribution to that event. Sadly, Barbara lost her battle with cancer in 2012. At that time I dedicated a recipe to her memory, and her spirit is greatly missed in the food blogging world.

    Pinterest image of Healing Asian Soup with Ginger

    We are a participant in the Amazon Services LLC Associates Program, an affiliate advertising program designed to provide a means for us to earn fees by linking to Amazon.com and affiliated sites. As an Amazon Associate, I earn from qualifying purchases.


    Source link

  • Easy Teriyaki Chicken Recipe

    Easy Teriyaki Chicken Recipe

    We’re confident that this recipe guarantees some of the best teriyaki chicken you’ll ever make at home!

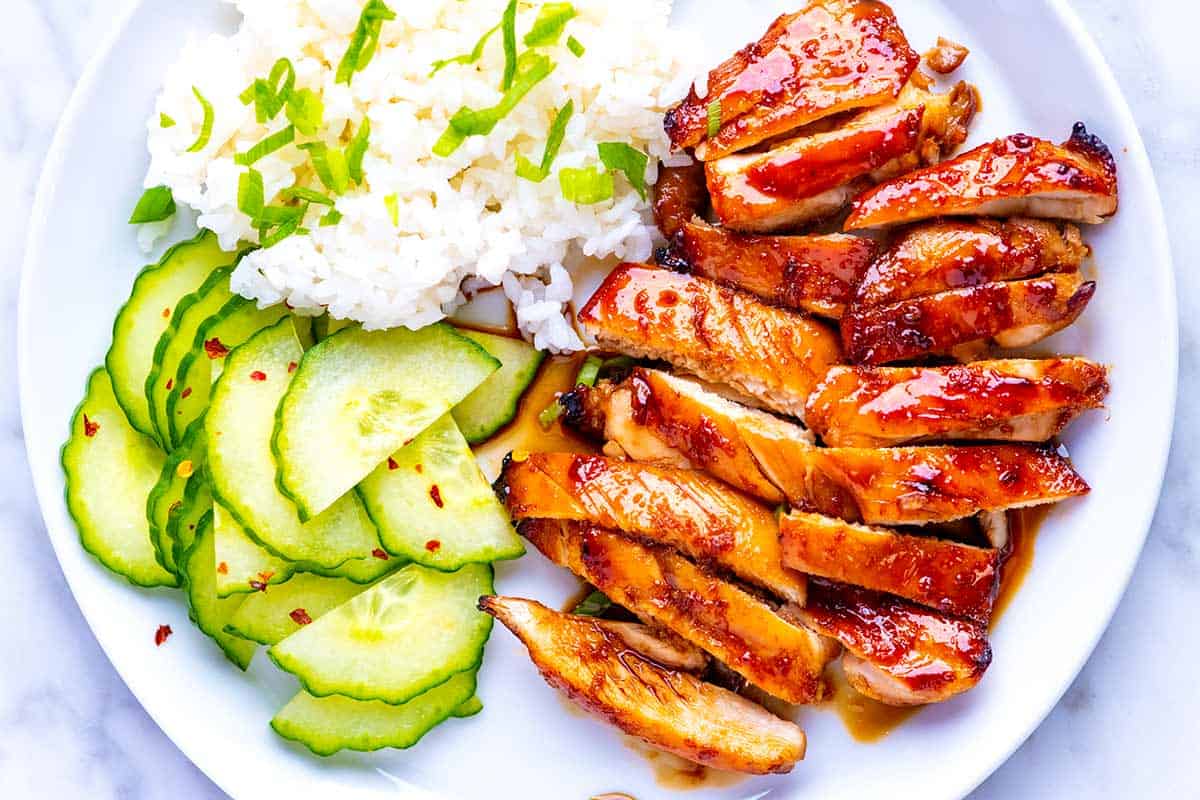
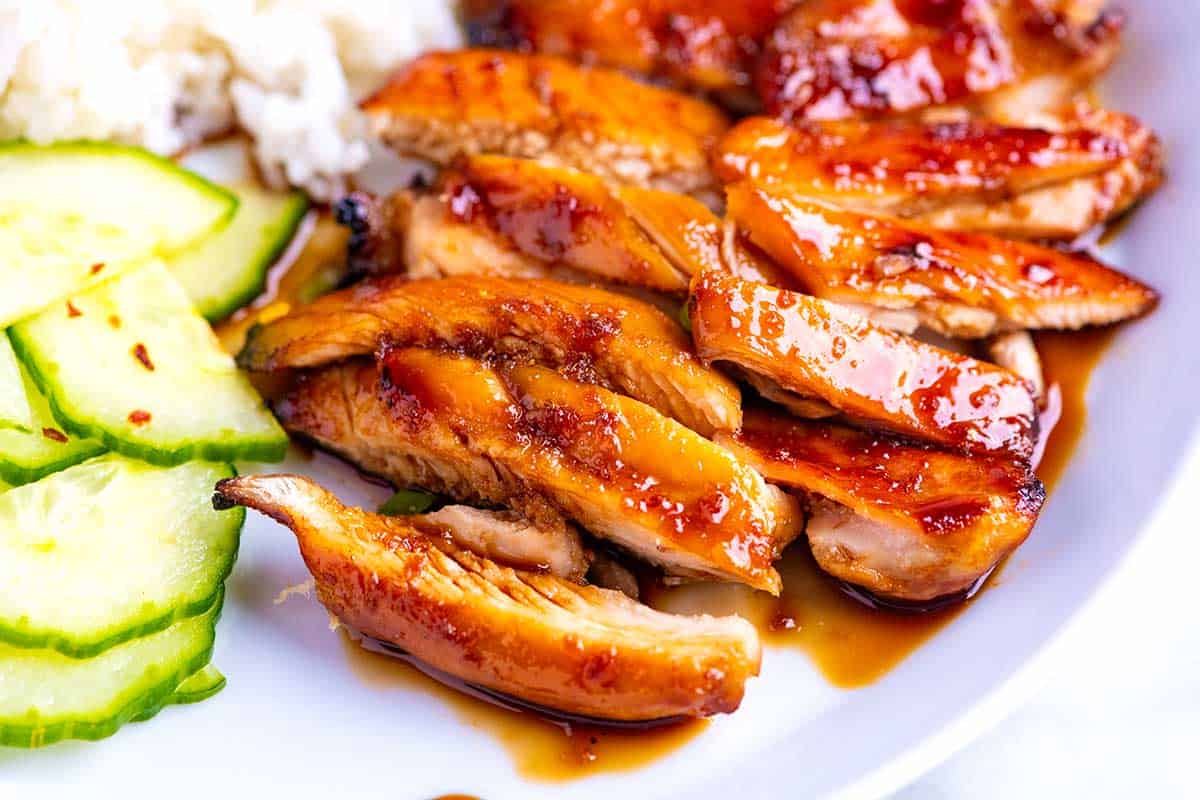
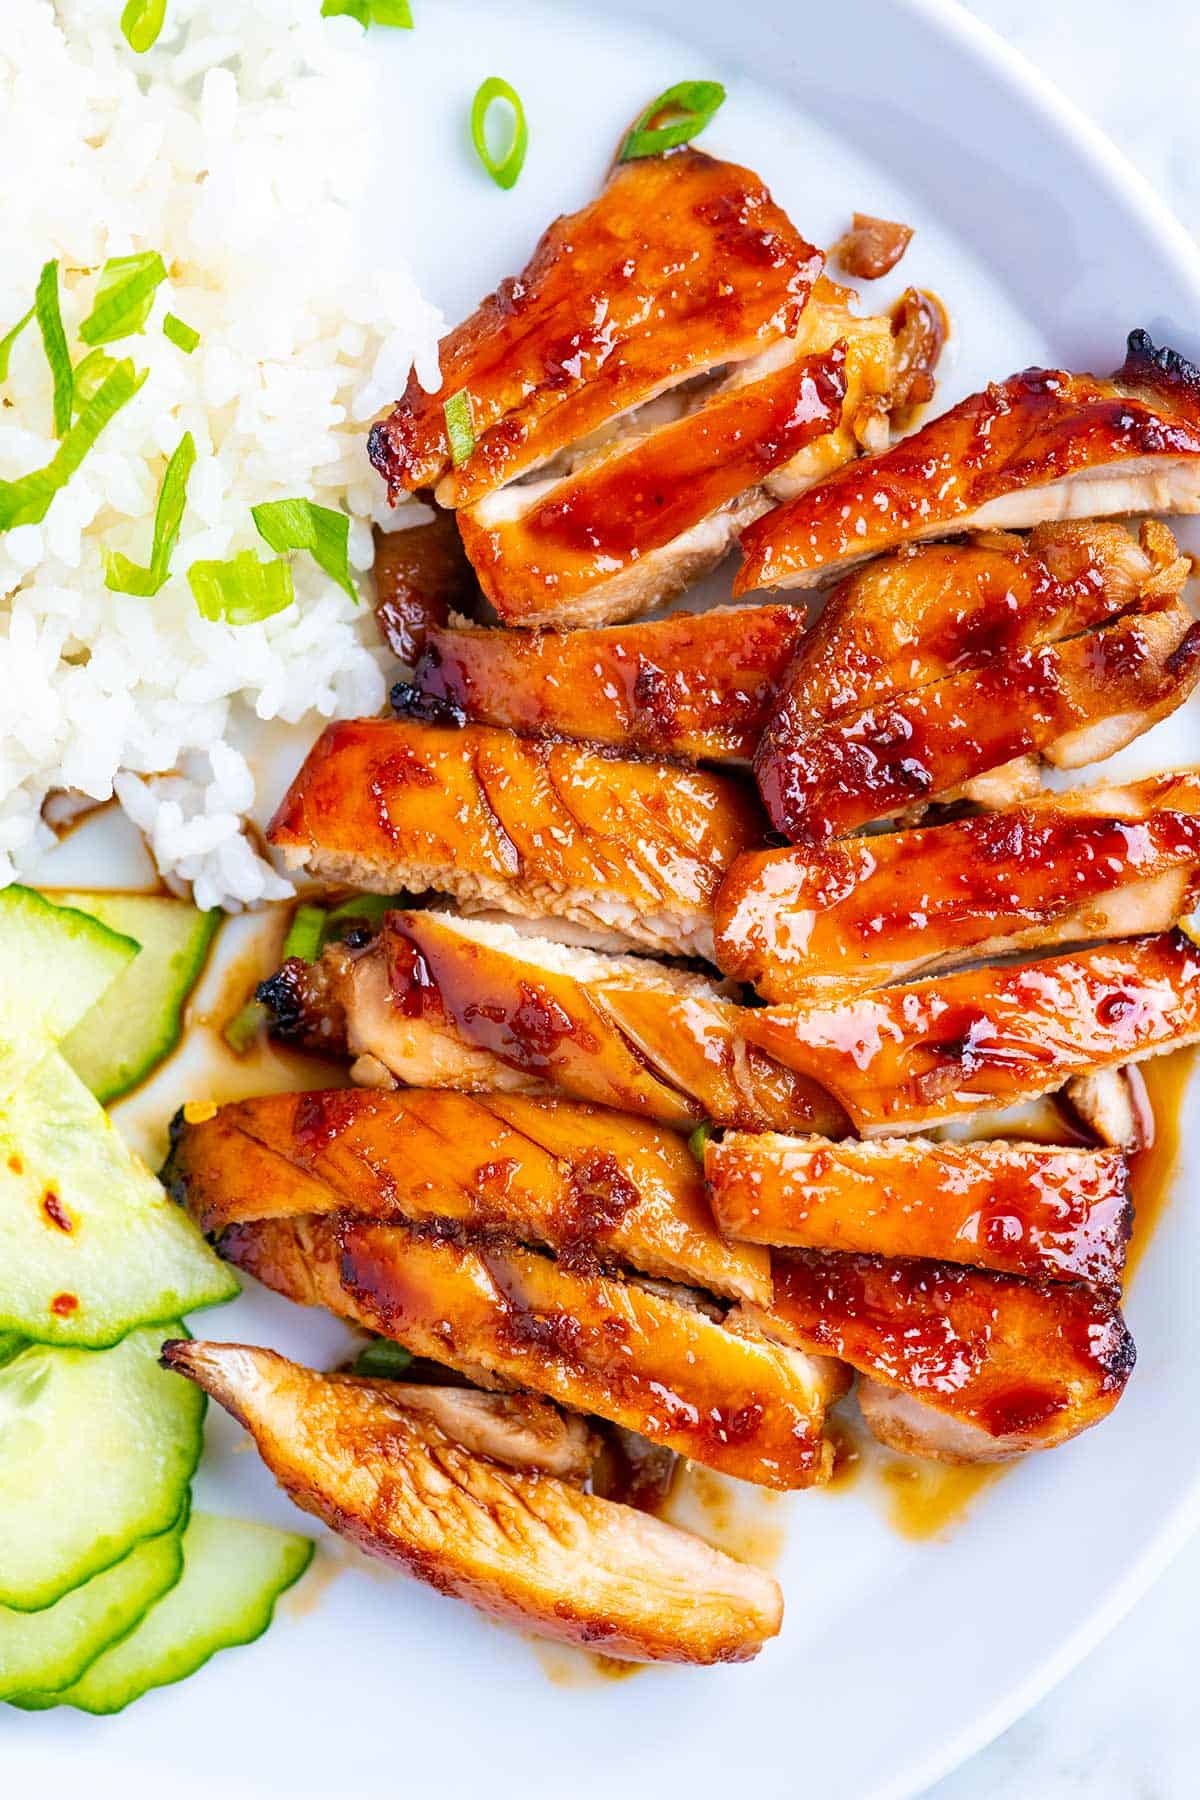
    Teriyaki chicken on a plate

    Our family used to live in Seattle next to some amazing teriyaki restaurants. We wanted to recreate that authentic flavor using simple, readily available ingredients.

    We use our favorite homemade teriyaki sauce for this dish. It’s made with five simple ingredients and lasts weeks in the fridge. I love serving this over rice with cucumbers tossed in vinegar, but our cilantro lime rice or coconut rice would also be excellent.

    Key Ingredients

    • Chicken: I love boneless, skinless chicken thighs for this recipe since they stay tender but cook quickly. They also soak up the teriyaki flavor beautifully! Skin-on chicken thighs would also be great if you prefer. Chicken breasts are also fine, but as with many of our chicken recipes, I love thighs!
    • Low-Sodium Soy Sauce: I use low-sodium soy sauce as the base of my sauce. It might seem salty at first, but trust me. It’ll blend beautifully with the other ingredients to create a perfectly balanced teriyaki flavor. You can substitute with light tamari with no changes.
    • Sugar: Granulated sugar balances the soy sauce and makes the teriyaki sauce thick and glossy when cooked. Feel free to experiment with brown sugar, coconut sugar, or even honey, but remember that these might make the sauce taste sweeter. If you love honey, you may enjoy this honey teriyaki chicken!
    • Sake: Don’t stress about buying expensive sake for teriyaki sauce! Use something you’d enjoy drinking. If you can’t find sake, mirin (a sweeter rice wine) works well too. You can swap it in directly or slightly reduce the sugar in the recipe.
    • Rice Vinegar: This adds a little zing to the sauce. You can usually find it near other vinegars at the grocery store. For substitutes, try white wine vinegar or plain white vinegar. Don’t worry if the sauce seems a bit strong after adding the vinegar, the flavors will mellow as it cooks.
    • Fresh Ginger (optional): I like to grate fresh ginger finely so it melts into the sauce. Ginger adds a bright, spicy note that complements the other flavors beautifully.

    Find the full recipe with measurements below.

    How to Make the Best Teriyaki Chicken

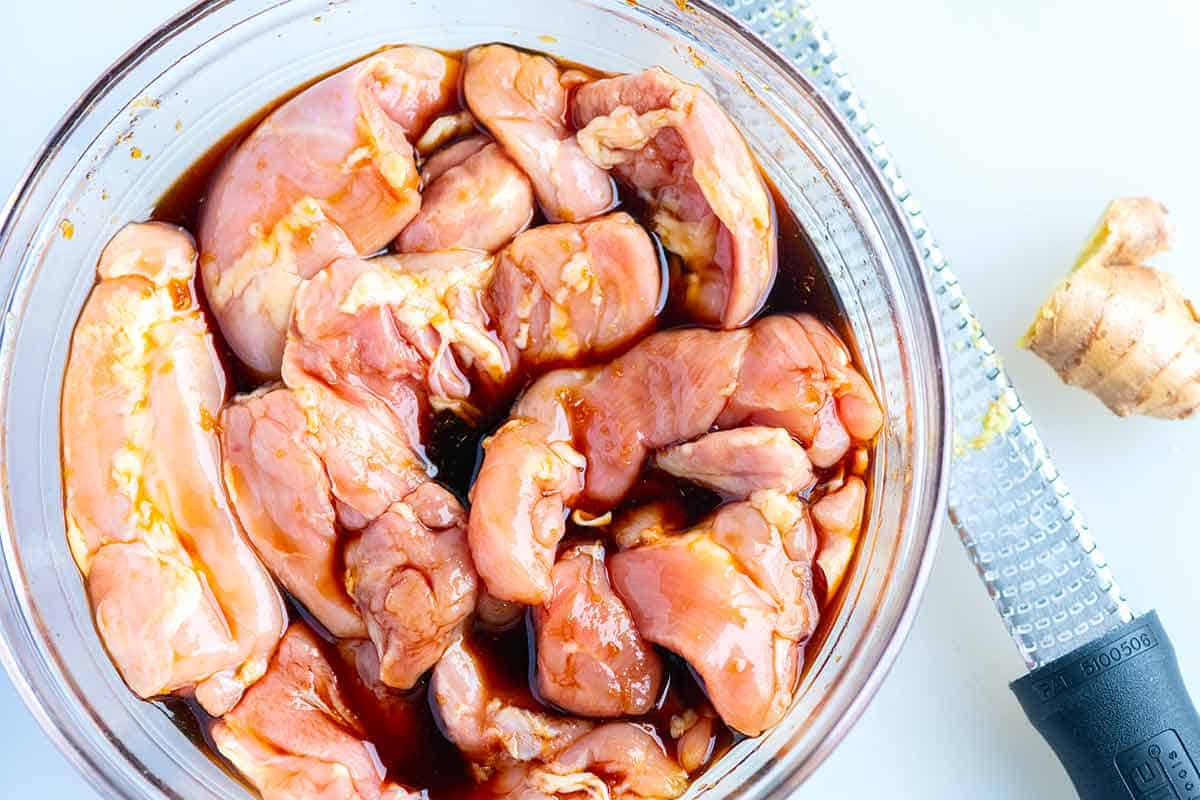
    Tip 1: Use our homemade sauce. The first step to making chicken teriyaki is making our homemade teriyaki sauce. Then, use some of it to marinate the chicken and reduce the rest until it is thick and glossy, which you spoon over as a glaze later. Marinate your chicken for as long as possible (up to 12 hours). Thirty minutes will do, but longer is always better.

    Marinating the chicken

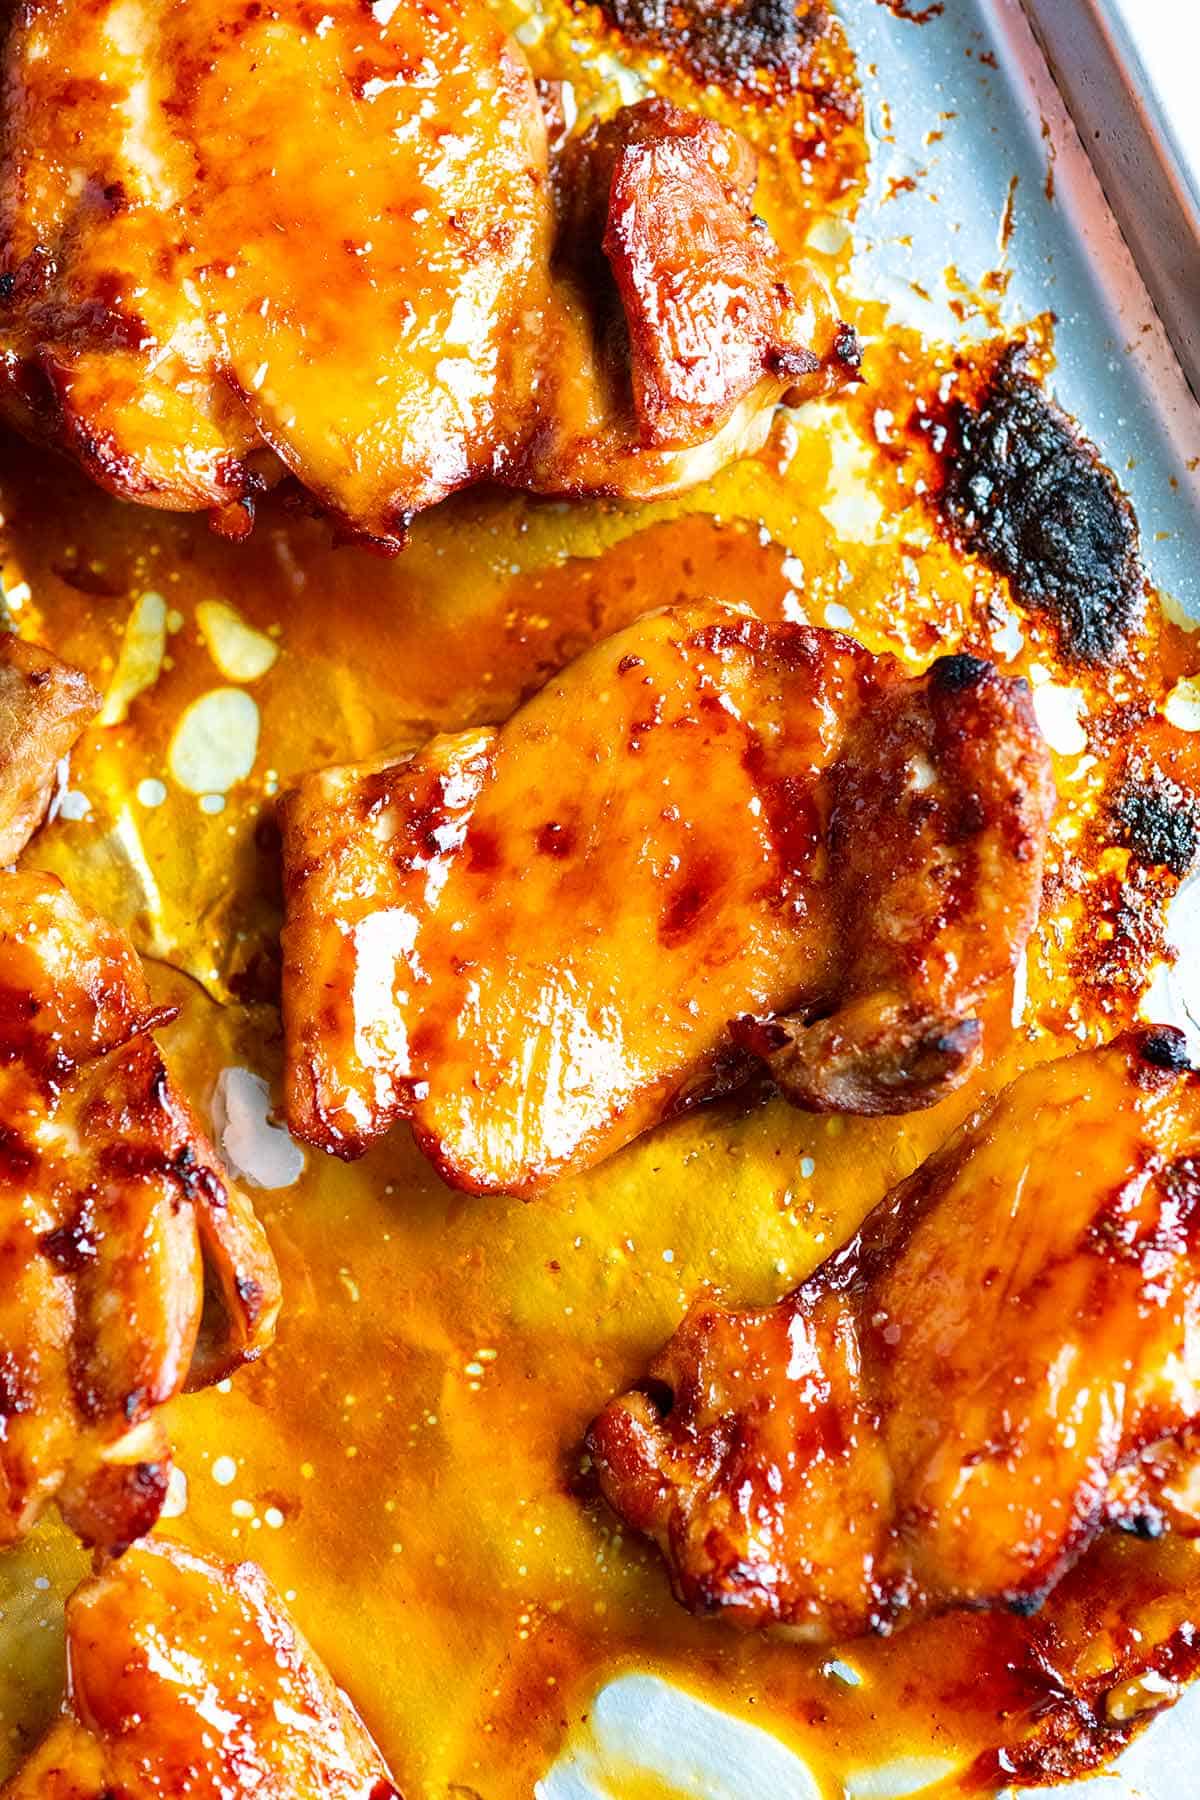
    Tip 2: Broil your chicken. Teriyaki chicken is often cooked on a grill, imparting a smoky char. While you could certainly use an outdoor grill for this recipe, we wanted to make it possible to achieve delicious results indoors. So we use our oven’s broiler! Think of it as an upside-down grill, providing intense heat from above.

    1. Position an oven rack towards the top of your oven, about six inches from the burner.
    2. Put the marinated chicken on a baking sheet and place it under the broiler.
    3. Broil the chicken until it is beautifully browned and starting to firm up, then flip and continue broiling until cooked through.
    4. Stay close to make sure the chicken isn’t burning or smoking too much. You can also spoon or brush extra sauce over the chicken as it cooks, transforming the sauce into a shiny glaze.
    Broiled chicken for teriyaki chicken

    More Chicken Recipes

    Homemade Teriyaki Chicken

    Easy Teriyaki Chicken

    • PREP
    • COOK
    • TOTAL

    This easy homemade teriyaki chicken recipe rivals my favorite teriyaki restaurants. The chicken is best when marinated for a while, but you can get away with a shorter marinating period if you’re short on time.

    In our recipe, we’ve shared the ingredients to make one batch of teriyaki sauce, perfect for 1 ½ pounds of chicken. We highly recommend making a larger batch of sauce (it’s that good). You can find the instructions for a larger batch in our teriyaki sauce recipe, which makes 2 cups and provides enough sauce for two batches of chicken.

    4 Servings

    You Will Need

    1 ½ pounds boneless, skinless chicken thighs

    1/2 cup (120ml) light soy sauce

    1/2 cup (100g) granulated sugar

    1/4 cup (60ml) sake, see tips

    2 tablespoons (30ml) rice vinegar

    2 teaspoons finely grated ginger, see tips

    Directions

    • Marinate the Chicken
    • 1Combine the soy sauce, sugar, sake, vinegar, and ginger in a small bowl. Stir until the sugar completely dissolves. Transfer 6 tablespoons of the sauce to a resealable plastic bag or container and add the chicken. Marinate the chicken in the refrigerator, turning once, for at least 30 minutes and up to 12 hours.

      2Add the remaining sauce to a small saucepan over medium heat. Bring it to a simmer and cook until the sauce reduces slightly and looks shiny, 3 to 5 minutes. If it reduces too much, add a bit of water to bring it back to a pourable consistency. Cool, and then save this in the refrigerator to use as a sauce for the cooked chicken.

    • Cook the Chicken
    • 1Position an oven rack towards the top, about 6 inches from the broiler. Heat the broiler to high.

      2Line a baking sheet with foil, then arrange the chicken so that the side that would have had skin faces down. Spoon a bit of the marinade with the chicken on top and discard the rest. Broil for 5 minutes. Stay close to the oven to keep an eye on the chicken as it cooks.

      3Flip the chicken, and then spoon or brush juices or sauce pooling on the pan back onto the chicken. Doing this a few times during cooking helps to add a shiny, browned crust to the chicken. Alternatively, you can steal some of the sauce saved for serving to spoon or brush over the chicken.

      4Broil another 5 to 10 minutes or until the outside of the chicken looks brown and caramelized and the inside is cooked through.

      5Meanwhile, reheat the sauce from earlier, adding a bit of water if it seems too thick. (This is the sauce that has not touched raw chicken, not the sauce used to marinate.)

      6To serve, slice the chicken into strips, place onto plates, and drizzle with the warmed sauce. Leftover sauce can be stored in the refrigerator for a few weeks (I like drizzling it over rice and vegetables.)

    Adam and Joanne’s Tips

    • Storing: Keep chicken teriyaki in an airtight container for up to 4 days.
    • Leftover sauce: The reduced teriyaki sauce (not sauce that’s sat with raw chicken) can be stored in the refrigerator for a few weeks. I like drizzling it over rice and vegetables.
    • Broiling the chicken: Depending on your oven, broil times may differ. Keep an eye on the chicken. Move the sheet pan down a rack if it looks like or smells like it is burning. If the chicken is cooking slower than expected, continue to broil until cooked through.
    • Use a grill pan: If you don’t have a broiler an outdoor grill or a grill pan on the stovetop are excellent alternatives. You can also bake the chicken, but you won’t get the same glazed look. That’s okay, though, because the flavor will still be incredible!
    • Ginger: We use a Microplane rasp grater, which helps the ginger to “melt” into the sauce. You can finely mince, but you will be left with bits of ginger in the sauce.
    • Substitute for Sake: We love the delicate flavor of sake for teriyaki sauce, but if you cannot find it, there are some alternatives. Mirin is a sweeter version of sake. You can either swap it for the sake and leave the sugar amount as is or pull back on the amount of sugar slightly to accommodate the extra sweetness. Dry vermouth or dry sherry can also work as a substitute. As a last resort, you can leave it out altogether, but keep in mind that this will change the taste of the sauce dramatically (taste the sauce before using it as you may find that without sake/mirin, you will need to adjust with additional vinegar or sugar).
    • Gluten-free: Check that all ingredients are certified gluten-free before using. Specifically, watch out for the soy sauce. You should look for gluten-free tamari.
    • The nutrition facts provided below are estimates. You will likely have leftover sauce, so the actual nutritional data may be less.

    Nutrition Per Serving
    Serving Size
    1/4 of the recipe (about 1 1/2 medium thighs)
    /
    Calories
    370
    /
    Total Fat
    7.1g
    /
    Saturated Fat
    1.9g
    /
    Cholesterol
    159.8mg
    /
    Sodium
    1000.9mg
    /
    Total Carbohydrate
    30.9g
    /
    Dietary Fiber
    0g
    /
    Total Sugars
    26.6g
    /
    Protein
    36g


    AUTHOR:

    Joanne Gallagher

    Adam and Joanne of Inspired Taste

    We are Adam and Joanne Gallagher, the creators of Inspired Taste. Established in 2009, Inspired Taste grew from a childhood dream into one of the internet’s most trusted recipe sites with hundreds of reliable recipes, step-by-step videos, and expert tips.More About Us
    Previous Post: Easy Taco Soup
    Next Post: Easy Tomato Broth

    Source link

  • Steak Rice Bowls With Tangy Chipotle Sauce

    Steak Rice Bowls With Tangy Chipotle Sauce

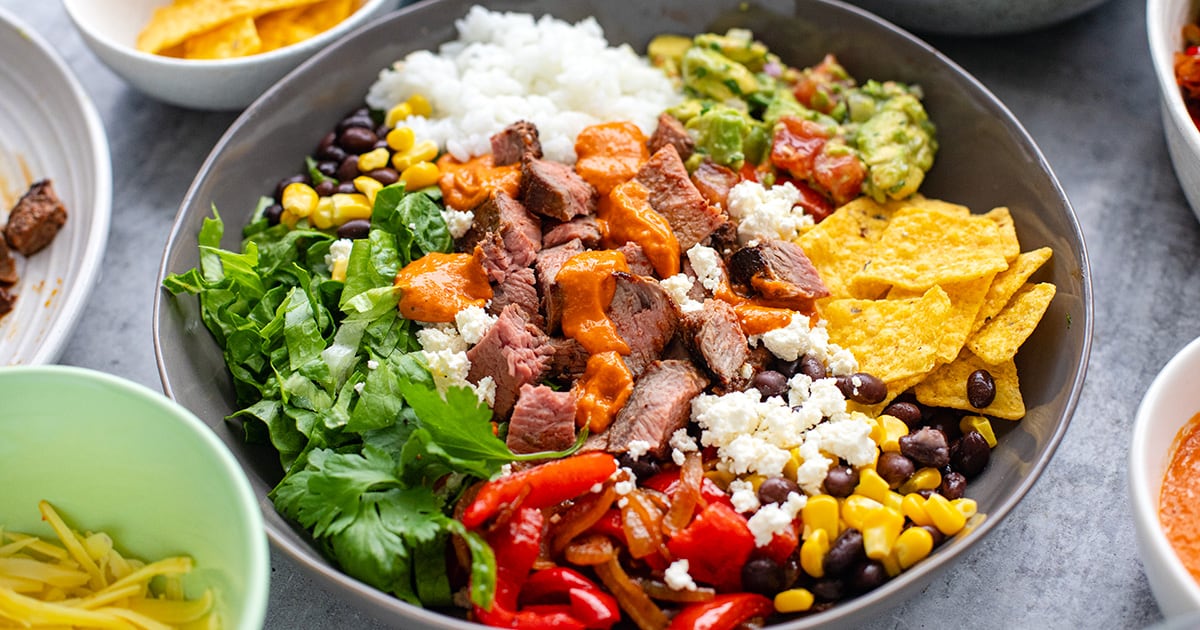
    If you love a good steak rice bowl, this one’s a keeper. You get tender taco-seasoned steak, caramelized veggies, and a creamy chipotle sauce that ties it all together.


    Jump to: ℹ️ Overview | 🛒 Ingredients | 📷 How To Make | 📹 Watch The Video | 👩‍🍳 Recipe Tips | 🥗 Serving Suggestions | 📝Full Recipe Card | 🍽 More Tex-Mex Recipes


    At A Glance

    • Ready In: 40 minutes
    • 🍽 Serves: 4
    • 🌱 Diet: Gluten-free (check your chipotle + toppings)
    • 💪 Nutrition Highlights: High in protein, fiber-rich with beans and veggies
    • 🥕 Main Ingredients: Steak, rice, black beans, corn, avocado, chipotle sauce
    • 🔥 Flavor Profile: Smoky, creamy, tangy, slightly spicy, fresh, and hearty
    • 🧊 Meal-Prep Friendly: Keeps 3–4 days in the fridge, great for batch cooking
    • 🍴 Best Served With: Extra lime wedges, crushed corn chips, fresh herbs

    If you love tacos, burritos and all things Tex-Mex, you will love this steak and rice bowl recipe. It’s one of my go-to meals when I want something satiating, nutritious and with bold flavors. It feels a bit special but is secretly very doable on a weeknight.

    You’ve got juicy, pan-seared steak (can also be chicken or shrimp), sweet caramelized onions and peppers, and my special creamy and tangy chipotle sauce that pulls everything together.

    What makes it stand out is the balance: smoky heat from the chipotle, freshness from the avocado salsa, and a bit of crunch from those corn chips (don’t skip them!). It’s inspired by those classic burrito bowls but with a slightly richer, more homemade feel.

    It’s also one of those meals where everyone can build their own bowl, which is always a win in my house.

    👩‍🍳 You might also like these recipes: garlic butter steak bites, steak and potatoes with chimichurri salsa, arugula steak salad, cumin butter beef steak, or slow cooker steak bites.

    What You’ll Need

    Here is what you’ll need for this saucy chipotle steak and rice bowl recipe. Find the full measurements in the recipe card below.

    For the steak

    • Beef steaks (rump, sirloin, or similar) – main protein, rich and hearty
    • Taco spice blend – adds warmth, smokiness, and depth
    • Salt – helps bring out the natural flavor of the beef
    • Olive oil – for a good sear

    For the rice (not pictured)

    • White or brown rice – your base, fluffy and comforting. You can use pre-cooked rice here
    • Salt – seasons the rice properly (don’t skip this step!)

    For the toppings

    • White onion – turns sweet and jammy when cooked
    • Red bell pepper – adds sweetness and colour
    • Olive oil + salt – helps everything caramelize nicely
    • Avocado – creamy and rich (balances the spice)
    • Tomato – freshness and juiciness
    • Red onion – a bit of bite
    • Cilantro/coriander – bright and herby
    • Lime juice – acidity to lift everything
    • Salt – brings it all together
    • Black beans – fiber + plant protein boost
    • Sweet corn – pops of sweetness

    For tangy chipotle sauce

    • Light mayo – creamy base
    • Chipotle in adobo sauce – smoky heat (this is the star!)
    • Fire-roasted peppers – extra depth and sweetness, you can use roast your own peppers or use the ones from the jar like I do.
    • Semi-dried tomatoes – little bursts of umami and tang, sun-dried tomatoes also work.
    • Garlic – punchy and savory, I like using fresh, but powder will work.
    • Water + salt – to thin and balance.

    Other toppings

    • Cheese (cheddar or/and feta) – salty richness, you pick which cheese you want
    • Lettuce – freshness and crunch
    • Corn chips – texture (trust me, so good here)
    • Extra herbs – optional but worth it, I would usually go for cilantro (coriander)

    How To Make Steak Rice Bowls

    Find the full recipe and nutritional information below. Here are some handy step-by-step photos for how to make these steak and rice bowls with my secret chipotle sauce.

    • Cook the rice with salt and set aside.
    • Season steak with taco spice and salt; let it sit at room temp.
    • Blend all chipotle sauce ingredients until smooth and drizzle-ready.
    • Cook onions and peppers in olive oil until soft, slightly charred, and caramelized.
    • Sear steak in a hot pan for 3.5–4 minutes per side, rest, then dice into cubes.
    • Combine avocado salad ingredients in a bowl and toss. Set aside.
    • Assemble bowls: rice → veggies → steak → toppings.
    • Finish with chipotle sauce and crushed corn chips.

    Watch The Video

    Recipe Tips

    • Don’t overcook the steak – medium or medium-rare keeps it juicy. Let it rest before cutting.
    • Slice steak against the grain – even if you cube it, this makes it more tender.
    • Layer your seasoning – a little salt at each stage = better flavor overall.
    • Adjust the sauce heat – add more or less chipotle depending on your spice tolerance.
    • Make it low-carb – skip the rice and serve over lettuce or cauliflower rice.
    • Meal prep tip: store components separately and assemble fresh for best texture.
    • Storage: keeps 3–4 days in the fridge; sauce may thicken—just stir in water.
    • Make-ahead: sauce and rice can be made 1–2 days ahead.

    Serving Suggestions

    I love serving these steak bowls with extra lime wedges and a little sprinkle of fresh coriander right at the end—it just wakes everything up.

    If you’re feeding a crowd, set everything out buffet-style and let people build their own bowls. It’s casual, fun, and everyone gets exactly what they want (always a win). And if you’re like me… keep a little extra chipotle sauce on the side. You’ll want it.

    PS. If you don’t love chipotle sauce, try the same bowl with my cilantro lime sauce.

    💬 If you’ve tried this steak rice bowls with tangy chipotle sauce or any other recipe on the blog then don’t forget to rate the recipe and let me know how you got on in the comments below, I love hearing from you! You can also FOLLOW ME on Instagram, Facebook, Pinterest, YouTube, and or sign up to my Newsletter to see more of my delicious food.

    Want to Save This Recipe?

    Enter your email & I’ll send it to your inbox. Plus, get great new recipes from me every week!

    By submitting this form, you consent to receive emails from Cooked & Loved

    If you love a good steak rice bowl, this one’s a keeper. You get tender taco-seasoned steak, caramelized veggies, and a creamy chipotle sauce that ties it all together. Find step-by-step photos and more recipe tips above.

    • Cook rice with salt and set aside.

    • Season steak with taco spice and salt; bring to room temp.

    • Heat oil and cook onions and peppers for 10 minutes on medium-high, then 5 minutes lower heat until caramelized.

    • Blend chipotle sauce ingredients until smooth; adjust water for drizzling consistency.

    • Combine avocado salad ingredients and toss through in a bowl.

    • Heat skillet on high, add oil, and cook steak 3.5–4 minutes per side. Rest 2 minutes, then dice.

    • Assemble bowls with rice, veggies, steak, and toppings.

    • Drizzle with chipotle sauce and finish with crushed corn chips.

    • What cut of steak works best? Rump, sirloin, flank, or strip all work well—just don’t overcook.
    • Can I make this dairy-free? Yes—skip the cheese or use a dairy-free option.
    • Is the chipotle sauce spicy? Mild to medium. Adjust chipotle to taste and sauce heat by adding more or less chipotle depending on your spice tolerance.
    • Can I freeze it? The steak and rice freeze well, but fresh toppings are best added later.
    • No chipotle? Try smoked paprika + a little hot sauce for a similar vibe.
    • Why add acid (lime)? It brightens everything and balances the richness—small detail, big difference.
    • Don’t overcook the steak – medium or medium-rare keeps it juicy. Let it rest before cutting.
    • Slice steak against the grain – even if you cube it, this makes it more tender.
    • Layer your seasoning – a little salt at each stage = better flavor overall.
    • Make it low-carb – skip the rice and serve over lettuce or cauliflower rice.
    • Meal prep tip: store components separately and assemble fresh for best texture.
    • Storage: keeps 3–4 days in the fridge; sauce may thicken—just stir in water.
    • Make-ahead: sauce and rice can be made 1–2 days ahead.

    Calories: 681kcal | Carbohydrates: 74g | Protein: 36g | Fat: 28g | Saturated Fat: 7g | Polyunsaturated Fat: 4g | Monounsaturated Fat: 14g | Trans Fat: 0.01g | Cholesterol: 76mg | Sodium: 1524mg | Potassium: 1211mg | Fiber: 12g | Sugar: 8g | Vitamin A: 1828IU | Vitamin C: 63mg | Calcium: 156mg | Iron: 4mg

    Keywords: Tex Mex, steak bowls, burrito bowls, steak and rice recipes, rice bowls

    More Tex-Mex Recipes


    Source link