Author: admin

  • Slow Cooker Pasta e Fagioli Soup

    Slow Cooker Pasta e Fagioli Soup

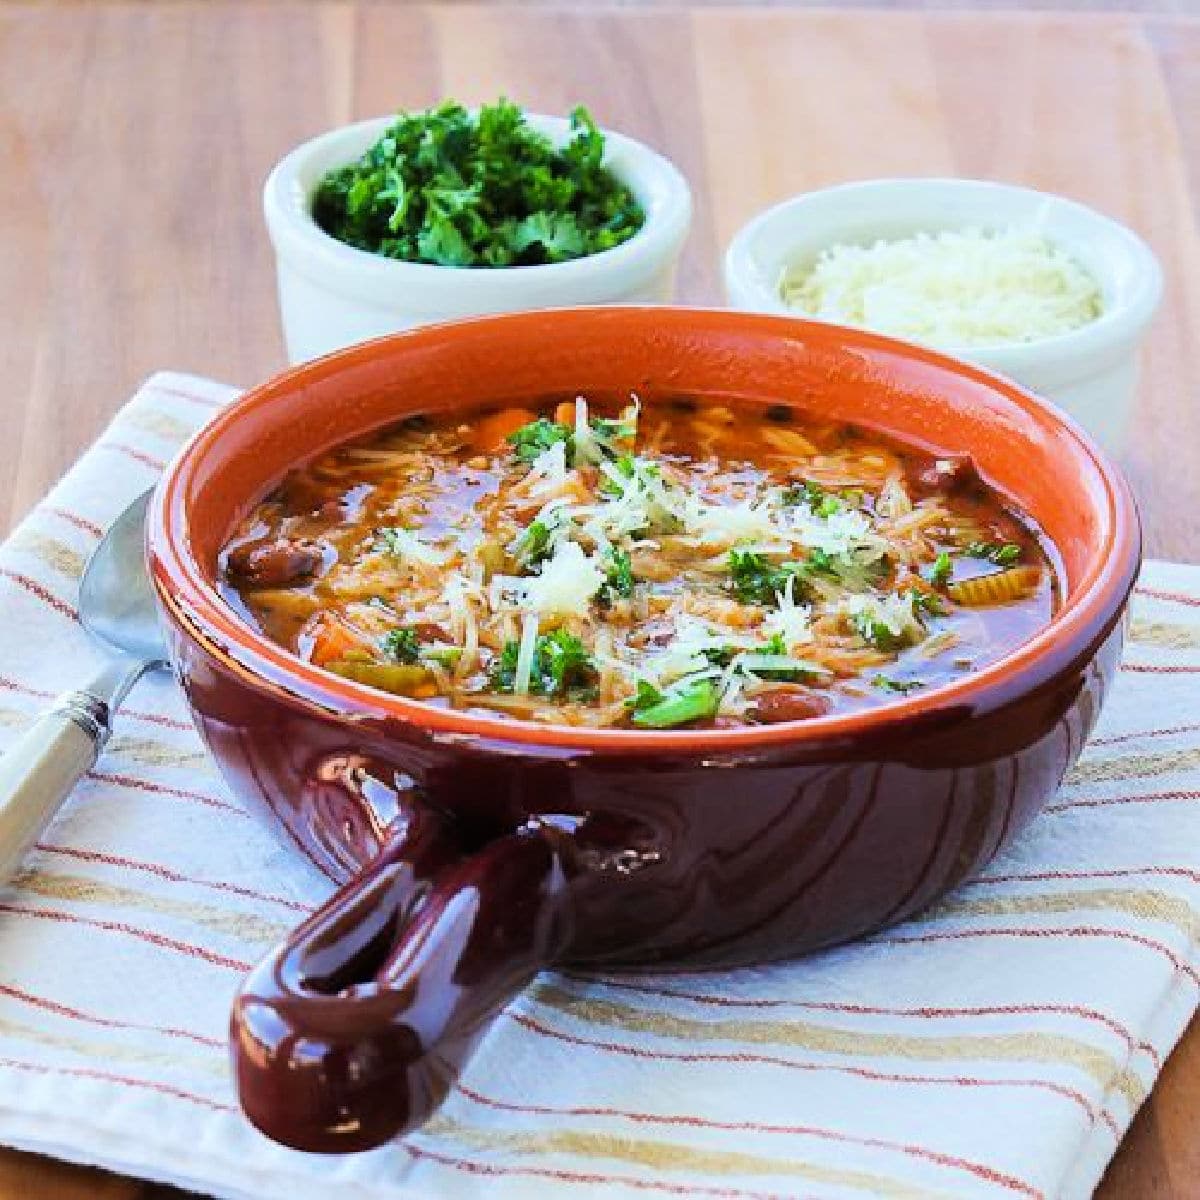
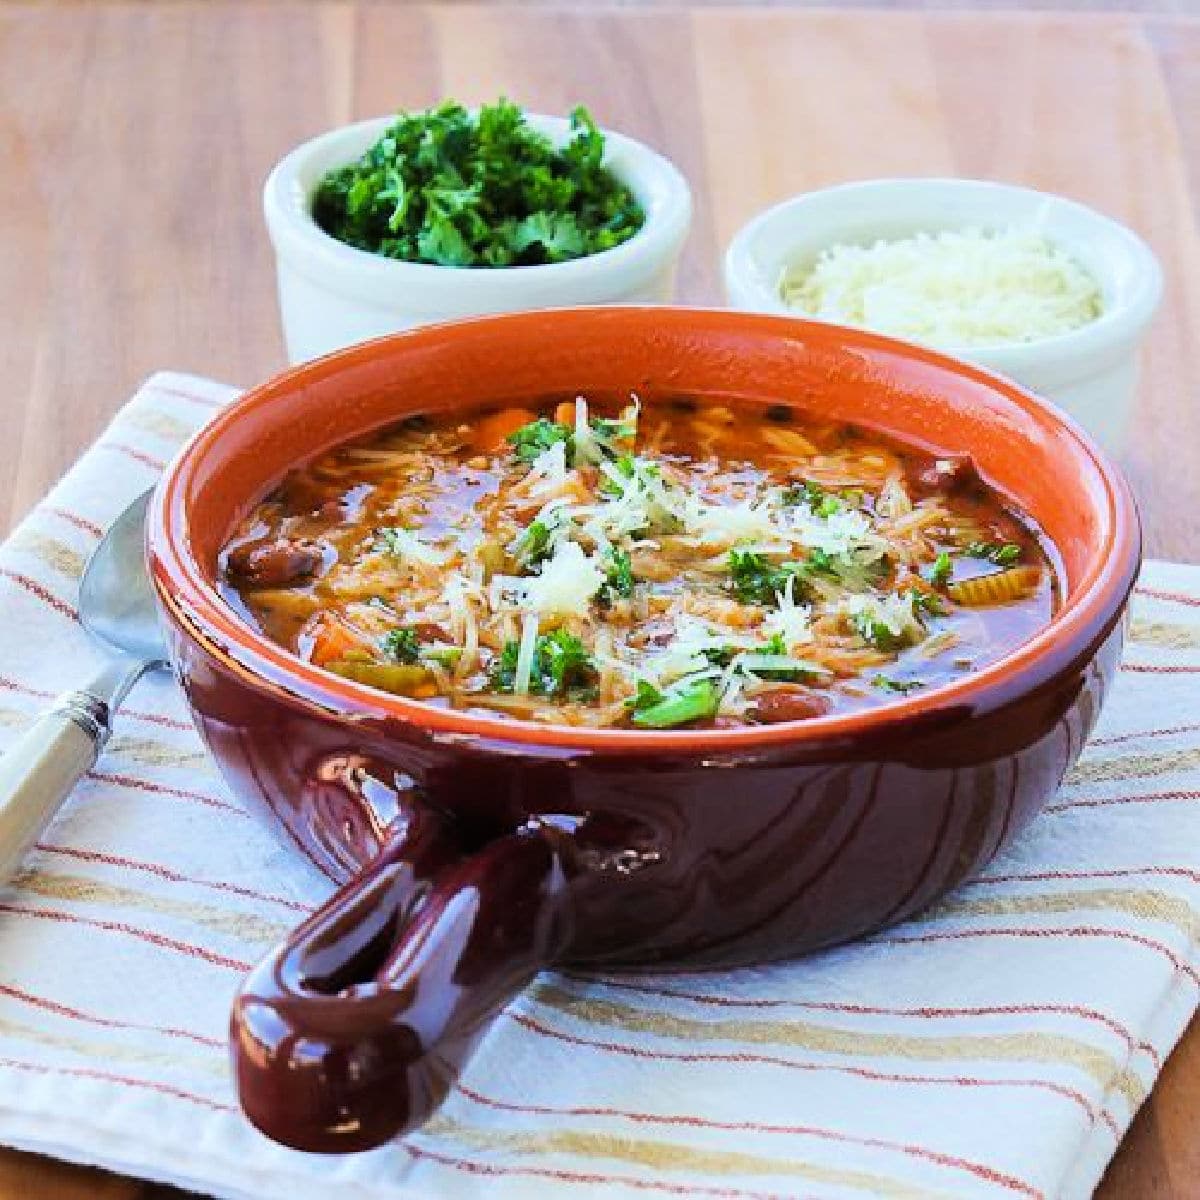
    Slow Cooker Pasta e Fagioli Soup is so delicious and you can use any large slow cooker to make this tummy-warming soup! The Pasta e Fagioli Soup recipe is vegetarian, and it can easily be vegan if you skip the Parmesan cheese!

    PIN Slow Cooker Pasta e Fagioli Soup to try it later!
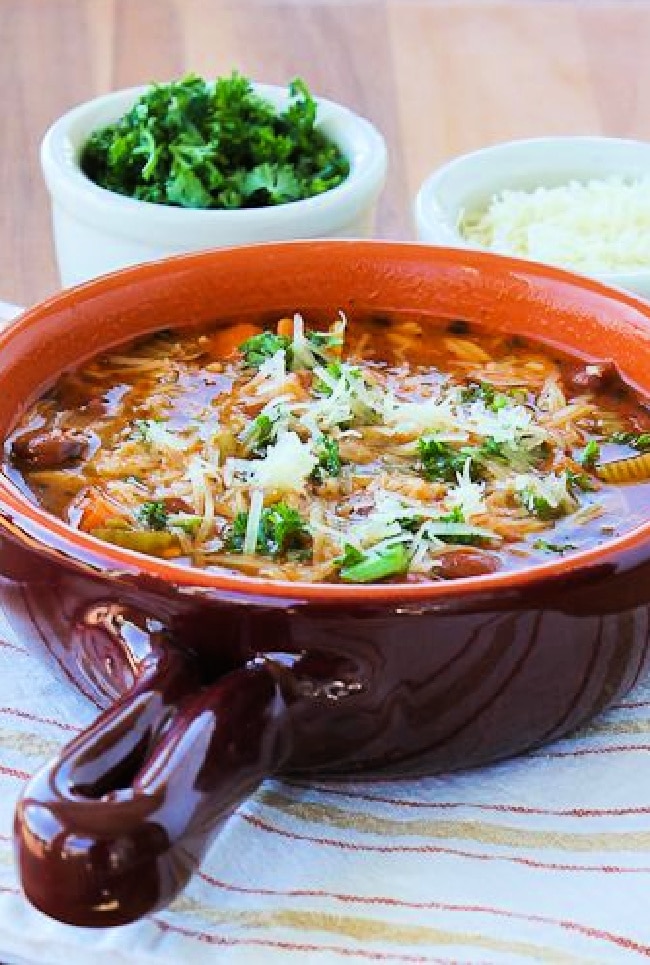
    Slow Cooker Pasta e Fagioli Soup shown in bowl with parsley and Parmesan in back.

    This Slow Cooker Pasta e Fagioli Soup tasted so great when I tried it out with my brother Rand on one of those chilly spring days that are so common in Utah. Pasta e Fagioli means simply “pasta and beans” and there are so many variations of this traditional Italian soup. If you have an Italian grandmother, this is the soup she probably made for you, or perhaps you’ve had it at an Italian restaurant. Either way, this soup is Italian comfort food at its best!

    And this is a meatless Pasta e Fagioli Soup recipe, and this is such a tasty idea for a plant-based meal! Hope you will try making Pasta e Fagioli Soup if you’ve had it in a restaurant and like the idea of making it in the slow cooker.

    What ingredients do you need for this recipe?

    (This is only a list of ingredients; please scroll down for complete printable recipe. Or if you use the JUMP TO RECIPE link at the top of the page, it will take you directly to the complete recipe with ingredient amounts.)

    What slow cooker did I use for Pasta e Fagioli Soup?

    I made this soup in the Ninja Slow Cooker (affiliate link) that my wonderful blogging and real-life friend Lydia sent me as a housewarming present. However, I’m not trying to convince you that everyone needs a Ninja Cooker, any Five Quart Slow Cooker (affiliate link) will work for this recipe, and I’ll give instructions that make it clear how to make the dish either way.

    What if you don’t want meatless Pasta e Fagioli Soup?

    This vegetarian soup is loaded with flavor, but you can definitely add browned Italian Sausage to the slow cooker if you prefer Pasta e Fagioli Soup with meat!

    What beans did we use for Slow Cooker Pasta e Fagioli Soup?

    We used canned red beans for this meatless soup, but you can use any beans you prefer.

    How high in carbs is this Pasta e Fagioli Soup?

    This vegetarian soup has 37 net carbs per serving, with 14 grams of protein.
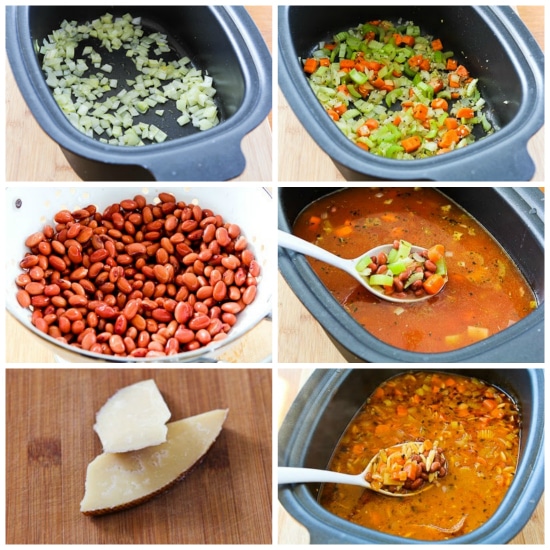
    Slow Cooker Vegetarian Pasta e Fagioli Soup found on KalynsKitchen.comSlow Cooker Vegetarian Pasta e Fagioli Soup found on KalynsKitchen.com

    How to Make Slow Cooker Pasta e Fagioli Soup:

    (This is only a summary of the steps for the recipe; please scroll down for complete printable recipe. Or if you use the JUMP TO RECIPE link at the top of the page, it will take you directly to the complete recipe.)

    1. Heat the olive oil and saute the onion (either in a pan on the stove or in the Ninja Cooker) until it’s starting to soften, about 4 minutes.
    2. Add the chopped celery and carrots to the onion and cook 3-4 minutes more.  Then add the minced garlic, Italian Herb Seasoning, Spike Seasoning, fennel, and red pepper flakes and cook about 1 minutes more. (Transfer to slow cooker if you’re doing this in a pan.)
    3. Rinse the canned red beans until no more foam appears.
    4. Add the beans, vegetable stock, and tomato sauce to the slow cooker and season the soup with a little salt and fresh ground black pepper and start to cook.
    5. If you really want to get the full Italian grandmother flavor, add a couple of Parmesan rinds to the soup when you start cooking it. (This is optional, or you can add more Parmesan to the finished soup if you don’t have a rind.)
    6. After the soup has cooked 3-4 hours on high (or 6-7 hours on low), add the whole wheat orzo (or brown rice) and cook about 40 minutes more.
    7. Stir in balsamic vinegar to finish the Pasta e Fagioli Soup and serve hot, with chopped parsley and freshly grated Parmesan to add at the table.
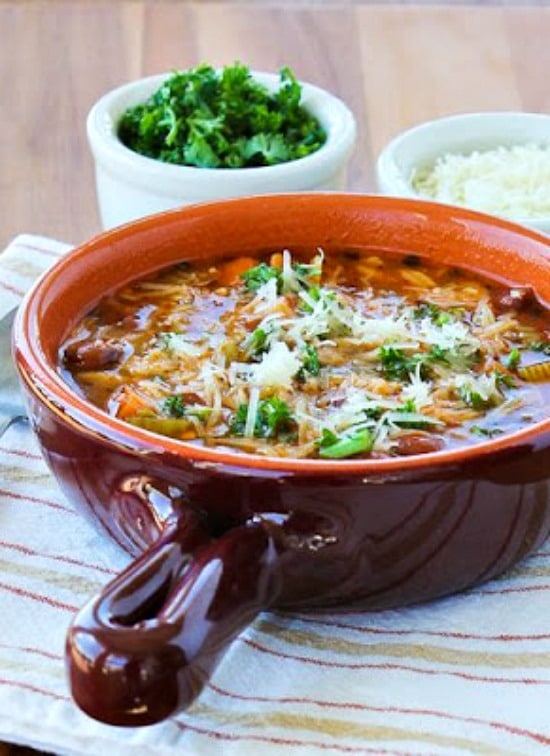
    Slow Cooker Vegetarian Pasta e Fagioli Soup found on KalynsKitchen.comSlow Cooker Vegetarian Pasta e Fagioli Soup found on KalynsKitchen.com

    Weekend Food Prep:

    This Slow Cooker Pasta e Fagioli Soup recipe has been added to a category called Weekend Food Prep where you’ll find recipes you can prep or cook on the weekend and eat during the week!

    Ingredients

    • 2 T olive oil
    • 1 large onion, chopped
    • 1 cup sliced celery
    • 1/2 cup chopped carrots
    • 1 T minced garlic
    • 1 tsp. Italian Herb Blend (Use any brand of Italian seasoning that you have.)
    • 2 tsp. Spike Seasoning (Or substitute any type of all-purpose seasoning blend that you like.)
    • 1/2 tsp. ground fennel (probably optional, but it adds a lot of flavor.)
    • 1/2 tsp. red pepper flakes
    • two 15 oz. cans red beans, rinsed and drained
    • three 14 oz. cans vegetable broth (or use homemade vegetable stock, which would be fantastic in this)
    • 8 oz. can tomato sauce
    • salt and fresh ground black pepper to taste
    • several pieces Parmesan rind (optional, but does add wonderful flavor to the soup)
    • 1/2 cup 100% Whole Wheat Orzo Pasta (see notes)
    • 2 T good quality balsamic vinegar
    • freshly grated Parmesan cheese for serving
    • chopped fresh parsley for serving

    Instructions

    1. Heat olive oil (either in the Ninja Cooker or in a pan on the stove) and saute the onions until they start to soften, about 4 minutes.
    2. Add the celery and carrots and cook 3-4 minutes more, then add the minced garlic, Italian Herb Seasoning (affiliate link), Spike Seasoning (affiliate link), ground fennel, and red pepper flakes and cook about a minute more.  (Transfer to the slow cooker if you’re using a pan on the stove.)
    3. While the vegetables are cooking, put the beans in a colander placed in the sink and rinse well with cold water, until no more foam appears.
    4. When vegetables are done, add the drained beans, vegetable broth, tomato sauce, salt, and fresh ground black pepper to the slow cooker (along with the Parmesan rinds if you have some) and cook on high for 3-4 hours (or on low for 6-8 hours.)
    5. Add the orzo (or other small pasta shape, or brown rice for gluten-free) and cook about 40 minutes more.
    6. Remove Parmesan rinds and stir in the balsamic vinegar.
    7. Serve soup hot, with freshly grated Parmesan and chopped fresh parsley to add at the table.
    8. This Pasta e Fagioli Soup freezes well, and I’m glad I have some in the freezer for the next chilly spring day!

    Notes

    I’d use at least a Five Quart Slow Cooker (affiliate link) for this recipe, and a larger size would also work.

    You could substitute any type of small whole wheat pasta, or use  brown rice for gluten-free variation.

    This recipe was adapted from 50 Simple Soups for the Slow Cooker, although I spiced it up quite a bit.

    Nutrition Information

    Yield

    8

    Serving Size

    1

    Amount Per Serving

    Calories 281Total Fat 5gSaturated Fat 1gTrans Fat 0gUnsaturated Fat 4gCholesterol 1mgSodium 1019mgCarbohydrates 47gFiber 10gSugar 4gProtein 14g

    Nutrition information is automatically calculated by the Recipe Plug-In I am using. I am not a nutritionist and cannot guarantee 100% accuracy, since many variables affect those calculations.
    Did you make this recipe?

    Did you make this recipe? Please leave a star rating (under the PRINT button in the recipe) or share a photo of your results on Instagram! THANKS!

    Square image for Slow Cooker Pasta e Fagioli Soup showing soup in bowl with Parmesan in back.Square image for Slow Cooker Pasta e Fagioli Soup showing soup in bowl with Parmesan in back.

    Low-Carb Diet / Low-Glycemic Diet / South Beach Diet Suggestions:
    You could make the soup lower in carbs by using fewer carrots, beans, and pasta, but this can never be a low-carb soup since it includes both pasta and beans. The Slow Cooker Pasta e Fagioli Soup would be Phase 2 or 3 for the original South Beach Diet. If you substitute another pasta shape, it needs to be 100% whole wheat pasta for South Beach. 

    Find More Recipes Like This One:
    Use Soup Recipes to find more like this one. Use the Diet Type Index to find recipes suitable for a specific eating plan. You might also like to follow Kalyn’s Kitchen on Pinterest, on Facebook, on Instagram, on TikTok, or on YouTube to see all the good recipes I’m sharing there.

    Historical Notes for this Recipe:
    This recipe for Slow Cooker Pasta e Fagioli Soup was posted in 2013. It was updated in 2021 with the option to add sausage, and was last updated with more information in 2026.
    Pinterest image of Slow Cooker Pasta e Fagioli Soup

    We are a participant in the Amazon Services LLC Associates Program, an affiliate advertising program designed to provide a means for us to earn fees by linking to Amazon.com and affiliated sites. As an Amazon Associate, I earn from qualifying purchases.

    Source link

  • Easy Tuna Salad Recipe

    Easy Tuna Salad Recipe

    Learn how to make our favorite tuna salad recipe! It is super easy, quick, and perfect for sandwiches, snacks, or topping your favorite salad!

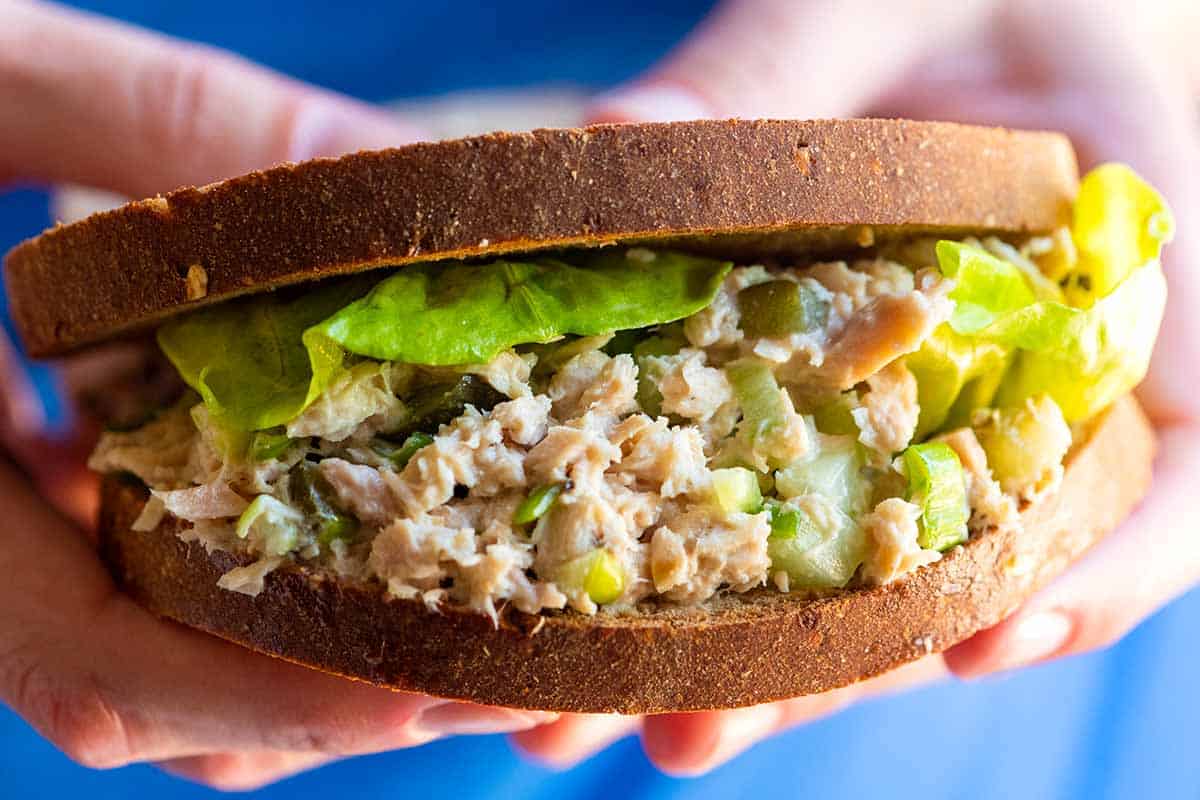
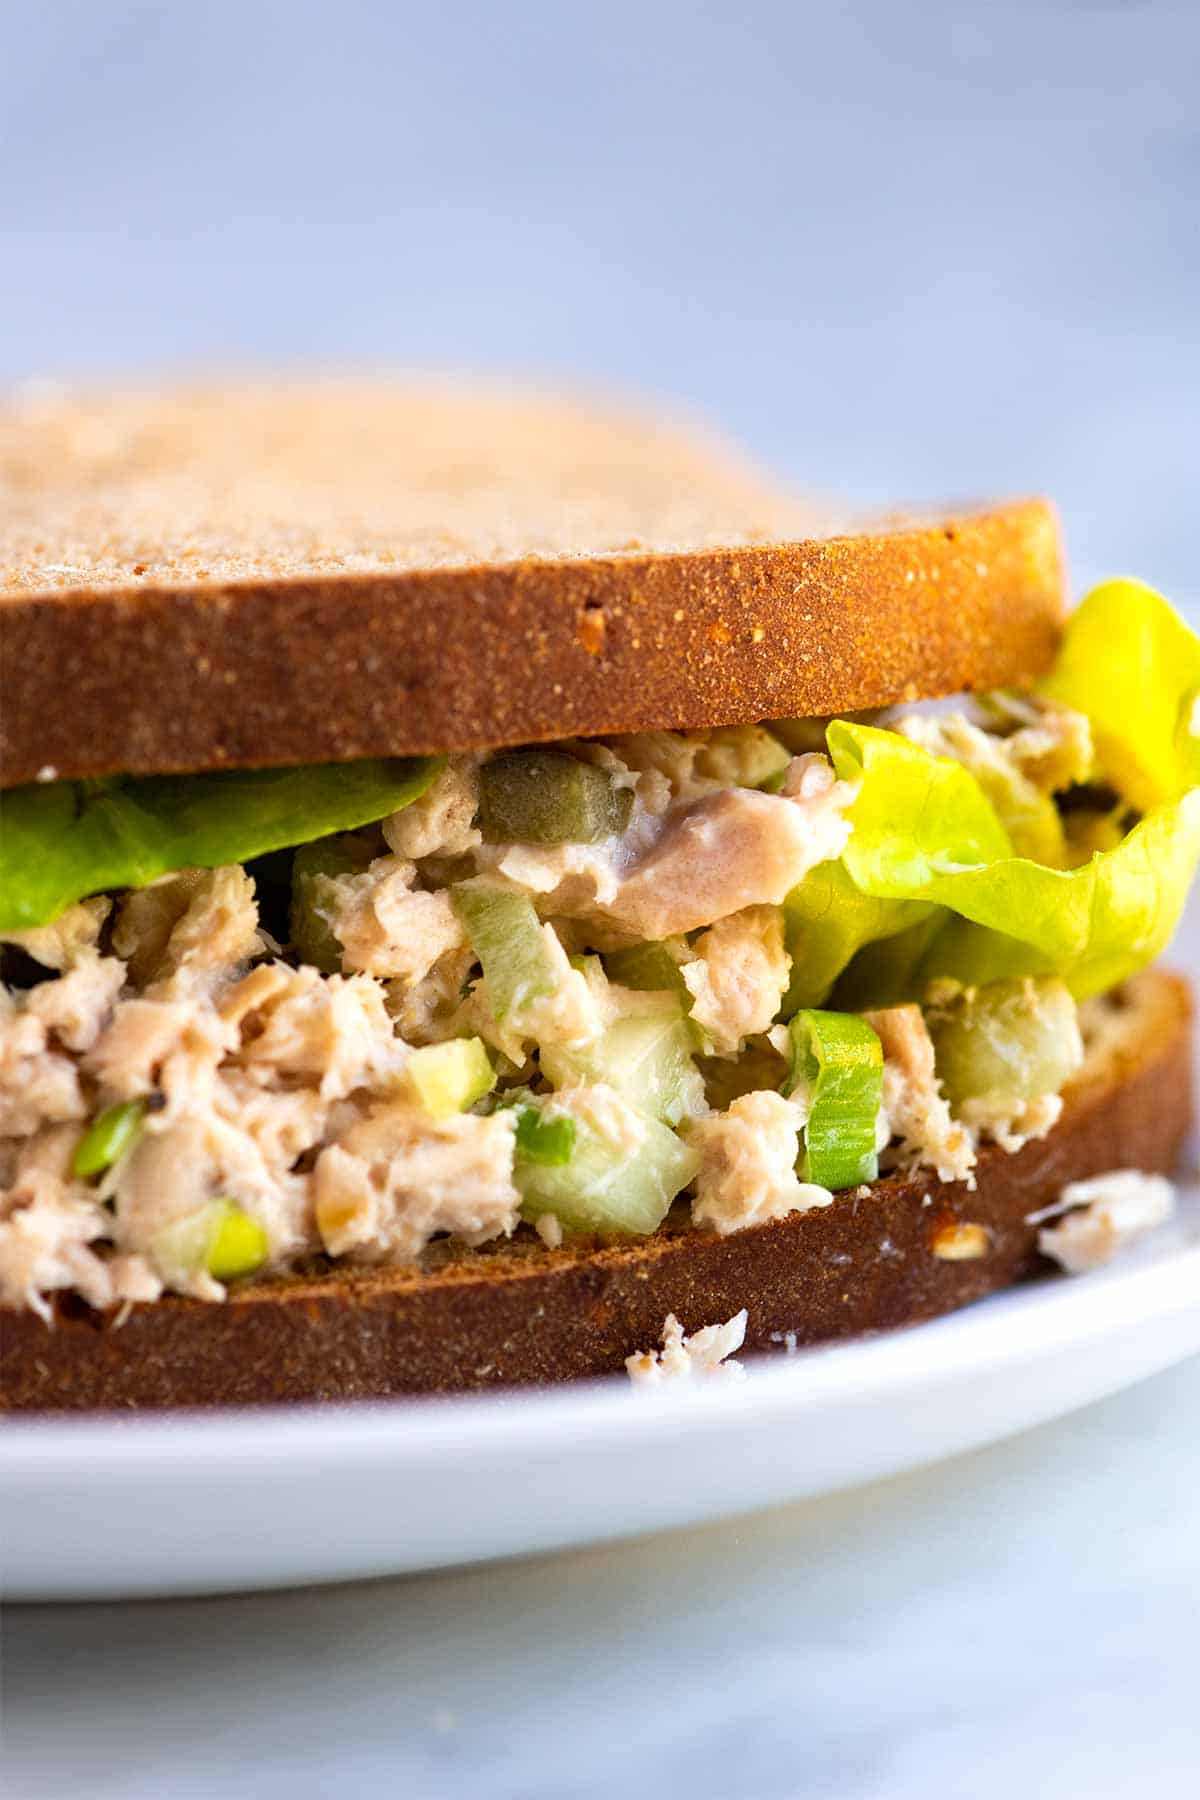
    Tuna Salad Sandwich

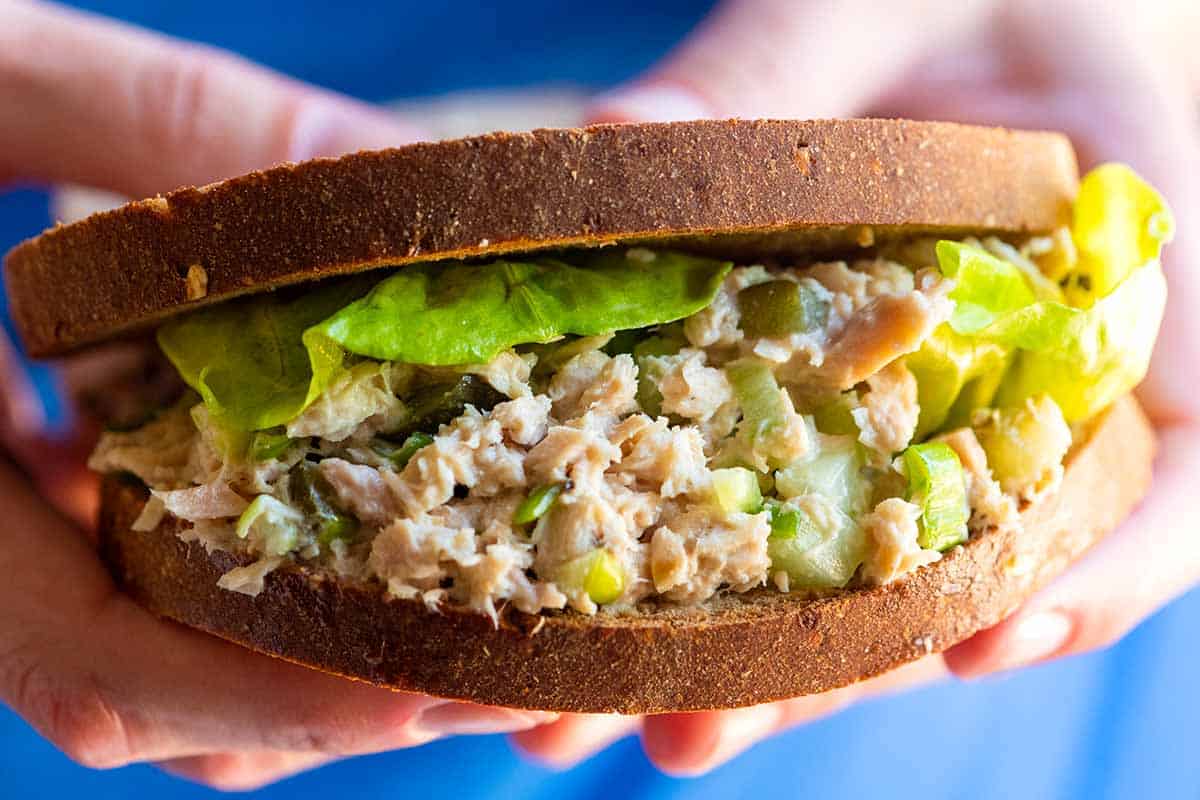
    My favorite tuna salad recipe uses high-quality tuna and simple ingredients for a delicious sandwich, wrap, or cracker topping. I’ve made this salad so many times. I love this quick, healthy salad on a sandwich, in a wrap, or with crackers.

    I grew up eating tuna salad sandwiches (thanks, Mom!), and they’re still one of my favorite lunches. If you’re looking for other easy and tasty salad ideas, I bet you’ll love our classic egg salad, smashed chickpea salad, and this chicken salad (it’s so good!).

    Key Ingredients

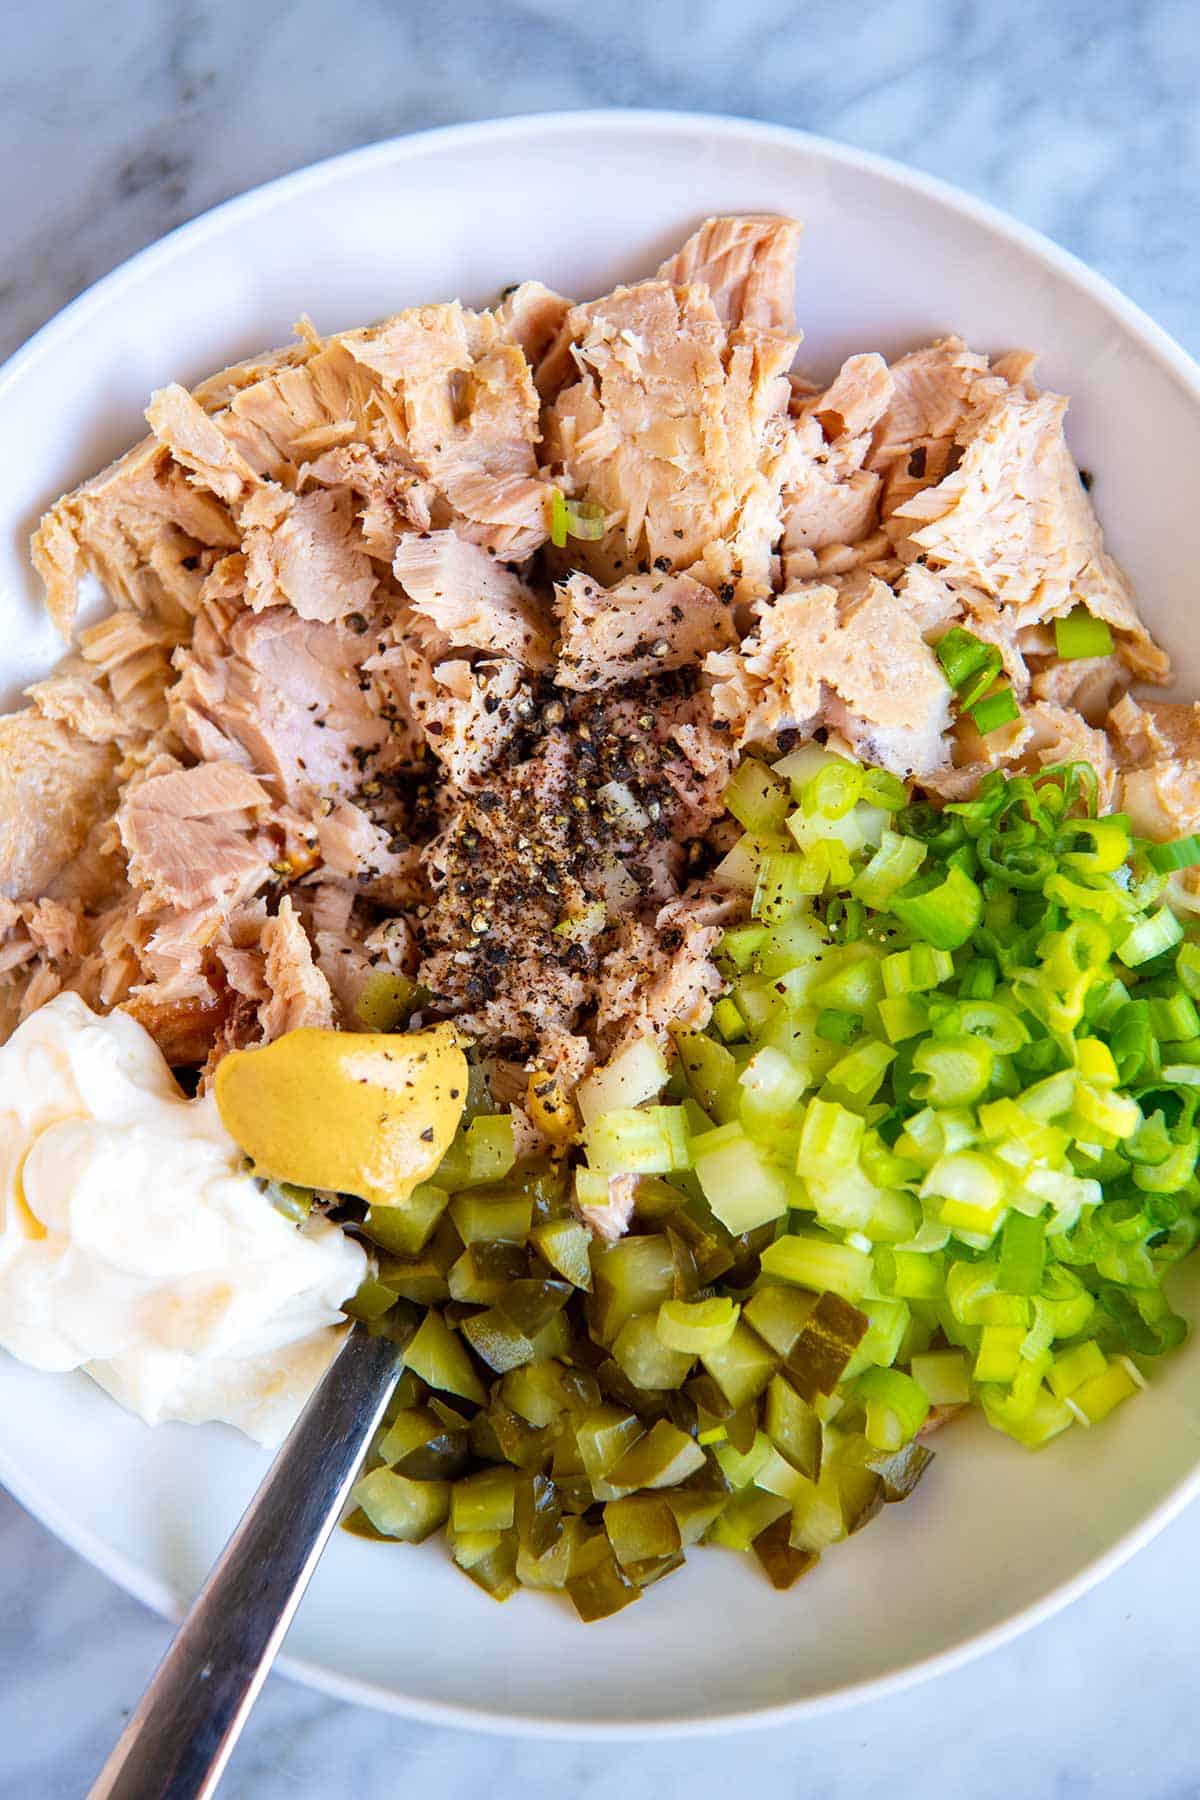
    • Tuna: I use canned albacore tuna caught using sustainable pole-and-line methods and cooked right in the can. This results in the most flavorful tuna that retains its natural juices and fats. When I buy canned tuna cooked in the can, I don’t drain it. Brands that don’t cook tuna in the can cook it first and then can it, which means that much of the natural juices and healthy fats are lost. That’s why you will often see tuna canned in water or oil. When the tuna is cooked right in the can, there is no need for extra water or oil. If sustainably caught, high-quality tuna isn’t available, flaked salmon or mashed chickpeas work well as a substitute. (I love this smashed chickpea salad sandwich.)
    • Mayonnaise: I use store-bought mayonnaise or homemade mayo if I have it in the fridge, but you can use a vegan mayo or swap some of it for a drizzle of olive oil if you prefer a less creamy salad.
    • Mustard: I’m a big fan of adding Dijon mustard for a zesty kick, but it’s totally optional. If you’re unsure, make the salad without it, and then try adding a bit to see if you like it.
    • Fresh Lemon Juice: I love a tiny squeeze of lemon juice to balance out the richness of the mayonnaise and cut through the fishy taste of the tuna.
    • Crunchy Things: This is where you can get creative! I love adding celery, homemade dill pickles (along with a splash of pickle juice), and scallions for extra crunch and flavor. Feel free to experiment with your favorite crunchy additions.

    Find the full recipe with measurements below.

    Tuna Salad Ingredients

    Enjoying Your Tuna Salad

    This simple tuna salad is incredibly versatile (I really do make it almost every week)! Here are some of our favorite ways to serve it:

    • Classic Tuna Sandwich: This is my go-to lunch. I love layering this salad with fresh tomatoes, cucumbers, and lettuce on bread. If I have any on hand, homemade focaccia is amazing, but use what you have!
    • Wraps and Flatbreads: Create easy and flavorful wraps using tortillas or flatbreads. If you are up for it, I love these homemade flour tortillas and this super easy flatbread recipe!
    • Add to Salads: Add protein to your favorite salads by adding a scoop of tuna salad. It’s delicious with our Caesar salad, Greek salad, or on top of this quinoa salad.
    • Serve with Crackers and Vegetables: Make a light and healthy snack by serving tuna salad with crackers or fresh slices of cucumber and zucchini.
    • Make a Tuna Melt: Here’s Adam’s favorite! Spread the salad on buttered and toasted bread, top with cheese (we recommend Gruyère or white cheddar), and broil until melted. So good!
    Tuna Salad

    Easy Tuna Salad

    • PREP
    • TOTAL

    We use canned Albacore tuna and a short list of simple ingredients in our favorite tuna salad recipe. It is so quick and easy. If you cannot find sustainably caught canned tuna, substitute the tuna with flaked salmon or mashed chickpeas (use about 2 cups). Tips for buying tuna for tuna salad are in the tips section below.

    4 Servings

    Watch Us Make the Recipe

    You Will Need

    2 (5 ounce) cans of tuna, see tips below

    3 to 4 tablespoons mayonnaise, try homemade mayonnaise

    1 teaspoon Dijon mustard, optional

    1 tablespoon fresh lemon juice

    1 stalk of celery, finely chopped

    1 scallion, finely chopped, or use 1 tablespoon of chopped onion

    1 to 2 dill pickles, finely chopped, try homemade pickles

    1 tablespoon dill pickle juice, optional

    Salt and fresh ground black pepper, to taste

    Directions

      1Prepare the tuna: Whether you drain the liquid in the can depends on the brand of tuna you have. If you have purchased tuna cooked in the can, you do not need to drain it. Draining it would remove the natural juices and fats, including omega-3 fats. If the can of tuna says “packed in water” or “packed in oil,” we prefer to drain it.

      2Make the salad: Place the tuna in a medium bowl and break it up with a fork. Add 3 tablespoons of mayonnaise, 1 tablespoon of lemon juice, 1 teaspoon of Dijon mustard, the chopped celery, scallion, pickles, 1 tablespoon of pickle juice, and a generous pinch of fresh ground black pepper. Mix thoroughly.

      3Taste and adjust: Taste the salad and adjust the seasoning with salt, or add another tablespoon of mayonnaise if needed.

    Adam and Joanne’s Tips

    • Storing:  Store tuna salad in airtight, food-safe containers in the fridge for up to 5 days. We do not recommend freezing the salad.
    • Do I need to drain tuna cans? The answer depends on the brand of tuna you have. If you have purchased tuna cooked in the can, then no, you do not want to drain it. Draining it would remove the natural juices and fats, including omega-3 fats. Alternatively, if the can of tuna says “packed in water” or “packed in oil,” we prefer to drain it. That tuna was likely cooked before being canned, so those natural juices have already been lost. Generally, most brands that cook the tuna can indicate this on the packaging or mention there is no need to drain.
    • Best tuna to buy for tuna salad: We look for the little blue logo with MSC on it (Marine Stewardship Council Certified) as well as key terms like “hand-operated pole-and-lines” or “pole and line caught.” Albacore tuna caught with trolling lines can also be a good option (be careful not to confuse trolling lines with trawling, which is very different).
    • The nutrition facts provided below are estimates.

    Nutrition Per Serving
    Serving Size
    1/4 of the recipe
    /
    Calories
    188 calories
    /
    Total Fat
    10.4g
    /
    Saturated Fat
    1.9g
    /
    Cholesterol
    40.5mg
    /
    Sodium
    577.3mg
    /
    Carbohydrate
    1.4g
    /
    Dietary Fiber
    0.5g
    /
    Total Sugars
    0.7g
    /
    Protein
    20.7g


    AUTHOR:

    Joanne Gallagher

    Adam and Joanne of Inspired Taste

    We are Adam and Joanne Gallagher, the creators of Inspired Taste. Established in 2009, Inspired Taste grew from a childhood dream into one of the internet’s most trusted recipe sites with hundreds of reliable recipes, step-by-step videos, and expert tips.More About Us

    Previous Post: Easy Bread and Butter Pickles
    Next Post: Easy Cookie Bars

    Source link

  • Perfect Cinnamon Apples Recipe

    Perfect Cinnamon Apples Recipe

    This stovetop cinnamon apples recipe can be whipped up in about 15 minutes and are a perfect topping for oatmeal, pancakes, ice cream, and more!

    Cinnamon Apples

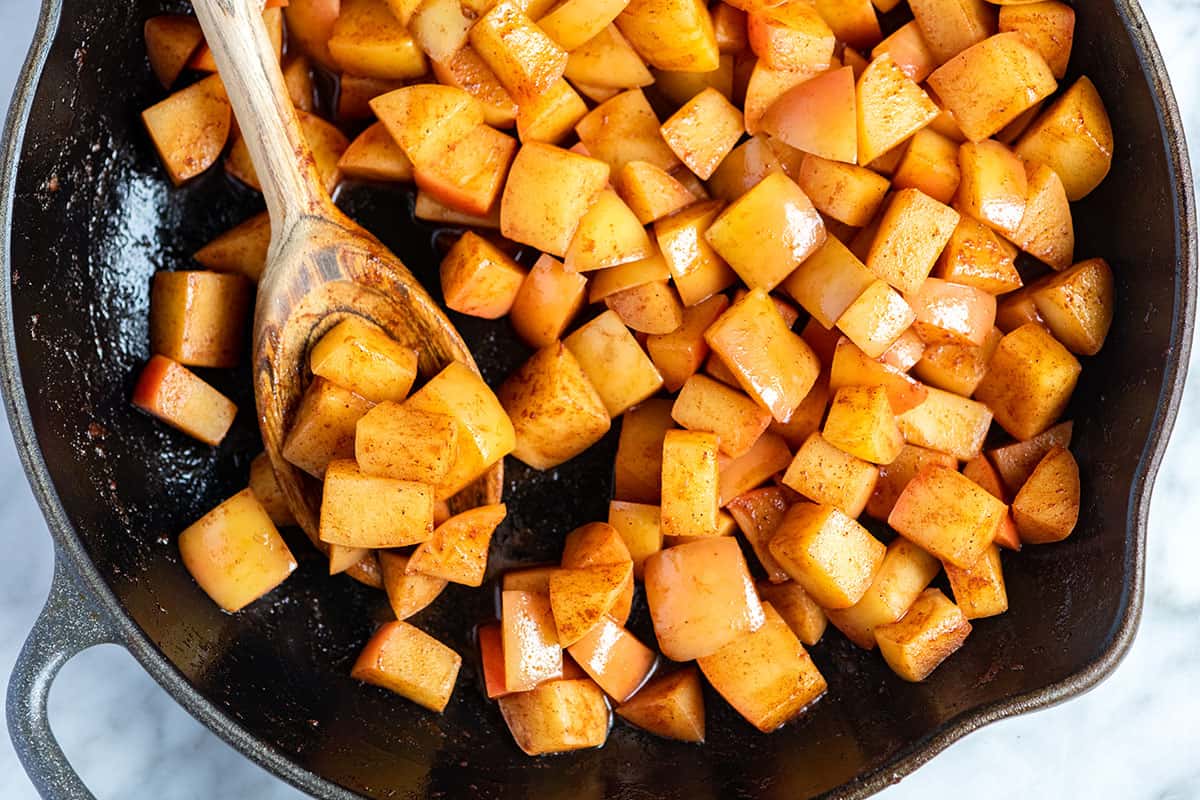
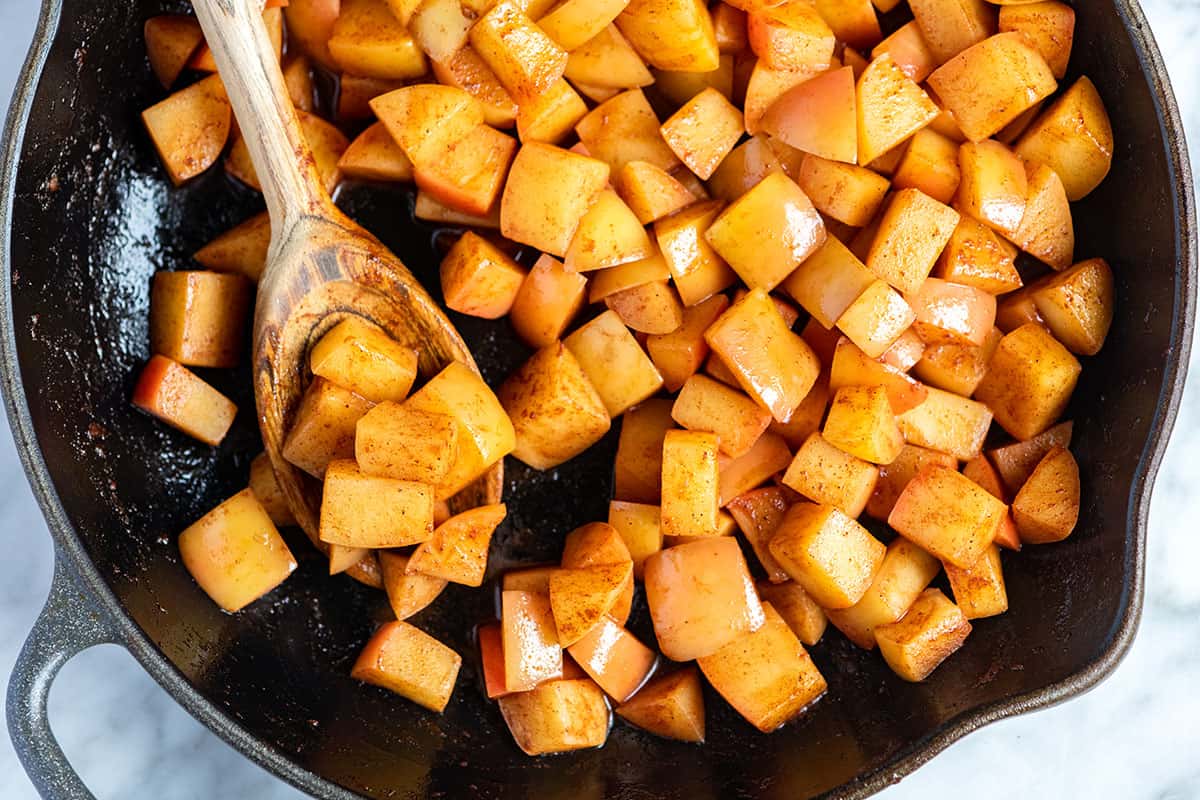
    This might be one of the easiest apple recipes on our site. I love them with my everyday oatmeal, as a side for breakfast, and spooned over vanilla ice cream with caramel sauce for dessert. My son even loves them added to his school lunchbox!

    Warm cinnamon apples are the best, especially during the fall!

    Key Ingredients

    • Apples: You can use any variety of apples for this recipe. I love crispier varieties like Honeycrisp, Granny Smith, and Pink Lady apples. These are the same apples I use for apple cobbler. You can peel them or leave the peel on. I love the peel, but my toddler prefers this recipe when made with peeled apples since the apples turn out a little softer.
    • Lemon Juice or Apple Cider Vinegar: A little acid, like lemon juice or vinegar, balances the sweetness of the apples and maple syrup. It makes everything pop.
    • Butter: I love cooking the apples in a bit of butter since it turns into a silky sauce. Plant-based butter or coconut oil is an excellent substitute.
    • Cinnamon: We are pretty generous with the cinnamon in this recipe. You can add or reduce as you see fit.
    • Optional Spices: I love adding extra spices like cardamom and nutmeg. They bump up the cozy factor and taste wonderful.
    • Vanilla and Maple Syrup: These make the apples taste more rich and add a bit of sweetness.

    Find the full recipe with measurements below.

    How to Make Cinnamon Apples

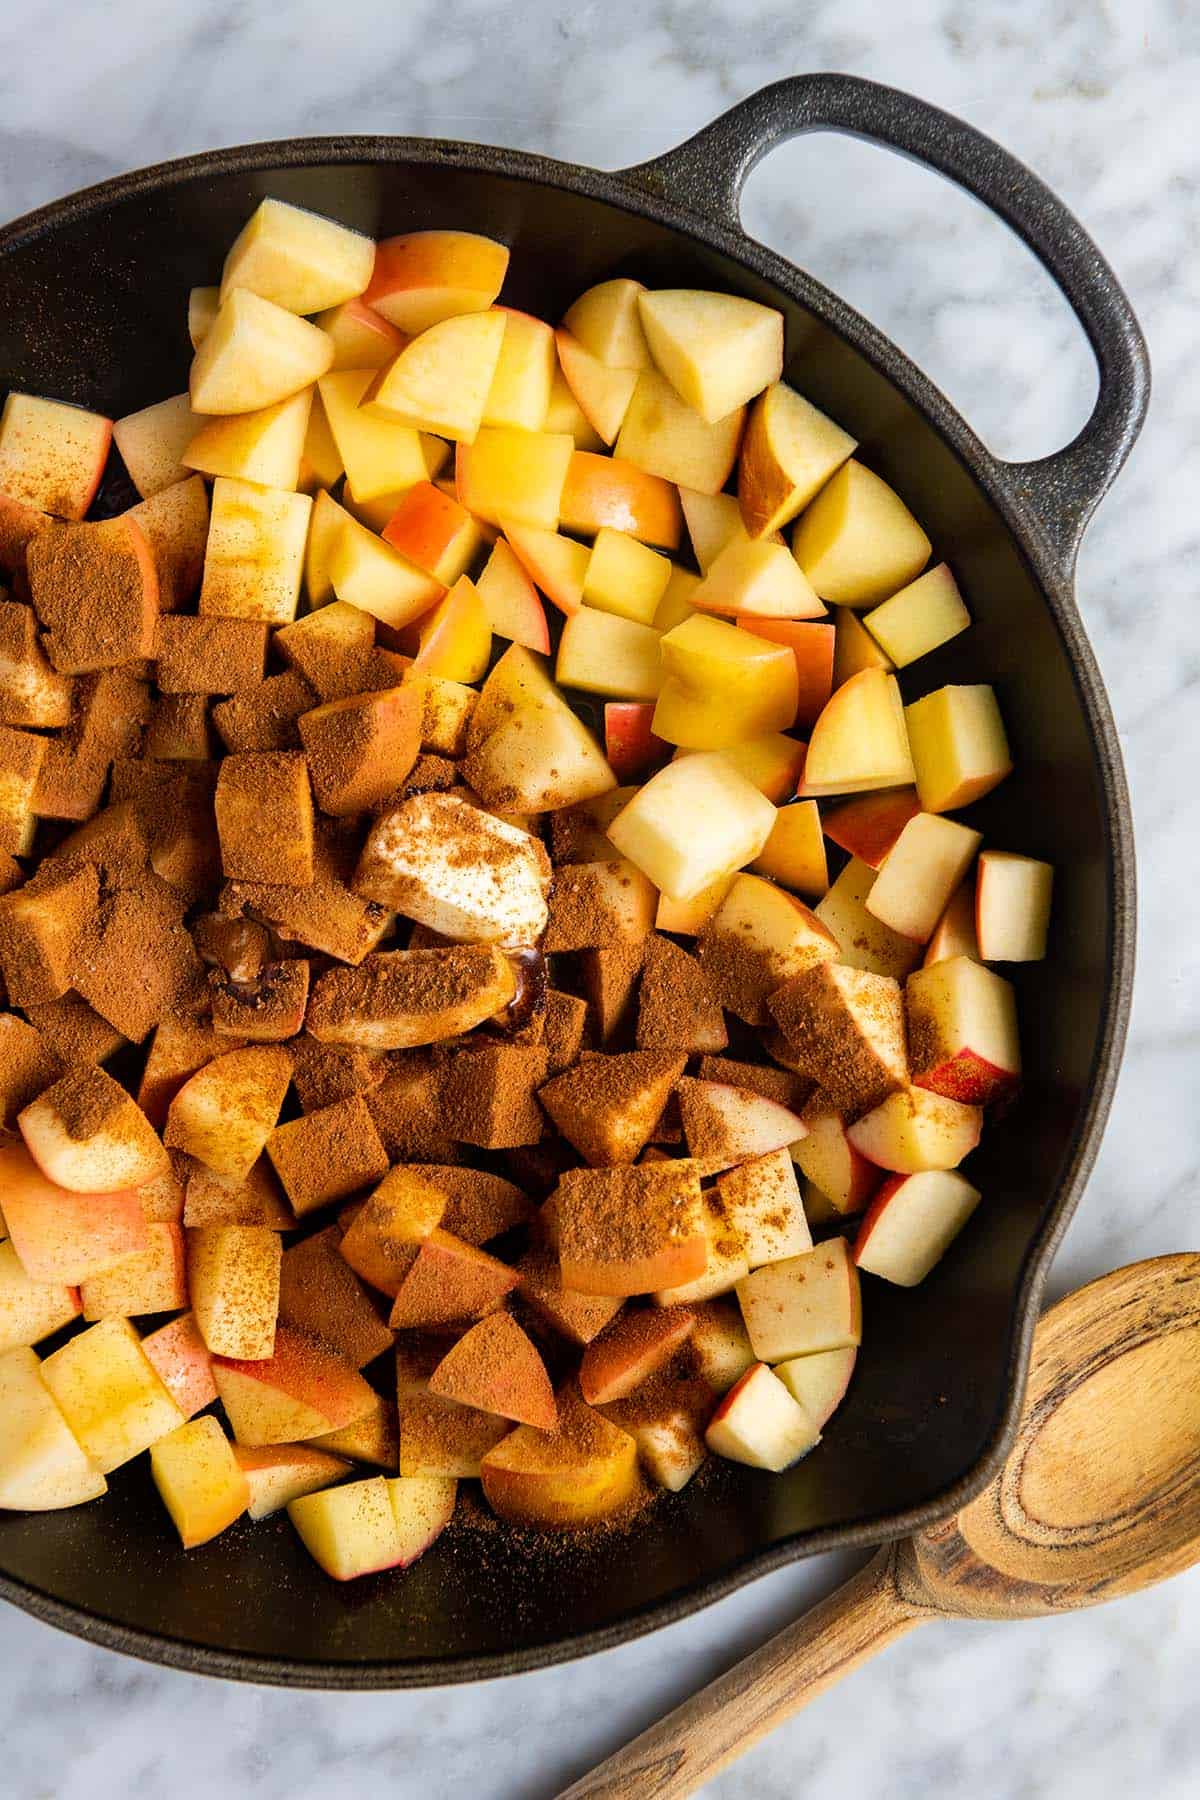
    Tip 1: Lemon is your best friend. We love the balance and brightness that lemon adds to the party. When adding the chopped apples to a skillet we add lemon juice and a bit of water. Cover the skillet with a lid and cook over medium-high heat until the apples soften. When they are soft, toss in your butter, cinnamon, extra spices, vanilla, and maple syrup.

    Apples in a Skillet with Cinnamon, and other baking spices.

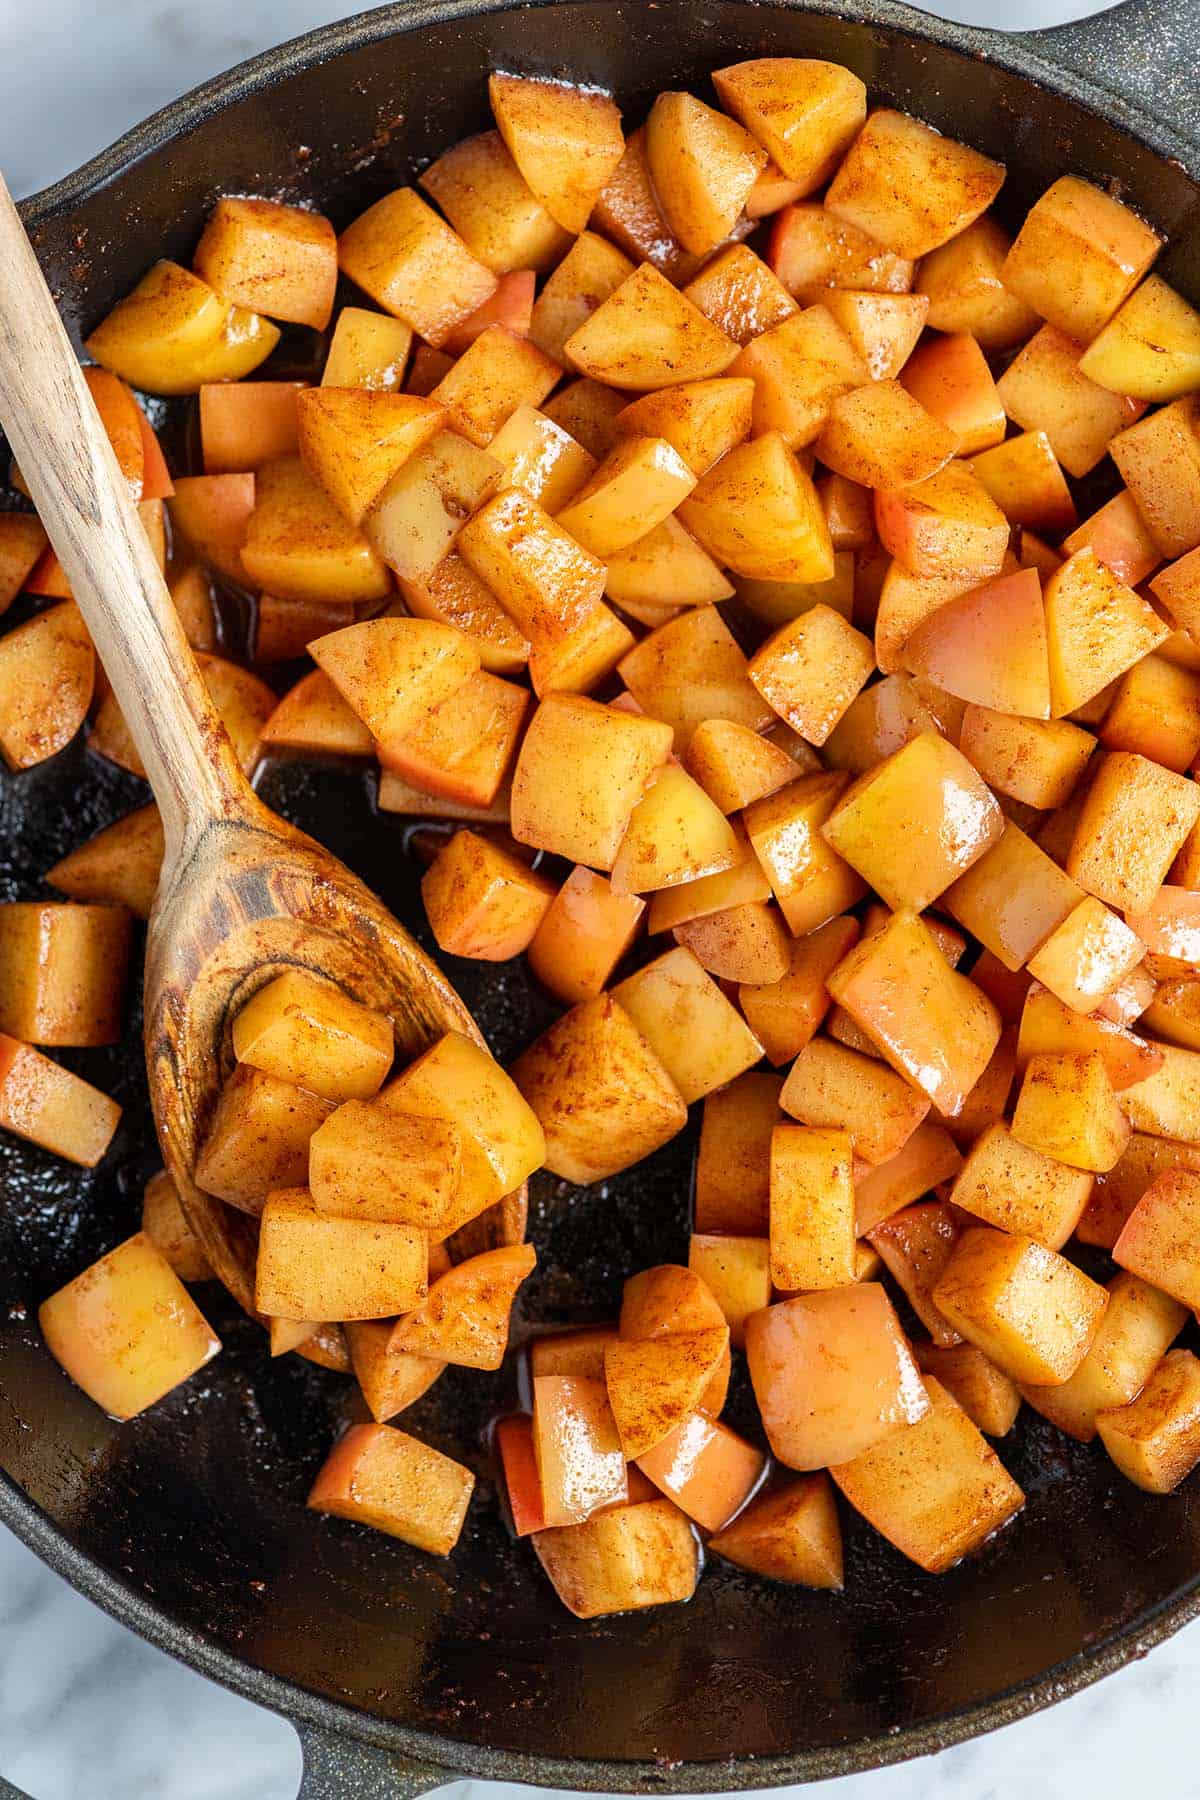
    Tip 2: Stir until the butter turns into a butter sauce. Stir the apples around the pan until the butter melts and turns into a silky cinnamon butter sauce that coats the apples. When it does, the apples are ready!

    Tip 3: Serving ideas. I love serving them with pumpkin pancakes and on top of steel-cut oats. My toddler also loves these and happily eats them with a spoon (or, more often, his fingers).

    More Easy Apple Recipes

    Easy Stovetop Cinnamon Apples

    Perfect Cinnamon Apples

    • PREP
    • COOK
    • TOTAL

    Extra easy cinnamon apples made on the stovetop in about 15 minutes! Enjoy these buttery spiced apples over ice cream for dessert, spooned over pancakes and waffles for breakfast, or as a deliciously sweet side.

    Makes 4 cups

    You Will Need

    1 ¾ pounds apples, 5 to 6 small

    1 teaspoon lemon juice or apple cider vinegar

    2 tablespoons water, plus more as needed

    2 tablespoons butter or vegan butter

    1 ½ teaspoons ground cinnamon

    1/4 teaspoon ground cardamom, optional

    1/8 teaspoon fresh grated nutmeg, optional

    1/2 teaspoon vanilla extract

    1/2 tablespoon to 1 tablespoon maple syrup, optional

    Directions

      1Choose whether or not you want to peel the apples. We prefer our apples with the peel. However, for softer cinnamon apples, peel them.

      2Core and cut the apples into bite-size pieces, 3/4-inch to 1-inch cubes. For slices, slice the apples into 1/4-inch thick slices.

      3Toss the apples, lemon juice (or vinegar), and two tablespoons of water into a wide skillet over medium-high heat. Cover the skillet with a lid (or tent them with aluminum foil). Cook, covered, for 3 to 4 minutes.

      4Uncover the apples, and stir in the butter, cinnamon, optional spices (cardamom and nutmeg), vanilla, and maple syrup (optional).

      5Cook, while stirring, until the butter melts and the apples soften to your liking, 3 to 5 minutes more. For more saucy apples, stir in 2 to 3 tablespoons more water. Simmer the water until it thickens and coats the apples. Taste, and then adjust with more maple syrup.

    Adam and Joanne’s Tips

    • Storing: These apples can be stored in an airtight container in the fridge for up to 5 days. You can also freeze them for a few months.
    • The nutrition facts provided below are estimates.

    Nutrition Per Serving
    Serving Size
    1/2 cup
    /
    Calories
    80
    /
    Total Fat
    3.1g
    /
    Saturated Fat
    1.8g
    /
    Cholesterol
    7.6mg
    /
    Sodium
    1.5mg
    /
    Carbohydrate
    14.2g
    /
    Dietary Fiber
    2.7g
    /
    Total Sugars
    10.4g
    /
    Protein
    0.3g


    AUTHOR:

    Joanne Gallagher

    Previous Post: Easy Pumpkin Cupcakes
    Next Post: Crispy Tofu Fingers

    Source link

  • Cheese Pinwheels Recipe

    Cheese Pinwheels Recipe

    Our easy cheese pinwheels made with puff pastry, two cheeses, and roasted red peppers are such a delicious appetizer! These cute little pinwheels fly off the plate!

    Cheese Pinwheels

    These puff pastry pinwheels are high on my list of best hors d’oeuvres. They are simple, pretty on the plate, taste incredible, and are perfect for making in advance! In our recipe below, we spread puff pastry with Boursin cheese, add lots of parmesan, and top with roasted red pepper for sweetness and color.

    I love them so much, and based on how quickly these disappear at parties, I can tell you my friends and family love them, too. Serve these alongside other popular appetizers, like red pepper hummus, classic shrimp cocktail, and tomato bruschetta.

    Key Ingredients

    • Puff Pastry: Use 1 sheet of frozen puff pastry, thawed. A standard box usually contains 2 sheets. I used Pepperidge Farm in the photos, but any brand will work! I thaw my puff pastry sheet in the fridge overnight. You can also thaw it on the counter. It should be ready in about 1 hour. I also use puff pastry to make quick and easy chocolate croissants, which would be the perfect way to use that leftover sheet.
    • Cheese: I use two cheeses in these. First, something creamy like garlic and herb Boursin cheese (it’s so delicious). Goat cheese or even herbed cream cheese are good substitutes. Then, I sprinkle grated parmesan cheese over the filling. Pecorino cheese or even a sharp cheddar work, too.
    • Roasted Red Peppers: People eat with their eyes, and rolling up chopped roasted red peppers makes these pinwheels so pretty and appetizing. I grab a few peppers from a jar of store-bought roasted peppers. You can use fresh diced red peppers if you don’t have them. In fact, can roll up just about anything. Think bacon, ham, caramelized onions, or different vegetables.
    • Fresh Herbs: These are optional, but I love adding something fresh and green to the pinwheel filling. Fresh parsley or basil are excellent.
    • Egg: So that the pinwheels bake up to be golden brown and pretty, we brush a little egg wash over them right before sliding them into the oven. It’s simple and made with beaten egg and water.

    How to Make Cheese Pinwheels

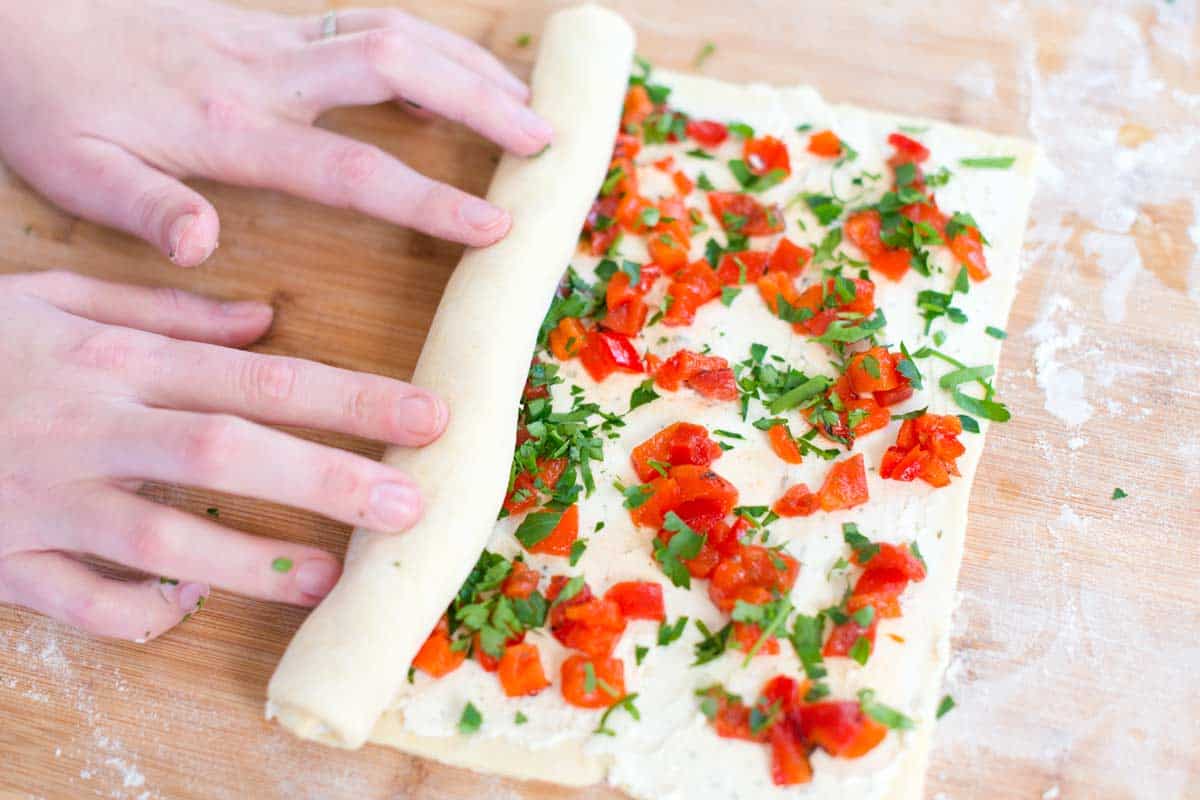
    Once your puff pastry is thawed, this recipe goes very quickly. Unfold the sheet, roll lightly to flatten any creases, and then add the filing. You’ll spread the soft Boursin cheese over the whole sheet and then top with parmesan, chopped roasted peppers, and herbs.

    How to Make Cheese Pinwheels: Rolling up the puff pastry.

    Roll the sheet up like a jelly roll, then slice it into your pinwheels. Place them onto a baking sheet, brush on some egg wash, and bake. They’ll take less than 20 minutes! Serve them hot or at room temperature.

    Cheese Pinwheels

    Cheese Pinwheels

    • PREP
    • COOK
    • TOTAL

    These easy pinwheels are the perfect appetizer or hors d’oeuvres! We use store-bought puff pastry, which makes them so easy! You will need thawed puff pastry, so leave it overnight in the fridge or on the counter for about 1 hour before making the pinwheels.

    Makes 20 Pinwheels

    You Will Need

    1 sheet frozen puff pastry, thawed

    1 large egg

    1 tablespoon water

    1/2 cup garlic and herb spreadable cheese, such as Boursin

    1/4 cup grated Parmigiano-Reggiano cheese

    1/2 cup roasted red peppers, chopped

    2 tablespoons chopped fresh parsley or basil

    Directions

      1Preheat the oven to 400°F (204°C). Line a baking sheet with parchment paper and set it aside.

      2Beat the egg and water in a small bowl with a fork or whisk and set aside.

      3Lightly flour your work surface. Unfold the pastry sheet, then lightly dust the top with flour. Use a rolling pin to roll lightly so the creases are flattened out (you don’t want to make the square much bigger).

      4Brush the square of pastry with egg wash. Evenly spread with the 1/2 cup of garlic and herb cheese, then sprinkle with the Parmigiano-Reggiano, peppers, and herbs.

      5Starting at the side closest to you, roll the puff pastry up like a jelly roll.

      6Cut into 20 slices, about 1/2 inch thick. A serrated bread knife works well for this.

      7Place pinwheel slices onto the baking sheet. Then, lightly brush the tops with egg wash. Bake for 14 to 18 minutes or until light golden brown. Serve warm or at room temperature.

    Adam and Joanne’s Tips

    • Puff pastry: Use 1 sheet of frozen puff pastry, thawed. A standard box usually contains 2 sheets. I used Pepperidge Farm in the photos, but any brand will work! I thaw my puff pastry sheet in the fridge overnight. You can also thaw it on the counter. It should be ready in about 1 hour.
    • Nutrition facts provided are estimates.

    Nutrition Per Serving
    Serving Size
    1 pinwheel
    /
    Calories
    93
    /
    Total Fat
    6.5g
    /
    Saturated Fat
    1.8g
    /
    Cholesterol
    13mg
    /
    Sodium
    83.5mg
    /
    Carbohydrate
    6g
    /
    Dietary Fiber
    0.3g
    /
    Protein
    2.7g


    AUTHOR:

    Adam Gallagher

    Adam and Joanne of Inspired Taste

    We are Adam and Joanne Gallagher, the creators of Inspired Taste. Established in 2009, Inspired Taste grew from a childhood dream into one of the internet’s most trusted recipe sites with hundreds of reliable recipes, step-by-step videos, and expert tips.More About Us

    Source link

  • Chicken and Chickpea Soup

    Chicken and Chickpea Soup

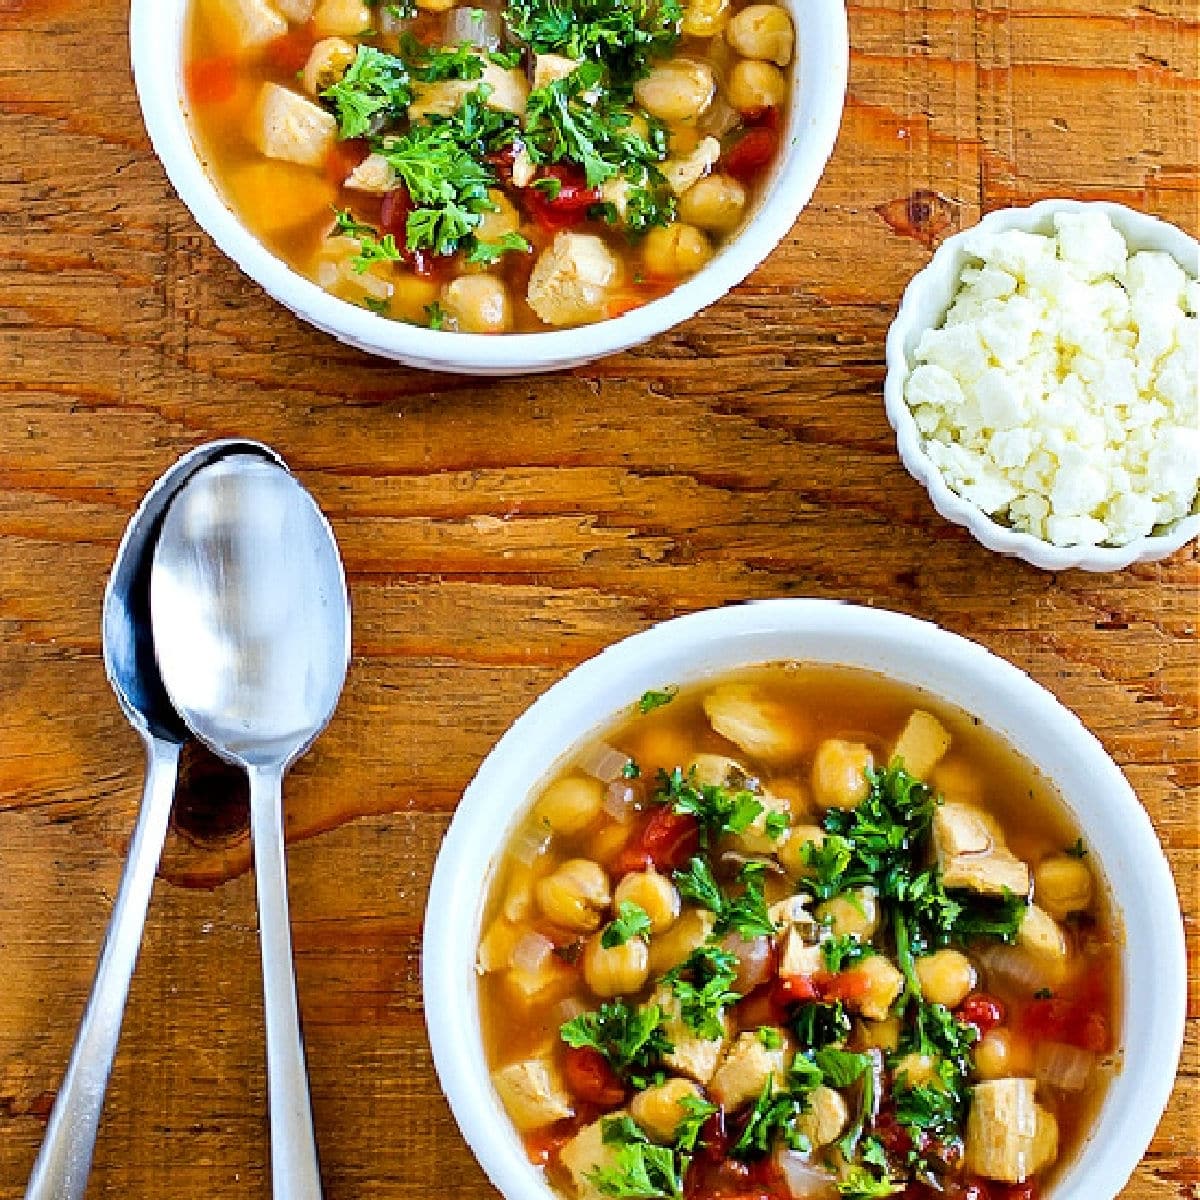
    Chicken and Chickpea Soup has oregano, Greek Seasoning, and Feta for a delicious slow cooker soup with Greek flavors. This recipe has a lot of chicken and not many chickpeas so it’s quite low in net carbs, but see tips for making a version that’s even lower in carbs.

    PIN Chicken and Chickpea Soup to try it later!

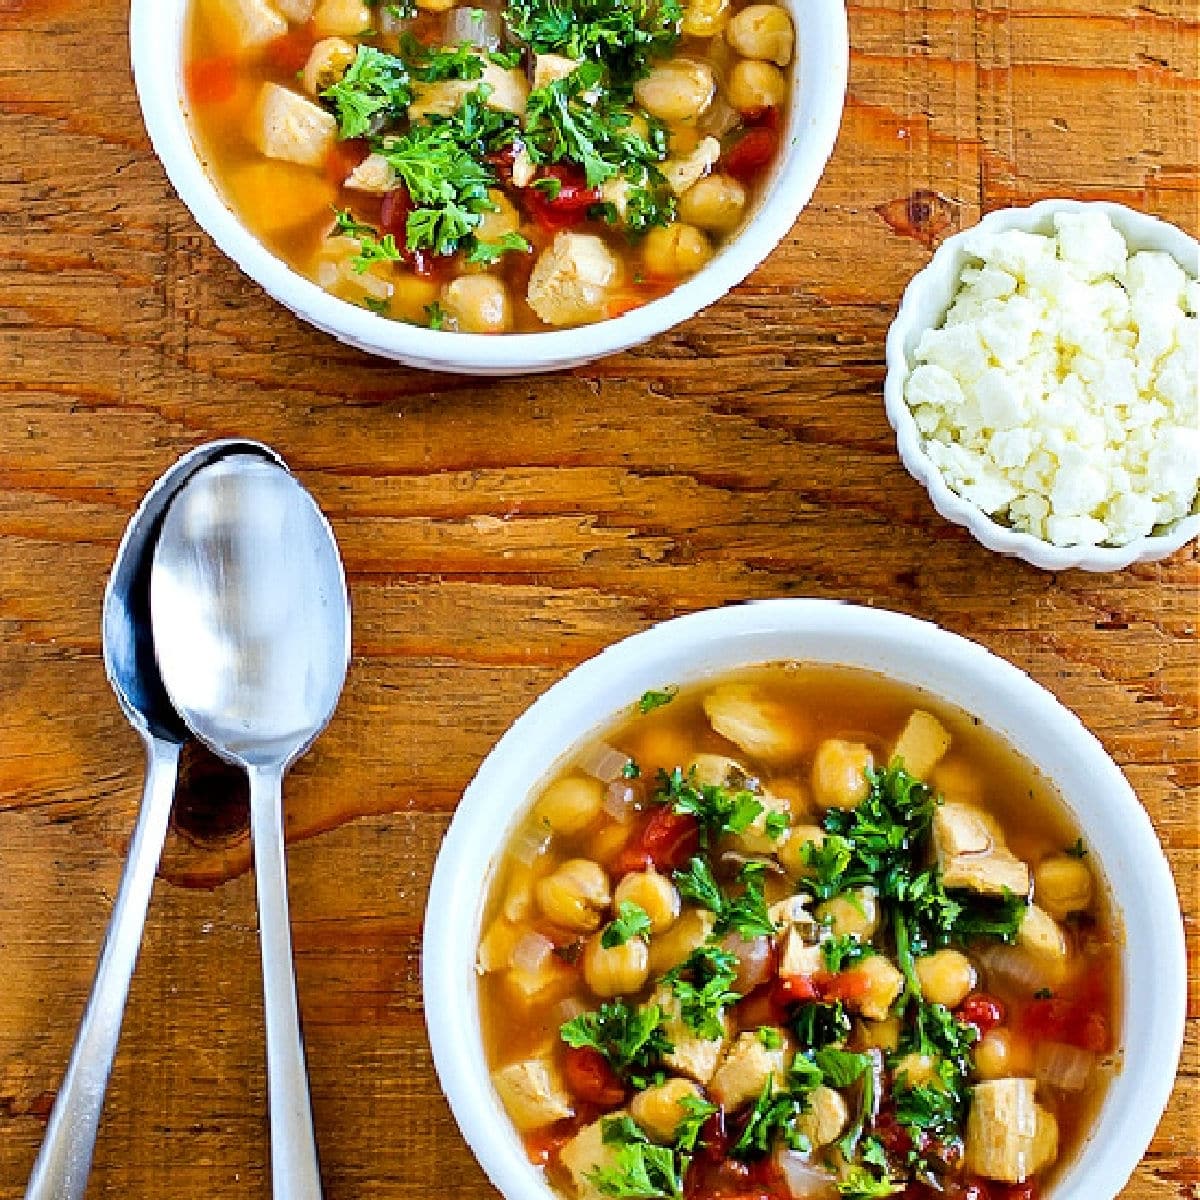
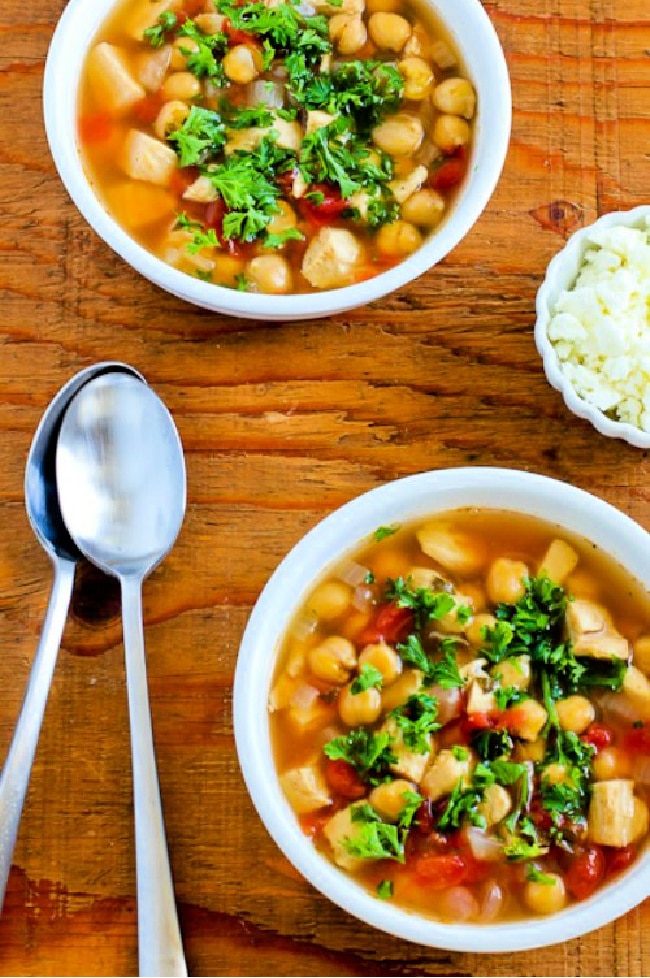
    Chicken Chickpea Soup in serving bowl with Feta and garnished with parsley

    Chicken and Chickpea Soup is a recipe I came up with years ago when I wanted something comforting and didn’t want to go to the store! The slow cooker soup starts with leftover cooked chicken, canned chickpeas, and canned tomatoes which simmer all day in the slow cooker with onions and Greek seasonings. Then you add another layer of Greek flavor to this tasty soup by sprinkling on some crumbled Feta at the table.

    I have Greek Oregano growing in my windowsill, and I used the fresh leaves in this soup, but if you don’t have access to fresh oregano, you could most definitely make this with dried oregano. Do splurge on a bit of fresh parsley if you can though. If you don’t have a crockpot, you can easily simmer the Chicken and Chickpea Soup slowly on the stove for a few hours. Enjoy!

    What ingredients do you need for this recipe?

    (This is only a list of ingredients; please scroll down for complete printable recipe. Or if you use the JUMP TO RECIPE link at the top of the page, it will take you directly to the complete recipe with ingredient amounts.)

    • diced, cooked chicken
    • can of chickpeas (garbanzo beans)
    • onion
    • can of petite diced tomatoes with juice
    • chopped fresh oregano, or use a smaller amount of Dried Oregano (affiliate link)
    • Minced Garlic (affiliate link)
    • Greek Seasoning (affiliate link)
    • vegetable soup base 
    • canned chicken broth (affiliate link) or stock
    • chopped fresh parsley

    What gives Chicken and Chickpea Soup the Greek flavors?

    Chickpeas, tomatoes, garlic, oregano, and Greek Seasoning all add Greek flavors to this soup, and the sprinkle of Feta cheese added at the table finishes it off perfectly!

    More About Using Oregano in Greek Cuisine:

    Oregano is an important component of this soup, and it’s used frequently in Greek cuisine, often combined with garlic and lemon. (There are two types of oregano, Greek Oregano and Mexican Oregano. If you want to think of the flavor difference between the two types, think of Greek oregano as the predominant flavor in pizza sauce, while Mexican oregano is commonly used in chile powder.)

    Can you make Chicken and Chickpea Soup without Greek Seasoning?

    Greek Seasoning (affiliate link) contains salt, oregano, garlic, lemon peel, black pepper, and marjoram. I love this blend of spices and use it often, but if you don’t have Greek Seasoning, use a combination of whichever of those spices you have.

    How low in carbs is this soup with chicken and chickpeas?

    This soup with Greek flavors has 11 net carbs per serving and 22 grams of protein.

    How can you make this recipe even lower in carbs?

    There’s a lot of chicken in proportion to the amount of chickpeas in this soup, which reduces the carbs. Just use even more chicken/ and or fewer chickpeas if you want to make the recipe even lower in carbs.

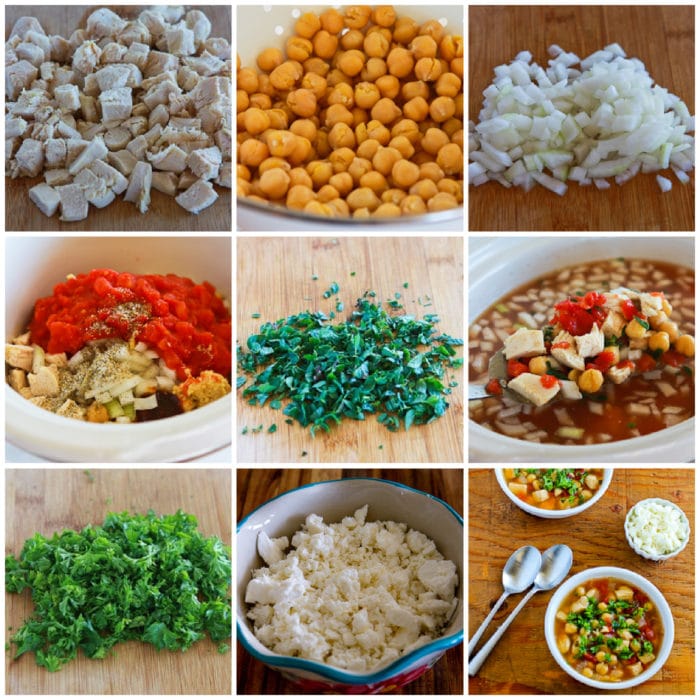
    Chicken Chickpea Soup process shot collageChicken Chickpea Soup process shot collage

    How to make Chicken and Chickpea Soup:

    (This is only a summary of the steps for the recipe; please scroll down for complete printable recipe. Or if you use the JUMP TO RECIPE link at the top of the page, it will take you directly to the complete recipe.)

    1. You’ll need 4 cups of diced, cooked chicken.
    2. Drain the can of chickpeas into a colander and rinse well (until no more foam appears.)
    3. Dice up a small onion. I prefer small pieces in soup, but it’s a personal preference.
    4. Add the chicken, rinsed chickpeas, chopped onion, and can of tomatoes to the slow cooker.
    5. I used a 3.5 Quart Slow Cooker (affiliate link) for this recipe, but any size that’s close will work.
    6. If you have fresh oregano, finely chop enough to make about 2 tablespoons chopped oregano.
    7. If you’re substituting dried oregano, I’d only use about 2-3 teaspoons. (Oregano is a strong flavor, so use less if you’re not sure how much you like it.)
    8. Add the oregano to the slow cooker, along with the chicken stock, vegetable soup base, minced garlic, and Greek seasoning.
    9. Cook on low for 8-10 hours. (Food blogger boo-boo; I forgot to take a photo of the finished soup in the slow cooker.)
    10. Just before you’re ready to eat the soup, chop up some fresh parsley and crumble the Feta.
    11. Serve Chicken and Chickpea Soup hot, with parsley and Feta added at the table.

    Make it a Low-Carb Meal:

    If you wanted something low in carbs to serve with the Chicken and Chickpea Soup, it would be amazing with Olive Bread made with almond flour!

    Square image for Chicken and Chickpea Soup shown in two bowls, with Feta on the side.Square image for Chicken and Chickpea Soup shown in two bowls, with Feta on the side.

    Want more Slow Cooker Soups?

    You can use Slow Cooker Recipes to find other slow cooker soups on my website.

    Ingredients

    • 4 cups diced, cooked chicken
    • one 15 oz. can garbanzo beans
    • 1 onion, diced small
    • one 14.5 oz can petite diced tomatoes 
    • 2 T finely chopped fresh oregano (see notes)
    • 1 tsp. minced garlic 
    • 1 tsp. Greek Seasoning
    • 1 tsp. vegetable soup base (see notes)
    • 8 cups chicken broth, homemade or canned
    • 1/2 cup chopped fresh parsley

    Instructions

    1. Cut up enough chicken to make 4 cups of diced cooked chicken.
    2. Rinse chickpeas very well in colander, until no more foam appears.
    3. Chop the onion, and finely chop the oregano.
    4. Put all ingredients except parsley into crockpot, cover, and cook on low 8-10 hours.
    5. Just before you’re ready to serve the soup, finely chop the fresh parsley and crumble the Feta.
    6. Add half the parsley to the soup and cook a few more minutes.
    7. Serve hot, with additional chopped parsley and crumbled Feta to add at the table if desired.

    Notes

    I used my favorite Crock Pot 3.5 Quart Slow Cooker (affiliate link), but any size that’s close will work.

    I like Better than Bouillon Organic Vegetable Base (affiliate link)). I use homemade chicken stock, but chicken broth in a can is fine. If you don’t have fresh oregano, use 2-3 tsp. dried oregano.

    Greek Seasoning (affiliate link) contains salt, oregano, garlic, lemon peel, black pepper, and marjoram. If you don’t have Greek Seasoning, use a combination of whichever of those you have.

    Recipe created by Kalyn.

    Nutrition Information

    Yield

    8

    Serving Size

    1

    Amount Per Serving

    Calories 252Total Fat 11gSaturated Fat 3gTrans Fat 0gUnsaturated Fat 6gCholesterol 68mgSodium 1360mgCarbohydrates 16gFiber 5gSugar 5gProtein 22g

    Nutrition information is automatically calculated by the Recipe Plug-In I am using. I am not a nutritionist and cannot guarantee 100% accuracy, since many variables affect those calculations.

    Did you make this recipe?

    Did you make this recipe? Please leave a star rating (under the PRINT button in the recipe) or share a photo of your results on Instagram! THANKS!

    Low-Carb Diet / Low-Glycemic Diet / South Beach Diet Suggestions:
    This Chicken and Chickpea Soup is probably lower in carbs than you think, but you could make an even lower-carb variation of the soup by using fewer beans and/or more chicken. Everything about this soup is great for all phases of the original South Beach Diet and other low-glycemic eating plans.

    Find More Recipes Like This One:
    Use Slow Cooker Recipes to find more recipes like this one. Use the Diet Type Index to find recipes suitable for a specific eating plan. You might also like to follow Kalyn’s Kitchen on Pinterest, on Facebook, on Instagram, on TikTok, or on YouTube to see all the good recipes I’m sharing there.

    Historical Notes for this Recipe:
    This recipe for a soup with chicken and chickpeas was first posted in 2006! It was updated with better photos in 2013, and was last updated with more information in 2025.

    Pinterest image of Chicken and Chickpea Soup

    We are a participant in the Amazon Services LLC Associates Program, an affiliate advertising program designed to provide a means for us to earn fees by linking to Amazon.com and affiliated sites. As an Amazon Associate, I earn from qualifying purchases.


    Source link

  • Easy Margherita Pizza Recipe

    Easy Margherita Pizza Recipe

    My family’s favorite Margherita pizza recipe is simple to make with an authentic no-cook sauce, mozzarella, and fresh basil.

    Homemade Margherita Pizza

    My family goes bonkers for this homemade Margherita pizza. Like many Italian dishes, Margherita pizza (or pizza Margherita) is simple, fresh, and delicious. We use our favorite homemade pizza dough, but feel free to swap in your favorite or use store-bought dough instead!

    I love the authentic pizza sauce! It’s so simple to make, and you’ll have it ready in 5 minutes! For more pizza recipes, look at our equally simple cheese pizza, American-style pizza sauce, and this balsamic pear pizza, which is a bit different but still delicious!

    Key Ingredients

    • Pizza Dough: We love this bubby homemade pizza dough. It’s easy to make and perfect for home kitchens. Plus, you can whip it up the same day or let it sit overnight for a longer, slower rise. Your favorite store-bought dough will also work.
    • Tomatoes: Unlike American-style pizza sauce, Margherita pizza sauce is no-cooks and as simple as it gets: crush canned San Marzano (or fresh peeled tomatoes) and mix with olive oil and salt. It’s fresh and so delicious with the mozzarella and basil.
    • Mozzarella Cheese: Authentic pizza Margherita has fresh mozzarella. Use fresh, or do what we did in our photos and use shredded mozzarella instead. We love fresh mozzarella on pizza but sometimes find that when cooked in home ovens, it doesn’t melt and brown as quickly and instead releases too much liquid. Shredded mozzarella doesn’t have the same problem.
    • Fresh Basil: This doesn’t really count as Margherita pizza without the basil. I add it before baking and scatter a few extra fresh leaves for serving.

    Find the full recipe with measurements below.

    Margherita Pizza

    How to Make Margherita Pizza

    Tip 1: Use a really hot oven. At least 30 minutes before you bake your pizza, preheat the oven to 450°F. If you have one, place a pizza steel or pizza stone into the oven before preheating.

    Tip 2: Make our no-cook sauce. While the oven preheats, you can make the quick, no-cook pizza sauce. Use your hands or a fork to crush whole peeled tomatoes and stir in olive oil and salt. We use canned San Marzano tomatoes because they taste sweet and flavorful.

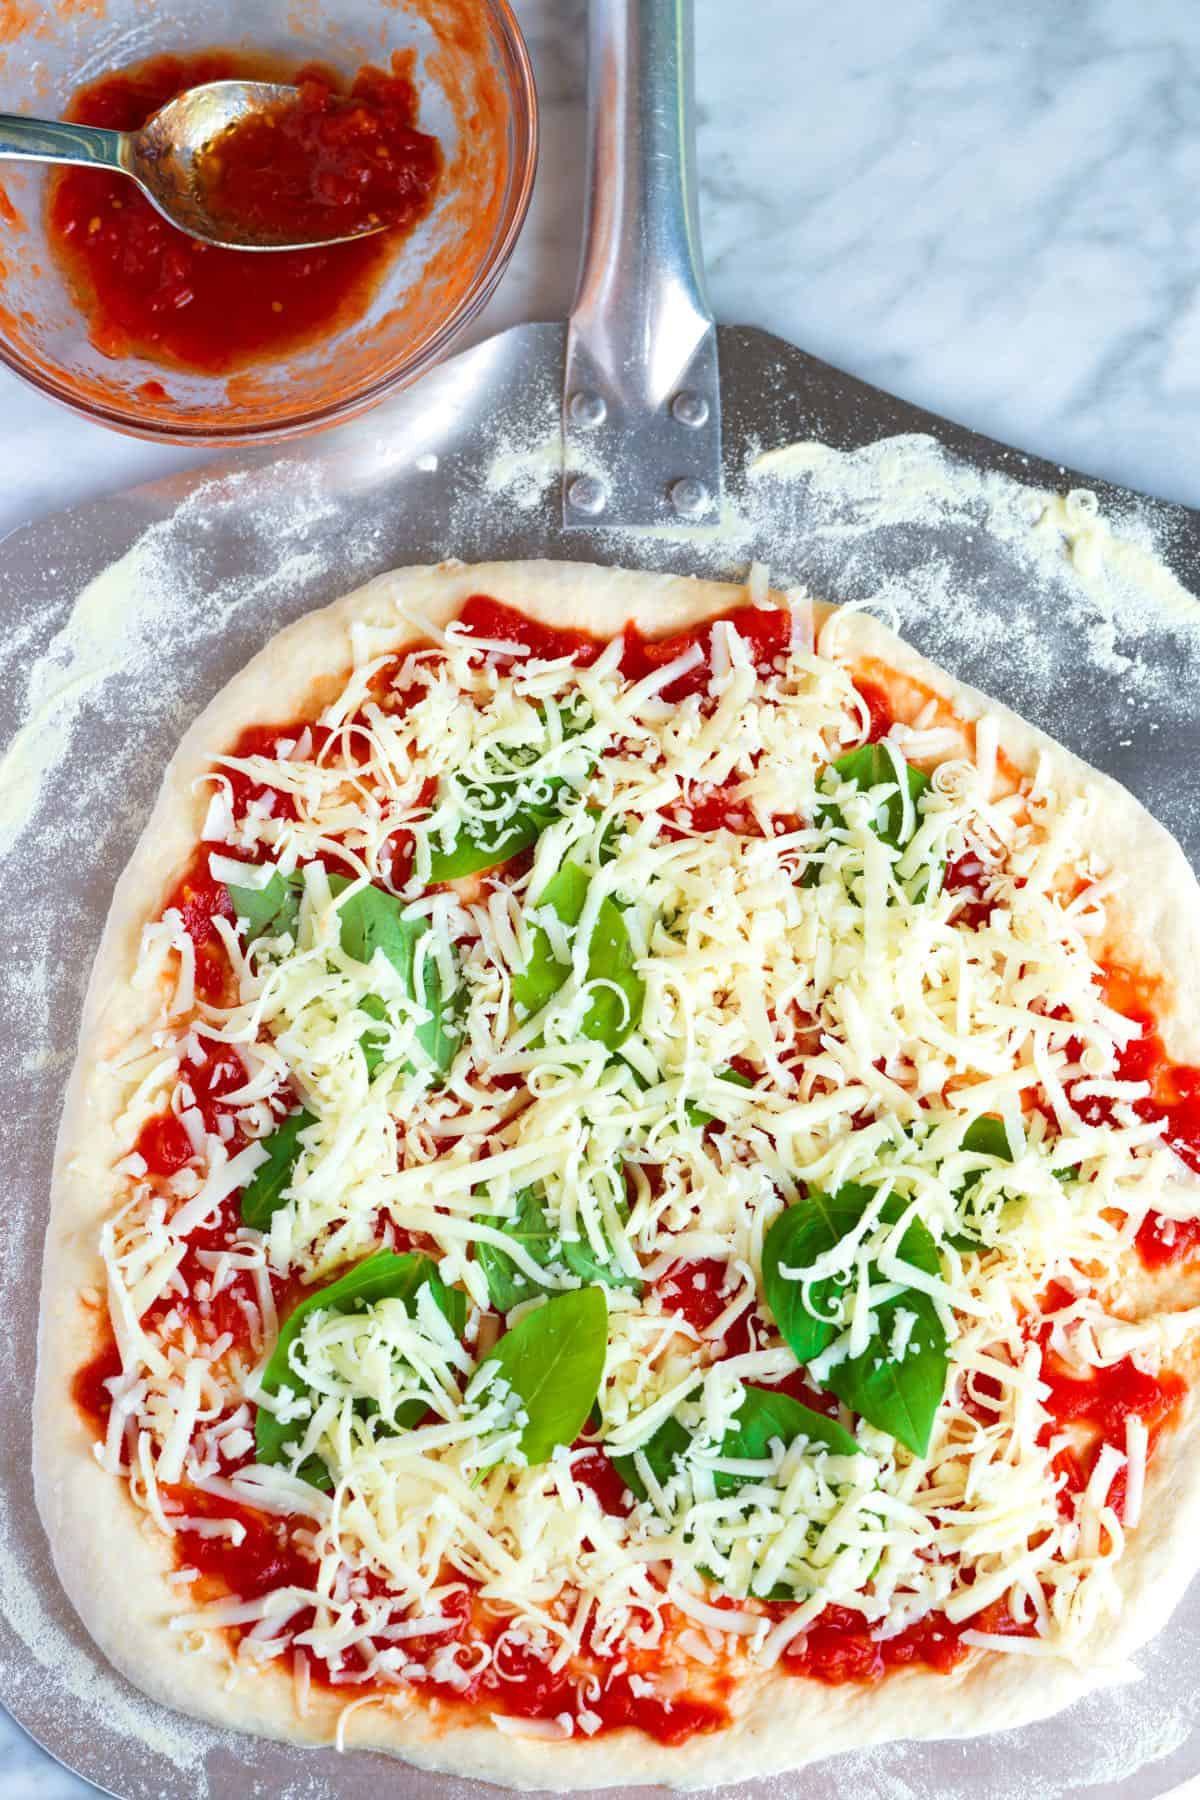
    Assembling margherita pizza with an authentic fresh tomato sauce and mozzarella cheese

    Tip 3: Don’t overdo the toppings. When your oven is ready, form and stretch your pizza dough into a large round, and then place it onto a pizza peel or pizza baking pan. Add a thin layer of Margherita pizza sauce and top with mozzarella cheese and fresh basil. Italian pizza usually has less toppings/cheese than American-style, so hold back a little.

    Tip 4: Serve with olive oil and basil. Bake your pizza until the crust is bubbly and the cheese is beginning to brown. Then, serve with a drizzle of olive oil and fresh basil scattered on top.

    Easy Margherita Pizza

    Easy Margherita Pizza

    • PREP
    • COOK
    • TOTAL

    This is our family’s favorite way to make Margherita pizza at home! We use our favorite homemade pizza dough, an authentic no-cook pizza sauce, mozzarella, and basil. We highly recommend our recipe for homemade pizza dough, but store-bought dough works. Use fresh mozzarella instead of the shredded mozzarella cheese in our recipe for classic Italian pizza. We love fresh mozzarella on pizza but sometimes find that when cooked in home ovens, it doesn’t melt and brown as quickly and instead releases too much liquid. Shredded mozzarella doesn’t have the same problem, so that’s what we end up using instead.

    Makes 1 large pizza

    You Will Need

    1 batch homemade pizza dough or use store-bought dough

    1/2 cup San Marzano whole peeled tomatoes from a can

    2 teaspoons olive oil

    Pinch fine sea salt

    1 cup (57g) shredded whole milk mozzarella or use fresh mozzarella

    Handful fresh basil leaves

    All-purpose flour, for forming dough disc

    Semolina flour, for dusting pan

    Directions

      1At least 30 minutes before you plan to bake your pizza, preheat the oven to 450° Fahrenheit (232°C). If you have one, place a pizza steel or pizza stone into the oven before preheating. Personally, we use a higher temperature, see the tips section for our thoughts on what temperature is best for baking pizza at home.

      2If your pizza dough is cold, allow it to warm at room temperature for 20 to 30 minutes.

      3While the oven preheats, make the sauce. In a bowl, crush the tomatoes with the olive oil and a pinch of salt. Taste, and then season with more salt as necessary.

      4When ready to bake your pizza, prepare a pizza peel or pizza pan by dusting it with semolina flour.

      5Dust a clean work surface with all-purpose flour, and then form your pizza dough into a round, large enough to fit your pizza peel or pan. To stretch the dough, avoid rolling it out, as this can flatten the bubbles that have formed. Instead, use your fingers to make dimples in the dough, starting from the center and working outwards. Carefully stretch and push the dough to fit your pizza pan or peel. Use a light touch to maintain as many air pockets in the dough as possible.

      6Transfer the dough round to your pizza peel or pan, and reform it if it shrinks back a bit.

      7Spread a light layer of pizza sauce over the pizza, leaving a thin edge untouched for the crust. Scatter the cheese and basil over the sauce.

      8Bake until the crust is set and golden brown and the cheese has melted with golden spots all over, 6 to 15 minutes, depending on oven temperature. Remove from the oven, scatter over some more fresh basil, cut, and serve.

    Adam and Joanne’s Tips

    • Oven temperature: We recommend 450° Fahrenheit (232°C) in the recipe, but if you are comfortable with it, increasing the temperature to 550° Fahrenheit (288°C) will provide even better results. If you have a vented hood above your oven, turn it on high. When our oven is heated to such a high temperature, the fire alarm occasionally goes off due to the hot air that escapes when we open our oven door. It’s not a problem, other than the noise, and in our experience, it is remedied with a few fans of a dish towel near the alarm, but it is something to consider. If 550° Fahrenheit (288°C) is too high for you, feel free to use a lower temperature. However, keep in mind that this pizza bakes best between 425° Fahrenheit and 550° Fahrenheit (218°C to 288°C). The lower the temperature, the longer it will take to bake and the less bubbly it will be.
    • The nutrition facts provided below are estimates.

    Nutrition Per Serving
    Serving Size
    1 of 8 slices
    /
    Calories
    158
    /
    Total Fat
    4.7g
    /
    Saturated Fat
    2g
    /
    Cholesterol
    11.1mg
    /
    Sodium
    439mg
    /
    Carbohydrate
    22.2g
    /
    Dietary Fiber
    1.2g
    /
    Total Sugars
    0.7g
    /
    Protein
    6.5g


    AUTHOR:

    Joanne Gallagher

    Adam and Joanne of Inspired Taste

    We are Adam and Joanne Gallagher, the creators of Inspired Taste. Established in 2009, Inspired Taste grew from a childhood dream into one of the internet’s most trusted recipe sites with hundreds of reliable recipes, step-by-step videos, and expert tips.More About Us

    Source link

  • Turkey, Sweet Potato, and Black Bean Soup

    Turkey, Sweet Potato, and Black Bean Soup

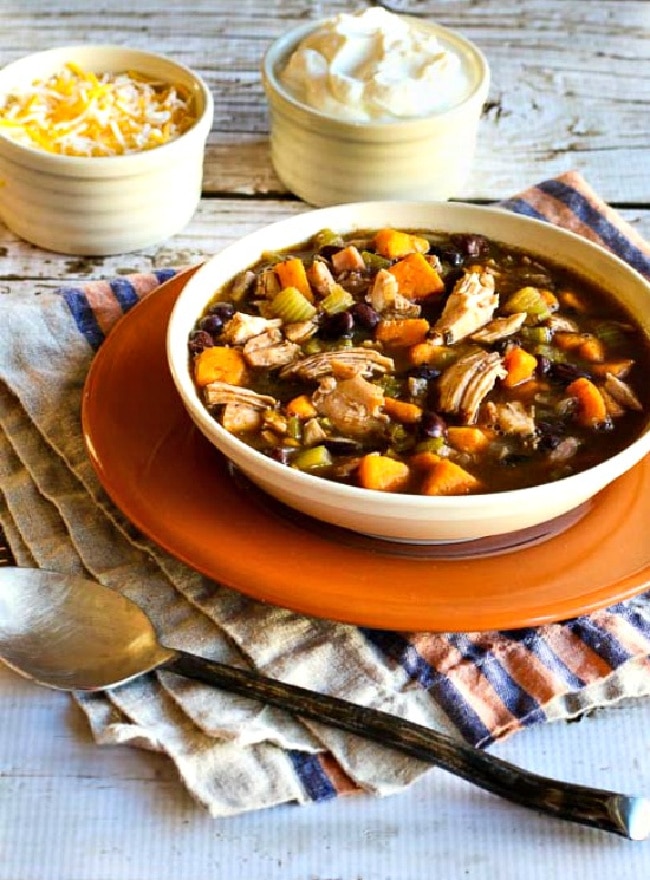
    Turkey, Sweet Potato, and Black Bean Soup is a great use for leftover turkey, but you can also make this tasty soup with chicken. And I’ve adjusted this recipe to use more turkey and fewer beans and sweet potatoes for a lower-carb version.

    PIN Turkey, Sweet Potato, and Black Bean Soup to try it later!

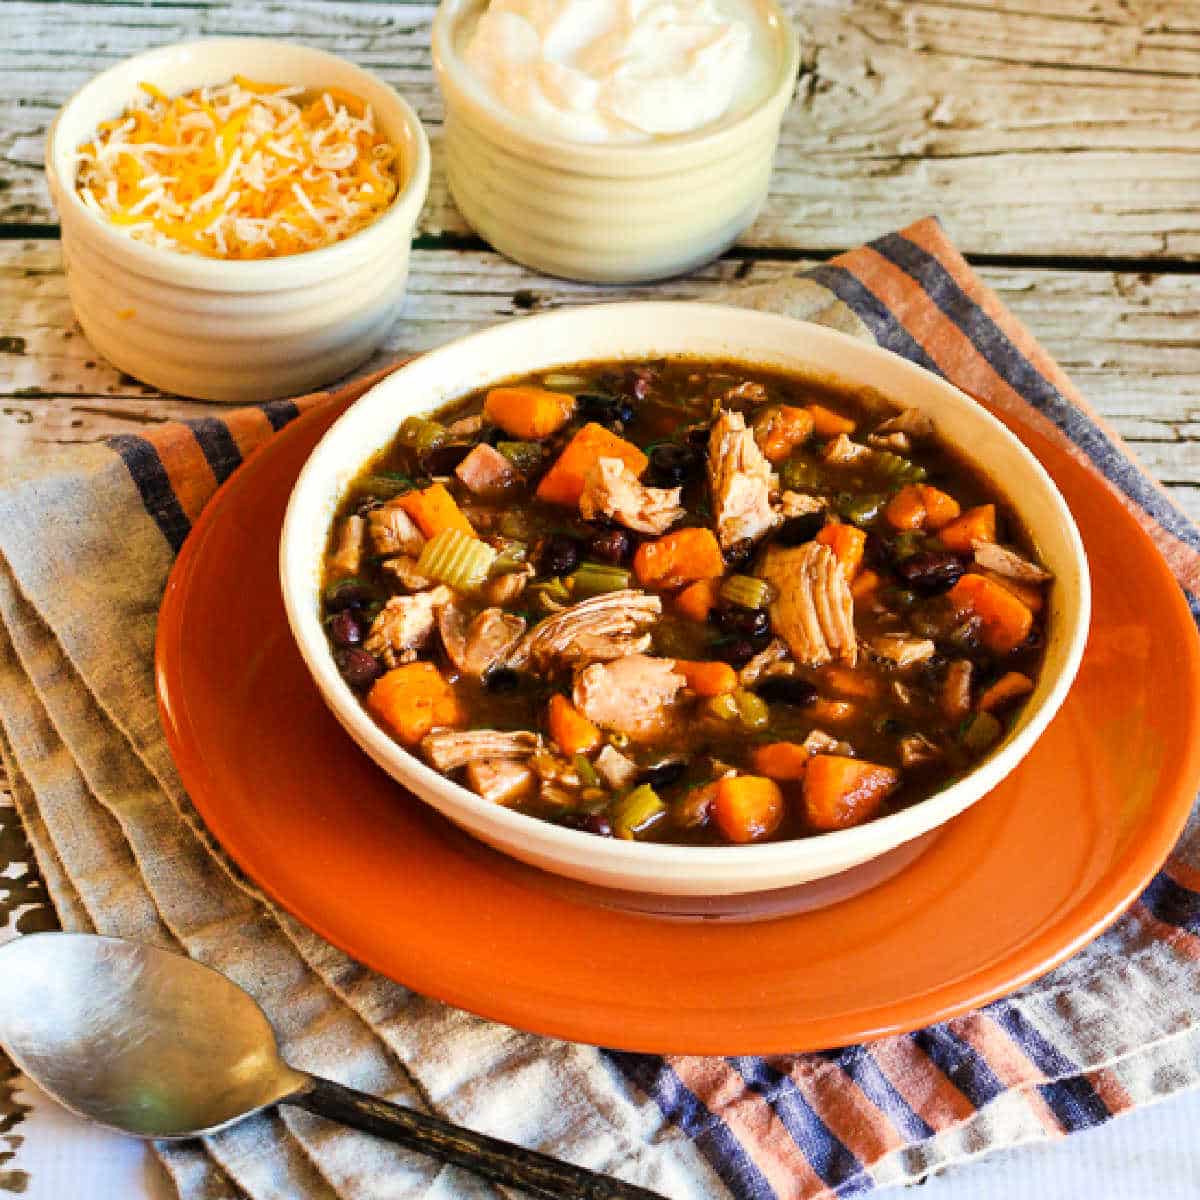
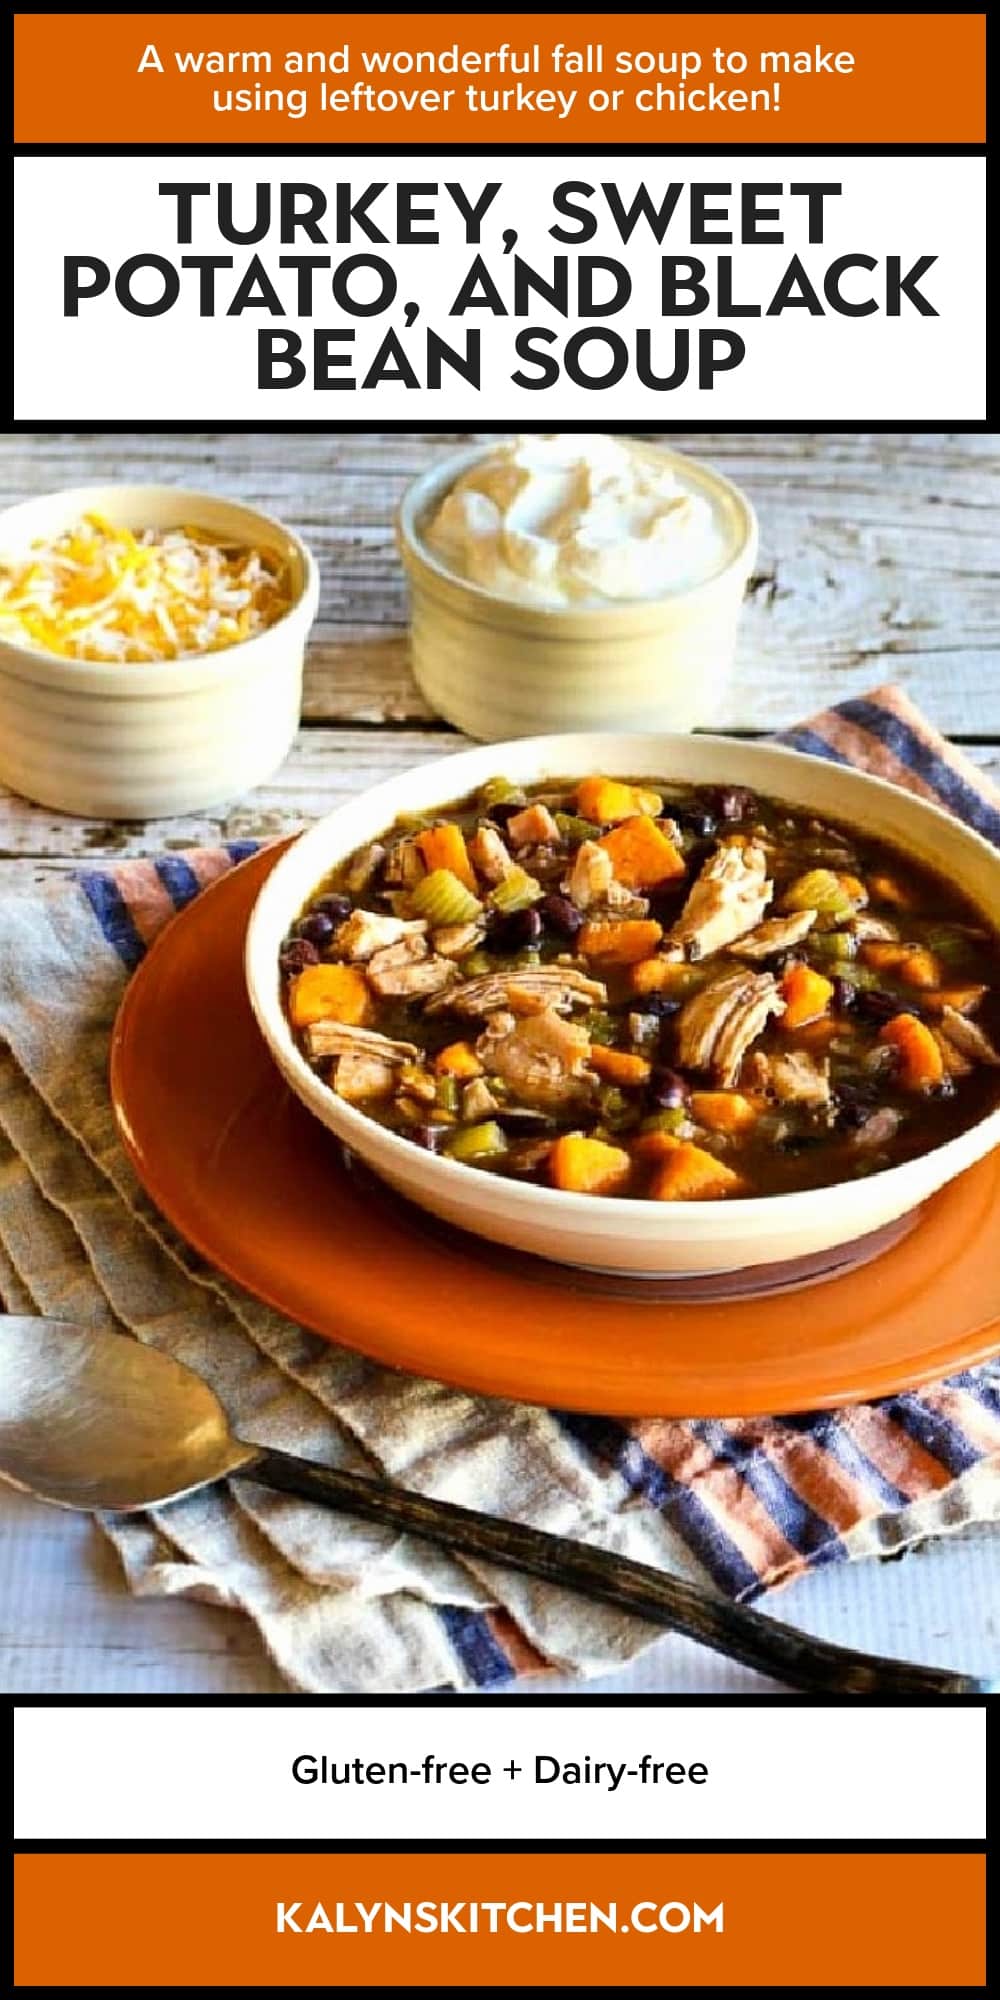
    Turkey, Sweet Potato, and Black Bean Soup soup shown in bowl with spoon and toppings.

    This delicious and easy Turkey, Sweet Potato, and Black Bean Soup is a lovely way to use leftover leftover turkey, if you’re lucky enough to end up with some! And one of my favorite traditions for the day after Thanksgiving is taking the turkey carcass, putting it in a roasting pan with lots of water, onions, carrots, celery, and a bit of Penzeys Turkey Soup Base, and filling up the house with the smell of homemade Turkey Stock.

    And this soup recipe with turkey, black beans, and lime is one of my favorite soups to make with leftover turkey, and I’m indulging my love of sweet potatoes here as well. This recipe is pretty flexible, but don’t leave out the touch of fresh lime juice added at the very end. Lime and sweet potatoes are what make this soup so absolutely delicious!

    Soup with sweet potatoes and black beans is a splurge for people who are watching carbs, but I’ve updated this favorite soup to make it a bit lower in carbs. Here’s the printer-friendly recipe of the original version for anyone who was a fan!

    What ingredients do you need?

    (This is only a list of ingredients; please scroll down for complete printable recipe. Or if you use the JUMP TO RECIPE link at the top of the page, it will take you directly to the complete recipe with ingredient amounts.)

    Can this Turkey Sweet Potato Soup recipe be made with chicken?

    Any soup recipe that uses leftover turkey can also be made with cooked diced chicken!

    What did I do to make the Turkey Sweet Potato Soup lower in carbs?

    I love this soup so much, but the original recipe was more of a carb splurge than I wanted these days with both beans and sweet potatoes. To make a lower-carb version of the soup, I just used fewer sweet potatoes and beans and more turkey. And I also added a little more turkey stock to make sure it’s still eight servings.

    Want Low-Carb Turkey Soups?

    Check out Low-Carb Turkey Soup Recipes to see the lowest-carb turkey soup recipes on my blog.

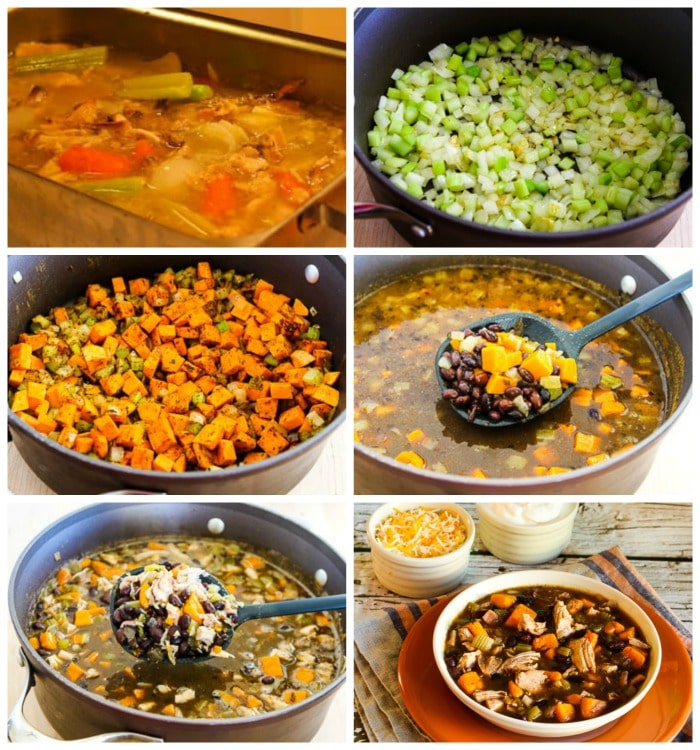
    Turkey, Sweet Potato, and Black Bean Soup process shots collageTurkey, Sweet Potato, and Black Bean Soup process shots collage

    How to make Turkey, Sweet Potato, and Black Bean Soup:

    (This is only a summary of the steps for the recipe; please scroll down for complete printable recipe. Or if you use the JUMP TO RECIPE link at the top of the page, it will take you directly to the complete recipe.)

    1. You can make the soup using chicken broth from a can, but I highly recommend making turkey stock if you have a turkey carcass. Here is how to make homemade Turkey Stock, and it will make your house smell great while it cooks.
    2. Start by cooking the onions and celery a few minutes in the bottom of the soup pot. 
    3. Then add diced sweet potatoes, spices, and turkey stock and simmer about 40 minutes. 
    4. Add black beans and liquid and simmer about 15 minutes more.
    5. Then add the diced turkey and green chiles and simmer another 15 minutes. 
    6. Stir in the lime juice, simmer a few minutes more, and serve hot. 
    7. This Turkey Sweet Potato Soup is good with cheese and sour cream to sprinkle on at the table if you like the sound of that!

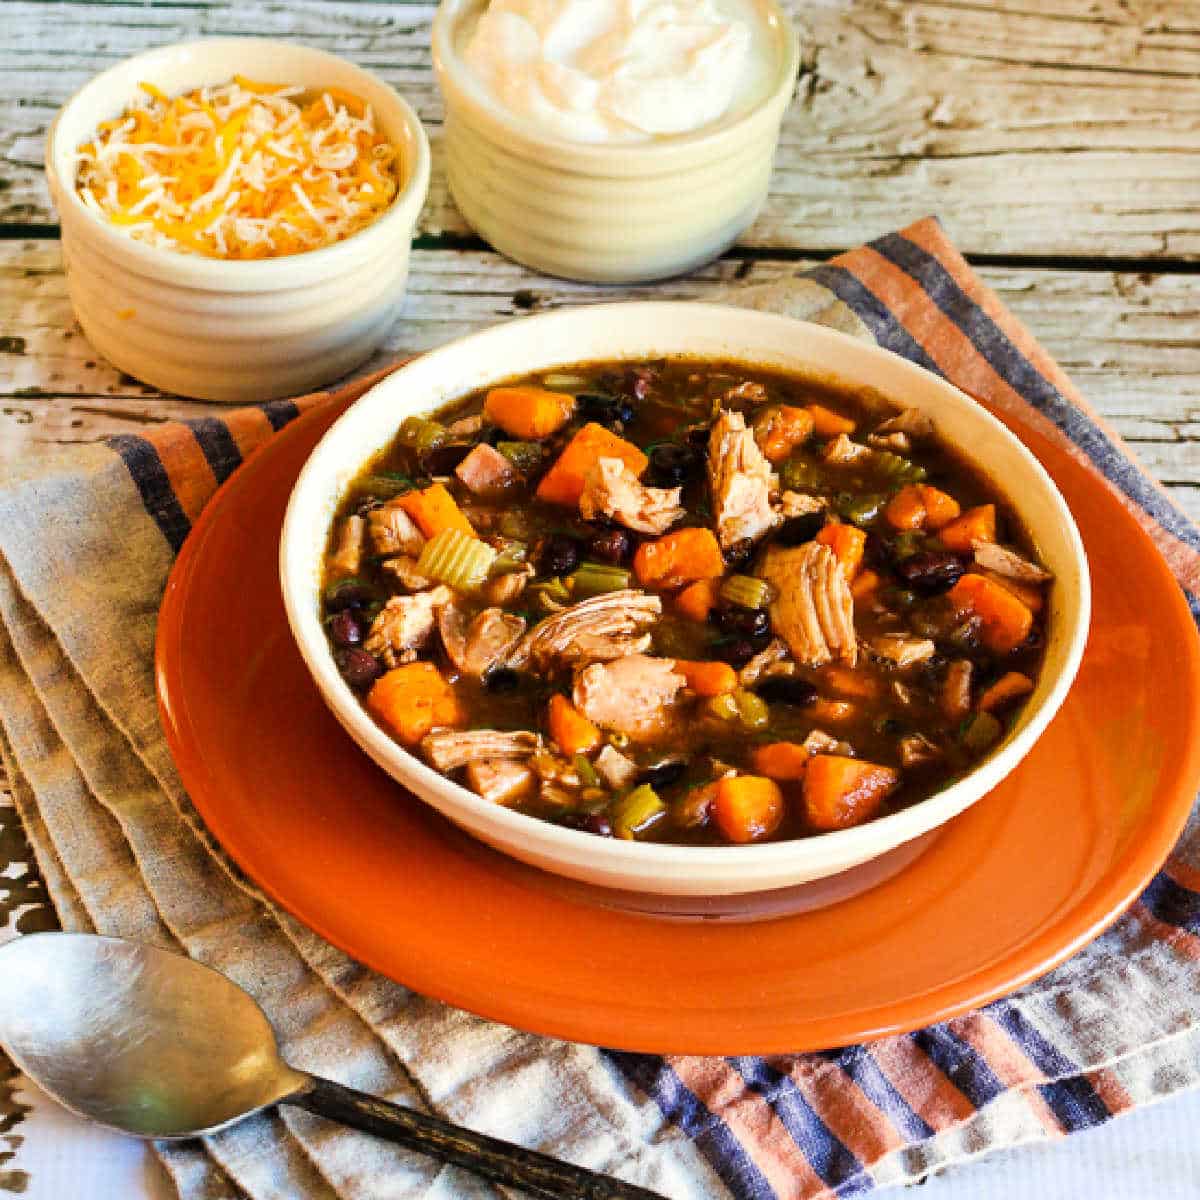
    Square image for Turkey, Sweet Potato, and Black Bean Soup, shown in bowl on orange plate.Square image for Turkey, Sweet Potato, and Black Bean Soup, shown in bowl on orange plate.

    Weekend Food Prep:

    This recipe for Turkey, Sweet Potato, and Black Bean Soup has been added to a category called Weekend Food Prep  to help you find recipes you can prep or cook on the weekend and eat during the week!

    Ingredients

    • 1 cup diced onion
    • 1 cup diced celery
    • 1 T olive oil
    • 2 cups diced sweet potato, cut in pieces about 1/2 inch (see notes)
    • 2 tsp. dried oregano (see notes)
    • 2 tsp. ground cumin
    • 1 tsp. ground chile powder 
    • 1/2 tsp. dried sage
    • 6 cups turkey stock (see notes)
    • one 15 oz. can black beans
    • 4 cups diced leftover turkey (see notes)
    • 4 oz. can diced green chiles
    • 1/4 cup fresh squeezed lime juice (I used my fresh-frozen lime juice)
    • salt, fresh ground black pepper to taste

    Notes

    These are orange sweet potatoes, which are often called Yams or Sweet Yams in U.S. stores. I used Mexican oregano, but either kind will work.

    You can use chicken stock or broth for this soup if you don’t have turkey stock.

    I’d use 3-4 cups leftover turkey, depending on how thick you prefer the finished soup to be.

    This would be great with sour cream, chopped cilantro, or grated cheese, and you could even add crushed corn chips for family members who aren’t watching their carbs.

    Recipe created by Kalyn.

    Nutrition Information

    Yield

    8

    Serving Size

    1

    Amount Per Serving

    Calories 327Total Fat 9gSaturated Fat 2gTrans Fat 0gUnsaturated Fat 6gCholesterol 79mgSodium 635mgCarbohydrates 31gFiber 6gSugar 9gProtein 29g

    Nutrition information is automatically calculated by the Recipe Plug-In I am using. I am not a nutritionist and cannot guarantee 100% accuracy, since many variables affect those calculations.

    Did you make this recipe?

    Did you make this recipe? Please leave a star rating (under the PRINT button in the recipe) or share a photo of your results on Instagram! THANKS!

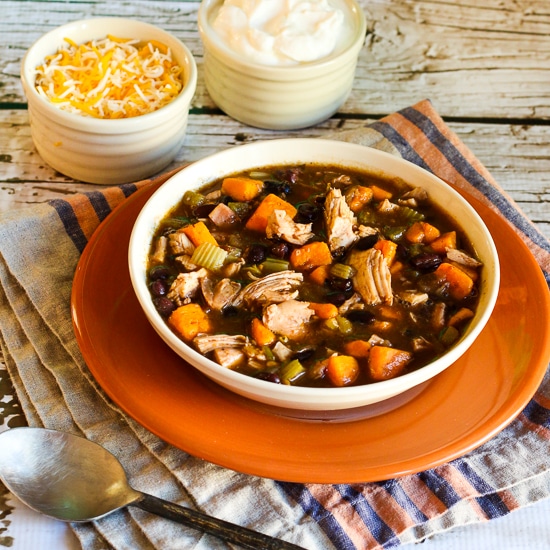
    Turkey, Sweet Potato, and Black Bean Soup thumbnail image of finished soup in bowlTurkey, Sweet Potato, and Black Bean Soup thumbnail image of finished soup in bowl

    Low-Carb Diet / Low-Glycemic Diet / South Beach Diet Suggestions:
    Sweet potatoes and black beans are both considered to be “good carbs” for the original South Beach Diet, meaning they are digested slowly. That means this Turkey, Sweet Potato, and Black Bean Soup would be suitable for phase 2 or 3 on South Beach. I’ve adjusted this recipe so it’s lower in carbs, but this soup still has some carbs so check the nutritional information if you’re following a stricter low-carb plan.

    Find More Recipes Like This One:
    Check out Soup Recipes for more tasty soups! Use the Diet Type Index to find recipes suitable for a specific eating plan. You might also like to follow Kalyn’s Kitchen on Pinterest, on Facebook, on Instagram, on TikTok, or on YouTube to see all the good recipes I’m sharing there.

    Historical Notes for this Recipe:
    This recipe for Turkey Sweet Potato Soup was first posted in 2007! It was updated in 2021 with recipe tweaks to make it a lower-carb soup and last updated with more information in 2025.

    Pinterest image of Turkey, Sweet Potato, and Black Bean Soup

    We are a participant in the Amazon Services LLC Associates Program, an affiliate advertising program designed to provide a means for us to earn fees by linking to Amazon.com and affiliated sites. As an Amazon Associate, I earn from qualifying purchases.



    Source link

  • Incredible Turkey Brine Recipe

    Incredible Turkey Brine Recipe

    Use this incredible turkey brine recipe for amazing flavor, soft and tender meat, and crispy skin.

    Making Turkey Brine

    If you’re on the fence about brining turkey, just do it! This turkey brine is a game-changer, adding incredible flavor and making your roasted turkey savory and delicious while tenderizing the meat (trust me on this one).

    We teamed up with our friend, Chef Richard Hattaway, to develop this easy turkey brine recipe, and we couldn’t be more thrilled with the results. I was determined to make sure that brining was truly worth the effort, and I am 100% confident that this brine delivers. It makes the best roasted turkey I’ve ever had, and you can bet I’ll be using it for every Thanksgiving turkey moving forward.

    Key Ingredients

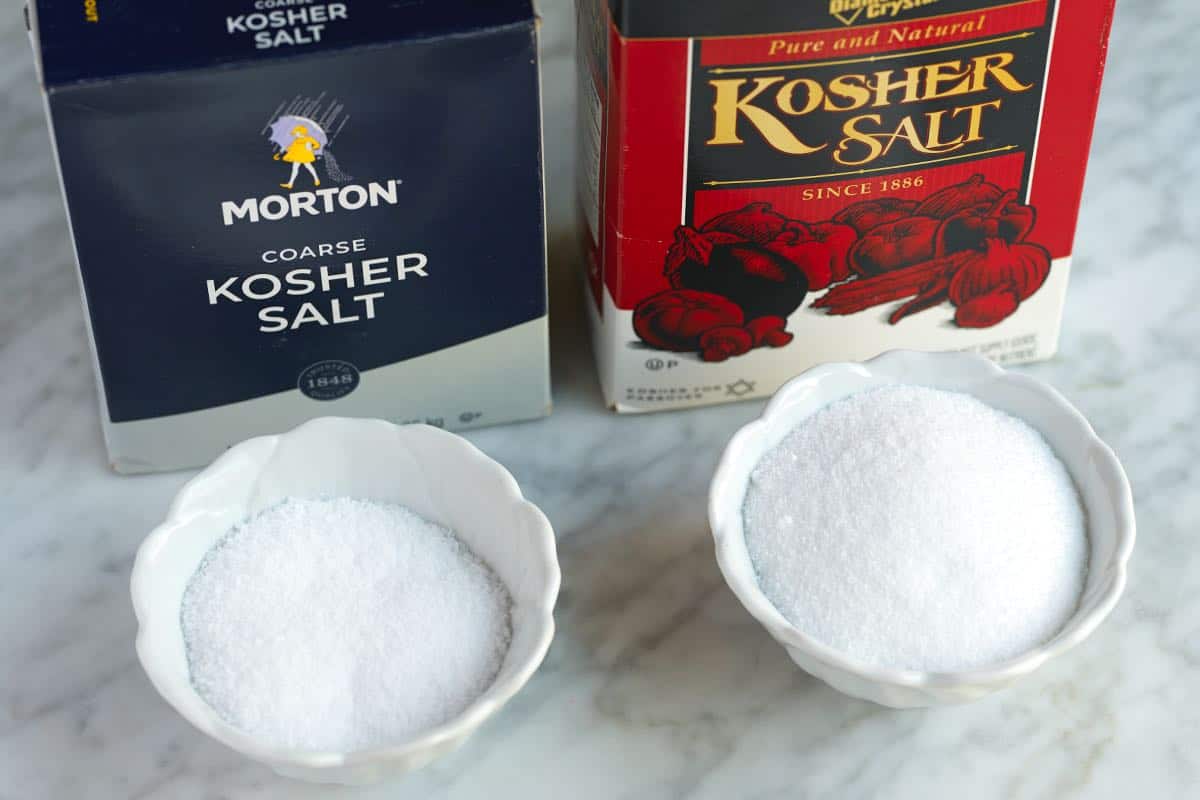
    • Salt: I use kosher or good-quality sea salt for my turkey brine. Avoid using iodized salt, as it can give the turkey a metallic taste. When measuring salt for your brine, use a scale or our specific volume measurements in the recipe below (we have provided them for Morton’s and Diamond Crystal). Look at my photo below. Both bowls are holding 4.5 ounces of salt. The Diamond Crystal salt flakes are fluffier and bigger, taking up more space than Morton’s salt. You don’t need to worry about this if weighing your salt, but if you use volume measurements (cups/tablespoons), you must know about it.
    • Sugar: If I’m going to brine a turkey, I want it to be flavorful. The brown sugar added to our brine recipe helps tremendously with this. The combination of salt and sugar in our brine recipe pulls some liquid from the turkey meat and replaces it with the brine, adding so much flavor.
    • Worcestershire Sauce: This adds a lovely savory, umami flavor to our brine (and ultimately the turkey meat).
    • Pepper: Richard adds a lot of black pepper to his brine, and I love it. Black pepper does a fantastic job of convincing you something is well-seasoned (that’s why so many chefs always season with salt AND pepper when cooking).
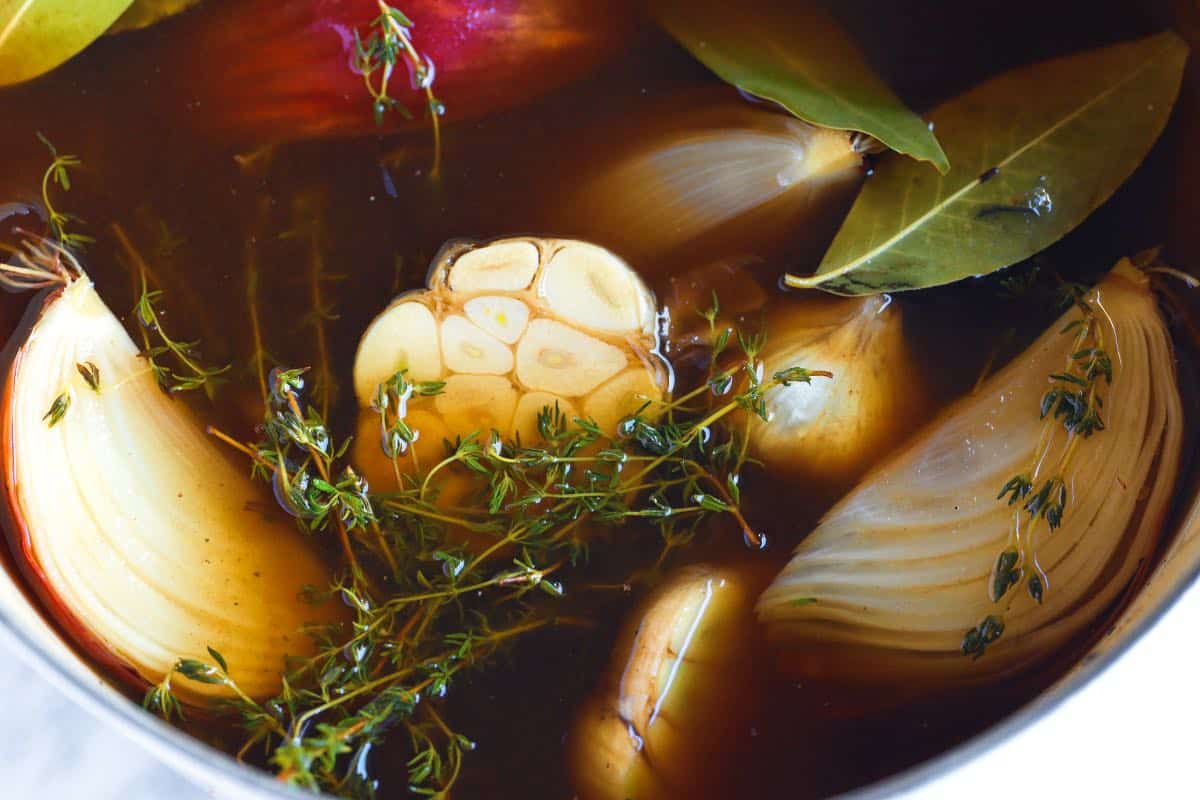
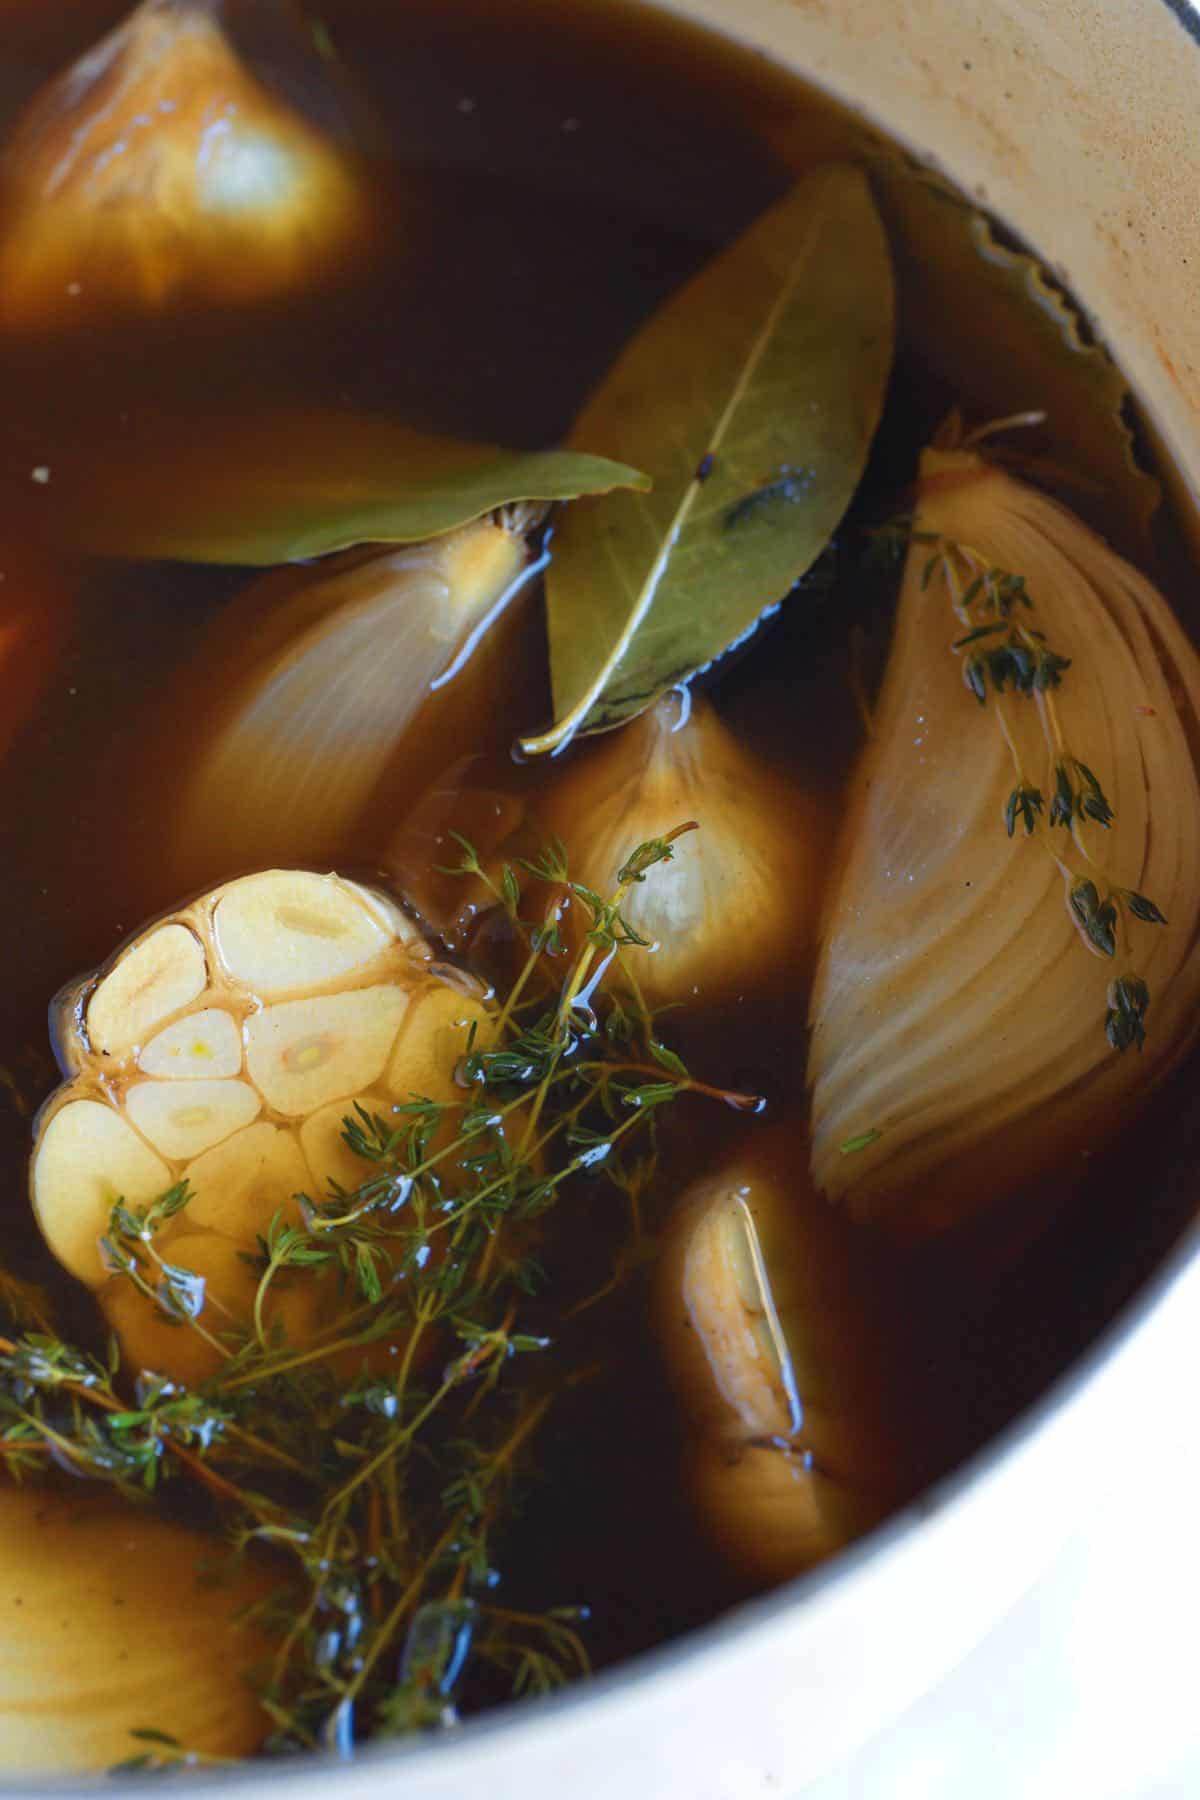
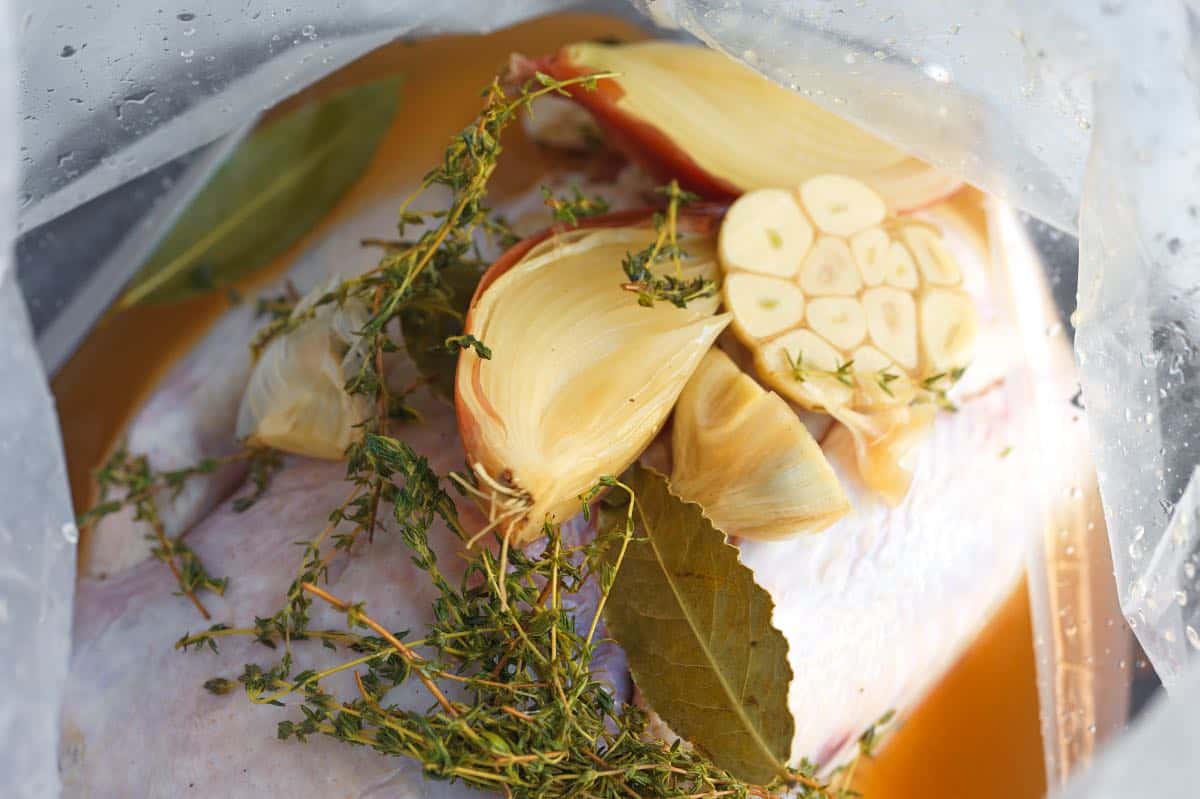
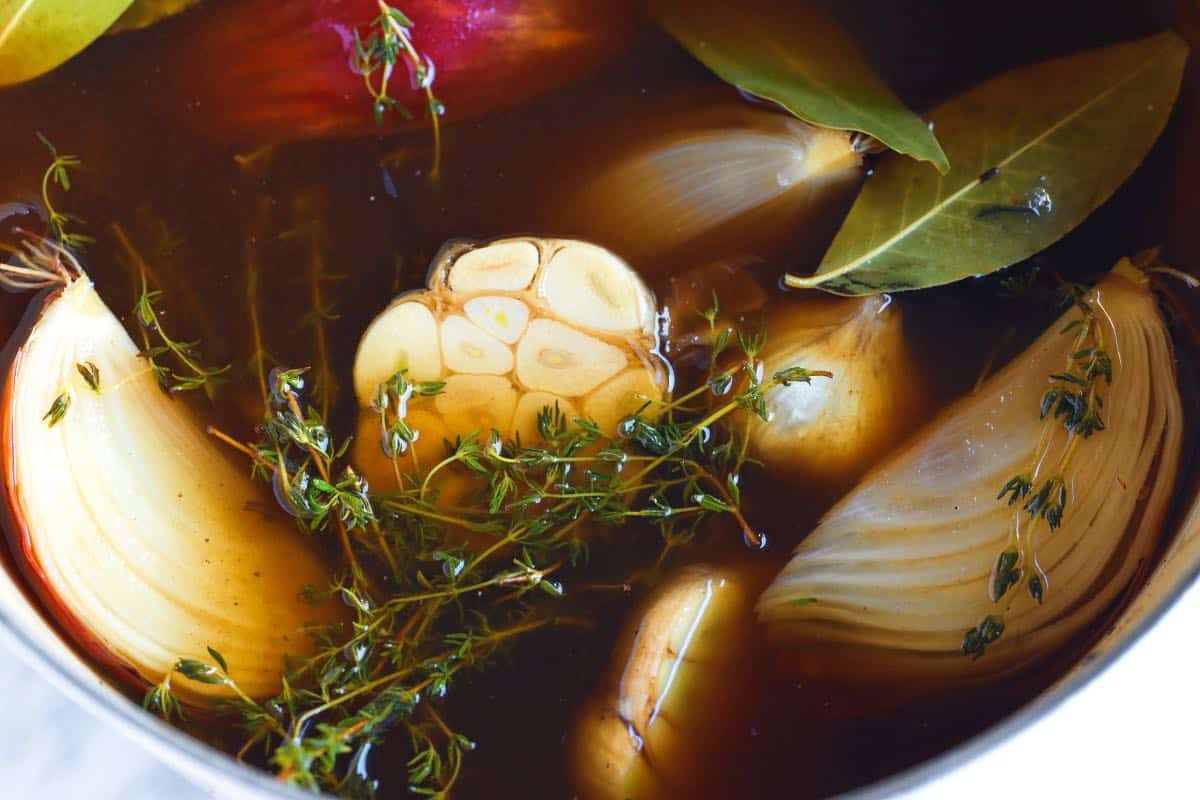
    • Garlic: This brine avoids citrusy flavors and focuses on savory flavors instead. Whole heads of garlic, lots of fresh thyme, and bay leaves make your turkey taste amazing.

    Find the full recipe with measurements below.

    Difference between Morton and Diamond Crystal salt for brine

    How to Brine a Turkey

    Tip 1: Brine turkey for 2 days. Turkeys are large, and the brine needs time to work through the bird. If you do not have 2 days, we still recommend leaving your turkey in the brine for at least 1 day (trust me, 1 day in this brine will produce a more flavorful turkey than not brining at all).

    Tip 2: Use a large, heavy-duty brine bag. These are sold in kitchen stores and online. You can also use a 5-gallon bucket with a food-safe liner. Don’t worry if the turkey is not entirely submerged (ours wasn’t in our video or photo below). If this happens to you, flip the turkey in the brine halfway through brining.

    Adding turkey brine to a brine bag

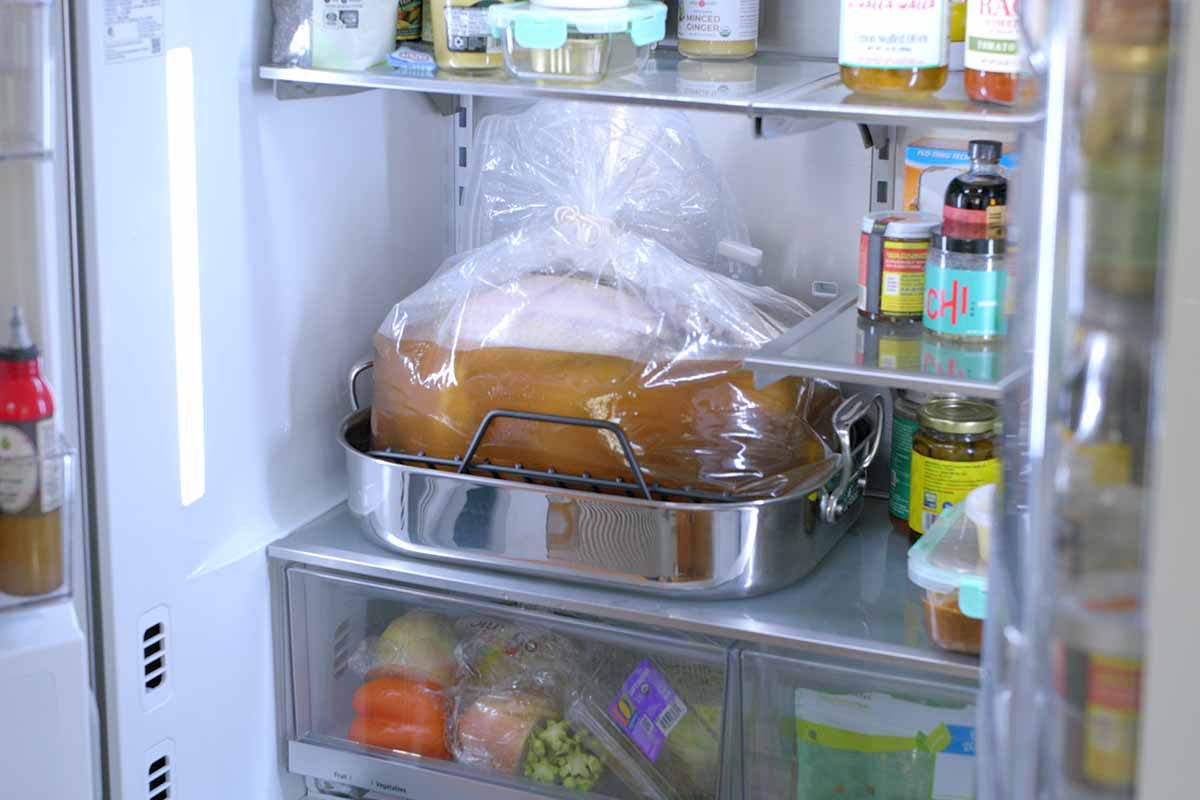
    Tip 3: Store turkey in the brine at or below 40°F (4°C). If you have the space (or a second fridge), you can brine the turkey in your refrigerator. Place your bag or bucket into the fridge. I put my brine bag into a roasting pan. If you do not have enough space, use a brine bag and place it in a well-insulated, ice-filled cooler. If you use a cooler, check the temperature of the ice water regularly to ensure that it stays below 40°F (4°C). Here’s the USDA’s guide for safely brining a turkey.

    While I use my roasting pan to hold my brine bag when using the fridge, the pan doesn’t fit inside my cooler, so I put the bag directly into the ice without a pan underneath. Brine bags are thick, so you should not have any issues with them leaking (just keep something sharp away from them).

    Turkey brining in the fridge

    Tip 4: Don’t rinse the turkey after brining it. You might see some recipes call for rinsing, but it’s not necessary with our recipe below. We’ve done side-by-side taste tests with rinsed and unrinsed turkeys and found no difference in saltiness. I promise your turkey won’t be over-salted!

    Tip 5: Air-dry in the fridge overnight. If you are like me and love crispy turkey skin, after removing it from the brine, let your turkey air-dry in the fridge overnight. I place it on a roasting rack inside a roasting pan or rimmed baking sheet. I love this step because my brine is out of the way, and my turkey is perfectly brined and ready to roast the next day.

    Thanksgiving Turkey Timeline

    If you are like us, you don’t roast many turkeys throughout the year. Most of us really only roast them around the holiday season.

    Here’s our timeline for thawing, brining, and roasting turkey. I will use Thursday as our goal since that’s how Thanksgiving falls in the US, but you can easily move the days around to fit your intended roasting day.

    This timeline assumes a thawed turkey. To safely thaw a turkey, do it in the refrigerator. Plan on 24 hours in the fridge for every four to five pounds of turkey–so a 16-pound turkey will take four days to thaw.

    • Monday: Brine the turkey
    • Wednesday night: Remove turkey from brine, place it onto a rack set inside a roasting pan or rimmed sheet pan, and refrigerate overnight
    • Thursday: Roast the turkey, allowing approximately 14 minutes per pound, in an oven preheated to 325°F (162° C). Here’s our roast turkey recipe and I highly recommend this turkey gravy!
    My Favorite Turkey Brine

    Incredible Turkey Brine

    • PREP
    • COOK
    • TOTAL

    Use this turkey brine for turkey with amazing flavor, soft and tender meat, and crispy skin. We highly recommend it for any turkey you’re preparing, from a whole bird to individual pieces like breasts and legs. For a whole turkey, we recommend brining for two days. If you’re using just turkey parts, a one-day brine is all you need.

    2 gallons, up to 20-pound turkey

    Watch Us Make the Recipe

    You Will Need

    1 (12 to 20 pound) turkey, thawed

    2 gallons (7.5L) cold water

    4.5 ounces (128g) kosher salt or good quality sea salt; see tips for volume measurements

    3/4 cup (160g) packed brown sugar

    1/4 cup (60ml) Worcestershire sauce or Pickapeppa sauce

    1 tablespoon (10g) coarse ground black pepper

    1 onion, quartered

    2 whole bulbs garlic, cut in half

    1 bunch fresh thyme

    5 bay leaves

    Directions

      1Make the brine: In a large pot, combine 2 quarts (8 cups) of water, salt, brown sugar, Worcestershire sauce, black pepper, onion quarters, garlic, thyme, and bay leaves. Bring to a simmer over medium-high heat and cook for 5 to 10 minutes or until the salt and sugar have dissolved completely. Allow the brine to cool to room temperature.
      2Combine turkey and brine: Place the turkey in a lined 5-gallon bucket or a large, food-grade brine bag. Carefully pour the cooled, room-temperature brine over the turkey, then add the remaining 6 quarts (24 cups) of cold water. If using a brine bag, be careful to hold the sides of the bag so they don’t flop down as you pour—another set of hands is very helpful here!

      3Brine for 2 days: Squeeze as much air as possible from the liner or bag and secure it shut to ensure the turkey is as submerged in the brine as possible (if the brine does not completely cover it, it’s okay). Place the bucket or brine bag in the refrigerator or an ice-filled cooler. Brine the turkey for two days. To ensure all areas of the turkey are fully submerged in the brine, flip it halfway through the two-day brining period.
      4Remove and air-dry: After two days, remove the turkey from the brine. Do not rinse the turkey. Instead, pat it dry with paper towels and place it on a roasting rack set inside a rimmed baking sheet. Refrigerate the turkey, uncovered, overnight. This air-drying process is crucial for achieving crispy, golden-brown skin. The next day, roast your turkey in an oven preheated to 325°F (162° C) with our delicious turkey butter for an incredible result (use this turkey recipe).

    Adam and Joanne’s Tips

    • Salt: Diamond Crystal salt flakes are fluffier and lighter than Morton’s kosher salt. For Diamond Crystal kosher salt: use ¾ cup + ½ tablespoon. For Morton’s kosher salt: use ⅓ cup + 2 ½ tablespoons.
    • Brine bag: Place in a roasting pan to prevent spills. We recommend using a heavy-duty brine bag.
    • Cooler: Check ice water temperature regularly to ensure it stays below 40°F (4°C).
    • Crisp skin: For best results, air-dry the brined turkey overnight in the fridge. If you are out of time, pat dry before roasting.
    • Pre-brined turkeys: Some store-bought turkeys are already pre-brined, injected with a solution of water, salt, and other flavorings. While most recipes would advise against brining these turkeys again, ours is different. We’ve intentionally developed a lower-salt brine that allows you to safely re-brine your turkey without the risk of it becoming too salty. You will still benefit from our brine and its savory flavor. If you are concerned, you can reduce your brine time to 1 day and still achieve great results.


    AUTHOR:

    Joanne Gallagher

    Source link

  • Seriously Good Chicken Tortilla Soup Recipe

    Seriously Good Chicken Tortilla Soup Recipe

    This is my all-time favorite chicken tortilla soup recipe. Tender chicken thighs, corn tortillas, and the perfect blend of spices make it unbelievably good.

    Homemade Chicken Tortilla Soup

    If you love a hearty, comforting soup, you’re going to love this. Our family has been making it for years, and it always gets rave reviews. Be sure to check out our serving suggestions. The toppings truly make chicken tortilla soup even better. I never skip a big handful of crispy homemade tortilla chips on top.

    The real secret is stirring chopped corn tortillas right into the soup. They break down as the broth simmers, adding body and a rich, warm corn flavor that genuinely makes this recipe one of my favorites!

    Key Ingredients

    • Chicken: Skin-on chicken thighs make the best chicken tortilla soup. If you prefer skinless thighs, chicken breasts, or cooked/rotisserie chicken, I share easy adjustments below.
    • Veggies: The soup starts with a flavorful mix of onion, celery, jalapeño, and garlic. Toward the end, you’ll add corn (fresh or frozen) and tomatoes for sweetness, color, and extra texture.
    • Spices: I love using ancho chili powder or homemade chili powder for this soup. We also add cumin and a bay leaf.
    • Corn Tortillas: These are essential for that classic tortilla soup flavor! You’ll roughly chop corn tortillas and stir them into the soup. As they simmer, they break down, adding flavor and thickening the broth slightly.
    • Broth: I prefer chicken stock, especially homemade chicken stock. But feel free to use your favorite store-bought brand or even vegetable broth.
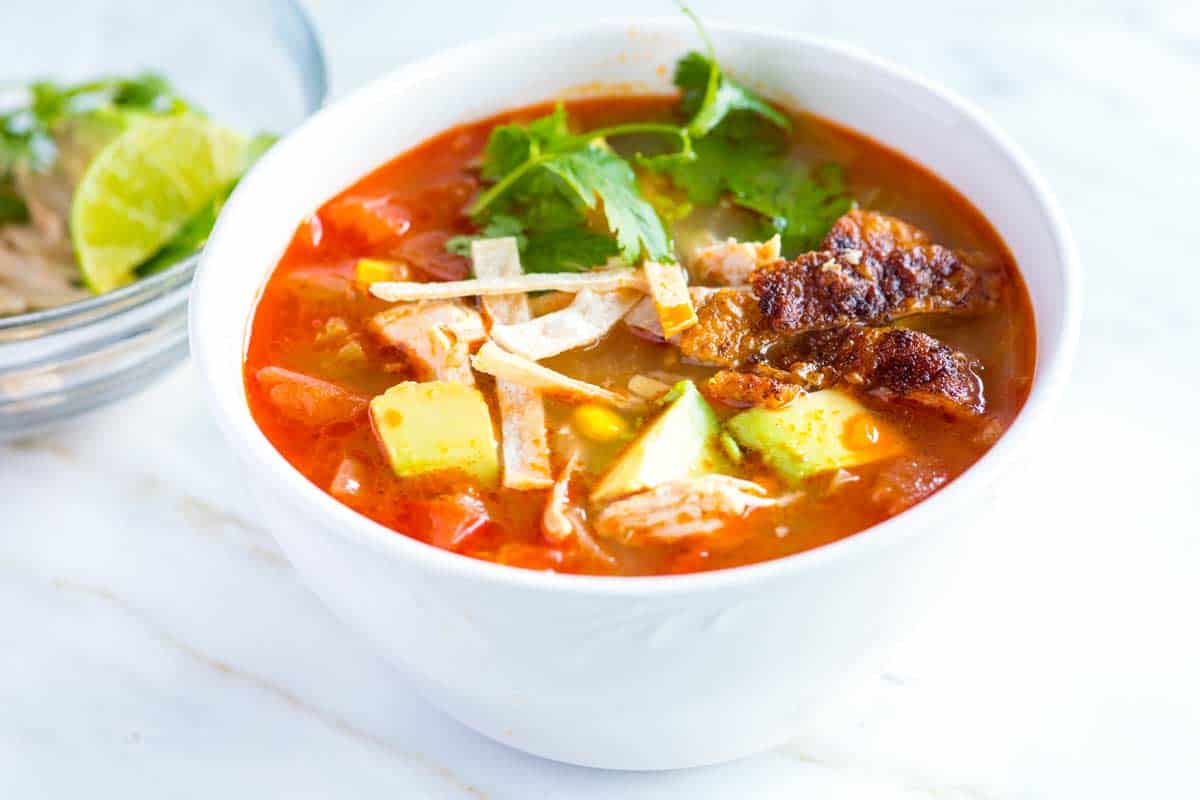
    • The Extras: This soup is all about the toppings! Set out a variety of options and let everyone customize their bowls. Some of our family favorites include fresh cilantro, extra lime wedges, crumbled queso fresco or other cheeses, tortilla chips or strips, diced avocados, and a spoonful of guacamole.

    Find the full recipe with measurements below.

    How to Make Our Favorite Chicken Tortilla Soup

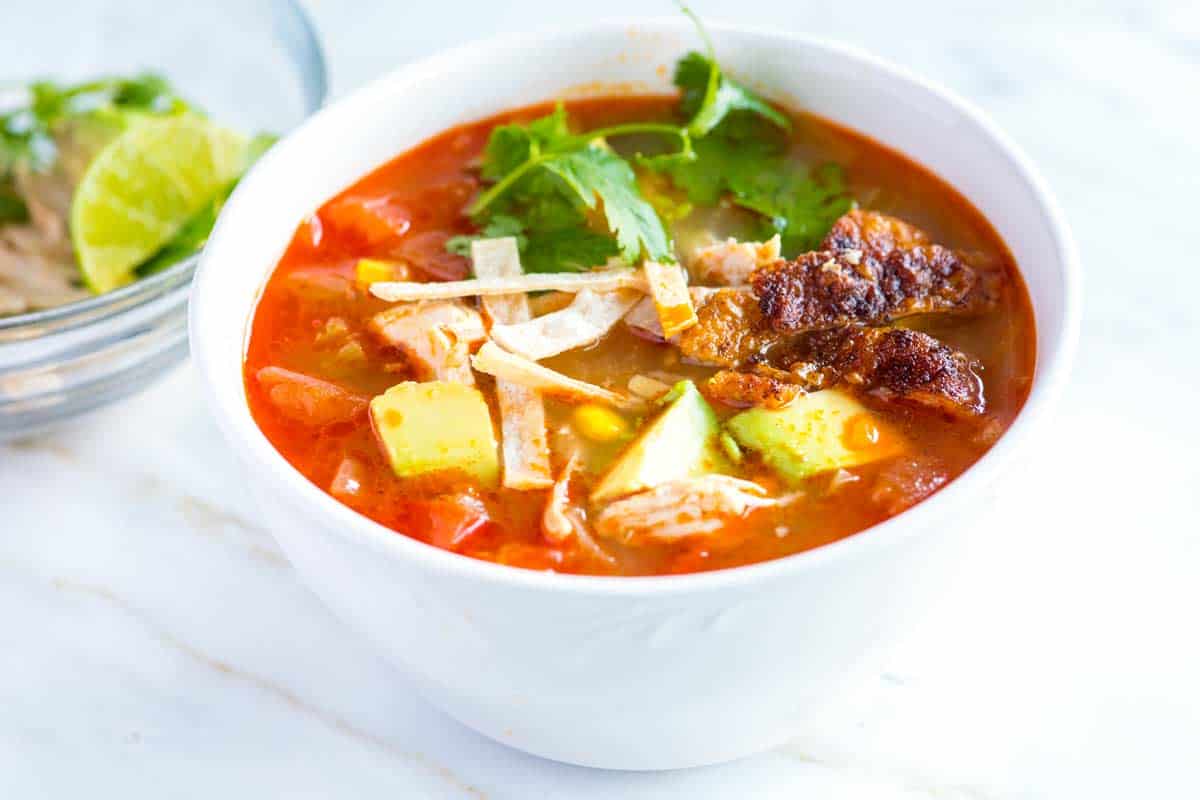
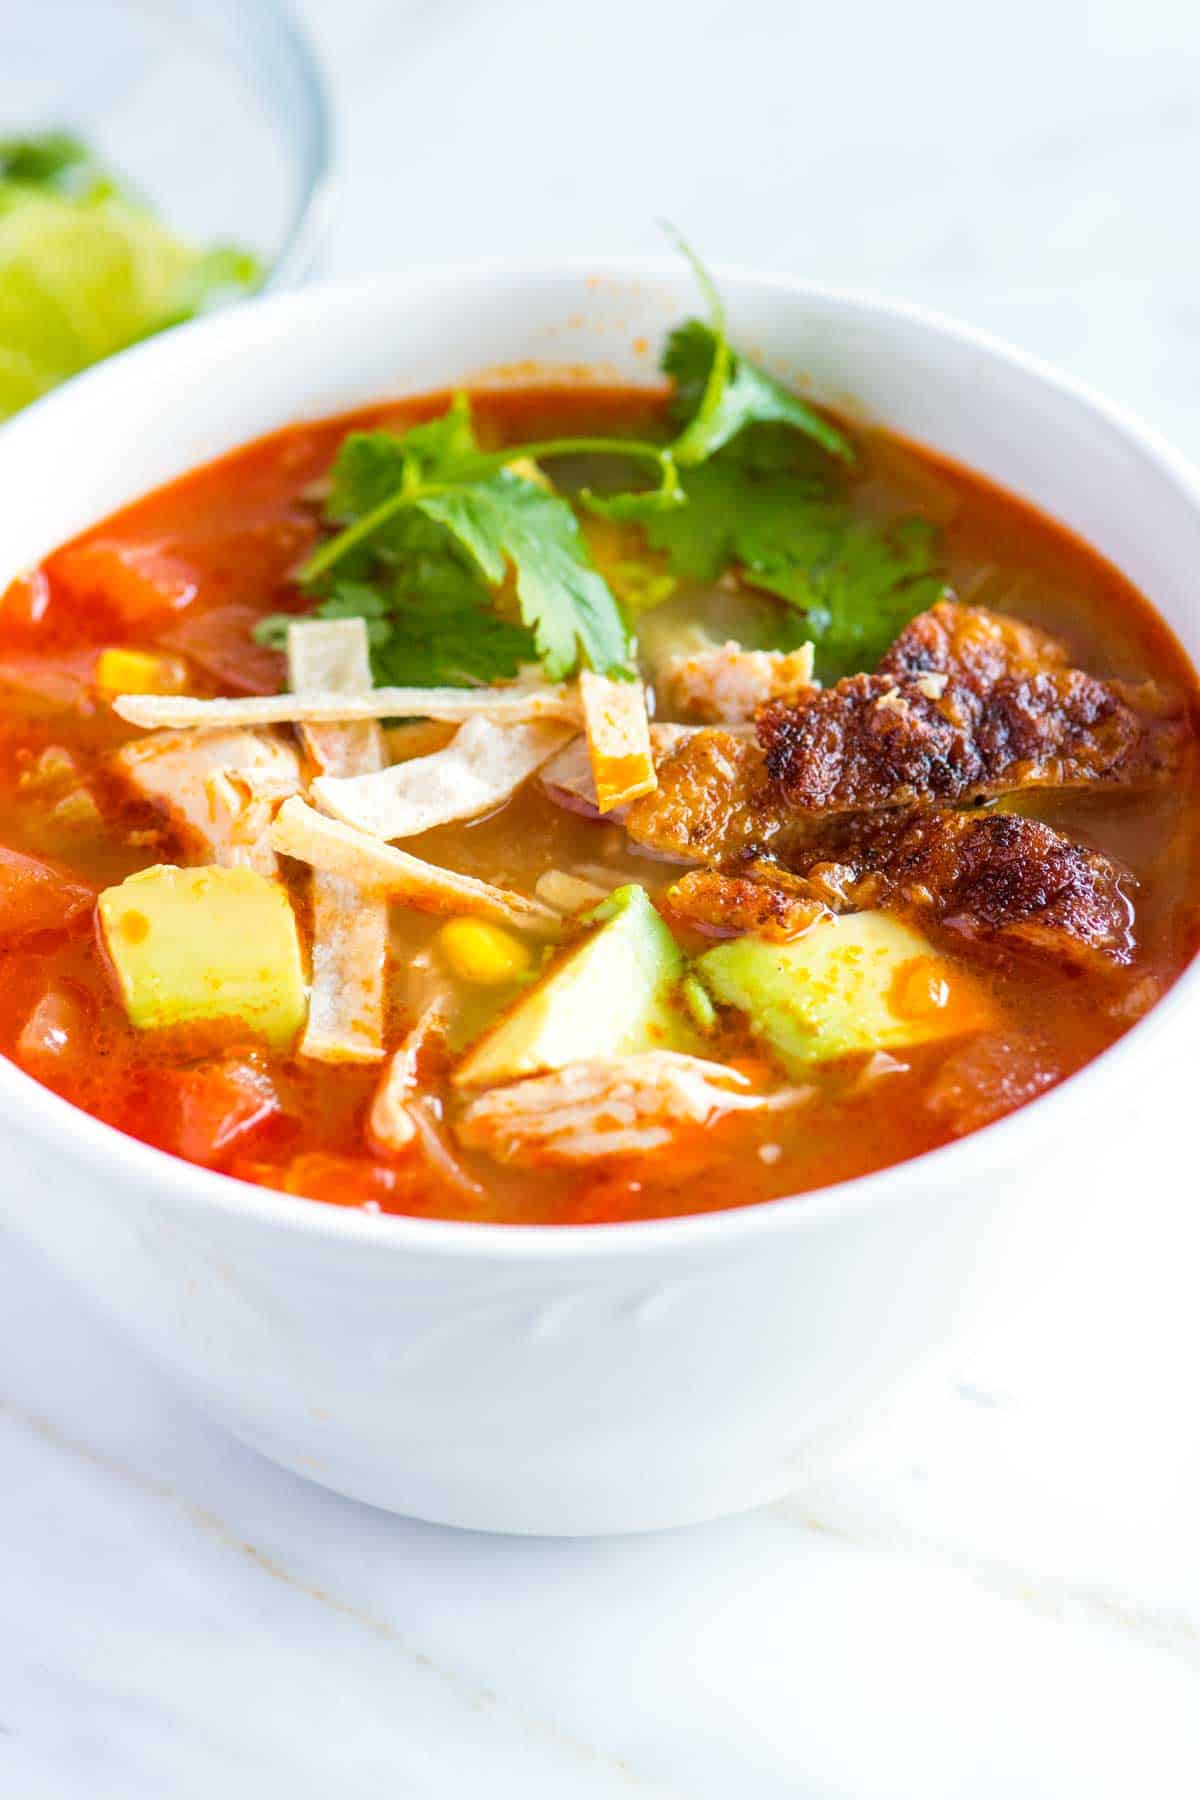
    Tip 1: Roast the chicken. For my chicken noodle soup, I simmer the chicken right in the pot, but for this soup, I love roasting skin-on chicken thighs in the oven. Once they’re cooked, shred the meat and stir it into the soup just before serving. Since the thighs are skin-on, I take one extra step: crisp the skin in a skillet and crumble it over the bowls. It adds incredible flavor and the perfect crispy topping.

    Before roasting the chicken in the oven, quickly brown the skin in the bottom of your soup pot. This adds color to the chicken, but also renders some chicken fat, which you can use for cooking the vegetables in the next step.

    Cooking chicken for tortilla soup

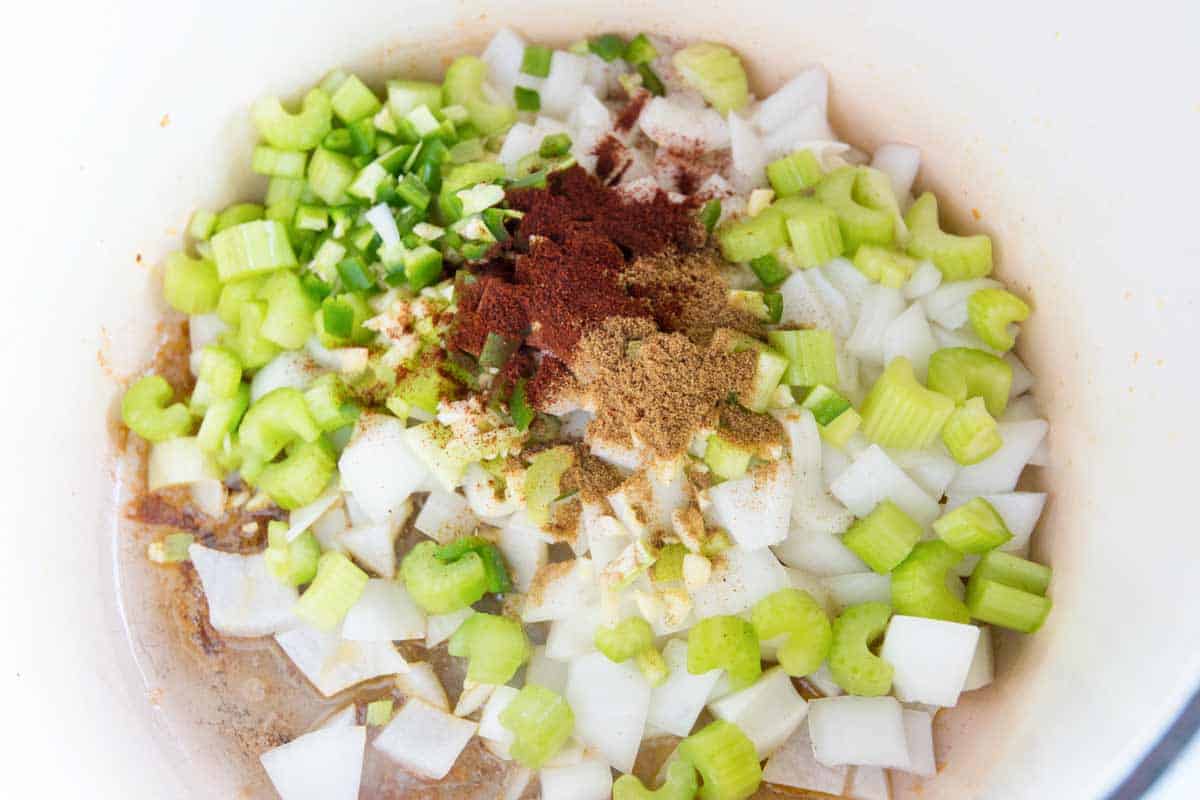
    Tip 2: Cook the veggies in the rendered fat. While the chicken roasts, start the soup base. Because we sear the chicken thighs in the pot first, you’re left with a layer of rich, flavorful chicken fat. Use it. Add the onion, celery, jalapeño, garlic, and spices to that fat, and cook until the onion is soft and sweet. This builds a richer, more savory flavor that makes the whole soup taste better.

    Cooking the veggies and spices in chicken fat.

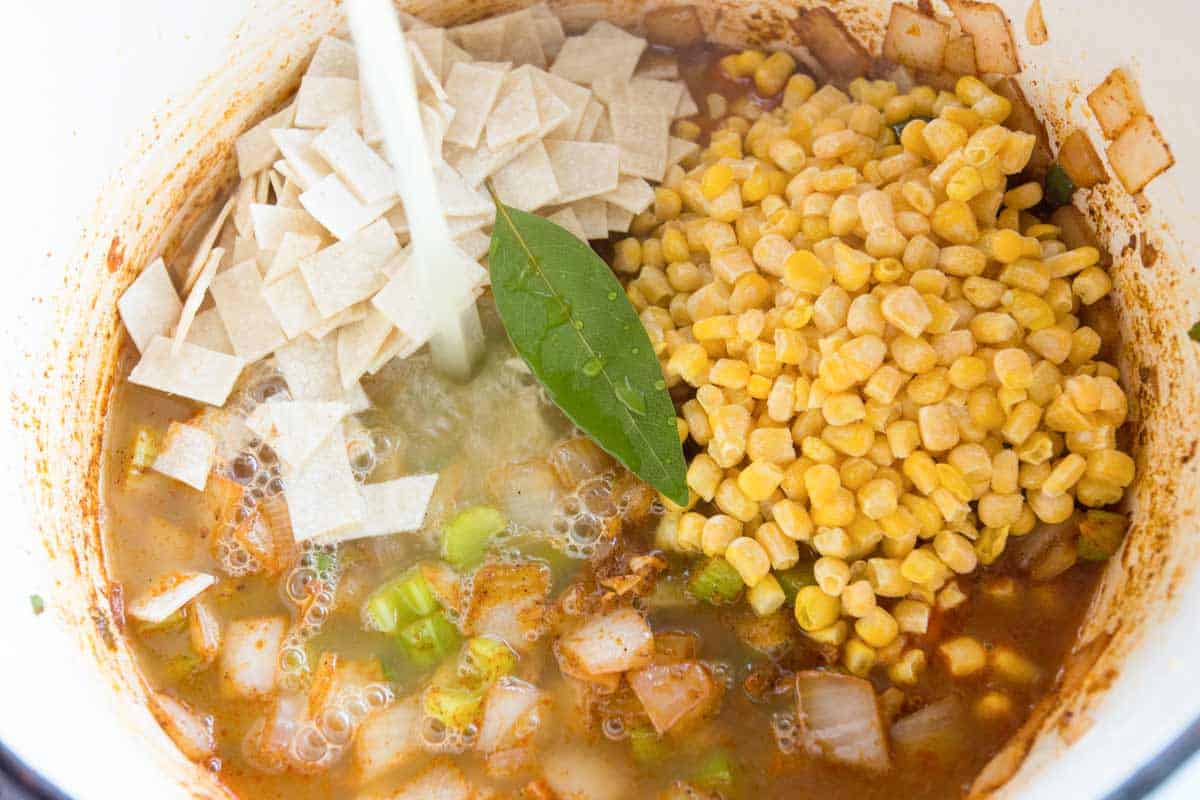
    Tip 3: Simmer with chopped tortillas. Once the onions are soft, pour in the chicken stock and add the corn, a bay leaf, and a generous handful of chopped corn tortillas. Let the soup simmer for about 20 minutes, until the tortillas soften and break down into the broth. This is what gives this soup its signature flavor.

    Adding the chicken stock, tortillas, and corn.

    Tip 4: Finish the soup. Just before serving, stir in chopped tomatoes, the shredded roasted chicken, and a healthy squeeze of lime juice.

    Tip 5: Serve with your favorite toppings. This soup gets better with toppings. I always crisp the chicken skin in a skillet (instructions are below), then crumble it over my soup. It’s so delicious. Then, you can have fun with more toppings. Here are some ideas:

    More Soup Recipes

    Chicken Tortilla Soup

    Seriously Good Chicken Tortilla Soup

    • PREP
    • COOK
    • TOTAL

    We love this super flavorful tortilla soup! Skin-on chicken thighs are the secret to the most delicious soup. I highly recommend them, but if you are starting with skinless chicken, I have provided tips below! I love ancho chili powder (McCormick has one in most larger stores) or homemade chili powder for this.

    6 Servings

    You Will Need

    1 pound skin-on, bone-in chicken thighs (450g)

    2 teaspoons avocado oil or olive oil

    1 large onion, finely chopped

    5 stalks celery, finely chopped

    1 large jalapeño, finely chopped

    3 garlic cloves, minced, about 1 tablespoon

    1 ¾ teaspoons ancho chili powder, divided, try homemade chili powder

    1 ½ teaspoons ground cumin

    1 bay leaf

    1 ½ cups corn kernels, fresh or frozen

    4 (6-inch) corn tortillas, roughly chopped

    6 cups chicken stock (1.4L)

    1 pound tomatoes, cored and finely chopped, or 1 (14oz) can diced tomatoes

    Juice of half a lime

    Salt and fresh ground black pepper

    For serving: Cilantro, lime wedges, avocado, queso fresco, crispy tortilla strips (see tips)

    Directions

    • Prepare the Chicken
    • 1Preheat the oven to 400°F (204°C). Line a baking sheet with parchment paper. Note: If you do not have skin-on chicken, you do not need to preheat the oven. See our tips below the recipe for using skinless chicken.

      2Pat the chicken thighs dry with a paper towel. Then, season them on both sides with 1/2 teaspoon salt and 1/4 teaspoon ancho chili powder.

      3Heat the 2 teaspoons of oil in a large pot, like a Dutch oven, over medium heat. Add the chicken thighs, skin-side down, and cook, without moving them, until the skin is golden brown, about 12 minutes.

      4Wiggle the chicken thighs to release them from the pot. Place the thighs skin-side up on the prepared baking sheet. It’s okay if some skin sticks to the bottom of the pot. Scrape up the larger pieces and place them on top of the chicken thighs. Leave the smaller bits in the pot.

      5Roast the chicken thighs until cooked through, about 20 minutes. Transfer to a plate and allow to rest for 10 minutes. When they are cool enough to handle, remove the skin from the chicken and shred the meat. Either discard the skin or save it as a topping for the soup.

    • Make Tortilla Soup
    • 1You can make the tortilla soup while the chicken roasts in the oven. Remove all but one tablespoon of the chicken fat left in the pot from browning the chicken thighs, then add the onions, celery, jalapeño, garlic, 1 ½ teaspoons chili powder, and 1 ½ teaspoons cumin. Cook until the onions are soft, about 10 minutes.

      2Stir in the bay leaf, corn kernels, chopped tortillas, and chicken stock. Bring to a boil, lower the heat, season to taste with salt and pepper and simmer uncovered for 20 minutes.

      3Add the tomatoes and simmer uncovered for 10 minutes.

      4Stir in the shredded chicken and the lime juice.

      5If you plan to garnish the soup with crispy chicken skin, just before serving, turn the broiler to high. Then, broil the chicken skin saved from earlier until crisp, for about 1 minute. Watch it closely so that it does not burn. Cut into strips.

      6Divide the soup between bowls and top with your favorite tortilla soup toppings, such as crispy chicken skin, crispy tortilla strips, extra lime, cilantro, and crumbled cheese.

    Adam and Joanne’s Tips

    • Skin-on chicken thighs: Skin-on chicken adds rich flavor to the soup. First, you’ll render the fat from the skin directly in the soup pot, creating a flavorful base for cooking the onions and other vegetables. If you prefer not to use skin-on chicken, see the tip below.
    • Skinless chicken thighs or breasts: You can still make a delicious soup with skinless chicken thighs or breasts, although you might lose some of the richness that the skin/rendered fat provides. Skip the searing and roasting steps and add the raw, skinless chicken directly to the soup pot at the same time as the chicken stock. After simmering for 20 minutes, the chicken will be fully cooked. Remove it from the pot, let it cool slightly, and then shred it. Finally, stir the shredded chicken back into the soup just before serving. When cooking the onions and other veggies, use a little oil in the pot.
    • Using rotisserie chicken: Add 2 to 3 cups of shredded cooked chicken to the soup when you add the tomatoes.
    • Quick homemade tortilla strips: You can buy them or make them yourself. Place a paper towel in the microwave, then arrange thinly sliced corn tortillas in a single layer on top. Microwave for 45 seconds, then check and continue microwaving in 20-second intervals until crisp. Watch them closely to prevent burning. You can also use our homemade tortilla chips recipe as a guide for fried chips.
    • Storing: Refrigerate in an airtight container for 3 to 4 days. Or freeze for up to 3 months.
    • The nutrition facts provided below are estimates.

    Nutrition Per Serving
    Serving Size
    1 bowl (1/6 of the recipe)
    /
    Calories
    367
    /
    Total Fat
    18.4g
    /
    Saturated Fat
    4.7g
    /
    Cholesterol
    81.2mg
    /
    Sodium
    650.8mg
    /
    Carbohydrate
    29.9g
    /
    Dietary Fiber
    3.8g
    /
    Total Sugars
    9.7g
    /
    Protein
    22g


    AUTHOR:

    Adam Gallagher

    Adam and Joanne of Inspired Taste

    We are Adam and Joanne Gallagher, the creators of Inspired Taste. Established in 2009, Inspired Taste grew from a childhood dream into one of the internet’s most trusted recipe sites with hundreds of reliable recipes, step-by-step videos, and expert tips.More About Us

    Source link

  • Perfect Lobster Mac and Cheese Recipe

    Perfect Lobster Mac and Cheese Recipe

    This lobster mac and cheese is outrageously delicious! The rich lobster cheese sauce is the star of the show, packed with lobster flavor and perfect for any special occasion, from date night to the holidays.

    Lobster Mac and Cheese

    We don’t skimp on flavor in this lobster mac and cheese. Unlike other recipes that simply add lobster meat to a standard mac and cheese, we take it a step further. We create a deeply flavorful lobster cheese sauce using the lobster bodies, similar to how lobster bisque is made.

    This results in an intensely flavorful mac and cheese, so much so that adding lobster meat is entirely optional! The sauce itself delivers incredible lobster flavor. You can absolutely add cooked lobster meat if you wish, but you might prefer to save it for other delicious dishes like lobster rolls.

    Key Ingredients

    • Lobster: We will start with 2 live lobsters, then cook them so that you have perfectly cooked lobster meat and lobster bodies ready to make our cheese sauce. If you prefer, you can ask your local fishmonger to cook your lobster, but don’t forget to ask for the lobster bodies back (the main shells with the head and tiny legs attached), as this makes our lobster cheese sauce so delicious. Remember, adding lobster meat to the mac and cheese is up to you. The bodies in our sauce add plenty of rich lobster flavor, so you may prefer to use the meat for another lobster recipe instead.
    • Aromatics: Since this is a classy dish, we bring in a few more ingredients than our basic macaroni and cheese. We use onion, carrot, garlic, fresh thyme, bay leaf, and tomato paste in our sauce. When they are all soft and sweet, they are blended into the cheese sauce, adding lots of flavor.
    • Butter and Flour: These help thicken our sauce.
    • White Wine: A dry white wine like Pinot Grigio, Sauvignon Blanc, or unoaked Chardonnay adds complexity. For a non-alcoholic option, substitute vegetable broth.
    • Milk: For the creamiest sauce, use whole milk.
    • Cheese: A high-quality white cheddar, such as Beecher’s or English cheddar, is my favorite for this mac and cheese. Gruyère would also be lovely!
    • Pasta: Use your favorite short pasta shape. Since this is a special recipe, it can take a fancier shape like cavatappi or torchiette.

    How to Make Lobster Mac and Cheese

    Step one for lobster mac and cheese is to prepare your lobsters. I know working with live lobsters might sound overwhelming, but I walk you through everything you need to know in our recipe. You can also learn more about working with live lobsters in our lobster roll recipe!

    Our method for dispatching the lobster is quick and effective. Place the lobster on a cutting board and find the faint cross on its shell where the head and body connect. Quickly and firmly insert a large, sharp knife into this cross, pushing down through the head and between the eyes. This severs the spinal cord, killing the lobster instantly.

    From there, you can separate the bodies from the tail, claws, and legs. We want to keep the bodies uncooked, so we can use them to make our lobster cheese sauce. Then, we will cook the lobster meat in boiling salted water. Once cooked, you can pull the meat from the shells and save it for adding to our lobster mac and cheese or save it for another dish. It keeps in the fridge for up to 4 days.

    How to Make Lobster Mac and Cheese: Simmering lobster bodies in our sauce

    The trick to the best lobster mac and cheese is to cook the lobster bodies with butter, aromatics, and milk for about 30 minutes. In this time, the bodies perfume the mixture with rich lobster flavor (more than any meat ever could). After 30 minutes, you’ll discard the bodies and blend your sauce with some cheese.

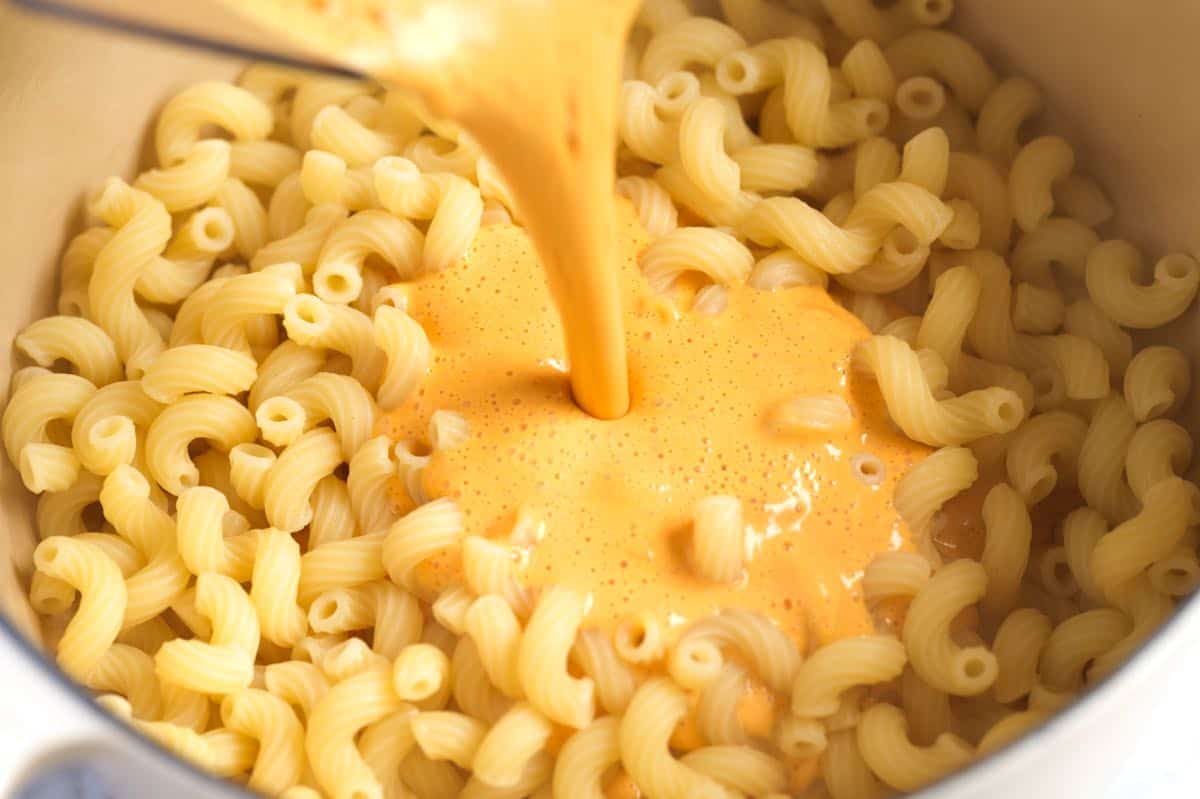
    How to Make Lobster Mac and Cheese: Tossing pasta with the lobster cheese sauce

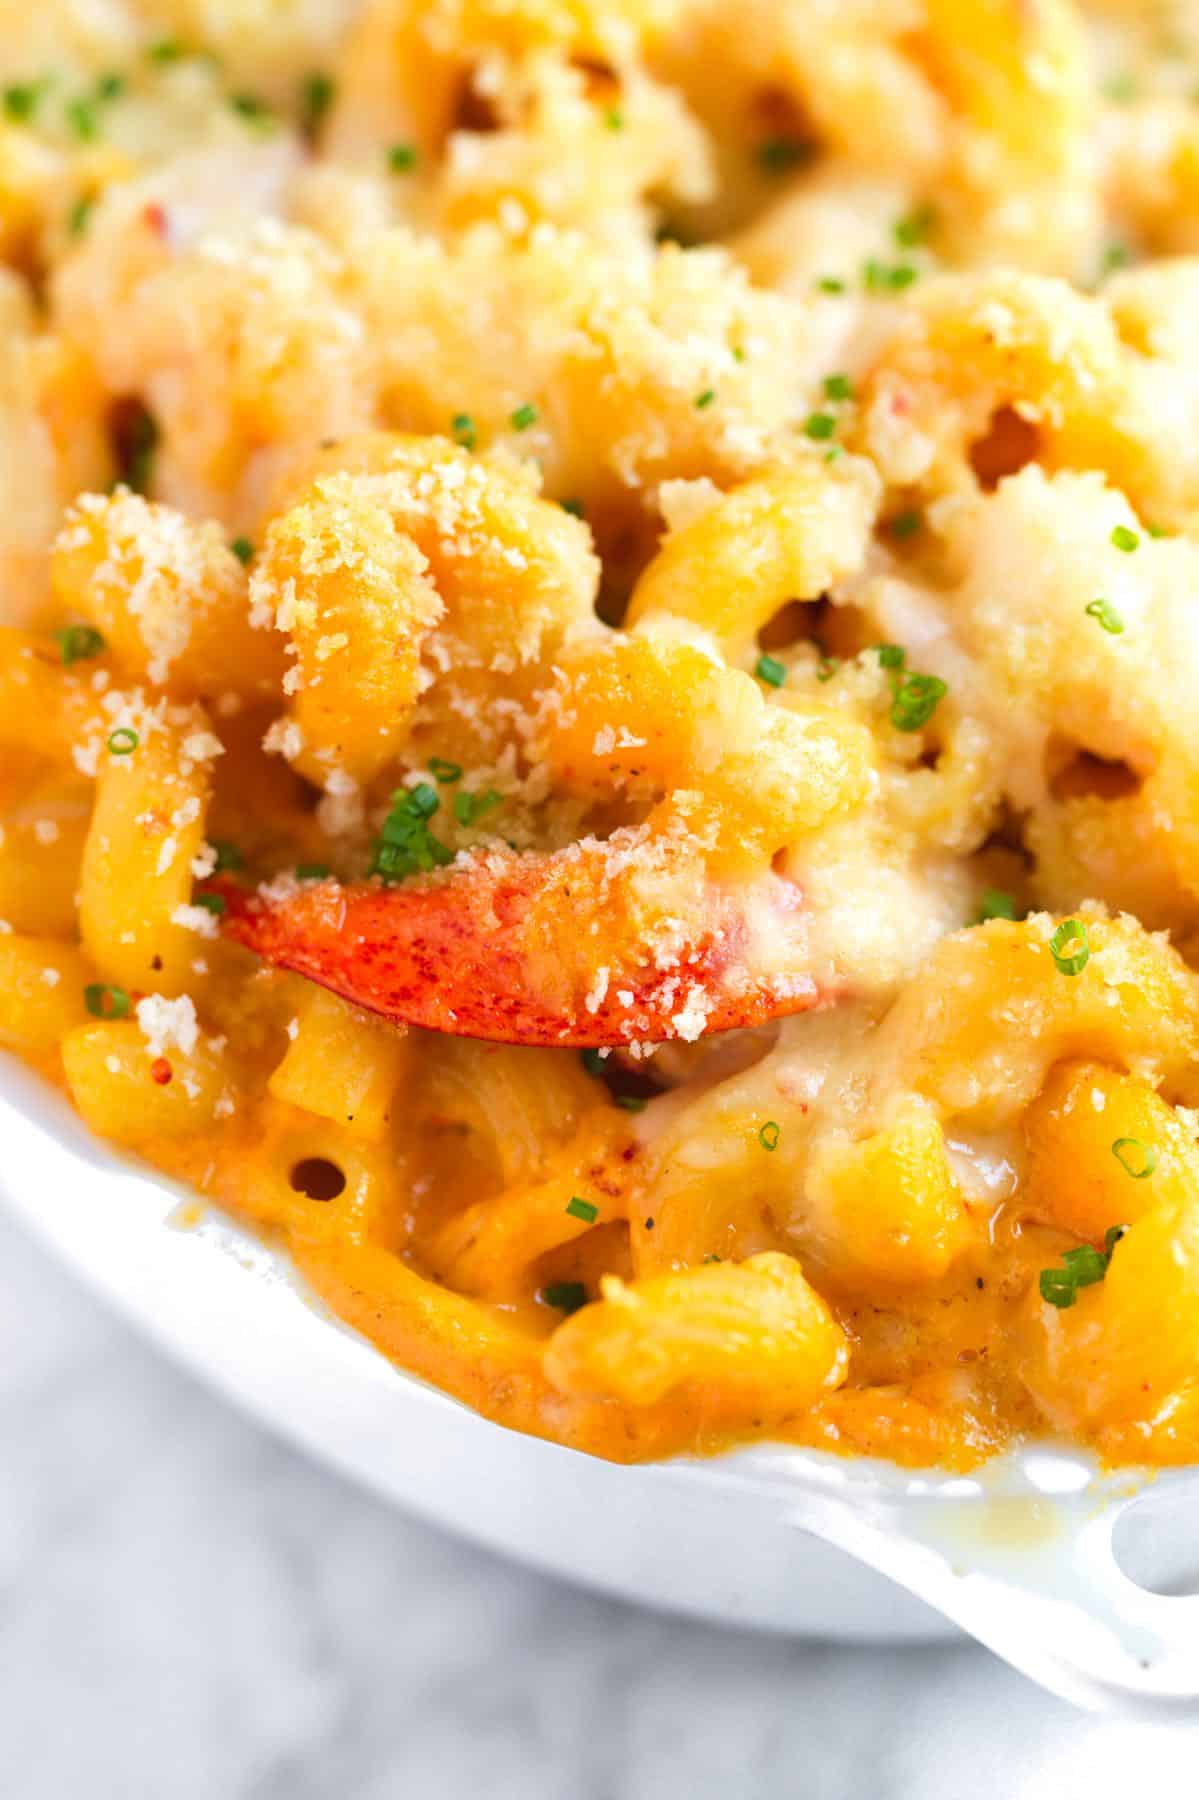
    Finally, toss the sauce with cooked pasta, add optional lobster meat, and bake in a casserole dish until bubbly. It’s incredible!

    Lobster Mac and Cheese

    Perfect Lobster Mac and Cheese

    • PREP
    • COOK
    • TOTAL

    There are two ways to make lobster mac and cheese: with or without lobster meat. In both cases, you’ll use the lobster shells to create the signature lobster flavor in the sauce. We’ll guide you through each step, from humanely dispatching and cooking live lobsters to making the rich lobster cheese sauce. Then, you can decide whether to fold the cooked lobster meat into your mac and cheese or enjoy it separately (it’s fantastic with melted butter or in lobster rolls!). The lobster bodies (the main shells with the head and tiny legs attached) release a rich, savory lobster flavor into the sauce, making them essential for this recipe.

    Make Ahead Tip: Cooked lobster meat can be refrigerated for up to 3 days, meaning you can prepare the meat in advance. You can also freeze the lobster bodies for up to 6 months. This lets you prepare the lobsters, enjoy the meat in another meal, and save the bodies for later.

    4 to 6 Servings

    You Will Need

    2 whole lobsters, 1 ½ pounds each

    2 tablespoons butter

    Half a sweet onion, finely chopped, about 1 cup

    1 medium carrot, finely chopped, about ½ cup

    2 cloves garlic, roughly chopped

    2 sprigs thyme

    1 tablespoon flour

    1 tablespoon tomato paste

    1/2 cup (60ml) white wine

    2 cups (473ml) whole milk

    1 bay leaf

    12 ounces (340g) white cheddar cheese, grated, about 3 cups

    8 ounces (226g) short pasta like fusilli, cavatappi, or torchiette

    1/4 cup (28g) panko breadcrumbs

    Salt and fresh ground black pepper

    Directions

    • Prepare Lobsters
    • 1If starting with live lobsters, handle them with care. Hold a lobster firmly just behind its head and place it on a cutting board, using a clean kitchen towel to keep it steady. Look for a small, cross-shaped mark on the shell where the head joins the body. Using a large, sharp knife, swiftly and firmly insert the tip into this mark and cut downwards through the head, between the eyes. This method dispatches the lobster quickly. The legs might twitch a little afterward, but the lobster is dead.

      2Separate the lobster parts by size: tails in one pile, large claws in another, and finally, all the small claws together in a third pile. You will cook these in the next step for lobster meat.

      3The lobster bodies (the main shells, including the head and tiny legs) are essential for the sauce. Set them aside. You will use them in our lobster sauce to create its rich flavor.

      4Bring a large pot of water to a boil with two tablespoons of salt.

      5Cook the tails for five minutes and transfer them to a plate to cool. Next, cook the large claws for 5 minutes. Transfer them to a plate to cool, and finish by cooking the small claws for four minutes.

      6Remove the lobster meat from the shells when the tails and claws are cool enough to handle. For the tails, use kitchen shears to cut down the top of the tails, pull them open, crack the back slightly, and then pull out the meat. For the claws, use a knife or mallet to crack open the claws and then remove the meat. Use tweezers or chopsticks to remove smaller bits of meat from legs and knuckles. Store the lobster meat in an airtight container in the fridge. If you plan to add some to the mac and cheese, you will need about 1 cup, which means you will likely have some extra lobster meat, which is never a bad thing.

    • Make Lobster Mac and Cheese
    • 1For lobster mac and cheese, you’ll need 2 lobster bodies and, optionally, 1 cup of cooked lobster meat. Cut the lobster bodies in half with a heavy knife.

      2In a wide pan at least 3 inches deep, like a rondo, melt the butter over medium heat. Ideally, use a pan with a lid, as you will need the lid later on.

      3Add the lobster bodies, onion, carrot, garlic, and thyme to the pan. Cook for about 10 minutes, stirring occasionally. The goal is not to brown the vegetables, just soften them. The lobster bodies will also turn red.

      4Add the flour and stir it around the pan, then do the same with the tomato paste.

      5Pour in the white wine and stir well. Once it begins to stick to the bottom, add the milk and bay leaf. Season with salt and pepper, then cook at a low and gentle simmer, partially covered, for 30 minutes. During this time, check that the milk is not bubbling too much or sticking to the bottom of the pan. Turn the heat down if necessary. The milk may look slightly curdled, but in the next step, we will blend everything, which brings the sauce back together.

      6Remove the lobster bodies and discard them. Then, pour the liquid into a blender. Add 6 ounces of cheese (1 ½ cups), and puree until smooth.  Chill the sauce in the fridge until ready to toss with the pasta. Blending tip: for safety remove the blender lid center insert and hold a kitchen towel over the hole while blending. This releases steam and prevents messy splatters.

      7Bring a pot of salted water to a boil, then cook the pasta until al dente. Strain.

      8Preheat the oven to 350°F (177°C). Lightly grease a casserole dish, that holds at least 2 quarts.

      9In a mixing bowl, combine the hot pasta with the lobster sauce and half the remaining cheese (2 ounces or 1/2 cup). Stir well to combine. If you are adding lobster meat, fold it in.

      10Transfer the pasta mixture to the casserole dish.

      11In a small bowl, mix the panko bread crumbs with the remaining cheese, and then scatter it over the top of the mac and cheese.

      12Bake for 40 to 50 minutes, until the middle is hot and the top is golden brown.

    Adam and Joanne’s Tips

    • Storing: Store baked lobster mac and cheese in an airtight container for up to 4 days.
    • Precooked lobster: If you prefer, you can ask your local fishmonger to cook your lobster, but don’t forget to ask for the lobster bodies back (the main shells with the head and tiny legs attached), as this makes our lobster cheese sauce so delicious. Starting with uncooked bodies adds a bit more flavor to our sauce, but you can still make it with cooked lobster bodies.
    • Nutrition facts are estimates. We included 1 cup of lobster meat and 1/2 teaspoon salt.

    Nutrition Per Serving
    Serving Size
    1/6 of the recipe
    /
    Calories
    530
    /
    Total Fat
    26.5g
    /
    Saturated Fat
    14.8g
    /
    Cholesterol
    109.8mg
    /
    Sodium
    763.9mg
    /
    Carbohydrate
    42.5g
    /
    Dietary Fiber
    2.2g
    /
    Total Sugars
    7.9g
    /
    Protein
    26.4g


    AUTHOR:

    Joanne Gallagher

    Adam and Joanne of Inspired Taste

    We are Adam and Joanne Gallagher, the creators of Inspired Taste. Established in 2009, Inspired Taste grew from a childhood dream into one of the internet’s most trusted recipe sites with hundreds of reliable recipes, step-by-step videos, and expert tips.More About Us

    Source link