Author: admin

  • Chickpea Tomato Soup

    Chickpea Tomato Soup

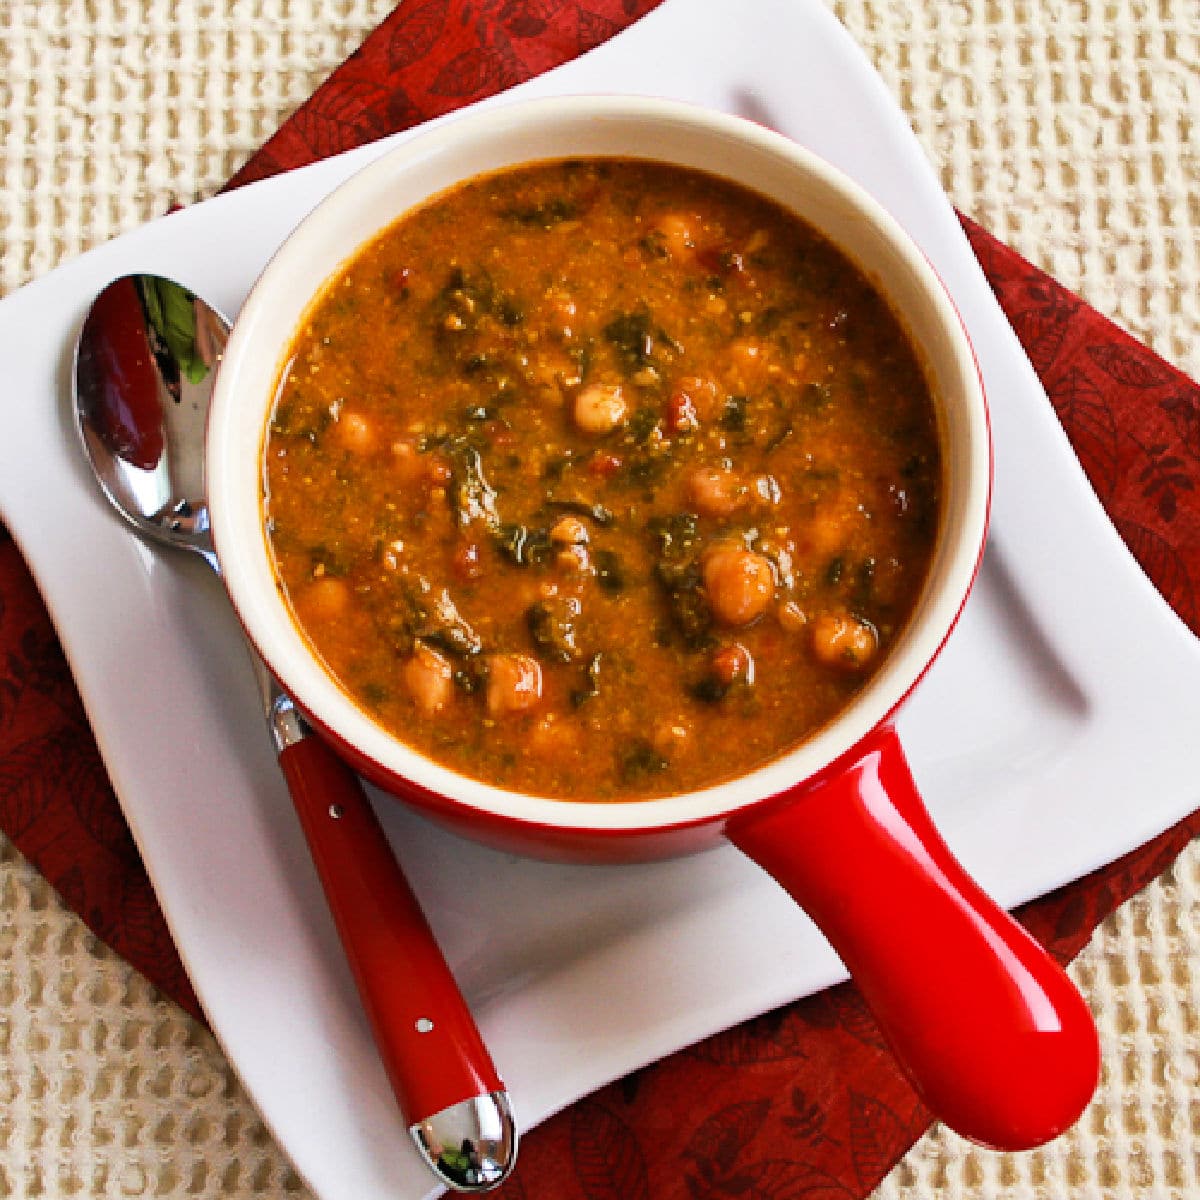
    This Chickpea Tomato Soup has spinach and basil, and this is a delicious meatless soup that’s also gluten-free. And if you don’t have fresh or frozen basil for this recipe, you can switch out the basil for basil pesto!

    PIN the tasty Chickpea Tomato Soup to try it later!
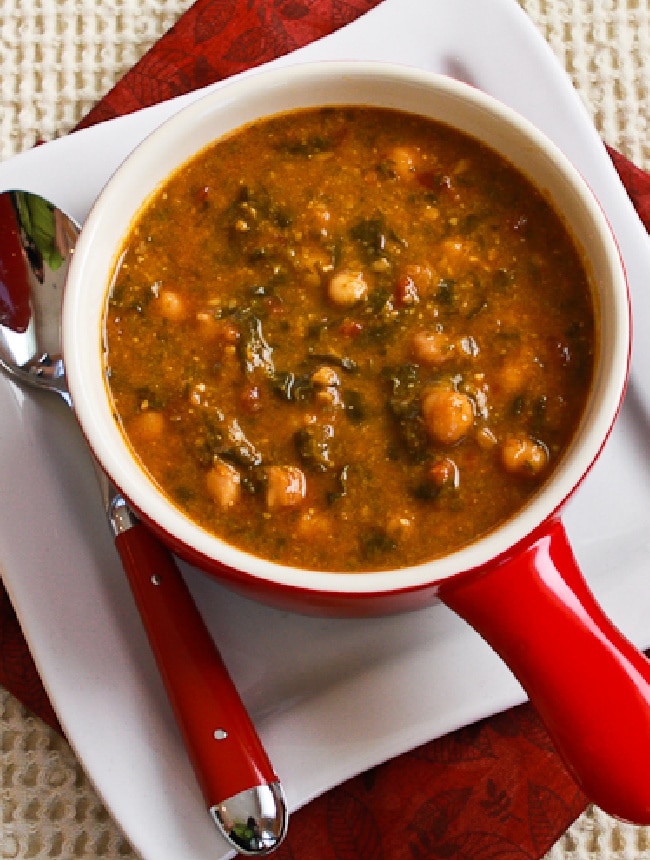
    Tomato Chickpea Soup in serving bowl with plate and spoon

    Chickpea Tomato Soup is one of the soups I make during the holidays for my annual soup party. But when it came time to stir in the basil this year, I didn’t have any of the frozen basil that usually lasts me through the winter. What I did have in my freezer was plenty of basil pesto, so I just stirred some of that into the soup instead. And this with pesto was such a hit that I’m going to add that option to the recipe along with the new photo you see above.

    Before I give you the recipe I’m going to confess that this is the first time I’ve soaked dried chickpeas and cooked them. Not that it’s shameful to use canned chickpeas, but the freshly cooked chickpeas were wonderful in this soup. Even better, the liquid the chickpeas were cooked in became the base of the soup, which made it extra flavorful.

    And if you like the flavors in this Chickpea Tomato Soup soup but don’t want the carbs from chickpeas, check out the Tomato Spinach Soup I made years later that’s also a delicious vegetarian soup that switches chickpeas for cauliflower rice! If you like these flavors I hope you’ll try one of these tasty soups.

    What ingredients do you need for this recipe?

    (This is only a list of ingredients; please scroll down for complete printable recipe. Or if you use the JUMP TO RECIPE link at the top of the page, it will take you directly to the complete recipe with ingredient amounts.)

    • dried chickpeas or canned chickpeas
    • canned vegetable broth (affiliate link)
    • onion
    • garlic
    • Olive Oil (affiliate link)
    • tomatoes
    • spinach
    • basil (or basil pesto)
    • salt and black pepper

    Can you make Chickpea Tomato Soup with canned chickpeas?

    I loved the flavor I got when I soaked dried chickpeas and used them in this soup, and that’s also much less expensive. But if that’s just not happening at your house you can use two 15 oz. cans of chickpeas. The cooking time will be shorter.

    How low in carbs is the Chickpea Tomato Soup?

    Even with chickpeas, this tasty soup has only 12 net carbs per serving, and 5 grams of protein.

    How can you make this soup lower in carbs?

    If you’d like a version of this soup with tomatoes, chickpeas, and spinach that’s lower in carbs, just use fewer chickpeas and double the amount of spinach.

    What if you don’t have fresh basil?

    I’d definitely use my frozen basil for this soup with tomatoes and chickpeas if I had some of that, but you can also use purchased basil pesto if that’s what you have.
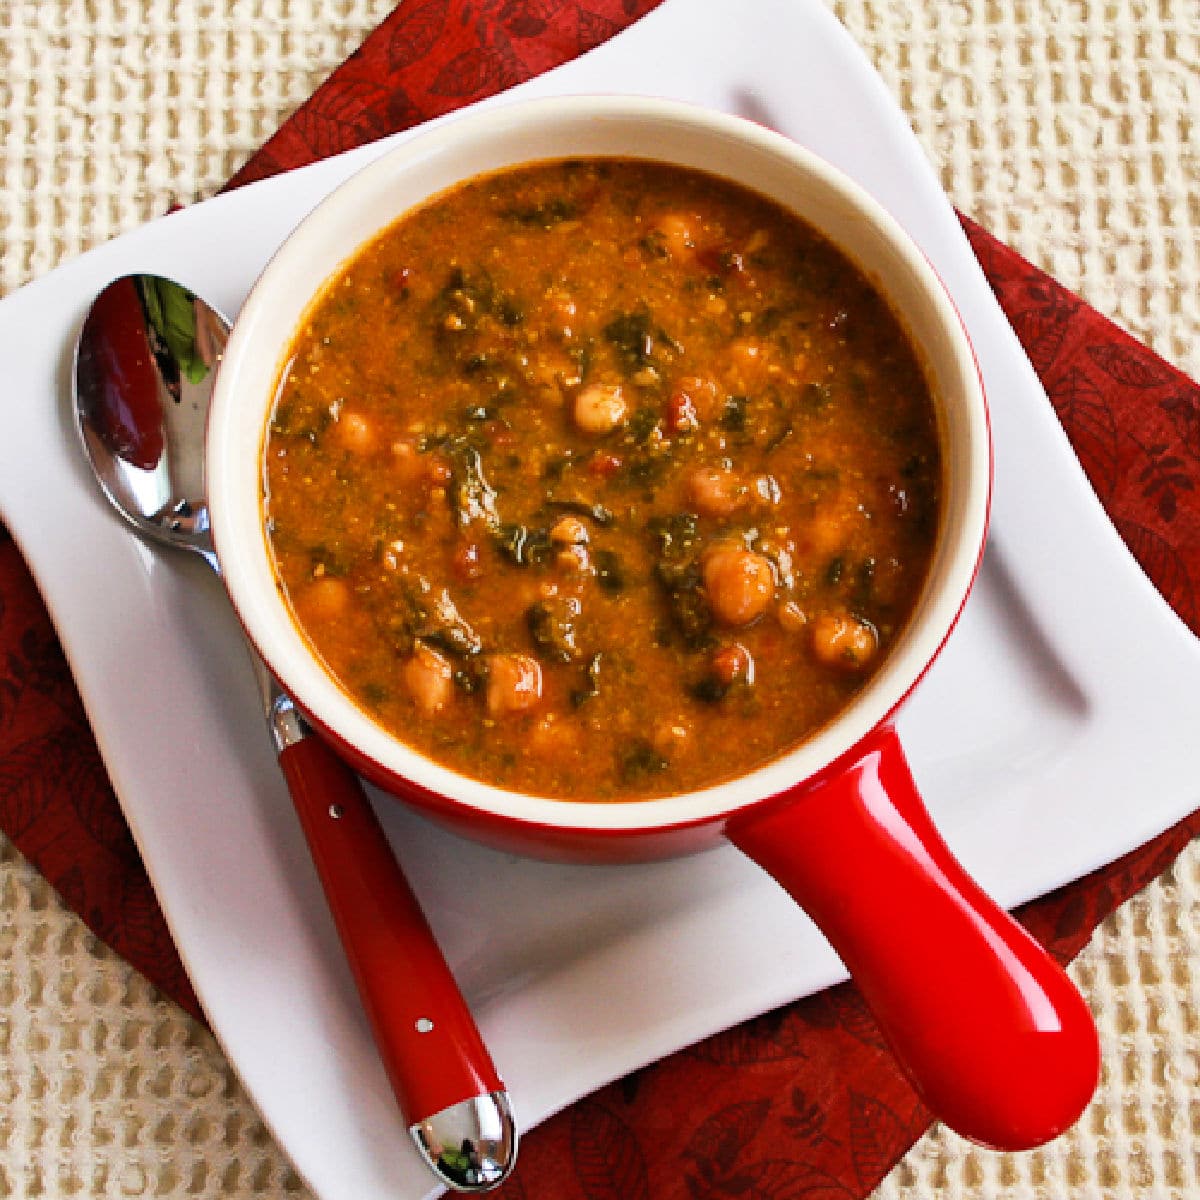
    Square image for Tomato Chickpea Soup shown in bowl on plate with spoon.Square image for Tomato Chickpea Soup shown in bowl on plate with spoon.

    Weekend Food Prep:

    This Chickpea Tomato Soup recipe has been added to a new category called Weekend Food Prep where you’ll find recipes you can prep or cook on the weekend and eat during the week!

    Ingredients

    • 1 cup dried chickpeas (garbanzo beans), soaked at least 8 hours or overnight in cold water (see notes)
    • 6 cups vegetable broth (see notes)
    • 1 yellow onion, diced
    • 8 cloves garlic, diced very small
    • 1 T olive oil (or less, depending on your pan)
    • one 14.5 oz can diced tomatoes with liquid
    • 4 cups chopped baby spinach (measure before chopping)
    • 4 T chopped fresh basil (see notes)
    • salt and fresh ground black pepper to taste

    Instructions

    1. Soak chickpeas overnight or for at least 8 hours in cold water.
    2. Drain chickpeas and discard water, and pick out any loose skins that have come off.
    3. Put chickpeas in heavy soup pot with vegetable stock and  bring to a boil, then reduce heat and simmer until chickpeas are tender. This will depend on how fresh the dried chickpeas were, but for me it took about an hour.
    4. Use a spoon or stock skimmer to remove any foam that appears.
    5. When chickpeas are tender, heat olive oil in heavy frying pan, then saute onions about 5 minutes, until fairly soft.
    6. Add garlic and cook 2-3 minutes more.
    7. Add onions and garlic to soup pot with diced tomatoes.
    8. Let soup simmer on low heat about 30 minutes.
    9. Add chopped spinach to soup (adding a bit more water or stock if needed) and simmer 15-30 minutes more.
    10. I used my beloved Immersion Blender (affiliate link) at this point to slightly break up the ingredients. If you don’t have an immersion blender, you can put about 1/3 of the soup into a Food Processor (affiliate link) or blender and pulse a few times. You can skip this step completely too, if you’d like a chunkier soup.
    11. Stir in chopped basil (I used my frozen basil, can also use  basil pesto if you don’t have any basil) and cook 5 minutes.
    12. Season Chickpea Tomato Soup with salt and fresh ground black pepper to taste and serve hot.

    Notes

    You can use 4 cans vegetable broth for the soup. I used my frozen basil for the recipe but you can also use basil pesto if you don’t have any basil.

    You can make this soup with two 14 oz. cans of chickpeas if cooking the dried chickpeas is not going to work for you.

    This is wonderful topped with freshly grated Parmesan cheese, although I know most Parmesan is not vegetarian!

    Recipe created by Kalyn with inspiration from this Vegetarian Lentil Soup from The Sugar Solution Cookbook.

    Nutrition Information

    Yield

    6

    Serving Size

    1

    Amount Per Serving

    Calories 108Total Fat 3gSaturated Fat 0gTrans Fat 0gUnsaturated Fat 3gCholesterol 0mgSodium 868mgCarbohydrates 16gFiber 4gSugar 5gProtein 5g

    Nutrition information is automatically calculated by the Recipe Plug-In I am using. I am not a nutritionist and cannot guarantee 100% accuracy, since many variables affect those calculations.
    Did you make this recipe?

    Did you make this recipe? Please leave a star rating (under the PRINT button in the recipe) or share a photo of your results on Instagram! THANKS!

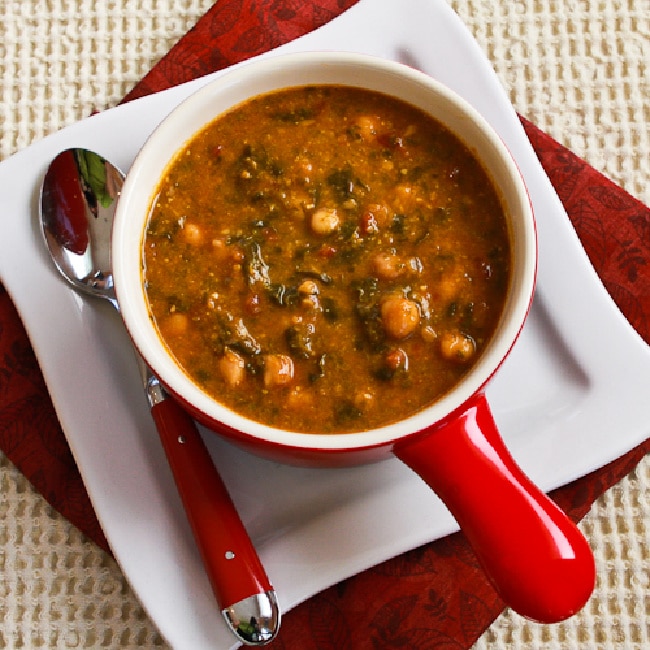
    Square image of Tomato Chickpea Soup in bowl with plate and spoonSquare image of Tomato Chickpea Soup in bowl with plate and spoon

    Low-Carb Diet / /Low-Glycemic Diet / South Beach Diet Suggestions:
    Chickpea Tomato Soup is a bit high in carbs for low-carb diet plans, but you can make it lower in carbs by using fewer chickpeas and more of the other ingredients, especially spinach. Soup like this is a perfect main dish for any phase of the original South Beach Diet.

    Find More Recipes Like This One:
    Use Soup Recipes to find more recipes like this one. Use the Diet Type Index to find more recipes suitable for a specific eating plan. You might also like to follow Kalyn’s Kitchen on Pinterest, on Facebook, on Instagram, on TikTok, or on YouTube to see all the good recipes I’m sharing there.

    Historical Notes for this Recipe:
    This soup recipe with chickpeas and tomatoes was posted in 2008, and I’ve made it many times for my annual soup party. It was updated with better photos in 2012 and was last updated with more information in 2026.
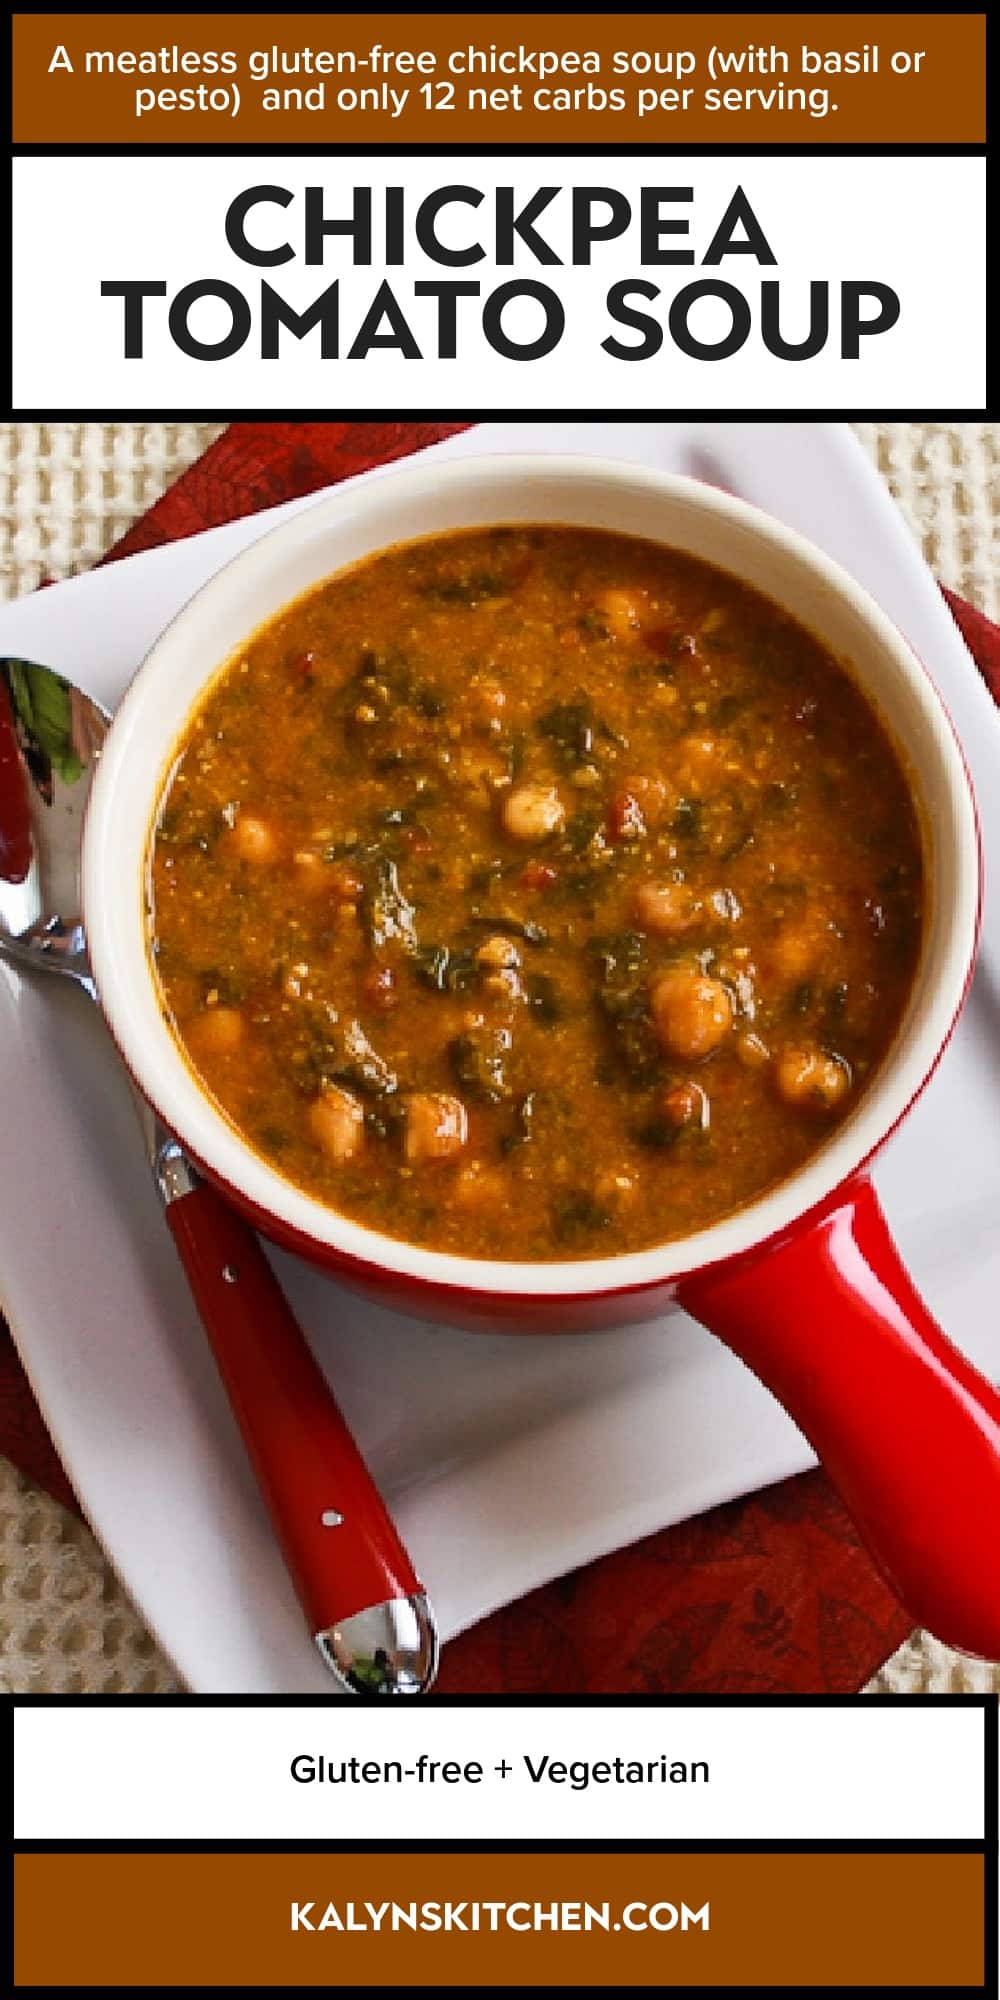
    Pinterest image of Chickpea Tomato Soup

    We are a participant in the Amazon Services LLC Associates Program, an affiliate advertising program designed to provide a means for us to earn fees by linking to Amazon.com and affiliated sites. As an Amazon Associate, I earn from qualifying purchases.
    Source link

  • Grilled Halloumi Salad

    Grilled Halloumi Salad

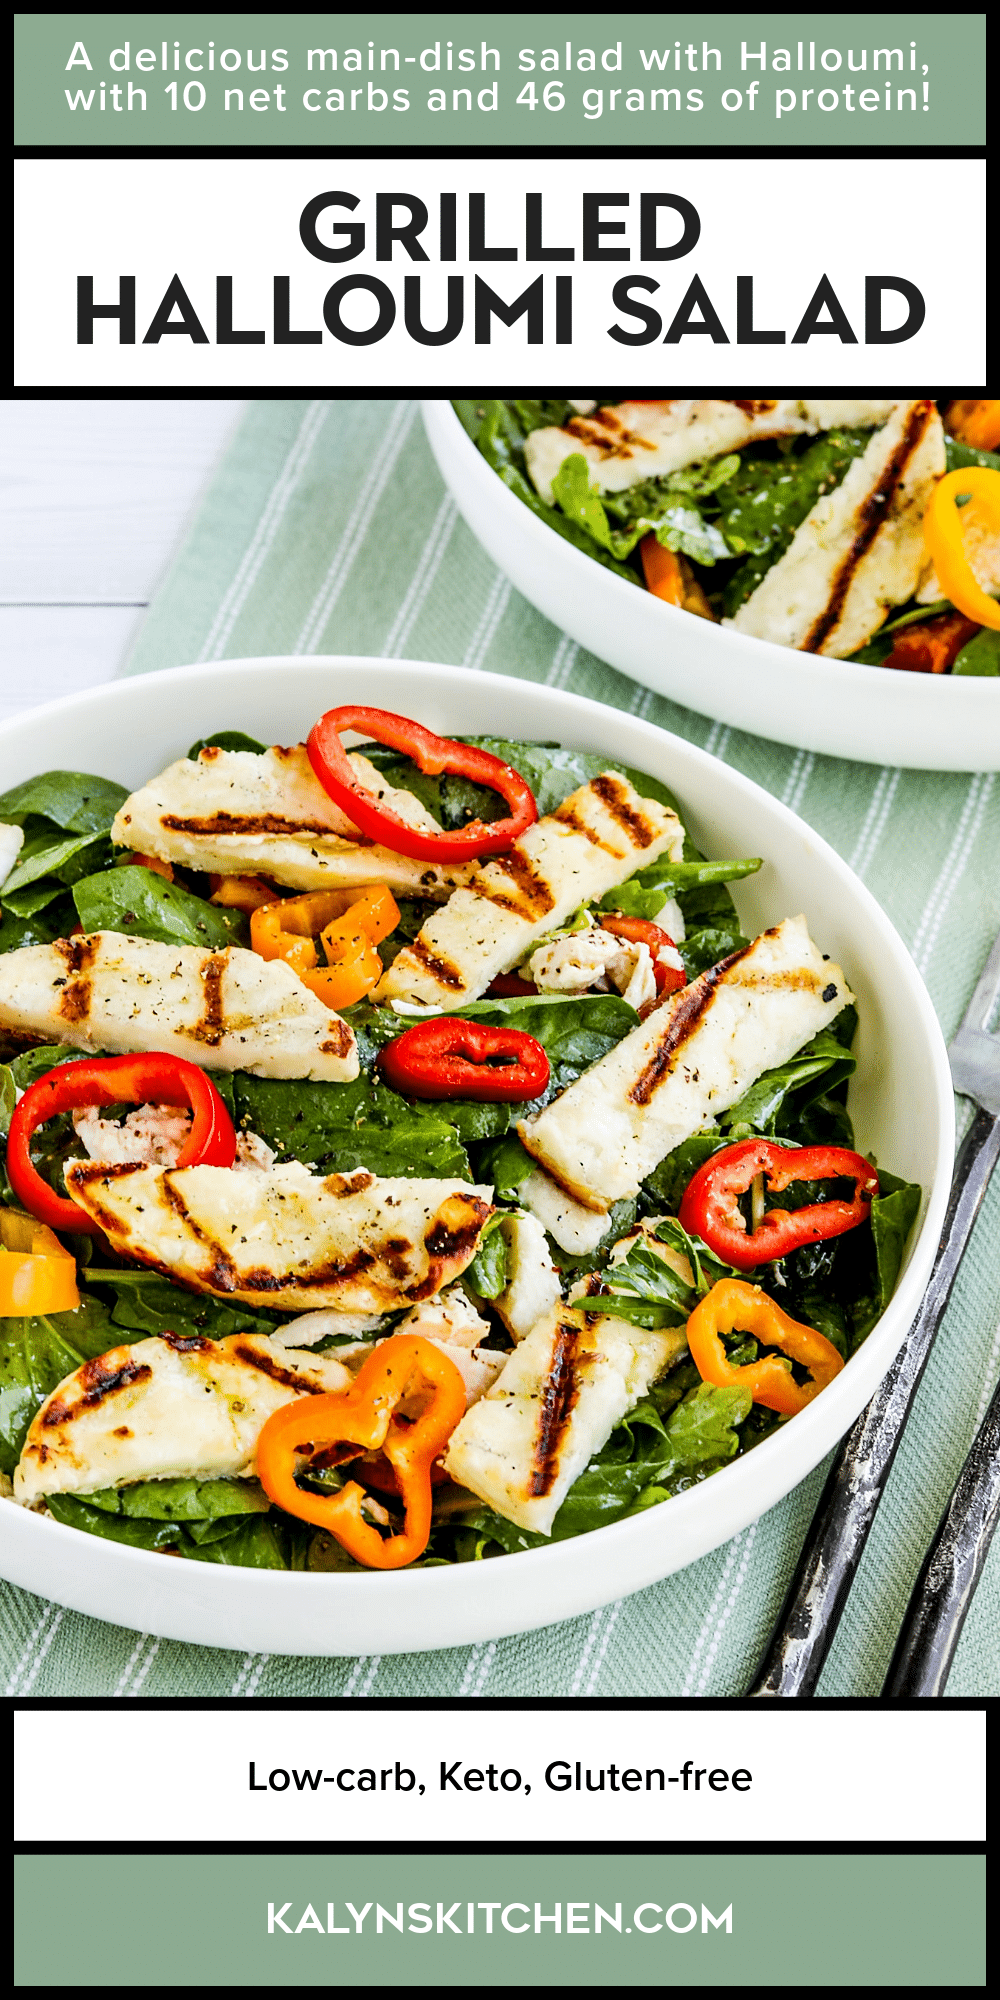
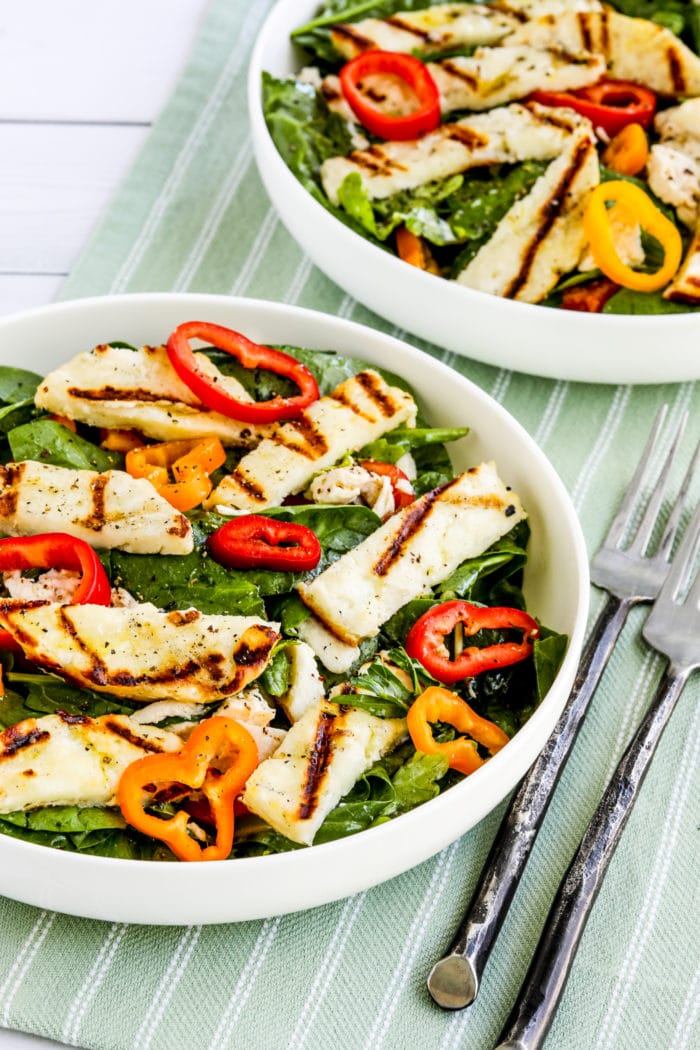
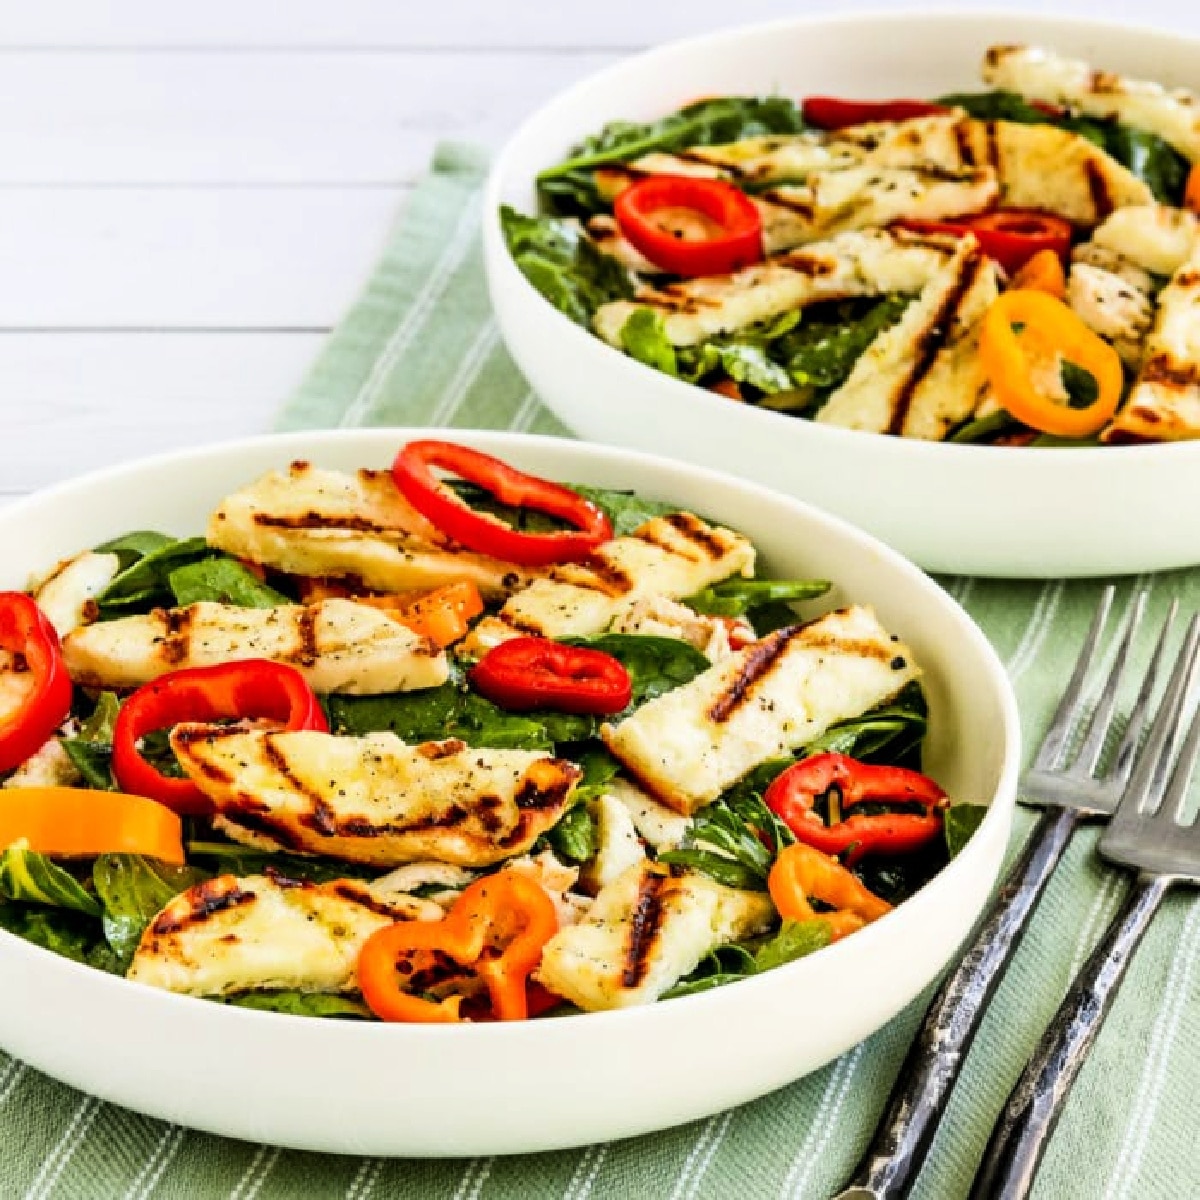
    Grilled Halloumi Salad has chicken and mini-peppers to make it a low-carb main dish, but skip those and make four side salads if you prefer. However you serve this salad, it’s the grilled Halloumi and the zesty lemony dressing that make this Halloumi Salad an absolute wow!

    PIN the Grilled Halloumi Salad to try it later!

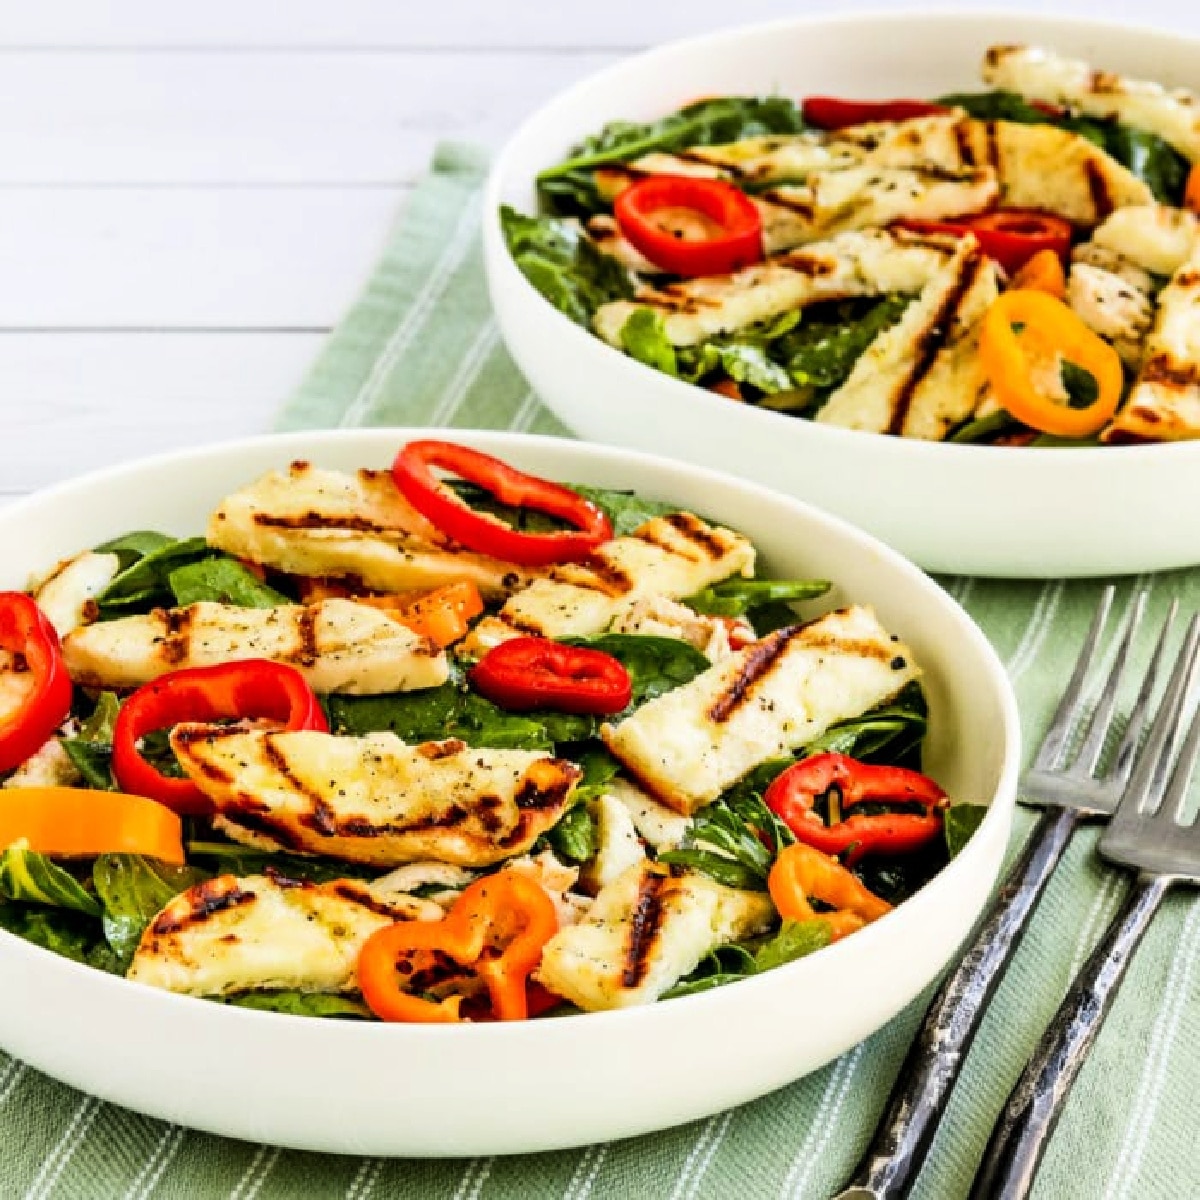
    Grilled Halloumi Salad shown in two serving bowls

    Grilled Halloumi Salad is my Friday Favorites pick for Labor Day weekend in the U.S., and this is a recipe I came up with after I discovered Halloumi Cheese a few years ago. I’ve always been passionate about trying new foods, and I couldn’t wait to try this salty cheese that can be grilled or fried. At first I couldn’t find Halloumi in Utah, but then one day I was walking through my favorite grocery store and I spotted some Halloumi in the cheese case!

    We loved this simple main dish Halloumi Salad that has grilled Halloumi, rotisserie chicken, and some sliced sweet mini-peppers with salad greens. And for sure the grilled Halloumi makes this salad truly memorable and perfect for a light summer dinner.

    Now this interesting cheese is even more widely available, and I’m encouraging you to try this recipe if you’ve never cooked with Halloumi! I think grilled Halloumi is a life-changing flavor adventure; I hope you try this salad and discover you like this interesting cheese just as much as I do!

    What ingredients do you need for this recipe?

    (This is only a list of ingredients; please scroll down for complete printable recipe. Or if you use the JUMP TO RECIPE link at the top of the page, it will take you directly to the complete recipe with ingredient amounts.

    What is Halloumi Cheese?

    Halloumi is a unique cheese from Cyprus that has a high melting point which allows it to be fried or grilled. The browned cheese is delightful, and although Halloumi is a bit of a budget splurge, it’s something I love to buy for a treat. Here is more about Halloumi Cheese and how it’s made.

    How low in carbs is the Grilled Halloumi Salad?

    This delicious main-dish salad recipe has only 10 net carbs per serving and 46 grams of protein!

    What salad greens can you use for this salad with Halloumi?

    I used my favorite Power Greens mix to make this salad, but you can use any type of greens or combination of greens that you prefer.

    What other veggies can you use for the Halloumi Salad?

    If you don’t like sweet mini peppers or don’t want to buy them for the salad, you could use cherry tomatoes, sugar snap peas, olives, cucumbers, radishes, or most any other vegetable that strikes your fancy in place of the mini peppers!

    Can you make Grilled Halloumi without an outdoor grill?

    I’ve grilled Halloumi on my Stovetop Grill Pan (affiliate link) many times, and I encourage you to try that if you don’t have an outdoor grill. And actually I thought it was even a bit easier on the stovetop grill pan!

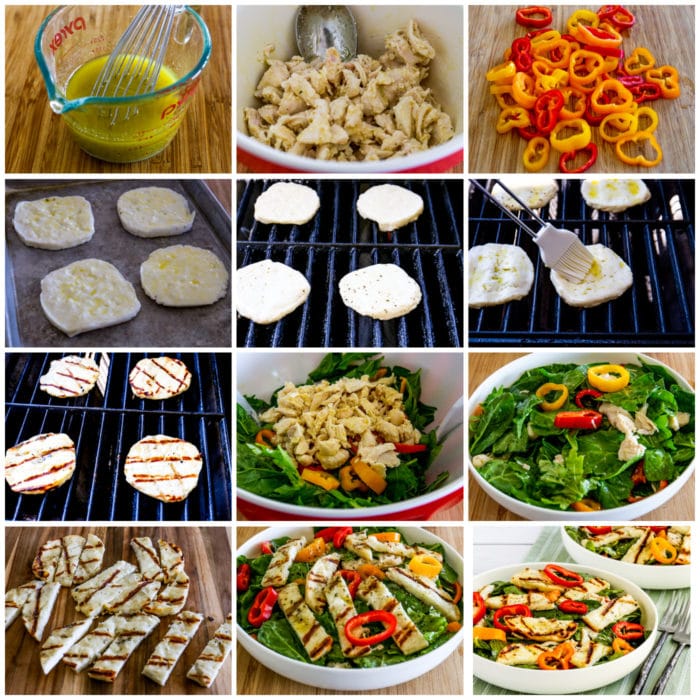
    Grilled Halloumi Salad process shots collage

    How to Make Grilled Halloumi Salad:

    (This is only a summary of the steps for the recipe; please scroll down for complete printable recipe. Or if you use the JUMP TO RECIPE link at the top of the page, it will take you directly to the complete recipe.)

    1. Mix together lemon juice, Dijon, garlic, and pepper; then whisk in olive oil to make the dressing.
    2. Shred chicken apart into bite-sized pieces and mix with a few tablespoons of the dressing. 
    3. Cut off the stem end, pull out the seeds, and slice mini peppers.
    4. I bought pre-sliced Halloumi, but cut into slices if needed.
    5. Preheat gas grill or stovetop grill pan to medium while you brush olive oil on the Halloumi cheese.
    6. Lay cheese at an angle to the grill grates and cook 2-3 minutes.
    7. Rotate pieces (to get criss-cross marks) and cook a couple minutes more on that side.
    8. Brush more olive oil on the top side before you turn the cheese over.
    9. Cook about 3-4 minutes more on the second side, or until the Halloumi has browned marks and is starting to feel firm.
    10. Let cheese cool while you toss the greens with dressing and toss in the marinated chicken and sliced mini peppers.
    11. Cut Halloumi into strips or cubes, whichever you prefer.
    12. Lay pieces of grilled Halloumi over the top of the salad and enjoy the flavorful salad!

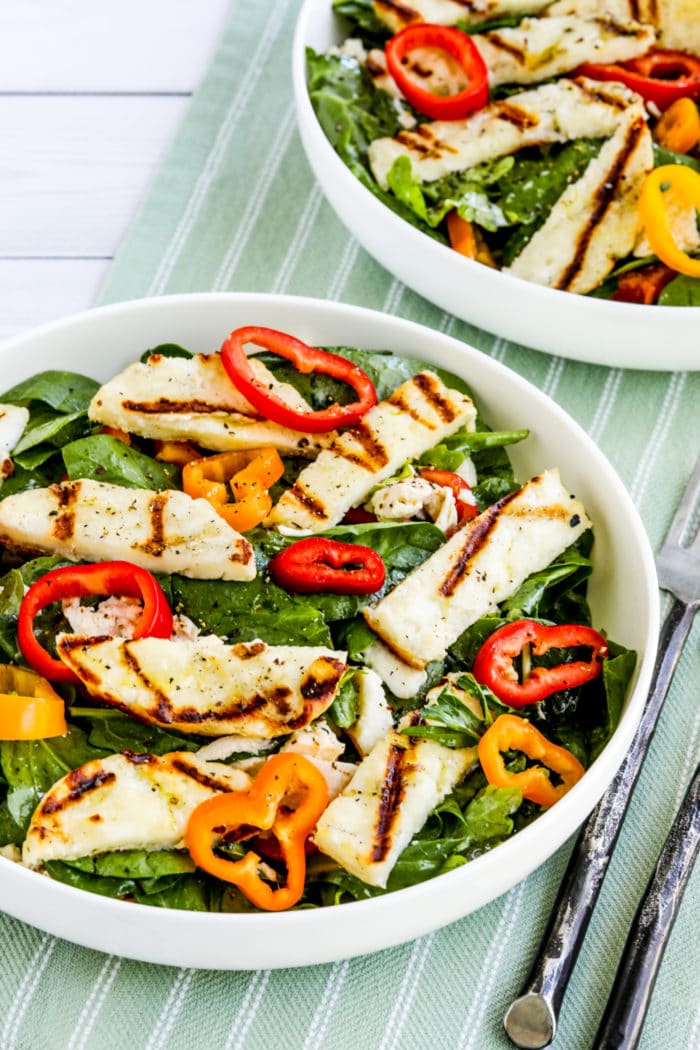
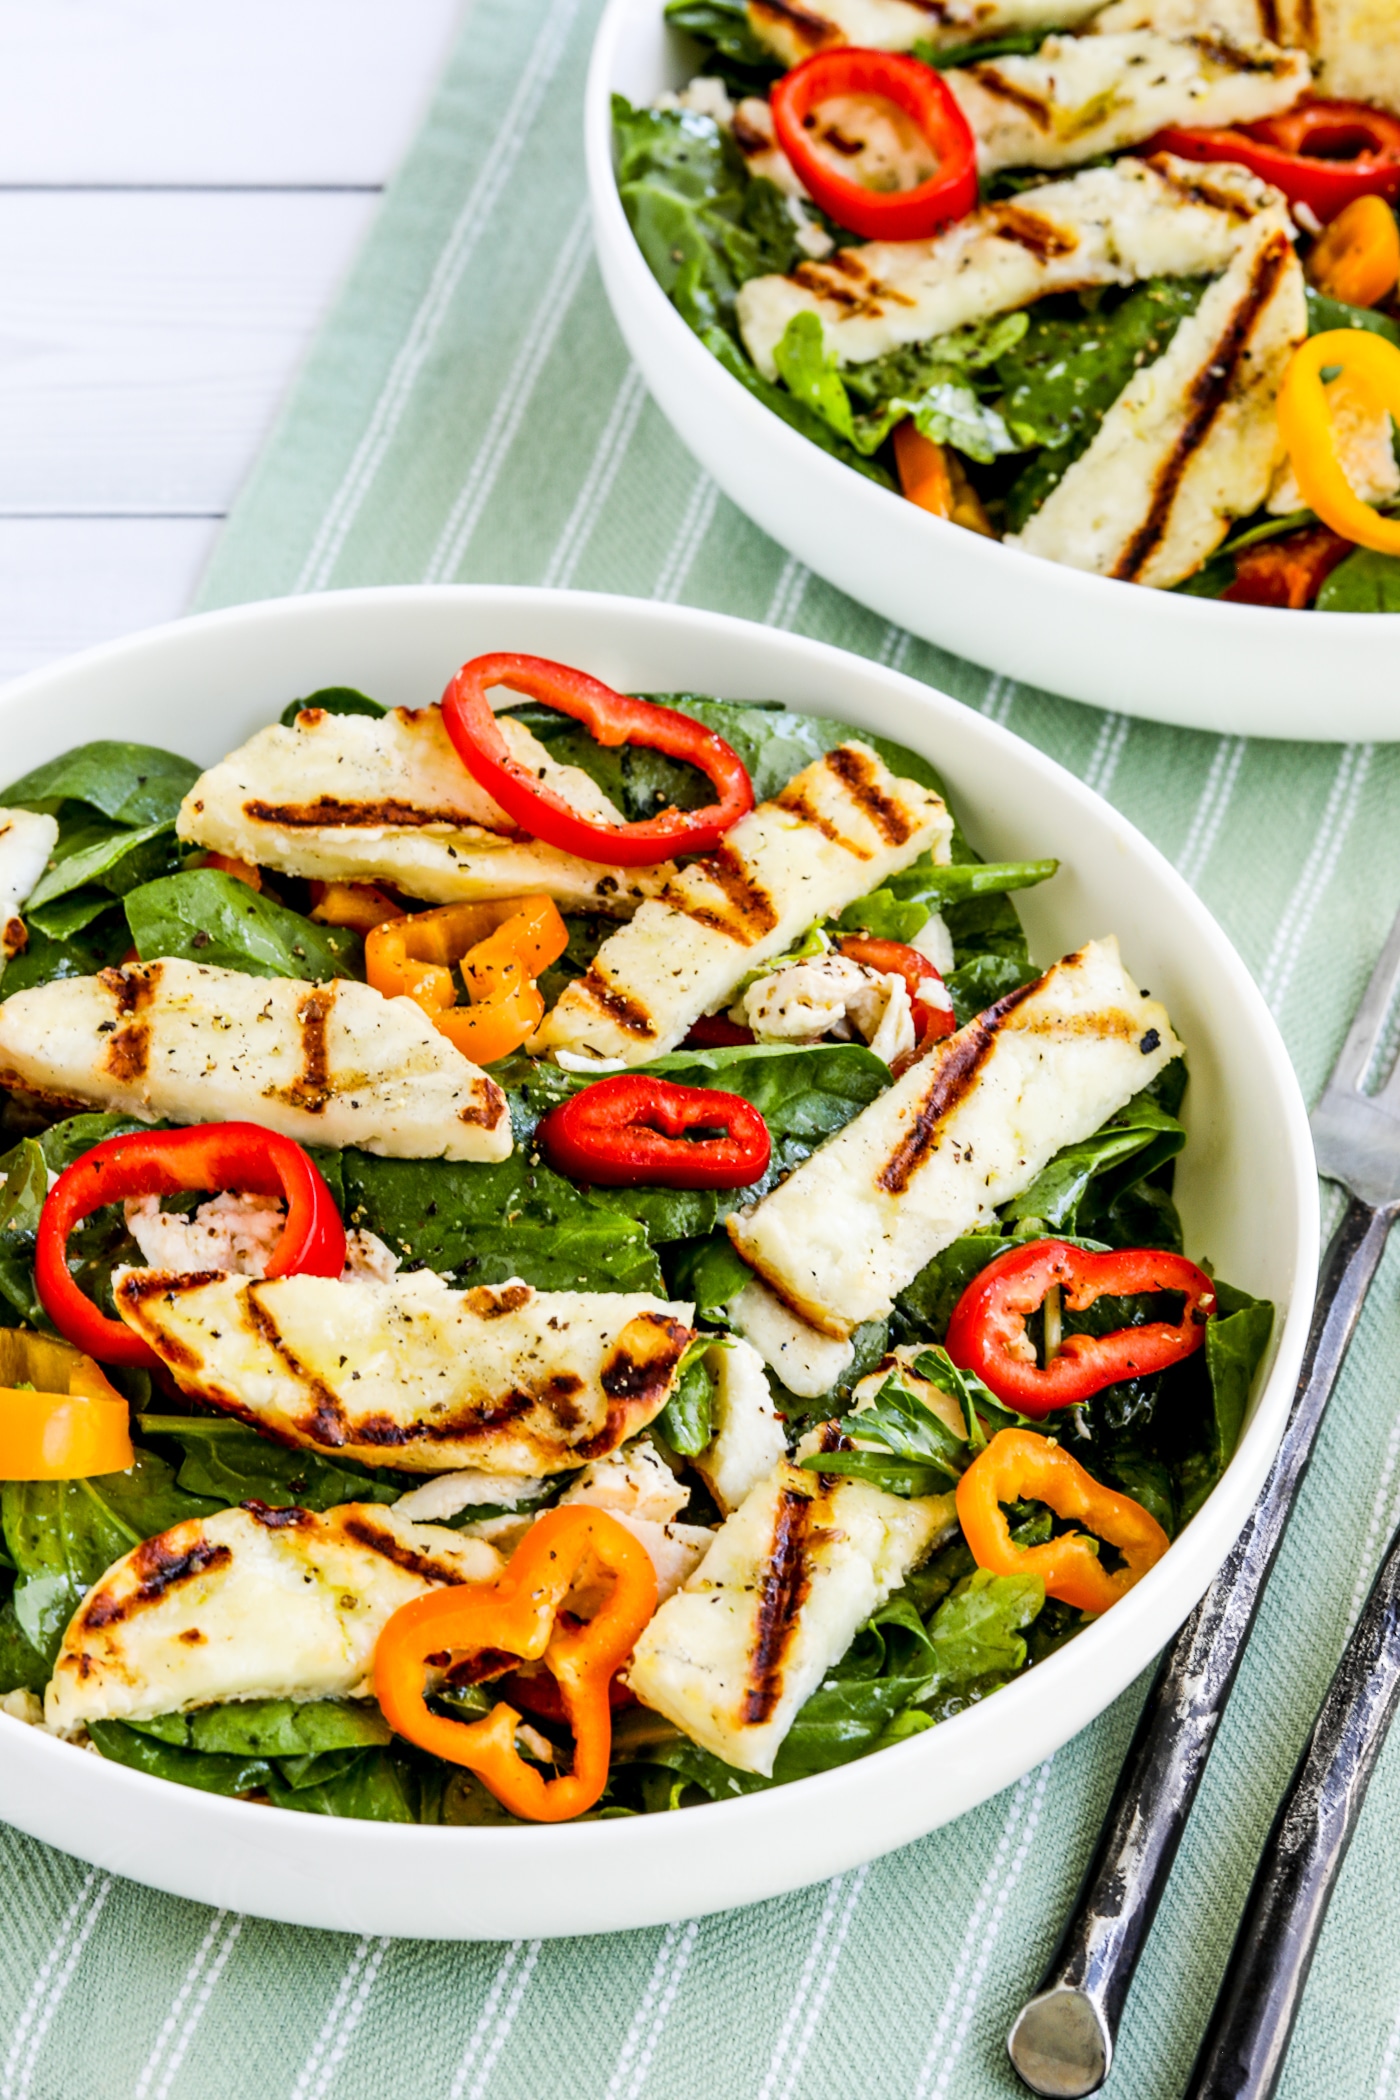
    Grilled Halloumi Salad finished salad shown in two large serving bowls

    More Grilled Summer Salads:

    You can use Amazing Grilled Vegetable Recipes to see more summer salads that start on the grill!

    Ingredients

    • 6 cups salad greens
    • 6 mini peppers 
    • 8 oz. diced cooked chicken
    • 4 slices Halloumi Cheese (about 7 oz. Halloumi, more or less to taste)
    • 1 T olive oil, for brushing cheese
    • 2 T fresh-squeezed lemon juice
    • 1/4 tsp. Dijon mustard
    • 1/2 tsp minced garlic
    • 1/4 tsp. Greek seasoning (see notes)
    • fresh ground black pepper to taste
    • 3 T olive oil

    Instructions

    1. Mix together lemon juice, Dijon, garlic, and pepper; then whisk in olive oil to make the dressing.
    2. Shred chicken apart into bite-sized pieces and mix with a few tablespoons of the dressing. Marinating the chicken in the dressing while you prepare greens and grill the cheese gives this salad extra flavor.
    3. Cut off the stem end, pull out the seeds, and then slice the mini peppers into rings.
    4. I bought pre-sliced Halloumi, but cut into slices if needed.
    5.  Preheat gas grill or stovetop grill pan to medium while you brush olive oil on the Halloumi cheese. (If you’re using a gas grill, be sure to spray with non-stick grilling spray or rub grill grates with oil before you heat the grill.)
    6. Lay cheese at an angle to the grill grates and cook 2-3 minutes or until you see grill marks.
    7. Rotate pieces (to get criss-cross marks) and cook a couple minutes more on that side.
    8. Then brush more olive oil on the top side before you turn the cheese over.
    9. Cook about 3-4 minutes more on the second side, or until the Halloumi has browned marks and is starting to feel firm.
    10. Let cheese cool while you toss the greens with dressing and then toss in the marinated chicken and sliced mini peppers.
    11. Arrange salad into two (or four) serving bowls.
    12. Cut Halloumi into strips or cubes, whichever you prefer.
    13. Lay pieces of grilled Halloumi over the top of the salads and enjoy!

    Notes

    Use any type of salad greens you prefer. If you don’t have any Greek Seasoning (affiliate link), it contains salt, garlic, lemon, oregano, pepper, and marjoram.

    Nutritional information is based on the generous amount of Halloumi we used but you still can make a delicious salad with a lot less Halloumi if that works better for you.

    Recipe created by Kalyn.

    Nutrition Information

    Yield

    2

    Serving Size

    1

    Amount Per Serving

    Calories 776Total Fat 60gSaturated Fat 18gTrans Fat 0gUnsaturated Fat 38gCholesterol 165mgSodium 783mgCarbohydrates 14gFiber 4gSugar 5gProtein 46g

    Nutrition information is automatically calculated by the Recipe Plug-In I am using. I am not a nutritionist and cannot guarantee 100% accuracy, since many variables affect those calculations.

    Did you make this recipe?

    Did you make this recipe? Please leave a star rating (under the PRINT button in the recipe) or share a photo of your results on Instagram! THANKS!

    Grilled Halloumi Salad shown in two bowls on napkin.

    Low-Carb Diet / Low-Glycemic Diet / South Beach Diet Suggestions:
    The Halloumi Salad with leafy greens, chicken, and sweet mini peppers is a great dish for low-carb diet plans, including Keto. Halloumi has 8 grams of fat per ounce, so this is probably a “once in a while treat” for the original South Beach Diet, but Halloumi is a treat that’s not to be missed for an occasional splurge.

    Find More Recipes Like This One:
    Use Salad Recipes to find more recipes like this one. Use the Diet Type Index to find more recipes suitable for a specific eating plan. You might also like to follow Kalyn’s Kitchen on Pinterest, on Facebook, on Instagram, on TikTok, or on YouTube to see all the good recipes I’m sharing there.

    Historical Notes for this Recipe:
    I first posted the Grilled Halloumi Salad in 2008, and I’ve been making it and enjoying it ever since. In 2021 updated the post with better photos, and it was last updated with more information about Halloumi and the process for making the salad in 2025.

    Grilled Halloumi Salad shown in two serving bowls
    Pinterest image of Grilled Halloumi Salad

    We are a participant in the Amazon Services LLC Associates Program, an affiliate advertising program designed to provide a means for us to earn fees by linking to Amazon.com and affiliated sites. As an Amazon Associate, I earn from qualifying purchases.


    Source link

  • Shredded Chicken In A Slow Cooker

    Shredded Chicken In A Slow Cooker

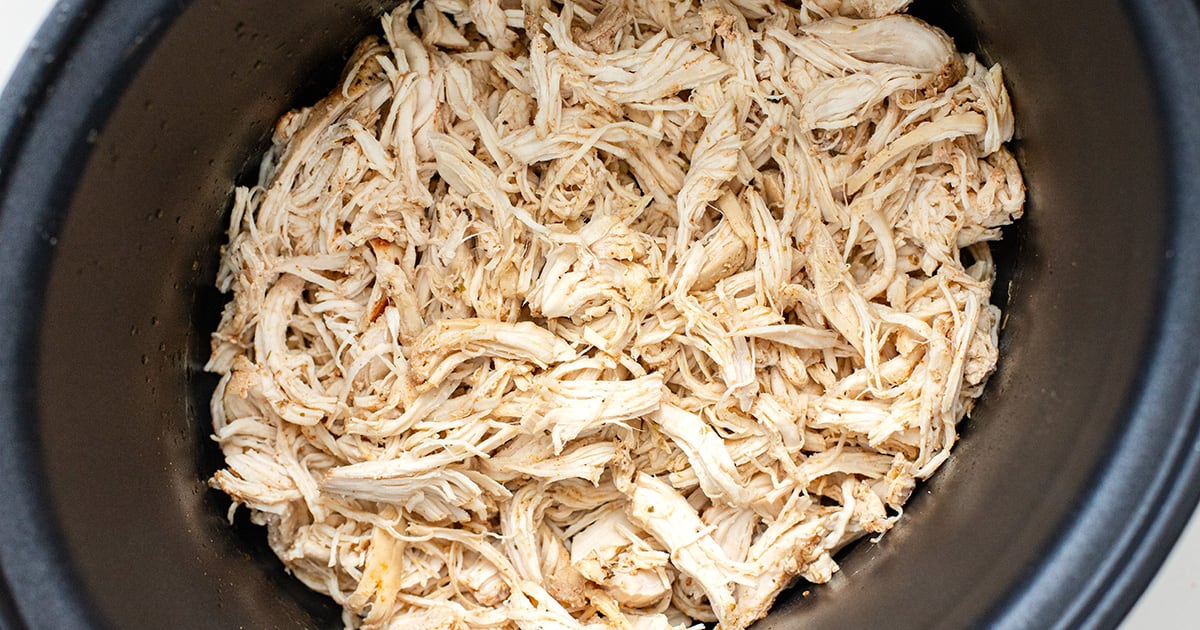
    If you’ve been wondering how to make shredded chicken in a slow cooker that isn’t bland or dry, this is it. It’s hands-off, packed with flavor, and perfect for easy dinners and meal prep.


    Jump to: ℹ️ Overview | 🛒 Ingredients | 📷 How To Make | 📹 Watch The Video | 👩‍🍳 Recipe Tips | 🥗 Serving Suggestions | 📝Full Recipe Card | 🍽 More Chicken Dinner Recipes


    At A Glance

    • ⏱ Ready In: 3 hours on HIGH or 6 hours on LOW
    • 🍽 Serves: 6-8
    • 💪 Nutrition Highlights: High in protein, low in carbs, great for meal prep, gluten-free, grain-free
    • 🐔 Main Ingredients: Chicken breasts, chicken stock, garlic, onion powder, paprika, herbs, butter (optional)
    • 🔥 Flavor Profile: Savory, lightly herby, buttery, juicy
    • 🧊 Meal-Prep Friendly: Keeps 4 days in the fridge and freezes beautifully
    • 🌮 Best Served With: Tacos, rice bowls, wraps, salads, soups
    • 🔪 Best Cuts to Use: Boneless skinless chicken breasts or thighs (thighs = extra juicy)

    Slow cooker shredded chicken is one of those reliable back pocket recipes that quietly saves dinner. The chicken turns perfectly tender and soaks up all that seasoned broth as it cooks, so every bite is juicy and flavorful.

    This version keeps things simple but balanced — garlic powder, onion powder, paprika, herbs, and just enough butter to round it out. No searing needed. When you’re making shredded chicken in a slow cooker, it’s all about moisture and flavor infusion, and this method delivers.

    It’s high in protein, low in carbs, and endlessly versatile — chicken casserole tonight, chicken salad wraps tomorrow, taco soup by the weekend. Get more ideas for recipes with shredded chicken here.

    👩‍🍳 You might also like these slow cooker recipes: marry me chicken in a slow cooker, slow cooker honey mustard chicken, these slow cooker steak bites, or this chicken tikka masala slow cooker recipe. And make sure to check out these healthy slow cooker chicken recipes and these slow cooker dinner ideas.

    What You’ll Need

    Here is what you’ll need for this shredded chicken in a slow cooker recipe. Find the full measurements in the recipe card below.

    • Boneless, skinless chicken breasts – Lean, high-protein, shred beautifully. Swap: Chicken thighs for extra richness and moisture.
    • Chicken stock – Keeps everything juicy and adds depth. Tip: If your stock is bland, add a stock cube for extra flavor. You can also use water and stock cube.
    • Butter – Just a dollop, adds richness and rounds out the seasoning.
    • Garlic powder (or fresh garlic) – Savory backbone.
    • Onion powder – Subtle sweetness and depth.
    • Paprika – Gentle warmth and color.
    • Dried herbs (oregano or thyme) – Light herby finish.
    • Salt – Enhances everything (season confidently!).
    • Optional splash of lemon juice – Brightens it up at the end.

    How To Make Shredded Chicken In A Slow Cooker

    Find the full recipe and nutritional information below. Here are some handy step-by-step photos for shredded chicken in a slow cooker.

    • Cut the chicken breasts in half lengthwise for even cooking.
    • Place chicken in the bottom of the slow cooker.
    • Pour chicken stock around (not directly on top of) the chicken.
    • Sprinkle over garlic powder, onion powder, paprika, herbs, and salt.
    • Add butter and gently rub seasoning over the chicken.
    • Cook on LOW for 5–6 hours or HIGH for 2.5–3.5 hours.
    • Once cooked, remove the chicken from the pot and shred it with two forks.
    • Pour a cup of cooking broth over shredded chicken and reserve the rest for soups/stews/casseroles.
    • Taste and adjust seasoning before serving.

    Watch The Video

    Recipe Tips

    • No Searing Needed: You can skip browning. For shredded chicken crock pot recipes, moisture matters more than crust.
    • Boost the flavor: Add half a chopped onion to the pot. Toss in a smashed garlic clove or two. A squeeze of lemon at the end wakes everything up. Stir in buffalo sauce, BBQ sauce or add taco seasoning to create variations of shredded chicken.
    • Use thighs for extra juiciness: Chicken thighs are slightly more forgiving and stay extra tender.
    • Storage: Fridge: Store in an airtight container up to 4 days. Freezer: Freeze up to 3 months. Always include a little cooking liquid to prevent dryness.
    • Make-ahead tip: Double the batch. Future-you will be thrilled.

    Ways To Use Shredded Chicken

    This is where shredded chicken in a slow cooker really shines — it’s basically lunch or dinner insurance for the week.

    Once you know how to make shredded chicken in a slow cooker, you’ll start seeing dinner possibilities everywhere. It’s the kind of prep that makes busy weeks feel a little more under control. Check out these shredded chicken recipes.

    💬 If you’ve tried this shredded chicken in a slow cooker or any other recipe on the blog then don’t forget to rate the recipe and let me know how you got on in the comments below, I love hearing from you! You can also FOLLOW ME on Instagram, Facebook, Pinterest, YouTube, and or sign up to my Newsletter to see more of my delicious food.

    Want to Save This Recipe?

    Enter your email & I’ll send it to your inbox. Plus, get great new recipes from me every week!

    By submitting this form, you consent to receive emails from Cooked & Loved

    Need foolproof shredded chicken in a slow cooker? This crock pot shredded chicken is perfectly seasoned, ultra-juicy, and made for easy weekly meal prep. Find step-by-step photos and more recipe tips above.

    • Cut the chicken breasts in half lengthwise to ensure even cooking.

    • Place the chicken in the bottom of the slow cooker.

    • Pour the chicken stock around the chicken.

    • Sprinkle over garlic powder, onion powder, paprika, dried herbs, and salt.

    • Add the butter on top and gently mix everything.

    • Cook on LOW for 5–6 hours or HIGH for 2.5–3.5 hours, until the chicken easily shreds with two forks.

    • Remove the chicken pieces from the pot and shred them with two forks. Pour a cup of cooking broth over the shredded chicken and reserve the rest for stews/soups/casseroles.

    • Taste and adjust seasoning as needed. Add a splash of lemon juice if desired.

    • Can I use frozen chicken? Yes, but for food safety and even cooking, it’s best to thaw first. If using frozen, extend cook time and ensure the internal temperature reaches 165°F (75°C).
    • Can I make this in a Crock Pot? Yes! A Crock Pot is just a brand of slow cooker. This works perfectly for crock pot shredded chicken. You can also use the Instant Pot pressure cooker.
    • How do I keep shredded chicken from drying out? Always store it with some of the cooking liquid. That’s the secret.
    • Can I use chicken thighs instead? Absolutely. Boneless, skinless thighs will be even juicier and shred beautifully. They are slightly more forgiving and stay extra tender.
    • What internal temperature should the chicken reach? 165°F (75°C) is the safe internal temperature for cooked chicken.
    • No Searing Needed: You can skip browning. For shredded chicken crock pot recipes, moisture matters more than crust.
    • Boost the flavor: Add half a chopped onion to the pot. Toss in a smashed garlic clove or two. A squeeze of lemon at the end wakes everything up. Stir in buffalo sauce, BBQ sauce or add taco seasoning to create variations of shredded chicken.
    • Storage: Fridge: Store in an airtight container up to 4 days. Freezer: Freeze up to 3 months. Always include a little cooking liquid to prevent dryness.
    • Make-ahead tip: Double the batch. Future-you will be thrilled.

    Serving: 100g | Calories: 164kcal | Carbohydrates: 2g | Protein: 25g | Fat: 5g | Saturated Fat: 2g | Polyunsaturated Fat: 1g | Monounsaturated Fat: 2g | Trans Fat: 0.1g | Cholesterol: 79mg | Sodium: 398mg | Potassium: 480mg | Fiber: 0.3g | Sugar: 1g | Vitamin A: 260IU | Vitamin C: 2mg | Calcium: 13mg | Iron: 1mg

    Keywords: shredded chicken in a slow cooker, crock pot shredded chicken

    More Chicken Dinner Recipes


    Source link

  • Easy Coconut Black Beans Recipe

    Easy Coconut Black Beans Recipe

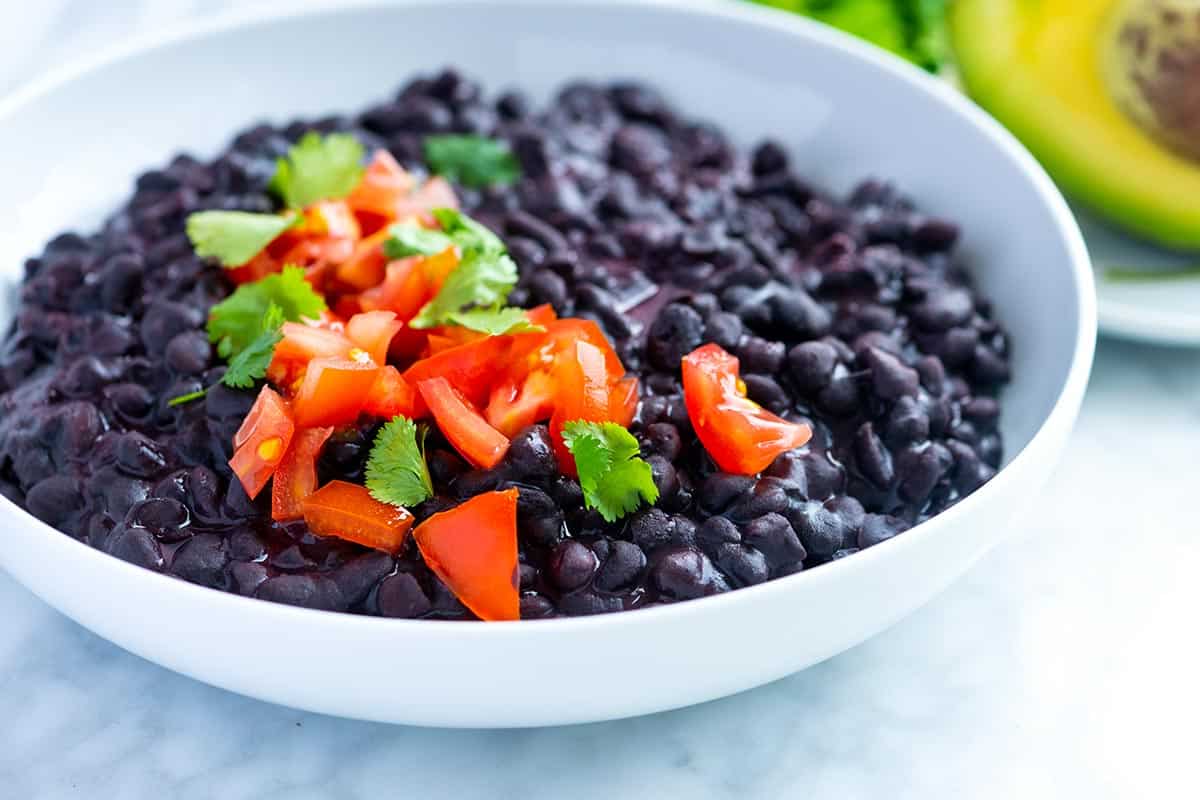
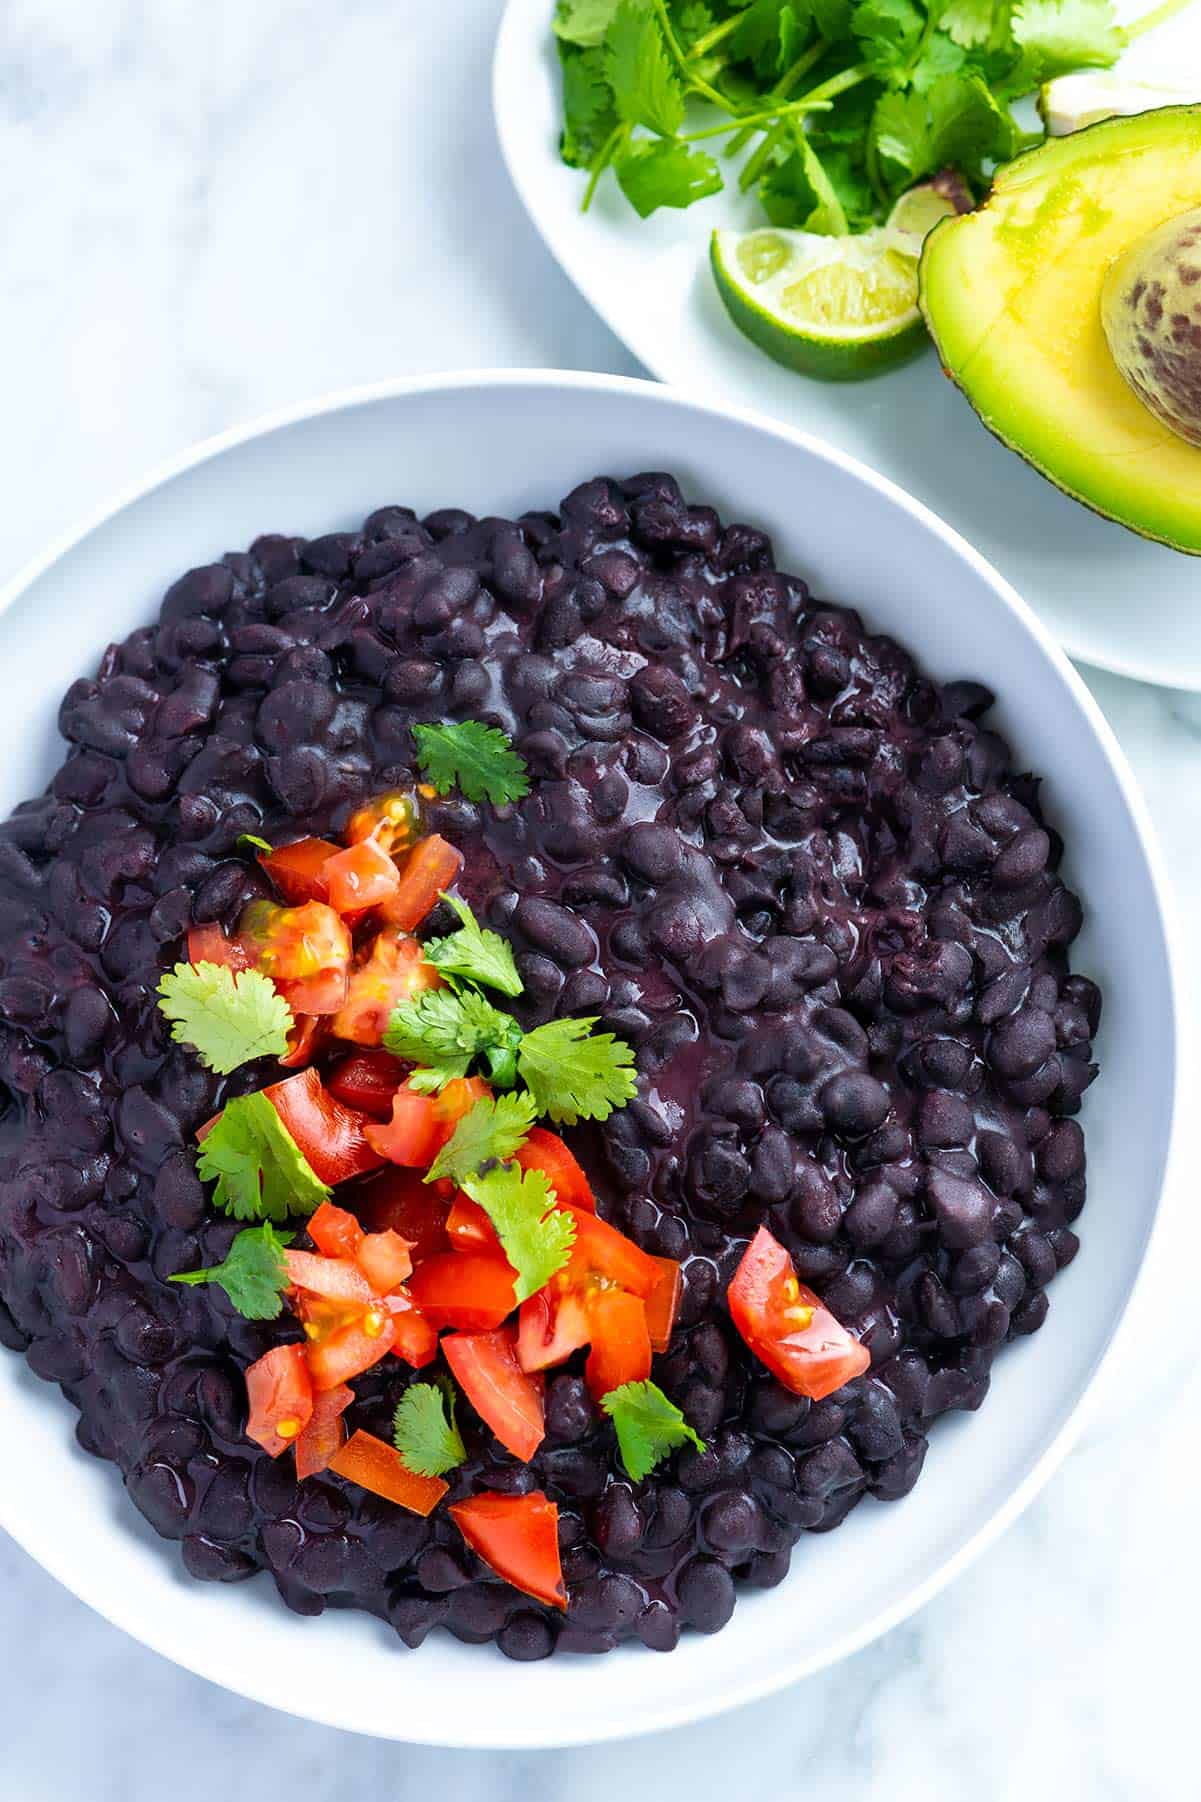
    These coconut black beans are the creamiest, most delicious beans! Thanks to canned coconut milk, they have a delicate coconut flavor, which is incredibly delicious when you squeeze fresh lime on top.

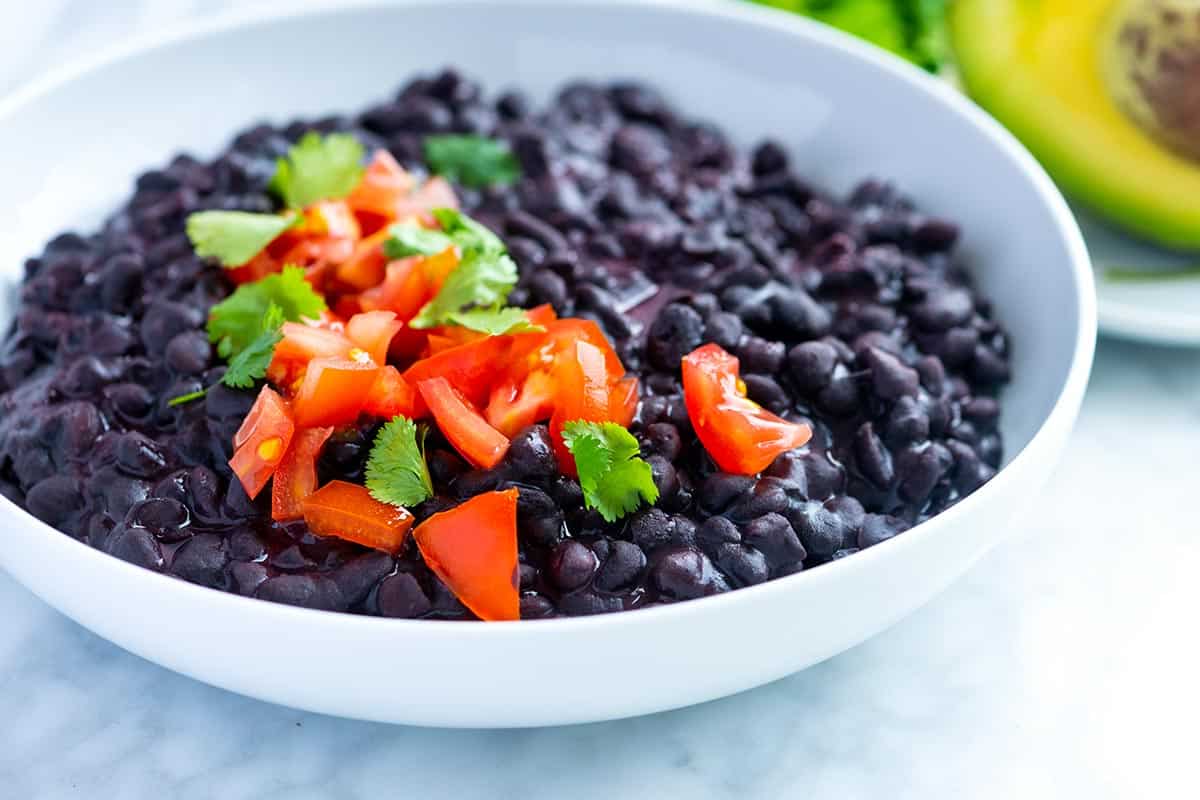
    Coconut Black Beans

    I absolutely love black beans, and these coconut black beans have quickly become a favorite way to cook them. They really couldn’t be any easier! Just toss the beans, coconut milk, garlic, onion, and spices into a large pot and simmer until the beans are tender and creamy and the liquid has thickened slightly.

    I love serving these beans with cilantro lime rice or Mexican rice. They’re also fantastic as a filling for burritos! And as a bonus, unlike many bean recipes, you don’t need to soak the black beans before cooking.

    Key Ingredients

    • Black Beans: This recipe calls for 2 cups of dried beans, which is about 1 pound. Most bags sold in stores are 1 pound.
    • Coconut Milk: For the best results, use a 14-ounce can of full-fat coconut milk. Light coconut milk will still work but will not make the beans as creamy.
    • Garlic and Onion: I toss whole garlic cloves and half an onion into the pot with our beans, adding light garlic and onion aroma and flavor.
    • Spices: This recipe keeps the seasoning simple yet flavorful with a bay leaf, ground cumin, a pinch of cinnamon, salt, and pepper.
    • Cilantro and Lime: Just before serving, top the beans with fresh cilantro and a squeeze of lime juice. Feel free to add other toppings you enjoy, such as chopped tomatoes, onions, pickled onions, or crumbled cojita cheese.

    How to Make Coconut Black Beans

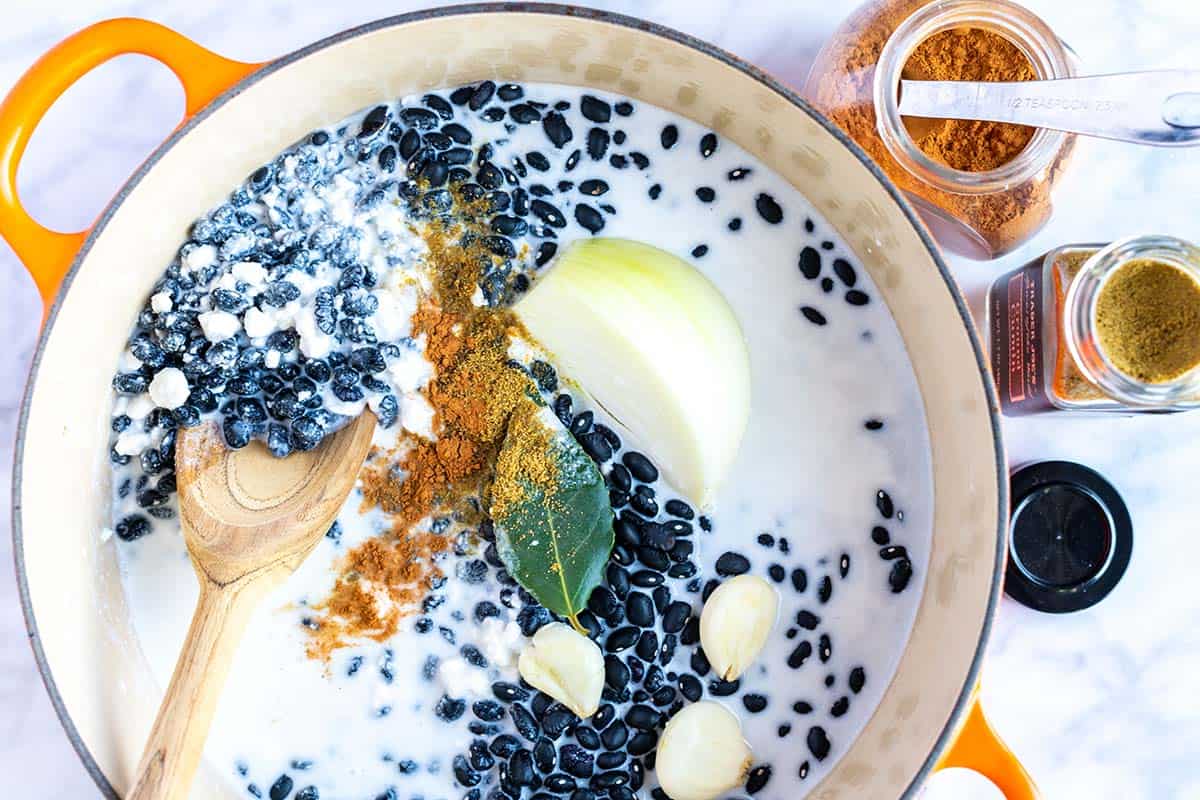
    One of the best things about this recipe is how easy it is! You’ll combine all the ingredients in a pot and simmer until the beans are creamy and tender. You’ll be adding dried black beans, spices, garlic, half an onion, coconut milk, and water to the pot.

    It’s important to use unsweetened coconut milk for this recipe. We experimented with coconut water, but the sugar content made the beans overly sweet and imparted a strong coconut flavor. Unsweetened coconut milk, on the other hand, adds a lovely creaminess and a subtle coconut hint. The spices provide depth, while the onion and garlic enhance the aroma and flavor of the beans.

    How to Make Coconut Black Beans: Ingredients in a pot ready to cook

    After simmering for 1 ½ to 2 hours, the beans will be tender. To achieve a thicker consistency, increase the heat slightly and simmer until the liquid reduces and clings to the beans. These creamy coconut black beans are incredibly versatile. While I enjoy them straight from the pot, they’re also delicious, served over rice, in tortillas, with eggs, or alongside virtually any dish.

    For a complete meal, try these coconut black beans with our easy ground pork tacos, creamy avocado lime sweet potato noodles, or these chicken fajitas.

    Coconut Black Beans

    Easy Coconut Black Beans

    • PREP
    • COOK
    • TOTAL

    These coconut black beans cannot get much easier. You just need a little bit of time. Throw everything into a large pot and simmer until the beans are tender. Using coconut milk for the liquid makes the beans extra creamy. They have a delicate coconut flavor, which is delicious when you squeeze fresh lime on top before serving. When choosing the coconut milk, make sure it is unsweetened. For the creamiest beans, use full-fat canned coconut milk. Reduced-fat canned or refrigerated coconut milk, often found near dairy milk, does work, but the beans will be slightly less creamy and rich.

    Makes 6 cups

    You Will Need

    2 cups dried black beans, picked through, rinsed (about 1 pound)

    3 cloves garlic, smashed and peeled

    1/2 medium onion, peeled, left unchopped

    1 bay leaf

    1 teaspoon ground cumin

    1/8 teaspoon ground cinnamon

    1 (14oz) can unsweetened coconut milk, about 1 3/4 cups

    Water

    Salt and ground black pepper

    Handful fresh cilantro

    1 lime

    Optional toppings: tomatoes, avocado, and cojita cheese

    Directions

      1Add black beans, garlic, onion, bay leaf, cumin, cinnamon, and coconut milk to a large pot. Cover the beans with 2 inches of water.

      2Bring to a boil, stir, and then reduce the heat to a low simmer. Cook uncovered until the beans are tender, 1 ½ to 2 hours. As they cook, stir the beans every once in a while and add extra water if they look dry.

      3Remove the onion, garlic, and bay leaf when the beans are tender. Taste and season with salt and pepper (start with 1/4 teaspoon and go from there).

      4Increase the heat to medium and bring to a rapid simmer. Simmer the beans, stirring often, until the liquid thickens, 5 to 10 minutes.

      5Serve with fresh cilantro and a squeeze of lime. Top with optional toppings.

    Adam and Joanne’s Tips

    • Coconut milk: One 14-ounce can of coconut milk should be close to 1 ¾ cups. If you are slightly under, simply add additional water to make up the missing liquid.
    • Storing: Store coconut black beans covered in the refrigerator up to 5 days and in the freezer up to one month.
    • The nutrition facts provided below are estimates.

    Nutrition Per Serving
    Serving Size
    1/2 cup
    /
    Calories
    191
    /
    Protein
    8 g
    /
    Carbohydrate
    22 g
    /
    Dietary Fiber
    8 g
    /
    Total Sugars
    1 g
    /
    Total Fat
    9 g
    /
    Saturated Fat
    8 g
    /
    Cholesterol
    0 mg
    /
    Sodium
    104 mg


    AUTHOR:

    Joanne Gallagher

    Adam and Joanne of Inspired Taste

    We are Adam and Joanne Gallagher, the creators of Inspired Taste. Established in 2009, Inspired Taste grew from a childhood dream into one of the internet’s most trusted recipe sites with hundreds of reliable recipes, step-by-step videos, and expert tips.More About Us

    Source link

  • Easy Hummus Cups Recipe

    Easy Hummus Cups Recipe

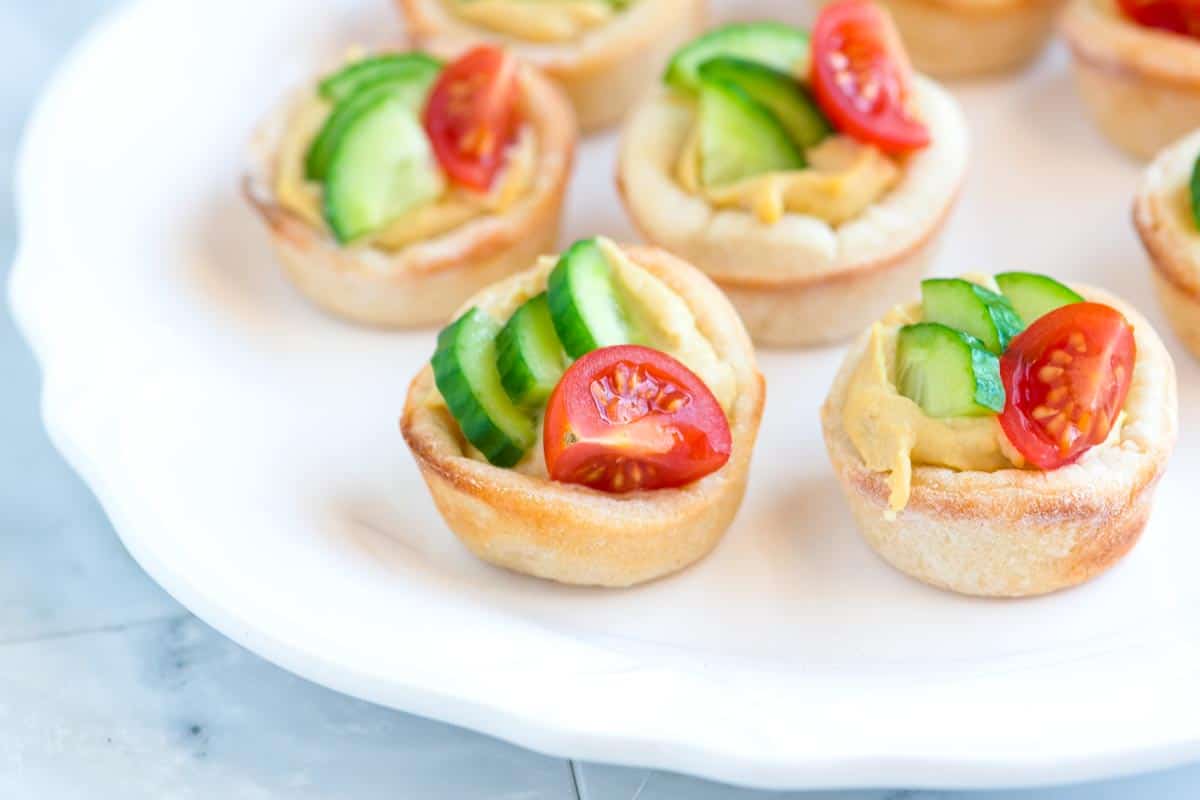
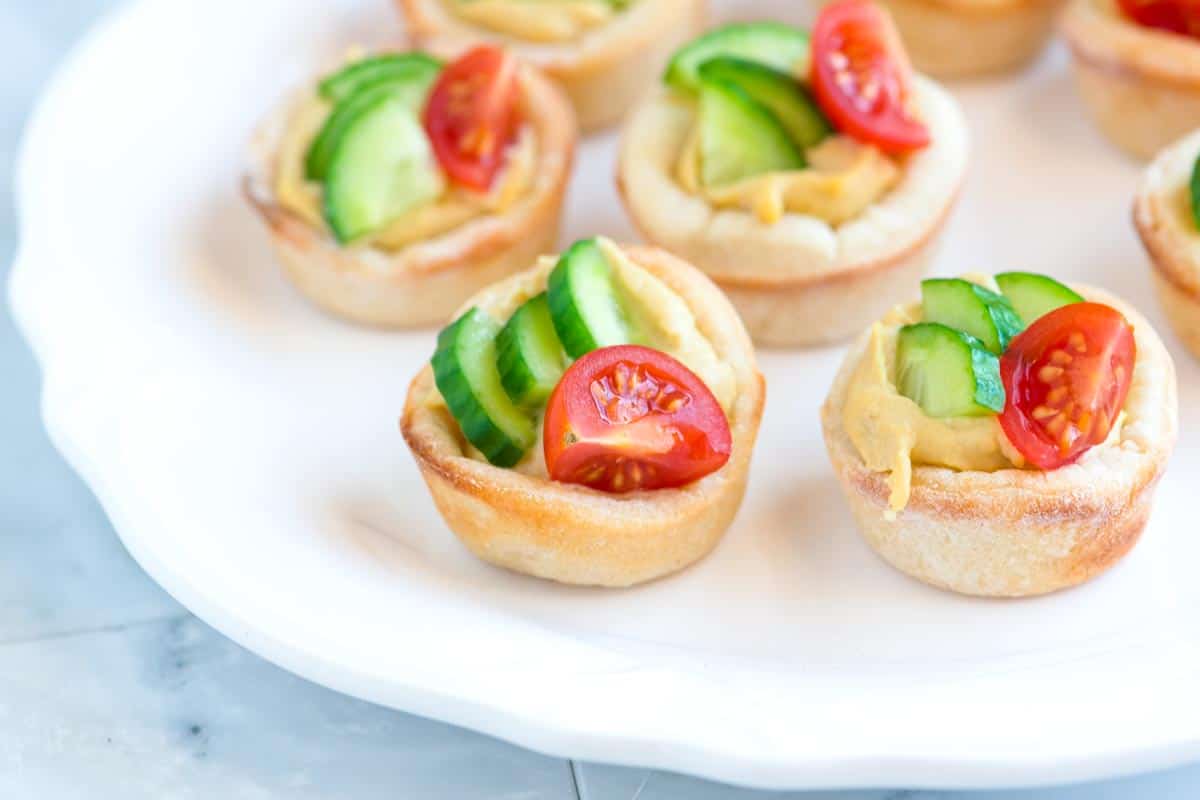
    These cute hummus appetizers are perfect for parties and entertaining! We make mini cups using pizza dough and then fill them with hummus and veggies. They are so much fun!

    Easy Hummus Cups

    If you’re a regular reader, you know how much we adore hummus, especially this simple homemade hummus! We love it so much that we’ve found many ways to serve it. And what better way to enjoy it than with these adorable hummus appetizers made with baked pizza dough cups?

    For more hummus inspiration, check out our roasted red pepper hummus and this hummus with spiced beef. You can also use hummus in our honey dijon chicken lettuce wraps or create a delicious platter with hummus, homemade falafel, tahini sauce, and creamy homemade labneh!

    Key Ingredients

    • Pizza Dough: I’ve experimented with different pizza doughs for these cups, both store-bought and homemade. One thing to keep in mind is that many doughs puff up during baking, which can fill in the cup and leave less room for the hummus. While we have included some tips to minimize this, I’ve found that Pillsbury pizza dough works best. It doesn’t puff up as much as my favorite homemade pizza dough (which I prefer for my pizza recipes because I love a bubbly crust!).
    • Hummus: Use your favorite hummus for these appetizer cups. I love our easy hummus recipe. You can swap the hummus for other dips, too. Think about baba ganoush (roasted eggplant dip), labneh, smoked salmon dip, or onion dip!
    • Cucumber and Tomatoes: I love adding something fresh, and love cucumber and tomatoes with a tiny sprinkle of salt. I’ve also made this chopped cucumber tomato salad and spooned it into the cups, and I loved it!

    How to Make Hummus Cups

    Let’s start by making the pizza cups! It’s super easy, but we’ll use a couple of tricks to make sure the dough bakes up perfectly with plenty of room for the delicious fillings.

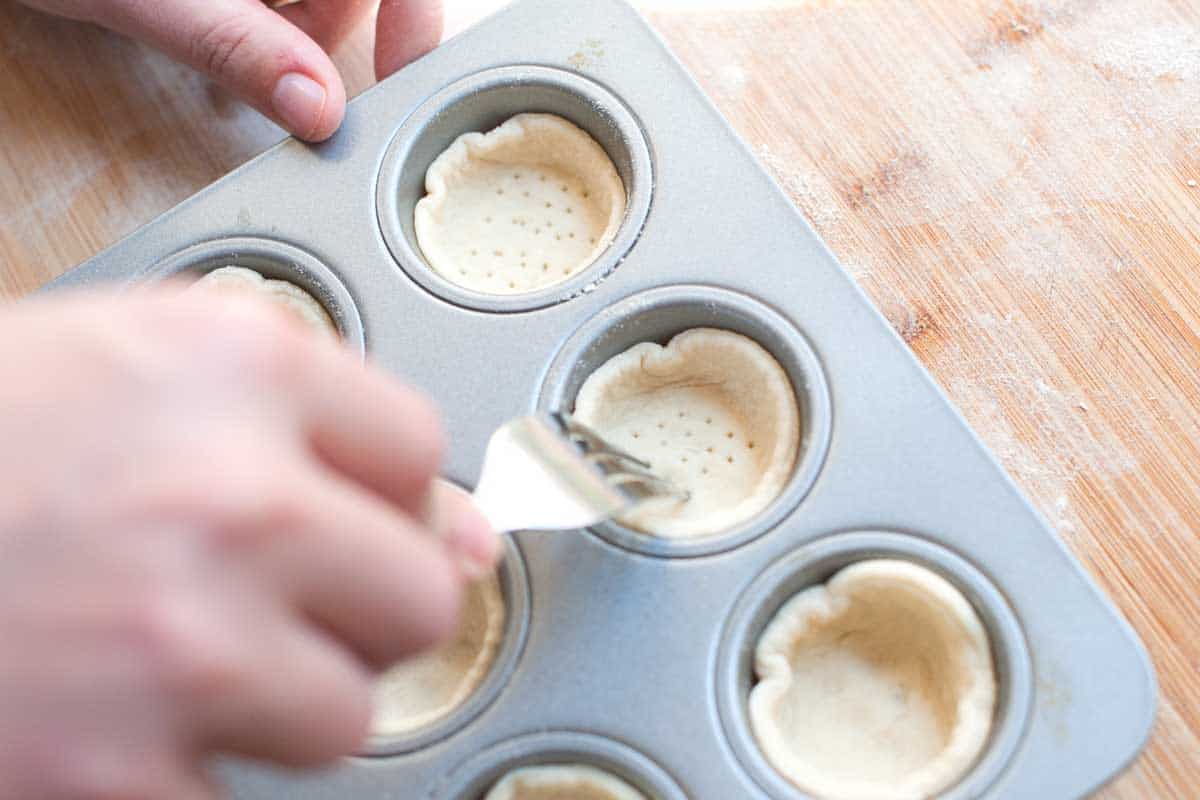
    First, roll the pizza dough into a thin rectangle and use a cookie cutter to cut out rounds. Press each round into a mini muffin cup, then grab a fork and poke a few holes in the bottom. This helps prevent the dough from puffing up too much.

    How to Make Hummus Cups: Pressing pizza dough in to a muffin tin

    For extra insurance, I like to place a mini muffin liner inside each cup and fill it with pie weights (dried rice or beans work great, too!). It’s the same idea as when you par-bake a pie crust.

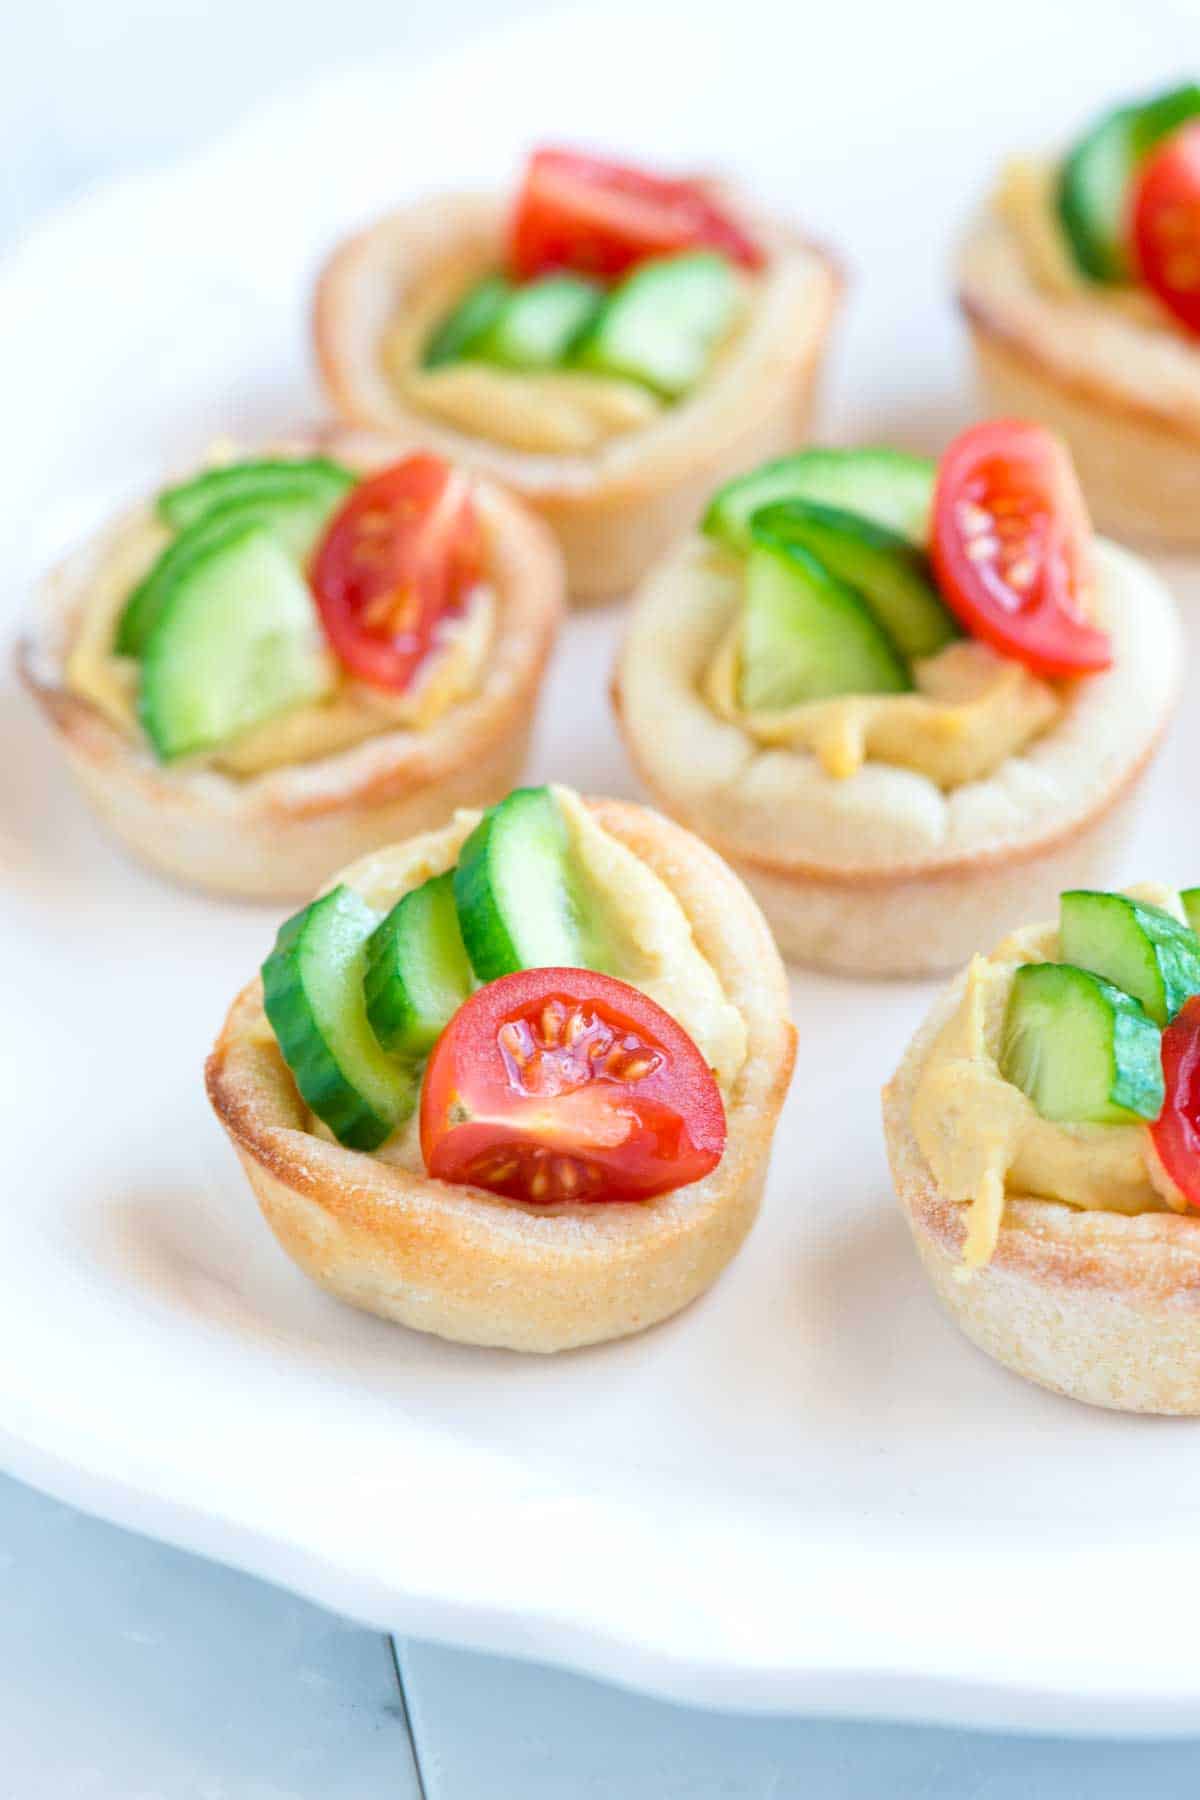
    Once the pizza cups are baked and cooled, it’s time to fill them with hummus and your favorite veggies! Then, you can enjoy them!

    Easy Hummus Cups

    Easy Hummus Cups

    • PREP
    • COOK
    • TOTAL

    These are such a fun appetizer! You can fill the hummus cups 1 hour in advance. Cover them with plastic wrap and store them in the fridge to prevent the tomatoes, cucumber, and hummus from drying out.

    Makes 20

    You Will Need

    1 (13.8oz) roll Pillsbury Classic Pizza Crust, see tips

    1/2 cup hummus, try homemade hummus

    1/2 cup diced cucumber

    5 cherry tomatoes, quartered

    1/8 teaspoon sea salt

    Directions

      1Preheat oven to 400°F (204°C) and lightly spray 20 mini muffin cups with cooking spray. Set aside 20 mini muffin paper liners, as well as pie weights, uncooked rice, or dried beans for baking the pizza cups.

      2Form pizza dough into a 14-inch by 12-inch rectangle (this doesn’t have to be exact, just close).

      3Use a 2 ½-inch round cookie cutter to cut out 20 circles of dough. Press each circle of dough into the muffin cups. Use a fork to pierce the bottom of each pizza cup. Three to four pricks with a fork should do it.

      4Place a muffin liner inside each pizza cup and fill it with pie weights, uncooked rice, or dried beans.

      5Bake the pizza cups for 8 to 10 minutes or until the edges are light golden brown. Transfer cups to a cooling rack to cool completely.

      6When cooled, fill each pizza cup with a heaping teaspoon of hummus and top with a few pieces of cucumber and a tomato quarter. Finish with a light sprinkle of salt.

    Adam and Joanne’s Tips

    • Pizza dough: While homemade pizza dough is delicious, we’ve found that Pillsbury pizza crust works best for pizza cups. Many doughs, like our homemade dough, puff up in the oven, making it hard to get a deep cup for your hummus. If you want to try your favorite store-bought or homemade dough, here’s a trick: press a cupcake liner into each cup and fill it with pie weights, dried beans, or rice. This will keep the dough from puffing up too much. I’ve added this tip to the recipe instructions so everyone has success.
    • Rolling the dough: If your pizza dough keeps bouncing back on you as you roll it out. Leave it for 5 to 10 minutes on the counter to rest and come to room temperature, and then try again.
    • Nutrition facts provided below are estimates.

    Nutrition Per Serving
    Serving Size
    1 hummus cup
    /
    Calories
    69
    /
    Total Fat
    3.5g
    /
    Saturated Fat
    1.2g
    /
    Cholesterol
    0mg
    /
    Sodium
    78.2mg
    /
    Carbohydrate
    8.6g
    /
    Dietary Fiber
    0.9g
    /
    Total Sugars
    1g
    /
    Protein
    1g


    AUTHOR:

    Adam Gallagher

    Previous Post: Chocolate Toffee Cookies
    Next Post: Easy Pumpkin Cupcakes

    Source link

  • The Best Chicken Quesadillas Recipe

    The Best Chicken Quesadillas Recipe

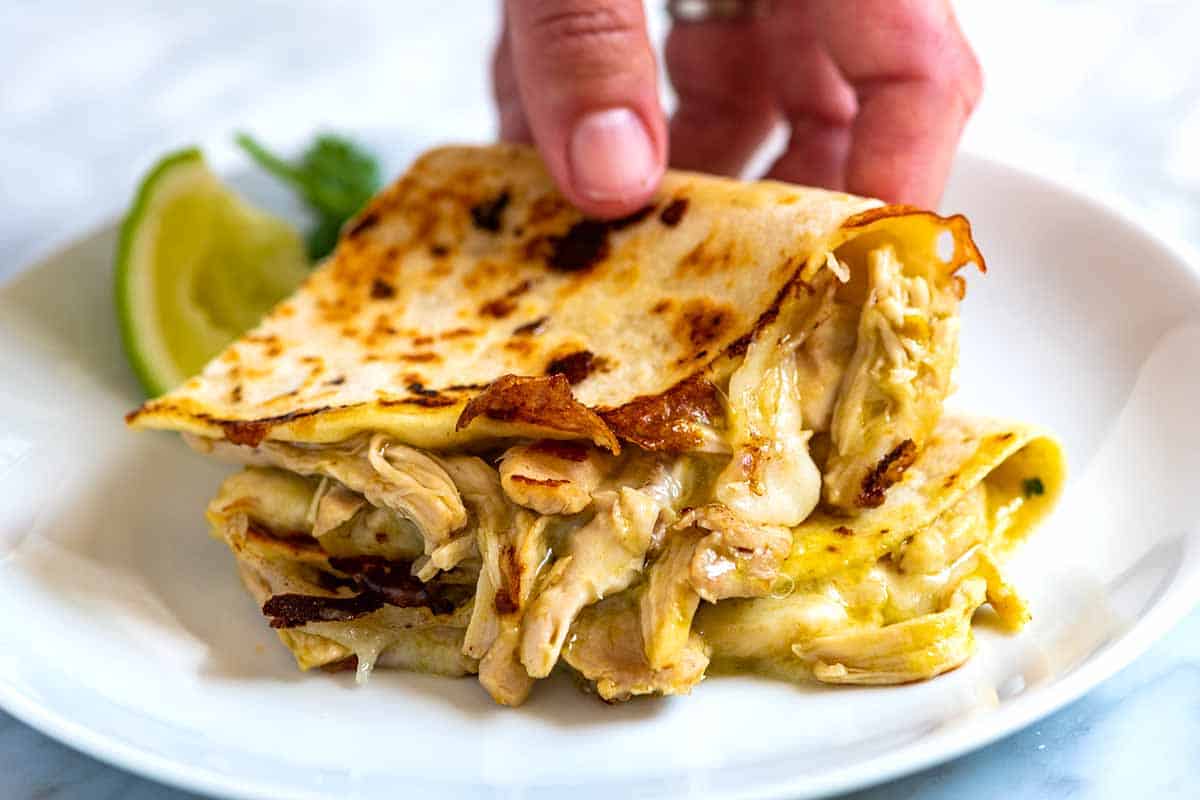
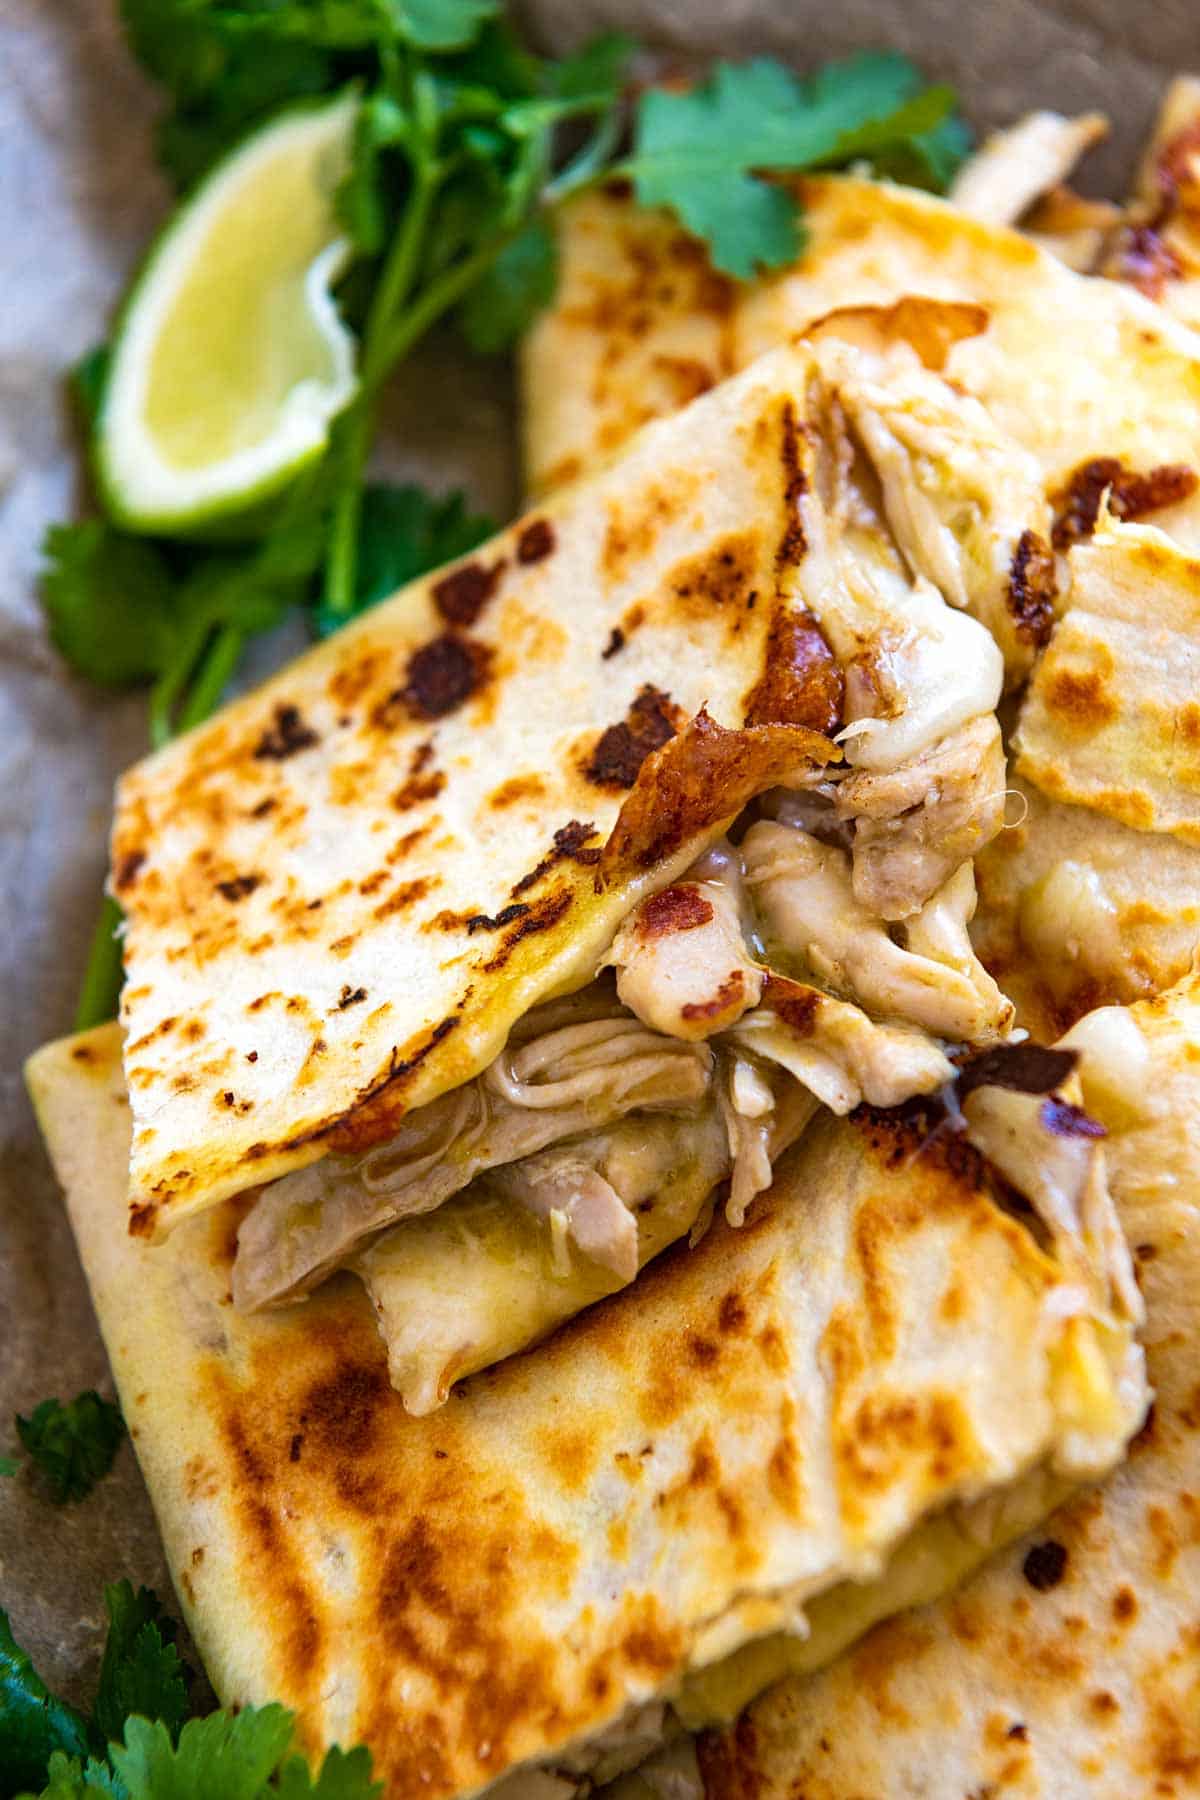
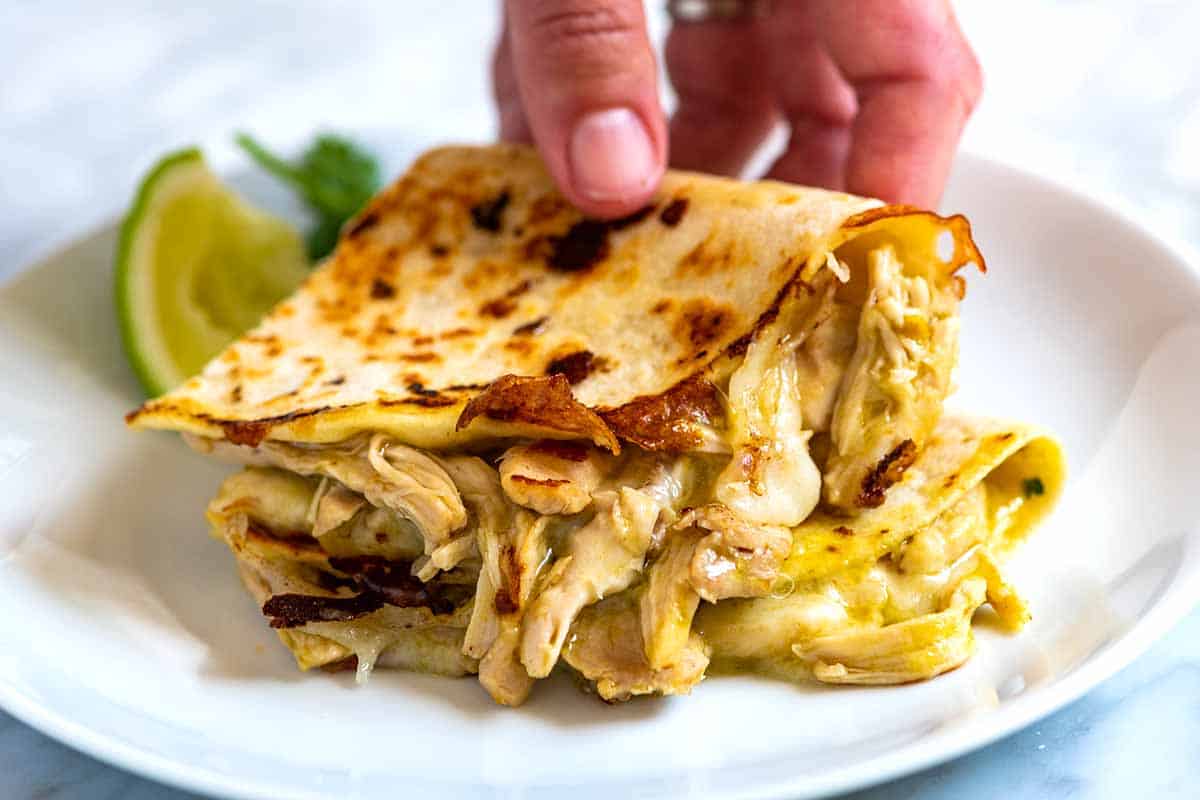
    My favorite chicken quesadilla recipe has gooey cheese and tender chicken cooked in flavorful green chile sauce. They’re so good that it’s hard to eat just one.

    Chicken Quesadillas

    Save this chicken quesadilla recipe for the next time you need a slam dunk, super flavorful, easy meal. Our green chicken enchiladas inspired the chicken inside the quesadilla. It’s juicy, tender, and quick!

    I love using homemade flour tortillas, but if you’re in a hurry, skip that and use your favorite store-bought brand instead. For another easy, really delicious option, try our vegetable quesadillas or these breakfast quesadillas, which are also a personal favorite!

    Key Ingredients

    • Tortillas: I love using these flour tortillas or homemade corn tortillas, but if you’re short on time, store-bought works great. I usually use flour for quesadillas, but my son prefers corn, so use whatever you prefer!
    • Chicken: You can use either chicken breast or chicken thighs for these quesadillas. I cook the chicken using a quick and easy method similar to my shredded chicken recipe, which keeps it juicy and tender.
    • Green Enchilada Sauce: Feel free to use your favorite store-bought enchilada sauce (I recommend Hatch or Fronterra) or try my homemade salsa verde. If you’re not a fan of green chile sauce, you can swap it for red, like this easy enchilada sauce.
    • Cheese: If you add cheese, go for something that melts nicely, like queso de Oaxaca or Monterey Jack. For a dairy-free option, try a spoonful of my delicious vegan queso.

    Find the full recipe with measurements below.

    How to Make Our Favorite Chicken Quesadillas

    Tip 1: Don’t miss the green chile chicken. Tossing your chicken with green enchilada sauce truly makes these the best quesadillas. They turn out so flavorful, and thanks to the sauce, the chicken stays juicy.

    Here are two ways to prepare it: Add your chicken to a saucepan with green enchilada sauce and gently simmer until cooked through, or use our Instant Pot salsa verde chicken recipe.

    Shredded Green Chile Chicken ready for Chicken Quesadillas

    Tip 2: Use a heavy-bottomed pan. For the very best quesadillas that are perfectly browned on the outside, cook them in a heavy-bottomed pan or skillet. Think a cast-iron pan, a heavy stainless steel skillet, or the more traditional comal (a flat griddle used in Mexico, Central America, and parts of South America).

    Serving Suggestions

    Serve these warm with your favorite quesadilla toppings and sides. I love homemade guacamole, pico de gallo, fresh lime wedges, and a little sour cream. To make this a complete meal, consider adding rice and beans. I love our cilantro lime rice or Mexican rice with homemade refried beans or these saucy black beans.

    More Quesadilla Recipes

    A plate with chicken quesadillas

    The Best Chicken Quesadillas

    • PREP
    • COOK
    • TOTAL

    I love this chicken quesadilla recipe with tender chicken cooked in flavorful salsa verde and lots of melted cheese. You can make the chicken in advance and keep it in the fridge or freezer for another day. See our storing tips below the recipe!

    6 Quesadillas

    Watch Us Make the Recipe

    You Will Need

    3 pounds boneless chicken thighs or chicken breasts

    2 cups green enchilada sauce or Mexican salsa verde

    6 medium to large flour or corn tortillas, see homemade flour tortillas

    2 cups mild melting cheese like queso de Oaxaca or Monterey Jack, shredded, 8 ounces

    Spray oil or oil brushed onto the pan

    Fresh cilantro and lime wedges for serving

    Salt, to taste

    Directions

      1Cook the chicken: In a large, heavy-bottomed saucepan, combine the chicken and green enchilada sauce (or salsa). Bring to a boil over high heat, then reduce to a gentle simmer. Partially cover the pan and cook until the chicken is tender and cooked through, 20 to 30 minutes.

      2Shred the chicken: Transfer the chicken to a cutting board. When cool enough to handle, shred the meat with two forks (or your fingers). Return the shredded chicken to the sauce and stir to coat. Taste and season with salt, if needed.

      3Prepare the skillet: Heat a heavy-bottomed skillet over medium heat. Lightly brush or spray the pan with oil, then place one tortilla in the skillet.

      4Cook the quesadillas: Scatter about ⅓ cup of cheese over the tortilla, then spoon ½ cup of shredded chicken onto one half, letting any excess sauce drip off first. Fold the tortilla in half and press gently with a spatula to seal. Cook until the underside is golden and toasted, about 2 minutes.

      5Flip and serve: Flip the quesadilla and cook for 1 to 2 minutes more, until the second side is toasted and the cheese has melted. Transfer the tortillas to a cutting board, slice them in half, and repeat with the remaining tortillas.

    Adam and Joanne’s Tips

    • Make-ahead and storing: This recipe makes about 5 cups of shredded chicken, enough for 6 quesadillas (maybe more). Leftover chicken can be stored in an airtight container in the fridge for up to 3 days or in the freezer for up to 1 month. Add leftover chicken to rice bowls, tacos, or salad.
    • Keep quesadillas warm: Keep them warm on a baking sheet in a 200°F (93°C) oven while you finish making the remaining quesadillas.
    • The nutrition facts provided below are estimates.

    Nutrition Per Serving
    Serving Size
    1 quesadilla
    /
    Calories
    444
    /
    Total Fat
    19.7g
    /
    Saturated Fat
    8.8g
    /
    Cholesterol
    127.7mg
    /
    Sodium
    1003.7mg
    /
    Carbohydrate
    31.9g
    /
    Dietary Fiber
    1.7g
    /
    Total Sugars
    3.9g
    /
    Protein
    34.6g


    AUTHOR:

    Joanne Gallagher

    Adam and Joanne of Inspired Taste

    We are Adam and Joanne Gallagher, the creators of Inspired Taste. Established in 2009, Inspired Taste grew from a childhood dream into one of the internet’s most trusted recipe sites with hundreds of reliable recipes, step-by-step videos, and expert tips.More About Us

    Source link

  • Red Beans and Rice Soup

    Red Beans and Rice Soup

    Red Beans and Rice Soup is an easy slow cooker soup for everyone who loves the flavors in Red Beans and Rice! See tips in this post if you’d like to make an equally tasty version of this soup that’s lower in carbs.

    PIN Red Beans and Rice Soup to try it later!

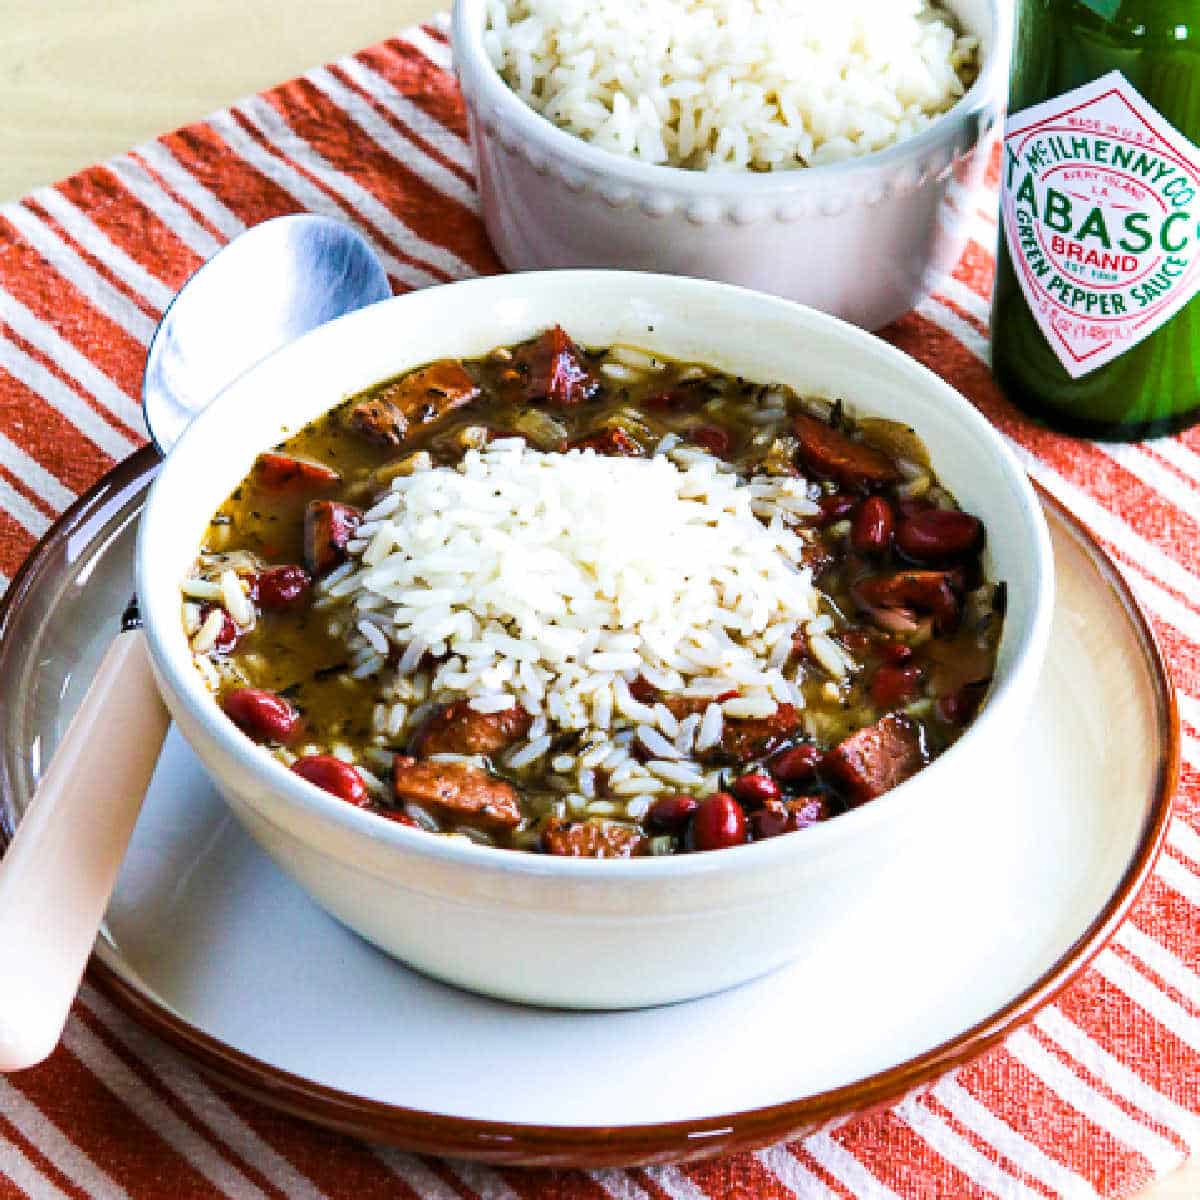
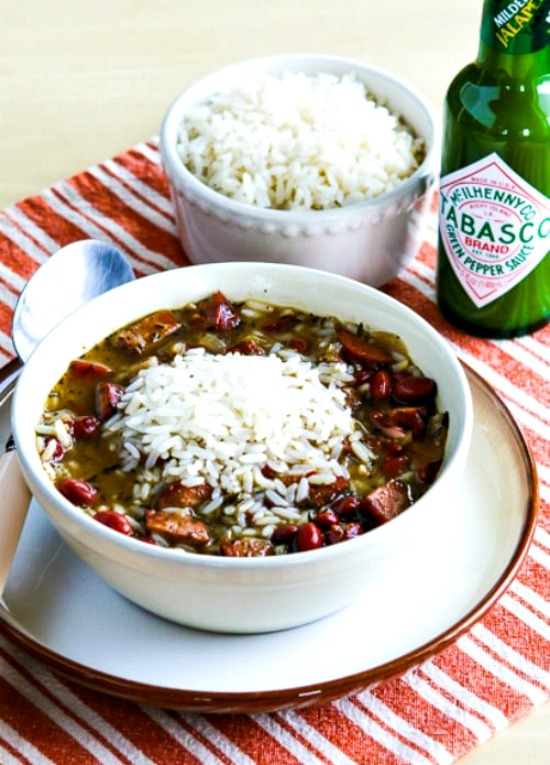
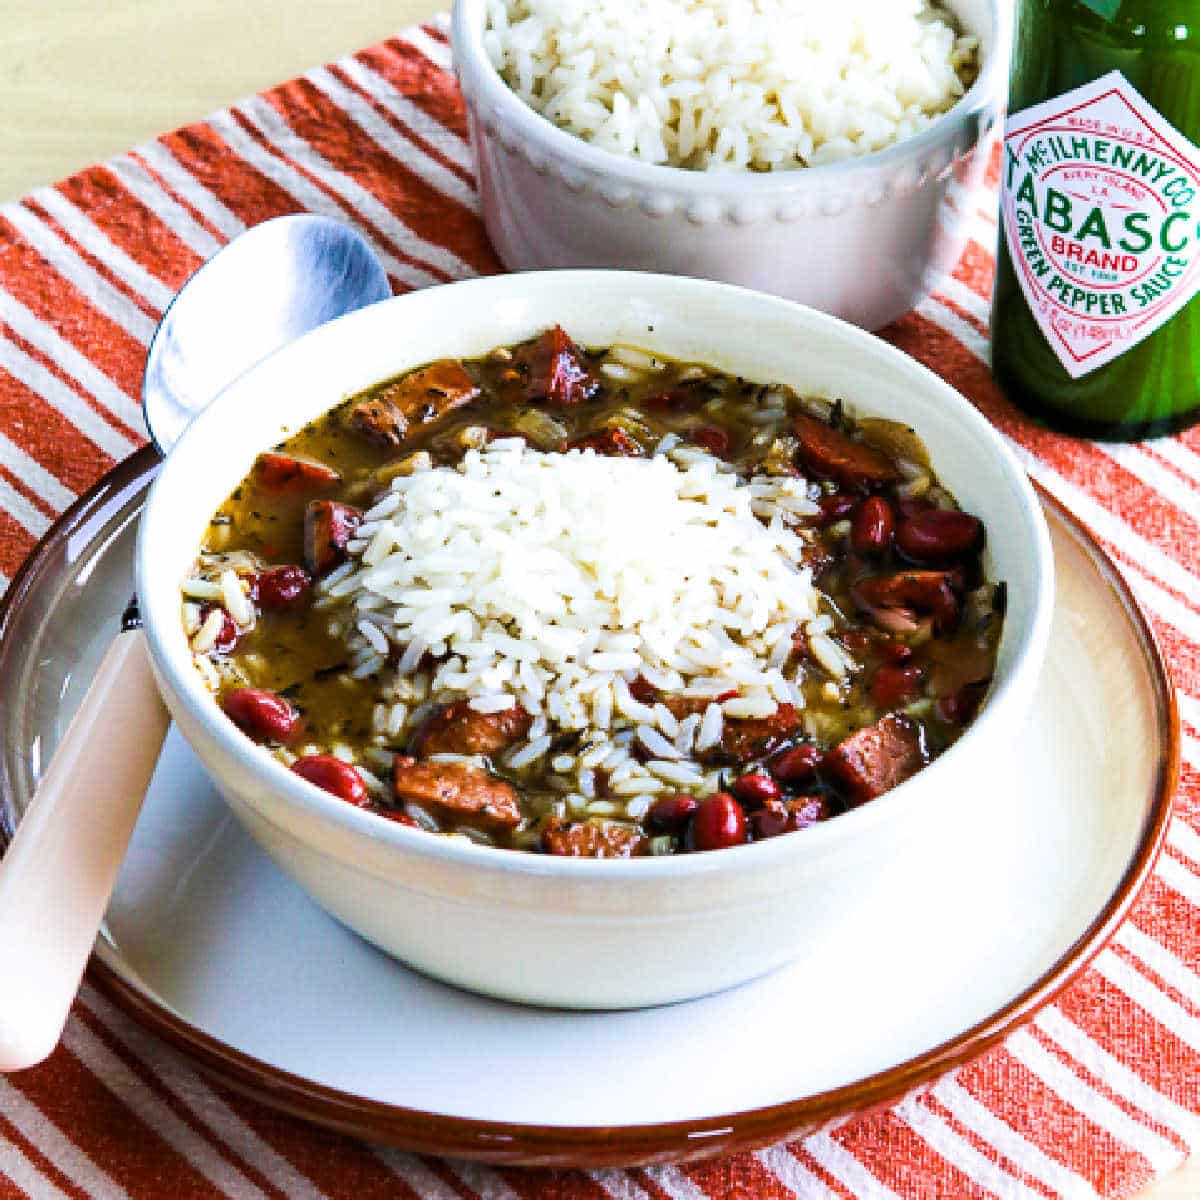
    Red Beans and Rice Soup shown in serving bowl with rice and Green Tabasco Sauce

    This recipe for Red Beans and Rice Soup came from my fondness for Slow Cooker Red Beans and Rice! And that’s a recipe has quite a few fans. But what inspired me to make red beans and rice in soup form was Amylu Chicken Andouille Sausage at Costco!

    I loved the flavor of that sausage that’s extra low in carbs. And those flavors always remind me of New Orleans, and love the spicy flavors that city is famous for. When I shared this soup with my sister Pam she wasn’t sure if it would be too spicy for her family. But halfway through dinner she texted me and said it was a hit!

    If you’re cooking for kids you might use a bit less of the spicy Creole Seasoning though. And those who want more heat can add Green Tabasco Sauce at the table. If you’re a fan of the famous New Orleans dish that inspired this soup, I hope you give Red Beans and Rice Soup a try!

    What ingredients do you need?

    (This is only a list of ingredients; please scroll down for complete printable recipe. Or if you use the JUMP TO RECIPE link at the top of the page, it will take you directly to the complete recipe.)

    What if you don’t have Andouille Sausage?

    I love the spicy chicken Andouille Sausage I used in this recipe, but if you don’t find that use any spicy Louisiana sausage you can find. Or you can make the soup with ham and add a bit more Creole Seasoning.

    How many carbs are in the Red Beans and Rice Soup?

    It’s obvious from the name that this isn’t a low-carb soup. This recipe has 39 net carbs per serving, with 38 grams of protein.

    How to make Red Beans and Rice soup lower in carbs:

    You can make a much lower carb version of Red Beans and Rice Soup by switching out the rice for frozen cauliflower rice. If you want to reduce the carbs even more, just use one can of beans and more sausage.

    Slow Cooker Red Beans and Rice Soup found on KalynsKitchen.comSlow Cooker Red Beans and Rice Soup found on KalynsKitchen.com

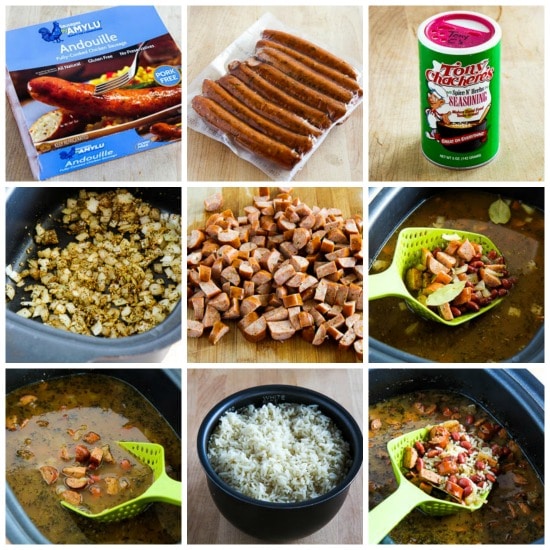
    How to Make Red Beans and Rice Soup:

    (This is only a summary of the steps for the recipe; please scroll down for complete printable recipe. Or if you use the JUMP TO RECIPE link at the top of the page, it will take you directly to the complete recipe.)

    1. Here’s the Amylu Chicken Andouille Sausage that inspired me to come up with this recipe!
    2. The sausage comes in packs of eight links, and they’re not too thick so I the whole pack (20 oz.) in the soup. If you’re buying the regular grocery store pack with 4 links, you can certainly use less.
    3. I taught school with a woman from Louisiana who taught me about Tony Chachere’s Creole Seasoning (affiliate link). If you don’t have this brand any Creole seasoning will work. 
    4. I was using the Ninja Slow Cooker (affiliate link), so I sauteed the onions, garlic, and spices right in the slow cooker, but you can definitely do this in a pan.
    5. I cut the sausage in half and then sliced it into half-moon pieces, but next time I might just go with round slices; take your pick!
    6. Put the onions, garlic, spices, cooked red beans, sliced sausage, chicken stock, Worcestershire sauce, Green Tabasco Sauce (affiliate link), and bay leave into the slow cooker.
    7. Cook on high for  about 4 hours or on low for 7-8 hours.
    8. While you cook the soup, cook enough rice to have 2 cups cooked rice and a little more for adding at the table. (I used my favorite Zojirushi Rice Cooker (affiliate link) to cook the rice, but you can cook it on the stove too.)
    9. If you’d like a lower-carb version of this tasty soup, just make it with cauliflower rice!
    10. Add the cooked rice or cauliflower rice and cook about 20-30 minutes more on high, adding a tiny bit more stock or water if you’d like a thinner soup.
    11. Serve Red Beans and Rice Soup hot, with additional rice and Green Tabasco Sauce to add at the table. 

    Slow Cooker Red Beans and Rice Soup found on KalynsKitchen.comSlow Cooker Red Beans and Rice Soup found on KalynsKitchen.com

    What else have I made with Amylu Chicken Andouille Sausage?

    If you like the spicy sausage used in this soup, check out my low-carb Chicken and Sausage Stew that you can make in the slow cooker or the Instant Pot.

    Weekend Food Prep:

    This recipe for soup with rice and red beans has been added to a category called Weekend Food Prep where you’ll find recipes you can prep or cook on the weekend and eat during the week!

    Ingredients

    • 1 large onion, chopped small
    • 2 tsp. olive oil
    • 1 T finely minced garlic
    • 2 tsp. dried thyme
    • 1 tsp. dried oregano
    • 1 T Tony Chachere’s Creole Seasoning, more or less to taste.
    • two 15 oz. cans red beans (see notes)
    • 8 links Amylu Chicken Andouille Sausage (see notes)
    • 8 cups chicken broth (see notes)
    • 2 T Worcestershire sauce
    • 2 tsp. Green Tabasco Sauce (or more if you want a lot of heat)
    • 3 bay leaves
    • 2 cups cooked white rice, plus more for serving if desired. (see notes)

    Instructions

    1. Heat the oil in the bottom of the slow cooker (or in a pan if your slow cooker doesn’t brown), add the onion and saute until it’s starting to brown, about 5 minutes.
    2. Add the minced garlic, dried thyme, dried oregano and Tony Chachere’s Creole Seasoning (affiliate link) and saute about 2 minutes more.
    3. Transfer to slow cooker if you’re sauteeing on the stove.
    4. Drain canned beans into a colander placed in the sink and rinse with cold water until no more foam appears, then let drain.
    5. When most of the water has drained off, transfer to the slow cooker.
    6. Cut the sausage into slices or half-moon slices and add to the slow cooker.
    7. Add the homemade chicken stock , Worcestershire sauce, Green Tabasco Sauce (affiliate link) and bay leaves.
    8. Cook on high for about 4 hours or on low for 7-8 hours.
    9. While the soup cooks, cook the rice using a rice cooker or according to package directions.
    10. When the soup has cooked about 4 hours (for high) or 7-8 hours (for low), stir in 2 cups cooked white rice.
    11. Add a little more water or chicken stock if the soup seems too thick and cook on high for 20-30 minutes more.
    12. Serve the Red Beans and Rice soup hot, with additional cooked rice and Green Tabascco Sauce to add at the table if desired.

    Notes

    Use about 3 cups of cooked red beans if you’re not using canned beans. You can use frozen Cauliflower Rice in this soup if you want fewer carbs.

    Use any Andouille Sausage you prefer; I used 20 oz. of sausage.

    Use about 4 1/2 cans of chicken broth if you don’t have homemade chicken stock.

    I used the 6 quart Ninja Cooker (affiliate link) to make this, but any slow cooker that’s 4.5 quarts or larger will work.

    Recipe created by Kalyn and inspired by Amylu Chicken Andouille Sausage found at Costco! 

    Nutrition Information

    Yield

    8

    Serving Size

    1

    Amount Per Serving

    Calories 511Total Fat 18gSaturated Fat 5gTrans Fat 0gUnsaturated Fat 11gCholesterol 92mgSodium 958mgCarbohydrates 47gFiber 8gSugar 5gProtein 38g

    Nutrition information is automatically calculated by the Recipe Plug-In I am using. I am not a nutritionist and cannot guarantee 100% accuracy, since many variables affect those calculations.

    Did you make this recipe?

    Did you make this recipe? Please leave a star rating (under the PRINT button in the recipe) or share a photo of your results on Instagram! THANKS!

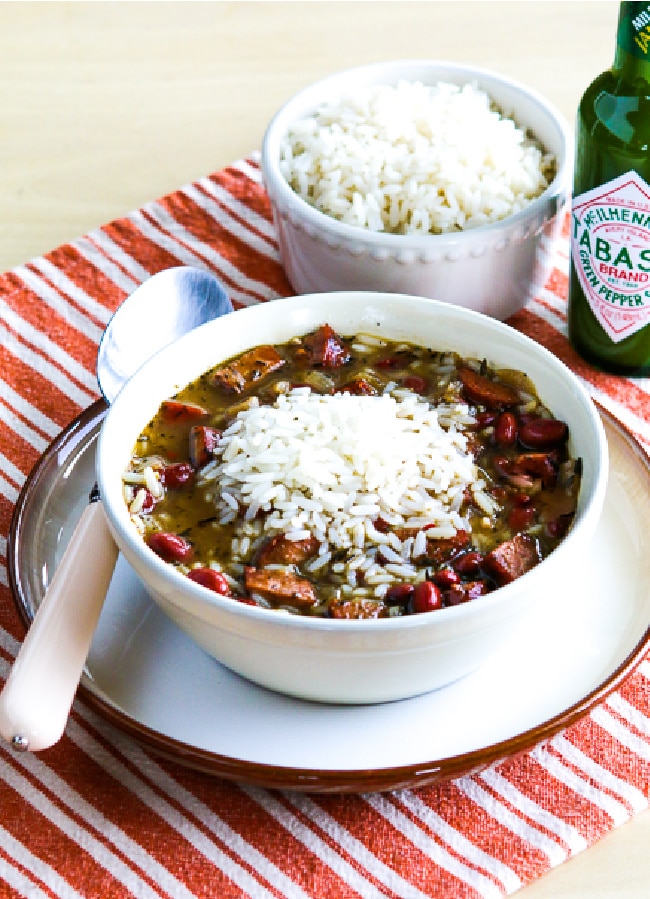
    Red Beans and Rice Soup shown in bowl with spoon and Green Tabasco Sauce in back.Red Beans and Rice Soup shown in bowl with spoon and Green Tabasco Sauce in back.

    Low-Carb Diet / Low-Glycemic Diet / South Beach Diet Suggestions:
    The use of rice and beans in this Red Beans and Rice Soup makes it too high in carbs for low-carb diets, and it’s limited to Phase 2 or 3 for the original South Beach Diet.  It’s also important to use lower fat chicken (or turkey) sausage if you’re making this for South Beach. You could make this with cauliflower rice for a lower-carb version, and I think it would be just as tasty! Or for even fewer carbs, make a version with only one can of beans, more sausage, and use frozen cauliflower rice.

    Find More Recipes Like This One:
    Use Slow Cooker Recipes to find more recipes like this one. Use the Diet Type Index to find recipes suitable for a specific eating plan. You might also like to follow Kalyn’s Kitchen on Pinterest, on Facebook, on Instagram, on TikTok, or on YouTube to see all the good recipes I’m sharing there.

    Historical Notes for this Recipe:
    This soup recipe with red beans and rice ingredients was first posted in 2014. The recipe was last updated with more information in 2026.

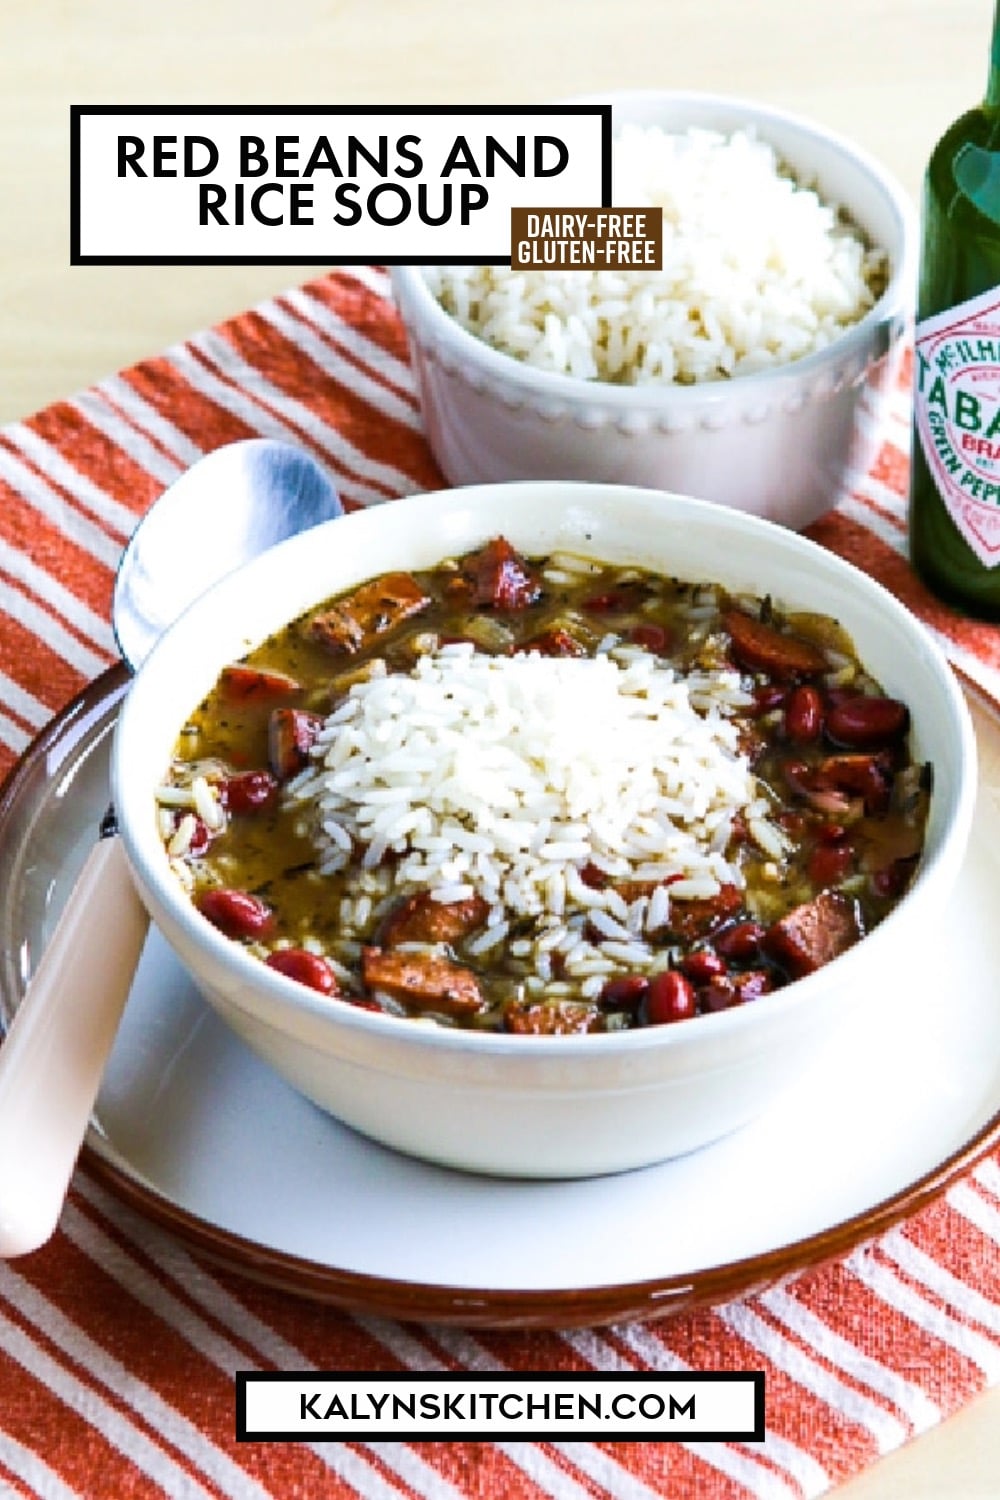
    Pinterest image of Red Beans and Rice Soup

    We are a participant in the Amazon Services LLC Associates Program, an affiliate advertising program designed to provide a means for us to earn fees by linking to Amazon.com and affiliated sites. As an Amazon Associate, I earn from qualifying purchases.


    Source link

  • Honey Walnut Shrimp Recipe | The Recipe Critic

    Honey Walnut Shrimp Recipe | The Recipe Critic

    This website may contain affiliate links and advertising so that we can provide recipes to you. Read my disclosure policy.

    Crispy shrimp tossed in a creamy sweet sauce with candied walnuts. This honey walnut shrimp is so much better than takeout and one of the best shrimp recipes that you will make!

    Calling all shrimp lovers! Here are more recipes you need to add to the dinner lineup: bang bang shrimp, dynamite shrimp, and Hawaiian-style garlic shrimp!

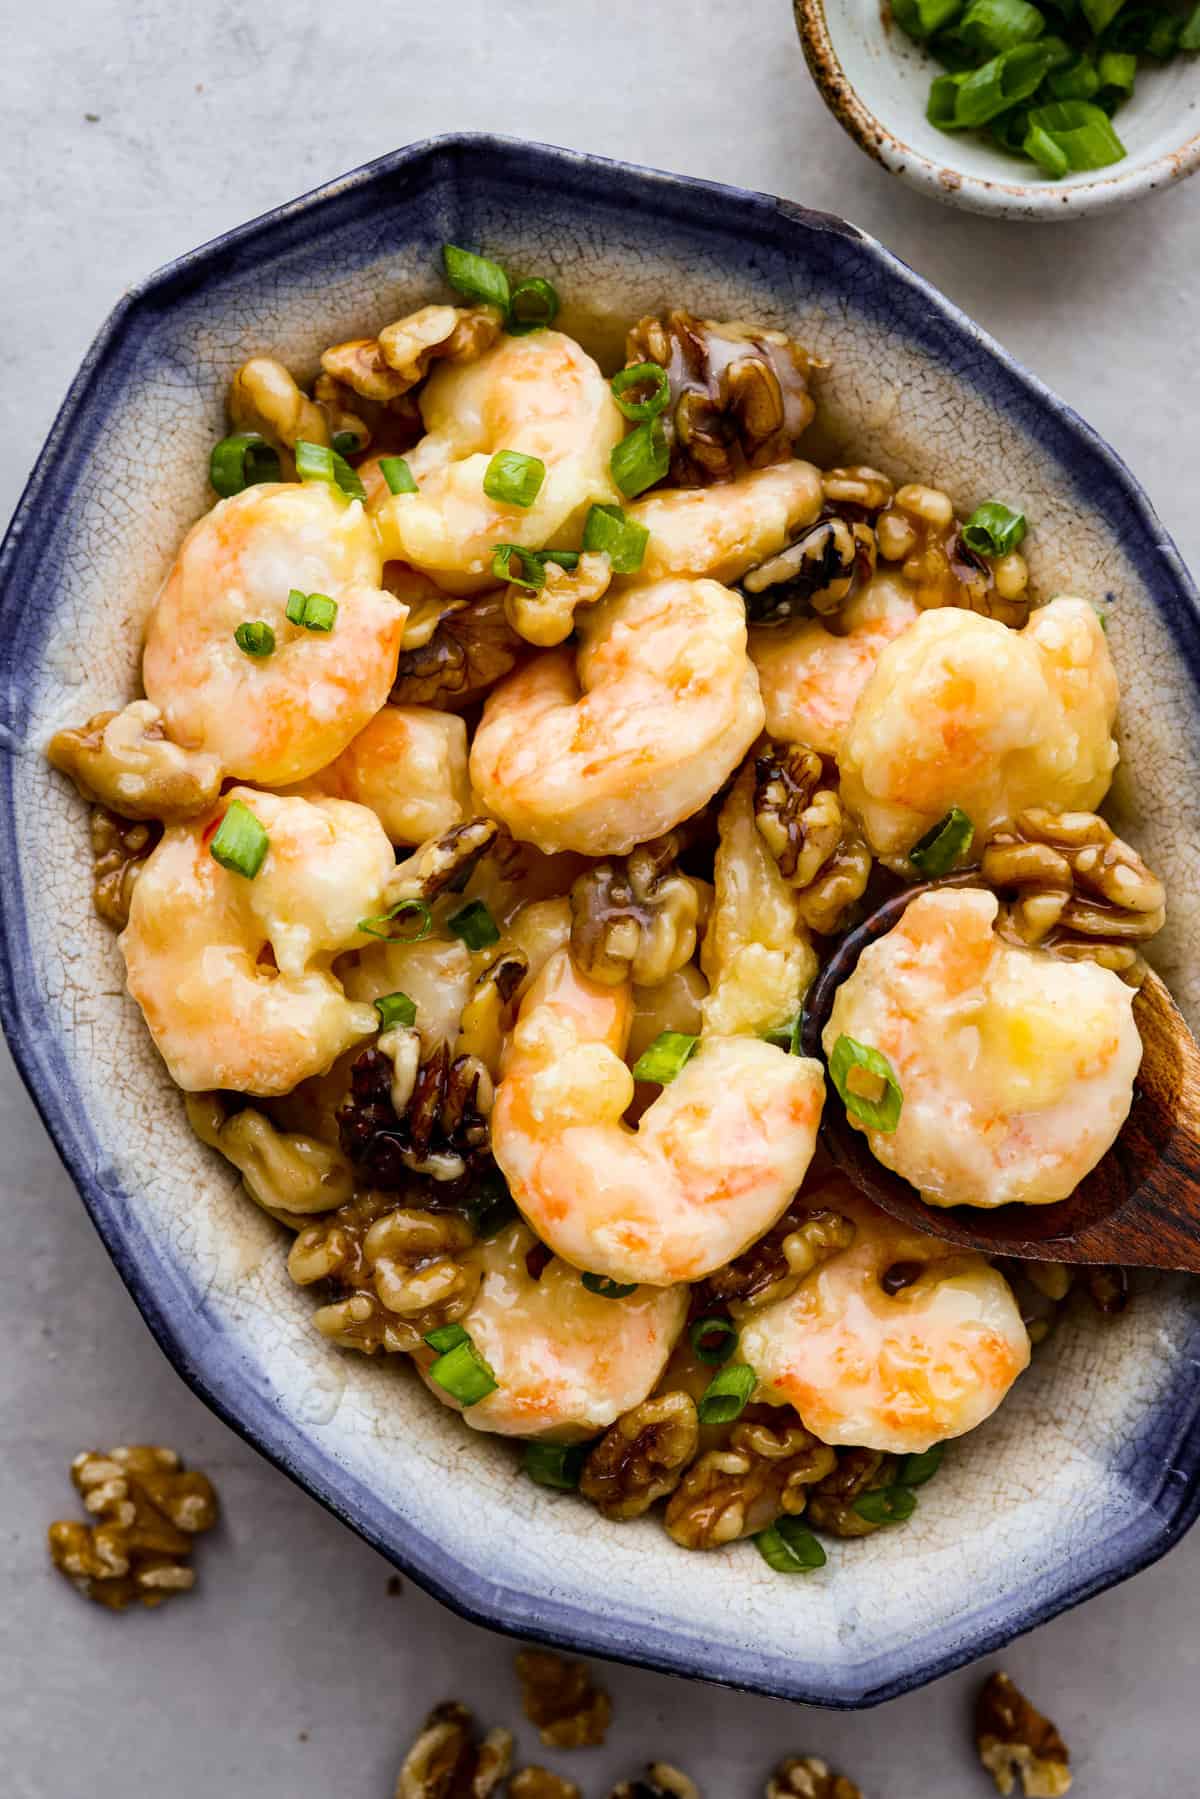
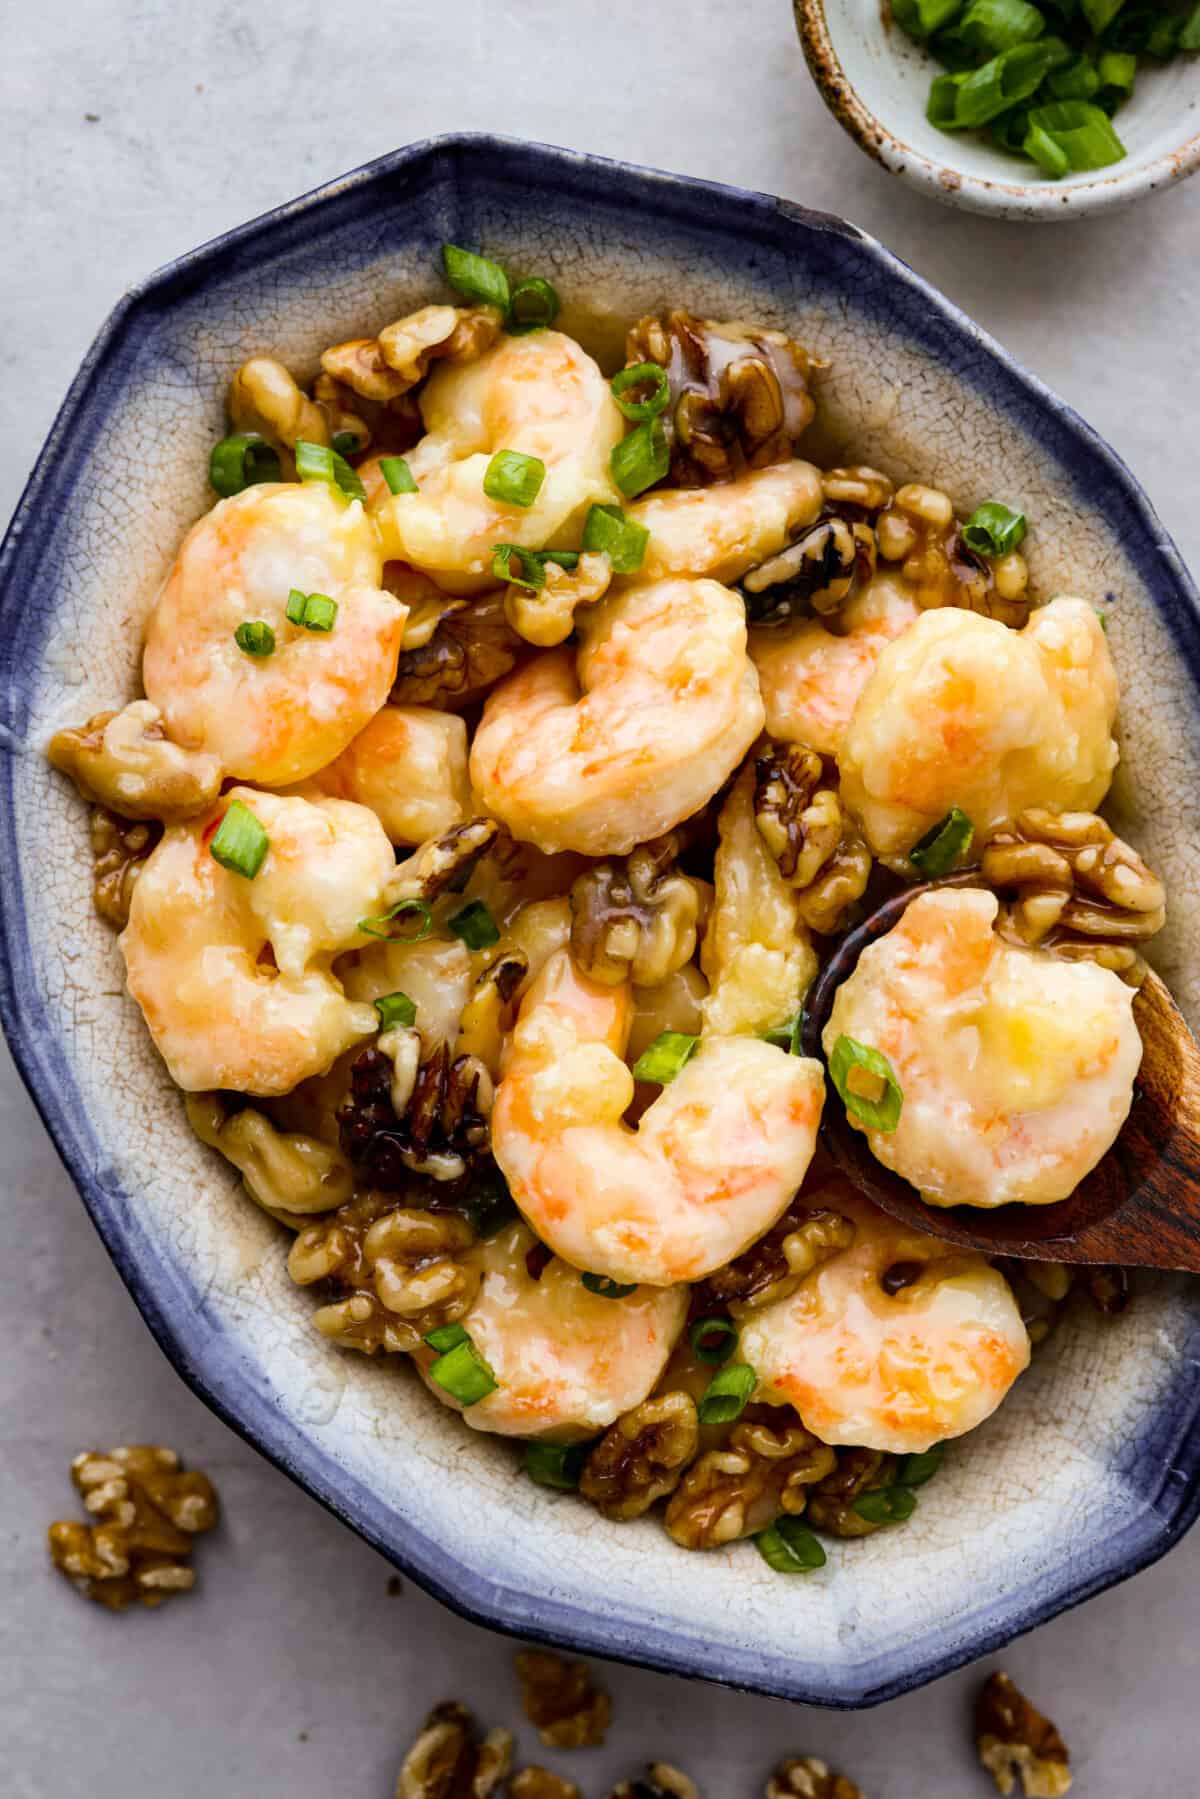
    Hero image of crispy walnut shrimp on a blue and white serving dish.

    A Reader’s Review

    Perfect and delicious! It turned out just as I was hoping, and really hits the mark for those craving the Panda Express version! Cannot recommend enough!

    Scott

    Honey Walnut Shrimp Recipe

    Let’s talk shrimp. Do you love it or hate it? My husband LOVES shrimp! He asks me to make it all the time. I wasn’t the biggest fan of it before, but I am a firm believer in giving things a second try. I’m so happy I did because shrimp is so delicious and versatile! Since honey walnut shrimp is such a popular dish, I decided to try recreating it at home with fresh, simple ingredients. No need to make a trip to Panda Express this time!

    This is a great recipe to start with if you aren’t a huge shrimp fan. (It will make you a believer!) First of all, the walnuts get a crunchy candied outside. Then, you pan fry the shrimp until the outside gets nice and crispy. But this honey glaze you guys… it is out of this world! It’s sweet, savory, creamy, and coats each piece of crispy shrimp perfectly. With honey walnut shrimp this good, you won’t be able to load enough onto your plate.

    Ingredients for Honey Walnut Shrimp

    The sauce is a combination of honey, mayonnaise, and sweetened condensed milk. Yes, you heard that right. Sweetened condensed milk! Just a little of this added to the sauce brings all of the flavors together and adds such a delicious and sweet glaze to the shrimp. And the candied walnuts throughout, so amazing!

    • Water: Adjusts the consistency of the honey glaze.
    • Sugar: Sweetens everything, making the walnuts sugary and giving a sweet taste to the shrimp.
    • Walnuts: Makes the dish crunchy and nutty when coated with sugar, which pairs nicely with the shrimp and sauce.
    • Vegetable Oil: Used to fry the shrimp, making them crispy and golden on the outside while keeping them soft inside.
    • Egg: Helps the cornstarch stick to the shrimp.
    • Cornstarch: The main coating for the honey walnut shrimp.
    • Shrimp: I used large deveined shrimp, but you can use any size you want. You may just need to adjust the cooking times a bit.
    • Mayonnaise: So the sauce is creamy and rich. Regular mayo and Japanese mayo (also known as kewpie mayo) both work!
    • Honey: Adds sweetness to the sauce, making it tasty and blending well with the walnuts.
    • Sweetened Condensed Milk: The secret ingredient! This adds a wonderful creaminess to the sauce.
    • Sliced Green Onions: Adds a little fresh onion taste and makes the dish look nice.

    Let’s Get Cooking!

    Honey walnut shrimp is the perfect 30-minute meal to impress your family with. Make a batch of my General Tso’s Chicken and Beef Chow Mein for the full takeout experience!

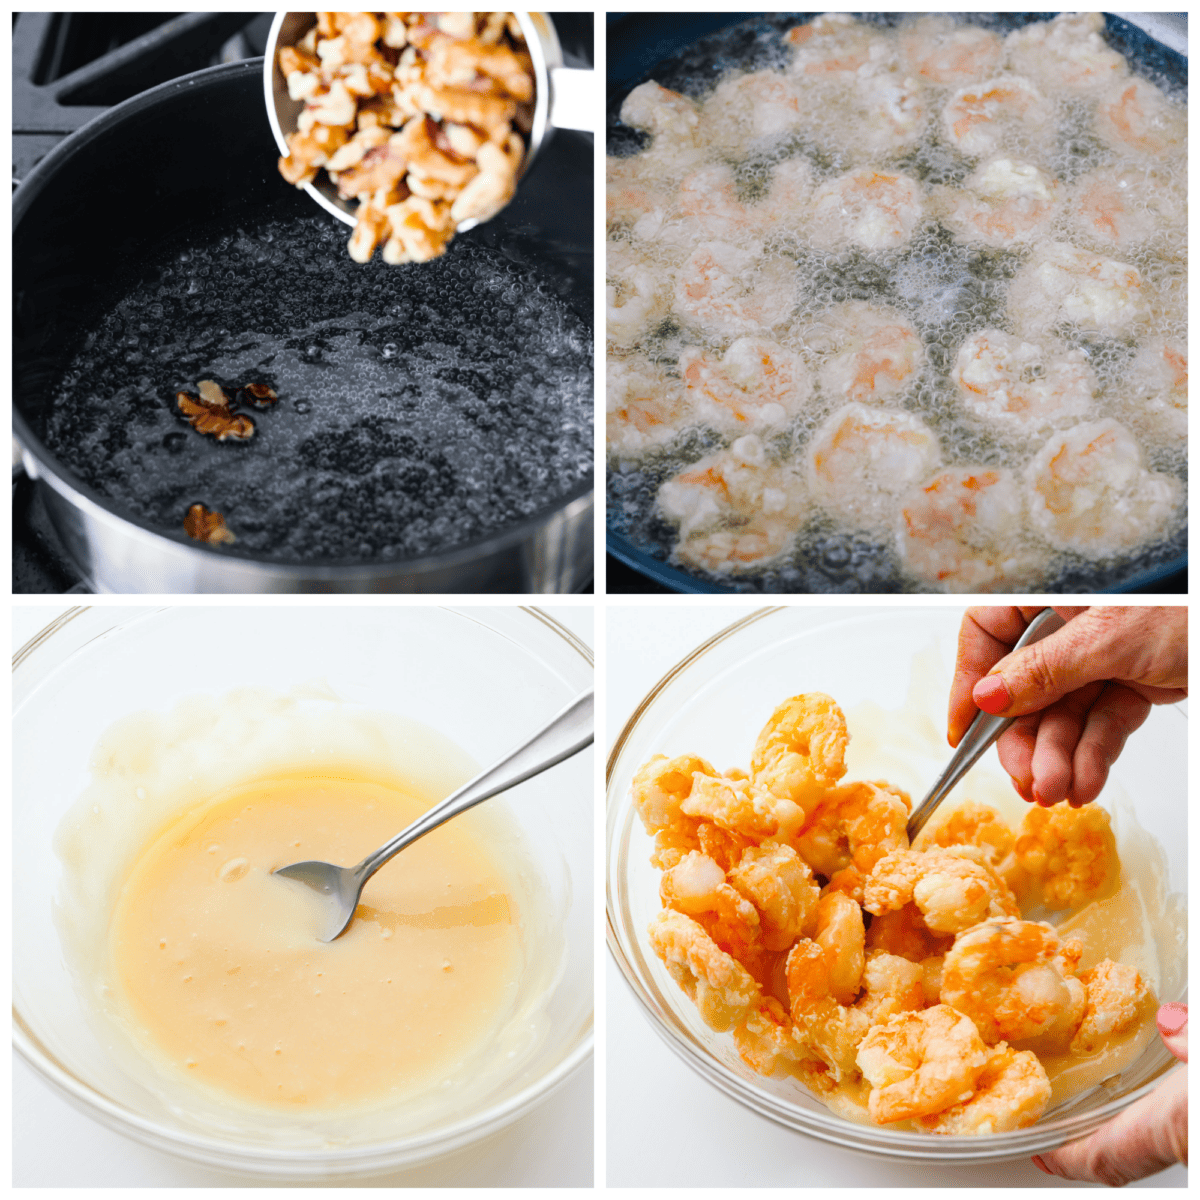
    1. Candy Walnuts: In a small saucepan stir together the water and sugar. Then bring to a boil and add the walnuts. Boil for about 2 minutes then drain and place on a cookie sheet to dry.
    2. Fry Shrimp: Heat the oil in a heavy deep skillet over medium high heat. In a small bowl whisk the egg. Then add the cornstarch to another small bowl. Dip the shrimp into the egg and then the cornstarch. Fry the shrimp for about 5 minutes or until they turn pink and the outside is golden brown. Remove with a slotted spoon and drain on a paper towel.
    3. Sauce Mixture: In a medium bowl whisk together mayonnaise, honey, and sweetened condensed milk. Add the fried shrimp and toss to coat. Sprinkle with candied walnuts and green onions. Serve honey walnut shrimp fresh with fried rice or any of your other favorite Chinese takeout recipes!
    4-photo collage of the shrimp being breaded and fried.

    Cooking Tips

    You are seriously going to love every single bite. Better-than-takeout recipes are the best! I promise that you are going to love this honey walnut shrimp just as much as my family does. Here are a few ways to make sure your dish turns out perfectly:
    • Candy the Walnuts First: Candy the walnuts early on, allowing them to dry properly on a cookie sheet. This ensures they’re crispy and sweet for the final dish.
    • Prep the Shrimp Well: Make sure to peel and devein the shrimp properly before coating with egg and cornstarch. This helps achieve crispy and evenly-coated shrimp.
    • Knowing When the Shrimp are Done: Fry the shrimp until they turn pink and have a golden brown exterior. Be careful not to overcook, as this can result in tough shrimp.
    • Fry Shrimp in Small Batches: To make sure each piece of shrimp gets cooked through properly, work in small batches and don’t overcrowd your skillet.
    • Drain Excess Oil: After frying, place the shrimp on a paper towel to drain any excess oil. No one likes soggy shrimp!
    • Create the Creamy Honey Sauce: Whisk the mayonnaise, honey, and sweetened condensed milk thoroughly to create a smooth sauce that coats the shrimp evenly.
    • Toss Shrimp Gently: When combining the shrimp with the sauce, toss them gently to ensure each shrimp is coated evenly without breaking that crispy outer texture.

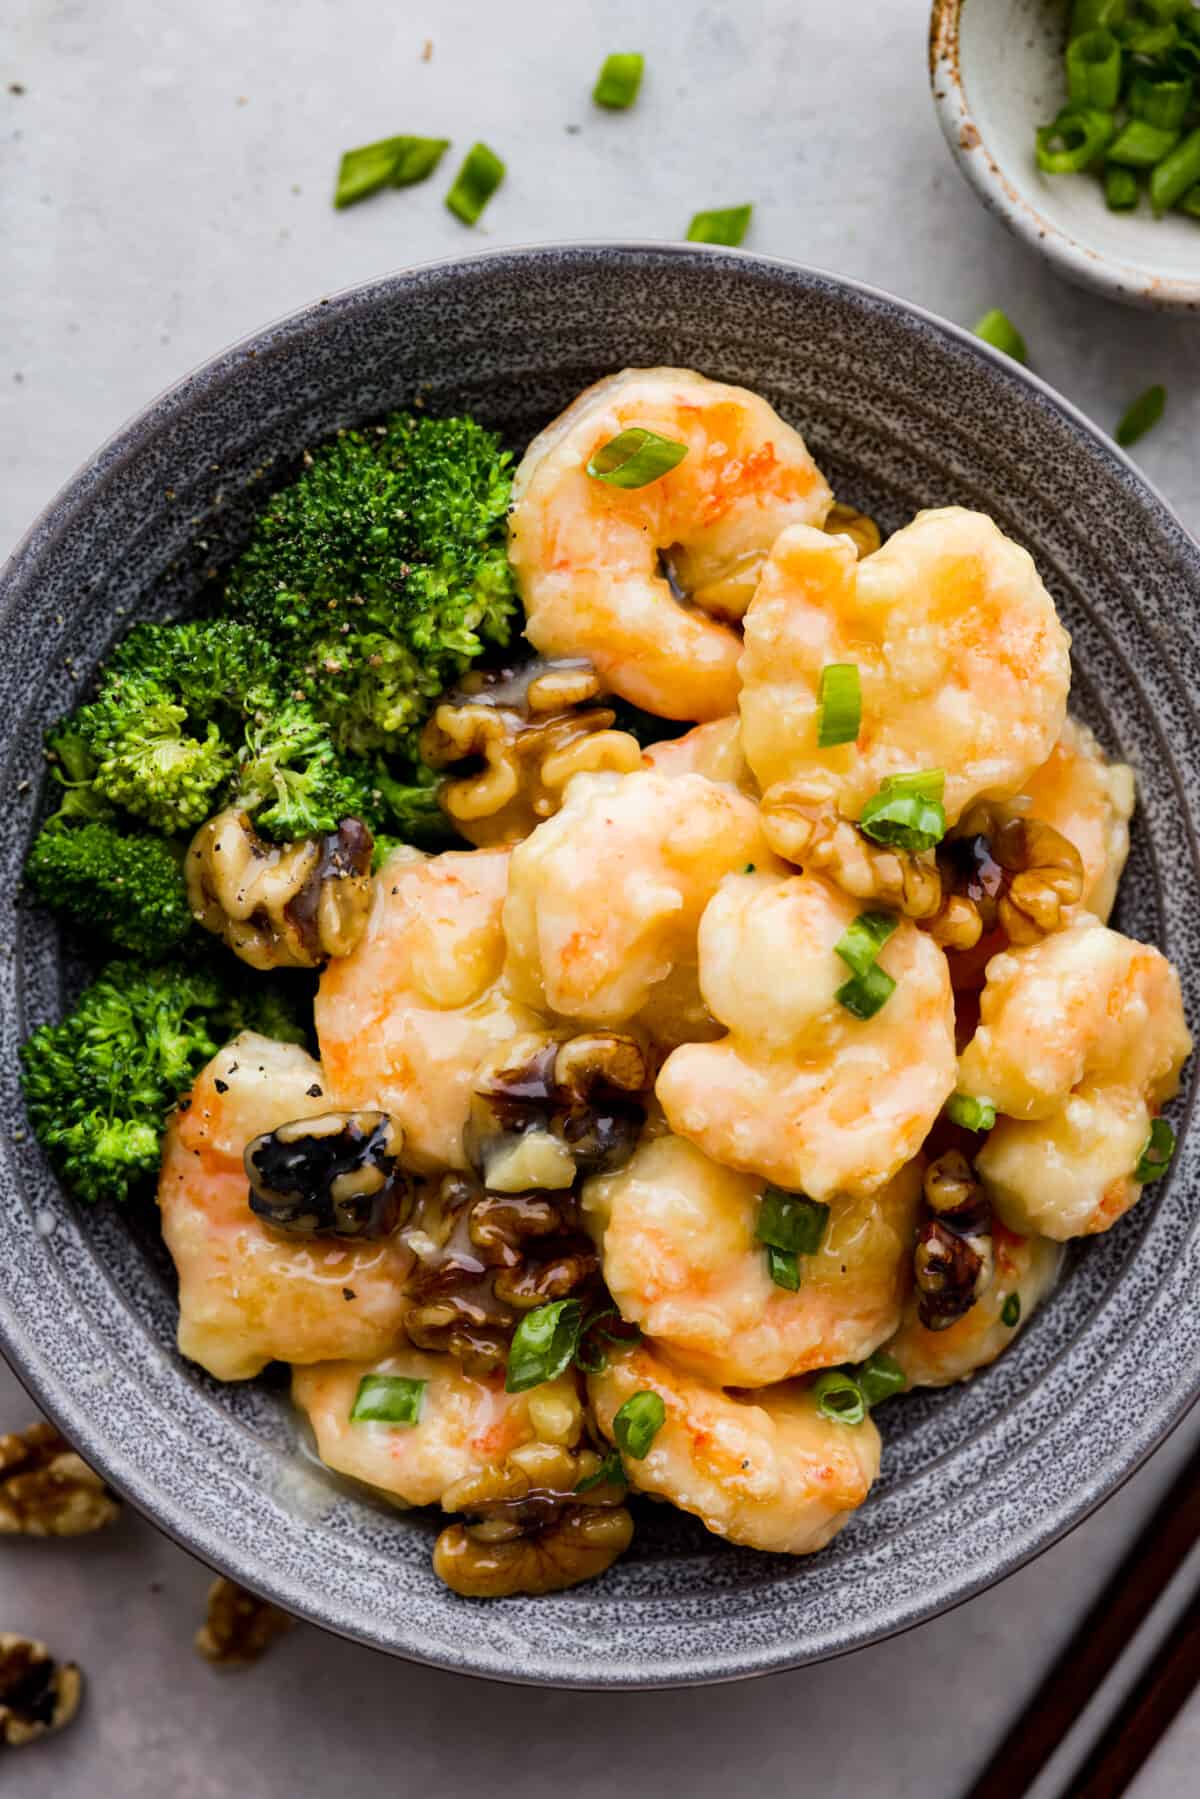
    Shrimp served with broccoli in a gray bowl.

    Storing Leftover Honey Walnut Shrimp

    If you have leftovers of this wonderful shrimp, here’s how to keep it fresh so you can enjoy it later.

    • In the Refrigerator: Transfer shrimp to an airtight container and store for 2-3 days.
    • Reheating: To make sure your shrimp stays crispy on the outside, I recommend reheating it in the oven. Add your honey walnut shrimp to a baking sheet and cook for about 10 minutes at 350 degrees Fahrenheit.
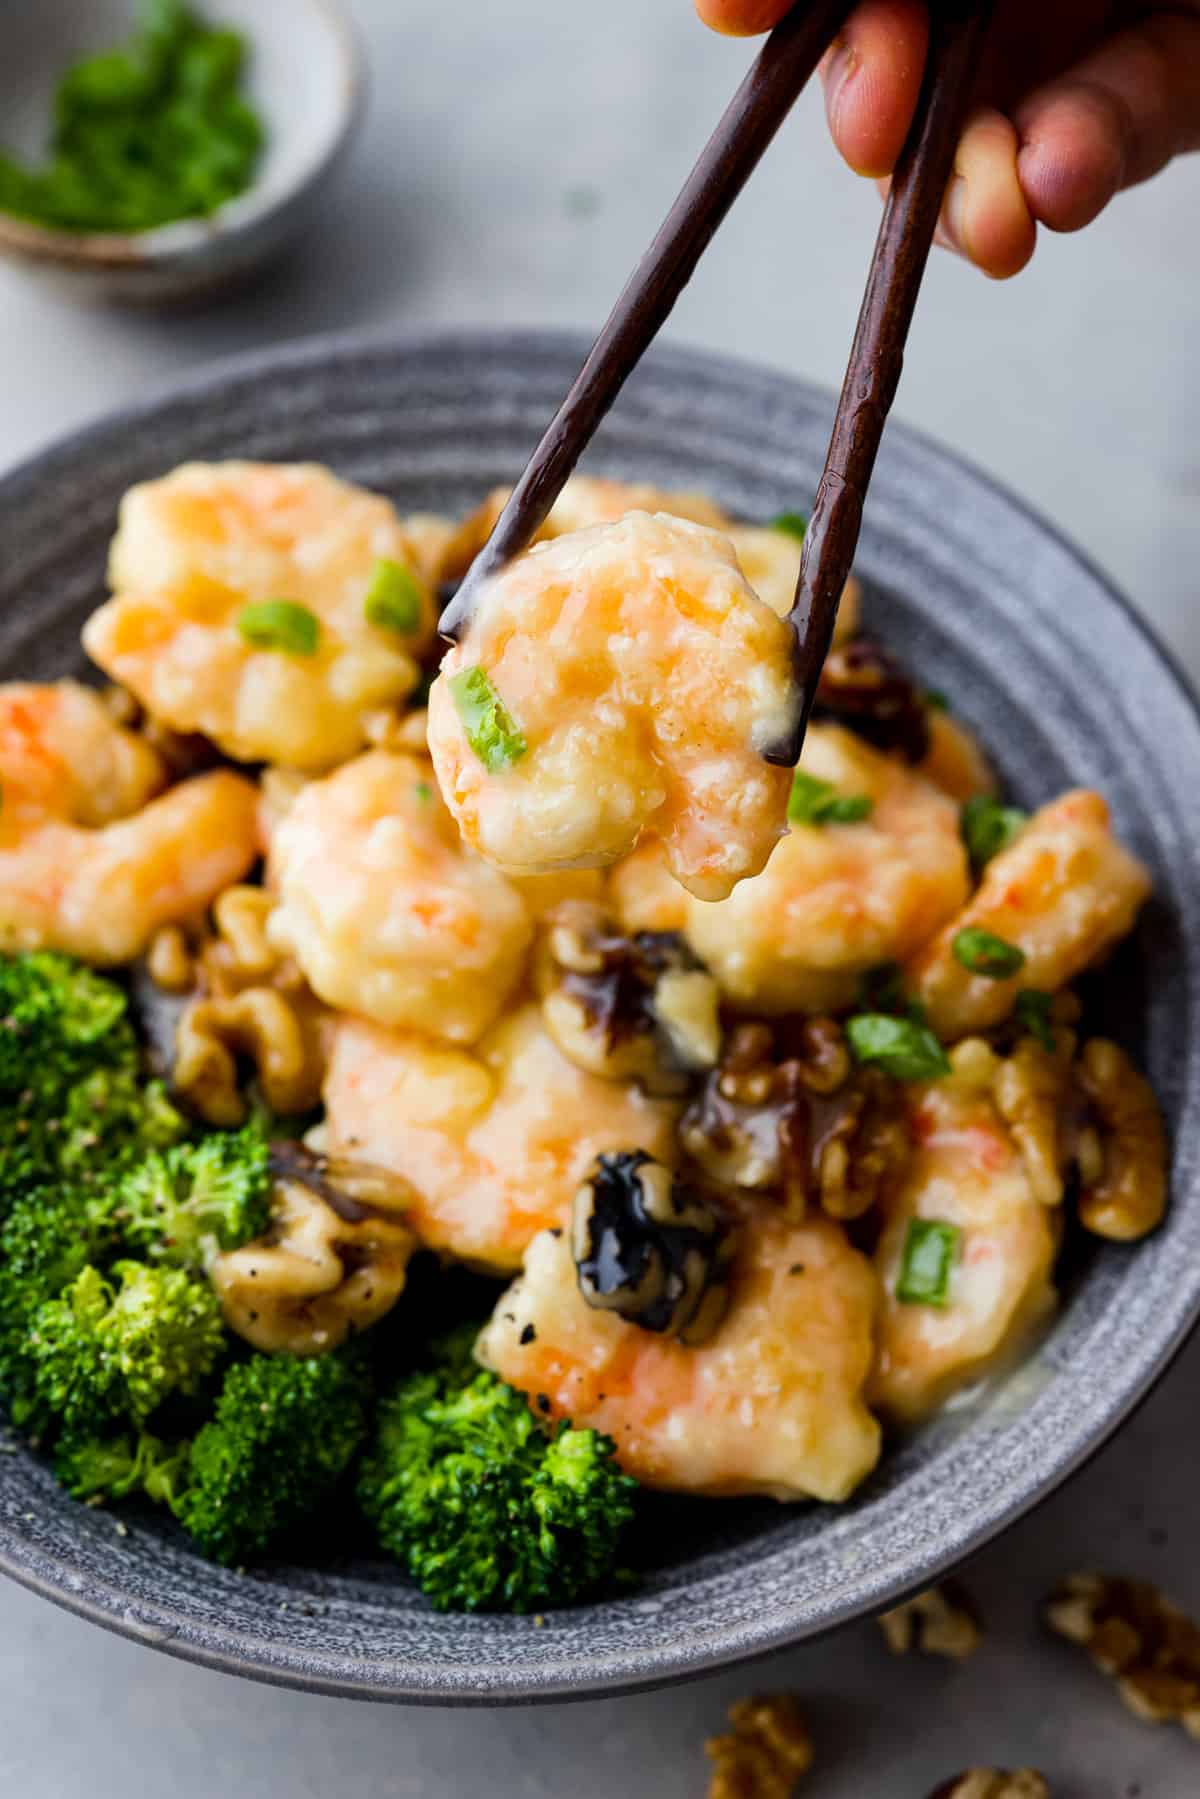
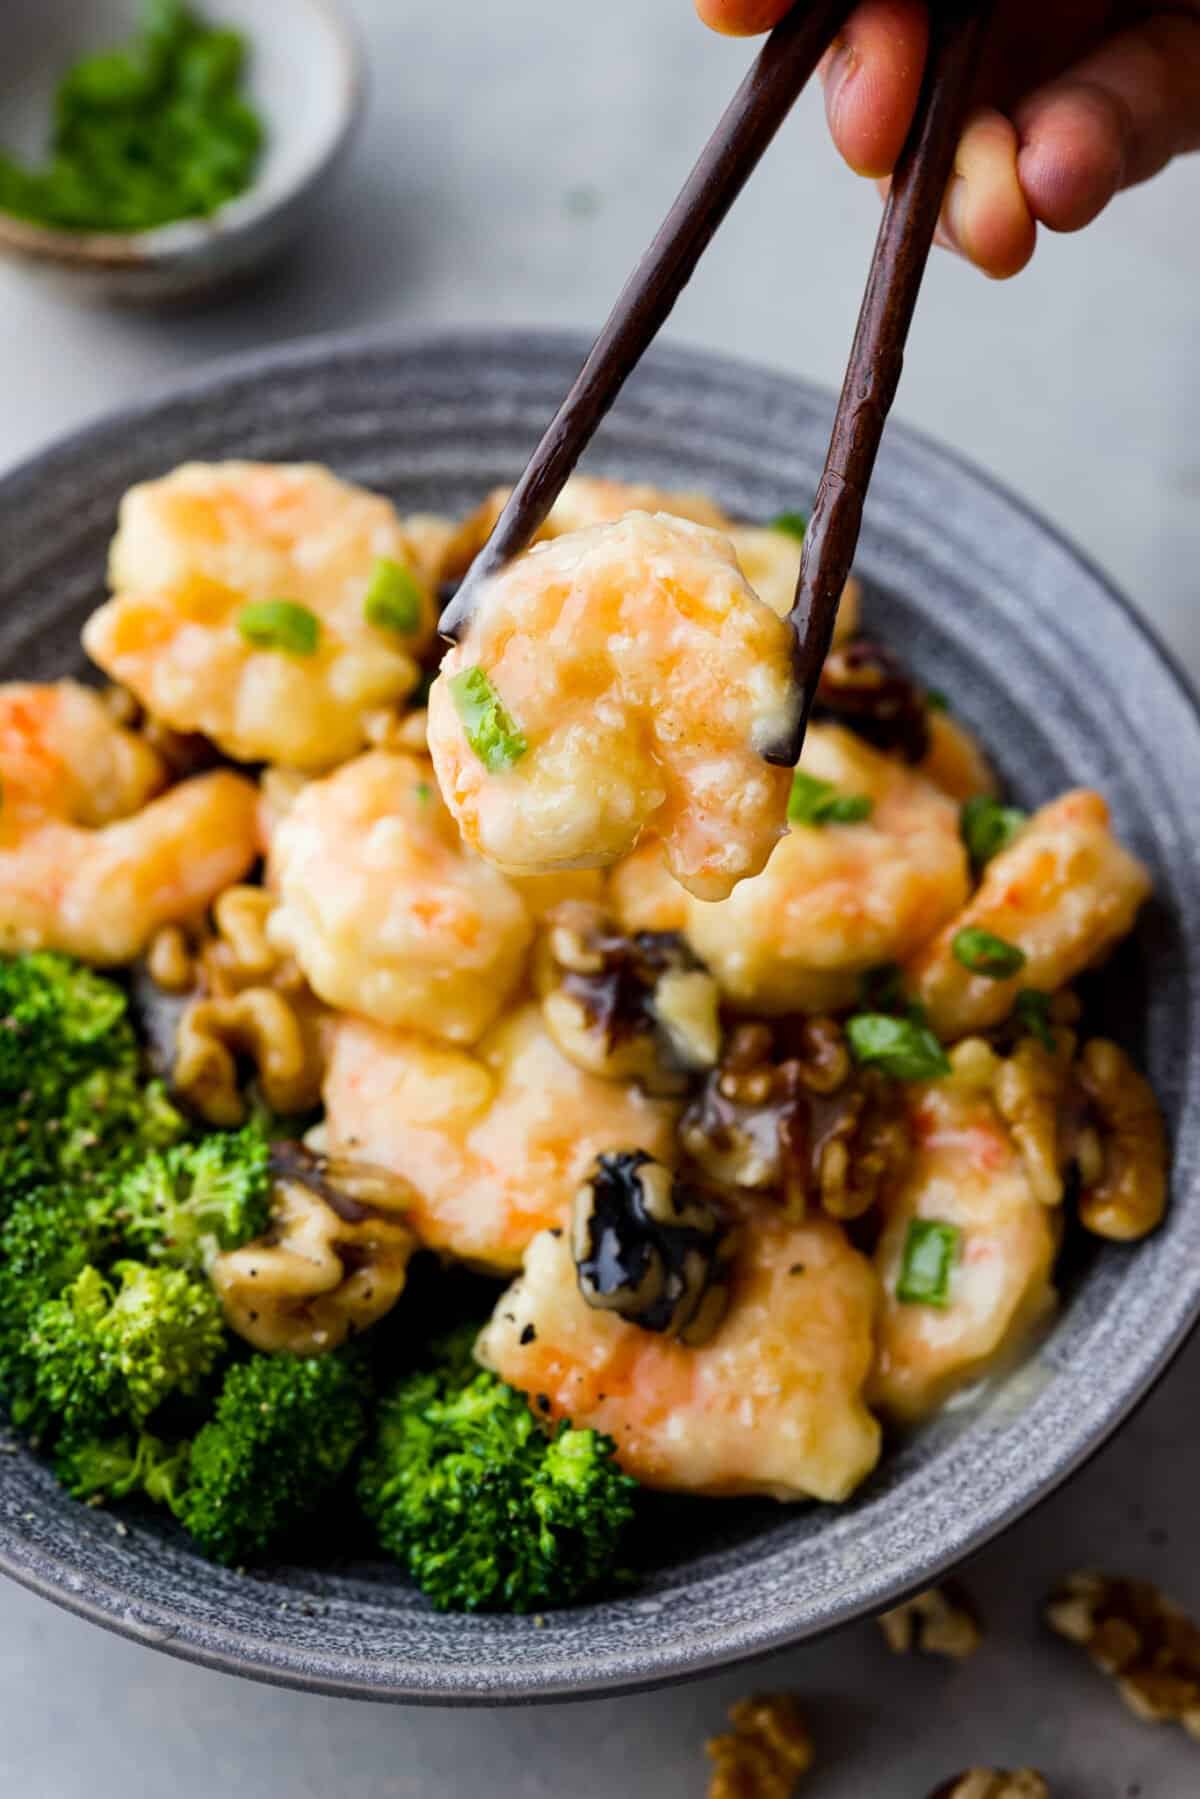
    Picking up a piece of honey walnut shrimp with chopsticks.

    More Better-Than-Takeout Recipes to Try:

    It’s so difficult to only choose four recipes here. I have so many favorites! If you love recreating your favorite Chinese dishes at home, you’ll have to check out my full list of recipes here for more dinner inspiration!

    Pin this now to find it later

    Pin It


    Source link

  • Slow Cooker Steak Bites

    Slow Cooker Steak Bites

    These slow cooker steak bites are melt-in-your-mouth tender and simmered in a rich, savory au jus-style sauce. It’s the kind of crock pot dinner recipe that feels like Sunday supper but cooks itself.


    Jump to: ℹ️ Overview | 🛒 Ingredients | 📷 How To Make | 👩‍🍳 Recipe Tips | 🥗 Serving Suggestions | 📝Full Recipe Card | 🍽 More


    At A Glance

    • Ready In: 6–8 hours
    • 🍽 Serves: 6
    • 🌱 Diet: Gluten-free (check gravy mix), high-protein
    • 💪 Nutrition Highlights: High in protein, rich in iron and B vitamins
    • 🥩 Main Ingredients: Sirloin roast, onion, garlic, au jus mix, beef broth
    • 🔪 Best Cuts to Use: Sirloin roast, chuck roast, bottom round
    • 🔥 Flavor Profile: Savory, beefy, buttery, deeply comforting
    • 🧊 Meal-Prep Friendly: Reheats beautifully and freezes well
    • 🍚 Best Served With: Mashed potatoes, egg noodles, rice, or crusty bread

    This slow cooker steak bites recipe hits that sweet spot between comfort food and practical weeknight dinner. It’s high in protein, deeply satisfying, and perfect for batch cooking. And honestly? It tastes even better the next day.

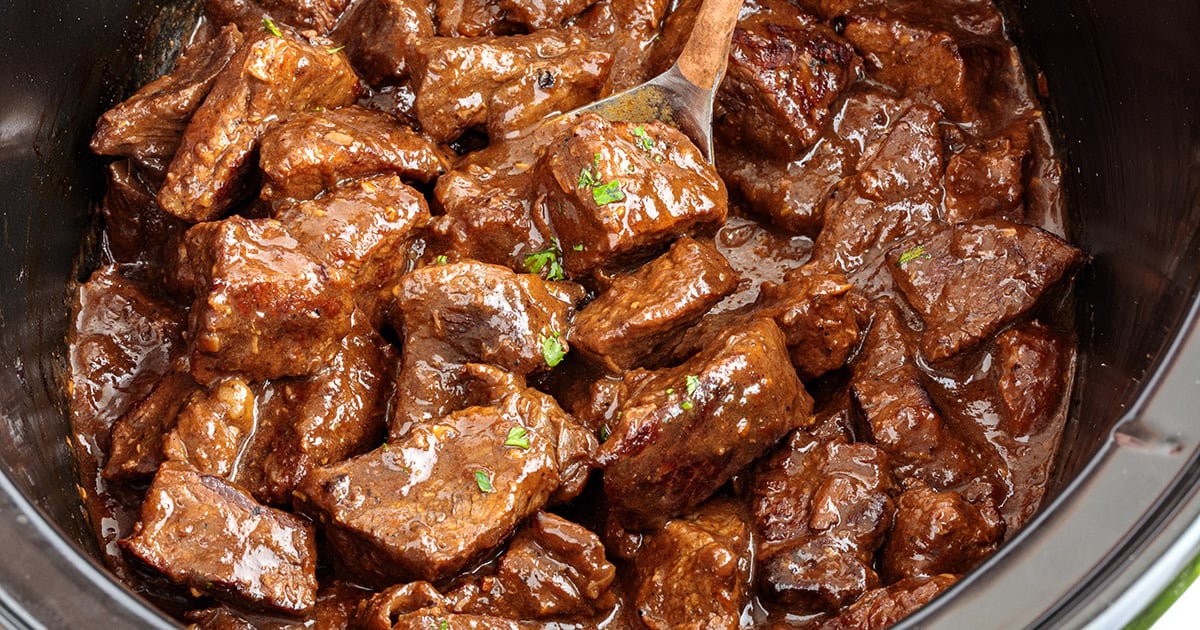
    The beef is cut into generous chunks or cubes, quickly seared for flavor, then slow cooked until fork-tender in a rich au jus-style sauce. After hours in the slow cooker, the steak becomes incredibly tender and coated in a glossy, savory sauce that tastes like you worked much harder than you did.

    👩‍🍳 Looking for more slow cooker recipes? Check out my slow cooker chicken tikka masala or this crock pot marry-me-chicken recipe. Check out more slow cooker dinner ideas here.

    Why This Recipe Works

    • Searing builds deep flavor (don’t skip if you can help it)
    • Deglazing captures every browned bit
    • Minced onion melts into the sauce
    • Low, slow cooking makes sirloin tender instead of tough
    • Simple ingredients = dependable results
    • Works in any kind of slow cooker (e.g. Crock-pot, Instant Pot)

    What You’ll Need

    Here is what you’ll need for this slow cooker steak bites recipe. Find the full measurements in the recipe card below.

    • Sirloin roast – Lean but tender when cooked low and slow. High in protein and iron. Swap: Chuck roast for richer flavor, bottom round for budget-friendly option.
    • Olive oil – For searing.
    • Kosher salt & black pepper – Simple seasoning that enhances the beef.
    • Aromatics: Onion (finely minced) which melts into the sauce for subtle sweetness, and garlic adds warmth and depth.
    • Au jus gravy mix – Creates that savory, beef-forward sauce. You can find it in most supermarkets in the dehydrated sauces section.
    • Beef broth – Helps deglaze and adds moisture.
    • A splash of Worcestershire or red wine for extra depth – these are optional but I always add them if I have some.
    • Butter – Adds richness at the end, again this is optional and you can skip it if watching calories.
    • Fresh parsley – For brightness.

    Best Cuts for Slow Cooker Steak Bites

    • Sirloin roast – Leaner, balanced flavor
    • Chuck roast – More marbling, ultra tender
    • Bottom round roast – Economical, needs full cook time
    • Top sirloin steak – Works if cut thick

    Avoid very lean cuts like eye of round unless cooking low for full duration.

    How To Make Slow Cooker Steak Bites

    Find the full recipe and nutritional information below. Here are some handy step-by-step photos for how to make steak bites in a slow cooker or crock pot.

    • Pat beef cubes dry and season with salt and pepper.
    • Sear in hot oil until well browned (work in batches).
    • Transfer beef to slow cooker.
    • Sauté onion until softened; add garlic briefly.
    • Deglaze pan with broth (and red wine, if using), scraping up browned bits.
    • Pour mixture over beef.
    • Sprinkle au jus mix evenly and stir gently. Add a splash of Worcestershire, if you have some on hand.
    • Cook LOW 6–8 hours or HIGH 3–4 hours.
    • Stir in butter before serving.

    Recipe Tips

    • Dry the beef first. Moisture prevents browning.
    • Don’t overcrowd the pan. Browning equals flavor.
    • Cut evenly sized cubes. This ensures even tenderness.
    • For thicker gravy: Mix 1 tablespoon cornstarch with 1 tablespoon cold water and stir in during last 15 minutes on HIGH.
    • Make-ahead: Cook fully, cool, refrigerate up to 3 days.
    • Freezer-friendly: Freeze up to 3 months.
    • Meal prep tip: Portion into containers with rice or potatoes for high-protein lunches.

    Serving Suggestions

    These slow cooker steak bites are made for mashed potatoes. The sauce seeps into every fluffy bite.

    They’re also excellent over buttered egg noodles or white rice. For a lighter option, try spooning them over cauliflower mash. Add sautéed green beans or glazed carrots on the side and you’ve got a full comfort dinner.

    This is the kind of slow cooker dinner recipe that feels cozy without being complicated.

    💬 If you’ve tried this slow cooker steak bites or any other recipe on the blog then don’t forget to rate the recipe and let me know how you got on in the comments below, I love hearing from you! You can also FOLLOW ME on Instagram, Facebook, Pinterest, YouTube, and or sign up to my Newsletter to see more of my delicious food.

    Want to Save This Recipe?

    Enter your email & I’ll send it to your inbox. Plus, get great new recipes from me every week!

    By submitting this form, you consent to receive emails from Cooked & Loved

    If you love hearty, comforting slow cooker steak recipes, these slow cooker steak bites deliver juicy beef and deep flavor with minimal effort. Find step-by-step photos and more recipe tips above.

    • Pat the sirloin cubes dry with paper towels. Season evenly with salt and black pepper.

    • Heat oil in a large skillet over medium-high heat. Sear beef in batches until browned on all sides. Transfer to slow cooker.

    • Reduce heat to medium. Add minced onion and cook 2–3 minutes until softened. Add garlic and cook 30 seconds.

    • Pour beef broth into skillet and scrape up browned bits. Simmer 1 minute. If using red wine, add at this stage as well.

    • Pour onion mixture over beef in slow cooker.

    • Sprinkle au jus gravy mix evenly over the beef and stir gently. If using Worcestershire sauce, add at this stage as well.

    • Cover and cook on LOW for 6–8 hours or HIGH for 3–4 hours, until tender.

    • Stir in butter just before serving. Garnish with parsley if desired.

    • Can I skip searing the beef? Yes, but searing adds depth and a richer sauce.
    • Will sirloin become tender? Yes, when cooked low for the full time and cut evenly.
    • Can I use cube steak? You can, but cube steak is already mechanically tenderized and cooks differently. Reduce cook time slightly and expect a softer texture.
    • How do I thicken the sauce? Use a cornstarch slurry during the last 15 minutes on HIGH.
    • Can I make this ahead? Absolutely. It reheats beautifully and tastes even richer the next day. Just cook fully, cool, refrigerate up to 3 days.
    • Dry the beef first. Moisture prevents browning.
    • Don’t overcrowd the pan. Browning equals flavor.
    • Cut evenly sized cubes. This ensures even tenderness.
    • For thicker gravy: Mix 1 tablespoon cornstarch with 1 tablespoon cold water and stir in during last 15 minutes on HIGH.
    • Freezer-friendly: Freeze up to 3 months.
    • Meal prep tip: Portion into containers with rice or potatoes for high-protein lunches.

    Calories: 354kcal | Carbohydrates: 3g | Protein: 49g | Fat: 14g | Saturated Fat: 5g | Polyunsaturated Fat: 1g | Monounsaturated Fat: 6g | Trans Fat: 0.2g | Cholesterol: 135mg | Sodium: 874mg | Potassium: 849mg | Fiber: 0.4g | Sugar: 1g | Vitamin A: 121IU | Vitamin C: 2mg | Calcium: 60mg | Iron: 4mg

    Keywords: steak bites, Crock Pot Turkey Breast, Slow Cooker Steak Bites, Crock Pot Steak, Slow Cooker Steak Recipes

    More Hearty Beef Dinners

    More Comforting Dinner Ideas


    Source link

  • Avocado Salsa Stuffed Sweet Potatoes Recipe

    Avocado Salsa Stuffed Sweet Potatoes Recipe

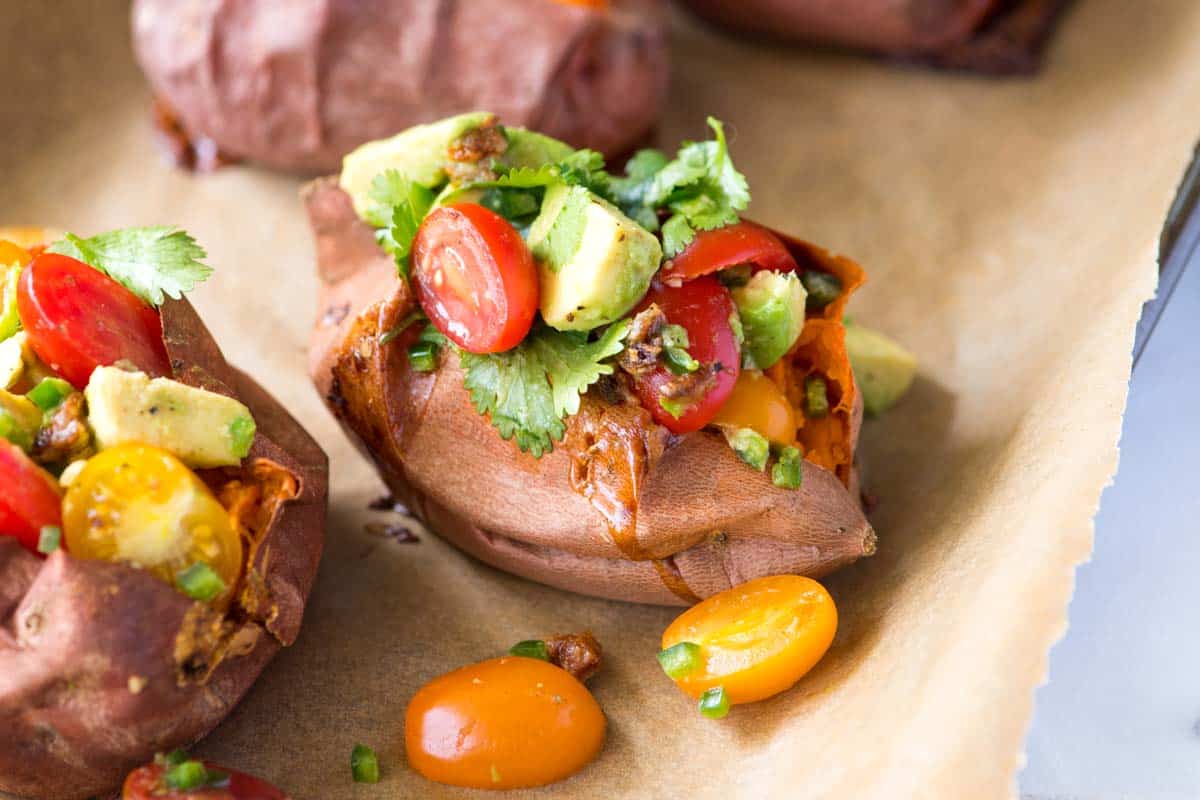
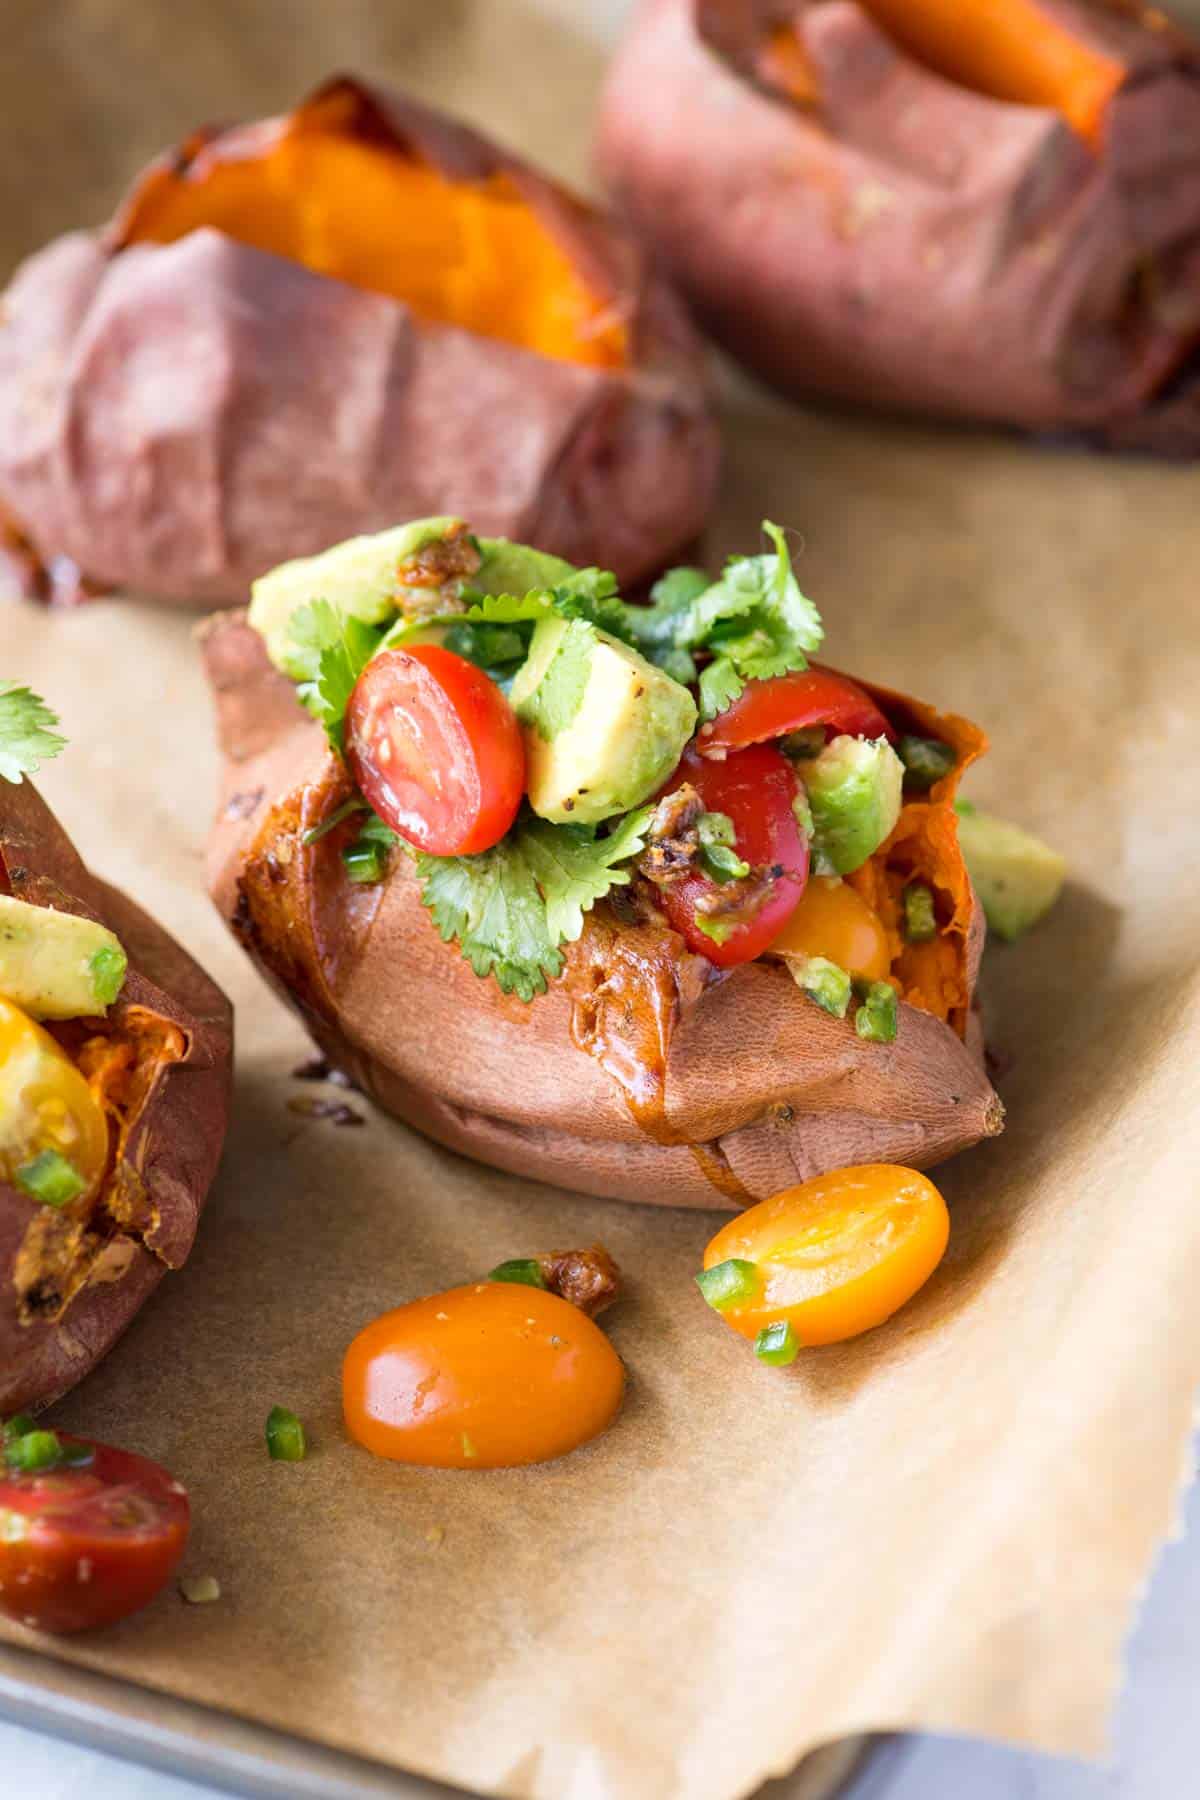
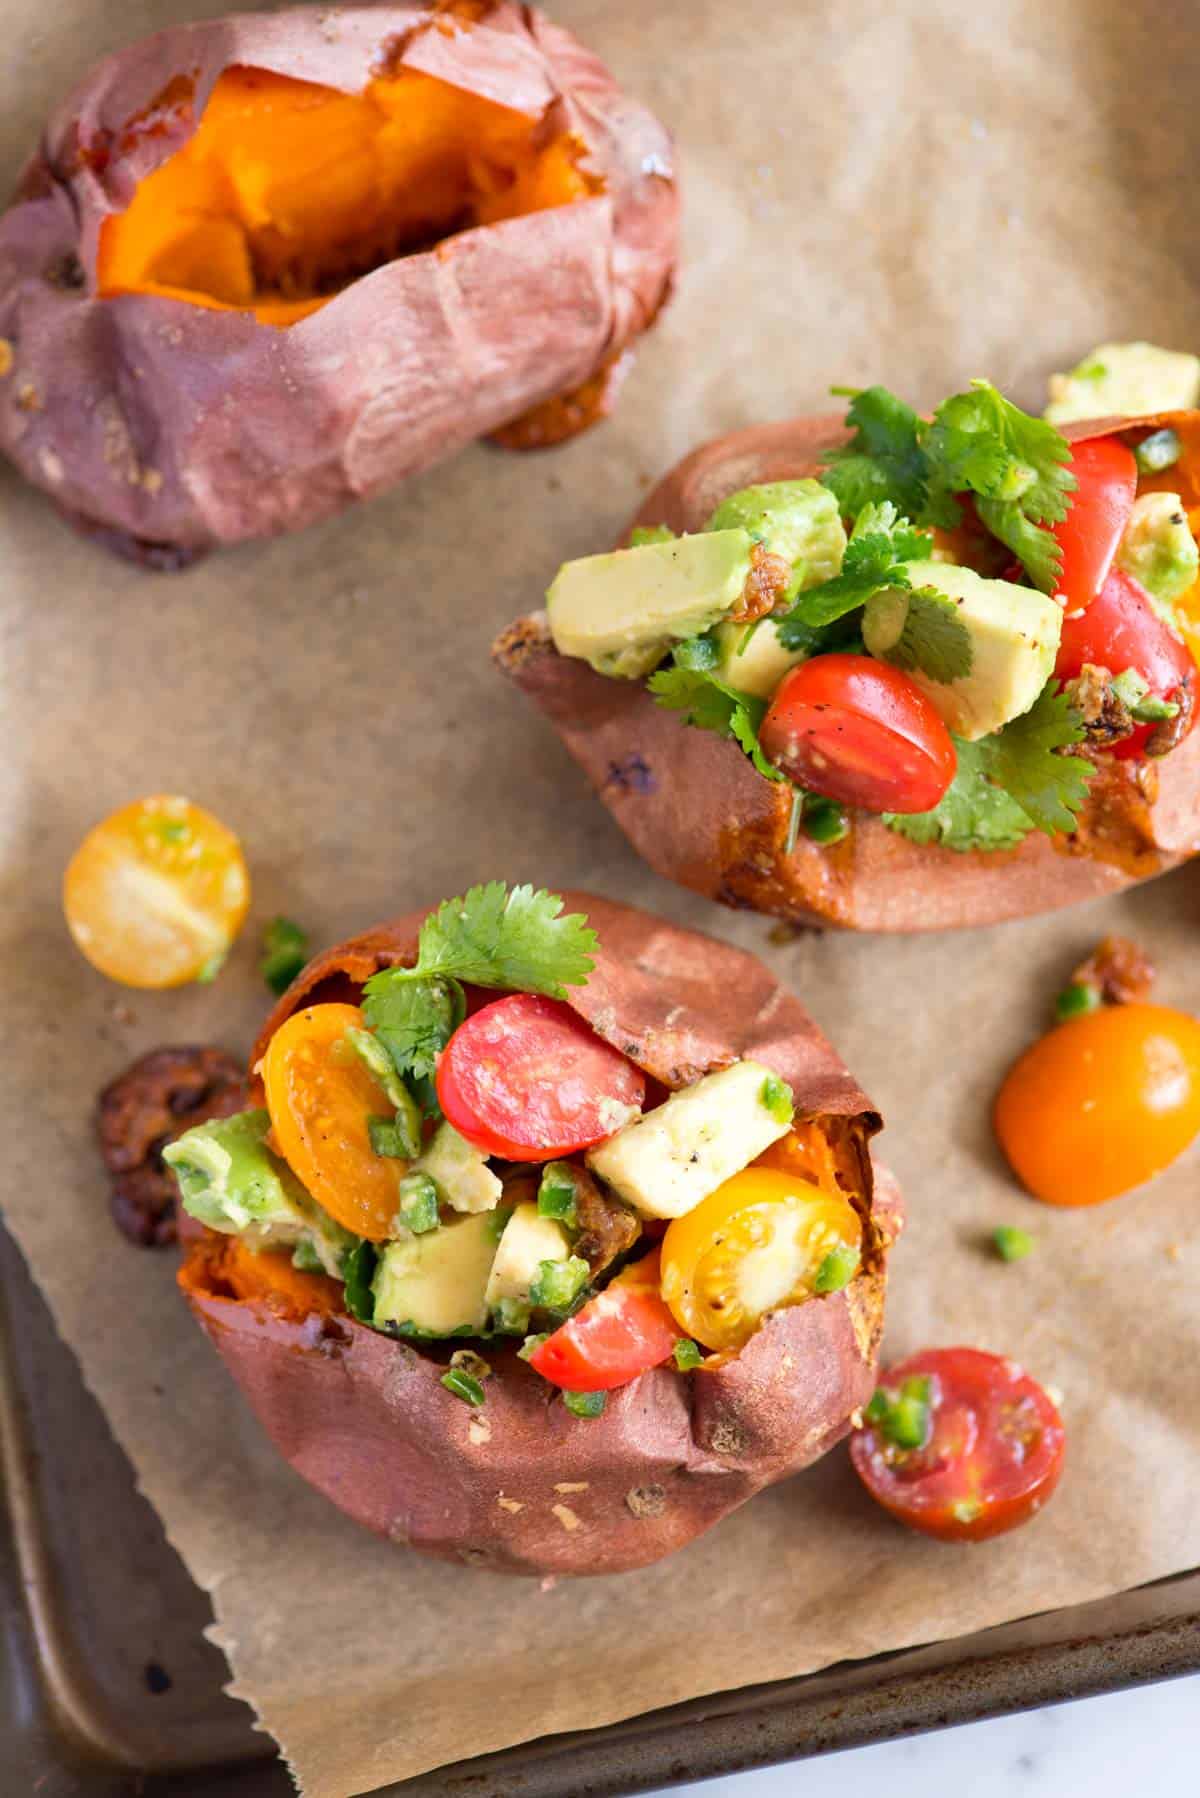
    These outrageously tasty vegan stuffed sweet potatoes are one of my favorite ways to enjoy sweet potatoes! We roast them and then stuff them with our simple avocado and tomato salsa. They are simple and so good!

    Vegan Avocado Salsa Stuffed Sweet Potatoes

    I’m always looking to add to our collection of sweet potato recipes, and these vegan stuffed sweet potatoes are such a great option! We roast the potatoes until soft and tender, then fill them with a zesty, chunky salsa made with avocados, tomatoes, and lime. It’s light and super comforting, perfect for a weeknight meal.

    Roasted sweet potatoes are on regular rotation in our house, so I love throwing in this stuffed version to change things up. This stuffed sweet potato recipe is definitely one you’ll want to make again and again. For more delicious sweet potato inspiration, check out our mashed sweet potatoes, coconut roasted sweet potatoes, or my favorite, sweet potato and black bean tacos!

    Key Ingredients

    • Sweet Potatoes: I look for medium sweet potatoes that are firm and have smooth skin. I also love purple sweet potatoes (ube) for this recipe if you can find them.
    • Garlic: I toss a few garlic cloves onto the baking sheet to roast alongside the sweet potatoes and turn sweet (like roasted garlic). Then, I squeeze the roasted garlic into my avocado and tomato salsa before stuffing the sweet potatoes.
    • Avocado: Use slightly firm, ripe avocados for this so you can chop them into bite-size pieces. To pick them, gently squeeze the avocado with the palm of your hand. If it yields a little when pressed, it’s ready to eat. You can also check under the stem. If the stem pulls away and the area underneath is green, you’ve found an avocado perfect for this recipe.
    • Tomatoes: Use what you love. In the photos, we have used a variety of cherry tomatoes, but any ripe tomato will do.
    • Lime, Jalapeño, and Cilantro: I use this combination when making our avocado salad, which this stuffing is loosely based on. Feel free to leave out the jalapeño or add more, depending on your love of spice.
    Vegan Avocado Salsa Stuffed Sweet Potatoes

    How to Make Stuffed Sweet Potatoes

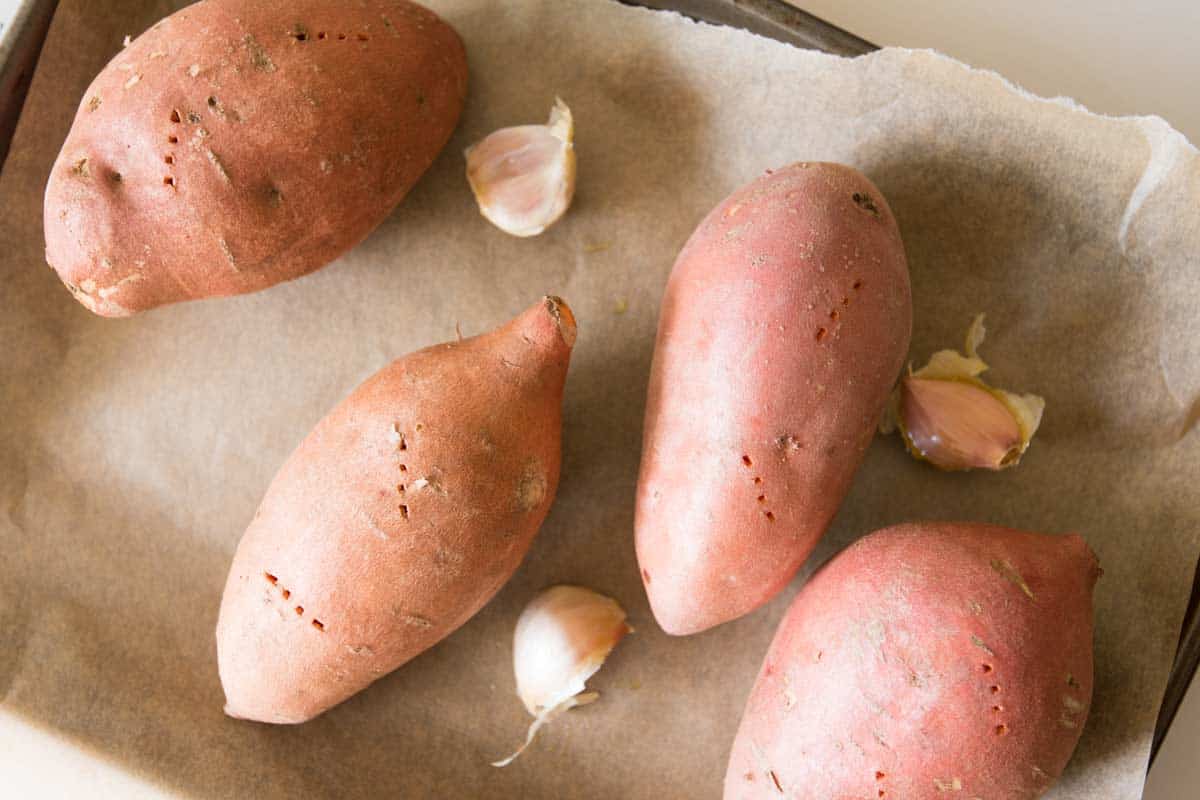
    We roast our sweet potatoes for this recipe, scrub away any dirt, and then use a fork to pierce the potatoes in several places. Place them onto a baking sheet, toss on your garlic cloves (with the peels left on), and then bake in a 400°F oven until they are very sweet and begin oozing (45 to 60 minutes).

    How to Make Stuffed Sweet Potatoes: Roasting the sweet potatoes

    Make the chunky salsa just as your sweet potatoes are finishing up in the oven. Combine chopped avocado, tomatoes, jalapeño, cilantro, and lime juice, then when they are cool enough to handle, squeeze the soft and sticky roasted garlic into the bowl. Add a pinch of salt and gently toss. Then, make a slit down the middle of your potatoes, and stuff them with as much salsa as you can fit.

    The sweet potatoes are soft and sweet, and the salsa is fresh, bright, and flavorful. We love it!

    Avocado Tomato Stuffed Sweet Potatoes

    Avocado Salsa Stuffed Sweet Potatoes

    • PREP
    • COOK
    • TOTAL

    Our family loves these stuffed sweet potatoes. The sweet potatoes are soft and sweet, and the salsa is fresh, bright, and flavorful. I love this as a light meal or on the side to other dishes. Check our tips below for roasting sweet potatoes in advance and adding protein with beans.

    4 Servings

    You Will Need

    4 medium sweet potatoes

    3 unpeeled garlic cloves

    1 teaspoon olive oil

    1 medium avocado, diced

    2 cups cherry tomatoes, halved

    1/4 cup fresh cilantro leaves

    1 jalapeño

    Salt

    Directions

      1Preheat the oven to 400°F (204°C). Line a baking sheet with parchment paper or foil.

      2Scrub sweet potatoes and pierce in several places with a fork. Place them onto the baking sheet.

      3Toss unpeeled garlic cloves with olive oil and place them around the potatoes on the baking sheet.

      4Bake for 45 minutes to an hour, depending on the size of the potatoes, until very soft and beginning to ooze.

      5While the sweet potatoes are roasting, you can prepare the salsa. Add the chopped avocado, tomato, and cilantro to a medium bowl.

      6Cut the jalapeño in half, lengthwise, and use a spoon to scrape out the white membrane and seeds. The membrane and seeds can be very spicy, so we remove them. Depending on how spicy you like things, you can leave some or all of the membrane and seeds.

      7Finely mince the jalapeño and add to the bowl.

      8When the garlic is cool enough to handle, squeeze the soft, sticky flesh inside the roasted garlic cloves onto your work surface, chop it, and add to the bowl.

      9Squeeze over the juice of one lime wedge, or about 1 to 2 tablespoons, and add a pinch of salt. Gently toss.

      10To serve, cut a slit down the middle of each sweet potato and fill with the tomato avocado salsa.

    Adam and Joanne’s Tips

    • Make ahead: Roast the sweet potatoes, allow them to cool, and store them in an airtight container for up to 4 days. Reheat, make the salsa, stuff them and enjoy. The salsa is best made the day you plan to eat it.
    • Add protein: Add 1 ½ cups drained canned or cooked black beans to the salsa to bump up the protein a bit. Here’s our recipe for how to cook black beans if you need it. Or, stir 2 cups of cooked quinoa into the salsa.
    • The nutrition facts provided below are estimates. We included 1/4 teaspoon of salt.

    Nutrition Per Serving
    Serving Size
    1 stuffed sweet potato
    /
    Calories
    202
    /
    Total Fat
    6.7g
    /
    Saturated Fat
    1g
    /
    Cholesterol
    0mg
    /
    Sodium
    224.8mg
    /
    Carbohydrate
    34.2g
    /
    Dietary Fiber
    7.8g
    /
    Total Sugars
    8.5g
    /
    Protein
    3.7g


    AUTHOR:

    Joanne Gallagher

    Adam and Joanne of Inspired Taste

    We are Adam and Joanne Gallagher, the creators of Inspired Taste. Established in 2009, Inspired Taste grew from a childhood dream into one of the internet’s most trusted recipe sites with hundreds of reliable recipes, step-by-step videos, and expert tips.More About Us

    Source link