Author: admin

  • Tangy BBQ Sauce Recipe

    Tangy BBQ Sauce Recipe

    This easy homemade BBQ sauce recipe is ready in about 15 minutes, uses pantry staples, and is so much better than store-bought!
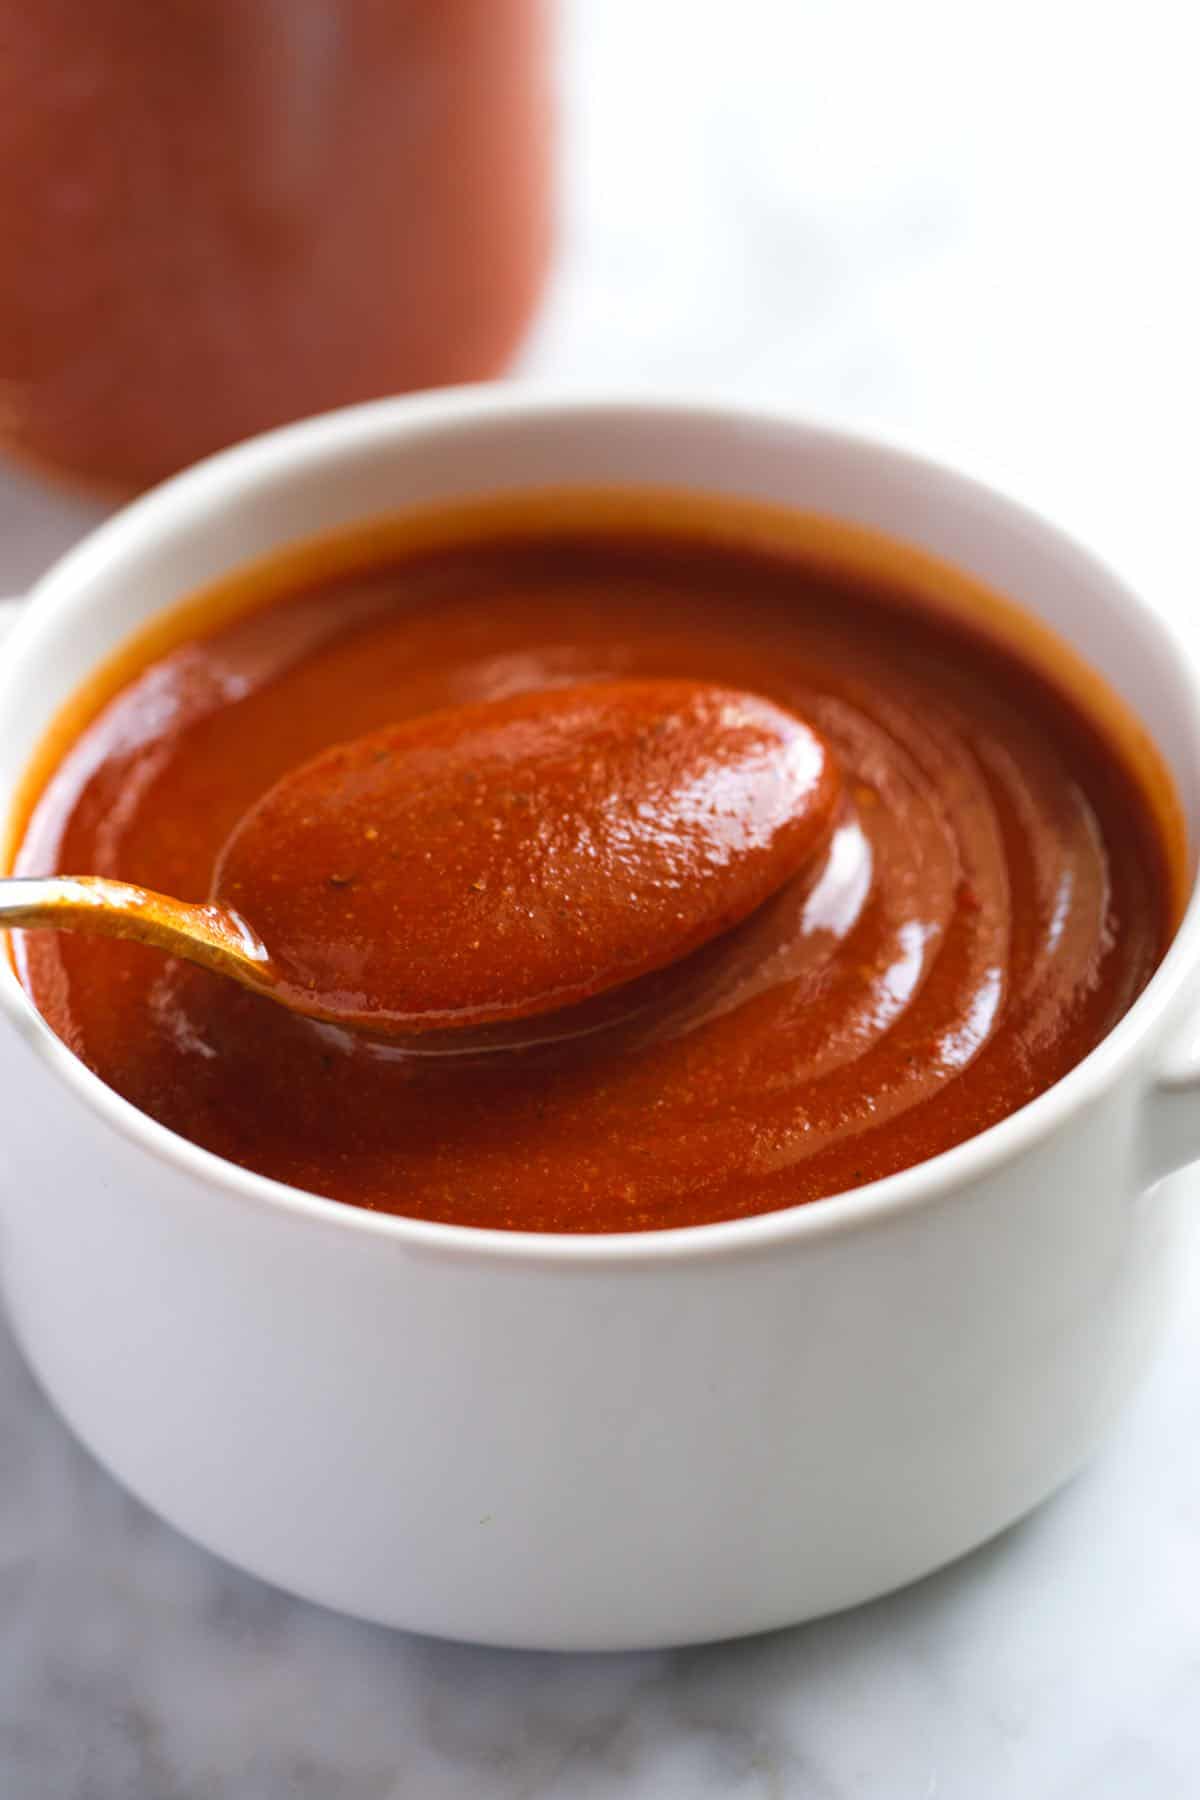
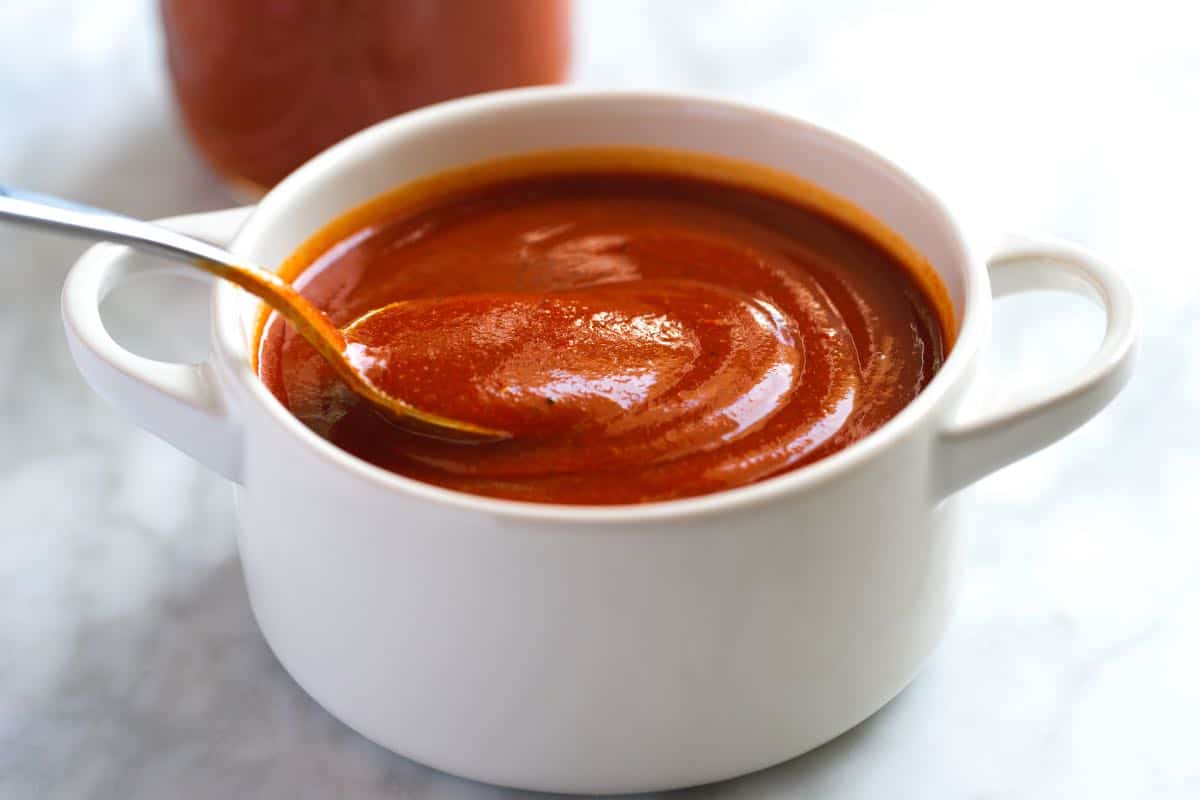
    Homemade BBQ Sauce

    This quick BBQ sauce is a delicious blend of Kansas City and Memphis styles, offering the best of both worlds. It’s slightly thicker than tangy Memphis style BBQ sauce but not as sugary sweet as the classic Kansas City version.

    Our recipe is the perfect DIY replacement for those store-bought bottles. It tastes better, and after looking at a few store-bought nutrition labels, this homemade version has significantly less sugar added, with more flavor! I use this sauce for our oven-baked beef ribs, and love it.

    Key Ingredients

    • Ketchup: We recommend using organic or natural ketchup for a thicker, less sweet sauce. Homemade ketchup also works!
    • Brown Sugar and Molasses: These add a rich sweetness to the sauce. I love how the molasses adds a richer flavor than brown sugar alone.
    • Pineapple Juice: Until testing this recipe, we had never used pineapple juice in barbecue sauce. But after tasting the sauce, we are sold! It’s sweet and tart. I love it! Look for pineapple juice with no sugar added.
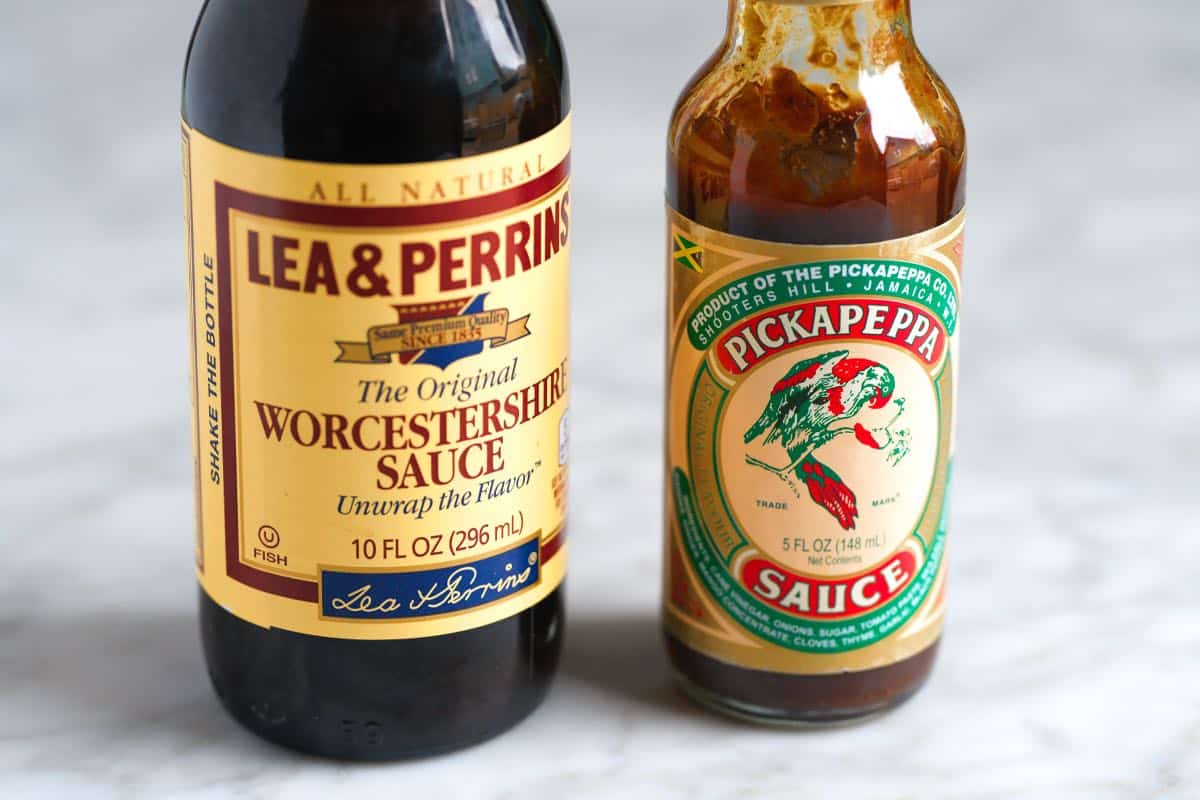
    • Worcestershire or Pickapepper Sauce: You can use either, but my favorite is Pickapepper sauce. If you’ve not heard of it before, you’ll find it near the condiments and where Worcestershire is sold. Pickapepper is a little thinner, slightly sweeter, and more aromatic than more savory Worcestershire. It’s also vegan, so if you hope to make a vegan BBQ sauce, use Pickapepper.
    • Apple Cider Vinegar: I love tangy BBQ sauces, so we add some apple cider vinegar to balance the sweetness from ketchup, brown sugar, molasses, and pineapple juice.
    • Spices: You probably already have most (if not all) of the spices you need in your kitchen. We add smoked paprika, mustard powder (or mustard, see our tips section), garlic powder, onion powder, and ground turmeric. For spice, which is optional, add cayenne pepper or Aleppo pepper.

    Find the full recipe with measurements below.

    How to Make the Best BBQ Sauce

    Tip 1: This sauce takes minutes to make. If you can add ingredients to a saucepan, you can make this easy BBQ sauce. Once you make it, try it slathered onto these tender baked ribs or stir it into our oven pulled pork (amazing!).

    Simply whisk everything together in a saucepan until it bubbles. Once it bubbles, reduce the heat and cover for 8 minutes. Then uncover the sauce and transfer it to jars so its ready for your next meal.
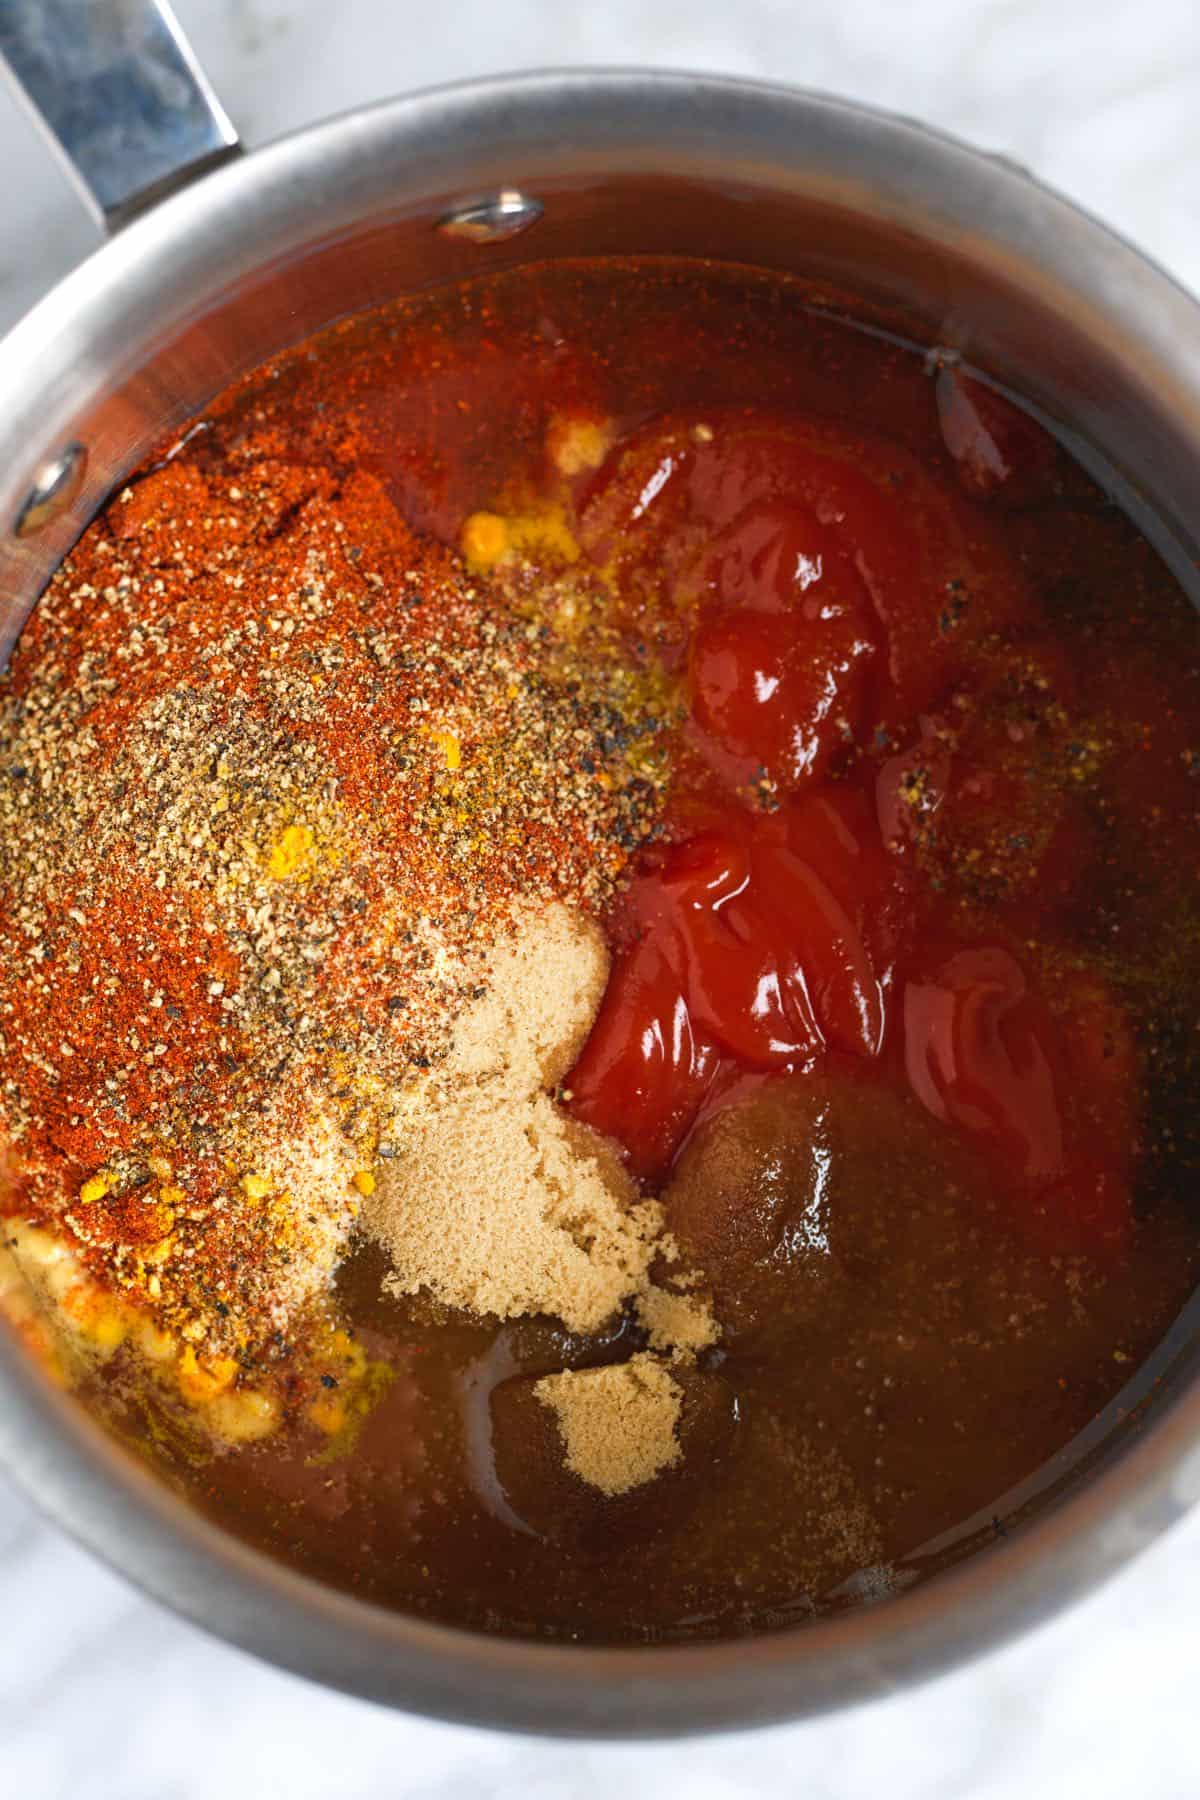
    Ingredients for bbq sauce in a pan

    Tip 2: Let it sit. At first taste, you might find the sauce too sweet or vinegary, but as it sits in the fridge, the flavors will bloom and become one. I love this sauce immediately, but it gets even better after an hour or two if you can wait.

    Ways to Use This Sauce

    This really is the perfect substitute for store-bought barbecue sauce. We use it for so many of the recipes on Inspired Taste. Here are some of our favorites:

    More Sauce Recipes
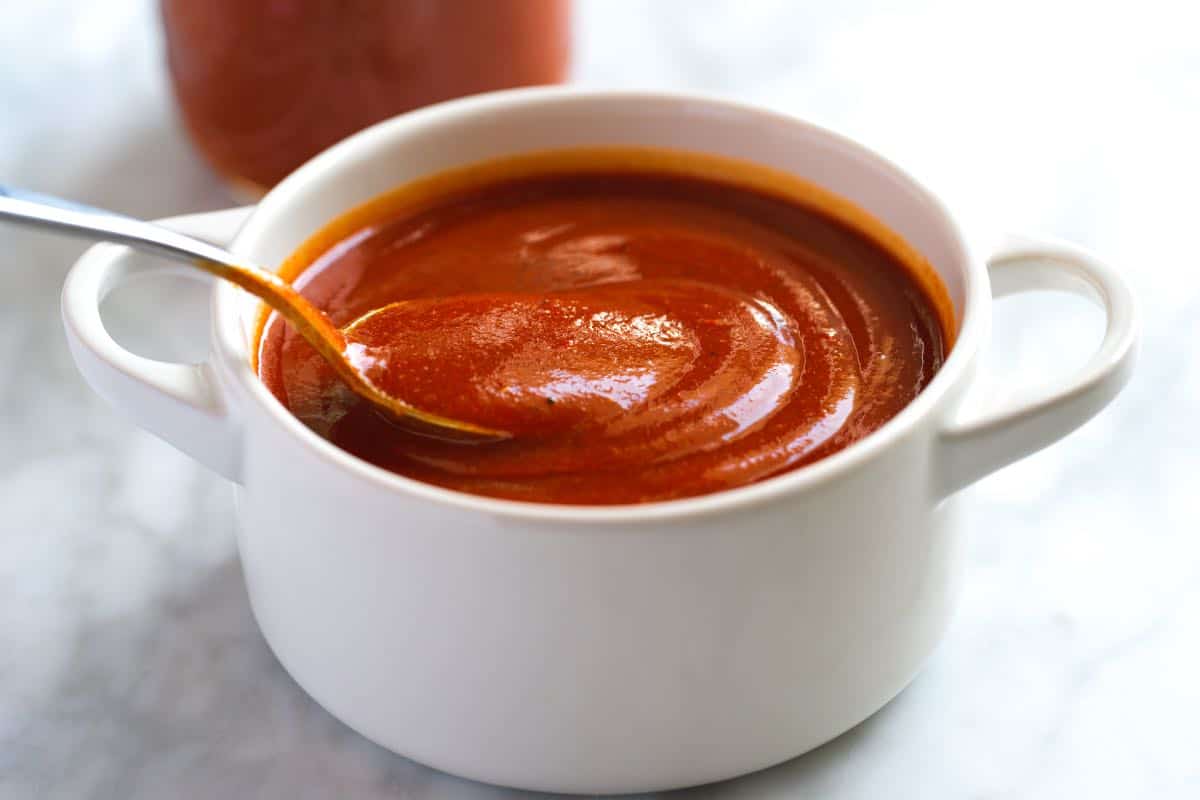
    Tangy Homemade BBQ Sauce

    Tangy BBQ Sauce

    • PREP
    • COOK
    • TOTAL

    If you can add ingredients to a saucepan, you can make this BBQ sauce. This homemade sauce is better than anything you can buy at the store! It’s made with pantry staples like ketchup, brown sugar, and cider vinegar and is ready in under 20 minutes. Store it in an airtight container in the fridge for up to 1 month!

    Makes 3 cups

    You Will Need

    1 ½ cups (390g) ketchup, see tips

    5 tablespoons (65g) packed light brown sugar

    1 tablespoon molasses

    6 ounces (177ml) pineapple juice with no added sugar (3/4 cup)

    2 tablespoons Worcestershire sauce or Pickapepper sauce, see tips

    2 tablespoons apple cider vinegar

    1 tablespoon plus 1/4 teaspoon smoked paprika

    2 teaspoons mustard powder, like Coleman’s, see tips

    1 ½ teaspoons garlic powder

    1 teaspoon onion powder

    1/8 teaspoon ground turmeric

    1/4 teaspoon fine sea salt

    1 teaspoon fresh ground black pepper

    1/4 teaspoon Aleppo pepper or cayenne pepper, optional for heat

    Directions

      1Whisk all the ingredients in a medium saucepan over medium-low heat. Continue to whisk as you bring the sauce to a simmer. Since the saucepan is over lower heat, this will take a few minutes, but keeping the heat low prevents the sugars in the sauce from scorching.

      2Once the BBQ sauce bubbles, cover the saucepan with its lid and reduce the heat to the lowest flame or setting. Leave the sauce covered for 8 minutes.

      3Transfer to jars and let cool. Keep refrigerated for up to one month.

      4At first, this homemade barbecue sauce tastes sweeter and vinegary. However, after it has cooled, the flavors mellow a little, and the sauce becomes one.

    Adam and Joanne’s Tips

    • Ketchup: This sauce is best when made with thicker varieties of ketchup with no high fructose corn syrup added. You can use homemade ketchup, or we have found that organic or natural options like Hunt’s 100% Natural or Heinz Simply work nicely in this recipe.
    • Pickapepper and Worcestershire sauce: These umami-rich condiments are used as seasonings in soups, stews, and sauces. Pickapepper is a little thinner and a bit sweeter than the more savory Worcestershire, but in most circumstances, they are interchangeable. As a bonus, Pickapeppa sauce is naturally vegan, so if you want to make vegan barbecue sauce, Pickapepper is the right choice.BBQ Sauce Ingredients: Worcestershire Sauce vs. Pickapepper Sauce
    • Dry mustard: Coleman’s dry mustard is excellent here, but you can substitute it with other mustard powders, such as prepared Coleman’s mustard or Dijon mustard. When substituting prepared mustard for dry, you will need a bit more. Start with one tablespoon of prepared mustard and go from there.
    • Making BBQ sauce on the grill: You can also make this BBQ sauce on the grill. Be mindful of the hotter areas of your grill. Keep the sauce over the coolest, most indirect heat so the sugars don’t burn.
    • Making vegan BBQ sauce: Use vegan-reviewed brands of ketchup, sugar, and molasses, as well as Pickapepper sauce, instead of Worcestershire.
    • The nutrition facts provided below are estimates.

    Nutrition Per Serving
    Serving Size
    2 tablespoons
    /
    Calories
    38
    /
    Total Fat
    0.1g
    /
    Saturated Fat
    0g
    /
    Sodium
    199.6mg
    /
    Carbohydrate
    9.3g
    /
    Dietary Fiber
    0.2g
    /
    Total Sugars
    7.4g
    /
    Protein
    0.2g


    AUTHOR:

    Joanne Gallagher

    Adam and Joanne of Inspired Taste

    We are Adam and Joanne Gallagher, the creators of Inspired Taste. Established in 2009, Inspired Taste grew from a childhood dream into one of the internet’s most trusted recipe sites with hundreds of reliable recipes, step-by-step videos, and expert tips.More About Us
    Source link

  • Perfect Asparagus Soup Recipe

    Perfect Asparagus Soup Recipe

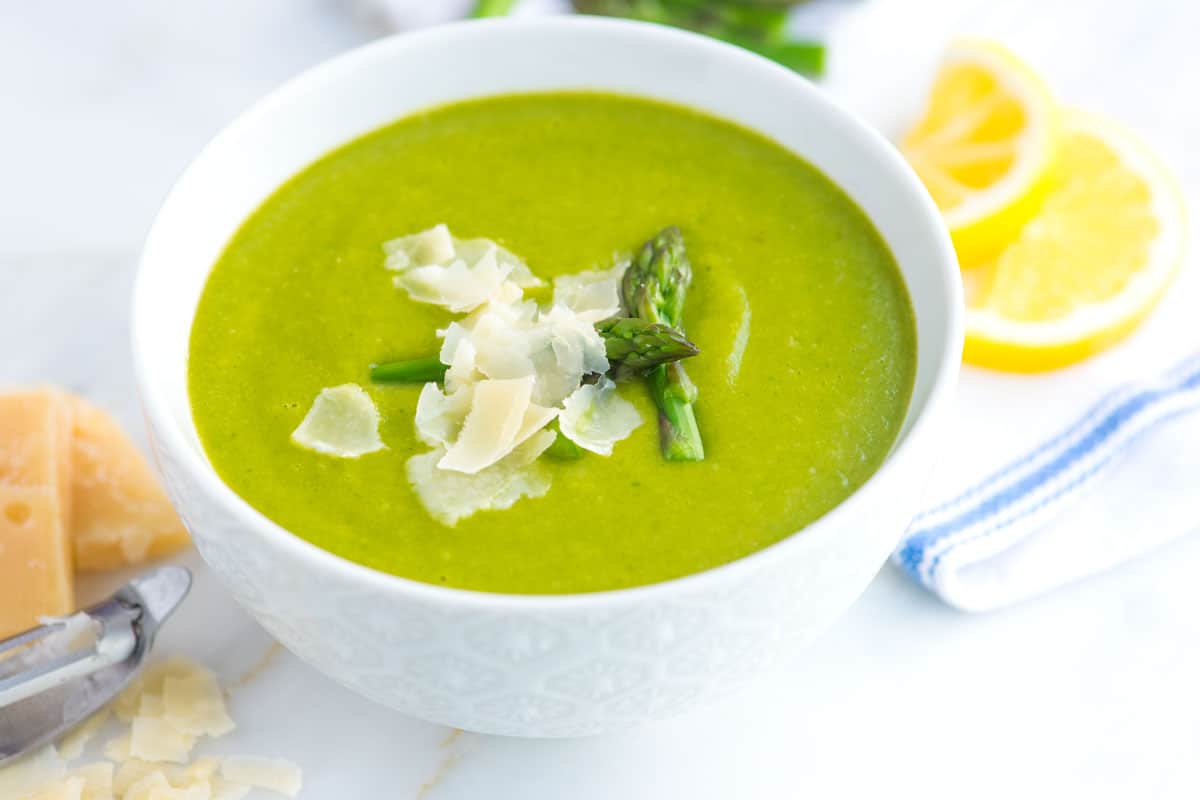
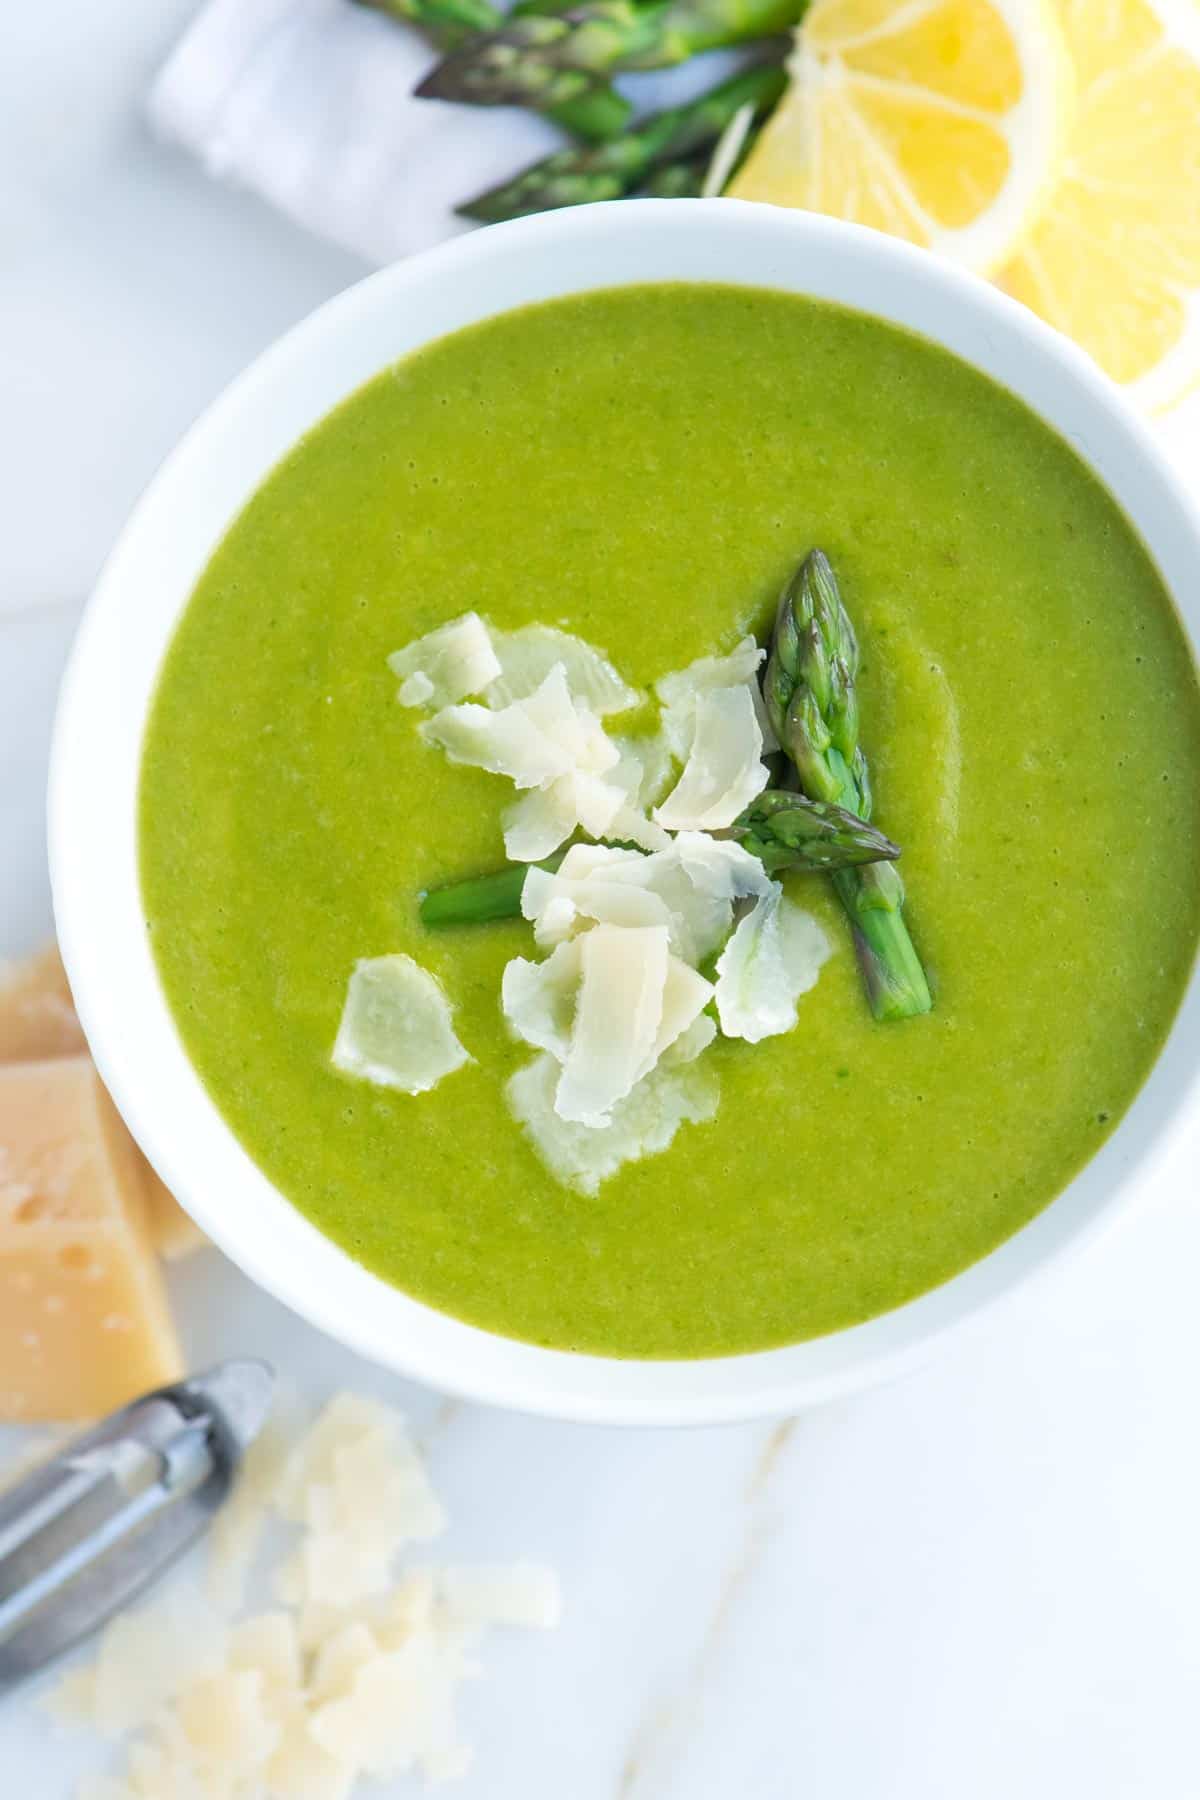
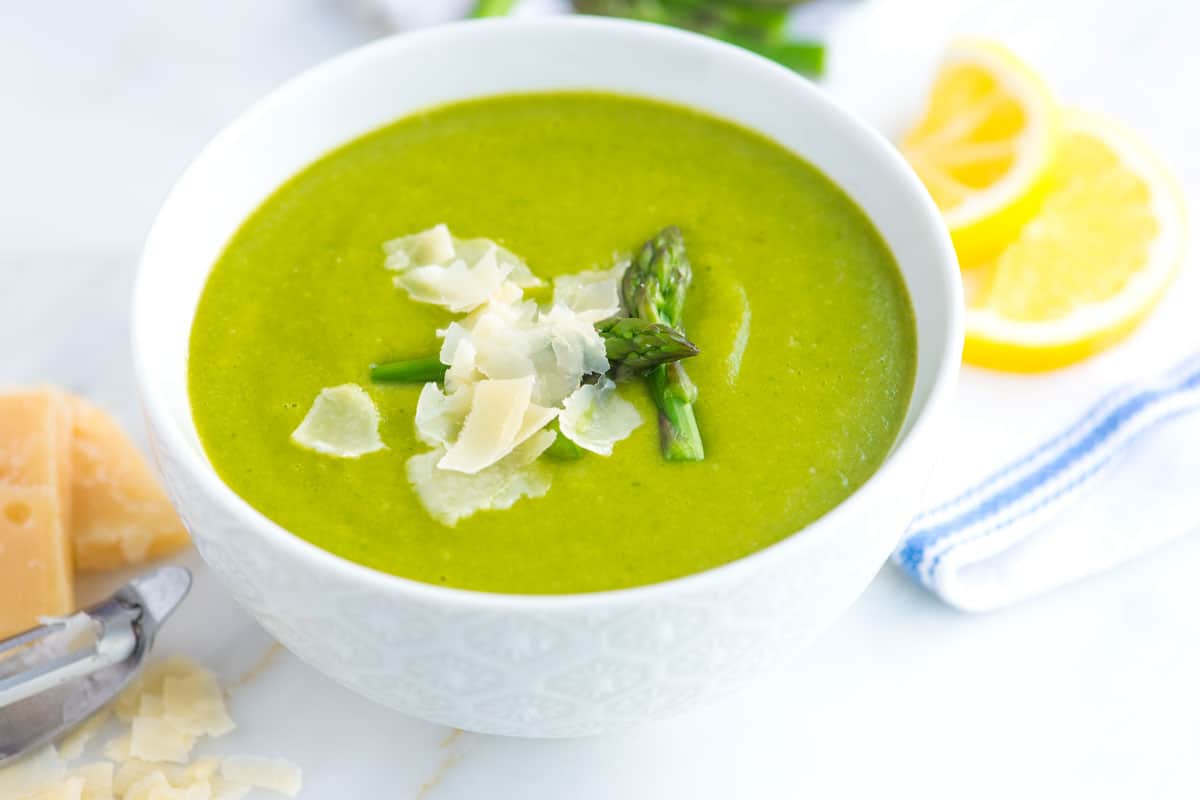
    This incredible asparagus soup recipe turns out perfectly silky and creamy, and that’s without cream. We blend asparagus, potatoes, and a simple homemade broth. It’s healthy, super satisfying, and vegetarian!

    Creamy Asparagus Soup

    This asparagus soup is pure Spring in a bowl, and honestly, it’s one of my favorite ways to cook with asparagus! It’s light on calories but big on flavor. Don’t get me wrong, I love a rich, creamy soup, but sometimes you just want something a little lighter. That’s where this recipe comes in. Substituting potatoes for cream thickens the soup and adds a silky texture without any heaviness. I use this trick in our creamy vegetable soup and broccoli cheddar soup, too!

    This soup is also resourceful! We use the parts of asparagus and leeks that usually get tossed (like the tough ends and dark green tops) to make a really flavorful broth. It’s such a tasty way to cut down on food waste while boosting flavor. For more asparagus recipes, I bet you’ll love this roasted asparagus or my go-to asparagus omelet.

    Key Ingredients

    • Asparagus: When shopping, look for bright green asparagus spears with tightly closed tips. A little purple on the tips is also a good thing. Skip any asparagus that looks dull, yellow, or has open, flowery tips. They should also feel firm and snap when bent. If they’re limp or bendy, they’re past their prime.
    • Leeks: Leeks are like onions, but taste a bit more sweet and delicate. We’ll use the white and light green parts in the soup, and save the dark green tops for our broth. To clean them, just trim off the root and dark green tops, slice the leek lengthwise, and rinse well under running water to get rid of any grit hiding inside. If you want more tips, check out our tutorial for how to clean leeks!
    • Carrot: Just one carrot brings a little sweetness and a bit of color to the broth.
    • Garlic: I like to use garlic in both the broth and the soup for extra flavor.
    • Potatoes: Here’s the secret to that creamy texture! No cream needed. Just potatoes (russet or Yukon Gold work great) to give this soup body and silkiness.
    • Spinach: Toss in a few handfuls of baby spinach at the end for a bit more green and a little extra nutrition.
    • Lemon: A squeeze of fresh lemon juice on top is my favorite finishing touch. It makes all the flavors pop!
    • Cheese (optional): We used parmesan in the photos, but feta or a spoonful of ricotta or mascarpone is amazing too.

    Find the full recipe with measurements below.

    How to Make Asparagus Soup

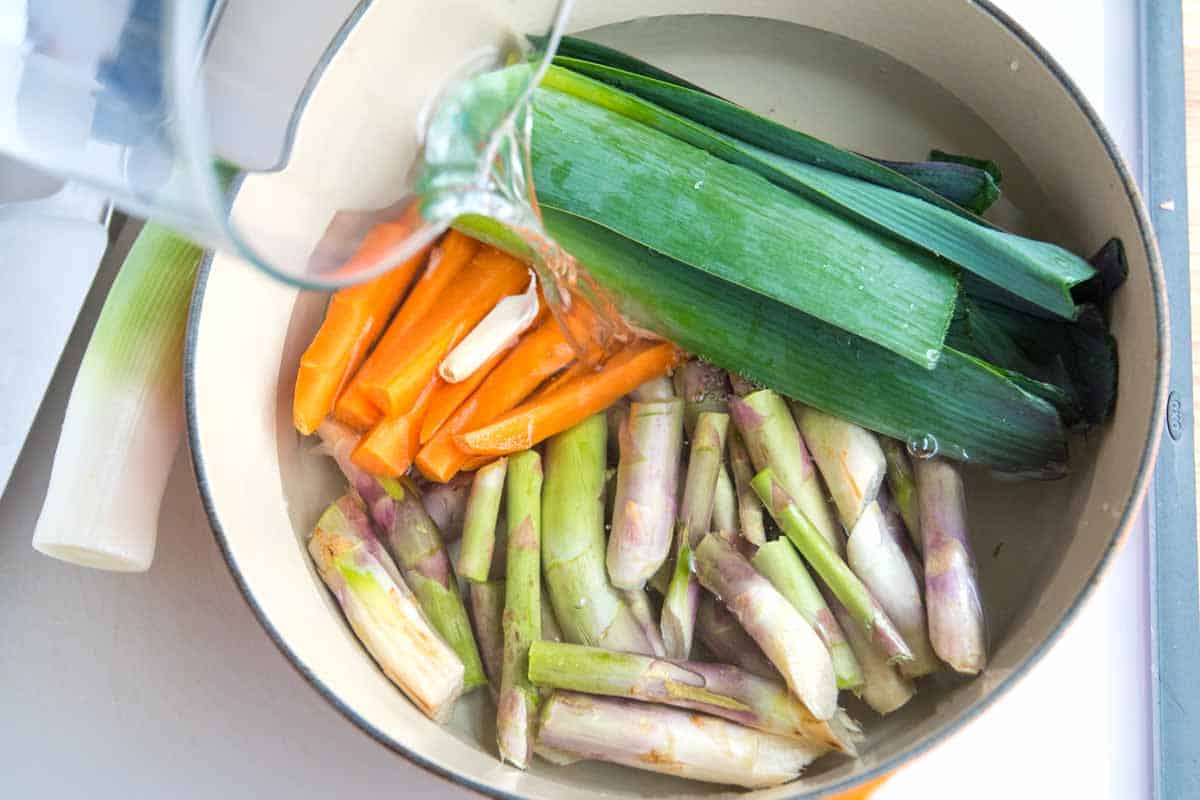
    Tip 1: Make the asparagus broth. My favorite part about this soup recipe is that the base is a broth made with ingredients you would normally just toss in the trash. For this asparagus soup, combine the trimmed ends of the asparagus, dark green tops of the leeks, a carrot, a garlic clove, a bay leaf, salt, and pepper in a pot. Cover with water (or a light chicken broth), then simmer for about 25 minutes.

    Making a veggie broth for Asparagus Soup

    Tip 2: Cook the leeks until soft. Whenever you use leeks, you really want to cook them long enough for them to soften and sweeten. We do this in a bit of olive oil in a Dutch oven, then build our soup from there. I cook my leeks the same way when making potato leek soup.

    Tip 3: Add potatoes. Once your leeks are soft and sweet, stir in garlic and potatoes. Then, pour in some of that asparagus broth from earlier. Let everything simmer until the potatoes are soft (about 20 minutes).

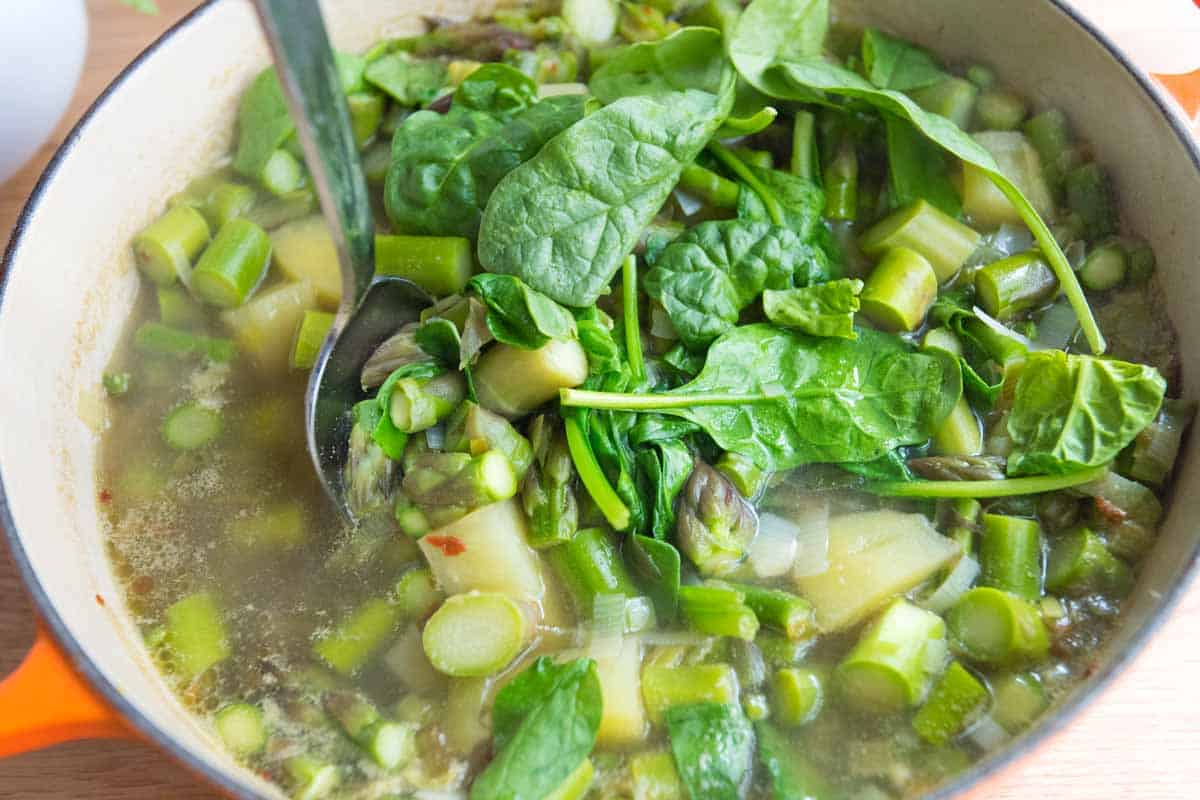
    Tip 4: Finish with the asparagus and spinach. The asparagus does not need much time to cook, so we wait until the potatoes are soft before adding it. When they are tender and bright green, we take the soup off of the heat and then stir in spinach. This adds flavor and nutrition, but most importantly, it makes our soup a bit greener.

    Adding chopped asparagus to the soup pot.
    Finishing with fresh spinach to make the soup more green.

    Tip 5: Blend and thin as needed. I usually use my immersion blender right in the soup pot, but for a completely smooth soup, transfer to a stand blender and blend. Depending on how thick you’d like the soup, you can thin it with a bit more of the asparagus broth. Then season to taste and serve.

    More Vegetable Soup Recipes

    Asparagus Soup

    Perfect Asparagus Soup

    • PREP
    • COOK
    • TOTAL

    This simple asparagus soup is delicious, vegetarian, and minimizes waste. Instead of using stock to make the soup, we make a quick asparagus broth using the asparagus and leek trimmings. The broth is delicate and fragrant and is the perfect way to make use of trimmings instead of throwing them away.

    6 Servings

    You Will Need

    2 pounds asparagus (907 g)

    1 large leek

    1 medium carrot

    2 garlic cloves, gently smashed

    1 bay leaf

    2 tablespoons extra-virgin olive oil

    2 medium russet potatoes, peeled and diced, about 1 pound (450 g)

    3 cups baby spinach, about 4 ounces (113 g)

    Half of a lemon, cut into wedges

    Salt and fresh ground black pepper

    Parmesan cheese, feta, ricotta, or mascarpone for garnish, optional

    Directions

    • Make Asparagus Broth
    • 1Trim the dry, woody bottoms of the asparagus. To find where to trim, bend the stalks until they naturally snap. Cut or snap at that point. Save the tops for the soup and add the stems to a large pot.

      2Cut the dark green tops from the leek and rinse them well to remove any grit. Add these to the pot with the asparagus stems. Rinse the leek’s lighter green and white parts and set them aside.

      3Add the carrot, smashed garlic clove, bay leaf, 1/2 teaspoon of salt, and 1/4 teaspoon of pepper to the pot. Cover with 9 cups of water and bring to a boil. Reduce the heat, cover, and simmer for 25 minutes. Season to taste with salt, adding a little at a time until you can taste the broth’s flavors without it being overly salty. Strain the broth and reserve the garlic cloves.

    • Make Asparagus Soup
    • 1Thinly slice the reserved white and light green parts of the leek.

      2Heat the olive oil in a large soup pot or Dutch oven over medium heat. Add the sliced leeks and 1/4 teaspoon of salt. Cook, stirring often, until softened and fragrant, about 5 minutes.

      3Stir in the reserved garlic cloves and cook for one more minute. Add the potatoes and 6 cups of the asparagus broth (save the rest for thinning later). Bring to a boil, then reduce heat and simmer, covered, until the potatoes are very tender, about 20 minutes.

      4Meanwhile, cut the tips from 12 asparagus spears measuring about 1 ½ inches from the top. Set these aside for garnish. Roughly chop the remaining asparagus.

      5Once the potatoes are tender, stir in the chopped asparagus (not the reserved tips) and simmer until tender-crisp and bright green.

      6Remove from the heat and stir in the spinach until wilted but still bright green, about 1 minute. Blend the soup until smooth using an immersion blender (or a regular blender in batches).

      7Taste and season with more salt and pepper as needed. If the soup is too thick, thin it with the reserved asparagus broth, 1/4 cup at a time.

      8Just before serving, cook the reserved asparagus tips in boiling salted water until tender-crisp and bright green (about 3 minutes). Rinse with cold water to stop the cooking.

      9Ladle the soup into bowls and garnish with the asparagus tips and cheese (optional). Serve with a lemon wedge for squeezing over the top.

    Adam and Joanne’s Tips

    • Storing: The soup’s bright green color may dull slightly over time, but you can store this in an airtight container in the fridge for up to 4 days.
    • Blending the soup: I use an immersion blender. If you use a stand blender, remember to blend in batches. If your soup is hot while blending, you want to remove the lid’s center insert and cover it with a kitchen towel while blending, helping some of the steam release and preventing the lid from popping off (which can be a big, hot mess).
    • Leftover broth: Use it in other soups to cook rice or grains or make risotto.
    • The nutrition facts provided below are estimates. We did include 1 tablespoon of parmesan cheese in the calculations for each serving (there are 6 servings total). We omitted salt from the calculations since you must add to your tastes.

    Nutrition Per Serving
    Serving Size
    1 of 6 servings
    /
    Calories
    149
    /
    Protein
    6g
    /
    Carbohydrate
    20g
    /
    Dietary Fiber
    4g
    /
    Sugars
    3g
    /
    Total Fat
    6g
    /
    Saturated Fat
    2g
    /
    Cholesterol
    3mg


    AUTHOR:

    Joanne Gallagher

    Adam and Joanne of Inspired Taste

    We are Adam and Joanne Gallagher, the creators of Inspired Taste. Established in 2009, Inspired Taste grew from a childhood dream into one of the internet’s most trusted recipe sites with hundreds of reliable recipes, step-by-step videos, and expert tips.More About Us
    Source link

  • Anasazi Bean Soup (Slow Cooker or Stovetop)

    Anasazi Bean Soup (Slow Cooker or Stovetop)

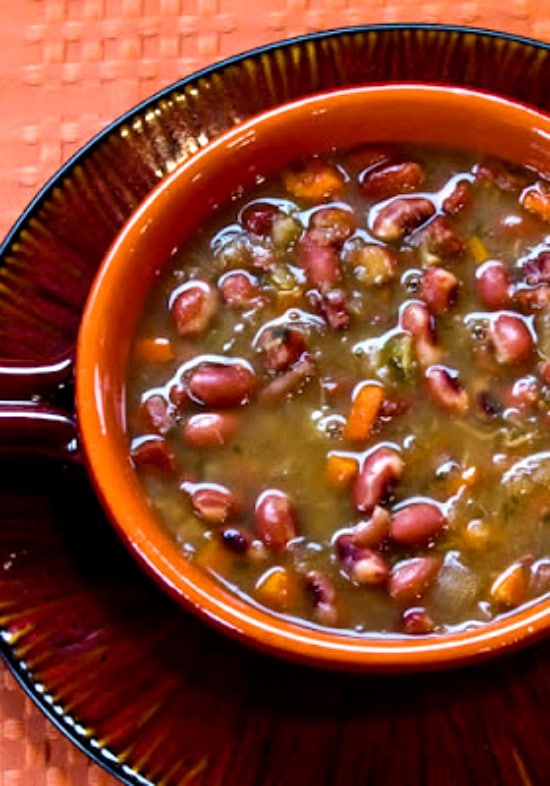
    Anasazi Bean Soup is a fun soup I used to make with my fourth grade students as we learned about the ancient people who lived in Utah! And there are instructions for making this tasty soup with other beans, and it came be made in the slow cooker or on the stove.

    PIN Anasazi Bean Soup to try it later.

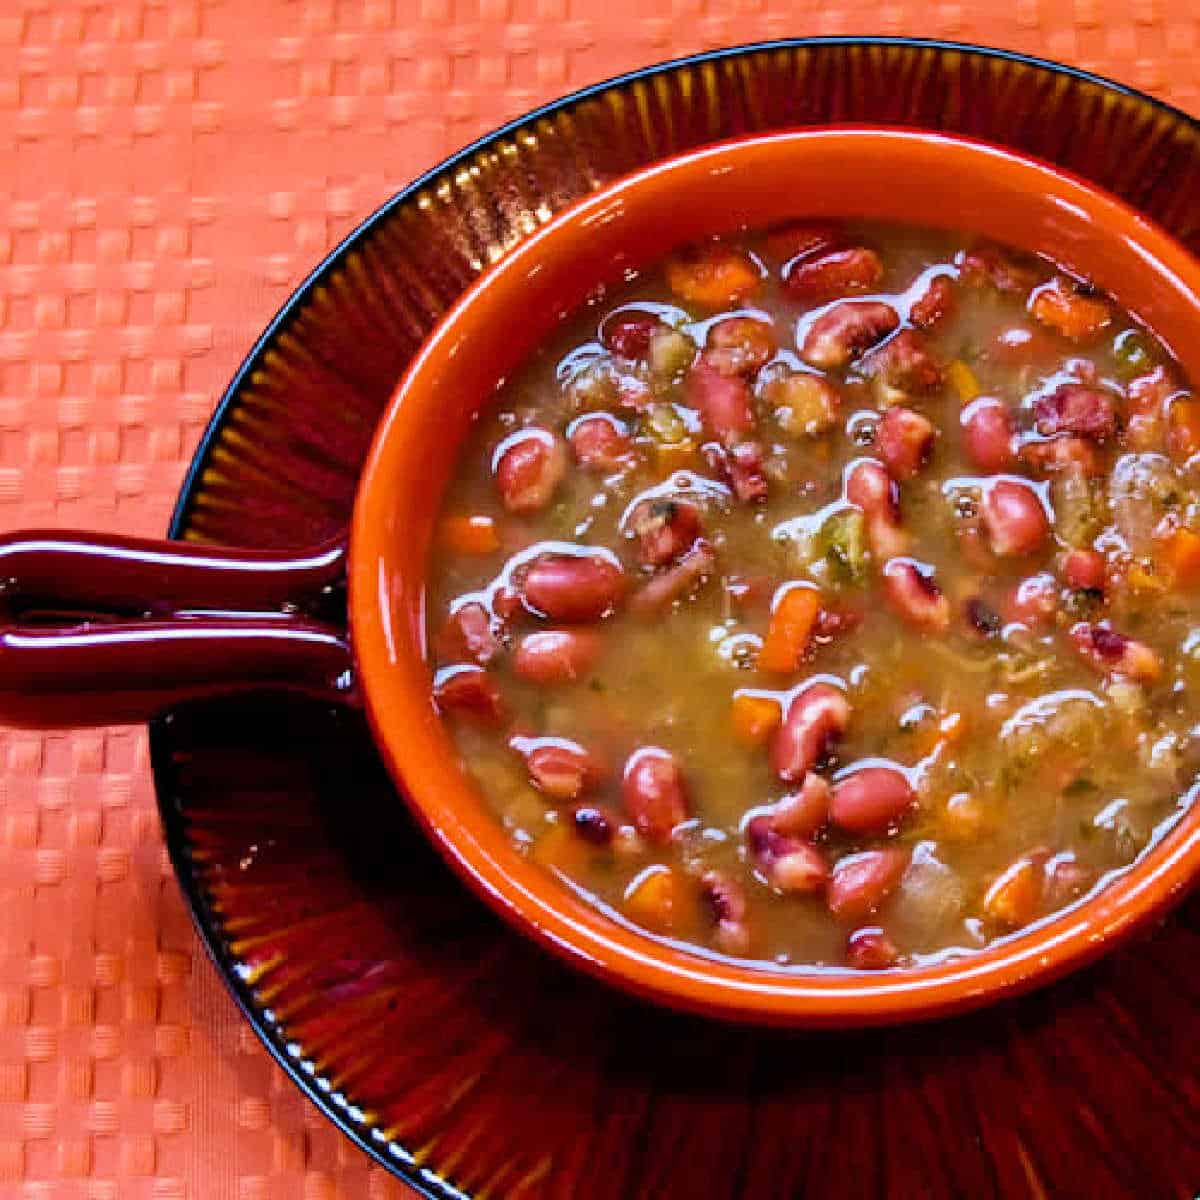
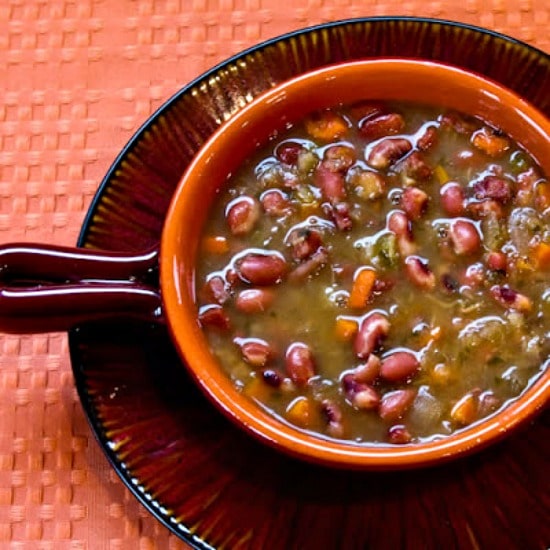
    Square image for CrockPot Anasazi Bean Soup shown in bowl on matching plate.

    Anasazi Bean Soup is made from delicious dried beans that are an interesting part of Utah history! When I taught fourth grade we learned about the earliest Utah people, and the word Anasazi means “ancient ones.” I used to cook these beans every year for the students when we had our Anasazi Feast at school.

    And I do love the delightful flavor of these ancient beans! In Salt Lake I can find Anasazi Beans at Whole Foods, or you can order them online. Unfortunately they lose much of the delightful speckled look when they’re cooked, but they still taste great.

    You can also make this tasty soup with pinto beans if you can’t locate the Anasazi beans. I like to make Anasazi Bean Soup in a slow cooker, but if you’re not a crockpot fan, I’ve got instructions for cooking them on top of the stove in the complete recipe below.

    What ingredients do you need?

    (This is only a list of ingredients; please scroll down for complete printable recipe. Or if you use the JUMP TO RECIPE link at the top of the page, it will take you directly to the complete recipe with ingredient amounts.)

    What are Anasazi Beans?

    I learned about Anasazi Beans when I taught Utah history! The Anasazi people were early native Americans living in the four corners area as far back as 130 A.D. They often lived in the structures called cliff dwellings. Anasazi Beans were one of very few crops cultivated by these people, and the beans were first found in the ruins.

    What makes Anasazi Beans so good?

    Anasazi Beans are a slightly sweet bean that contains less of the gas-producing carbohydrates found in many types of dried beans!

    What size Slow Cooker did I use?

    I’d recommend at least a 5 Quart Slow Cooker (affiliate link) for this recipe, and a slightly bigger size wouldn’t hurt.

    Can you make Anasazi Bean Soup on the stove?

    Scroll down to the complete recipe below and you’ll find easy instructions for making this tasty soup on the stove.

    Crockpot (or Stovetop) Anasazi Bean and Cabbage Soup found on KalynsKitchen.comCrockpot (or Stovetop) Anasazi Bean and Cabbage Soup found on KalynsKitchen.com

    How to make Anasazi Bean Soup (Slow Cooker or Stovetop):

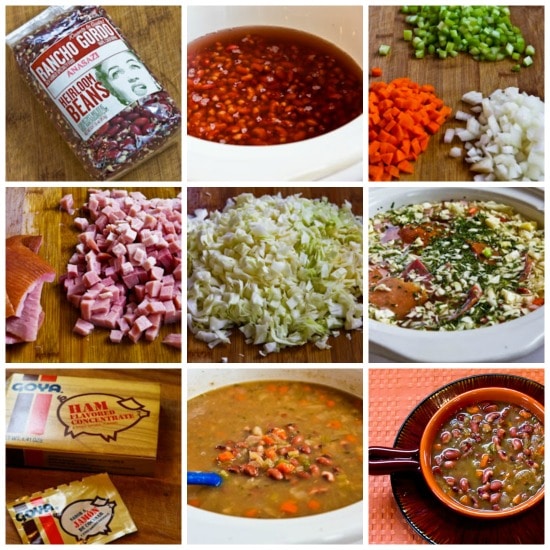
    (This is only a summary of the steps for the recipe; please scroll down for complete printable recipe. Or if you use the JUMP TO RECIPE link at the top of the page, it will take you directly to the complete recipe.)

    1. I first bought Anasazi Beans from Ranch Gordo but now I don’t find them on their website. Luckily you can buy Anasazi Beans at Amazon.com! (affiliate link)
    2. I soaked the beans overnight in cold water in the crockpot. I recommend soaking for this soup, so plan ahead. 
    3. In the morning, drain beans, discard the soaking water, and return beans to the crockpot with 8 cups of water.
    4. Chop one cup each of finely chopped onion, carrot, and celery, and add to the crockpot.
    5. Chop 2 cups ham into small cubes and add to the crockpot.
    6. I always buy a ham with a rind on it, and I add the rind to the soup for even more flavor.
    7. Add 2 cups of very finely chopped green cabbage to crockpot.
    8. Add dried parsley, garlic powder, onion powder, and bay leaves to crockpot and start to cook on high.
    9. Depending on the model of slow cooker you have and how hot it gets, you may want to reduce heat to low after 4-5 hours.
    10. After the soup has cooked for about 8 hours (or a bit less if your slow cooker gets hotter), I remove ham rinds and taste to see if I want to add ham flavor base. I love Goya Ham Flavor Concentrate (affiliate link), for a flavor-boost in soups with ham. (This is optional, some ham is so flavorful you won’t need it.)
    11. Soup is done when the beans are starting to break apart and the cabbage has almost completely dissolved into the soup.
    12. Cooking time will depend on how hot your slow cooker gets, but the soup in this photo was cooked nearly 10 hours on high.
    13. Serve hot, with a sprinkle of balsamic vinegar if desired.
    14. If you prefer making this soup on the stove, scroll down to the complete recipe below.

    Crockpot (or Stovetop) Anasazi Bean and Cabbage Soup found on KalynsKitchen.comCrockpot (or Stovetop) Anasazi Bean and Cabbage Soup found on KalynsKitchen.com

    Weekend Food Prep:

    This recipe for Anasazi Bean Soup has been added to a category called Weekend Food Prep where you’ll find recipes you can prep or cook on the weekend and eat during the week!

    Ingredients

    • 1 pound dried Anasazi Beans, soaked overnight in crockpot
    • 1 cup diced celery
    • 1 cup diced carrots
    • 1 cup diced onion
    • 2 cups very finely chopped cabbage
    • 2 cups ham, cut into small dice
    • ham rind if available (remove for the last few hours of cooking time)
    • 8 cups water (you can also use partly ham stock if you have it)
    • 2 T dried parsley
    • 1-2 T garlic powder
    • 2-3 tsp. onion powder
    • 2-3 bay leaves
    • fresh ground black pepper to taste
    • ham flavored concentrate or ham bouillon (optional but good)
    • balsamic vinegar for serving, optional

    Instructions

    1. Soak beans overnight in cold water in the crockpot.
    2. The next morning, drain beans, discard soaking water, and put beans back in the crockpot with 8 cups water (or a combination of water and ham stock if you have it.)
    3. Cut up celery, carrots, onions, cabbage, and ham.
    4. Put all ingredients in crock pot (including ham rind if you’re lucky enough to have some) with dried parsley, garlic powder, onion powder, and bay leaves, and start to cook on high. (It may look like there isn’t enough liquid, but in the crock pot foods give up liquid and you end up with more than you started with.)
    5. I cooked this soup on high for 10 hours or longer, until about half of the beans have disintegrated into the soup and the cabbage is mostly dissolved. My large crock pot is the original “slow-cooker” type, which may cook a bit less hot than some. If you have a newer model, you might want to cook on high 4-5 hours, then reduce to low.
    6. After about 8 hours, remove ham rind if using, then taste for seasoning and add ham bouillon or ham flavor concentrate if desired. (Use of this is optional, and will depend on how much flavor is in your ham. If you have really good ham you might not need it.)
    7. Cook until beans are starting to break apart and the cabbage has mostly dissolved into the soup.
    8. Serve Anasazi Bean Soup hot, with a drizzle of balsamic vinegar if desired.  This soup freezes well.

    Stovetop Instructions:

    1. You could cook this on the stove if you don’t have a crock pot or want it done sooner.
    2. For stovetop cooking, add all ingredients to heavy soup pot and simmer about 3 hours, or until beans are very well done and cabbage has disintegrated into the soup.
    3. I would increase the amount of water I started out with  by several cups for cooking it on the stove, since some of the liquid will evaporate.
    4. Check for seasoning after a few hours, and add more ham ham flavor base as desired.

    Nutrition Information

    Yield

    8

    Serving Size

    1

    Amount Per Serving

    Calories 195Total Fat 4gSaturated Fat 1gTrans Fat 0gUnsaturated Fat 2gCholesterol 43mgSodium 1006mgCarbohydrates 24gFiber 5gSugar 9gProtein 19g

    Nutrition information is automatically calculated by the Recipe Plug-In I am using. I am not a nutritionist and cannot guarantee 100% accuracy, since many variables affect those calculations.

    Did you make this recipe?

    Did you make this recipe? Please leave a star rating (under the PRINT button in the recipe) or share a photo of your results on Instagram! THANKS!

    Crockpot (or Stovetop) Anasazi Bean and Cabbage Soup found on KalynsKitchen.comCrockpot (or Stovetop) Anasazi Bean and Cabbage Soup found on KalynsKitchen.com

    Low-Carb Diet / Low-Glycemic Diet / South Beach Diet Suggestions:
    Dried beans are considered a “good carb” on the original South Beach Diet, but you’d have to leave out the carrots for this Crockpot Anasazi Bean Soup to be approved for phase one. Soup with Beans is high in carbs for a traditional low-carb diet. 

    Find More Recipes Like This One:
    Use Slow Cooker Recipes to find more recipes like this one. Use the Diet Type Index to find recipes suitable for a specific eating plan. You might also like to follow Kalyn’s Kitchen on Pinterest, on Facebook, on Instagram, on TikTok, or on YouTube to see all the good recipes I’m sharing there.

    Historical Notes for this Recipe:
    This tasty soup made with Anasazi Beans was first posted in 2006, when I was still teaching and making Anasazi Bean Soup at school! In those days, a lot of kids would request their mom to make the soup at home. The recipe was last updated with more information in 2025.

    Pinterest image of Anasazi Bean Soup (Slow Cooker or Stovetop)

    We are a participant in the Amazon Services LLC Associates Program, an affiliate advertising program designed to provide a means for us to earn fees by linking to Amazon.com and affiliated sites. As an Amazon Associate, I earn from qualifying purchases.


    Source link

  • Easy Taco Soup Recipe

    Easy Taco Soup Recipe

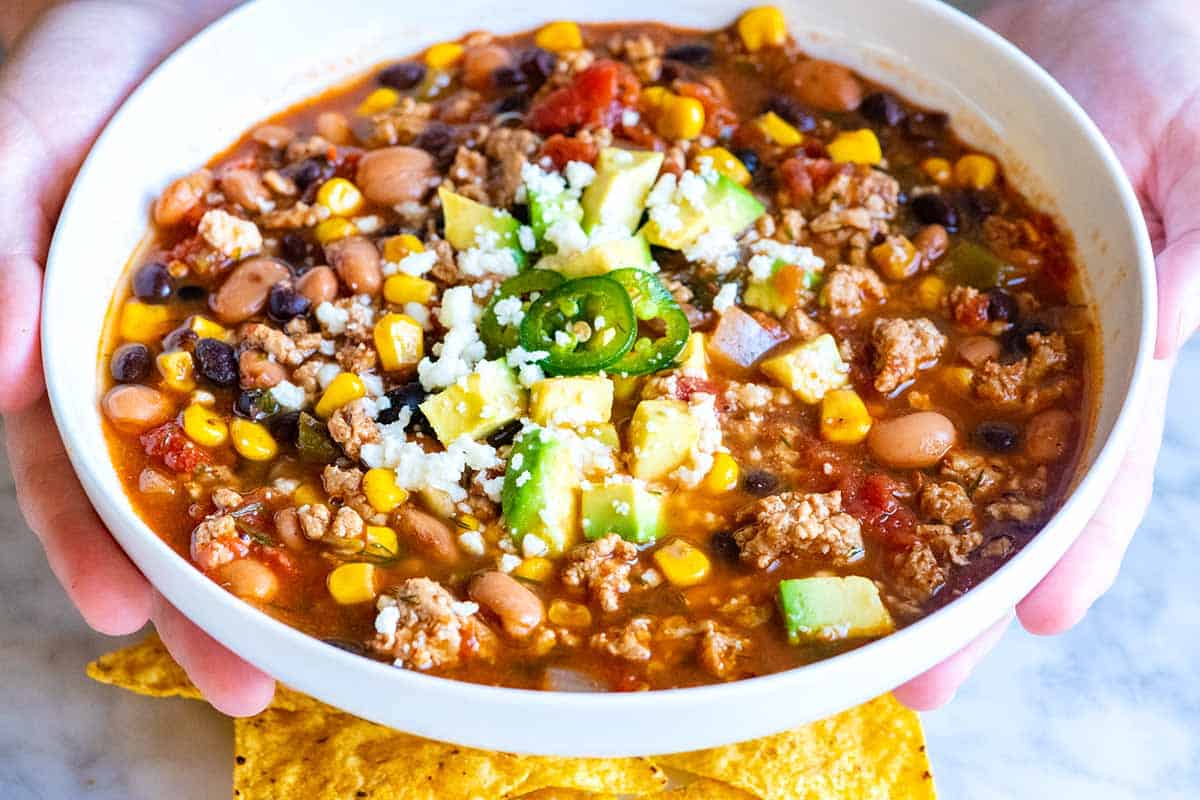
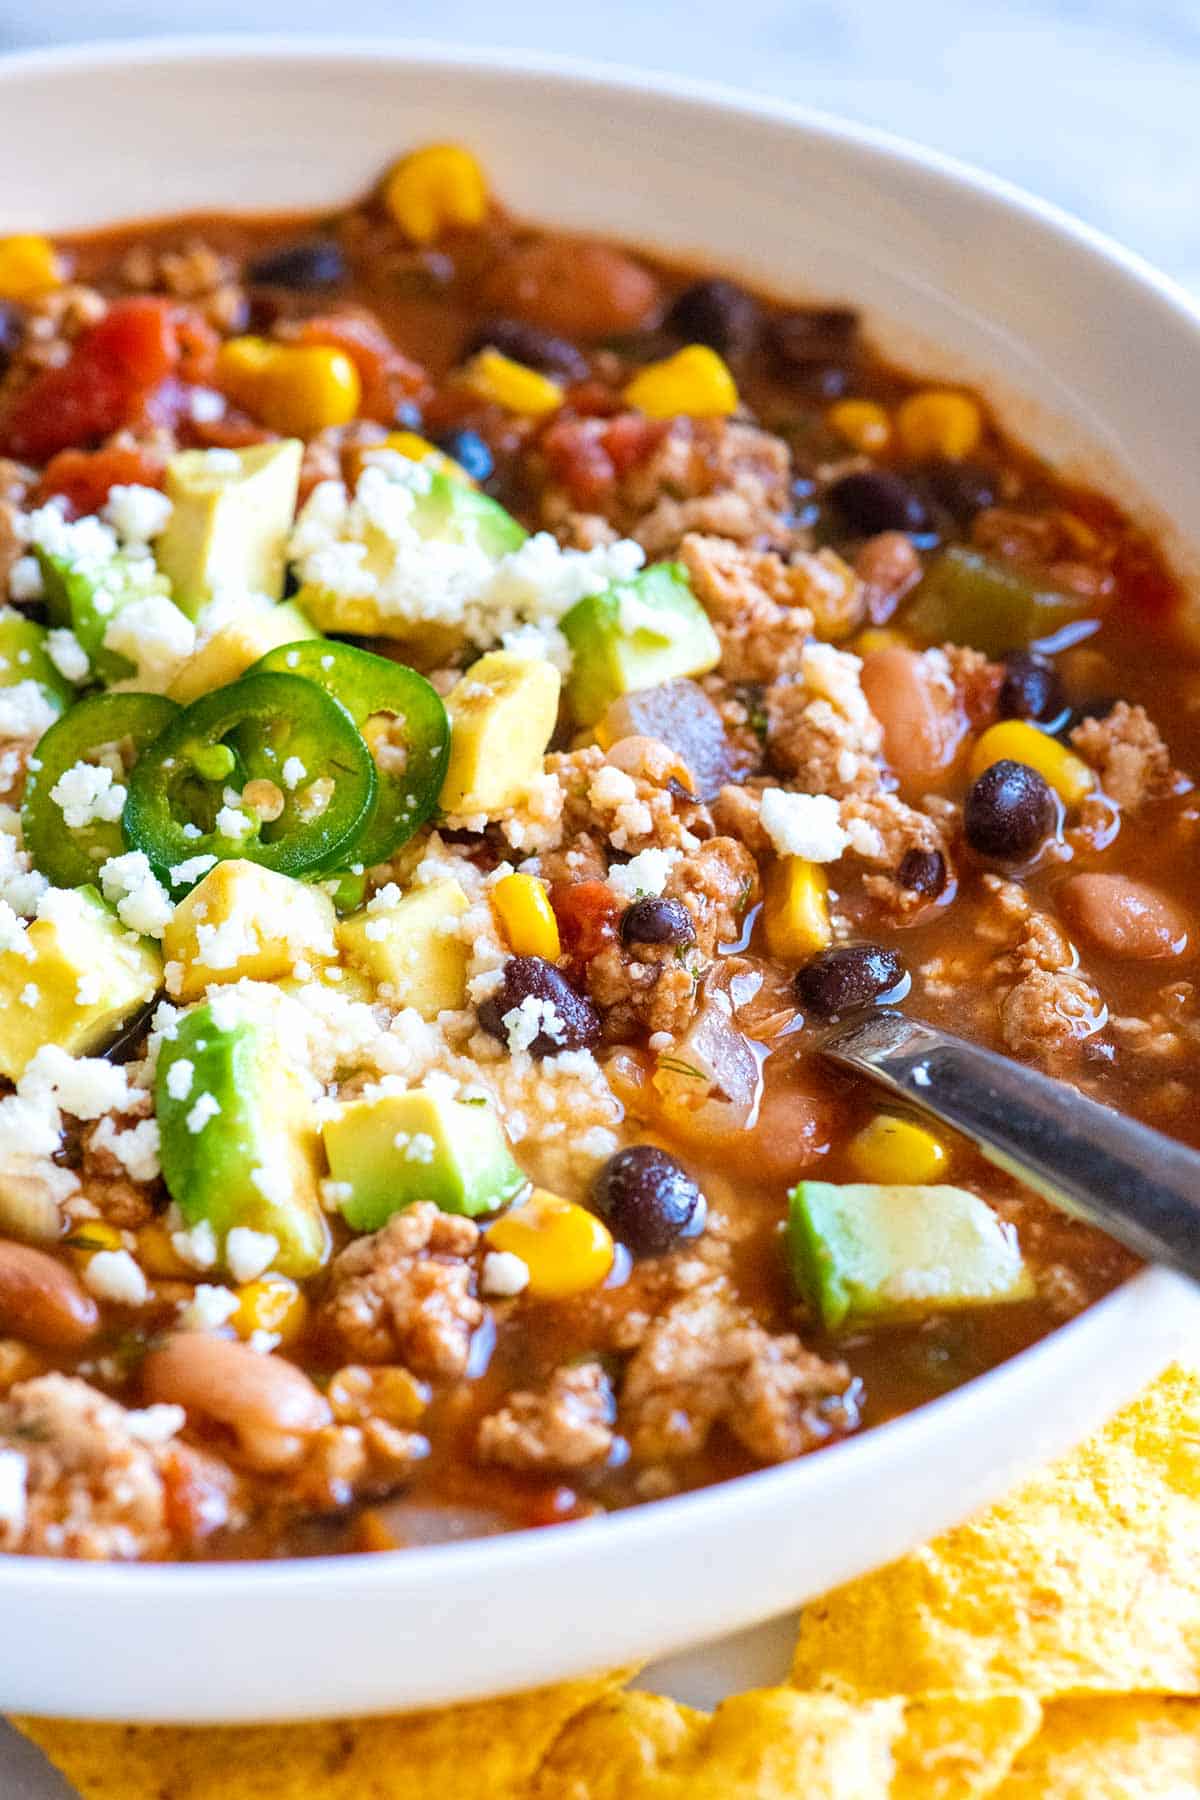
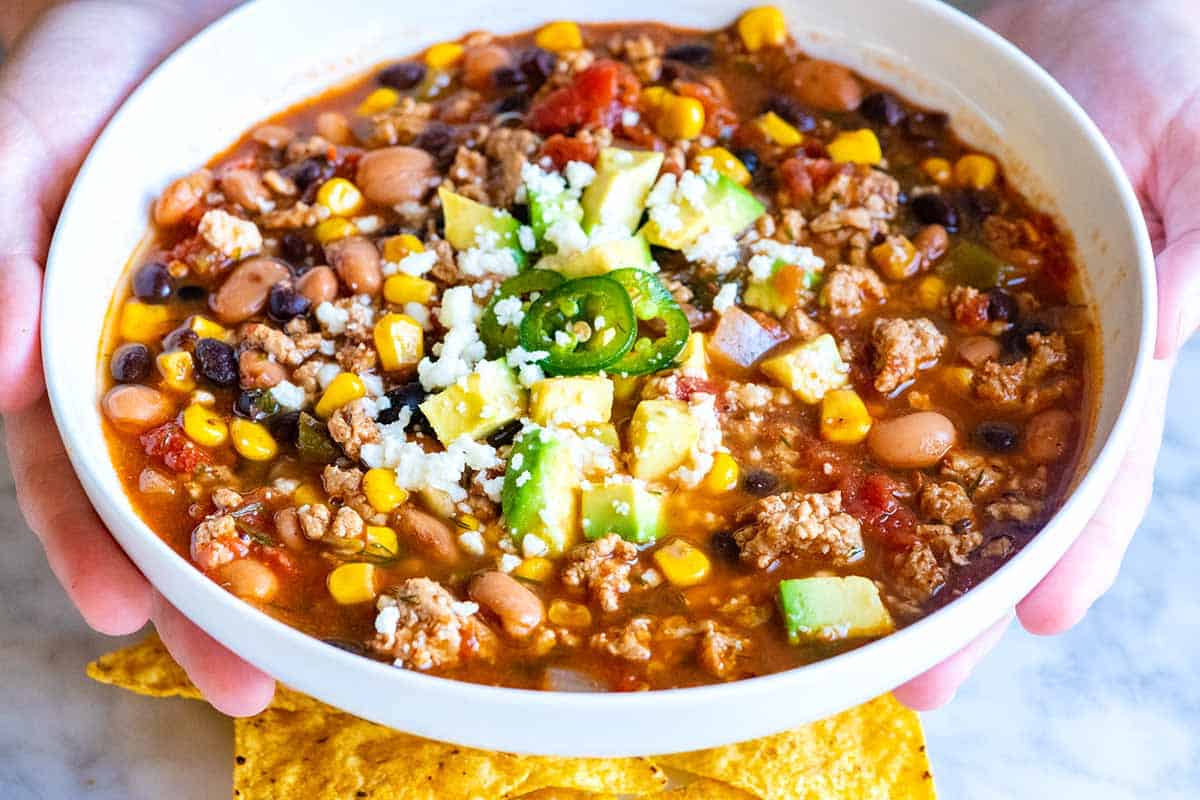
    My favorite taco soup recipe has ground beef, beans, and simple pantry staples. This easy, one-pot dinner is healthy, hearty, and tastes just like taco night.

    Easy Taco Soup

    You’re looking at about 30 minutes to make our easy taco soup on the stove. It really is one of my favorite cozy weeknight dinners! I’ve even included instructions for how to make it in a slow cooker below. My family loves tacos (see all of our taco recipes as proof), and this soup packs everything we love about taco night into one hearty, flavorful dish.

    Every time we make this taco soup, we’re blown away by how much flavor it has. I know your family will love it just as much as mine does. If you love this taco-inspired soup, check out our chicken tortilla soup and taco salad recipe next, they’re reader favorites!

    Key Ingredients

    • Ground Meat: For this soup, you can use lean ground beef, pork, chicken, or turkey. I especially love using ground pork since it reminds me of our favorite pork tacos.
    • Taco Seasoning: Use your favorite store-bought blend or try our homemade taco seasoning (it has way more flavor than the packets from the store). Making your own seasoning means you can control the salt, spice, and smokiness.
    • Veggies: I love adding onion, garlic, a can of diced green chiles (Hatch brand is my favorite), and a large can of tomatoes. When I have it in the freezer, I toss in frozen corn for extra sweetness and color.
    • Beans: Canned beans bulk up the soup beautifully. I like black beans, pinto beans, kidney beans, or a mix of all three! You can use low-sodium beans and rinse them before adding.
    • Broth: Use a flavorful chicken stock or homemade chicken broth if you have it.
    • Fresh Dill: It might sound unusual for a taco-inspired recipe, but fresh dill adds incredible flavor. Some recipes call for a packet of ranch seasoning, but fresh dill works just fine and adds that ranch flavor.
    • Toppings: Top this simple taco soup with your favorite taco or chili toppings. My family loves avocado or guacamole, sliced jalapeños (or candied jalapeños), and crumbled cotija cheese. I also love adding a bit of crunch with tortilla chips or serving warm corn tortillas on the side.

    Find the full recipe with measurements below.

    How to Make the Best Taco Soup

    Tip 1: Brown the meat first. Start by heating a little olive oil in a large soup pot or Dutch oven. Add your ground meat and cook until nicely browned. Browning adds a lot of flavor and improves the texture. If, after it browns, you notice a lot of fat rendered at the bottom of your pot, you can use a spoon to remove it. Just leave a tablespoon or so for cooking the onions and garlic.

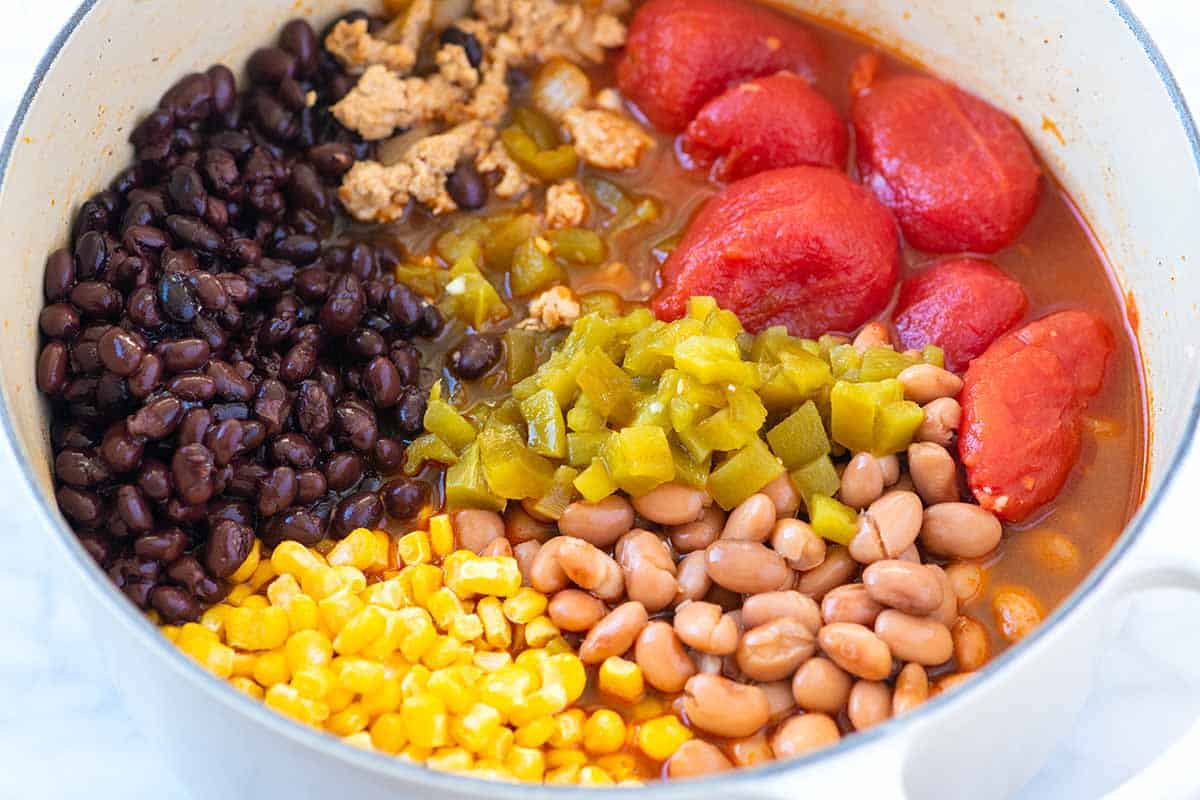
    Tip 2: Add the remaining soup ingredients. When the meat is browned, quickly sauté your onions, then add the garlic and taco seasoning. After a minute or two, the pot smells amazing, which means it’s time to add everything else: a large can of diced tomatoes, green chiles, beans, frozen corn, and your broth. Give it a good stir, and make sure that you take a moment to scrape up any browned bits from the bottom of the pot (that’s where so much flavor hides).

    Taco soup Ingredients

    Tip 3: Simmer for 20 minutes. Bring the soup to a simmer, then reduce the heat and let it bubble gently for 15 to 20 minutes. This gives all the ingredients time to meld into a rich, flavorful soup. If the soup looks too thick, add a little more stock or water until it’s just how you like it.

    Tip 4: Don’t forget the toppings. Ladle the soup into bowls and add your favorite taco toppings. Or, serve the toppings family-style on the table, and let everyone add what they love. We usually set a bowl of tortilla chips, guacamole, and pico de gallo on the table and dig in.

    Our Favorite Variations

    • Make it with chicken: For a lighter version, use ground chicken or shredded cooked chicken instead of beef or pork. If you already have rotisserie or leftover roasted chicken, add it near the end of cooking so it stays juicy. You could even start with shredded Instant Pot chicken or slow-cooker shredded chicken if you’ve made a batch ahead of time.
    • Try it in a slow cooker: To make slow cooker taco soup, brown the ground meat and onions first, then transfer everything to your slow cooker. Add the remaining ingredients and cook on LOW for 5 to 6 hours or on HIGH for 2 to 3 hours. It’s an easy, set-it-and-forget-it dinner that tastes even better the next day.
    • Make it vegetarian: Skip the ground meat and double up on the beans and veggies. We make vegetarian taco soup quite often. We swap the chicken stock for vegetable broth and toss in extra vegetables. I love to add bell peppers, zucchini, chopped sweet potatoes, and shredded cabbage. I recommend quickly sautéing the veggies before adding the stock and tomatoes for even more flavor.
    Easy Taco Soup

    Easy Taco Soup

    • PREP
    • COOK
    • TOTAL

    My family loves this taco soup made with ground meat (beef, pork, chicken, and turkey all work), veggies, and hearty beans. The dill in the recipe is a substitute for store-bought Ranch seasoning (a common ingredient in taco soup). It really does make the soup delicious!

    6 Servings

    You Will Need

    1 pound lean ground meat like beef, turkey, chicken, or pork (450g)

    1 teaspoon olive oil

    1 small onion, chopped

    2 tablespoons taco seasoning, try homemade taco seasoning

    3 cloves garlic, minced

    1 (28 ounce) can whole or diced tomatoes

    1 (4 ounce) can diced green chiles

    2 (15 ounce) cans beans like black beans, pinto beans, or kidney beans

    1 cup frozen corn

    3 cups chicken stock or vegetable broth (709ml)

    2 to 3 tablespoons chopped fresh dill, optional

    Salt and cayenne pepper or hot sauce to taste

    Optional for serving: Avocado or guacamole, diced tomatoes or pico de gallo, shredded or crumbled cheese, shredded lettuce or cabbage, sliced jalapeños, cowboy candy, sour cream, tortilla chips

    Directions

      1Brown the meat: Heat the oil in a large soup pot (or Dutch oven) over medium-high heat. Add the ground meat and cook until browned, about 5 minutes. As the meat cooks, use a wooden spoon to break the meat into crumbles.

      2Cook the onions: Move the browned meat to the side. Add the onions and cook, stirring them around the pot, until they soften, about 5 minutes.

      3Add garlic and spices: Stir in the garlic and taco seasoning and cook until fragrant, about 1 minute.

      4Simmer the soup: Add the tomatoes with their juices, canned chiles, beans, corn, and the stock. Bring to a boil, reduce to a simmer, and cook for 15 to 20 minutes. Use a wooden spoon to break apart the tomatoes as the soup simmers. Stir in the dill.

      5Serve: Taste, then adjust with salt, cayenne pepper, or hot sauce. Serve with your favorite taco toppings.

    Adam and Joanne’s Tips

    • Storing: I actually think it gets better over time! Refrigerate the soup stored in an airtight container for up to 4 days or freeze for up to 3 months.
    • Vegetarian or vegan: Skip the ground meat and use vegetable broth. To bulk up the soup a bit, add extra vegetables. I love to add bell peppers, zucchini, chopped sweet potatoes, and shredded cabbage. I’d brown the veggies before adding the stock and tomatoes for even more flavor.
    • Use a crock pot: To make the soup in a slow cooker, you’ll need a skillet and a slow cooker. Brown ground meat in a bit of oil. Move the browned meat to one side of the pot, add chopped onions and cook, stirring around the skillet, until softened. Add the browned meat, onions, and the remaining soup ingredients to the slow cooker. Stir. Cook on HIGH for 2 to 3 hours or on LOW for 5 to 6 hours.
    • The nutrition facts provided below are estimates.

    Nutrition Per Serving
    Serving Size
    1/6 of the recipe
    /
    Calories
    360
    /
    Total Fat
    9g
    /
    Saturated Fat
    2.3g
    /
    Cholesterol
    55.8mg
    /
    Sodium
    801.9mg
    /
    Carbohydrate
    43.5g
    /
    Dietary Fiber
    12.4g
    /
    Sugars
    9.5g
    /
    Protein
    28.7g


    AUTHOR:

    Joanne Gallagher

    Adam and Joanne of Inspired Taste

    We are Adam and Joanne Gallagher, the creators of Inspired Taste. Established in 2009, Inspired Taste grew from a childhood dream into one of the internet’s most trusted recipe sites with hundreds of reliable recipes, step-by-step videos, and expert tips.More About Us

    Source link

  • Red Lentil and Chickpea Soup

    Red Lentil and Chickpea Soup

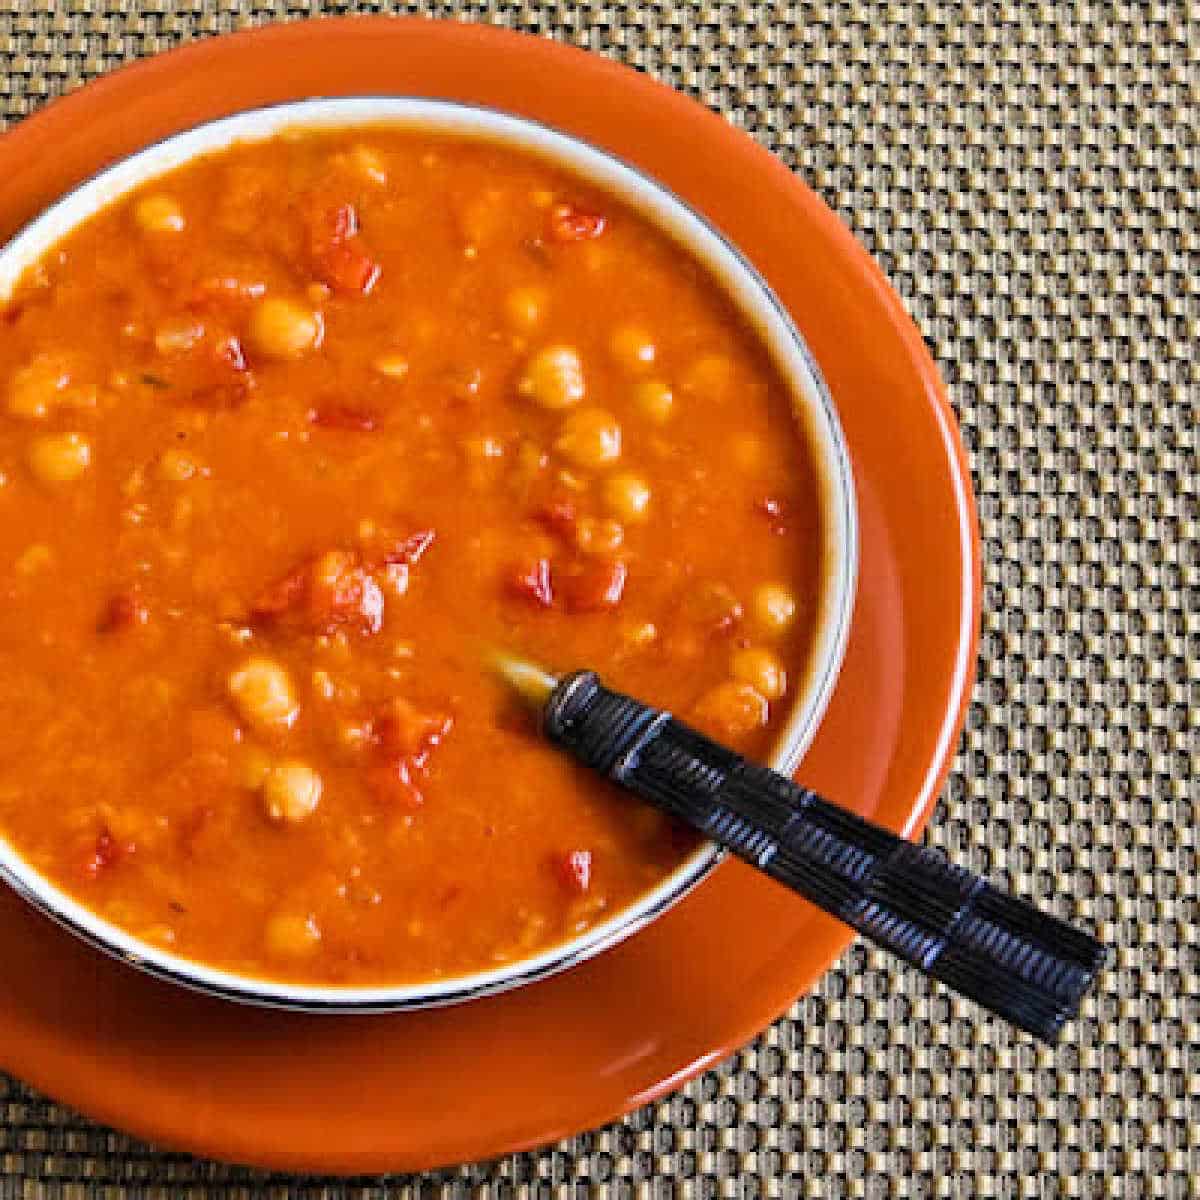
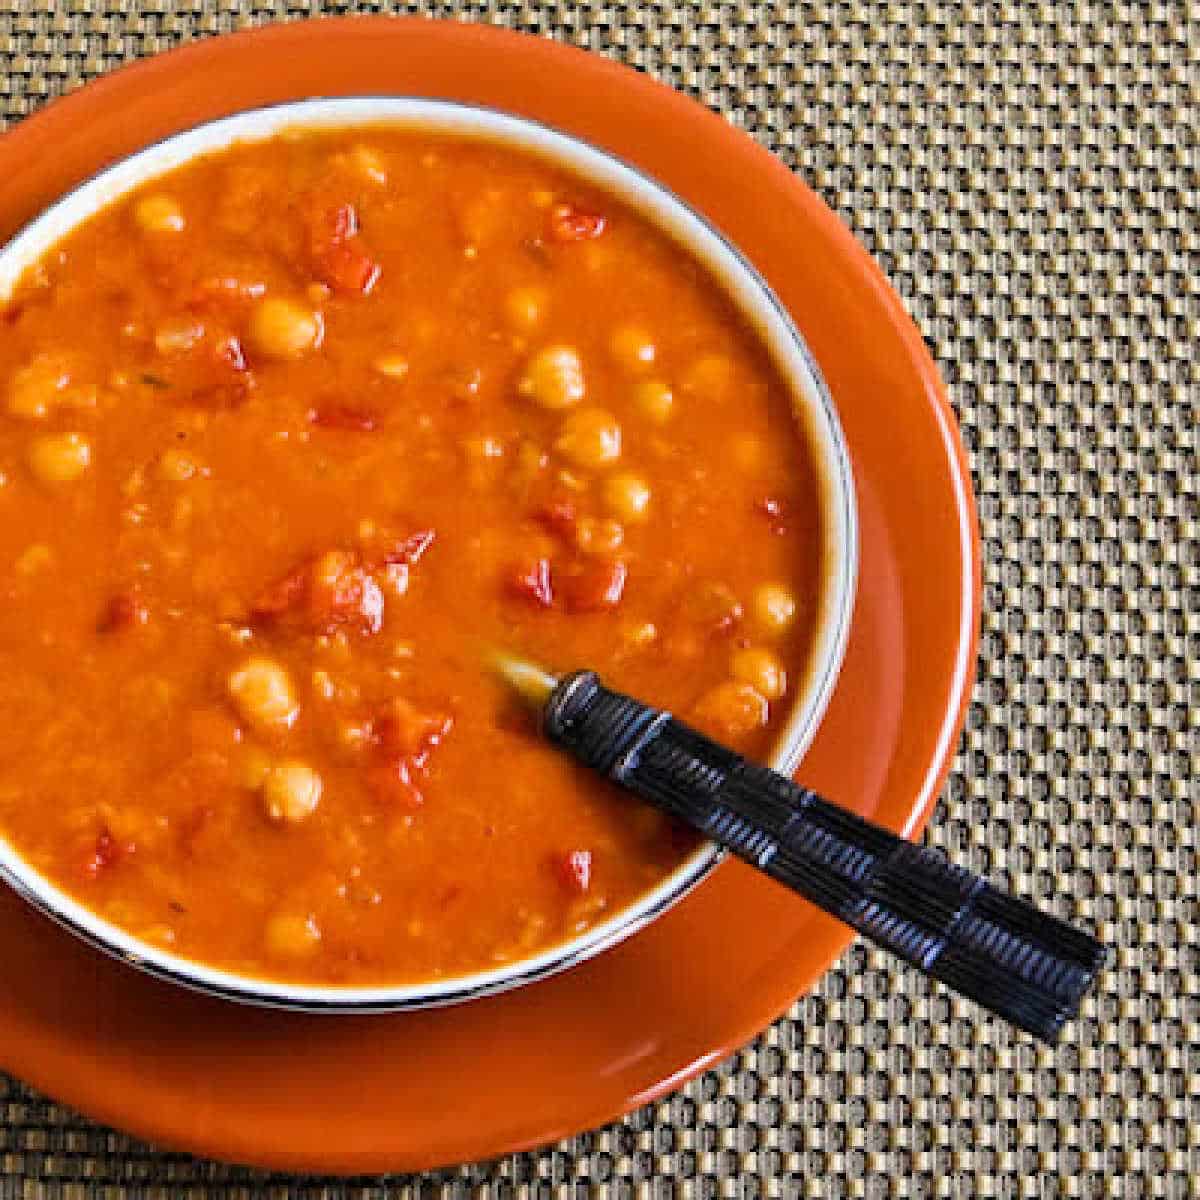
    I love the smoked paprika in this Red Lentil and Chickpea Soup and this crockpot soup also has onions and tomatoes. And this soup with red lentils and chickpeas is also vegan, for those who care about that!

    PIN Red Lentil and Chickpea Soup to try it later!

    Square image for Red Lentil and Chickpea Soup shown in bowl on orange plate.

    I’ve been loving smoked paprika lately, an infatuation that started when my friend Margarethe sent me a recipe using it. Then I got inspired about creating a crockpot soup with smoked paprika when I spotted a recipe for yellow split pea soup with smoked paprika in a cookbook.

    This Red Lentil and Chickpea Soup was one of those recipes where it took me a few tries to get it just right, but I served this version to my brother Mark and his wife Lisa when they stopped by on Saturday, and they both gave it a thumbs up.

    And no matter how much we long for spring, you know there’ll still be more cold wintery days before warm weather arrives, so make this soup in your crockpot next time it’s a cold day where you are.

    What ingredients do you need for this recipe?

    (This is only a list of ingredients; please scroll down for complete printable recipe. Or if you use the JUMP TO RECIPE link at the top of the page, it will take you directly to the complete recipe.)

    Can you make this lentil and chickpea soup with brown lentils?

    You can make the soup with brown lentils of course. But red lentils dissolve more quickly and add amazing color to the soup, so I recommending using red lentils if you can.

    Can you make Red Lentil and Chickpea Soup with chicken stock?

    If you don’t care about the soup being vegetarian or vegan you can definitely use chicken stock or canned chicken broth in this soup.

    Love your slow cooker?

    If you’re still a slow cooker fan you can use Slow Cooker to find all my slow cooker recipes. And you can also find lots of Slow Cooker / Instant Pot Recipes on my other site!

    Crockpot Red Lentil, Chickpea, and Tomato Soup with Smoked Paprika found on KalynsKitchen.comCrockpot Red Lentil, Chickpea, and Tomato Soup with Smoked Paprika found on KalynsKitchen.com

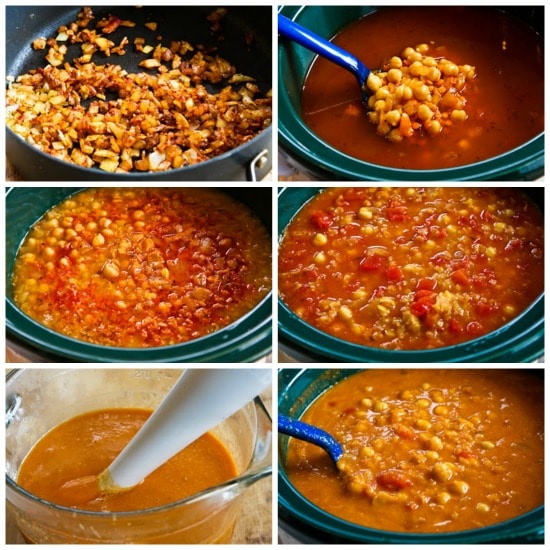
    How to Make Red Lentil and Chickpea Soup:

    (This is only a summary of the steps for the recipe; please scroll down for complete printable recipe. Or if you use the JUMP TO RECIPE link at the top of the page, it will take you directly to the complete recipe.)

    1. Saute a generous amount of chopped onion in olive oil, then add garlic, smoked paprika and other spices and cook 2-3 minutes more.
    2. Add the onions and spices to the crockpot along with red lentils, chickpeas, and vegetable stock.
    3. Let the soup cook for 2-3 hours on high, or until the lentils are very soft and starting to dissolve.
    4. Add 2 cans petite diced tomatoes plus the juice and cook for 2 hours longer on high. The lentils and chickpeas should both be quite soft when the soup has cooked this long.
    5. Remove about half of the soup and puree completely with an Immersion Blender (affiliate link), food processor, or blender. (This photo is a giant 8-cup glass measuring cup with about 4 cups of soup.)
    6. Stir the pureed soup back into the CrockPot, season to taste with salt and fresh ground black pepper, let cook about 15 minutes more and serve hot.
    7. If you’re not vegan, this is good with a dollop of sour cream.

    More Slow Cooker Soup You Might Like:

    Weekend Food Prep:

    This recipe for Red Lentil and Chickpea Soup has been added to a category called Weekend Food Prep  to help you find recipes you can prep or cook on the weekend and eat during the week!

    Ingredients

    • 1 large yellow onion, diced small
    • 1 T olive oil
    • 1 T minced garlic
    • 1 tsp. smoked paprika
    • 1 tsp. sweet paprika
    • 1/2 tsp. dried thyme
    • 1/2 tsp. salt
    • fresh ground black pepper to taste
    • 1 cup red lentils
    • 2 15 oz. cans chickpeas, rinsed
    • 5 C vegetable stock (see notes)
    • 2 14.5 oz. cans petite dice tomatoes

    Instructions

    1. Heat olive oil in frying pan and saute the diced onion until it’s soft and starting to brown lightly, about 5 minutes.
    2. Add garlic, smoked paprika, sweet paprika, dried thyme, Vege-Sal, and black pepper and saute 2-3 minutes more, or until spices are fragrant.
    3. Add onion-spice mixture to CrockPot, then rinse out the frying pan with 1 cup of the stock and add to crockpot along with red lentils, rinsed chickpeas, and rest of stock.
    4. Cook on high for 2-3 hours, or until lentils are starting to soften and dissolve into the soup. (I cooked mine for 2 1/2 hours. Cooking time will depend partly on how old the lentils are.)
    5. When lentils are starting to soften, add the 2 cans of diced tomatoes with juice. Cook for  about 2 hours more on high, or until the lentils and chickpeas are both quite soft.
    6. Then remove about 1/2 the soup to a bowl (or the large 8-cup measuring cup I had worked perfectly.)
    7. Puree the soup you removed using an immersion blender, food processor, or blender. (If you’re using a food processor or blender, be very careful with the hot soup, pureeing in batches if necessary.)
    8. Stir the pureed soup back into the soup in the CrockPot; taste and add more salt or fresh ground black pepper if desired. Let soup cook about 15 minutes more, then serve hot.

    Notes

    Use 3 cans vegetable broth and a little water if you want to use broth from a can. Please don’t skip the Smoked Paprika (affiliate link) because it adds amazing flavor to the soup.

    I used a 3.5 quart slow cooker (affiliate link).

    I haven’t frozen this soup, but I have no doubt that it freezes well, so make a double batch if you only have a big CrockPot.

    Recipe created by Kalyn.

    Nutrition Information

    Yield

    8

    Serving Size

    1

    Amount Per Serving

    Calories 238Total Fat 5gSaturated Fat 1gTrans Fat 0gUnsaturated Fat 3gCholesterol 0mgSodium 630mgCarbohydrates 38gFiber 11gSugar 7gProtein 12g

    Nutrition information is automatically calculated by the Recipe Plug-In I am using. I am not a nutritionist and cannot guarantee 100% accuracy, since many variables affect those calculations.

    Did you make this recipe?

    Did you make this recipe? Please leave a star rating (under the PRINT button in the recipe) or share a photo of your results on Instagram! THANKS!

    Crockpot Red Lentil, Chickpea, and Tomato Soup with Smoked Paprika found on KalynsKitchen.comCrockpot Red Lentil, Chickpea, and Tomato Soup with Smoked Paprika found on KalynsKitchen.com

    South Beach Diet / Low-Carb Diet Suggestions:
    Red Lentil and Chickpea Soup is made with low-glycemic ingredients, and would be approved for any phase of the original South Beach Diet. However dried beans and legumes are limited to 1/3 to 1/2 cup serving for phase one so unless you have a very small serving I would consider this phase two for the South Beach Diet. This is too high in carbs for low-carb diet plans.

    Find More Recipes Like This One:
    Use Slow Cooker to find more recipes like this one. Use the Diet Type Index to find recipes suitable for a specific eating plan. You might also like to follow Kalyn’s Kitchen on Pinterest, on Facebook, on Instagram, on TikTok, or on YouTube to see all the good recipes I’m sharing there.

    Historical Notes for this Recipe:
    This recipe for Red Lentil Chickpea Soup was posted in 2011. It was last updated with more information in 2023.

    Pinterest image of Red Lentil and Chickpea Soup

    We are a participant in the Amazon Services LLC Associates Program, an affiliate advertising program designed to provide a means for us to earn fees by linking to Amazon.com and affiliated sites. As an Amazon Associate, I earn from qualifying purchases.


    Source link

  • Veggie Stuffed Shells Recipe

    Veggie Stuffed Shells Recipe

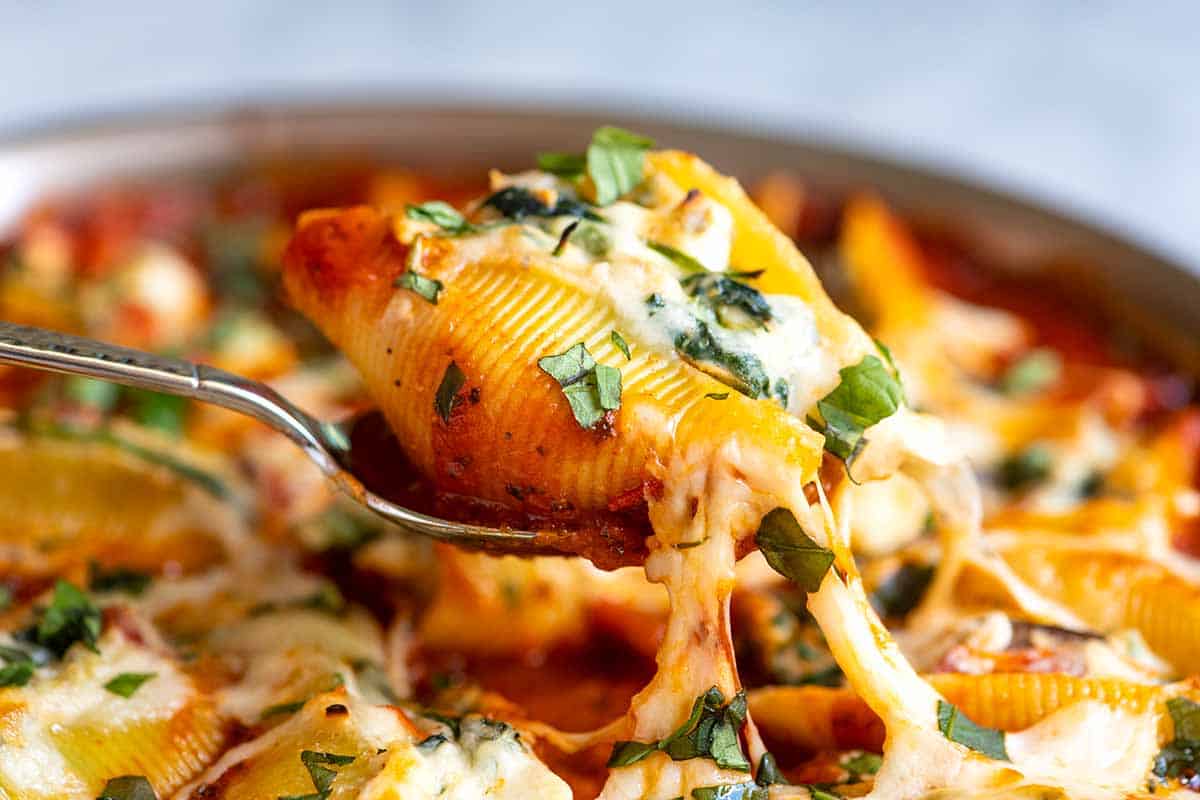
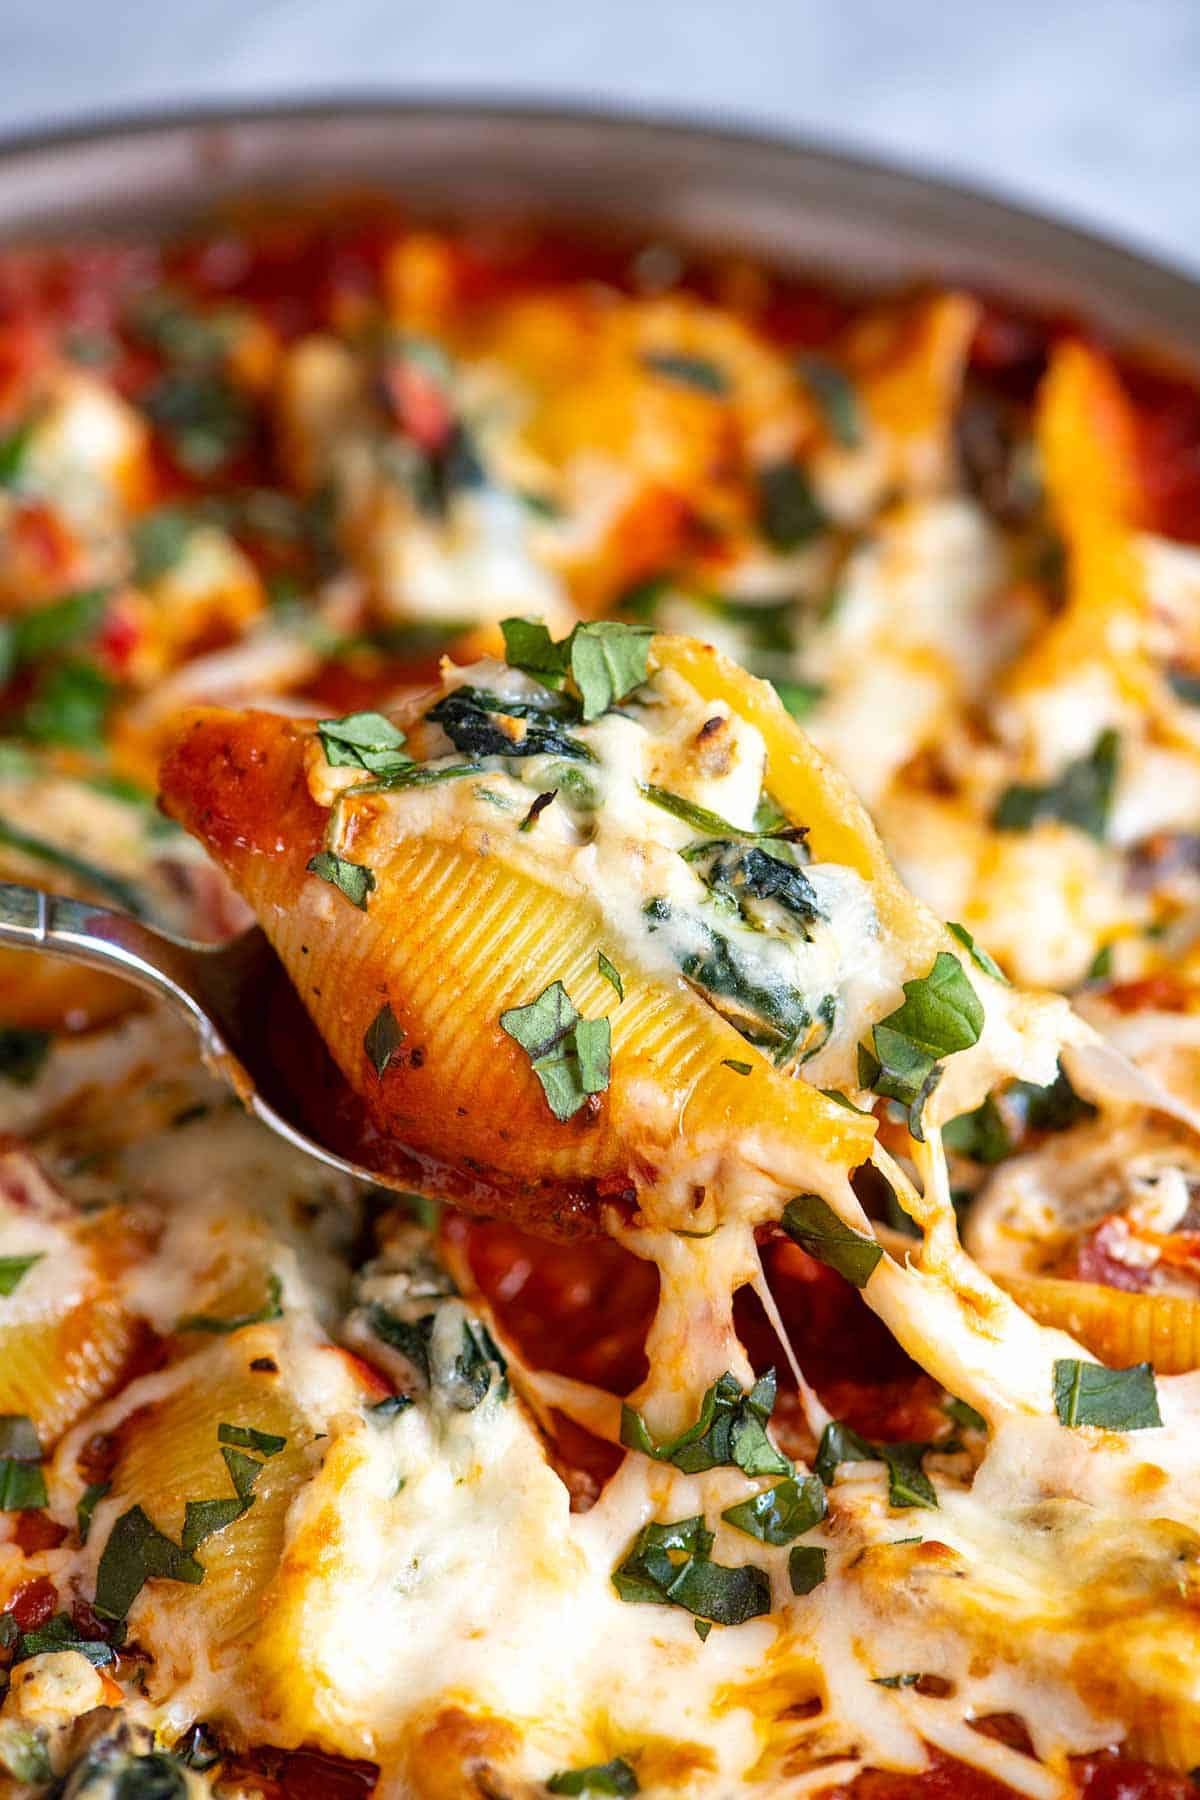
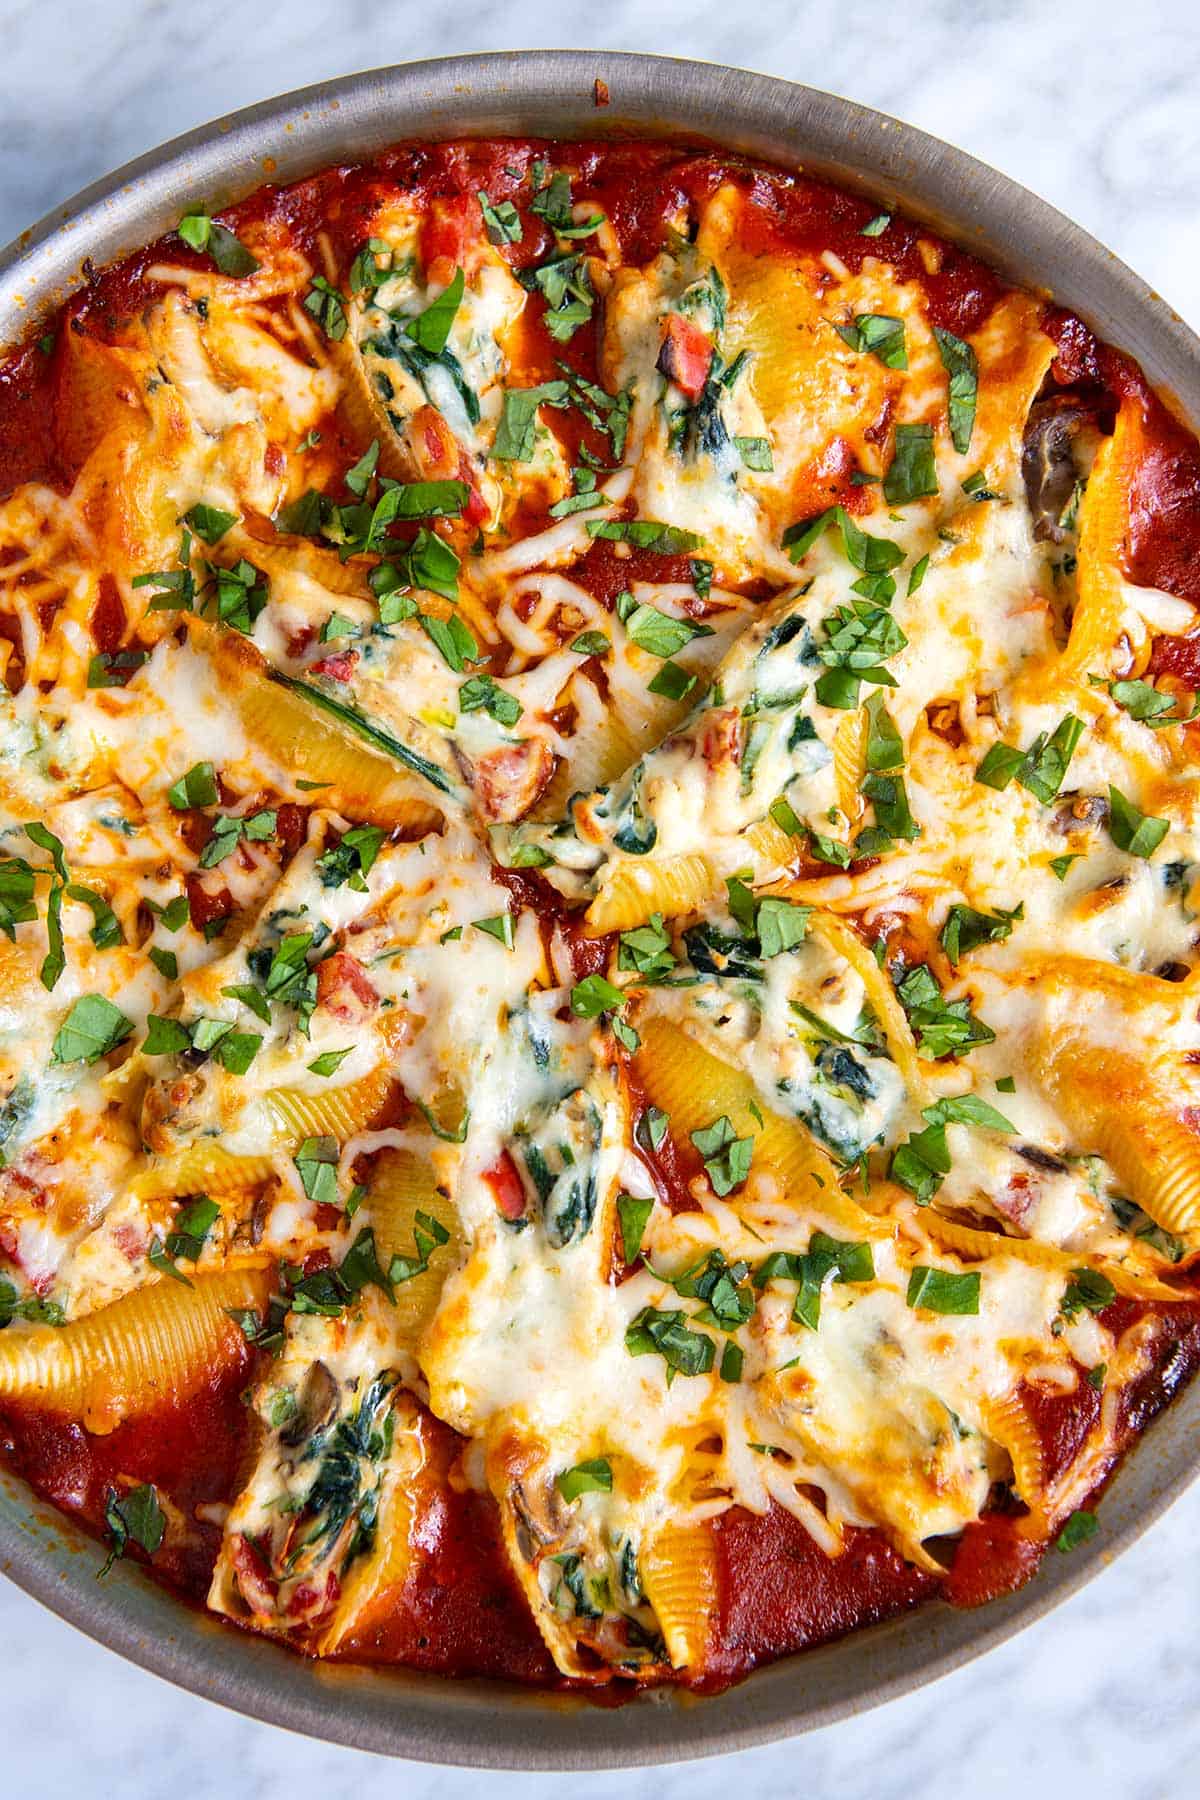
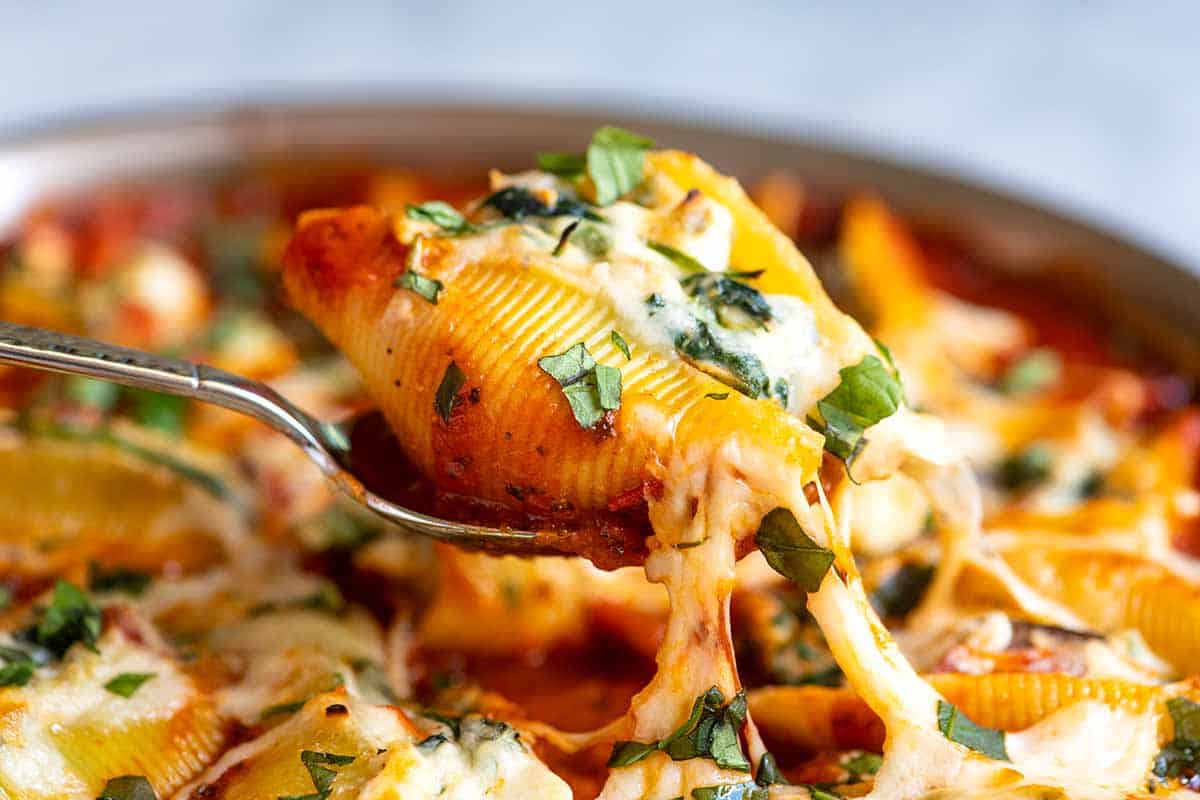
    Our family loves this veggie stuffed shells recipe with jumbo pasta shells and a simple ricotta and sautéed vegetable filling.

    Veggie Stuffed Shells

    I’m always game for stuffed shells, and this version made with a cheese and vegetable filling is high on my list. If you’ve been following us for a while, you already know we like to tuck in fresh veggies whenever we can, and this veggie stuffed shells recipe is a great example of that.

    The shells bake on top of a bed of marinara sauce until the cheese is bubbly and melted. It’s a keeper, for sure. If you love veggie-heavy pastas, like me, you may also enjoy this veggie spaghetti or our popular vegetable lasagna.

    Key Ingredients

    • Pasta Shells: I use large dried pasta shells and cook them in boiling water until al dente, then fill them. It’s a good idea to cook a few extra shells than you think you’ll need, as some might tear during boiling. Don’t worry about any leftover or broken shells (they make a tasty snack with extra cheese filling or marinara sauce). You can also swap the shells for manicotti shells or the crespelle we make in our homemade manicotti recipe.
    • Vegetables: I love loading these stuffed shells with vegetables! My go-to combination is mushrooms, bell peppers, spinach, and garlic, sautéed until tender. Feel free to get creative and add your favorite vegetables or swap some out.
    • Cheese: I use whole milk ricotta cheese and Parmesan for a rich and creamy filling. To finish the dish, I top the stuffed shells with mozzarella cheese for a delicious, melty topping. If you’re making vegetarian stuffed shells, omit the Parmesan cheese or use a vegetarian-friendly alternative.
    • Herbs: To make these extra delicious, I mix in lots of fresh basil leaves and a bit of dried oregano.
    • Marinara Sauce: You can use your favorite store-bought jarred pasta sauce or one of our homemade sauce recipes. Try this homemade marinara or this easy pasta sauce.

    Find the full recipe with measurements below.

    Veggie Stuffed Shells

    How to Make Veggie Stuffed Shells

    Tip 1: Cook the shells until al dente. When making stuffed shells, you will need to boil jumbo shells in salted water first. They usually take 8 to 10 minutes. You are looking for them to be tender with a bit of a bite left, not super soft. Once you are happy with them, drain them so they are ready to fill.

    Tip 2: Quickly cook the vegetables. While the shells boil, you can cook mushrooms in a wide, oven-safe skillet. Give them some space and let the first side brown (as we do in this video on how to cook mushrooms). Once the first side is golden brown, stir, then add bell peppers and cook until slightly softened. Finally, stir in a generous amount of spinach and cook until wilted. It all goes quickly and adds so much flavor to the filling.

    Tip 3: Make the ricotta filling. Stir the ricotta cheese, fresh basil (yum), salt, pepper, oregano, and shredded Parmigiano-Reggiano in a bowl. Then, fold in the sautéed veggies. (Remember: if you are making vegetarian stuffed shells, leave the Parmesan out.)

    Making the ricotta filling for stuffed shells

    Tip 4: Prepare the baking dish. I love adding my sauce to the bottom of the baking dish instead of spreading it on top of the shells. This way, the tops of the shells get a little color and crisp up around the edges. By the way, if you use an oven-safe skillet for the vegetables, you can use the same pan for baking. Otherwise, a baking dish will work perfectly.

    Tip 5: Stuff the shells and bake. Fill each cooked shell with a spoonful of the cheese and vegetable mixture, then nestle them into the marinara sauce. Top with cheese for a melty, golden top. Bake uncovered until the sauce bubbles and the cheese is melted and slightly browned.

    Serving Suggestions

    Since there’s a nice assortment of vegetables stirred into the filling, you can view these stuffed shells as a standalone dinner, with no other dishes required. That said, if you’re feeling feisty, we do have several suggestions for what works nicely with them. First, a salad is always welcomed, and I love these shells with something simple like greens tossed in Italian dressing or simple Caesar.

    You can always bump up the veggies on your plate, too. I love this with our roasted broccolini or roasted cabbage (both work nicely when swooped through the sauce). And, my son loves a side of garlic bread, which is also perfect for dipping into the sauce.

    More Stuffed Shells Recipes

    Veggie Stuffed Shells

    Veggie Stuffed Shells

    • PREP
    • COOK
    • TOTAL

    We love these vegetable stuffed shells! If you have one, cook the vegetables in a wide oven-safe skillet. Then, bake the shells in the same pan. If you do not have an oven-safe skillet, bake the shells in a baking dish.

    This filling is enough for about 16 shells. We recommend adding a couple of extra shells to the water, as you might find that one or more shells tear during cooking.

    Makes 16 shells or 4 Servings

    You Will Need

    18 jumbo pasta shells

    4 ounces mushrooms, thinly sliced, about 2 cups sliced

    1 medium bell pepper, chopped

    5 ounces spinach leaves, about 4 cups packed (140g)

    3 garlic cloves, 1 tablespoon minced

    2 cups whole milk ricotta cheese

    3 ounces finely grated parmesan cheese, about 1 cup

    ¼ cup fresh basil leaves, chopped or substitute 1 teaspoon dried

    ½ teaspoon dried oregano

    3 cups marinara sauce, try our homemade marinara sauce

    2 ounces shredded mozzarella cheese, about 1/2 cup

    Fine sea salt and fresh ground black pepper

    Directions

      1Prep: Preheat the oven to 400°F (204°C). Set aside a wide, oven-safe skillet, or if you do not have one, a wide skillet and a large baking dish.

      2Cook the shells: Bring a large pot of salted water to a boil. Add the pasta shells and cook, stirring occasionally, until al dente, about 9 minutes. Drain. Run under cold water to stop the cooking, then drain again.

      3Cook the vegetables: Meanwhile, heat the oil in a wide oven-safe skillet over medium heat. Spread the mushrooms into one layer. Cook, without moving, until browned on one side, 3 to 5 minutes. Stir, then add the chopped bell pepper and cook, stirring occasionally, until the peppers start to soften, about 2 minutes.

      4Pile the spinach leaves into the pan and add the garlic and a generous pinch of salt. Wait about 30 seconds or until the bottom layer of leaves has started to wilt, and then toss the leaves around the pan. As the spinach cooks, keep tossing so that all the leaves have a chance to hit the bottom of the skillet. When the spinach is bright green and mostly wilted, remove the pan from the heat and let the vegetables cool for a minute or two.

      5Make ricotta filling: Combine ricotta, parmesan, basil, oregano, 1/2 teaspoon salt, and 1/2 teaspoon pepper in a medium bowl. Stir in the vegetables and then taste the mixture. Adjust as needed with more salt or pepper.

      6Make a bed of sauce: If using an oven-safe skillet, pour the marinara into the skillet. If your skillet is not oven-safe, add the marinara to a large baking dish instead.

      7Fill the shells: Spoon 2 tablespoons of the ricotta mixture into each cooked shell, then nestle the filled shell down into the marinara sauce. If you have any cheese mixture left, divide it between the shells or enjoy it with any leftover shells as a cook’s snack.

      8Bake: Slide the skillet (or baking dish) into the oven and bake, uncovered, until the shells are heated through and the cheese is melted on top, about 20 minutes. Remove from the oven and let sit 5 minutes before serving.

    Adam and Joanne’s Tips

    • Storing: Keep leftover shells with the sauce in an airtight container in the fridge for up to 3 days. Reheat in the microwave or in the oven until heated through.
    • Make ahead tips: The shells can be stuffed and arranged in the baking dish or skillet and kept in the refrigerator (covered) for up to a day. You can also freeze them. Wrap them tightly with a layer (or two) of foil and freeze up to three months. Thaw overnight in the fridge and then bake. Or bake from frozen, but expect them to take a bit longer to heat all the way through.
    • Store-bought sauce: One (28-ounce) jar of store-bought marinara sauce has about 3 cups.
    • The nutrition facts provided below are estimates.

    Nutrition Per Serving
    Serving Size
    4 shells
    /
    Calories
    596
    /
    Total Fat
    26g
    /
    Saturated Fat
    14.6g
    /
    Cholesterol
    85.1mg
    /
    Sodium
    1504mg
    /
    Carbohydrate
    51g
    /
    Dietary Fiber
    6.3g
    /
    Total Sugars
    9.8g
    /
    Protein
    37g


    AUTHOR:

    Joanne Gallagher

    Source link

  • 27 High-Protein Dinners

    27 High-Protein Dinners

    If you’re looking for high-protein dinner recipes that are actually easy, satisfying, and don’t taste like “diet food,” you’re in the right place. Whether your goal is weight loss, muscle building, or just staying full longer (hello, fewer late-night snacks), these meals pack in protein without overcomplicating dinner.


    Jump to: ℹ️ Overview | 🍗 Easy Chicken | 🥩 Beef & Seafood | 🌿 Vegetarian | 🥘 Comfort Food & Meal Prep


    High-protein dinners don’t have to mean plain chicken and broccoli on repeat (thankfully).

    These days, they can look like saucy tacos, cozy pasta bakes, fresh bowls, and hearty vegetarian meals that actually keep you full. The key is building meals around protein-rich ingredients like chicken, beef, fish, tofu, lentils, or beans — then layering in flavor so it still feels like a proper dinner, not “health food.”

    In this roundup, you’ll find a mix of quick weeknight meals, meal-prep options, comfort food favourites, and lighter dinners — all designed to be satisfying, balanced, and easy to make again and again.


    Easy High-Protein Chicken Dinners

    If you need reliable, quick, and protein-packed meals, chicken is your best friend. These recipes are simple enough for weeknights but still have enough flavour to keep things interesting.


    High-Protein Beef & Seafood Dinners

    For something a little heartier, these beef and seafood dinners bring serious flavor and plenty of protein. Think steak, salmon, and saucy dishes that feel a bit more special.


    High-Protein Vegetarian Dinner Ideas

    No meat? No problem. These vegetarian high-protein dinners use lentils, tofu, beans, and dairy to create meals that are filling, balanced, and genuinely satisfying.


    High-Protein Comfort Food & Meal Prep Dinners

    These are the cozy, make-ahead, and crowd-pleasing meals — casseroles, pasta bakes, and bowls that reheat beautifully and make life easier during the week.


    Save These High-Protein Dinners To Pinterest

    Source link

  • Easy Creamy Vegetable Soup Recipe

    Easy Creamy Vegetable Soup Recipe

    This easy creamy vegetable soup recipe is incredibly delicious and made in one pot with a short list of healthy ingredients.

    Easy Creamy Vegetable Soup

    I’ve been making this creamy vegetable soup for over 15 years. It’s a staple soup for my family, the one we turn to when we need a little comfort or an easy meal.

    Our recipe below is for a blended vegetable soup. For a brothy veggie soup, see this Easy Vegetable Soup.

    Key Ingredients

    • Vegetables: I keep this vegetable soup really simple with onions, garlic, carrots, and celery. If you have other veggies in the fridge that need to be used up, feel free to add them. I’ve added zucchini, summer squash, and even winter squash cubes to this and loved it.
    • Potatoes: Instead of using a roux made with butter and flour, we add a pound of potatoes to make this soup thick and creamy. I prefer thin-skinned potatoes like Yukon Gold and don’t peel them. You can substitute sweet potatoes.
    • Broth: This recipe calls for vegetable broth or chicken broth. You can make your own or buy it. When looking for store-bought veggie broth, I go for the brands that include mushrooms (these tend to have more flavor).
    • Thyme and Bay Leaves: I love these for their classic flavor. You can use fresh or dried.
    • Something Creamy: When the soup is blended, I stir in something creamy to make things extra delicious. I love cream or half-and-half, but you can use dairy-free coconut milk or this homemade cashew cream.

    Find the full recipe with measurements below.

    How to Make the Best Creamy Veggie Soup

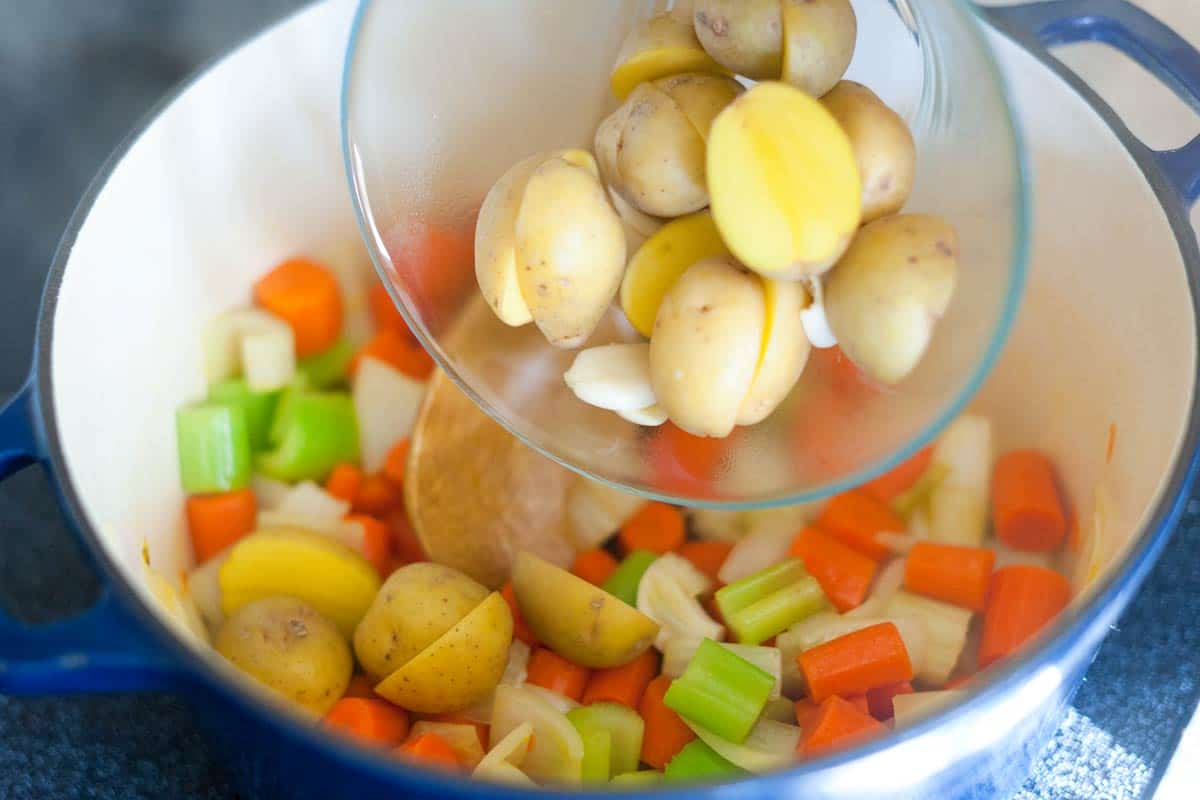
    Tip 1: Cut all the veggies to the same size. So that everything cooks quickly and evenly, chop your vegetables into similar sizes. Remember that this soup is eventually blended, so there’s no need for perfect cuts, though. I cook onions, carrots, and celery in a big pot until softened. Then, I add potatoes, garlic, broth, and herbs.

    Cooking the Vegetables for Creamy Vegetable Soup

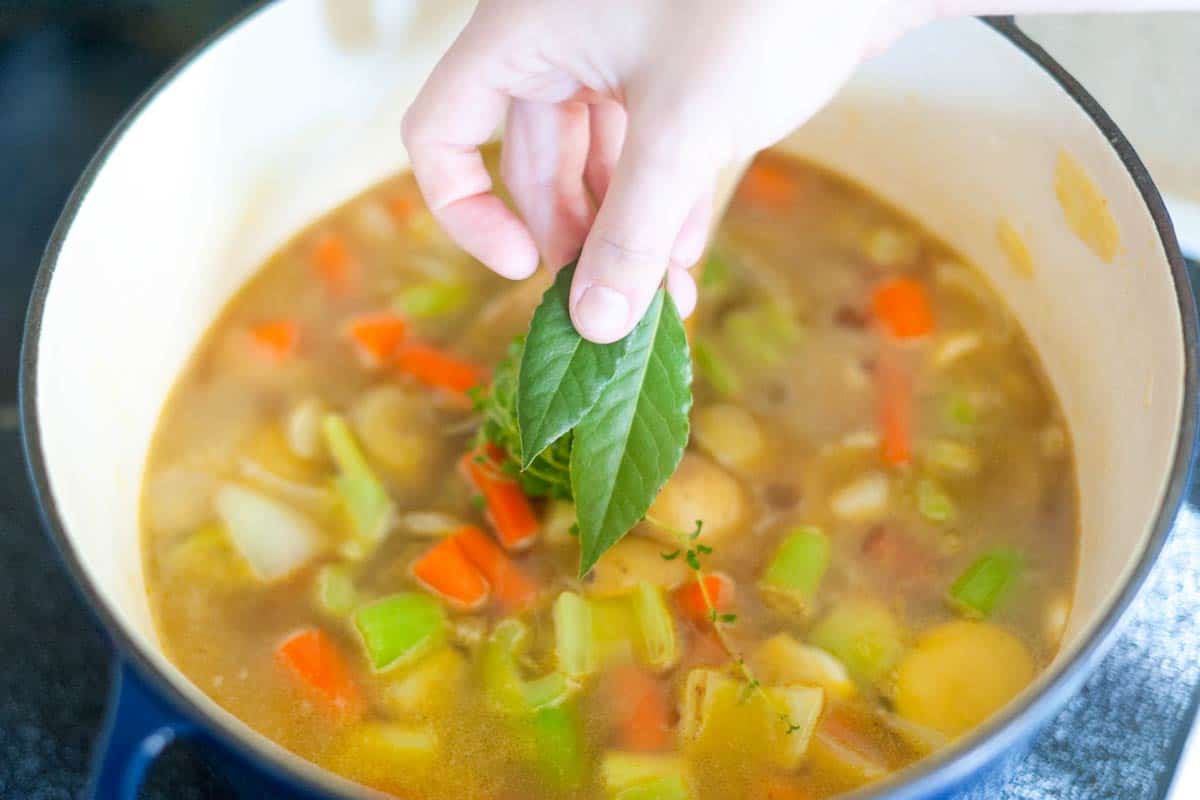
    Tip 2: Remove your bay leaf before blending. The vegetables will be soft after simmering for 15 minutes. Then you will blend. Before you do, remove the bay leaf and thyme stalks (the leaves will have fallen off into the soup). Then, blend the vegetables into a creamy soup. I’ve lost count of how many times I’ve forgotten a bay leaf before blending soup. The thyme stalks and bay leaf don’t soften well enough to blend in, so it really is best to remove them!

    How to Make Creamy Vegetable Soup - Adding thyme and bay leaves to the pot

    Tip 3: Finish with something creamy. The potatoes really make this soup thick and creamy, but I still love adding a splash of cream or half-and-half just before serving. You can skip it or use a dairy-free option like coconut milk. It’s amazing all by itself, but I love topping it with some homemade croutons.

    More Creamy Soup Recipes

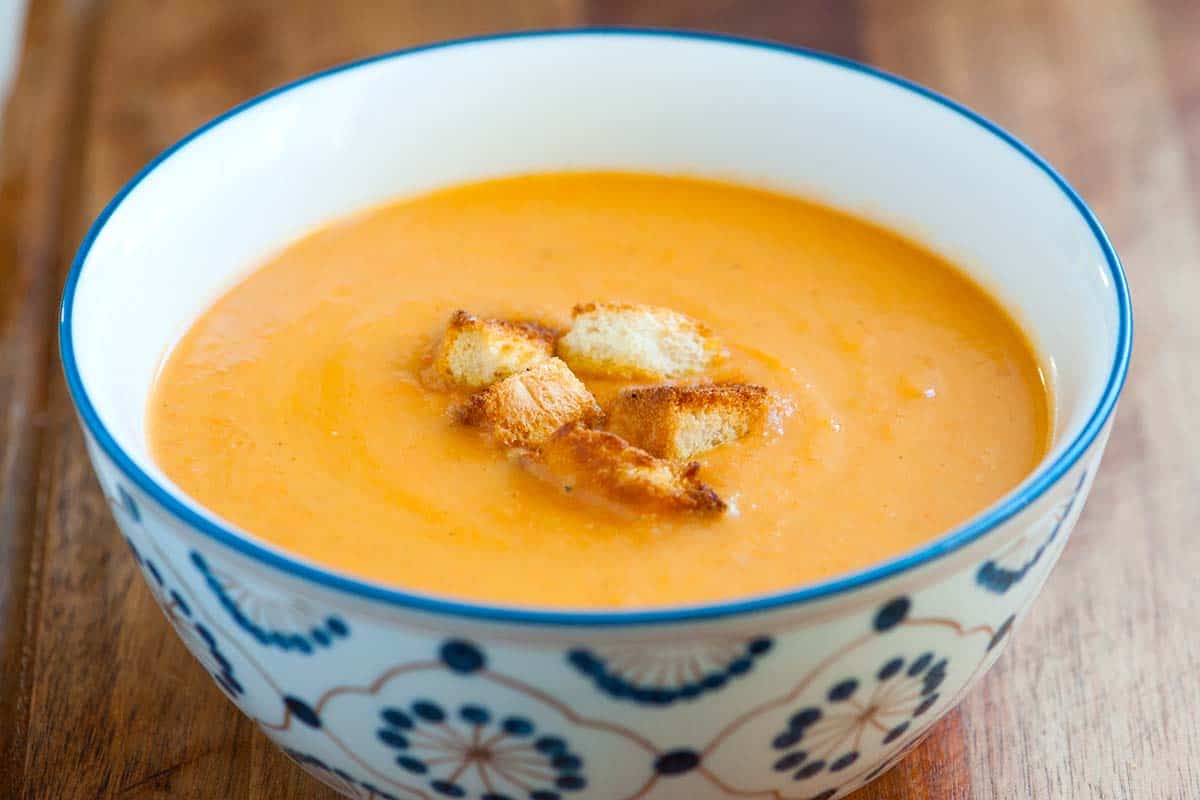
    A Bowl of Creamy Vegetable Soup

    Easy Creamy Vegetable Soup

    • PREP
    • COOK
    • TOTAL

    You will love this easy, delicious, and creamy vegetable soup recipe. Don’t worry too much about how you prep the vegetables. You should be fine as long as they are all of a similar size. Since this is a blended soup, you do not need to mince the garlic cloves. Just peel and cut them in half.

    We have been making this soup for years. It’s simple to make, healthy, and comforting. Throw lots of vegetables into a big pot, add stock and herbs, and then simmer until done. Blend, and it is ready to eat. For a brothy soup, see this Homemade Vegetable Soup.

    Makes 4 Servings

    Watch Us Make the Recipe

    You Will Need

    1 large onion, chopped into ½-inch pieces

    1 pound carrots, peeled and chopped into 1/2-inch pieces, 4 to 5 medium carrots

    4 celery sticks, chopped into ½-inch pieces

    1 tablespoon olive oil

    Salt, as needed

    ¼ teaspoon crushed red pepper flakes

    1 pound thin-skinned potatoes, chopped into ½-inch pieces, 3 medium potatoes

    3 garlic cloves, peeled and halved

    3 cups vegetable broth or chicken broth (710ml)

    2 bay leaves

    3 sprigs fresh thyme or ½ teaspoon dried thyme

    ¼ cup half-and-half, cream, or coconut milk (60ml)

    Directions

      1Cook the veggies: Heat the oil in a large pot over medium-high heat. Toss the onion, carrots, and celery around in the oil. Sprinkle with ½ teaspoon of salt and add the red pepper flakes. Cook, stirring occasionally, until the vegetables sweat, soften, and smell sweet, 5 to 10 minutes.

      2Add the potatoes: Stir in the potatoes, garlic halves, bay leaves, and thyme. Cook for 5 minutes. Add more oil if the pot seems dry.

      3Simmer the soup: Pour in the broth and bring to a boil. Reduce to a simmer and cook until you can easily pierce the potatoes with a fork, about 15 minutes.

      4Blend the soup: Remove the soup from the heat. Take out the bay leaves and thyme sprigs and discard them. Use an immersion blender, stand blender, or food mill to puree the soup until smooth.

      5To finish: Stir in the cream. Taste for seasoning and adjust with more salt and pepper if necessary.

    Adam and Joanne’s Tips

    • Storing: Store leftovers in an airtight container in the fridge for up to 4 days. You can also freeze it! Portion into freezer-safe containers or bags and freeze for up to 3 months. Thaw overnight in the fridge.
    • Reheating: Add to a saucepan over medium-low heat and cook, stirring occasionally, until hot. You can also microwave it. Use a spoon or whisk to bring the soup back together if it is separated.
    • Vegan vegetable soup: Use either homemade veggie broth or store-bought broth, and look for one that is heavy on mushrooms for the most flavor. Add full-fat coconut milk or cashew cream at the end.
    • Substitute the potatoes: Try 1 can of drained and rinsed white beans. Once blended, they make the soup creamy and add a little extra protein.
    • The nutrition facts provided below are estimates. We included ¼ cup of half and half in the calculations and assumed 4 servings. We omitted salt from the calculations since you will need to add it to your taste.

    Nutrition Per Serving
    Calories
    234
    /
    Protein
    6 g
    /
    Carbohydrate
    41 g
    /
    Dietary Fiber
    7 g
    /
    Total Sugars
    8 g
    /
    Total Fat
    6 g
    /
    Saturated Fat
    2 g
    /
    Cholesterol
    6 mg


    AUTHOR:

    Joanne Gallagher

    Adam and Joanne of Inspired Taste

    We are Adam and Joanne Gallagher, the creators of Inspired Taste. Established in 2009, Inspired Taste grew from a childhood dream into one of the internet’s most trusted recipe sites with hundreds of reliable recipes, step-by-step videos, and expert tips.More About Us
    Source link

  • Seriously Good Shrimp Carbonara Recipe

    Seriously Good Shrimp Carbonara Recipe

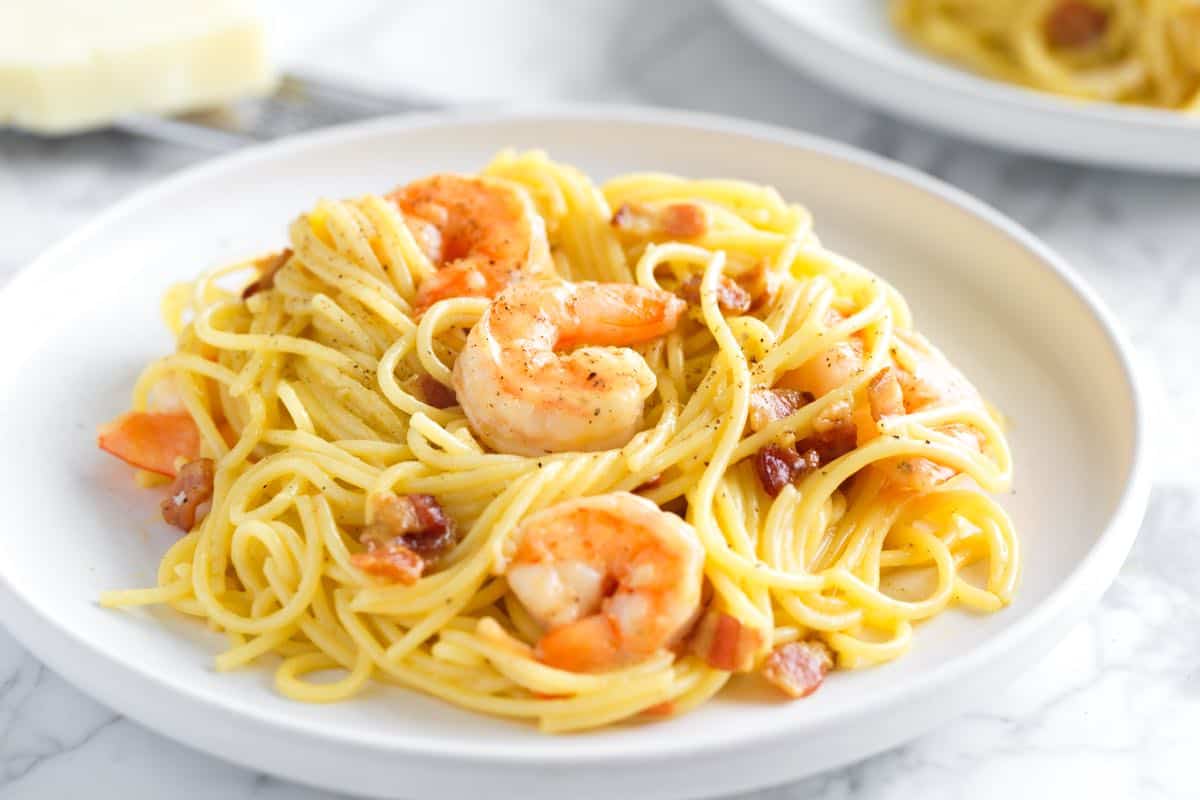
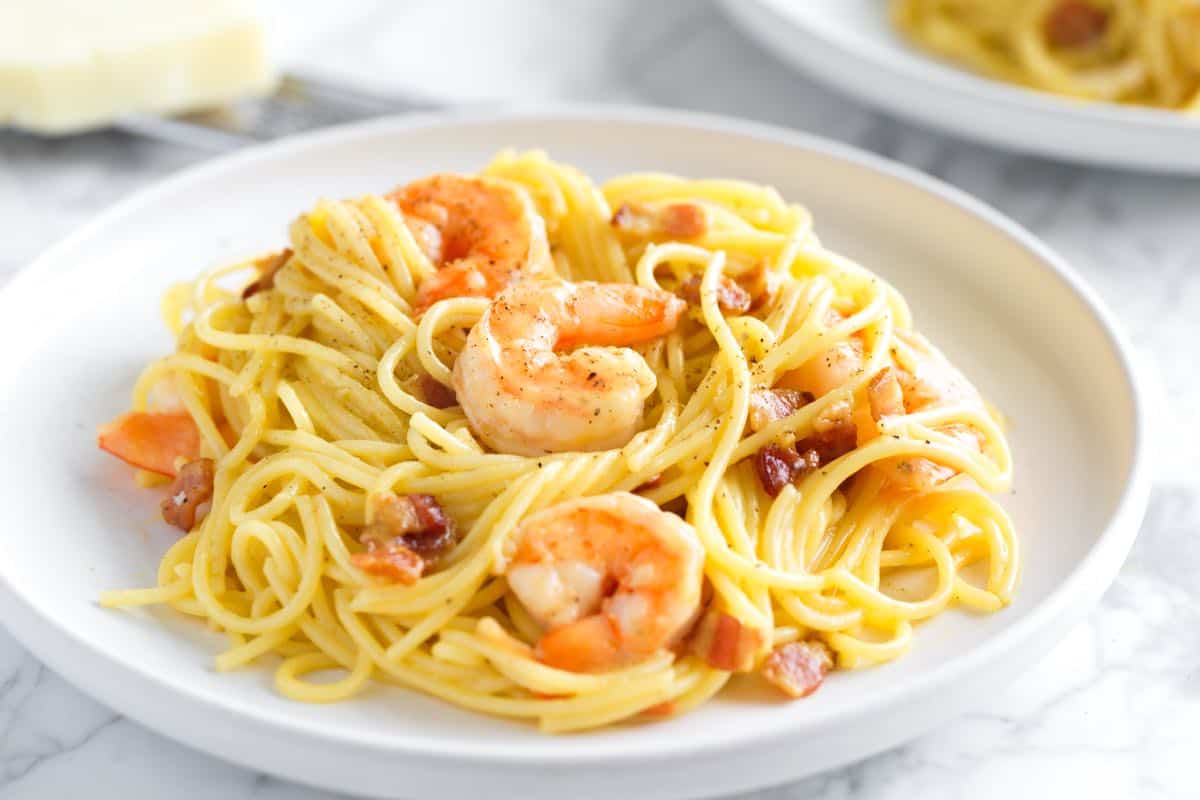
    I’m excited to share this delicious shrimp carbonara recipe which features perfectly cooked shrimp tossed with spaghetti in a silky sauce.

    Shrimp Carbonara

    If you are a pasta traditionalist, look away. If you love seafood pasta and don’t mind bending the rules a bit in the vein of delicious dishes, this recipe is for you! I’ve shared our pasta carbonara before. It’s simple and has the most delightful silky sauce.

    We’re obsessed, and after you try it, you will be too! For this recipe, we’re using all the techniques of traditional carbonara and adding shrimp. It’s easier than you might think, which is why this works as a quick weeknight dinner. And, as a bonus, it hits all the marks for a special dinner, like, say, for date night (see more of our date night recipes).

    Key Ingredients

    • Shrimp: For the best results, I prefer large or jumbo shrimp. They are less likely to overcook and dry out. Look for fresh shrimp that is firm and has a slightly sweet smell. If you have frozen shrimp, thaw and drain them before using. I leave the shrimp whole before tossing it with the pasta, but if you’d prefer to have smaller bites of shrimp throughout, you can cut them into smaller pieces.
    • Pork: You want a form of cured, fatty pork like guanciale (most traditional), pancetta, or thick-cut bacon (easiest to find). We will render this in a skillet, which adds flavor to our dish, and since you’ll have some rendered fat, it makes our sauce much creamier after mixing it with the eggs and cheese.
    • Pasta: My go-to is spaghetti, but bucatini, which looks like spaghetti with a hole down the middle, is also lovely. If you are up for it, this recipe made with homemade pasta is incredible!
    • Room Temperature Eggs: There’s no cream in this recipe. Instead, we combine egg and egg yolk with the rendered pork fat and some starchy pasta water to make the sauce silky and creamy. The eggs heat up but likely don’t hit a temperature that makes them fully cooked (similar to when making homemade tiramisu). We want a creamy, emulsified sauce, not a fully cooked scrambled egg texture. If you are concerned about raw eggs, use pasteurized eggs (they are common at most grocery stores). If you are still worried, add some shrimp to our easy fettuccine alfredo instead, which has no eggs and uses butter and cheese for the sauce. Note: If your eggs are straight from the fridge, you can warm them up quickly by adding them (in their shells) to a bowl of warm water and leaving them for a few minutes.
    • Cheese: I use Parmigiano-Reggiano AND Pecorino Romano and love the combination. If you need to choose one, go with Pecorino Romano (used for authentic cacio e pepe). It’s saltier and tangier than Parmigiano-Reggiano, which works incredibly well in carbonara. For the best results, use a fine grater to grate the cheese, and skip the pre-grated parmesan, as it doesn’t melt down as well into a silky carbonara sauce. Some regions of Italy would never think to combine shrimp and cheese, but as I said above, this recipe bends the rules a bit, and honestly, your taste buds will thank you!
    • Salt and Black Pepper: For perfectly seasoned pasta, you want to season your pasta water, which will season the pasta itself, and since we use some of that starchy water to bring our sauce together, it will also season the sauce. Fresh black pepper is pretty standard in carbonara, and for good reason. I like a fine grind for the pepper, use a lot of it, and love it!

    Find the full recipe with measurements below.

    How to Make Shrimp Carbonara

    Tip 1: Render your pork. While the pasta cooks, add the pork to a skillet with halved garlic cloves, olive oil and black pepper, then cook over medium-low heat. The pork should be sizzling gently, not browning too quickly. Cook until the fat renders and the pork is still slightly chewy in the center (not crunchy/crispy).

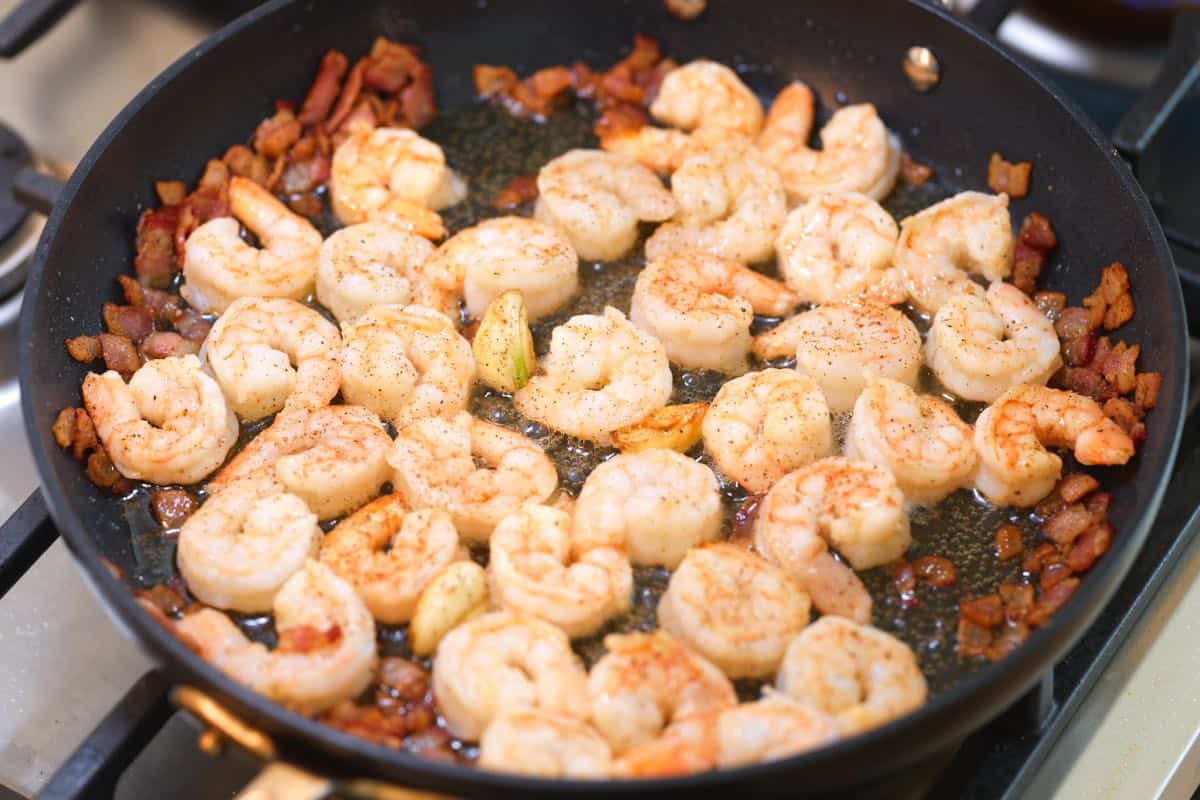
    Tip 2: Cook your shrimp in the same skillet. Next, toss in your shrimp. I like spreading them out in one layer, letting them cook for about one minute, and then flip them and cook another 30 to 60 seconds until they are tender and ever-so-slightly undercooked. Transfer the shrimp to a plate, and then move on to finishing the carbonara sauce.

    Cooking the shrimp with garlic in rendered bacon fat

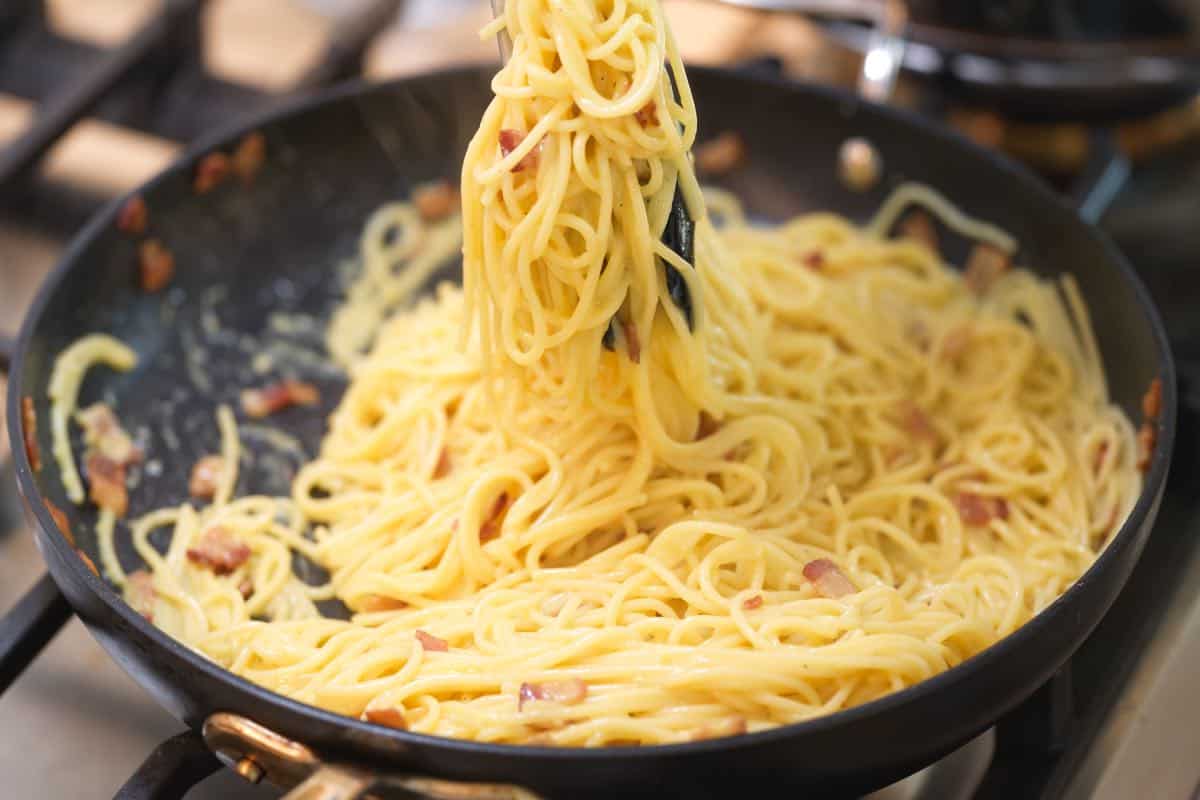
    Tip 3: Toss on low heat. When the pasta is ready, use tongs to toss it into the skillet with the rendered pork and its fat. Toss well for 2 minutes. The heat should stay low, and you’ll be tossing the pasta the whole time, giving the spaghetti a chance to absorb the flavors from the pork, shrimp juices, and rendered fat. (The shrimp is still on the side on a plate, but since you cooked them in the fat, it imparts a seafood flavor to the skillet).

    Tip 4: Turn off the heat. Now, turn off the heat and let the skillet sit for a minute before pouring in a whisked mixture of egg and cheese. Since the skillet sat for a minute, it won’t be so hot that it scrambles the eggs, but it will be hot enough to gently cook the eggs so they turn into that silky smooth sauce.

    Continuously tossing the spaghetti with the carbonara sauce

    Tip 5: Don’t stop tossing. During this step, you want to continuously toss the pasta around the skillet since keeping things moving makes sure you create the sauce without scrambling the eggs. You’ll notice it’s a bit thick as you toss, so loosen it with some pasta water (a couple of tablespoons or more as needed).

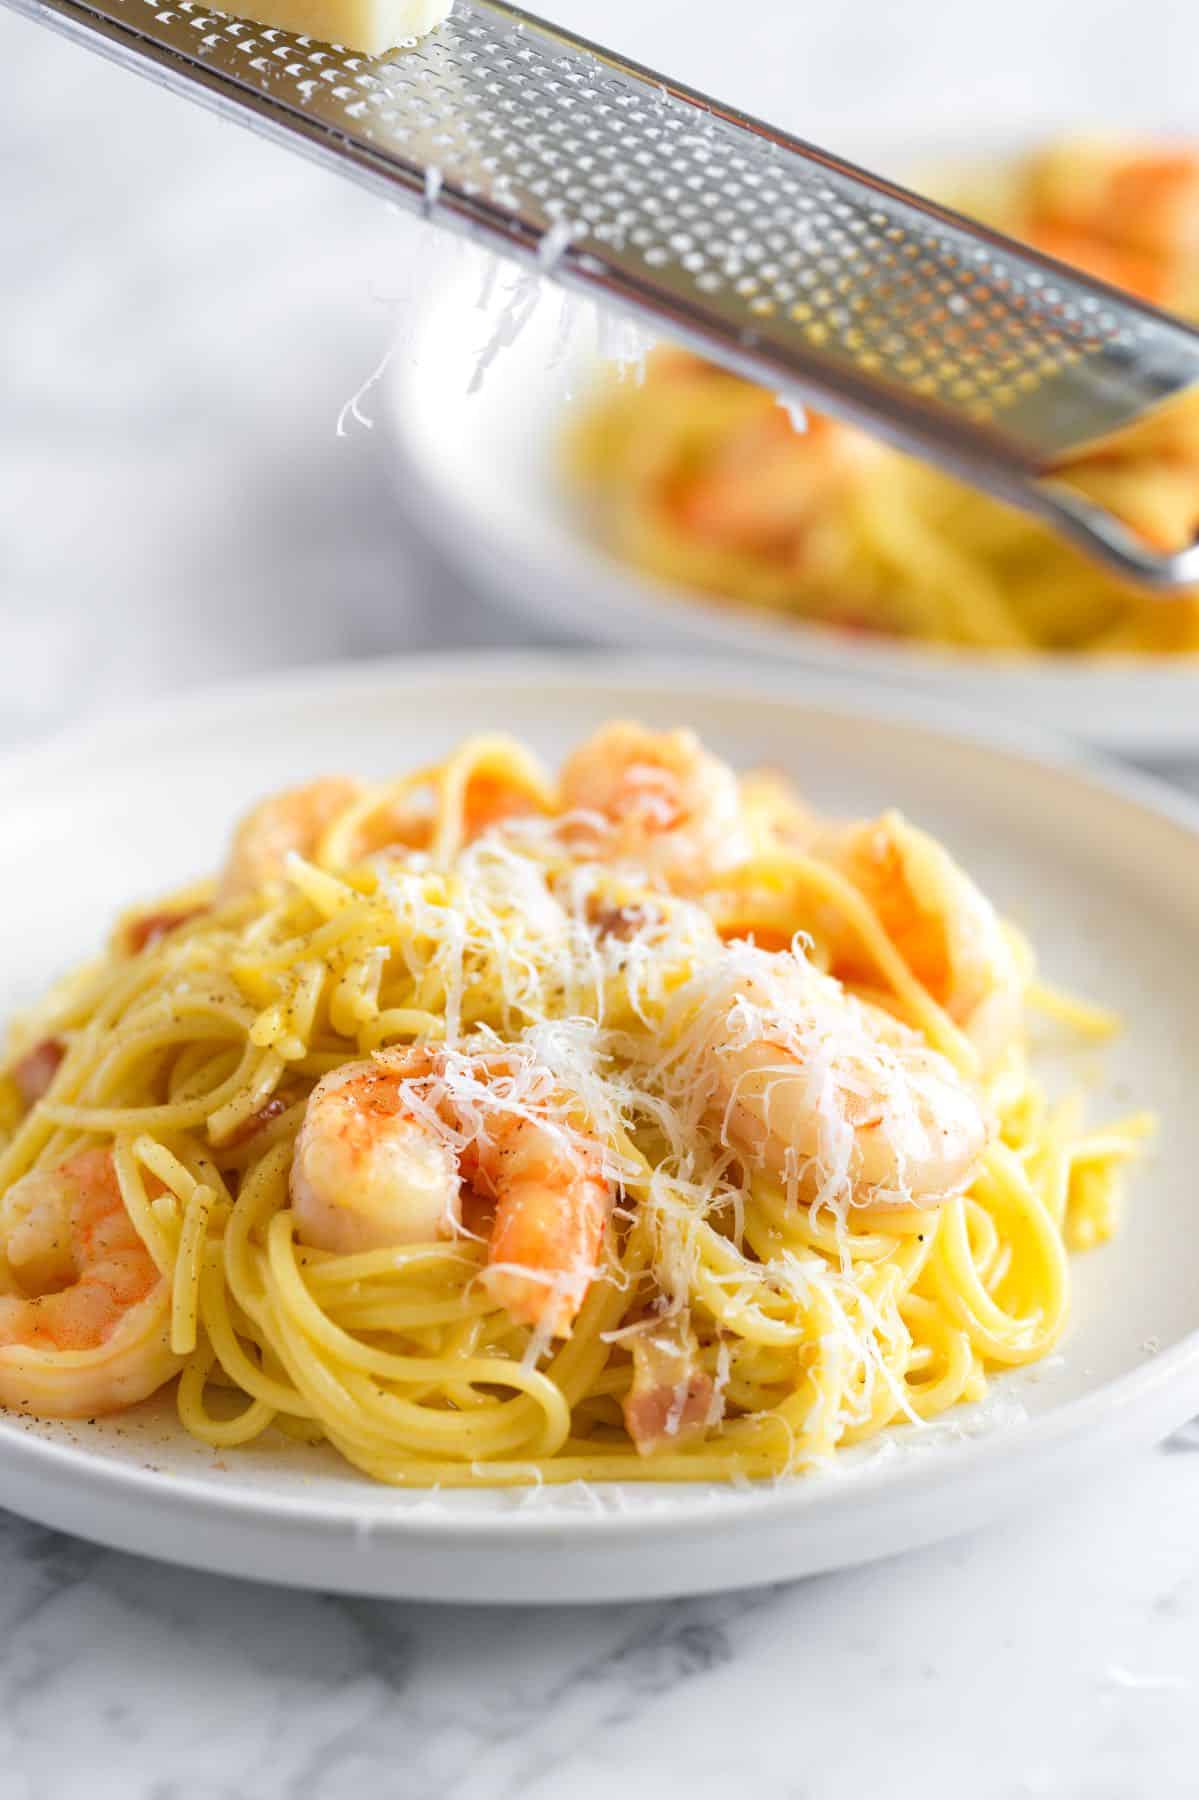
    Tip 6: Serve hot. When you are happy with the sauce, toss in the shrimp and serve immediately so it’s hot, topped with freshly grated cheese and more black pepper. It’s seriously good!

    More Simple Pasta Recipes

    Shrimp Carbonara

    Seriously Good Shrimp Carbonara

    • PREP
    • COOK
    • TOTAL

    We’re adding shrimp to our family’s favorite carbonara recipe. This shrimp carbonara relies on eggs for the sauce. We want a smooth, emulsified sauce, not scrambled eggs! Because of this, we don’t make the sauce over direct heat. Instead, we make the sauce in our skillet off the heat. The pan is still quite hot, but not so much it will scramble the eggs. For best results, start with room temperature eggs. If your eggs are cold from the fridge, place them (in their shells) in a bowl of warm water for a few minutes before you begin.

    We call for Parmigiano-Reggiano and Pecorino Romano for this recipe. The combination of both cheeses really makes this simple shrimp pasta delicious. If you need to choose just one, go with Pecorino Romano, which has more of a salty, sharp flavor that’s incredible in carbonara (you would use 2 ounces).

    4 Servings

    Watch Us Make the Recipe

    You Will Need

    12 ounces (340g) spaghetti or bucatini pasta

    1 pound (450g) large or extra large shrimp, peeled and deveined

    2 large eggs at room temperature

    2 large egg yolks at room temperature

    1 ounce (28g) finely grated Parmigiano-Reggiano cheese, 1/2 packed cup

    1 ounce (28g) finely grated Pecorino Romano cheese, 1/2 packed cup, plus more for serving

    1/2 tablespoon extra-virgin olive oil

    4 ounces (113g) thick-cut bacon, pancetta, or guanciale, 1/4-inch thick pieces or cubes

    2 garlic cloves, gently smashed

    1/2 teaspoon finely ground black pepper, plus more to taste, I prefer 3/4 teaspoon

    Salt for cooking the pasta

    Directions

      1Season shrimp: Pat the shrimp dry, then season with 1/4 teaspoon of salt and 1/4 teaspoon of finely ground black pepper.

      2Cook pasta: Bring a pot of salted water to a boil. Add the pasta and cook until al dente (tender, with a nice chew). I add 1 tablespoon of salt to the pasta water. If you’re using fresh pasta, wait to add it to the water until just before the bacon is almost finished rendering, as it cooks much more quickly.

      3Prepare egg mixture: In a medium bowl, thoroughly whisk 2 whole eggs, 2 egg yolks, 1 ounce finely grated Parmigiano-Reggiano, and 1 ounce finely grated Pecorino Romano. Set aside.

      4Render pork: Heat 1/2 tablespoon of olive oil in a wide skillet over medium heat. Add the bacon (or pancetta or guanciale), garlic cloves, and 1/2 teaspoon black pepper. Cook, stirring occasionally, until the fat renders and the bacon begins to crisp but still has a slight chew, 5 to 6 minutes.

      5Cook shrimp: Add the shrimp, in one layer, to the skillet. Cook for 1 minute, flip, and cook until tender and slightly undercooked, about 1 minute. Transfer the shrimp to a plate and loosely cover with foil. Discard the garlic. Turn off the heat, and set the skillet aside until the pasta is ready. Just before the pasta is done, reheat the bacon and rendered fat in the skillet over low heat.

      6Add pasta to skillet: Do not drain the pasta water. Instead, use tongs to transfer the pasta to the skillet with bacon over low heat. Toss the pasta around the skillet for 2 minutes.

      7Create the sauce: Turn off the heat and wait one minute. Now, it’s all about keeping things moving from here. Add the egg and cheese mixture, and immediately begin tossing everything together. Add a splash of pasta water (2 to 3 tablespoons), or more as needed, to thin the sauce until a silky sauce forms. Stopping or a pan that’s too hot will cause the eggs to scramble. Keeping everything moving around will make the sauce turn silky. It takes a minute or two.

      8Taste and season with salt and additional pepper as needed. Toss in the shrimp. Divide between dishes and dust with more cheese and black pepper on top.

    Adam and Joanne’s Tips

    • Room temperature eggs: For best results, start with room temperature eggs. If your eggs are cold from the fridge, place them (in their shells) in a bowl of warm water for a few minutes before you begin.
    • Seasoning your pasta water: I use 1 tablespoon of salt. If you’re unsure, taste the water—it should taste pleasantly salty, like seawater.
    • Grating the cheese: I use a fine microplane grater to grate the cheese for this recipe. The super fine cheese melts into the sauce so nicely. Since it’s so fluffy, it fills a measuring cup quickly, so to measure it, I lightly push the cheese into the cup to pack it down a bit.
    • The nutrition facts provided below are estimates.

    Nutrition Per Serving
    Serving Size
    1/4 of the recipe
    /
    Calories
    668
    /
    Total Fat
    23.4g
    /
    Saturated Fat
    8.3g
    /
    Cholesterol
    399.9mg
    /
    Sodium
    597.1mg
    /
    Carbohydrate
    66.3g
    /
    Dietary Fiber
    2.8g
    /
    Protein
    46.3g


    AUTHOR:

    Joanne Gallagher

    Adam and Joanne of Inspired Taste

    We are Adam and Joanne Gallagher, the creators of Inspired Taste. Established in 2009, Inspired Taste grew from a childhood dream into one of the internet’s most trusted recipe sites with hundreds of reliable recipes, step-by-step videos, and expert tips.More About Us
    Source link

  • Greek Lentil Soup (Slow Cooker)

    Greek Lentil Soup (Slow Cooker)

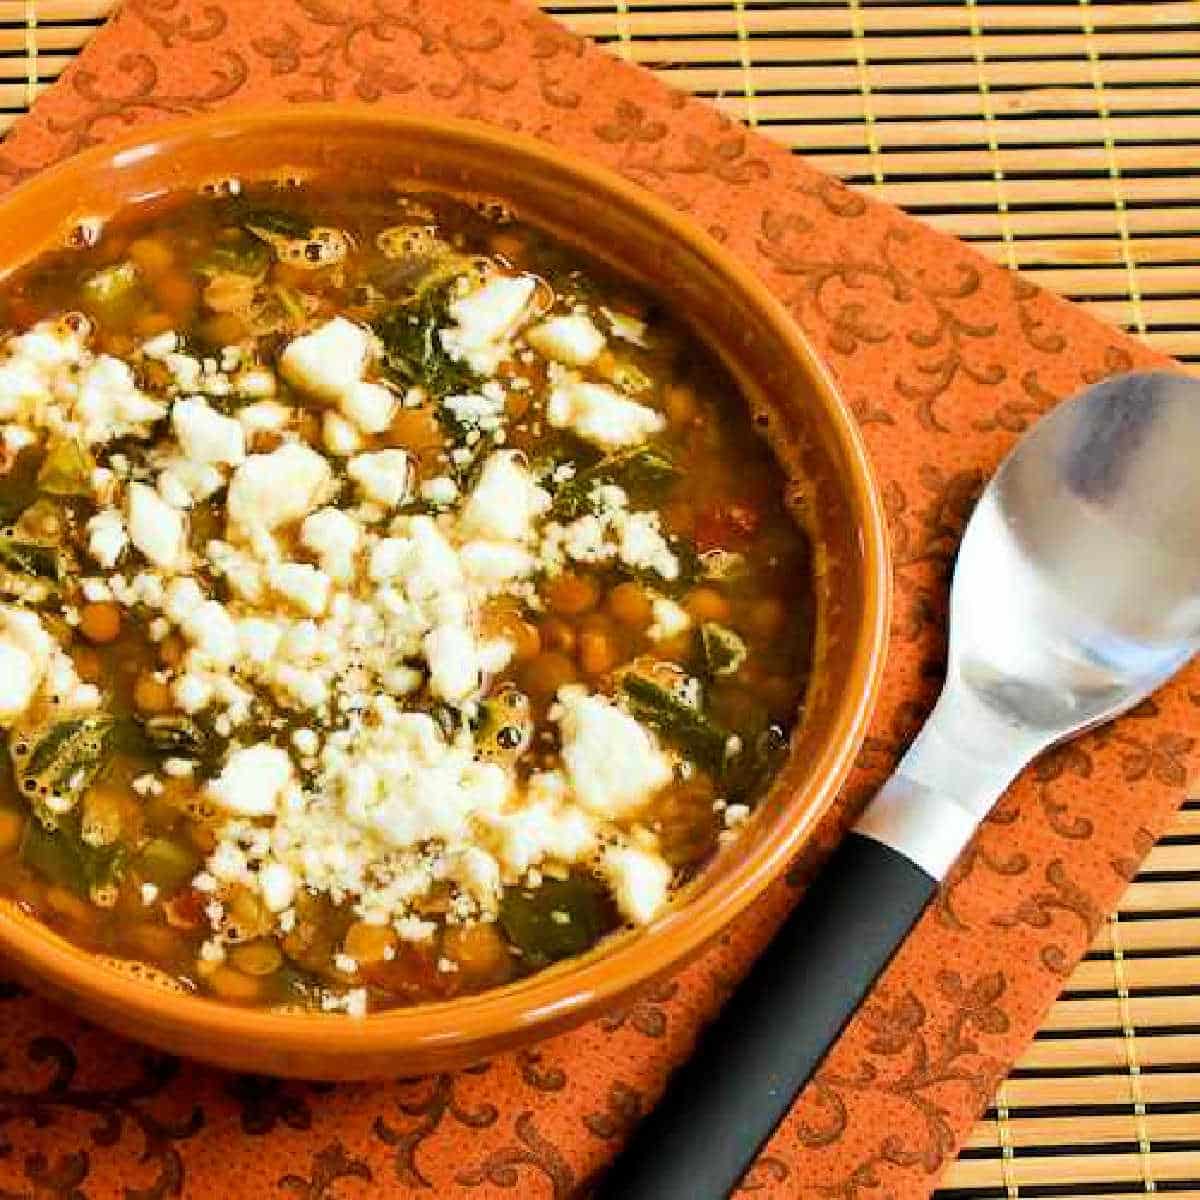
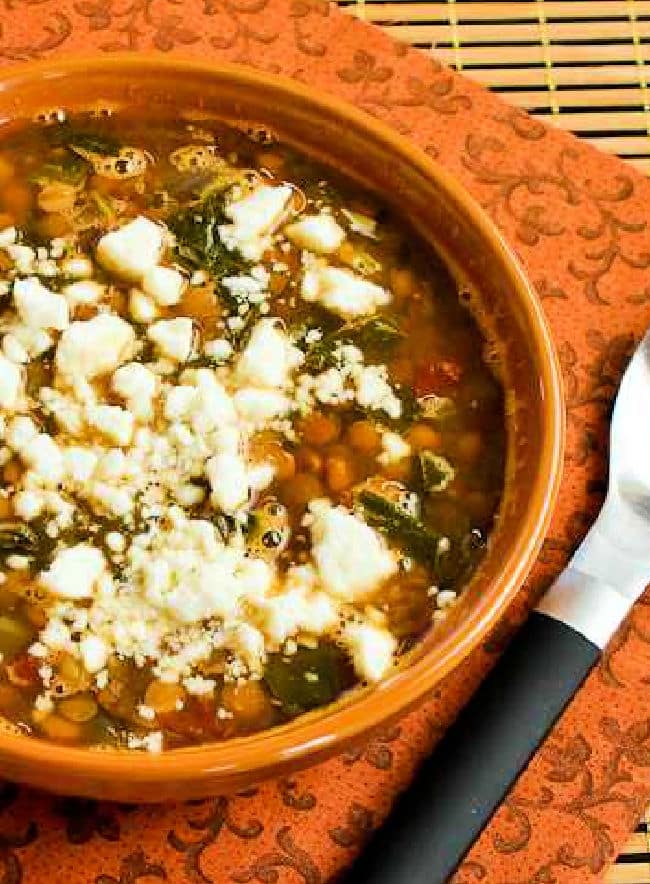
    Greek Lentil Soup with tomatoes, spinach, lemon, and Feta cheese is a perfect vegetarian soup to make in the slow cooker! And this soup is a must-make for people who love Greek flavors, and it’s surprisingly low in net carbs for a soup with lentils.
    PIN the Greek Lentil Soup Recipe to try it later!

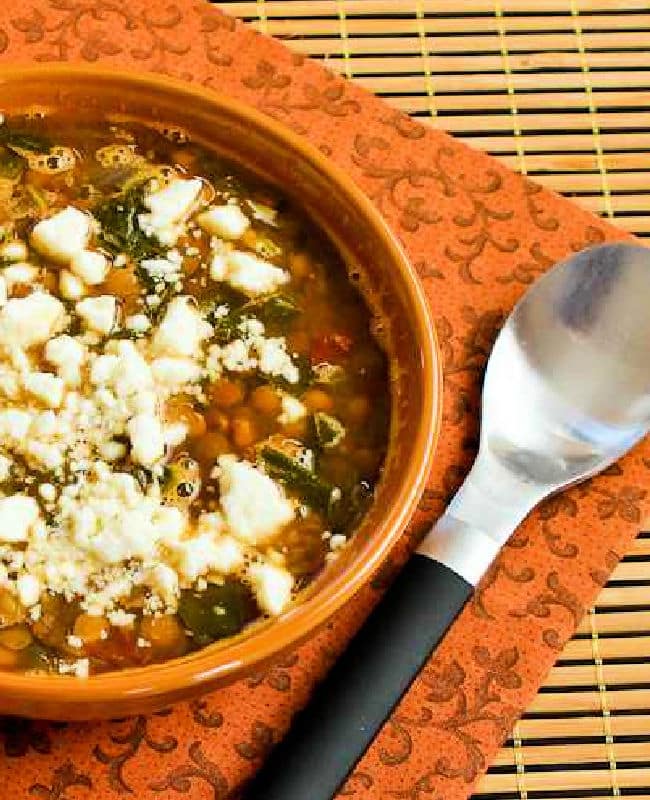
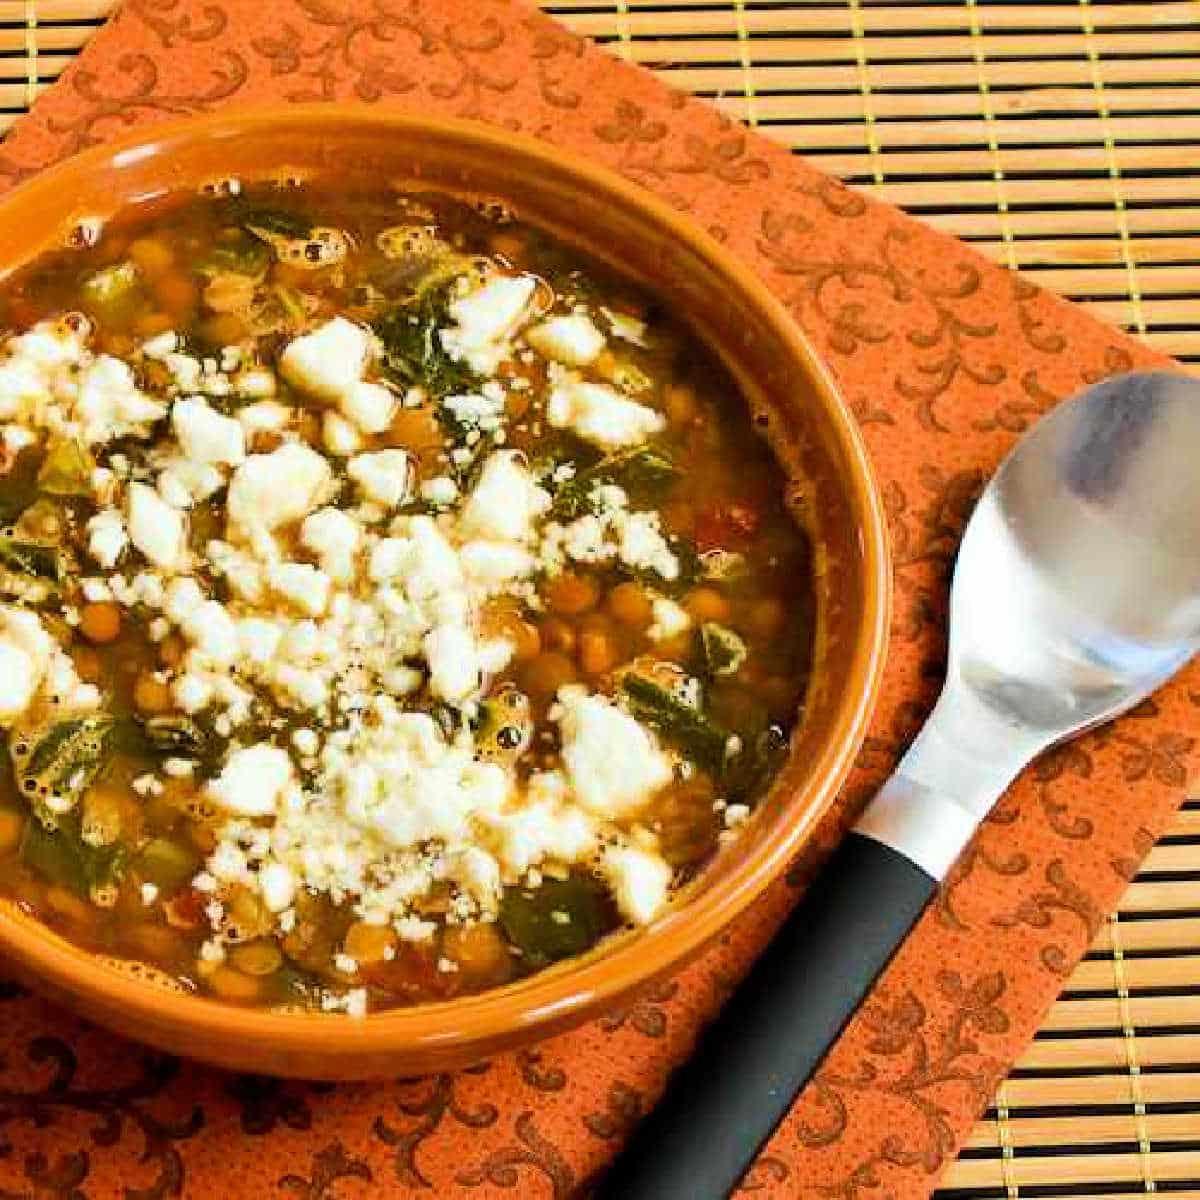
    Slow Cooker Greek Lentil Soup in bowl with spoon, cropped image.

    This Greek Lentil Soup recipe might remind you how I’m a long-time fan of lentils, and have some soup recipes using them. But I spotted Greek Lentils with Spinach and Feta in the American Heart Association Healthy Slow Cooker Cookbook (affiliate link). And I couldn’t resist turning that recipe into a soup!

    This slow cooker soup with Greek flavors starts with lentils, chopped celery and onion, garlic, vegetable (or chicken) stock, canned tomatoes, and spices. I added more vegetables and stock so it wasn’t as much of a splurge on carbs. And if you chop the vegetables the night the soup is easy to throw in the slow cooker in the morning and let it cook all day.

    When you get home, add chopped spinach to the soup with some lemon juice and cook a bit longer, then scoop into bowls, add Feta, and you have a tummy-warming soup for dinner. I’ve never used Feta on soup, but I loved how it added a vibrant burst of flavor. And if you like these Greek flavors, I bet you’ll want to make Greek Lentil Soup over and over!

    What ingredients do you need for this recipe?

    (This is only a list of ingredients; please scroll down for complete printable recipe. Or if you use the JUMP TO RECIPE link at the top of the page, it will take you directly to the complete recipe with ingredient amounts.)

    What gives this lentil soup the Greek flavors?

    The ingredients that give this recipe Greek flavors are thyme, Greek oregano, Greek Seasoning, tomatoes, spinach, lemon, and of course Feta Cheese!

    Can you use other colors of lentils for this Greek Soup?

    You can definitely make this soup with other colors of lentils, but cooking time might be slightly different, and red lentils in particular cook much more quickly than brown ones.

    How many carbs are in this Greek Lentil Soup Recipe?

    This tasty lentil soup with Greek flavors has only 12 net carbs per serving, and 7 grams of protein.

    Want more tasty ideas for soup?

    Use Soup Recipes to see all the soups that have been featured on Kalyn’s Kitchen. You can also search “lentils” if you want more recipes with lentils!

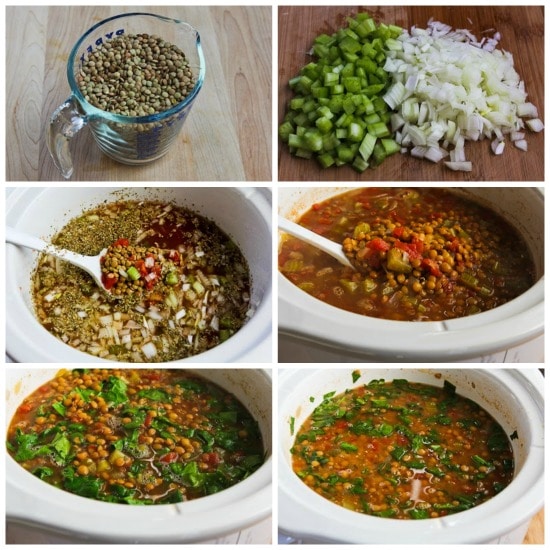
    Slow Cooker Vegetarian Greek Lentil Soup with Tomatoes, Spinach, and Feta on KalynsKitchen.comSlow Cooker Vegetarian Greek Lentil Soup with Tomatoes, Spinach, and Feta on KalynsKitchen.com

    How to make Greek Lentil Soup in the Slow Cooker:

    (This is only a summary of the steps for the recipe; please scroll down for complete printable recipe. Or if you use the JUMP TO RECIPE link at the top of the page, it will take you directly to the complete recipe.)

    1. Start with 2 cups regular brown lentils. (Lentils that are fresher will cook more quickly, so take that into account for timing.)
    2. Finely chop one medium onion and 1 cup of celery. (Do this the night before if you want to get this in the slow cooker early in the morning!)
    3. Put lentils, onions, celery, vegetable (or chicken) stock, Greek Seasoning, Dried thyme, dried oregano, minced garlic, black pepper, and canned tomatoes with juice into the slow cooker.
    4. Cook on high about 4 hours or on low for 8-9 hours, until the lentils are as soft as you prefer. (Slightly longer cooking time won’t matter, either on high or low.)
    5. After nearly 4 hours on high the lentils were soft but still kept their shape.
    6. When the lentils are softened to your liking, chop the spinach (and wash in salad spinner if needed.)
    7. Add chopped spinach to the soup with lemon juice, turn to high if cooking on low, and cook for 30 minutes more.  (Add more stock at this point if the soup seems thicker than you’d like.)
    8. When the spinach is nicely softened, serve Greek Lentil Soup hot, garnished with Feta cheese if you like the sound of that.

    Make it a Vegetarian Meal:

    Either Olive Bread or Savory Almond Flour Bread would be perfect to serve on the side with this Greek Lentil Soup!

    Slow Cooker Greek Lentil Soup in bowl with black spoon.Slow Cooker Greek Lentil Soup in bowl with black spoon.

    Want more meatless soup recipes?

    Check out Amazing Vegetarian and Vegan Soups on my Slow Cooker or Pressure sites to see lots of meatless soup ideas for the slow cooker or Instant Pot!

    Weekend Food Prep:

    This Greek Lentil Soup recipe has been added to a category called Weekend Food Prep where you’ll find recipes you can prep or cook on the weekend and eat during the week!

    Ingredients

    • 2 cups brown lentils (washed and picked over if needed)
    • 8 cups vegetable broth (or more)
    • 1 medium onion, diced small
    • 1 cup chopped celery, chopped into fairly small pieces
    • 1 T Greek Seasoning
    • 1 tsp. dried thyme
    • 2 tsp. dried Greek or Turkish oregano
    • 1 T minced garlic
    • fresh-ground black pepper to taste
    • one 14.5 oz. can petite diced tomatoes
    • 1 bunch spinach leaves, stems cut off, chopped and washed
    • 2 T fresh-squeezed lemon juice (or a little less if you’re not that into lemon)
    • crumbled Feta Cheese for serving (optional, but good)

    Instructions

    1. Chop onions and celery and measure 2 cups brown lentils. (Do this the night before and store in the fridge in a Ziploc bag if you want to get this into the slow cooker quickly in the morning.)
    2. Put the lentils, onions, celery, vegetable broth, Greek Seasoning (affiliate link), dried thyme (affiliate link), dried oregano, minced garlic, black pepper, and canned tomatoes with juice into the slow cooker.
    3. Cook on high for about 4 hours or on low for 8-9 hours, or until the lentils are as softened as you’d like them. (Cooking time will partly depend on how fresh your lentils are; lentils that have been on the pantry or store shelf for a while will take a little longer to cook.)
    4. When the lentils are softened as much as you’d like, chop the spinach and wash in salad spinner if needed.
    5. Add spinach and lemon juice to the soup, turn slow cooker to high if you were cooking on low, and cook about 30 minutes more.  (A little longer won’t hurt, but the longer you cook the spinach the darker green it will get.
    6. Add another cup or two of stock at this point if the soup seems thicker than you’d like.)
    7. Serve the Greek Lentil Soup soup hot, with a tablespoon or two of crumbled Feta sprinkled on each serving if desired.

    Nutrition Information

    Yield

    8

    Serving Size

    1

    Amount Per Serving

    Calories 108Total Fat 1gSaturated Fat 1gTrans Fat 0gUnsaturated Fat 0gCholesterol 3mgSodium 1367mgCarbohydrates 18gFiber 6gSugar 5gProtein 7g

    Nutrition information is automatically calculated by the Recipe Plug-In I am using. I am not a nutritionist and cannot guarantee 100% accuracy, since many variables affect those calculations.

    Did you make this recipe?

    Did you make this recipe? Please leave a star rating (under the PRINT button in the recipe) or share a photo of your results on Instagram! THANKS!

    Square image of Slow Cooker Greek Lentil Soup in soup bowl, sprinkled with Feta.Square image of Slow Cooker Greek Lentil Soup in soup bowl, sprinkled with Feta.

    Low-Carb Diet / Low-Glycemic Diet / South Beach Diet Suggestions:
    I’m not tagging the recipe low-carb, but the Greek Lentil Soup is relatively low in net carbs for a soup with lentils. Dried beans or lentils are approved for all phases of the original South Beach Diet although portion size is limited for Phase One.

    Find More Recipes Like This One:
    Use Soup Recipes to find more recipes like this one. Use the Recipes by Diet Type photo index pages to find more recipes suitable for a specific eating plan. You might also like to follow Kalyn’s Kitchen on Pinterest, on Facebook, on Instagram, on TikTok, or on YouTube to see all the good recipes I’m sharing there.

    Historical Notes for this Recipe:
    This recipe for a meatless slow cooker lentil soup with Greek flavors was posted in 2014. It was last updated with more information in 2026.

    Pinterest image of Greek Lentil Soup (Slow Cooker)

    We are a participant in the Amazon Services LLC Associates Program, an affiliate advertising program designed to provide a means for us to earn fees by linking to Amazon.com and affiliated sites. As an Amazon Associate, I earn from qualifying purchases.


    Source link