Author: admin

  • Easy Fry Sauce Recipe

    Easy Fry Sauce Recipe

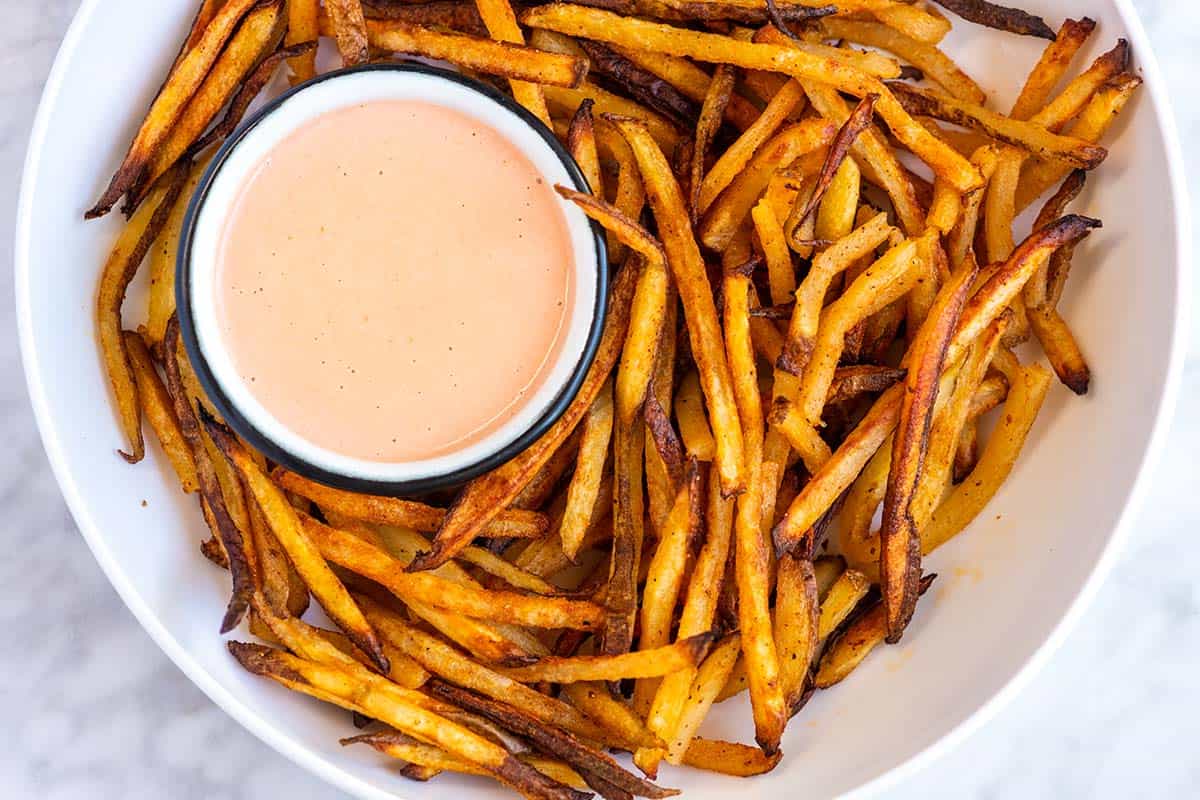
    My fry sauce recipe is super easy and makes a tangy, creamy, perfectly sweet sauce that is incredible with fries, burgers, and more!
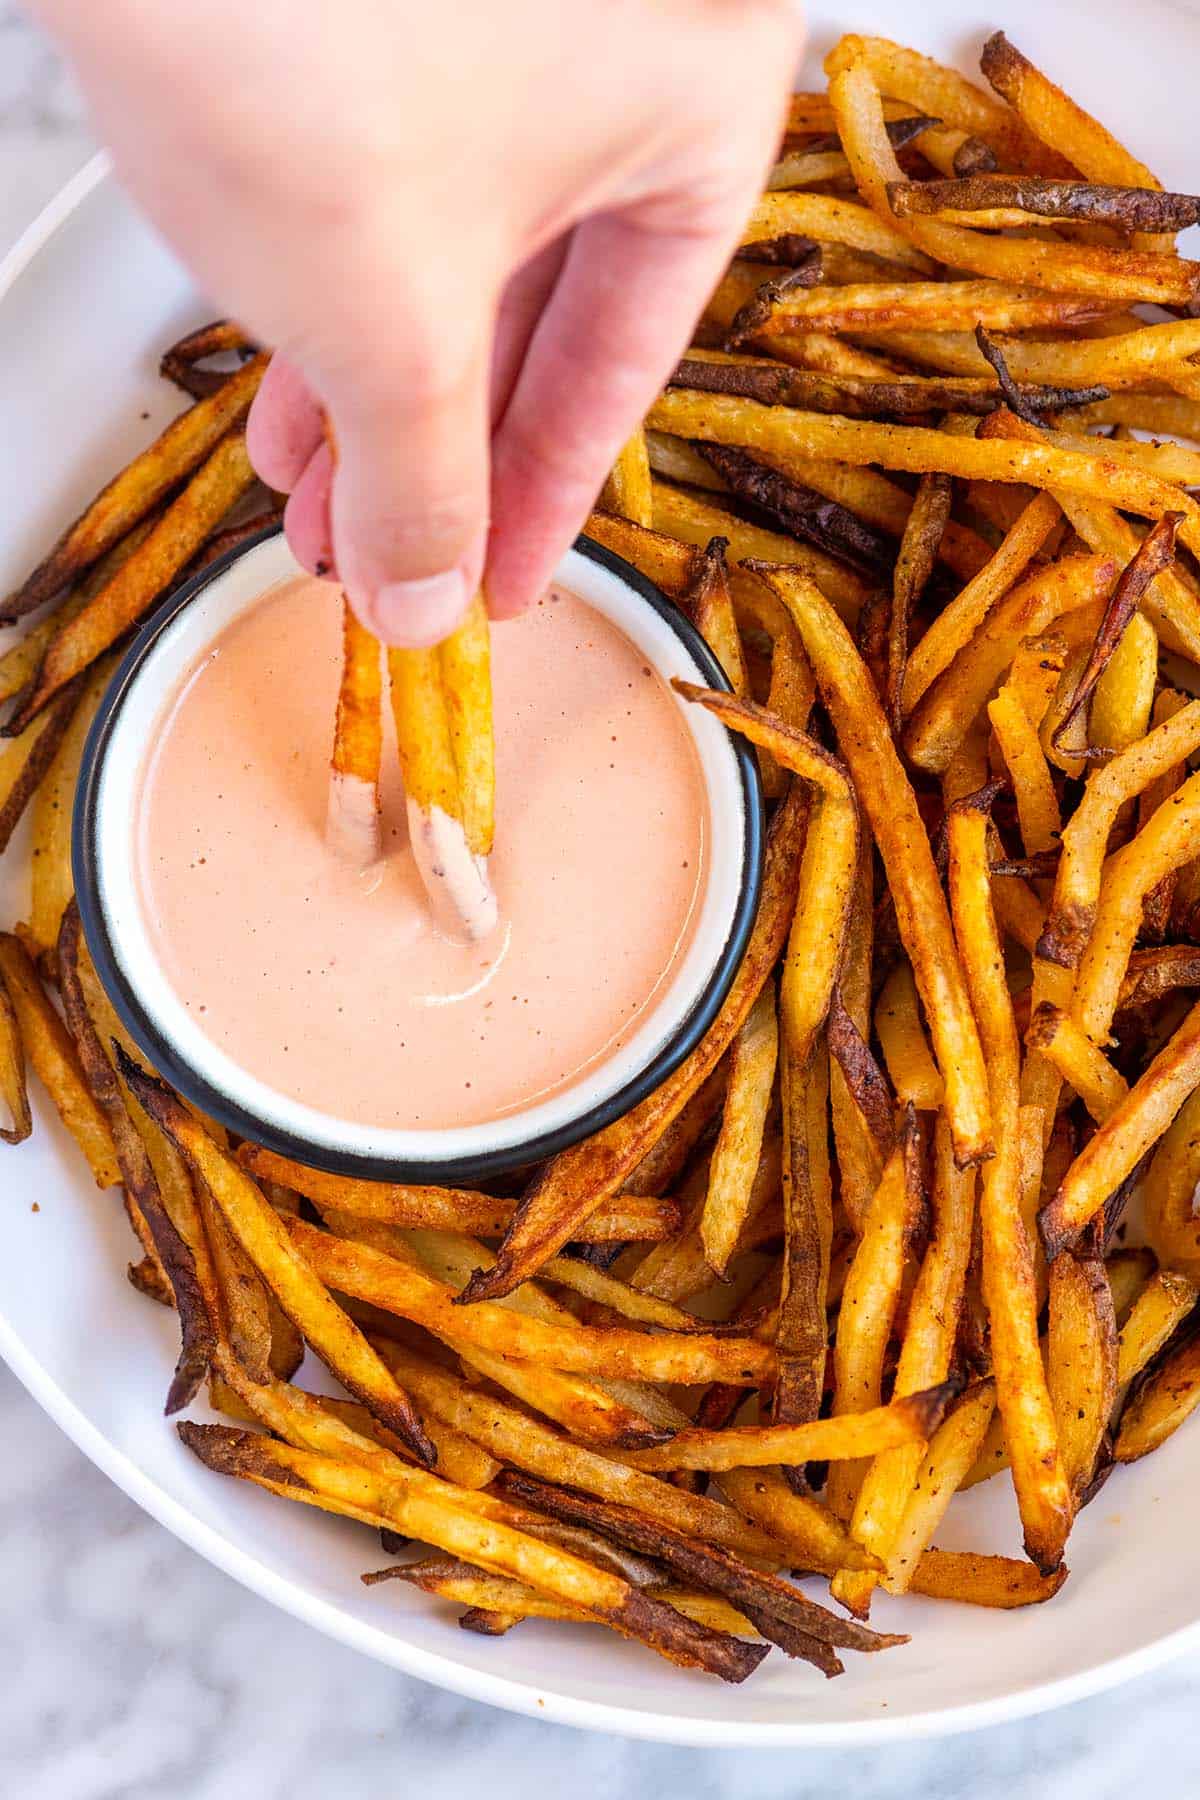
    Dipping french fries into fry sauce

    I used to order delivery from a local burger place whose fries always came with fry sauce (I loved the sauce!). One night, they forgot the sauce, and I was so bummed. From that night on, I was determined to make my own so I would never be out of fry sauce again!

    This is our family’s best fry sauce recipe, which we love with fries (obviously), but also chicken nuggets, fish sticks, roasted veggies, and more! For more dipping sauces, try our spicy mayo, burger sauce, and creamy honey mustard.

    Key Ingredients

    • Mayonnaise: This is the base, so use a good-quality mayo or make your own mayo. For a vegan option, here’s our recipe for vegan mayo!
    • Ketchup: This turns our sauce pink and starts to turn it into fry sauce. I prefer slightly less sweet ketchup, but use what you love. We also have a recipe for homemade ketchup if you are interested.
    • Vinegar: I love a little white vinegar (distilled). White wine vinegar would work, too.
    • Hot Sauce: You can add as many dashes as you like. I really love using a vinegary hot sauce like Crystal.
    • Worcestershire: This gives the sauce a little backbone and just makes it taste better.
    • Pickle Juice: We say it is optional in our recipe below, but we always add it (we love dill pickles in our home).

    Find the full recipe with measurements below.

    How to Make Fry Sauce

    Tip 1: Make the base. Pretty much every fry sauce begins with good old mayonnaise and ketchup. The ketchup gives it that classic sweet, tangy pink color we all know and love.
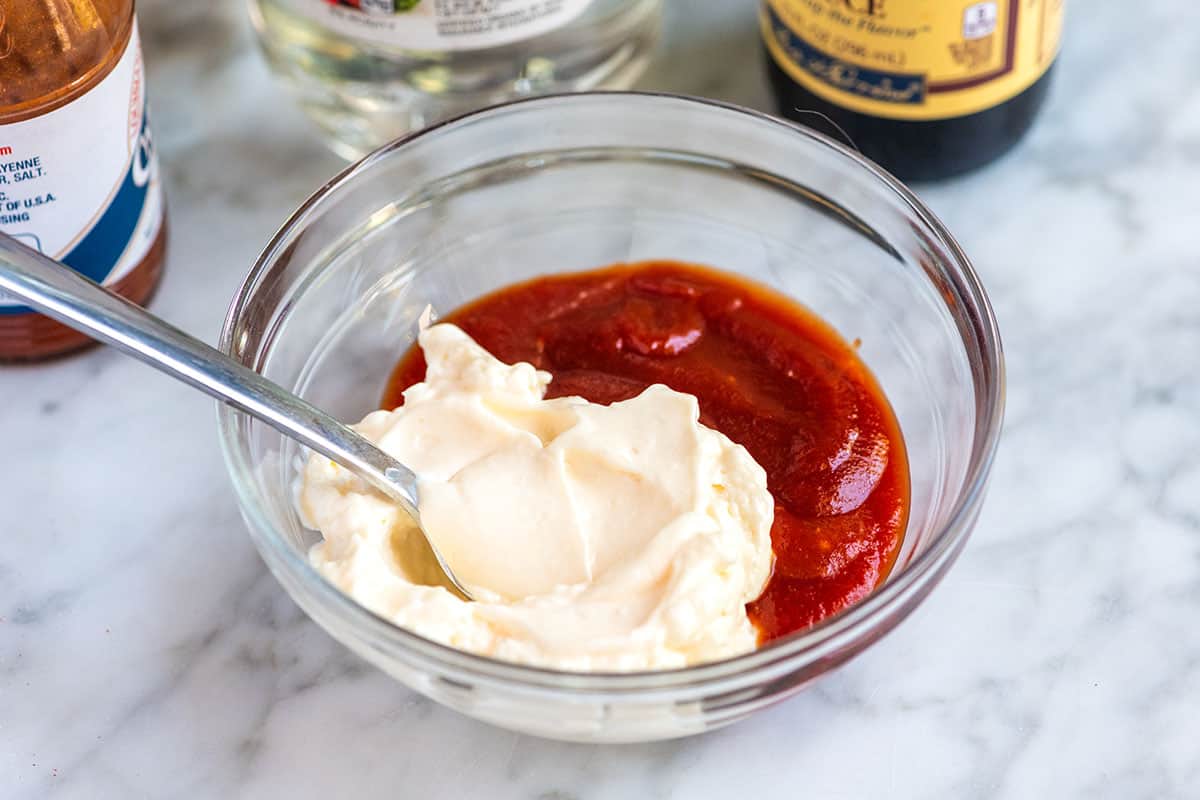
    Ketchup and mayonnaise in a bowl

    Tip 2: Making it better with vinegar and heat. What really makes our sauce taste amazing is balancing the mayonnaise and ketchup with a handful of tangy ingredients like vinegar, hot sauce, and pickle juice. Then, for a bit of extra richness, we love Worcestershire in there, too. These tangy ingredients are what make this sauce totally irresistible. We can not stop dipping!

    Serving Suggestions

    Some of our favorite dishes to serve with fry sauce are below:
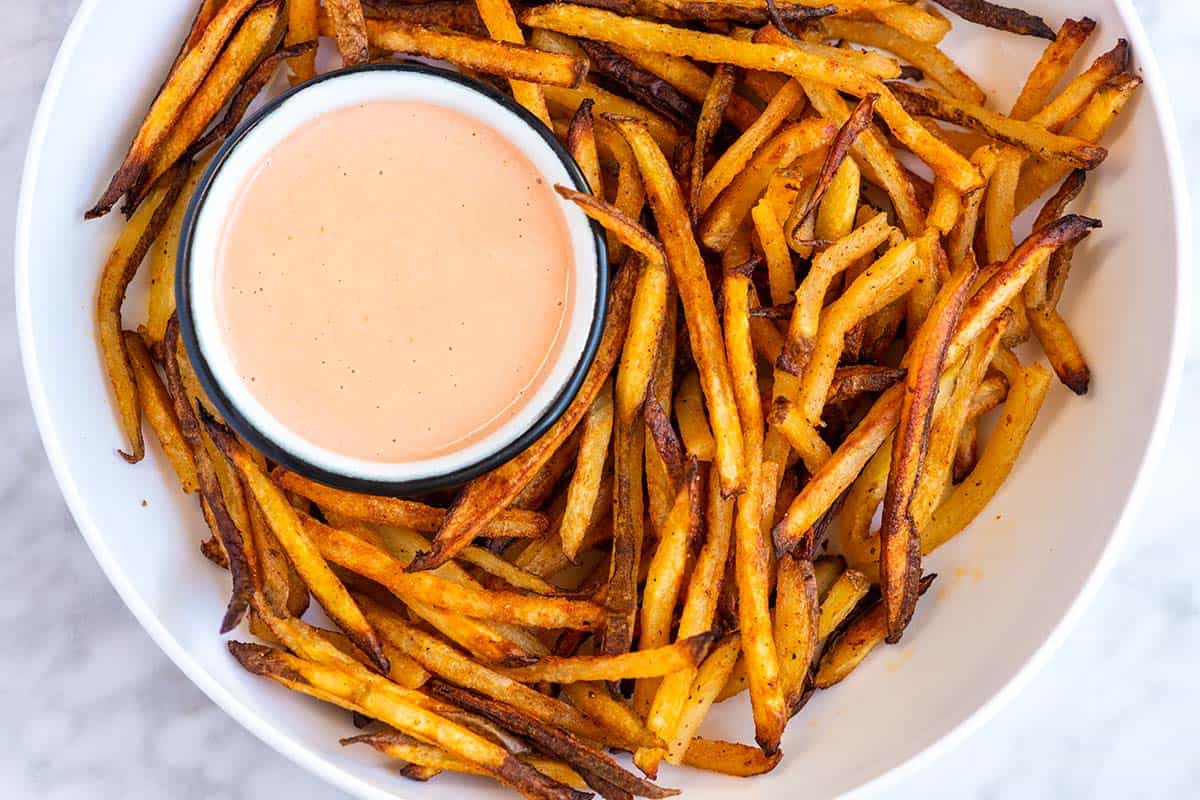
    Homemade Fry Sauce

    Easy Fry Sauce

    Our fry sauce perfectly balances tangy, creamy, and sweet. It’s perfect for dipping French fries and is delicious on a burger. It’s easy, and I bet you already have everything in your kitchen.

    Feel free to increase the ketchup or add more ingredients, such as spices or dill pickle juice (Adam always adds a little pickle juice to the sauce when he makes it).

    To take the sauce up a notch, try making it with homemade mayonnaise and homemade ketchup. If you are egg-free or vegan, swap traditional mayonnaise with our homemade vegan mayonnaise.

    Makes 3/4 cup

    You Will Need

    1/2 cup mayonnaise, try homemade mayonnaise (120 g)

    1/4 cup ketchup, try homemade ketchup (60 g)

    1 tablespoon distilled vinegar

    3 to 6 dashes hot sauce, like Crystal

    3 to 4 dashes Worcestershire sauce

    Salt, to taste

    Dash dill pickle juice, optional

    Directions

      1Whisk together the mayonnaise, ketchup, vinegar, hot sauce, Worcestershire sauce, and pickle juice until smooth. Taste, and then season with salt.

      2Store fry sauce in an airtight container, in the refrigerator, for up to one week.

    Adam and Joanne’s Tips

    • Vegan fry sauce: Substitute the mayonnaise for vegan mayo, leave out the Worcestershire sauce, and make sure that all other ingredients are listed as vegan.
    • The nutrition facts provided below are estimates.

    Nutrition Per Serving
    Serving Size
    1 tablespoon
    /
    Calories
    69
    /
    Total Fat
    6.9g
    /
    Saturated Fat
    1.1g
    /
    Cholesterol
    3.9mg
    /
    Sodium
    132.8mg
    /
    Carbohydrate
    1.7g
    /
    Dietary Fiber
    0g
    /
    Total Sugars
    1.4g
    /
    Protein
    0.1g


    AUTHOR:

    Joanne Gallagher

    Adam and Joanne of Inspired Taste

    We are Adam and Joanne Gallagher, the creators of Inspired Taste. Established in 2009, Inspired Taste grew from a childhood dream into one of the internet’s most trusted recipe sites with hundreds of reliable recipes, step-by-step videos, and expert tips.More About Us
    Source link

  • Honey Roasted Chickpeas Recipe

    Honey Roasted Chickpeas Recipe

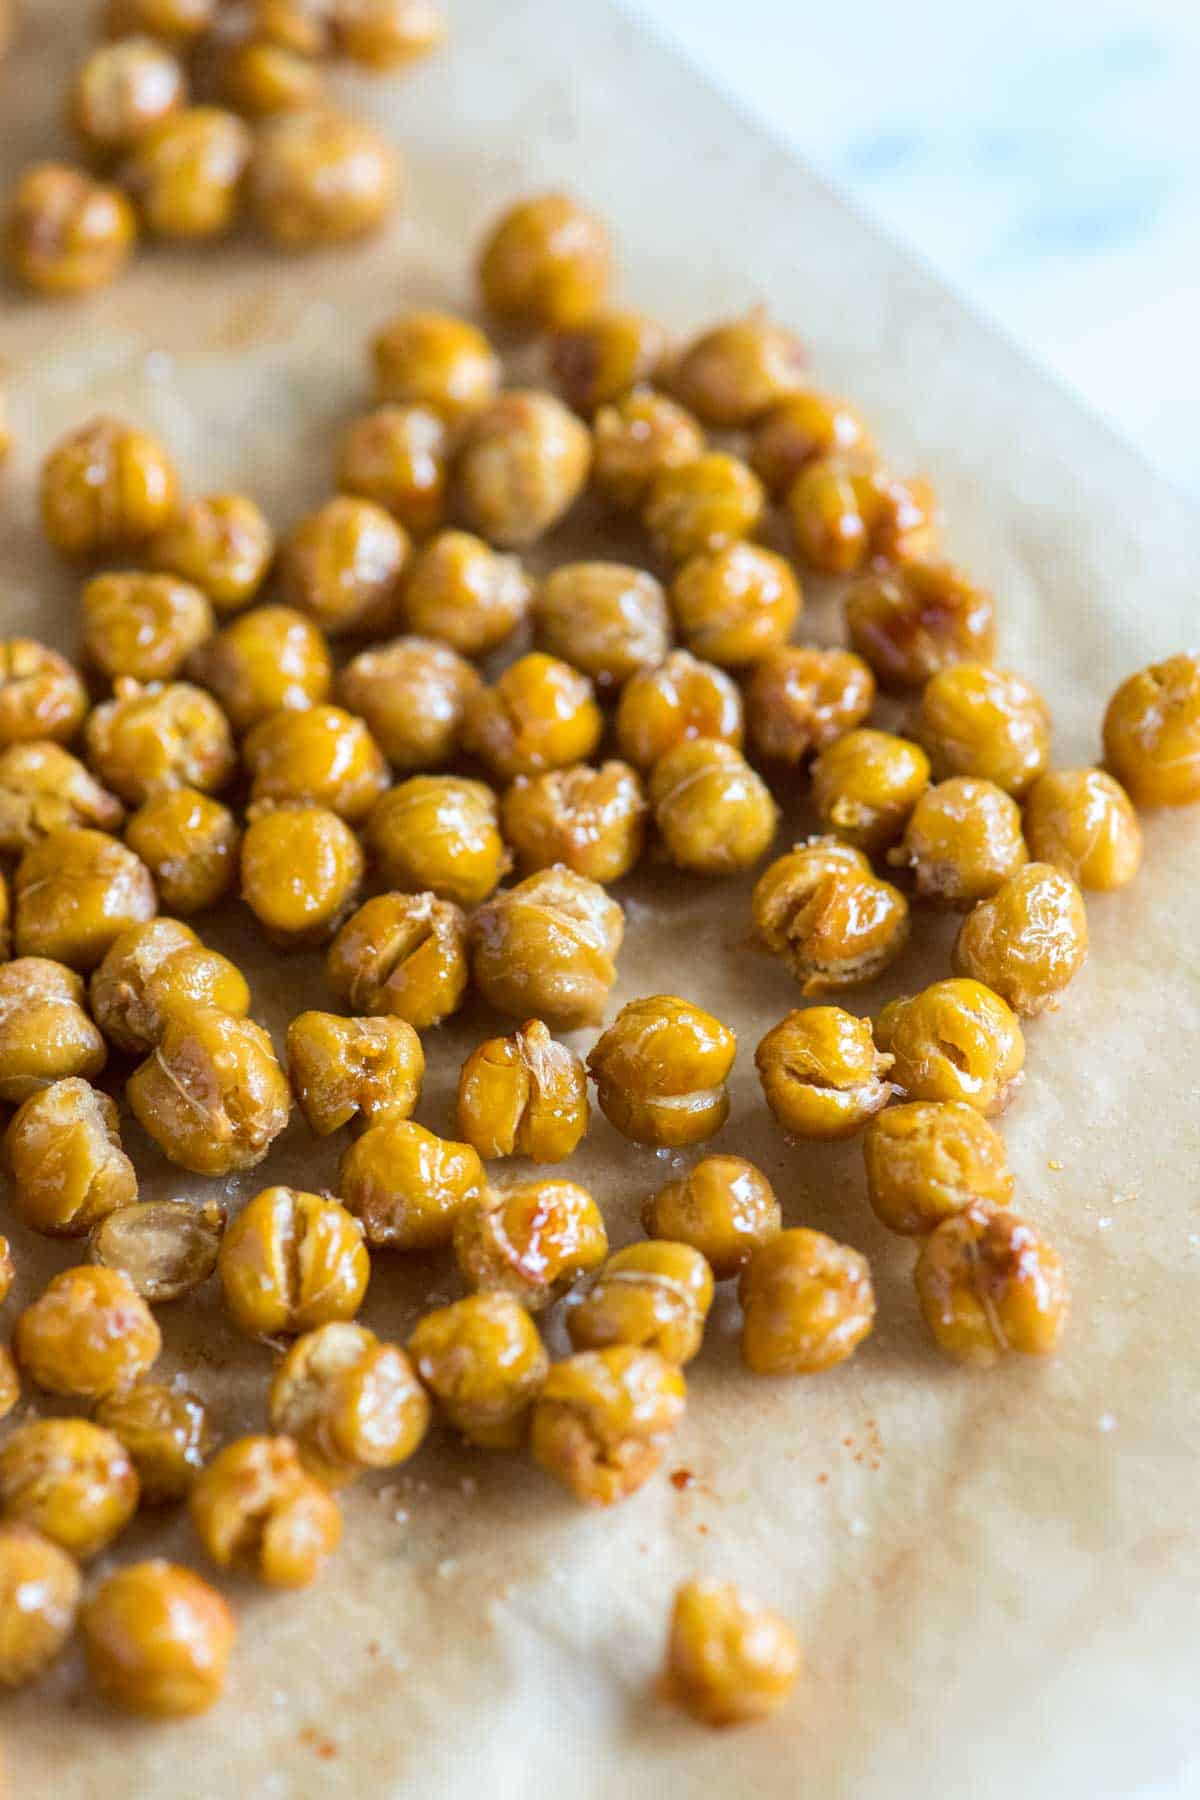
    I love roasted chickpeas and have fallen hard for this honey roasted version! They’re so easy to make with just a handful of ingredients, and seriously, once you start, you won’t be able to stop!

    Honey Roasted Chickpeas

    There’s no shortage of chickpea recipes on Inspired Taste. We’ve shown you how to cook chickpeas from scratch, make the best hummus, add them to salads, and more. And today, we’re sharing another of our favorites: these crispy honey roasted chickpeas!

    Roasted chickpeas are easy to make, and you can adapt the recipe to your favorite flavors. Our recipe below uses honey and sea salt for a sweet and salty snack, but feel free to change things up to match your favorite flavors!

    Key Ingredients

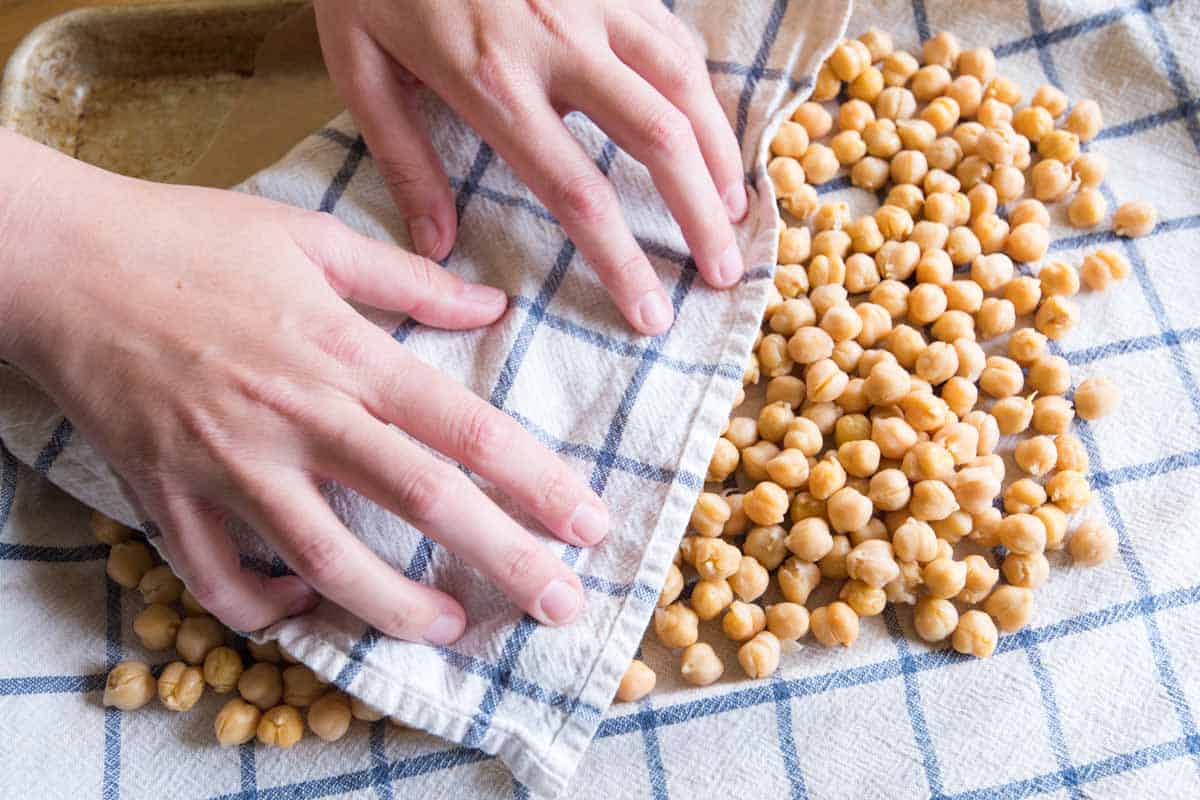
    • Chickpeas: For this recipe, you can use canned or cooked chickpeas. Whatever you choose, before roasting them, you need to get the chickpeas very dry. I pat them dry and then leave them out to air dry for about half an hour.
    • Honey: You’ll add the honey towards the end of the roasting time, which caramelizes it onto the chickpeas. Use something you love!
    • Oil, Cinnamon, and Salt: I love the flavor combination of honey, olive oil, cinnamon, and sea salt. It’s delicious!

    How to Make Honey Roasted Chickpeas

    These homemade roasted chickpeas are a delicious and healthy snack. To make the best roasted chickpeas, there are a few things to keep in mind. First, we want them to be really dry, so pat them dry and let them air dry on the counter for 30 minutes to an hour. From there, you’ll roast them in the oven. I roast them plain without any oil so they can crisp up. I don’t peel them, and I like how some peels turn extra crispy in the oven.

    How to Make Honey Roasted Chickpeas: Drying chickpeas before roasting

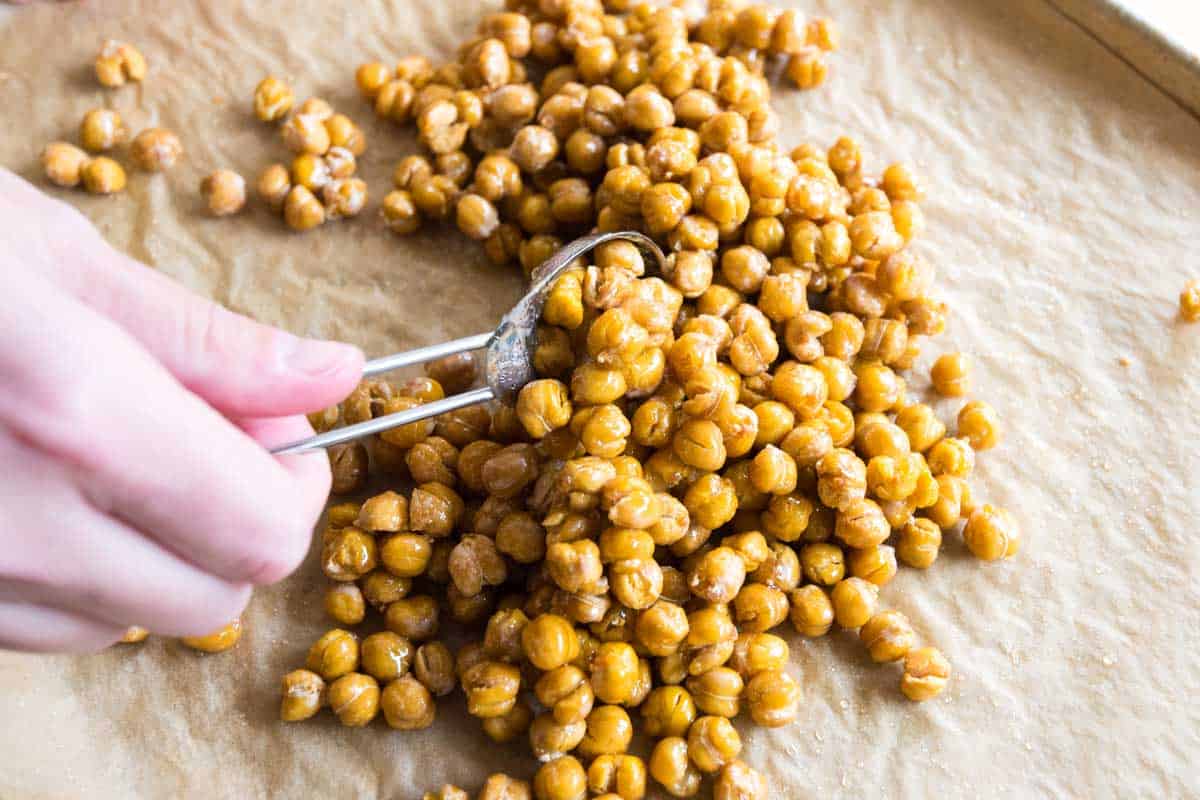
    When the chickpeas are nice and crispy, I toss them with my seasonings. For this recipe, that means honey, olive oil, cinnamon, and salt, but you can always change the seasonings to what you love. For example, you could skip the honey and cinnamon and use your favorite savory seasoning blend (think chili powder, Cajun seasoning, or ranch).

    How to Make Honey Roasted Chickpeas: Tossing with honey, cinnamon, and salt

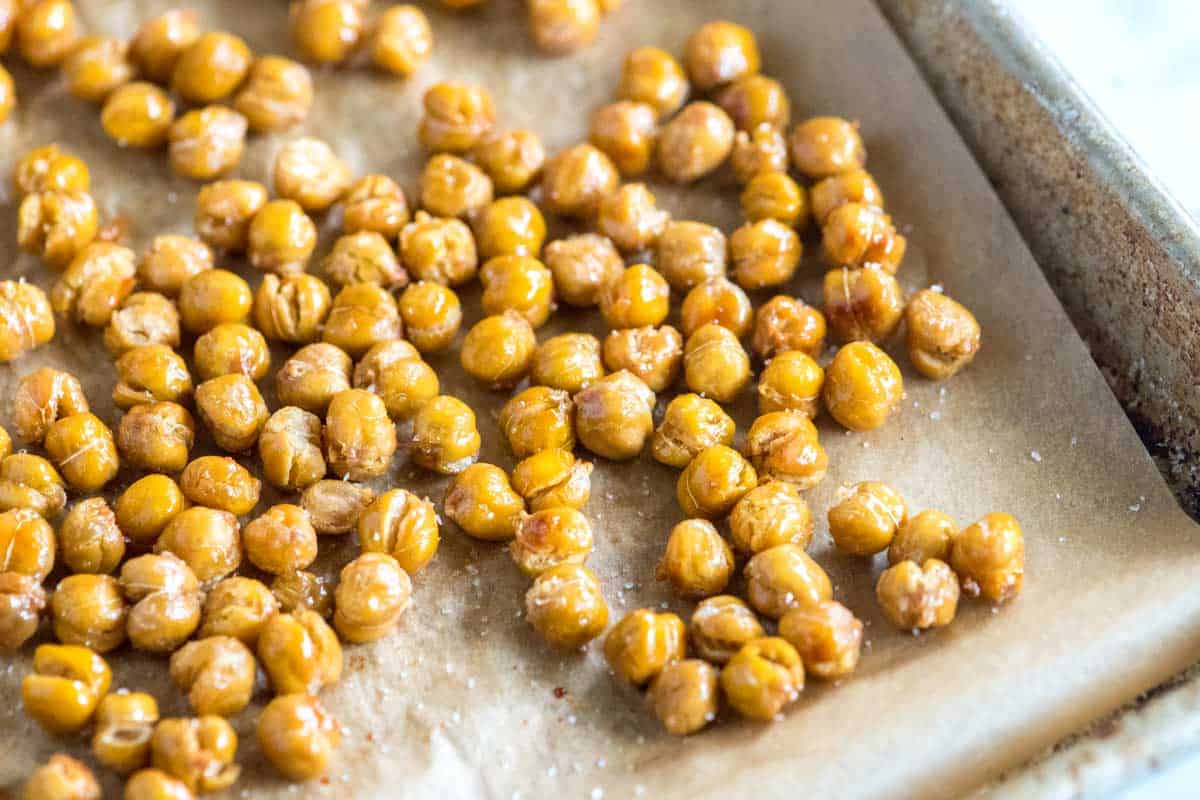
    After 5 to 10 more minutes in the oven, I turn the oven off, open the door, and let them sit in there until the oven and chickpeas are cooled down. This last step gives them one more chance to crisp up even more.

    Honey Roasted Chickpeas

    Honey Roasted Chickpeas

    • PREP
    • COOK
    • TOTAL

    I love these easy honey roasted chickpeas! You can use cooked or canned chickpeas for this recipe. If using canned, each 15-ounce can contains about 1 1/2 cups of beans, so you will need 2 cans. For the chickpeas to become nice and crispy, they need to be dry before roasting. Patting them dry and air-drying helps with this.

    Makes 3 Cups

    You Will Need

    3 cups cooked chickpeas, drained and rinsed, from two 15oz cans

    1 tablespoon extra virgin olive oil

    1 ½ tablespoons honey

    1/4 teaspoon ground cinnamon

    1/4 teaspoon fine sea salt, or more to taste

    Directions

      1Spread out chickpeas on a paper towel. Pat dry, then let air dry for 30 minutes to an hour.

      2Preheat the oven to 375°F (190°C).

      3Line a rimmed sheet pan with parchment paper, and spread chickpeas in one layer on the pan.

      4Bake in the center of the oven until crunchy, 35 to 45 minutes, stirring and rotating every 10 minutes. The chickpeas will continue to get crunchy as they cool.

      5Meanwhile, stir olive oil, honey, cinnamon, and salt in a small bowl.

      6Take the roasted chickpeas out of the oven, and while they are still hot, toss them with the honey mixture until well coated.

      7Bake another 5 to 10 minutes. Shut off the oven, open the oven door, and let the chickpeas cool inside. (This will help make them even more crunchy.)

    Adam and Joanne’s Tips

    • Storing: Roasted chickpeas can be stored in an airtight container for up to a week. (Do not store them in the refrigerator, which causes them to lose their crispiness.)
    • Savory version: This recipe can easily be adapted for a savory roasted chickpea snack. Instead of mixing the olive oil with honey and cinnamon, try your favorite spice blend or leave them plain and lightly season with sea salt.
    • Nutrition facts are estimates.

    Nutrition Per Serving
    Serving Size
    1/4 cup
    /
    Calories
    123
    /
    Total Fat
    3.2g
    /
    Saturated Fat
    1.1g
    /
    Cholesterol
    0mg
    /
    Sodium
    295.9mg
    /
    Carbohydrate
    19g
    /
    Dietary Fiber
    5.1g
    /
    Total Sugars
    3.7g
    /
    Protein
    5.6g


    AUTHOR:

    Adam Gallagher

    Adam and Joanne of Inspired Taste

    We are Adam and Joanne Gallagher, the creators of Inspired Taste. Established in 2009, Inspired Taste grew from a childhood dream into one of the internet’s most trusted recipe sites with hundreds of reliable recipes, step-by-step videos, and expert tips.More About Us
    Source link

  • Easy Coconut Rice Recipe

    Easy Coconut Rice Recipe

    This coconut rice recipe is just as easy to make as plain and is bursting with coconut flavor.

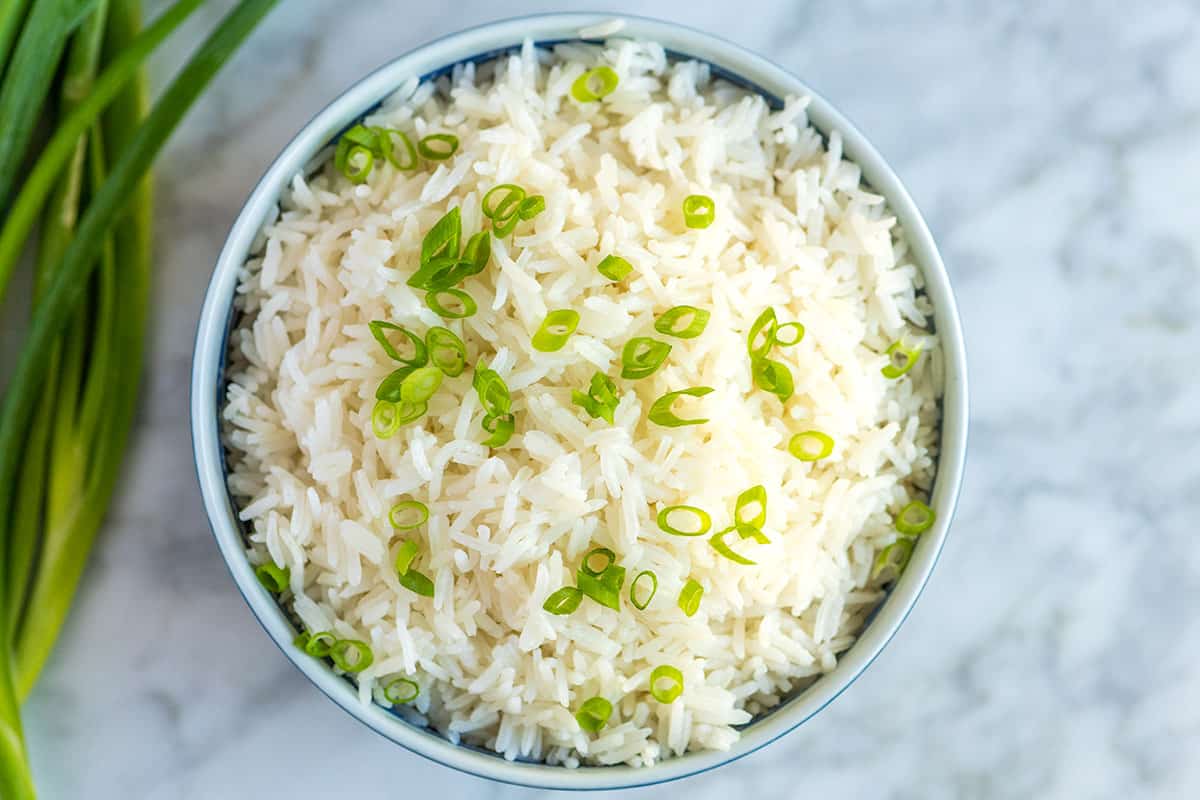
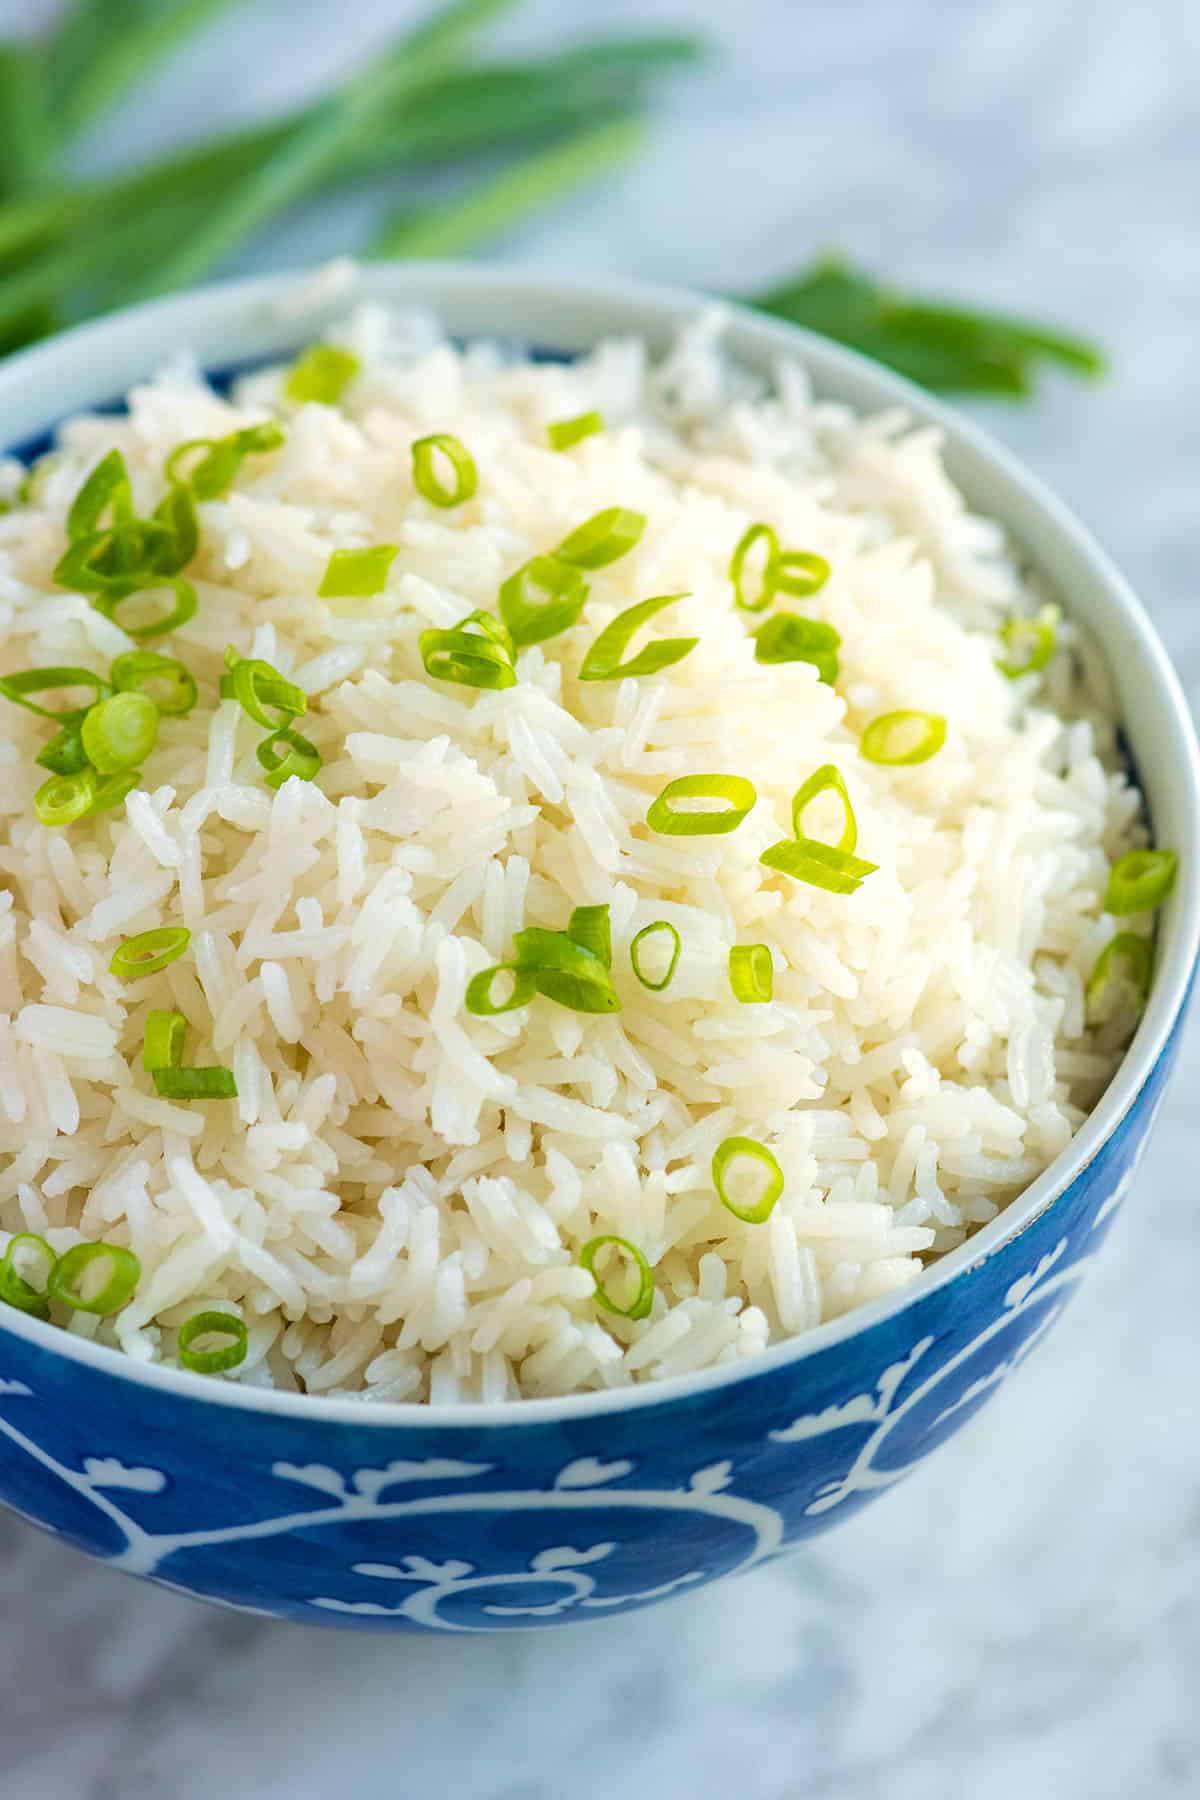
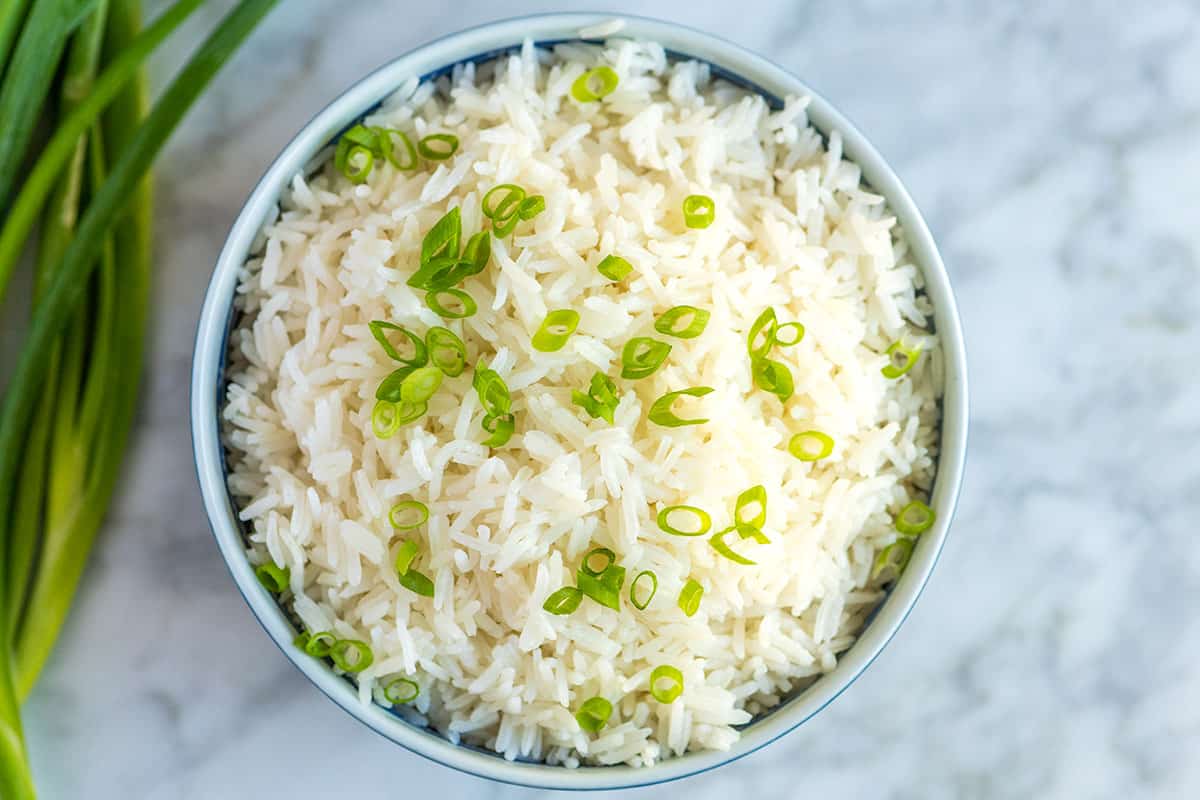
    A bowl of coconut rice

    This coconut rice recipe is one of my family’s favorite rice recipes. It’s right up there with our cilantro lime rice, saffron rice, and Mexican rice. It’s ridiculously simple to make, too!

    I love this coconut-infused rice with Indian and Thai curries like our chicken curry or this easy vegetable curry. It’s also perfect for rice bowls and burritos and is incredible topped with black beans or these sweet and sour meatballs!

    Key Ingredients

    • Rice: I love long-grain Jasmine rice for this recipe. It plumps up beautifully and stays fluffy, and its aromatic fragrance works nicely with the coconut. If you do not have jasmine rice, use another long-grain variety like basmati rice.
    • Coconut Milk: You’ll want to use full-fat coconut milk from a can (or fresh coconut milk if you have access to it). When shopping for canned coconut milk, I shake the can. If I hear lots of liquid, I put it back and find a can that doesn’t sound like much when I shake it. This means it’s full of coconut cream, which will help make the rice taste even more delicious.
    • Salt: I always cook my rice with a bit of salt and do the same for coconut rice.

    Find the full recipe with measurements below.

    How to Make the Best Coconut Rice

    Tip 1: No rinsing required. It might be a surprise, but we don’t rinse our rice for this recipe, especially when using long-grain rice. Of course, we usually do, but in this recipe, if you use long-grain Jasmine rice, you don’t need to. In fact, after testing the recipe for rinsed and unrinsed rice, we found that the unrinsed rice tasted more like coconut.

    Tip 2: Cooking your rice. Making coconut rice is no different from making regular rice. First, combine everything in a saucepan, bring to a boil, reduce the heat to a low simmer, and cover and cook for 15 minutes. After 15 minutes, turn off the heat and leave the pot alone for 10 to 15 minutes so the rice has the chance to steam and absorb any excess liquid.

    Serving Suggestions

    This coconut rice is perfect for almost any dish you would have served with plain rice. It’s perfect in rice bowls, with curries, Thai dishes, stir-fries, and as a side to chicken and fish. Try one of these dishes:

    Coconut Rice

    Easy Coconut Rice

    • PREP
    • COOK
    • TOTAL

    Coconut rice is just as easy to make as plain rice and tastes fantastic! All we need to do is swap half of the water for coconut milk. This coconut rice is perfect for almost any dish served with plain rice. It’s perfect in rice bowls, with curries, Thai dishes, stir-fries, and as a side to chicken and fish.

    *Long-grain rice works best in this recipe. Shorter grain rice tends to be more sticky.

    4 Servings

    You Will Need

    1 cup long-grain Jasmine white rice

    3/4 cup well-stirred full-fat coconut milk

    3/4 cup water

    1/4 teaspoon fine sea salt

    1 scallion, thinly sliced, optional, substitute chopped chives

    Directions

      1Place the rice (we do not rinse the rice), coconut milk, water, and salt in a medium, heavy-bottomed saucepan over medium-high heat.

      2Bring to a boil and cook for one minute. Stir once, turn the heat to low, cover the saucepan with its lid, and cook for 15 minutes.

      3Do not lift the lid. Turn off the heat and let the rice steam for 10 minutes.

      4Remove the lid and fluff the rice with a fork. Serve with sliced scallions.

    Adam and Joanne’s Tips

    • Storing: Cooked coconut rice can be stored in an airtight container in the refrigerator for up to three days or frozen for up to a month.
    • Rinsing the rice: We do not rinse long-grain jasmine rice for this recipe. We made it with rinsed and unrinsed rice and found similar results. If anything, the unrinsed rice tasted more like coconut. If you have medium-grain or short-grain rice, you might consider rinsing it before following our recipe.
    • Sugar: While we prefer coconut rice without sugar, many authentic recipes call for adding 1 to 2 teaspoons. Feel free to add this in step one.
    • The nutrition facts provided below are estimates.

    Nutrition Per Serving
    Serving Size
    3/4 cup
    /
    Calories
    253
    /
    Total Fat
    9.4g
    /
    Saturated Fat
    8.1g
    /
    Cholesterol
    0mg
    /
    Sodium
    155.2mg
    /
    Carbohydrate
    38.3g
    /
    Dietary Fiber
    0.6g
    /
    Total Sugars
    0.1g
    /
    Protein
    4.2g


    AUTHOR:

    Joanne Gallagher

    Adam and Joanne of Inspired Taste

    We are Adam and Joanne Gallagher, the creators of Inspired Taste. Established in 2009, Inspired Taste grew from a childhood dream into one of the internet’s most trusted recipe sites with hundreds of reliable recipes, step-by-step videos, and expert tips.More About Us
    Source link

  • Easy White Chicken Chili Recipe

    Easy White Chicken Chili Recipe

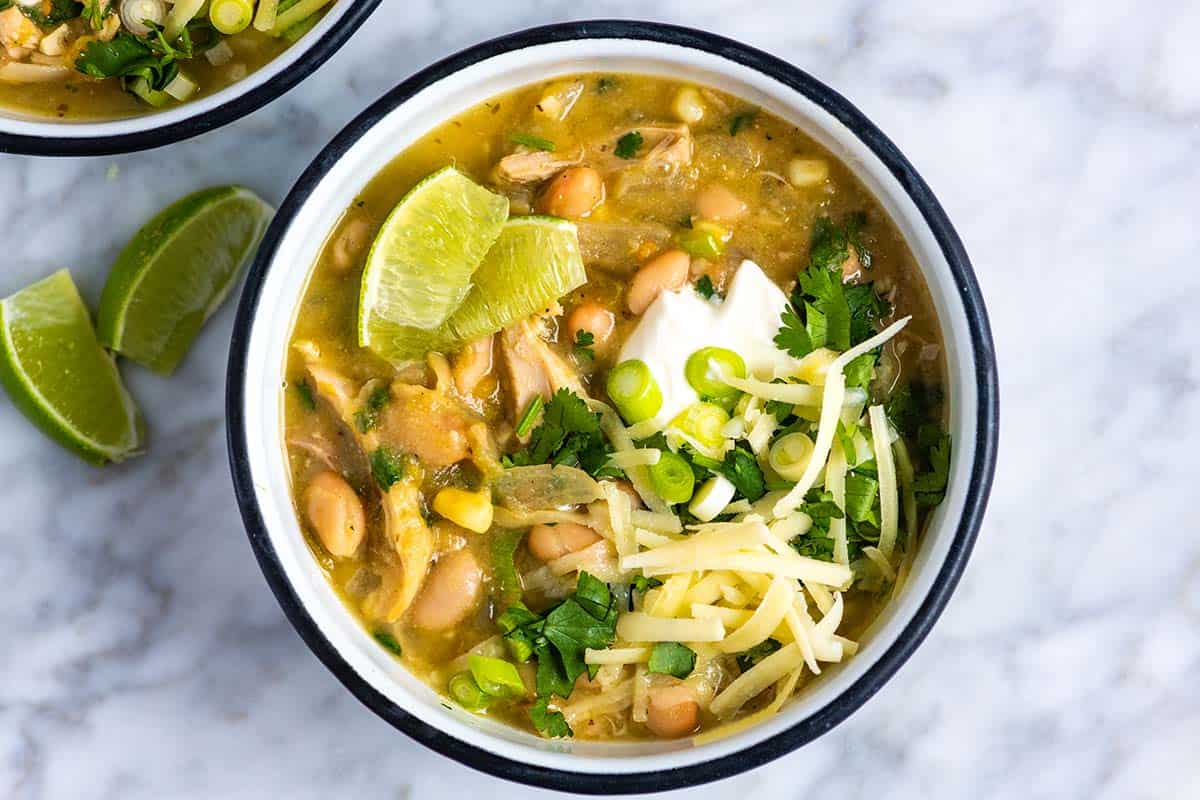
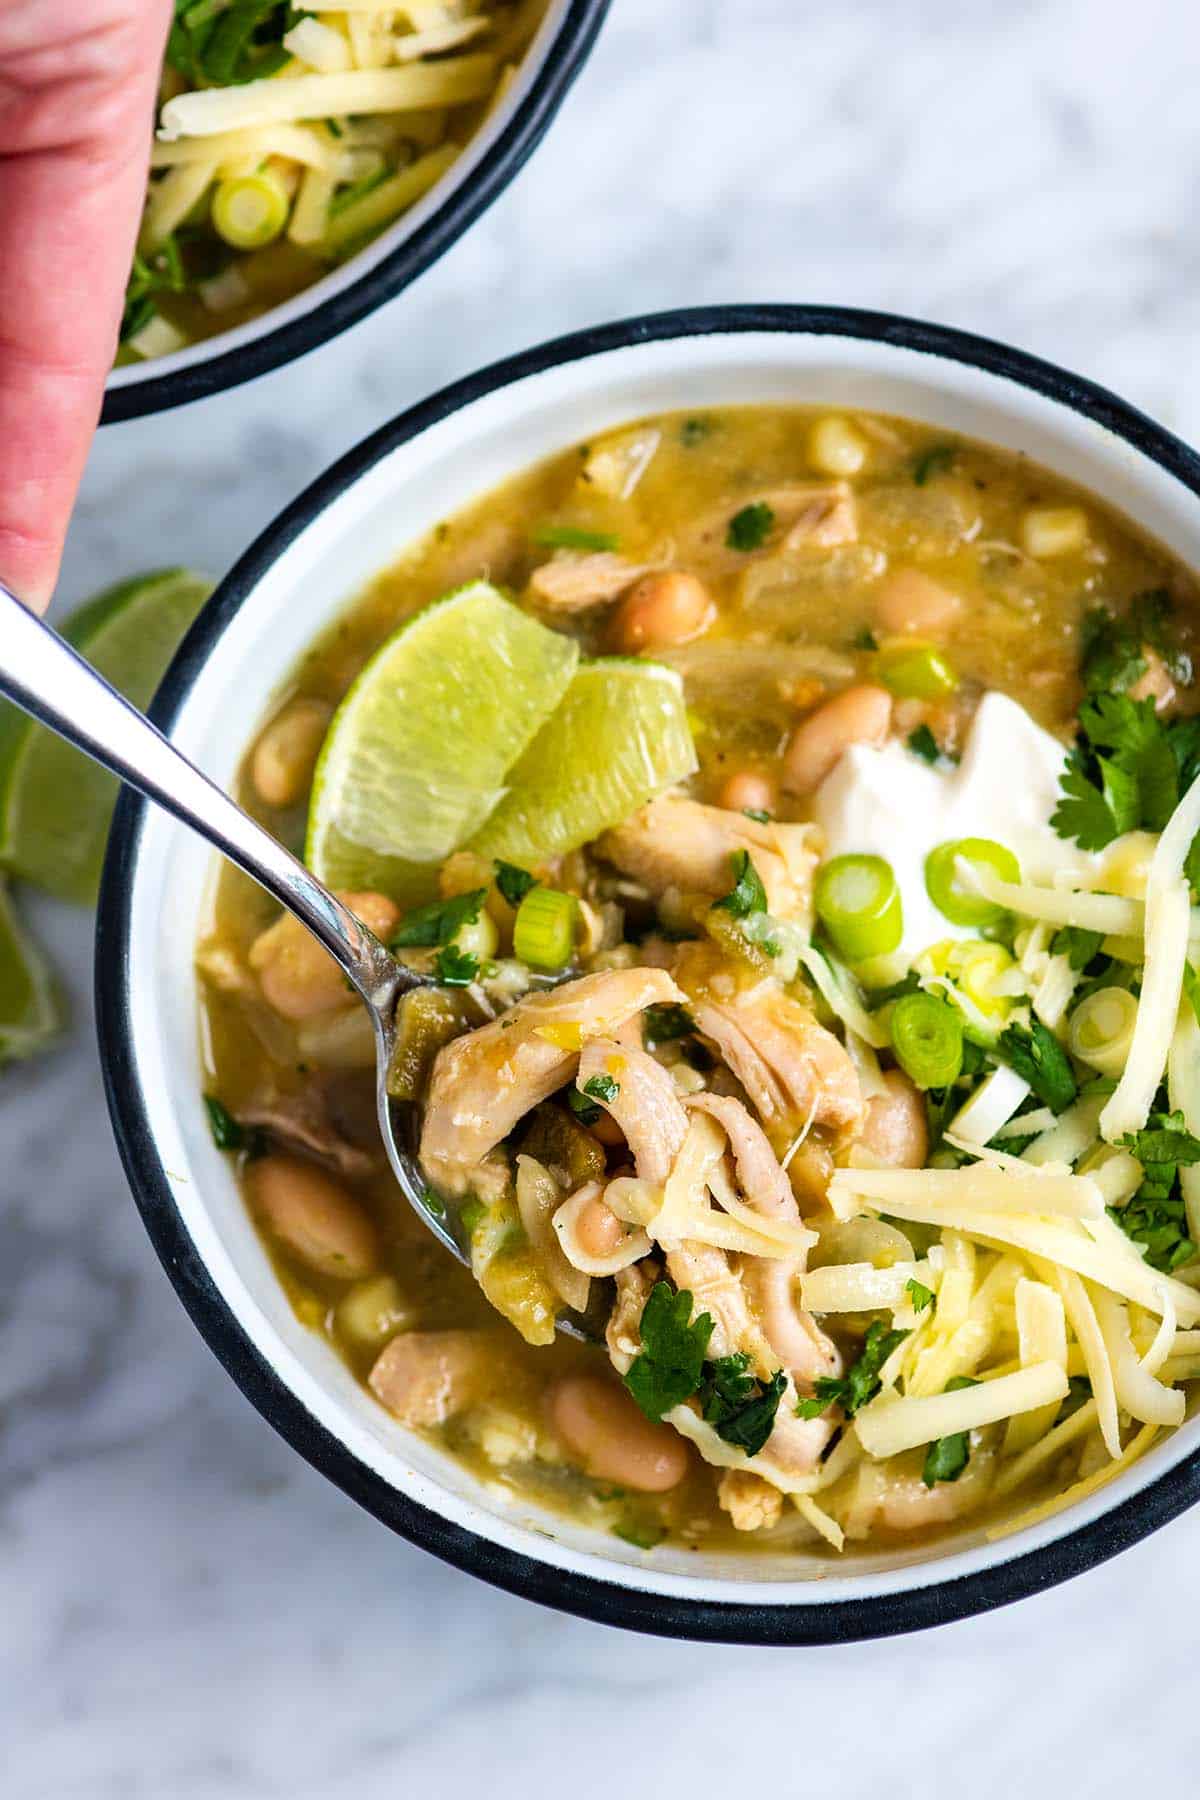
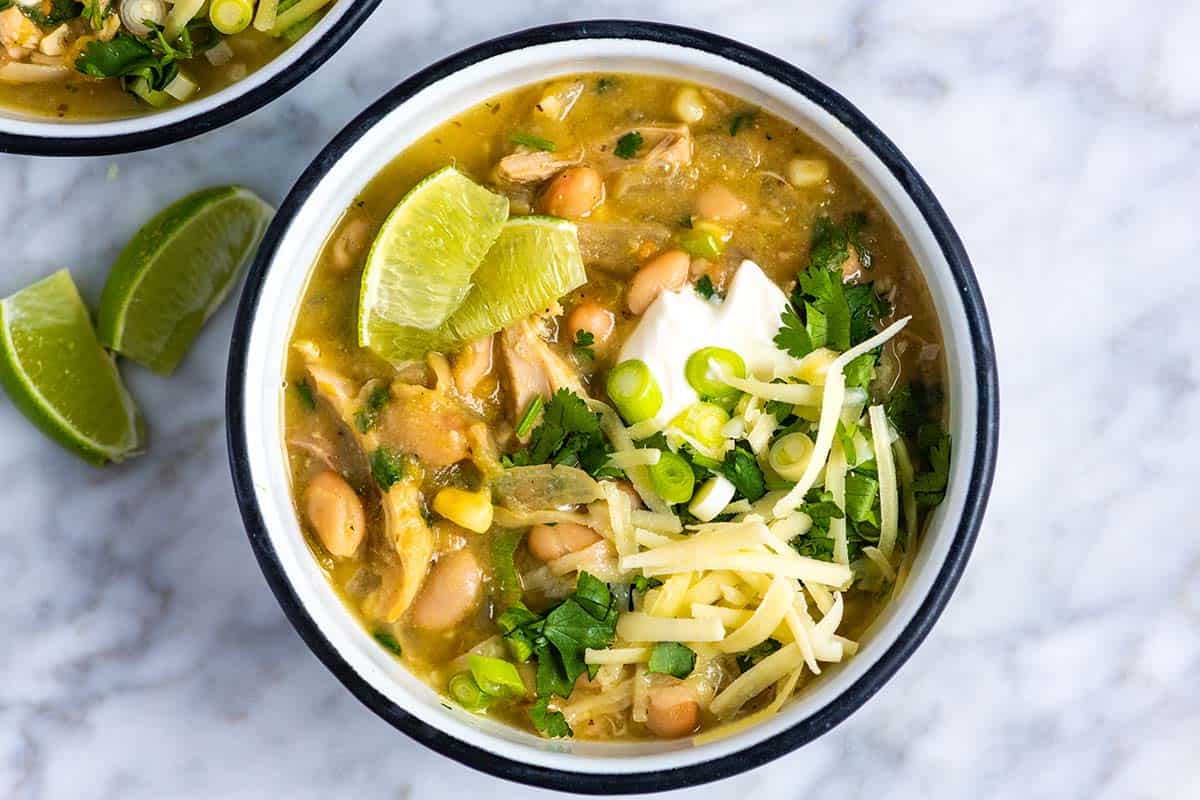
    This easy white chicken chili recipe is creamy, flavorful, and comforting. Made with tender chicken, white beans, and a silky broth, it’s the perfect cozy dinner.

    Easy White Chicken Chili

    I’ve always loved a big bowl of classic chili, but this white bean chicken chili is one I return to again and again. It’s cozy and so satisfying, with just the right balance of hearty and fresh.

    What makes this version extra special is the addition of canned green chiles. They are one of my favorite ingredients and add so much flavor to this chicken chili. For more, see our white turkey chili made with ground turkey, beans, and cream cheese.

    Key Ingredients

    • Chicken: Use chicken thighs or breasts for this chili. I usually go with thighs since they turn out soft and tender. If you are short on time, rotisserie chicken or leftover roast chicken works, too (just stir it in near the end).
    • White Beans: Canned or cooked white beans are both great. Great Northern, cannellini, or navy beans are all good choices. You can use other beans, such as pinto or black beans, but I prefer the appearance of white beans in this chili.
    • Canned Green Chiles: I love Hatch green chiles (they come in small cans). Choose mild or hot depending on your taste. If you can’t find them, try a small can of salsa verde or chopped roasted poblano peppers.
    • Onion and Garlic: I’m generous with both in this recipe (and think you should be, too!). Six cloves of garlic add so much flavor.
    • Spices: Ground cumin, onion powder, oregano, salt, and a touch of cayenne or chipotle powder bring this chili to life. No need for regular chili powder, the canned green chiles do the job.
    • Broth: Chicken, turkey, or veggie broth all work well. Use what you have on hand.
    • Corn: I usually make this chili in cooler months, so I use frozen corn. Fresh corn is wonderful when it’s in season, and canned corn works if that’s what you’ve got.
    • Masa Harina or Tortillas: Masa harina (the flour for corn tortillas) thickens the chili beautifully and adds a subtle corn flavor. You can also use chopped corn tortillas and stir them in (they’ll break down in the chili).
    • Cilantro and Lime: I love fresh chopped cilantro and a squeeze of lime at the end. Optional toppings, such as sour cream, shredded cheese, pickled onions, or crushed tortilla chips, make it even better.

    Find the full recipe with measurements below.

    My Tips for Making the Best White Chicken Chili

    Tip 1: Make the flavorful base. This white chicken chili is incredibly easy to prepare. You’ll start with a simple yet flavorful base of sautéed onions, garlic, spices, broth, and canned green chilies.

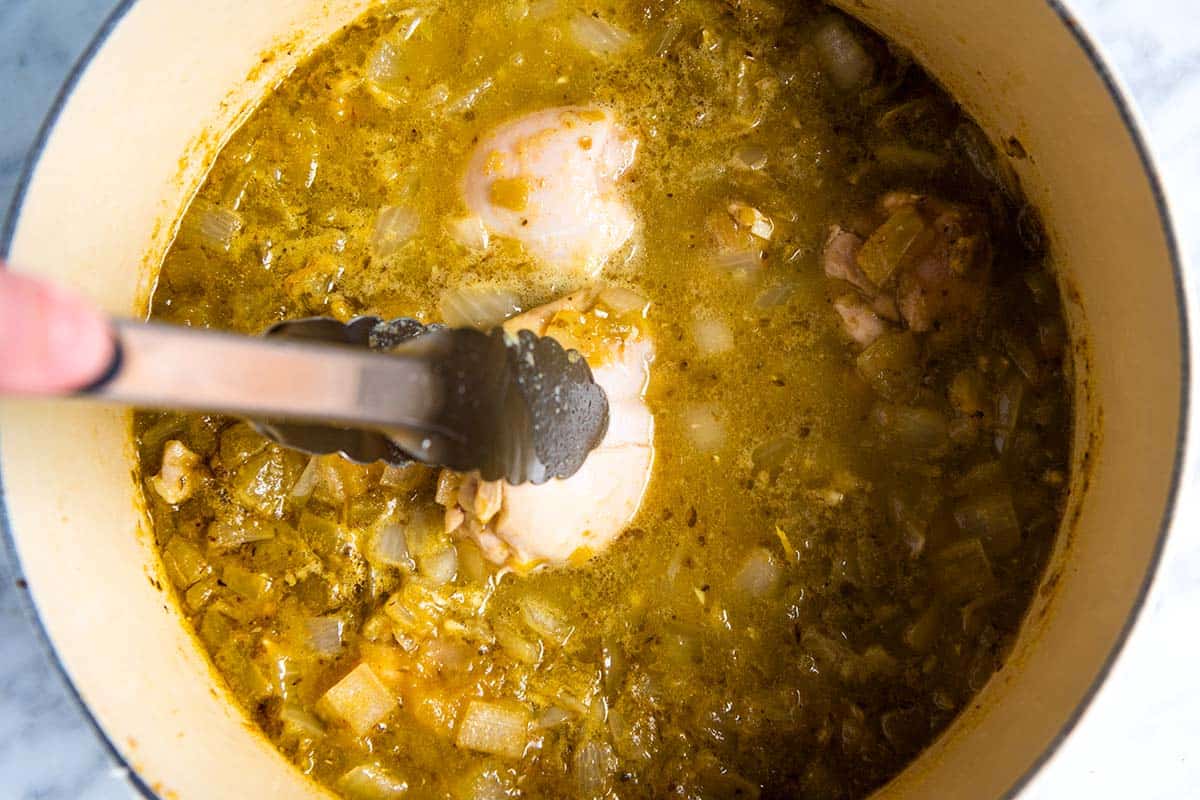
    Tip 2: Gently cook the chicken. Submerge the chicken in the broth and let it simmer until just cooked through (similar to the method I use for shredded chicken). Cooking it this way keeps the meat tender and juicy.

    Cooking chicken for white chicken chili

    Tip 3: Remove and shred the chicken. Once the chicken is cooked, remove it from the pot, let it cool slightly, then shred. Hold it aside until the chili is ready, so the chicken stays moist when you stir it back in.

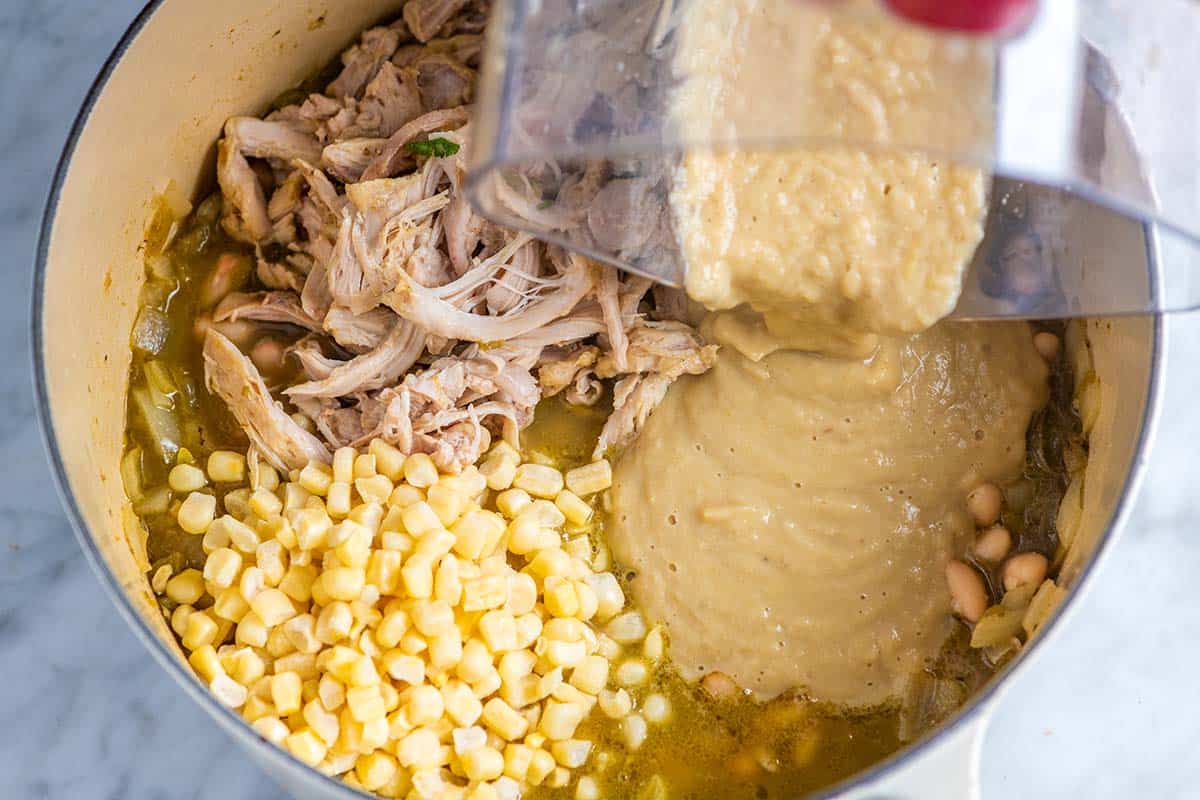
    Tip 4: Blend for creaminess. Stir in the beans, then scoop out about a cup of the beans and broth. Blend until smooth, and add the puree back to the pot. This step gives you that silky, creamy texture without adding cream or sour cream.

    Stirring pureed white beans back into white bean chicken chili.

    Tip 5: Finish with masa harina. Just before serving, whisk in a spoonful of masa harina. This is my favorite trick! It thickens the chili slightly and adds a subtle corn flavor that pairs perfectly with the chicken and white beans.

    Serving Suggestions

    This white chicken chili is incredible when served in a big bowl, topped with a spoonful of sour cream, a sprinkle of shredded cheddar cheese, sliced green onions, fresh lime juice, and cilantro. For more toppings, consider a spoonful of guacamole or handful of homemade tortilla chips. I also love a side of homemade cornbread.

    More Chili Recipes

    Easy White Chicken Chili

    Easy White Chicken Chili

    • PREP
    • COOK
    • TOTAL

    White chicken chili is pure comfort food. The base is perfectly spiced and creamy and filled with tender shredded chicken, white beans, green chilies, and corn.

    4 Servings

    You Will Need

    1 ¼ pound boneless, skinless chicken thighs or breast

    2 tablespoons butter or oil

    1 medium onion, finely chopped

    6 medium garlic cloves, minced, about 2 tablespoons

    1 ¼ teaspoons ground cumin

    1 ¼ teaspoons onion powder

    1 teaspoon dried oregano

    1/2 teaspoon fine sea salt

    1/4 teaspoon cayenne or chipotle powder, optional for heat

    2 cups low sodium chicken stock, try homemade chicken stock

    3 (4-ounce) cans mild chopped green chilies

    2 (15-ounce) cans white beans like great northern beans or cannellini beans, drained and rinsed

    1 cup frozen corn

    1 tablespoon masa harina or 1 to 2 small corn tortillas torn into small pieces, optional

    1/2 small bunch cilantro, roughly chopped

    1 lime, juiced, plus more to taste

    Scallions, sour cream, avocado, shredded cheese for serving

    Directions

      1Heat the butter or oil in a large pot (like a Dutch oven). Stir in the onions and cook until softened, about 5 minutes.

      2Stir in the garlic, ground cumin, onion powder, oregano, salt, and cayenne pepper. After one minute, pour in the chicken stock and diced green chilies with their juices.

      3Bring the broth to a simmer, then submerge the chicken into it. Adjust the heat so that the broth is gently simmering around the chicken. Partially cover the pot with its lid and cook until the chicken is cooked through and tender, 25 to 30 minutes.

      4Transfer the chicken to a clean work surface and allow it to cool enough so that you can shred it. Use two forks to shred the chicken into smaller pieces.

      5Adjust the broth to a low simmer and stir in the beans. Use a measuring cup or jug to steal about one cup of beans and broth from the pot, and then pour it into a blender. Blend into a smooth puree.

      6Pour the blended beans back into the pot. Add the shredded chicken and corn, then stir everything together and allow it to reheat.

      7Mix the tablespoon of masa with three tablespoons of water into a smooth paste and stir it into the chili. If you are using corn tortillas instead of masa paste, tear the tortillas into small pieces and stir them into the chili. After a minute or so, the tortillas will disintegrate into the chili.

      8Taste the chili and then adjust with salt, pepper, or cayenne pepper.

      9Remove the chili from the heat and serve with fresh lime, cilantro, and any other chili toppings you love.

    Adam and Joanne’s Tips

    • Storing: This is perfect for making in advance. Store white chicken chili in airtight containers and refrigerate for up to 4 days or freeze for up to 6 months.
    • Canned green chilies: You can buy mild and hot canned green chilies. The one you choose is up to how spicy you enjoy your food. I typically purchase mild and add spice with cayenne pepper or chipotle powder. I love to purchase the Hatch brand.
    • The nutrition facts provided below are estimates. We used 1/2 teaspoon of salt in our calculations and assumed a generous serving (about 1/4 of the pot).

    Nutrition Per Serving
    Serving Size
    1/4 of the pot (4 servings total)
    /
    Calories
    316 Calories
    /
    Total Fat
    10.2g
    /
    Saturated Fat
    4.5g
    /
    Cholesterol
    59mg
    /
    Sodium
    710.7mg
    /
    Carbohydrate
    38.9g
    /
    Dietary Fiber
    9.8g
    /
    Total Sugars
    7.8g
    /
    Protein
    19.9g


    AUTHOR:

    Joanne Gallagher

    Adam and Joanne of Inspired Taste

    We are Adam and Joanne Gallagher, the creators of Inspired Taste. Established in 2009, Inspired Taste grew from a childhood dream into one of the internet’s most trusted recipe sites with hundreds of reliable recipes, step-by-step videos, and expert tips.More About Us
    Source link

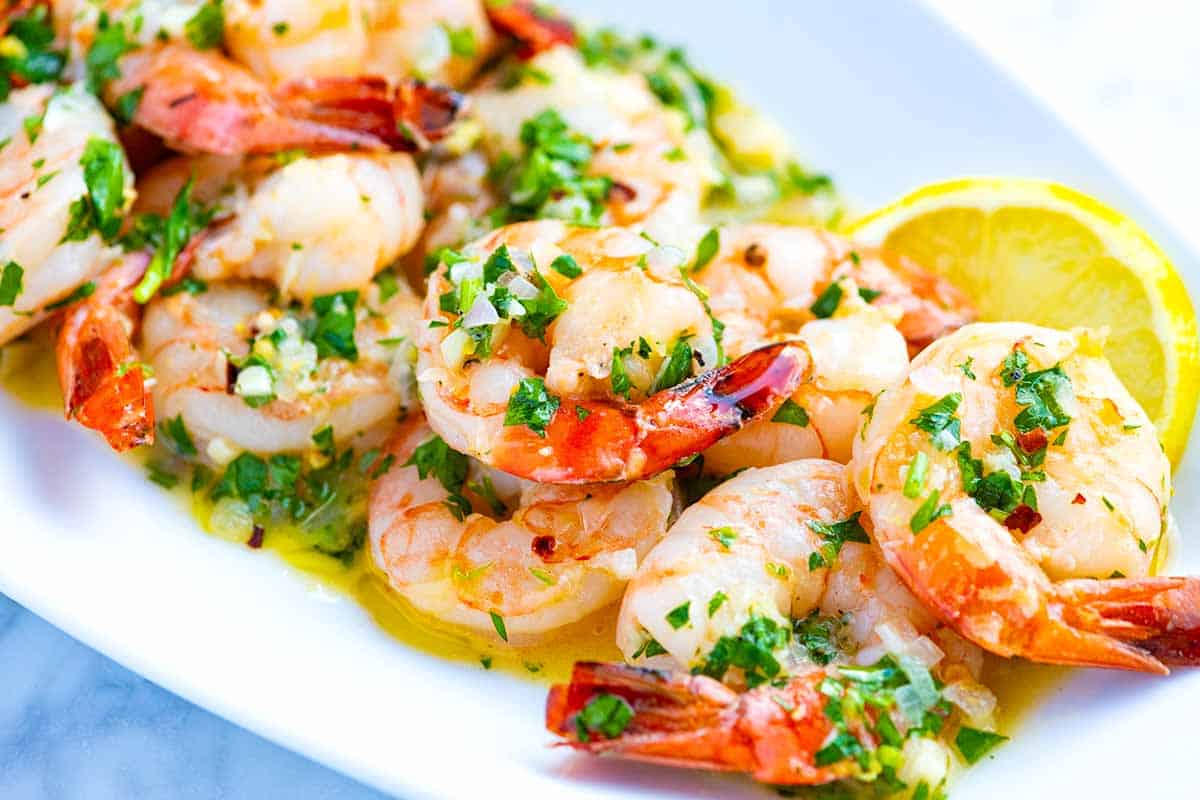
  • Garlic Shrimp Scampi Recipe

    Garlic Shrimp Scampi Recipe

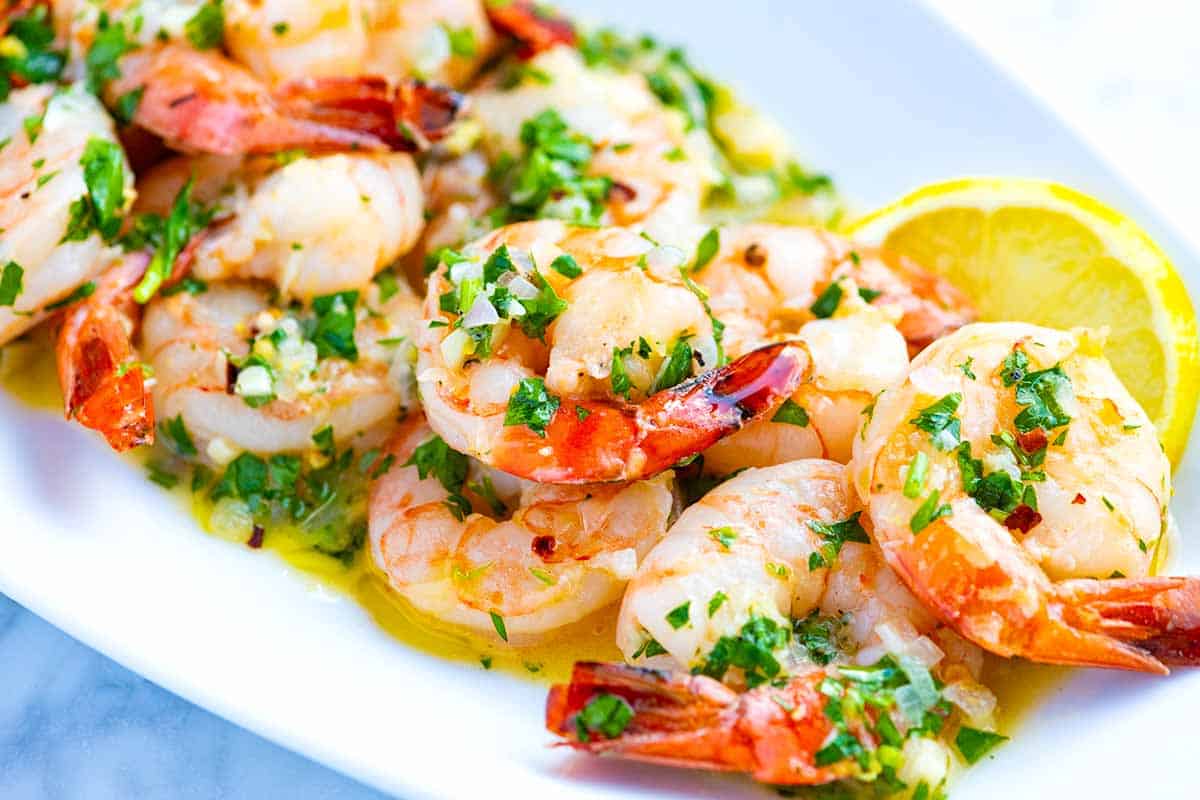
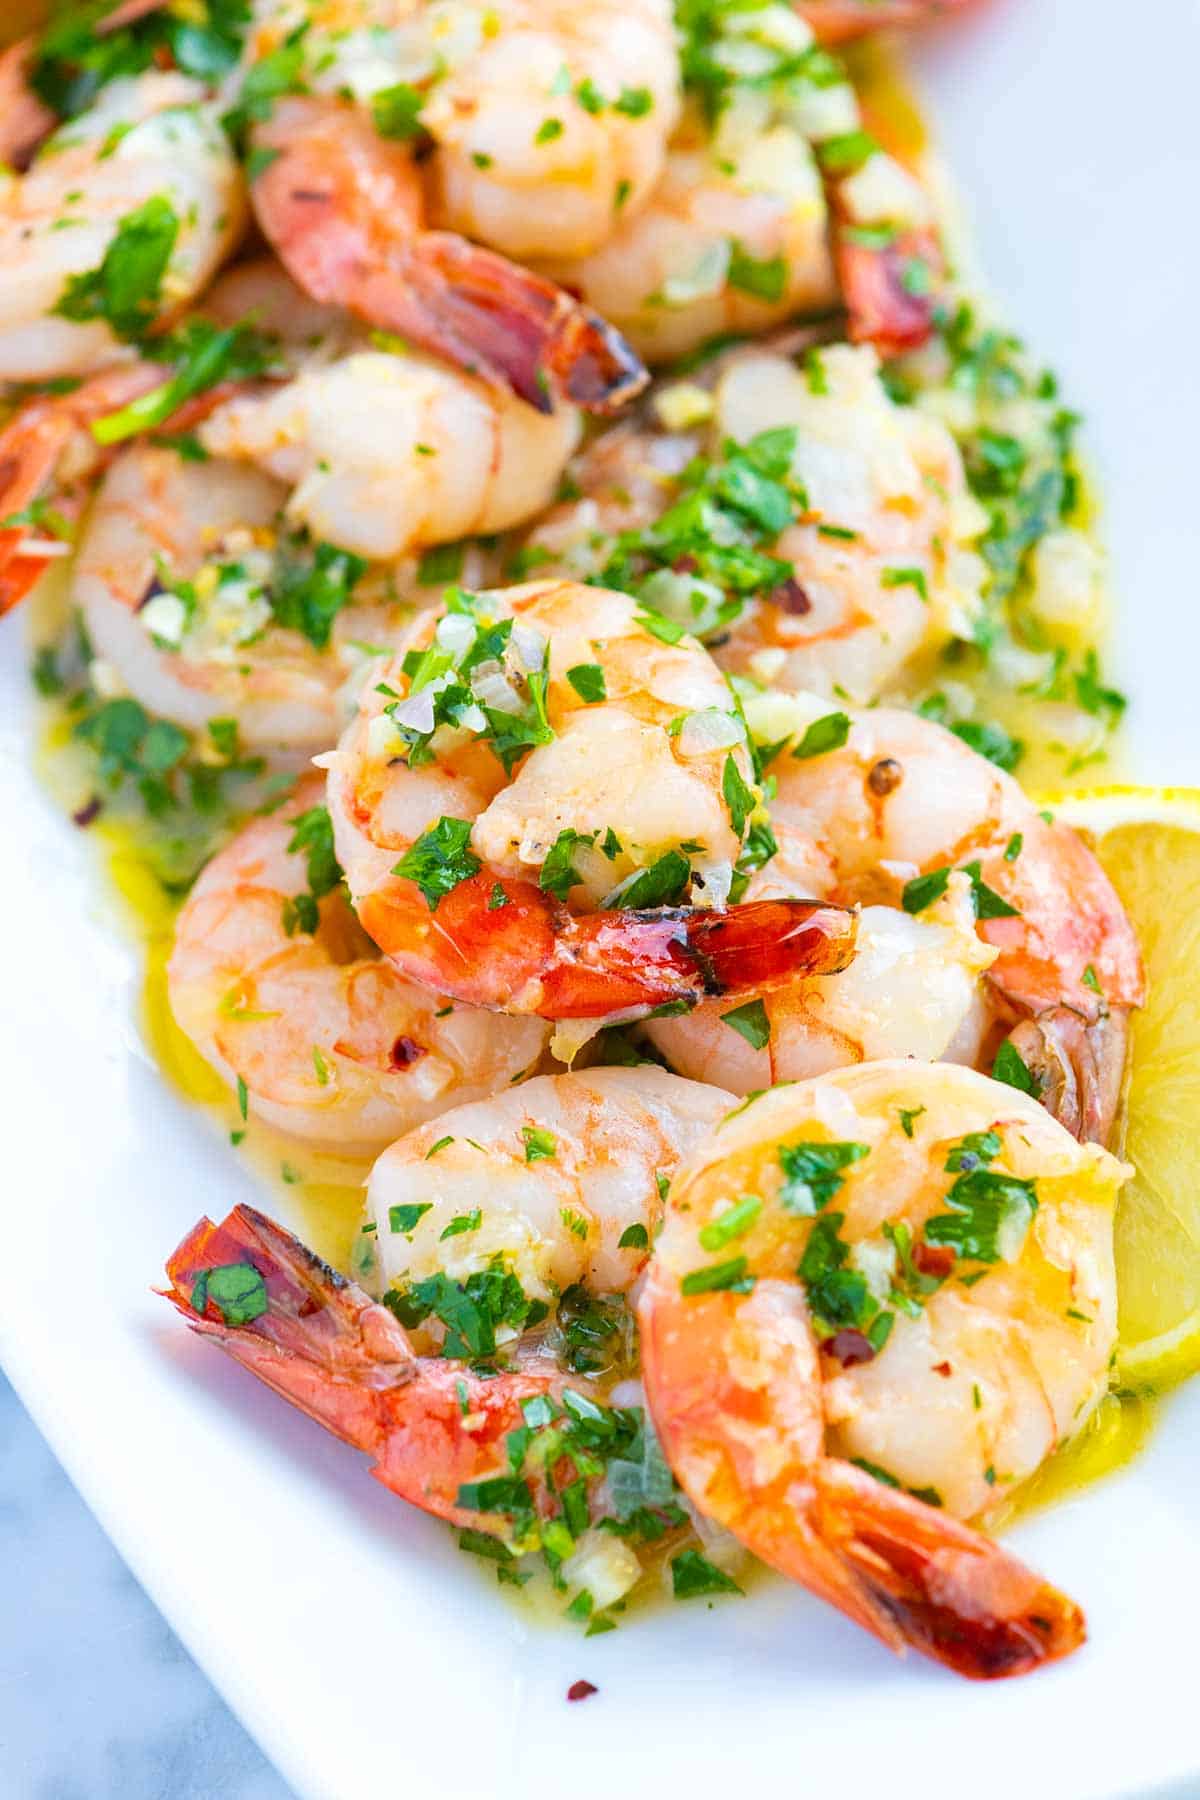
    Our shrimp scampi recipe made with garlic, butter, white wine, and lemon feels fancy but is actually super quick and easy. It’s basically the best garlic butter shrimp you’ll ever make.

    Shrimp scampi with a garlic butter sauce

    Shrimp scampi is a true classic, and it comes together in minutes at home. That’s why it’s one of my go-to weeknight dinners. Even if you are starting with frozen shrimp, you’ll have dinner on the table in no time (see my tips for quickly thawing them below).

    We love this garlicky shrimp with toasted bread, but it’s just as good piled over pasta for dinner. For more easy shrimp recipes, try our cilantro lime butter shrimp for a fun twist!

    Key Ingredients

    • Shrimp: Choose fresh, high-quality jumbo or large shrimp for the best texture and flavor. Keep the tails on for presentation or remove them for easier eating. If you have frozen shrimp, see my tip below for quickly thawing them (I do this all the time).
    • Shallots, Garlic, and Red Pepper Flakes: Sautéed in olive oil, these aromatics build the base of our sauce.
    • Fresh Lemon Juice and White Wine: These deglaze the pan to create the classic scampi sauce. The best wine for this is a dry, crisp white such as Pinot Grigio, Sauvignon Blanc, or an unoaked Chardonnay. Since our recipe calls for ½ cup, use a wine you’ll enjoy sipping with the finished dish. A light vegetable broth is a good substitute.
    • Butter and Parsley: You’ll stir these in at the end. They create a silky, garlicky butter sauce that clings to every shrimp.

    Find the full recipe with measurements below.

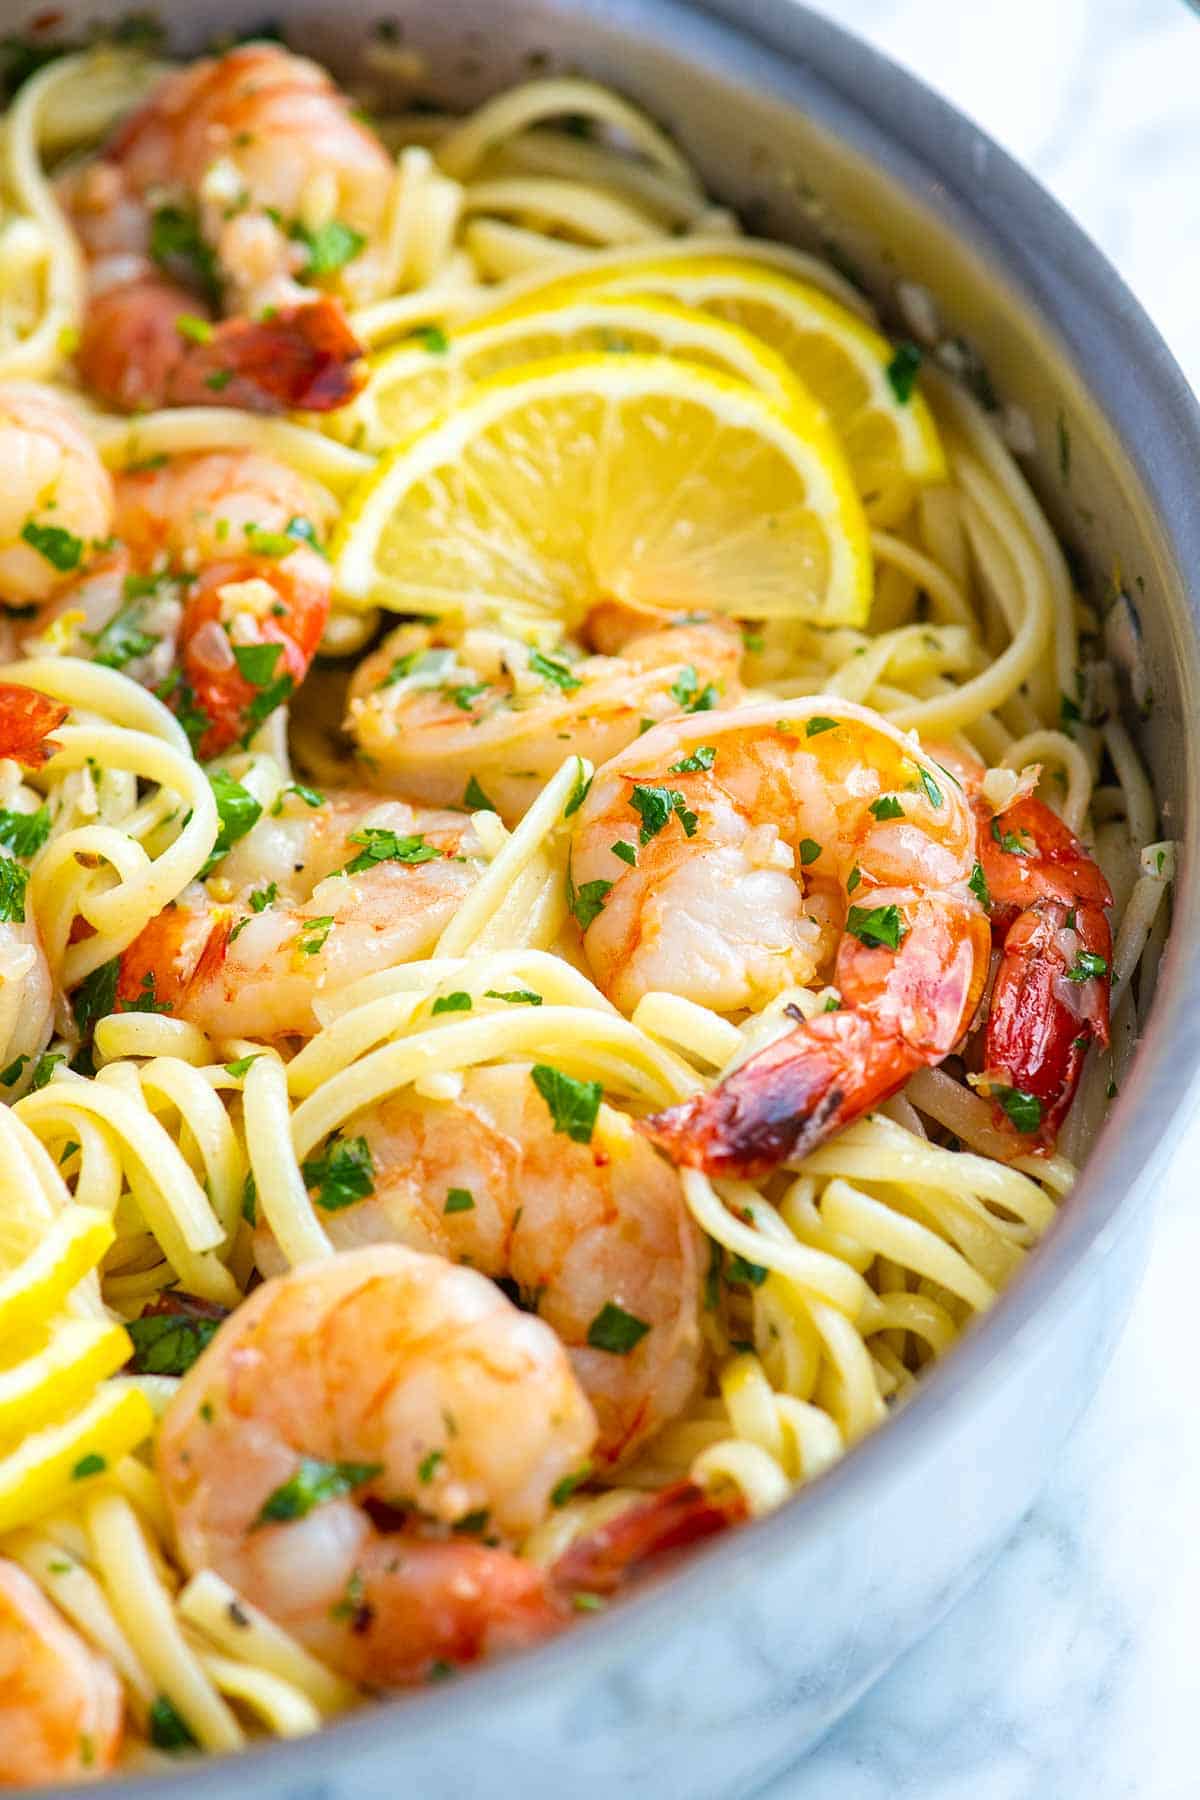
    Shrimp Scampi tossed with spaghetti

    How to Make the Best Shrimp Scampi

    Tip 1: How to quickly thaw frozen shrimp. If you have fresh or thawed shrimp, skip to the next tip, but if you are like me, you probably have a bag of frozen shrimp in the freezer. This is how we quickly thaw them:

    • Option 1 (the quickest): Add your frozen shrimp to a bowl without a bag, then cover them with cold water (cold is important, don’t use warm or hot). They should take 15 to 20 minutes to thaw. Make sure you change the water a few times (keep it cold) and move the shrimp around occasionally to help them thaw. Note: Don’t leave your shrimp in water for much longer than 30 minutes, as their texture may start to degrade.
    • Option 2: Place the shrimp into a sealed plastic bag (like a ziplock bag), but squeeze out as much air as you can. Fully submerge the bag of shrimp in a large bowl of cold water, flipping the bag a few times, and changing the water every 30 minutes until the shrimp have thawed.

    Tip 2: Pat the shrimp dry. Whether you are starting with fresh or thawed shrimp, make sure you pat them dry with paper towels so they brown in the skillet rather than steam.

    Tip 3: Cook the aromatics. Before cooking the shrimp, add your shallots, garlic, and red pepper flakes to olive oil in a skillet over medium heat. Cook them until the shallots turn soft and smell sweet.

    Tip 4: Cook the shrimp in a single layer. Add your shrimp to the skillet with the aromatics, making sure they are in a single layer (or as close to one as you can manage). This way, every shrimp gets a chance to hit the hot skillet. They will take about 2 minutes per side. Shrimp cook quickly, so keep a close eye on them. Just as they finish, remove them from the pan and set aside so they don’t overcook while you finish the sauce.

    Cooking shrimp in a skillet for shrimp scampi

    Tip 5: Make scampi sauce. Now your skillet will have the aromatics, little bits of shrimp that were left from cooking them, and some liquid (also left over from cooking the shrimp). Let’s build on all that flavor with white wine and lemon juice. Let the sauce simmer and reduce a little, then turn off the heat and swirl in butter to make it a little creamy. Add the shrimp back to the skillet, toss well in the sauce, and enjoy!

    Making shrimp scampi sauce with shrimp on a plate to the side.

    Serving Suggestions

    You can serve this in so many different ways. The first (and probably one of the most loved) is shrimp scampi pasta. To turn our recipe below into a pasta dish, cook about 8 ounces of spaghetti, fresh pasta, or linguini in salted boiling water until al dente, then use tongs to transfer the pasta to the skillet with shrimp and sauce. Toss really well, adding a little starchy pasta cooking water to help it along. If you think it needs it, add a bit more butter and serve! For a lower-carb option, add the shrimp to our garlic zucchini noodles.

    Beyond pasta, I love spooning some of the shrimp and sauce over toasted or grilled bread. Sourdough is perfect, as is focaccia. Or, serve it as is with other light Italian dishes like Caprese salad, Caesar salad, bruschetta, polenta, or our olive oil bread dip.

    More of Our Favorite Shrimp Recipes

    Shrimp Scampi

    Garlic Shrimp Scampi

    • PREP
    • COOK
    • TOTAL

    Shrimp scampi is one of my favorite classic Italian dishes! You can make it in just about 15 minutes, and it works as an appetizer, with toasted or grilled bread, or tossed with pasta.

    4 Servings

    You Will Need

    1 pound fresh or thawed large or extra-large shrimp, peeled and deveined (450 g)

    Salt and fresh ground black pepper

    1 tablespoon olive oil

    4 tablespoons butter, cut into four pieces

    ¼ cup minced shallot, 1 medium

    1 ½ tablespoons minced garlic, about 4 cloves

    ¼ teaspoon red pepper flakes, optional

    ½ cup dry, crisp white wine like Pinot Grigio, Sauvignon Blanc or unoaked Chardonnay, see tips (118 ml)

    1 lemon, cut in half

    ½ cup fresh parsley leaves and tender stems, chopped

    Directions

      1Prepare the shrimp: Place the thawed shrimp in a colander and toss with ¼ teaspoon salt. Let sit for 1 minute, then rinse and pat very dry with paper towels. Season with ¼ teaspoon of fresh ground black pepper and set aside.

      2Cook aromatics: Heat the olive oil in a skillet over medium heat. Add shallots, garlic, and red pepper flakes. Stir them around the pan and cook until the shallots soften, 1 to 2 minutes. Add the shrimp to the skillet in a single layer. Cook for 1 to 2 minutes per side or until pink and opaque. Transfer the shrimp to a plate.

      3Make the sauce: Pour the white wine and the juice from half a lemon into the skillet. Simmer until slightly reduced, about 1 minute. Remove the skillet from the heat. Swirl in the butter and parsley until melted and creamy. Season with additional salt, pepper, or lemon juice to taste. Spoon the scampi sauce over the shrimp and enjoy.

    Adam and Joanne’s Tips

    • Storing: Store leftovers in an airtight container for up to 3 days.
    • Thawing shrimp: See the article for tips on quickly thawing shrimp.
    • Substitute for wine: Use 1/2 cup of chicken broth, vegetable broth, or seafood broth. I also like adding a bit more lemon juice.
    • Shrimp scampi pasta: Use 8 to 12 ounces of dry pasta for 1 pound of shrimp. If, when tossing the pasta into the scampi sauce, it seems dry, add a 1/4 cup to 1/2 cup of the pasta cooking water to thin it out a bit. The starches in the water will also help the sauce to stick to the pasta strands.
    • The nutrition facts provided below are estimates.

    Nutrition Per Serving
    Serving Size
    1/4 of the recipe
    /
    Calories
    257
    /
    Total Fat
    15.9g
    /
    Saturated Fat
    7.8g
    /
    Cholesterol
    213mg
    /
    Sodium
    301.4mg
    /
    Carbohydrate
    5.6g
    /
    Dietary Fiber
    1.5g
    /
    Total Sugars
    1.4g
    /
    Protein
    24.4g


    AUTHOR:

    Adam Gallagher

    Adam and Joanne of Inspired Taste

    We are Adam and Joanne Gallagher, the creators of Inspired Taste. Established in 2009, Inspired Taste grew from a childhood dream into one of the internet’s most trusted recipe sites with hundreds of reliable recipes, step-by-step videos, and expert tips.More About Us
    Source link

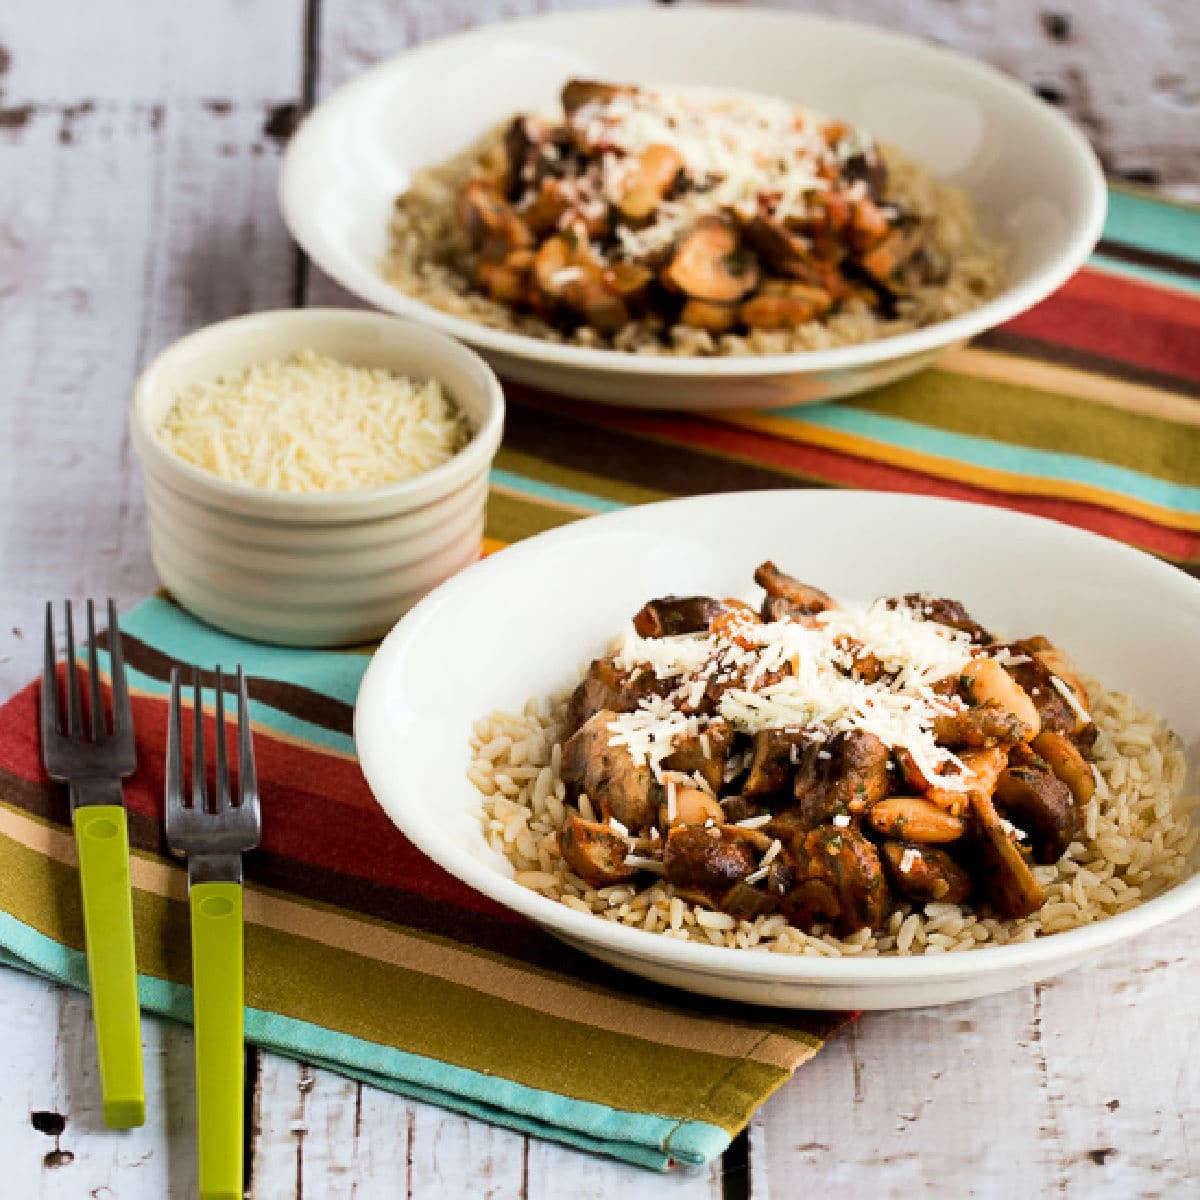
  • Mushroom and Bean Stew

    Mushroom and Bean Stew

    This delicious Mushroom and Bean Stew has mushrooms, Cannellini beans, and tomatoes flavored with onions, garlic, and herbs. The stew makes a great meatless meal that’s also gluten-free; serve over rice or cauliflower rice if you like.

    PIN Mushroom and Bean Stew to try it later!

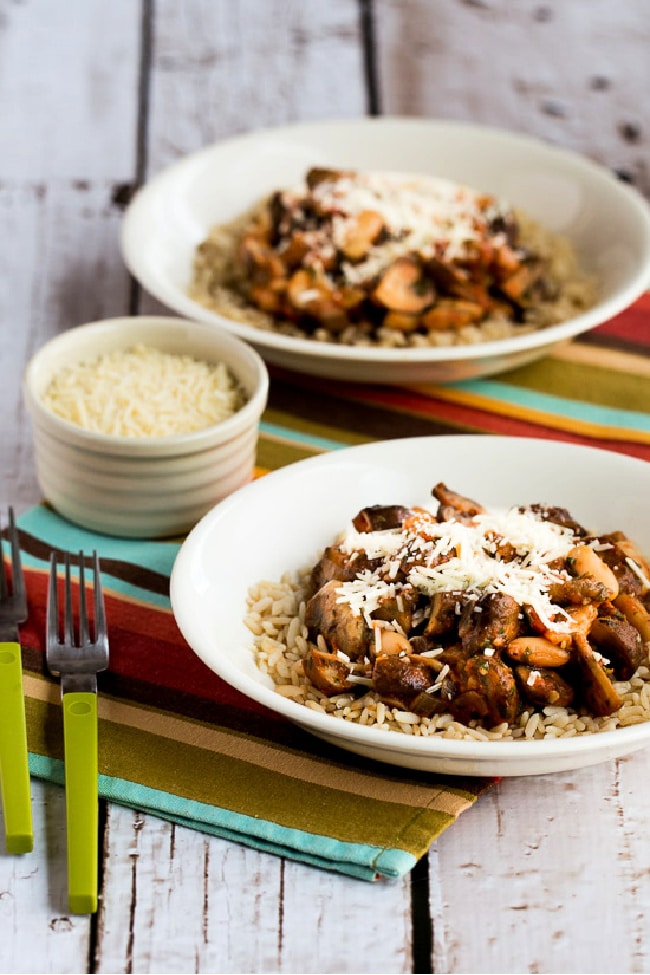
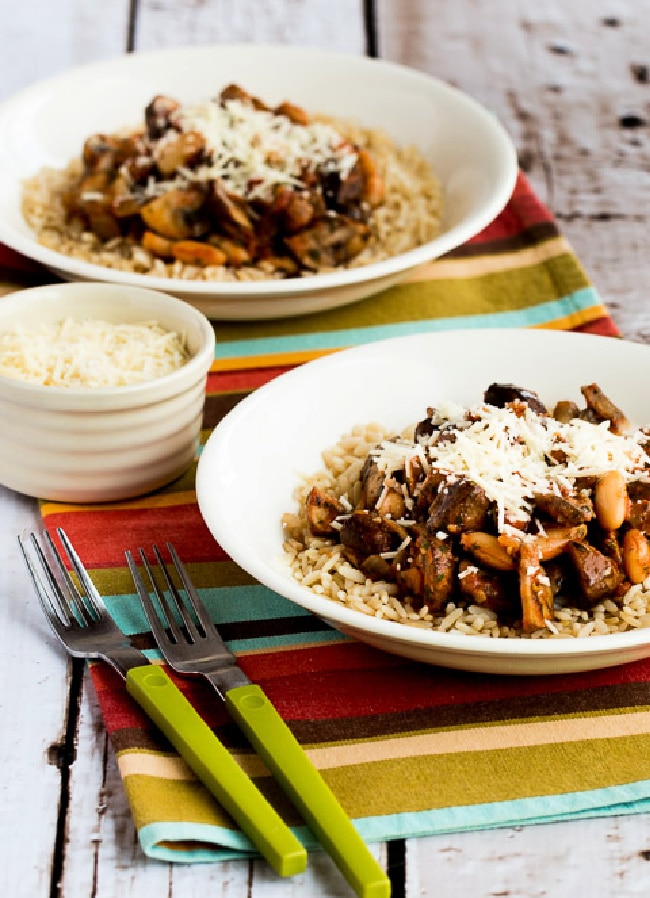
    Mushroom Stew with Beans and Tomatoes finished stew in serving dishes

    This delightful Mushroom and Bean Stew was delicious, easy to make, and if you left off the Parmesan this recipe could easily be vegan. Whether you’re a strict vegetarian or someone who likes to eat meatless meals part of the time, I promise this is a delicious option for a plant-based meal!

    You can eat the tasty mushroom stew with beans and tomatoes over brown rice like I did, or serve over cauliflower rice if you’d like a few less carbs. And don’t skip the ground fennel, which was one of the flavors that I thought really made this interesting.

    What ingredients do you need for this recipe?

    (This is only a list of ingredients; please scroll down for complete printable recipe. Or if you use the JUMP TO RECIPE link at the top of the page, it will take you directly to the complete recipe with ingredient amounts.)

    • Olive Oil (affiliate link)
    • onions
    • Minced Garlic (affiliate link)
    • Dried Thyme (affiliate link)
    • ground fennel (affiliate link) seed
    • Dried Sage (affiliate link)
    • Cremini mushrooms
    • canned vegetable broth (affiliate link)
    • canned Cannellini beans
    • canned petite dice tomatoes
    • fresh parsley
    • salt and fresh ground black pepper to taste
    • freshly grated Parmesan Cheese or Vegetarian Parmesan (optional, but good)

    What mushrooms are good for Mushroom and Bean Stew?

    I’m a fan of brown Cremini Mushrooms and that’s what I used for this stew. But any mushrooms you prefer will be fine.

    What beans did we use for the Mushroom and Bean Stew?

    We used Cannellini Beans for this recipe, which are white kidney beans. Those are creamy and good, but you can use any type of white bean you prefer.

    How high in carbs is this stew with beans and mushrooms?

    This stew with white beans has 29 net carbs per serving, with 13 grams of protein. Of course the canned beans are the highest carb ingredient in this mushroom stew. If you want a version that’s lower in carbs, you can replace those with a low-carb vegetable like zucchini or cauliflower.

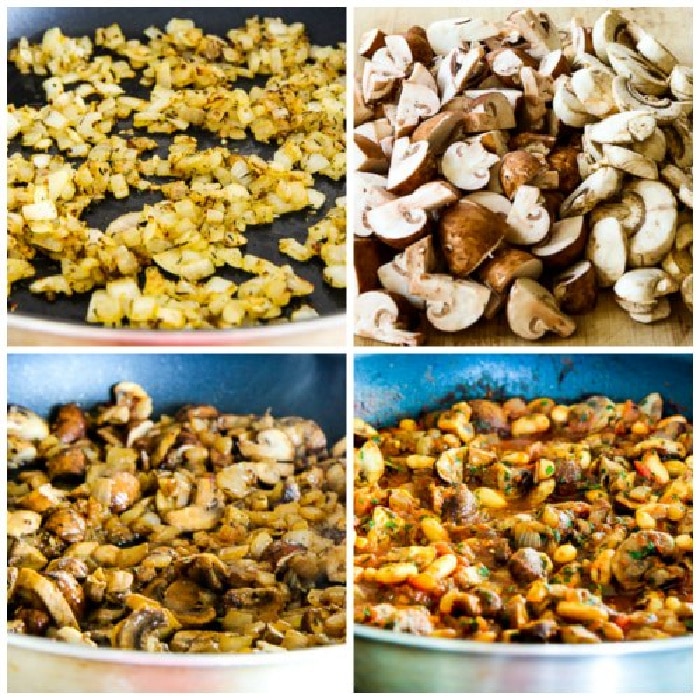
    Mushroom Stew process shots collageMushroom Stew process shots collage

    How to Make Mushroom Stew:

    (This is only a list of ingredients; please scroll down for complete printable recipe. Or if you use the JUMP TO RECIPE link at the top of the page, it will take you directly to the complete recipe.)

    1. Saute onions, garlic, and herbs until the onions are soft and starting to brown.
    2. While onions cook, wash and trim mushrooms, then cut into quarters (or sixths if the mushrooms are large.)
    3. Add mushrooms and vegetable broth to the pan with onions, cover and simmer 5-6 minutes.
    4. After mushrooms have cooked 5-6 minutes, add drained beans, tomatoes and juice, and 1/2 cup chopped parsley.
    5. Cover again and simmer 10 minutes more.
    6. Season to taste with salt and fresh ground black pepper.
    7. Serve hot, over brown rice or cauliflower rice.
    8. Mushroom and Bean Stew is great topped with freshly-grated Parmesan Cheese or Vegetarian Parmesan, but if you skip the cheese the recipe will be Vegan and dairy-free.

    Mushroom Stew in two Bowls with spoons and Parmesan CheeseMushroom Stew in two Bowls with spoons and Parmesan Cheese

    More Meatless Main Dishes:

    Weekend Food Prep:

    This recipe for Mushroom and Bean Stew has been added to a category called Weekend Food Prep to help you find recipes you can prep or cook on the weekend and eat during the week!

    Ingredients

    • 1 1/2 T olive oil
    • 2 medium onions, chopped
    • 2 tsp. minced garlic
    • 1 tsp. dried thyme
    • 1 tsp. ground fennel seed
    • pinch dried sage
    • 1 lb. Cremini mushrooms, washed, trimmed, and cut in quarters (or sixths if the mushrooms are large.)
    • 1/4 cup vegetable broth (see notes)
    • one 15 oz. can Cannellini beans, rinsed
    • one 14.5 oz. can petite diced tomatoes
    • 1/2 cup finely chopped fresh parsley (see notes)
    • salt and fresh ground black pepper to taste
    • freshly grated Parmesan cheese or Vegetarian Parmesan for serving (optional, but good)

    Notes

    I think canned vegetable broth is sometimes rather flavorless, so I’d start with 1/2 cup and reduce it by simmering before adding to the recipe for more concentrated flavor. I used flat Italian parsley, but either kind will work.This is great topped with freshly-grated parmesan cheese.

    I didn’t have any left to freeze, but I’m sure this freezes well if you can manage to have leftovers.

    Recipe adapted slightly from Moosewood Restaurant Simple Suppers.

    Nutrition Information

    Yield

    4

    Serving Size

    1

    Amount Per Serving

    Calories 244Total Fat 6gSaturated Fat 1gTrans Fat 0gUnsaturated Fat 5gCholesterol 1mgSodium 711mgCarbohydrates 38gFiber 9gSugar 7gProtein 13g

    Nutrition information is automatically calculated by the Recipe Plug-In I am using. I am not a nutritionist and cannot guarantee 100% accuracy, since many variables affect those calculations.

    Did you make this recipe?

    Did you make this recipe? Please leave a star rating (under the PRINT button in the recipe) or share a photo of your results on Instagram! THANKS!

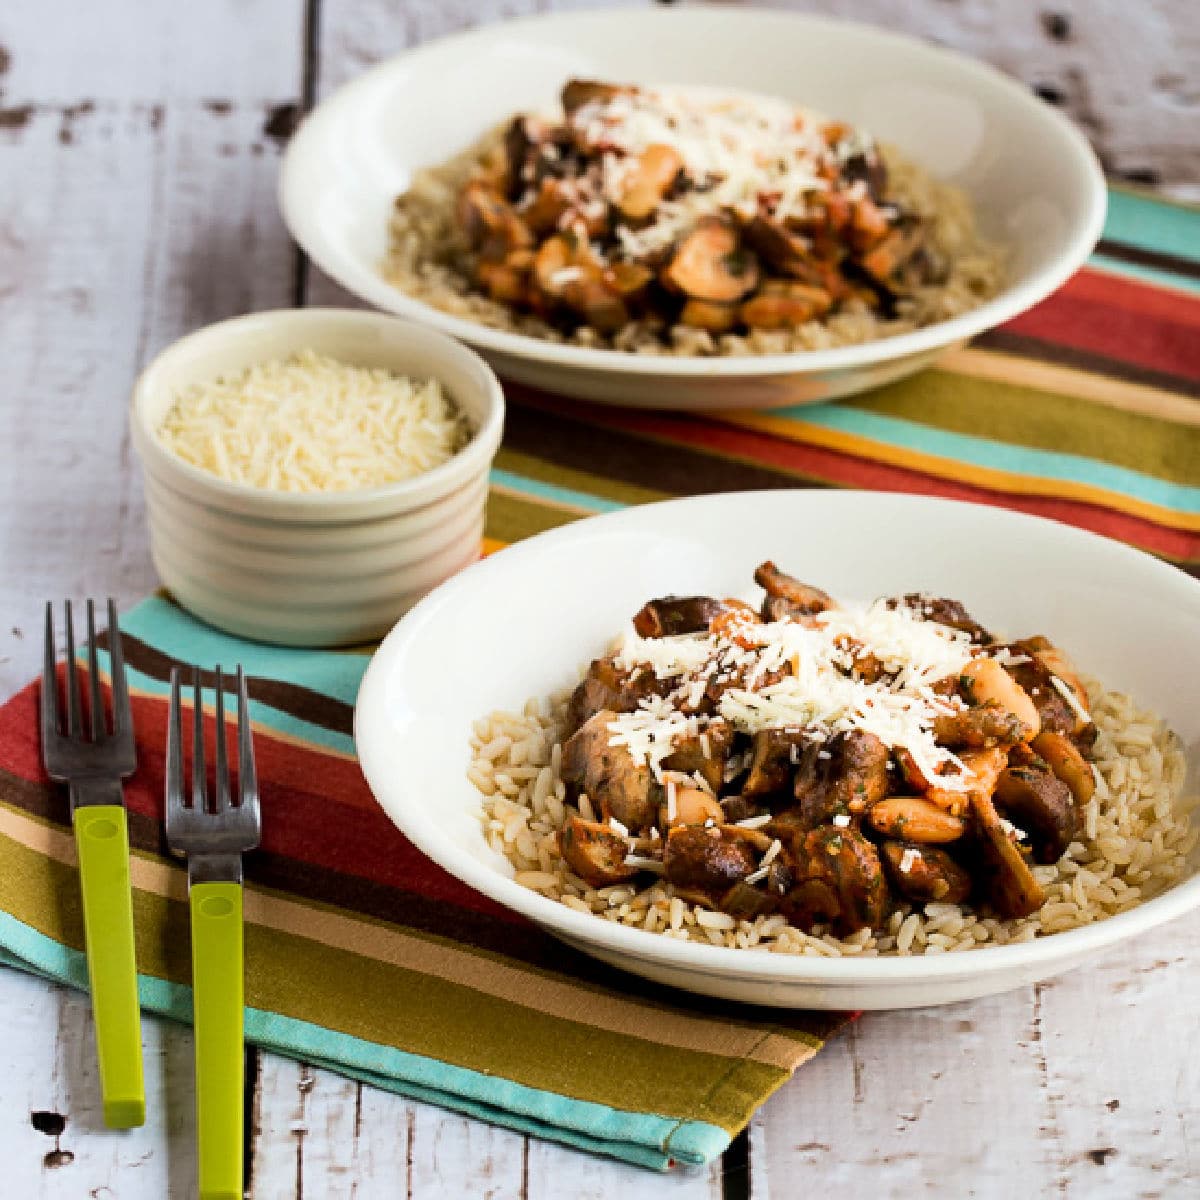
    Square image for Mushroom Stew shown in two bowls with forks and Parmesan.Square image for Mushroom Stew shown in two bowls with forks and Parmesan.

    Low-Carb Diet / Low-Glycemic Diet / South Beach Diet Suggestions:
    Served in a bowl (without rice) this Mushroom and Bean Stew would make a great meatless main dish for any phase of the original South Beach Diet. With brown rice or whole wheat noodles it would be approved for phase 2 or 3 of South Beach. You can eat this over cauliflower rice if you want fewer carbs, but it still has carbs from the beans and the tomatoes and isn’t suitable for low-carb diet plans.

    Find More Recipes Like This One:
    Use Stew Recipes to find more recipes like this one. Use the Diet Type Index to find recipes suitable for a specific eating plan. You might also like to follow Kalyn’s Kitchen on Pinterest, on Facebook, on Instagram, on TikTok, or on YouTube to see all the good recipes I’m sharing there.

    Historical Notes for this Recipe:
    This recipe for Mushroom and Bean Stew was first posted in 2011. It was last updated with more information in 2025.

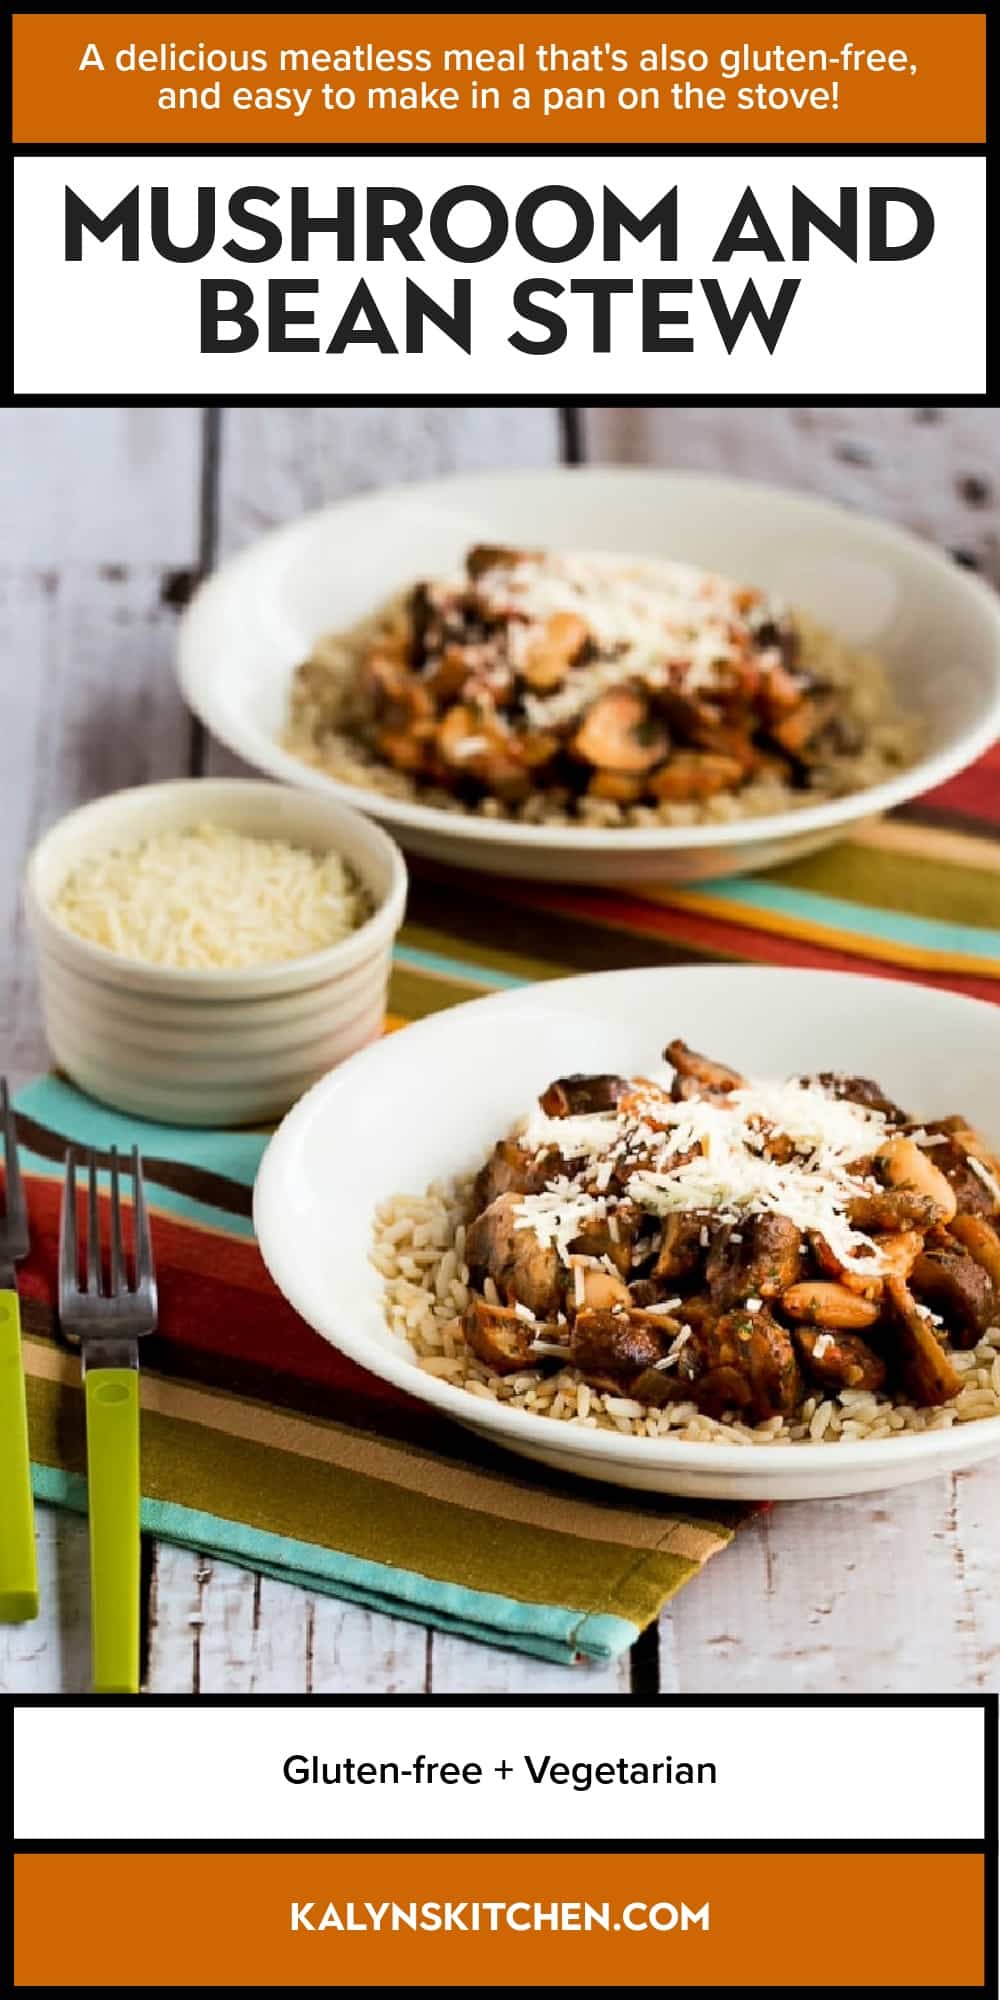
    Pinterest image of Mushroom and Bean Stew

    We are a participant in the Amazon Services LLC Associates Program, an affiliate advertising program designed to provide a means for us to earn fees by linking to Amazon.com and affiliated sites. As an Amazon Associate, I earn from qualifying purchases.


    Source link

  • The Best Chicken and Dumplings Recipe

    The Best Chicken and Dumplings Recipe

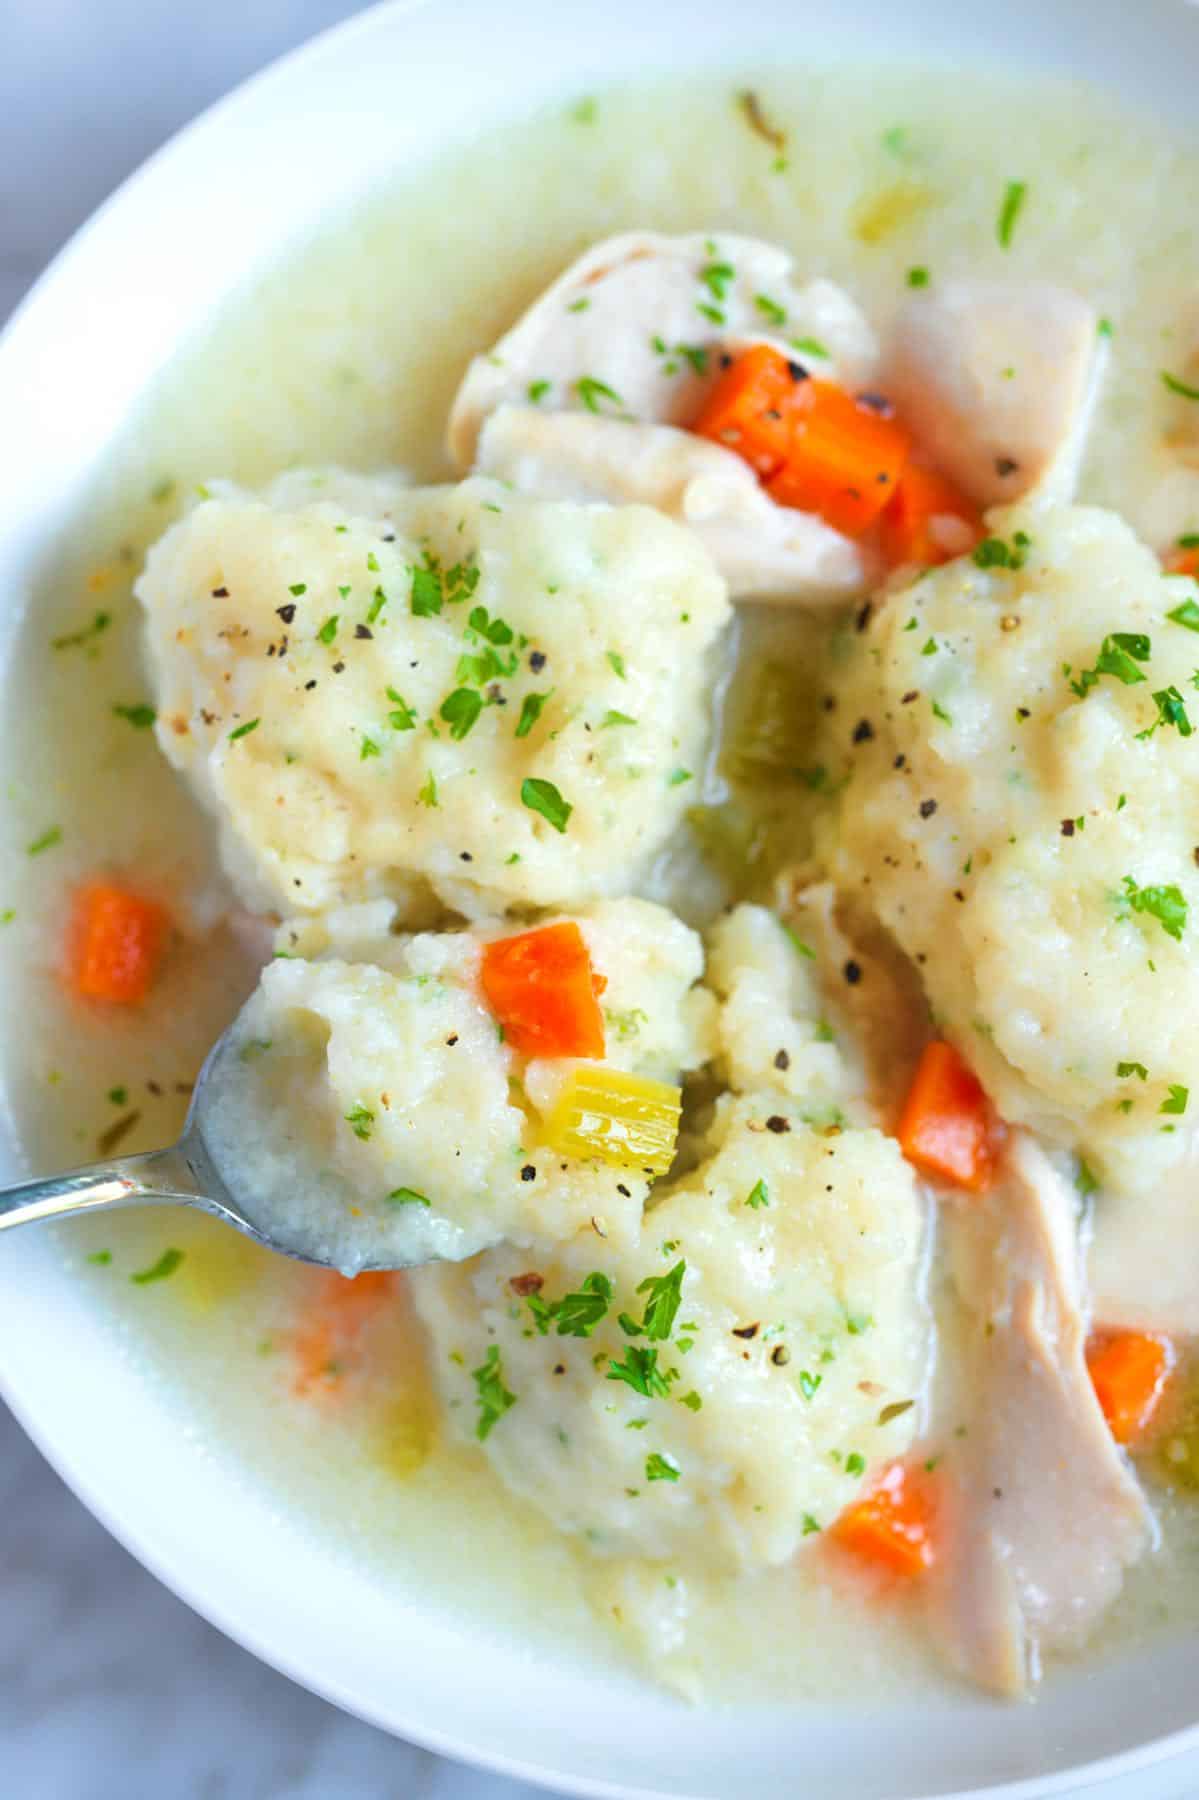
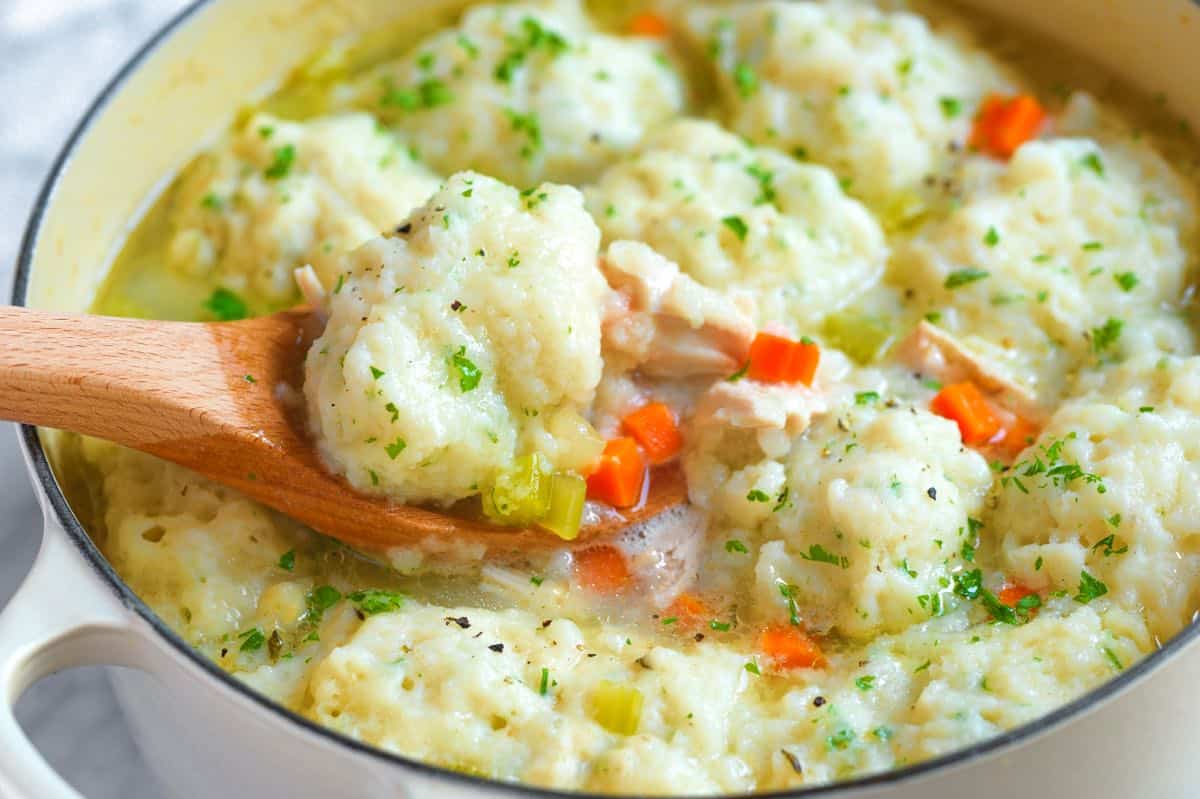
    This homemade chicken and dumplings recipe features light, fluffy drop dumplings, soft and tender chicken, and an incredibly flavorful broth.

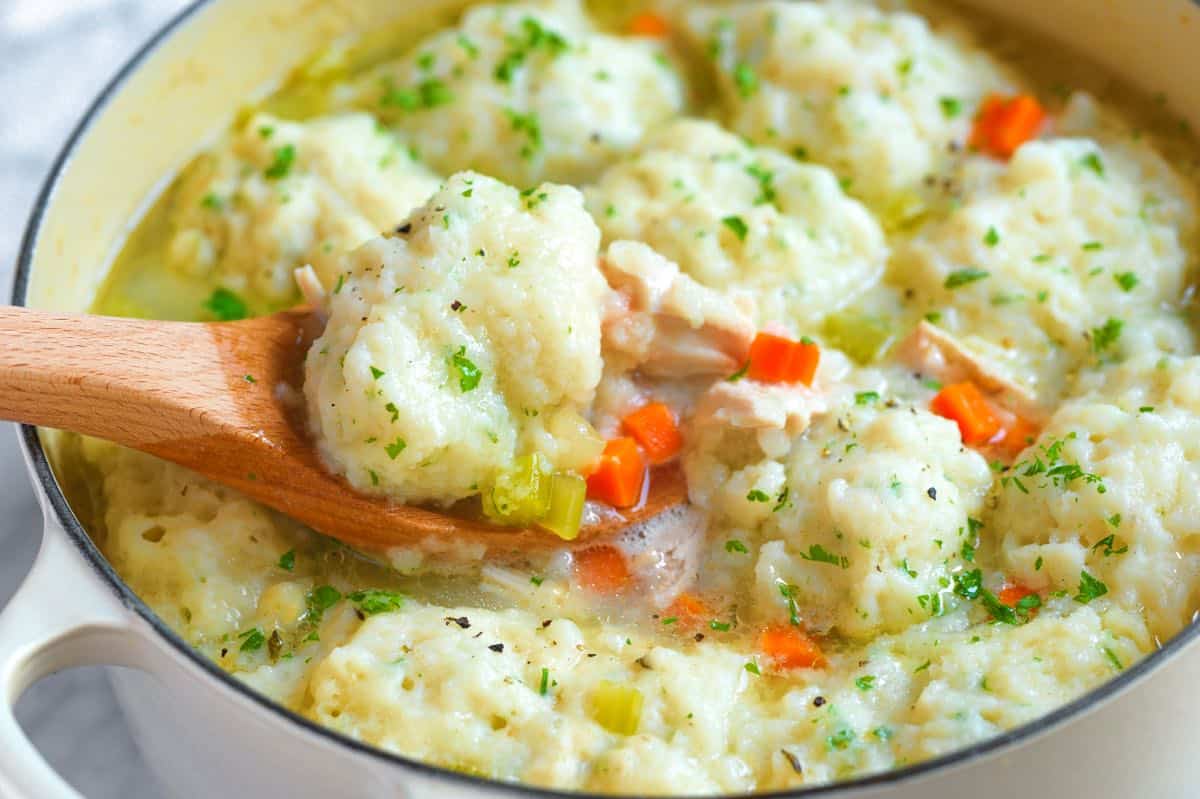
    Homemade Chicken and Dumplings

    This simple, one-pot chicken and dumplings is made entirely from scratch. The dumplings come together in minutes, and you’ll cook the chicken and make the incredible broth all in a single step.

    This recipe comes from our friend Richard, who was inspired by his grandmother. His recipe makes a truly incredible, flavorful broth and tender drop dumplings. I can’t wait for you to make it!

    Key Ingredients

    • Whole chicken: I simmer a whole chicken with aromatics for about 1 hour, which produces the most delicious chicken broth and tender, moist chicken. Once you try making it this way, you’ll never go back. I use the same process to make our easy chicken broth. For making this with leftover chicken, see tips below the recipe.
    • Aromatics: For the classic broth, we add an onion top (the part you usually throw away — you can see what I mean by looking at our photos or watching the video), carrot, celery, garlic, bay leaves, peppercorns, thyme, and salt. These are similar ingredients used for our popular chicken noodle soup recipe.
    • Self-rising flour: I use self-rising flour for the drop dumplings. Baking powder and salt have already been added, making the dumpling batter so easy! If you do not have it, I have included a DIY version in the tips section of the recipe.
    • Milk: I use whole milk, which brings our dumpling batter together and helps make them tender.
    • Butter: Adds flavor and keeps the dumplings moist.
    • Spices: I add ground pepper, a bit of extra salt, and fresh parsley to the dumpling batter.

    Find the full recipe with measurements below.

    How to Make Chicken and Dumplings from Scratch

    Tip 1: Cook the chicken and make broth in a one step. For the best chicken and dumplings, we make a broth similar to this chicken broth. It’s easy and so worth it.

    Gently simmer a whole chicken in water with a few simple ingredients. It takes 1 hour, but if you are short on time, I have included a speedier option using store-bought broth below.

    Making chicken broth for chicken and dumplings from scratch

    Tip 2: Use our wet, drop dumpling batter. This Southern-style recipe uses drop dumplings (similar to our easy drop biscuits). I love how light and fluffy the drop-style dumplings turn out. They also make the soup thicker and creamier because some batter will fall into the broth, helping to thicken it. We also have this recipe for more traditional biscuits, but I’d keep those for dipping into the broth, not for cooking on top.

    Shredded batter for chicken and dumplings
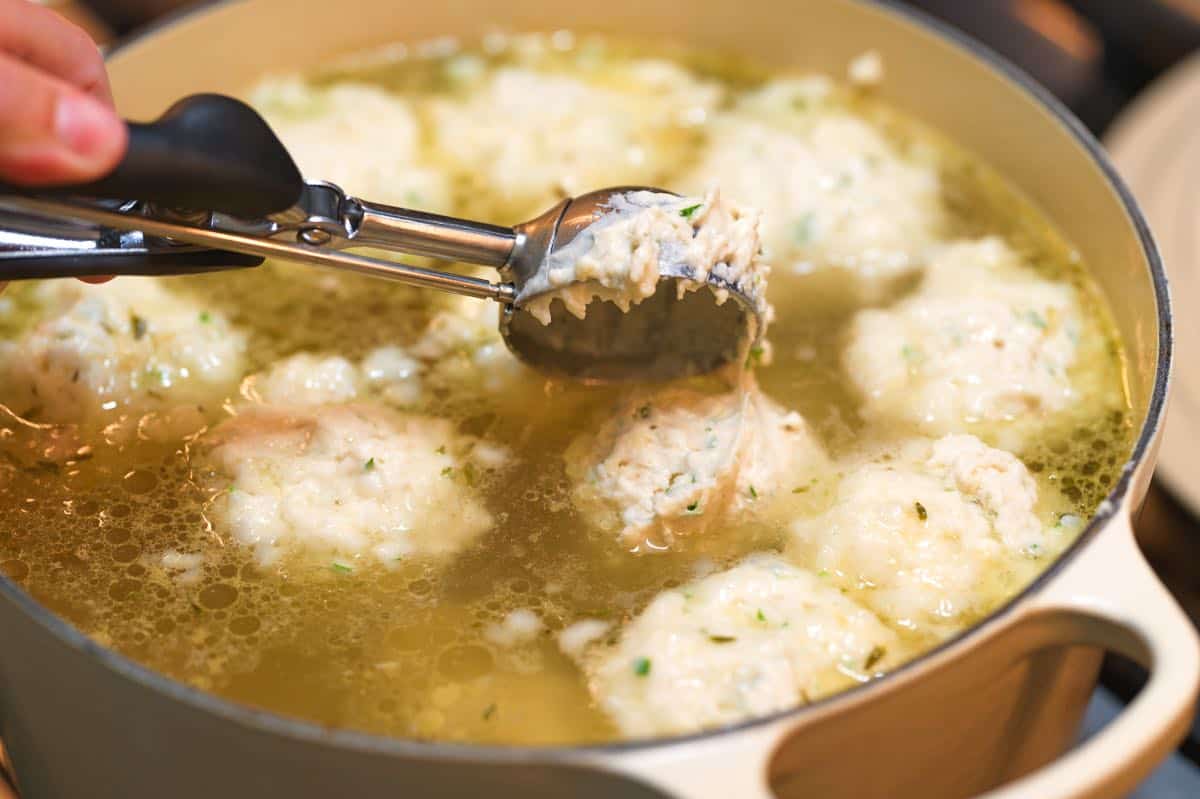
    Dropping dumpling batter into chicken soup

    Tip 3: Cooking the dumplings. To cook the dumplings, you will drop the batter by the spoonful into simmering broth. It’s easy, here are a few tips to help you out:

    1. Use a cookie scoop or spoon to gently drop your dumplings into the gently simmering broth. Don’t worry if the pot looks crowded. Depending on your pot shape, you might even have a few dumplings on top of each other.
    2. If the dumplings fully cover your soup, use a spoon to make a small hole in the middle to allow steam and some of the simmering bubbles to release.
    3. Covering the pot with a lid helps the dumplings steam.
    4. Keep the pot at a gentle simmer. An aggressive simmer or boiling will break the dumplings apart.

    More Comforting Chicken Recipes

    Homemade Chicken and Dumplings

    The Best Chicken and Dumplings

    • PREP
    • COOK
    • TOTAL

    Our recipe for chicken and dumplings starts with a whole chicken simmered with aromatics to create a rich and flavorful broth. We use self-raising flour for the drop dumplings (DIY self-raising flour is shared in the tips if needed).

    Makes 6 servings

    Watch Us Make the Recipe

    You Will Need

    Chicken and Broth

    1 whole chicken, about 4 pounds

    1 onion top, see notes

    1 garlic clove, smashed

    1 large carrot

    2 stalks celery

    3 bay leaves

    8 whole peppercorns

    1 tablespoon fine sea salt

    12 to 14 cups (3 liters) water

    1 bunch fresh thyme


    Dumplings

    2 ½ cups (325g) self-rising flour, spooned and leveled, see notes

    8 twists black pepper

    3/4 teaspoon fine sea salt

    2 tablespoons chopped fresh parsley

    1 ½ cups (350ml) whole milk

    1/4 cup (60g) butter, melted

    Directions

    • Make Broth and Cook Chicken
    • 1Cut a 3-inch section of the carrot, about 1/4 the size of the whole carrot, and set aside. Chop the remaining carrot into small cubes. Cut a 4-inch piece of celery stalk and set aside with the carrot. Chop the remaining celery into small cubes. Save the chopped carrot and celery for later.

      2Place the chicken, breast facing up, in a large pot (we use a 9-quart Dutch oven). Then, toss the 1/4 carrot, 4-inch piece of celery, onion top, smashed garlic clove, bay leaves, peppercorns, and 1 tablespoon of salt around the chicken.

      3Pour in 12 to 14 cups of water, depending on the size of your pot. In the video, we used 14 cups. It is okay if the chicken is not fully covered; an inch or so of chicken breast above the water is okay.

      4Cover the pot with a lid, turn the heat to medium-high, and bring to a simmer. Once the broth is at a simmer, reduce it so that it’s a gentle simmer — the bubbles should be slowly dancing around in the pot.

      5Cook at a gentle simmer for 50 minutes. Peek under the lid occasionally to see if the heat needs to be reduced.

      6After 50 minutes, the broth will be aromatic, and the chicken will be cooked through (you can test this with an internal temperature thermometer — it should read above 165 °F).

      7Carefully transfer the chicken to a plate and allow it to cool until you can handle it.

      8Strain the broth, wipe any foam stuck to the sides of the pot, and then pour the strained broth back into the pot used to make it. Place the pot back over medium heat, add the thyme, chopped carrots, and chopped celery.

    • Finish Chicken and Dumplings
    • 1When it is cool enough to handle, shred the chicken by hand, removing all the bones and skin. Shred as big/little as you like. We keep the chicken in larger pieces.

      2To make the dumpling batter, melt the butter. In a medium bowl, stir the flour, pepper, 3/4 teaspoon of salt, parsley, milk, and melted butter until mixed.

      3Remove the thyme from the soup, scraping a few leaves off the bundle as you remove it.

      4Stir the shredded chicken and any juices left on the plate into the soup.

      5Bring the broth to a gentle simmer, and then use a spoon to scoop golf ball-sized portions of the batter into the soup, scraping them off with your finger. (If you have a large cookie scoop, scoop balls of batter into the soup.) Do this until all the batter is in the soup — it will look crowded. Some might sink.

      6Cover with a lid and cook the dumplings at a low simmer for 5 to 7 minutes or until they look like they are firming up on the bottom. Then, carefully turn each one over to simmer the other side. If there’s no space for the liquid to bubble up past the dumplings, use a spoon and make a small hole in the middle of the pot.

      7Once they are all turned over, simmer over low heat with the lid on for another 8 to 10 minutes. You can test a dumpling to check they are done — The center should look cooked through and fluffy, not doughy. When cooking the dumplings, keep the pot at a gentle simmer. An aggressive simmer or boiling will break them apart. Keep the heat low and keep your pot covered so that they steam. The dumplings can cook longer than the suggested times without issues, but agitating them with an aggressive simmer will make them fall apart.

    Adam and Joanne’s Tips

    • Onion top: We are only looking for a mild onion flavor in our broth. Slice an onion at the top, keeping the skins on. Use the top (what you would normally throw away) to make the broth, and save the onion for another recipe. You can also use a 1-inch slice of onion in its place.
    • Self-rising flour: Unlike all-purpose flour, self-rising flour adds baking powder and salt. For 2 ½ cups of homemade self-rising flour (what you need for this recipe), whisk 2 ½ cups all-purpose flour with 3 ¾ teaspoons baking powder and 1/2 teaspoon salt.
    • Measuring your flour: Fluff the flour in its container, then gently scoop it into your measuring cup until slightly mounded. Level off the top with a knife for accurate measuring. For even more accuracy, use a scale and measure the flour by weight (in grams).
    • Pot size: The perfect size for this recipe is a 9-quart Dutch oven, which is large enough to make the broth and cook all the dumplings. I have also used a 7 ½-quart Dutch oven with this recipe and found that I could only fit 12 cups of water with my chicken. If you don’t have either of these, make sure the pot is large enough to hold at least 12 cups of water with the chicken.
    • Shortcut with leftover chicken: I highly recommend the homemade broth, but if you are short on time, use 10-12 cups of store-bought broth. Bring your chicken broth to a low simmer, and add chopped carrot and celery. Stir in 3 to 4 cups of shredded cooked chicken. Make the dumpling batter and cook by gently simmering them covered with a lid, per our instructions above.
    • Storing: This dish is best when fresh, but you can store it in the fridge for a couple of days and gently reheat. The dumplings will be slightly more moist and might fall apart, but the flavors will all be there. We do not recommend freezing them.
    • Make ahead tips: To reduce the preparation time of the recipe, you can make the broth and chicken up to three days in advance. When you are ready to serve, reheat the broth, add your carrots and celery, and then make your dumpling batter.
    • The nutrition facts provided below are estimates.

    Nutrition Per Serving
    Serving Size
    1/6 of the recipe
    /
    Calories
    501
    /
    Total Fat
    14.4g
    /
    Saturated Fat
    7g
    /
    Cholesterol
    136.8mg
    /
    Sodium
    1599.2mg
    /
    Carbohydrate
    48.7g
    /
    Dietary Fiber
    3.8g
    /
    Total Sugars
    4.1g
    /
    Protein
    42.4g


    AUTHOR:

    Joanne Gallagher

    Adam and Joanne of Inspired Taste

    We are Adam and Joanne Gallagher, the creators of Inspired Taste. Established in 2009, Inspired Taste grew from a childhood dream into one of the internet’s most trusted recipe sites with hundreds of reliable recipes, step-by-step videos, and expert tips.More About Us
    Source link

  • The Best Maryland Crab Cakes Recipe

    The Best Maryland Crab Cakes Recipe

    Our Maryland crab cake recipe is the perfect blend of sweet lump crab meat and just enough binder to hold it all together.

    Homemade Maryland Crab Cakes

    We’re so excited to share our favorite crab cake recipe with you! Growing up on the Chesapeake in Annapolis, MD, we’ve made it our mission to find the absolute best recipe out there, and we finally did.

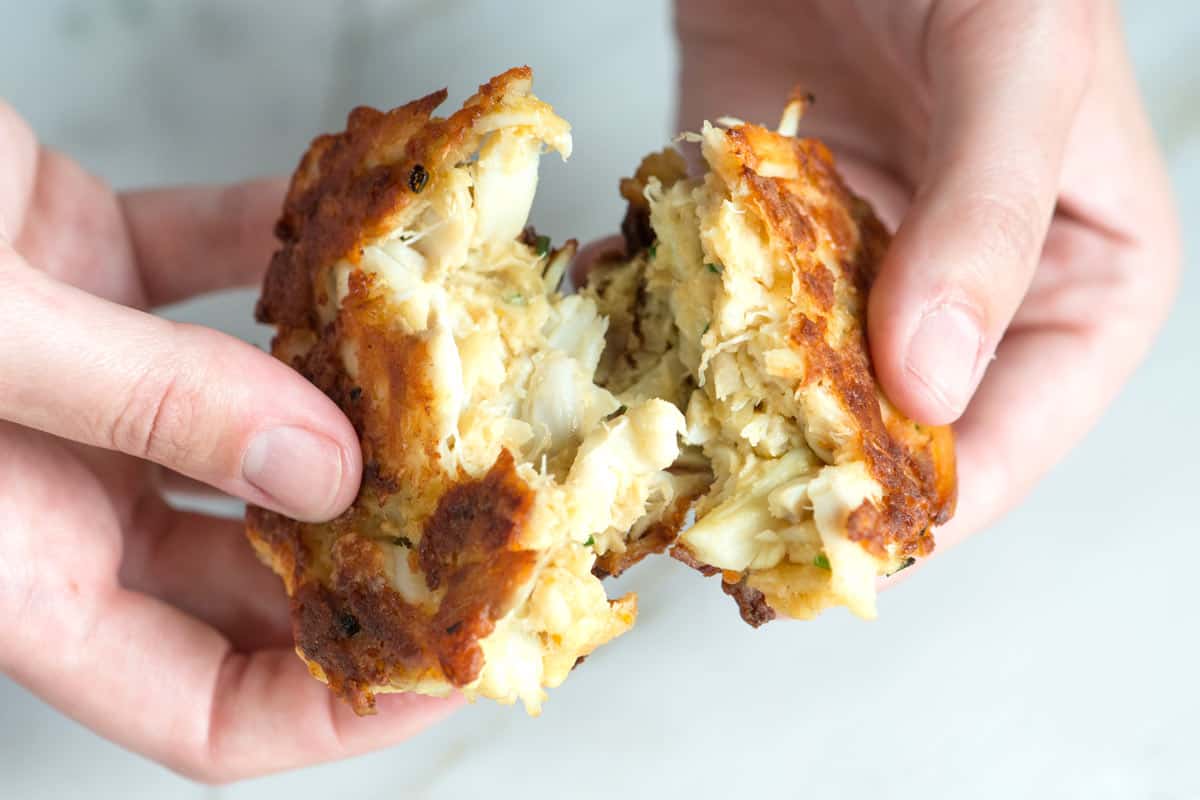
    This recipe is a true Maryland crab cake: all about the sweet, delicious lump crab meat and very little filler. It’s easy to make with a simple list of ingredients. Use our recipe to make classic crab cakes, a delicious sandwich, or even fun, bite-sized crab balls!

    Key Ingredients

    • Crab: For the best flavor, use fresh, high-quality lump crab meat. I look for it sold in the clear plastic containers in the fresh seafood department. If that’s not available, refrigerated crabmeat (like the cans from Phillips) is a great backup. While blue crab is best for a true Maryland-style cake, I’ve had great results using Dungeness crab, too, which is more available on the West Coast.
    • Saltine Crackers: I prefer crushed saltine crackers over breadcrumbs. They’re very light and already seasoned with salt. If you prefer breadcrumbs, panko breadcrumbs are your best bet. Regular breadcrumbs are too heavy and can make these seem like they have more filler than they do.
    • Mayonnaise and Egg: These both add flavor and bind the mixture together. When I have it in the fridge, I love using homemade mayonnaise.
    • Dijon Mustard: A little Dijon mustard adds a nice pop of flavor.
    • Fresh Parsley: This adds color and a bit of flavor, but you can leave it out if you need to.
    • Worcestershire Sauce: A bit of Worcestershire sauce makes these taste better. I also use it in my crab dip recipe.
    • Old Bay: I don’t add Old Bay to my crab cake mixture, but instead sprinkle it on top after they’re cooked. It reminds me of my childhood, when every restaurant table had a shaker jar of Old Bay. Of course, you can mix it in if you prefer.
    • Crab Cake Sauce: Don’t forget the sauce! My homemade tartar sauce is the perfect pairing for these crab cakes.

    Find the full recipe with measurements below.

    How to Make the Best Crab Cakes

    Tip 1: Minimal filler. In Maryland, fillers and extras are a no-no. All the crab house menus promise “no filler” crab cakes, but honestly, you do need a little bit of filler to help them stay together. We use the absolute minimum, opting for a delicious mixture made from crushed saltine crackers, mayonnaise, and one egg. It works beautifully.

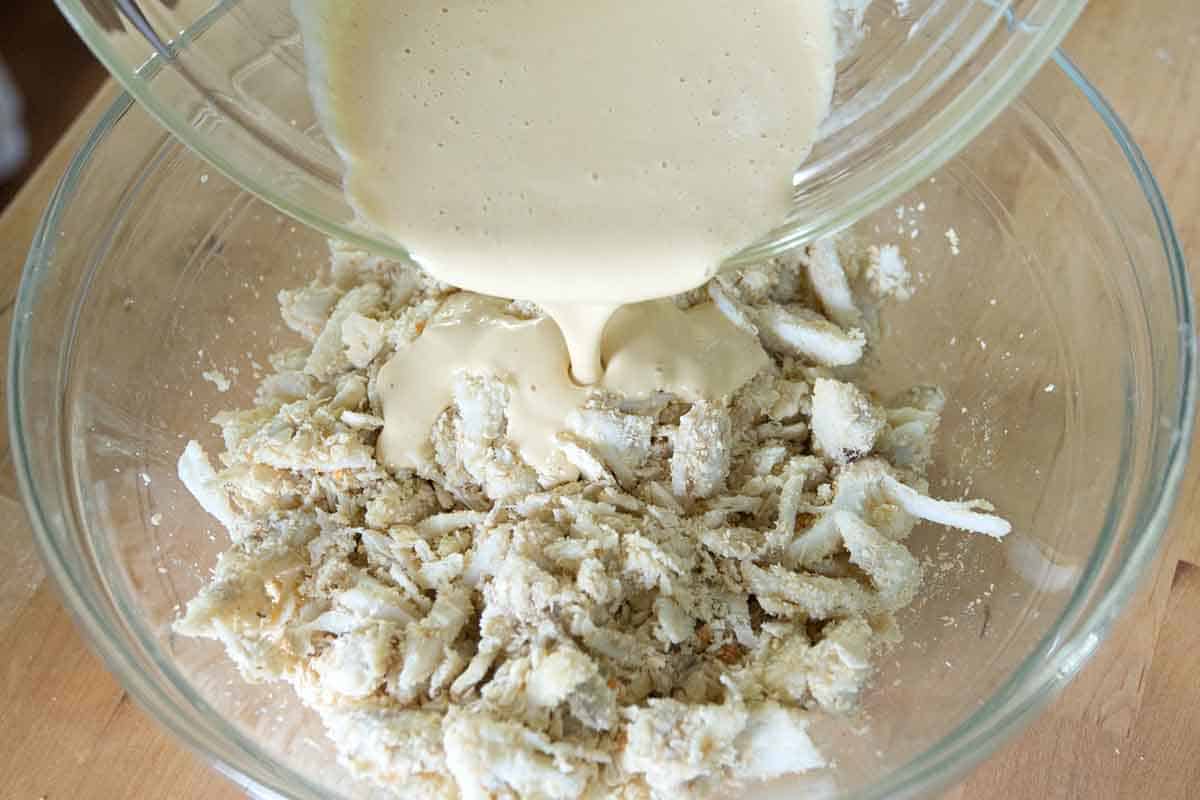
    Tip 2: Toss the crab with crushed saltines first. Before adding your wet ingredients, toss your fresh crab meat with the crushed saltine crackers. As you do this, try to keep the larger lumps of crab intact. As the crushed crackers sit with the crab, they absorb any extra moisture. Then, you can pour over a mixture of mayo, egg, Dijon mustard, and Worcestershire sauce. It’s a simple step, but it makes a huge difference.

    Making crab cake mixture with fresh crabmeat

    Tip 3: Chill the mixture in the fridge. After adding the wet ingredients, the crab cake mixture is pretty loose, so we refrigerate it for an hour. This allows the crackers to absorb the liquid, which ultimately holds them together. After some time in the fridge, you can form the crab cakes. Our recipe makes 6 generous cakes or 24 mini crab balls.

    Tip 4: Cooking them. You have two choices for cooking: pan-fried or broiled. I love both ways, but broiling tends to be my favorite. Here’s the differences:

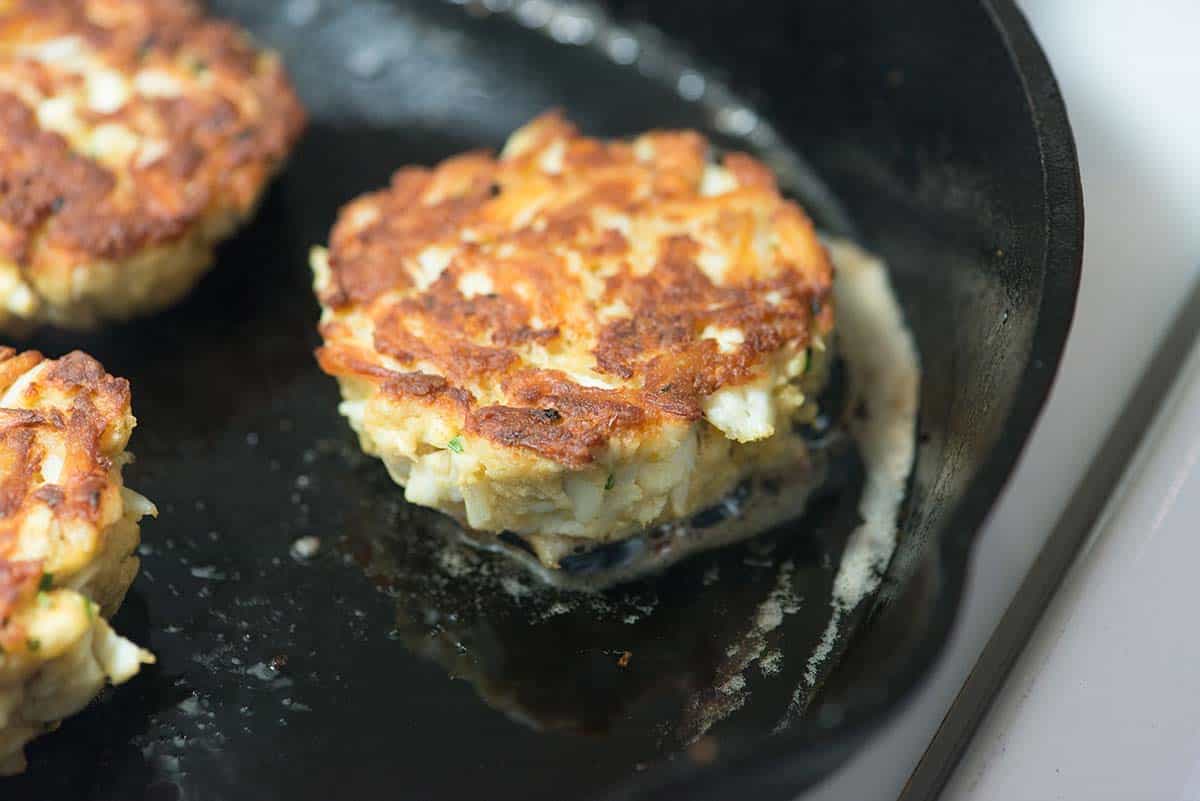
    • Pan-fried are flatter and have a golden crust, as shown in the photo below. I pan-fry them in a bit of butter for that golden crust.
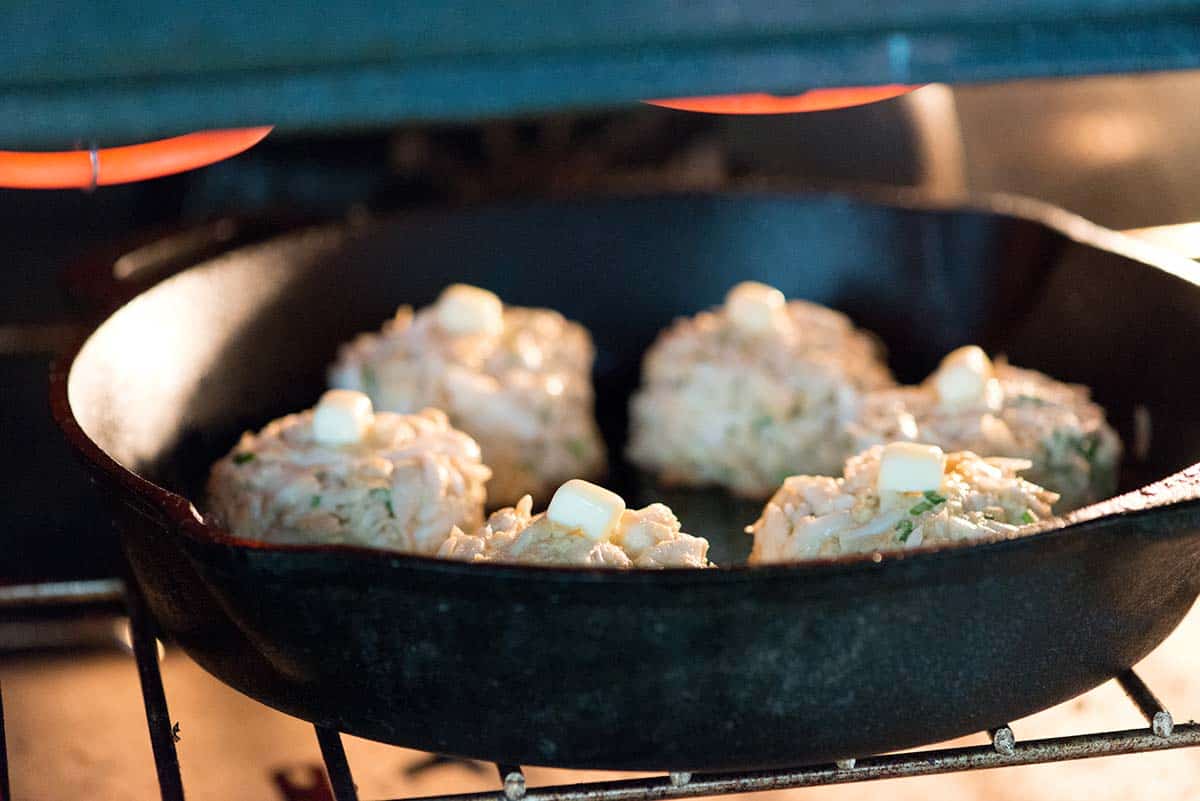
    • Broiled are more domed and have a lighter texture since they aren’t pressed down in the pan. When broiling, I always add a little butter on top so it melts and makes the top a little crispy.
    Cooking Crab Cakes in a Skillet
    How to broil crab cakes

    Ask any Marylander, and they’ll have a preferred cooking method. If you don’t know which you like, try them both! You really can’t go wrong. Either way, these will be some of the best you’ll ever taste. Just look at the photo below!

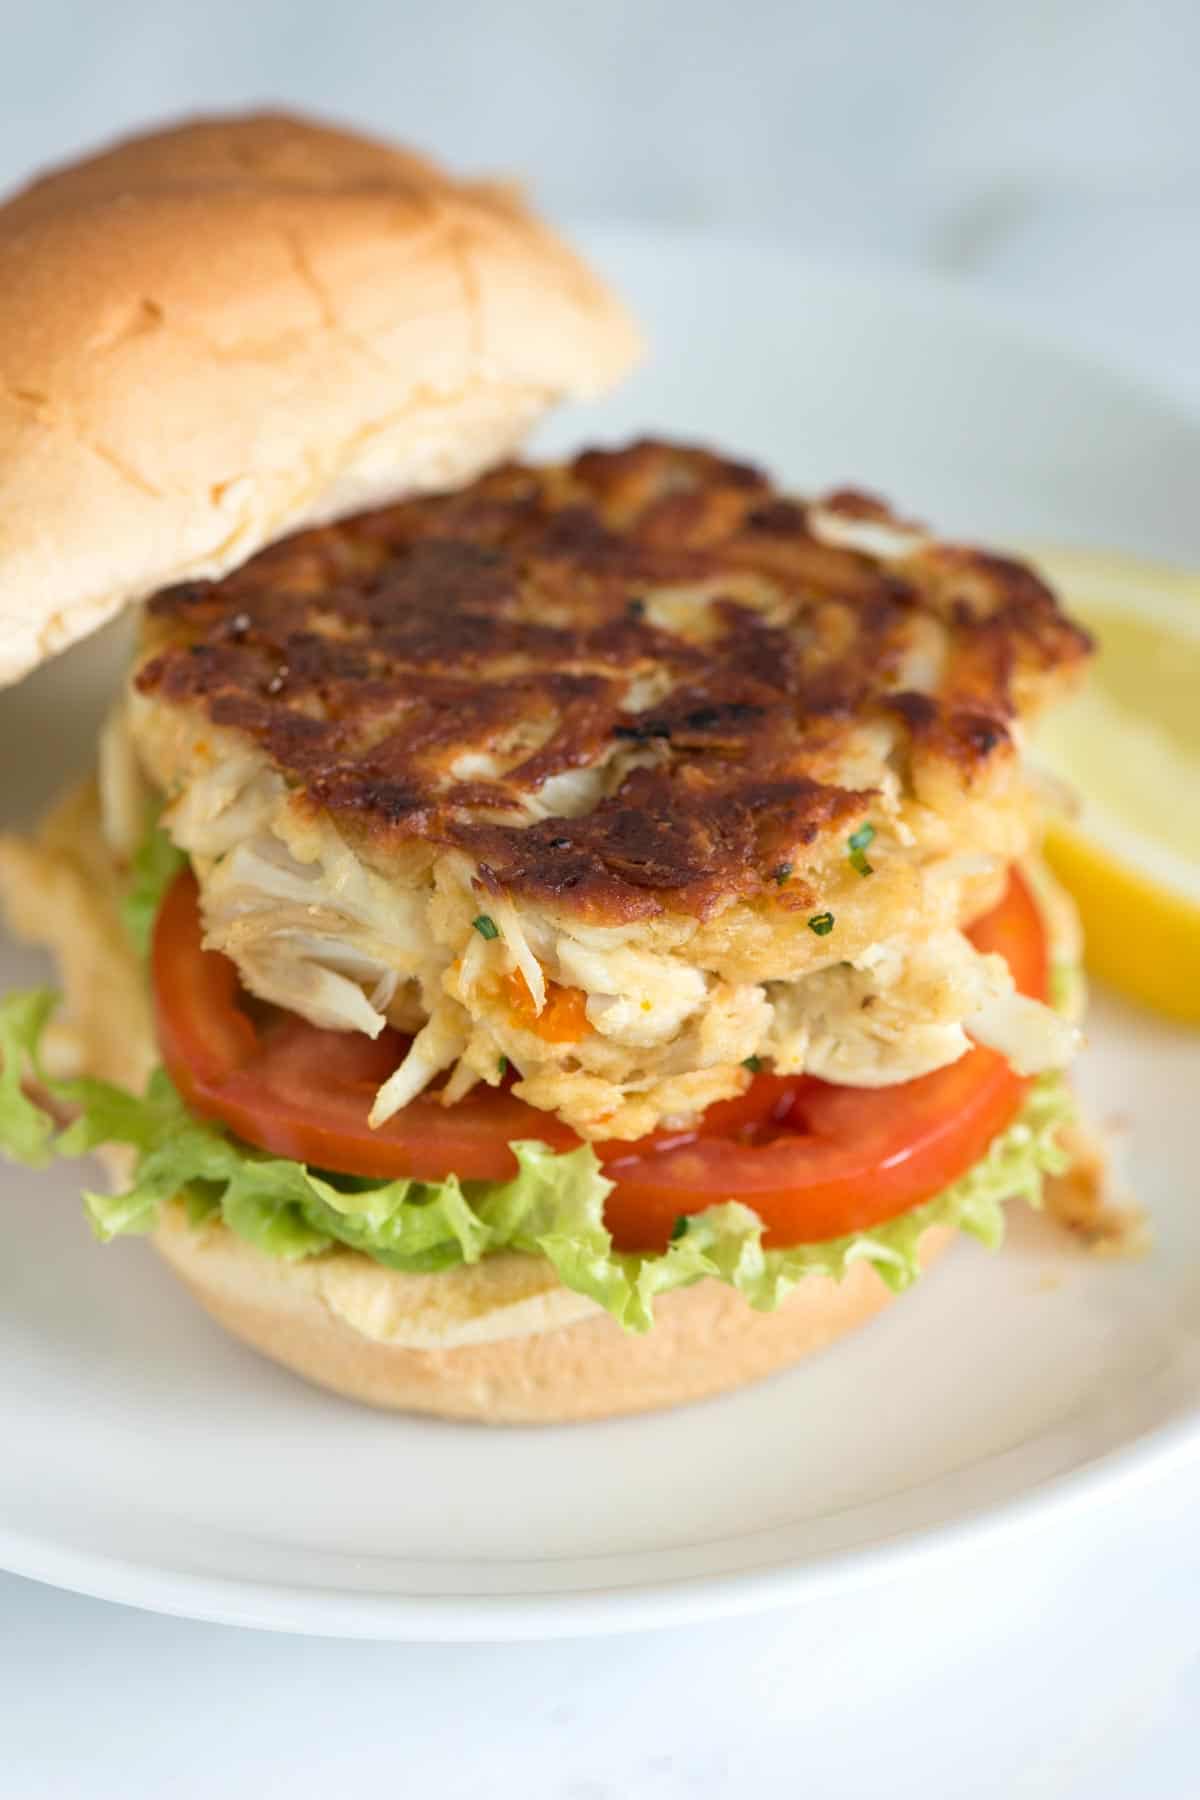
    No Filler Maryland Crab Cake

    Serving Suggestions

    • Classic Crab Cakes: Serve with a few lemon wedges and tartar sauce on the side.
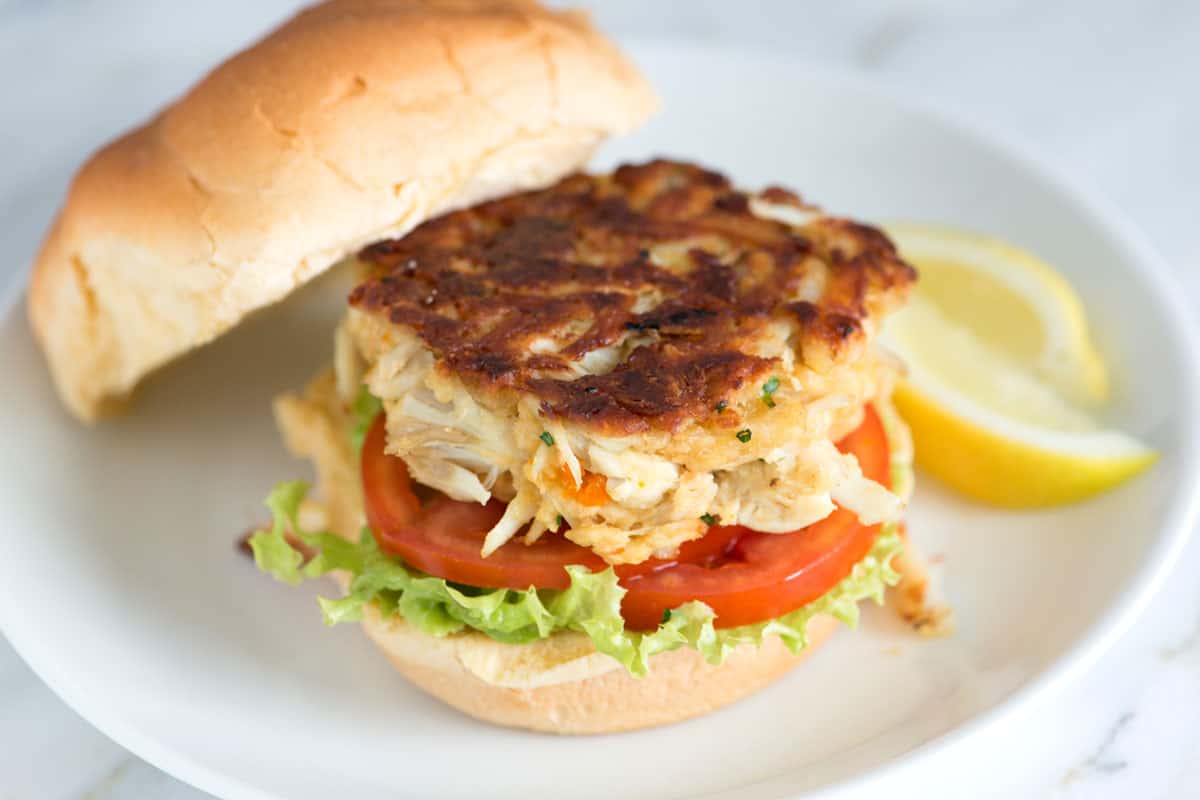
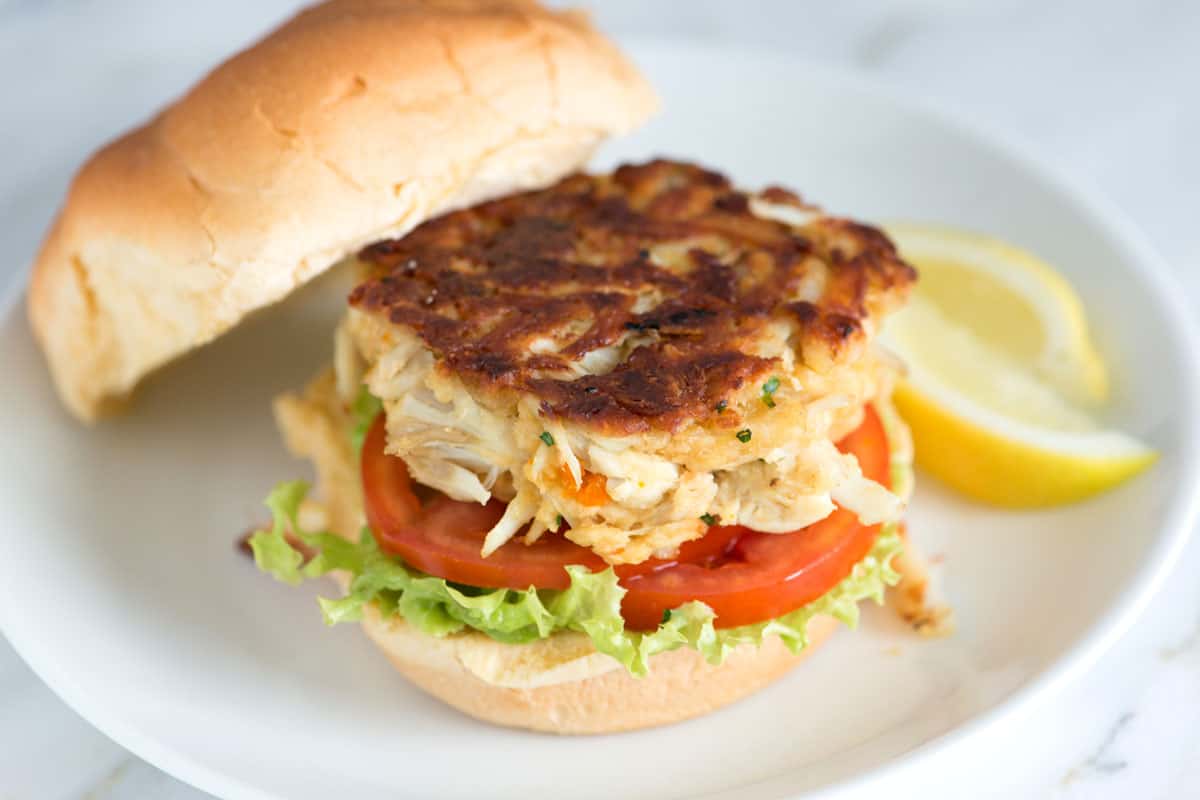
    • Sandwiches: Lightly butter and toast a soft bread roll, spread over some mayo or tartar sauce, a layer of green lettuce, tomato, and the crab cake.
    • For Crab Balls: Serve them on a plate with a big bowl of tartar sauce and cocktail sauce. These make the best appetizer!
    • Crab Cake Benedict: Swap the Canadian bacon for a crab cake in our recipe for Eggs Benedict

    Our Favorite Sides

    As for side dishes, try Cajun butter corn, roasted corn, or this corn salad. Summer sides like creamy potato salad, macaroni salad, or this no mayo potato salad are lovely.

    To mimic our summers on the Eastern Shore, you can serve these next to cornbread, french fries, potato wedges, or sweet potato fries (and don’t forget a side of homemade ketchup!). A side of crab dip is a good idea, too!

    For more ways to use fresh crab, see our crab rangoon recipe.

    The Best Maryland Crab Cakes

    The Best Maryland Crab Cakes

    • PREP
    • COOK
    • TOTAL

    We are in love with these incredible Maryland crab cakes! Our recipe has very little filler for the best texture and flavor. Use blue crab for the most authentic crab cake, although I have made this recipe with Dungeness crab, and it was excellent. We have included two ways to cook the crab cakes. Pan-frying adds a golden crust to both sides, while broiling keeps them more rounded with golden crispy tops.

    Makes 6 large crab cakes or 24 mini crab cakes

    Watch Us Make the Recipe

    You Will Need

    1 pound jumbo lump crab meat or backfin crab meat, fresh or pasteurized (450g)

    20 saltine crackers, crushed into crumbs, just less than 1 cup of crumbs (65g)

    1 tablespoon minced chives or parsley, optional

    1/4 cup mayonnaise, try homemade mayonnaise (55g)

    1 large egg

    1 tablespoon Dijon mustard

    1 tablespoon Worcestershire sauce

    1/4 cup avocado oil (60ml)

    1 tablespoon butter

    Old Bay seasoning, to taste

    Homemade Tartar Sauce, for serving

    Directions

      1Prepare the crab meat: Add the crab meat to a colander to drain, and pick out any rogue shells. Transfer to a large bowl. Toss the cracker crumbs, herbs, and crab meat together, using your fingers to flake apart some of the lumps.

      2Make binder: Whisk the mayonnaise, egg, mustard, and Worcestershire sauce together, then use a rubber spatula to fold the mixture into the crab. It will look loose. Cover with plastic wrap and refrigerate for at least 1 hour.

      3Form the cakes: Scoop the crab mixture into six ½ cup mounds and lightly pack them into patties about 1 ½ inches thick. For crab balls, use a medium cookie scoop and form into 24 mini cakes.

      4To pan-fry: Heat the oil over medium heat in a wide cast-iron skillet. When the oil shimmers, add the crab cakes to the pan. Cook until the underside of the crab cakes is dark golden brown, 4 to 6 minutes. Carefully flip the crab cakes, reduce the heat to medium-low, and add the butter. Continue cooking until the second side is well browned, 4 to 6 minutes.

      5To broil: Position an oven rack 6 to 8 inches from the top of the oven and turn the broiler to high. In a wide oven-safe skillet, heat the oil over medium heat. When the oil shimmers, add the crab cakes to the pan. Cook until the underside of the cakes is golden brown, 3 to 5 minutes. Cut the butter into six pieces, then add one to the top of each crab cake. Slide the pan under the broiler and cook until the tops are lightly browned, 4 to 6 minutes.

      6Serving: Serve crab cakes with lemon wedges, a dusting of Old Bay, and tartar sauce on the side.

    Adam and Joanne’s Tips

    • Storing: Keep leftovers in an airtight container in the refrigerator for up to 3 days. Reheat in a skillet or in the oven.
    • Old Bay: To add it to the crab cake mixture, use 1/4 to 1/2 teaspoon Old Bay seasoning in our recipe above.
    • Mini crab cakes or crab balls: Instead of making six large crab cakes, divide the crab mixture into 24 mini crab cakes.
    • The nutrition facts provided below are estimates.

    Nutrition Per Serving
    Serving Size
    1 crab cake
    /
    Calories
    280
    /
    Protein
    16g
    /
    Carbohydrate
    8g
    /
    Dietary Fiber
    0g
    /
    Total Sugars
    1g
    /
    Total Fat
    20g
    /
    Saturated Fat
    4g
    /
    Cholesterol
    113mg


    AUTHOR:

    Adam Gallagher

    Adam and Joanne of Inspired Taste

    We are Adam and Joanne Gallagher, the creators of Inspired Taste. Established in 2009, Inspired Taste grew from a childhood dream into one of the internet’s most trusted recipe sites with hundreds of reliable recipes, step-by-step videos, and expert tips.More About Us
    Source link

  • 38 Easy Dinner Recipes For Real Life
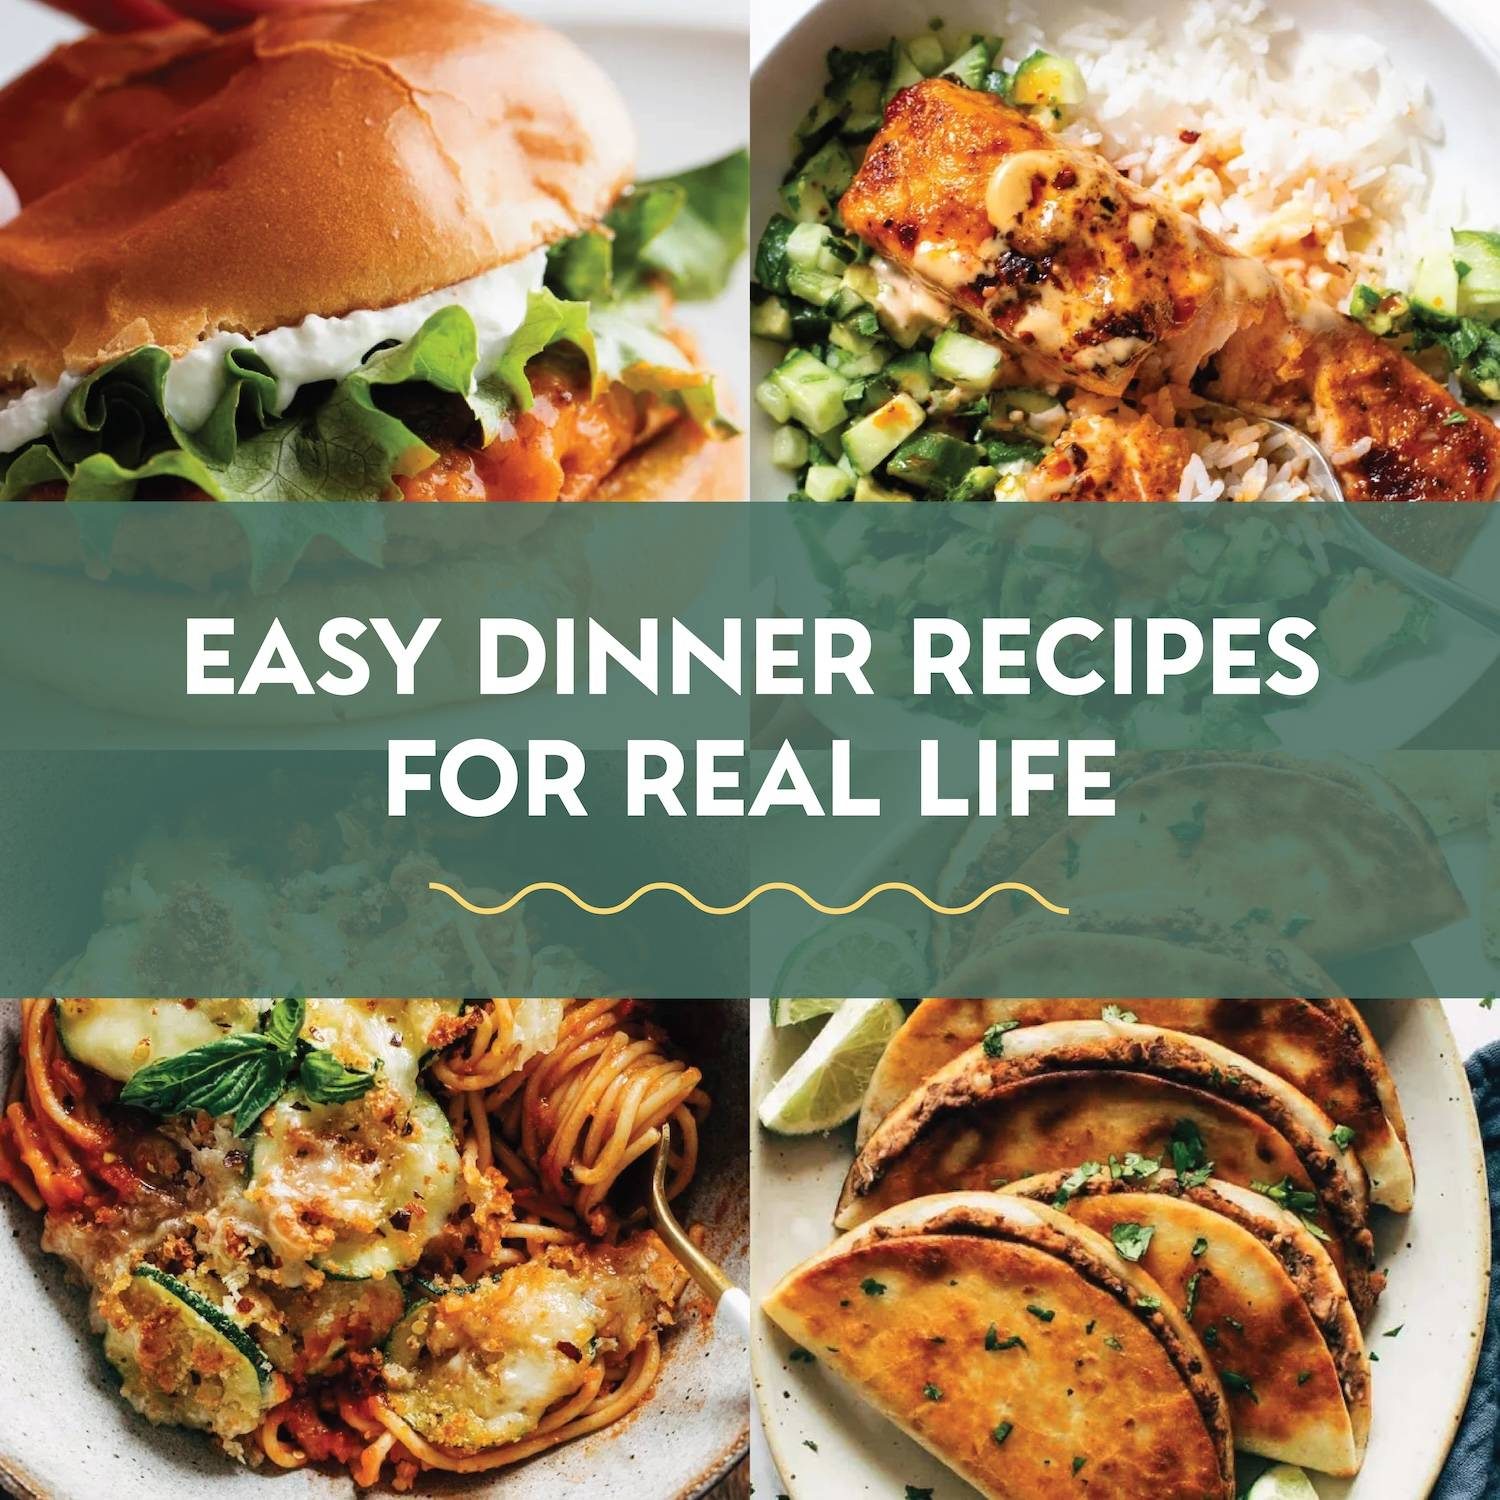
    38 Easy Dinner Recipes For Real Life

    Easy dinner recipes that are low effort, high reward! Just a handful ingredients and a few easy steps to get these on the table!

    Some nights you want a home-cooked dinner that feels special – but you also have approximately zero energy, only a handful of ingredients, and no time for anything complicated. That’s exactly where this list comes in! These are the recipes my family turns to on weeknights and have earned a permanent spot in the rotation because they’re just that reliable.

    The recipes on this list don’t require anything complicated – nothing you need to hunt down at a specialty store or prep three days in advance. We’re talking short ingredient lists, straightforward steps, and flavors that make it feel like you totally had your act together. (Even if you absolutely do not.)

    Whether you’re feeding a family, cooking for two, or just trying to get a decent meal on the table after a long day, there’s something here for you!


    Easy Dinner Recipes

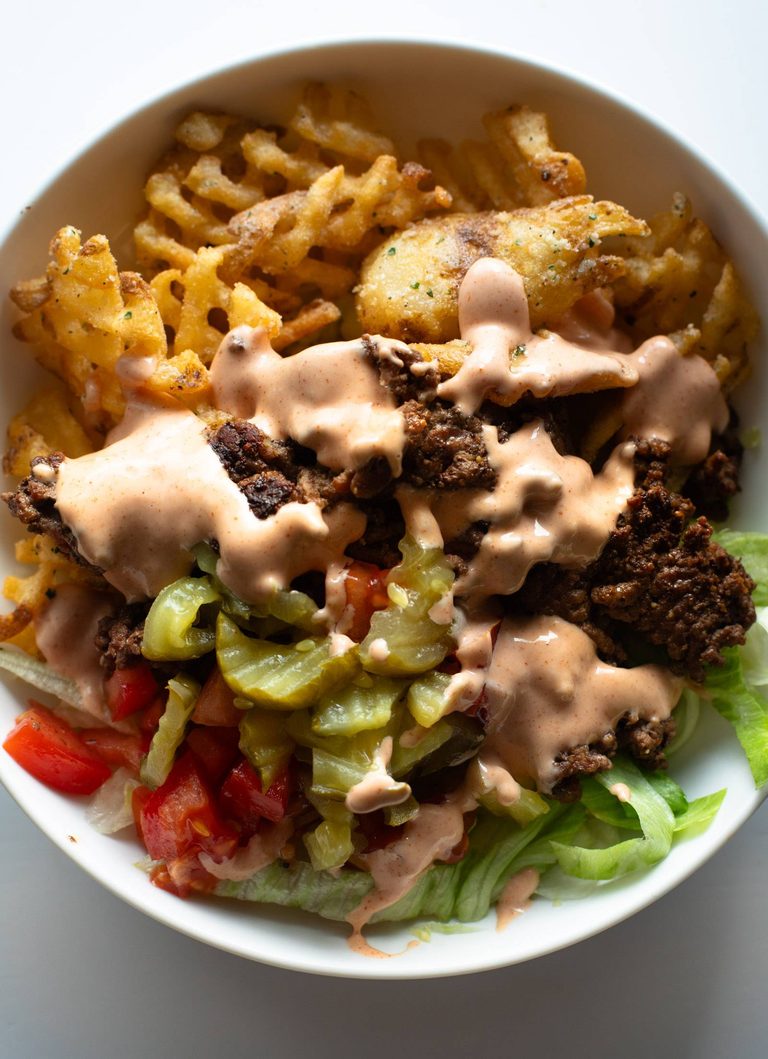
    Burger bowl with house sauce.

    Burger Bowls with House Sauce and Ranch Fries

    A burger in a bowl! Ranch-seasoned fries topped with a burger patty and all the fixings, with a drizzle of house sauce to take it over the top!

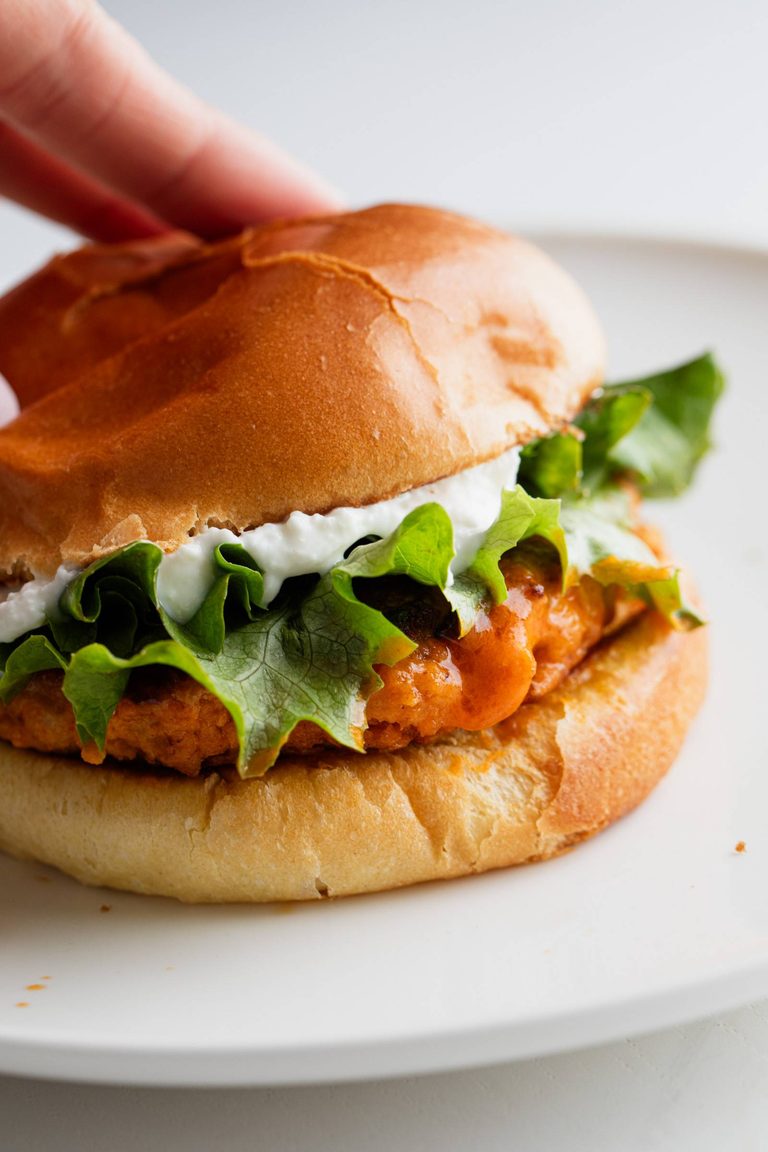
    Buffalo chicken burger.

    Buffalo Chicken Burgers with Whipped Feta Spread

    Easy and amazing buffalo chicken burgers! Piled high with crisp lettuce, a whipped feta spread, sitting atop of toasted brioche bun.

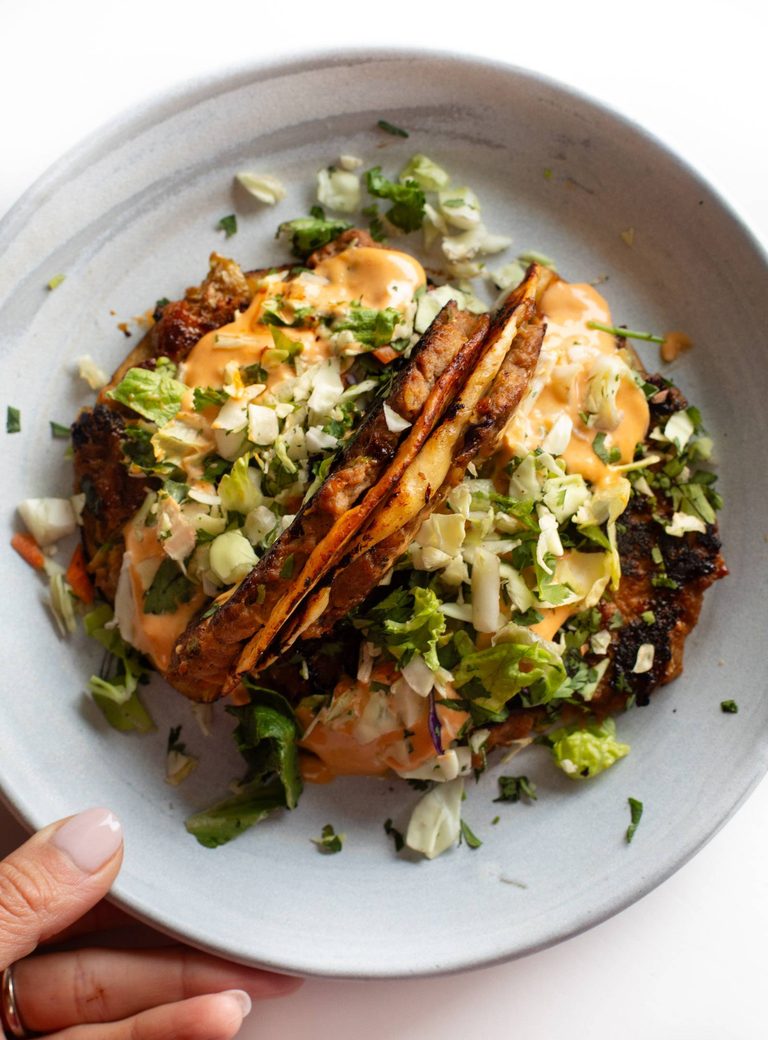
    Egg roll tacos.

    Brandon’s Egg Roll Tacos

    Egg rolls meet tacos! I love this! Easy to make and ridiculously good with a classic egg roll filling, crunchy veg, pillowy tortillas, and a spicy gochujang sauce.

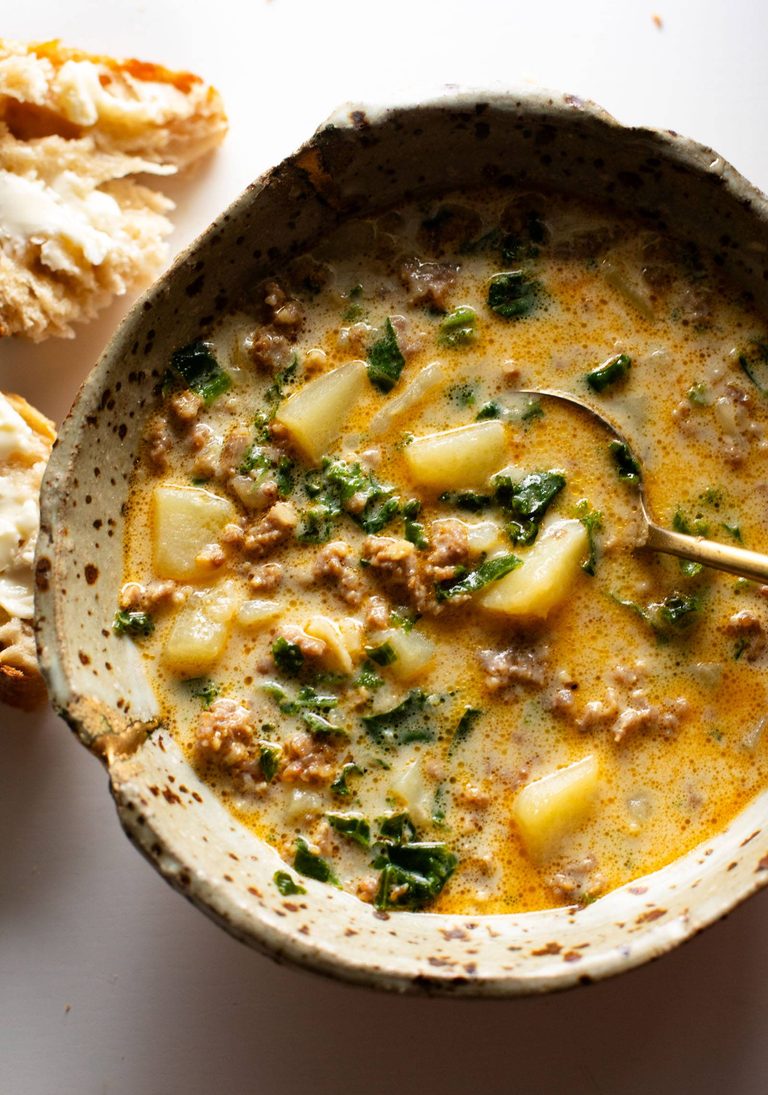
    Zuppa toscana in a bowl.

    Zuppa Toscana

    Easy Zuppa Toscana made in 30 minutes with browned bits of sausage, tender potatoes, and wilted kale, all wrapped in a a creamy, rich, slurpable broth!

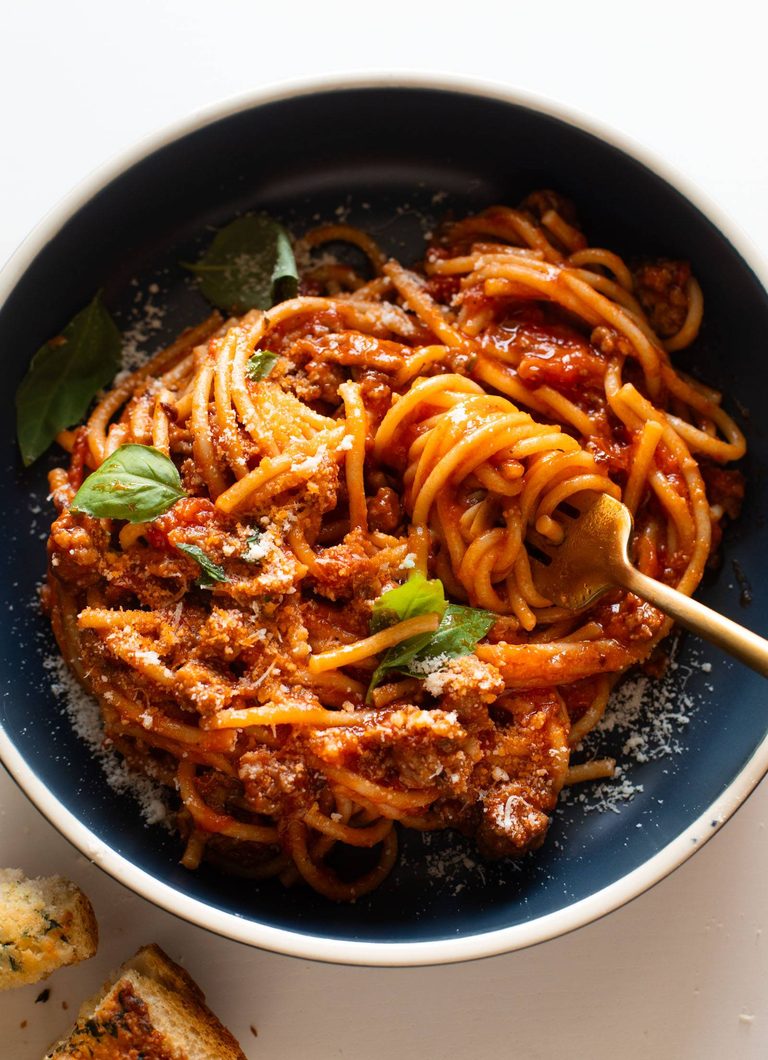
    Instant Pot spaghetti in a bowl.

    Instant Pot Spaghetti

    My whole family loves this Instant Pot Spaghetti! Silky, flavorful, and delightfully clingy. Easy enough for my kids to make it too!

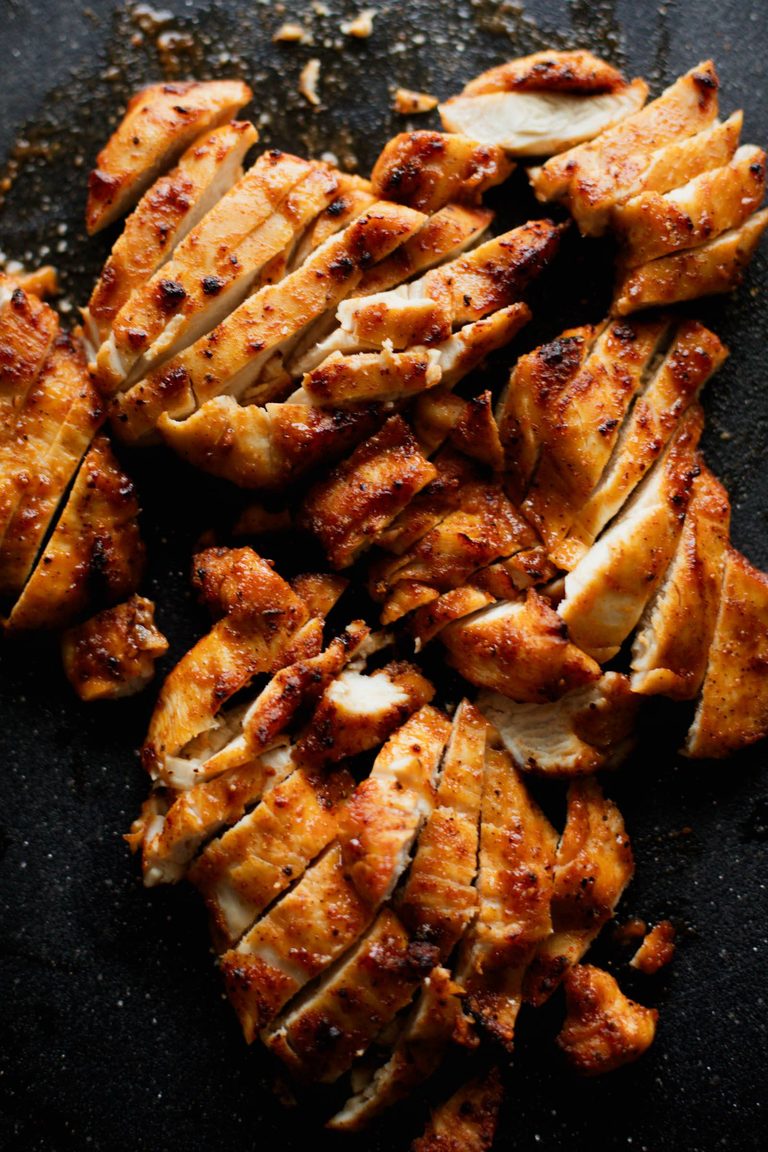
    Air fryer chicken on a cutting board.

    Ridiculously Good Air Fryer Chicken Breast

    My go-to everyday air fryer chicken! Thinly sliced chicken breast pieces, coated to the max in spices, plus a bit of brown sugar and cornstarch, and air fried to golden, juicy perfection.

    Apricot chicken on a sheet pan.

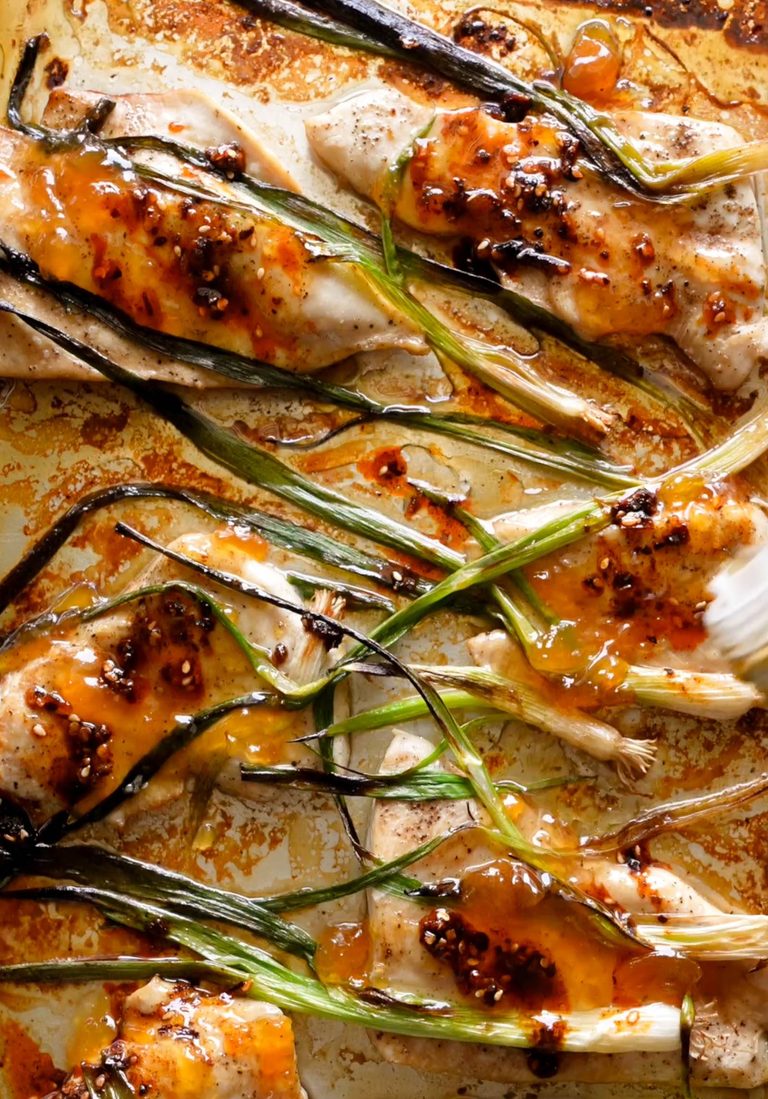
    Apricot Chicken with Charred Scallions

    This apricot chicken, made on a sheet pan, is so easy and SO GOOD! Just a few simple ingredients, minimal cleanup, and a major flavor boost from the roasty charred scallions on top.

    Thai peanut chicken noodle bowl.

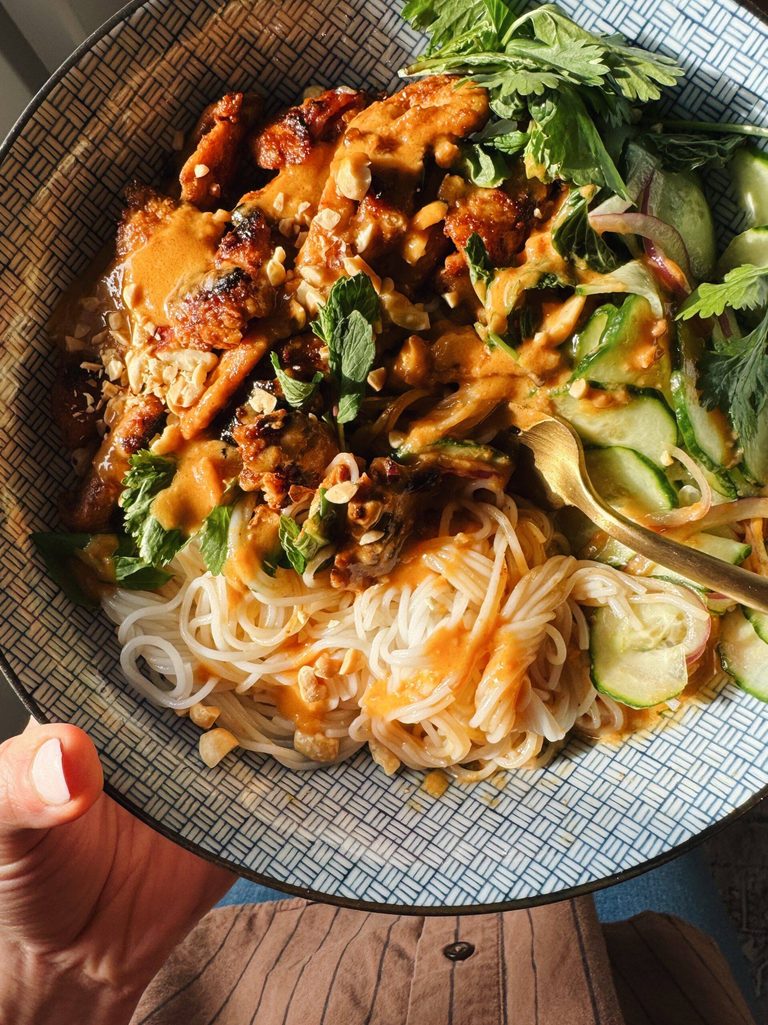
    Thai Peanut Chicken Bowls

    I love a shortcut dinner hack! These bowls feature caramelized peanut chicken, a tangle of vermicelli noodles, fresh herbs and cucumber salad, and peanut sauce all over top.

    Bang bang salmon in a bowl with rice.

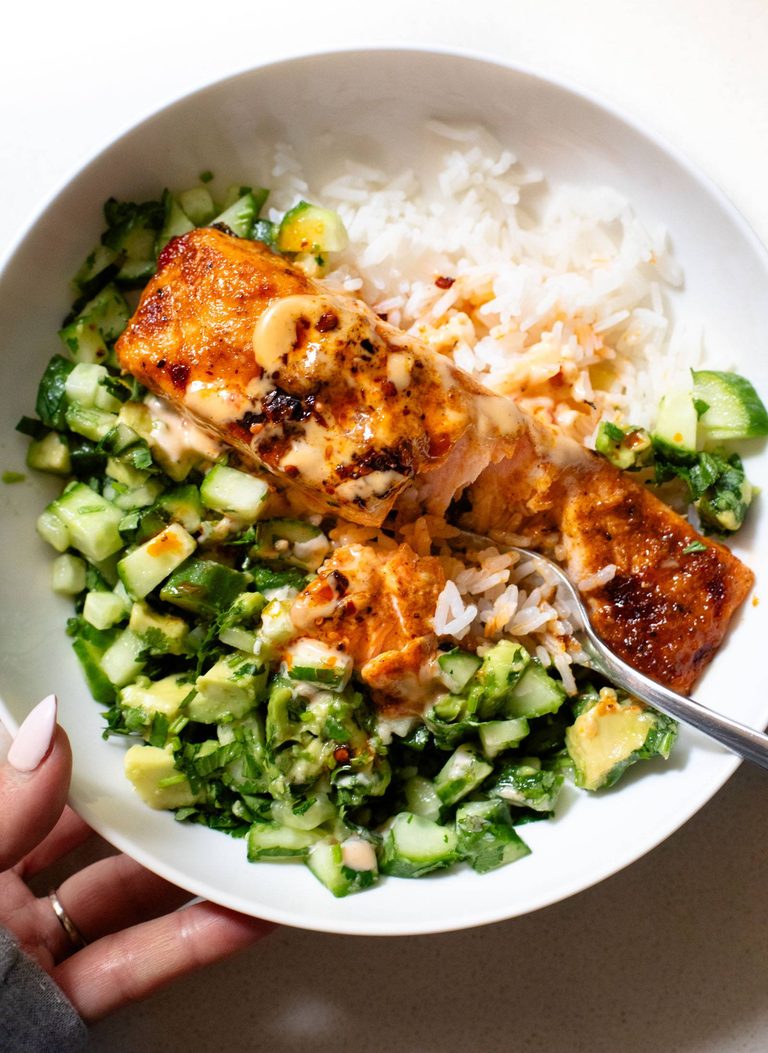
    Bang Bang Salmon with Avocado Cucumber Salsa

    Bang Bang Salmon! Creamy, sweet, savory, and punchy. Served with some steamy rice and an avocado cucumber salsa. Weeknight perfection!

    Chicken tacos.

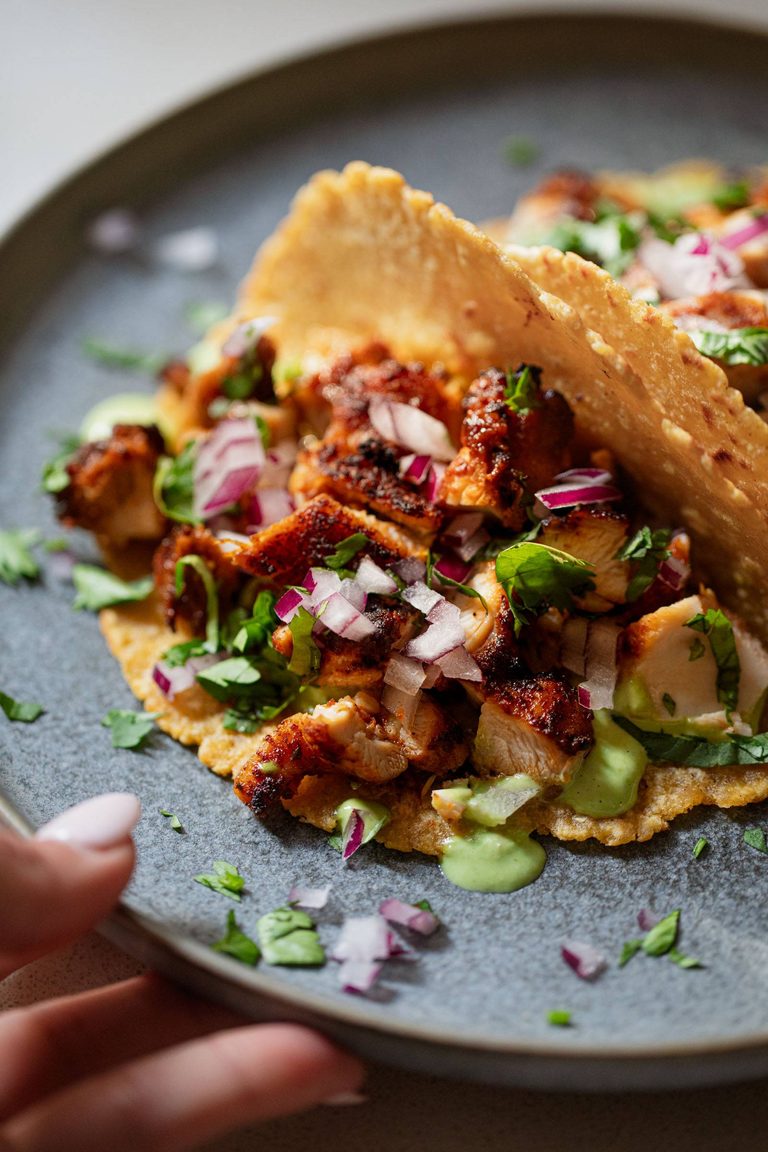
    Ridiculously Good Chicken Tacos with Green Sauce

    Just 20 minutes to get these chicken tacos on the table! Juicy, flavorful, and absolutely mindless in the best way.

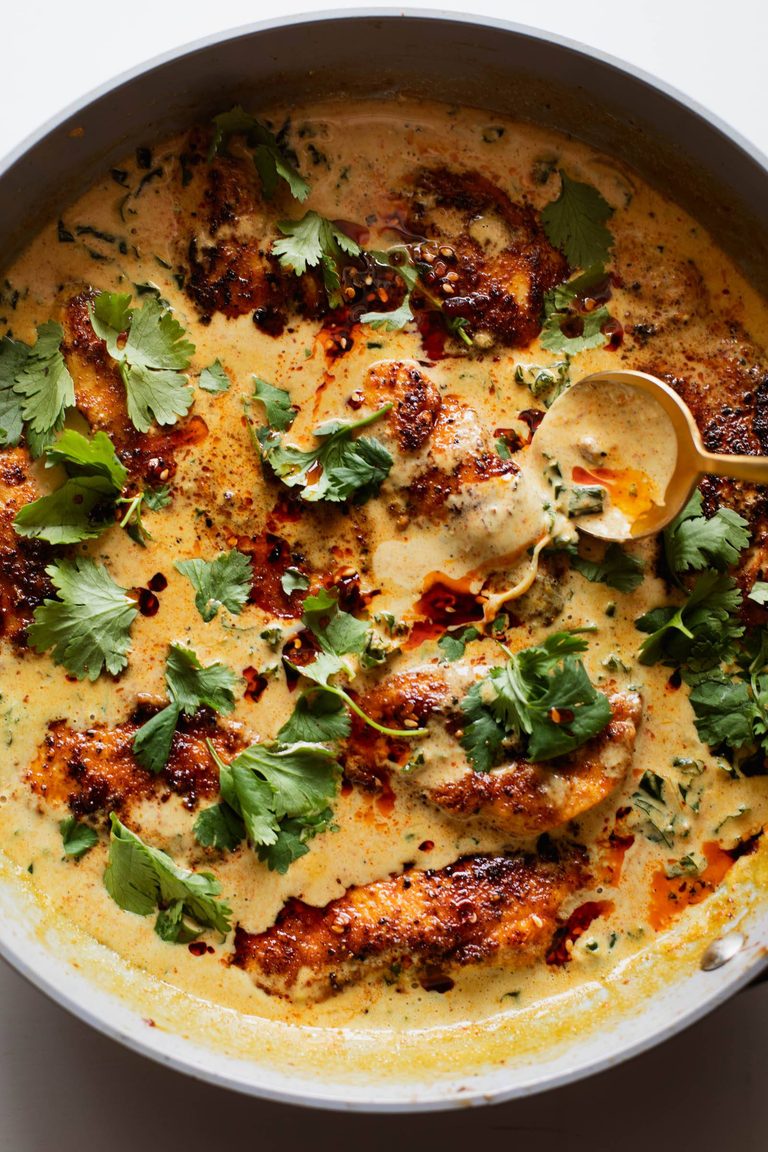
    Chicken in coconut kale sauce.

    Chicken with Coconut Kale

    Golden, juicy, thinly sliced pan-fried chicken swims in a creamy coconut-kale gravy-like situation with slips of shallot and a bit of heat. Super easy, minimal ingredients!

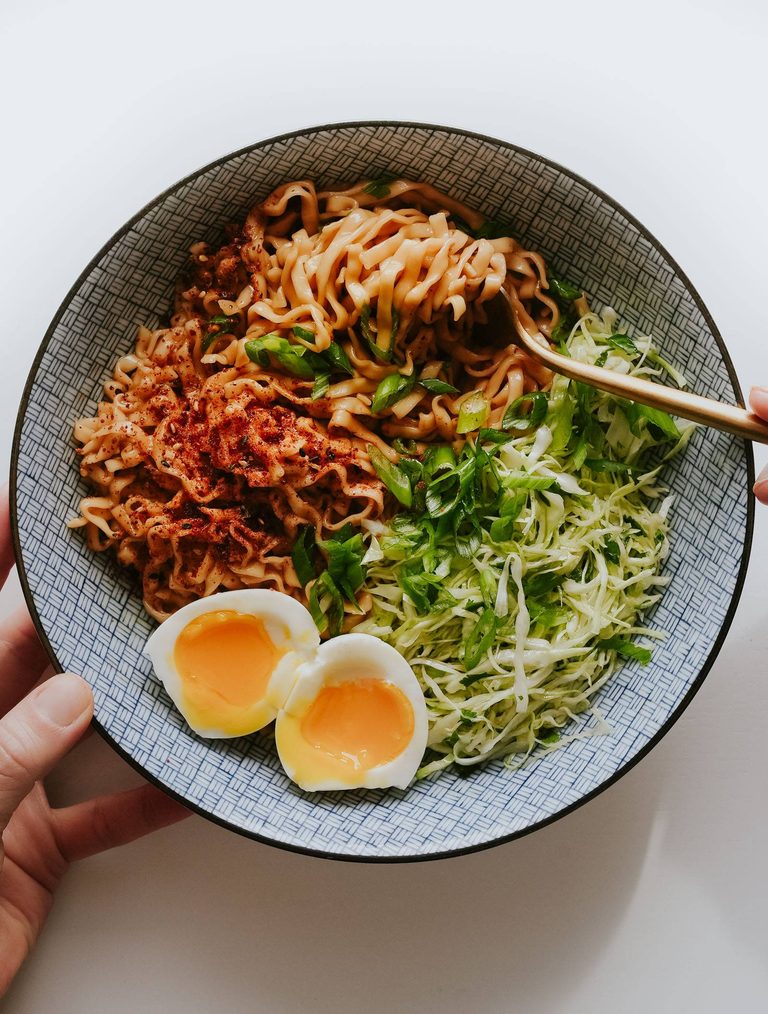
    Sesame butter noodles with slaw.

    Shortcut Sesame Butter Noodles

    One of my favorite back-pocket recipes! Packaged noodles for ease, butter for creaminess, honey for sweetness, and sesame oil for depth. Just tangly slips of joy!

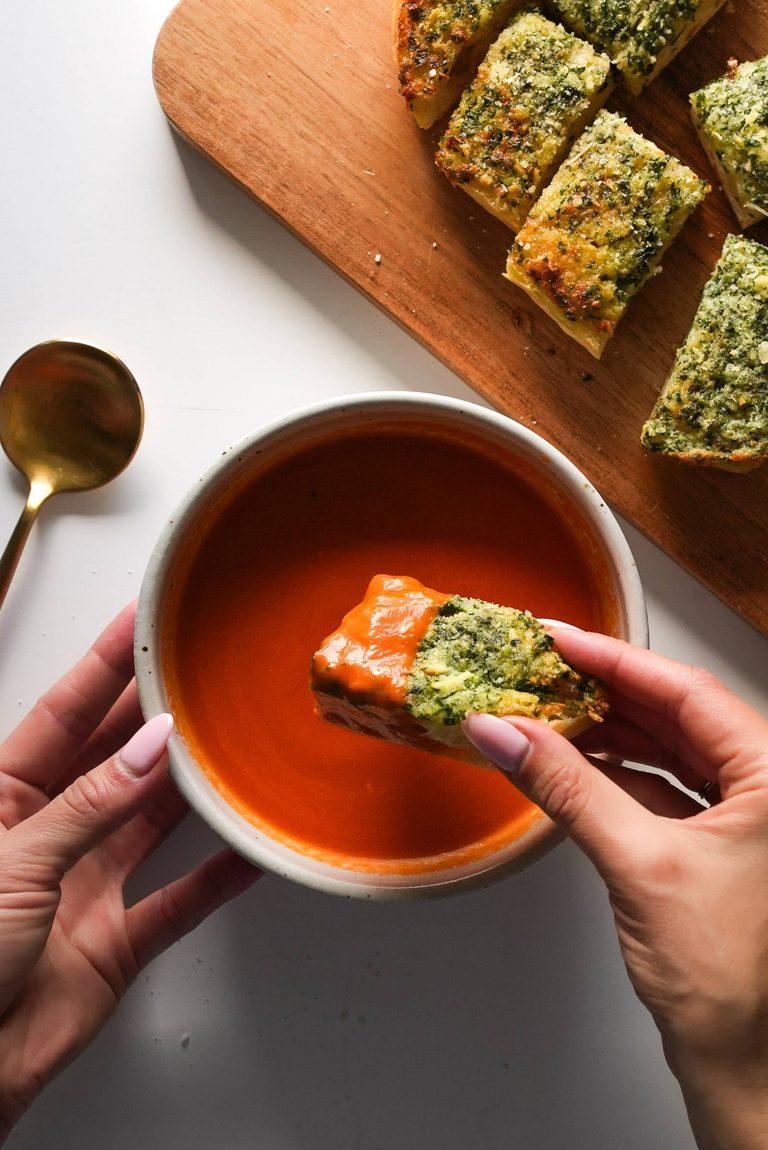
    Tomato soup in a bowl with garlic bread.

    5 Ingredient Tomato Soup

    A simple 5 ingredient tomato soup made with butter, onion, and canned San Marzano tomatoes. Based on the Marcella Hazan tomato sauce recipe. This hits the cozy vibes just right.

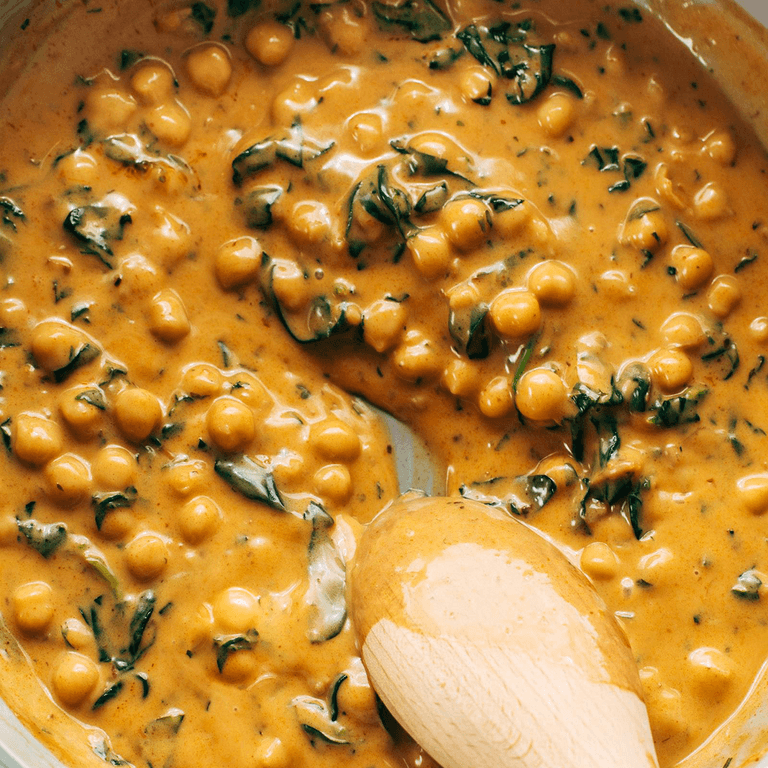
    Chickpea curry in a skillet.

    Steph’s Chickpea Curry with Spinach and Rice

    Amazingly creamy, saucy chickpea curry served over rice with a dollop of chili crisp and a side of cucumber salad. Ready in 20 minutes!

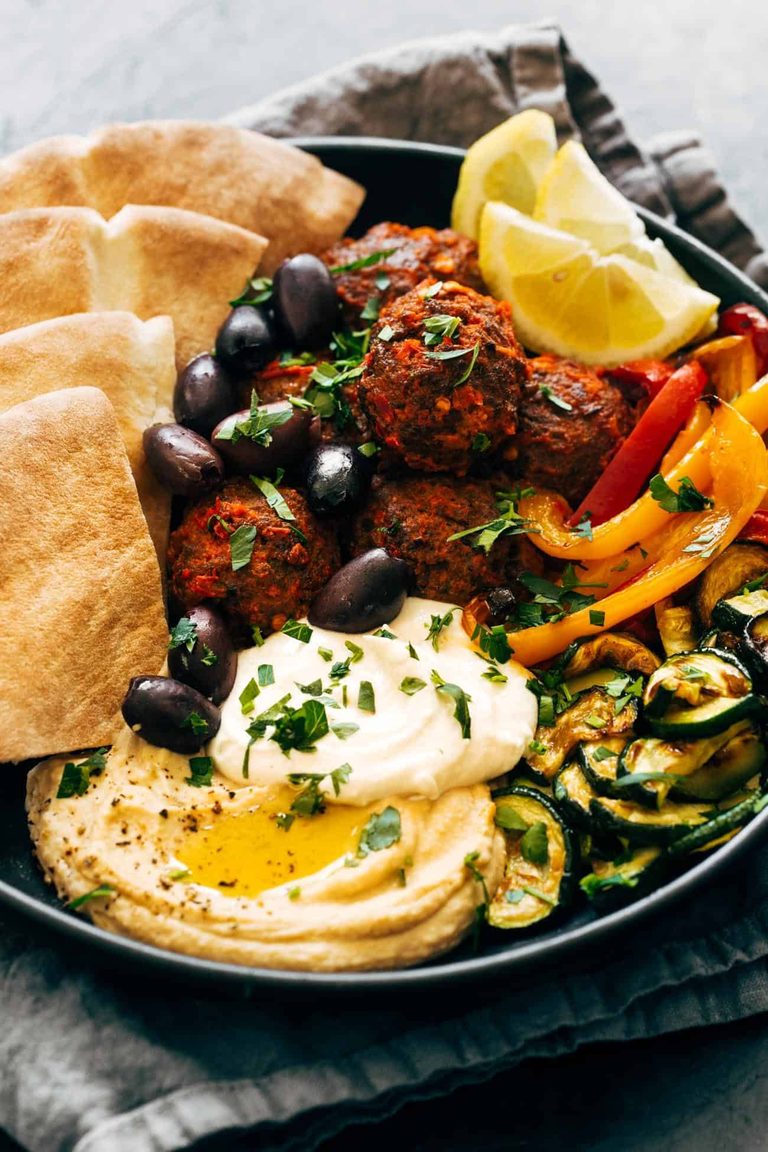
    Harissa meatballs with hummus and whipped feta.

    Harissa Meatballs with Whipped Feta

    These Harissa Meatballs with Whipped Feta are perfect for an easy SOS dinner! Store-bought meatballs, bell peppers, zucchini, harissa, and whipped feta all in one bowl. YUMMY!

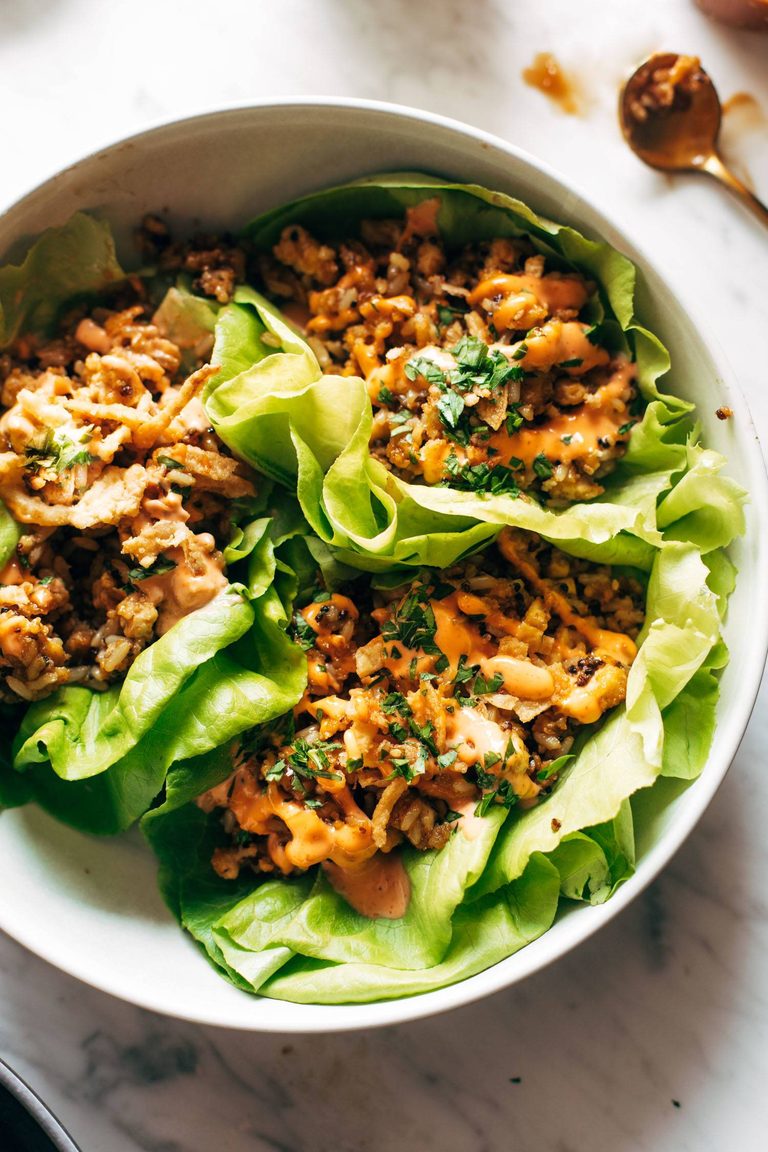
    Tofu and brown rice lettuce wraps.

    Tofu and Brown Rice Lettuce Wraps with Peanut Sauce

    These lettuce wraps are ridiculously good! Crunchy, fresh, and packed with tofu, brown rice, crispy onions, plus a drizzle of peanut sauce and spicy mayo. Delicious!

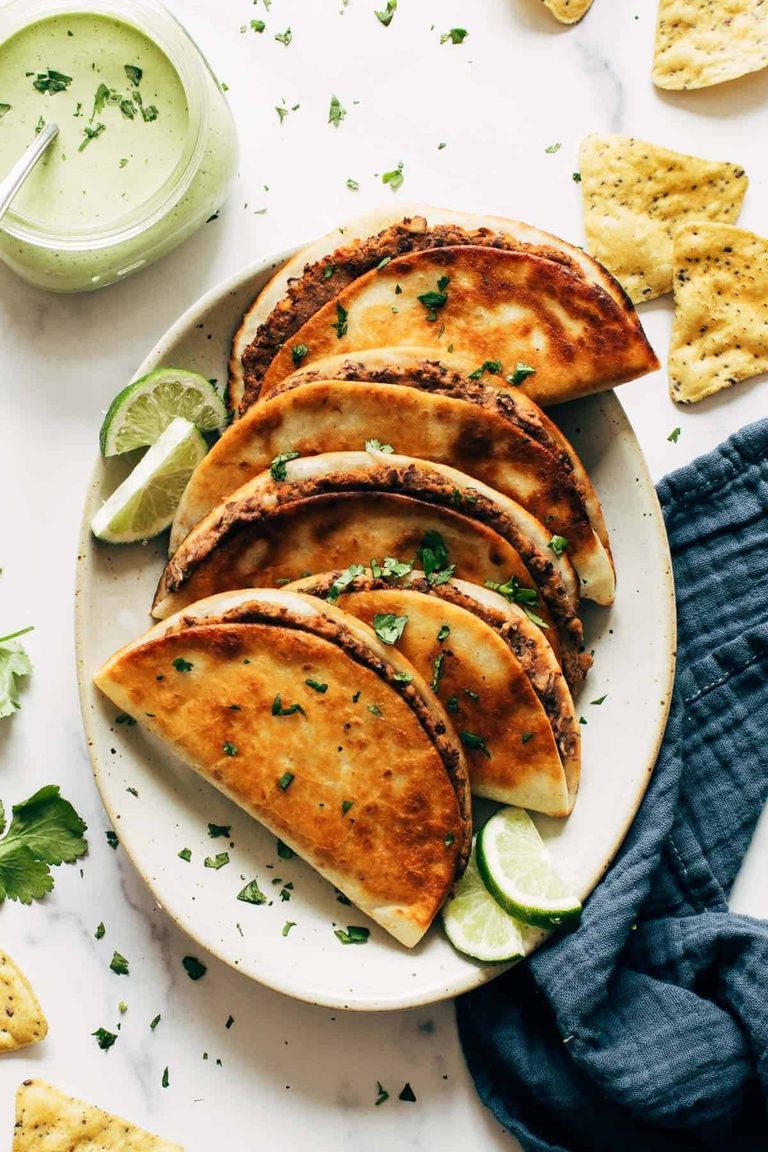
    Crispy black bean tacos on a plate.

    Crispy Black Bean Tacos with Cilantro Lime Sauce

    These vegetarian tacos have a deliciously satisfying black bean filling with fresh salsa and seasonings all tucked into a golden crispy tortilla and served alongside a cool and creamy cilantro lime sauce. YUM!

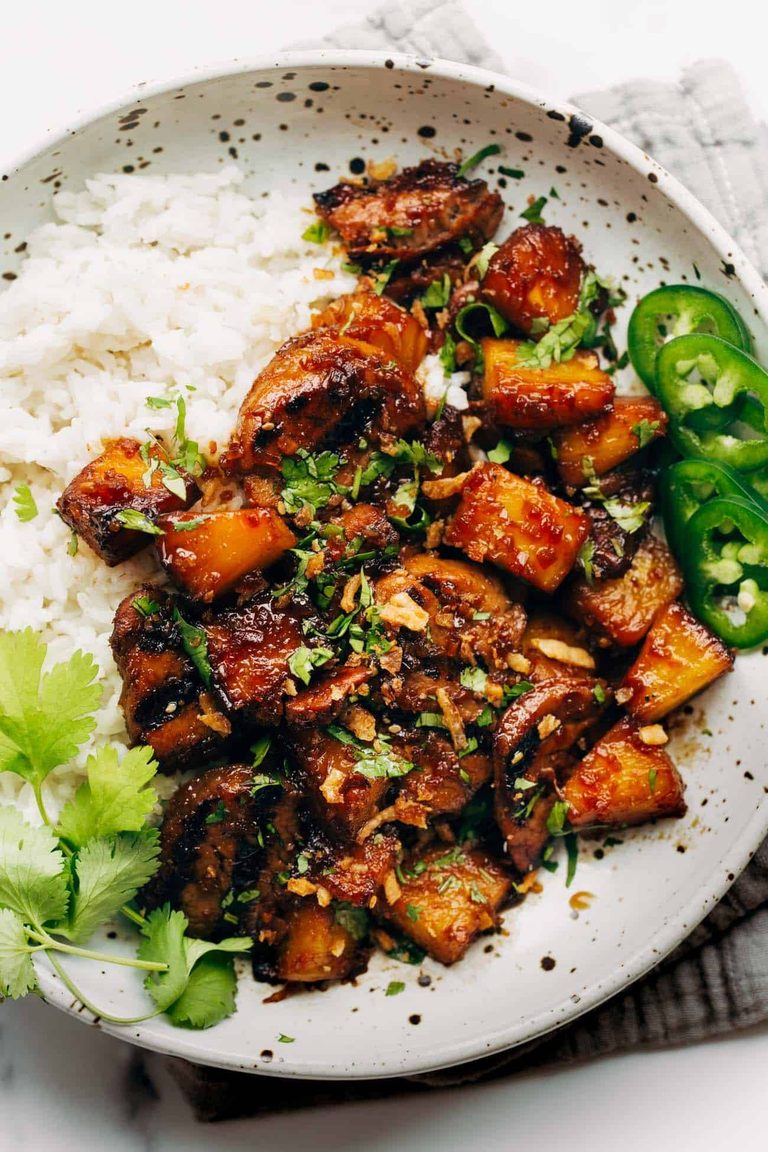
    Pineapple pork in a bowl with rice.

    Pineapple Pork with Coconut Rice

    Sticky-sweet pork, juicy pineapple, fresh herbs, jalapeño, and crispy onions all served over a bed of fluffy coconut rice. SO GOOD!

    Chicken meatballs on a sheet pan.

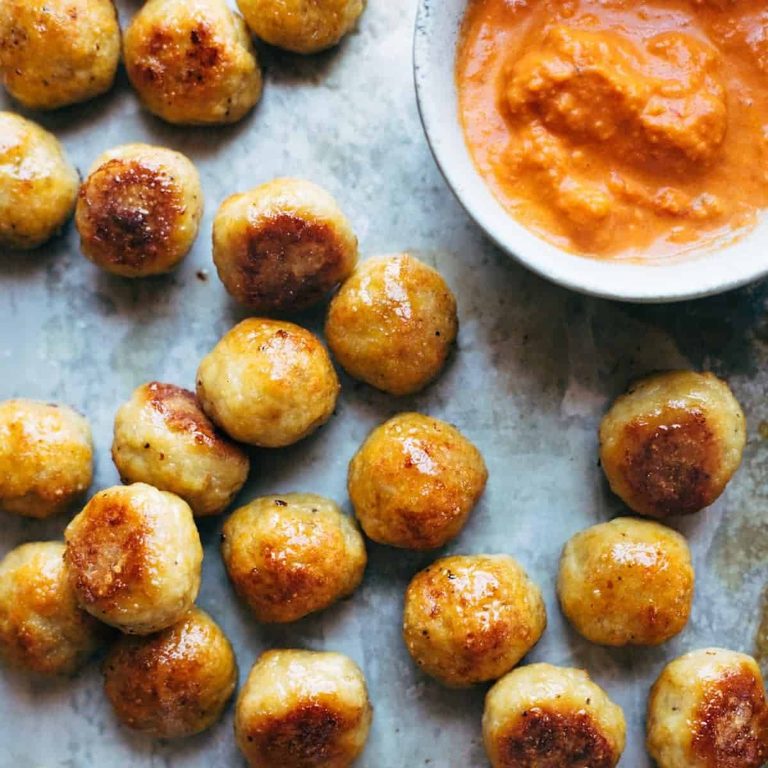
    Best Anytime Baked Chicken Meatballs

    These Baked Chicken Meatballs are the BEST! The perfect addition to any meal or to eat right on their own. Bonus: they’re meal-prep friendly to stock up throughout the week!

    Chicken tinga tacos.

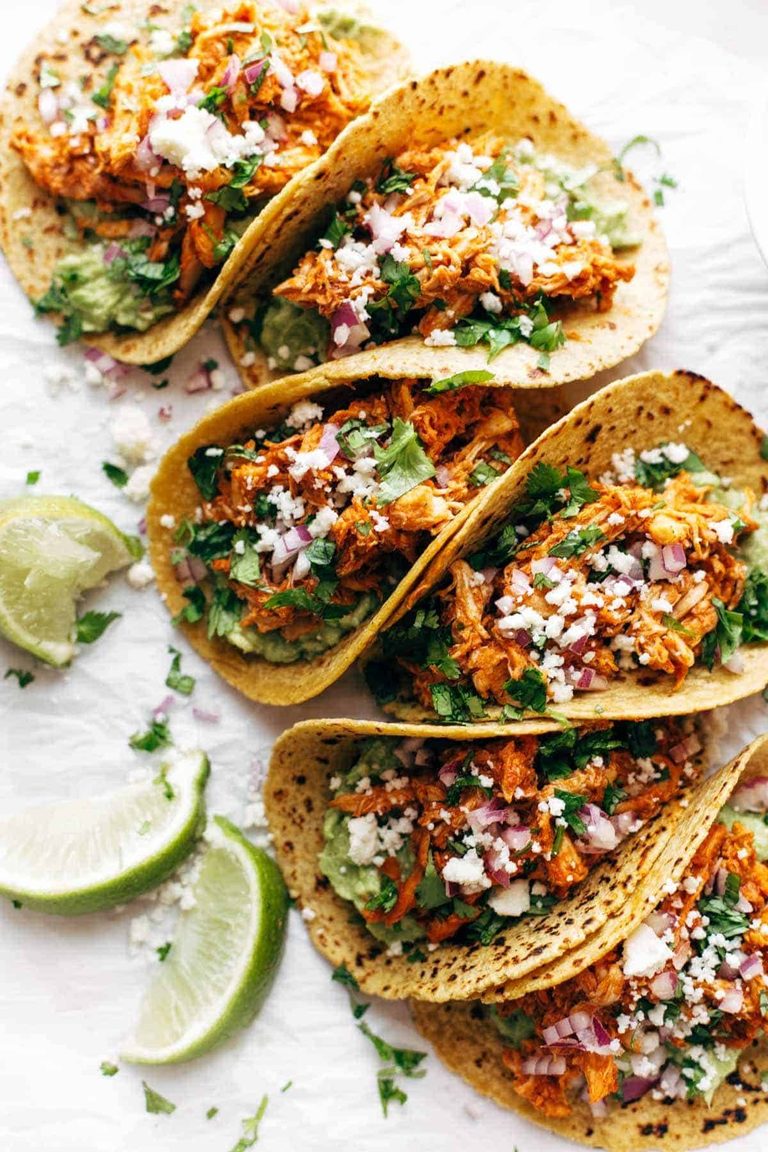
    The Best Chicken Tinga Tacos

    These Chicken Tinga Tacos are THE BEST! Saucy, spicy, real food perfection.

    Cauliflower black bean tostadas.

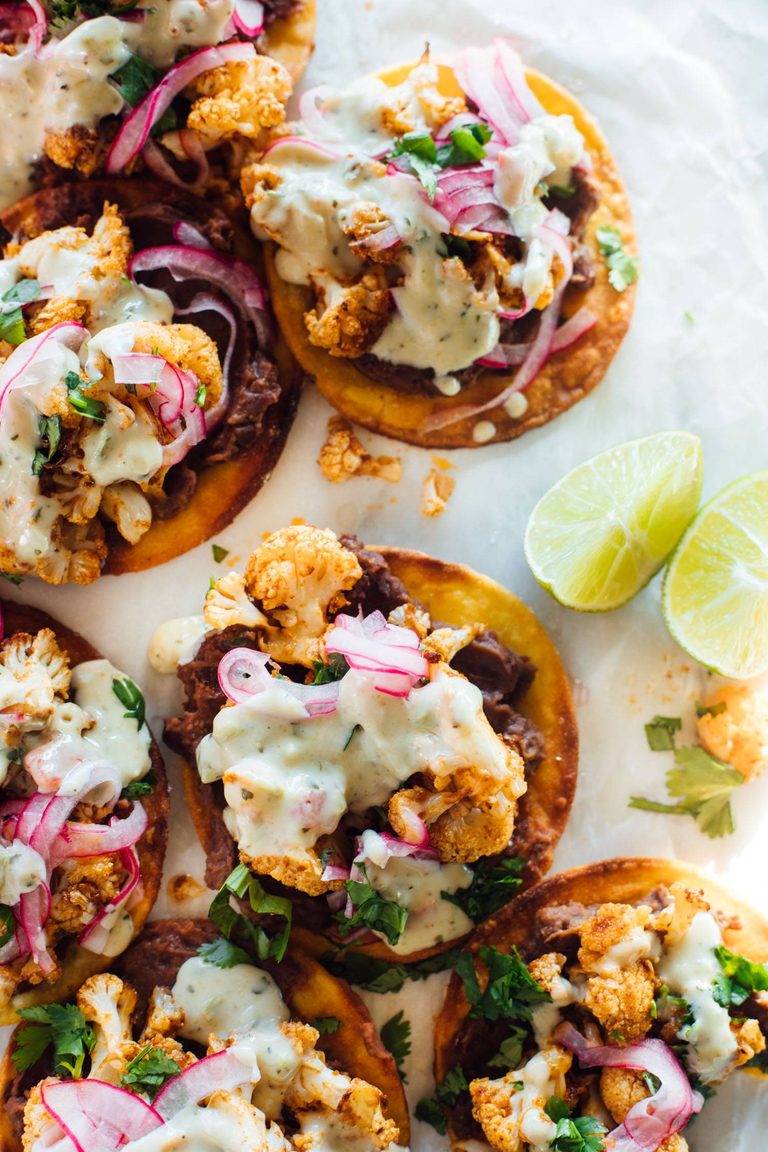
    Cauliflower Black Bean Tostadas with Queso and Pickled Onion

    Tangy, creamy, crunchy, smoky, seasoned vegetarian goodness on a perfectly crisp little corn tortilla disk. Cauliflower Black Bean Tostadas to the rescue!

    Gochujang noodles in a bowl.

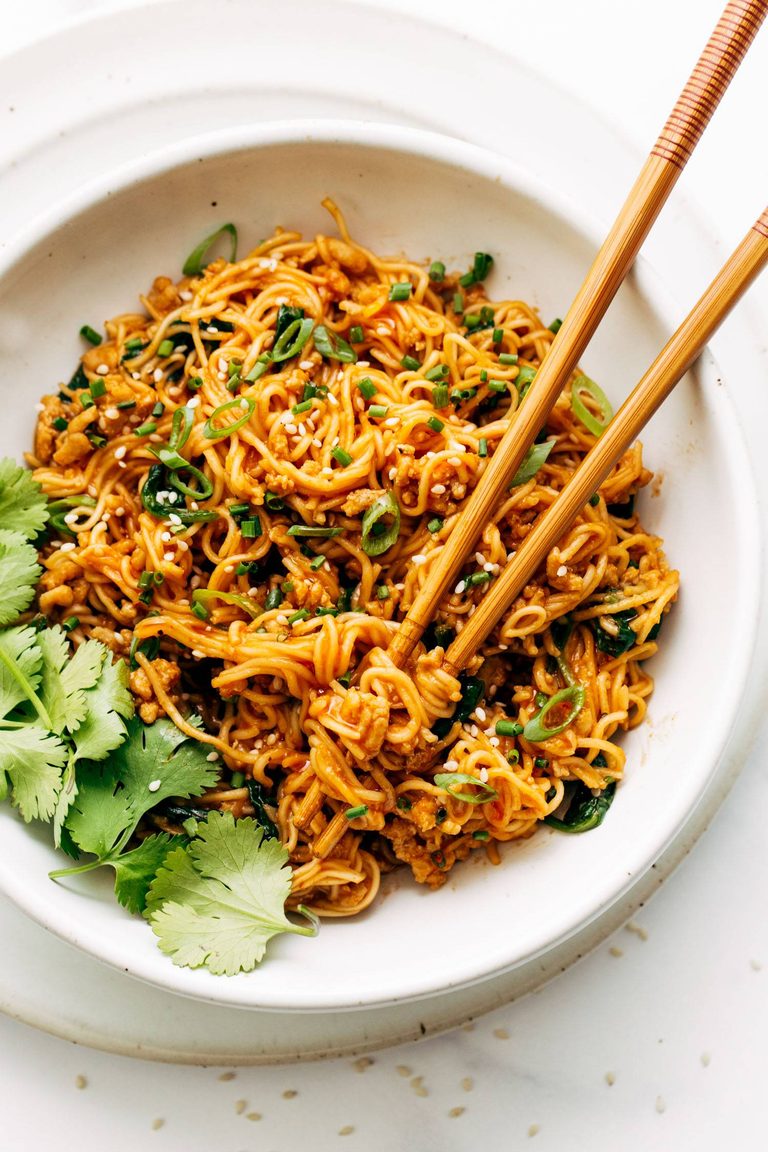
    Saucy Gochujang Noodles with Chicken

    A spicy, peanutty, noodley bit of super easy comfort food! These gochujang noodles require just a handful of ingredients – like ramen noodles, peanut butter, sesame oil, and soy sauce – and come together in just 20 minutes.

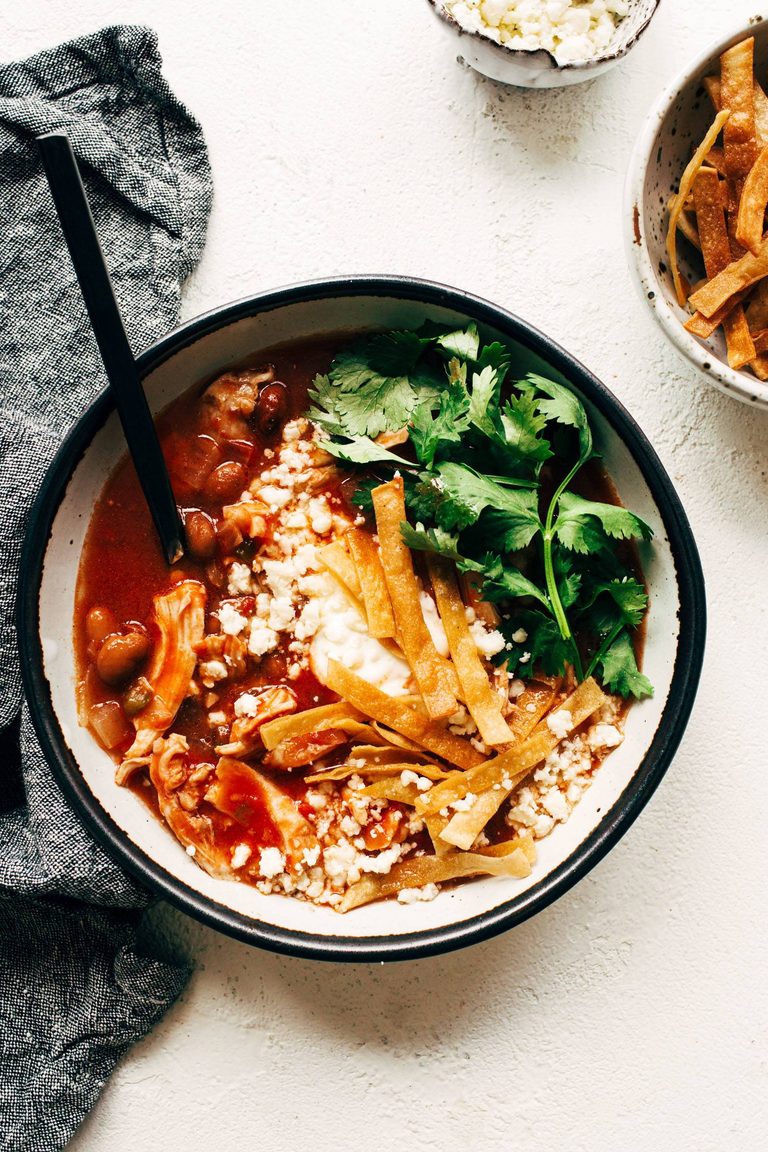
    Chicken tortilla soup in a bowl with cilantro.

    Chicken Tortilla Soup

    Winner, winner, Chicken Tortilla Soup dinner! Tender chicken thighs, creamy pinto beans, garlic and onions, crushed tomatoes, jalapeño pepper, crushed tomatoes, and ALL the toppings.

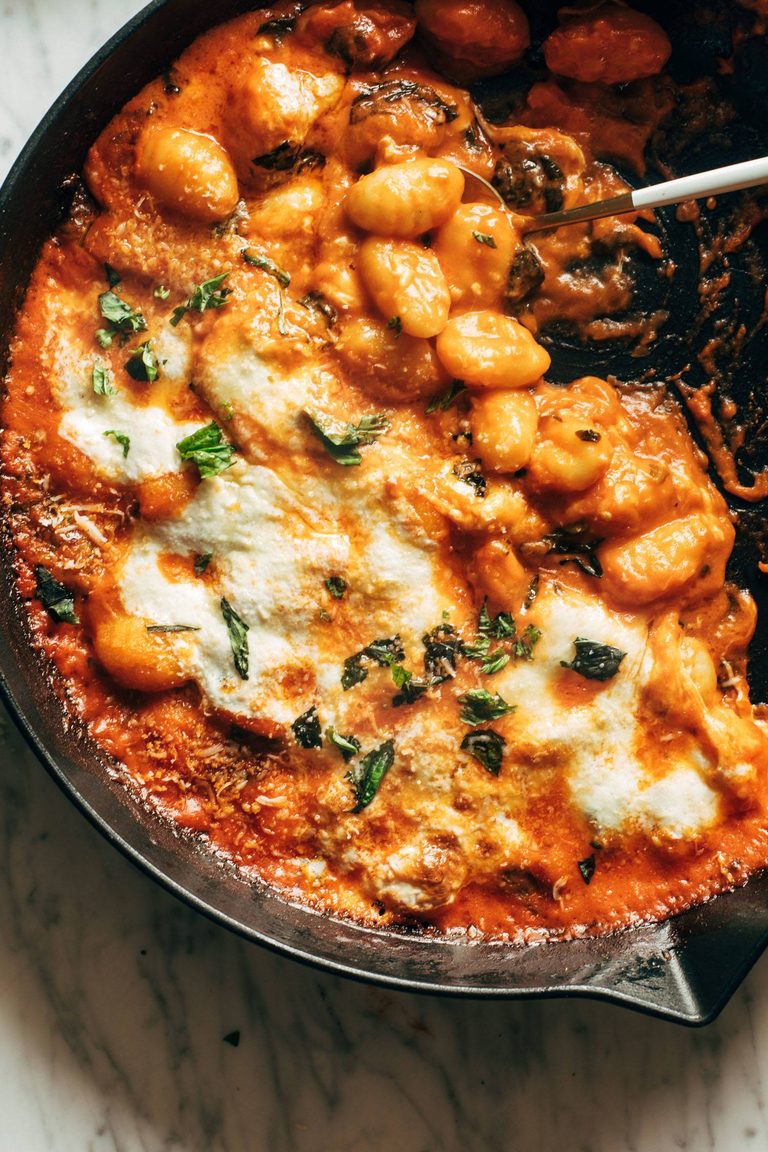
    Baked gnocchi in a cast iron skillet.

    Three Cheese Baked Gnocchi with Spinach

    You’re in for a treat with this delicious Three Cheese Baked Gnocchi! Tender gnocchi blanketed in a creamy tomato sauce, speckled with fresh spinach and bites of melty cheese. Gorgeous!

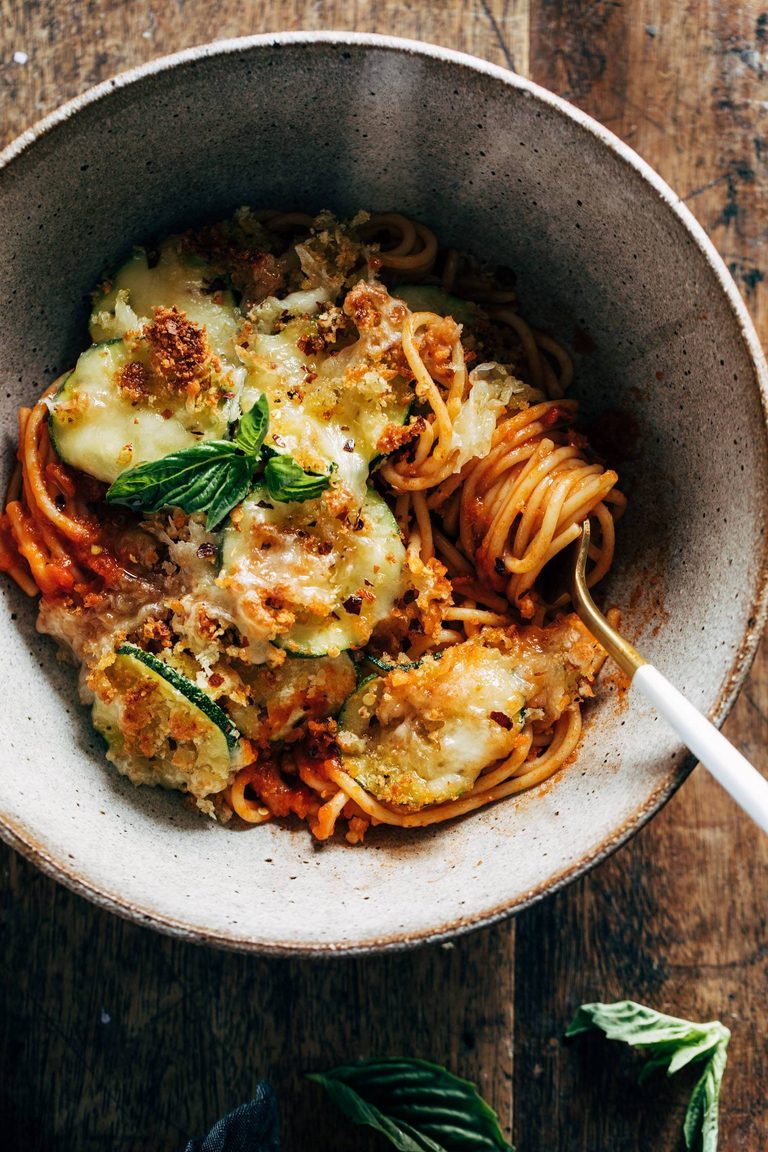
    Spaghetti topped with cheesy crispy zucchini.

    Spaghetti with Crispy Zucchini

    This Spaghetti with Crispy Zucchini is the perfect end-of-summer song! It doesn’t get much better than fresh summer zucchini coated in a crispy, cheesy breading piled high on top of spaghetti with fresh herbs. YUM!

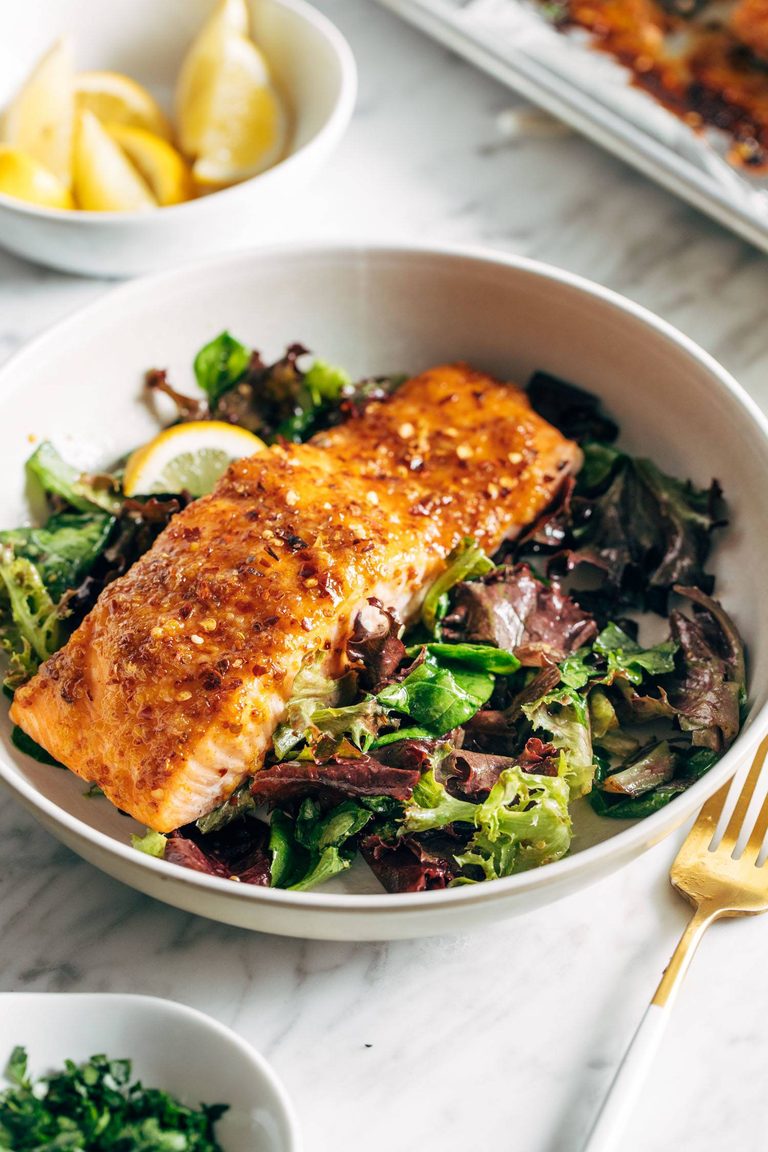
    Hot honey salmon on a salad mix.

    Hot Honey Salmon

    This Hot Honey Salmon is giving off major fancy-to-eat-but-not-fancy-to-make vibes. Spicy-sweet salmon coated in fresh garlic, stone ground mustard, sweet honey, and flecks of red peppers flakes. It’s a magical little number!

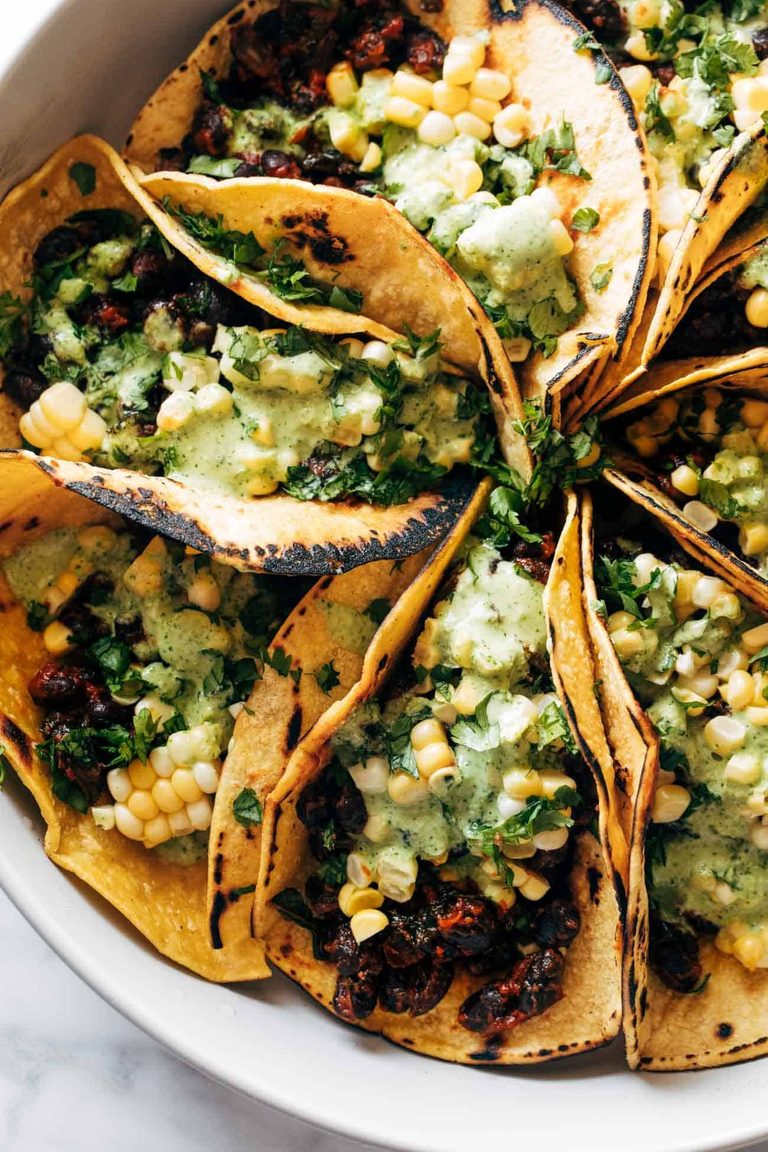
    Smoky beans and greens tacos.

    Smoky Beans & Greens Tacos with Aji Verde

    Three cheers for summertime eating! Smoky black beans sautéed with kale and garlic and spices, tucked into charred corn tortillas, and topped with the best feisty, punchy green sauce – Aji Verde!

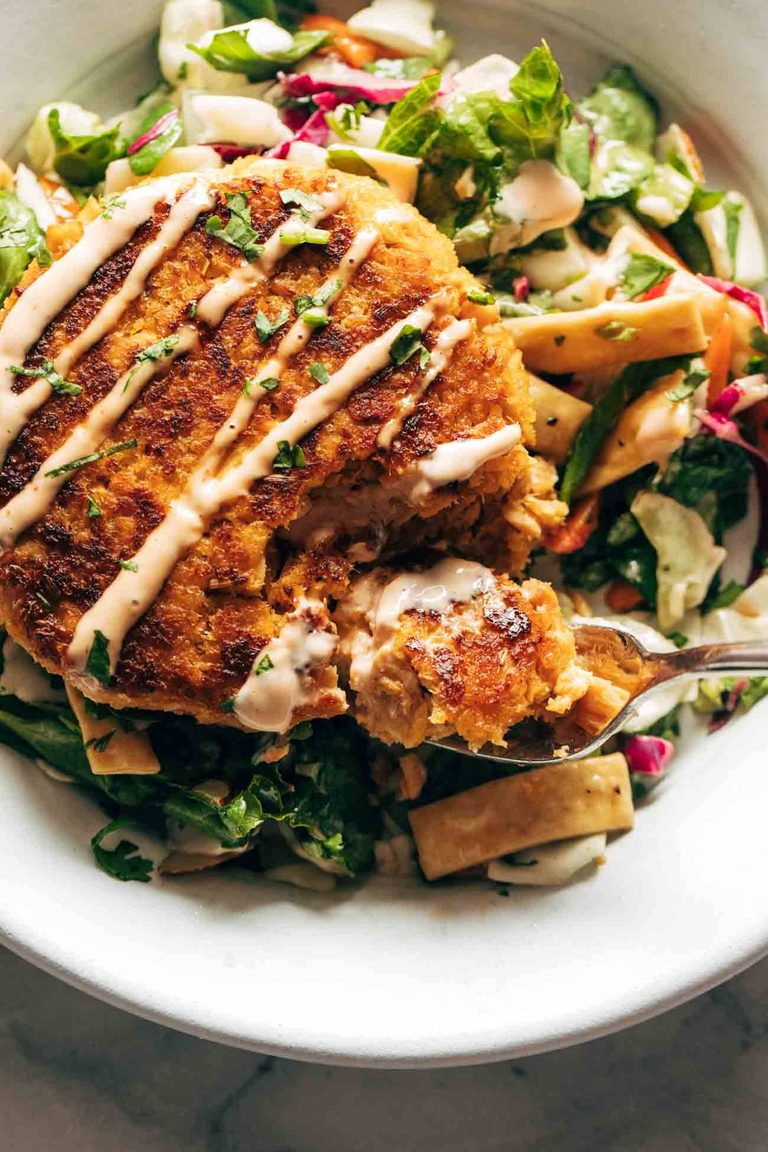
    Spicy salmon burger with salad mix.

    Spicy Salmon Burgers

    These Spicy Salmon Burgers are little bundles of flavor! Canned salmon, panko, refreshing lemongrass, and a sweet-spicy zingy combo of red curry paste and brown sugar. So good and so simple!

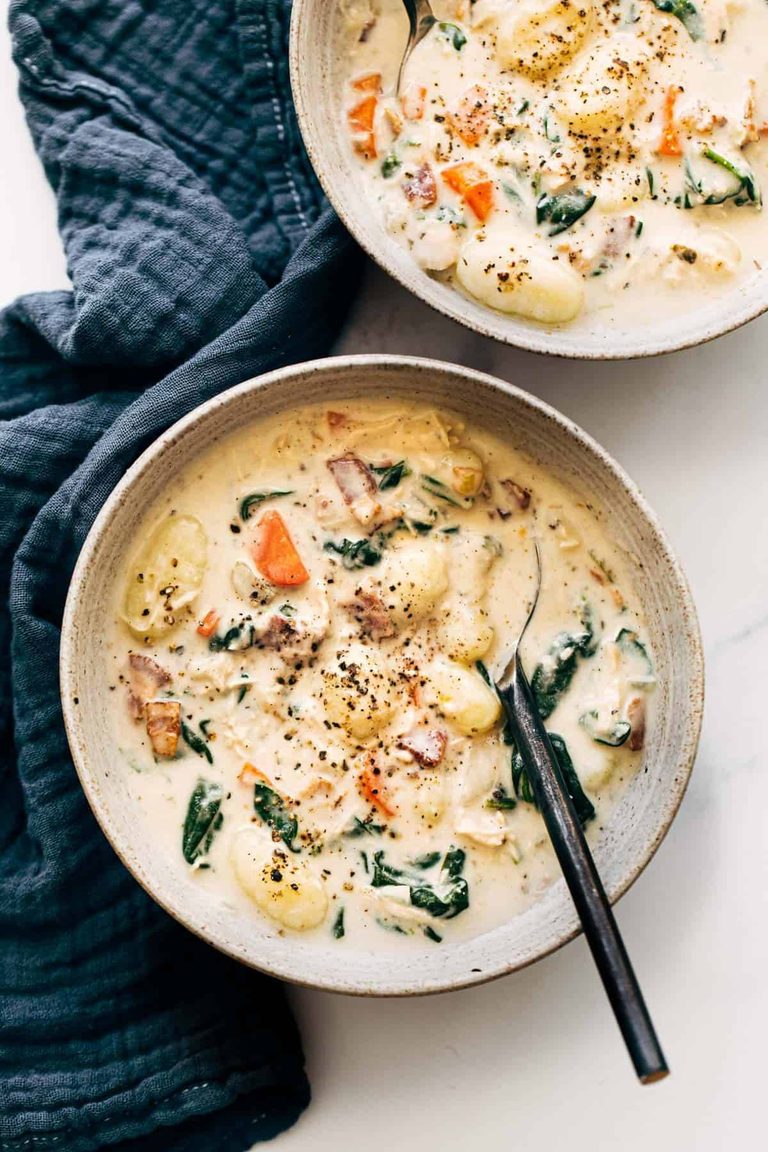
    Creamy chicken gnocchi soup.

    Crockpot Chicken Gnocchi Soup

    This Crockpot Chicken Gnocchi Soup is lusciously cream-free, comforting, and made with lots of vegetables. Perfect with crusty bread and a green salad. ♡

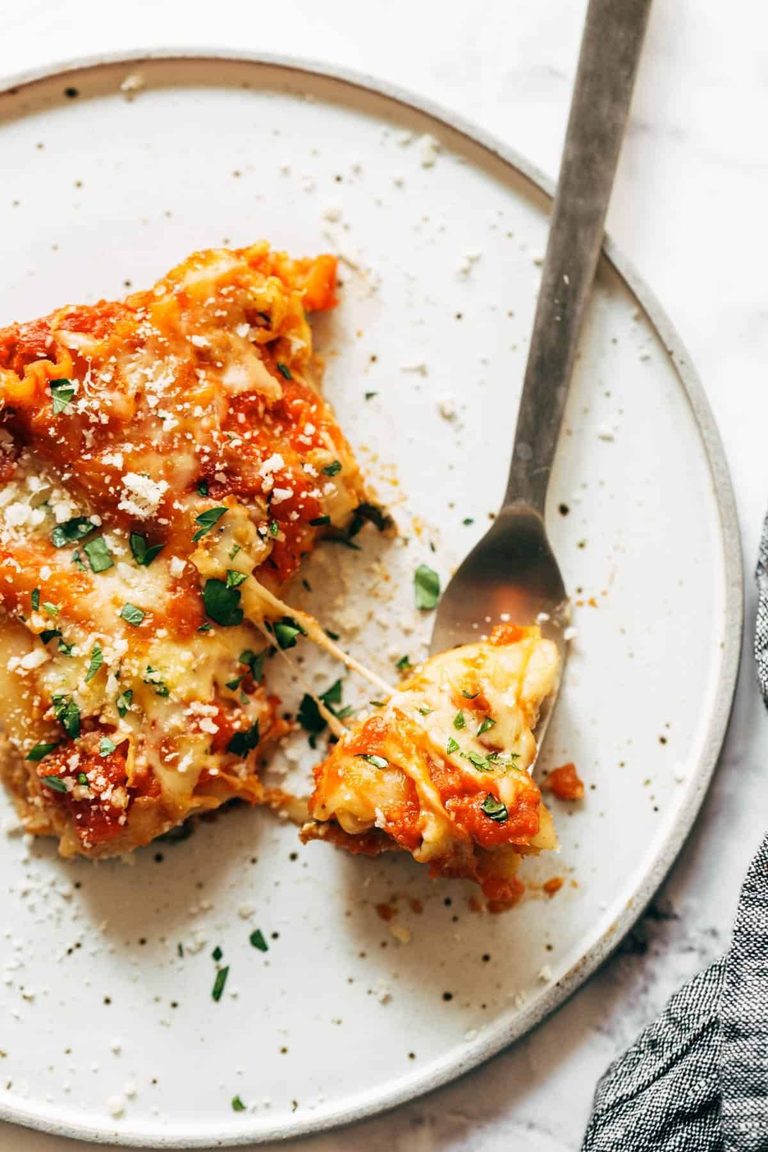
    Creamy tomato lasagna florentine.

    Creamy Tomato Lasagna Florentine

    This Creamy Tomato Lasagna Florentine is so deliciously comforting and simple. Noodles, tomato sauce, and a creamy spinach layer!

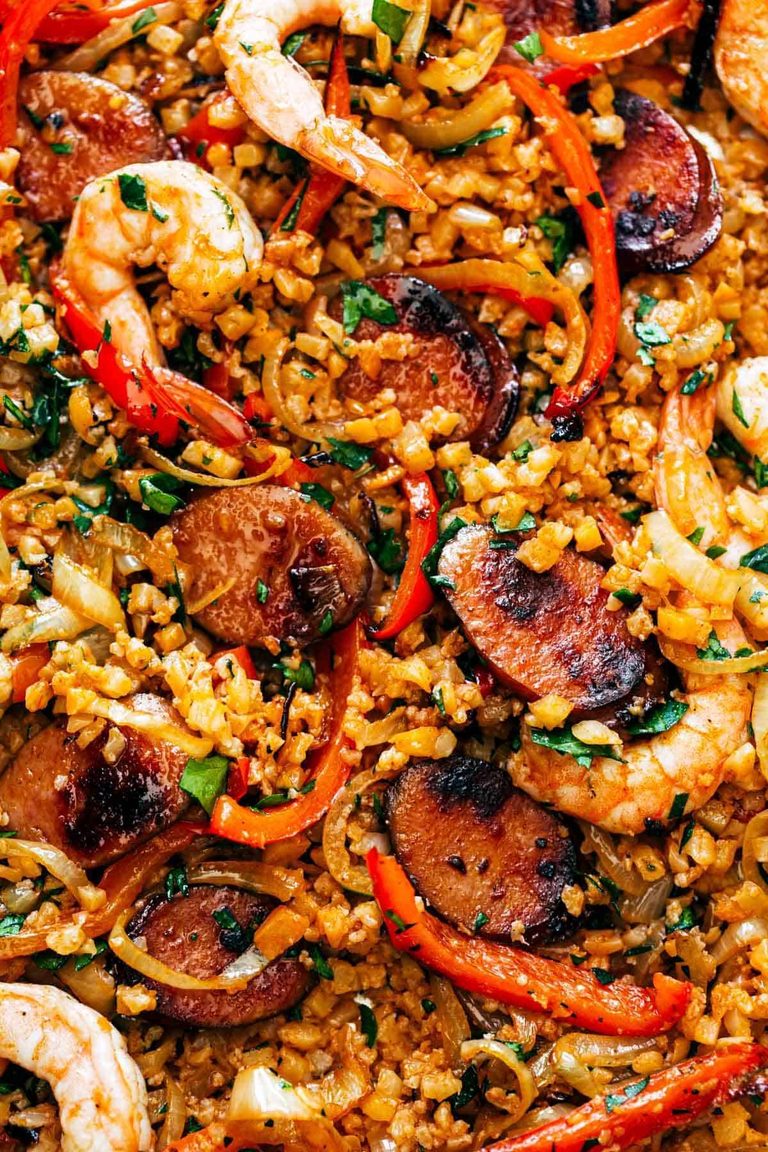
    Sheet pan jambalaya.

    Sheet Pan Jambalaya

    Sheet Pan Jambalaya: maximum flavor, minimal dishes. Sausage, peppers, onions, shrimp, and cauliflower rice all roasted up on a sheet pan. Big flavor, easy dinner!

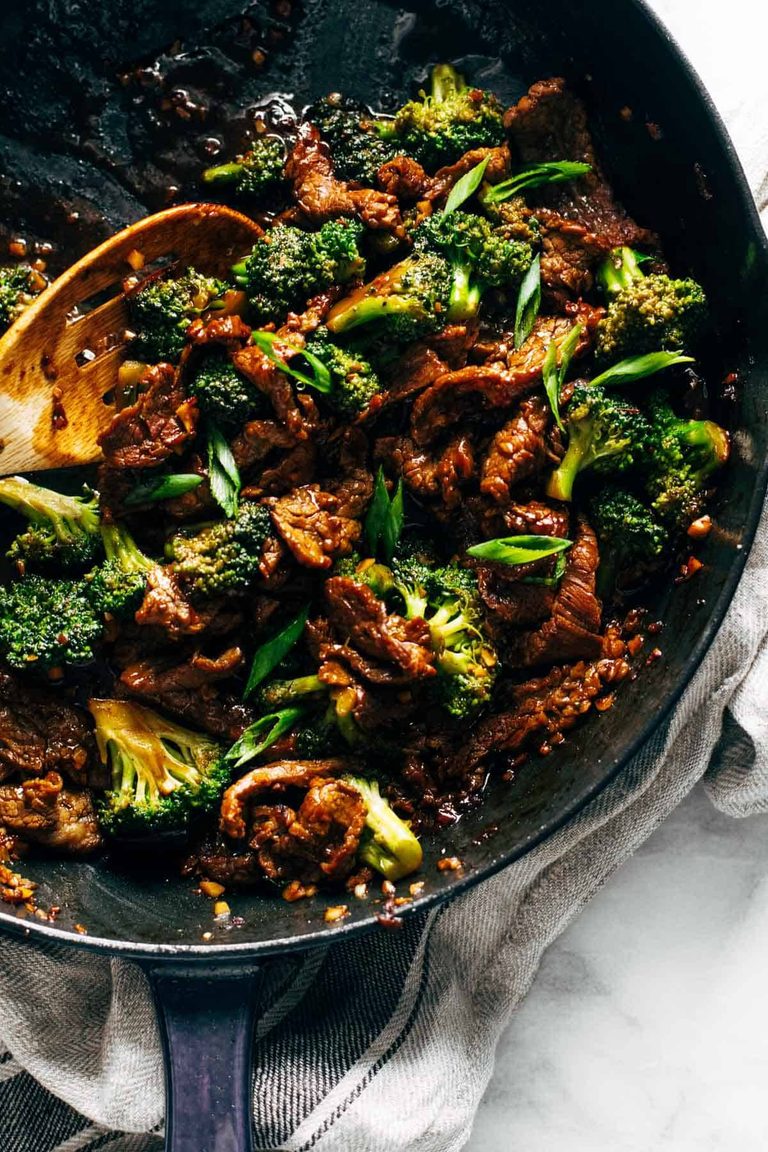
    Beef and broccoli in a cast iron.

    Sesame Beef and Broccoli

    Sesame Beef and Broccoli! Full of protein, green broccoli goodness, and sticky-sweet garlic and ginger flavor. Perfect at-home takeout!

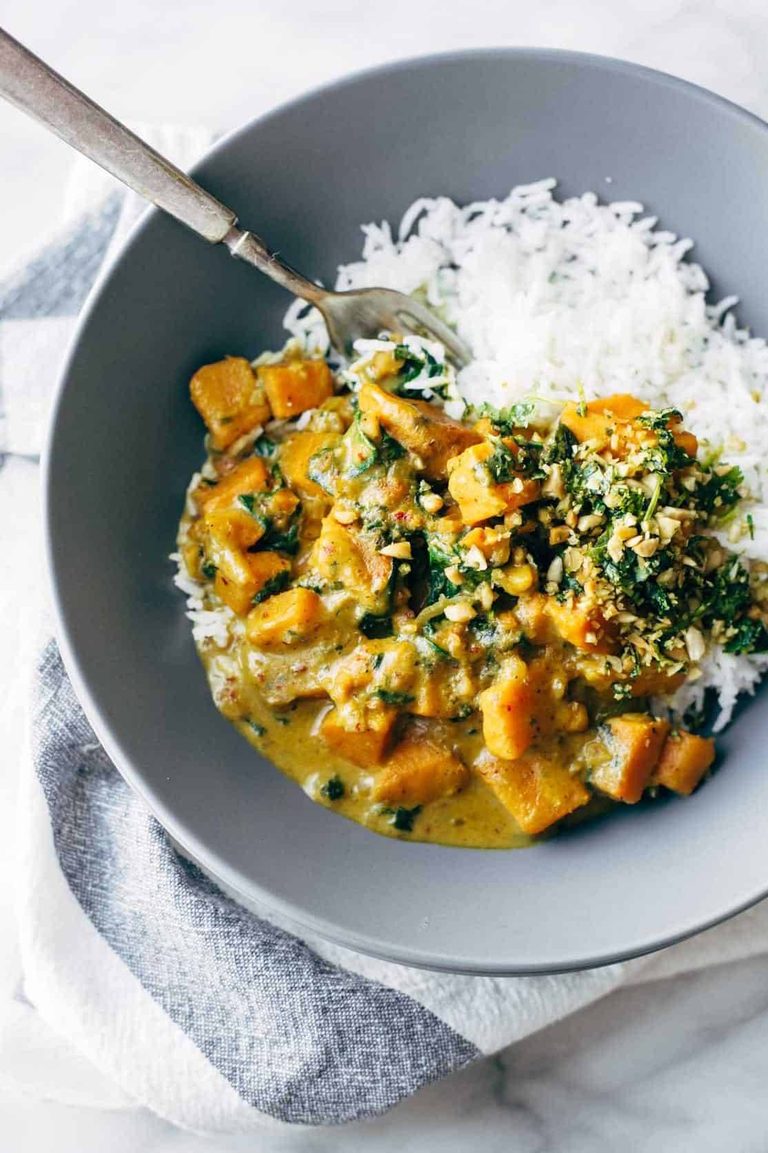
    Creamy sweet potato curry in a bowl with rice.

    Creamy Thai Sweet Potato Curry

    Creamy Thai Sweet Potato Curry – packed with nutrition! Our favorite easy, healthy, winter comfort food recipe.

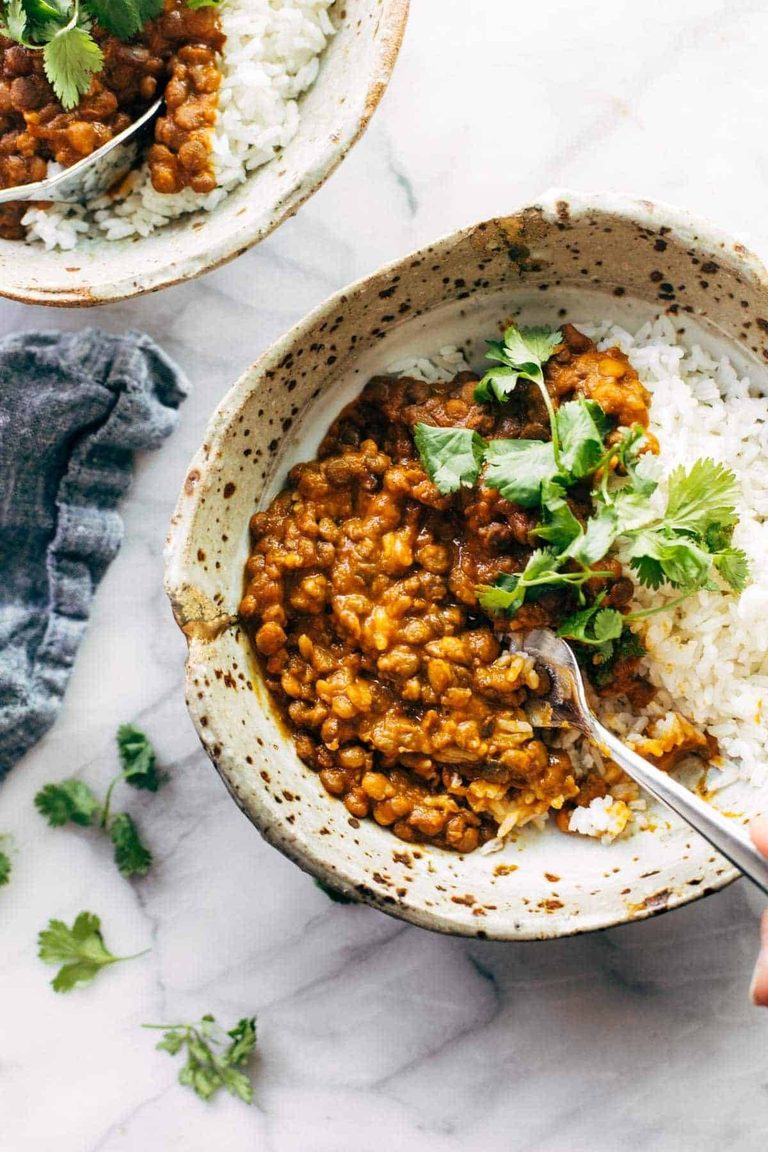
    Red curry lentils with rice.

    Instant Pot Red Curry Lentils

    Guess what’s for dinner? Creamy, spicy, delicious red curry lentils, made in the Instant Pot.

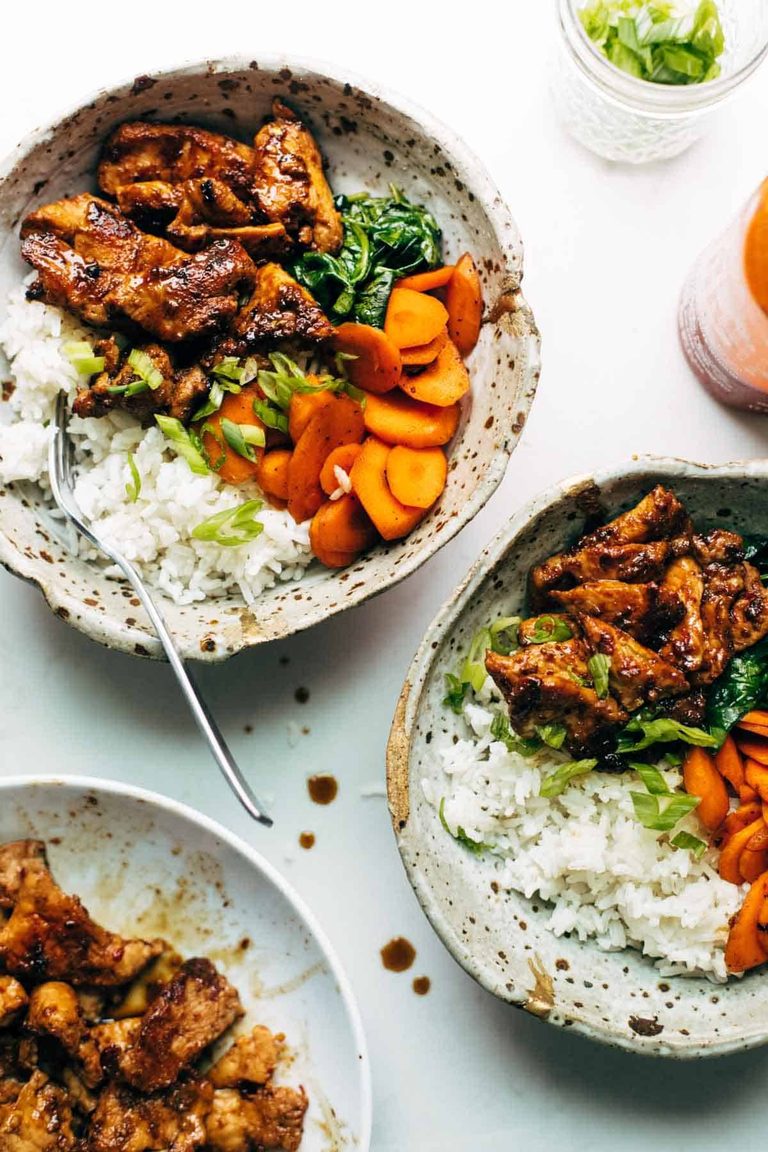
    Spicy pork in a bowl with rice and veggies.

    5 Ingredient Spicy Pork

    5 Ingredient Spicy Pork! A fancy-feeling dinner recipe that actually comes together in snap. Serve it in bowls, stir-fry it with some veggies, or add it to burritos!

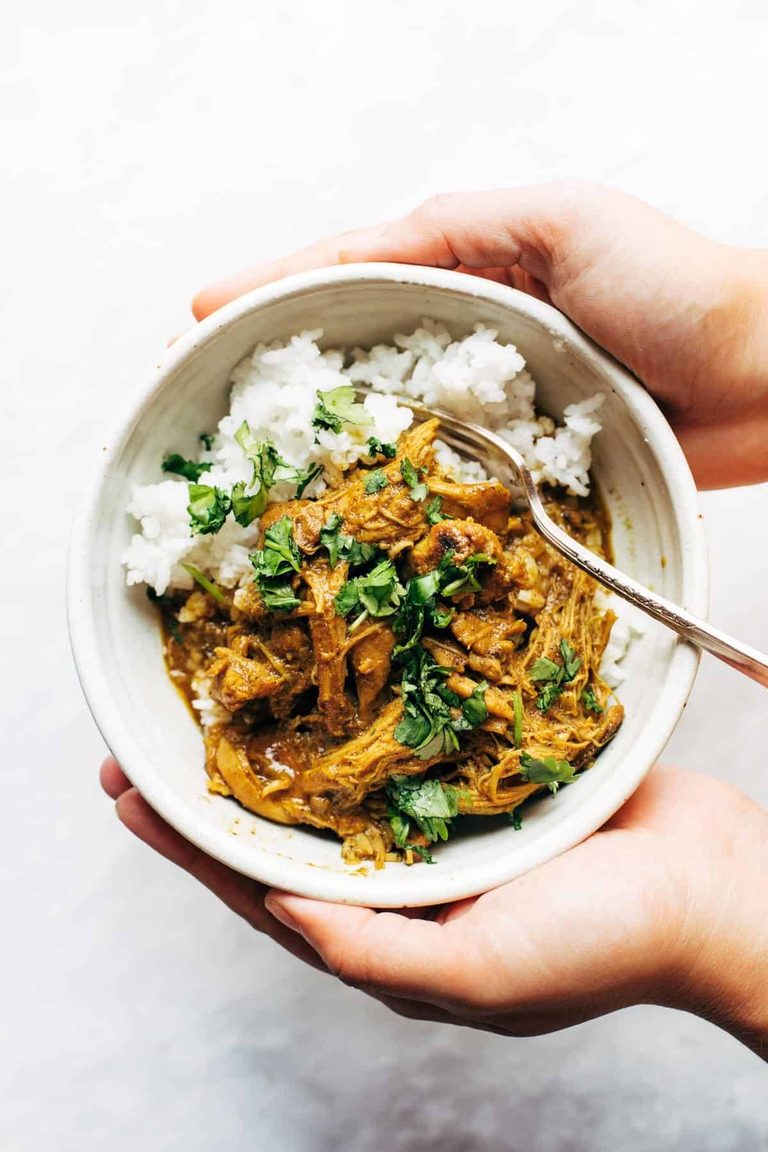
    Tandoori chicken in a bowl with rice.

    Instant Pot Coconut Tandoori-Inspired Chicken

    Coconut Tandoori Chicken made with rich spices and creamy coconut milk. Ridiculously easy (like, 5 minutes hands-on time) and so, so yummy! My new favorite make-ahead freezer meal.

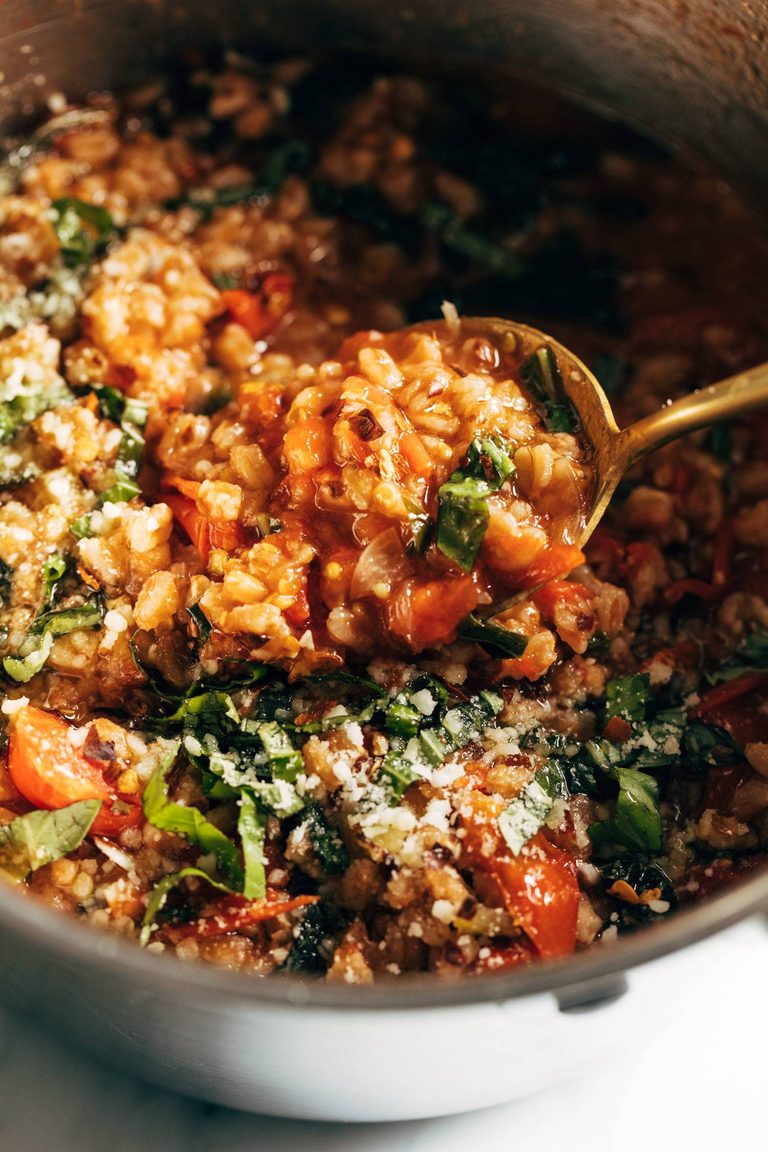
    One pan farro with tomatoes and kale.

    One-Pan Farro with Tomatoes and Kale

    This One-Pan Farro with Tomatoes and Kale is a straight-up DREAM! Rustic farro cozied up to cherry tomatoes, onions, garlic, and kale. So good and so wholesome!

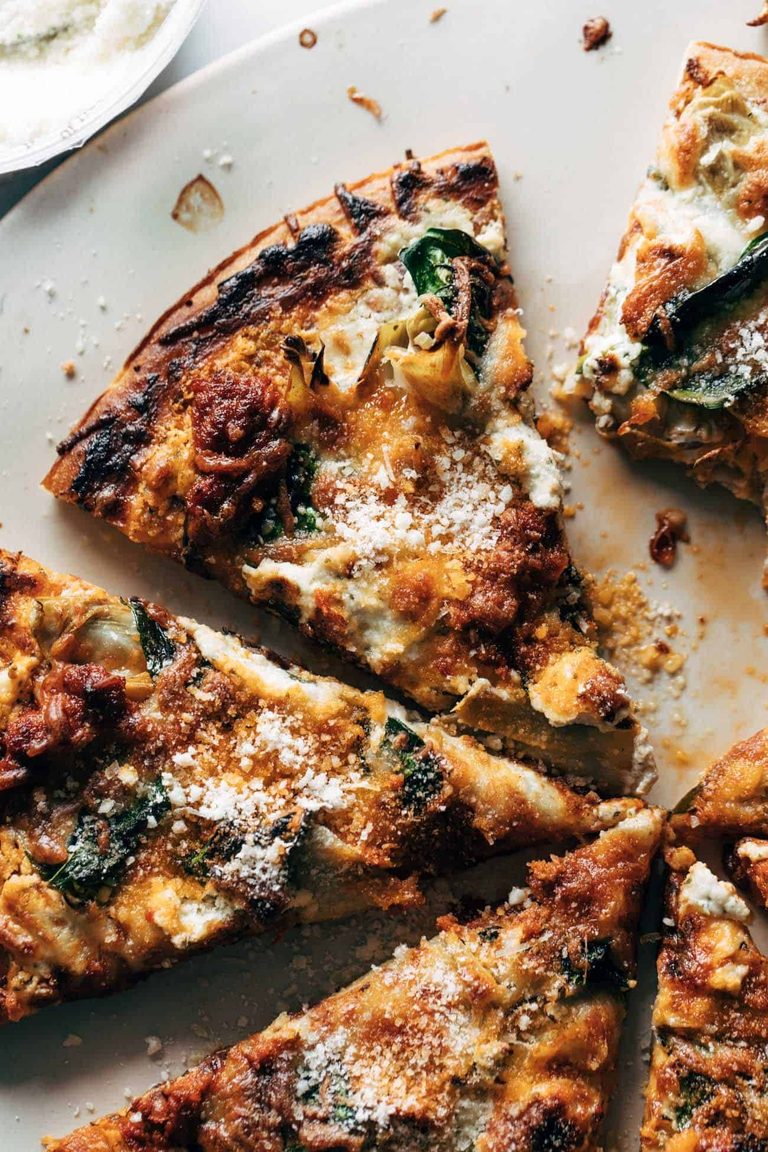
    Spinach and artichoke pizza.

    The Absolute Easiest Spinach and Artichoke Pizza

    This really is the absolute easiest Spinach and Artichoke Pizza! Garlicky spreadable cheese, canned artichokes, fresh spinach, sun-dried tomatoes, and mozzarella – all on a pre-made pizza crust. Oof, it’s good!

    Source link

  • Buttermilk Banana Pancakes Recipe

    Buttermilk Banana Pancakes Recipe

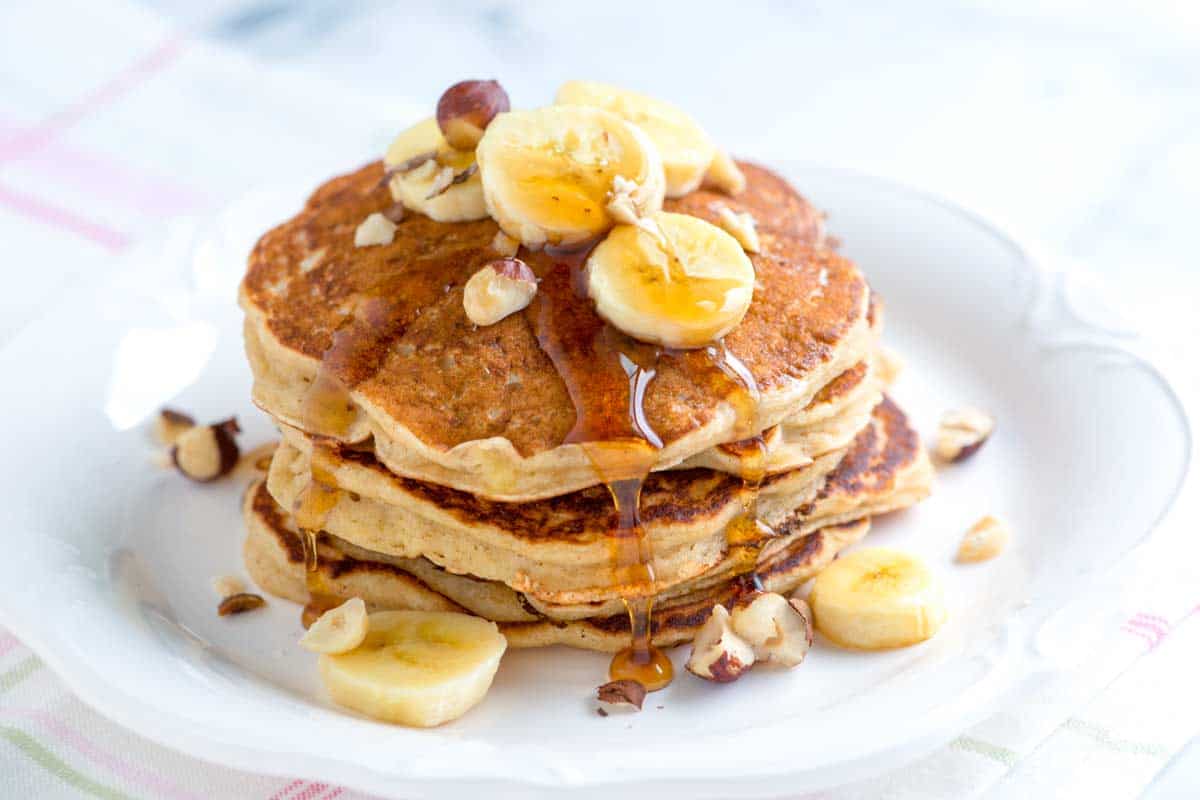
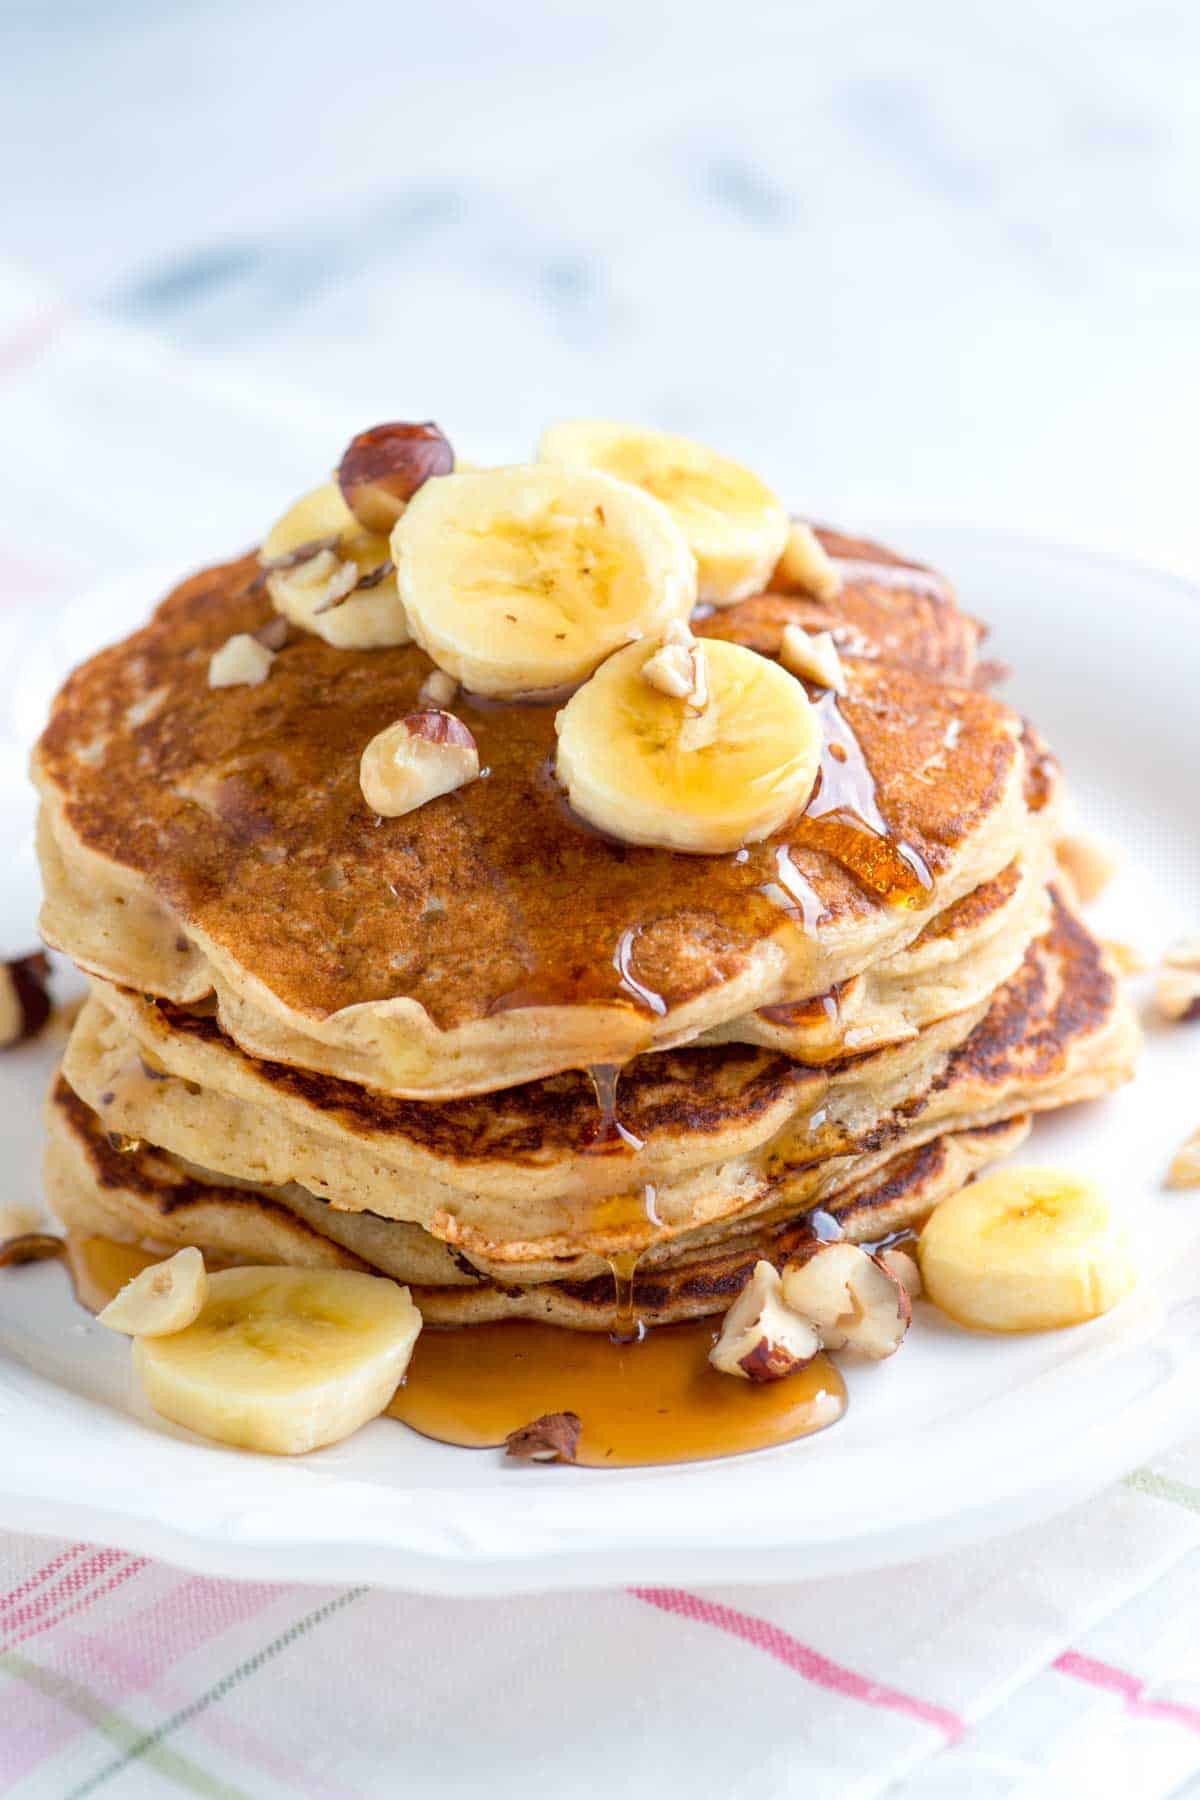
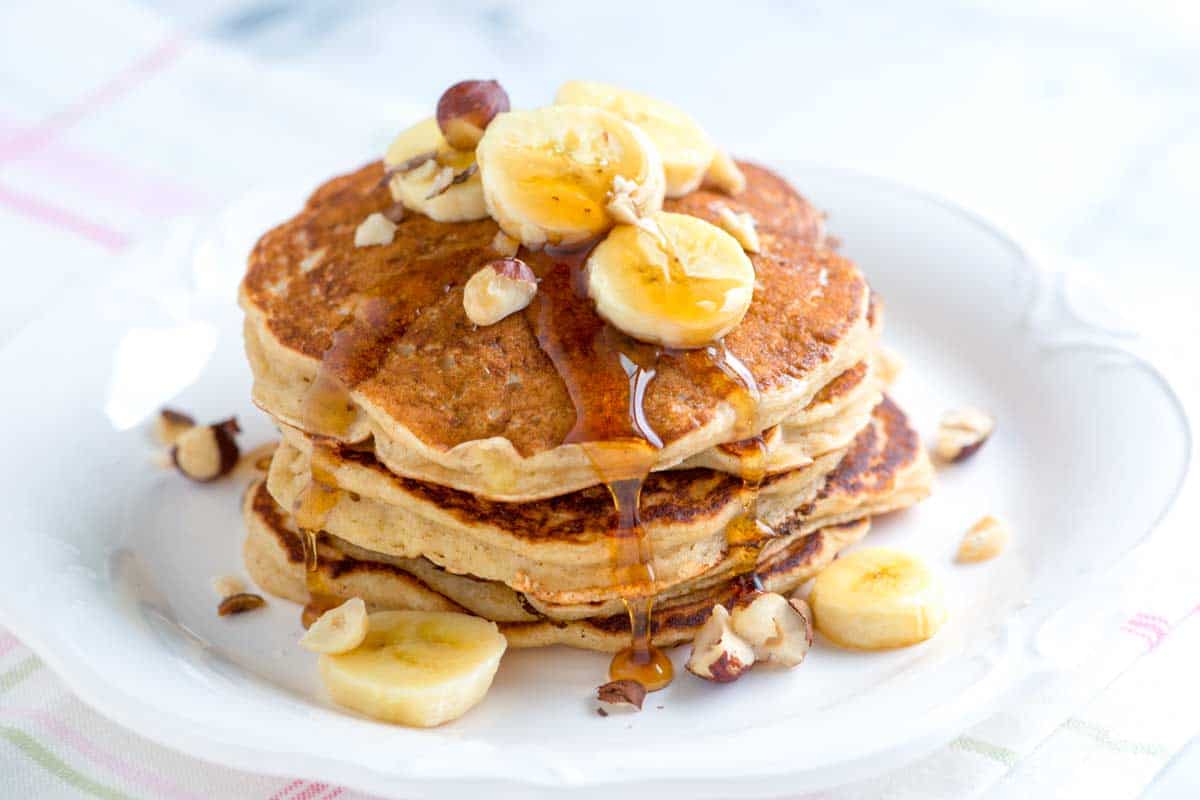
    My family loves these buttermilk banana pancakes! Mashed banana adds so much flavor, and the buttermilk makes them deliciously tangy. If you don’t have buttermilk, I’ve got you covered with an easy substitute in the recipe.

    Easy Buttermilk Banana Pancakes

    We have many pancake recipes on Inspired Taste, but these buttermilk banana pancakes are my son’s favorite! He’s on to something because I have to tell you, these are truly fantastic.

    If you don’t have buttermilk on hand, don’t worry! I’ve included my quick DIY buttermilk recipe in the tips section below our recipe. For more inspiration, see our original fluffy buttermilk pancakes. If you want to make pancakes with milk, I highly recommend these easy fluffy pancakes.

    Key Ingredients

    • Banana: I use 1 large banana and mash it with a fork in the bottom of my mixing bowl. The riper your banana, the better these pancakes will taste. This recipe is perfect for those brown, speckly bananas sitting on your counter (the same goes for our banana bread and these banana muffins).
    • Buttermilk: This adds a lovely tangy flavor to our pancakes, which is incredibly delicious, especially when combined with something sweet (like maple syrup). If you don’t have buttermilk, you can still make these pancakes. See my tips for an easy buttermilk substitute below the recipe (it’s a mixture of milk and vinegar or lemon juice).
    • Flour: I use all-purpose flour, but whole wheat, spelt, or even your favorite gluten-free flour blend will work in this recipe.
    • Baking Soda and Baking Powder: I use both for these easy pancakes. The baking soda reacts with the acid in the buttermilk, and the baking powder adds a little extra lift for fluffiness. I do the same for these fluffy buttermilk pancakes.
    • Sugar, Spices, and Vanilla: These make our pancakes taste amazing. I love a little cinnamon and nutmeg in the batter, which goes so well with the banana.
    • Butter: I love buttery pancakes, so I’m generous with butter. I also cook my buttermilk banana pancakes in melted butter for crispy edges.

    What to Serve with Buttermilk Banana Pancakes

    Buttermilk pancakes are already one of the best breakfasts, but I’m in heaven when you turn them into banana buttermilk pancakes. I love topping mine with extra sliced bananas, chopped walnuts, and maple syrup. For something different, try whipped cream or dairy-free coconut cream (delicious!), easy apple butter, or some of our homemade pumpkin butter.

    Also, don’t forget a side of crispy baked bacon, scrambled eggs, or sausage. See more of our breakfast recipes.

    Buttermilk Banana Pancakes

    Buttermilk Banana Pancakes

    • PREP
    • COOK
    • TOTAL

    These buttermilk banana pancakes with warm cinnamon and nutmeg are perfect on a sleepy morning. They come together quickly and taste incredible! If you do not have buttermilk, we have provided a note below sharing how to make buttermilk at home (all you need is dairy or non-dairy milk and an acid like white vinegar or lemon juice).

    Buttermilk tends to vary in thickness, so you might need more to achieve the right batter consistency. Our recipe below shares a visual cue to get it just right.

    Makes 10 pancakes

    You Will Need

    1 ½ cups (354ml) buttermilk, see tip for substitute

    3 tablespoons (42g) unsalted butter, plus more for skillet

    1 large banana, mashed, about 1/2 cup

    1 large egg

    1/2 teaspoon vanilla extract

    1 ½ cups (195g) all-purpose flour, see tips below for how to measure flour

    1 tablespoon sugar

    1 teaspoon baking powder

    1 teaspoon baking soda

    1/2 teaspoon ground cinnamon

    1/8 teaspoon finely grated nutmeg

    1/2 teaspoon fine sea or table salt

    Directions

      1If you do not have buttermilk and need to make a buttermilk substitute, do it now and set it aside.

      2Melt 3 tablespoons of butter, and then set aside.

      3In a medium bowl, mash the banana into a paste, and then whisk in the buttermilk, egg, vanilla extract, and melted butter. (Don’t worry if the butter solidifies slightly).

      4In a large bowl, whisk the flour, sugar, baking powder, baking soda, cinnamon, nutmeg, and salt together until well blended.

      5Create a well in the center of your dry ingredients. Pour in the banana buttermilk mixture and stir gently with a fork until the flour is just incorporated. A few small lumps are okay.

      6When you lift the whisk or fork from the batter, it should slowly run back into the bowl. If this does not happen and the batter is too thick, add an extra splash of buttermilk.

      7Place a large skillet or griddle over medium heat. Sprinkle in a few drops of water to test if it’s ready. You want them to dance around a bit and evaporate.

      8Brush the skillet with melted butter (this creates crispy edges, but you can skip it if using a quality nonstick pan).

      9Scoop the batter onto the skillet using a 1/4 cup measure or large cookie scoop, and spread each pancake into a 4-inch circle.

      10After 1 to 2 minutes, the edges will look dry, and bubbles will form and pop on the surface. Flip the pancakes and cook for another 1 to 2 minutes until lightly browned and cooked in the middle.

    • Storing
    • 1Store buttermilk banana pancakes in an airtight container in the fridge for up to a week or freeze them for up to 2 months. If freezing, line the pancakes on a baking sheet and freeze for about 30 minutes. Then, transfer them to a freezer-safe bag with parchment paper between each pancake to prevent sticking.

      2To reheat them, place them on a microwave-safe plate and cook for 20 seconds per pancake (add more time for multiple pancakes). Or wrap the pancakes in foil and bake at 350°F for about 10 minutes.

    Adam and Joanne’s Tips

    • Buttermilk substitute: Combine 1 ½ cups of milk (dairy or non-dairy) with 1 ½ tablespoons of white vinegar or fresh lemon juice. Set aside for 10 minutes before using the recipe above.
    • Measuring flour: Fluff the flour in its container, then gently scoop it into your measuring cup until slightly mounded. Level off the top with a knife for accurate measuring. For even more accuracy, use a scale and measure the flour by weight (in grams).
    • The nutrition facts provided below are estimates.

    Nutrition Per Serving
    Serving Size
    1 pancake
    /
    Calories
    142
    /
    Protein
    3.9 g
    /
    Carbohydrate
    19 g
    /
    Dietary Fiber
    0.9 g
    /
    Total Sugars
    5.1 g
    /
    Total Fat
    5.8 g
    /
    Saturated Fat
    3.3 g
    /
    Cholesterol
    37.1 mg
    /
    Sodium
    47.5 mg


    AUTHOR:

    Joanne Gallagher

    Previous Post: Tangy BBQ Sauce
    Next Post: Easy Margherita Pizza

    Source link