Tag: Recipe

  • Easy Chicken Broth Recipe

    Easy Chicken Broth Recipe

    This is the easiest homemade chicken broth recipe I’ve made and it tastes like pure chicken.
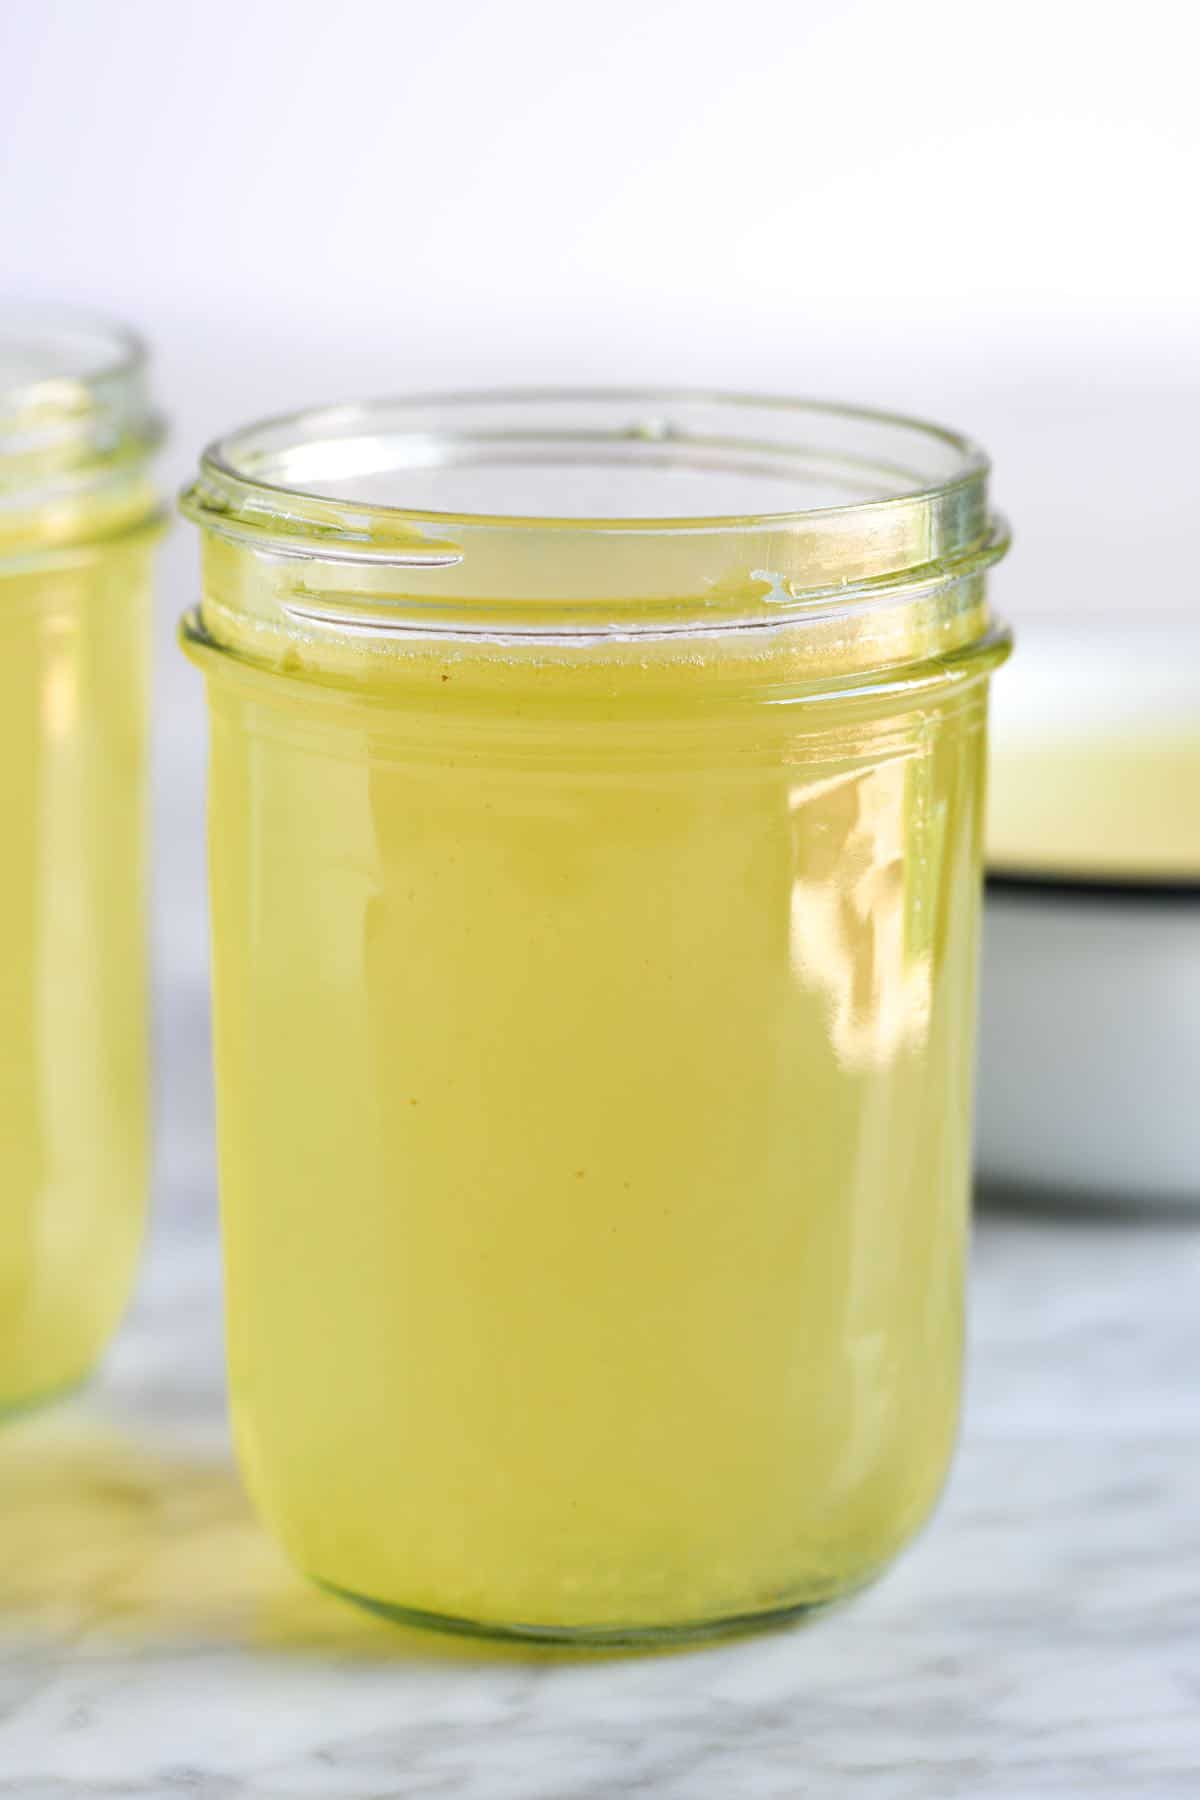
    Homemade Chicken Broth

    This recipe has quickly become one of my favorites. It’s ridiculously simple to make, and since it starts with a whole chicken, you are left with an incredible broth and a whole cooked chicken at the end.

    You can use the broth to make your favorite soups (chicken noodle soup for me!) and the chicken to make chicken salad or these incredible chicken enchiladas.

    Key Ingredients

    • Chicken: I use a whole chicken to make the broth and gently poach it in cold water with the other ingredients for just over an hour (that’s all!).. We also have this chicken stock recipe, which I love, but it takes much longer (more like 3 to 4 hours).
    • Peppercorns: Pepper has this fantastic ability to make things taste more rounded out and seasoned, which is why it’s a common ingredient when making broth. I use whole peppercorns in this recipe.
    • Garlic: I add 2 garlic cloves that I lightly smash with my knife for a light flavor.
    • Thyme and Bay Leaf: Super classic and delicious, fresh thyme and a bay leaf bring out the pure chicken flavor and make the broth taste well-rounded.

    Find the full recipe with measurements below.

    Tips for Making the Best Chicken Broth

    Tip 1: Use a whole chicken. To make the broth, I place a whole chicken, breast-side-down, in a pot and add the garlic cloves, peppercorns, fresh thyme, a bay leaf, and a bit of salt. I barely cover it with cold water, bring it to a boil, and then reduce it to a simmer. We use a similar method when making the broth for chicken and dumplings.

    A whole chicken in a pot with garlic, herbs, and water.

    Tip 2: Skim your broth. Some scum and foam rise to the top as the water heats up. Skim that off the top using a slotted spoon or a soup skimmer. Then, cover the pot and allow the broth to simmer for an hour and fifteen minutes.

    Tip 3: Strain and store for your favorite recipes. Remove the chicken, and pour the broth through a fine mesh strainer. Now it is ready to use or store your broth in jars for another day. It keeps in the fridge for four days and in the freezer for a few months. We highly recommend using the cooked chicken to make our chicken salad or chicken enchiladas.

    Leftover poached chicken and homemade chicken broth.

    Serving Suggestions

    Since the chicken simmers for just over an hour, it comes out juicy and tender. This is a fantastic bonus to this recipe! You can use the tender cooked chicken for other dishes, like chicken salad, green chicken enchiladas, and more! I especially love it when making our homemade French onion soup.

    For more broth and stock recipes, see our classic chicken stock recipe, which calls for chicken bones from leftover roasted chicken. We also have this incredible chicken bone broth, which we make using our Instant Pot. Finally, for a vegetable option, I love this homemade vegetable broth (it’s so good that I sip it like tea).
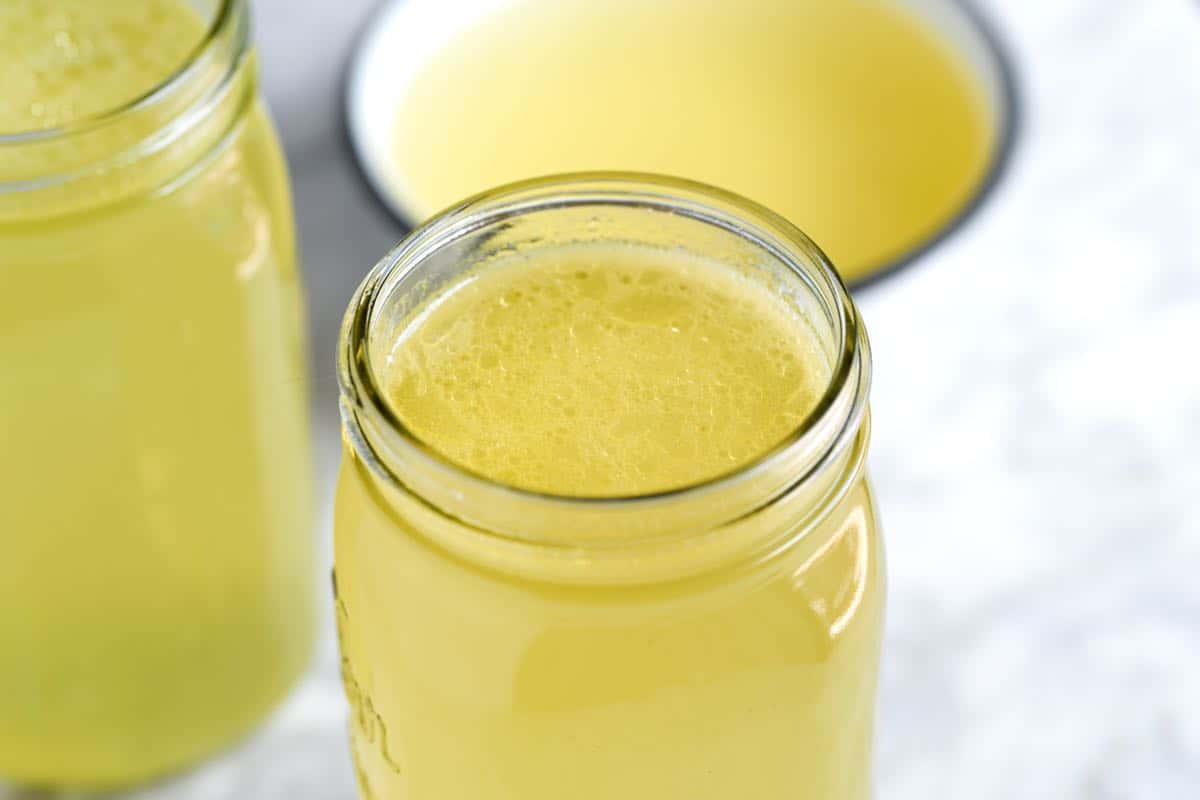
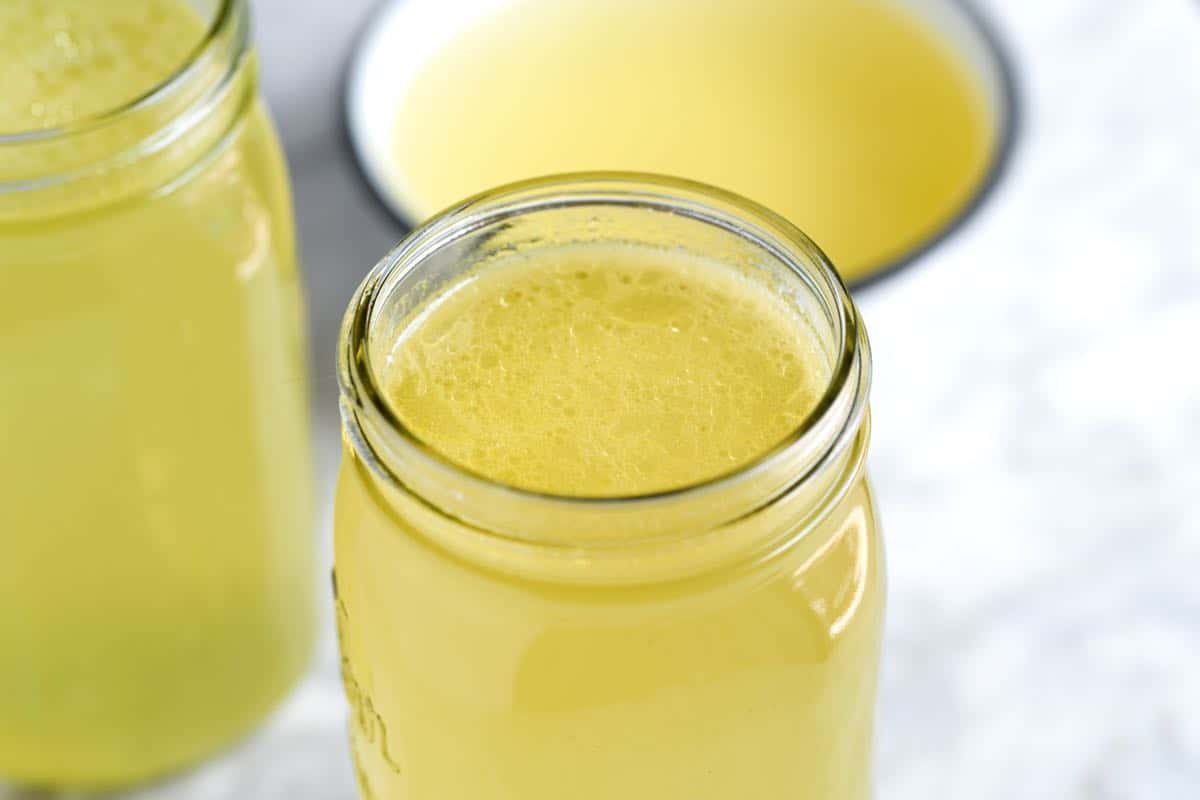
    Homemade Chicken Broth in jars

    Easy Chicken Broth

    • PREP
    • COOK
    • TOTAL

    This chicken broth recipe has just five ingredients (plus salt and water), starts with one whole chicken, and makes some of the nicest broth we’ve ever made. The broth tastes like pure chicken. Use it in any recipe that calls for broth or stock. It’s delightful.

    This broth keeps in the fridge for up to 4 days and in the freezer for up to 3 months.

    Makes 2 quarts (8 cups)

    You Will Need

    1 whole chicken, 4 to 5 pounds

    5 whole peppercorns

    4 sprigs fresh thyme

    2 garlic cloves, smashed

    1 bay leaf

    1/4 teaspoon fine sea salt, plus more to taste

    Cold water

    Directions

      1Place the whole chicken, breast-side down, in a pot that is just large enough to fit the chicken — we use our 5 ½ quart Dutch oven.

      2Add the peppercorns, thyme, garlic cloves, bay leaf, and 1/4 teaspoon of salt. Barely cover the chicken with cold water — depending on your pot, you will need 7 to 9 cups.

      3Bring to a boil and reduce to a simmer. Use a mesh skimmer or slotted spoon to skim any foam that floats to the surface.

      4Cook at a low simmer, covered with a lid, for 1 hour and 15 minutes.
      Use tongs or two chopsticks tucked under the wings to transfer the chicken to a plate. Allow the chicken to cool and save it for another dish.

      5Ladle the stock through a fine mesh strainer and transfer it to one-quart jars. Use immediately or save for later. Note that this broth may taste light at first but tastes better after cooling in the fridge. Another option is to continue simmering the broth to reduce the flavor further.

      6Refrigerate for up to four days or freeze for up to three months. After the stock has chilled, fat will rise to the surface. We usually leave this, but you can reserve the fat and use it like oil or butter in other dishes.

    Adam and Joanne’s Tips

    • The nutrition facts provided below are estimates. It was difficult to estimate actual numbers for this recipe, but we have done our best.

    Nutrition Per Serving
    Serving Size
    1 cup
    /
    Calories
    12
    /
    Protein
    1g
    /
    Carbohydrate
    1g
    /
    Dietary Fiber
    0g
    /
    Total Sugars
    0g
    /
    Total Fat
    0g
    /
    Saturated Fat
    0g
    /
    Cholesterol
    0mg
    /
    Sodium
    343mg


    AUTHOR:

    Joanne Gallagher

    Adam and Joanne of Inspired Taste

    We are Adam and Joanne Gallagher, the creators of Inspired Taste. Established in 2009, Inspired Taste grew from a childhood dream into one of the internet’s most trusted recipe sites with hundreds of reliable recipes, step-by-step videos, and expert tips.More About Us
    Source link

  • Brown Sugar Baked Salmon Recipe

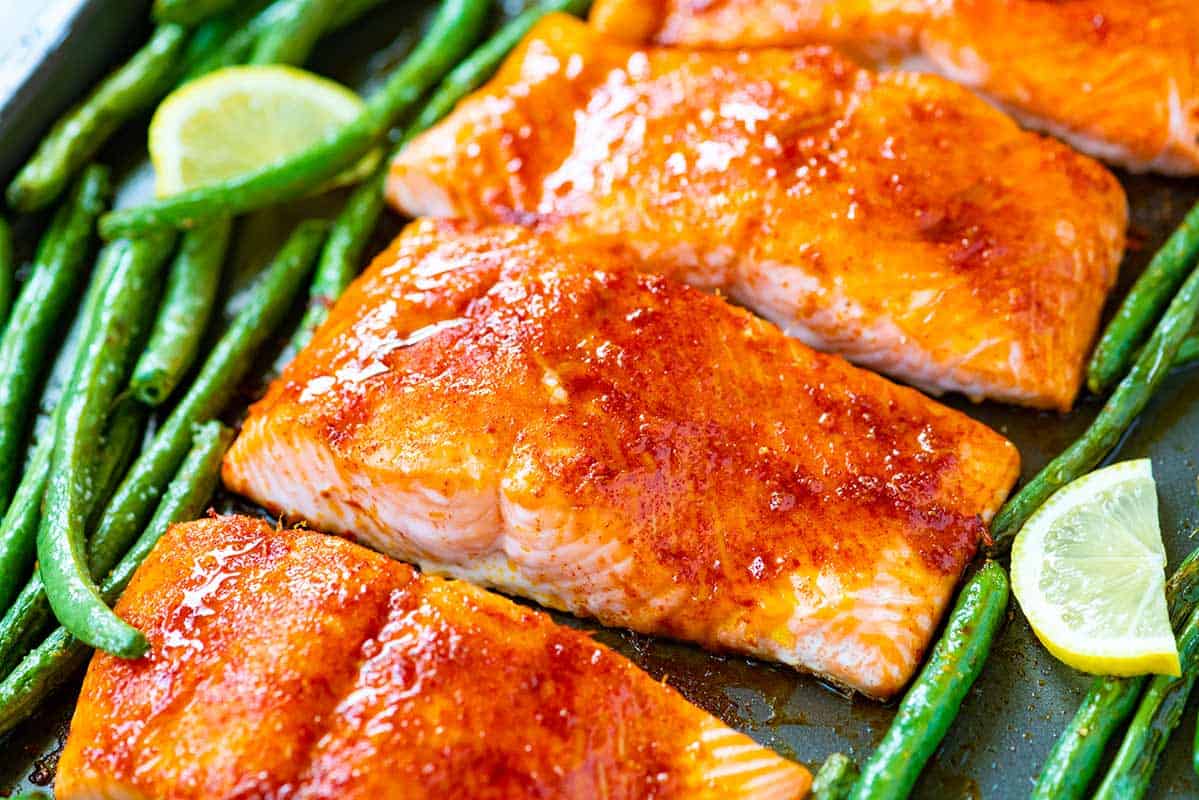
    Brown Sugar Baked Salmon Recipe

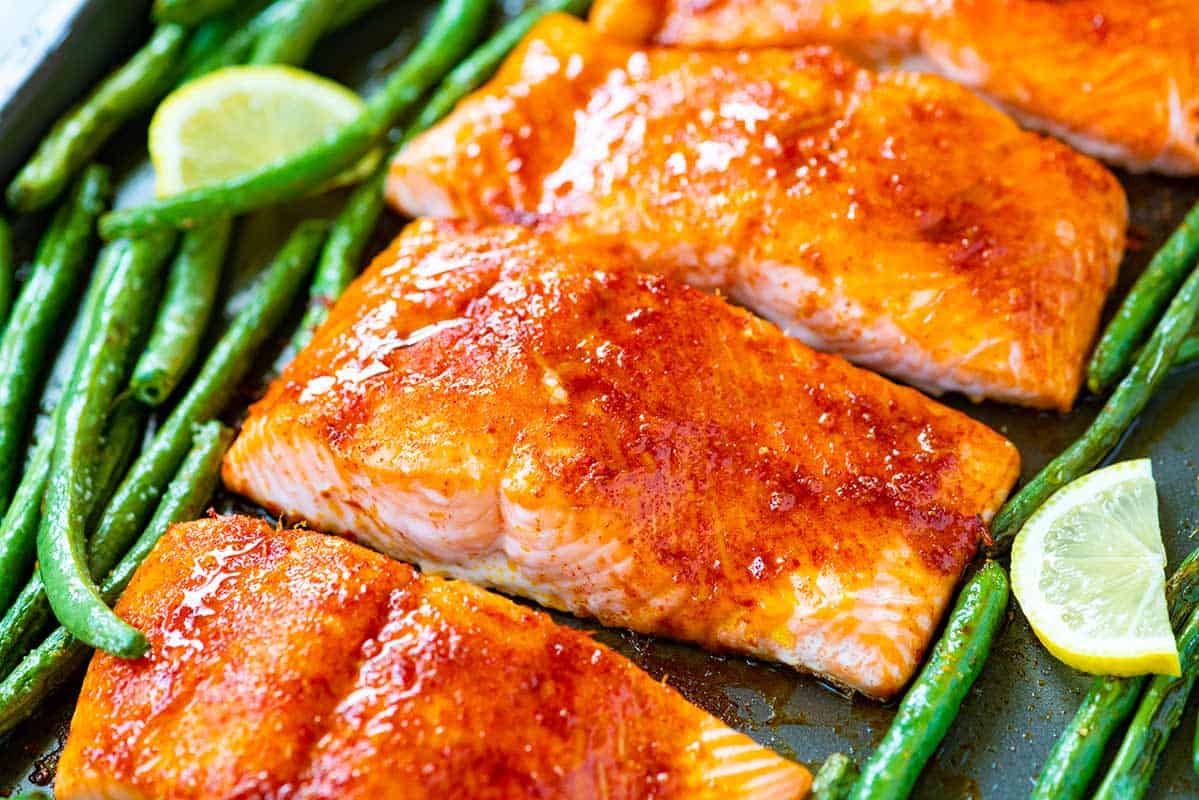
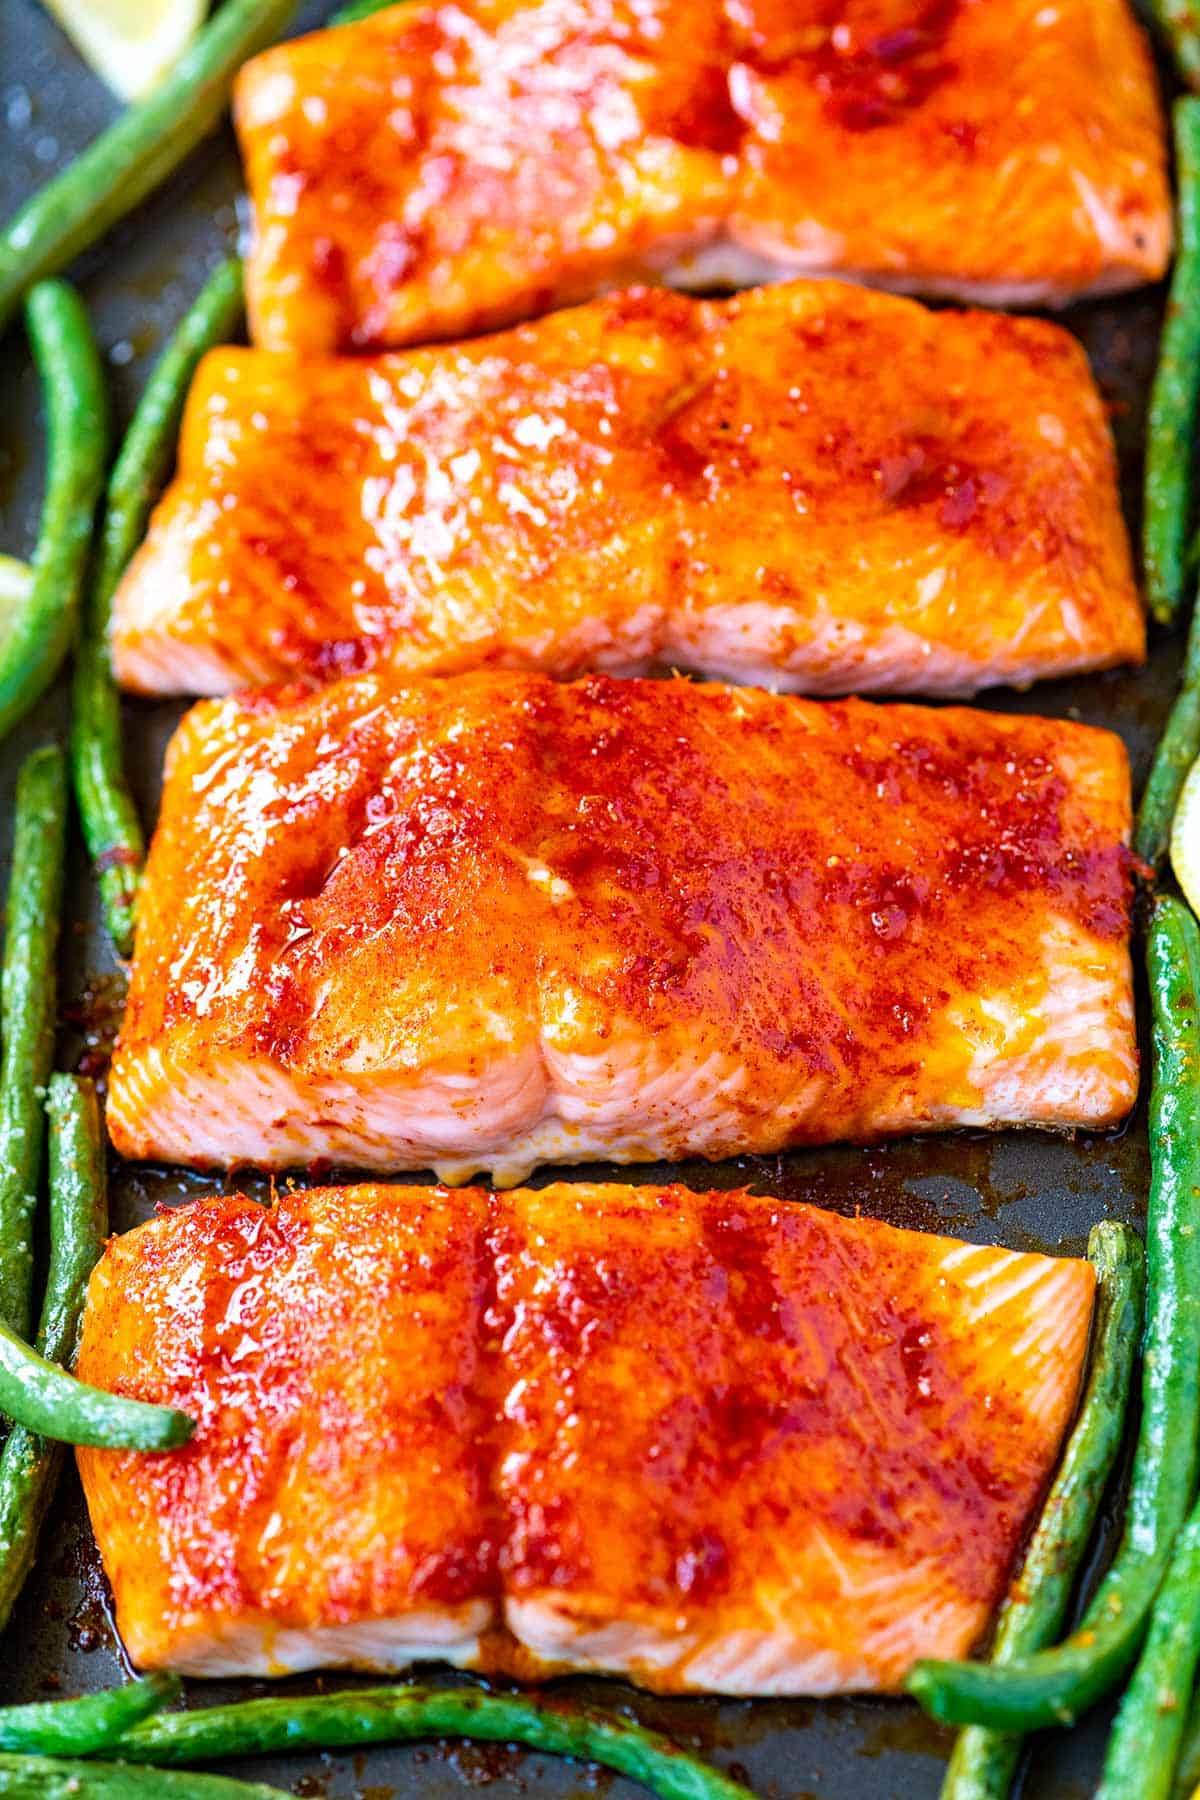
    This brown sugar baked salmon recipe is such a delicious and easy dinner. Our easy brown sugar rub caramelizes and turns into a sweet, smoky glaze in the oven.

    Brown sugar baked salmon with a brown sugar glaze

    My family loves this easy salmon recipe! It only takes a few minutes to prepare, and you’ll love the brown sugar glaze on top. This recipe is perfect for when you are busy or overwhelmed!

    This is one of my favorite salmon recipes on our site, this recipe is easy to turn into a sheet pan dinner. Simply toss a handful of veggies onto the sheet pan and bake them alongside it! I love fast-cooking green beans, but you can substitute what you love. For more recipes like this, see our maple soy glazed salmon or this lemon dill baked salmon.

    Key Ingredients

    • Salmon: Any salmon fillet will work for this recipe. I especially love salmon with a higher fat content, like sockeye, king, and coho. Salmon with a higher fat content stays soft and moist after it is baked.
    • Brown sugar: It adds sweetness, and it lightly caramelizes in the oven. You don’t need a lot — one tablespoon for four large fillets is plenty.
    • Lemon: A bit of lemon zest adds a pop of flavor. We use our microplane to zest the lemon. Then, we use the zested lemon for serving. A squeeze of fresh lemon juice just before serving is a must.
    • Smoked paprika: It adds a smoky-sweet flavor and color to the salmon spice rub. For a spicier rub, try a little chipotle powder or cayenne (1/8 to 1/4 teaspoon should do it).
    • Veggies: Since we bake our salmon fillets on a large baking sheet, we have some space left for veggies. Choose a quick-cooking veggie, such as green beans, zucchini, asparagus, snap peas, broccolini, or cherry tomatoes.

    Find the full recipe with measurements below.

    Tips for Making the Best Baked Salmon

    Tip 1: Use our salmon rub. This salmon is tender, moist, and soft in the middle. Add our brown sugar spice rub, and the outside becomes lightly caramelized, sweet, and a bit smoky. We love it!

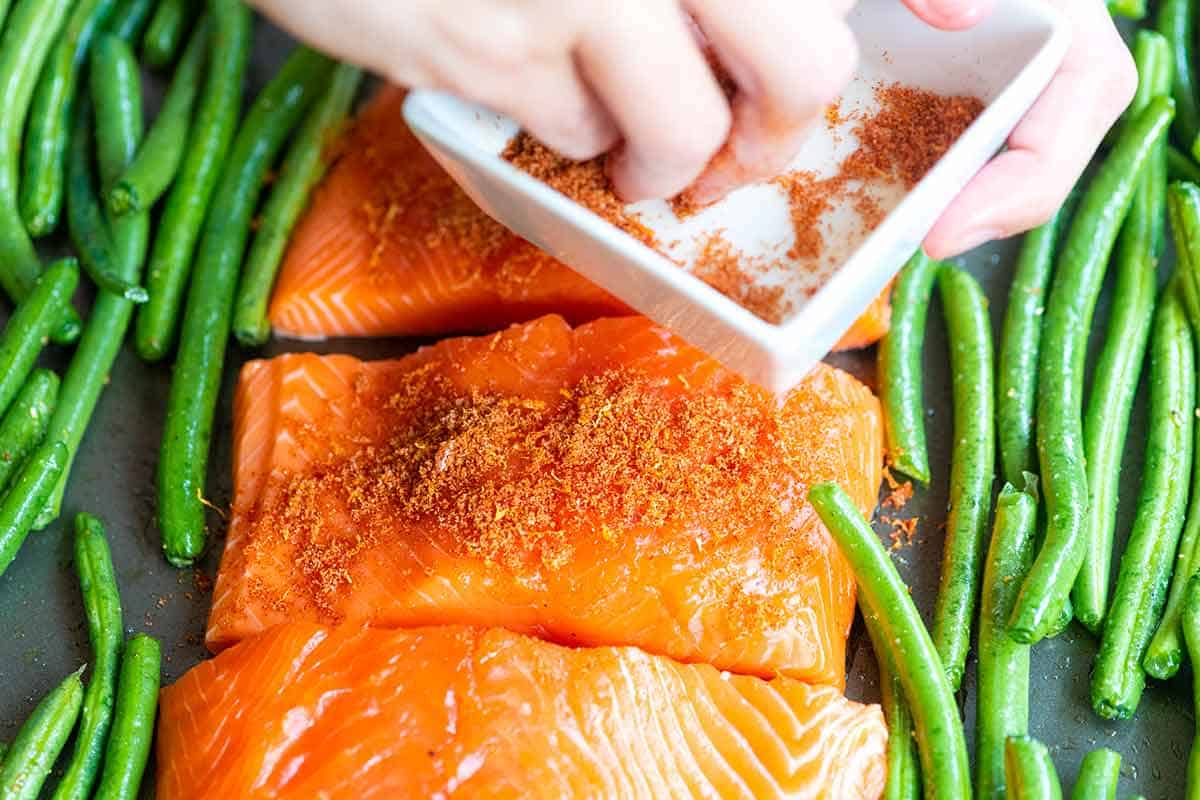
    I use the same salmon rub when making cedar plank salmon and love its simplicity. All you need to do is mix brown sugar with lemon zest, salt, and smoked paprika. Then rub it all over your salmon fillets (I’m pretty generous with it).

    Adding Brown sugar rub to salmon fillets

    Tip 2: Turn this recipe into a sheet pan dinner. Add your salmon to a sheet pan and bake it in the oven until done. I use a 400°F oven for this recipe, which means it usually takes between 15 and 20 minutes. Remember, you can turn this into a sheet pan dinner, and add your favorite veggies to the baking sheet. I’ve shared suggestions below.

    Tip 3: How to tell when your salmon is done. When baking salmon, you can tell it’s ready to come out of the oven when the flesh is somewhat opaque and flakes easily when you insert a fork into it. If you have an internal thermometer, use it! I take my salmon out when it reads 125°F, which means it will be a slightly darker pink in the middle.

    Serving Suggestions

    Since we bake our salmon fillets on a large baking sheet, we have some space left for veggies. I love sheet pan dinners! This salmon recipe needs 15 to 20 minutes in the oven, perfect for green beans, asparagus, zucchini, snap peas, peppers, onions, broccolini, or cherry tomatoes.

    If you prefer heartier vegetables, partially bake them first. Add the salmon for the last 15 to 20 minutes of cooking, adjusting the total baking time based on your chosen veggies. For example, broccoli, cauliflower, and Brussels sprouts take 20 to 25 minutes, while root vegetables and winter squash take 30 to 45 minutes.

    More side dishes you’ll love include corn salad, mashed sweet potatoes, cilantro lime rice, and my favorite quinoa salad.

    Brown Sugar Baked Salmon Fillets

    Brown Sugar Baked Salmon

    • PREP
    • COOK
    • TOTAL

    My family loves this easy brown sugar salmon recipe! As the salmon bakes in the oven, the brown sugar rub melts and caramelizes into a delicious, sweet, smoky glaze. To make this a sheet pan dinner, toss your favorite veggies onto the baking sheet with the salmon. The article above has suggestions for which veggies work well in this recipe.

    Makes 4 servings

    Watch Us Make the Recipe

    You Will Need

    For the Salmon

    4 salmon fillets, preferably wild-caught, about 6 ounces each

    1 teaspoon olive oil

    1 tablespoon brown sugar

    1 teaspoon lemon zest

    1/2 teaspoon smoked paprika or substitute chipotle powder for a spicier version

    1/4 teaspoon fine sea salt

    Half of a lemon, quartered


    For the Beans

    3/4 pound green beans or quick cooking veggie

    1 tablespoon olive oil

    Salt and fresh ground black pepper

    Directions

      1Preheat the oven to 400°F (200°C). Set aside a large rimmed baking sheet.

      2Mix 1 tablespoon brown sugar, 1 teaspoon lemon zest, 1/2 teaspoon smoked paprika, and 1/4 teaspoon of salt in a small bowl.

      3Pat the salmon fillets dry and rub them with olive oil.

      4Scatter the brown sugar rub over the salmon, and gently massage it into the fish. Swipe the skin side of the salmon through any spice rub that’s fallen onto the cutting board. If you have the time, marinate the salmon for 10 to 15 minutes.

      5Add the salmon fillets, skin-side down, to the baking sheet.

      6Toss the beans with a tablespoon of olive oil and 1/4 teaspoon salt, and then scatter them around the salmon on the baking sheet.

      7Bake the salmon until it is cooked through, 12 to 15 minutes, depending on its thickness. We cook salmon until an instant-read thermometer inserted into the thickest part reads 125°F.

      8Serve with lemon wedges on the side for squeezing over the salmon.

    Adam and Joanne’s Tips

    • How to tell when salmon is cooked: Cook salmon to 125°F (51°C), which means it will be soft, tender, and slightly pink in the center. For a visual cue, look for the flesh to be somewhat opaque. Also, when inserting a fork into the salmon, it should flake easily.
    • Baking time: Depending on the type and thickness of the salmon you are baking, cook time will vary. The cook times suggested above are for middle cut fillets, about 1-inch thick. For thinner fillets or end pieces, check the salmon a bit earlier. For thicker fillets, you may need an additional 5 to 10 minutes of bake time.
    • Veggies: Try green beans, chopped zucchini, snap peas, bell peppers, broccoli, asparagus, or cherry tomatoes. Heartier veggies like broccoli will take longer, so partially bake them for 10 to 15 minutes before adding the salmon to the baking sheet.
    • Storing: Baked salmon can be stored in an airtight container in the refrigerator for up to 4 days. You can also freeze it in an airtight container or freezer bag for up to 3 months. Thaw it overnight in the refrigerator before reheating. To reheat, bake in a preheated oven at 325°F (165°C) for 10 to 15 minutes.
    • The nutrition facts provided below are estimates.

    Nutrition Per Serving
    Serving Size
    1 (6-ounce) fillet and 1/4 of the beans
    /
    Calories
    325
    /
    Total Fat
    15g
    /
    Saturated Fat
    2.9g
    /
    Cholesterol
    76.5mg
    /
    Sodium
    374.9mg
    /
    Carbohydrate
    8.7g
    /
    Dietary Fiber
    2.4g
    /
    Total Sugars
    5.1g
    /
    Protein
    38.4g


    AUTHOR:

    Joanne Gallagher

    Adam and Joanne of Inspired Taste

    We are Adam and Joanne Gallagher, the creators of Inspired Taste. Established in 2009, Inspired Taste grew from a childhood dream into one of the internet’s most trusted recipe sites with hundreds of reliable recipes, step-by-step videos, and expert tips.More About Us
    Source link

  • Crispy Chicken Milanese Recipe

    Crispy Chicken Milanese Recipe

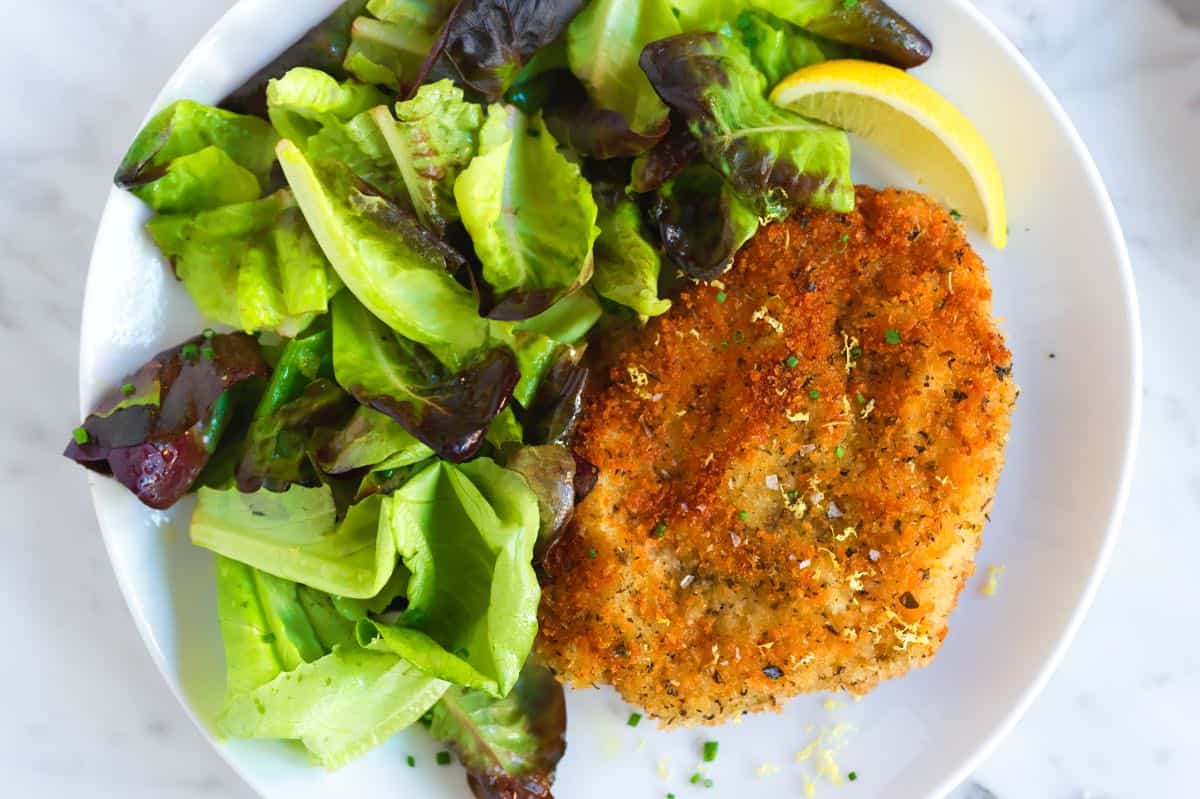
    This chicken milanese recipe turns out perfectly crisp and golden on the outside and juicy and tender inside. It’s simple to make and everyone I’ve served it to loves it!

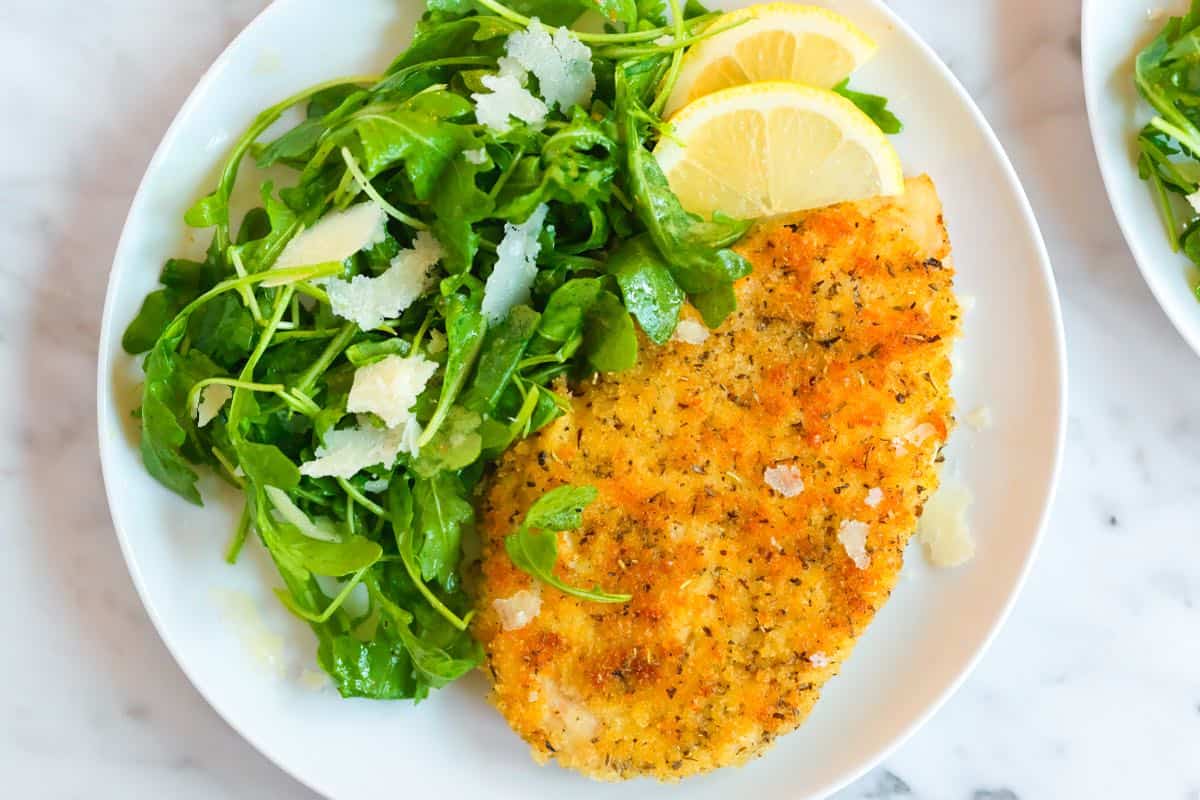
    Chicken Milanese

    We can’t believe we waited this long to share this recipe. The chicken stays incredibly tender, and the crispy breaded coating is so flavorful thanks to the Italian herbs mixed into the breadcrumbs.

    We love this easy breaded chicken served with a handful of greens mixed with our lemon vinaigrette, but you’ll find more ways to serve it below so it fits any night of the week. For more like this, see our crispy pork milanese!

    Key Ingredients

    • Chicken: Use boneless, skinless chicken breasts. Either buy them already cut into thinner cutlets, or slice full-size chicken breasts in half horizontally to make two thinner chicken breasts. Starting with thinner chicken cutlets is the key to this recipe.
    • Flour and Eggs: We use a three-part breading station. Step one is to dredge your chicken in flour, and step two is to dip it in whisked eggs. I use all-purpose flour.
    • Breadcrumbs: After flour and eggs, the third part of the breading is breadcrumbs. I love light and crispy panko breadcrumbs or homemade breadcrumbs.
    • Italian Seasoning: We are really generous with the herbs in our breading, so we mix a good amount of Italian seasoning into the breadcrumbs.
    • Parmesan Cheese: Optional, but highly recommended. Finely grated Parmigiano-Reggiano stirred into the breadcrumb mixture makes the milanese-style breading well seasoned and extra delicious.

    Find the full recipe with measurements below.

    How to Make Chicken Milanese

    Tip 1: Prepare the chicken. Start with thin chicken breast cutlets (see above). Then, pound them even thinner with a meat mallet, rolling pin, or the bottom of a sauce pot.

    Pounding helps the chicken cook quickly and evenly, so your breading turns golden in the same time it takes the chicken to cook. As a bonus, it tenderizes the meat, so your chicken will turn out tender and juicy.

    Pounding chicken breast cutlets thin for chicken milanese

    Tip 2: Set up the breading station. You’ll need three wide, shallow bowls. Add flour to the first. In the second, whisk the eggs and water until smooth. In the third, combine the breadcrumbs, Italian seasoning, parmesan cheese, and a good pinch of salt.

    Tip 3: Bread the chicken. I like to work with one piece of chicken at a time and use a fork to move it around.

    1. Dip it into the flour on both sides, shaking off any excess.
    2. Next, coat it in the egg mixture.
    3. Finally, press it into the breadcrumbs until evenly covered.

    Gently shake off any loose crumbs, then place the breaded chicken on a baking sheet. Continue with the remaining chicken pieces.

    Breading chicken cutlets for milanese

    Tip 4: Cook the chicken. You have two options. My favorite way to cook them is to pan-fry in a skillet with some oil. You can also use an air fryer. Both cooking methods are provided in the recipe below.

    However you cook them, you’ll know they’re perfect when the coating is crisp and golden, and the chicken is firm and cooked through. An internal thermometer should read 165°F when inserted into the middle.

    Serving Suggestions

    The most classic way to serve chicken milanese is with a wedge of lemon and a light salad. In our photos, you can see ours next to a simple arugula salad tossed in our lemon vinaigrette. Or, swap for caprese salad or sautéed greens. We love sautéed spinach or sautéed kale.

    More ideas are to serve with polenta, risotto, or pasta, such as fettuccine Alfredo or buttered noodles. It’s also lovely with roasted vegetables. This roasted cabbage or parmesan roasted cauliflower is my go-to. And finally, you can always turn it into a sandwich on crusty bread, with arugula, tomato, and a little garlic aioli.

    More Chicken Recipes

    Chicken Milanese with Arugula Salad

    Crispy Chicken Milanese

    • PREP
    • COOK
    • TOTAL

    Serve chicken milanese next to a light, fresh salad. I especially love tossing salad greens with this lemon vinaigrette. The bright, tangy dressing is perfect with the chicken. Or, see more serving ideas in the article.

    6 Servings

    Watch Us Make the Recipe

    You Will Need

    3 boneless, skinless chicken breasts, about 10 ounces each (1 ¾ pounds)

    1 cup all-purpose flour (130g)

    2 large eggs

    4 tablespoons water

    1 ½ cups panko or homemade breadcrumbs, crushed a little finer (130g)

    3 tablespoons Italian seasoning

    3 tablespoons finely grated Parmigiano-Reggiano, optional

    Salt and fresh ground black pepper

    Oil, for cooking

    Directions

      1Prepare the chicken cutlets: Place a chicken breast onto the cutting board, then with one hand on top of the breast, use a chef’s knife with the other hand to slice the breast in half horizontally (crosswise), making 2 thinner chicken breast cutlets. Repeat with the remaining chicken breasts.

      2Pound the chicken: Place the chicken cutlets between sheets of plastic wrap or parchment paper and pound to about ⅓ inch thick using a mallet or the bottom of a small pot.

      3Season the chicken: In a small bowl, mix ½ teaspoon salt with ½ teaspoon freshly ground black pepper. Line a large baking sheet with parchment paper, then arrange the chicken on it. Season both sides evenly with the salt and pepper mixture.

      4Set up the breading station: You’ll need three wide, shallow bowls. Add the flour to the first. In the second, whisk together the eggs and water until smooth. In the third, combine the breadcrumbs, Italian seasoning, parmesan cheese, and a good pinch of salt.

      5Bread the chicken: Working with one cutlet at a time, using a fork, dredge it with flour, shaking off any excess. Dip it into the egg mixture, then press it into the breadcrumb mixture so it is well coated. Shake off any excess crumbs, then place the breaded chicken back on the baking sheet. Repeat with the remaining chicken pieces.

      6Cook: Set a large skillet (with sides) over medium heat and let it preheat. Add enough oil to cover the bottom by about ⅛ inch. To test the temperature, drop in a breadcrumb. It should sizzle right away.

      7When the oil is ready, add 2 chicken cutlets at a time, depending on the size of your pan. Cook for 2 to 3 minutes per side, or until golden brown and the internal temperature reaches 165°F. Transfer to a rack, sprinkle lightly with salt, and repeat with the remaining chicken (adding a little more oil to the pan as needed).

    Adam and Joanne’s Tips

    • Leftover breading: You will have some flour, eggs, and breadcrumbs left over. We do not recommend saving them.
    • Air fryer instructions: Spray both sides of the breaded chicken lightly with cooking spray. Place them in a single layer in the air fryer basket (work in batches if needed). Cook at 390°F for 4 minutes, then flip and continue cooking for 3 to 5 minutes more, or until the chicken is golden brown and the internal temperature reaches 165°F.
    • Baking instructions: Preheat your oven to 425°F (218°C). Line a baking sheet with parchment or lightly oil it. Arrange the breaded chicken cutlets on the baking sheet in a single layer, then lightly spray or brush the tops with olive oil. Bake for 14 to 18 minutes, flipping once halfway through, until the breading is crisp and the internal temperature reaches 165°F. For even crispier results, bake the cutlets on an oven-safe wire rack set inside the baking sheet.
    • Arugula salad: Toss 6 cups baby arugula with 4 to 5 tablespoons of this lemon vinaigrette. Add parmesan shavings, then serve on the side of the chicken.
    • The nutritional information provided are estimates.

    Nutrition Per Serving
    Serving Size
    1 chicken cutlet (6 total)
    /
    Calories
    460
    /
    Total Fat
    15.1g
    /
    Saturated Fat
    3.3g
    /
    Cholesterol
    168.1mg
    /
    Carbohydrate
    38.2g
    /
    Dietary Fiber
    2.9g
    /
    Total Sugars
    1.9g
    /
    Protein
    41g


    AUTHOR:

    Joanne Gallagher

    Adam and Joanne of Inspired Taste

    We are Adam and Joanne Gallagher, the creators of Inspired Taste. Established in 2009, Inspired Taste grew from a childhood dream into one of the internet’s most trusted recipe sites with hundreds of reliable recipes, step-by-step videos, and expert tips.More About Us
    Source link

  • Easy Blueberry Hand Pies Recipe

    Easy Blueberry Hand Pies Recipe

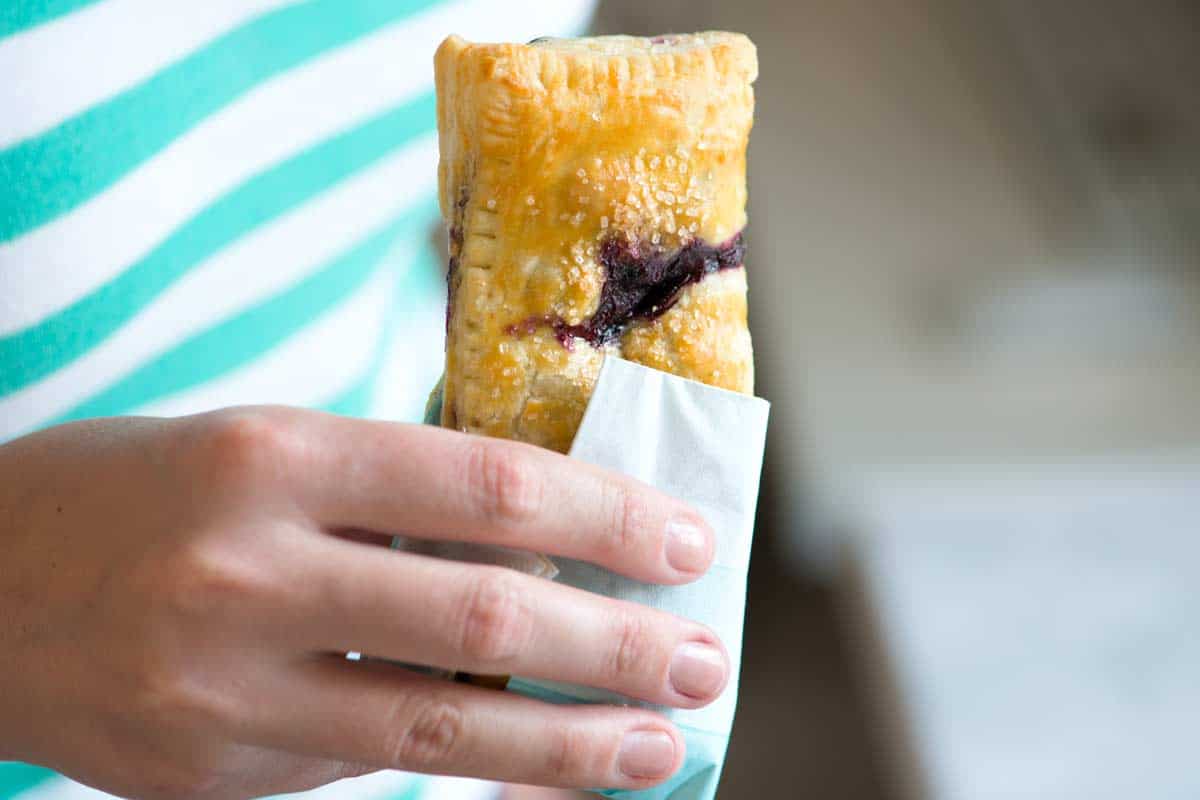
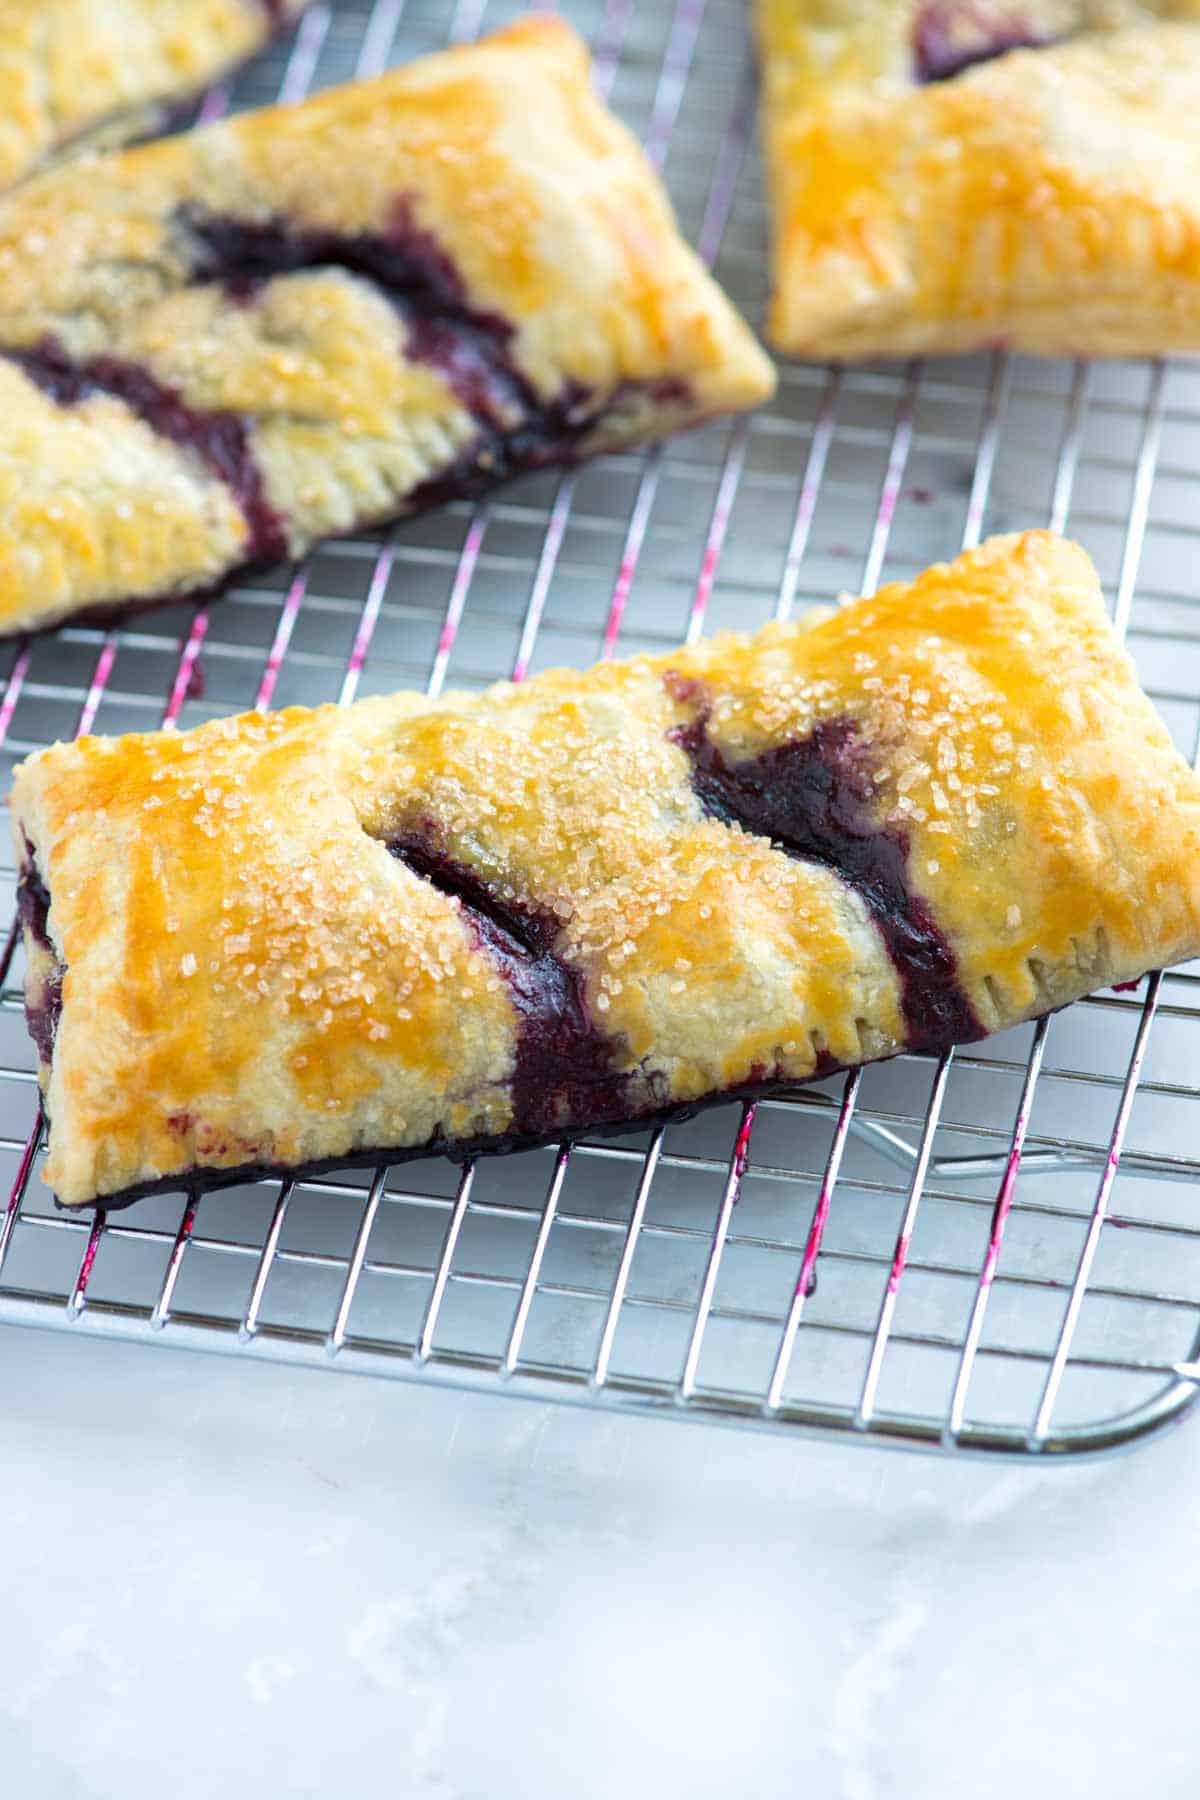
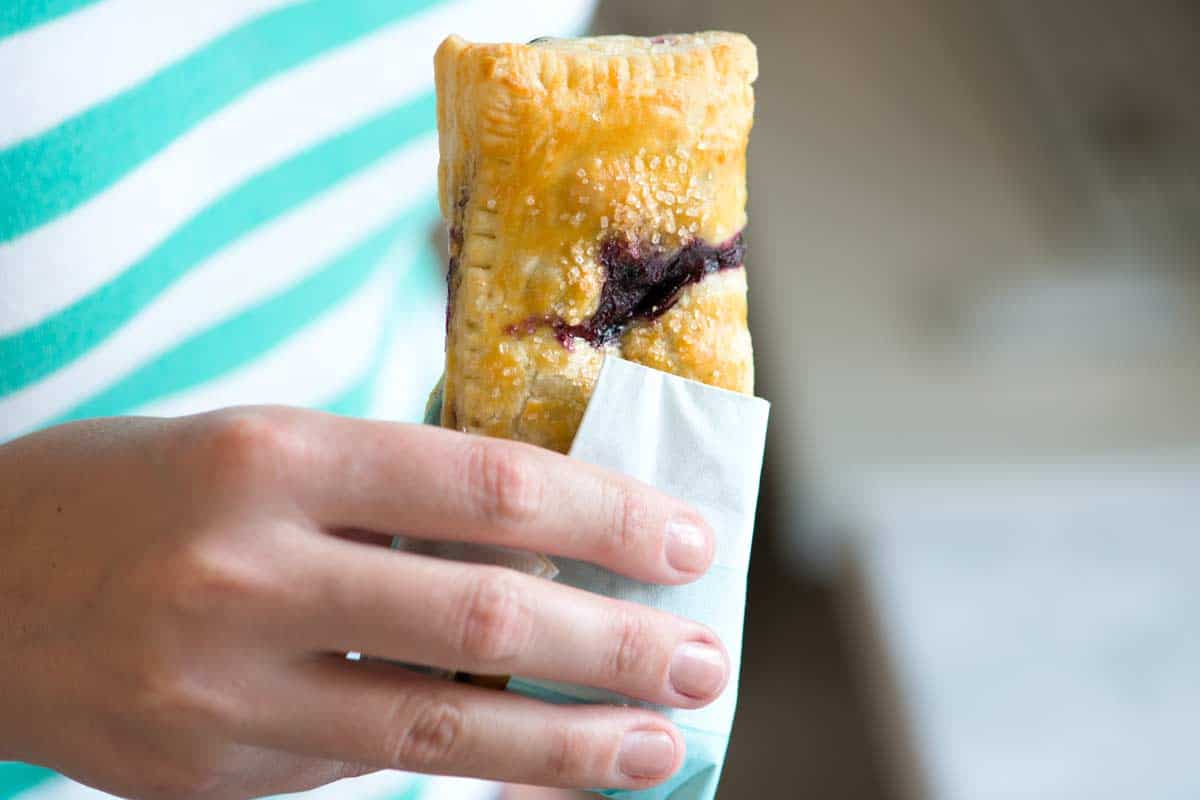
    Get ready to fall in love with these easy blueberry hand pies, featuring a jammy blueberry filling wrapped in a perfectly crisp buttery crust. All made simple thanks to store-bought puff pastry!

    Blueberry Hand Pies

    These hand pies filled with blueberries make me smile whenever we make them! My family loves blueberry pie, and the fact that this recipe turns it into a handheld experience is seriously the best! I keep these super easy with store-bought puff pastry, making them a little lighter and airier than if you swap it for traditional pie crust (which is an option, by the way).

    I love fresh blueberries in these pies, but I’ve shared tips for swapping them for frozen blueberries, blackberries, cherries, and strawberries below! For more pie inspired recipes, try our apple pie cupcakes, made with a base of cinnamon roll dough (I know!). Or, for another blueberry recipe, see this easy blueberry crumble!

    Key Ingredients

    • Store-Bought Puff Pastry: Puff pastry is the secret to these easy individual hand pies. It is made with multiple layers of dough separated by butter. When you bake it, the butter puffs and lifts the layers of dough above it. That’s why puff pastry becomes so flaky. I used Pepperidge Farm in the photos, but use what you have available! You can also substitute it with homemade pie crust (no changes necessary).
    • Blueberries: I love fresh blueberries (especially during the summer when they are in season). You can also use frozen berries in our recipe (tips for this are in the recipe). Or substitute for other berries or cherries.
    • Sugar: I don’t like the filling to be too sweet, but I add a little sugar to help make that jammy texture. Granulated sugar or coconut sugar is perfect. If you have some, sprinkle coarse sugar over the dough before baking (or use more granulated sugar).
    • Cornstarch: This thickens the filling nicely. For fresh fruit, use 2 tablespoons to 2 cups of fruit. If you have frozen, increase by 1/2 tablespoon.
    • Lemon Juice, Salt, and Almond Extract: These make our filling taste incredible. I love the almond extract (and also call for it in my homemade blueberry pie), but you can leave it out if you don’t have any on hand.
    • Egg Wash: I love these hand pies with a shiny, golden exterior, so I brush a little egg wash with an egg yolk and cream over them before baking.
    Blueberry Hand Pies

    Easy Blueberry Hand Pies

    • PREP
    • COOK
    • TOTAL

    These blueberry hand pies are perfect when you want pie but don’t have the time to make a whole pie! We use store-bought puff pastry dough for these, which makes them extra easy. Before making these, make sure that your puff pastry is thawed according to the package directions. I usually take them out of the freezer and place them into the fridge overnight.

    Makes 8

    You Will Need

    1 (17.3oz) package puff pastry sheets, thawed, 2 sheets puff pastry

    2 cups fresh blueberries

    1/4 cup (50g) granulated sugar

    2 tablespoons (14g) cornstarch

    1 tablespoon fresh lemon juice

    1/8 teaspoon salt

    1/8 teaspoon almond extract, optional

    1 egg yolk

    1 tablespoon cream

    Coarse sugar or extra granulated sugar for topping pies

    Directions

      1Preheat the oven to 400°F (204°C). Line two baking sheets with parchment paper or aluminum foil.

      2Prepare blueberry filling: Combine blueberries, 1/4 cup of sugar, 2 tablespoons of cornstarch, 1 tablespoon of lemon juice, 1/8 teaspoon of salt, and the optional 1/8 teaspoon of almond extract in a saucepan over medium heat.

      3Cook, stirring often, until the liquid at the bottom comes to a simmer. Reduce the heat to medium-low and cook for 3 to 5 minutes or until it thickens. Transfer to a bowl and let cool to room temperature (to speed this up, stir it occasionally and place into the refrigerator).

      4Make egg wash: Whisk an egg yolk and 1 tablespoon of cream in a small bowl. Set aside.

      5Prepare pie crusts: When the filling is mostly cooled down. Unfold one of the thawed puff pastry sheets on a lightly floured work surface. Roll the pastry sheet into a 12-inch square. Cut into four 6-inch squares. Repeat with the remaining pastry sheet. Transfer pastry squares to the baking sheets.

      6Assemble hand pies: Divide the filling between the pastry squares, placing it onto one-half of each pastry square. Spoon any liquid accumulated on the bottom of the bowl over blueberries.

      7Brush the edges of the pastry with egg wash, fold the half of pastry without filling over blueberries then use a fork to press edges and seal. Brush the tops with more egg wash and top them with a sprinkle of sugar. Cut two 1-inch slits into the top of each pie.

      8Bake pies: Bake for 15 to 20 minutes until golden brown and the filling is bubbling out of the slits on top. (Don’t worry. Plenty of filling is left inside.) Cool the hand pies on baking sheets for 5 minutes, then transfer to cooling racks to cool completely.

    Adam and Joanne’s Tips

    • Storing: Once cool, store the hand pies in an airtight container at room temperature for up to 2 days, in the fridge for up to one week, or in the freezer for up to 1 month.
    • Using frozen blueberries: You can use frozen blueberries in this recipe. Add them frozen, but increase the cornstarch by 1/2 tablespoon (so use 2 ½ tablespoons total).
    • Using cherries, strawberries, or blackberries: Use 2 cups of fresh blackberries, pitted and halved cherries, or chopped fresh strawberries. You may need to increase the sugar by 1 tablespoon for blackberries unless they are very ripe and sweet.
    • The nutrition facts provided below are estimates.

    Nutrition Per Serving
    Serving Size
    1 Hand Pie
    /
    Calories
    396
    /
    Total Fat
    24g
    /
    Saturated Fat
    6.2g
    /
    Cholesterol
    24.1mg
    /
    Sodium
    188.5mg
    /
    Carbohydrate
    40.9g
    /
    Dietary Fiber
    1.8g
    /
    Total Sugars
    10.5g
    /
    Protein
    5.1g


    AUTHOR:

    Joanne Gallagher

    Previous Post: Perfect Ricotta Gnocchi
    Next Post: Homemade Berry Tart

    Source link

  • Perfect Pickled Beets Recipe

    Perfect Pickled Beets Recipe

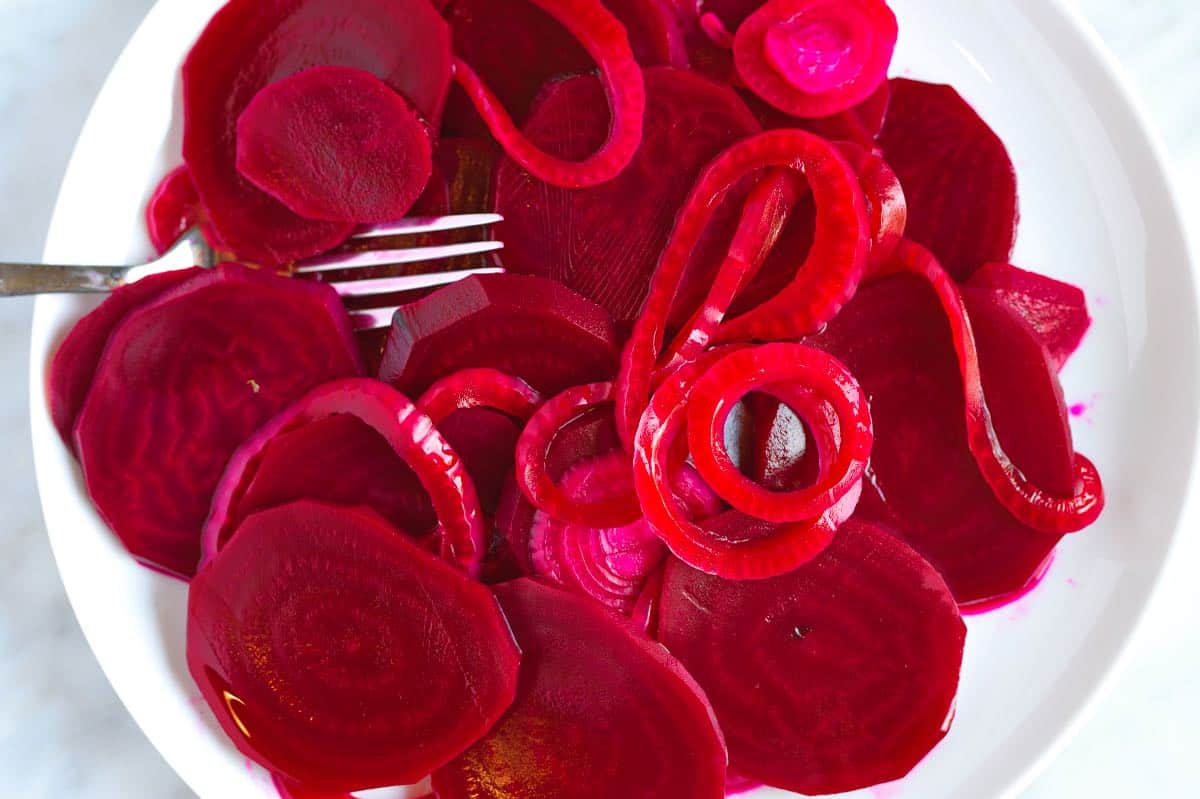
    This pickled beets recipe is quick, easy, and makes outrageously delicious, tangy, and slightly sweet beets.

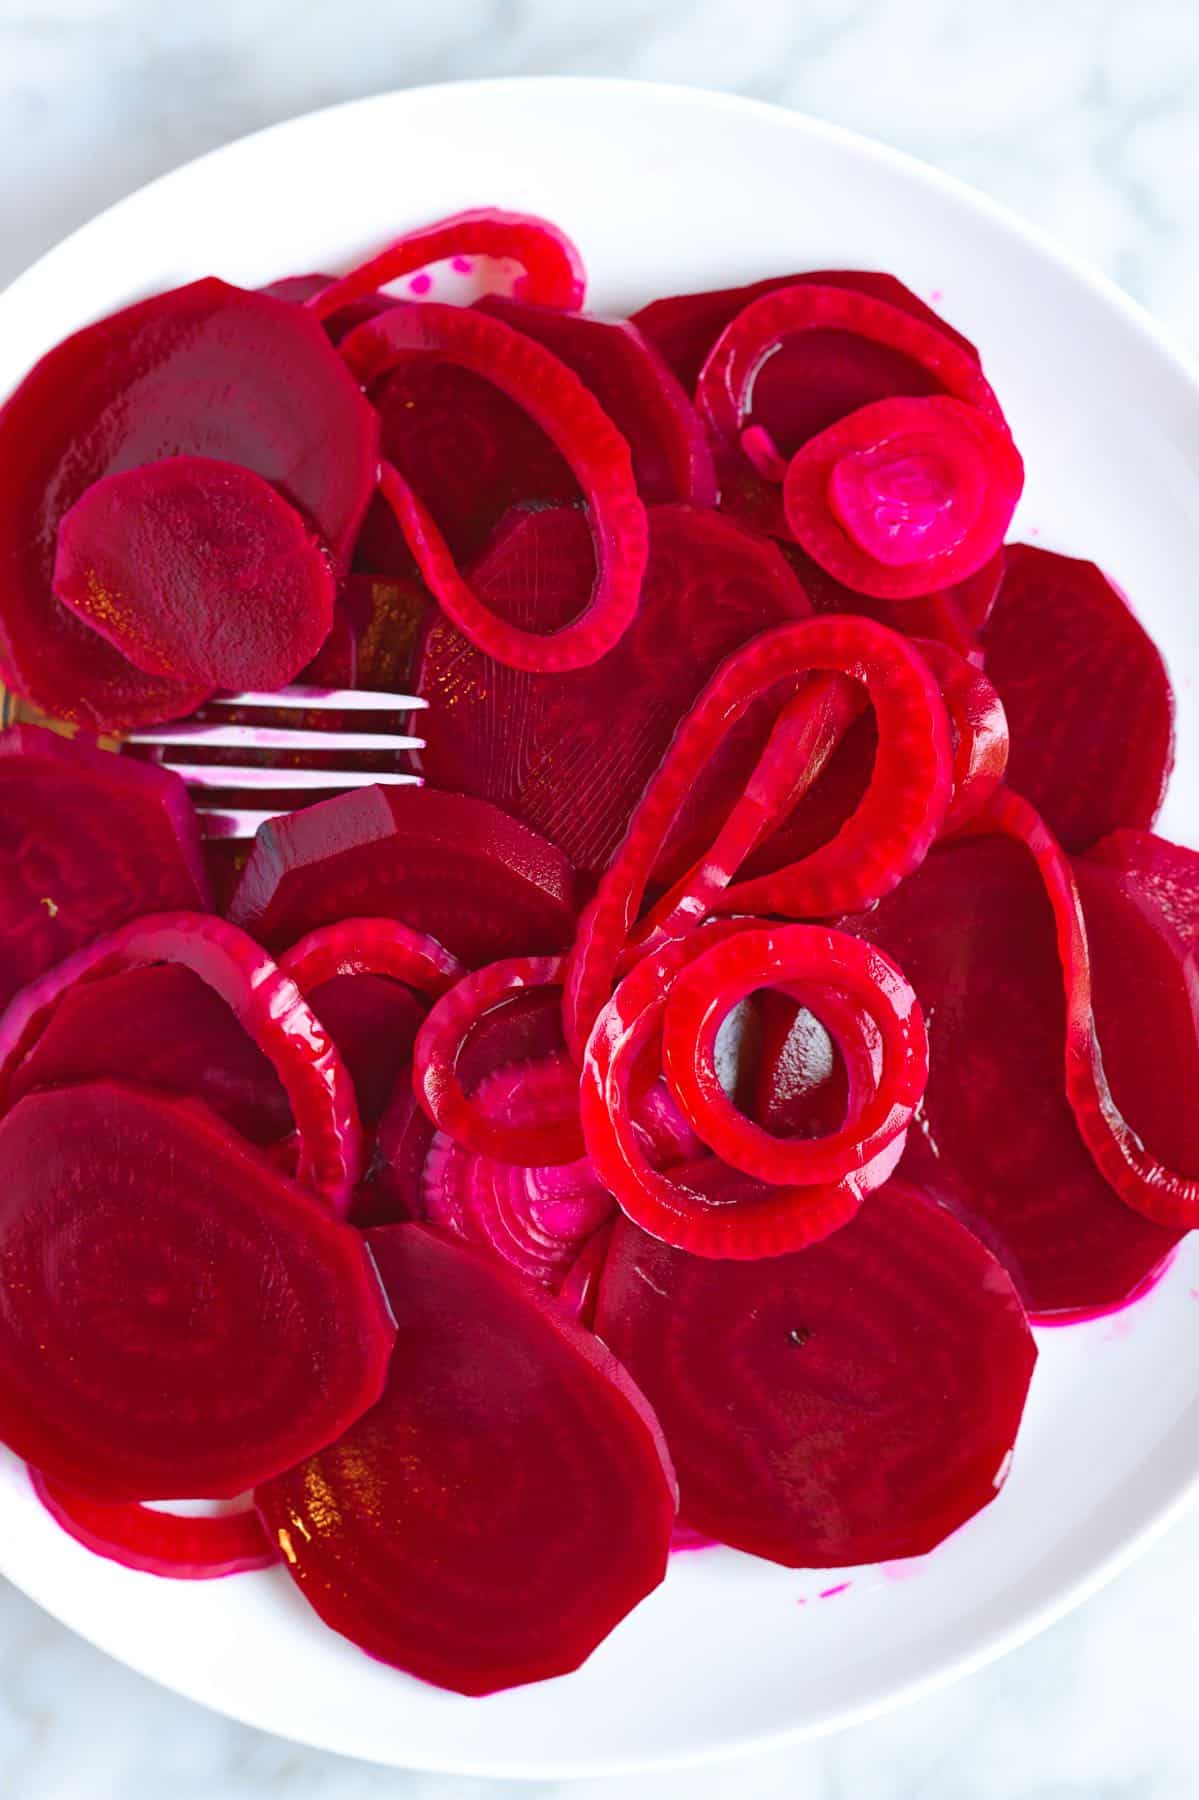
    Pickled Beets

    I love homemade pickled beets. This recipe has tangy, slightly sweet flavor with a subtle hint of spice. Plus, since we add onions, you also get pickled onions!

    These are refrigerator pickles, which means you can enjoy them as early as tomorrow. For another easy refrigerator pickle, try our dill pickles.

    Key Ingredients

    • Beets: Look for firm beets with smooth, unblemished skin. Red or yellow beets work well. Before pickling the beets, you’ll first roast them with a bit of olive oil.
    • Onion: I love pickled beets and onions, so we always add a few slices of onion to the top of the jar so they pickle with the beets. If you only want to pickle onions, see our pickled red onions recipe.
    • Vinegar: Plain distilled vinegar works, but I prefer the flavor of apple cider vinegar.
    • Sugar: This balances the acidity of the vinegar. You can reduce the sugar in our recipe below. When making the brine on the stovetop, add sugar to taste. We enjoy the balance of 4 tablespoons (see the full recipe below). That said, you can adjust the amount as needed. You can also substitute the sugar for honey or maple syrup.
    • Pickling Spices: I use salt, a clove, and an allspice berry in this pickle brine. Since I don’t use allspice berries very often, I steal one from a jar of pickling spice, which I also use to make these bread and butter pickles.

    Find the full recipe with measurements below.

    How to Make the Best Pickled Beets

    Tip 1: Ready in no time. These are refrigerator pickled beets, which fall into the refrigerator pickle category, requiring no complicated canning process. They are fast and easy to make, and you can enjoy them in as little as a day. For another easy refrigerator pickle, try these dill pickles.

    Tip 2: Roast the beets. For the best flavor and texture, roast your beets in the oven until they are tender enough to be pierced with a fork. Roasting them brings out more flavor. If you prefer to boil them, you can, but you’ll lose a little flavor.

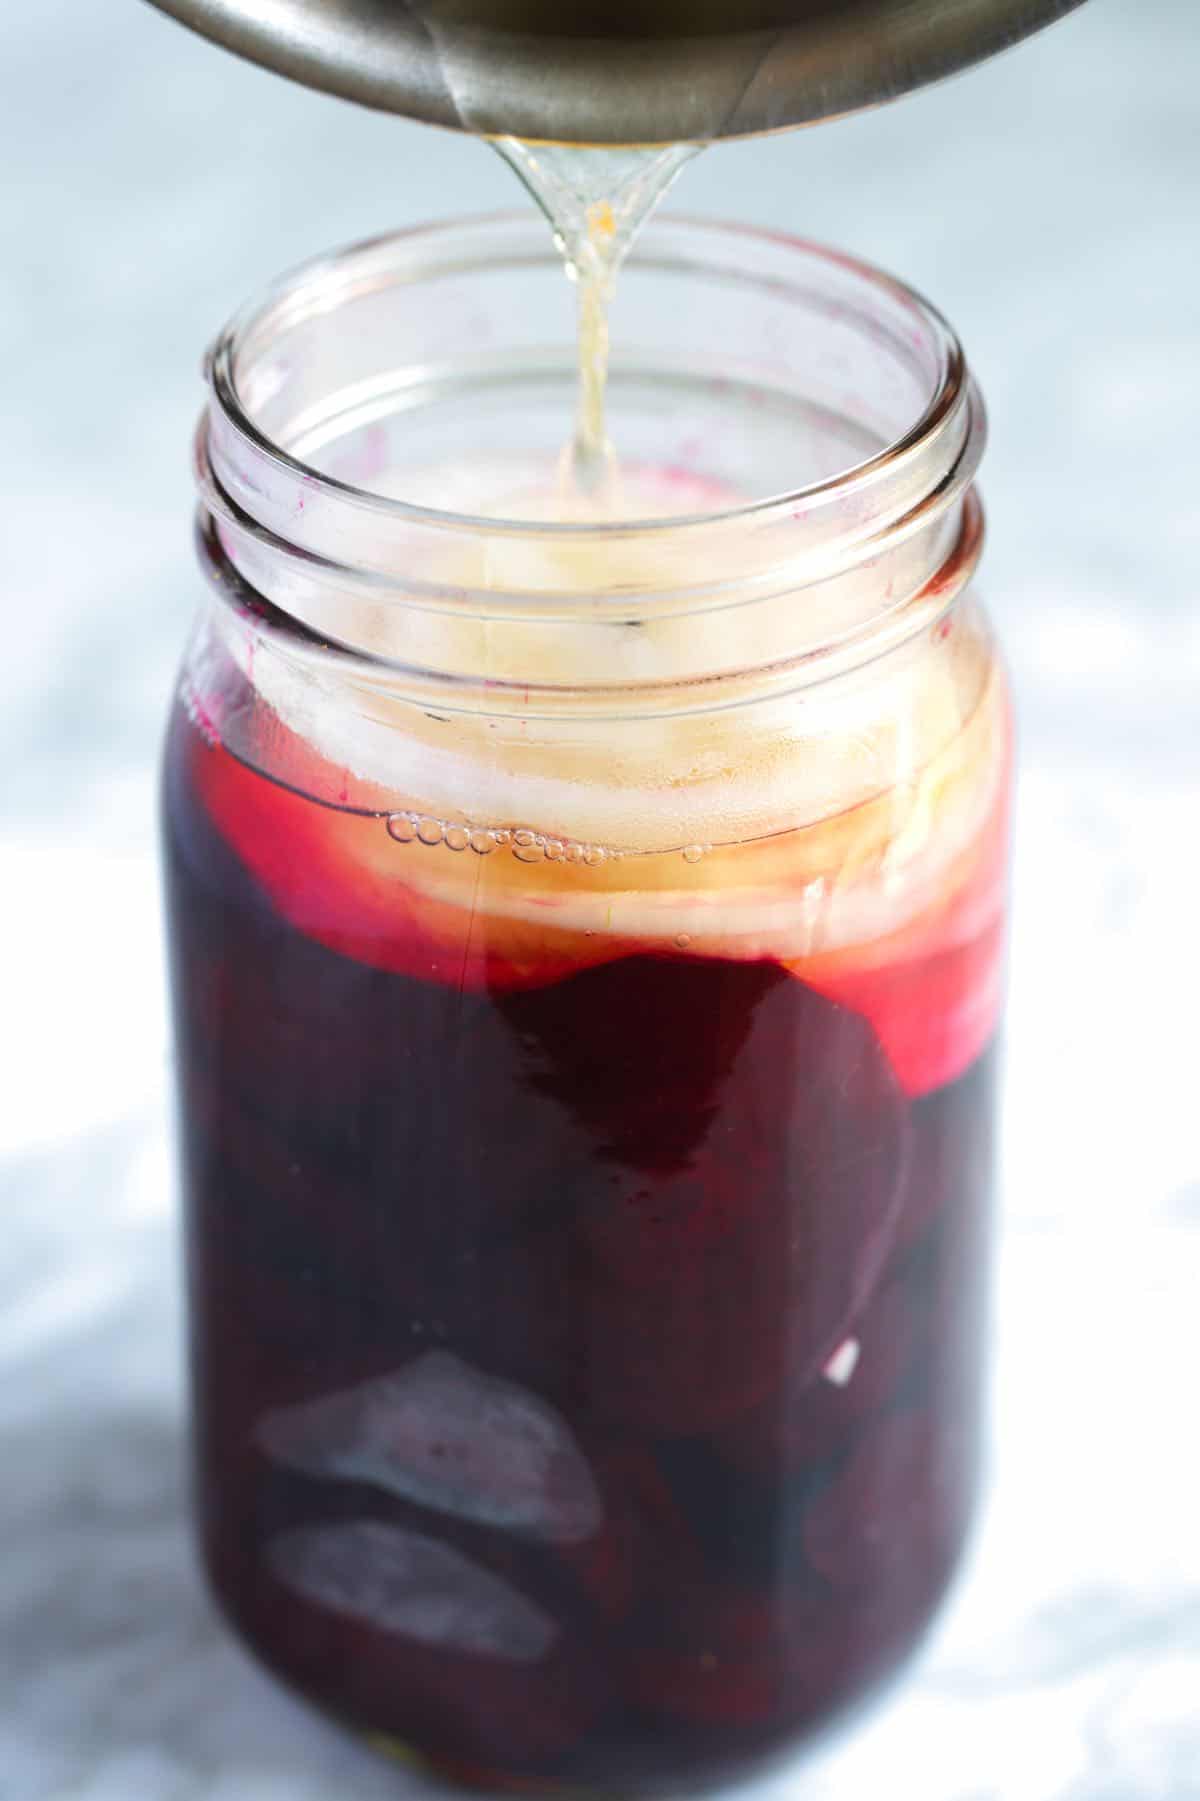
    Tip 3: Pickle with onions. Once the cooked beets have cooled down, you can peel and slice them. Then, combine them with sliced onions in a jar and prepare a simple vinegar brine using cider vinegar, sugar, cloves, and allspice berries. As the brine works its magic, you’ll end up with a jar full of delightful pickled beets and a bonus of pickled onions.

    Pouring the hot brine over the beets and onions

    Tip 4: Enjoying them. Once you have a jar of these pickled beets in your fridge, you’ll discover endless possibilities for enjoying them. They’re a fantastic addition to sandwiches, wraps, and salads, and they stand alone as a hearty and delightful side dish. I especially love them with sharp cheddar cheese and this cucumber salad for a snack or light lunch.

    More Homemade Pickles

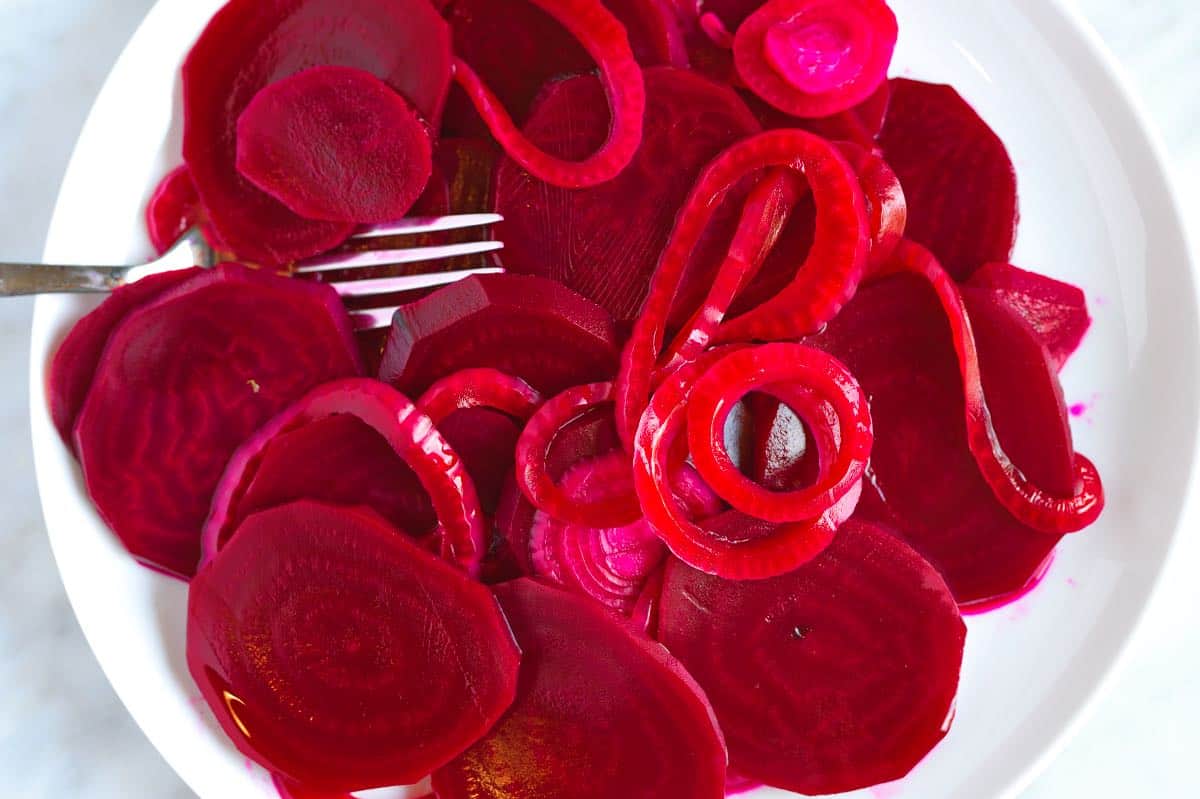
    Homemade Pickled Beets

    Perfect Pickled Beets

    • PREP
    • COOK
    • TOTAL

    Pickling beets is simple, and our recipe results in amazingly delicious, tangy, and slightly sweet beets. These work wonders in sandwiches, salads, or as a stand-alone side dish. Use any variety or color of beet for this recipe.

    Makes 1 quart

    You Will Need

    4 medium beets

    1 ½ tablespoons olive oil, for roasting

    A quarter of an onion, sliced 1/4-inch thick

    4 tablespoons granulated sugar (50g)

    1 ¼ cups apple cider vinegar (295ml)

    1/2 teaspoon fine sea salt

    1 whole clove

    1 allspice berry, see notes

    Directions

    • Roast Beets
    • 1Preheat the oven to 375°F (190°C). Set aside a large baking sheet.

      2Prepare the beets by removing the tops and roots, and then place them on a large sheet of aluminum foil or parchment paper. Drizzle olive oil over them, ensuring they are well coated, and fold up the foil or paper to create a sealed packet.

      3Place the packet on the baking sheet and roast in the oven until they are easily pierced with a fork, 45 to 55 minutes. Allow the beets to cool in the packet at room temperature or, better yet, refrigerate until cold.

    • Pickle the Beets
    • 1Peel the beets and slice them into 1/4-inch thick pieces. If needed, use a vegetable peeler to help with the peeling. Pack the sliced beets tightly into a clean jar and add the sliced onions.

      2Heat the vinegar, sugar, salt, clove, and allspice berry in a small saucepan over medium-high heat until simmering and the sugar dissolves.

      3Pour the hot liquid over the onions and beets, leaving a 1/8-inch gap between the pickle brine and the top of the jar. Place the lid on the jar and tighten it until finger-tight. Let cool to room temperature.

      4Once cooled, fully tighten the lid and store the jar in the refrigerator. Initially, place the jar upside down in a bowl and flip it right-side up after a day or two. Enjoy pickled beets as early as the next day. As long as the brine covers the beets and onions, they will last in the fridge for up to a month.

    Adam and Joanne’s Tips

    • Allspice berries taste like a combination of cloves, cinnamon, and nutmeg. We found whole allspice berries less common in the grocery spice aisle, but Chef Richard recommends buying a “pickling spice blend” instead. McCormick “Mixed Pickling Spice” contains allspice berries, which we pick out of the jar and use in this recipe.
    • The nutrition facts provided below are estimates.

    Nutrition Per Serving
    Serving Size
    1/6 of the jar
    /
    Calories
    123
    /
    Total Fat
    3.7g
    /
    Saturated Fat
    0.5g
    /
    Cholesterol
    0mg
    /
    Sodium
    268.5mg
    /
    Carbohydrate
    20.1g
    /
    Dietary Fiber
    3g
    /
    Total Sugars
    15.8g
    /
    Protein
    1.8g


    AUTHOR:

    Joanne Gallagher

    Adam and Joanne of Inspired Taste

    We are Adam and Joanne Gallagher, the creators of Inspired Taste. Established in 2009, Inspired Taste grew from a childhood dream into one of the internet’s most trusted recipe sites with hundreds of reliable recipes, step-by-step videos, and expert tips.More About Us
    Source link

  • Fall Off the Bone Oven Baked Beef Ribs Recipe

    Fall Off the Bone Oven Baked Beef Ribs Recipe

    Learn how to cook incredibly delicious BBQ beef ribs in the oven. Most of the cooking time is hands-off, letting the ribs slowly bake until fall-apart tender.

    Baked BBQ Beef Ribs

    The key is baking them low and slow. It’s the same approach we use for our popular pork ribs, and it works beautifully with beef. Once I started making beef ribs this way, I never looked back.

    For this beef ribs recipe, we rub short ribs with a simple dry rub, sear them to build flavor, and then bake until unbelievably tender. A final layer of BBQ sauce goes on at the end, and as it finishes in the oven, it becomes sticky and glossy over the meat. They are incredible!

    Key Ingredients

    • Beef Ribs: This recipe is written for beef short ribs, which are meaty and become very tender when cooked low and slow. If using beef back ribs, you can still follow this method, but they may cook a little faster. Note, do not use flanken ribs (Korean-style ribs), as these are too thin for this cooking method. More details below.
    • Dry Rub: Beef needs a generous amount of seasoning. We mix salt, pepper, smoked paprika, garlic powder (or granulated garlic), and onion powder.
    • BBQ Sauce: Use your favorite store-bought sauce, or make our tangy BBQ sauce recipe.
    • Apple Cider Vinegar: We add a bit of extra tang to the BBQ sauce with apple cider vinegar. White wine vinegar or champagne vinegar are good substitutes.
    • Beef Stock or Water: This thins our BBQ sauce a bit. You only need ¼ cup, so if you have beef stock in the fridge, great. Otherwise, water does the job.
    • Worcestershire Sauce: A teaspoon adds a bit more savoriness to the sauce.

    Find the full recipe with measurements below.

    How to Cook Beef Ribs in the Oven

    Tip 1: Do not trim all the fat. When working with short ribs, we rarely trim much fat before cooking. The butcher has already done most of the work. If you see any very large pieces of fat or gristle, you can remove them, but avoid over-trimming. Some fat is key to tender, juicy ribs. As Chef Richard likes to say, “don’t go chasing the fat.”

    Tip 2: Use our dry rub and sear before baking. Beef needs a good amount of seasoning, so use our simple dry rub early on to build flavor. It’s a mixture of salt, pepper, smoked paprika, garlic powder, and onion powder.

    Rub the short ribs all over with the dry rub. They should be thoroughly coated. Then, sear them in a pan with some oil until golden on all sides. This step builds flavor and gives the fat on the outside a head start.

    Searing short ribs rubbed with BBQ dry rub

    Tip 3: Bake them low and slow. High heat will toughen beef ribs before they have a chance to soften. A lower oven temperature gives us more time to slowly cook the connective tissues (collagen) and fat, which keeps the beef tender and juicy. In the photos below, the first one shows the seared ribs ready for the oven, and as you scroll down, you can see how tender they look after cooking them slowly in the oven.

    For tender ribs, cook them at 275°F (135°C) for 2 to 3 hours, then add BBQ sauce and continue cooking for another hour. The size of your short ribs will affect baking time. We provide tips in our recipe below.

    Ribs ready to be baked in the oven until tender

    Tip 4: Cover the pan for most of the cooking time. Tightly cover your baking pan with foil so the ribs cook in their own steam. This prevents moisture from escaping and helps the ribs turn tender. Baking them uncovered for too long will dry them out.

    Keep your ribs tightly covered with foil until the last 20 to 25 minutes. Then, uncover and bake until the glaze is shiny and sticky.

    Tip 5: Check the ribs toward the end of cooking. Every oven runs a little differently. When the ribs are done, a fork should slide in easily with very little resistance. If they still feel firm, keep baking. Also, check the pan. There should be plenty of rendered fat and juices. If the pan seems dry, the foil was not sealed tightly enough.

    Spooning BBQ sauce over tender baked beef ribs

    Tip 6: Add BBQ sauce at the end. Spoon over your BBQ sauce during the last part of cooking. If added too early, you’ll lose some flavor, and the sugars in the sauce might even cause your ribs to dry out.

    Brush on the BBQ sauce after the ribs have become tender, then return the pan to the oven. Finishing uncovered allows the sauce to thicken into a glossy glaze without burning or drying the ribs.

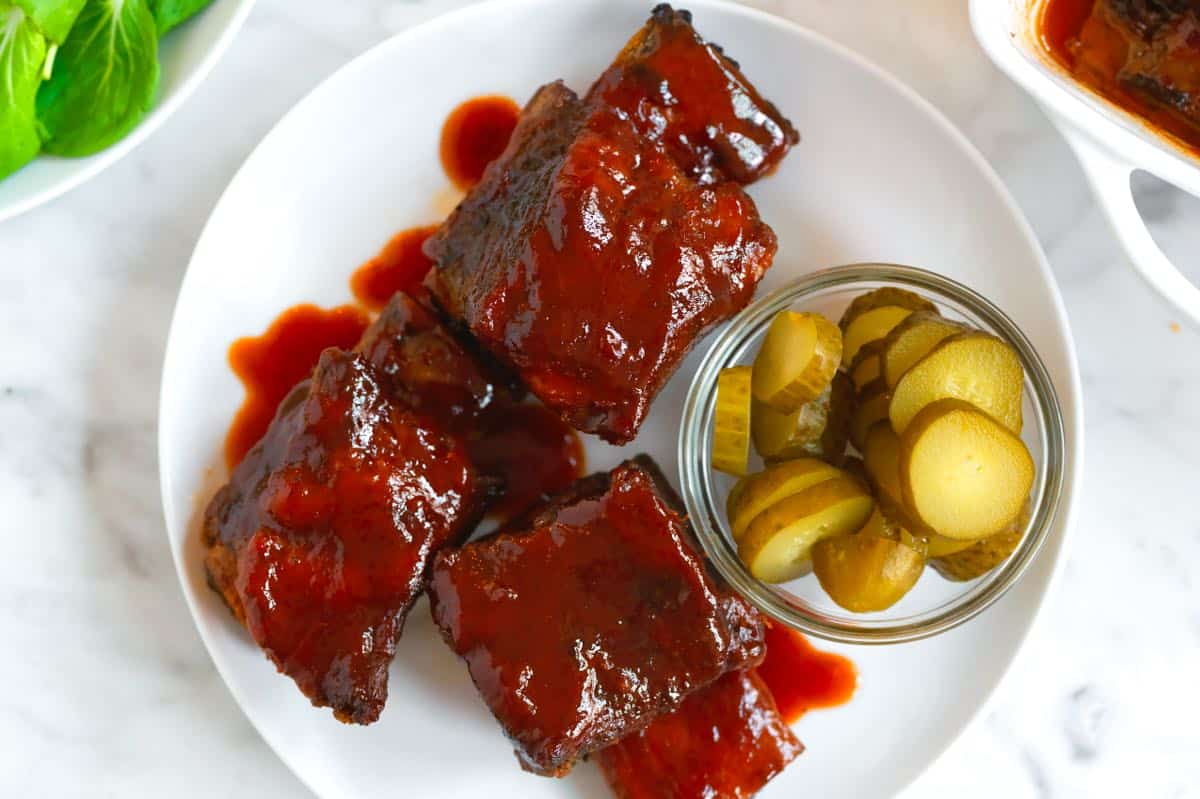
    Beef ribs ready to serve

    A Note on Types of Beef Ribs

    There are four common types of beef ribs you’ll likely come across:

    • Chuck short ribs: These are cut from the upper portion of the rib cage (closer to the shoulder). They are smaller, a bit more irregular in shape, and are the most common option in standard grocery stores.
    • Plate short ribs: These come from the lower portion of the rib cage. They are larger, meatier, and have richer marbling. You are more likely to find them at a butcher shop or specialty grocery store.
    • Beef back ribs: These have much less meat because they are usually removed after the rib roast or ribeye is cut away. Rib roasts or ribeyes are some of the most expensive cuts of beef, so most butchers leave very little meat on the bone. These work in the recipe below, but will cook faster. Start checking for tenderness earlier.
    • Flanken ribs: These are cut very thin, sometimes called Korean-style or Galbi. These do better with quick, high-heat cooking, and are not ideal for this recipe. We use them in our Korean short ribs recipe.

    Our recommendation: If you have the choice, use plate short ribs cut into smaller pieces (3 to 4 inches long), sometimes labeled English-style. They have the best balance of meat and fat and become especially tender when baked low and slow. I also use plate ribs for these red wine braised short ribs.

    Serving Suggestions

    These BBQ ribs are rich and satisfying. Depending on their size, plan for 1 to 2 ribs per person. Short ribs can be quite meaty, which is one of the reasons we love them.

    For serving, something fresh on the side works beautifully. Coleslaw is a favorite. Try our creamy coleslaw or vinegar coleslaw. A simple green salad with a bright lemon vinaigrette or honey mustard dressing is also a great match, and this napa cabbage salad is excellent. As shown in our photos, we also love a side of pickles for something tangy.

    For more sides, Cajun butter corn, corn salad, or homemade cornbread are all wonderful. If you want something heartier, serve the ribs with potatoes au gratin, mashed potatoes, a baked potato, or baked mac and cheese. Enjoy!

    More Rib Recipes

    Oven Baked BBQ Beef Ribs

    Fall Off the Bone Oven Baked Beef Ribs

    • PREP
    • COOK
    • TOTAL

    For these beef ribs, bake them covered with foil for 2 to 3 hours, then check for tenderness. If a fork slides in easily, go ahead and add the BBQ sauce.

    If the ribs are not yet tender, reseal the pan tightly, and continue baking. If the pan ever looks dry (it shouldn’t), add a splash of water or stock, then seal well with foil. Keep baking until the ribs are very tender, then uncover, add the sauce, and finish baking as directed below.

    *See the article above for tips on buying ribs for this recipe.

    6 Servings

    You Will Need

    For the Ribs

    3 pounds meaty short ribs, 8 to 10 ounces each, about 6 ribs (1.3kg)

    1 tablespoon fine sea salt

    1 ½ teaspoons freshly ground black pepper

    1 teaspoon smoked paprika

    1 teaspoon garlic powder or granulated garlic

    ½ teaspoon onion powder

    2 tablespoons avocado oil


    For the Sauce

    1 cup BBQ sauce, try our homemade BBQ sauce

    2 tablespoons apple cider vinegar

    ¼ cup beef stock or water

    1 teaspoon Worcestershire sauce

    Directions

      1Prep: Preheat the oven to 275°F (135°C). Set aside a 13×9-inch baking dish (possibly 2 if you have really large ribs).

      2Prep ribs: We don’t trim much from the short ribs. If you see larger fat clumps or flaps, trim them. Don’t over trim. You want to leave most of the fat for flavor and moisture.

      3Add spice rub: In a small bowl, mix the salt, pepper, smoked paprika, garlic powder, and onion powder. Pat the ribs dry with paper towels, then coat all sides generously with the spice rub.

      4Sear the ribs: Heat the oil in a wide skillet over medium heat. Working in batches, sear the ribs on all sides until browned, about 2 minutes on each side. Transfer them to the baking dish, placing the fattiest side facing up. It will be a tight fit.

      5Bake the ribs: Tightly cover the baking dish with foil and bake until the ribs are very tender but not yet falling apart, about 2 ½ hours.

      6Begin checking for tenderness after 1 ½ hours by sliding a fork into the meat. It should meet some resistance but not feel tough. Continue checking every 30 minutes until tender. The goal is tender, but not yet fall-apart-tender.

      7Prepare the sauce: While the ribs bake, whisk together the BBQ sauce, vinegar, beef stock, and Worcestershire in a medium bowl.

      8Add the sauce: When the ribs are fork tender, remove the foil and check the liquid in the dish. Some is fine, but if it’s almost to the top, remove some of it. Then, brush the ribs all over with sauce (saving some for later). Re-cover tightly with foil and return to the oven for 45 minutes.

      9Caramelize the sauce: Remove the foil completely, add more sauce, and return to the oven for another 20 to 25 minutes, or until the sauce has thickened into a shiny glaze and the edges look slightly caramelized.

      10Let them rest: Remove the ribs from the oven and let them rest for 15 minutes, tented lightly with foil, before serving.

    Adam and Joanne’s Tips

    • Short ribs thickness: The thickness and meatiness of your ribs affect cooking time. Begin checking for tenderness after 1 ½ hours of baking (before adding sauce). Meaty, thick ribs typically need about 2 ½ hours, and really meaty ribs may need even longer, before they’re ready for sauce.
    • Short ribs vs. back ribs: Short ribs are meatier and richer than beef back ribs. You can use back ribs in the recipe above, but expect less meat and a shorter cooking time (about 45 minutes to 1 hour less before adding sauce). The remaining steps and times stay the same.
    • Doneness: The ideal texture depends on preference. For ribs that hold together when bitten (the classic barbecue competition style), bake for slightly less time and stop when the meat is tender but still cohesive. For a fall-apart texture, continue baking until a fork slides in easily and the meat pulls away with minimal effort.
    • Sauce: For store-bought sauce, we have used Sweet Baby Ray’s with great results. I also love this homemade barbecue sauce, which was our attempt at recreating store-bought sauce, but with slightly less sugar.
    • Storing: Store them in an airtight container in the fridge for up to 4 days, or freeze for up to 3 months (I double-wrap them before freezing). Thaw overnight in the refrigerator.
    • Reheating: Place the ribs (thawed), wrapped in foil, in a 275°F oven for 20 to 30 minutes or place them on the grill over medium heat. Slather the warmed ribs with extra BBQ sauce before serving.
    • The nutrition facts provided are estimates.

    Nutrition Per Serving
    Serving Size
    1/6 of the recipe, or 1 short rib
    /
    Calories
    508
    /
    Total Fat
    26.6g
    /
    Saturated Fat
    9.8g
    /
    Cholesterol
    125.4mg
    /
    Sodium
    1678.5mg
    /
    Carbohydrate
    23.6g
    /
    Dietary Fiber
    1g
    /
    Total Sugars
    18.6g
    /
    Protein
    41.2g


    AUTHOR:

    Joanne Gallagher

    Source link

  • Crispy Pork Milanese Recipe

    Crispy Pork Milanese Recipe

    This pork milanese recipe is all about tender, juicy pork with a light, crispy breading. It’s easier than you might think and turns out absolutely delicious every time.

    Pork Milanese

    Inspired by Italian cotoletta alla milanese (made with veal) and chicken milanese, this version made with lean pork chops is quick, budget-friendly, and so tasty. It’s perfect with a squeeze of lemon and a side of lightly dressed salad greens (I especially love it with our lemon vinaigrette!).

    Pounding the pork thin is the secret to success. It helps the meat cook quickly and evenly, keeping it juicy inside while the breading turns golden and crisp. From there, you’ll bread and cook the cutlets, either traditionally by pan-frying in oil or in an air fryer (both methods are below!).

    Key Ingredients

    • Pork Chops: Start with boneless pork chops. I like center-cut or loin-cut chops. This dish works best with thinner cuts, so either buy thin-cut or slice thicker ones in half crosswise to make two thinner pieces. More tips for this are below.
    • Flour and Eggs: We use a three-part breading station for this recipe. Step one is to dredge your pork in flour, and step two is to pull them through whisked eggs. I use all-purpose flour.
    • Breadcrumbs: After flour and eggs, the third part of the breading is breadcrumbs. I love light and crispy panko breadcrumbs or homemade breadcrumbs.
    • Italian Seasoning: We are really generous with the herbs in our breading, so we mix a good amount of Italian seasoning into the breadcrumbs.
    • Parmesan Cheese: Optional, but highly recommended. Finely grated Parmigiano-Reggiano stirred into the breadcrumb mixture takes the milanese-style breading to the next level.

    Find the full recipe with measurements below.

    How to Make Pork Milanese

    Tip 1: Prepare the pork. Start with thin pork chops (see above). Then, pound them even thinner with a meat mallet, rolling pin, or the bottom of a sauce pot.

    Pounding helps them cook quickly and evenly, so your breading turns golden before the pork overcooks. As a bonus, it tenderizes the meat, so your pork will turn out tender and juicy.

    Pounding pork chops thin before breading for pork milanese

    Tip 2: Set up the breading station. You’ll need three wide, shallow bowls. Add flour to the first. In the second, whisk the eggs and water until smooth. In the third, combine the breadcrumbs, Italian seasoning, parmesan cheese, and a good pinch of salt.

    Tip 3: Bread the pork. I like to work with one chop at a time and use a fork to move it around.

    1. Dip it into the flour on both sides, shaking off any excess.
    2. Next, coat it in the egg mixture.
    3. Finally, press it into the breadcrumbs until evenly covered.

    Gently shake off any loose crumbs, then place the breaded pork on a baking sheet. Continue with the remaining chops.

    Breading pork chops

    Tip 4: Cook the pork. You have two options. My favorite way to cook them is to pan-fry in a skillet with some oil. You can also use an air fryer. Both cooking methods are provided in the recipe below.

    However you cook them, you’ll know they’re perfect when: the coating is crisp and golden and the pork feels firm but still juicy.

    Pan-frying pork chops breaded in breadcrumbs for pork milanese

    More Pork Recipes

    Pork Milanese

    Crispy Pork Milanese

    • PREP
    • COOK
    • TOTAL

    Serve pork milanese next to a light, fresh salad. I especially love tossing salad greens with this lemon vinaigrette. The bright, tangy dressing is perfect with the pork.

    Note on the pork: The recipe assumes 1-inch thick chops, which you will slice in half crosswise before pounding to ¼ inch. Another option is to start with thin-cut pork chops (about ½ inch thick) and pound them to ⅓ inch thick (you will need 6 of them).

    6 Servings

    You Will Need

    1 ½ pounds boneless pork chops, 3 chops about 1-inch thick

    1 cup all-purpose flour (130g)

    2 large eggs

    4 tablespoons water

    1 ½ cups panko or homemade breadcrumbs, crushed a little finer (130g)

    3 tablespoons Italian seasoning

    3 tablespoons finely grated Parmigiano-Reggiano, optional

    Salt and fresh ground black pepper

    Oil, for cooking

    Directions

      1Prepare the pork: Slice each pork chop in half crosswise to make two thinner chops. Place them between sheets of plastic wrap or parchment paper and pound to about ⅓ inch thick using a mallet or the bottom of a small pot.

      2Season the pork: In a small bowl, mix ½ teaspoon salt with ½ teaspoon freshly ground black pepper. Line a large baking sheet with parchment paper, then arrange the flattened pork chops on it. Season both sides evenly with the salt and pepper mixture.

      3Set up the breading station: You’ll need three wide, shallow bowls. Add the flour to the first. In the second, whisk together the eggs and water until smooth. In the third, combine the breadcrumbs, Italian seasoning, parmesan cheese, and a good pinch of salt.

      4Bread the pork: Working with one chop at a time, using a fork, dredge it with flour, shaking off any excess. Dip it into the egg mixture, then press it into the breadcrumb mixture so it is well coated. Shake off any excess crumbs, then place the breaded pork back on the baking sheet. Repeat with the remaining chops.

      5Cook: Set a large skillet (with sides) over medium heat and let it preheat. Add enough oil to cover the bottom by about ⅛ inch. To test the temperature, drop in a breadcrumb. It should sizzle right away.

      6When the oil is ready, add 2 to 3 chops at a time, depending on the size of your pan. Cook for 2 to 3 minutes per side, or until golden brown and the internal temperature reaches at least 145°F. Transfer to a rack, sprinkle lightly with salt, and repeat with the remaining chops (adding a little more oil to the pan as needed).

    Adam and Joanne’s Tips

    • Leftover breading: You will have some flour, eggs, and breadcrumbs left over. We do not recommend saving them.
    • Air fryer instructions: Spray both sides of the breaded pork chops lightly with cooking spray. Place them in a single layer in the air fryer basket (work in batches if needed). Cook at 375°F for 8 minutes, then flip and continue cooking for 5 to 10 minutes more, or until the pork is golden brown and the internal temperature reaches 145°F.
    • The nutritional information provided are estimates.

    Nutrition Per Serving
    Serving Size
    1 breaded chop
    /
    Calories
    378
    /
    Total Fat
    8.9g
    /
    Saturated Fat
    3g
    /
    Cholesterol
    136.1mg
    /
    Sodium
    544.3mg
    /
    Carbohydrate
    37.6g
    /
    Dietary Fiber
    2.8g
    /
    Total Sugars
    1.9g
    /
    Protein
    34.5g


    AUTHOR:

    Joanne Gallagher

    Adam and Joanne of Inspired Taste

    We are Adam and Joanne Gallagher, the creators of Inspired Taste. Established in 2009, Inspired Taste grew from a childhood dream into one of the internet’s most trusted recipe sites with hundreds of reliable recipes, step-by-step videos, and expert tips.More About Us

    Source link

  • Perfect Black Bean Soup Recipe

    Perfect Black Bean Soup Recipe

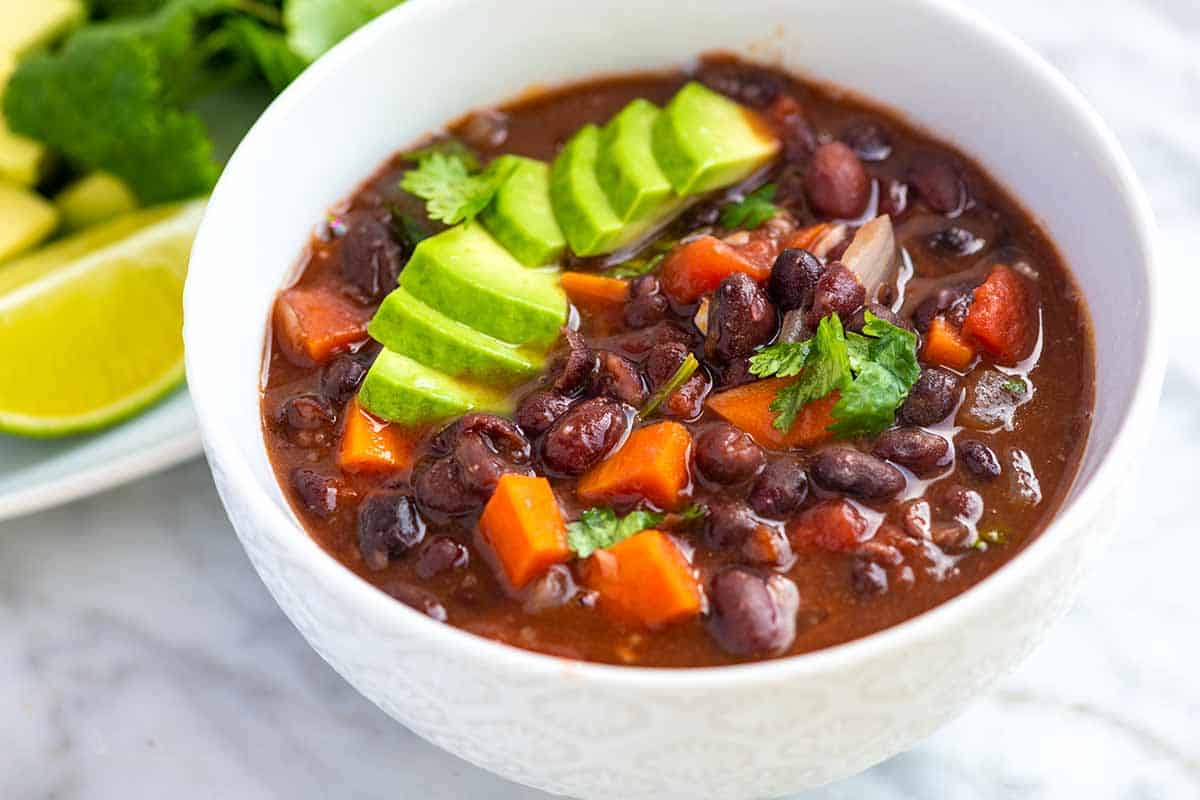
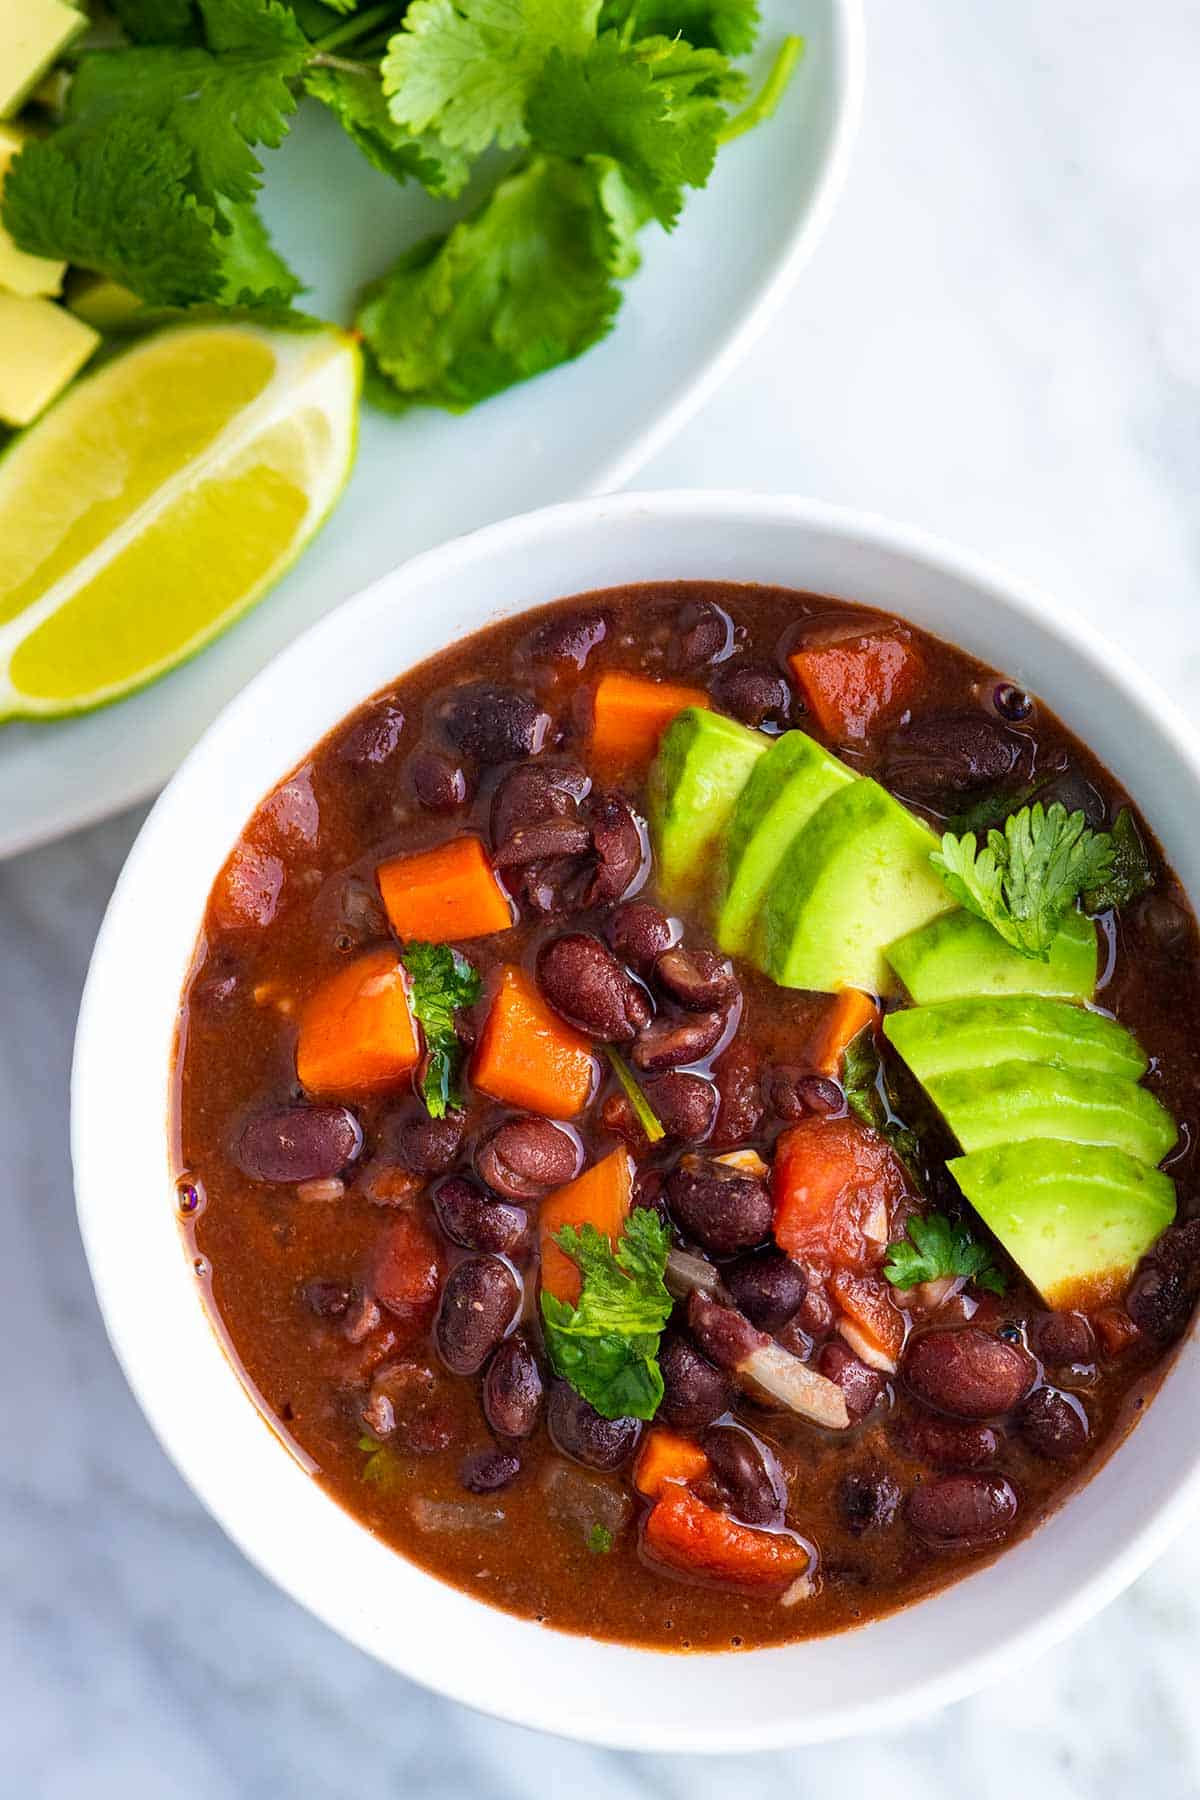
    This black bean soup recipe has quickly become a family favorite! It’s easy, incredibly flavorful, and vegetarian when you use veggie broth.

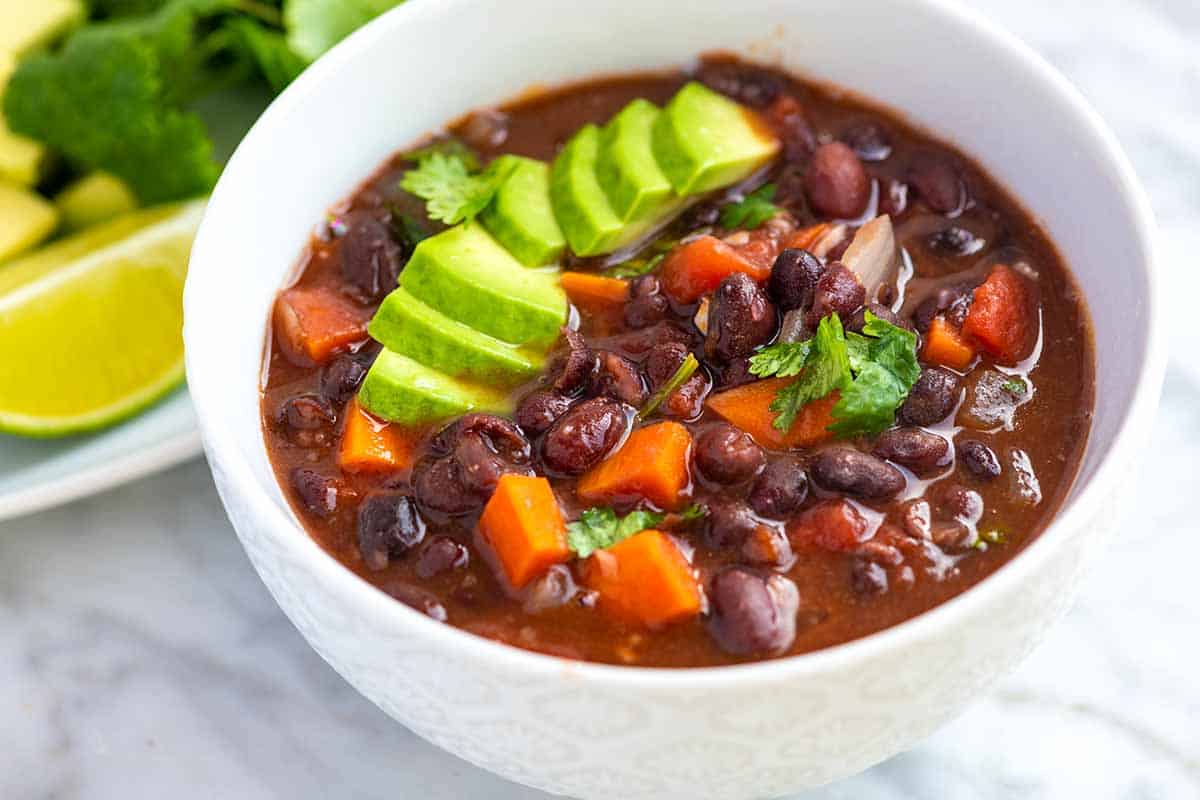
    Homemade black bean soup

    My family loves this easy black bean soup recipe so much. We make it often! I love how quickly it comes together and that it’s designed for canned or previously cooked black beans (hello, quick dinner!).

    You can make this soup as spicy as you like. I add canned chipotles in adobo, which adds some spice, but you can add even more for a spicy black bean soup. For more bean soups, try our white bean soup, easy vegetarian chili with quinoa and black beans, or this hearty split pea soup.

    Key Ingredients

    • Black Beans: You can use canned black beans or home-cooked black beans (here’s how to cook dried black beans).
    • Aromatics: I love making this soup hearty, so I combine onion, carrot, and garlic for the base. Then, I add more flavor with a bay leaf, cilantro, vinegar, oregano, and cumin. This soup is so flavorful!!
    • Chipotle Chiles in Adobo: Whenever I see them in the store, I add a can of chipotles in adobo sauce to my cart. Chipotles are dried, smoked jalapeños that taste smoky and quite spicy. Adobo sauce is a spicy, red sauce that packs a major punch of flavor. For this soup, I add one pepper, which I mince, along with a little sauce. This amount adds enough spice to the soup so that you notice it. For an extra spicy black bean soup, add more. You will have some leftover, which you can save for another recipe (it freezes well). I also use chipotles in adobo sauce to make my chipotle bean chili.
    • Tomatoes: Canned diced tomatoes are perfect for this soup, but chopped fresh tomatoes are great, too. If you go the canned route, look for fire-roasted tomatoes for extra flavor.
    • Broth: I use veggie broth, but chicken broth or chicken stock are fine. Use what you love!

    Find the full recipe with measurements below.

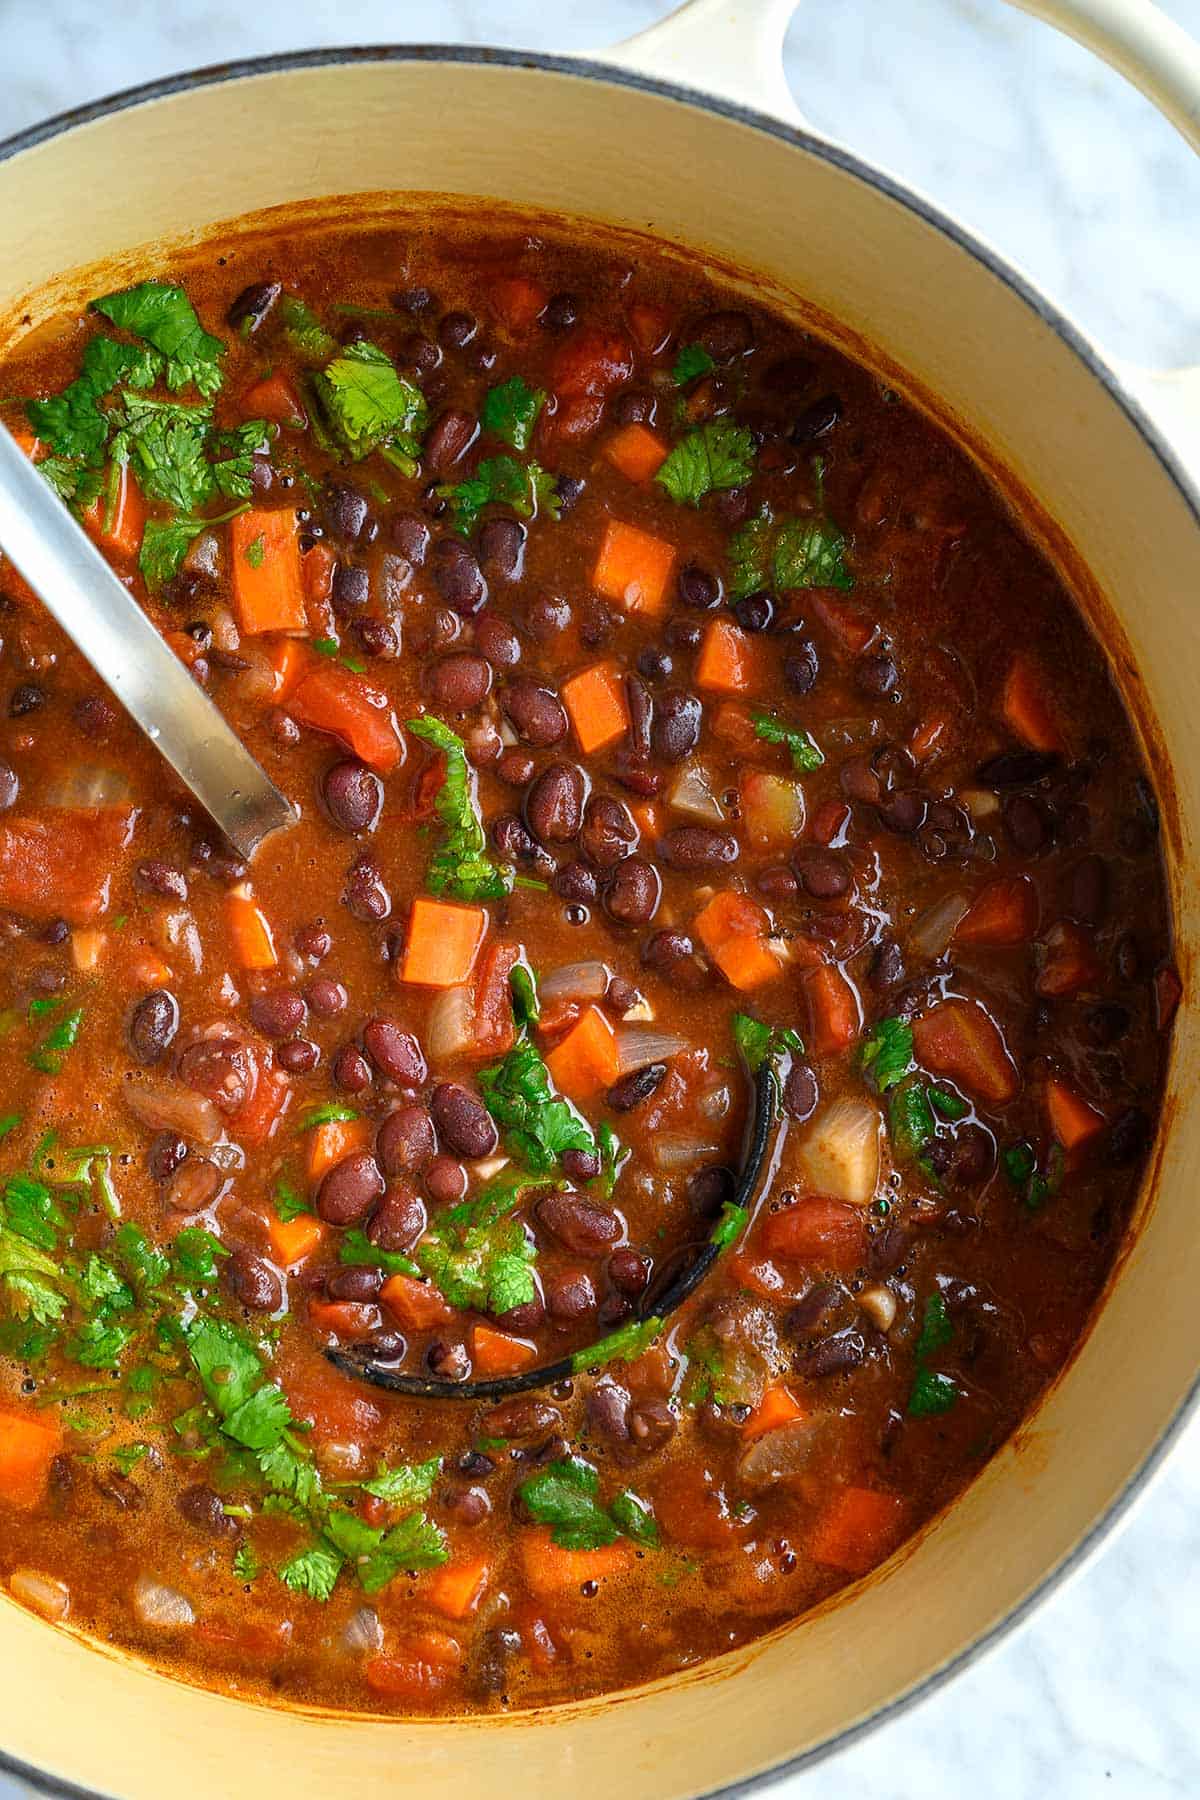
    Pot of homemade black bean soup

    How to Make the Best Black Bean Soup

    Tip 1: Use one pot. Making black bean soup is simple (it all happens in one pot)! To make it, you’ll cook onions and carrots in olive oil until soft and sweet. Then stir in garlic, ground cumin, oregano, red wine vinegar, and chipotle chiles for more flavor. Pour in your broth, tomatoes, and a bay leaf. Then, stir in the black beans and simmer until the veggies are tender, about 20 minutes.

    Tip 2: Season with salt and acid. Before serving, I like to taste the soup and season it with salt and a little extra acid from vinegar or lime juice. I love lime juice for this (it really makes the flavors of the soup pop).

    Tip 3: Creamy or brothy. We often enjoy this as a brothy soup (like in our photos), but you can also turn this into a creamy black bean soup by blending. For a thickened soup that’s somewhere in between, blend a portion and add it back (like I do for this white chicken chili).

    Serving Suggestions

    I usually add a few slices of avocado to the top of this soup, but there are many options. Try our favorite guacamole, crushed tortilla chips, or a spoonful of sour cream. I also love extra lime juice and cilantro!

    Beyond that, you can add something to the side. Consider a batch of homemade corn tortillas (they are so good) or a side of this avocado salad.

    Black Bean Soup

    Perfect Black Bean Soup

    • PREP
    • COOK
    • TOTAL

    My family loves this easy black bean soup. Use your favorite stock or broth to make it. I love veggie broth, which keeps it vegetarian, but chicken stock works well, too. Serve this brothy or blend a portion or all of the soup to make it super creamy.

    Makes 4 to 6 servings

    Watch Us Make the Recipe

    You Will Need

    4 (15oz) cans black beans, drained and rinsed or use 6 cups cooked black beans

    1 to 3 canned chipotles in adobo, finely chopped, plus 1 tablespoon adobo sauce

    2 tablespoons olive oil

    1 cup diced onion, 1/2 large onion

    3/4 cup diced carrots, 1 large carrot

    1 tablespoon minced garlic, 3 to 4 cloves

    1 teaspoon ground cumin

    1/2 teaspoon dried oregano

    1 tablespoon red wine vinegar or lime juice

    1 (15oz) can diced tomatoes, try fire roasted tomatoes

    4 cups (946ml) vegetable broth, see our homemade veggie broth

    1 bay leaf

    1/2 cup cilantro leaves, roughly chopped

    For serving: Avocado, lime wedges, cilantro, sour cream, cheese

    Directions

      1Open the can of chipotles and adobo sauce, remove a pepper (or more for spicier soup), and mince finely.

      2Heat the olive oil in a large Dutch oven or deep pot over medium heat. Add the onions and carrots. Cook, stirring often, until they have softened slightly and smell sweet, about 5 minutes.

      3Stir in the garlic, cumin, and oregano, and cook for 30 seconds.

      4Add the vinegar or lime juice, minced chipotles and adobo sauce, can of tomatoes, broth, black beans, and bay leaf.

      5Bring to a simmer, taste, and then season with salt and pepper.

      6Simmer the soup until the carrots are tender, and the broth reduces slightly, about 20 minutes.

      7Stir in the cilantro and the juice from half a lime (or substitute the lime with an additional tablespoon of vinegar).

      8For a brothy soup (like in our photos and video), serve the soup straight away.

      9For a thicker, more velvety soup, transfer 1/4 of the soup to a blender and blend until smooth. Pour the blended portion back into the soup and serve.

    Adam and Joanne’s Tips

    • Chipotles in adobo: We use 1 whole pepper and 1 tablespoon of the adobo sauce in the can, adding moderate heat to the soup. For a spicier soup, add more, but be careful. The peppers do pack a punch. Find canned chipotles in adobo sauce in most grocery stores, usually near hot sauce or enchilada sauces. Substitute your favorite smoky hot sauce.
    • The nutrition facts provided below are estimates.

    Nutrition Per Serving
    Serving Size
    1 cup
    /
    Calories
    169
    /
    Total Fat
    2.9g
    /
    Saturated Fat
    0.5g
    /
    Cholesterol
    0mg
    /
    Sodium
    387.2mg
    /
    Carbohydrate
    27.4g
    /
    Dietary Fiber
    10.6g
    /
    Total Sugars
    2.4g
    /
    Protein
    9g


    AUTHOR:

    Joanne Gallagher

    Adam and Joanne of Inspired Taste

    We are Adam and Joanne Gallagher, the creators of Inspired Taste. Established in 2009, Inspired Taste grew from a childhood dream into one of the internet’s most trusted recipe sites with hundreds of reliable recipes, step-by-step videos, and expert tips.More About Us

    Source link

  • Perfect Seared Scallops Recipe

    Perfect Seared Scallops Recipe

    Learn how to cook restaurant-worthy scallops at home. Our recipe guarantees beautiful golden-brown seared scallops and comes together in 10 minutes!

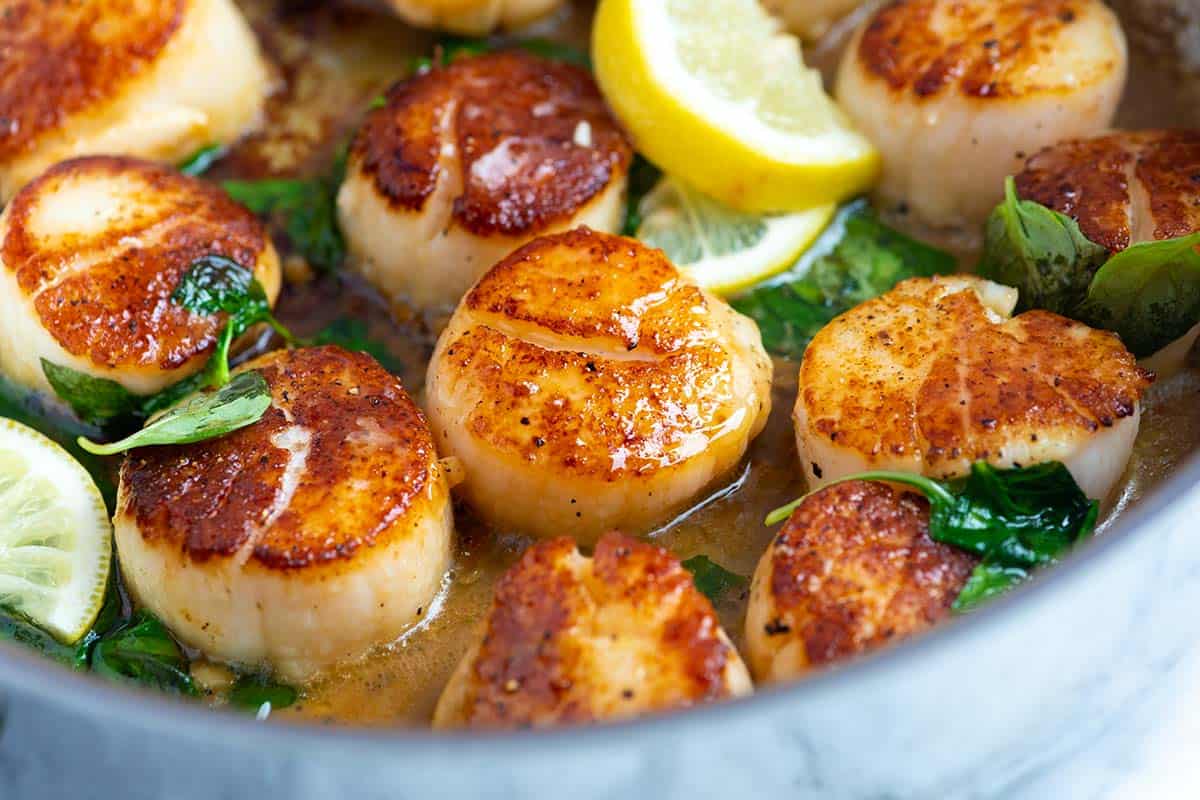
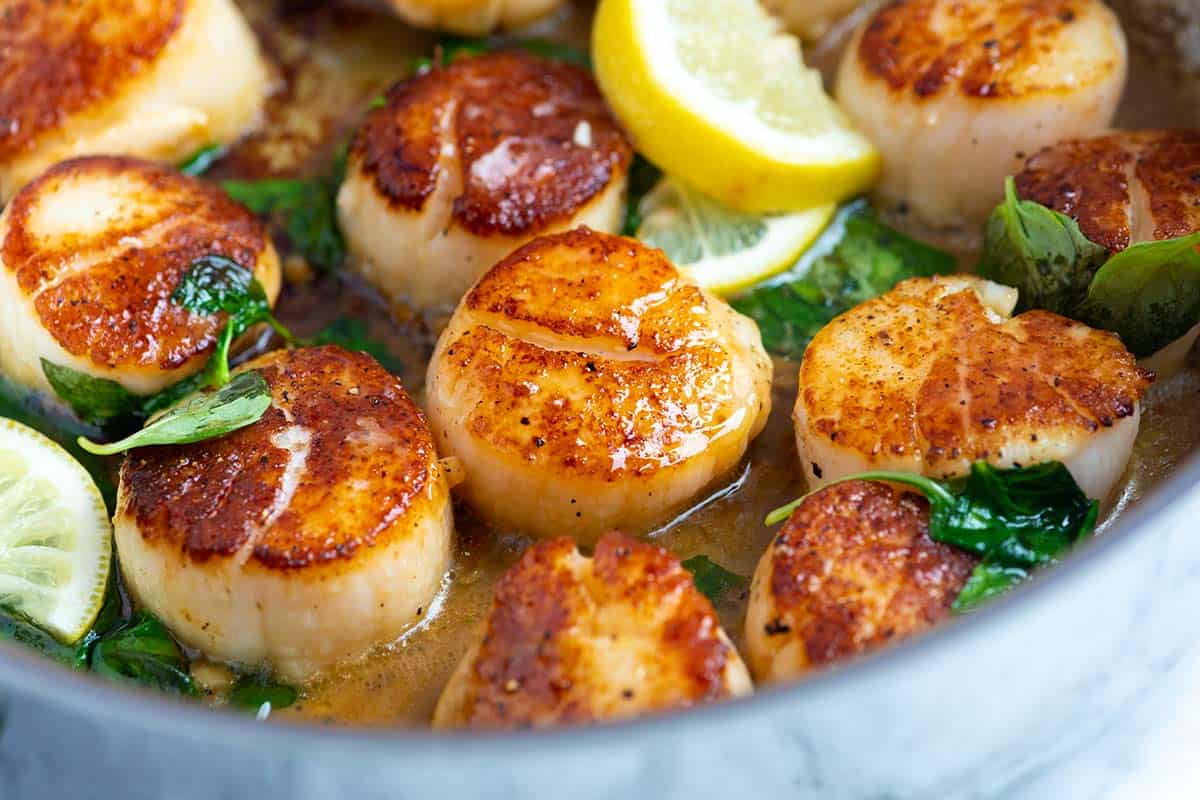
    Pan-seared scallops with butter, lemon, and basil

    Scallops are one of the easiest things you can cook, especially if you sear them in a pan (they’re just as easy as shrimp). This is my go-to scallops recipe, and I’m happy to share it with you!

    There’s no need to be intimidated. Scallops are easy to cook, I promise. With a few tricks, you’ll be cooking them like a pro in no time. Plus, I’ll show you how to make our delicious garlic basil butter to serve with them.

    Key Ingredients

    • Scallops: I look for large sea scallops since they taste sweet. I also prefer fresh. Frozen will work in this recipe, so check the tips section below for tips on thawing them before cooking.
    • Oil, salt, and pepper: I cook them in a hot skillet with some oil. Any high-heat oil works. I especially love avocado oil. You’ll also want to season your scallops liberally before cooking them.
    • Flour: While optional, I love dusting flour over mine before cooking them. The flour absorbs excess moisture and adds a nice golden brown crust. You can skip this step if you don’t have flour or are gluten-free.
    • Butter, garlic, basil, and lemon: It’s hard to describe just how delicious our garlic basil butter is with these seared scallops. I highly recommend it, and it only adds a minute or two of cooking time.

    Find the full recipe with measurements below.

    How to Cook Scallops Like a Pro

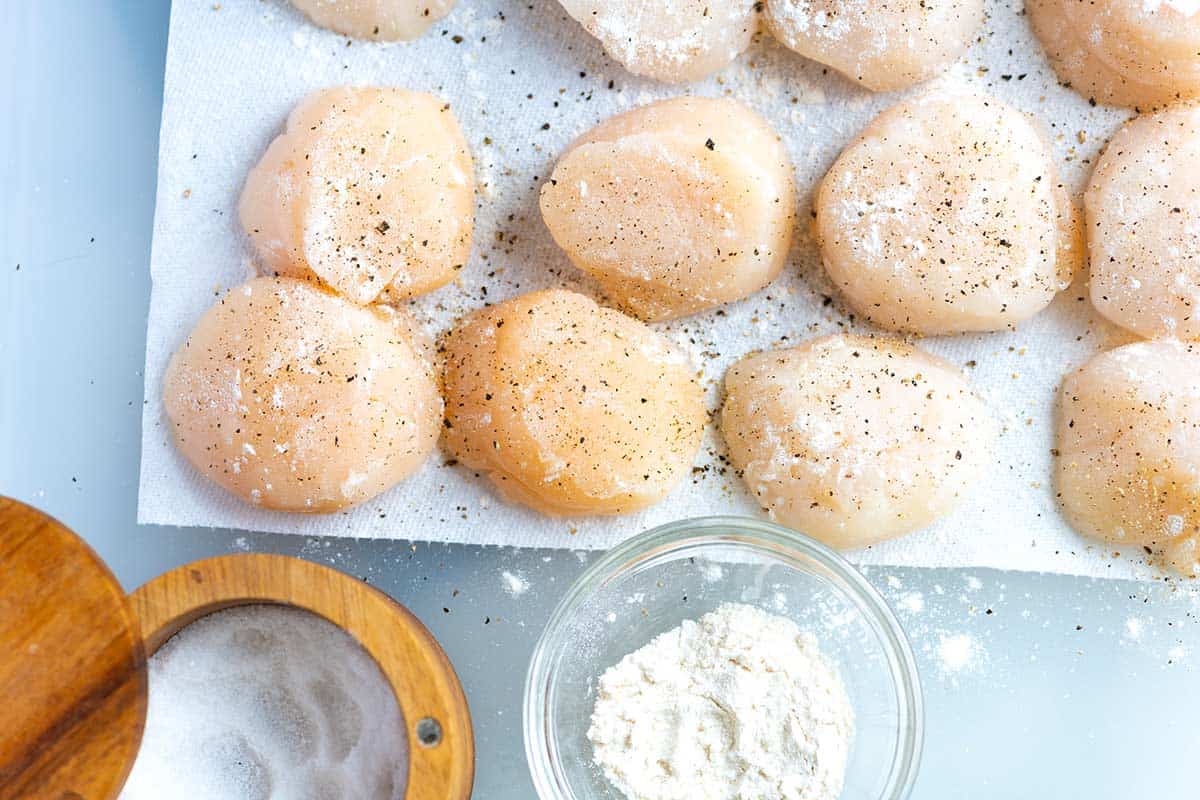
    Tip 1: Pat them dry. I use a paper towel to pat them as dry as possible. Damp scallops don’t sear or brown in the pan. The drier they are, the better they will sear. Frozen scallops will have more moisture, so take extra care when patting them dry.

    Tip 2: Lightly dust flour on each side. The flour absorbs excess moisture and adds a nice golden brown crust. I use the same trick when searing fish, and even pork chops!

    Scallops with a light dusting of flour, salt and pepper

    Tip 3: Season well. I use a generous amount of salt and pepper. I season one side of the scallops out of the pan, place them seasoned side down into the hot pan, and then while that side cooks, I season the other side.

    Tip 4: Use a hot skillet. If they aren’t sizzling when you place them in the pan, it isn’t hot enough. You can always test the heat with one scallop and adjust from there.

    Tip 5: Finish with our garlic basil butter. To really make these restaurant-worthy, use our garlicky butter. Scallops already taste incredible, but adding a bit of creamy butter, garlic, and fresh herbs at the end of cooking makes them out of this world. I also love using garlic butter when finishing our shrimp scampi recipe and cilantro lime butter shrimp.

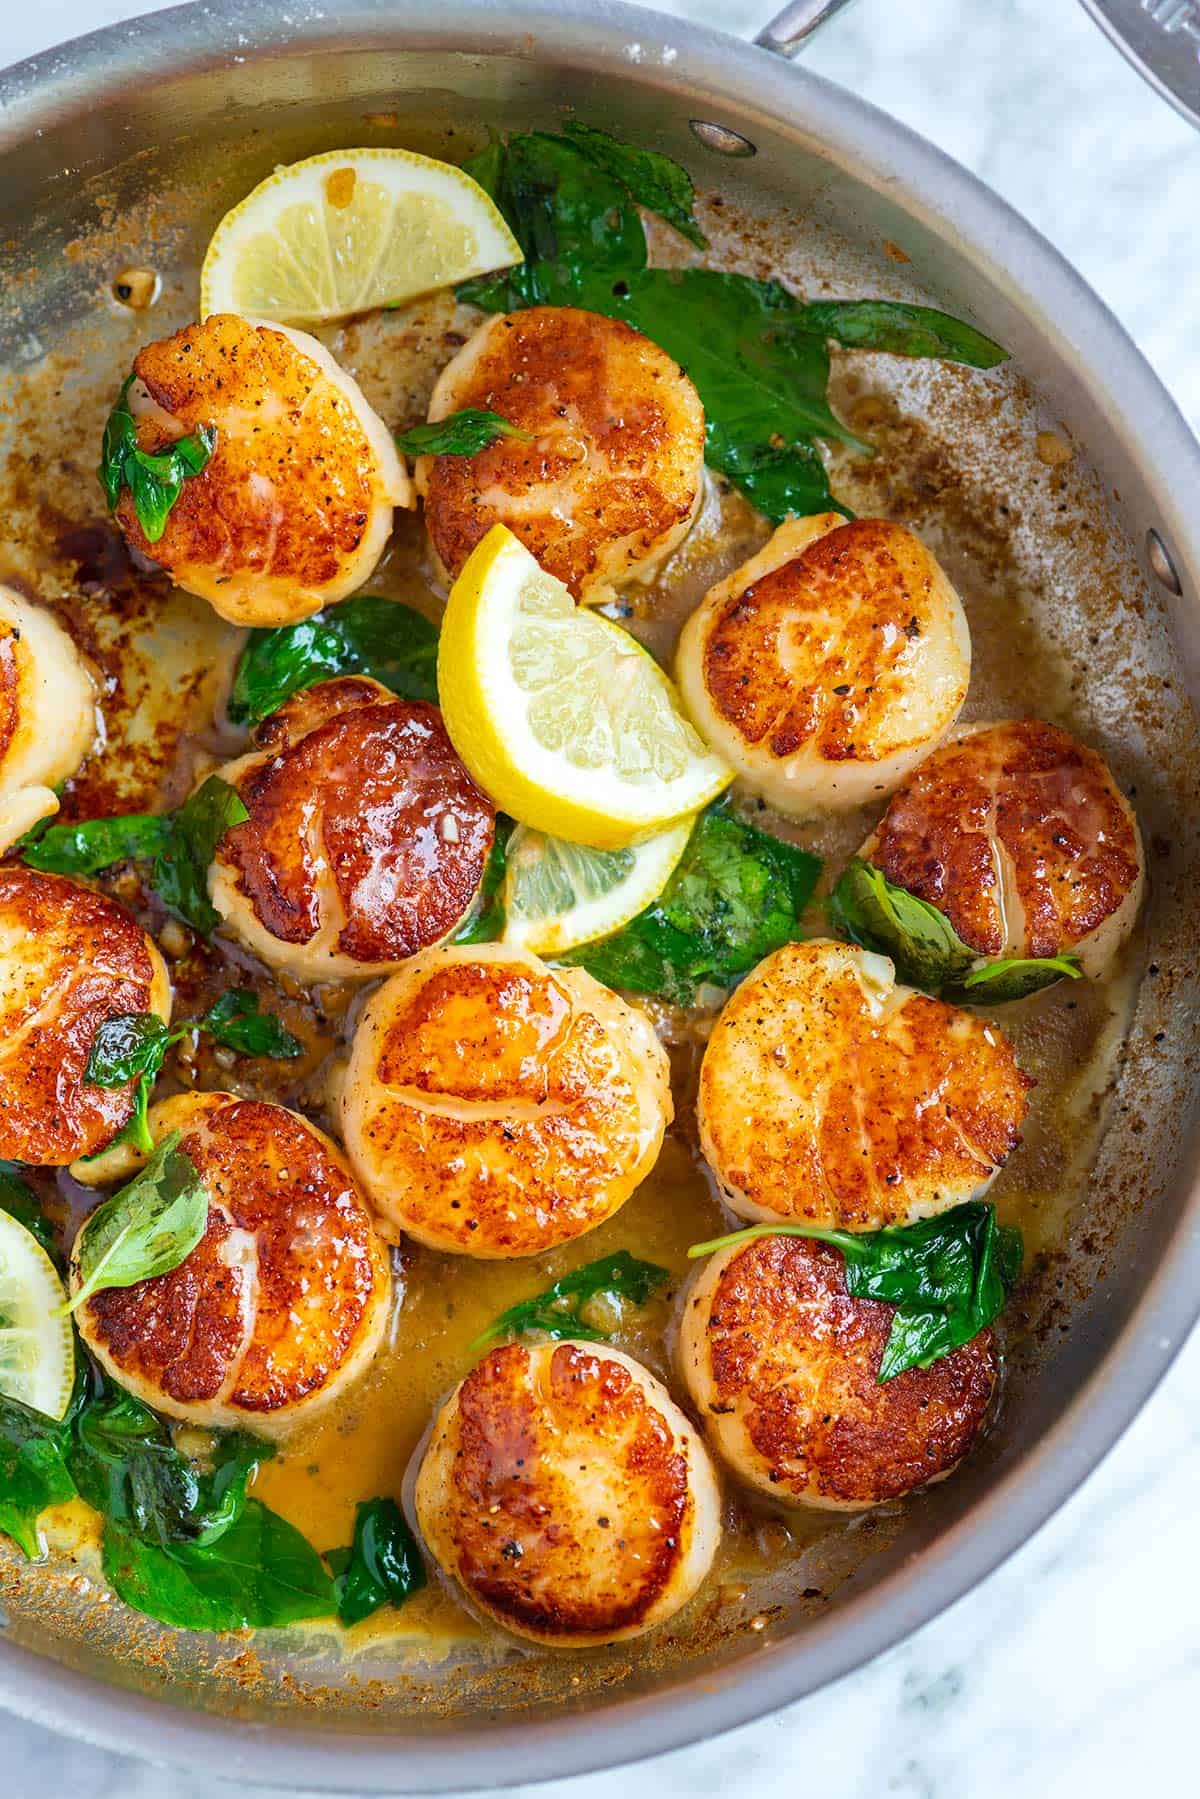
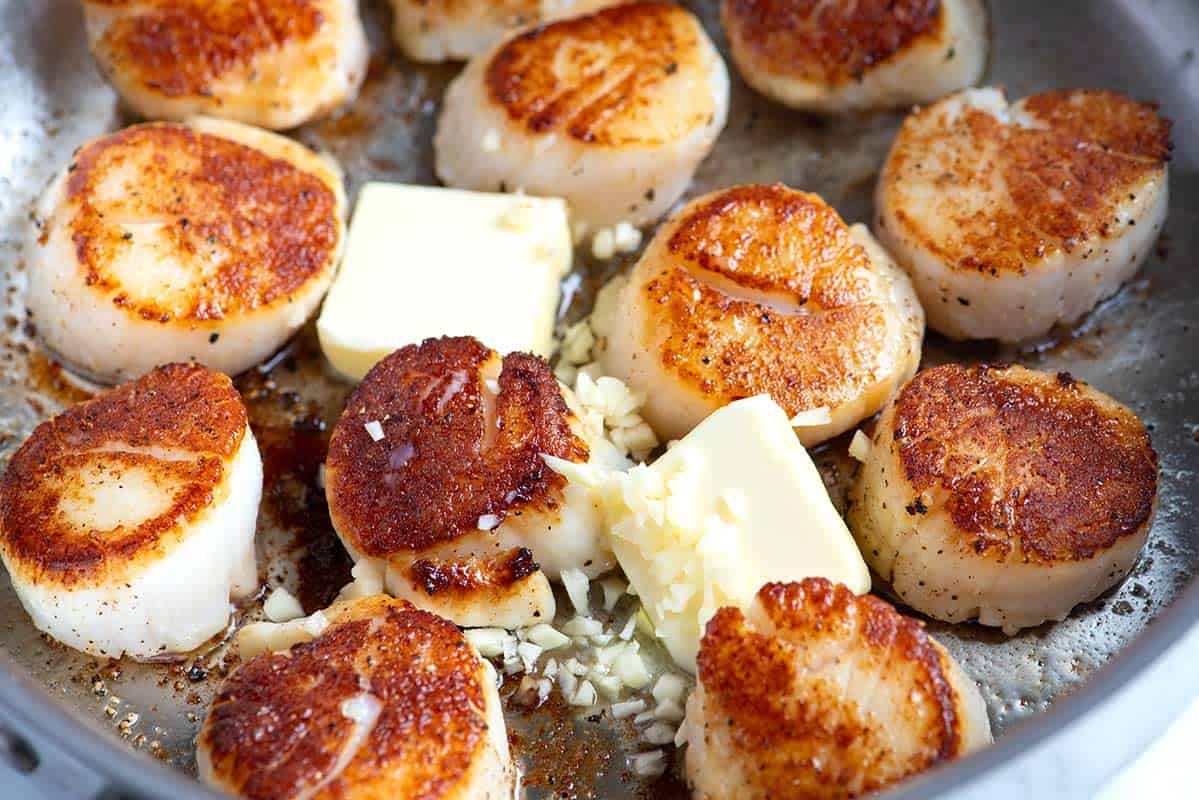
    Pan-seared scallops with butter and garlic

    Serving Suggestions

    Many side dishes work well with seared scallops. I love creamy grits, polenta, mashed potatoes, and mushroom risotto. For a lighter, low-carb side, try mashed cauliflower or zucchini noodles.

    For rice, take a look at our saffron rice, coconut rice or this cilantro lime rice. Roasted vegetables are also lovely. Think about roasted asparagus, roasted cabbage, or roasted green beans.

    More Favorite Seafood Recipes

    Seared scallops

    Perfect Seared Scallops

    • PREP
    • COOK
    • TOTAL

    Seared scallops cook quickly (within 5 minutes) and are best when enjoyed immediately. If you’re serving them with pasta, vegetables, or rice, make sure they are ready before cooking the scallops. I highly recommend the garlic basil butter!

    A few favorite sides for these are creamy polenta, mashed cauliflower, and this saffron rice!

    4 Servings, 3 large scallops each

    Watch Us Make the Recipe

    You Will Need

    12 large sea scallops, 1 ¼ to 1 ½ pounds

    2 teaspoons all-purpose flour, optional, see notes

    Salt and fresh ground black pepper

    2 tablespoons avocado oil or vegetable oil


    Garlic Basil Butter

    1 ½ tablespoons butter

    2 garlic cloves, minced

    1 cup fresh basil leaves

    3 to 4 lemon slices

    Directions

      1Pat the scallops dry with a paper towel. Dust one side of the scallops with a small amount of flour, then season with salt and pepper.

      2Heat a wide skillet over medium-high heat. Add the oil to the pan. When the oil is hot and shimmery, carefully place the scallops in the pan, seasoned side down.

      3Cook, without moving them, until browned, about 2 minutes.

      4While the first side is browning, dust the unseasoned side of the scallops with a bit of flour and season them with salt and pepper.

      5Flip the scallops. If any stick to the pan, wait a few more seconds then try again, gently wiggling them side to side to help release them.

      6Add the butter and garlic to the pan, swirling the butter around as it melts.

      7Cook another minute or two, then remove the pan from the heat. Stir in the basil leaves and lemon slices. Serve.

    Adam and Joanne’s Tips

    • Storing: Cooked scallops last in an airtight container in the fridge for up to 3 days. Do your best to store them in the coldest part of your fridge (usually towards the back). While you can technically freeze cooked scallops, you should only freeze scallops that were initially from fresh sources (not previously frozen).
    • Reheating: To reheat, add them to a skillet over medium heat with a small amount of butter or olive oil. Sear for 1 to 2 minutes per side until heated through.
    • Do I need to use flour? If you don’t want to use flour, it’s okay. It helps with even browning, and since some of the flour sticks to the bottom of the pan, it mixes with the butter, helping to thicken the garlic basil butter sauce. If you are gluten-free or don’t want to use flour, make sure the scallops are as dry as you can get them for the best chance at a good sear.
    • Using frozen scallops: The easiest and safest way to thaw them is to place them in the refrigerator the night before cooking them. To quickly thaw scallops, add them to a sealed bag and put them in a large bowl under cold running water. Move the bag around the bowl occasionally until the scallops have defrosted, about 30 minutes. Before cooking them, take extra care when patting them dry.
    • The nutrition facts provided below are estimates.

    Nutrition Per Serving
    Serving Size
    1/4 of the recipe (3 scallops)
    /
    Calories
    267
    /
    Total Fat
    12.6g
    /
    Saturated Fat
    3.7g
    /
    Cholesterol
    69.5mg
    /
    Sodium
    1236.8mg
    /
    Carbohydrate
    9.6g
    /
    Dietary Fiber
    0.2g
    /
    Total Sugars
    0.2g
    /
    Protein
    29.6g


    AUTHOR:

    Adam Gallagher

    Adam and Joanne of Inspired Taste

    We are Adam and Joanne Gallagher, the creators of Inspired Taste. Established in 2009, Inspired Taste grew from a childhood dream into one of the internet’s most trusted recipe sites with hundreds of reliable recipes, step-by-step videos, and expert tips.More About Us

    Source link

  • Hoisin Sauce Recipe (Better than Store-Bought)

    Hoisin Sauce Recipe (Better than Store-Bought)

    Make this homemade hoisin sauce recipe, and you’ll never feel the need to buy it from the store again. Use in stir-fries, marinades, glazes, and more!

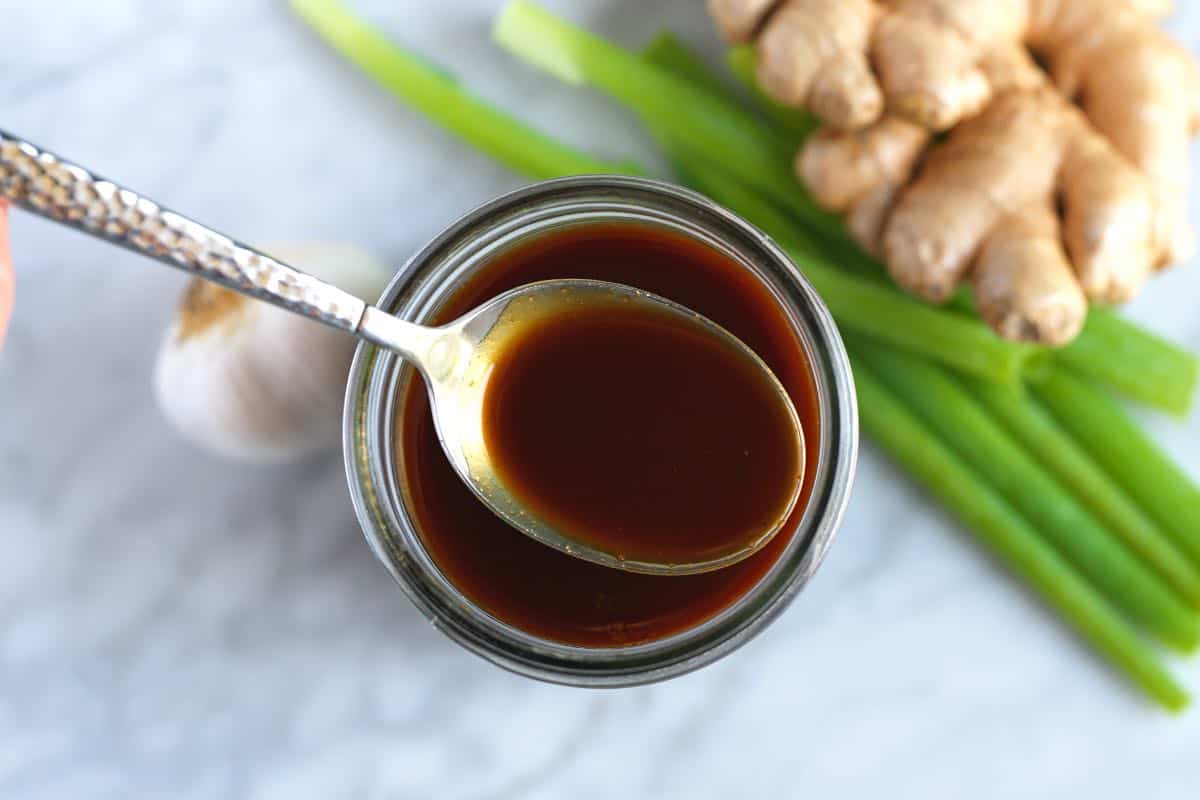
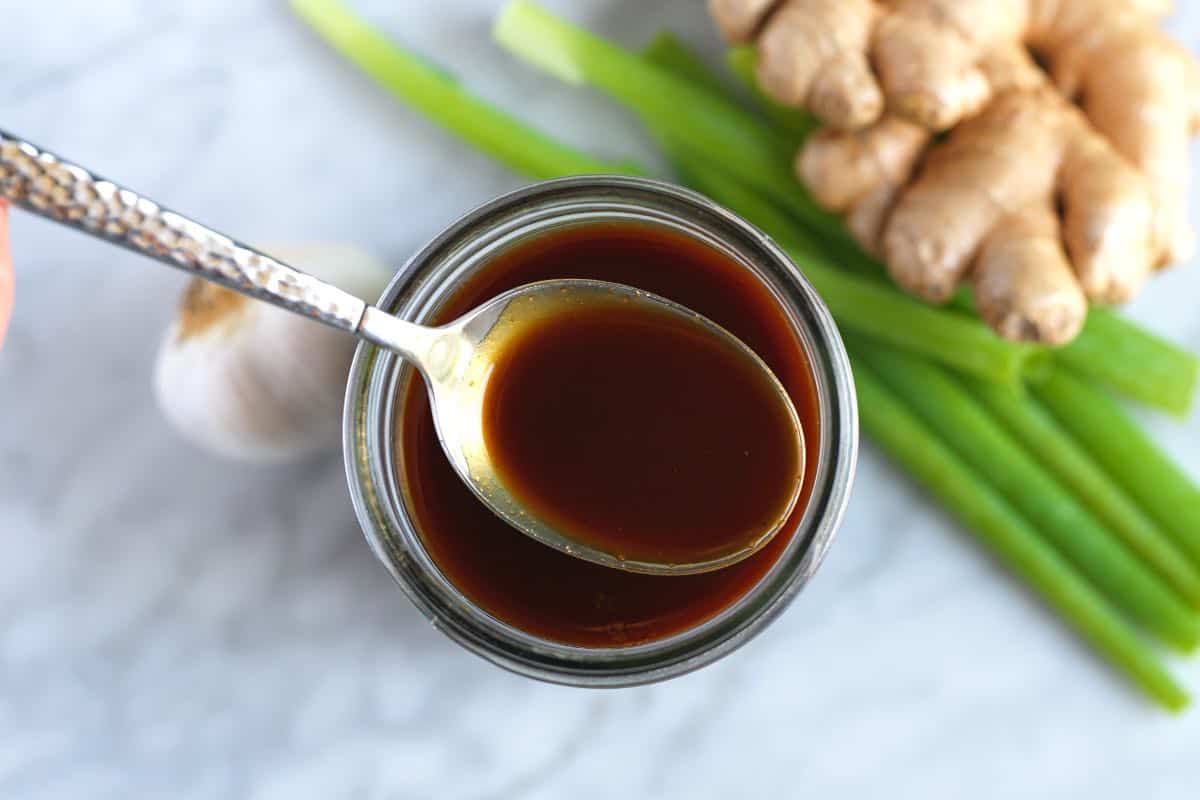
    Homemade hoisin sauce

    Store-bought hoisin tends to be excessively salty, overly sweet, and disappointingly thick. Our recipe tastes sweet, salty, tangy, and downright delicious. Use this umami-rich sauce for chicken, salmon, ribs, tofu, and veggies.

    Since perfecting this homemade hoisin sauce recipe, we’ve explored so many ways to use it. To date, we’ve used it to make glazed salmon, tossed it with tofu, and used it for hoisin sticky ribs. We also love using this sauce to make these chicken lettuce wraps.

    Key Ingredients

    • Garlic, ginger, and green onion: Add fresh flavor to our sauce. I especially love the ginger in this homemade sauce.
    • Light tamari or soy sauce: The foundation of our sauce’s salty, savory flavor. Light tamari offers a cleaner taste, but light soy sauce works nicely.
    • Maple syrup and molasses: Sweeten our sauce and balance the salty tamari.
    • Peanut butter: Makes the hoisin taste more complex. However, the finished sauce does not taste like peanut butter. You can substitute tahini or almond butter.
    • Gochujang: Replicates the complex flavor of fermented beans in traditional hoisin sauce. For a substitute, use miso paste and add a dash of your favorite hot sauce for optional heat. We also use gochujang when making our easy shrimp marinade.
    • Rice wine vinegar: Just a little vinegar brightens the sauce and brings all of the flavors together.
    • Chinese Five Spice: A warm and fragrant blend of star anise, fennel, Szechuan peppercorns, cloves, and cinnamon. Look for this in the spice aisle of most grocery stores.
    • Cornstarch: Thickens our sauce (optional, but recommended).

    Find the full recipe with measurements below.

    How to Make the Best Hoisin Sauce

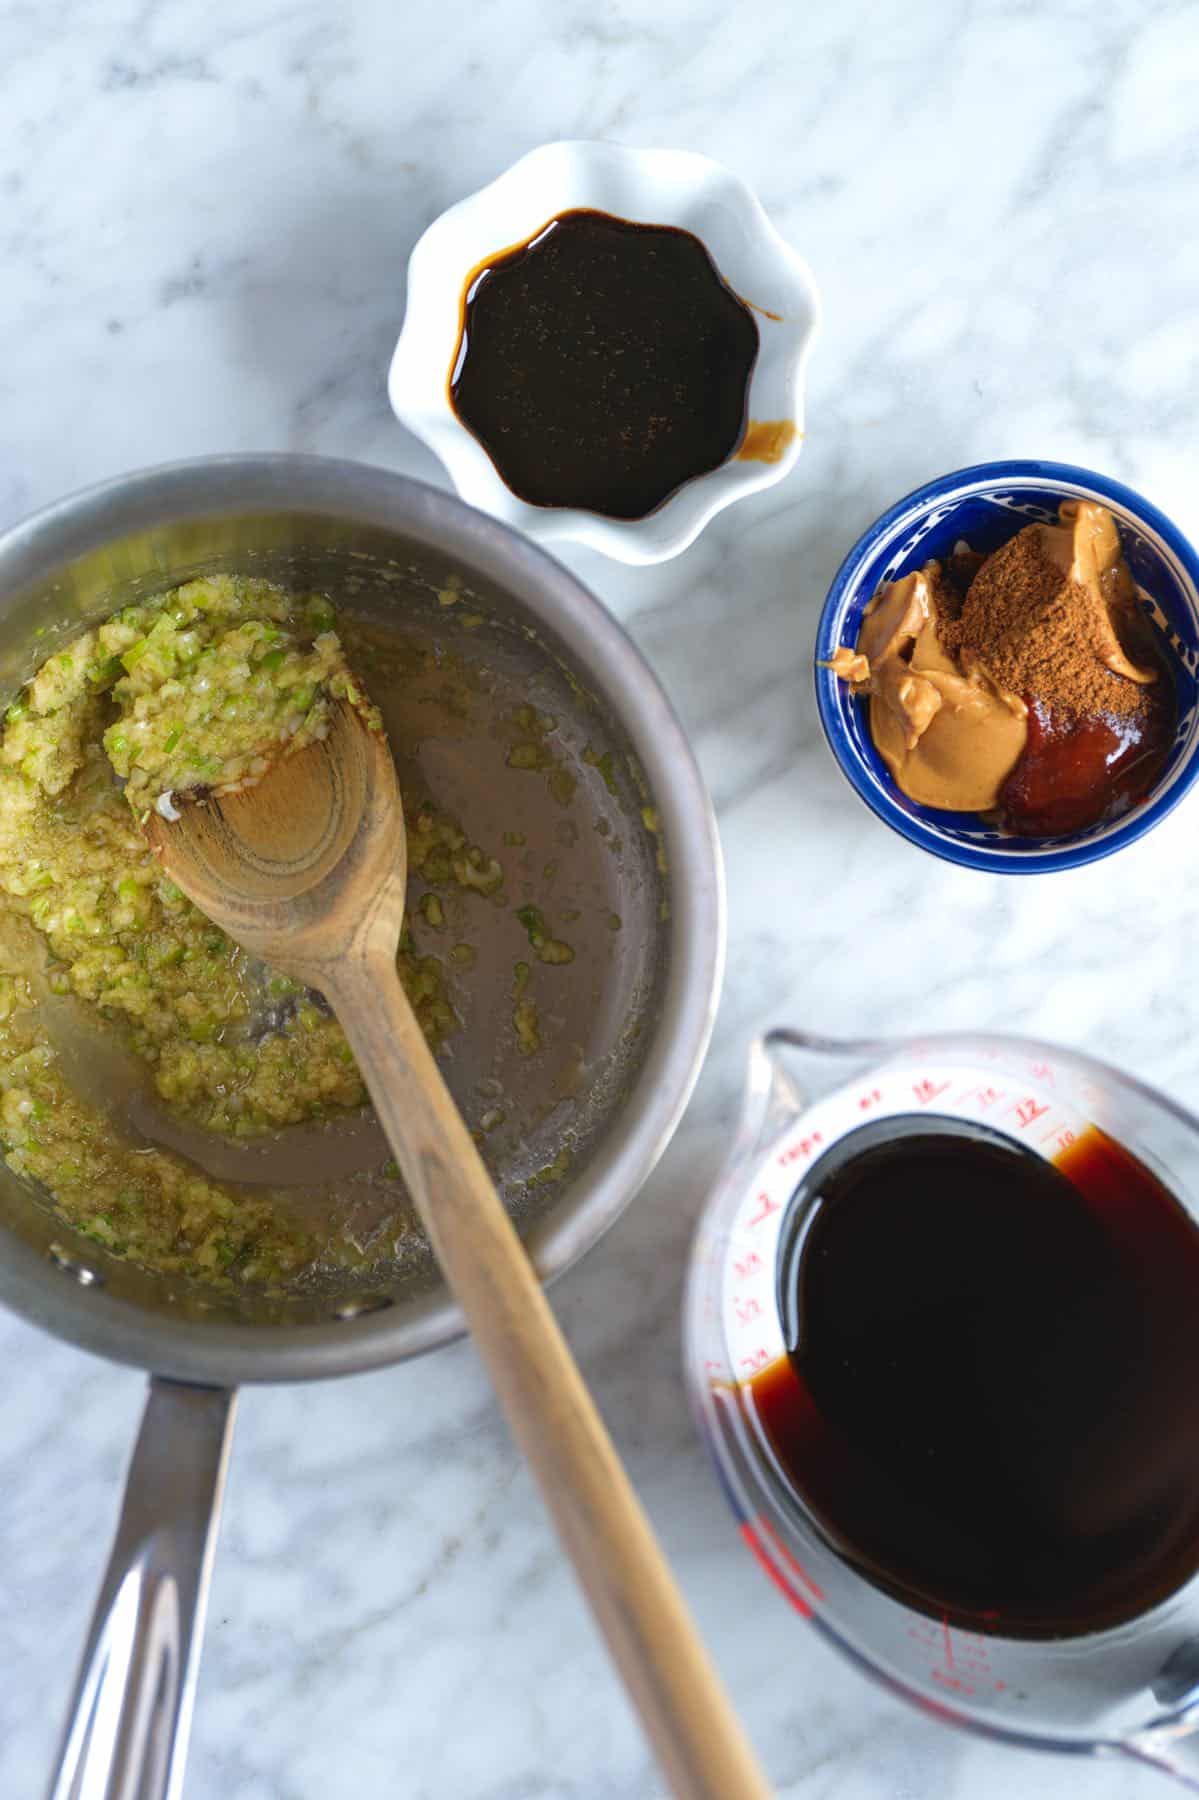
    Tip 1: Make in small saucepan. This recipe only takes about 15 minutes to make, and it all happens in a small saucepan. Sauté fresh garlic, ginger, and scallions until softened, then stir in everything left on your ingredient list. The peanut butter melts into the sauce, and the garlic and ginger perfume the sauce nicely.

    Hoisin sauce ingredients

    Tip 2: Thicken your sauce. Our recipe includes cornstarch, which helps thicken the sauce. You can stick with our suggested amount or add more for a thicker sauce. (As written, the hoisin is slightly thinner than you might find with store-bought.)

    Tip 3: Keep a jar on standby. This sauce makes weeknight dinners so easy. Whenever I have something like chicken or tofu (like our baked tofu) in the fridge and have no idea what to do with it, I reach for this sauce. Toss whatever you have in the fridge in some sauce and bake. Easy!

    More Homemade Sauces

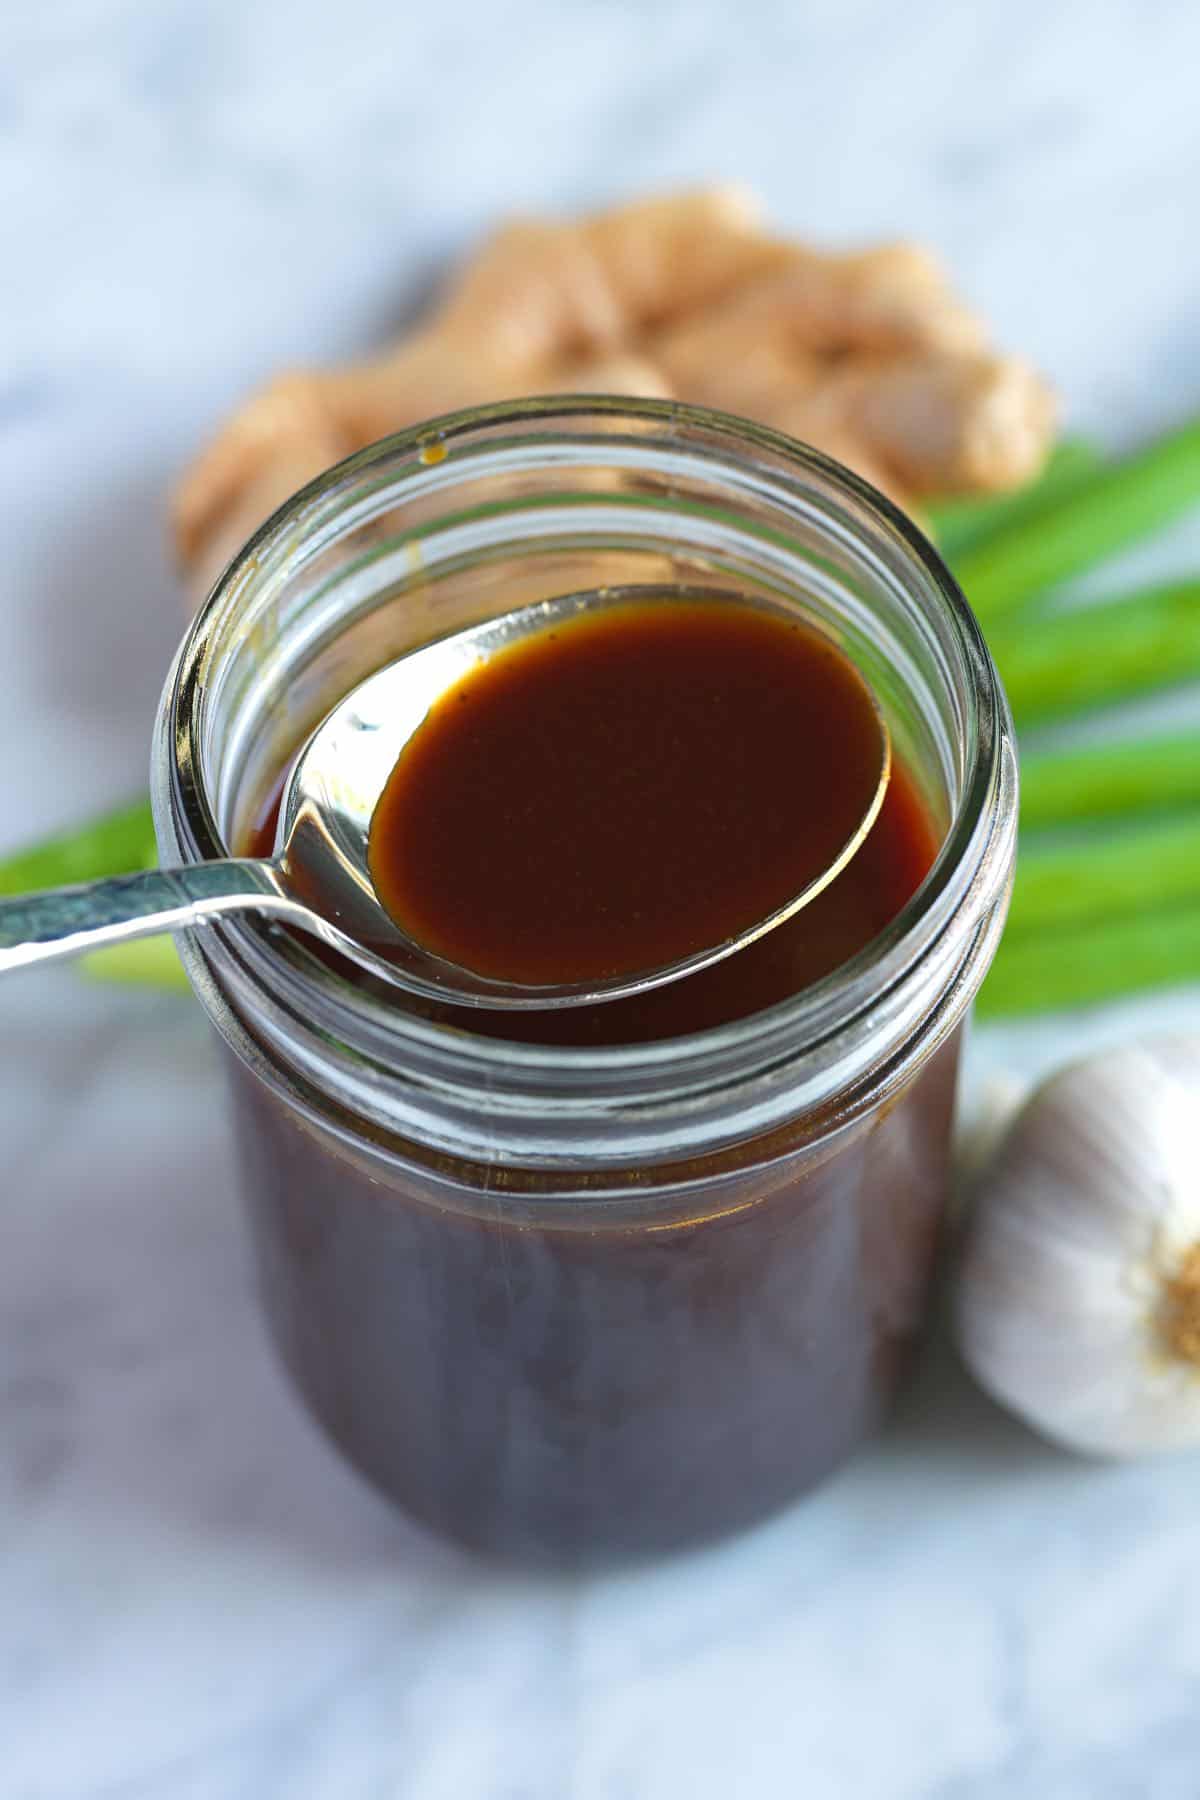
    A jar of homemade hoisin sauce

    Hoisin Sauce (Better than Store-Bought)

    • PREP
    • COOK
    • TOTAL

    Homemade hoisin sauce is a thick, flavorful condiment popular in Chinese cuisine, particularly Cantonese cooking. It’s added to stir-fries, marinades, and glazes (think Peking duck!). I find store-bought hoisin too sweet, salty, and thick. Once you try this homemade hoisin, you’ll never need to buy it from the store again.

    Makes 1 cup

    Watch Us Make the Recipe

    You Will Need

    1 tablespoon toasted sesame oil

    2 cloves garlic, finely minced or grated

    One 1-inch thumb-size piece fresh ginger, finely minced or grated

    2 green onions, whites and light green parts only, finely minced

    5 tablespoons (65g) light tamari or light soy sauce, plus more to taste

    5 tablespoons (65g) pure maple syrup

    2 tablespoons (30g) molasses

    1 tablespoon (20g) peanut butter, try homemade peanut butter

    1 ½ teaspoons Gochujang, see notes

    1 teaspoon rice wine vinegar

    1/4 teaspoon Chinese Five Spice, see notes

    1/4 teaspoon cornstarch

    Directions

      1Heat sesame oil in a small saucepan over medium heat. Stir in the garlic, ginger, and green onion. Cook, stirring occasionally, until tender and translucent, 3 to 5 minutes. Set the saucepan aside to cool.

      2Stir in soy sauce, maple syrup, molasses, peanut butter, Gochujang, rice wine vinegar, and the Chinese Five Spice. Return the saucepan to medium heat and, while stirring, slowly bring to a simmer. Taste the sauce and adjust with 1/2 tablespoon to 1 tablespoon of soy sauce if necessary.

      3Make a cornstarch slurry by mixing 1/2 teaspoon cornstarch with 2 teaspoons water. Whisk the slurry into the sauce. As it simmers, the sauce will thicken. Once thickened, remove it from the heat and let it cool. Refrigerate your sauce for up to one month.

    Adam and Joanne’s Tips

    • Storing: Your sauce can be refrigerated for up to 1 month. As it sits, it may separate. We store our sauce in an airtight glass jar, which allows us to shake it to combine before using it. The sauce also freezes well. Keep it in a freezer-safe container in the freezer for up to 3 months.
    • Gochujang: Gochujang is a spicy Korean condiment made with rice and fermented soybeans. Substitute miso paste, and if you’d like to add some spice, add a dash or two of hot sauce or chili paste like sambal oelek.
    • Adjusting to your taste: Feel free to adjust the spice level, saltiness, and sweetness to your taste. I love the heat from Gochujang, but you can substitute it with miso paste if you’d prefer.
    • Thickness of the sauce: I like to keep this on the thinner side, which makes it more saucy when tossing it into stir-fries or slathering it over ribs. Increase the cornstarch for a thicker sauce.
    • Gluten-free: Double check that all products are labeled gluten-free (especially the soy sauce or tamari) for gluten-free hoisin sauce.
    • The nutrition facts provided below are estimates.

    Nutrition Per Serving
    Serving Size
    2 tablespoons
    /
    Calories
    86
    /
    Total Fat
    2.8g
    /
    Saturated Fat
    0.5g
    /
    Cholesterol
    0mg
    /
    Sodium
    290mg
    /
    Carbohydrate
    14.8g
    /
    Fiber
    0.3g
    /
    Total Sugars
    12.3g
    /
    Protein
    1.3g


    AUTHOR:

    Joanne Gallagher

    Adam and Joanne of Inspired Taste

    We are Adam and Joanne Gallagher, the creators of Inspired Taste. Established in 2009, Inspired Taste grew from a childhood dream into one of the internet’s most trusted recipe sites with hundreds of reliable recipes, step-by-step videos, and expert tips.More About Us

    Source link