Tag: Recipe

  • The Best Crab Rangoon Recipe

    The Best Crab Rangoon Recipe

    We love this Crab Rangoon recipe! These crunchy fried wontons have a perfectly creamy filling and taste incredible dipped in the insanely good sweet and sour sauce.

    Homemade Crab Rangoon (cream cheese wontons)

    I’m going out on a limb and saying this easy Crab Rangoon recipe boasts a better filling than what you’ll find at most takeout spots, because if I’m making crab wontons, I want to taste the crab, so we’re extra generous with it! Oh, and that sweet and sour sauce? It’s outrageously good!

    We developed this recipe with the help of Chef Richard Hattaway, and every time we’ve tested it, the wontons disappeared in minutes! For more of our favorite takeout-inspired dishes, check out our crispy chicken spring rolls or our easy fried rice!

    Key Ingredients

    • Wonton wrappers: I use thin square wonton wrappers for crab rangoon. My grocery store sells them in the refrigerated section near tofu, but you’ll find an even better selection at International grocery stores. Consider using leftover wonton wrappers to make these baked wonton cups.
    • Crab: I love using real crab for these. We used Dungeness crab in the photos and video, but blue crabmeat is also excellent. Imitation crab works, too (surimi), but it tastes milder and sweeter than real crab.
    • Cream cheese: This makes our crab rangoon (also known as crab and cream cheese wontons) filling creamy and rich while helping to bind everything together. You might notice that our recipe calls for less cream cheese than other recipes, making these wontons more crab-forward and less heavy.
    • Veggies: For flavor, we stir in sliced green onion, chopped red bell pepper, and a bit of garlic. I highly recommend using all three.
    • Soy sauce: Crabmeat is naturally salty, so you don’t need much seasoning in the filling. I add a teaspoon of soy sauce or tamari to the mix.

    Find the full recipe with measurements below.

    How to Make the Best Homemade Crab Rangoon

    Tip 1: Make little envelopes. There are a few ways to fold your wontons, but making little envelopes is the easiest. You can see me do this in our video (which I highly recommend watching before making this recipe).

    Folding wontons for crab rangoon

    Tip 2: For the best results, fry them! I’m not someone who fries a lot of food at home, but it’s worth it for these crunchy wontons. I’ve tried them in an air fryer and the oven, and while they absolutely work, the wontons don’t get nearly as crispy (because the filling is so wet from the cream cheese).
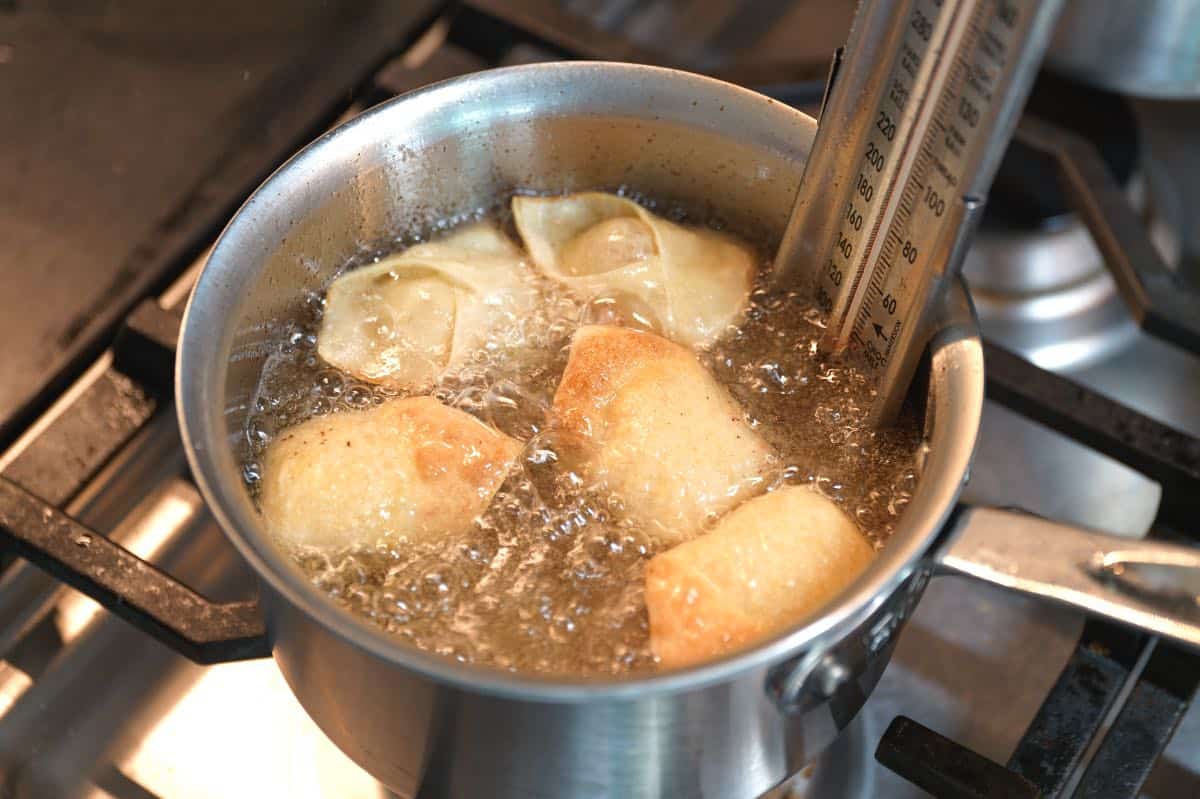
    Frying crab rangoon at home

    Tip 3: Use our sweet and sour sauce. Don’t miss our homemade sweet and sour sauce (it’s so good!). It takes less than 5 minutes to make. Once you try it, you’ll understand why I’m pushing you so hard to make it!

    Crab Rangoon (Cream Cheese Wontons)

    The Best Crab Rangoon

    • PREP
    • COOK
    • TOTAL

    Our family absolutely loves these homemade Crab Rangoon. Watch our recipe video to see me folding them. For best results, fry them using a deep saucepan or a Fry Daddy (inexpensive and handy for frying at home). Baking and air fryer tips are below, but since the filling is wet from the cream cheese, the wontons do not get as crisp or golden brown.

    Makes 24 wontons

    Watch Us Make the Recipe

    You Will Need

    Crab Rangoon

    8 ounces (226g) fresh or pasteurized crabmeat, like blue crab or Dungeness crab

    4 ounces (113g) cream cheese, softened

    1 green onion, thinly sliced

    2 tablespoons finely diced red bell pepper

    1 small clove garlic, grated on a microplane or finely minced

    1 teaspoon light soy sauce or tamari

    26 wonton wrappers

    Peanut oil or vegetable oil for frying


    Sweet and Sour Dipping Sauce

    2 tablespoons Sambal Oelek chili paste (we use Huy Fong)

    6 tablespoons (75g) granulated sugar

    2 tablespoons unseasoned rice wine vinegar

    Directions

      1Prepare the crab: Place the crabmeat in a colander and let it drain for at least 5 minutes. Then, pick through the crabmeat for any bits of shell and remove them.

      2Make the dipping sauce: Combine the chili paste, sugar, and rice wine vinegar in a small saucepan over medium heat. Cook, stirring, until the sugar dissolves, about 30 seconds. Remove the pan from the heat, cover, and set aside for serving. If needed, warm the sauce after frying the wontons.

      3Make the filling: In a medium bowl, stir the cream cheese, green onion, bell pepper, garlic, and soy sauce. Fold in the crabmeat.

      4Make an egg wash: Whisk an egg with a tablespoon of water in a small bowl.

      5Fill wontons: Line a large baking sheet with parchment paper and dust with flour. Lay a few wontons out on a lightly floured work surface. Keep the rest under a damp towel or plastic wrap to prevent them from drying out.

      6Place one teaspoon of the cream cheese and crab filling in the middle of each wonton. Moisten the edges with the egg wash, then fold into a triangle, pushing as much air out of the middle as possible. Moisten one of the corners of the triangle, and then bring the two corners together, overlapping the moistened corner on top of the other corner and pressing to seal to make a little envelope. Watch us do this in our video. It is important the edges are sealed, otherwise they will not hold together in the oil.

      7Place filled and folded wontons onto the prepared baking sheet and cover with a clean dishcloth. Repeat with remaining wontons (this recipe makes about 24).

      8Prepare the oil: To avoid using a large amount of oil, use a small, deep saucepan (like in our video). Fill it with 2 to 3 inches of oil, ensuring ample space to fry the crab Rangoons without the oil rising too close to the top. Heat the oil to 350°F (175°C) as registered on an instant-read thermometer.

      9Fry the wontons: Carefully drop 5 to 6 wontons into the oil. Cook, adjusting the heat to maintain close to 350°F (175°C). Use a wire mesh spider to flip them in the oil.

      10When the wontons look crisp and golden brown, carefully transfer them to a paper towel-lined baking sheet to drain. Repeat with the remaining wontons. Occasionally, a wonton will split and cause the oil to spit around it. If you’ve left enough room in your pot, this should not be a problem. If you are worried, place a splatter screen over the pot.

    Adam and Joanne’s Tips

    • Crab substitute: You can use 8 ounces of imitation crab (surimi) cut into 1/2-inch pieces. You can also try cooked and finely chopped shrimp.
    • Baked crab rangoon: These are not as golden brown and crispy. The edges become crisp, but since the filling is so wet, the areas touching the filling stay soft. Lightly brush with cooking oil and bake in a 375°F (190°C) oven until crisp. Check them at 5 minutes, and continue to bake until crisp (5 to 10 minutes more).
    • Air fryer crab rangoon: Crispier than baked, but still not as good as fried. Lightly brush with cooking oil and air fry at 375°F (190°C). Check them at 5 minutes, and continue to air fry until crisp, 5 to 10 minutes more.
    • Save and reuse the oil: After frying the wontons, allow the oil to cool completely (this takes a while), and then save it for another day. I use a fine mesh strainer to remove any bits and pour the oil back into the bottle using a funnel.
    • Keeping fried wontons warm: Preheat the oven to 200°F (93°C). Transfer the fried and drained wontons to a baking sheet in the warm oven and hold until ready to serve.
    • Make-ahead filling: Store the filling in an airtight container in the refrigerator for up to 3 days.
    • Freezing uncooked wontons: Freeze them in a single layer on a parchment paper-lined baking sheet until hard. Once frozen, transfer them to a freezer-safe container or bag and store them for up to 3 months. When ready to enjoy, you can fry them directly from frozen.
    • Freezing cooked wontons: Freeze cooked crab rangoon in a single layer on a baking sheet. Once frozen, transfer them to a freezer-safe container or bag and store them for up to 3 months. To reheat, bake in a 300°F (150°C) oven until crisp, 8 to 10 minutes.
    • The nutrition facts provided below are estimates. Nutrition is difficult with fried foods because we cannot determine how much oil is absorbed. So we have provided nutrition for everything but the oil. We realize this isn’t the most helpful, but it is the best we can do without a laboratory.

    Nutrition Per Serving
    Serving Size
    4 wontons
    /
    Calories
    250
    /
    Total Fat
    7.3g
    /
    Saturated Fat
    4g
    /
    Cholesterol
    58.9mg
    /
    Sodium
    541.5mg
    /
    Carbohydrate
    34.2g
    /
    Dietary Fiber
    0.7g
    /
    Total Sugars
    14.5g
    /
    Protein
    11.5g


    AUTHOR:

    Joanne Gallagher

    Previous Post: Perfect Cheesecake
    Next Post: Ranch Dressing (Better than Store-Bought)

    Source link

  • Cranberry Pear Vodka Cocktail Recipe

    Cranberry Pear Vodka Cocktail Recipe

    This is such a simple pear vodka cocktail! We are upgrading a classic cranberry vodka and using pear vodka, which adds a lovely, fruity sweetness. It’s also perfect for the holidays!

    Cranberry Pear Vodka Cocktail

    This upgraded vodka cranberry made with pear vodka is one of my favorite holiday cocktails. It’s pretty, easy to make for many, and it feels special thanks to the pear vodka. Our recipe below shares how to make one cocktail, but check the notes for my tips for making this in a pitcher to serve a crowd!

    This is one of many cocktail recipes on Inspired Taste. A few more you might enjoy is this lemon drop martini (I love the lemon sugar), our classic cosmopolitan, and another crowd-friendly cocktail, the mimosa!

    Key Ingredients

    • Pear Vodka: Use good-quality pear vodka (we like Grey Goose La Poire). Feel free to substitute for other flavored or infused vodkas, such as citrus, orange, and peach.
    • Cranberry Juice: The most common option is “cranberry juice cocktail,” which adds some sugar. You can also find unsweetened cranberry juice, which is much more tart. Use what you love, but keep in mind that if you use unsweetened juice, you may need to add a sweetener to the cocktail to balance it out.
    • Triple Sec: This orange-flavored liqueur adds a subtle sweetness and a hint of citrus that complements the tart cranberry. You can make this cocktail without it, but if you have it on hand, try it.
    • Lime: I love squeezing a wedge of lime into the glass and think it brings everything together.
    • Pear Slices and Mint: These are optional, but if you plan to serve this during the holidays, they make the cocktail look extra special.
    Cranberry Pear Vodka Cocktail

    Cranberry Pear Vodka Cocktail

    This is such a simple cocktail recipe! We are upgrading a classic cranberry vodka and using pear vodka, which adds a lovely, fruity sweetness. I use a bottled cranberry cocktail, which has a bit of sugar added. If you use unsweetened cranberry juice, you might need a bit of sweetener to balance the cocktail.

    Makes 1 cocktail

    You Will Need

    1 ½ ounces pear vodka

    4 ounces cranberry juice

    1/2 ounce triple sec

    1 lime wedge

    Ice

    Fresh pear slices and fresh mint for garnish

    Directions

      1Fill a highball glass with ice.

      2Add the pear vodka, triple sec, and cranberry juice.

      3Squeeze the lime wedge over the drink and drop it in. Garnish with pear slice and fresh mint.

    Adam and Joanne’s Tips

    • Cranberry juice: 100% cranberry juice is usually unsweetened, so you may need some sweetener (see note below). Cranberry juice cocktail usually has a bit of sugar added.
    • Make sweeter: If you prefer a sweeter drink, add a teaspoon of simple syrup, agave nectar, or maple syrup. This lemon ginger syrup would also be pretty delicious.
    • Make a pitcher serving 6: Combine 6 ounces pear vodka, 2 cups (16oz) cranberry juice, 2 ounces triple sec, and the juice of 1/2 a lime in a pitcher. Stir well, taste, and adjust with a sweetener or more lime. Serve over ice.
    • Nutrition facts are estimates.

    Nutrition Per Serving
    Serving Size
    1 cocktail
    /
    Calories
    218
    /
    Total Fat
    0.2g
    /
    Saturated Fat
    0g
    /
    Cholesterol
    0mg
    /
    Sodium
    3.7mg
    /
    Carbohydrate
    22.5g
    /
    Dietary Fiber
    0g
    /
    Total Sugars
    19.9g
    /
    Protein
    0g


    AUTHOR:

    Adam Gallagher

    Previous Post: Easy Apple Pie Cupcakes
    Next Post: Easy Banana Cake

    Source link

  • Epic Taco Salad Recipe

    Epic Taco Salad Recipe

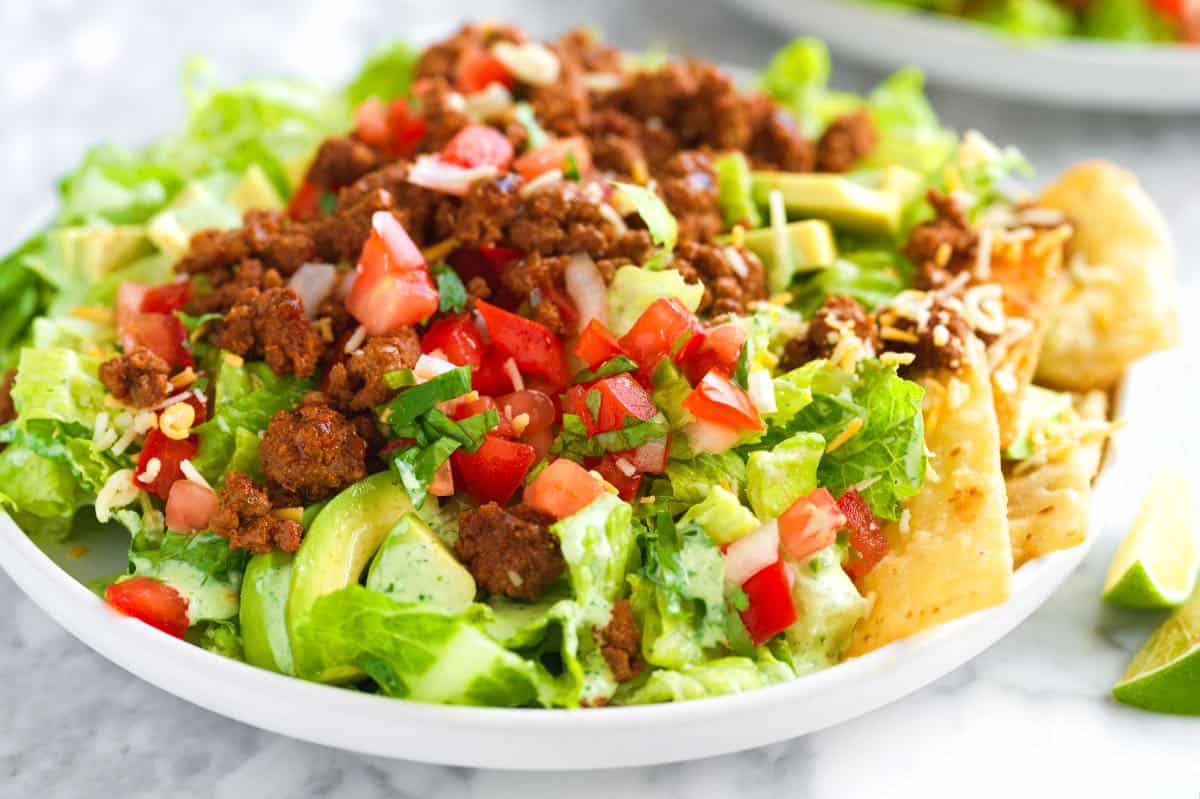
    Our favorite taco salad recipe is an easy weeknight meal with fresh lettuce, tortilla chips, seasoned ground beef, cheese, and a creamy cilantro lime dressing.

    Taco Salad

    We love tacos of all kinds (see all of our taco recipes as proof), but we really love taco salad. It’s fast, fresh, and super easy! You’ve got perfectly seasoned ground beef made with our homemade taco mix, crisp fresh lettuce, and all the best taco toppings.

    You have a lot of play with when it comes to making this taco salad recipe, but I’ll walk you our favorite way to make it! It’s healthy, but doesn’t feel that way, so it feels like a splurge. We love topping this salad with our cilantro lime dressing!

    Key Ingredients

    • Taco Meat: I’ve used lean ground beef (90/10) for my salad in the photos, but you can substitute ground turkey, ground pork, or ground chicken without any changes. Instead of using a store-bought seasoning, we make our own with chili powder, cumin, smoked paprika, garlic powder, dried oregano, and salt. When we cook the meat, we also add a couple of tablespoons of tomato paste, which helps make the meat extra tasty. You can also swap our seasoning below for our homemade taco seasoning, which is equally as delicious. (Here’s more about how to make taco meat if you are interested.)
    • Lettuce: You want crisp, crunchy lettuce for this salad, so Iceberg or Romaine is perfect.
    • All the Toppings: So this is where you get to have fun. Think of your favorite taco toppings, and then add them to this salad. I love pico de gallo, avocado or guacamole, and shredded cheese, but add your favorite toppings as you see fit!
    • Taco Salad Dressing: My favorite dressing for this is our creamy cilantro lime dressing. Still, you can substitute your favorite store-bought dressing or go with another homemade dressing like this easy ranch dressing.
    • Tortilla Chips: So these are optional and take away a little bit from the healthy angle, but I do love them! Make homemade tortilla chips or use some from your favorite store-bought bag, and add them to the top right before digging in. They add that corn tortilla flavor and lots of crunch. Some people prefer Fritos, but to be honest, I like to stick with regular chips. I’m such a fan!

    Find the full recipe with measurements below.

    Homemade Taco Salad with Ground Beef

    How to Make the Best Taco Salad

    Tip 1: Generously season the ground meat. I’m extra generous with the salt and seasonings for my taco meat. It may taste slightly too seasoned on its own, but when you scatter it all over the salad, it works! If you like spicy tacos, add a pinch or two of cayenne pepper to the spice blend.

    Tip 2: Add lots of different textures. My favorite part about this salad is the variety of textures. We want to keep the prep to a minimum since this is very likely something you are making on a weeknight, but that doesn’t mean we can’t pack in lots of goodies. Avocado is creamy, tomato or pico de gallo is fresh, and the chips add some crunch. Think about other fridge staples like sour cream, salsa, guacamole, or pickled red onions. They will all work well in this salad!

    Tip 3: Make the taco meat ahead of time. You can cook the ground beef with the spices, then keep it in an airtight container for up to 4 days. This way, it’s ready for you when you are craving this taco salad. The dressing is great for making ahead, too!

    Taco Salad

    Epic Taco Salad

    • PREP
    • COOK
    • TOTAL

    This easy taco salad recipe with ground beef is such an easy weeknight dinner. Make our recommended cilantro lime dressing recipe (which is sort of like a cilantro ranch) or skip that step and use your favorite store-bought ranch.

    4 Servings

    Watch Us Make the Recipe

    You Will Need

    For the Taco Meat

    1 ½ teaspoons chili powder

    1 teaspoon ground cumin

    ½ teaspoon smoked paprika

    1 teaspoon garlic powder

    ¼ teaspoon dried oregano

    ¾ teaspoon fine sea salt, plus more as needed

    1 ½ tablespoons avocado oil

    1 pound lean ground beef, 90/10 (450g)

    2 tablespoons tomato paste (35g)

    ½ cup chicken stock or water


    For the Taco Salad

    12 cups shredded crispy lettuce, like romaine or iceberg lettuce

    1 cup homemade pico de gallo or chopped tomatoes

    ½ cup Mexican blend shredded cheese (113g)

    1 large avocado, pitted and sliced

    1 cup tortilla chips, try homemade tortilla chips, optional

    Cilantro Lime Dressing, Homemade Ranch, or your favorite store-bought ranch

    Directions

      1Make spice mix: In a small bowl, stir together the chili powder, cumin, smoked paprika, garlic powder, dried oregano, and salt.

      2Cook the seasoned beef: Heat the avocado oil in a medium skillet over medium-high heat. Add the ground beef and sprinkle the spice mixture over it. Use a wooden spoon to break up the meat as it cooks, stirring until it begins to brown. Stir in the tomato paste and cook for 2 more minutes. Add the chicken stock (or water) and let it simmer for a few minutes until the sauce has thickened. Taste, and then add more salt if you think it needs it (since this will top a salad, keeping this well seasoned works really well with the rest of the salad.)

      3Make the salad: In a large salad bowl, toss the lettuce with 4 to 8 tablespoons of the dressing (adjust depending on how dressed you like your salad). Divide the lettuce between four bowls or plates, then top each with a generous ½ cup of the beef mixture, pico de gallo, shredded cheese, and the avocado. Sneak some tortilla chips on the side, then enjoy!

    Adam and Joanne’s Tips

    • More toppings: Feel free to add more of your favorite taco toppings like sour cream, salsa, chopped tomatoes, queso fresco, red onion, black olives, and more!
    • Seasoning: I prefer the spice blend above to your average packet of taco seasoning from the store; however, if you have a favorite, feel free to swap our blend for the packet. Of all the options I have tried, Siete Foods has the tastiest.
    • Lettuce: I usually buy the romaine hearts sold in threes at the store. For 4 servings (12 cups), you will need two 12-ounce bags of romaine hearts.
    • The nutrition facts are estimates.

    Nutrition Per Serving
    Serving Size
    1/4 of the recipe (1/2 cup beef)
    /
    Calories
    534
    /
    Total Fat
    40.7
    /
    Saturated Fat
    10.6g
    /
    Cholesterol
    95.2mg
    /
    Sodium
    1069.8mg
    /
    Carbohydrate
    14.3g
    /
    Dietary Fiber
    6.7g
    /
    Total Sugar
    5.4g
    /
    Protein
    29.7g


    AUTHOR:

    Joanne Gallagher

    Adam and Joanne of Inspired Taste

    We are Adam and Joanne Gallagher, the creators of Inspired Taste. Established in 2009, Inspired Taste grew from a childhood dream into one of the internet’s most trusted recipe sites with hundreds of reliable recipes, step-by-step videos, and expert tips.More About Us

    Source link

  • Easy Roasted Pumpkin Seeds Recipe

    Easy Roasted Pumpkin Seeds Recipe

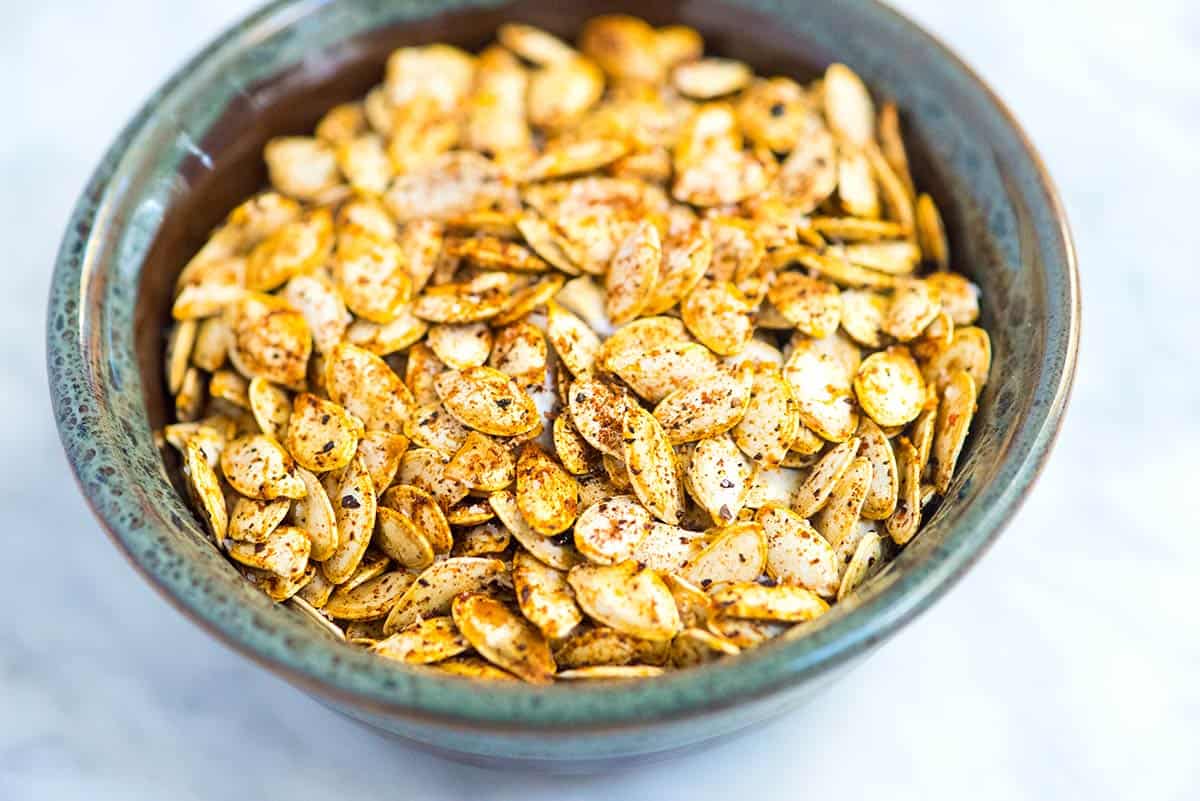
    My roasted pumpkin seeds recipe is super simple, and they taste amazing! Use this recipe for pumpkin seeds or seeds from other winter squash, like butternut squash.

    Roasted Pumpkin Seeds

    This recipe takes me straight back to my childhood. Carving pumpkins goes hand in hand with roasting pumpkin seeds. Bonus, the aroma from the oven is incredible! If you have never tried it before, I’ve got you covered. This is my favorite method for how to roast pumpkin seeds!

    Our family loves pumpkins. Be sure to check out some of our other favorite pumpkin recipes. Making homemade pumpkin puree is fun and easy, which you can use for pumpkin pie, maple pumpkin butter, or pumpkin spice latte.

    How to Make the Best Roasted Pumpkin Seeds

    Please don’t throw away those pumpkin seeds! Use our recipe and turn them into a delicious snack! After scooping out your seeds (they will be messy), we need to clean them of all those stringy bits.

    Tip 1: Clean your pumpkin seeds. Throw your seeds into a bowl of cold water. Swish the seeds around the bowl, then remove them as they float to the top. They’re mostly clean now, but we have one more chance to clean them up.

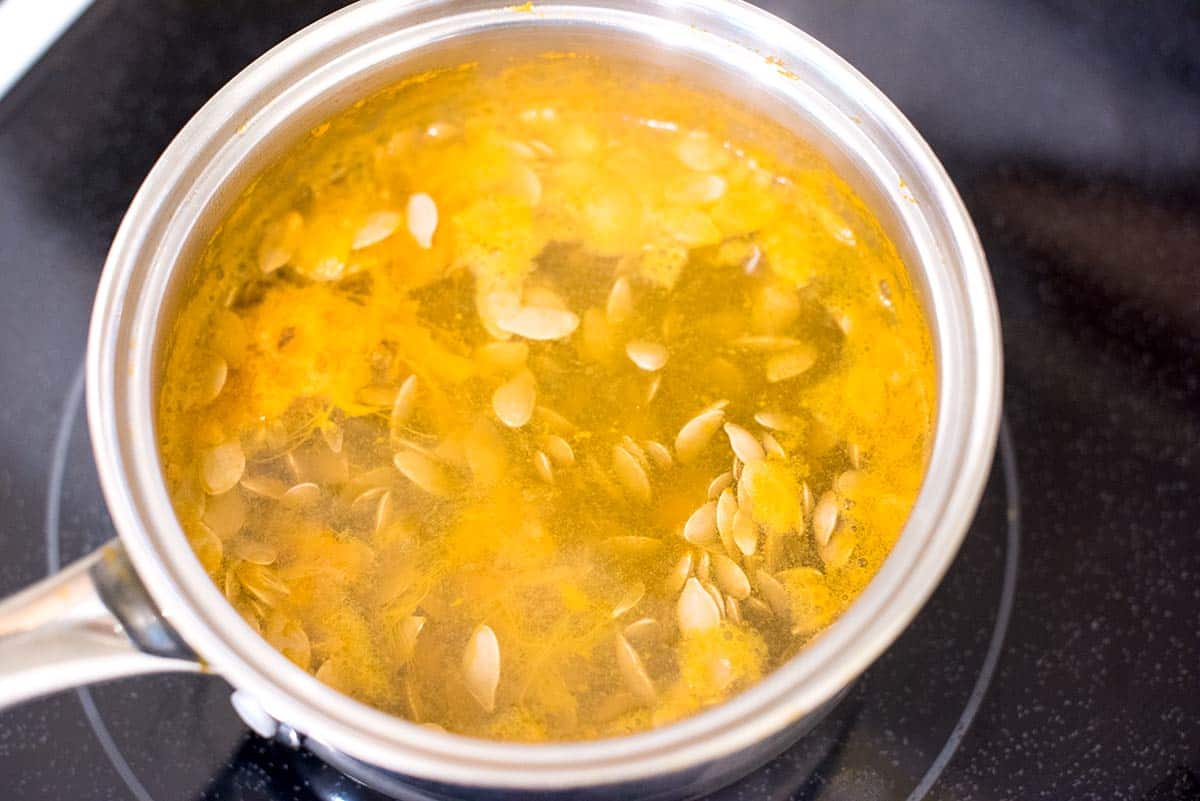
    Tip 2: Boil in salted water. Next, add the mostly clean seeds to a pot of boiling salted water and simmer for about 5 minutes. This step cleans the seeds even more and seasons them (like adding salt to the boiling water to season pasta).

    Simmering pumpkin seeds before roasting them.

    Tip 3: Pat your seeds dry. Drain and rinse the seeds. Pull away any extra bits of pumpkin left, then dry them as well as you can. The more dry your pumpkin seeds are, the better they will roast in the oven.

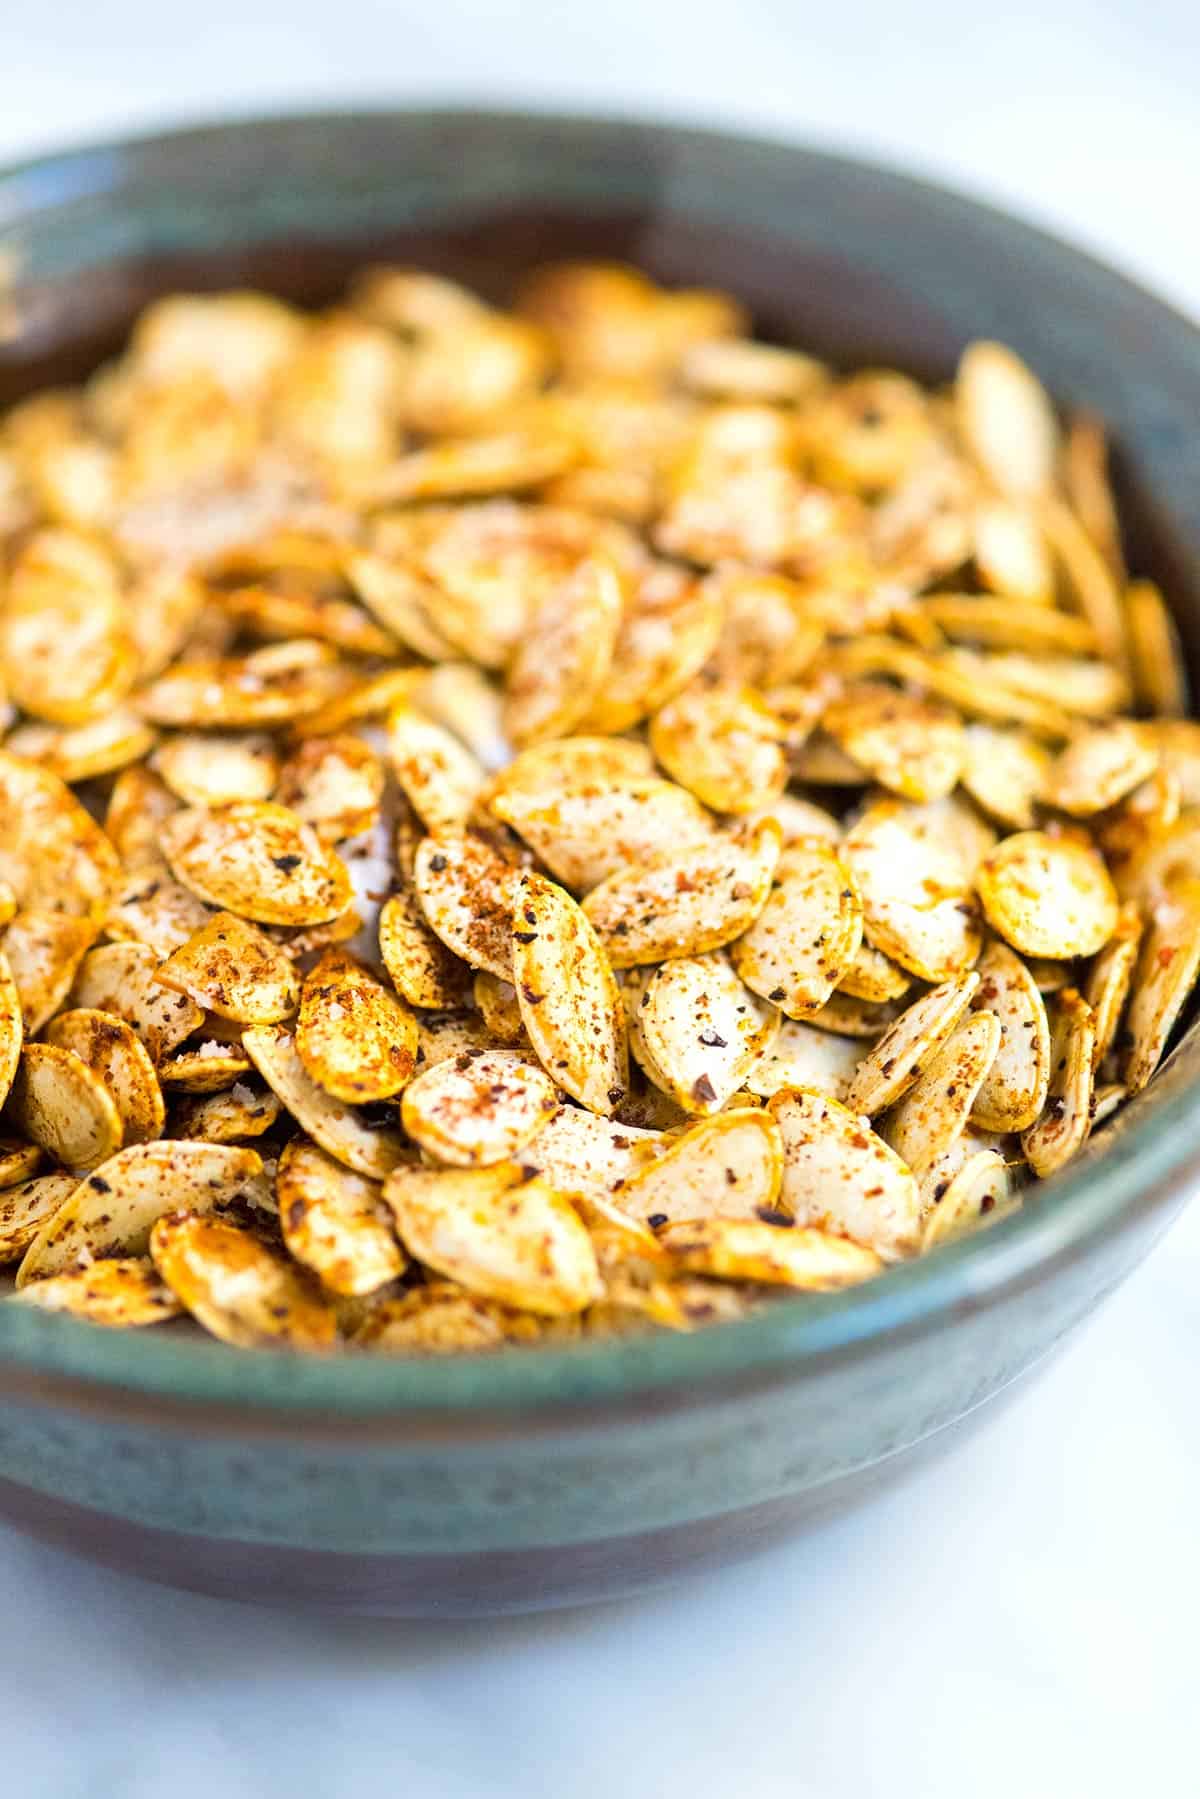
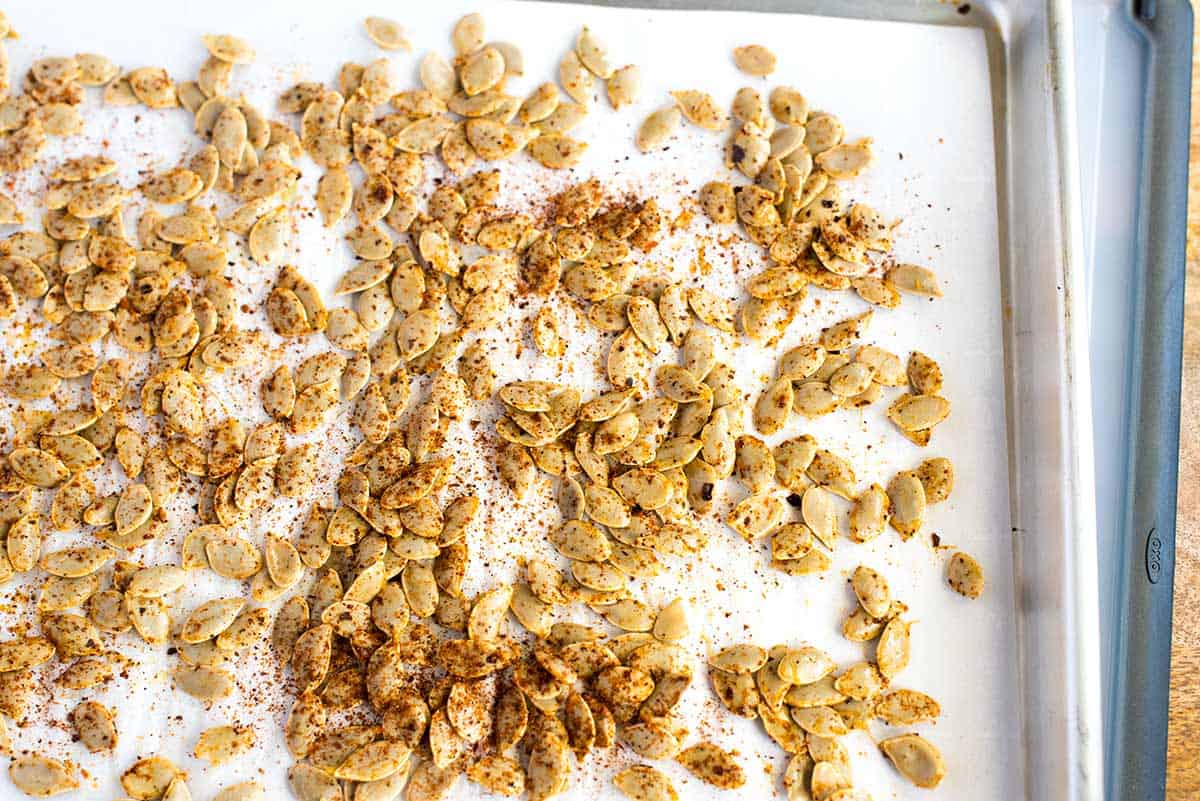
    Tip 4: Add flavor and roast. Toss the dry seeds with oil (use olive oil, coconut oil, or a nut oil like walnut). Add a sprinkle of your favorite spice blend. I used harissa in the photo, but curry powder, pumpkin spice, or chili powder is also excellent. Spread your seeds into one layer and roast them in a 350°F oven until crisp and browned around the edges.

    Roasting pumpkin seeds with spices on a baking sheet

    Tip 5: Try roasting winter squash seeds. Halloween isn’t the only time to roast pumpkin seeds. You can do it throughout fall and winter or swap the pumpkin for other winter squash, such as butternut squash, spaghetti squash, or delicata squash. The method stays the same, although you may find the smaller seeds don’t need as much time in the oven.

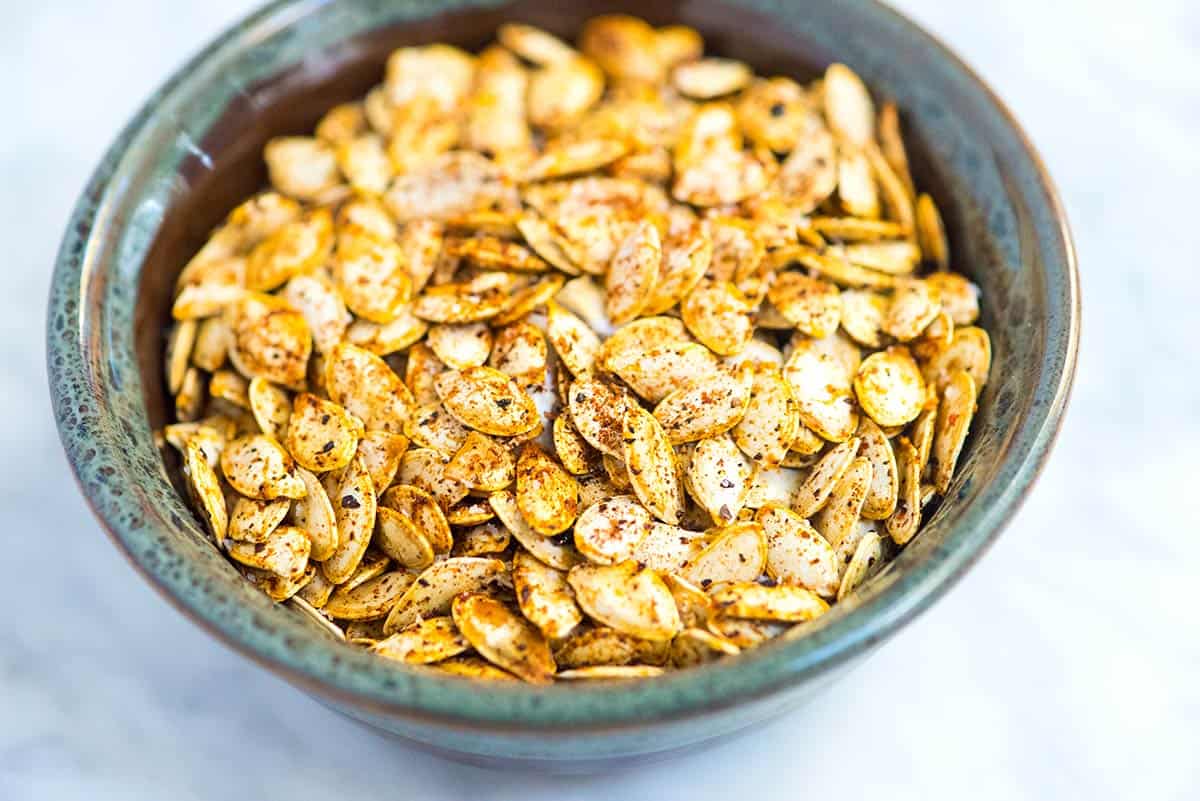
    Roasted pumpkin seeds

    Easy Roasted Pumpkin Seeds

    • PREP
    • COOK
    • TOTAL

    This is my favorite roasted pumpkin seeds recipe. The secret is simmering your pumpkin seeds in salted water for 5 minutes before roasting, which helps to clean and season them. Before roasting, pat them dry, otherwise, they will not brown or crisp.

    Makes 1 1/2 cups

    Watch Us Make the Recipe

    You Will Need

    1 ½ cups pumpkin seeds

    2 teaspoons fine sea salt, plus more for serving

    2 teaspoons olive oil, melted coconut oil, or nut oil like walnut

    2 teaspoons favorite spice blend such as pumpkin pie spice, curry powder, harissa or chili powder

    Directions

      1Preheat the oven to 350°F (177°C). Line a baking sheet with parchment paper and set aside.

      2Fill a medium saucepan with 2 cups of water and season with 2 teaspoons of salt. Bring to a boil.

      3Meanwhile, scoop the seeds from your pumpkin. Add the pumpkin seeds to a bowl filled with cold water and swish them until they float and are mostly clean.

      4Add the cleaned seeds to the boiling salted water. Simmer for 5 minutes.

      5Drain and pull away any remaining pumpkin attached to the seeds.

      6Scatter the seeds onto clean dishcloths and pat them very dry.

      7Mound the dried seeds onto the prepared baking sheet. Add the oil and spices, then toss until well coated.

      8Spread the seeds into one layer. Bake, stirring the seeds at least once, until fragrant and golden around the edges, 10 to 25 minutes, depending on the size of the seeds.

    Adam and Joanne’s Tips

    • Storing: Allow the roasted seeds to cool, then store them in an air-tight container. They will last this way at room temperature for a couple of weeks and in the freezer for a few months.
    • Can you eat pumpkin seed shells? We enjoy the shells and love that they add some extra fiber. If you don’t like the shells, you can always hull them after roasting. I usually do this by biting into the seed and using my teeth to crack the shell.
    • The nutrition facts provided below are estimates.

    Nutrition Per Serving
    Serving Size
    2 tablespoons
    /
    Calories
    105
    /
    Protein
    5 g
    /
    Carbohydrate
    2 g
    /
    Dietary Fiber
    1 g
    /
    Total Sugars
    0 g
    /
    Total Fat
    9 g
    /
    Saturated Fat
    2 g
    /
    Cholesterol
    0 mg


    AUTHOR:

    Adam Gallagher

    Adam and Joanne of Inspired Taste

    We are Adam and Joanne Gallagher, the creators of Inspired Taste. Established in 2009, Inspired Taste grew from a childhood dream into one of the internet’s most trusted recipe sites with hundreds of reliable recipes, step-by-step videos, and expert tips.More About Us

    Source link

  • Banza Chicken Bowls with Calabrian Chili Sauce Recipe

    Banza Chicken Bowls with Calabrian Chili Sauce Recipe

    I Honestly Wake Up In The Morning Thinking About These Chicken Bowls.

    Lindsay headshot

    Yep, still here, still talking about that air fryer chicken but this time it’s in bowl form and there’s a new sauce in town.

    Tonight we had these chicken bowls for dinner, and Bjork smothered his still-warm, juicy, golden chicken strips with that spicy tangy Calabrian chile sauce and declared it the best chicken he’s ever had. And as soon as I open my eyes in the morning, one of my first waking thoughts is: “YES I get to eat that bowl again for lunch today.”

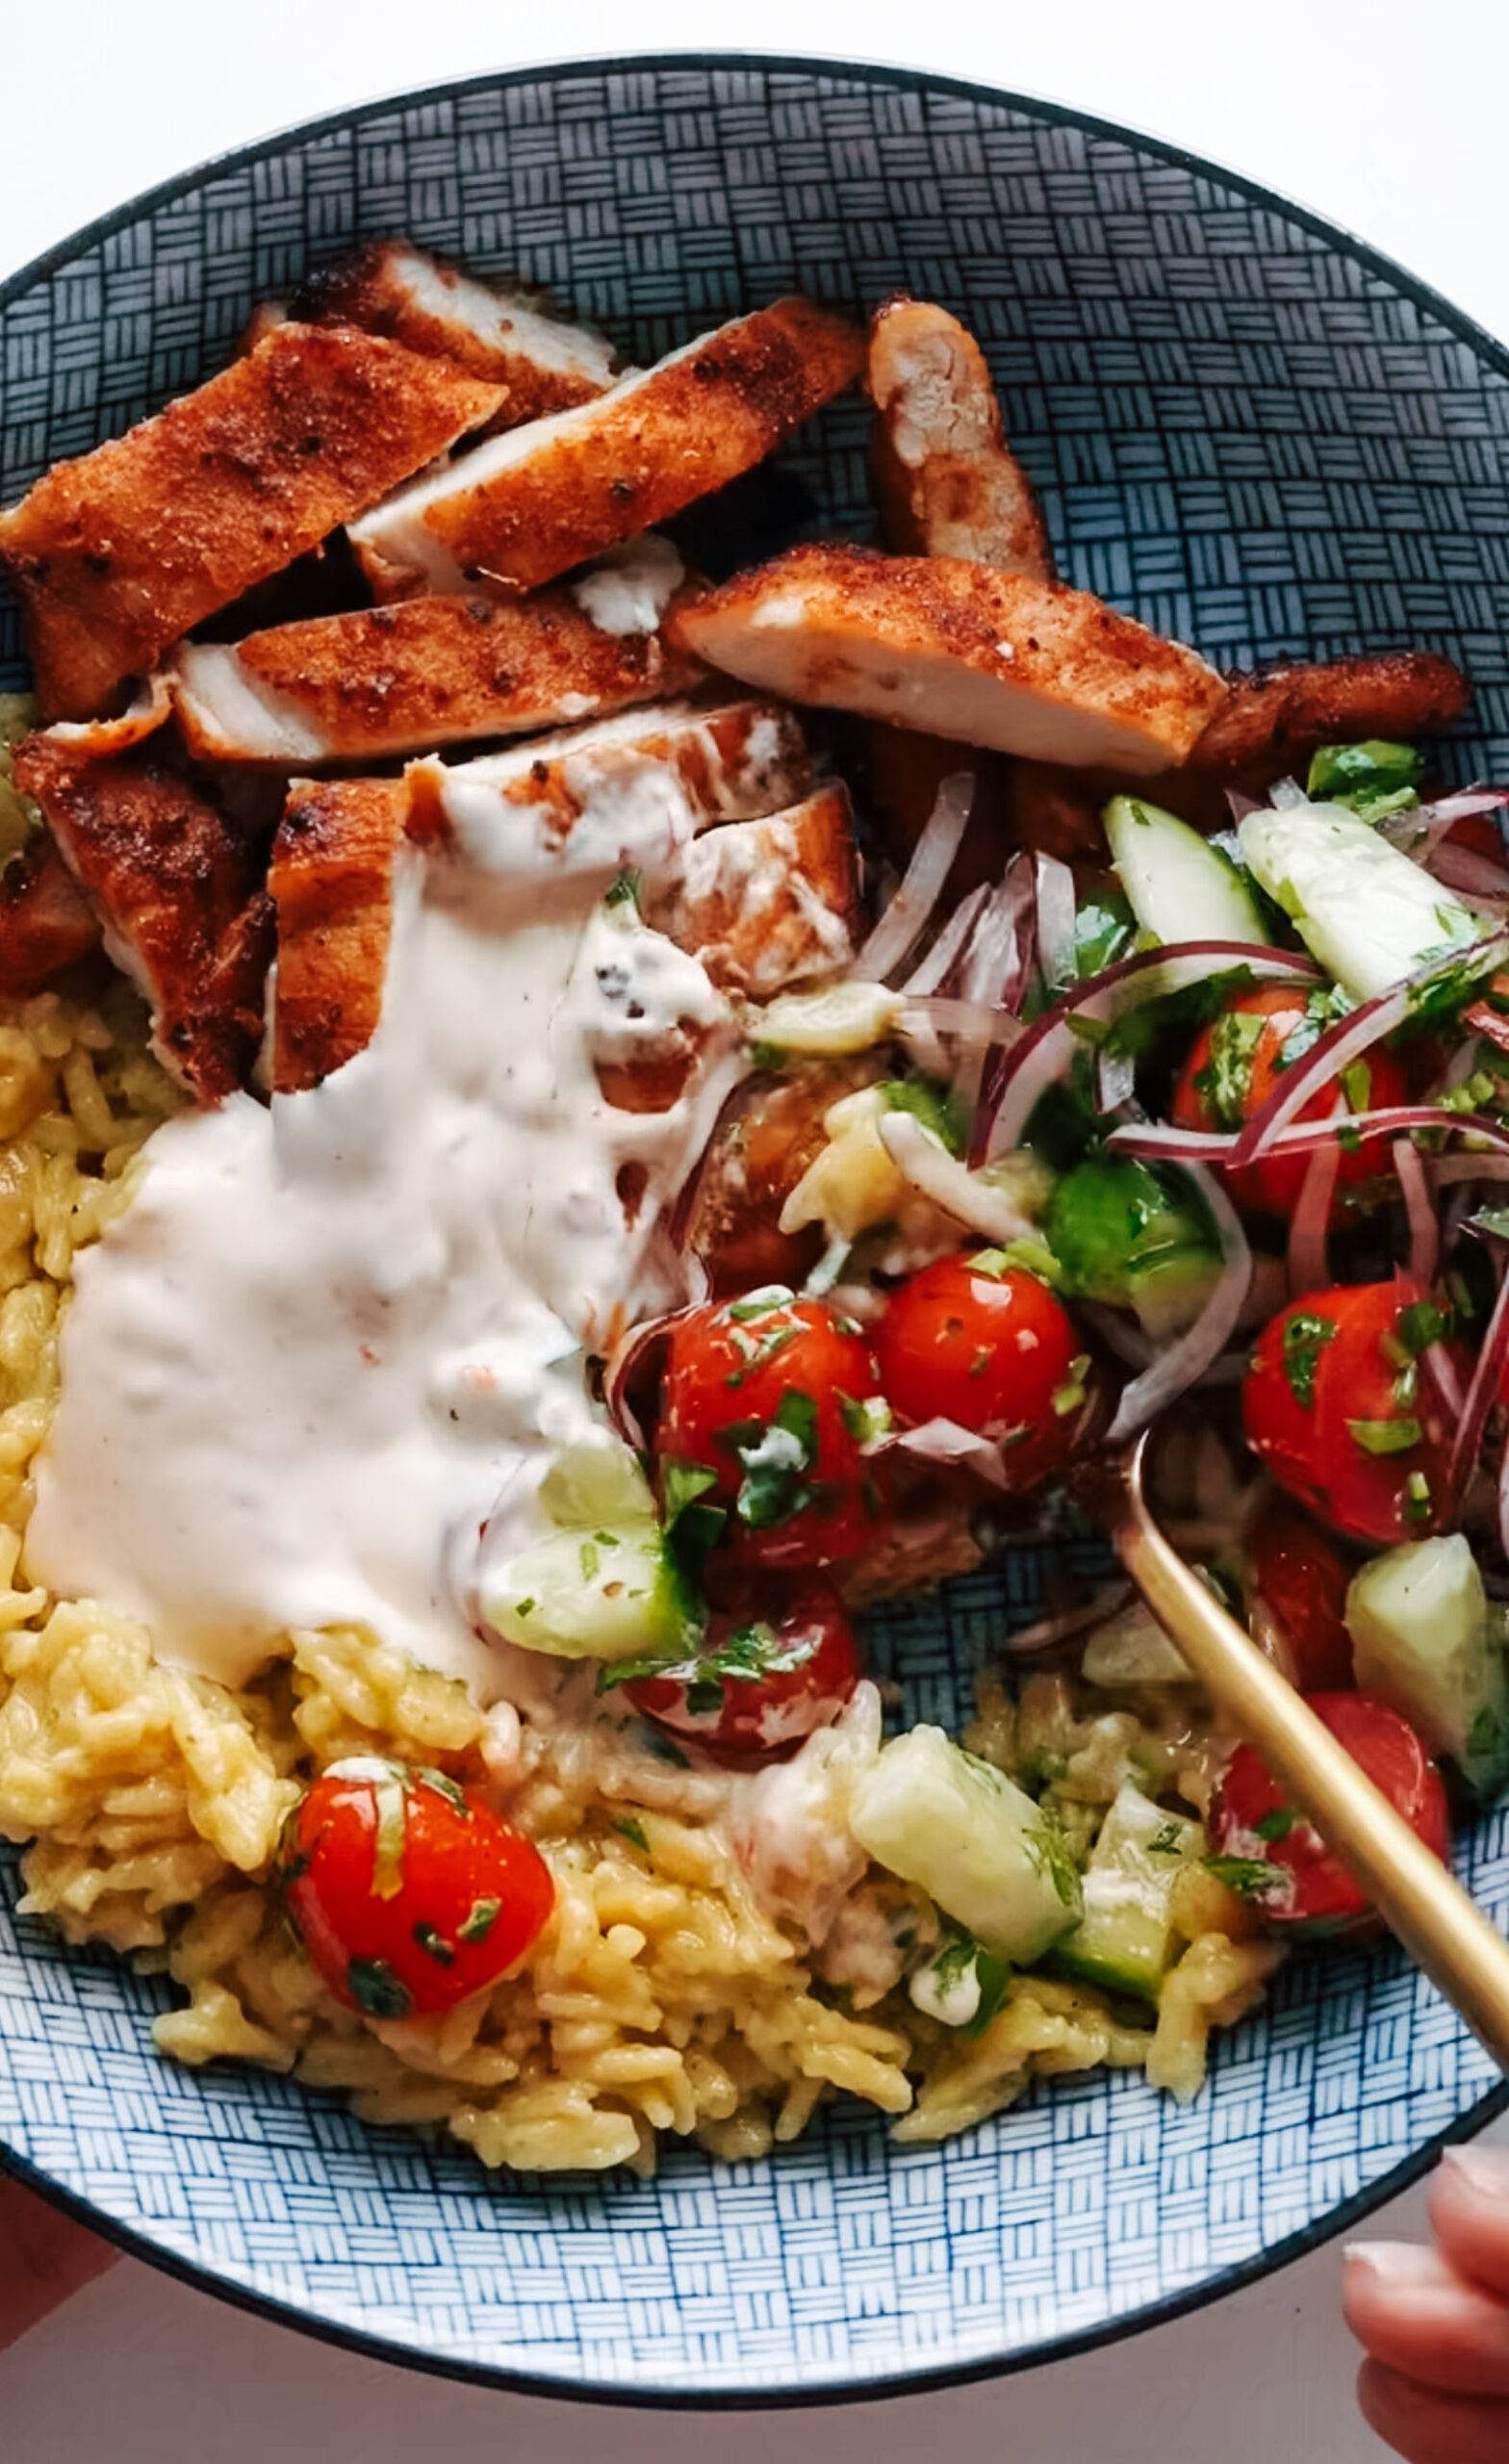
    This bowl is like a little symphony – the crunch of the tomato cucumber salad, the thin slips of bitey red onion, the golden crisped air fryer chicken cut into tender little strips, a big pile of perfectly chewy Banza, and a heavy pour of tangy Calabrian chile sauce on top. I am drooling.

    If you need to scale it back and make it easier with fewer elements, just go for the chicken with the sauce and the salad. Or the chicken with the sauce and the Banza.

    Or, really, just the chicken with the sauce. That Calabrian chile sauce is at the heart of it all.

    January is long, but this bowl, for me, has been one of those super happy meals where I’m excited to eat it AND I feel good about the actual nutrition in it. Like, one of those meals that I look forward to and it becomes the highlight of my day. Belly full, tastebuds so exceptionally happy. Hope you like it!

    Lindsay signature

    Source link

  • Thai Fish Curry Recipe

    Thai Fish Curry Recipe

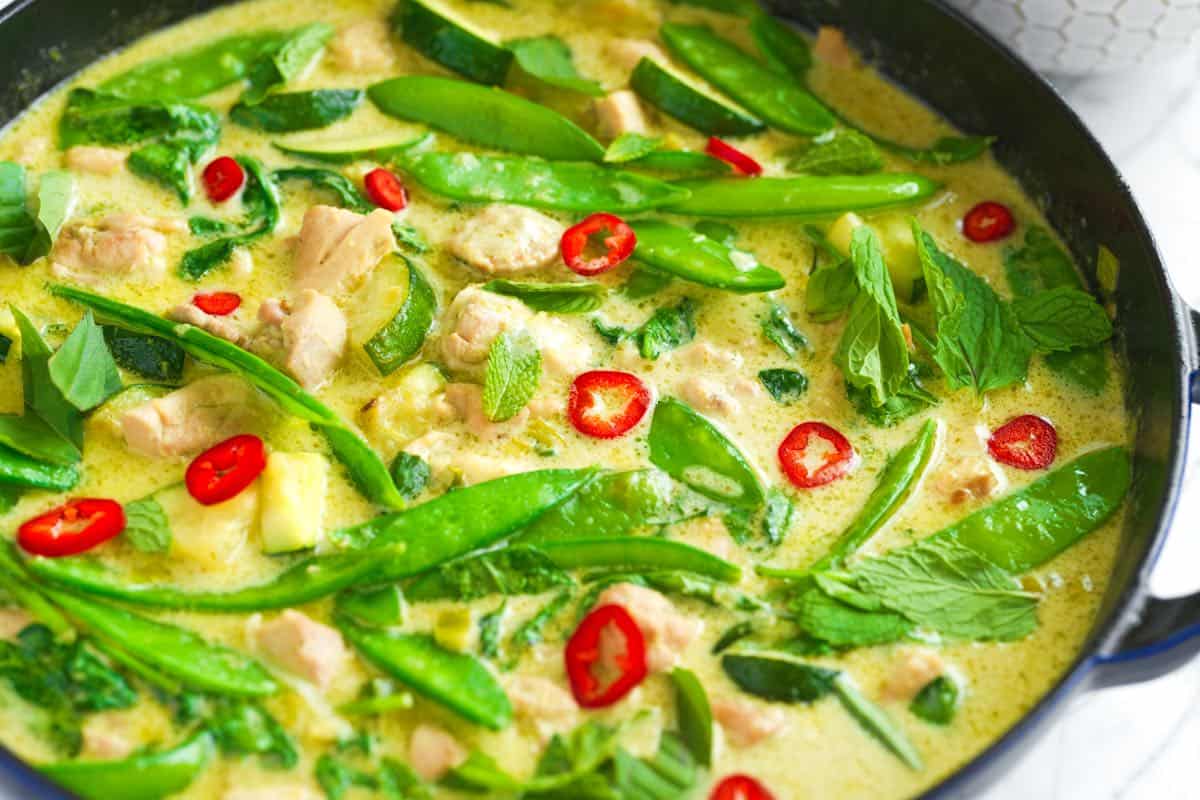
    This incredibly flavorful Thai fish curry recipe with flaky white fish swimming in a creamy coconut green curry broth with veggies is pure magic.

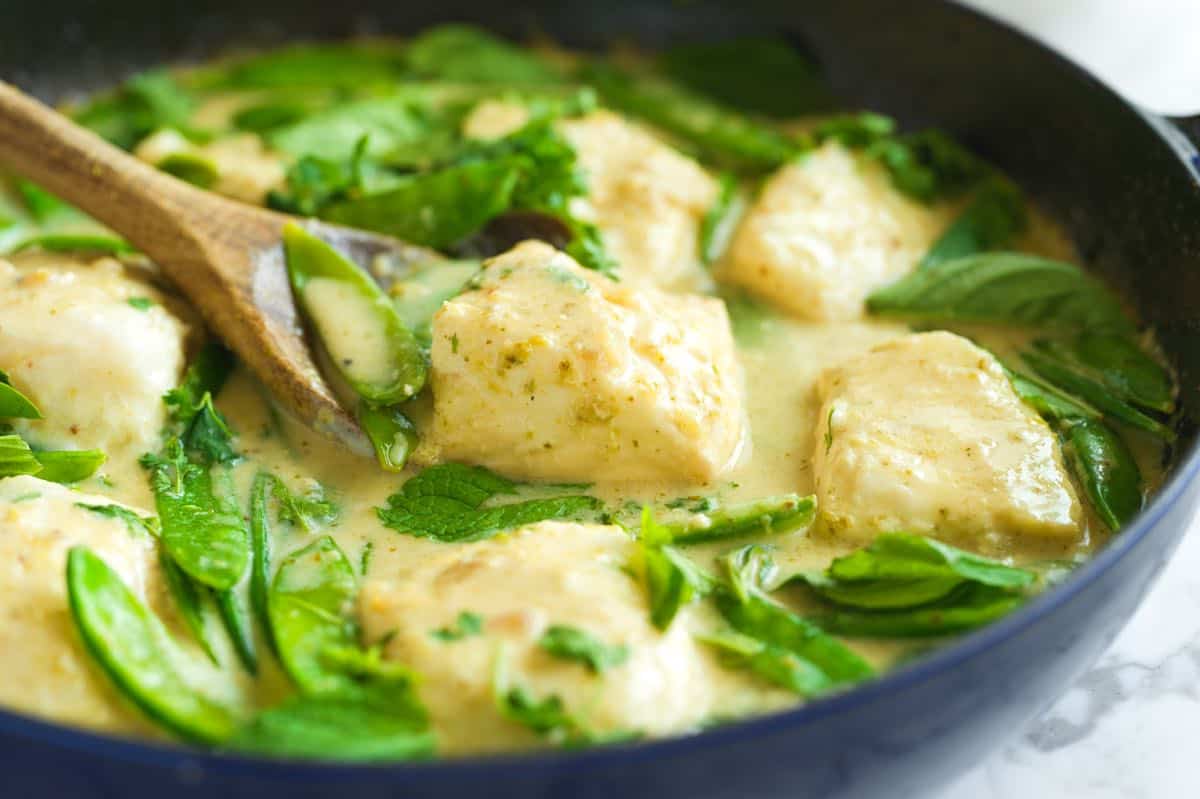
    Thai Fish Curry with Coconut and Green Curry Paste

    If you’ve been following along, you know we’ve been obsessed with our homemade green curry paste. We have already shared our Thai Green Curry with chicken, but we loved the flavor so much, we had to find another way to use it, and this Thai-inspired fish curry was the answer. It’s everything we hoped for and more.

    It’s also really easy to make (I promise!). This saucy green curry fish is perfect for when you’re craving a light, flavorful meal, but you don’t have much time. You’ll gently simmer flaky white fish in a vibrant, aromatic coconut sauce. Then, serve the fish and lots of the creamy green curry sauce over Jasmine rice or rice noodles.

    Key Ingredients

    • White Fish: Choose a flaky white fish for this fish curry. Think cod, halibut, haddock, tilapia, and snapper for a tender, soft texture. Or, go with mahi mahi or sea bass for a slightly firmer texture.
    • Green Curry Paste: I love using our homemade curry paste, which is bright and super herby thanks to chile peppers, garlic, lemongrass, ginger, mint, and basil. With our recipe, you have complete control over the spice level, which is a big bonus. Of course, you can still use a store-bought Thai curry paste. My favorite is from Maesri (sold in cans).
    • Coconut Milk: This is a non-negotiable for a creamy curry, and full-fat coconut milk really is best. A quick tip when you’re shopping: give the can a shake. If it sounds liquidy, skip it. A can that’s not as liquidy has more of that delicious thick coconut cream inside!
    • Fish Sauce: This helps to season the curry. I have two favorites in my pantry, including Red Boat and Three Crabs fish sauce.
    • Vegetables: I always start by cooking some sliced shallots, and then finish the curry with a quick-cooking veggie like snow peas. Zucchini, snap peas, green beans, spinach, asparagus, or small broccoli florets are also great options.
    • Lime and Fresh Herbs: To build off the fresh, herby flavor of the curry paste, I love finishing the curry with a squeeze of fresh lime juice and a handful of fresh herbs like Thai basil and mint (Italian basil works, too).
    • Kaffir Lime Leaves (Optional): These are optional, but they add a lovely aromatic flavor to this curry recipe. They used to be sold in my local grocery store, but they have been harder to find recently. You can buy them online, though! If you do find them fresh, buy a bunch, then freeze them!

    Find the full recipe with measurements below.

    How to Make Thai Fish Curry

    Tip 1: Boost store-bought paste: If you aren’t starting with our homemade green curry paste, you can boost the flavor of store-bought. Store-bought curry pastes range in flavor and spice level. I recommend Maesri (sold in cans). To achieve the fresh, vibrant flavor that homemade paste gives our curry, add the following along with the curry paste in step two of the recipe below: 2 teaspoons minced garlic, 2 teaspoons finely grated fresh ginger, and 2 teaspoons lemongrass paste.

    Tip 2: Cook your curry paste first: Before adding the coconut milk, sauté your curry paste in some oil to bring out the flavors. I do this over medium heat and cook the paste until the color deepens a little, and it just begins to stick to the pan. This step makes a huge difference!

    Making fish curry with coconut milk, Thai green curry paste, and vegetables

    Tip 3: Prepare for some spice: Note! Green curry is supposed to be SPICY. It’s generally the hottest of all the Thai curries. If you are not interested in a spicy dish, you can make our homemade paste and reduce the chili peppers. Or, swap the green curry paste for yellow curry paste, which is much milder and sweeter.

    Tip 4: Don’t forget the rice: This fish curry is extra saucy, so you’ll want a bed of rice or noodles to soak up all the creamy coconut sauce. Jasmine rice, brown rice, coconut rice, cilantro lime rice, or cooked rice noodles are perfect. If you’re trying to keep the carbs down, consider my favorite cauliflower rice.

    More Thai Curry Recipes

    Thai Fish Curry

    Thai Fish Curry Recipe

    • PREP
    • COOK
    • TOTAL

    This Thai fish curry recipe is perfect for an easy weeknight dinner. We love this from scratch curry paste, but check our tips section below the recipe for ways to boost the flavor of store-bought curry paste.

    A quick note on the spice level: traditional green curry is usually quite hot. Our homemade paste is easy to adjust, but be aware that the spice level of store-bought versions will vary. If you’re looking for a good store-bought option, I highly recommend Maesri (sold in cans).

    Serve this curry over steamed Jasmine rice, cilantro lime rice, or cooked rice noodles. It’s also amazing with some crispy fried shallots sprinkled over the top!

    4 to 6 Servings

    You Will Need

    2 tablespoons avocado oil

    2 medium shallots, sliced thin

    6 tablespoons homemade green curry paste (see tips below for using store-bought curry paste)

    1 (15oz) can full-fat coconut milk

    1 tablespoon fish sauce

    4 kaffir lime leaves, optional

    1 ½ pounds skinless, boneless white fish, cut into chunks (680g)

    8 ounces snow peas (225g)

    Juice from half a lime, plus lime wedges for serving

    ½ cup green herbs like Thai basil, mint, and cilantro for serving

    Thinly sliced red chilies for serving, optional

    Directions

      1Cook the shallots: Heat a wide pot or deep skillet over medium heat. Add the avocado oil and shallots, then cook, stirring them around the pot, until translucent, about 4 minutes.

      2Bloom the curry paste: Add the green curry paste and cook, stirring it around, until slightly darker and beginning to stick to the pot, 2 to 3 minutes.

      3Simmer the sauce: Pour in the coconut milk, then swirl about 1 cup of water in the empty can to get any remaining coconut milk, and pour the water into the pot. Scrape any stuck bits from the bottom, then stir in the fish sauce. Add the kaffir lime leaves (optional). Simmer until the sauce thickens slightly, 5 to 6 minutes.

      4Cook the fish and veggies: Add the fish and snow peas, then simmer until the fish is cooked through and flakes easily with a fork, 5 to 8 minutes. As they cook, spoon the coconut sauce over the fish and vegetables. If most of the fish is tender, but the very tops of the fish are still undercooked, turn the heat off, and cover the pot with a lid for a few minutes so they finish cooking.

      5Finish and serve: Turn off the heat, remove the lime leaves, and stir in the lime juice. Taste and season with more fish sauce as needed. Serve over rice, topped with fresh herbs and thinly sliced red chiles (optional).

    Adam and Joanne’s Tips

    • Store-bought curry paste: I like the 4-ounce cans from Maesri (here’s a link to them on Amazon). I use 4 to 6 tablespoons. Commonly sold Thai Kitchen green curry paste is not as flavorful, but the spice is more potent (if this is what you have, start with 2 tablespoons and go from there). It’s a good idea to taste your curry paste before using it to see where it sits on the flavor/spice scale.
    • Making store-bought curry paste better: Add the following ingredients along with the curry paste in step two: 2 teaspoons minced garlic, 2 teaspoons finely grated fresh ginger, and 2 teaspoons lemongrass paste. I buy lemongrass paste in tubes. To learn how to make lemongrass paste from fresh, see the tips section of our green curry paste recipe.
    • Recipe inspired by our Thai Green Curry and Ali Sagle’s Corn and Cod Green Curry (NYT).
    • The nutrition facts provided are estimates.

    Nutrition Per Serving
    Serving Size
    1/6 of the recipe
    /
    Calories
    274
    /
    Total Fat
    17g
    /
    Saturated Fat
    11.3g
    /
    Cholesterol
    52.2mg
    /
    Sodium
    718.5mg
    /
    Carbohydrate
    8.4g
    /
    Dietary Fiber
    2.1g
    /
    Total Sugars
    2.9g
    /
    Protein
    23.3g


    AUTHOR:

    Joanne Gallagher

    Adam and Joanne of Inspired Taste

    We are Adam and Joanne Gallagher, the creators of Inspired Taste. Established in 2009, Inspired Taste grew from a childhood dream into one of the internet’s most trusted recipe sites with hundreds of reliable recipes, step-by-step videos, and expert tips.More About Us

    Source link

  • Easy Thai Green Curry Recipe

    Easy Thai Green Curry Recipe

    I’d happily eat this unbelievably flavorful Thai green curry recipe made with chicken, coconut milk, and veggies every week.

    Thai Green Curry

    A great Thai curry recipe starts with a great curry paste. While our homemade green curry paste is my go-to for this recipe, I completely understand that a good store-bought option can save you a lot of time. That’s why I’ve included tips for bumping up the flavor of store-bought curry paste, guaranteeing your curry is as delicious as possible.

    For more of our favorite homemade curries, explore our recipes for Thai red curry paste, Thai fish curry, our easy vegetable curry, the perfect yellow chicken curry, and my family’s favorite Indian-inspired chicken curry.

    Key Ingredients

    • Thai Green Curry Paste: I love using this homemade green curry paste, which you see in our photos. It’s bright and super herby thanks to the mint and basil, and you have complete control over the spice level. While authentic Thai green curry is usually quite hot, you can easily tone it down with our recipe if that’s not your style. Of course, you can still make this green chicken curry with a store-bought paste. My favorite store-bought paste is from Maesri (sold in cans). Even when I use store-bought, I love to add a little extra flavor with some fresh ginger and lemongrass. Be sure to check out my tips below the recipe!
    • Garlic and Green Onions: I find these add a fresh punch of flavor to the curry, and I love the green onions because they’re so quick and easy to prep.
    • Chicken Thighs: When it comes to the chicken, I always choose boneless, skinless chicken thighs. While chicken breast will work, you’ll find that chicken thighs turn out much more tender and flavorful.
    • Coconut Milk: Make sure you use full-fat coconut milk (light won’t make it creamy enough). A quick tip when you’re shopping: give the can a shake. If it sounds liquidy, skip it. A can that’s not as liquidy has more of that delicious coconut cream inside!
    • Fish Sauce: This helps to season the curry. I have Red Boat and Three Crabs fish sauce in my pantry.
    • Veggies: Authentic green curry often has snow peas and Japanese eggplant. I like to swap the eggplant for zucchini and stir in some spinach, but you can use whatever you love.
    • Lime and Green Herbs: Before you serve the curry, I recommend squeezing over some fresh lime juice and scattering over some fresh cilantro, basil and/or mint. I love Thai basil for this, but regular Italian basil will do just fine if that’s all you have on hand.
    • Kaffir Lime Leaves (Optional): While it’s optional, I think kaffir lime leaves (also called makrut lime leaves) add the most lovely aromatic flavor to this curry. They used to be so easy to find at our local grocery store, but I’ve noticed they’re not nearly as common anymore (such a bummer!). You can find them sold as dried leaves online, and if you ever find them fresh, I highly recommend buying a bunch and freezing them so you’ll always have them on hand! We love them so much, we just bought a Kaffir Lime tree (I’m so excited!).

    Find the full recipe with measurements below.

    How to Make Our Favorite Thai Green Curry

    Want to make Thai green curry like a pro, even on a weeknight? Here are our top tips for getting the most flavor and perfect results every time.

    Tip 1: Start with a great curry paste. While our homemade curry paste is full of fresh flavor, you can also boost a store-bought version with a few extra aromatics. We already add extra garlic and green onion to our homemade paste, but if you’re using store-bought, I recommend also adding some finely minced fresh ginger and lemongrass paste.

    Note! Green curry is supposed to be SPICY. It’s generally the hottest of all the Thai curries. If you are not interested in a spicy dish, you can also make our homemade paste and reduce the chili peppers. Or, try our yellow curry, which is intentionally mild.

    Tip 2: Always cook your curry paste first. Before adding the coconut milk, sauté the curry paste in some oil to really bring out the flavors. I do this over medium heat and cook the paste until the color deepens a little and it just begins to stick to the pan. This step makes a huge difference!

    Adding the coconut milk

    Tip 3: Add your veggies towards the end. The chicken needs longer to cook than the vegetables, so give it a head start. This way, your chicken will turn out soft and tender, and your veggies will still have a little bite. If you’re adding zucchini, I like to take a moment at the beginning of the recipe to add a little color to them, then I remove them from the pan (they’ll be a little browned but still raw in the middle) and save them to add to the curry later.

    Adding the vegetables later on

    Tip 4: Serve over rice or rice noodles. This curry is saucy, so you’ll want a bed of rice or noodles for soaking up all the delicious sauce. Jasmine rice, cilantro lime rice, or cooked rice noodles (like what we use for Pho) are perfect.

    More Curry Recipes

    Thai Green Curry

    Easy Thai Green Curry

    • PREP
    • COOK
    • TOTAL

    I crave this Thai green chicken curry recipe all the time! Whether you use our from scratch green curry paste or follow our tips below the recipe for boosting a store-bought version, this recipe guarantees you’ll have a fabulous dinner on your table.

    Just a quick note on the spice level: traditional green curry is usually quite hot. Our homemade paste is easy to adjust, but be aware that the spice level of store-bought versions will vary. If you’re looking for a good store-bought option, I highly recommend Maesri (sold in cans).

    Serve this curry over Jasmine rice, cilantro lime rice, or cooked rice noodles. It’s also amazing with some crispy fried shallots sprinkled over the top!

    4 Servings

    You Will Need

    2 tablespoons avocado oil

    1 medium zucchini, sliced into 1/2-inch thick quarter moons, about 2 cups

    4 green onions, sliced

    2 garlic cloves, minced

    1 ½ pounds boneless, skinless chicken thighs, cut into 1/2 inch pieces

    6 to 8 tablespoons homemade green curry paste, see tips for using store-bought curry paste below

    1 (15oz) can full-fat coconut milk

    2 to 3 teaspoons fish sauce

    4 kaffir lime leaves, optional

    4 ounces snow peas

    2 cups spinach leaves

    Salt, to taste

    1/4 cup torn Thai basil and mint for serving

    1 red chili pepper, like a Fresno chile, thinly sliced for serving

    Directions

      1Brown the zucchini: Heat a wide skillet over medium-high heat. Add 1 tablespoon of the oil, then arrange the zucchini in a single layer. Cook until the underside has a few browned spots, then flip and cook another 30 seconds until the second side is also lightly browned. Transfer the zucchini to a plate to add to the curry later.

      2Brown the chicken: To the same skillet, still over medium-high heat, add another tablespoon of oil. Arrange the chicken in a single layer, season with a few pinches of salt, and cook, tossing occasionally, for 2 to 3 minutes until it picks up a little color.

      3Build the curry base: Stir in the green onion and garlic (and ginger and lemongrass if using store-bought curry paste). Cook, stirring constantly for 30 seconds, then add the green curry paste. Cook and stir for about 1 minute until the paste is fragrant and starts to stick a little to the bottom of the pan.

      4Simmer the curry: Pour in the coconut milk, then fill the empty can halfway with water and pour that in as well. Use a wooden spoon to scrape any stuck curry paste from the bottom of the skillet and bring to a low simmer, lowering the heat as needed. Stir in 2 teaspoons of fish sauce, then taste the sauce. Add more fish sauce and/or curry paste if needed. Add the kaffir lime leaves (if using) then simmer the curry for 10 to 15 minutes, or until the chicken is cooked through.

      5Add the veggies: Stir in the zucchini, snow peas, and spinach. Continue to simmer until the vegetables are crisp-tender, 5 to 8 minutes.

      6To serve: Turn off the heat. Squeeze over a little lime juice, then scatter torn fresh basil and mint over the top. For some extra heat, you can also add sliced red chilies. Serve immediately over rice or rice noodles.

    Adam and Joanne’s Tips

    • Store-bought curry paste: These range in flavor and spice level. I like the 4-ounce cans from Maesri (here’s a link to them on Amazon). I use 6 tablespoons, sometimes a bit more. Commonly sold Thai Kitchen green curry paste is not as flavorful, but the spice is more potent (if this is what you have, start with 2 tablespoons and go from there). It’s a good idea to taste your curry paste before using to see where it sits on the flavor/spice scale.
    • Making store-bought curry paste better: To achieve the fresh, vibrant flavor that homemade paste gives our curry, add 2 teaspoons finely grated fresh ginger and 2 teaspoons lemongrass paste. I buy lemongrass paste in tubes. To learn how to make lemongrass paste from fresh, see the tips section of our green curry paste recipe.
    • Kaffir lime leaves: These add a lovely aromatic flavor to the curry. I used to find them in my local grocery store, but they are becoming harder to find (such a bummer!). You can buy them online or possibly find in International or Thai markets. Use them the same way you would use bay leaves in this recipe (add them to simmer in the curry, then remove them before serving).
    • Storing: Green chicken curry lasts stored in an airtight container in the fridge for up to 4 days. You can also freeze it, but expect the veggies to lose some of their crunch.
    • The nutrition facts provided are estimates.

    Nutrition Per Serving
    Serving Size
    1/4 of the recipe
    /
    Calories
    501
    /
    Total Fat
    32.8g
    /
    Saturated Fat
    18.8g
    /
    Cholesterol
    159.8mg
    /
    Sodium
    904mg
    /
    Carbohydrate
    13.5g
    /
    Dietary Fiber
    3.1g
    /
    Total Sugars
    3.5g
    /
    Protein
    38.3g


    AUTHOR:

    Joanne Gallagher

    Adam and Joanne of Inspired Taste

    We are Adam and Joanne Gallagher, the creators of Inspired Taste. Established in 2009, Inspired Taste grew from a childhood dream into one of the internet’s most trusted recipe sites with hundreds of reliable recipes, step-by-step videos, and expert tips.More About Us

    Source link

  • Easy Broccoli Cheddar Soup Recipe

    Easy Broccoli Cheddar Soup Recipe

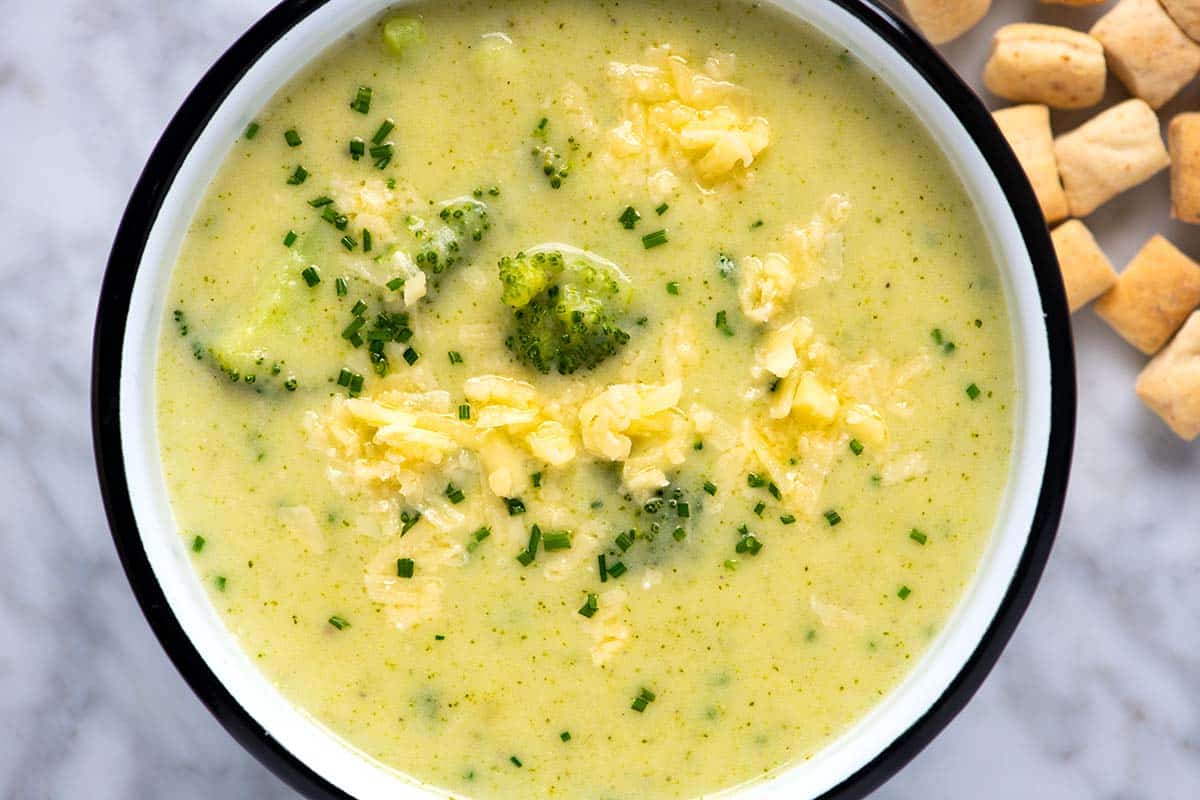
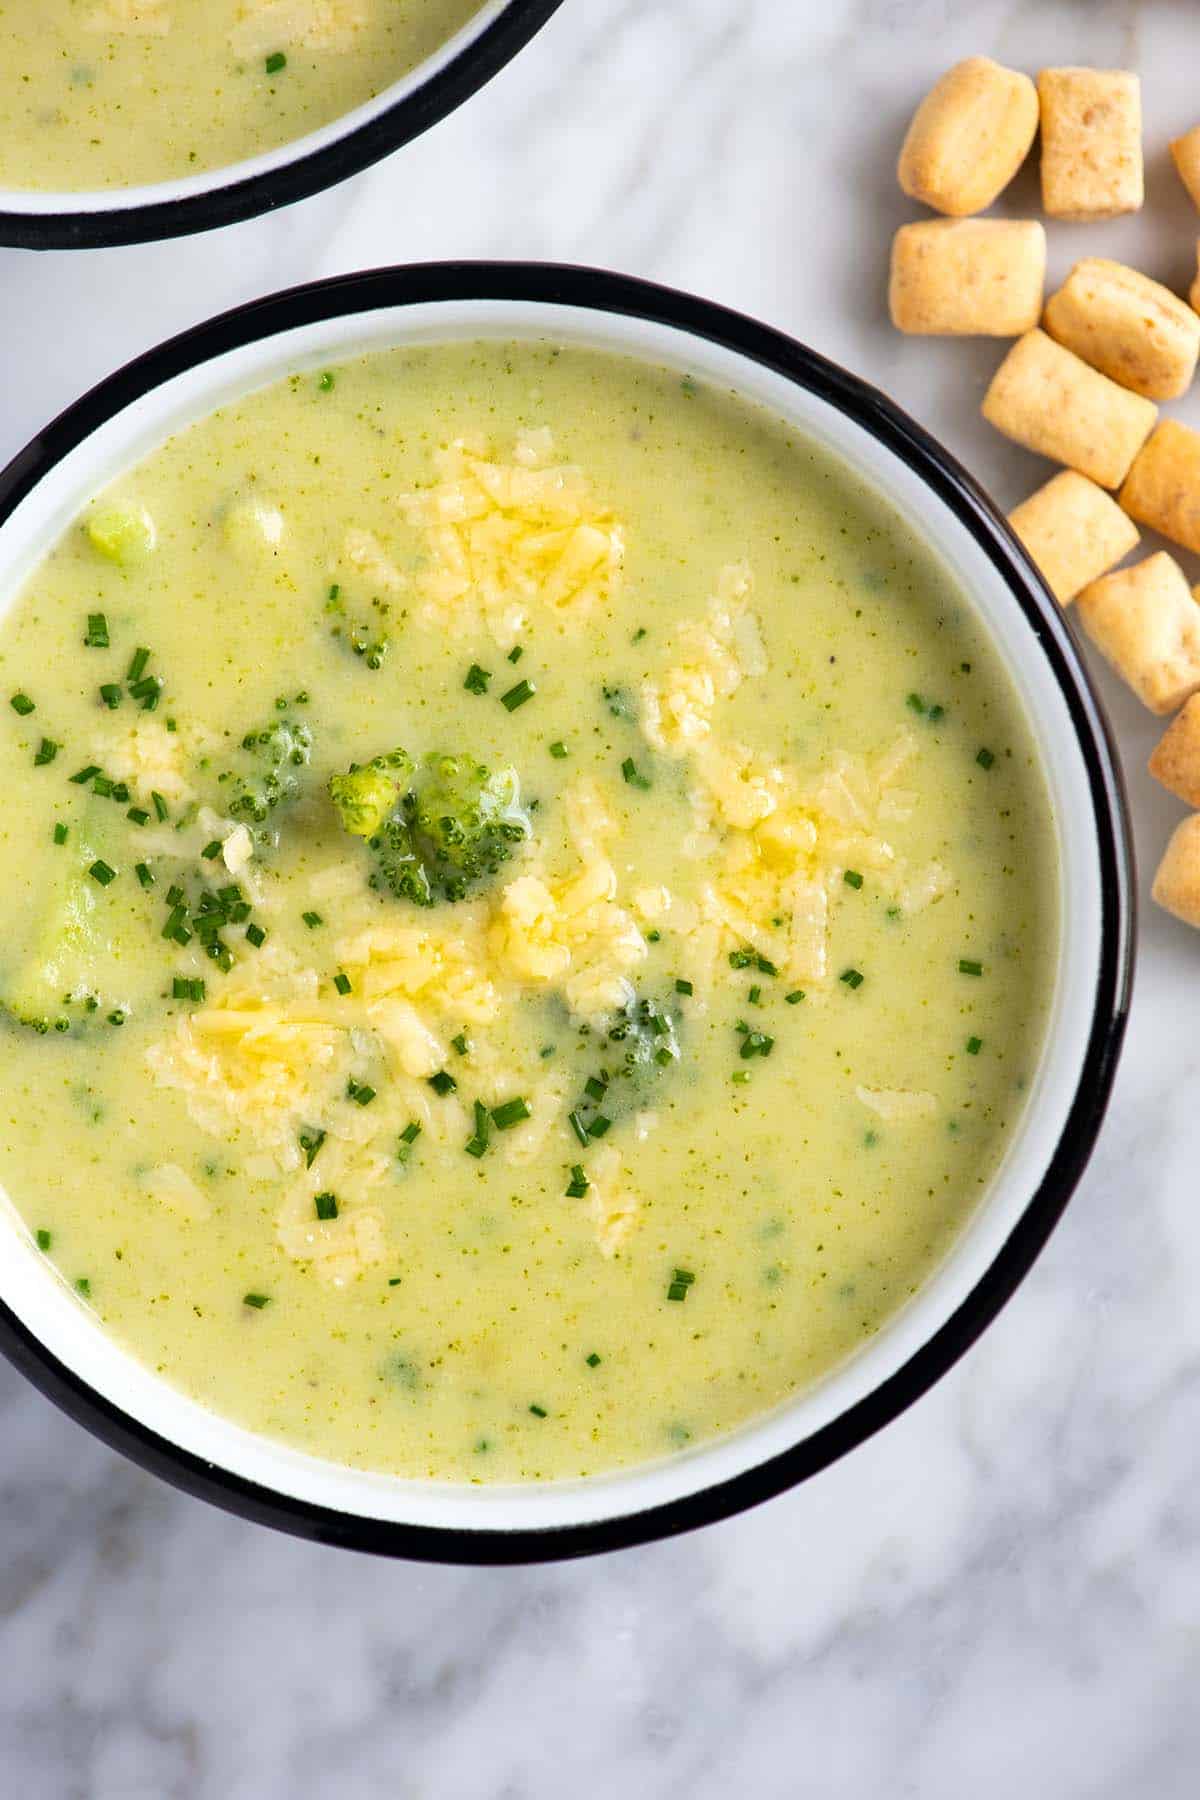
    Our broccoli cheddar soup recipe is extra cheesy, packed with broccoli, and incredibly creamy!

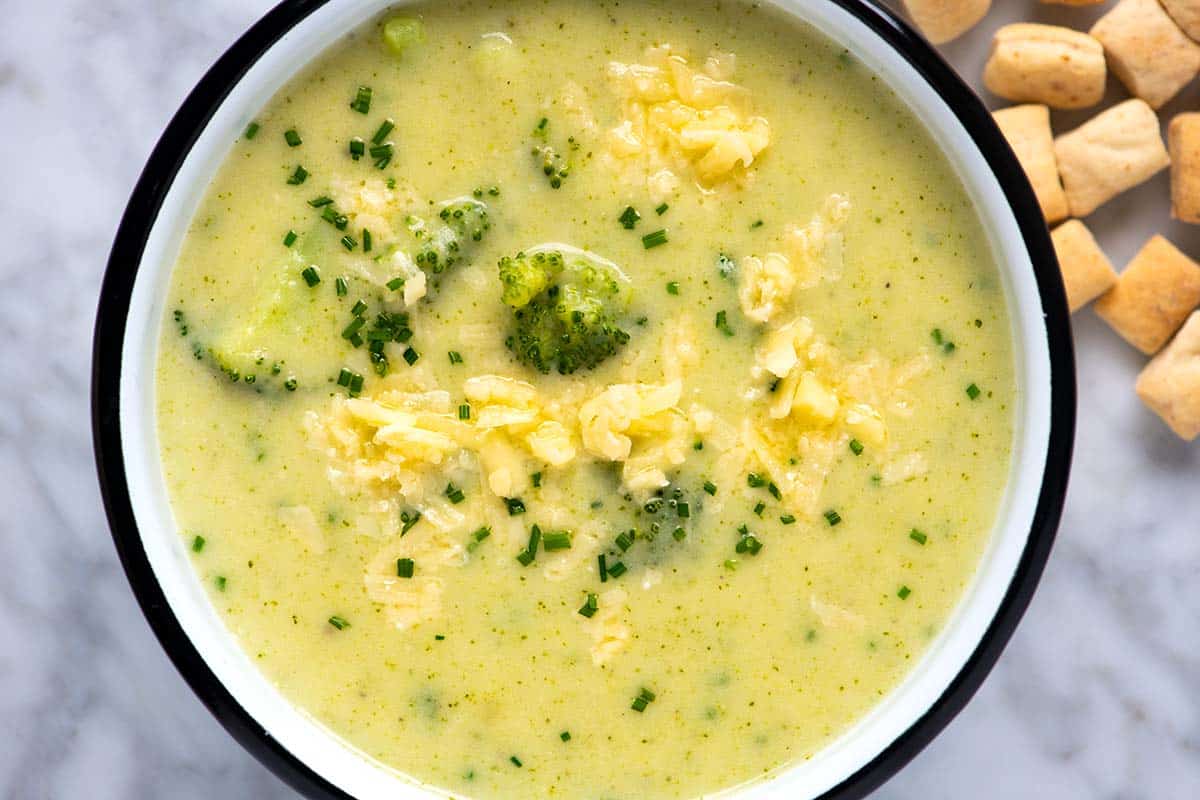
    A bowl of broccoli cheddar soup

    I love broccoli cheddar soup so much, especially this one, which skips the flour and butter base common in many other recipes. Instead of extra butter and flour, we use a potato to thicken our soup and make it creamy.

    Even with these smart changes, our soup is creamy, rich, and incredibly delicious! For a similar soup, take a look at our cauliflower soup made with parmesan cheese.

    Key Ingredients

    • Broccoli: I love using broccoli with the stems for this recipe. The stems (or stalks) taste fantastic and blend well with the potato to make this super creamy broccoli soup.
    • Butter or Olive Oil: I love cooking my onion and garlic in butter, but olive oil is excellent for this soup.
    • Onion and Garlic: I’m pretty generous with the onion and garlic. I love one large sweet or yellow onion with four cloves of garlic. You’ll cook them until soft and sweet so they taste mild in the soup.
    • Potato: One potato makes this soup super creamy without needing the traditional flour and butter roux.
    • Spices: Salt and pepper are a must, but you will also need a pinch of red pepper flakes (or gochugaru), Dijon mustard, and a bay leaf. These round out the flavor of our soup.
    • Broth: I use something light, like our homemade veggie broth or chicken broth. You can even use chicken bone broth to add a bit of extra protein. I have also made this plenty of times with plain water. It works great and allows the broccoli flavor to shine!
    • Cheese: I stir in about 2 cups of sharp cheddar cheese for the perfect cheesy flavor. Other cheeses work, too, but I do love the combo of broccoli and cheddar (see my cheddar roasted broccoli and this broccoli cheddar quiche for proof).

    Find the full recipe with measurements below.

    How to Make the Best Broccoli Cheddar Soup

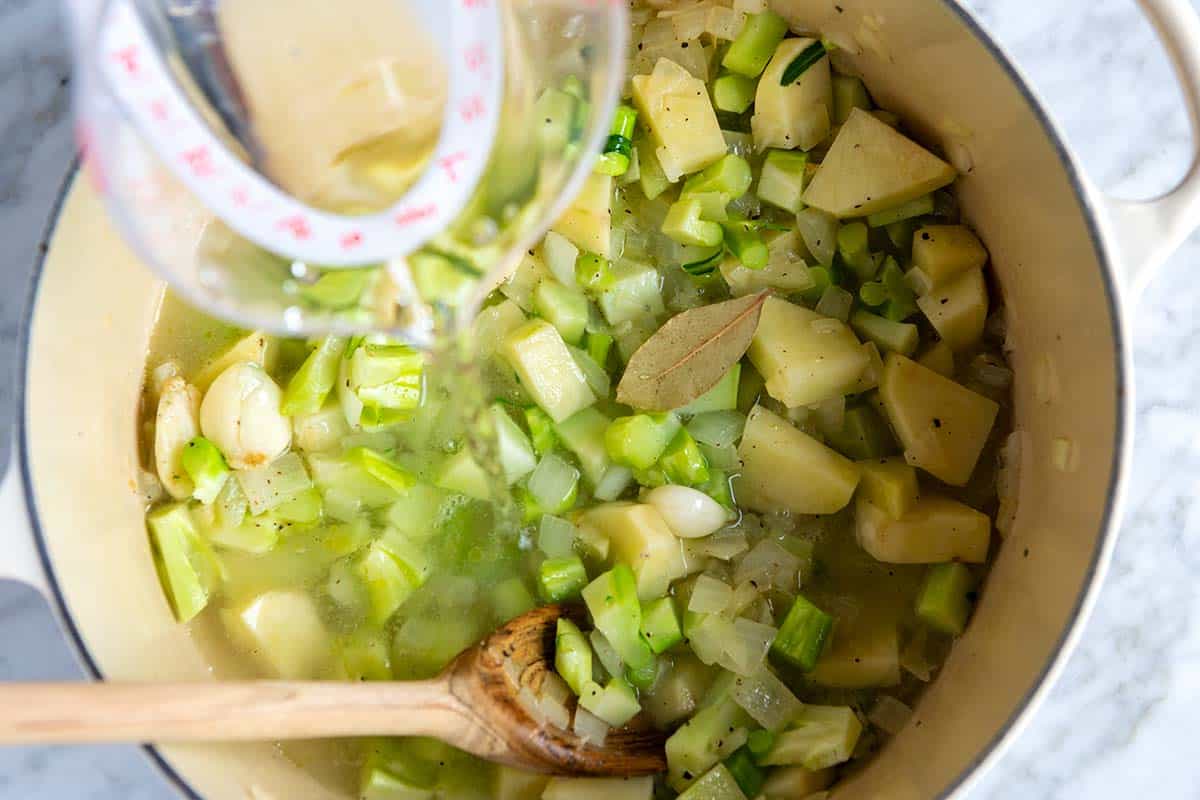
    Tip 1: Use the broccoli stalks. In this broccoli soup, you’ll use both the stalks and the florets of the broccoli. You’ll cook onions and whole garlic cloves in butter or olive oil until soft and sweet. Then, stir in the diced potatoes and broccoli stalks. Add your broth and simmer. The potato and broccoli stalks become the base of this creamy soup.

    Adding broth to the pot with potatoes, broccoli, and onions.

    Tip 2: Save some florets for the end. When the potato and stalks are tender, you’ll add half of the broccoli florets. Then, when they are tender, blend them into the soup so everything is super creamy and thick. As a last step, add the remaining broccoli florets and cook until they are bright green and tender. This way, the base of the soup is green and creamy, and you still get a few small bites of broccoli.

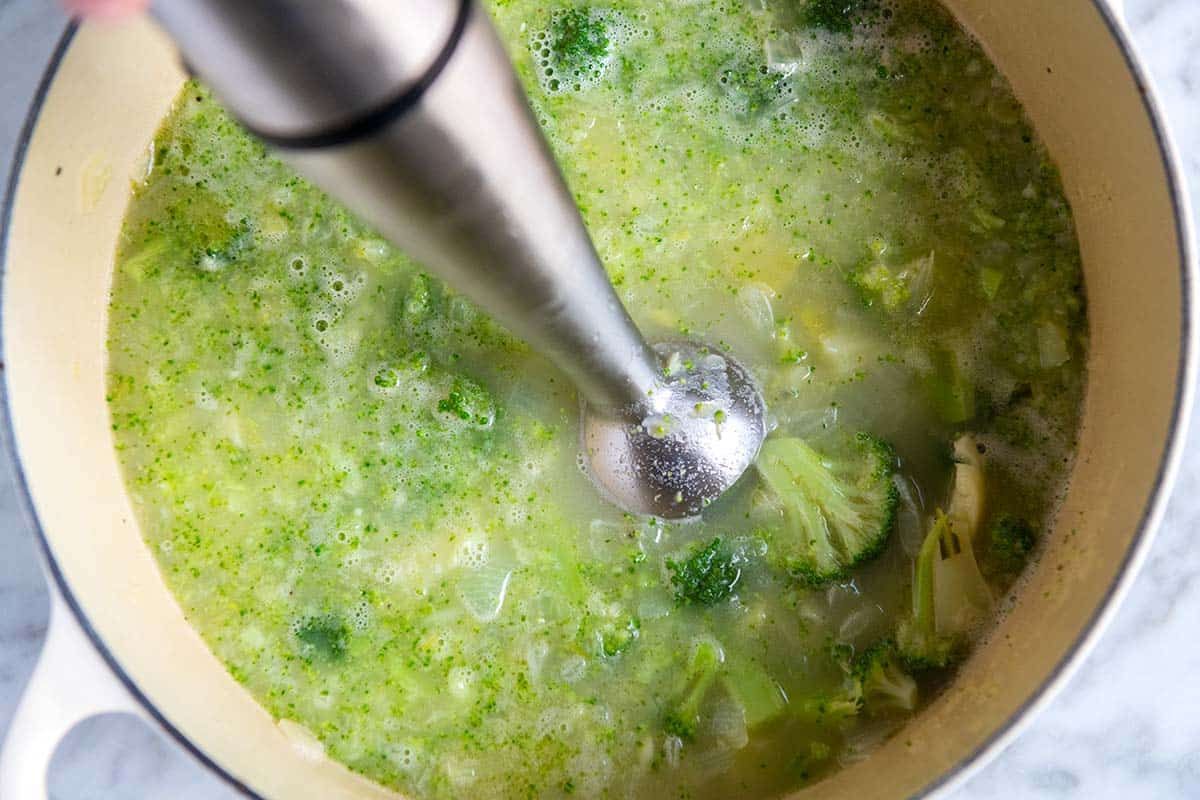
    Blending broccoli cheddar soup ingredients with an immersion blender

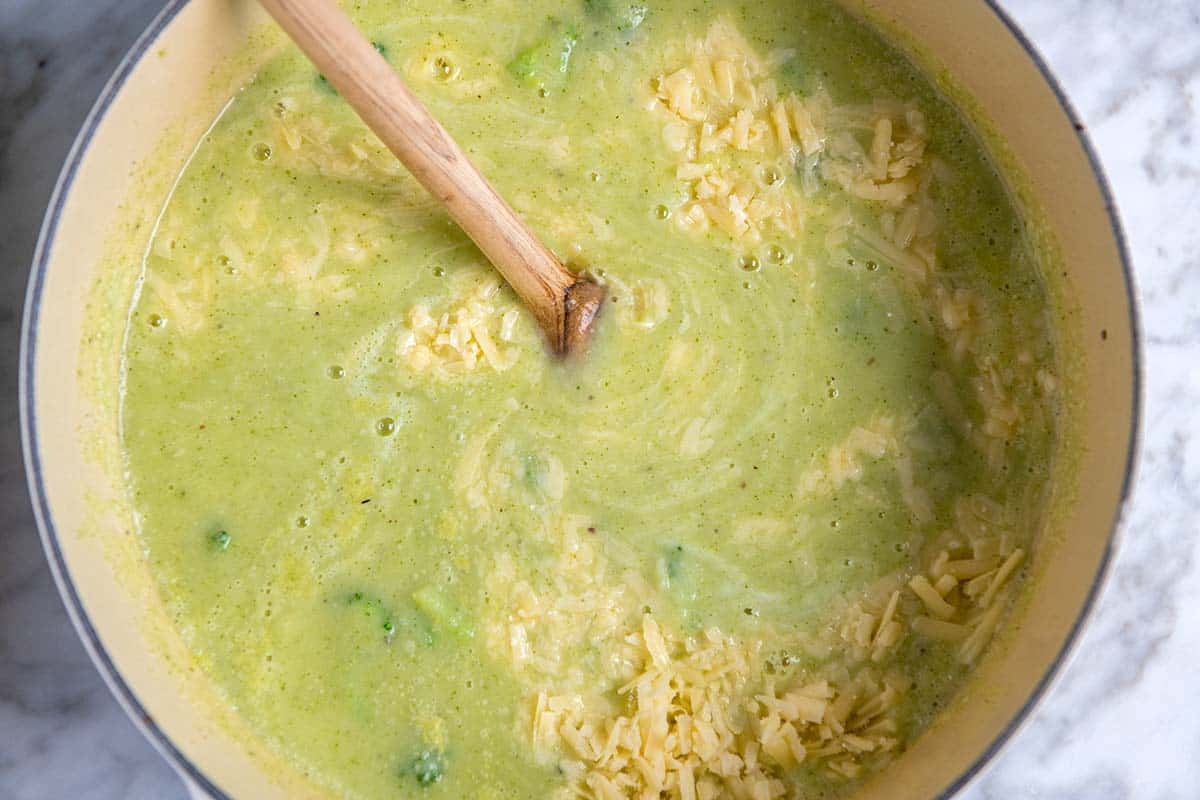
    Tip 3: Add cheese and cream. Stir in lots of grated sharp cheddar cheese and, if you want it extra creamy and luxurious, a bit of cream. This is a good one!

    Stirring cheddar cheese into broccoli soup

    More Creamy Soups

    More Broccoli Recipes

    If you have some broccoli leftover, I highly recommend making our easy sautéed broccoli, broccoli salad with bacon, or this incredible broccoli slaw.

    Broccoli Cheddar Soup

    Easy Broccoli Cheddar Soup

    • PREP
    • COOK
    • TOTAL

    This broccoli cheddar soup recipe is packed with broccoli and is extra cheesy. It is made without flour and butter and gets its thick, creamy base from a potato! When shopping for this soup, look for broccoli sold with long stalks. We chop the stalks up and cook them with the potato. After a quick blend, the stalks and potato turn into a delicious, creamy soup.

    6 Servings

    Watch Us Make the Recipe

    You Will Need

    1 large onion, finely chopped

    4 medium garlic cloves, peeled and smashed

    2 tablespoons unsalted butter or olive oil

    2 pounds broccoli with stalks

    3/4 teaspoon fine sea salt, plus more to taste

    1/2 teaspoon fresh ground black pepper

    1/8 to 1/4 teaspoon crushed red pepper flakes, omit if sensitive to spice

    1 teaspoon Dijon mustard

    1 medium-to-large potato, peeled and chopped

    1 bay leaf

    4 cups chicken broth, veggie broth, or water

    1/2 cup cream, optional

    2 cups grated sharp cheddar cheese, 8 ounces (226g)

    Thinly sliced chives, for serving, optional

    Fish sauce, optional

    Directions

      1Slice the florets from the stalks. Set the broccoli stalks aside and cut the florets into small bite-size pieces (watch our video for reference). Throw the florets into a bowl and set them aside for later.

      2Grab the broccoli stalks, cut about 1 inch from the bottom of each stalk, and discard it. Use a vegetable peeler to peel away the tough outer layer of the stalks, and then slice the stalks into 1/2-inch pieces.

      3Melt the butter in a large pot like a Dutch oven over medium heat. When it has melted, toss in the onion and garlic cloves. Cook, occasionally stirring, until the onions are soft and smell sweet, about 5 minutes.

      4Add the chopped broccoli stalks, potato, 3/4 teaspoon salt, 1/2 teaspoon black pepper, Dijon mustard, and red pepper flakes (if using). Cook for two minutes, then add the bay leaf and four cups of broth or water.

      5Bring the soup to a boil, then reduce to a low simmer. Cook, at a low simmer, until the broccoli and potatoes are tender, about 15 minutes.

      6Stir in half of the broccoli florets to the soup, cover with a lid, and cook until they turn bright green and are tender, 3 to 5 minutes. Adding the florets in this step ensures that our soup stays green.

      7Turn off the heat, remove the bay leaf, and blend the soup until smooth with an immersion blender. You can also use a blender, but be careful to blend the soup in batches, do not fill more than halfway, and hold the lid down firmly as you blend. Hot liquids can cause steam to build up in the blender, and the top can pop off.

      8Place the pot back onto the burner and heat over medium heat. Stir in the remaining broccoli florets, cover the pot again, and cook until they turn bright green and are tender, 3 to 5 minutes.

      9Stir in the cream and cheese. When the cheese melts into the soup, taste it, and then adjust with additional salt and pepper. For a pop of flavor, add a few dashes of fish sauce. Serve with chives scattered on top.

    Adam and Joanne’s Tips

    • Storing: Store leftover broccoli cheddar soup in an airtight container in the refrigerator for up to 4 days. Freezing is an option, but it risks the soup separating. Freeze for up to 1 month. Thaw overnight in the fridge and reheat gently on the stovetop, stirring frequently. If the soup does separate, a quick blend can restore its smoothness.
    • No stalks: If you cannot find broccoli with the stalks/stem still attached, use 2 pounds of broccoli florets.
    • Make the soup more green: For an even more vibrant green color, just before you plan to blend the soup, add a couple of handfuls of baby spinach leaves and allow them to wilt into the soup slightly (30 to 45 seconds).
    • Fish sauce: This is optional but adds a lovely flavor to sauces and soups like this broccoli cheddar soup. Two to three dashes season the soup nicely. Think of fish sauce as salt on steroids. It doesn’t make the soup taste fishy but makes the flavor pop.
    • The nutrition facts provided below are estimates.

    Nutrition Per Serving
    Serving Size
    1/6 of the recipe
    /
    Calories
    295
    /
    Total Fat
    19.2g
    /
    Saturated Fat
    11g
    /
    Cholesterol
    54.7mg
    /
    Sodium
    627.3mg
    /
    Carbohydrate
    19.3g
    /
    Dietary Fiber
    5.1g
    /
    Total Sugars
    5g
    /
    Protein
    14.4g


    AUTHOR:

    Joanne Gallagher

    Adam and Joanne of Inspired Taste

    We are Adam and Joanne Gallagher, the creators of Inspired Taste. Established in 2009, Inspired Taste grew from a childhood dream into one of the internet’s most trusted recipe sites with hundreds of reliable recipes, step-by-step videos, and expert tips.More About Us

    Source link

  • Garlic Caper Baked Salmon Recipe

    Garlic Caper Baked Salmon Recipe

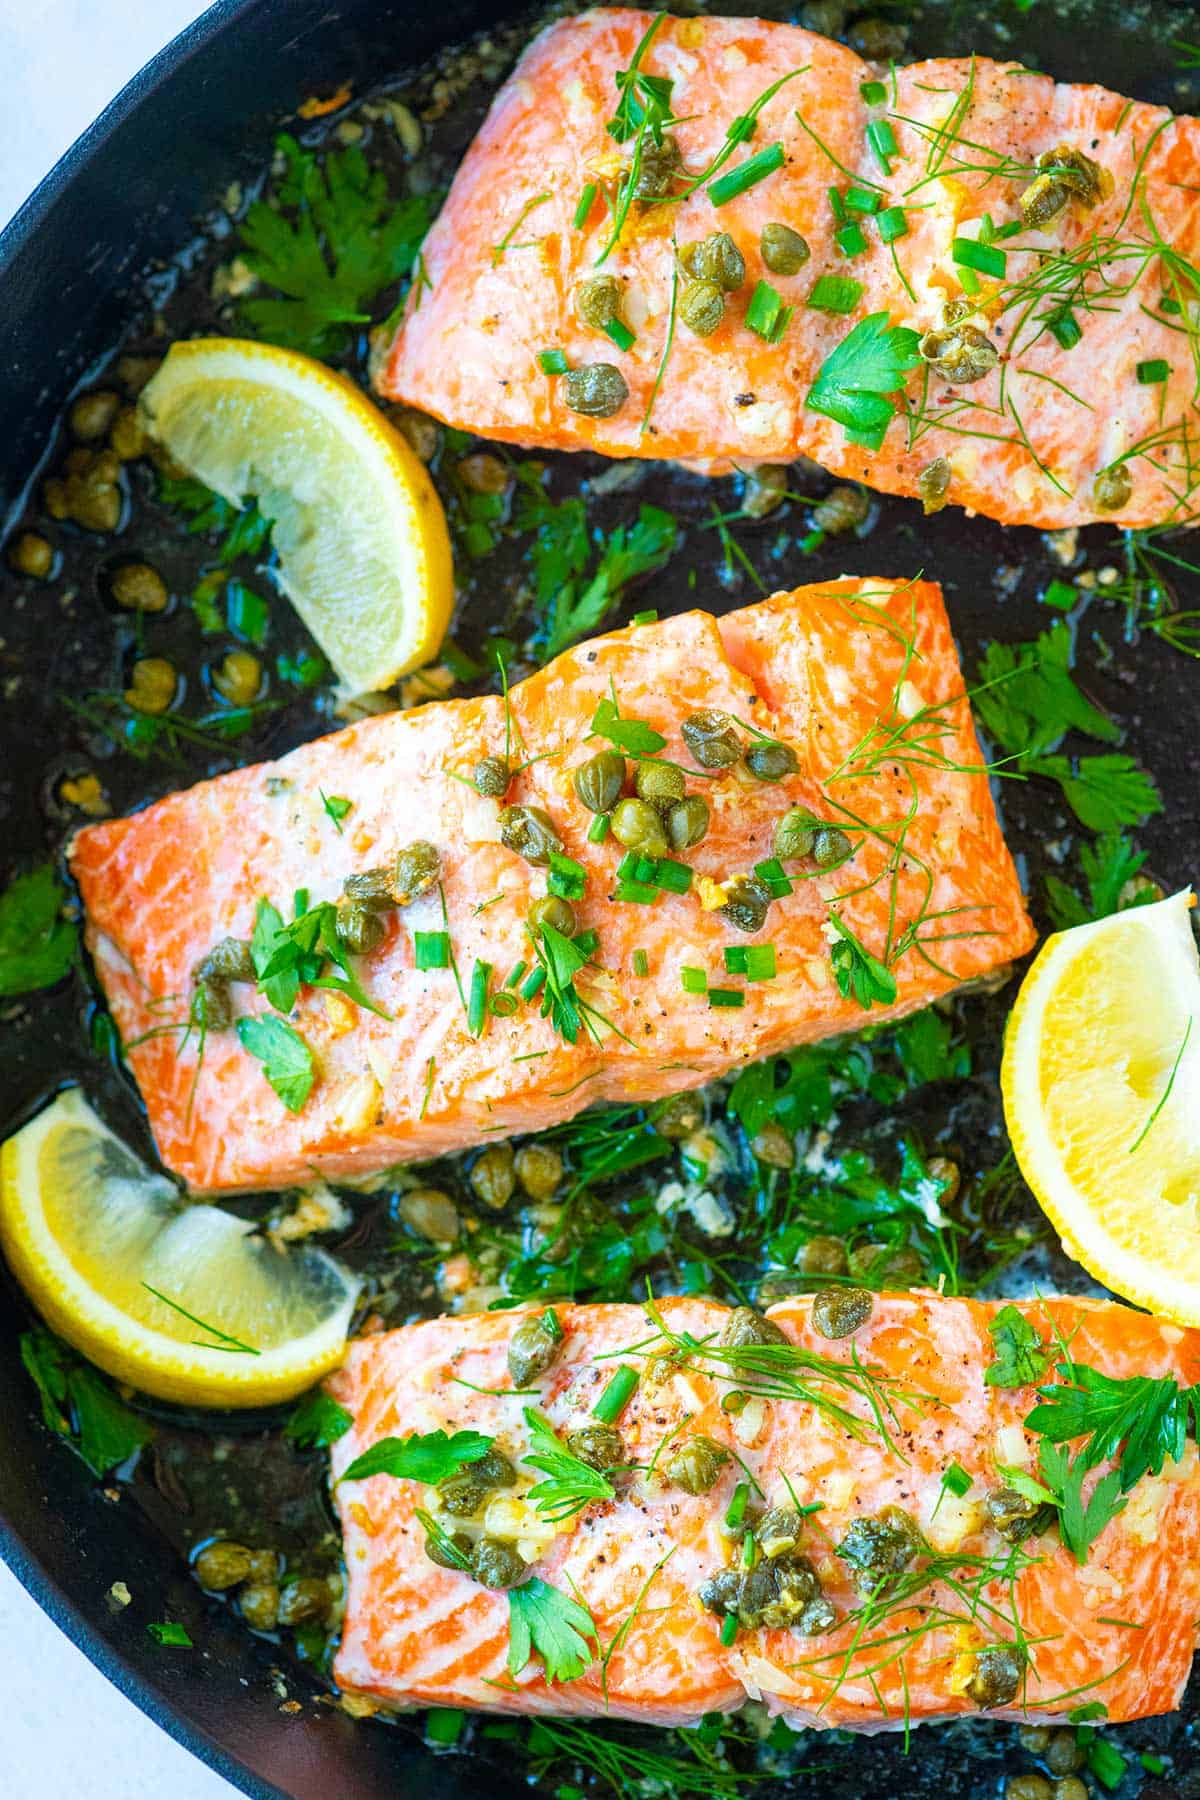
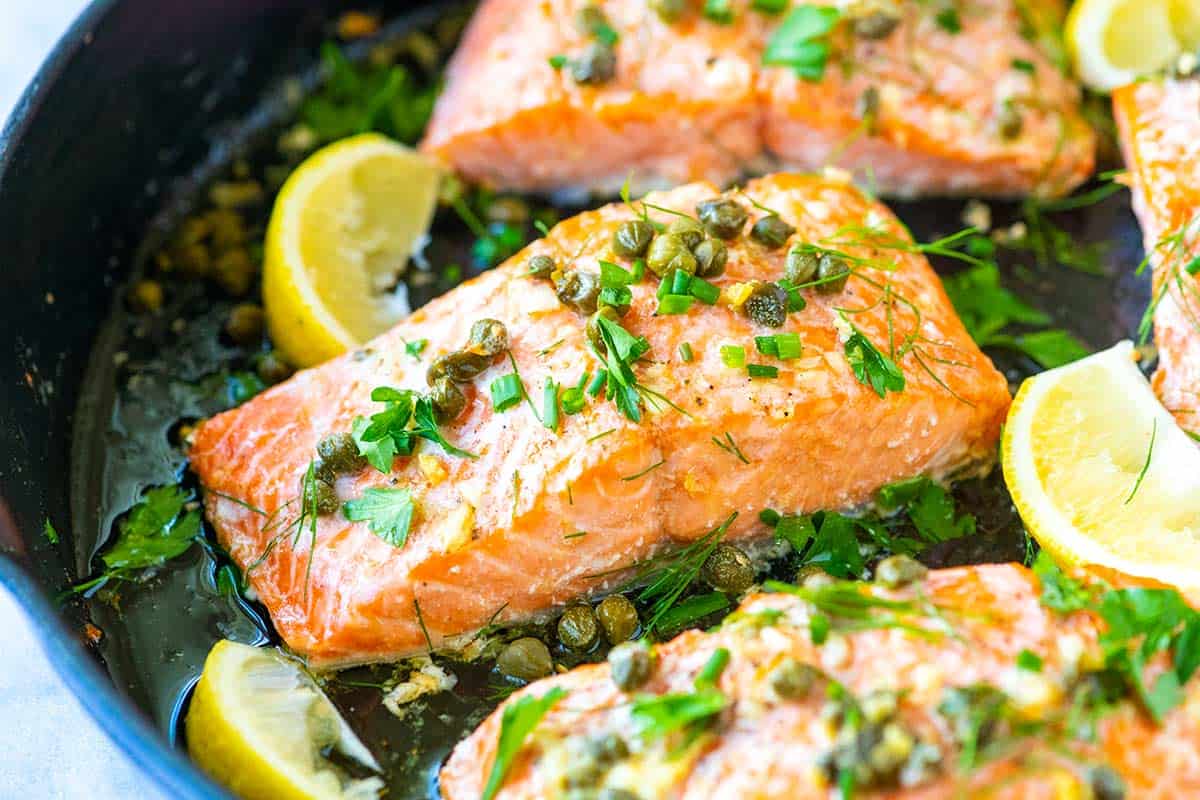
    We love this baked salmon recipe with capers and garlic. It tastes incredible. Tender, flaky salmon, gently cooked in butter with garlic, lemon, and capers. It’s one of the best things we’ve made recently.

    Garlic Caper Baked Salmon

    We’ve been making a variation of this salmon recipe for ages. The method comes from my Mom, and I know I’m biased on this one, but my Mom’s method for cooking salmon is the best. She gently bakes her salmon, covered at a low temperature with a little liquid in the pan, so it doesn’t dry out.

    In this caper butter version, we use melted butter as the baking liquid, then add lots more flavor with capers, fresh lemon, and garlic. Trust me when I say it’s incredible, or read through the reviews, everyone loves this recipe!

    Key Ingredients

    • Salmon: Any salmon fillet will work for this recipe. However, I especially love those with a higher fat content, like sockeye, king, and coho. When baked, these types of salmon stay soft and moist. I advise the same for most of our salmon recipes including our popular brown sugar baked salmon.
    • Butter: The base of our lemon caper sauce. The salmon gently bakes in the butter, which you can spoon over the finished salmon fillets before serving (it’s incredible).
    • Garlic: I love garlic butter and use a tablespoon of minced garlic to make our butter sauce.
    • Capers: Salmon and capers are such a classic combination! I use drained capers to make this recipe. 
    • Lemon: If salmon and capers are classic, adding lemon makes it even more so! Use fresh lemon for this recipe. It makes a difference.

    Find the full recipe with measurements below.

    How to Make Baked Salmon with Capers

    Tip 1: Use an oven-safe skillet. To make this salmon, we use one pan. (Hello, easy cleanup!) A large, oven-safe skillet is best. I use my cast-iron skillet.

    You’ll melt butter with garlic and capers, then when it is bubbling and smells like garlic butter, take it off the heat and place your seasoned salmon fillets into the pan.

    Making garlic caper butter sauce before adding the salmon.
    Seasoned salmon fillets in an oven-safe skillet in the caper butter ready to bake.

    Tip 2: Covering the pan is key. Spoon a little butter over the fillets, and then cover the skillet with foil or tuck a sheet of parchment paper around the salmon (an oven-safe lid is fine, too). Covering the salmon creates a steamy environment, preventing it from drying out in the oven.

    Tip 3: How to tell it’s ready to come out of the oven. You’ll know the salmon is ready to come out of the oven when it flakes and is a little pink in the middle.

    Once it’s out of the oven, squeeze over lemon juice, and take a moment to gather up all the garlic butter from the bottom of the pan and spoon it back over the salmon (YUM). I can’t wait for you to try this one!

    Serving Suggestions

    Thanks to the butter sauce, this salmon works really well next to many of our side dishes. Some of our family favorites are mashed cauliflower, which is light, or mashed potatoes, which are a bit more hearty. We also love this salmon with saffron rice, homemade grits, or this unbelievably creamy polenta.

    I also love a veggie side like sautéed green beans or roasted green beans, quickly sautéed bok choy, sautéed cabbage, sautéed veggies, or this garlic roasted asparagus.

    And, for a truly special meal, serve this delicious salmon over risotto. Try our easy mushroom risotto or this vegetable risotto.

    More Favorite Salmon Recipes

    Garlic Butter Caper Salmon

    Garlic Caper Baked Salmon

    • PREP
    • COOK
    • TOTAL

    If you save one salmon recipe for life, make it this one. This garlic caper salmon is so flavorful, and I really cannot get enough of the garlic caper butter sauce! The cooking time may vary depending on the type and thickness of the salmon you have, so check the tips below for our tips on telling when the fish is ready to come out of the oven. If you love salmon, we also love this brown sugar baked salmon!

    Makes 4 servings

    Watch Us Make the Recipe

    You Will Need

    1 ½ pounds salmon fillets, 1-inch thick, preferably wild-caught (680g)

    Salt and fresh ground black pepper

    4 tablespoons unsalted butter (56g)

    1 tablespoon minced garlic, 3 to 4 cloves

    3 tablespoons drained capers

    Chopped or torn fresh herbs like parsley, chives or dill

    Half of a lemon, quartered

    Directions

      1Prep: Preheat the oven to 325°F (162°C).

      2Season the salmon: Season both sides of the salmon with salt and pepper (we use 1/2 teaspoon fine sea salt for 1 ½ pounds of salmon). (Optionally, cut the salmon into four 6-ounce fillets.)

      3Make the sauce: Melt the butter in a wide oven-safe skillet over medium heat. When the butter is bubbling, stir in the garlic and capers. Cook, stirring, until warm, about 1 minute. Remove the skillet from the heat.

      4Cook the salmon: Add the salmon fillets, skin-side down, to the skillet. Tilt the pan so butter pools on one side, then spoon garlic caper butter over each fillet. Cover the skillet with aluminum foil or parchment paper, loosely tucking it around the salmon. Bake the salmon in the oven for 15 minutes, covered.

      5Uncover the salmon: Uncover and spoon more of the butter over the salmon. Continue to bake, uncovered, until your desired doneness, 5 to 10 minutes more. The best way to prevent overcooking is to check the temperature of the salmon using an internal thermometer. The thickest part of the salmon should read 125°F.

      6To serve: Squeeze fresh lemon juice over the baked salmon, sprinkle with lots of fresh herbs, and serve with another spoonful of the garlic caper butter on top.

    Adam and Joanne’s Tips

    • No oven-safe skillet: Cook the garlic and capers in butter in a regular skillet, and then add to a baking dish with the salmon.
    • How to tell when salmon is cooked: We cook salmon to 125°F, which means it will be soft, tender and slightly pink in the center. For a visual cue, look for the flesh to be somewhat opaque. You should also be able to flake the salmon with a fork.
    • Cook time: Cook time will vary depending on the type and thickness of the salmon you are baking. The cook times suggested above are for middle-cut fillets about 1 inch thick.
    • The nutrition facts provided below are estimates.

    Nutrition Per Serving
    Serving Size
    1 (6-ounce) fillet
    /
    Calories
    357
    /
    Total Fat
    21.7g
    /
    Saturated Fat
    9.3g
    /
    Cholesterol
    107mg
    /
    Sodium
    524.mg
    /
    Carbohydrate
    1.6g
    /
    Dietary Fiber
    0.4g
    /
    Total Sugars
    0.2g
    /
    Protein
    37.3g


    AUTHOR:

    Joanne Gallagher

    Adam and Joanne of Inspired Taste

    We are Adam and Joanne Gallagher, the creators of Inspired Taste. Established in 2009, Inspired Taste grew from a childhood dream into one of the internet’s most trusted recipe sites with hundreds of reliable recipes, step-by-step videos, and expert tips.More About Us

    Source link

  • Perfect Flax Egg Recipe

    Perfect Flax Egg Recipe

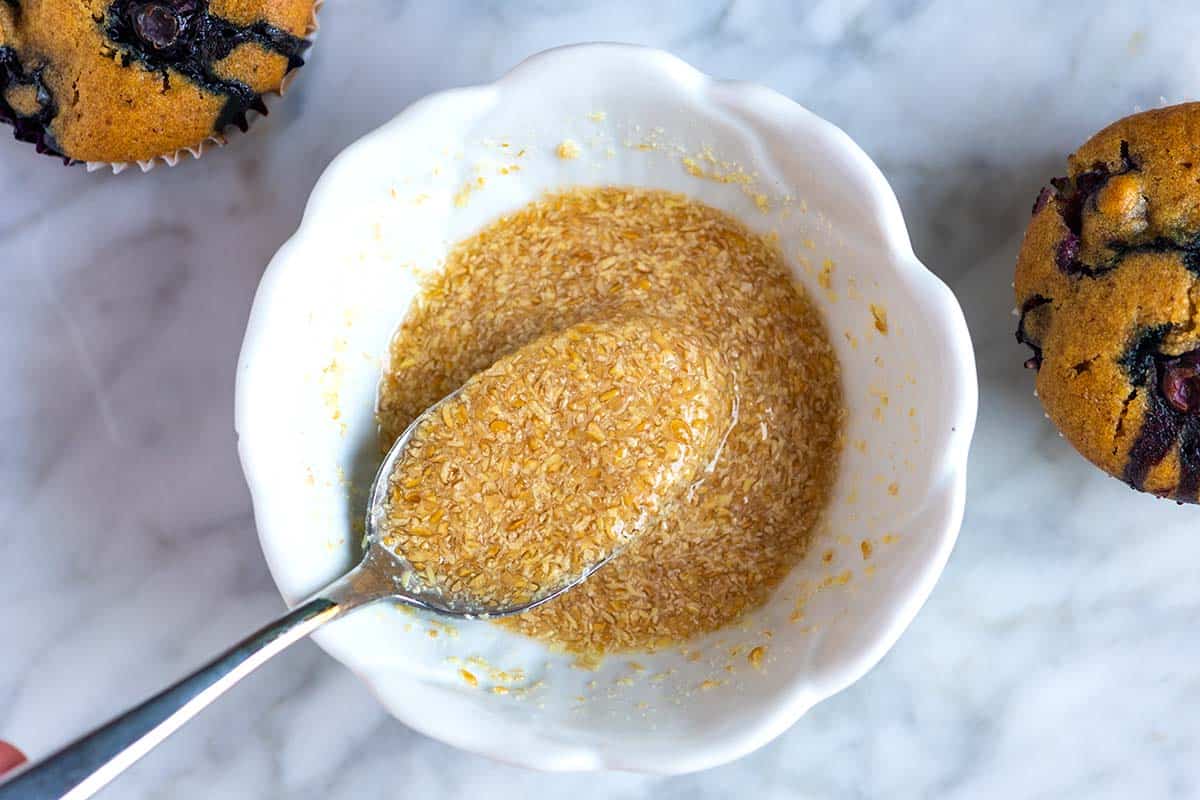
    Making a flax egg is super easy! I’m sharing all my tips for creating these simple vegan egg substitutes with just water and flaxseed meal.

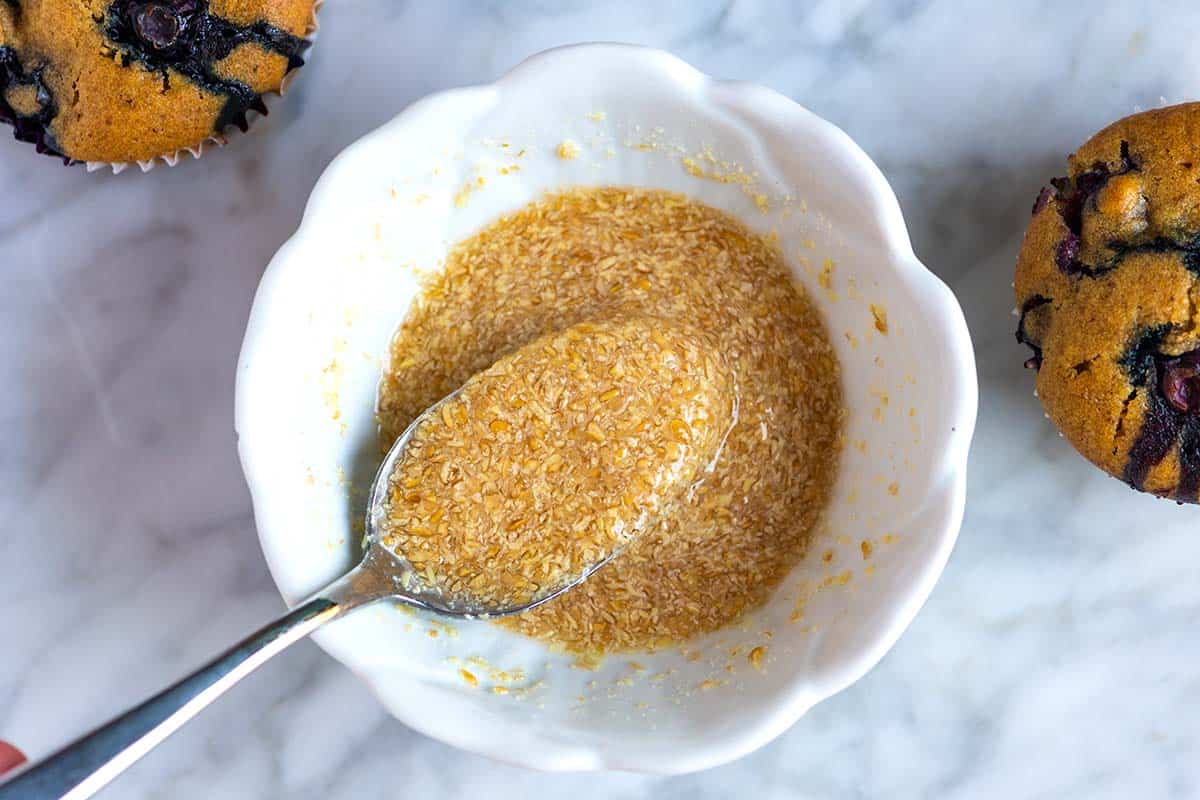
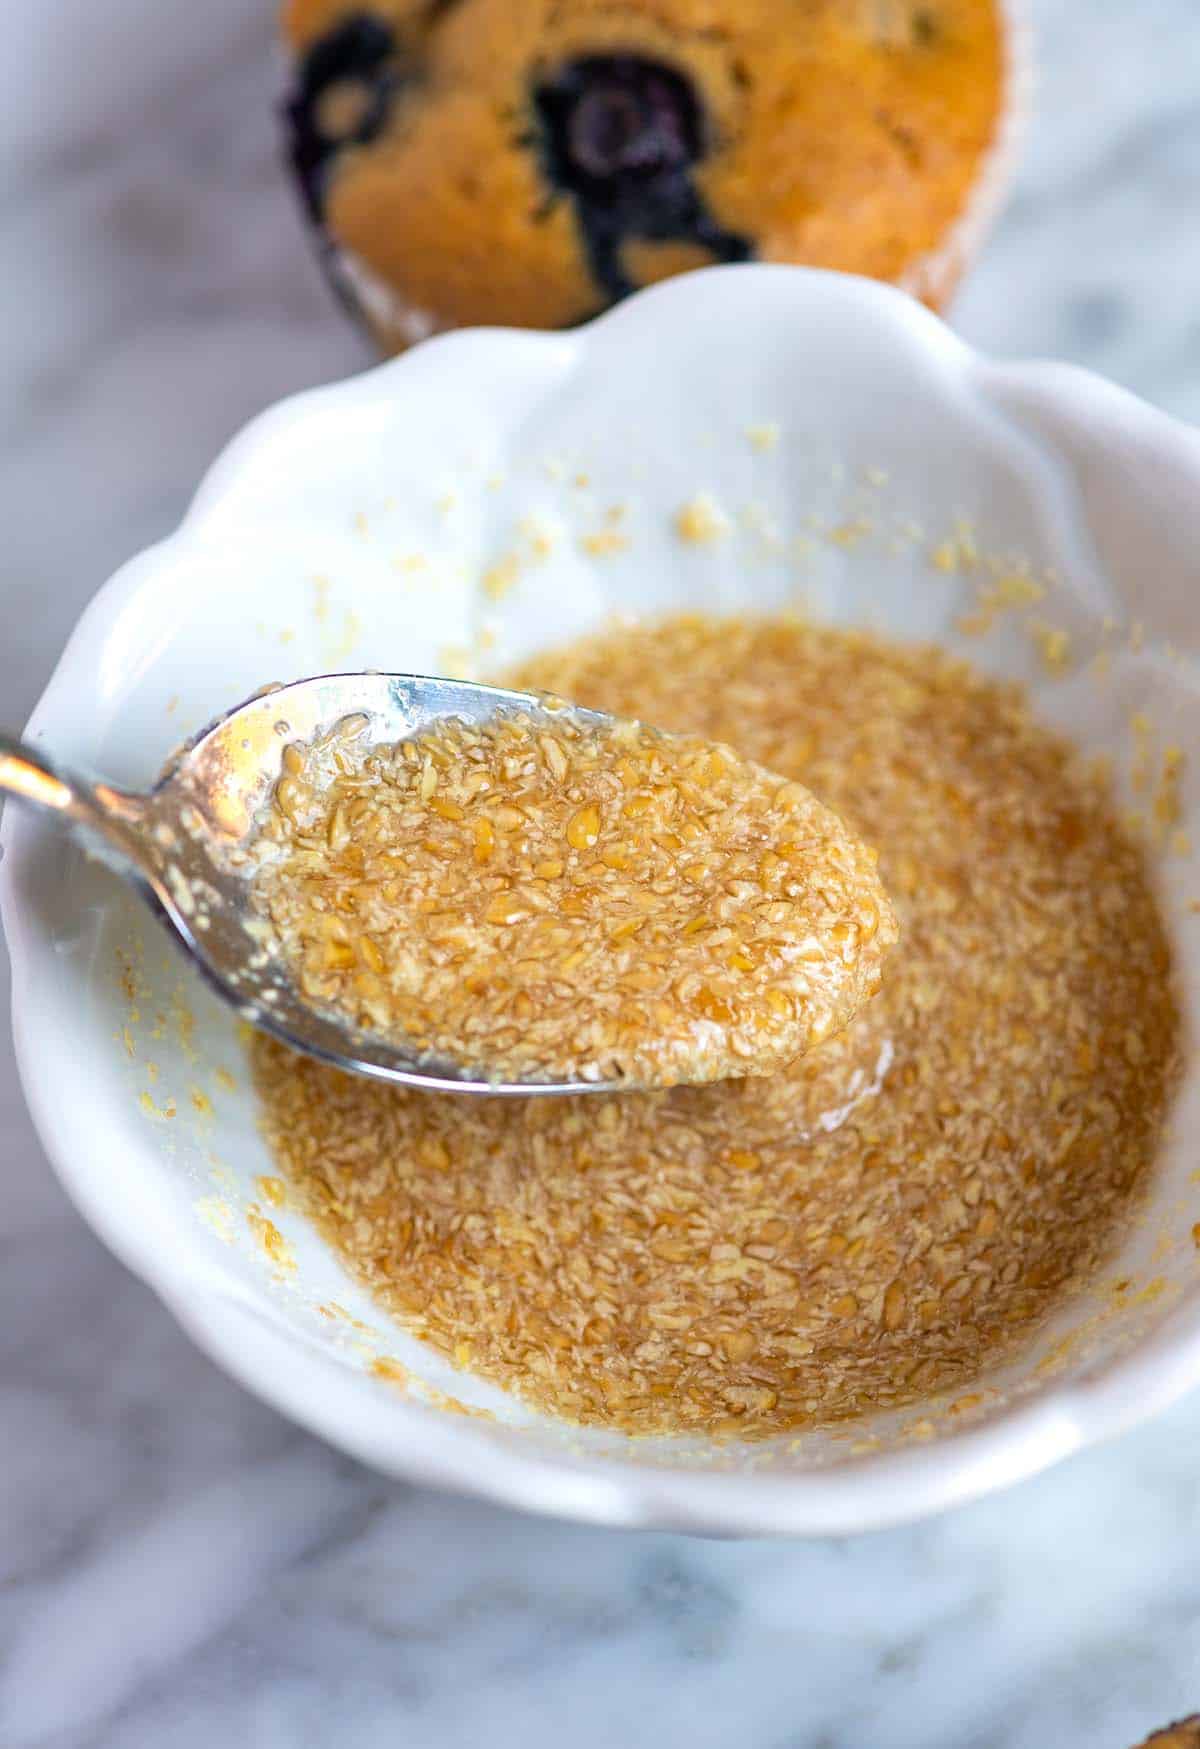
    How to Make a Flax Egg: Stirring flaxseed meal with water.

    Flax eggs are perfect for eggless pancakes, muffins, and cookies! When made correctly, they provide binding and moisture, similar to regular eggs. Another popular egg replacer is aquafaba.

    My favorite recipe that calls for a flax egg is my vegan blueberry muffins. If you have a recipe that calls for one or two eggs and need that recipe to be egg-free, flax eggs might be your answer.

    Key Ingredients

    • Flaxseed Meal: Flaxseed meal or flax meal is simply ground flaxseeds. You can buy it pre-ground or grind whole flaxseeds yourself. I prefer using pre-ground flaxseed meal for convenience (I buy Bob’s Red Mill). Flaxseeds are packed with nutrients and offer two varieties: golden and brown. Both work great for making flax eggs! If you do not have flaxseed meal, try chia seeds!
    • Water: Plain water is great. Filtered is even better.
    Flax Egg

    Perfect Flax Egg

    • PREP
    • TOTAL

    Learn how to make a flax egg! This simple egg substitute is a staple for vegan baking. They work wonders in flour-based recipes that call for 1 or 2 eggs, like pancakes and muffins. However, flax eggs might not be the best option for recipes needing more than 2 eggs, like airy cakes, as they don’t provide the same leavening power.

    Makes 1 flax egg

    You Will Need

    1 tablespoon (7g) flaxseed meal

    3 tablespoons (45ml) water

    Directions

      1Stir the flaxseed meal and water together in a small bowl.

      2Place in the refrigerator for 10 to 15 minutes or until the mixture is thick. Stir again, and then use in your favorite baking recipe.

    Adam and Joanne’s Tips

    • Storing: I make flax eggs as needed for freshness and texture. However, you can store them in an airtight container in the fridge for up to 2 days.
    • How to make a chia egg: Substitute the flaxseed meal with 1 tablespoon (9g) chia seeds.
    • The nutrition facts provided below are estimates.

    Nutrition Per Serving
    Serving Size
    1 flax egg
    /
    Calories
    30
    /
    Total Fat
    0g
    /
    Saturated Fat
    0g
    /
    Cholesterol
    0mg
    /
    Sodium
    0mg
    /
    Carbohydrate
    0g
    /
    Dietary Fiber
    2g
    /
    Total Sugars
    0g
    /
    Protein
    1.5g


    AUTHOR:

    Joanne Gallagher

    Previous Post: Easy Homemade Croutons
    Next Post: Chorizo and Eggs

    Source link