Tag: Recipe

  • Juicy Chicken Burger Recipe

    Juicy Chicken Burger Recipe

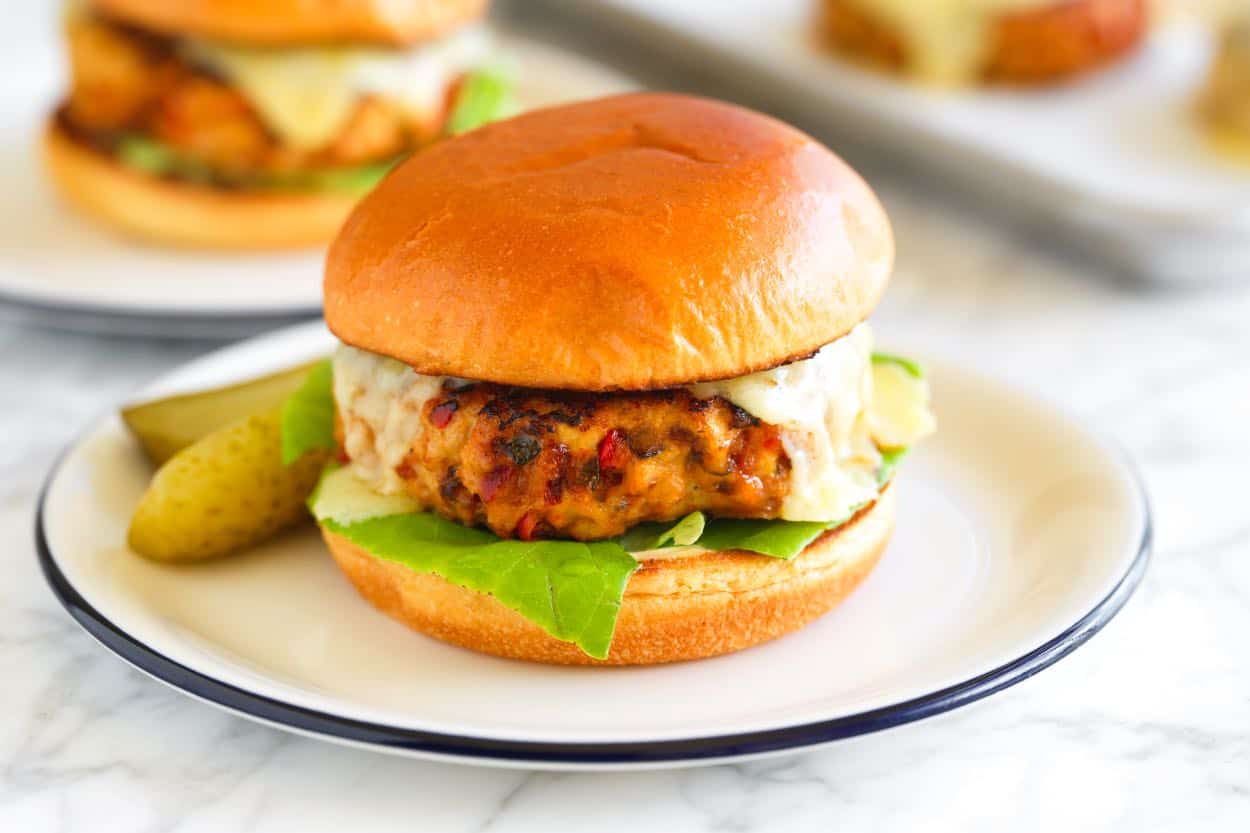
    This ground chicken burger recipe is seriously delicious. The secret is a mixture of spiced veggies that we mix right into the patties. Trust me, you’ll want to make these again and again.

    Chicken Burger on a plate

    The moment we nailed the recipe for these chicken burgers, I immediately put everything back on my shopping list so we could make them again soon. Mixing veggies right into the ground chicken is a game-changer. They add so much flavor, color, and keep the burgers extra juicy.

    If you’ve made our turkey burgers or turkey meatloaf, you already know we’re big fans of sneaking veggies into our recipes. It’s the best way to keep ground meat dishes juicy and flavorful.

    Key Ingredients

    • Ground Chicken: As with all of our recipes that call for ground chicken, use ground meat with a bit of fat. Look for 93% lean 7% fat or 93/7 on the package, which indicates it’s a blend of ground chicken breast and dark meat. You can also substitute ground turkey for the chicken in this recipe.
    • Veggies: We fold a mixture of cooked zucchini, bell pepper, onion, and garlic into the burger mix. You can substitute eggplant or yellow squash (summer squash). Between the vegetables and spices, these remind me of the flavors of late-summer ratatouille. So delicious!
    • Tomato Paste, Vinegar, and Spices: This burger recipe is not afraid of flavor, so we add lots with tomato paste, oregano, smoked paprika, and red wine vinegar.
    • Egg and Breadcrumbs: We don’t want too much filler here, but a whole egg plus an egg yolk helps the burgers hold together, adds flavor, and a bit of fat (we use the same combo in our meatloaf recipe). Then, a small amount of panko breadcrumbs helps the mixture firm up, making it easier to form into burgers and cook.
    • Extras: Choose your favorite burger buns, then spread a bit of mayonnaise and Dijon mustard over them (like a make-shift Dijonaise). I love a little crunch from lettuce, and always add some cheese. Gruyère or Swiss are amazing with the other flavors in the chicken burger patties.

    Find the full recipe with measurements below.

    How to Make Chicken Burgers

    Tip 1: Make the veggie mix. Lean ground chicken needs help in the flavor department, so we cook a simple mixture of finely chopped zucchini, bell pepper, onion, and garlic until cooked down, soft and lightly caramelized. It takes about 10 minutes and is so worth it!

    Just as the veggies are finishing up, we stir in tomato paste and dried oregano. Then, as they cool, we stir in red wine vinegar. You can see the final mixture below. It adds so much incredible flavor to these chicken burgers.

    Finely chopped vegetables in a skillet.
    Cooked vegetables ready to be added to the chicken burger mix.

    Tip 2: Mix the eggs and spices before adding the chicken. We use this trick a lot when working with ground meat. So that the spices, salt, and egg are well distributed, whisk them together first, then add your ground chicken.

    Tip 3: Finish with vegetables and breadcrumbs. Before forming your burgers, mix in the vegetable mixture and panko breadcrumbs. Your hands are usually the best tool for this kind of job, but a fork works.

    The chicken burger mix in a large bowl.

    Tip 4: Chill to firm up. Pop the burger mixture into the fridge for 20 minutes to let the breadcrumbs absorb the moisture. This helps with flavor and makes forming the burgers easier.

    Tip 5: Start in a skillet, finish in the oven. To get some color, brown the burgers on both sides in a skillet in a little olive oil, then transfer them to a preheated oven to finish cooking in the middle.

    We like forming our burger mix into big meatballs, then adding them to the skillet and pressing them into patties. Once they are brown on both sides, we bake them until almost done, then add cheese and continue to bake until the burgers are cooked in the middle and the cheese melts.

    Cooking chicken burgers in a skillet to brown on both sides.
    Chicken burgers ready to eat with melted cheese on top.

    Serving Suggestions

    When assembling the burgers, we love a buttery burger bun with some mayo and Dijon spread onto each half and crunchy lettuce (iceberg or butter lettuce is great). Then, we keep the sides simple. Adam loves roasted potato wedges or baked French fries. I love sweet potato fries, and our son loves tater tots.

    Something fresh, cool, and crispy would be really nice, too. Try our orzo pasta salad, creamy cucumber salad, or our cherry tomato salad. A side salad would be lovely. I especially love homemade ranch or our simple lemon vinaigrette.

    More of Our Favorite Ground Chicken Recipes

    Chicken Burger on a plate

    Juicy Chicken Burgers

    • PREP
    • COOK
    • TOTAL

    There’s nothing plain about this chicken burger recipe. Perfectly spiced and cooked veggies are added to the ground chicken, guaranteeing the burger patties turn out juicy and flavorful. We love Gruyère or Swiss cheese with these burgers (they work nicely with the ratatouille-inspired flavors of the veggie mix).

    4 Servings

    Watch Us Make the Recipe

    You Will Need

    2 tablespoons olive oil

    1 ½ cups finely chopped zucchini, 1 small-to-medium zucchini (145 g)

    ¾ cup finely chopped red bell pepper, 1 small pepper (105 g)

    ½ cup finely chopped onion, quarter of a medium onion (70 g)

    3 garlic cloves, minced

    2 teaspoons tomato paste

    ½ teaspoon dried oregano

    1 teaspoon red wine vinegar

    1 pound ground chicken, 93/7 lean (450 g)

    ½ teaspoon fine sea salt

    ¼ teaspoon fresh ground black pepper

    ½ teaspoon smoked paprika

    1 large egg

    1 large egg yolk

    ¼ cup panko breadcrumbs (20 g)

    3.5 ounces Gruyère cheese, sliced or grated (95 g)

    For assembly: burger buns, butter lettuce, mayonnaise, Dijon mustard, and Gruyere cheese

    Directions

      1Make vegetable mix: Heat the olive oil in a skillet over medium heat. Add the zucchini, bell pepper, onion, and garlic. Add a pinch of salt and cook, stirring occasionally, for about 8 minutes. Stir in the tomato paste and dried oregano, then cook for 3 minutes. Remove from the heat and stir in the red wine vinegar. Spread onto a plate and refrigerate to cool it quickly.

      2Make burger mix: In a large mixing bowl, whisk ½ teaspoon salt, the pepper, smoked paprika, whole egg, and egg yolk until blended. Add the ground chicken and stir to combine. Fold in the cooled vegetable mixture and panko bread crumbs. Refrigerate for 20 minutes.

      3Prep the oven: Preheat the oven to 350°F (177°C) and line a large baking sheet with parchment paper.

      4Make burgers: Divide the mixture into four 6-ounce meatballs. Wipe out the skillet used for the veggies, then place it over medium heat and add a drizzle of olive oil. Working in batches, place the giant meatballs into the pan (2 to 3 should fit). Smash them into a thick patty, and sear on both sides before moving them to the prepared baking sheet. When all the burgers are seared and on the baking sheet, bake them for 10 minutes, or until they reach an internal temperature close to 160°F (they will finish cooking after adding the cheese). Add the cheese and bake for another 3 to 4 minutes, or until the internal temperature reaches 165°F.

      5Assemble and serve: While the burger patties bake, toast the buns in the skillet. Spread a little mayonnaise and Dijon mustard on each bun, put down a few lettuce leaves, add the cheese-topped burger, and enjoy.

    Adam and Joanne’s Tips

    • Storing: Keep leftover cooked burgers in an airtight container in the fridge for up to 4 days. Reheat in a skillet over medium-low heat (use a lid to trap some steam) or in the oven.
    • Make ahead: Prepare burger mix, cover tightly, then refrigerate overnight. Form patties and cook the next day.
    • The nutrition facts provided below are estimates and do not include the bun or extra mayo/mustard.

    Nutrition Per Serving
    Serving Size
    1 burger patty with cheese (no bun)
    /
    Calories
    406
    /
    Total Fat
    27g
    /
    Saturated Fat
    9.2g
    /
    Cholesterol
    216.3mg
    /
    Sodium
    609mg
    /
    Carbohydrate
    10.6g
    /
    Dietary Fiber
    1.6g
    /
    Total Sugars
    3g
    /
    Protein
    31.1g

    AUTHOR:

    Joanne Gallagher

    Source link

  • Easy Poached Shrimp Recipe

    Easy Poached Shrimp Recipe

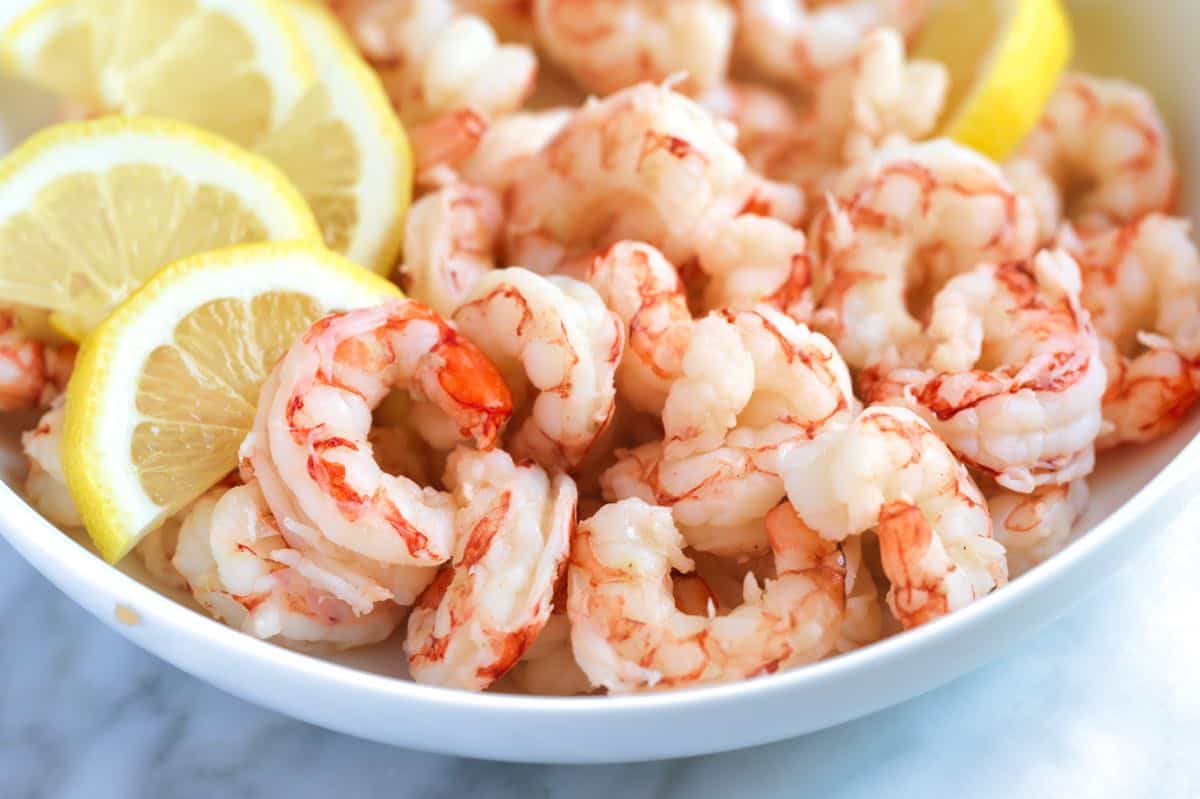
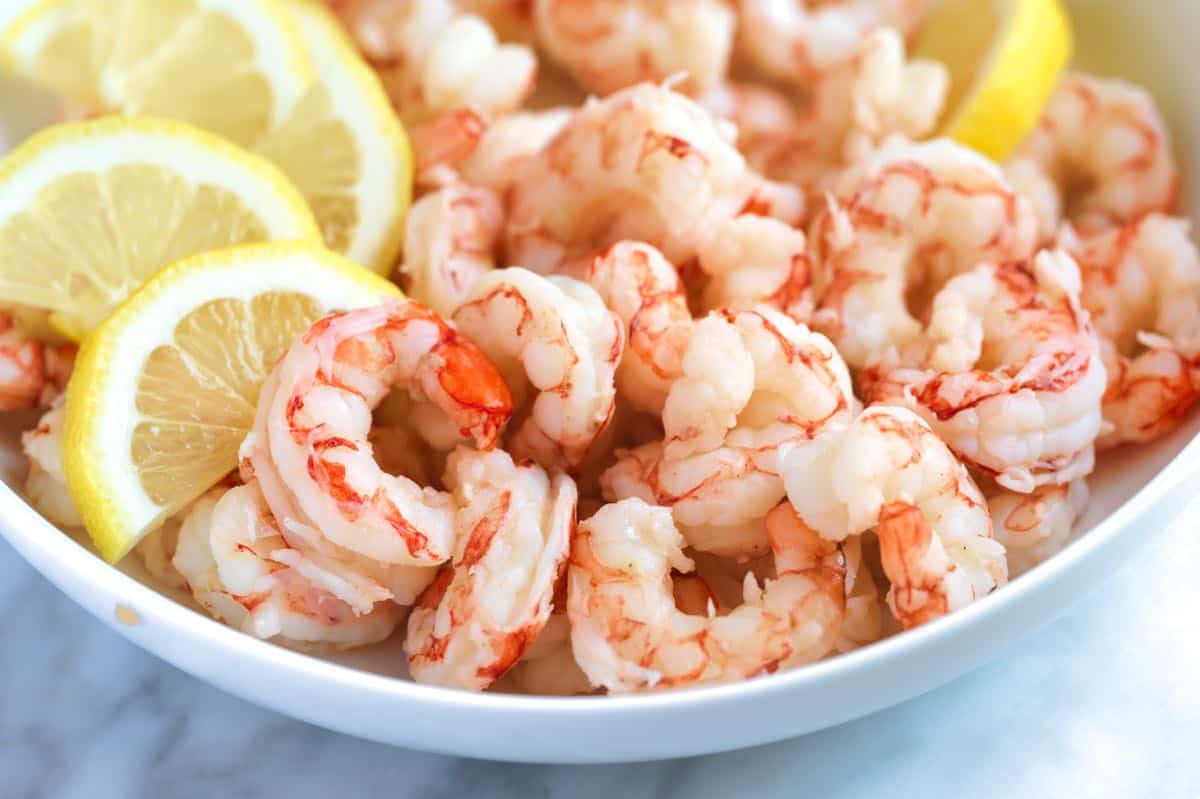
    How to poach shrimp! Our gentle poaching method guarantees perfectly cooked and flavorful poached shrimp.

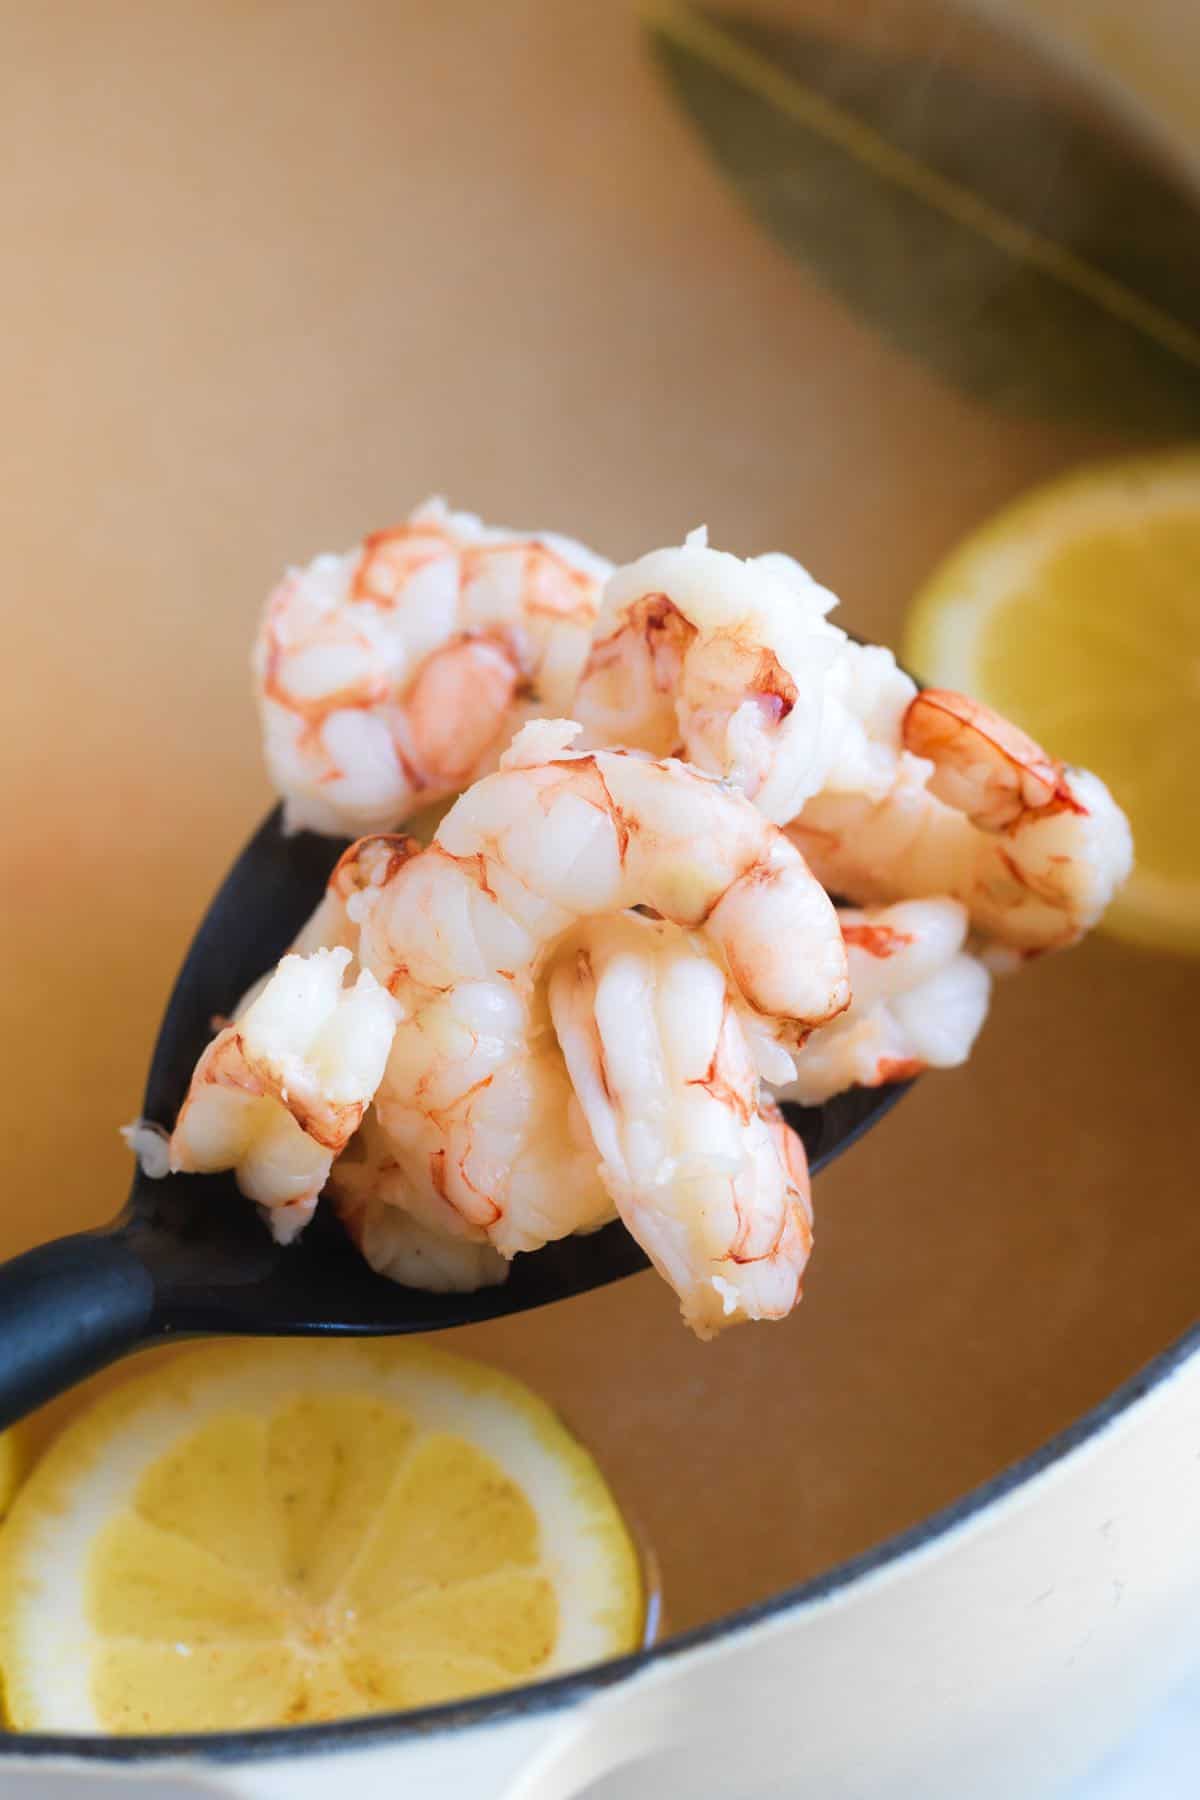
    Poached shrimp coming out of the poaching liquid

    If you have never poached shrimp before, it’s time to start! This quick and easy method is one of my favorite ways to cook shrimp. I use it to cook the shrimp for my favorite shrimp salad, add them to salads, make shrimp cocktail, and more!

    Our method for poaching shrimp is very similar to poaching salmon, chicken, and eggs. You’ll prepare a flavorful poaching liquid with simple ingredients, and then gently poach the shrimp to perfection.

    Key Ingredients

    • Shrimp: In my photos, I’ve poached large shrimp, which take about 3 minutes, but I have included a suggested cooking time below for other shrimp sizes.
    • Water: We use a large pot filled with 8 cups of water to poach shrimp.
    • Lemon: For fresh flavor, cut a lemon in half and toss it into the poaching liquid.
    • Garlic: I love a hint of garlic. Add 2 peeled and gently smashed cloves to the poaching liquid.
    • Bay leaf: Classic with shrimp and add a lovely herbal aroma to the liquid.
    • Salt, pepper, and Cajun seasoning: I season the water really well so that my shrimp are perfectly seasoned when they come out of the poaching liquid. I love salt, pepper, and some homemade Cajun seasoning.

    Find the full recipe with measurements below.

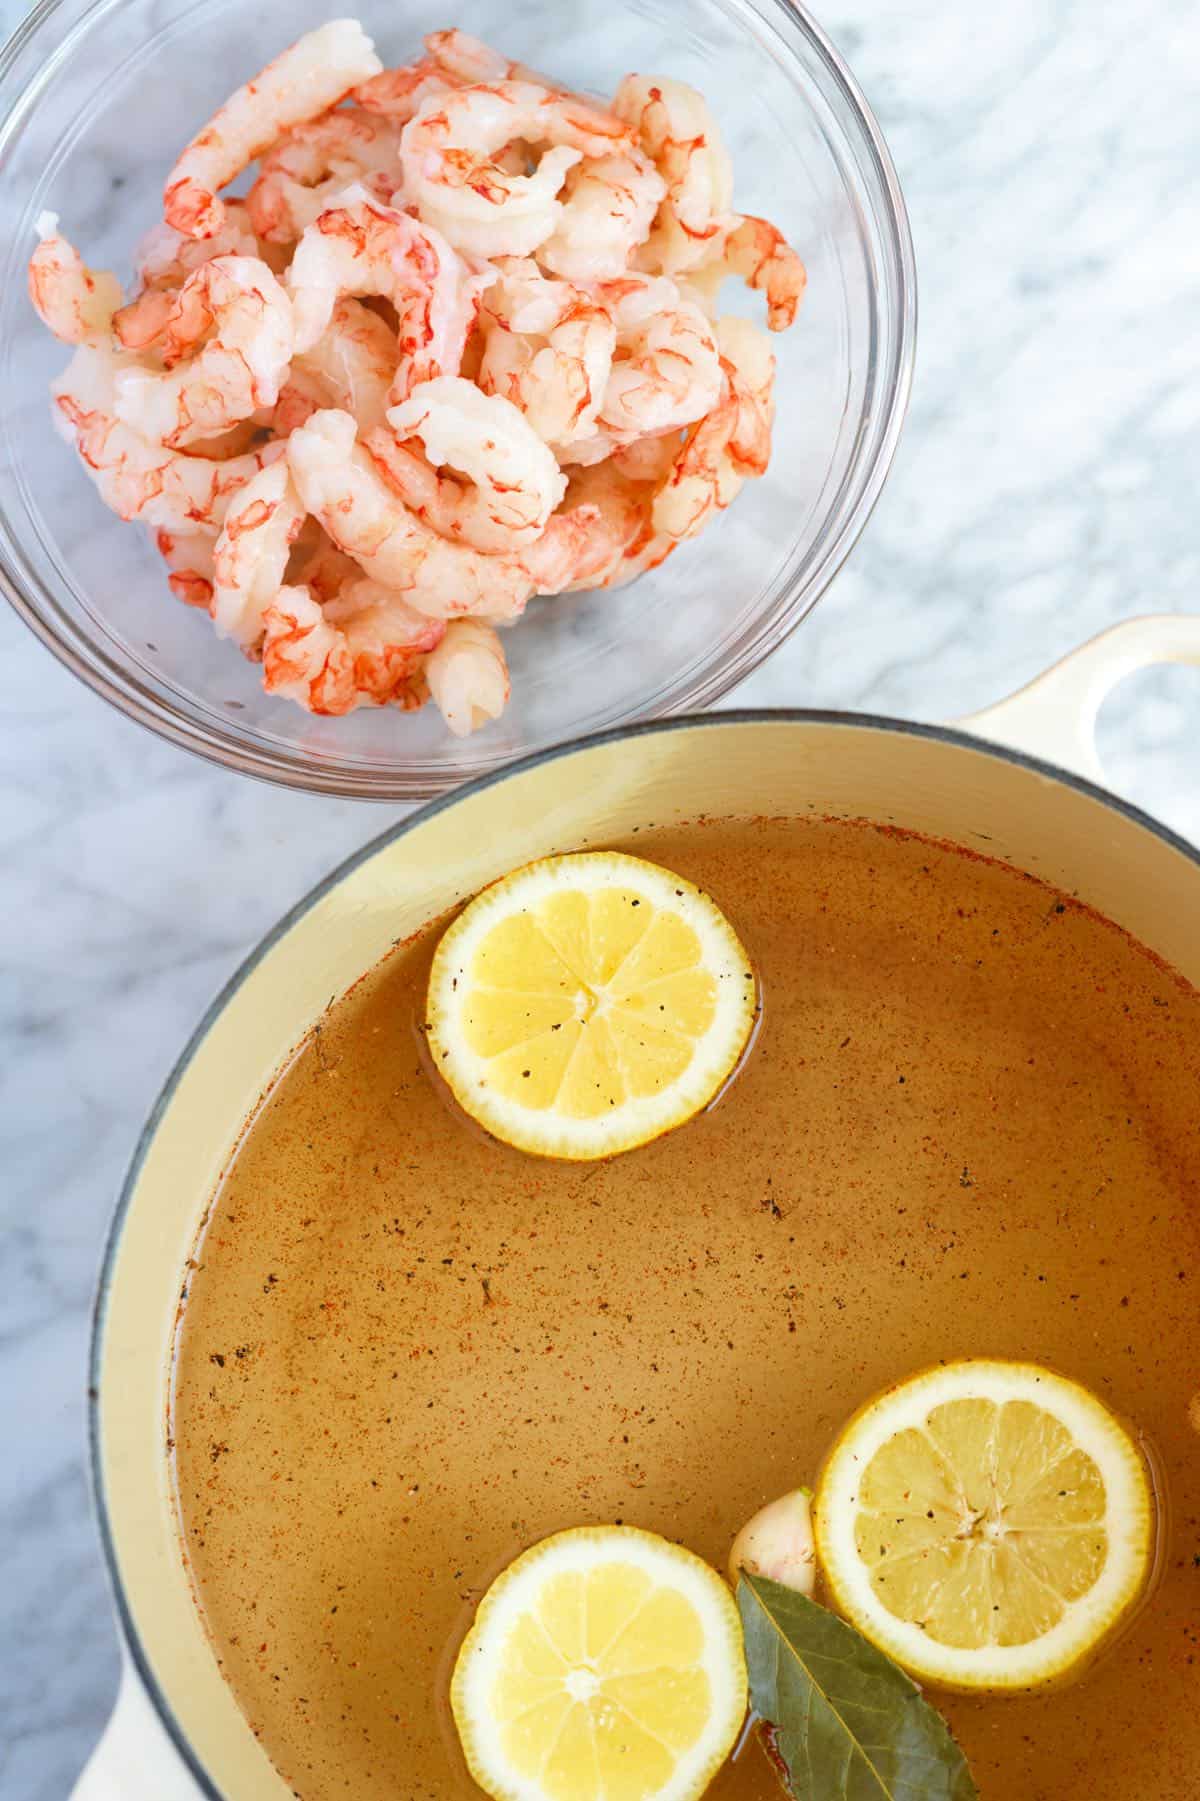
    Raw shrimp with a simple poaching liquid

    Recommended Cooking Times

    The number of shrimp per pound typically indicates shrimp sizes. Here’s a list of standard shrimp sizes and their corresponding count per pound. Please note that these are estimated cooking times; see our tips for telling when the shrimp are ready to come out of the poaching liquid below.

    • Small shrimp (71-90 per pound): 1 to 2 minutes
    • Medium shrimp (41-50 per pound): 2 to 3 minutes
    • Large shrimp (31-40 per pound): 3 minutes
    • Jumbo shrimp (21-25 per pound): 4 to 5 minutes
    • Colossal shrimp (16-20 per pound): 5 to 6 minutes
    • Super Colossal shrimp (8 to 12 per pound): 6 to 7 minutes

    How to tell when the shrimp are done: Shrimp turn from translucent to opaque when cooked. As they cook, many varieties change from a grayish or bluish-gray color to a pink or orange hue. They also curl into a loose “C” shape, while overcooked shrimp take on a “O” shape. They should also feel firm and springy to the touch. If the shrimp is still floppy, it needs more cooking time.

    If you still aren’t sure, take a shrimp out and cut into it to test it. Leave the shrimp in the poaching liquid for 20 to 30 seconds if it seems undercooked.

    More Shrimp Recipes

    Poached Shrimp

    Easy Poached Shrimp

    • PREP
    • COOK
    • TOTAL

    How to poach shrimp so they turn out perfectly cooked and flavorful. Cooking times will vary depending on the size of your shrimp. The recipe below assumes large shrimp, but we have provided guidance for other sizes of shrimp in the article above.

    Keep in mind that our poaching liquid recipe can accommodate multiple pounds of shrimp, but we recommend cooking 1 pound at a time.

    Makes 1 pound

    You Will Need

    1 pound large shrimp (31-40 per pound), see notes for cooking more than one pound

    2 quarts water

    1 lemon, cut in half

    2 cloves garlic, peeled and lightly crushed

    1 bay leaf

    3 twists pepper grinder

    1 ½ tablespoons salt

    1/2 teaspoon Cajun seasoning, optional

    Directions

      1Prepare shrimp: Depending on your serving preferences, you can choose to peel the shrimp or leave the shells intact. For salads, we peel and devein the shrimp before poaching. For a shrimp cocktail, you may want to peel and devein the shrimp while leaving the tails on.

      2Prepare poaching liquid: Add 2 quarts of water to a large pot and place it on the stove over high heat. Squeeze a little lemon juice into the water and drop the lemon halves into the pot. Add the garlic, bay leaf, pepper, salt, and Cajun seasoning. Bring the liquid to a rolling boil.

      3Poach the shrimp: Once the water reaches a rolling boil, remove the pot from the heat and immediately submerge the shrimp into the hot water. Use a timer to set the recommended cooking time: 2 to 3 minutes for medium shrimp, 3 minutes for large shrimp, and 4 to 5 minutes for jumbo shrimp. Shrimp turn from translucent to opaque when cooked. They should also feel firm and springy to the touch. If the shrimp is still floppy, it needs more cooking time.

      4Using tongs or a slotted spoon, carefully transfer the cooked shrimp to a plate. Allow them to cool by placing them in the refrigerator or plunge them into a prepared ice-water bath.

      5If you plan to poach another batch of shrimp, make sure the poaching liquid returns to a rolling boil before adding the second batch.

    Adam and Joanne’s Tips

    • More than 1 pound of shrimp: Our poaching liquid recipe can accommodate multiple pounds of shrimp, but we recommend cooking 1 pound at a time. If you plan to poach more than one pound of shrimp, after poaching the first batch, ensure the poaching liquid returns to a rolling boil before removing the pot from the heat and adding the second batch of shrimp.
    • The nutrition facts provided below are estimates.

    Nutrition Per Serving
    Serving Size
    1/4 pound shrimp
    /
    Calories
    112
    /
    Total Fat
    0.3g
    /
    Saturated Fat
    0.1g
    /
    Cholesterol
    214.2mg
    /
    Sodium
    125.8mg
    /
    Carbohydrate
    0.2g
    /
    Dietary Fiber
    0g
    /
    Total Sugars
    0g
    /
    Protein
    27.2g


    AUTHOR:

    Joanne Gallagher

    Previous Post: Easy Blueberry Mojito
    Next Post: Chewy Oatmeal Raisin Cookies

    Source link

  • Shrimp Burger Recipe with Lime Slaw

    Shrimp Burger Recipe with Lime Slaw

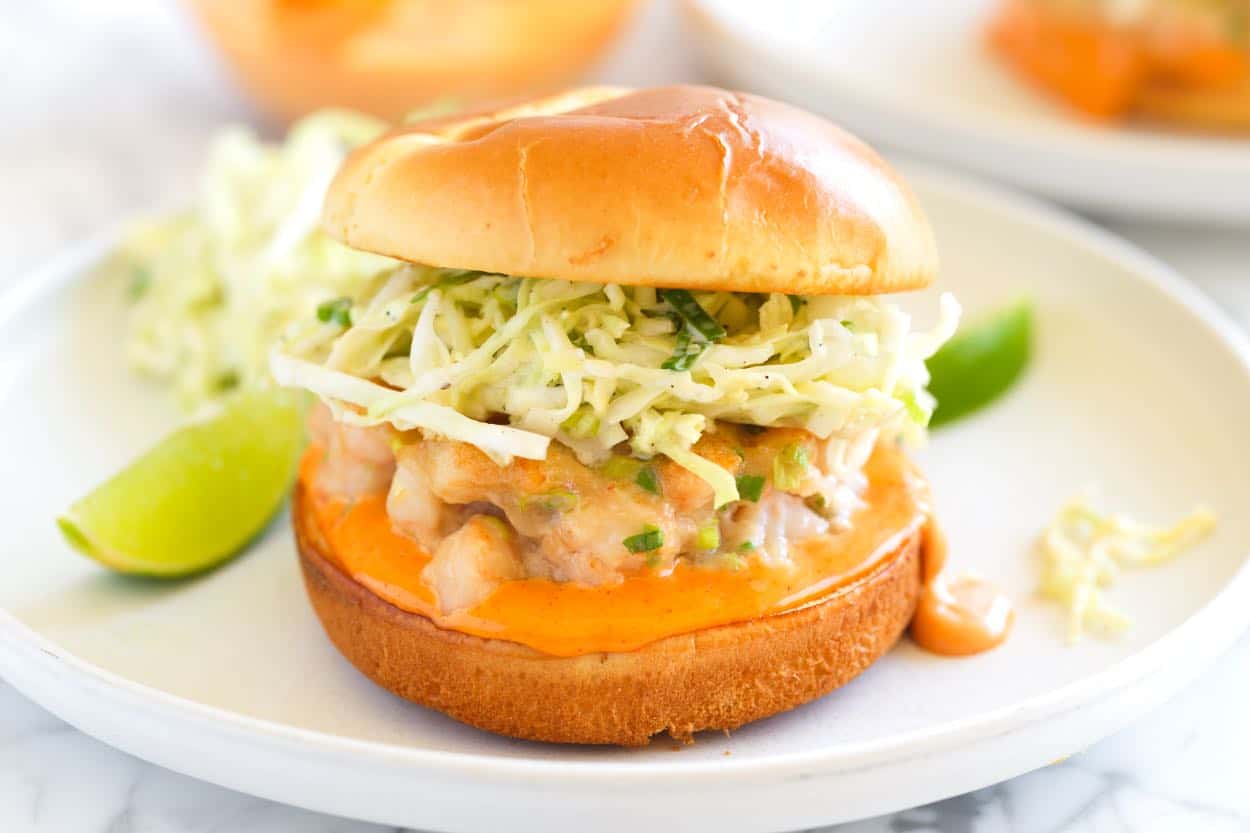
    This shrimp burger recipe with garlic and ginger is a total win in our house. They’re juicy, a bit sweet from the shrimp, and perfect with our creamy lime slaw.

    Shrimp Burger

    We’ve been dreaming up this shrimp burger for a while now, and I am so happy to be able to finally share it with you. The secret is raw shrimp, egg white, and a little cornstarch. The egg white and cornstarch hold the patties together while keeping the burgers light.

    I highly recommend topping your burger with our creamy lime slaw (recipe below) and a bit of spicy mayo, which makes a great burger sauce.

    Key Ingredients

    • Shrimp: You really taste the shrimp in this burger recipe, so use shrimp you love. We particularly enjoy Patagonian pink shrimp, which cooks up to be firm and sweet. I use them for our shrimp salad, and I’m always happy I did. I also mostly buy frozen shrimp, thaw them overnight in the fridge, and then use them the next day. You can also quickly thaw them in a bowl under cold (not warm) running water. They’ll be thawed in a few minutes.
    • Garlic, Ginger, and Green Onions: These burgers are inspired by Asian shrimp dishes, so we mix in fresh garlic, ginger, and lots of green onions. I mince the garlic, finely grate the ginger (though pre-grated frozen ginger works great), and then mince the green onion by hand.
    • Egg White and Cornstarch: Flour and breadcrumbs overpower the shrimp’s flavor, so to bind the mixture into patties, we use one egg white and a good amount of cornstarch. It works like a charm.
    • Salt, Sugar, and Tamari: To season them nicely, mix in a little salt, sugar, and low-sodium tamari (or use shoyu or soy sauce). You don’t use much of any of it, but they make a big difference in flavor.
    • Burger Sauce: Stick to toasted buns and a little plain mayo, or we love our homemade spicy mayo for these burgers. Another idea is to skip the sauce shared below and use Bang Bang sauce instead (it’s sweet, spicy, and creamy).
    • Slaw: These sweet shrimp patties pair perfectly with something cool and crunchy, so we put together a simple coleslaw to serve with them. It’s cabbage, green onion (yes, more!), salt, pepper, lime juice, and mayo. The black pepper really makes this slaw, so feel free to add more than what we recommend in the recipe below. For a mayo-free version, we also love this cilantro lime slaw.

    How to Make Shrimp Burgers

    Tip 1: Preparing your shrimp. It’s the most hands-on part of this recipe, but honestly, it’s not hard at all.

    • First, I toss the shrimp with a bit of salt, let it sit for a minute, then rinse, drain, and pat very dry. I use this trick a lot, like in our shrimp stir fry. It plumps up the shrimp and makes them taste cleaner in the end.
    • Next, I finely mince about three-quarters of the shrimp. You can do this by hand or in a food processor. Then, chop the remaining shrimp a little chunkier for some nice texture in the patties.
    Chopped shrimp ready to be made into a shrimp burger

    Tip 2: Making the burger mix. Before adding your chopped shrimp, stir all the burger mix ingredients together until smooth (salt, sugar, tamari, garlic, ginger, green onions, egg white, and cornstarch). Then fold in the chopped shrimp.

    The shrimp burger mixture ready to be refrigerated before cooking.

    Tip 3: Refrigerate the burger mix for 30 minutes. The mixture will be sticky and a little loose, so to help it firm up a bit and allow the cornstarch time to absorb the moisture, pop it into the fridge for half an hour.

    While it chills, you can make your sauce and slaw (both are simple and just need a quick mix).

    The creamy lime slaw ingredients in a bowl ready to be mixed.

    Tip 4: Sear the shrimp patties on both sides first. To get a little color, form the mixture into four balls (don’t worry if they’re not perfect or if things get a little sticky). Then, place each ball into a bit of oil in a skillet, gently press them into patties, and sear both sides until they get a little color.

    Searing shrimp burgers in a skillet

    Tip 5: Finish in the oven. Once both sides are golden, I move the patties to a baking sheet and let them finish in the oven for about 10 to 12 minutes, so they cook through in the middle.

    Shrimp burgers on a baking sheet ready for the oven

    Serving Suggestions

    These burgers, simply topped with slaw, are excellent all by themselves, but you can always add something on the side. Oven-baked French fries or sweet potato fries are classic (don’t forget the fry sauce). They are also great with sautéed broccoli, garlic ginger spicy edamame, or pickles.

    More of Our Favorite Shrimp Recipes

    Shrimp Burger

    Shrimp Burgers with Lime Slaw

    • PREP
    • COOK
    • TOTAL

    These shrimp burgers are a favorite around here! When I’m craving shrimp but want to mix things up, this is what I make. They’re sweet, full of real shrimp flavor, and you get just the right amount of garlic and ginger. Pile them onto a bun with a little spicy mayo and our quick lime slaw, and you’ve got dinner sorted.

    4 Servings

    You Will Need

    For the burgers

    1 pound large shrimp, peeled with tails removed (450g)

    ½ teaspoon fine sea salt

    1 teaspoon sugar

    1 teaspoon low-sodium tamari or soy sauce

    2 garlic cloves, minced

    1 ½ teaspoons finely grated fresh ginger, from a thumb-sized piece

    3 green onions, trimmed and minced

    1 large egg white

    2 tablespoons cornstarch

    4 burger buns, split and toasted

    1 batch spicy mayo, optional


    For creamy lime slaw

    4 cups thinly sliced cabbage

    5 green onions, trimmed and thinly sliced

    ½ teaspoon fine sea salt

    ¼ teaspoon fresh ground black pepper, or more to taste

    Juice of one lime

    2 tablespoons mayonnaise

    Directions

      1Prepare the shrimp: Place the shrimp in a colander and toss with ¼ teaspoon salt. Let sit for 1 minute, then rinse and pat very dry with paper towels.

      2Make burger base: In a large mixing bowl, add the remaining ¼ teaspoon salt, sugar, tamari, garlic, ginger, green onions, egg white, and cornstarch. Whisk until smooth. Set aside.

      3Chop the shrimp: Place about three-quarters of the shrimp into the bowl of a food processor, then pulse until chopped into small bits (around 5 short pulses should do it). Scrape into the mixing bowl. Then chop the remaining shrimp by hand into slightly larger pieces, about ¼ inches. Add them to the rest of the shrimp in the mixing bowl. Alternatively, finely mince three-quarters of the shrimp by hand, then chop the remaining shrimp into slightly larger pieces.

      4Mix and refrigerate: Mix the burger mix and shrimp well. It should be sticky; if it is not, add ½ to 1 teaspoon more cornstarch. Refrigerate the mixture for 30 minutes.

      5Make the slaw: In another mixing bowl, toss the cabbage, green onions, salt, and pepper together. Add the lime juice (from 1 lime) and the mayonnaise, then mix well. Set aside.

      6Prep the oven: Preheat the oven to 350°F (177°C) and line a baking sheet with parchment paper.

      7Cook the burgers: Place a wide skillet over medium heat. Then drizzle with olive oil. Form the sticky shrimp mixture into 4 equal-sized balls, each around 4 ½ ounces (since the mix is soft, your balls won’t look perfect). Place each ball into the preheated skillet, then gently press into patties about ¾ inch thick. Sear on both sides, being gentle when flipping, then transfer to the prepared baking sheet and bake for 10 to 12 minutes, or until the center is fully cooked.

      8Assemble burgers: Spread some sauce on both halves of the buns. Place a shrimp patty on the bottom bun, then top with some slaw. Top with the remaining half of the bun and enjoy.

    Adam and Joanne’s Tips

    • Storing: Keep leftover shrimp burger patties in an airtight container in the fridge for 2 to 3 days. Reheat either in a skillet or the oven.
    • Shrimp: You really do taste the shrimp in these burgers, so choose high-quality shrimp. When we can find them, we love Patagonian pink shrimp for their sweetness, but use what you love.
    • The nutrition facts provided are estimates. We included the patty, slaw, and bun. No extra sauce.

    Nutrition Per Serving
    Serving Size
    1 burger with slaw (no spicy mayo)
    /
    Calories
    312
    /
    Total Fat
    7.5g
    /
    Saturated Fat
    1.5g
    /
    Cholesterol
    185.4mg
    /
    Sodium
    1050.6mg
    /
    Carbohydrate
    33.2g
    /
    Dietary Fiber
    3.8g
    /
    Total Sugars
    9.2g
    /
    Protein
    29.4g


    AUTHOR:

    Joanne Gallagher

    Adam and Joanne of Inspired Taste

    We are Adam and Joanne Gallagher, the creators of Inspired Taste. Established in 2009, Inspired Taste grew from a childhood dream into one of the internet’s most trusted recipe sites with hundreds of reliable recipes, step-by-step videos, and expert tips.More About Us

    Source link

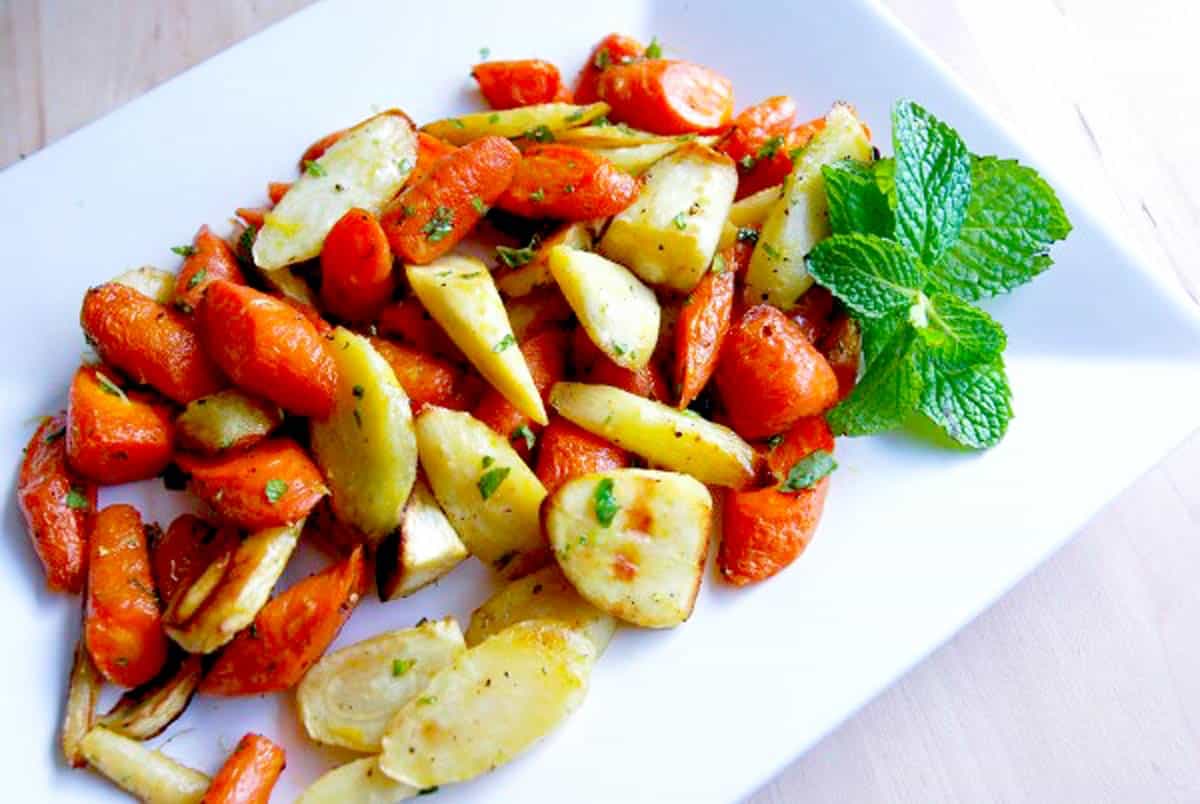
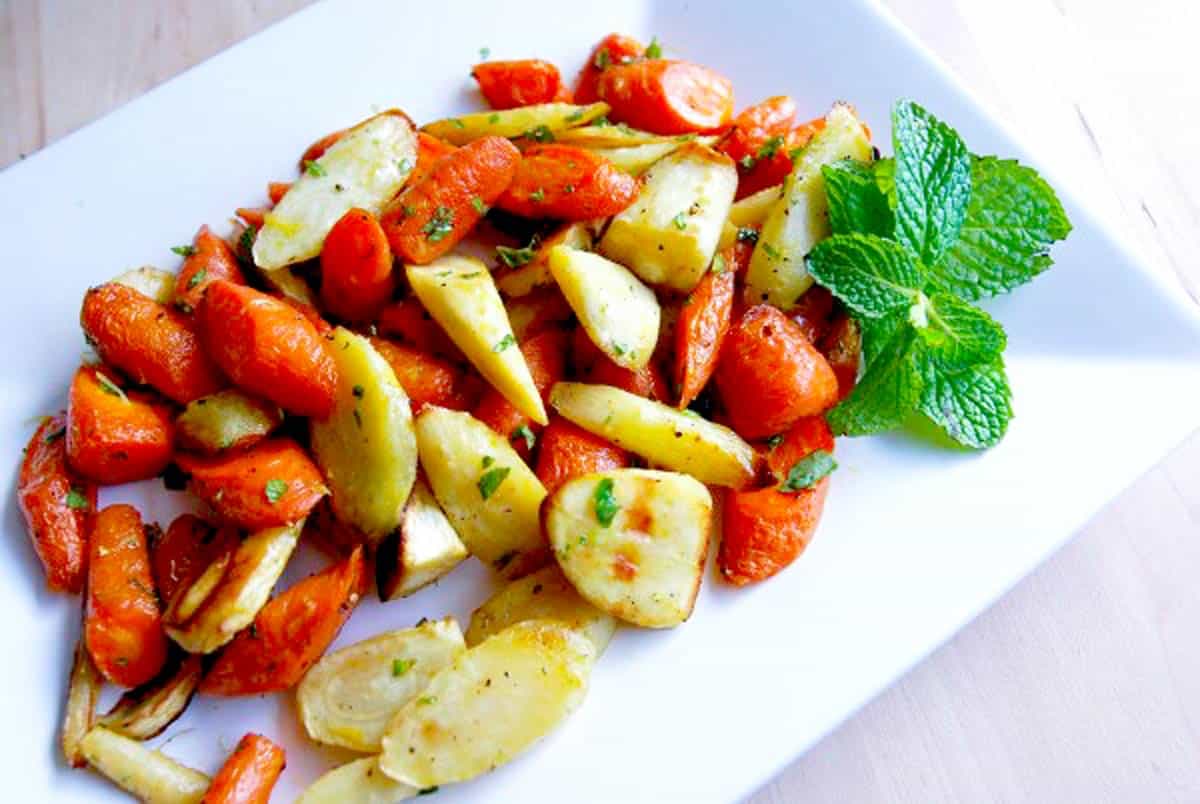
  • Roasted Carrots and Parsnips Recipe

    Roasted Carrots and Parsnips Recipe

    My roasted carrots and parsnips are such a classic side dish, and for good reason! The oven transforms them, intensifying their flavor, caramelizing the sugars, and browning the outsides with very little effort from you!

    Easy Roasted Carrots and Parsnips with Mint

    I grew up with this dish. My Mom (who’s from the UK) made roasted carrots and parsnips at least once every week, and I am so happy that she did! Roasting will forever be my favorite way to make vegetables even better. This happens with our favorite roasted carrots recipe, and it happens with this recipe, which adds parsnips to the party.

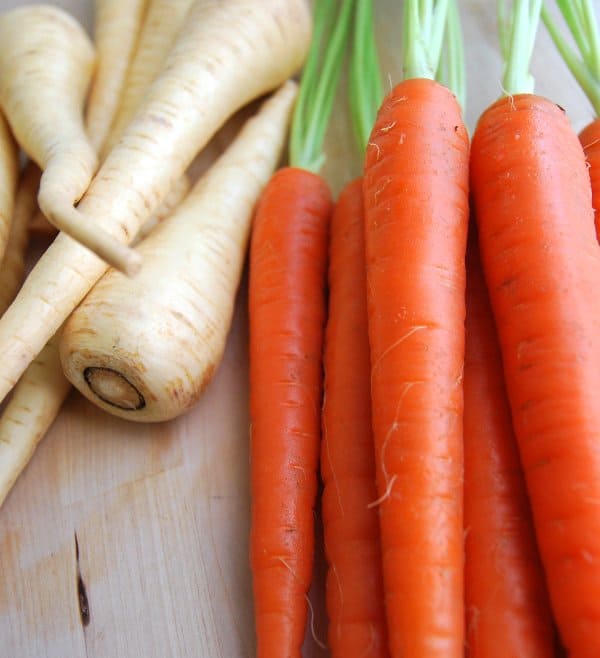
    If you are unfamiliar with parsnips, they are between a carrot and a potato (sweet like carrots and creamy like a potato). I love them! We also use them to make creamy parsnip puree, which I think rivals mashed potatoes any day.

    Key Ingredients

    • Carrots: Use any variety of carrots for this recipe. Orange carrots are the most common, but yellow, purple, or more exciting varieties are great! Scrub your carrots clean and then skip peeling them (helpful on a busier night when time is limited) or peel them.
    • Parsnips: Often sold near other root vegetables, parsnips look like white carrots. Look for firm, smooth, and evenly colored parsnips with no soft spots. Like the carrots, you can scrub them clean and then skip peeling or peel them.
    • Oil, Salt, and Pepper: I love avocado oil or olive oil. Then, I simply season the carrots and parsnips with salt and pepper. You can swap for my favorite seasoned salt, or use an herb blend like Herbes de Provence.
    • Fresh Mint: When I have it on hand, I love tossing the warm roasted veggies with chopped fresh mint. Other herbs are lovely too! You can even make a herbed butter like I do for my buttery roasted carrots.
    Parsnips and Carrots

    Roasted Carrots and Parsnips

    • PREP
    • COOK
    • TOTAL

    Carrots and parsnips are lovely together, and you can make this roasted version in about 30 minutes. Roasted carrots and parsnips are great with just oil, salt, and pepper, but we especially love them tossed with fresh mint just before serving!

    6 Servings

    You Will Need

    1 pound (450g) carrots, peeled, 4 to 5 medium

    1 pound (450g) parsnips, peeled, 4 to 5 medium

    2 tablespoons olive oil or avocado oil

    1/2 teaspoon fine sea salt

    1/2 teaspoon fresh ground black pepper

    2 tablespoons chopped fresh mint, optional

    Directions

      1Heat the oven to 400°F (200°C). Line a large baking sheet with parchment paper or use a silicone baking mat.

      2Trim the carrot and parsnip ends and slice them diagonally into 1-inch-thick slices. As the carrots roast, they will shrink. (Depending on how wide the thicker ends of the parsnips are, you may need to slice each stick in half, lengthwise.)

      3Add the carrots, parsnips, oil, salt, and pepper to a large bowl, and toss until well coated. Spread them in one layer on the prepared baking sheet.

      4Roast for 15 minutes, stir, and then roast until the carrots and parsnips are tender and caramelized around the edges, 5 to 10 minutes longer. (For even more caramelization, roast for another 5 to 10 minutes.)

      5Toss with chopped mint and serve.

    Adam and Joanne’s Tips

    • Storing: Place roasted carrots and parsnips in an airtight container and refrigerate for up to 4 days. To freeze them, freeze them in a single layer on a parchment-lined baking sheet. Once frozen, transfer them to a freezer-safe container, and they’ll keep for up to 3 months.
    • The nutrition facts provided below are estimates.

    Nutrition Per Serving
    Serving Size
    1 of 6 servings
    /
    Calories
    118
    /
    Total Fat
    5g
    /
    Saturated Fat
    0.7g
    /
    Cholesterol
    0mg
    /
    Sodium
    236.4mg
    /
    Carbohydrate
    18.5g
    /
    Dietary Fiber
    5.2g
    /
    Total Sugars
    6g
    /
    Protein
    1.4g


    AUTHOR:

    Joanne Gallagher

    Previous Post: Creamy Parsnip Purée
    Next Post: Garlic Olive Oil Mashed Potatoes

    Source link

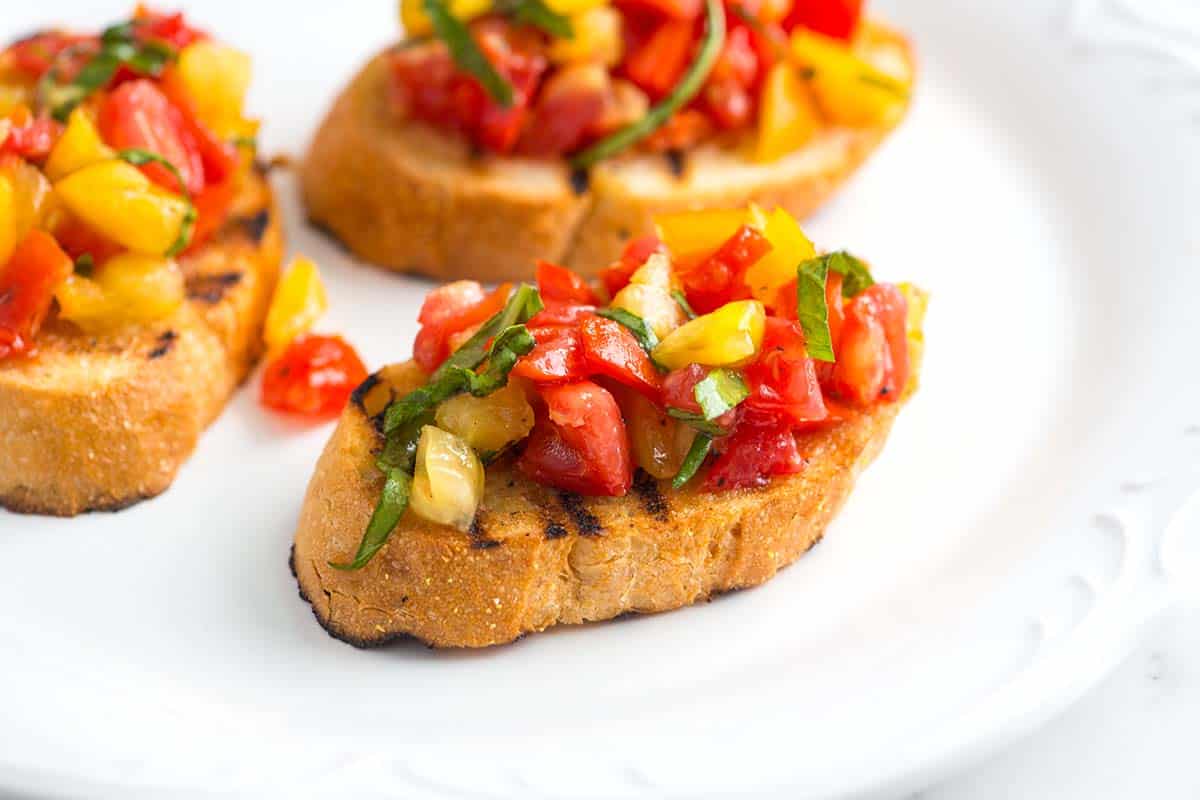
  • Easy Tomato Bruschetta Recipe

    Easy Tomato Bruschetta Recipe

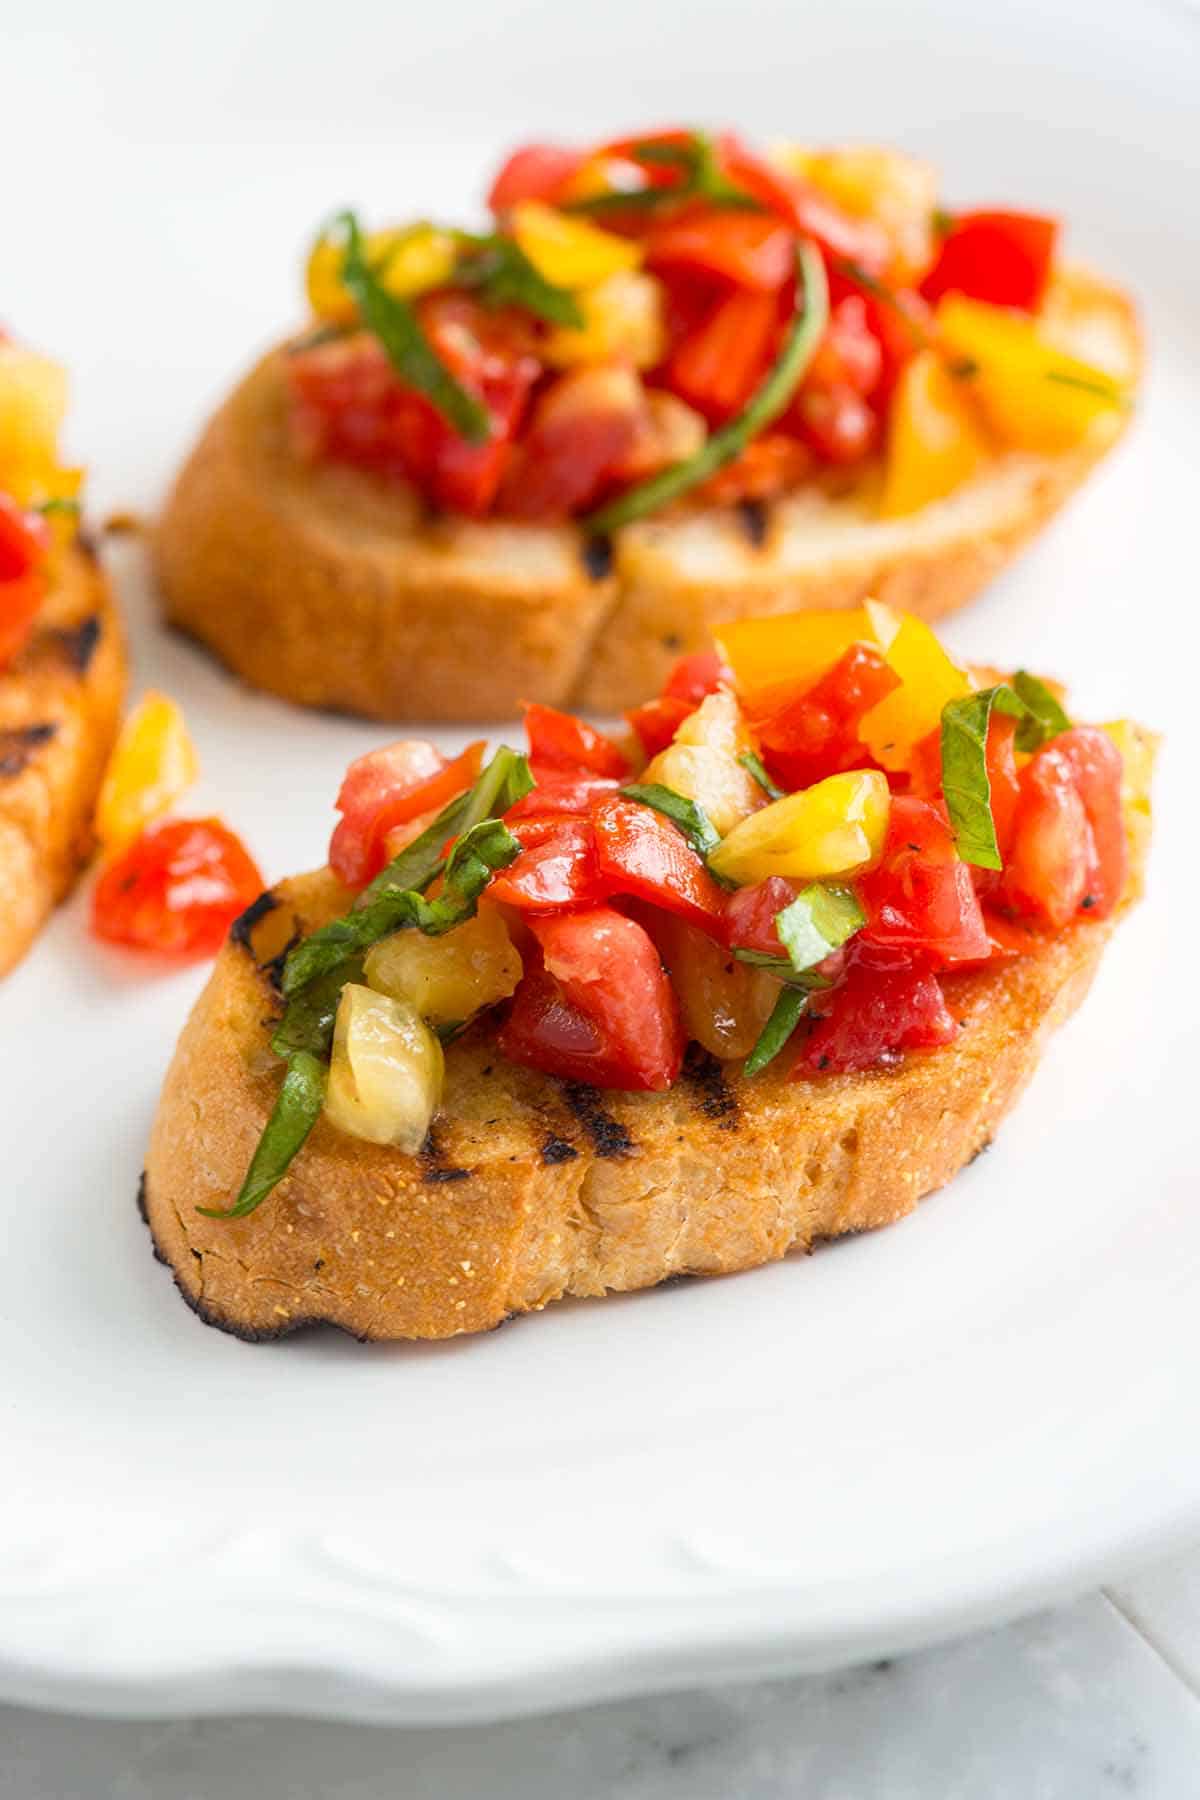
    This bruschetta recipe is hands down my favorite recipe to make in the summer when tomatoes are at their best and it comes together in minutes!

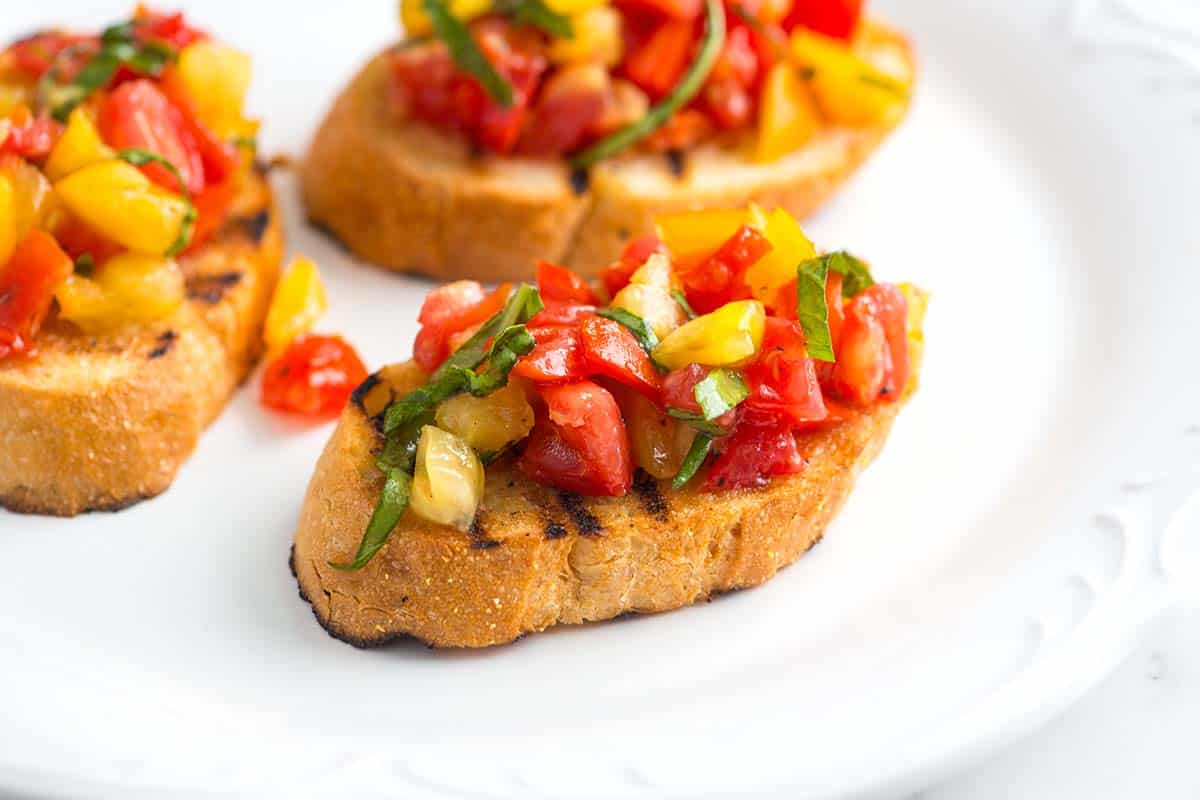
    Homemade Tomato Bruschetta

    I can’t tell you how often we’ve made this recipe! Like so many incredible Italian dishes, it calls for fresh, high-quality ingredients and very little fuss.

    This homemade bruschetta is one of my most made appetizer recipes. For more like this, see our Caprese salad or antipasto salad!

    Key Ingredients

    • Tomatoes: Everyone is probably telling you to use the best tomatoes for the best bruschetta (including me), but let’s make sure we are on the same page with what that means. You will find the best tomatoes later in the summer. They should feel heavy and have smooth skin. They should also smell like tomatoes (if there’s no smell, skip it!). Finally, don’t refrigerate your tomatoes. Something happens after refrigerating tomatoes (they become less flavorful and tomato-y). We store them on the counter. Roma tomatoes, heirloom tomatoes, garden tomatoes, and cherry tomatoes all work nicely for this recipe. If you crave bruschetta outside of tomato season, use cherry tomatoes. We’ve found them to be sweeter and more consistent all year round.
    • Bread: I use a rustic Italian bread or a French loaf (like a baguette) to make bruschetta. It should be soft and chewy in the middle, with a little bite around the crust. Slices of homemade focaccia bread work nicely, too.
    • Garlic: Fresh garlic is key to authentic bruschetta. I don’t add garlic to my tomatoes, but rub my warm, toasted (or grilled) bread with it instead.
    • Olive Oil, Salt, Pepper, and Basil: I use olive oil when toasting my bread and add a drizzle to my chopped tomatoes. Salt helps bring out the tomato flavor, and fresh basil is lovely (although don’t fret if you don’t have any – the tomatoes are the star here).
    • Cheese (Optional): For bruschetta with mozzarella, tear fresh mozzarella into smaller pieces and place them on top of the tomatoes and bread.

    Find the full recipe with measurements below.

    How to Make the Best Bruschetta

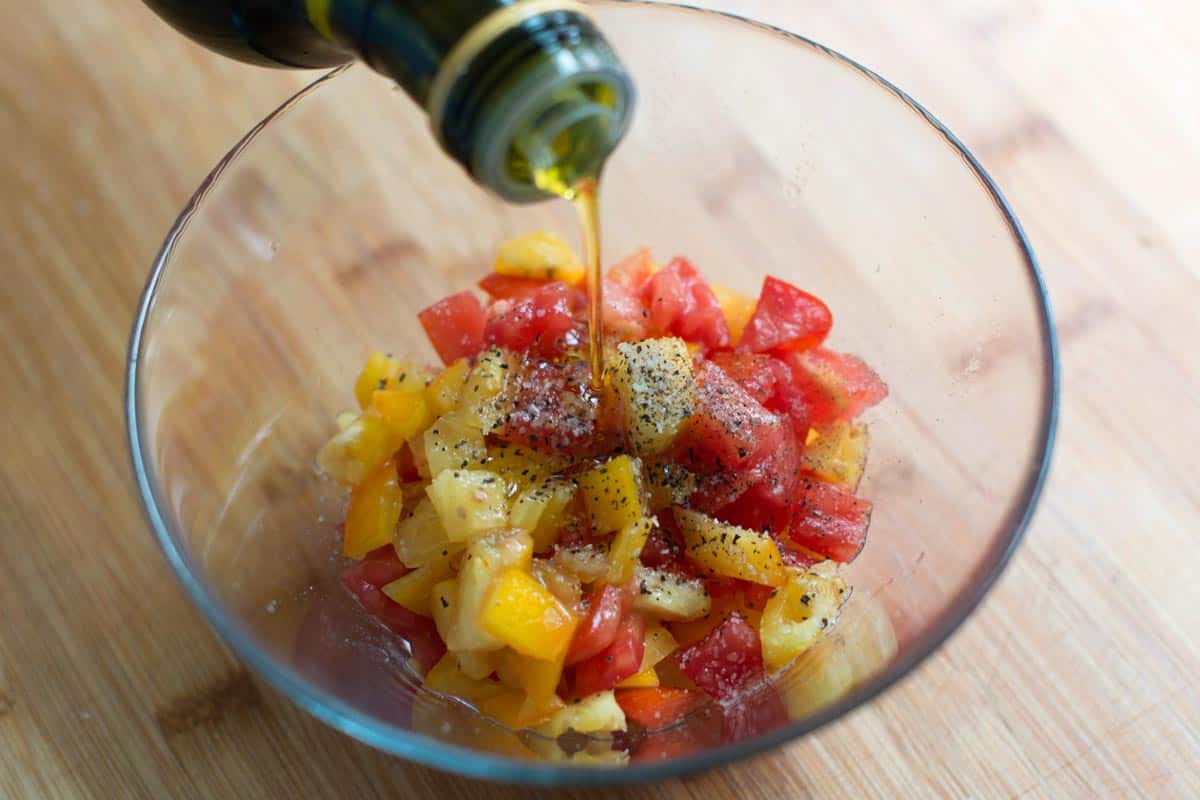
    Tip 1: Season your tomatoes. Chop and toss yours tomatoes with salt, pepper, and a drizzle of olive oil. Then, set the bowl aside while you toast or grill your bread. As the tomatoes sit with the salt, they release lots of delicious juices, making the tomato topping extra delicious (I do the same when making my tomato and mozzarella salad).

    Adding olive oil, salt and pepper to chopped fresh tomatoes

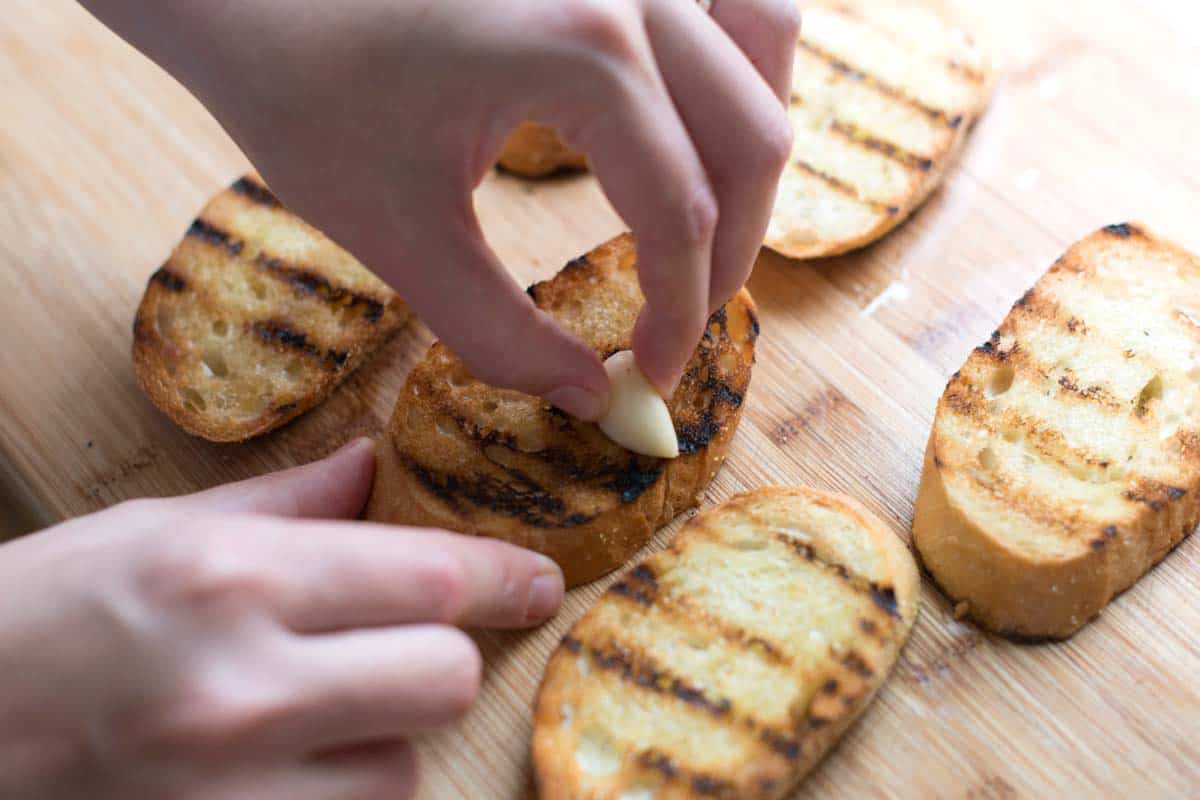
    Tip 2: Rub your bread with fresh garlic. Once my bread has been toasted (or grilled), rub it with fresh garlic. This is a classic Italian trick for making bruschetta. The garlic melts onto the warm bread and prepares it for the tomato topping.

    Rubbing toasted bread with a fresh garlic clove.

    Tip 3: Consider extra toppings. I’m happy with classic tomato bruschetta, but you can always add fresh mozzarella and a drizzle of balsamic glaze (my personal favorite).

    More Easy Appetizers

    Tomato Bruschetta

    Easy Tomato Bruschetta

    • PREP
    • COOK
    • TOTAL

    When serving this classic bruschetta recipe, spoon some of the tomato juices from the bowl over each bread slice. Thanks to the tomatoes, olive oil, and salt, that liquid is pure gold! If you have any extra, use it as a dip for more bread or sip on it (it is the best!).

    Makes 6 Servings, 2 bruschetta each

    Watch Us Make the Recipe

    You Will Need

    12 slices Italian bread or French baguette, 1/2-inch-thick

    3 cloves garlic, peeled and left whole

    1 pound ripe fresh tomatoes, at room temperature, 3 to 4 medium (450g)

    2 tablespoons extra virgin olive oil, plus more for the bread

    12 fresh basil leaves, thinly sliced

    Salt and fresh ground black pepper

    6 ounces fresh mozzarella, torn into small pieces, optional (170g)

    Directions

      1Prepare tomato topping: Chop the tomatoes into 1/4-inch pieces, then add to a medium mixing bowl with a generous pinch of salt, a small pinch of black pepper, and the olive oil. Stir and let sit for 10 minutes.

      2Prepare the bread: Meanwhile, heat a grill pan over medium heat or prepare an outdoor grill for medium heat. Drizzle the bread slices with the remaining olive oil and grill for 2 to 3 minutes on each side until warmed through and grill marks appear.

      3Rub garlic over the bread: Rub one side of the warm grilled bread with garlic (two to three strokes per slice should do it), and then place it onto a serving plate with the garlic-rubbed side facing up.

      4To finish: Stir and taste the tomatoes, then add more salt or pepper as needed. Spoon a generous amount of tomatoes onto each bread slice. Drizzle a little of the juice remaining at the bottom of the bowl over the tomatoes, and add basil and optional mozzarella. Serve immediately.

    Adam and Joanne’s Tips

    • Canned tomatoes: If you cannot access sweet, ripe tomatoes, use high-quality canned whole tomatoes. Reserve the juice for another recipe and chop the whole tomatoes for the bruschetta. We love San Marzano tomatoes and have also been very happy with canned Muir Glen tomatoes.
    • Balsamic vinegar: For extra flavor, stir 1 to 2 teaspoons of balsamic vinegar into the tomatoes. Or, after assembling the bruschetta, drizzle over a balsamic glaze.
    • The nutrition facts provided below are estimates. We did not include mozzarella.

    Nutrition Per Serving
    Serving Size
    2 bruschetta
    /
    Calories
    169
    /
    Protein
    4 g
    /
    Carbohydrate
    18 g
    /
    Dietary Fiber
    2 g
    /
    Total Sugars
    3 g
    /
    Total Fat
    10 g
    /
    Saturated Fat
    1 g
    /
    Cholesterol
    0 mg


    AUTHOR:

    Joanne Gallagher

    Previous Post: Perfect Juicy Grilled Chicken
    Next Post: The Best Instant Pot Pot Roast

    Source link

  • Korean Short Ribs Recipe (Galbi)

    Korean Short Ribs Recipe (Galbi)

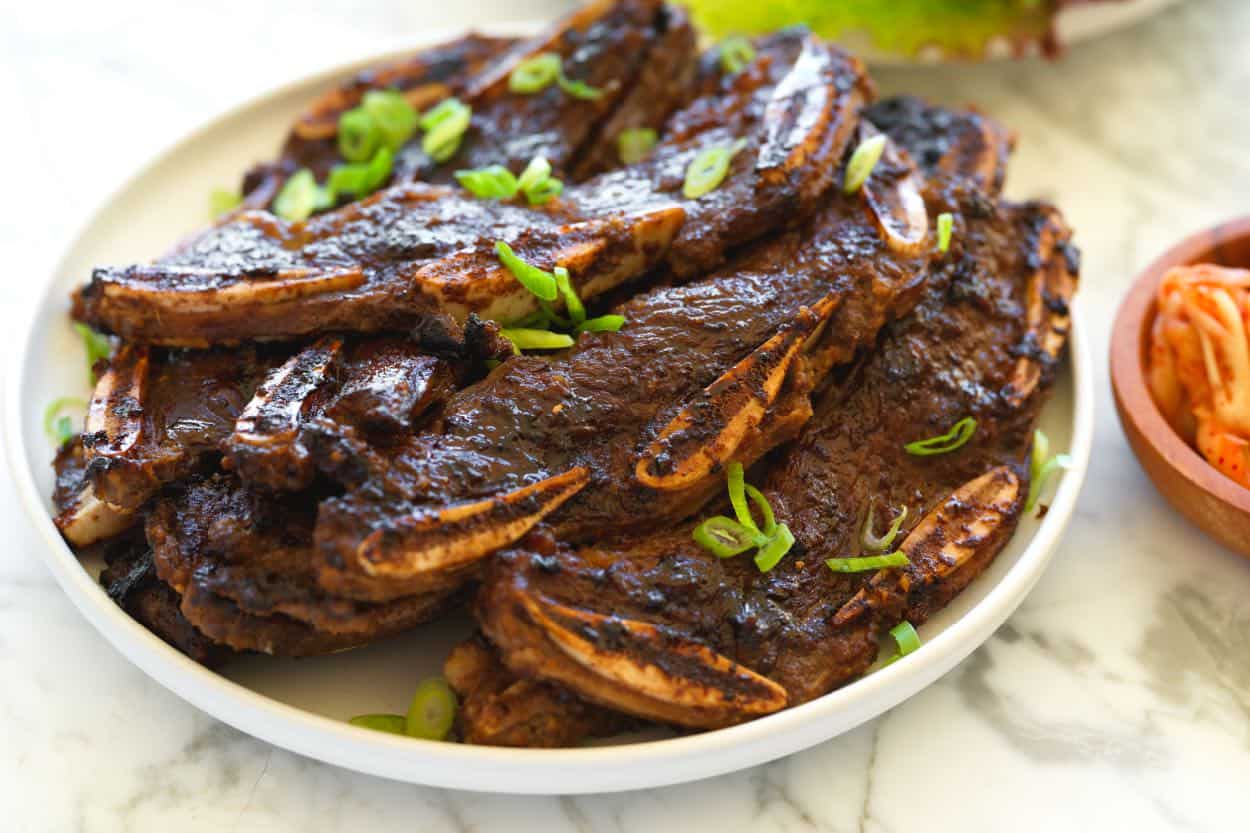
    The trick to this Korean short ribs recipe is to marinate thinly cut beef ribs in our savory-sweet soy marinade, then cook them on a hot grill or grill pan until they’re caramelized and a little bit charred.

    Korean Short Ribs

    Adam is obsessed with Korean-style ribs. Also called beef Galbi, these are thinly sliced beef short ribs that soak up all the flavor from the marinade and cook in just a few minutes on the grill. You get those perfect caramelized, charred edges that we can’t get enough of.

    The Galbi marinade is a lot like our go-to bulgogi marinade, just with a little extra brown sugar, an onion, and more aromatics for an authentic flavor. This is one of our favorite ways to bring Korean BBQ flavors into our own kitchen, and you can totally do it at home, too!

    Key Ingredients

    • Flanken Ribs: For this recipe, you’ll want thinly sliced short ribs. Somewhere between 1/4-inch and 3/4-inch thick is perfect. The thin cut means they grill up super fast. When you’re shopping, look for packages labeled “flanken ribs,” “Korean-style ribs,” or “LA-style beef short ribs.” Just make sure they’re cut across the bone, so you get 3 to 4 little round bones in each piece.
    • Soy Sauce: This is the base of our marinade. We usually go for low-sodium soy sauce, but low-sodium tamari works great, too.
    • Rice Wine Vinegar: Look for unsweetened rice vinegar (usually with a green bottle cap or label).
    • Sesame Oil: Toasted sesame oil adds a lovely, toasty, rich flavor to the ribs.
    • Brown Sugar and Honey: We really love both for this. The combination makes our beef taste more interesting and complex. The honey also caramelizes beautifully. We use the same combination when making beef bulgogi, another Korean-inspired recipe.
    • Black Pepper: We use a lot of black pepper in this recipe. I hand-grind mine, so it has to be worth it. Trust me, it is! One teaspoon is just right.
    • Garlic and Ginger: I always go for fresh garlic. For ginger, you can use fresh ginger root or grab ginger puree from the store (refrigerated or frozen both work).
    • Pear: This is the secret ingredient in a lot of Korean marinades. It adds sweetness and helps tenderize the beef. We look for Asian, Korean, or Nashi pears, but if you can’t find those, a ripe Bosc or Anjou pear works just fine.
    • Lettuce, Rice, and Sides: To make it a full meal, we serve these ribs with steamed rice and lettuce leaves for wrapping. Don’t forget the banchan (little sides) like kimchi or spicy cucumber salad, and a bit of ssamjang, the savory Korean dipping sauce that ties it all together.

    Find the full recipe with measurements below.

    How to Make Korean Short Ribs at Home

    Tip 1: Prepare the ribs. If you have thin-cut flanken ribs that are 3/8-inch or thinner, skip this tip. If, however, you can only find thicker-cut ribs (say 1/2-inch), stick around. The thinner the ribs, the more tender they turn out, so if you are sitting there with a thicker cut, it’s a good idea to grab a meat mallet (a dual-sided one with the spiked teeth on one side). Lay each rib flat, then lightly pound the beef using the pointy side. This helps break up connective tissue, making the meat more tender in the end.

    Note: Ribs thicker than 1/2-inch won’t have the same results, even with the meat mallet.

    Tip 2: Make our galbi marinade. We like using our food processor to make the marinade. If you don’t have one, you can make this marinade by hand, but a food processor makes really quick work of it. Toss everything in and hit pulse until mostly smooth. If you’re doing it by hand, you’ll mince the garlic, finely grate the ginger with a microplane, then grate the pear and onion with a box grater.

    Tip 3: Marinate overnight. If you are short on time, you can cut the marinating time down a bit, but for the best results, we highly recommend leaving the ribs in the marinade overnight.

    Once made, pour the marinade over your ribs, then massage them and move them around in the marinade so all of the beef is well covered. Cover the bowl, then refrigerate. If you have the chance, go back once or twice and move the ribs around a bit to make sure everything is still well coated.

    Marinating Korean Short Ribs in a Galbi marinade

    Tip 4: Grill the ribs. At a Korean barbecue restaurant, there’s often a grill right in the middle of the table where you can quickly sear/grill the ribs. At home, we use our outdoor grill or a heavy-bottomed grill pan over medium-high heat.

    If cooking on a grill pan, add a little oil, then cook the marinated ribs in batches, keeping one layer of ribs in the pan at a time (stacking too many at once will steam the beef rather than caramelize and brown it).

    Our Favorite Way to Serve Korean Ribs

    We love serving these family-style next to rice, big lettuce leaves, kimchi, and ssamjang (a savory dipping sauce — look near gochujang in Korean markets or more internationally friendly grocery stores). Very often, when we’re out at a Korean BBQ place, we’ve seen people using kitchen shears to cut the grilled beef from the bones, then take the meat and build their bite. If you have some on hand, try it! It does make removing the beef from the bones easy. Otherwise, just get in there!

    More of Our Favorite Beef Recipes

    Korean Short Ribs

    Korean Short Ribs (Galbi)

    • PREP
    • COOK
    • TOTAL

    We love making Korean ribs at home, and you can totally do it, too! The key to the best flavor is letting those thinly sliced short ribs sit overnight in our savory-sweet soy marinade.

    We think these ribs are at their best when grilled, on an outdoor grill or in a grill pan, then pulled or cut from the bone and tucked into lettuce wraps. We love serving them with kimchi and ssamjang on the side. You can grab kimchi at the store or make your own with our kimchi recipe. Ssamjang is a spicy dipping sauce you’ll find near gochujang in Korean markets or in the international aisle at bigger grocery stores. It’s also easy to order online.

    6 Servings

    You Will Need

    3 pounds thin-sliced bone-in beef short ribs, ¼-inch to ⅜-inch thick, see tips

    1 Asian pear, peeled, cored, and cut into 1-inch pieces

    1 small onion, cut into 1-inch pieces

    5 garlic cloves

    1 ½ inch piece fresh ginger, peeled and roughly chopped into ¼ inch pieces

    ½ cup low-sodium soy sauce

    ¼ cup brown sugar

    3 tablespoons honey

    2 tablespoons toasted sesame oil

    2 tablespoons rice wine vinegar

    1 teaspoon ground black pepper

    High-heat cooking oil, if using a grill pan

    3 green onions, sliced

    Lettuce leaves, steamed rice, kimchi, and ssamjang (Korean dipping sauce), optional for serving

    Directions

      1Prepare the ribs: If your ribs are on the thicker side, use the pointy side of a meat mallet to gently pound them (this makes them a bit more tender in the end). Place them into a large bowl or resealable zip-top bag.

      2Make marinade: Add the pear, onion, garlic, ginger, soy sauce, brown sugar, honey, sesame oil, rice wine vinegar, and pepper to the bowl of a food processor. Pulse until everything is nice and smooth.

      3Marinate: Pour the marinade over the ribs, massaging them and moving it around so they are evenly coated. Refrigerate overnight. As they marinate, go back once or twice to move them around in the marinade.

      4Cook the ribs: When you’re ready to cook, heat an outdoor grill to medium-high or add a little oil to a grill pan or cast-iron skillet over medium-high heat. Cook the ribs in batches for 2 to 3 minutes per side, until they’re caramelized and a little charred. Pile them onto a platter and scatter sliced green onions over the top. If you’re cooking on the stovetop, just a heads up: the marinade caramelizes fast, so you might want to wipe out the pan between batches.

    Adam and Joanne’s Tips

    • Storing: Keep leftovers in an airtight container in the fridge for up to 4 days. Reheat in a skillet over medium heat.
    • The ribs: These are sometimes called “Korean-style,” “flanken ribs,” “LA-Style beef short ribs,” or “Galbi ribs”, which are just short ribs cut super thin. If you can, ask for ribs that are ¼ to ⅜ inch thick. If you can’t find that exact cut, don’t stress! If you’ve got thin-cut short ribs closer to ½-inch thick, they just need a little pounding with a meat mallet before marinating to help them stay tender. If yours are already thin, you’re good to go.
    • No food processor: No problem! Just peel and grate the pear and onion with a box grater, mince the garlic, and use a microplane to grate the ginger.
    • Pear substitutes: If you cannot find an Asian pear (sometimes called Korean pear or Nashi pear), substitute a ripe Bosc pear or Anjou pear.
    • The nutrition facts provided are estimates.

    Nutrition Per Serving
    Serving Size
    1/6 of the recipe
    /
    Calories
    520
    /
    Total Fat
    26.7g
    /
    Saturated Fat
    10.7g
    /
    Cholesterol
    130mg
    /
    Sodium
    733mg
    /
    Carbohydrate
    24.3g
    /
    Dietary Fiber
    1.2g
    /
    Total Sugars
    19.9g
    /
    Protein
    44.1g


    AUTHOR:

    Joanne Gallagher

    Source link

  • Easy Salmon Patties Recipe

    Easy Salmon Patties Recipe

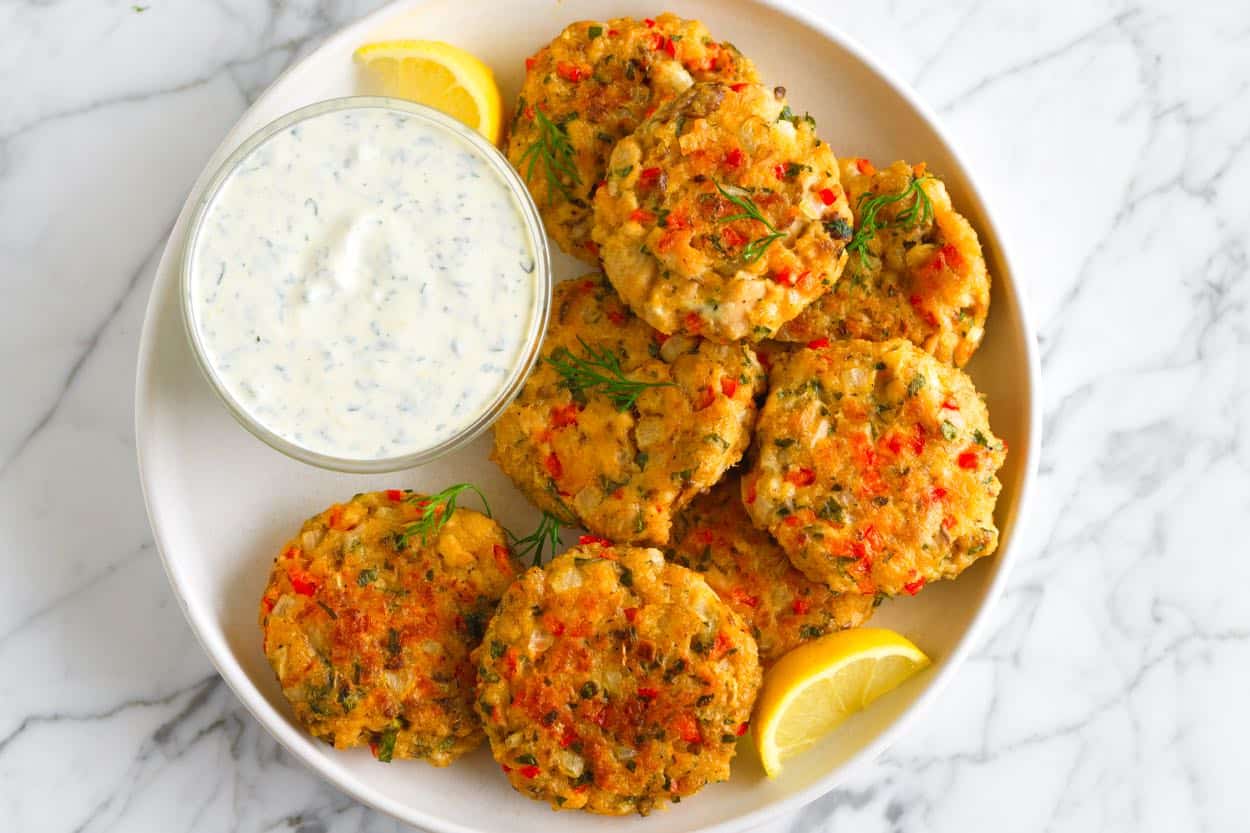
    This salmon patties recipe, which calls for canned salmon, makes the most delicious salmon cakes we’ve tried. They are budget-friendly, easy, and seriously tasty!

    Salmon Patties

    When we set out to create a recipe for salmon patties, all three of us (Adam, Chef Richard, and I) were a little skeptical. The goal was to create crave-worthy, seriously tasty patties made with canned salmon, and after making these on repeat for a while, we think we did it!

    Richard had the most experience with salmon patties. He grew up in the South with a mom who regularly made salmon patties for dinner. While he appreciates his mom’s efforts, he didn’t have much to say about the patties, so this one was an uphill battle. Well, we told him to go away and make the canned salmon patties (sometimes called salmon cakes) of his dreams. He stayed skeptical at first, but, as usual, he knocked it out of the park. We all fell in love and agreed that these are a must-make for you!

    Key Ingredients

    • Canned Salmon: We’re partial to Wild Alaskan pink salmon, which tastes great and is affordable. Just like when I buy canned tuna for tuna salad, I prioritize sustainability and look for smaller producers or cans with an MSC certification. Wild Planet is widely available and is a brand we’ve tested this recipe (with great results). If you do not have canned, but have leftover cooked salmon, it works nicely in this recipe, too (leftover baked salmon or poached salmon would be lovely in this recipe).
    • Onion and Bell Pepper: These add flavor and texture. The key is to chop them finely so they blend into the patties. I used red bell pepper in the photos, but orange or yellow are great, too.
    • Garlic: One garlic clove is perfect. We like to grate it finely with a microplane. If you do not have a microplane, mince your garlic as finely as you can before adding it to the other ingredients.
    • Mayonnaise: This keeps our salmon moist and acts as a binder. Homemade mayonnaise is lovely, but use what you have on hand.
    • Egg: As the patties bake in the oven, the egg firms up and begins to hold them together.
    • Dijon Mustard: This adds some flavor and cuts through some of the fishy taste in the salmon. Whole-grain mustard would be a good substitute.
    • Spices: The secret to the best patties. You’ll combine Cajun seasoning, smoked paprika, salt, and pepper.
    • Parsley: I love the pop of fresh flavor and green color, but you can leave this out if you’d prefer.
    • Breadcrumbs: Panko is perfect since it is so light. Homemade breadcrumbs work nicely, too. Crushed saltines (like we use for crab cakes) are also great.

    Find the full recipe with measurements below.

    Dipping Salmon Patties into Dill Sauce

    How to Make Salmon Patties

    Tip 1: Drain the salmon. Most canned salmon will come packed in water or oil. Before making these patties, drain the excess liquid from the can, otherwise your mixture will be too wet.

    Tip 2: Mix everything, but the salmon and breadcrumbs first. In a mixing bowl, stir together the onion, bell pepper, garlic, mayonnaise, egg, mustard, spices, and parsley until a mostly smooth sauce forms. It will be pretty wet. We don’t want to overmix the salmon, so holding off on adding it at this point is really helpful.

    Making the base for salmon patties with mayonnaise, spices, egg, onion, garlic, and bell pepper.

    Tip 3: Gently fold in the salmon. Flake the salmon into the bowl and use a large spoon to fold it in. Again, the mixture will seem loose and wet (you may even think it looks too wet).

    Tip 4: Add the breadcrumbs last. Now sprinkle over the breadcrumbs and fold them in. They will begin to absorb some of the moisture in the bowl, but things will still be pretty wet (do you see a pattern here…don’t worry about the moisture).

    The salmon patty mixture before chilling (it looks wet and loose).

    Tip 5: Refrigerate for 30 minutes. So that the breadcrumbs and salmon have a chance to absorb some of the moisture from the other ingredients, place the bowl in the fridge and leave it there for 30 minutes. The chilled mixture is much easier to form into patties. We use the same trick in our crab cake recipe.

    Tip 6: Don’t cook these in a skillet. These are intentionally more moisture-heavy than other recipes, which means cooking them in a skillet is tricky (they fall apart). All of the extra moisture is welcome once you bake the patties, and keeps them tender and delicious. These patties will not turn out dry, promise!

    Instead of cooking these in a skillet, you’ll form them into patties and bake them in the oven. They still brown nicely, but the oven is a more delicate, hands-off way to cook them. You’ll bake them for about 15 minutes, then flip them, and continue baking for 10 to 15 more minutes. The initial 15 minutes are enough to firm them up, so flipping them is really easy, and they won’t crumble on you.

    Tip 7: Trust the process. To make these truly delicious, we need all the extra moisture from the mayo, egg, and mustard. Plus, so they aren’t bready, we don’t want too much breadcrumb filler. These two things combine to make a pretty loose, wet mixture. Forming the patties is a tad messy (nothing a quick hand wash can’t fix, though).

    Keeping the moisture level high means your salmon patties turn out juicy, moist, and really delicious. So, if you’re making these and questioning things, don’t. Once you get them into the oven, they will firm up nicely.

    Serving Suggestions

    These are seriously so tasty. In our photos, we’ve served them with our dill sauce, which is perfect. Our homemade tartar sauce is great, too! If you have kids and they love ketchup, homemade ketchup is always a winner.

    I love these on the side with more summery sides like coleslaw, vinegar coleslaw, red potato salad, corn salad, avocado salad, and macaroni pasta salad. They are also excellent when added to the top of a salad (here’s all of our salad recipes for inspiration). If you’d prefer a more of a hot plate, consider a side of roasted potatoes, roasted broccoli, or sautéed broccoli (all of which would be really delicious dipped into the creamy dill sauce I suggested above).

    More Salmon Recipes

    Salmon Patties

    Easy Salmon Patties

    • PREP
    • COOK
    • TOTAL

    These are the tastiest salmon patties I’ve had, and probably my new favorite way to use canned salmon! The salmon mixture is loose and intentionally wet so that once the cakes/patties bake, they stay moist and tender.

    We do not recommend cooking these on the stovetop (they may fall apart on you). Instead, bake them in the oven. After 15 minutes of baking, they firm up enough to flip, then you can continue baking until they are firm throughout (another 12 to 15 minutes more).

    4 Servings, 8 small patties

    Watch Us Make the Recipe

    You Will Need

    2 (6-ounce) cans wild pink salmon, drained

    ⅓ cup finely chopped onion, ¼ of a large onion (50g)

    ⅓ cup finely chopped bell pepper, ½ of a medium pepper (50g)

    1 garlic clove, finely grated

    ½ cup mayonnaise, see homemade mayonnaise (113g)

    1 large egg

    1 tablespoon Dijon mustard

    1 ½ teaspoons Cajun seasoning

    ¼ teaspoon smoked paprika

    ¼ teaspoon fine sea salt

    ¼ teaspoon fresh ground black pepper

    4 tablespoons chopped fresh parsley

    ½ cup panko or homemade breadcrumbs (42g)

    1 batch creamy dill sauce, for serving, optional

    Directions

      1Make the patty mixture: In a mixing bowl, combine the onion, bell pepper, garlic, mayonnaise, egg, mustard, Cajun seasoning, smoked paprika, salt, and pepper. Stir well to form a smooth sauce. Flake in the drained canned salmon, then fold it into the sauce, doing your best to keep some texture.

      2Sprinkle over the breadcrumbs, then fold them in until combined. Chill in the refrigerator for 30 minutes to firm up. Note that this mixture is intentionally wet and looser than what you may be used to.

      3Heat the oven: About 10 minutes before you are ready to cook, preheat the oven to 400°F (204°C) and line a baking sheet with parchment paper.

      4Form patties: Gently form the salmon mixture into 8 equal-sized balls, then press them into patties, forming the edges into smooth sides. This mixture will be a bit sticky and wet, but you should still be able to form it into patties. Once formed, place them down onto the parchment-lined baking sheet (moving them again is messy).

      5Bake: Bake the patties for 15 minutes, then use a spatula to flip them over and continue baking for 12 to 15 minutes, or until they are lightly browned on both sides and firm in the middle. Let them rest on the baking sheet for 3 to 5 minutes before serving.

    Adam and Joanne’s Tips

    • Storing: Keep baked patties in an airtight container in the fridge for up to 4 days. Reheat in a 350°F (177°C) oven or skillet over medium heat.
    • Canned salmon: We like canned wild Alaska pink salmon and look for the MSC certification for sustainability. If you have leftover cooked salmon, you can use it in this recipe. You will need 12 ounces.
    • The nutrition facts provided are estimates.

    Nutrition Per Serving
    Serving Size
    1 small patty (8 total)
    /
    Calories
    196
    /
    Total Fat
    13.6g
    /
    Saturated Fat
    2.3g
    /
    Cholesterol
    54.1mg
    /
    Sodium
    439.9mg
    /
    Carbohydrate
    6.5g
    /
    Dietary Fiber
    0.7g
    /
    Total Sugars
    1.1g
    /
    Protein
    10.8g


    AUTHOR:

    Joanne Gallagher

    Source link

  • Easy Chicken Vegetable Soup Recipe

    Easy Chicken Vegetable Soup Recipe

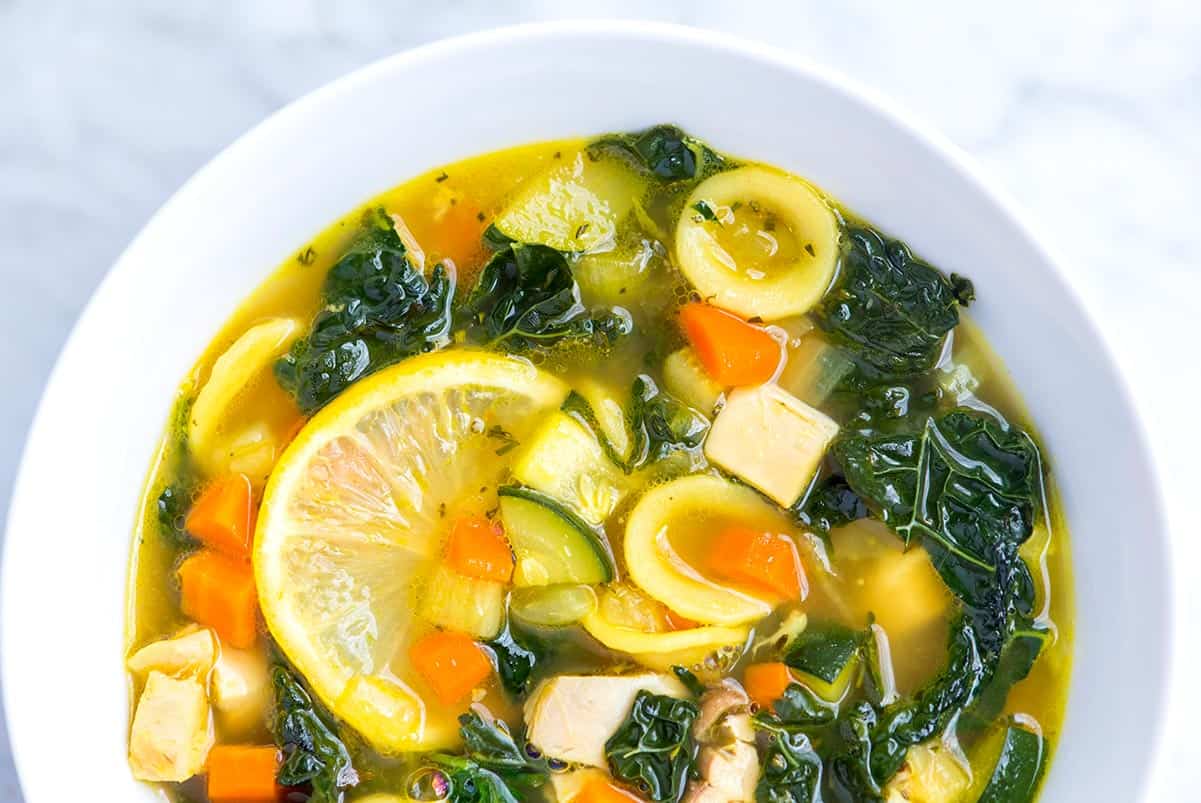
    This chicken vegetable soup recipe checks all the boxes. Thanks to lots of veggies, this soup is hearty, healthy, and perfect for a cozy night in.

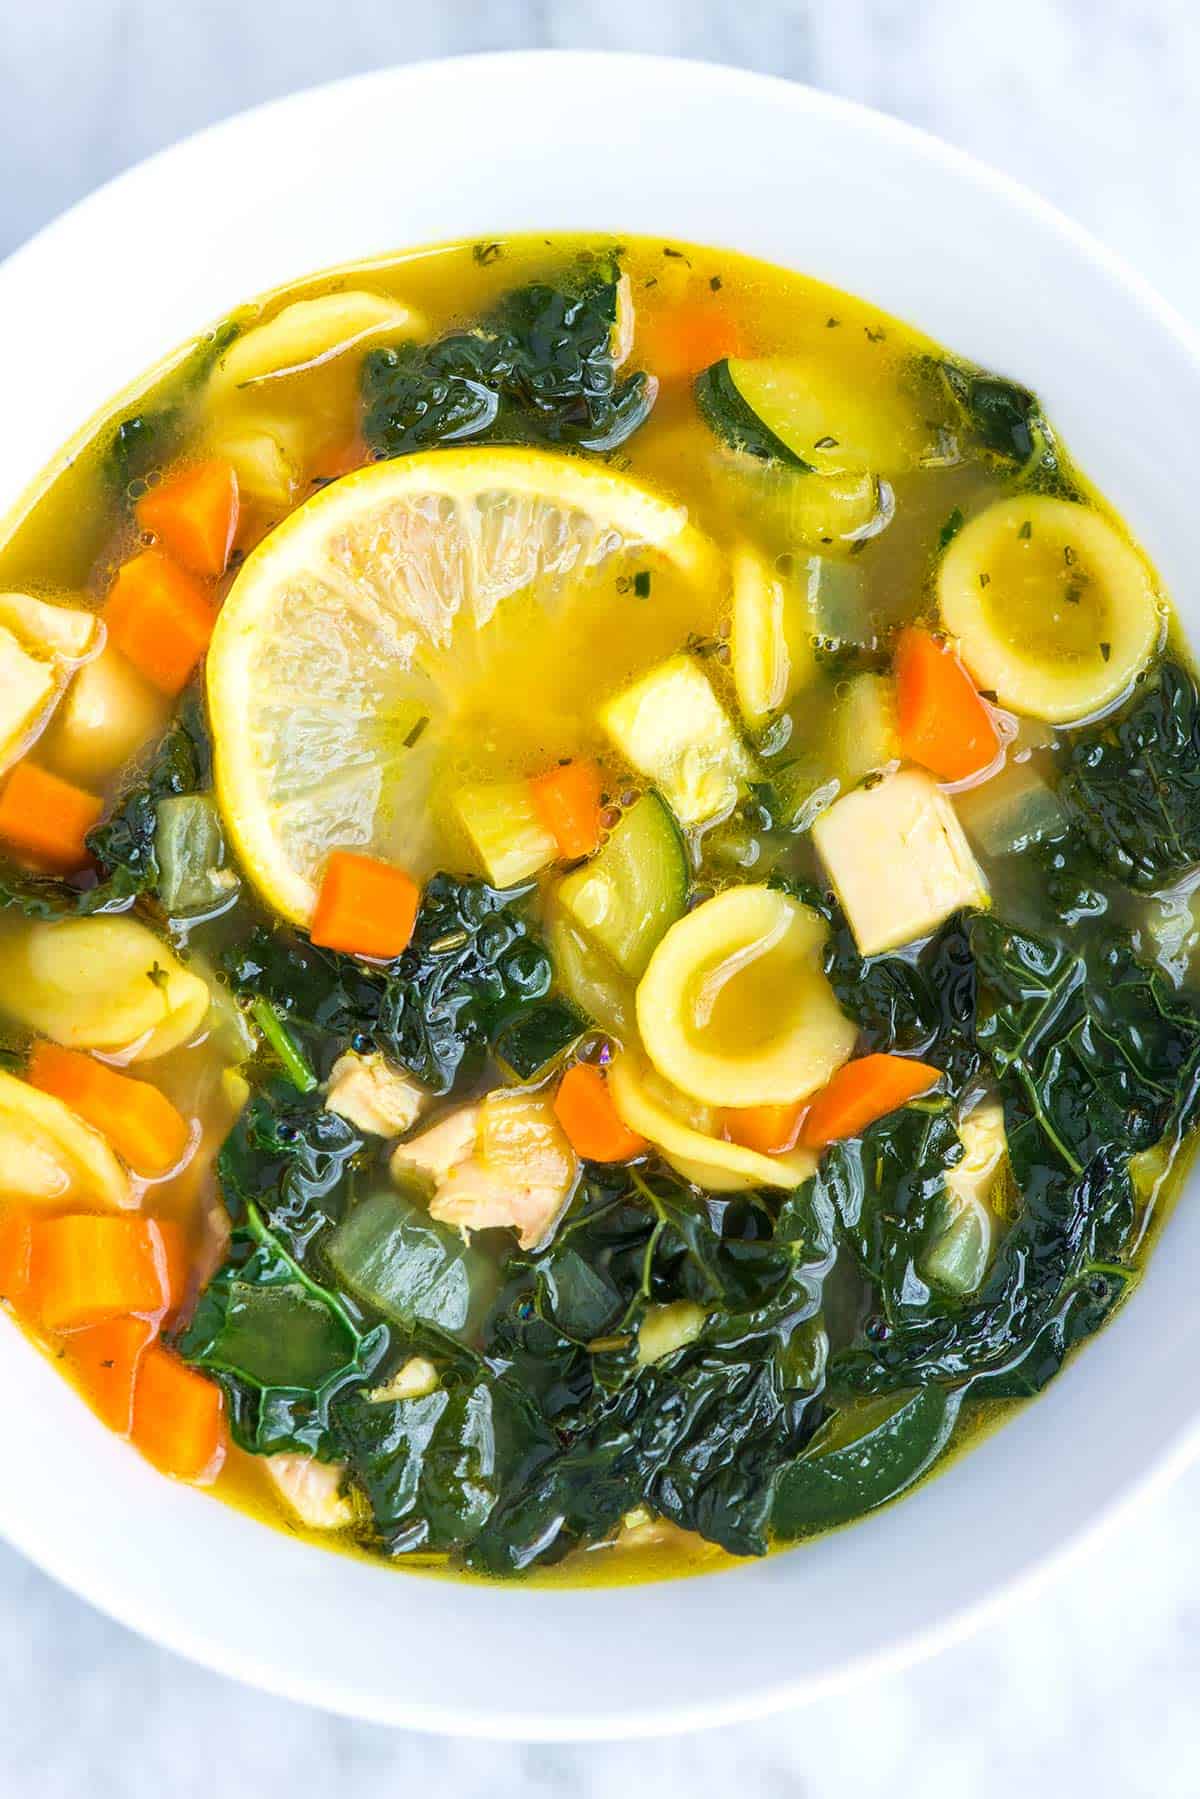
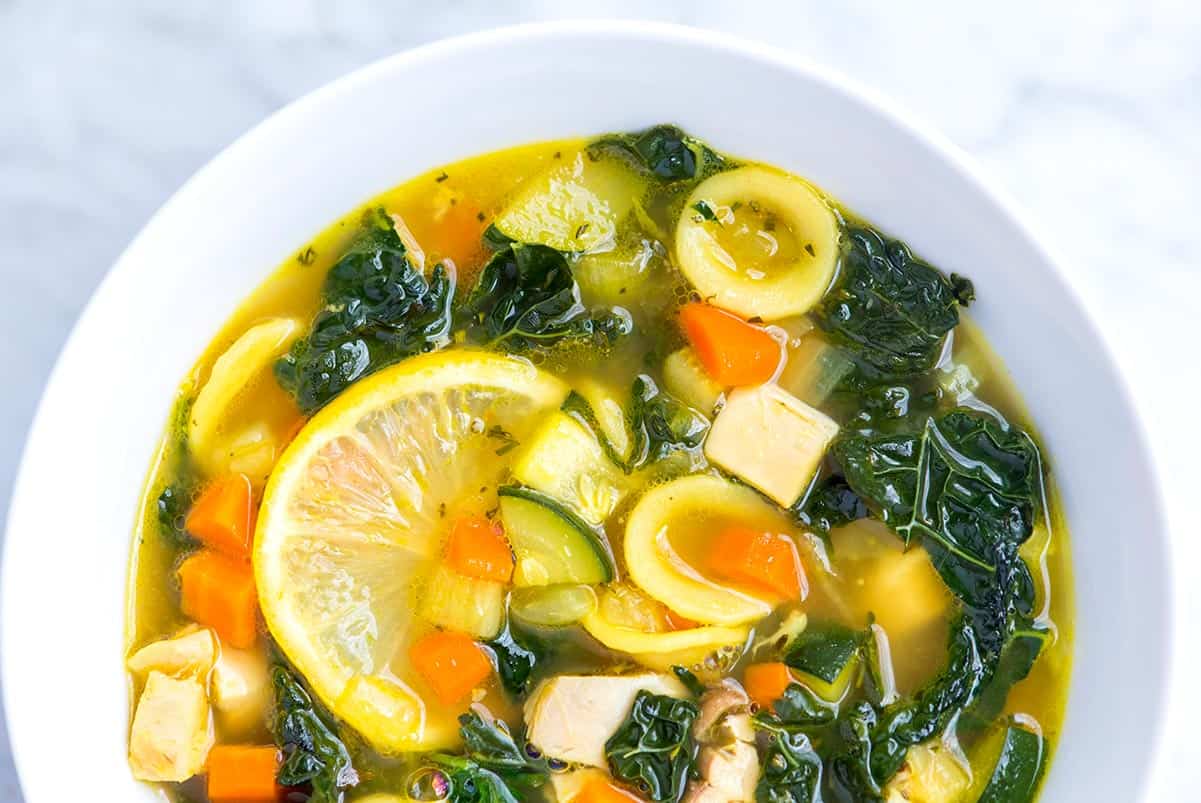
    Chicken Vegetable Soup

    You’ll love how this chicken and vegetable soup is loaded with tender chicken, five different veggies, and just the right amount of pasta to make it really satisfying. I’ve made it so many times, I’ve lost count.

    It’s similar to our chicken noodle soup, but with even more vegetables and a few slices of lemon added to brighten the flavor. I can’t wait for you to try it!

    Key Ingredients

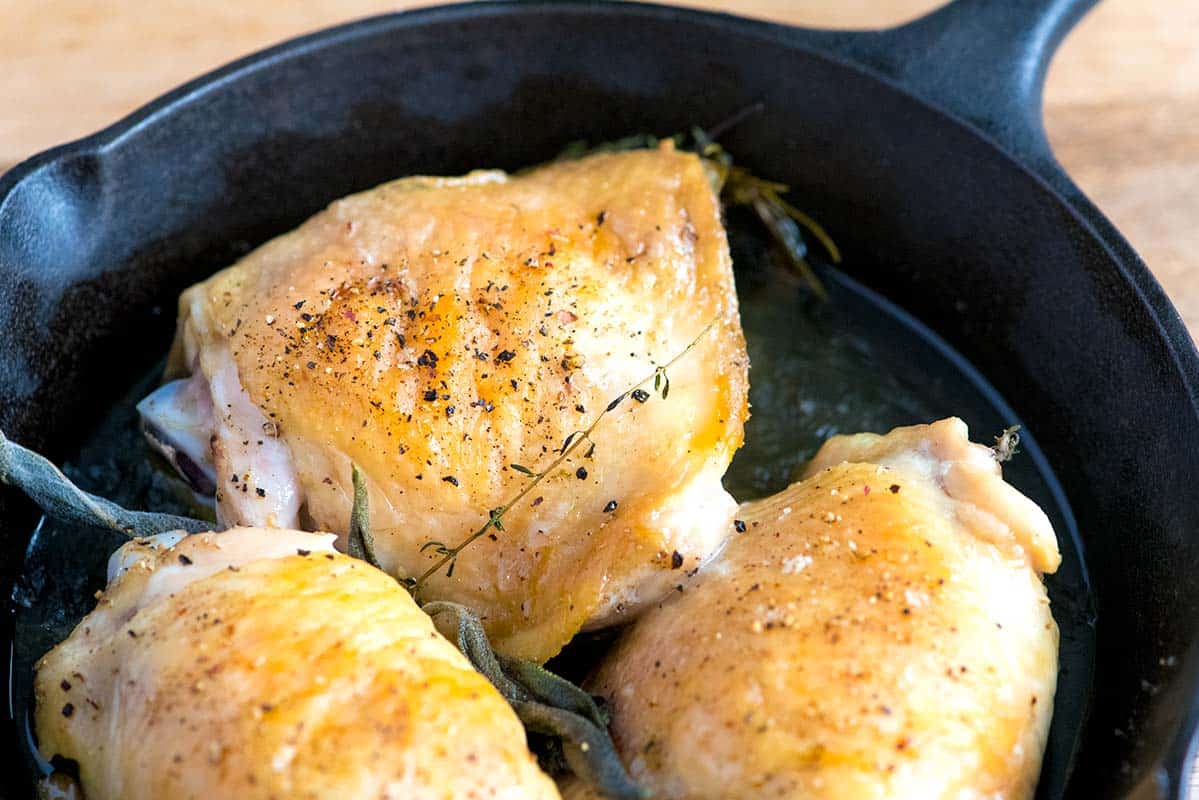
    • Chicken: Use leftover or rotisserie chicken, or cook chicken specifically for this soup. I’ve included instructions for easy roasted chicken thighs in the recipe, which I love chopping up and stirring in.
    • Vegetables: I use five veggies in this chicken soup. You’ll find onion, carrots, fennel, zucchini, and kale. Feel free to add more if you have them on hand.
    • Herbs and Spices: Garlic, thyme (or rosemary), a bay leaf, and a touch of ground turmeric add flavor and a beautiful golden color to the broth.
    • Broth: Use your favorite store-bought chicken or vegetable broth. Bone broth is another great option and adds extra protein. For homemade options, try our chicken broth, bone broth, or vegetable broth recipes.
    • Pasta: I love a small amount of pasta. It’s optional, but adding just under a cup of dry pasta to the pot makes the soup hearty and dinner-worthy. Potatoes would do the same!
    • Lemon: Just before serving, slide in a few lemon slices. It brightens everything up. I use this trick in our lentil soup and ham and cabbage soup as well.

    Find the full recipe with measurements below.

    How to Make the Best Chicken Vegetable Soup

    Tip 1: Start with flavorful chicken. If you don’t already have leftover cooked chicken, bake a few chicken thighs with herbs in the oven. Roast them at 400°F until cooked through. This method keeps the chicken juicy and adds a lot of flavor. You can even pour a little of the roasting juices into the soup for extra richness.

    Cooking the chicken thighs to add to chicken and vegetable soup

    Tip 2: Cook the hearty veggies first. This soup comes together in two stages. Start by cooking the onion, carrot, and fennel until they’re soft and smell sweet. Then add the garlic, herbs, and broth, and let everything simmer for about 20 minutes.

    Cooking carrot, onion, and fennel for the base of chicken and vegetable soup

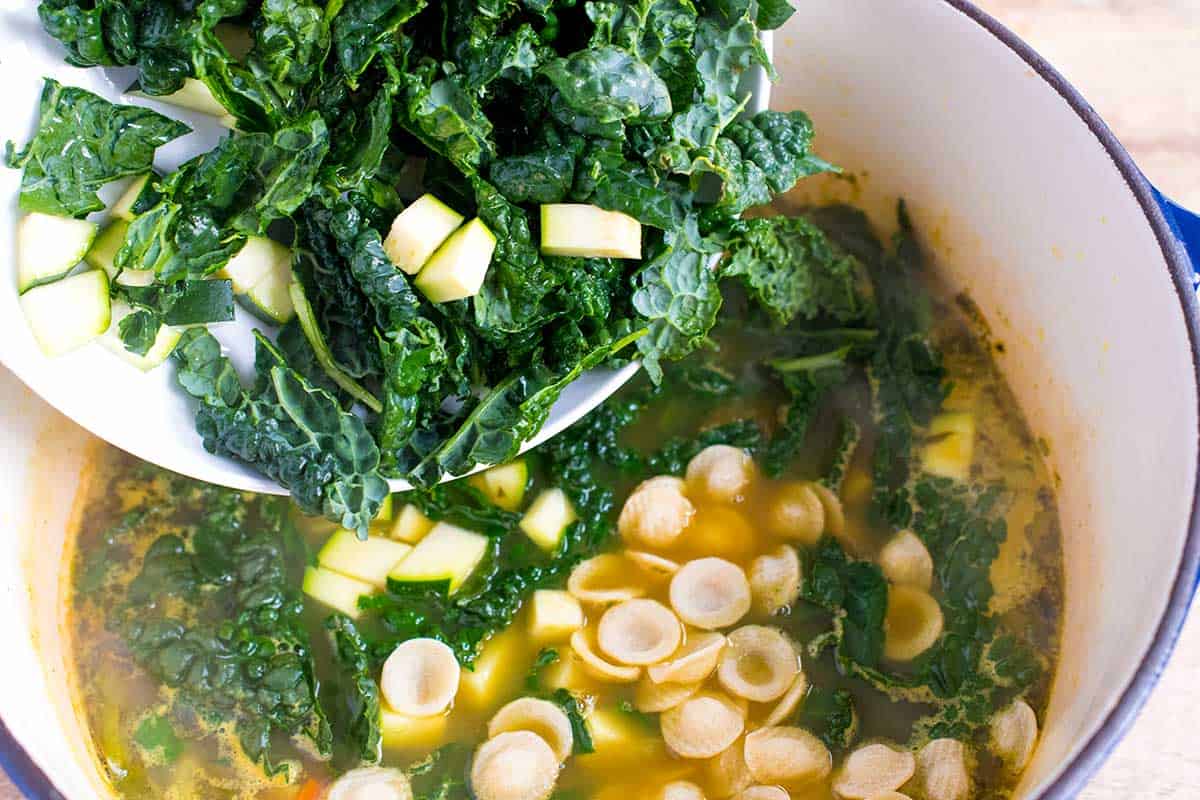
    Tip 3: Add the delicate veggies with the pasta. Zucchini and kale cook quickly, so add them near the end along with the pasta, which only needs about 10 minutes to cook. This is also the perfect time to stir in your chicken and any pan juices, adding a lot of flavor.

    Adding the kale and zucchini to the chicken soup

    More Vegetable Soups

    Chicken Vegetable Soup

    Easy Chicken Vegetable Soup

    • PREP
    • COOK
    • TOTAL

    This chicken vegetable soup recipe has lots of veggies and chicken, making it perfectly hearty. Use about 2 cups of cooked chicken or follow our directions for cooking chicken from scratch. The soup is also delicious without the chicken added.

    6 Servings

    You Will Need

    For the Chicken

    1 ½ pounds skin-on chicken thighs (680g)

    1 teaspoon olive oil

    Salt and fresh ground pepper

    4 sprigs fresh thyme or rosemary


    For the Soup

    1 ½ tablespoons olive oil

    1 medium onion, chopped, about 1 cup

    2 medium carrots, chopped, about 1 cup

    1 medium fennel bulb, core removed and chopped, about 1 ¼ cups

    2 cloves garlic, minced, 2 teaspoons

    1 tablespoon chopped fresh thyme or rosemary

    ½ teaspoon turmeric

    1 bay leaf

    8 cups chicken broth or veggie broth (1.8L)

    1 medium zucchini, chopped, about 1 cup

    1 bunch kale, stems removed and chopped, about 4 cups chopped

    ¾ cup small dried pasta, like orecchiette or orzo

    Sea salt and fresh ground black pepper

    2 to 3 fresh lemon slices with seeds removed, optional

    Grated parmesan cheese for serving, optional

    Directions

    • Cook the Chicken
    • 1Preheat the oven to 400°F (204°C). Line a baking sheet with foil or parchment paper, or use a cast-iron pan.

      2Make a bed for the chicken by placing a few sprigs of fresh herbs on the pan. Rub the chicken with 1 teaspoon of olive oil, then season lightly with salt and pepper.

      3Roast for 25 to 35 minutes, or until an instant-read thermometer inserted into the thickest part of the chicken reads 165°F. Transfer the chicken to a plate and let it cool until it’s easy to handle. Remove the skin and bones, then chop the meat into small pieces. Save any juices from the pan to add to the soup for extra flavor.

    • Make the Soup
    • 1About 10 minutes before the chicken is finished roasting, start the soup. Place a large, heavy-bottomed pot (we love using our Dutch oven) over medium heat. Add 1 ½ tablespoons of oil, along with the onions, carrots, fennel, and a pinch of salt. Cook, stirring occasionally, until the vegetables smell sweet and almost tender, about 10 minutes.

      2Stir in the garlic, herbs, turmeric, and bay leaf, and cook for 1 minute until fragrant.

      3Pour in the broth and bring to a simmer. Once it reaches a simmer, reduce the heat to medium-low to maintain a gentle bubble. Season with ¼ teaspoon of salt and a generous amount of pepper. Let simmer for 20 minutes.

      4Add the zucchini, kale, pasta, chopped chicken, and any juices left in the pan from roasting the chicken. Simmer for 10 minutes, or until the pasta is al dente. Taste and adjust the seasoning (we usually add 1 to 1 ½ teaspoons of salt total, depending on the broth).

      5Just before serving, drop in the lemon slices. Ladle into bowls and top with grated Parmesan cheese, if you like.

    Adam and Joanne’s Tips

    • Pasta: If you plan to serve the whole batch of soup straight away, add the pasta according to our directions above. If you plan to enjoy the soup over a few days, it’s best to cook the pasta separately and add it when serving. The pasta will soak up the liquid as the soup sits and become mushy.
    • Storing: The soup will keep in the refrigerator for a few days and in the freezer for up to a month. It’s best to keep the pasta and soup separate when storing since the pasta will absorb liquid and become too soft. If it seems dry when you reheat the soup, add a splash of stock or water.
    • The nutrition facts provided below are estimates.

    Nutrition Per Serving
    Serving Size
    1/6 of the recipe
    /
    Calories
    240
    /
    Total Fat
    9g
    /
    Saturated Fat
    2g
    /
    Cholesterol
    34mg
    /
    Sodium
    875mg
    /
    Carbohydrate
    25g
    /
    Dietary Fiber
    4g
    /
    Total Sugars
    5g
    /
    Protein
    18g


    AUTHOR:

    Joanne Gallagher

    Adam and Joanne of Inspired Taste

    We are Adam and Joanne Gallagher, the creators of Inspired Taste. Established in 2009, Inspired Taste grew from a childhood dream into one of the internet’s most trusted recipe sites with hundreds of reliable recipes, step-by-step videos, and expert tips.More About Us

    Source link

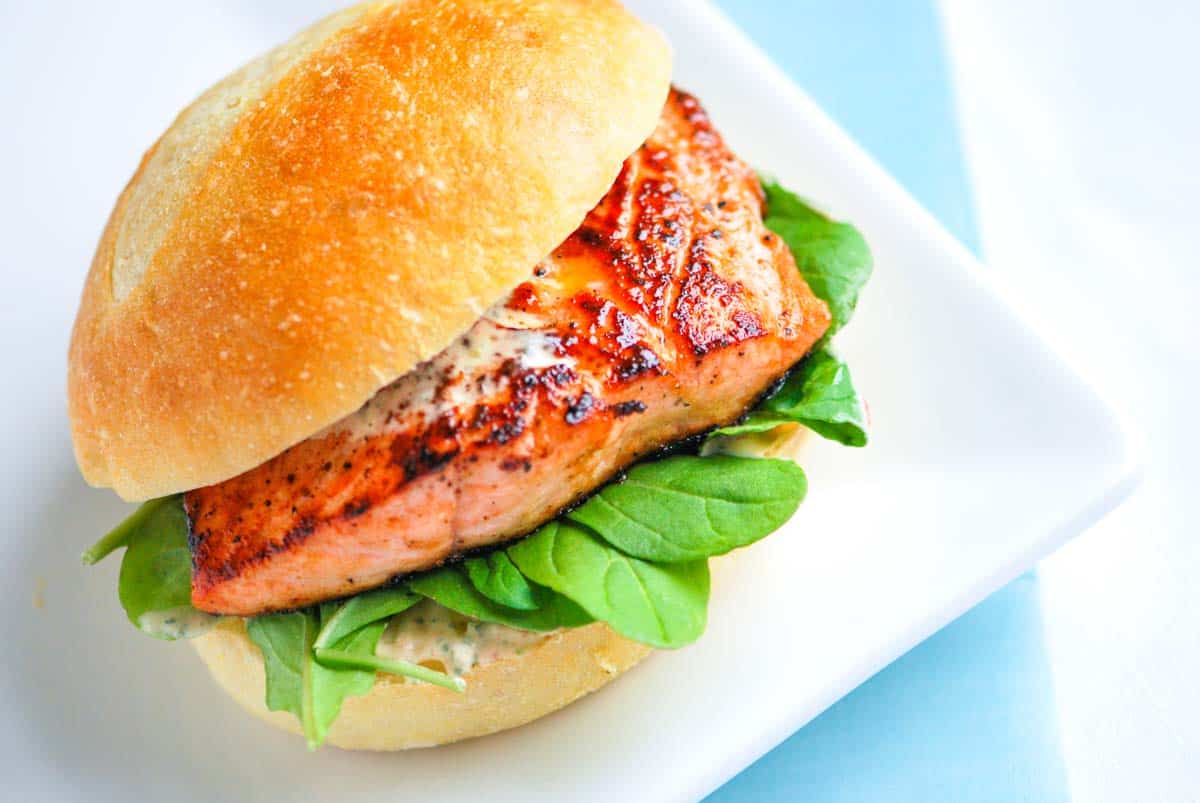
  • Chipotle Salmon Sandwiches Recipe

    Chipotle Salmon Sandwiches Recipe

    These easy salmon sandwiches are seriously delicious with pan-seared salmon and a quick homemade mayonnaise. They are a little sweet, a little spicy, and incredibly delicious!

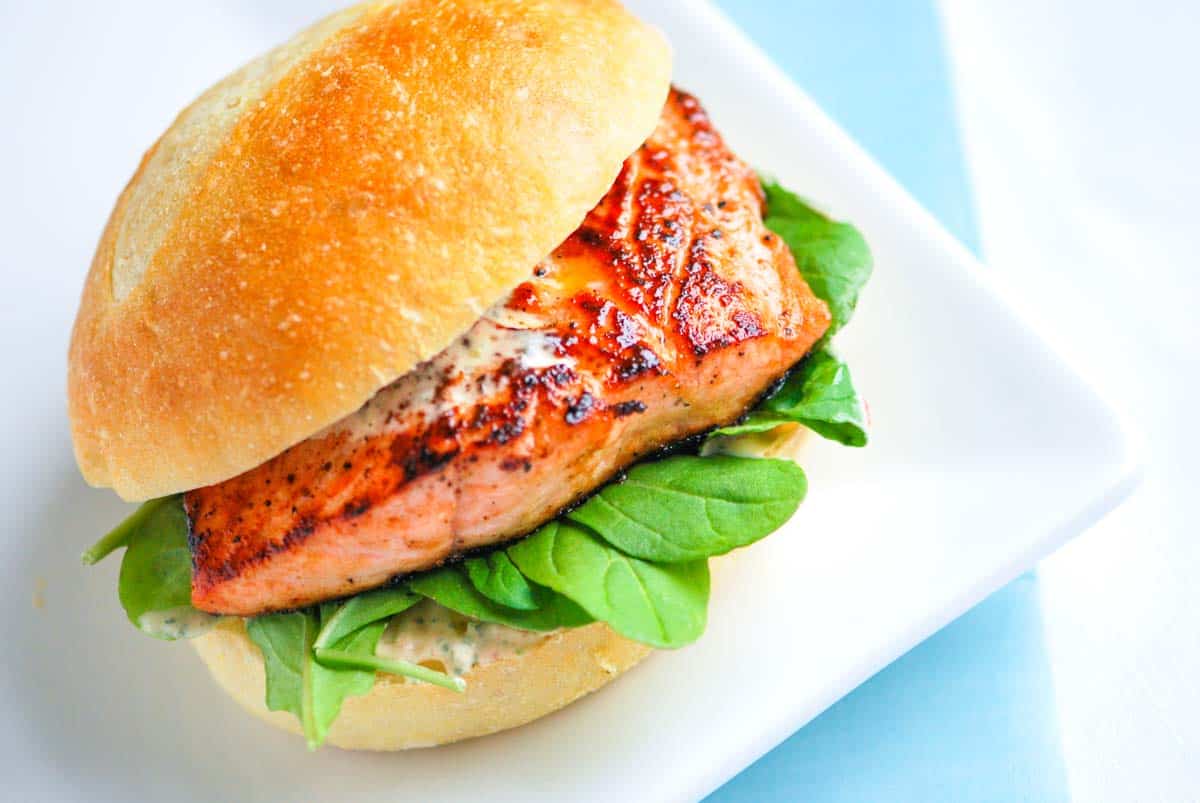
    Salmon Sandwiches

    My family loves salmon (as proven by all the salmon recipes you will find on Inspired Taste!) We are always looking for new ways to enjoy it, which is how these easy salmon sandwiches came to be!

    These sandwiches taste incredible, thanks to a bit of agave nectar brushed onto the salmon fillets before searing them in the pan. Then, we balance the sweet crust of the salmon with a moderately spicy homemade chipotle mayo. I can’t wait for you to try them! For a salmon burger patty, see our salmon burger recipe.

    Key Ingredients

    • Salmon: Any salmon fillet will work for these sandwiches. I especially love salmon with a higher fat content, like sockeye, king, and coho. Salmon with a higher fat content stays soft and moist after it is cooked.
    • Agave Nectar: If you do not have agave, no worries! Substitute with honey or maple syrup. You’ll lightly brush each salmon fillet with a little agave before searing them in the pan, adding a lovely, sweet caramelized crust to the salmon.
    • Greens: I used baby spinach in the photos, but any tender, fresh greens like arugula or baby kale will work.
    • Rolls: Since the salmon is soft, I prefer softer rolls, so when you take a bite, the whole sandwich doesn’t fall apart on you. Use what you love!
    • Chipotle Mayo: Making flavored mayo is really easy and adds so much flavor! To make my chipotle mayo, combine mayonnaise with cilantro, lime juice, salt, pepper, and chipotle in adobo sauce. Chipotle in adobo sauce is smoky and spicy. They are smoked jalapeños preserved in a flavorful adobo sauce made with spices and chili peppers. You can buy them in small cans, usually next to salsas or in your store’s International aisle. I also use them to make our roasted corn with chipotle butter, these mini fish tacos, and our sweet potato tacos.
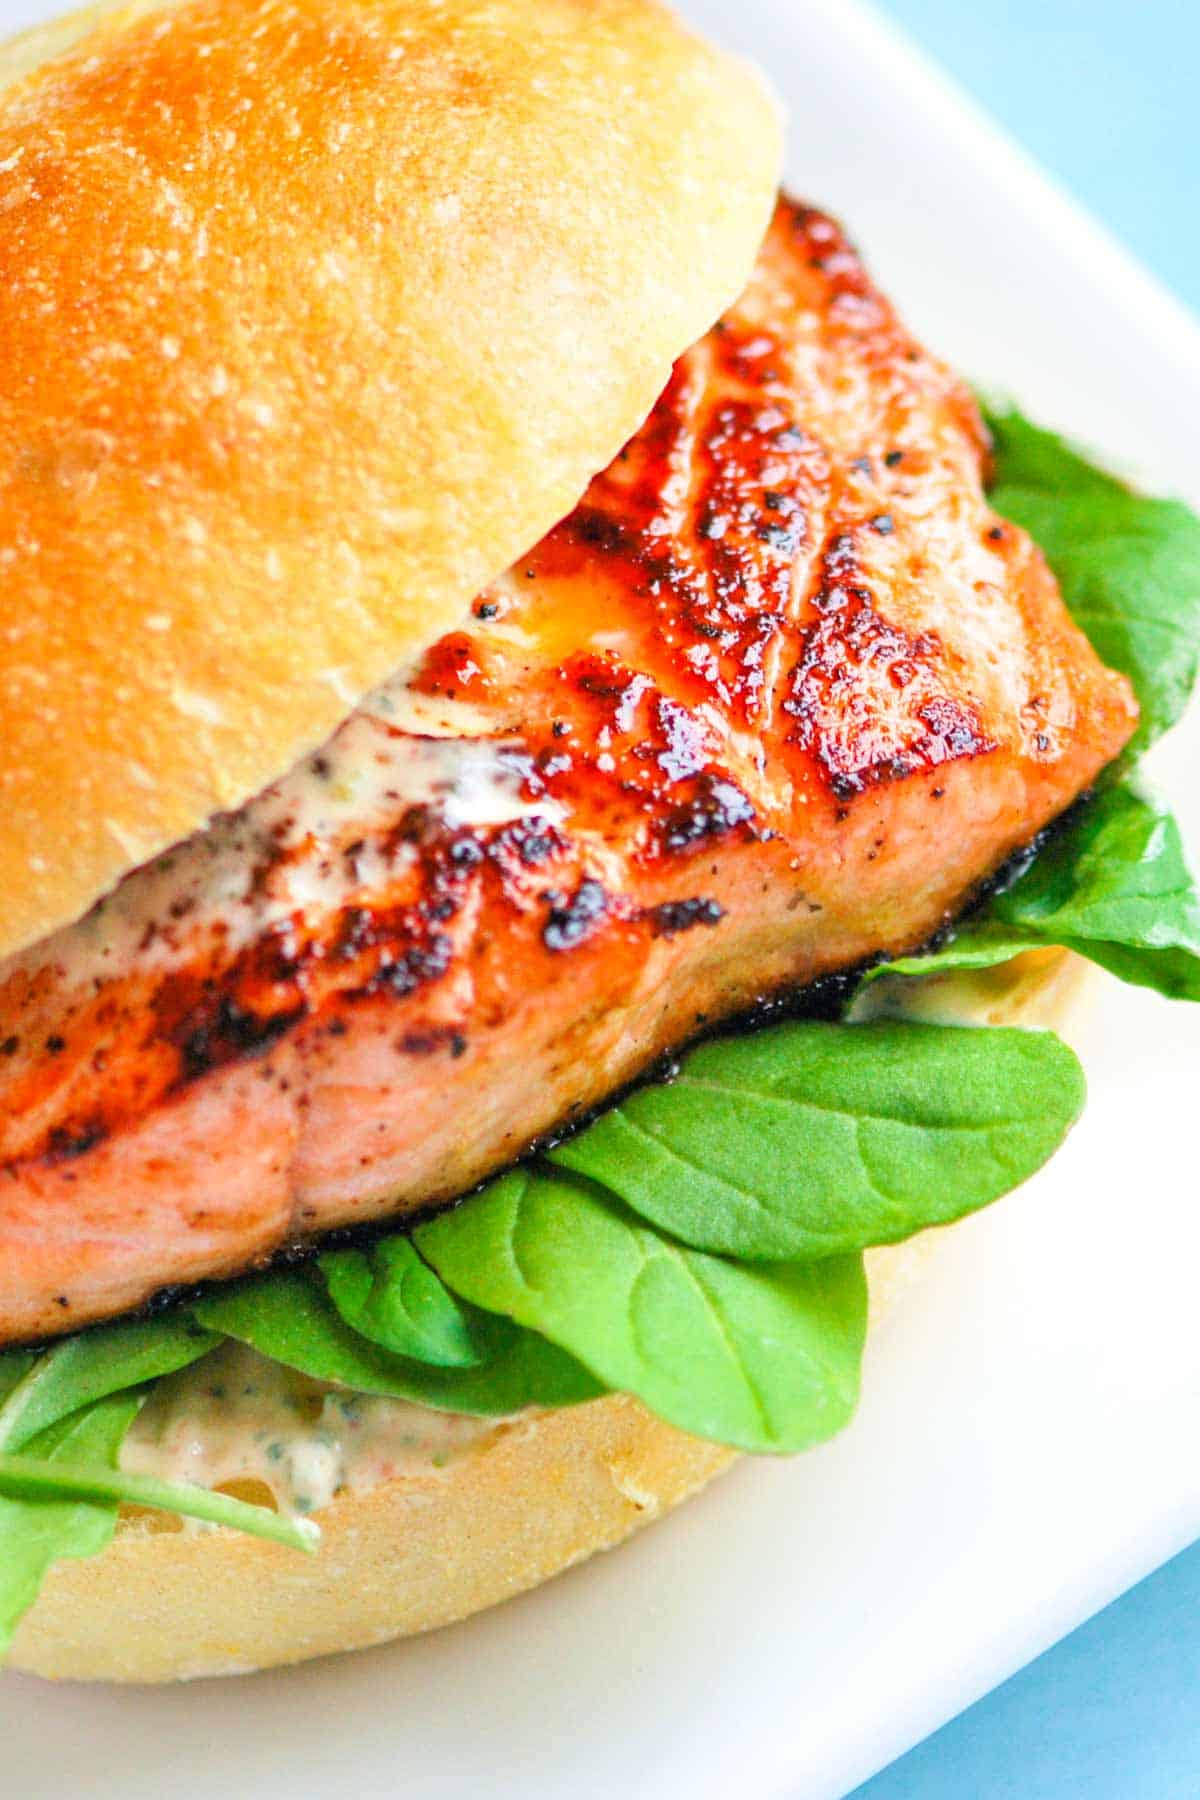
    Pan Seared Salmon Burger with Chipotle Mayonnaise

    Chipotle Salmon Sandwiches

    • PREP
    • COOK
    • TOTAL

    I love these pan-seared salmon sandwiches. We make a simple chipotle mayonnaise to spread on the bread rolls. You can do this using a food processor, or if you prefer, mince the chipotle pepper and cilantro very small and stir them into the mayonnaise with a spoon. You can usually find canned chipotle peppers in adobo sauce sold near salsas, but if your store does not carry them, try an International or Mexican market.

    4 Servings

    You Will Need

    Salmon Sandwiches

    1 tablespoon grape seed or canola oil

    4 center cut salmon fillets, skin removed, about 6 ounces each

    2 tablespoons agave nectar or substitute honey

    Salt and fresh ground black pepper

    1 cup baby spinach or arugula

    4 bread rolls, lightly toasted


    Chipotle Mayonnaise

    1 cup mayonnaise, see homemade mayonnaise

    1 to 2 small chipotle peppers in adobo, seeded, depending spice level

    1 tablespoon sauce from the canned adobo chile peppers

    1/4 cup fresh cilantro leaves, finely chopped

    Juice of 1 lime

    Salt and fresh ground black pepper

    Directions

      1Make chipotle mayo: Add the mayonnaise, minced pepper, adobo sauce, cilantro and lime juice to a small food processor. Season with about 1/4 teaspoon of salt then blend until mostly smooth. Taste and adjust with more peppers, sauce or salt.

      2Cook the salmon: Heat oil in a heavy-bottomed skillet over medium-high heat. Brush agave nectar onto both sides of the salmon fillets then season with salt and pepper. Add salmon to the skillet and cook 2 to 3 minutes until the agave forms a nice brown crust. Turn the fillets and cook for another 2 to 3 minutes, or until the salmon flakes easily with a fork. Transfer to a plate and rest for 5 minutes.

      3Assemble sandwiches: Spread mayonnaise onto bread rolls then add a handful of arugula to the bottom slice of each roll. Place salmon on top and enjoy.

    Adam and Joanne’s Tips

    • The nutrition facts provided below are estimates. We assumed a ciabatta roll and 6 tablespoons of the mayonnaise for 4 burgers.

    Nutrition Per Serving
    Serving Size
    1 burger
    /
    Calories
    563
    /
    Total Fat
    27.4g
    /
    Saturated Fat
    4.9g
    /
    Cholesterol
    66.6mg
    /
    Sodium
    807.2mg
    /
    Carbohydrate
    46.2g
    /
    Dietary Fiber
    2.1g
    /
    Total Sugars
    9.3g
    /
    Protein
    34.6g


    AUTHOR:

    Adam Gallagher

    Previous Post: Easy Pumpkin Puree
    Next Post: Perfect Baked Tofu

    Source link

  • Honey Mustard Chicken Recipe

    Honey Mustard Chicken Recipe

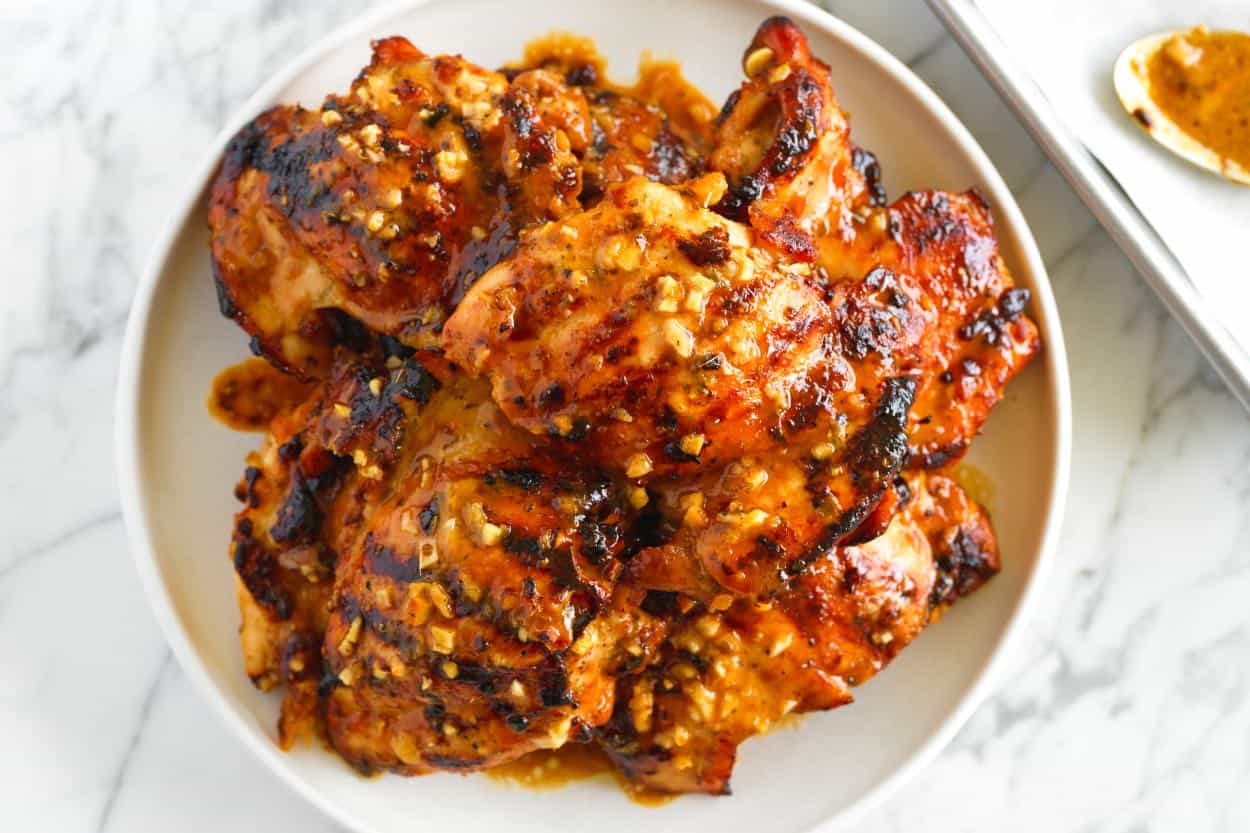
    Our honey mustard chicken recipe packs in so much incredible flavor thanks to an easy honey dijon marinade that doubles as a sauce for serving.

    Honey Mustard Chicken

    Not a week goes by without us being asked to share more chicken recipes. I get it! So many of us toss a package of chicken into our cart before knowing what we are going to do with it.

    This super flavorful honey mustard chicken recipe is your answer! You’ll marinate chicken thighs (or other cuts of chicken if that’s what you have), then cook them with the marinade. The chicken turns out incredibly juicy, saucy, and really delicious. I’ve currently got this recipe on repeat for my family, and I’m excited for you to try it soon!

    Key Ingredients

    • Chicken: I love chicken thighs for this recipe, but our marinade works for pretty much any cut of chicken (boneless, bone-in, skinless, or skin-on). The honey mustard marinade shared below is enough to marinate 2 pounds (probably a bit more), so feel free to adjust the amount based on how much chicken you have on hand.
    • Honey and Mustard: I use a pure, local honey and Dijon mustard. I especially love the fancier mustards for their flavor (they are a bit more punchy). The most common higher end option I see in standard grocery stores is Maille, which is perfect.
    • Mayonnaise: We love using mayonnaise in our marinade recipes (see this pork chop marinade as proof). It adds flavor, tenderizes, and keeps the chicken nice and juicy. If you’d prefer to use a plain thick yogurt, you can. In fact, we use it for our popular Greek chicken marinade (Icelandic or Greek full-fat yogurt are my go-tos).
    • Lemon: We use the juice from one lemon for the marinade, which balances the sweetness of the honey.
    • Garlic and Oregano: This chicken recipe calls for a good amount of garlic (we call for 6 cloves). The honey-and-Dijon mustard combo can take it without the garlic overpowering anything. Originally, this recipe was developed for fresh oregano, which, if you have it, is lovely! I’ve used dried in my photos because it’s more readily available at our local stores. I gave amounts for dried vs. fresh below.

    Find the full recipe with measurements below.

    How to Make Honey Mustard Chicken

    Tip 1: Make our marinade. For the very best flavored chicken, use our honey mustard chicken marinade. It’s pretty simple and works so nicely with the chicken (in our case, chicken thighs).

    To make it, whisk together honey, mustard, mayonnaise (or yogurt), lemon juice, garlic, oregano, salt, and pepper. Then add your chicken and let it marinate in the fridge for a while. We recommend waiting at least 4 hours or even overnight for the best flavor.

    Marinating chicken thighs in a honey mustard marinade

    Tip 2: Start cooking the chicken on the stovetop. I love a little color on my chicken, so I pull out my grill pan, heat it over medium, and add the marinated chicken (saving the marinade left in the bowl for later). We’re not looking to fully cook the chicken all the way through, just add some color.

    I love the grill pan here. The honey in the marinade will brown quickly, helping create those grill marks. If you don’t have a grill pan, a regular skillet works fine, just watch the honey doesn’t get too dark.

    Grilling marinated chicken in a grill pan on the stovetop

    Tip 3: Finish in the oven. Once we have some color, I love transferring the chicken to a baking sheet and pouring the reserved marinade over it before baking in the oven. If you are worried about reusing the marinade, it will bake in the oven long enough to come to a safe temperature.

    Bake the chicken, covered in the marinade, until an internal thermometer reaches 165°F or 175°F-180°F for thighs (they are safe at 165°F, but more tender and succulent when cooked a little longer).

    Pouring marinade over chicken before baking in the oven

    Serving Suggestions

    You have so many options for serving this chicken! It’s perfect with sautéed broccoli and plain steamed rice. I love it for topping salads, served next to roasted potatoes, with sweet potato fries, and so much more.

    For more of a cookout-style meal, consider summery sides like potato salad, creamy pasta salad, or coleslaw. Or, for a fall-ish meal, add some roasted butternut squash, mashed sweet potatoes, or even comforting macaroni and cheese.

    More of Our Favorite Marinades

    Honey Mustard Chicken

    Honey Mustard Chicken

    • PREP
    • COOK
    • TOTAL

    Our easy honey mustard chicken marinade is the secret to juicy, tender, and flavorful chicken. We use chicken thighs in our photos, but this recipe works for all cuts of chicken! To cook them, we recommend using a grill pan to add some grill marks and color, then transferring the chicken, covered with the marinade, to the oven to finish cooking. We are reusing the marinade in this case, but since you will bake the chicken for 20+ minutes, it should reach a safe temperature (165°F).

    5 Servings

    You Will Need

    6 tablespoons honey (125g)

    ¼ cup Dijon mustard (65g)

    ¼ cup mayonnaise (57g)

    1 lemon, juiced

    6 garlic cloves, minced, about 2 tablespoons

    2 teaspoons dried oregano or 2 tablespoons chopped fresh oregano

    1 teaspoon fine sea salt

    ¾ teaspoon fresh ground black pepper

    2 pounds boneless, skinless chicken thighs (907g)

    1 tablespoon avocado oil or olive oil, or more as needed

    Directions

    • Marinate
    • 1Make marinade: Whisk the honey, mustard, mayonnaise, juice from 1 lemon, minced garlic, oregano, salt, and pepper in a large nonreactive bowl (such as a glass or stainless-steel bowl).

      2Marinate the chicken: Add the chicken and toss to coat evenly. Refrigerate, covered, for at least 4 hours and up to overnight.

    • Cook the Chicken
    • 1Prep: Preheat the oven to 375°F (190°C) and prepare a parchment-lined baking sheet.

      2Start in a grill pan: Heat a grill pan over medium heat. Add a bit of oil, then place the chicken into the pan. Cook for 2 to 3 minutes on each side until grill marks appear, but do not cook until the center is cooked through. Watch the heat during this step and turn it down if the honey starts to get too dark.

      3Finish in the oven: Transfer the chicken to the prepared baking sheet and spoon any remaining marinade from the bowl over it. Bake until an internal thermometer inserted into the thickest part of the chicken reads 165°F (73°C), 20 to 30 minutes, depending on the thickness of your chicken. Note that 165°F (73°C) is for safety, but if you are cooking chicken thighs, continue to cook them to 175°F (79°C) to 180°F (82°C) for more tender thighs. Rest for 5 minutes and serve.

    Adam and Joanne’s Tips

    • Alternatives for cooking the chicken: You can grill, bake, or cook the chicken in a skillet or grill pan. My favorite option is to sear the outside for color and finish in the oven. Since honey is in the marinade, it will darken quite a bit so watch for burning when you sear your chicken. This is why we love the grill pan. You’ll get dark grill marks where the honey takes on color, but it won’t be completely blackened over the entire piece of chicken. You can skip the grill pan and go directly to the oven. You will still get a little color. If you use an outdoor grill, use our grilled chicken recipe for tips.
    • The nutrition facts provided below are estimates. We assumed chicken thighs.

    Nutrition Per Serving
    Serving Size
    1 of 5 servings, about 5 ounces
    /
    Calories
    417
    /
    Total Fat
    18.6g
    /
    Saturated Fat
    3.6g
    /
    Cholesterol
    175.1mg
    /
    Sodium
    1021.1mg
    /
    Carbohydrate
    23.3g
    /
    Dietary Fiber
    0.4g
    /
    Total Sugars
    21.2g
    /
    Protein
    36.2g


    AUTHOR:

    Joanne Gallagher

    Source link