Tag: Recipe

  • Ground Turkey Tacos Recipe

    Ground Turkey Tacos Recipe

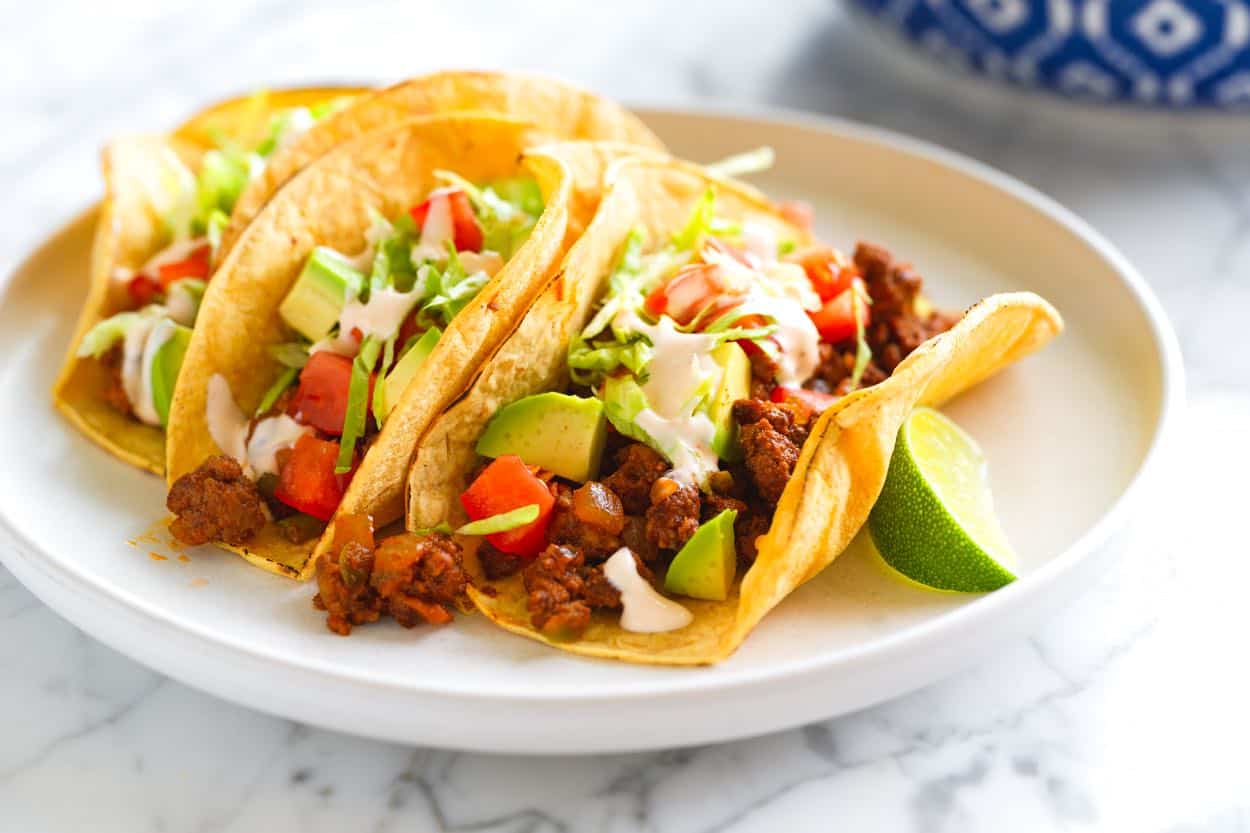
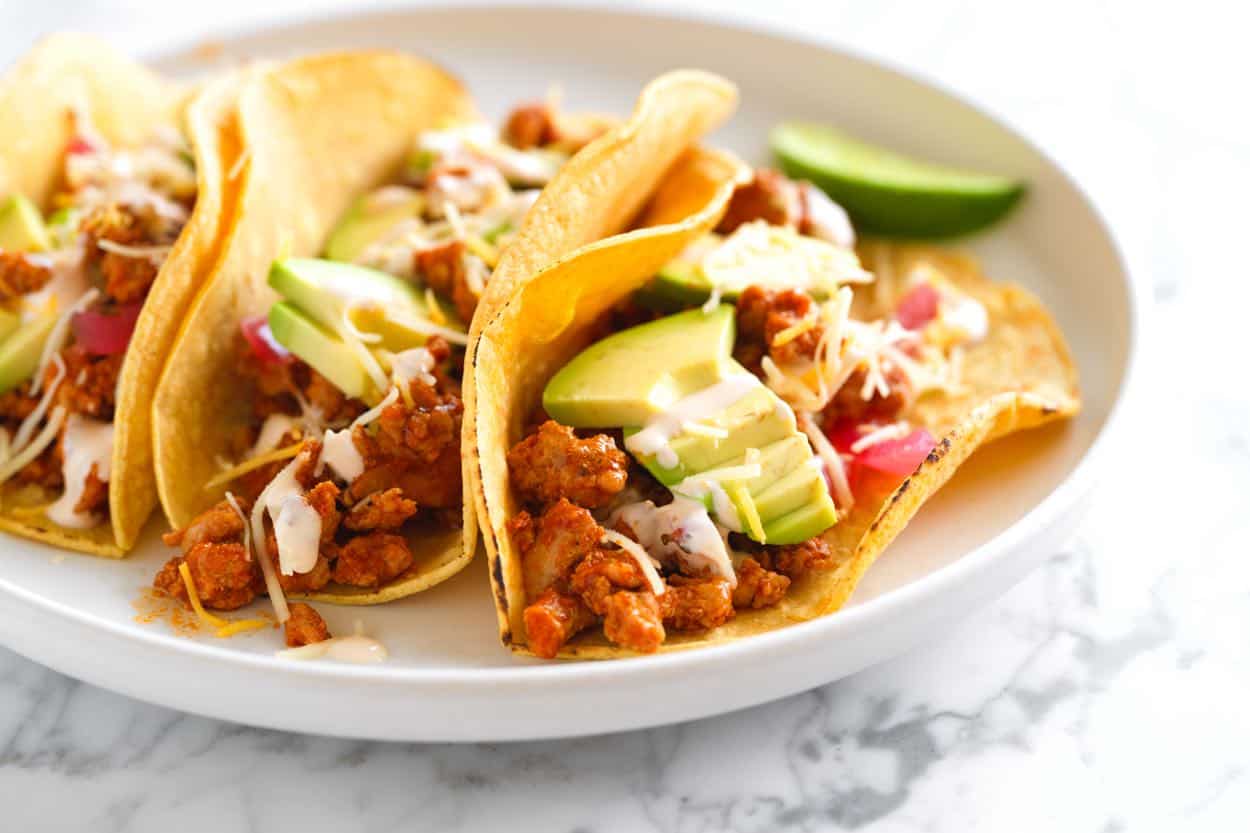
    Our family makes this ground turkey tacos recipe almost weekly! We all love it, and it takes less than 30 minutes. A true weeknight meal!

    Ground Turkey Tacos

    Like many of you, I’m always looking for fast weeknight meals that feel put together. These quick turkey tacos made with ground turkey are one of my go-tos. The taco seasoning is made with spices I always have in my pantry, so I don’t have to think twice when it’s time to make them.

    The turkey cooks up in under 20 minutes. All that’s left is to warm some tortillas, pile on your favorite toppings, and dinner is ready. This is honestly one of the recipes we make the most. If you love tacos as much as we do, check out our ground beef tacos and pork tacos.

    Key Ingredients

    • Taco Seasoning: I know you can buy packets at the store, but I much prefer our taco spice blend below. You’ll combine chili powder, ground cumin, smoked paprika, garlic powder, oregano, and salt together. Another option is to use this homemade taco seasoning, which makes a larger batch and has a few optional ingredients for added flavor.
    • Ground Turkey: I like to use ground turkey with at least 7% fat for these tacos. If you go with a leaner package, it can get a little dry. You can substitute ground chicken without any changes, and if you want to add veggies, see our taco meat recipe for tips.
    • Tomato Paste and Stock: These make the taco mixture richer and more flavorful.  I like vegetable broth, tomato broth, or chicken stock. You only need ½ cup, so use whatever you have (water will work in a pinch, too).
    • Tortillas: Use whatever tortillas you love best. Homemade tortillas are always a treat, and if you want to try making them, we have recipes for both corn tortillas and flour tortillas.
    • Taco Toppings: These are your tacos, so go wild with your favorites! In our house, we switch it up between lettuce, cabbage, tomato, avocado (sliced or mashed), sour cream with a squeeze of lime, and pickled red onions. Cheese is always a hit, too.

    Find the full recipe with measurements below.

    Ground Turkey Tacos

    How to Make Turkey Tacos

    Tip 1: Make our homemade spice mix. If you’ve been around here for a while, you know we love our homemade taco seasoning. If you’re new, trust me. Skip the store-bought packets and mix up your own with chili powder, cumin, smoked paprika, garlic powder, dried oregano, and salt. It makes all the difference.

    Tip 2: Brown the turkey. Let your ground turkey get a little color and a few crispy edges. I like to press the turkey down in the skillet and let it hang out for a minute before breaking it up. Sprinkle in your spice mix, then use a wooden spoon to break it up into crumbles. A heavy skillet (cast iron is my go-to) works wonders here. I do the same thing when I make our beef tacos.

    Cooking ground turkey with tacos seasoning in a skillet

    Tip 3: Finish with tomato paste and stock. This is the secret to juicy, flavorful taco meat. Once your turkey is browned and crumbly, stir in a spoonful of tomato paste and a splash of stock. Let it bubble away for a minute or two, and you’re all set to build your tacos!

    Stirring tomato paste into browned turkey meat for tacos
    Stirring broth into ground turkey taco meat

    Tip 4: Warm your tortillas. My favorite way is to toast them one at a time over the gas burner until they’re soft with a few charred spots. If you don’t have a gas burner, just heat them in a hot pan until they’re warm and still soft. Stack them up and wrap in a clean dish towel until you’re ready to eat.

    Serving Suggestions

    I’m sure you already have favorite toppings for tacos, but here are a few more ideas from our kitchen. We love stuffing tortillas with all the toppings. The options are endless!Here are some of our go-tos:

    For sides, we love rice and beans. Here are our recipes for Mexican rice, saffron rice, and cilantro lime rice. Plus, two recipes for beans: refried beans or these saucy black beans. And if you want dinner to feel like your favorite Tex-Mex restaurant, try homemade salsa with tortilla chips.

    More Taco Recipes

    Ground Turkey Tacos

    Ground Turkey Tacos

    • PREP
    • COOK
    • TOTAL

    In these turkey tacos, we use our family’s favorite taco meat recipe, but swap ground beef for ground turkey. These turn out best when made with ground turkey that has at least 7% fat. To make them really special, try homemade tortillas. Here’s our recipes for flour tortillas and corn tortillas.

    4 Servings

    You Will Need

    1 ½ teaspoons chili powder

    1 teaspoon ground cumin

    ½ teaspoon smoked paprika

    1 teaspoon garlic powder

    ¼ teaspoon dried oregano

    ¾ teaspoon fine sea salt, plus more as needed

    1 ½ tablespoons avocado oil

    1 pound ground turkey, 93/7 (450 g)

    2 tablespoons tomato paste (35 g)

    ½ cup chicken stock or water

    8 flour tortillas or corn tortillas, warmed over a gas burner or in a skillet

    Favorite taco toppings like cheese, cabbage, avocado, sour cream, pickled onions, pico de gallo, roasted tomatillo salsa, lime wedges, or hot sauce

    Directions

      1Make spice mix: In a small bowl, stir together the chili powder, cumin, smoked paprika, garlic powder, dried oregano, and salt.

      2Cook the taco meat: Heat the avocado oil in a medium skillet over medium-high heat. Add the ground turkey and sprinkle the spice mixture over it. Use a wooden spoon to break up the meat as it cooks, stirring until it begins to brown.

      3Stir in the tomato paste and cook for 2 more minutes. Add the chicken stock (or water) and simmer for a few minutes until the sauce thickens. Taste, then add more salt if you think it needs it.

      4Warm tortillas: For a gas burner, turn the burner to medium, place the tortilla over the flame, and heat through. When it starts to blister a bit, flip and warm the second side. Continue with the remaining tortillas. Alternatively, to warm in a skillet, place a heavy-bottomed skillet over medium heat, add the tortillas (one at a time), and cook until warm, soft, and toasty. Keep warmed tortillas wrapped in a clean dish towel to keep them warm.

      5Build tacos: Divide the turkey between warmed tortillas and top with your favorite taco toppings.

    Adam and Joanne’s Tips

    • Make-ahead: Make the turkey mixture up to 4 days in advance. Store in an airtight container in the refrigerator. Reheat before serving. Adding a tablespoon or two of additional stock or water helps to moisten the meat.
    • Making thinned sour cream: To make it drizzleable, stir 2 tablespoons of sour cream with a teaspoon or two of fresh lime juice, then add a pinch of salt.
    • The nutrition facts provided below are estimates. We included the taco meat and tortillas.

    Nutrition Per Serving
    Serving Size
    1/4 of the recipe
    /
    Calories
    341
    /
    Total Fat
    16.6g
    /
    Saturated Fat
    3.4g
    /
    Cholesterol
    84.1mg
    /
    Sodium
    580.5mg
    /
    Carbohydrate
    24.8g
    /
    Dietary Fiber
    4g
    /
    Total Sugars
    1.6g
    /
    Protein
    25.4g


    AUTHOR:

    Joanne Gallagher

    Adam and Joanne of Inspired Taste

    We are Adam and Joanne Gallagher, the creators of Inspired Taste. Established in 2009, Inspired Taste grew from a childhood dream into one of the internet’s most trusted recipe sites with hundreds of reliable recipes, step-by-step videos, and expert tips.More About Us
    Source link

  • Easy Tomato Feta Salad Recipe

    Easy Tomato Feta Salad Recipe

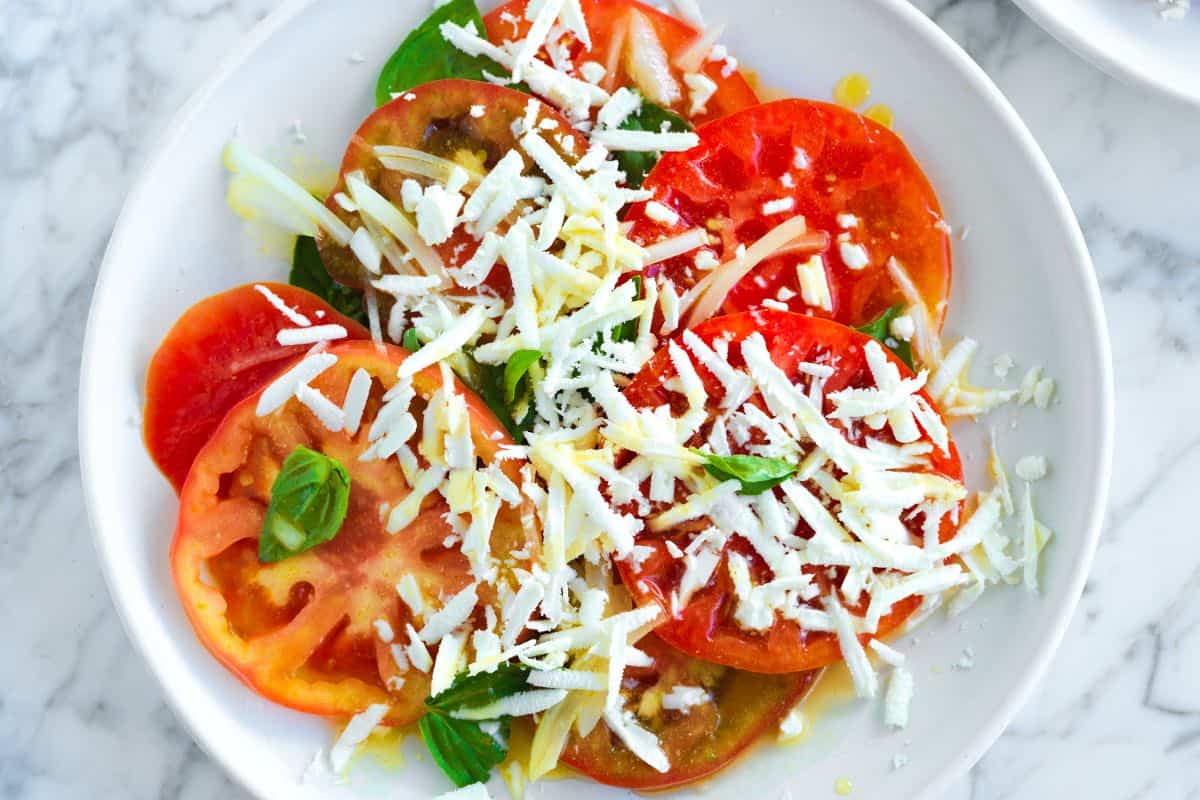
    Our tomato feta salad with honey mustard lime vinaigrette is a true showstopper. It combines peak-season tomatoes, fresh basil, a simple homemade dressing, and the surprising, creamy texture of grated feta for a truly standout dish.

    Tomato Feta Salad

    As proven by all our tomato recipes, we’re obsessed and especially get excited during the summer when tomatoes are in full season. This recipe is a fun twist on classic tomato salad. We keep the tomatoes and basil but go rogue with the dressing and make a zesty honey mustard lime vinaigrette, which works beautifully with the tomatoes and feta cheese.

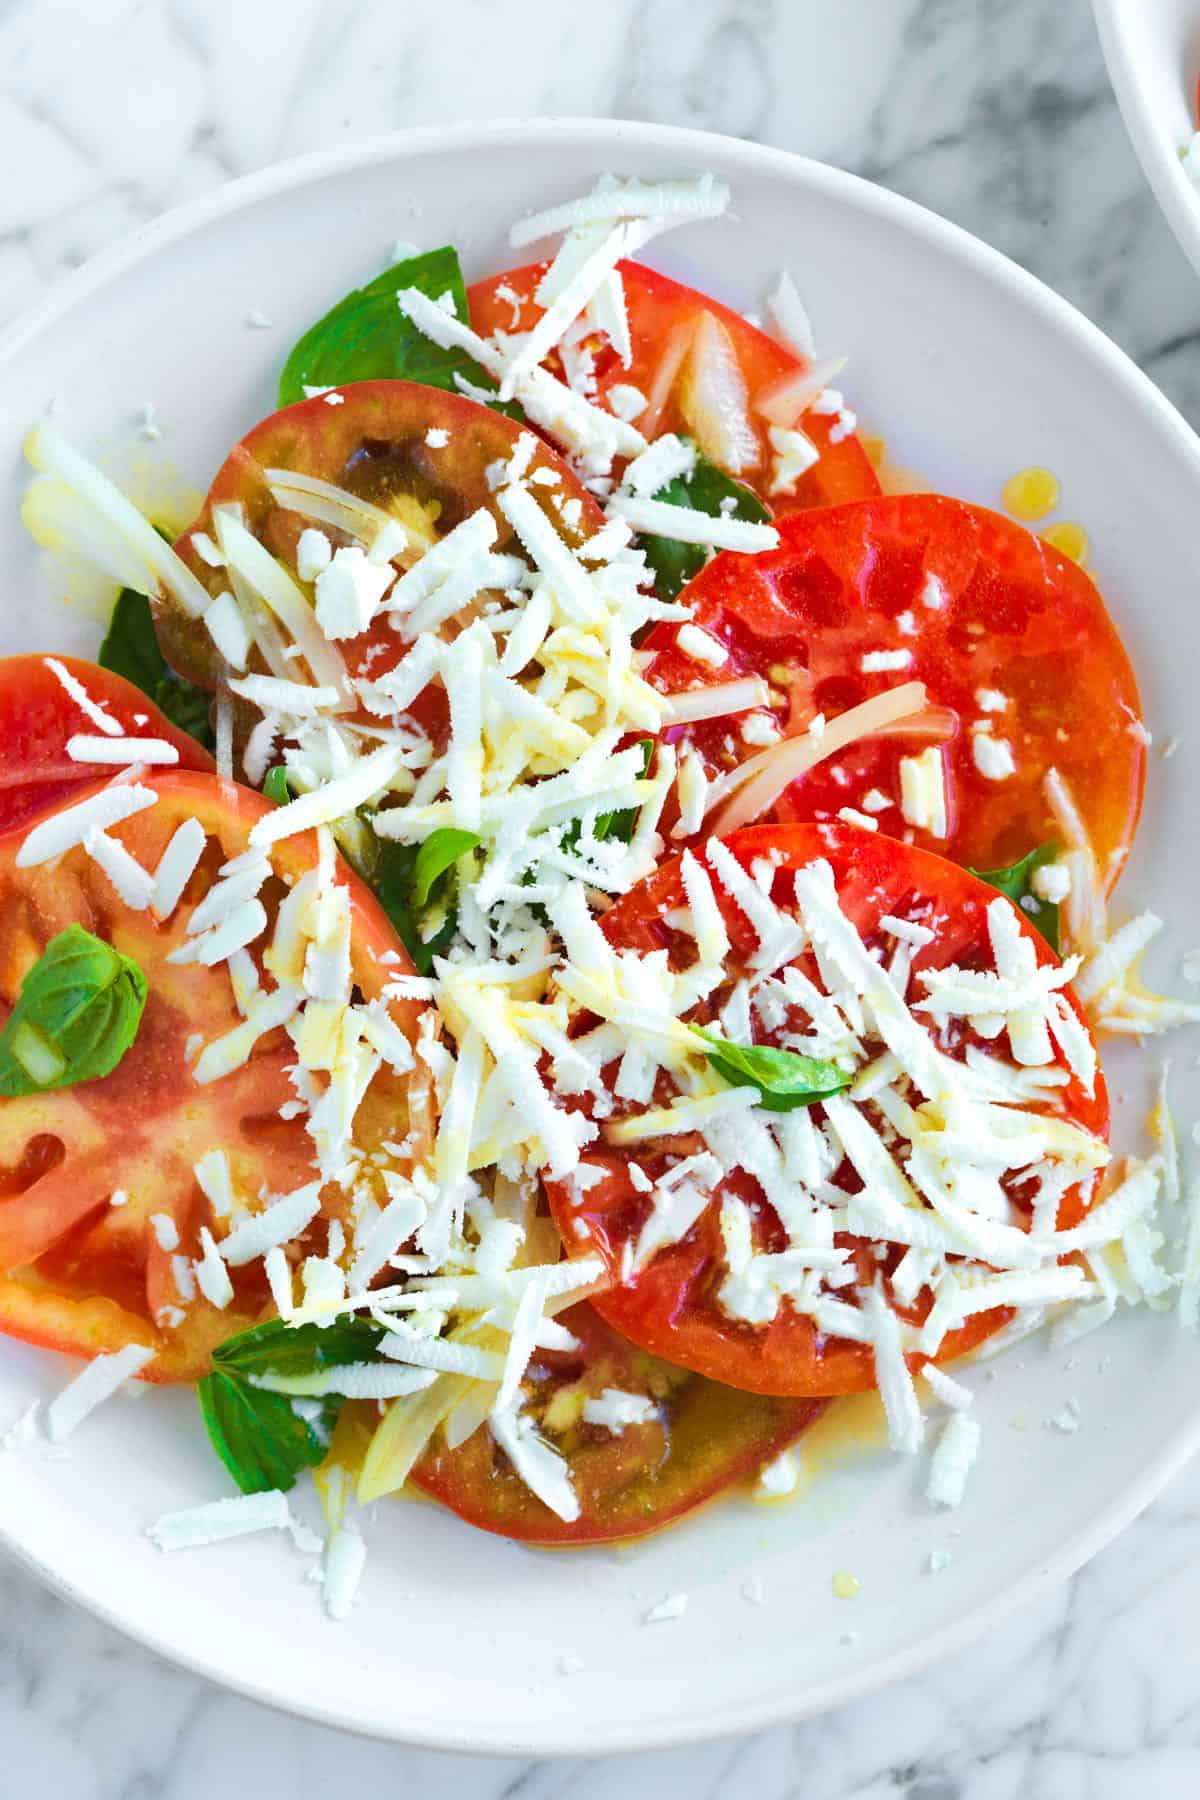
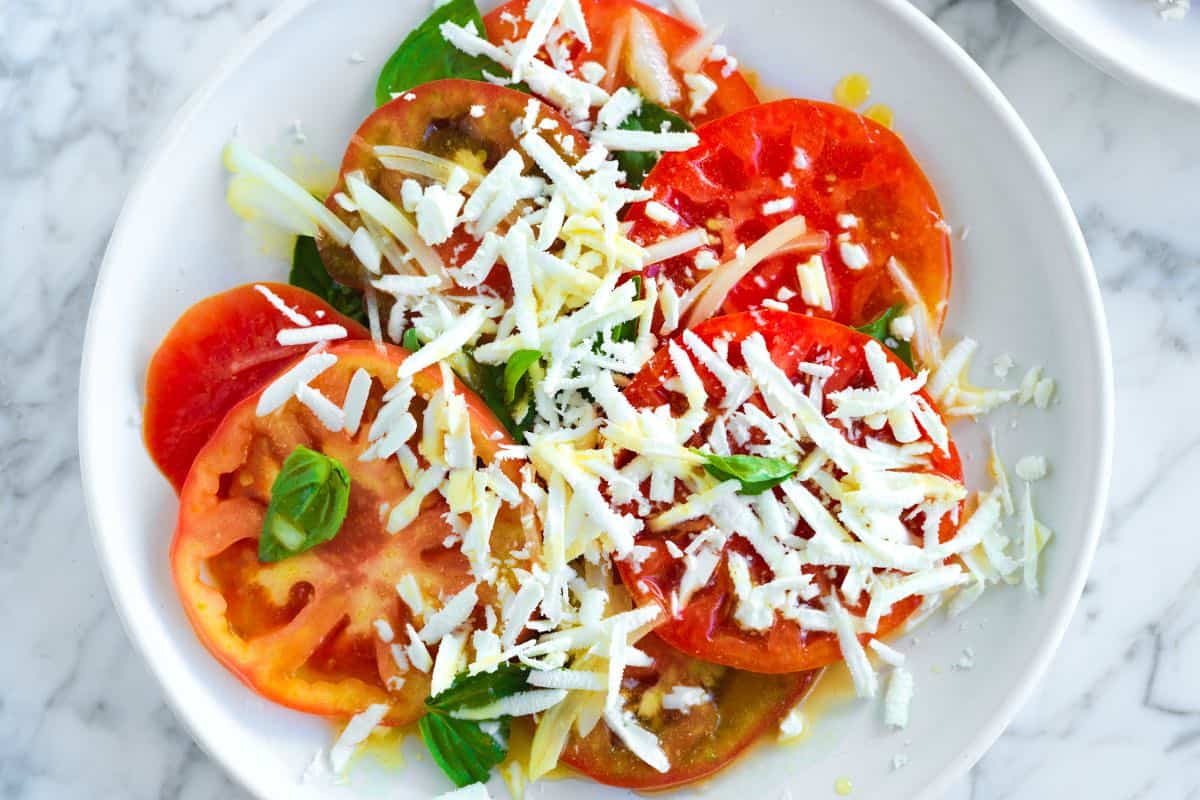
    The secret to this salad is to use the large holes on your box grater and grate the feta over the tomatoes on your plate. The thin gratings of feta melt in your mouth with each bite of tomato. We can all thank Chef Richard for the tip, and you can be sure that I’ll be grating my feta over salads from now on. For more salad recipes like this one, see our Greek salad with tomato, cucumber, and feta or this watermelon feta salad.

    Key Ingredients

    • Tomatoes: Choose slicer or juicy heirloom tomatoes for this salad. You’ll slice them into rounds before drizzling with the vinaigrette. When shopping for tomatoes, you want them to feel heavy for their size and really smell like a tomato (if you take a sniff and they don’t smell like anything, the tomato won’t taste that great). For a salad calling for cherry tomatoes, see this cherry tomato salad (which also has feta).
    • Basil and Onion: Sweet Italian basil is lovely, or substitute Thai basil or purple basil (really pretty!). Then, for the onion, use a sweet onion, such as Walla Walla or Vidalia, if you can get your hands on one.
    • Feta: Use block feta cheese sold in brine. You’ll grate the feta over your salad using a box grater. This shreds it into thin strips, letting you enjoy its salty, briny kick with every bite. If you don’t have a box grater, you can crumble the cheese instead.
    • Honey Mustard Lime Vinaigrette: You can make the vinaigrette in a bowl with a whisk or shake it all together in a glass jar. It combines fresh lime juice (from 1 lime), honey (maple syrup is a good substitute), salt, cumin, Dijon mustard, and extra-virgin olive oil.
    Tomato Feta Salad

    Easy Tomato Feta Salad

    • PREP
    • TOTAL

    When tomatoes are in season, I’m all about enjoying them in every way possible. This tomato feta salad is a standout, especially when made with our honey mustard lime vinaigrette. It’s particularly perfect for larger tomatoes like heirlooms. The secret? We use a box grater to thinly shave the feta directly over the salad. This makes the feta so delicate it practically melts in your mouth with each bite of tomato. I highly recommend it! No problem if you don’t have a box grater. Crumbling the feta works beautifully, too. For another recipe with tomatoes and feta, see our cherry tomato salad or this authentic Greek salad!

    2 large servings or 4 small salads

    You Will Need

    3 medium heirloom tomatoes, about 1 pound

    1/2 cup thinly sliced onion, preferably sweet onion

    2 ounces block feta cheese

    14 basil leaves, torn

    1 lime, juiced, about 2 tablespoons

    1 ½ tablespoons honey

    1/4 teaspoon fine sea salt

    1/4 teaspoon ground cumin

    1 teaspoon Dijon mustard

    2 tablespoons extra-virgin olive oil

    Maldon flaky sea salt, as needed

    Directions

      1Make the lime vinaigrette: Combine the juice of lime juice, honey, salt, cumin, Dijon mustard, and olive oil in a medium bowl. Whisk well until emulsified (or add to a glass jar, close the lid, and shake until emulsified).

      2Add the onions: Drop the sliced onions into the vinaigrette and mix well. (This will tone down the raw flavor of the onion a bit).

      3Prepare the tomato salad: Slice the tomatoes into 1/4-inch thick rounds and lay them on a large platter or plate. Spoon some of the vinaigrette and onions over the tomatoes and sprinkle with a pinch or two of flaky sea salt (like Maldon). Scatter the basil over the tomatoes. Then, grate the feta cheese over the top using the large holes of a box grater or crumble it with your fingers. Serve.

    Adam and Joanne’s Tips

    • Storing: Tomato salad is best eaten on the same day (at room temperature), but you can refrigerate it for up to 2 days.
    • The nutrition facts are estimates.

    Nutrition Per Serving
    Serving Size
    1 small side salad (4 total)
    /
    Calories
    154
    /
    Total Fat
    10.3g
    /
    Saturated Fat
    3.2g
    /
    Cholesterol
    12.6mg
    /
    Sodium
    354mg
    /
    Carbohydrate
    14.2g
    /
    Dietary Fiber
    1.8g
    /
    Total Sugars
    11.1g
    /
    Protein
    3.4g


    AUTHOR:

    Joanne Gallagher

    Previous Post: Easy Blueberry Scones
    Next Post: Easy Vegan Blueberry Muffins

    Source link

  • Crispy Baked Buffalo Hot Wings Recipe

    Crispy Baked Buffalo Hot Wings Recipe

    With our crispy buffalo wings recipe, you can skip the oil and fryer and make delicious, crispy baked wings that rival your favorite restaurants.

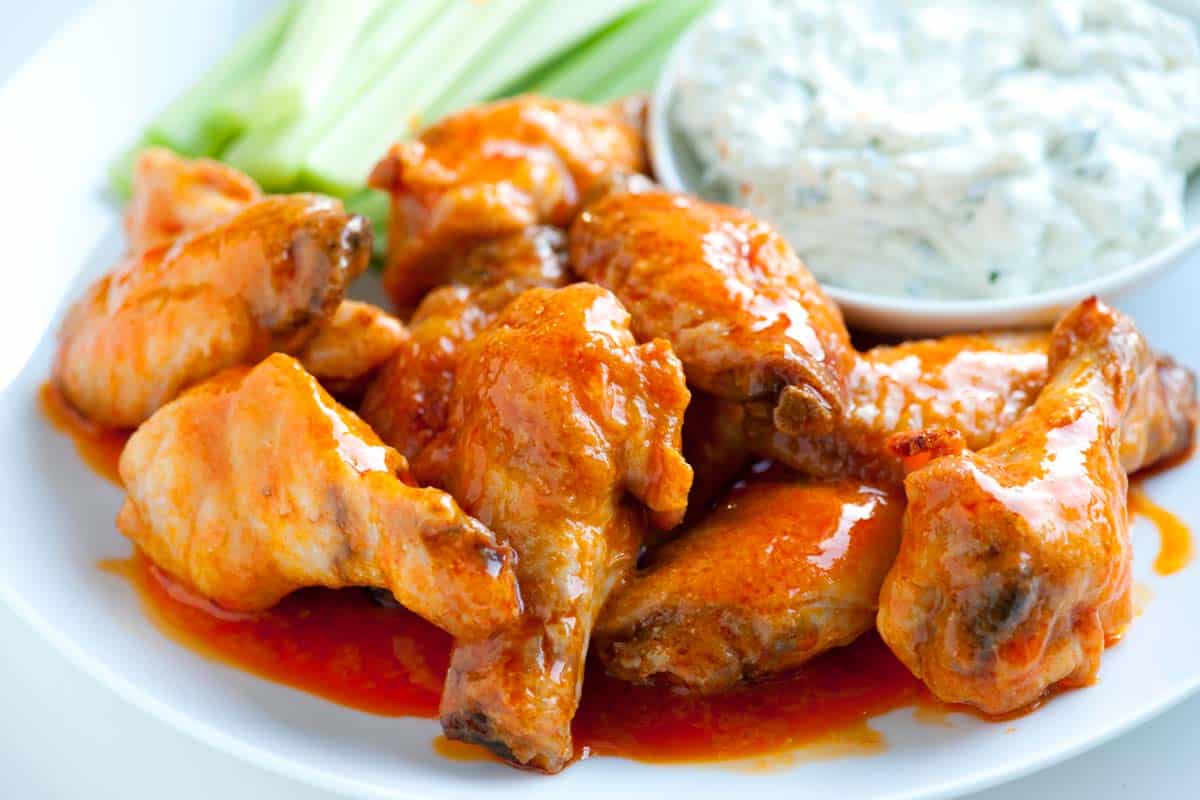
    Baked Buffalo Chicken Hot Wings

    This recipe guarantees crispy and delicious chicken wings. You are going to LOVE them! They are perfect for serving a crowd. I use my easy buffalo sauce, and love to serve them with the blue cheese dressing shared below.

    This is my favorite method for making chicken wings at home, so we’ve shared a few different versions over the years. You might also enjoy these BBQ wings, spicy glazed wings, and these sticky sweet chili wings.

    Key Ingredients

    • Chicken Wings: Depending on where you buy them, they are sold as the whole wing or separated into a drumstick and wingette. If you can only find whole chicken wings, hop over to our tutorial for separating a chicken wing.
    • Buffalo Sauce: I love using my favorite homemade buffalo sauce. It’s easy and quick to make. You can make it while your wings bake in the oven with butter, hot sauce (like Crystal), garlic powder, and a bit of honey. It’s delicious and I think it tastes better than the store-bought.
    • Blue Cheese Dip: I love these served with thick blue cheese dip, so I’ve shared a quick recipe below, but if you prefer ranch, I highly recommend trying our homemade ranch. I also have this thinner blue cheese dressing.

    Find the full recipe with measurements below.

    How to Make Crispy Baked Wings

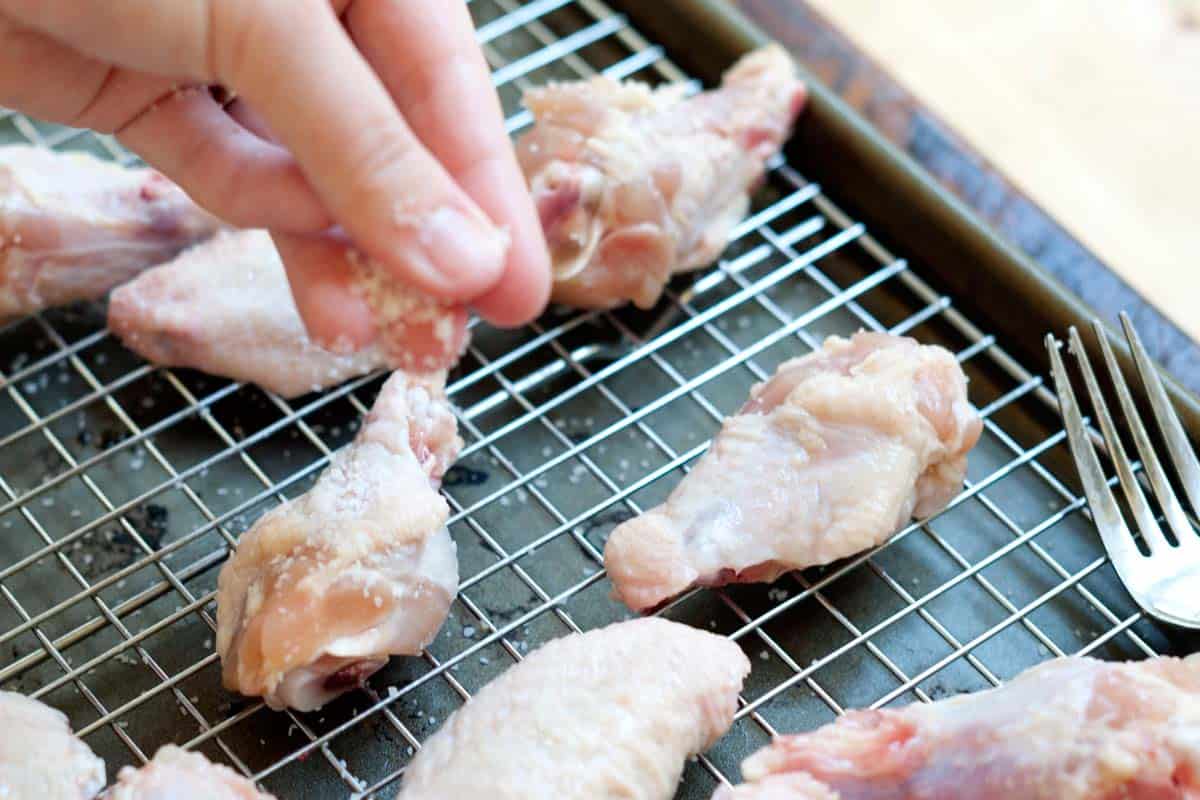
    Tip 1: Use an oven-safe rack. For the crispiest wings, use an oven-safe baking rack inset into a rimmed baking sheet (like in my photos and video). This rack lifts the wings and allows some airflow around them. I use the same setup when baking crispy bacon.

    Seasoning chicken wings with salt

    Tip 2: Pat dry before baking. It’s really important to pat your wings dry, helping them crisp up in the oven even more. And don’t forget to season them with salt! I don’t use any other seasonings, but feel free to do so if you’d like.

    Tip 3: Bake wings at a higher temperature. I bake my chicken wings in a 425°F oven until crispy, usually 30 to 45 minutes. Adam and I really love them when they are extra crispy, so I continue baking until they have had enough chance to render their fat and crisp up the skin. That means I usually cook them a few more minutes than necessary to reach an internal temperature of 165°F.

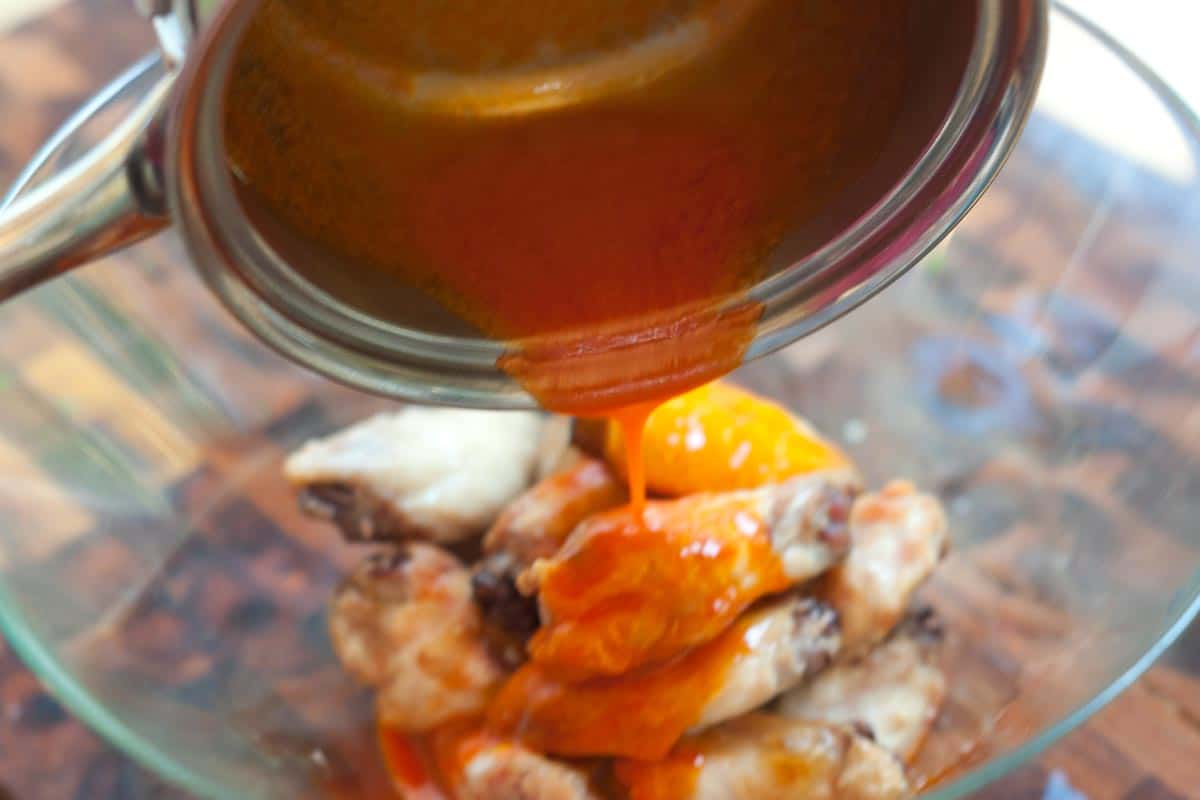
    Tip 4: Try our homemade buffalo sauce. Once your wings are ready, toss them in your favorite sauce. Our homemade wing sauce combines melted butter, hot sauce (I use Crystal), and a little garlic powder. I also like adding a slight drizzle of honey, balancing the sauce and making everything taste even better.

    Adding Buffalo sauce to baked chicken wings

    Serving Suggestions

    Celery, carrot sticks, and blue cheese or ranch dressing are classic sides. I love serving them alongside creamy coleslaw, refreshing cucumber salad, or creamy potato salad to turn them into a meal.

    You can also serve wings with crispy baked French fries, potato wedges, or try these roasted fingerling potatoes with its creamy sauce for dipping. I also highly recommend browsing our game day recipes category for more ideas.

    Baked Chicken Hot Wings

    Crispy Baked Buffalo Hot Wings

    • PREP
    • COOK
    • TOTAL

    Skip the oil and fryer and make our baked chicken wings instead. I love using the homemade wing sauce shared below, but you can substitute your favorite store-bought sauce or use BBQ sauce.

    2 to 3 Servings

    Watch Us Make the Recipe

    You Will Need

    Baked Chicken Wings

    1 pound chicken wings, separated at joints, tips discarded (450g)

    Salt, to season the chicken

    4 tablespoons unsalted butter (56g)

    ⅓ cup cayenne pepper hot sauce, like Crystal or Frank’s (80ml)

    ½ teaspoon garlic powder

    1 teaspoon honey, or more to taste, optional

    Celery sticks or carrot sticks, for serving


    Blue Cheese Dip

    ½ cup sour cream (113g)

    ½ cup mayonnaise, try homemade mayo (113g)

    6 ounces crumbled blue cheese (170g)

    1 tablespoon minced parsley

    Salt and fresh ground pepper

    Directions

      1Prepare oven and pan: Preheat the oven to 425°F (220°C). Set a wire rack inside a large-rimmed baking sheet.

      2Bake the wings: Pat dry chicken wings with paper towels, and then season with salt. Spread out in one layer on the wire rack. Bake until cooked through and crispy, 35 to 45 minutes.

      3Make blue cheese dip: Stir the sour cream, mayonnaise, blue cheese, and parsley together in a bowl. Season to taste with salt and pepper, then refrigerate until ready to serve with the wings.

      4Make buffalo sauce: Meanwhile, melt the butter in a medium saucepan over medium heat. Remove the saucepan from the heat, then stir in the hot sauce, garlic powder, and honey. Season with salt to taste. Set aside until the wings are out of the oven.

      5To finish: In a large bowl, toss the baked chicken wings in the sauce and serve with the blue cheese dip and veggies on the side.

    Adam and Joanne’s Tips

    • Wings: There are 8 to 12 wings in 1 pound (depends on size). If you need to separate the wings into the wing and drumette, see How to Cut and Break Down Chicken Wings.
    • No wire rack: If you do not have a wire rack that will fit inside a baking sheet, you can still bake them. Arrange them on the baking sheet without the rack and rotate a few times during baking.
    • The nutrition facts provided below are estimates. We did not include the blue cheese dipping sauce in our calculations.

    Nutrition Per Serving
    Serving Size
    1/2 the recipe
    /
    Calories
    487
    /
    Total Fat
    41g
    /
    Saturated Fat
    20g
    /
    Cholesterol
    222mg
    /
    Carbohydrate
    0 g
    /
    Dietary Fiber
    0g
    /
    Total Sugars
    0g
    /
    Protein
    29g


    AUTHOR:

    Joanne Gallagher

    Adam and Joanne of Inspired Taste

    We are Adam and Joanne Gallagher, the creators of Inspired Taste. Established in 2009, Inspired Taste grew from a childhood dream into one of the internet’s most trusted recipe sites with hundreds of reliable recipes, step-by-step videos, and expert tips.More About Us
    Source link

  • Perfect Bang Bang Shrimp Recipe

    Perfect Bang Bang Shrimp Recipe

    This Bang Bang shrimp recipe with light, crispy fried shrimp tossed in the easiest homemade Bang Bang sauce makes us so happy. Crispy, creamy, a little sweet, and just the right amount of heat.

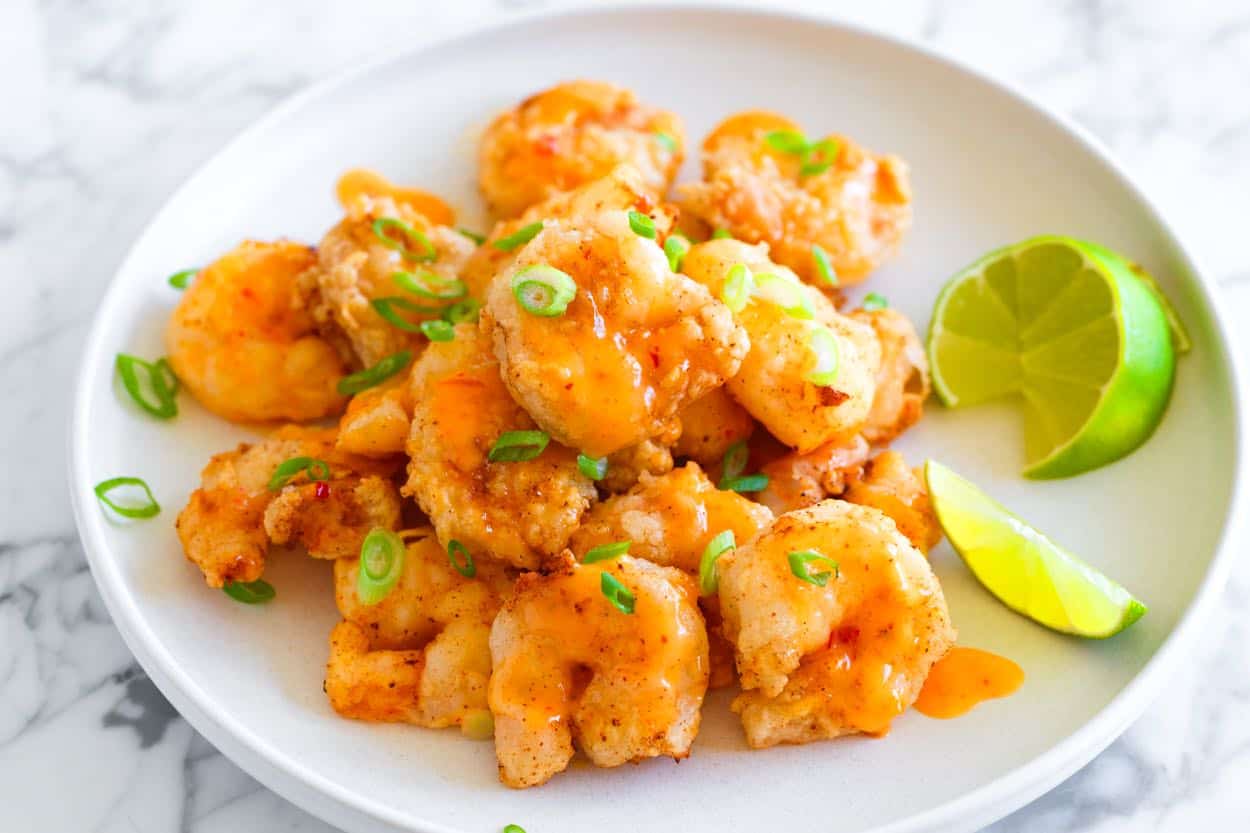
    Bang Bang Shrimp

    We first fell for Bang Bang shrimp at Bonefish Grill, and it was love at first bite. Ever since, I’ve wanted to make our own version at home, and I’m so excited to finally share it with you!

    We start by marinating the shrimp, then coat them in a light batter and fry until perfectly crisp. After that, we toss them in our homemade Bang Bang sauce. Ever since we got this recipe just right, Adam asks for it all the time! I think it’s officially one of his favorites.

    Key Ingredients

    • Shrimp: Use fresh, high-quality large or extra-large shrimp. If using frozen shrimp, thaw them overnight in the refrigerator, then pat them dry with paper towels before marinating (or use my tips below for quick thawing).
    • Buttermilk: Before dredging and frying the shrimp, we marinate them in a mixture of buttermilk and salt (only 15 minutes). This adds flavor and plumps them up, making them juicy when cooked.
    • Cornstarch and Flour: The best Bang Bang shrimp has a delicate batter (nothing heavy or made with breadcrumbs). After marinating the shrimp, you’ll dredge them in a mix of cornstarch and flour. The cornstarch in our recipe keeps the batter super light.
    • Spices: These are mixed with the cornstarch and flour. You’ll need garlic powder, onion powder, and pepper.
    • Bang Bang Shrimp Sauce: I’ve shared our recipe below. It combines mayonnaise, Thai sweet chili sauce, sriracha, lime juice (our secret for the best sauce), and honey.
    • Oil: The shrimp are fried in this recipe, so you will need a good-quality frying oil. We like peanut oil or vegetable oil. I know some of you will wonder if you can skip frying and bake these shrimp instead. You can, but not with the batter we provide in our recipe below. Check our tips below the recipe.

    Find the full recipe with measurements below.

    How to Make Bang Bang Shrimp

    Tip 1: Marinate the shrimp. The marinade is simple but so effective. Buttermilk and salt make the shrimp extra flavorful and plump, so they’re juicy and snappy when cooked.

    Marinating shrimp in buttermilk

    Tip 2: Homemade sauce is better. Our easy sauce comes together in just a few minutes. Just stir everything together in a bowl. It keeps for a week in the fridge, so don’t forget to save any leftovers! (We have more ideas for using it in our recipe for Bang Bang sauce.)

    Bang Bang sauce ingredients in a bowl

    Tip 3: Frying the shrimp. I use a Fry Daddy, which is inexpensive and makes frying at home a little easier (we don’t fry that much, but I still find it a worthwhile buy for the times when we do). That said, a deep pot works really well, too. Keep the following in mind when frying these shrimp:

    • Use enough oil! You want the oil deep enough so the shrimp float and don’t touch the bottom, but not so much that it gets close to the rim of your pot. A deep pot is your friend here.
    • Get your oil temperature right! I aim for 350°F (the Fry Daddy runs a little hotter, but that’s fine). A thermometer is super helpful here.
    • Drain your shrimp well! You don’t want them too wet before they hit the oil. After draining, quickly dredge them in the flour, cornstarch, and spice mix. I like to dredge in batches (just enough for what I’m frying right away).
    • Once the shrimp are fried, move them to paper towels to drain. Serve them while they’re still hot and crispy!
    Dredging the shrimp in flour and cornstarch
    Frying the shrimp before adding the sauce

    Tip 4: Adding the sauce. We want to keep the shrimp nice and crispy, so add your sauce only when you are ready to serve. I add just enough to coat the shrimp without weighing it down. You can always add some dipping sauce on the side, too!

    Tossing crispy fried shrimp with Bang Bang sauce

    Serving Suggestions

    Very often, in restaurants, these are served as an appetizer, but at home, we turn them into dinner. You can make Bang Bang shrimp tacos (coming soon), or serve these shrimp with something cool and crisp. I love this cilantro-lime slaw, or the lime slaw used for our shrimp burgers. Rice (try saffron rice or cilantro lime rice), roasted cabbage, or roasted potatoes are great options, too.

    More Shrimp Recipes

    Bang Bang Shrimp

    Perfect Bang Bang Shrimp

    • PREP
    • COOK
    • TOTAL

    These Bang Bang shrimp are hard to stop eating. Perfectly crispy, with a delicious homemade sweet-and-spicy sauce. These are fried, but we have provided tips for baking the shrimp below the recipe.

    4 Servings

    You Will Need

    For the Shrimp

    1 pound shrimp, large or extra-large, peeled, deveined, with tails removed

    1 cup well-shaken buttermilk (227 g)

    ¾ teaspoon fine sea salt

    ½ cup cornstarch (60 g)

    ½ cup all-purpose flour (65 g)

    1 teaspoon garlic powder

    1 teaspoon onion powder

    ⅛ teaspoon fresh ground pepper

    Peanut oil or vegetable oil for frying

    2 green onions, thinly sliced, for serving

    1 teaspoon toasted sesame seeds, for serving


    For the Sauce

    ½ cup mayonnaise (113 g)

    ¼ cup Thai sweet chili sauce, like Mae Ploy (95 g)

    1 ½ tablespoons Sriracha

    1 tablespoon lime juice

    1 teaspoon honey

    Directions

      1Marinate the shrimp: Combine the shrimp with the buttermilk and salt in a large bowl, then let it sit on the counter for 15 minutes.

      2Make the sauce: In a small bowl, stir together the mayonnaise, sweet chili sauce, sriracha, lime juice, and honey. Set aside (or refrigerate for up to one week).

      3Make breading: In a wide, shallow bowl, whisk together the cornstarch, flour, garlic powder, onion powder, and pepper.

      4Prepare the oil: Use a medium, deep saucepan or Fry Daddy (see tips below). Fill it with enough oil so the shrimp are submerged without resting on the bottom. Also, make sure that there is ample space to fry them without the oil rising too close to the top. Heat the oil to 350°F (175°C) as registered on an instant-read thermometer.

      5Cook the shrimp: Drain the shrimp, then, working in batches, toss them into the dredge and toss until lightly coated. Carefully place the shrimp into the hot oil and fry for 2 to 3 minutes, or until golden and crisp. Transfer the fried shrimp to a paper-towel-lined plate.

      6To finish: When ready to serve, toss the shrimp with just enough of the sauce to coat, then serve with green onions and sesame seeds scattered over the top.

    Adam and Joanne’s Tips

    • Storing: Keep the sauce in an airtight container or jar in the fridge for up to a week. Stir well before using. The fried shrimp will not stay crisp, but lasts up to 3 days in the fridge.
    • Healthier sauce: Substitute the mayonnaise for plain thick yogurt like Icelandic or Greek yogurt. I prefer less tangy options.
    • Quickly thaw shrimp: Add your frozen shrimp to a bowl without a bag, then cover them with cold water (cold is important, don’t use warm or hot). They should take 15 to 20 minutes to thaw. Make sure you change the water a few times (keep it cold) and move the shrimp around occasionally to help them thaw. Note: Don’t leave your shrimp in water for much longer than 30 minutes, as their texture may start to degrade.
    • Frying: We have a Fry Daddy, which makes frying at home a little easier. It’s not very expensive and sold online (we purchased ours on Amazon).
    • Baked shrimp: You can’t bake these shrimp with the batter above, but you can still get great flavor. Just mix 1/4 teaspoon each of salt, pepper, garlic powder, and onion powder. Toss the shrimp with a little oil and the spice mix, spread them on a baking sheet, and bake until plump and opaque. Toss with the Bang Bang sauce. You can also cook them in a skillet.
    • The nutrition facts provided are estimates. We assumed 4 tablespoons of sauce. We left the oil out as it is difficult for us to determine the nutrition facts of fried foods.

    Nutrition Per Serving
    Calories
    341
    /
    Fat
    10g
    /
    Saturated Fat
    2.4g
    /
    Cholesterol
    193.2mg
    /
    Sodium
    820.5mg
    /
    Carbohydrate
    35.3g
    /
    Fiber
    0.9g
    /
    Total Sugars
    7.2g
    /
    Protein
    26.8g


    AUTHOR:

    Joanne Gallagher

    Adam and Joanne of Inspired Taste

    We are Adam and Joanne Gallagher, the creators of Inspired Taste. Established in 2009, Inspired Taste grew from a childhood dream into one of the internet’s most trusted recipe sites with hundreds of reliable recipes, step-by-step videos, and expert tips.More About Us
    Source link

  • Sauerkraut Soup Recipe

    Sauerkraut Soup Recipe

    Our homemade sauerkraut soup recipe, made with kielbasa and bacon, is smoky, tangy, and incredibly comforting.

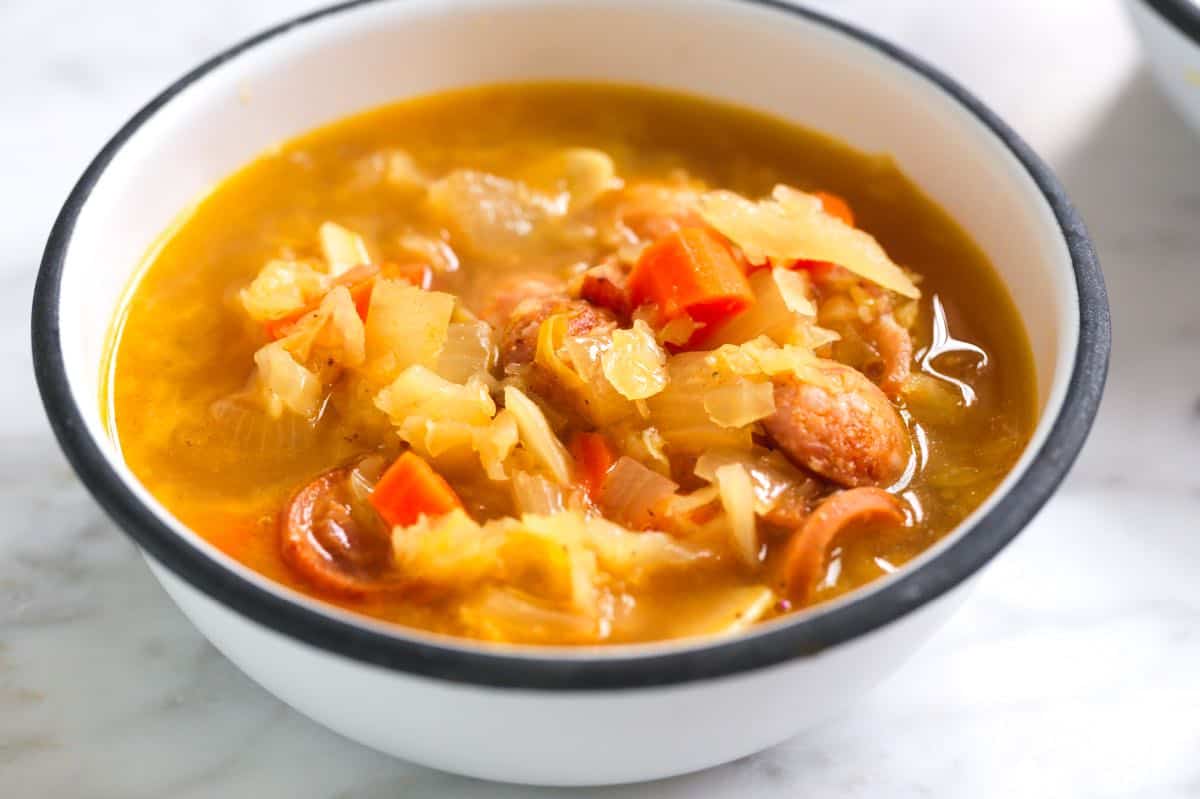
    Sauerkraut Soup

    There’s almost always a batch of homemade sauerkraut in our fridge, which is how we stumbled into this soup recipe. And now, our family genuinely can’t stop making it.

    It’s cozy, really delicious, and hard to resist going back for seconds. The sauerkraut adds just the right amount of sourness, perfectly balancing the richness of the bacon and sausage.

    Key Ingredients

    • Sauerkraut: The star of our soup. I love fermented sauerkraut, which you can buy or make yourself (here’s our sauerkraut recipe). Another option is to make our fresh sauerkraut, which tastes incredible, but skips the fermenting time, meaning you can make and enjoy it on the same day. When buying sauerkraut from the grocery store, look for more traditional options with classic spices like caraway.
    • Bacon and Sausage: For the bacon, I use thick-cut slices and cut them into lardons (small strips). For the sausage, kielbasa is my favorite, but any smoked sausage will work.
    • Onion, Carrot, and Garlic: Roughly chop the onion and carrot, then slice the garlic. No need for perfection here, this is a rustic soup after all.
    • Thyme and Paprika: The fresh thyme adds a lot of flavor, but you can substitute it with dried thyme. For the paprika, use sweet paprika to avoid introducing extra smokiness or heat.
    • Stock: I use chicken stock or chicken broth, but vegetable broth would work just fine here.

    Find the full recipe with measurements below.

    My Tips for Making Sauerkraut Soup

    Tip 1: Render the bacon and sausage. Flavor builds step by step in this soup. Start by cooking the bacon and sausage until browned and their fat has rendered. Transfer the meat to a plate, but leave the flavorful fat in the pot. This is what you’ll use to sauté the veggies.

    Making sauerkraut soup with rendered bacon and kielbasa fat, carrots, and onions.

    Tip 2: Keep things hearty. This is a rustic, filling soup, so there’s no need to finely dice or mince the ingredients. Chop the onion and carrot into bite-sized pieces that can stand up to the sausage slices.

    Tip 3: You only need a quick simmer. My favorite part of this sauerkraut soup is the carrots! They turn out so sweet against the sourness of the broth. When simmering, look for the carrots to become tender, and when they do, you can serve. It only simmers for about 15 minutes.

    Stirring cooked kielbasa and bacon back into the sauerkraut soup before serving

    More Rustic Soup Recipes

    Sauerkraut Soup

    Sauerkraut Soup

    • PREP
    • COOK
    • TOTAL

    This sauerkraut soup recipe turns out a little smoky, tangy, and sour thanks to the sauerkraut. I love using homemade sauerkraut, but store-bought works really well (just choose one that’s been made with classic flavors like caraway seeds). It’s lovely served by itself, with potatoes, or crusty bread.

    5 Servings

    You Will Need

    4 ounces bacon, thinly sliced (113g)

    12 ounces kielbasa, sliced ¼-inch thick (340g)

    1 medium onion, diced

    2 medium carrots, peeled and diced

    4 garlic cloves, thinly sliced

    ½ teaspoon sweet paprika

    5 fresh thyme sprigs

    6 cups chicken stock (1.4L)

    2 ½ cups drained sauerkraut (450g)

    ¼ teaspoon fine sea salt, optional

    ¼ teaspoon freshly ground black pepper

    Directions

      1Cook the bacon: Place a large pot over medium heat. Add the bacon and cook until the fat renders and the bacon is browned and almost crisp. Remove the bacon with a slotted spoon and set aside, leaving the fat in the pot.

      2Brown the sausage: Add the kielbasa and cook until lightly browned on all sides, 4 to 5 minutes. Remove with a slotted spoon and set aside with the bacon.

      3Cook the vegetables: Add the onion, carrot, garlic, paprika, and thyme to the pot. Cook, stirring often, until the onion softens slightly, about 3 minutes.

      4Simmer the soup: Pour in the chicken stock, then add the sauerkraut. Stir and taste for seasoning, then add salt and pepper as needed. Bring to a simmer and cook, uncovered, until the carrots are tender, 15 to 20 minutes.

      5Finish and serve: Stir the bacon and kielbasa back into the soup, discard the thyme sprigs, and season to taste. Ladle into bowls and enjoy!

    Adam and Joanne’s Tips

    • Serving: I love this as-is, but it would be lovely with a spoonful of sour cream and fresh herbs (like fresh dill or parsley) sprinkled over the top.
    • Storing: Keep leftover soup in an airtight container in the fridge for up to 4 days or freeze for up to 3 months. Thaw overnight in the fridge and reheat over medium-low heat on the stove or use the microwave.
    • Measuring your sauerkraut: It doesn’t need to be completely dry; some brine is fine. I like to use a spoon and pull the cabbage out to measure it.
    • Thyme: I like to tie my thyme with a little twine to make it easy to remove later on. For dried thyme, use ½ teaspoon.
    • The nutrition facts provided are estimates.

    Nutrition Per Serving
    Serving Size
    1 of 5 servings (about 1.5 cups)
    /
    Calories
    330
    /
    Total Fat
    22.8g
    /
    Saturated Fat
    7.8g
    /
    Cholesterol
    62.4mg
    /
    Sodium
    1538.3mg
    /
    Carbohydrate
    14.9g
    /
    Dietary Fiber
    3.3g
    /
    Total Sugars
    4g
    /
    Protein
    18.8g


    AUTHOR:

    Joanne Gallagher

    Previous Post: 12 Pumpkin Recipes We Come Back to Every Fall
    Next Post: Quick Shrimp Stir Fry

    Source link

  • Easy Ground Beef Tacos Recipe

    Easy Ground Beef Tacos Recipe

    My family’s best beef taco recipe calls for lean ground beef and a simple blend of pantry spices. One of my favorite 20-minute dinners, and the entire family loves it!

    Ground Beef Tacos

    These easy beef tacos are a weeknight favorite at our house. We use our go-to taco meat recipe with lean ground beef and a handful of pantry spices. It’s quick, simple, and so much better than anything you’d get from a store-bought seasoning packet.

    Adam and I both love tacos for dinner, but it wasn’t until our son really fell for this taco recipe that we started making it on repeat. I love the spiced beef mixture tucked into corn tortillas and top it with whatever I happen to have on hand. Sour cream, lettuce, cabbage, pico de gallo, guacamole, avocado, you name it. They all work!

    Key Ingredients

    • Taco Seasoning: I know you can buy packets at the store, but I much prefer our taco spice blend below. You’ll combine chili powder, ground cumin, smoked paprika, garlic powder, oregano, and salt together. Another option is to use this homemade taco seasoning, which makes a larger batch and adds a few optionals ingredients for flavor.
    • Ground Beef: I like to use lean ground beef (90/10 or 10% fat) for these tacos. If you go with a fattier beef, it can get a little greasy. You can substitute other ground meat in this taco recipe (we swap in chicken or turkey all the time, see our ground turkey tacos as an example). For shredded beef, see our shredded beef tacos or beef birria, which you can turn into birria tacos.
    • Veggies: Totally optional, but if I have chopped onion or Anaheim pepper hanging out in the fridge, I toss them in the skillet. They add a little extra texture, and I love how sweet they get once they’re cooked.
    • Tomato Paste and Stock: These make the beef mixture richer and more flavorful.  I like vegetable broth, tomato broth, beef stock, or chicken stock. You only need 1/2 cup, so use whatever you have (water will work in a pinch, too).
    • Tortillas: Use whatever tortillas you love best. Homemade tortillas are always a treat, and if you want to try making them, we have recipes for both corn tortillas and flour tortillas.
    • Taco Toppings: These are your tacos, so go wild with your favorites! In our house, we switch it up between lettuce, cabbage, tomato, avocado (sliced or mashed), sour cream with a squeeze of lime, and pickled onions. Cheese is always a hit, and you can’t go wrong with classic chopped onion.

    Find the full recipe with measurements below.

    How to Make the Best Beef Tacos

    Tip 1: Make our homemade spice mix. Skip the packets at the store. Our simple taco seasoning calls for spices you likely already have on hand. You’ll stir together chili powder, cumin, smoked paprika, garlic powder, dried oregano, and salt.

    Tip 2: Brown the beef. For the best flavor and texture, let your ground beef get a little color and crispy edges. I like to press it down in the skillet and let it sit for a minute before breaking it up. Add your spice mix, then use a wooden spoon to crumble the meat. A heavy skillet, like a cast-iron skillet, works great here. I do the same when making our ground pork tacos.

    Browning lean ground beef with taco seasoning for tacos

    Tip 3: Add extra veggies if you have them. I don’t always do this, but when there’s onion or Anaheim pepper in the fridge, I toss them in with the meat. They get soft and sweet, and it’s so good with all the spices.

    Adding onion and chopped Anaheim pepper to spice ground beef for beef tacos

    Tip 4: Finish with tomato paste and stock. This is what brings everything together and keeps the taco meat juicy. Stir in a spoonful of tomato paste, then add a splash of stock. Let it simmer, and you’re ready to build your tacos!

    Pouring stock into a skillet with spiced ground beef for taco meat

    Tip 5: Warm your tortillas. I love using my gas burner to toast tortillas one at a time over the flame. They get soft with a few charred spots, which taste amazing. If you don’t have a gas burner, heat them in a hot pan until they’re warm but still soft. Stack them up and wrap in a clean dishcloth until you’re ready to eat.

    Serving Suggestions

    I’m sure you already have your own favorite way to build beef tacos, but here are a few more ideas from our kitchen. We love stuffing tortillas with all the toppings. The options are endless! Here are some of our go-tos:

    • Mexican Rice or Cilantro Lime Rice
    • Refried Beans, Refried Black Beans, or these saucy Black Beans
    • Sliced or mashed avocado or Guacamole
    • Shredded cheese, crumbled queso fresco, or cojita cheese
    • Chopped fresh tomatoes, Pico de Gallo, or Roasted Tomato Salsa
    • Salsa with Tortilla Chips
    • Raw onions, Pickled Onions, or Cowboy Candy (Candied Jalapeños)
    • Cilantro Lime Slaw, fresh sliced cabbage, or crunchy lettuce
    • Sour cream thinned with fresh lime juice and seasoned with a pinch of salt.
    • Homemade Ranch Dressing or Cilantro Lime Dressing (my favorite for taco salad)

    More Taco Recipes

    Ground Beef Tacos

    Easy Ground Beef Tacos

    • PREP
    • COOK
    • TOTAL

    This is my family’s go-to beef taco recipe. We’ve called for lean ground beef below and prefer this when made with ground meat that has a little fat (7% to 10% is perfect). Any more, and it’s a bit greasy (any less, and it turns out dry). The onions and pepper are optional, but they add a bit of extra texture.

    4 Servings

    You Will Need

    1 ½ teaspoons chili powder

    1 teaspoon ground cumin

    ½ teaspoon smoked paprika

    1 teaspoon garlic powder

    ¼ teaspoon dried oregano

    ¾ teaspoon fine sea salt, plus more as needed

    1 tablespoon avocado oil

    1 pound lean ground beef, 90/10 (450 g)

    ¾ cup finely chopped onion, a quarter of a medium onion, optional

    1 Anaheim pepper, deseeded and finely chopped, optional

    2 tablespoons tomato paste (35 g)

    ½ cup chicken stock or water (60 ml)

    6 to 8 tortillas, corn or flour

    Favorite taco toppings like cheese, cabbage, avocado, sour cream, pickled onions, pico de gallo, roasted tomato salsa, lime wedges, or hot sauce

    Directions

      1Make spice mix: In a small bowl, stir together the chili powder, cumin, smoked paprika, garlic powder, dried oregano, and salt.

      2Make taco meat: Heat the avocado oil in a medium skillet over medium-high heat. Add the ground beef, pat it down into the skillet, and sprinkle the spice mixture over it. Use a wooden spoon to break up the meat as it cooks, stirring until it begins to brown.

      3Stir in the onions and pepper, then cook, moving them around the pan until they begin to soften and the onions smell sweet, about 3 minutes.

      4Stir in the tomato paste and cook for 2 more minutes. Add the chicken stock (or water) and simmer for a few minutes until the sauce thickens. Taste, then add more salt if you think it needs it.

      5Warm tortillas: For a gas burner, turn the burner to medium, place the tortilla over the flame, and heat through. When it starts to blister a bit, flip and warm the second side. Continue with the remaining tortillas. Alternatively, to warm in a skillet, place a heavy-bottomed skillet over medium heat, add the tortillas (one at a time), and cook until warm, soft, and toasty. Keep warmed tortillas wrapped in a clean dish towel to keep them warm.

      6Build tacos: Divide the beef between warmed tortillas and top with your favorite taco toppings.

    Adam and Joanne’s Tips

    • Make-ahead: Make the ground beef mixture up to 4 days in advance. Store in an airtight container in the refrigerator. Reheat before serving. Adding a tablespoon or two of additional stock or water helps to moisten the beef.
    • Making thinned sour cream: To make it drizzleable, stir 2 tablespoons of sour cream with a teaspoon or two of fresh lime juice, then add a pinch of salt.
    • The nutrition facts provided below are estimates. We included the taco meat and tortillas.

    Nutrition Per Serving
    Serving Size
    2 tortillas (8 total)
    /
    Calories
    374
    /
    Total Fat
    16.8g
    /
    Saturated Fat
    5.2g
    /
    Cholesterol
    73.5mg
    /
    Sodium
    579mg
    /
    Carbohydrate
    29.4g
    /
    Dietary Fiber
    5.1g
    /
    Total Sugars
    3.8g
    /
    Protein
    27.3g


    AUTHOR:

    Joanne Gallagher

    Adam and Joanne of Inspired Taste

    We are Adam and Joanne Gallagher, the creators of Inspired Taste. Established in 2009, Inspired Taste grew from a childhood dream into one of the internet’s most trusted recipe sites with hundreds of reliable recipes, step-by-step videos, and expert tips.More About Us
    Source link

  • Easy Napa Cabbage Salad Recipe

    Easy Napa Cabbage Salad Recipe

    Here’s the Napa cabbage salad recipe I’ve been making on repeat. It’s remarkably tasty for how easy it is to throw together, and the sesame in the dressing will have you going back for more!

    Easy Napa Cabbage Salad

    I’ve fallen so hard for this cabbage salad, and I think you will, too. I’m always on the hunt for super simple, quick-to-prepare sides, and this Napa cabbage salad with garlic and sesame is hitting it out of the park.

    This truly is a low-effort dish. Just a quick massage of toasted sesame oil, grated garlic, and salt into the cabbage rewards you with a sweet, toasty, and delicious salad. It pairs incredibly well with grilled meats, chicken, and seafood, and I especially love it with meaty or umami-rich dishes, such as grilled steak and pork chops made with this pork marinade.

    Key Ingredients

    • Napa Cabbage: I adore cabbage, made evident by the many cabbage recipes we have, but Napa cabbage holds a special place in my heart. It’s lighter on its feet and wonderfully crunchy, making it an incredibly refreshing base for salads.
    • Sesame Oil and Sesame Seeds: I love the deep, toasty notes that toasted sesame oil adds to this salad. It brings a rich, nutty flavor that makes it incredibly hard to stop eating! To really lean into the sesame, we also toss in some toasted sesame seeds.
    • Garlic and Green Onions: A finely grated garlic clove, massaged into the cabbage, adds so much flavor, but don’t worry, it doesn’t overpower the salad. The natural sweetness of the cabbage stands up beautifully to the raw garlic, and the toasted sesame oil perfectly cuts through. I also love thinly sliced green onions for more flavor and color.
    • Salt and Pepper: These are obvious, but the salt really helps with making our cabbage taste incredible. You’ll massage it into the cabbage, so it helps to tenderize the cabbage and make it taste more like cabbage.

    The secret to this salad’s amazing flavor is massaging the Napa cabbage with the dressing ingredients. I do the same when making kale salad and kimchi because it works wonders. The massage relaxes the cabbage, making it more tender and incredibly receptive to absorbing the garlicky and toasty sesame flavors. It’s a simple step that makes a big difference in the end.

    Easy Napa Cabbage Salad

    Easy Napa Cabbage Salad

    • PREP
    • TOTAL

    It’s hard to stop eating this Napa cabbage salad with toasted sesame oil and garlic. Think of it as a light-on-its-feet, crispy side perfect for richer, umami-rich dishes like grilled steak, baked pork chops, teriyaki chicken, my favorite baked tofu, or grilled swordfish. This salad never overpowers! Instead, it adds a lovely crisp, savory, fresh bite that truly works well with so many things. While Napa cabbage is perfect for this recipe, feel free to substitute other varieties of cabbage if that’s what you have on hand.

    4 Servings

    You Will Need

    Half of a large head Napa Cabbage, about 1 pound, about 8 cups sliced

    3 tablespoons sesame seeds

    1 ½ tablespoons toasted sesame oil, or more to taste

    1 medium garlic clove, finely grated, about 1/4 teaspoon grated

    1/4 teaspoon fine sea salt, or more to taste

    1/4 teaspoon fresh ground black pepper

    2 green onions, thinly sliced

    Directions

      1Prepare the cabbage: Remove the core of the cabbage. Cut lengthwise into 1-inch ribbons, then slice crosswise into 1-inch thick pieces. Rinse under cool water and pat very dry or spin dry using a salad spinner (wet cabbage will water down the salad).

      2Toast the sesame seeds: Add the sesame seeds to a small skillet over medium-low heat and toast, stirring frequently, until golden brown and fragrant, 2 to 4 minutes. Keep a close eye on them, as they can burn quickly.

      3Make the salad: In a large bowl, add the cabbage, toasted sesame seeds, 1 ½ tablespoons of toasted sesame oil, the grated garlic, 1/4 teaspoon of salt, 1/4 teaspoon of black pepper, and thinly sliced green onions. Toss and lightly massage everything together until well combined. Taste and adjust with more salt or sesame oil if needed. As the cabbage is massaged and sits with the salt, it will reduce in size.

    Adam and Joanne’s Tips

    • Storing: The Napa cabbage is at its crispiest when served right away, but this salad will keep well in the refrigerator for 1 to 2 days. Beyond that, the cabbage may become too soft.
    • The nutritional information provided are estimates.

    Nutrition Per Serving
    Serving Size
    1/4 of the recipe (about 1 cup)
    /
    Calories
    104
    /
    Total Fat
    8.7g
    /
    Saturated Fat
    1.2g
    /
    Cholesterol
    0mg
    /
    Sodium
    156.8mg
    /
    Carbohydrate
    5.7g
    /
    Dietary Fiber
    2.3g
    /
    Total Sugars
    1.7g
    /
    Protein
    2.6g


    AUTHOR:

    Joanne Gallagher

    Previous Post: Cheesy Bean Dip
    Next Post: Easy Beer Brats

    Source link

  • Perfect Baked Sweet Potato Fries Recipe

    Perfect Baked Sweet Potato Fries Recipe

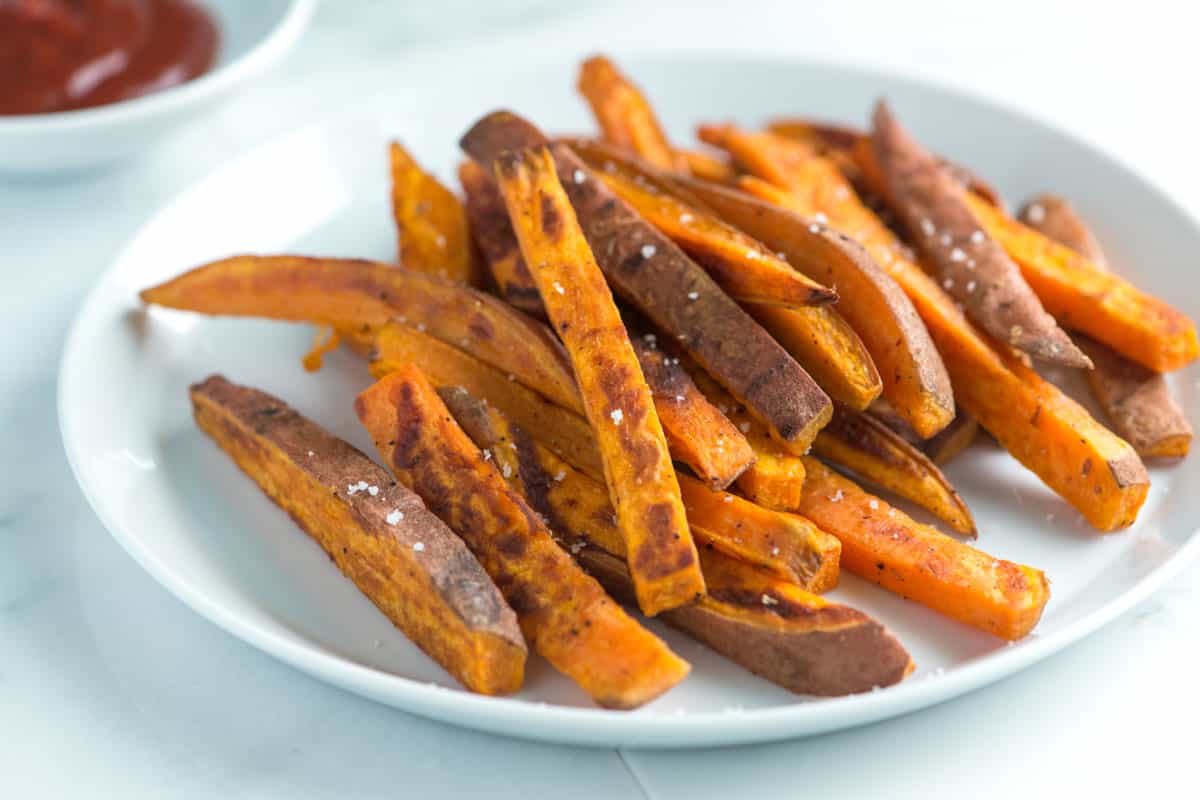
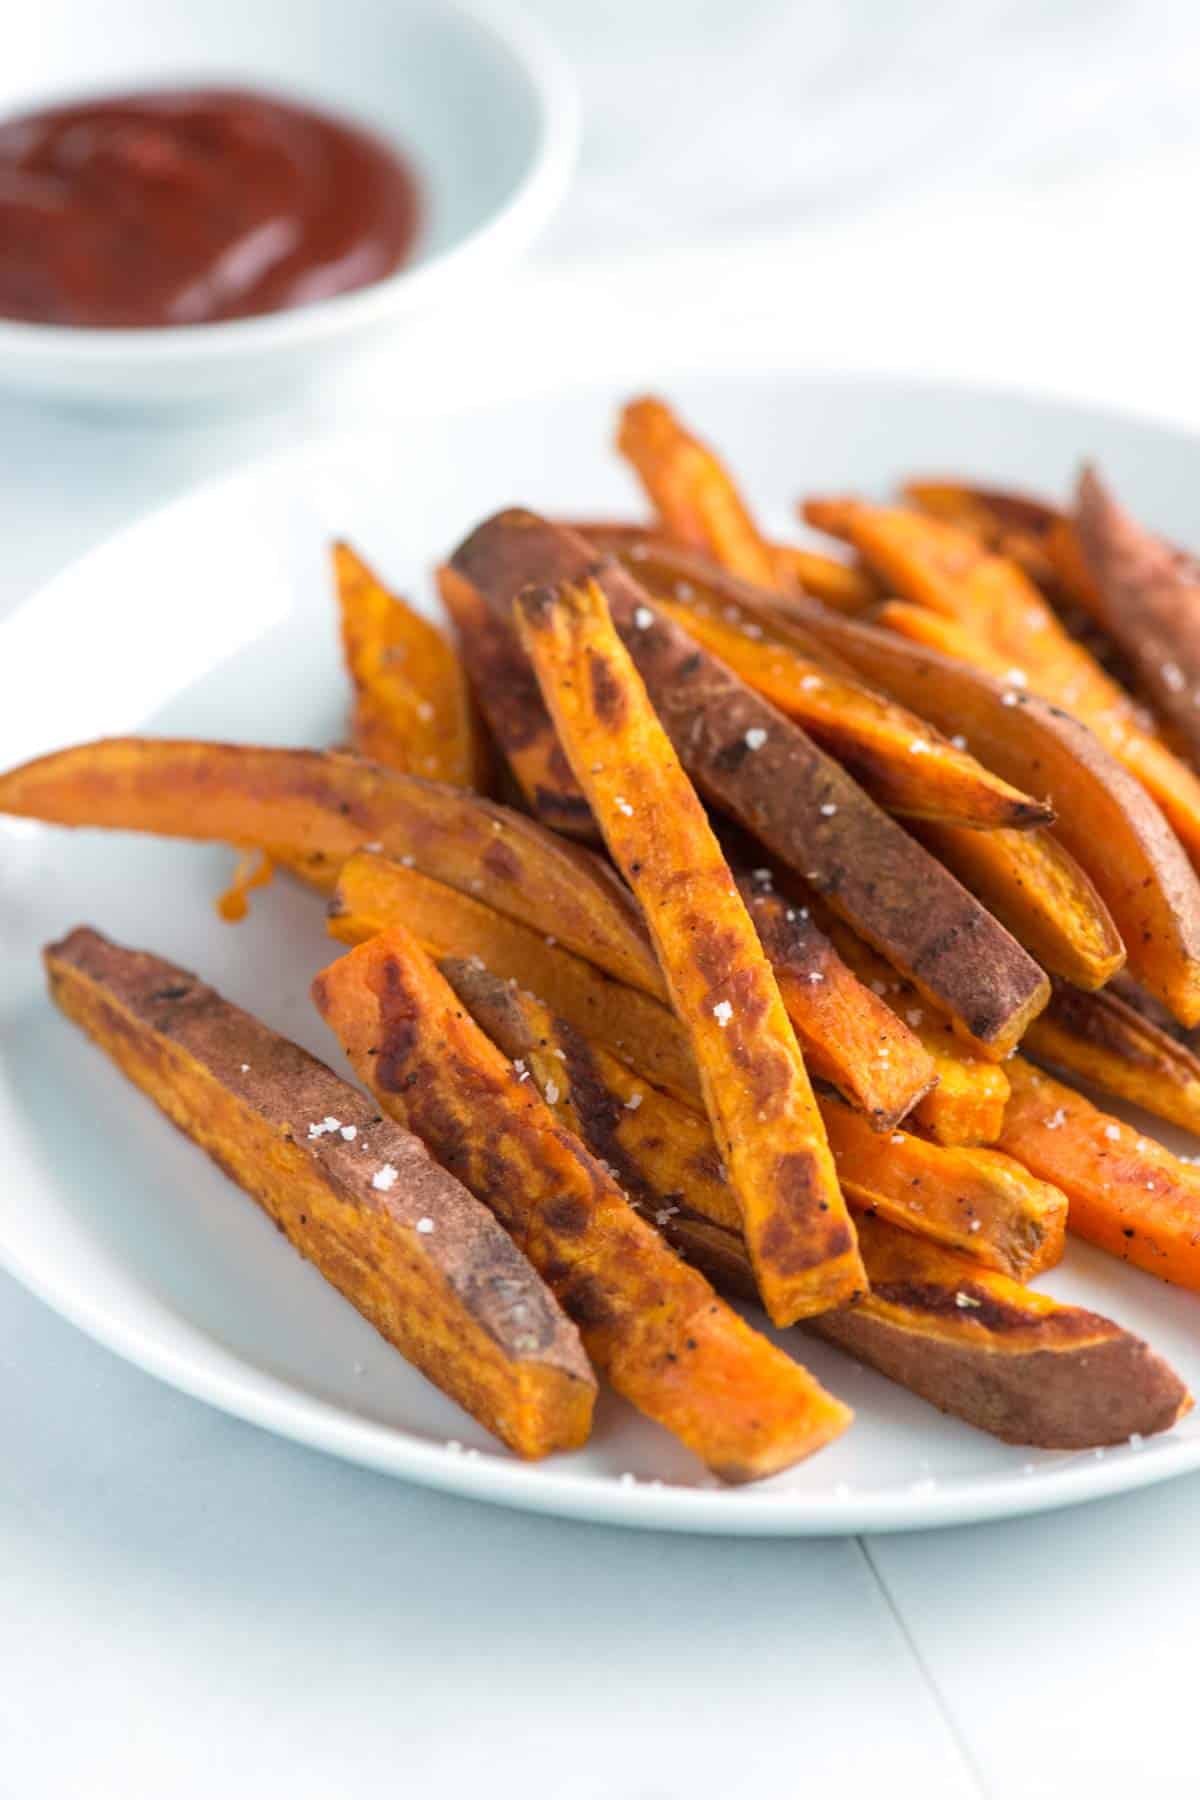
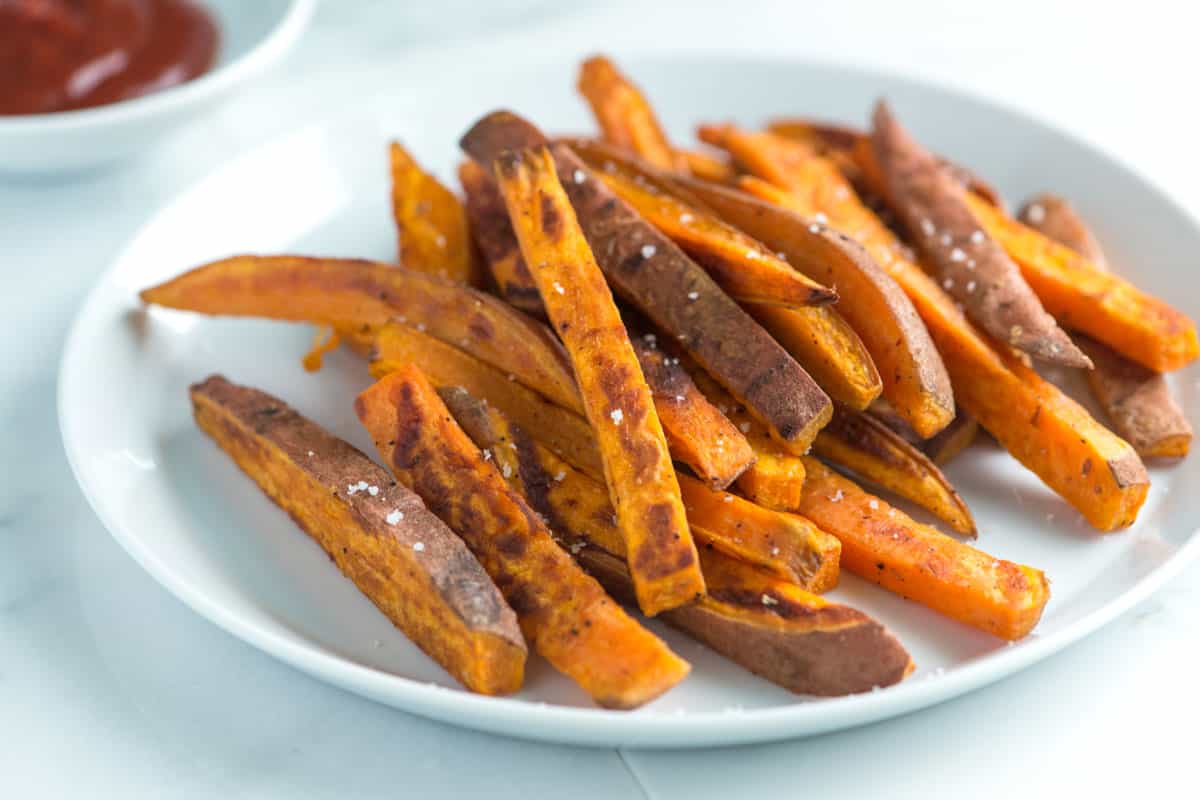
    My easy baked sweet potato fries recipe guarantees crispy, golden-brown outsides with sweet and tender insides. Trust us, you’ll want to make a double batch.

    Crispy Baked Sweet Potato Fries

    Our family absolutely devours these sweet potato fries! If Joanne is in the kitchen while I’m making them, she starts eating them straight off the sheet pan. That’s why we always recommend making a double batch. Bonus: they’re unbelievably easy to make!

    We’re pretty picky about fries, which is why we’re obsessed with how these turn out. Perfectly caramelized and crispy on the outside, yet sweet and tender in the middle. If you love these, be sure to check out some of our other favorites, like our baked french fries, potato wedges, and homemade tater tots.

    Key Ingredients

    • Sweet potatoes: I like medium sweet potatoes (sometimes sold as yams) for these fries. It doesn’t matter if the label says sweet potato or yam, as long as you buy small-to-medium potatoes with orange flesh. Look for Beauregard, Jewel, or Garnet sweet potatoes. They make the best fries.
    • Oil: I use avocado oil or olive oil for coating the fries before baking.
    • Salt and pepper: I keep them simple, but this is a great time to bring out seasoned salt or your favorite spice blend (I love this Cajun seasoning).

    Find the full recipe with measurements below.

    How to Make the Best Sweet Potato Fries

    Tip 1: Don’t worry about peeling. I bake my sweet potato fries in the oven. They’re not quite as crispy as deep-fried fries, but they’re healthier and taste incredible. I don’t bother peeling the sweet potatoes. Just scrub them clean under cold water before slicing.

    Tip 2: Cut them thin. It’s up to you how thick you want your fries, but we like them thin and crispy, so we slice them on the thinner side. Cut the sweet potato into slabs, then slice the slabs into thin fries. Watch our video to see exactly how we do it. It’s really easy!

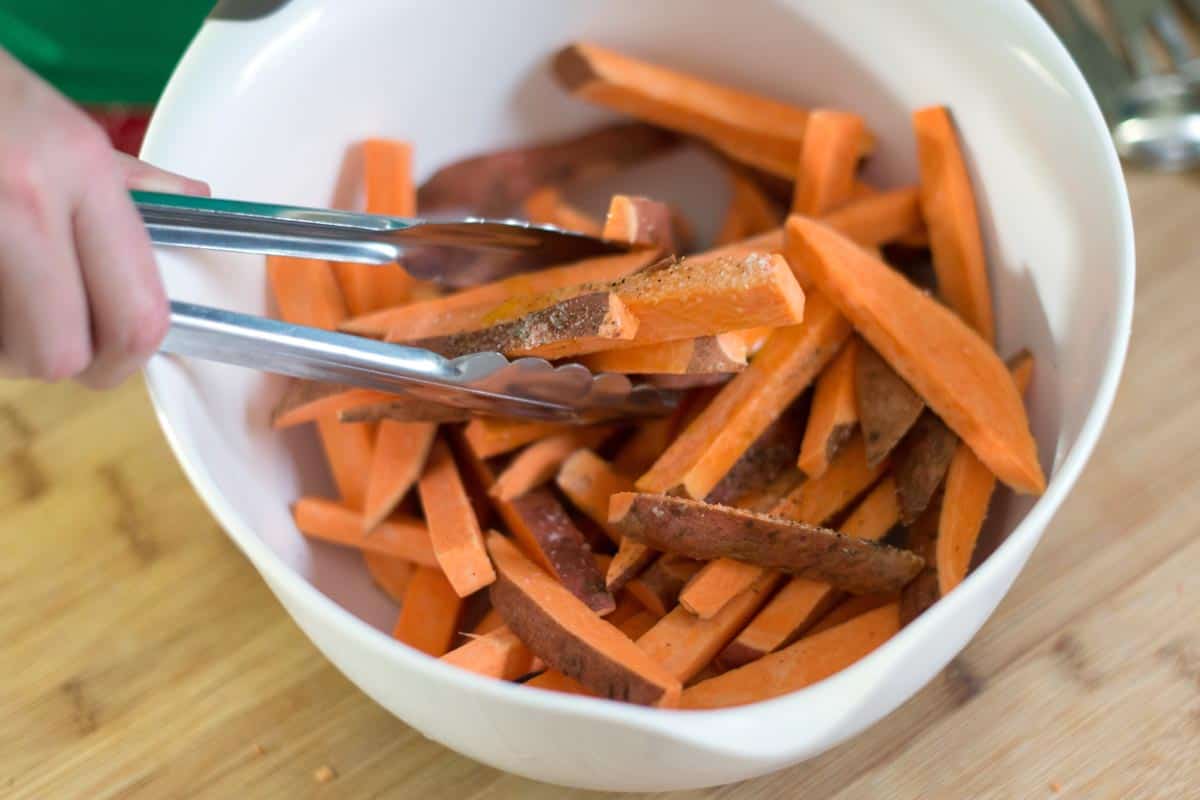
    Seasoning sweet potato fries before baking them

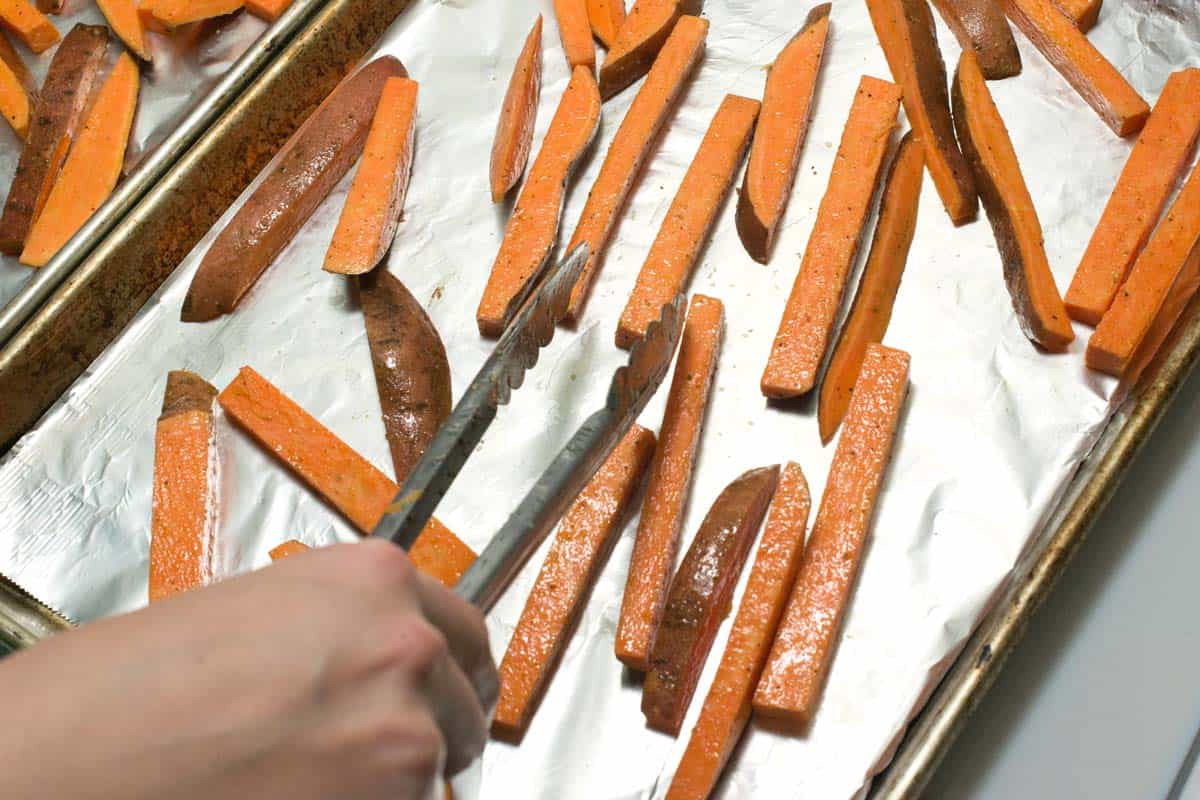
    Tip 3: Don’t overcrowd your baking sheet and preheat it. The secret to crispy baked sweet potato fries is giving them plenty of space. If they’re packed too tightly, they’ll steam instead of crisp up. I also like to preheat my baking sheets before adding the fries since it gives them a head start and helps them brown beautifully.

    Toss the fries with oil, salt, and pepper, then spread them out on foil- or parchment-lined, preheated baking sheets.

    Baking sweet potato fries

    Tip 4: Bake at a higher temperature. Bake the sweet potato fries in a 425°F oven until they’re golden brown and crisp. Depending on how thick you cut them, this usually takes 15 to 25 minutes. Keep an eye on them near the end so they don’t over-brown. Sweet potatoes can go from perfectly caramelized to too dark pretty quickly.

    Serving Suggestions

    Serve these delicious oven-baked sweet potato fries with burgers, veggie burgers, Caesar salad, sandwiches, and turkey meatloaf. My son also loves these with homemade fish sticks and chicken nuggets.

    Depending on your favorite dipping sauce, you can make a homemade sauce alongside them. I love homemade ketchup, mayonnaise, or this creamy honey mustard sauce. Garlic aioli is another favorite, and don’t forget fry sauce!

    More Sweet Potato Recipes

    Homemade Baked Sweet Potato Fries

    Perfect Baked Sweet Potato Fries

    • PREP
    • COOK
    • TOTAL

    This is my favorite sweet potato fries recipe. The fries bake up with caramelized edges and tender centers every time. Watch our recipe video to see exactly how we cut the sweet potatoes into fries. I like to keep the skins on for extra texture and flavor, but you can peel them if you prefer.

    4 Servings

    Watch Us Make the Recipe

    You Will Need

    4 medium sweet potatoes

    3 tablespoons avocado oil or olive oil

    ½ teaspoon fine sea salt

    ½ teaspoon fresh ground black pepper

    Directions

      1Preheat the oven: Preheat the oven to 425°F (218°C). Set aside two baking sheets. The fries caramelize best when placed directly on the baking sheet, but you can line them with aluminum foil for easier cleanup.

      2Preheat the baking sheets: Place the baking sheets in the oven while it heats. Preheating them gives the fries a head start and helps them crisp up.

      3Prepare the sweet potatoes: Slice the sweet potatoes into ½-inch sticks. Add them to a large bowl and toss with oil, salt, and pepper until evenly coated.

      4Arrange the fries: Carefully remove the hot baking sheets from the oven. Divide the sweet potatoes between them and spread into a single layer. Avoid crowding them, if the fries are too close together, they’ll steam instead of brown.

      5Bake the fries: Bake the sweet potato fries, turning once and rotating the pans halfway through, until the edges are lightly browned and the centers are tender, 15 to 25 minutes. They’re done when the surface looks dry and puffy. Don’t worry if the edges turn brown; they’ll taste caramelized, not burnt. Serve the fries hot with your favorite dipping sauce and a final sprinkle of salt.

    Adam and Joanne’s Tips

    • Cornstarch: Some swear by adding a generous pinch of cornstarch to the fries before tossing and baking to make them extra crispy. It really does work, so give it a try if you’d like. We usually skip it because we’re already happy with how crispy the fries turn out as-is.
    • Storing leftovers: Store cooled fries in an airtight container and refrigerate for up to 3 days. They’ll soften as they sit, but you can easily bring them back to life.
    • Re-crisping fries: To reheat, spread the fries on a baking sheet and bake at 400°F (204°C) for 5 to 10 minutes until warmed through and crisp again.
    • The nutrition facts provided below are estimates.

    Nutrition Per Serving
    Calories
    201
    /
    Protein
    2 g
    /
    Carbohydrate
    26 g
    /
    Dietary Fiber
    4 g
    /
    Total Sugars
    5 g
    /
    Total Fat
    10 g
    /
    Saturated Fat
    1 g
    /
    Cholesterol
    0 mg


    AUTHOR:

    Adam Gallagher

    Adam and Joanne of Inspired Taste

    We are Adam and Joanne Gallagher, the creators of Inspired Taste. Established in 2009, Inspired Taste grew from a childhood dream into one of the internet’s most trusted recipe sites with hundreds of reliable recipes, step-by-step videos, and expert tips.More About Us
    Source link

  • Our Favorite Taco Meat Recipe

    Our Favorite Taco Meat Recipe

    Our favorite taco meat recipe calls for ground beef, turkey, or chicken, along with basic spices you probably already have on hand. Easy and so much better than what you can make from the packets sold at the store.

    Taco Meat

    My entire family loves this taco meat recipe, and we use it all the time for quick dinners like beef tacos, turkey tacos, taco salad, burritos, nachos, and more.

    It’s absolutely a recipe you should keep in your back pocket, because when those busy days happen (which they do!), knowing that you can make a 15-minute dinner with basic spices from your spice cabinet and a pound of ground meat helps.

    Key Ingredients

    • Taco Seasoning: I know you can buy packets at the store, but trust me, our taco spice blend is so much better. Also, I bet you already have all the spices you need to make it in your spice cabinet. You’ll combine chili powder, ground cumin, smoked paprika, garlic powder, oregano, and salt together. It’s easy and makes the taco meat extra delicious. Another option is to use this taco seasoning recipe, which makes a larger batch has a few optional ingredients for flavor.
    • Ground meat: Our photos show ground beef, but you can use ground turkey, ground chicken, ground pork, or really any ground meat you have on hand in our recipe below. We like a little fat, but not too much, or else the meat turns out greasy. Look for 7% to 10% fat.
    • Veggies: These are optional, and I don’t always add them. That said, when I have them in the fridge, I love adding chopped onion and Anaheim pepper to my skillet. It adds a bit of extra texture, and I love how they both turn out sweet once cooked.
    • Tomato Paste and Stock: These bring everything together. A little tomato paste deepens the rich flavor of the meat and spices, and the stock keeps it from drying out. I like vegetable broth, tomato broth, beef stock, or chicken stock. You only need 1/2 cup, so use whatever you have (water will work in a pinch, too).

    Find the full recipe with measurements below.

    How to Make the Best Taco Meat

    Tip 1: Make our homemade spice mix. Skip the packets at the store, our simple taco meat seasoning calls for spices I bet you already have on hand. You’ll stir together chili powder, cumin, smoked paprika, garlic powder, dried oregano, and salt. So simple!

    Tip 2: Brown the ground meat. For the best results, get a little color and crispy texture on your ground meat. I like patting it down into the skillet and leaving it for a minute so it starts to pick up some color. Add your spice mix, and then use a wooden spoon to break the meat apart into crumbles. A heavier skillet (like a cast-iron pan) is perfect.

    Browning ground beef in a skillet with taco seasoning.

    Tip 3: Add some extra veggies. I don’t always do this, but when I have them on hand, I love cooking some chopped onion and Anaheim peppers with the meat. They soften and take on a little sweetness, which is really nice with the spices.

    Adding onions and Anaheim peppers to taco meat for extra texture

    Tip 4: Finish with tomato paste and stock. Here’s where we bring everything together and make sure our taco meat stays juicy, not dried out. Stir in a bit of tomato paste, then, when it’s distributed, pour in a bit of stock. Let it simmer, and then you are good to go!

    Pouring chicken stock into a skillet with taco meat

    Serving Suggestions

    I’m betting you already have a few ideas for using your taco meat, but here are a few more suggestions. We love it tucked into homemade tortillas (try corn tortillas or flour tortillas), spooned on top of taco salad, and stuffed into burritos. The toppings and sides for this are endless. Here’s a list of our favorites:

    Taco Meat

    Our Favorite Taco Meat

    • PREP
    • COOK
    • TOTAL

    This is my family’s go-to taco meat recipe. We’ve called for lean ground beef below, but feel free to substitute ground turkey, chicken, or pork. We prefer this when made with ground meat that has a little fat (7% to 10% is perfect). Any more and it’s a bit greasy, any less and it turns out dry. The onions and pepper are optional, but they add a bit of extra texture.

    4 Servings

    You Will Need

    1 ½ teaspoons chili powder

    1 teaspoon ground cumin

    ½ teaspoon smoked paprika

    1 teaspoon garlic powder

    ¼ teaspoon dried oregano

    ¾ teaspoon fine sea salt, plus more as needed

    1 tablespoon avocado oil

    1 pound lean ground beef, 90/10 (450 g)

    ¾ cup finely chopped onion, a quarter of a medium onion, optional

    1 Anaheim pepper, deseeded and finely chopped, optional

    2 tablespoons tomato paste (35 g)

    ½ cup chicken stock or water (60 ml)

    Directions

      1Make spice mix: In a small bowl, stir together the chili powder, cumin, smoked paprika, garlic powder, dried oregano, and salt.

      2Brown the meat: Heat the avocado oil in a medium skillet over medium-high heat. Add the ground beef, pat it down into the skillet, and sprinkle the spice mixture over it. Use a wooden spoon to break up the meat as it cooks, stirring until it begins to brown.

      3Add veggies: Stir in the onions and pepper, then cook, moving them around the pan until they begin to soften and the onions smell sweet, about 3 minutes.

      4To finish: Stir in the tomato paste and cook for 2 more minutes. Add the chicken stock (or water) and simmer for a few minutes until the sauce thickens. Taste, then add more salt if you think it needs it (since this usually gets added to tacos or salads, keeping it well seasoned works really well).

    Adam and Joanne’s Tips

    • Storing: Keep leftovers in an airtight container in the fridge for up to 4 days or in the freezer for up to 3 months.
    • The nutrition facts provided are estimates.

    Nutrition Per Serving
    Serving Size
    1/4 of the recipe
    /
    Calories
    201
    /
    Total Fat
    7.5g
    /
    Saturated Fat
    2.2g
    /
    Cholesterol
    67.8mg
    /
    Sodium
    556.4mg
    /
    Carbohydrate
    6.6g
    /
    Dietary Fiber
    1.6g
    /
    Total Sugars
    2.5g
    /
    Protein
    26.6g


    AUTHOR:

    Joanne Gallagher

    Adam and Joanne of Inspired Taste

    We are Adam and Joanne Gallagher, the creators of Inspired Taste. Established in 2009, Inspired Taste grew from a childhood dream into one of the internet’s most trusted recipe sites with hundreds of reliable recipes, step-by-step videos, and expert tips.More About Us
    Source link

  • Pizza Burgers Recipe – Pinch of Yum

    Pizza Burgers Recipe – Pinch of Yum

    My Grandma Knew.

    Lindsay Ostrom headshot.

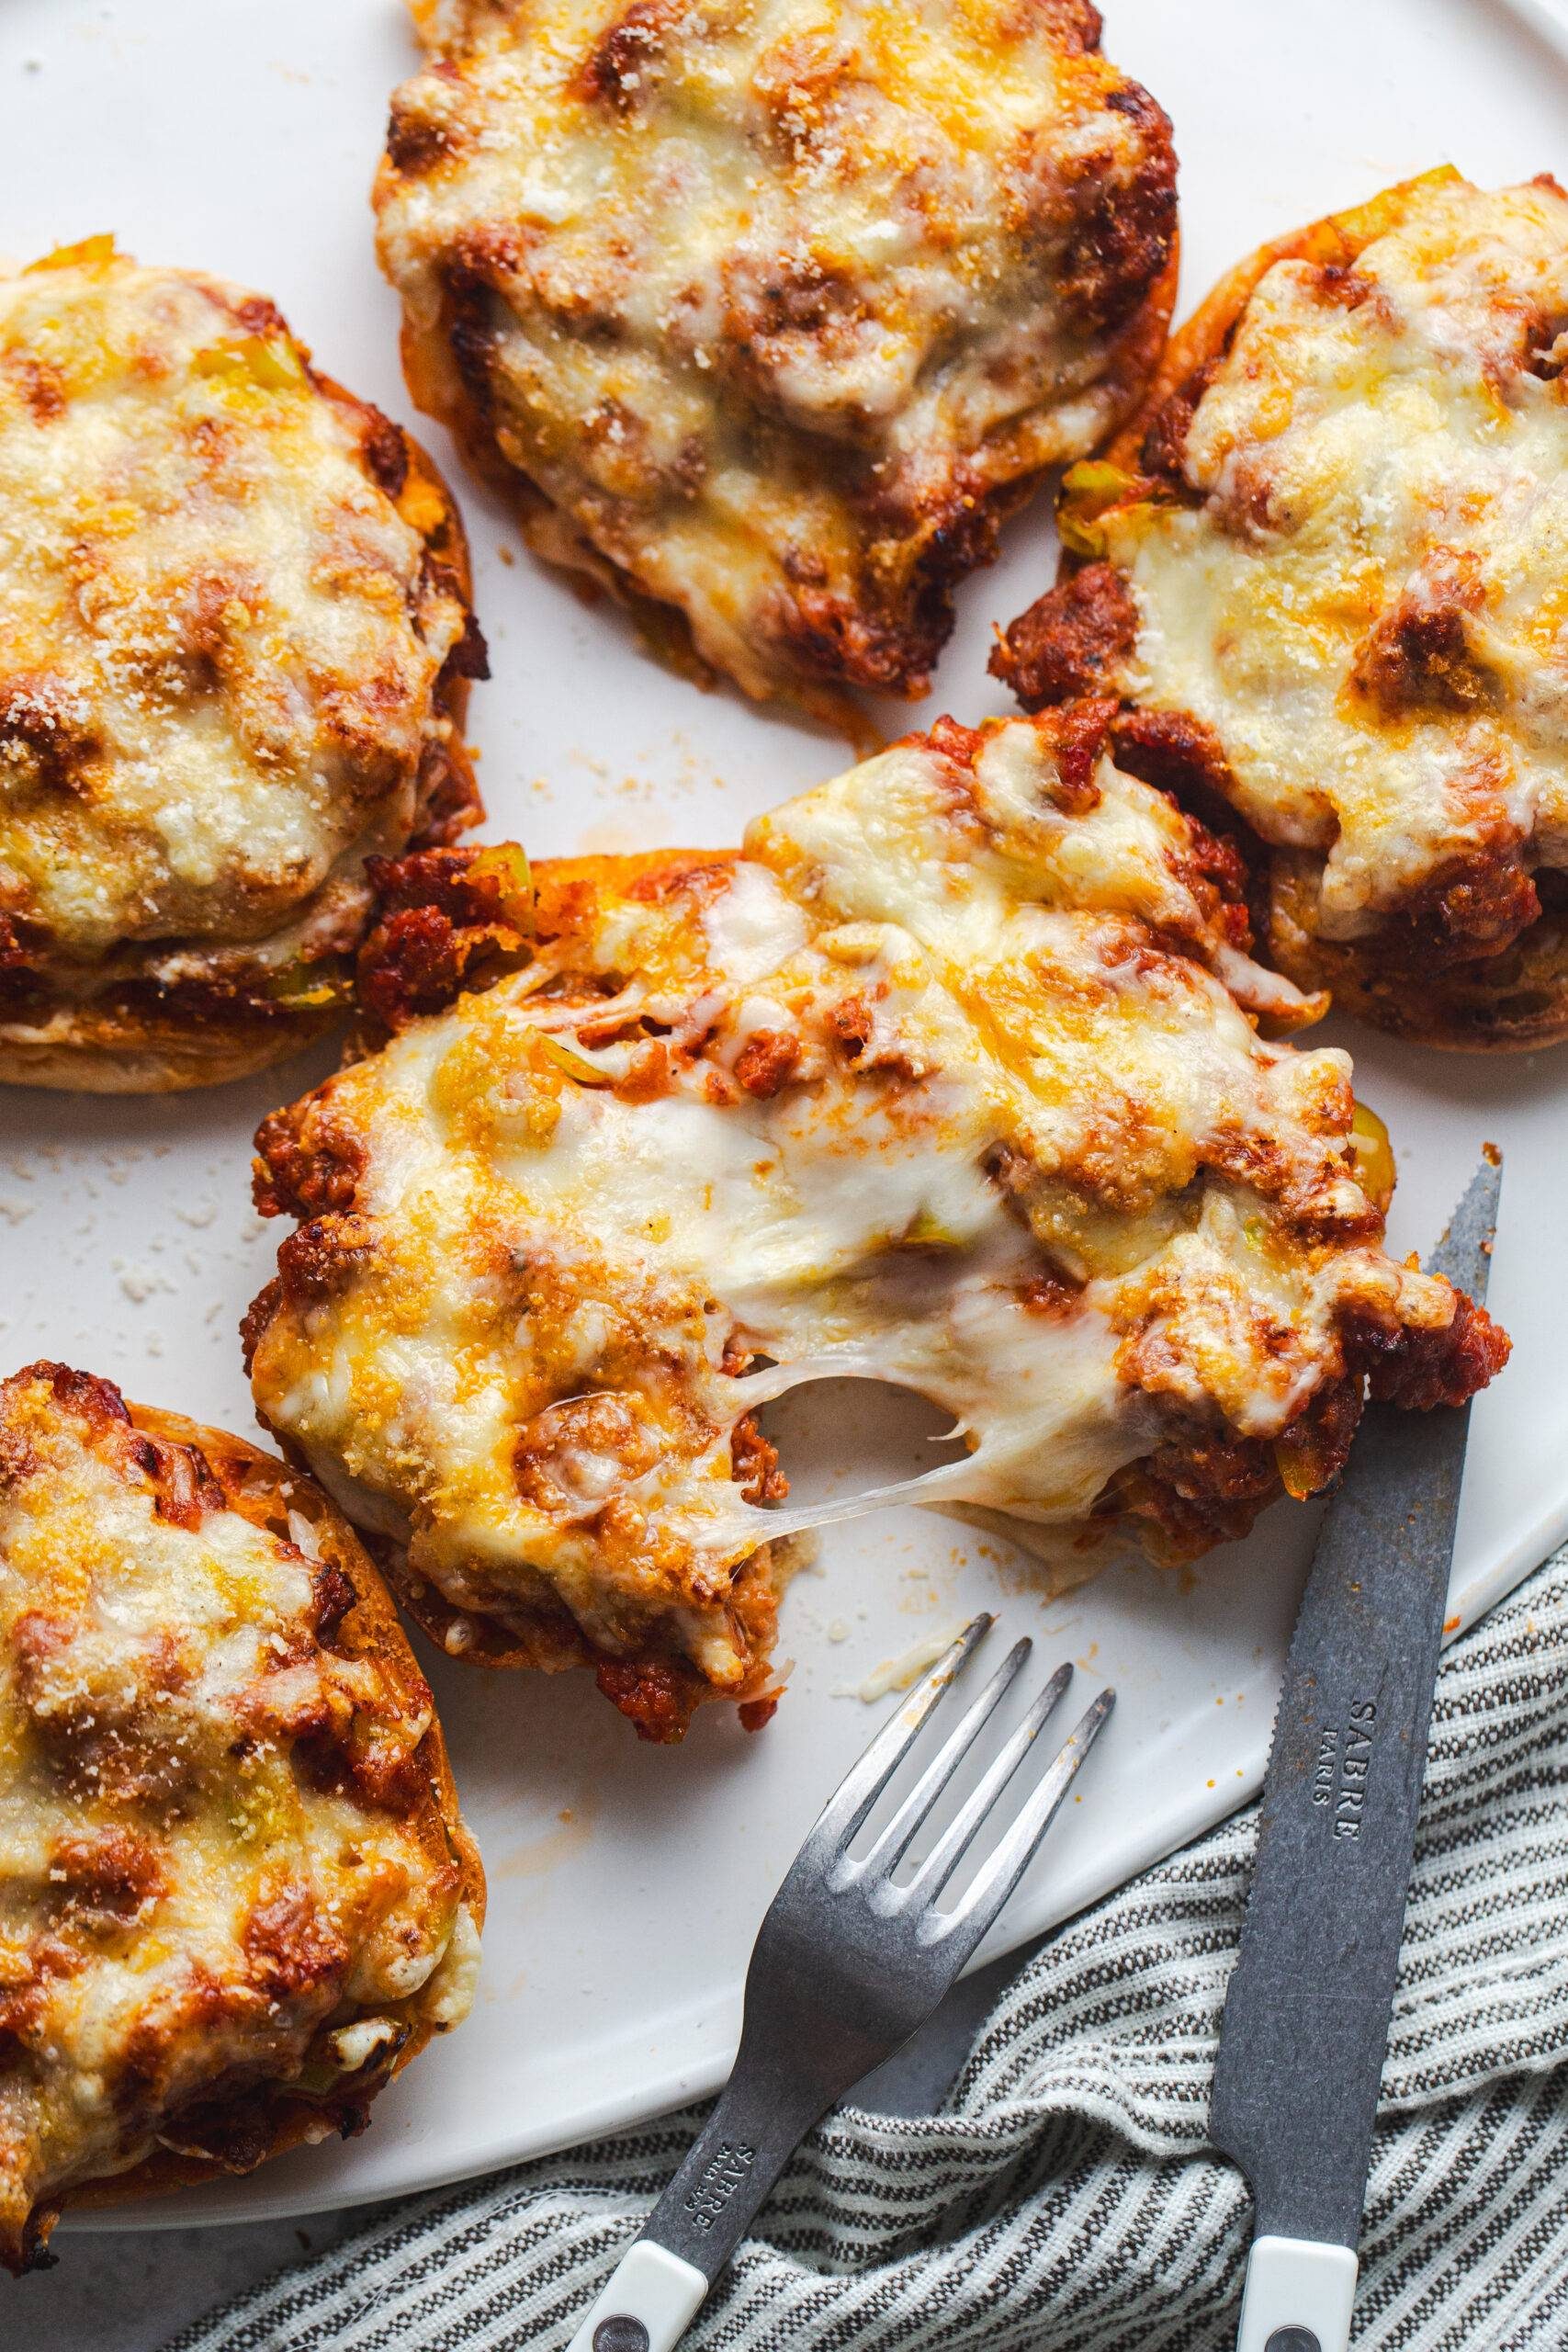
    A crisped English muffin brushed with garlic butter, topped with a savory meat sauce and melty cheese? Oh MAN these are good.

    I’m currently very obsessed with these, which is kind of making me chuckle, because it feels like a peak 90s Midwestern mom moment. HERE FOR IT!

    “Pizza burgers” are a staple of my childhood. My grandma made these all the time, and whenever she would come visit our family, she’d re-up our freezer stash.

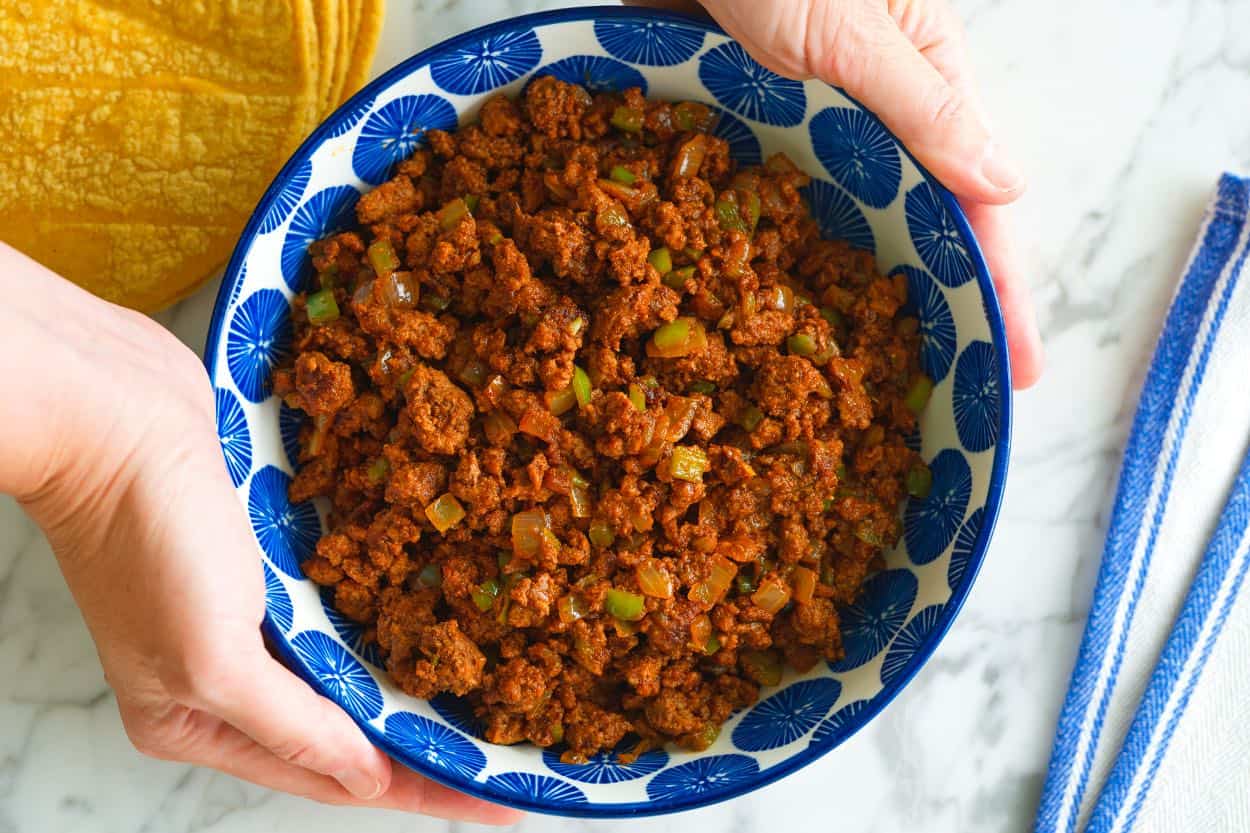
    This recipe is like a collab between my grandma and me: she always did them on English muffins, and I prefer ground Italian sausage (or turkey, or chicken), and brushing all of it with garlic butter.

    They’re just my favorite for the end-of-school-year madness right now:

    • They’re MINDLESSLY EASY.
    • My kids love them.
    • Fun toppings can be mixed in (my fave = pepperoncini).
    • And, importantly: they can be pulled out of the freezer and reheated one at a time – ideal for the times we are trying to get out the door to soccer or find something to eat quickly between work meetings and just questioning every life decision that led us to this moment.
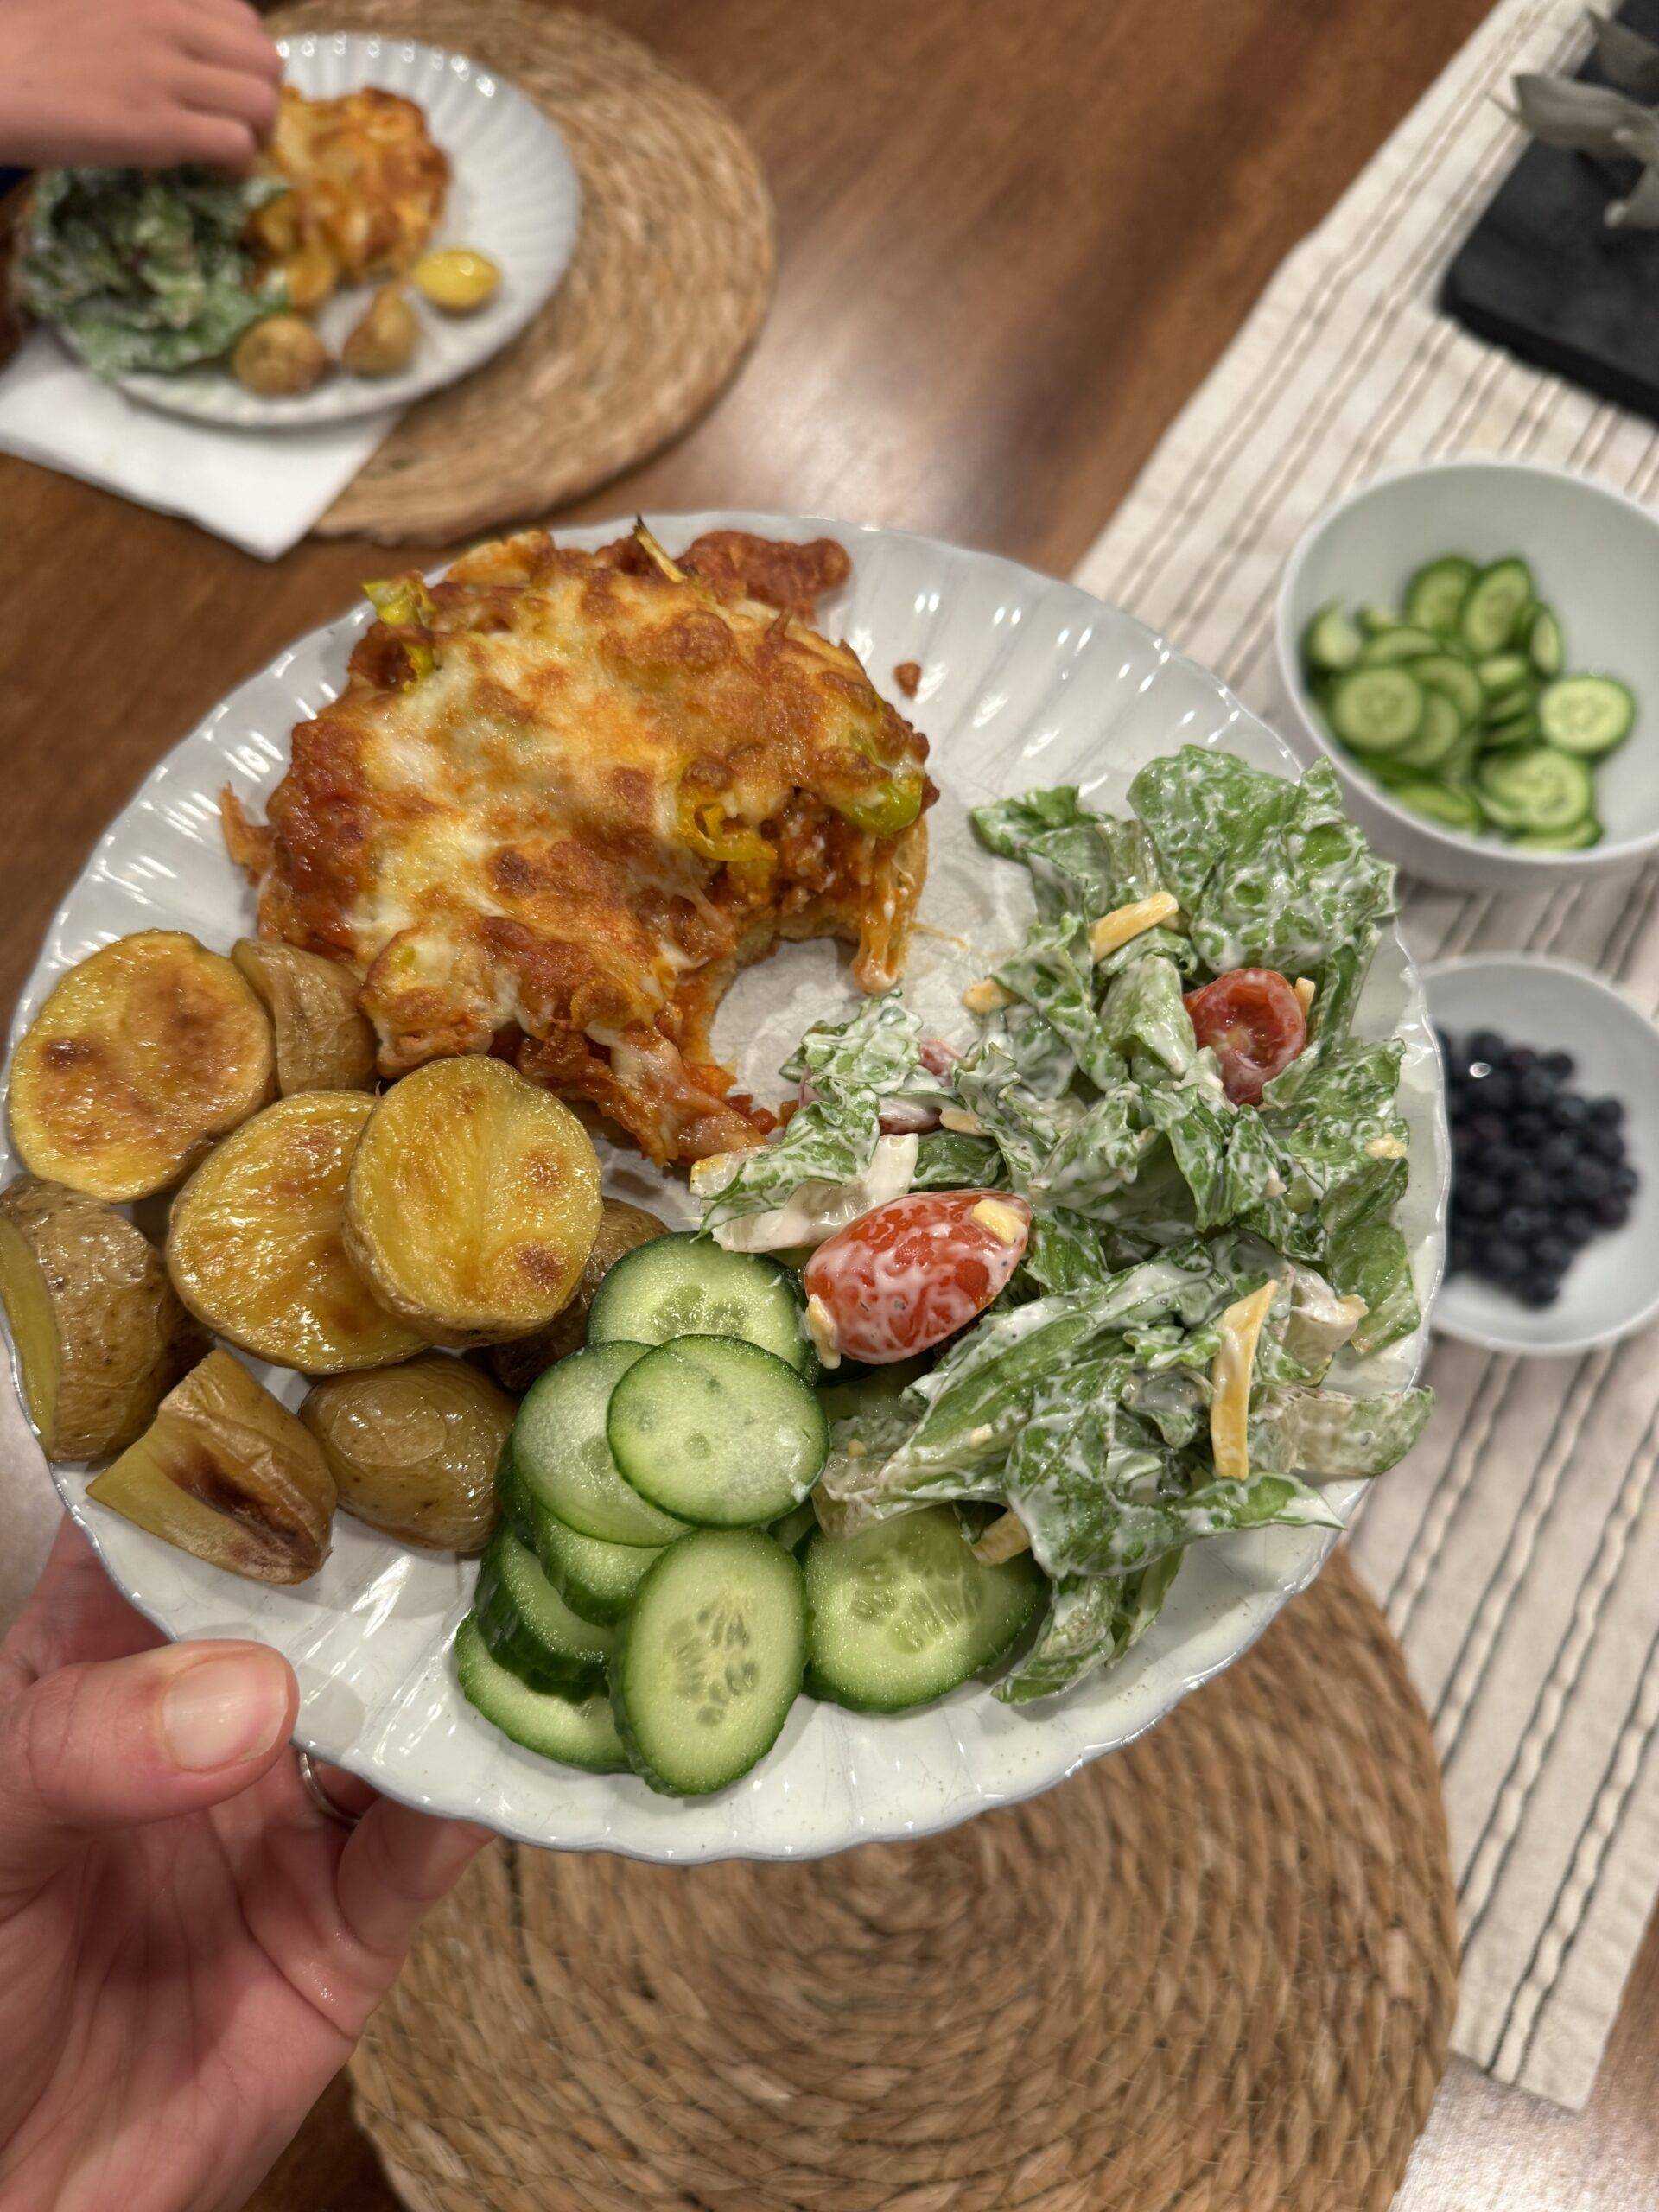
    Pizza burger on a plate with potatoes, cucumber, and salad.

    While in the process of writing this post, I literally just ate two of them for lunch. Oh man, so good.

    Pulled out of the freezer. Air-fried for 8 minutes. Drizzled them with good olive oil (DELICIOUS) and topped with some kosher salt and served alongside a pile of supremely crunchy cucumbers. It was a moment!

    Hope you love these! From my Midwestern grandma, to me, to all of us. 🙂

    Lindsay signature.

    Source link