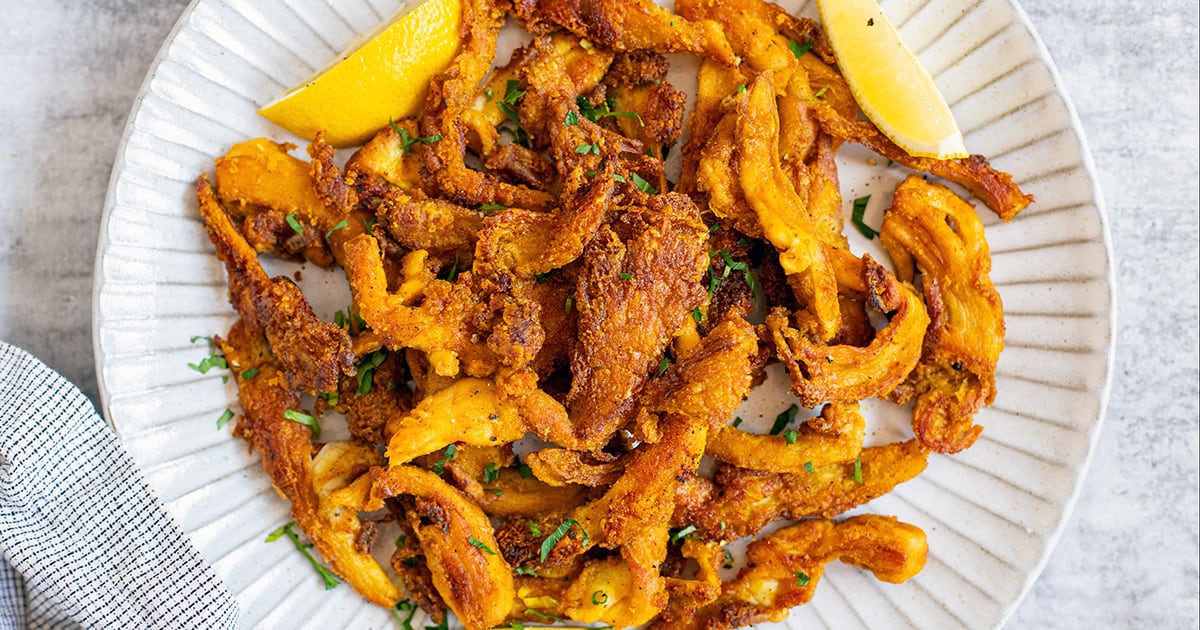
Author: admin

  • BBQ Chicken Pineapple Skewers

    BBQ Chicken Pineapple Skewers

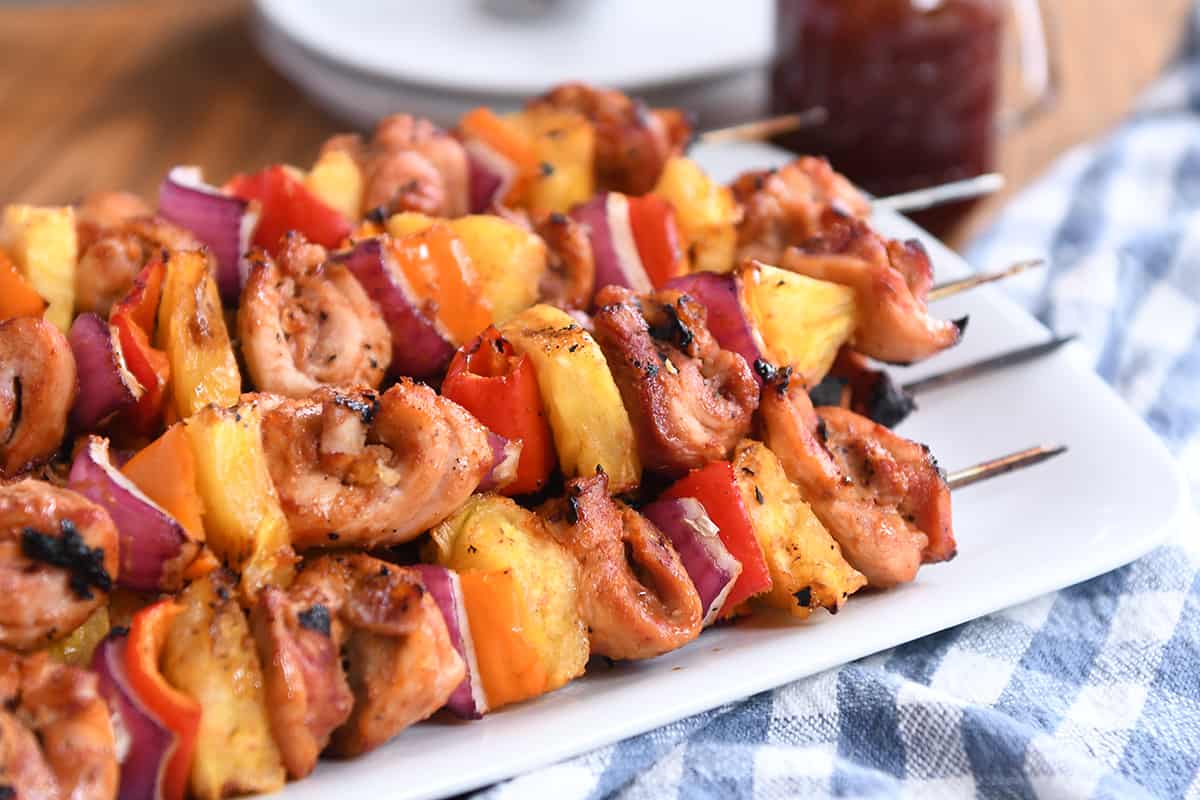
    These easy BBQ chicken pineapple skewers are fantastic! Moist, flavorful chicken pieces next to the sweet, juicy pineapple make it the perfect summer meal.

    Not only are these tasty little BBQ chicken pineapple skewers perfect for a summer holiday cookout, but they are excellent (and easy enough) for a refreshing weeknight dinner. My family goes crazy for them!
    A Simple Marinade

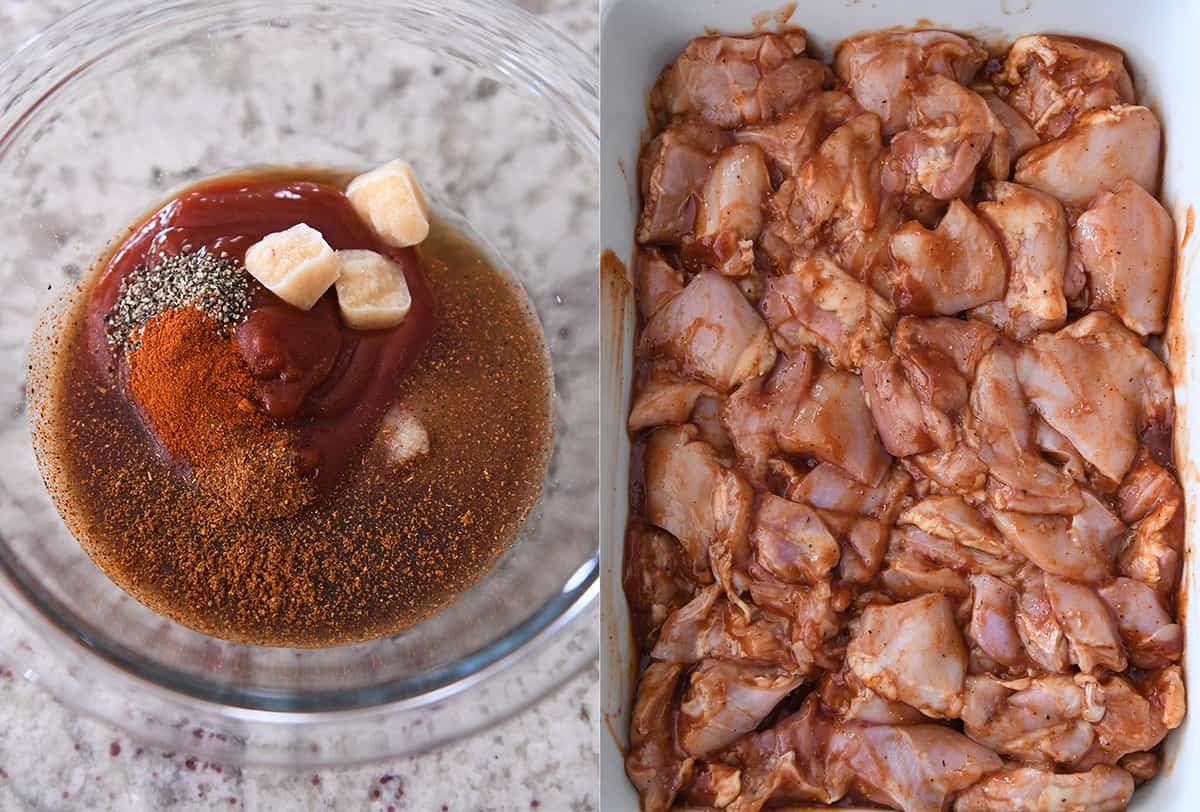
    The secret to these easy BBQ skewers is the marinade. It is zesty and flavorful!

    • ketchup
    • honey
    • vinegar
    • worcestershire sauce
    • garlic
    • paprika + chili powder + salt + pepper

    The frozen cubes in the bowl of marinade below is frozen garlic (courtesy of Trader Joe’s – one of my favorite things to buy there and gives all the fresh garlic flavor without any fuss).

    Marinade the chicken pieces for at least two hours but up to 24 hours.
    Chicken Breasts vs Chicken Thighs

    For these skewers, I definitely think chicken thighs are just a touch better, but I’ve made them with both cuts of meat, and you can’t go wrong with either.

    If using chicken breasts, take care not to over cook the skewers. The small pieces of meat will cook pretty quickly!

    One of the great advantages to using chicken thighs is that they they don’t dry out like chicken breasts (unless vastly overcooked). Don’t be that person. 😉

    To be honest, while I can appreciate that many people consider thighs to be the superior cut of chicken to use, and I also enjoy the flavor and juiciness, I only use them occasionally because I don’t love the fat-trimming process. Even pre-trimmed chicken thighs get an extra trimming in my kitchen.

    Whichever cut of chicken you choose, the results will be spectacular if you keep an eye on the cooking time!
    Grilling/Cooking Options

    I exclusively use a pellet smoker/grill for all my grilling. For this recipe, I cook the skewers at 375 degrees F for a few minutes on each side.

    A regular propane or charcoal grill will work just fine, too.

    If you don’t have a grill, try broiling the skewers on a foil-lined and greased baking sheet for 3 to 4 minutes per side (watch closely).

    I think the chicken, pineapple, pepper and onion pieces could also get tossed into an air fryer (sans the skewer) and cooked that way, too. It’s a very forgiving recipe!
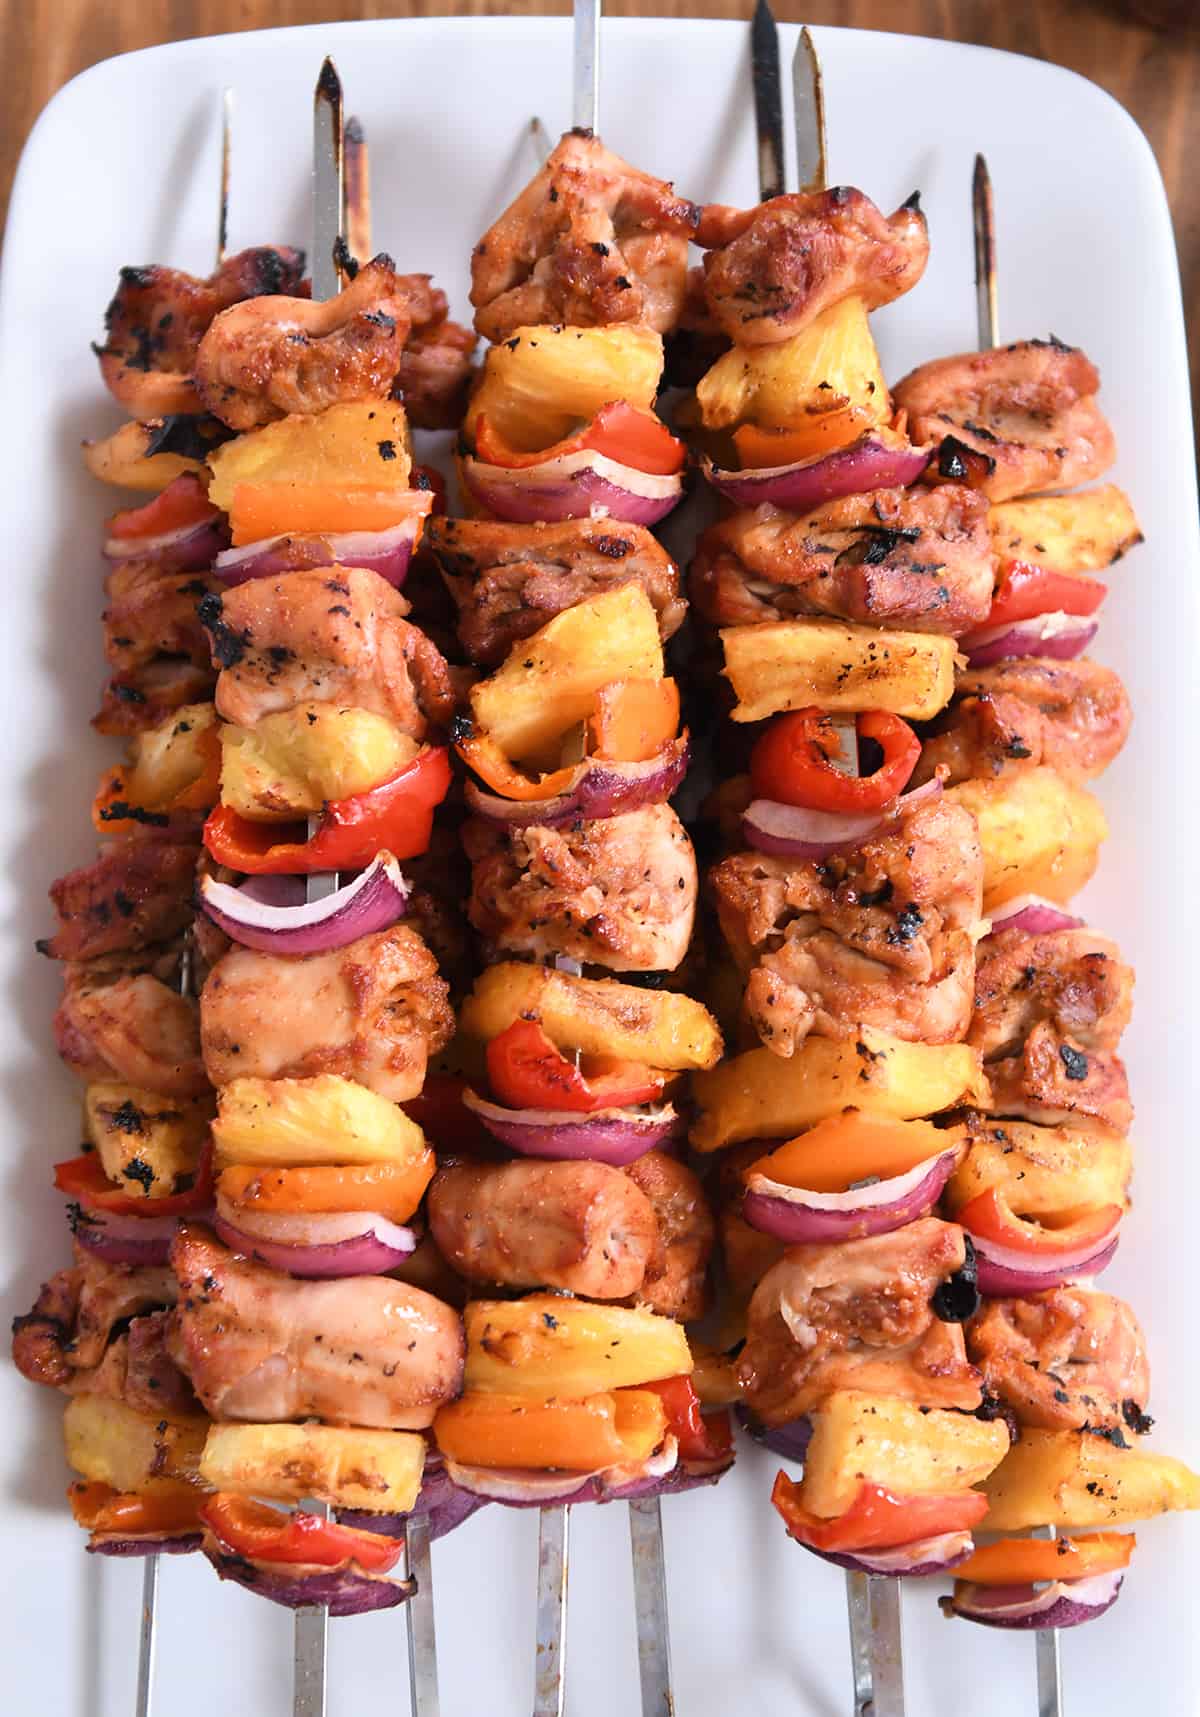
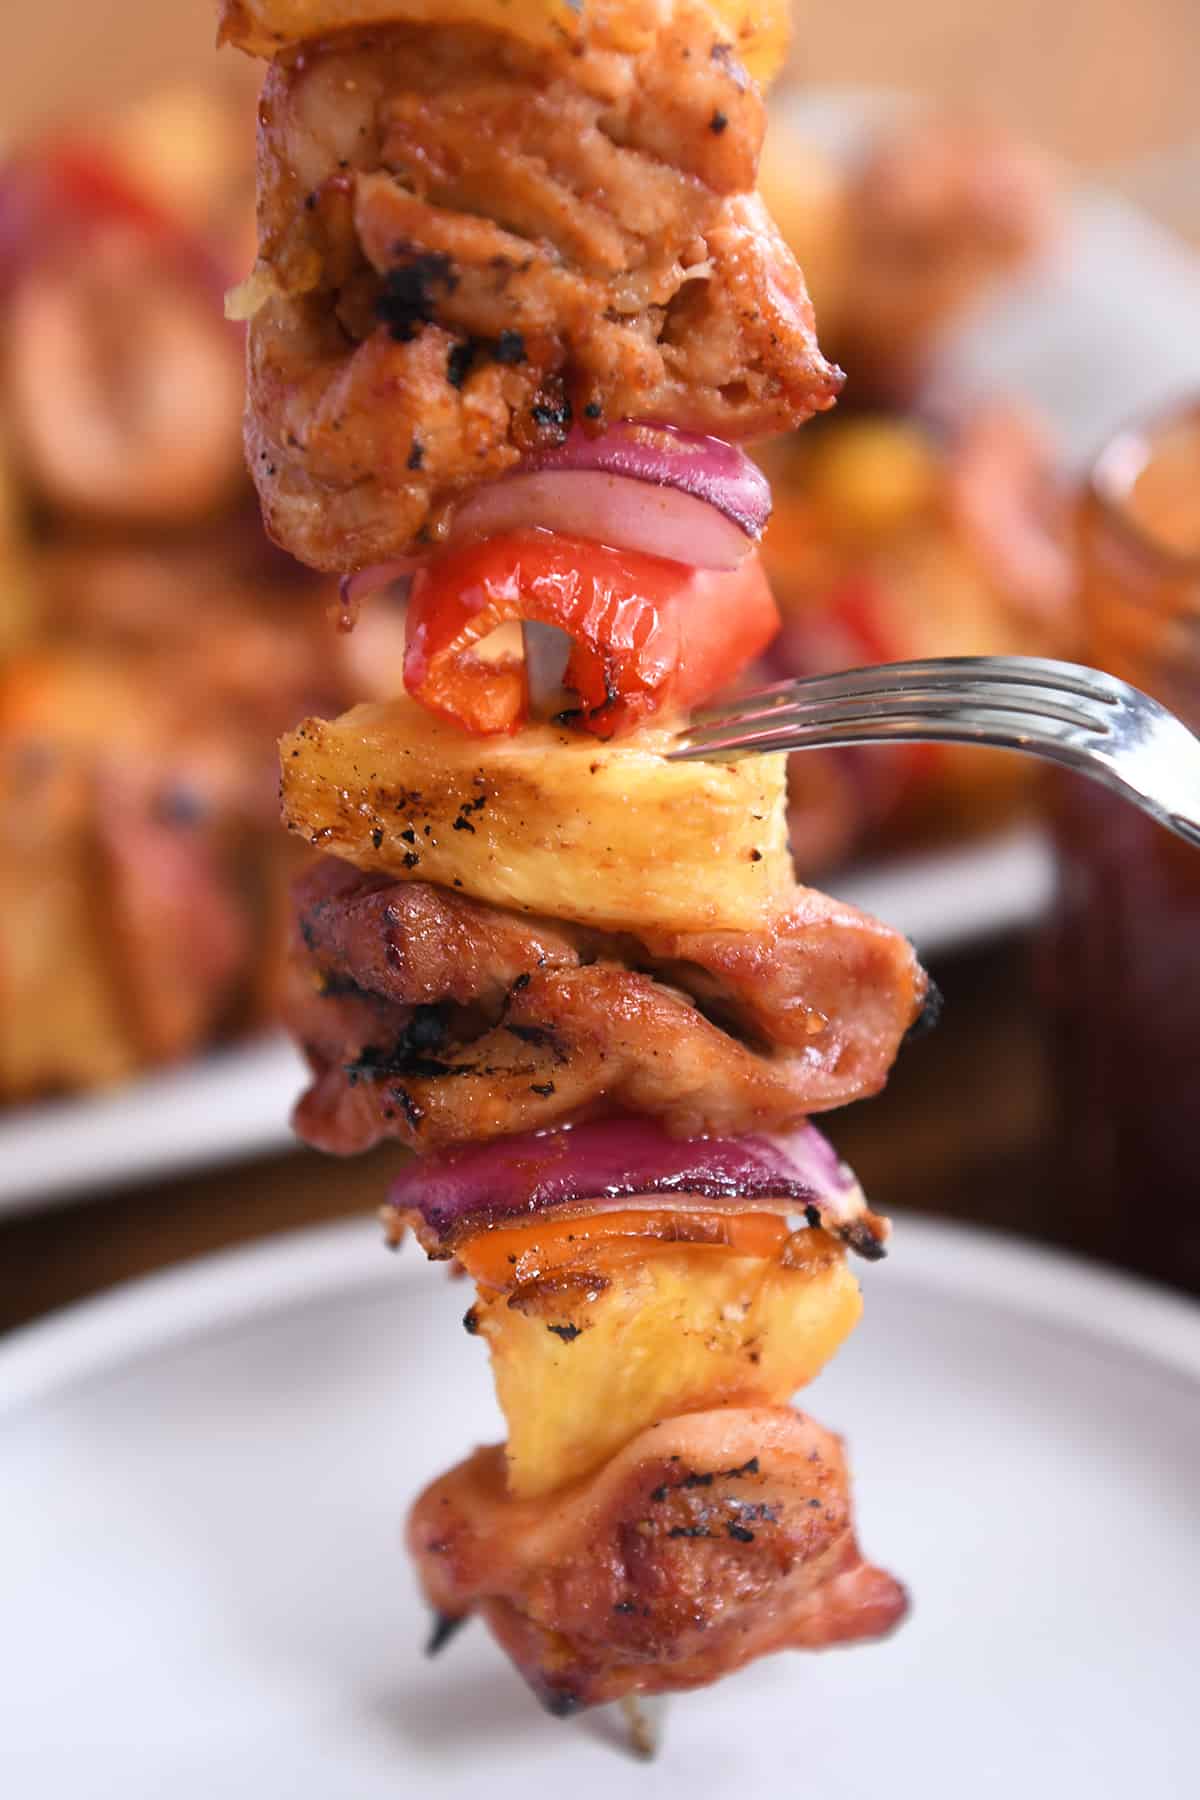
    There are few things I love in this life more than grilled pineapple, and while the flavorful, tender chicken is very, very good, it’s the juicy, caramelized pineapple that really gets me.

    To be sure, the entire combination of zesty BBQ flavors, sweet/juicy pineapple, and crisp-tender veggies is an absolute winner.

    We love these skewers and make them all the time. They are way too good to relegate to holiday BBQ’s and cookouts only!
    One Year Ago: Cheesy Zucchini Spaghetti Casserole 
    Two Years Ago: My Favorite Chicken Salad 
    Three Years Ago: Jalapeño Cheddar Turkey Burgers 
    Four Years Ago: Crazy Good Korean Beef Tacos with Quick Slaw and The Sauce to End All Sauces
    Five Years Ago: Steak Fajitas with Chipotle Sour Cream
    Six Years Ago: The Best Zucchini Muffins {Whole Grain}
    Seven Years Ago: BBQ Chicken Salad Cilantro Lime Rice Bowls
    Eight Years Ago: Skillet Turkey Meatballs with Lemon Rice
    Nine Years Ago: Brookies {Brownie + Chocolate Chip Cookies} 
    Ten Years Ago: Brazilian Lemonade
    BBQ Chicken Pineapple Skewers

    • cup (180 g) ketchup
    • 1 tablespoon honey
    • 1 tablespoon rice vinegar or apple cider vinegar
    • 1 tablespoon Worcestershire sauce
    • 1 tablespoon garlic, finely minced (or 1 1/2 teaspoons garlic powder)
    • ½ teaspoon sweet or smoked paprika
    • ½ teaspoon coarse, kosher salt
    • ¼ teaspoon chili powder
    • ¼ teaspoon black pepper
    • 1 ½ to 2 pounds boneless skinless chicken breasts or chicken thighs cut into 1 1/2-inch pieces
    • 1 medium pineapple
    • 2 medium bell peppers, any color
    • 1 medium red onion

    Prevent your screen from going dark

    • In a medium bowl, whisk together the ketchup, honey, vinegar, Worcestershire sauce, garlic, paprika, salt, chili powder and black pepper.

    • Place chicken pieces in gallon-size resealable bag or shallow dish. Pour the marinade over the chicken and toss to coat evenly. Seal the bag or cover the dish and refrigerate for 2 to 24 hours.

    • Preheat a pellet grill or regular grill to medium/medium-high heat.

    • Cut the pineapple, peppers and onions into 1 to 1/2-inch pieces.

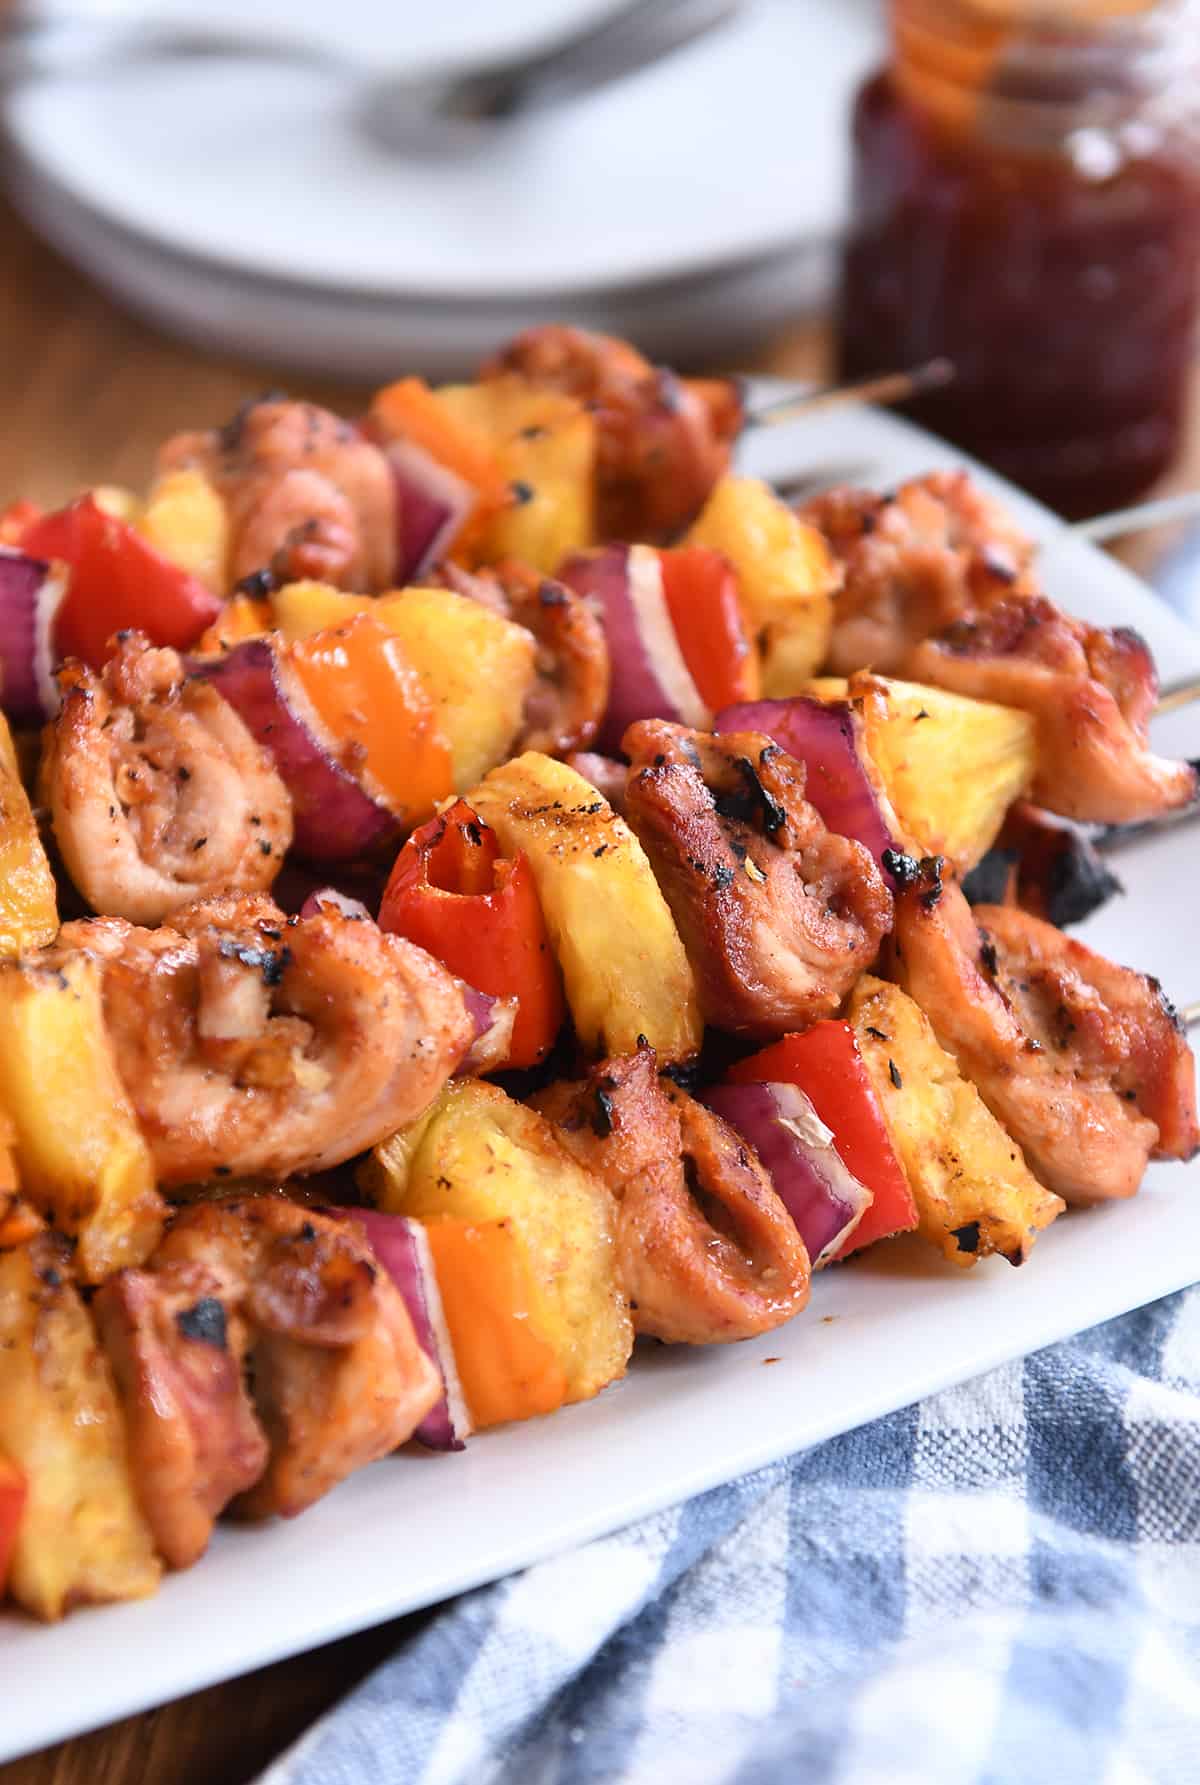
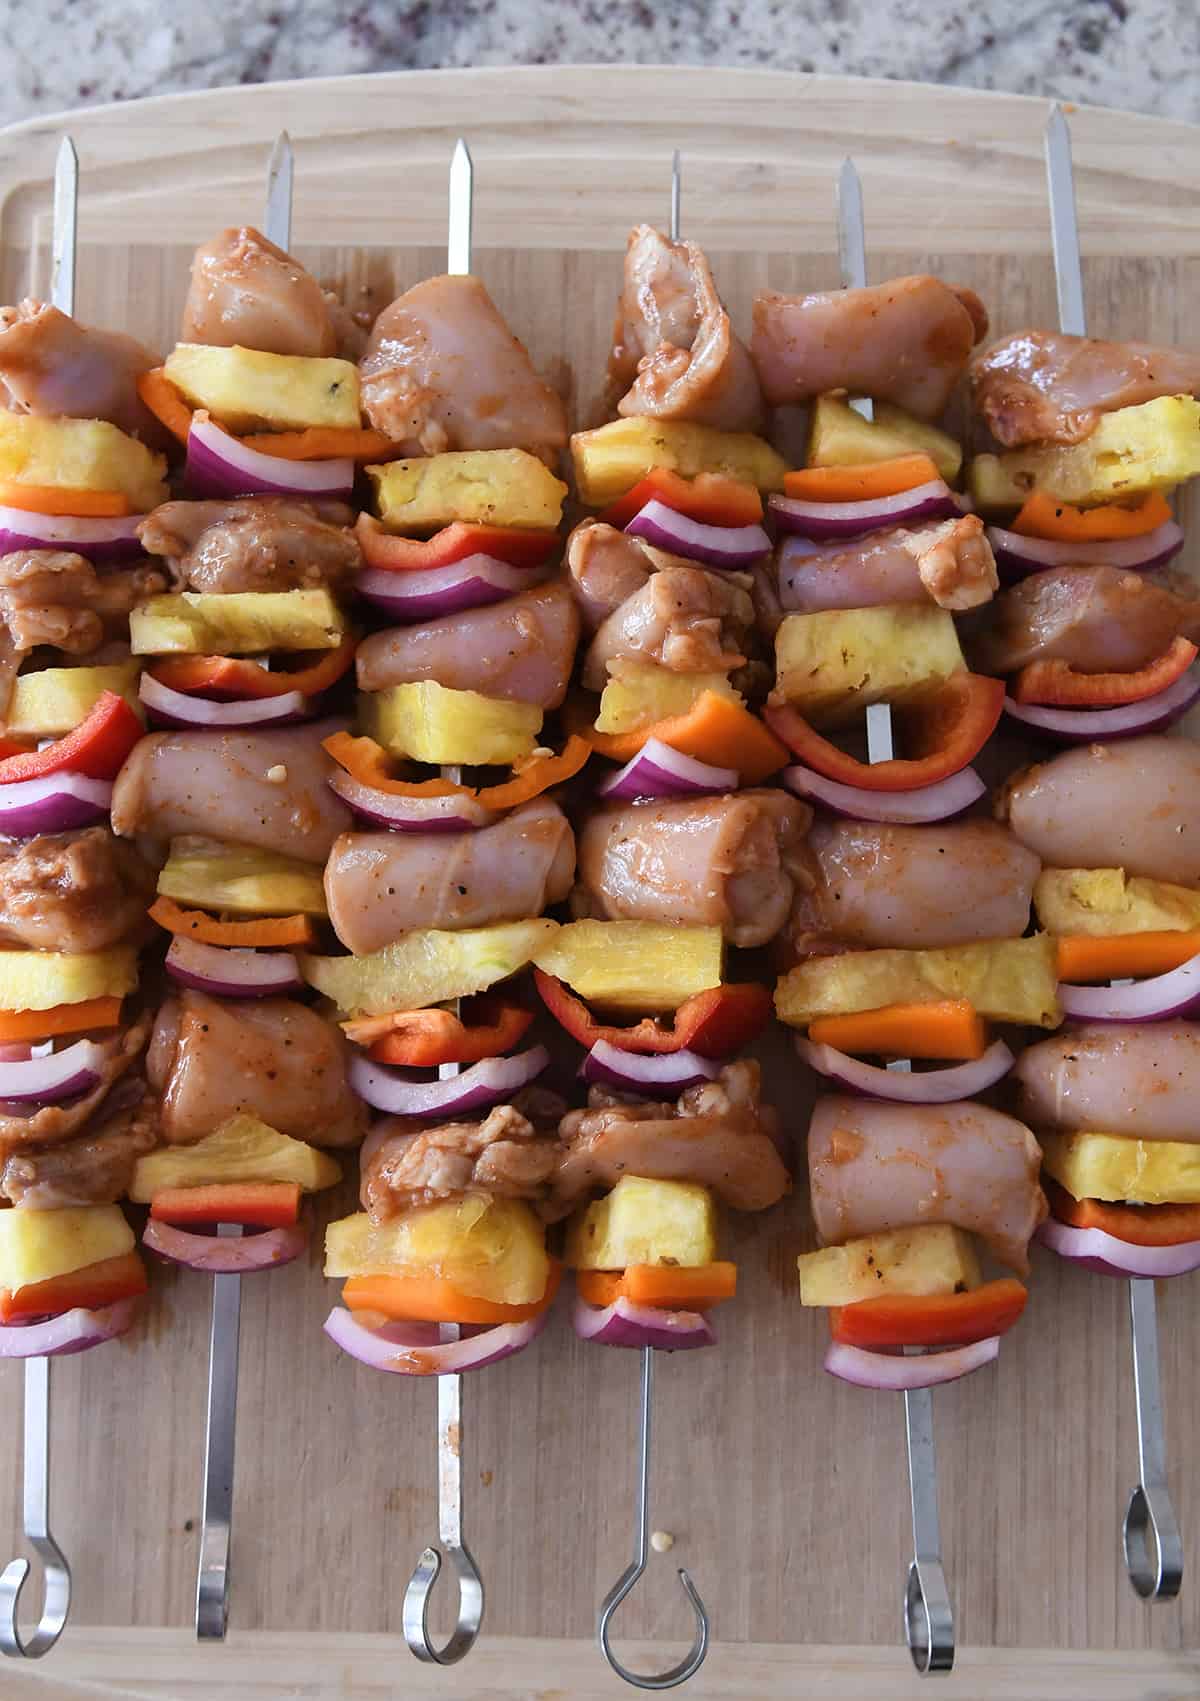
    • Thread the chicken, pineapple, peppers and onions onto skewers. The order doesn’t necessarily matter, but I thread as follows: onion, pepper, pineapple chicken (repeated about 4 times for 12-inch skewers). If any of the chicken pieces are really long, fold them in half before threading onto the skewer.

    • Grill the skewers, flipping once, until the chicken is cooked through, about 4 to 5 minutes per side for chicken breasts and 6 to 7 minutes per side for chicken thighs. Serve immediately.

    Pineapple: depending on the size of the pineapple, you may have some leftover so take care to keep it uncontaminated during the threading process (with the raw chicken); the leftover fresh pineapple can be served alongside the grilled skewers, if desired. I haven’t tried this recipe with canned pineapple chunks but I’m guessing they should work ok if you don’t have fresh pineapple.
    Veggies + Onions: the bell peppers and onions add great flavor (plus they are really delicious grilled), however, they can be left off, if desired. 
    Chicken: the chicken marinade is really tasty and would also be delicious for whole grilled chicken breasts or thighs. 

    Serving: 2 skewers, Calories: 388kcal, Carbohydrates: 50g, Protein: 39g, Fat: 5g, Saturated Fat: 1g, Cholesterol: 109mg, Sodium: 824mg, Fiber: 5g, Sugar: 37g

    Disclaimer: I am a participant in the Amazon Services LLC Associates Program, an affiliate advertising program designed to provide a means for me to earn fees by linking to Amazon.com and affiliated sites. As an Amazon Associate I earn from qualifying purchases.
    Source link

  • Cheesy Chicken Fritters – All Day I Dream About Food

    Cheesy Chicken Fritters – All Day I Dream About Food

    These easy Chicken Fritters are crispy on the outside, tender on the inside, and packed with savory flavor. Made with keto-friendly ingredients, they come together quickly for a delicious low carb meal or appetizer. Perfect for meal prep or dipping in your favorite sauces, these fritters will be a hit with the whole family!

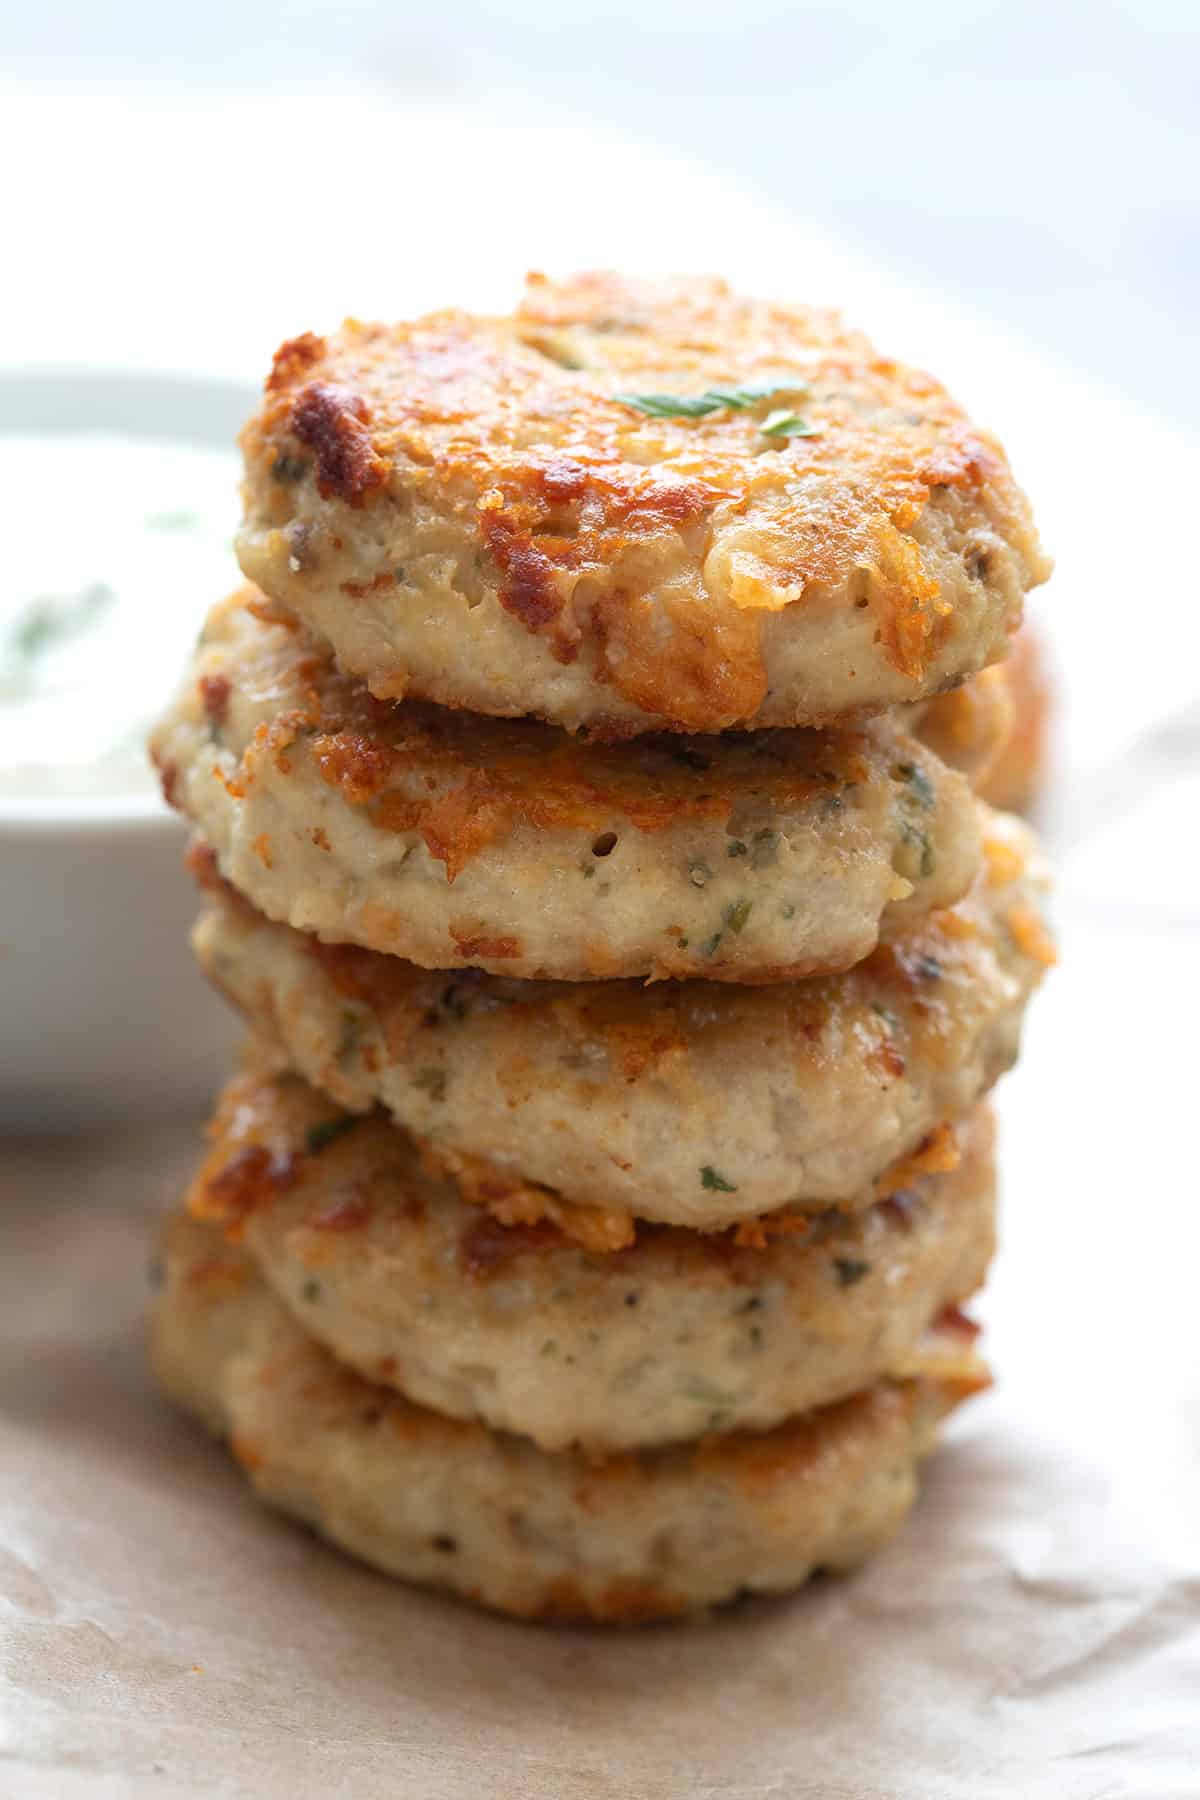
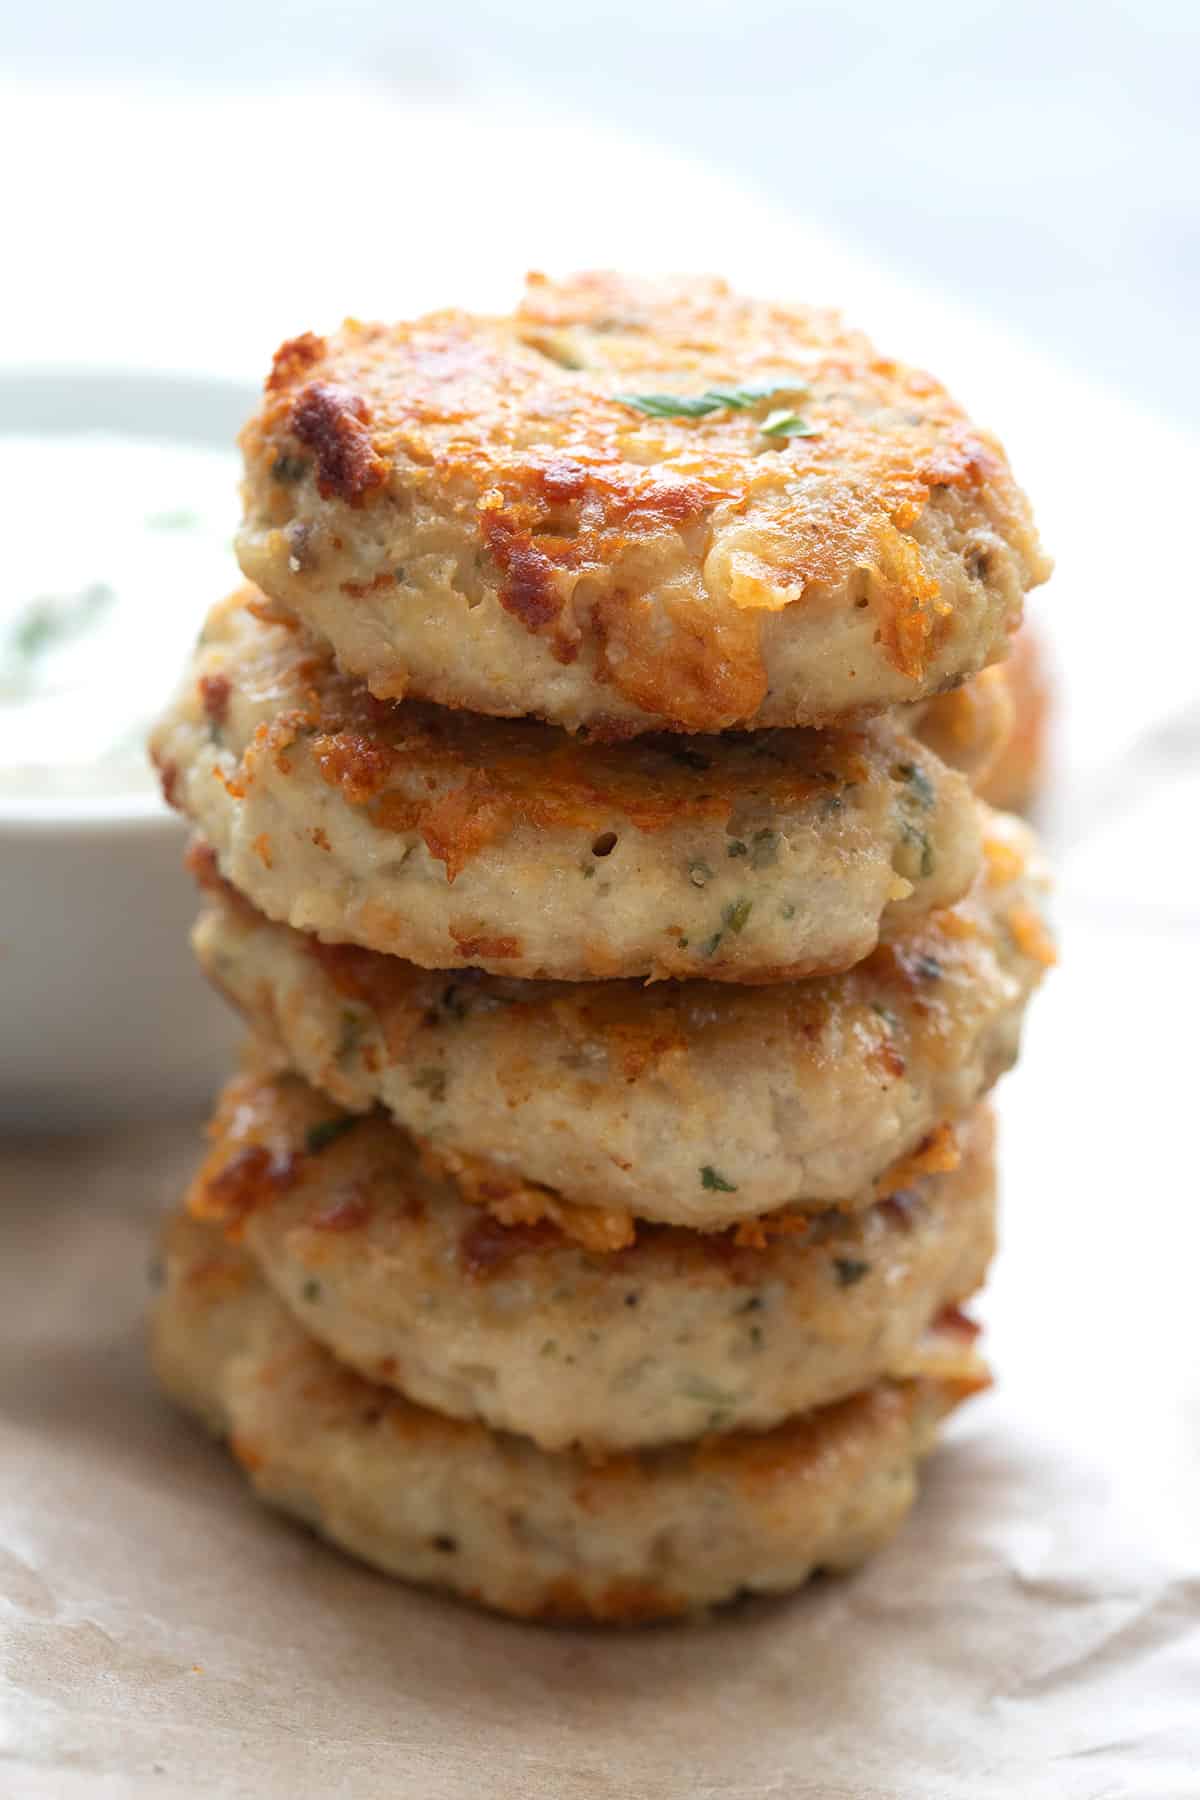
    Close up shot of a stack of Keto Chicken Fritters.

    Let me give you a little bit of advice, my friends. Head to your kitchen right now and whip up a batch of these Chicken Fritters. You will be so darn happy that you did! These tasty nuggets are crispy on the outside, tender on the inside, and packed with cheesy goodness.

    Make a big batch to serve to friends with some feta dressing or chipotle ranch dressing for dipping. Or keep them all for yourself for quick lunches or high protein snacks. They’re great over salad too!

    Susan says:

    “These are literally the BEST. I’ve made them so many times as a meal. Side of steamed garlic broccoli, & serve with ranch, bleu cheese, au jus, all of the above, whatever. Whole family loves them. So much flavor.”

    A stack of easy chicken fritters.

    These keto chicken fritters have been insanely popular from the moment I hit publish. And it’s not hard to see why. They’re made with simple, wholesome ingredients. And the cheddar melts into the fritters as they cook, creating a crispy golden crust and a tender, cheesy interior.

    It’s easily one of my most popular keto appetizer recipes. One bite and you’ll be hooked. And if you watch the video and see me doing the happy dance, you might just want to groove along with me!

    Top down image of chicken fritters on a piece of brown parchment, with a bowl of ranch dressing.

    Why readers love this recipe

    • Fabulous flavor: These chicken fritters are made with sharp cheddar, garlic, and red pepper flakes, for bold savory flavor.
    • Wonderful texture: Crispy on the outside, tender and cheesy on the inside!
    • Easy recipe: Using ground chicken makes these fritters come together quickly and easily.
    • Healthy ingredients: No special ingredients in this recipe. Just some chicken, cheese, almond flour, and some seasonings.
    • Gluten-free: Great for people who can’t tolerate wheat or gluten.
    • Customizable: Feel free to use ground turkey or a different cheese like pepper jack. I have one reader who made a Tex Mex version!
    • Make ahead: You can easily prep these ahead for easy appetizers or family-friendly dinners.
    • Great macros: With 19 grams of protein and less than 2 grams of carbs per serving, these chicken fritters are ideal for low carb and keto-friendly diets.

    Ingredient Notes

    Top down image of ingredients for low carb gluten-free chicken fritters.
    • Ground chicken: This simplifies the process, as there is no need to chop the chicken or to process it in a food processor.
    • Sharp cheddar: I grated a full block of sharp cheddar (Cabot Seriously Sharp!) for these fritters and they were seriously amazing. They had a crispy cheese crust as they came out of the pan that was absolutely delectable. 
    • Almond flour: Almond flour or another nut or seed meal will help bind the mixture together. I don’t recommend coconut flour, as it will make the fritters dry and tough. Instead, try using another nut or seed meal, or even ground pork rinds.
    • Egg: This is the glue that binds the patty mixture together.
    • Seasonings: Garlic, parsley, red pepper flakes, salt and pepper
    • Oil and butter for frying

    Overview: How to make Chicken Fritters

    A collage of 6 images showing how to make keto chicken fritters.
    1. Combine the ingredients: Combine the chicken, cheddar, almond flour, egg, garlic, parsley, salt, pepper, and red pepper flakes. Mix with your hands to make it all nicely uniform.
    2. Form the patties: Use about 2 tablespoons of the mixture at a time and form into small patties about 2 ½ to 3 inches across. Place a baking sheet lined with parchment paper and refrigerate one hour.
    3. Cook the patties: Heat the oil or butter in a large skillet and add butter. When melted and hot, brown the chicken patties until cooked through.
    4. Drain: Place the patties on a paper towel lined plate to drain off any residual oil.
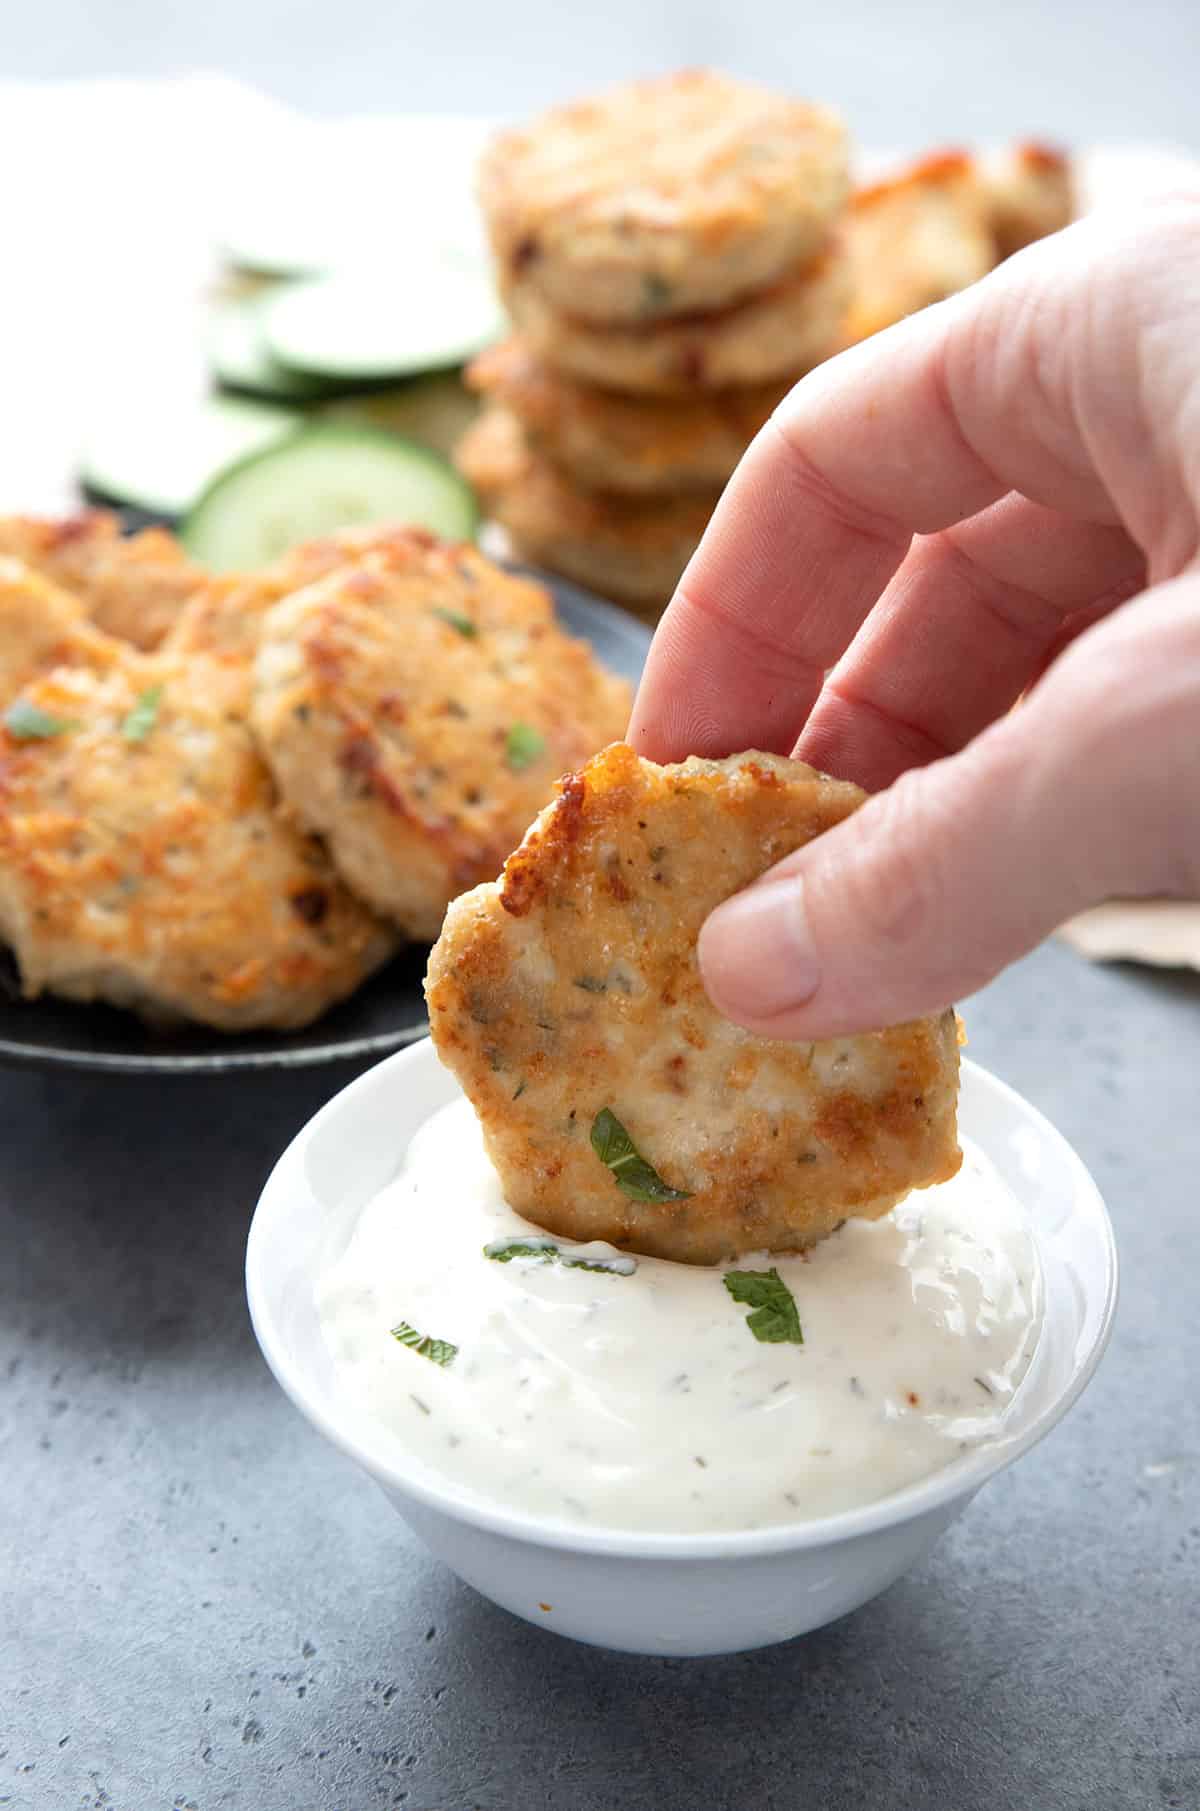
    A hand dipping a chicken fritter into ranch dressing.

    Tips for Success

    An hour in the fridge allows the fritters to firm up hold together better when frying. But you can make the patties up to a day in advance of cooking.

    Make them any size! I like the small fritters for appetizers and snacks but many readers turn them into full size burgers.

    You should get 24 to 26 small patties, and you can cook 8 to 10 at a time in a large skillet, so you will need to work in batches. I recommend scraping out some of the stuck-on cheese between batches, to avoid burning it.

    Yes, you can air fry them! Grease the basket well and then brush a little melted butter over the fritters to help them brown. I suggest cooking them at 400ºF for 10 to 12 minutes, flipping them halfway through cooking.

    A hand holding up a chicken fritter with a bite taken out of it.

    Frequently Asked Questions

    How long will chicken fritters keep?

    Store any leftovers in an airtight container in the fridge for up to 5 days. Reheat gently in a warm oven. You can also freeze the cooked chicken fritters for several months. Use a heavy duty freezer bag and remove excess air to avoid freezer burn.

    How many carbs are in Keto Chicken Fritters?

    This keto chicken fritter recipe has 1.7g of carbs and 0.6g of fiber per serving. If you count net carbs, that comes to 0.9g carbs for 2 fritters.

    Close up shot of keto chicken fritters in a white serving tray.

    More keto fritter recipes

    Close up shot of a stack of Keto Chicken Fritters.

    Chicken Fritters Recipe

    Servings: 12 servings

    Prep Time 15 minutes

    Cook Time 18 minutes

    Total Time 33 minutes

    These easy Chicken Fritters are crispy on the outside, tender on the inside, and packed with savory flavor. Made with keto-friendly ingredients, they come together quickly for a delicious low carb meal or appetizer. Perfect for meal prep or dipping in your favorite sauces, these fritters will be a hit with the whole family!

    • 2 lb (907.18 g) ground chicken
    • 8 ounces (226.8 g) Cabot Seriously Sharp, grated
    • ½ cup (56 g) almond flour
    • 1 large (1) egg
    • 3 cloves garlic, minced
    • 2 tsp dried parsley
    • 1 tsp salt
    • 1 tsp pepper
    • ½ tsp (0.5 tsp) red pepper flakes
    • 3 tbsp olive oil
    • 1 ½ tbsp (1.5 tbsp) butter

    Prevent your screen from going dark

    • Line a large baking sheet with parchment or waxed paper.

    • In a large mixing bowl, combine the chicken, cheddar, almond flour, egg, garlic, parsley, salt, pepper, and red pepper flakes. Use your hands to mix everything well.

    • Using 2 tablespoons at a time, form the mixture into small patties about 2 ½ to 3 inches across. You should get 24 to 26 patties. Place on the prepared baking sheet and refrigerate one hour.

    • Set a large skillet over medium heat and add 1 tablespoon of the oil and ½ tablespoon of the butter. Once hot, add 8 to 10 of the chicken patties. Cook about 3 minutes per side, until cooked through (the internal temperature should reach at least 165ºF on an instant read thermometer).

    • Place the finished patties on a paper towel lined plate to dry and repeat 2 more times, until all of the patties are cooked. Note: you may want to scrape out some of the baked-on cheese between batches, to avoid burning it.

    • Serve warm, with some ranch or bleu cheese dressing for dipping.

    Serving: 2fritters | Calories: 235kcal | Carbohydrates: 1.7g | Protein: 19.3g | Fat: 15.6g | Fiber: 0.6g

    Categories:

    Appetizers & Snacks,

    Nutritional Disclaimer

    Please note that I am not a medical or nutritional professional. I am simply recounting and sharing my own experiences on this blog. Nothing I express here should be taken as medical advice and you should consult with your doctor before starting any diet or exercise program. I provide nutritional information for my recipes simply as a courtesy to my readers. It is calculated using MacGourmet software and I remove erythritol from the final carb count and net carb count, as it does not affect my own blood glucose levels. I do my best to be as accurate as possible but you should independently calculate nutritional information on your own before relying on them. I expressly disclaim any and all liability of any kind with respect to any act or omission wholly or in part in reliance on anything contained in this website.

    Free Bonus: Secrets to Keto Baking!

    Sign up for your favorite recipes delivered straight to your inbox plus get our FREE bonus: Secrets to Keto Baking!


    Source link

  • Stuffed Pepper Soup (with Rice)

    Stuffed Pepper Soup (with Rice)

    Stuffed Pepper Soup (with Rice) is great for a cold winter night and it’s perfect for everyone who likes stuffed peppers made! If you don’t want that many carbs, check out my low-carb version of this tasty soup made with cauliflower rice!

    Click here to PIN Stuffed Pepper Soup (with Rice)!

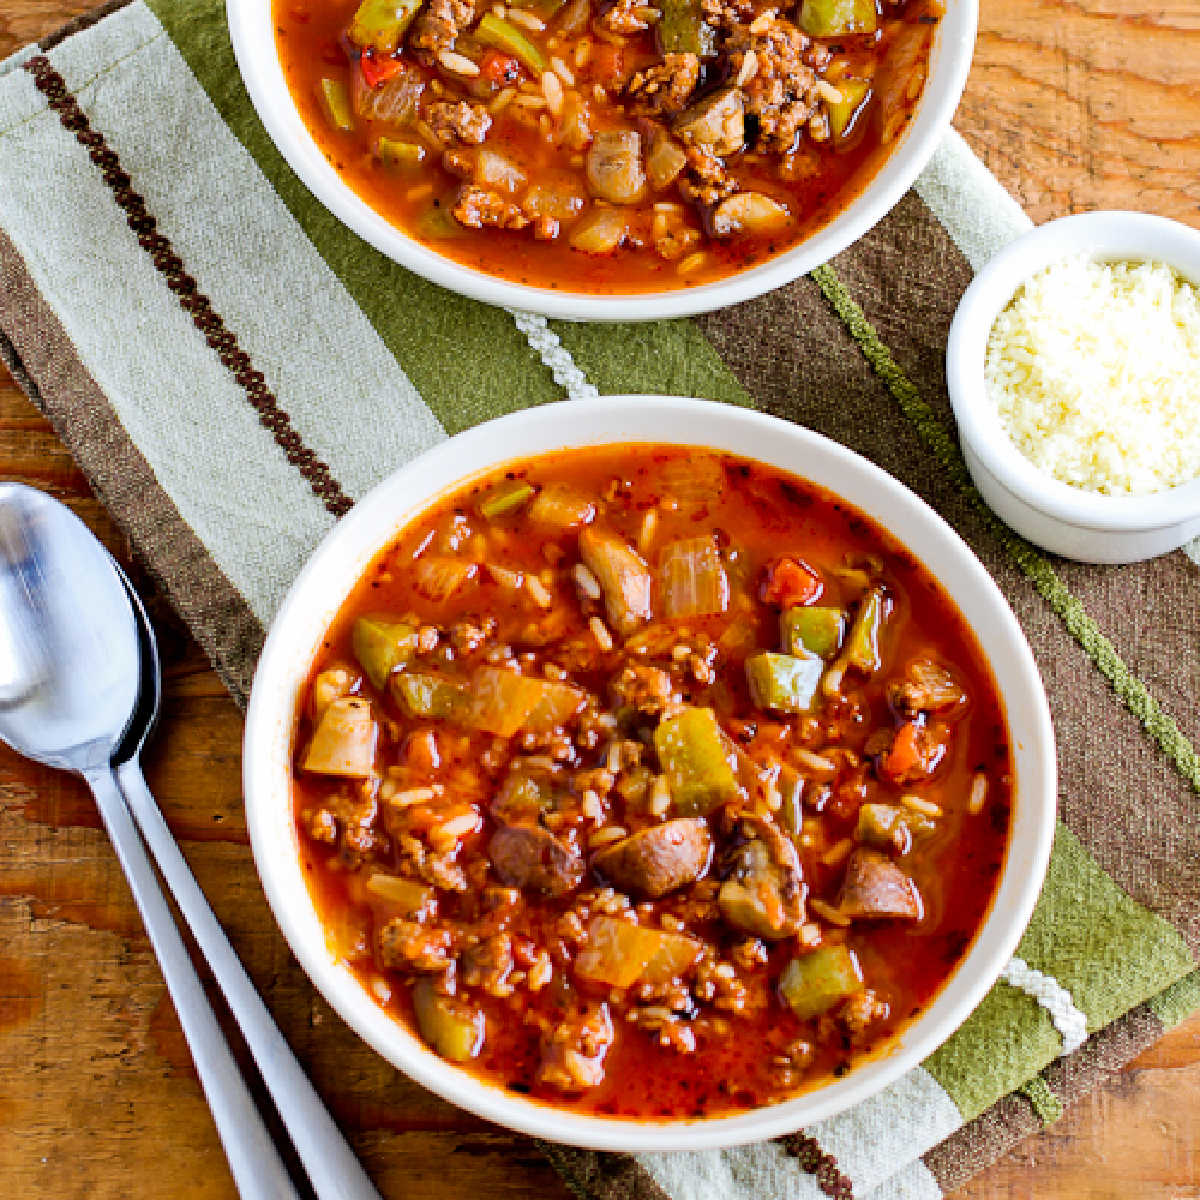
    Stuffed Pepper Soup found on KalynsKitchen.comStuffed Pepper Soup found on KalynsKitchen.com

    Stuffed Pepper Soup (with Rice) is a recipe I came up with after I had “stuffed pepper soup” in my recipe ideas notebook for months. And when I decided to make it, I found out just how many other people have made a soup inspired by stuffed peppers!

    But that didn’t stop me from creating my version, which uses both hot turkey Italian sausage and lean ground beef, and has secret ingredient to add flavor. Jake and I both loved the soup, and when I gave my sister Pam some to take to work for her lunch she texted me in the middle of the day to say she loved it too.

    If you like stuffed peppers, you’re going to love this Stuffed Pepper Soup with Rice! The recipe makes a huge pot of soup, but this freezes well. You’ll probably want to add a little stock or water when you reheat it, because the rice absorbs the liquid a bit. I hope you try this soup soon!

    What ingredients do you need?

    (This is only a list of ingredients; please scroll down for complete printable recipe. Or if you use the JUMP TO RECIPE link at the top of the page, it will take you directly to the complete recipe with ingredient amounts.)

    What’s the secret ingredient in this Stuffed Pepper Soup?

    The secret ingredient that adds amazing tomato flavor to this soup is sugar-free ketchup (affiliate link) but you can use regular ketchup if you prefer!

    What if you don’t want spicy Sausage in the Stuffed Pepper Soup?

    You can definitely make the Stuffed Pepper Soup with mild Italian sausage if you prefer, or skip the sausage and double the amount of ground beef.

    How high in carbs is this Stuffed Pepper Soup with Rice?

    This tasty soup with stuffed pepper flavors has about 25 net carbs per serving.

    Want Low-Carb Stuffed Pepper Soup?

    If you’d prefer Low-Carb Version of this tasty soup, just follow that link and make the version with cauliflower rice that has only about 7 net carbs per serving.

    Stuffed Pepper Soup found on KalynsKitchen.comStuffed Pepper Soup found on KalynsKitchen.com

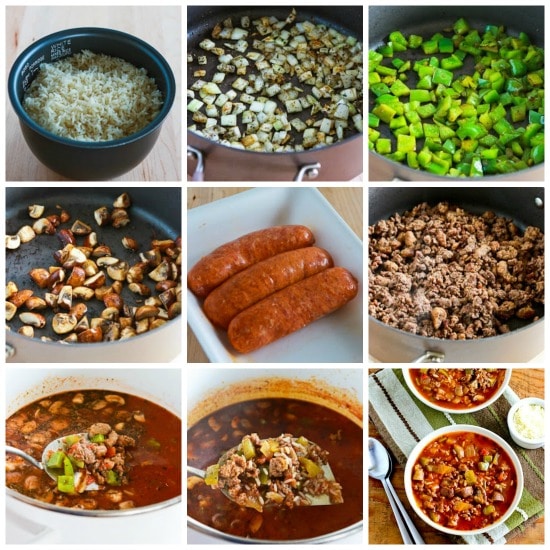
    How to Make Stuffed Pepper Soup (with Rice):

    (This is only a summary of the steps for the recipe; please scroll down for complete printable recipe. Or if you use the JUMP TO RECIPE link at the top of the page, it will take you directly to the complete recipe.)

    1. I used my beloved Zojirushi Rice Cooker (affiliate link) to cook the rice; use any method you prefer.  
    2. I think browning onions, peppers, and mushrooms in advance is really important to add flavor to the soup.
    3. Saute onions in olive oil until they’re starting to brown, then add the Italian Herb Blend and cook 1-2 minutes longer.  Transfer to large soup pot.
    4. Saute the peppers in the same pan, cooking them until they’re getting just a slight char on the edges.  Transfer peppers to soup pot.
    5. Mushrooms are probably optional in this, but good. Saute the mushrooms until they’re released their liquid and are starting to brown, then transfer to the soup pot.
    6. I had a package of turkey Italian sausage with five links, and I was using two links for another recipe, so I just used the other three to test the recipe. I’d use the whole package for a meatier soup next time.
    7. Brown the ground beef and sausage together, cooking until it’s nicely browned.
    8. Then add browned meat to the soup pot along with the crushed tomatoes, beef broth, water, Worcestershire sauce, and ketchup and simmer about 30 minutes. (I used an 8 quart soup pot to make this, but it could have been a little smaller.)
    9. After the soup has cooked 30 minutes, add the rice (and a little more water if needed) and let the soup simmer 15 minutes more.
    10. Season Stuffed Pepper Soup to taste with salt and fresh ground black pepper and serve soup hot, with freshly-grated Parmesan cheese to add at the table.

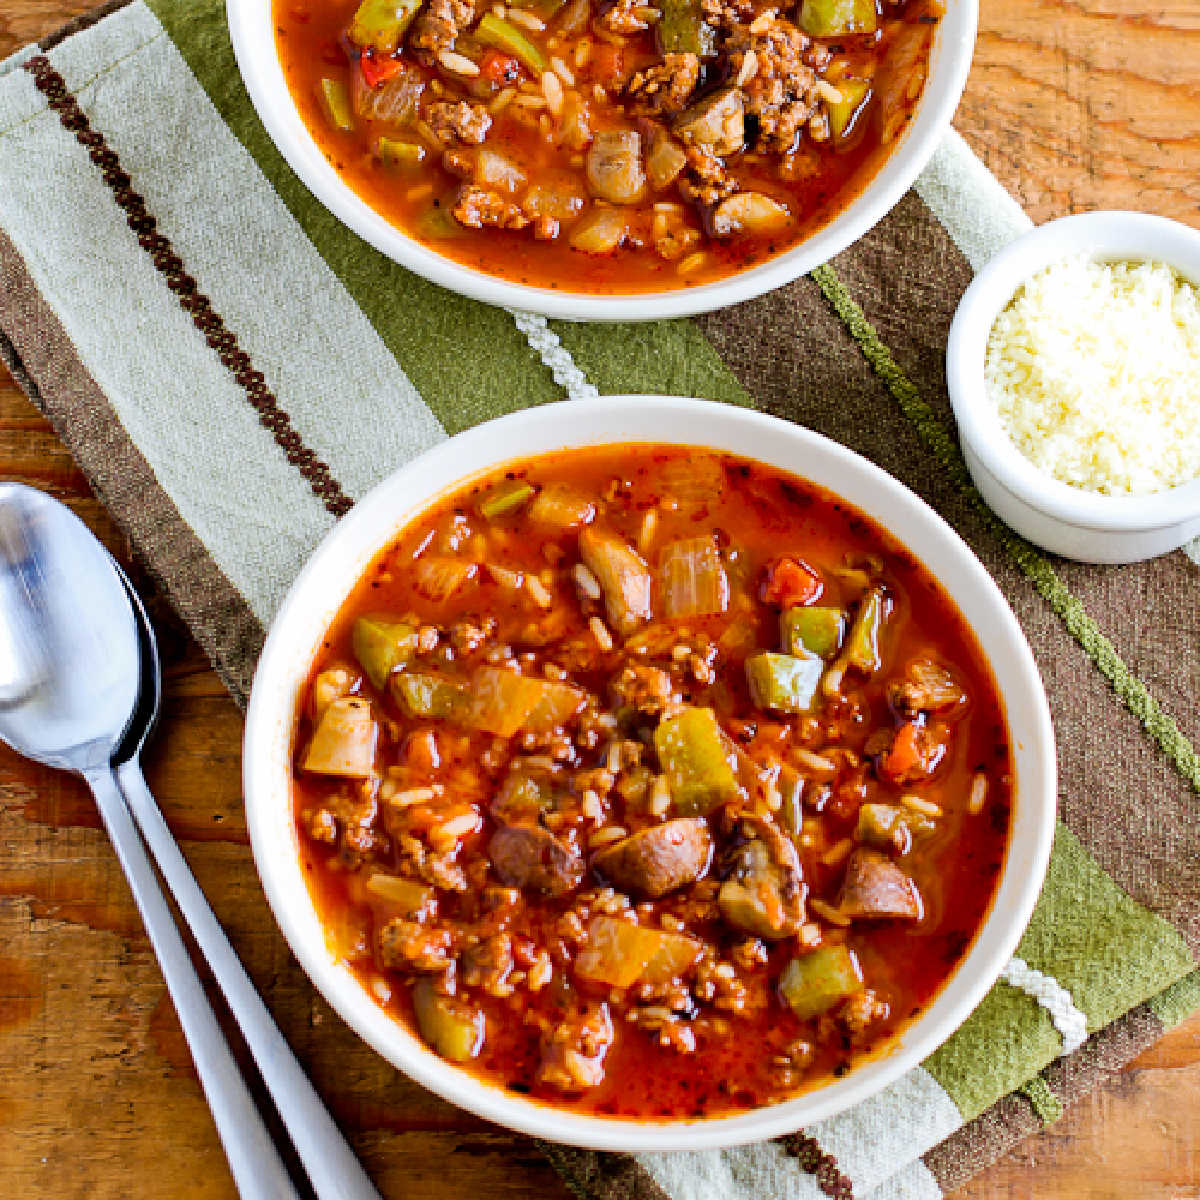
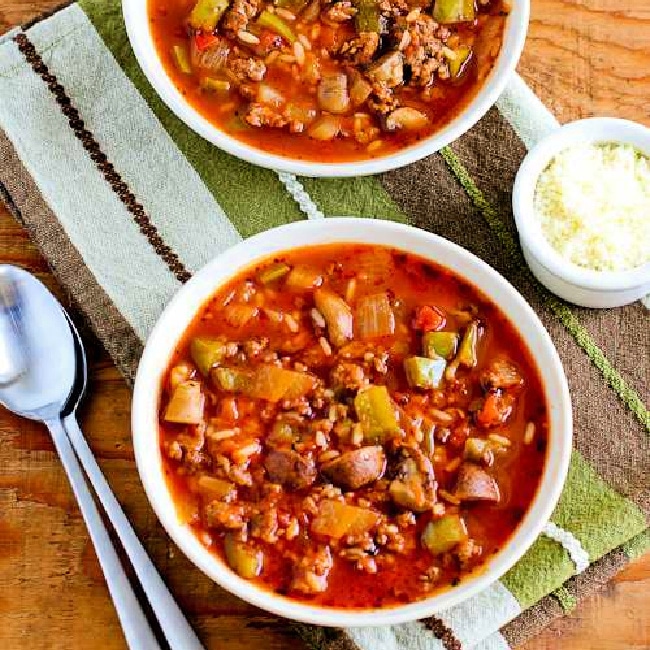
    Square image for Stuffed Pepper Soup shown in two bowls with napkin and spoons.Square image for Stuffed Pepper Soup shown in two bowls with napkin and spoons.

    More Soup with Italian Sausage:

    Weekend Food Prep:

    This recipe for Stuffed Pepper Soup (with Rice) has been added to a category called Weekend Food Prep where you’ll find recipes you can prep or cook on the weekend and eat during the week!

    Ingredients

    • 2 cups cooked rice (see notes)
    • 4 tsp. olive oil, divided
    • 1 onion, chopped fairly small
    • 1 T Italian Herb Blend
    • 2 green bell peppers, stems and seeds removed and chopped into pieces about 5/8 inch across
    • 8 oz. brown Cremini mushrooms, washed if needed and then cut in half or fourths (see notes)
    • one 19.5 oz. package hot turkey Italian sausage
    • 1 lb. lean ground beef
    • 2 15 oz. cans crushed tomatoes + 2 cans water
    • 3 14 oz cans beef broth (see notes)
    • 1 T Worcestershire sauce
    • 1/2 cup ketchup (see notes)
    • salt and fresh-ground black pepper to taste
    • freshly-grated Parmesan cheese for serving (optional but good)

    Instructions

    1. Cook long-grain white rice (I used Ben’s Original Converted Rice) according to package instructions to make 2 cups cooked rice.  (I used my beloved rice cooker  – affiliate link.)
    2. Heat 2 tsp. oil in a large frying pan, add chopped onion and saute over medium high heat until the onion is barely browned on the edges.
    3. Add Italian Herb Seasoning (affiliate link), and cook 1-2 minutes more.
    4. Add onion to soup pot.  (I used an 8 quart soup pot for this, but it could have been a little smaller.)
    5. In the same frying pan, add the chopped green pepper and saute until the edges have a slight char.
    6. Add peppers to soup pot.
    7. Then add the mushrooms to the same pan and cook until mushrooms release their liquid and are slightly browned.
    8. Add mushrooms to soup pot.
    9. Add the other 2 tsp. olive oil to the pan along with the ground beef and the sausage which you’ve squeezed out of the casing.
    10. Cook the meat until it’s nicely browned, turning several times and breaking apart with the back of the turner.
    11. Add browned meat to the soup pot along with the crushed tomatoes, 2 cans water, 3 cans beef broth, Worcestershire sauce, and ketchup (I use Heinz reduced-sugar ketchup).
    12. Bring soup to a low simmer, then cook on low about 30 minutes.
    13. Add the rice and cook 15 minutes more, adding a little more water if you think it’s needed.
    14. Season Stuffed Pepper Soup with Rice to taste with salt and fresh-ground black pepper and serve hot, with freshly grated Parmesan cheese to add at the table if desired.

    Notes

    I used Ben’s Original Converted Rice, which is a low-glycemic variety of white rice. Mushrooms are optional in this soup, but good. Use about 5 cups homemade beef stock if you have some. I used Heinz Low-Sugar Ketchup (affiliate link).

    This soup will keep for quite a few days in the fridge and also freezes well.  The rice will absorb some of the liquid in the soup when it’s stored, so you’ll need to add a little water or beef stock when you reheat.  For best flavor, reheat in a small pan on the stove.

    Recipe created by Kalyn, possibly inspired by many other versions of Stuffed Pepper Soup found online.

    Nutrition Information

    Yield

    8

    Serving Size

    1

    Amount Per Serving

    Calories 427Total Fat 18gSaturated Fat 5gTrans Fat 1gUnsaturated Fat 10gCholesterol 118mgSodium 1530mgCarbohydrates 28gFiber 3gSugar 10gProtein 39g

    Nutrition information is automatically calculated by the Recipe Plug-In I am using. I am not a nutritionist and cannot guarantee 100% accuracy, since many variables affect those calculations.

    Did you make this recipe?

    Did you make this recipe? Please leave a star rating (under the PRINT button in the recipe) or share a photo of your results on Instagram! THANKS!

    Stuffed Pepper Soup finished soup in two serving bowlsStuffed Pepper Soup finished soup in two serving bowls

    Low-Carb Diet / Low-Glycemic Diet / South Beach Diet Suggestions:
    Stuffed Pepper Soup (with Rice) would be limited to Phase 2 or 3 for the Original South Beach Diet, and if you’re making it for South Beach I would recommend using Ben’s Original Converted Rice (affiliate link) or brown rice. South Beach would also recommend lean ground beef and turkey or chicken Italian sausage. This recipe has 25 net carbs per serving, but if you want fewer carbs, I have a tasty low-carb version of the recipe made with cauliflower rice!

    Find More Recipes Like This One:
    Use Soup Recipes to find more recipes like this one. Use the Recipes by Diet Type photo index pages to find more recipes suitable for a specific eating plan. You might also like to follow Kalyn’s Kitchen on Pinterest, on Facebook, on Instagram, on TikTok, or on YouTube to see all the good recipes I’m sharing there.

    Historical Notes for this Recipe:
    The easy Stuffed Pepper Soup (with Rice) was first posted in 2013. It was last updated with more information in 2025.

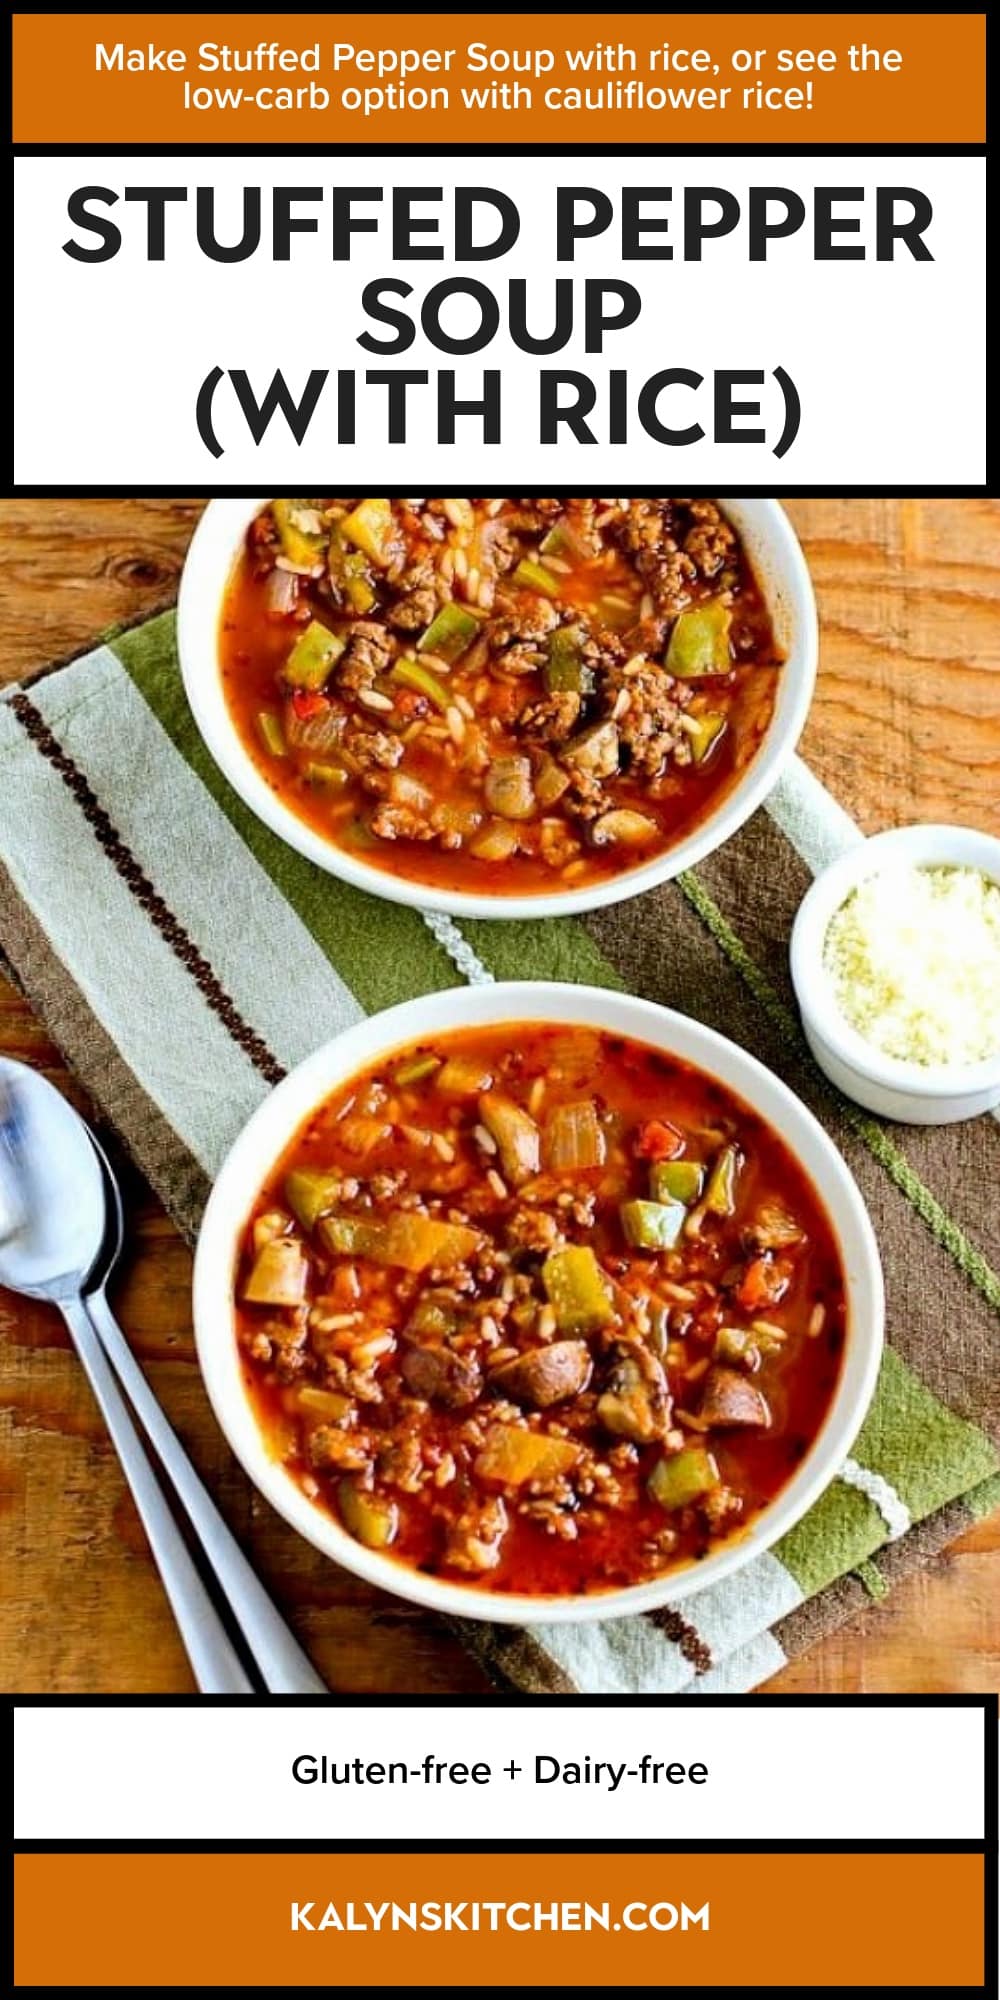
    Pinterest image of Stuffed Pepper Soup (with Rice)

    We are a participant in the Amazon Services LLC Associates Program, an affiliate advertising program designed to provide a means for us to earn fees by linking to Amazon.com and affiliated sites. As an Amazon Associate, I earn from qualifying purchases.


    Source link

  • Greek Air Fryer Wings

    Greek Air Fryer Wings

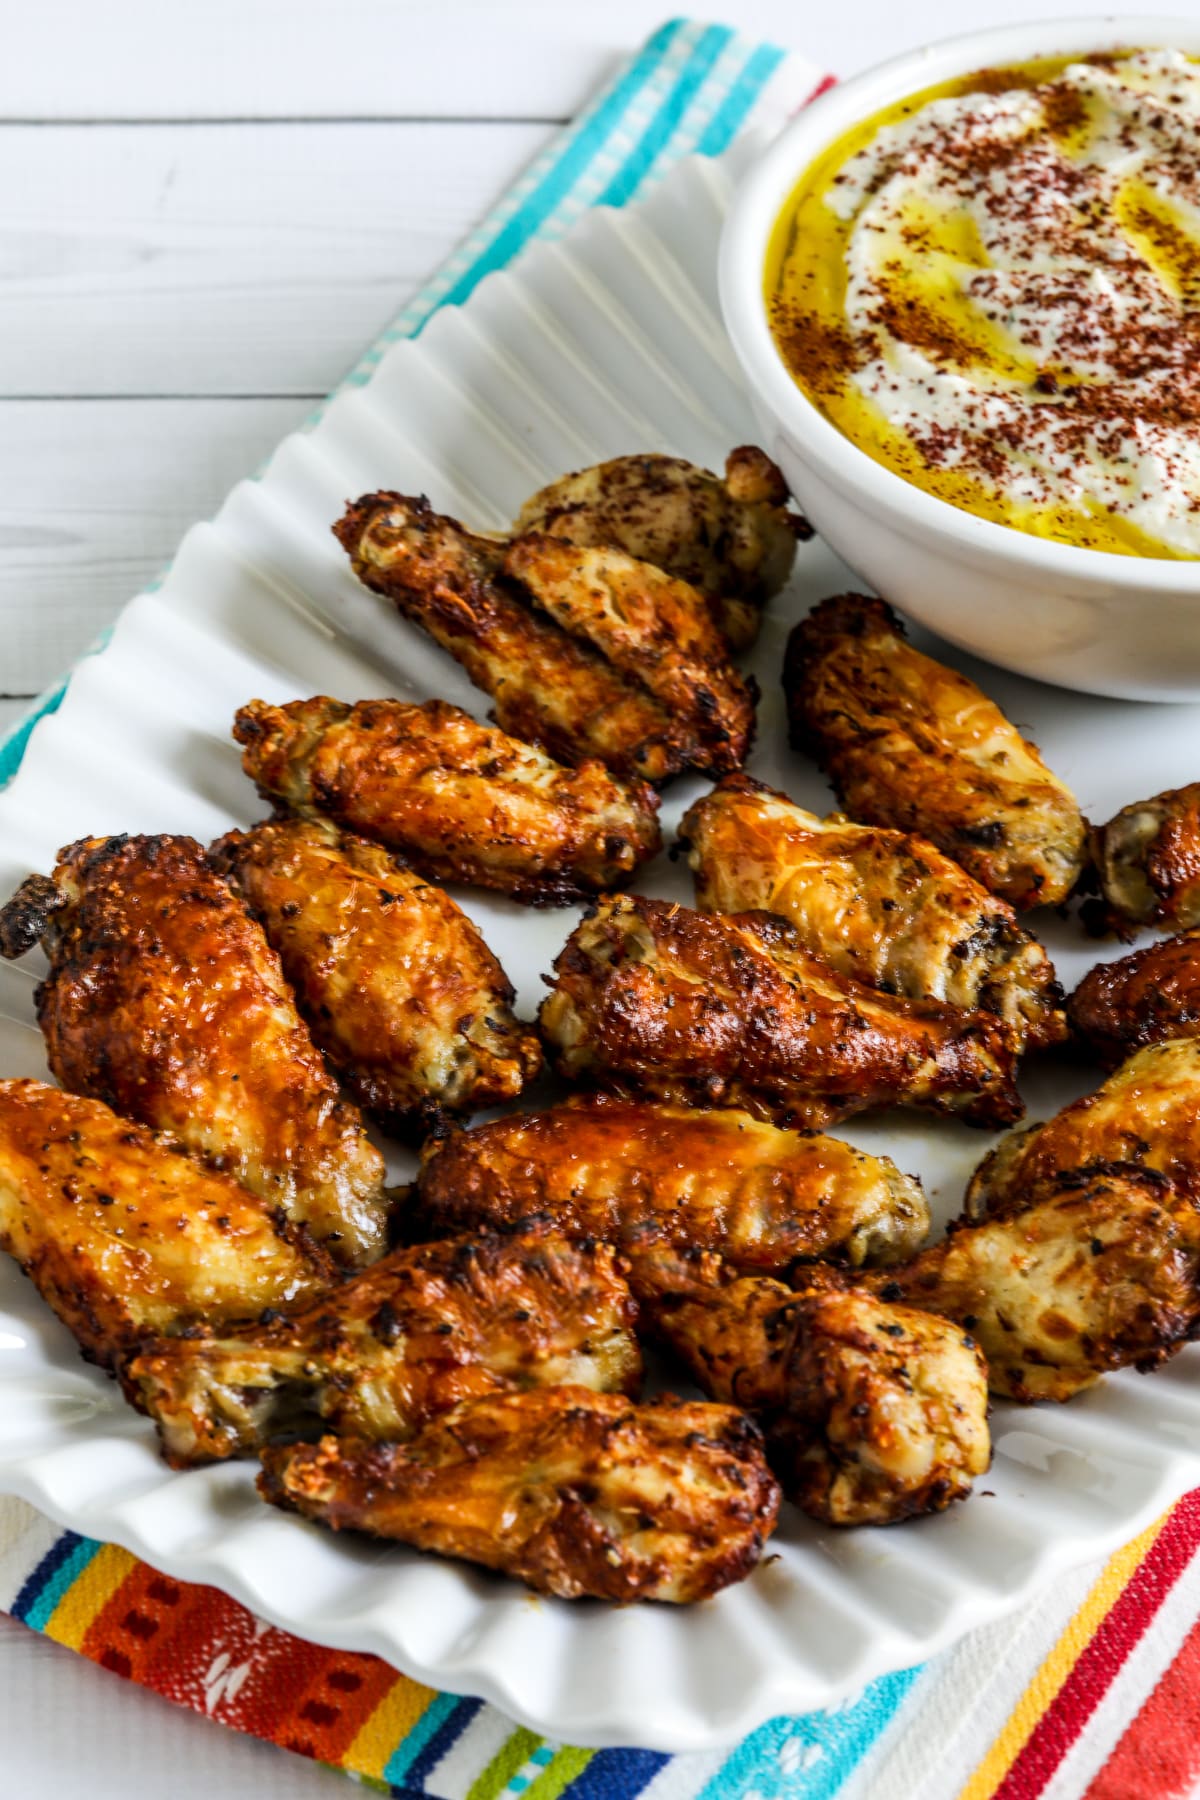
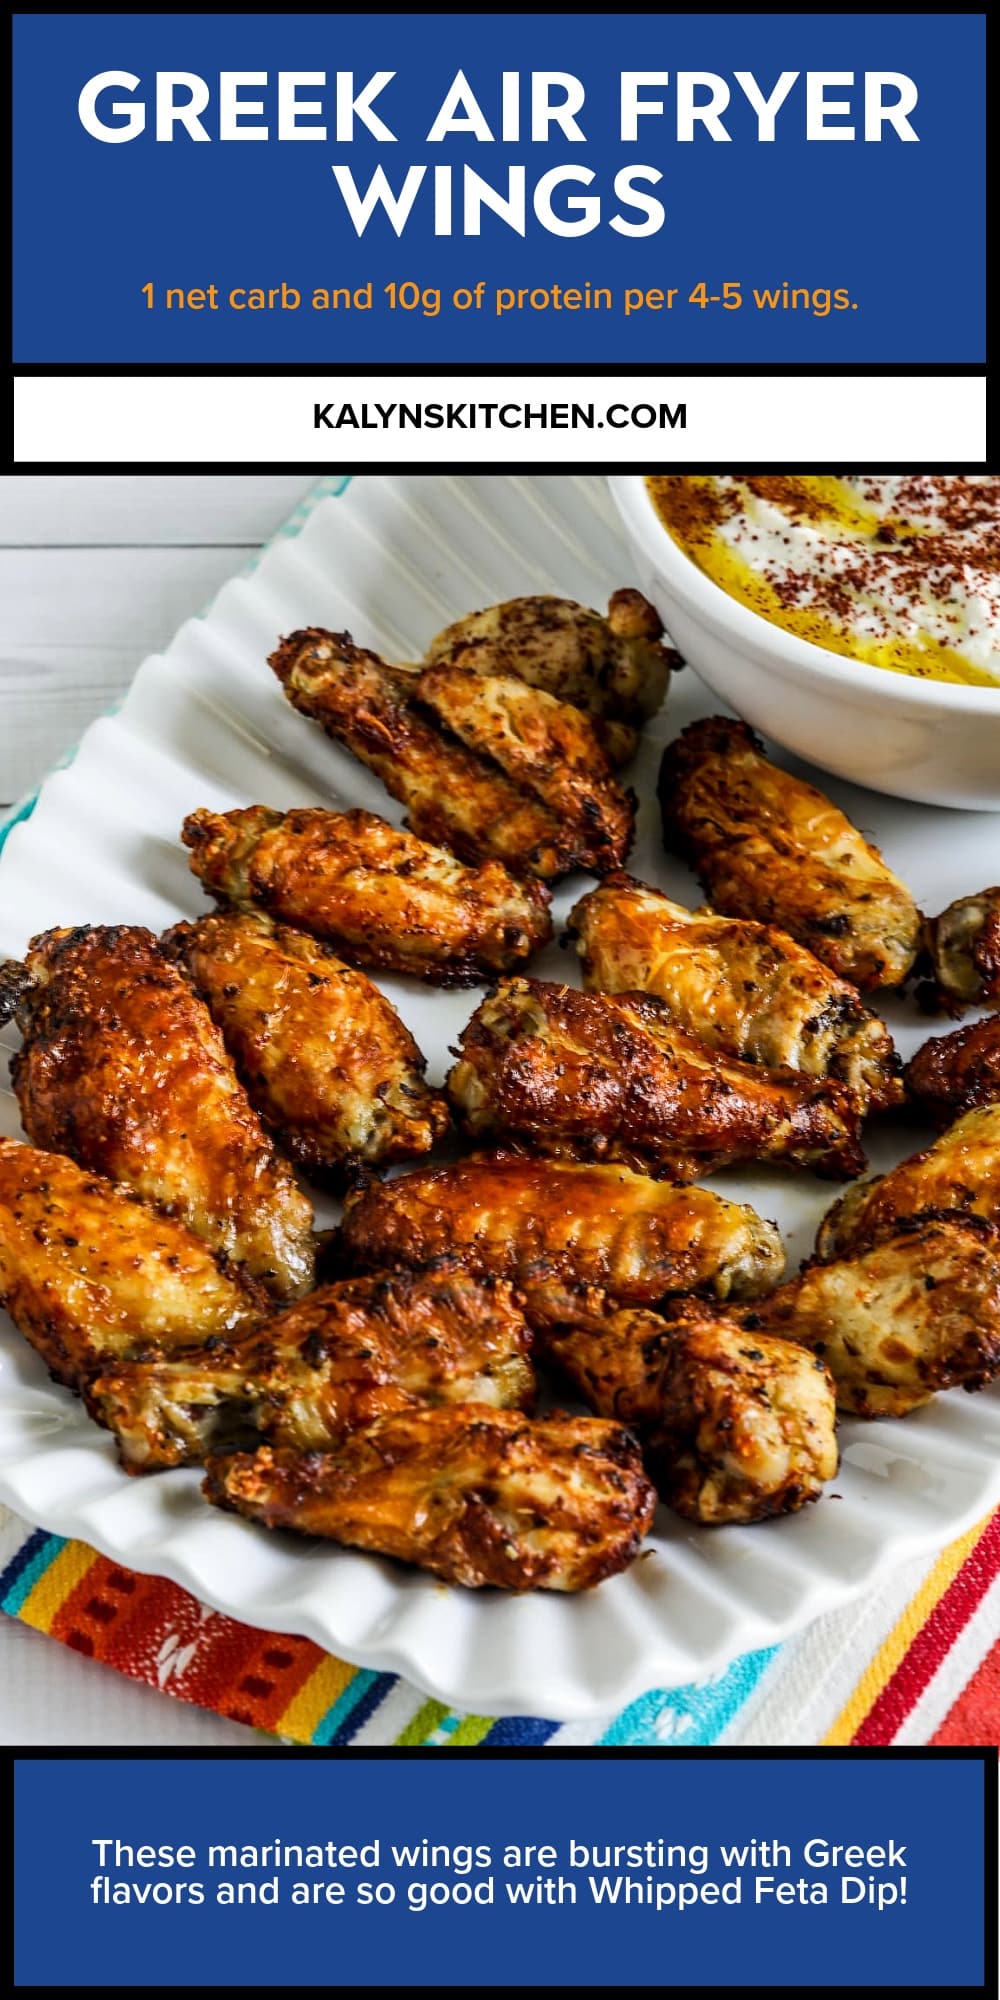
    Greek Air Fryer Wings are amazing for an appetizer or a main dish, and marinating the wings adds amazing flavor. These Greek wings are delicious with Whipped Feta Dip, but the recipe gives other options as well.

    PIN the recipe for Greek Wings to try them later!

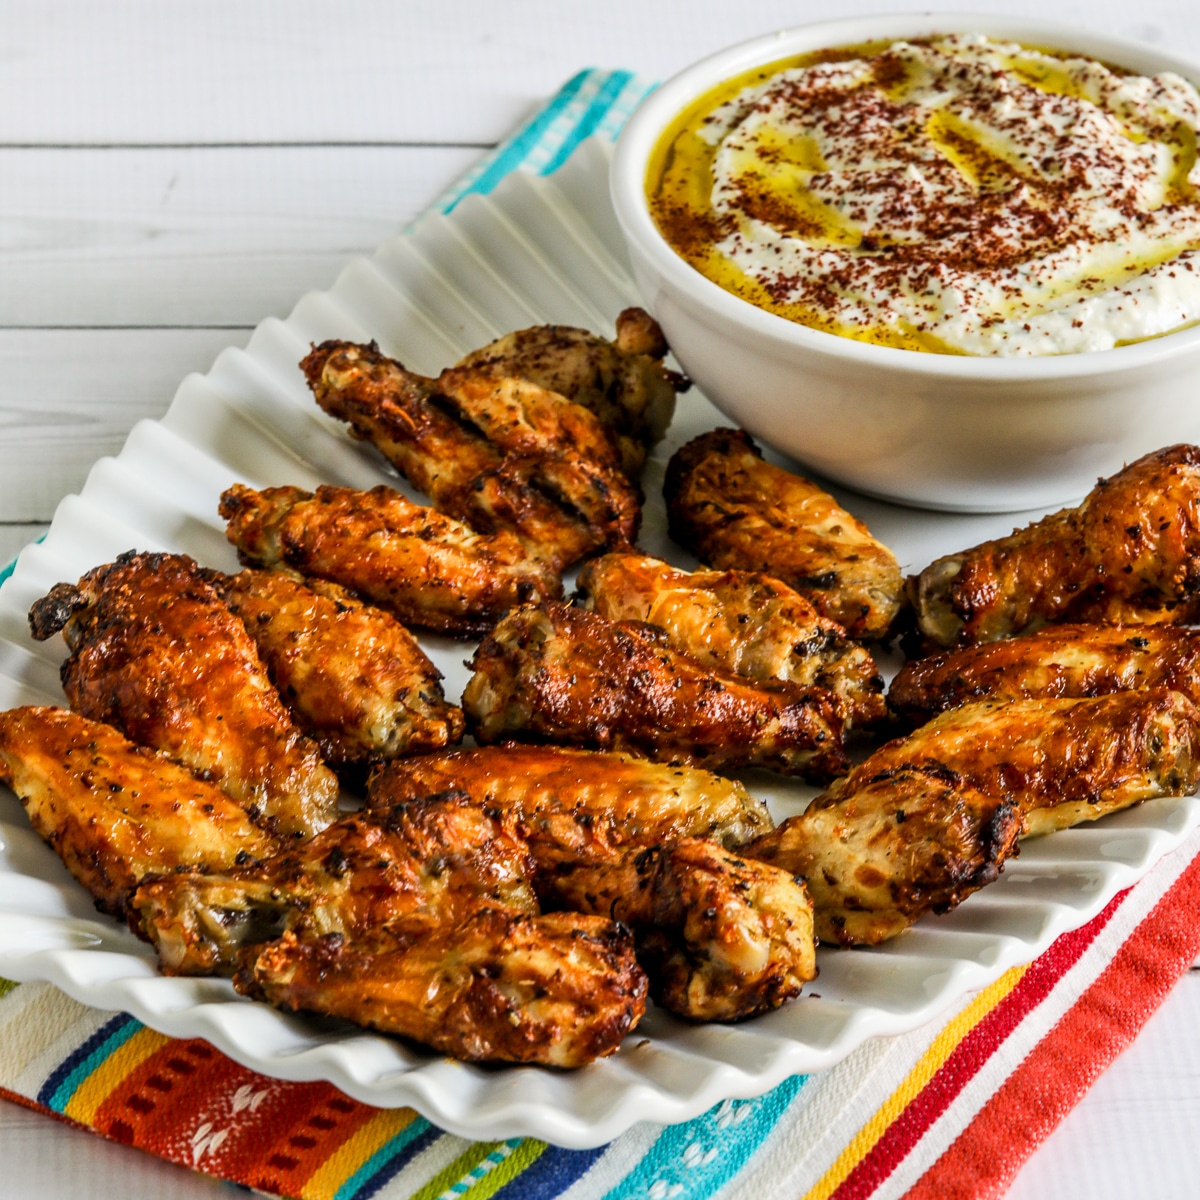
    Greek Air Fryer Chicken Wings shown on serving platter with Feta dip

    These tasty Greek Air Fryer Wings are an amazing appetizer or main dish that has those Greek Flavors so many people like! I’ve always enjoyed chicken wings as a low-carb appetizer in a restaurant. But I’m not sure I would have tried making them at home until my brother Rand raved about Greek Wings he made to enjoy as a main dish. And I realized wings would be perfect to cook in the Air Fryer and serve with my favorite Whipped Feta Dip.

    I cut down and simplified the inspiring recipe to get Greek wings that are flavorful and also easy to make in the Air Fryer. But I want to emphasize, don’t skip the step of marinating the wings to add amazing flavor! We marinated them overnight the first time we tested the recipe and that worked well. But if that isn’t possible, I recommend a minimum of four hours marinating time (and eight hours or more is even better.)

    This recipe uses 1 1/2 pounds of wing pieces which made 16-18 individual wings, but if you’re cooking for a crowd it can definitely be doubled. And whether you serve the wings as an appetizer or a main dish, everyone will love this easy recipe that’s extra low in carbs! See tips below for other dips that would be great with the air fryer wings. And I’m reminding you about this fun recipe for cooking wings for my Friday Favorites this week, and I hope you try the recipe soon!

    What ingredients do you need?

    (This is ONLY a list of ingredients for the recipe; please scroll down for complete printable recipe. Or if you use the JUMP TO RECIPE link at the top of the page, it will take you directly to the complete recipe.)

    • freshly-grated lemon zest (optional, but recommended)
    • fresh-squeezed lemon juice
    • extra-virgin olive oil
    • Minced Garlic (affiliate link) 
    • salt
    • Dried Oregano (affiliate link)
    • trimmed chicken wings
    • Whipped Feta Dip for serving (optional; see other options below)

    Which Air Fryer did I Use?

    I’m crazy about the Cuisinart Convection Air Fryer Toaster Oven (affiliate link) which is what I used for this recipe. This air fryer has a large basket, which let me fit 17 chicken wings, and I find this model easy to use. I also like the convenience of having an air fryer that stays out on the counter. (Use Air Fryer Recipes to see all Air Fryer recipes on this site.)

    What gives these Air Fryer wings the Greek Flavors?

    The Greek flavors in this recipe come from olive oil, lemon, garlic, and oregano, which are traditionally used for marinating Greek Lemon Chicken. And if you serve the wings with the Whipped Feta Dip that adds another Greek flavor.

    Do chicken wings need to be trimmed?

    I bought a six-pack of what Costco called Chicken Party Wings and used two of the packages for this recipe. The Kirkland wings from Costco were pretty well-trimmed, but when I looked at packages of wings at my grocery store it seemed like most of them would need trimming. Personally I enjoy wings the most when they just have a moderate amount of skin, and I always want to trim off some fat.

    Can you cook Greek Wings in the oven?

    I haven’t tried cooking these wings in the oven, but if you want to try it I would set the temperature at 400F/205C. Then cook the wings on a baking sheet until they’re crispy and the thickest part of the wing has reached a temperature of 165F/75C. Cooking time in the oven will be definitely longer than in the Air Fryer.

    How low in carbs are the Greek Air Fryer Wings?

    For an appetizer-sized serving of 4-5 wings, this recipe has only 1 net carb and 10 grams of protein! That doesn’t include the Feta Dip, but that’s also extra low in carbs.

    What other dips would be good with Greek Air Fryer Wings?

    We did LOVE these wings with the Whipped Feta Dip. But here are some other tasty options:

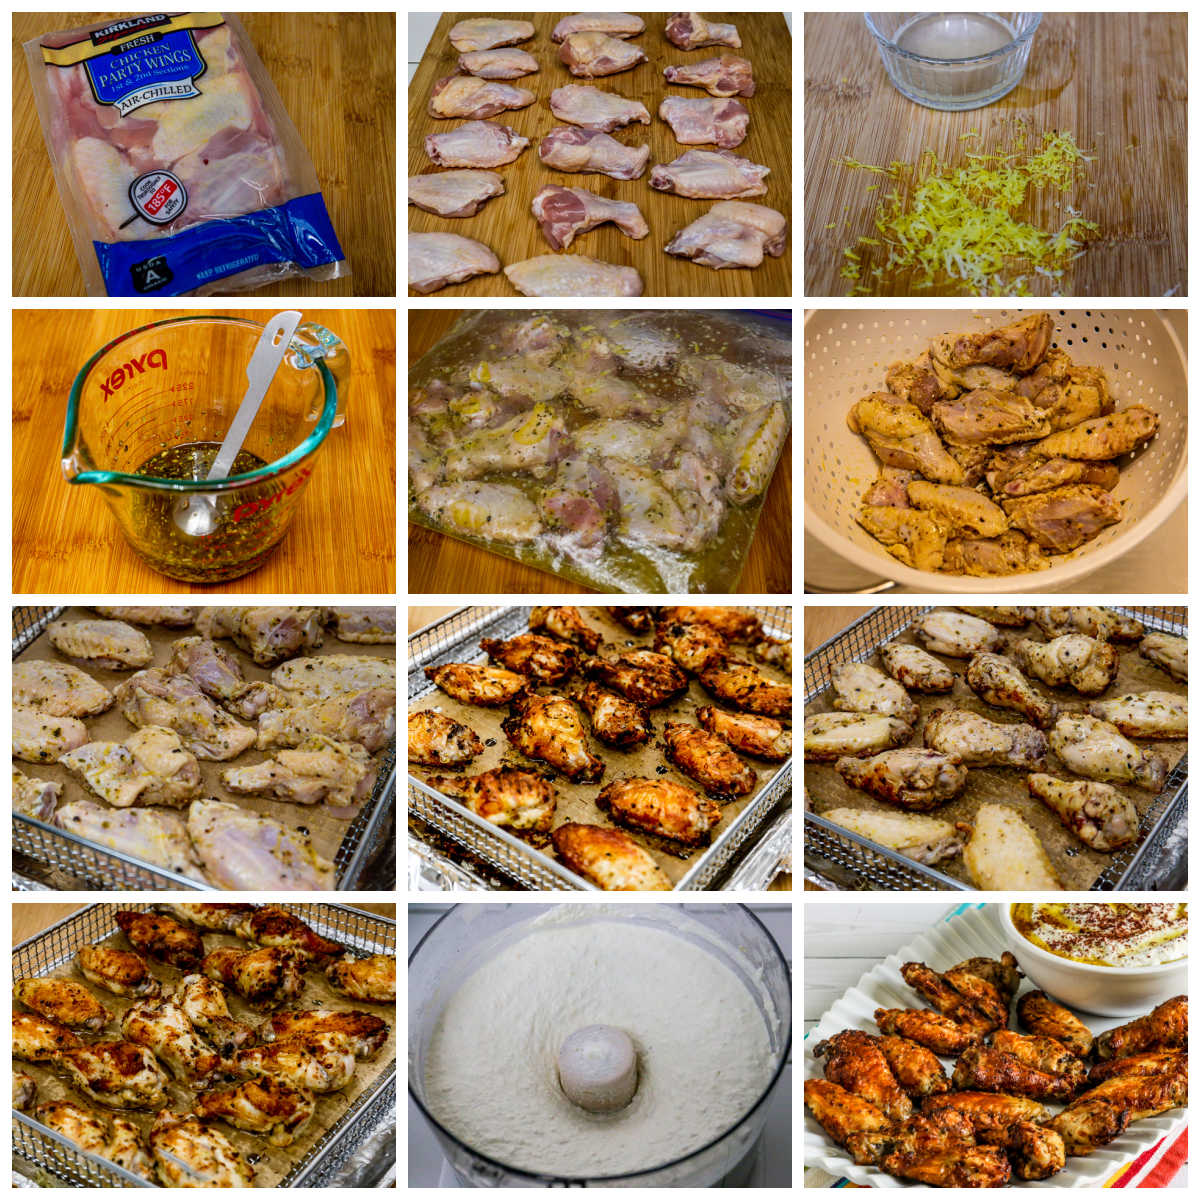
    Greek Air Fryer Chicken Wings collage of recipe steps

    How to Make Greek Air Fryer Wings:

    (This is ONLY a summary of the steps for the recipe; please scroll down for complete printable recipe. Or if you use the JUMP TO RECIPE link at the top of the page, it will take you directly to the complete recipe.)

    1. I used Kirkland Party Wings, and we used two packs from the six-pack for this recipe
    2. Trim the wings if needed.
    3. Zest a lemon and then squeeze the juice
    4. Whisk together lemon zest (if using), lemon juice, olive oil, garlic, oregano, salt, and pepper
    5. Let wings marinate at least four hours in the fridge; marinating overnight or eight hours is even better
    6. When you’re ready to cook, drain wings and discard the marinade
    7. Let wings come to room temperature and preheat Air Fryer to 400F/205C. (Preheat without the rack in the Air Fryer if you are going to use Air Fryer Parchment Paper, which I recommend.
    8. Line rack with Air Fryer Parchment Paper (if using) and arrange wings so they are not touching each other. (If you have a smaller Air Fryer you may need to cook in two batches.)
    9. Cook wings 8 minutes, or until the first side is getting brown
    10. Remove Air Fryer basket and turn wings over with tongs or a fork
    11. Put basket back in the Air Fryer and cook until second side is golden brown and wings are 165F/75C in the thickest part. (For us that was about 6 minutes on the second side, but other Air Fryer models might take more or less time.
    12. While the wings cook, make the Whipped Feta Dip (or other dip or sauce of your choice.)
    13. Serve the Greek Wings hot, with plenty of napkins!

    Make it a Low-Carb Meal:

    This recipe makes four appetizer servings, but probably 3 servings if you serve it as a meal. The Greek Air Fryer Wings would taste amazing with one of these side dishes:

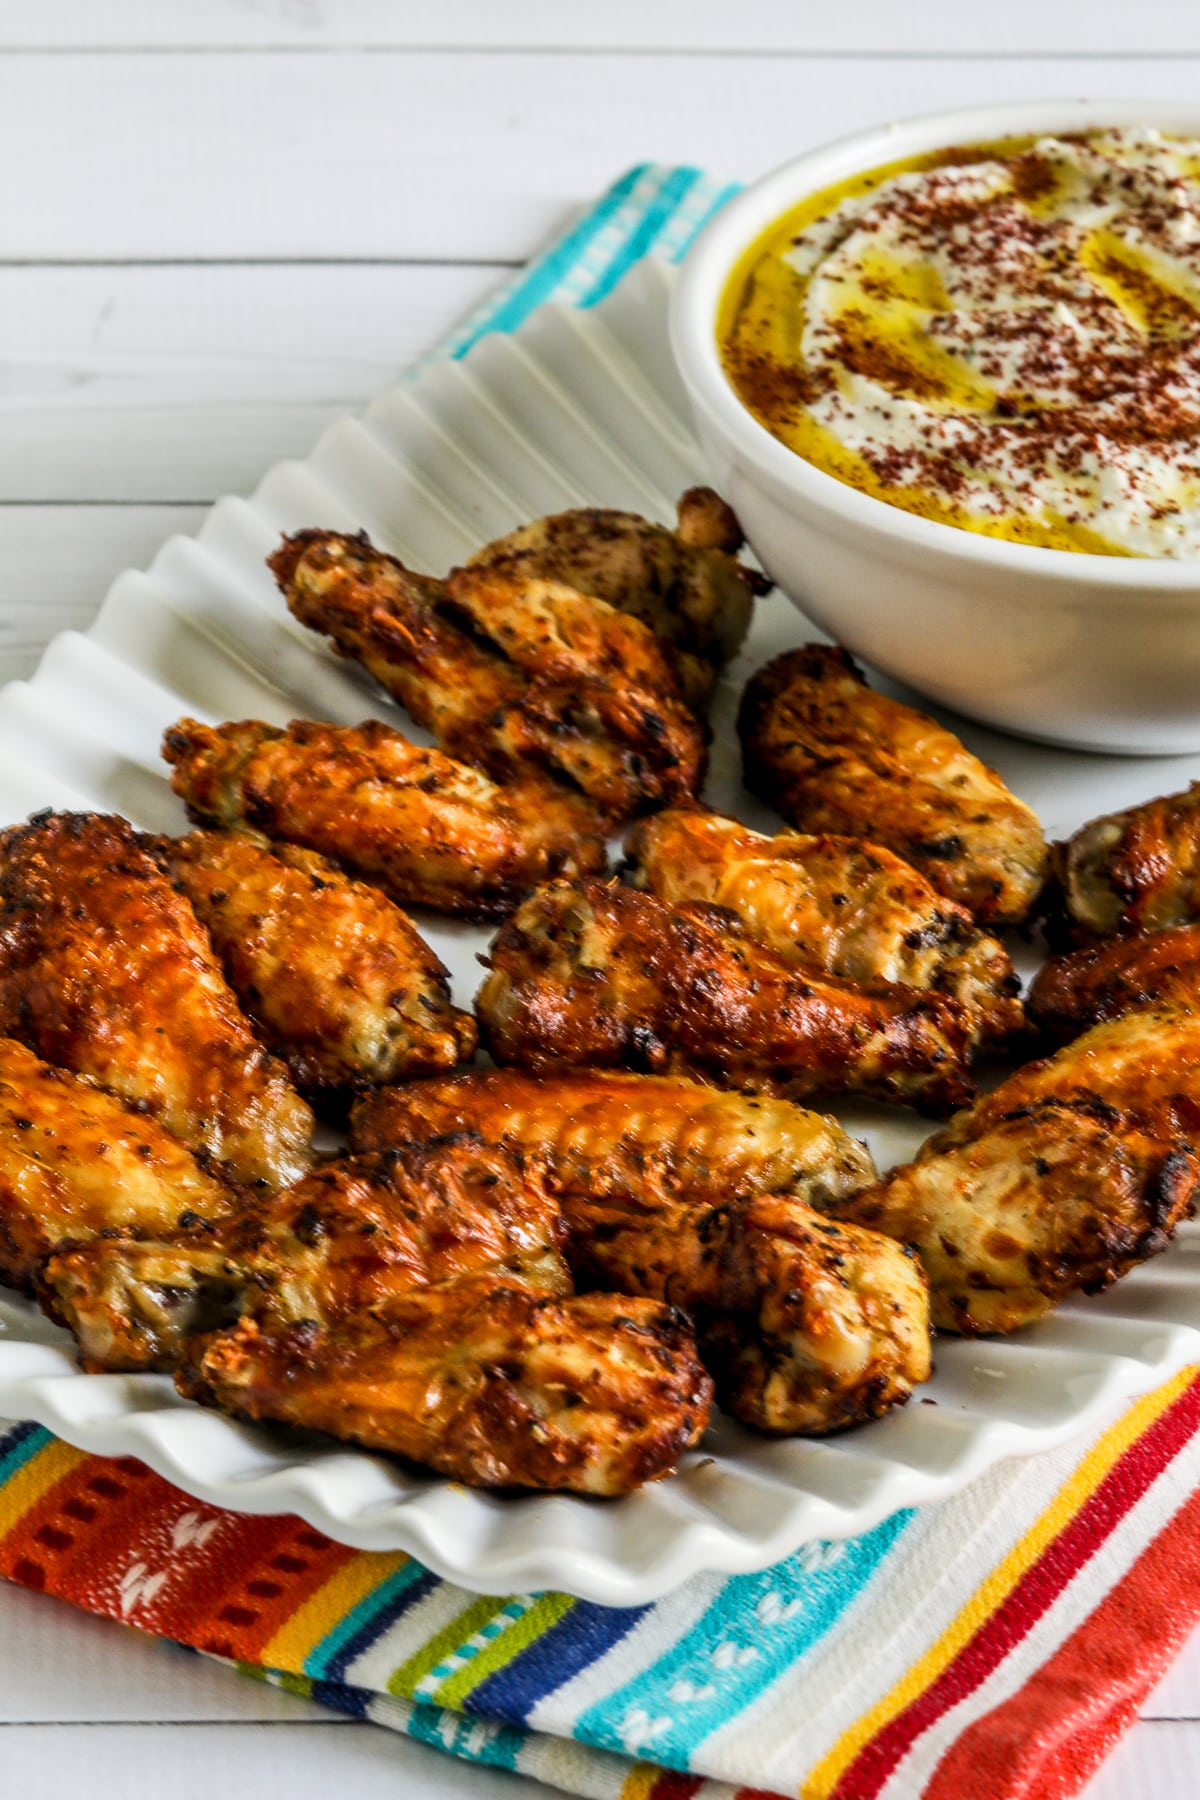
    Greek Air Fryer Chicken Wings on serving platter with Feta dip

    More Chicken with Greek Flavors:

    Ingredients

    • 1 T freshly-grated lemon zest (optional, but recommended)
    • 1 T fresh-squeezed lemon juice (or more if you really like lemon)
    • 1/4 cup extra-virgin olive oil
    • 1 tsp. minced garlic (or more)
    • 1 tsp. salt (more or less to taste)
    • 1 tsp. dried oregano
    • 1.5 pounds trimmed raw chicken wings (see notes)
    • Whipped Feta Dip with Sumac for serving (optional)

    Instructions

    1. Trim the wings if needed. (We didn’t need to do much trimming for the Kirkland Party Wings we used, but some grocery store wings will need to have excess skin and fat trimmed.)
    2. Zest the skin from a lemon and then squeeze the juice. (Or you can use fresh-frozen lemon juice and skip the zest if you don’t want to buy a lemon.)
    3. Whisk together lemon zest (if using), lemon juice, olive oil, garlic, oregano, salt, and pepper to make the marinade
    4. Put the wings and marinade in a large Ziploc bag or plastic container with a snap-tight lid, and let them marinate in the fridge for a minimum of four hours, or marinating them overnight or for eight hours or longer will give more flavor
    5. When you’re ready to cook, drain the wings into a colander place in the sink and discard the marinade. (If you don’t want the oily marinade to go down your sink, catch it in a bowl and discard.)
    6. Let wings come to room temperature while you preheat Air Fryer to 400F/205C. (Preheat without the rack in the Air Fryer if you are going to use Air Fryer Parchment Paper, which I recommend.)
    7. Line Air Fryer rack with Air Fryer Parchment Paper if using. Try to arrange wings in the Air Fryer basket so they are not touching each other. (I was able to fit 18 wing pieces in my Cuisinart Air Fryer, but if you have a smaller Air Fryer you may need to cook in two batches.)
    8. Cook wings 8 minutes, or until they are golden-brown on the first side. (Some Air Fryers cook a bit hotter, so I’d start checking after 6 minutes.)
    9. Remove Air Fryer basket and turn wings over (with tongs or a fork so you don’t burn your fingers.)
    10. Put basket back into the Air Fryer and cook until the second side is golden brown and wings have reached 165F/75C in the thickest part. (For us that was 6 minutes on the second side, but other Air Fryer models might take a bit more or less time.)
    11. While the wings cook, make the Whipped Feta Dip with Sumac (or other dip or sauce of your choice.
    12. Serve the Greek Wings hot, with plenty of napkins!

    Notes

    I used Kirkland Chicken Party Wings from Costco, which included both flats and drumettes. One and one-half pounds of wings will be 16-18 individual wing half pieces.

    I used my Cuisinart Convection Air Fryer Toaster Oven (affiliate link) for this recipe.

    Nutritional information is for the wings and marinade and doesn’t include the optional dip.

    This recipe adapted from Greek Wings with Lemon and Feta on Bon Appetit.

    Nutrition Information

    Yield

    4

    Serving Size

    1

    Amount Per Serving

    Calories 518Total Fat 21gSaturated Fat 4gTrans Fat 0gUnsaturated Fat 16gCholesterol 60mgSodium 624mgCarbohydrates 1gFiber .2gSugar .2gProtein 10g

    Nutrition information is automatically calculated by the Recipe Plug-In I am using. I am not a nutritionist and cannot guarantee 100% accuracy, since many variables affect those calculations.

    Did you make this recipe?

    Did you make this recipe? Please leave a star rating (under the PRINT button in the recipe) or share a photo of your results on Instagram! THANKS!

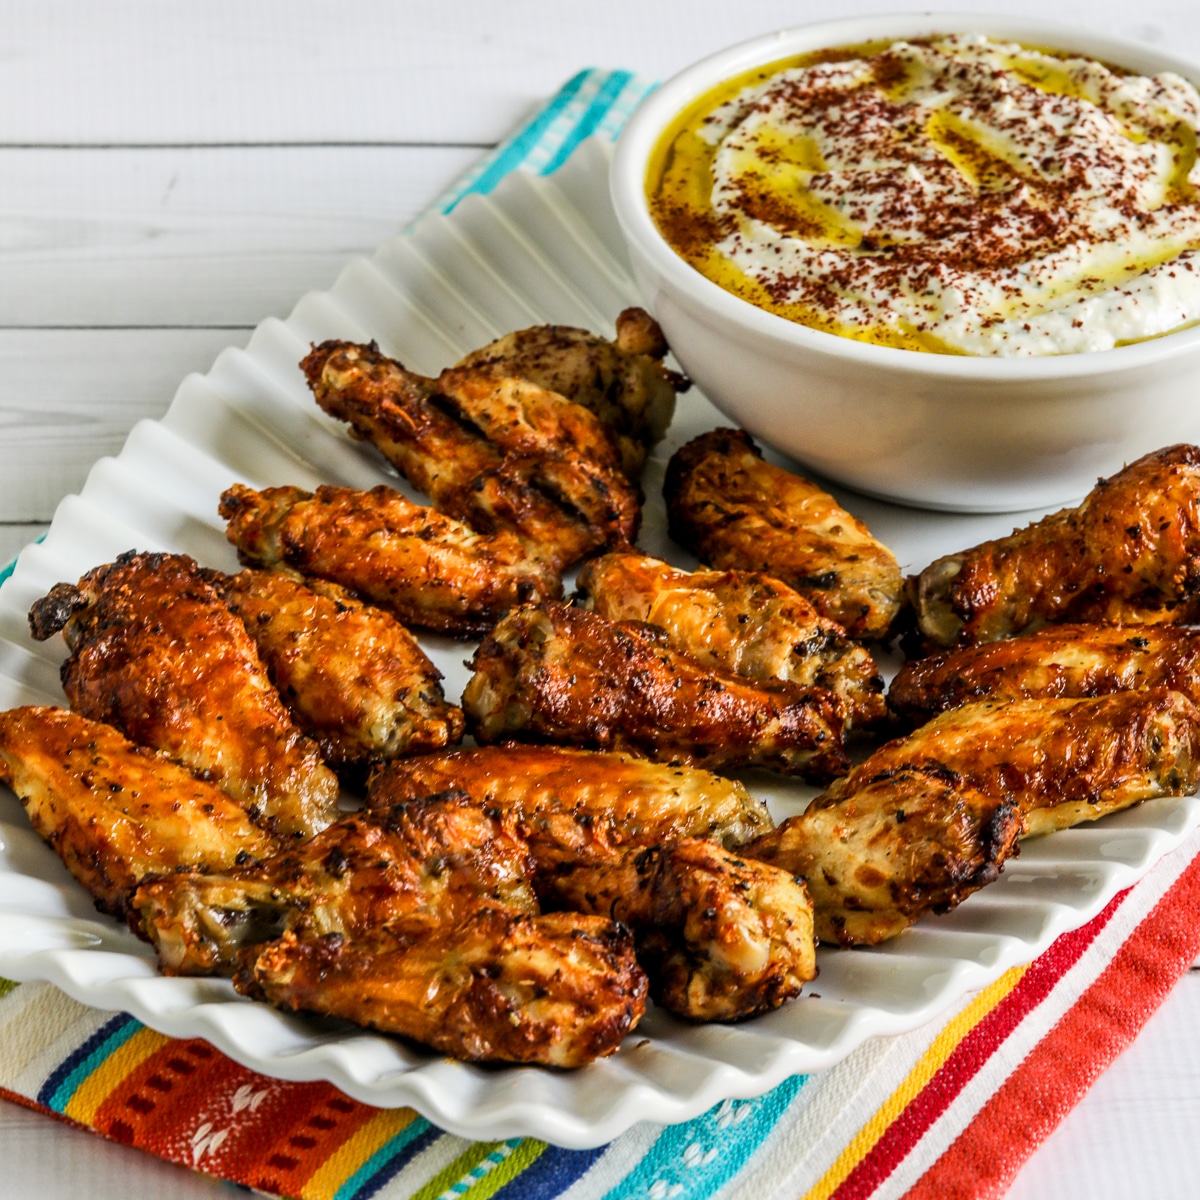
    square image of Greek Air Fryer Chicken Wings on platter

    Low-Carb Diet / Low-Glycemic Diet / South Beach Diet Suggestions:
    Greek Air Fryer Wings are good recipe for low-carb or Keto diets. Wings are not recommended for the original South Beach Diet, due to the amount of fat.

    Find More Recipes Like This One:
    Use the Diet Type Index to find more recipes suitable for a specific eating plan. You might also like to follow Kalyn’s Kitchen on Pinterest, on Facebook, on Instagram, on TikTok, or on YouTube to see all the good recipes I’m sharing there.

    Historical Notes for this Recipe:
    The Greek Wings with Whipped Feta Dip were first posted in 2023. The recipe was last updated with more information in 2026.

    Pinterest image of Greek Air Fryer Wings

    We are a participant in the Amazon Services LLC Associates Program, an affiliate advertising program designed to provide a means for us to earn fees by linking to Amazon.com and affiliated sites. As an Amazon Associate, I earn from qualifying purchases.


    Source link

  • Marry Me Chicken Orzo Bake

    Marry Me Chicken Orzo Bake

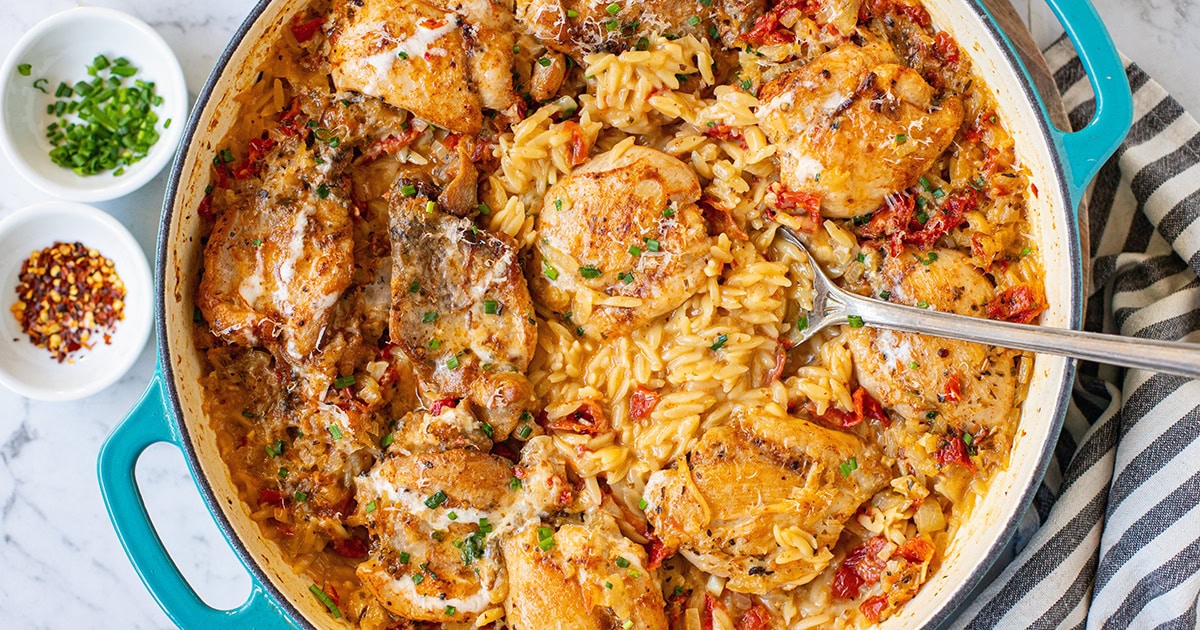
    Marry Me chicken orzo bake is a creamy one-pot pasta dinner made with chicken thighs, sun-dried tomatoes, garlic, and orzo baked in a luscious sauce.


    Jump to: ℹ️ Overview | 🛒 Ingredients | 📷 How To Make | 📹 Watch The Video | 👩‍🍳 Recipe Tips | 🥗 Serving Suggestions | 📝 Full Recipe Card | 🍽 More Pasta Recipes


    This Marry Me chicken orzo bake has all the classic marry me chicken vibes — garlicky, creamy, herby, and just a little fancy thanks to sun-dried tomatoes.
    The twist? Instead of serving it over plain pasta, it gets baked right into a saucy orzo casserole where the pasta soaks up all that flavor. I use skinless, boneless chicken thighs to keep things juicy and a touch lighter, plus a splash of light cream to make it luscious without feeling heavy.

    The chicken gets seared, then everything simmers and bakes in one pan. It’s cozy, high-protein, and crazy satisfying. And yes, I tested this a few times — and every time it turned out like a hug in a bowl.

    👩‍🍳 You might also like these: crock pot Marry Me chicken, chicken pasta recipes, lemon chicken orzo pasta, boursin orzo bake, lemon chicken orzo soup, chicken asparagus risotto, other chicken and rice recipes, and even more orzo recipes here. Check out my creamy Italian sausage pasta as well.

    What You’ll Need

    Here is what you’ll need for this creamy chicken orzo bake recipe. Find the full measurements in the recipe card below.

    For the Chicken:

    • Boneless, skinless chicken thighs — juicy and flavorful, a bit lighter without the skin; chicken breast works too, but I find thighs more forgiving.
    • Olive oil, salt, pepper, smoked paprika — classic flavor trio to season the chicken and add warmth.

    For the Sauce & Pasta:

    • Onion + garlic — your flavor base, don’t skip them!
    • Sun-dried tomatoes (oil-packed) — salty, tangy, and slightly sweet. These are the flavor bombs.

    • Dried Italian herbs + oregano — herby backbone. You can also use dried thyme if you don’t have mixed Italian herbs.
    • Chicken stock — flavorful liquid that orzo soaks up like a sponge.
    • Light cream — gives it that creamy, velvety sauce without the heaviness.
    • Orzo (or risoni) — the tiny pasta that cooks like rice. Soaks up everything.
    • Parmesan — salty, nutty, and so perfect melted into the sauce.
    • Chili flakes (optional) — for a bit of warmth if you like a tiny kick.

    To Finish:

    • Fresh herbs (basil, chives, parsley) — freshness to balance all that creamy richness.
    • Extra Parmesan — always.

    How To Make Marry Me Chicken Orzo Bake

    Find the full recipe and nutritional information below. Here are some handy step-by-step photos for how to make this one-pot baked chicken and orzo recipe.

    • Dice the onions and garlic so these are ready to go. Strain sun-dried tomatoes (if they are packed in oil) and chop them into smaller pieces. Set aside while we move onto the chicken.
    • Preheat oven to 350°F (180°C fan).
    • Season chicken thighs and pan-sear 2–3 minutes per side in a large oven-safe pan. I use cast iron low casserole pan.
    • Remove chicken; sauté onions first and then add garlic in the same pan. Add a little extra oil if needed.
    • Add chopped sun-dried tomatoes, herbs, and a pinch of chili flakes.
    • Pour in chicken stock (reserving a bit), cream, and Parmesan. Simmer briefly.
    • Taste the sauce and adjust seasoning; it should be salty as orzo absorbs a lot of the flavor.
    • Stir in orzo and nestle chicken back in.
    • Cover and bake for 15–20 minutes until orzo is tender and chicken is fully cooked. I think I did mine for 18 minutes.
    • Rest a few minutes, then sprinkle with herbs and more Parmesan. Dig in!

    Watch The Video

    Recipe Tips

    • Use an oven-safe deep pan or French (or Dutch) oven pot if you’ve got one — one less dish!
    • Don’t worry if the sauce looks a bit runny at first — orzo thickens a lot as it sits. If however it looks like it’s soaked up a lot of the stock, add a few splashes at the end to thin it out.
    • Want it spicier? Add more chili flakes or a pinch of cayenne.
    • Chicken breast? Sure, just don’t overcook it. Bone-in thighs also work but will need more time.
    • Want more veg? Stir in chopped spinach or baby kale before baking.
    • Make-ahead tips: You can pre-sear the chicken and make the sauce a day ahead. Store separately or all together (without the orzo) in the fridge, then mix in orzo and bake when ready.
    • Storage tips: Store leftovers in an airtight container in the fridge for up to 3 days. Reheat with a splash or two of broth or cream to loosen the orzo. Freezing is okay, but orzo can get soft. I don’t recommend.

    Serving Suggestions

    I love serving this with a bright, crunchy salad (lemon vinaigrette all the way – check out my asparagus salad) or simple steamed green beans, sauteed asparagus, or broccolini with garlic and lemon. It’s rich, so a little citrus on the side balances it beautifully.

    💬 If you’ve tried this Marry Me chicken orzo bake or any other recipe on the blog then don’t forget to rate the recipe and let me know how you got on in the comments below, I love hearing from you! You can also FOLLOW ME on Instagram, Facebook, Pinterest, YouTube, and or sign up to my Newsletter to see more of my delicious food.

    Want to Save This Recipe?

    Enter your email & I’ll send it to your inbox. Plus, get great new recipes from me every week!

    By submitting this form, you consent to receive emails from Cooked & Loved

    Marry Me Chicken Orzo Bake is a creamy one-pot pasta dinner made with chicken thighs, sun-dried tomatoes, garlic, and orzo baked in a luscious sauce. Find step-by-step photos and more recipe tips above.

    • Preheat oven to 350°F (180°C fan).

    • Season chicken with salt, pepper, and smoked paprika.

    • Heat a tablespoon of olive oil in a large oven-safe sauté pan or Dutch oven over medium-high heat.

    • Sear chicken on both sides until golden (2–3 mins per side). Remove and set aside.

    • Lower heat to medium, add extra oil if needed, and sauté onions until soft (3–4 mins). Add garlic and cook for 30 seconds.

    • Stir in chopped sun-dried tomatoes, Italian herbs, oregano, and chili flakes (if using).

    • Add stock (3 cups), cream, Parmesan, and bring to a gentle simmer. Season to taste — it should be slightly salty.

    • Add orzo and stir to combine. Nestle seared chicken on top.

    • Cover and bake for 15–20 minutes until orzo is tender and chicken is cooked through. I did mine for 18 minutes.

    • Optional step: splash extra stock around the edges if it looks dry near the end. Orzo tends to soak up more liquid around the edges of the pan as it’s hotter.

    • Let rest for 5 minutes. Garnish with herbs, more Parmesan, and a drizzle of cream if you’re feeling extra.

    • Can I use chicken breast instead of thighs? Yes! Just don’t overcook it — thighs are more forgiving and juicier. Bone-in thighs also work but will need more time.
    • What if I don’t have light cream? Use half-and-half or mix milk with a bit of heavy cream. Even evaporated milk works.
    • Why is it still saucy out of the oven? That’s perfect! Orzo keeps absorbing liquid after baking. The extra sauce keeps things creamy.
    • Can I make this dairy-free? You can try using coconut cream and skip the Parmesan, but the flavor will change quite a bit.
    • Can I double the recipe? Yes, just use a larger baking dish or split between two. Add a few extra minutes to the bake time.
    • Use an oven-safe deep pan or Dutch oven if you’ve got one — one less dish!
    • Don’t worry if the sauce looks a bit runny at first — orzo thickens a lot as it sits. If however it looks like it’s soaked up a lot of the stock, add a few splashes at the end to thin it out.
    • Want it spicier? Add more chili flakes or a pinch of cayenne.
    • Want more veg? Stir in chopped spinach or baby kale before baking.
    • Make-ahead tips: You can pre-sear the chicken and make the sauce a day ahead. Store separately or all together (without the orzo) in the fridge, then mix in orzo and bake when ready.
    • Storage tips: Store leftovers in an airtight container in the fridge for up to 3 days. Reheat with a splash or two of broth or cream to loosen the orzo. Freezing is okay, but orzo can get soft. I don’t recommend.

    Calories: 528kcal | Carbohydrates: 48g | Protein: 36g | Fat: 21g | Saturated Fat: 9g | Polyunsaturated Fat: 2g | Monounsaturated Fat: 8g | Trans Fat: 0.02g | Cholesterol: 152mg | Sodium: 868mg | Potassium: 1234mg | Fiber: 4g | Sugar: 11g | Vitamin A: 743IU | Vitamin C: 10mg | Calcium: 157mg | Iron: 4mg

    Keywords: chicken orzo, Marry Me Chicken Orzo Bake, chicken orzo bake, baked chicken orzo, chicken with orzo pasta

    More Pasta Recipes


    Source link

  • Mongolian Shrimp

    Mongolian Shrimp

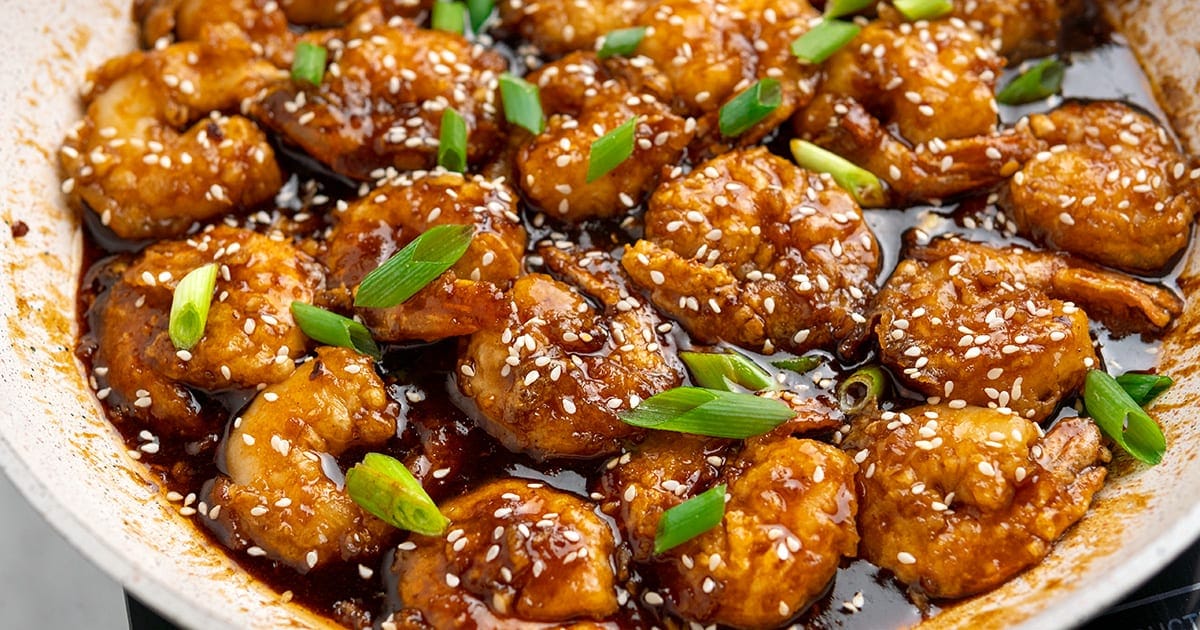
    This Mongolian shrimp recipe is a scrumptious combination of succulent shrimp (prawns) coated in light crispy batter, stir-fried with a sweet and savory Chinese sauce, and garnished with a sprinkle of green onions and sesame seeds. This seafood version of the classic Chinese dish is so easy to make that even a novice cook can whip it up in no time. This recipe is gluten-free with paleo-friendly swaps.


    Jump to: ℹ️ Overview | 🛒 Ingredients | 📷 How To Make |📺 Watch The Video | 📝 Go To Full Recipe | 🦐 More Recipes With Shrimp


    What Is Mongolian Shrimp?

    You might be familiar with Mongolian lamb or beef from takeout menus and your favorite Chinese restaurants. Despite its name, Mongolian anything is not a traditional Mongolian dish but rather a creation of Chinese-American cuisine.

    This Mongolian shrimp is a seafood version of this popular dish. It’s made with succulent shrimp that’s been coated in egg white and starch, shallow fried and coated in a delicious, sticky sweet and savoury sauce. It has bold flavors and just enough crunch to make it totally irresistible.

    Mongolian Sauce

    Whether you use shrimp, beef, chicken or tofu to make this recipe, the star of the dish is the sauce. In almost all recipes, the Mongolian sauce consists of soy sauce, hoisin sauce, brown sugar, garlic, ginger, and sometimes chili flakes or Sriracha for a spicy kick. It can be used in a stir-fry with protein, vegetables or tossed through noodles.

    There are variations to this sauce and my version uses honey instead of brown sugar. I also coat the shrimp in tapioca flour (you can use cornstarch too) so it’s gluten-free and/or grain-free.

    👩‍🍳 You might also like these dishes: cauliflower shrimp fried ‘Rice’ for something Asian, Spanish cauliflower rice (with chorizo, chicken and shrimp) for something Mediterranean, shrimp Caesar salad or grilled shrimp salad for something light, this incredible garlic butter shrimp or shrimp with white sauce (Alabama-style).

    What You’ll Need

    Here is what you will need for this Mongolian shrimp recipe. Find the full measurements in the recipe card below.

    • Shrimp: In Australia, we refer to shrimp as prawns but I am sticking with shrimp as the name as it’s so commonly used by my readers. I recommend large shrimp, the bigger the better. Get deveined and de-shelled shrimp to save yourself on prep time, otherwise, you will need to peel it first. You can also use frozen shrimp and defrost it in warm water for 10-15 minutes.
    • For coating: I am using Chihyu’s of I Heart Umami tip to use frothed egg whites to coat the shrimp, followed with tapioca starch/flour or cornstarch, which gives them very light yet puffed up and crispy batter.
    • Avocado oil or coconut oil for frying is best if you want to stay away from unhealthful vegetable or canola oils. The shrimp is shallow-fried in a thin layer of oil rather than deep fried, so you won’t need a whole lot of oil.
    • For Mongolian sauce: freshly minced or grated ginger and garlic, soy sauce (Tamari or coconut aminos for Paleo/gluten-free), Hoisin sauce, honey (or brown sugar, I use a lot less than most recipes out there), a little sesame oil and chilli flakes.
    • For garnish: green onions (scallions) and sesame seeds if you have some on hand.
    • To serve: I usually do rice and Asian greens or garlicky pan-fried broccoli; you can also try my coconut cauliflower rice or veggies for a low-carb/paleo meal.
    • By the way, I have a recipe for Paleo hoisin sauce here if you must avoid the store-bought version.

    Watch The Video

    How To Make Mongolian Shrimp

    The full recipe card with ingredients and a nutritional breakdown are in the recipe card below. Here are some step-by-step photos and a video to guide you along.

    • Step 1. Peel and devein the shrimp if needed. Pat the shrimp dry with a clean paper towel. Make sure it’s completely dry so it turns out extra crispy when coated in starch and fried. 
    • Step 2. Butterfly the shrimp to make it look extra pretty when cooked. Cut the flesh along the back to butterfly shrimp, ensuring not to cut through the shrimp. Set aside.
    • Step 3. Whisk the egg whites until frothy in one bowl and set another bowl with the flour/starch. 
    • Step 4. Heat the oil in a shallow layer in a skillet or frying pan over medium-high heat. Once sizzling hot, add the shrimp. Working in batches, dip the shrimp in the egg-white mixture and then roll in the flour. Shake off the excess and carefully add to the hot oil in the pan.
    • Cook for about 2 minutes on each side until golden brown and crispy. Remove cooked shrimp to a plate lined with some paper towel.
    • Step 5. While the shrimp is cooking, you can whisk the sauce ingredients in a bowl. Combine everything except for garlic and ginger and whisk together. You can also do this first or ahead of time.
    • Step 6. Once all the shrimp are cooked, pour out excess oil from the pan into a bowl or soak it up with a paper towel. Leave a little bit of oil to fry off the garlic and ginger. 
    • Step 7. Keeping the pan on medium-high heat, add minced garlic and ginger to the pan and stir for 30 seconds to a minute. Don’t let them get too brown, we want just a little colour.
    • Then pour in the sauce and stir over heat for about a minute, until it starts to bubble away and caramelise slightly. At this stage, return the pre-cooked shrimp and stir through the sauce.
    • Turn the heat off and sprinkle with green onions and sesame seeds. Serve over rice with side vegetables or salad.

    💬 If you’ve tried this shrimp recipe or any other recipe on the blog then don’t forget to rate the recipe and let me know how you got on in the comments below, I love hearing from you! You can also FOLLOW ME on Instagram, Facebook, Pinterest, YouTube and or sign up to my Newsletter to see more of my delicious food.

    Want to Save This Recipe?

    Enter your email & I’ll send it to your inbox. Plus, get great new recipes from me every week!

    By submitting this form, you consent to receive emails from Cooked & Loved

    Mongolian shrimp is a delicious Chinese-American dish made by stir-frying succulent shrimp with a sweet and savoury Mongolian sauce. The result is a mouthwatering dish with tender shrimp coated in a flavourful sauce that’s great served over a bed of steamed rice or veggies.

    • Peel and devein the shrimp. Pat the shrimp dry with a clean paper towel. Make sure it’s completely dry so it turns out extra crispy when coated in starch and fried. 

    • Butterfly the shrimp to make it look extra pretty when cooked. Cut the flesh along the back to butterfly shrimp, ensuring not to cut through the shrimp. Set aside.

    • Whisk the egg whites until frothy in one bowl and set another bowl with the flour/starch. 

    • Heat the oil in a shallow layer in a skillet or frying pan over medium-high heat. Once sizzling hot, add the shrimp. Working in batches, dip the shrimp in the egg-white mixture and then roll in the flour. Shake off the excess and carefully add to the hot oil in the pan. Cook for about 2 minutes on each side until golden brown and crispy. Remove cooked shrimp to a plate lined with a paper towel.

    • While the shrimp is cooking, you can whisk the sauce ingredients in a bowl. Combine everything except for garlic and ginger and whisk together.

    • Once all the shrimp is cooked, pour out excess oil from the pan into a bowl or soak it up with a paper towel. Leave a little bit of oil to fry off the garlic and ginger. 

    • Keeping the pan on medium-high heat, add minced garlic and ginger to the pan and stir for 30 seconds to a minute. Don’t let them get too brown, we want just a little colour. Then pour in the sauce and stir over heat for about a minute, until it starts to bubble away and caramelize slightly. At this stage, return the pre-cooked shrimp and stir through the sauce. Turn the heat off and sprinkle with green onions and sesame seeds.

    • Serve over rice with side vegetables or salad.

    Calories: 416kcal | Carbohydrates: 33g | Protein: 20g | Fat: 23g | Saturated Fat: 3g | Polyunsaturated Fat: 4g | Monounsaturated Fat: 14g | Trans Fat: 0.01g | Cholesterol: 142mg | Sodium: 2023mg | Potassium: 251mg | Fiber: 1g | Sugar: 14g | Vitamin A: 266IU | Vitamin C: 2mg | Calcium: 81mg | Iron: 1mg

    Keywords: Stir-Fry, Shrimp Recipes, Asian Shrimp Recipe, Mongolian Shrimp, Mongolian Prawns, Mongolian Sauce

    More Recipes You Might Like


    Source link

  • Turkey Meatballs & Kale In Lemony Garlic Broth (Paleo, Whole30)

    Turkey Meatballs & Kale In Lemony Garlic Broth (Paleo, Whole30)

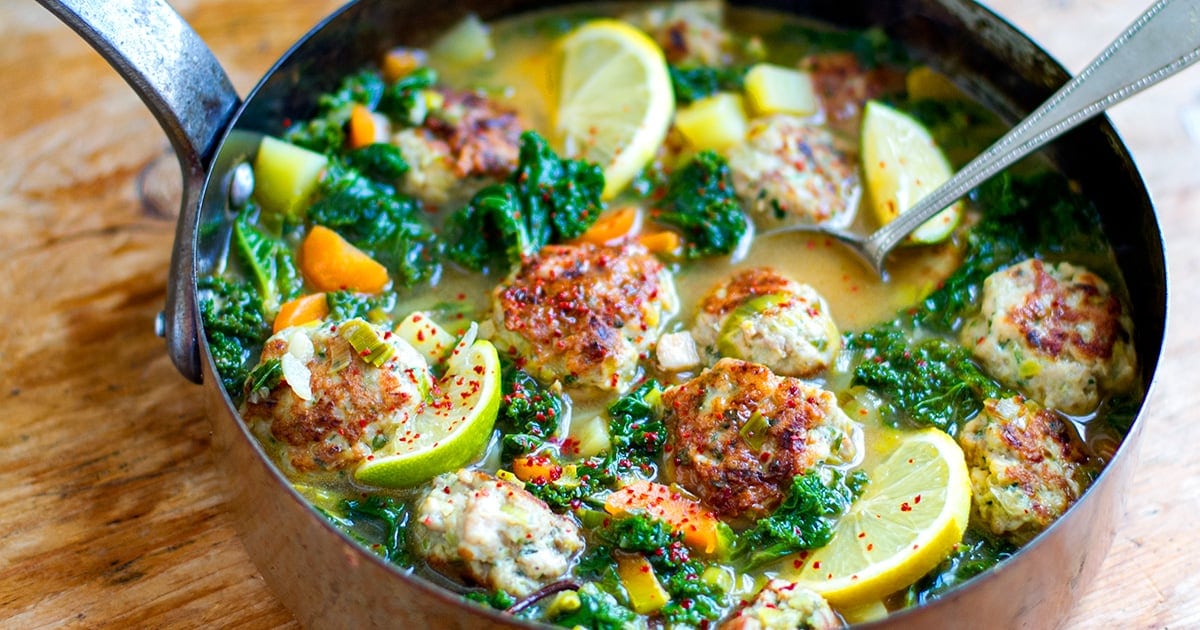
    This super nourishing soup of turkey meatballs and kale braised in lemony garlic broth is full of flavour and makes for a great comfort dish that is still very healthy. You get the benefits of antioxidant-packed kale, chicken broth and protein-rich turkey or chicken meat, plus all those beautiful notes of citrus and garlic. I made this dish for my Paleo reset program and it’s become a crowd-favourite, so I am sharing it on the blog as well.  It’s paleo, gluten-free, Whole30 and keto-friendly. 


    I love making this soup when I feel like something nourishing and warm. It’s great for when you’re feeling under the weather or coming down with a cold as it’s full of nutrients, Vitamin C and healing broth. In my true style, I made sure it’s also packed with flavour and in this case you get lots of umami, citrus and garlic.

    How To Make Braised Turkey Meatballs & Kale Soup

    There are two parts to making this lovely turkey meatball soup dish.

    First, you make the meatballs and you can use ground turkey, chicken or pork. Fish can also be ground up into mince and will work well in this recipe. The meatballs are partially pan-fried before you add them to the soup. 

    The soup base is very easy to make and I used a few spices, citrus and garlic to give it a lot of flavour. The addition of fish sauce gives the broth saltiness and that lovely umami flavour but you can always use a little extra salt instead. 

    I used kale but any leafy greens with work. You might like to add some collard greens or Chinese greens like bok choy or broccoli, Swiss chard etc. To be honest, you can add as many different veggies as you like. Add starchy roots earlier so they can cook and leafy, fibrous ones towards the end. I often use kale in soups, like this chicken tortilla one.


    Dietary Modifications

    This soup has a few starchy vegetables, so if you’re following a low-carb or keto diet, replace the carrots and potatoes with zucchini and/or broccoli. You might want to keep some carrots. You can also use a little less leek. White potatoes can be swapped for sweet potatoes or parsnips. 

    Make-Ahead Tips

    You can make the meatballs ahead of time. You can pan-fry them or keep them raw in the fridge for 2-3 days or freeze them for up to 3 months. Defrost in the fridge overnight before using as per recipe instructions. I also love keeping some homemade chicken broth in the freezer or fridge but you can also use store-bought broth. 

    Pre-chopping the kale and leeks and peeling garlic will also save you some time. You can store those in an airtight container in or Ziploc bags in the fridge for 2-3 days before using. Use the potatoes when needed, though. 

    More make-ahead friendly recipes here. 

    Want to Save This Recipe?

    Enter your email & I’ll send it to your inbox. Plus, get great new recipes from me every week!

    By submitting this form, you consent to receive emails from Cooked & Loved

    This soup of turkey meatball and kale braised in a lemony, citrus garlic broth is nourishing and tasty, perfect for the whole family. It’s easy to make and keeps well for 2-3 days in the fridge.

    • If you have a food processor, place leek, parsley, mint, thyme, garlic and lime zest inside with an S-blade attached. Blitz a few times, until the ingredients are finely ground up. Alternatively, chop everything very finely using a knife. Transfer to a large mixing bowl together with the turkey or chicken mince, salt and pepper. Mix really well, until well incorporated.

    • Heat coconut or olive oil in a large skillet over medium-high heat. Roll the mixture into small meatballs; about 25 g / 1 oz. each, smaller than a ping pong ball. Fry the meatballs for 7-8 minutes, turning them throughout so they turn golden brown on all sides.

    • In the meantime, add the olive oil, the other part of the leek, lemon peels, carrot and potatoes to a medium saucepan. Sauté for a few minutes, then add the garlic, cumin, star anise, chicken stock and fish sauce. Season with some salt and pepper and bring to a boil. Add the meatballs and cook over medium heat, covered, for 3-4 minutes.

    • Prepare the kale and add to the soup, stir through and cook for a further 5 minutes, covered. Test the potato and once soft, remove from the heat and add the lime and lemon juice. Stir and taste for salt. Let it sit for 5 minutes off the heat before serving.

    If you don’t have limes, replace with lemon where stated.

    • Meat: Turkey, chicken or pork mince can be used in this recipe. Even fish would work really well with the flavours of the soup. If you can’t find ground-up chicken or turkey mince, get some thighs (skin and bone off) and grind it up using a food processor.
    • Herbs: Other herbs like sage and oregano can be used instead of thyme; coriander and basil would work well instead of parsley.
    • AIP: Omit the chilli and use parsnip or sweet potato instead of white potato.

    Calories: 446kcal | Carbohydrates: 30g | Protein: 44g | Fat: 18g | Saturated Fat: 6g | Polyunsaturated Fat: 3g | Monounsaturated Fat: 8g | Trans Fat: 0.02g | Cholesterol: 82mg | Sodium: 1768mg | Potassium: 1503mg | Fiber: 8g | Sugar: 8g | Vitamin A: 18029IU | Vitamin C: 157mg | Calcium: 420mg | Iron: 6mg

    Keywords: Paleo, Dinner Ideas, Kale, Ground Turkey, Turkey Recipes


    You Might Also Like


    Save Turkey Meatball Soup To Pinterest


    [mv_playlist doNotAutoplayNorOptimizePlacement=”false” doNotOptimizePlacement=”true” id=”224″ jsonLd=”false” ratio=”16:9″ thumbnail=”https://mediavine-res.cloudinary.com/v1599716598/plqh05ivvby851y7acqo.jpg” title=”WATCH MY TOP 10 HEALTHY VIDEO RECIPES” volume=”70″]

    Source link

  • How To Cook Oyster Mushrooms

    How To Cook Oyster Mushrooms

    Learn how to cook oyster mushrooms with this pan-fried recipe that makes them crispy, golden, and ridiculously delicious! Eat them straight from the pan or dress them up with balsamic and Parmesan for a fancy little appetizer. PS. More cooking methods provided below.


    Jump to: ℹ️ Overview | 🛒 Ingredients | 📷 How To Make | 📹 Watch The Video | 👩‍🍳 Recipe Tips | 🥗 Serving Suggestions | 📝 Full Recipe Card | Oyster Mushrooms FAQs | More Cooking Methods | 🍽 More Recipes With Mushrooms


    These pan-fried oyster mushrooms are my absolute favorite way to cook them—crispy, golden, and packed with savory goodness. Lightly coated in a bit of flour and seasoned with garlic, paprika, and soy sauce, they develop a flavorful crust while staying tender and meaty inside.

    You can serve them as a snack with a squeeze of lemon, toss them into salads and sandwiches, or level them up with a drizzle of balsamic and some Parmesan.

    Oyster mushrooms are naturally vegan (minus the cheese) and full of umami, making them a great plant-based alternative to crispy chicken.

    Below the recipe, I will also share a few more tips and ways for how to cook oyster mushrooms.

    👩‍🍳 You might also like these mushroom recipes: my thyme mushrooms or chili garlic mushrooms, this amazing vegetarian mushroom sandwich, this hearty mushroom stew, or my vegetarian Stroganoff. Oh, and this beef and mushroom stew is kickass if you eat meat. Want to try another unique fungi, try this Lion’s Mane mushroom recipe (from a fellow blogger).

    What You’ll Need

    Here is what you’ll need for this pan-fried oyster mushroom recipe. Find the full measurements in the recipe card below.

    • Oyster Mushrooms – The star of the show! Use whole or tear larger ones into bite-sized pieces for even cooking. If using King Oyster mushrooms, slice them into thin strips.
    • For flavor – Garlic powder, onion powder, smoked paprika, turmeric, cumin, salt, and pepper for a balanced, earthy, and slightly smoky taste. Add a pinch of chili flakes if you like a little heat.
    • Binding and coating – A little olive oil and soy sauce help the seasoning stick, while flour gives the mushrooms their crispy crust. Swap soy sauce for tamari or coconut aminos for a gluten-free option. Use cornstarch instead of flour for an extra crispy, gluten-free coating.
    • For serving – Lemon wedges for a bright finish, or go fancy with aged balsamic and grated Parmesan.

    👩‍🍳 What Are Oyster Mushrooms?

    Oyster mushrooms are delicate, fan-shaped fungi with a mild, slightly sweet, and umami-rich flavor. They have a tender yet meaty texture, making them a great plant-based substitute for chicken. Popular varieties include pearl, king, and blue oyster mushrooms, each slightly different in shape and size but all equally delicious.

    How To Prep

    • If the mushrooms are large, tear them into smaller pieces for even cooking (see pictures and my video below).
    • No need to wash them—just wipe off any dirt with a damp paper towel. Mushrooms absorb water quickly, so avoid soaking them!
    • Separate the caps from thick stems if needed, as the stems take longer to cook.

    How To Make Pan-Fried Oyster Mushrooms

    Find the full recipe and nutritional information below. Here are some handy step-by-step photos for pan-fried oyster mushrooms.

    • Place mushrooms in a bowl and drizzle with olive oil and soy sauce.
    • Sprinkle with garlic powder, onion powder, smoked paprika, turmeric, cumin, salt, and pepper. Add flour and toss everything together.
    • Heat 2-3 tablespoons of olive oil in a large frying pan over medium-high heat.
    • Once the oil is hot, arrange the mushrooms in a single layer with space between them.
    • Cook for 2-3 minutes per side until crispy and golden. Add more oil if needed.
    • Transfer to a paper towel-lined plate to absorb excess oil.
    • Serve with lemon wedges and flaky salt, or drizzle with balsamic and top with Parmesan.

    Watch The Video

    Recipe Tips

    • Don’t overcrowd the pan! Mushrooms release moisture when cooking, and too many in one pan will steam instead of crisp up.
    • Use high heat for the best golden-brown crust. Medium-high is your friend here.
    • Keep them moving—some parts of the pan might be hotter, so shuffle the mushrooms around for even cooking.
    • For extra crunch, let them sit in the pan for a few seconds before flipping.
    • Storage tips: Store leftovers in an airtight container in the fridge for up to 3 days. Reheat in a pan or air fryer to bring back crispiness. Freezing is not recommended, as they can become soggy when thawed.
    • Make-ahead tips: You can season and coat the mushrooms with olive oil and soy sauce ahead of time, but not the flour! Store them in the fridge for up to a few hours before cooking. Coat with flour just before cooking. Cook them fresh for the best texture.

    Serving Suggestions

    💬 If you’ve tried these pan-fried oyster mushrooms or any other recipe on the blog then don’t forget to rate the recipe and let me know how you got on in the comments below, I love hearing from you! You can also FOLLOW ME on Instagram, Facebook, Pinterest, YouTube, and or sign up to my Newsletter to see more of my delicious food.

    Want to Save This Recipe?

    Enter your email & I’ll send it to your inbox. Plus, get great new recipes from me every week!

    By submitting this form, you consent to receive emails from Cooked & Loved

    Learn how to cook oyster mushrooms with this pan-fried recipe that makes them crispy, golden, and ridiculously delicious! Eat them straight from the pan or dress them up with balsamic and Parmesan for a fancy little appetizer. Find step-by-step photos and more recipe tips above.

    For Balsamic Parmesan Oyster Mushrooms:

    • If mushrooms are large, tear them into 2-3 pieces. Wipe clean with a damp paper towel.

    • In a bowl, toss mushrooms with olive oil, soy sauce, spices, and flour until evenly coated.

    • Heat 2-3 tablespoons olive oil in a frying pan over medium-high heat.

    • Add mushrooms in a single layer, leaving space between them. Cook for 2-3 minutes per side until crispy and golden brown.

    • Transfer to a plate lined with paper towels.

    • Serve with lemon wedges and flaky salt, or drizzle with balsamic and sprinkle with Parmesan.

    • Don’t overcrowd the pan! Mushrooms release moisture when cooking, and too many in one pan will steam instead of crisp up.
    • Use high heat for the best golden-brown crust. Medium-high is your friend here.
    • Keep them moving—some parts of the pan might be hotter, so shuffle the mushrooms around for even cooking.
    • For extra crunch, let them sit in the pan for a few seconds before flipping.
    • Storage Tips: Store leftovers in an airtight container in the fridge for up to 3 days. Reheat in a pan or air fryer to bring back crispiness. Freezing is not recommended, as they can become soggy when thawed.
    • Make-Ahead Tips: You can season and coat the mushrooms with olive oil and soy sauce ahead of time, but not the flour! Store them in the fridge for up to a few hours before cooking. Coat with flour just before cooking. Cook them fresh for the best texture.

    Calories: 92kcal | Carbohydrates: 10g | Protein: 4g | Fat: 5g | Saturated Fat: 1g | Polyunsaturated Fat: 1g | Monounsaturated Fat: 3g | Cholesterol: 2mg | Sodium: 698mg | Potassium: 358mg | Fiber: 2g | Sugar: 2g | Vitamin A: 306IU | Vitamin C: 0.2mg | Calcium: 34mg | Iron: 2mg

    Keywords: oyster mushrooms, pan-fried oyster mushrooms, crispy oyster mushrooms

    More Ways to Cook Oyster Mushrooms

    Pan-frying is my favorite way to cook oyster mushrooms, but there are plenty of other ways to enjoy them!

    • Sautéed – Cook them in a pan with a little olive oil or butter, garlic, and a splash of soy sauce or lemon juice for a simple, flavorful side dish.
    • Deep-fried – Dip them in a light batter or seasoned flour and fry until crispy. These make an amazing vegan alternative to fried chicken!
    • Grilled – Brush with olive oil, season with salt and pepper, and grill until they develop a smoky, slightly charred edge. Perfect for BBQs!
    • Air-Fried – Toss with a little oil and seasoning, then air fry at 375°F (190°C) for 10-12 minutes, shaking the basket halfway through.
    • Roasted – Spread them on a baking sheet, drizzle with olive oil, and roast at 400°F (200°C) for 20-25 minutes until golden brown.
    • Braised – Simmer them in a flavorful broth with soy sauce, garlic, and ginger for a rich, umami-packed dish.

    Each method brings out a slightly different texture and flavor, so try them all and see which one you love best.

    FAQs

    What do oyster mushrooms taste like?

    They have a mild, slightly nutty, and umami-rich flavor with a tender yet meaty texture.

    Why are they called oyster mushrooms?

    Because their shape resembles an oyster shell!

    How do oyster mushrooms grow?

    They grow in clusters on decaying wood, often in forests or commercial farms using controlled environments.

    Are oyster mushrooms healthy?

    Yes! They’re low in calories, high in fiber, and packed with antioxidants, vitamins, and minerals.

    How long do oyster mushrooms last?

    Fresh ones last about 5-7 days in the fridge when stored in a paper bag.

    Can you eat oyster mushrooms raw?

    Technically, yes, but cooking enhances their flavor and makes them easier to digest.

    Do oyster mushrooms have to be cooked?

    Not necessarily, but they taste much better when pan-fried, roasted, or sautéed!

    More Recipes With Mushrooms


    Source link

  • Copycat Raising Cane’s Chicken (Crispy and Easy)

    Copycat Raising Cane’s Chicken (Crispy and Easy)

    This website may contain affiliate links and advertising so that we can provide recipes to you. Read my disclosure policy.

    Make this copycat Raising Cane’s chicken tenders at home, no drive-thru required. An easy marinade, simple ingredients, and a quick fry give you crisp, light chicken and that unmistakable Cane’s sauce for a fraction of the cost.

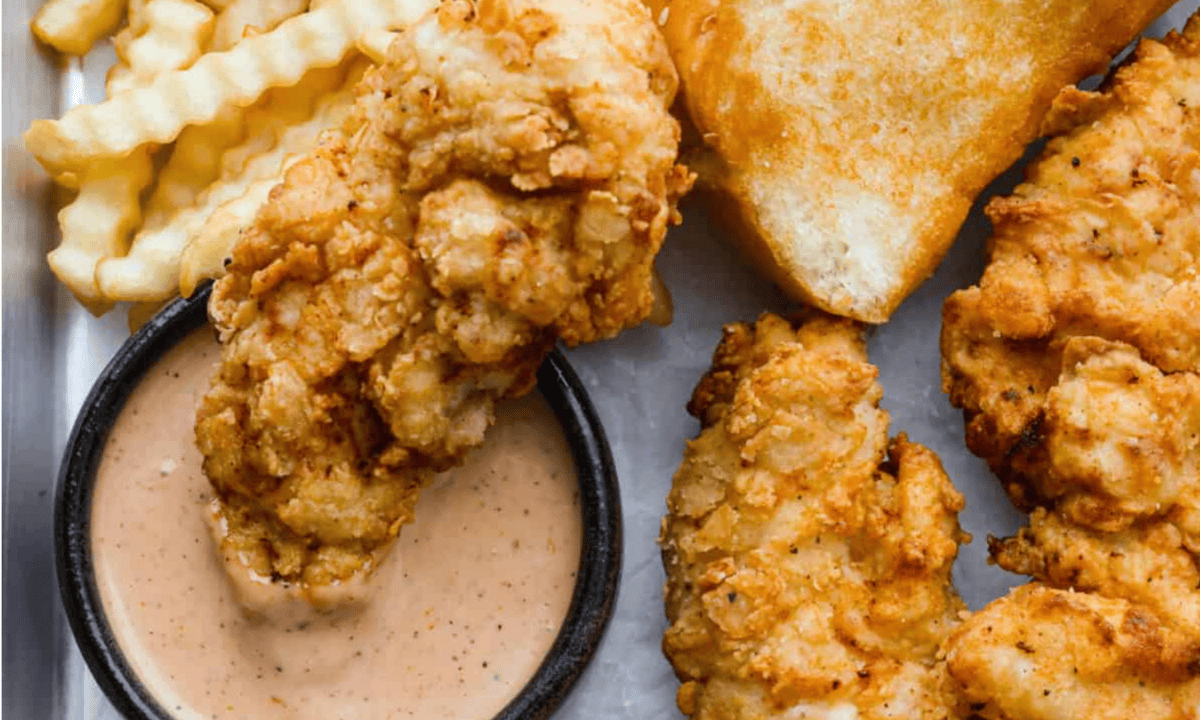
    Crispy Raising Cane's chicken tenders on a plate next to crinkle cut fries, Texas toast, and a small bowl of Cane's dipping sauce.

    The Magic Behind the Crunch and the Sauce

    • Double Crunch: My version uses a double coat of breading for that extra-loud crunch you expect from the real thing.
    • Air Fryer Friendly: Not into deep frying? No problem. I include air fryer directions that still give you a crisp finish.
    • Built-In Flavor: Spices go into both the marinade and the breading, so every bite hits with the same bold flavor you get at Cane’s.

    Raising Cane’s Chicken Tenders Ingredients

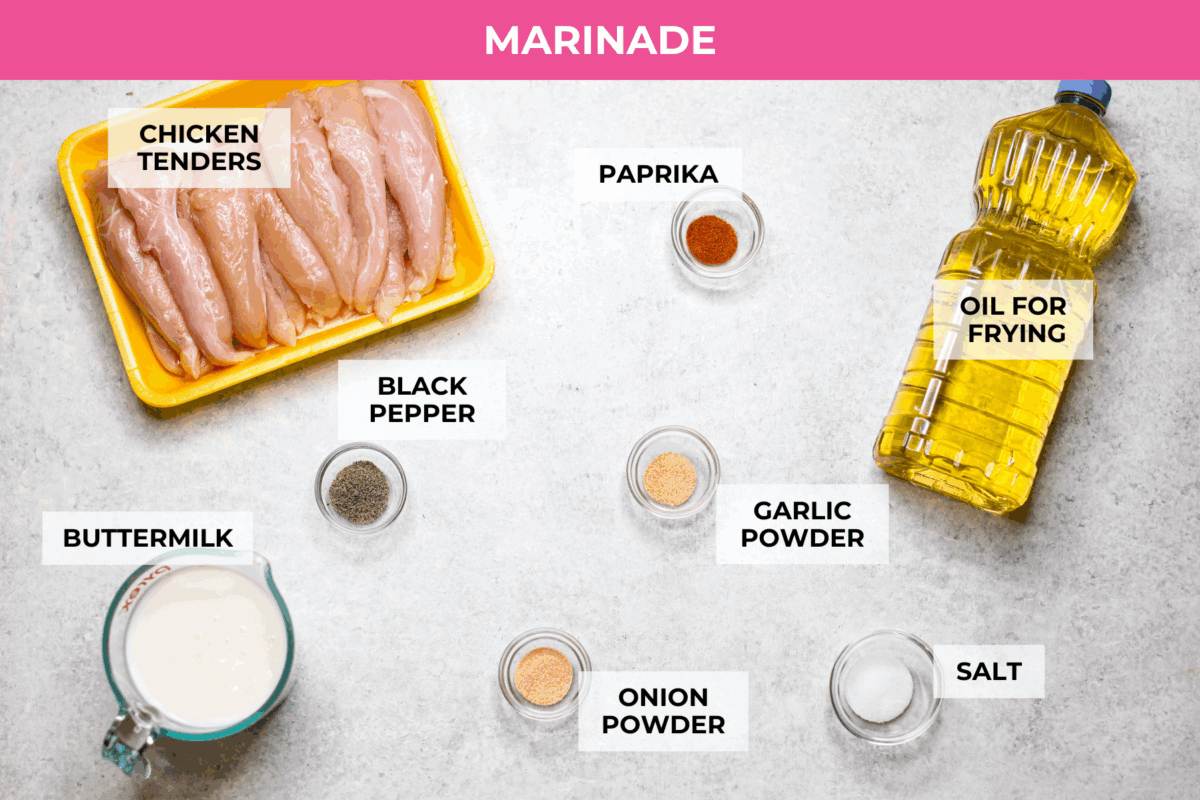
    Overhead shot of labeled raising canes chicken marinade ingredients.
    • Bring the Heat! Add 1-2 teaspoons of hot sauce to the marinade and a pinch or two of cayenne pepper to the breading for added heat.
    • Buttermilk: Don’t have buttermilk, make your own. It won’t be as thick, so the breading may not stick as well, but in a pinch, it can work.
    • Chicken: Remove the tendons from the chicken tenders before marinating, or use chicken breasts, sliced into even vertical pieces.
    Overhead shot of labeled breading ingredients.

    How to Make Raising Cane’s Chicken

    If you’re craving Cane’s but don’t want to leave the house or pay the higher restaurant prices. You can make them at home, and it’s easier than you’d think!

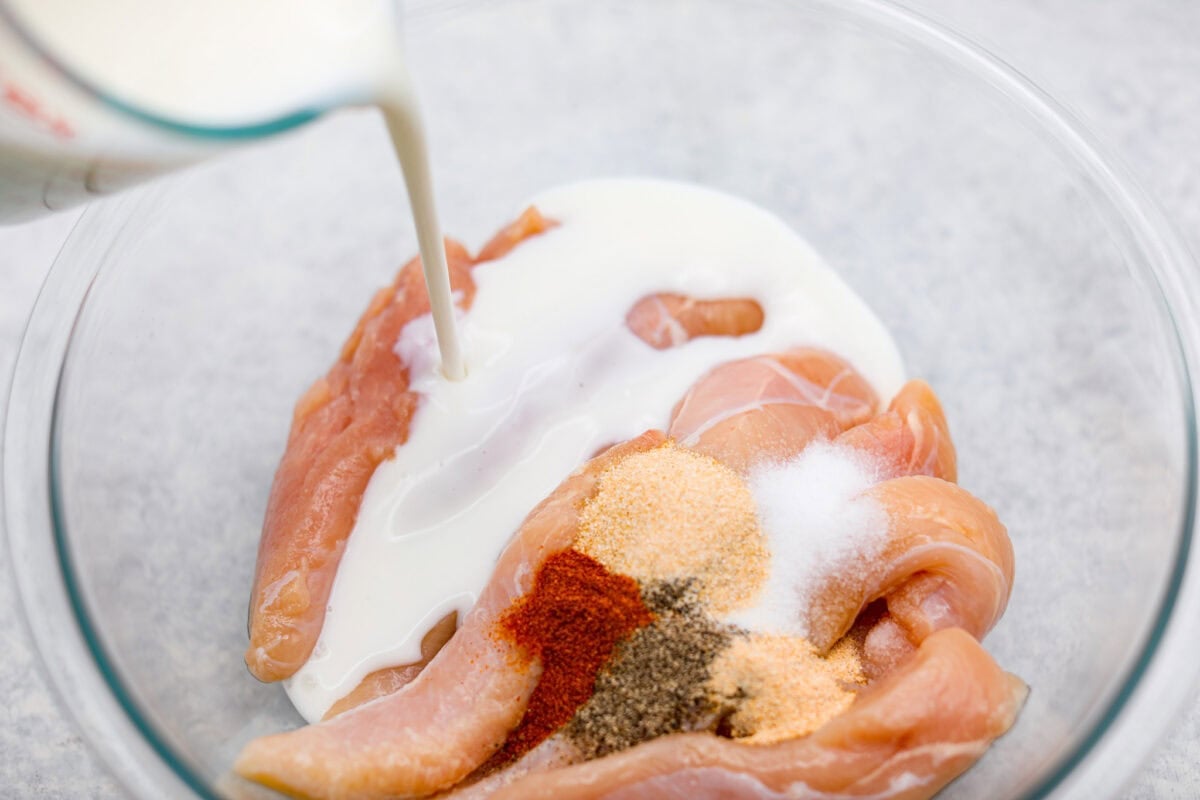
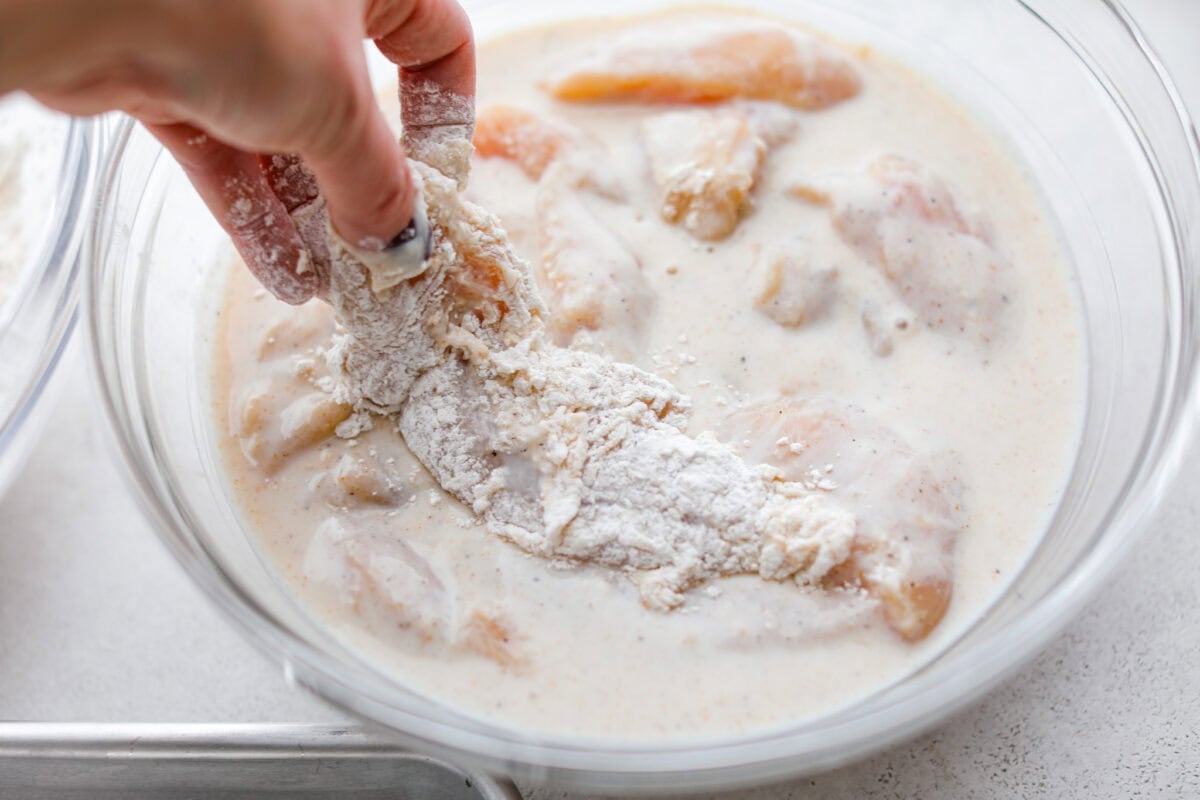
    1. Trim & Season Chicken: Trim the chicken by removing the tendons. Add the chicken to a large bowl. Add the buttermilk, salt, pepper, onion powder, garlic powder, and paprika to the bowl with the chicken. 
    2. Marinate: Toss everything together until well combined and the chicken is fully coated. Let it marinate for at least 4 hours, or up to 24 hours.
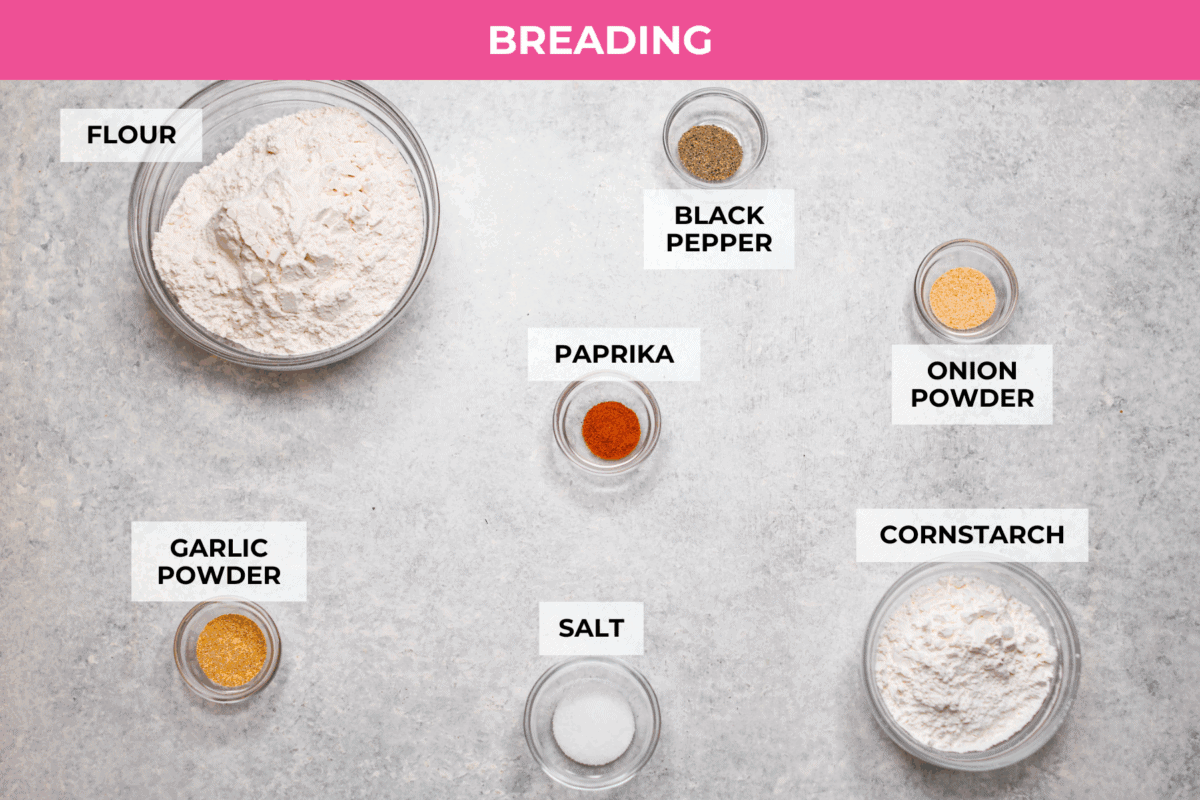
    3. Heat Oil & Make Breading: When ready to fry, add 5-6 cups of vegetable oil to a large, deep pot until it is about 2 inches deep. Heat over high heat until it reaches 350°F. Meanwhile, combine the flour, cornstarch, salt, pepper, onion powder, garlic powder, and paprika in a large bowl.
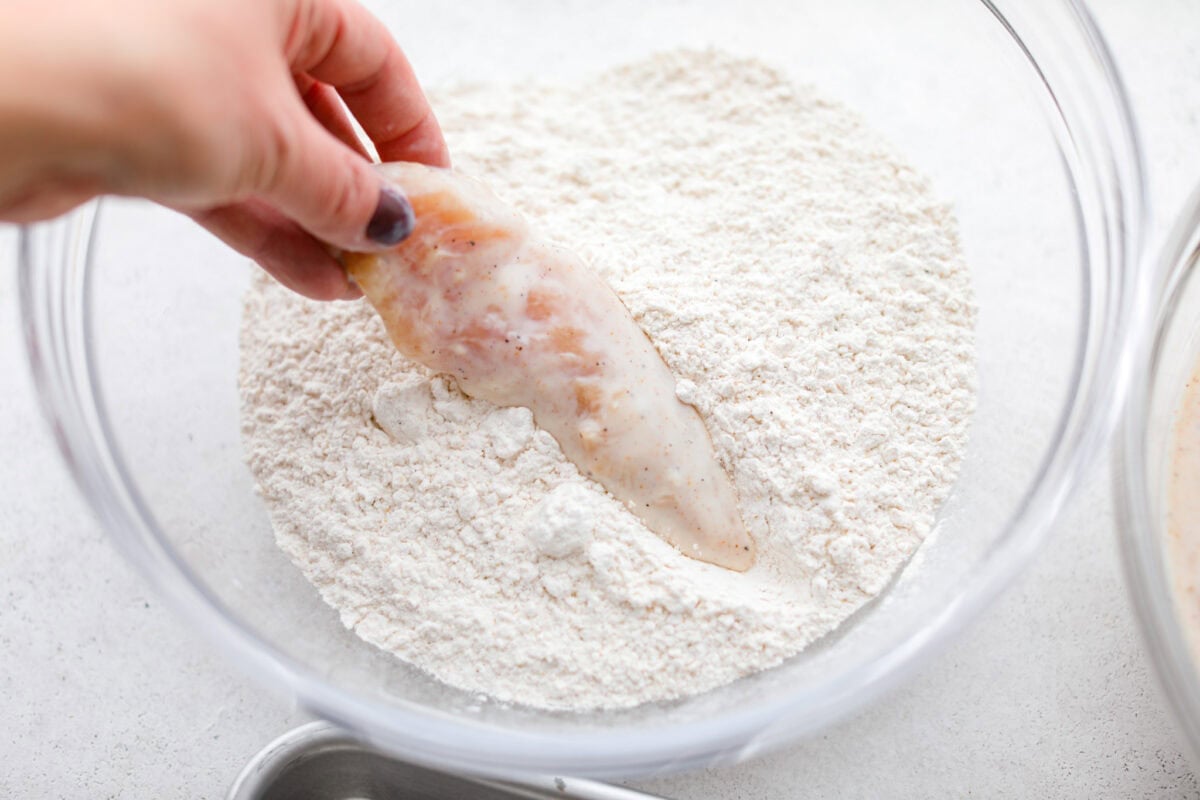
    4. Dip Chicken In Breading: Remove the chicken strips from the marinade, one at a time, letting the excess marinade drip off before adding them to the breading mixture.
    5. Double Dip: Coat each piece of chicken fully with the breading mixture. Press it onto the chicken with your hands, then dip it back into the marinade, then back into the flour mixture. This double-breading will give you an extra-flaky coating.
    6. Fry & Drain: Fry the breaded chicken in batches for 5-7 minutes, flipping them halfway through, until the thickest part of the tenders reaches 165°F. Transfer them to a baking pan lined with paper towels or a wire rack to drain. Serve Raising Cane’s Chicken Tenders with crinkle-cut fries, coleslaw, and  Cane’s Sauce

    Air Fryer Option

    Don’t want to Deep Fry? Air fry the breaded chicken tenders by spraying them with oil, then air fry at 400°F for 12 minutes, flipping halfway through and spraying them lightly with oil again. 

    Pin this now to find it later

    Pin It

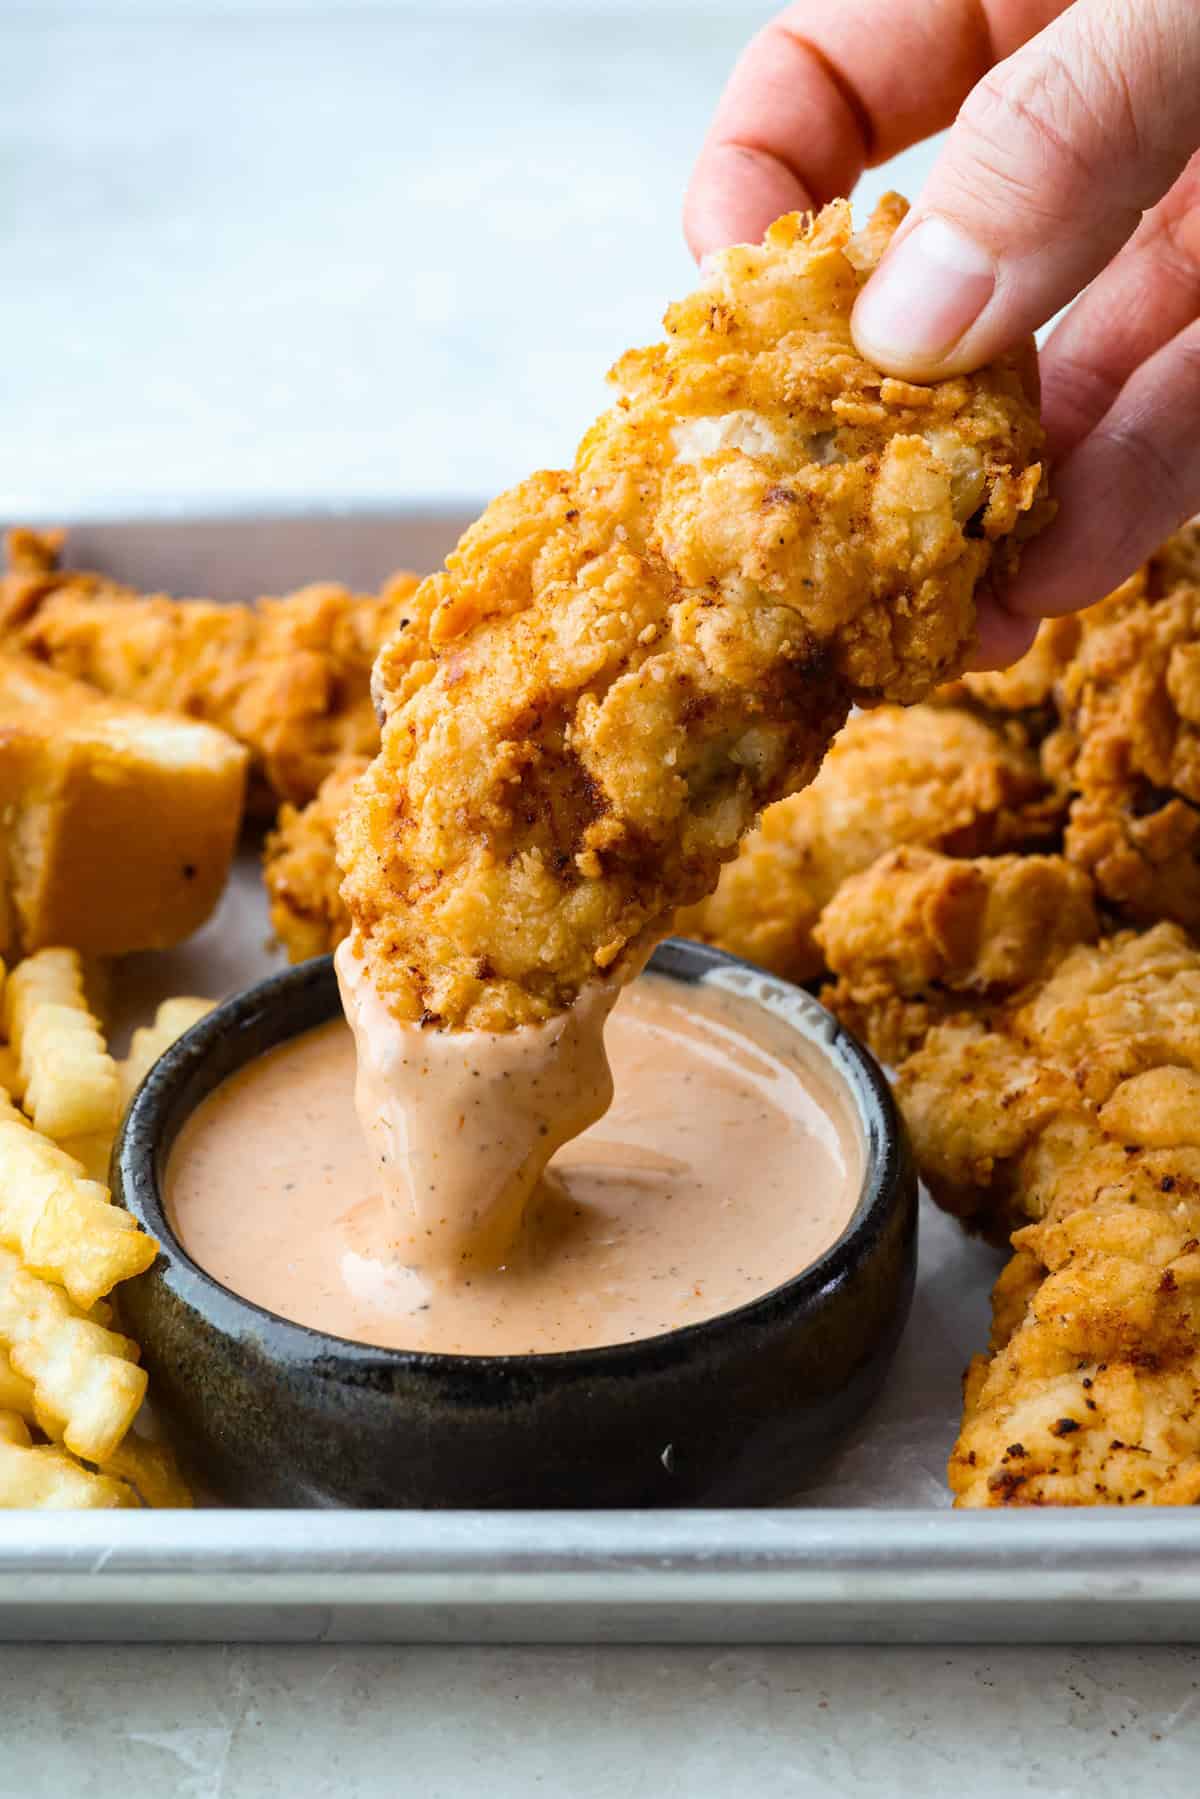
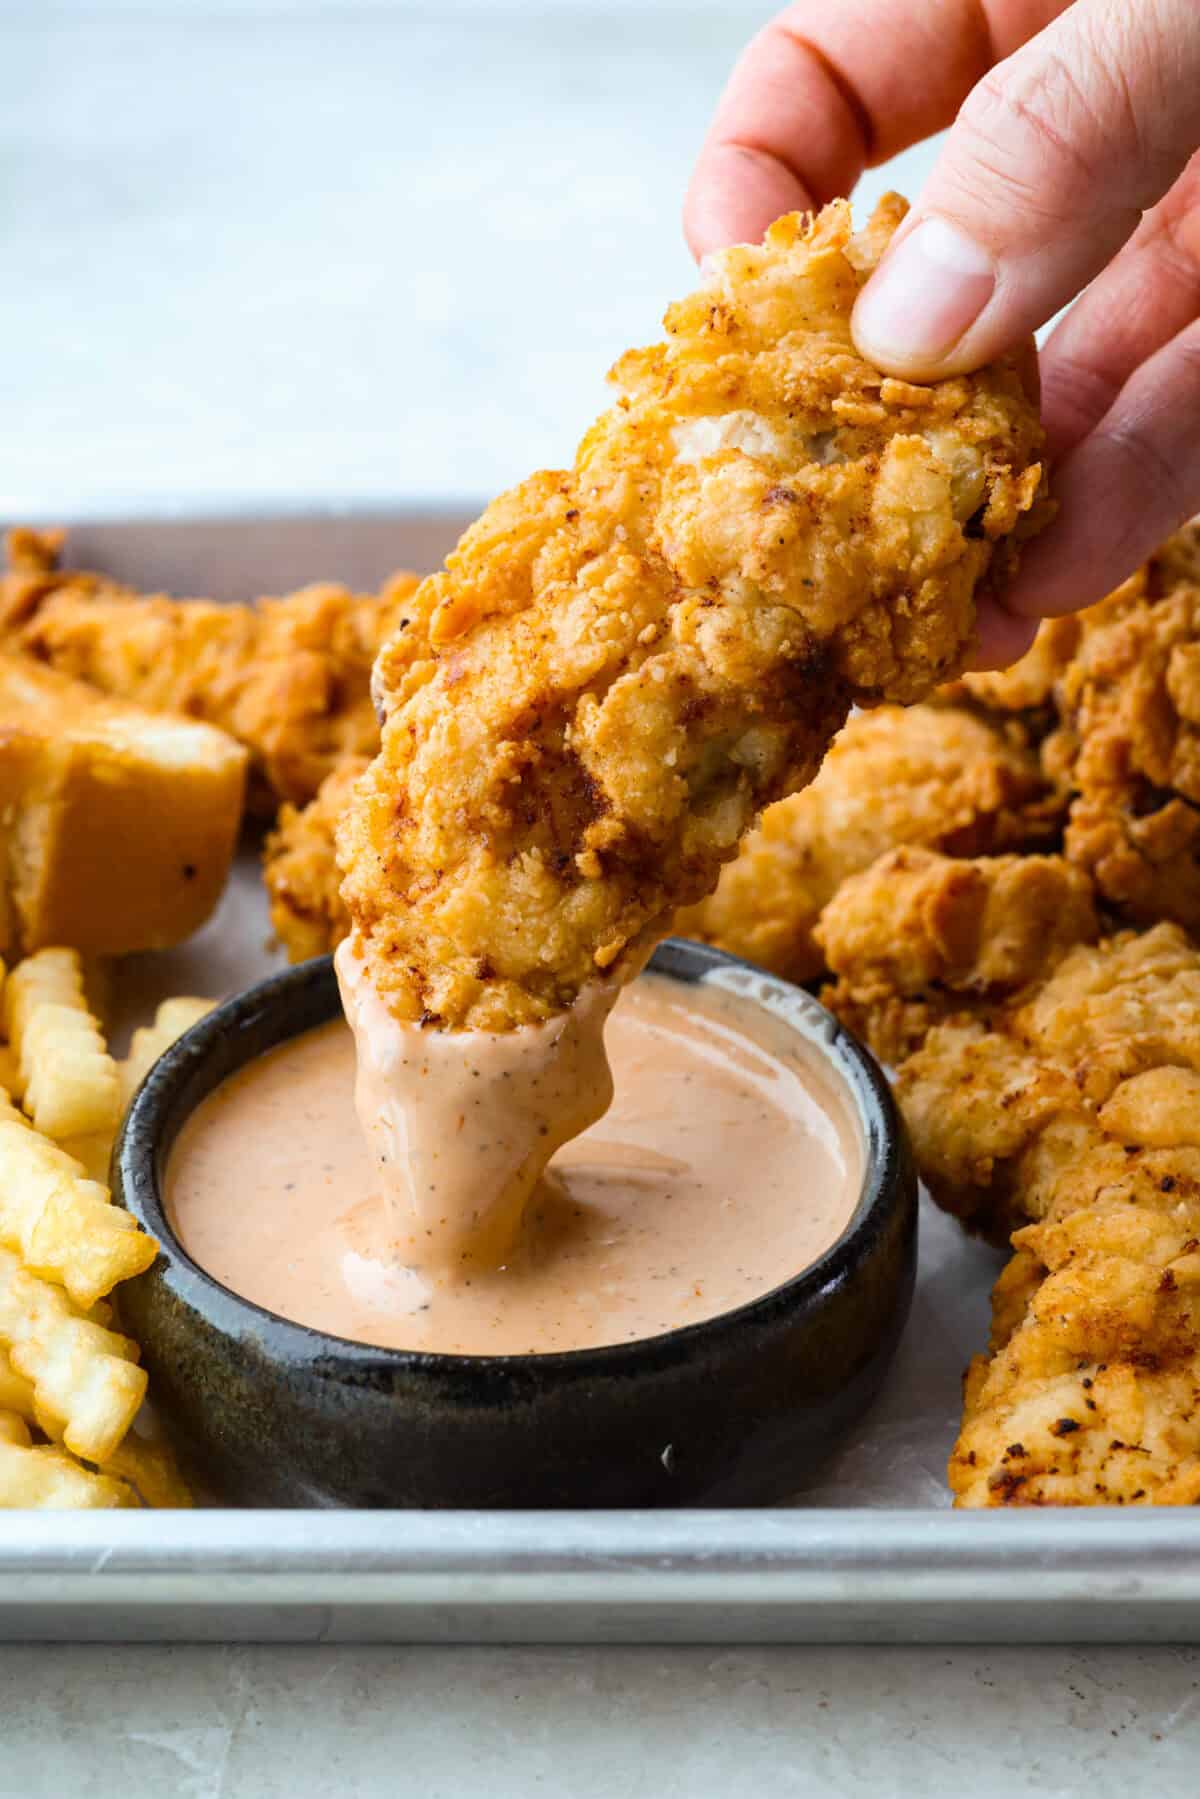
    Someone dipping a Raising Cane's chicken into a small bowl of Cane's sauce.

    More Copycat Recipes To Try

    If you loved this Copycat Raising Cane’s Chicken Tender recipe, you’ll love all of my other copycat recipes. What copycat recipe would you like me to try next?

    Copycat Crumbl Cookies

    40 minutes


    Source link

  • 5-Minute Burger Sauce | The Recipe Critic

    5-Minute Burger Sauce | The Recipe Critic

    This website may contain affiliate links and advertising so that we can provide recipes to you. Read my disclosure policy.

    This burger sauce is a game-changer for your cookouts, adding a delicious twist to your favorite meals. Whip it up in minutes and enjoy a flavorful blend that’s perfect for burgers or as a dip for fries.

    My family is obsessed with this special sauce! I cannot wait for you to enjoy it yourself. Making different sauce recipes at home is such a great way to elevate meals! Try some of our other favorites like this alfredo sauce, this cheese sauce, or our copycat Cane’s sauce.

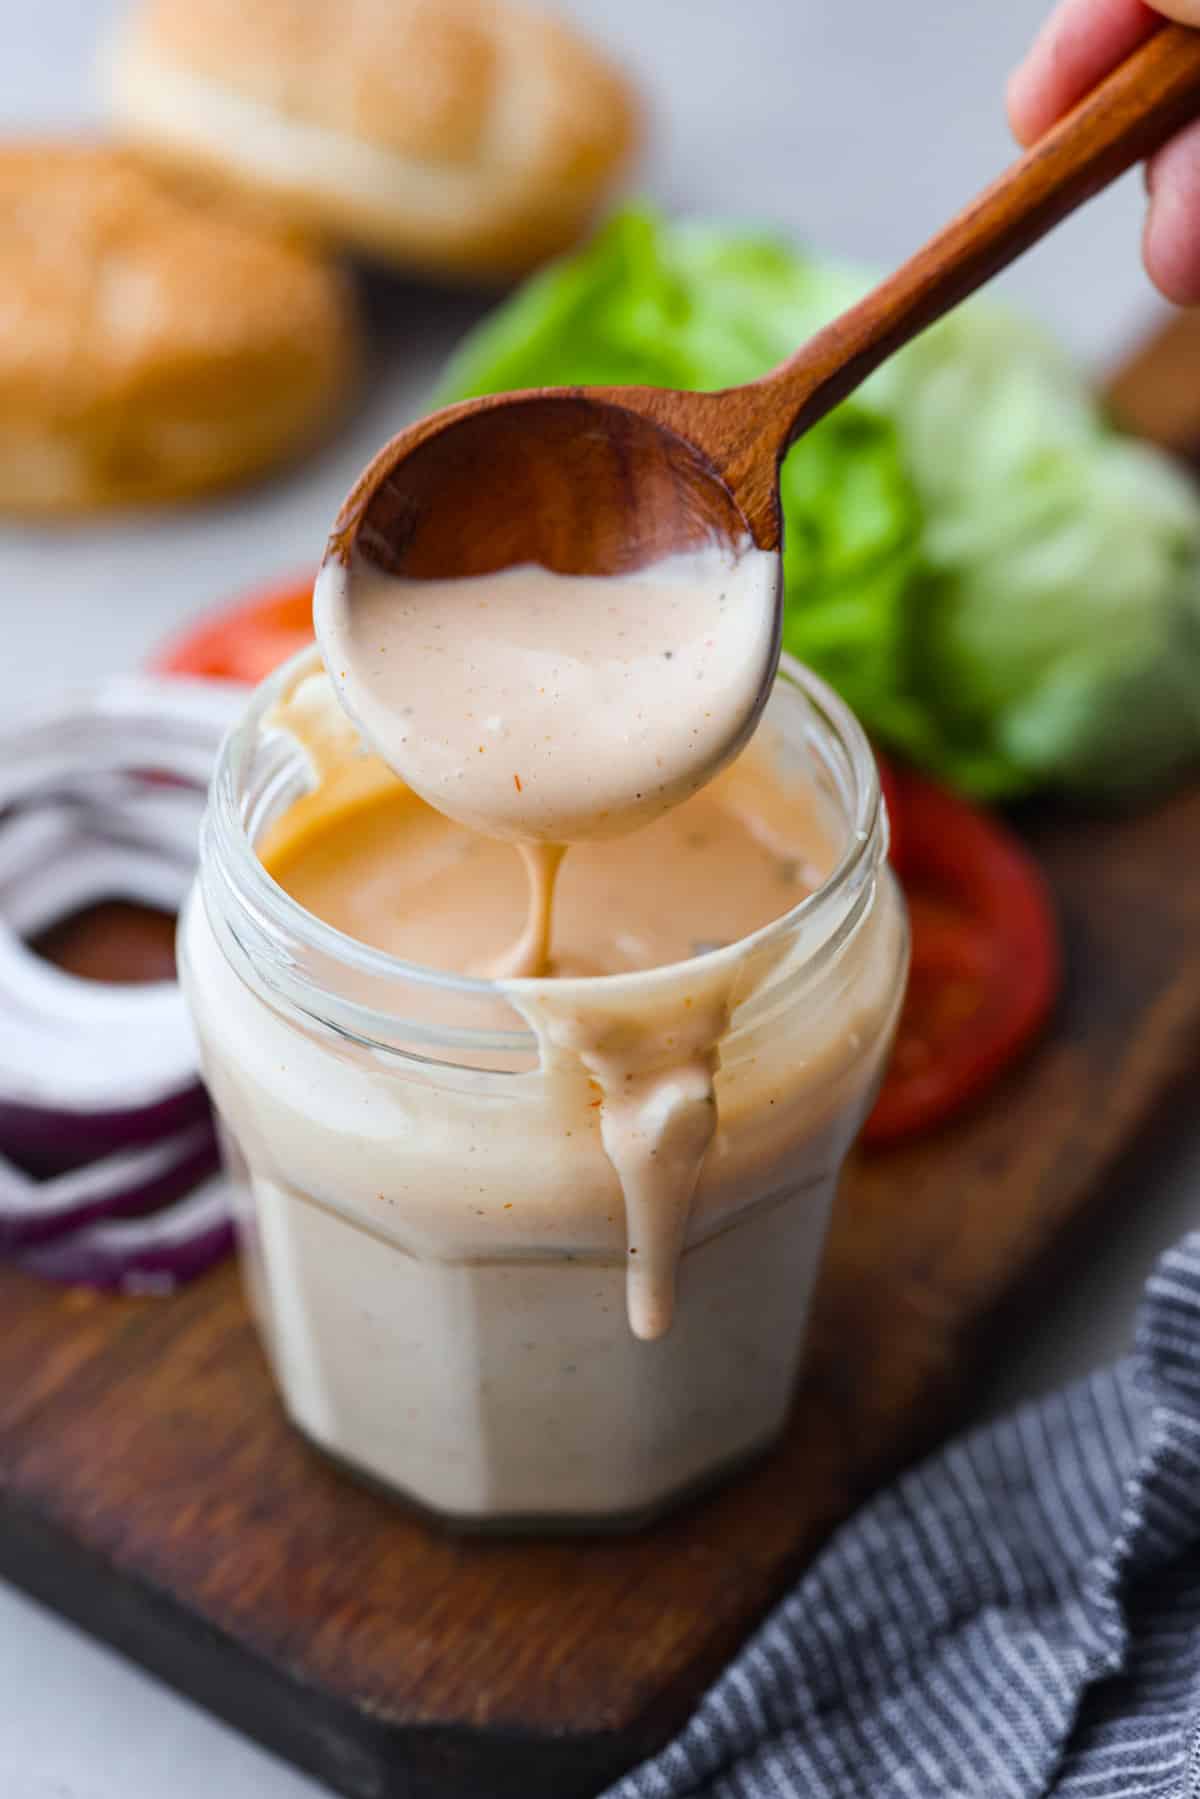
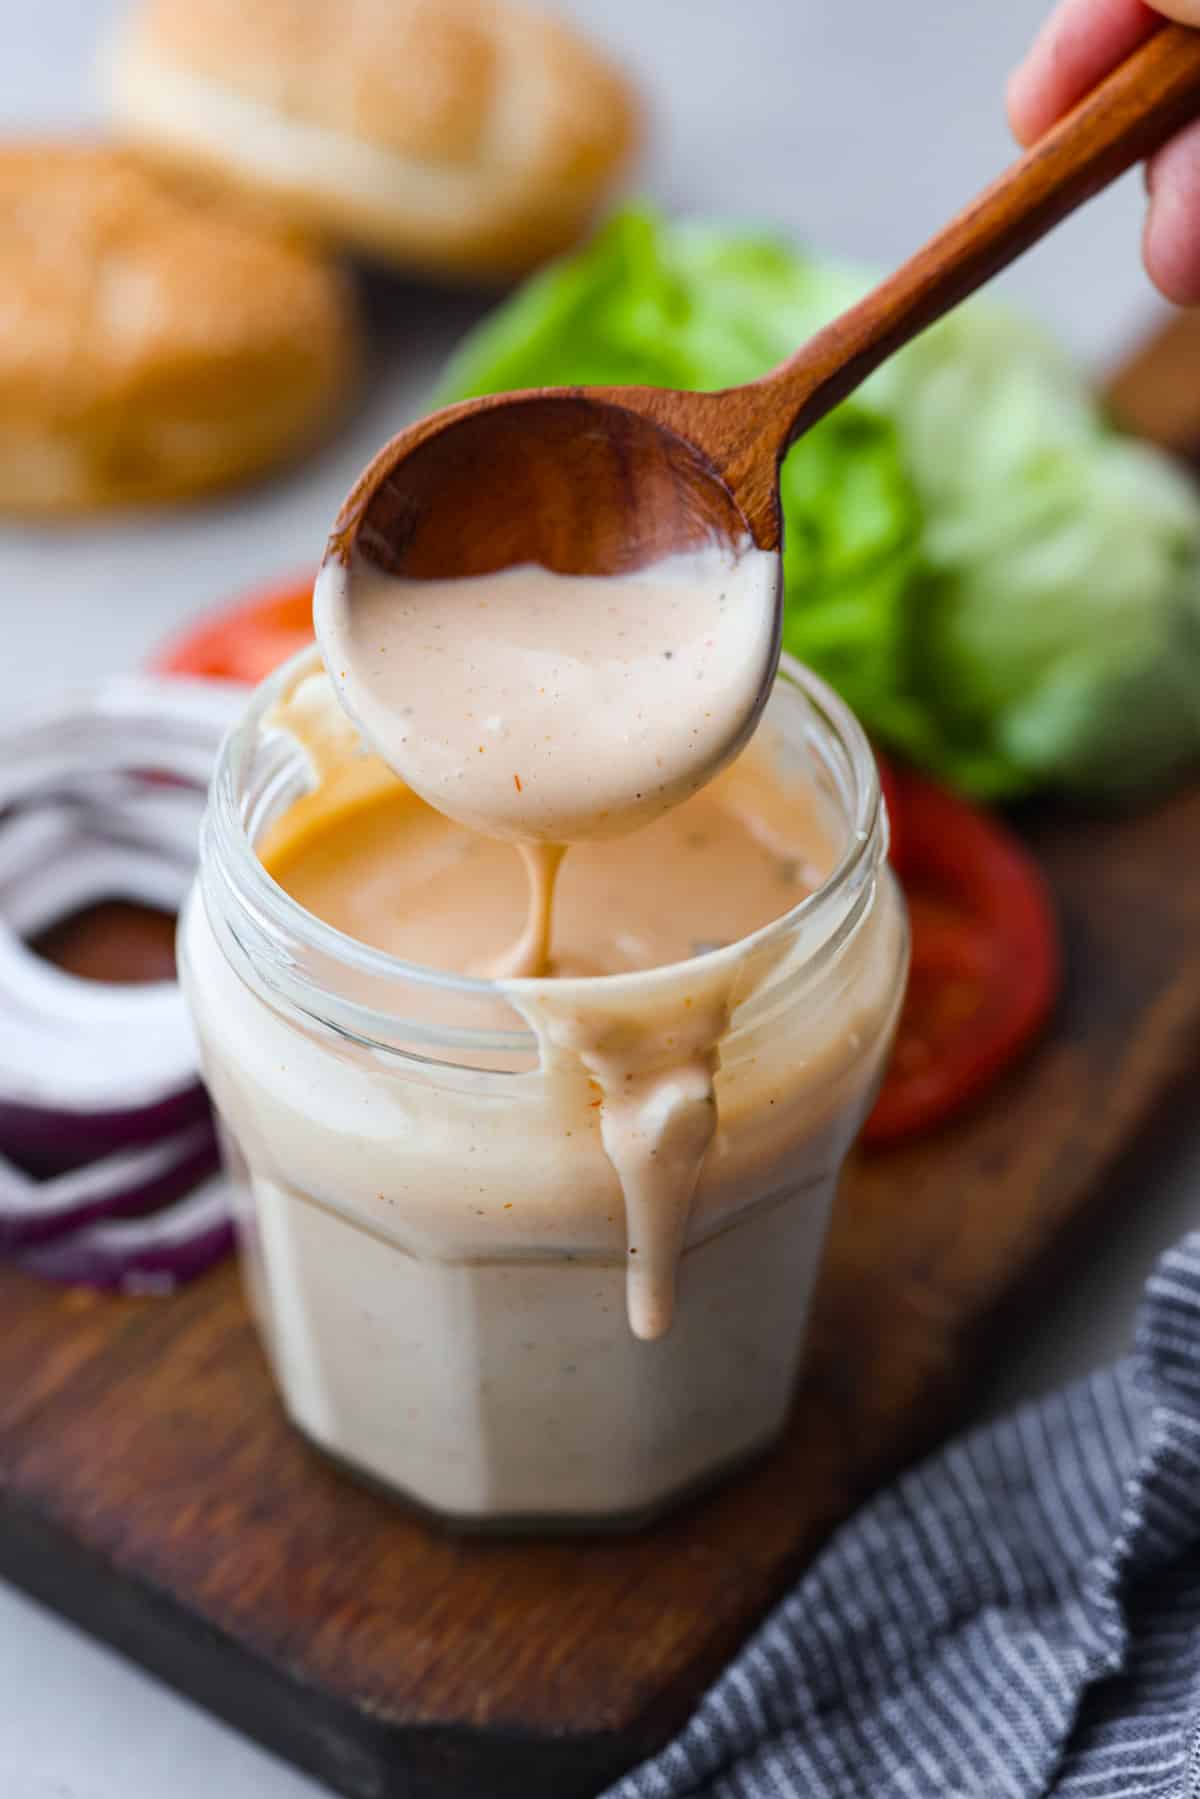
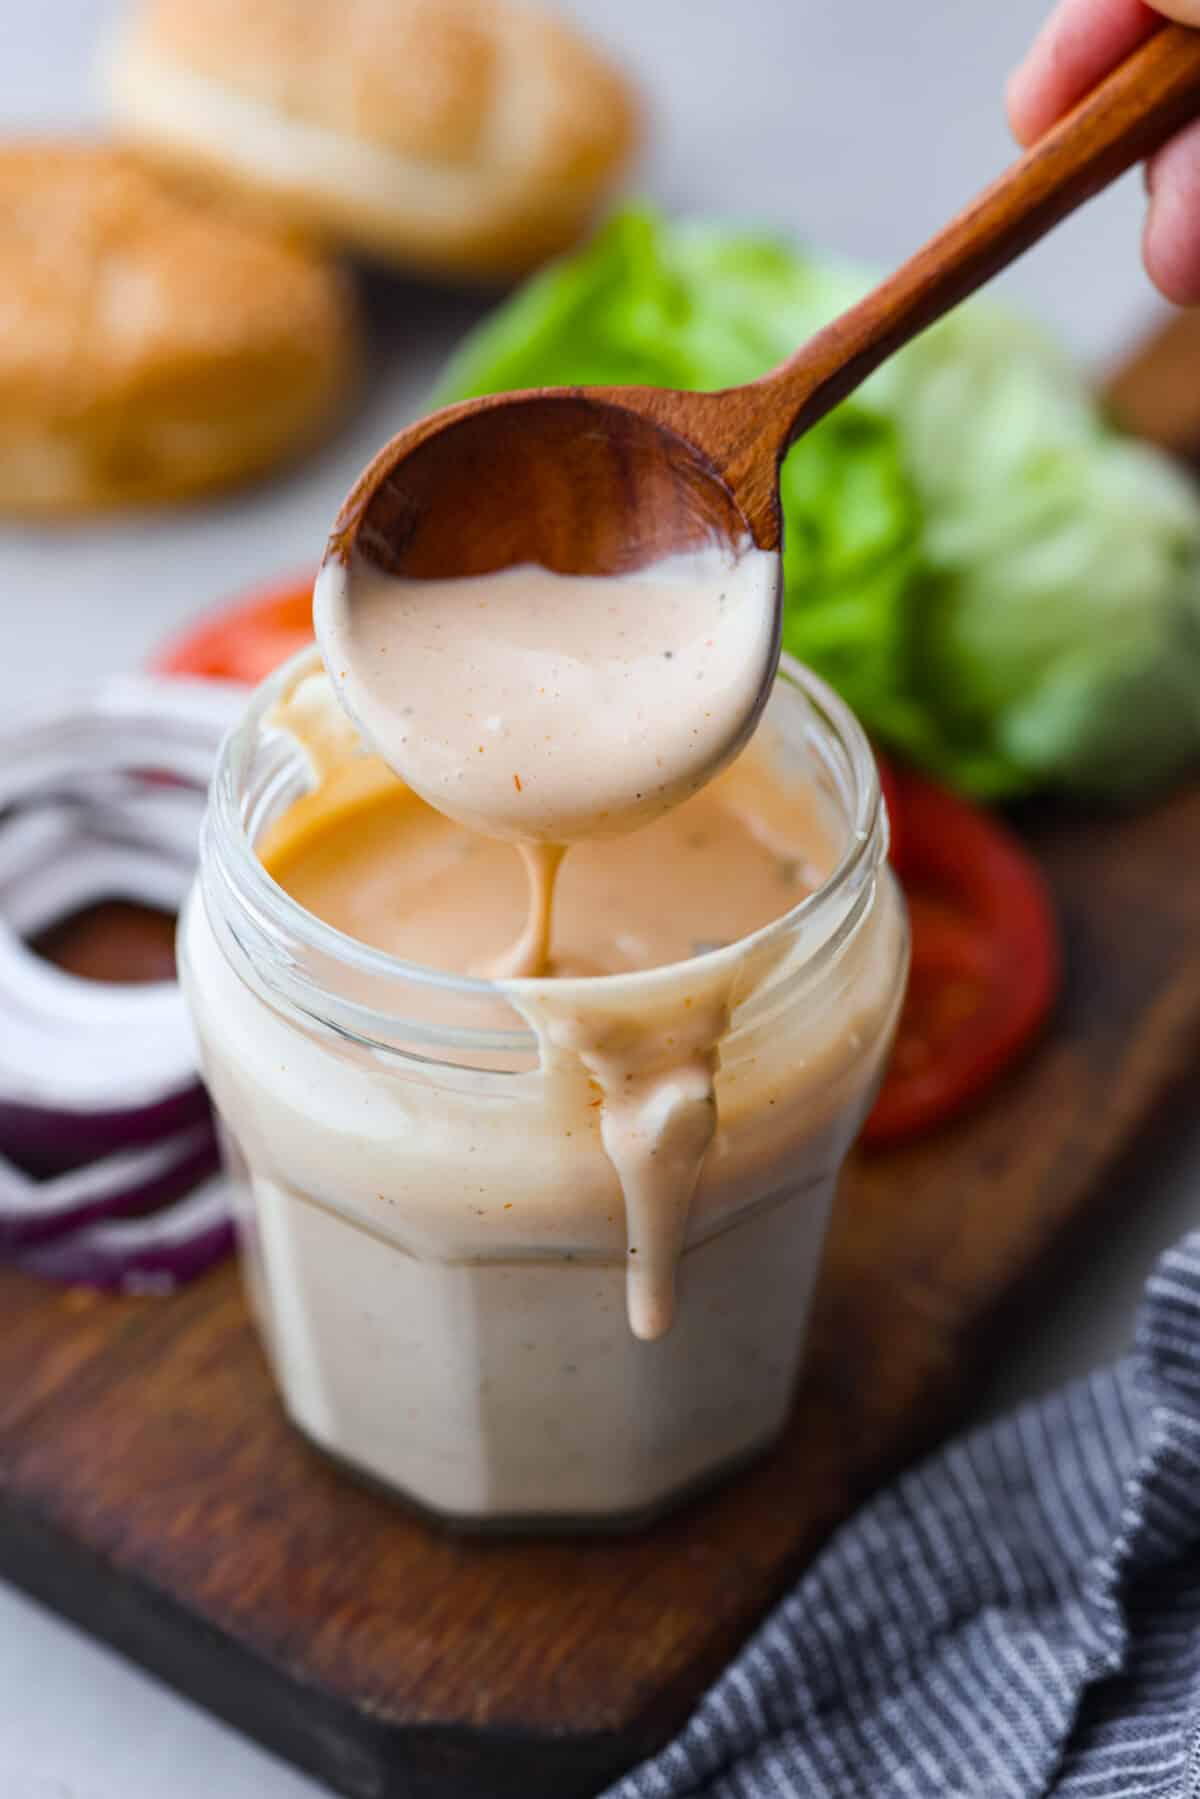
    Burger sauce in a jar with a wooden spoon.

    Reasons You’ll LOVE This Burger Sauce

    • Quick and Easy to Make: Whipping up this spread is as simple as stirring together some of your pantry staple ingredients. It can be whipped up in less than 5 minutes!
    • Versatile:  While it’s perfect on burgers and as a dip for French fries, it’s also incredible with other grilled meats, drizzled over roasted vegetables, and spooned onto sandwiches and wraps.
    • Unbeatable Flavor: This secret sauce will totally take your burger game to the next level! It’s creamy with a blend of perfectly balanced sweet, savory and tangy flavors. You’re going to love it!

    Burger Sauce Recipe

    Take your hamburgers from ordinary to extraordinary with this sensational burger sauce! It could not be easier to make and you can use it on everything from burgers and chicken tenders to fries and onion rings. It adds so much flavor to foods, you’re going to want to try it with everything!

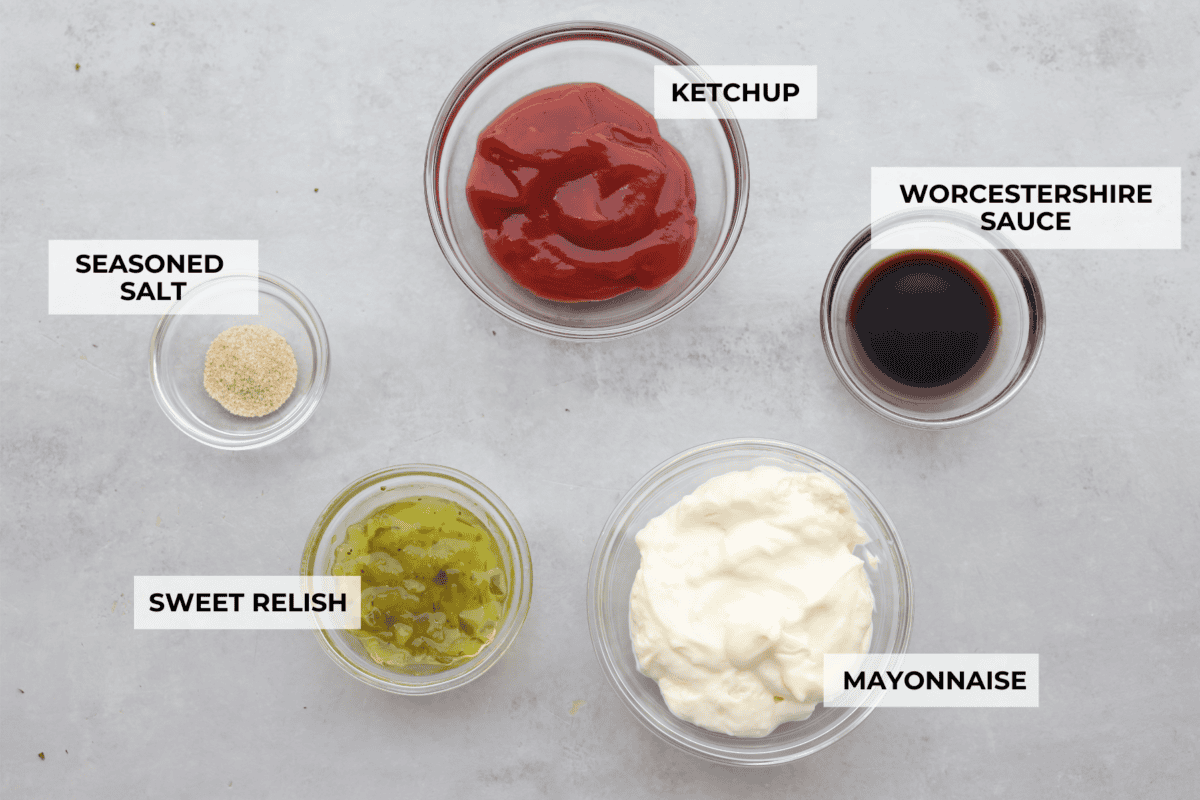
    It’s a simple mix of mayo, ketchup, sweet relish and a hint of both Worcestershire sauce and seasoning salt for a taste that is absolutely heavenly. Have this available at your next backyard barbecue and everyone will be asking you for the recipe!

    Ingredients You’ll Need

    With just 5 simple ingredients you can make this burger sauce recipe any day of the week. In fact, you probably have everything needed in your kitchen right now! Exact measurements can be found in the recipe card below.

    • Mayonnaise: The base of the burger sauce that makes it perfectly creamy.
    • Ketchup: Adds sharp flavor and a touch of sweetness to balance out the mayo.
    • Sweet Relish: It’s a combination of tart, sweet, and salty making it an absolute must in this recipe.
    • Worcestershire Sauce: For a deep, complex taste.
    • Seasoned Salt: To enhance and bring out all of the delicious flavors.
    A top view of the ingredients in individual glass bowls and each labeled.

    How to Make Burger Sauce

    This irresistible burger sauce is ready to serve in just about 5 minutes! It’s so good, you’re going to want to keep this on-hand at all times! Want a BBQ burger sauce? Make my copycat Red Robbin campfire sauce!

    1. Mix Ingredients: Add all of the sauce ingredients to a small bowl and whisk to combine.
    2. Test the Flavor: Taste and adjust ingredients to your liking if needed.
    3. Refrigerate: Chill until ready to serve. The longer it chills the more the flavors meld.
    4. Enjoy: Use as a sauce on burgers or as a dipping sauce for fries.

    Change up the Flavor

    Burger sauce can be made just the way you like it! Here are some ideas to adjusting the flavors.

    • Mayonnaise Substitution: It is best to enjoy the thick, rich texture of real mayonnaise but substitute it for Miracle Whip or a veganaise mayo for a preferred taste.
    • Adjust the Sweetness: If you like your burger sauce a little sweeter, add a pinch of granulated sugar. It will help balance out the salty, tangy flavor.
    • Heat: Make this burger sauce spicy if you want! Try adding a dash or two of hot sauce like Tabasco sauce. You can also sprinkle in some cayenne pepper to bring on some extra heat.

    A close up of a jar of burger sauce.

    Storing Leftovers

    Be sure to save any leftover sauce! This burger sauce is so versatile and can be used for more than just burgers. My kids love this sauce with a quick and easy batch of air fryer French fries!

    • In the Refrigerator: Store burger sauce in an airtight jar or container for 4-5 days. Give it a quick stir before using it!

    Burger sauce being spread onto a patty that is on a bun with lettuce.

    More Delicious Sauce Recipes

    Homemade sauces not only taste better than store-bought, but they’re also free of additives and preservatives! In addition, they’re super easy to mix up and usually only take a few simple ingredients to make. Most of which you probably already have in your pantry! Here are some other favs:

    Easy Homemade BBQ Sauce

    15 minutes

    Pin this now to find it later

    Pin It


    Source link