This website may contain affiliate links and advertising so that we can provide recipes to you. Read my disclosure policy.
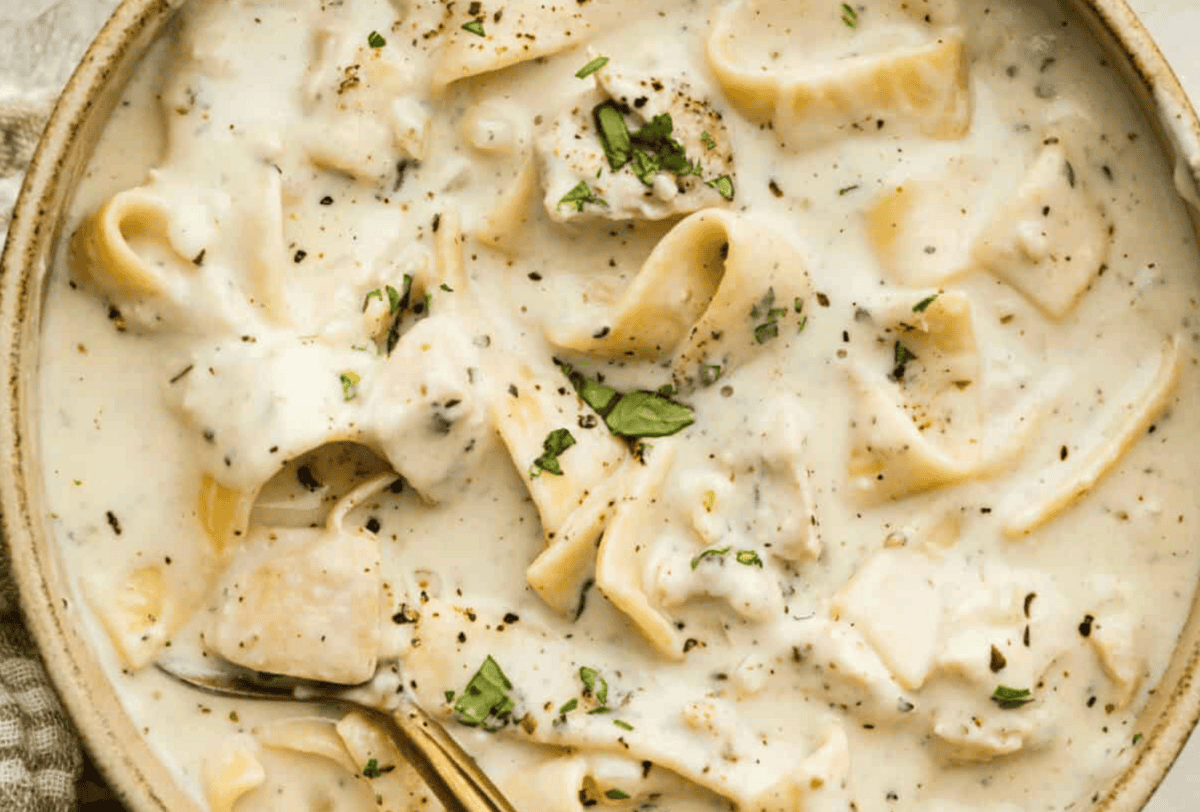
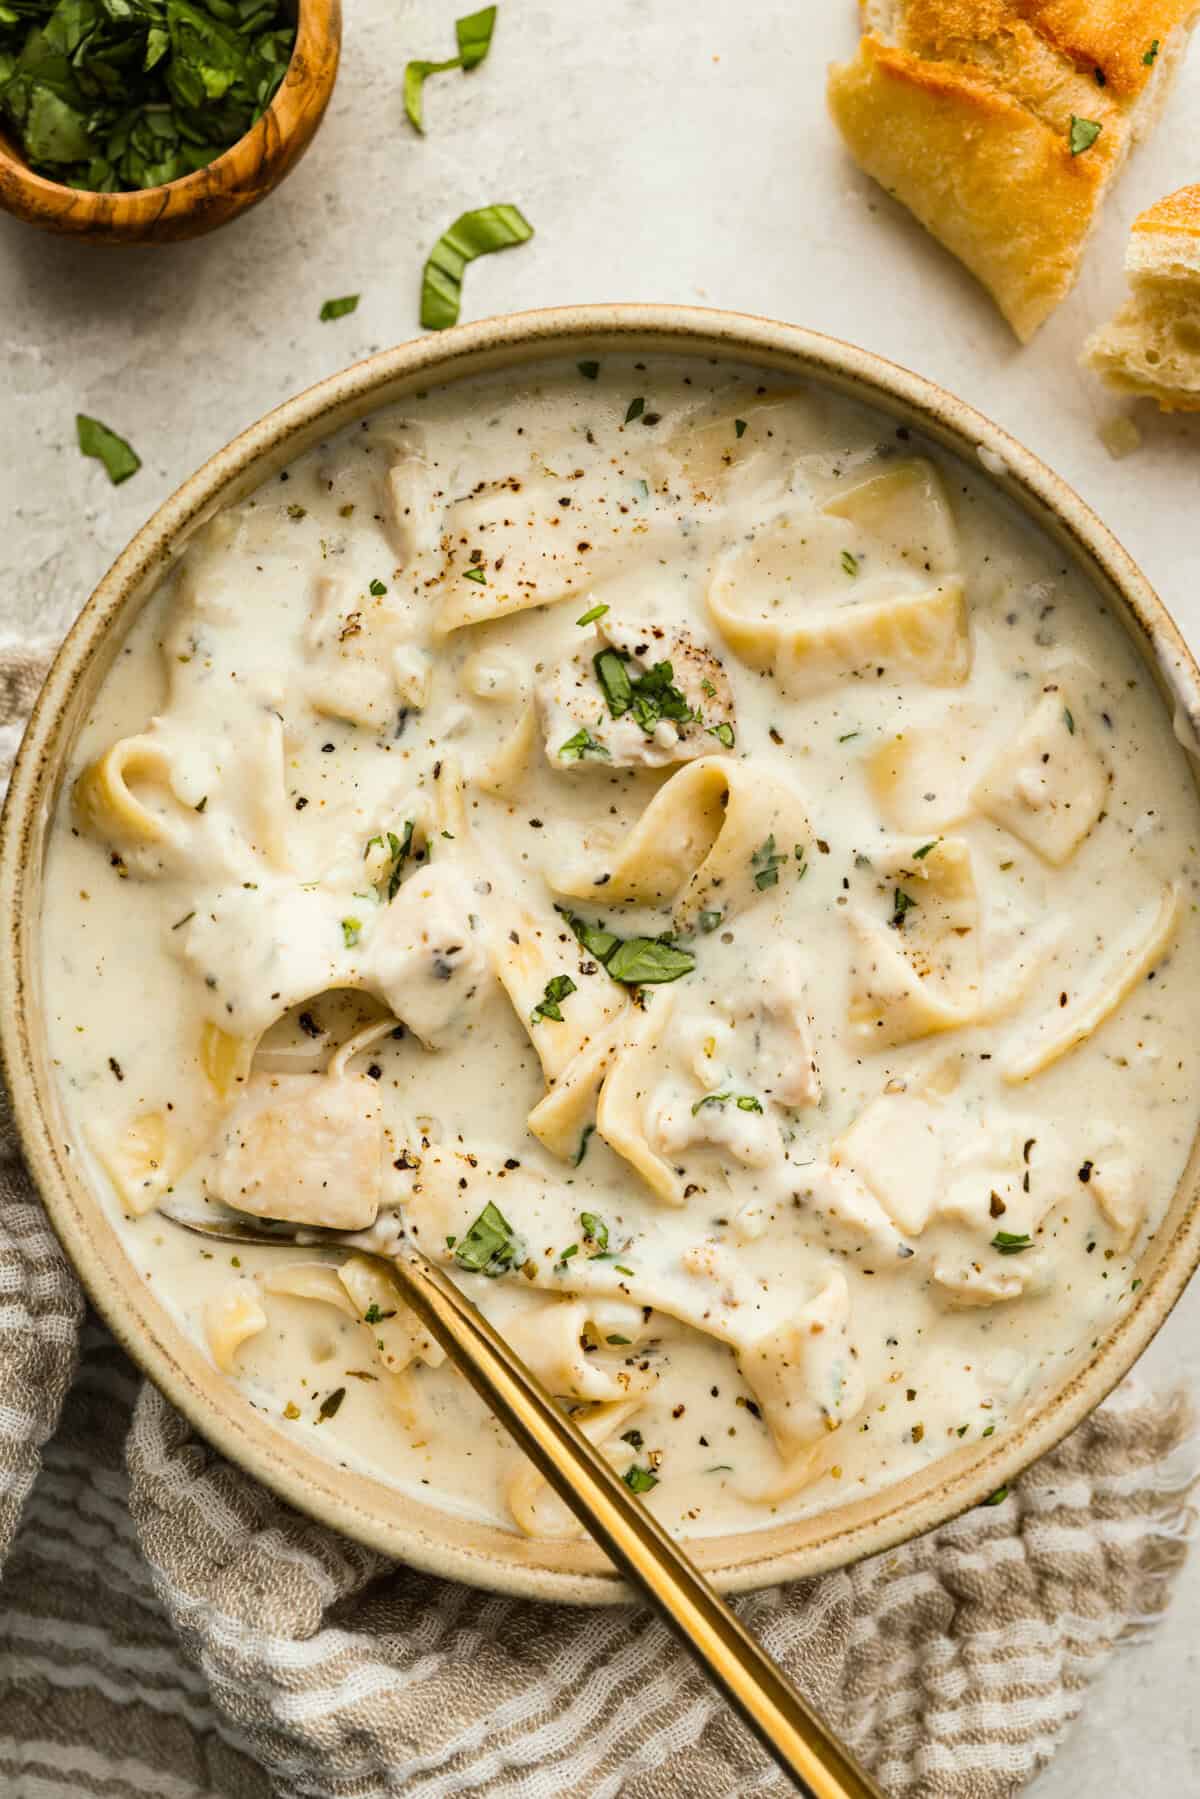
You guys are obsessed with my homemade alfredo sauce. So I had to make this creamy, cheesy chicken Alfredo soup! Tender chicken, rich broth, and pasta all come together in just 30 minutes!
Why This Soup is a Weeknight Wonder
All-in-One Pot: Everything cooks together in a single pot, making cleanup a breeze while delivering layers of creamy, cheesy flavor.
Perfect Family Dinner: Hearty and satisfying, it’s a simple meal everyone will love. Pair it with easy no-knead bread, my Grandma’s homemade bread, or these rolls.
Make it Your Own: Add extra veggies, swap in your favorite pasta, or spice it up!
Ingredients for Chicken Alfredo Soup
Half and Half: Half and half makes this soup creamy but not overly rich. You can make your own half and half if you don’t have any.
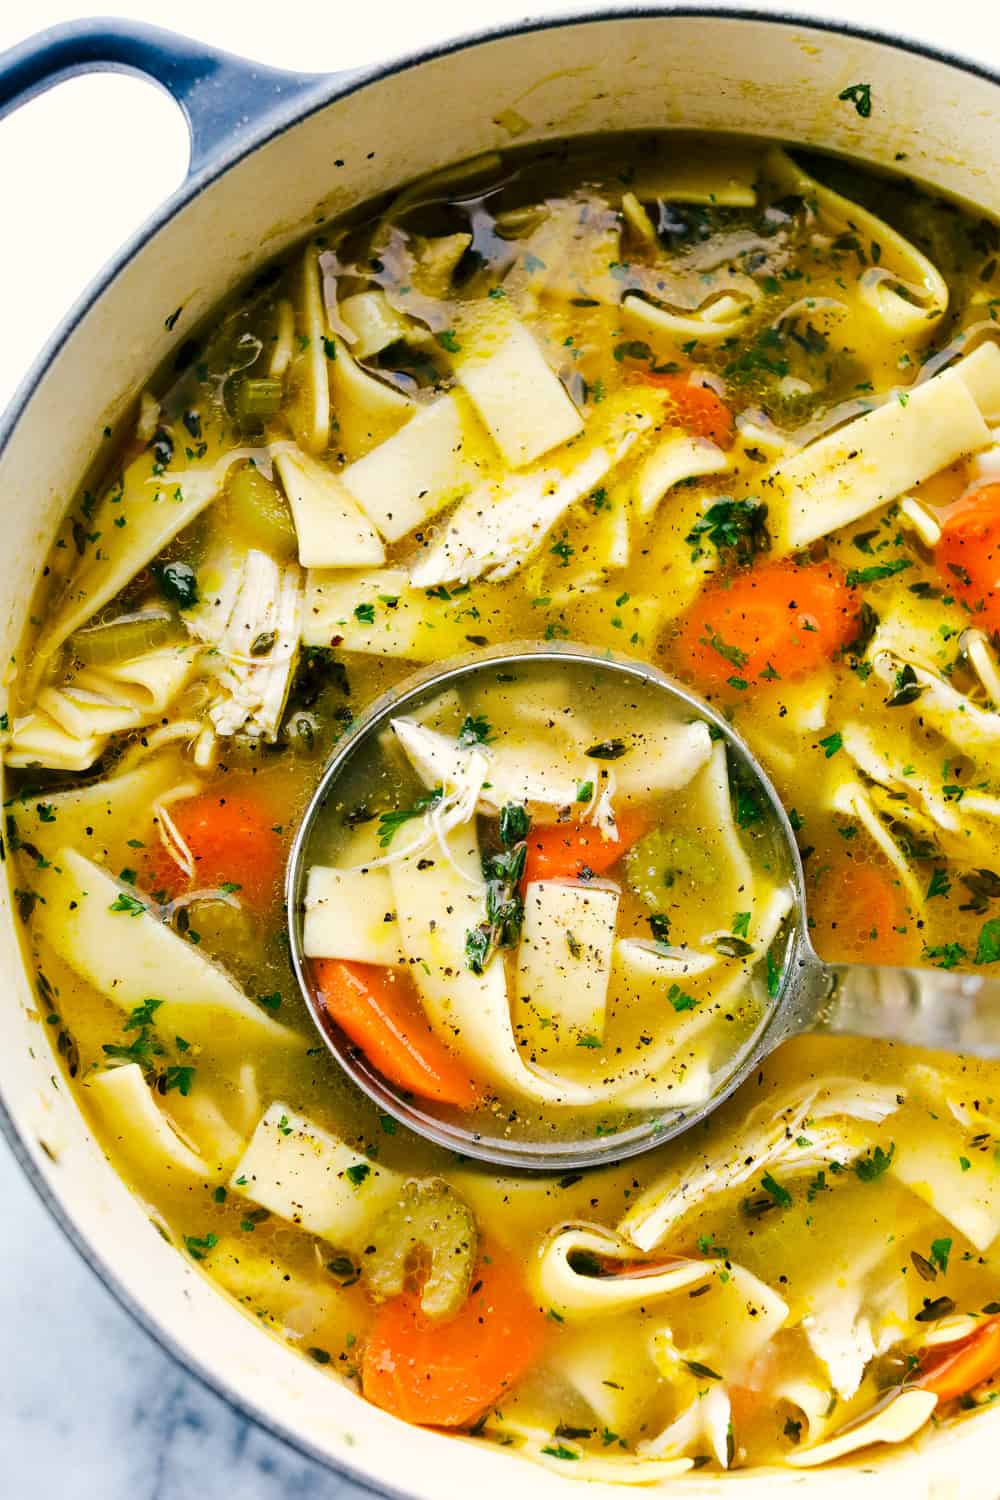
Pasta: Use any pasta shape for this. I love using wide egg noodles. Other great options are bowtie, rotini, or even cheese tortellini.
Chicken: This is a great recipe to use up leftover rotisserie chicken or make a quick batch of my air fryer chicken.
How to Make Chicken Alfredo Soup
One pot, simple ingredients, and big flavor! This creamy chicken Alfredo soup is a quick way to everyone’s heart! It’s so good and feels like a warm hug!
Sauté the Onions: In a large pot over medium heat, melt the butter. Once melted, add diced onion and garlic. Cook until the onions begin to soften, about 2-3 minutes. Sprinkle all-purpose flour over the onions. Stir and cook the flour for 1-2 minutes.
Add Seasonings: Add Italian seasoning, garlic powder, salt, and pepper to taste. Then slowly whisk in chicken broth and half and half.
Cook: Bring to a boil and then add uncooked pasta. Reduce to a simmer and cook until the pasta is al dente.
Finish with Chicken and Cheese: Add cooked chicken, grated parmesan cheese, and shredded mozzarella cheese, then cook until the cheese is melted. Add fresh basil and parsley and serve.
This website may contain affiliate links and advertising so that we can provide recipes to you. Read my disclosure policy.
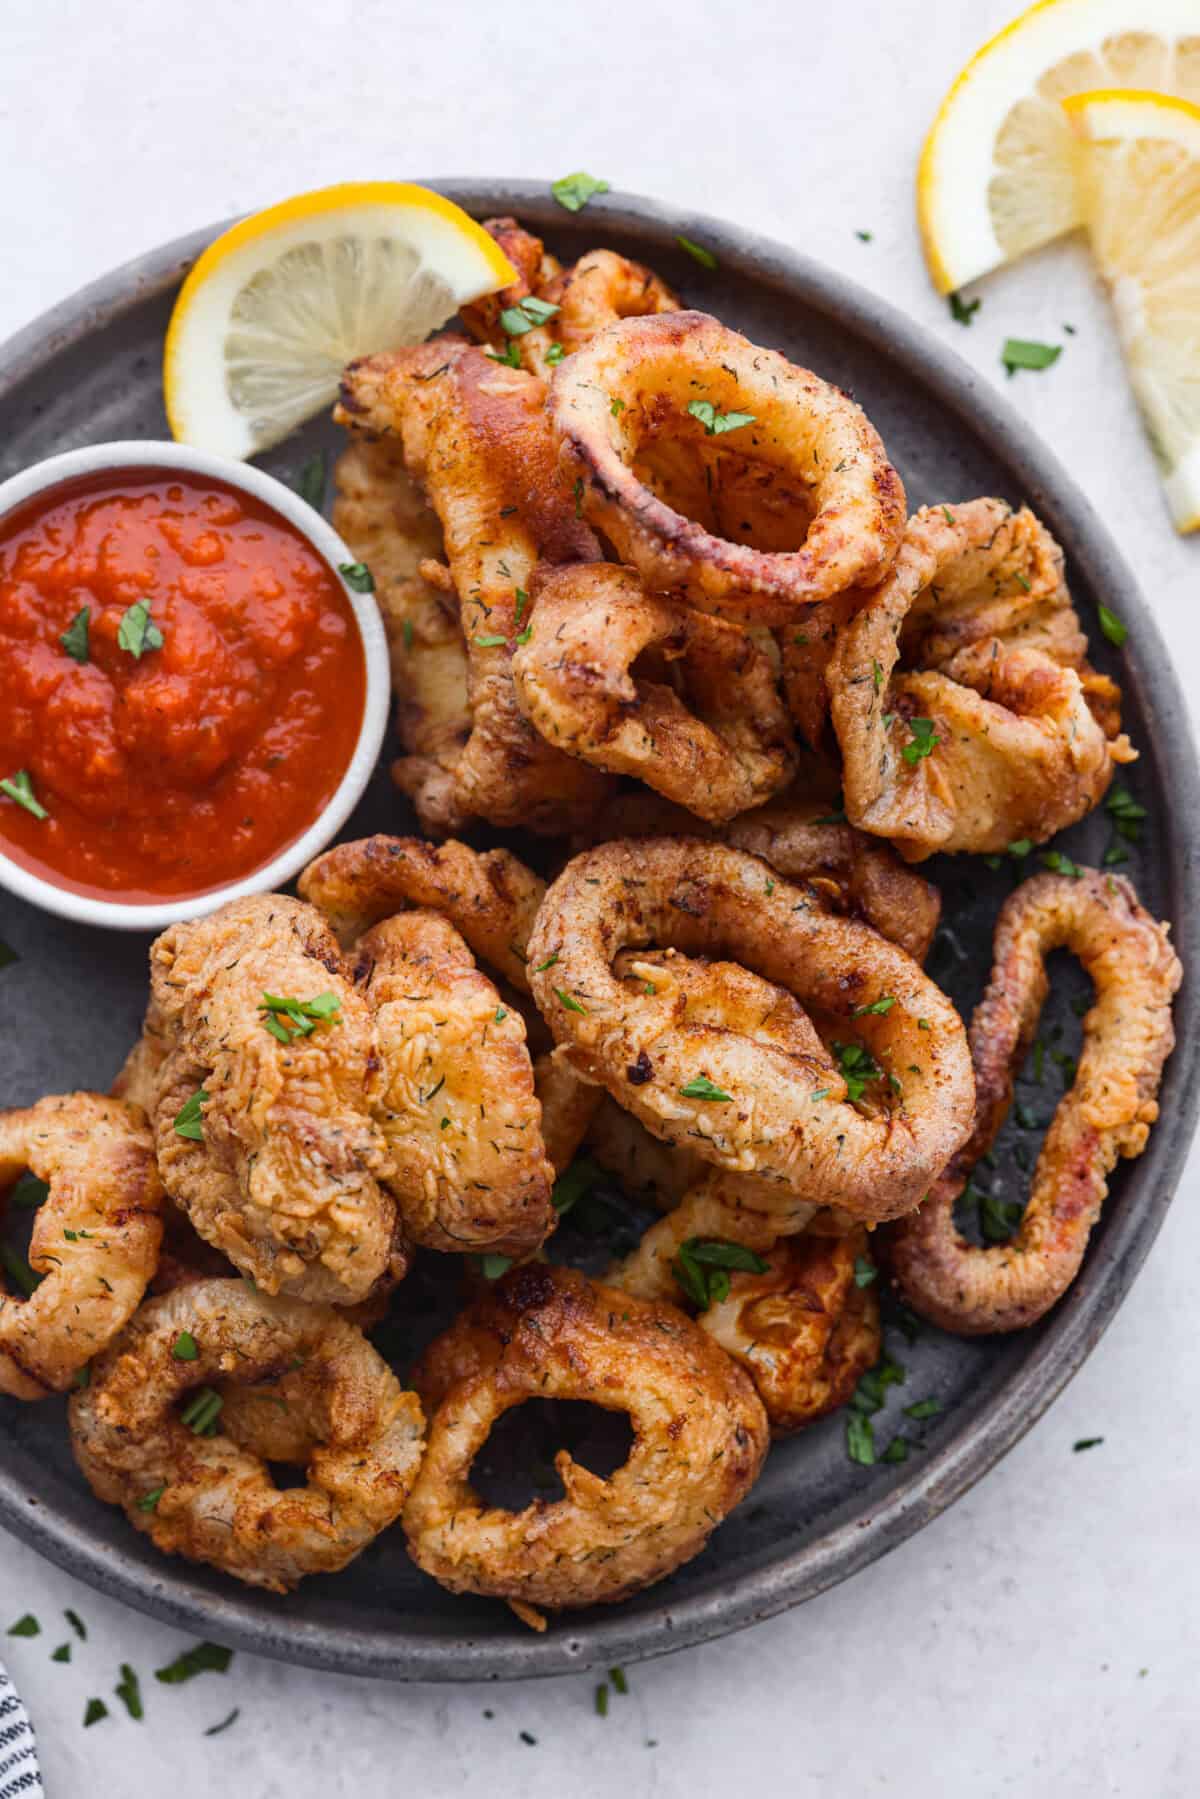
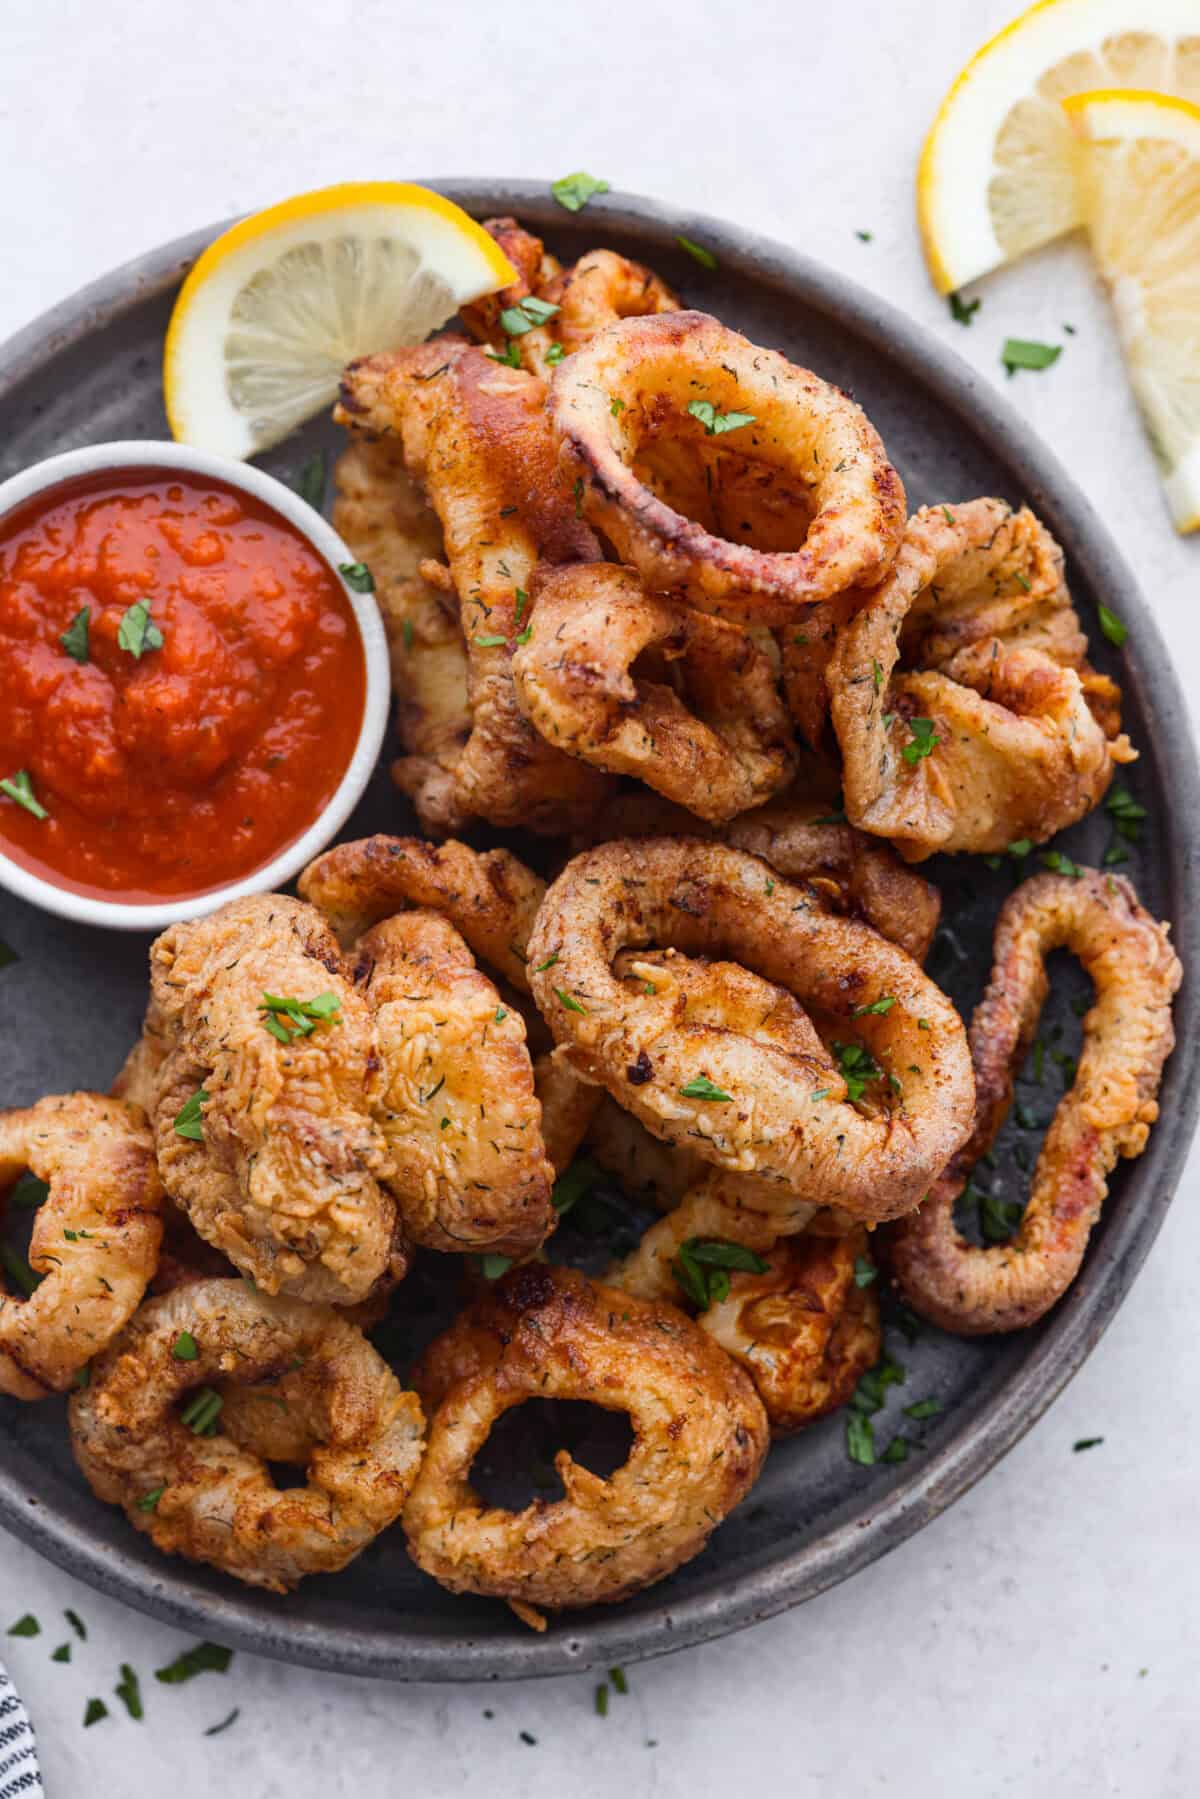
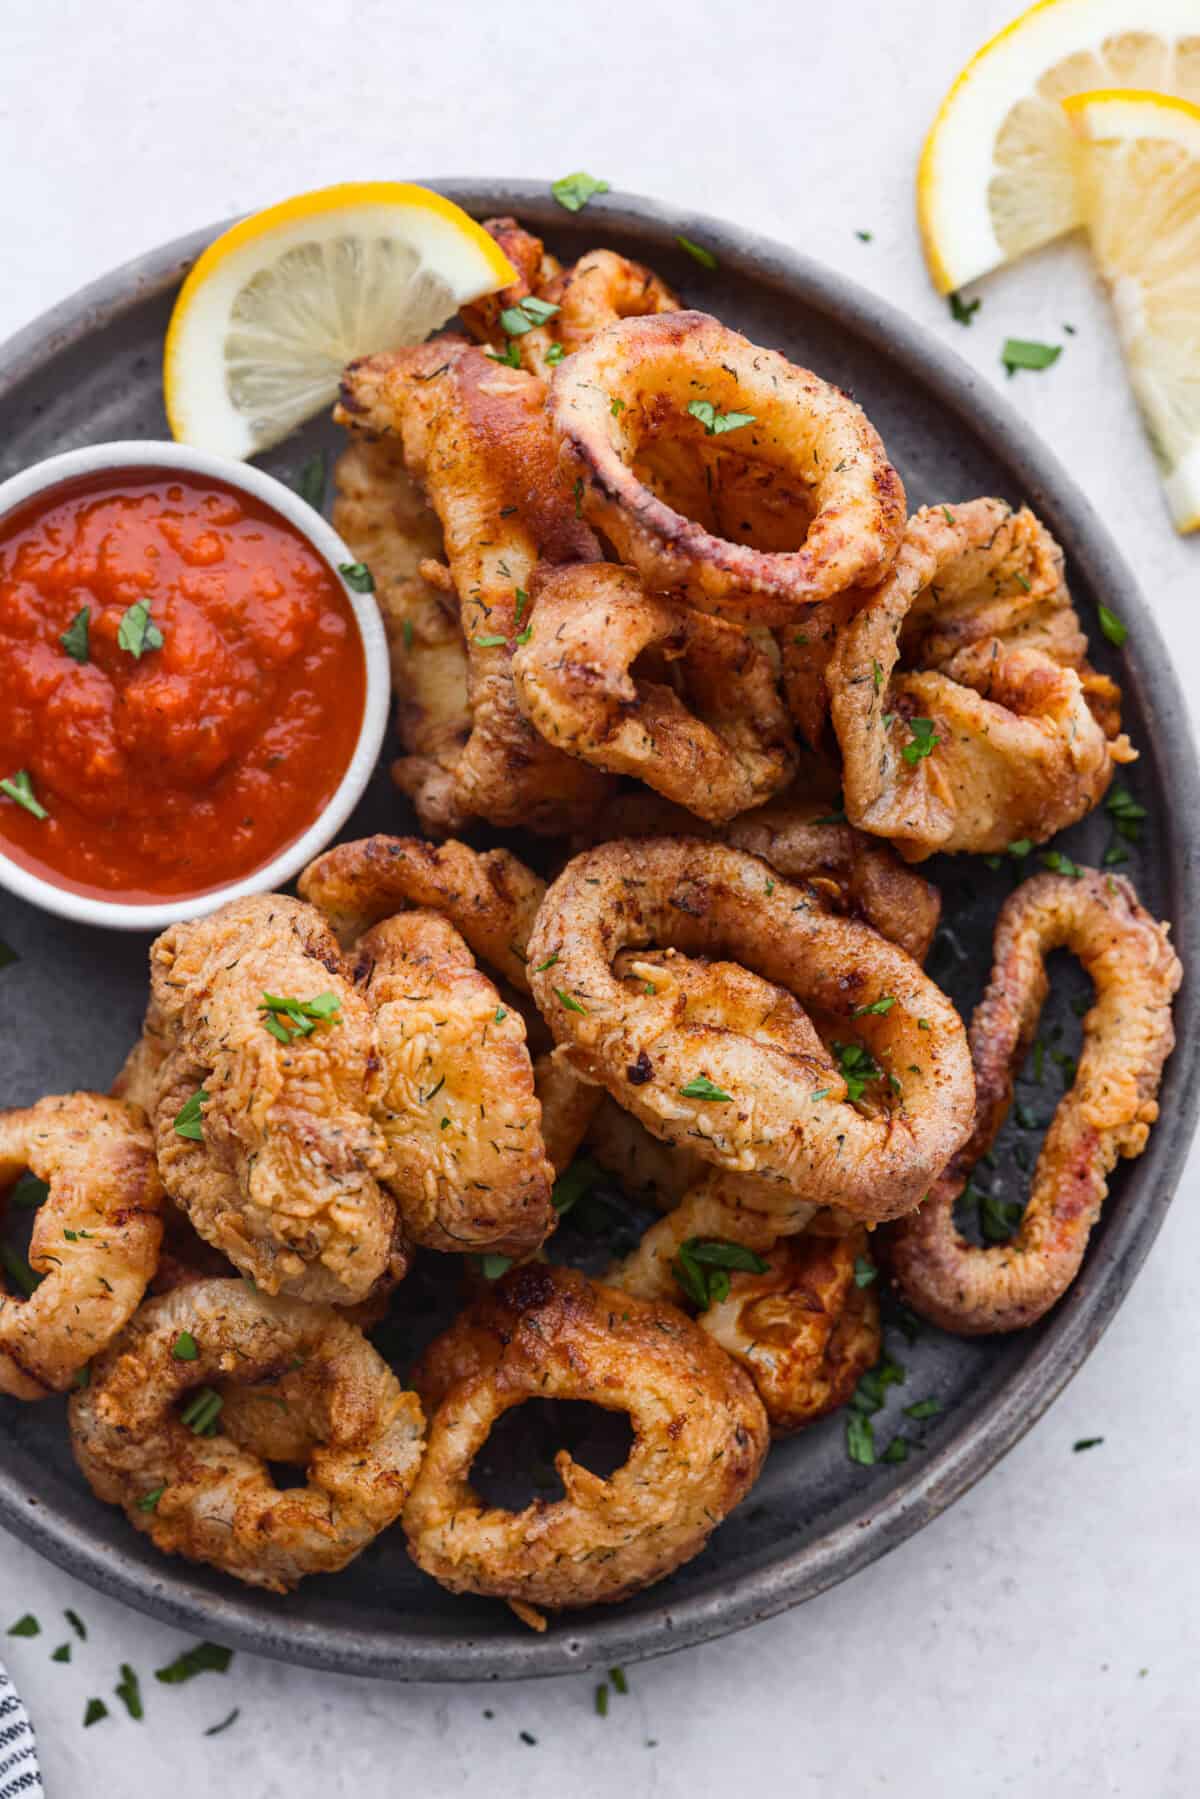
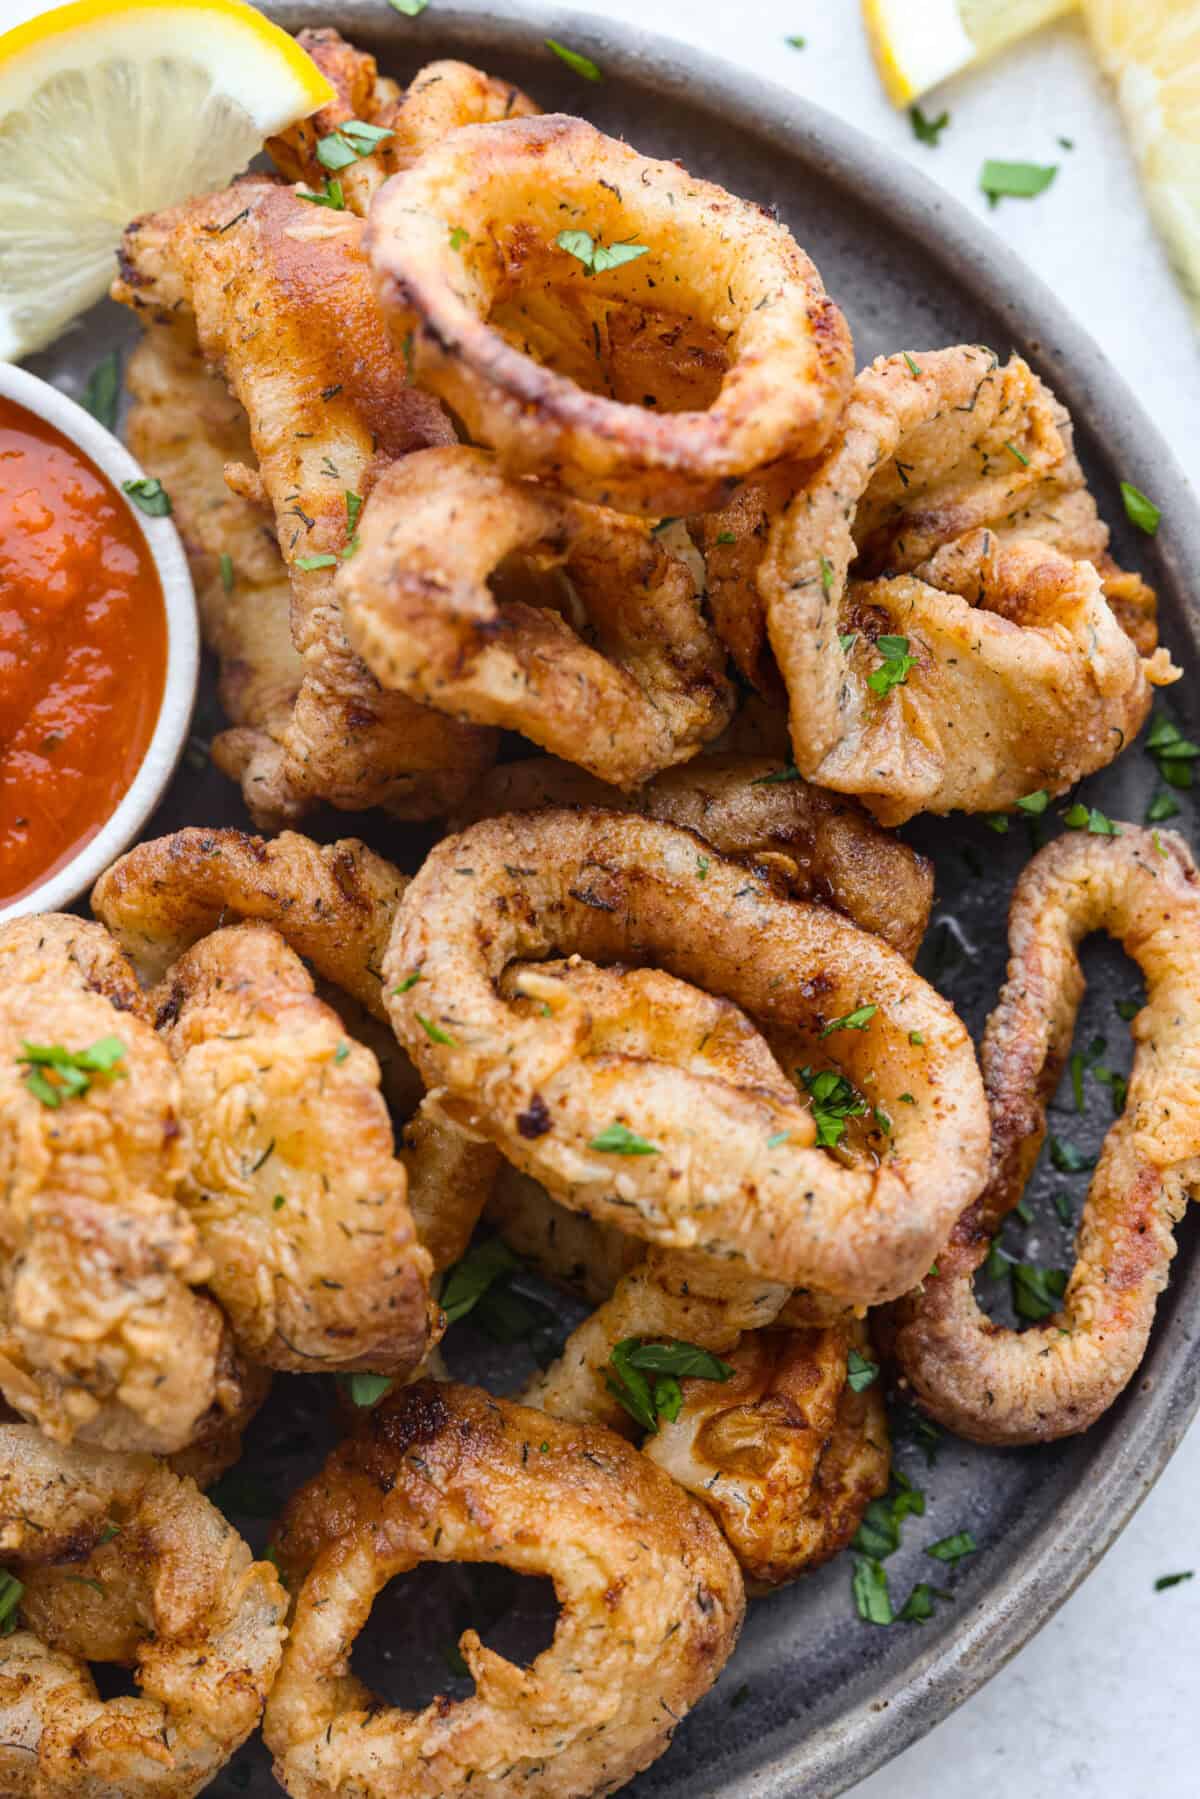
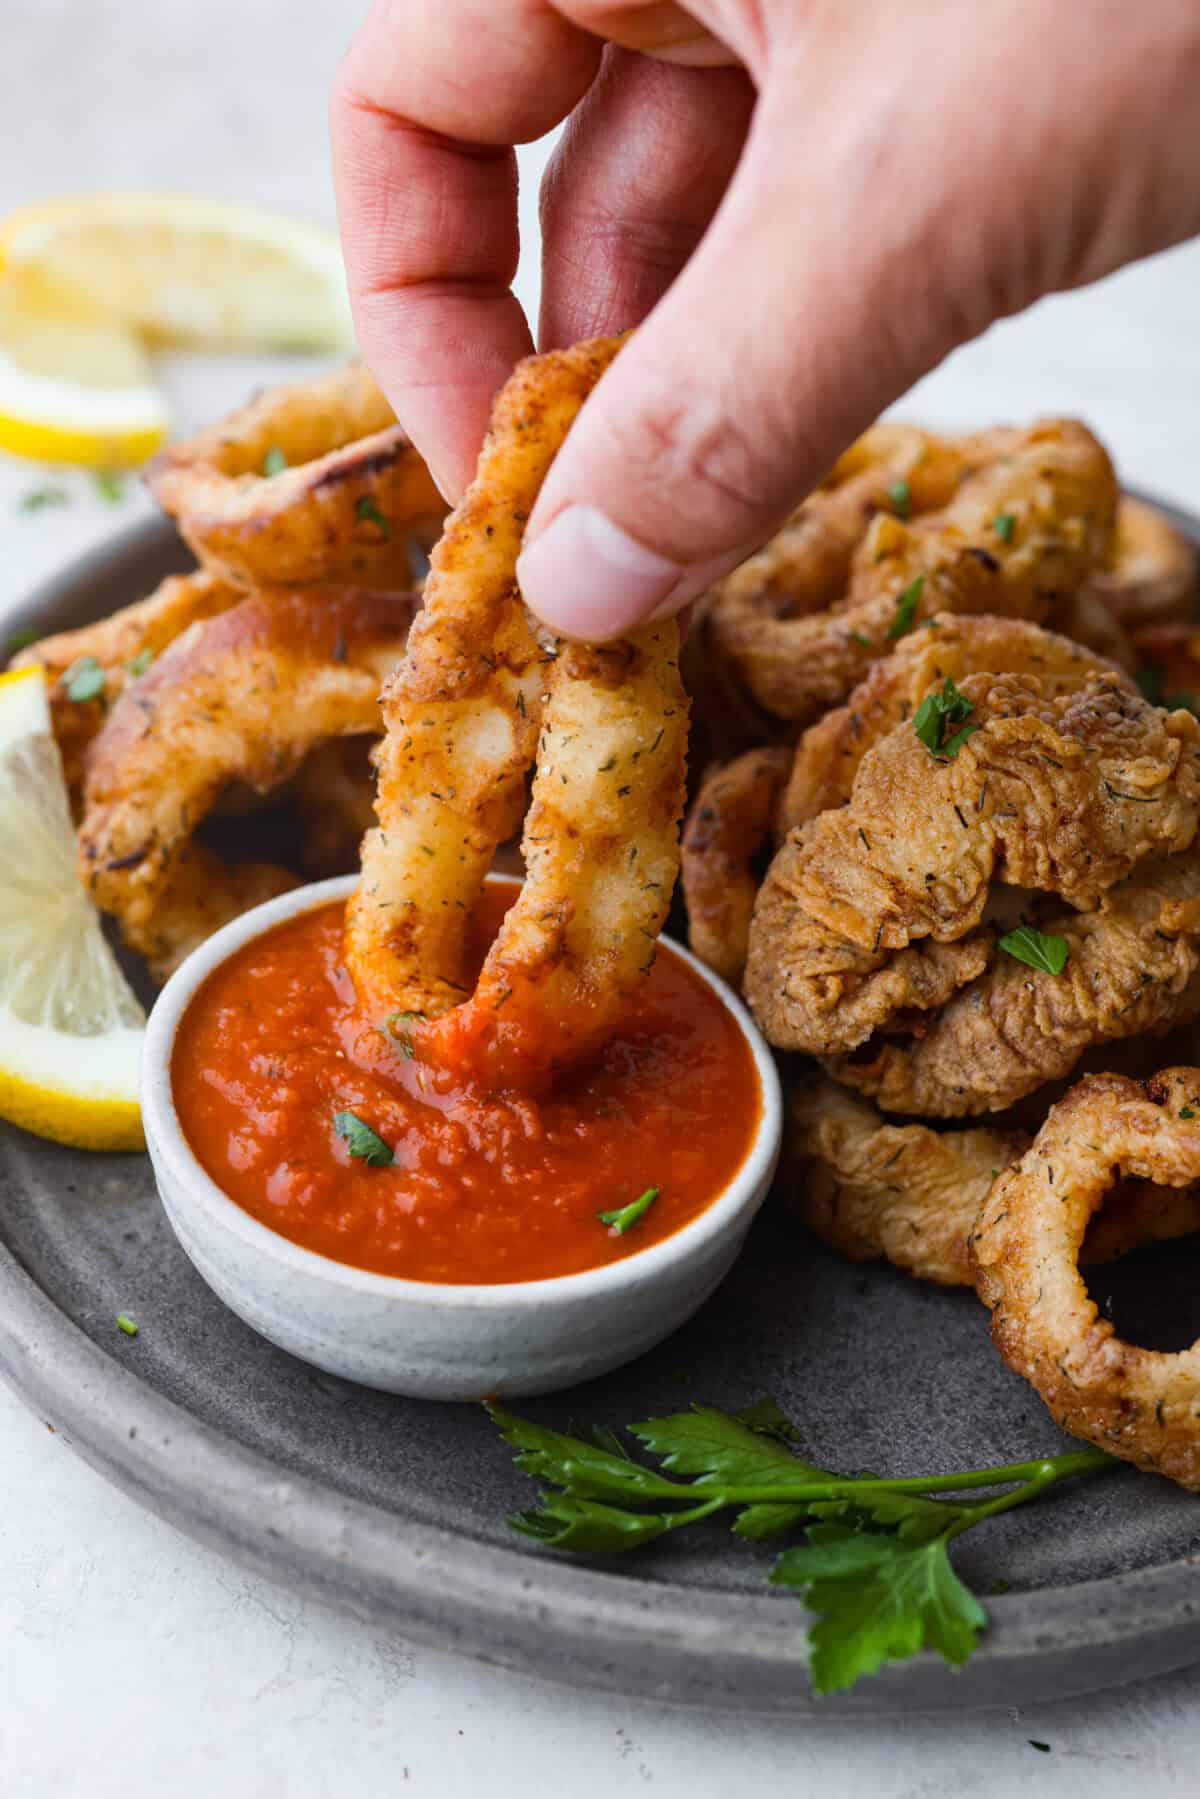
Crispy, flavorful Fried Calamari is a delicious appetizer that tastes like something you would order in a fancy restaurant. The calamari is tenderized, breaded, and then fried to golden brown, crunchy perfection. Take it to the next level with marinara sauce for dipping!
Reasons You’ll Love This Recipe
Delicious Texture and Flavor: This fried calamari recipe uses simple seasonings to get the flavor just right. Plus, the ratio of ingredients for the breading results in the perfect crispy texture.
Two Methods for Cooking: I’m giving you instructions for deep frying and for the air fryer. Both methods will produce a crispy, crunchy appetizer that everyone will love.
Easy to Make at Home: Calamari is inexpensive and readily available at most grocery stores. I’ll walk you through the simple method, and you’ll be chowing down on this deliciousness in no time.
What is Fried Calamari?
You’ll find fresh calamari in the seafood department at most grocery stores. We love it so much that we always have to order it if we see it on the menu! It’s also easy to make at home.
You can find fresh calamari at most grocery stores in the seafood department. You can also find frozen squid in the freezer aisle. The key to making sure your calamari is tender is to first soak it in a milk and lemon juice mixture. Then, you’ll bread it with a simple mix of flour, cornstarch, and seasonings. Fry it up in just minutes to a perfect golden brown. Its crispy goodness will have you coming back for seconds and thirds!
Ingredients You’ll Need For Crispy Fried Calamari
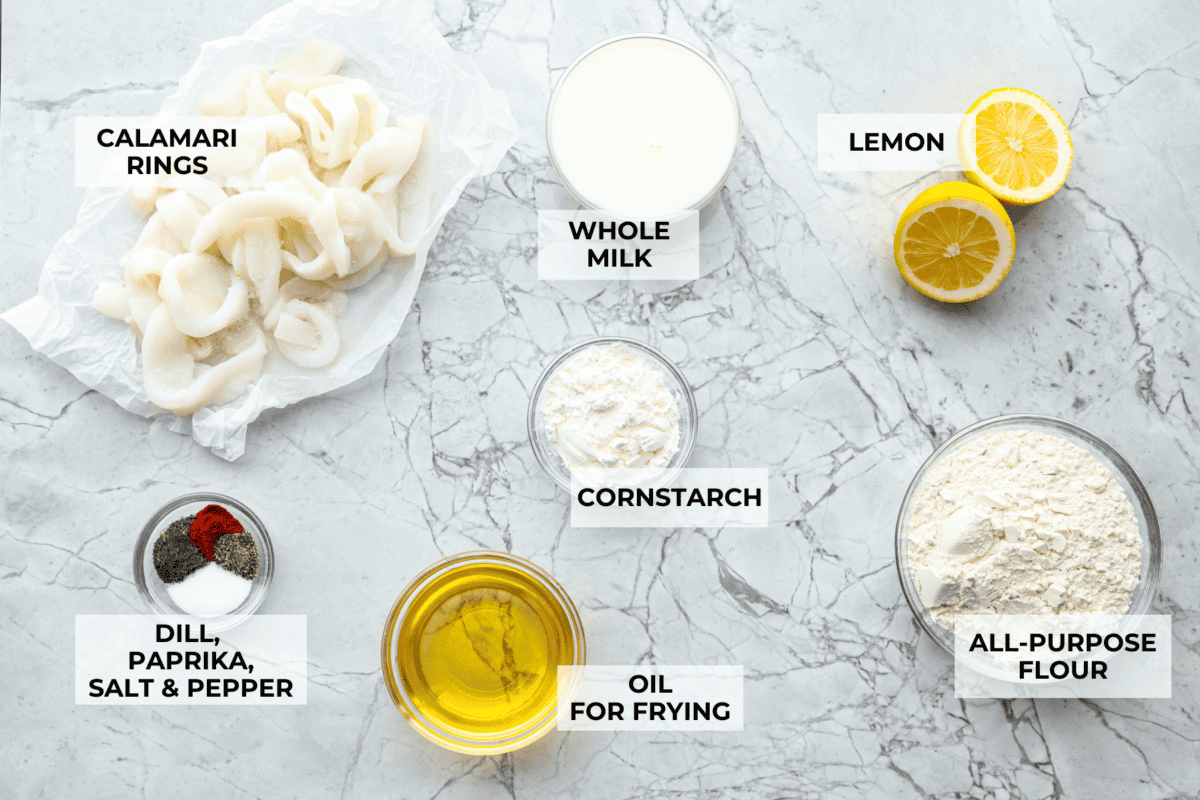
The ingredients for this calamari recipe are simple. Other than the calamari, you probably already have what you need! It’s all about the ratio of flour to cornstarch to get that delicious crispiness. Exact measurements can all be found below in the recipe card.
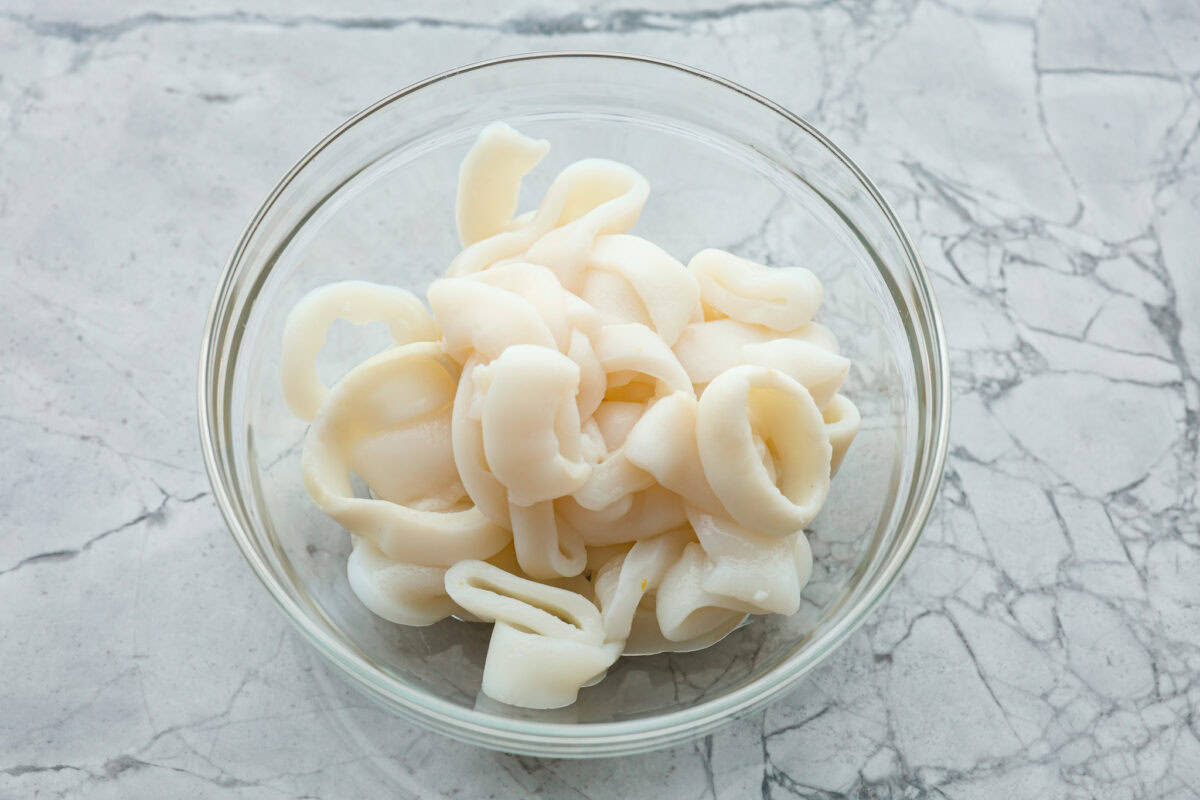
Calamari Rings: You can use either calamari rings that are sold already cleaned (seen below) or whole squid, which you cut into tubes before use.
Milk and Lemon Juice: Soaking the calamari in a mix of whole milk and lemon juice will make it tender and also help the breading adhere to it.
Flour/Cornstarch: For the breading, you’ll need a mix of all-purpose flour and cornstarch for golden brown crispiness. The flour is what will fry up golden brown and the cornstarch will give the exterior that crispy crunch.
Dried Dill: Gives the perfect complimentary flavor to the squid.
Paprika: Adds a nice peppery flavor that gives a bit of heat.
Salt & Pepper: To taste!
Oil: Vegetable oil for frying.
Lemon Wedges: Serve with lemon wedges to squeeze a bit of fresh lemon juice over the top for brightness in every bite.
How to Make Fried Calamari
Frying crispy calamari is much easier to make at home than you might think! The steps are simple, and the calamari only takes about 3 minutes to fry!
Prep: Prepare the calamari rings by thawing them if they are frozen. Pat the rings dry and place them into a bowl.
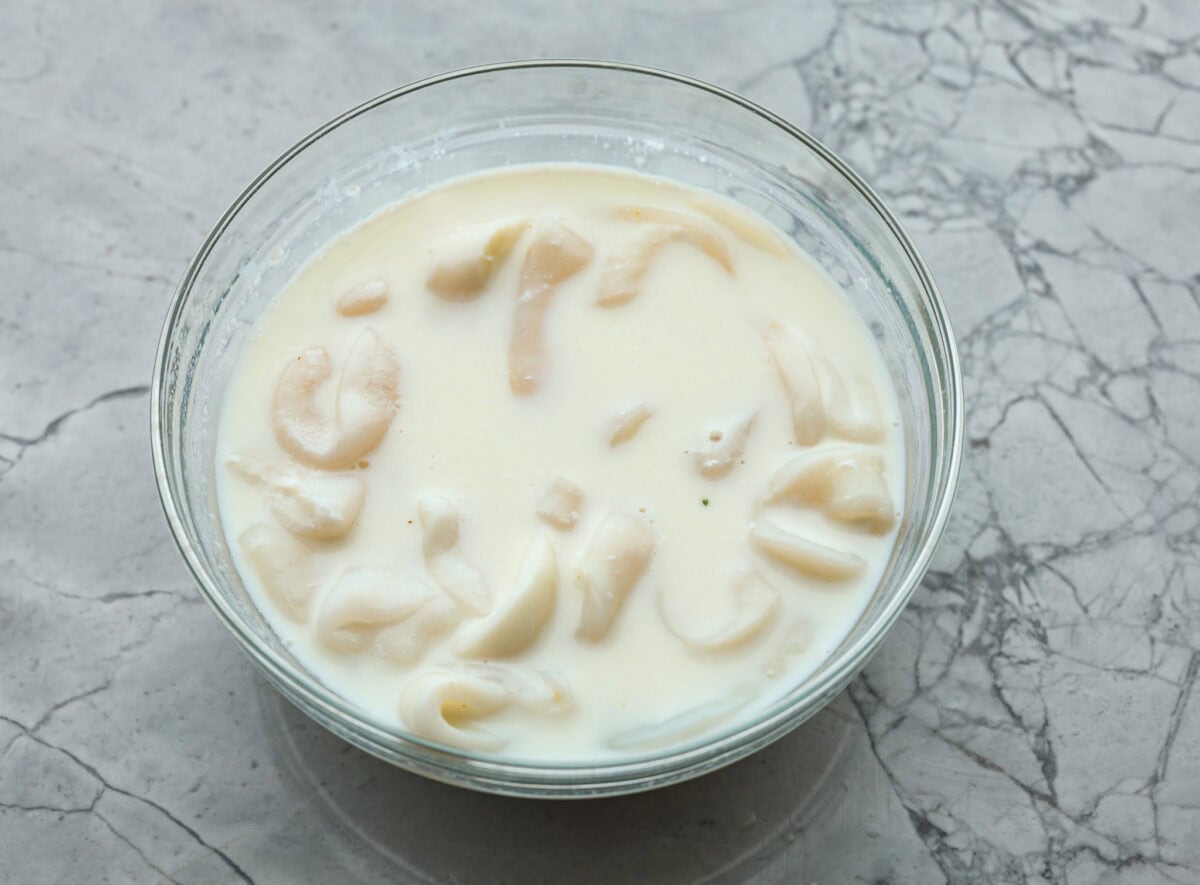
Coat with Milk and Lemon Juice: Pour the milk and lemon juice over the rings and stir to combine and coat the rings evenly in the milk mixture.
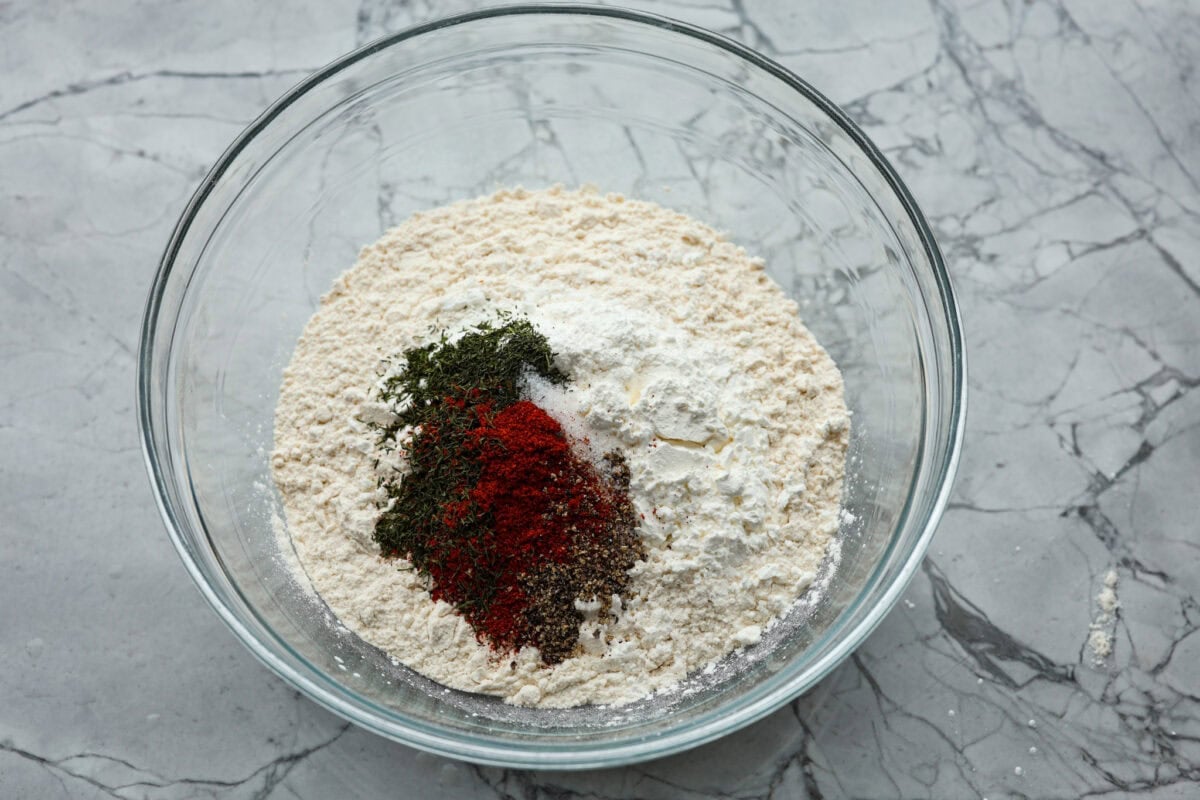
Mix: In a separate bowl, whisk together the flour, cornstarch, salt, dill, paprika, and pepper.
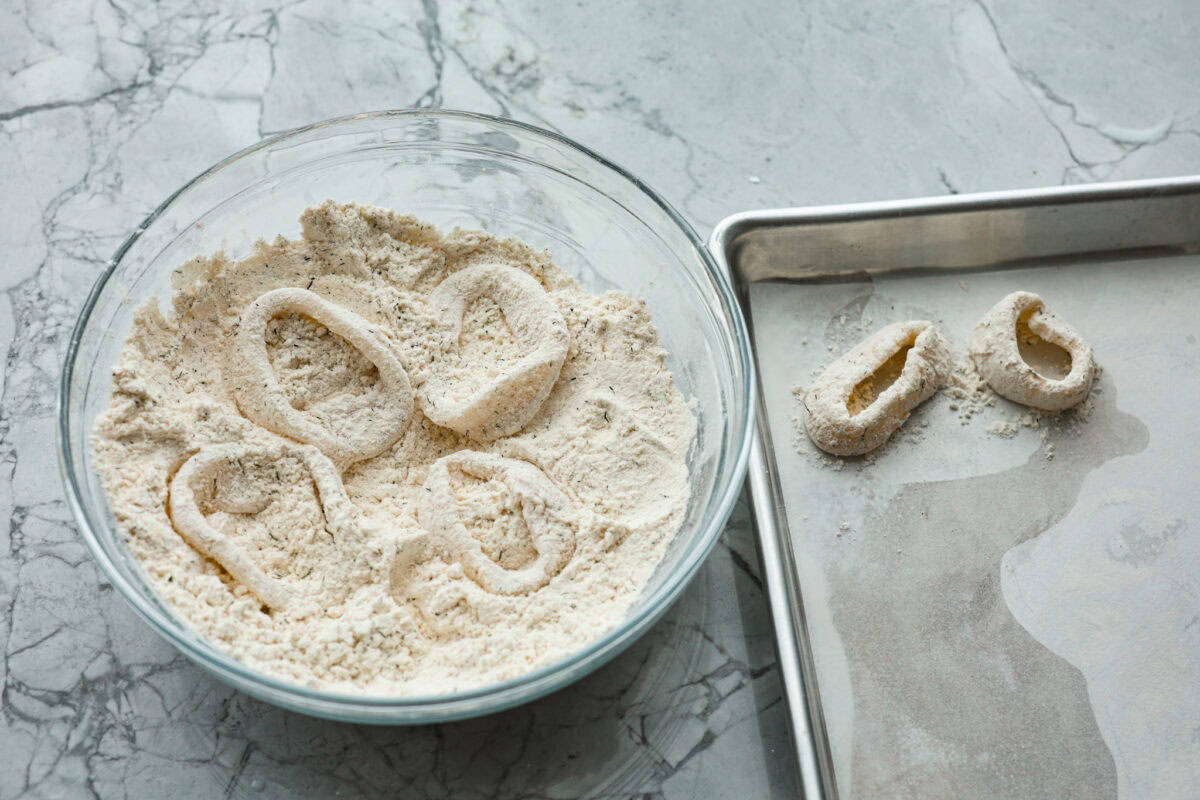
Dredge in Flour Mixture: Remove the rings from the milk mixture, allowing excess liquid to drip off. Then, toss them in the flour mixture. Next, place the breaded calamari rings onto a plate or sheet pan. Meanwhile, prepare a second plate or sheet pan by lining it with paper towels.
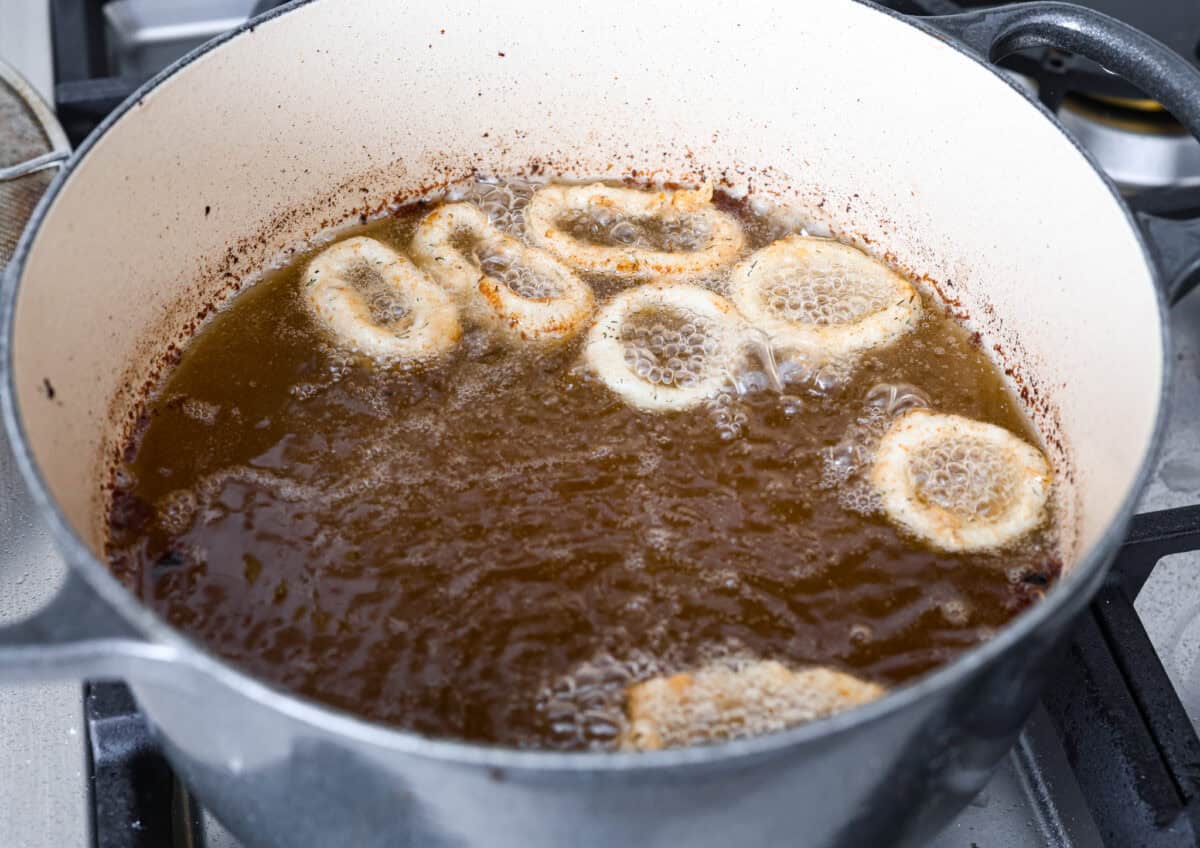
Fry: Heat about an inch of oil in a large skillet over medium-high heat. When the oil is hot carefully place the battered calamari into the hot oil and fry them for about 3 minutes until they are golden brown.
Finish Frying and Serve: Once you finish frying the calamari, place them onto a paper towel-lined plate or sheet pan. Work in batches until you’ve cooked all the calamari, then serve it fresh with lemon wedges.
Tips for Making Fried Calamari
Don’t be intimidated to fry your own calamari at home! This tasty appetizer is something that you can easily make in your own kitchen, and it will be even better than any you get in a restaurant! Here are a few tips and ideas to help you along the way:
Calamari to Use: You can use calamari tubes and cut them into rings for the calamari rings. You can also use mixes with tentacles for this recipe. Thaw the squid all the way before you start breading and frying for the best results.
Use the Air Fryer: To air fry, follow the steps up until you fry them. Instead, spray the breaded calamari with oil and place them into your air fryer basket. Air fry at 400 degrees Fahrenheit for 4-5 minutes.
Serving Sauces: Calamari goes great with Marinara Sauce, Tartar Sauce, or Tzatziki Sauce.
Thaw First: If you are using frozen calamari rings, thaw them completely before using them.
How to Store Leftover Fried Calamari
If you’re lucky enough to have any leftover calamari, here are my best tips for how to store them and reheat them to make sure they are crispy when you reheat them.
Refrigerate: Store leftovers in the fridge in an airtight container for up to 3 days.
Reheat: I recommend baking or air frying the leftovers to get them crispy. To air fry, cook at 350 degrees Fahrenheit for 3-5 minutes. If using the oven, heat in the oven at 400 for 3-5 minutes.
More Delicious Appetizers
If you are like me, then you’ll agree that appetizers are the best part of the meal! They’re great for parties and entertaining, too! Below, you’ll find some of my most popular appetizer recipes that everyone loves.
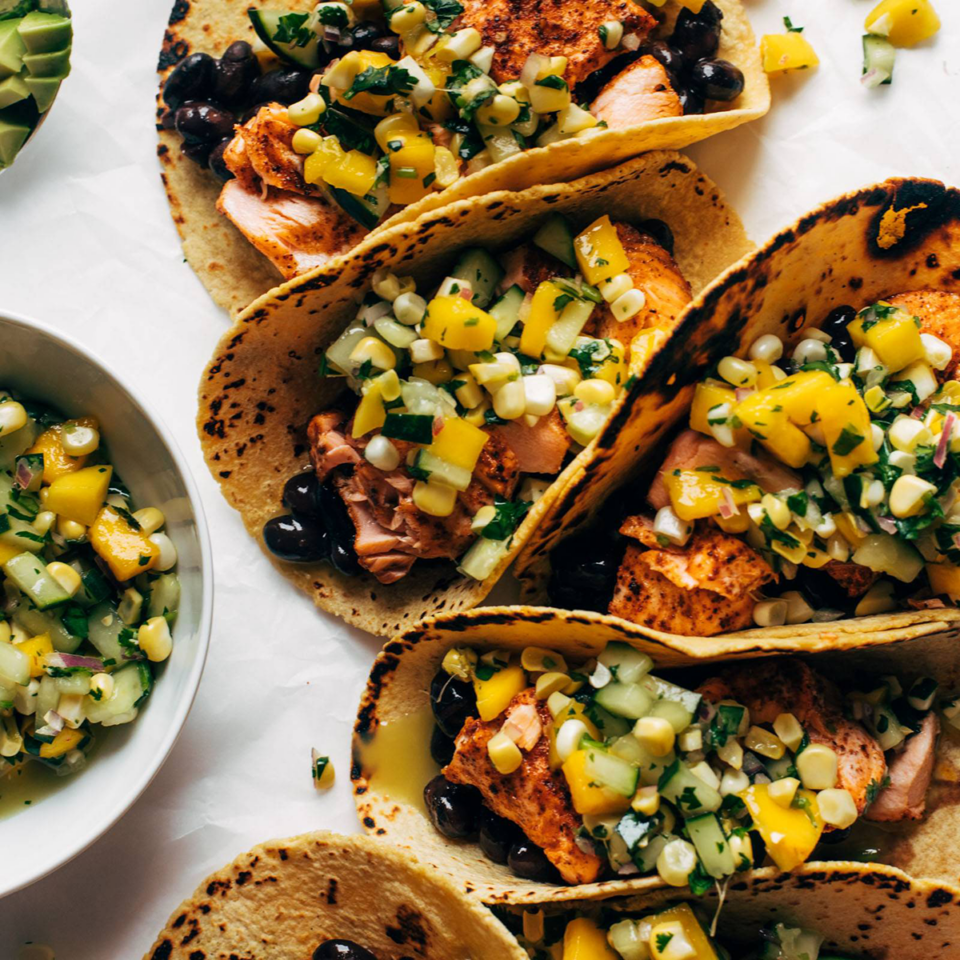
Super easy salmon tacos loaded with a mango, sweet corn, and cucumber salsa!
This is a brand new recipe that’s part of our Spring 2023 SOS Series – in other words, EASY recipes! View our full collection of SOS recipes here.
In This Post: Everything You Need For Salmon Tacos
Salmon Tacos Video
Lindsay’s Notes
These tacos are THE dinner for me right now!
A few nights ago, I made them (again), and I set the sheet pan of salmon down on the table and my whole family literally descended upon it and started grabbing at the salmon with their hands and forks as I stood by watching in half shock, half pride. It was a feeding frenzy.
Of course, we love salmon. It’s a great source of nutrition and protein and, when cooked well, it gently slides apart into buttery, juicy, delightful little flakes.
But I’m not going to lie to you: the main event here is that mango corn salsa.
The salmon itself is completely SOS (taco seasoning and THAT’S IT), which is why I think it makes sense to put all your effort and energy into the salsa. This salsa is also the thing that’s going to keep you sitting at the table long after you’re done eating tacos, just scooping some extra salsa bites all on its own and suddenly thinking of it as more of a salad? It can be a salad, right? I would totally eat this salsa on its own as a salad.
In general, I’m a believer that salmon and mango are a match made in heaven.
Each bite is extra crispy and unexpected from the raw sweet corn and cucumber with a little burst of juicy flavor. But it’s also mainstream enough with the mango that my two young kids are usually happy to devour it right along with us.
I love a million sauces on my tacos (okay, fine, on every recipe). But with this one, all it needs is a bit of extra lime and honey to finish it off. Simple, minimal effort, max deliciousness.
Looking For More Dinner Ideas?
Check out our collection of 30+ top dinner recipes!
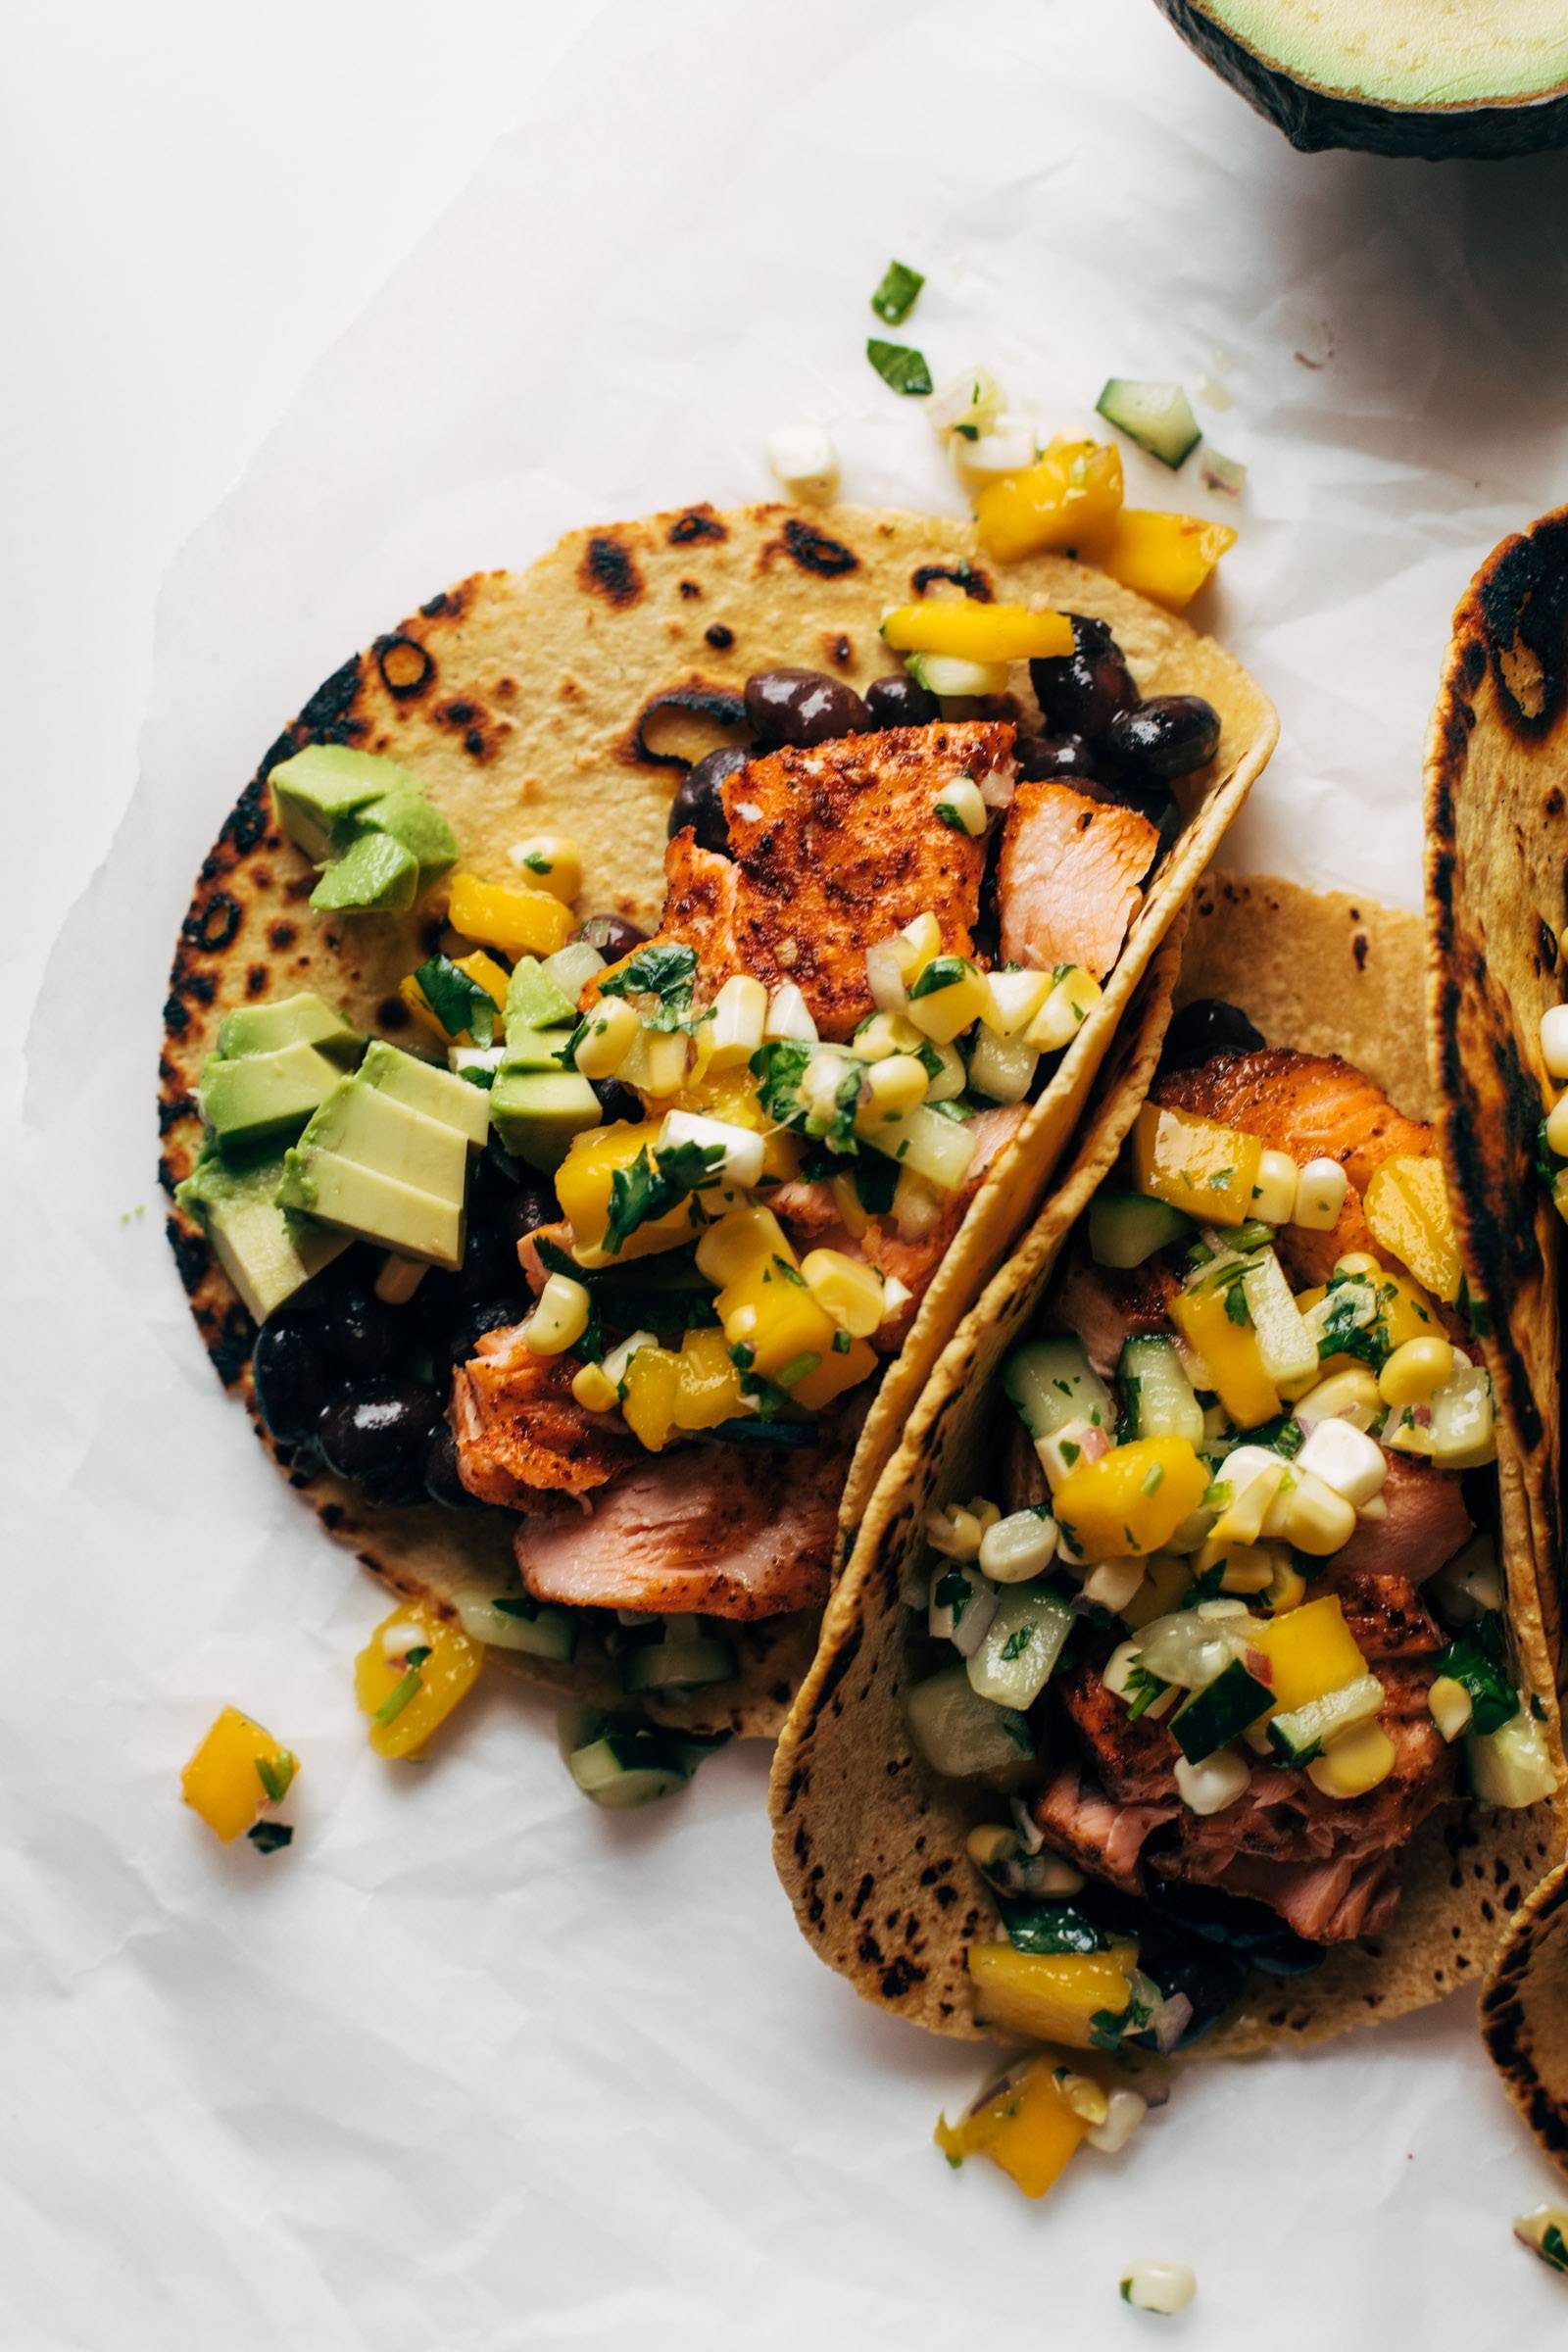
Super easy salmon tacos loaded with a mango, sweet corn, and cucumber salsa! Perfect with black beans or avocado tucked into a corn tortilla.
Salmon Tacos:
Mango Corn Salsa:
Extras:
Prep: Preheat the oven to 425 degrees. Line a baking sheet with parchment paper.
Season the Salmon: Toss the salmon with the taco seasoning and avocado oil until well-coated – you can do this in a bowl or directly on the baking sheet. If your taco seasoning does not have salt, add some salt to the salmon.
Bake the Salmon: Bake the salmon for 8 minutes, close to the top of the oven, or until it slips apart easily when pressed with a fork.
Make the Salsa: While the salmon is baking, chop up your salsa ingredients and toss together in a bowl. Season to taste.
Soften the Tortillas: To soften the corn tortillas, I usually heat up some oil in a large skillet and then give the tortilla a very quick one-sided dip into the hot oil and transfer to a paper-towel lined plate. I stack them up as I go so the heat and oil kind of distributes between all the tortillas. You can also wrap the tortillas in a few damp paper towels and microwave for 30 seconds to steam them so they become more pliable and yummy to eat.
Assemble the Tacos: Mash avocado or spread refried beans on the bottom of the tortilla. Add a couple pieces of salmon; press to gently smash them. Top with a big scoop of the salsa. I often finish these with lime squeezes and a drizzle of honey!
Notes
Purchasing Salmon: For this recipe, I look for salmon fillets that are nice and thick so you can cube it! I usually cut the skin off and then cut into large cubes; I love the cube shape because they cook nice and evenly and make for a fun shape to squish apart in the taco. It’s also totally fine to just sprinkle your seasonings onto a thinner fillet and flake the fish apart to put into the tacos.
Salmon Doneness: People cook salmon to varying degrees of doneness depending on your preferences and the quality of the salmon. I like to cook it to medium well, where everything is almost totally cooked through but it’s nice and soft and slips apart easily when you press it with a fork. Here’s a guide with more info on cooking salmon and how to tell when it’s done.
Salsa Spiciness: As written, this salsa is not spicy at all, but a jalapeño would be a great addition! I keep it mild for my kids, but if that is not your journey, go for the heat!
Tortillas: In the photos, I was using a thicker type of tortilla (corn and flour blend) that I charred in a dry cast iron skillet. When I usually make this, I use regular corn tortillas and I follow the recipe directions for softening them.
Taco Seasoning: All brands are different, but if you’re using a mild one and you want more going on with your salmon, sprinkle it with some extra chili powder, onion powder, and garlic powder. *chef’s kiss*
Air-Frying The Salmon: This would work well using this Air Fryer Salmon recipe. Just replaced the seasonings in that recipe with the taco seasoning in this one!
Lately I’ve been using the one from Kowalski’s (a local grocery store) – that’s my favorite in this recipe right now.
I also like the Siete brand mild taco seasoning (affiliate link) – the spicy one is a bit much for my kids, but the mild is great.
What Tortillas Do You Like?
In these photos, I’m using the La Tortilla Factory corn and flour blend tortillas! They are a bit thicker than your average tortillas and they hold up well, which is why I picked them for the photos.
If I’m making these at home, no photos necessary, I usually use just a standard yellow corn tortilla.
Can I Use Something Else Besides Salmon?
Yes, this would be delicious with chicken or shrimp! Just adjust your baking time a bit – chicken needs more like 10-12 minutes (depending on the size of your pieces) and shrimp would be about 8 minutes.
Can I Make This Vegetarian?
I would roast up some cauliflower in place of the salmon, following the same method of coating it with the taco seasoning and increasing the roasting time to 25-30 minutes.
If you’re looking for extra protein, tofu would also be good. Here’s our guide to cooking tofu – I would recommend the crispy baked method!
Can I Make This Gluten-Free / Dairy-Free?
It should be both gluten-free and dairy free as written!
Double-check your taco seasoning and your corn tortillas for any added wheat or dairy; otherwise, all the other ingredients are good to go!
How Does This Keep As Leftovers?
I wouldn’t recommend this as a leftovers meal. The salsa gets a bit soggy and the salmon doesn’t do great reheated (everyone is different, but this is just my personal opinion).
If you are cooking for one or two people, I would just keep the salsa ingredients separate and toss them before serving, and maybe even keep the extra salmon un-baked until right before serving.
Can I Air-Fry The Salmon?
Yes! And I highly recommend it! Here’s how to make air fryer salmon. I’d just replace the seasonings in that recipe with the taco seasoning in this recipe.
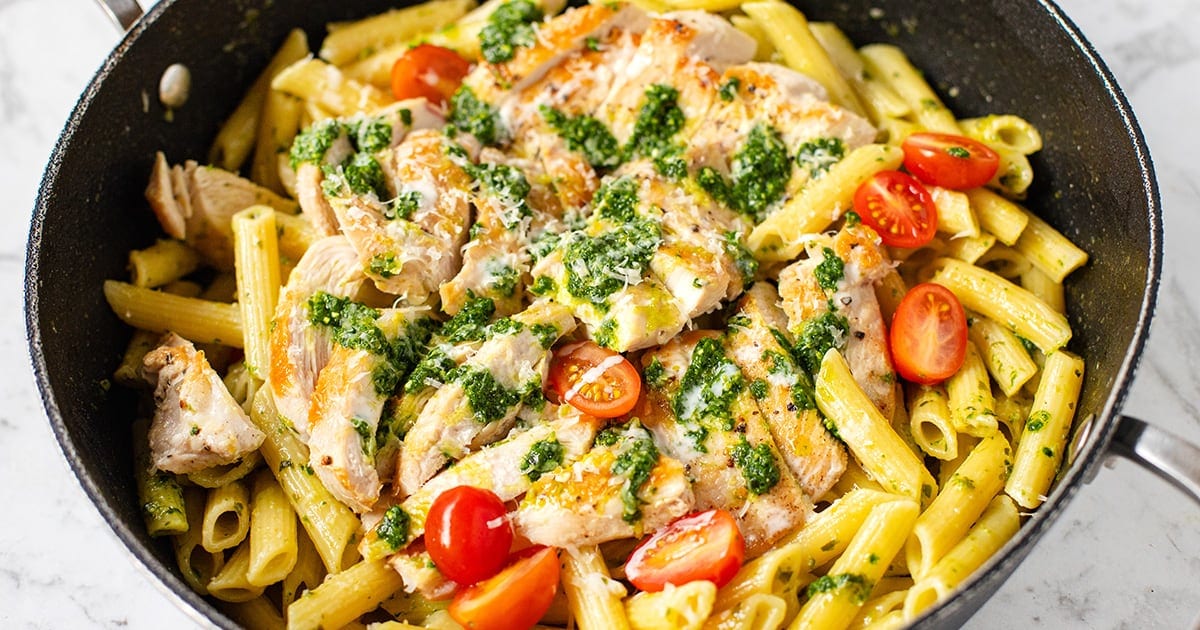
This creamy chicken pasta with pesto is fresh, vibrant, and perfectly comforting. It’s family-friendly, high in protein, satisfying, and everyone at my table gobbled it up (including my 4-year-old).
Jump to: ℹ️ Overview | 🛒 Ingredients | 📷 How To Make | 📹 Watch The Video | 👩🍳 Recipe Tips | 🥗 Serving Suggestions | 📝 Full Recipe Card | 🍽 More Chicken Recipes
This creamy chicken pasta with pesto is something I make often, and it never fails me. It’s got that gorgeous fresh basil flavor from pesto, balanced with a light cream sauce that clings to every bite of tender chicken and penne.
Unlike heavier Alfredo-style pastas, this one feels just right — creamy but not overwhelming. A bit of lemon keeps it bright, and a sprinkle of Parmesan ties it all together.
My kid always asks for seconds, and I secretly love that it packs in protein without feeling too rich. Each serving hits that sweet spot of about 30 grams of protein and enough carbs to keep you full. Honestly, it’s one of those recipes you’ll tuck away and keep coming back to.
👩🍳 You might also like these pasta dishes: creamy Italian sausage pasta, Marry Me chicken orzo bake, chicken pasta Alfredo with broccoli, garlic Parmesan chicken and pasta, lemon chicken orzo pasta, butternut squash pasta, and veggie pasta bake. You may also want to check out these chicken pasta recipes and crock pot Marry Me chicken.
What You’ll Need
Here is what you’ll need for this creamy chicken pasta with pesto recipe. Find the full measurements in the recipe card below.
Pasta – I like penne pasta, but you could use fusilli or rigatoni — anything that holds sauce nicely.
Chicken – Boneless chicken breast (you could use boneless thighs if you prefer juicier meat), and you will need salt and pepper for seasoning and a little olive oil for cooking. PS. For a speedy version, slice up some store-bought rotisserie chicken and skip the chicken cooking step altogether!
Basil pesto – Store-bought basil pesto is fine, but homemade makes it special. If buying store-bought, I highly recommend fresh pesto you would get in the refrigerated section, it’s more pungent and vibrant green.
Also for creamy pesto sauce – garlic (for that savory backbone), lemon zest and juice (brightens up the cream), chicken stock (adds depth and volume), light cream (or use half-and-half), and Parmesan cheese (for salty, nutty richness).
To Serve – Cherry tomatoes (I love the pop of color) and extra Parmesan (never too much cheese).
How To Make Creamy Chicken Pasta With Pesto
Find the full recipe and nutritional information below. Here are some handy step-by-step photos for how to make creamy chicken pasta with pesto.
Cut chicken breasts horizontally for even cooking, season with salt and pepper.
Sear chicken in olive oil until golden and cooked through, about 5 minutes each side; set aside.
In parallel, cook pasta until just al dente; set aside.
In the same pan, add a little extra oil and sauté garlic and lemon zest gently.
Pour in chicken stock, half the pesto, light cream, lemon juice, and Parmesan.
Simmer 4–5 minutes until the sauce is slightly thickened.
Slice chicken, return to pan with juices (you can also pop the chicken on top of the pasta later).
Stir in cooked pasta and remaining pesto.
Top with extra pesto, Parmesan, and cherry tomatoes.
Watch The Video
Recipe Tips
Make it extra creamy: Swap light cream for heavy cream if you want indulgence.
Protein swap: Try shrimp or rotisserie chicken (this will make things even easier as you won’t need to cook the chicken). If using shrimp/prawns, pan-fry for 2 minutes each side.
Veg it up: Stir in baby spinach or peas at the end. Try adding some sun-dried tomatoes.
Pasta water: If your sauce feels too thick, add a splash of pasta cooking water to loosen it.
Leftover pesto: Freeze in an ice cube tray for quick flavor boosts.
Storage tips: Leftovers keep well in the fridge up to 3 days. Reheat gently on the stovetop with a splash of stock or cream. I don’t recommend freezing—cream sauces can separate.
Make-ahead tips: You can cook the chicken and make the sauce a day ahead—just reheat gently before tossing with pasta. Even the pasta can be cooked in advance and lightly oiled to prevent sticking.
Serving Suggestions
I like serving this with a simple side salad or a green salad and maybe a hunk of crusty bread to mop up the sauce. A glass of chilled white wine doesn’t hurt either.
💬 If you’ve tried this creamy chicken pasta with pesto or any other recipe on the blog then don’t forget to rate the recipe and let me know how you got on in the comments below, I love hearing from you! You can also FOLLOW ME on Instagram, Facebook, Pinterest, YouTube, and or sign up to my Newsletter to see more of my delicious food.
Want to Save This Recipe?
Enter your email & I’ll send it to your inbox. Plus, get great new recipes from me every week!
By submitting this form, you consent to receive emails from Cooked & Loved
This creamy chicken pasta with pesto is fresh, vibrant, and perfectly comforting. It’s family-friendly, high in protein, satisfying, and everyone at my table gobbled it up (including my 4-year-old). Find step-by-step photos and more recipe tips above.
Cook Pasta: Cook the penne according to package directions until al dente. Drain and set aside.
Prepare Chicken: Cut the chicken breasts horizontally so they cook evenly. Season both sides with salt and pepper.
Sear Chicken: Heat 1 tablespoon olive oil in a large sauté pan over high heat. Add chicken, reduce heat to medium-high, and cook about 5 minutes per side. Remove thinner pieces early if needed. Transfer all chicken to a plate and rest.
Make Sauce: Lower heat to medium. Add 1 teaspoon olive oil, garlic, and lemon zest. Sauté until fragrant.
Build Sauce: Pour in chicken stock, half the pesto, cream, lemon juice, and Parmesan. Simmer for 4–5 minutes until slightly reduced.
Finish Chicken: Slice cooked chicken. Return to pan along with any juices. You can also return the juices to the sauce and reserve the chicken to serve on top like I did (for nicer presentation).
Combine Pasta: Add pasta and remaining pesto. Toss to coat.
Serve: Top with extra Parmesan, cherry tomatoes, and another drizzle of pesto.
Can I use jarred pantry pesto rather than fresh? Absolutely! Just look for one with good olive oil and real Parmesan.
What’s the best pasta shape? I like penne or rigatoni because they hold the sauce nicely.
Does this reheat well? Yes! We always enjoy the leftovers — just warm it gently on the stove with a splash of stock or cream.
Make it extra creamy: Swap light cream for heavy cream if you want indulgence.
Protein swap: Try shrimp or rotisserie chicken (this will make things even easier as you won’t need to cook the chicken). If using shrimp/prawns, pan-fry for 2 minutes each side.
Veg it up: Stir in baby spinach or peas at the end. Try adding some sun-dried tomatoes.
Pasta water: If your sauce feels too thick, add a splash of pasta cooking water to loosen it.
Leftover pesto: Freeze in an ice cube tray for quick flavor boosts.
Storage tips: Leftovers keep well in the fridge up to 3 days. I don’t recommend freezing—cream sauces can separate.
Make-ahead tips: You can cook the chicken and make the sauce a day ahead—just reheat gently before tossing with pasta. Even the pasta can be cooked in advance and lightly oiled to prevent sticking.
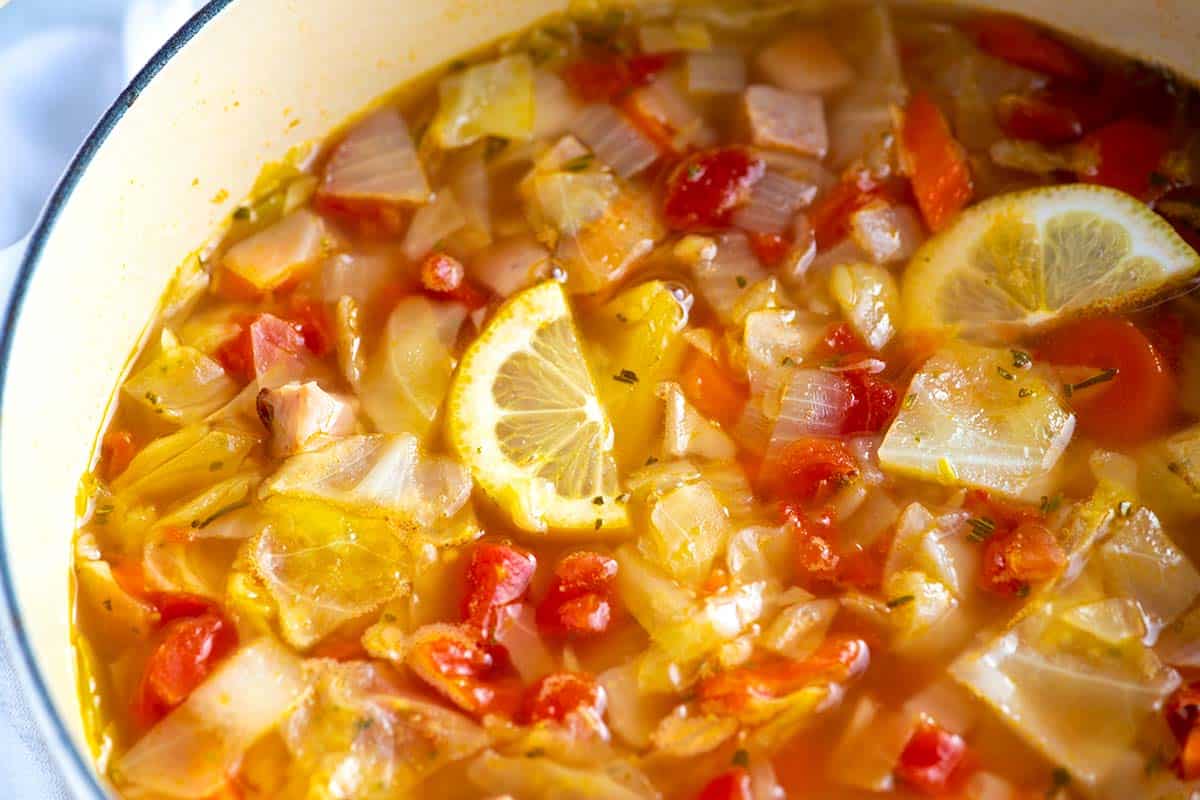
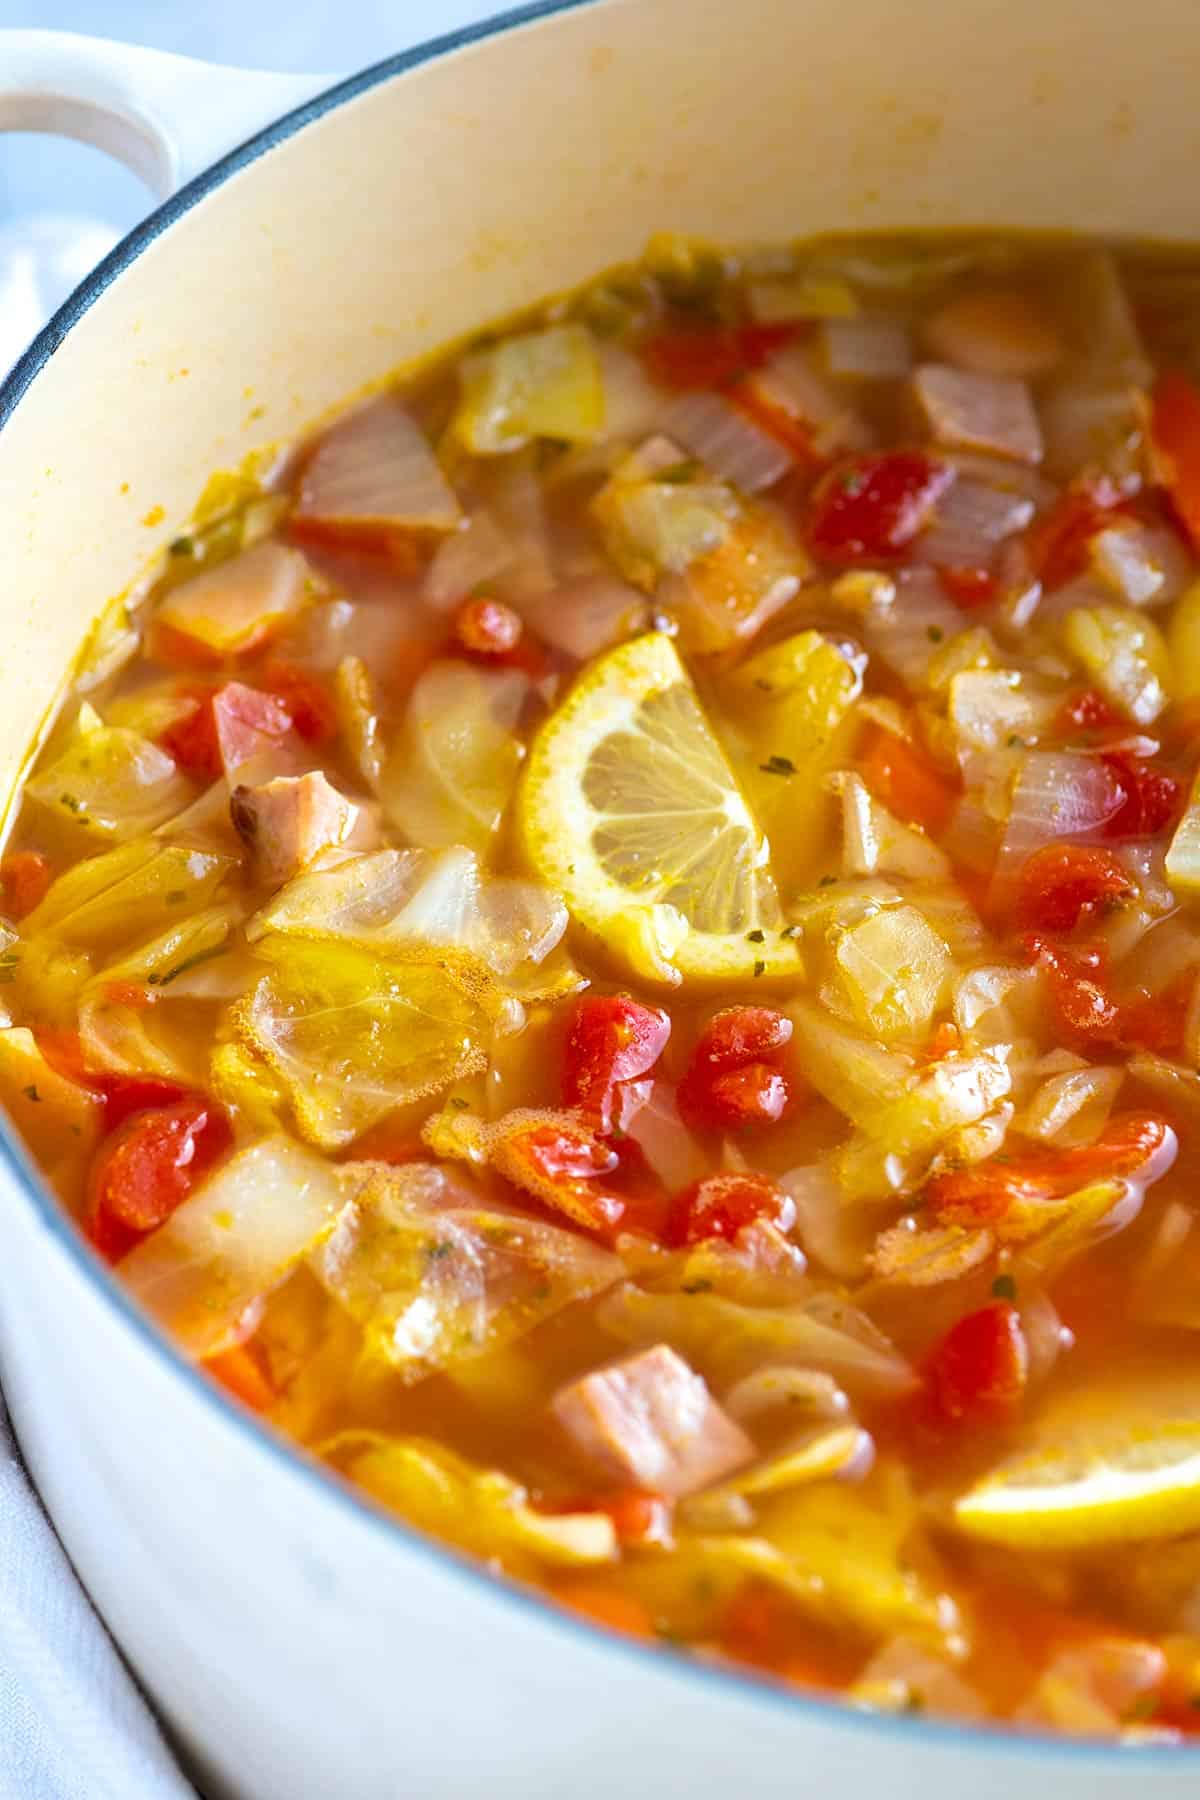
This ham and cabbage soup recipe is hearty, healthy, and tastes incredible! This easy soup is ready in about 30 minutes.
Cabbage soup may not sound like the most exciting meal, but trust me, this version with ham, carrots, and onions is delicious! Much like many of our cabbage recipes, this soup is nutritious, low-calorie, and tastes fantastic!
Since cabbage shrinks and softens when cooked, you can add a lot to the pot. In this ham and cabbage soup, we call for eight cups of chopped cabbage, and you could probably stir in quite a bit more. It’s so good! For another soup, try this cabbage soup, or for another recipe with ham, try our easy split pea soup.
Key Ingredients
Ham: I use a boneless ham steak for this soup. If you have bone-in ham, use it! Just cut it away from the bone, then add the bone to the soup as it simmers (it should add a bit more flavor). Remove it before serving.
Cabbage: Use regular white cabbage for this soup. I like how it softens as it simmers. If you have leftover cabbage, consider using it in one of our other cabbage recipes!
Veggies: In addition to the cabbage, we saute onion, carrots, garlic, and rosemary before adding broth to this soup. They create a flavorful base. Fresh or dried rosemary will work. I’ve given amounts for both in the recipe below.
Tomatoes: I add a small can of tomatoes to the soup, but fresh tomatoes work fine. See the tip below the recipe for substituting fresh tomatoes.
Broth: Any light broth or stock works in this cabbage soup recipe. My go-to’s are chicken stock, chicken broth, ham stock, and vegetable broth.
Find the full recipe with measurements below.
How to Make Ham and Cabbage Soup
Tip 1: Make the soup in one pot. To make this soup, you’ll cook the onion, carrots, and ham in a big pot and then add the rest of the ingredients. It comes together quickly and only needs to simmer for about 20 minutes before you can dig in.
Tip 2: Add ham for extra flavor. As the soup simmers, the ham flavors and seasons the broth. The soup becomes rich, hearty, and ultra-flavorful. If you don’t have any ham on hand or do not eat meat, you can leave the ham out. It will still be terrific.
Tip 3: Use lots of cabbage. Since cabbage shrinks and softens when it’s cooked, you can add lots of it to the pot. We add eight cups of chopped cabbage to this easy cabbage soup, and to be honest, you could probably stir in quite a bit more.
More Soup Recipes
Easy Ham and Cabbage Soup
PREP
COOK
TOTAL
This ham and cabbage soup recipe is hearty, healthy, easy to make, and tastes fantastic. Before adding the ham to the soup, taste it to see how salty it is. You may not need to add salt to the soup, depending on the salt level. Taste and adjust the seasoning of the soup a few times during cooking.
I love this soup with a side of crusty bread or homemade focaccia. Homemade garlic bread would be pretty amazing, too!
4 to 6 servings (8 cups of soup)
You Will Need
3 tablespoons olive oil
1 medium onion, chopped, about 2 cups
4 medium carrots, chopped, about 2 cups
8 ounces boneless ham steak, cubed, about 1 ½ cups
1 tablespoon minced garlic, 3 cloves
1 tablespoon chopped fresh rosemary or 1 teaspoon dried rosemary
1/2 teaspoon fresh ground black pepper
Pinch crushed red pepper flakes
8 cups chopped white cabbage, about 1 ½ pounds
1 (15oz) can diced tomatoes with juices
6 cups (1.4L) low-sodium chicken stock, ham stock, or vegetable broth
2 bay leaves
Salt, to taste
3 lemon slices or more to taste
Directions
1Heat 2 tablespoons of the olive oil in a stockpot or Dutch oven over medium heat.
2Add the onions, carrots, and cubed ham. Cook, stirring occasionally, until the vegetables have softened and the onions are translucent, 8 to 10 minutes.
3Add the garlic, rosemary, black pepper, and red pepper flakes. Cook, stirring, for one minute.
4Stir in the cabbage, and then pour in the canned tomatoes and their juices, as well as the stock. Add the bay leaves.
5Raise the heat to medium-high and bring the soup to a boil. Taste and adjust the salt. The ham adds some salt to the soup, so you may not need much additional seasoning.
6Partially cover the pot with a lid, and then reduce the heat to maintain a low simmer. Simmer for 20 minutes or until the cabbage and other vegetables are tender.
7Remove the pot from the heat and remove the bay leaves.
8Stir in the lemon slices and the remaining tablespoon of olive oil. Taste and season with more salt and pepper. Serve.
Adam and Joanne’s Tips
Storing: Place the leftover soup in an airtight container in the fridge and store it for up to 3 days or a month in the freezer.
Why lemon slices? While we don’t actually eat lemon slices, adding them to the soup brightens up the flavors a bit. You can also squeeze in fresh lemon juice or use vinegar, such as apple cider vinegar or wine vinegar.
Use fresh tomatoes: Substitute about 1 pound (5 to 6 tomatoes) for 1 (15oz) can of diced tomatoes.
The nutrition facts provided below are estimates.
Nutrition Per Serving Serving Size About 1 cup / Calories 157 / Total Fat 7.8g / Saturated Fat 1.5g / Cholesterol 12mg / Sodium 436.4mg / Carbohydrate 13.7g / Dietary Fiber 4.2g / Total Sugars 5.1g / Protein 11.1g
AUTHOR:
Joanne Gallagher
We are Adam and Joanne Gallagher, the creators of Inspired Taste. Established in 2009, Inspired Taste grew from a childhood dream into one of the internet’s most trusted recipe sites with hundreds of reliable recipes, step-by-step videos, and expert tips.More About Us
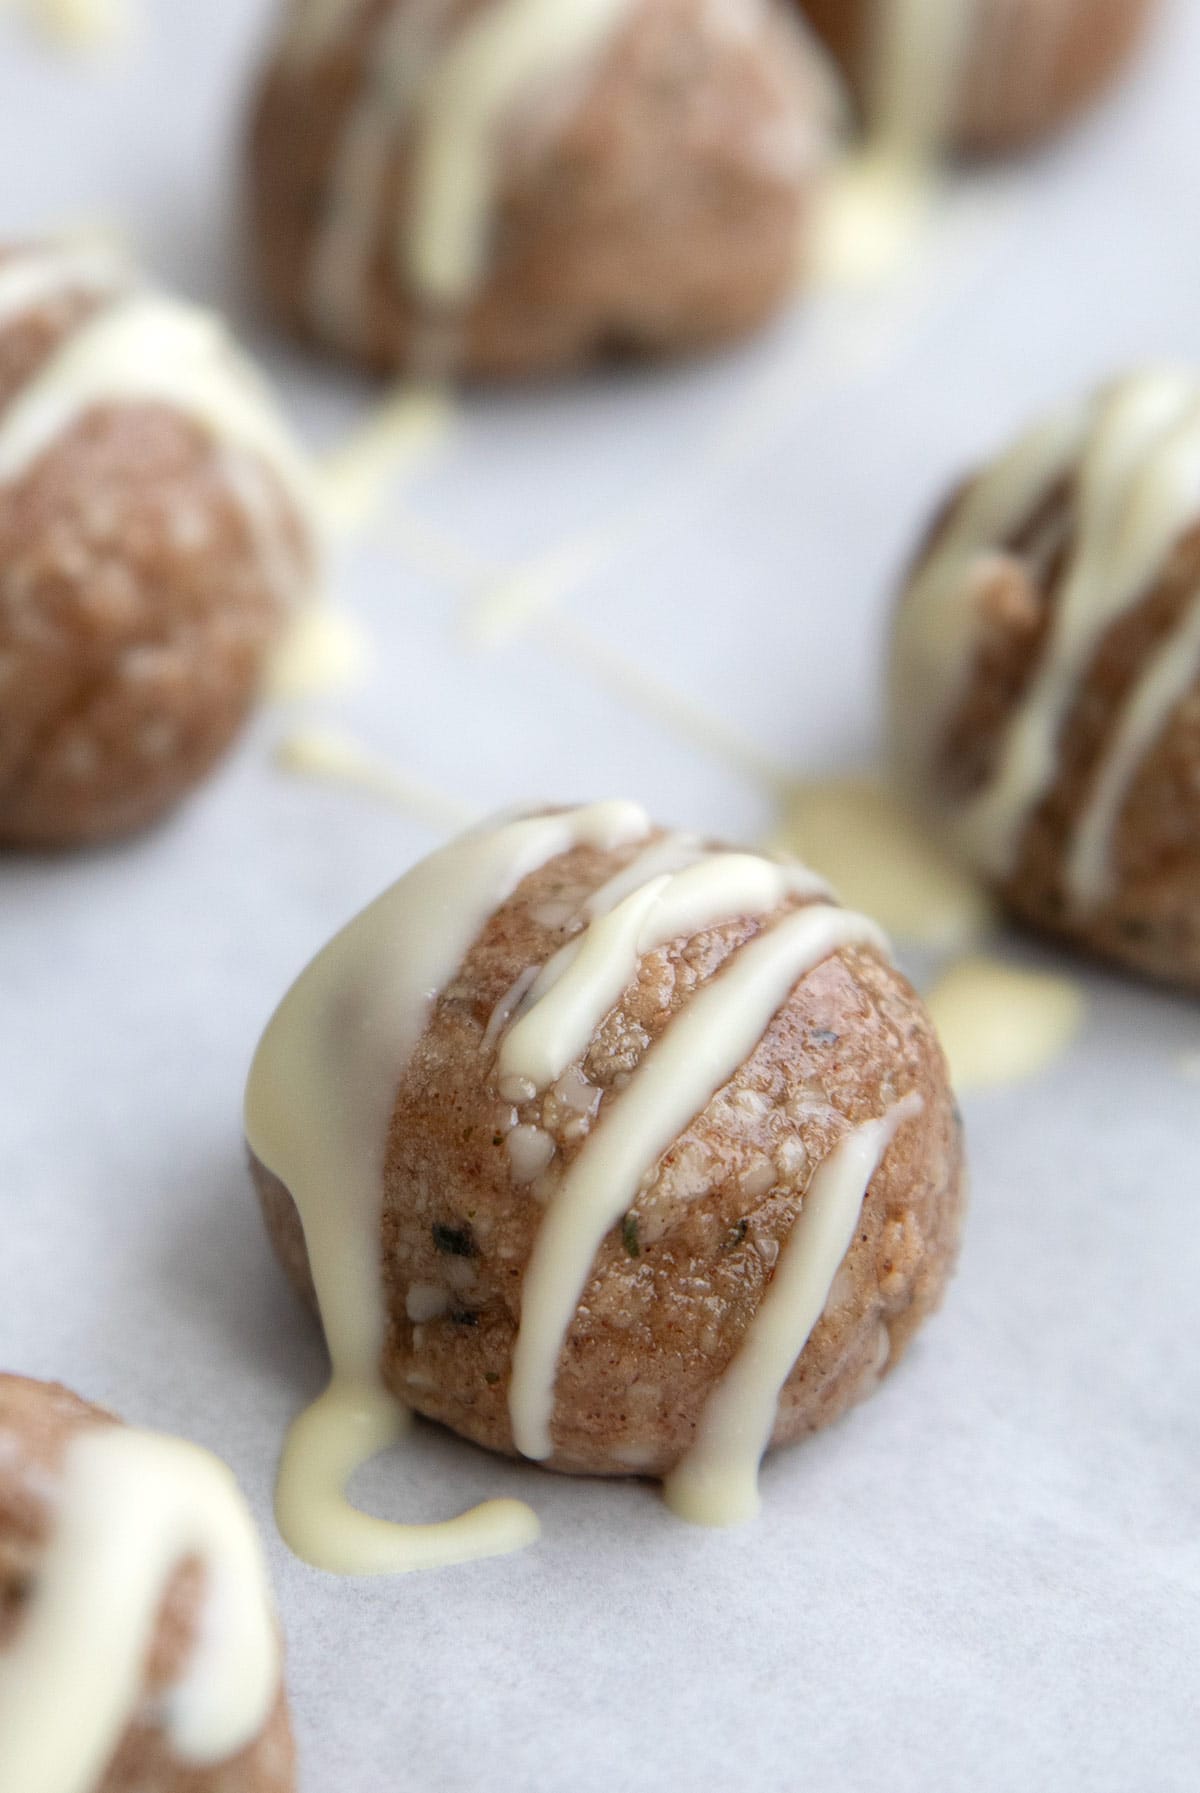
These Cinnamon Roll Protein Bites are an easy and delicious keto snack idea. Tender little bites packed with protein and sweet cinnamon spice. And a little drizzle of white chocolate doesn’t hurt either!
Protein snacks are all the rage and I am riding that delicious trend with absolute delight. Getting more protein into your diet can seem like a daunting task, so I love coming up with creative ways to make it more enjoyable. And these Cinnamon Roll Protein Balls are definitely enjoyable!
I often keep Peanut Butter Protein Balls in the fridge for quick boosts, but I decided to switch up the flavor profile. And what’s more tasty than cinnamon rolls? These little bites are soft and lightly sweetened, and just the right size for a post-workout snack or afternoon pick-me-up.
And they come together quickly and easily, no baking required! You may also want to try my Protein Cookie Dough Bark.
Why you’ll love this recipe
Sweet cinnamon flavor: Who doesn’t love cinnamon rolls? These little bites have all the flavor without the sugar high.
Easy no bake recipe: Just mix the ingredients and roll into balls.
Make ahead: These protein balls store well in the fridge for up to 2 weeks.
Portable: Pop a few in your bag as you head to the office or to the gym.
Protein packed: 12 grams of protein per serving.
Sugar free and low carb: No added sugar and only 3.2 grams net carbs.
Ingredient Notes
Nut butter: I used almond butter, but you can really use any nut or seed butter in this recipe. Sunflower seed butter is a good nut-free alternative.
Protein powder: Your favorite protein powder should work here, whether it’s whey or collagen. Different kinds may affect the consistency of the dough so be ready to adjust.
Sweetener: Powdered sweetener works best for protein balls.
Hemp seeds: Hemp seeds have a surprising amount of protein and add a nutty crunch to the protein balls. If you prefer, you can use more almond flour.
Almond flour: This helps create some bulk and hold the balls together better. You can also use sunflower seed flour for a nut-free option.
Sugar free white chocolate: A little white chocolate drizzle makes them look like cinnamon rolls.
Coconut oil: This helps the white chocolate melt more smoothly.
Pantry staples: Cinnamon and salt.
Overview: How to Make This Recipe
Make thedough: Combine the almond butter, protein powder, sweetener, cinnamon, and salt.
Mix in additions: Add the hemp seeds and almond flour and mix until a cohesive dough forms. Add a little oil if the dough is crumbly.
Roll into balls: Roll into 1 inch balls and refrigerate until firm.
Drizzle: Melt the white chocolate with the coconut oil then drizzle over the protein balls and refrigerate until set.
Tips for Success
The consistency of the dough depends heavily on the almond butter. Make sure to mix in any separated oil very well before starting this recipe. Too much oil will cause the dough to be wet and goopy, which is easily corrected with almond flour.
The kind of protein powder you use will also affect the consistency. I recommend whey protein for best results, but other kinds will work. Again, you simply need to be ready to adjust with almond flour or additional oil.
I recommend powdered sweetener for this recipe, either erythritol or Allulose-based. But high intensity sweeteners like stevia or monk fruit extract are an option as well.
Sugar free white chocolate is VERY finicky. Be sure to melt it over a double boiler with barely simmering water, stirring constantly. Once it’s mostly melted, remove the bowl from over the heat. Continue to stir, allowing the residual heat to melt it smoothly.
Frequently Asked Questions
Is whey protein keto friendly?
Protein powders can contain added ingredients and sweeteners that raise the carb count significantly. But some brands use cleaner ingredients and keto-friendly sweeteners such as stevia or monk fruit and are appropriate for keto diets. I look for grass-fed whey protein with 2 grams or less per serving.
How many carbs are in Keto Cinnamon Roll Protein Balls?
This keto cinnamon roll protein balls recipe has 6.3g of carbs and 3.1g of fiber per serving. That comes to 3.2g net carbs for two protein balls.
How do you store Keto Protein Balls?
Store the balls in a covered container in the fridge for up to 2 weeks. They can also be frozen for several months.
More recipes you’ll love
Keto Cinnamon Roll Protein Balls
Servings: 10servings
Prep Time 25 minutesmins
Total Time 55 minutesmins
These Cinnamon Roll Protein Bites are an easy and delicious keto snack idea. Tender little bites packed with protein and sweet cinnamon spice. And a little drizzle of white chocolate doesn’t hurt either!
Prevent your screen from going dark
In a large bowl, combine the almond butter, protein powder, sweetener, cinnamon, and salt. Mix well.
Add the hemp seeds and almond flour and mix until a cohesive dough forms and you can roll into balls.
If the dough is dry and crumbly, add avocado oil a teaspoon at a time until the correct consistency is achieved. If the dough is too wet and goopy, add almond flour, 1 tablespoon at a time, until the correct consistency is achieved.
Roll into 1-inch balls and refrigerate until firm, about 20 minutes.
In a heatproof bowl set over a pan of barely simmering water, combine the white chocolate with the coconut oil, stirring constantly. Once mostly melted, remove the bowl from over the heat and continue to stir until smooth.
Drizzle over the chilled protein balls and refrigerate until set, 10 minutes.
Storage Information: Store the protein balls in a covered container in the fridge for up to 2 weeks.
Please note that I am not a medical or nutritional professional. I am simply recounting and sharing my own experiences on this blog. Nothing I express here should be taken as medical advice and you should consult with your doctor before starting any diet or exercise program. I provide nutritional information for my recipes simply as a courtesy to my readers. It is calculated using MacGourmet software and I remove erythritol from the final carb count and net carb count, as it does not affect my own blood glucose levels. I do my best to be as accurate as possible but you should independently calculate nutritional information on your own before relying on them. I expressly disclaim any and all liability of any kind with respect to any act or omission wholly or in part in reliance on anything contained in this website.
Free Bonus: Secrets to Keto Baking!
Sign up for your favorite recipes delivered straight to your inbox plus get our FREE bonus: Secrets to Keto Baking!
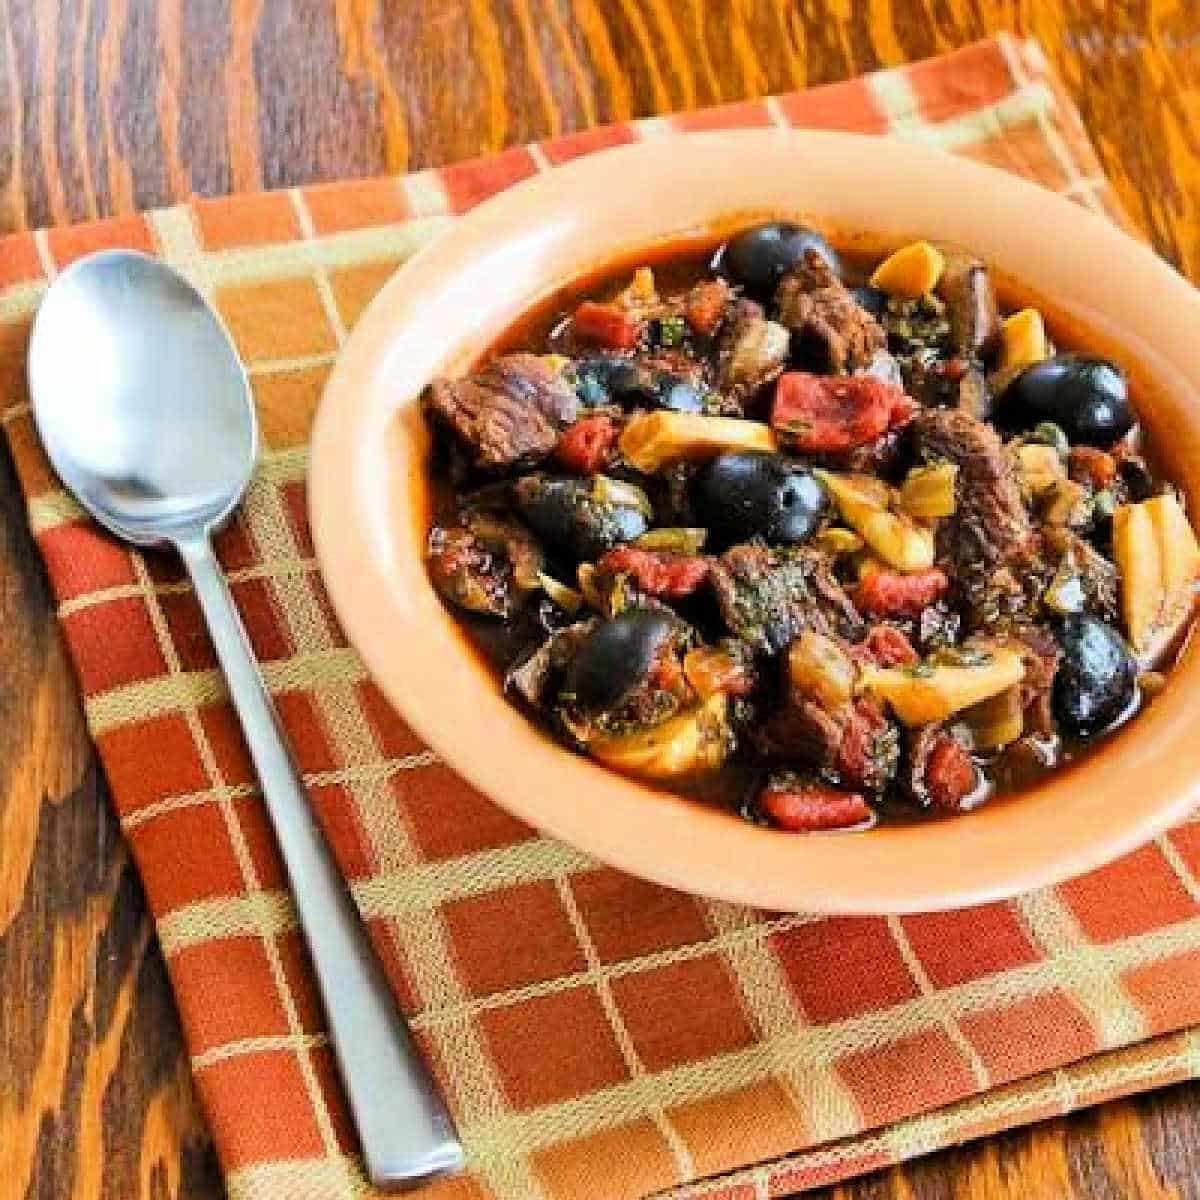
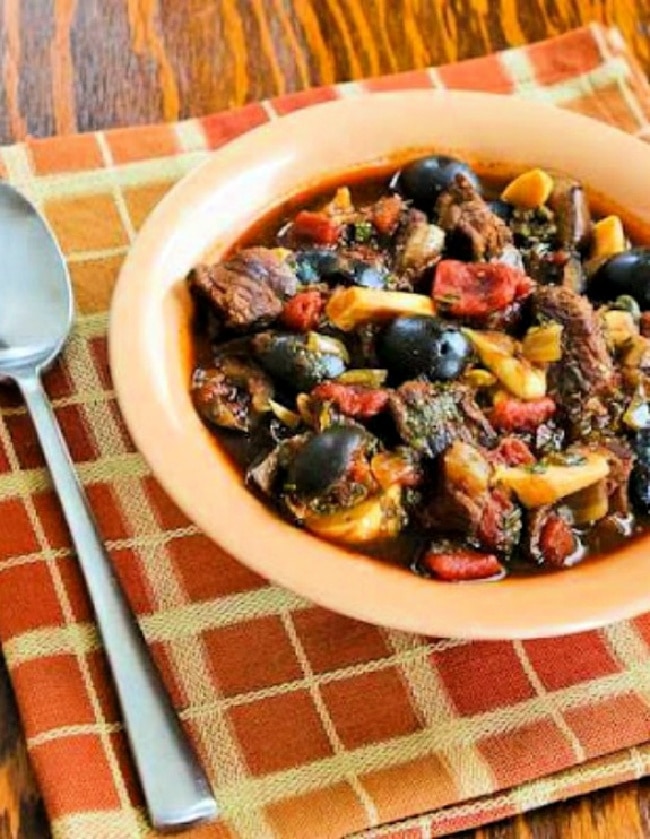
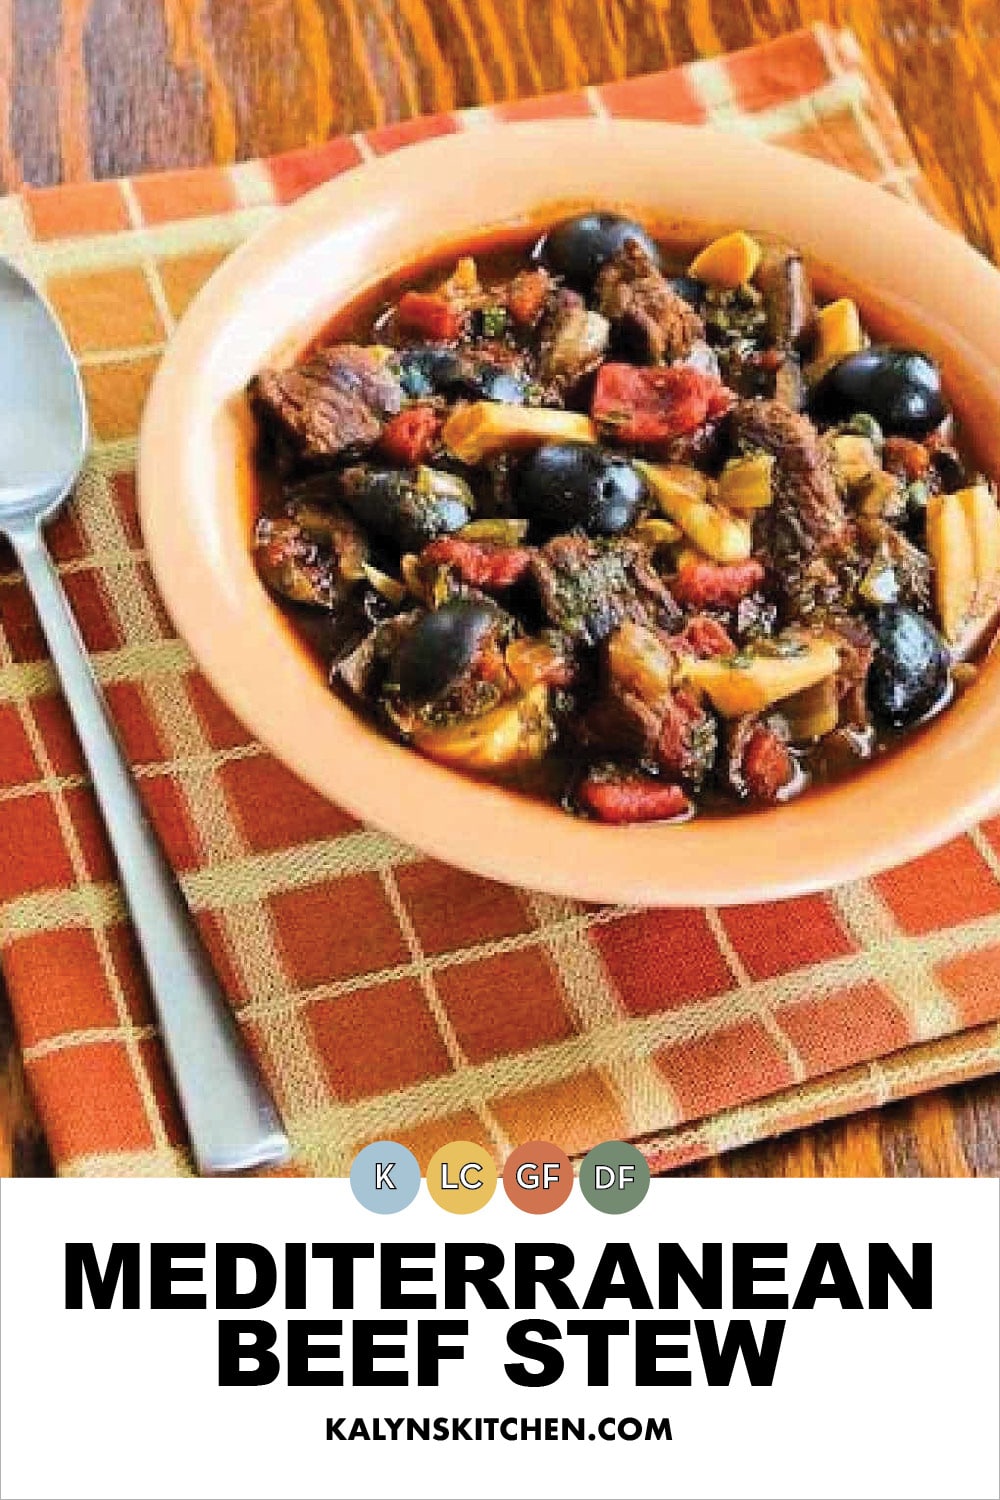
Mediterranean Beef Stew will be a hit with everyone who loves rosemary, olives, and capers; make it in the slow cooker or on the stove. This stew is loaded with flavor and low in carbs; see tips for making it even lower in carbs if you prefer!
PIN Mediterranean Beef Stew to try it later!
Next time you’re feeling like a slow cooker dinner that can cook all day while you do something else, why not make this slow Mediterranean Beef Stew with lots of interesting Mediterranean flavors? You can start this mid morning and by dinner time it will be ready to go, and this is great for a low-carb meal.
If you’ll be gone all day, just do the advance prep the night before, refrigerate the ingredients in a plastic container, and put the cold ingredients in the slow cooker and let it cook all day while you’re out.
I’d love this with a dollop of sour cream on top, but no matter how you eat it, this stew is loaded with mediterranean flavors from rosemary, olives, and capers. And there are also stove-top instructions if you don’t have a slow cooker!
What ingredients do you need for this recipe?
(This is only a list of ingredients; please scroll down for complete printable recipe. Or if you use the JUMP TO RECIPE link at the top of the page, it will take you directly to the complete recipe.)
olive oil
mushrooms
onion
chuck steak or roast
beef stock or canned beef broth (affiliate link)
canned diced tomatoes with juice
tomato sauce
balsamic vinegar, I use Colavita Aged Balsamic Vinegar (affiliate link)
black olives
garlic cloves,
fresh rosemary or use ground rosemary (affiliate link)
fresh parsley
Capers (affiliate link)
fresh ground black pepper and salt to taste
Do you have to pre-brown brown the beef?
I realize, (and some people remind me occasionally!) that some of you don’t like having to brown the meat or pre-cook other ingredients before you put them in the slow cooker. I recommend doing that because I think browning the meat or onions adds so much flavor to slow cooker dishes, and cooking mushrooms removes the extra liquid that doesn’t get cooked off in the slow cooker. But I don’t take it personally if you ignore my instructions, and I think this will still be pretty good even if you just dump the ingredients in the slow cooker and turn it to low.
Want a version of Mediterranean Beef Stew that’s even lower in carbs?
This recipe is quite low in carbs, but if you want to make a version that’s even lower in carbs (or don’t have balsamic vinegar), use less tomato sauce and use 2 tablespoons red wine vinegar plus a little sweetener to replace the balsamic vinegar.
What size show cooker did I use?
I used a Crock-Pot 3.5 Quart Slow Cooker (affiliate link) for this recipe, but any similar size will work. If you’re a slow cooker fan you can find lots more Slow Cooker / Instant Pot Recipes on my other site!
More Beef in the Slow Cooker:
If you’re a slow cooker fan, check out 20 Keto Slow Cooker Recipes with Beef to find more tasty beef recipes like this one. Or you can use Low-Carb and Keto Stew Recipes to find more tasty stews.
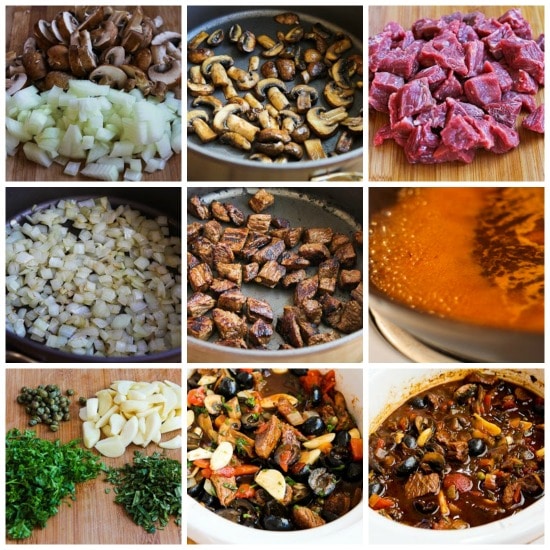
How to make Slow Cooker Mediterranean Beef Stew:
(This is only a summary of the steps for the recipe; please scroll down for complete printable recipe. Or if you use the JUMP TO RECIPE link at the top of the page, it will take you directly to the complete recipe.)
Slice 8 oz. mushrooms and chop up one small onion.
Heat a small amount of olive oil and cook the mushrooms. When they’re brown and the pan is dry, add them to the slow cooker.
While the mushrooms cook trim the chuck steak into bite-sized pieces. (I trim away the fatty parts, and save all those fatty pieces to make homemade beef stock.)
After you remove the mushrooms, add a little more oil and lightly brown the chopped onions; then add them to the slow cooker.
Then add a little more oil, add the pieces of beef and cook until they are well browned on all sides. Add the browned beef to the slow cooker.
De-glaze pan with one cup of homemade beef stock or beef broth, cook until slightly reduced, then add to the slow cooker.
While the beef browns slice the garlic pieces and olives, measure the capers, and chop the rosemary and parsley. Add the can of diced tomatoes, tomato sauce, balsamic vinegar, olives, garlic slices, chopped rosemary, chopped parsley, and capers.
Cook for 6-8 hours on low (or slightly longer if you prep the night before and started with ingredients that were cold.) This can also be cooked on high for 3-4 hours, but I prefer longer cooking on low for beef.
The last photo shows how the stew looked when it had cooked all day and was ready to eat. Season with fresh ground black pepper (and a little salt if desired), and eat!
More Slow Cooker Recipes with Beef:
Weekend Food Prep:
This recipe has been added to a new category called Weekend Food Prep to help you find recipes you can prep or cook on the weekend and eat during the week!
Ingredients
1-2 T olive oil (depends on your pan)
8 oz. sliced mushrooms
1 small onion, diced in 1/2 inch pieces
2 lbs. trimmed and diced chuck steak or roast, cut in bite-sized pieces (see notes)
1 cup beef stock or canned beef broth (see notes)
one 14.5 oz. can diced tomatoes with juice
1/2 cup tomato sauce (see notes)
1/4 cup balsamic vinegar (see notes for lower-carb alternative)
1 can black olives, cut in half or fourths
20 cloves garlic, cut in thin slices (optional, but good)
2 T finely chopped fresh rosemary (see notes)
2 T finely chopped fresh parsley (see notes)
1 T capers (or more)
fresh ground black pepper and salt to taste
Instructions
Slow Cooker Instructions:
Heat small amount of olive oil in heavy frying pan over medium-high heat, add mushrooms and cook several minutes, until starting to brown. Add mushrooms to slow cooker.
Add a little more oil, then cook diced onions about 5 minutes, or until starting to brown. Add onions to slow cooker.
Add a little more oil again, then add diced beef and brown well, about 10-15 minutes. Don’t rush the browning step. Add beef to the slow cooker.
Add 1 cup beef stock to the pan and simmer a few minutes until slightly reduced, scraping off all browned bits, then add that stock to the slow cooker.
Add diced tomatoes and juice, tomato sauce, balsamic vinegar, olives, garlic, rosemary, parsley, capers, and a little black pepper. Stir gently to combine, then put lid on Crockpot and cook 6-8 hours on low. (You could cook this 3-4 hours on high, but for a recipe with large pieces of garlic like this I prefer the low setting.)
Season to taste with salt and more fresh ground black pepper and serve hot.
If you do all the advance preparation the night before and put the combined ingredient in the refrigerator overnight, this could cook as long as 10 hours in the Crockpot while you’re at work. Manufacturers don’t recommend putting crockery liner with prepared ingredients in the refrigerator; store in another container so contents stay cold, then put in Crockpot in the morning.
Stovetop Instructions:
Follow all the preparation steps as outlined, putting ingredients in heavy dutch oven type pan. Add one cup additional beef stock. Simmer on very low heat about 2 hours.
Notes
I used about 3 cups meat, for stove-top cooking I might use a more tender cut of meat. Use 2 cups beef stock for stovetop cooking.
If you don’t have fresh rosemary, use 2 tsp ground rosemary. If you only have cracked rosemary, I would grind the rosemary in a mortar and pestle or spice grinder or pound with a meat mallet. If you don’t have fresh parsley, use 1 T dried parsley.
If you want to make a version of this recipe that’s even lower in carbs, skip the tomato sauce and use 2 tablespoons red wine vinegar plus a little sweetener to replace the balsamic vinegar.
Nutrition information is automatically calculated by the Recipe Plug-In I am using. I am not a nutritionist and cannot guarantee 100% accuracy, since many variables affect those calculations.
Did you make this recipe?
Did you make this recipe? Please leave a star rating (under the PRINT button in the recipe) or share a photo of your results on Instagram! THANKS!
Low-Carb Diet / Low-Glycemic Diet / South Beach Diet Suggestions: This Mediterranean Beef Stew with rosemary, olives, and capers would be suitable for low-carb diets, including Keto if you followed the ideas in this post for slightly reducing the carbs. If you use lean beef it would work for any phase of the original South Beach Diet.
Find More Recipes Like This One: Use Slow Cooker Recipes to find more recipes like this one. Use the Diet Type Index to find recipes suitable for a specific eating plan. You might also like to follow Kalyn’s Kitchen on Pinterest, on Facebook, on Instagram, on TikTok, or on YouTube to see all the good recipes I’m sharing there.
Historical Notes for this Recipe: This recipe was posted in 2007, and I’ve made it quite a few times since then! The recipe was last updated with more information in 2023.
We are a participant in the Amazon Services LLC Associates Program, an affiliate advertising program designed to provide a means for us to earn fees by linking to Amazon.com and affiliated sites. As an Amazon Associate, I earn from qualifying purchases.
This website may contain affiliate links and advertising so that we can provide recipes to you. Read my disclosure policy.
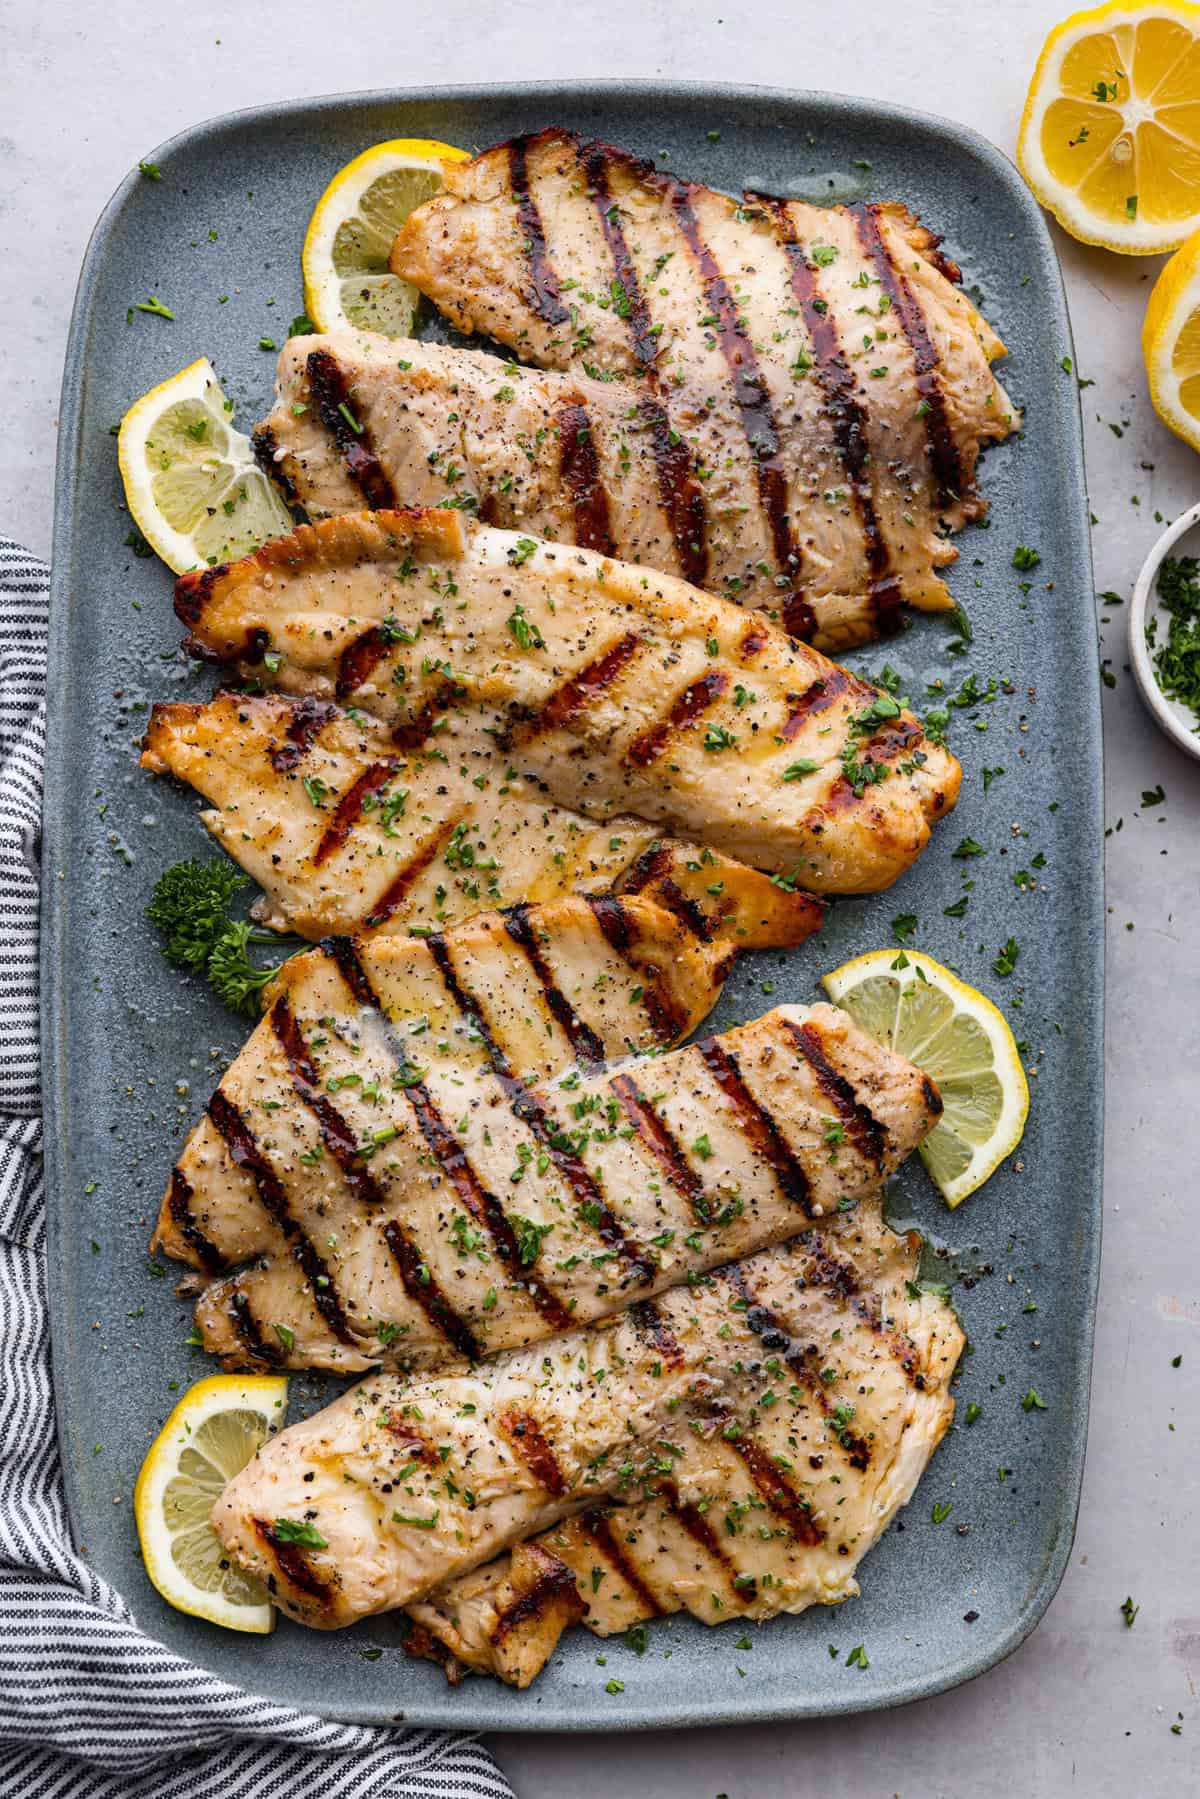
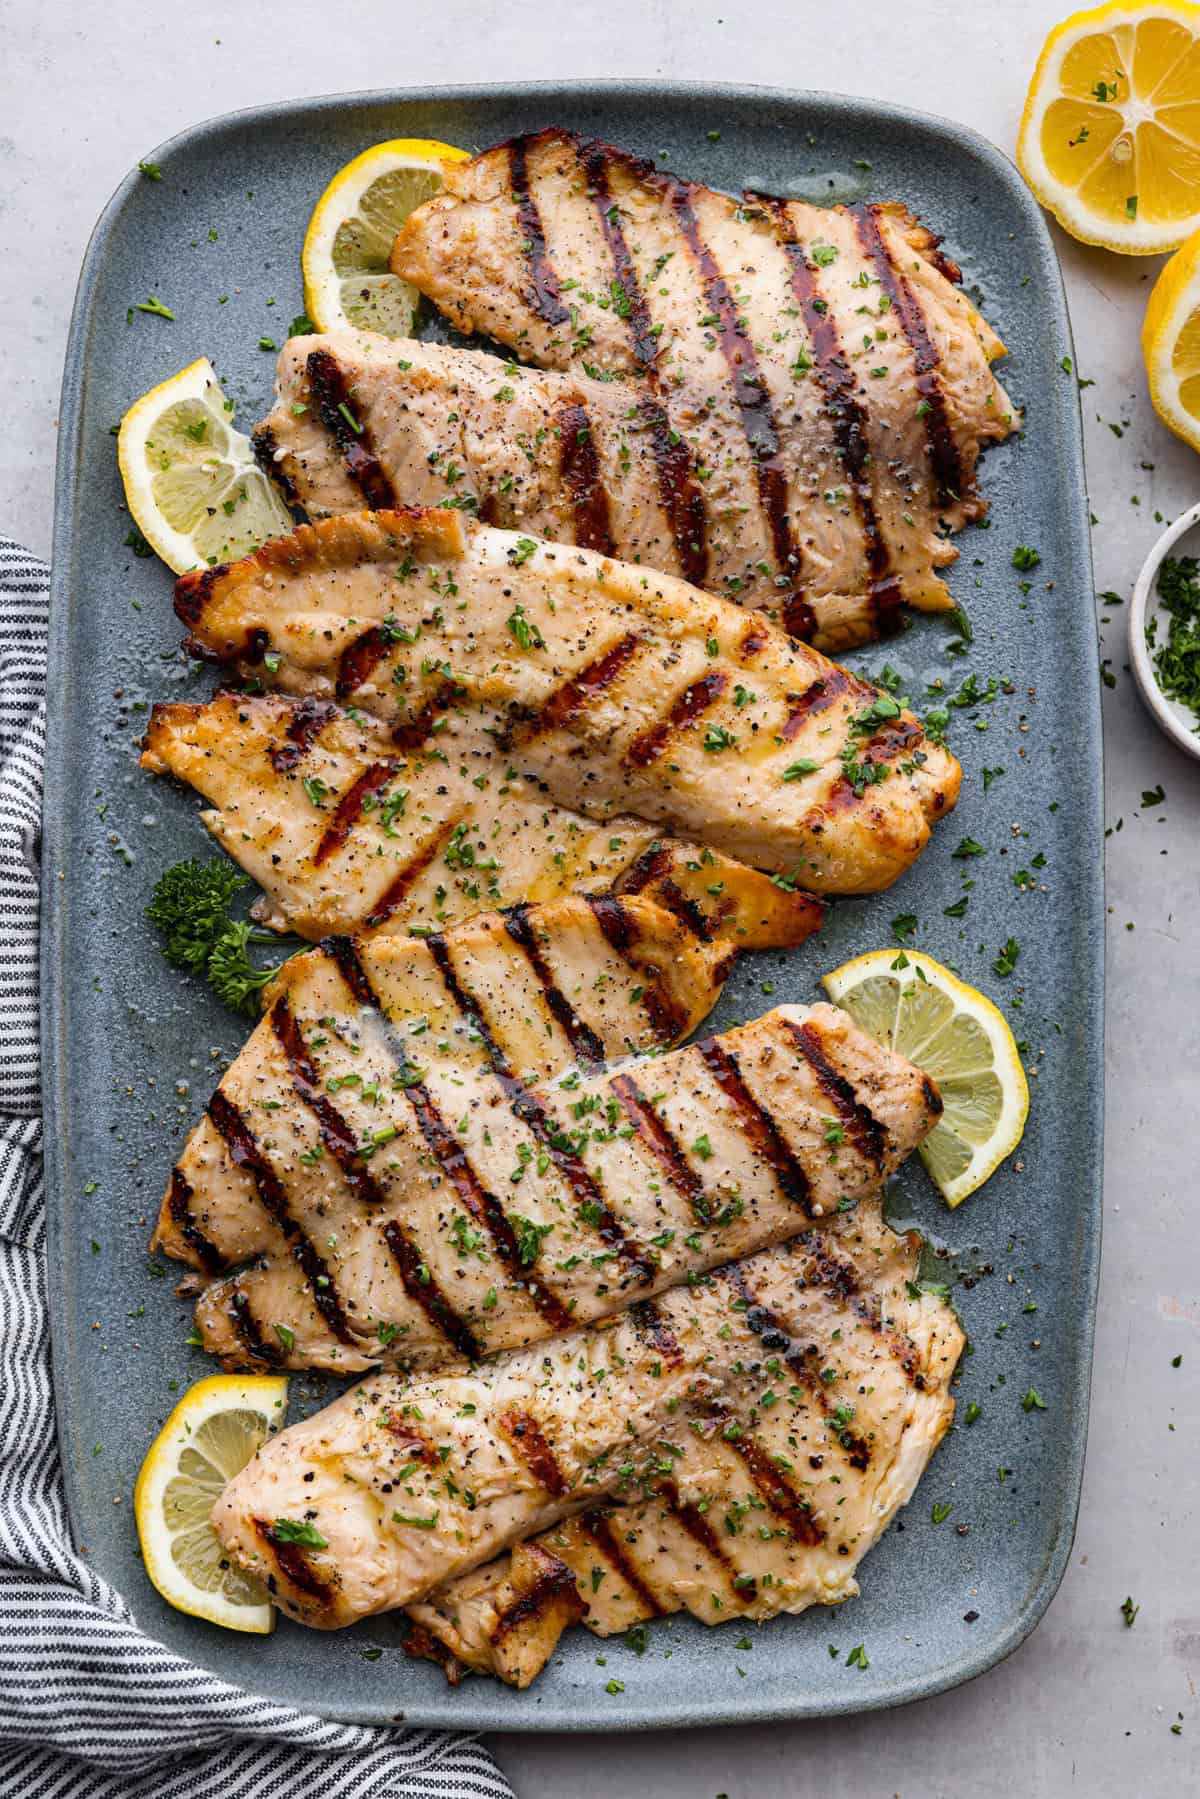
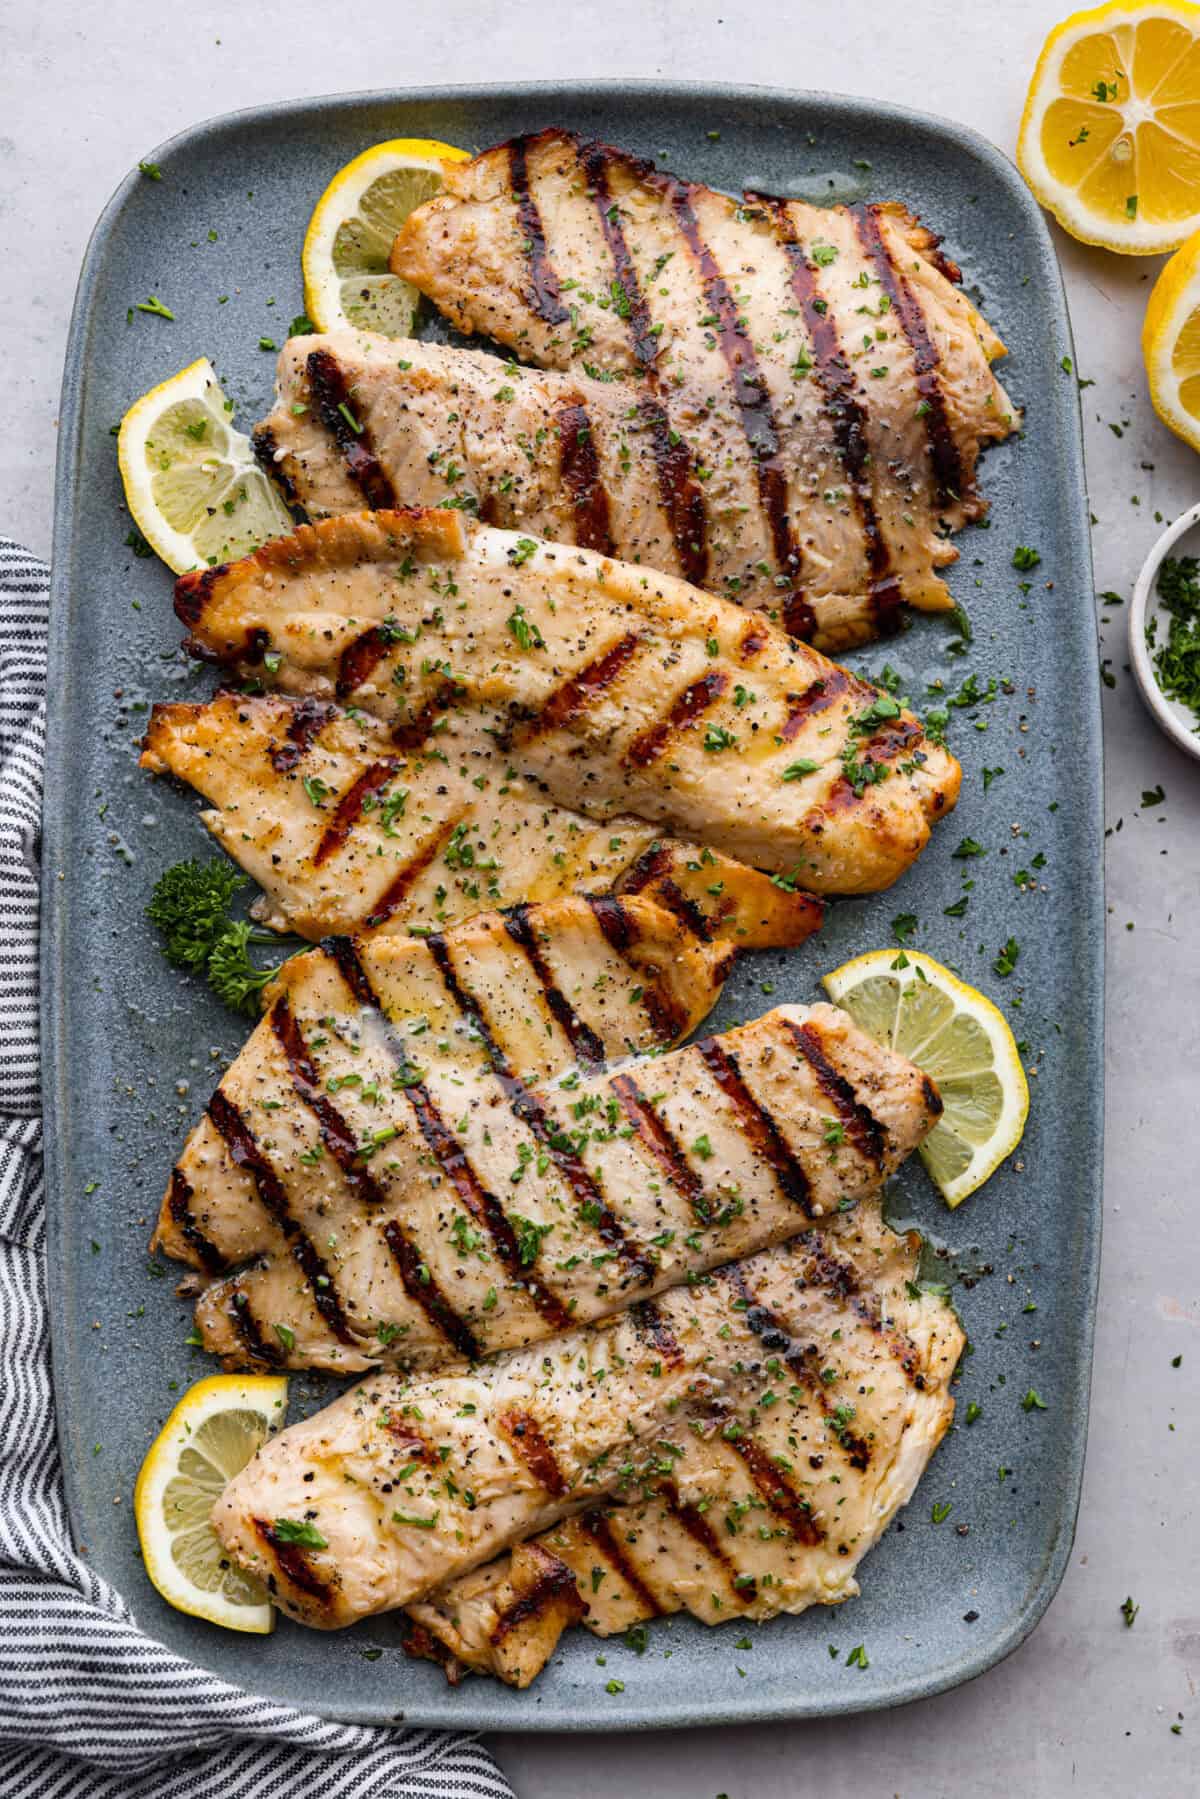
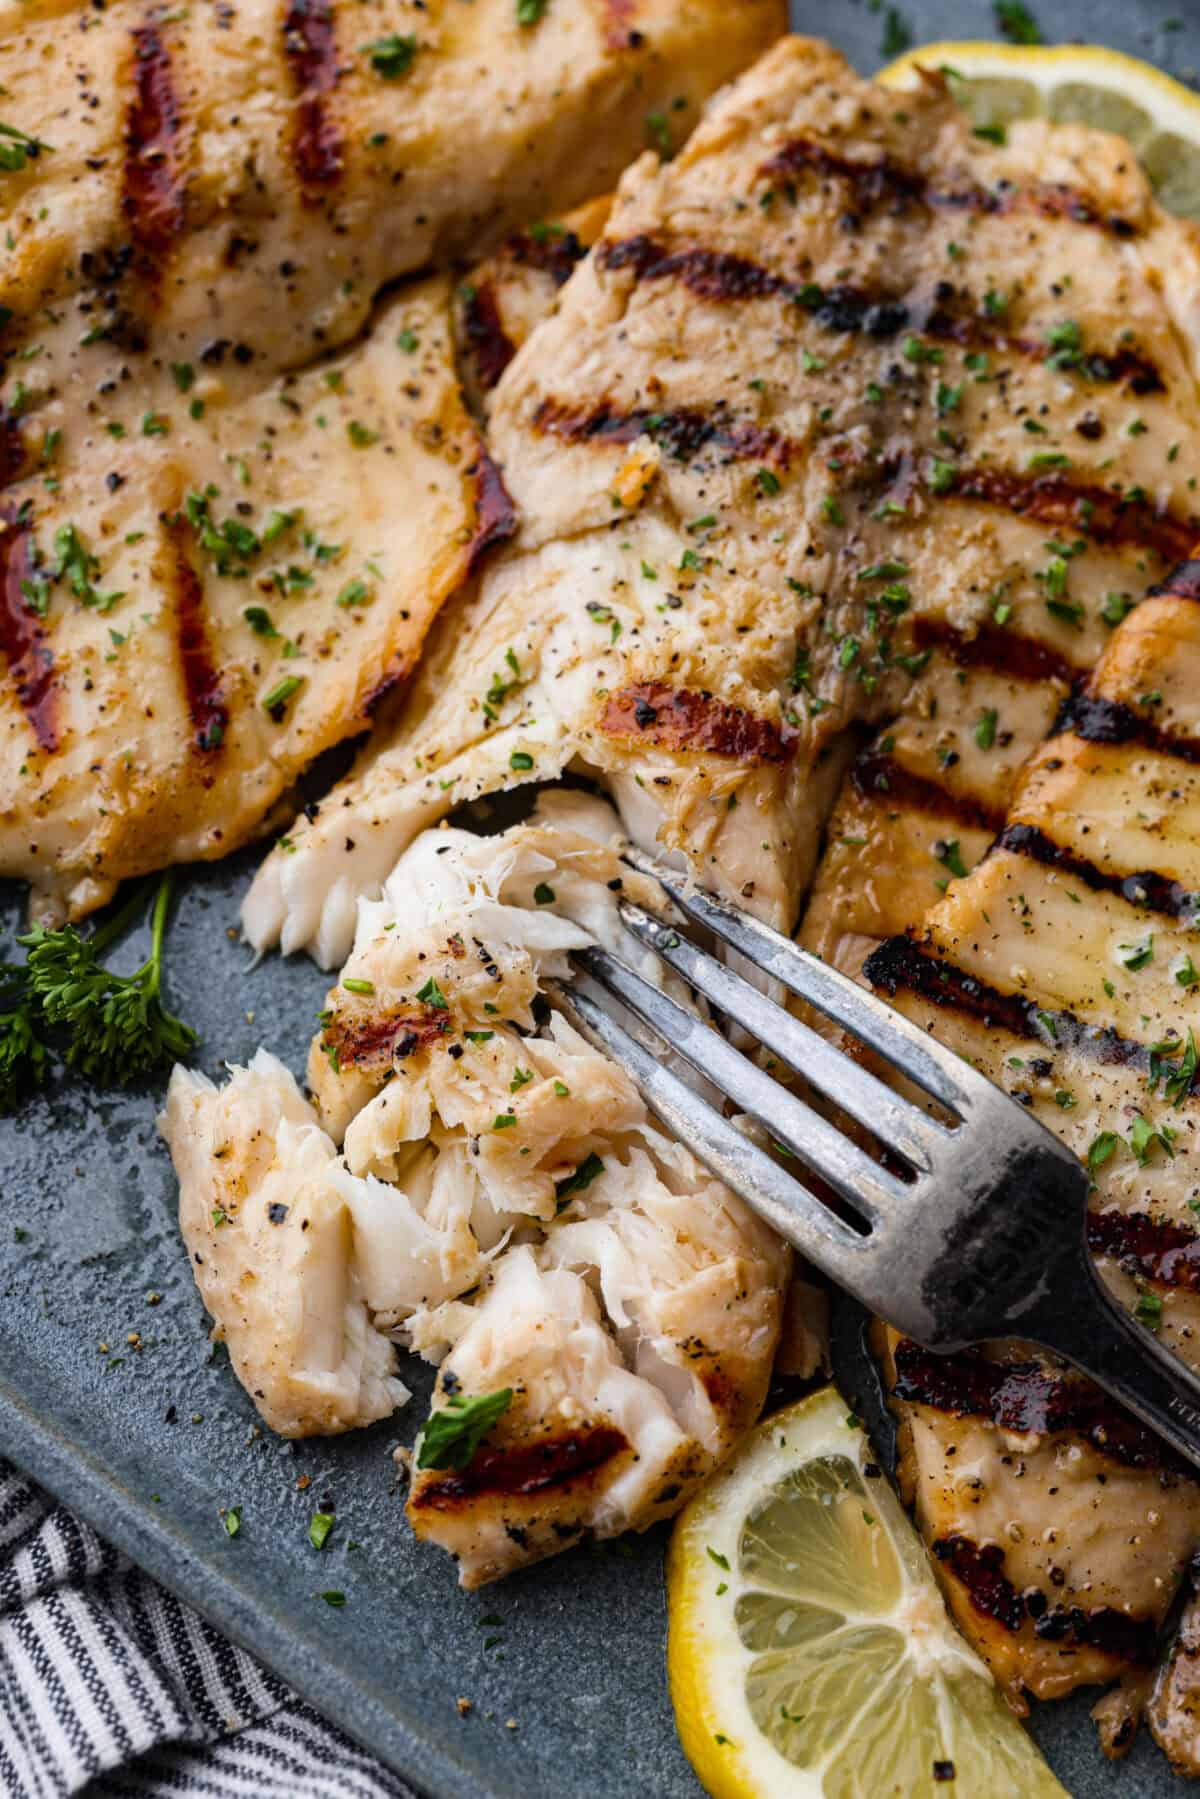
Fire up the grill! This grilled tilapia is deliciously seasoned and has the best flaky texture. Mix a few simple ingredients for the marinade, give it a little time to get super tasty and then it is grilled to perfection in a matter of minutes!
Grilling recipes are some of the best! They are easy, quick to prepare and have the best smoky flavor. I love to pair this grilled tilapia with grilled sides like grilled zucchini, grilled Mexican street corn and this fresh grilled caesar salad!
Reasons You Will Love This Recipe
Quick and Simple: Making grilled tilapia is so easy and can be ready to serve in just over 30 minutes including marinating time.
Light and Filling: Fish is a great source of lean protein and includes essential healthy fats.
Versatile: This is the perfect dinner that pairs with EVERYTHING!
Filled with Bright Flavors: Fresh lemon and garlic create the best flavors combined with the smokiness of grilling. You will love the taste and texture of this fish!
What You Need to Make Grilled Tilapia
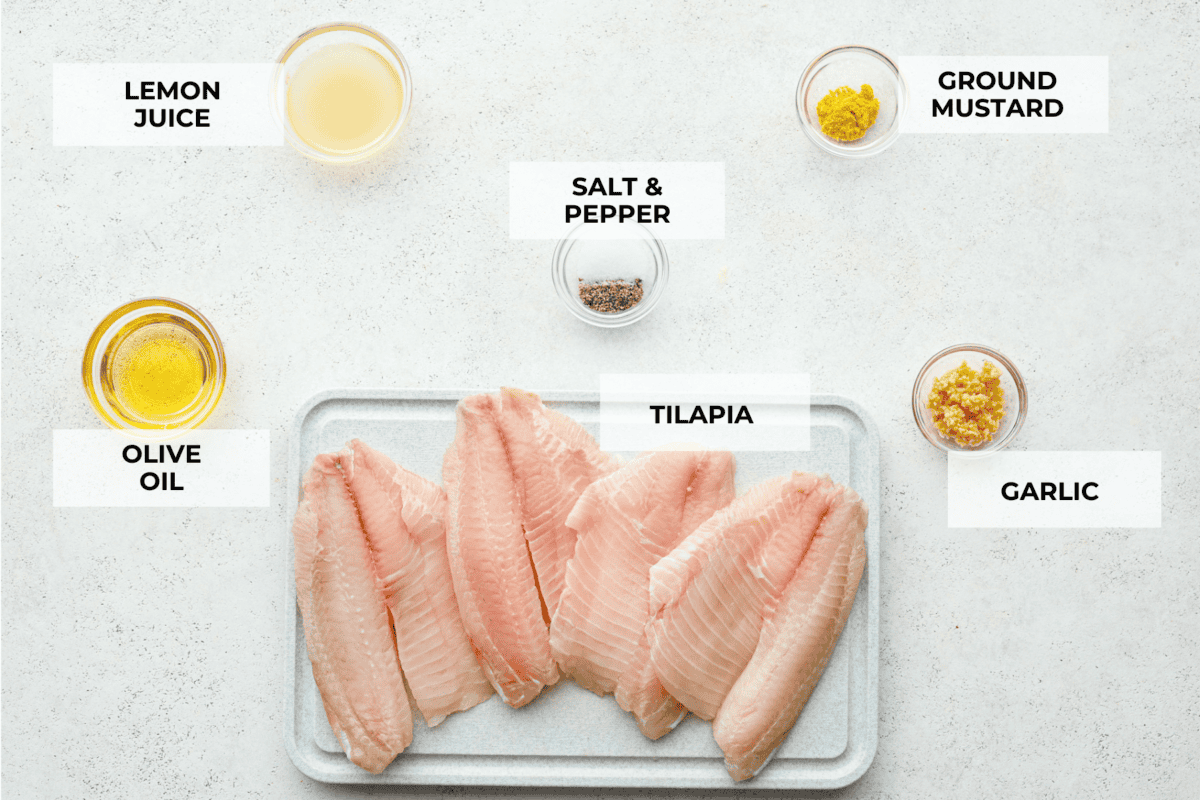
You’ll only need a handful of simple ingredients to make this super tasty grilled tilapia! They come together for tender tilapia that will rival even the best seafood restaurant! The complete list of ingredients and measurements are listed in the recipe card at the bottom of the post.
Fresh Lemon Juice: Lemon adds fresh flavor to almost any grilled fish.
Olive Oil: Provides the marinade with a bit of fat and also is used for cooking the filets on the grill.
Garlic: Minced fresh garlic adds a delicious savory taste.
Seasoning: A simple blend of fresh ground black pepper, salt and mustard powder brings out all of the flavor in the fish.
Tilapia Filets: This recipe calls for 4 tilapia filets to feed 4 people.
How to Make Grilled Tilapia
Tilapia is one of the easiest proteins to grill! Marinate the fish for about 30 minutes, and then grill it for less than 12 minutes. You will want to make this recipe all season long!
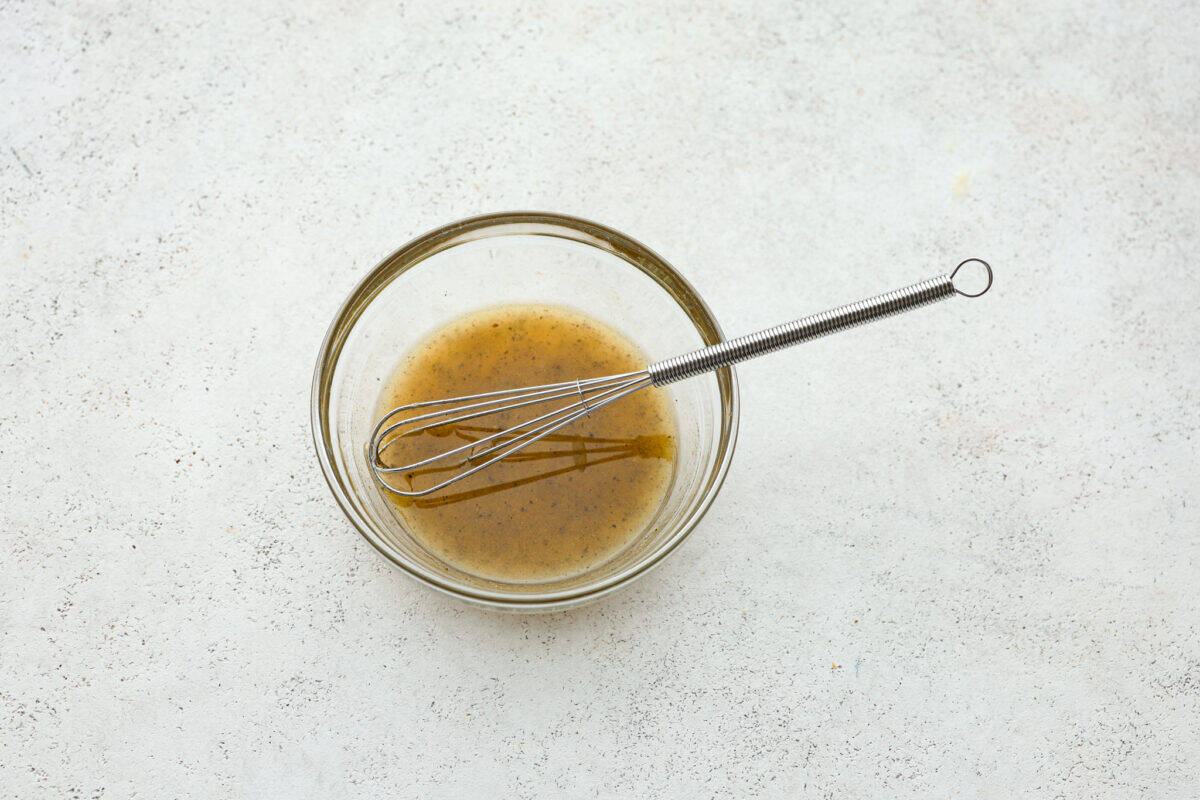
Make the Marinade: Whisk together the lemon juice, olive oil, garlic, black pepper, salt, and mustard powder to prepare the marinade.
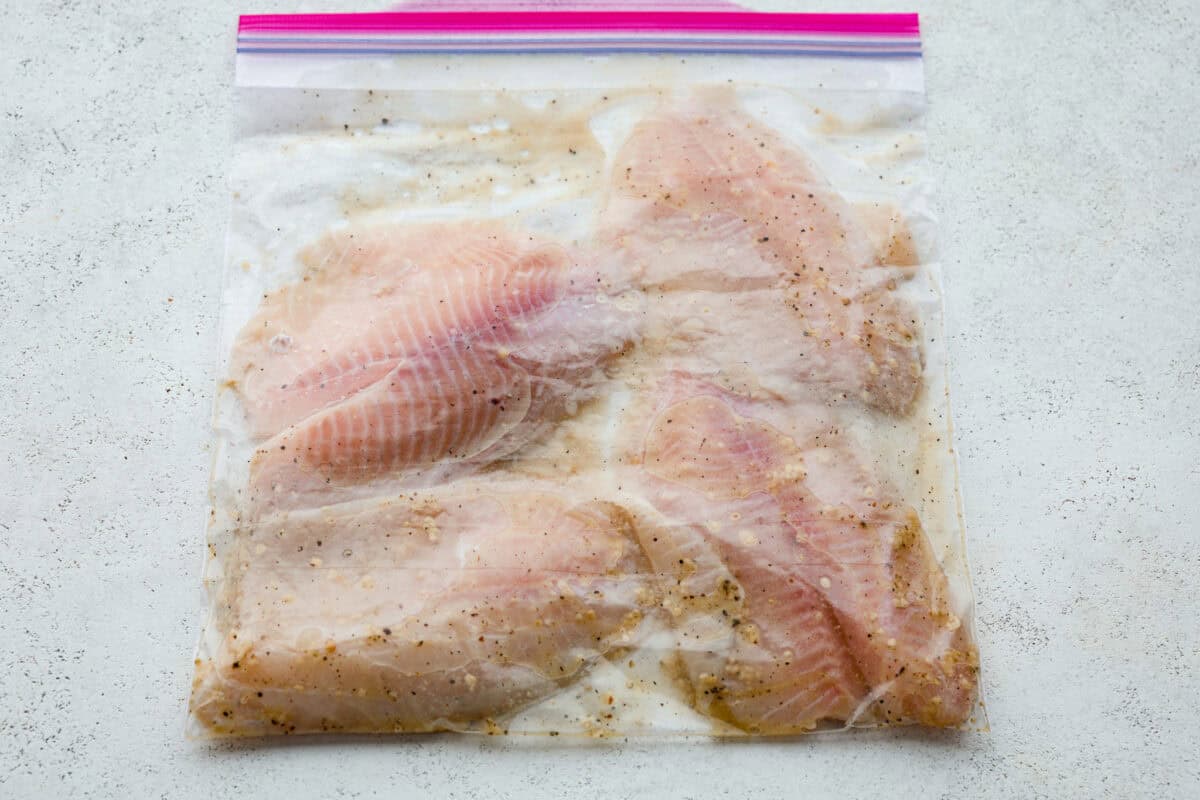
Marinate the Fish: Pour the marinade into a large sealable bag or container and place the tilapia filets into the container. Marinate the tilapia for 30 minutes to an hour. While the filets are marinating, preheat a grill to 400 degrees Fahrenheit.
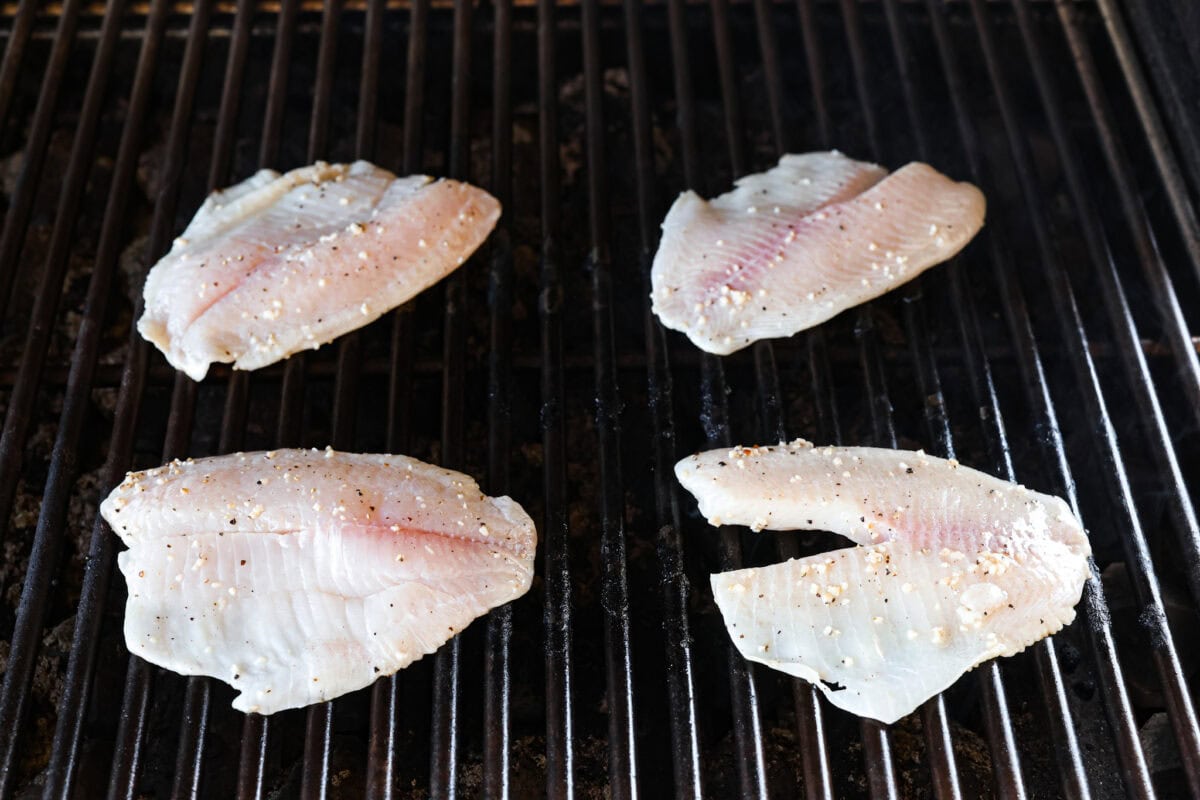
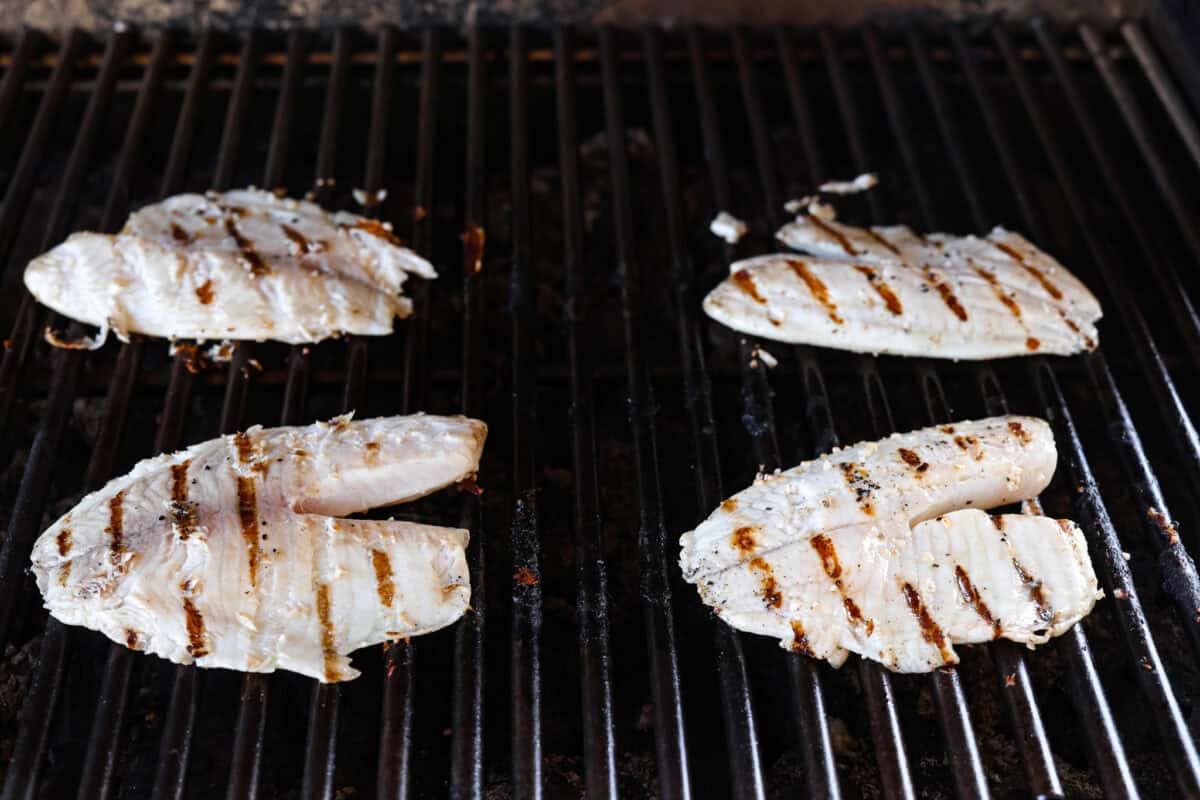
Grill: Once the tilapia filets are ready, remove them from the marinade. Brush the grill with olive oil and grill the filets for 4-6 minutes per side. The filets should easily come off the grill, if they are sticking give them another 1-2 minutes.
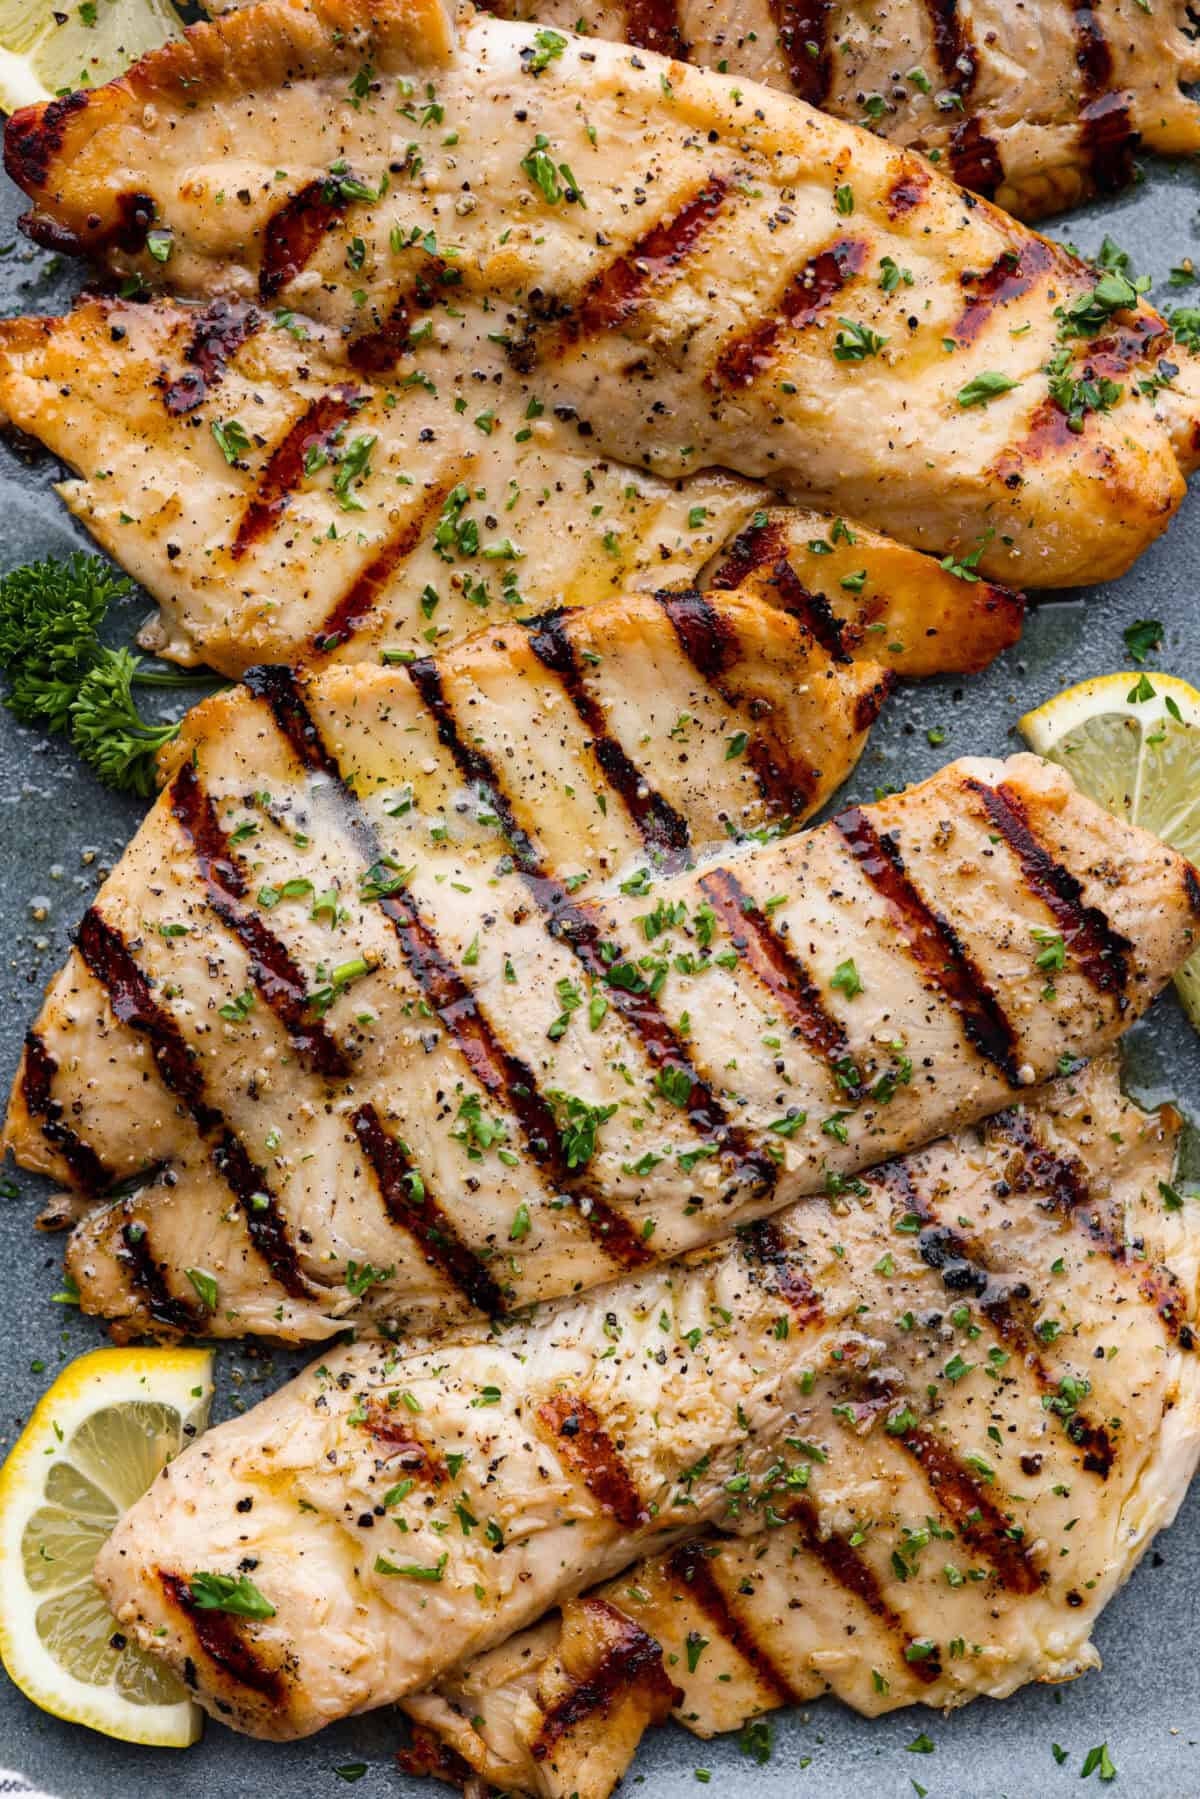
Serve: Remove the grilled tilapia from the grill and enjoy!
Whisk together the marinade.Marinate the tilapia in a Ziplock bag for 30 minutes.Grill the tilapia for 4-6 minutes.Carefully flip the tilapia and grill for 4-6 minutes on the other side.
How to Know When Tilapia is Cooked
You’ll know your fish is cooked through when it’s completely opaque. However, you definitely don’t want to overcook it, or it will become dry. Additionally, you can use a meat thermometer to check and see if it has an internal temperature of 145 degrees Fahrenheit.
Tips for Grilling Tilapia
Here are a few things to keep in mind when grilling tilapia. They are simple tips, but will ensure your fish turns out perfect!
Serving Options: This dish goes great with rice, couscous and your favorite vegetable side like grilled asparagus!
Thaw Filets: If using frozen, be sure they are thawed before you marinate. Thaw overnight in the fridge or place packaged frozen filets in cold water for about 10 minutes.
Discard the Marinade: Be sure to discard the used marinade after using.
Cook Time: The fillets I used were a little on the thicker side, so about 5 minutes was perfect. If your fillets are thinner, reduce the time.
How to Store Leftover Tilapia
Although grilled tilapia is best served right away, here’s how to store leftovers to enjoy them later!
In the Refrigerator: Once it has cooled, then place it in an airtight container or wrap it tightly in plastic wrap. Put it in your fridge, and your fish will stay good for up to 3 days.
Reheating: The quickest way to reheat your grilled tilapia is in the air fryer for a couple of minutes at 350 degrees. You can also reheat it over medium heat on the stove with a little melted butter in the pan.
More Seafood Recipes
We love to enjoy seafood dishes often because they are satisfying yet light and typically contain many nutrients. Here are some of our favorite fish recipes that we make on repeat. And if you’re looking for more, browse through our many other seafood recipes!
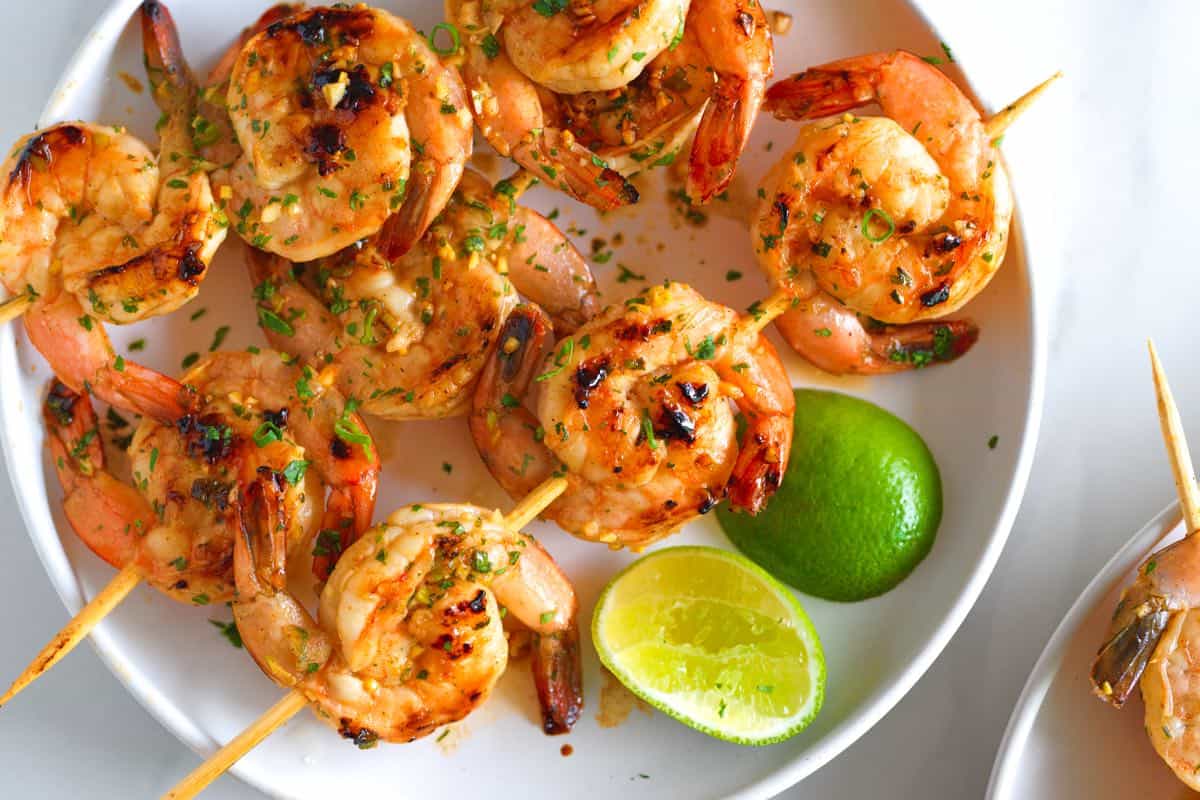
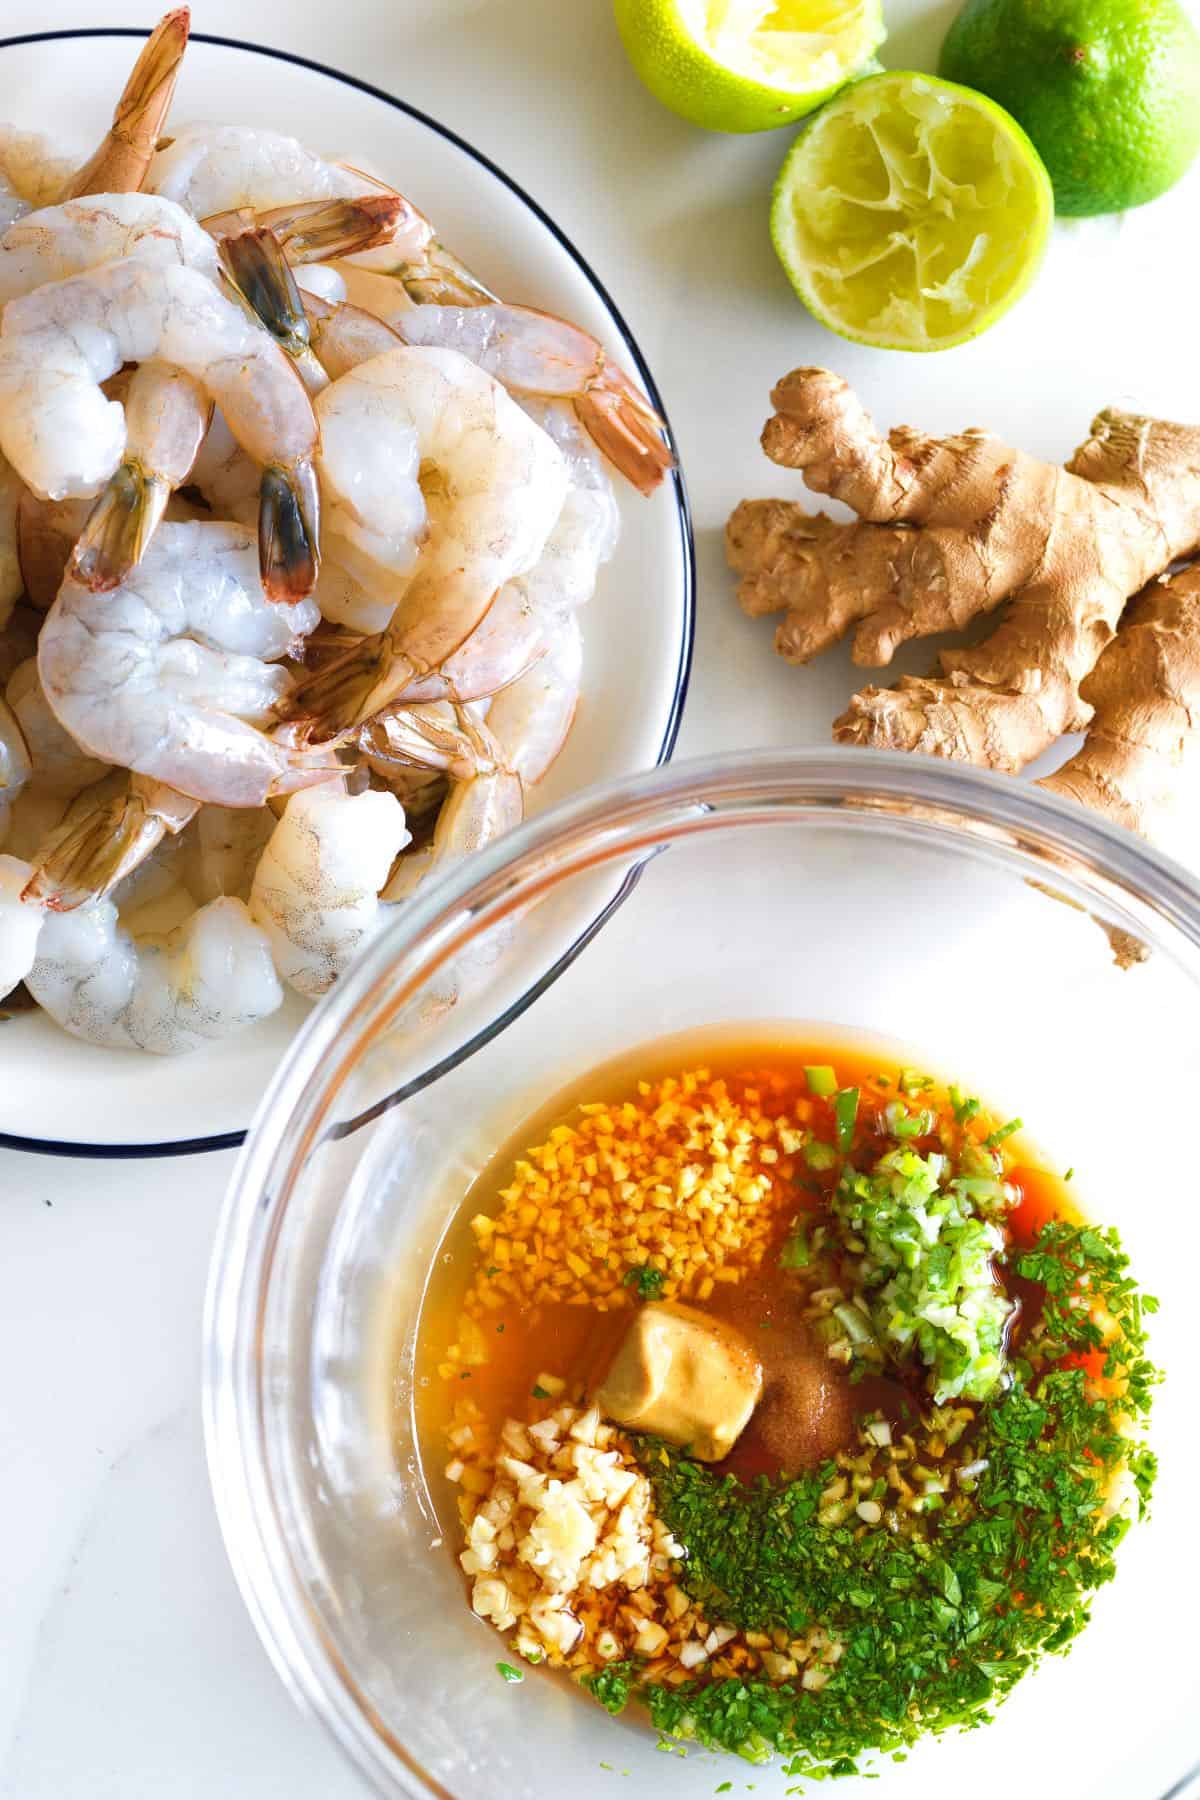
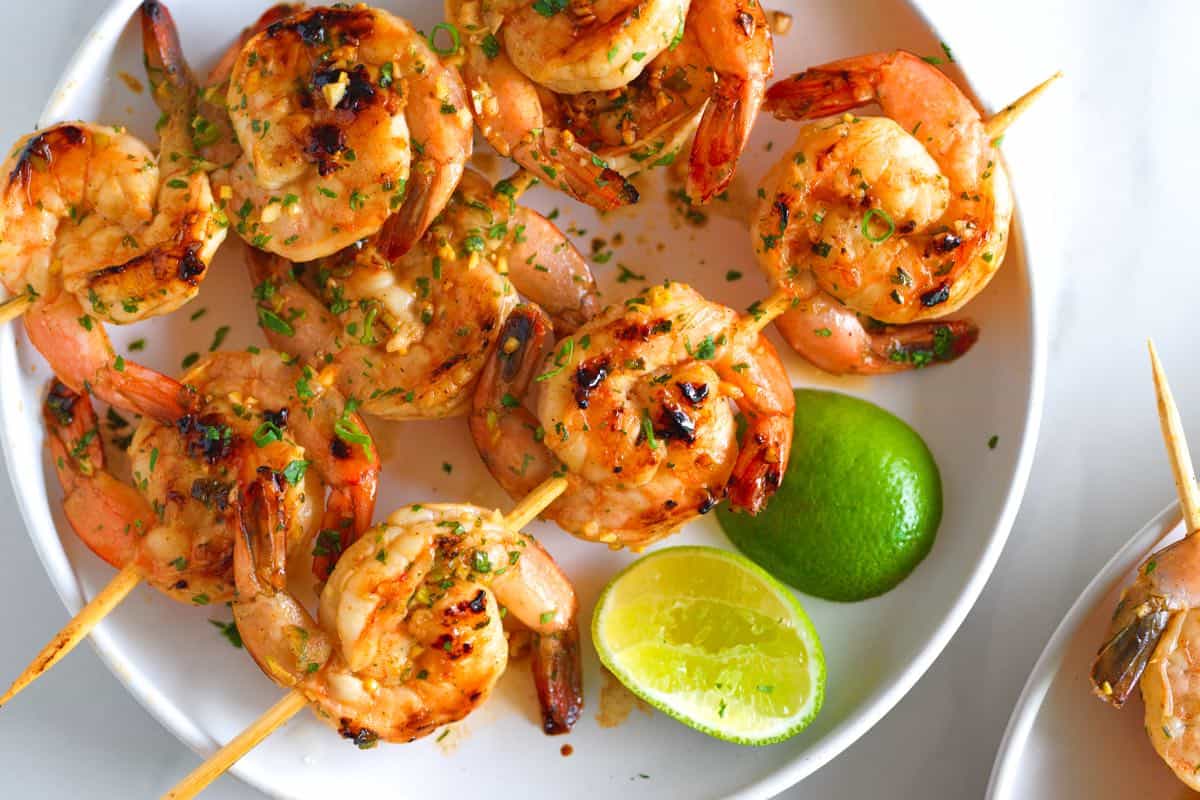
This shrimp marinade recipe is perfect for grilling or roasting! Ginger, garlic, fish sauce, sesame oil, and honey combine for a delicious, sweet, sticky glaze.
Chef Richard created this easy shrimp marinade recipe. We wanted something bright, zesty, and a bit spicy, and he delivered! It features some of my favorite ingredients: ginger, fresh lime, fish sauce, and toasty sesame oil.
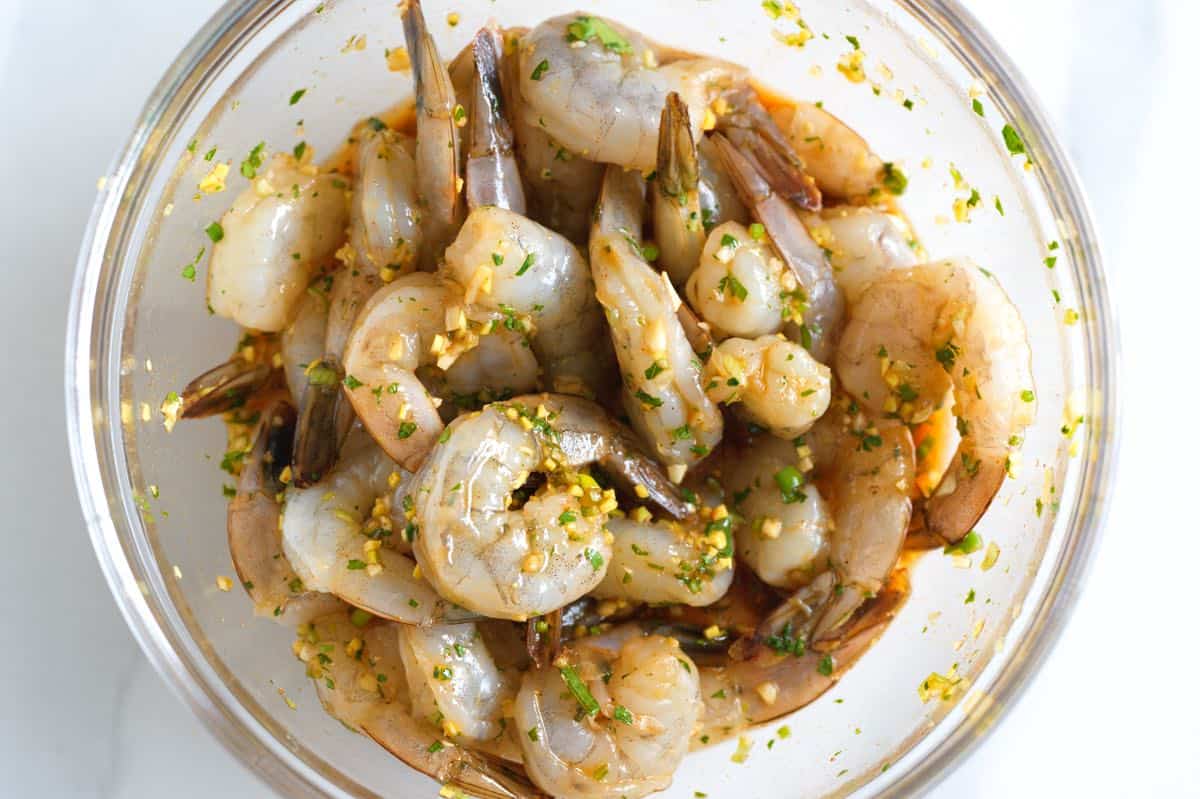
We let the shrimp marinate for 30 to 60 minutes. No longer, or the acidity will start “cooking” them. This marinade is great for shrimp, chicken, tofu, or beef. It’s quick, easy, and always makes me happy. I love serving this marinated shrimp with coconut rice or cilantro lime rice.
Key Ingredients
Shrimp: For the best results, I prefer large or jumbo shrimp. They are less likely to overcook and dry out. Look for fresh shrimp that is firm and has a slightly sweet smell. If you have frozen shrimp, thaw and drain them before marinating.
Fresh Ginger and Garlic: The ginger adds warmth and a subtle spiciness, and the garlic complements all the other Asian-inspired flavors. Fresh is best for these.
Cilantro and Green Onion: These will give you a pop of color and freshness. I like using the white and lighter green parts of the green onion for the marinade and saving the darker green tops for slicing and scattering over the cooked shrimp when serving.
Soy Sauce or Tamari: Use what you prefer. If gluten-free is a concern, I recommend using gluten-free certified tamari.
Lime: This will brighten everything up and add acidity, making everything taste better. I usually buy an extra lime and use it for serving.
Honey: After cooking, the honey turns the marinade into a slightly sticky glaze. You can substitute maple syrup.
Fish Sauce: This magical ingredient adds a savory, umami flavor to the marinade. I recommend Red Boat Fish Sauce. If it’s unavailable, look for fish sauce in glass jars, which tend to be higher quality.
Sesame Oil: The toasted sesame oil will provide a nutty richness and a wonderful aroma.
Gochujang: This Korean fermented chili paste adds mild to moderate heat. You can adjust the amount to your liking or substitute it with Sriracha. I also use it to make our homemade hoisin sauce.
Dijon Mustard: This adds a subtle tang and makes the marinade more interesting. I love Dijon mustard for marinades and also use it when making this chicken marinade and honey mustard chicken.
Find the full recipe with measurements below.
How to Make the Best Shrimp Marinade
Tip 1: Perfect for weeknights. This marinade comes together in minutes. Combine all ingredients in a bowl or zip-top bag. Then, add shrimp and let it marinate for 30 minutes to an hour. This timeframe allows the shrimp to absorb the marinade flavors without becoming tough. This is especially important if the marinade has acidic ingredients, like the lime juice in this Asian marinade.
Marinating the shrimp longer than 60 minutes will begin to “cook” the shrimp which you don’t want in this recipe.
Tip 2: Cook with high heat. We love this marinade for grilled shrimp, which we cook on an outdoor grill or on the stove using a grill pan. You can also roast the marinated shrimp at high heat in the oven, which caramelizes the honey.
More Shrimp Recipes
Sesame Ginger Shrimp Marinade
PREP
COOK
TOTAL
We love this Asian-inspired shrimp marinade recipe. Quickly marinate your shrimp, 30 to 60 minutes is perfect. Any longer, and the shrimp will begin to “cook” in the lime juice. This marinade is perfect for grilled shrimp, but you can roast them in the oven or cook them in a skillet. Below, we provide tips for all three cooking methods.
Serves 4
You Will Need
1 pound (450g) large or jumbo shrimp, peeled and deveined
1 tablespoon minced fresh ginger, ½-inch piece
1 tablespoon minced garlic, 3 cloves
1 tablespoon finely chopped fresh cilantro
1 tablespoon finely chopped green onion
1 tablespoon fresh lime juice
1 tablespoon toasted sesame oil
1 tablespoon honey
1 tablespoon soy sauce or tamari
1 tablespoon fish sauce
1 teaspoon Gochujang, see notes
1 teaspoon Dijon mustard
1/4 teaspoon fine sea salt
Directions
Marinate Shrimp
1Combine the shrimp marinade ingredients in a bowl or zip-top freezer bag. Let the shrimp marinate for 30 minutes to 1 hour.
2If using skewers, soak wooden skewers in water while the shrimp marinate so they do not burn on the grill or in the oven.
Cook Shrimp
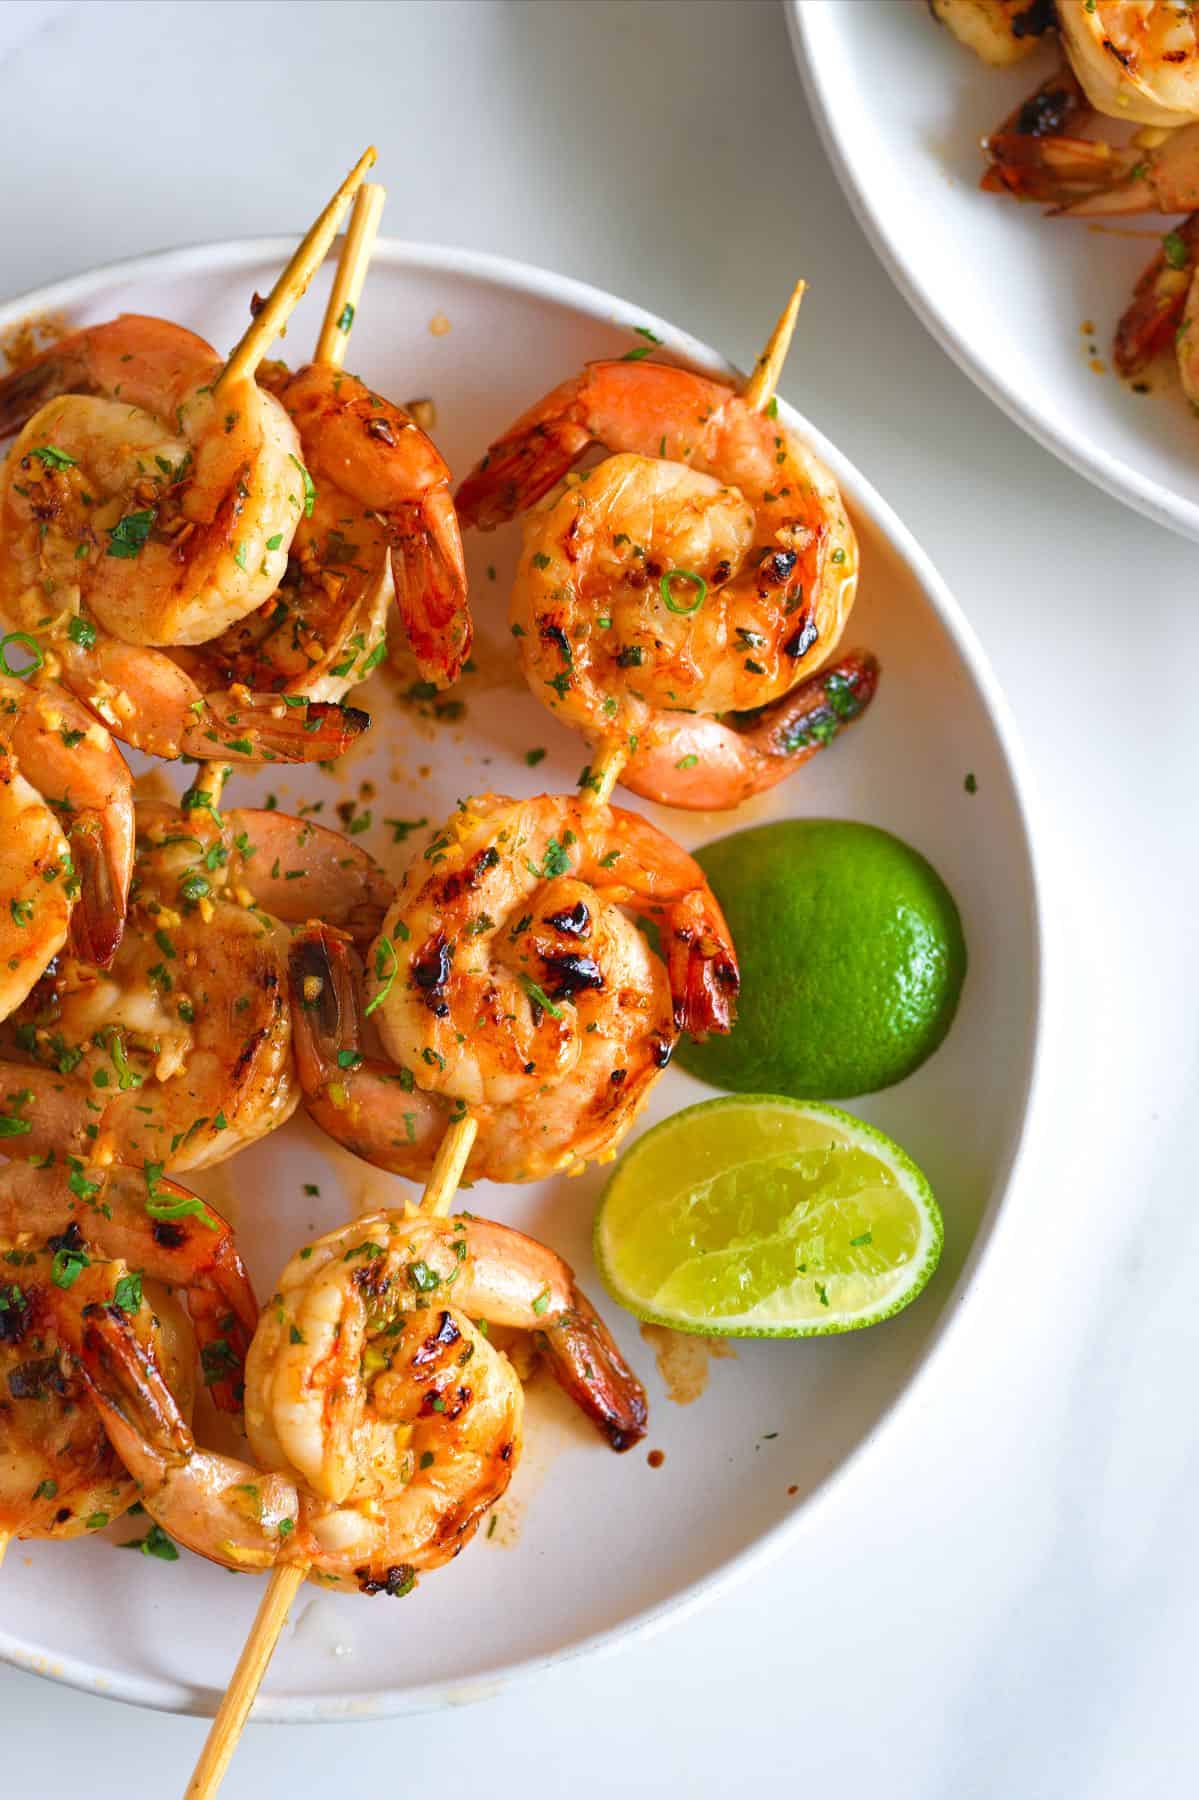
1Grill (Recommended): Preheat your grill or a grill pan to medium-high heat. Thread shrimp onto skewers in opposing directions (heads touching, tails outward) for flat skewers. See our photos for reference. Push the skewer through the head and tail of each shrimp. They will look like an interlocking circle, keeping the shrimp skewers flat.
2Grill for 2 to 3 minutes per side until opaque and cooked through.
3Roast: Preheat your oven to 400°F (200°C). Spread shrimp in a single layer on a baking sheet and roast for 5 to 7 minutes or until opaque and cooked through.
4Skillet: Heat skillet over medium heat. Cook shrimp for 5 to 7 minutes until opaque and cooked. Watch for the honey burning in the pan (keep the heat between medium and medium-high).
Adam and Joanne’s Tips
Frozen Shrimp: Thaw and drain frozen shrimp before marinating.
Gochujang: A Korean chili paste, we find Mother-in-law’s Gochujang in stores around us. It can also be found sold in Asian or Korean markets. While it does not taste the same, Sriracha is a good substitute in this marinade recipe. Or leave it out.
Best Cooking Method: This marinade works exceptionally well on an outdoor grill or in a grill pan. Roasting in the oven is our second-best method.
Gluten-free: Use GF Tamari and ensure all other ingredients (specifically the fish sauce and gochujang) are marked gluten-free.
Nutrition facts: The nutrition facts provided below are estimates. We have used the USDA database to calculate approximate values.
Nutrition Per Serving Serving Size 1/4 of the recipe / Calories 156 / Total Fat 4g / Saturated Fat 0.6g / Cholesterol 182.5mg / Sodium 799.4mg / Carbohydrate 6.7g / Dietary Fiber 0.2g / Total Sugars 5g / Protein 23.6g
AUTHOR:
Joanne Gallagher
We are Adam and Joanne Gallagher, the creators of Inspired Taste. Established in 2009, Inspired Taste grew from a childhood dream into one of the internet’s most trusted recipe sites with hundreds of reliable recipes, step-by-step videos, and expert tips.More About Us
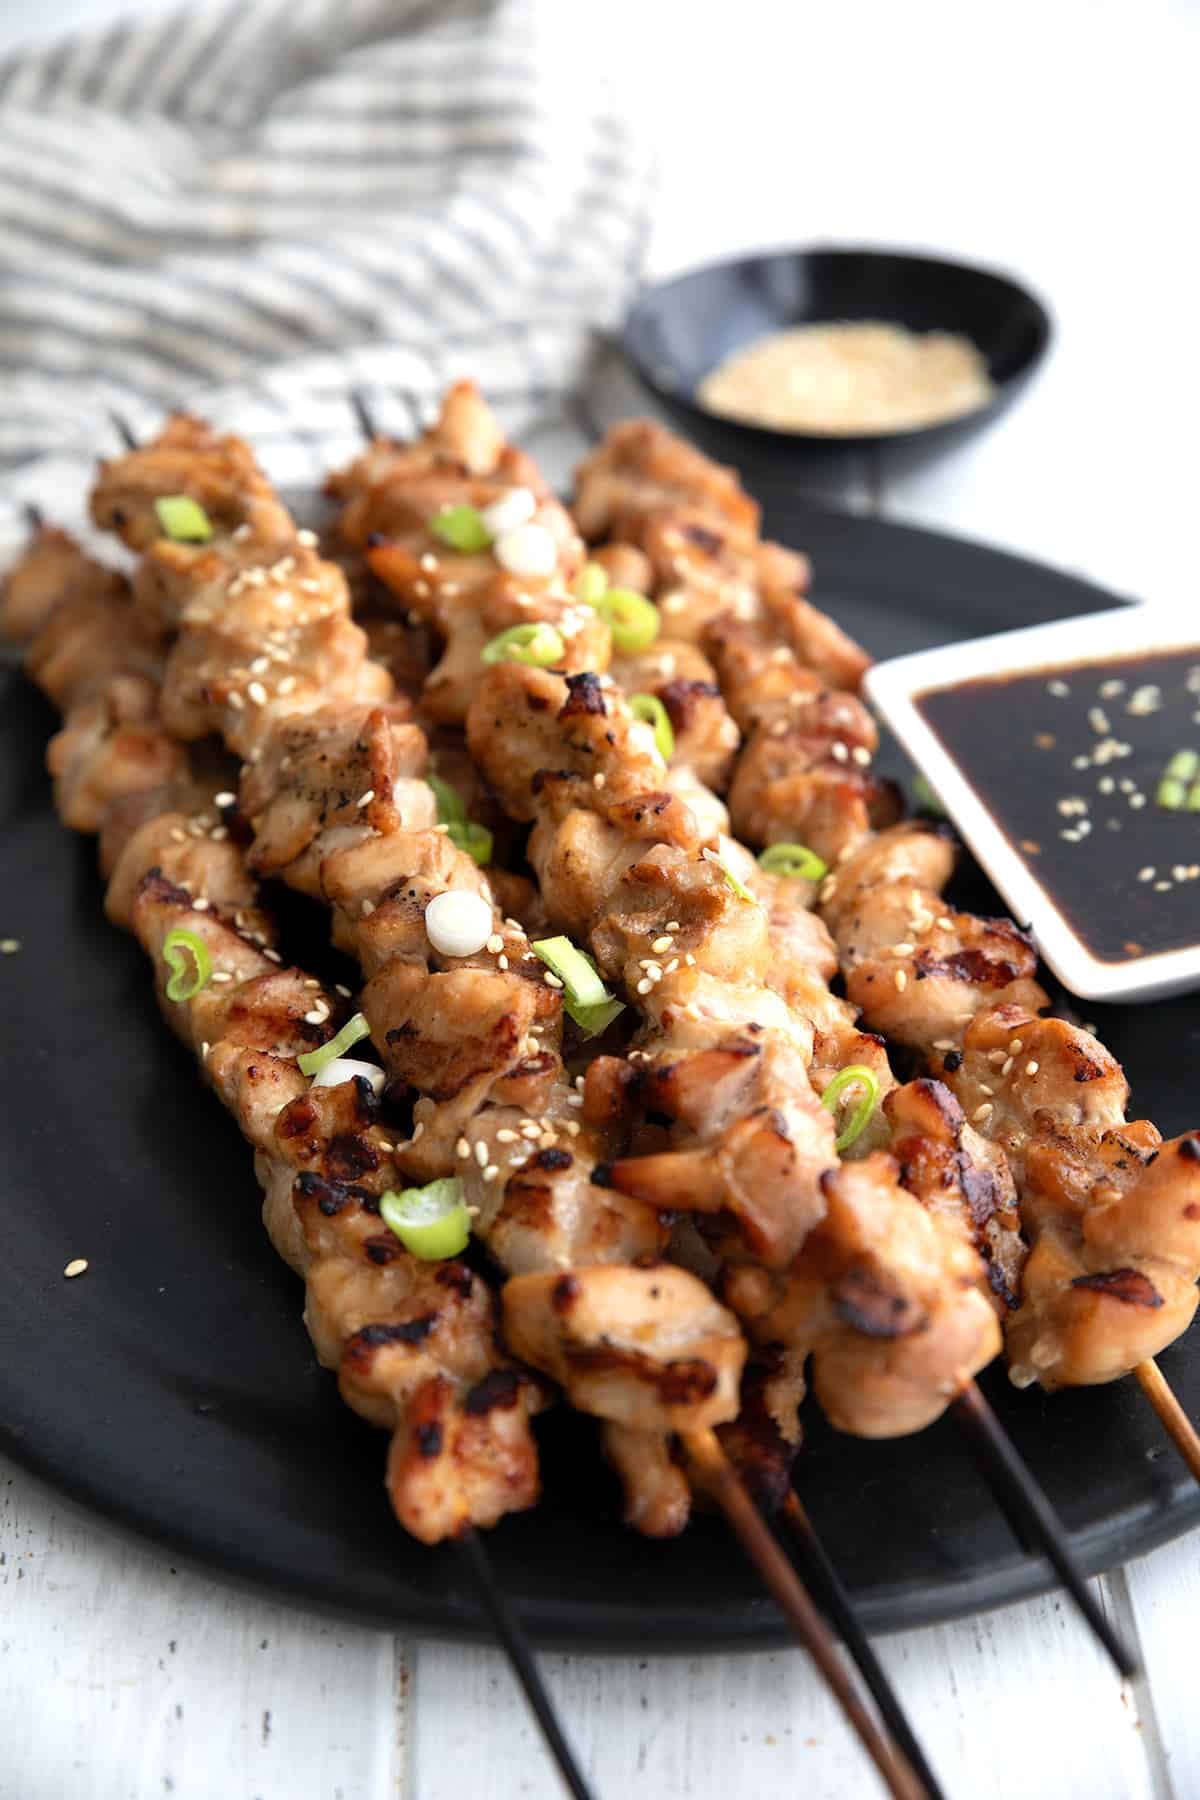
Easy Chicken Yakitori goes low carb with a delectable sugar-free glaze. These juicy grilled chicken skewers have authentic Japanese flavor for a simple keto dinner or appetizer.
When I make over a conventional recipe, I work hard to stay as true to the original as possible. And this mouthwatering chicken yakitori recipe keeps all of the luscious umami flavor while cutting out the unnecessary sugars.
Yakitori is a classic Japanese street food featuring juicy grilled chicken skewers brushed with a savory-sweet glaze. Similar to Keto Teriyaki Wings or Asian Steak Bites, it has that irresistible sticky, caramelized finish.
Eat it as an appetizer or serve with some Chili Garlic Green Beans or some Keto Sesame Noodles for a light and healthy meal!
And the best part? My whole family loves it, even my three picky teenagers. That’s a rare phenomenon, as many parents would know. They devoured the skewers hot of the grill and requested it again the very next week. It’s a huge win when I can serve something that’s low carb enough for me and gets thumbs up from the kids.
Reader’s Thoughts
“This is NOT an understatement… You are a genius and have made our keto diet manageable. Tonight we enjoyed your chicken yakitori along with the buster bar. Thank you for sharing your talents with us all!” — Karen
Why we love this recipe
Juicy and tender: These easy chicken skewers are cooked quickly over a hot grill to lock in the juices and flavors.
Easy to make: Prepare the sauce and marinate the chicken. Then three onto skewers and you’re ready to go!
Flavorful sauce: It has all the salty-sweet flavor of the original without the added sugar.
Grill or broil: It’s great for grilling season but you can also cook them in the oven.
Low carb: Swapping out the sugar for keto-friendly sweeteners means it won’t spike your blood sugar.
High protein: When served as a full meal, this chicken yakitori recipe has 35 grams of high quality protein per serving.
Ingredient Notes
Soy sauce: I know many keto and paleo proponents recommend coconut aminos but it simply doesn’t have that classic umami flavor, and I find it a weak substitute for keto Asian recipes. Additionally, it has more carbs than real soy sauce or tamari (gluten-free soy sauce).
Sweetener: I used brown sugar substitute, with a bit of allulose to make the sauce more syrupy and sticky.
Toasted sesame oil: Toasted sesame oil has more flavor. You could use another oil like avocado if you prefer.
Flavor: Fresh garlic, ginger and hot pepper flakes.
Xanthan gum: This is used to thicken the sauce. You could also try using glucomannan in the same amount.
Chicken thighs: I like using boneless chicken thighs for more succulent, juicy skewers.
Garnishes: Toasted sesame seeds and green onions.
Overview: How to Make This Recipe
Prepare the sauce: Combine the tamari, water, sweeteners, sesame oil, garlic, ginger, and hot pepper flakes and bring to a boil. Sprinkle the surface with the xanthan gum and whisk vigorously to combine. Cook until somewhat thickened then remove from heat and cool completely.
Marinate the chicken: Combine chicken with 2/3 of the sauce and chill for 2 hours to marinate.
Grill: Thread the chicken onto the skewers and grill over medium high heat, brushing the chicken with the marinating liquid.
Serve: Remove to a platter and sprinkle with sesame seeds and scallions. Serve with the reserved sauce at the table.
Tips for Success
Appetizer size: This makes a wonderful appetizer when served on smaller skewers. You would likely get 12 to 15 skewers out of this recipe.
Oven-baked method: You can easily cook these skewers in the oven as well. Heat the broiler to high and place on a broiling rack 8 to 10 inches from the heat. Broil about 4 minutes per side, until nicely browned. Be sure to keep your eye on them as broilers differ in intensity.
Sweetener options: You can sweeten the sauce with any sweetener you like best. However, I find that brown sweeteners give a deeper flavor and a little allulose (or xylitol) helps to give it that sticky Asian quality.
Frequently Asked Questions
What is yakitori made of?
These Japanese skewers are traditionally made with many parts of the chicken, including gizzards and hearts, along with thigh and breast meat. Sometimes it includes pieces of green onion as well. It’s all cut into bite-sized pieces, and then basted in a sweet and savory sauce and grilled over charcoal.
Do you need to soak the skewers before grilling?
If you are using bamboo skewers, be sure to soak them for at least half an hour before threading the meat onto them. Soaking them ensures that they don’t catch on fire over the hot flames.
How many carbs are in Keto Chicken Yakitori?
This keto chicken yakitori recipe has 1.1g of carbs and 0g of fiber per serving.
More delicious keto Asian recipes to try
Keto Chicken Yakitori Recipe
Servings: 6servings
Prep Time 15 minutesmins
Cook Time 17 minutesmins
Total Time 32 minutesmins
Easy Chicken Yakitori goes low carb with a delectable sugar-free glaze. These juicy grilled chicken skewers have authentic Japanese flavor for a simple keto dinner or appetizer.
Prevent your screen from going dark
In a medium saucepan over medium heat, combine the tamari, water, sweeteners, sesame oil, garlic, ginger, and hot pepper flakes. Bring to a boil.
Sprinkle the surface with the xanthan gum and whisk vigorously to combine. Continue to boil 2 to 3 minutes until somewhat thickened. Remove from heat and cool completely.
Place the chicken in a bowl and toss with 2/3 of the sauce. Refrigerate 2 hours to marinate. Reserve the remaining sauce for serving with the chicken.
If you’re using bamboo skewers, place in a pan with water to soak for at least an hour. You will need 6 to 8 large skewers or 12 small appetizer-sized skewers.
Preheat the grill to medium high and grease the grates to prevent sticking. Thread the chicken onto the skewers. Place the skewers on the grill and brush the the marinating liquid.
Grill 5 to 6 minutes per side, brushing frequently with the marinating liquid. Remove to a platter and sprinkle with sesame seeds and scallions. Serve with the reserved sauce at the table.
Storage Information: Store the leftovers in a covered container in the fridge for up to 5 days.
Please note that I am not a medical or nutritional professional. I am simply recounting and sharing my own experiences on this blog. Nothing I express here should be taken as medical advice and you should consult with your doctor before starting any diet or exercise program. I provide nutritional information for my recipes simply as a courtesy to my readers. It is calculated using MacGourmet software and I remove erythritol from the final carb count and net carb count, as it does not affect my own blood glucose levels. I do my best to be as accurate as possible but you should independently calculate nutritional information on your own before relying on them. I expressly disclaim any and all liability of any kind with respect to any act or omission wholly or in part in reliance on anything contained in this website.
Free Bonus: Secrets to Keto Baking!
Sign up for your favorite recipes delivered straight to your inbox plus get our FREE bonus: Secrets to Keto Baking!