Author: admin

  • Coconut-Lime Turkey Rice Soup Recipe

    Coconut-Lime Turkey Rice Soup Recipe

    This Coconut-Lime Turkey Rice Soup Recipe is a great idea for leftover turkey, and you can make it with chicken if you don’t have turkey. Just substitute cauliflower rice for the rice to make this a low-carb soup!

    PIN the Turkey Rice Soup Recipe to try it later!
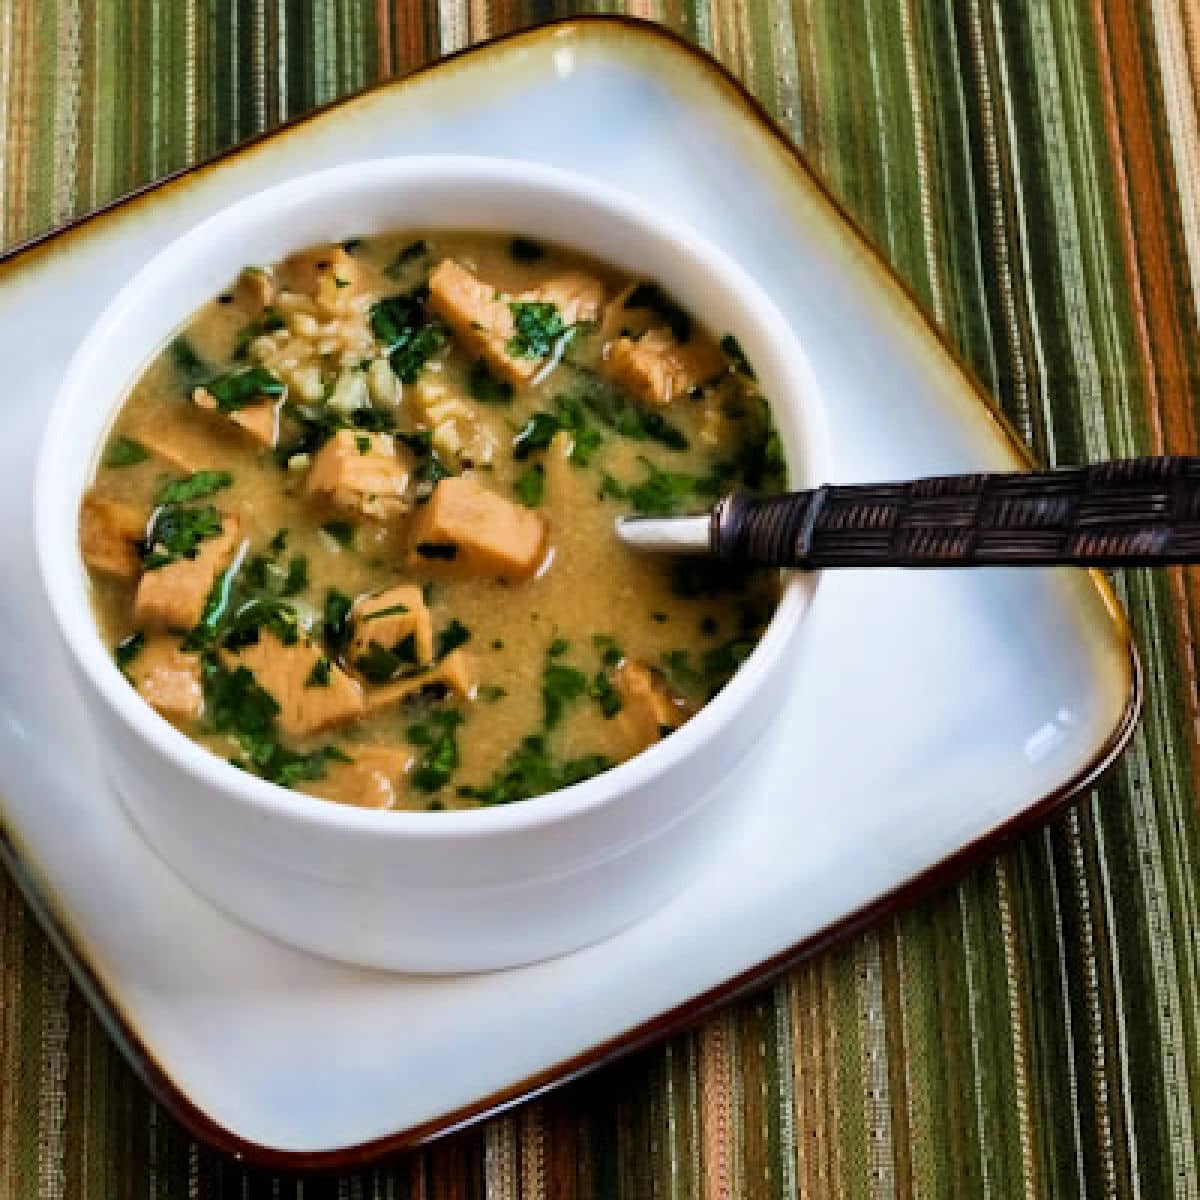
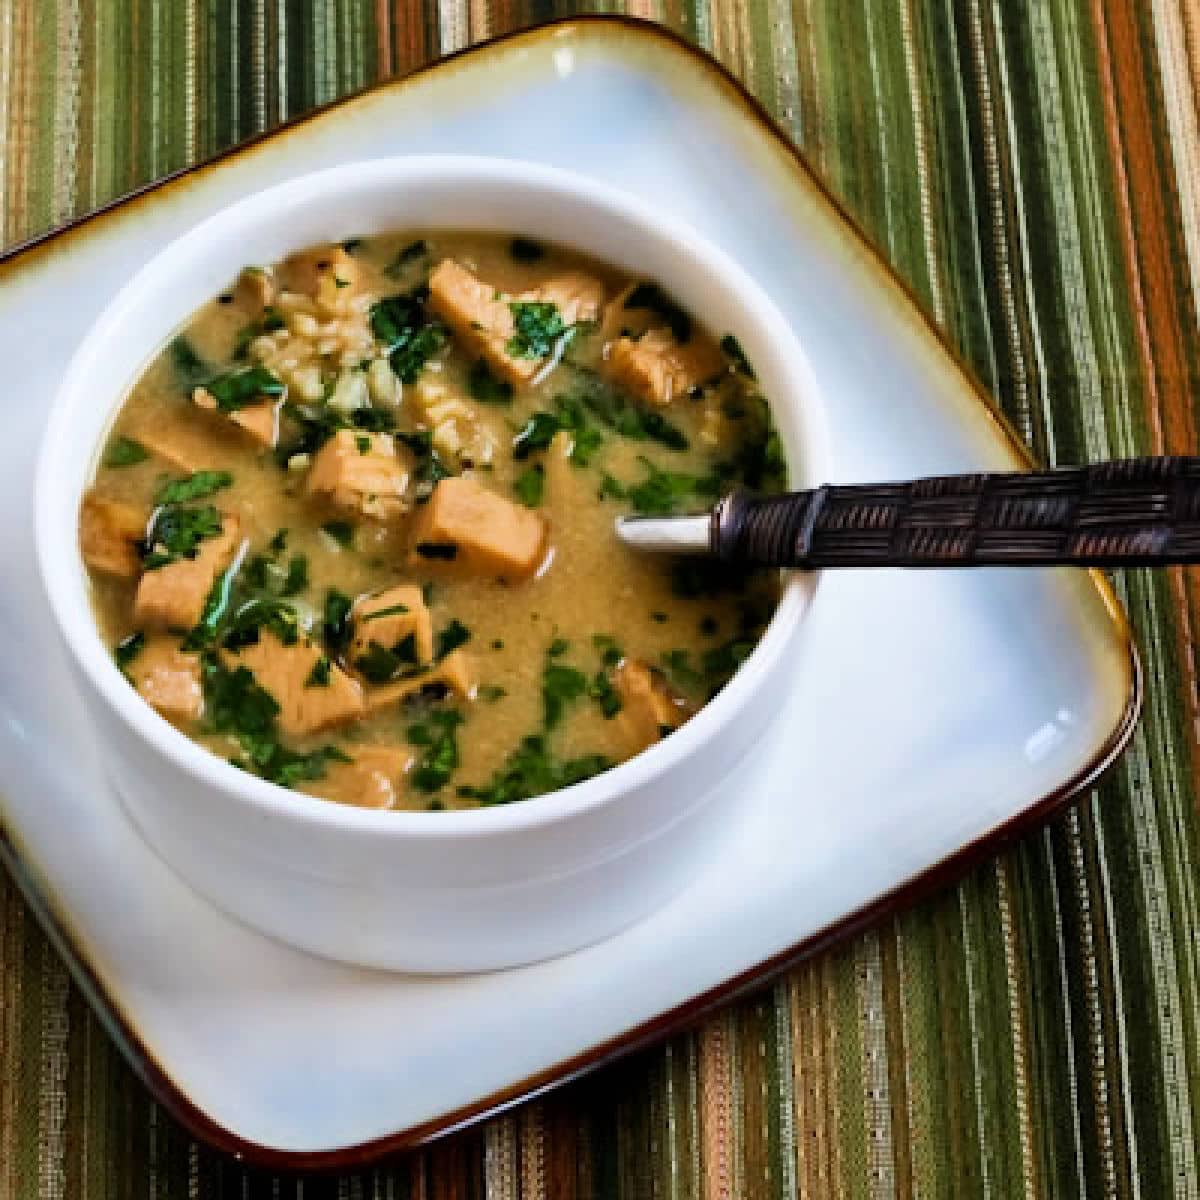
    Square image for Coconut-Lime Turkey and Rice Soup in bowl with spoon.

    This Coconut-Lime Turkey Rice Soup Recipe is different than any leftover turkey soup I’ve made, with a slightly spicy broth, lime juice, and coconut milk as the base of the soup. This is a turkey soup that’s loaded with Asian flavors!

    I used cilantro in the soup but if you’re not a cilantro fan I’d love this with Thai Basil if I had some. If you don’t have any fresh herbs, I think thinly sliced green onions would also be nice in the soup.

    And the last few times I’ve made this turkey soup with coconut milk, I’ve switched out the small amount of rice for frozen cauliflower rice, which makes this a soup that’s very low in carbs. And if you don’t have any leftover turkey, I highly recommend making the soup with leftover chicken!

    What ingredients do you need for this recipe?

    (This is only a list of ingredients; please scroll down for complete printable recipe. Or if you use the JUMP TO RECIPE link at the top of the page, it will take you directly to the complete recipe with ingredient amounts.)

    What gives the Asian flavors in this Turkey Rice Soup?

    The main ingredients that add Asian flavors and make this a think-outside-the-box recipe for turkey soup include lime juice, ginger root, garlic cloves, soy sauce, and coconut milk. I used Green Tabasco Sauce for the spicy flavor but you could also use some kind of Asian hot sauce.

    How many carbs are in the two version of Turkey Rice Soup?

    If you make the original version of this soup with a small amount of brown rice, this soup will have 11 net carbs per serving and 11 grams of protein. If you switch the brown rice for cauliflower rice, the soup will have only 5 net carbs per serving, and still with 11 grams of protein! (I recently discovered some of my recipes that use Monkfruit Sweetener were originally calculated in correctly, so I have corrected that info.)

    Want more low-carb ideas for using leftover turkey?

    I would absolutely switch out the rice that’s added at the end in this soup for frozen cauliflower rice to make this a low-carb soup! And if you have plenty of leftover turkey to use, check out my Low-Carb Recipes for Leftover Turkey!
    Coconut-Lime Turkey (or Chicken) and Rice Soup found on KalynsKitchen.comCoconut-Lime Turkey (or Chicken) and Rice Soup found on KalynsKitchen.com

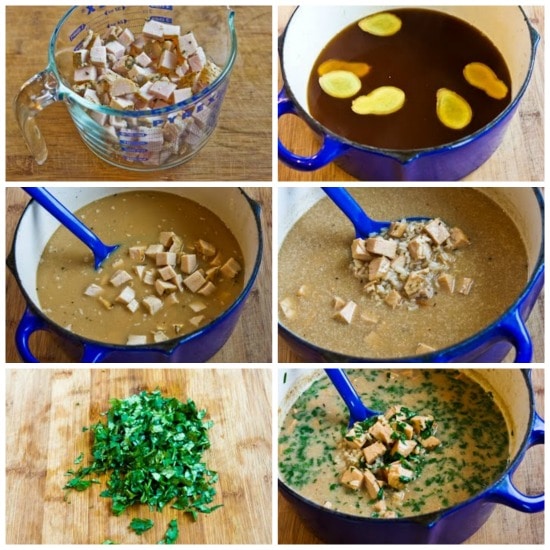
    How to Make Coconut-Lime Turkey Rice Soup:

    (This is only a summary of the steps for the recipe; please scroll down for complete printable recipe. Or if you use the JUMP TO RECIPE link at the top of the page, it will take you directly to the complete recipe.)

    1. I used 2 cups of leftover turkey, and next time I’d shred the turkey into pieces instead of cutting it.
    2. You’ll need fresh ginger root to make this recipe (don’t even think of substituting ground ginger!) Slice about 6 slices of ginger.
    3. The ginger is simmered with chicken stock, garlic cloves, lime juice, soy sauce, and Golden Monkfruit Sweetener (affiliate link) or sweetener of your choice to make a flavorful base for the soup.
    4. Then remove garlic and ginger pieces and add the diced or shredded leftover turkey (or chicken), coconut milk, and some Green Tabasco Sauce (affiliate link), or use a fresh chile pepper if you prefer.
    5. Simmer that for about 6 minutes without letting it come to a boil.
    6. Add 1 1/2 cups of cooked rice or cooked Cauliflower Rice (affiliate link) and cook soup a couple minutes more, just long enough that the rice is hot. (I first made this with cooked Uncle Ben’s Brown Rice that I had in the freezer and just thawed it in the microwave. Now I’d use frozen cauliflower rice that cooks in the bag in the microwave.)
    7. While the rice simmers in the soup, wash and finely chop the cilantro, basil, or Thai basil, or sliced green onions whichever you’re using.
    8. Stir in the chopped herbs or green onions, simmer a minute or two more and serve hot.
    9. Sliced limes to squeeze into the Coconut-Lime Turkey Rice Soup would be nice for serving.
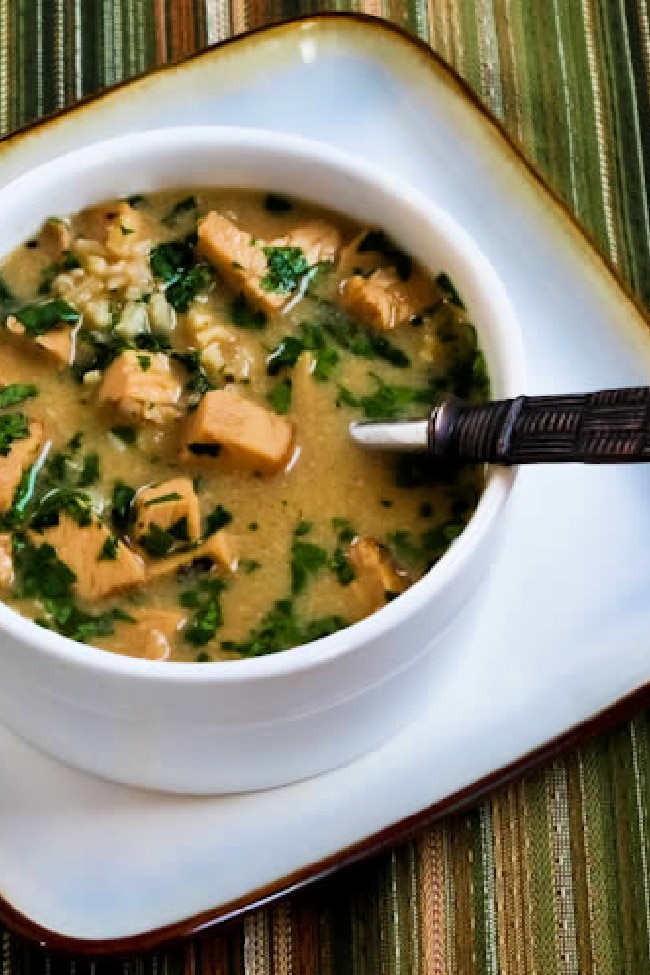
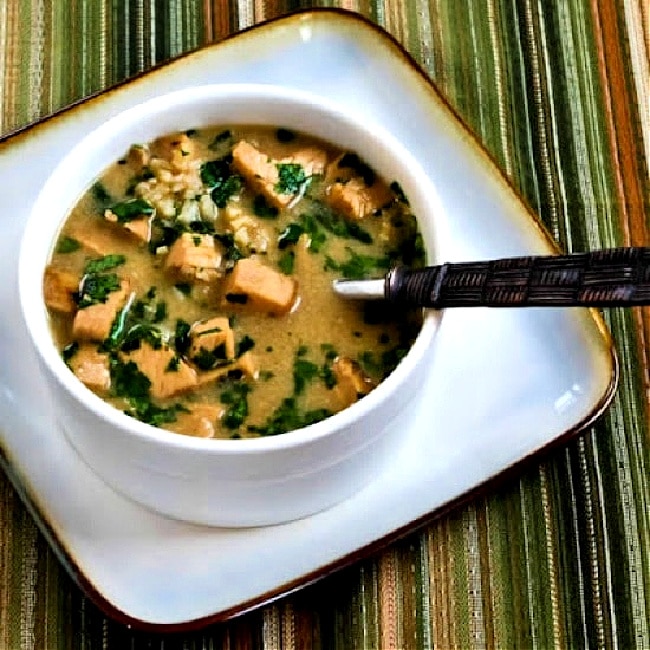
    Coconut-Lime Turkey and Rice Soup in bowl with spoon, sitting on square plate.Coconut-Lime Turkey and Rice Soup in bowl with spoon, sitting on square plate.

    Want More Turkey Soup Ideas?

    Check out Low-Carb Turkey Soup Recipes on Kalyn’s Kitchen for lots more ideas for tasty soups with turkey, chicken, or ground turkey!

    Weekend Food Prep:

    This Coconut-Lime Turkey Rice Soup Recipe has been added to a category called Weekend Food Prep to help you find recipes you can prep or cook on the weekend and eat during the week!

    Ingredients

    • 3 cups chicken broth (see notes)
    • 3 T fresh-squeezed lime juice
    • 6 thin slices fresh ginger root
    • 2 medium garlic cloves, sliced in half
    • 1 1/2 T soy sauce (gluten-free if needed)
    • 1 1/2 T Golden Monkfruit Sweetener
    • one 13.5 oz. can coconut milk (see notes)
    • 2 cups diced turkey 
    • 1/2 tsp. Green Tabasco sauce (see notes)
    • 1 cup cooked brown rice (see notes)
    • 1/2 cup chopped cilantro (see notes)

    Nutrition Information

    Yield

    6

    Serving Size

    1

    Amount Per Serving

    Calories 245Total Fat 18gSaturated Fat 14gTrans Fat 0gUnsaturated Fat 4gCholesterol 26mgSodium 744mgCarbohydrates 13gFiber 2gSugar 3gProtein 11g

    Nutrition information is automatically calculated by the Recipe Plug-In I am using. I am not a nutritionist and cannot guarantee 100% accuracy, since many variables affect those calculations.
    Did you make this recipe?

    Did you make this recipe? Please leave a star rating (under the PRINT button in the recipe) or share a photo of your results on Instagram! THANKS!

    Coconut Lime Turkey Rice Soup thumbnail of finished soup in bowlCoconut Lime Turkey Rice Soup thumbnail of finished soup in bowl

    Low-Carb Diet / Low-Glycemic Diet / South Beach Diet Suggestions:
    When it’s made with cauliflower rice, this Turkey Rice Soup Recipe would be suitable for low-carb and Keto diets. The brown rice would work for phase two and three for the original South Beach Diet. The cauliflower rice version would work for all phases. South Beach would prefer light coconut milk.

    Find More Recipes Like This One:
    Check out Soup Recipes for more tasty soups or use Thanksgiving Recipes for more ideas for leftover turkey. Use the Diet Type Index to find recipes suitable for a specific eating plan. You might also like to follow Kalyn’s Kitchen on Pinterest, on Facebook, on Instagram, on TikTok, or on YouTube to see all the good recipes I’m sharing there.

    Historical Notes for this Recipe:
    This Turkey Rice Soup Recipe was posted in 2010. It was updated with the option to use cauliflower rice in 2021 and was last updated with more information and corrected nutritional information in 2025.
    Pinterest image of Coconut-Lime Turkey Rice Soup Recipe

    We are a participant in the Amazon Services LLC Associates Program, an affiliate advertising program designed to provide a means for us to earn fees by linking to Amazon.com and affiliated sites. As an Amazon Associate, I earn from qualifying purchases.


    Source link

  • Louisiana Casserole | The Recipe Critic

    Louisiana Casserole | The Recipe Critic

    This website may contain affiliate links and advertising so that we can provide recipes to you. Read my disclosure policy.

    This delicious Louisiana Casserole has become an instant favorite in our house! It has all of the delicious flavors of a jambalaya in an easy-to-make casserole. Tasty andouille sausage, shrimp, veggies, rice, and cajun seasoning come together for a complete meal on the table in just 40 minutes!

    Overhead shot of Louisiana Casserole.Overhead shot of Louisiana Casserole.

    Reasons You’ll Love This Recipe

    • Comfort Food: If you’re craving some warm, cozy, classic comfort food, you will love this hearty Louisiana casserole. 
    • Easy to Make: This dish comes together so quickly and easily. You can whip this up in less than an hour, which includes prep and cook time! 
    • So tasty: The combination of bold spices with cajun-style ingredients, plenty of texture, and the crisp topping will be a dinner that you’ll want to enjoy again and again!

    Ingredients Needed for Louisiana Casserole

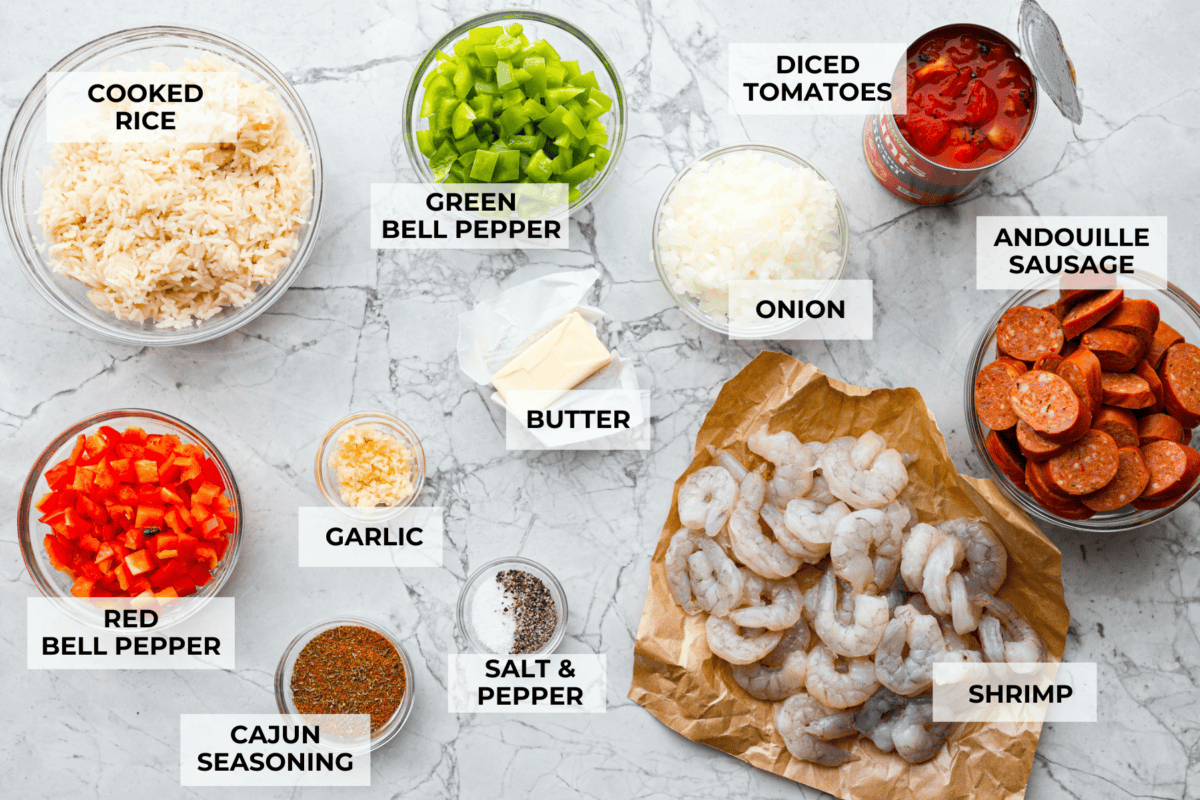
    The ingredients needed to make this Louisiana casserole recipe come together for major flavor and texture. This meal is similar to a traditional jambalaya, or my Chicken and Sausage Gumbo, but everything is cooked together in one dish. Check out the recipe card at the bottom of the post for exact measurements.

    • Shrimp: For convenience, buy your shrimp peeled and deveined.
    • Andouille Sausage: A smoked sausage commonly used in Cajun cuisine.
    • Cooked Rice: I used minute rice for this recipe, but you can make regular rice with a rice maker.
    • Yellow Onion: Adds a sweet, savory flavor and a bit of texture.
    • Red Bell Pepper: Gives the dish a beautiful color and a slightly sweet crunch.
    • Green Bell Pepper: Provides a green color, which adds contrast, making the dish look appetizing and tastes amazing!
    • Canned Fire Roasted Tomatoes: Adds the most delicious smoky flavor.
    • Butter: Cooking the vegetables in butter adds a rich, deep flavor.
    • Garlic: Freshly minced garlic is one of the best ingredients to pair with shrimp (just ask this brown butter spicy shrimp), and along with the other veggies, it adds depth and complexity.
    • Salt and Pepper: To enhance all of the flavors.
    • Cajun Seasoning: You can use a store-bought spice blend or try this homemade cajun seasoning.
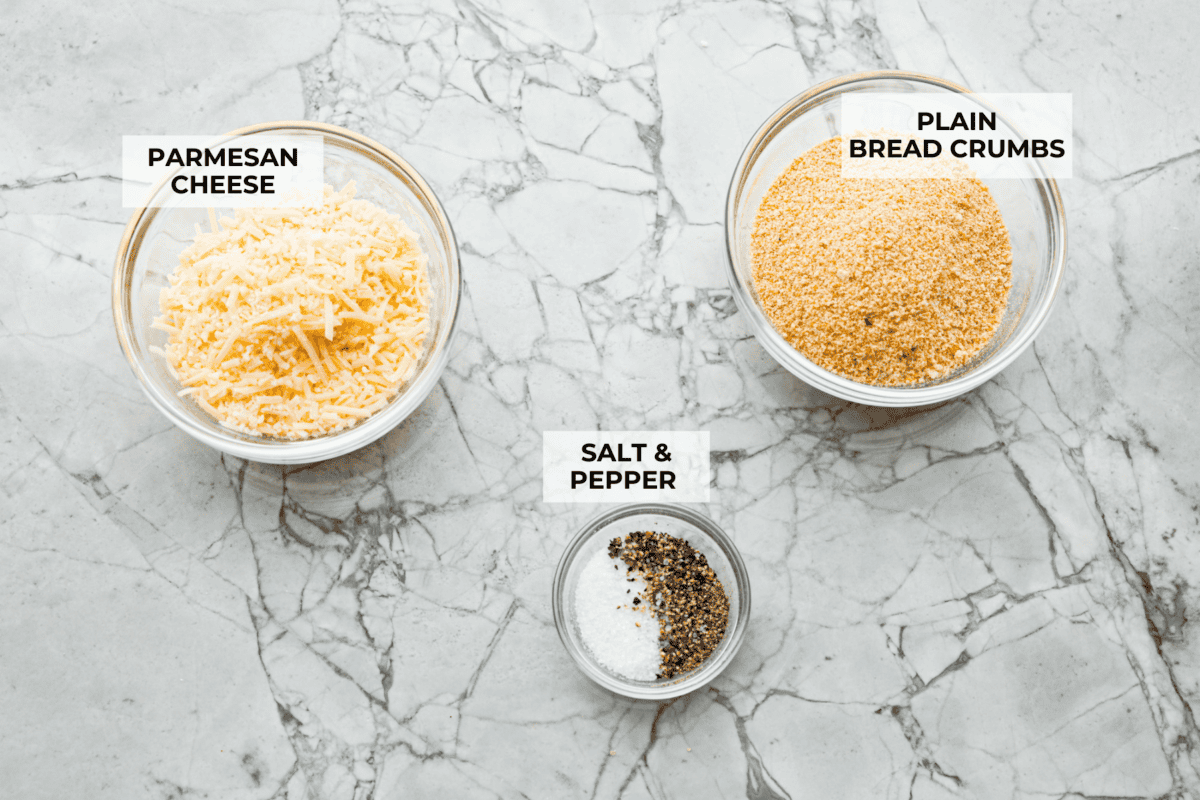
    Overhead shot of labeled casserole ingredients. Overhead shot of labeled casserole ingredients.

    Breadcrumb topping

    • Parmesan Cheese: For sharp cheesy flavor.
    • Bread Crumbs: Adds golden, crispy texture on top of the casserole.
    • Salt and Pepper: For extra flavor.
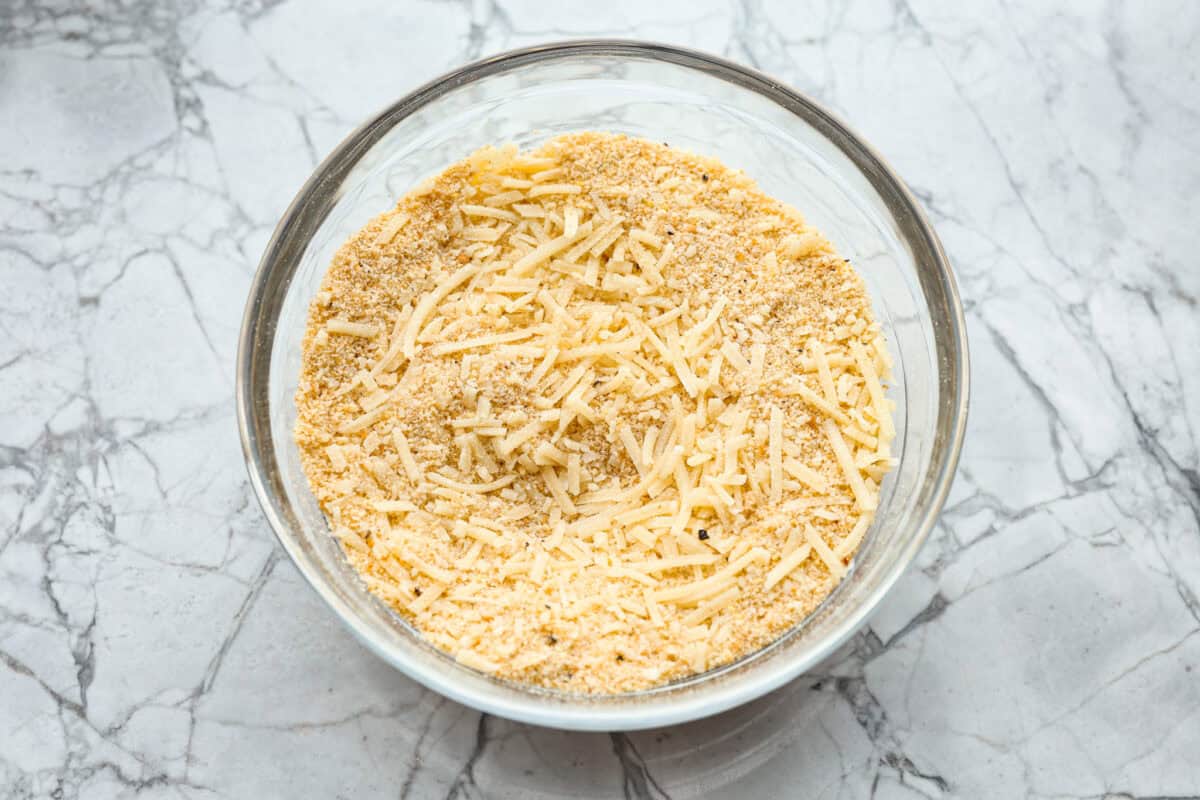
    Overhead shot of breadcrumb topping ingredients.Overhead shot of breadcrumb topping ingredients.

    How to Make Louisiana Casserole

    Trust me when I say this is an easy recipe to follow. Most of the ingredients are ready to go! You just need to sauté the veggies, heat the sausage, and cook the shrimp, and dinner is served! The whole family will love this one. Here’s how everything comes together:

    1. Prep: Preheat oven to 375 degrees Fahrenheit and spray a 9×13-inch baking dish with non-stick cooking spray.
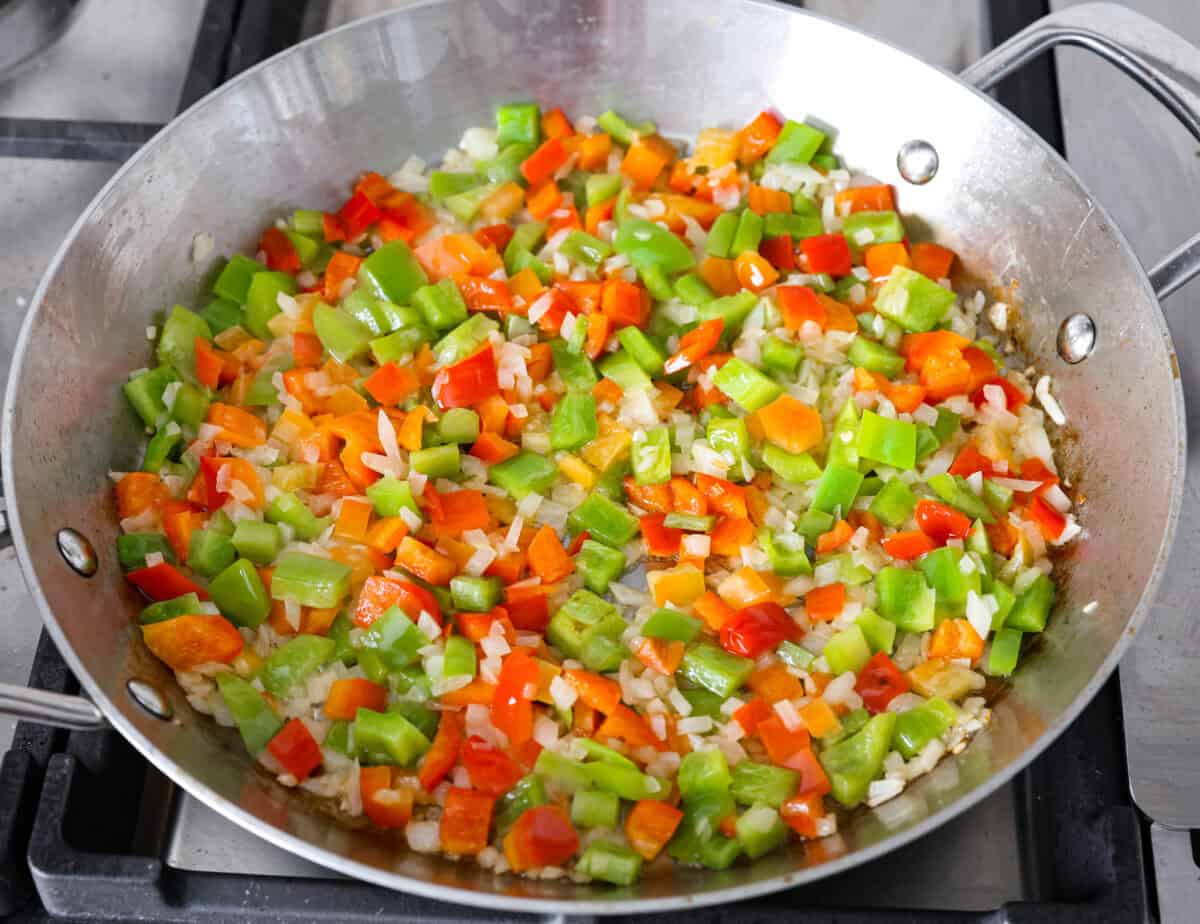
    2. Sauté Veggies: Heat the butter in a large skillet over medium-high heat. Then add the onion, red, and green pepper to the skillet and sauté until the vegetables become tender.
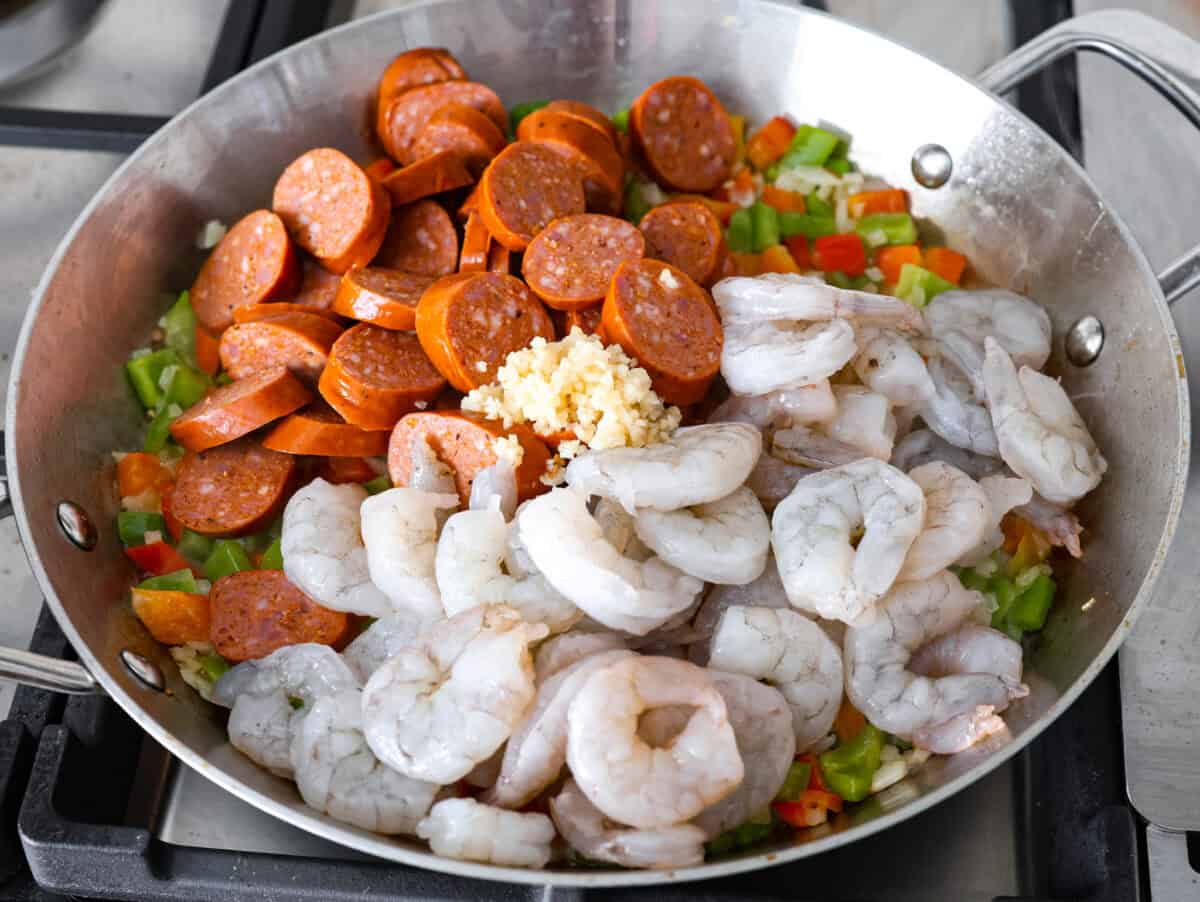
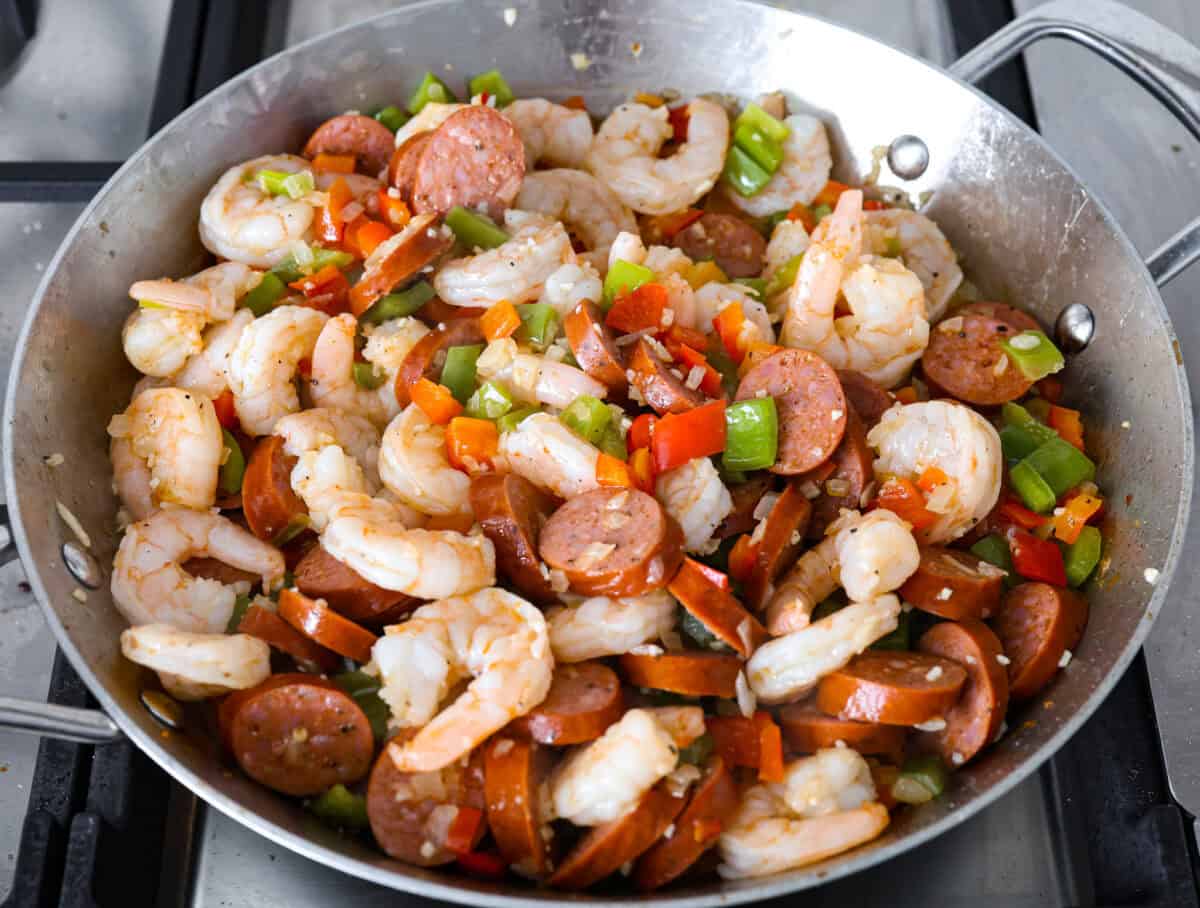
    3. Sauté Sausage and Shrimp: Add the garlic, sausage, and shrimp to the skillet, season with salt and pepper, sauté until the shrimp are mostly pink.
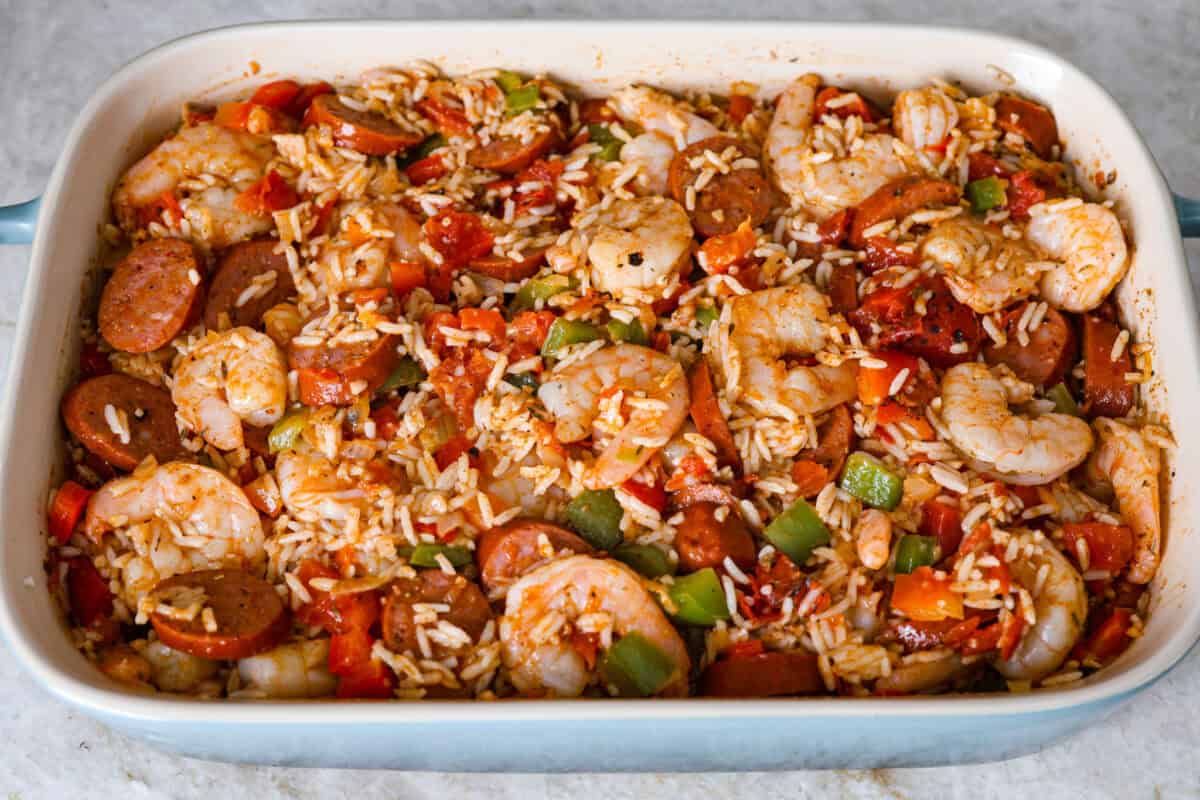
    4. Combine All Ingredients: Add the vegetables and meat to the baking dish along with the rice, tomatoes, and cajun seasoning. Stir everything together.
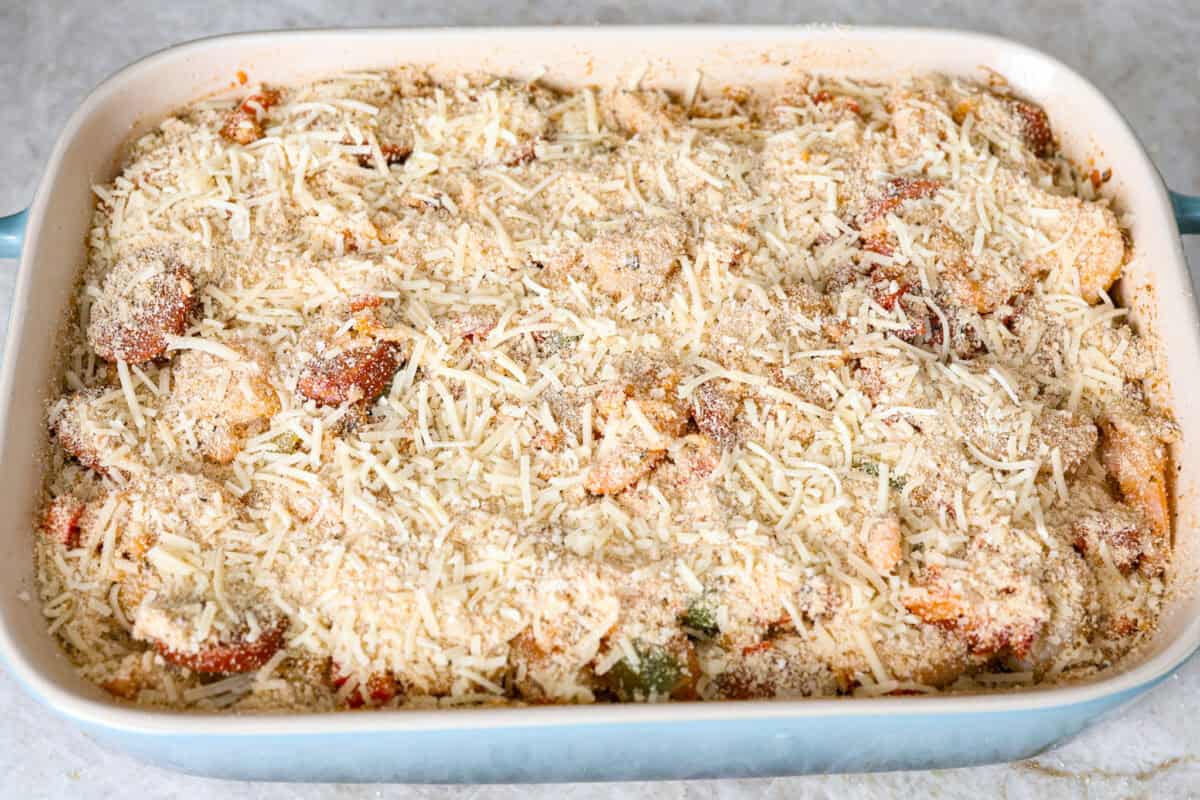
    5. Mix the Topping: Mix the parmesan cheese, bread crumbs, salt, and pepper, in a small bowl. Then sprinkle the top of the casserole with this mixture.
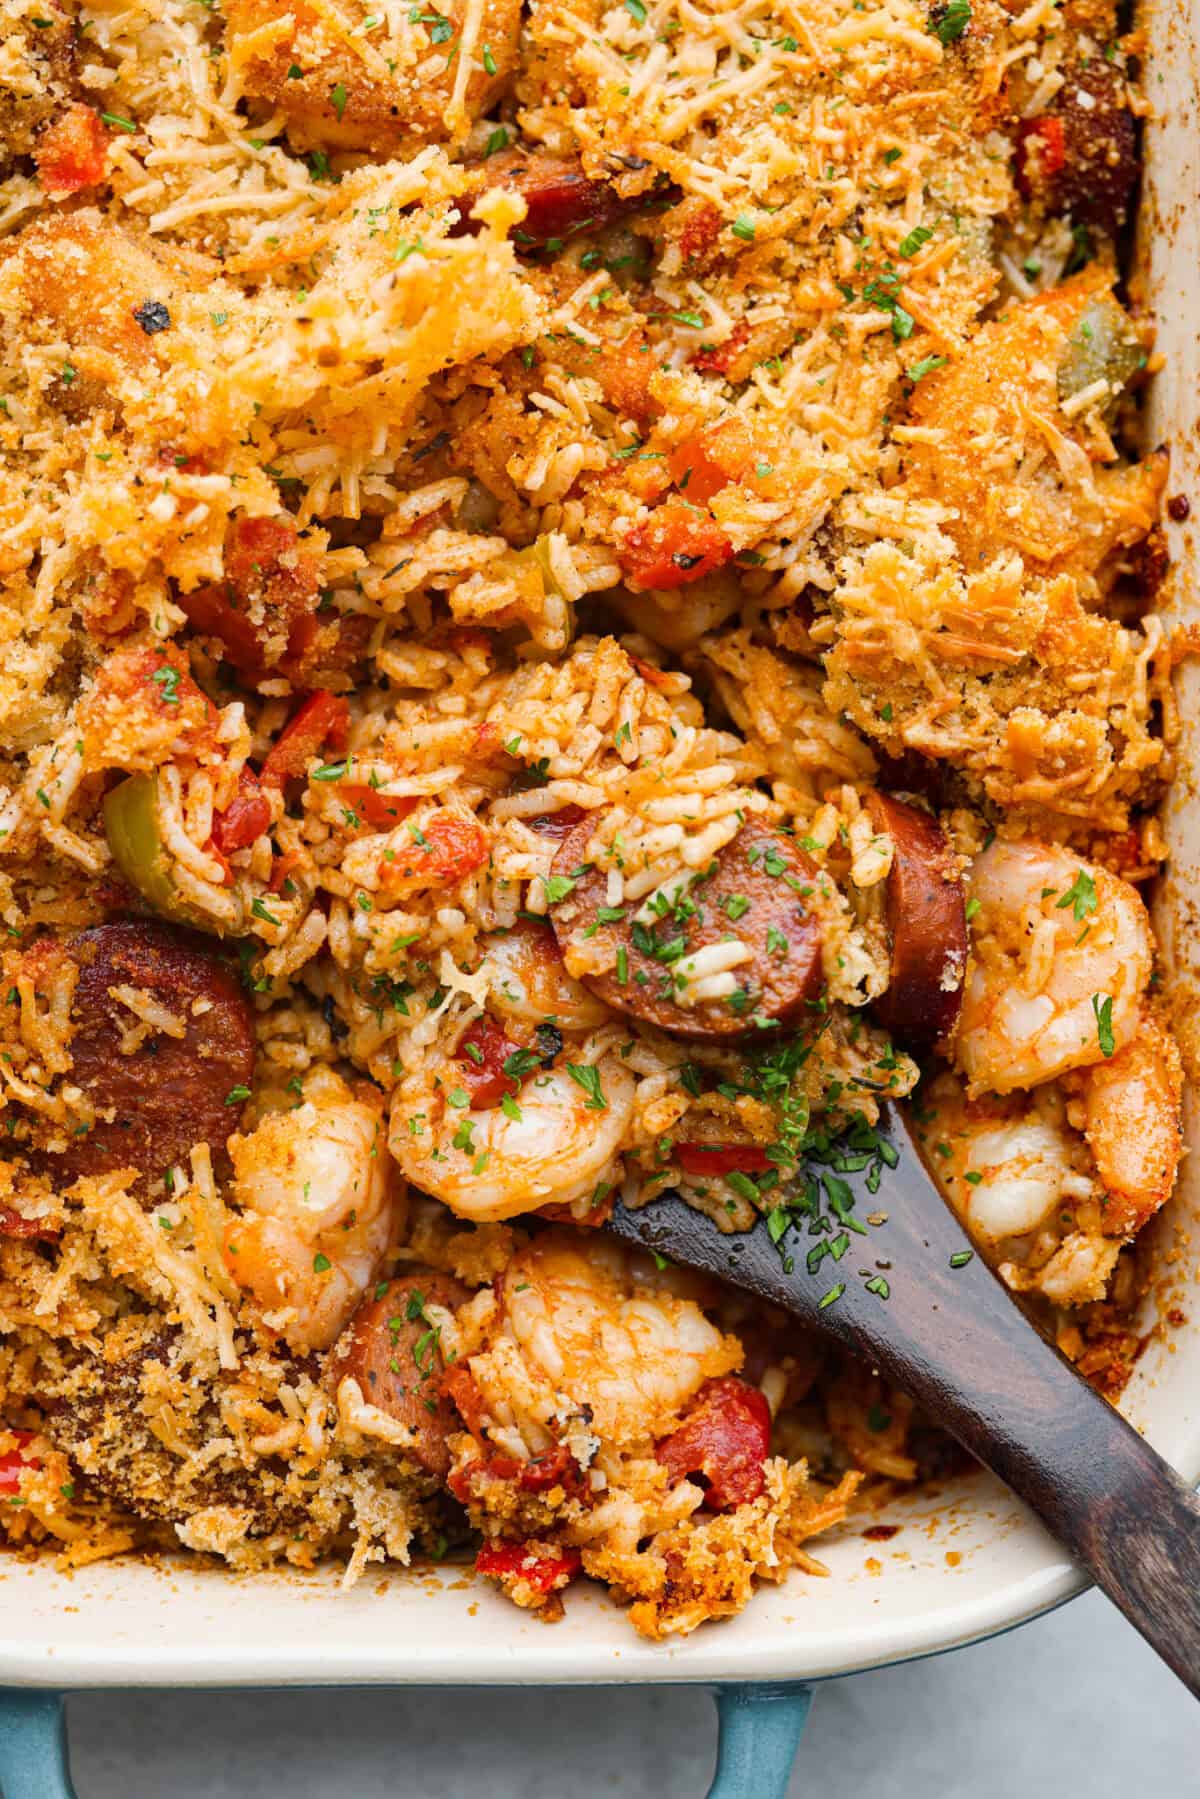
    6. Bake: Place the dish in the oven and bake for 20 minutes, until the top is golden brown and the rice has had time to soak in any excess juice.
    7. Rest and Serve: Remove from the oven and allow the casserole to rest for a few minutes before serving. Enjoy!

    Louisiana Casserole Tips and Variations

    It’s hard to get this casserole wrong. It really is so simple to put this casserole together and it tastes amazing! But here are a few tips and substitution ideas so it turns out exactly how you like it!

    • For the Topping: For the breadcrumb topping, I used plain breadcrumbs. You can try panko breadcrumbs as a substitute.
    • Thaw Frozen Shrimp: If you use frozen shrimp, be sure to thaw it completely before cooking it with the sausage and veggies. 
    • Pre-Cooked Rice: To save time, I like to use pre-cooked rice that you heat in the microwave. 5-minute rice should also work just fine.
    • Sausage: This recipe calls for andouille sausage, but you can use a kielbasa or other link sausage of your choice!
    • Spice Level: Want to spice things up? I recommend adding a seeded and diced jalapeño to the skillet with the bell peppers and onions. You can also mix in some red pepper flakes for that extra kick of heat!
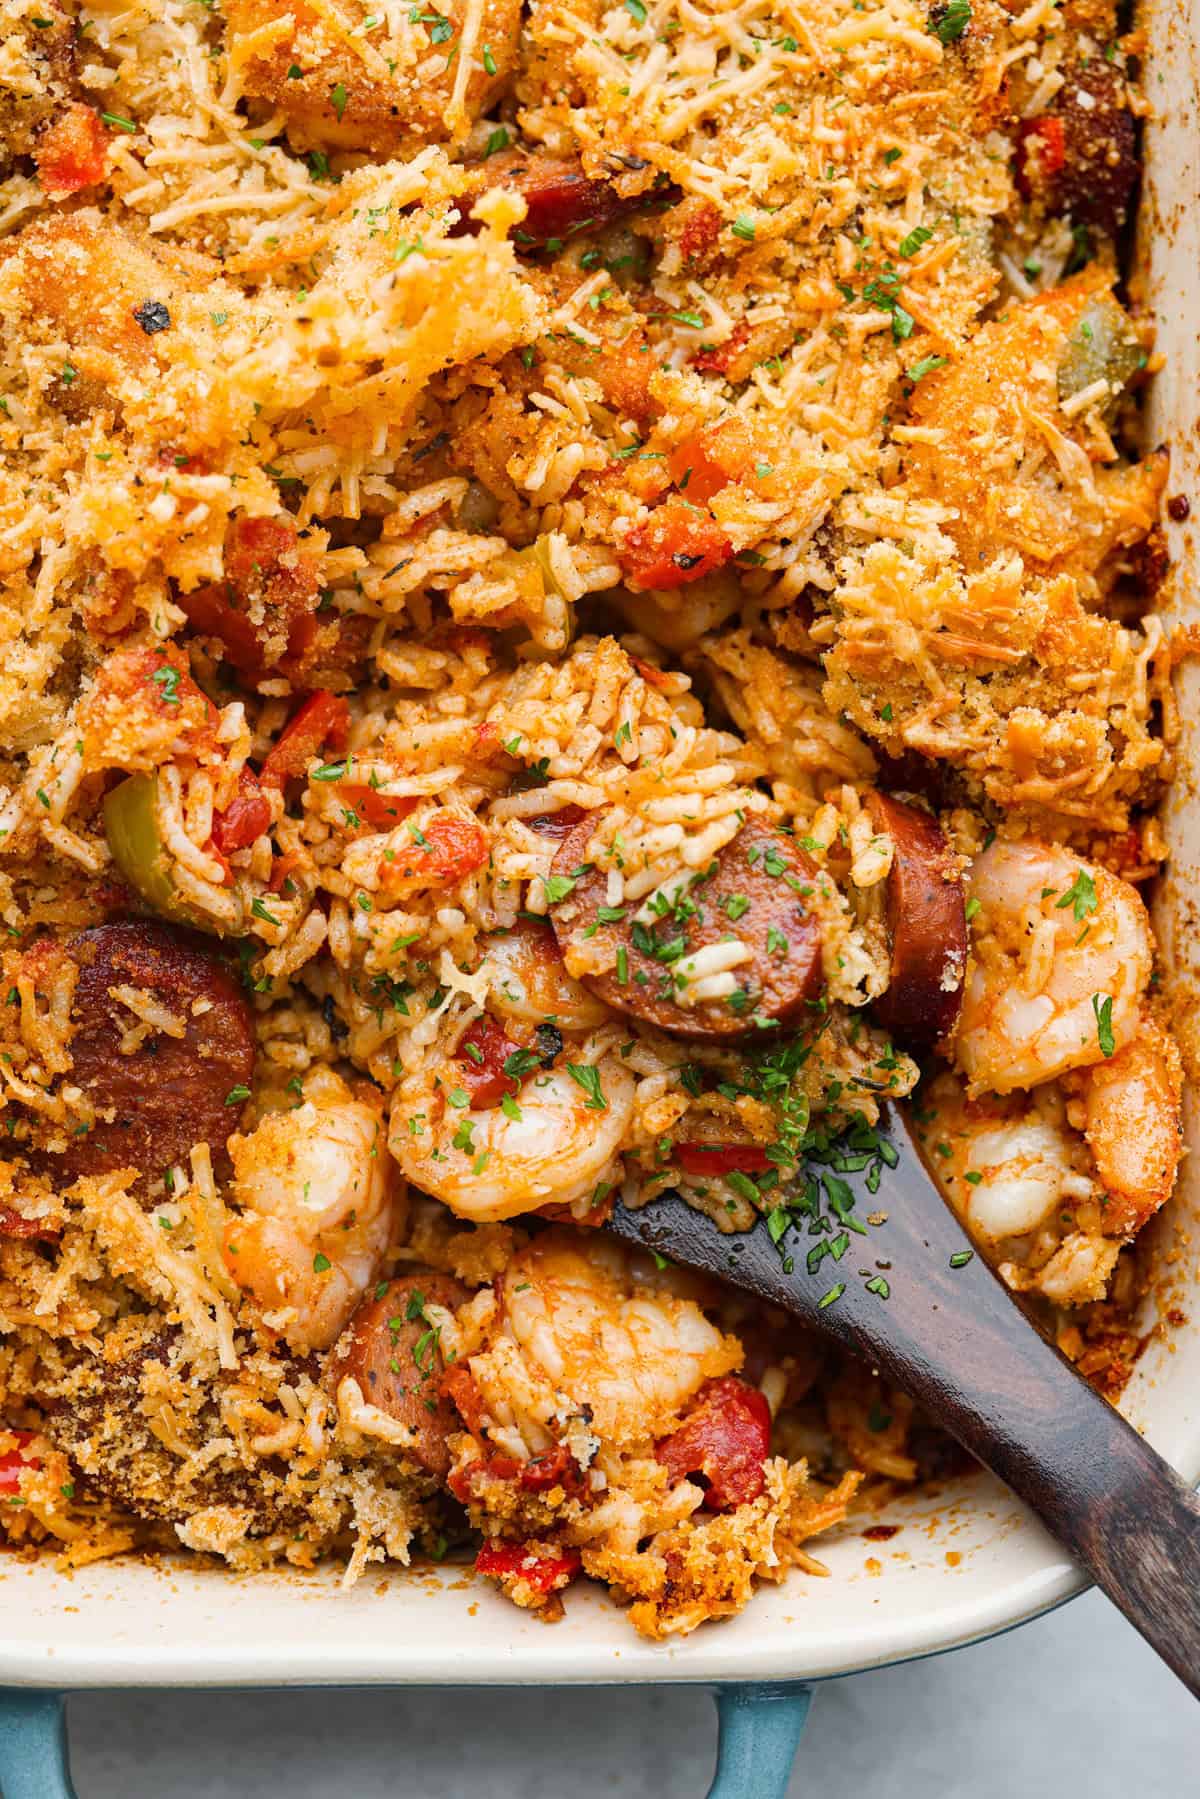
    Close up shot of baked Louisiana casserole.Close up shot of baked Louisiana casserole.
    Storing Leftovers

    This Louisiana casserole has the best texture when it is served fresh out of the oven. However, leftovers can be stored and enjoyed for a few days after cooking. This dish makes a great lunch for the next day! Here are my tips for storing and reheating leftovers.

    • In the Refrigerator: Stored properly in an airtight container, leftovers will last up to 4 days in the refrigerator.
    • Reheating: I recommend reheating in the microwave until warmed through. I always start with using 30 second increments, so I don’t over cook the shrimp.
    • Freezing: I do not recommend freezing this recipe.

    Overhead shot of plated Louisiana casserole.  Overhead shot of plated Louisiana casserole.

    More Casserole Recipes

    Casseroles make some of the best meals. They are usually super easy to throw together and taste amazing. Try out some of my other family favorites! For more dinner inspiration, find my full list of casseroles here!

    Pin this now to find it later

    Pin It


    Source link

  • Steph’s Chickpea Curry with Spinach and Rice Recipe

    Steph’s Chickpea Curry with Spinach and Rice Recipe

    Amazingly creamy, saucy chickpea curry served over rice with a dollop of chili crisp and a side of cucumber salad. Ready in 20 minutes!

    In This Post: Everything You Need For Chickpea Curry


    Chickpea Curry Video


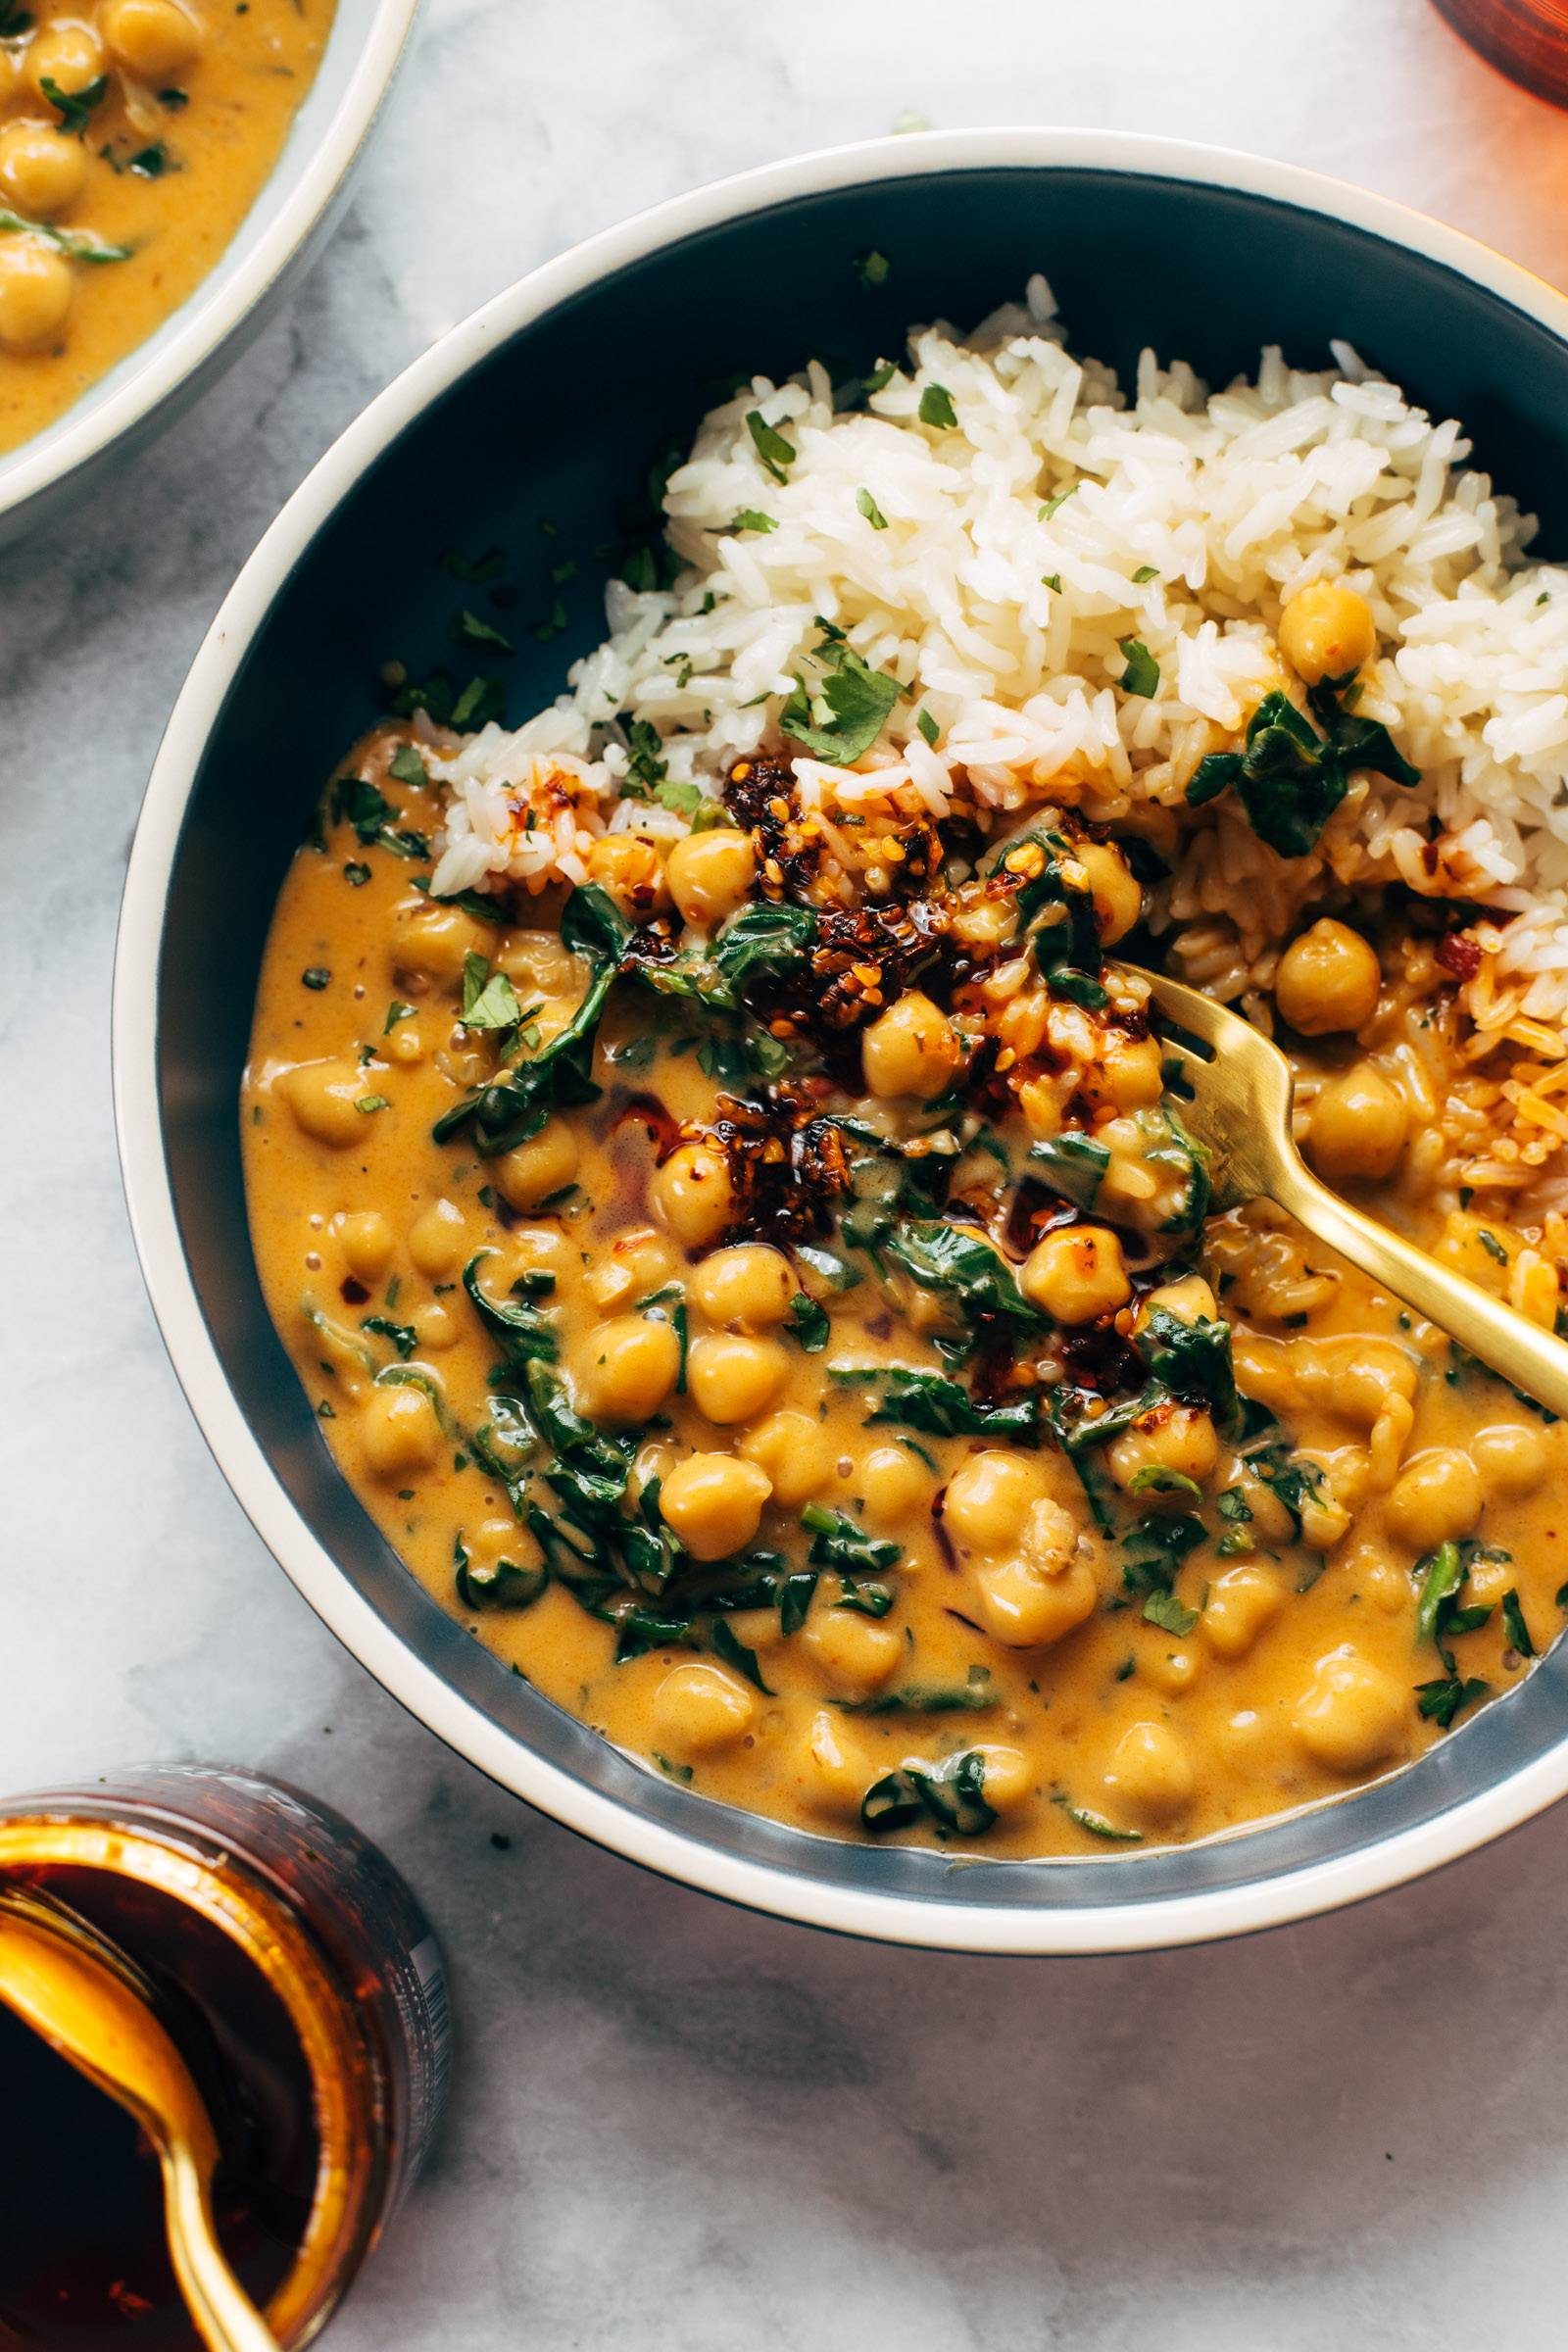
    Bowl of coconut curry chickpeas

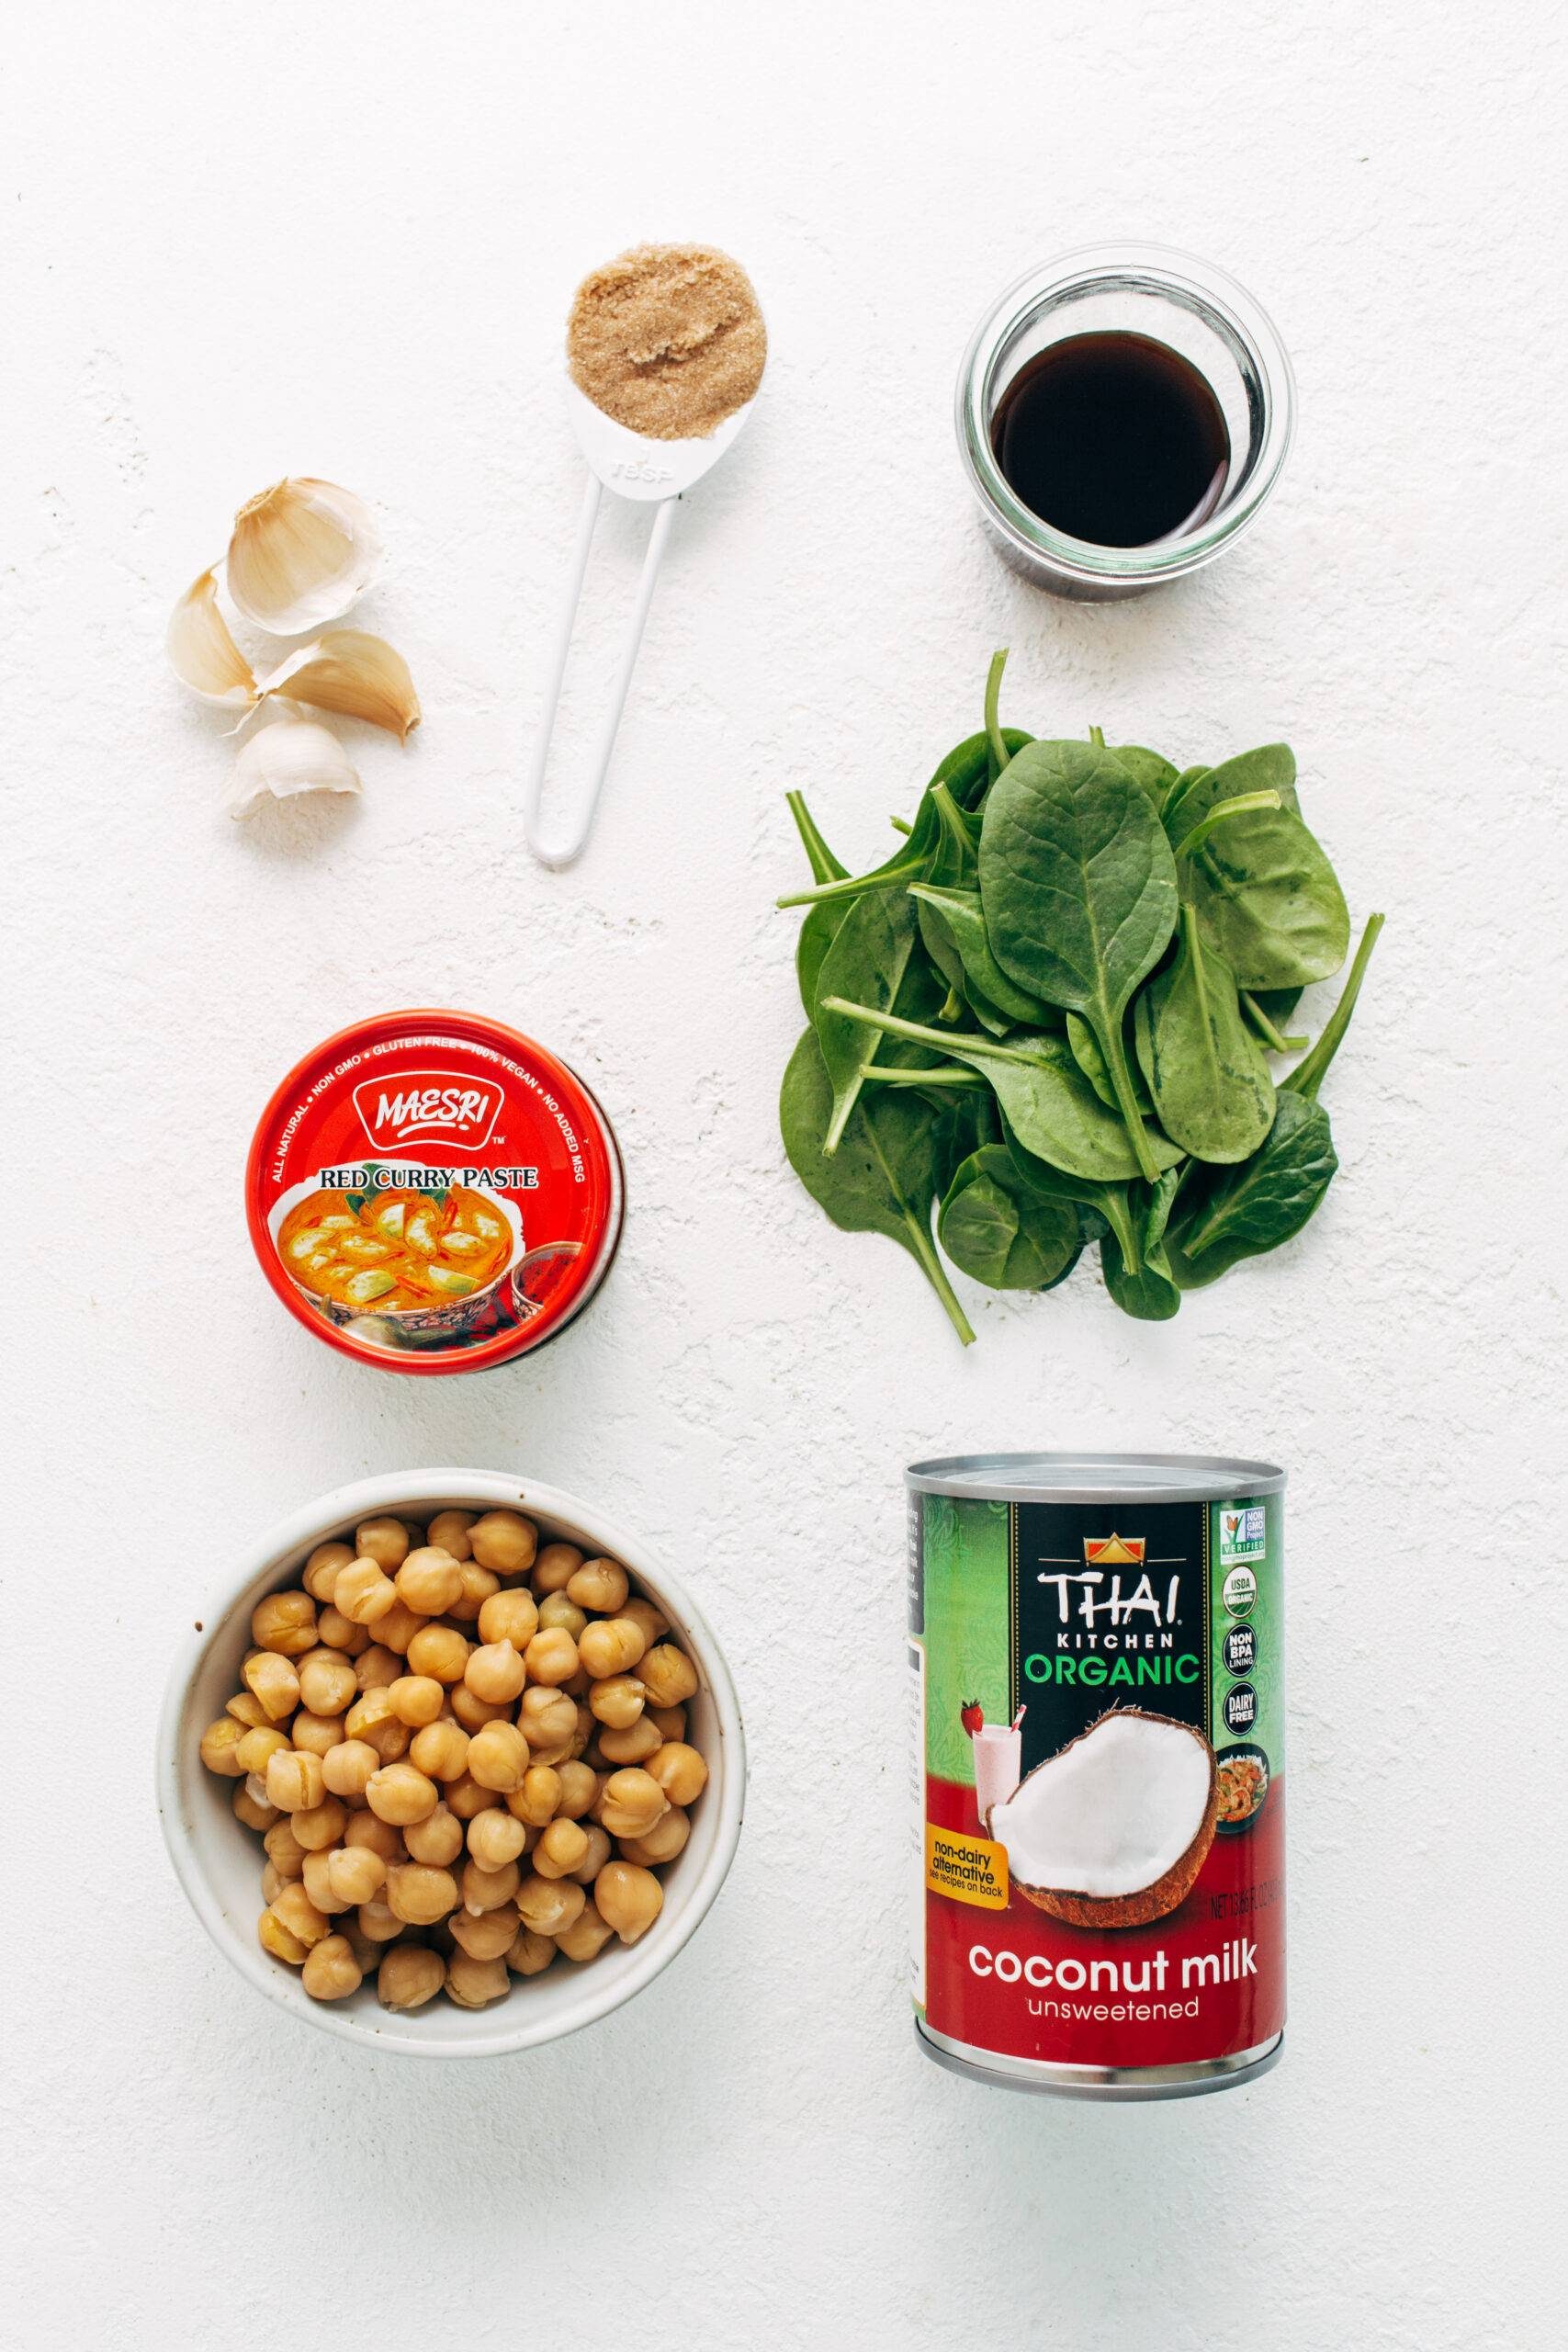
    Ingredients For This Recipe

    Brown Sugar

    The perfect little bit of sweetness. The brown sugar helps offset the spiciness and makes everything just deliciously rich.

    Curry Paste

    This recipe uses red curry paste. Any brand will work, but I usually opt for the Thai Kitchen brand that I can find pretty easily at my local grocery store.

    Coconut Milk

    Please, please use full-fat coconut milk in this recipe. The perfect thickness and sauciness!

    Soy Sauce

    We’ve got sweetness, we’ve got richness, we’ve got spiciness, and this is where the saltiness comes in!

    Chickpeas

    Just one can of chickpeas – my favorite easy plant-based protein.

    Spinach

    I love adding spinach to this for a little bit of veg. Other veggies you could use: green beans, broccoli, cauliflower, or carrots.

    Cilantro

    A sprinkling of cilantro finish everything off!

    Rice

    Heap this delicious mixture over a mound of fluffy rice, and that’s it!

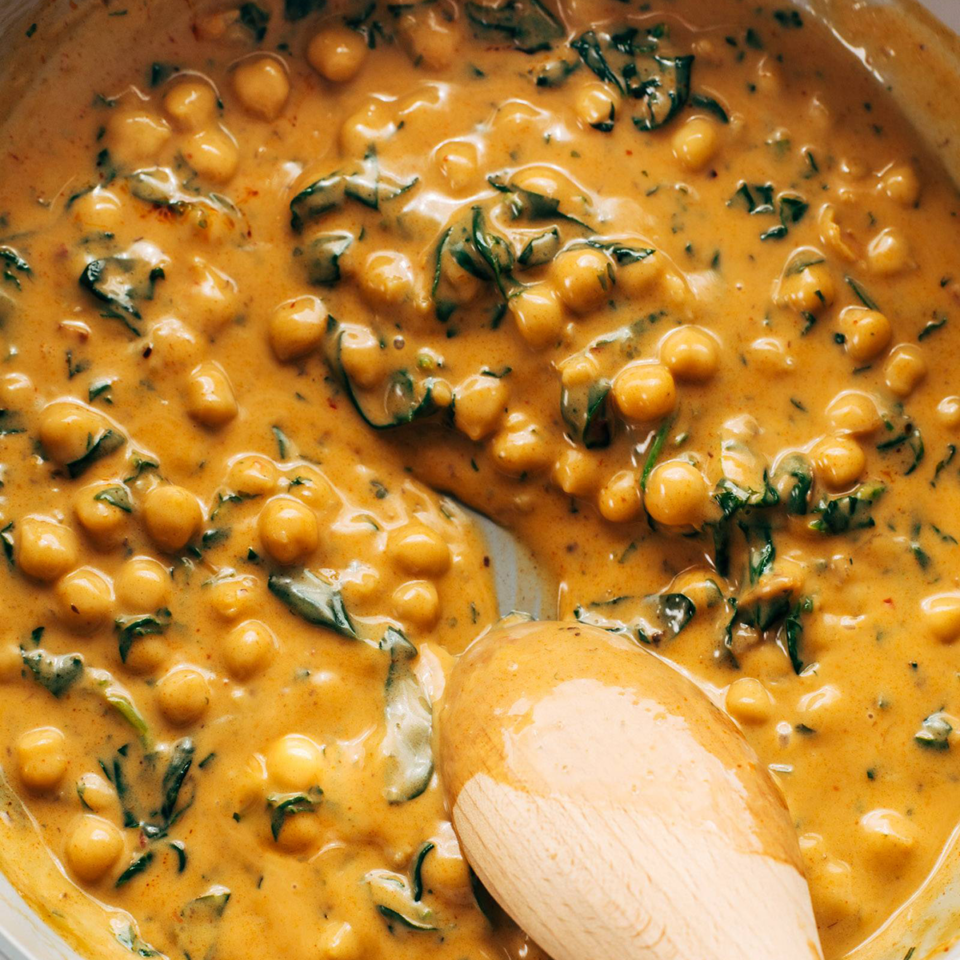
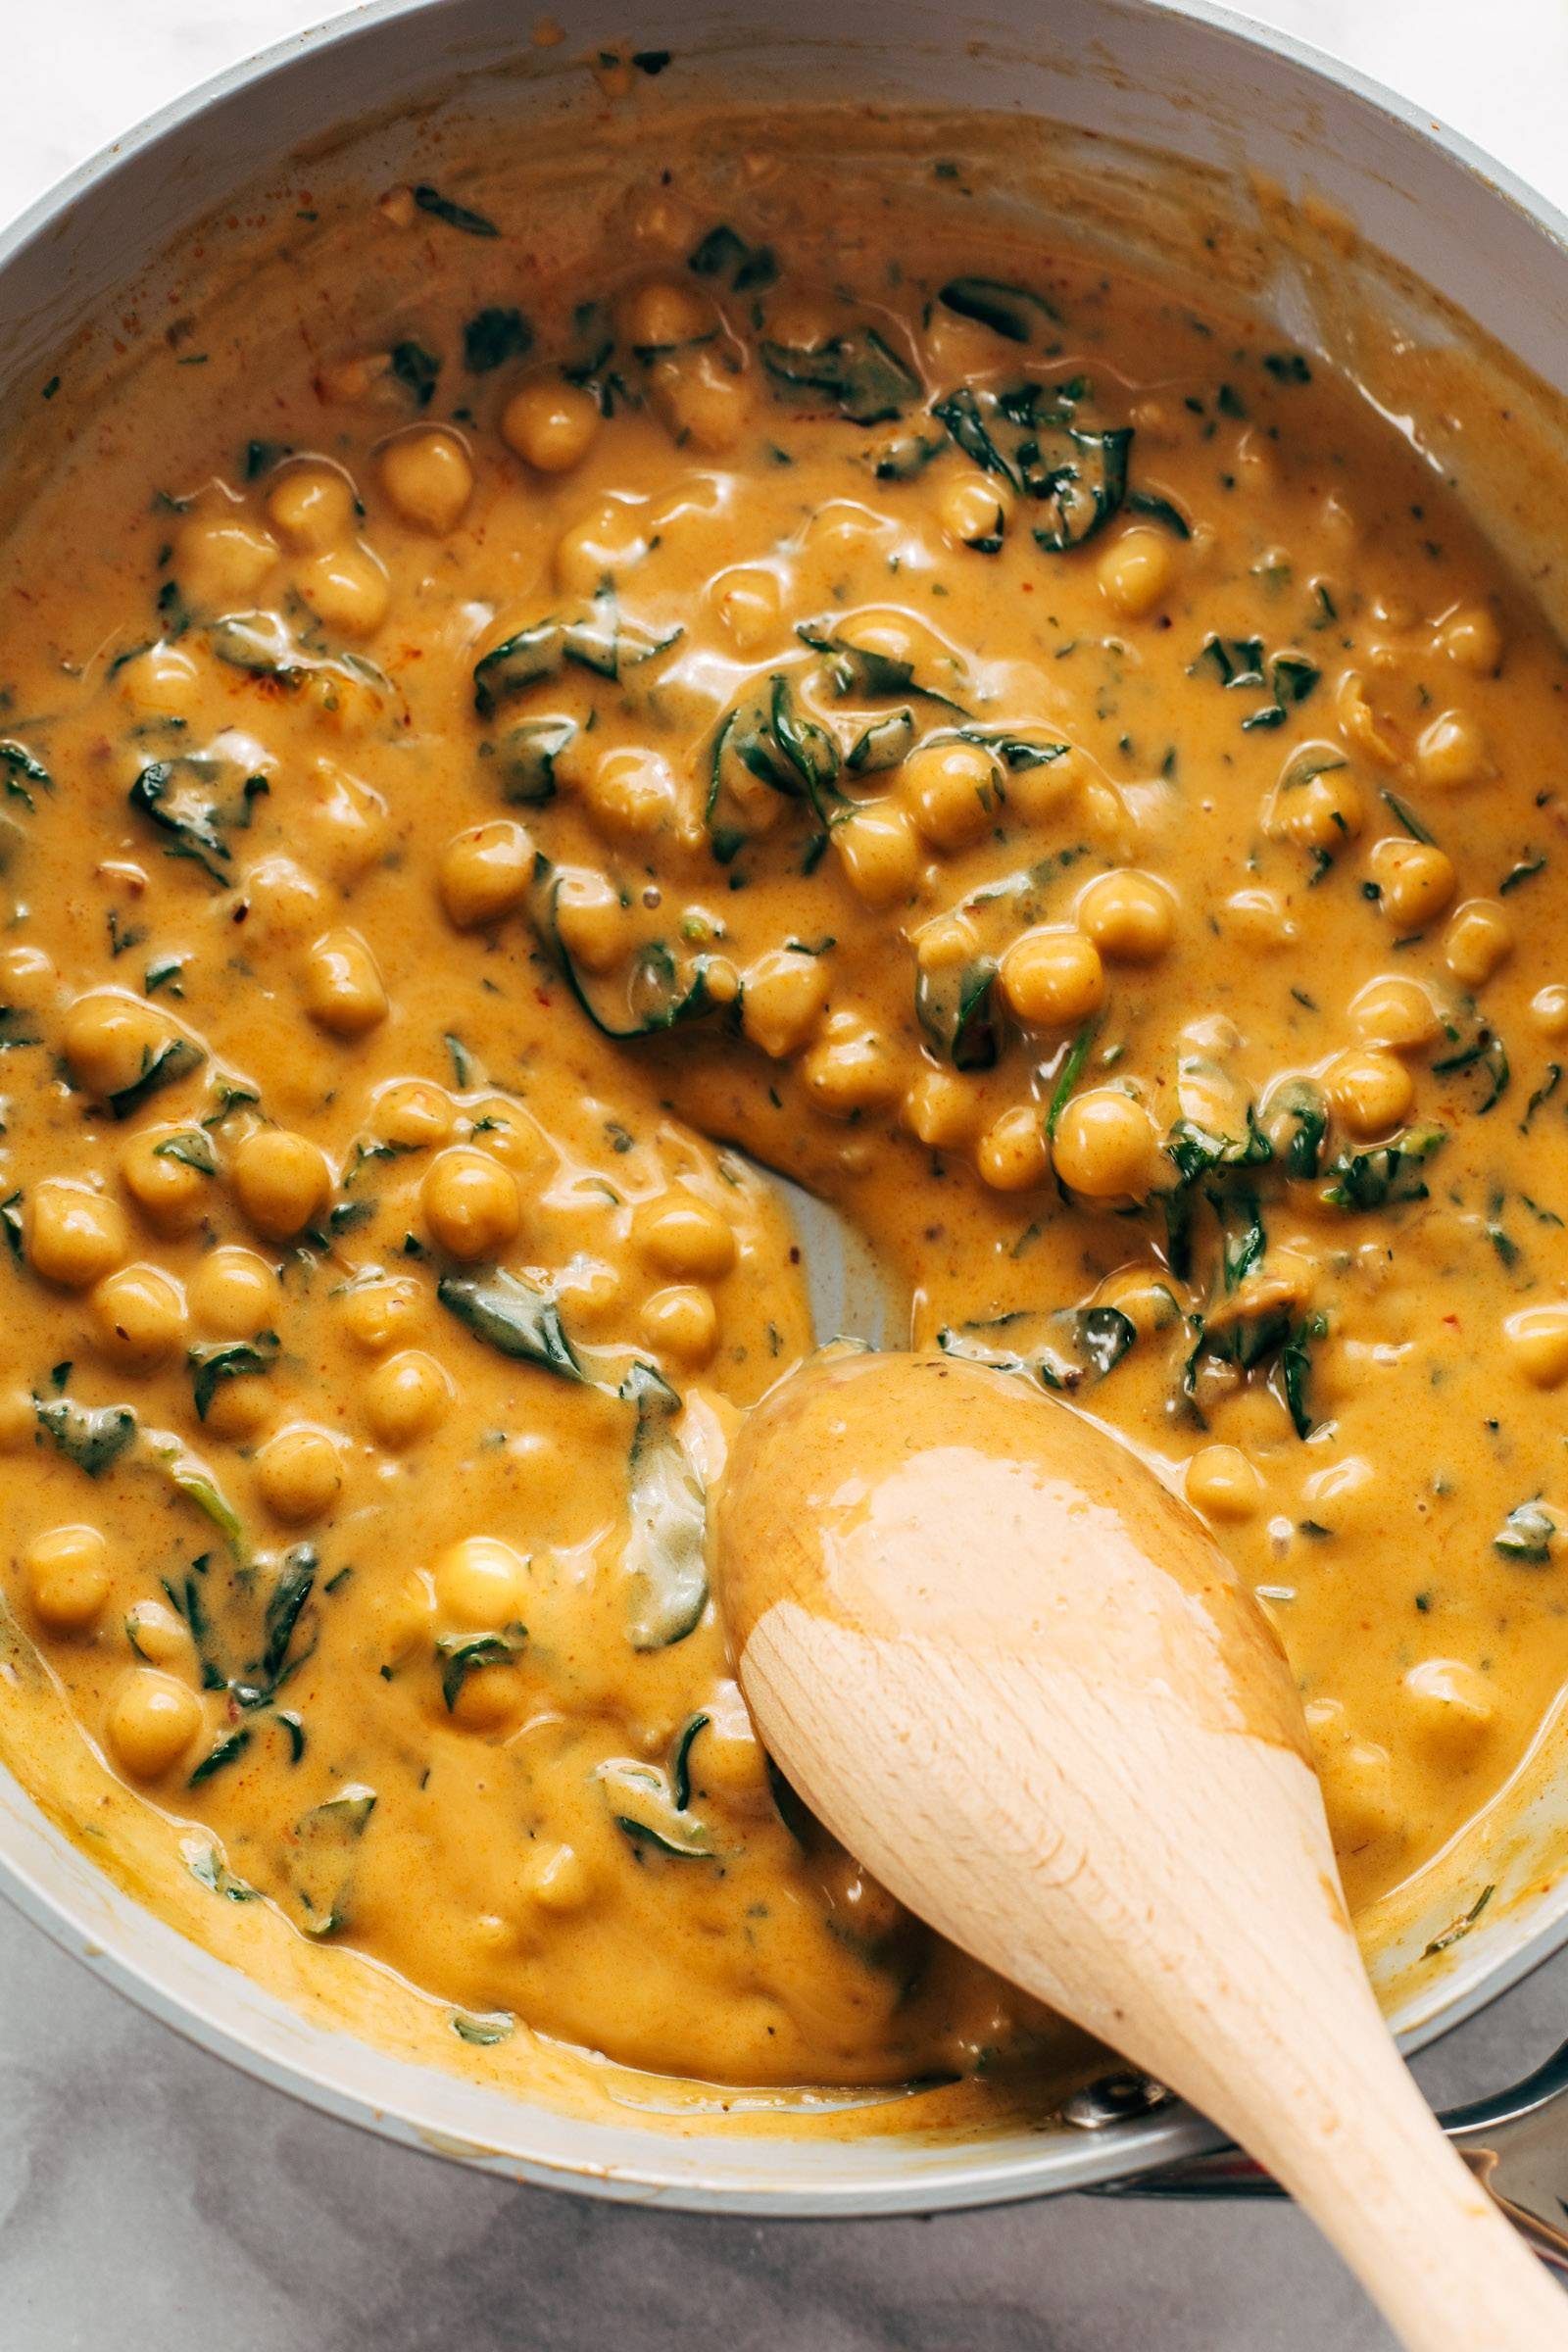
    Coconut curry chickpeas with spinach in a pan.

    Lindsay’s Notes

    How it happened is that I asked my sister Steph what she’s been making for dinner lately, and she said, “I make that salmon recipe but I just use a can of chickpeas instead to keep it easy.” And now, if you ask me what I’m making for dinner lately, I’m going to say the exact same thing because okay wow that is very delicious and it only takes ten minutes.

    STEPH FOR PRESIDENT!

    This chickpea curry is, well, it’s everything. It’s cozy, it’s pantry-friendly, and maybe even a little elegant? *hair toss* even though it’s super super easy? It’s comforting without being heavy, nutritious without being boring, and beautiful without being high maintenance. I’m no stranger to a delicious chickpea curry, but this one takes it to the next level.

    I came into this realization too late to include it in the photos here, but serving this with a little side of pickled cucumber salad (sliced cucumbers, sliced red onion, white vinegar, olive oil, salt, and sugar) is *chef’s kiss* SOS perfection. (I also love this little cucumber salad with these beef skewers. SO GOOD.)

    With or without the cucumber salad, I can definitely say that swooping the wooden spoon leisurely through that luscious sauce, piling the saucy goodness of chickpeas and spinach over steaming rice, and then drizzling the chili crisp (affiliate link) over the whole thing… it’s definitely a living-my-best-life type moment.


    Print

    clock clock iconcutlery cutlery iconflag flag iconfolder folder iconinstagram instagram iconpinterest pinterest iconfacebook facebook iconprint print iconsquares squares iconheart heart iconheart solid heart solid icon

    Description

    Amazingly creamy, saucy chickpea curry served over rice with a dollop of chili crisp and a side of cucumber salad. Ready in 20 minutes!


    1. Cook rice according to package directions.
    2. Heat the avocado oil over medium heat. Add the garlic and curry paste; sauté until softened and fragrant, about 1-2 minutes.
    3. Add the brown sugar, coconut milk, and soy sauce. Bring to a low simmer until thickened slightly.
    4. Add chickpeas, spinach, and cilantro; cook until chickpeas are heated through and spinach is wilted. Mash the chickpeas ever so slightly with the back of a wooden spoon if you want to change up the texture and make it more creamy.
    5. Taste and adjust to your liking – we often add a squeeze of lime or some extra ginger or lemongrass, but it’s really not necessary. The flavor is totally there even with the most basic ingredient list. Serve over rice with a dollop of chili crisp (affiliate link) and a side of pickled cucumber salad if you want (and I promise you do want this – see notes). Top with more cilantro, if you want! 

    Notes

    For the pickled cucumber salad, thinly slice 3 small cucumbers and a small chunk of red onion on a mandoline. Toss sliced cucumbers and red onion with 1 tablespoon white vinegar, 2 tablespoons avocado oil, and 1/2 teaspoon salt and 1/2 teaspoon sugar. Let them hang out for 20-30 minutes (more if you have time) and just serve with the curry! So good. My kids love these, too!

    1 1/2 cups of rice will give you a bit more than you technically need – it’s 4 hearty portions or 6 regular portions. We always use this amount, though, because my girls often want to eat the rice plain, and I’d rather have a bit of extra rice instead of not enough rice!

    If your sauce is too runny, this is likely because of the brand of coconut milk. Typically when I use Asian brands of coconut milk (Aroy D or Chaokoh) I do not have this issue, and the sauce consistently turns out thick and luscious and creamy, almost like a gravy. If you find yourself with a runny sauce, just whisk one tablespoon of cornstarch into one tablespoon of cold water and add it to the bubbling sauce in the pan. Within a minute or two of gentle heat, you’ll see it start to thicken up. Works like a charm.

    • Prep Time: 5 minutes
    • Cook Time: 15 minutes
    • Category: Dinner
    • Method: Saute
    • Cuisine: Asian-Inspired

    Keywords: chickpea curry, curry recipe, vegetarian curry

    Chickpea Curry: Frequently Asked Questions

    What is the best kind of coconut milk to use?

    The texture of the sauce will vary a bit depending on brand. I like Aroy-D or Chaokoh canned coconut milk (full fat). If you use a coconut milk that is more on the runny side and the sauce isn’t thick enough for you, you can add the cornstarch slurry as directed in the recipe notes.

    Can you use light coconut milk?

    Personally I prefer full-fat coconut milk for this (and most) recipes. If you do use light coconut milk, it will probably need a bit of thickener such as the cornstarch to get it creamy and saucy as pictured.

    Can you use a different protein besides the chickpeas?

    Yes, absolutely. I love this with just about everything – tofu, chicken, shrimp, salmon, etc. It is a magical sauce that makes everything taste amazing.

    How could I add more vegetables to this?

    I have added sliced bell peppers to the sauce, sautéing them first so they are nice and soft. This sauce also goes well with broccoli.

    I also love serving this with a little pickled cucumber salad – instructions for that are in the recipe notes.

    How do the leftovers keep?

    This recipe makes for awesome leftovers. I especially like this for leftovers because the chickpeas do better in the fridge for longer than chicken or shrimp. This works great to make ahead and keep in the fridge for a week’s worth of lunches! Store it separately from the rice, or just side-by-side in individual containers.

    If you can, you may want to hold off on adding the spinach until just before serving – it’s not necessary, but it would ensure that you don’t encounter any mushy or slimy spinach in your leftovers.

    Can I make this vegan?

    Yes! That said, all curry pastes are different in what ingredients they use (and some do have fish products in them, like fish sauce or shrimp paste), so just be sure to check your curry paste to make sure that it is vegan.

    Can I make this gluten-free?

    To make this gluten free, just skip the soy sauce and double-check that the curry paste is gluten-free! (Use fish sauce or coconut aminos in place of the soy sauce.)

    Ingredients for coconut curry chickpeas.

    If You Like This, You Should Try:

    Source link

  • Chicken Livers and Onions

    Chicken Livers and Onions

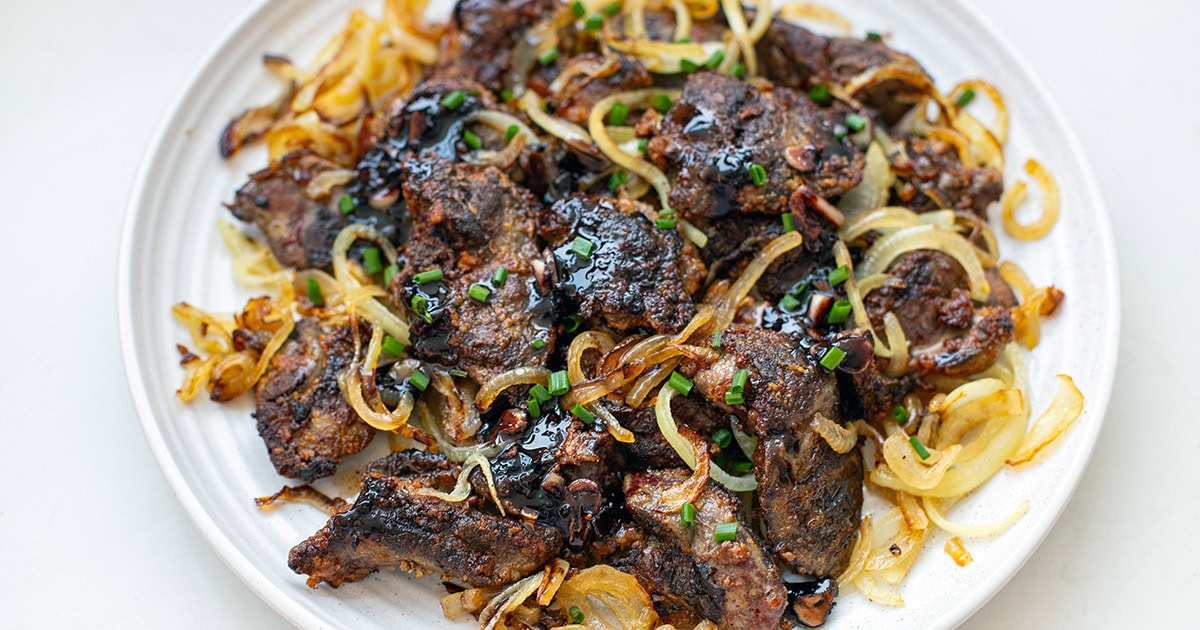
    Pan-fried chicken livers and onions with a sweet and tangy balsamic wine glaze. A simple, nutritious, and surprisingly delicious dinner worth trying.


    Jump to: ℹ️ Overview | 🛒 Ingredients | 📷 How To Make | 📹 Watch The Video | 👩‍🍳 Recipe Tips | 🥗 Serving Suggestions | 📝 Full Recipe Card | 🍽 More Healthy Chicken Recipes


    If you’ve never been big on liver, this is the recipe that might change your mind. This is probably my favorite way to cook chicken livers, and they always come out creamy in the center with a little crispy edge — exactly how they should be.

    The sweet, sautéed onions and the balsamic wine glaze balance the savory, lightly gamey flavor so perfectly that even my partner — who’s definitely not a liver fan — said this dish was delicious.

    Chicken liver is budget-friendly and nutrient-packed (hello, iron and B vitamins!), and this dish comes together in about 30 minutes. Serve it over buttery mash or crunchy toast, and you’ve got yourself an old-school comfort meal that feels a little fancy.

    👩‍🍳 You might also want to check out these liver recipes: Asian-style chicken livers, chicken liver skewers, or beef liver recipes. Learn more about the liver benefits here.

    What You’ll Need

    Here is what you’ll need for this chicken livers and onions recipe. Find the full measurements in the recipe card below.

    • Chicken Livers — the star of the dish, rich in nutrients; I used fresh, but you can thaw out frozen livers. Newbie tip: While chicken livers might look slimy due to their shiny appearance, they are actually quite firm and easy to work with. They feel better than they look.
    • Milk or lemon water — for soaking chicken livers to mellow flavor and tenderize.
    • Plain flour — for a light, crispy crust, can be swapped with gluten-free flour, cornstarch, or tapioca flour.
    • Spices: garlic powder, onion powder, smoked paprika — for savory depth, and salt and pepper for seasoning.
    • Onions — yellow or white onion—sliced thin for caramelized sweetness.
    • Olive oil — for sautéing and frying.
    • For the Glaze: Red wine—adds acidity and richness, garlic for aromatic kick, butter (makes the glaze velvety), aged or regular balsamic vinegar for that tangy-sweet finish, and a little honey to balance out acidity. Red wine can be swapped with chicken broth.

    How To Cook Chicken Livers & Onions

    Find the full recipe and nutritional information below. Here are some handy step-by-step photos for how to make pan-fried chicken livers and onions.

    • Rinse and trim chicken livers; remove some of the visible connective tissue. I like to cut them into 1-inch pieces. Soak in milk 10 minutes, then pat dry. Soaking helps to mellow out the flavor and tenderize the livers.
    • Slice onions and onions until golden, set aside.
    • Season chicken livers with salt, spices, and coat with flour.
    • Heat oil in another pan; cook livers in batches over high heat — about 3 minutes per side, until crispy and golden. Don’t overcook as they can get gritty and rubbery.
    • Remove livers; deglaze the pan with red wine and add butter, garlic, balsamic, and honey. Stir and bring to a simmer, allowing to bubble and caramelize slightly.
    • When it starts to look glossy and thick, return livers and onions, or serve them topped with the glaze.
    • Eat while hot, although I’ve enjoyed snacking on them cold out of the fridge.

    Watch The Video

    Recipe Tips

    • Don’t overcrowd: Cook livers in batches so they brown, not steam. Leave enough space between livers.
    • Use high to medium-high heat: For that lovely crust outside.
    • Soak in milk: It really helps mellow the strong flavor.
    • Try variations: Add crispy bacon, mushrooms, or a splash of cream to the glaze.
    • Test doneness: Cut into the thickest piece—it should be a little pink and creamy.
    • Storage tips: Store leftovers in an airtight container in the fridge for up to 3 days. Reheat gently in a skillet. I don’t recommend freezing—they’ll turn grainy.
    • Make-ahead tips: You can soak and prep the livers (trimmed and coated) a few hours ahead. Keep them in the fridge until ready to cook. Onions can be sautéed in advance and reheated.

    Serving Suggestions

    I love these with my sour cream mashed potatoes or thick slices of crusty bread to mop up all that glaze. They’re also great alongside creamy green beans or a simple cheesy leafy green salad for freshness.

    💬 If you’ve tried this chicken livers and onions or any other recipe on the blog then don’t forget to rate the recipe and let me know how you got on in the comments below, I love hearing from you! You can also FOLLOW ME on Instagram, Facebook, Pinterest, YouTube, and or sign up to my Newsletter to see more of my delicious food.

    Want to Save This Recipe?

    Enter your email & I’ll send it to your inbox. Plus, get great new recipes from me every week!

    By submitting this form, you consent to receive emails from Cooked & Loved

    Pan-fried chicken livers and onions with a sweet and tangy balsamic wine glaze. A simple, nutritious and surprisingly delicious dinner worth trying. Find step-by-step photos and more recipe tips above.

    • Rinse chicken livers if you like. Trim off fat or any green bits. Cut larger pieces in half.

    • Soak in milk for 10 minutes. Drain and pat dry well.

    • While soaking, cook onions: heat 1 tablespoon oil in a skillet, sauté onions with salt for 5–8 minutes until golden. Set aside.

    • Season livers with salt, garlic powder, onion powder, and smoked paprika. Sprinkle with flour and toss to coat evenly.

    • Heat 2 tablespoons olive oil over high heat. Add livers in batches — don’t crowd the pan. Cook about 3 minutes, flip, and cook 2–3 minutes more until browned outside and creamy inside. Transfer to a plate.

    • Deglaze pan with red wine, scraping up browned bits. Add butter, garlic, balsamic, and honey. Simmer 30 seconds until slightly thickened.

    • Serve livers with onions and drizzle glaze over the top (or toss everything in the pan to coat).

    • Enjoy hot (or cold).

    • Newbie tip: While chicken livers might look slimy due to their shiny appearance, they are actually quite firm and easy to work with. They feel better than they look.
    • How do I know when chicken livers are cooked? They should be browned on the outside and a little pink and creamy inside. Overcooked livers turn grainy and dry.
    • Can I skip the milk soak? Technically, yes—but soaking helps mellow the stronger flavor and tenderize them.
    • What if I don’t want to use wine? Use chicken or beef broth instead. The glaze will still be delicious.
    • Are chicken livers good for you? Definitely! They’re one of the most nutrient-dense foods — high in iron, vitamin A, and B vitamins. Check out these 50 nutrient-dense foods.
    • Can I freeze cooked chicken livers? I don’t recommend it; the texture suffers. It’s best eaten fresh or reheated within a day or two.
    • Don’t Overcrowd: Cook livers in batches so they brown, not steam. Leave enough space between livers.
    • Use High to Medium-High Heat: For that lovely crust outside.
    • Try Variations: Add crispy bacon, mushrooms, or a splash of cream to the glaze.
    • Test Doneness: Cut into the thickest piece—it should be a little pink and creamy.
    • Storage tips: Store leftovers in an airtight container in the fridge for up to 3 days. Reheat gently in a skillet. I don’t recommend freezing—they’ll turn grainy.
    • Make-ahead Tips: You can soak and prep the livers (trimmed and coated) a few hours ahead. Keep them in the fridge until ready to cook. Onions can be sautéed in advance and reheated.

    Calories: 344kcal | Carbohydrates: 16g | Protein: 22g | Fat: 20g | Saturated Fat: 6g | Polyunsaturated Fat: 3g | Monounsaturated Fat: 10g | Trans Fat: 0.2g | Cholesterol: 402mg | Sodium: 652mg | Potassium: 410mg | Fiber: 1g | Sugar: 6g | Vitamin A: 12946IU | Vitamin C: 23mg | Calcium: 63mg | Iron: 11mg

    Keywords: chicken livers and onions, balsamic-glazed chicken livers, chicken livers with onions, pan-fried chicken livers

    More Healthy Chicken Recipes


    Source link

  • Brandon’s Egg Roll Tacos Recipe

    Brandon’s Egg Roll Tacos Recipe

    icon-arrowicon-chevron-whiteicon-chevronicon-commenticon-facebookicon-hearticon-instagramicon-instant-poticon-listicon-lockicon-meal-prepicon-nexticon-pinteresticon-popularicon-quoteicon-searchicon-staricon-sugar-freeicon-tiktokicon-twittericon-veganicon-videoicon-youtubemenu-closemenu-open


    Our recipes, your inbox. Sign up

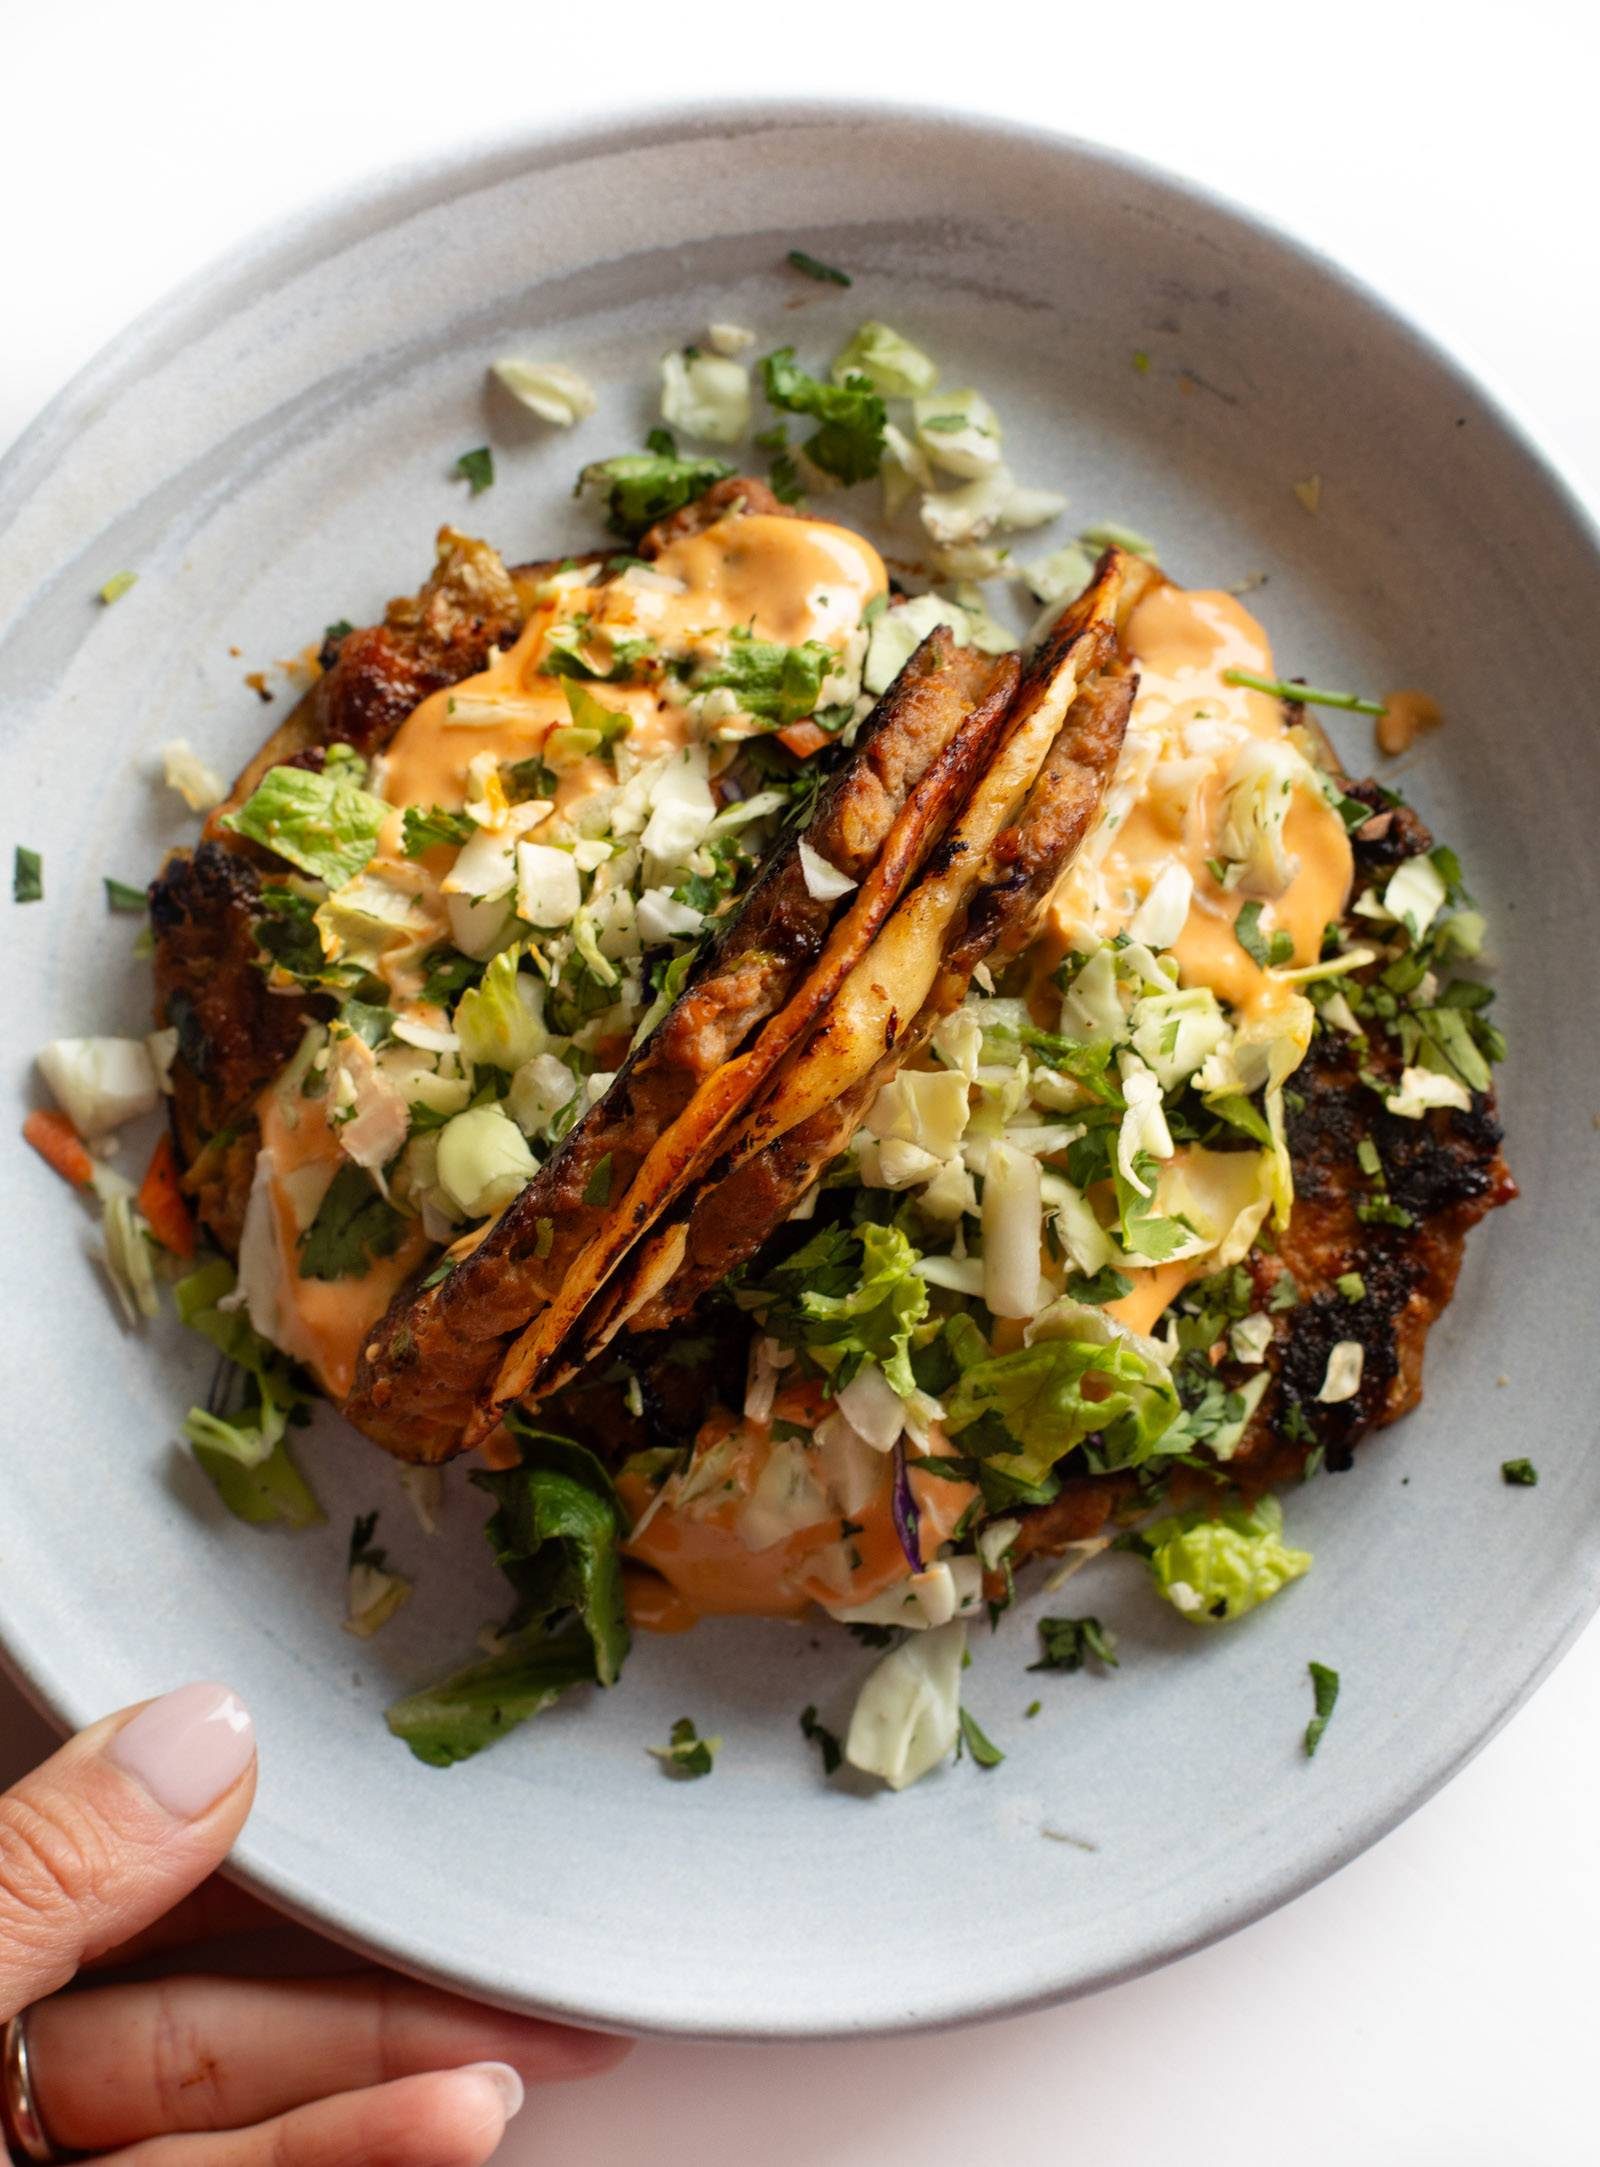
    Egg rolls meet tacos! I love this! Easy to make and ridiculously good with a classic egg roll filling, crunchy veg, pillowy tortillas, and a spicy gochujang sauce.

    Egg Roll, Meet Taco.

    Lindsay Ostrom headshot.

    Are you even ready for this? What we have here is like an egg roll filling (meat, cabbage, carrots, soy sauce, garlic, ginger) meets a fried little taco (flour tortilla, fresh veg on top, gochujang sauce for serving) and the whole thing eats a lot like a folded sandwich.

    That’s going to be a big yes from me.

    My friend Brandon has been telling me about these for weeks. I know the whole idea of meat smashed into tortillas is really having a moment on social media (smash burger tacos, chicken Caesar smash tacos, etc.), but the concept has always seemed a little strange to me.

    Until I tried these ones – and now I’m a believer.

    Besides being super yummy (don’t skip the gochujang sauce it is DIVINE on there) – these are shockingly easy to make. I know some of the recipes in the last SOS series leaned a little more towards “involved” than I normally do – there were some extras that I just couldn’t let go of. Shallot crispies, panko breading, house sauce, etc. So let’s think of this as a BONUS SOS recipe. You can easily make this in 20 minutes without breaking a sweat.

    Hope you love it! And thanks to Brandon for sharing this idea with me! YOU WERE RIGHT!

    Lindsay signature.

    Watch Me Make This Recipe

    [embed]https://www.youtube.com/watch?v=CwtR_bB-nSw[/embed]
    Print
    clock clock iconcutlery cutlery iconflag flag iconfolder folder iconinstagram instagram iconpinterest pinterest iconfacebook facebook iconprint print iconsquares squares iconheart heart iconheart solid heart solid icon
    A picture of Brandon’s Egg Roll Tacos

    Brandon’s Egg Roll Tacos


    5 Stars 4 Stars 3 Stars 2 Stars 1 Star

    4.9 from 35 reviews

    • Author: Lindsay
    • Total Time: 20 minutes
    • Yield: 4 servings (2 tacos each)

    Description

    Egg rolls meet tacos! I love this! Easy to make and ridiculously good with a classic egg roll filling, crunchy veg, pillowy tortillas, and a spicy gochujang sauce.


    Instructions

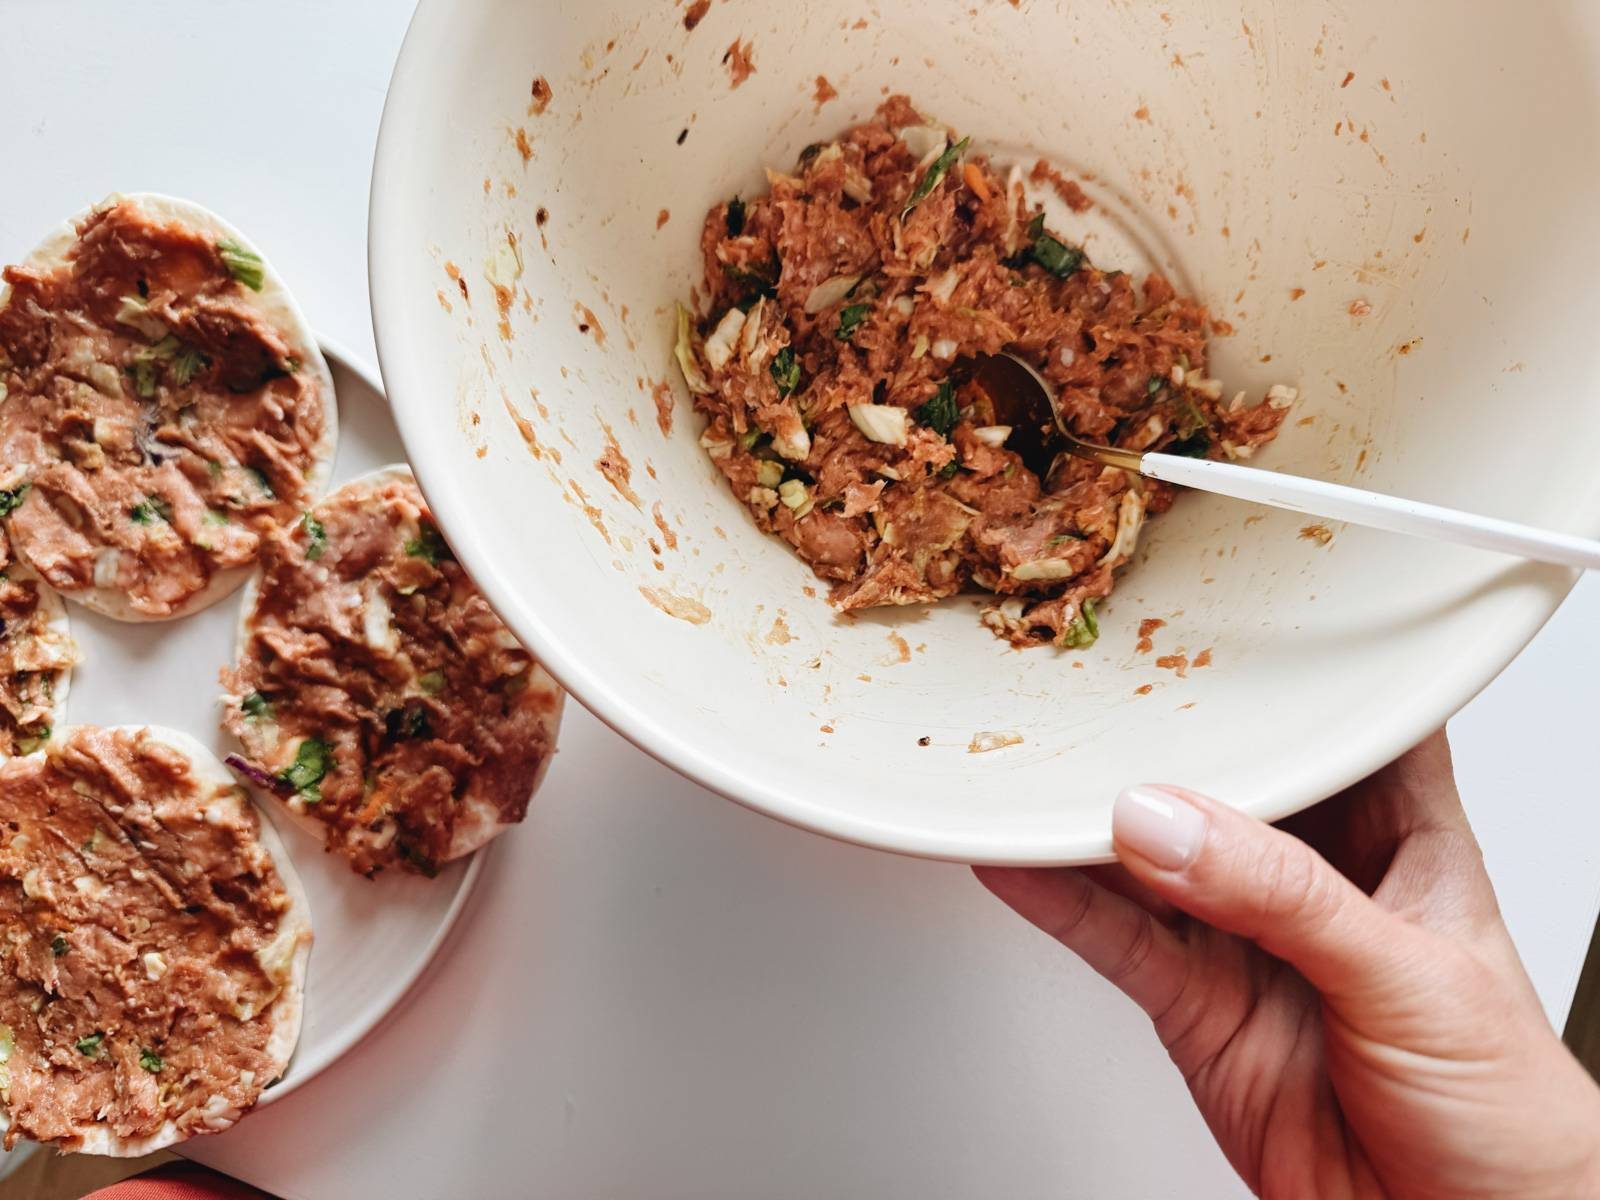
    1. Make Filling: Mix the ground meat, soy sauce, chili crisp, garlic, ginger, and veggies together. I just mix it all up with my hands.

      Spreading egg roll filling on flour tortillas.

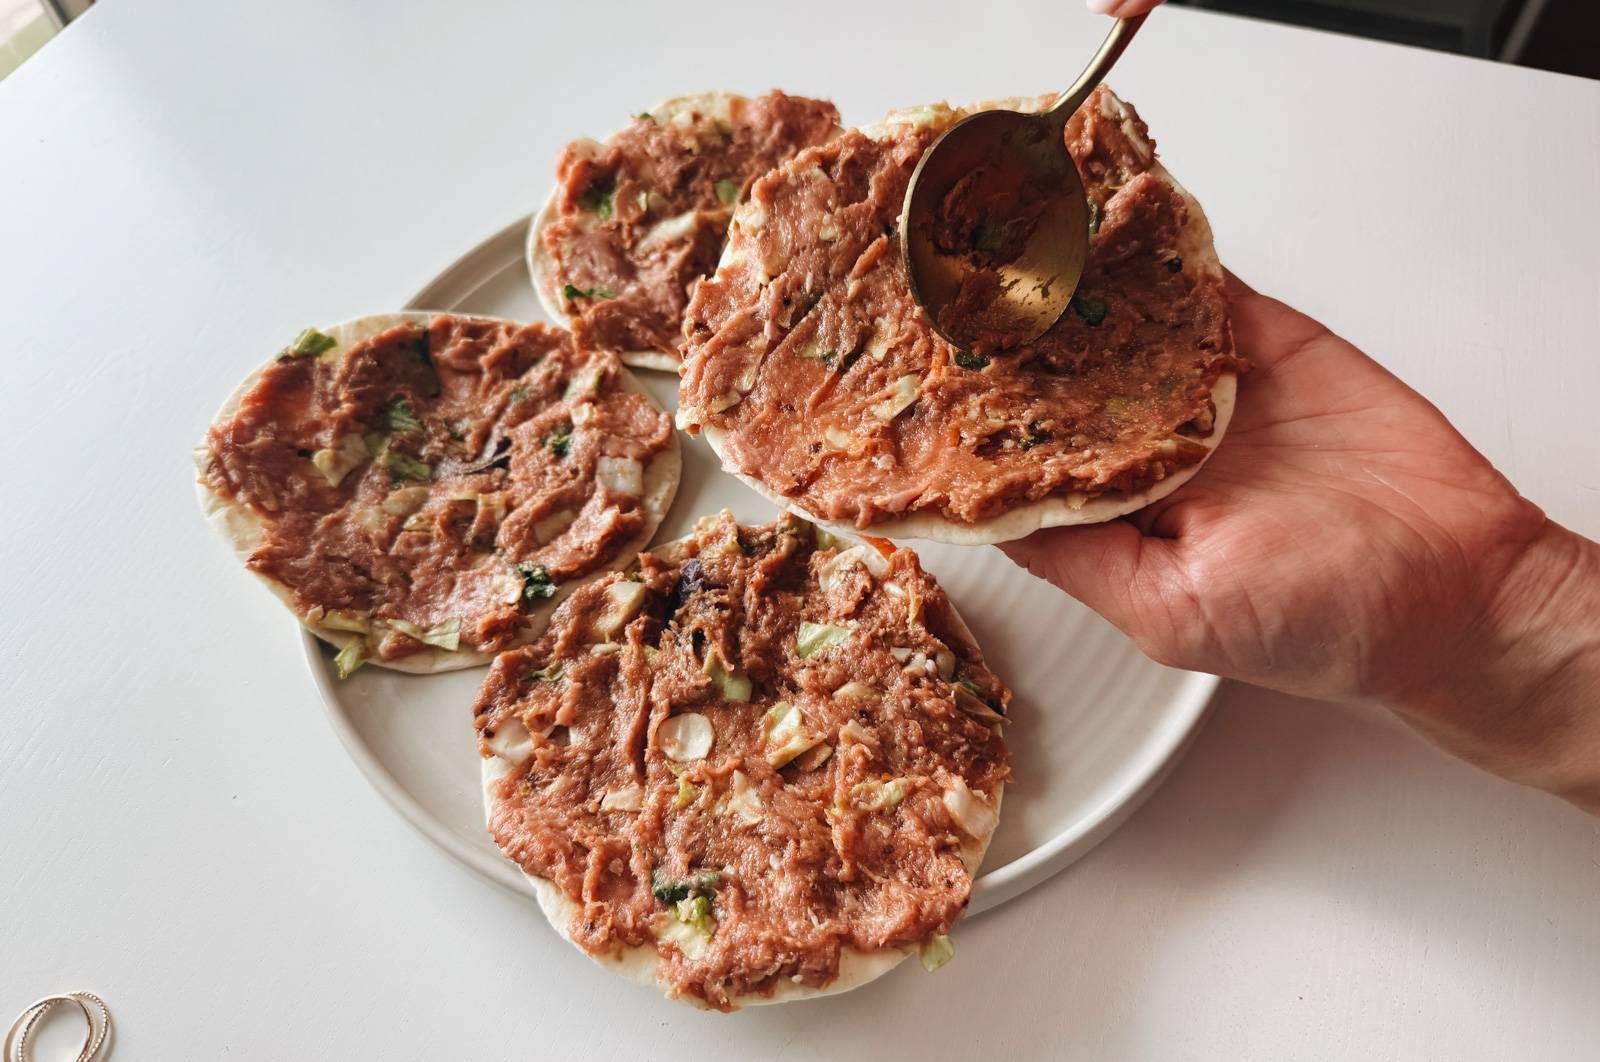
    2. Spread Filling: Press the mixture onto one side of the tortillas. I find it easiest to do all of them at once, before you start cooking them.

      Spreading egg roll mixture on flour tortillas.

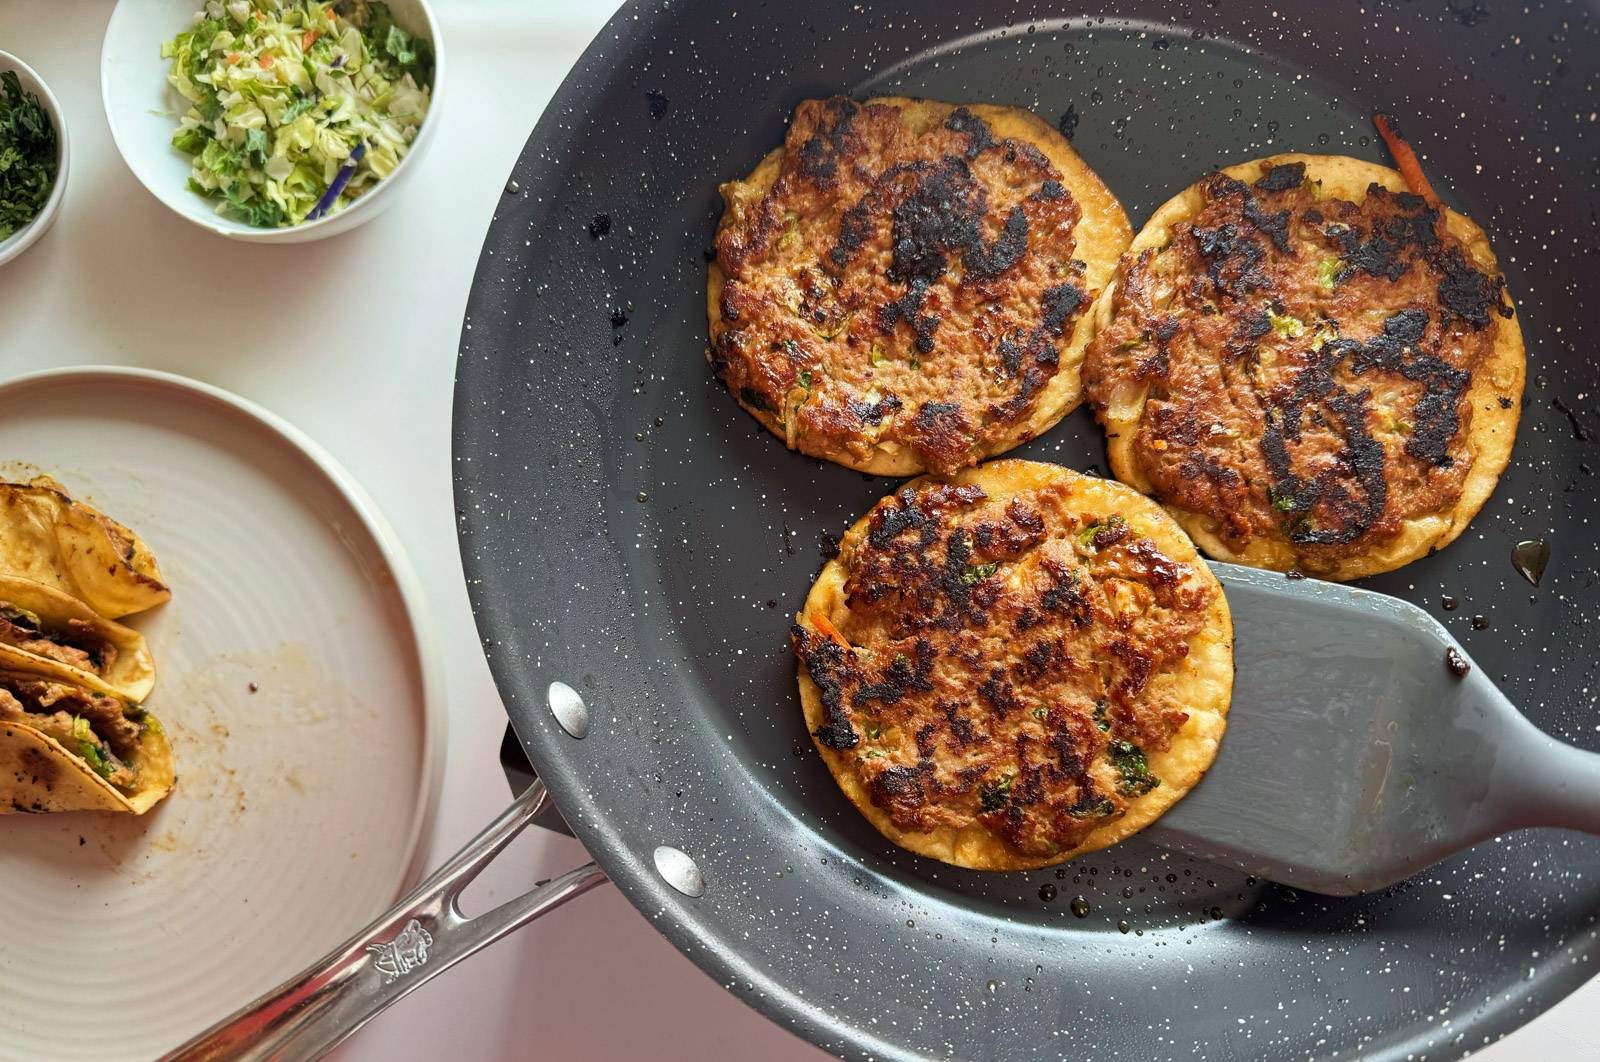
    3. Cook Tacos: Heat a skillet over medium high heat. Add the oil. Working in batches, add the tacos, meat-side down, and cook for 3-4 minutes until they are browned. Flip to the back side for 1 minute to get the tortillas a bit golden, and then finish with one more flip to being meat-side down to ensure it’s cooked through. (165 degrees for chicken and turkey, 160 for ground pork.)

      Frying egg roll tacos in a skillet.

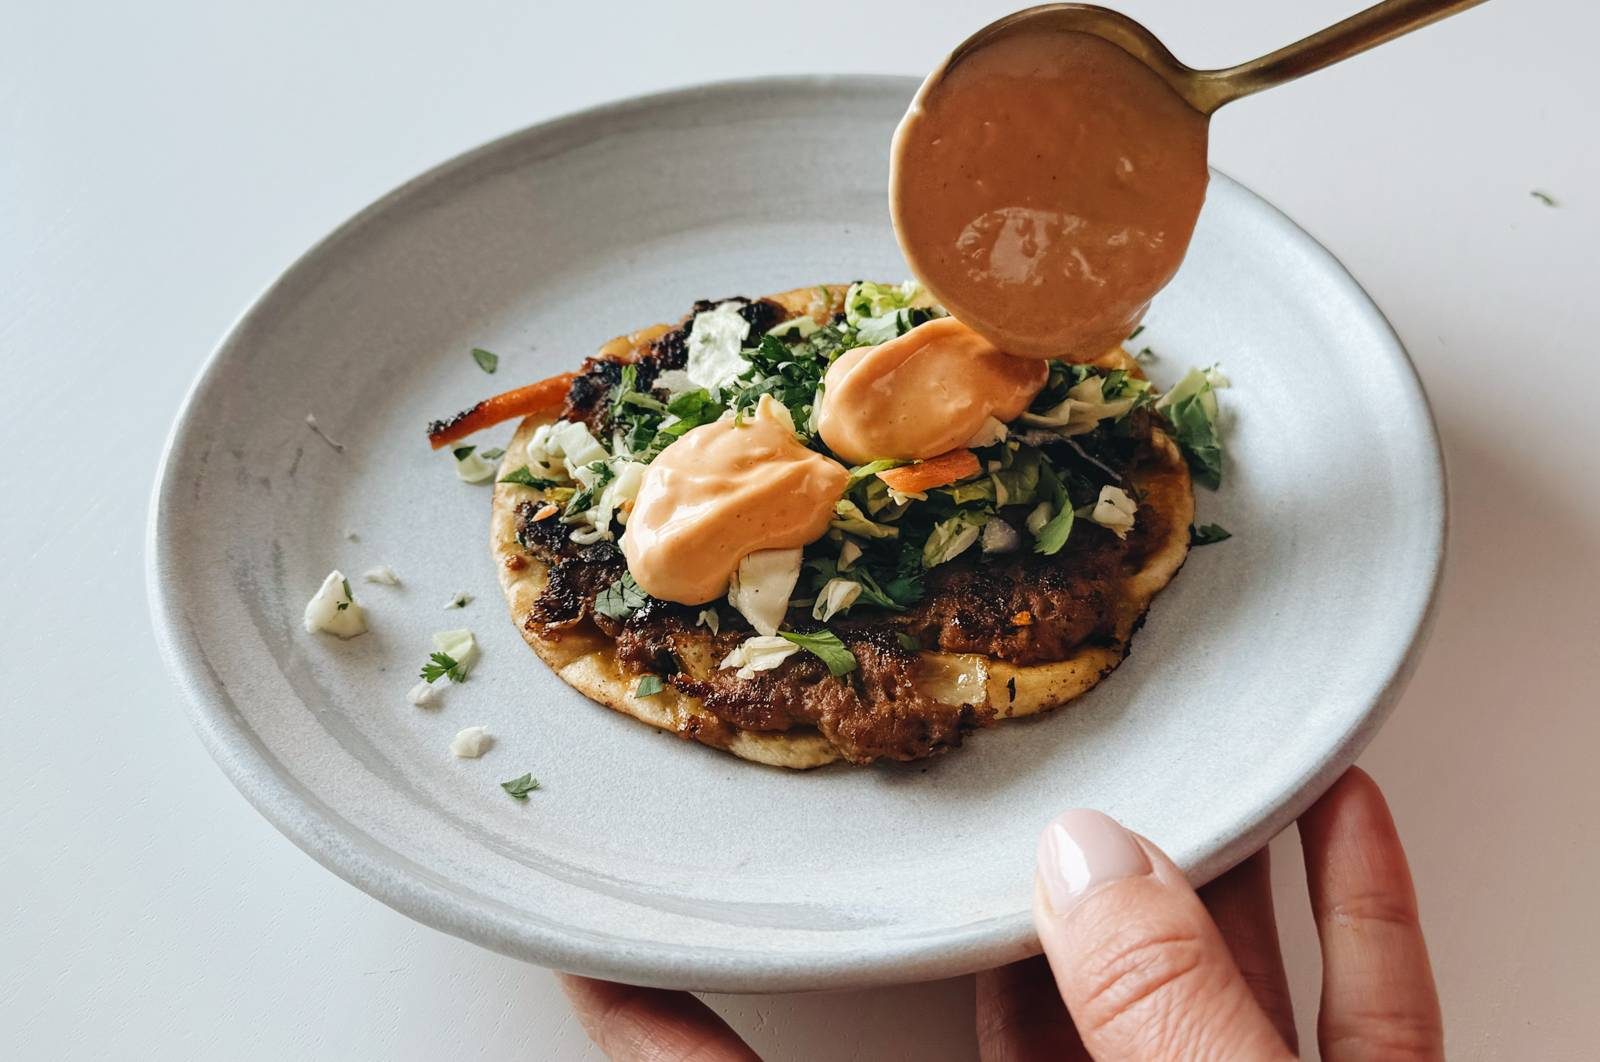
    4. Top and Eat: Top with more fresh cabbage, cilantro or green onions, and your sauces of choice. Fold in half – it eats kind of like a hybrid between a taco and sandwich, but tastes like an eggroll. I *love* these with the gochujang sauce!

      Spooning gochujang sauce on egg roll tacos.

    Notes

    Egg rolls meet tacos! I love this! Easy to make and ridiculously good with a classic egg roll filling, crunchy veg, pillowy tortillas, and a spicy gochujang sauce.

    • Prep Time: 10 minutes
    • Cook Time: 10 minutes
    • Category: Dinner
    • Method: Stovetop
    • Cuisine: Asian-Inspired

    Keywords: egg roll tacos, egg roll recipe, taco recipe

    More Seriously Fast Taco Recipes


    Source link

  • Cheese Stuffed Zucchini Boats Recipe

    Cheese Stuffed Zucchini Boats Recipe

    This stuffed zucchini recipe has three cheeses, roasted red peppers, and basil. These are easy, taste incredible, and perfectly cheesy!

    Cheese Stuffed Zucchini Boats

    This recipe came from the summer we decided to grow zucchini in our garden. We were inundated with them! We needed lots of ways to use zucchini, and these made it to the top of our favorites list. They are easy, quick, and taste amazing.

    The ingredient list for this recipe is inspired by our super popular veggie lasagna, which is made with zucchini, cheese, and a sauce made with tomatoes and roasted red peppers.

    Key Ingredients

    • Zucchini: For this recipe, I look for medium, firm zucchini. You’ll cut them in half and then scoop out some of the middle, so you want them large enough to fit the cheese stuffing. Yellow summer squash is also excellent.
    • Roasted Red Pepper: I love the sweet flavor of roasted red peppers and often keep a jar of them in the fridge. If you would like to roast your own, look at our roasted red pepper hummus recipe, which shows how to roast bell peppers.
    • Cheese: I use three cheeses in this recipe. Ricotta makes the filling creamy, parmesan adds a sharp, cheesy flavor, and mozzarella melts and turns golden brown. Cottage cheese is an excellent substitute for the ricotta. If you are making this vegetarian, use a vegetarian-friendly parmesan cheese or substitute it with another sharp cheese like white cheddar.
    • Basil: We add basil leaves to the for fresh summer flavor before serving. If you only have dried basil, mix 1 teaspoon into the ricotta filling instead.

    Find the full recipe with measurements below.

    How to Make Stuffed Zucchini Boats

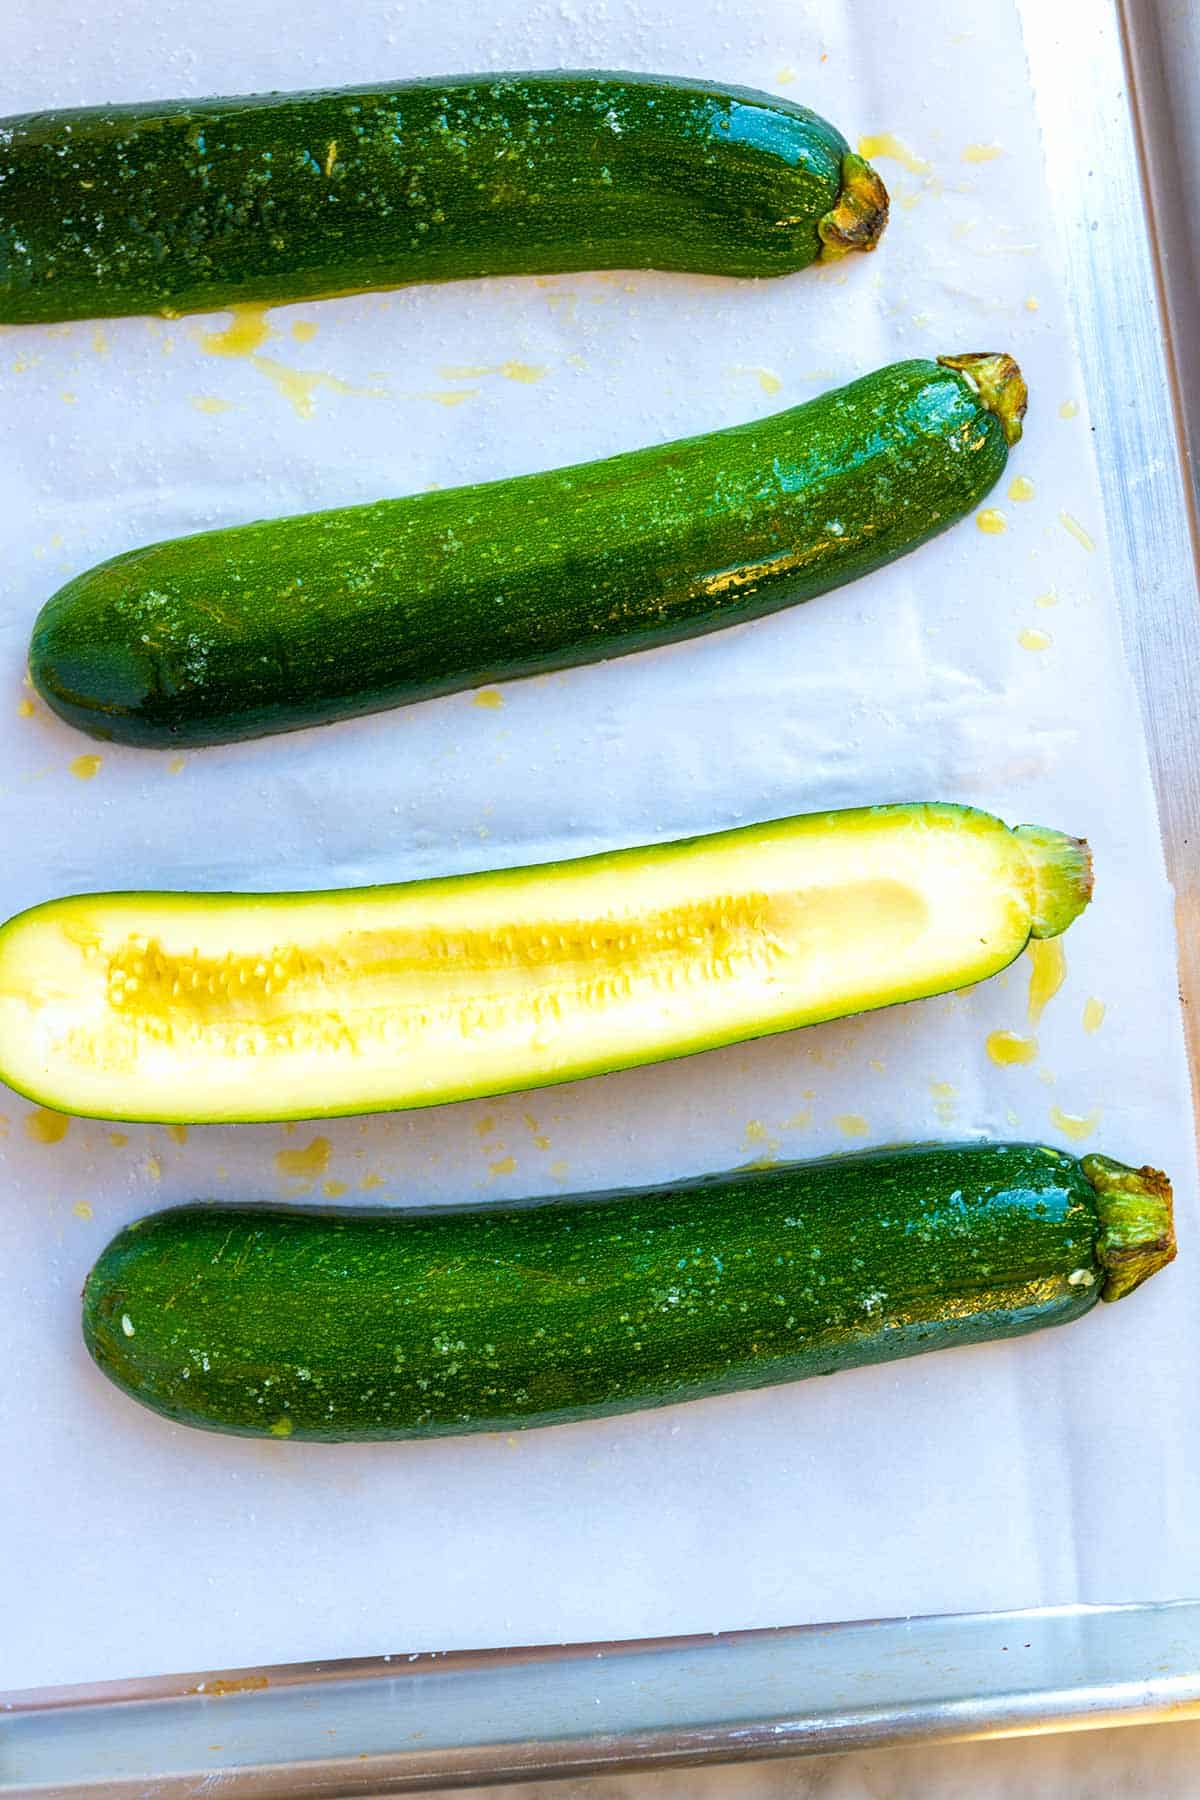
    Tip 1: How to make zucchini boats. All you need to do is slice the zucchini in half lengthwise. Then use a spoon to scoop out a channel down the middle. You don’t need to remove much, just enough to make some room for the ricotta and pepper filling. The channel created by scooping out some of the zucchini makes them look like canoes.

    Turning zucchini into zucchini boats ready for stuffing

    Tip 2: Bake zucchini without the stuffing first. Rub the zucchini halves with olive oil and sprinkle with salt. Place them cut-side down on a baking sheet and roast until tender (about 15 minutes). This is where some other recipes fall short. Zucchini has a lot of moisture, so roasting them unstuffed first lets some extra moisture cook off.

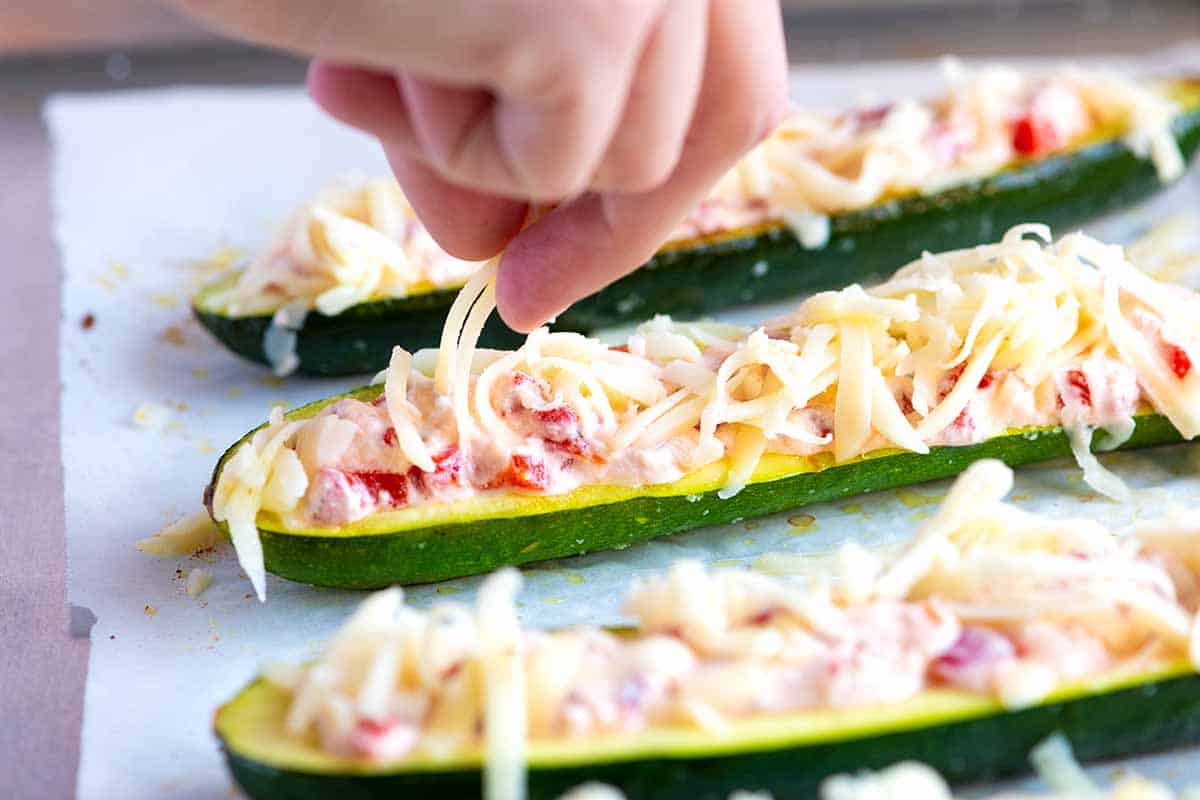
    Tip 3: Stuff the zucchini. I love to stuff the zucchini with a mixture of ricotta cheese, parmesan cheese, and chopped roasted red peppers, top it with mozzarella cheese, and slide it back into the oven to finish cooking.

    For a heartier variation, add some cooked quinoa, rice, or cooked ground turkey or chicken to the stuffing.

    Stuffed Zucchini with ricotta and mozzarella cheese

    More Zucchini Recipes

    Cheese Stuffed Zucchini Boats

    Cheese Stuffed Zucchini Boats

    • PREP
    • COOK
    • TOTAL

    We stuff the zucchini with three kinds of cheese and one of our favorite ingredients: roasted red peppers. The pepper adds color and tastes incredible when mixed with cheese and basil. Enjoy these as your main meal (I’d eat two halves) or as a side next to a big salad. Add protein by stirring some cooked ground turkey or sausage into the ricotta and pepper mixture. Crumbled tofu, quinoa, rice, or even a handful of canned or cooked chickpeas would also make these more substantial.

    Makes 4 small servings or 2 servings as a main meal

    You Will Need

    2 medium zucchini

    1 tablespoon olive oil

    1 roasted red pepper from a jar of roasted peppers

    1/4 cup ricotta cheese (3 ounces)

    1/4 cup finely grated parmesan cheese (1/2 ounce)

    1/2 cup grated mozzarella cheese (2 ounces)

    Handful of torn fresh basil leaves

    Salt and fresh ground black pepper

    Directions

      1Preheat the oven to 425°F (220°C). Line a baking sheet with a silicone mat, aluminum foil, or parchment paper.

      2Cut the zucchini in half, lengthwise. Use a spoon to scoop a channel down the middle of each zucchini half, making boats.

      3Rub the zucchini with olive oil and a generous pinch of salt. Place the zucchini halves, cut side down, onto the prepared baking sheet. Roast for about 12 minutes or until the zucchini is tender but not soft.

      4Meanwhile, chop the roasted red pepper into small pieces and add it to a small bowl. Mix in the ricotta and parmesan cheese.

      5Flip the zucchini so that they are cut side up, and divide the ricotta-pepper mixture between the zucchini boats.

      6Sprinkle mozzarella on top, then place the zucchini back into the oven and bake for another 8 to 10 minutes, until the cheese melts and the zucchini is soft. For some browned cheesy spots, before taking the baking sheet out of the oven, turn the oven to broil and broil until the cheese bubbles and browns, an additional 1 to 2 minutes.

      7Serve with basil, a light sprinkle of salt, and fresh ground black pepper scattered on top.

    Adam and Joanne’s Tips

    • Vegetarian tips: Depending on the brand, parmesan cheese is not vegetarian-friendly. Substitute with a sharp white cheddar, or parmesan-style cheese that advertises they do not use animal rennet to make the cheese.
    • Dried basil: Stir 1 teaspoon of dried basil in the ricotta cheese mixture.
    • The nutrition facts provided below are estimates.

    Nutrition Per Serving
    Serving Size
    1 zucchini half
    /
    Calories
    120
    /
    Total Fat
    9.4g
    /
    Saturated Fat
    4.1g
    /
    Cholesterol
    20.8mg
    /
    Sodium
    289.9mg
    /
    Carbohydrate
    2.8g
    /
    Dietary Fiber
    0.7g
    /
    Total Sugars
    1.5g
    /
    Protein
    6.2g


    AUTHOR:

    Joanne Gallagher

    Adam and Joanne of Inspired Taste

    We are Adam and Joanne Gallagher, the creators of Inspired Taste. Established in 2009, Inspired Taste grew from a childhood dream into one of the internet’s most trusted recipe sites with hundreds of reliable recipes, step-by-step videos, and expert tips.More About Us

    Source link

  • Essential Mignonette Sauce Recipe

    Essential Mignonette Sauce Recipe

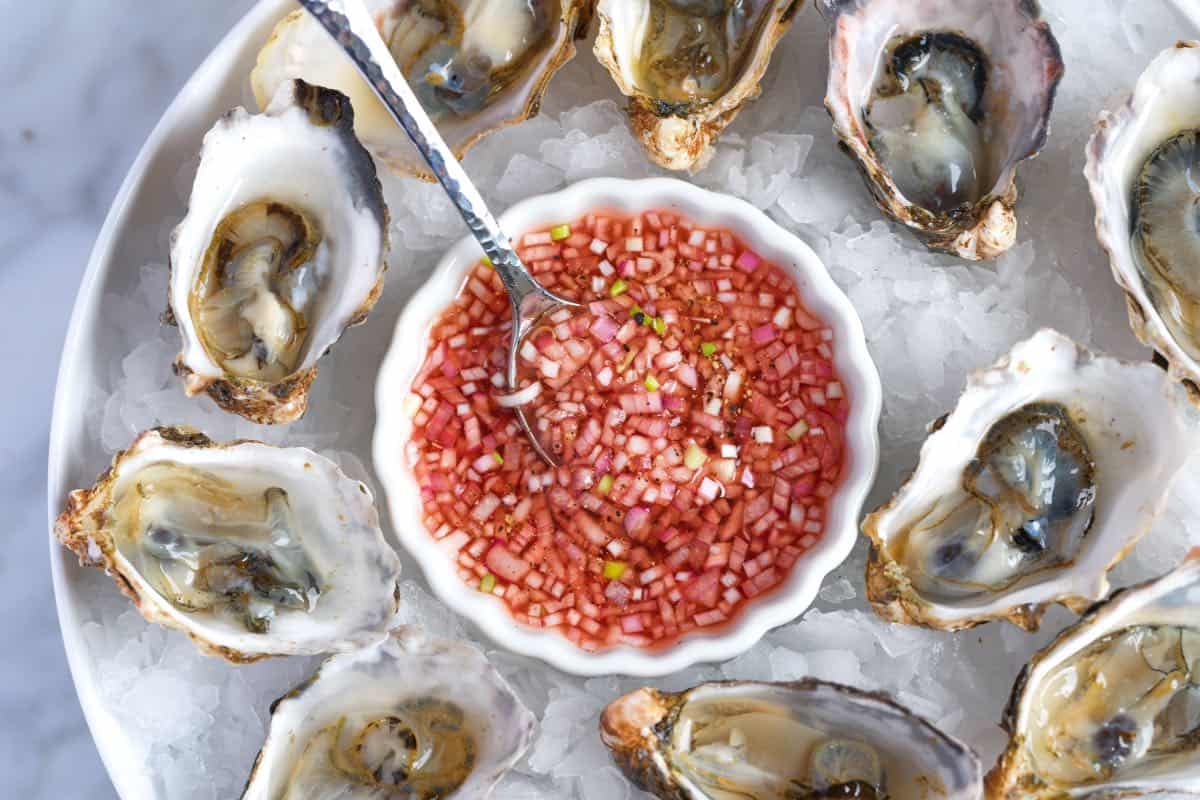
    If you love oysters, then you need this mignonette sauce recipe in your life. It’s shockingly easy and made with shallots, red wine vinegar, and pepper.

    Classic Mignonette Sauce

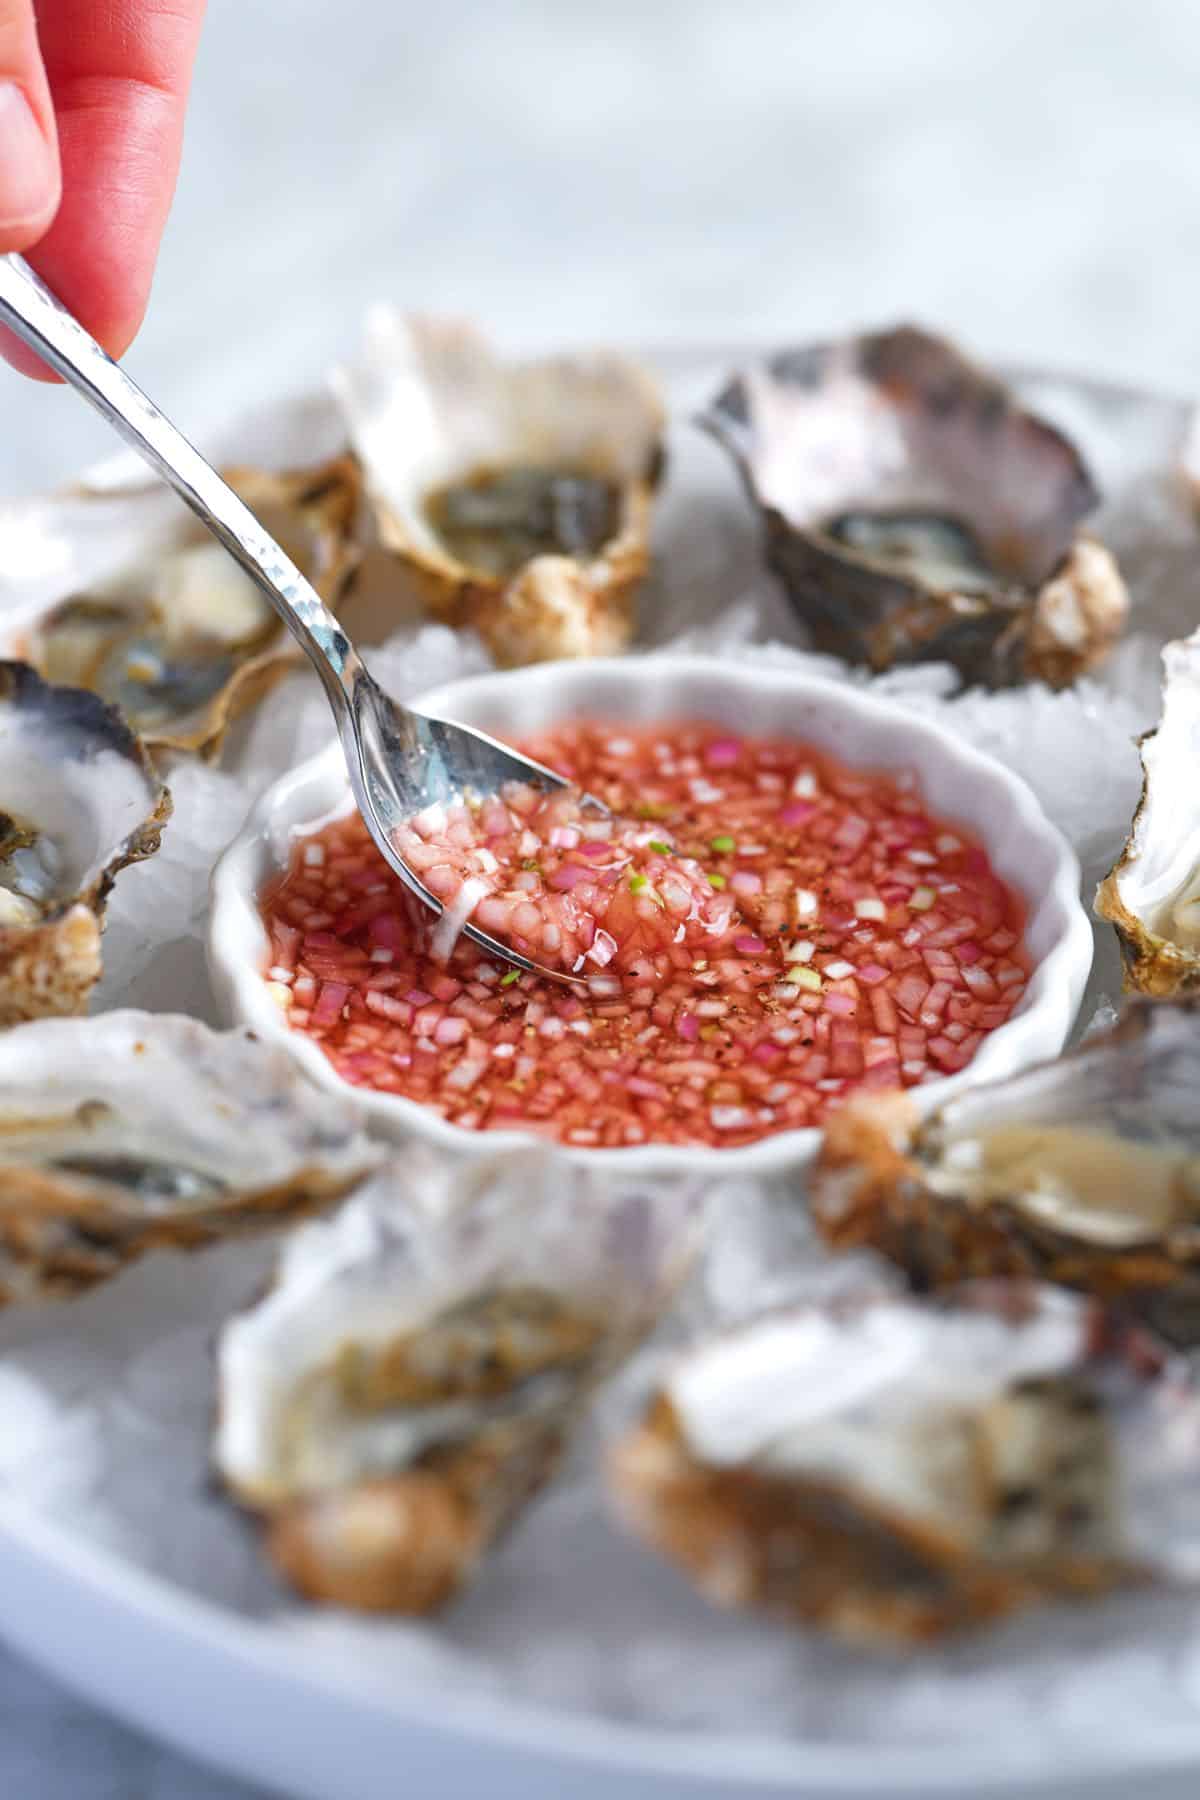
    This is our family’s essential mignonette. Mignonette (French) is roughly translated to “cute” or “dainty,” which seems fitting since it’s always served with a tiny spoon in a tiny bowl (haha).

    I love this sauce with fresh oysters and think you will, too! This one is super classic, but try our herb mignonette for a herby, sweeter twist!

    Key Ingredients

    • Shallots: I mince my shallots finely and use a lot. The vinegar cuts their sharpness and gently pickles them. We hand-mince our shallot instead of using a food processor. (A food processor creates a more mushy situation that tastes stronger in the sauce.)
    • Pepper: You can use white or black peppercorns. I like both. White pepper tastes more mellow and less spicy than black pepper, but both work nicely in this sauce.
    • Vinegar: We have used red wine vinegar in our photos, but white wine vinegar and champagne vinegar are also excellent choices. Use something you enjoy the taste of. My favorite widely available brand of red wine vinegar is Pompeian, but you can always look in specialty stores and online for more high-end options.

    Find the full recipe with measurements below.

    How to Make Mignonette Sauce

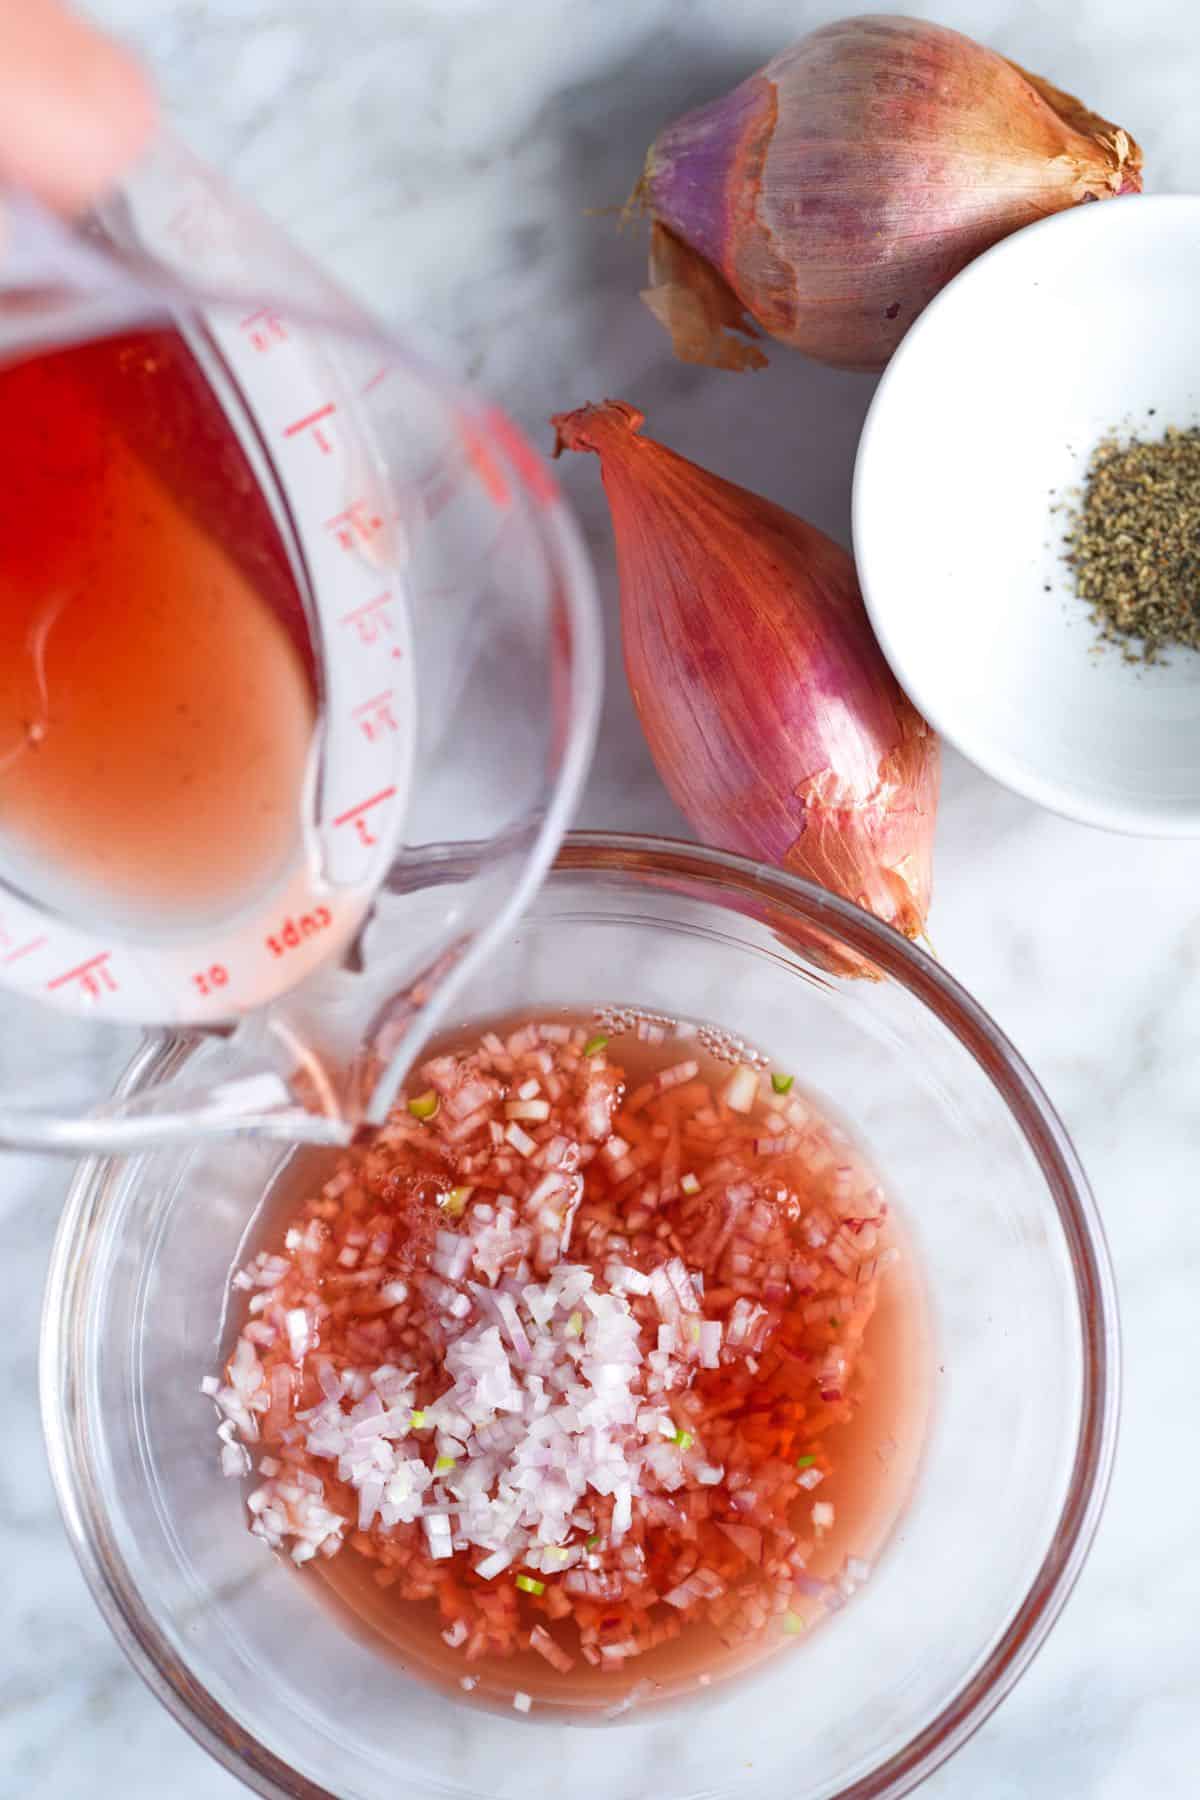
    Tip 1: Make the sauce. To make a classic mignonette for oysters, combine the finely minced shallots with vinegar and pepper. I also add a small pinch of sea salt, but that’s optional!

    Making mignonette sauce for oysters

    Tip 2: Let it sit in the fridge for a bit. After making it, store the sauce in the fridge for at least two hours so the shallots can mellow and pickle before serving it. And, here’s a fun fact about mignonette: it lasts in the fridge for a month! I actually love it after it has sat for a while in the refrigerator.

    More Sauce Recipes

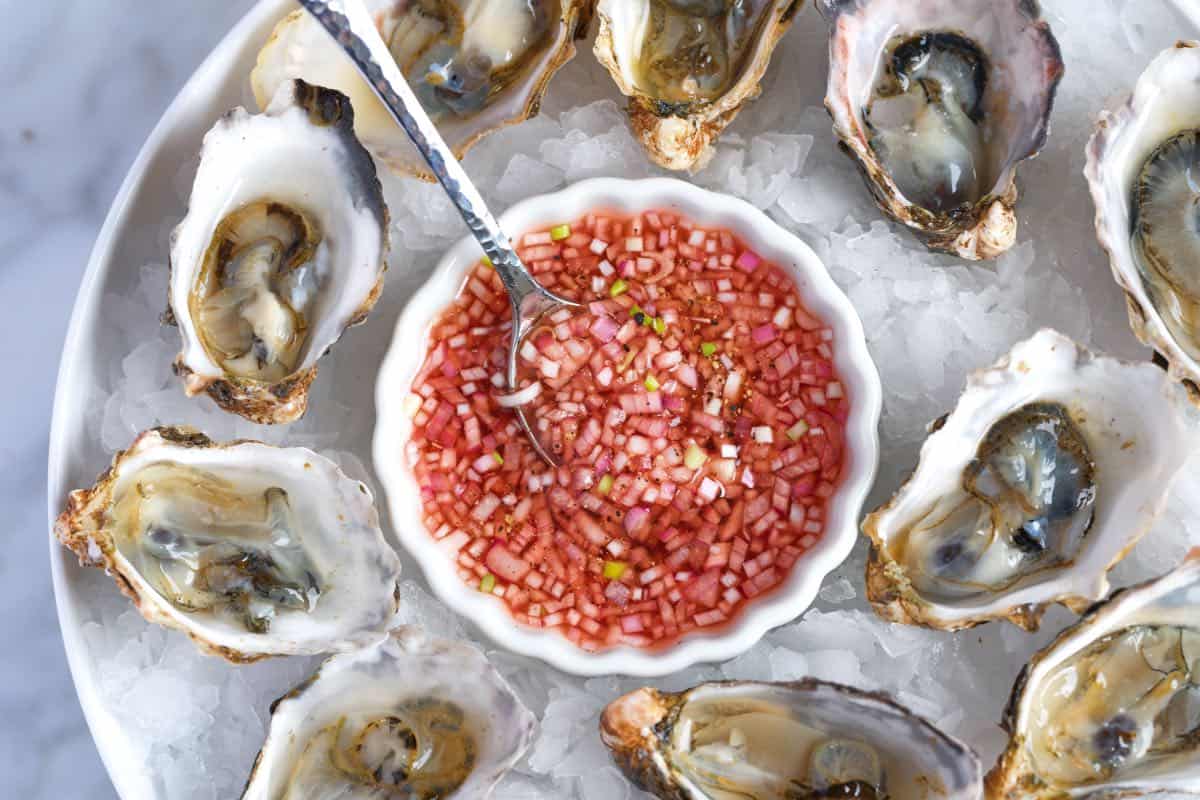
    Mignonette Sauce with Oysters

    Essential Mignonette Sauce

    • PREP
    • TOTAL

    If you love oysters, then you need this essential sauce in your life. It’s shockingly easy and made with shallots, red wine vinegar, and pepper. We have used red wine vinegar in our photos, but white wine vinegar and champagne vinegar are also excellent choices. Use something you enjoy the taste of. My favorite widely available brand of red wine vinegar is Pompeian, but you can always look in specialty stores and online for more high-end options.

    Makes 4 ounces or just over 1/3 cup

    You Will Need

    ¼ cup finely diced shallots, 1 to 2 shallots (30g)

    ⅓ to ½ cup red wine vinegar, white wine vinegar, or champagne vinegar; use something you enjoy (80-120ml)

    ¼ to ½ teaspoon coarsely ground black or white peppercorns

    Small pinch of fine sea salt, optional

    Directions

      1Make the sauce: Combine the shallots, vinegar, pepper, and a small pinch of salt in a non-reactive bowl or glass jar. Taste and adjust with more pepper. The vinegar will taste sharp at first, but it mellows as the shallots sit in the fridge. If the sauce tastes too abrasive, stir in a small pinch of sugar to balance it.

      2Refrigerate: Cover and refrigerate for at least 2 hours before serving so the shallots can soften and pickle.

      3Serve: Shuck your oysters and spoon the sauce into a small ramekin. Serve on the side and add a spoonful to each oyster just before eating. I like to go heavy on the shallots. Then repeat.

    Adam and Joanne’s Tips

    • Storing: This keeps for up to 1 month in the refrigerator. It will continue to mellow over time (which I enjoy). If it loses some of its brightness, stir in a splash of fresh vinegar to perk it up.
    • The nutrition facts provided below are estimates.

    Nutrition Per Serving
    Serving Size
    1/4 of the recipe
    /
    Calories
    13
    /
    Total Fat
    0g
    /
    Saturated Fat
    0g
    /
    Cholesterol
    0mg
    /
    Sodium
    42.2mg
    /
    Carbohydrate
    1.9g
    /
    Dietary Fiber
    0.4g
    /
    Total Sugars
    0.8g
    /
    Protein
    0.3g


    AUTHOR:

    Joanne Gallagher

    Previous Post: Perfect French Toast
    Next Post: Easy Potato Leek Soup

    Source link

  • Perfect Black Bean Dip Recipe

    Perfect Black Bean Dip Recipe

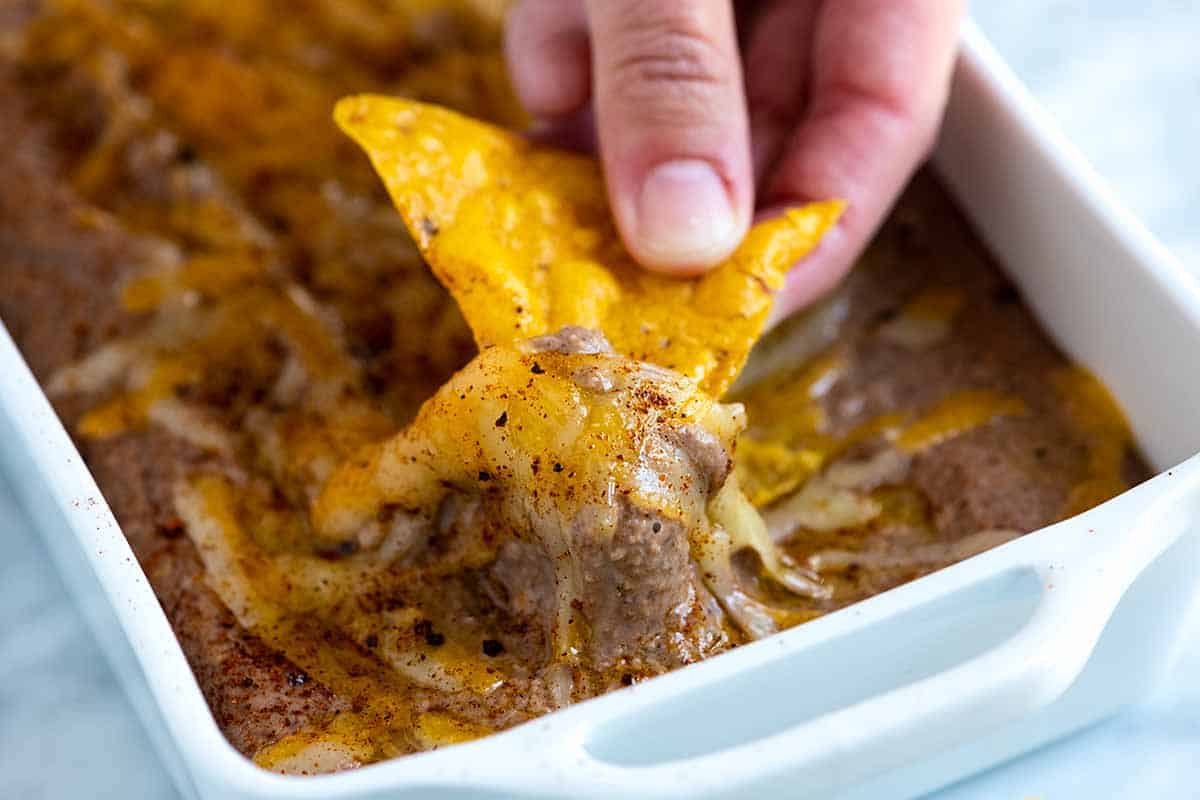
    Think of this black bean dip as a mash-up of black bean puree and onion dip. Thanks to the addition of cooked sweet onions, this easy bean dip is absolutely delicious and perfect served with pita wedges or chips.

    Perfect Black Bean Dip

    This black bean dip is truly a slam-dunk appetizer, hitting the mark with its super creamy, almost airy texture. We blend sweet onions, fragrant spices, and sour cream directly into the black beans, creating an irresistible dip.

    Beyond tortilla chips and veggies, I love using it as a spread for wraps and sandwiches. Picture it over a warm corn tortilla, topped with fresh lettuce and pico de gallo—truly incredible! For more bean dips, try our cheesy bean dip (made with pinto beans) or our popular hummus recipe.

    Key Ingredients

    • Black Beans: For the easiest dip, use canned, drained, and rinsed black beans. For the absolute best flavor, start with our recipe for cooking black beans from scratch.
    • Onion: Cooked sweet onions are the secret weapon here. They add a natural sweetness and are essential for that ultra-creamy texture once everything is blended.
    • Spices: You won’t find this dip lacking in flavor! We use a generous blend of garlic powder, ground cumin, chili powder, and cayenne pepper. Our homemade chili powder or store-bought ancho chili powder takes it to the next level when you have it on hand!
    • Sour Cream: A half cup of sour cream is crucial for making this dip light and wonderfully creamy, giving it an almost airy texture. Feel free to substitute with crème fraiche or cream cheese.
    • Lime: Fresh lime juice is the non-negotiable ingredient that ties all the flavors together. Don’t skip it!
    • Cheese (optional): If you’re baking your dip, choose a good melting cheese, such as Monterey Jack, cheddar, or Oaxaca. Just add it to the top and bake until it’s bubbly and golden.

    Find the full recipe with measurements below.

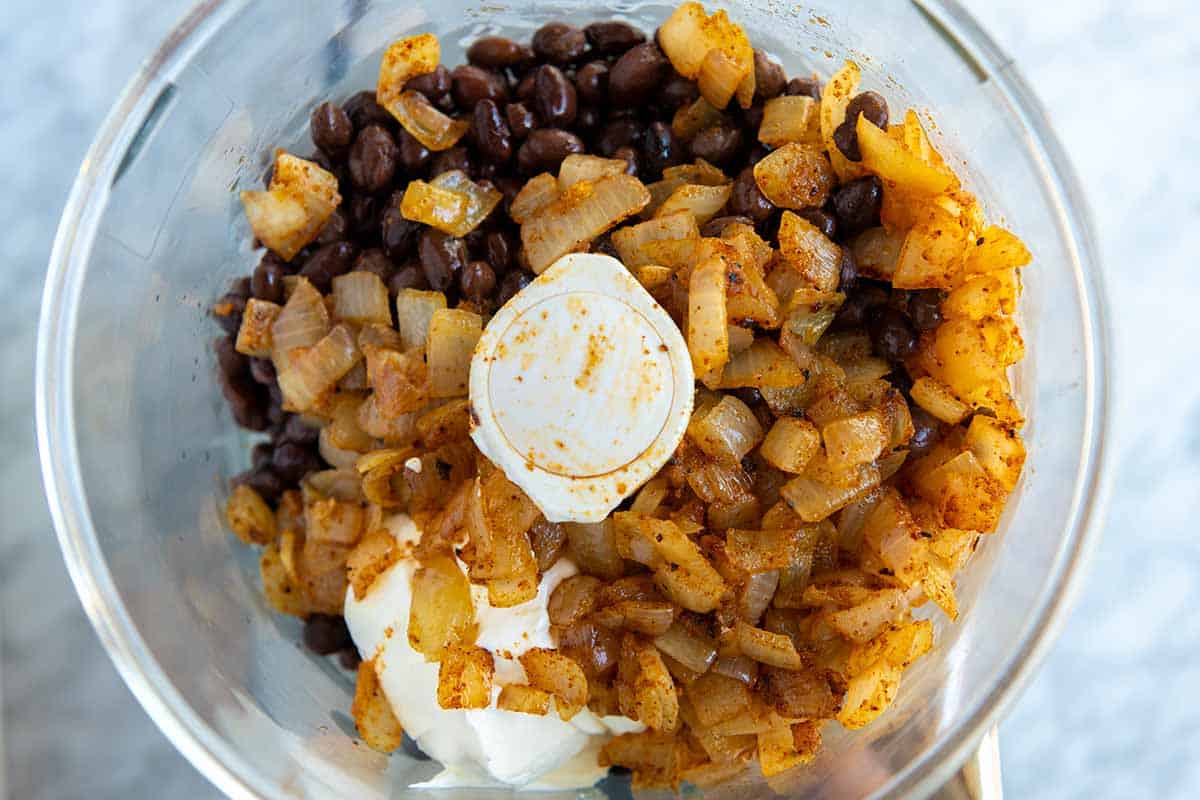
    How to make black bean dip: Ingredients in a food processor

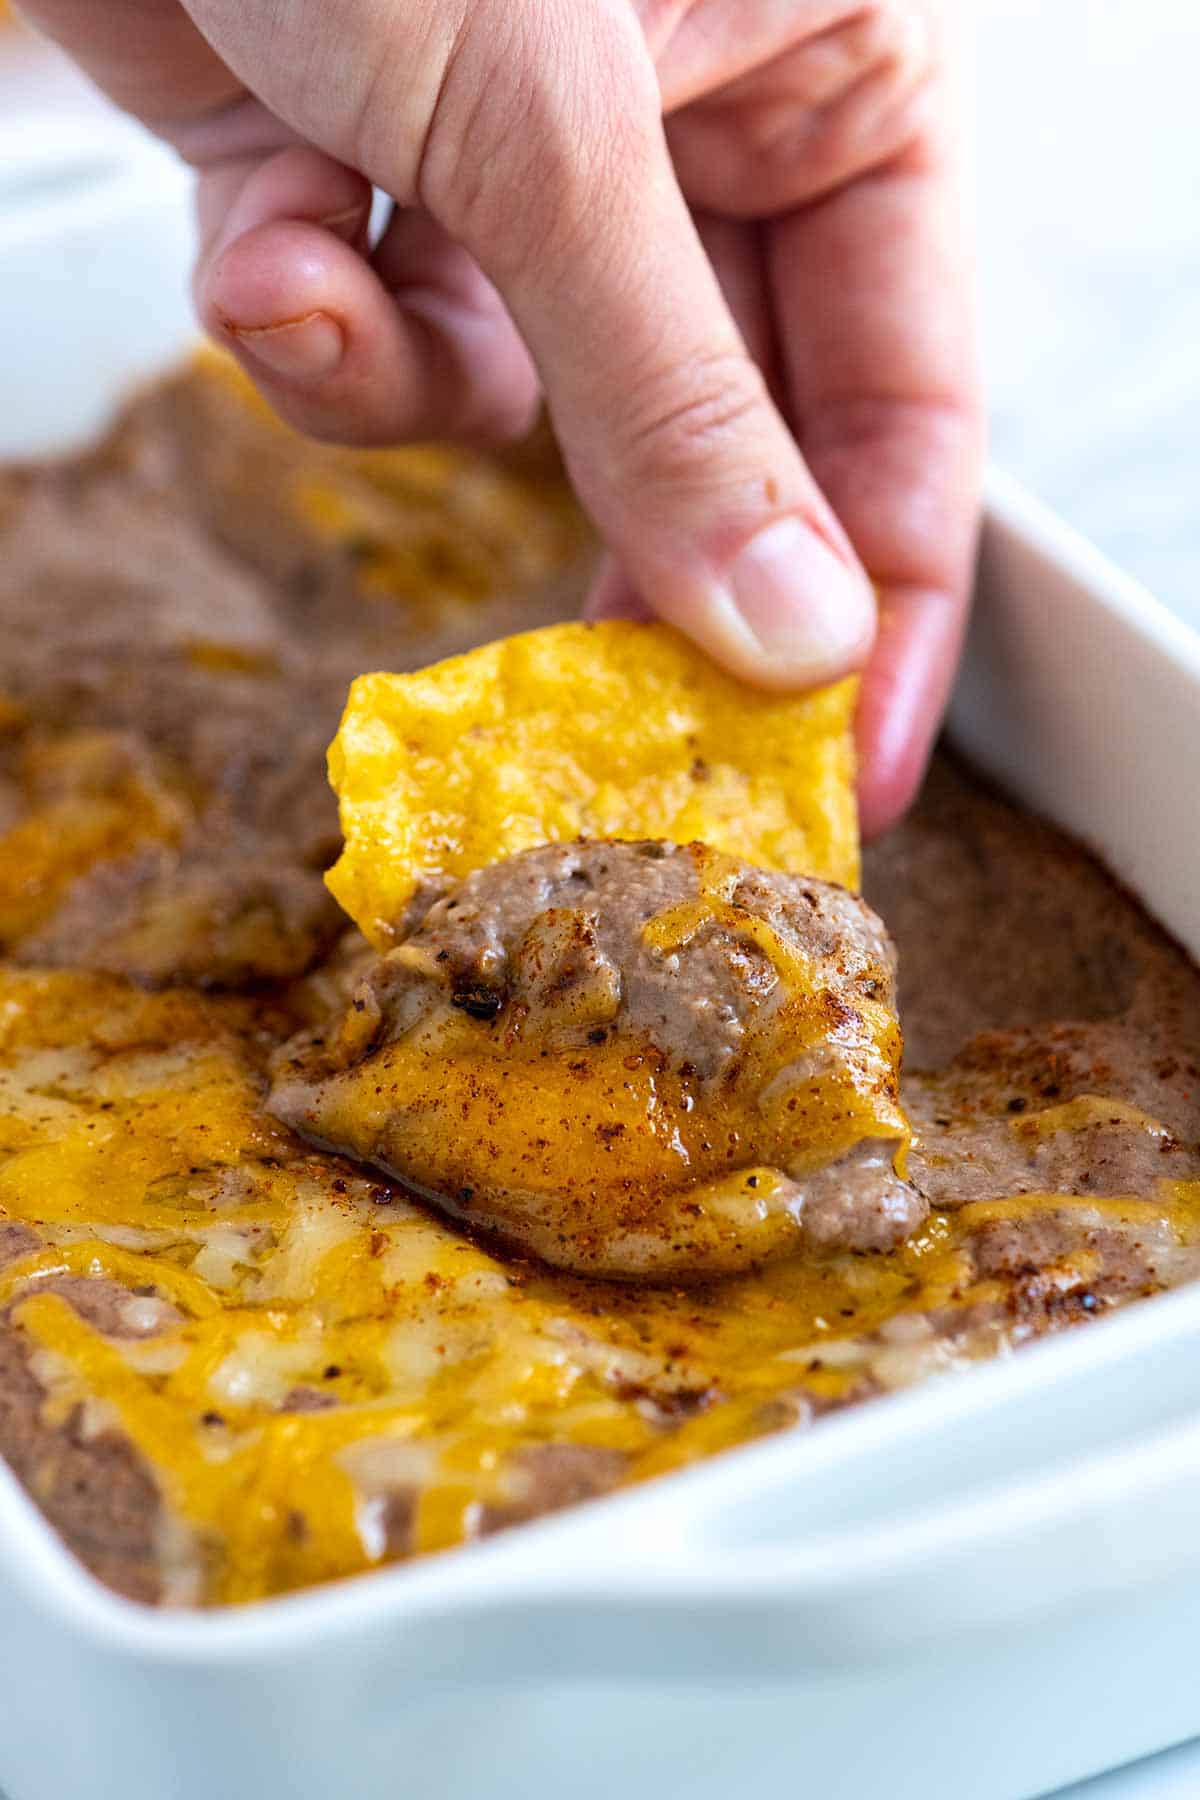
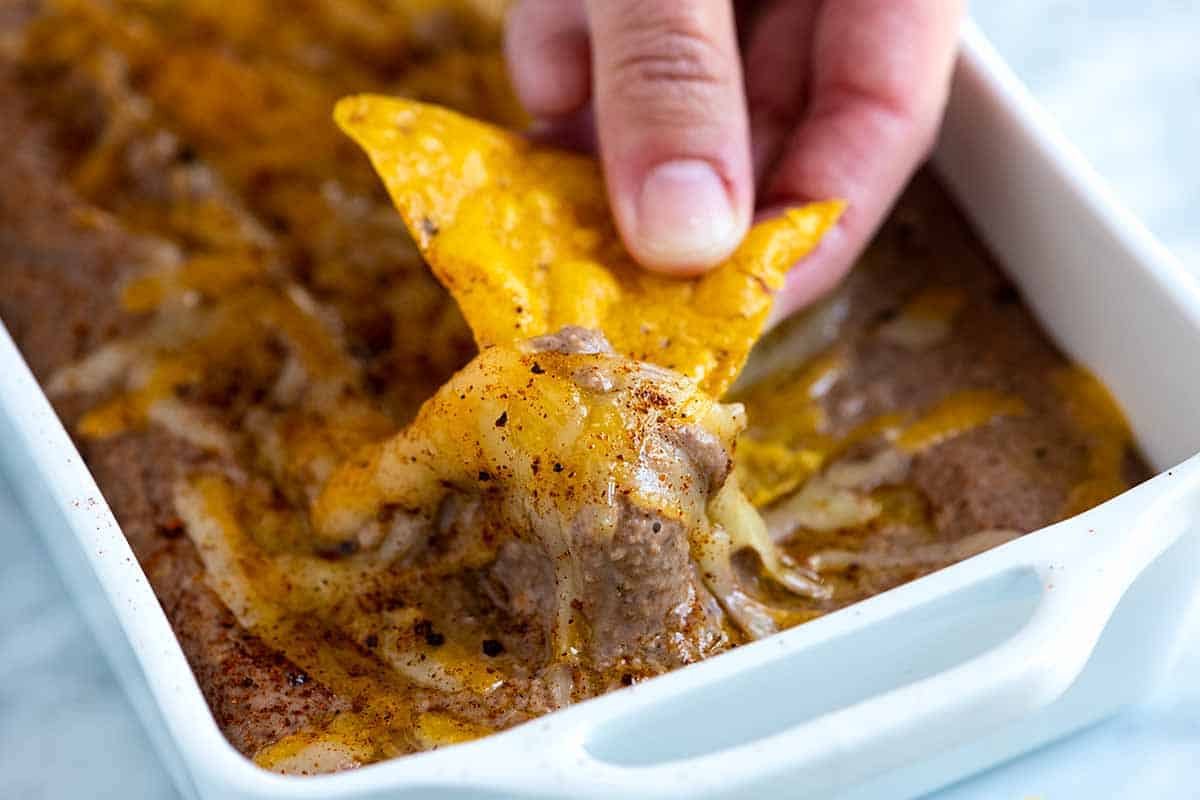
    For the best results, blend the dip ingredients using a blender or food processor. Once blended, you can serve it at room temperature like hummus, or transfer it to a baking dish, top with cheese, and bake until warm and the cheese is bubbly.

    Perfect Black Bean Dip

    Perfect Black Bean Dip

    • PREP
    • COOK
    • TOTAL

    Think of this as a mash-up of black bean dip and onion dip. Thanks to the addition of cooked sweet onions, this easy bean dip is delicious and perfect when served with pita wedges or chips. While you can serve this at room temperature (more like a hummus), I prefer it baked with cheese on top. For a more traditional sour cream-based dip, see our recipe for creamy onion dip.

    8 Servings

    Watch Us Make the Recipe

    You Will Need

    2 tablespoons olive oil

    1 medium sweet onion, chopped, like Walla Walla or Vidalia, about 2 cups

    1/2 teaspoon garlic powder

    1/2 teaspoon ground cumin

    1/2 teaspoon chili powder, see our chili powder recipe

    1/8 teaspoon to 1/4 teaspoon cayenne pepper

    2 (15oz) cans black beans, drained and rinsed or 3 cups cooked black beans

    1/2 cup sour cream

    2 to 3 tablespoons water

    Spritz of fresh lime

    Salt and fresh ground black pepper

    1/3 cup shredded cheese, optional for baked dip

    Directions

      1Cook the onions: In a skillet over medium heat, add the oil, onions, and 1/4 teaspoon of salt. Cook until they are very soft and smell sweet, 15 to 20 minutes. Stir in the garlic powder, cumin, chili powder, and cayenne pepper. Remove from heat and set aside for 5 minutes.

      2Make black bean puree: In a blender or the bowl of a food processor, combine the cooked onions, drained black beans, and sour cream. Add 2 tablespoons of water, and then blend. If the mixture is having trouble blending, add one or two more tablespoons of water to help it along.

      3Taste, and then season with salt and lime to taste. Serve now, or follow the directions for baked black bean dip below.

      4Baked black bean and onion dip: For a baked dip, transfer the bean dip to a small baking dish and top with shredded cheese. Bake in a 350°F (177°C) oven until heated through and the cheese has melted, about 10 minutes.

    Adam and Joanne’s Tips

    • Vegan modifications: Leave out the sour cream and increase the water by a tablespoon or so. The dip will still be delicious. You can also substitute the sour cream with a plant-based sour cream or cream cheese.
    • The nutrition facts provided below are estimates.

    Nutrition Per Serving
    Serving Size
    1/8 servings
    /
    Calories
    173
    /
    Total Fat
    6.9g
    /
    Saturated Fat
    2.4g
    /
    Cholesterol
    7.4mg
    /
    Sodium
    146.7mg
    /
    Carbohydrate
    20.4g
    /
    Dietary Fiber
    6.4g
    /
    Total Sugars
    2g
    /
    Protein
    8.5g


    AUTHOR:

    Joanne Gallagher

    Previous Post: Creamy Vegan Queso
    Next Post: Baked Red Pepper Chicken Breast

    Source link

  • The Best Chicken Noodle Soup Recipe

    The Best Chicken Noodle Soup Recipe

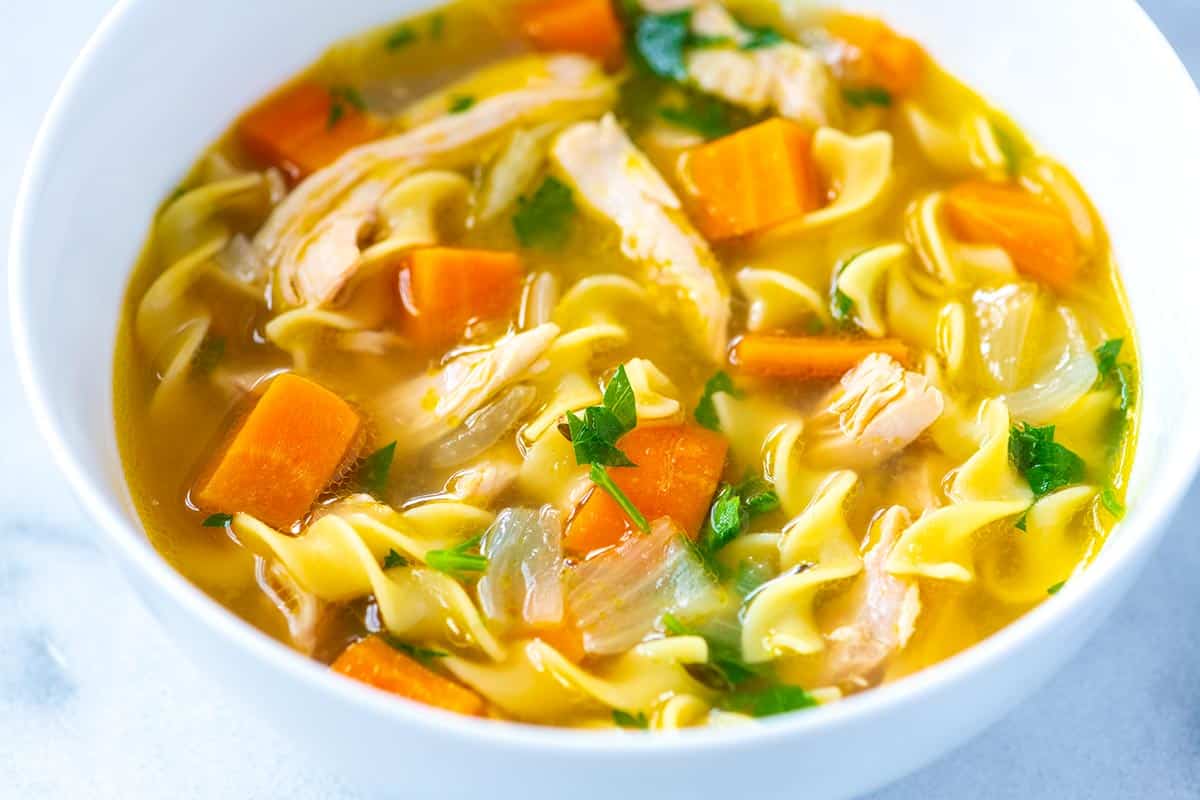
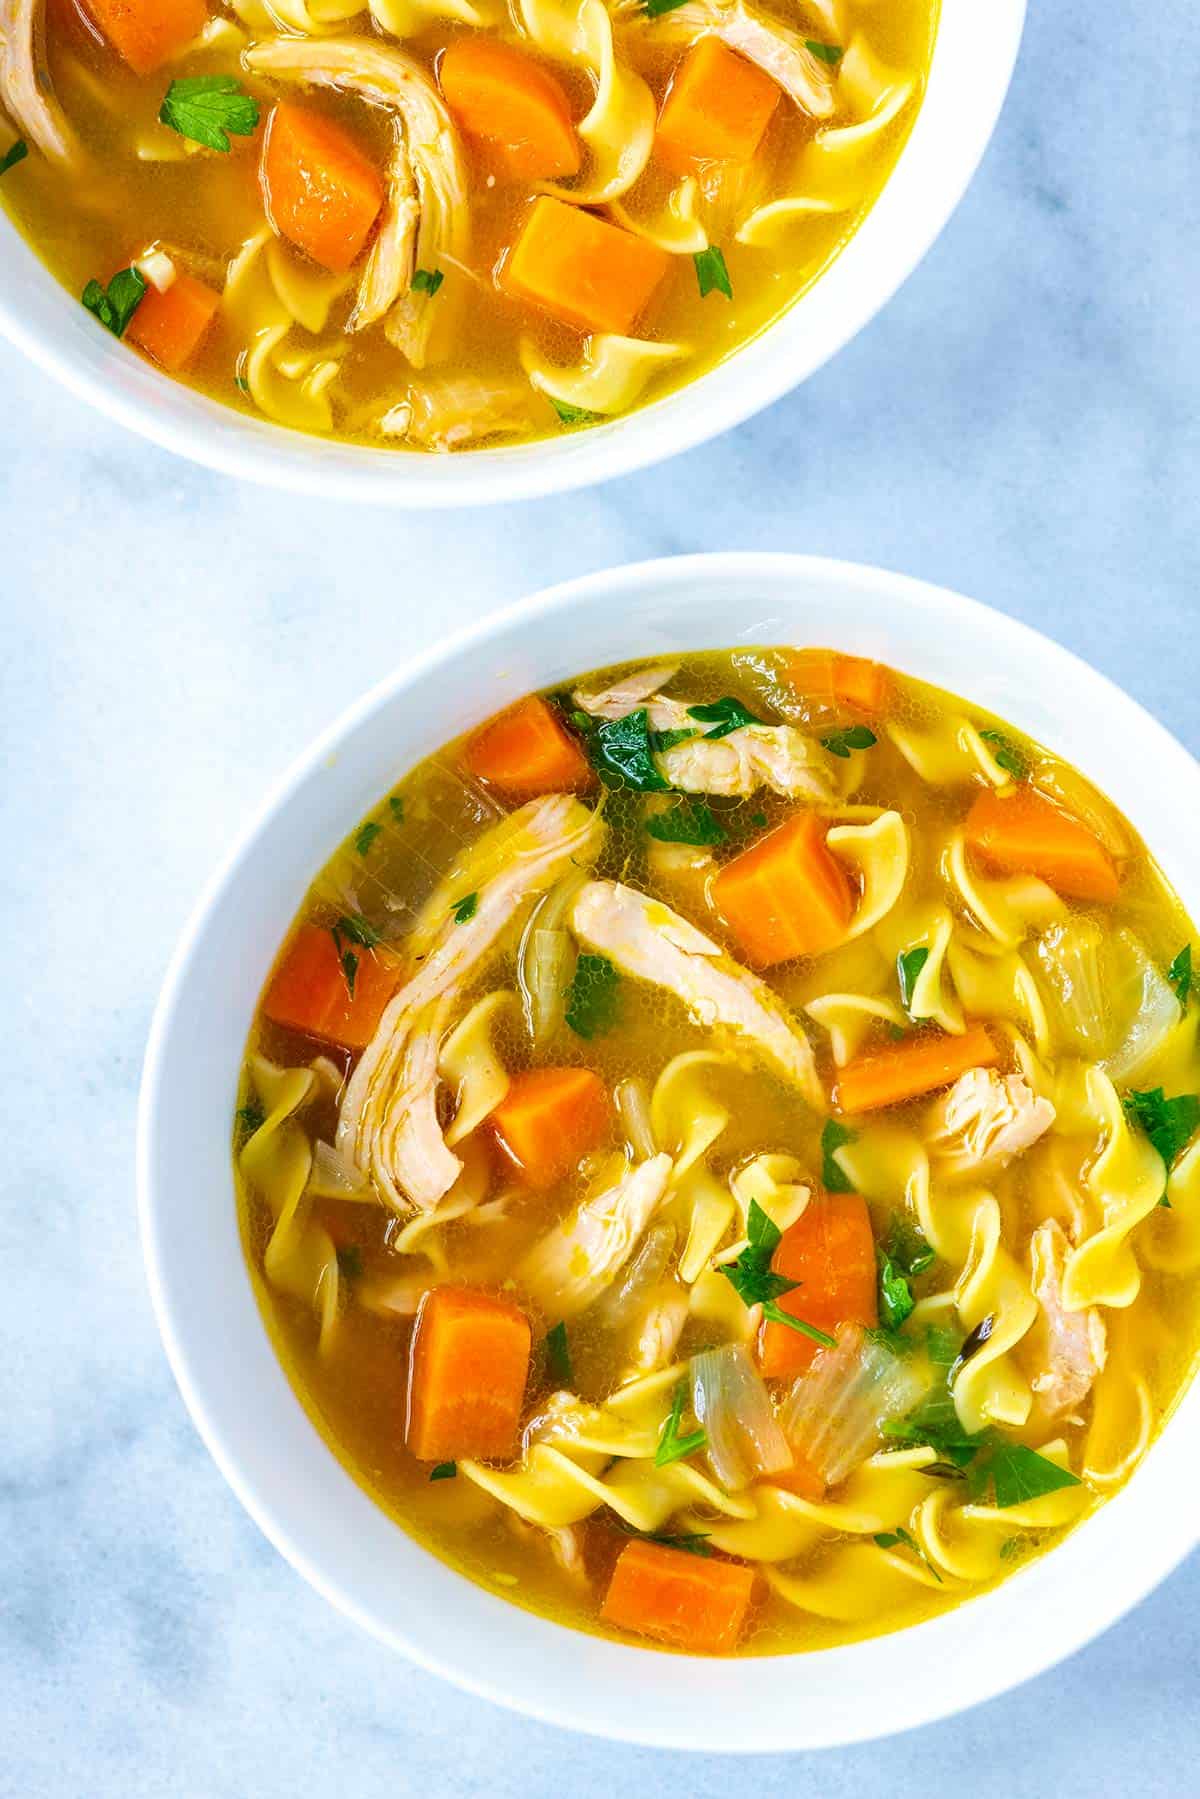
    Our easy homemade chicken noodle soup recipe has tender chicken, fresh veggies, and the most delicious broth that tastes like it’s been cooking for hours.

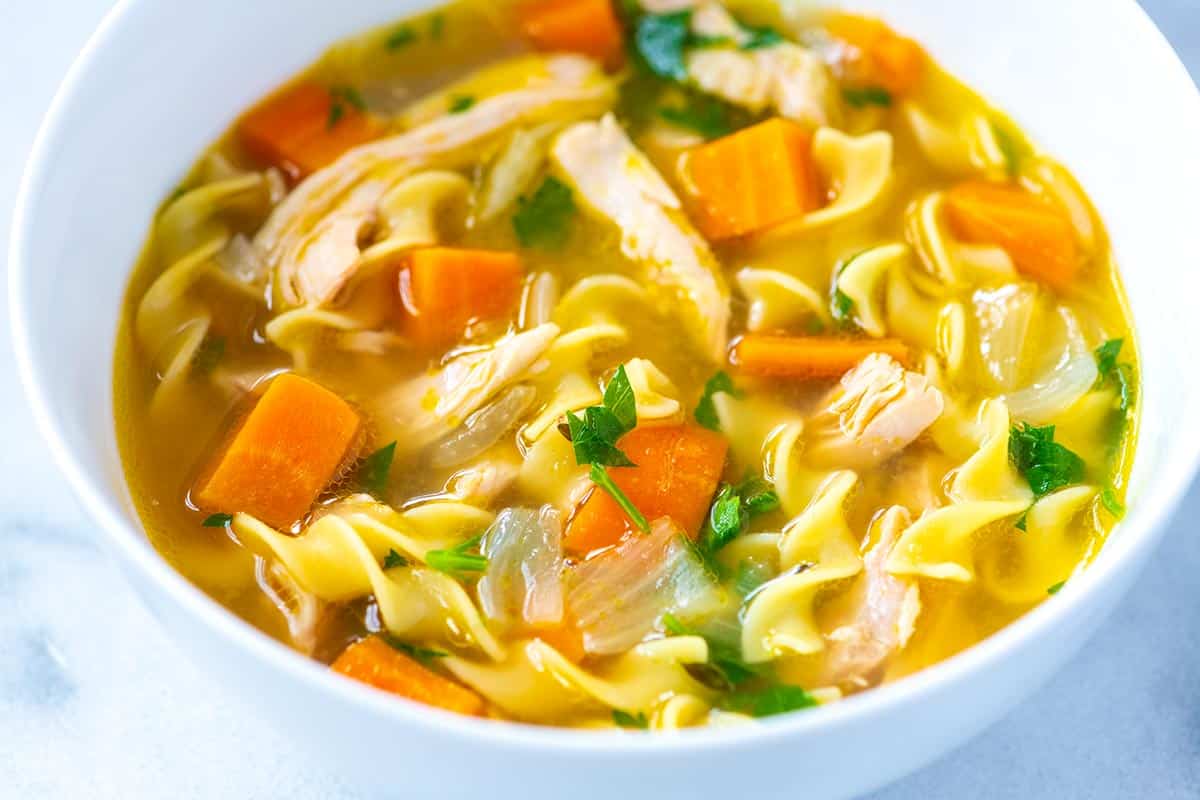
    Homemade chicken noodle soup

    This homemade chicken noodle soup makes me smile just thinking about it! Our family has been making this for years! Not to mention it’s my go-to soup whenever it’s chilly or someone is sick.

    It tastes way better than store-bought and it’s fast! The secret is chicken thighs! They guarantee a ridiculously flavorful broth that’s ready in under 40 minutes, with most of the time being hands-off. For a creamier soup, I highly recommend this incredible creamy chicken noodle soup. For another classic chicken recipe, see this chicken pot pie.

    Key Ingredients

    • Chicken Thighs: My secret for the best soup! Chicken thighs get super soft and delicious. You can make this soup with a whole chicken, but usually I don’t have time for that, so chicken thighs are my answer. They have a little fat, add lots of flavor, and stay tender.
    • Chicken Stock: I highly recommend homemade chicken stock or chicken broth, but store-bought works! When shopping for stock, darker broth or bouillon usually means more flavor. I also love boxed bone broths (or you can make bone broth).
    • Egg Noodles: I love them, but you can always substitute your favorite pasta. I’ve even swapped the noodles for tortellini like in our veggie tortellini soup!
    • Veggies: I keep this soup simple with onion, celery, carrots, and garlic. Feel free to add more, but these four will get you to that classic chicken soup flavor. When I have them in the fridge, I often stir in a few handfuls of fresh spinach or kale leaves.
    • ThymeBay Leaves, and Parsley: These add a little backbone to the broth. I love fresh thyme and parsley, and then use dried bay leaves. For more of a herby soup, stir in chopped mint, basil, cilantro, or a combination just before serving.

    Find the full recipe with measurements below.

    How to Make the Best Chicken Noodle Soup

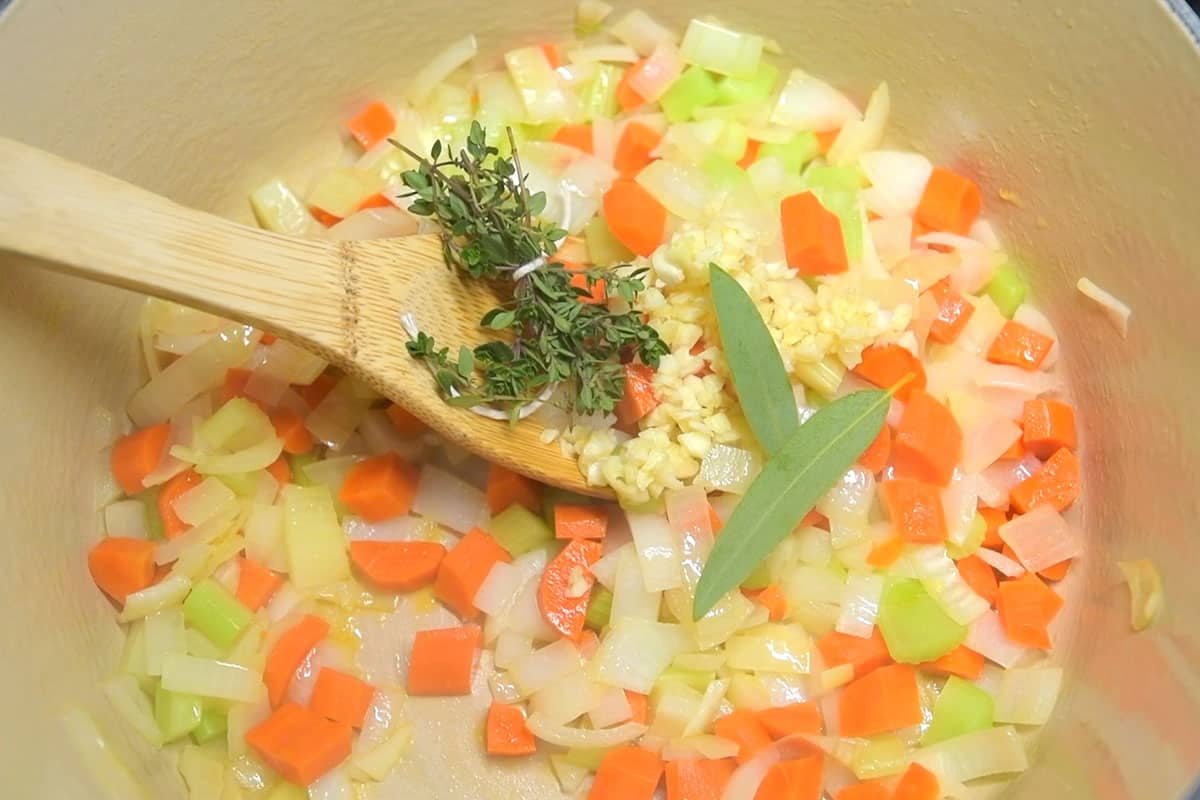
    Tip 1: Start your vegetables in butter. For the best flavor, I always sauté my vegetables in butter before adding any broth. You’re not really looking to brown them, just soften them a bit and cook off that raw onion and garlic flavor. If you have rendered chicken fat (schmaltz) on hand, use it instead of butter for even more flavor.

    Step for making chicken noodle soup - cooking onion, carrot and celery in a pot

    Tip 2: Taste your broth early. Once you add the broth to your softened vegetables, taste it. Store-bought broths can be light on flavor, so seasoning early helps you build a more flavorful broth. Add a little salt now, then continue adjusting as the soup cooks. This simple step separates an okay soup from one that tastes truly great.

    Tip 3: Gently poach the chicken thighs. Here’s why I love using chicken thighs for this soup. They fit nicely in the pot, cook through in about 20 minutes, and release lots of flavor into the broth as they simmer. They are easy to shred, too, which is why I also use them to make our favorite shredded chicken.

    Adding chicken thighs to broth for chicken noodle soup

    Tip 4: Add the noodles last. To keep your noodles from turning mushy, add them about 10 minutes before serving. I like cooking them directly in the soup so they soak up all that delicious chicken flavor. They also release just a little starch into the broth, giving the soup a lovely, silky texture.

    Adding noodles to a soup pot

    Tip 5: Don’t be shy with seasoning. Before serving, taste your chicken soup one last time. If it doesn’t make you smile, it probably needs a touch more salt, or a little something extra. A few dashes of fish sauce (my secret weapon) work wonders in this soup. Or brighten things up with a squeeze of lemon juice or a dash of hot sauce.

    A pot of homemade chicken noodle soup

    Recipe Variations

    Use rotisserie chicken: For an even faster chicken soup, skip poaching and stir in shredded rotisserie chicken or leftover roast chicken toward the end of cooking. It’s a great shortcut for busy nights and still adds plenty of flavor.

    Add extra vegetables: Make this soup even more nutritious and hearty by adding extra veggies. Mushrooms, spinach, kale, peas, and corn all work beautifully. Cook heartier vegetables like mushrooms with the onions and garlic, then add the quicker-cooking ones toward the end so they stay bright and tender.

    Make it creamy: Stir in a splash of cream or half-and-half at the end, just like we do in our creamy chicken noodle soup. It gives the broth a silky texture and makes it more luxurious.

    Substitute the noodles: Try swapping them for another pasta shape, or even broken spaghetti. For a lighter, low-carb option, use spiralized zucchini or spaghetti squash strands. Or make it more filling with cooked rice, quinoa, or barley instead of noodles.

    More Favorite Soup Recipes

    Easy Chicken Noodle Soup

    The Best Chicken Noodle Soup

    • PREP
    • COOK
    • TOTAL

    You will love this homemade chicken noodle soup, which skips cooking a whole chicken and calls on boneless, skinless chicken thighs instead. The soup tastes incredible, satisfying, and classic, and the significantly reduced cooking time makes it perfect for a weeknight. If you love creamy soups, take a look at this creamy chicken noodle soup, which uses the same base recipe as this one.

    6 Servings

    Watch Us Make the Recipe

    You Will Need

    1 pound skinless, boneless chicken thighs, 4 to 5 thighs (450g)

    5 ounces egg noodles or pasta of choice (140g)

    2 tablespoons butter, chicken fat, or olive oil (28g)

    1 large onion, chopped

    2 large carrots, chopped

    2 ribs celery, chopped, optional

    1 heaped tablespoon minced garlic, 4 cloves

    2 bay leaves

    3 sprigs fresh thyme or use 1/2 teaspoon dried thyme

    8 cups chicken stock or broth, low sodium, or use homemade stock (1.89L)

    Salt and pepper, to taste

    1/4 cup fresh parsley, finely chopped

    Directions

      1Cook the vegetables: Melt the butter in a large pot or Dutch oven over medium heat. Add the diced onions, carrots, and celery, and cook, stirring every few minutes, until the onions turn translucent and the vegetables begin to soften, about 5 to 6 minutes.

      2Stir in the garlic, bay leaves, and thyme, and cook for another minute until the garlic smells fragrant.

      3Add the broth: Pour in the chicken stock and bring the soup to a gentle simmer (you should see small bubbles breaking on the surface). Taste the broth and adjust with salt and pepper as needed. Depending on your stock, you may need to add a teaspoon or more of salt to build a rich, flavorful broth.

      4Poach the chicken thighs: Nestle the chicken thighs into the pot so they’re fully submerged in the broth. Bring the soup back to a low simmer, then partially cover the pot, leaving a small gap for steam to escape.

      5Cook, stirring occasionally, until the chicken is cooked through and tender, about 20 minutes. Transfer the chicken to a plate. If the broth reduces too much, add a splash of stock or water and lower the heat to medium-low.

      6Add the noodles: Stir the noodles into the simmering soup and cook until tender, about 6 to 10 minutes, depending on the type of noodles you’re using (check the cook time on the package).

      7Shred the chicken: While the noodles cook, shred the chicken into bite-size pieces using two forks (or dice it into cubes if you prefer).

      8Finish the soup: Return the shredded chicken to the pot and taste again for seasoning. Add more salt and pepper if needed. Stir in fresh parsley, then ladle your chicken soup into bowls and enjoy!

    Adam and Joanne’s Tips

    • Storing: Refrigerate chicken noodle soup in an airtight container for 3 to 4 days. Or freeze for up to 3 months. As the soup sits, the noodles soak up the broth. When you reheat, add a splash of extra broth or water.
    • Make ahead: Follow the recipe above, but do not add the noodles. Refrigerate or freeze the soup. When ready to reheat, bring the soup to a low simmer and add the dried noodles. Cook until they are done, and enjoy.
    • Seasoning: If you feel the soup is missing some zing, add a bit more salt. You can also add a pop of flavor with a squeeze of fresh lemon juice, a dash of fish sauce (we use this trick for store-bought stocks and broths often) or Worcestershire sauce.
    • Using rotisserie chicken: Add two to three cups of shredded or diced cooked chicken to the soup when you add the dried noodles and reduce the simmer time by 10 minutes. (I also love using leftover roasted chicken!)
    • The nutrition facts provided below are estimates.

    Nutrition Per Serving
    Serving Size
    1/6 of the recipe
    /
    Calories
    298
    /
    Total Fat
    11.4g
    /
    Saturated Fat
    4.4g
    /
    Cholesterol
    97.7mg
    /
    Sodium
    748.7mg
    /
    Carbohydrate
    22.9g
    /
    Dietary Fiber
    1.7g
    /
    Total Sugars
    7.5g
    /
    Protein
    24.8g


    AUTHOR:

    Joanne Gallagher

    Source link

  • Easy Baked Fish in Parchment with Orange and Olives

    Easy Baked Fish in Parchment with Orange and Olives

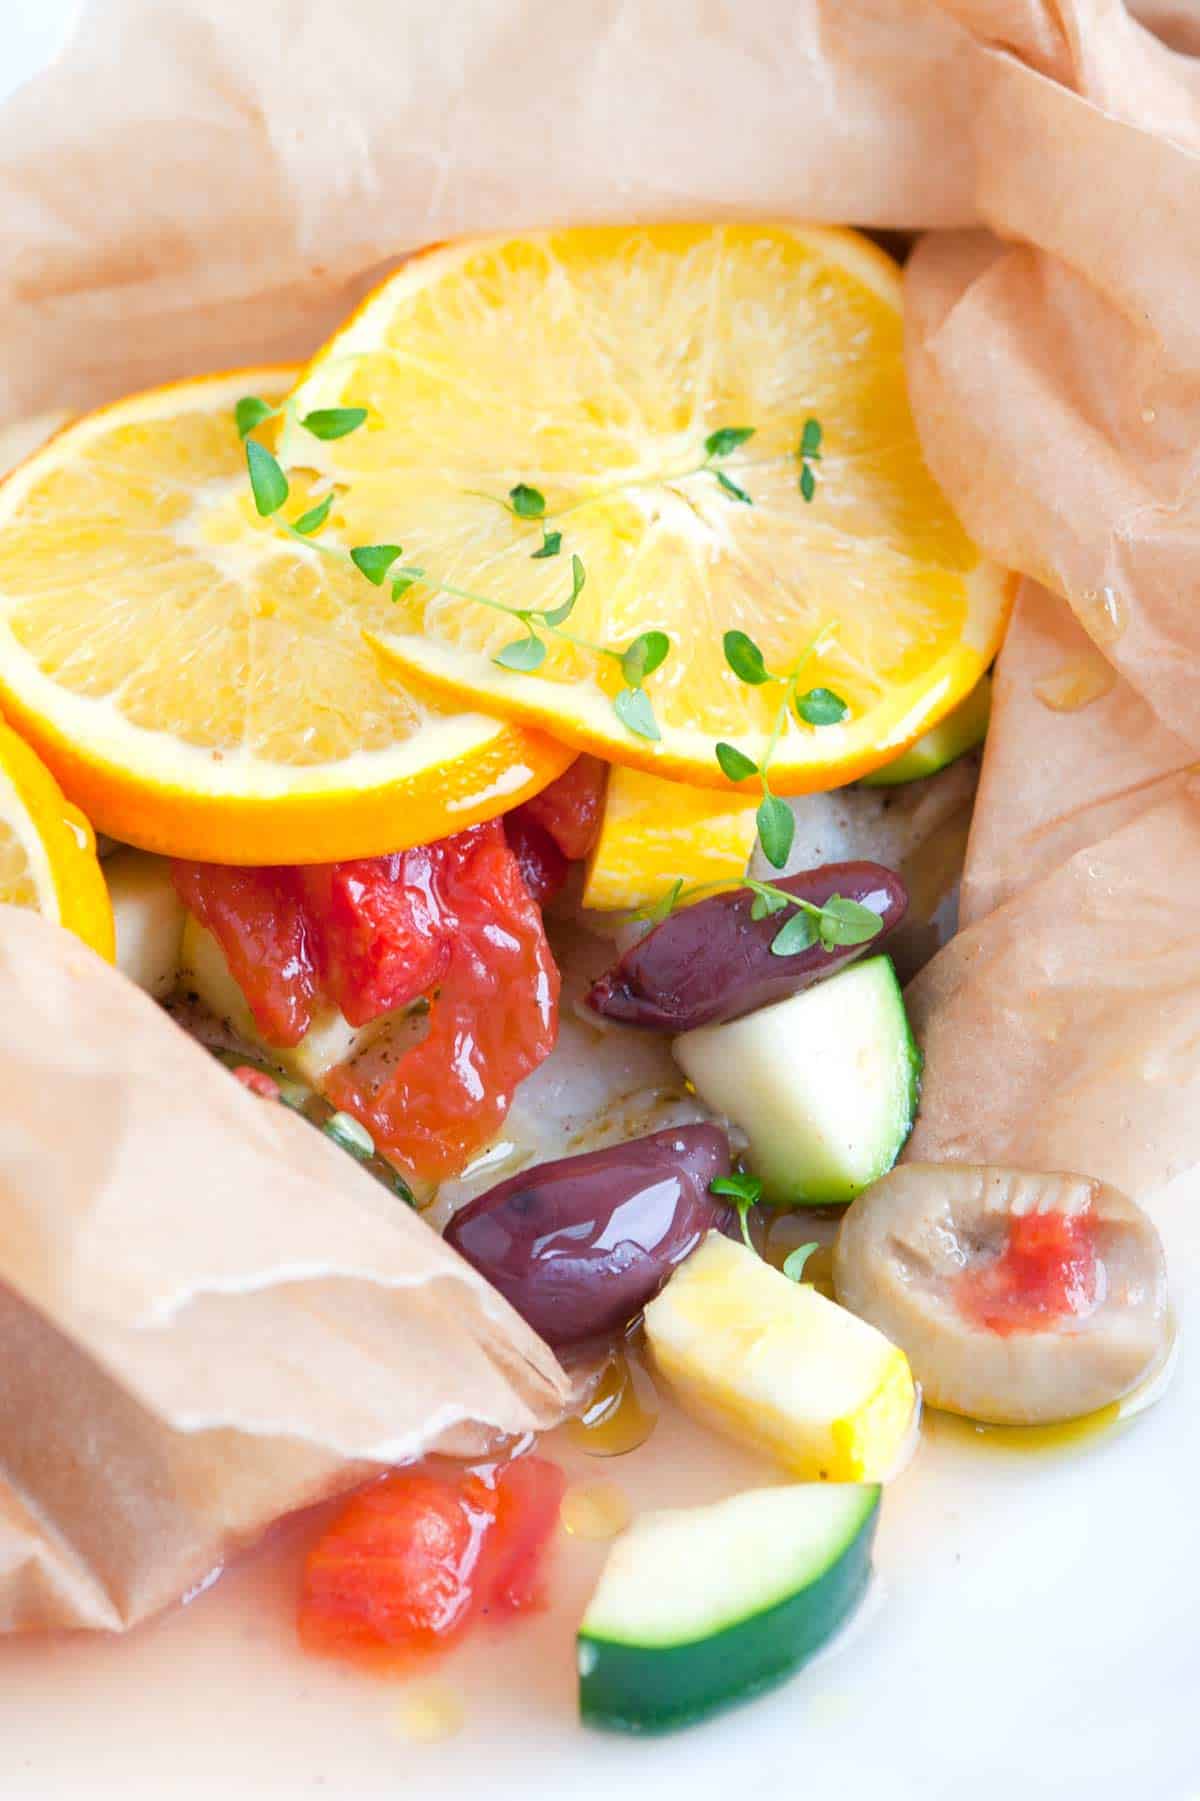
    Light and healthy baked fish packets with tomatoes, olives and orange. Jump to the Baked Fish with Orange and Olives Recipe or read on to see our tips for making it.

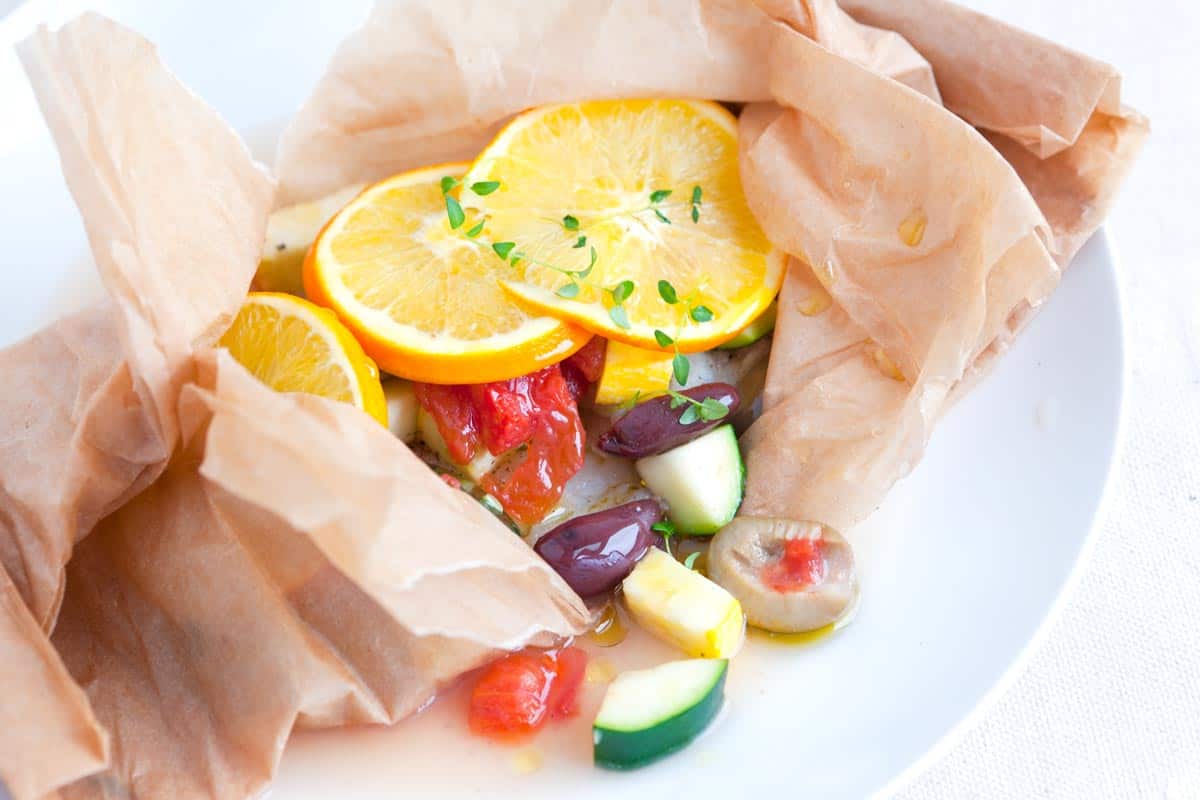
    Easy Baked Fish in Parchment with Orange and Olives

    I love how easy this recipe is, plus it has everything you need in one adorable little packet.

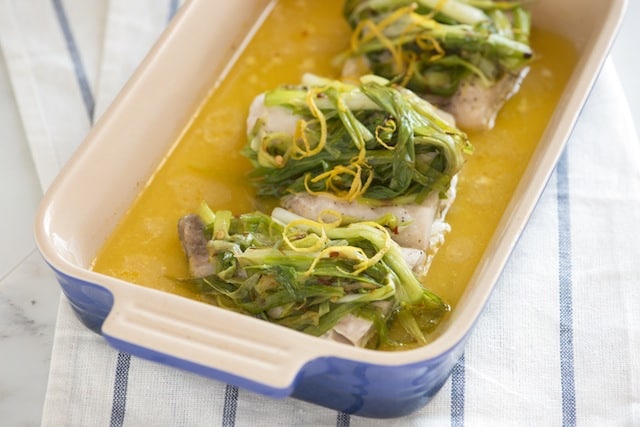
    Baked Fish with ScallionsYOU MAY ALSO LIKE: How to make perfectly baked fish with scallions and orange. Jump to the Baked Fish Recipe with Scallions.
    How to Bake Fish in Parchment Packets

    This recipe comes together very quickly. You will need a sheet of parchment paper. We pile everything into it then fold it up and bake in the oven until the fish is perfectly cooked and the vegetables are tender.

    How to Bake Fish in Parchment Packets

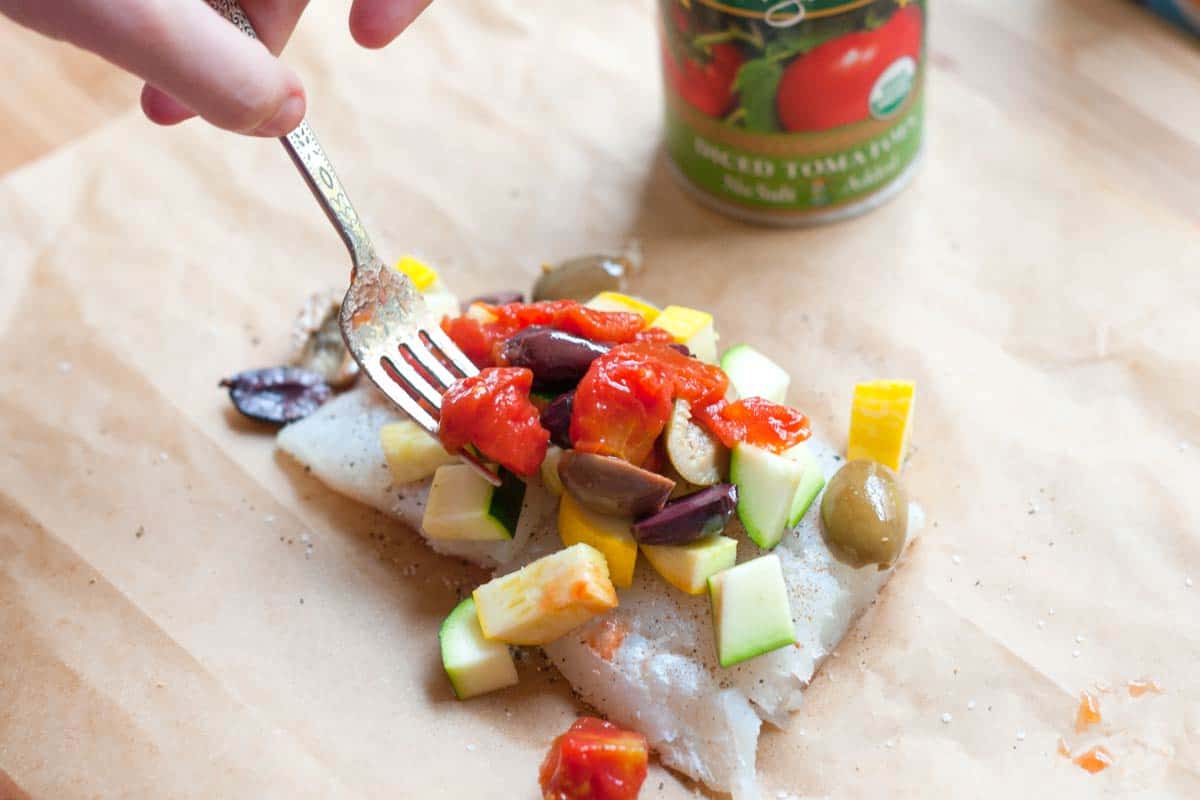
    Season the fish with salt, pepper and a little cinnamon. I know cinnamon sounds a bit odd, but the orange-cinnamon combination is really delicious. Mound olives, squash and tomatoes on top. We used canned tomatoes, but fresh will work nicely.

    Adding the vegetables

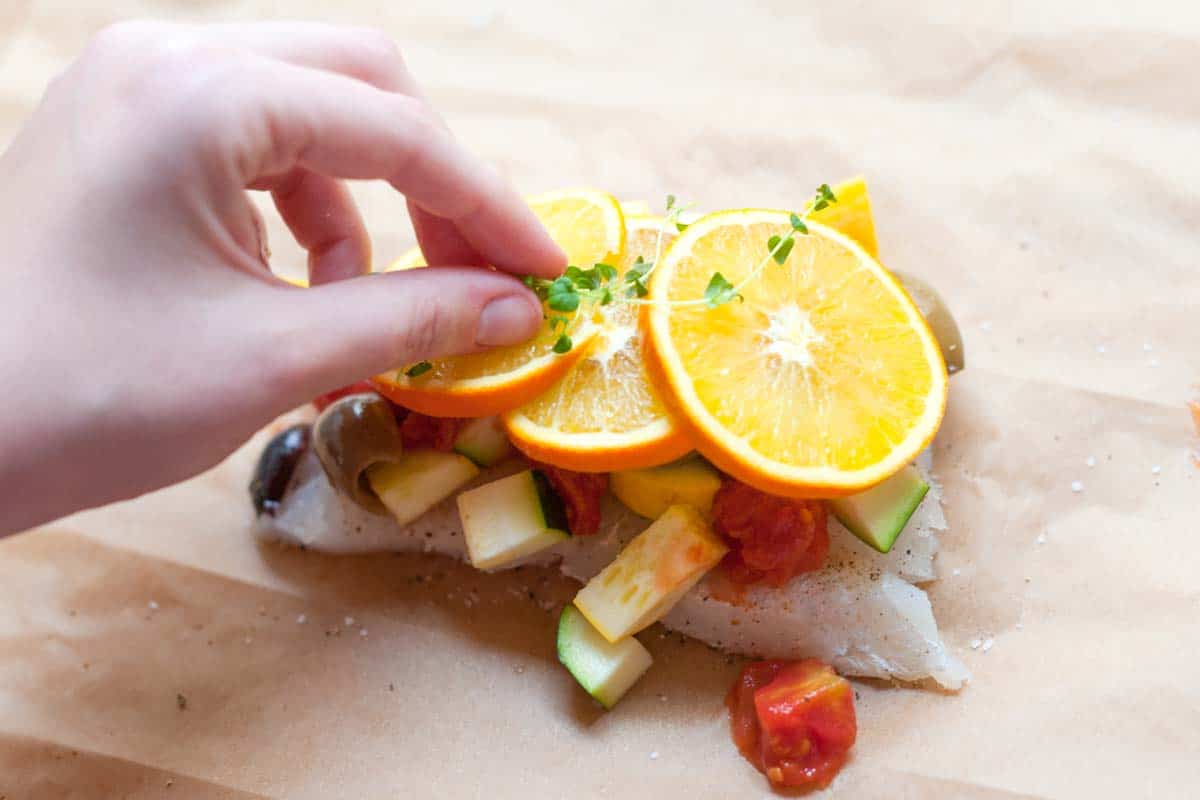
    Add a tiny drizzle of olive oil, a few orange slices and some fresh thyme. Just before folding up the parchment, pour a couple tablespoons of liquid over the fish and vegetables. Chicken stock, fish stock or a dry white wine are all excellent options. This little bit of liquid helps the fish to steam inside the packet, keeping the fish from drying out.

    Adding orange and thyme

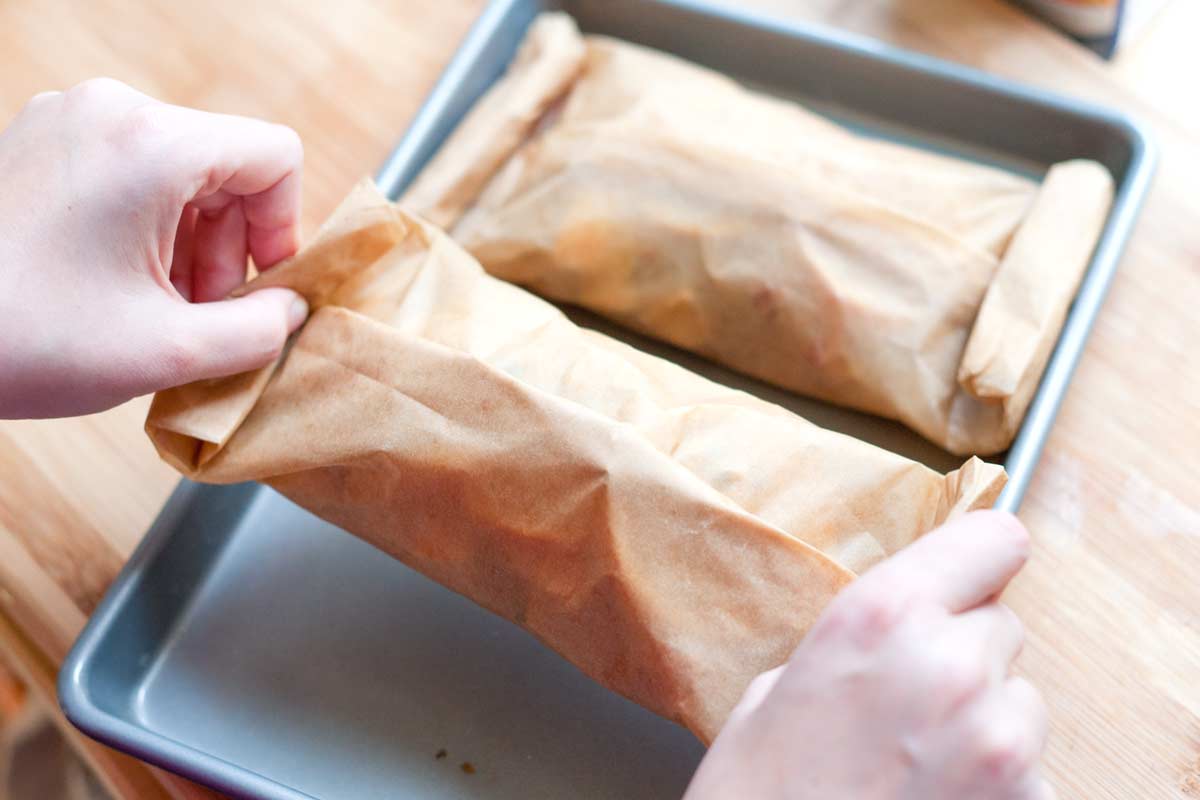
    Alright, now it’s time to fold up the parchment paper to make little packets. Bring two sides of the paper together and then roll and crimp the edges so that the top of the packet is completely sealed. Do the same with the ends and transfer to a baking sheet. After 12 to 15 minutes, the fish will be cooked and the veggies tender.

    Folding up the packets

    Back in the day we were contributors for Betty Crocker. We shared this recipe with them. We loved it so much we had to share an adapted version with you.

    Recipe updated, originally posted January 2012. Since posting this in 2012, we have tweaked the recipe to be more clear. – Adam and Joanne

    Easy Baked Fish in Parchment with Orange and Olives

    • PREP
    • COOK
    • TOTAL

    We use fresh thyme for this, if you would prefer to use dried, use 1/4 teaspoon of dried thyme. Other fresh herbs will work, too. Basil, dill or parsley are excellent. When you serve, add the parchment packet to each plate and allow each person to slit through the parchment, releasing the aromas of cinnamon, orange and herbs.

    Makes 2 servings

    You Will Need

    2 (6-ounce) firm white fish fillets such as Pacific halibut, Pacific rockfish or Pacific cod

    1/4 teaspoon ground cinnamon

    Salt and freshly ground pepper

    1 cup diced zucchini and yellow summer squash, 1/4-inch cubes

    1/4 cup pitted olives, halved

    1 tablespoon extra-virgin olive oil

    1/4 cup drained canned diced tomatoes

    4 tablespoons chicken stock, fish stock or dry white wine

    4 thin orange slices

    2 sprigs fresh thyme

    Directions

      1Heat oven to 400 degrees F. Cut two 16-inch squares of cooking parchment paper or use foil.

      2Lay both squares of parchment out onto your workbench. Season both sides of the fish with cinnamon, salt and pepper, and then place one fillet onto the middle of each parchment square.

      3Divide the olives, zucchini and yellow squash, tomatoes and olive oil between fillets, mounding them on top of the fish. Season with another pinch of salt and a few grinds of black pepper then pour two tablespoons of liquid (stock or wine) over each fillet. Top with orange slices and thyme.

      4To make packets, roll and crimp opposite sides of parchment paper together over fish and vegetables, then roll and crimp ends to prevent steam from escaping.

      5Place packets onto a rimmed baking sheet. Bake until the fish flakes easily with a fork, 12 to 15 minutes depending on thickness of fillets. To check for doneness, carefully open one end of a packet. Transfer packets to plates for serving.

    Adam and Joanne’s Tips

    If you make this recipe, snap a photo and hashtag it #inspiredtaste — We love to see your creations on Instagram and Facebook! Find us: @inspiredtaste


    AUTHOR:

    Joanne Gallagher

    Adam and Joanne of Inspired Taste

    We are Adam and Joanne Gallagher, the creators of Inspired Taste. Established in 2009, Inspired Taste grew from a childhood dream into one of the internet’s most trusted recipe sites with hundreds of reliable recipes, step-by-step videos, and expert tips.More About Us


    Source link