Tag: Easy

  • 38 Easy Dinner Recipes For Real Life

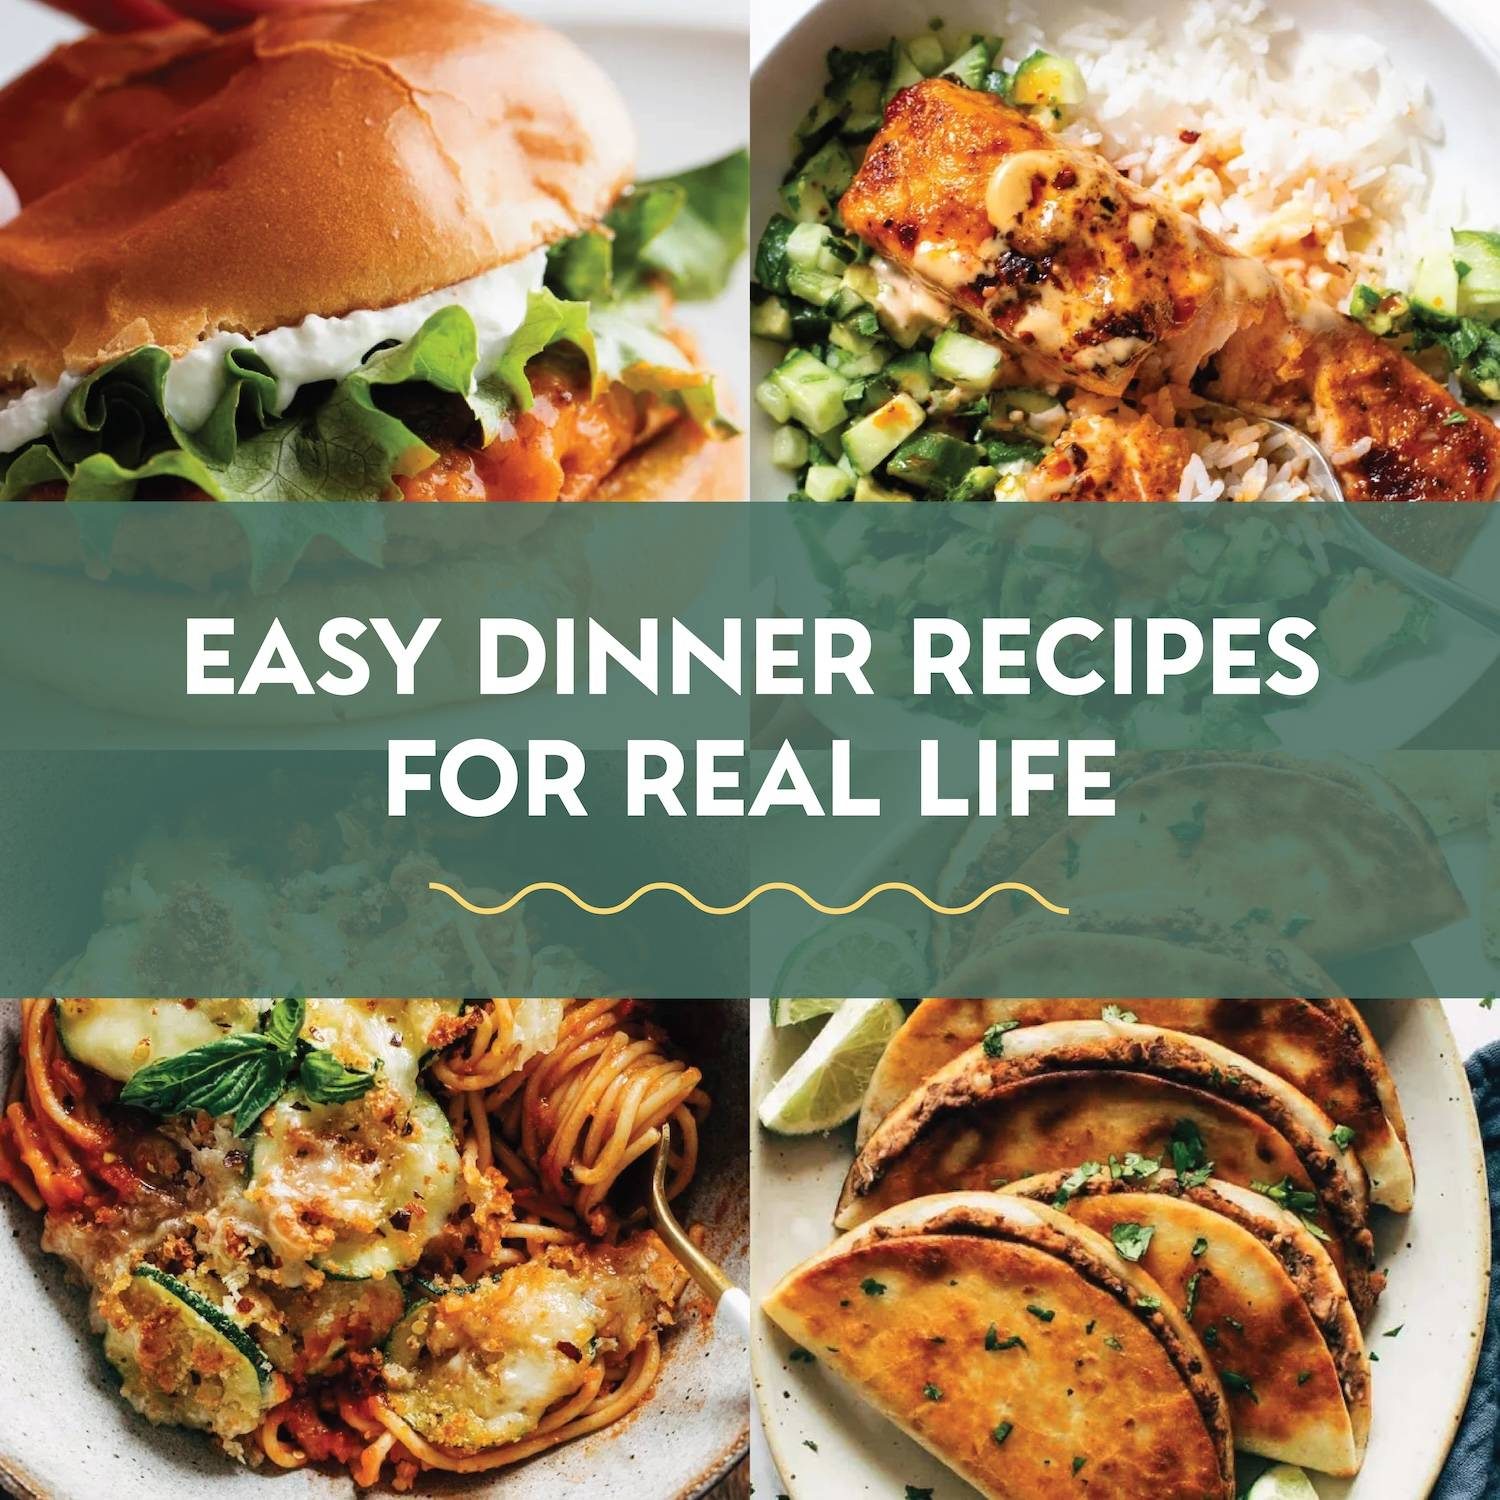
    38 Easy Dinner Recipes For Real Life

    Easy dinner recipes that are low effort, high reward! Just a handful ingredients and a few easy steps to get these on the table!

    Some nights you want a home-cooked dinner that feels special – but you also have approximately zero energy, only a handful of ingredients, and no time for anything complicated. That’s exactly where this list comes in! These are the recipes my family turns to on weeknights and have earned a permanent spot in the rotation because they’re just that reliable.

    The recipes on this list don’t require anything complicated – nothing you need to hunt down at a specialty store or prep three days in advance. We’re talking short ingredient lists, straightforward steps, and flavors that make it feel like you totally had your act together. (Even if you absolutely do not.)

    Whether you’re feeding a family, cooking for two, or just trying to get a decent meal on the table after a long day, there’s something here for you!


    Easy Dinner Recipes
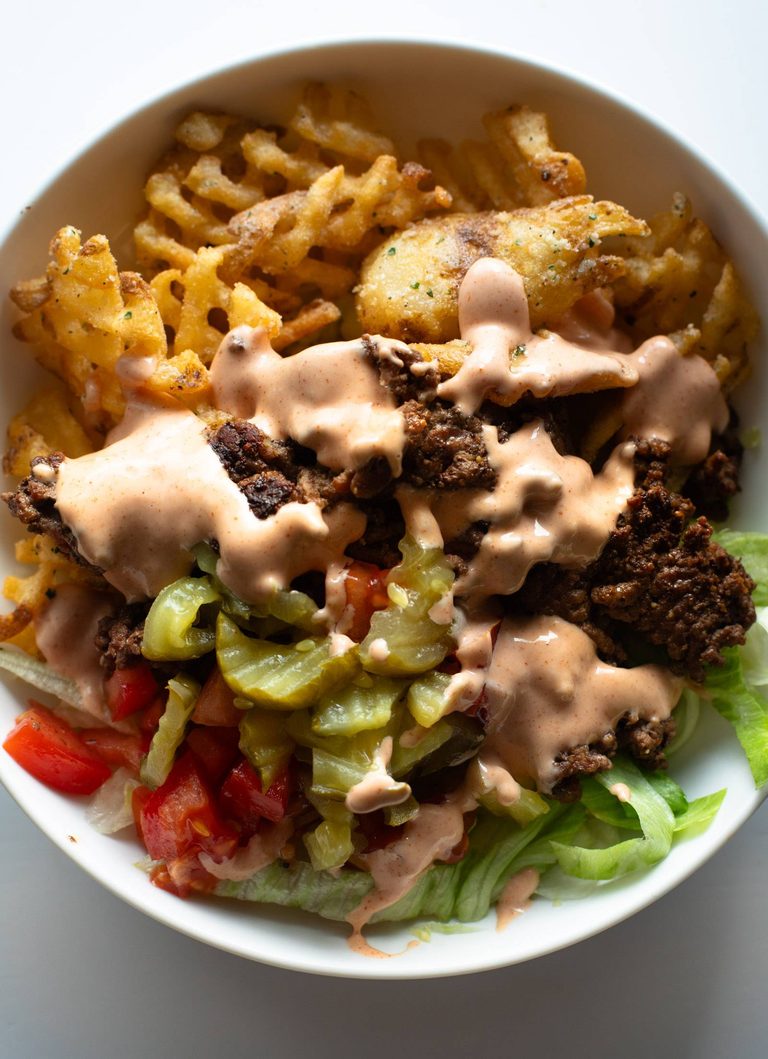
    Burger bowl with house sauce.

    Burger Bowls with House Sauce and Ranch Fries

    A burger in a bowl! Ranch-seasoned fries topped with a burger patty and all the fixings, with a drizzle of house sauce to take it over the top!
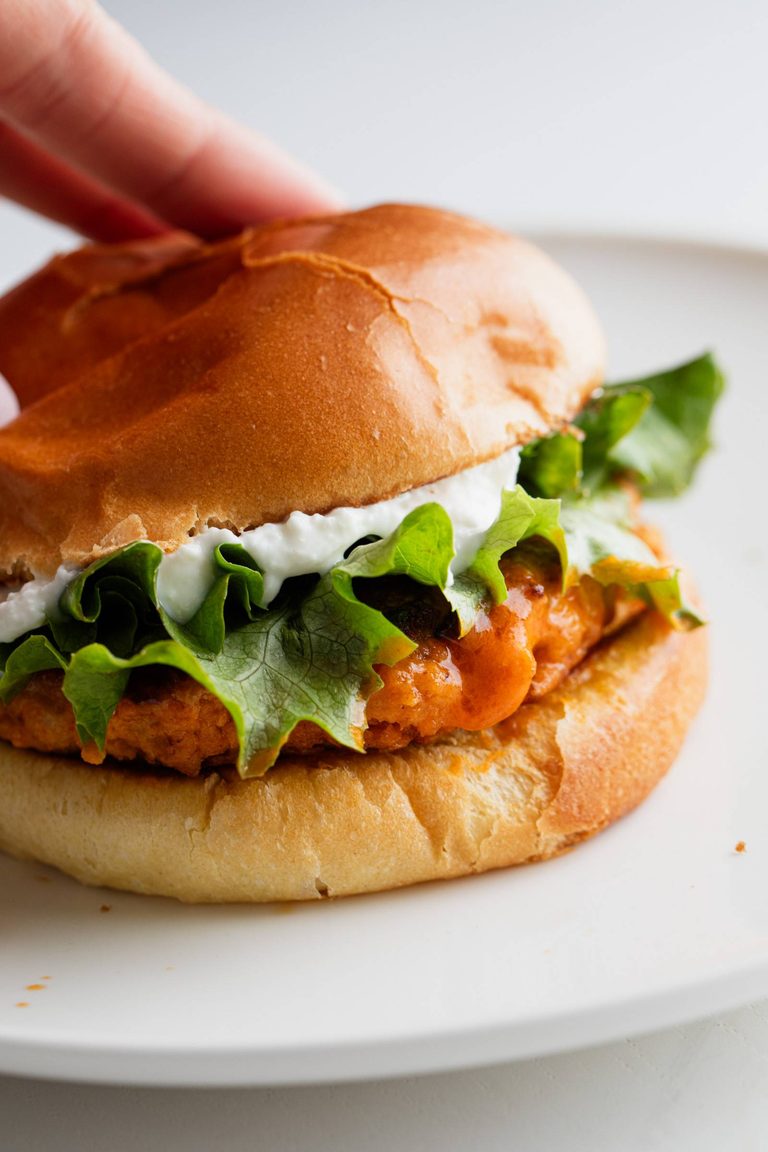
    Buffalo chicken burger.

    Buffalo Chicken Burgers with Whipped Feta Spread

    Easy and amazing buffalo chicken burgers! Piled high with crisp lettuce, a whipped feta spread, sitting atop of toasted brioche bun.
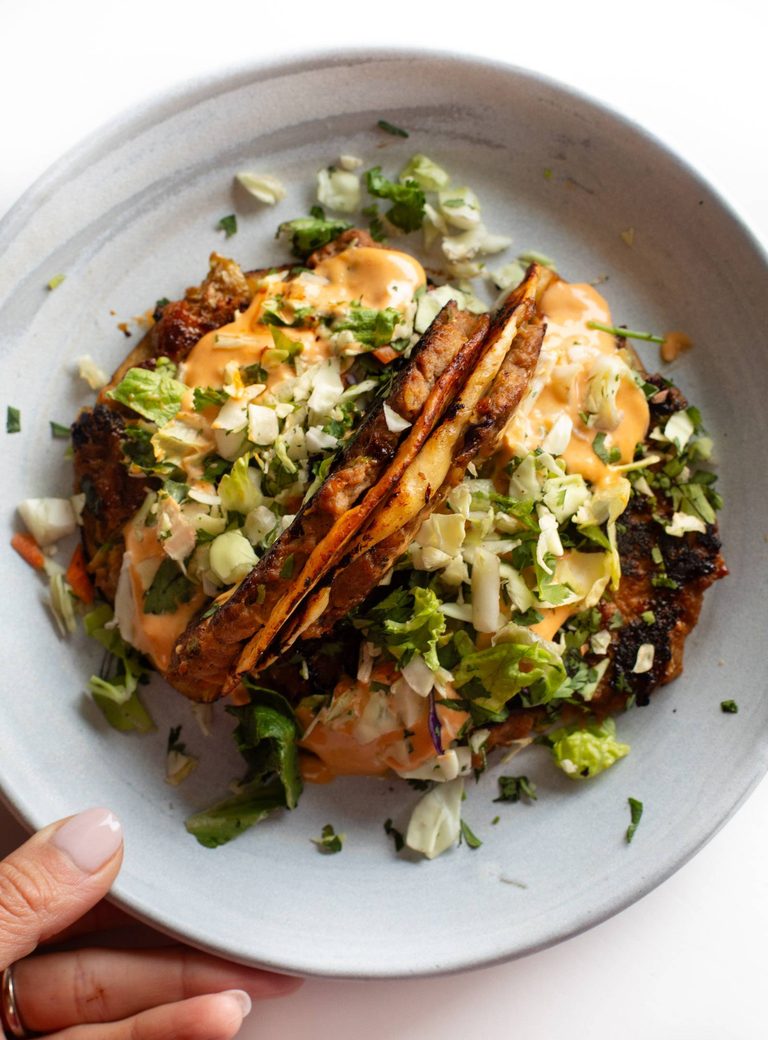
    Egg roll tacos.

    Brandon’s Egg Roll Tacos

    Egg rolls meet tacos! I love this! Easy to make and ridiculously good with a classic egg roll filling, crunchy veg, pillowy tortillas, and a spicy gochujang sauce.
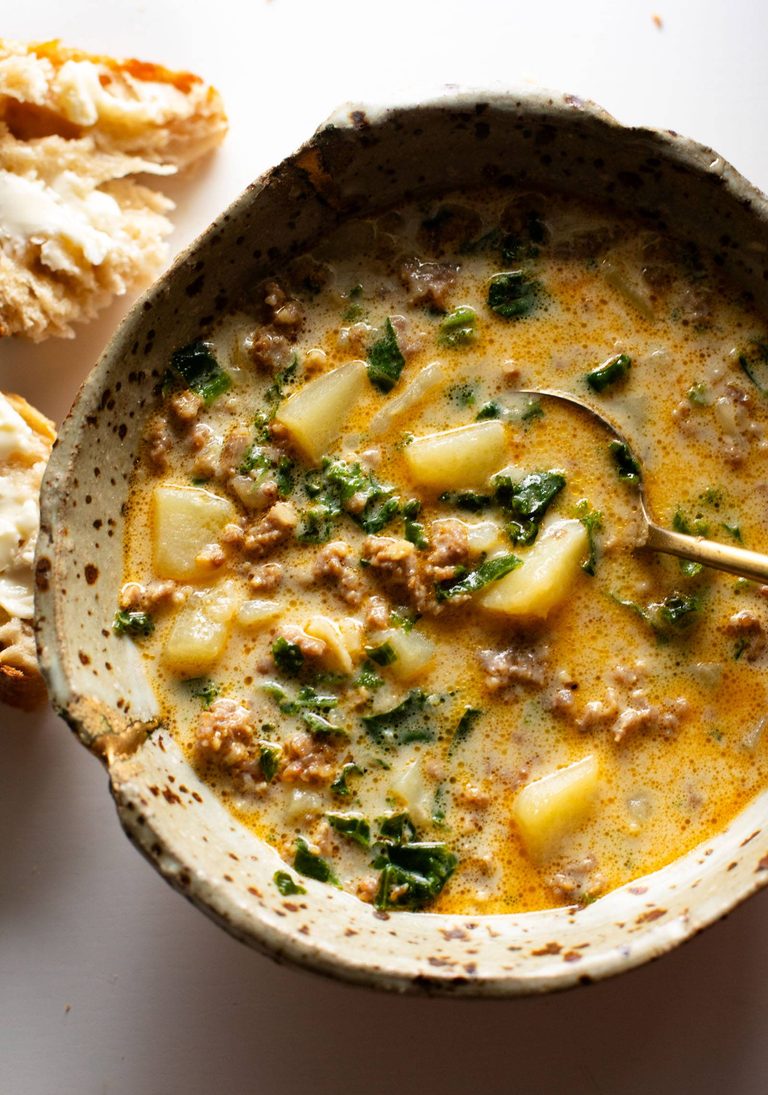
    Zuppa toscana in a bowl.

    Zuppa Toscana

    Easy Zuppa Toscana made in 30 minutes with browned bits of sausage, tender potatoes, and wilted kale, all wrapped in a a creamy, rich, slurpable broth!
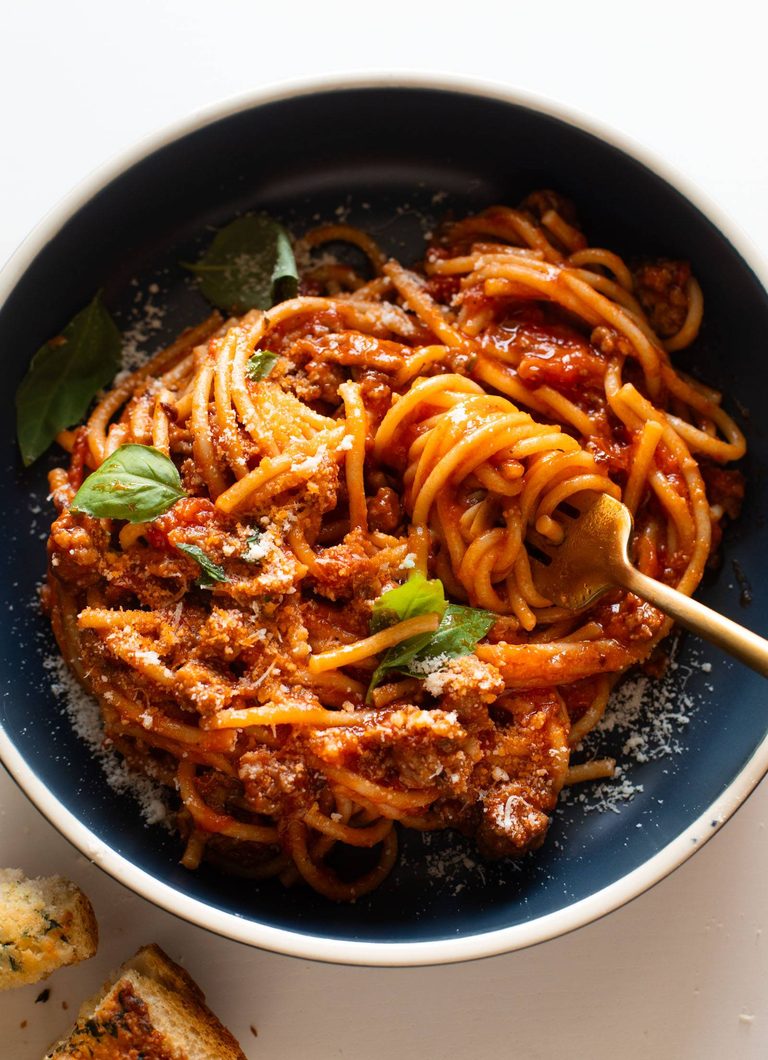
    Instant Pot spaghetti in a bowl.

    Instant Pot Spaghetti

    My whole family loves this Instant Pot Spaghetti! Silky, flavorful, and delightfully clingy. Easy enough for my kids to make it too!
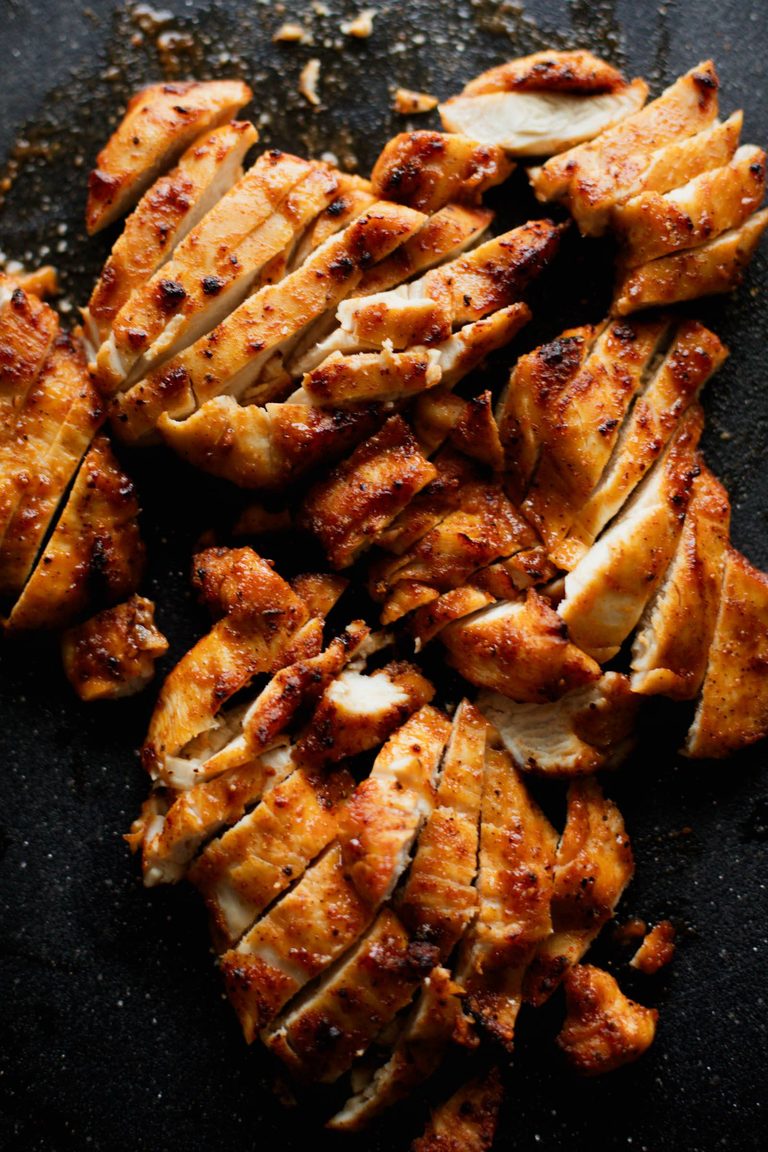
    Air fryer chicken on a cutting board.

    Ridiculously Good Air Fryer Chicken Breast

    My go-to everyday air fryer chicken! Thinly sliced chicken breast pieces, coated to the max in spices, plus a bit of brown sugar and cornstarch, and air fried to golden, juicy perfection.
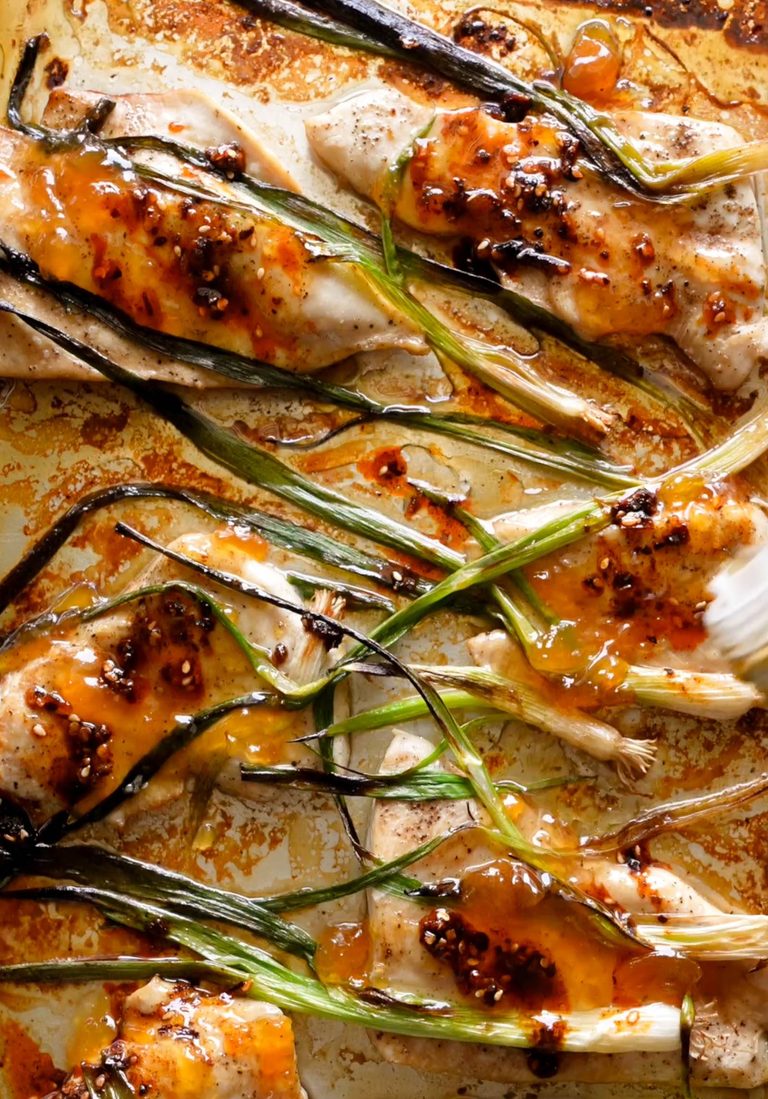
    Apricot chicken on a sheet pan.

    Apricot Chicken with Charred Scallions

    This apricot chicken, made on a sheet pan, is so easy and SO GOOD! Just a few simple ingredients, minimal cleanup, and a major flavor boost from the roasty charred scallions on top.
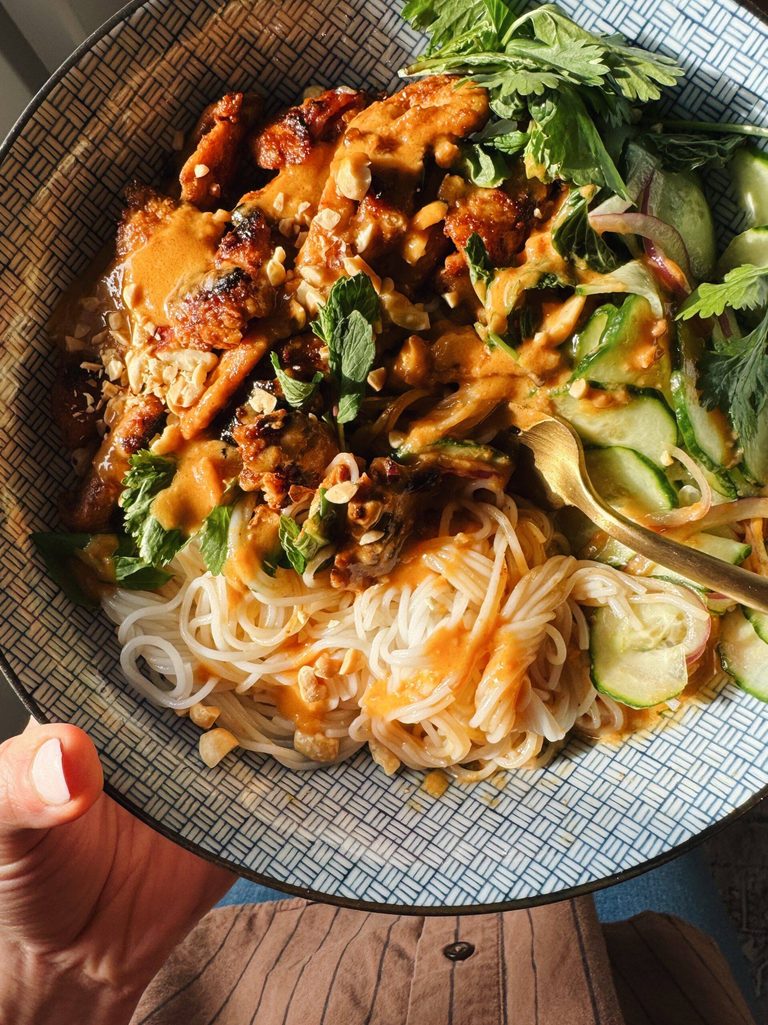
    Thai peanut chicken noodle bowl.

    Thai Peanut Chicken Bowls

    I love a shortcut dinner hack! These bowls feature caramelized peanut chicken, a tangle of vermicelli noodles, fresh herbs and cucumber salad, and peanut sauce all over top.
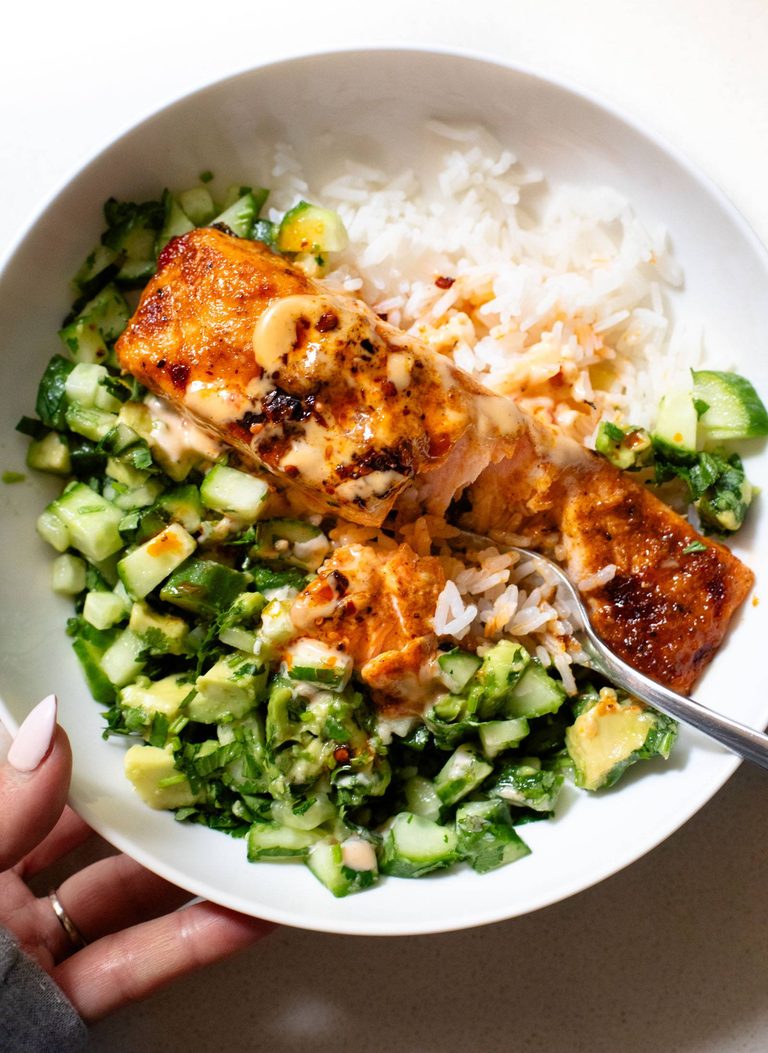
    Bang bang salmon in a bowl with rice.

    Bang Bang Salmon with Avocado Cucumber Salsa

    Bang Bang Salmon! Creamy, sweet, savory, and punchy. Served with some steamy rice and an avocado cucumber salsa. Weeknight perfection!
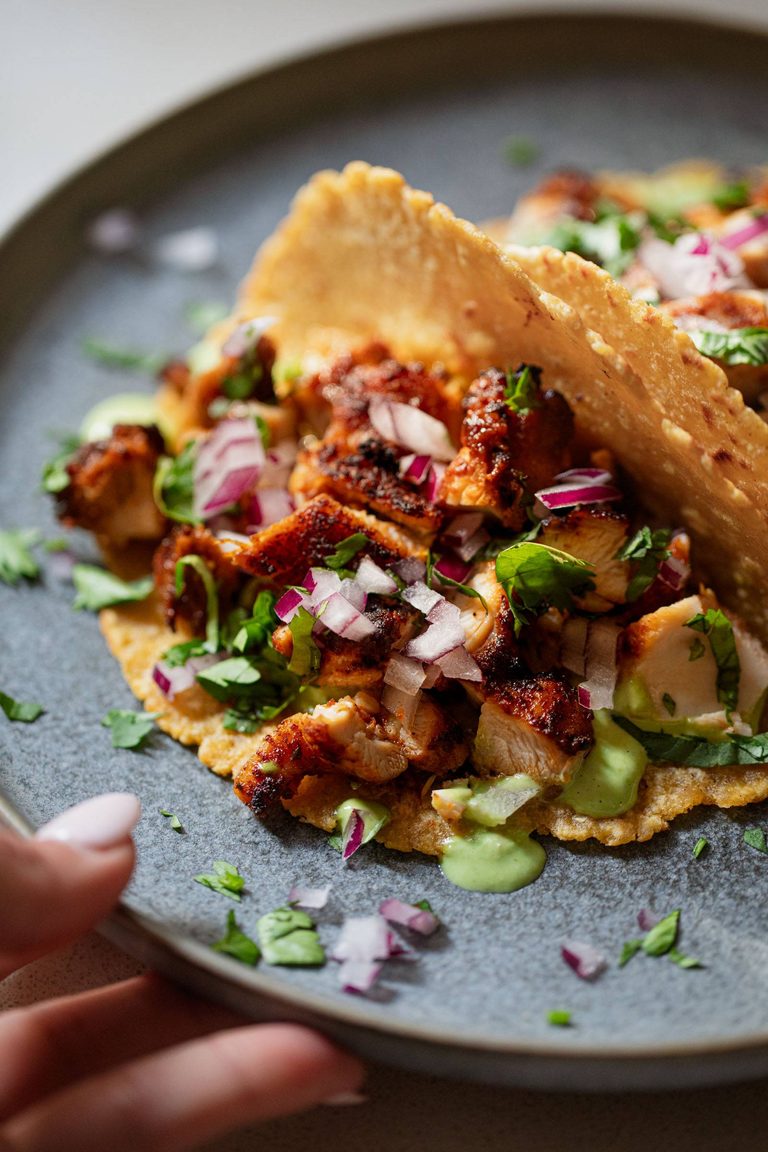
    Chicken tacos.

    Ridiculously Good Chicken Tacos with Green Sauce

    Just 20 minutes to get these chicken tacos on the table! Juicy, flavorful, and absolutely mindless in the best way.

    Chicken in coconut kale sauce.

    Chicken with Coconut Kale

    Golden, juicy, thinly sliced pan-fried chicken swims in a creamy coconut-kale gravy-like situation with slips of shallot and a bit of heat. Super easy, minimal ingredients!
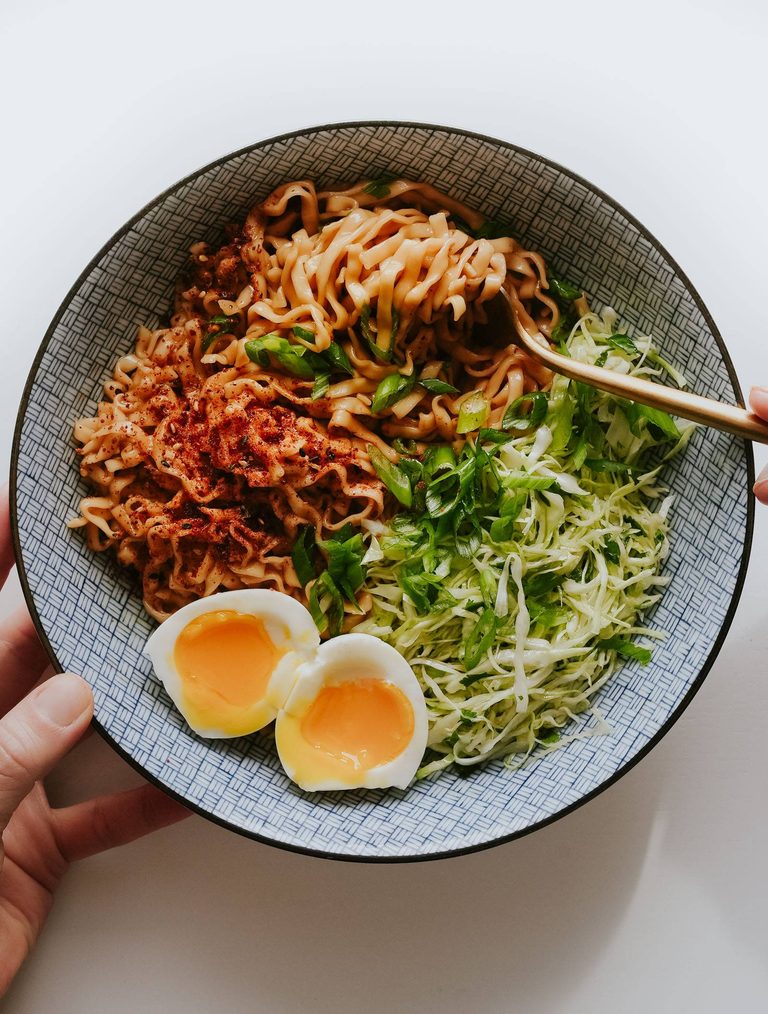
    Sesame butter noodles with slaw.

    Shortcut Sesame Butter Noodles

    One of my favorite back-pocket recipes! Packaged noodles for ease, butter for creaminess, honey for sweetness, and sesame oil for depth. Just tangly slips of joy!
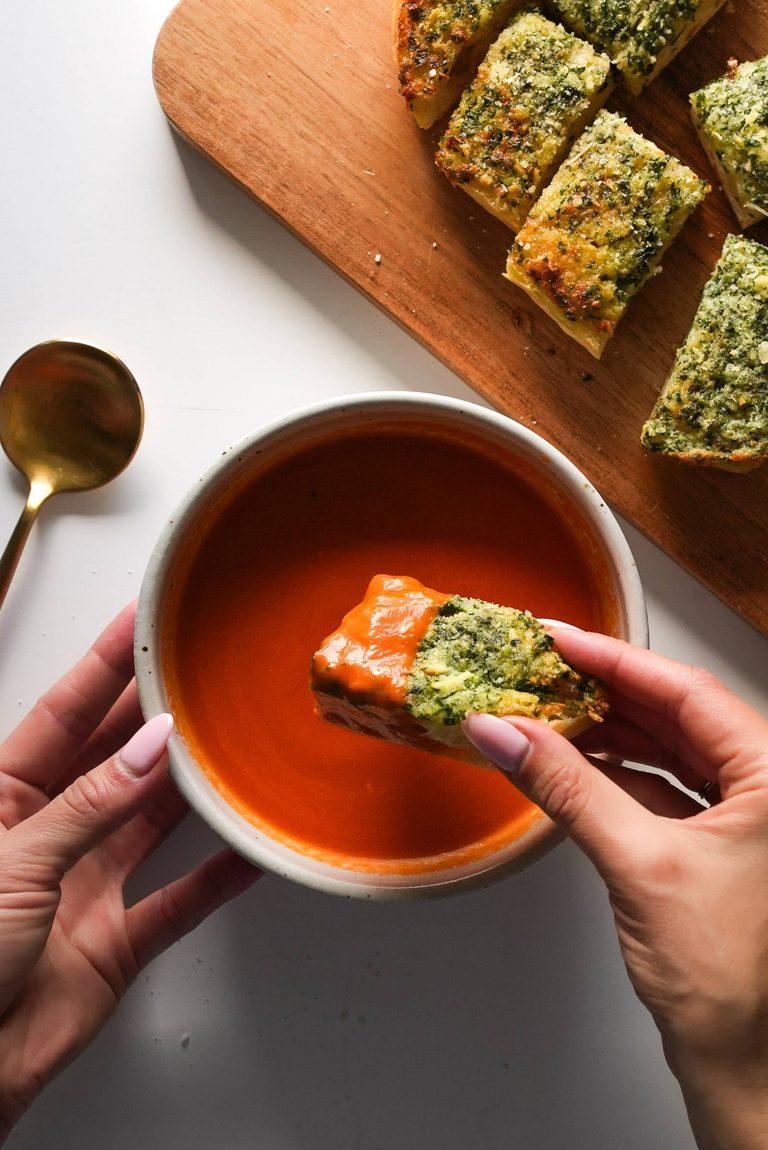
    Tomato soup in a bowl with garlic bread.

    5 Ingredient Tomato Soup

    A simple 5 ingredient tomato soup made with butter, onion, and canned San Marzano tomatoes. Based on the Marcella Hazan tomato sauce recipe. This hits the cozy vibes just right.
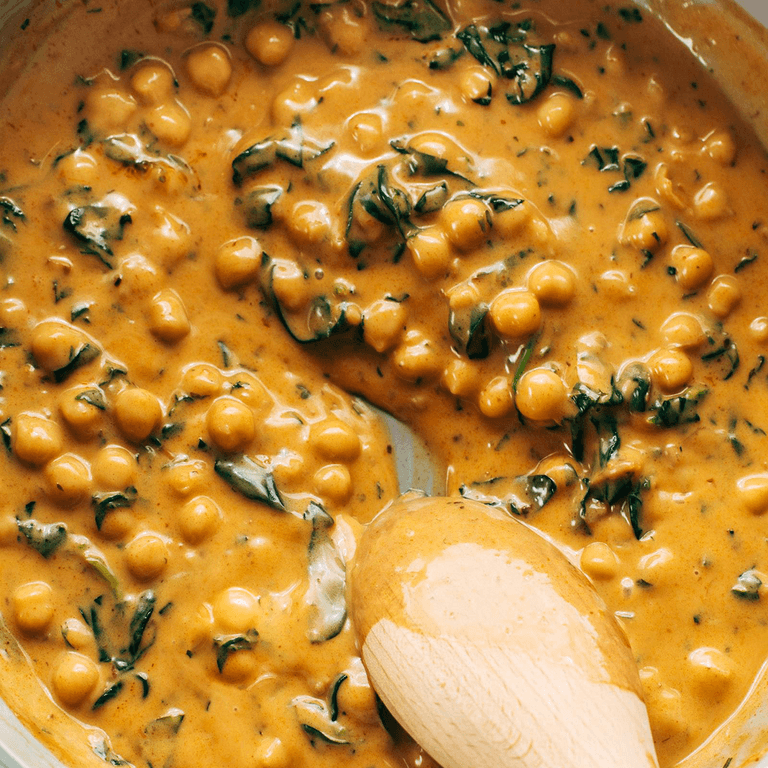
    Chickpea curry in a skillet.

    Steph’s Chickpea Curry with Spinach and Rice

    Amazingly creamy, saucy chickpea curry served over rice with a dollop of chili crisp and a side of cucumber salad. Ready in 20 minutes!
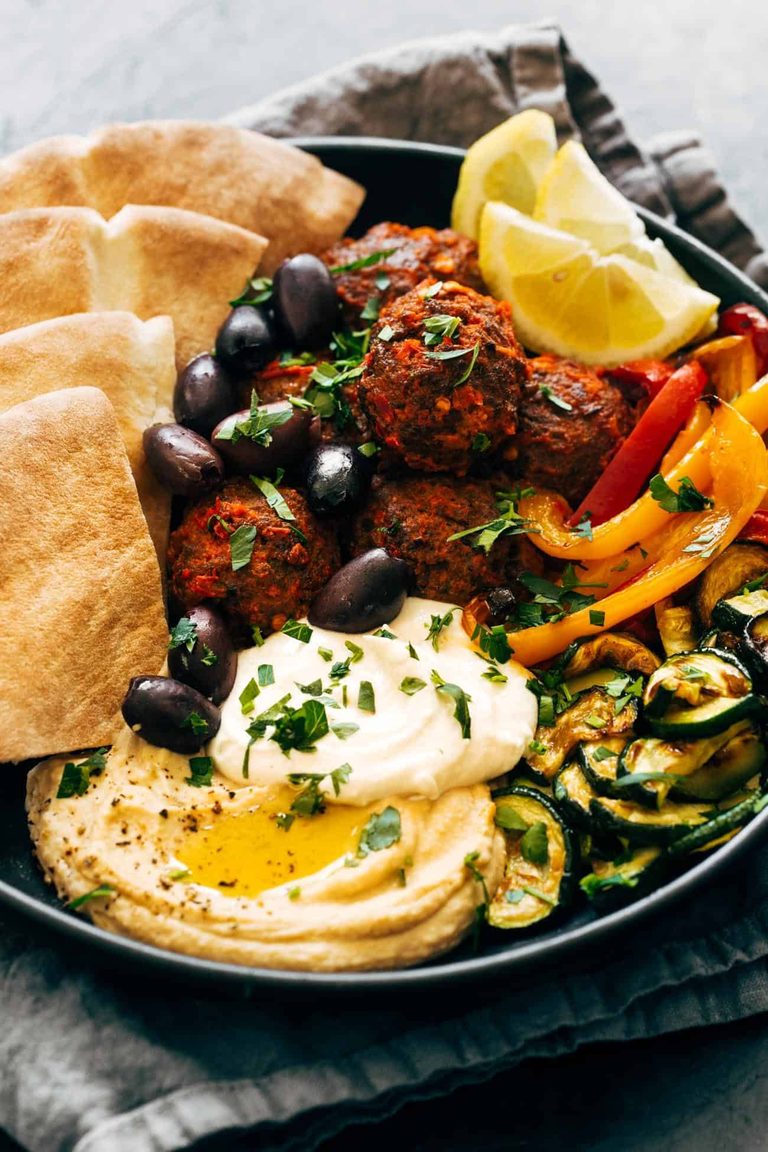
    Harissa meatballs with hummus and whipped feta.

    Harissa Meatballs with Whipped Feta

    These Harissa Meatballs with Whipped Feta are perfect for an easy SOS dinner! Store-bought meatballs, bell peppers, zucchini, harissa, and whipped feta all in one bowl. YUMMY!
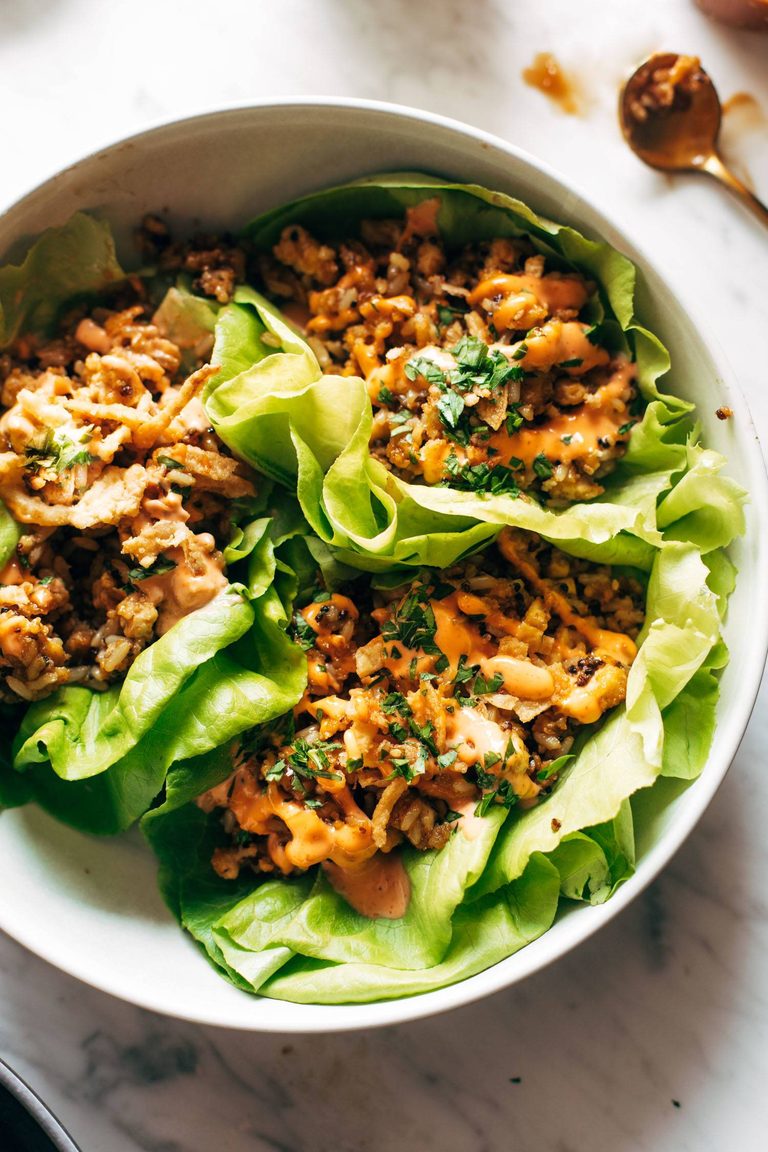
    Tofu and brown rice lettuce wraps.

    Tofu and Brown Rice Lettuce Wraps with Peanut Sauce

    These lettuce wraps are ridiculously good! Crunchy, fresh, and packed with tofu, brown rice, crispy onions, plus a drizzle of peanut sauce and spicy mayo. Delicious!
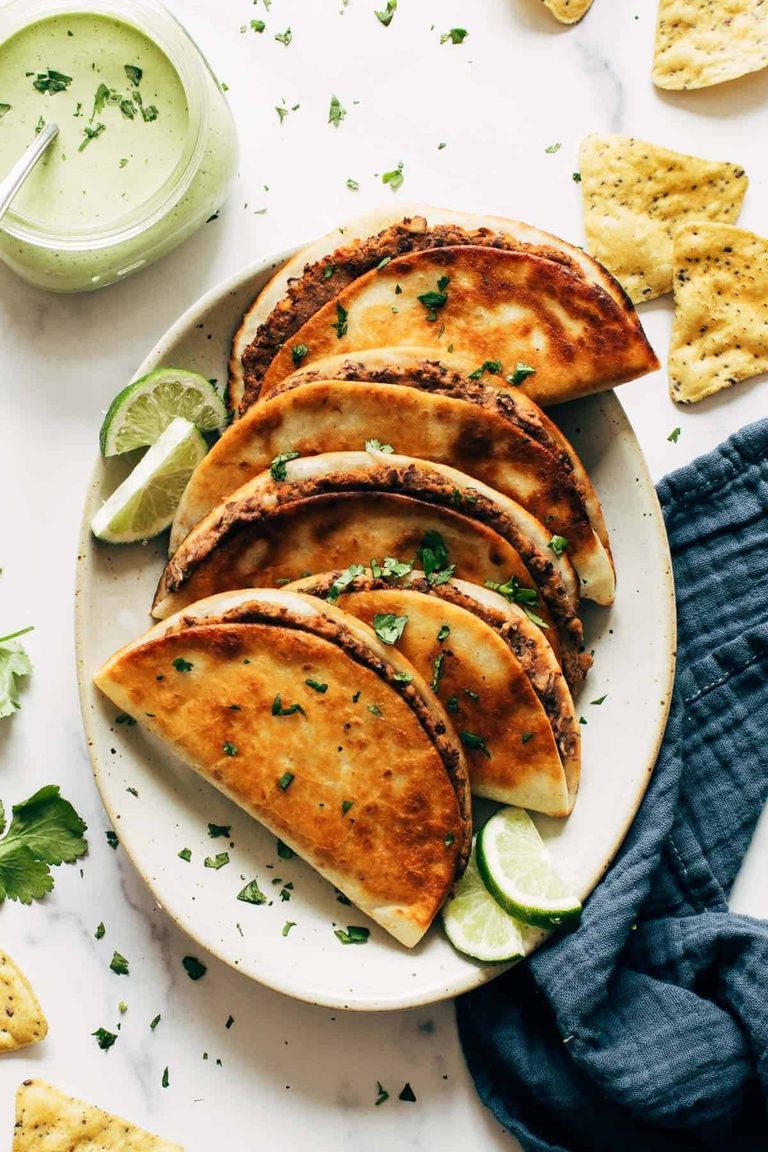
    Crispy black bean tacos on a plate.

    Crispy Black Bean Tacos with Cilantro Lime Sauce

    These vegetarian tacos have a deliciously satisfying black bean filling with fresh salsa and seasonings all tucked into a golden crispy tortilla and served alongside a cool and creamy cilantro lime sauce. YUM!
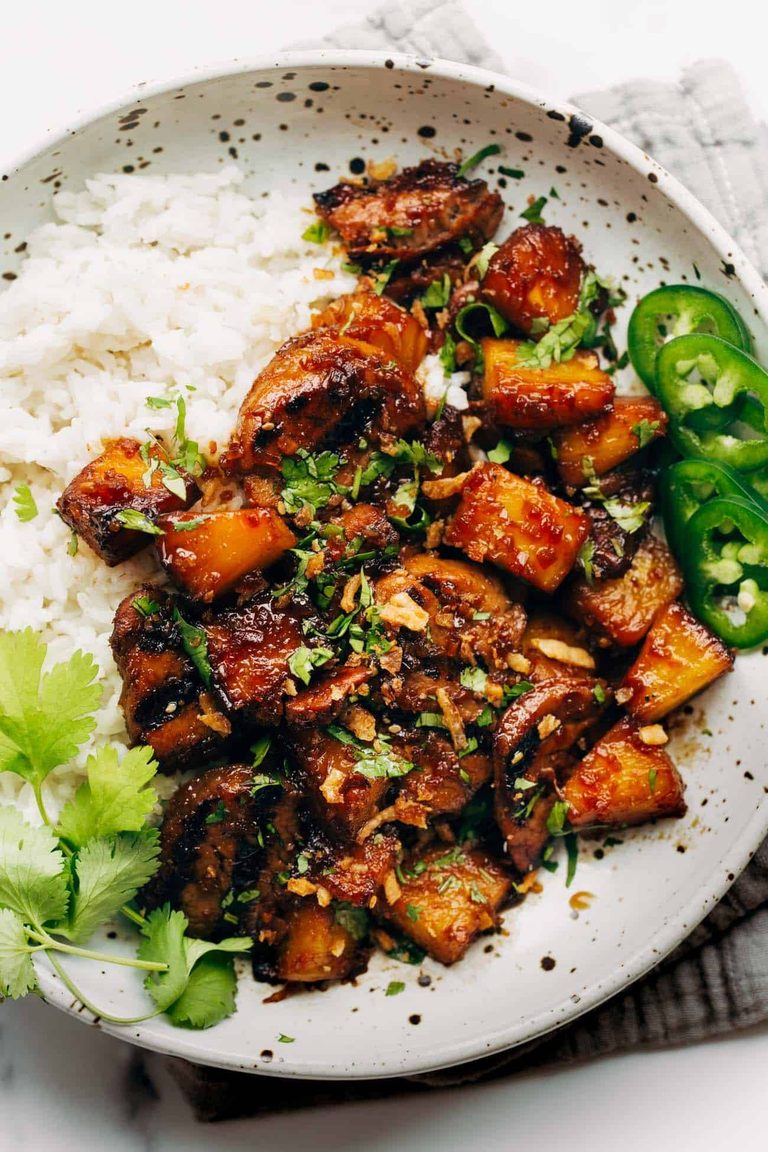
    Pineapple pork in a bowl with rice.

    Pineapple Pork with Coconut Rice

    Sticky-sweet pork, juicy pineapple, fresh herbs, jalapeño, and crispy onions all served over a bed of fluffy coconut rice. SO GOOD!

    Chicken meatballs on a sheet pan.

    Best Anytime Baked Chicken Meatballs

    These Baked Chicken Meatballs are the BEST! The perfect addition to any meal or to eat right on their own. Bonus: they’re meal-prep friendly to stock up throughout the week!

    Chicken tinga tacos.

    The Best Chicken Tinga Tacos

    These Chicken Tinga Tacos are THE BEST! Saucy, spicy, real food perfection.

    Cauliflower black bean tostadas.

    Cauliflower Black Bean Tostadas with Queso and Pickled Onion

    Tangy, creamy, crunchy, smoky, seasoned vegetarian goodness on a perfectly crisp little corn tortilla disk. Cauliflower Black Bean Tostadas to the rescue!
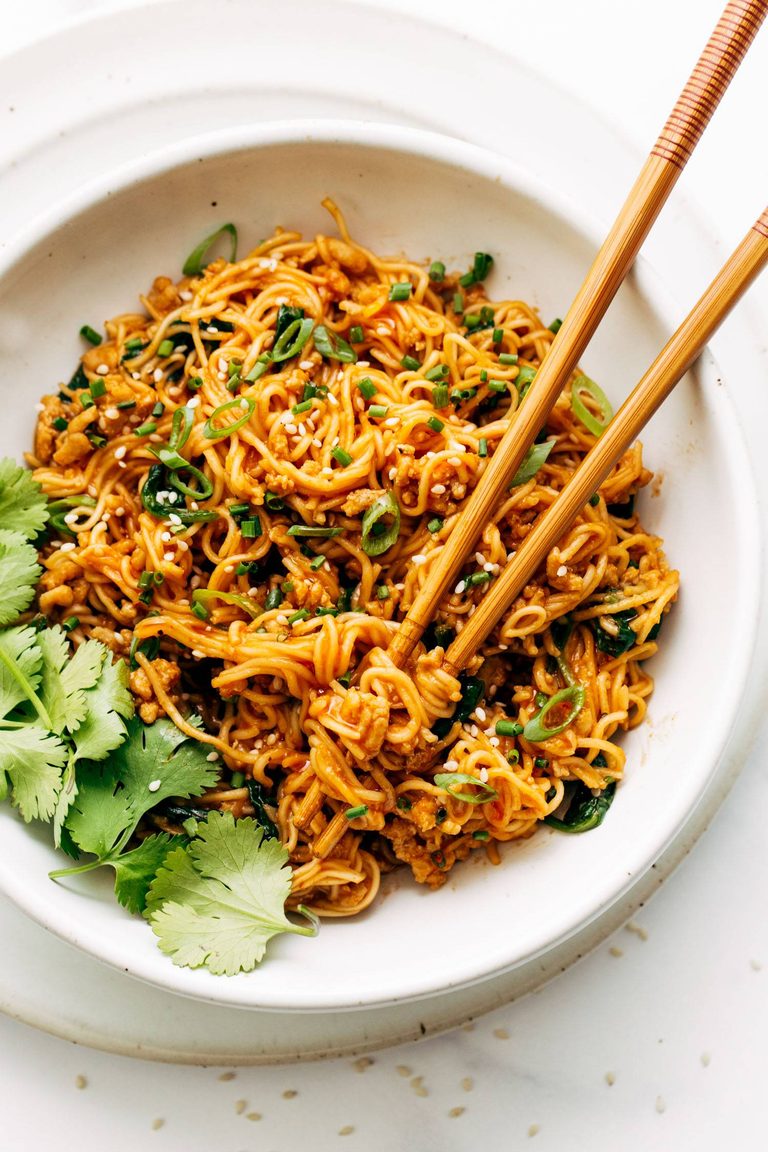
    Gochujang noodles in a bowl.

    Saucy Gochujang Noodles with Chicken

    A spicy, peanutty, noodley bit of super easy comfort food! These gochujang noodles require just a handful of ingredients – like ramen noodles, peanut butter, sesame oil, and soy sauce – and come together in just 20 minutes.
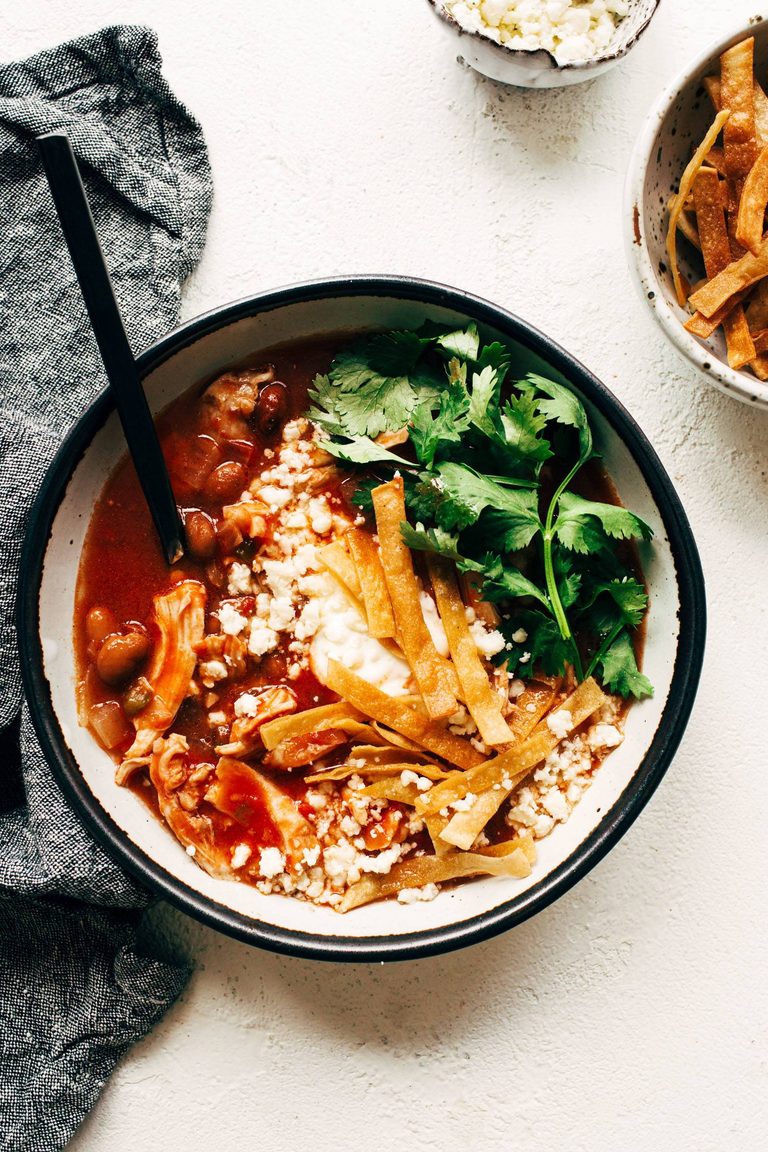
    Chicken tortilla soup in a bowl with cilantro.

    Chicken Tortilla Soup

    Winner, winner, Chicken Tortilla Soup dinner! Tender chicken thighs, creamy pinto beans, garlic and onions, crushed tomatoes, jalapeño pepper, crushed tomatoes, and ALL the toppings.
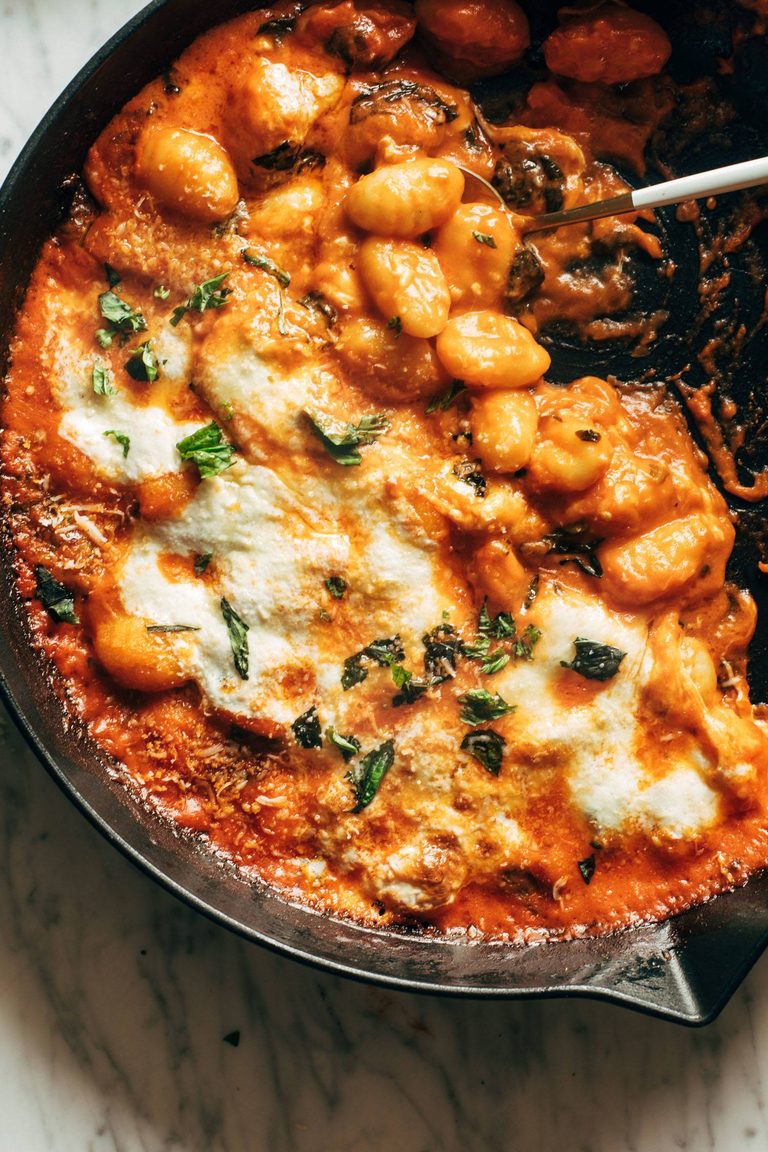
    Baked gnocchi in a cast iron skillet.

    Three Cheese Baked Gnocchi with Spinach

    You’re in for a treat with this delicious Three Cheese Baked Gnocchi! Tender gnocchi blanketed in a creamy tomato sauce, speckled with fresh spinach and bites of melty cheese. Gorgeous!
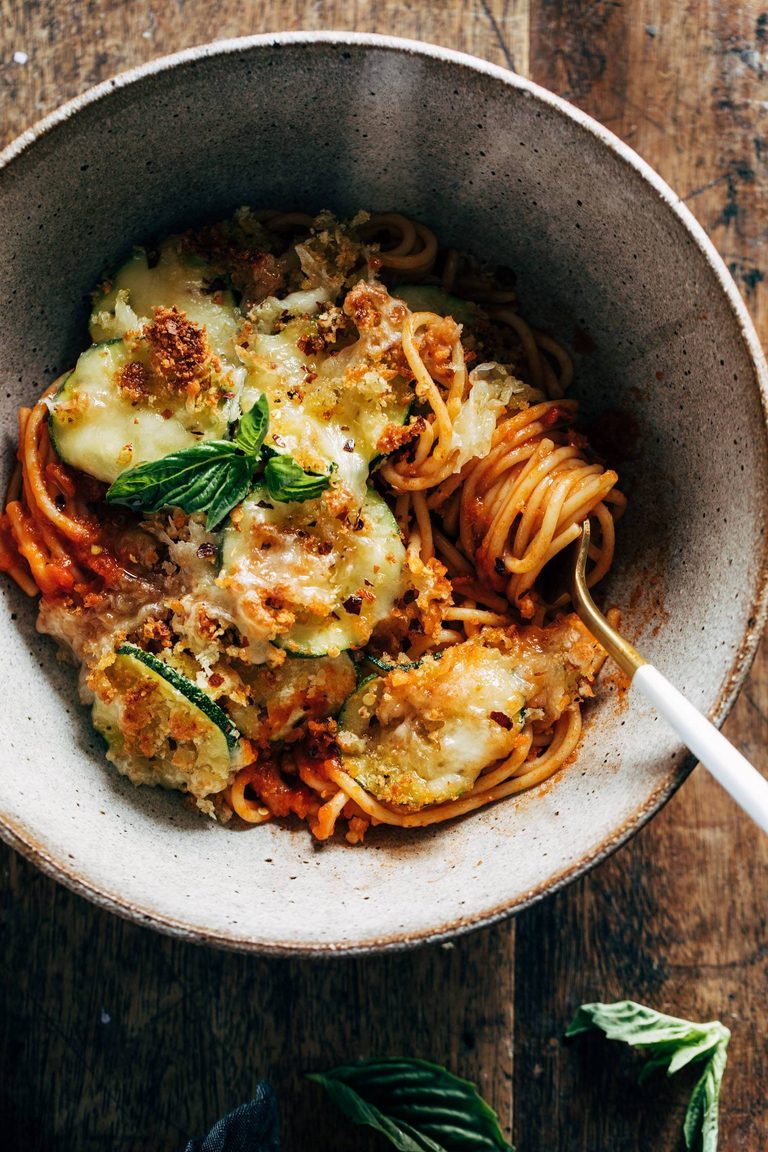
    Spaghetti topped with cheesy crispy zucchini.

    Spaghetti with Crispy Zucchini

    This Spaghetti with Crispy Zucchini is the perfect end-of-summer song! It doesn’t get much better than fresh summer zucchini coated in a crispy, cheesy breading piled high on top of spaghetti with fresh herbs. YUM!
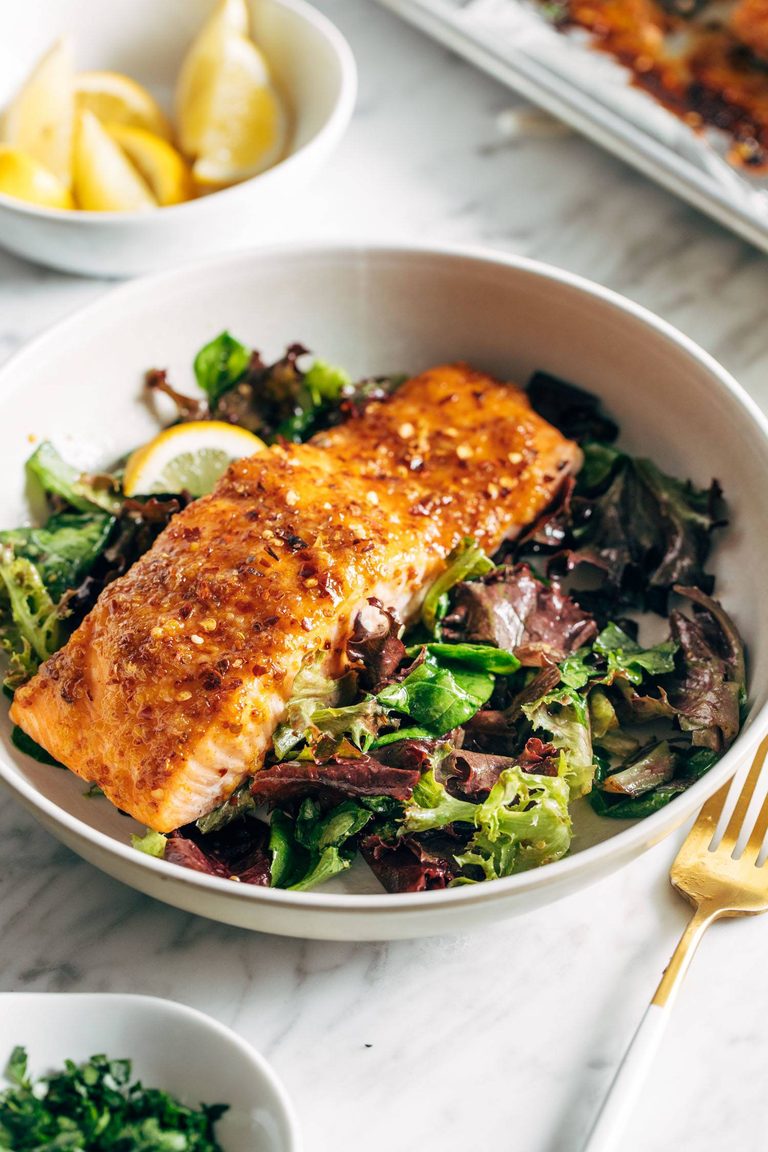
    Hot honey salmon on a salad mix.

    Hot Honey Salmon

    This Hot Honey Salmon is giving off major fancy-to-eat-but-not-fancy-to-make vibes. Spicy-sweet salmon coated in fresh garlic, stone ground mustard, sweet honey, and flecks of red peppers flakes. It’s a magical little number!
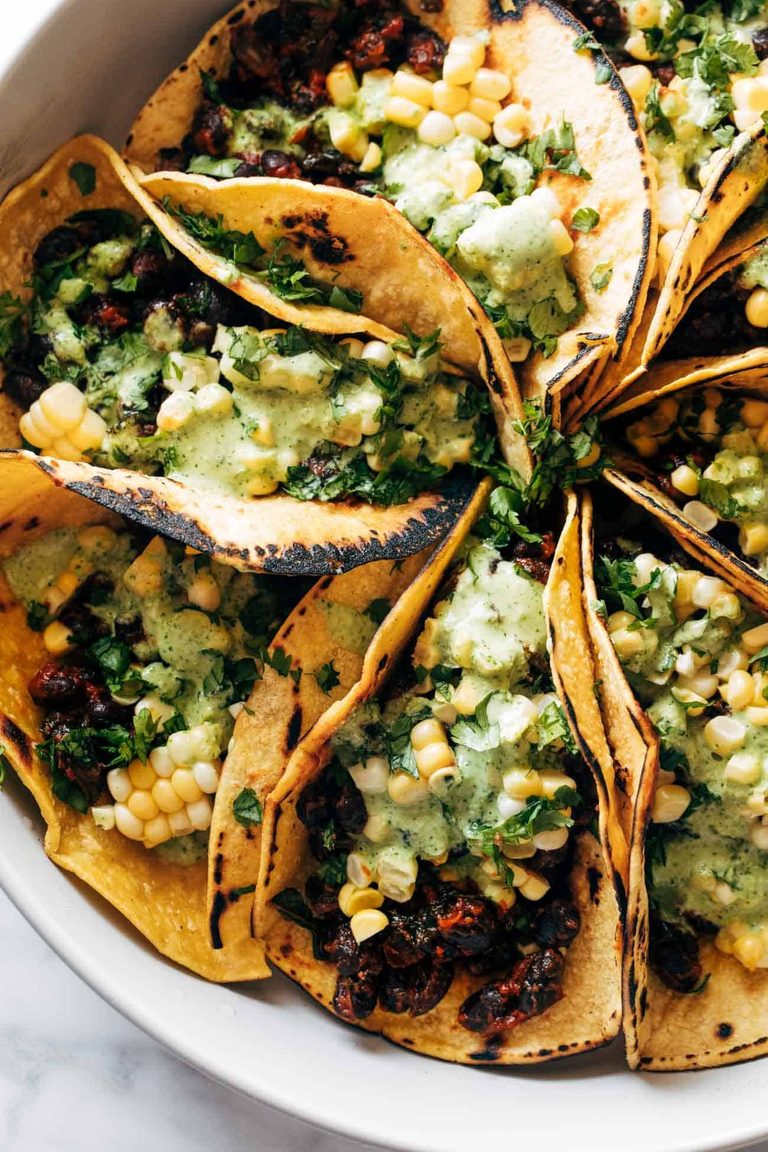
    Smoky beans and greens tacos.

    Smoky Beans & Greens Tacos with Aji Verde

    Three cheers for summertime eating! Smoky black beans sautéed with kale and garlic and spices, tucked into charred corn tortillas, and topped with the best feisty, punchy green sauce – Aji Verde!
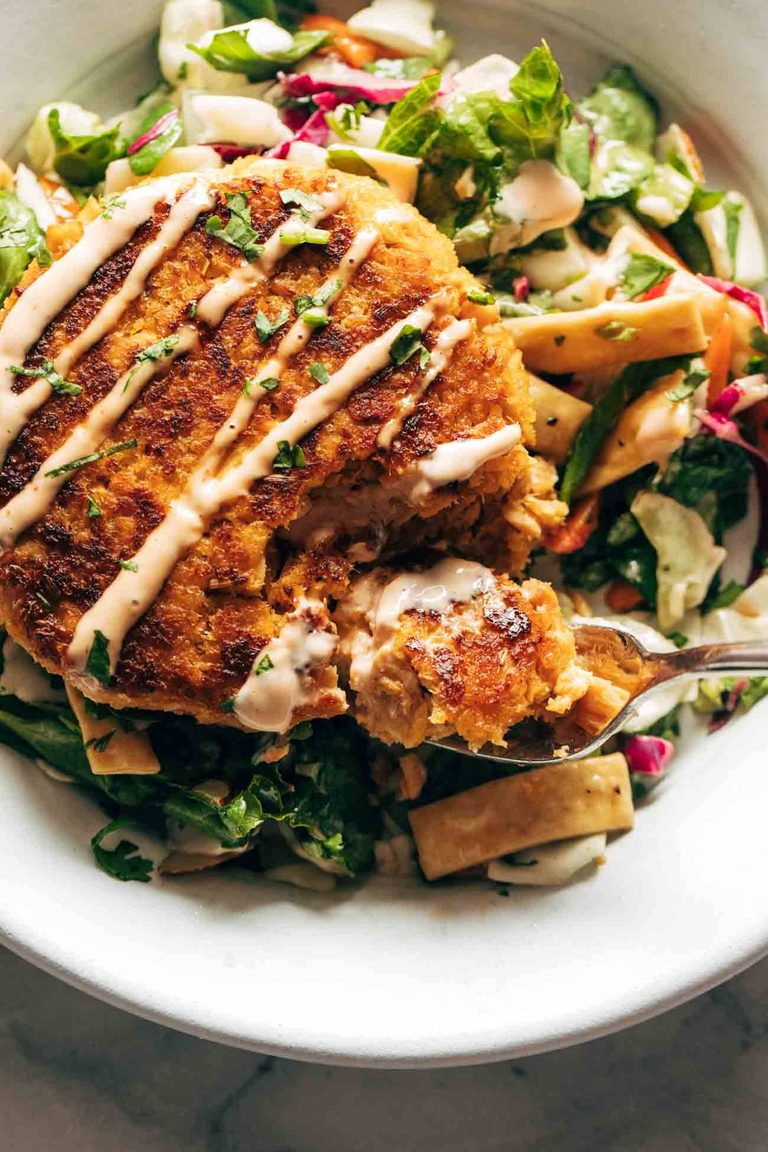
    Spicy salmon burger with salad mix.

    Spicy Salmon Burgers

    These Spicy Salmon Burgers are little bundles of flavor! Canned salmon, panko, refreshing lemongrass, and a sweet-spicy zingy combo of red curry paste and brown sugar. So good and so simple!
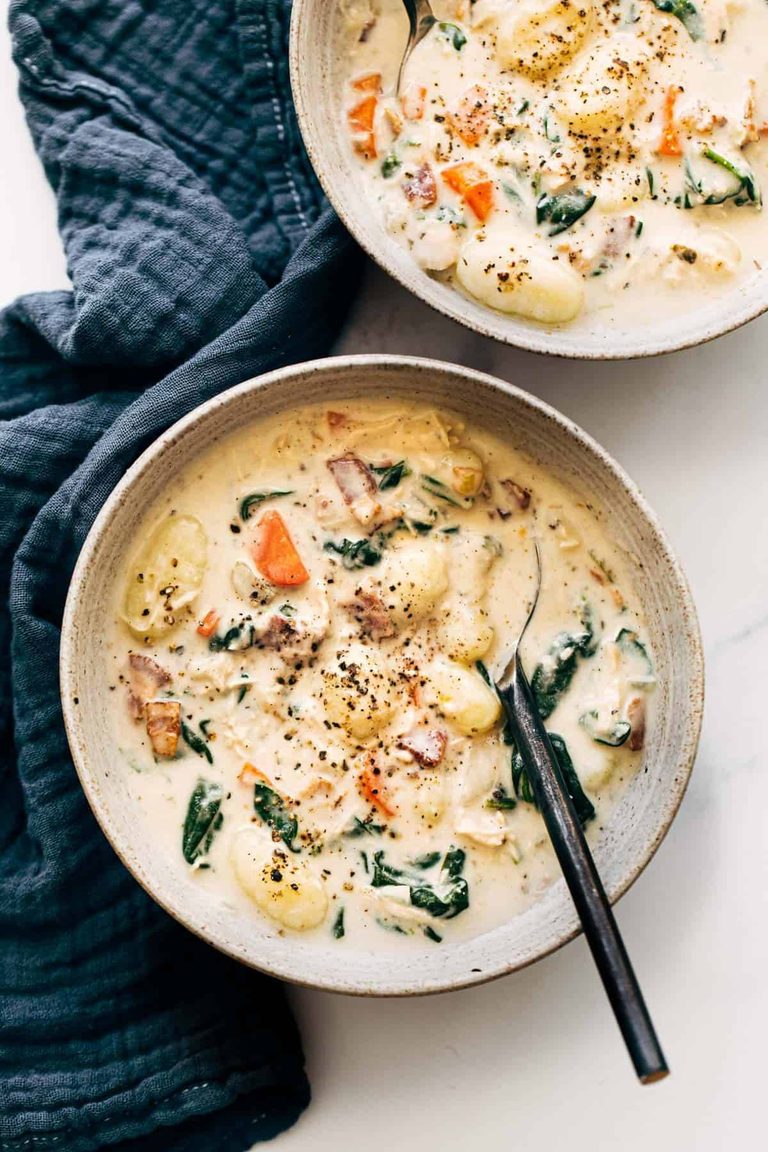
    Creamy chicken gnocchi soup.

    Crockpot Chicken Gnocchi Soup

    This Crockpot Chicken Gnocchi Soup is lusciously cream-free, comforting, and made with lots of vegetables. Perfect with crusty bread and a green salad. ♡
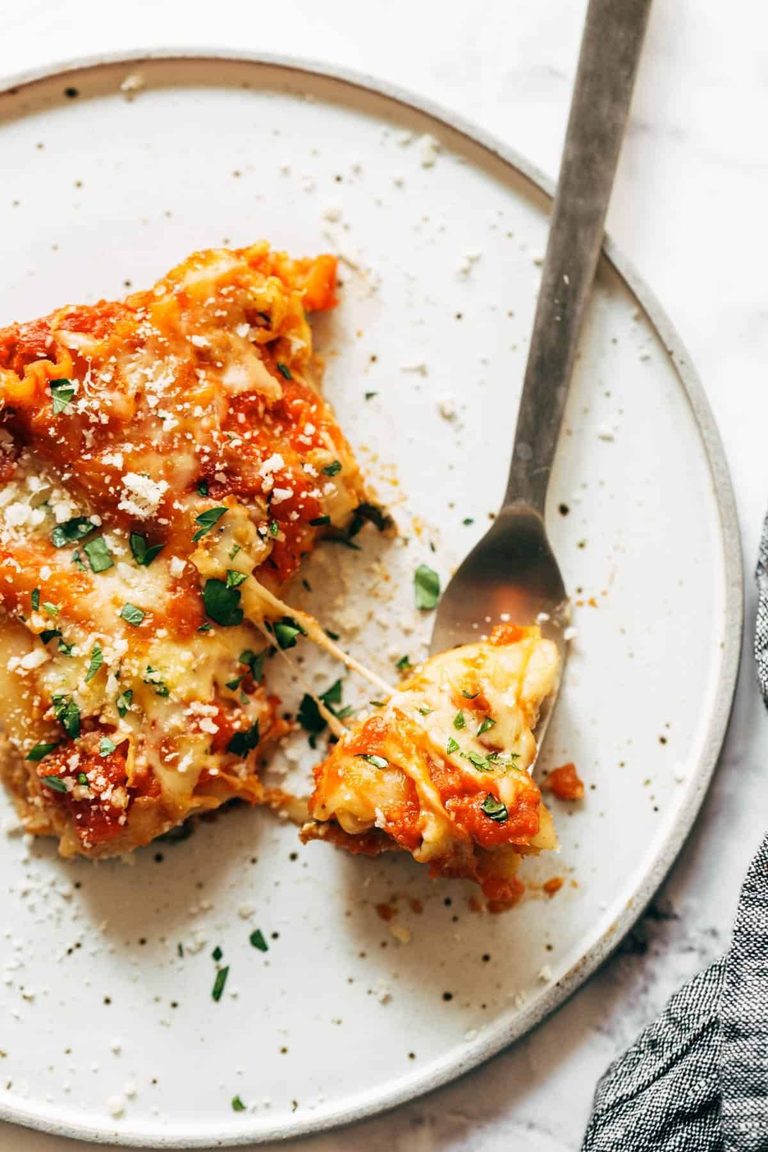
    Creamy tomato lasagna florentine.

    Creamy Tomato Lasagna Florentine

    This Creamy Tomato Lasagna Florentine is so deliciously comforting and simple. Noodles, tomato sauce, and a creamy spinach layer!
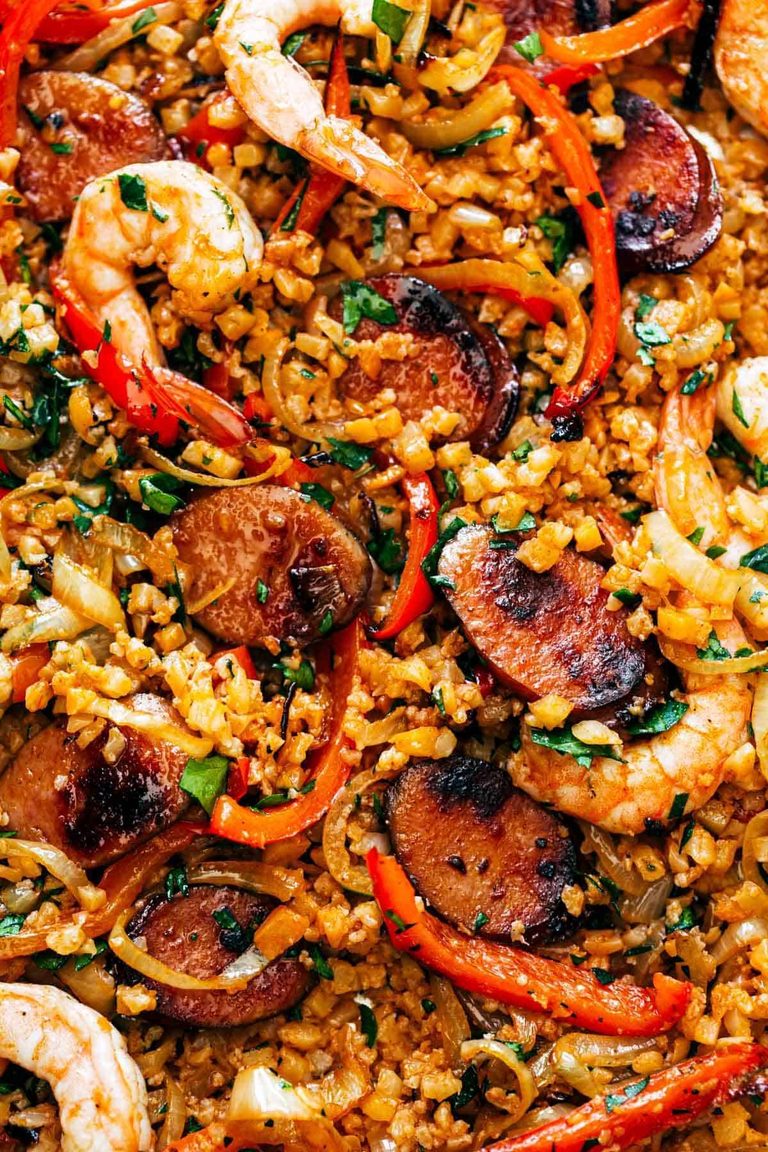
    Sheet pan jambalaya.

    Sheet Pan Jambalaya

    Sheet Pan Jambalaya: maximum flavor, minimal dishes. Sausage, peppers, onions, shrimp, and cauliflower rice all roasted up on a sheet pan. Big flavor, easy dinner!
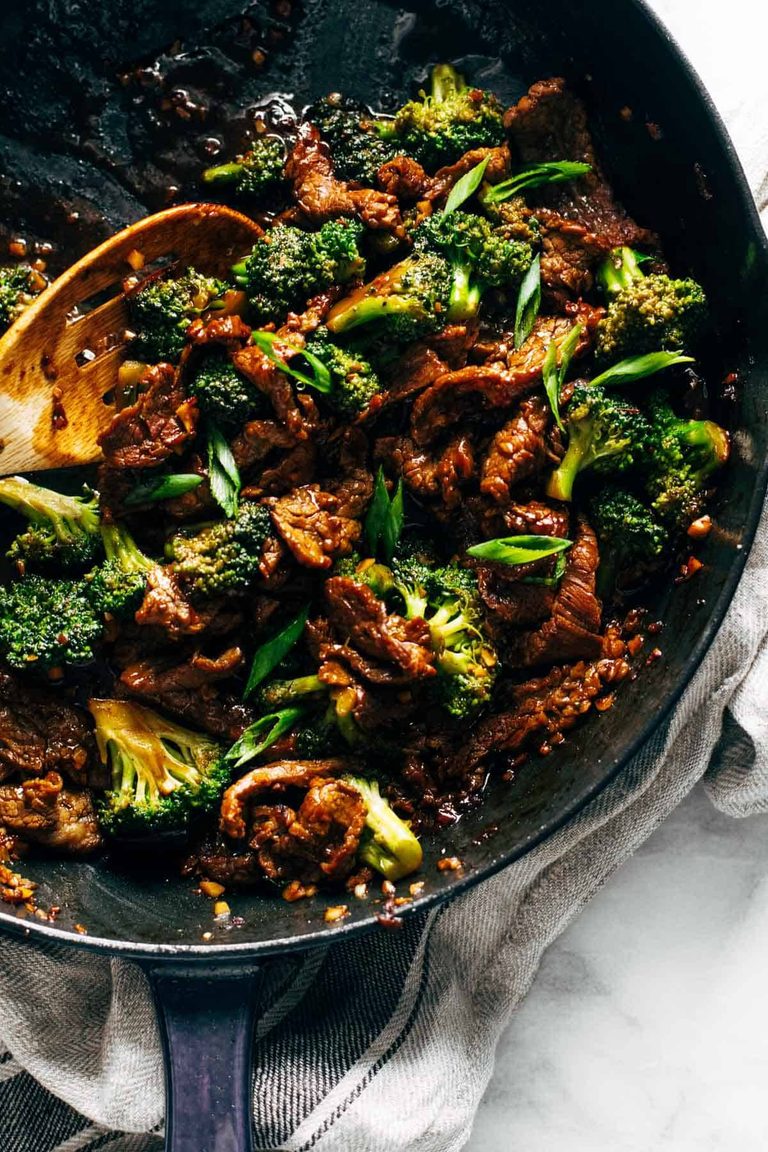
    Beef and broccoli in a cast iron.

    Sesame Beef and Broccoli

    Sesame Beef and Broccoli! Full of protein, green broccoli goodness, and sticky-sweet garlic and ginger flavor. Perfect at-home takeout!
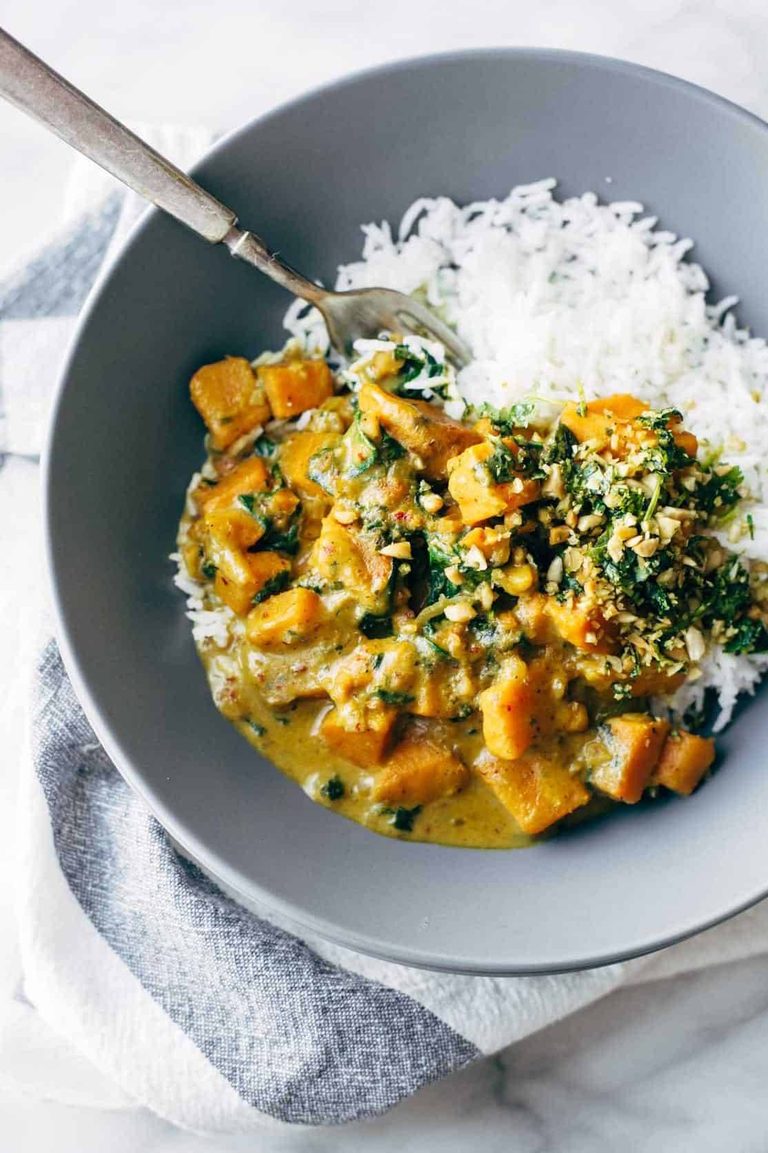
    Creamy sweet potato curry in a bowl with rice.

    Creamy Thai Sweet Potato Curry

    Creamy Thai Sweet Potato Curry – packed with nutrition! Our favorite easy, healthy, winter comfort food recipe.
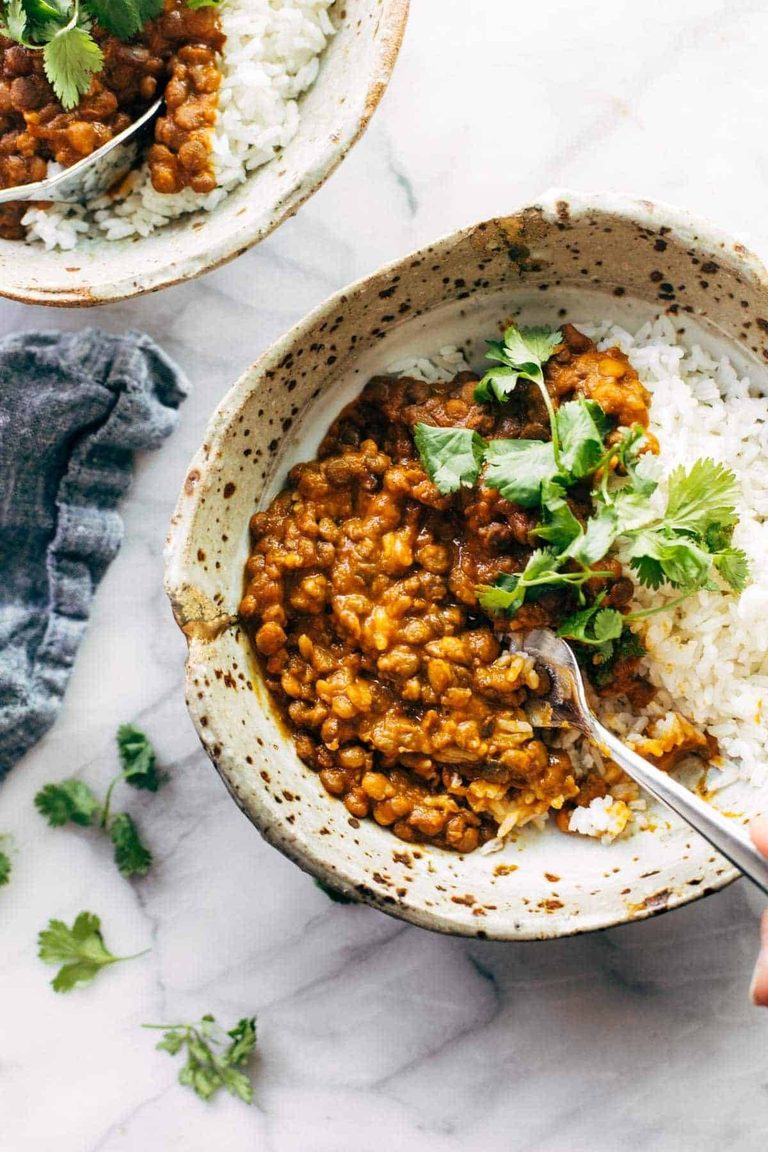
    Red curry lentils with rice.

    Instant Pot Red Curry Lentils

    Guess what’s for dinner? Creamy, spicy, delicious red curry lentils, made in the Instant Pot.
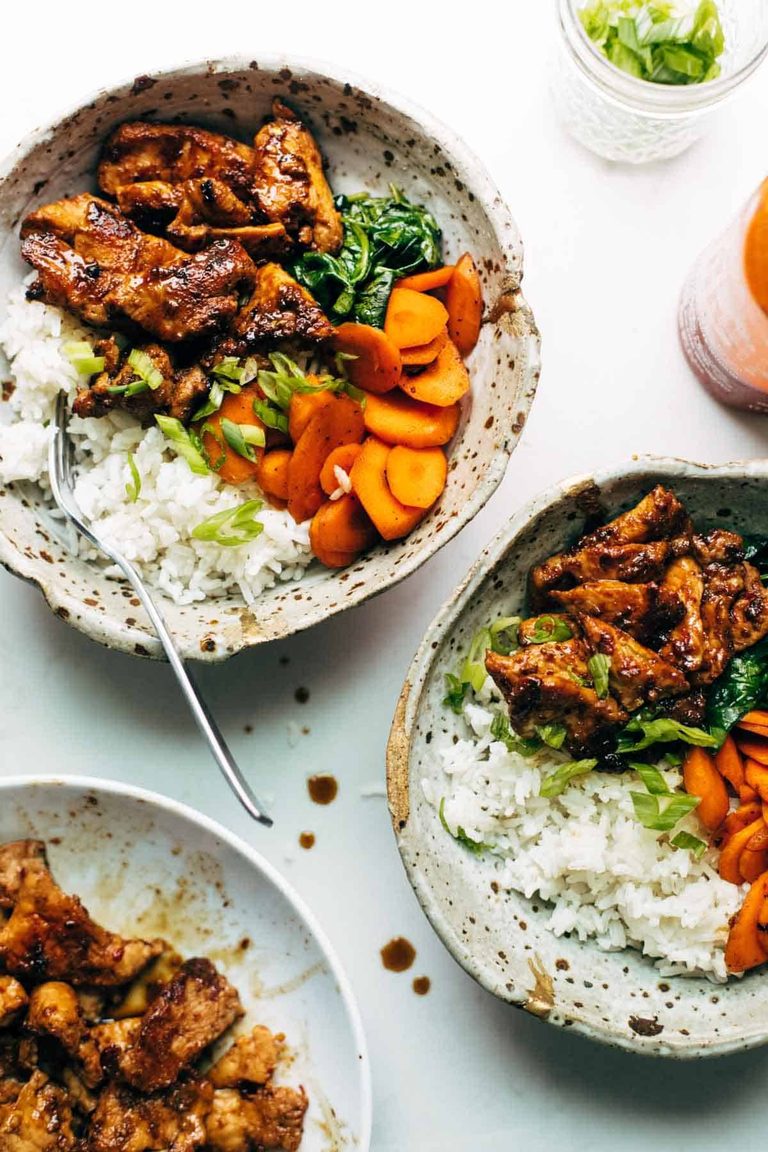
    Spicy pork in a bowl with rice and veggies.

    5 Ingredient Spicy Pork

    5 Ingredient Spicy Pork! A fancy-feeling dinner recipe that actually comes together in snap. Serve it in bowls, stir-fry it with some veggies, or add it to burritos!
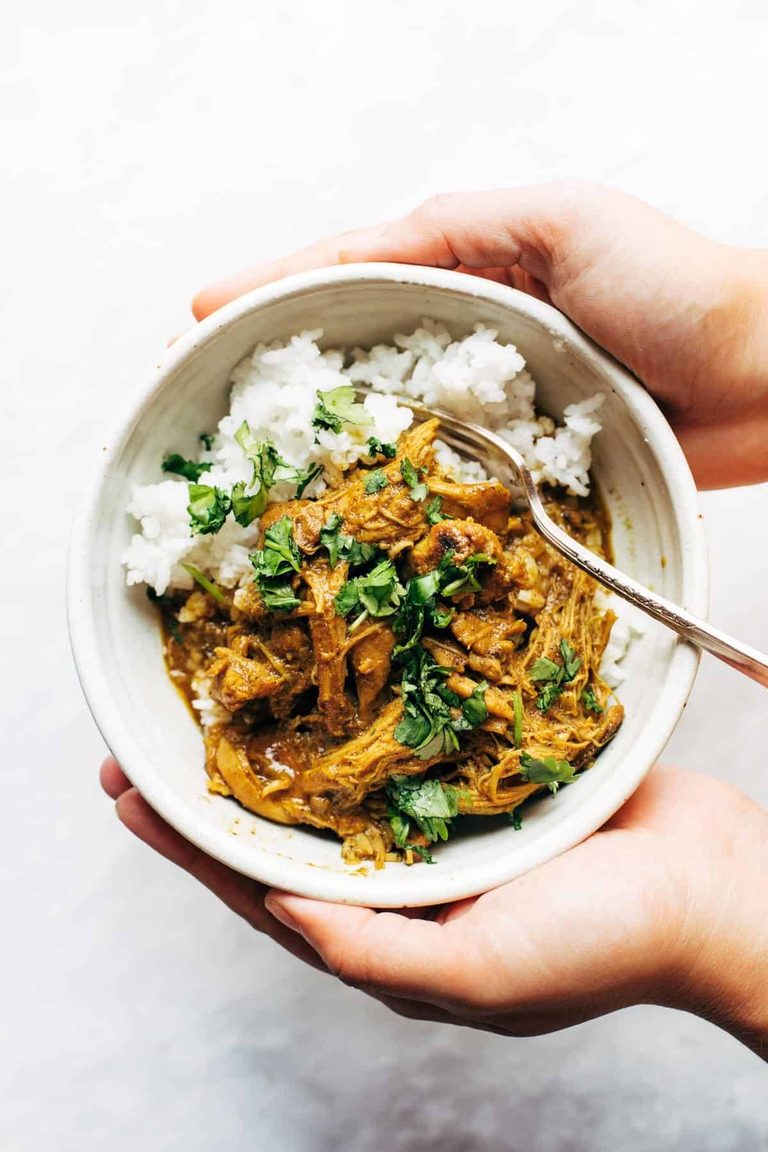
    Tandoori chicken in a bowl with rice.

    Instant Pot Coconut Tandoori-Inspired Chicken

    Coconut Tandoori Chicken made with rich spices and creamy coconut milk. Ridiculously easy (like, 5 minutes hands-on time) and so, so yummy! My new favorite make-ahead freezer meal.
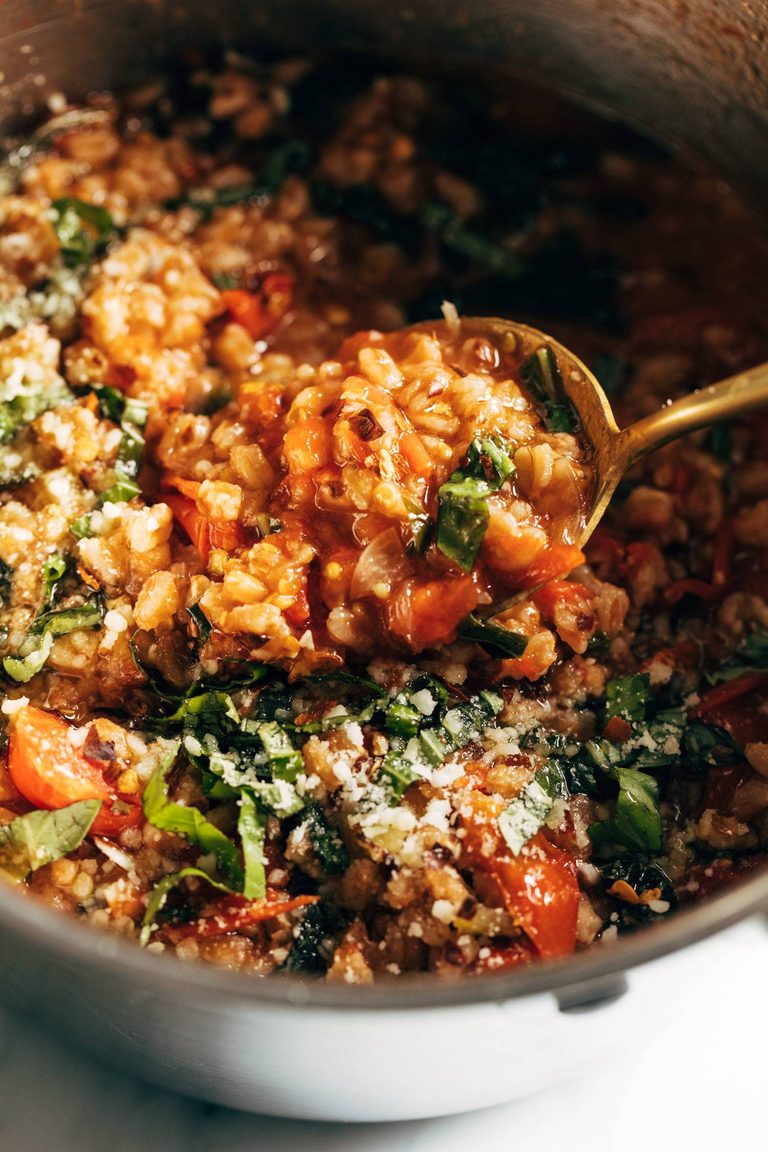
    One pan farro with tomatoes and kale.

    One-Pan Farro with Tomatoes and Kale

    This One-Pan Farro with Tomatoes and Kale is a straight-up DREAM! Rustic farro cozied up to cherry tomatoes, onions, garlic, and kale. So good and so wholesome!

    Spinach and artichoke pizza.

    The Absolute Easiest Spinach and Artichoke Pizza

    This really is the absolute easiest Spinach and Artichoke Pizza! Garlicky spreadable cheese, canned artichokes, fresh spinach, sun-dried tomatoes, and mozzarella – all on a pre-made pizza crust. Oof, it’s good!


    Source link

  • Easy Pumpkin Mac and Cheese Recipe

    Easy Pumpkin Mac and Cheese Recipe

    This pumpkin mac and cheese recipe is the ultimate fall dinner! Pumpkin puree makes the cheese sauce extra creamy and delicious.

    Creamy pumpkin mac and cheese

    If you haven’t tried it yet, adding pumpkin puree to mac and cheese is truly delicious. I remember being surprised the first time I tried it, but it makes the sauce silkier, creamier, and just a little bit richer.

    You can use homemade pumpkin puree or canned pumpkin puree. I often turn to this recipe when I have leftover pumpkin from baking a batch of pumpkin scones or making pumpkin spice lattes.

    Key Ingredients

    • Pasta: Choose pasta with nooks and crannies that hold onto the sauce. Elbow macaroni or shells are perfect.
    • Pumpkin: Use pure pumpkin puree (not pumpkin pie mix, which has added spices). Libby’s and Whole Foods 365 are great store-bought options, or try our pumpkin puree recipe.
    • Butter and Flour: These form a simple roux that thickens the cheese sauce once you add the milk.
    • Milk: Whole or reduced-fat milk both work beautifully.
    • Cheese: Sharp cheddar melts really well and has a classic flavor. For the creamiest sauce, grate the cheese yourself rather than using pre-shredded cheese.
    • Extras: A bit of Dijon mustard, black pepper, and nutmeg improves the flavor of the sauce, making the pumpkin mac and cheese incredible.

    Find the full recipe with measurements below.

    My Tips for Making Pumpkin Mac and Cheese

    Tip 1: Start with a roux. Start the sauce by cooking the flour in melted butter until it smells nutty and turns a light golden color. This step creates the base that thickens the milk and gives your cheese sauce a rich flavor. We use the same method when making classic baked mac and cheese and this creamy mac and cheese.

    Tip 2: Make the pumpkin cheese sauce. After whisking in the milk, the mixture will thicken. Stir in your seasonings, pumpkin puree, and most of the cheese. I highly recommend tasting the sauce before adding the pasta. If it seems flat, add a pinch more salt and pepper. The flavor of pumpkin will be there, but it will be subtle. I love it!

    Making the cheese sauce for pumpkin mac and cheese

    Tip 3: Decide how you’ll serve it. For a creamier, looser mac and cheese, serve it straight from the stovetop. For a golden, bubbly topping, transfer to a baking dish, sprinkle on extra cheese, and bake. I love it served both ways!

    Serving Suggestions

    I love richer dishes like this one with something fresh on the side. A crisp green salad with honey mustard dressing, or roasted vegetables like roasted green beans or Brussels sprouts, work really well. I also love this tahini kale and white bean salad!

    For a heartier meal, you can serve it as a side to pork chops, roast chicken, garlic herb roasted turkey breast, or sausages, like beer brats. You can add toppings, too! Consider crumbled bacon or sausage. And of course, a side of garlic bread or focaccia is always welcome.

    Pumpkin Mac and Cheese

    Easy Pumpkin Mac and Cheese

    • PREP
    • COOK
    • TOTAL

    My family loves this pumpkin mac and cheese recipe! Pumpkin puree makes a velvety, rich cheese sauce. Use pure pumpkin puree, not the canned mix labeled “pumpkin pie mix,” which has spices added to it. You can also swap pumpkin for another pureed squash, such as butternut squash.

    8 Servings

    Watch Us Make the Recipe

    You Will Need

    1 pound pasta, such as macaroni or shells (450g)

    Salt, as needed

    4 tablespoons unsalted butter (55g)

    1/4 cup all-purpose flour (30g)

    2 cups milk, whole or 2% are best (470ml)

    1 teaspoon Dijon mustard

    1/2 teaspoon fresh ground black pepper

    1/4 teaspoon finely grated nutmeg

    1 cup pure pumpkin puree, try homemade pumpkin puree (227g)

    2 cups grated sharp cheddar cheese, 8 ounces (226g)

    Directions

      1Preheat the oven to 350°F (177°C). Butter a 3-quart casserole dish or spray with nonstick cooking spray.

      2Bring a large pot of salted water to a boil. Cook pasta as directed on the package. (Usually 7 to 10 minutes). Drain.

      3Melt the butter in a large, high-sided pan over medium heat. When it begins to bubble, add the flour. Cook, whisking constantly for 2 to 3 minutes until the butter smells fragrant and nutty. The color of the butter-flour mixture will turn light brown.

      4While whisking, slowly pour in the milk. Continue to cook, whisking constantly until the sauce bubbles and thickens.

      5Reduce the heat to low, and then season the sauce with a 1/2 teaspoon of salt, pepper, nutmeg, and mustard.

      6Add the pumpkin puree and three-quarters of the grated cheese. Stir until the cheese has melted and the sauce is smooth. Taste the sauce for seasoning and adjust with more salt or pepper.

      7Stir the cooked pasta into the sauce until well coated, then spoon into the prepared baking dish and top with remaining cheese.

      8Bake uncovered until golden brown on top, for about 25 minutes. Let stand 5 minutes before serving.

    Adam and Joanne’s Tips

    • Storing: Keep covered in the refrigerator for up to 3 days. To freeze, transfer to a freezer-safe container and freeze for up to 2 months. Bake, covered, in a 350°F oven for about an hour. Or thaw overnight and gently reheat on the stove (if it seems dry, add a tablespoon or two of extra milk).
    • Dutch oven: If you have one, make the sauce in an oven-safe Dutch oven. This way, there is no need to dirty a baking dish. Instead, mix the pasta and sauce in the Dutch oven and bake.
    • The nutrition facts provided below are estimates.

    Nutrition Per Serving
    Calories
    474
    /
    Protein
    19g
    /
    Carbohydrate
    57g
    /
    Dietary Fiber
    4g
    /
    Total Sugars
    5g
    /
    Total Fat
    19g
    /
    Saturated Fat
    11g
    /
    Cholesterol
    51mg


    AUTHOR:

    Joanne Gallagher

    Adam and Joanne of Inspired Taste

    We are Adam and Joanne Gallagher, the creators of Inspired Taste. Established in 2009, Inspired Taste grew from a childhood dream into one of the internet’s most trusted recipe sites with hundreds of reliable recipes, step-by-step videos, and expert tips.More About Us

    Source link

  • Easy Tortellini Soup Recipe

    Easy Tortellini Soup Recipe

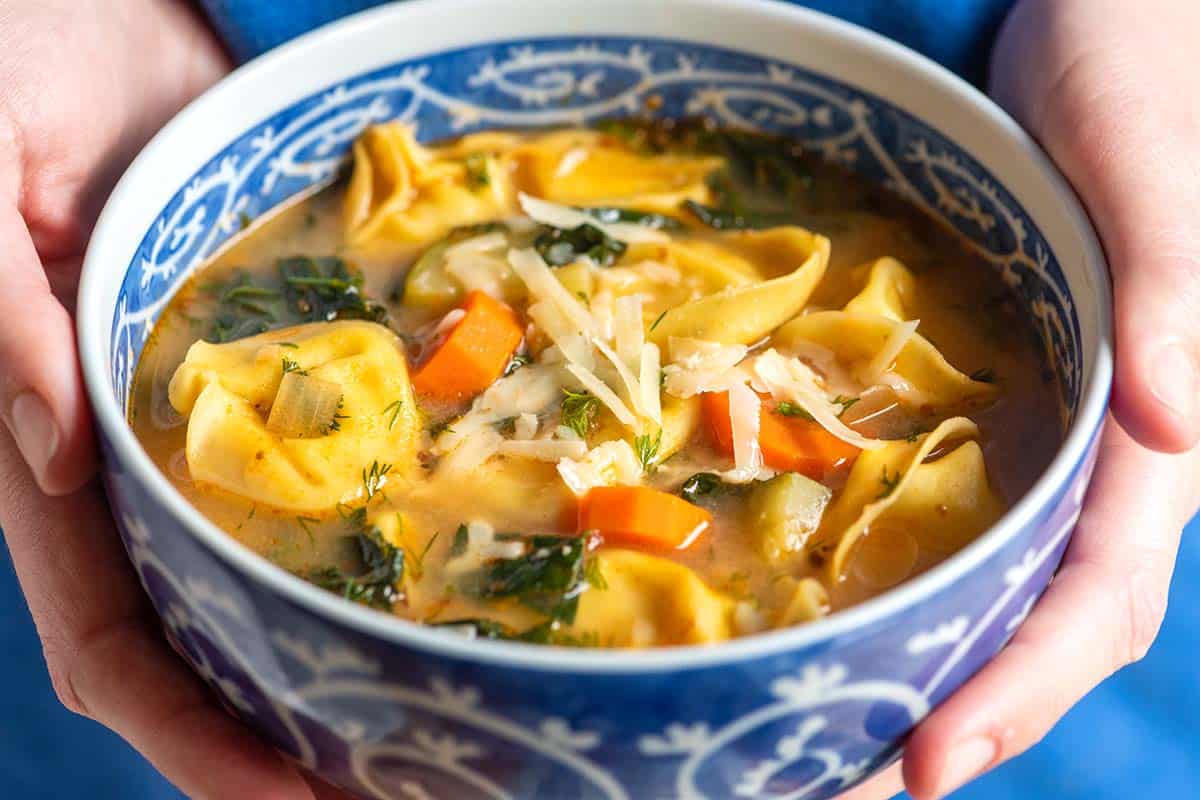
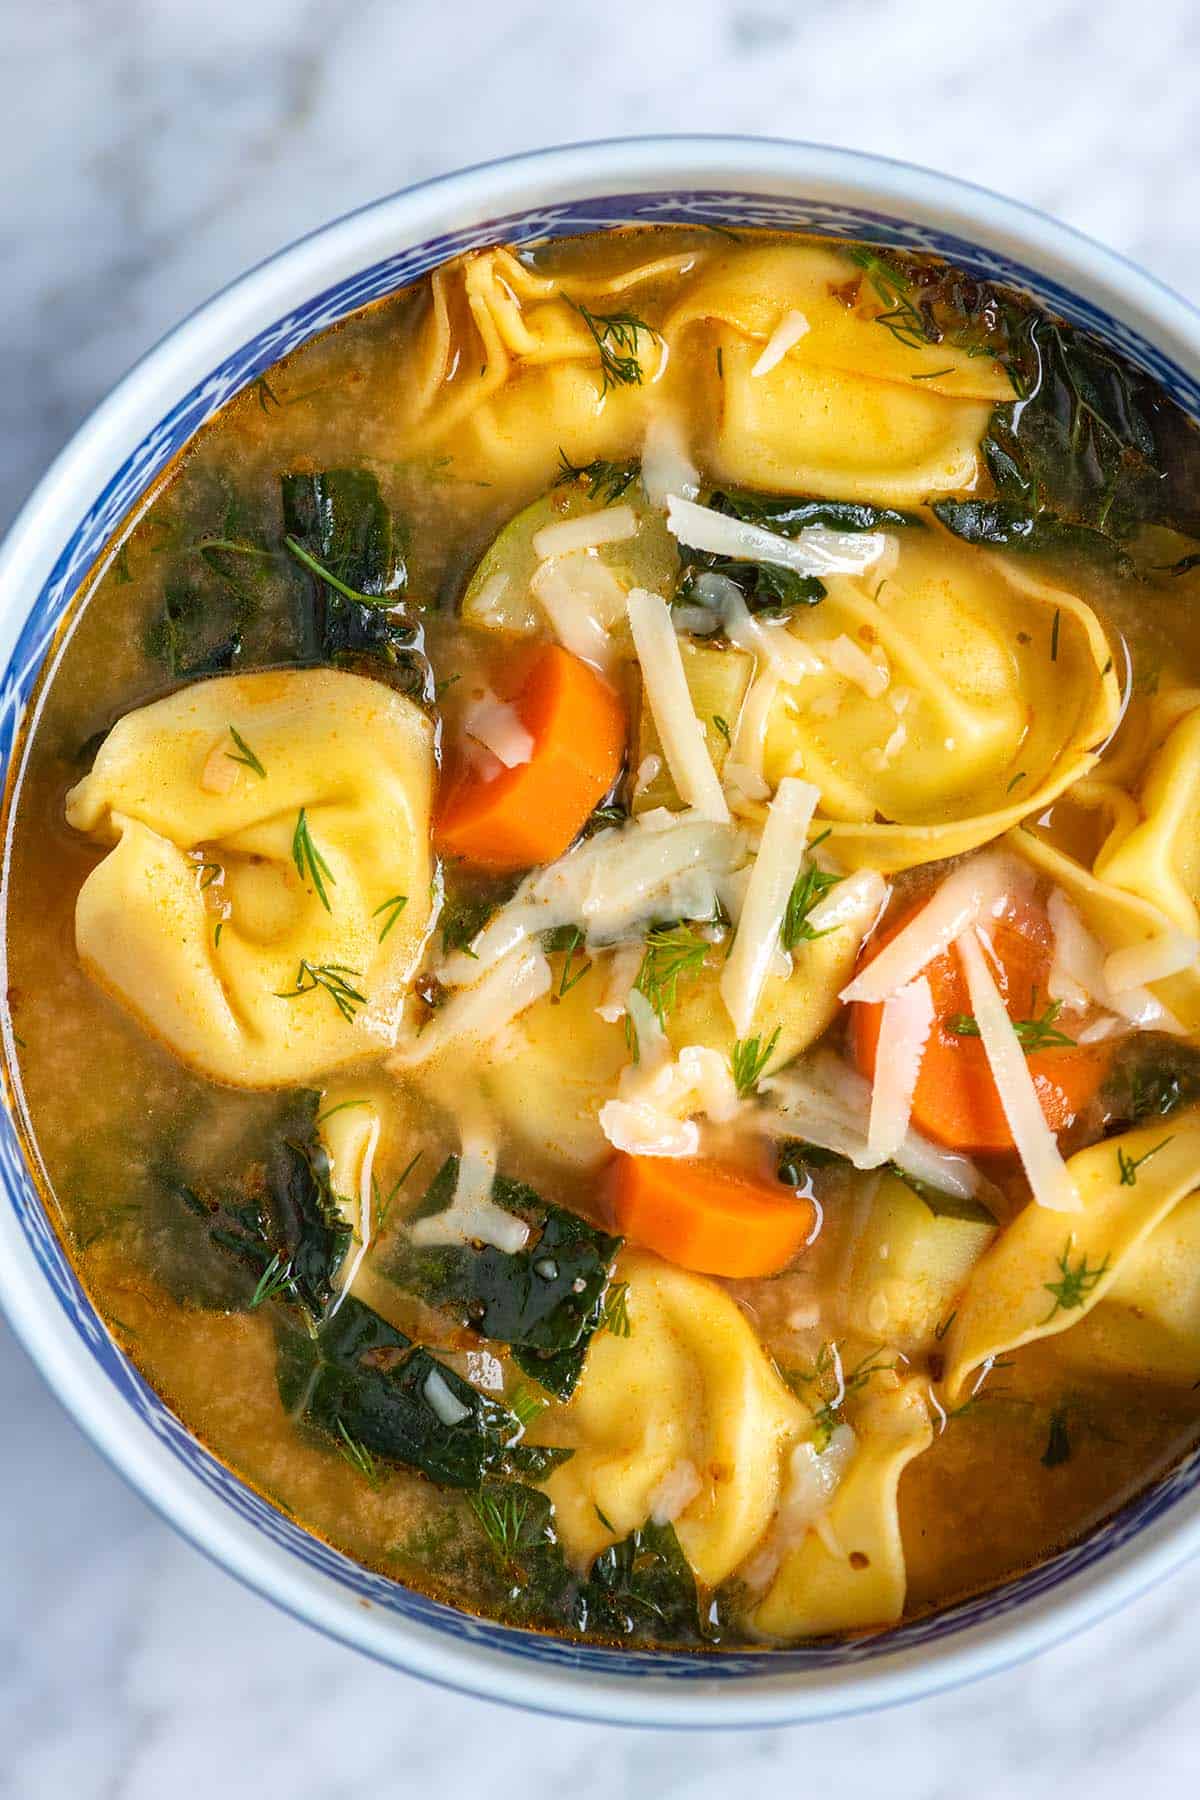
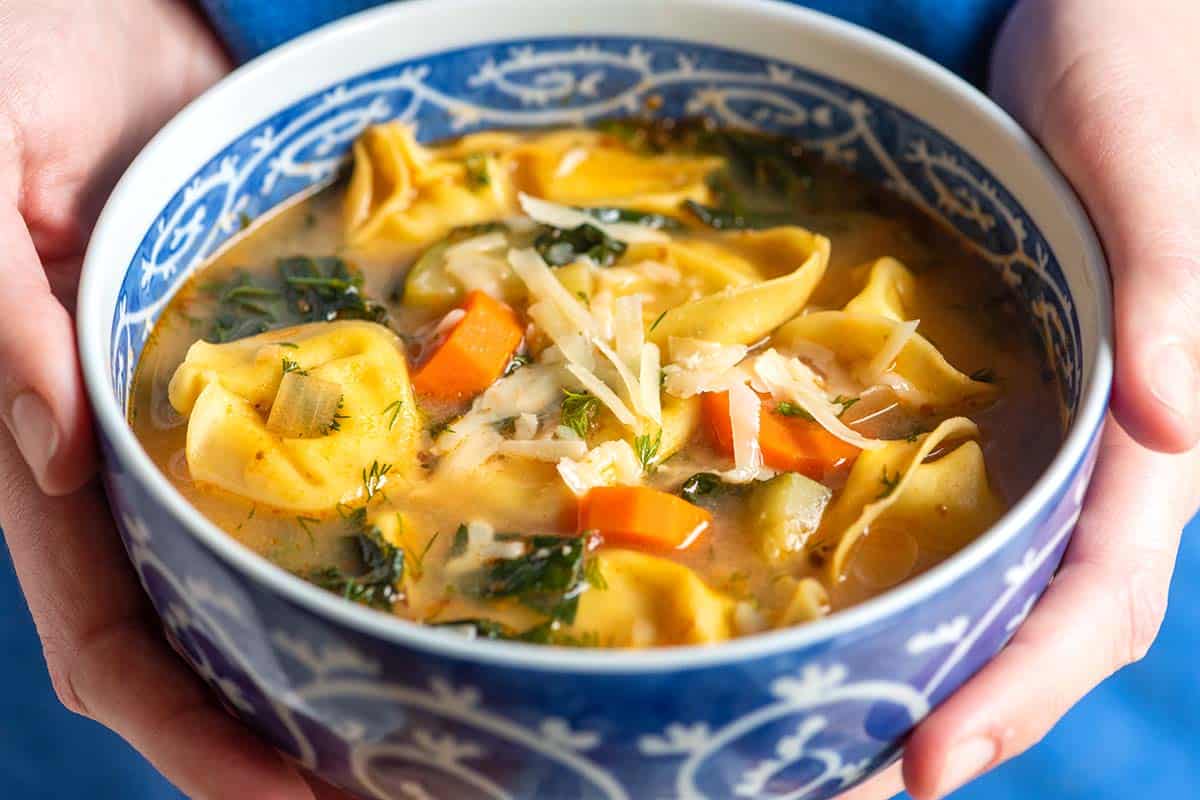
    We love this cozy tortellini soup recipe! It’s filled with tender veggies, store-bought tortellini, and a garlicky broth that’s ready in just 30 minutes.

    Tortellini Soup

    I’m always happy when this vegetable tortellini soup is for dinner. It’s one of my favorite ways to use a package of store-bought tortellini. I enjoy so many of the soup recipes on Inspired Taste, but this one truly delivers on the comfort food front! It’s hearty, delicious, and quick.

    Feel free to use your family’s favorite tortellini in the soup, which means you can try out different fillings to find what you love most.

    Key Ingredients

    • Tortellini: I’m a fan of cheese-filled tortellini, but feel free to use your favorite kind. You’ll find plenty of options at the store, including spinach, chicken, and even vegan tortellini. Small ravioli is a great substitute! And if you don’t have tortellini, regular pasta works just fine. The soup itself is still delicious.
    • Veggies: I pack this hearty soup with onion, carrot, zucchini, garlic, and kale (or substitute spinach).
    • Tomato Paste and Spices: Tomato paste adds a bit of color and richness, while the spices add incredible flavor. I use Italian seasoning and crushed red pepper flakes. The pepper flakes are optional, but they add a nice little kick.
    • Broth: For a vegetarian tortellini soup, use vegetable broth. If that’s not a concern, chicken broth works great.
    • Fresh Herbs: I love finishing the soup with fresh herbs. Parsley and dill are my favorites.

    Find the full recipe with measurements below.

    How to Make My Favorite Tortellini Soup

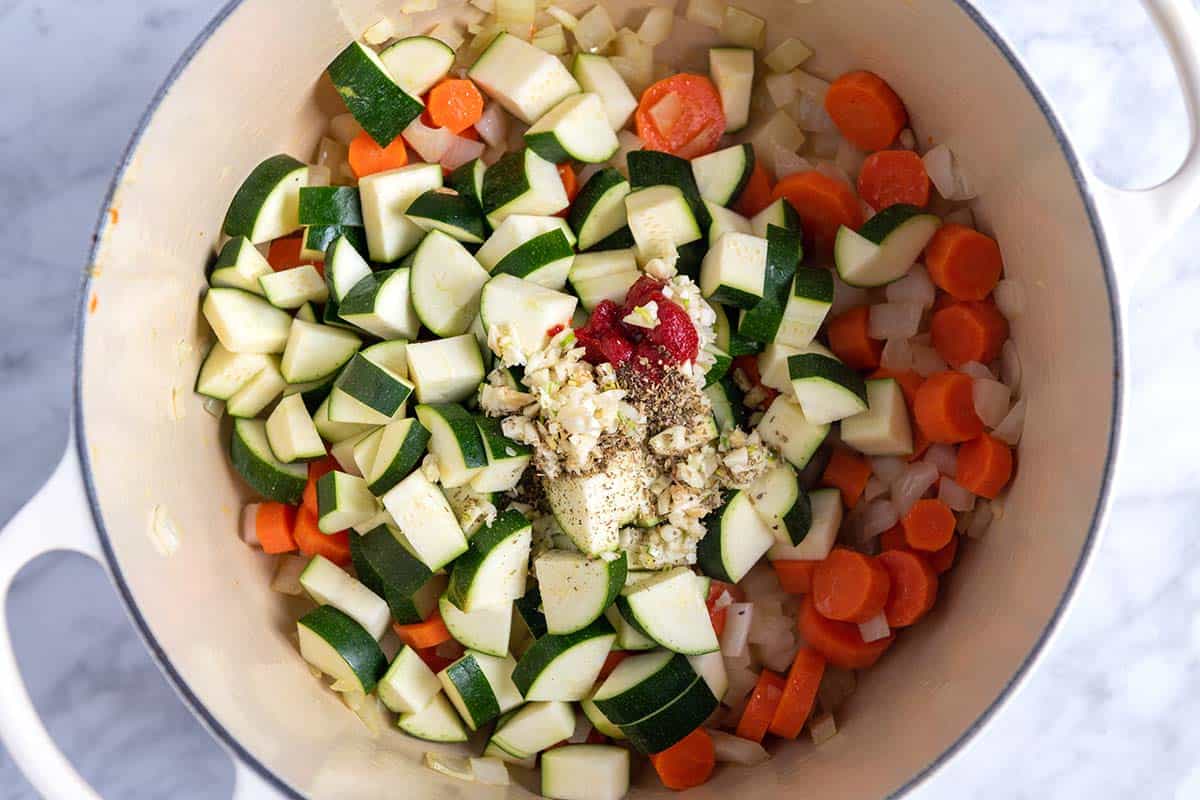
    Tip 1: Start with the aromatics. Cook chopped onions and carrots in a small amount of oil until they begin to soften. This simple step builds the base flavor for the soup. Then, layer in more flavor with minced garlic, tomato paste, Italian seasoning, and chopped zucchini.

    Cooking veggies with garlic, tomato paste and herbs for tortellini soup

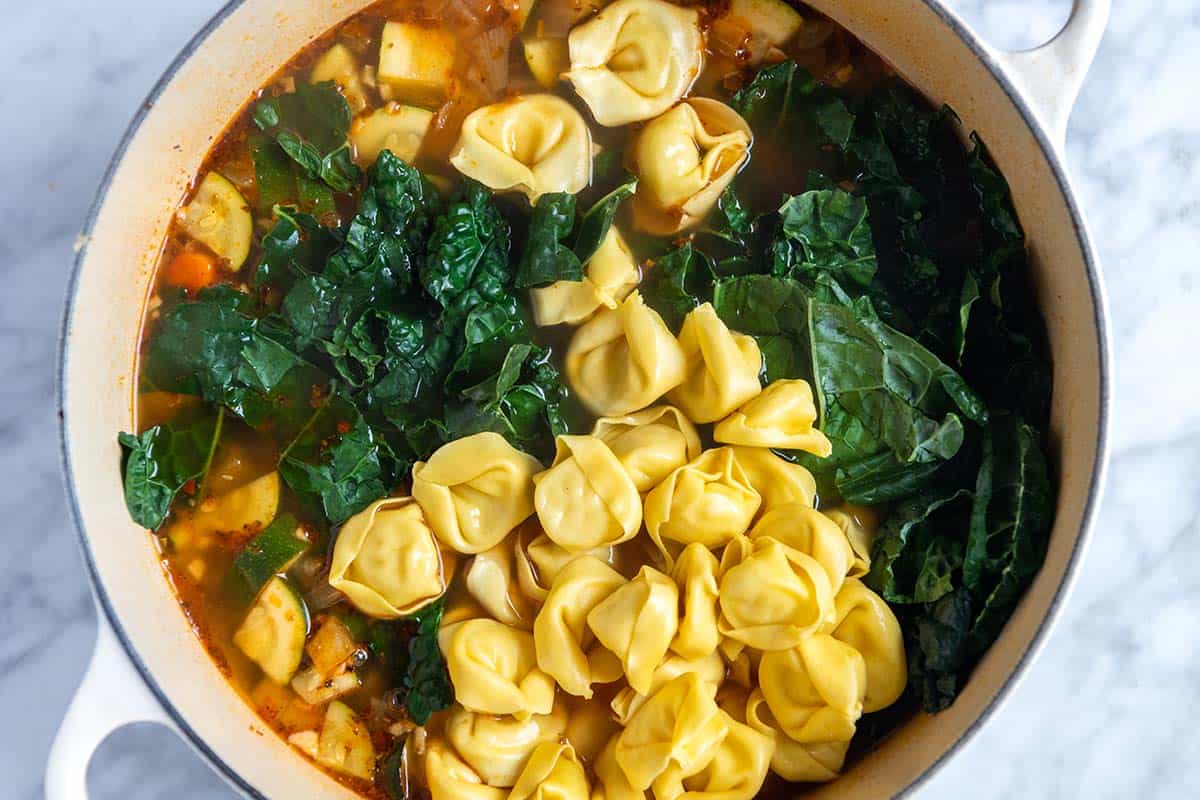
    Tip 2: Add the tortellini and kale at the end. Pour in the broth and simmer until the vegetables are tender. Then stir in the tortellini and a handful of torn kale (or spinach) in the soup. Cook for just a few minutes more, until the greens are wilted and the pasta is tender.

    Adding tortellini and kale to the soup pot

    Tip 3: Make it creamy. Season the soup to taste, and if you’d like a creamy broth, add a splash of cream or non-dairy milk. I also love stirring in chopped fresh herbs, such as dill or parsley, right before serving for an extra pop of color and fresh flavor.

    More Easy Soup Recipes

    Tortellini Soup with Vegetables

    Easy Tortellini Soup

    • PREP
    • COOK
    • TOTAL

    We love this quick and easy tortellini soup recipe made with store-bought pasta, a garlicky broth, and plenty of veggies. I usually keep it vegetarian and use cheese tortellini, but you can use whatever you love (spinach, sausage, chicken, or even vegan fillings). Most varieties are easy to find in larger grocery stores across the US.

    4 Servings

    Watch Us Make the Recipe

    You Will Need

    1 tablespoon olive oil

    1 medium onion, chopped

    2 medium carrots, sliced

    2 medium zucchini, chopped

    4 medium cloves garlic, minced, 1 heaping tablespoon

    1 tablespoon tomato paste

    1 ½ teaspoons Italian seasoning

    ¼ teaspoon crushed red pepper flakes, omit if sensitive to spice

    8 cups vegetable broth or chicken broth (1.8L)

    1 package tortellini, 8 to 10 ounces

    1 small bunch kale, thick stems removed and chopped

    Splash cream or non-dairy milk, optional

    Handful chopped fresh herbs like parsley or dill

    Dash fish sauce, optional

    Parmesan for serving, optional

    Directions

      1Cook onions and carrots: Heat the oil in a large pot, such as a Dutch oven, over medium heat. Add the onions and carrots, then cook, stirring occasionally, until they soften, about 5 minutes.

      2Add zucchini and spices: Stir in the zucchini, garlic, tomato paste, Italian seasoning, and crushed red pepper flakes, and cook for one minute.

      3Simmer: Pour in the broth, bring to a boil, and then reduce to a simmer. Cook the soup at a low simmer until the vegetables are tender, 10 to 15 minutes.

      4Add tortellini and kale: Stir in the tortellini and kale, and cook for 5 to 10 minutes. Turn the heat to low and stir in the milk/cream (this adds a creamy texture to the broth, but you can skip it if you prefer a plain broth).

      5To finish: Taste the soup and season with additional salt as needed. For extra flavor, add a few dashes of fish sauce (optional). Serve with chopped fresh herbs and grated parmesan cheese scattered on top (optional).

    Adam and Joanne’s Tips

    • Storing: Keep leftover soup in an airtight container and refrigerate for up to 4 days.
    • Vegan tortellini soup: To make this soup vegan, look for a vegan tortellini (Kite Hill makes one) and omit the cheese and fish sauce.
    • Fish sauce: This is optional but adds a lovely flavor to sauces and soups like this tortellini soup. Two to three dashes season the soup nicely. Think of fish sauce as salt on steroids. It doesn’t make the soup taste fishy but makes the flavor pop.
    • The nutrition facts provided below are estimates. We did not include optional ingredients and assumed regular (not low-sodium) vegetable broth.

    Nutrition Per Serving
    Serving Size
    1/4 of the recipe
    /
    Calories
    268
    /
    Total Fat
    8.1g
    /
    Saturated Fat
    2.6g
    /
    Cholesterol
    23.7mg
    /
    Sodium
    1369.4mg
    /
    Carbohydrate
    41.3g
    /
    Dietary Fiber
    3.3g
    /
    Total Sugars
    7.9g
    /
    Protein
    9.3g


    AUTHOR:

    Joanne Gallagher

    Previous Post: Easy Creamy Vegetable Soup
    Next Post: Best Veggie Burger We’ve Ever Made

    Source link

  • Easy Teriyaki Chicken Recipe

    Easy Teriyaki Chicken Recipe

    We’re confident that this recipe guarantees some of the best teriyaki chicken you’ll ever make at home!

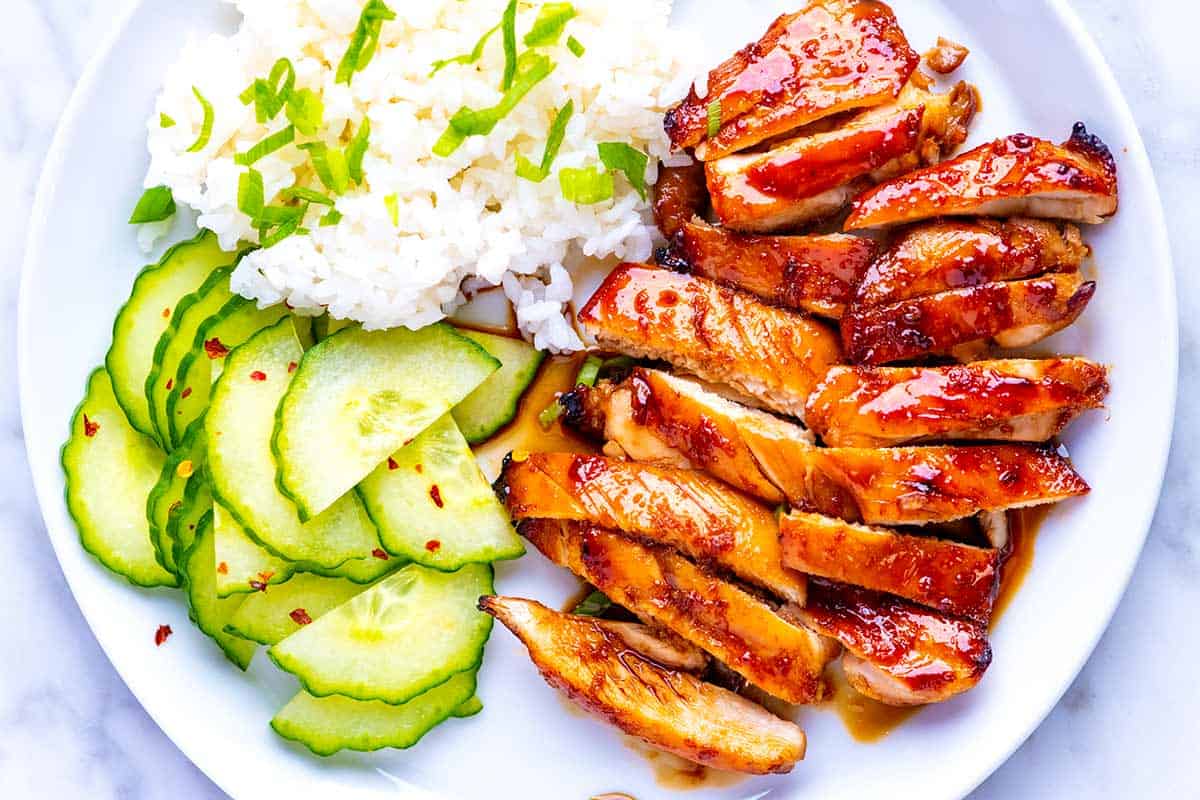
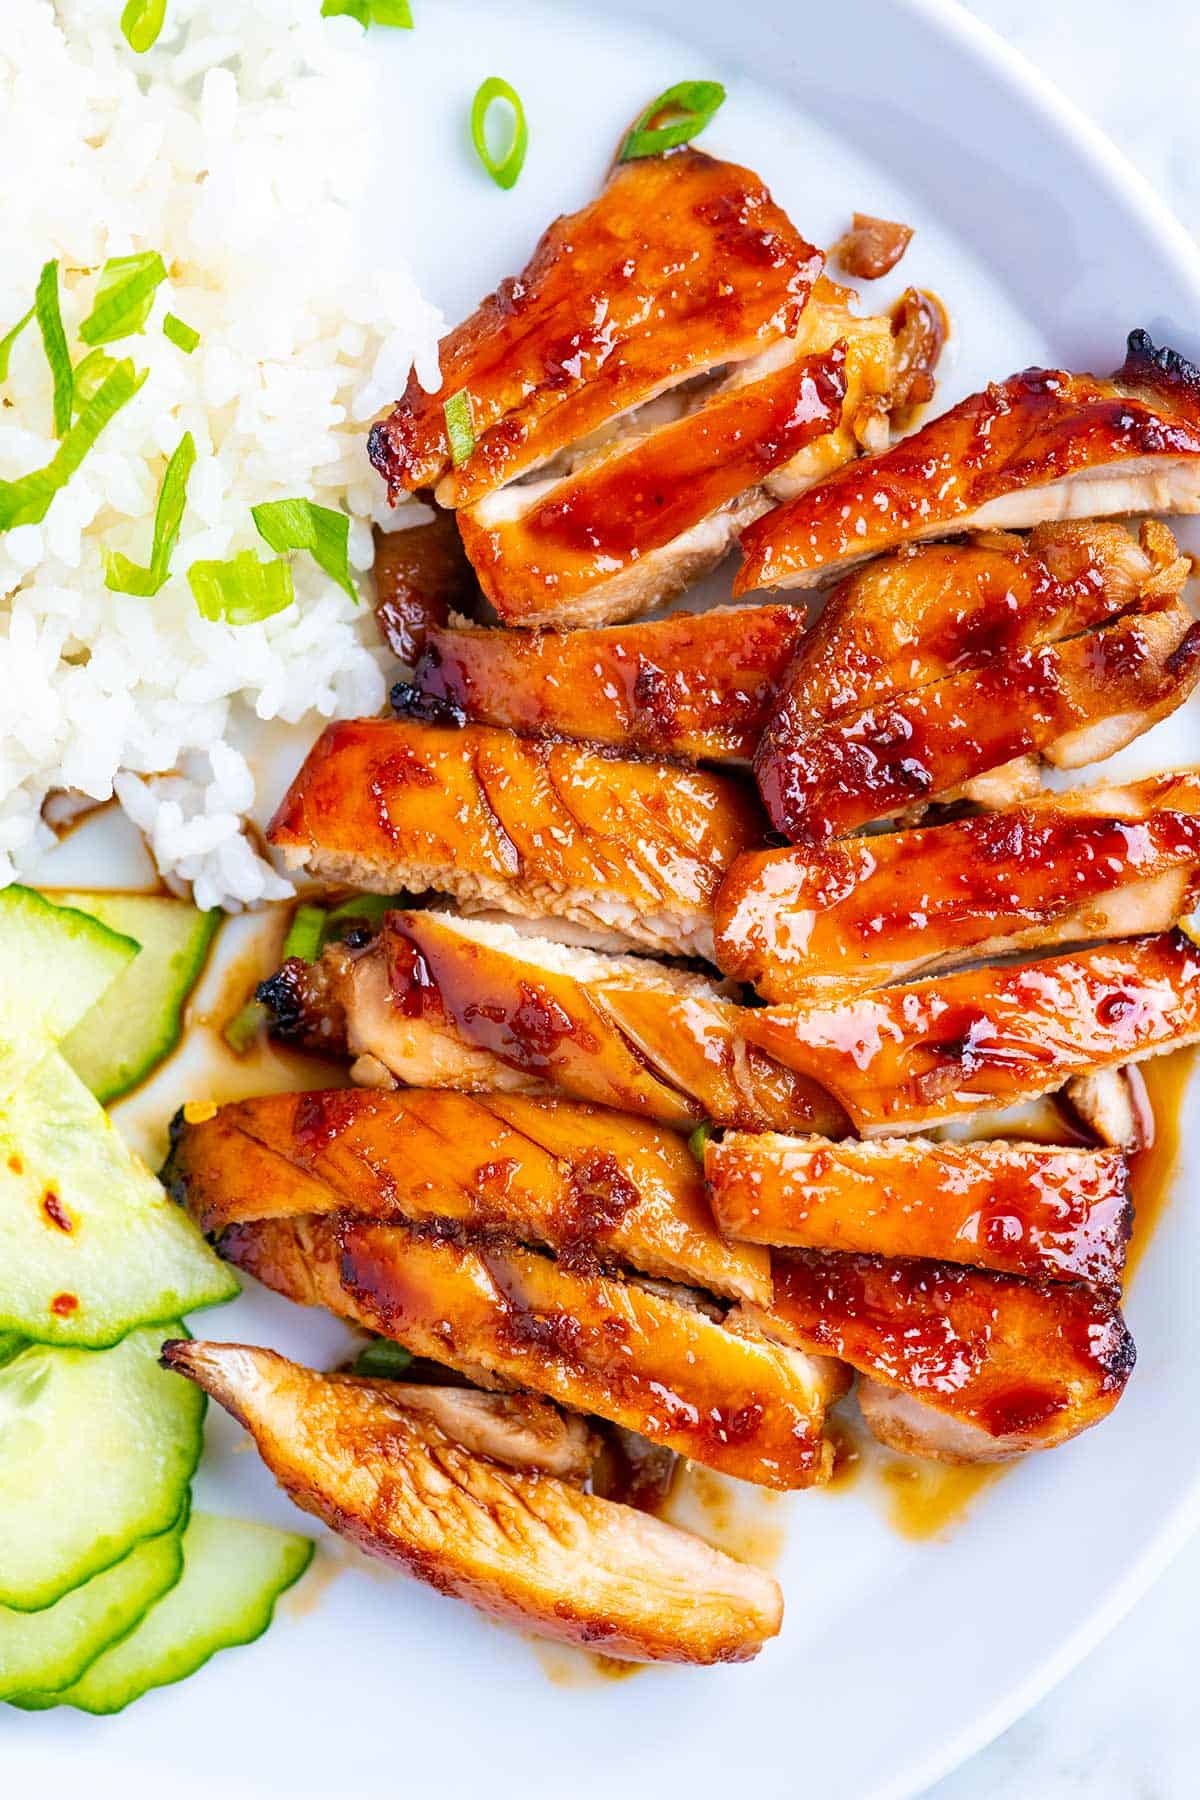
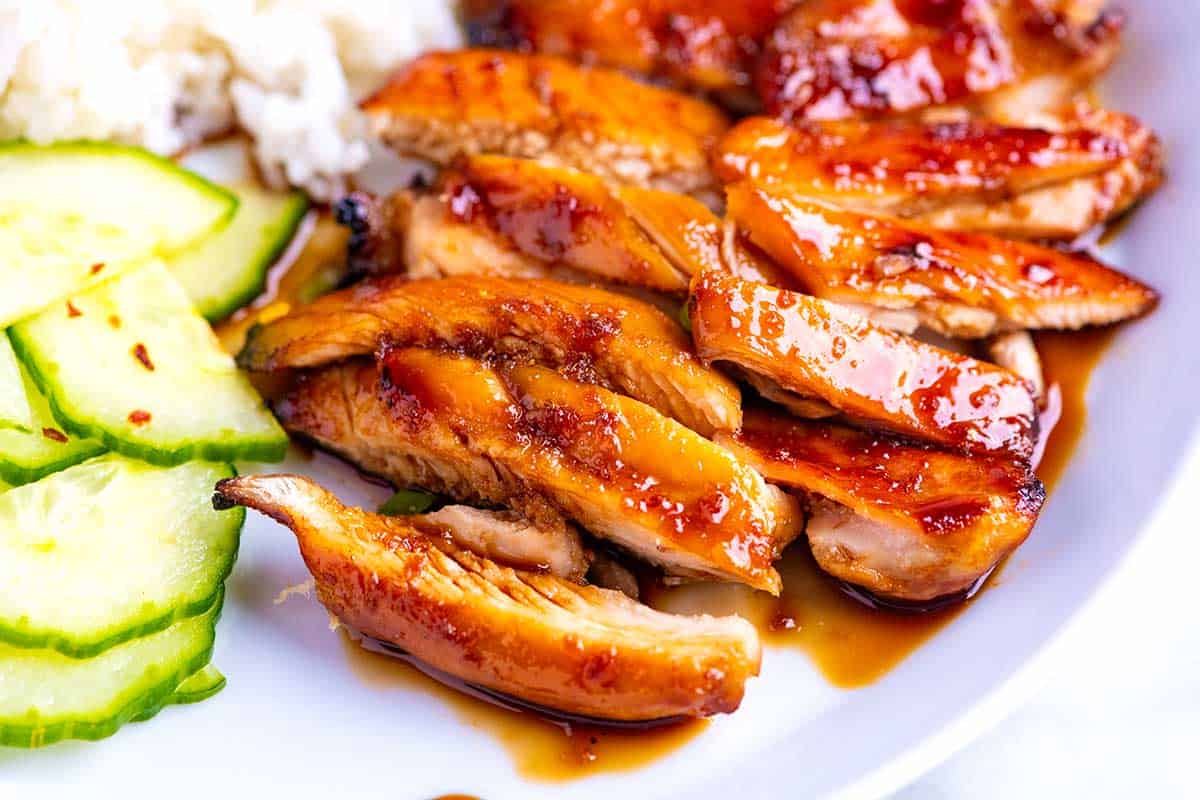
    Teriyaki chicken on a plate

    Our family used to live in Seattle next to some amazing teriyaki restaurants. We wanted to recreate that authentic flavor using simple, readily available ingredients.

    We use our favorite homemade teriyaki sauce for this dish. It’s made with five simple ingredients and lasts weeks in the fridge. I love serving this over rice with cucumbers tossed in vinegar, but our cilantro lime rice or coconut rice would also be excellent.

    Key Ingredients

    • Chicken: I love boneless, skinless chicken thighs for this recipe since they stay tender but cook quickly. They also soak up the teriyaki flavor beautifully! Skin-on chicken thighs would also be great if you prefer. Chicken breasts are also fine, but as with many of our chicken recipes, I love thighs!
    • Low-Sodium Soy Sauce: I use low-sodium soy sauce as the base of my sauce. It might seem salty at first, but trust me. It’ll blend beautifully with the other ingredients to create a perfectly balanced teriyaki flavor. You can substitute with light tamari with no changes.
    • Sugar: Granulated sugar balances the soy sauce and makes the teriyaki sauce thick and glossy when cooked. Feel free to experiment with brown sugar, coconut sugar, or even honey, but remember that these might make the sauce taste sweeter. If you love honey, you may enjoy this honey teriyaki chicken!
    • Sake: Don’t stress about buying expensive sake for teriyaki sauce! Use something you’d enjoy drinking. If you can’t find sake, mirin (a sweeter rice wine) works well too. You can swap it in directly or slightly reduce the sugar in the recipe.
    • Rice Vinegar: This adds a little zing to the sauce. You can usually find it near other vinegars at the grocery store. For substitutes, try white wine vinegar or plain white vinegar. Don’t worry if the sauce seems a bit strong after adding the vinegar, the flavors will mellow as it cooks.
    • Fresh Ginger (optional): I like to grate fresh ginger finely so it melts into the sauce. Ginger adds a bright, spicy note that complements the other flavors beautifully.

    Find the full recipe with measurements below.

    How to Make the Best Teriyaki Chicken

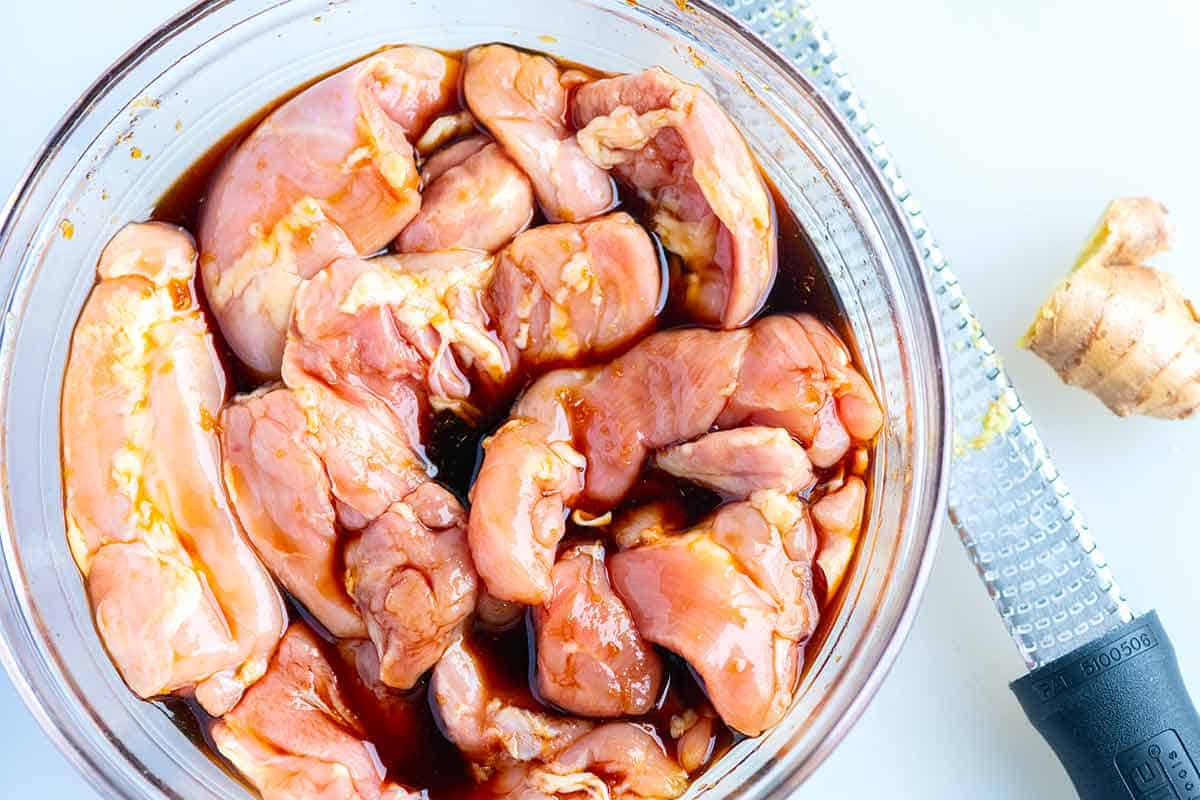
    Tip 1: Use our homemade sauce. The first step to making chicken teriyaki is making our homemade teriyaki sauce. Then, use some of it to marinate the chicken and reduce the rest until it is thick and glossy, which you spoon over as a glaze later. Marinate your chicken for as long as possible (up to 12 hours). Thirty minutes will do, but longer is always better.

    Marinating the chicken

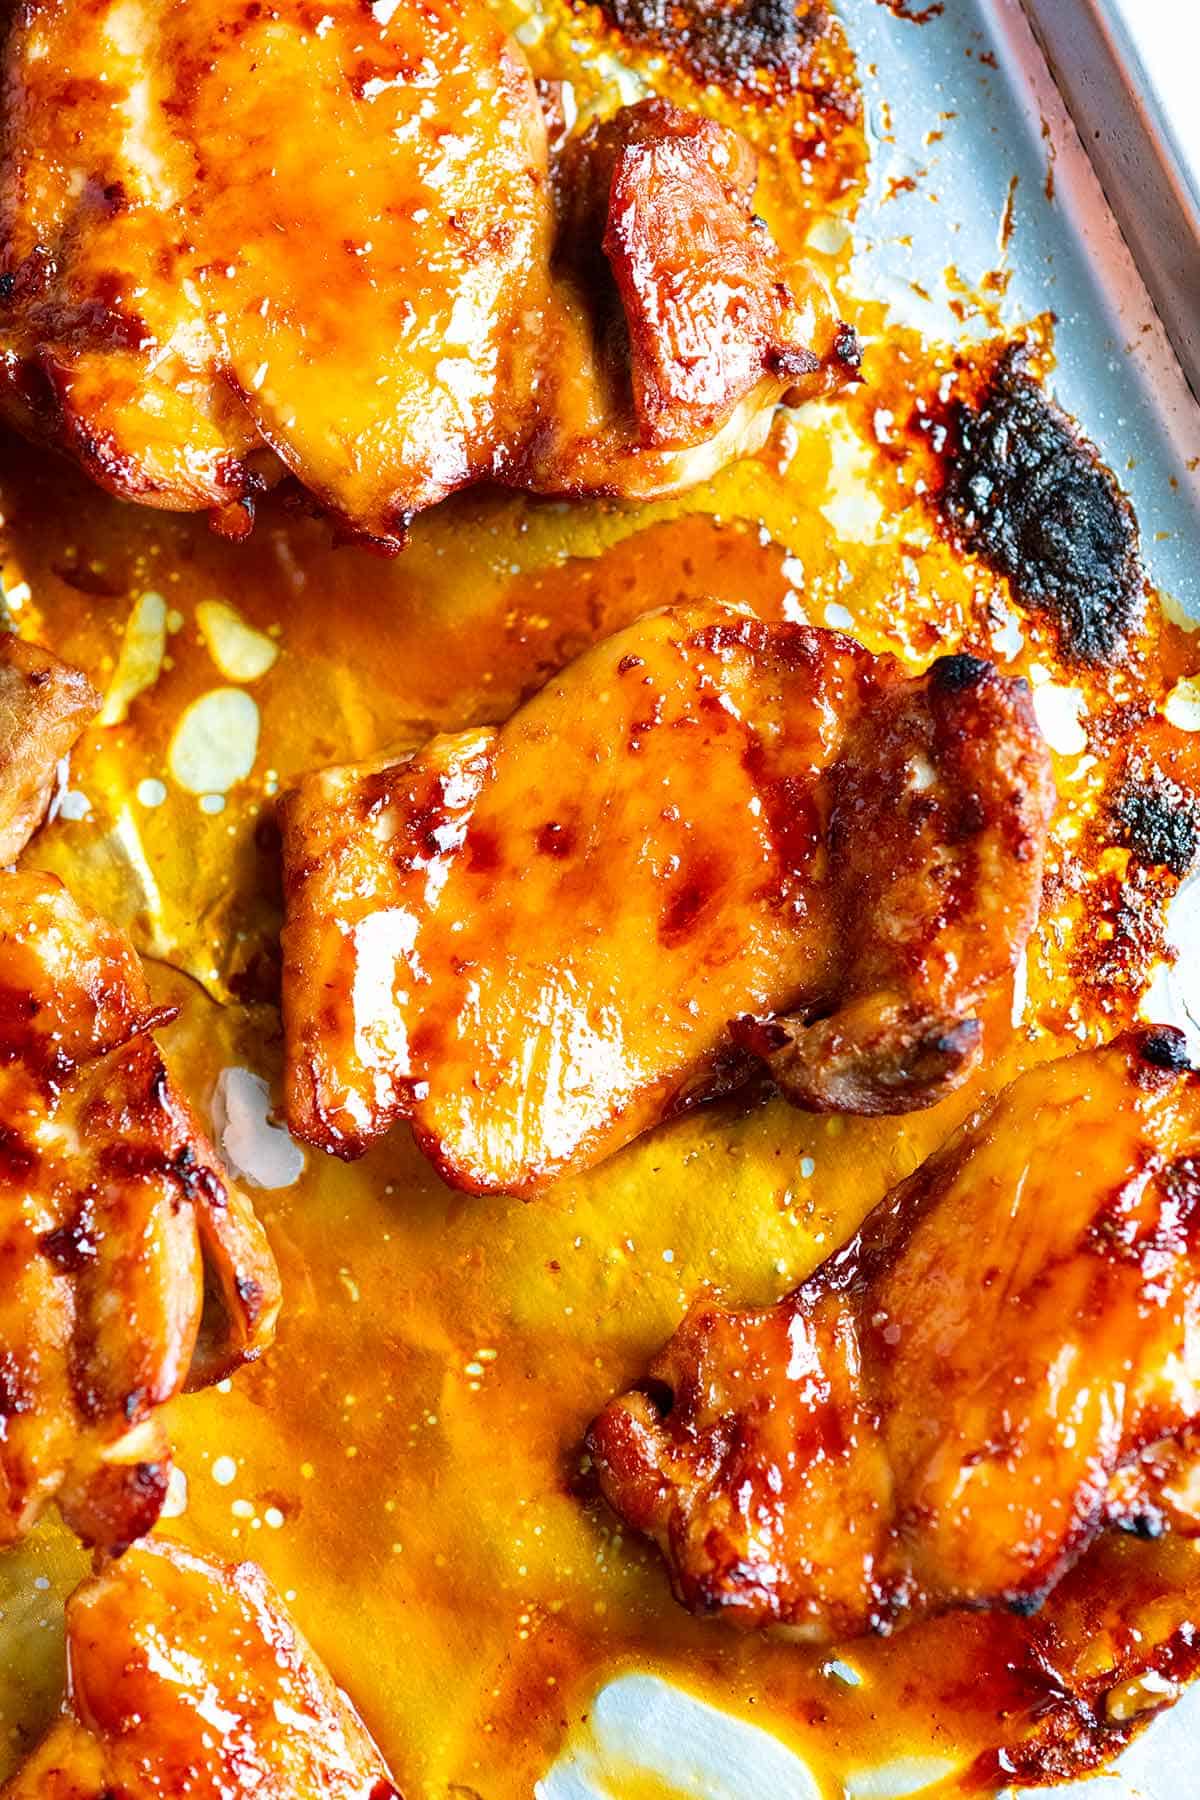
    Tip 2: Broil your chicken. Teriyaki chicken is often cooked on a grill, imparting a smoky char. While you could certainly use an outdoor grill for this recipe, we wanted to make it possible to achieve delicious results indoors. So we use our oven’s broiler! Think of it as an upside-down grill, providing intense heat from above.

    1. Position an oven rack towards the top of your oven, about six inches from the burner.
    2. Put the marinated chicken on a baking sheet and place it under the broiler.
    3. Broil the chicken until it is beautifully browned and starting to firm up, then flip and continue broiling until cooked through.
    4. Stay close to make sure the chicken isn’t burning or smoking too much. You can also spoon or brush extra sauce over the chicken as it cooks, transforming the sauce into a shiny glaze.
    Broiled chicken for teriyaki chicken

    More Chicken Recipes

    Homemade Teriyaki Chicken

    Easy Teriyaki Chicken

    • PREP
    • COOK
    • TOTAL

    This easy homemade teriyaki chicken recipe rivals my favorite teriyaki restaurants. The chicken is best when marinated for a while, but you can get away with a shorter marinating period if you’re short on time.

    In our recipe, we’ve shared the ingredients to make one batch of teriyaki sauce, perfect for 1 ½ pounds of chicken. We highly recommend making a larger batch of sauce (it’s that good). You can find the instructions for a larger batch in our teriyaki sauce recipe, which makes 2 cups and provides enough sauce for two batches of chicken.

    4 Servings

    You Will Need

    1 ½ pounds boneless, skinless chicken thighs

    1/2 cup (120ml) light soy sauce

    1/2 cup (100g) granulated sugar

    1/4 cup (60ml) sake, see tips

    2 tablespoons (30ml) rice vinegar

    2 teaspoons finely grated ginger, see tips

    Directions

    • Marinate the Chicken
    • 1Combine the soy sauce, sugar, sake, vinegar, and ginger in a small bowl. Stir until the sugar completely dissolves. Transfer 6 tablespoons of the sauce to a resealable plastic bag or container and add the chicken. Marinate the chicken in the refrigerator, turning once, for at least 30 minutes and up to 12 hours.

      2Add the remaining sauce to a small saucepan over medium heat. Bring it to a simmer and cook until the sauce reduces slightly and looks shiny, 3 to 5 minutes. If it reduces too much, add a bit of water to bring it back to a pourable consistency. Cool, and then save this in the refrigerator to use as a sauce for the cooked chicken.

    • Cook the Chicken
    • 1Position an oven rack towards the top, about 6 inches from the broiler. Heat the broiler to high.

      2Line a baking sheet with foil, then arrange the chicken so that the side that would have had skin faces down. Spoon a bit of the marinade with the chicken on top and discard the rest. Broil for 5 minutes. Stay close to the oven to keep an eye on the chicken as it cooks.

      3Flip the chicken, and then spoon or brush juices or sauce pooling on the pan back onto the chicken. Doing this a few times during cooking helps to add a shiny, browned crust to the chicken. Alternatively, you can steal some of the sauce saved for serving to spoon or brush over the chicken.

      4Broil another 5 to 10 minutes or until the outside of the chicken looks brown and caramelized and the inside is cooked through.

      5Meanwhile, reheat the sauce from earlier, adding a bit of water if it seems too thick. (This is the sauce that has not touched raw chicken, not the sauce used to marinate.)

      6To serve, slice the chicken into strips, place onto plates, and drizzle with the warmed sauce. Leftover sauce can be stored in the refrigerator for a few weeks (I like drizzling it over rice and vegetables.)

    Adam and Joanne’s Tips

    • Storing: Keep chicken teriyaki in an airtight container for up to 4 days.
    • Leftover sauce: The reduced teriyaki sauce (not sauce that’s sat with raw chicken) can be stored in the refrigerator for a few weeks. I like drizzling it over rice and vegetables.
    • Broiling the chicken: Depending on your oven, broil times may differ. Keep an eye on the chicken. Move the sheet pan down a rack if it looks like or smells like it is burning. If the chicken is cooking slower than expected, continue to broil until cooked through.
    • Use a grill pan: If you don’t have a broiler an outdoor grill or a grill pan on the stovetop are excellent alternatives. You can also bake the chicken, but you won’t get the same glazed look. That’s okay, though, because the flavor will still be incredible!
    • Ginger: We use a Microplane rasp grater, which helps the ginger to “melt” into the sauce. You can finely mince, but you will be left with bits of ginger in the sauce.
    • Substitute for Sake: We love the delicate flavor of sake for teriyaki sauce, but if you cannot find it, there are some alternatives. Mirin is a sweeter version of sake. You can either swap it for the sake and leave the sugar amount as is or pull back on the amount of sugar slightly to accommodate the extra sweetness. Dry vermouth or dry sherry can also work as a substitute. As a last resort, you can leave it out altogether, but keep in mind that this will change the taste of the sauce dramatically (taste the sauce before using it as you may find that without sake/mirin, you will need to adjust with additional vinegar or sugar).
    • Gluten-free: Check that all ingredients are certified gluten-free before using. Specifically, watch out for the soy sauce. You should look for gluten-free tamari.
    • The nutrition facts provided below are estimates. You will likely have leftover sauce, so the actual nutritional data may be less.

    Nutrition Per Serving
    Serving Size
    1/4 of the recipe (about 1 1/2 medium thighs)
    /
    Calories
    370
    /
    Total Fat
    7.1g
    /
    Saturated Fat
    1.9g
    /
    Cholesterol
    159.8mg
    /
    Sodium
    1000.9mg
    /
    Total Carbohydrate
    30.9g
    /
    Dietary Fiber
    0g
    /
    Total Sugars
    26.6g
    /
    Protein
    36g


    AUTHOR:

    Joanne Gallagher

    Adam and Joanne of Inspired Taste

    We are Adam and Joanne Gallagher, the creators of Inspired Taste. Established in 2009, Inspired Taste grew from a childhood dream into one of the internet’s most trusted recipe sites with hundreds of reliable recipes, step-by-step videos, and expert tips.More About Us

    Previous Post: Easy Taco Soup
    Next Post: Easy Tomato Broth

    Source link

  • Easy Taco Soup Recipe

    Easy Taco Soup Recipe

    My favorite taco soup recipe has ground beef, beans, and simple pantry staples. This easy, one-pot dinner is healthy, hearty, and tastes just like taco night.

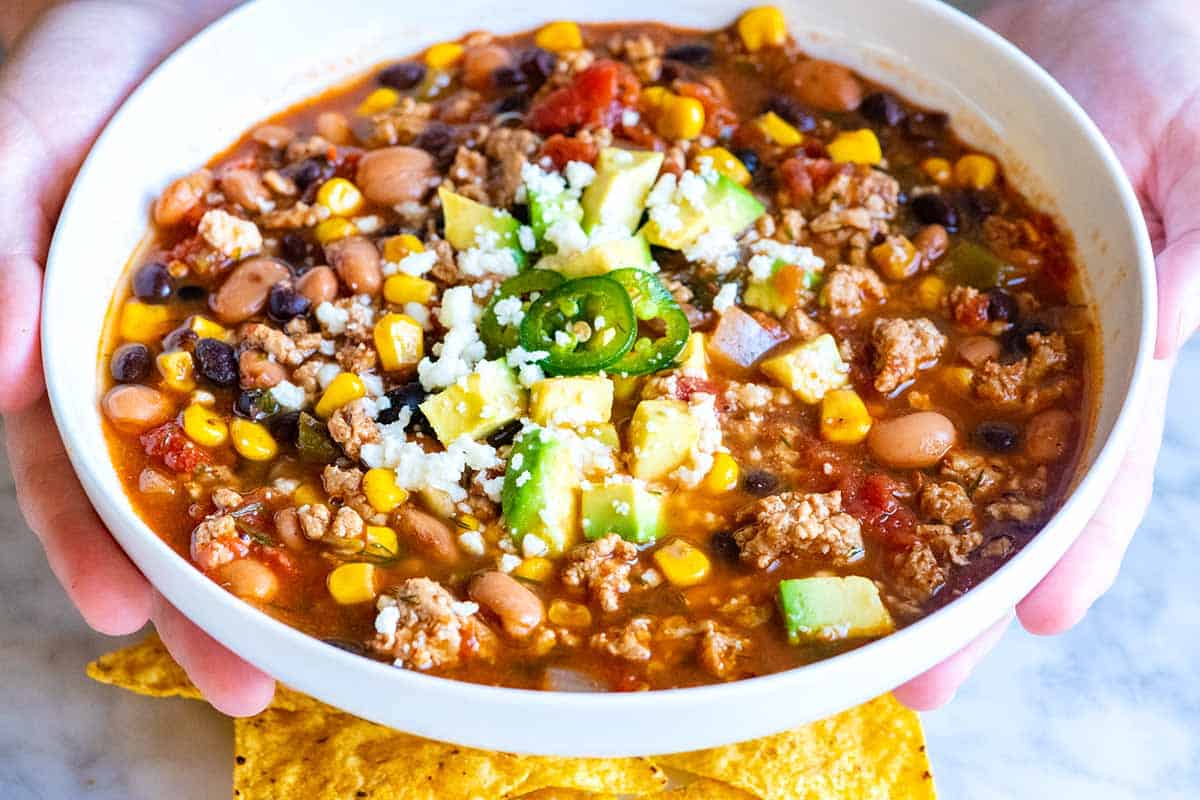
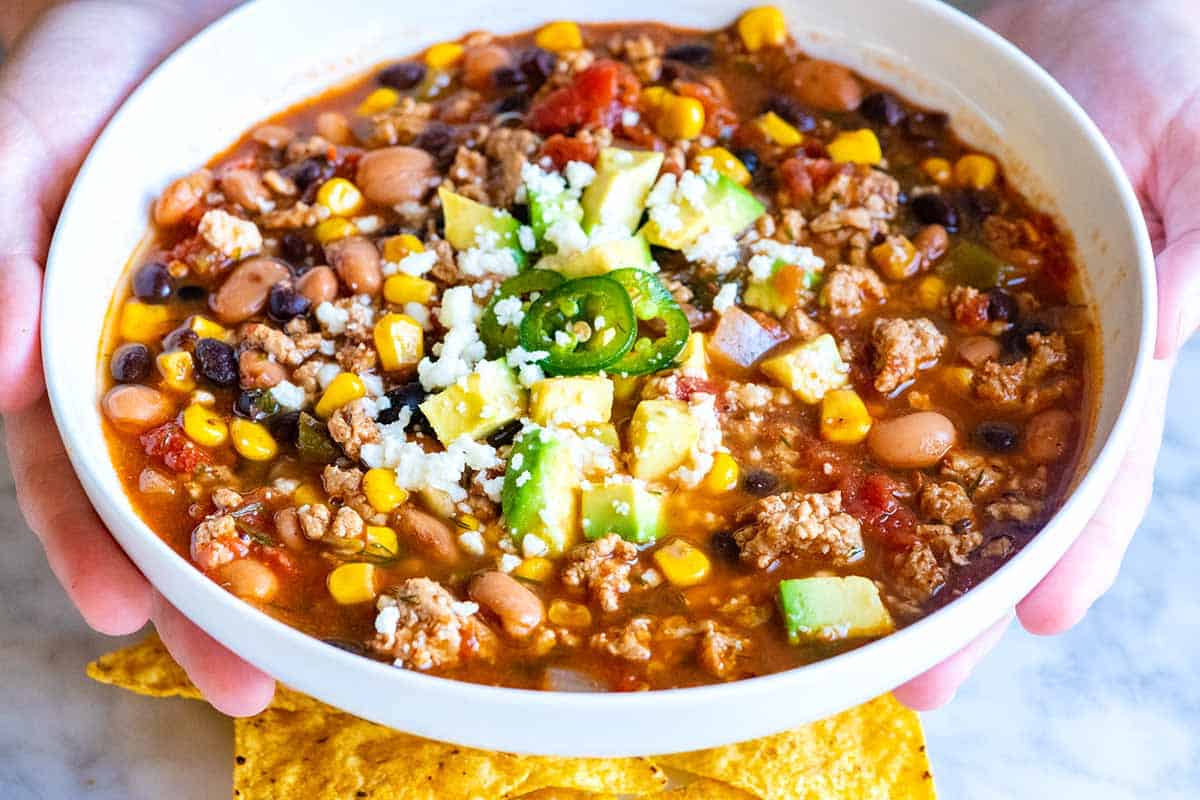
    Easy Taco Soup

    You’re looking at about 30 minutes to make our easy taco soup on the stove. It really is one of my favorite cozy weeknight dinners! I’ve even included instructions for how to make it in a slow cooker below. My family loves tacos (see all of our taco recipes as proof), and this soup packs everything we love about taco night into one hearty, flavorful dish.

    Every time we make this taco soup, we’re blown away by how much flavor it has. I know your family will love it just as much as mine does. If you love this taco-inspired soup, check out our chicken tortilla soup and taco salad recipe next, they’re reader favorites!

    Key Ingredients

    • Ground Meat: For this soup, you can use lean ground beef, pork, chicken, or turkey. I especially love using ground pork since it reminds me of our favorite pork tacos.
    • Taco Seasoning: Use your favorite store-bought blend or try our homemade taco seasoning (it has way more flavor than the packets from the store). Making your own seasoning means you can control the salt, spice, and smokiness.
    • Veggies: I love adding onion, garlic, a can of diced green chiles (Hatch brand is my favorite), and a large can of tomatoes. When I have it in the freezer, I toss in frozen corn for extra sweetness and color.
    • Beans: Canned beans bulk up the soup beautifully. I like black beans, pinto beans, kidney beans, or a mix of all three! You can use low-sodium beans and rinse them before adding.
    • Broth: Use a flavorful chicken stock or homemade chicken broth if you have it.
    • Fresh Dill: It might sound unusual for a taco-inspired recipe, but fresh dill adds incredible flavor. Some recipes call for a packet of ranch seasoning, but fresh dill works just fine and adds that ranch flavor.
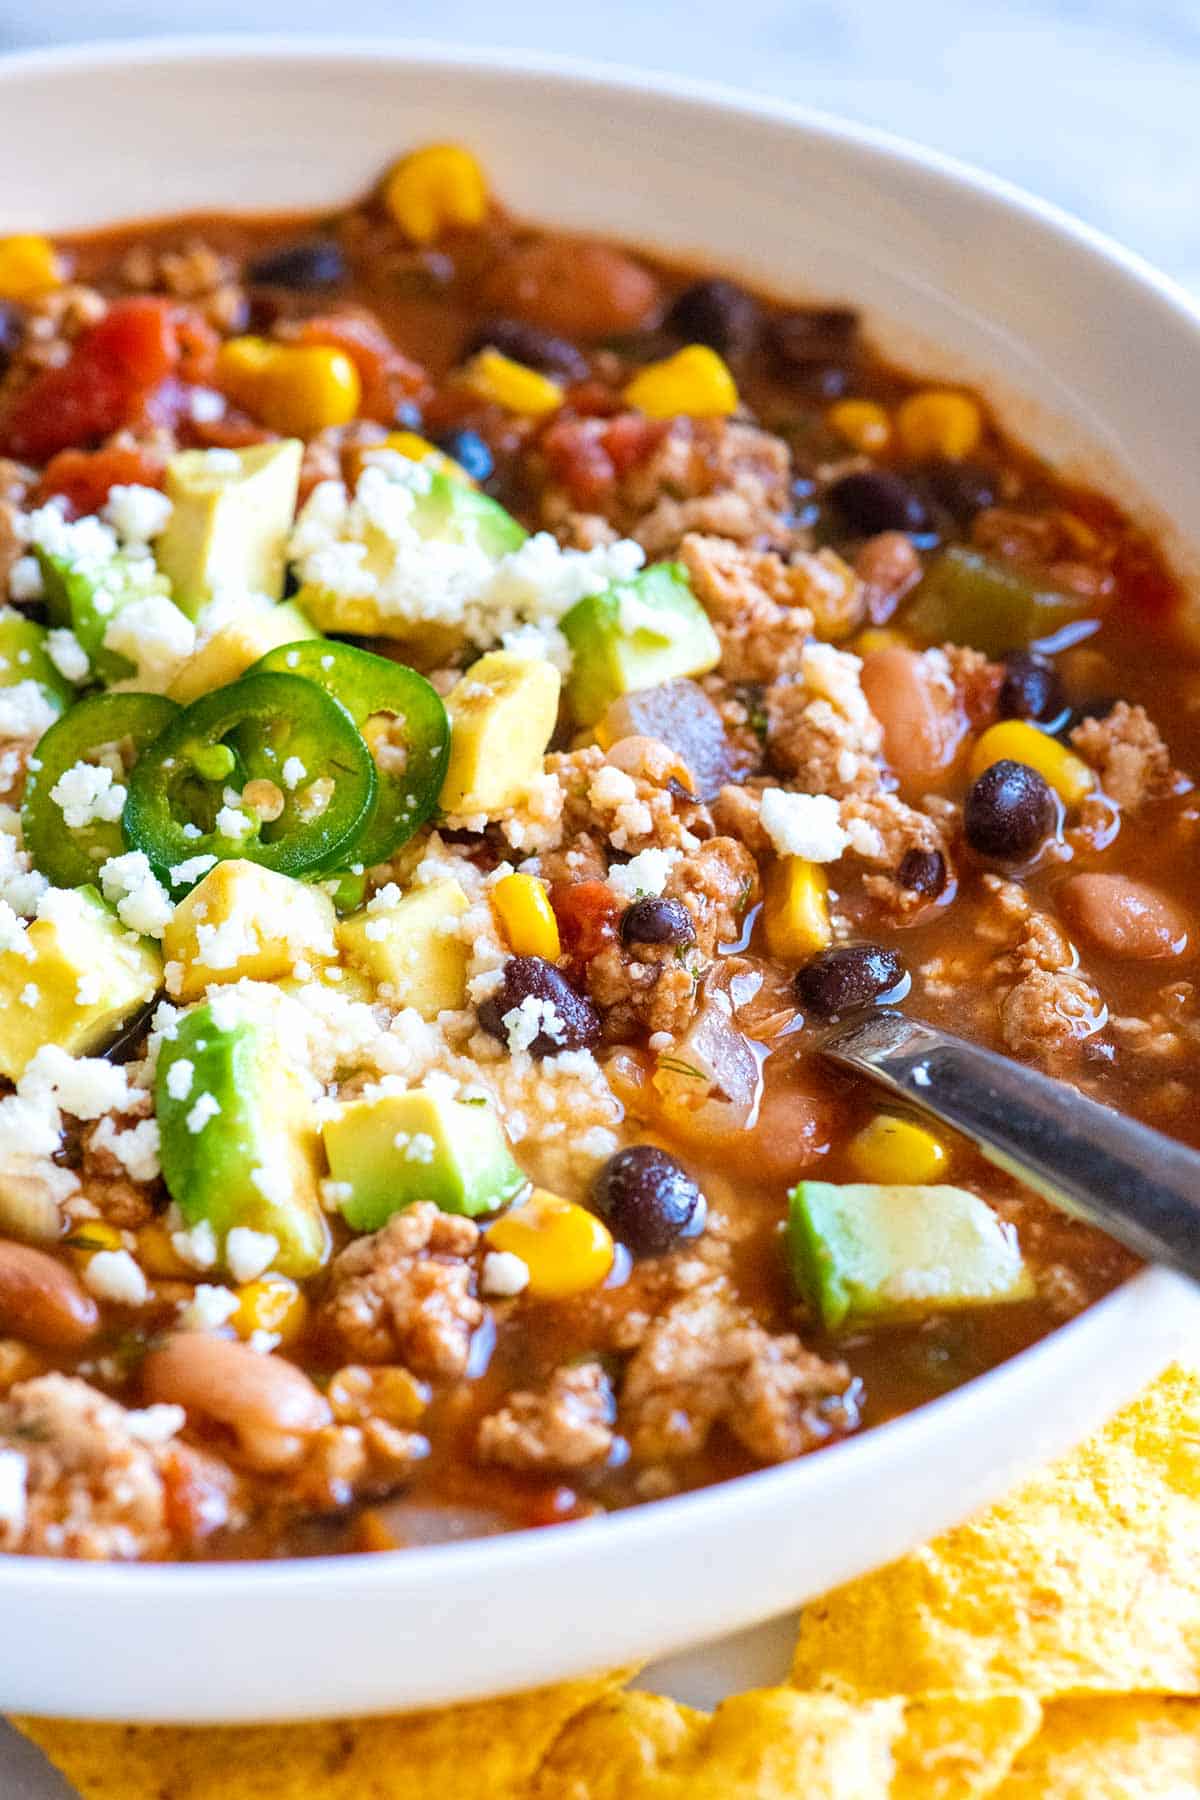
    • Toppings: Top this simple taco soup with your favorite taco or chili toppings. My family loves avocado or guacamole, sliced jalapeños (or candied jalapeños), and crumbled cotija cheese. I also love adding a bit of crunch with tortilla chips or serving warm corn tortillas on the side.

    Find the full recipe with measurements below.

    How to Make the Best Taco Soup

    Tip 1: Brown the meat first. Start by heating a little olive oil in a large soup pot or Dutch oven. Add your ground meat and cook until nicely browned. Browning adds a lot of flavor and improves the texture. If, after it browns, you notice a lot of fat rendered at the bottom of your pot, you can use a spoon to remove it. Just leave a tablespoon or so for cooking the onions and garlic.

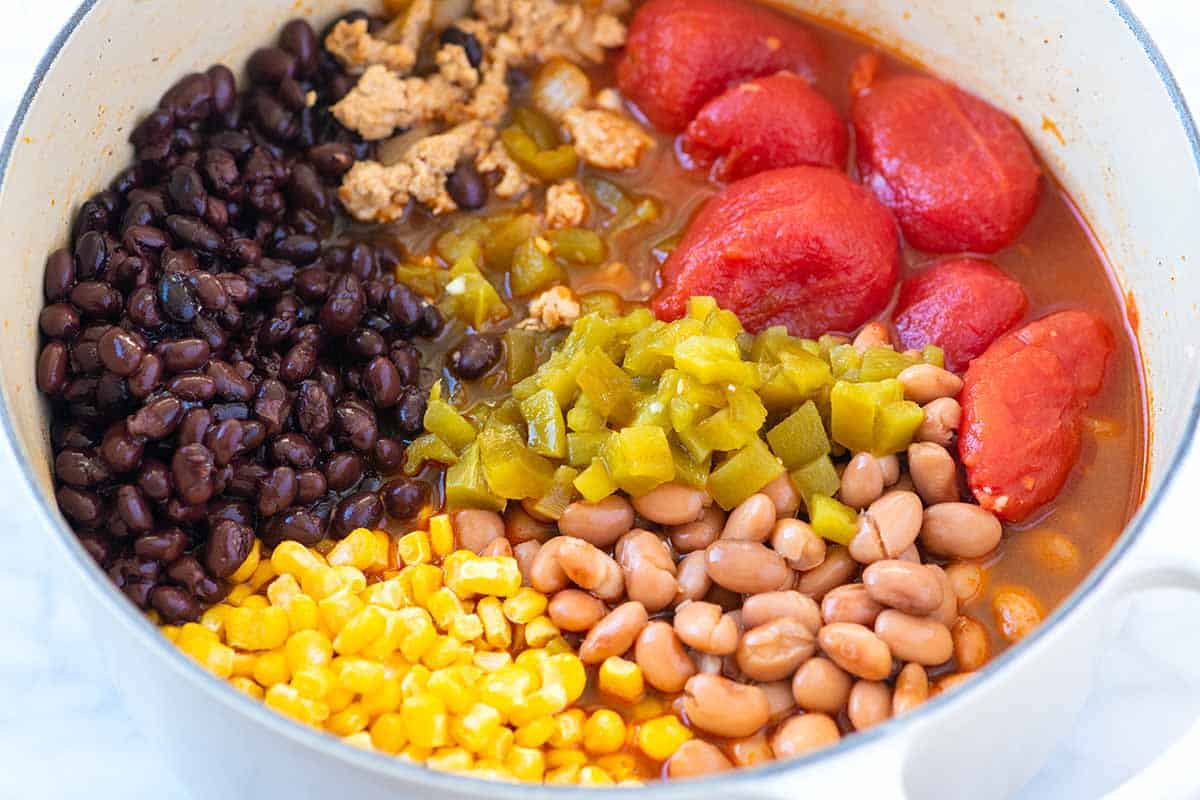
    Tip 2: Add the remaining soup ingredients. When the meat is browned, quickly sauté your onions, then add the garlic and taco seasoning. After a minute or two, the pot smells amazing, which means it’s time to add everything else: a large can of diced tomatoes, green chiles, beans, frozen corn, and your broth. Give it a good stir, and make sure that you take a moment to scrape up any browned bits from the bottom of the pot (that’s where so much flavor hides).

    Taco soup Ingredients

    Tip 3: Simmer for 20 minutes. Bring the soup to a simmer, then reduce the heat and let it bubble gently for 15 to 20 minutes. This gives all the ingredients time to meld into a rich, flavorful soup. If the soup looks too thick, add a little more stock or water until it’s just how you like it.

    Tip 4: Don’t forget the toppings. Ladle the soup into bowls and add your favorite taco toppings. Or, serve the toppings family-style on the table, and let everyone add what they love. We usually set a bowl of tortilla chips, guacamole, and pico de gallo on the table and dig in.

    Our Favorite Variations

    • Make it with chicken: For a lighter version, use ground chicken or shredded cooked chicken instead of beef or pork. If you already have rotisserie or leftover roasted chicken, add it near the end of cooking so it stays juicy. You could even start with shredded Instant Pot chicken or slow-cooker shredded chicken if you’ve made a batch ahead of time.
    • Try it in a slow cooker: To make slow cooker taco soup, brown the ground meat and onions first, then transfer everything to your slow cooker. Add the remaining ingredients and cook on LOW for 5 to 6 hours or on HIGH for 2 to 3 hours. It’s an easy, set-it-and-forget-it dinner that tastes even better the next day.
    • Make it vegetarian: Skip the ground meat and double up on the beans and veggies. We make vegetarian taco soup quite often. We swap the chicken stock for vegetable broth and toss in extra vegetables. I love to add bell peppers, zucchini, chopped sweet potatoes, and shredded cabbage. I recommend quickly sautéing the veggies before adding the stock and tomatoes for even more flavor.
    Easy Taco Soup

    Easy Taco Soup

    • PREP
    • COOK
    • TOTAL

    My family loves this taco soup made with ground meat (beef, pork, chicken, and turkey all work), veggies, and hearty beans. The dill in the recipe is a substitute for store-bought Ranch seasoning (a common ingredient in taco soup). It really does make the soup delicious!

    6 Servings

    You Will Need

    1 pound lean ground meat like beef, turkey, chicken, or pork (450g)

    1 teaspoon olive oil

    1 small onion, chopped

    2 tablespoons taco seasoning, try homemade taco seasoning

    3 cloves garlic, minced

    1 (28 ounce) can whole or diced tomatoes

    1 (4 ounce) can diced green chiles

    2 (15 ounce) cans beans like black beans, pinto beans, or kidney beans

    1 cup frozen corn

    3 cups chicken stock or vegetable broth (709ml)

    2 to 3 tablespoons chopped fresh dill, optional

    Salt and cayenne pepper or hot sauce to taste

    Optional for serving: Avocado or guacamole, diced tomatoes or pico de gallo, shredded or crumbled cheese, shredded lettuce or cabbage, sliced jalapeños, cowboy candy, sour cream, tortilla chips

    Directions

      1Brown the meat: Heat the oil in a large soup pot (or Dutch oven) over medium-high heat. Add the ground meat and cook until browned, about 5 minutes. As the meat cooks, use a wooden spoon to break the meat into crumbles.

      2Cook the onions: Move the browned meat to the side. Add the onions and cook, stirring them around the pot, until they soften, about 5 minutes.

      3Add garlic and spices: Stir in the garlic and taco seasoning and cook until fragrant, about 1 minute.

      4Simmer the soup: Add the tomatoes with their juices, canned chiles, beans, corn, and the stock. Bring to a boil, reduce to a simmer, and cook for 15 to 20 minutes. Use a wooden spoon to break apart the tomatoes as the soup simmers. Stir in the dill.

      5Serve: Taste, then adjust with salt, cayenne pepper, or hot sauce. Serve with your favorite taco toppings.

    Adam and Joanne’s Tips

    • Storing: I actually think it gets better over time! Refrigerate the soup stored in an airtight container for up to 4 days or freeze for up to 3 months.
    • Vegetarian or vegan: Skip the ground meat and use vegetable broth. To bulk up the soup a bit, add extra vegetables. I love to add bell peppers, zucchini, chopped sweet potatoes, and shredded cabbage. I’d brown the veggies before adding the stock and tomatoes for even more flavor.
    • Use a crock pot: To make the soup in a slow cooker, you’ll need a skillet and a slow cooker. Brown ground meat in a bit of oil. Move the browned meat to one side of the pot, add chopped onions and cook, stirring around the skillet, until softened. Add the browned meat, onions, and the remaining soup ingredients to the slow cooker. Stir. Cook on HIGH for 2 to 3 hours or on LOW for 5 to 6 hours.
    • The nutrition facts provided below are estimates.

    Nutrition Per Serving
    Serving Size
    1/6 of the recipe
    /
    Calories
    360
    /
    Total Fat
    9g
    /
    Saturated Fat
    2.3g
    /
    Cholesterol
    55.8mg
    /
    Sodium
    801.9mg
    /
    Carbohydrate
    43.5g
    /
    Dietary Fiber
    12.4g
    /
    Sugars
    9.5g
    /
    Protein
    28.7g


    AUTHOR:

    Joanne Gallagher

    Adam and Joanne of Inspired Taste

    We are Adam and Joanne Gallagher, the creators of Inspired Taste. Established in 2009, Inspired Taste grew from a childhood dream into one of the internet’s most trusted recipe sites with hundreds of reliable recipes, step-by-step videos, and expert tips.More About Us

    Source link

  • Easy Creamy Vegetable Soup Recipe

    Easy Creamy Vegetable Soup Recipe

    This easy creamy vegetable soup recipe is incredibly delicious and made in one pot with a short list of healthy ingredients.

    Easy Creamy Vegetable Soup

    I’ve been making this creamy vegetable soup for over 15 years. It’s a staple soup for my family, the one we turn to when we need a little comfort or an easy meal.

    Our recipe below is for a blended vegetable soup. For a brothy veggie soup, see this Easy Vegetable Soup.

    Key Ingredients

    • Vegetables: I keep this vegetable soup really simple with onions, garlic, carrots, and celery. If you have other veggies in the fridge that need to be used up, feel free to add them. I’ve added zucchini, summer squash, and even winter squash cubes to this and loved it.
    • Potatoes: Instead of using a roux made with butter and flour, we add a pound of potatoes to make this soup thick and creamy. I prefer thin-skinned potatoes like Yukon Gold and don’t peel them. You can substitute sweet potatoes.
    • Broth: This recipe calls for vegetable broth or chicken broth. You can make your own or buy it. When looking for store-bought veggie broth, I go for the brands that include mushrooms (these tend to have more flavor).
    • Thyme and Bay Leaves: I love these for their classic flavor. You can use fresh or dried.
    • Something Creamy: When the soup is blended, I stir in something creamy to make things extra delicious. I love cream or half-and-half, but you can use dairy-free coconut milk or this homemade cashew cream.

    Find the full recipe with measurements below.

    How to Make the Best Creamy Veggie Soup

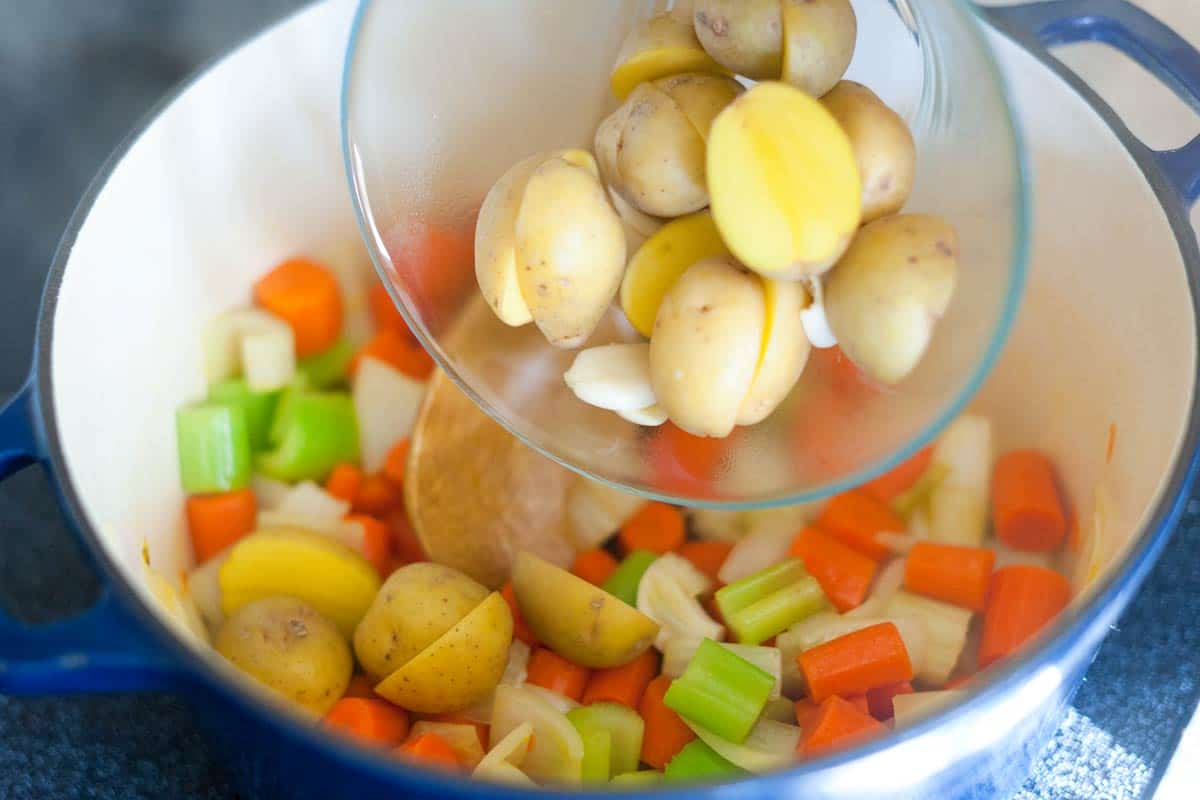
    Tip 1: Cut all the veggies to the same size. So that everything cooks quickly and evenly, chop your vegetables into similar sizes. Remember that this soup is eventually blended, so there’s no need for perfect cuts, though. I cook onions, carrots, and celery in a big pot until softened. Then, I add potatoes, garlic, broth, and herbs.

    Cooking the Vegetables for Creamy Vegetable Soup

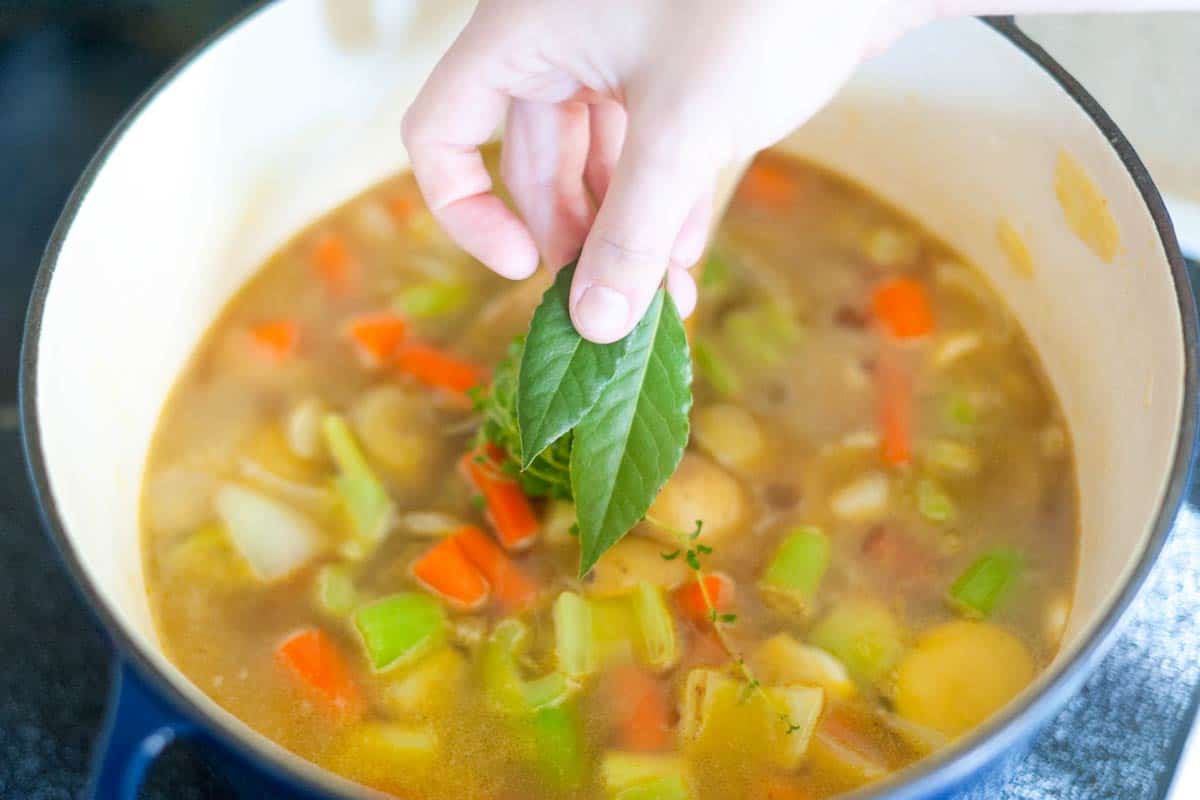
    Tip 2: Remove your bay leaf before blending. The vegetables will be soft after simmering for 15 minutes. Then you will blend. Before you do, remove the bay leaf and thyme stalks (the leaves will have fallen off into the soup). Then, blend the vegetables into a creamy soup. I’ve lost count of how many times I’ve forgotten a bay leaf before blending soup. The thyme stalks and bay leaf don’t soften well enough to blend in, so it really is best to remove them!

    How to Make Creamy Vegetable Soup - Adding thyme and bay leaves to the pot

    Tip 3: Finish with something creamy. The potatoes really make this soup thick and creamy, but I still love adding a splash of cream or half-and-half just before serving. You can skip it or use a dairy-free option like coconut milk. It’s amazing all by itself, but I love topping it with some homemade croutons.

    More Creamy Soup Recipes

    A Bowl of Creamy Vegetable Soup

    Easy Creamy Vegetable Soup

    • PREP
    • COOK
    • TOTAL

    You will love this easy, delicious, and creamy vegetable soup recipe. Don’t worry too much about how you prep the vegetables. You should be fine as long as they are all of a similar size. Since this is a blended soup, you do not need to mince the garlic cloves. Just peel and cut them in half.

    We have been making this soup for years. It’s simple to make, healthy, and comforting. Throw lots of vegetables into a big pot, add stock and herbs, and then simmer until done. Blend, and it is ready to eat. For a brothy soup, see this Homemade Vegetable Soup.

    Makes 4 Servings

    Watch Us Make the Recipe

    You Will Need

    1 large onion, chopped into ½-inch pieces

    1 pound carrots, peeled and chopped into 1/2-inch pieces, 4 to 5 medium carrots

    4 celery sticks, chopped into ½-inch pieces

    1 tablespoon olive oil

    Salt, as needed

    ¼ teaspoon crushed red pepper flakes

    1 pound thin-skinned potatoes, chopped into ½-inch pieces, 3 medium potatoes

    3 garlic cloves, peeled and halved

    3 cups vegetable broth or chicken broth (710ml)

    2 bay leaves

    3 sprigs fresh thyme or ½ teaspoon dried thyme

    ¼ cup half-and-half, cream, or coconut milk (60ml)

    Directions

      1Cook the veggies: Heat the oil in a large pot over medium-high heat. Toss the onion, carrots, and celery around in the oil. Sprinkle with ½ teaspoon of salt and add the red pepper flakes. Cook, stirring occasionally, until the vegetables sweat, soften, and smell sweet, 5 to 10 minutes.

      2Add the potatoes: Stir in the potatoes, garlic halves, bay leaves, and thyme. Cook for 5 minutes. Add more oil if the pot seems dry.

      3Simmer the soup: Pour in the broth and bring to a boil. Reduce to a simmer and cook until you can easily pierce the potatoes with a fork, about 15 minutes.

      4Blend the soup: Remove the soup from the heat. Take out the bay leaves and thyme sprigs and discard them. Use an immersion blender, stand blender, or food mill to puree the soup until smooth.

      5To finish: Stir in the cream. Taste for seasoning and adjust with more salt and pepper if necessary.

    Adam and Joanne’s Tips

    • Storing: Store leftovers in an airtight container in the fridge for up to 4 days. You can also freeze it! Portion into freezer-safe containers or bags and freeze for up to 3 months. Thaw overnight in the fridge.
    • Reheating: Add to a saucepan over medium-low heat and cook, stirring occasionally, until hot. You can also microwave it. Use a spoon or whisk to bring the soup back together if it is separated.
    • Vegan vegetable soup: Use either homemade veggie broth or store-bought broth, and look for one that is heavy on mushrooms for the most flavor. Add full-fat coconut milk or cashew cream at the end.
    • Substitute the potatoes: Try 1 can of drained and rinsed white beans. Once blended, they make the soup creamy and add a little extra protein.
    • The nutrition facts provided below are estimates. We included ¼ cup of half and half in the calculations and assumed 4 servings. We omitted salt from the calculations since you will need to add it to your taste.

    Nutrition Per Serving
    Calories
    234
    /
    Protein
    6 g
    /
    Carbohydrate
    41 g
    /
    Dietary Fiber
    7 g
    /
    Total Sugars
    8 g
    /
    Total Fat
    6 g
    /
    Saturated Fat
    2 g
    /
    Cholesterol
    6 mg


    AUTHOR:

    Joanne Gallagher

    Adam and Joanne of Inspired Taste

    We are Adam and Joanne Gallagher, the creators of Inspired Taste. Established in 2009, Inspired Taste grew from a childhood dream into one of the internet’s most trusted recipe sites with hundreds of reliable recipes, step-by-step videos, and expert tips.More About Us

    Source link

  • Easy Steel Cut Oats Recipe

    Easy Steel Cut Oats Recipe

    This is my family’s favorite steel cut oats recipe! I make it on the stovetop, but I have also included tips for cooking steel cut oats in a slow cooker or pressure cooker (like an Instant Pot).

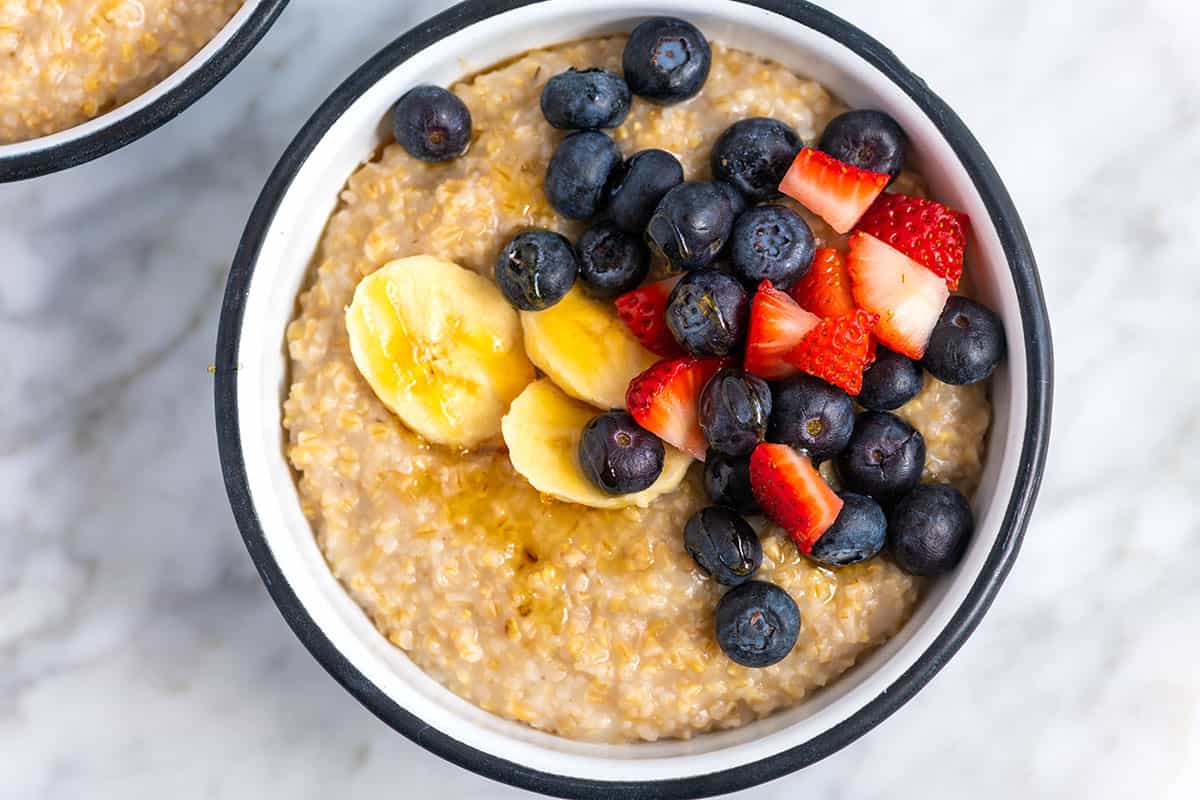
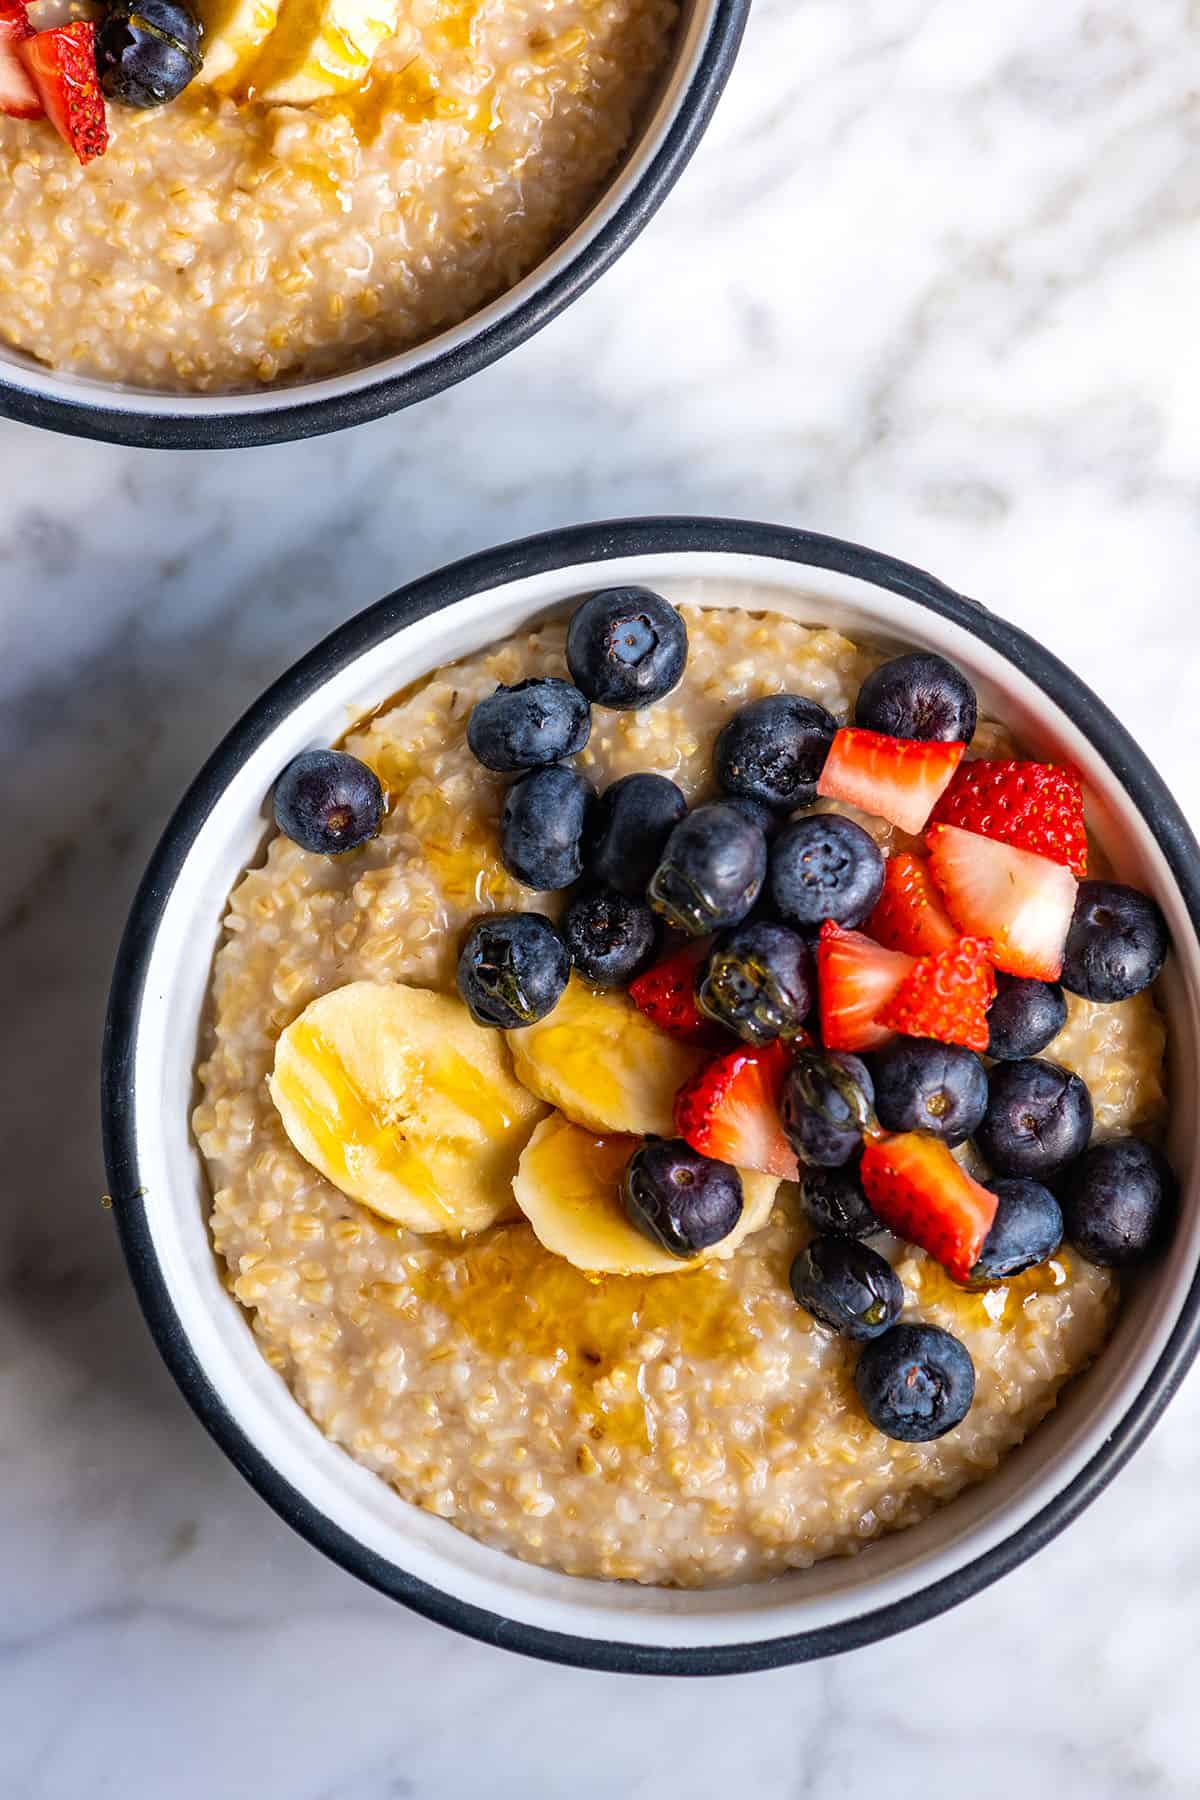
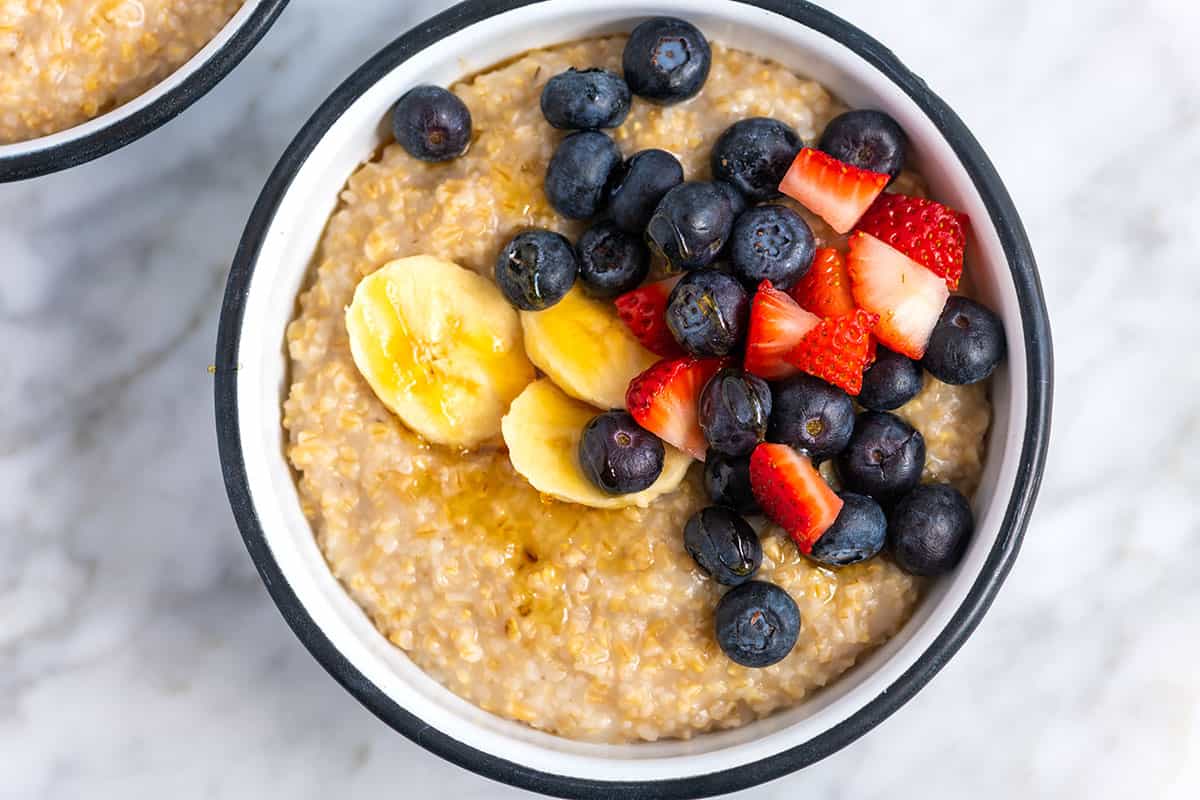
    Creamy Steel Cut Oats with berries and banana on top

    My family often eats oatmeal for breakfast. We love it almost any way we can get it, like this easy oatmeal recipe with rolled oats, our baked oatmeal, and even turned into energy balls with peanut butter and honey. We call steel cut oats “fancy oats” in our home and absolutely love them.

    Steel cut oats are whole oat groats cut into small bits (instead of rolled into flat discs like with rolled oats). They take slightly longer to cook than rolled oats but are delicious. My method for cooking them is super simple, too! I can’t wait for you to try it.

    How to Make Steel Cut Oats

    I love cooking steel cut oats on the stovetop. However, if you prefer a hands-off approach, you can absolutely make them in a slow cooker or Instant Pot! You’ll find detailed instructions for those methods in the recipe below. (Just a heads up: we don’t recommend cooking steel cut oats in the microwave. If you need a super quick oatmeal recipe, check out our easy oatmeal with tips for microwave cooking.)

    When cooking steel cut oats on the stovetop, I stick to a simple ratio: one part oats to three parts liquid, guaranteeing perfectly cooked, creamy oats every time. Keep in mind that the liquid ratio might vary slightly when using a slow cooker or pressure cooker. You’ll find specific tips for those appliances in the recipe below.

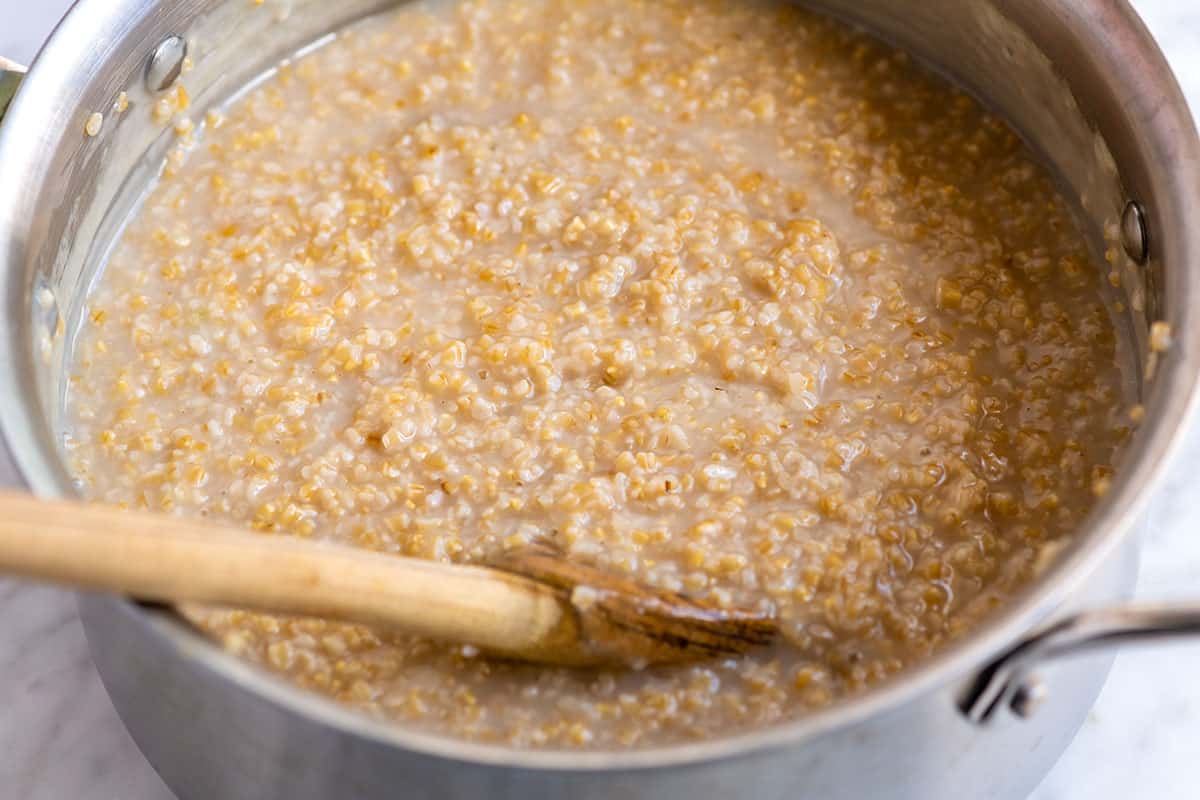
    Cooking steel cut oats

    To make steel cut oats, start by toasting them in a tablespoon of butter, coconut oil, or vegan butter for about 2 minutes, adding a lovely nutty flavor to the oats. Then, pour in the water and bring it to a gentle simmer, uncovered. Cook for 20 to 25 minutes, stirring occasionally, until the oats are tender and have absorbed most of the water.

    For extra creaminess, stir in 1/2 to 1 cup of milk. Finally, customize your bowl with spices, a pat of butter, and a touch of sweetness like maple syrup or honey. More topping suggestions are below!

    How to Serve Steel Cut Oats

    You can stir just about anything you love into cooked oatmeal, but here’s a bit of extra inspiration for you:

    • Mashed or sliced fruit. I love bananas, strawberries, and blueberries
    • Toasted nuts and seeds like walnuts, pecans, hazelnuts, or roasted pumpkin seeds.
    • Nut butter like peanut butter, almond butter, or cashew butter
    • Chia seeds, hemp seeds, or ground flax
    • Splash of cream, milk, buttermilk, yogurt, or non-dairy milk (like homemade oat milk)
    • Vanilla extract or spices like cinnamon, nutmeg, or pumpkin pie spice
    • Brown sugar, honey, or maple syrup
    • Dried fruit like cranberries, mulberries, or raisins
    • Sautéed spinach or kale and a poached egg or soft boiled egg
    Steel Cut Oats

    Easy Steel Cut Oats

    • PREP
    • COOK
    • TOTAL

    Steel cut oats are whole oat groats cut into small bits (instead of rolled into flat discs like with rolled oats). They take slightly longer to cook than other oat varieties but are delicious. When cooked, steel cut oats have a creamy, chewy texture. We love them topped with fruit and nut butter, but take a look at our article above for topping suggestions.

    For a quicker cooking time, consider soaking the oats in water the night before you plan to make them. Soaking them will reduce the cooking time by about half.

    4 Servings

    You Will Need

    2 tablespoons butter or vegan butter

    1 cup steel cut oats

    3 cups water

    Pinch salt

    1/2 to 1 cup milk, dairy or non-dairy

    1/4 teaspoon ground cinnamon

    1 tablespoon sweetener like brown sugar, honey, or maple syrup

    Optional oatmeal toppings like nut butter, fruit, nuts, and seeds

    Directions

    • Stovetop Steel Cut Oats
    • 1Melt 1 tablespoon of butter in the bottom of a medium saucepan over medium heat. Add the oats and stir them in the butter for a minute or two or until they smell nutty.

      2Combine the oats with the water and bring to a simmer. Reduce the heat so that the water is just barely simmering. Cook for about 20 minutes, stirring once or twice to lift any oats stuck to the bottom of the pan.

      3Stir in the milk, butter, cinnamon, and honey. Cook for 5 to 10 minutes or until the oats are soft with a slight chew. If the oatmeal seems dry, add a splash of more water or milk. Serve with your favorite oatmeal toppings.

    • Slow Cooker Steel Cut Oats
    • 1Slow cooker steel cut oats are much creamier than when cooked using other methods (think creamy, delicious oatmeal pudding). To cook steel cut oats in the slow cooker, combine 1 cup steel cut oats with 4 cups water. Add whatever seasonings you love (I add 1 tablespoon butter, 1/2 teaspoon ground cinnamon, and a pinch of salt). Cover the slow cooker and cook on LOW for 7 to 8 hours or on HIGH for 3 to 4 hours. Stir the oats before serving. For extra creamy oatmeal, stir in 1/2 to 1 cup of milk.

    • Instant Pot Steel Cut Oats
    • 1To cook steel cut oats in a pressure cooker like an Instant Pot, combine 1 cup steel cut oats with 3 cups water, a pinch of salt, 1/4 teaspoon ground cinnamon, and 1 tablespoon butter (or vegan butter). Stir the oats, secure the lid, and then cook on the manual or pressure cooker setting for 3 minutes at high pressure. When the cooking time is complete, allow the cooker to naturally release the pressure. Stir well before serving. For creamier oats, add 1/2 to 1 cup milk.

    Adam and Joanne’s Tips

    • Storing: Store cooked steel cut oats in the refrigerator for up to 5 days and freeze for up to 3 months. Steel cut oats thicken as they sit, so you might need to add a splash of water or milk when reheating them to achieve the perfect consistency again.
    • Soaking steel cut oats: You do not need to soak steel cut oats before cooking them. However, if you soak steel cut oats in water (usually 8 hours or overnight), they will soften slightly. Since the oats are softer, they cook quicker the following day. Soaking also may help unlock some of the nutrients in the oats, making them more available to us to absorb. If you plan on soaking steel cut oats, the stovetop cook time will be reduced by about half.
    • For gluten-free oatmeal, make sure that the oats and any toppings that you plan to use are certified gluten-free.
    • The nutrition facts provided below are estimates. We did not include any toppings in the calculations. We assumed whole milk in the calculations.

    Nutrition Per Serving
    Serving Size
    1/4 of the recipe
    /
    Calories
    215 calories
    /
    Total Fat
    9g
    /
    Saturated Fat
    4.5g
    /
    Cholesterol
    18.3mg
    /
    Sodium
    60mg
    /
    Carbohydrate
    28.7g
    /
    Dietary Fiber
    3.9g
    /
    Total Sugars
    5.9g
    /
    Protein
    5.6g


    AUTHOR:

    Joanne Gallagher

    Adam and Joanne of Inspired Taste

    We are Adam and Joanne Gallagher, the creators of Inspired Taste. Established in 2009, Inspired Taste grew from a childhood dream into one of the internet’s most trusted recipe sites with hundreds of reliable recipes, step-by-step videos, and expert tips.More About Us

    Source link

  • Easy Creamy Potato Soup Recipe

    Easy Creamy Potato Soup Recipe

    This homemade potato soup recipe makes the creamiest, most delicious soup. It’s easy, loaded with potatoes and veggies, and the broth is so creamy!

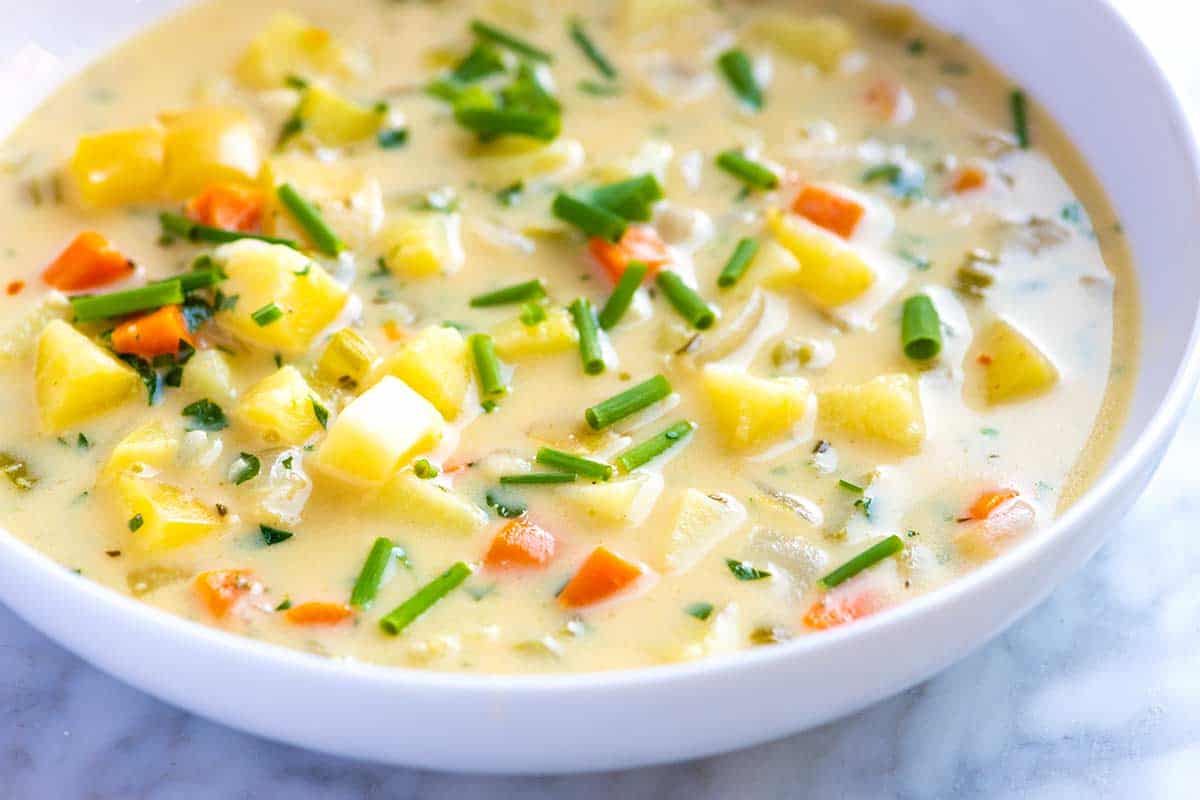
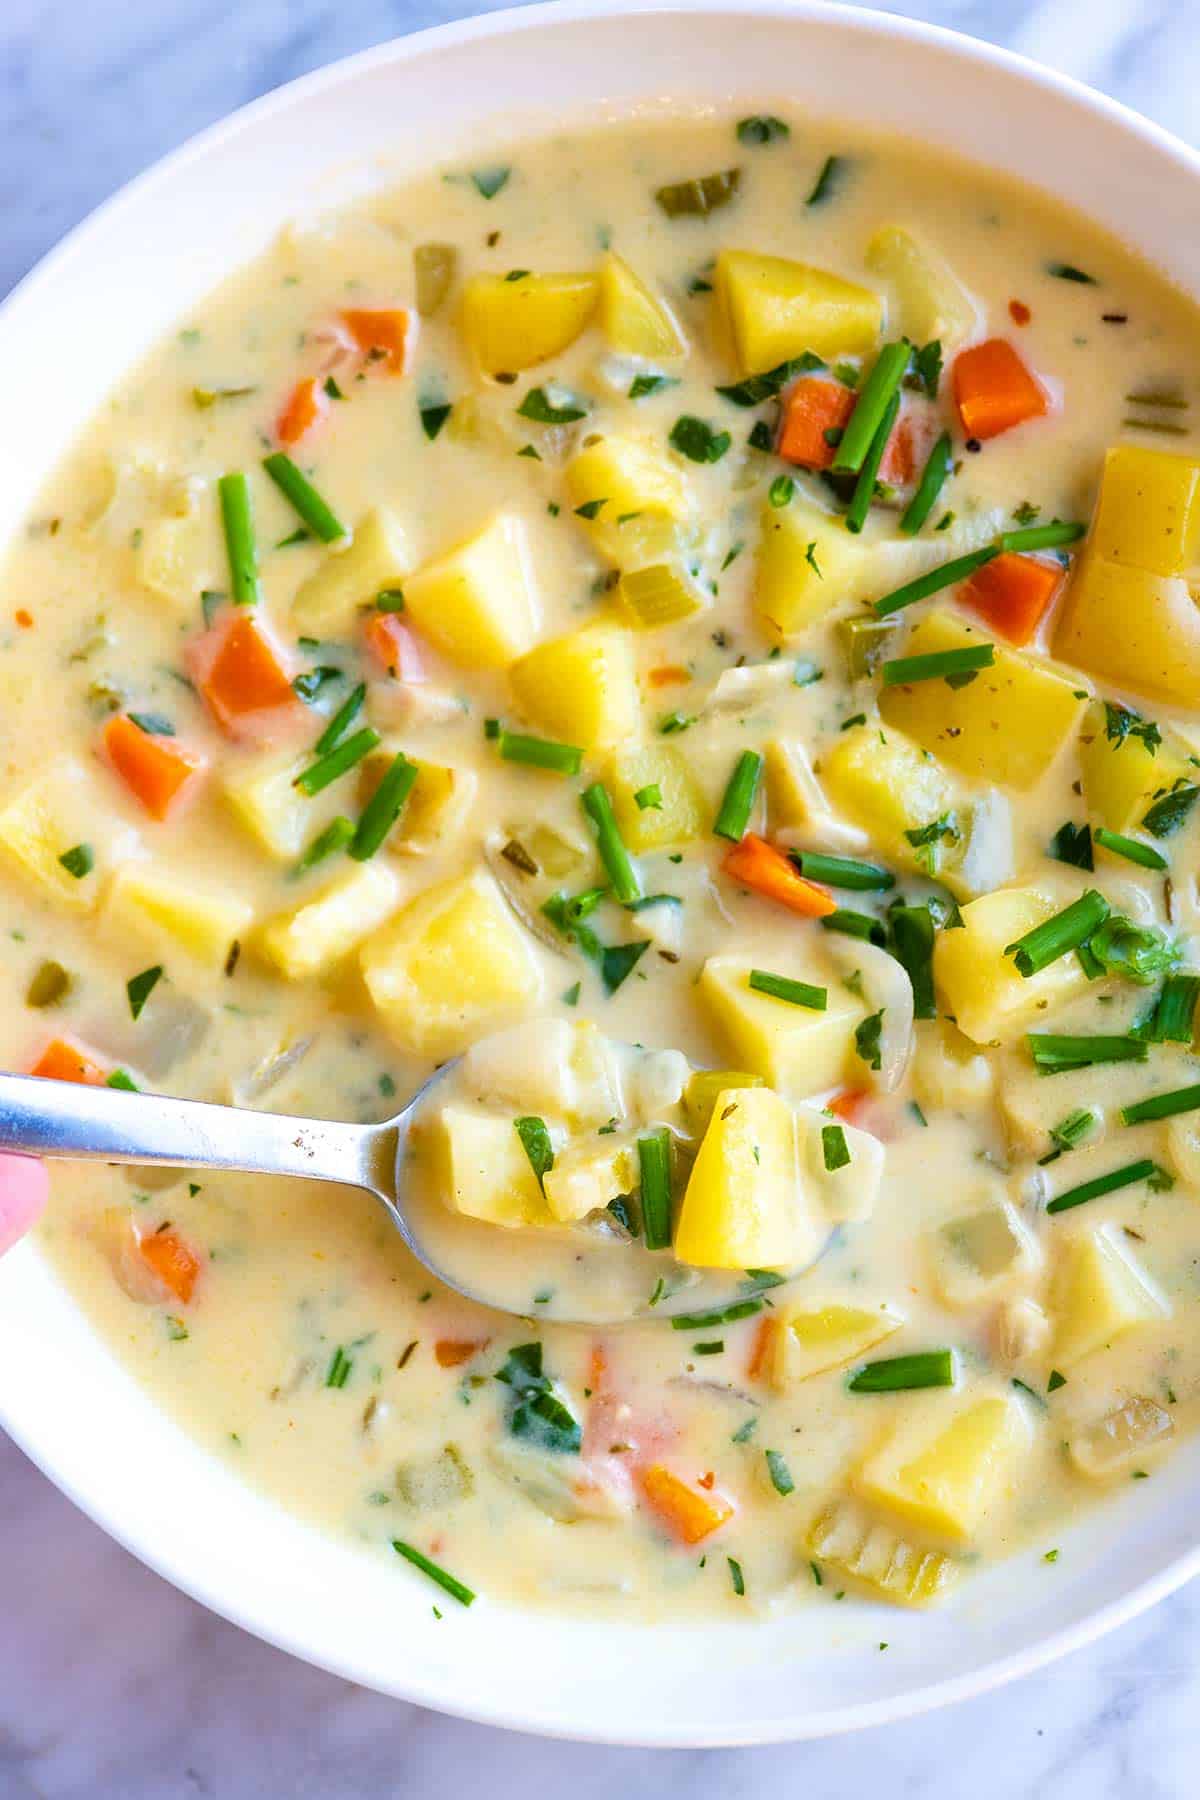
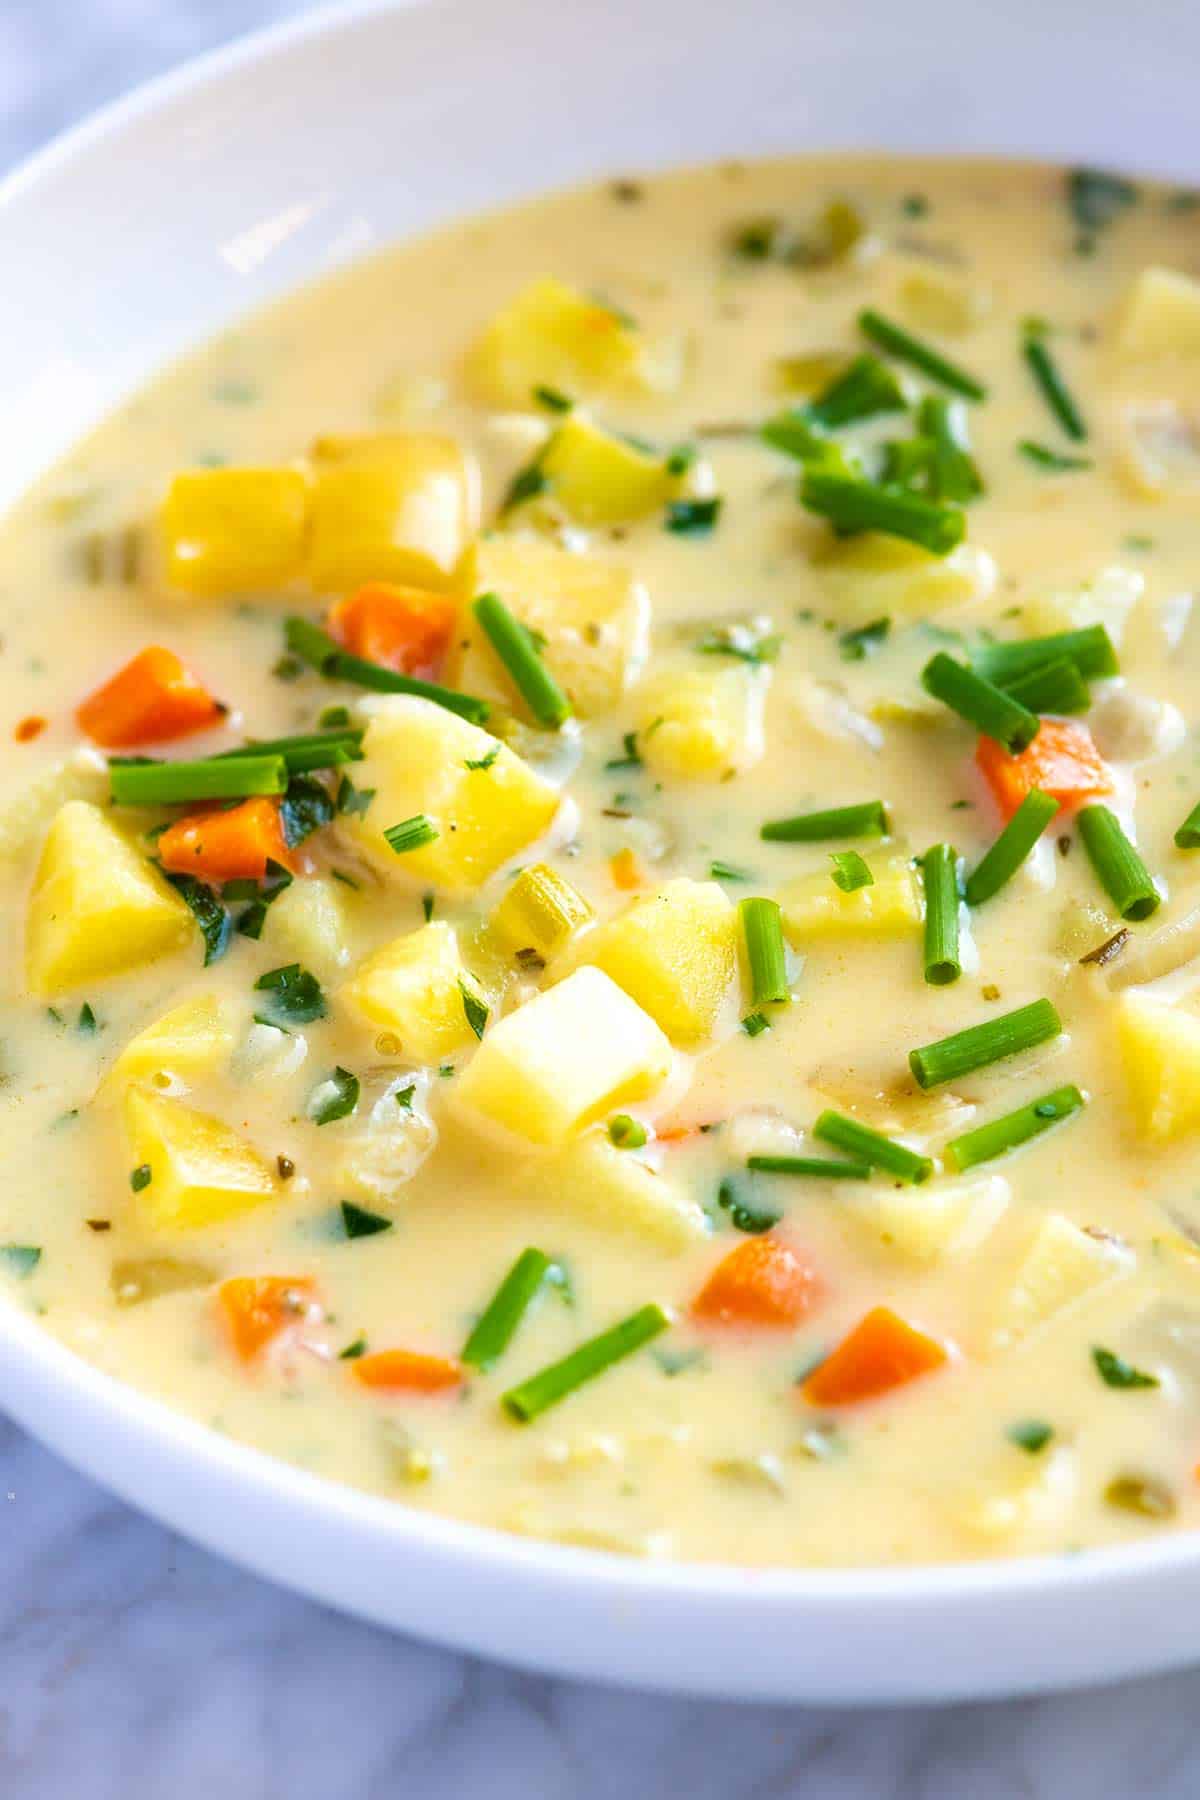
    The Best Creamy Potato Soup from Scratch

    This is my favorite potato soup because it is pure comfort food, but not so rich that you can’t enjoy it regularly. Joanne is a major fan of this soup! We like to make this all year around and it is ridiculously easy to whip up for a quick tasty dinner.

    I also love that you have two options for serving. You can keep it on the brothy side (like our photos) or blend it for a thick, creamy soup. If you love this here are two other favorites, see our sausage and potato soup or this potato and leek soup.

    Key Ingredients

    • Potatoes: You can use any potato in our recipe, but I highly recommend Yukon Gold potatoes. There’s no need to peel them, and when cooked, they are buttery and almost melt in your mouth.
    • Veggies: This is potato soup, but we love adding a few cups of extra veggies. Onions are a must, carrots add color and some sweetness, and chopped celery adds flavor and texture.
    • Garlic and rosemary: Make this the tastiest potato soup I’ve made. I’ve found some potato soup recipes too rich or lacking in flavor, but that’s not a problem with this easy potato soup. I love rosemary, garlic, and potato together.
    • Butter and flour: The combination of butter and flour thickens our soup. Unsalted butter or salted butter works just fine for this recipe. You will need to season with salt to taste. I’ve added tips for omitting the flour in the recipe below for gluten-free potato soup.
    • Stock or broth: For the best potato soup, use good-quality chicken stock from the store or homemade. When reaching for store-bought broth, we go for low sodium. We also look for a store-bought broth that’s darker in color (usually means more flavor), and since it usually has more of a backbone, we like to buy boxed bone broth (we use homemade bone broth sometimes, too).
    • Cream: We add a little cream to this soup. The chicken stock adds flavor, and the cream makes the broth creamy and more luxurious. You can also try half-and-half, sour cream, or plain yogurt.
    • Cheese: This is optional, but if you have some on hand, it adds a lovely richness to the soup. Use sharp cheddar for cheesy potato soup that rivals cheesy baked potatoes. We also love stirring in Gruyère or parmesan.

    Find the full recipe with measurements below.

    Creamy Potato Soup from Scratch

    How to Make the Best Potato Soup

    Tip 1: Cook veggies in flavored butter. We love to cook our vegetables with garlic and rosemary in butter. The kitchen will smell incredible and this adds so much flavor.

    Tip 2: Thicken with a little flour. So that our soup thickens nicely, you’ll stir in some flour and cook until toasty. The mixture of butter and flour helps thicken the soup. Then, it’s time to add the broth and potatoes and simmer until tender, which takes about 20 minutes.

    Tip 3: Finding the perfect blend. Finish by stirring in cream and some cheese if you plan to add it. You can serve the brothy soup or blend some to thicken it even more. I like to blend a portion of the soup (about 2 cups). Then, I add the blended mixture back into the soup.

    What to Serve with Potato Soup

    I love serving this potato soup with bread for dipping. A few favorites from the blog are this homemade focaccia bread, this roasted garlic bread, and our beer bread! Consider a light salad on the side to balance the soup’s richness. I love this strawberry balsamic salad or this easy chopped salad.

    As for topping potato soup, I love scattering over fresh herbs (especially chives), but you can add more cheese, cooked bacon, sour cream, or crispy fried shallots.

    Easy Homemade Potato Soup

    Easy Creamy Potato Soup

    • PREP
    • COOK
    • TOTAL

    We love this easy potato soup recipe with potatoes and veggies simmered in a creamy broth. For the best potato soup, use Yukon Gold potatoes. They have thin skins, so it is not necessary to peel them. They also become buttery and soft when cooked.

    Makes about 7 cups of soup or 4 to 6 servings

    Watch Us Make the Recipe

    You Will Need

    1 ½ pounds (680g) potatoes, peeled and chopped, 4 cups

    1 medium onion, chopped, 2 cups

    2 medium carrots, chopped, 1 cup

    2 stalks celery, chopped, 1 cup

    1 tablespoon minced garlic, 3 to 4 cloves

    3 tablespoons butter or olive oil

    1 teaspoon chopped fresh rosemary or 1/4 teaspoon dried

    1/4 teaspoon crushed red pepper flakes

    3 tablespoons all-purpose flour

    4 cups chicken stock or vegetable broth

    1 bay leaf

    Salt and fresh ground black pepper

    1/4 cup cream, half and half, sour cream, or plain yogurt

    1 cup (2 ounces) shredded cheese, optional

    For serving (optional): Chives or scallions, sour cream, crumbled cooked bacon, fried shallots, hot sauce

    Directions

      1Melt the butter over medium heat in a large, heavy-bottomed pot (like a Dutch oven). When the butter melts, stir in the onions, carrots, and celery. Cook, stirring occasionally, until they begin to soften, 5 to 6 minutes.

      2Stir in the garlic, rosemary, red pepper flakes, 1/2 teaspoon of salt, and 1/4 teaspoon of black pepper, and then cook, stirring everything around the pot, for 30 seconds.

      3Scatter the flour over the vegetables and cook, stirring, until it looks medium blonde in color, about 1 minute. It will smell toasty, like browned butter.

      4Slowly whisk in 2 cups of the stock, ensuring no lumps of flour remain. It will be thick.

      5Pour in the remaining stock and whisk until blended. Increase the heat to a boil, then reduce to a simmer.

      6Add the potatoes and bay leaf, then cook, partially covered, until the potatoes are fork-tender, about 20 minutes.

      7Turn the heat down to low, remove the bay leaf, and stir in the cream and cheese.

      8Taste for seasoning, then adjust with more salt and pepper as needed.

      9Serve with fresh herbs on top. For a thick and blended soup, use a potato masher to mash or an immersion blender to blend about half of the potatoes, and then stir back into the soup.

    Adam and Joanne’s Tips

    • Storing: Potato soup lasts stored in an airtight container in the fridge for up to 4 days. You can also freeze potato soup for up to 3 months. Thaw the soup overnight in the refrigerator before reheating. When you reheat potato soup, it might look a bit separated. Don’t worry. Just use a whisk to blend it back together.
    • Make it gluten-free: Do not use the flour and instead whisk a tablespoon of cornstarch into the cream (or use milk) and add it to the soup (the cornstarch acts as a thickener). Or leave out flour and the cornstarch and blend about half of the soup to thicken it.
    • Vegan potato soup: Use plant-based butter or olive oil, veggie broth, and skip the cream at the end.
    • The nutrition facts provided below are estimates.

    Nutrition Per Serving
    Serving Size
    About 1 cup
    /
    Calories
    224
    /
    Total Fat
    11.8g
    /
    Saturated Fat
    6.9g
    /
    Cholesterol
    30.7mg
    /
    Sodium
    302.2mg
    /
    Carbohydrate
    23.9g
    /
    Dietary Fiber
    3.6g
    /
    Total Sugars
    3.9g
    /
    Protein
    7.4g


    AUTHOR:

    Adam Gallagher

    Adam and Joanne of Inspired Taste

    We are Adam and Joanne Gallagher, the creators of Inspired Taste. Established in 2009, Inspired Taste grew from a childhood dream into one of the internet’s most trusted recipe sites with hundreds of reliable recipes, step-by-step videos, and expert tips.More About Us

    Source link

  • Easy Homemade Fish Sticks Recipe

    Easy Homemade Fish Sticks Recipe

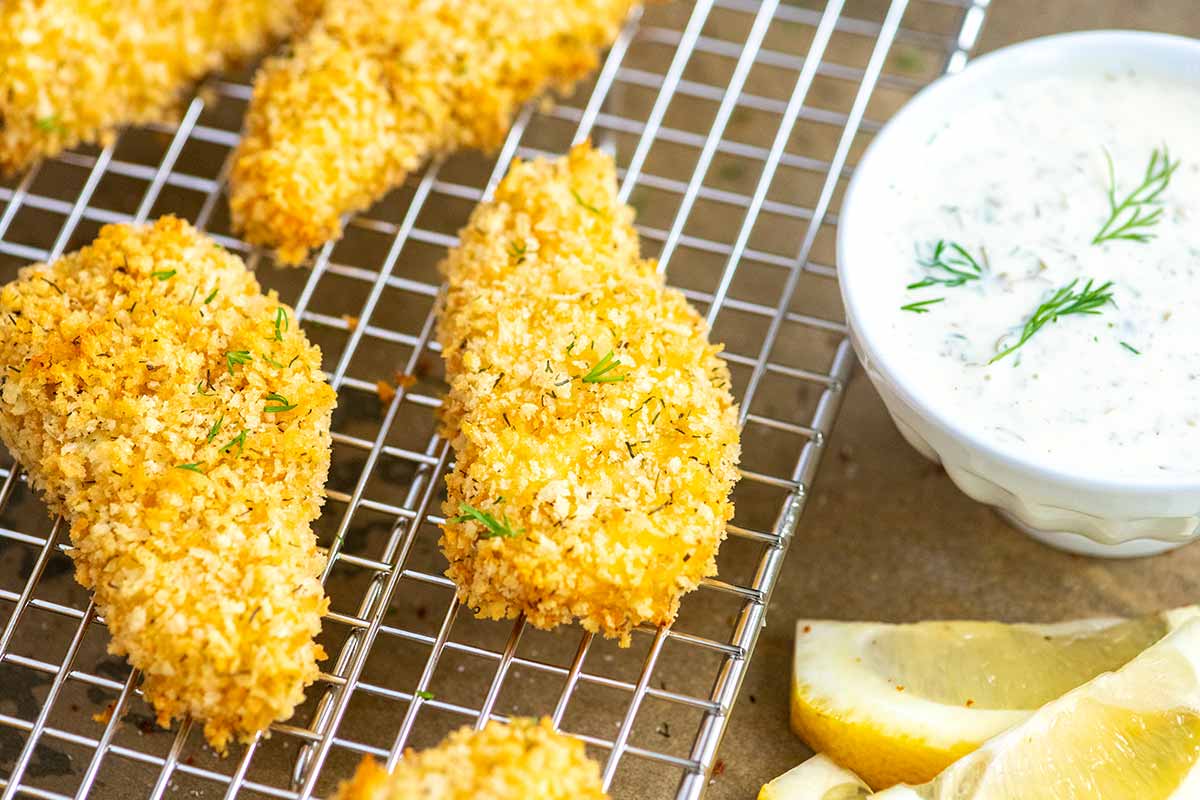
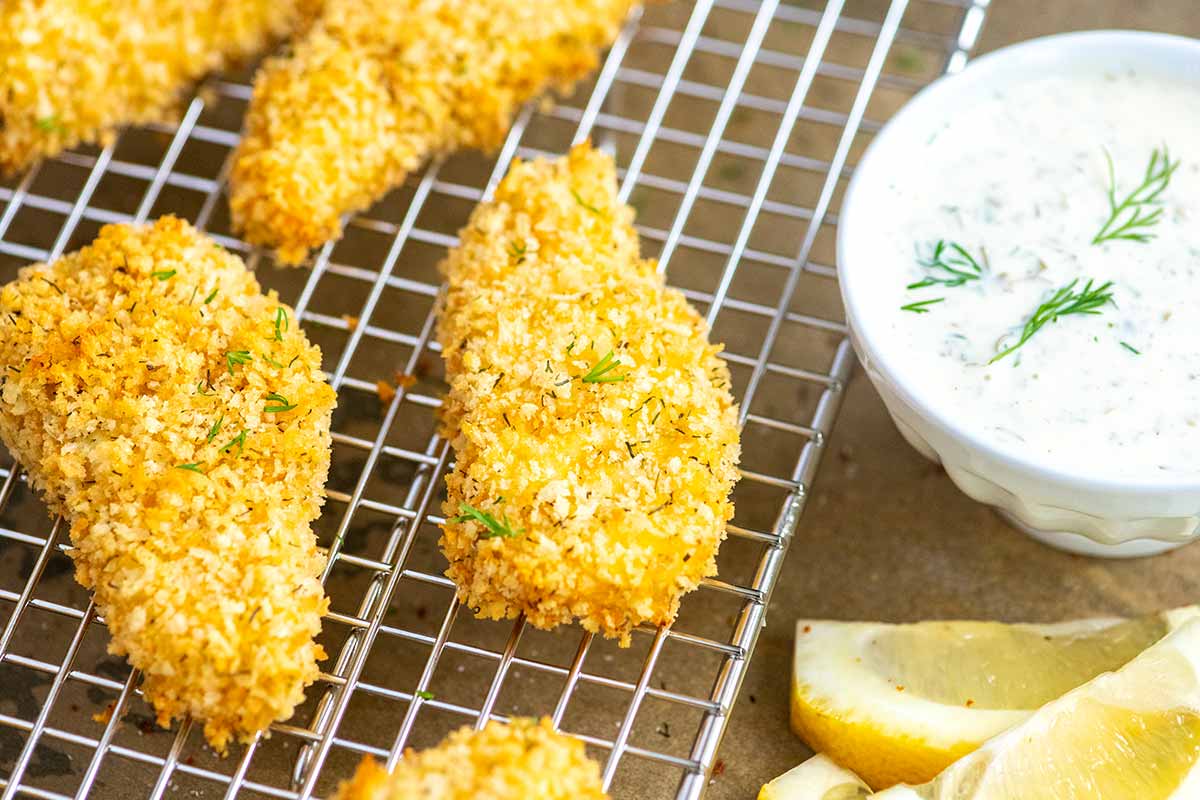
    Our family loves these homemade fish sticks! They are flaky and tender on the inside and crispy on the outside. These are baked, not fried, and call for a handful of real, simple ingredients.

    Homemade Fish Sticks

    These homemade fish sticks are way better than anything sold in the freezer section of your local grocery store. Just like our homemade chicken nuggets, adults and kids go crazy for them, thanks to our simple seasoning blend. Plus, since we bake them in the oven, they are healthier, too.

    I cannot wait for you to make these fish sticks. The ingredient list is simple, and you probably already have most of what you need in your kitchen! I love them served next to fresh lemon slices and homemade tartar sauce. We also love this homemade ketchup and our creamy honey mustard sauce!

    Key Ingredients

    • Fish: Use any firm white fish like Pacific cod, mahi-mahi, or tilapia. The trick is to cut the fish into similar sizes so the fish sticks all bake in the same amount of time.
    • Flour, Eggs, and Breadcrumbs: We use a three-part breading. First, all-purpose flour is mixed with spices. Second, beaten eggs and a little hot sauce, and third, breadcrumbs mixed with a little oil and dill. For gluten-free fish sticks, use gluten-free flour and crushed gluten-free certified cereal or potato chips for the breadcrumbs. For egg-free, try substituting the egg for cream (or a plant-based cream).

    How to Make Fish Sticks

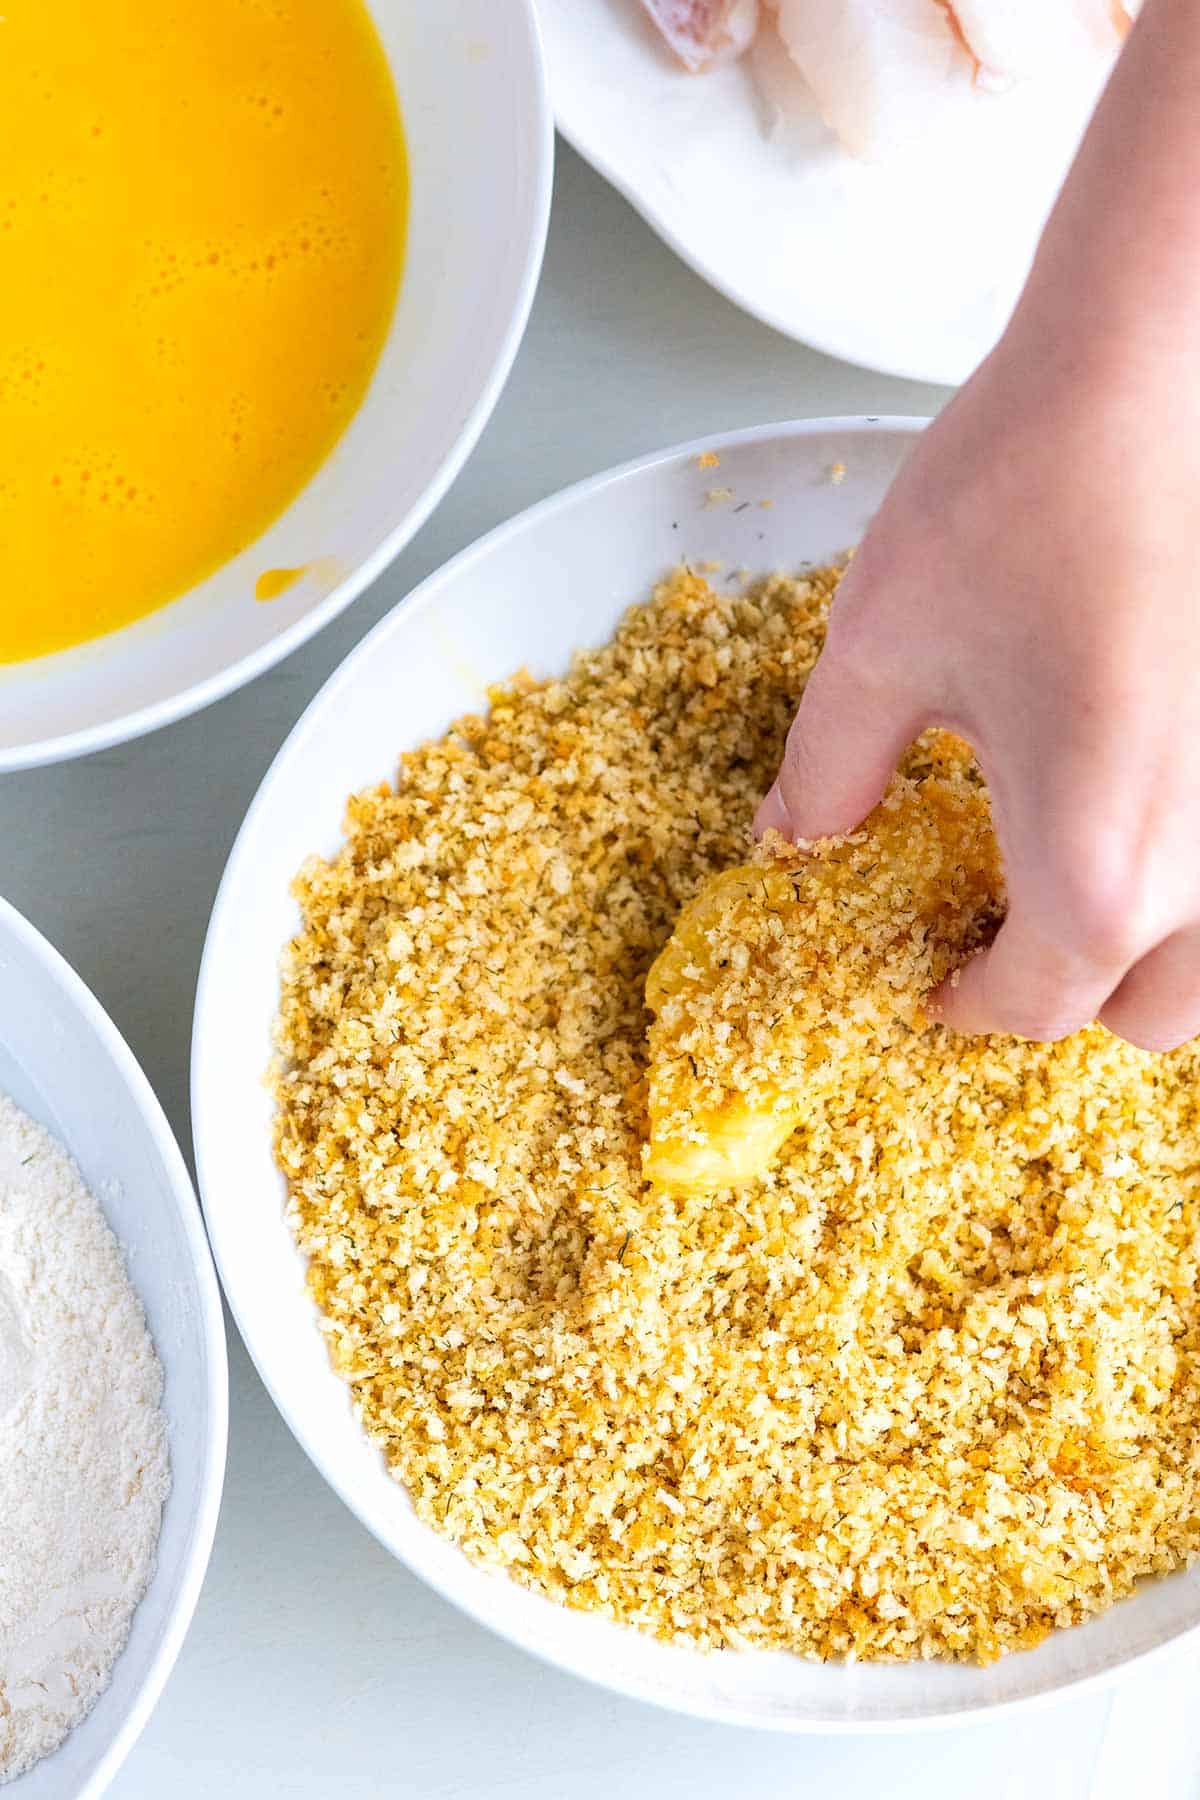
    To bread the fish, we use a traditional three-part breading process, which is the best way to make sure the breading stays on the fish and becomes crisp. It’s a simple process. Add flour and spices to one dish, beat eggs in a second dish, and then mix breadcrumbs and a few more seasonings in a third dish.

    After cutting the fish into thin strips, roll them into the flour, dip them into the egg, and then coat them in the breadcrumbs.

    How to Make Fish Sticks: Breading fish with flour, egg and breadcrumbs

    As I mentioned above, we bake our fish sticks. You can also fry them in a deep skillet with oil or use an air fryer (we haven’t tried this yet, but I bet they would be amazing).

    You have two options when baking them: First, you can bake them directly on a parchment paper-lined baking sheet. You will need to flip the fish sticks halfway through baking. Or, follow my favorite method and bake them on an oven-safe wire rack set inside a rimmed baking sheet. The rack allows air to circulate around the fish, which makes them extra crispy.

    Homemade Fish Sticks

    Easy Homemade Fish Sticks

    • PREP
    • COOK
    • TOTAL

    Our family loves these homemade fish sticks! They are flaky and tender on the inside and crispy on the outside. We highly recommend baking the fish on top of an oven-safe rack inset into a rimmed baking sheet, which helps to make the fish sticks extra crispy. If you do not have one, bake the fish sticks directly on a baking sheet lined with parchment paper or a silicone baking mat and turn once during baking.

    4 Servings (about 16 fish sticks)

    You Will Need

    1 pound (450g) cod fillets, sliced crosswise into 1-inch strips

    1/3 cup (43g) all-purpose flour

    1 teaspoon onion powder

    1/2 teaspoon garlic powder

    2 large eggs

    2 to 3 dashes hot sauce, optional

    1 ⅓ cup (150g) panko breadcrumbs or homemade breadcrumbs

    1 teaspoon dried dill or 1 tablespoon chopped fresh dill

    Olive oil or non-stick cooking spray

    Salt and fresh ground black pepper

    Directions

      1Preheat the oven to 375°F (190°C) and line a baking sheet with parchment paper or a silicone baking mat. If you have one, place an oven-safe wire rack on the baking sheet and spray with nonstick cooking spray. This will make the fish sticks extra crispy.

      2Prepare three shallow bowls. Whisk the flour with onion powder, garlic powder, and 1/2 teaspoon salt in the first bowl. In the second bowl, whisk the eggs and hot sauce together until blended. In the final bowl, stir the breadcrumbs and dill together. Drizzle one tablespoon of olive oil over the breadcrumbs and mix well. (Or spray with nonstick cooking spray).

      3Pat the fish dry, then roll a piece of fish into the flour with one hand. Shake off excess flour and then dip into the egg mixture. Shake the excess egg off, and then with your other hand or a fork, roll the fish into the breadcrumbs and place onto the prepared baking sheet (or onto the rack). Repeat with the remaining pieces of fish.

      4Bake for 15 to 20 minutes, turning once during cooking. (If you are using a rack, turning it is unnecessary.) The fish sticks are done when the breading is golden brown, and the fish flakes easily with a fork.

      5Serve with a very light sprinkle of salt and fresh ground black pepper over the top.

    Adam and Joanne’s Tips

    • Gluten-free fish sticks: Substitute gluten-free certified flour blend or almond flour for the all-purpose flour and crushed gluten-free certified cereal or potato chips for the breadcrumbs.
    • Egg-free fish sticks: Cook’s Illustrated suggests using heavy cream as a substitute for eggs when breading fish, vegetables, and chicken. You can also try olive oil.
    • For even more golden brown color and crispiness, before breading the fish, toast the breadcrumbs mixed with a little olive oil until light brown. In a 375 degree oven, this will take a minute or two. Make sure you check on the breadcrumbs and stir every 30 seconds so that they do not burn. You can also toast the breadcrumbs in a skillet over medium heat.
    • The nutrition facts provided below are estimates.

    Nutrition Per Serving
    Serving Size
    4 fish sticks
    /
    Calories
    333
    /
    Total Fat
    8.1g
    /
    Saturated Fat
    1.7g
    /
    Cholesterol
    145.1mg
    /
    Sodium
    448mg
    /
    Carbohydrate
    35.4g
    /
    Dietary Fiber
    2.2g
    /
    Total Sugars
    2.5g
    /
    Protein
    29.1g


    AUTHOR:

    Joanne Gallagher

    Adam and Joanne of Inspired Taste

    We are Adam and Joanne Gallagher, the creators of Inspired Taste. Established in 2009, Inspired Taste grew from a childhood dream into one of the internet’s most trusted recipe sites with hundreds of reliable recipes, step-by-step videos, and expert tips.More About Us

    Source link

  • Easy Tuna Salad Recipe

    Easy Tuna Salad Recipe

    Learn how to make our favorite tuna salad recipe! It is super easy, quick, and perfect for sandwiches, snacks, or topping your favorite salad!

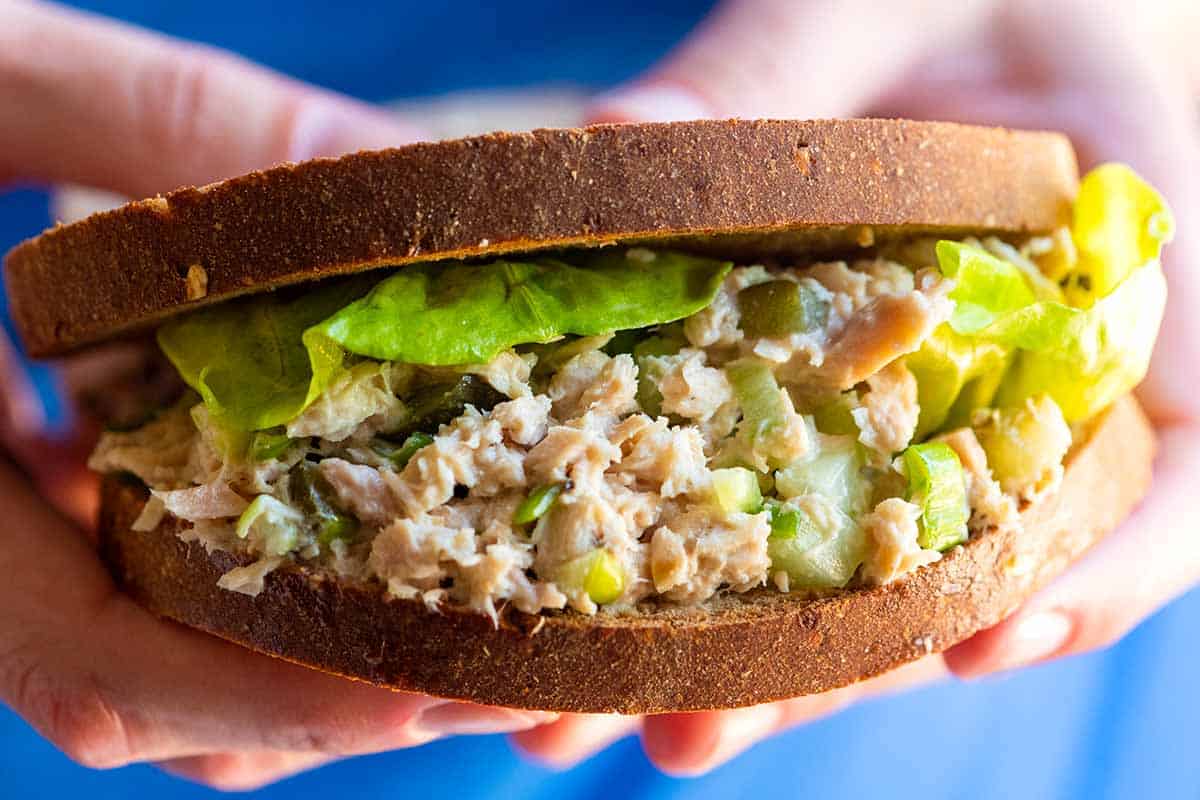
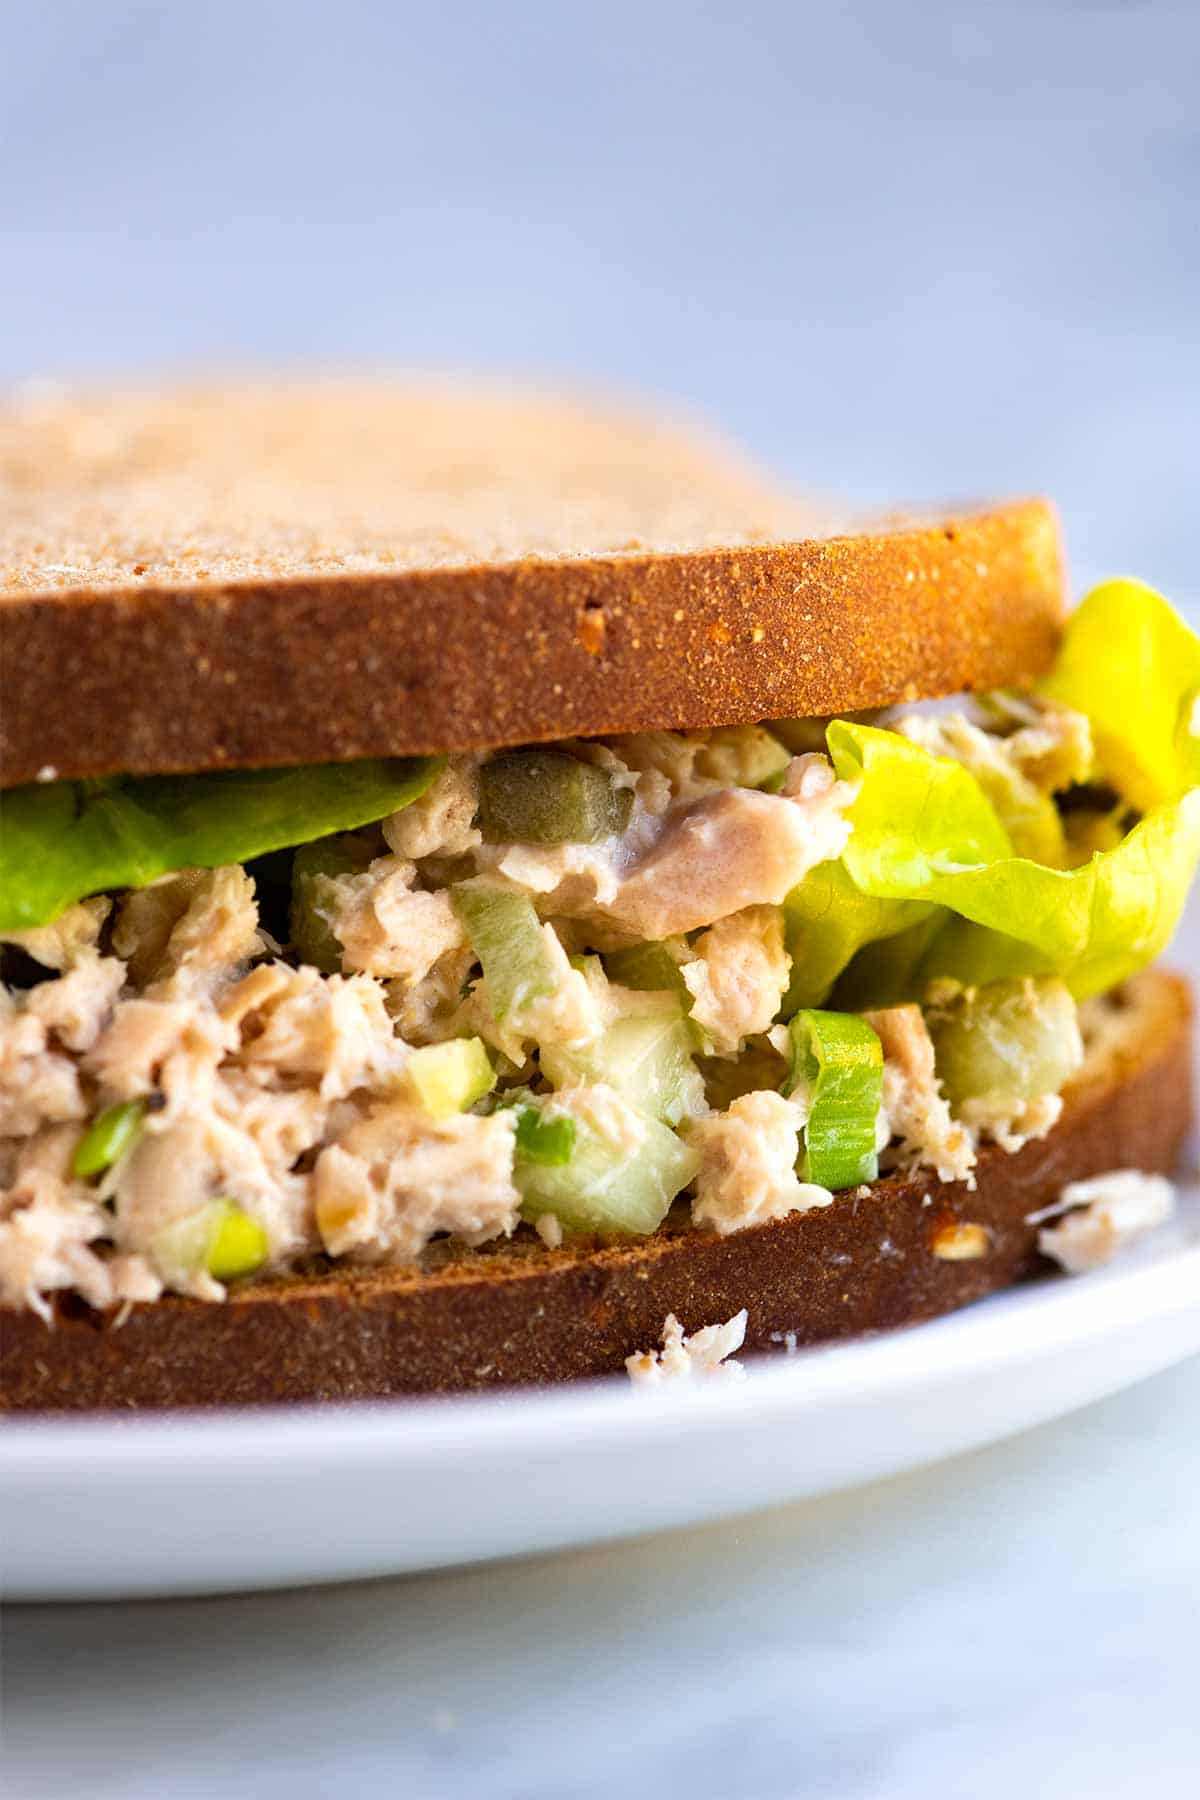
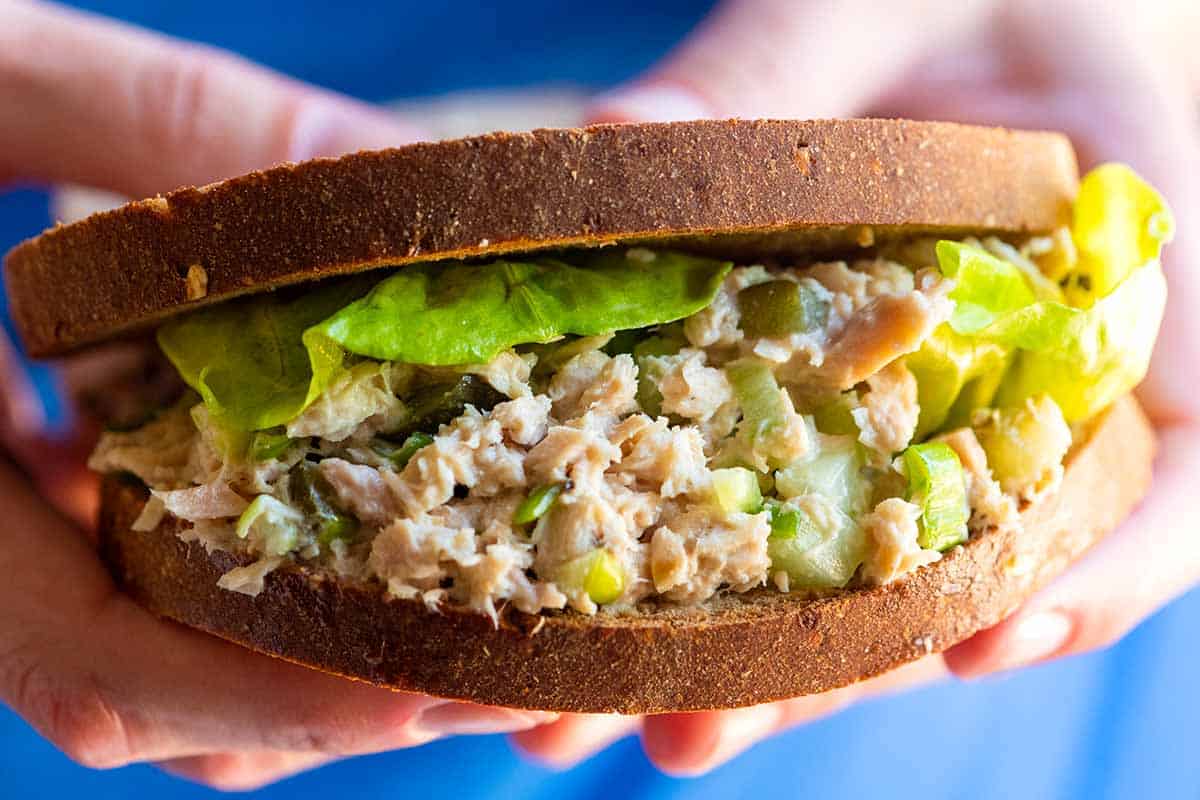
    Tuna Salad Sandwich

    My favorite tuna salad recipe uses high-quality tuna and simple ingredients for a delicious sandwich, wrap, or cracker topping. I’ve made this salad so many times. I love this quick, healthy salad on a sandwich, in a wrap, or with crackers.

    I grew up eating tuna salad sandwiches (thanks, Mom!), and they’re still one of my favorite lunches. If you’re looking for other easy and tasty salad ideas, I bet you’ll love our classic egg salad, smashed chickpea salad, and this chicken salad (it’s so good!).

    Key Ingredients

    • Tuna: I use canned albacore tuna caught using sustainable pole-and-line methods and cooked right in the can. This results in the most flavorful tuna that retains its natural juices and fats. When I buy canned tuna cooked in the can, I don’t drain it. Brands that don’t cook tuna in the can cook it first and then can it, which means that much of the natural juices and healthy fats are lost. That’s why you will often see tuna canned in water or oil. When the tuna is cooked right in the can, there is no need for extra water or oil. If sustainably caught, high-quality tuna isn’t available, flaked salmon or mashed chickpeas work well as a substitute. (I love this smashed chickpea salad sandwich.)
    • Mayonnaise: I use store-bought mayonnaise or homemade mayo if I have it in the fridge, but you can use a vegan mayo or swap some of it for a drizzle of olive oil if you prefer a less creamy salad.
    • Mustard: I’m a big fan of adding Dijon mustard for a zesty kick, but it’s totally optional. If you’re unsure, make the salad without it, and then try adding a bit to see if you like it.
    • Fresh Lemon Juice: I love a tiny squeeze of lemon juice to balance out the richness of the mayonnaise and cut through the fishy taste of the tuna.
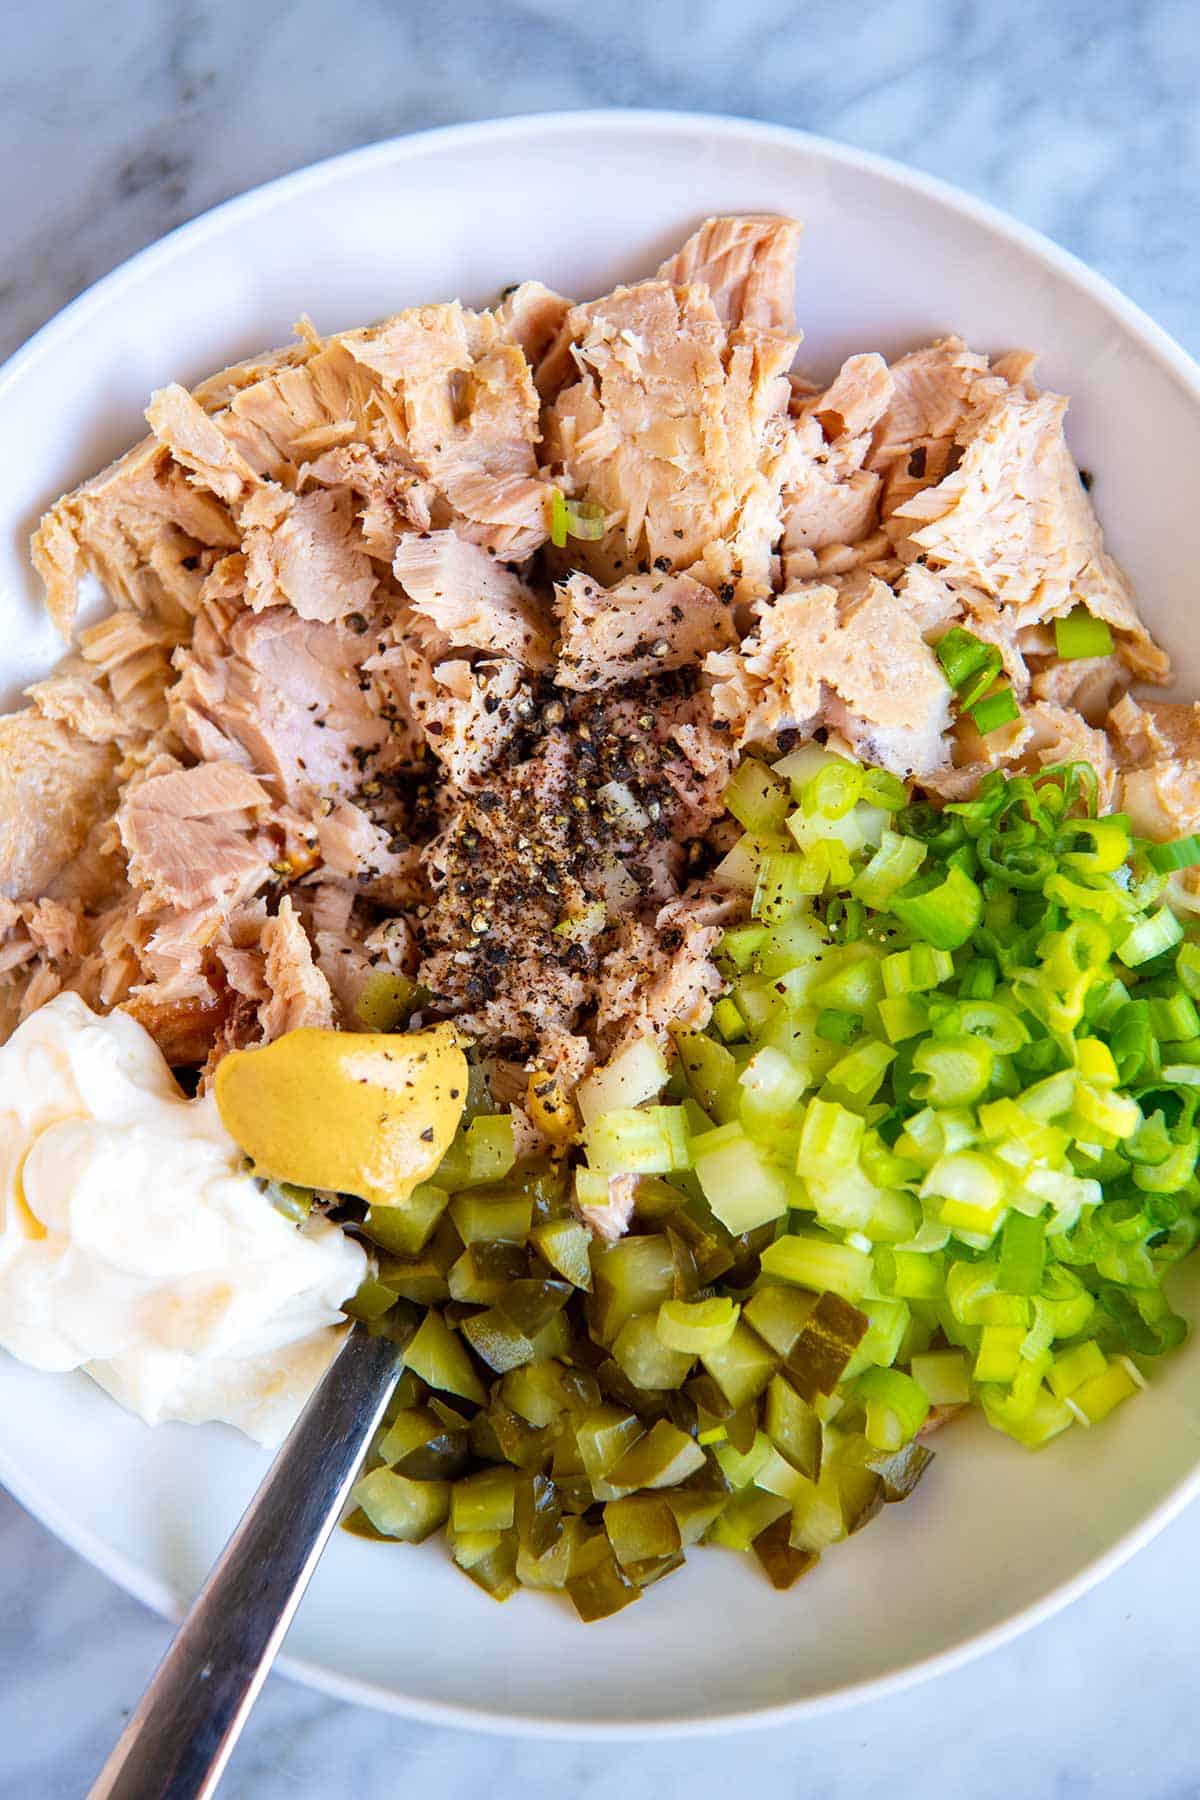
    • Crunchy Things: This is where you can get creative! I love adding celery, homemade dill pickles (along with a splash of pickle juice), and scallions for extra crunch and flavor. Feel free to experiment with your favorite crunchy additions.

    Find the full recipe with measurements below.

    Tuna Salad Ingredients

    Enjoying Your Tuna Salad

    This simple tuna salad is incredibly versatile (I really do make it almost every week)! Here are some of our favorite ways to serve it:

    • Classic Tuna Sandwich: This is my go-to lunch. I love layering this salad with fresh tomatoes, cucumbers, and lettuce on bread. If I have any on hand, homemade focaccia is amazing, but use what you have!
    • Wraps and Flatbreads: Create easy and flavorful wraps using tortillas or flatbreads. If you are up for it, I love these homemade flour tortillas and this super easy flatbread recipe!
    • Add to Salads: Add protein to your favorite salads by adding a scoop of tuna salad. It’s delicious with our Caesar salad, Greek salad, or on top of this quinoa salad.
    • Serve with Crackers and Vegetables: Make a light and healthy snack by serving tuna salad with crackers or fresh slices of cucumber and zucchini.
    • Make a Tuna Melt: Here’s Adam’s favorite! Spread the salad on buttered and toasted bread, top with cheese (we recommend Gruyère or white cheddar), and broil until melted. So good!
    Tuna Salad

    Easy Tuna Salad

    • PREP
    • TOTAL

    We use canned Albacore tuna and a short list of simple ingredients in our favorite tuna salad recipe. It is so quick and easy. If you cannot find sustainably caught canned tuna, substitute the tuna with flaked salmon or mashed chickpeas (use about 2 cups). Tips for buying tuna for tuna salad are in the tips section below.

    4 Servings

    Watch Us Make the Recipe

    You Will Need

    2 (5 ounce) cans of tuna, see tips below

    3 to 4 tablespoons mayonnaise, try homemade mayonnaise

    1 teaspoon Dijon mustard, optional

    1 tablespoon fresh lemon juice

    1 stalk of celery, finely chopped

    1 scallion, finely chopped, or use 1 tablespoon of chopped onion

    1 to 2 dill pickles, finely chopped, try homemade pickles

    1 tablespoon dill pickle juice, optional

    Salt and fresh ground black pepper, to taste

    Directions

      1Prepare the tuna: Whether you drain the liquid in the can depends on the brand of tuna you have. If you have purchased tuna cooked in the can, you do not need to drain it. Draining it would remove the natural juices and fats, including omega-3 fats. If the can of tuna says “packed in water” or “packed in oil,” we prefer to drain it.

      2Make the salad: Place the tuna in a medium bowl and break it up with a fork. Add 3 tablespoons of mayonnaise, 1 tablespoon of lemon juice, 1 teaspoon of Dijon mustard, the chopped celery, scallion, pickles, 1 tablespoon of pickle juice, and a generous pinch of fresh ground black pepper. Mix thoroughly.

      3Taste and adjust: Taste the salad and adjust the seasoning with salt, or add another tablespoon of mayonnaise if needed.

    Adam and Joanne’s Tips

    • Storing:  Store tuna salad in airtight, food-safe containers in the fridge for up to 5 days. We do not recommend freezing the salad.
    • Do I need to drain tuna cans? The answer depends on the brand of tuna you have. If you have purchased tuna cooked in the can, then no, you do not want to drain it. Draining it would remove the natural juices and fats, including omega-3 fats. Alternatively, if the can of tuna says “packed in water” or “packed in oil,” we prefer to drain it. That tuna was likely cooked before being canned, so those natural juices have already been lost. Generally, most brands that cook the tuna can indicate this on the packaging or mention there is no need to drain.
    • Best tuna to buy for tuna salad: We look for the little blue logo with MSC on it (Marine Stewardship Council Certified) as well as key terms like “hand-operated pole-and-lines” or “pole and line caught.” Albacore tuna caught with trolling lines can also be a good option (be careful not to confuse trolling lines with trawling, which is very different).
    • The nutrition facts provided below are estimates.

    Nutrition Per Serving
    Serving Size
    1/4 of the recipe
    /
    Calories
    188 calories
    /
    Total Fat
    10.4g
    /
    Saturated Fat
    1.9g
    /
    Cholesterol
    40.5mg
    /
    Sodium
    577.3mg
    /
    Carbohydrate
    1.4g
    /
    Dietary Fiber
    0.5g
    /
    Total Sugars
    0.7g
    /
    Protein
    20.7g


    AUTHOR:

    Joanne Gallagher

    Adam and Joanne of Inspired Taste

    We are Adam and Joanne Gallagher, the creators of Inspired Taste. Established in 2009, Inspired Taste grew from a childhood dream into one of the internet’s most trusted recipe sites with hundreds of reliable recipes, step-by-step videos, and expert tips.More About Us

    Previous Post: Easy Bread and Butter Pickles
    Next Post: Easy Cookie Bars

    Source link