Tag: Easy

  • Easy Eggless Caesar Dressing Recipe

    Easy Eggless Caesar Dressing Recipe

    I love this simple Caesar dressing made without eggs or mayonnaise. Our eggless dressing is easy to make, light, and super flavorful!
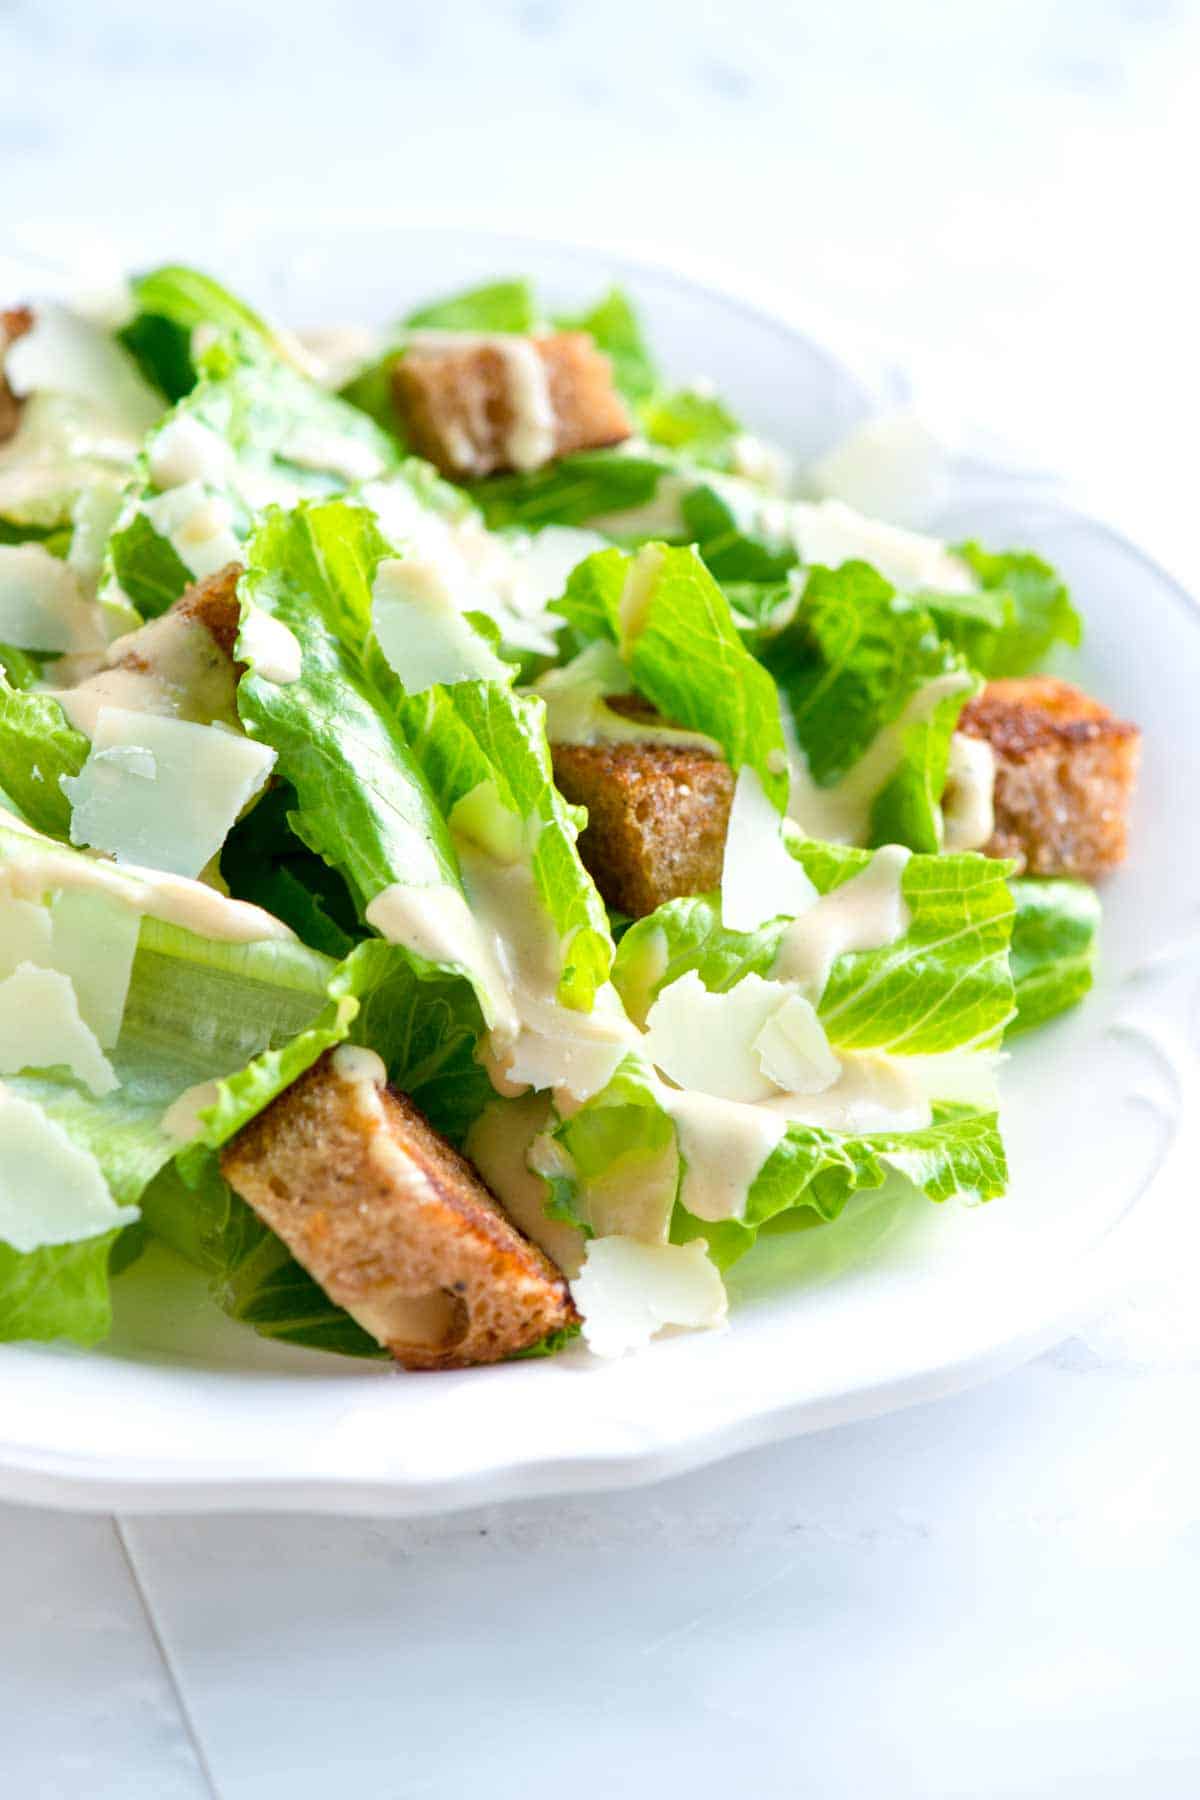
    Eggless Caesar Salad Dressing

    You’ll love this egg-free Caesar dressing recipe. Instead of using egg yolk as our base to make the dressing creamy, we make a vinaigrette-style dressing with garlic, lemon, anchovy, parmesan, and olive oil. It’s delicious and still surprisingly creamy!

    I love Caesar salad (especially chicken Caesar salad), and making your dressing at home is easy and tastes much better than store-bought. To see my classic dressing made with egg yolks, see this Caesar dressing.

    Key Ingredients

    • Parmesan Cheese: I always add a handful of parmesan to my salad, but I also love adding a few tablespoons of grated parmesan to the dressing for extra flavor. I do the same when making my Italian dressing.
    • Anchovies: These little fish add a savory depth to the dressing we associate with classic Caesar salad. You can use whole anchovies or anchovy paste.
    • Olive Oil: I prefer a light and fruity olive oil for this simple dressing. Since you’ll be using 1/4 cup, choose one you really enjoy the taste of.
    • Garlic: I use one clove, which gives it a mild garlic flavor. You can adjust the amount depending on how much you love raw garlic.
    • Lemon: Fresh lemon juice cuts through the richness of the dressing and emulsifies with the olive oil to create a smooth vinaigrette.
    • Mustard and Worcestershire: Mustard acts as an emulsifier, helping to bind the ingredients together, while Worcestershire sauce adds a savory, umami flavor that we all associate with Caesar salad.
    • Sour Cream: This is optional but makes the dressing super creamy!

    How to Make Eggless Caesar Dressing

    You can make this dressing by hand, but a food processor blender makes it quick and creamy. To make it, add the parmesan, garlic, lemon juice, mustard, anchovy, and Worcestershire sauce and blend until smooth. Then, stream in the olive oil with the food processor running until you’ve got a thick and creamy dressing.
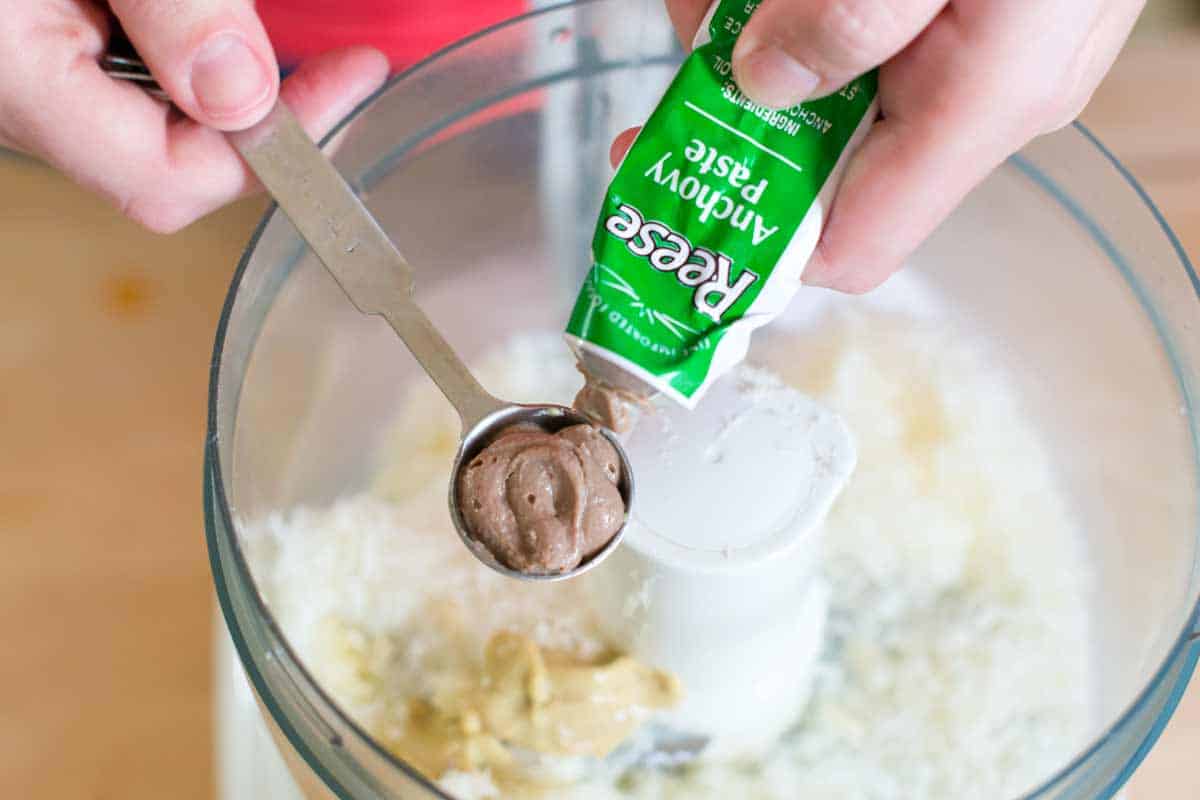
    Adding anchovy paste to  food processor to make the egg-free caesar dressing

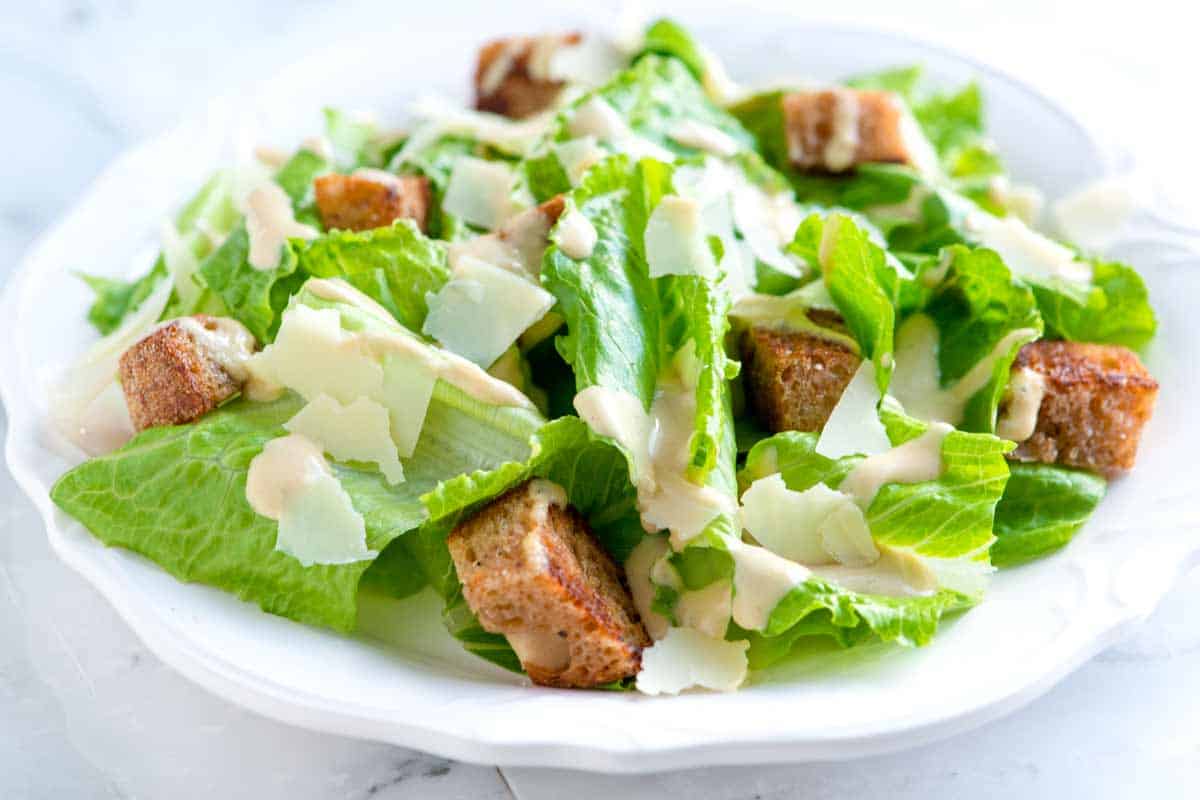
    For extra creamy dressing, add a tablespoon or two of sour cream. (I always do this and love how creamy it makes the dressing.) Then, toss your eggless dressing with Romaine lettuce, add more cheese, and a handful of homemade croutons!
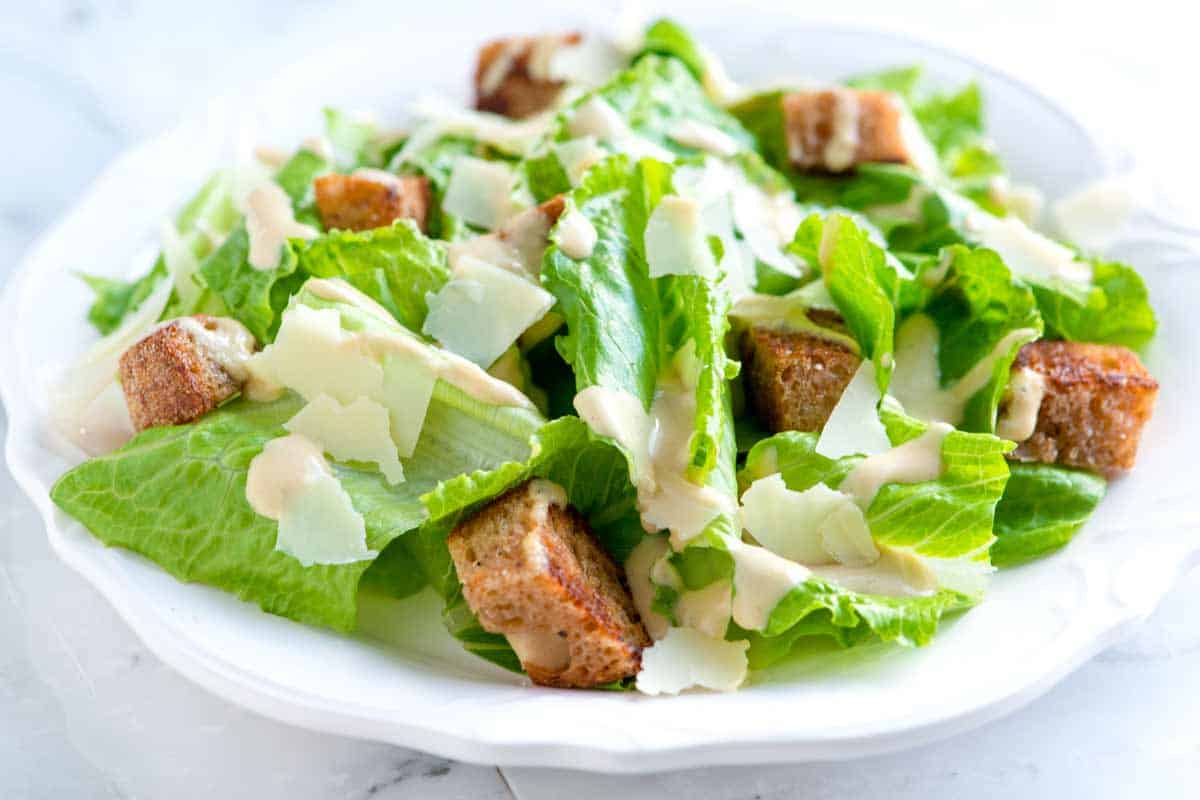
    Easy Eggless Caesar Dressing drizzled over salad

    Easy Eggless Caesar Dressing

    • PREP
    • COOK
    • TOTAL

    You can make this homemade egg-free Caesar dressing by hand, but it’s quicker and creamier when made in a food processor or blender. The sour cream is optional, but makes it extra creamy.

    Makes 4 to 6 servings

    You Will Need

    1 cup (30g) finely grated parmesan cheese

    1 garlic clove, peeled and finely chopped

    2 tablespoons fresh lemon juice

    1 teaspoon anchovy paste or 1 to 2 anchovies, smashed and minced

    1 teaspoon Dijon mustard

    2 teaspoons Worcestershire sauce

    1/4 cup (60ml) extra-virgin olive oil

    2 tablespoons sour cream, optional

    Salt and fresh ground black pepper

    Directions

    • Make Dressing
    • 1Add the parmesan cheese, garlic, lemon juice, mustard, anchovy, and Worcestershire sauce to the bowl of a food processor or blender. Turn the machine on and let it run for 15 to 20 seconds.

      2Scrape the sides with a spatula, turn the machine on, and let it run for 15 to 20 seconds.

      3With the machine running, slowly drizzle in the olive oil.

      4Add sour cream (if using) and season with salt and pepper. Let the machine run for 15 to 20 seconds until thick and creamy.

    Adam and Joanne’s Tips

    • Storing: Eggless Caesar dressing will last up to 3 days in the refrigerator. Store it in an airtight jar or container. I do not recommend freezing this dressing. The emulsification will break as it thaws.
    • The nutrition facts provided below are estimates. We did not include additional salt.

    Nutrition Per Serving
    Serving Size
    1/6 of the recipe
    /
    Calories
    147
    /
    Total Fat
    13.6g
    /
    Saturated Fat
    4g
    /
    Cholesterol
    11.3mg
    /
    Sodium
    271.5mg
    /
    Carbohydrate
    1.6g
    /
    Dietary Fiber
    0g
    /
    Total Sugars
    0.5g
    /
    Protein
    5.4g


    AUTHOR:

    Adam Gallagher

    Adam and Joanne of Inspired Taste

    We are Adam and Joanne Gallagher, the creators of Inspired Taste. Established in 2009, Inspired Taste grew from a childhood dream into one of the internet’s most trusted recipe sites with hundreds of reliable recipes, step-by-step videos, and expert tips.More About Us
    Source link

  • Easy Korean Beef Bowls

    Easy Korean Beef Bowls

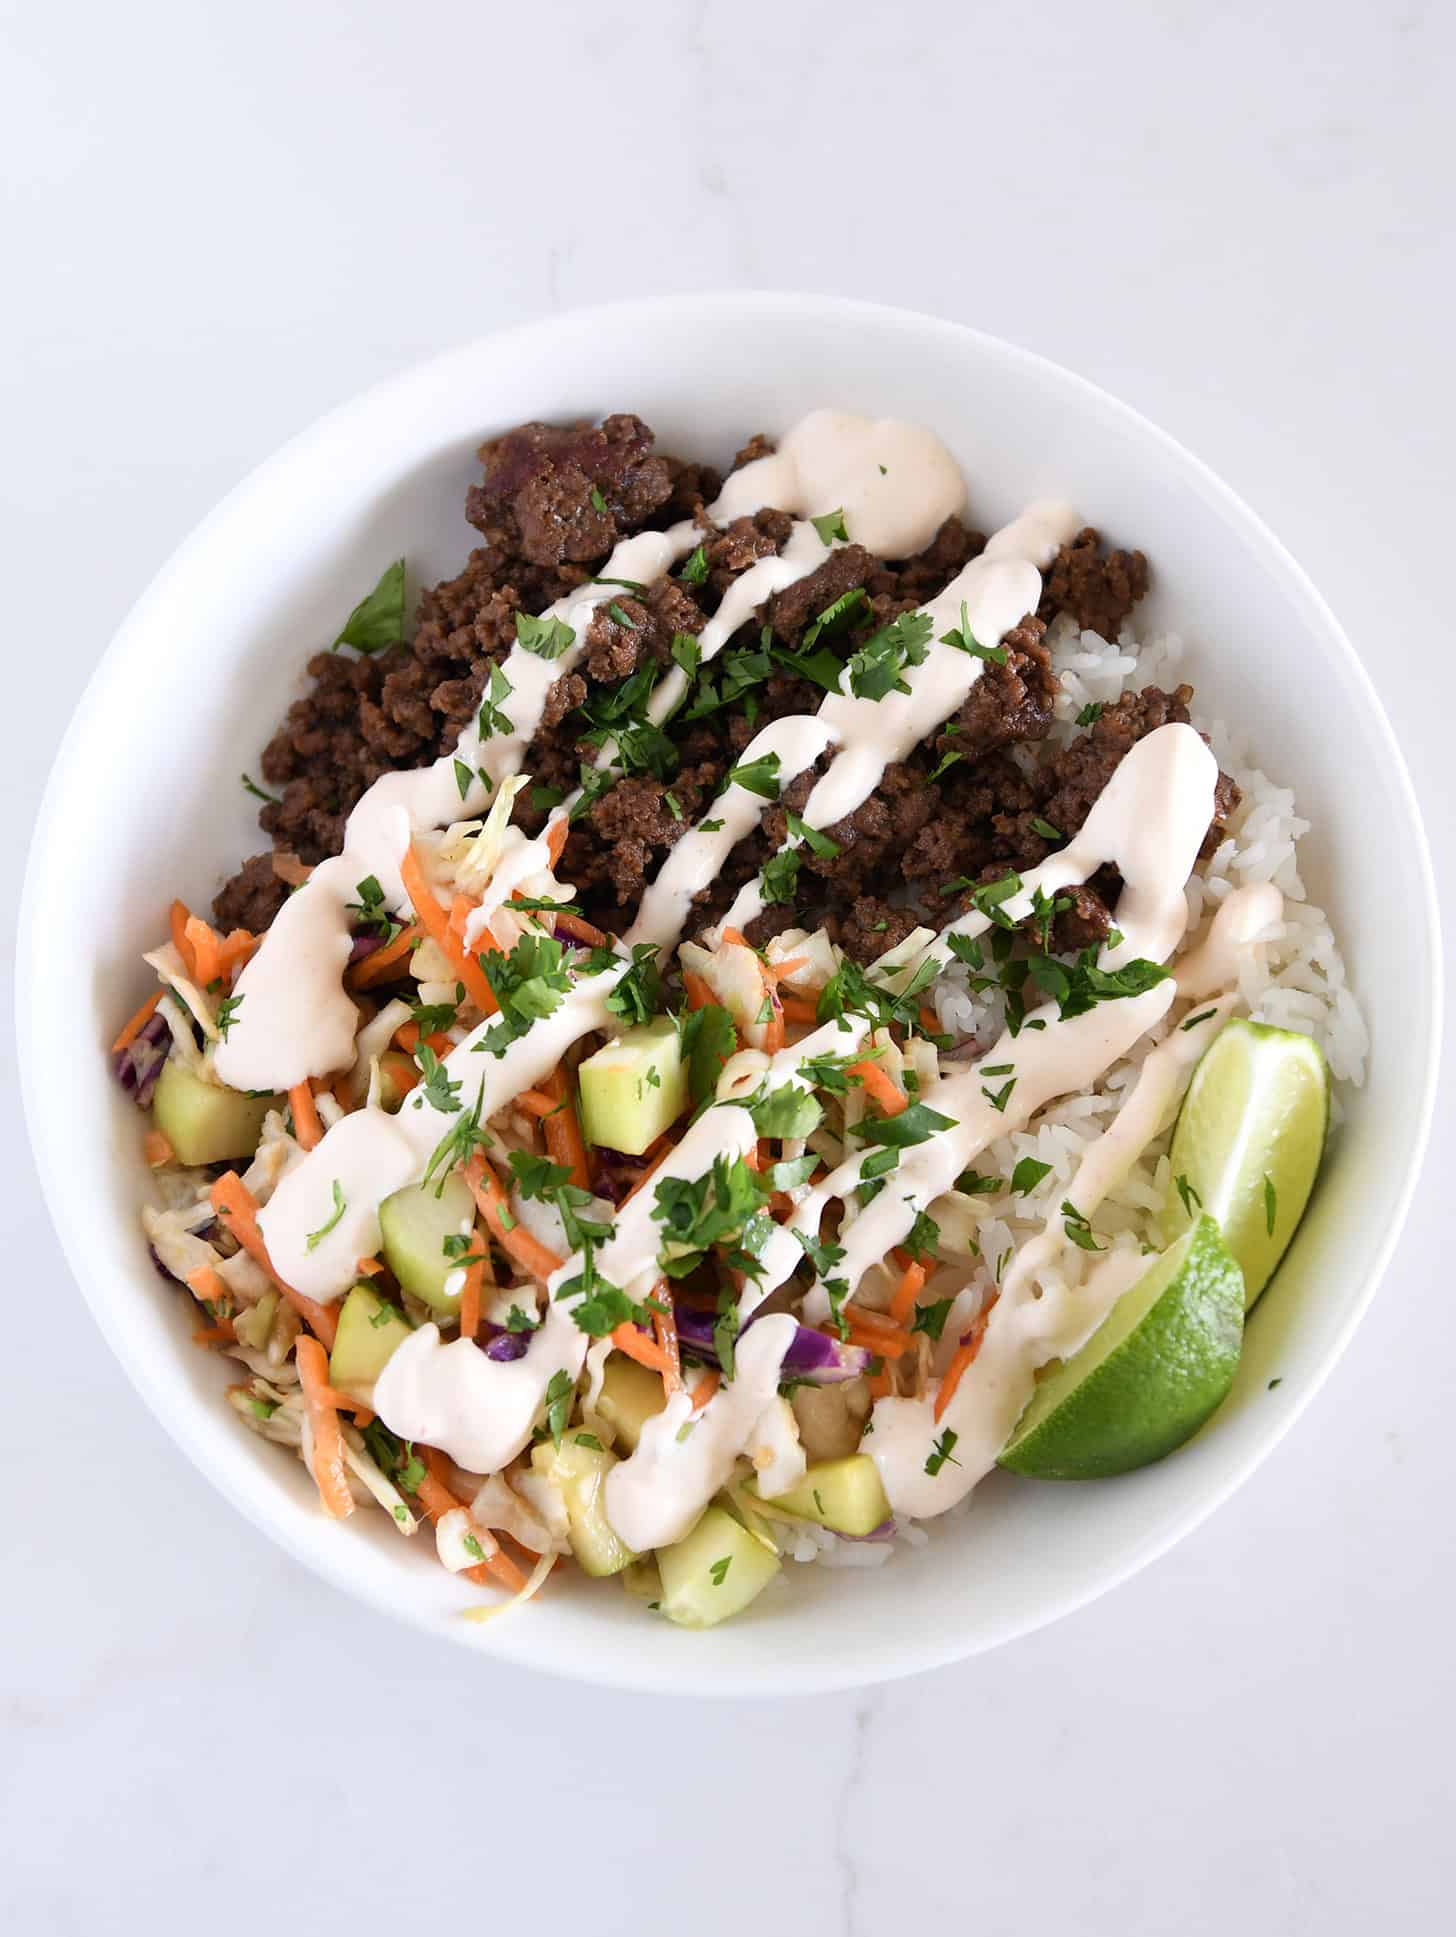
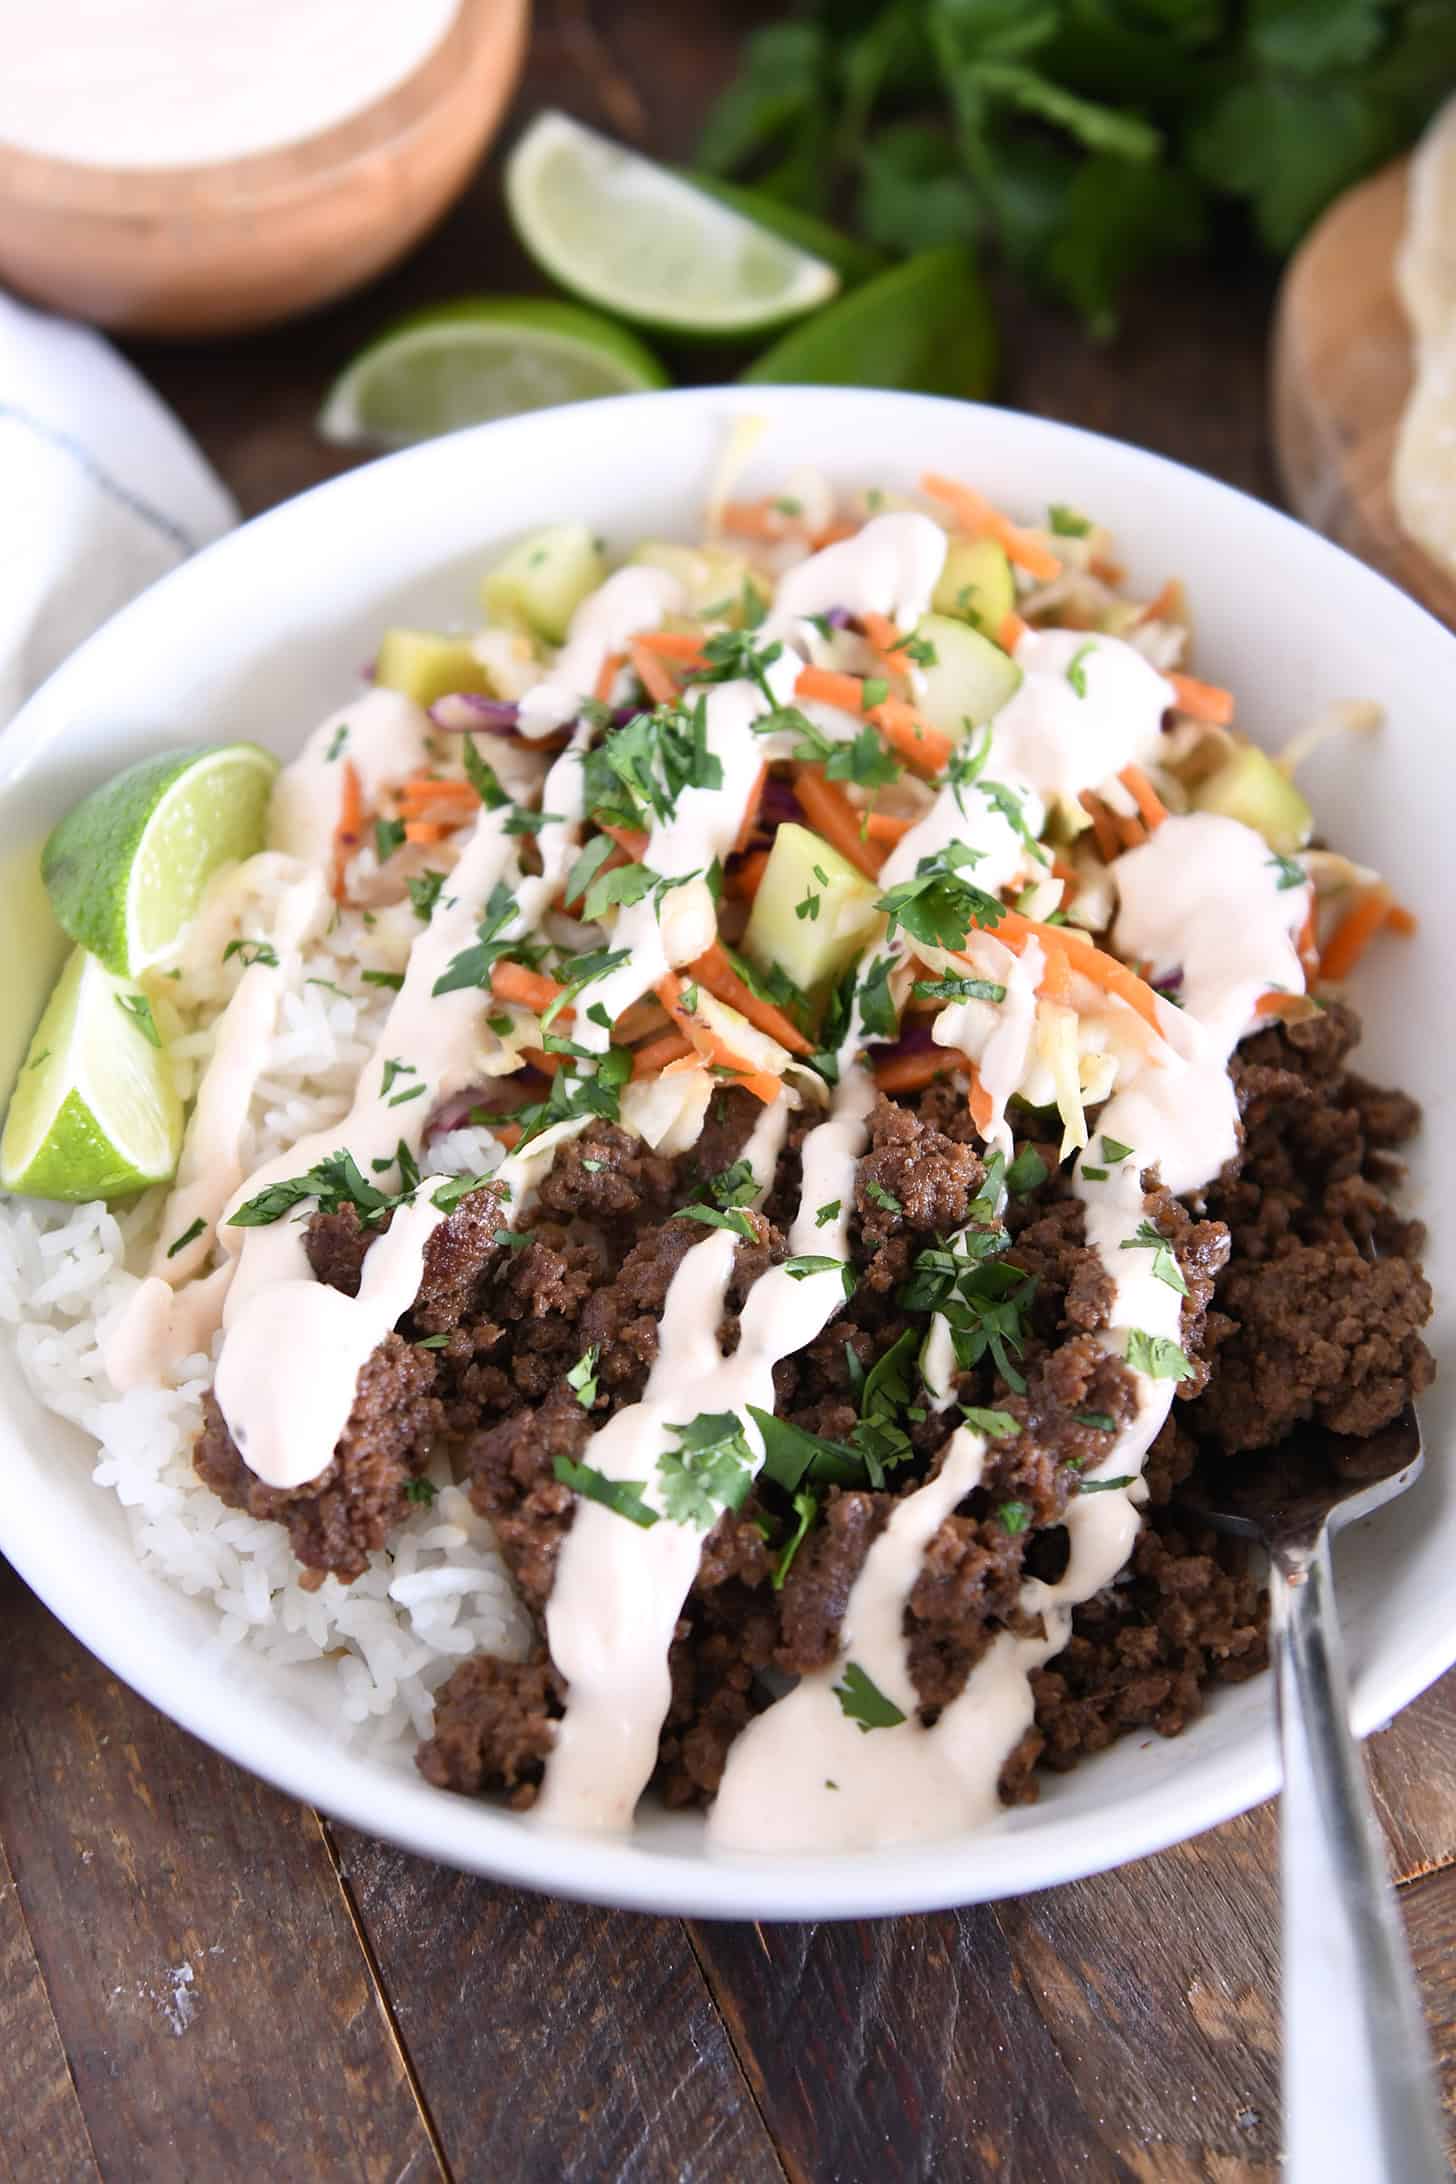
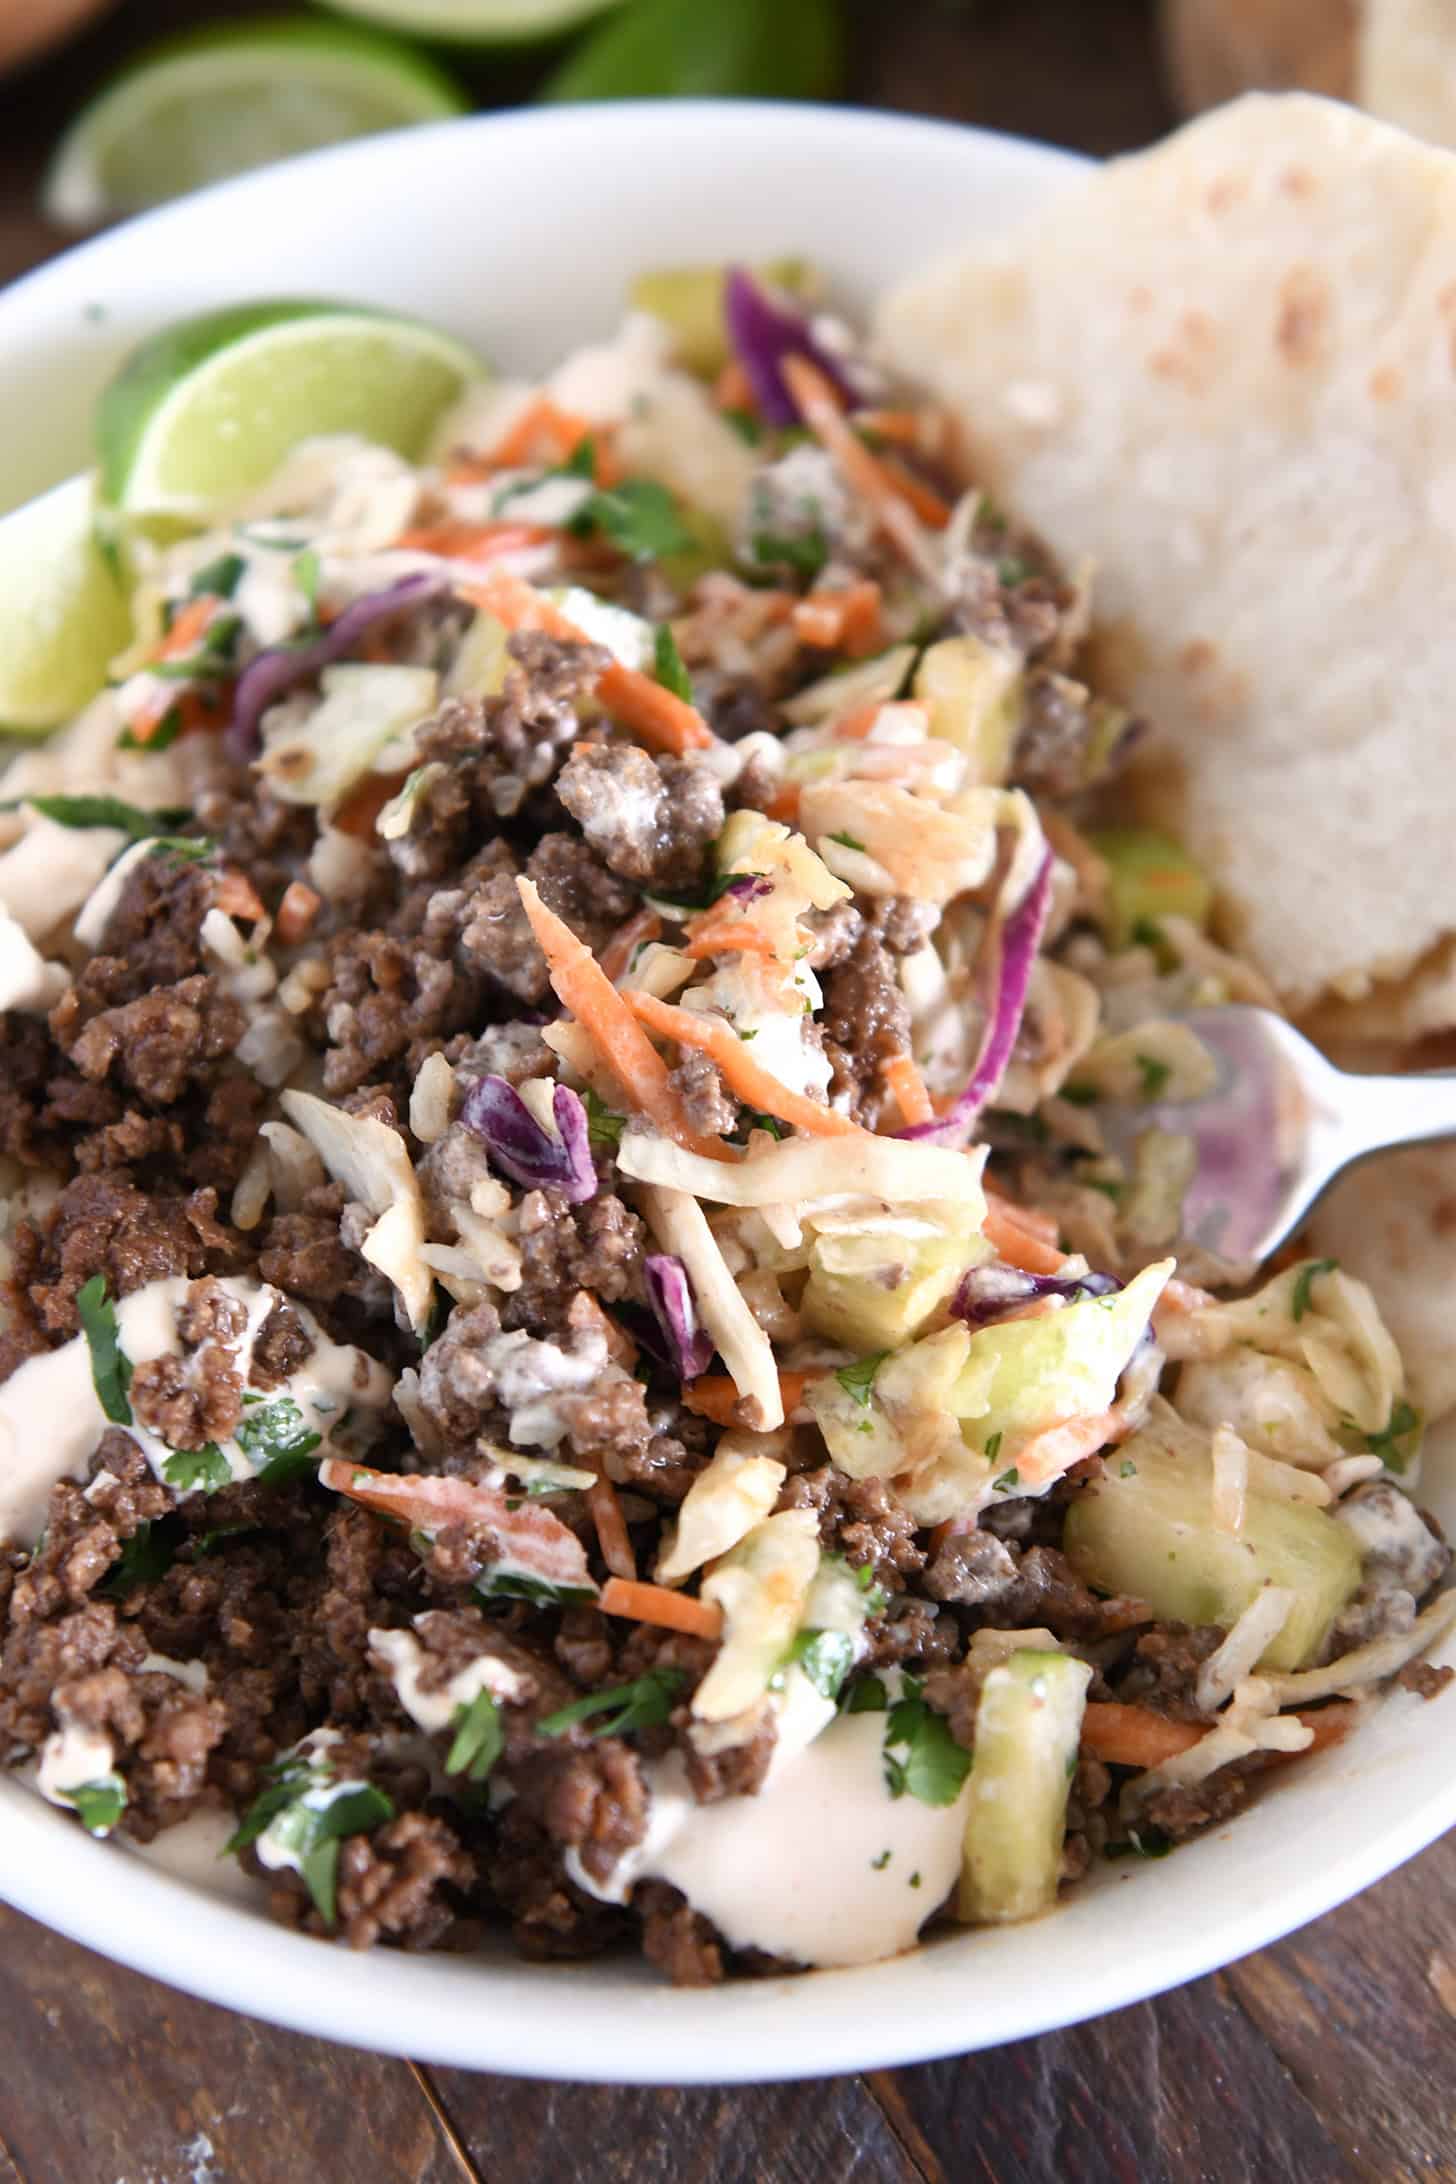
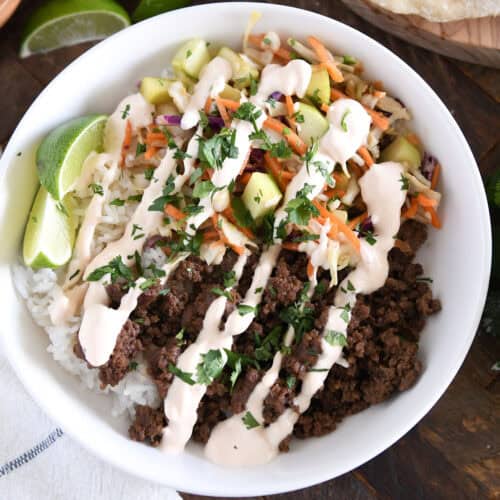
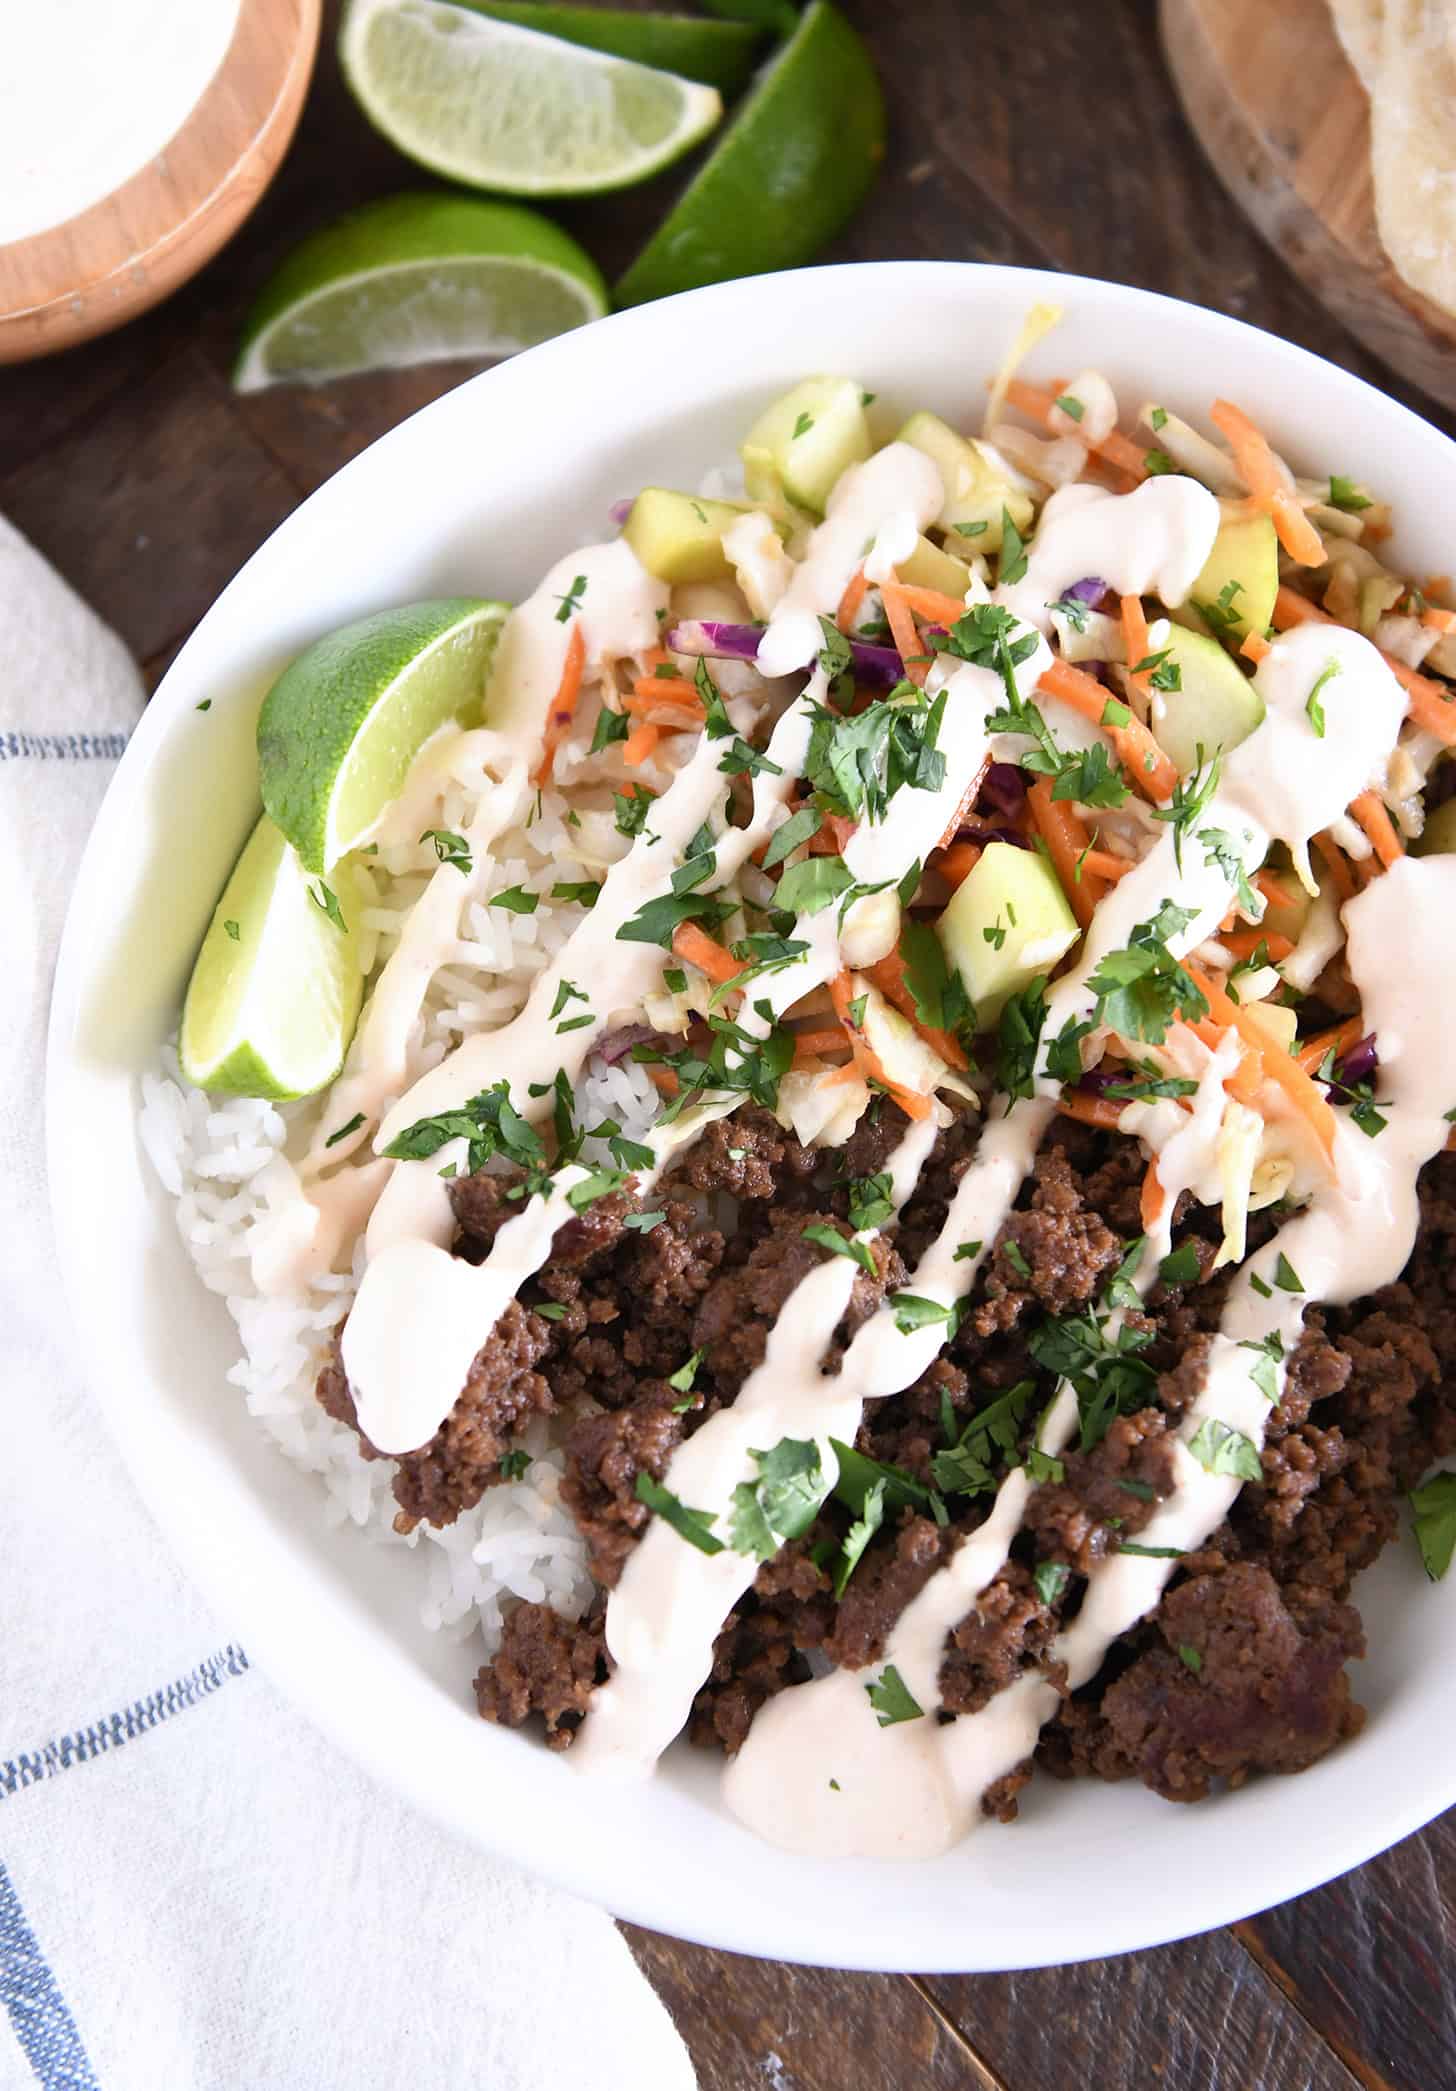
    The combination of flavorful beef, zesty slaw, and spicy garlic sauce, makes these easy Korean beef bowls an amazing weeknight dinner!

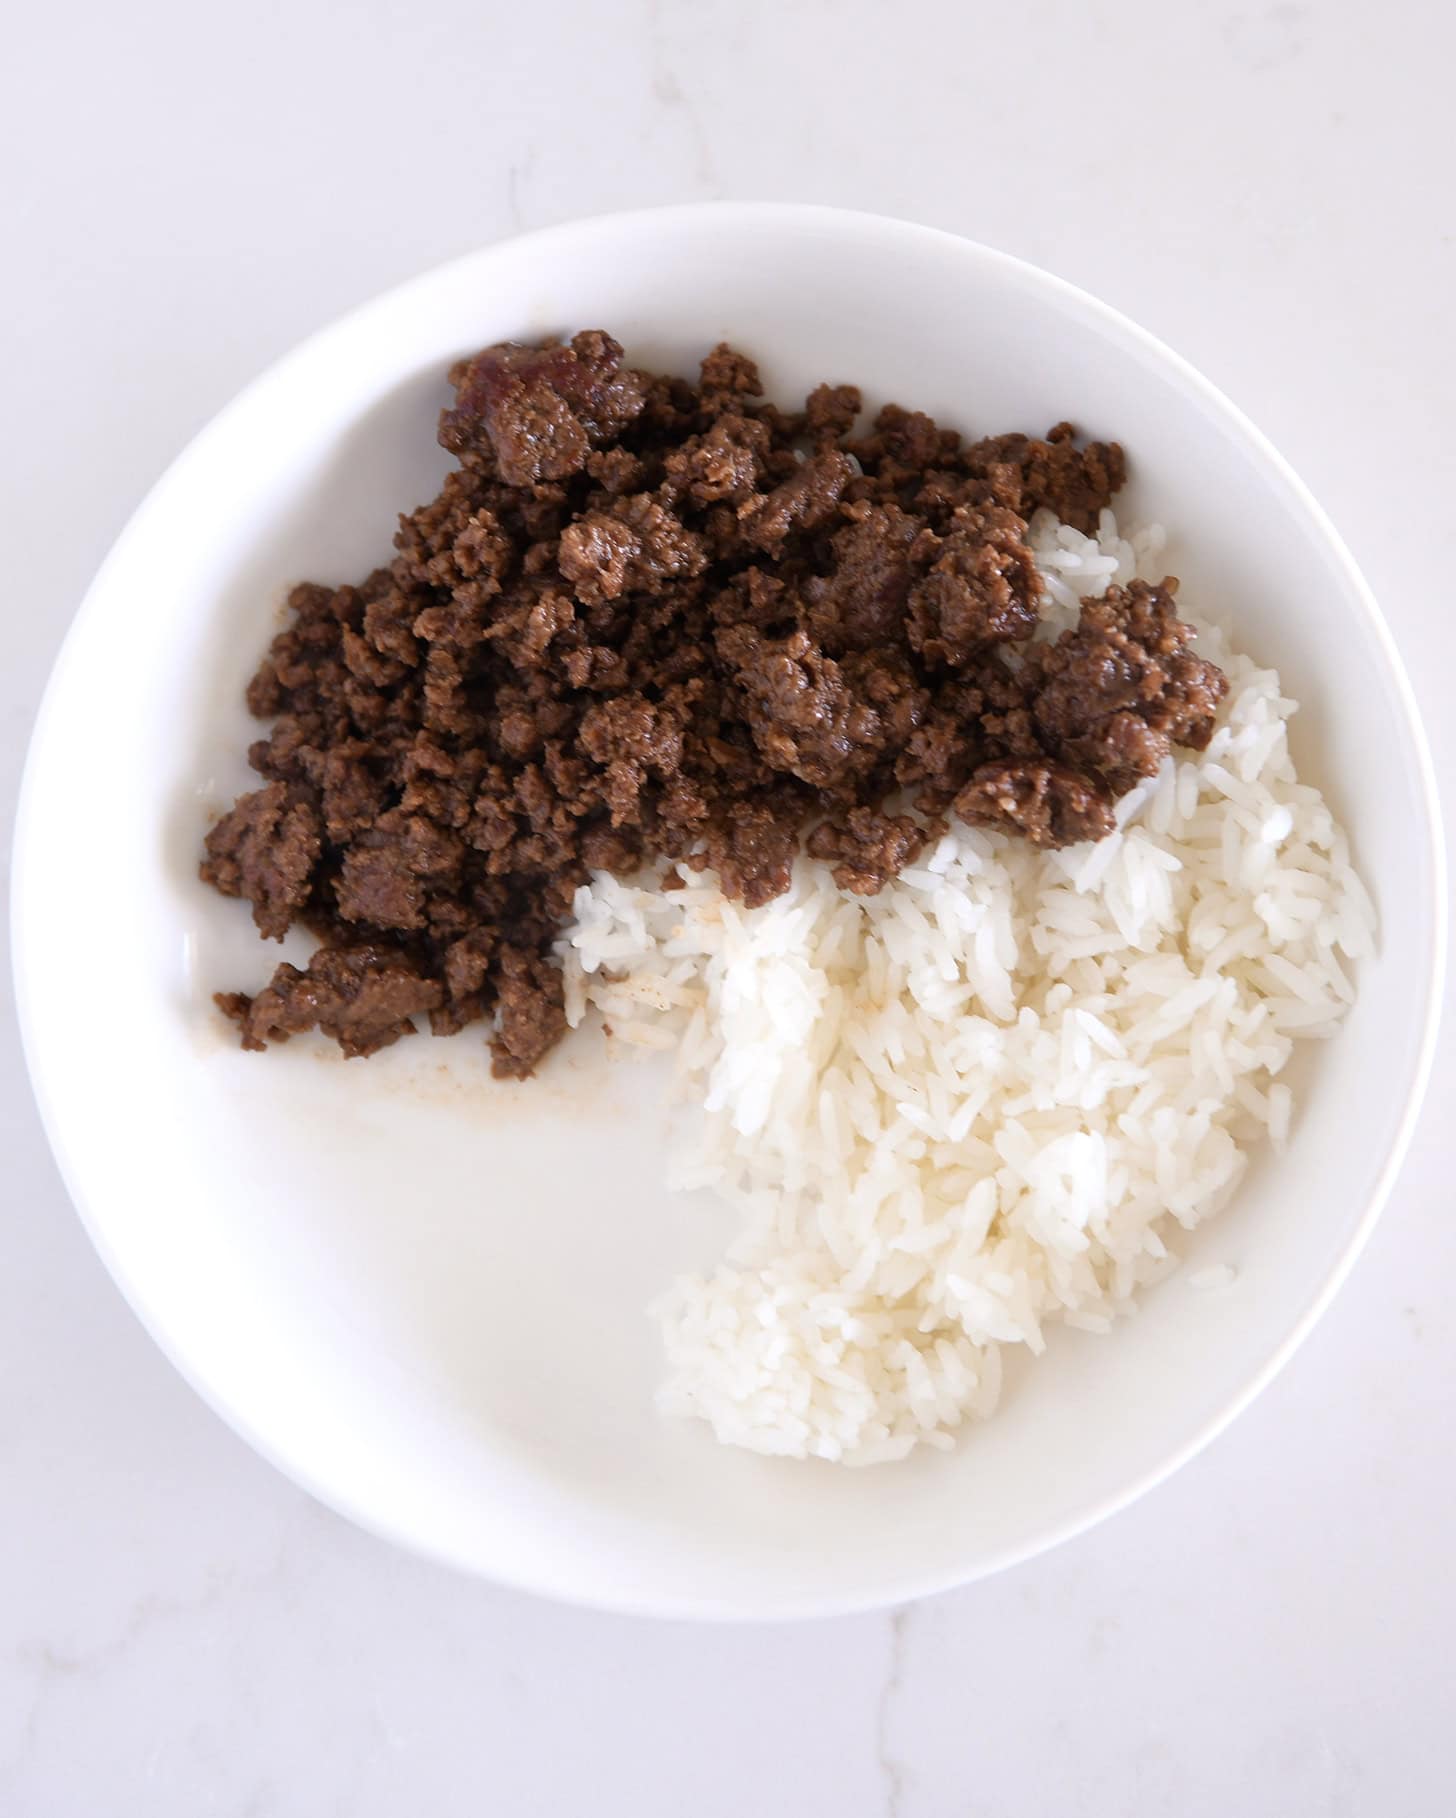
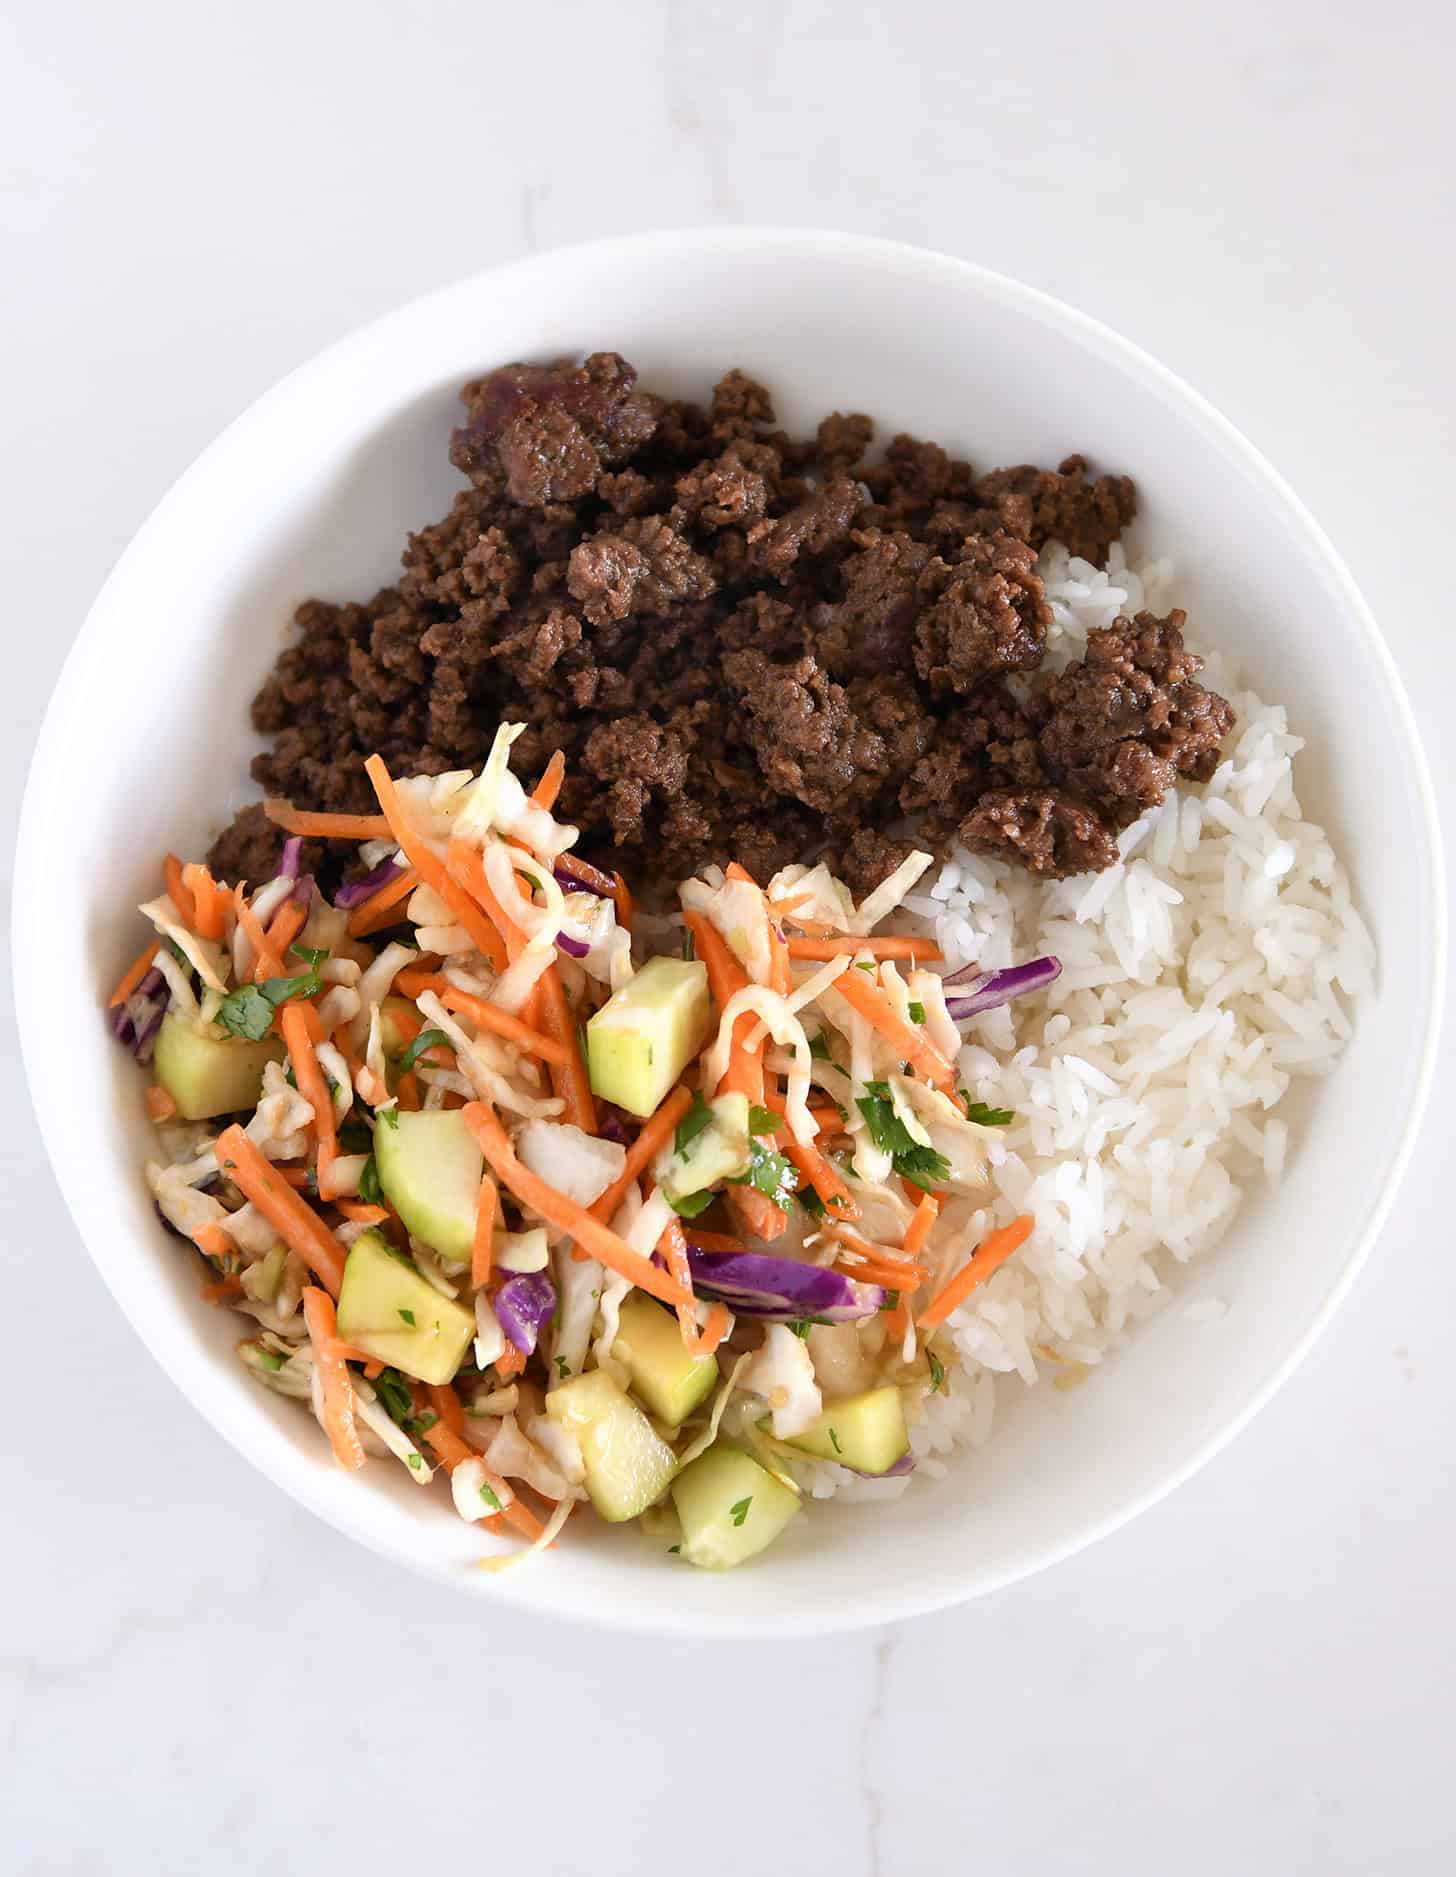
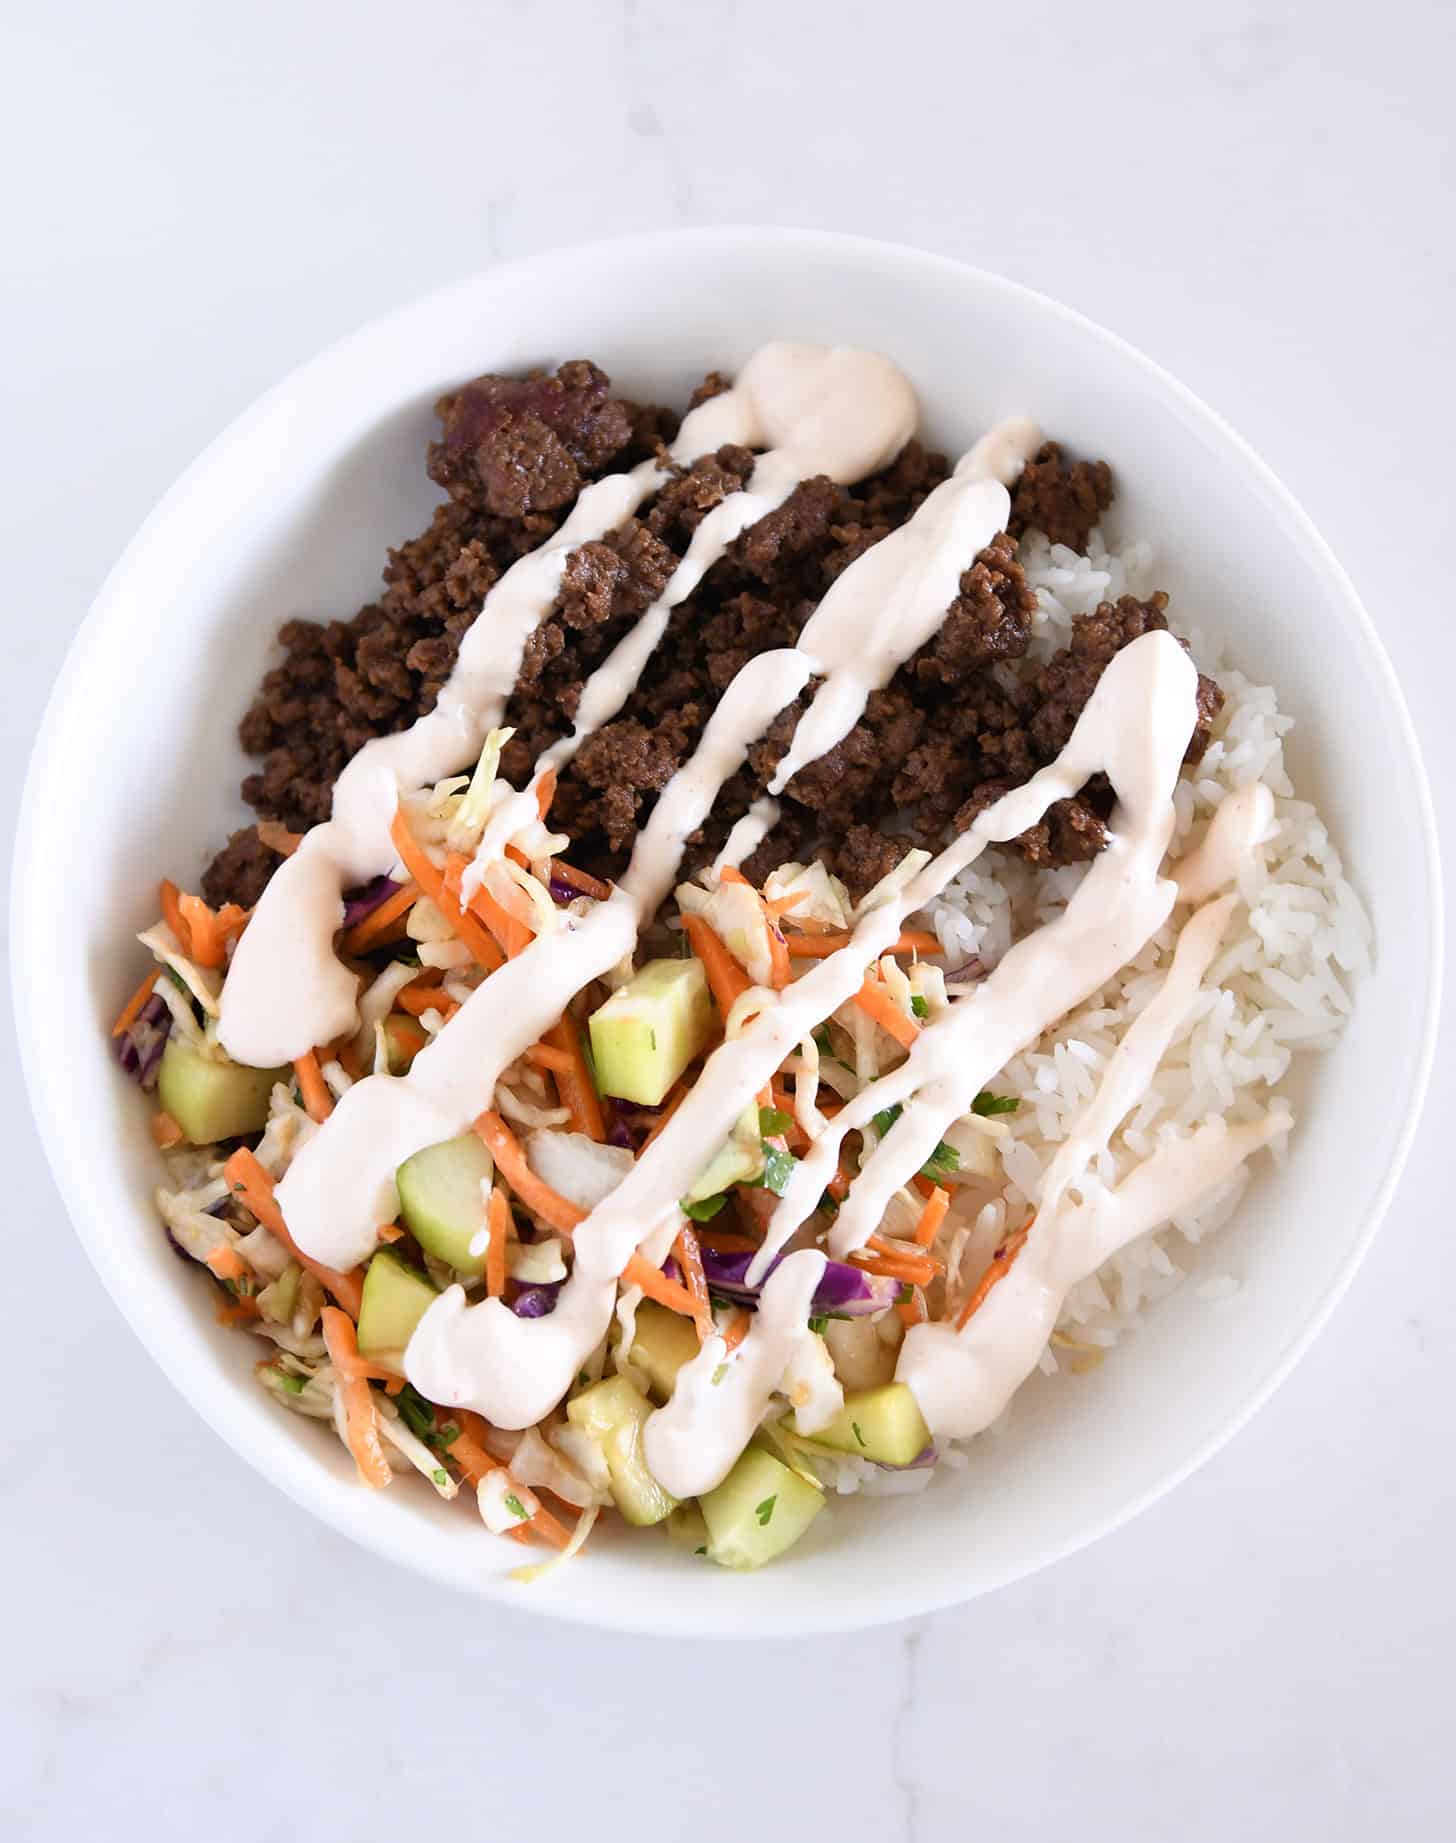
    Please meet one of our favorite dinners EVER. Modeled after these favorite Korean beef tacos, this “bowl” version is quicker, easier, and just as delicious! (Scroll down for a quick and simple salmon version!)

    Slaw + Sauce + Beef

    There are three main components to this recipe:

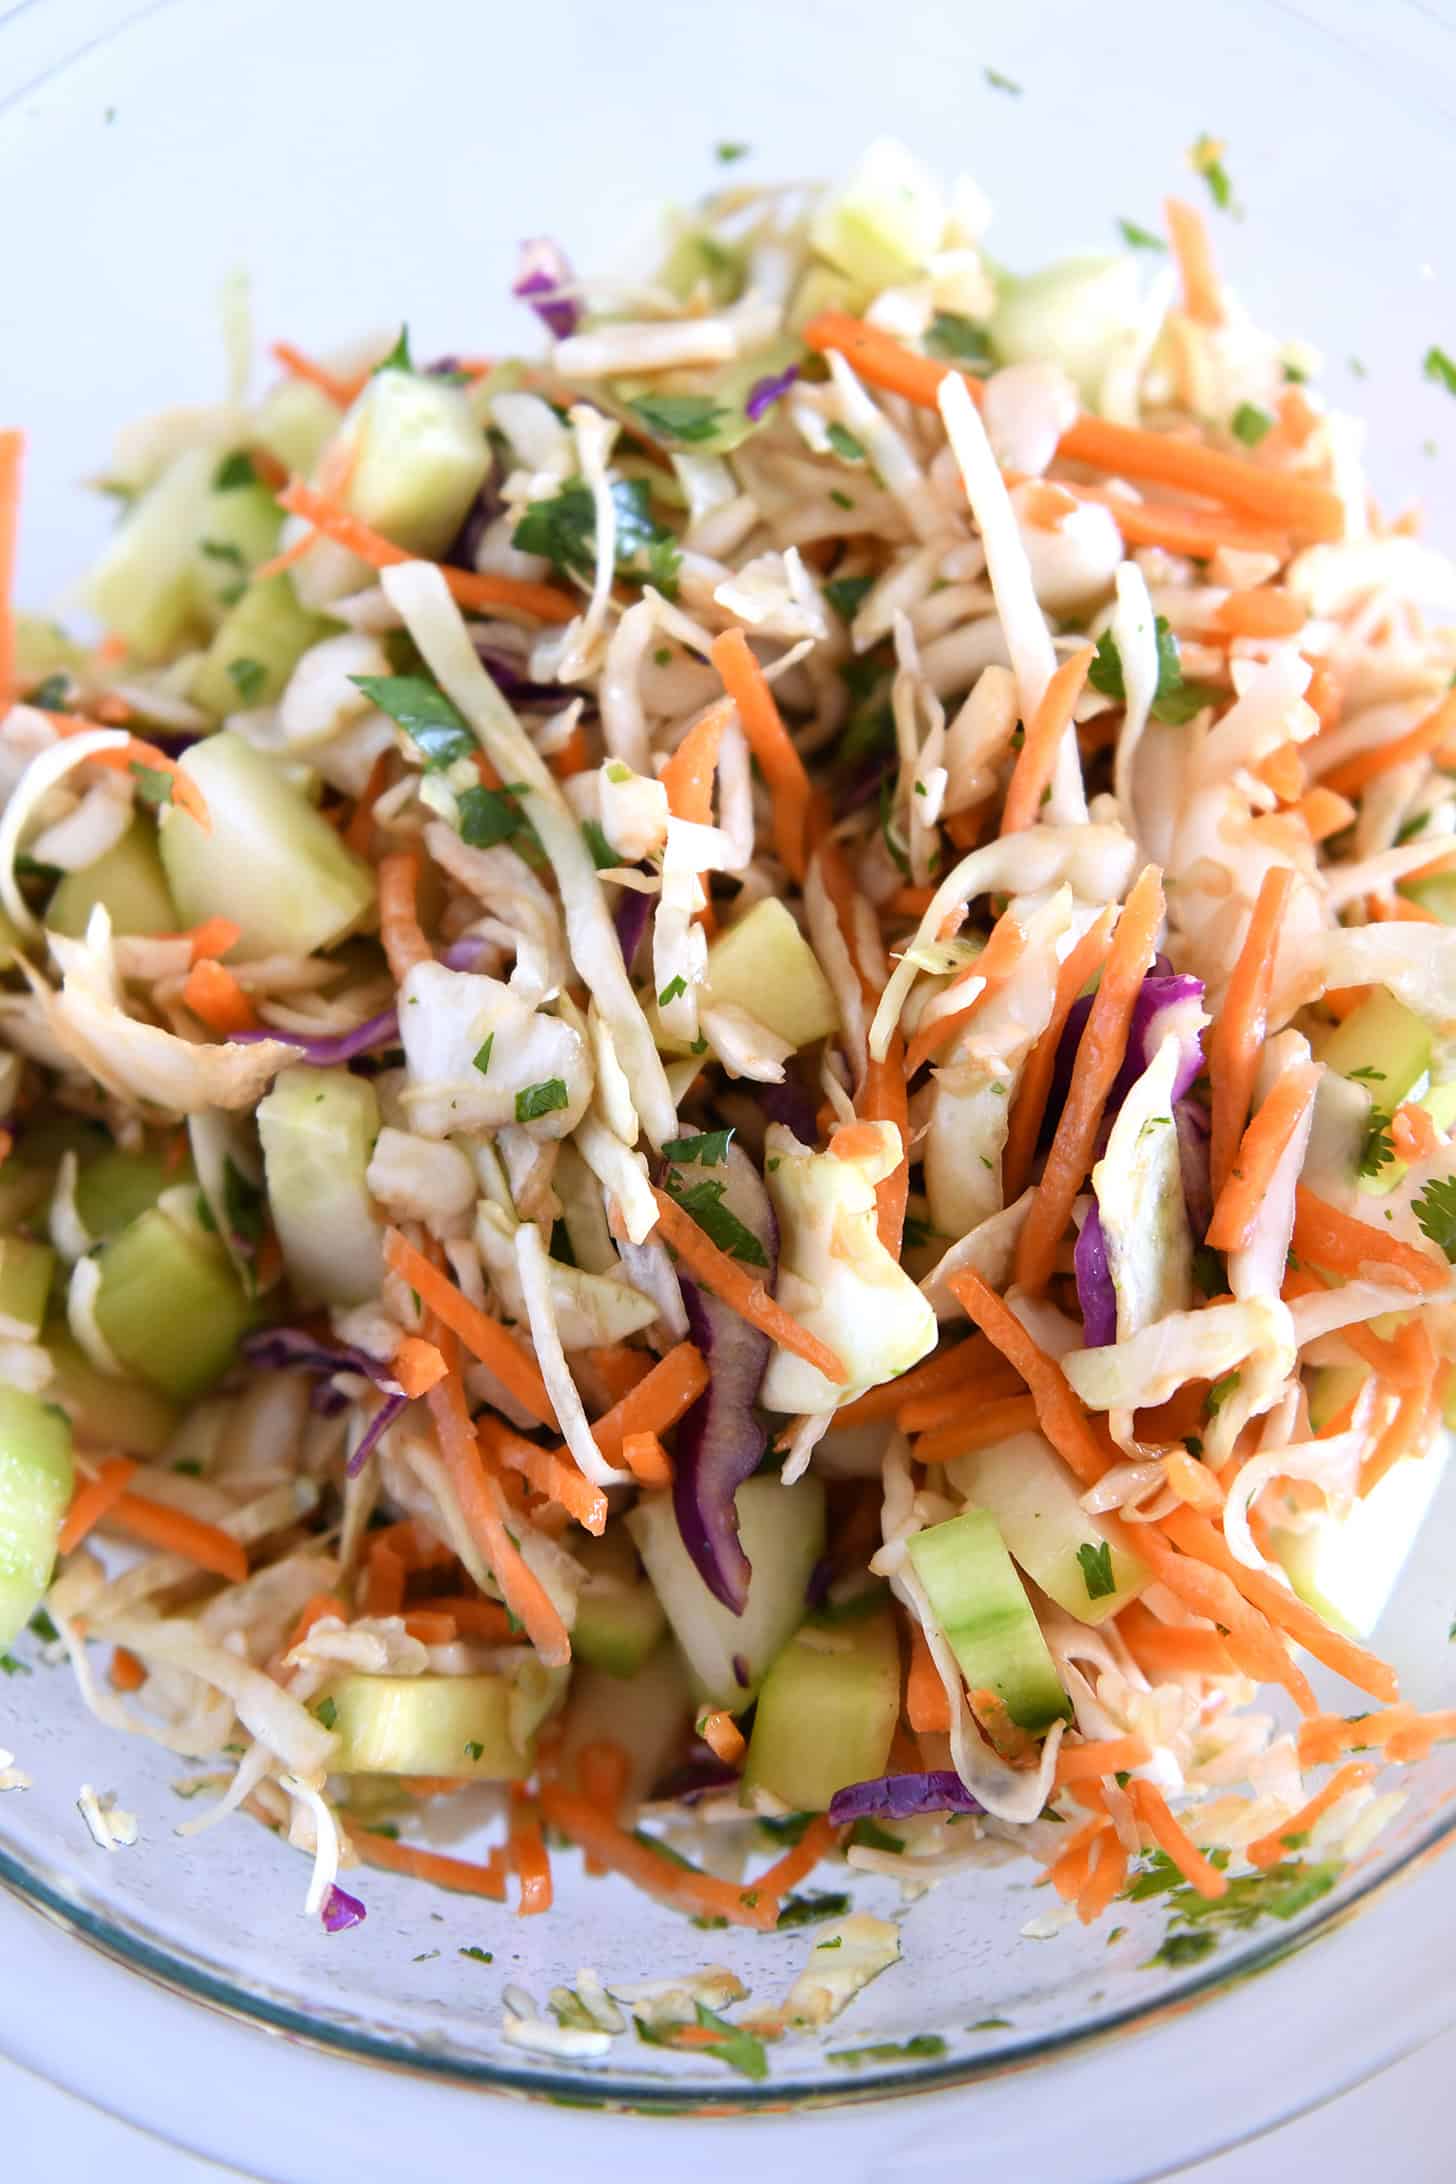
    • Zesty, fresh slaw with crunchy cucumbers
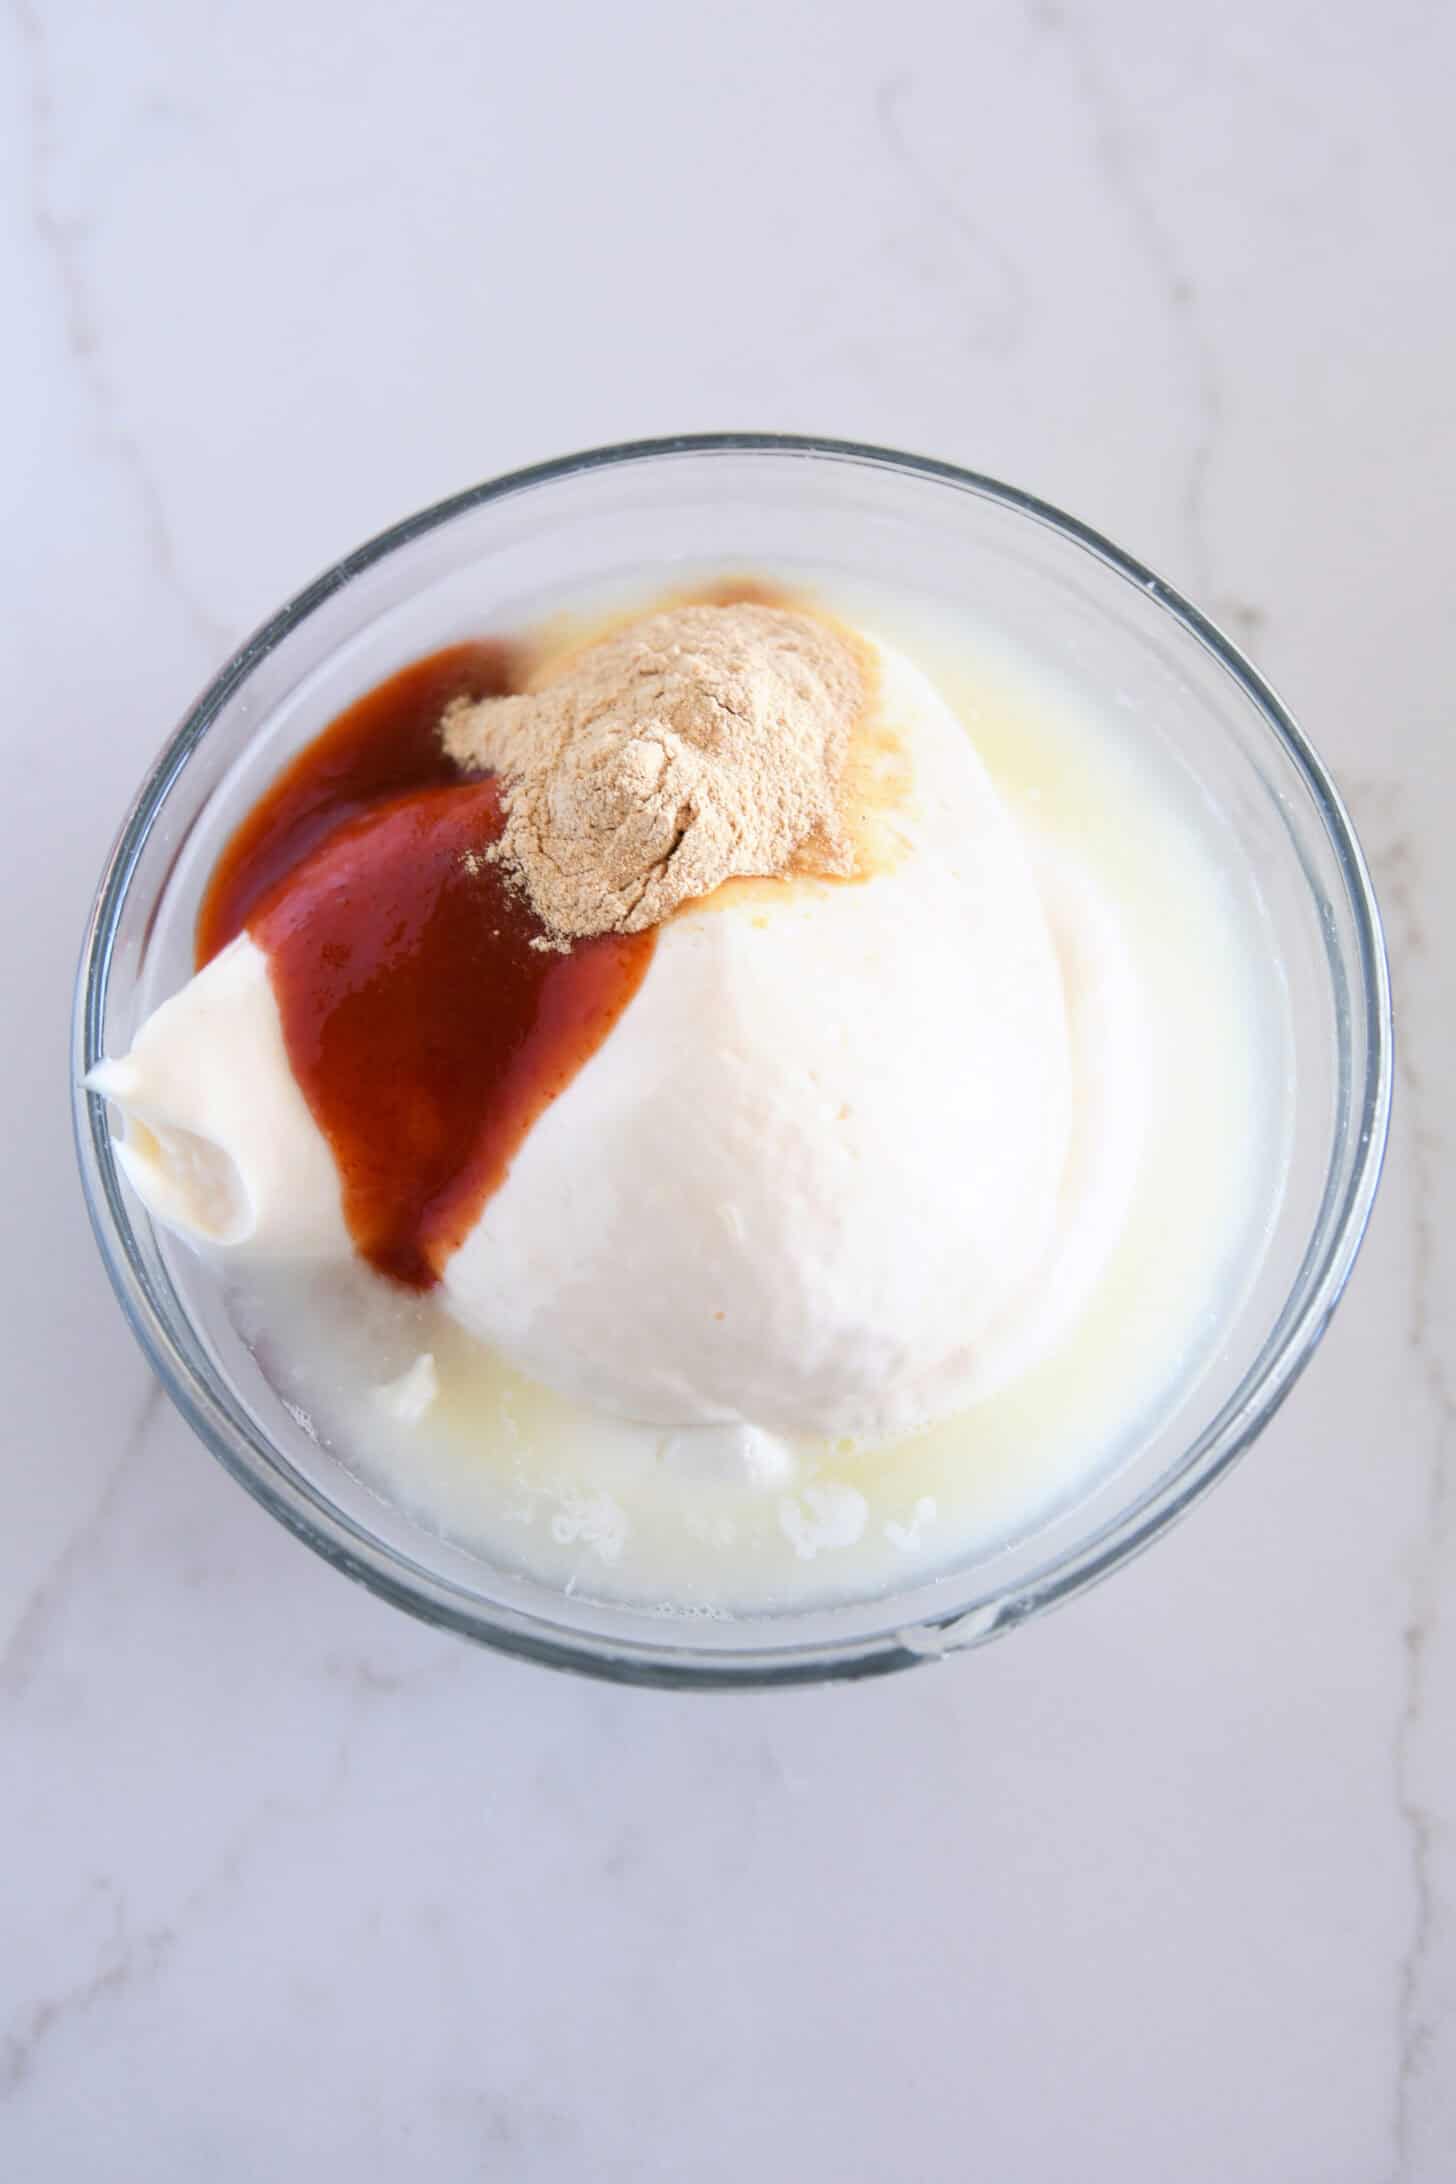
    • The sauce to end all sauces (creamy, spicy, garlicky)
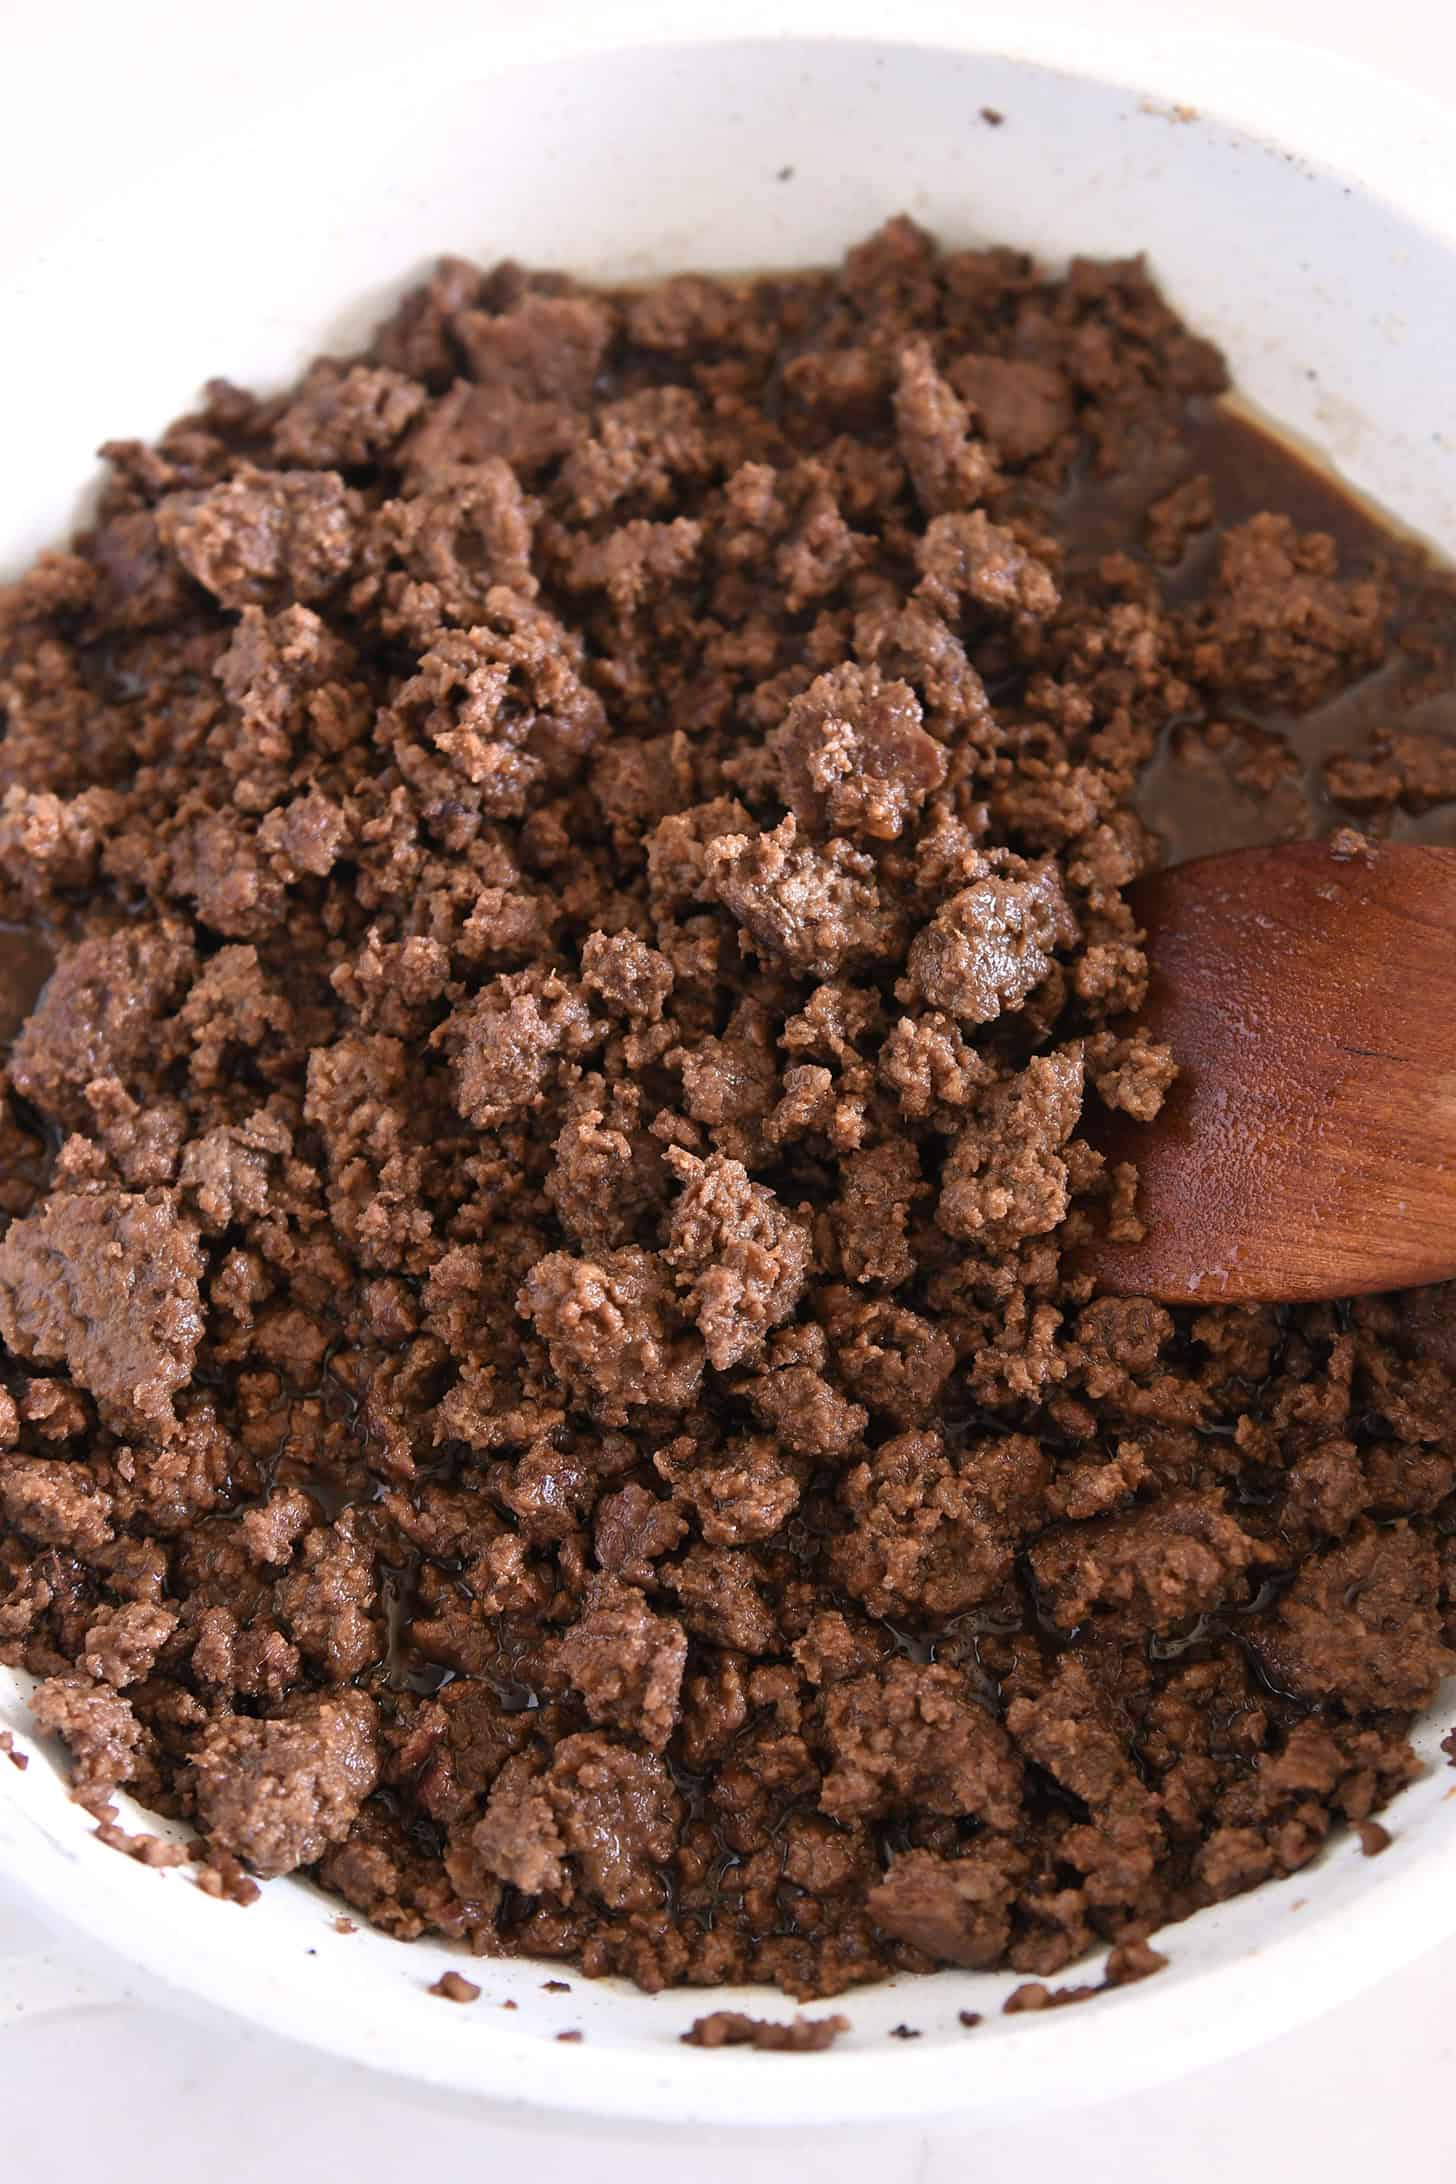
    • Flavorful Korean-style ground beef

    While the ingredients list in the recipe may look a bit long, each component comes together incredibly fast. The slaw and sauce can be made ahead of time to speed up dinner night assembly!

    And to simplify prep even further, you can use a bag of pre-shredded coleslaw mix for the cabbage and carrots called for in the recipe.

    Assembling Korean Beef Bowls

    These Korean beef bowls are delicious served with the three main recipe components above. But they are even more delicious with a few additions.

    This is how we like to serve them:

    • Hot, cooked rice
    • Korean beef
    • Slaw
    • Sauce (and more sauce)
    • Lime wedges
    • Chopped cilantro
    • Avocados

    Sometimes we’ll throw naan bread on the side, too. YUM!

    Build-Your-Own Meal

    The great thing about this recipe and the reason it makes such a fabulous, family-friendly dinner is that it is easily a build-your-own meal where everyone can create the beef and rice bowl of their dreams.

    I, for one, always add extra beef, extra slaw, extra sauce, and a lot of fresh lime squeezes. Sometimes, a little drizzle of extra sriracha. Oh, and a good amount of chopped cilantro.

    My family? Their bowls have just a tiny bit less personality (and less cabbage), but I don’t judge them for it. Especially because that means more leftovers for meeeeee.

    These Korean beef bowls are tremendous.

    They are easily one of my favorite things to eat for dinner, and there are never any complaints from the family (see the aforementioned build-your-own appeal).

    The flavors are out of this world delicious! I love how quickly and easily this meal comes together. Really, I could eat this over and over and never get tired of it.

    And if you’re looking to change it up just a little, try using the sauce for the beef as a salmon marinade. After marinading the salmon for a couple of hours, cook it on the grill, in the air fryer, or broil in the oven and serve with all the other recipe components. SO, SO GOOD.

    What to Serve With This:

    This is pretty much a complete meal as is! A few additional side suggestions:

    One Year Ago: Easy Cinnamon Honey Butter {For Rolls and Toast}
    Two Years Ago: Roasted Asparagus Lemon Orzo Salad with Fresh Mozzarella 
    Three Years Ago: Heavenly Raspberry Cream Angel Food Cake Dessert 
    Four Years Ago: Chocolate Chip Banana Bread Scones
    Five Years Ago: Soft and Chewy Oatmeal Chocolate Chip Coconut Cookies {My Favorite Cookie}
    Six Years Ago: Fudgy Brownie Cupcakes with The Best Peanut Butter Frosting
    Seven Years Ago: Simple Homemade Lemonade
    Eight Years Ago: Divine 1-Hour Homemade Breadsticks 
    Nine Years Ago: Whole Grain Pumpkin Blueberry Muffins 
    Ten Years Ago: Slow Cooker Chicken Philly Sandwiches 

    Easy Korean Beef Bowls

    Quick Slaw:

    • 4 cups shredded cabbage (napa, green, purple or a combo) – see note
    • 1 cup shredded or grated carrots
    • 1 cup chopped cucumbers
    • ¼ to ½ cup chopped fresh cilantro
    • 2 tablespoons lime juice
    • 2 tablespoons soy sauce
    • 2 tablespoons olive oil
    • Salt and pepper
    • Sriracha, to taste

    Sauce to End All Sauces:

    • ½ cup sour cream
    • ½ cup mayonnaise
    • 3 tablespoons fresh lime juice
    • 1 teaspoon sriracha sauce
    • 1 teaspoon garlic powder

    Korean Beef:

    • 1 ½ to 2 pounds lean ground beef
    • ½ cup low-sodium soy sauce
    • ¼ cup unseasoned rice vinegar
    • 2 tablespoons light brown sugar
    • 2 tablespoons toasted sesame oil
    • 1 tablespoon fresh ginger or ginger paste
    • 1 tablespoon minced fresh garlic (4 to 5 cloves) or 1 teaspoon garlic powder

    For serving (optional but tasty):

    • Hot, cooked rice
    • Naan bread
    • Avocado slices
    • Fresh lime wedges
    • Chopped cilantro

    Prevent your screen from going dark

    • For the slaw, in a large bowl, combine the cabbage, carrots, cucumbers, and cilantro. In a small bowl whisk together the lime juice, soy sauce, olive oil, salt and pepper (start with a pinch of each and add more to taste, if needed), and sriracha. Pour the dressing over the slaw and toss to combine. Refrigerate until ready to serve (it can be made 4-6 hours in advance).

    • For the sauce, stir together all the ingredients and refrigerate until ready to serve (it can be made several days in advance).

    • For the beef, in a 12-inch nonstick skillet set over medium heat, brown the ground beef, breaking the meat into small pieces, until no longer pink. Drain excess grease.

    • To the skillet, add the soy sauce, vinegar, brown sugar, sesame oil, ginger and garlic or garlic powder. Stir to combine and bring the meat and sauce to a simmer over medium heat. Simmer for 3 to 4 minutes until heated through.

    • For serving, to each bowl, add a scoop of rice (if using), add a portion of beef and slaw. Drizzle with sauce. Serve with lime wedges, avocados, and naan bread, if desired.

    Slaw: this makes quite a bit of slaw as we like to load up our bowls with a lot of slaw. If you think you might want less, you can halve the slaw ingredients.
    To speed up prep time, you can use part of a 14-ounce bag of pre-shredded coleslaw mix (without the dressing) for the cabbage and carrots called for in the recipe. 

    Serving: 1 Serving, Calories: 370kcal, Carbohydrates: 15g, Protein: 29g, Fat: 21g, Saturated Fat: 6g, Cholesterol: 80mg, Sodium: 1389mg, Fiber: 2g, Sugar: 8g

    Recipe Source: from Mel’s Kitchen Cafe (adapted from this Korean tacos recipe)

    Disclaimer: I am a participant in the Amazon Services LLC Associates Program, an affiliate advertising program designed to provide a means for me to earn fees by linking to Amazon.com and affiliated sites. As an Amazon Associate I earn from qualifying purchases.

    Source link

  • Easy Taco Bites – All Day I Dream About Food

    Easy Taco Bites – All Day I Dream About Food

    Taco bites are a fun keto appetizer that everyone loves. They’re easy to make, full of flavor, and infinitely poppable! Add your favorite taco toppings for a tasty high protein snack.

    Keto Taco Bites piled up in a black cast iron dish, with two sitting in front.

    These Taco Bites are bite-sized keto egg muffins with all the flavor of your favorite Mexican dish. Loved by kids and adults alike, they are an easy idea for any party or get together. And they take only four simple ingredients!

    Keto Taco Bites piled up in a black cast iron dish, with two sitting in front.

    I first made these easy keto appetizers for a New Year’s Eve party in 2018. It was a large group of all ages and I needed something easy that made enough for everyone. And something that appealed to all the picky kids (and some picky adults too!).

    Given the popularity of my Easy Taco Pie, I knew a taco-inspired appetizer would fit the bill. So why not just turn it into finger food? I browned up some beef, greased my mini muffin pan, and got cracking some eggs.

    At the party, I made sure to have plenty of sour cream, guacamole, and salsa for topping the bites. They were an instant hit, and I got several requests for the recipe. We now make them all the time as easy appetizers and high protein snacks!

    Four taco bites on a white plate in front of a black serving dish.

    Why we love this recipe

    How can you go wrong with little egg bites packed with meat, cheese, and taco seasonings?

    • Seriously easy! These little taco bites take only 4 ingredients and are ready in about 35 minutes.
    • Full of flavor: Taco seasoning is pretty much delicious on anything. But you can play up the heat in these, or tone it down. It’s up to you!
    • Kid-friendly: My kids love these and my friends’ kids love these. They have infinite appeal to the younger crowd!
    • High protein snack: Four of these little bites have 18g of protein and only 1g of carbs.
    • Make ahead: These are great for making ahead and storing in the fridge or freezer!

    Reader’s Thoughts

    “Just made these and couldn’t wait to try one! Delicious! Looking forward to breakfasts this week!” — Colleen

    Ingredient Notes

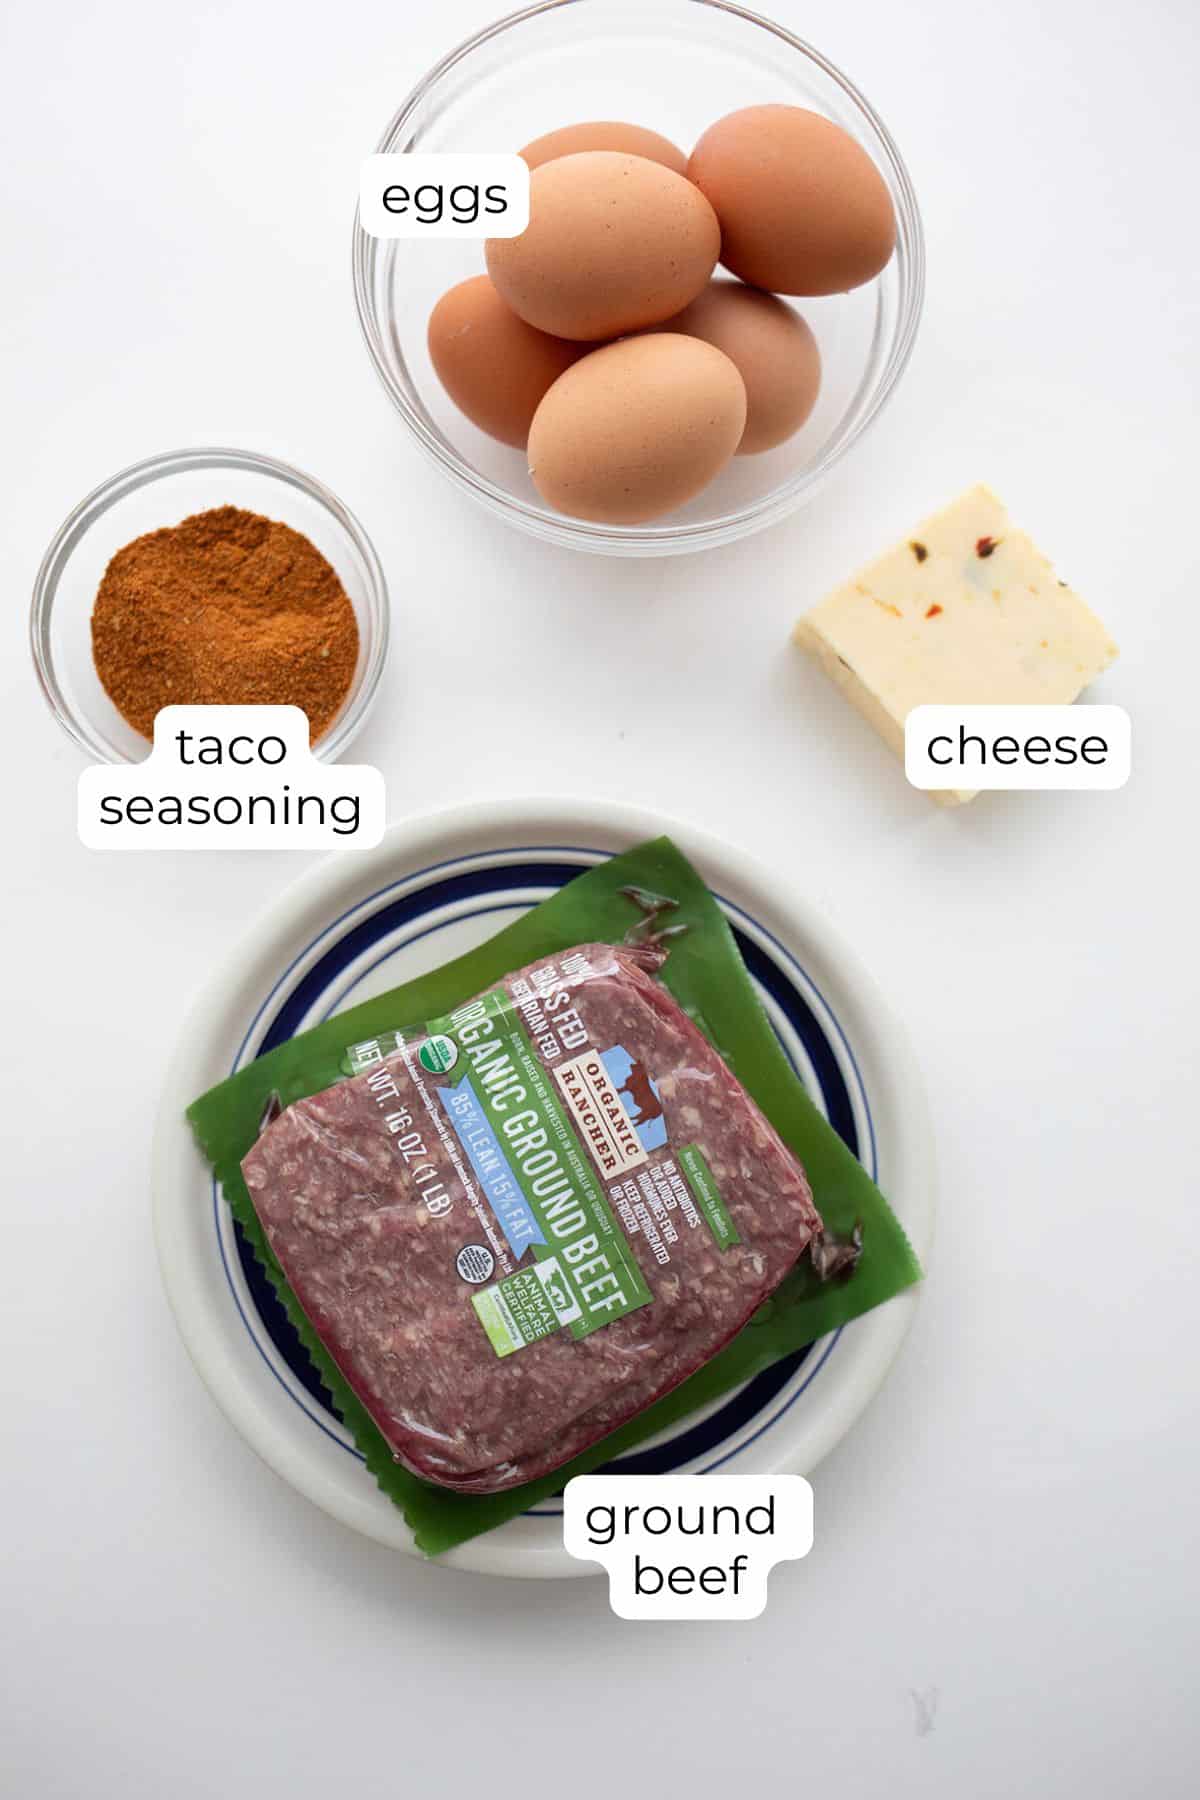
    Top down image of ingredients needed for Keto Taco Bites.
    • Ground beef: You can also use ground chicken or turkey.
    • Taco seasoning: I usually store-bought seasoning, but I always make sure it has no added fillers, sugars, or starches. Or make your own by combining chili powder, cumin, garlic, oregano, salt, and pepper.
    • Eggs: Eggs make up the bulk of this recipe, besides the taco meat. They help bind the meat and cheese together.
    • Shredded cheese: I usually use cheddar or a Mexican blend. You can also use Monterey Jack or Pepper jack.
    • Garnish: Sour cream, sliced olives, cilantro, salsa, or guacamole.

    Step by Step Directions

    A collage of 6 images showing how to make Taco Bites.
    1. Sauté the meat: In a large skillet over medium heat, sauté the ground meat until almost cooked through, breaking up the clumps with a wooden spoon. Add the taco seasoning and continue to sauté until completely cooked through. Remove from heat and let cool.
    2. Prepare the muffin pan: Preheat the oven to 350ºF and brush a good non-stick mini muffin pan with the melted butter. (You can also use silicone or parchment mini muffin liners, if you prefer – if your pan is not very non-stick, this is your best option). This recipe makes about 32 mini muffins so you may need to work in batches if you don’t have more than one mini muffin pan.
    3. Prepare the filling: In a large bowl, whisk the eggs. Add the taco meat and half of the shredded cheese. Whisk thoroughly to combine. Fill the muffin cups and sprinkle with the remaining shredded cheese. 
    4. Bake the bites: Bake 15 to 20 minutes, until puffed and firm to the touch. Remove and let cool 10 minutes. Use a thin flexible spatula to run around the edge of the muffins to release. Serve with your favourite taco toppings, such as salsa, sour cream, and guacamole.
    Taco bites piled up in a black dish on a wooden cutting board, with bowls of salsa, sour cream and pickled jalapeños.

    Tips for Success

    Choose your muffin pan (or muffin liners!) wisely, as it needs to be very non-stick. If you have an older metal pan, the taco bites may stick a lot. You can use silicone liners or a silicone muffin pan instead.

    Most taco seasoning has a fair bit of salt, as does cheese. So this recipe doesn’t call for any additional salt. If your taco seasoning is salt-free, add 1 teaspoon of salt to the meat along with the seasoning. If your bites aren’t quite seasoned enough after cooking, just sprinkle them with a little extra!

    Want to kick the heat up a notch? Add half a teaspoon of cayenne or chipotle powder along with the seasoning.

    Three taco bites with sour cream and pickled jalapeños on top, sitting on a small white plate.

    Frequently Asked Questions

    Is taco seasoning keto friendly?

    Most taco seasonings are just a mix of spices and are perfectly keto friendly. However, sometimes brands add starches or even sugar so it’s best to check the labels. I really like Kinder’s Taco Blend.

    How many carbs are in Keto Taco Bites?

    This easy low carb recipe for taco bites has only 1g of carbs per 4 bites. It’s a perfect high protein snack!

    Can I freeze Taco Bites?

    Keto Taco Bites are a fabulous make-ahead recipe. Simply bake the bites and remove from the pan, then let cool completely. Flash freeze them on a parchment lined baking sheet and

    Three mini taco egg muffins arranged in front of a black bowl filled with more muffins.

    More Delicious Bite Sized Recipes

    Keto Taco Bites piled up in a black cast iron dish, with two sitting in front.

    Mini Taco Bites

    Servings: 32 mini muffins

    Prep Time 10 minutes

    Cook Time 25 minutes

    Total Time 35 minutes

    Taco bites are a fun keto appetizer that everyone loves. They’re easy to make, full of flavor, and infinitely poppable! Add your favorite taco toppings for a tasty high protein snack.

    • 1 lb ground beef
    • 3 tbsp taco seasoning
    • 6 large eggs
    • 4 ounces shredded cheddar or Mexican cheese
    • Salsa, guacamole, and sour cream

    Prevent your screen from going dark

    • In a large skillet over medium heat, sauté the beef until almost cooked through, breaking up the clumps with a wooden spoon. Add the taco seasoning and continue to sauté until completely cooked through. Remove from heat and let cool.

    • Preheat the oven to 350ºF and brush a good non-stick mini muffin pan with the melted butter. (You can also use silicone or parchment mini muffin liners, if you prefer – if your pan is not very non-stick, this is your best option). This recipe makes about 32 mini muffins so you may need to work in batches if you don’t have more than one mini muffin pan.

    • In a large bowl, whisk the eggs. Add the taco meat and half of the shredded cheese. Whisk thoroughly to combine.

    • Fill the muffin cups and sprinkle with the remaining shredded cheese. Bake 15 to 20 minutes, until puffed and firm to the touch.

    • Remove and let cool 10 minutes. Use a thin flexible spatula to run around the edge of the muffins to release.

    • Serve with your favourite taco toppings, such as salsa, sour cream, and guacamole.

    Storage Information: Store the bites in a covered container in the fridge for up to 5 days. They can also be frozen for several months. 
    To freeze: Arrange the bites in a single layer on a parchment lined baking sheet, not touching. Freeze until firm and then transfer to an airtight container. This will keep the bites from sticking together once they are frozen. 

    Serving: 4bites | Calories: 234kcal | Carbohydrates: 1g | Protein: 18.7g | Fat: 14.5g | Saturated Fat: 7.2g | Fiber: 0.2g

    Categories:

    Appetizers & Snacks,
    Low Carb,

    Nutritional Disclaimer

    Please note that I am not a medical or nutritional professional. I am simply recounting and sharing my own experiences on this blog. Nothing I express here should be taken as medical advice and you should consult with your doctor before starting any diet or exercise program. I provide nutritional information for my recipes simply as a courtesy to my readers. It is calculated using MacGourmet software and I remove erythritol from the final carb count and net carb count, as it does not affect my own blood glucose levels. I do my best to be as accurate as possible but you should independently calculate nutritional information on your own before relying on them. I expressly disclaim any and all liability of any kind with respect to any act or omission wholly or in part in reliance on anything contained in this website.

    Free Bonus: Secrets to Keto Baking!

    Sign up for your favorite recipes delivered straight to your inbox plus get our FREE bonus: Secrets to Keto Baking!


    Source link

  • Easy Potato Leek Soup Recipe

    Easy Potato Leek Soup Recipe

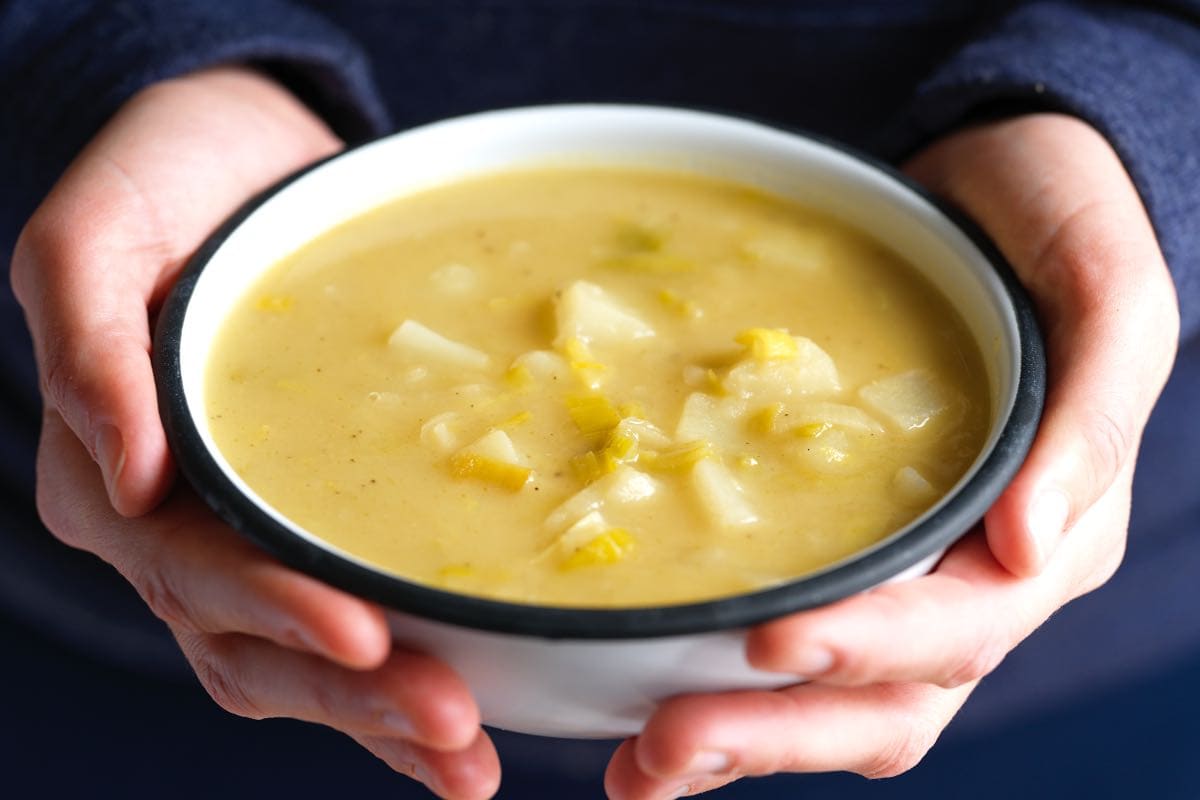
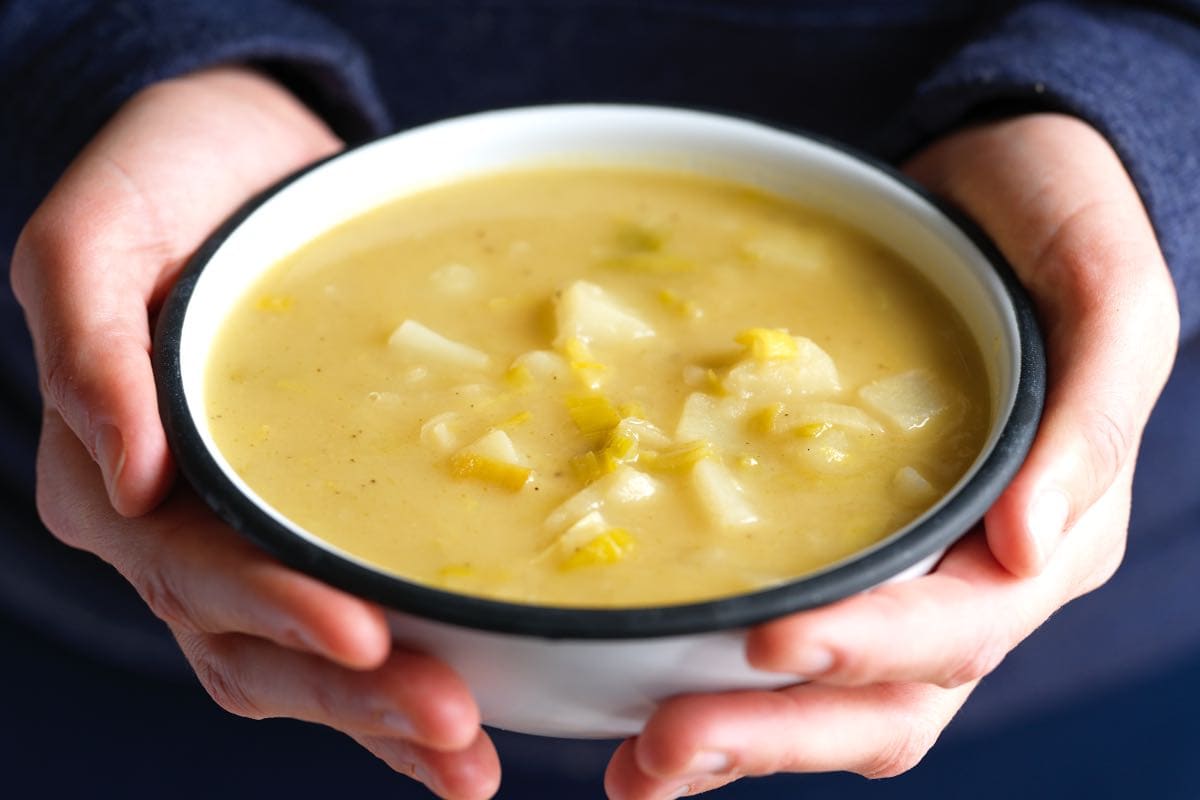
    I make this potato leek soup recipe all the time! This easy soup is super creamy and comforting (and I make it without cream!).

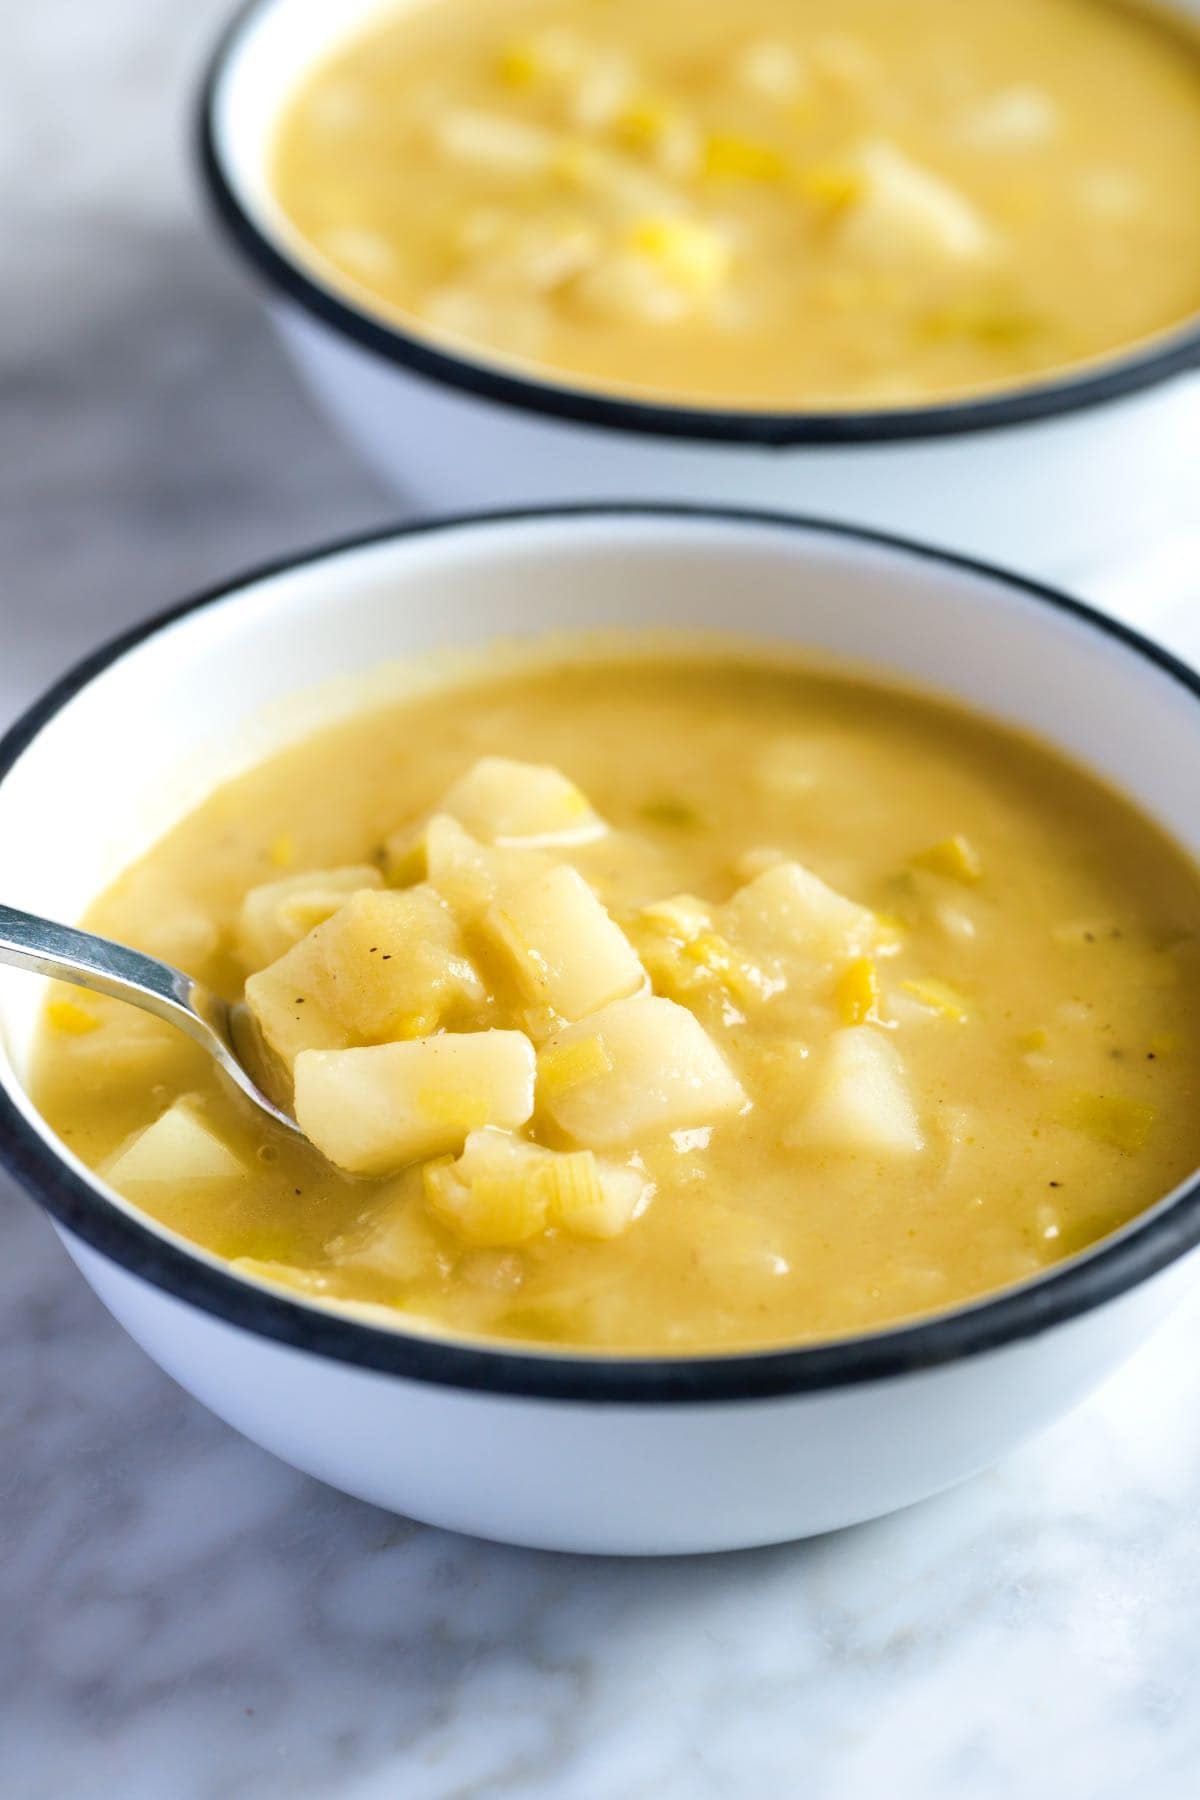
    Two Bowls of Leek and Potato Soup

    I learned how to make potato leek soup from my Mom, who makes it weekly. The ingredient list for this easy soup is pretty short (woohoo!) and super simple to prepare.

    Plus, it keeps well in the fridge or freezer for busy days. We love this soup and hope you’ll give it a try!

    Key Ingredients

    • Butter: I love the creaminess butter adds, especially since this soup has no cream, but olive oil is a good substitute.
    • Leeks: Think of leeks as sweet, mellow onions. We’ll use the white and light green parts, saving the tougher dark green tops for stock. Check out my article about how to clean leeks for more tips!
    • Potatoes: Use any kind you have. Yukon Gold potatoes will make it extra creamy, but russets break down easily for a nice texture, too.
    • Broth: Either chicken broth or vegetable broth works perfectly here.
    • Spices: Don’t be shy with the salt and pepper! A pinch of nutmeg adds a subtle warmth, and half a bay leaf is plenty for flavor.

    Find the full recipe with measurements below.

    How to Make Potato and Leek Soup

    Tip 1: Throughly clean your leeks. Leeks tend to trap sand, so I always clean them thoroughly. My go-to method is slicing them in half lengthwise, which makes it easier to rinse away any hidden grit. If you need a visual guide, check out my article on cleaning leeks.

    Tip 2: Cook the leeks until soft. Once your leeks are clean and chopped, this soup comes together quickly. Start by cooking the leeks in butter until they’re very soft, then add the rest of the ingredients and simmer until the potatoes are tender.

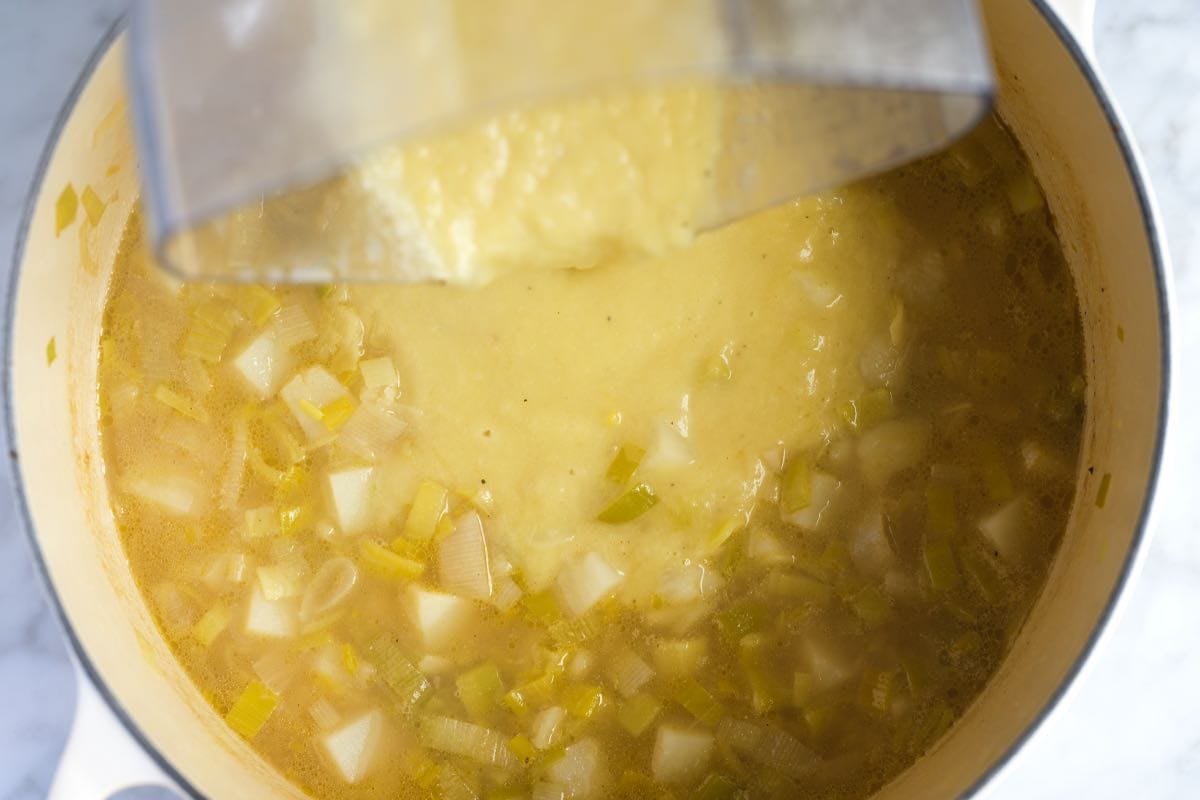
    Tip 3: Blend half of the soup for the best texture. I’m a big fan of textured soups. While many potato leek soup recipes call for blending until silky smooth, I prefer a heartier, more rustic approach. I leave plenty of potato chunks and sliced leeks in the pot. We blend about half the soup to thicken it up and add creaminess while leaving the rest chunky for texture.

    Blending half of the potato and leek soup

    More Potato Soup Recipes

    Homemade Potato Leek Soup

    Easy Potato Leek Soup

    • PREP
    • COOK
    • TOTAL

    We love this potato and leek soup recipe with butter, leeks, potatoes, stock, and spices. This soup is so creamy and comforting. There’s no cream needed, but if you want to make this more decadent, add a little crème fraîche, sour cream, or cream to your bowl before serving.

    Makes 4 servings

    You Will Need

    3 tablespoons butter or olive oil

    3 large leeks

    2 medium-to-large russet potatoes, peeled and chopped into ½-inch cubes

    6 cups stock or broth, see our chicken stock or vegetable broth

    Half of a bay leaf

    Salt and fresh ground black pepper

    Pinch freshly ground nutmeg

    Crème fraîche, sour cream, or cream for serving, optional

    Directions

    • Prepare Leeks
    • 1Cut away the stem and dark green parts of the leeks. Discard the stem and save the green tops for stock or broth. We only need the light green and white parts of the leeks for this recipe.

      2Slice the leeks into half, lengthwise, and then run cold water over them, using your fingers to release any dirt stuck inside the layers.

      3Slice the leeks into 1/4-inch thick half-moons.

    • Prepare Soup
    • 1Melt the butter in a large saucepan or Dutch oven over medium heat.

      2Stir in the leeks and 1/4 teaspoon of salt. Reduce the heat to medium-low, and cook, stirring frequently, until very soft but not browned, 10 to 15 minutes. If the leeks begin to brown, lower the heat a bit more.

      3Stir in the potatoes, stock, and 1/4 teaspoon of fresh ground pepper. Add half of a bay leaf, and then bring it to a boil. Reduce the soup to a low simmer, and cook uncovered for 10 to 15 minutes or until the potatoes are tender.

      4Taste the broth and season with additional salt.

      5Blend one-third of the soup, and then stir back into the pot. Stir in a bit more ground pepper and a pinch of nutmeg. Serve.

    Adam and Joanne’s Tips

    • Storing: Store potato leek soup in airtight containers in the fridge for up to 3 days or in the freezer for up to 3 months.
    • Vegetarian and vegan adaptations: Use vegetable broth. Try our homemade veggie broth.
    • The nutrition facts provided below are estimates.

    Nutrition Per Serving
    Serving Size
    1/4 of the recipe
    /
    Calories
    263
    /
    Total Fat
    11.3g
    /
    Saturated Fat
    6.2g
    /
    Cholesterol
    22.9mg
    /
    Sodium
    418.8mg
    /
    Carbohydrate
    33.7g
    /
    Dietary Fiber
    2.9g
    /
    Total Sugars
    3.8g
    /
    Protein
    10.7g


    AUTHOR:

    Joanne Gallagher

    Adam and Joanne of Inspired Taste

    We are Adam and Joanne Gallagher, the creators of Inspired Taste. Established in 2009, Inspired Taste grew from a childhood dream into one of the internet’s most trusted recipe sites with hundreds of reliable recipes, step-by-step videos, and expert tips.More About Us
    Previous Post: Essential Mignonette Sauce
    Next Post: Easy Apple Crisp

    Source link

  • Easy Cranberry Orange Scones Recipe

    Easy Cranberry Orange Scones Recipe

    This cranberry orange scones recipe is a keeper! They turn out light and flaky, with fresh orange zest and dried cranberries.

    Cranberry Orange Scones

    My Mom makes a lot of scones. She inherited her love from her Mom, and I can only imagine it goes back from there. Now, here I am sharing our favorite recipe with you! You can top these with bit of sugar, or add my delicious orange glaze.

    Scones are really easy to make. If you’ve made homemade biscuits, you’ll recognize many of the steps in our recipe below. For more scones recipes, see our classic scones, blueberry scones, blackberry lemon scones or these pumpkin scones.

    Key Ingredients

    • Cranberries: I use dried cranberries in my photos, but you can absolutely use fresh or frozen cranberries in these scones. If you opt for fresh cranberries, keep in mind that they are more tart, so you might want to add a touch more sugar to the dough (I’ve shared tips below the recipe).
    • Orange: I use plenty of orange zest to infuse the dough with a bright citrus flavor. For more orange flavor, try my optional orange glaze, which you’ll find in the recipe below.
    • Flour: I stick to all-purpose flour for my scones. It consistently yields light and flaky results.
    • Baking powder: This adds a little extra lift and lightness to the scones. I also use baking powder when making this strawberry shortcake!
    • Butter: I always use very cold butter when making these. The cold butter creates steam in the oven, resulting in that delightful flaky texture we all love.
    • Heavy cream: I’m partial to cream scones because they tend to be lighter and more tender than those made solely with butter.
    • Honey: I love the subtle sweetness honey adds to these cranberry orange scones. For an extra special touch, try using orange blossom honey! Feel free to substitute with sugar.

    Find the full recipe with measurements below.

    Tips for Making the Best Cranberry Orange Scones

    Tip 1: Use chilled ingredients. Using cold ingredients is really important when making scones. The butter should be chilled and hard, and you want to use the cream straight from the refrigerator.

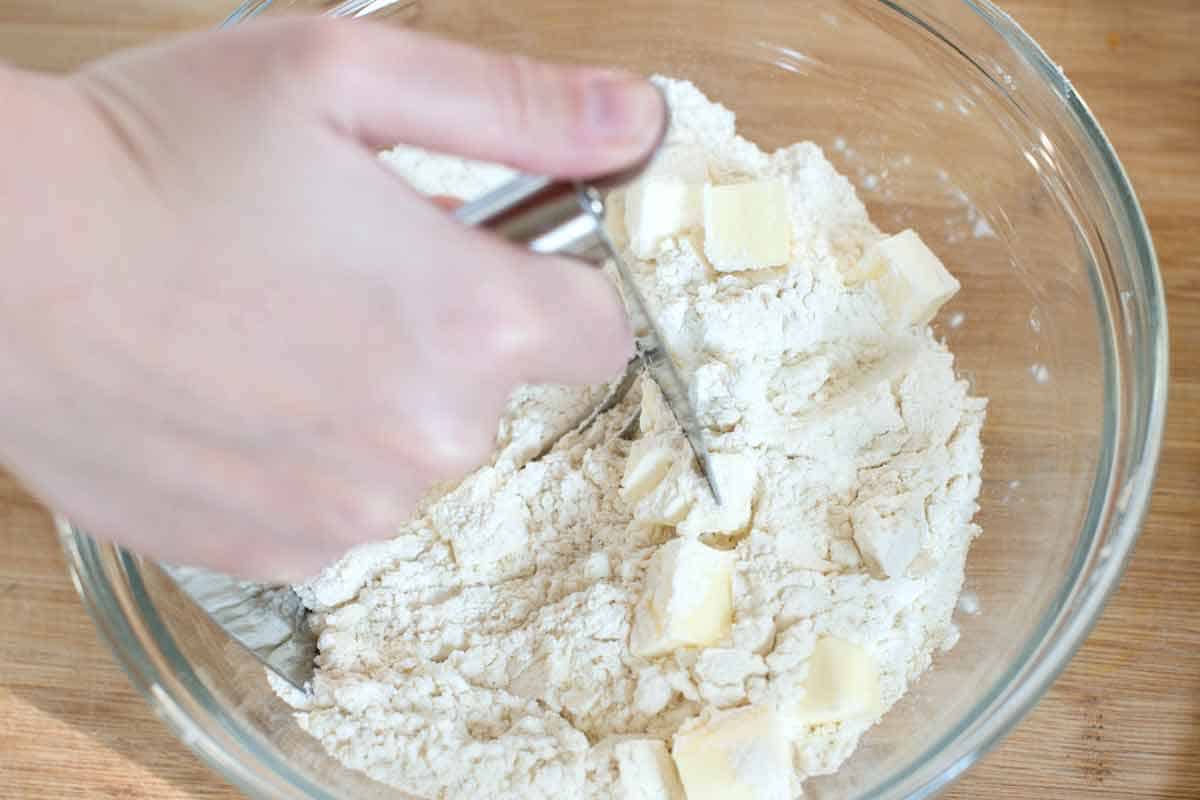
    To make scones, you will “cut in” very cold butter. I use a pastry blender, but cold hands or a food processor will work. The goal is to distribute small pieces of butter throughout the flour. As the scones bake, these little bits of butter create steam pockets that make the dough rise, resulting in a light and tender texture (the same happens in my butter pie crust recipe and these biscuits).

    Cutting cold butter into flour

    Tip 2: Add fresh orange flavor. You can add orange flavor in two ways to these scones. First, add a generous amount of orange zest to the dough itself (similar to how we add lemon zest to these blueberry scones). Second, you can make our orange glaze. It’s optional, but it’s really easy! Stir powdered sugar and fresh orange juice together, then drizzle the glaze over the baked and cooled scones.

    Cranberry orange scone dough

    Tip 3: Don’t overwork your dough. When making these, gentle handling is key! Overworking the dough develops gluten, which can make your scones less fluffy and tender. That’s why I skip the biscuit cutter and lightly pat the dough into a circle before cutting them into 8 triangles.

    Cutting scone dough into triangles.

    Tip 4: Sprinkle sugar on top (optional). Transfer your triangles of dough onto a baking sheet, leaving a little room (they will spread slightly), and then brush them generously with cream. For a beautiful, shiny, textured top, sprinkle coarse sugar over the cream and bake.

    Homemade Cranberry Orange Scones

    Easy Cranberry Orange Scones

    • PREP
    • COOK
    • TOTAL

    These incredible cranberry orange scones are light and flaky, with fresh orange zest and dried cranberries. I love topping them with a little coarse sugar, but they are also delicious drizzled with our optional orange glaze shared in the recipe below.

    Makes 8 scones

    You Will Need

    2 cups (260g) all-purpose flour

    1 tablespoon baking powder

    1/2 teaspoon fine sea salt

    5 tablespoons (70g) cold, unsalted butter, cut into 1/4-inch cubes

    1 cup (235ml) heavy cream, plus more for tops of scones

    3 tablespoons honey or sugar

    1 tablespoon grated orange zest

    3/4 cup (100 grams) dried cranberries, see tips for fresh cranberries

    1 tablespoon coarse sugar for tops of scones


    Optional Glaze

    1 cup (120g) powdered sugar

    2 to 3 tablespoons (30ml to 45ml) orange juice

    Directions

      1Adjust the oven rack to the middle position and heat the oven to 425°F (218°C). Line a large baking sheet with parchment paper or use a silicon baking mat.

      2Whisk together flour, baking powder, and salt in a medium bowl.

      3Combine cream, honey, and orange zest in a measuring jug. Stir until the honey is completely incorporated into the cream.

      4Use a pastry blender to work the butter into the flour mixture until it resembles a coarse meal with a few small crumbles of butter the size of peas. (Or use a food processor).

      5Stir in cranberries. Pour in the cream mixture and use a rubber spatula to mix until a crumbly dough forms.

      6Transfer the dough and all dry, floury bits to a lightly floured work surface. Knead the dough 3 to 5 times until it just comes together. Form into an 8-inch circle. Cut into 8 triangles, or use a biscuit cutter.

      7Place the scones on the baking sheet, brush with extra cream, and lightly sprinkle the tops with coarse sugar.

      8Bake until light golden brown, 12 to 15 minutes. Cool at least 10 minutes before serving.

      9For the optional glaze, whisk the powdered sugar and 2 tablespoons of the orange juice until smooth. If it’s too thick, add a bit more orange juice. Drizzle over the cooled scones.

    Adam and Joanne’s Tips

    • Fresh or frozen cranberries: You can substitute 1 heaping cup of fresh or frozen (not thawed) cranberries in the recipe above. They will be more tart, so consider increasing the honey or sugar by 1 to 2 tablespoons.
    • Storing: Scones are best eaten fresh. If you do have leftovers, your best bet for keeping them fresh is to freeze them. Freeze baked and cooled scones until hard, then transfer to resealable plastic bags. Freeze for up to 1 month. To reheat, bake in a 350°F oven until warmed. It shouldn’t take long.
    • You can freeze unbaked scone dough: Chill cut scones in the freezer until firm, then transfer to resealable plastic bags. They can be kept for up to one month. Bake in a 425°F oven straight from the freezer. (They may take a few extra minutes.)
    • Recipe inspired and adapted from America’s Test Kitchen

    Nutrition Per Serving
    Serving Size
    1 scone
    /
    Calories
    343
    /
    Protein
    4 g
    /
    Carbohydrate
    42 g
    /
    Dietary Fiber
    1 g
    /
    Total Sugars
    16 g
    /
    Total Fat
    19 g
    /
    Saturated Fat
    11 g
    /
    Cholesterol
    60 mg
    /
    Sodium
    342 mg


    AUTHOR:

    Joanne Gallagher

    Adam and Joanne of Inspired Taste

    We are Adam and Joanne Gallagher, the creators of Inspired Taste. Established in 2009, Inspired Taste grew from a childhood dream into one of the internet’s most trusted recipe sites with hundreds of reliable recipes, step-by-step videos, and expert tips.More About Us
    Source link

  • Slow Cooker Korean BBQ Chicken – Easy & Flavorful

    Slow Cooker Korean BBQ Chicken – Easy & Flavorful

    This website may contain affiliate links and advertising so that we can provide recipes to you. Read my disclosure policy.

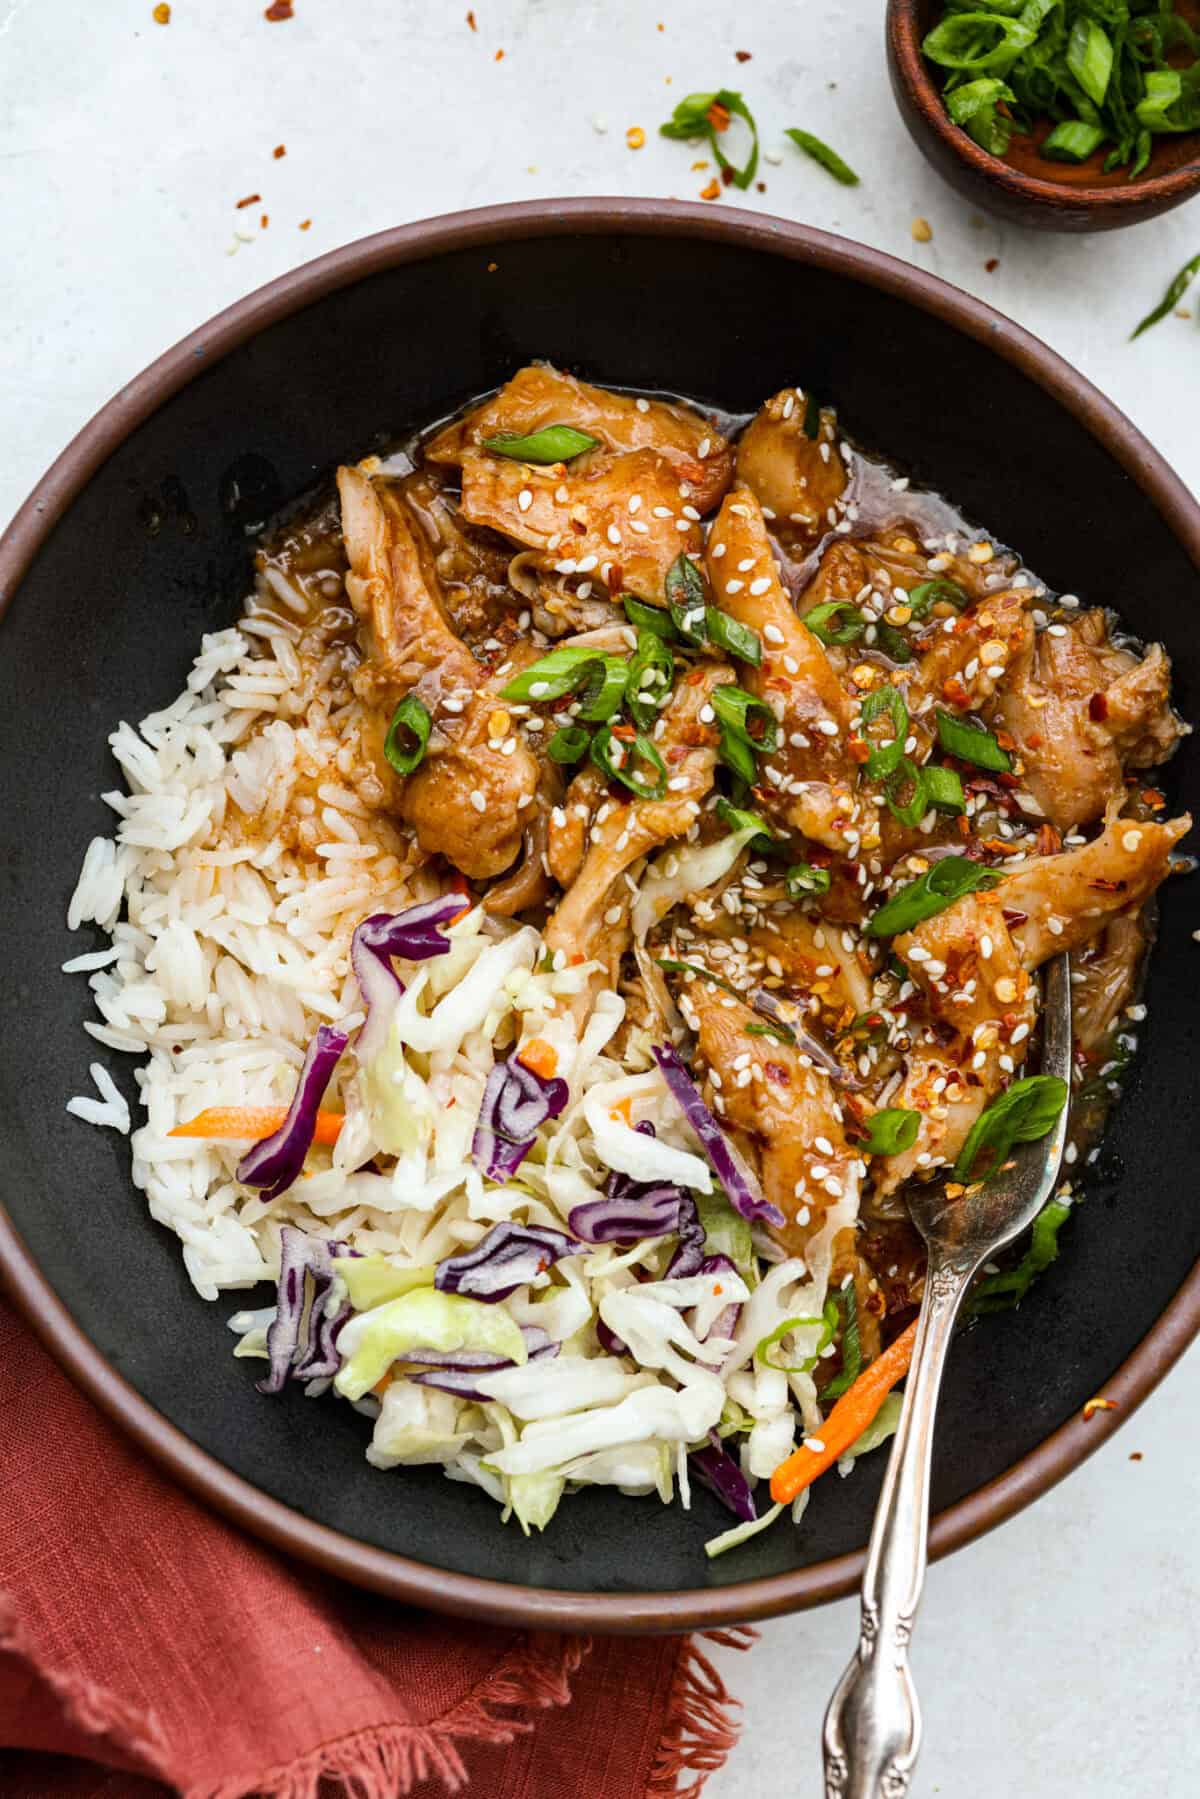
    Set it and forget it! This slow cooker Korean BBQ chicken is sweet, savory, and just the right amount of spice. Perfect for tossing over rice, piling onto buns, topping a salad, or even making tacos. Weeknight dinner just got easier!

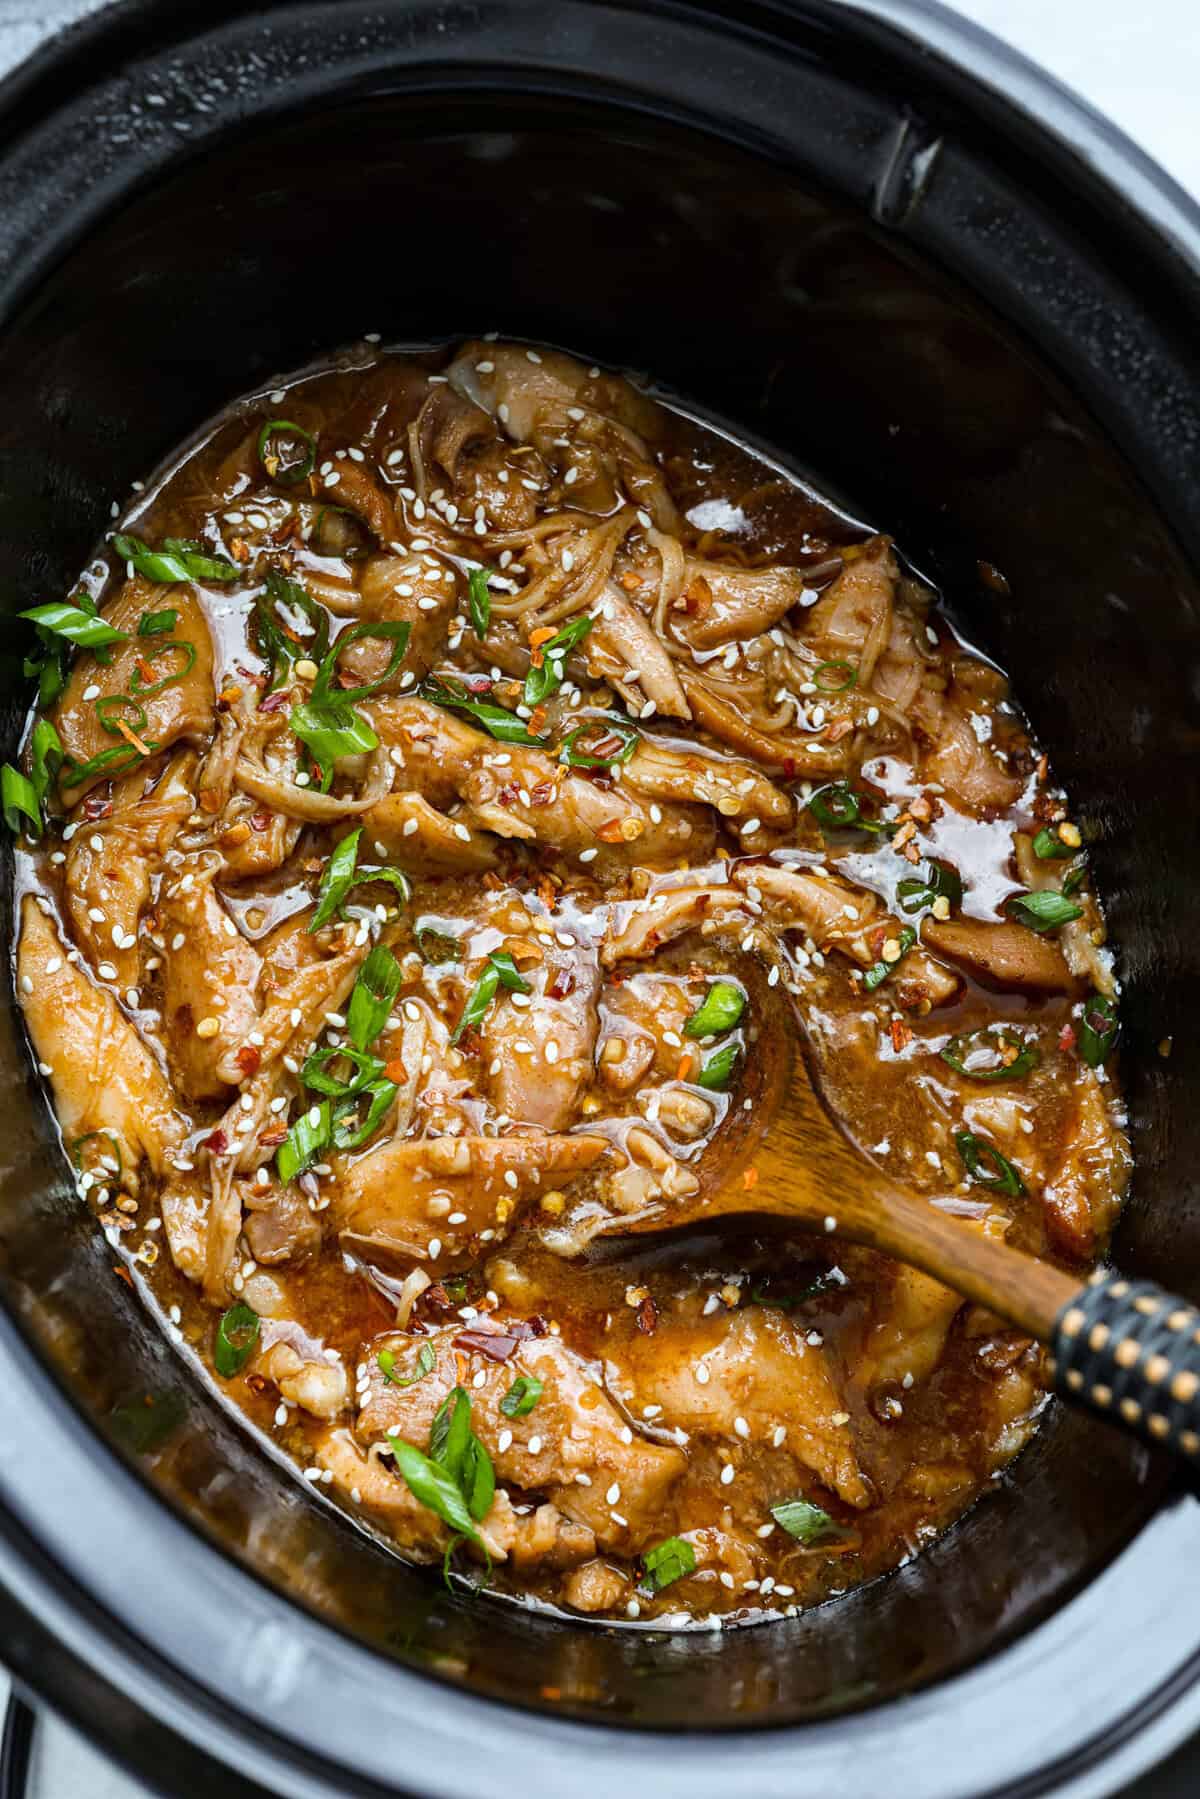
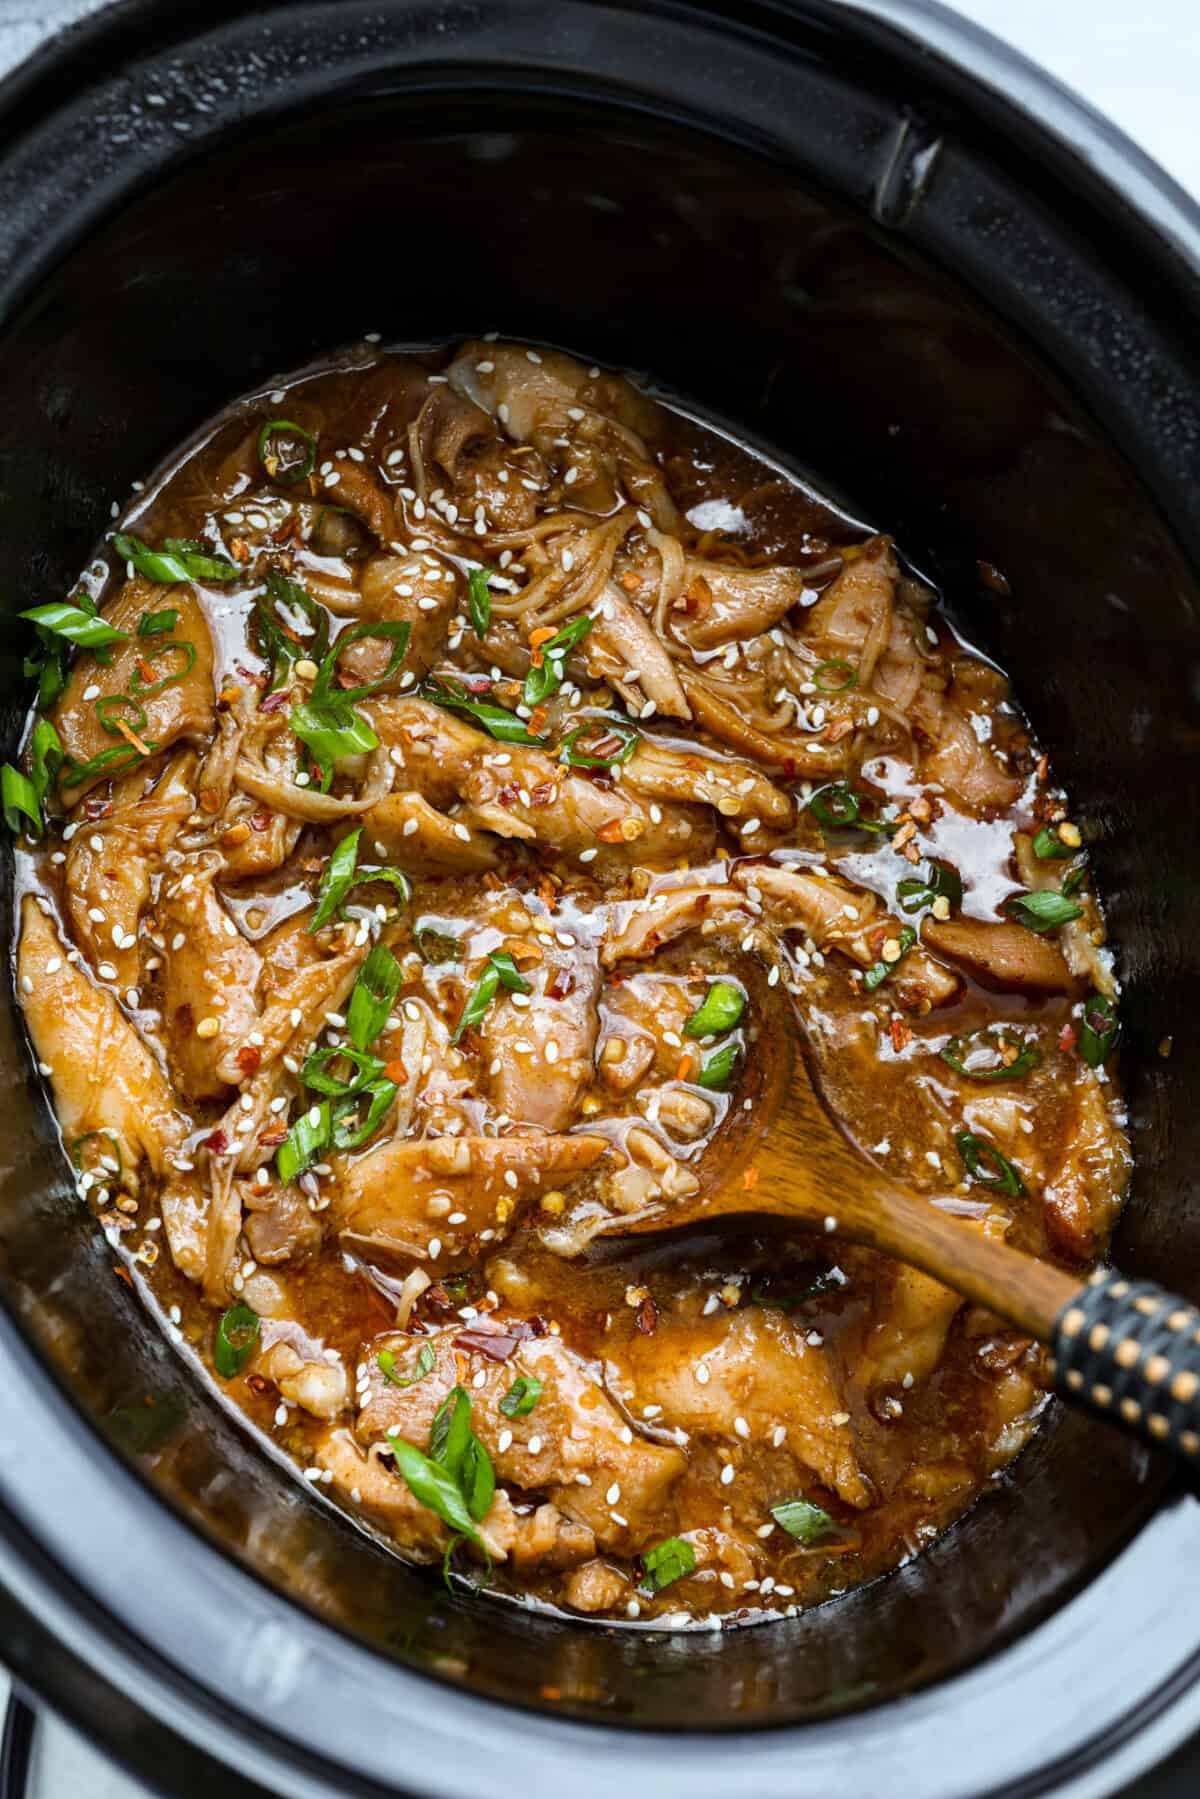
    Slow cooker Korean BBQ chicken in a crockpot with a wooden spoon, with sesame seeds and green onions.

    Why You’ll Keep Coming Back for More

    • Hands-Off Magic: Just toss it in the slow cooker and let the flavors meld while you go on about your day.
    • Tender Perfection: The low-and-slow cooking creates melt-in-your-mouth chicken every time.
    • Flavor Packed: Balanced sweet, savory, and spicy notes make each bite irresistible. Love Korean flavors? Make my Korean Short Ribs or Slow Cooker Korean Beef next.

    Korean BBQ Chicken Ingredients

    Overhead shot of labeled ingredients.
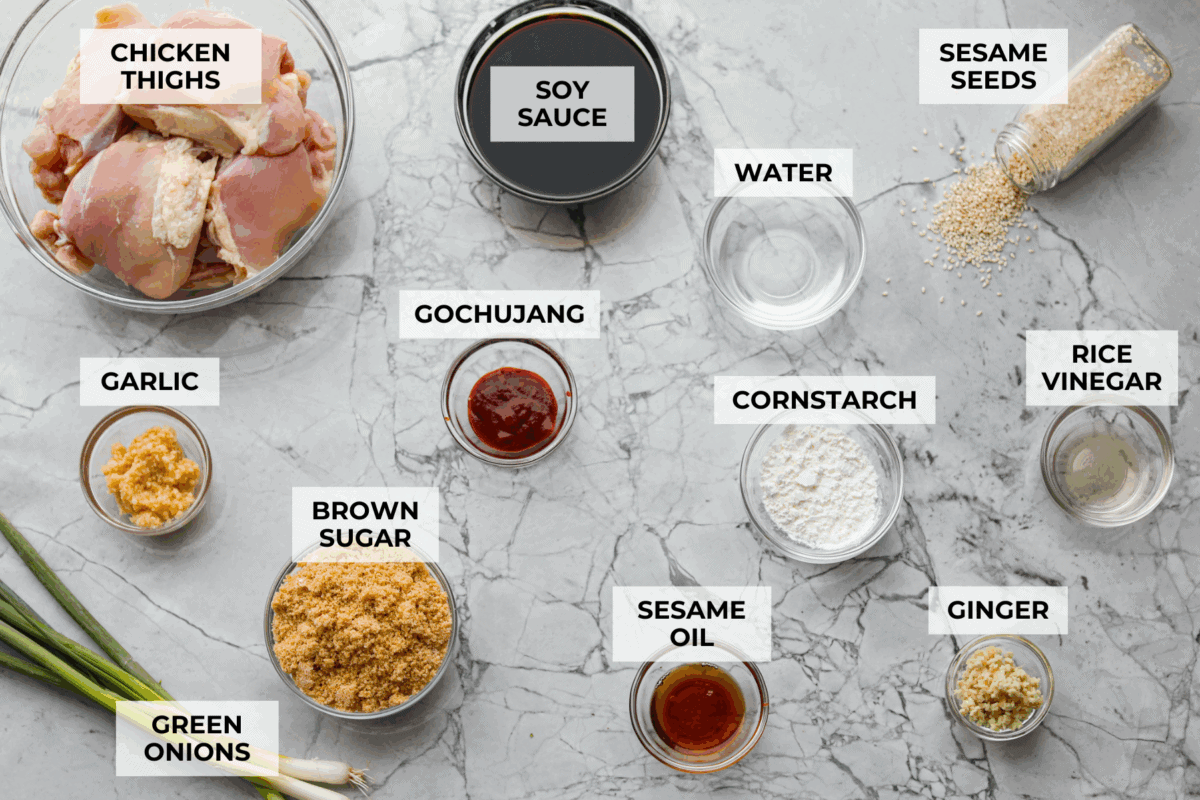
    • Chicken Choice: If you prefer, you can use chicken breasts, but they may dry out slightly. I prefer boneless, skinless chicken thighs because they stay juicy and tender in the slow cooker.
    • Ginger: Fresh ginger gives the best flavor, but ½ teaspoon ground ginger works if that’s what you have on hand.
    • Heat Level: Start small, then taste, and adjust to your preferred spice level.
    • Soy Sauce: If you are salt sensitive, use low-sodium soy sauce, or half regular soy sauce and half water.

    How to Make Korean BBQ Chicken

    With just a few simple ingredients and five minutes of prep, this slow cooker Korean BBQ chicken recipe comes together. The result is tender chicken with bold Korean BBQ flavor that everyone will love!

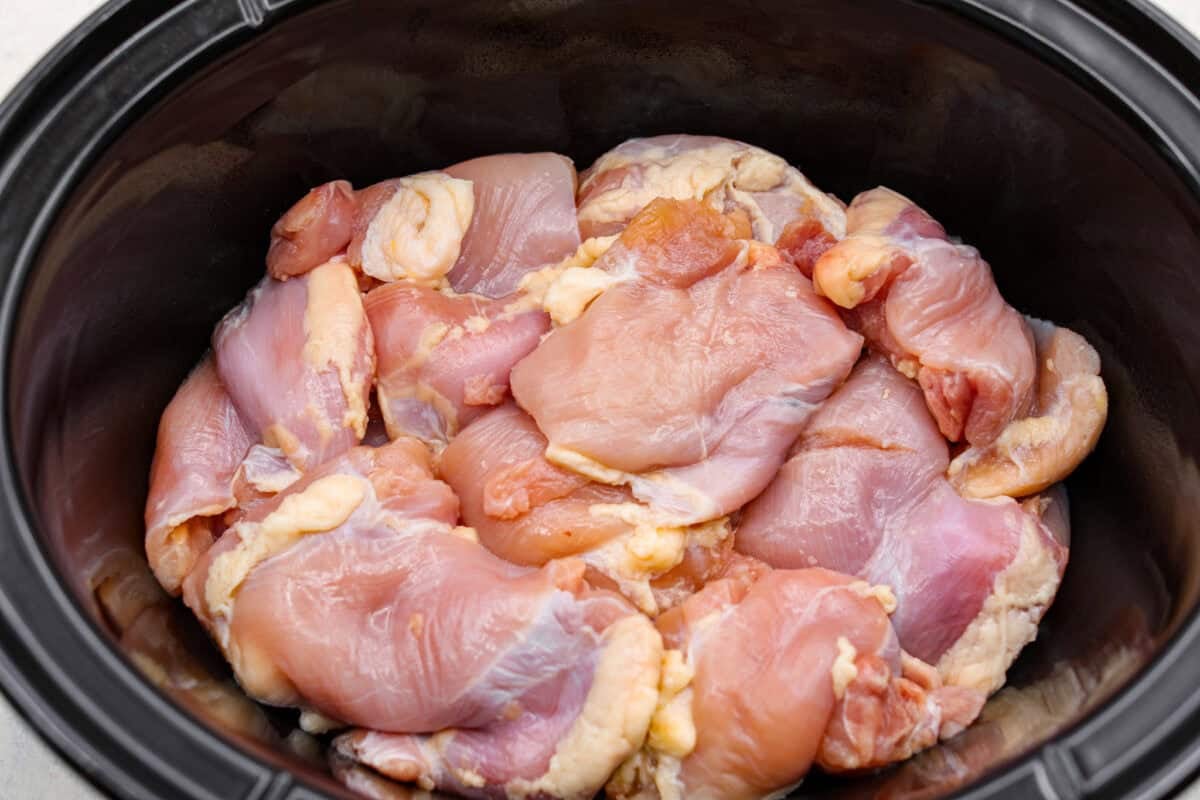
    1. Add Chicken: Spray a 4 or 6-quart slow cooker with nonstick cooking spray, then add the chicken to the bottom.
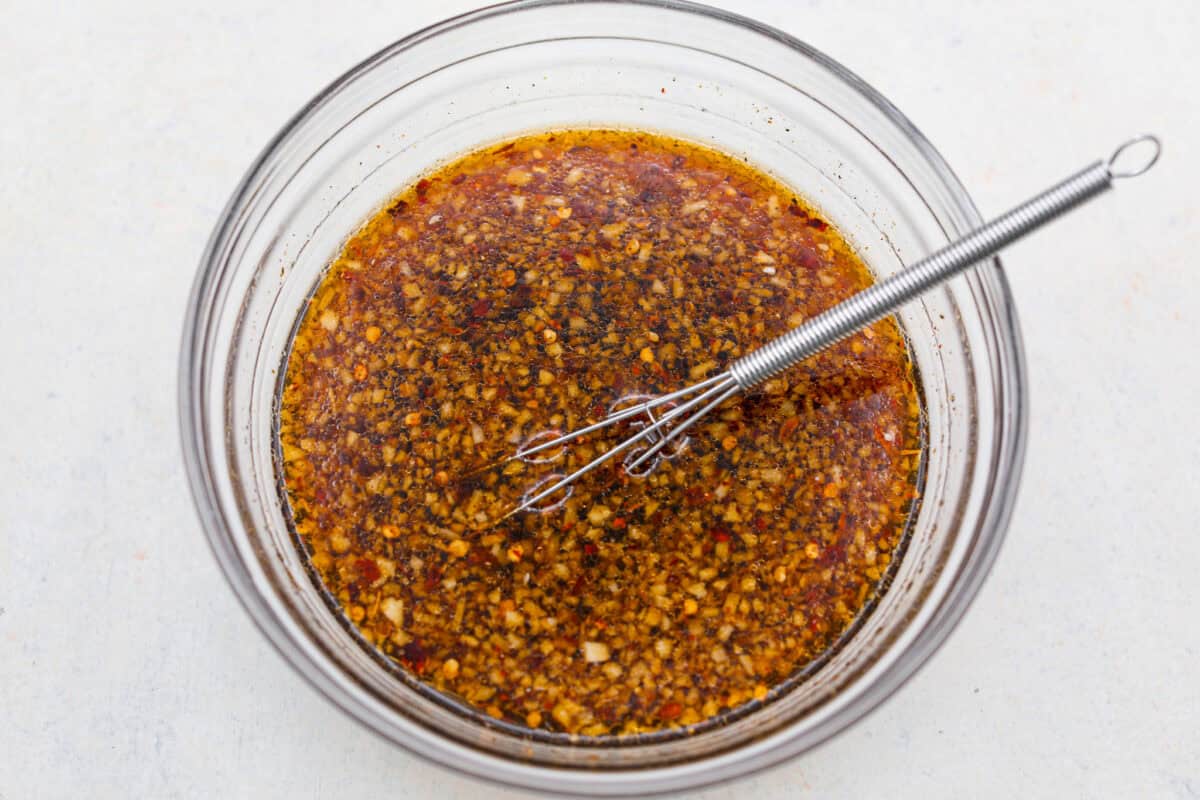
    2. Make the Sauce: Whisk brown sugar, soy sauce, sesame oil, garlic, ginger, rice vinegar, and gochujang together in a medium bowl. (Click here for my Korean BBQ sauce recipe.)
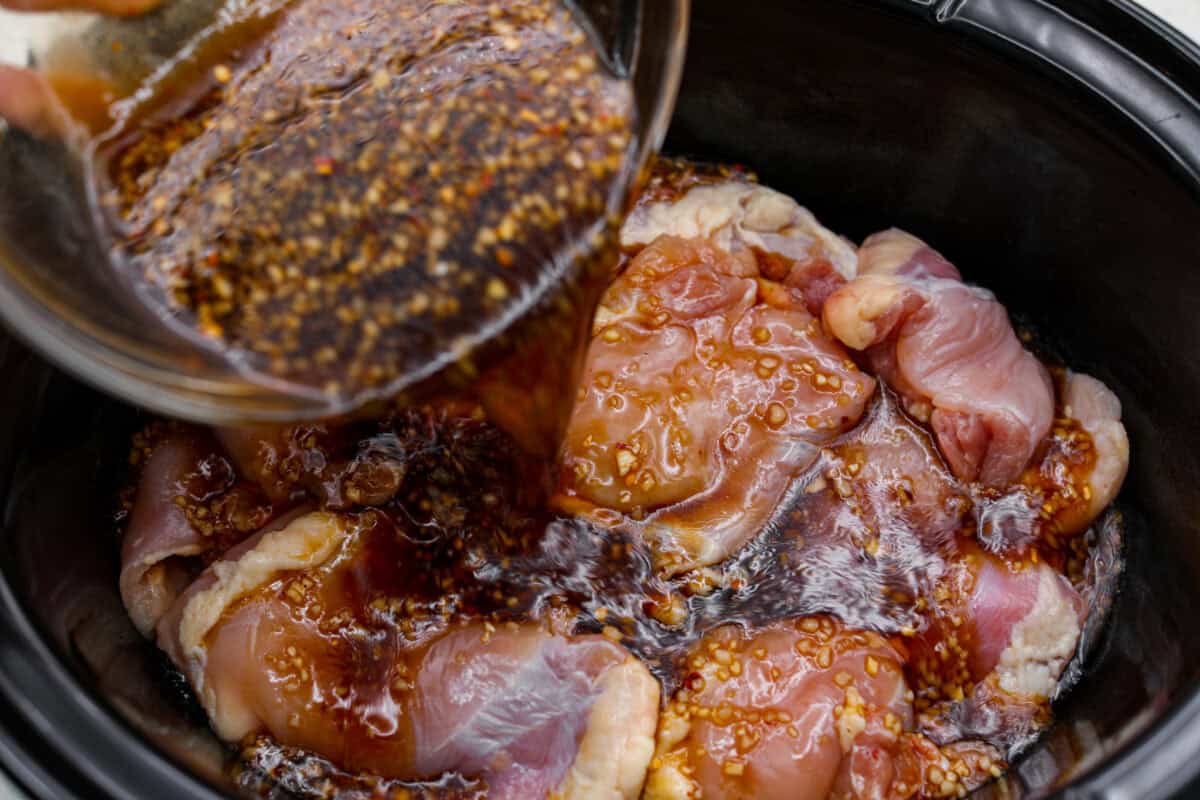
    3. Cook: Pour the sauce over the chicken, then toss to coat the thighs. Cover, then cook on LOW for 4-5 hours or on HIGH for 3-4 hours. 
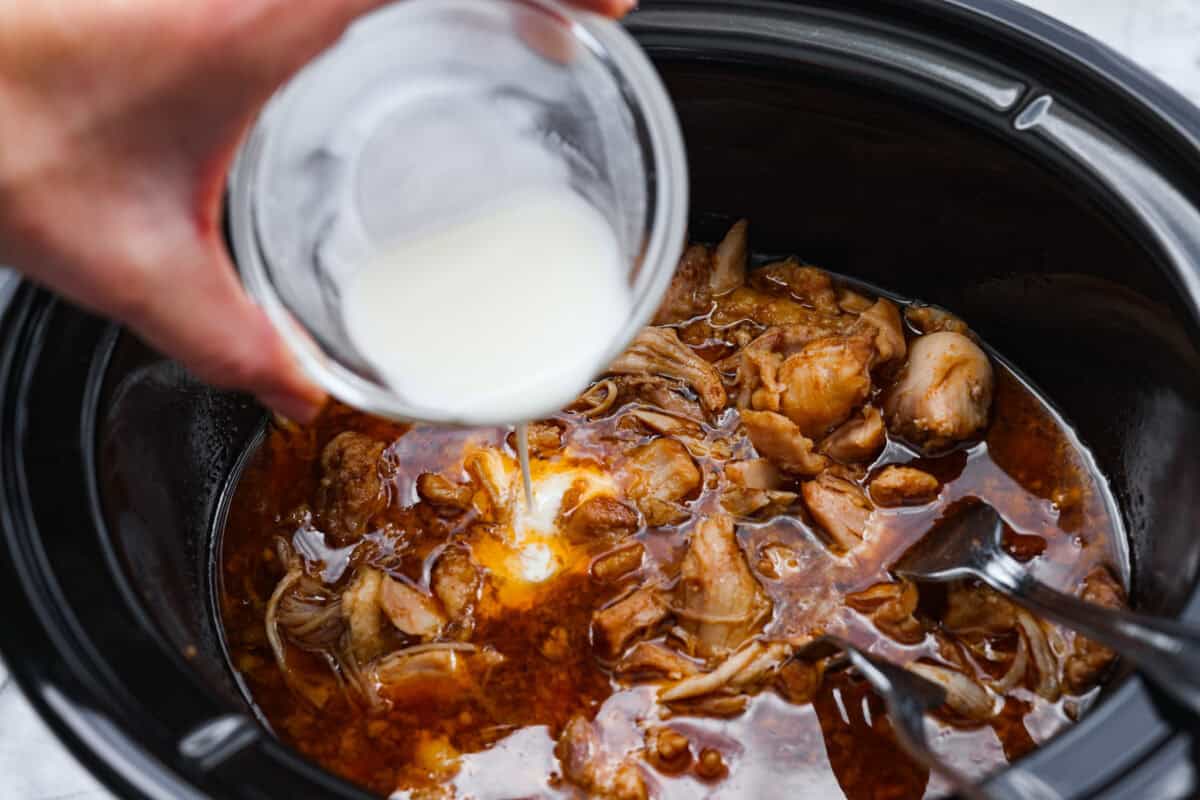
    4. Shred the Chicken: Use two forks to shred the chicken in the slow cooker. Whisk together cornstarch and water in a small bowl, then add to the slow cooker and stir to incorporate. Cover and cook for 20-30 minutes, until the sauce thickens. Serve your crockpot Korean BBQ chicken over warm rice, and garnish with green onions and sesame seeds.

    Alyssa’s Pro Tip

    Serving Ideas: Enjoy this Korean BBQ chicken over salad, rice, or quinoa. Pile it on a bun or slider, or even in tacos. For extra flavor and crunch, pair it with my broccoli ramen salad, pickled carrots, or a refreshing cucumber salad.

    Pin this now to find it later

    Pin It

    Slow cooker Korean BBQ chicken in a bowl with rice and cabbage.

    More Asian Slow Cooker Recipes

    Slow Cooker General Tso’s Chicken

    3 hours 5 minutes


    Source link

  • Easy Balsamic Chicken Marinade for Grilling or Baking

    Easy Balsamic Chicken Marinade for Grilling or Baking

    This website may contain affiliate links and advertising so that we can provide recipes to you. Read my disclosure policy.

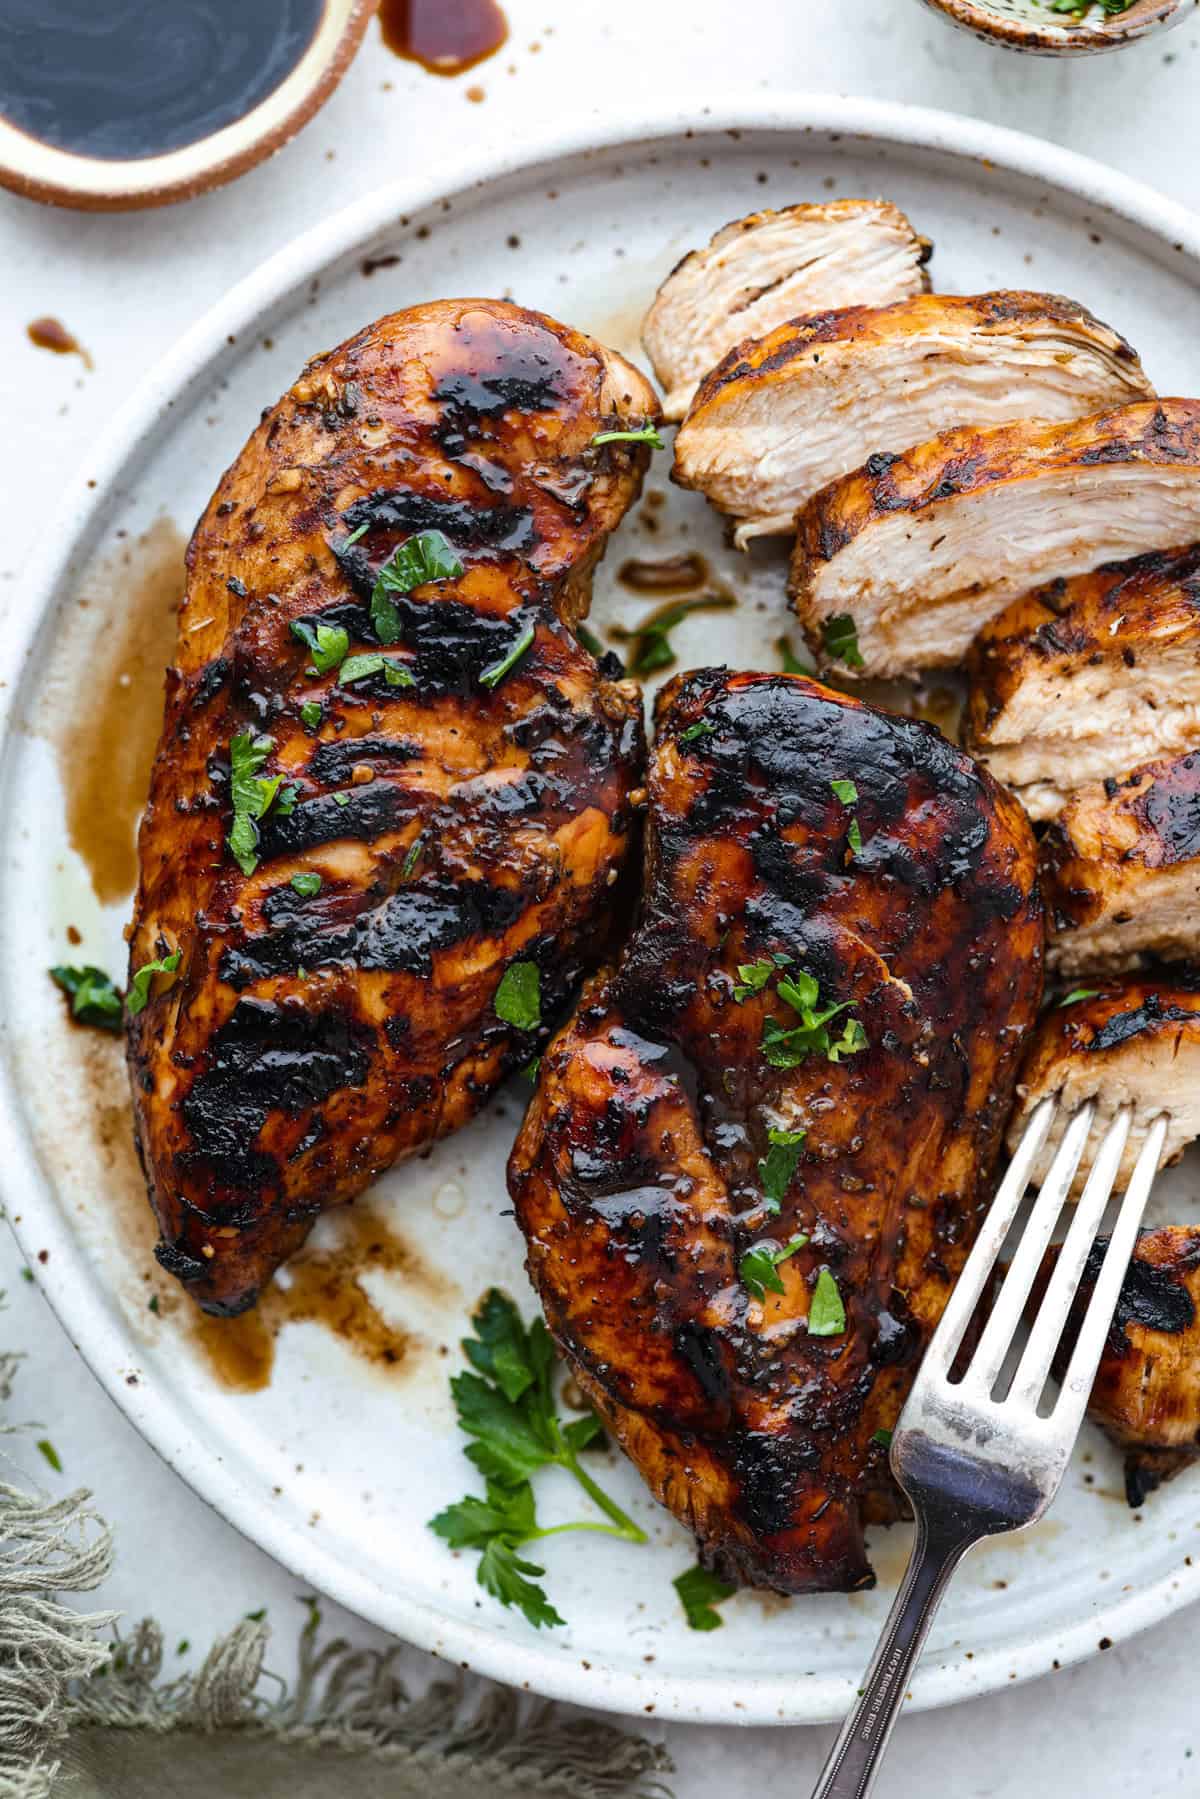
    I’ve been on a balsamic kick lately. Drizzling it on salads, veggies, and even watermelon! But this Balsamic Chicken marinade is pure magic. It’s tangy, a little sweet, and makes everyday chicken taste incredible!

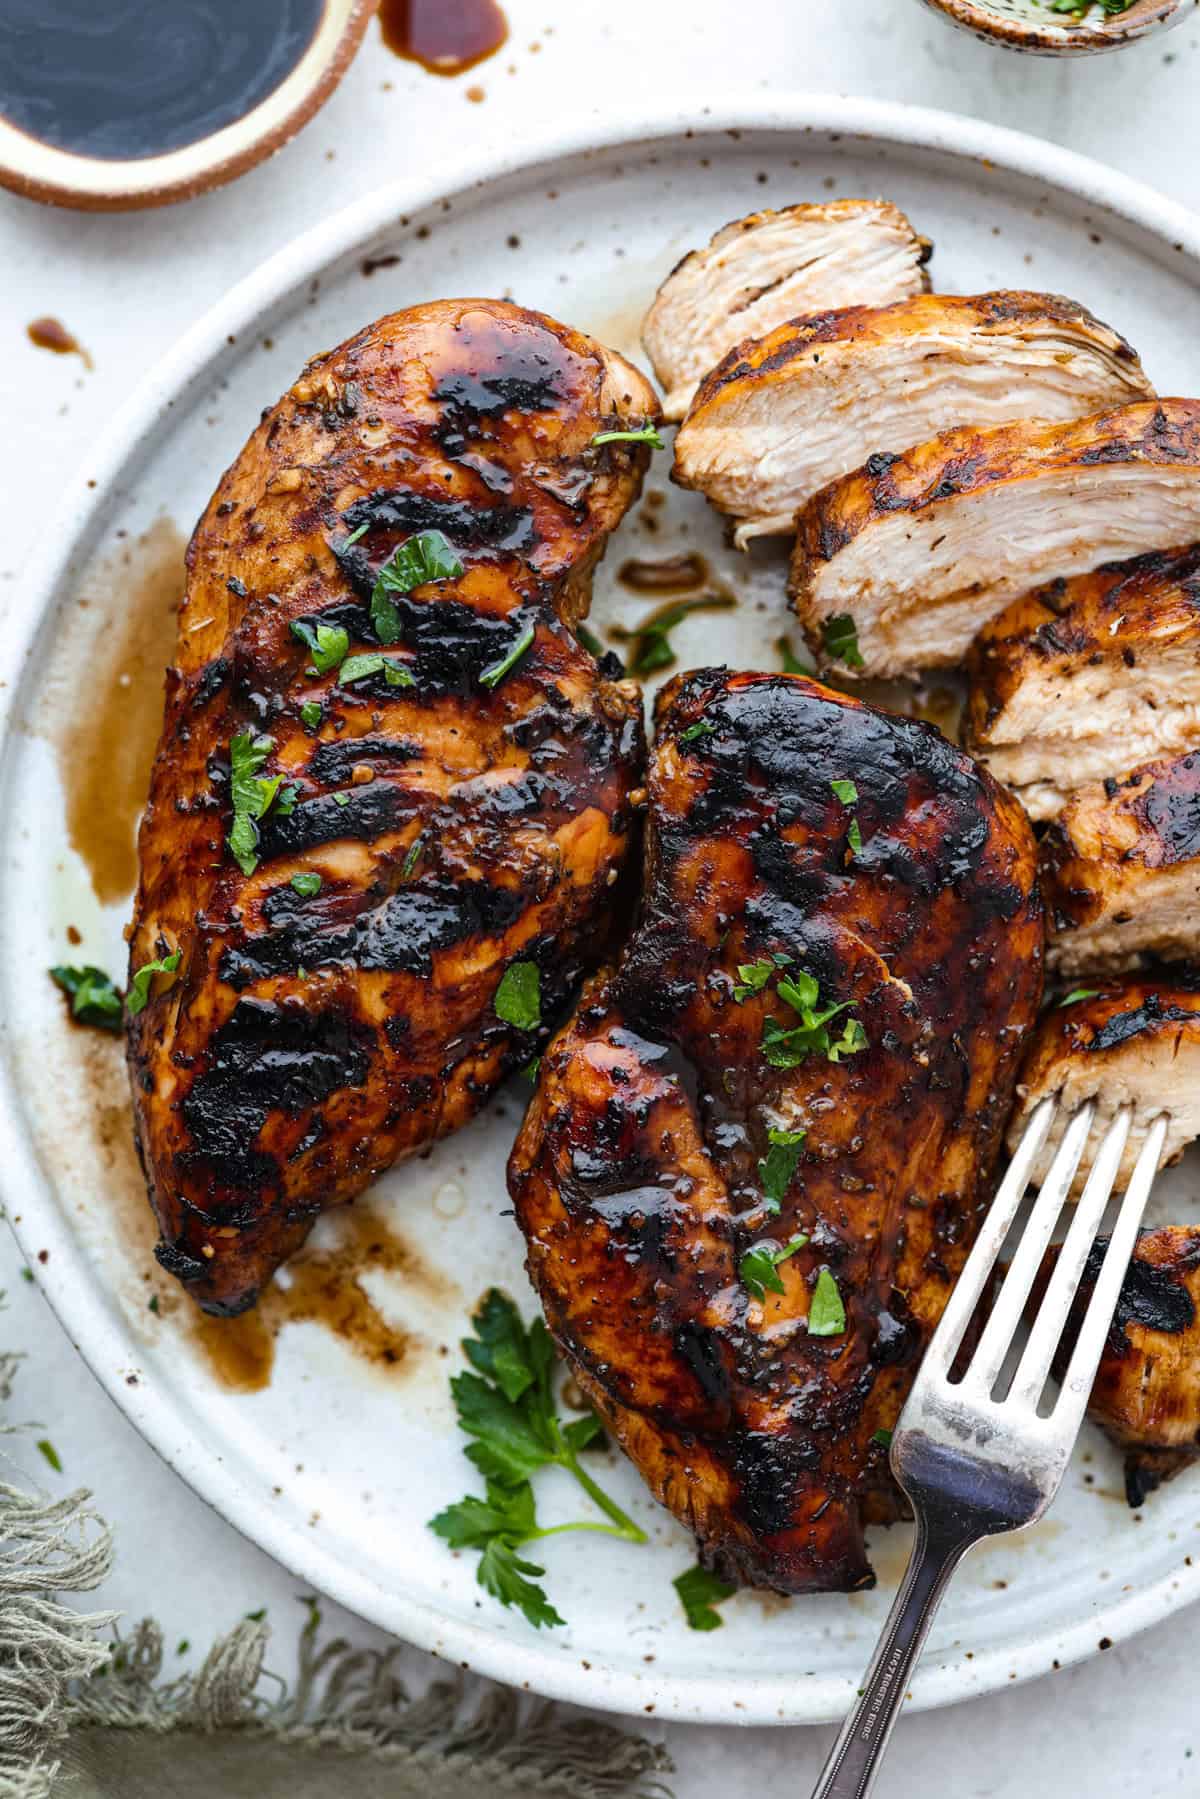
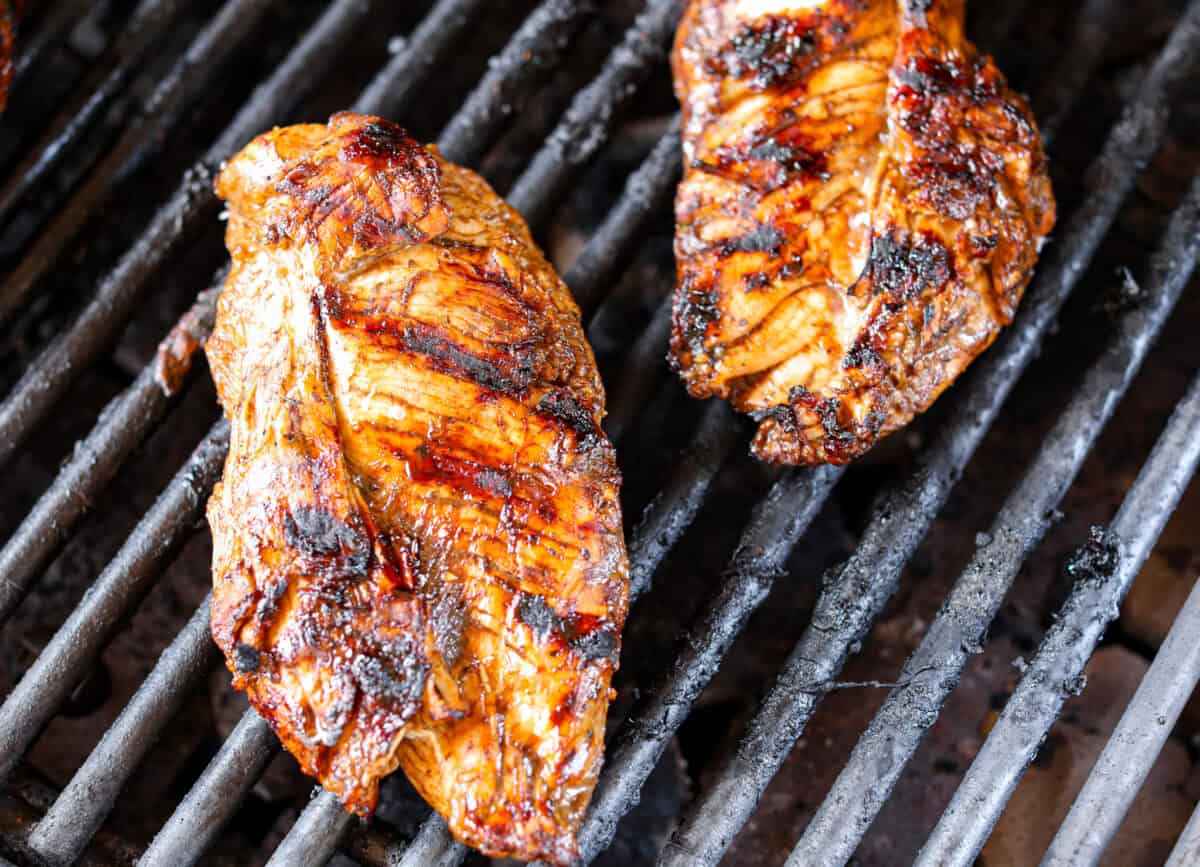
    Overhead shot of grilled chicken that was cooked in balsamic chicken marinade.Overhead shot of grilled chicken that was cooked in balsamic chicken marinade.

    Marinade Magic

    • Big Taste, Easy Prep: Balsamic chicken marinade packs bold, tangy flavor using just a few pantry staples.
    • Great for Meal Prep: Marinate ahead of time and then cook when you want. Perfect for quick weeknight meals or weekend grilling.
    • Cook Your Way: Grill it, pan-sear it, or roast it, this marinade performs like a champ no matter how you cook it up.
    • Pairs with Everything: Serve your balsamic chicken on salads, with veggies, rice, or pasta. It’s a tasty go-to for any meal!

    Balsamic Chicken Marinade Ingredients

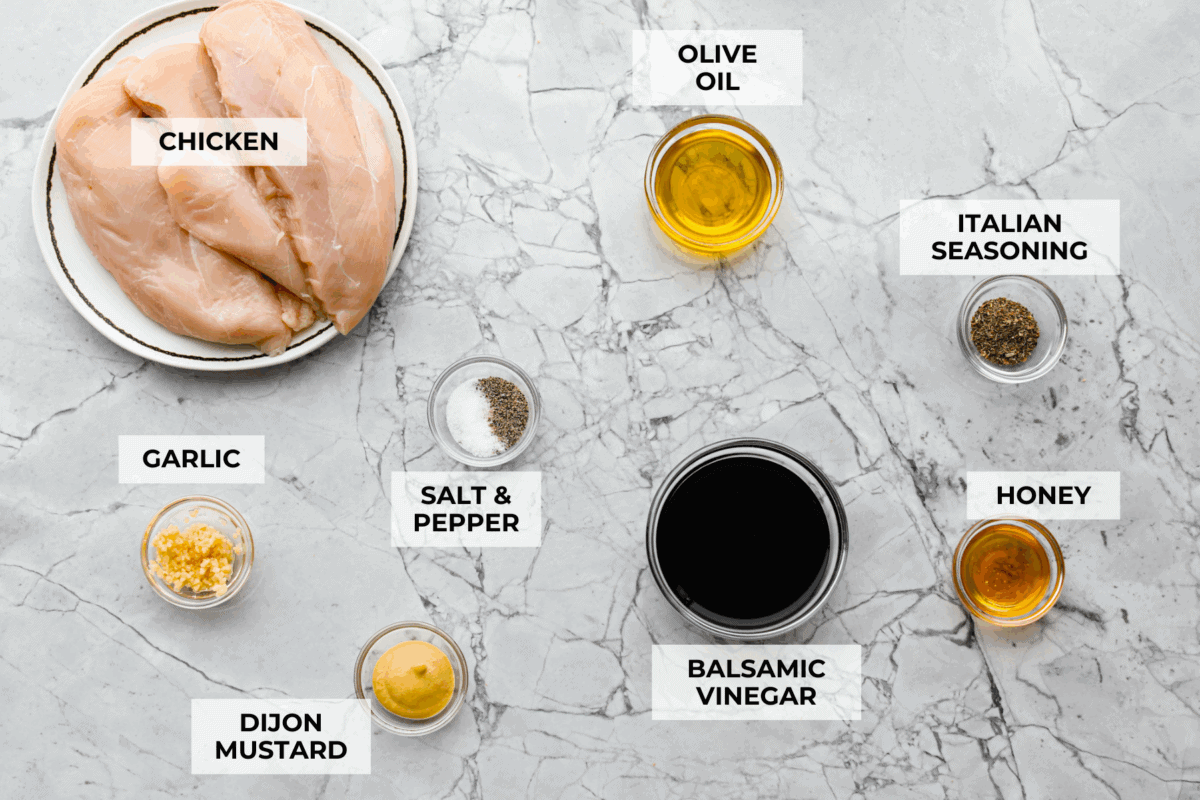
    Overhead shot of labeled ingredients.Overhead shot of labeled ingredients.
    • For sweetness: If you prefer brown sugar, it swaps in easily for the honey. Want it sweeter? Then add a tablespoon or two more of honey.
    • Add fresh herbs: Not into Italian seasoning? Skip it and toss in some chopped fresh herbs instead, about a teaspoon each. Rosemary, thyme, and oregano all play really well with balsamic.
    • Balsamic vinegar: No need to splurge here, affordable balsamic works perfectly since it gets mixed in. Save the fancy stuff for a drizzle on top when serving.

    How to Make Balsamic Chicken Marinade

    This easy balsamic chicken marinade takes 5 minutes to prepare! Just whisk the ingredients together and pour them into a large zip-top bag with your chicken!

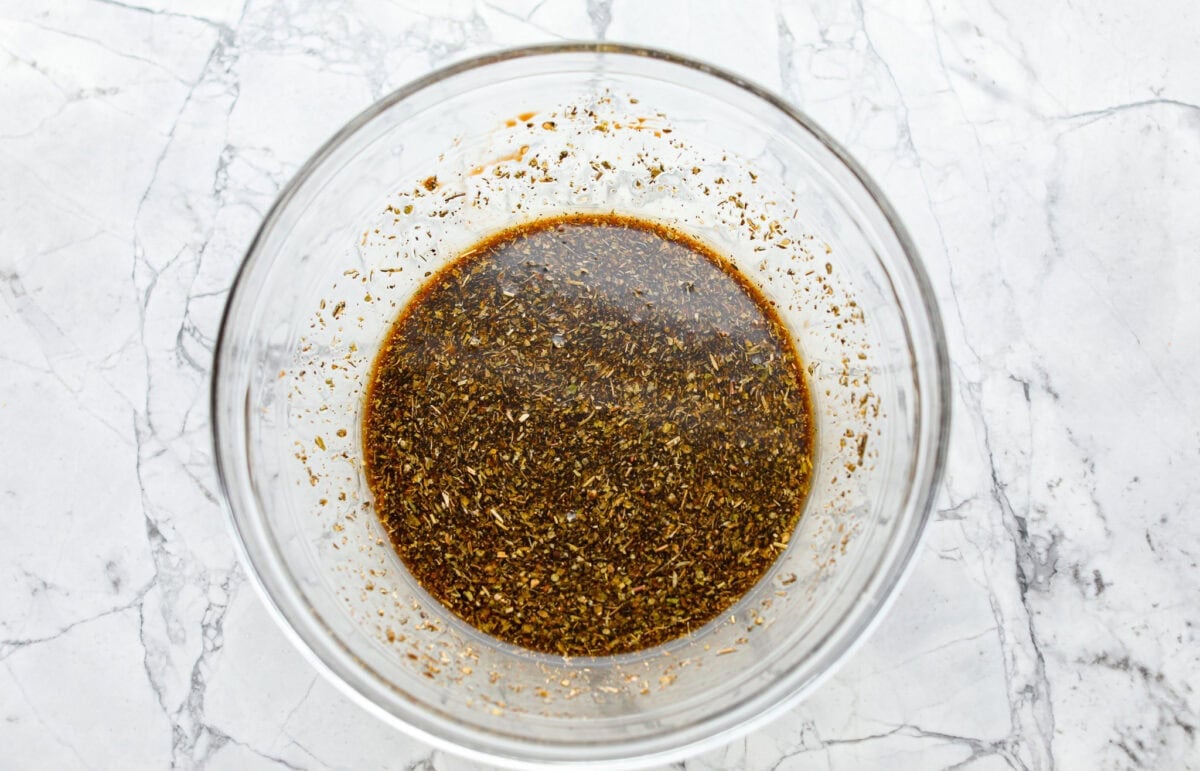
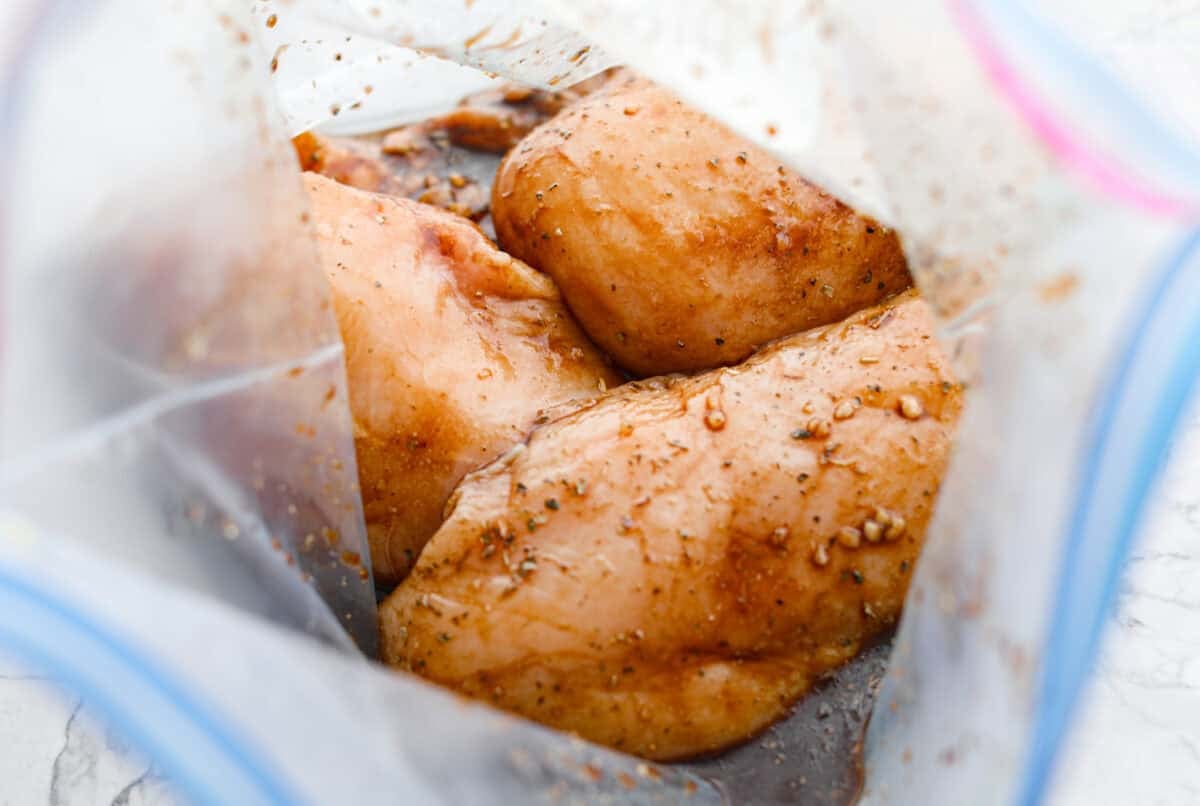
    1. Combine: Add the chicken breasts to a gallon ziplock bag, then set aside. Add the balsamic vinegar, olive oil, honey, garlic, mustard, Italian seasoning, salt, and pepper to a medium bowl, mix until fully combined.
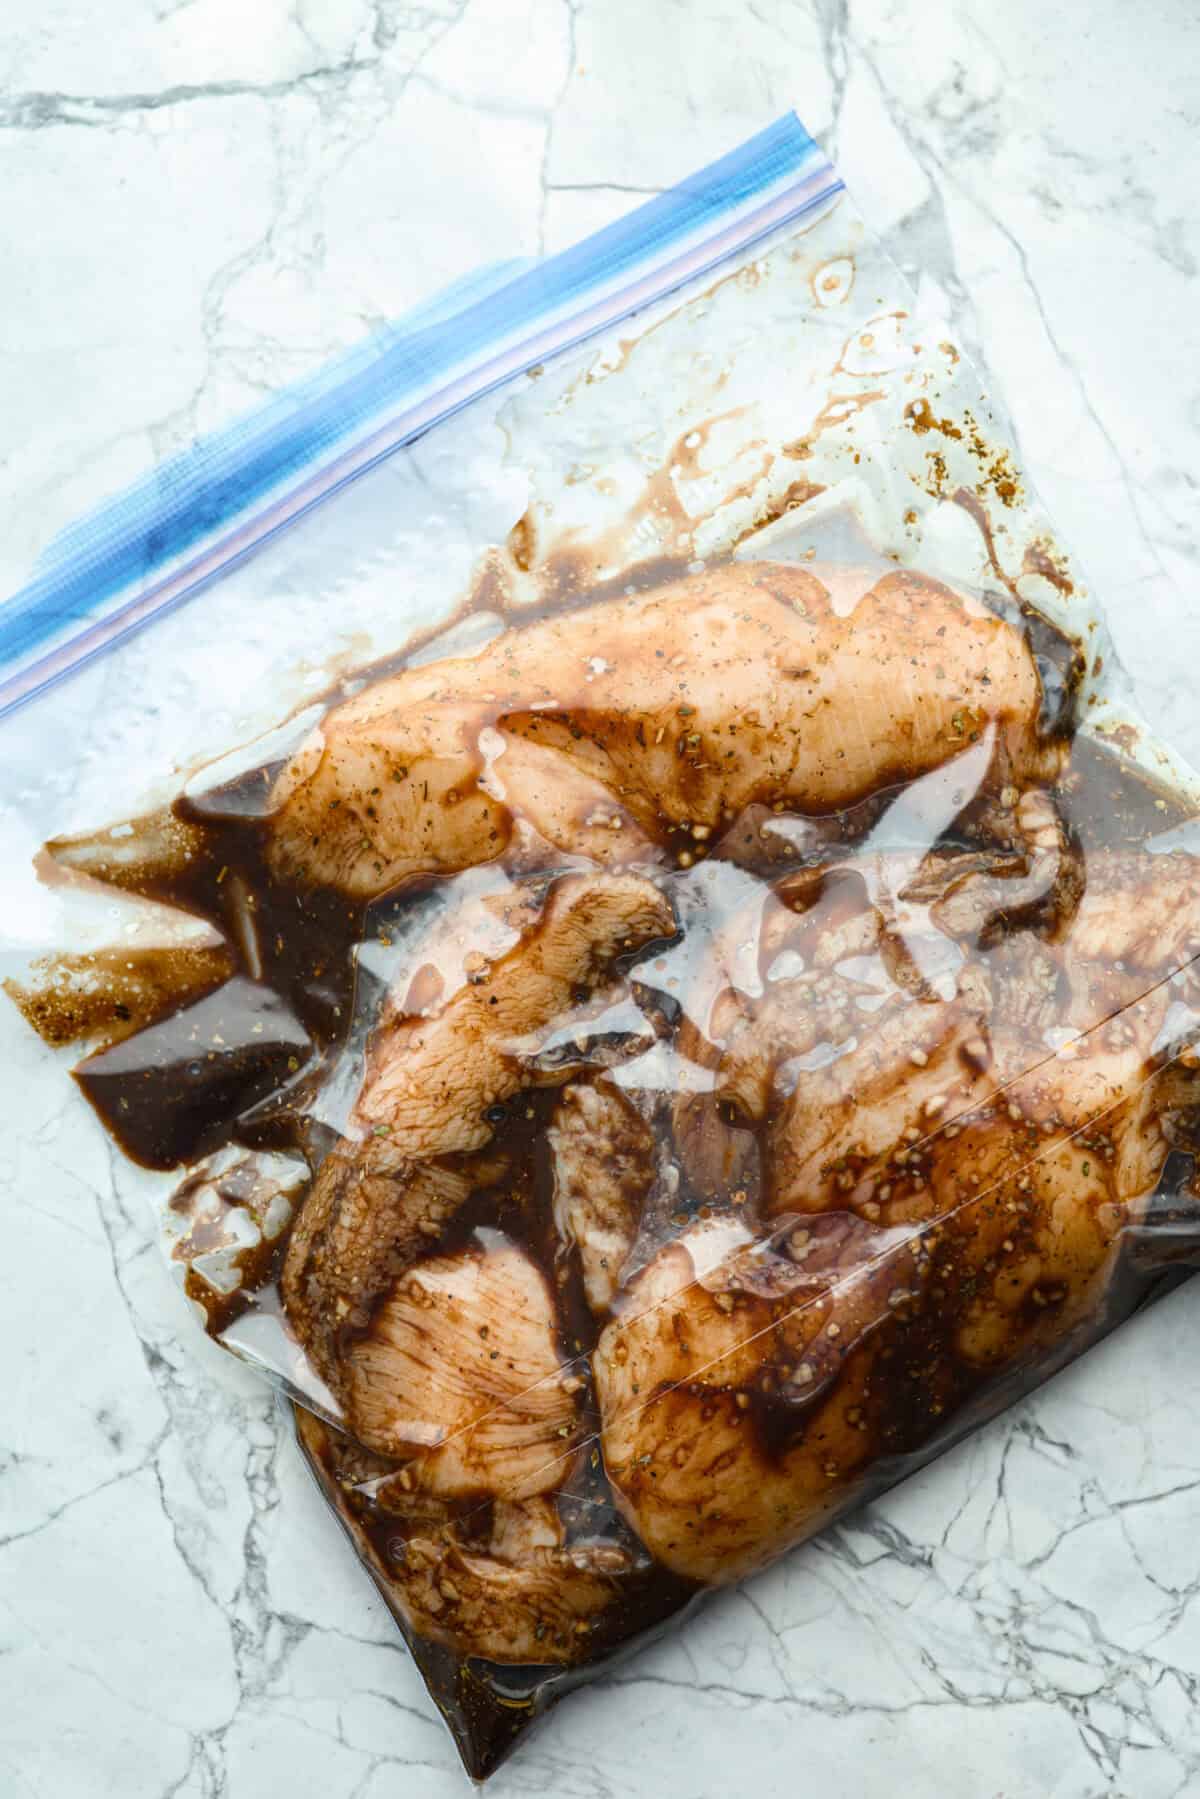
    2. Marinate: Pour the marinade over the chicken in the bag and close it. Be sure to press out all the air from the bag. Squish the chicken around to ensure all of it is covered with the marinade. Set it aside to marinate at room temperature for 1-1 ½ hours, or in the fridge for up to 8 hours. *Tip: Don’t marinate too long. If you do it over 8 hours (or 2 at room temp), the vinegar can make it mushy.
    3. Cook: Once finished marinating, discard the sauce and cook the chicken using your preferred cooking method. *Cooking instructions in recipe card below.

    Alyssa’s Pro Tip

    Doubling Up? If you’re marinating more than 2 pounds of chicken, go ahead and double the recipe. Every piece of chicken deserves its fair share of balsamic chicken marinade flavor.

    Freezing and Storing Cooked Chicken

    • Freezing: If you’re freezing the chicken in the balsamic chicken marinade, it’ll keep for up to 3 months. Just thaw it overnight in the fridge before cooking.
    • Storing Cooked Chicken: Once cooked, you can then store the chicken in the fridge for up to 7 days, or freeze it in an airtight container for up to 3 months. 

    Pin this now to find it later

    Pin It

    Bag of raw chicken in the balsamic chicken marinade. Bag of raw chicken in the balsamic chicken marinade.

    More Marinade Recipes

    A good marinade can turn a simple meal into something amazing! It adds flavor, softens the meat, and makes it juicy and delicious. Here are some other tried and true favorites!

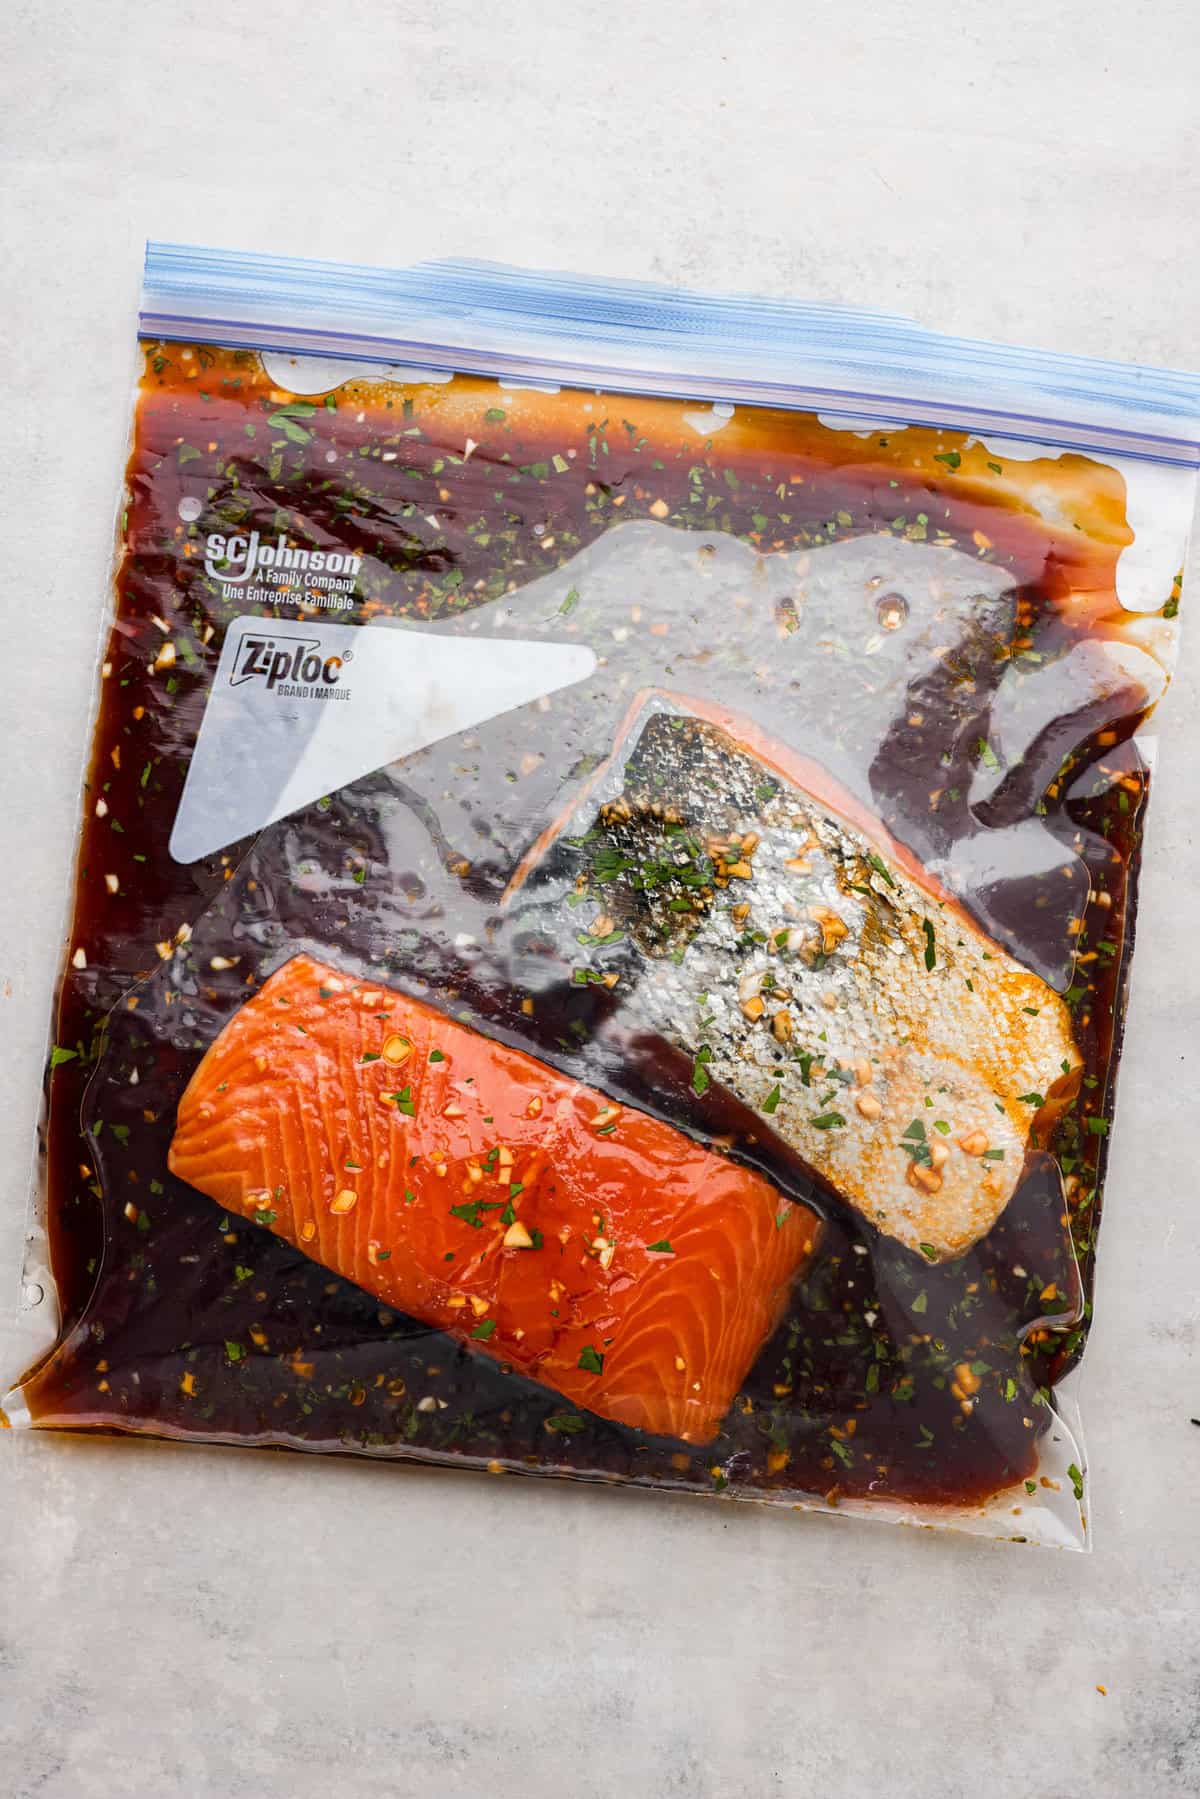
    Salmon Marinade

    32 minutes

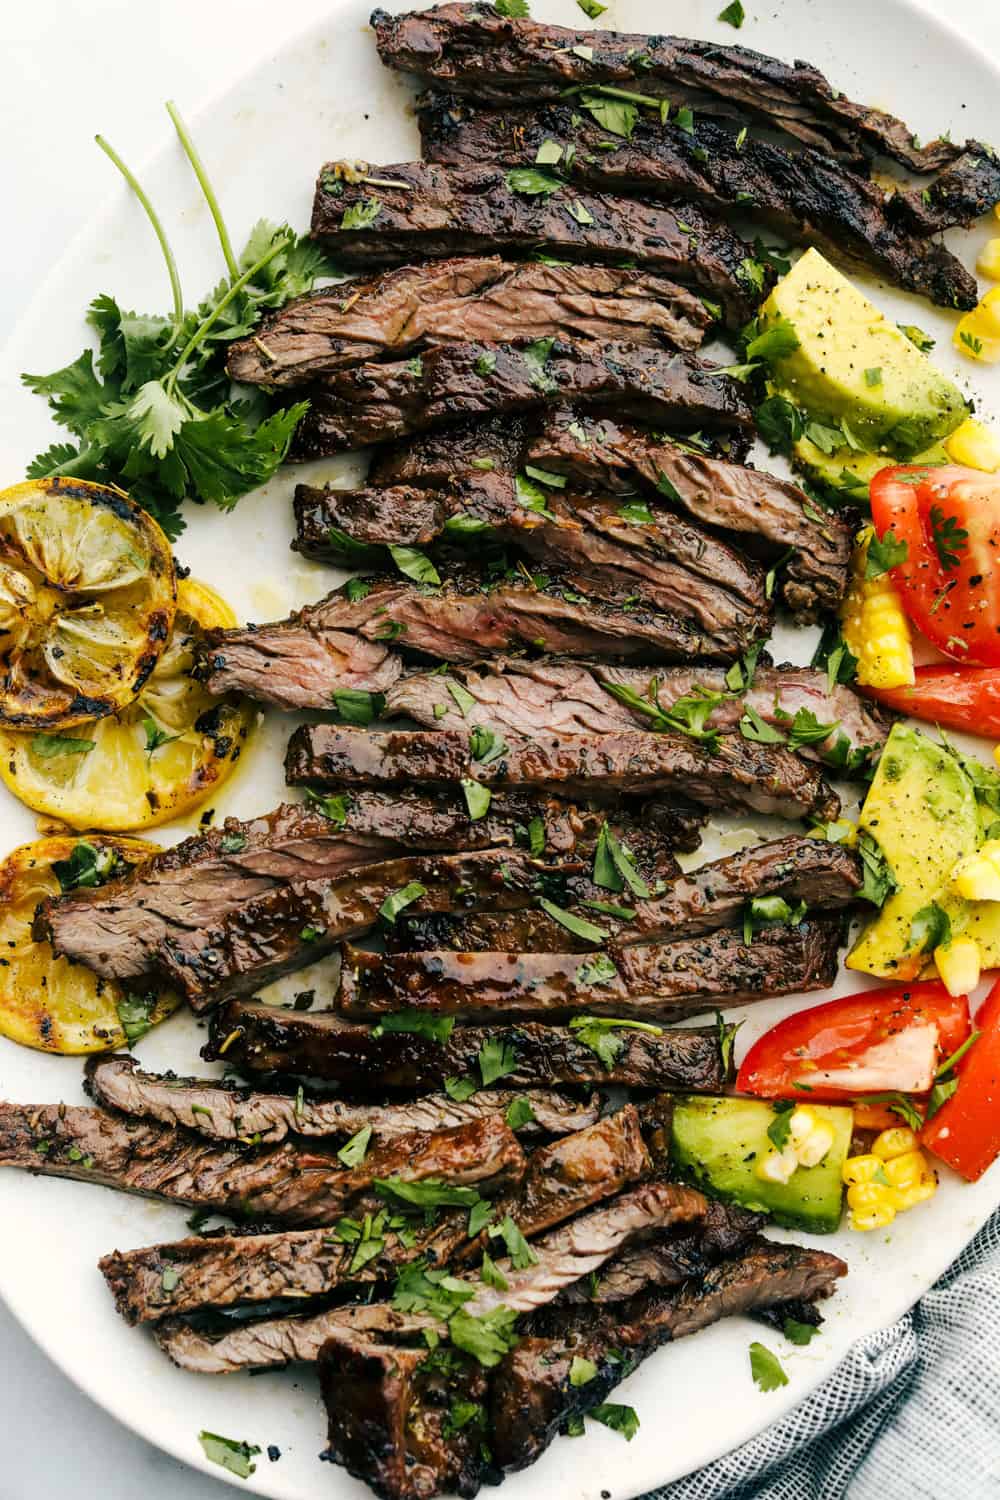
    Skirt Steak Marinade

    2 hours 10 minutes

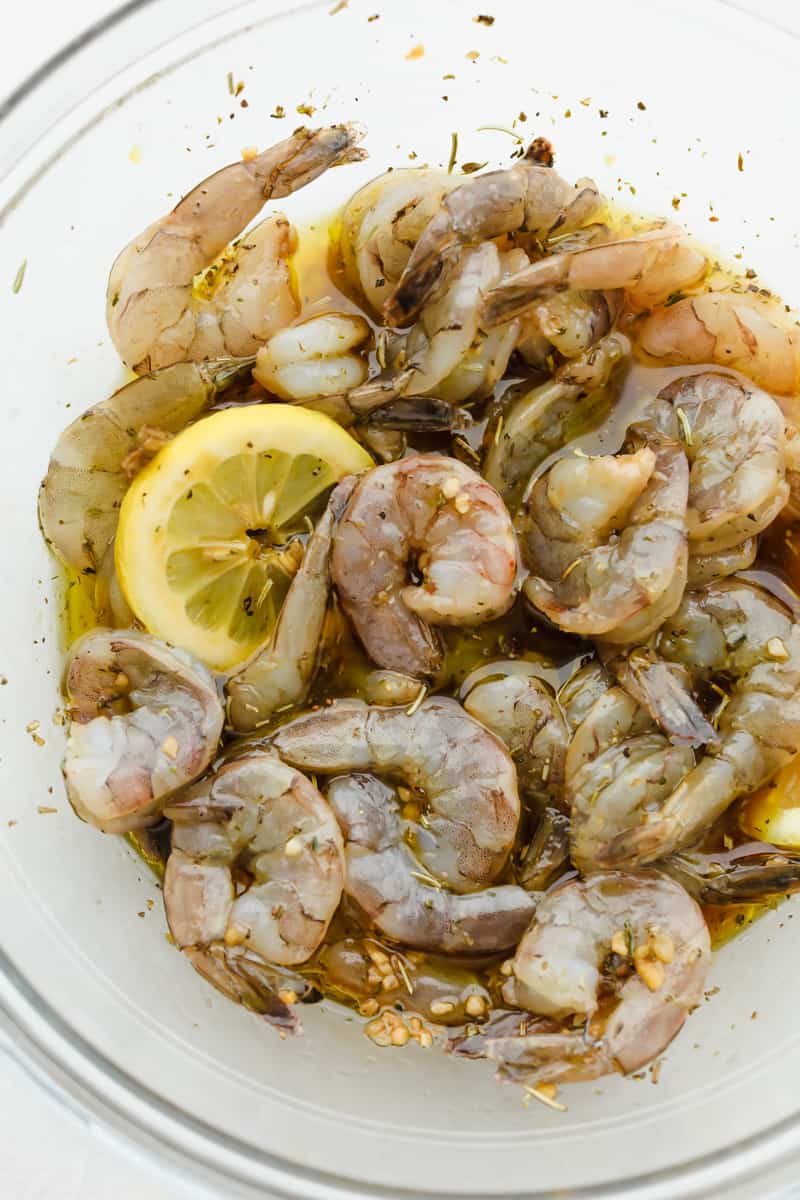
    The Best Shrimp Marinade

    1 hour 5 minutes

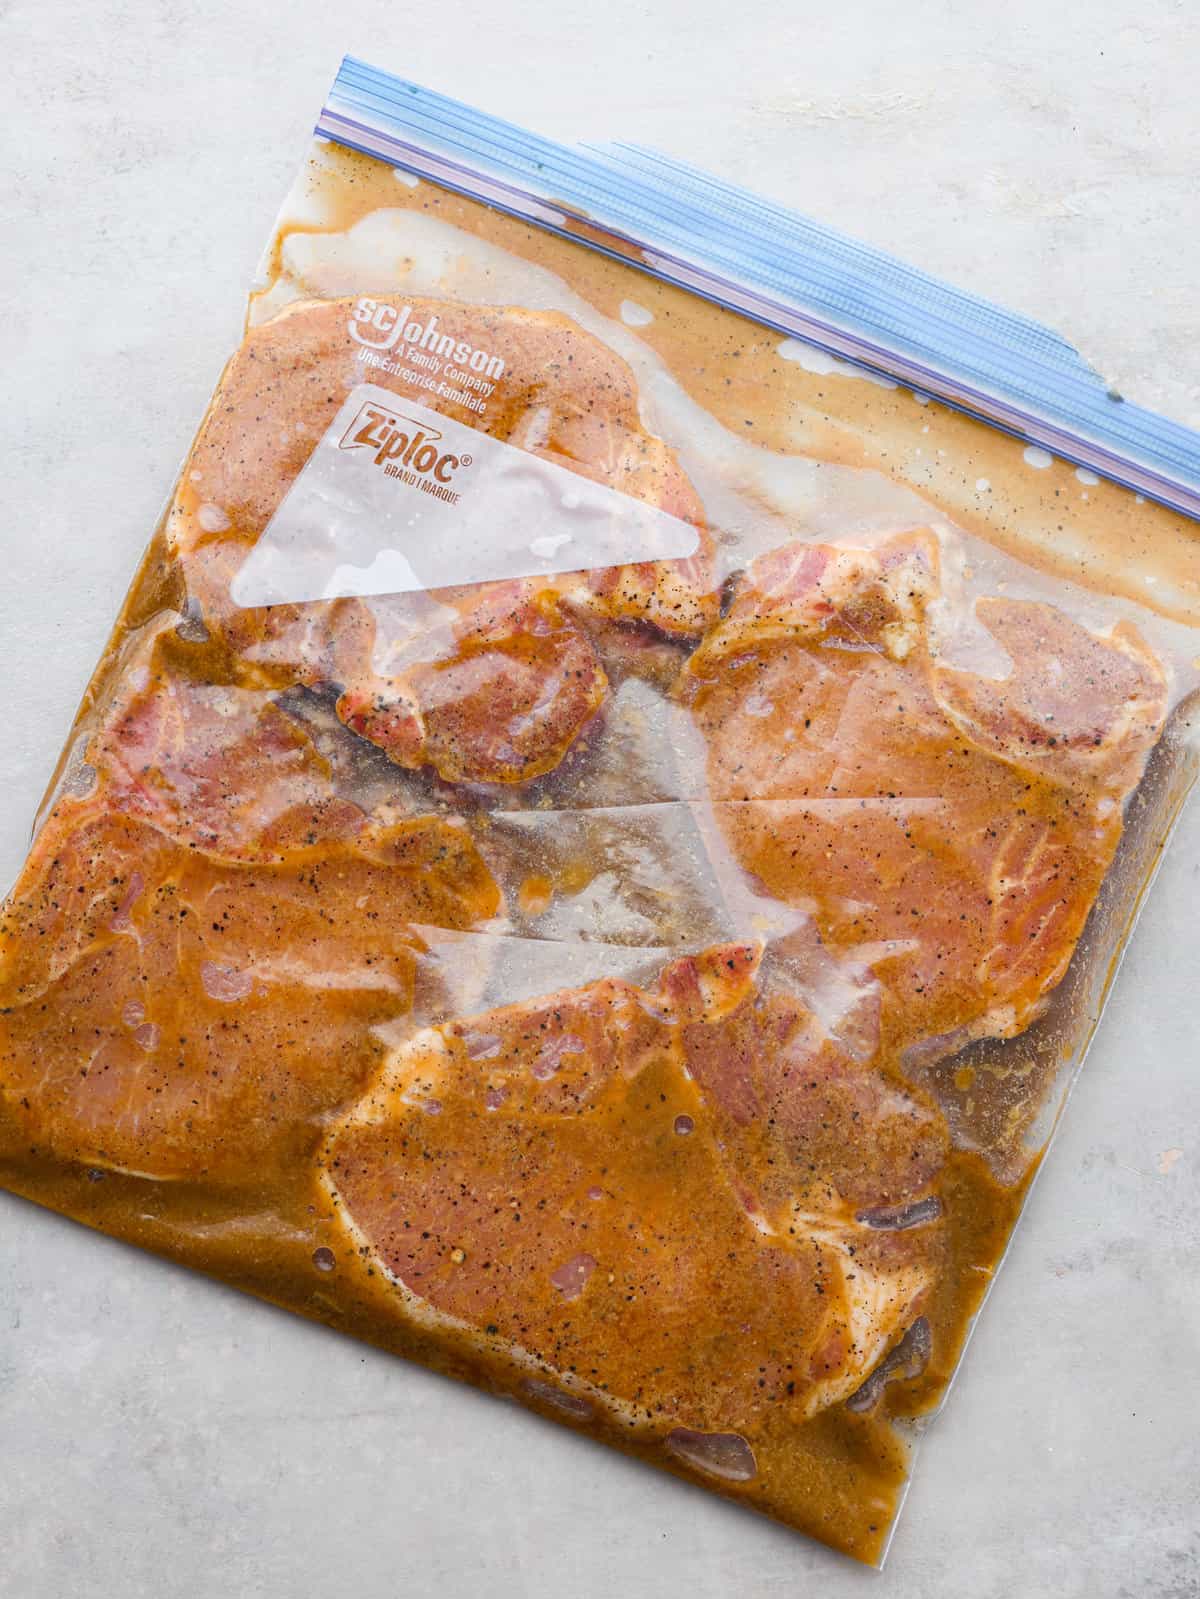
    Pork Chop Marinade

    5 minutes


    Source link

  • Easy Roasted Cauliflower Soup Recipe

    Easy Roasted Cauliflower Soup Recipe

    This roasted cauliflower soup recipe is close to my heart. It’s rich and creamy, super easy to make, and tastes amazing!

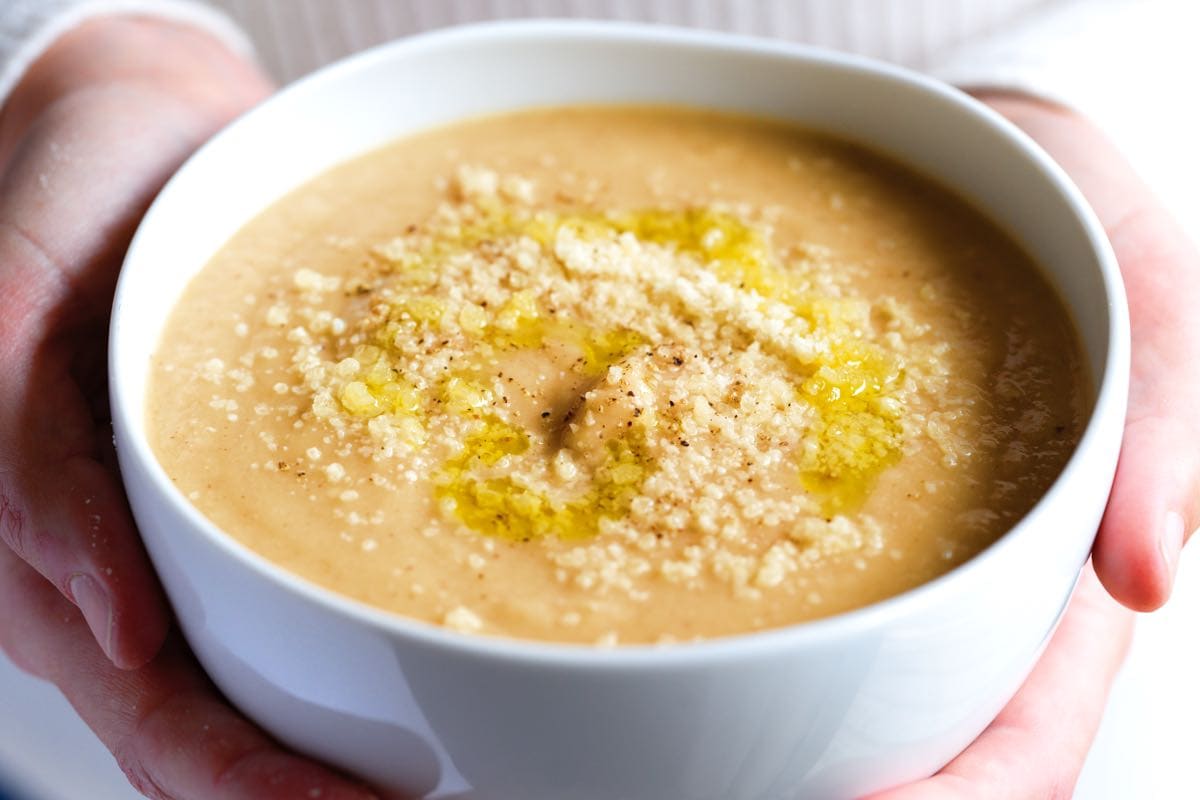
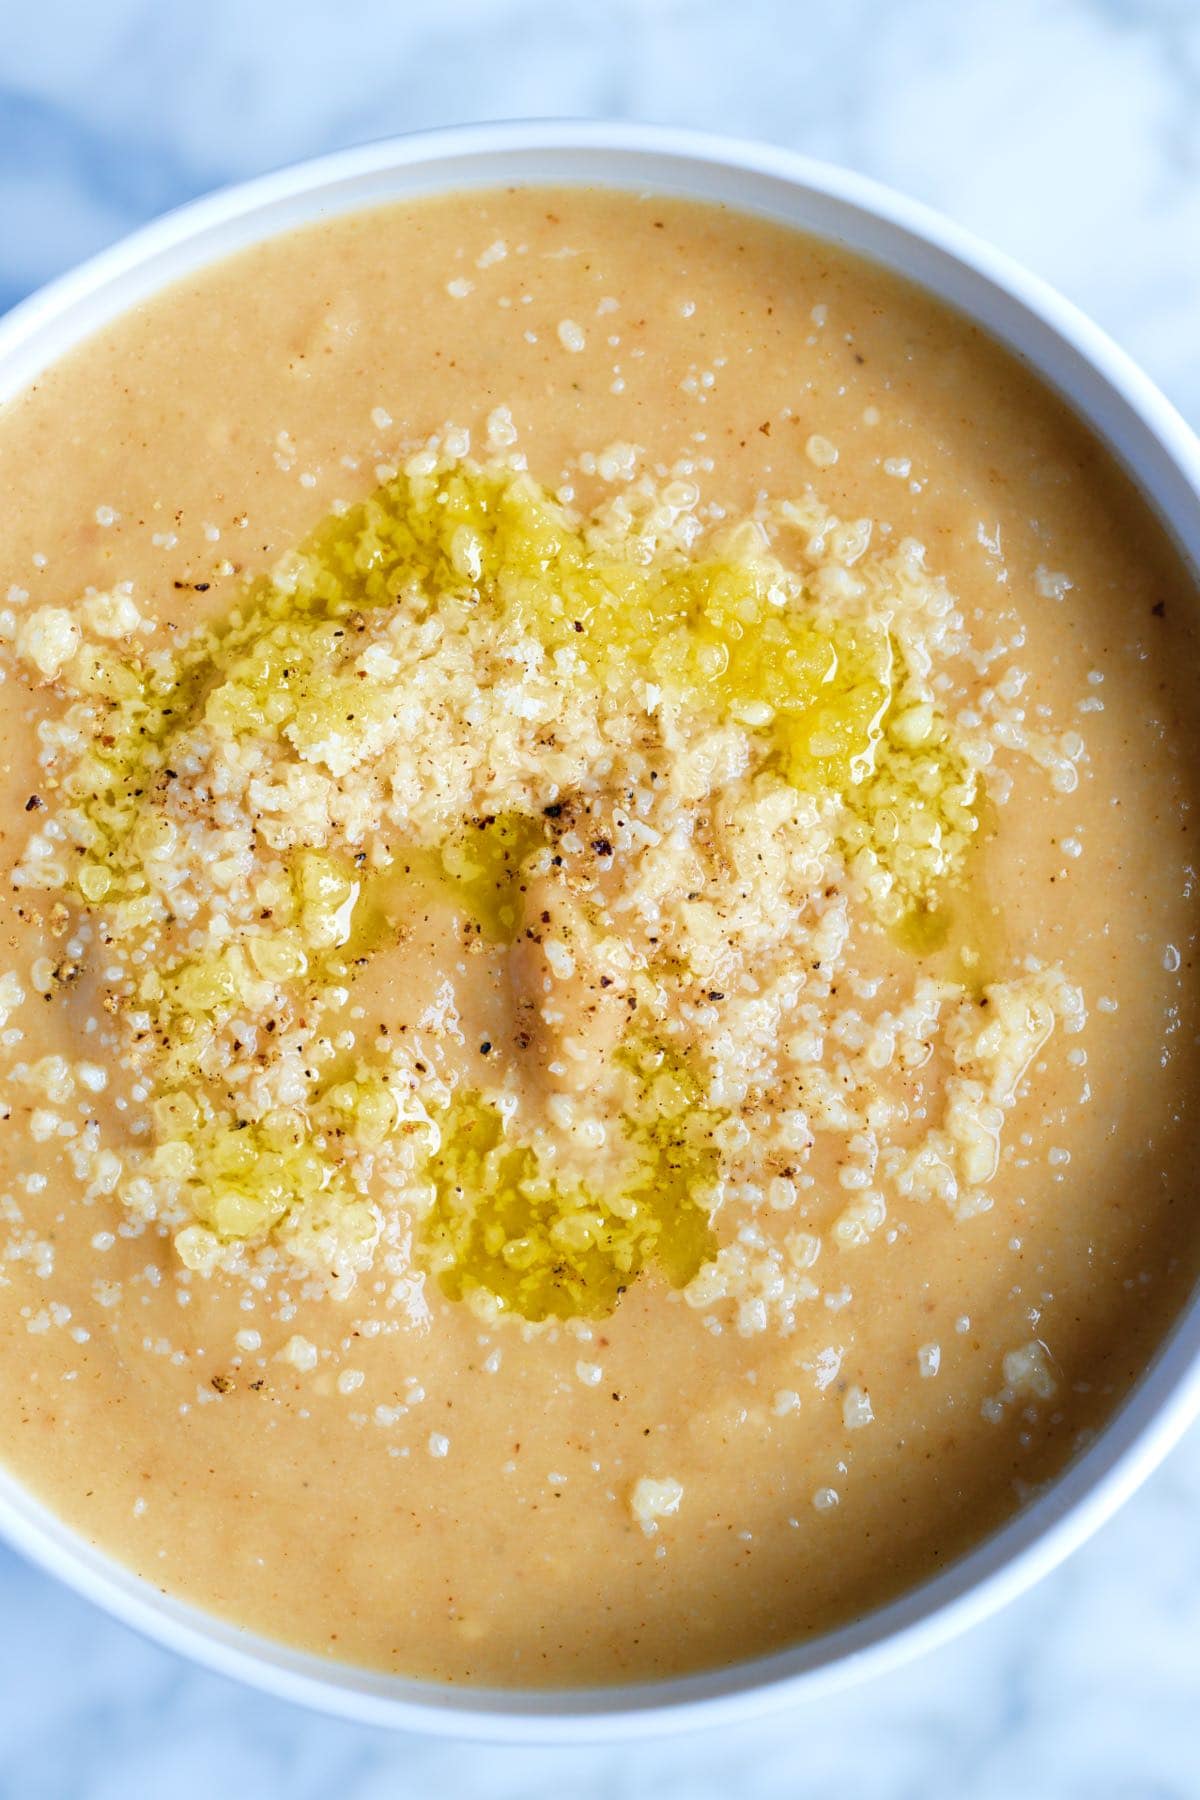
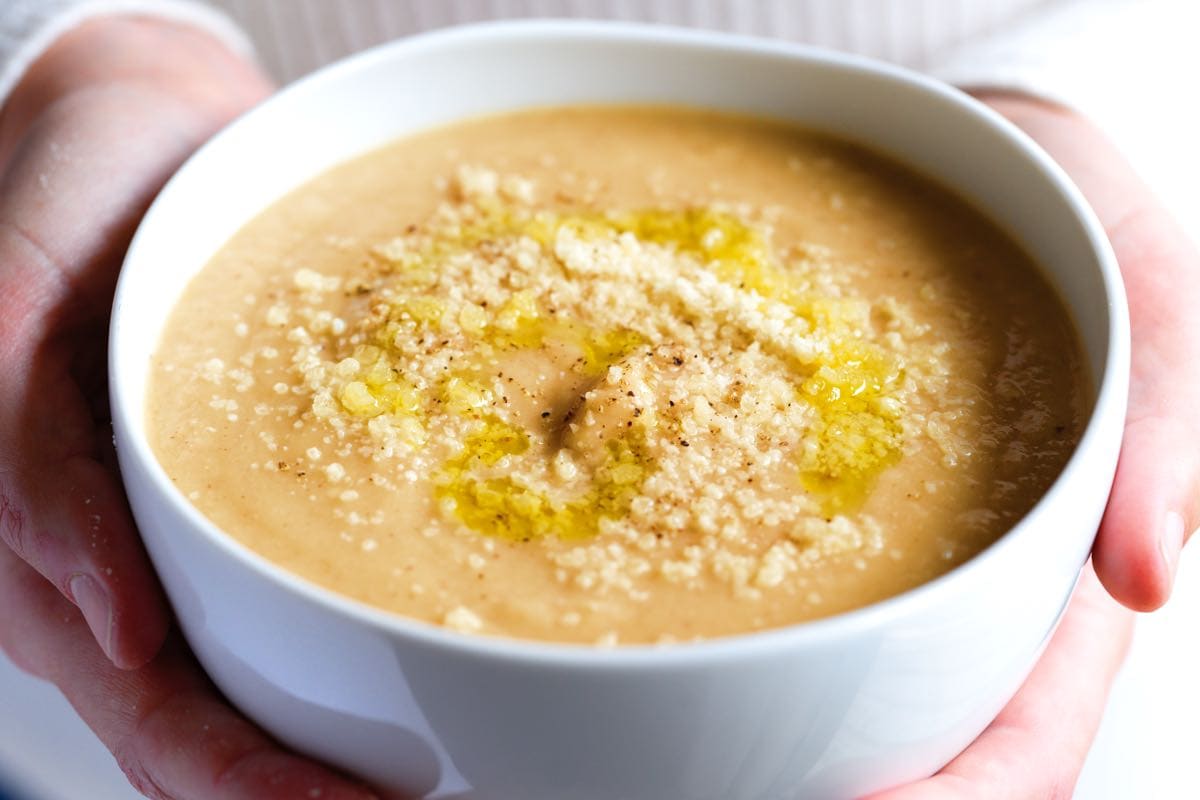
    Roasted Cauliflower Soup with parmesan on top

    For this easy cauliflower soup, we roast a whole head of cauliflower until golden brown and blend with onion, parmesan cheese, and broth until silky smooth.

    We have so many cauliflower recipes on Inspired Taste, and honestly, I love them all, but this soup is the one I go to when I need a little comfort. A big bowl of this soup makes the day melt away.

    Key Ingredients

    • Cauliflower: I use one large head of cauliflower for this soup, which means you’ll get 4 generous servings.
    • Garlic and Thyme: Since I roast the cauliflower for this soup, I take the opportunity to toss a few garlic cloves and fresh thyme onto the baking sheet. They add so much flavor!
    • Onion and Celery: Once the cauliflower has finished roasting in the oven, we cook onion and celery with a pinch of red pepper flakes and salt, adding more nutritious vegetables to the soup and flavor.
    • Broth: I love using a light broth so that the cauliflower shines. I especially love this easy chicken broth and this delicious veggie broth.
    • Butter: I don’t add cream to this cauliflower soup, but I do add butter. Use a good-quality European-style butter or your favorite plant-based butter.
    • Lemon Juice: A squeeze of fresh lemon juice brings this soup together. We highly recommend it.
    • Cheese: I love adding parmesan cheese, but you can substitute it for another kind of cheese or leave it out altogether.

    Find the full recipe with measurements below.

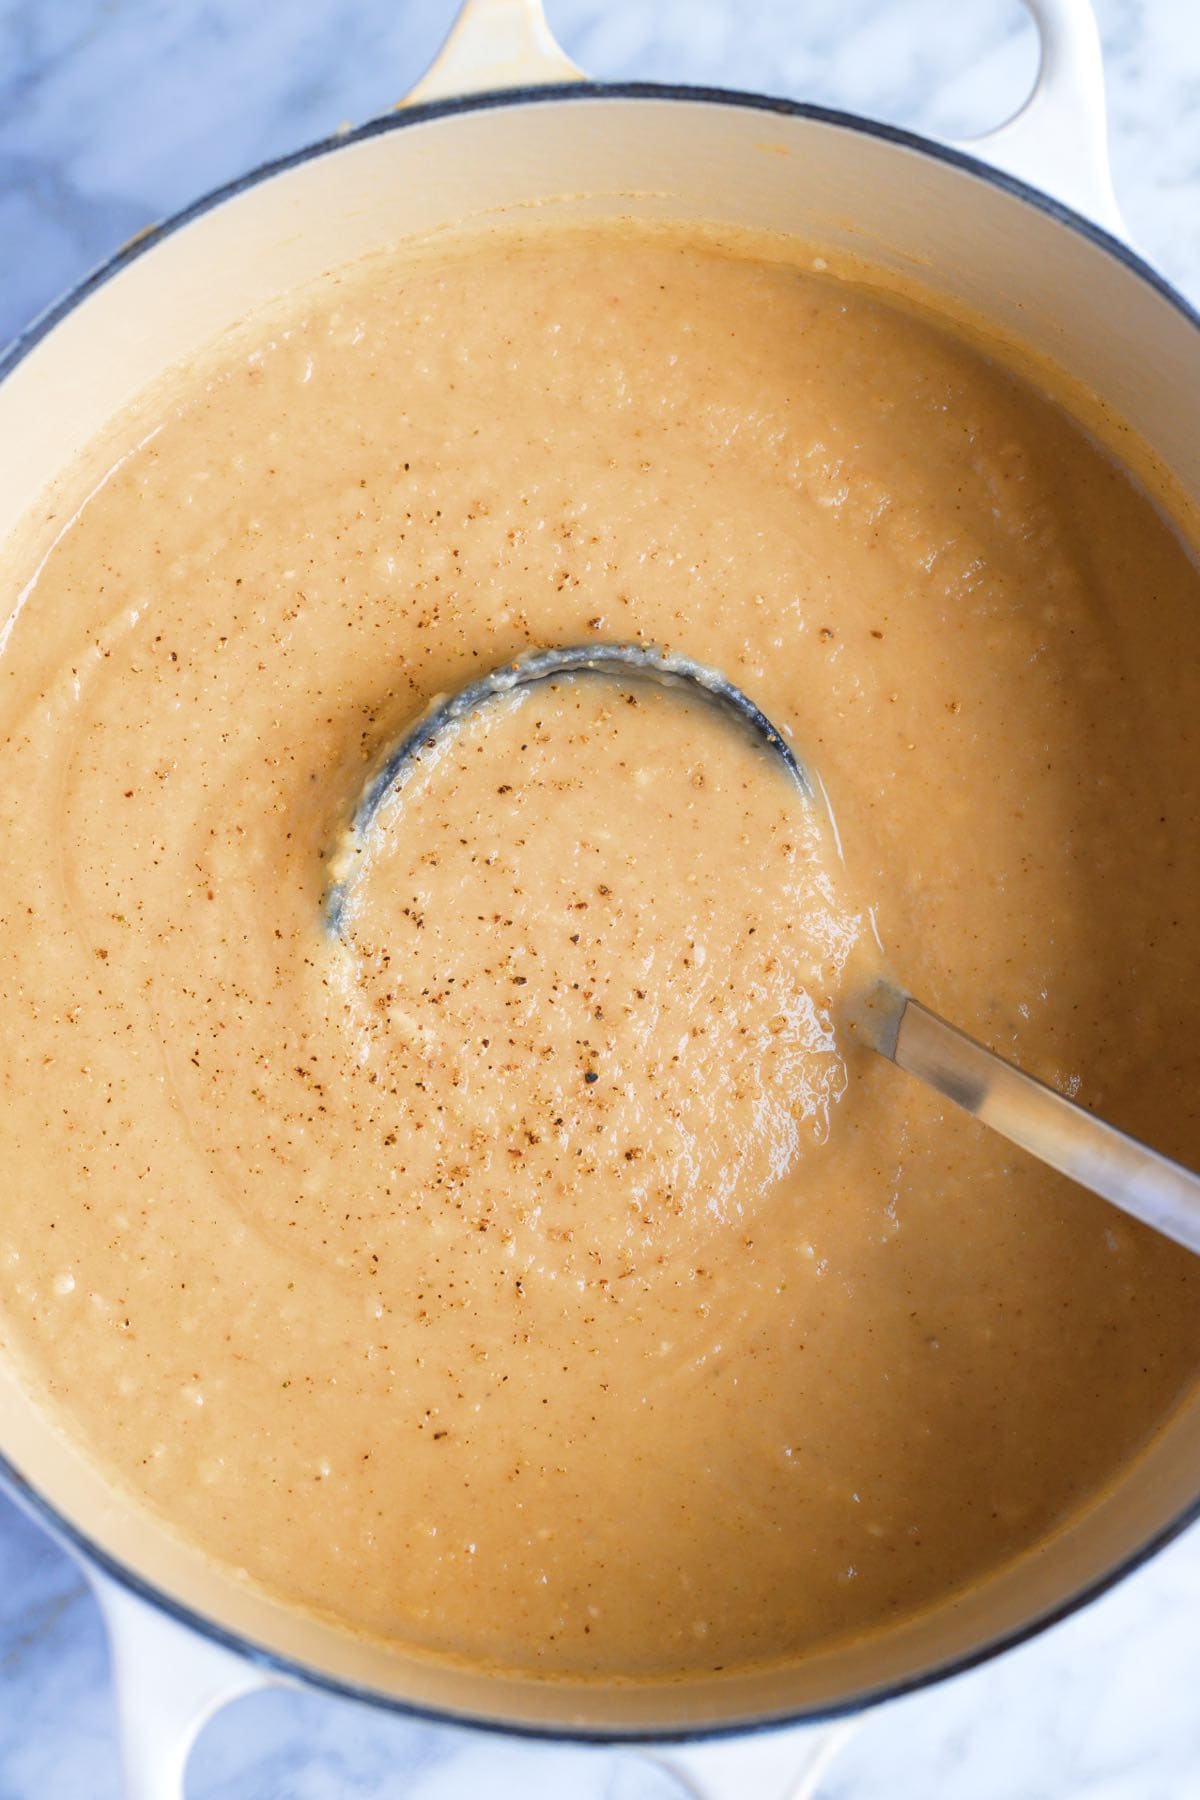
    A Pot of Creamy Cauliflower Soup

    How to Make the Best Roasted Cauliflower Soup

    Tip 1: Roast garlic and cauliflower. This cauliflower soup starts with roasting a whole head of cauliflower. I don’t pay too much attention to how well I chop the cauliflower. Slicing it into cauliflower steaks or slabs is the quickest way. Then we toss them with olive oil, salt, thyme, and whole garlic cloves (you can leave the peel on for now). As the garlic roasts in the oven, it softens and becomes sweet (like in our whole roasted garlic recipe)

    The cauliflower and garlic roast in a hot oven for 20 to 25 minutes, so it’s pretty quick. When it is nearly finished roasting, you can prepare the remaining ingredients.

    Roasted Cauliflower Ready for Cauliflower Soup

    Tip 2: Build flavors. Just as the cauliflower and garlic is finishing in the oven, in a soup pot, cook roughly chopped onion and celery in butter (or olive oil) until soft. The roasted garlic will have softened a lot, so you can easily squeeze the soft garlic cloves to the pot. Then, pour in broth and add the roasted cauliflower. I have two favorite homemade broths for this: veggie broth or chicken broth.

    Tip 3: Blend until creamy. Let the soup simmer for 10 minutes, then blend it into a smooth, decadent soup. I love adding some fresh lemon juice and parmesan cheese, but you can adjust the seasoning with fresh herbs, another kind of cheese, or leave it plain. You can see from the photos that the cauliflower soup is super creamy without having to add any cream!

    More Vegetable Soup Recipes

    More Cauliflower Recipes

    Roasted Cauliflower Soup

    Easy Roasted Cauliflower Soup

    • PREP
    • COOK
    • TOTAL

    For this easy cauliflower soup recipe, we roast a whole head of cauliflower until golden brown and then blend it with onion, parmesan cheese, and broth until silky smooth. This healthy soup is creamy, decadent, and delicious! For more crunch, try serving this soup topped with our homemade garlic croutons.

    4 Servings (makes 6 to 7 cups)

    Watch Us Make the Recipe

    You Will Need

    1 large head cauliflower, about 2 pounds

    4 tablespoons olive oil

    1 teaspoon fresh thyme leaves or 1/4 teaspoon dried thyme

    4 garlic cloves, left unpeeled

    1/2 large onion, chopped, about 1 ¼ cups

    1 celery stalk, chopped, about 1/2 cup

    Pinch crushed red pepper flakes, optional for heat

    4 cups (946ml) vegetable broth or chicken broth

    2 tablespoons butter

    1 tablespoon fresh lemon juice, or more if needed

    1/4 cup grated parmesan cheese, plus more for serving, optional (1/2 ounce)

    Directions

      1Preheat the oven to 425°F (220°C) and prepare a baking sheet. We roast the cauliflower directly on the baking sheet, but for easy cleanup, line it with parchment paper or a silicone baking mat.

      2Remove the larger leaves from the cauliflower and leave the core intact. (You can save the leaves to blend into the soup later.)

      3Slice the cauliflower in half and cut it into 3/4-inch thick slices.
      Drizzle two tablespoons of olive oil onto the baking sheet, then arrange the cauliflower on top of the oil.

      4Add the unpeeled garlic cloves (they will roast in their peels) and the thyme, then drizzle over two more tablespoons of olive oil. Move the cauliflower slices around so they each have a chance to touch some oil.

      5Roast for 20 minutes or until the bottom of each slice looks well browned. Flip each piece, and then roast for 5 minutes more.

      6Melt two tablespoons of butter in a deep soup pot over medium heat. Then, stir in the onions, celery, pinch of red pepper flakes, and 1/4 teaspoon salt. Cook until softened, about 5 minutes.

      7When they are cool enough to handle, squeeze the garlic from inside each clove and place it in the soup pot. Discard the garlic peel.

      8Transfer the roasted cauliflower to the pot and pour in the broth. If you saved any cauliflower leaves from earlier, add them to the pot. Bring to a simmer and cook for 10 minutes.

      9Turn off the heat, and add the cheese and two tablespoons of lemon juice.

      10Blend the soup until smooth. An immersion blender is the easiest, or you can use a blender. If you use a regular blender, it is best to blend in batches and fill the blender less than you usually would since the soup is so hot. We like to remove the lid’s center insert and cover it with a kitchen towel while blending. This helps to release some of the steam and prevents the blender lid from popping off (which can be a big, hot mess).

      11Taste the soup and add more lemon juice, salt, and pepper until the flavor pops (it should make you smile). Serve with more cheese, a few grinds of black pepper, and a drizzle of olive oil on top.

    Adam and Joanne’s Tips

    • Storing: This cauliflower soup lasts in your refrigerator for up to 5 days. It can also be frozen for up to one month, probably longer.
    • Soup is too thick: Add 1/4 cup to 1 cup of water. Add enough water to achieve your preferred thickness. The water will not water down the flavor of your soup, but if you are concerned or have more on hand, you can use stock or broth.
    • Vegetarian adaptations: Use vegetable broth, a vegetarian-friendly cheese or leave it out altogether.
    • Vegan adaptations: Use vegan broth, vegan butter and vegan cheese or a couple tablespoons of nutritional yeast instead (my preference).
    • The nutrition facts provided below are estimates.

    Nutrition Per Serving
    Serving Size
    1/4 of the recipe (1 of 4 servings)
    /
    Calories
    288
    /
    Total Fat
    23.2g
    /
    Saturated Fat
    7.5g
    /
    Cholesterol
    23.4mg
    /
    Sodium
    686.7mg
    /
    Carbohydrate
    18.1g
    /
    Dietary Fiber
    5.2g
    /
    Total Sugars
    7.5g
    /
    Protein
    6.8g


    AUTHOR:

    Joanne Gallagher

    Adam and Joanne of Inspired Taste

    We are Adam and Joanne Gallagher, the creators of Inspired Taste. Established in 2009, Inspired Taste grew from a childhood dream into one of the internet’s most trusted recipe sites with hundreds of reliable recipes, step-by-step videos, and expert tips.More About Us
    Source link

  • Instant Pot Lobster Tails that are Tender and Easy
    Instant Pot Lobster Tails that are Tender and Easy

    This website may contain affiliate links and advertising so that we can provide recipes to you. Read my disclosure policy.

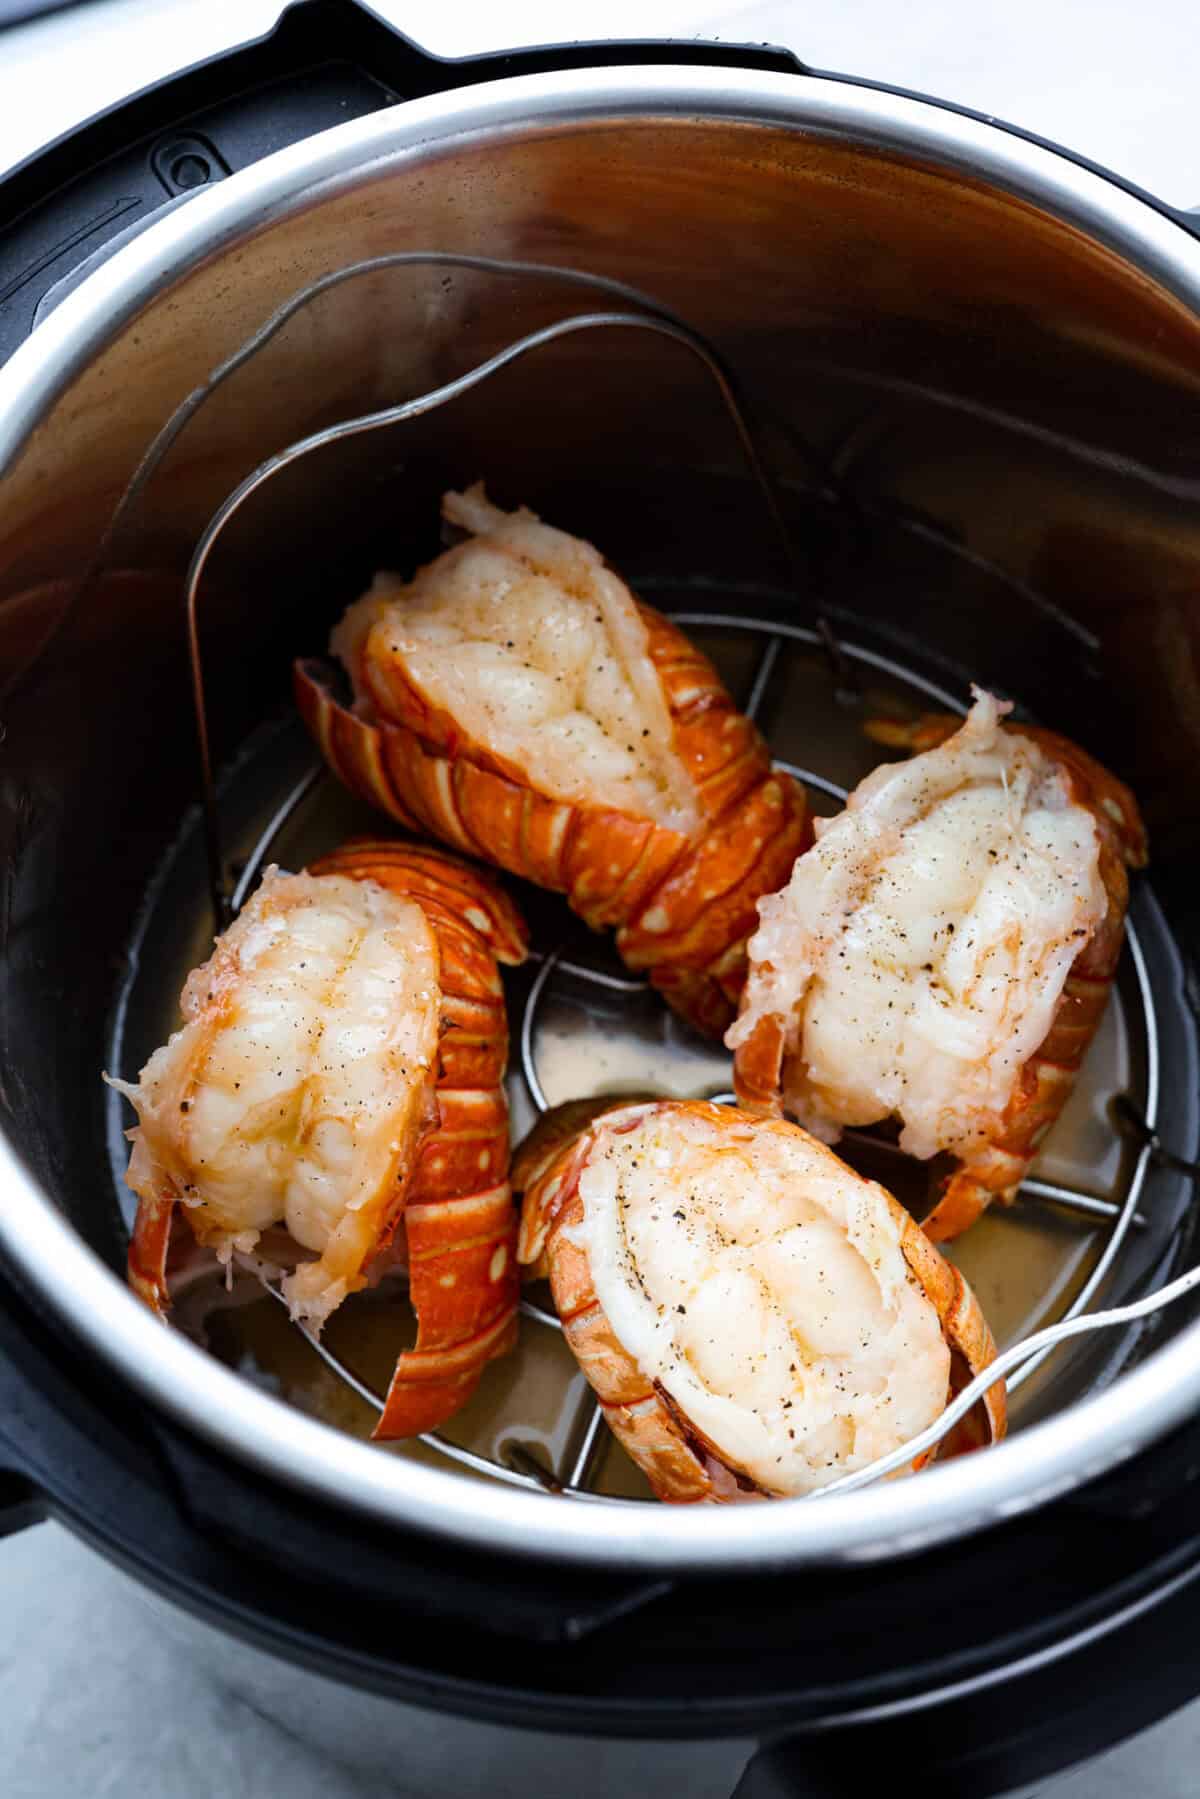
    Instant pot lobster is the easiest way to bring a little luxury to your dinner table, no boiling pots or fancy techniques needed! In just minutes, the lobster cooks up tender, juicy, and perfectly steamed, ready to soak up a rich garlic herb butter.

    Overhead shot of instant pot lobster tails inside the instant pot.

    Why This Recipe Is a Total Catch

    • Effortless Elegance: You get restaurant-style lobster with almost zero work! The Instant Pot handles the steaming, so you can just relax!
    • Flavor Boosted Butter: The warm garlic-herb butter melts into every bite, making each tail taste rich and luxurious without a long ingredient list.
    • Pairs Like a Dream: Serve it with lemon garlic cream fettuccini, roasted veggies, or a simple caesar salad for a dinner that looks fancy but takes hardly any time at all.

    Instant Pot Lobster Tail Ingredients

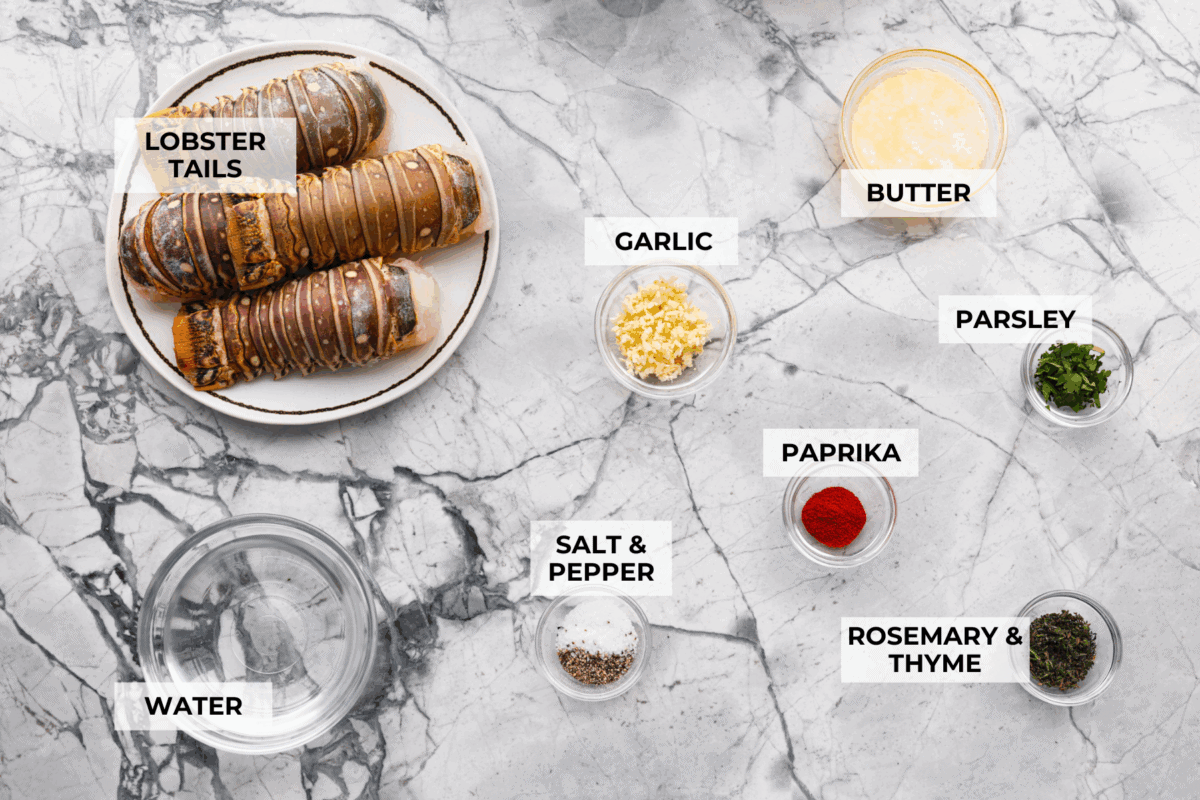
    Overhead shot of labeled instant pot lobster ingredients.Overhead shot of labeled instant pot lobster ingredients.
    • Lobster Tails: Pick similar sized tails so they cook evenly. Fresh or frozen work, just thaw frozen tails in the fridge for the best texture.
    • Water: Chicken broth is a great alternative and adds extra flavor as it steams!
    • Butter: Use good quality unsalted butter like Kerrygold or Plugra for a rich flavor. If you use salted butter, cut back on any extra salt.
    • Herbs: Fresh herbs make a big impact. If using dried, use about one third as much because they are more concentrated.

    How to Make Instant Pot Lobster Tails

    Lobster tails may look intimidating, but pressure cooking them makes them totally doable. It’s simple to prepare and turns any dinner or holiday meal into something really special.

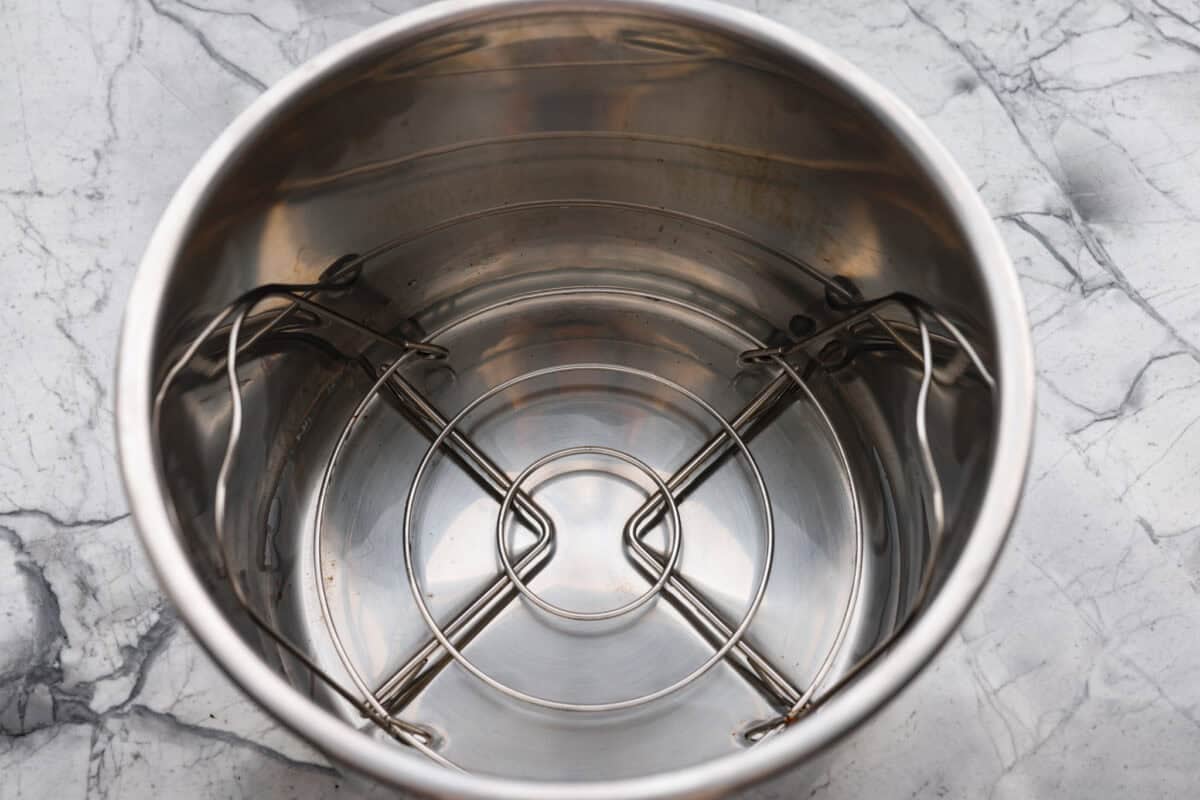
    1. Prepare: Add the trivet and water to the bottom of the Instant Pot.
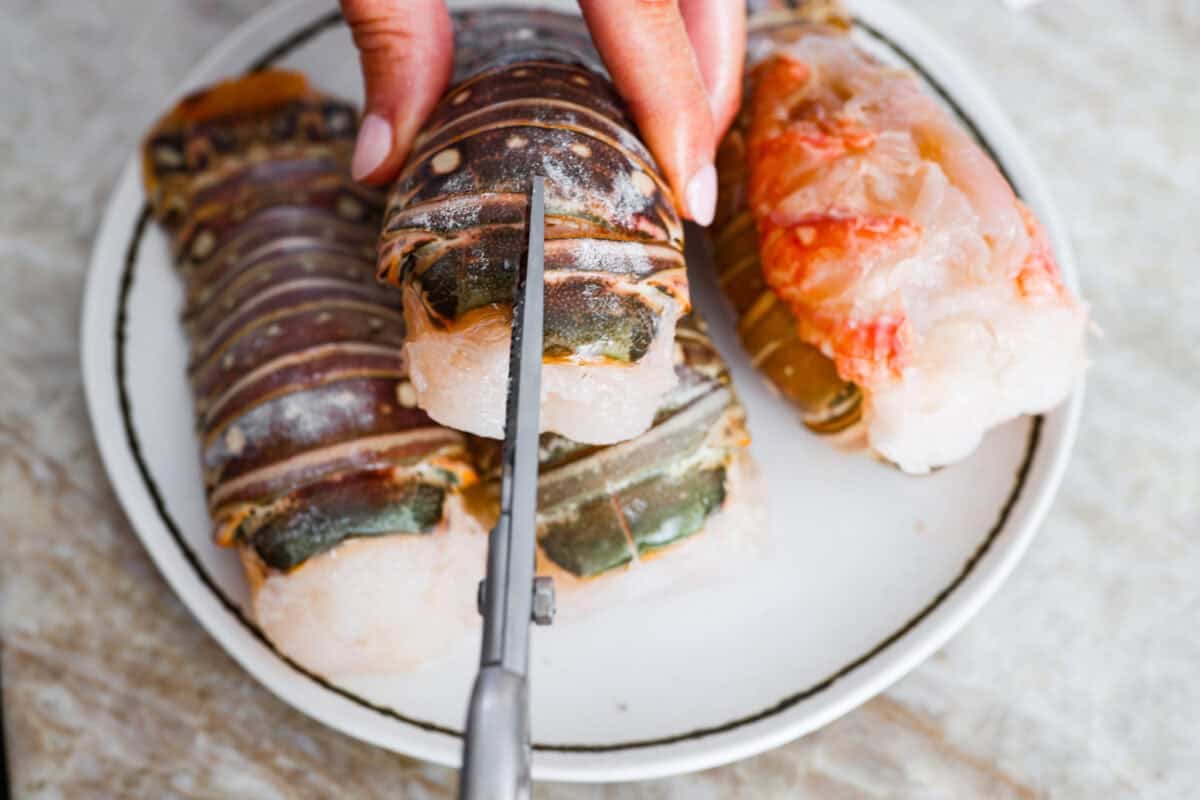
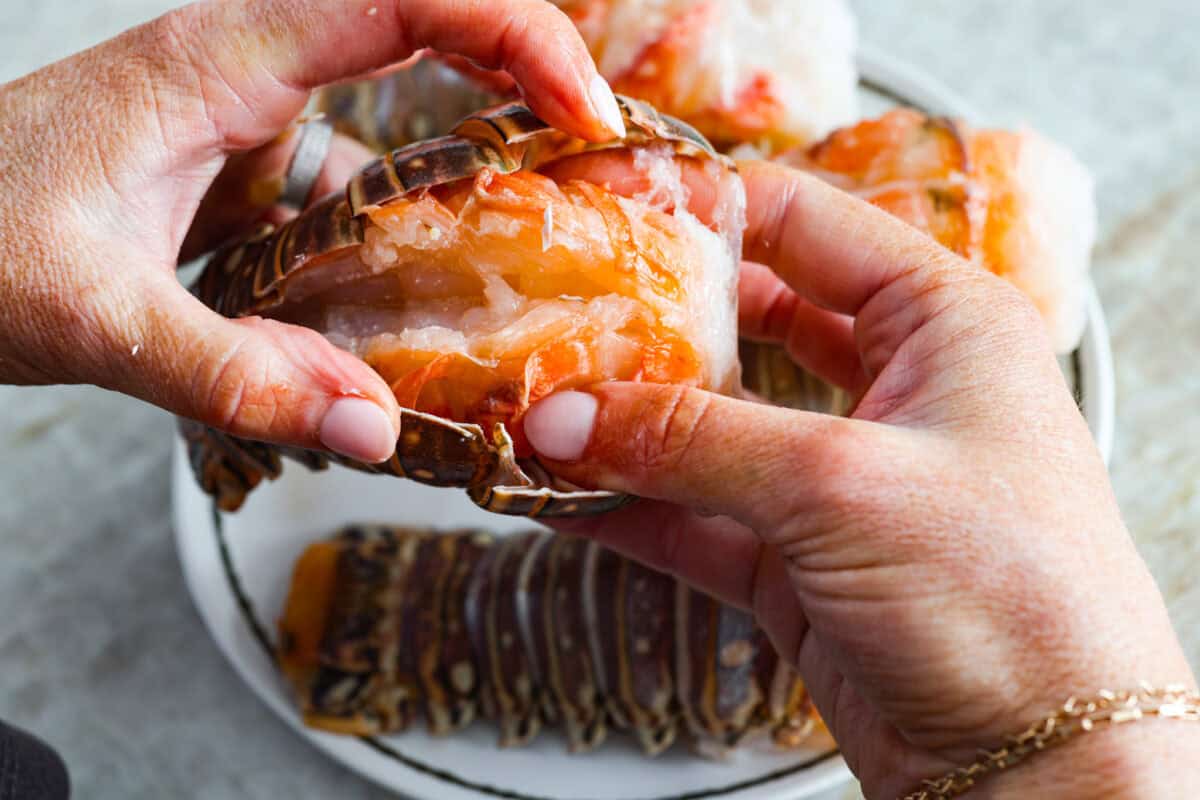
    2. Cut the Tails: Using kitchen shears, butterfly the tails of the lobster by cutting down the center.
    3. Loosen the Meat: Loosen the meat, then pull the lobster meat upward.
    4. Steam: Place the lobster tails on top of the trivet, shell side down, then close the lid and lock it in place. Select the “SEAL” mode, then press “STEAM” and add 2 minutes to the cook time. Manually release the steam once the lobster has cooked.
    5. Whisk the Butter Sauce: In a small bowl, whisk together the melted butter, garlic, paprika, thyme, rosemary, and parsley.
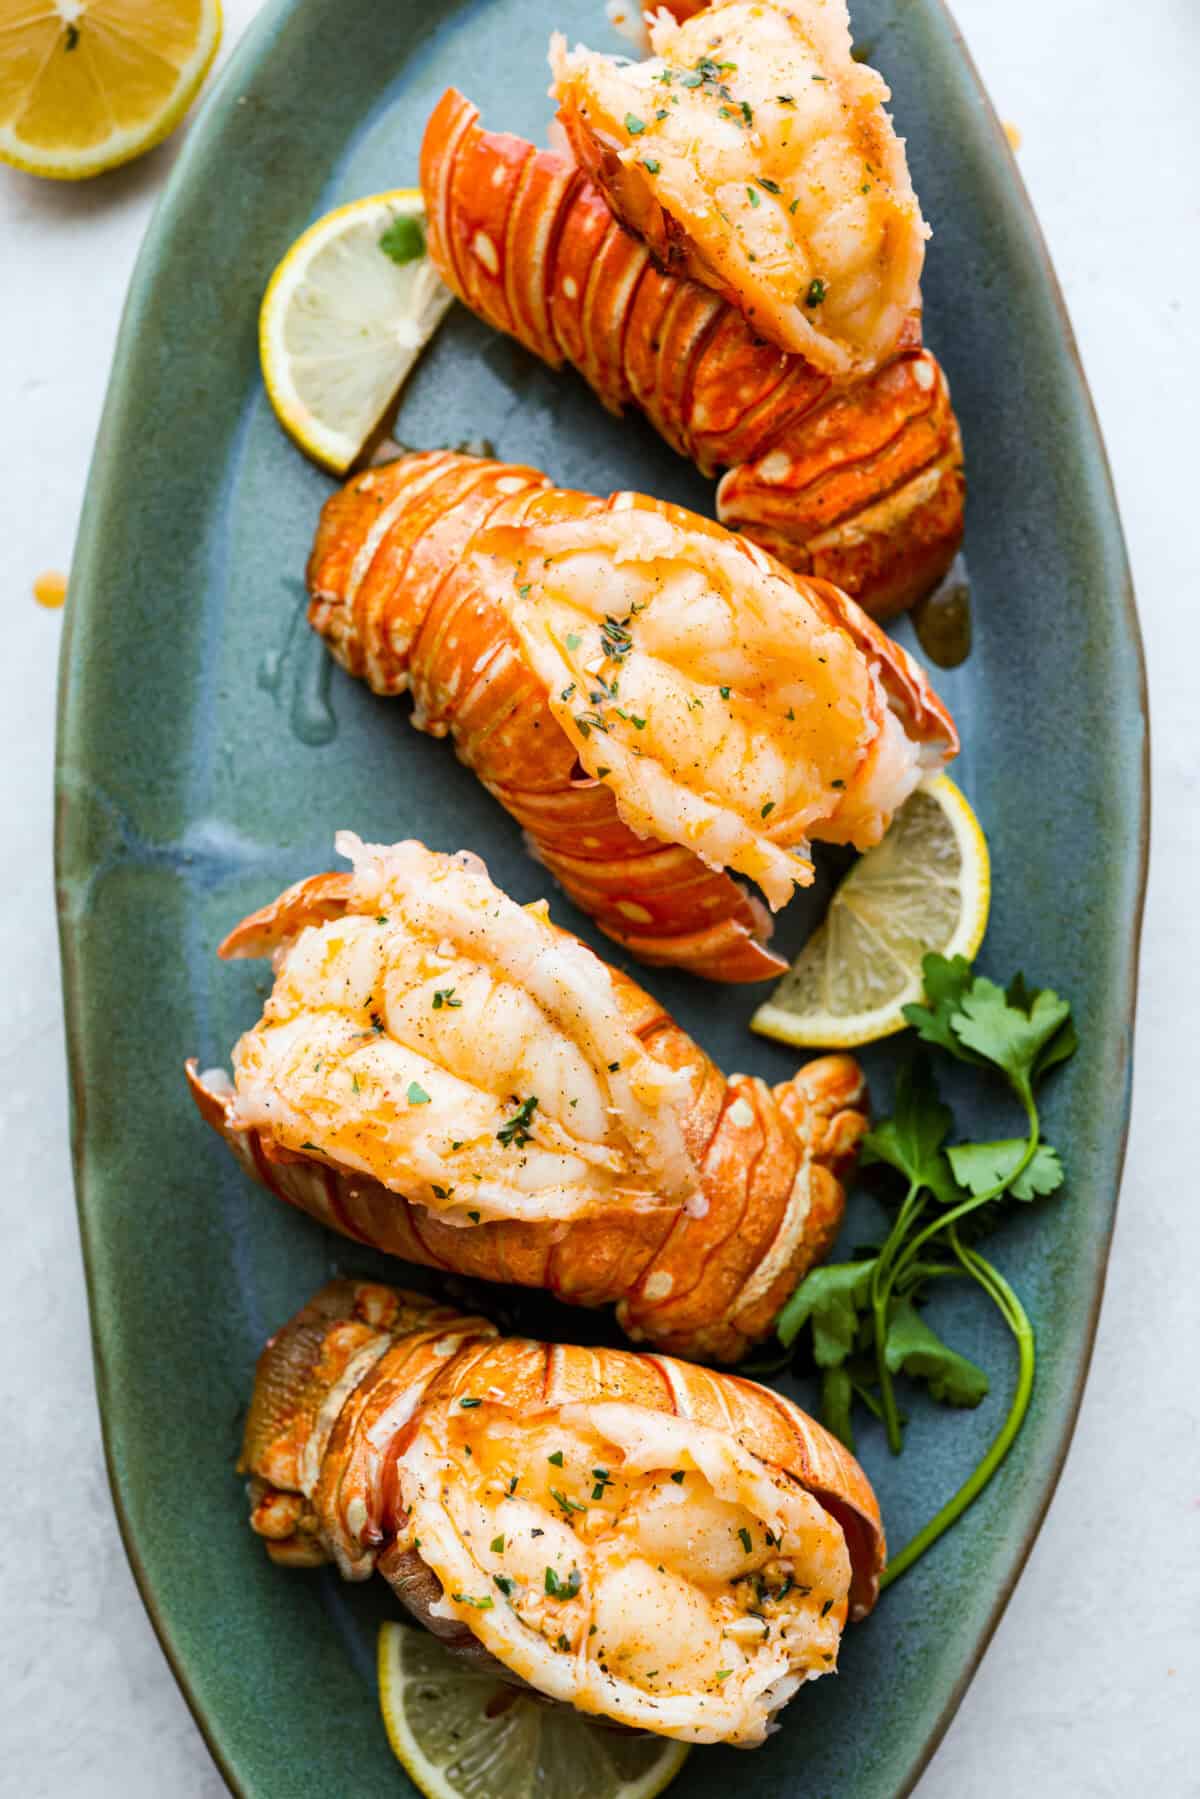
    6. Brush and Serve: Brush the sauce on the perfect Instant Pot lobster tails and enjoy!

    Alyssa’s Pro Tip

    Don’t Overcook! When checking for doneness, the lobster meat should be opaque and firm, with just a hint of pink near the tail. Avoid overcooking, as even a minute too long can make the beef rubbery and tough.

    Pin this now to find it later

    Pin It

    Plated instant pot lobster tails. Plated instant pot lobster tails.

    More Delicious Lobster Recipes

    If you like seafood and want to make this Instant Pot lobster, check out more ways to make it. Each is simple and will wow your friends and family.


    Source link

  • Easy Baked Pesto Chicken

    Easy Baked Pesto Chicken

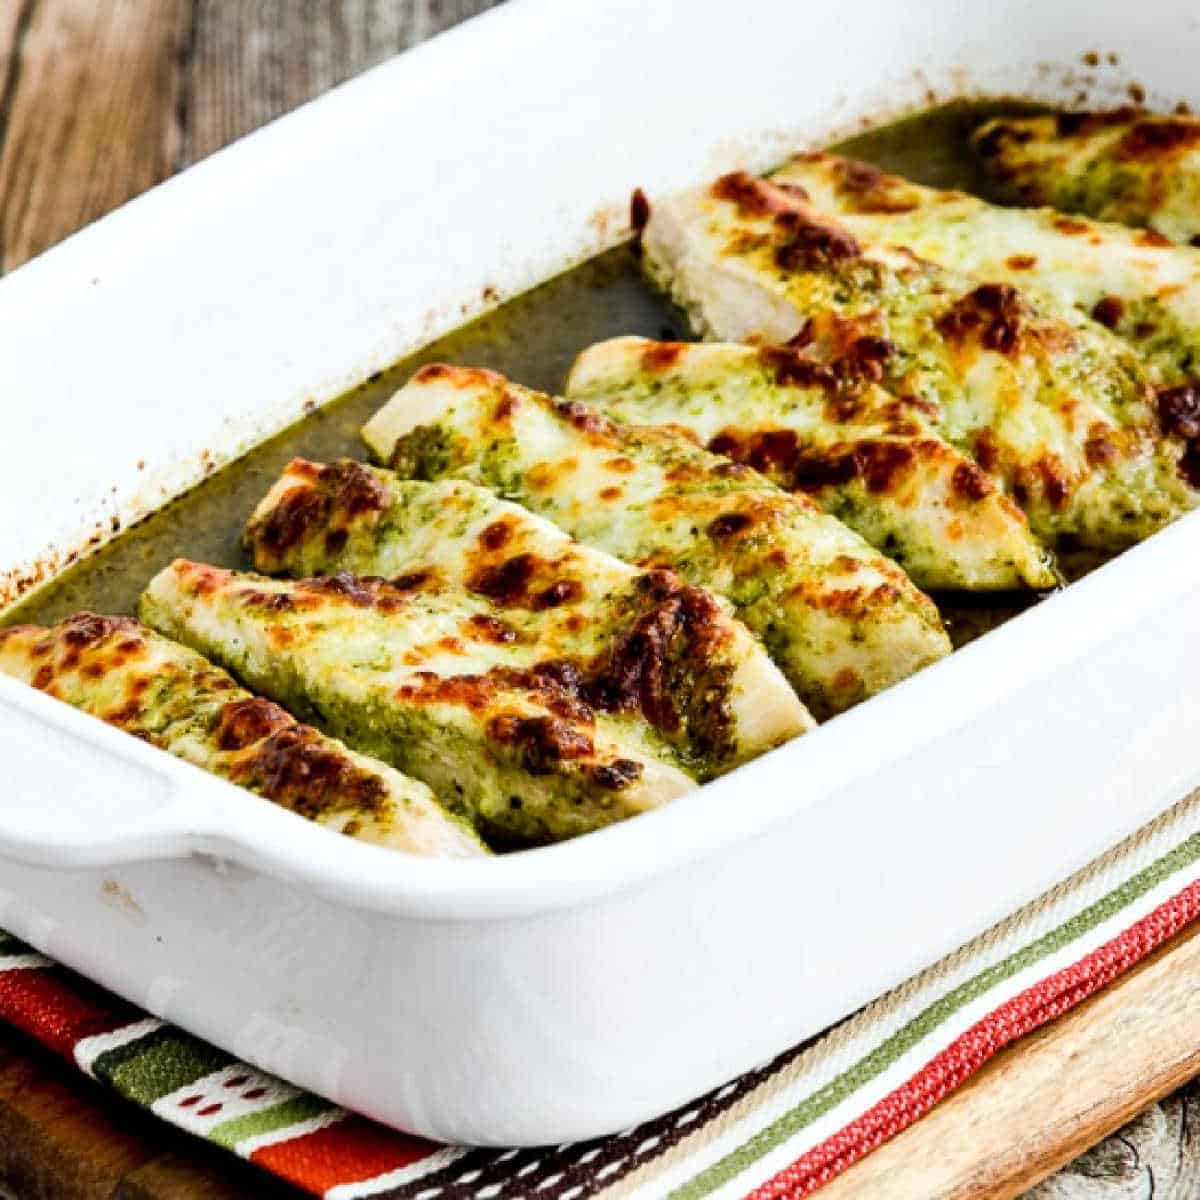
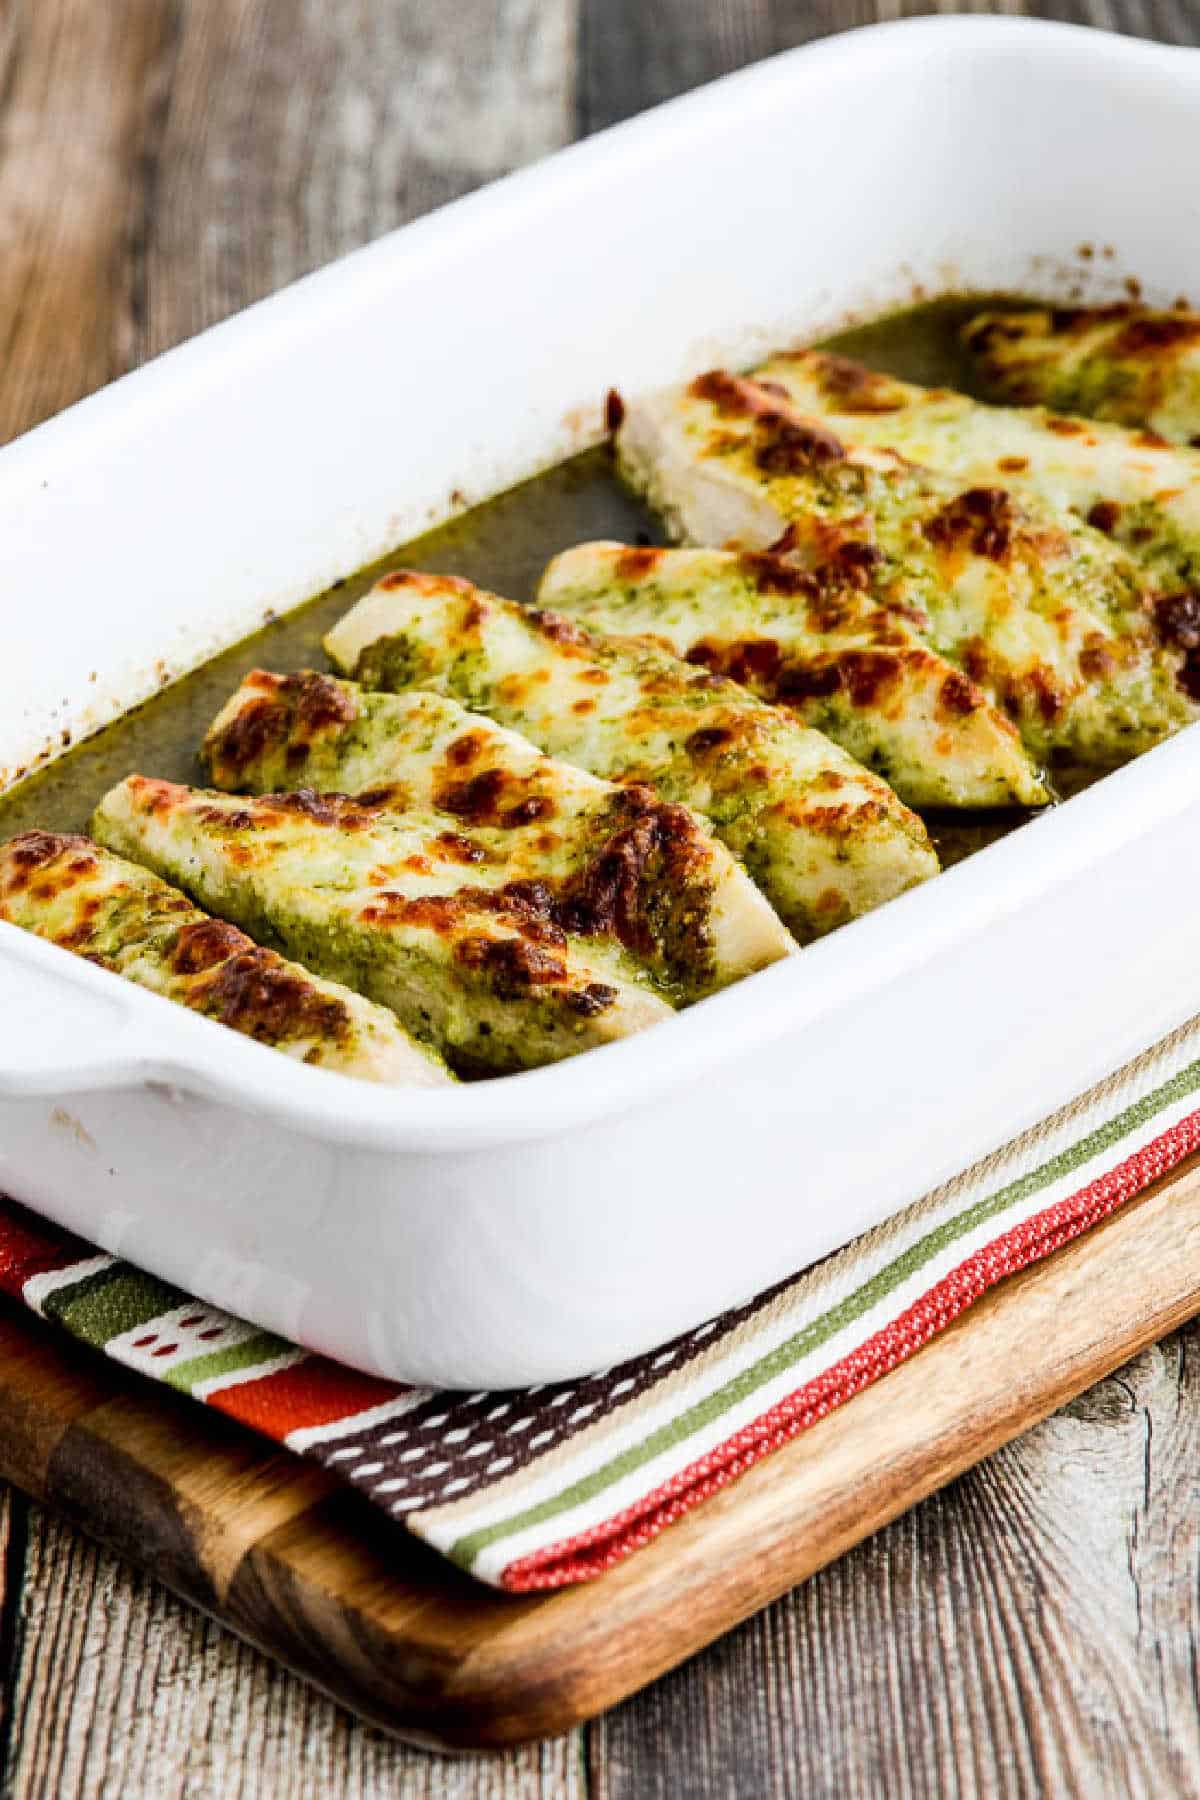
    Easy Baked Pesto Chicken is a tasty dinner to make with purchased pesto, or use homemade pesto if you have some! And this easy five-ingredient low-carb baked chicken recipe is probably something the whole family will enjoy!

    Pin Easy Baked Pesto Chicken to try it later!

    Easy Baked Pesto Chicken shown in baking dish with melted cheese

    When I first made Easy Baked Pesto Chicken, I loved what a flavorful dinner it was. But I didn’t realize it would become one of the most popular recipes on the blog. Now it’s been pinned millions of times and visited over and over on my website! And I’ve made this many times myself.

    I got the inspiration for a Baked Pesto Chicken recipe years ago when I was browsing in The South Beach Diet Quick and Easy Cookbook. That was in the summer, and when it’s summer at my house there’s fresh basil on the counter, I’m freezing basil for winter, and I’m making Basil Pesto with Lemon. So it’s not surprising that a recipe using pesto would catch my eye.

    But this recipe is also great with purchased pesto. I’m a fan of Kirkland Basil Pesto, so that’s what I’d use if I don’t have homemade pesto in the freezer. I hope you try the recipe if you’re also a pesto fan!

    What ingredients do you need for this recipe?

    (This is only a list of ingredients; please scroll down for complete printable recipe. Or if you use the JUMP TO RECIPE link at the top of the page, it will take you directly to the complete recipe.

    • boneless, skinless chicken breasts
    • salt and fresh ground black pepper for seasoning chicken
    • Basil Pesto (affiliate link), or Basil Pesto with Lemon
    • grated Mozzarella cheese

    Is this baked chicken with pesto a kid-friendly dish?

    A few years after I posted this recipe I started working out with a trainer named Wendy. Then one day she told me she had searched the recipe for her kids’ favorite chicken dish, and it was this recipe from my blog! So if you’re wondering if this can be kid-friendly, Wendy says her kids love this Baked Pesto Chicken. Wendy serves it with pasta for the kids, but I’d serve with one of the options below for a tasty low-carb meal.

    Can you make Baked Pesto Chicken with pesto from the store?

    You can certainly make this ultra-easy main dish with purchased basil pesto, which is what the inspiring recipe called for. But when I have some on hand, I’d always make it with my homemade pesto from the freezer.

    How low in carbs is the Easy Baked Pesto Chicken?

    This flavorful chicken dish only has 3 net carbs per serving, with 48 grams of protein! And this tasty chicken dish is also gluten-free.

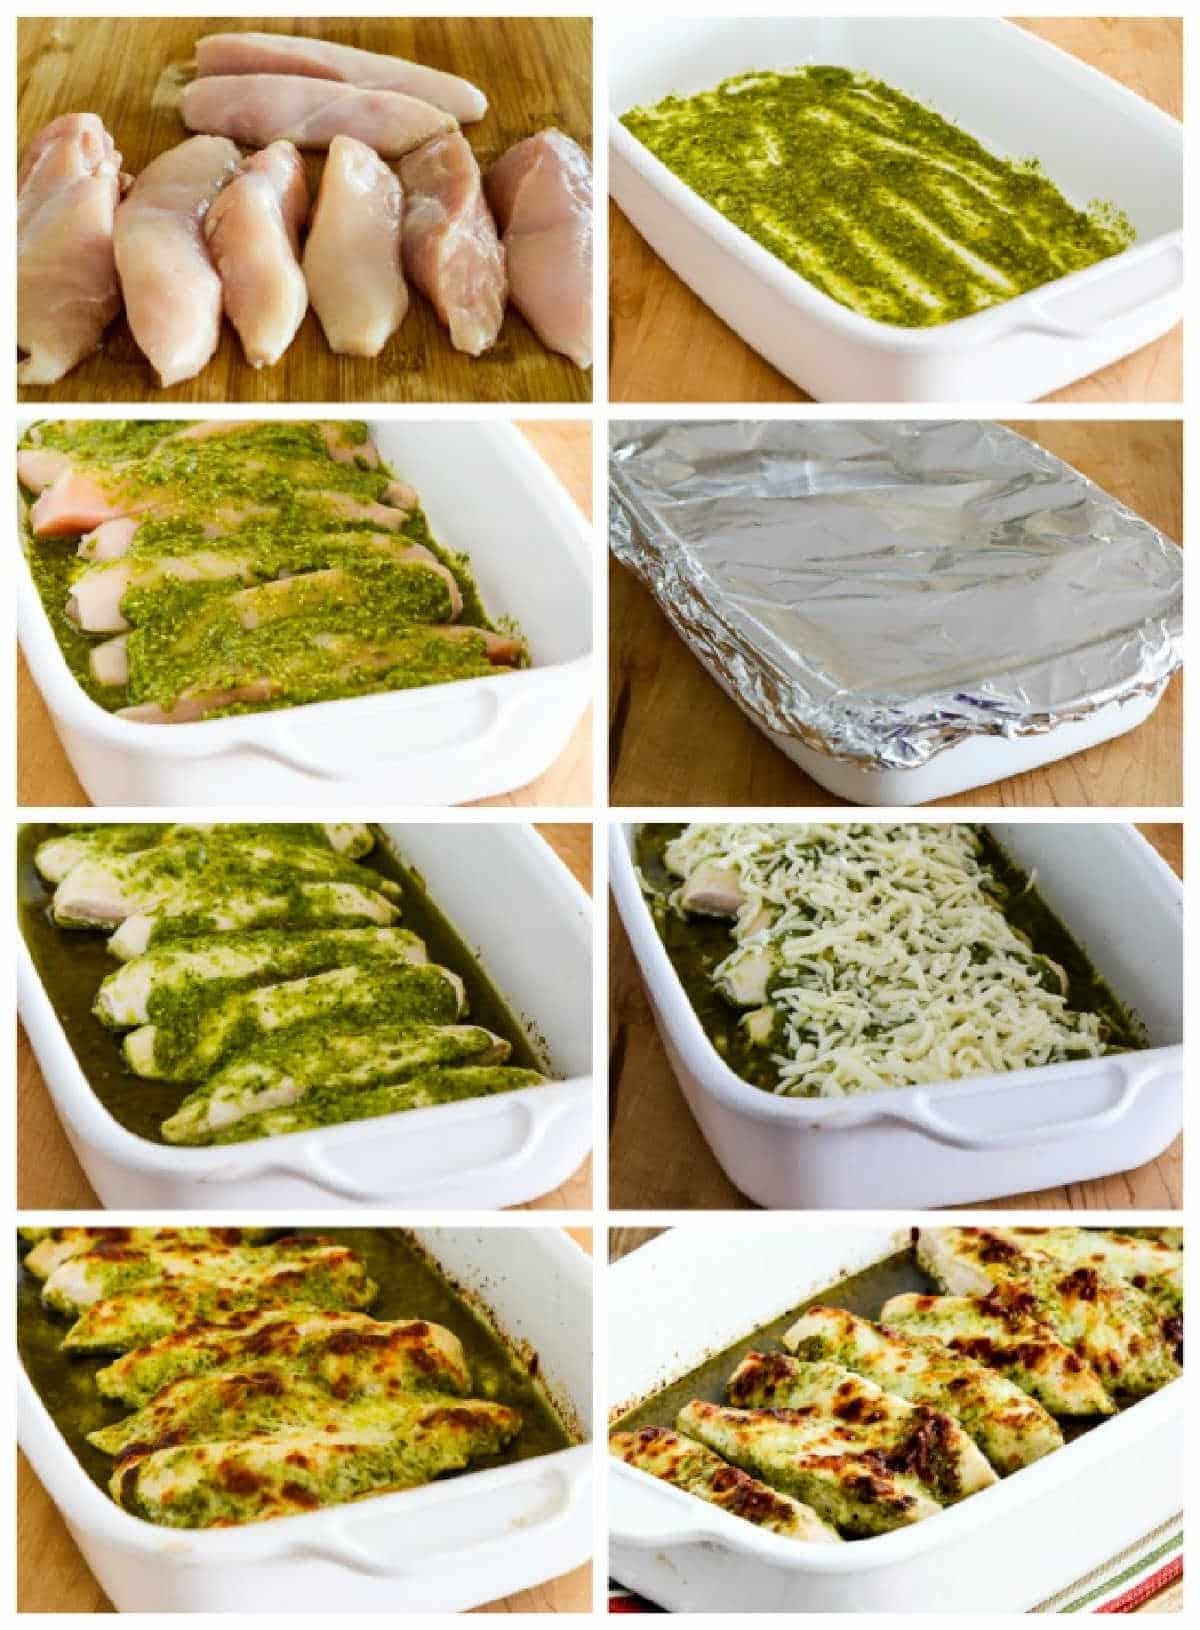
    recipe steps collage for Easy Baked Pesto Chicken

    How to Make Easy Baked Pesto Chicken:

    (This is only a summary of the steps for the recipe; please scroll down for complete printable recipe. Or if you use the JUMP TO RECIPE link at the top of the page, it will take you directly to the complete recipe.)

    1. Trim chicken breasts and cut into lengthwise strips. (I save scraps in the freezer and use them to make homemade chicken stock.)
    2. Spray casserole dish with non-stick spray, then spread 1/4 cup basil pesto over the bottom of the dish.
    3. Lay chicken strips over the pesto and season with salt and fresh ground black pepper.
    4. Spread another 1/4 cup of basil pesto over chicken strips.
    5. Cover dish with foil and bake at 375F/190C for 25-30 minutes, or until the chicken is barely cooked through. (Don’t cook too long at this stage, or the chicken will be overcooked when the cheese is melted.)
    6. Then sprinkle 1/2 cup grated mozzarella cheese (or a little more) over the top and bake about 5 minutes more, or until cheese is melted. (If your broiler is separate from the oven, start preheating it.)
    7. I wanted the cheese to be lightly browned, so after 5 minutes I switched to broil for just long enough to get some color on the cheese.
    8. That’s all there is to making this easy and delicious low-carb chicken dinner!
    9. Serve Easy Baked Pesto Chicken hot, and I hope this will become a favorite in your household!

    Make it a Low-Carb Meal:

    Baked Pesto Chicken would be delicious with either Pureed Cauliflower with Garlic, Parmesan, and Goat Cheese or Easy Cauliflower Rice to smother with the flavorful sauce that will be left in the dish. (It would also be amazing with Greek Lemon Rice if you don’t mind having more carbs!)

    Or serve with one of these low-carb side dishes:

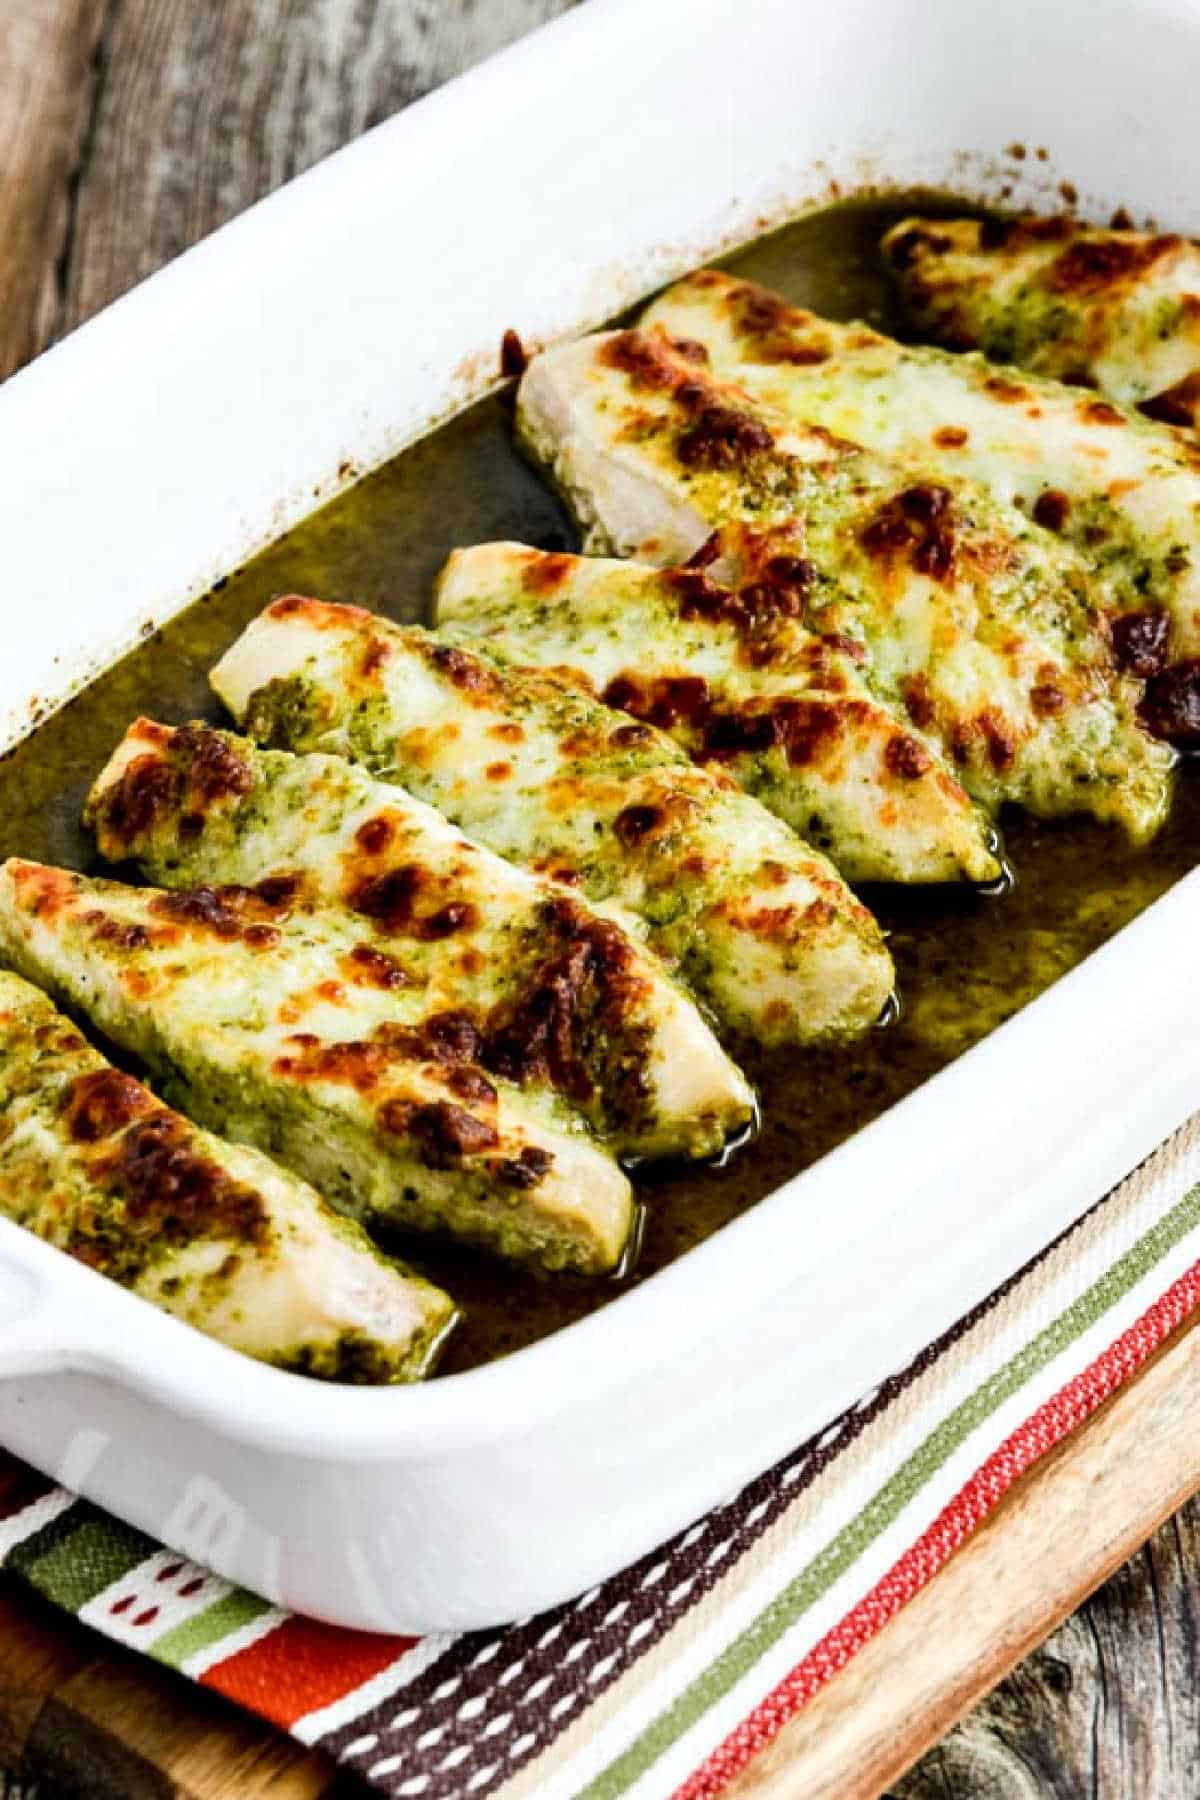
    Easy Baked Pesto Chicken in baking dish on striped napkin and cutting board

    Want more low-carb dinners with pesto?

    If you still have more basil pesto after you make this, check out my other Amazing Recipes with Pesto!

    Weekend Food Prep:

    This recipe has been added to a category called Weekend Food Prep where you’ll find recipes you can prep or cook on the weekend and eat during the week! This recipe can easily be doubled if you want leftovers to reheat later.

    Ingredients

    • 4 boneless, skinless chicken breasts
    • salt and fresh ground black pepper for seasoning chicken
    • 1/2 cup basil pesto (see notes)
    • 1/2 cup grated mozzarella cheese (or more if you like it cheesy!)

    Instructions

    1. Preheat oven to 375F/190C. Trim all visible fat and tendons from chicken pieces, then cut each chicken breast lengthwise into 2 or 3 pieces. (I cut the larger ones into 3 strips and the smaller ones into 2 strips.)
    2. Spray a 9″ x 12″ (or 8.5″ X 12.5″) baking dish with non-stick spray, then spread 1/4 cup basil pesto over the bottom of the dish.
    3. Lay chicken strips over the pesto, then spread 1/4 cup more basil pesto over the chicken.
    4. Cover the baking dish with aluminum foil (or use a baking dish with a tight-fitting lid) and bake the chicken for 25-30 minutes, just until chicken is barely firm and cooked through. (Don’t cook too much at this point, or the chicken will be overcooked by the time the cheese is melted.)
    5. When chicken is barely cooked through, remove foil and sprinkle chicken with 1/2 cup grated mozzarella cheese (or more.)
    6. Put dish back into the oven without foil and cook 5 minutes more, just until cheese is melted. (If your broiler is separate from the oven, start preheating it when you take the chicken out.)
    7. After I melted the cheese for 5 minutes I switched my oven to broil and broiled a few minutes more, just long enough to get the cheese lightly browned.
    8. Serve the Baked Pesto Chicken hot.
    9. There will be some flavorful juice in the bottom of the dish when this is done, so you may want to serve with rice, Cauliflower Rice, or quinoa to soak up the juice.

    Nutrition Information

    Yield

    4

    Serving Size

    1

    Amount Per Serving

    Calories 472Total Fat 28gSaturated Fat 9gUnsaturated Fat 20gCholesterol 134mgSodium 457mgCarbohydrates 3gFiber 0gSugar 1gProtein 48g

    Nutrition information is automatically calculated by the Recipe Plug-In I am using. I am not a nutritionist and cannot guarantee 100% accuracy, since many variables affect those calculations.

    Did you make this recipe?

    Did you make this recipe? Please leave a star rating (under the PRINT button in the recipe) or share a photo of your results on Instagram! THANKS!

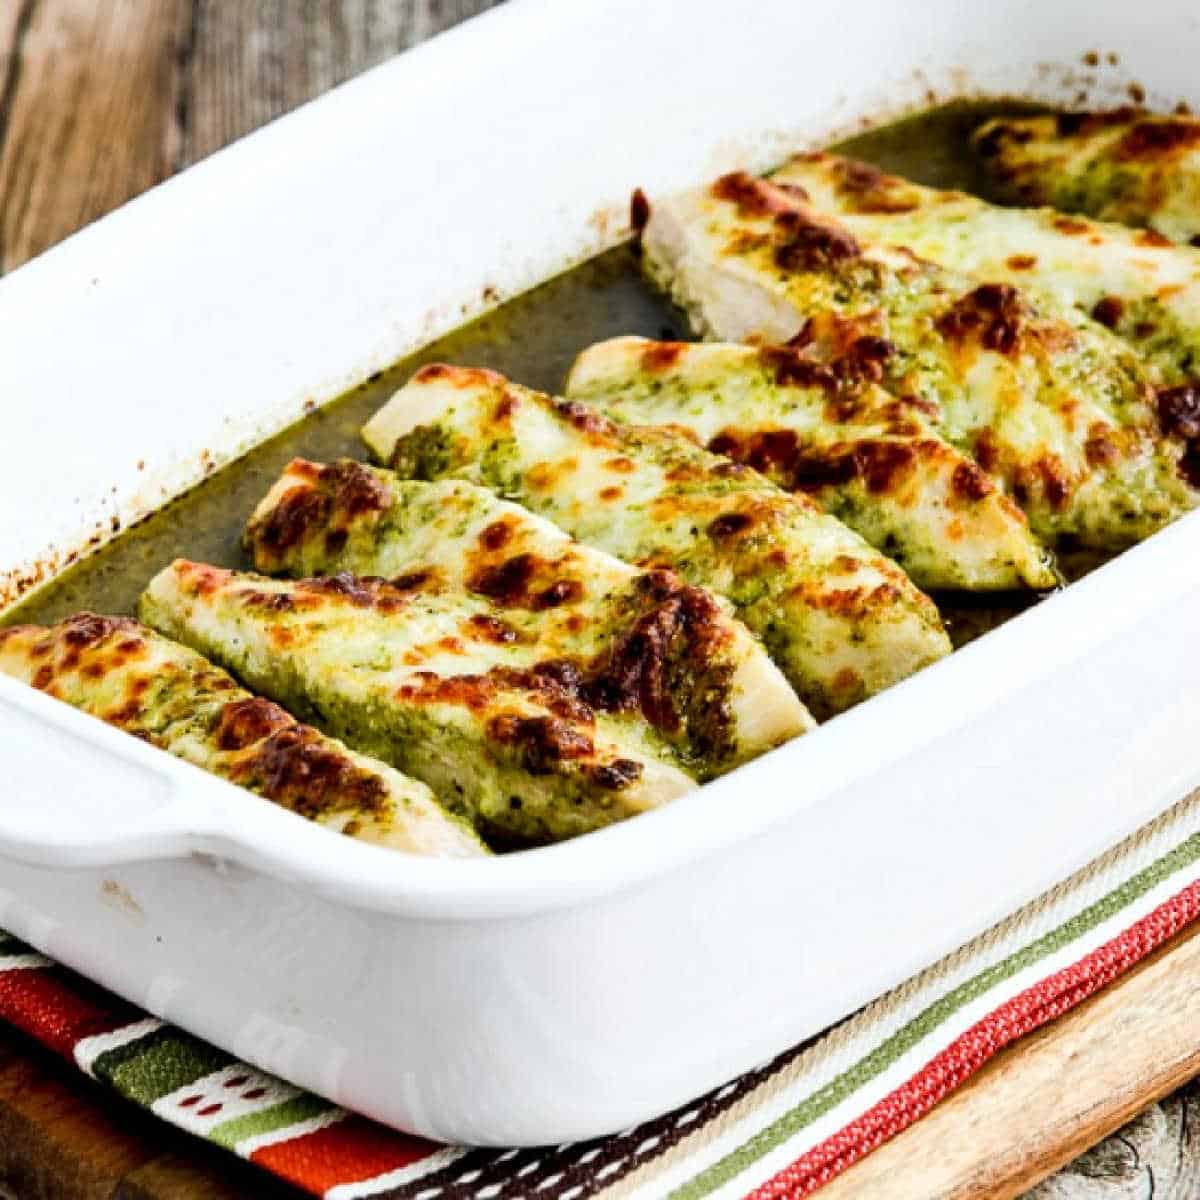
    square image of Easy Baked Pesto Chicken in baking dish on striped napkin

    Low-Carb Diet / Low-Glycemic Diet / South Beach Diet Suggestions:
    This Baked Pesto Chicken would be great for low-carb and Keto diets. If you use low-fat Mozzarella, it could work for any phase of the original South Beach Diet. For low-carb eating plans, full-fat Mozzarella would be preferred.

    Find More Recipes Like This One:
    Use Casserole Recipes to find more recipes like this one. Use the Diet Type Index to find recipes suitable for a specific eating plan. You might also like to follow Kalyn’s Kitchen on Pinterest, on Facebook, on Instagram, on TikTok, or on YouTube to see all the good recipes I’m sharing there.

    Historical Notes for this Recipe:
    This popular recipe was first posted in 2010 (probably with a photo that would make me shudder if I saw it now.) The recipe was updated in 2022 and last updated with more information in 2026.

    Pinterest image of Easy Baked Pesto Chicken

    We are a participant in the Amazon Services LLC Associates Program, an affiliate advertising program designed to provide a means for us to earn fees by linking to Amazon.com and affiliated sites. As an Amazon Associate, I earn from qualifying purchases.


    Source link