This website may contain affiliate links and advertising so that we can provide recipes to you. Read my disclosure policy.
Saucy and packed with flavor, this sweet chili chicken is a weeknight winner! Tender chicken bites get a crunchy coating, then get tossed in a sticky, sweet, and slightly spicy sauce. YUM!
3 Reasons This Chicken Beats Takeout
Less Oil: A light cornstarch coating creates golden chicken using just a little oil, no deep frying needed.
Flavor Explosion: Sweet, tangy, and just the right amount of spice make every bite of this sweet chili chicken dish irresistible.
Easy to Customize: Serve over rice, with noodles, or stir fry vegetables, and tweak the heat to your taste for the perfect family friendly meal.
Ingredients for Sweet Chili Chicken
Chicken: Boneless skinless chicken thighs can be used in place of the chicken breast if you prefer.
Oil: Vegetable or canola oil is best for frying the chicken! Add more oil, if needed, to prevent the chicken from sticking.
Sweet Chili Sauce: Store-bought bottled sauce makes this recipe super easy, but if you prefer homemade, use my recipe!
How to Make Sweet Chili Chicken
This sweet chili chicken recipe is quick, easy, and packed with sticky, sweet goodness that clings to every crispy bite. Serve it with fried rice and Kung Pao Brussels sprouts for an Asian inspired meal.
Season Chicken: Place chicken pieces into a large bowl, then season with garlic salt and paprika. Crack 1 large egg on top of the chicken and massage it in with your hand to coat the chicken evenly.
Coat in Cornstarch*: Transfer the chicken to a large Ziplock bag. Add 1 cup of cornstarch to the bag, then seal it and shake to coat the chicken well.
Pan Fry Chicken: In a medium sized frying pan over medium high heat, add vegetable oil for frying. Add the coated chicken and cook 7-8 minutes, or until cooked through and browned.
Add Sauce & Serve: Pour Thai sweet chili sauce and toss to coat well. Garnish with diced green onions, if desired. Serve sweet chili chicken over rice and enjoy!
Alyssa’s Pro Tip
*Cornstarch Tip: Coating each piece of chicken in cornstarch gets you the “fried” texture. It’s important to shake off any excess cornstarch before cooking the chicken.
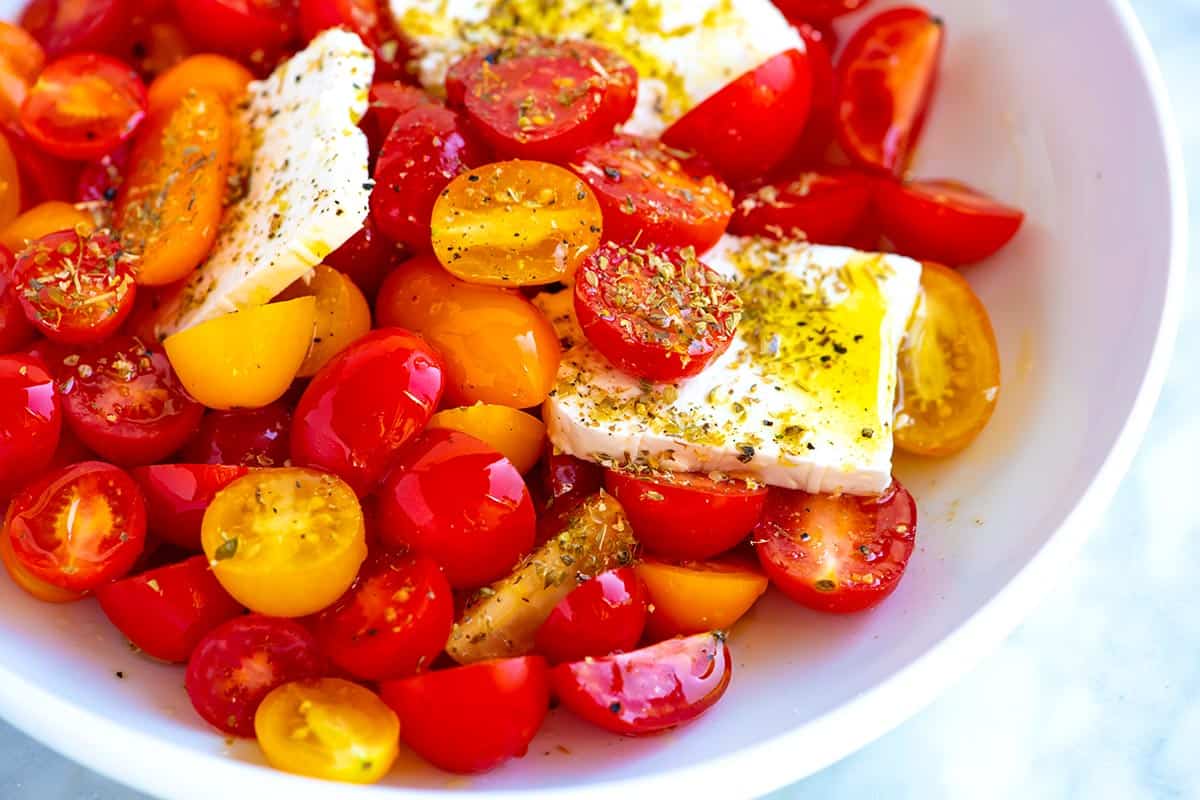
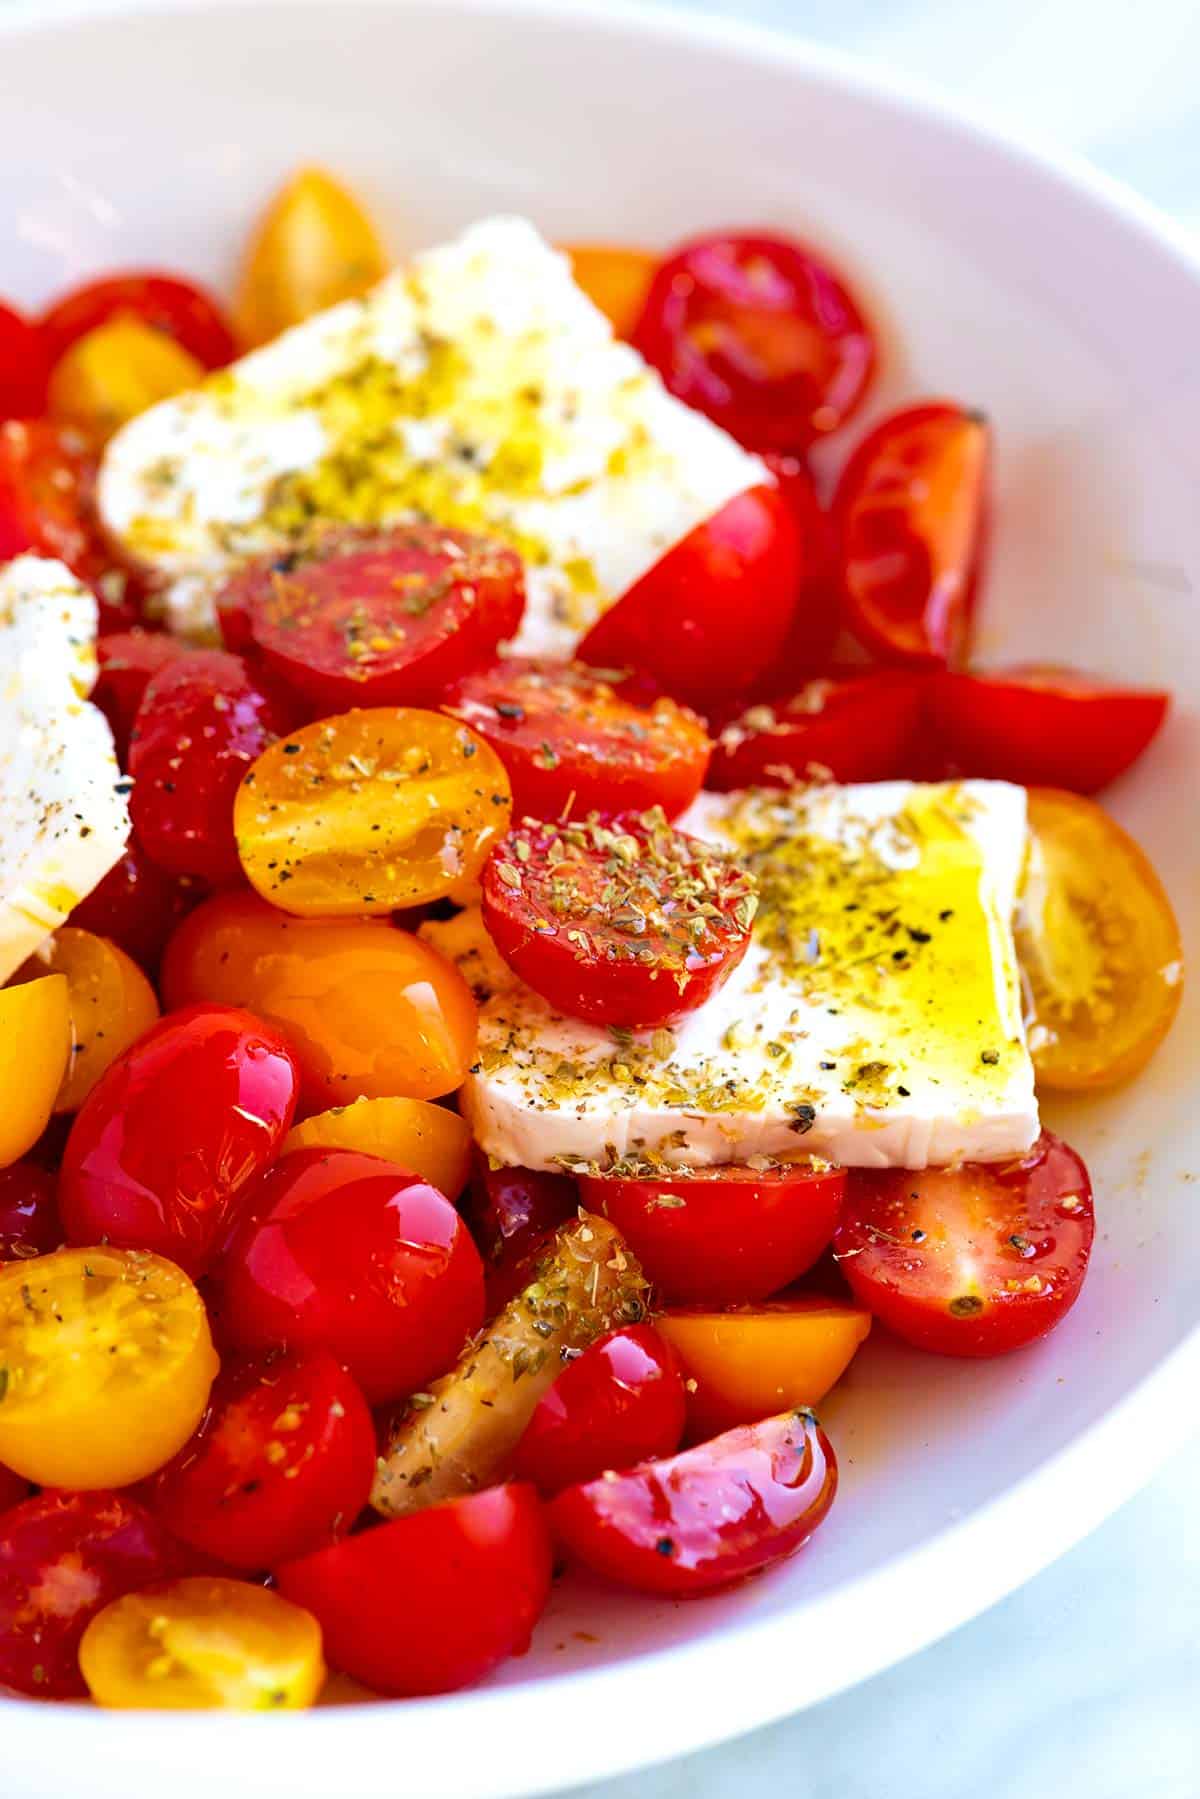
My favorite cherry tomato salad is made with juicy cherry tomatoes, a simple olive oil dressing, and briny feta cheese! It’s super simple, absolutely delicious, and sure to be a hit!
Whenever I have cherry tomatoes in the house, I save a handful to make this easy cherry tomato salad. It’s absolutely perfect. I love it so much that I could honestly eat it every day!
The trick is quickly marinating the tomatoes in salt before adding the other salad ingredients. I use the same trick for this tomato mozzarella salad and our favorite caprese salad!
Key Ingredients
Cherry tomatoes: We designed this as a cherry tomato salad, but you can use any variety of tomato. Make sure that they are ripe, sweet, and juicy.
Vinegar: Use red wine vinegar, white wine vinegar, champagne vinegar, or balsamic vinegar. They are all delicious!
Oregano: This cherry tomato salad is inspired by our Greek salad recipe, so I use a good amount of dried Oregano. I love it!
Olive Oil: Use your favorite kind. It will combine with the tomato juices to make a delicious dressing.
Salt and Pepper: The trick to the best tomato salad is to salt your tomatoes ahead of time. You’ll see me say the same thing on all the tomato salad recipes we’ve shared (this caprese salad being one example). The salt draws out the tomato juices, intensifying their flavor. Then, those juices mix with our olive oil to create a simple dressing.
Feta: I love adding big slabs of feta cheese to this salad. They crumble and mix into the salad as you push your fork into them. Mozzarella or burrata cheese is also excellent.
How to Make My Favorite Cherry Tomato Salad
The key to this cherry tomato salad is giving the salt and tomatoes time together before adding anything else. They taste great by themselves, but they are incredible after I allow the tomatoes to marinate in a little salt for a bit. Their sweetness and flavor intensify. (I also use this tip for the best bruschetta!)
When you’re ready to eat the salad, stir in a bit of acid. I’ve been obsessed with champagne vinegar lately, but red wine vinegar or balsamic vinegar are fantastic with cherry tomatoes.
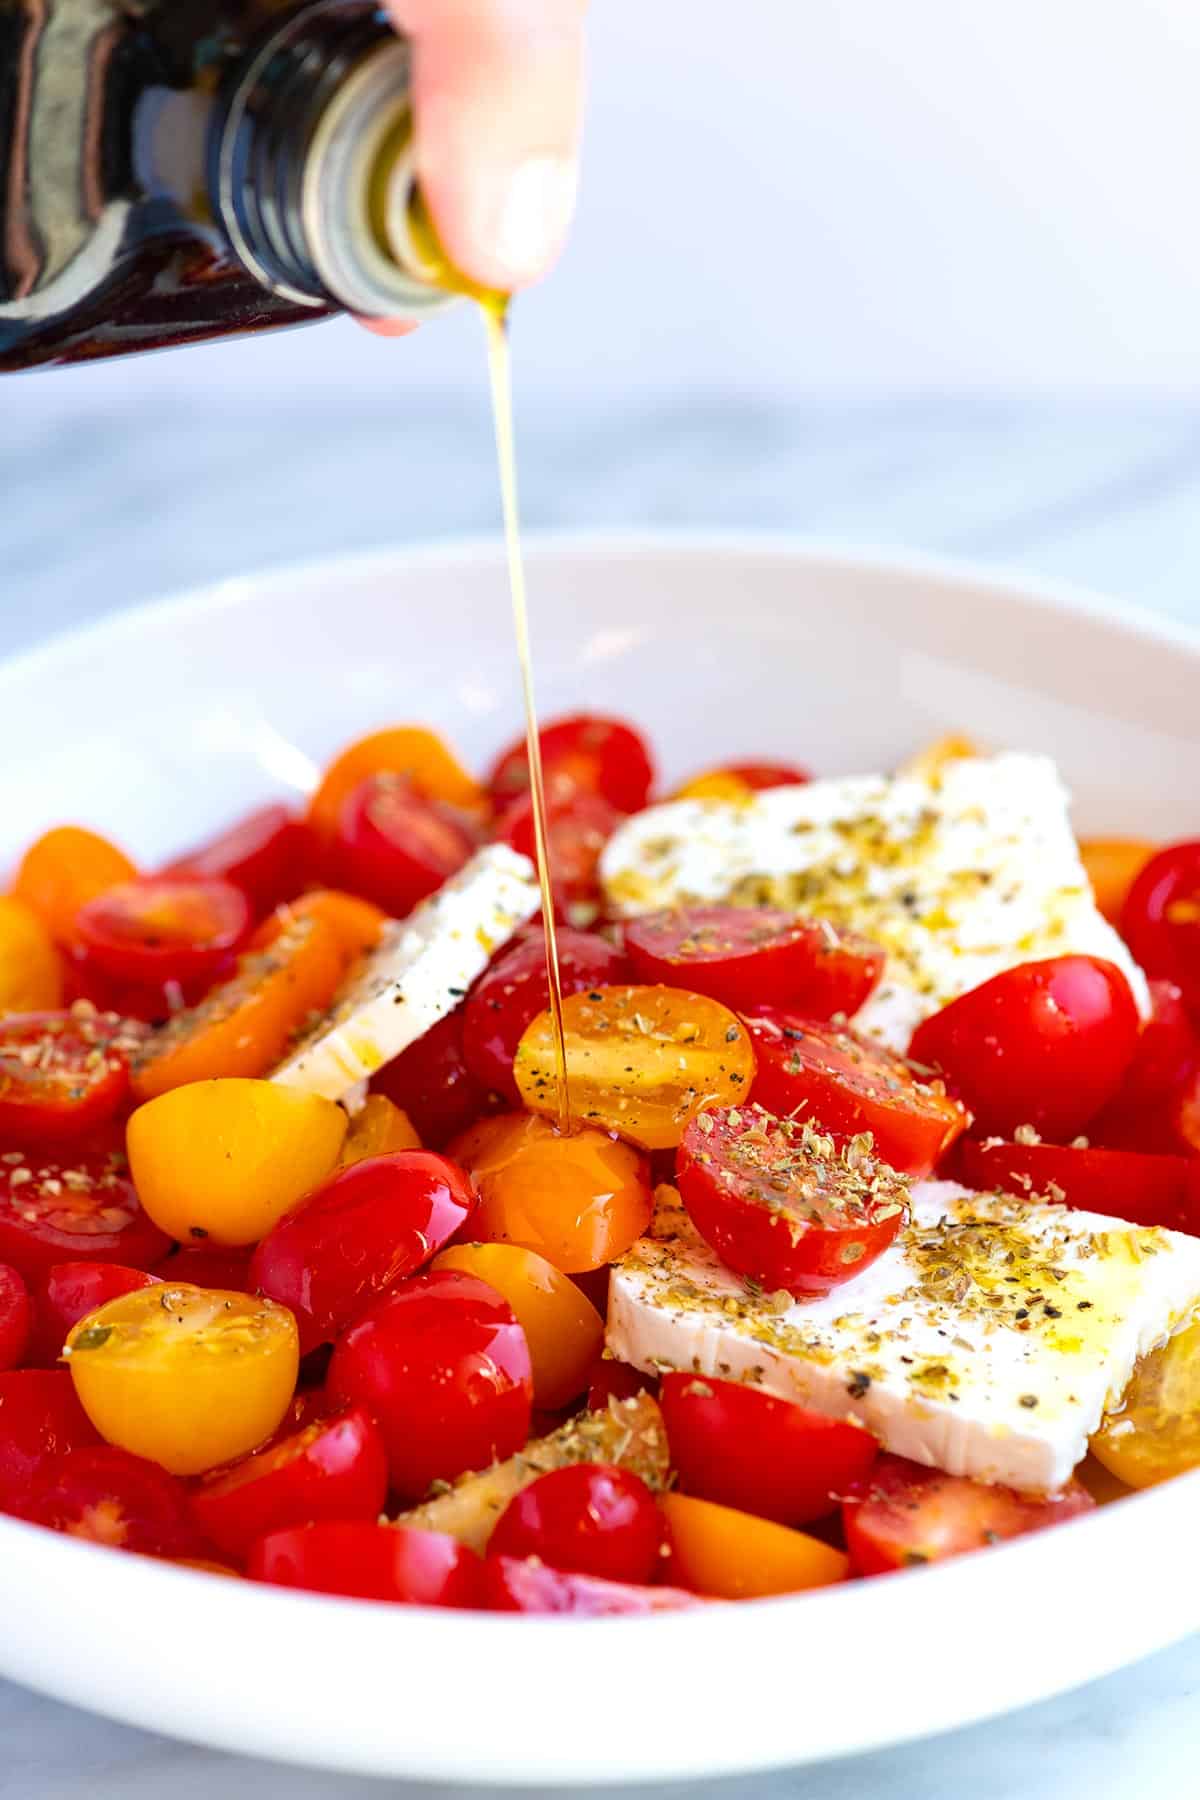
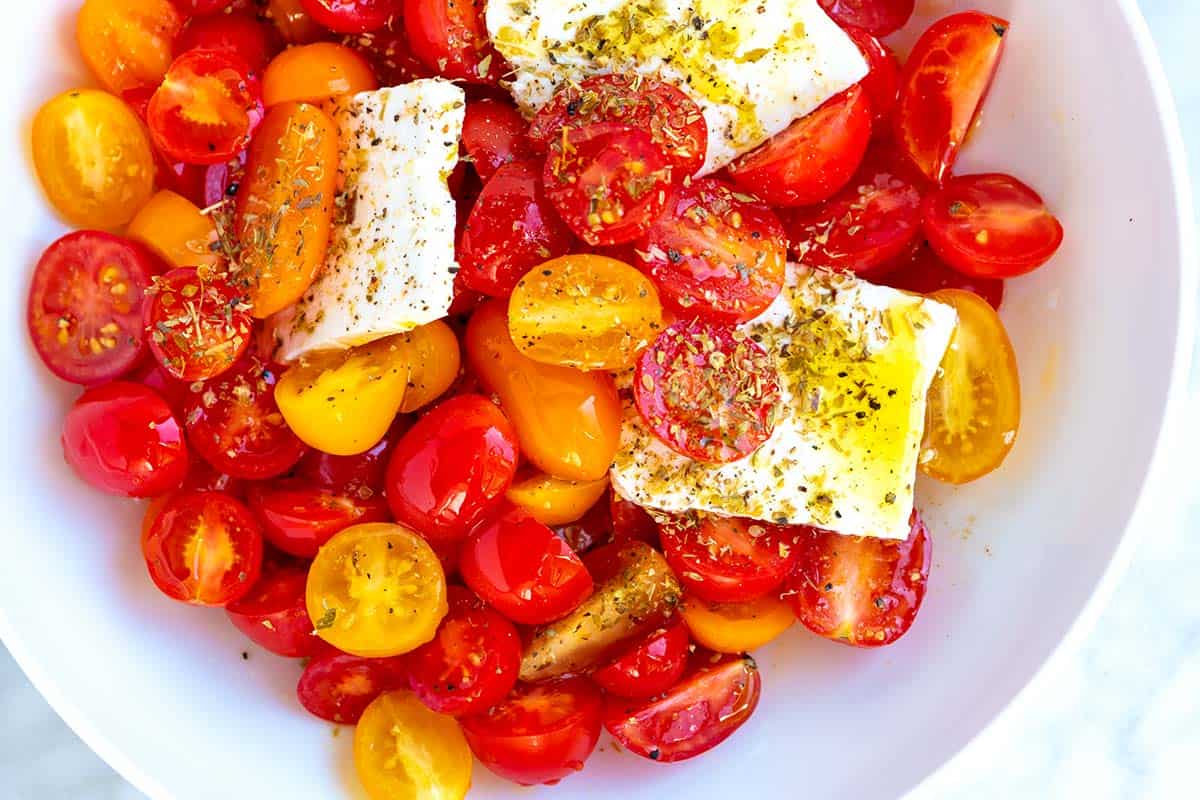
As a nod to Greek salad, I add a slab of feta cheese. Then I scatter some oregano and pepper on top and finish with a drizzle of high-quality olive oil. It’s easy, fresh, and delicious. Make this one soon. I know you’ll love it!
Easy Cherry Tomato Salad
PREP
TOTAL
This cherry tomato salad recipe is undeniably simple, but that doesn’t mean it won’t blow you away. Salting the tomatoes for at least 10 minutes intensifies their sweetness and flavor. We call for cherry tomatoes, but all varieties, large and small, work.
Makes 2 servings
You Will Need
2 cups cherry tomatoes, about 10 ounces
1/4 teaspoon fine sea salt
1 teaspoon vinegar like red wine, balsamic or champagne vinegar or use fresh lemon juice
2 ounces feta cheese, cut into large slabs
1/4 teaspoon dried oregano
Generous pinch of fresh ground pepper
1 tablespoon extra-virgin olive oil
Directions
1Halve or quarter the tomatoes so they are a variety of shapes and sizes.
2Add to a serving bowl, then toss with salt. Set aside for at least 10 minutes.
3Stir in the vinegar, and then nestle the feta cheese slabs into the pile of tomatoes.
4Scatter the oregano and black pepper on top.
5Finish with a drizzle of olive oil.
Adam and Joanne’s Tips
Storing: This is best eaten the day you make it, but will keep, covered in the refrigerator, for a day or two.
The nutrition facts provided below are estimates.
Nutrition Per Serving Serving Size 1/2 of the recipe / Calories 169 / Total Fat 13.4g / Saturated Fat 5.3g / Cholesterol 25.3mg / Sodium 560.4mg / Carbohydrate 8.5g / Dietary Fiber 2.3g / Total Sugars 5.9g / Protein 5.7g
AUTHOR:
Adam Gallagher
We are Adam and Joanne Gallagher, the creators of Inspired Taste. Established in 2009, Inspired Taste grew from a childhood dream into one of the internet’s most trusted recipe sites with hundreds of reliable recipes, step-by-step videos, and expert tips.More About Us
Previous Post: Easy Ham and Cabbage Soup Next Post: Homemade Red Curry Paste
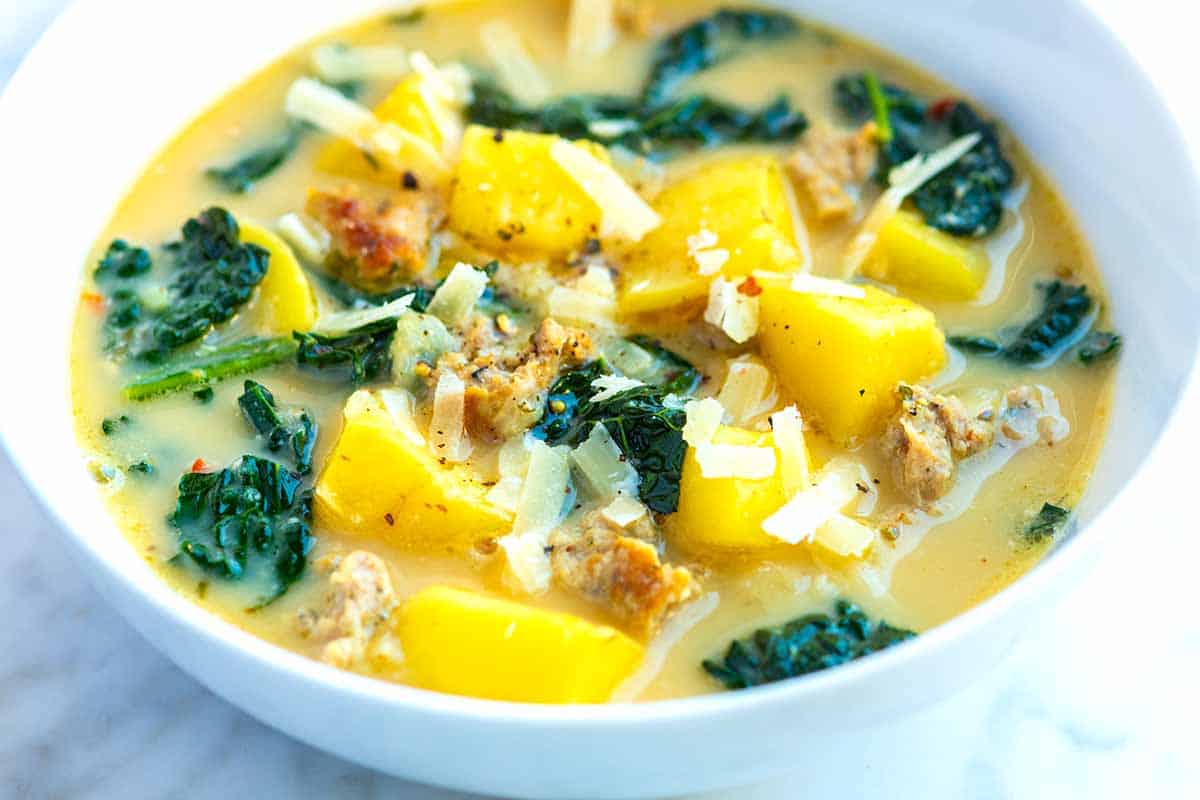
My family loves this sausage potato soup recipe made with Italian sausage, potatoes, and kale. It reminds us of Olive Garden’s Zuppa Toscana, only lighter and just as delicious.
This sausage and potato soup is a dream for busy nights. Thanks to flavorful Italian sausage, you only need a short list of ingredients, and it comes together quickly.
Hearty, comforting, and incredibly flavorful this simple soup keeps well for leftovers the next day. For more like this, try our potato leek soup or creamy potato soup.
Key Ingredients
Italian Sausage: Use sweet or hot Italian sausage. I usually reach for sweet Italian and then adjust the spice level with crushed red pepper flakes.
Potatoes: I highly recommend Yukon Gold potatoes for their buttery texture and how well they hold up in the broth. Baby red or white potatoes also work beautifully.
Onion and Garlic: These add so much flavor to the broth. I don’t add other veggies to keep the ingredient list short.
Spices: Italian sausage already brings flavor from fennel and other spices, but I like to add more spice with oregano, red pepper flakes (optional), a bay leaf, and fresh thyme.
Broth: Use a good-quality chicken stock or homemade broth. For store-bought, choose low-sodium and darker-colored stock for more flavor. Boxed bone broth is an easy shortcut that adds richness, or use homemade bone broth if you have it.
Kale: Kale adds color, texture, and a bit of nutrition. You can also substitute spinach, Swiss chard, or other hearty greens.
Cream and Parmesan Cheese: A splash of cream and some grated Parmesan stirred in at the end make the broth velvety and rich. Both are optional but add so much flavor.
Find the full recipe with measurements below.
How to Make Sausage and Potato Soup
Tip 1: Brown the sausage. The secret to this soup’s flavorful broth is browning the sausage in the pot before adding any other ingredients. It brings out the flavor and helps render a bit of fat, which the onions and garlic will cook in a bit later.
Tip 2: Soften the onions. So that they are sweet and tender, quickly sauté the onions and garlic in the pot with the browned sausage for a few minutes. This takes away their raw bite, making them really delicious in the soup.
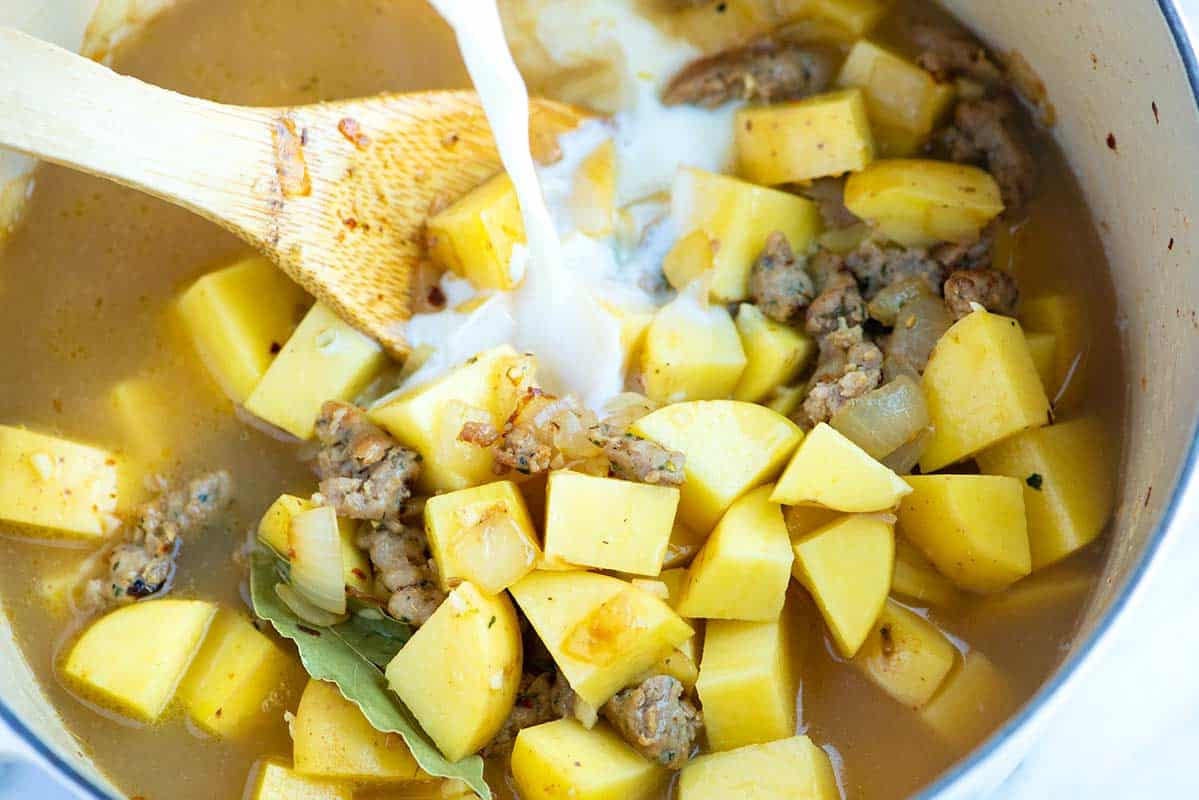
Tip 3: Add spices, broth, and potatoes. Next comes the broth and potatoes. Simmer until the potatoes are tender. When they are, your soup is almost ready!
Tip 4: Add kale and cream. When your potatoes are tender, stir in the kale and cream and allow it to cook for a few minutes until the kale is tender and bright green. The splash of cream makes the broth silky. It’s optional, but really delicious.
More Easy Soup Recipes
Easy Sausage Potato Soup
PREP
COOK
TOTAL
You will love this easy sausage and potato soup recipe. It is comforting and incredibly delicious. For the best texture, use Yukon Gold potatoes. They have thin skins, so you don’t need to peel them. The red pepper flakes are optional and add a bit of spice to the soup. If you use hot Italian sausage (spicy), you may not need them.
4 to 6 Servings
You Will Need
8 ounces bulk Italian sausage or links with the casings removed (226g)
1 tablespoon olive oil
1 medium onion, chopped
3 cloves garlic, minced, 1 tablespoon
¼ teaspoon dried oregano
¼ to ½ teaspoon crushed red pepper flakes, optional
Salt and fresh ground black pepper
1 bay leaf
2 sprigs thyme
1 ½ pounds Yukon Gold potatoes, cubed, 2 to 3 medium (680g)
5 cups chicken stock (1182ml)
¼ cup heavy cream or half-and-half, or more to taste (60ml)
4 cups chopped kale leaves with ribs removed or use baby kale
½ cup shredded parmesan cheese, optional, 1 ounce (28g)
Pinch freshly grated nutmeg
Directions
1Brown the sausage: Heat the olive oil in a large pot or Dutch oven over medium heat. Add the sausage and cook, breaking it apart with a wooden spoon, until browned and slightly crispy, about 8 to 10 minutes.
2Cook the onions: Add the onions and cook, stirring every few minutes, until they soften, 5 to 6 minutes.
3Add garlic and spices: Stir in the garlic, oregano, crushed red pepper flakes, ½ teaspoon of salt, and ¼ teaspoon of freshly ground black pepper. Cook, stirring often, for about 1 minute until fragrant.
4Add potatoes and stock: Add the bay leaf, thyme, and potatoes. Pour in the stock, then increase the heat to medium-high and bring the soup just to a simmer (avoid a full boil). Reduce the heat to medium-low, partially cover, and simmer until the potatoes are fork-tender, about 15 minutes, stirring occasionally.
5Add cream, kale, and cheese: Uncover the pot and remove the bay leaf and thyme sprigs. Stir in the cream, kale, and parmesan cheese. Add a small pinch of nutmeg, then taste and adjust with more salt and pepper as needed. Reduce the heat to low, cover, and cook until the kale is tender and wilted, about 5 minutes more.
Adam and Joanne’s Tips
Storing: Store in the refrigerator for up to 4 days or freeze for up to 3 months. Thaw overnight and reheat gently on the stovetop. Potatoes may soften slightly after freezing. The cream may separate when reheating, so do it over low heat or leave it out when freezing and add fresh after it has reheated.
Thick and creamy soup: For a creamier and thicker broth, grab a potato masher and mash some of the potatoes in the pot just before adding the kale.
Kale: The kale softens in the broth over time. If you like extra soft and tender kale, leave the lid on the pot and keep warm for 10 to 15 minutes more.
Lighter soup: For a lightened-up version, use chicken or turkey sausage and substitute the cream for additional stock.
The nutrition facts provided below are estimates.
Nutrition Per Serving Serving Size 1 cup of soup / Calories 268 / Total Fat 11.5g / Saturated Fat 3.9g / Cholesterol 33.9mg / Sodium 639.4mg / Carbohydrate 26.2g / Dietary Fiber 2.9g / Sugars 9g / Protein 15.2g
AUTHOR:
Adam Gallagher
Previous Post: Easy Garlic Bread Next Post: Easy White Bean Soup
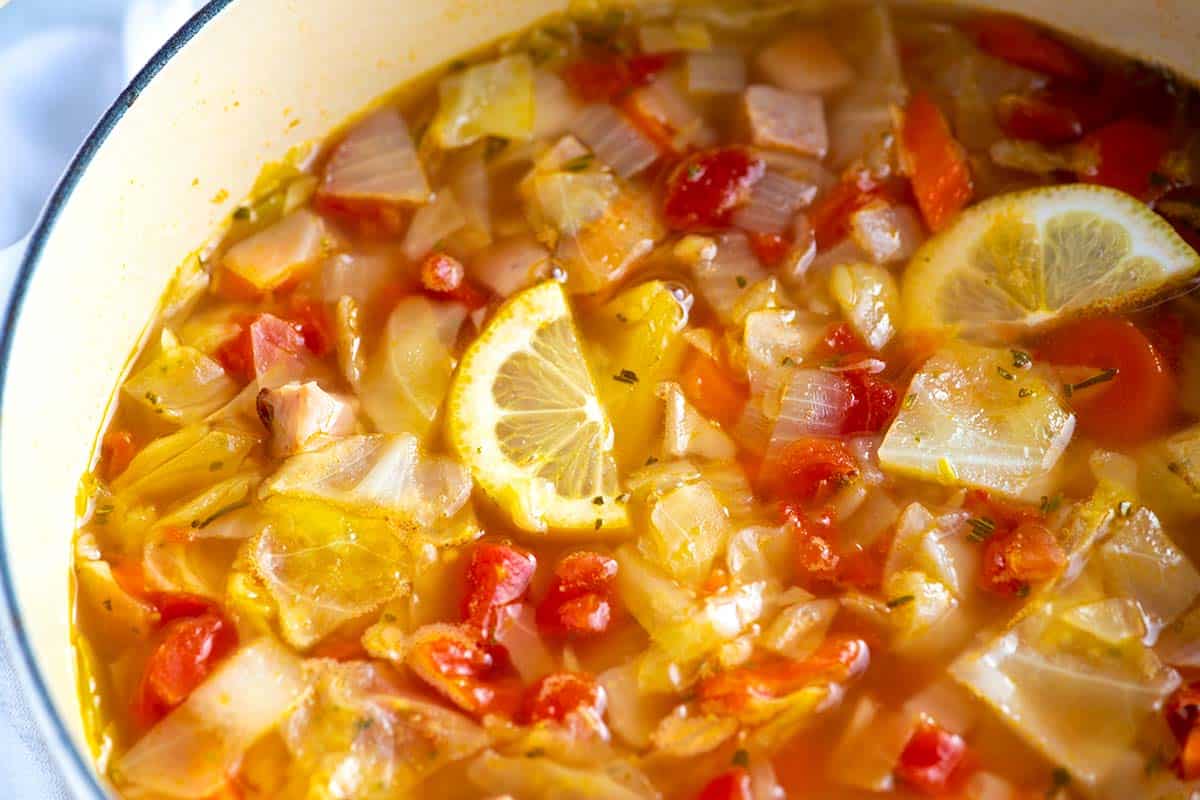
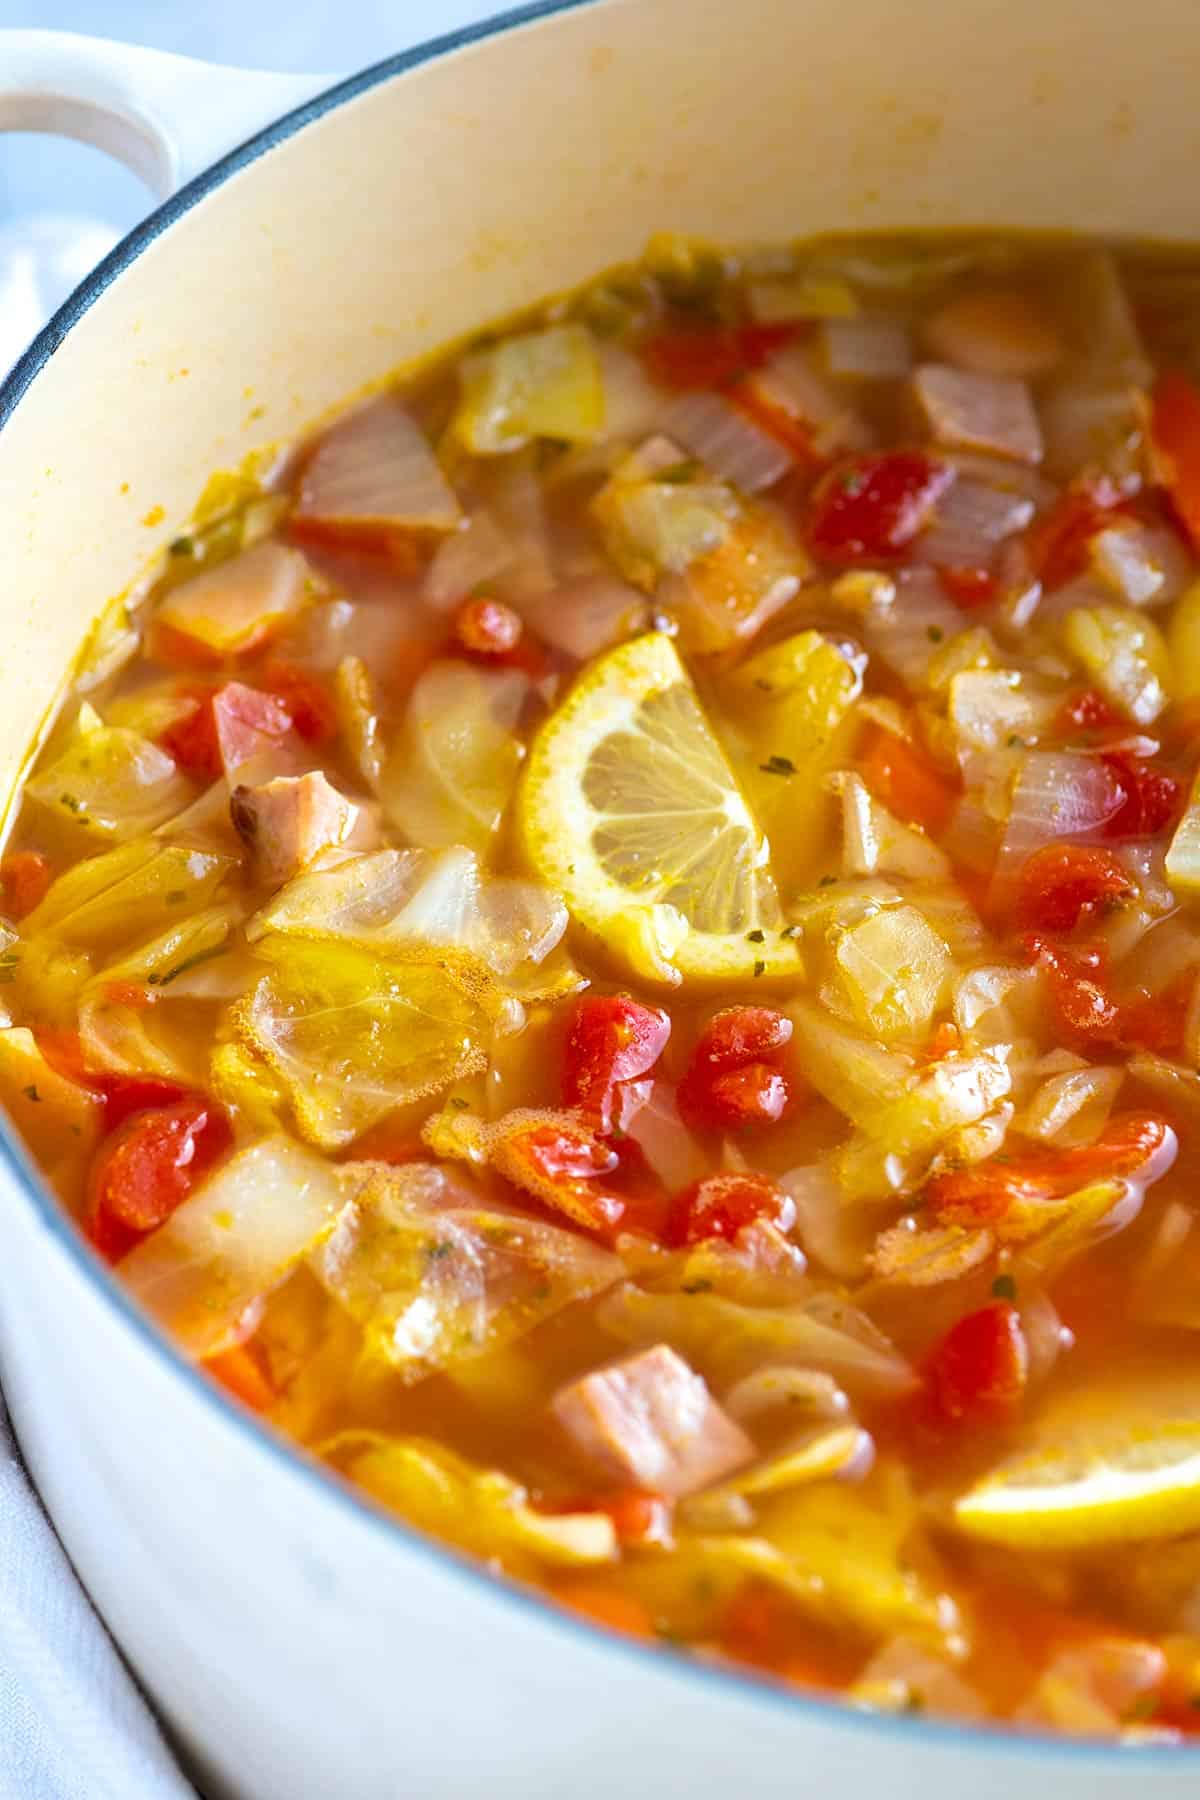
This ham and cabbage soup recipe is hearty, healthy, and tastes incredible! This easy soup is ready in about 30 minutes.
Cabbage soup may not sound like the most exciting meal, but trust me, this version with ham, carrots, and onions is delicious! Much like many of our cabbage recipes, this soup is nutritious, low-calorie, and tastes fantastic!
Since cabbage shrinks and softens when cooked, you can add a lot to the pot. In this ham and cabbage soup, we call for eight cups of chopped cabbage, and you could probably stir in quite a bit more. It’s so good! For another soup, try this cabbage soup, or for another recipe with ham, try our easy split pea soup.
Key Ingredients
Ham: I use a boneless ham steak for this soup. If you have bone-in ham, use it! Just cut it away from the bone, then add the bone to the soup as it simmers (it should add a bit more flavor). Remove it before serving.
Cabbage: Use regular white cabbage for this soup. I like how it softens as it simmers. If you have leftover cabbage, consider using it in one of our other cabbage recipes!
Veggies: In addition to the cabbage, we saute onion, carrots, garlic, and rosemary before adding broth to this soup. They create a flavorful base. Fresh or dried rosemary will work. I’ve given amounts for both in the recipe below.
Tomatoes: I add a small can of tomatoes to the soup, but fresh tomatoes work fine. See the tip below the recipe for substituting fresh tomatoes.
Broth: Any light broth or stock works in this cabbage soup recipe. My go-to’s are chicken stock, chicken broth, ham stock, and vegetable broth.
Find the full recipe with measurements below.
How to Make Ham and Cabbage Soup
Tip 1: Make the soup in one pot. To make this soup, you’ll cook the onion, carrots, and ham in a big pot and then add the rest of the ingredients. It comes together quickly and only needs to simmer for about 20 minutes before you can dig in.
Tip 2: Add ham for extra flavor. As the soup simmers, the ham flavors and seasons the broth. The soup becomes rich, hearty, and ultra-flavorful. If you don’t have any ham on hand or do not eat meat, you can leave the ham out. It will still be terrific.
Tip 3: Use lots of cabbage. Since cabbage shrinks and softens when it’s cooked, you can add lots of it to the pot. We add eight cups of chopped cabbage to this easy cabbage soup, and to be honest, you could probably stir in quite a bit more.
More Soup Recipes
Easy Ham and Cabbage Soup
PREP
COOK
TOTAL
This ham and cabbage soup recipe is hearty, healthy, easy to make, and tastes fantastic. Before adding the ham to the soup, taste it to see how salty it is. You may not need to add salt to the soup, depending on the salt level. Taste and adjust the seasoning of the soup a few times during cooking.
I love this soup with a side of crusty bread or homemade focaccia. Homemade garlic bread would be pretty amazing, too!
4 to 6 servings (8 cups of soup)
You Will Need
3 tablespoons olive oil
1 medium onion, chopped, about 2 cups
4 medium carrots, chopped, about 2 cups
8 ounces boneless ham steak, cubed, about 1 ½ cups
1 tablespoon minced garlic, 3 cloves
1 tablespoon chopped fresh rosemary or 1 teaspoon dried rosemary
1/2 teaspoon fresh ground black pepper
Pinch crushed red pepper flakes
8 cups chopped white cabbage, about 1 ½ pounds
1 (15oz) can diced tomatoes with juices
6 cups (1.4L) low-sodium chicken stock, ham stock, or vegetable broth
2 bay leaves
Salt, to taste
3 lemon slices or more to taste
Directions
1Heat 2 tablespoons of the olive oil in a stockpot or Dutch oven over medium heat.
2Add the onions, carrots, and cubed ham. Cook, stirring occasionally, until the vegetables have softened and the onions are translucent, 8 to 10 minutes.
3Add the garlic, rosemary, black pepper, and red pepper flakes. Cook, stirring, for one minute.
4Stir in the cabbage, and then pour in the canned tomatoes and their juices, as well as the stock. Add the bay leaves.
5Raise the heat to medium-high and bring the soup to a boil. Taste and adjust the salt. The ham adds some salt to the soup, so you may not need much additional seasoning.
6Partially cover the pot with a lid, and then reduce the heat to maintain a low simmer. Simmer for 20 minutes or until the cabbage and other vegetables are tender.
7Remove the pot from the heat and remove the bay leaves.
8Stir in the lemon slices and the remaining tablespoon of olive oil. Taste and season with more salt and pepper. Serve.
Adam and Joanne’s Tips
Storing: Place the leftover soup in an airtight container in the fridge and store it for up to 3 days or a month in the freezer.
Why lemon slices? While we don’t actually eat lemon slices, adding them to the soup brightens up the flavors a bit. You can also squeeze in fresh lemon juice or use vinegar, such as apple cider vinegar or wine vinegar.
Use fresh tomatoes: Substitute about 1 pound (5 to 6 tomatoes) for 1 (15oz) can of diced tomatoes.
The nutrition facts provided below are estimates.
Nutrition Per Serving Serving Size About 1 cup / Calories 157 / Total Fat 7.8g / Saturated Fat 1.5g / Cholesterol 12mg / Sodium 436.4mg / Carbohydrate 13.7g / Dietary Fiber 4.2g / Total Sugars 5.1g / Protein 11.1g
AUTHOR:
Joanne Gallagher
We are Adam and Joanne Gallagher, the creators of Inspired Taste. Established in 2009, Inspired Taste grew from a childhood dream into one of the internet’s most trusted recipe sites with hundreds of reliable recipes, step-by-step videos, and expert tips.More About Us
This website may contain affiliate links and advertising so that we can provide recipes to you. Read my disclosure policy.
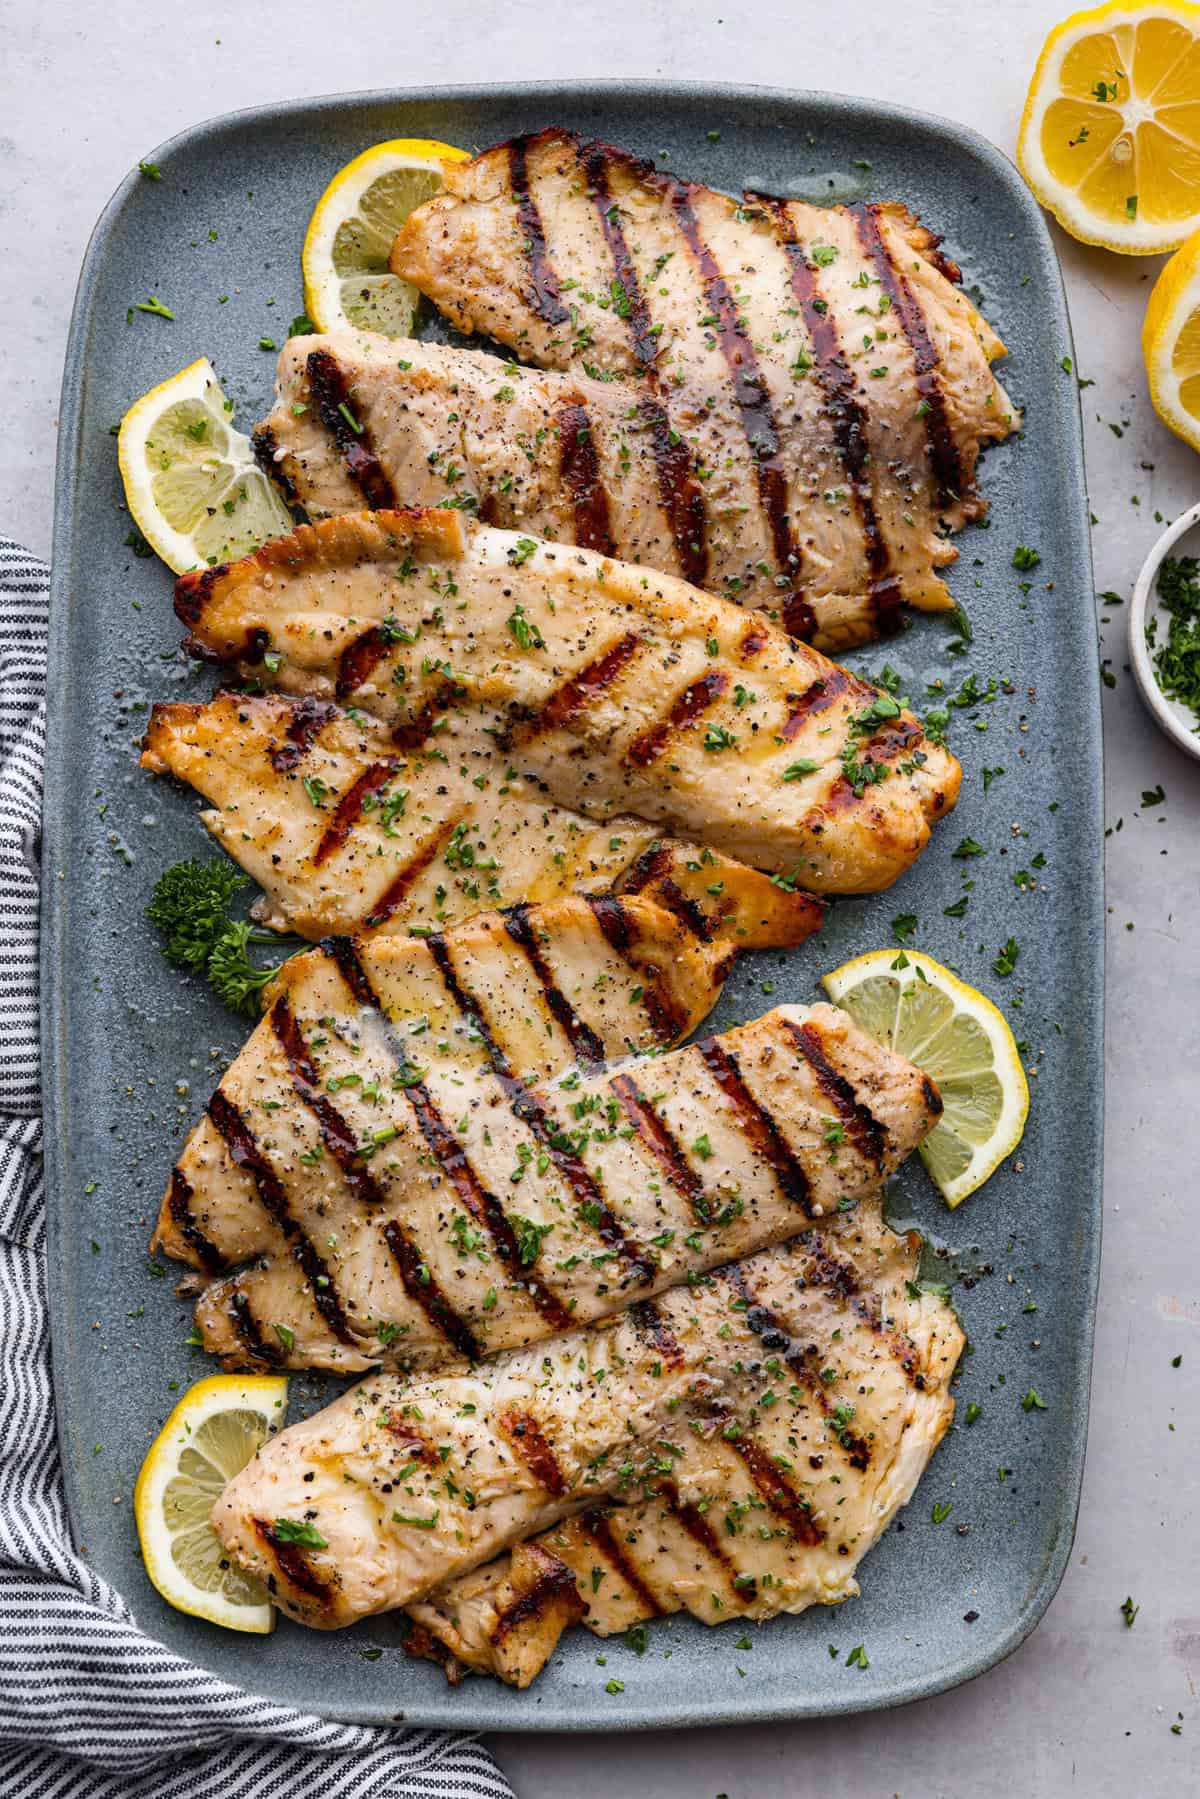
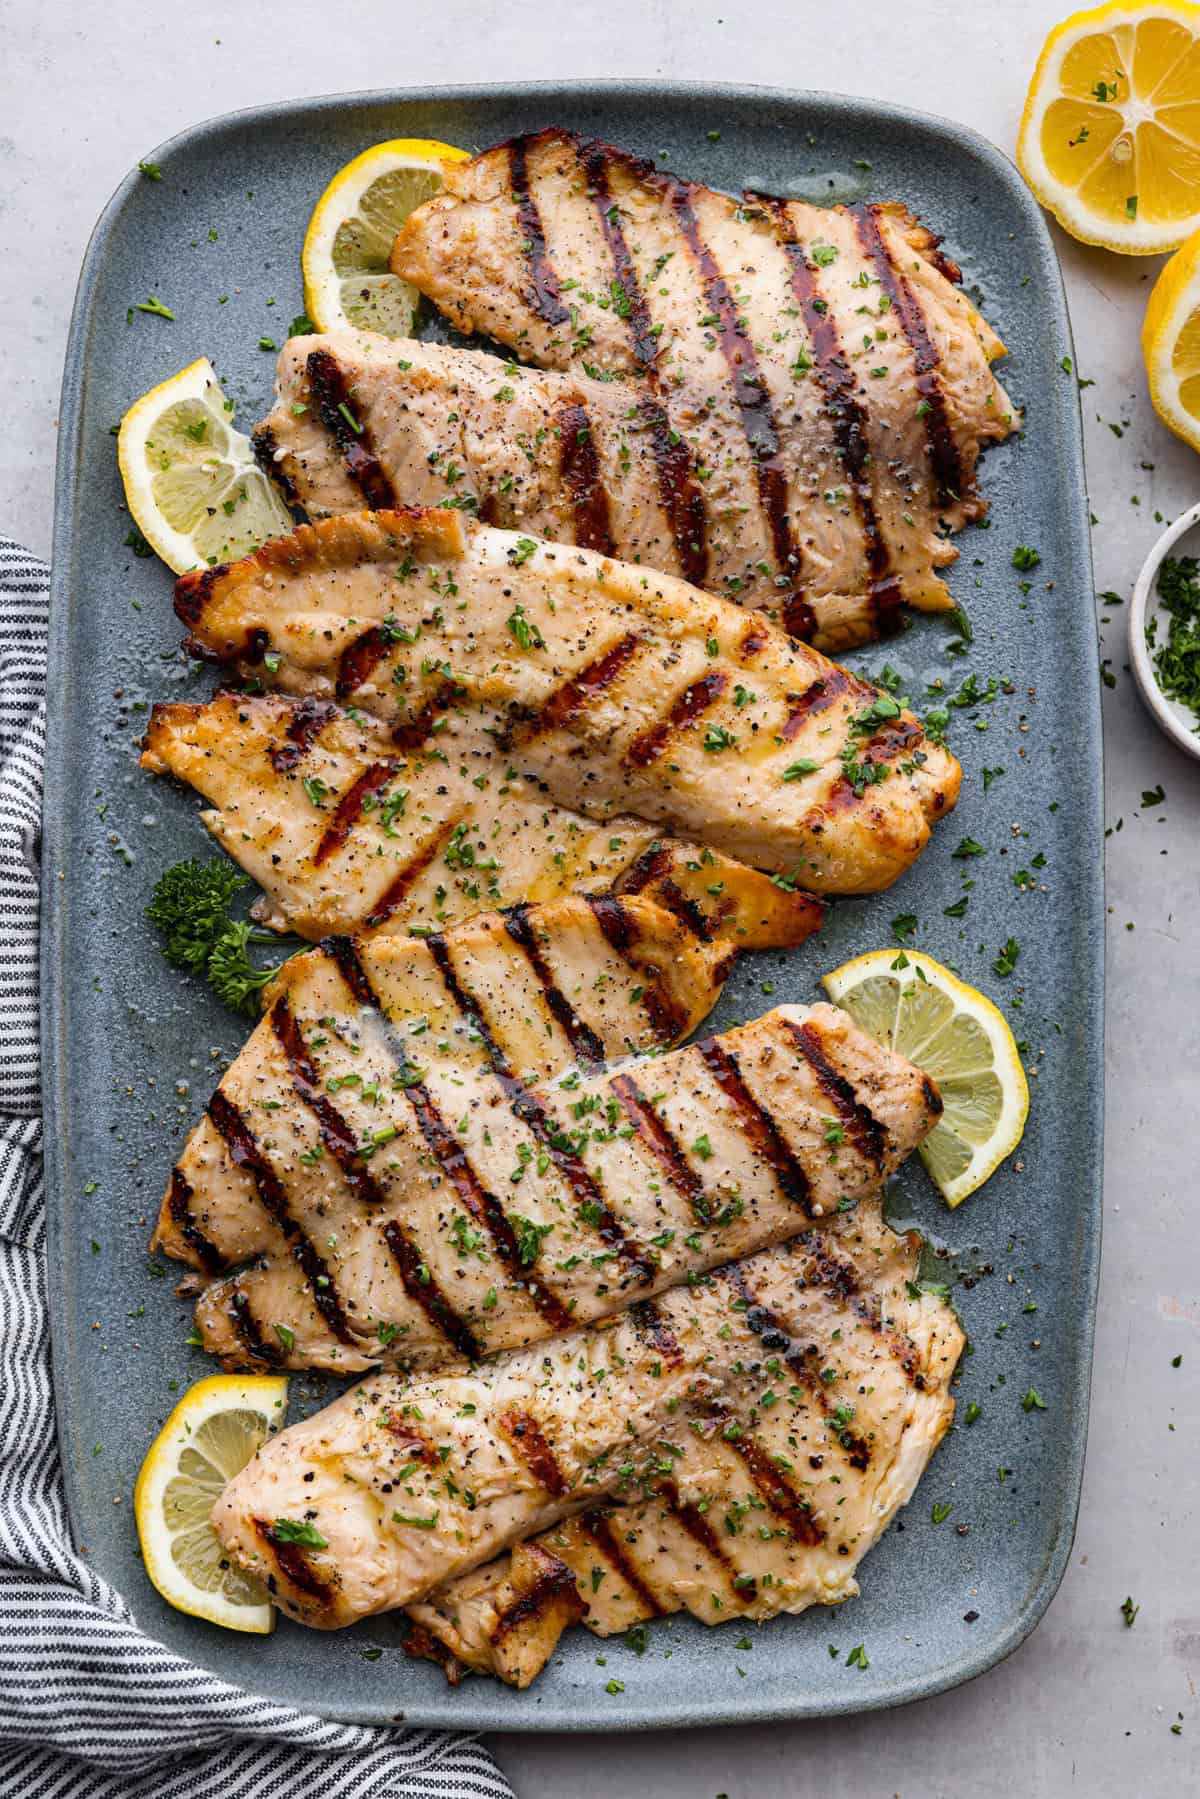
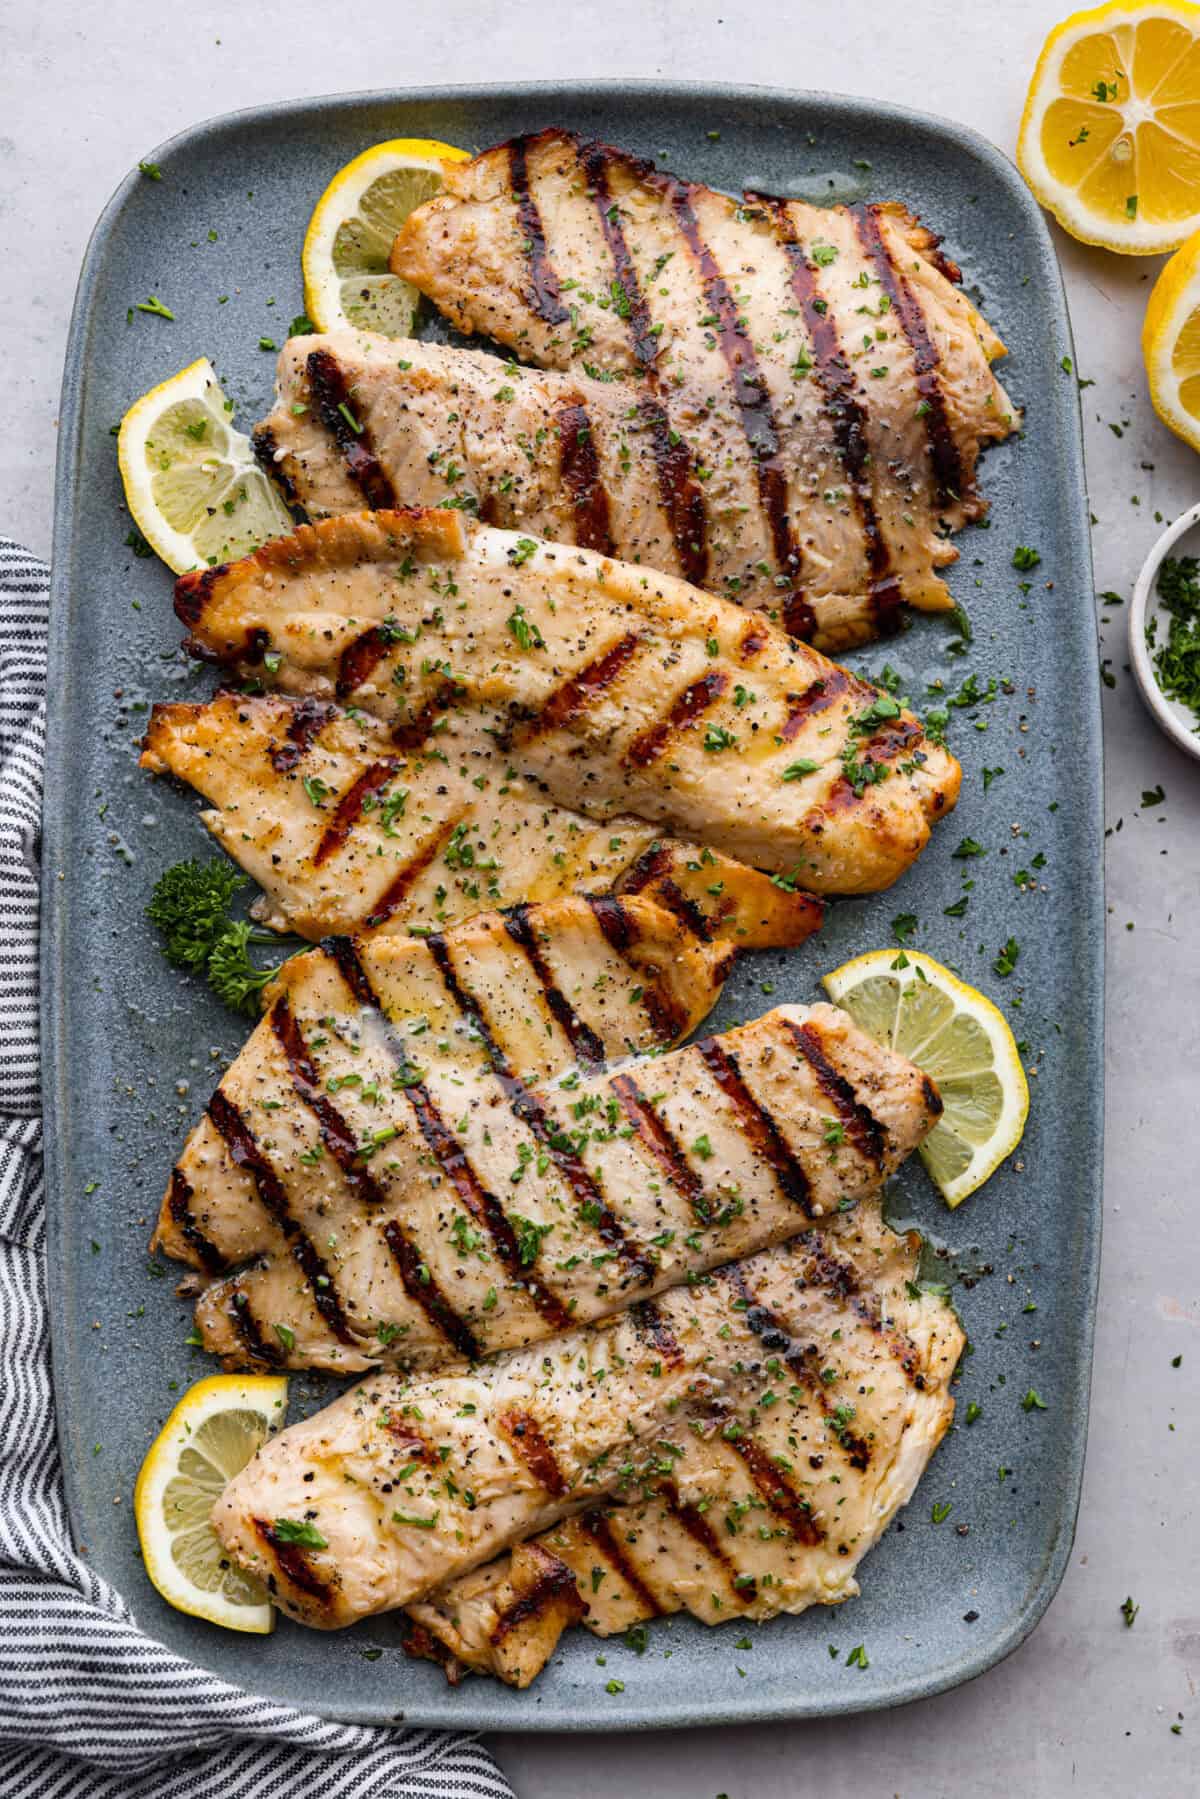
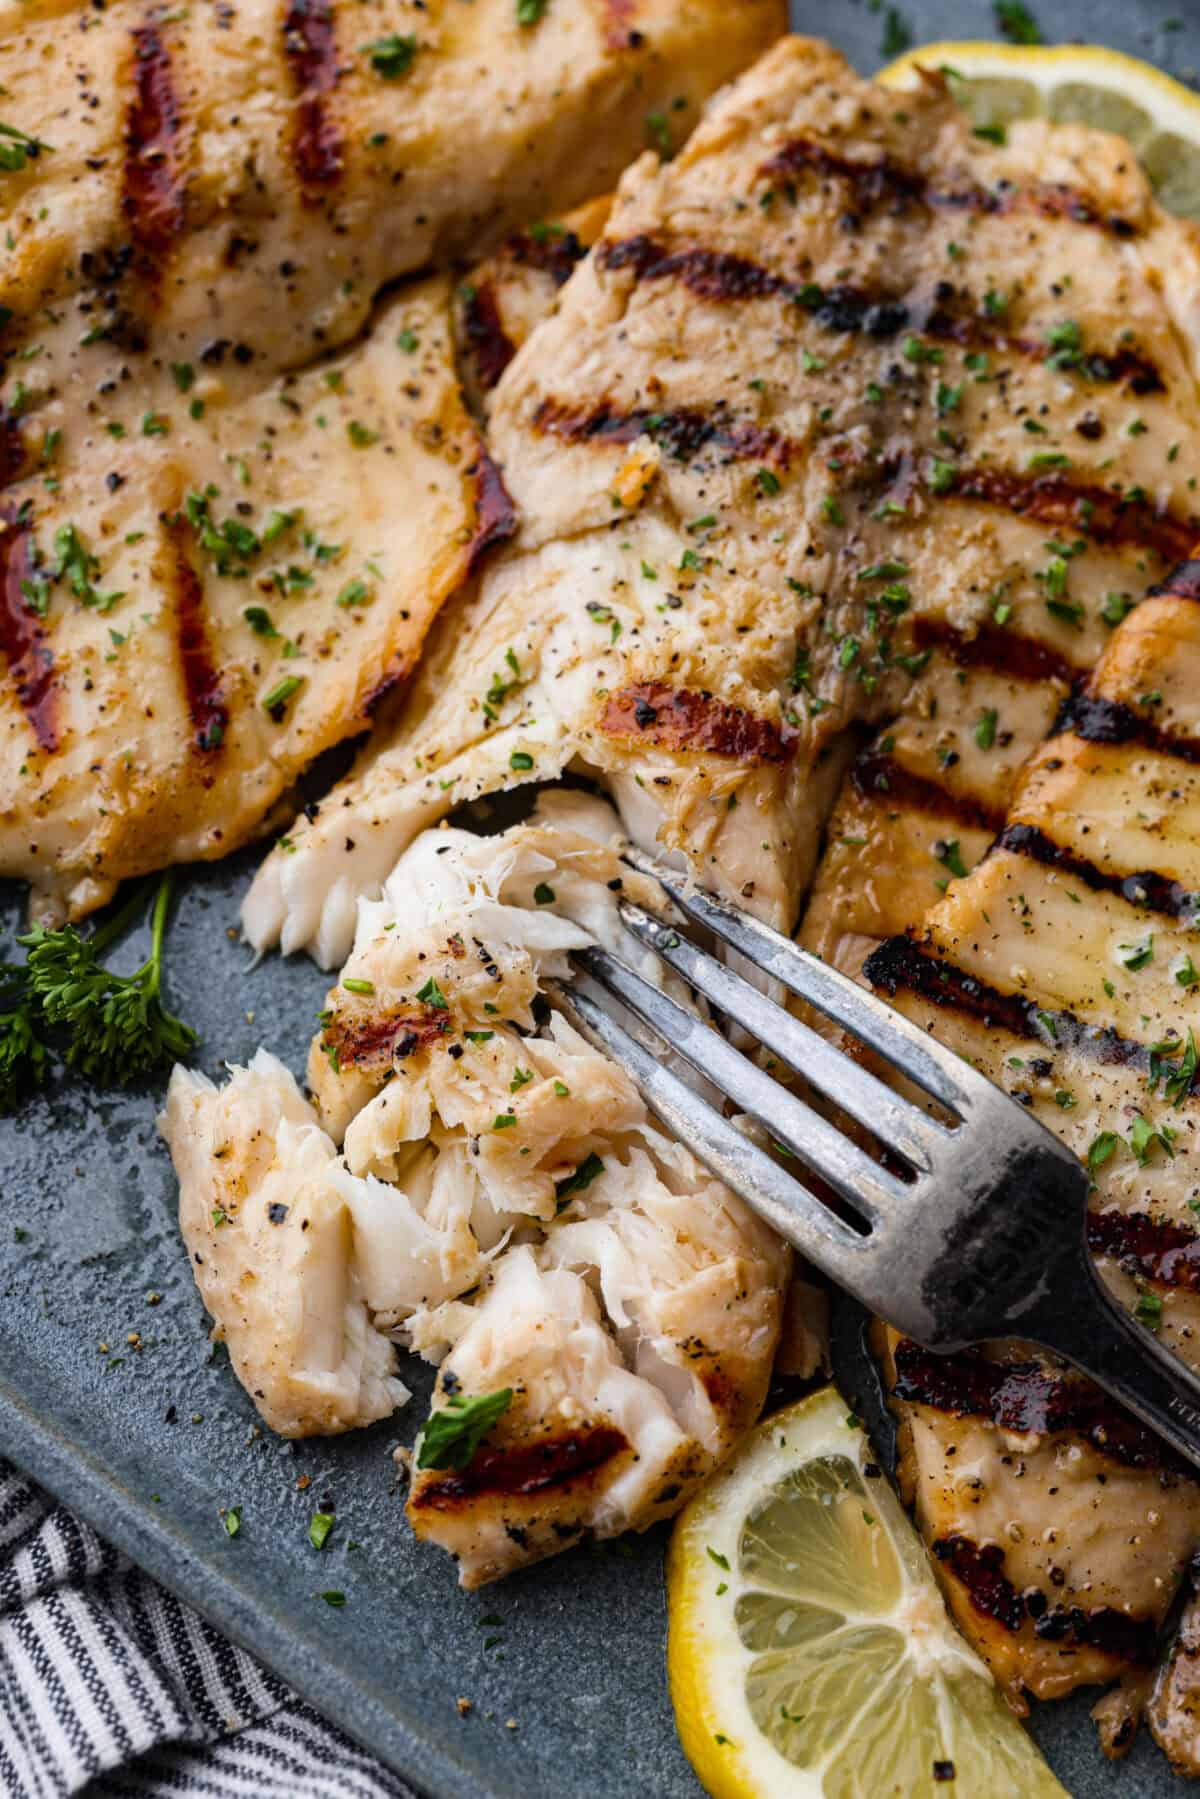
Fire up the grill! This grilled tilapia is deliciously seasoned and has the best flaky texture. Mix a few simple ingredients for the marinade, give it a little time to get super tasty and then it is grilled to perfection in a matter of minutes!
Grilling recipes are some of the best! They are easy, quick to prepare and have the best smoky flavor. I love to pair this grilled tilapia with grilled sides like grilled zucchini, grilled Mexican street corn and this fresh grilled caesar salad!
Reasons You Will Love This Recipe
Quick and Simple: Making grilled tilapia is so easy and can be ready to serve in just over 30 minutes including marinating time.
Light and Filling: Fish is a great source of lean protein and includes essential healthy fats.
Versatile: This is the perfect dinner that pairs with EVERYTHING!
Filled with Bright Flavors: Fresh lemon and garlic create the best flavors combined with the smokiness of grilling. You will love the taste and texture of this fish!
What You Need to Make Grilled Tilapia
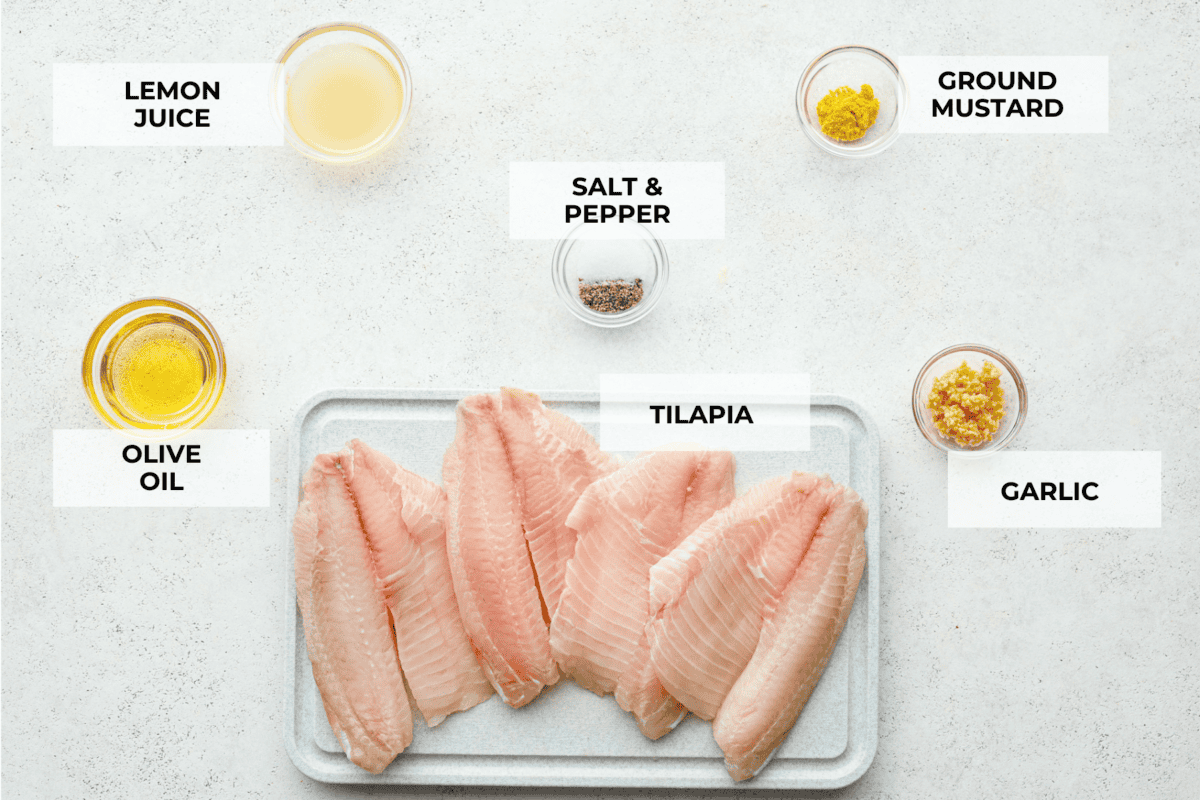
You’ll only need a handful of simple ingredients to make this super tasty grilled tilapia! They come together for tender tilapia that will rival even the best seafood restaurant! The complete list of ingredients and measurements are listed in the recipe card at the bottom of the post.
Fresh Lemon Juice: Lemon adds fresh flavor to almost any grilled fish.
Olive Oil: Provides the marinade with a bit of fat and also is used for cooking the filets on the grill.
Garlic: Minced fresh garlic adds a delicious savory taste.
Seasoning: A simple blend of fresh ground black pepper, salt and mustard powder brings out all of the flavor in the fish.
Tilapia Filets: This recipe calls for 4 tilapia filets to feed 4 people.
How to Make Grilled Tilapia
Tilapia is one of the easiest proteins to grill! Marinate the fish for about 30 minutes, and then grill it for less than 12 minutes. You will want to make this recipe all season long!
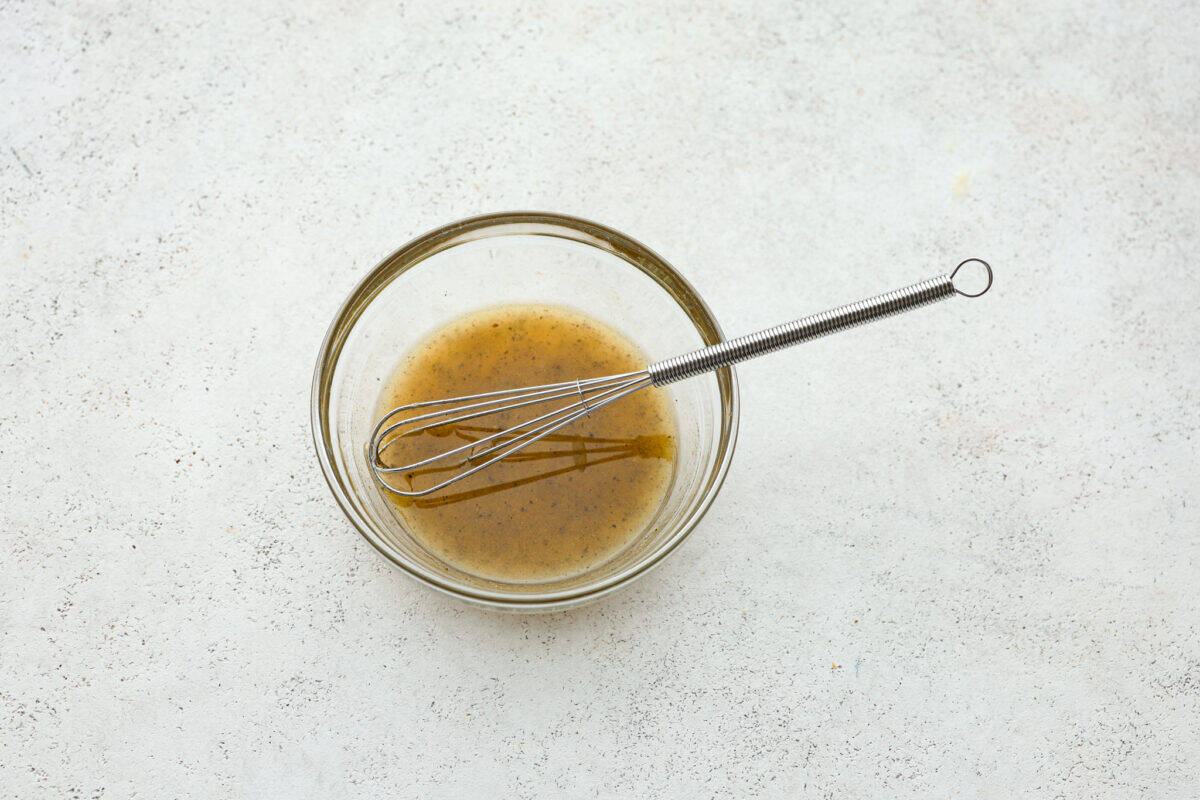
Make the Marinade: Whisk together the lemon juice, olive oil, garlic, black pepper, salt, and mustard powder to prepare the marinade.
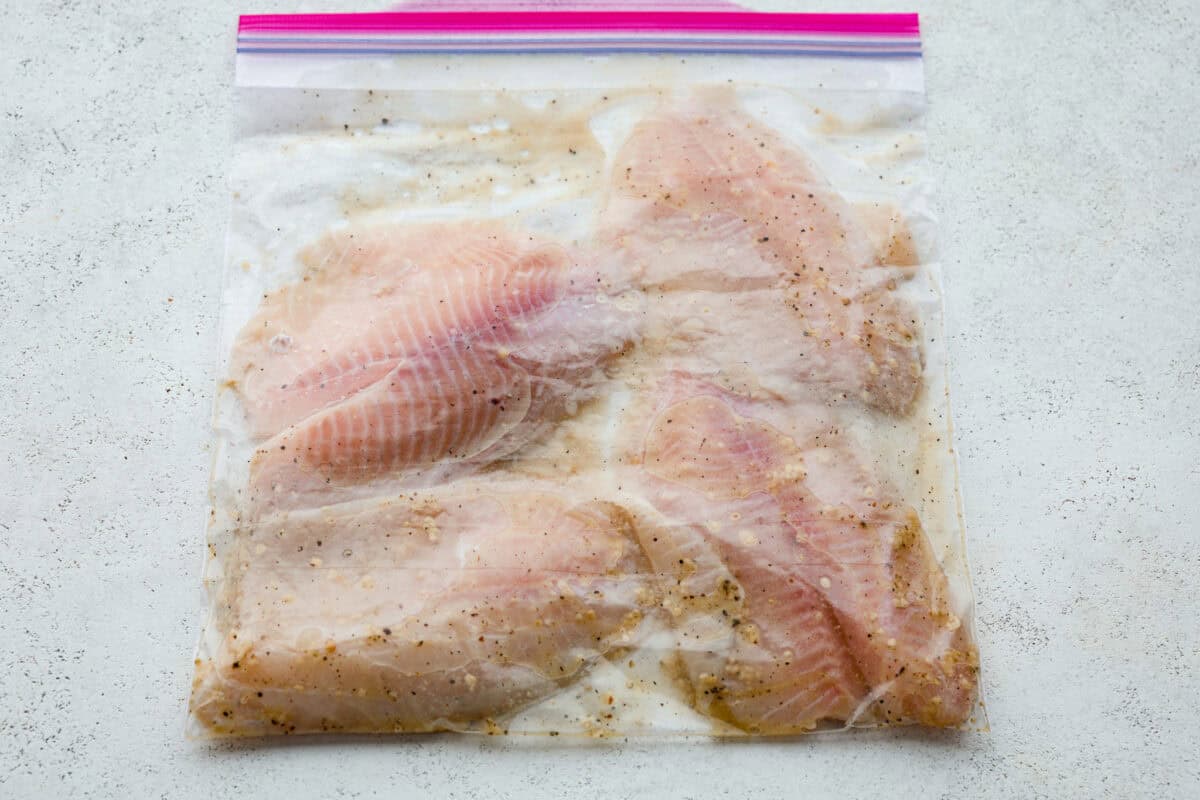
Marinate the Fish: Pour the marinade into a large sealable bag or container and place the tilapia filets into the container. Marinate the tilapia for 30 minutes to an hour. While the filets are marinating, preheat a grill to 400 degrees Fahrenheit.
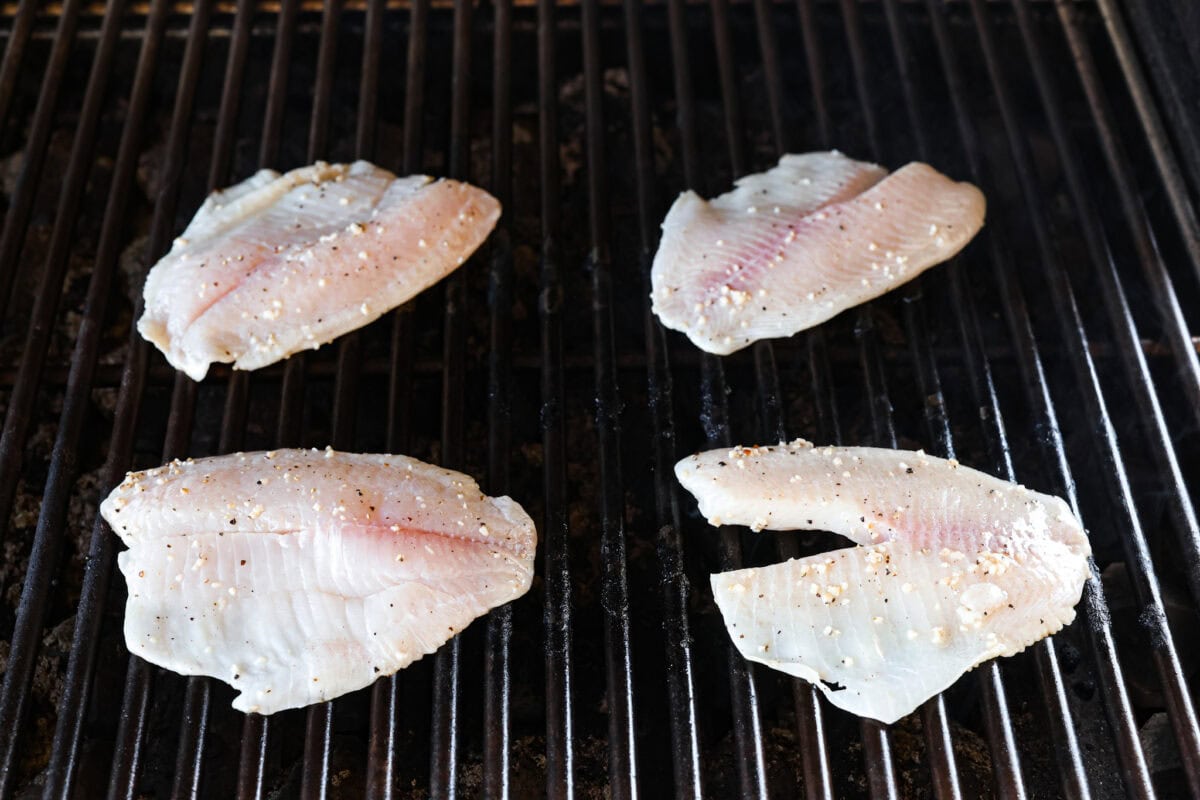
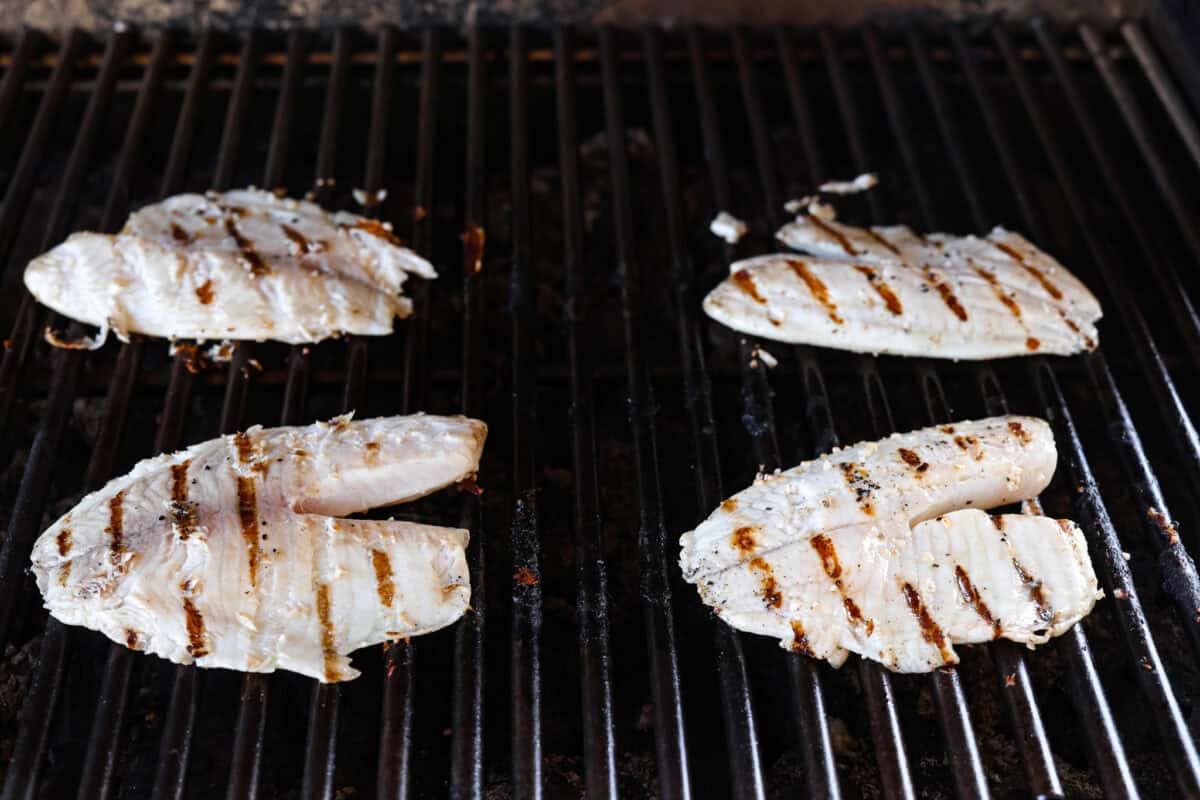
Grill: Once the tilapia filets are ready, remove them from the marinade. Brush the grill with olive oil and grill the filets for 4-6 minutes per side. The filets should easily come off the grill, if they are sticking give them another 1-2 minutes.
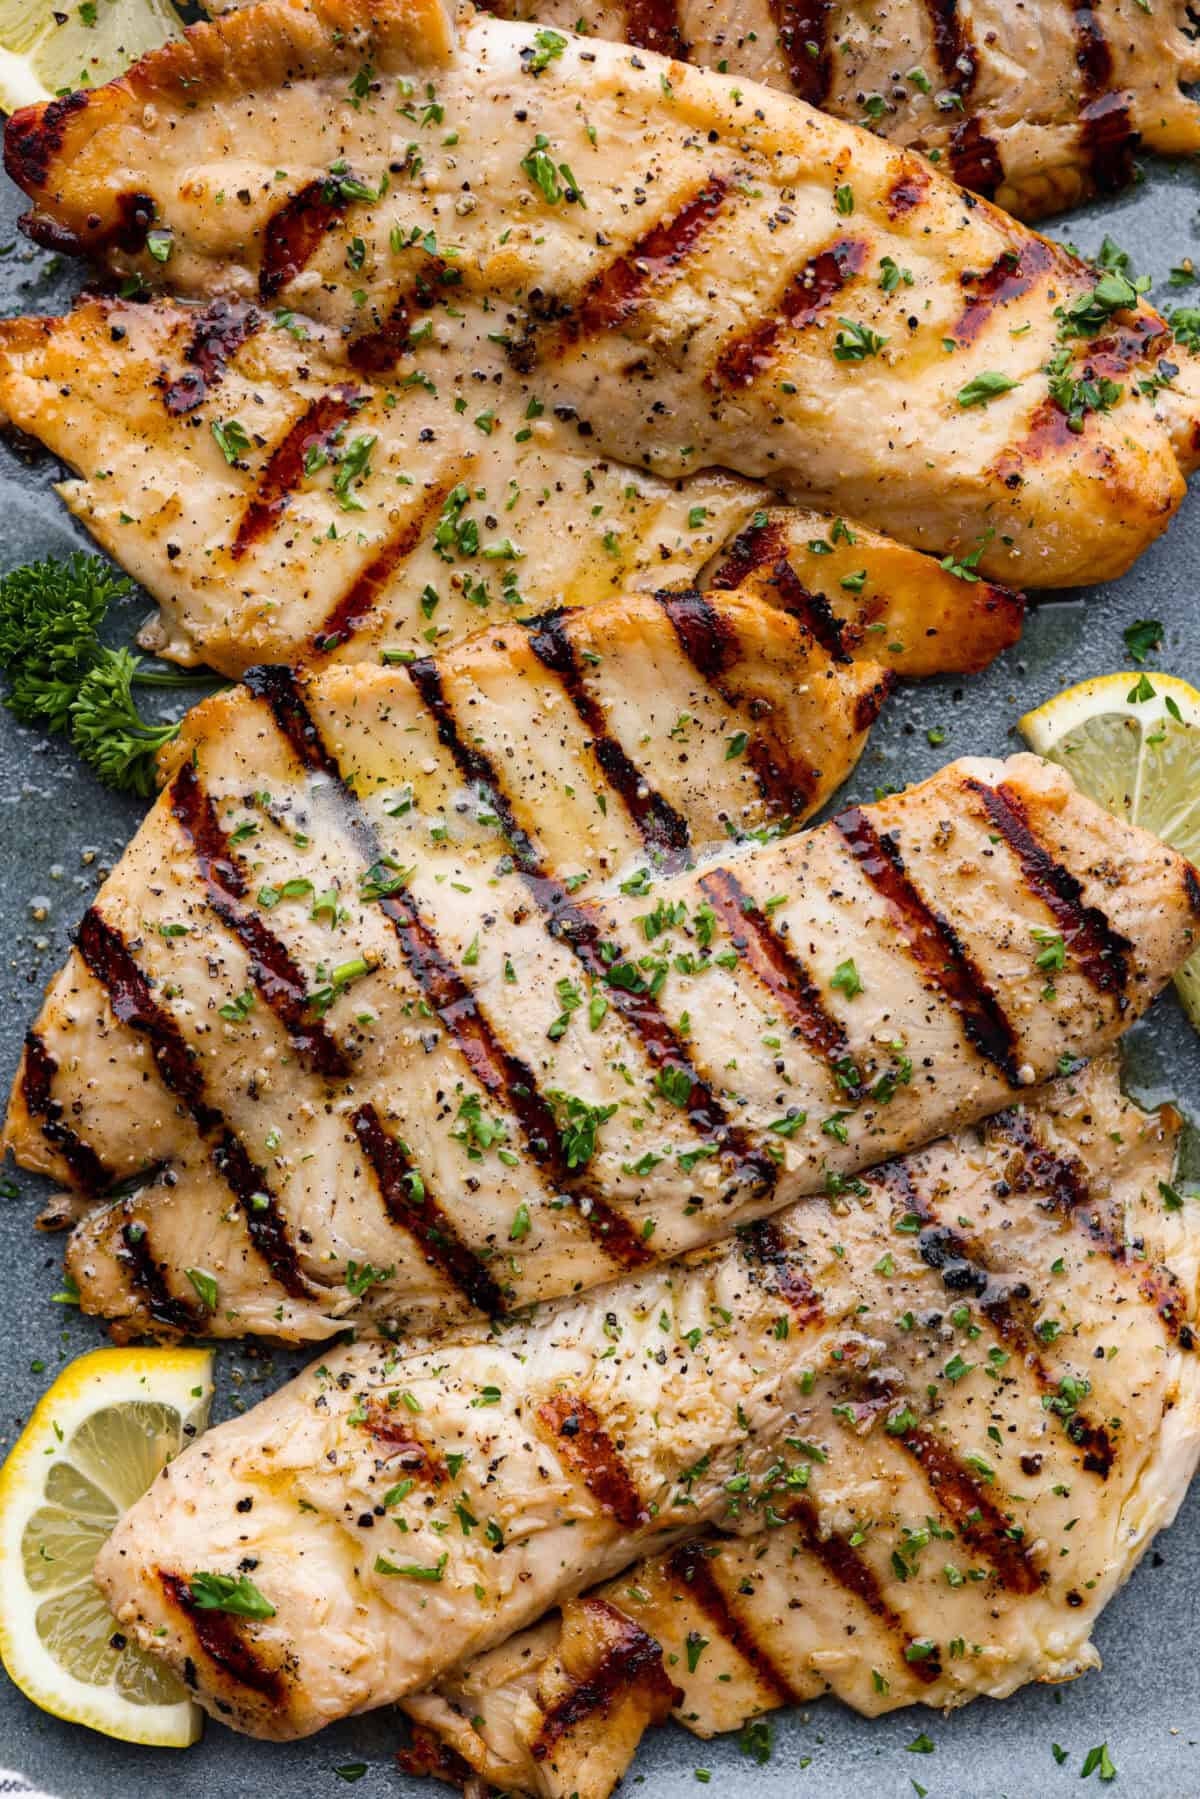
Serve: Remove the grilled tilapia from the grill and enjoy!
Whisk together the marinade.Marinate the tilapia in a Ziplock bag for 30 minutes.Grill the tilapia for 4-6 minutes.Carefully flip the tilapia and grill for 4-6 minutes on the other side.
How to Know When Tilapia is Cooked
You’ll know your fish is cooked through when it’s completely opaque. However, you definitely don’t want to overcook it, or it will become dry. Additionally, you can use a meat thermometer to check and see if it has an internal temperature of 145 degrees Fahrenheit.
Tips for Grilling Tilapia
Here are a few things to keep in mind when grilling tilapia. They are simple tips, but will ensure your fish turns out perfect!
Serving Options: This dish goes great with rice, couscous and your favorite vegetable side like grilled asparagus!
Thaw Filets: If using frozen, be sure they are thawed before you marinate. Thaw overnight in the fridge or place packaged frozen filets in cold water for about 10 minutes.
Discard the Marinade: Be sure to discard the used marinade after using.
Cook Time: The fillets I used were a little on the thicker side, so about 5 minutes was perfect. If your fillets are thinner, reduce the time.
How to Store Leftover Tilapia
Although grilled tilapia is best served right away, here’s how to store leftovers to enjoy them later!
In the Refrigerator: Once it has cooled, then place it in an airtight container or wrap it tightly in plastic wrap. Put it in your fridge, and your fish will stay good for up to 3 days.
Reheating: The quickest way to reheat your grilled tilapia is in the air fryer for a couple of minutes at 350 degrees. You can also reheat it over medium heat on the stove with a little melted butter in the pan.
More Seafood Recipes
We love to enjoy seafood dishes often because they are satisfying yet light and typically contain many nutrients. Here are some of our favorite fish recipes that we make on repeat. And if you’re looking for more, browse through our many other seafood recipes!
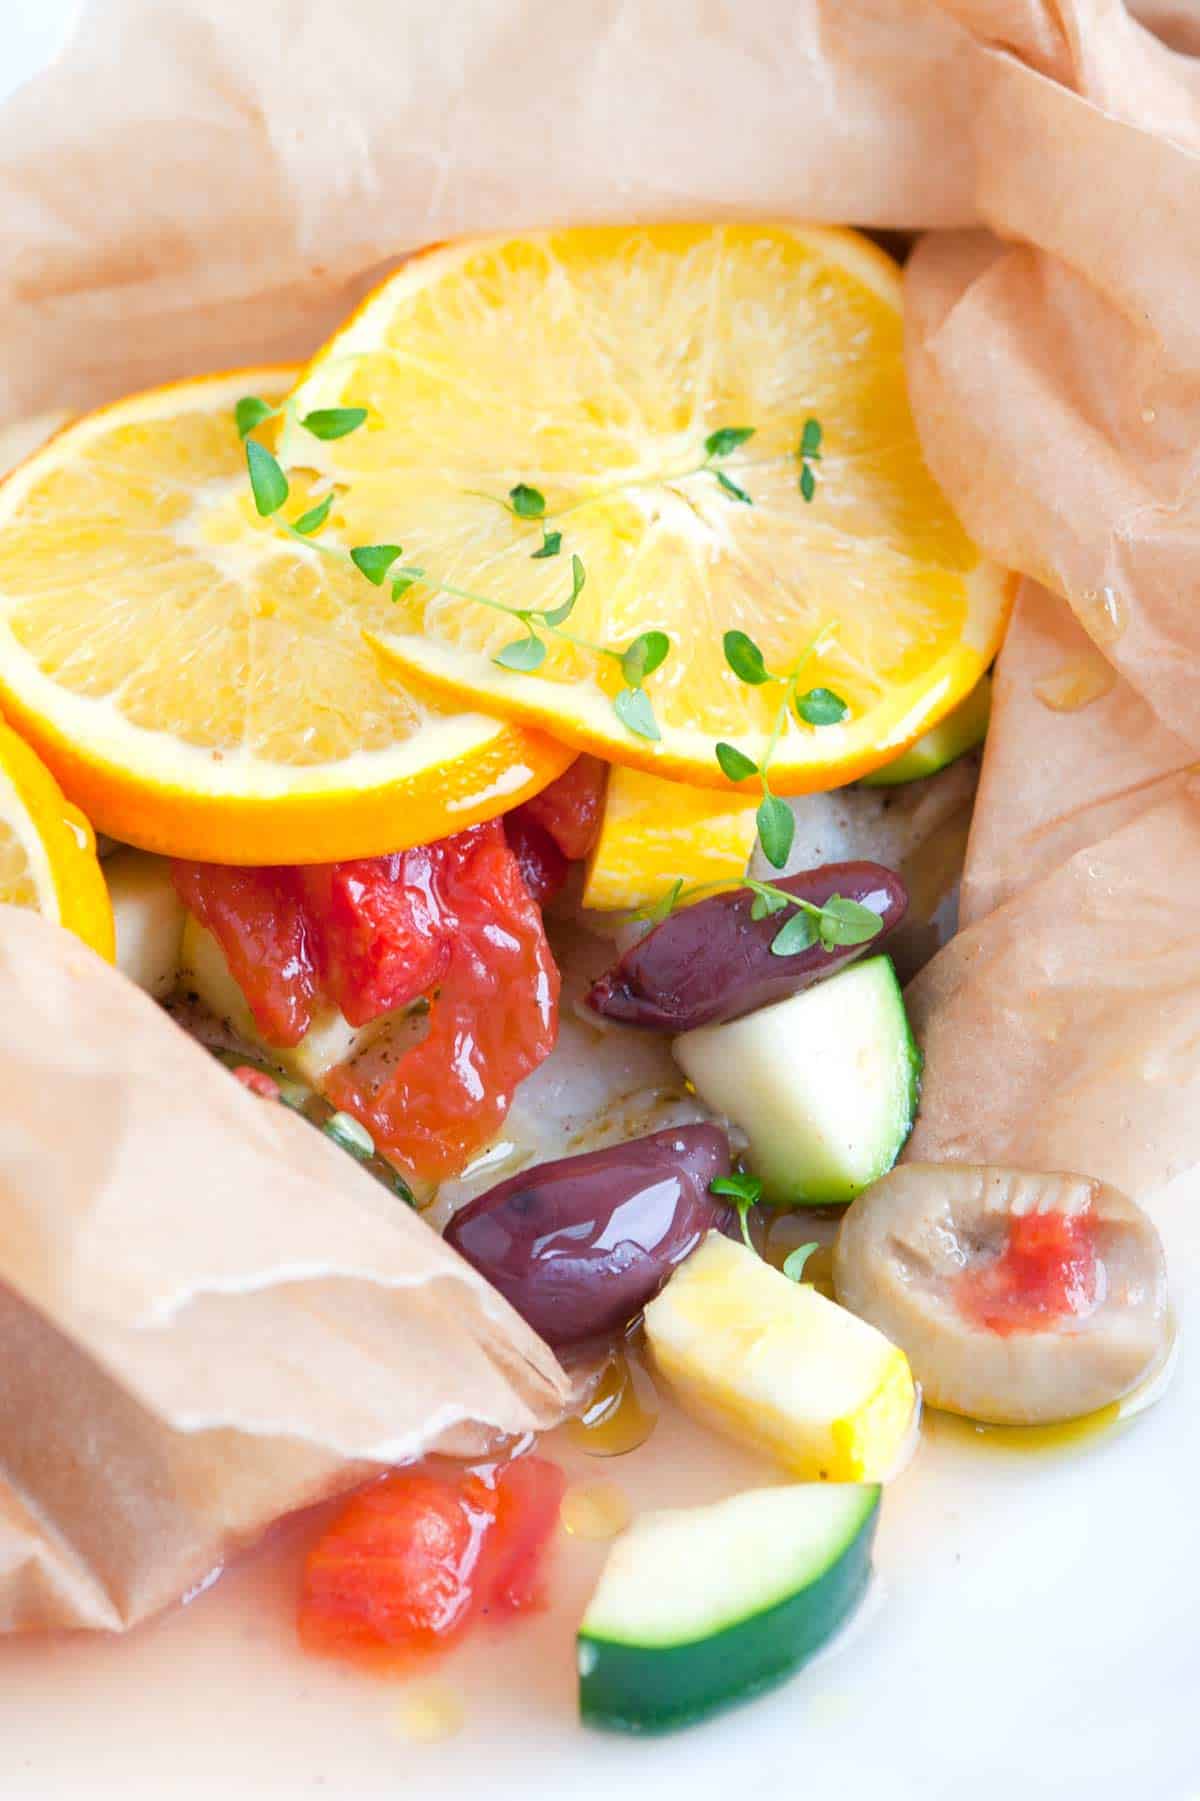
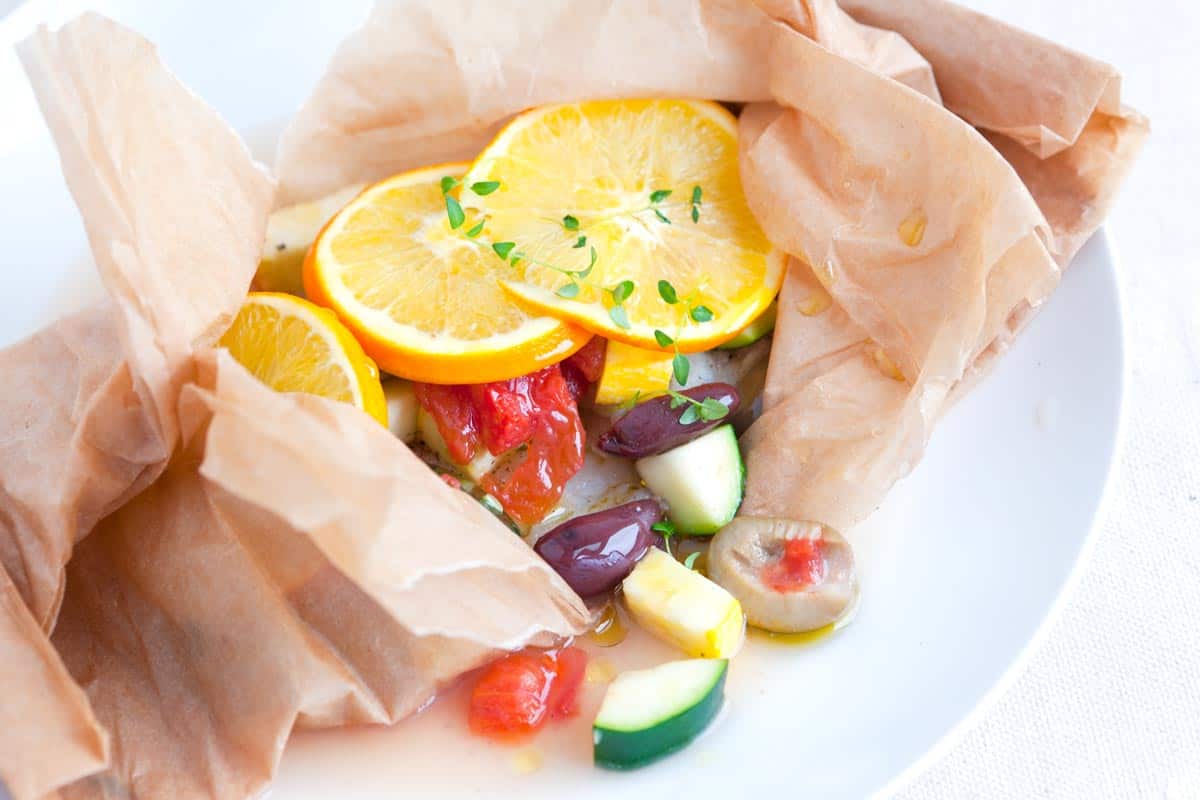
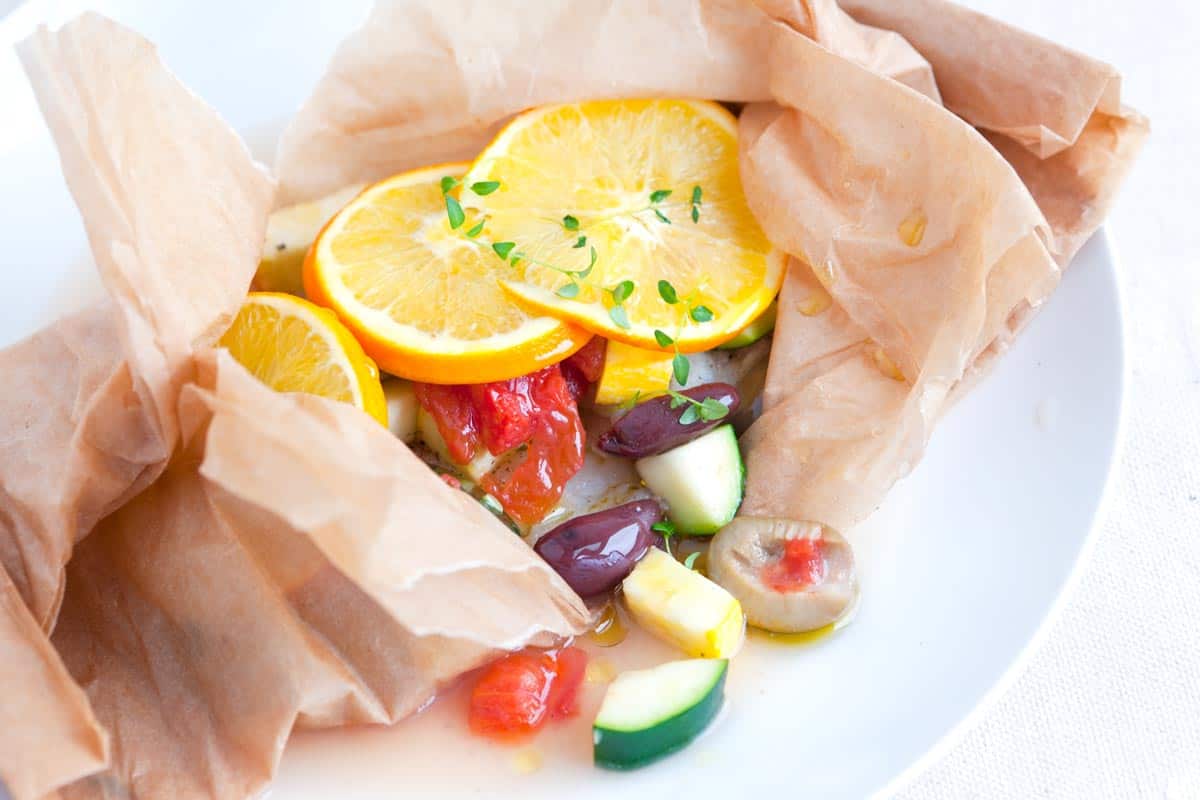
Light and healthy baked fish packets with tomatoes, olives and orange. Jump to the Baked Fish with Orange and Olives Recipe or read on to see our tips for making it.
I love how easy this recipe is, plus it has everything you need in one adorable little packet.
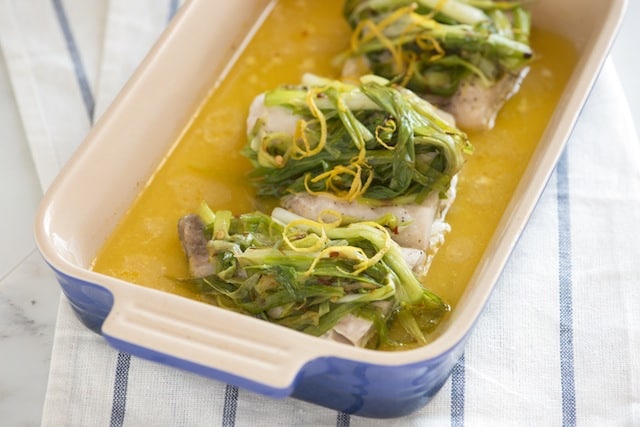
YOU MAY ALSO LIKE: How to make perfectly baked fish with scallions and orange. Jump to the Baked Fish Recipe with Scallions.
How to Bake Fish in Parchment Packets
This recipe comes together very quickly. You will need a sheet of parchment paper. We pile everything into it then fold it up and bake in the oven until the fish is perfectly cooked and the vegetables are tender.
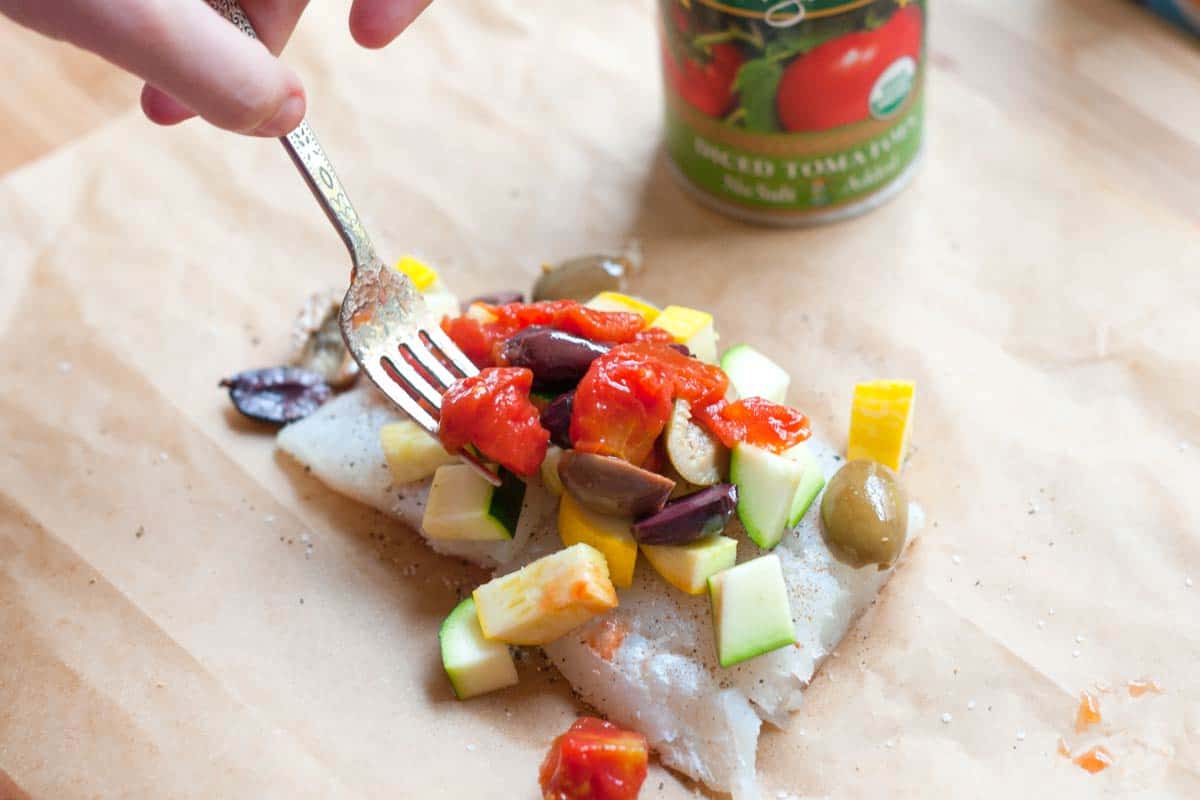
Season the fish with salt, pepper and a little cinnamon. I know cinnamon sounds a bit odd, but the orange-cinnamon combination is really delicious. Mound olives, squash and tomatoes on top. We used canned tomatoes, but fresh will work nicely.
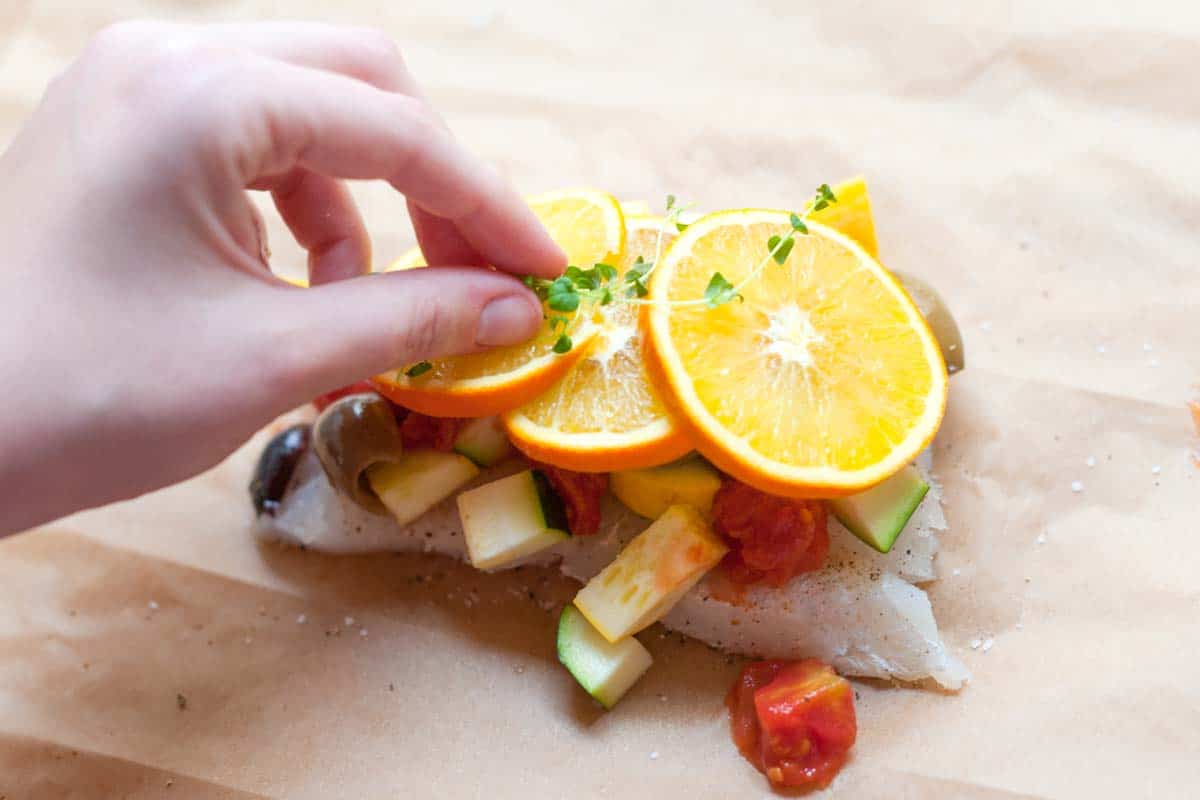
Add a tiny drizzle of olive oil, a few orange slices and some fresh thyme. Just before folding up the parchment, pour a couple tablespoons of liquid over the fish and vegetables. Chicken stock, fish stock or a dry white wine are all excellent options. This little bit of liquid helps the fish to steam inside the packet, keeping the fish from drying out.
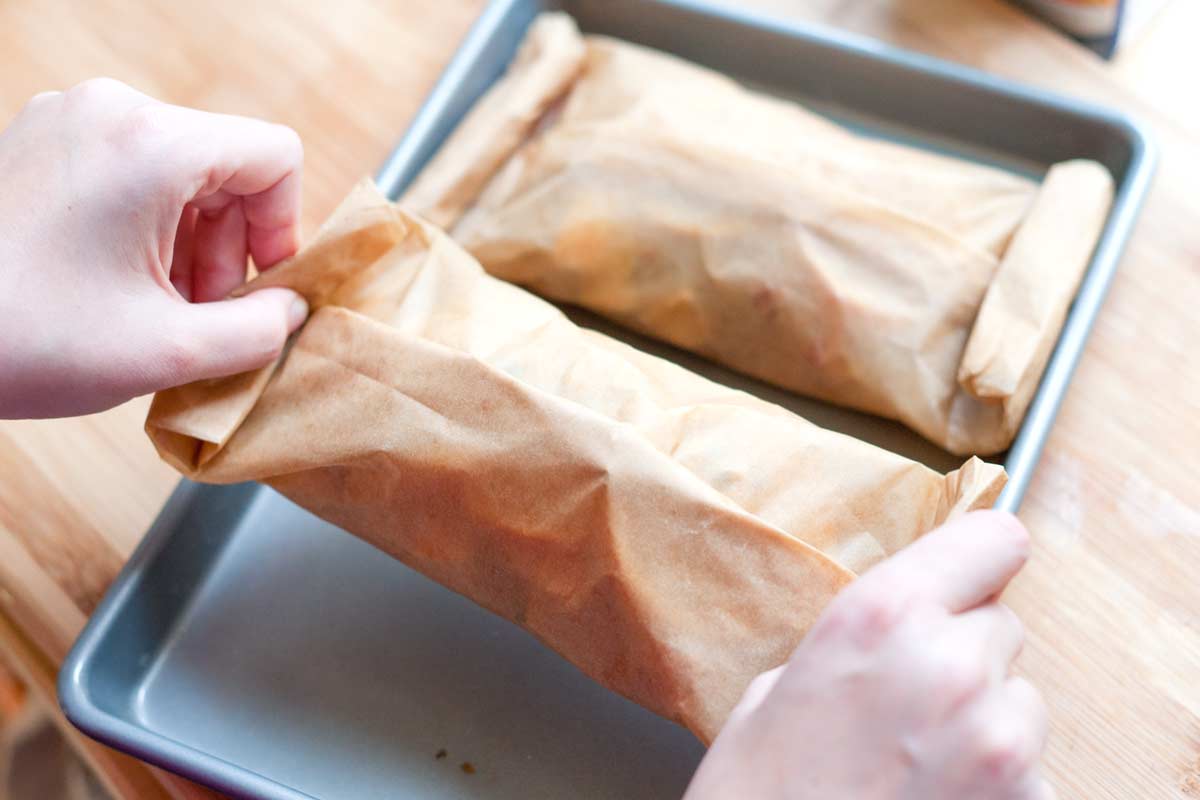
Alright, now it’s time to fold up the parchment paper to make little packets. Bring two sides of the paper together and then roll and crimp the edges so that the top of the packet is completely sealed. Do the same with the ends and transfer to a baking sheet. After 12 to 15 minutes, the fish will be cooked and the veggies tender.
Back in the day we were contributors for Betty Crocker. We shared this recipe with them. We loved it so much we had to share an adapted version with you.
Recipe updated, originally posted January 2012. Since posting this in 2012, we have tweaked the recipe to be more clear. – Adam and Joanne
Easy Baked Fish in Parchment with Orange and Olives
PREP
COOK
TOTAL
We use fresh thyme for this, if you would prefer to use dried, use 1/4 teaspoon of dried thyme. Other fresh herbs will work, too. Basil, dill or parsley are excellent. When you serve, add the parchment packet to each plate and allow each person to slit through the parchment, releasing the aromas of cinnamon, orange and herbs.
Makes 2 servings
You Will Need
2 (6-ounce) firm white fish fillets such as Pacific halibut, Pacific rockfish or Pacific cod
1/4 teaspoon ground cinnamon
Salt and freshly ground pepper
1 cup diced zucchini and yellow summer squash, 1/4-inch cubes
1/4 cup pitted olives, halved
1 tablespoon extra-virgin olive oil
1/4 cup drained canned diced tomatoes
4 tablespoons chicken stock, fish stock or dry white wine
4 thin orange slices
2 sprigs fresh thyme
Directions
1Heat oven to 400 degrees F. Cut two 16-inch squares of cooking parchment paper or use foil.
2Lay both squares of parchment out onto your workbench. Season both sides of the fish with cinnamon, salt and pepper, and then place one fillet onto the middle of each parchment square.
3Divide the olives, zucchini and yellow squash, tomatoes and olive oil between fillets, mounding them on top of the fish. Season with another pinch of salt and a few grinds of black pepper then pour two tablespoons of liquid (stock or wine) over each fillet. Top with orange slices and thyme.
4To make packets, roll and crimp opposite sides of parchment paper together over fish and vegetables, then roll and crimp ends to prevent steam from escaping.
5Place packets onto a rimmed baking sheet. Bake until the fish flakes easily with a fork, 12 to 15 minutes depending on thickness of fillets. To check for doneness, carefully open one end of a packet. Transfer packets to plates for serving.
Adam and Joanne’s Tips
If you make this recipe, snap a photo and hashtag it #inspiredtaste — We love to see your creations on Instagram and Facebook! Find us: @inspiredtaste
AUTHOR:
Joanne Gallagher
We are Adam and Joanne Gallagher, the creators of Inspired Taste. Established in 2009, Inspired Taste grew from a childhood dream into one of the internet’s most trusted recipe sites with hundreds of reliable recipes, step-by-step videos, and expert tips.More About Us
This website may contain affiliate links and advertising so that we can provide recipes to you. Read my disclosure policy.
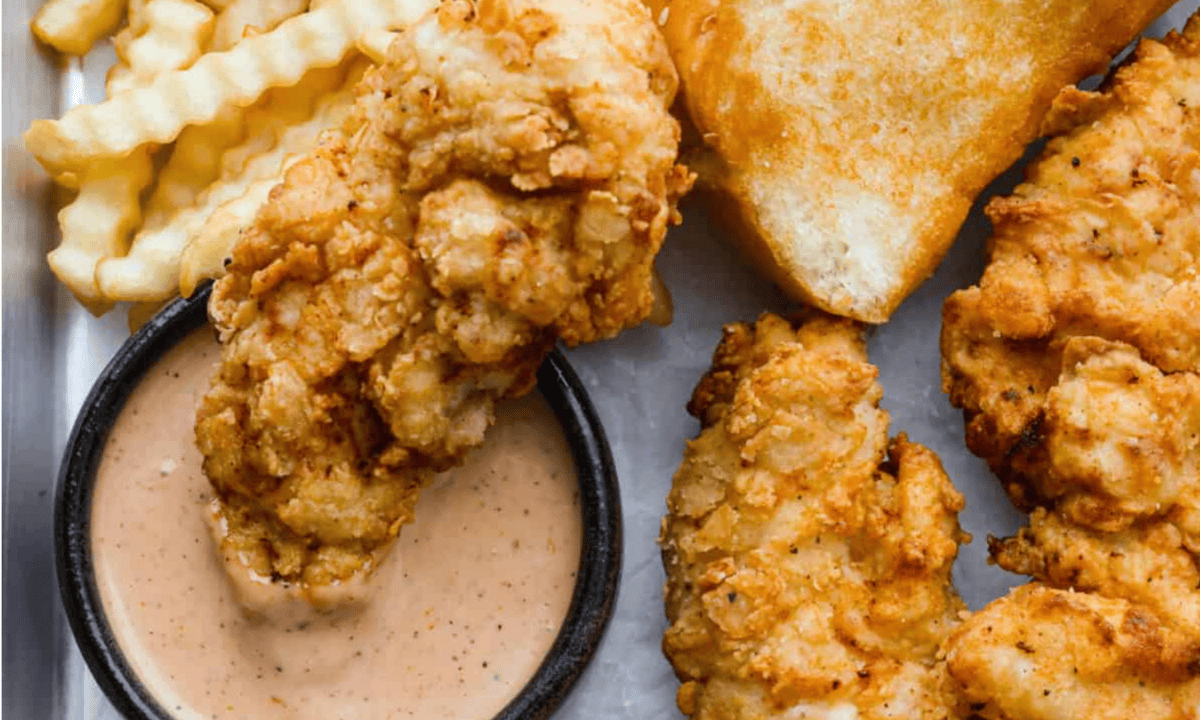
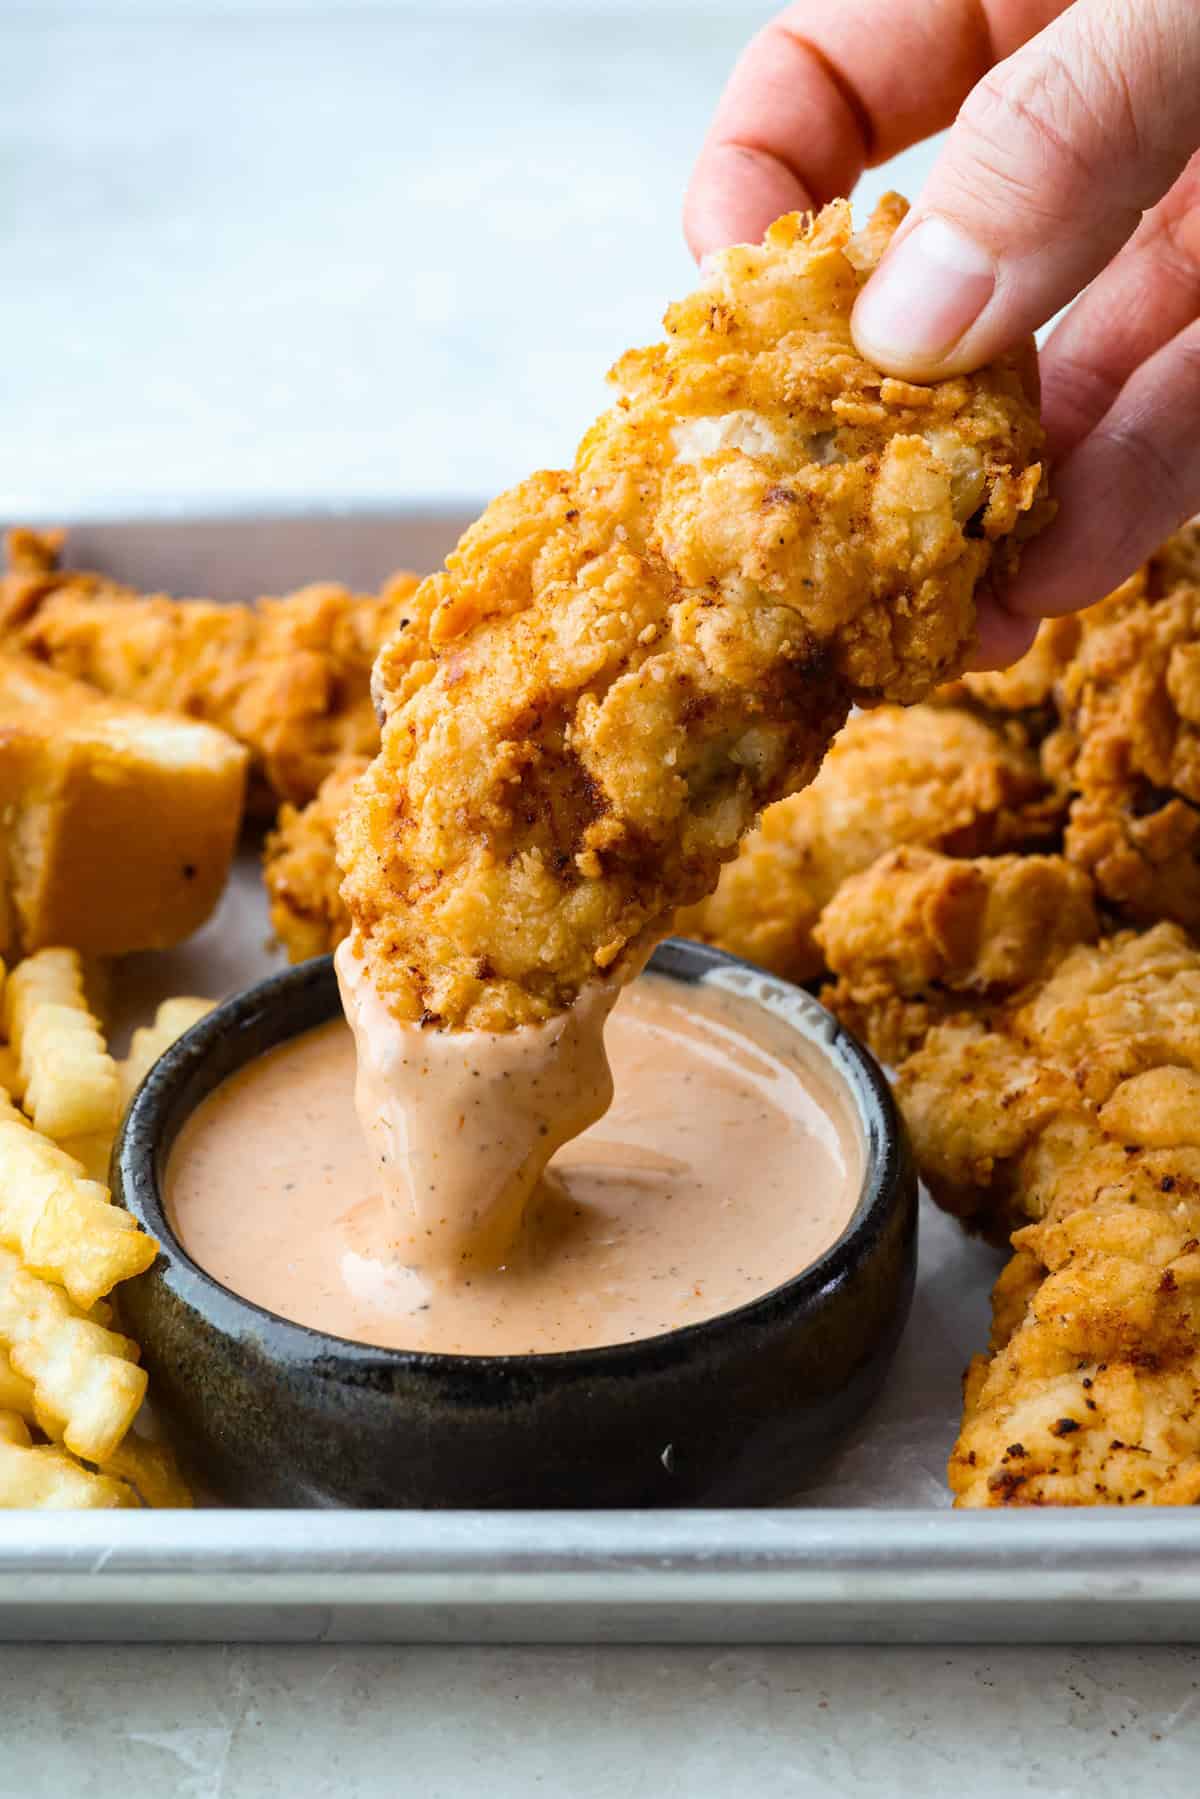
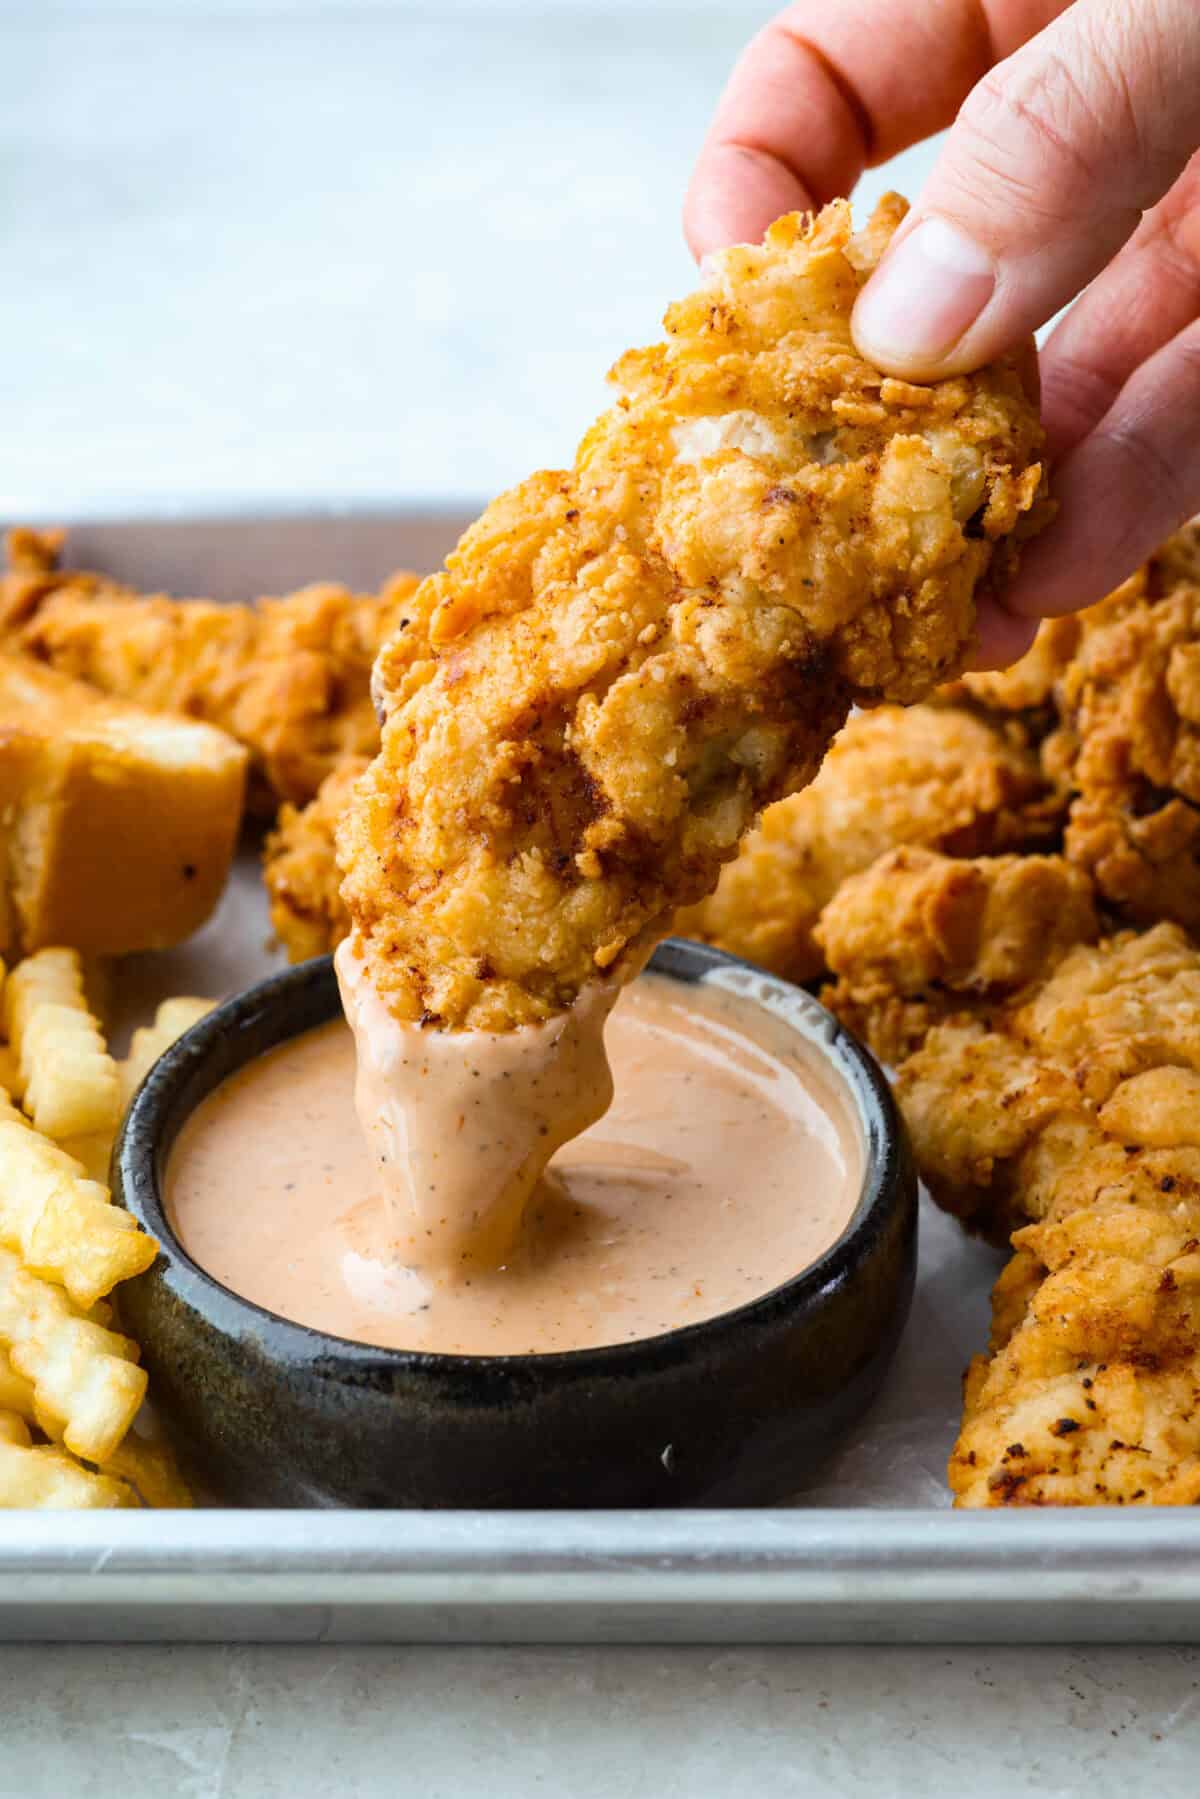
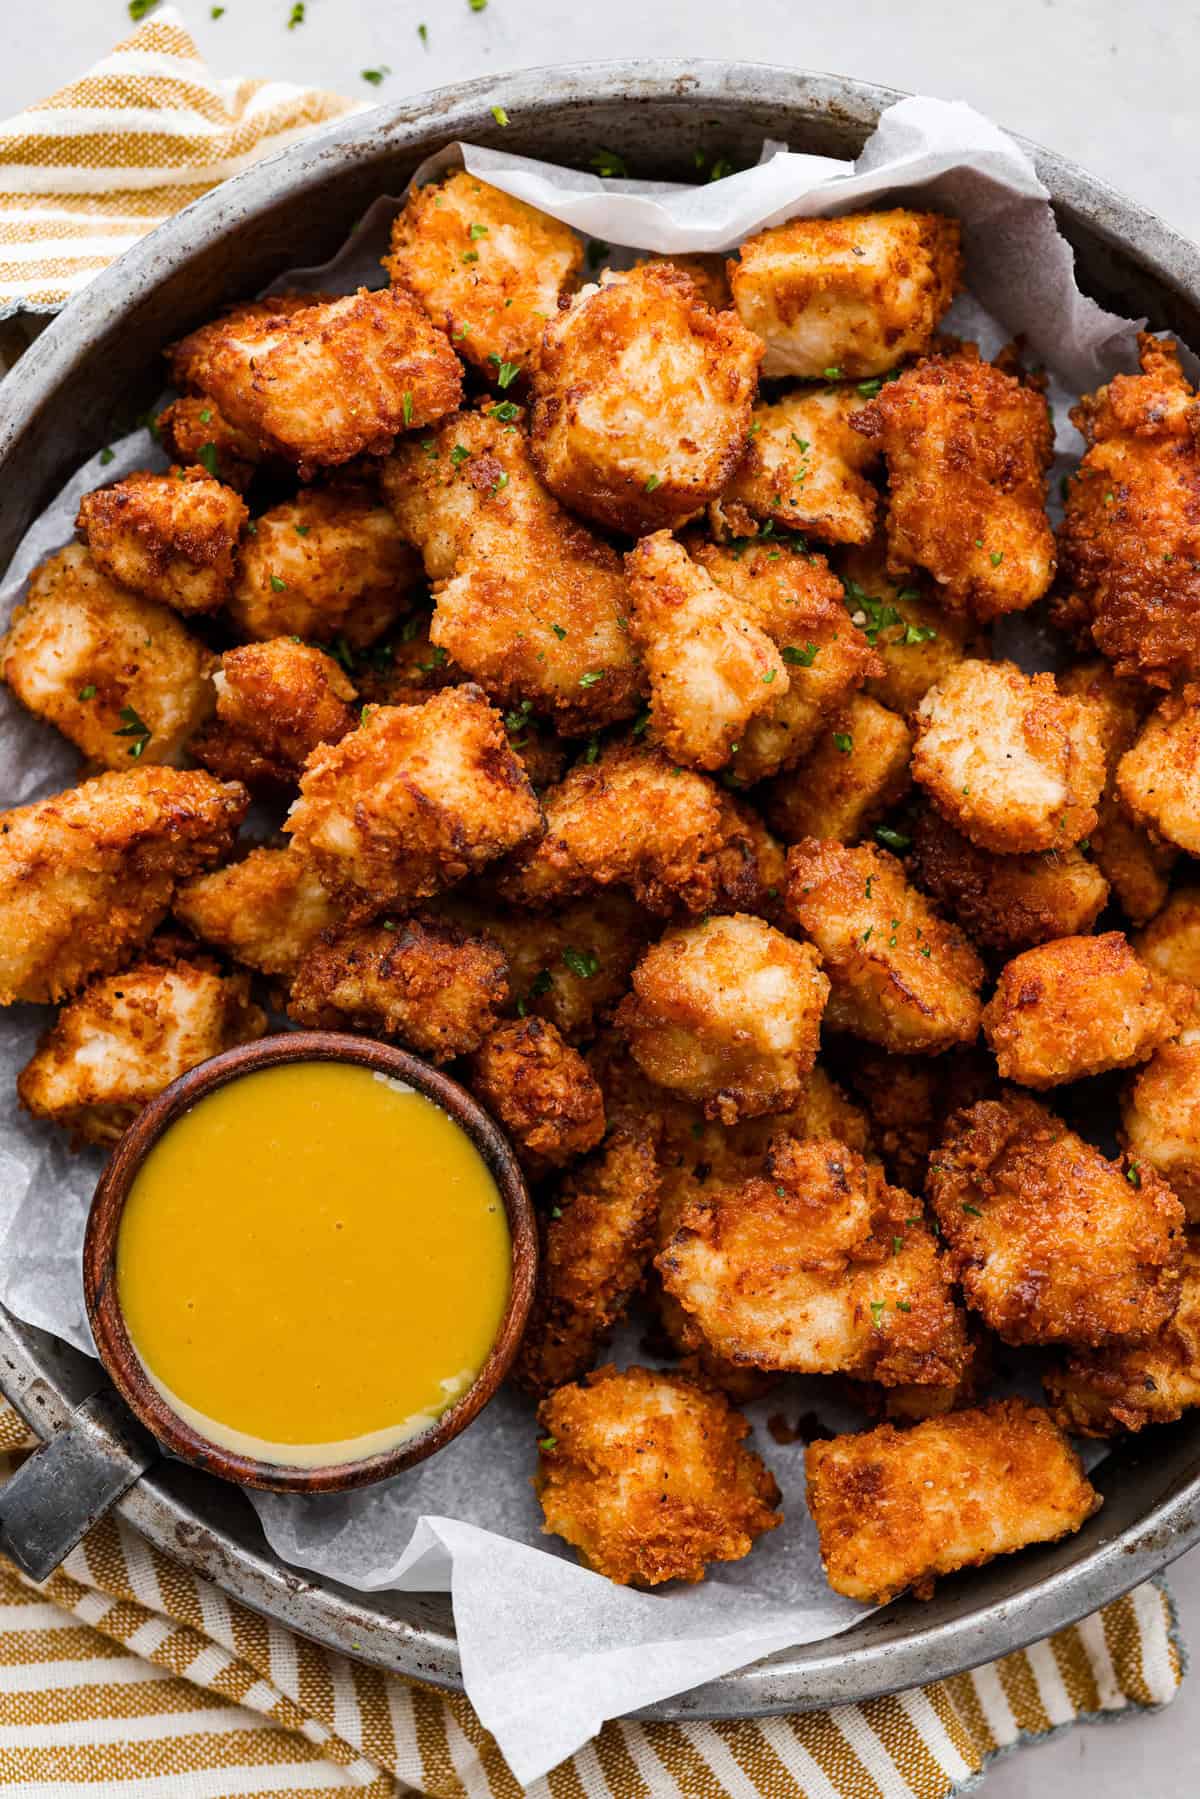
Make this copycat Raising Cane’s chicken tenders at home, no drive-thru required. An easy marinade, simple ingredients, and a quick fry give you crisp, light chicken and that unmistakable Cane’s sauce for a fraction of the cost.
The Magic Behind the Crunch and the Sauce
Double Crunch: My version uses a double coat of breading for that extra-loud crunch you expect from the real thing.
Air Fryer Friendly: Not into deep frying? No problem. I include air fryer directions that still give you a crisp finish.
Built-In Flavor: Spices go into both the marinade and the breading, so every bite hits with the same bold flavor you get at Cane’s.
Raising Cane’s Chicken Tenders Ingredients
Bring the Heat! Add 1-2 teaspoons of hot sauce to the marinade and a pinch or two of cayenne pepper to the breading for added heat.
Buttermilk: Don’t have buttermilk, make your own. It won’t be as thick, so the breading may not stick as well, but in a pinch, it can work.
Chicken: Remove the tendons from the chicken tenders before marinating, or use chicken breasts, sliced into even vertical pieces.
How to Make Raising Cane’s Chicken
If you’re craving Cane’s but don’t want to leave the house or pay the higher restaurant prices. You can make them at home, and it’s easier than you’d think!
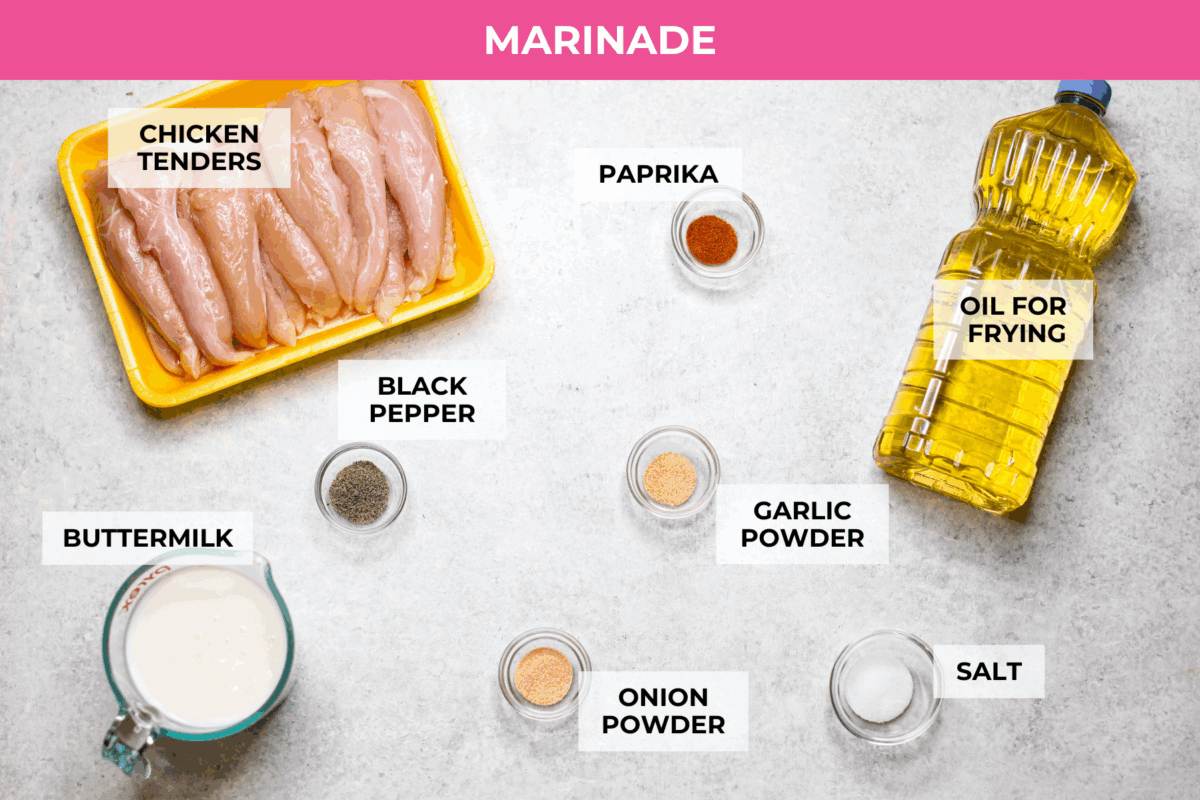
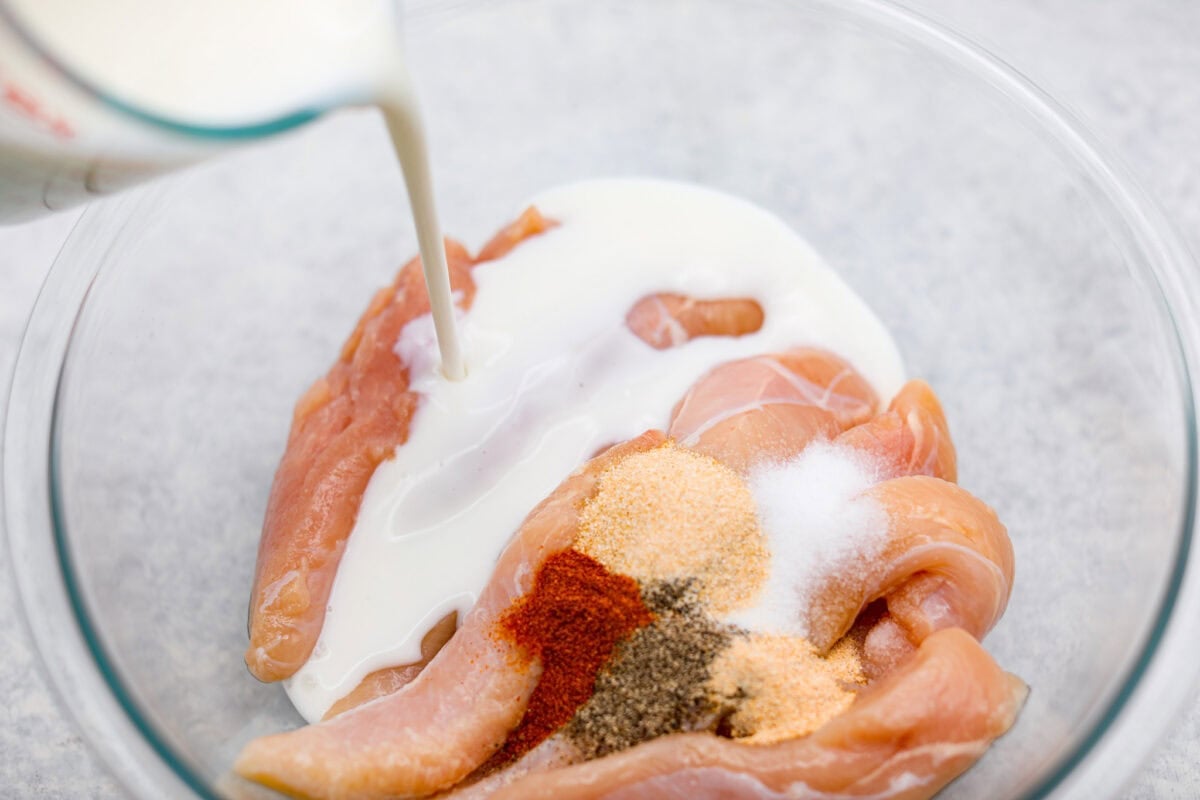
Trim & Season Chicken: Trim the chicken by removing the tendons. Add the chicken to a large bowl. Add the buttermilk, salt, pepper, onion powder, garlic powder, and paprika to the bowl with the chicken.
Marinate: Toss everything together until well combined and the chicken is fully coated. Let it marinate for at least 4 hours, or up to 24 hours.
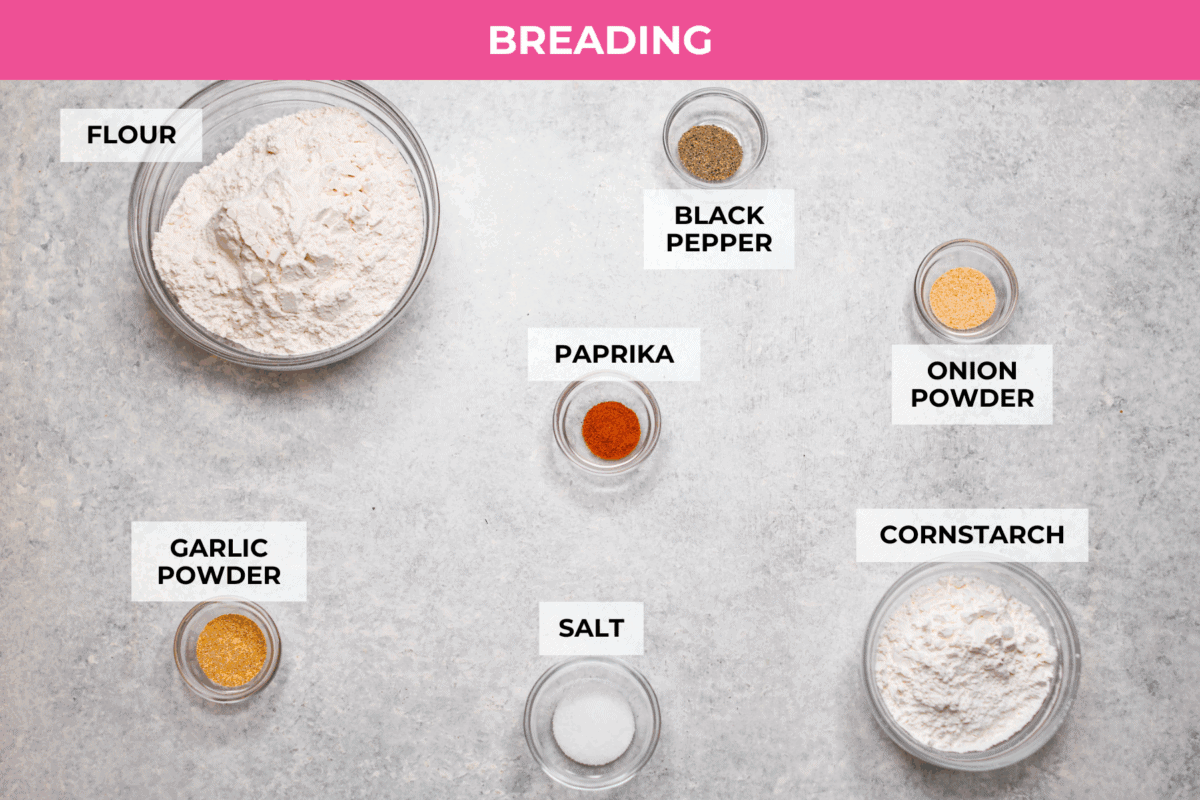
Heat Oil & Make Breading: When ready to fry, add 5-6 cups of vegetable oil to a large, deep pot until it is about 2 inches deep. Heat over high heat until it reaches 350°F. Meanwhile, combine the flour, cornstarch, salt, pepper, onion powder, garlic powder, and paprika in a large bowl.
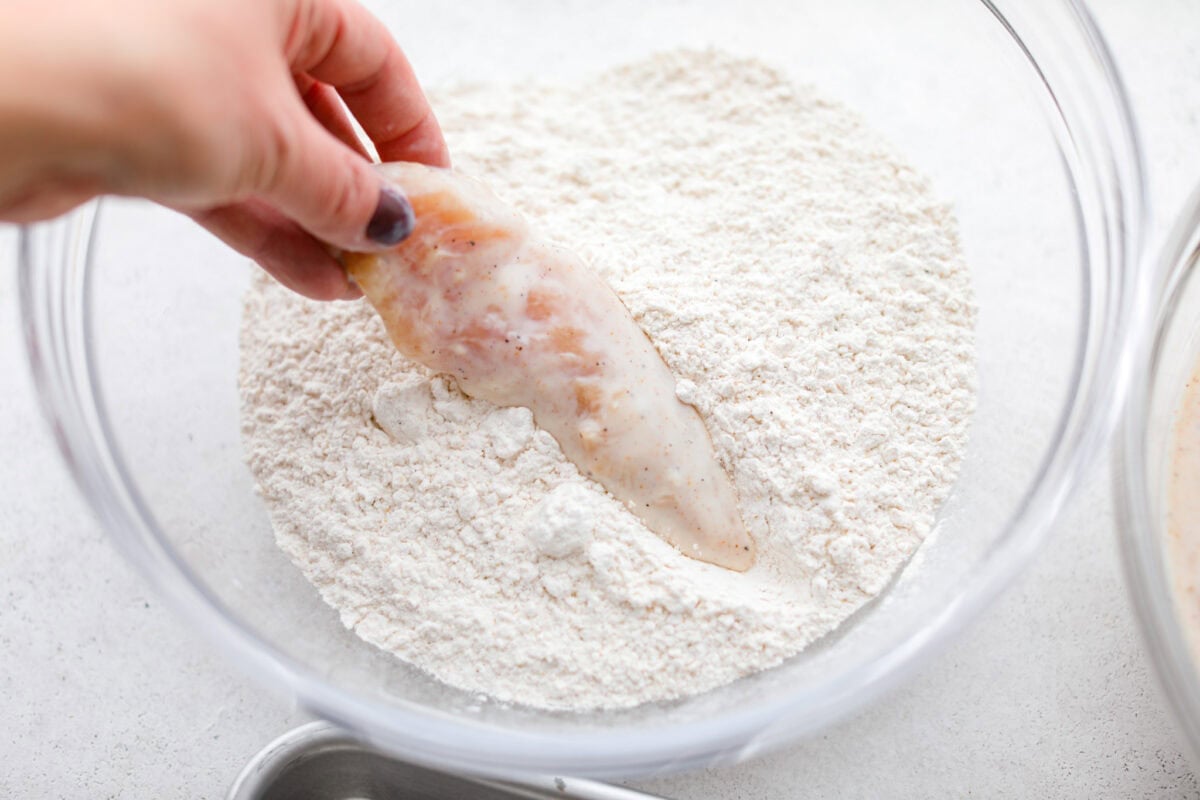
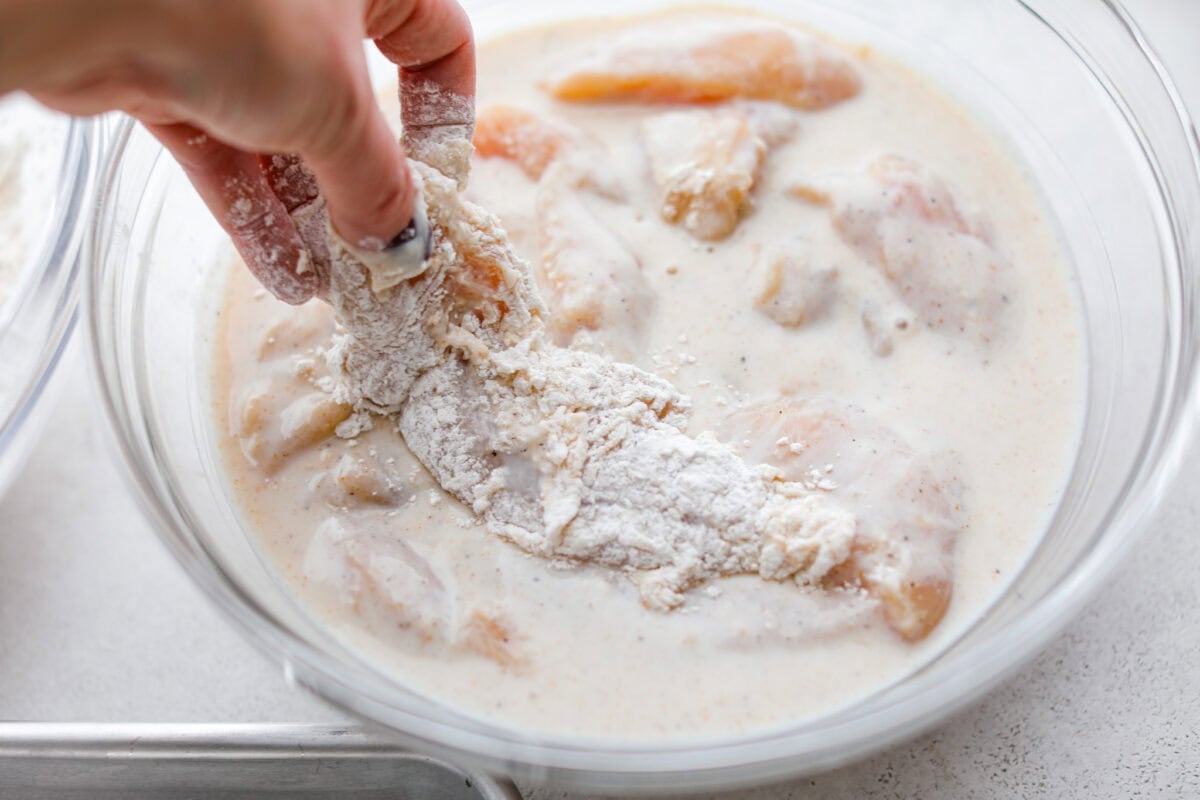
Dip Chicken In Breading: Remove the chicken strips from the marinade, one at a time, letting the excess marinade drip off before adding them to the breading mixture.
Double Dip: Coat each piece of chicken fully with the breading mixture. Press it onto the chicken with your hands, then dip it back into the marinade, then back into the flour mixture. This double-breading will give you an extra-flaky coating.
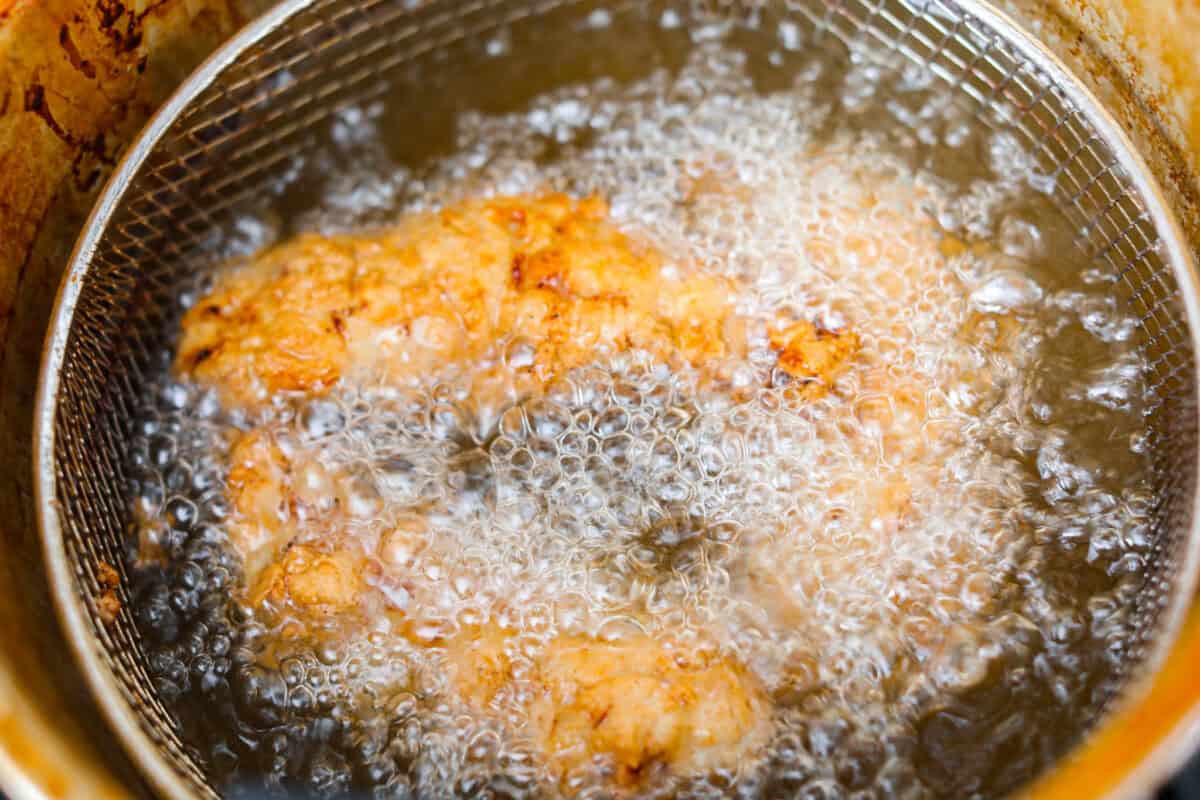
Fry & Drain: Fry the breaded chicken in batches for 5-7 minutes, flipping them halfway through, until the thickest part of the tenders reaches 165°F. Transfer them to a baking pan lined with paper towels or a wire rack to drain. Serve Raising Cane’s Chicken Tenders with crinkle-cut fries, coleslaw, and Cane’s Sauce
Air Fryer Option
Don’t want to Deep Fry? Air fry the breaded chicken tenders by spraying them with oil, then air fry at 400°F for 12 minutes, flipping halfway through and spraying them lightly with oil again.
Pin this now to find it later
Pin It
More Copycat Recipes To Try
If you loved this Copycat Raising Cane’s Chicken Tender recipe, you’ll love all of my other copycat recipes. What copycat recipe would you like me to try next?
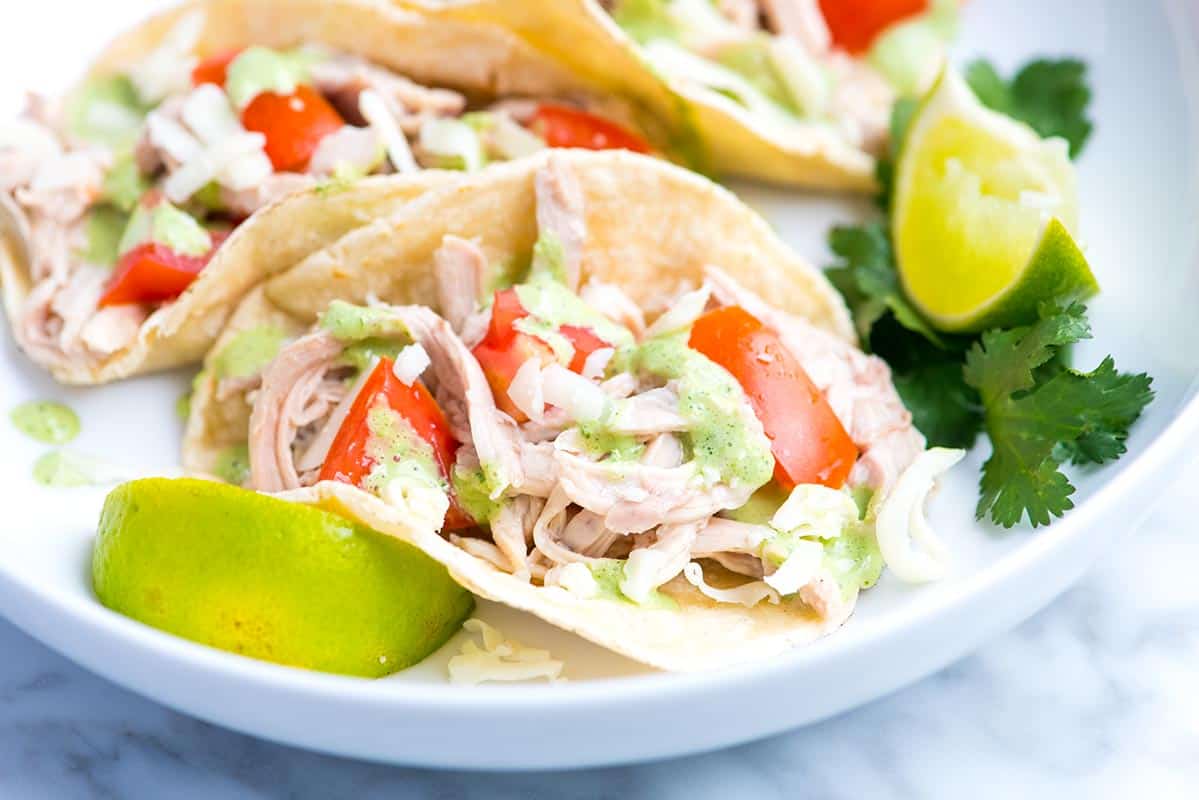
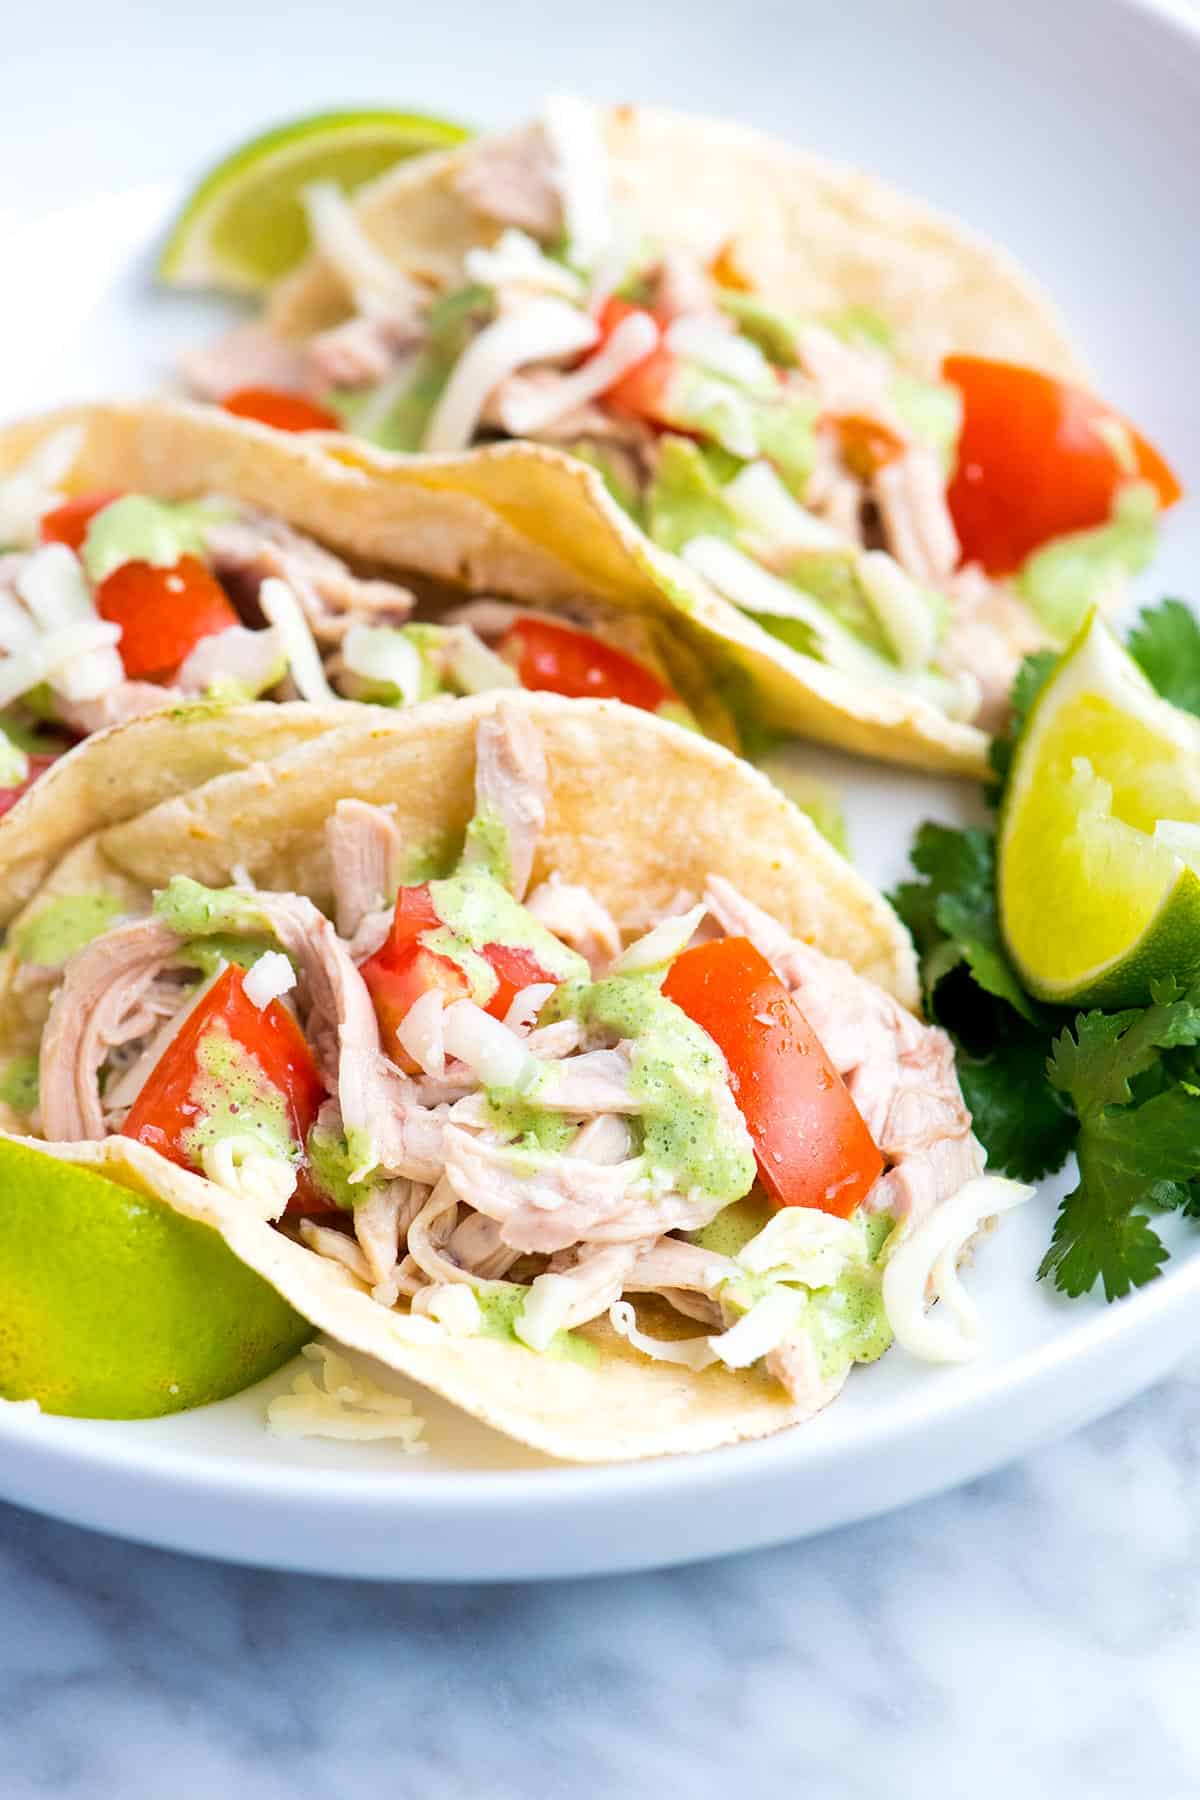
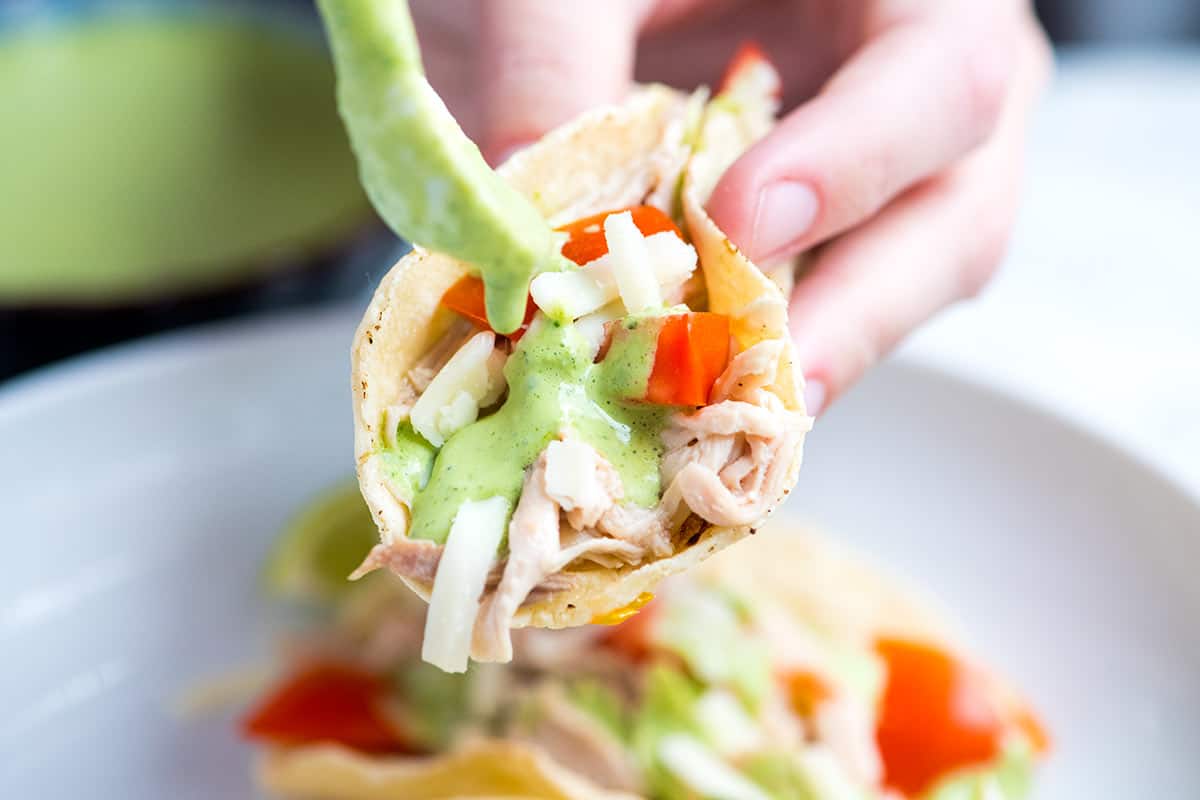
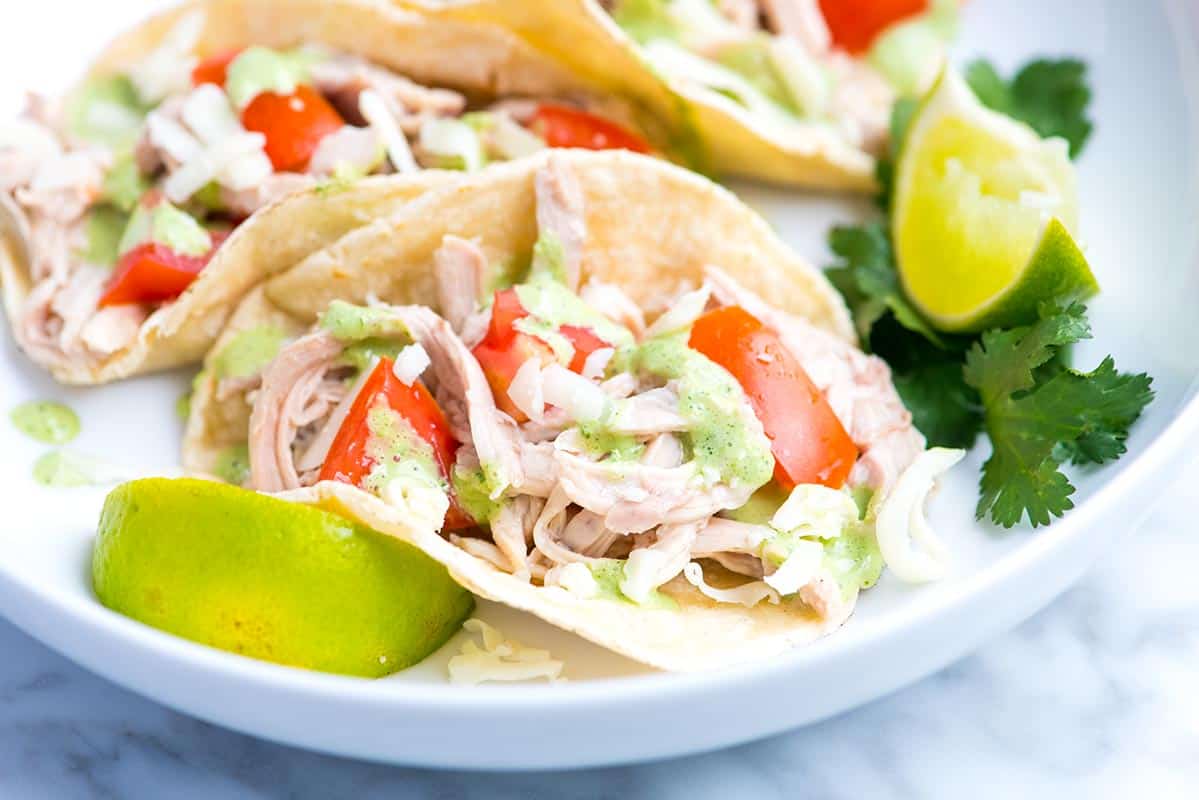
This easy shredded chicken tacos recipe is such an easy dinner! They’re fresh, flavorful, and the kind of easy dinner that never feels boring.
They’re a mash-up of two of our most-loved recipes on Inspired Taste: our tender shredded chicken and the creamy cilantro sauce from our veggie tacos. The combination makes every bite fresh, zesty, and absolutely delicious.
These tacos come together fast, making them ideal for busy nights. You can even prepare the chicken and sauce in advance, so dinner practically makes itself. For more like this, see our shredded chicken nachos.
Key Ingredients
Chicken: Make chicken for this, use leftover chicken, or use a rotisserie chicken. I love making the chicken by gently simmering chicken thighs or breasts with onion, garlic, bay leaf, cumin, salt, and pepper until they are tender and shreddable. You can do this on the stove, like in our stovetop shredded chicken, or in a slow cooker using our crockpot shredded chicken recipe.
Creamy Cilantro Sauce: I love drizzling our creamy cilantro lime sauce over the tacos, which I make with sour cream, lime juice, jalapeño, and cilantro. You can always substitute your favorite store-bought sauce or dressing, but it really does add a lot to the flavor of these tacos. I also use it for these veggie tacos. For more of a cilantro ranch, try this cilantro lime dressing, which I use for our taco salad.
Tortillas: Use your favorite tortillas. Corn or flour both work great. When I have the time, I love making my own using our recipes for soft flour tortillas or corn tortillas.
Extras: Finish your tacos with your favorite toppings. I love adding extra cilantro, chopped tomato, and crumbled queso fresco. You can also top them with guacamole, pico de gallo, or quick pickled onions for even more flavor.
Find the full recipe with measurements below.
How to Make Shredded Chicken Tacos
Tip 1: The best chicken for tacos. When making shredded chicken for tacos, I love using one of the recipes below. Since the chicken gently cooks in flavorful cooking liquid, it turns out incredibly tender and juicy. Depending on your day, you can choose the quicker stovetop version or the slow cooker option.
Tip 2: Seasoning the chicken. If you use one of the recipes above, the chicken will already be quite flavorful. For even more flavor, consider tossing it with red enchilada sauce or green enchilada sauce. You can buy them (I love Hatch), or make them with one of our recipes:
Tip 3: Make-ahead tips. This is one of those dishes I rely on during busy weeks, as it is incredibly easy to meal prep. The cooked chicken will keep in the fridge for up to 3 days and in the freezer for up to a month. The sauce will keep in the refrigerator for about a week.
Serving Suggestions
I’m happy with just tacos on my plate, but if you’d like to add a few more dishes, consider serving these alongside homemade refried beans and Mexican rice, or try this yellow saffron rice. A bowl of tortilla chips and homemade salsa or queso always goes down well, too!
Easy Shredded Chicken Tacos
PREP
COOK
TOTAL
These chicken tacos has been a lifesaver for my family. They are quick, delicious, and you can build your tacos however you want. I highly recommend the cilantro sauce, but feel free to customize your tacos with your favorite toppings.
4 Servings
You Will Need
Chicken Tacos
1 ½ pounds boneless chicken thighs or chicken breasts
1 medium onion, peeled and sliced
4 cloves garlic, peeled and lightly crushed
1 bay leaf
1 ½ teaspoons ground cumin
1 teaspoon salt
1/2 teaspoon ground black pepper
12 corn tortillas or flour tortillas
1 medium tomato, chopped
Cheese such as queso fresco for serving
1 lime, cut into wedges
Creamy Cilantro Sauce
½ cup sour cream
2 tablespoons fresh lime juice
½ jalapeño, seeds and membrane removed
½ cup packed cilantro leaves and tender stems
Salt to taste
Directions
1Cook the chicken: Combine chicken, onion, garlic, bay leaf, salt, cumin, and pepper in a large heavy-bottomed saucepan. Add just enough water to cover the chicken. Turn heat to high, bring to a boil, then remove any foam or scum that floats to the top.
2Adjust the heat so that the water simmers very gently around the chicken. Cook until chicken is very tender, about 30 minutes. Transfer chicken to a cutting board, and then when it is cool enough to handle, use two forks or your fingers to shred the meat.
3Reduce cooking liquid: After removing the chicken, boil the remaining liquid in the saucepan until it has reduced by one-third or until its flavor has concentrated. Spoon about 1 cup of the concentrated cooking liquid over the shredded chicken and toss to coat. Use within 2 to 3 days or freeze.
4Make the sauce: Add sour cream, lime juice, jalapeño, cilantro, and a pinch of salt to a blender. Blend until smooth. Taste, then add more lime juice or salt if needed. Refrigerate for up to a week.
5Warm tortillas: Wrap tortillas in two stacks with aluminum foil. Place into the oven for 10 to 15 minutes or until warm.
6Make tacos: Fill each warmed tortilla with chicken and tomatoes. Top with cheese and a drizzle of the cilantro sauce. Serve with extra sauce and lime wedges on the side.
Adam and Joanne’s Tips
Make-ahead tips: The shredded chicken will keep in the fridge for up to 3 days and in the freezer for up to a month. The sauce will keep in the refrigerator for about a week.
Double batch of chicken: To make a double batch, increase the chicken to 3 pounds then add more water to the pot. The onion, garlic, and spices do not need to change.
Skin-on chicken: We have made this recipe using boneless, skinless chicken thighs and chicken thighs with skin still attached. Both work very well. If you use chicken with skin, just remove and discard the skin before you shred the chicken. You may also find that you need to skim some of the fat from the cooking broth before spooning it over the chicken.
Leftover cooking liquid: You will have cooking liquid leftover. It is quite delicious on its own as a light soup. You can also use it as broth for other recipes. Or, if you’re keeping the chicken more than a day, add a spoonful or two to add a little moisture.
Slow cooker shredded chicken: add all the ingredients to the slow cooker then cook on LOW until the chicken is cooked and tender, 3 to 4 hours. Shred the chicken and transfer the broth to a saucepan. Simmer the broth until reduced by a third then spoon over the chicken.
The nutrition facts provided below are estimates.
Nutrition Per Serving Serving Size 3 small tacos / Calories 313 / Protein 23g / Carbohydrate 22g / Dietary Fiber 3g / Total Sugars 4g / Total Fat 15g / Saturated Fat 6g / Cholesterol 121mg / Sodium 801mg
AUTHOR:
Joanne Gallagher
We are Adam and Joanne Gallagher, the creators of Inspired Taste. Established in 2009, Inspired Taste grew from a childhood dream into one of the internet’s most trusted recipe sites with hundreds of reliable recipes, step-by-step videos, and expert tips.More About Us
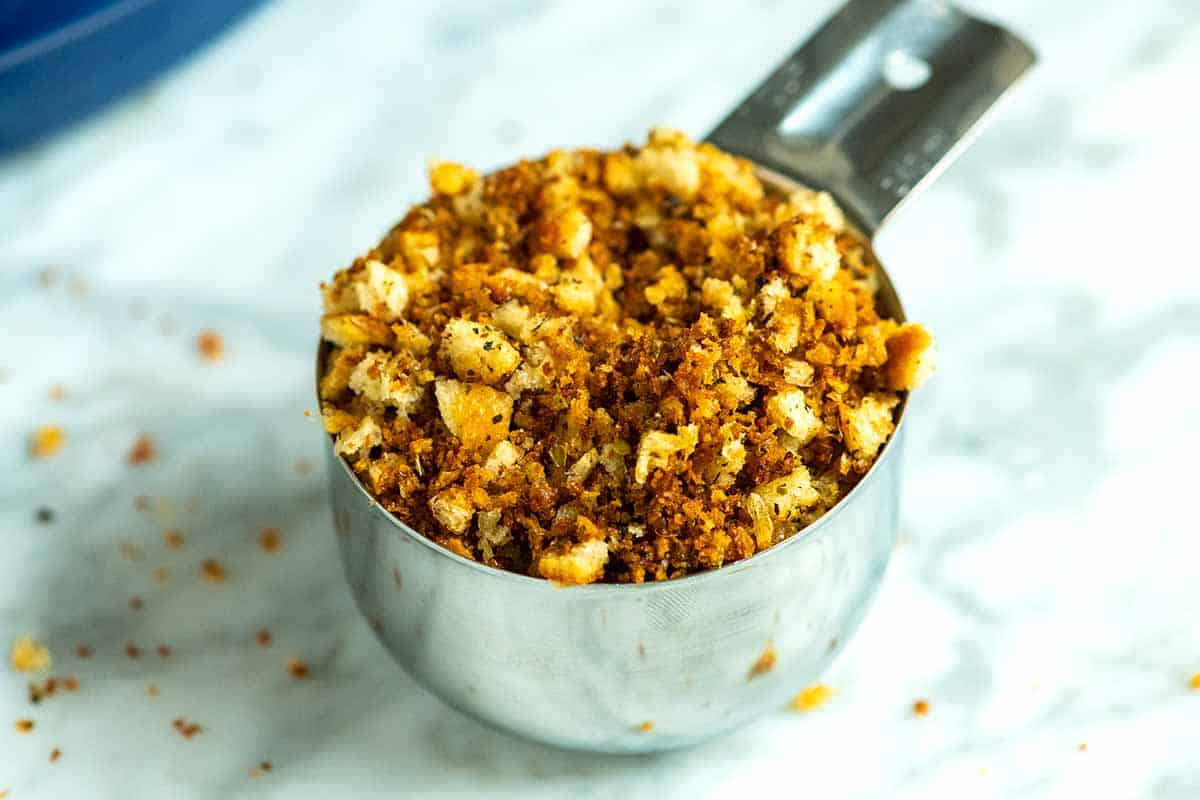
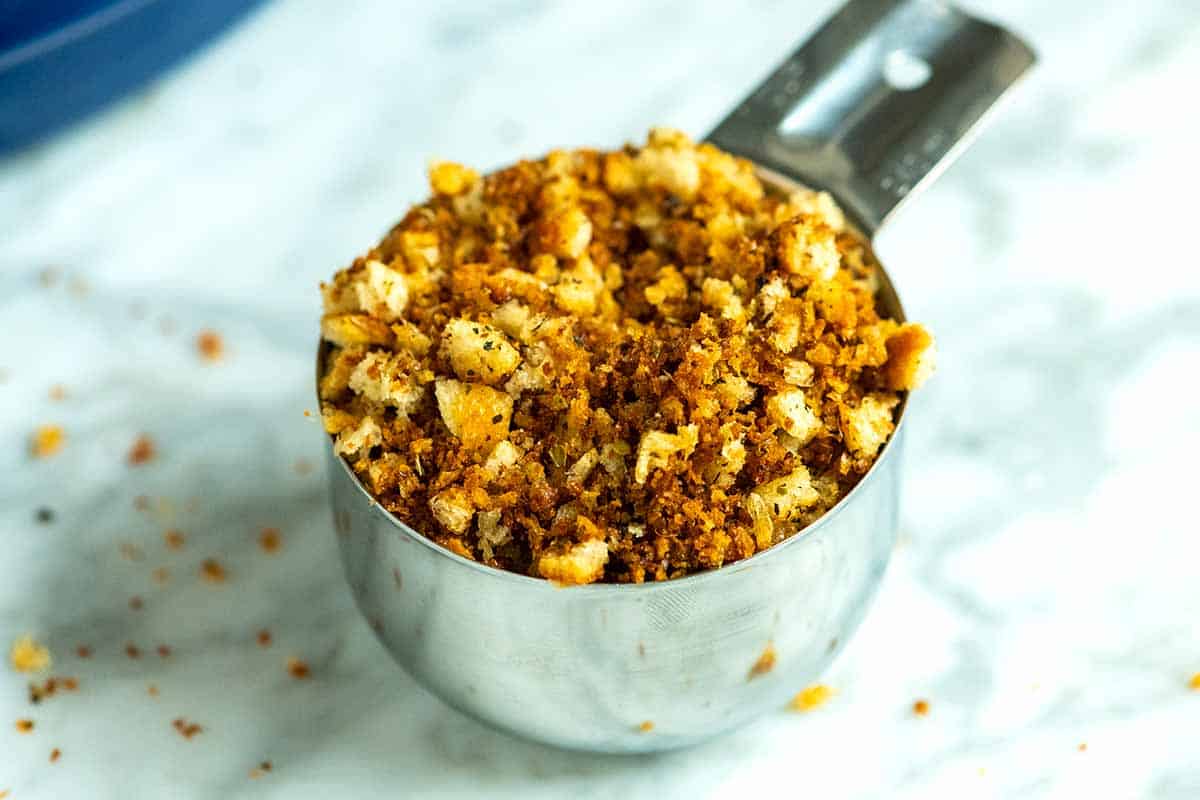
Making homemade breadcrumbs is easy! We love using these bread crumbs for meatballs, meatloaf, breaded chicken, and so much more!
While you can easily find breadcrumbs at the grocery store, I’ve recently discovered the joy of making my own. You can use almost any bread you have lying around. Better yet, stale bread or the harder end of a bread loaf are ideal.
Another benefit is that you have complete control over the texture. You can make them as fine or coarse as you like. Another option is to make homemade croutons and smash them into bits.
How to Make Homemade Breadcrumbs
Tip 1: Use a food processor. I love using my food processor or blender to make bread crumbs (for smaller batches you can also use a spice grinder). Slice or cube your bread into small pieces, and then pulse until the bread breaks down into your desired size. Depending on how much bread you have and how powerful your food processor or blender is, you might need to do this in batches.
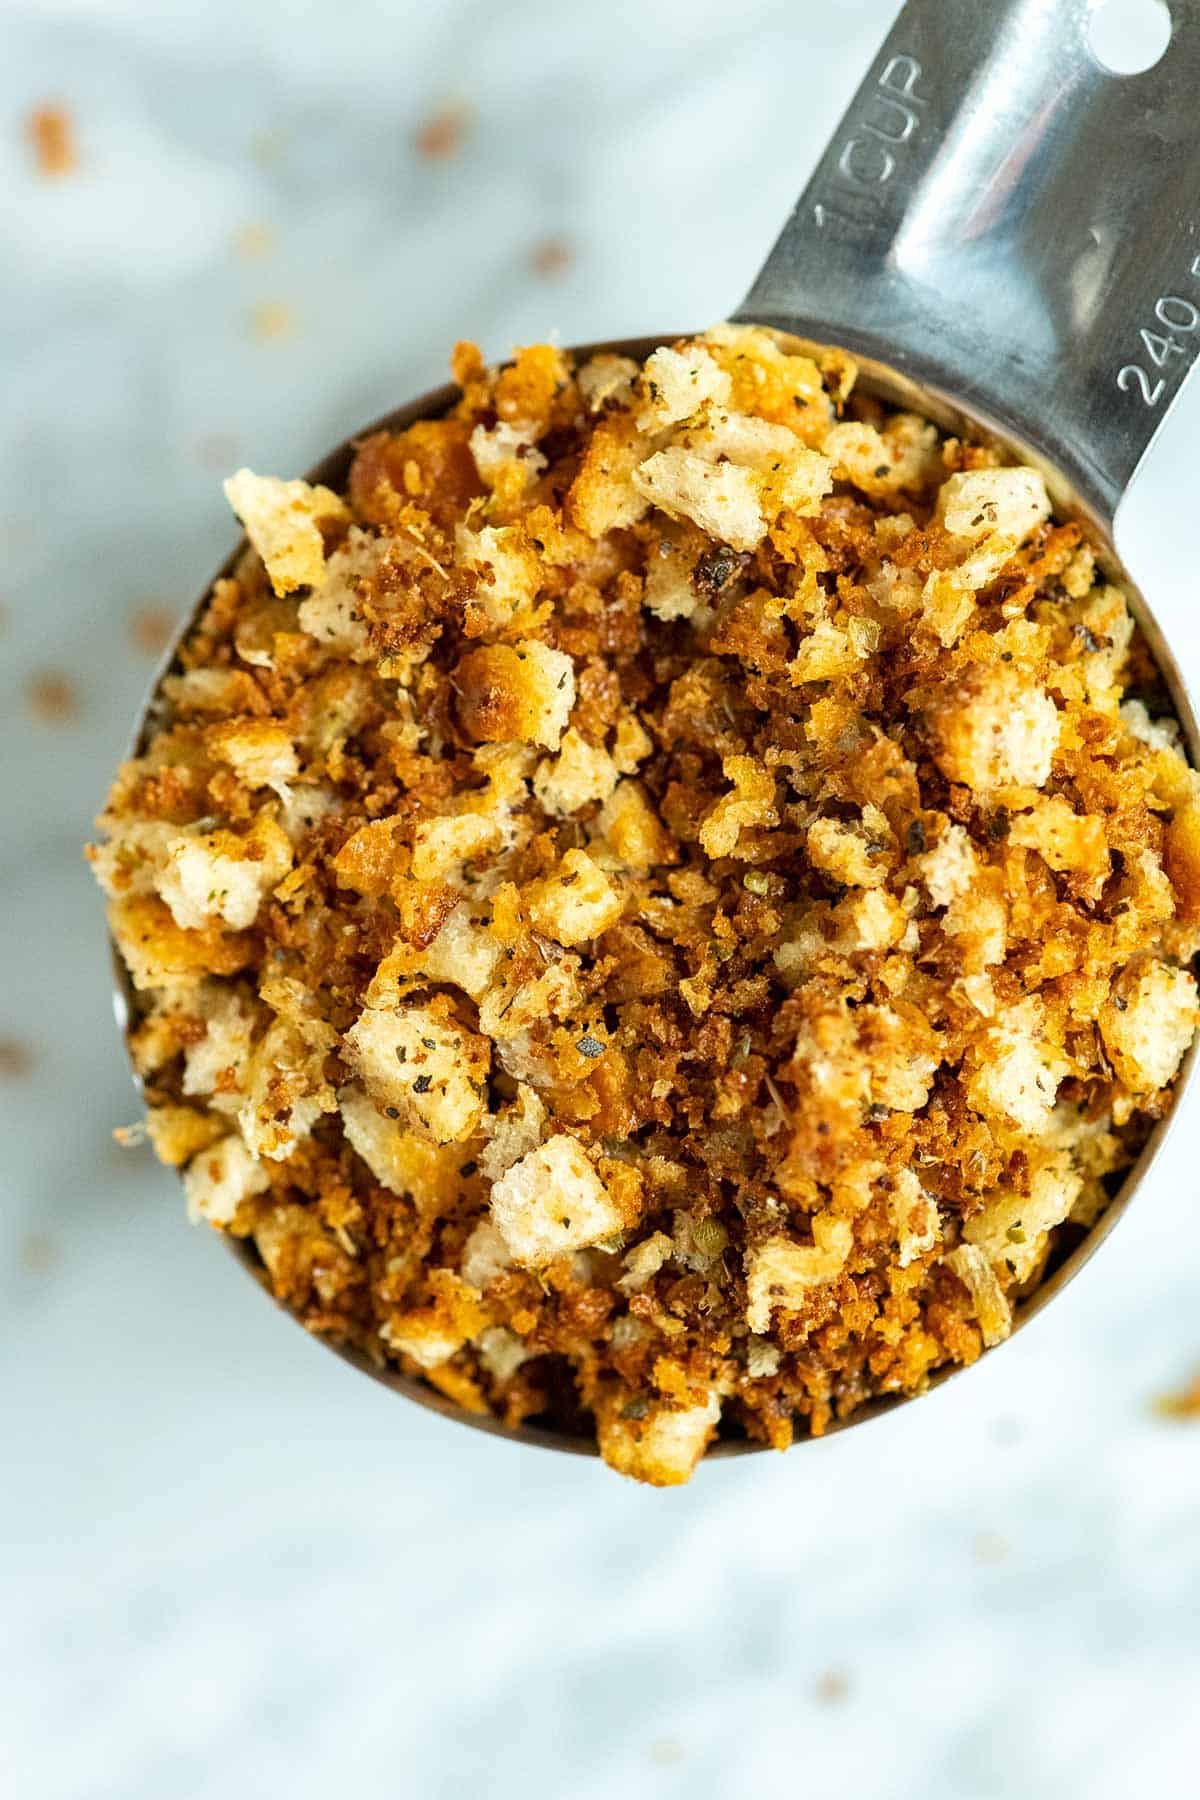
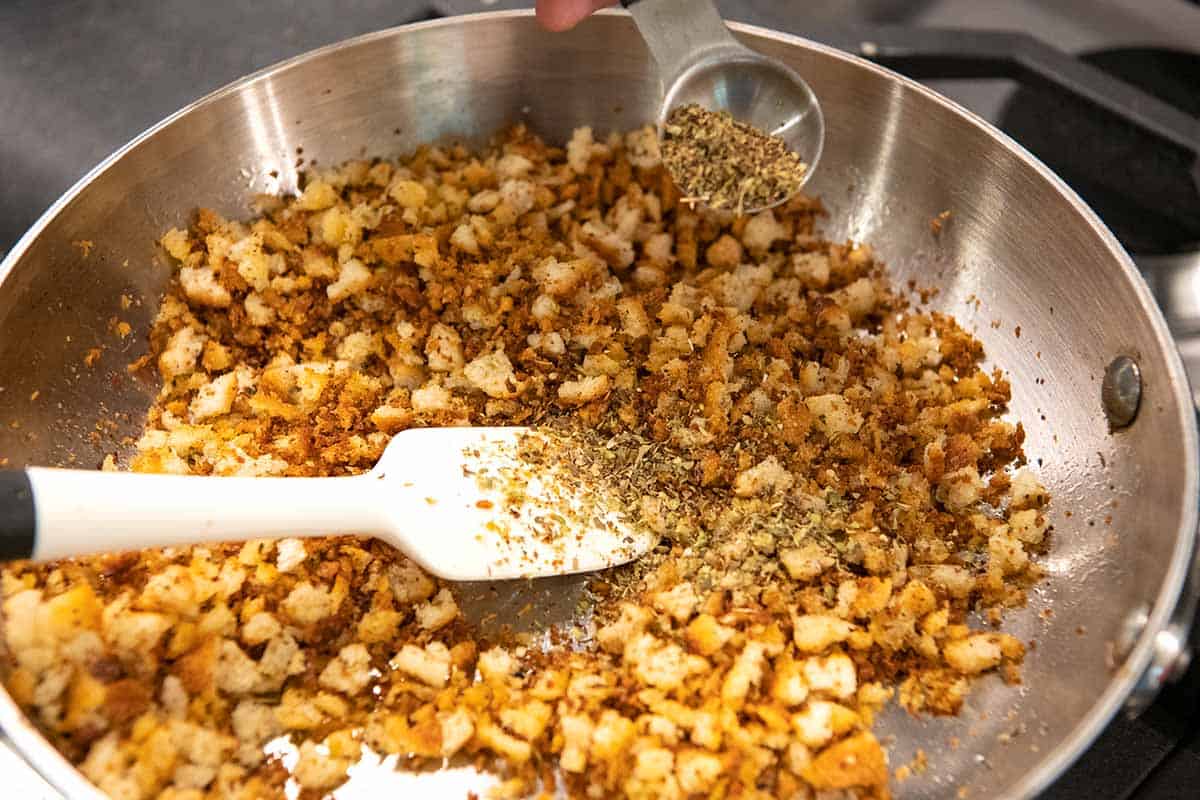
Tip 2: Toasting your breadcrumbs. Depending on what you plan to do with them, you can make fresh bread crumbs or toast them in a skillet until golden and crisp. To toast my breadcrumbs, I stir them with olive oil or butter and seasonings over medium heat until they are golden and crisp (I’ve included tips for Italian breadcrumbs below in the recipe).
I love the oil (or butter) and spices, but you can skip them and toast the breadcrumbs in a dry pan for plain breadcrumbs.
Ways to Use Breadcrumbs
Use homemade bread crumbs anytime you would have used store-bought. Some of my favorites ways to use them, include our popular turkey meatloaf, our easy chicken parmesan, and my favorite stuffed mushrooms.
If you are making them for a specific recipe, you can dial in the texture. For example, I prefer finer breadcrumbs in our recipes for meatballs and meatloaf, but I like them coarser when using them as a crunchy salad topping.
Easy Homemade Breadcrumbs
PREP
COOK
TOTAL
Breadcrumbs are easy to make at home and can be spiced up any way you like. Remember that you can control how fine or coarse the crumbs are. When making them for meatballs, we want them a bit finer. If we make breadcrumbs for a crunchy topping, we keep them more rustic and coarse. For Italian breadcrumbs, use Italian seasoning when toasting the breadcrumbs.
Makes 1 cup
You Will Need
2 to 3 cups cubed bread (about 2 ounces)
2 tablespoons olive oil or melted butter
1/4 teaspoon fine sea salt
1/4 teaspoon fresh ground black pepper
2 to 3 teaspoons Italian seasoning or dried herbs, optional
Directions
1Cut the bread into small pieces. (The smaller the pieces, the easier for your device to break them down.)
2Add the bread pieces to your food processor or blender and pulse until they break down into your desired size of breadcrumbs.
3For toasted breadcrumbs, add breadcrumbs, olive oil, salt, pepper, and dried herbs to a wide skillet over medium heat. Cook, stirring often, until they are golden and crisp, about 5 minutes.
4Alternatively, heat the oven to 300°F. Toss the breadcrumbs with the olive oil, salt, pepper, and dried herbs. Add the mixture to a rimmed baking sheet and spread it into an even layer. Bake for 5 minutes, stir, and then bake another 3 to 5 minutes or until the breadcrumbs are golden and crisp.
Adam and Joanne’s Tips
Storing: Cool and store the breadcrumbs in an airtight container. They can be kept at room temperature for a few days or in the freezer for up to a month. If they soften a little, throw them into a hot skillet for a few minutes to crisp them up.
Fresh vs. toasted: Depending on what you plan to do with them, you can leave bread crumbs fresh (an excellent option for meatballs or meatloaf) or toast them in a skillet or bake in the oven until golden and crisp.
Do you need to cut off the crust? This is up to you, but we never cut off the crusts when making bread crumbs. I love the different colors and textures you achieve when using the middle and the bread crusts.
No food processor or blender: If your bread is hard and stale, add it to a bag and beat it into submission with something heavy like a rolling pin, heavy pan, or mallet. This method doesn’t work well for softer, fresh bread, so if that’s all you have, consider baking the bread to dry it out, just like we do when making homemade croutons.
The nutrition facts provided below are estimates.
Nutrition Per Serving Serving Size 1/4 cup / Calories 137 / Total Fat 8 g / Saturated Fat 1.2g / Cholesterol 0mg / Sodium 287.4mg / Carbohydrate 14.3g / Dietary Fiber 0.8g / Total Sugars 1.6g / Protein 2.6g
AUTHOR:
Joanne Gallagher
We are Adam and Joanne Gallagher, the creators of Inspired Taste. Established in 2009, Inspired Taste grew from a childhood dream into one of the internet’s most trusted recipe sites with hundreds of reliable recipes, step-by-step videos, and expert tips.More About Us
Easy fall dinners that are cozy, simple, and totally doable for busy weeknights. Soups, curries, casseroles, and more!
Fall feels like the best and busiest time of year! It’s the back-to-school transition, the arrival of evening activities, and all kinds of new routines. It feels like a lot, and somehow dinner still needs to be made!?
These recipes are the weeknight lifesavers that I need when life feels a little crazy: cozy, simple, and very doable meals that don’t ask for much, but deliver big. Easy cozy soups, sheet pan dinners, crockpot meals, and more.
Here are the easy fall dinners I’m making on repeat!
Easy Fall Dinner Recipes
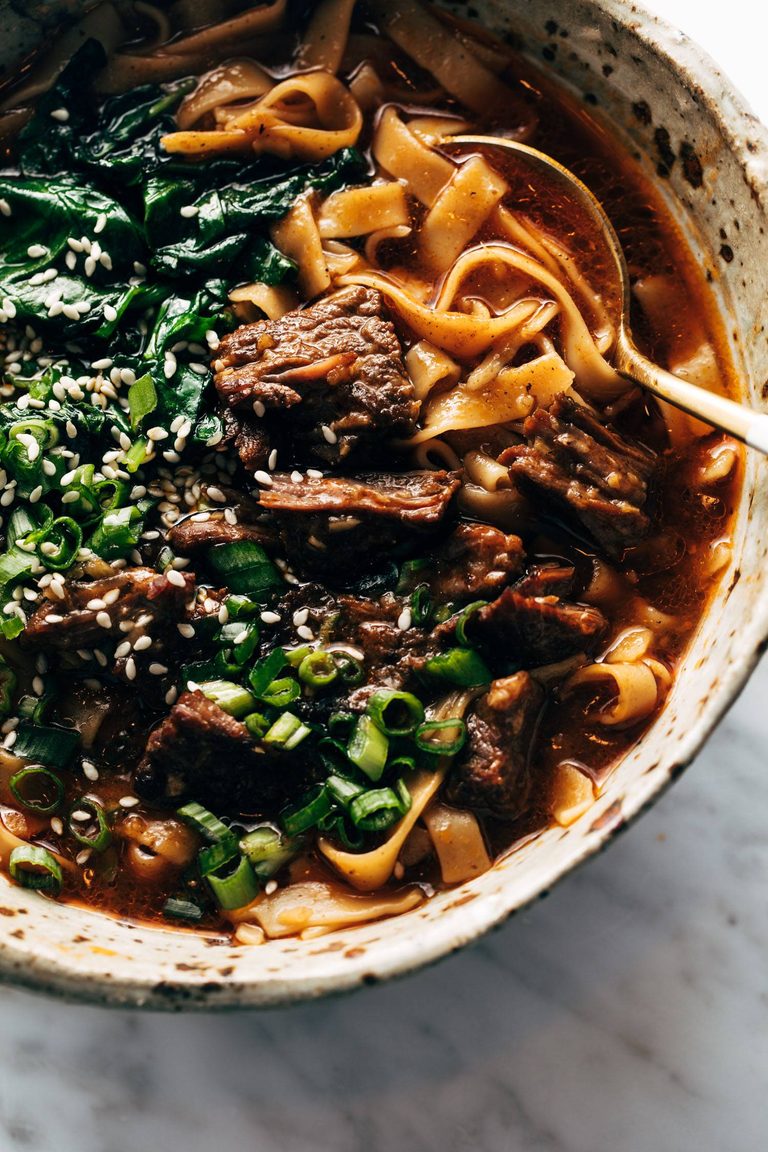
Instant Pot Spicy Short Rib Noodle Soup
Short ribs simmer away in an Instant Pot or slow cooker, and are served in bowls with tender noodles and lots of delicious broth! This is one of my all-time cold-weather favorites.
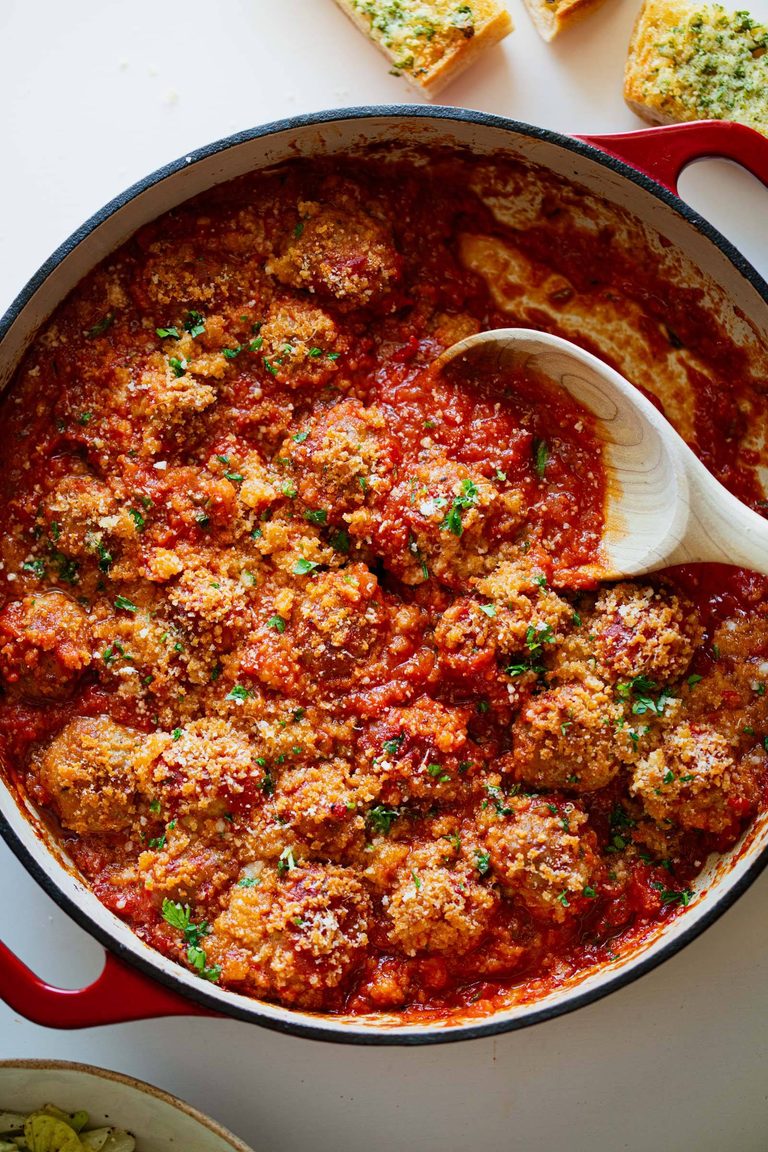
Ricotta Meatballs with the Crispy Topping
One of the most popular weeknight dinners on the site! Homemade ricotta meatballs baked under a blanket of crispy topping. Serve it with garlic bread or pasta!
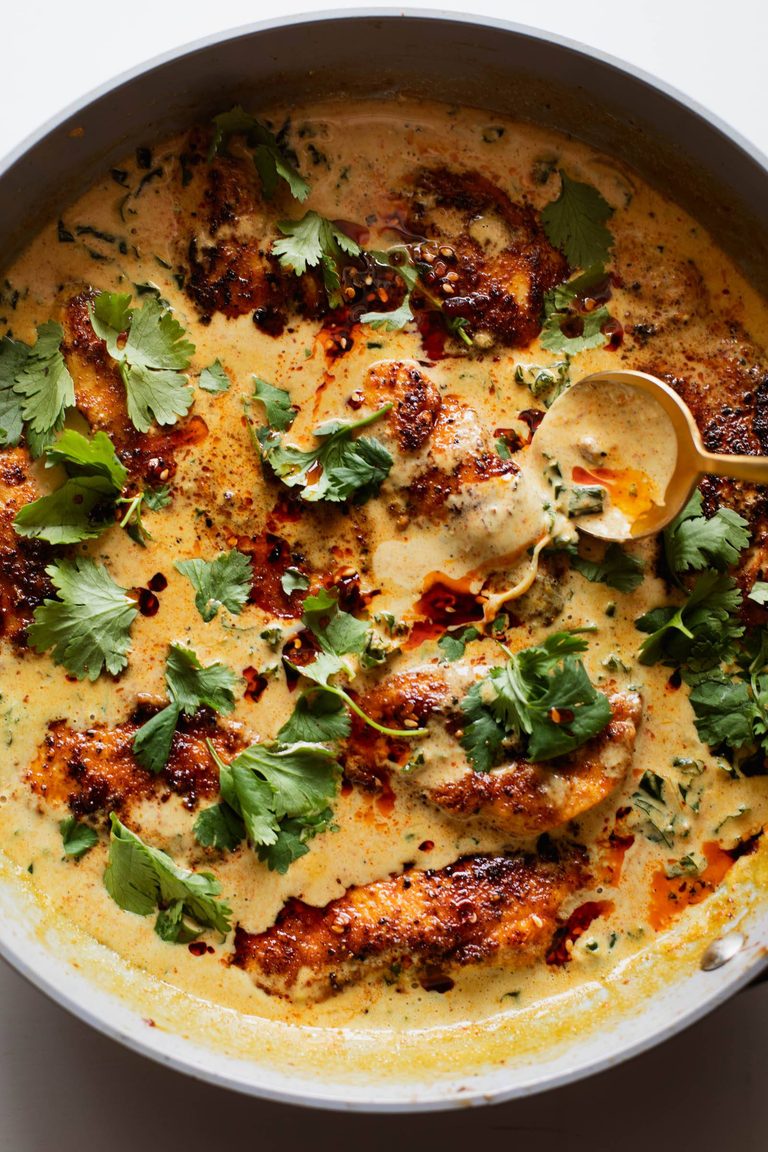
Chicken with Coconut Kale
A luxurious-feeling but super easy one-skillet meal packed with protein! I love to serve this one over a pile of steamy rice.
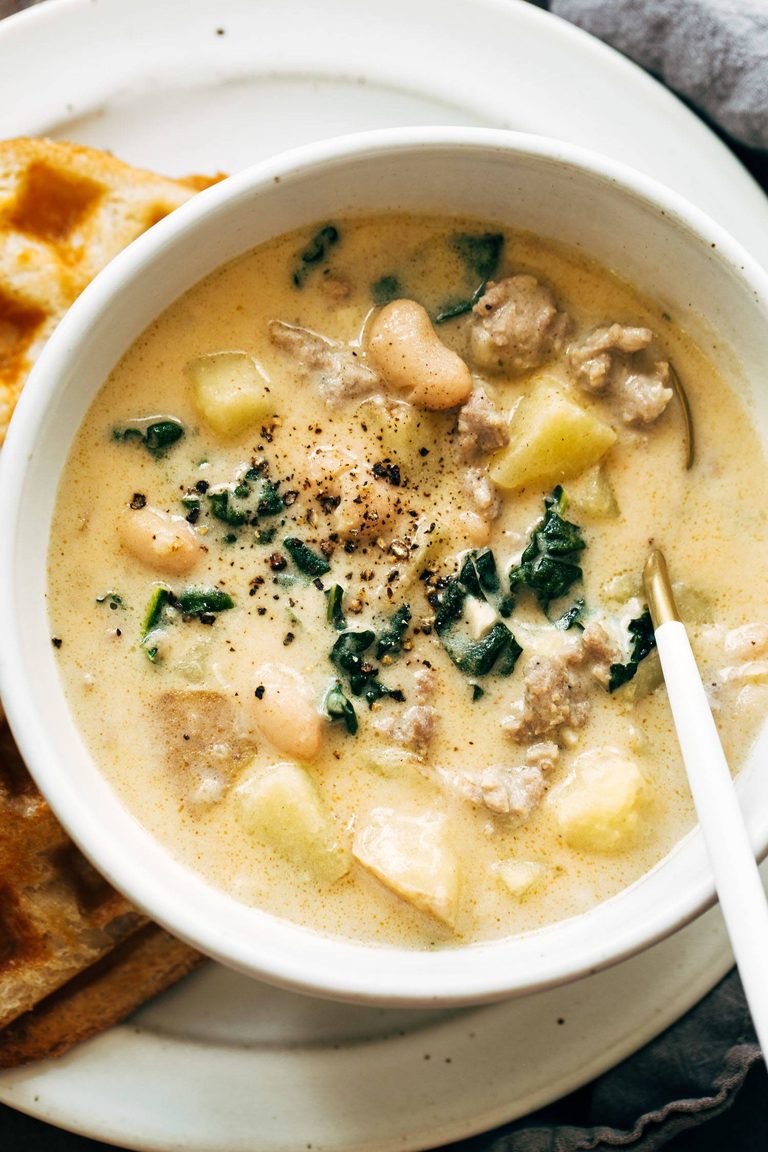
Sausage, Kale, and White Bean Soup
Such a simple, delicious, and cozy soup! Herby Italian sausage, kale, smoky paprika, creamy beans and potatoes, and a splash of cream.
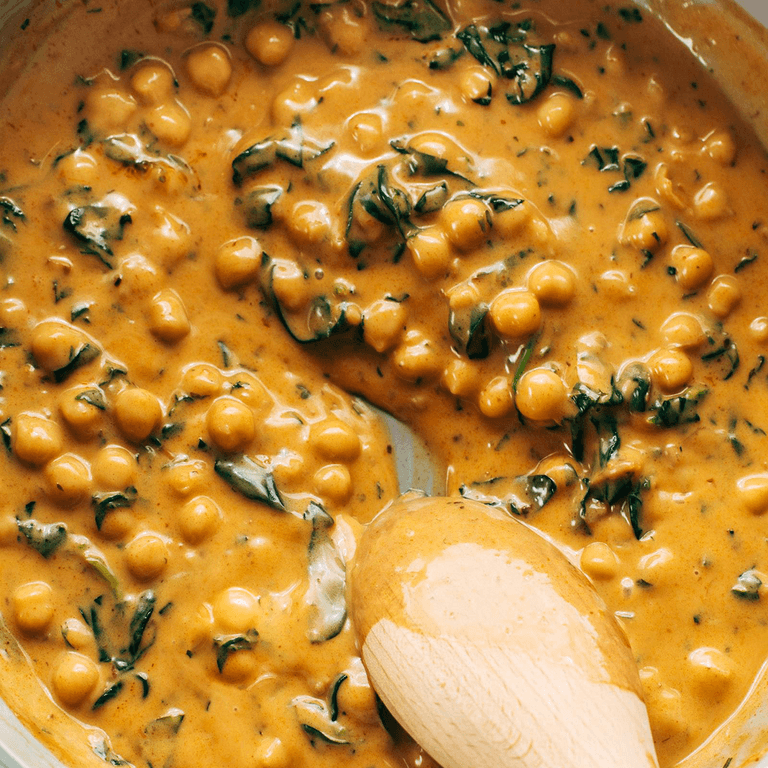
Steph’s Chickpea Curry with Spinach and Rice
Amazingly creamy, saucy chickpea curry served over rice with a dollop of chili crisp and a side of cucumber salad. Ready in 20 minutes!
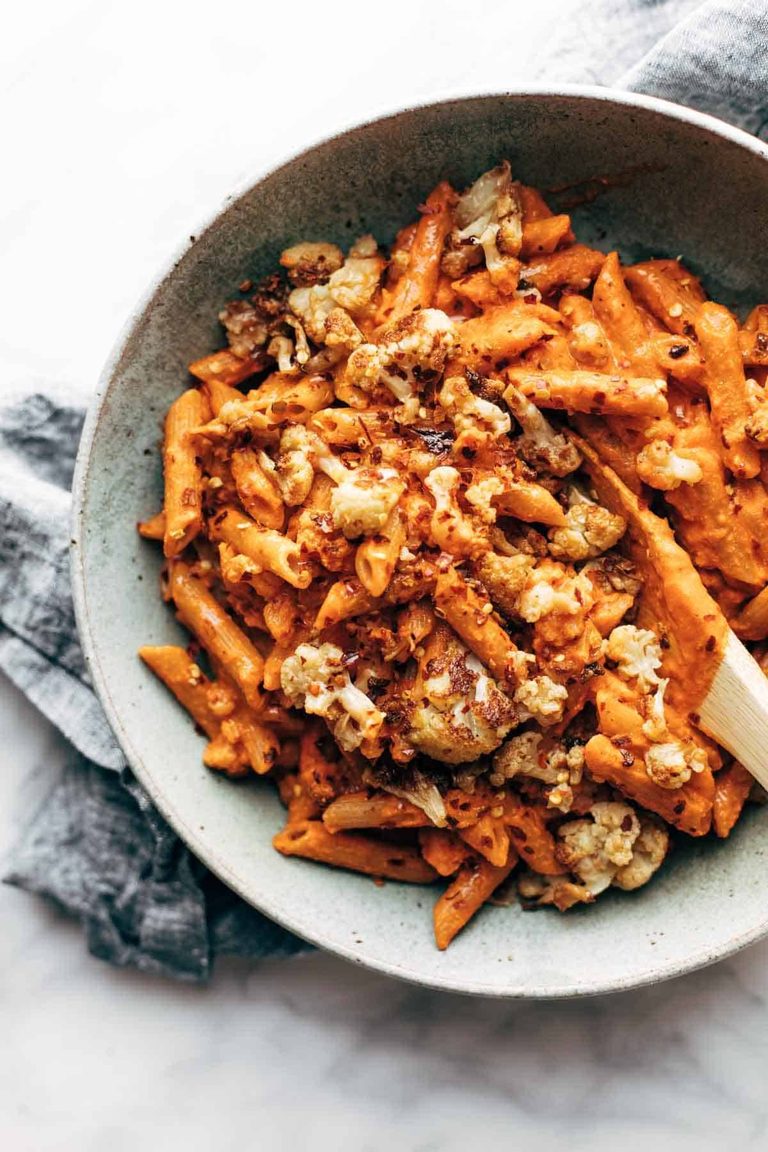
Red Pepper Cashew Pasta with Roasted Cauliflower
Three-ingredient red pepper cashew sauce, roasted crispy cauliflower, and piles of noodles. Hearty and so delicious!
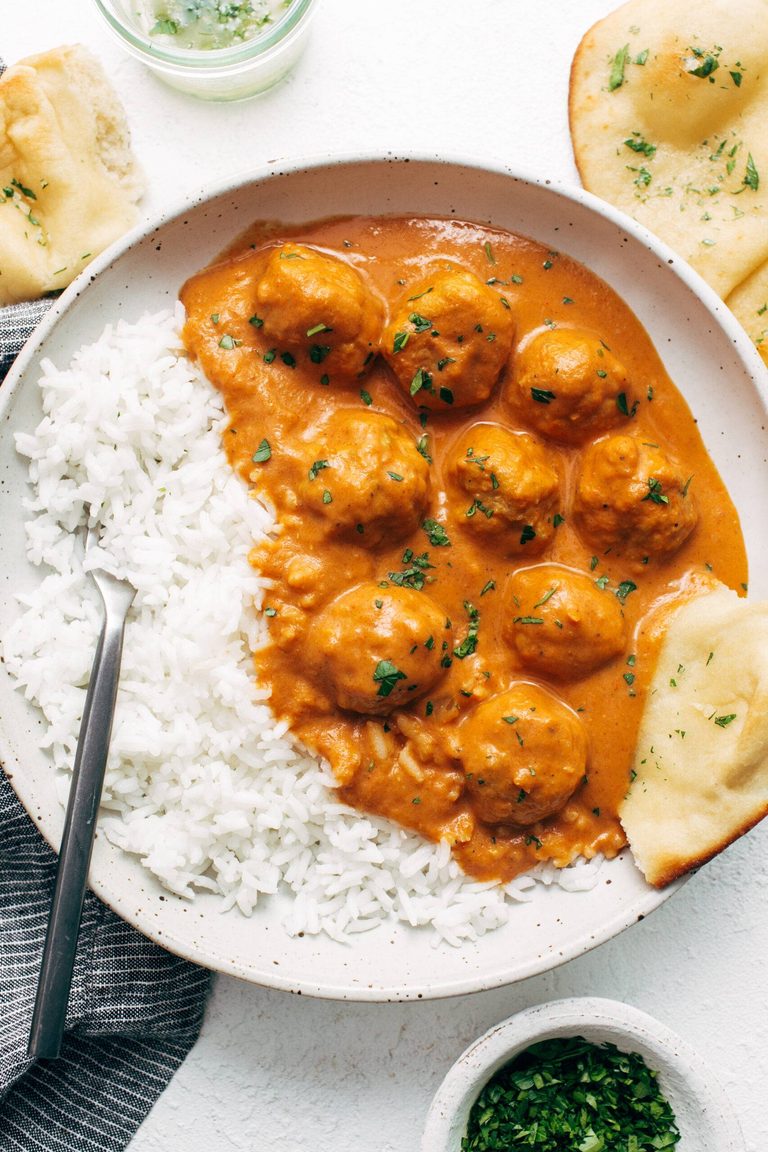
Butter Chicken Meatballs
Storebought (or homemade) chicken meatballs covered in a rich and mildly spiced tomato gravy that is made luxurious with just a little bit of butter and cream. One of my family’s absolute favorites!
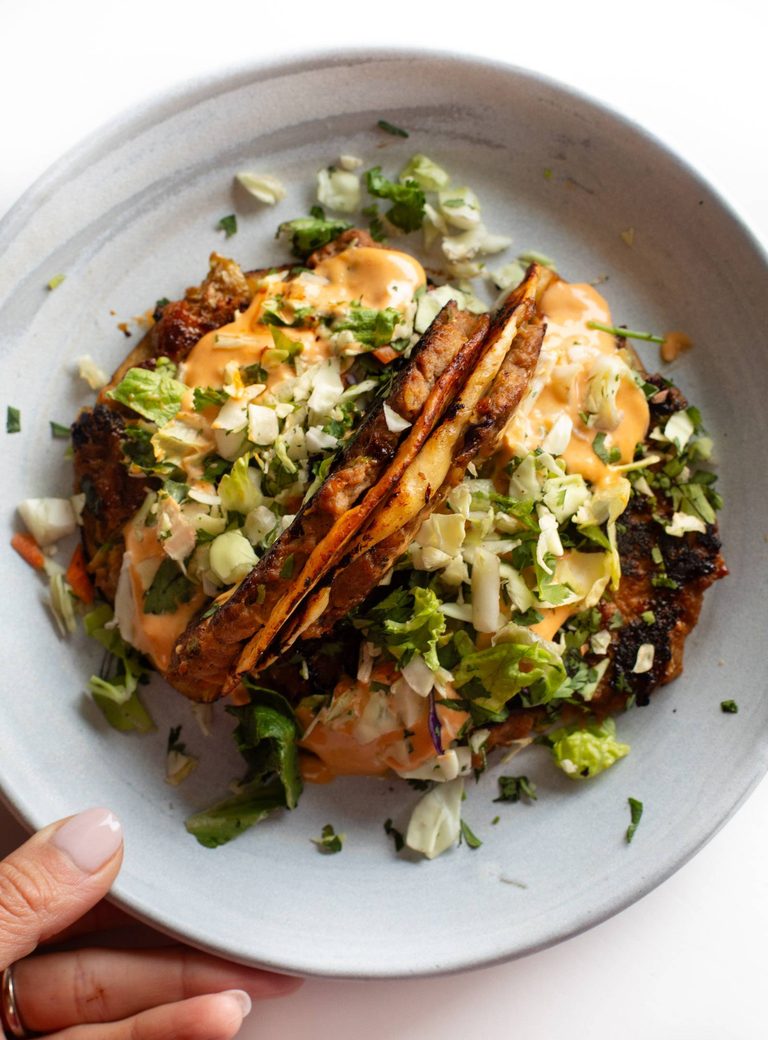
Brandon’s Egg Roll Tacos
Egg rolls meet tacos! I love this! Easy to make and ridiculously good with a classic egg roll filling, crunchy veg, pillowy tortillas, and a spicy gochujang sauce.
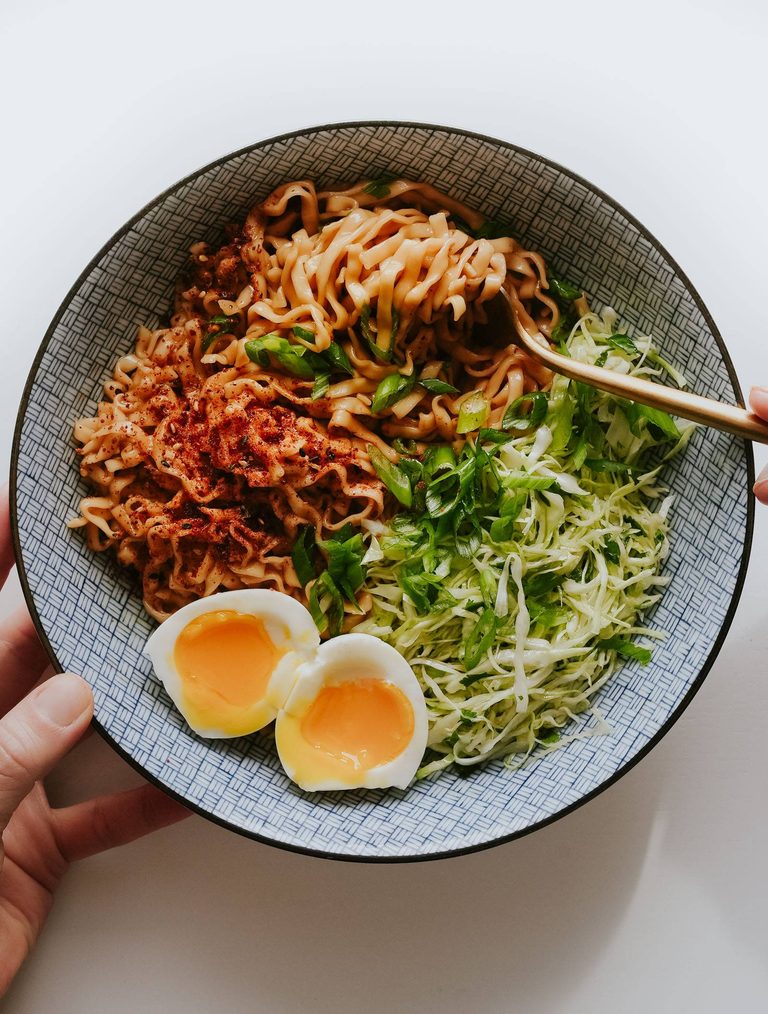
Shortcut Sesame Butter Noodles
One of my favorite back-pocket recipes! Packaged noodles for ease, butter for creaminess, honey for sweetness, and sesame oil for depth. Just tangly slips of joy!
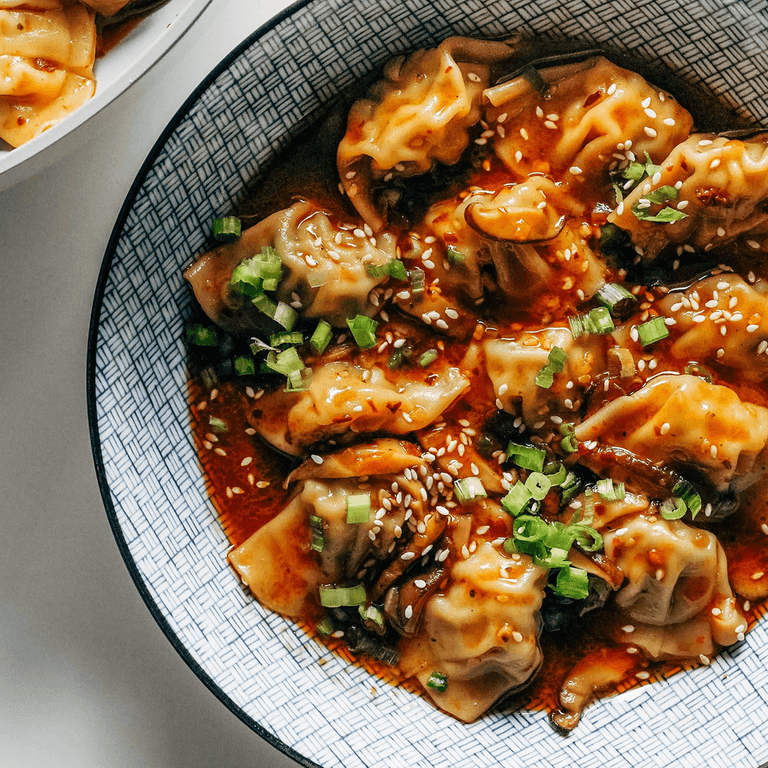
Chicken Wontons in Spicy Chili Sauce
Big, beautiful, bossy flavors! Shiitake mushrooms and chicken wontons swim in a brothy flavor-filled sauce and get finished with a swirl of sesame oil and chili crisp on top.
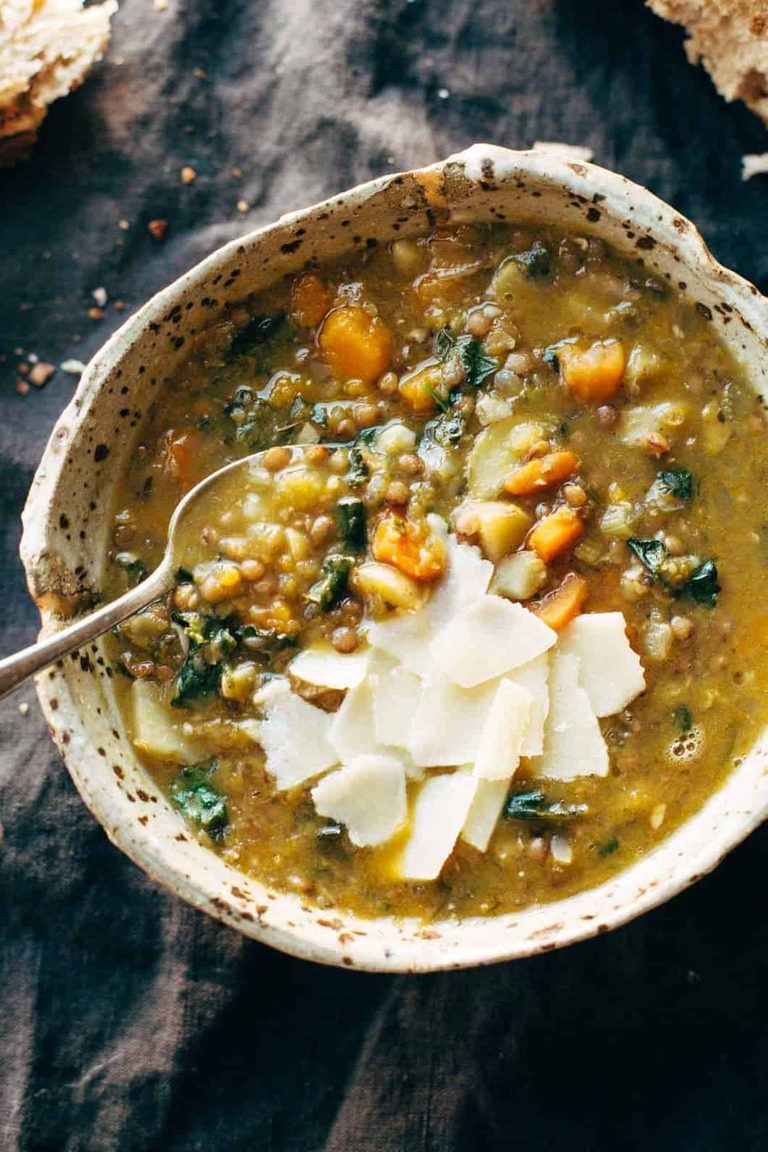
The Best Detox Crockpot Lentil Soup
This one is such a classic, and has been made so many times by so many of you! Lentils, squash, kale, and all sorts of soothing and nutritious things. Made in the crockpot so super hands-off, too!
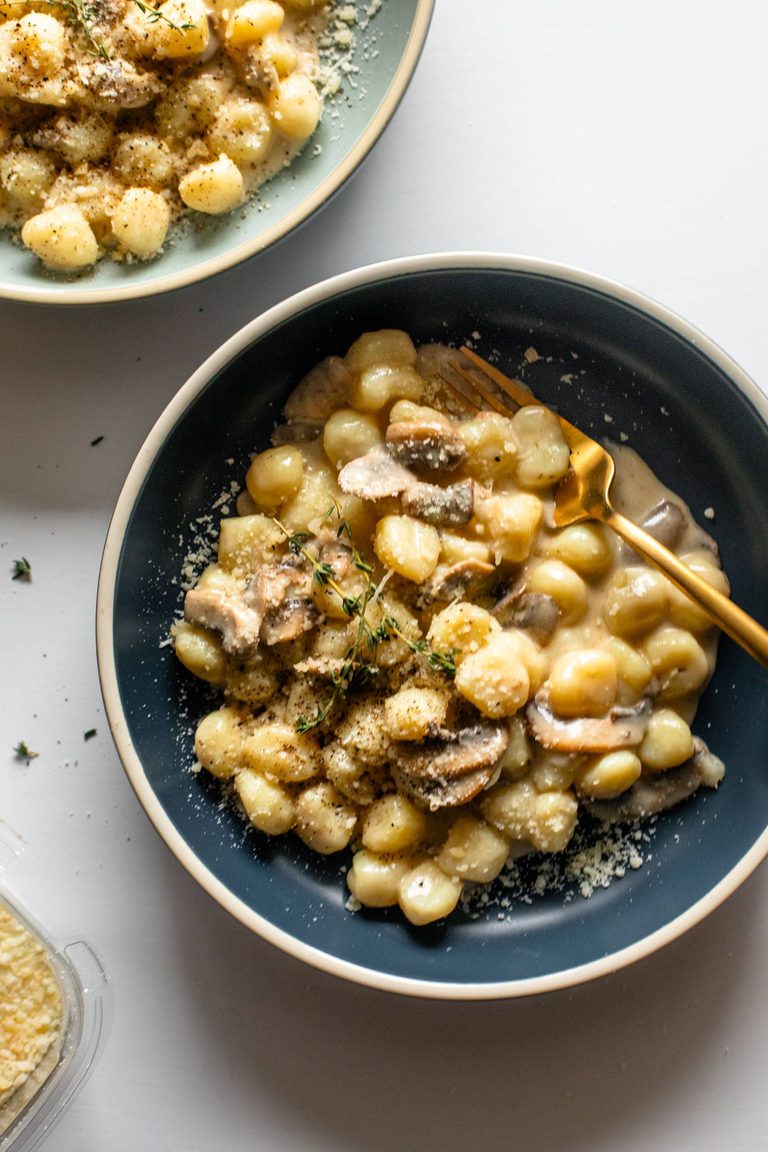
Gnocchi with Creamy Mushroom Sauce
Delicious pillowy gnocchi swimming in a silky creamy sauce that’s laced with thyme and loaded with little slips of garlic butter-browned mushrooms! This is fall!
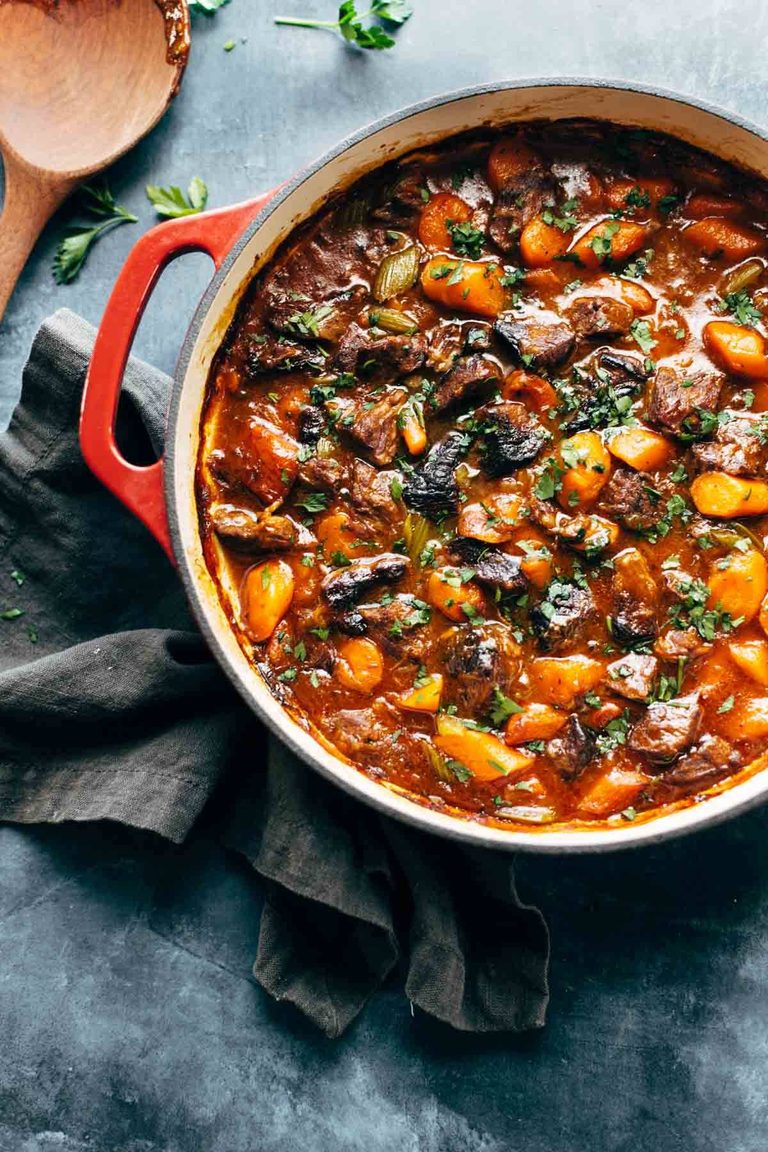
Life Changing Instant Pot Beef Stew
Six ingredients, 45 minutes, SO EASY. The perfect, comforting meal that’s filling, heart, and incredibly simple to make.
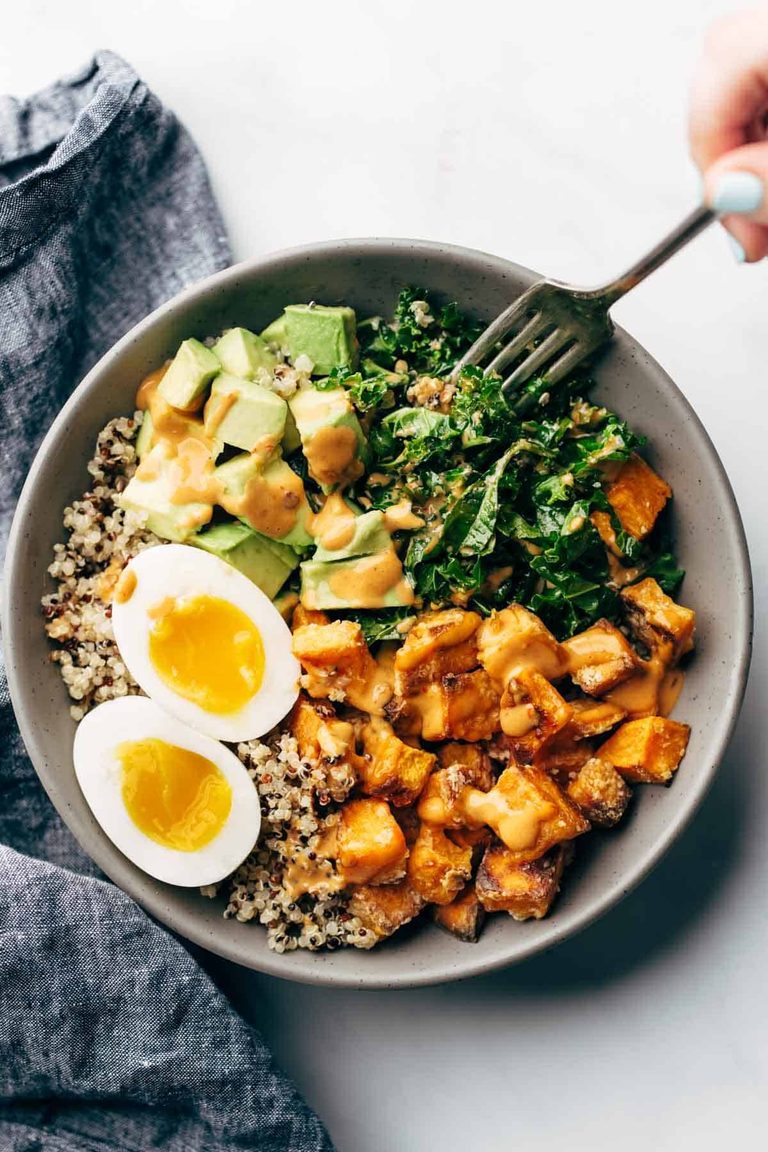
Chipotle Tahini Bowls
The chipotle tahini in this recipe is in my top 10 sauces of all time. It’s perfectly smoky, luxuriously creamy, and the perfect spicy combo with a pile of roasted sweet potatoes.
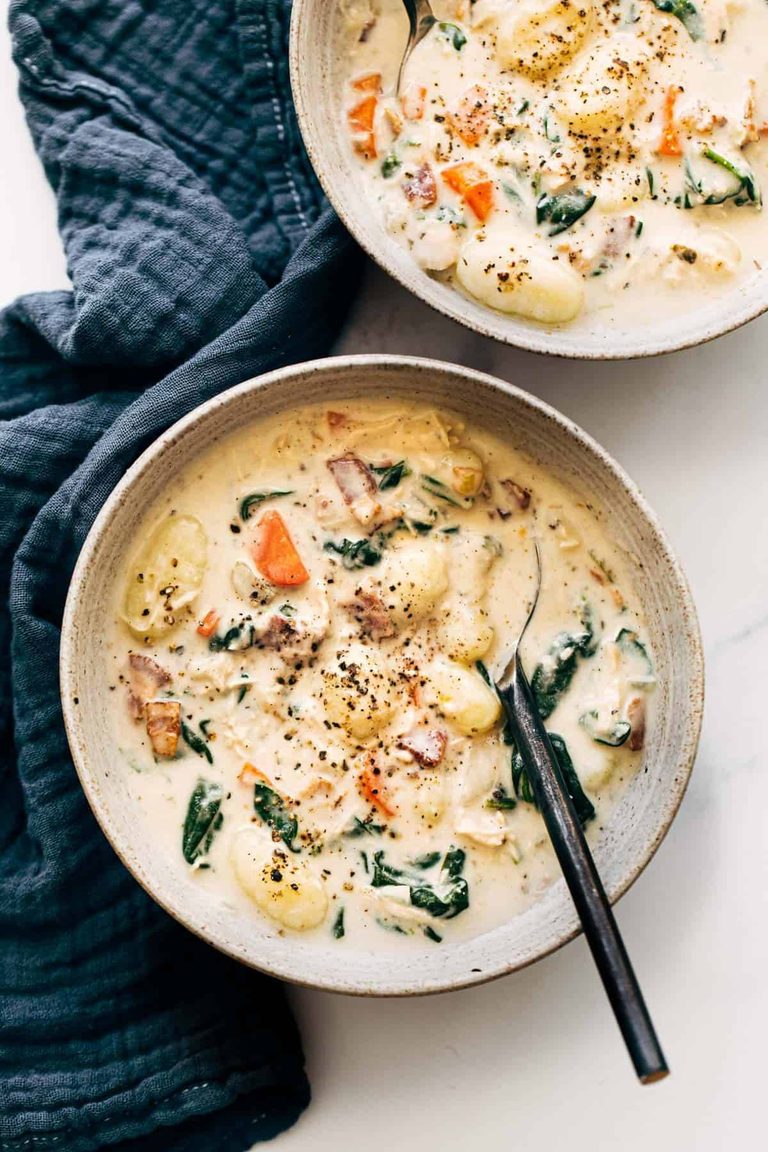
Crockpot Chicken Gnocchi Soup
Another crockpot favorite for fall soups! You let it simmer all day with chicken to make a delicious soup base, and then add creaminess and carby-ness with gnocchi before serving. Love this one!
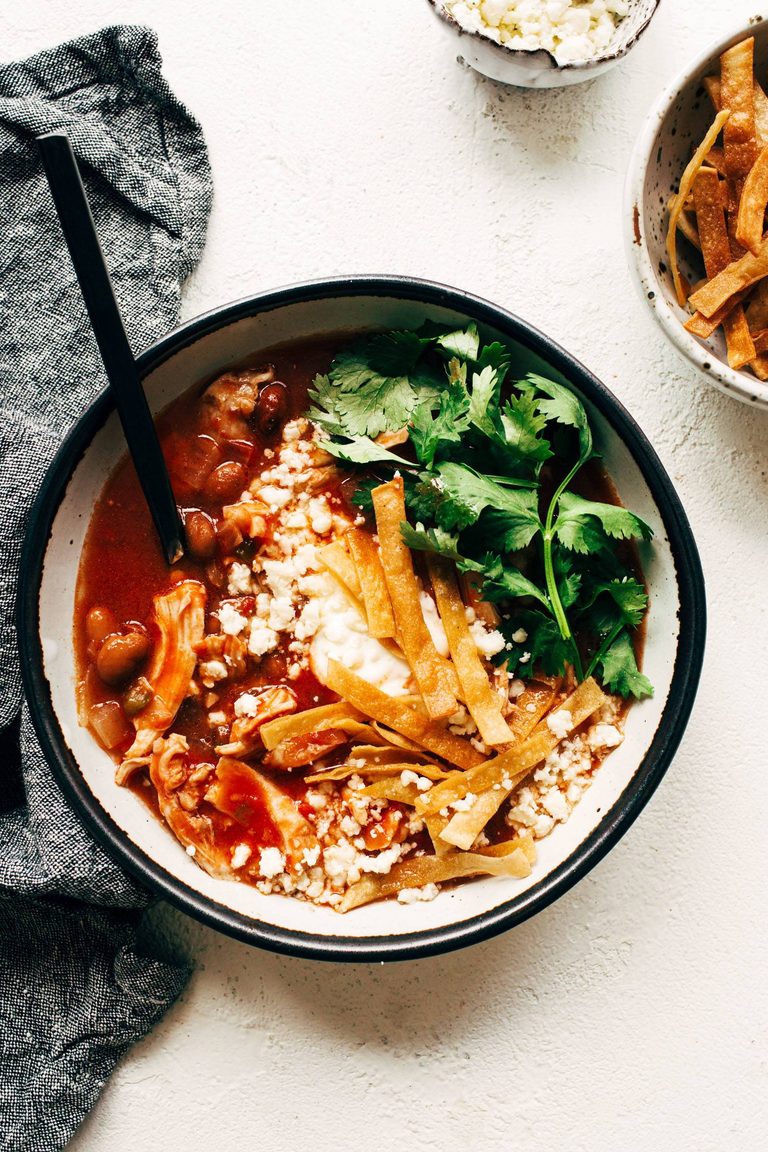
Chicken Tortilla Soup
Just a basic and super delicious chicken tortilla soup! I could eat this every week, and the bonus is that it makes for excellent leftovers for lunch.
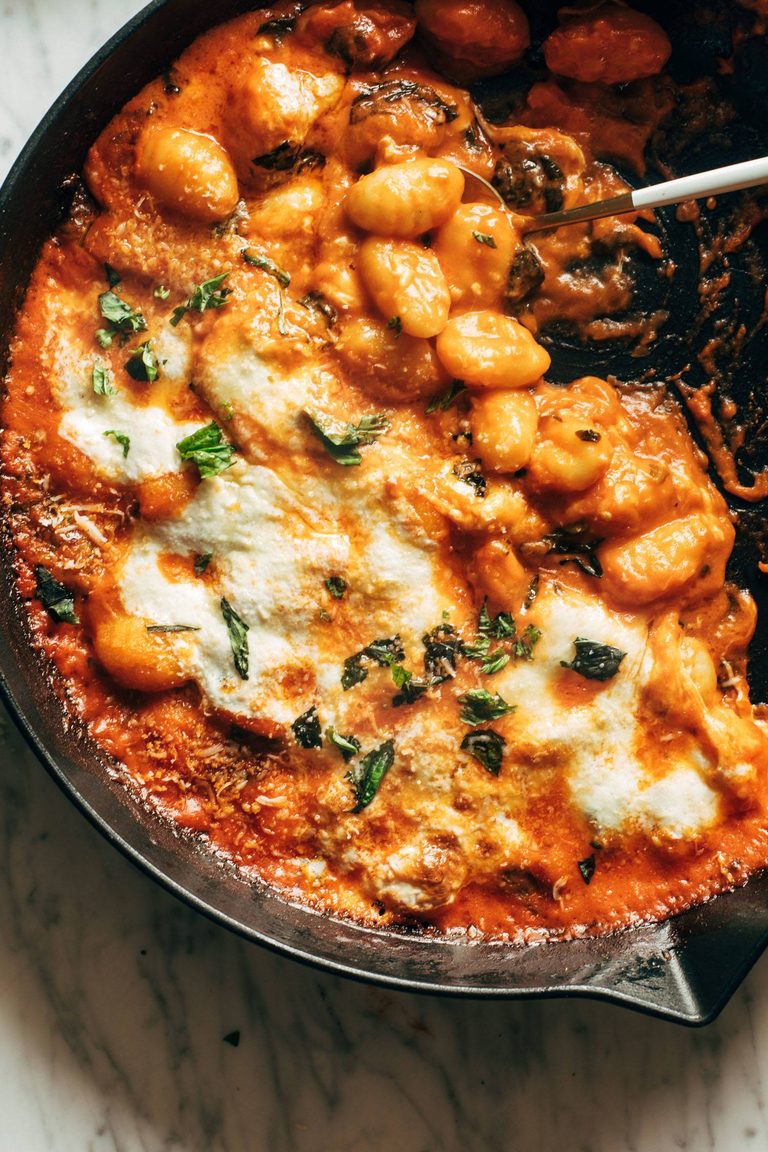
Three Cheese Baked Gnocchi with Spinach
This is so cheesy, cozy, and comforting and it really is a stunner all bubbled up in a skillet. Serve with bread and salad!
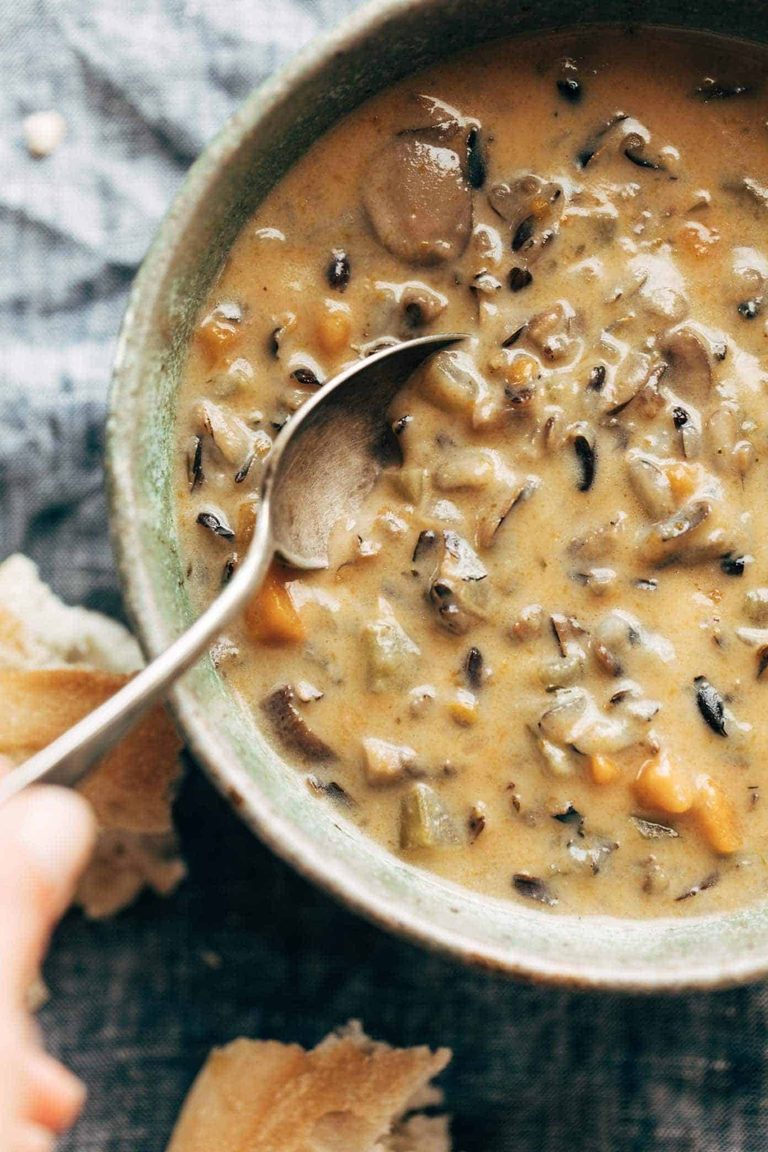
Instant Pot Wild Rice Soup
This really is the best wild rice soup (and as a Minnesotan, I know these things!). You can even add chicken too if that’s your thing, or keep it veg with mushrooms only. Either way, it’s not fall without it!
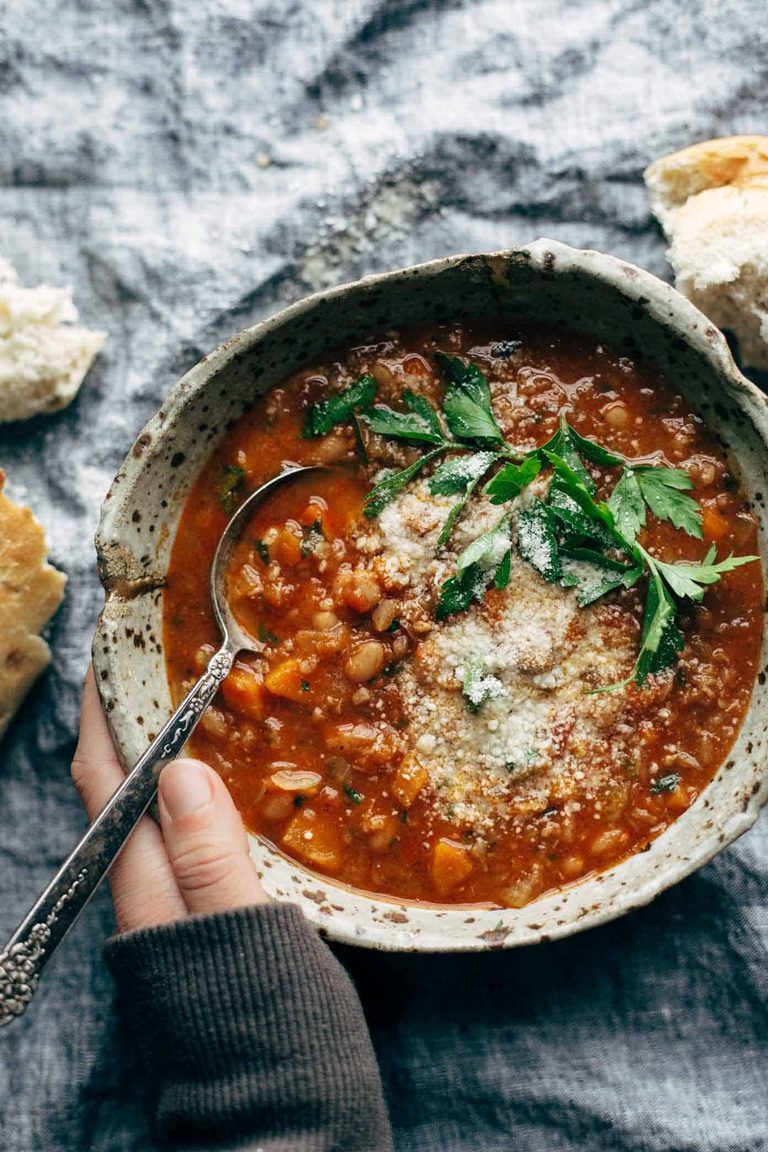
Instant Pot Minestrone Soup
This soup has a shocking amount of veggies! And packed with cannelini beans and cheese, it’s the perfect balance of nourishing and nutritious but also filling and comforting. Made all in one pot!
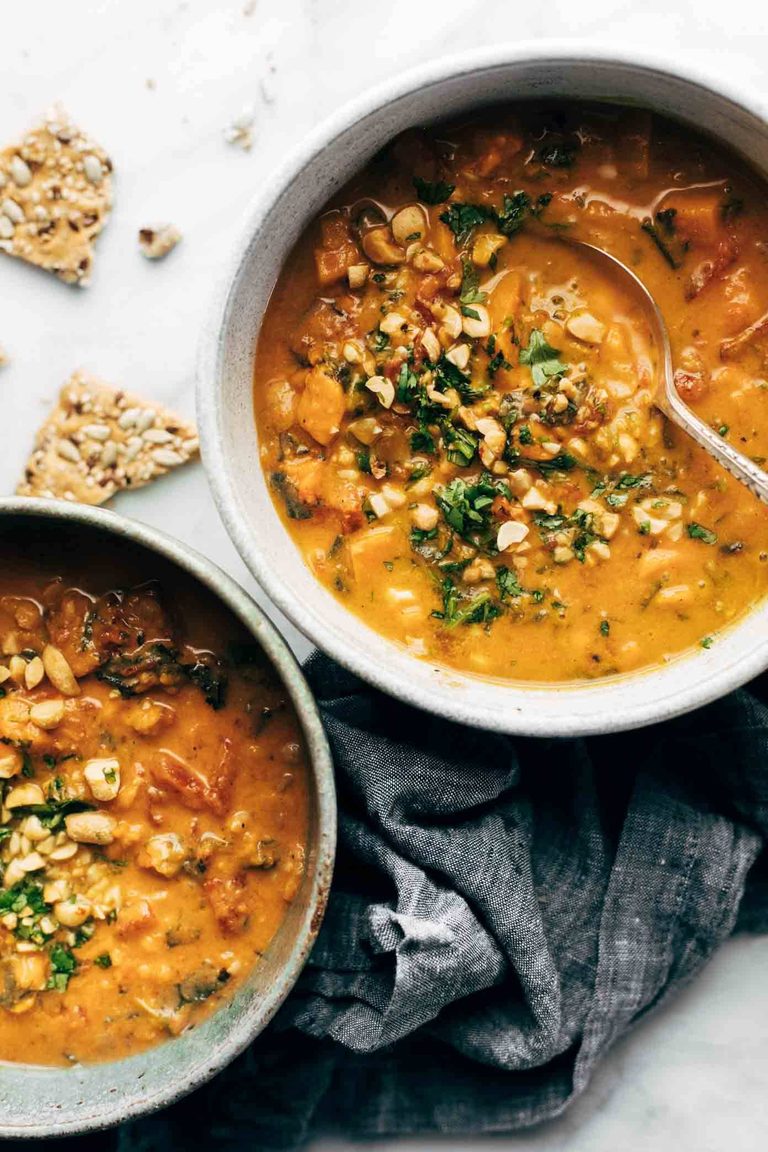
Spicy Peanut Soup with Sweet Potato + Kale
Another one of the most popular soups on the site! There’s something so magical about the sweet potatoes, coconut milk, and peanut butter coming together to make the most creamy (vegan!) bowl of deliciousness.
Red Curry Chicken Stir Fry with Spicy Cashew Sauce
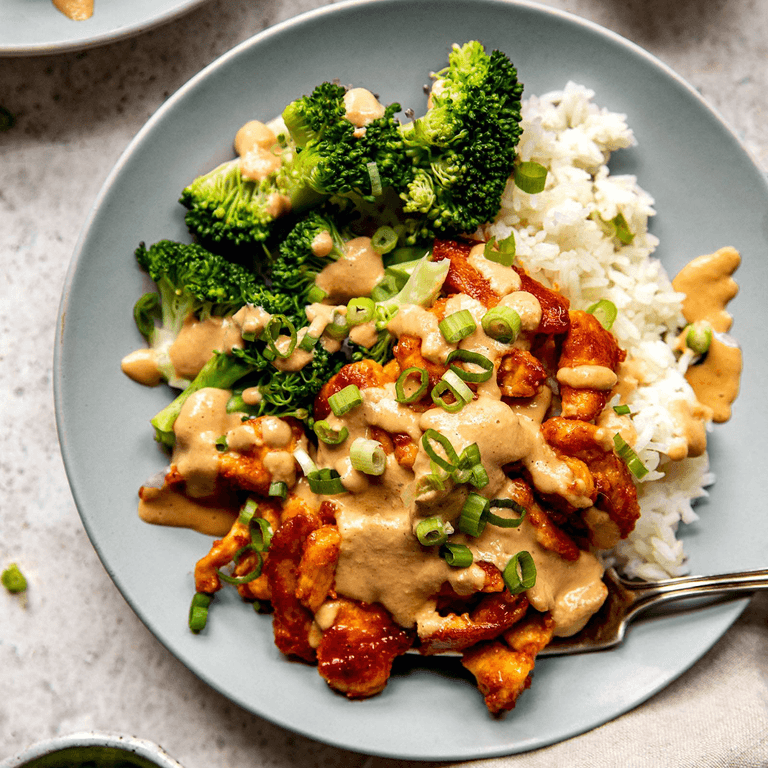
Caramelized red curry chicken sits next to a bed of hot, fluffy rice and steamed broccoli and then totally sauced up with the BEST spicy cashew sauce. Ooof, this is so, so good.
Chicken Enchilada Casserole
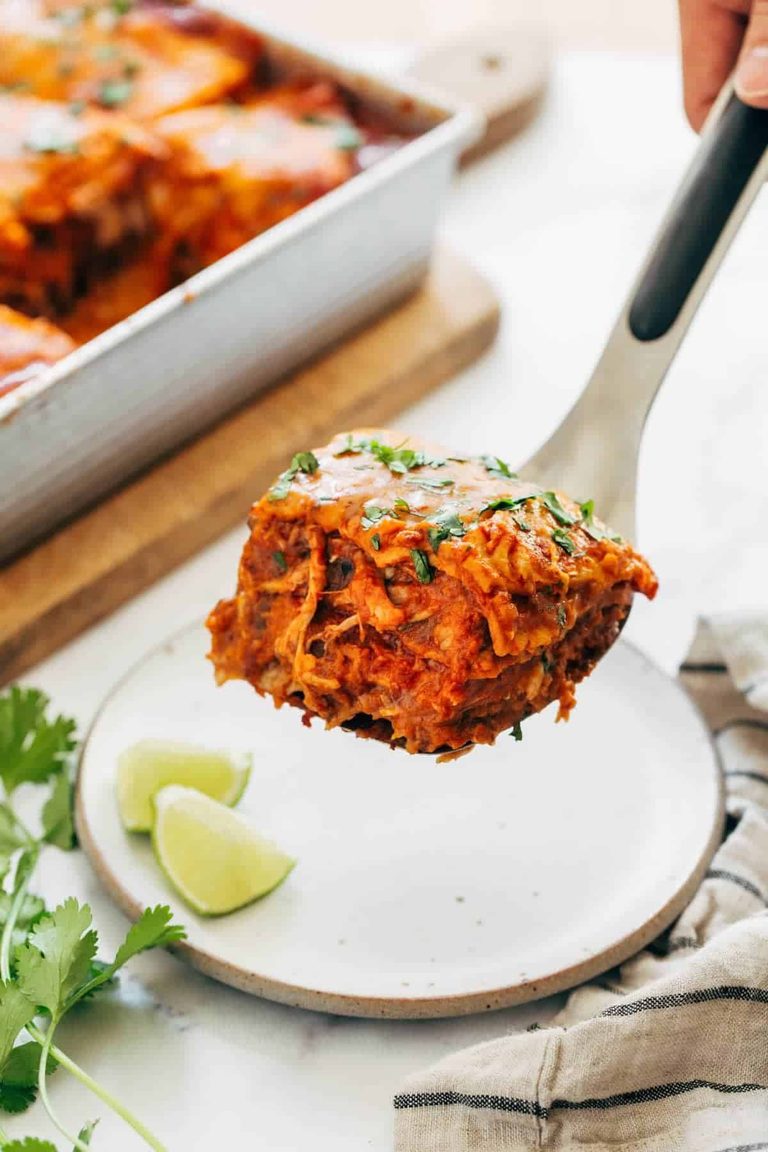
A five-ingredient stacked enchilada casserole layered with tortillas, beans, and chicken and covered with cheese and enchilada sauce. Basic, easy, filling, and so good.
Little Things That Make Fall Cooking Easy
I have a few favorite tricks and tools to make dinner easier throughout the week. Here’s what I recommend checking out! (FYI: Some links below are affiliate links!)
Air Fryer: I use this multiple times per week, if not every day. My favorite use is for the Air Fryer Chicken – it is the best chicken I’ve ever made and is quick enough to add to a dinner plate in under 15 minutes.
Instant Pot: Perfect for soups, and a whole lot of other things!
Slow Cooker: The OG of making dinner easier. There are several recipes above that use it, and so many others to enjoy! The bonus is that it also makes your house smell amazing on cozy chilly nights after school/work.
Freezer Meals: This kit of freezer meals is a lifesaver. You can prep up to 22 meals, stick them in the freezer, and pull them out to get dinner on the table (hands-off!) quickly and easily.
Happy fall to you and yours! Here’s to making weenight cooking easier!







 YOU MAY ALSO LIKE: How to make perfectly baked fish with scallions and orange. Jump to the Baked Fish Recipe with Scallions.