Tag: Chicken

  • Loaded Chicken Fajita Sweet Potatoes

    Loaded Chicken Fajita Sweet Potatoes

    With the veggies, chicken, sweet potato and simple seasonings, these loaded chicken fajita sweet potatoes are amazing! So much flavor!

    If fajita flavors are your jam, you are going to love this recipe!

    Veggies (customizable to your liking!), chicken and lots of smoky flavors are piled high on tender sweet potatoes, and the result is a combination that never gets old!

    Mushrooms and bell peppers and broiled cheese on sweet potatoes.

    Fajita Vegetables

    I like to stick with traditional fajita vegetables for this recipe;

    • onions
    • bell peppers (usually red, yellow and/or orange)
    • mushrooms

    But you can definitely (and easily) customize the vegetables to your liking, subbing in veggies you like or have on hand and nixing the veggies that cause you stress.

    The vegetables are sautéed in a skillet – and if you like lots of golden color on them, cook them in batches so they get maximum exposure to the bottom of the hot pan.
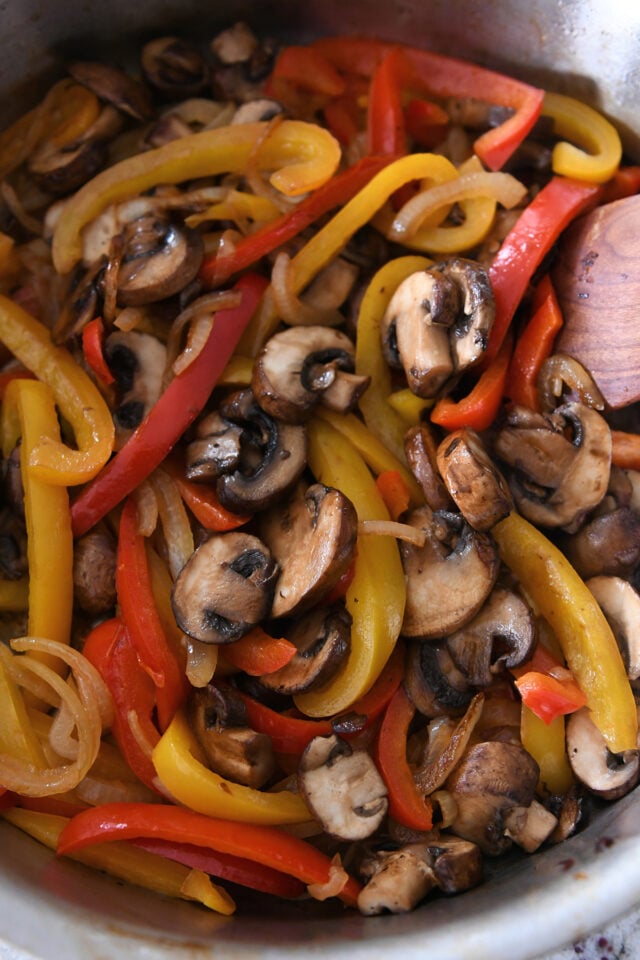
    Pan with bell peppers, onions and mushrooms.

    Everything Else for Fajitas

    Once the vegetables are cooked just until tender (say no to mushy veggies!), add in:

    • cooked chicken
    • cilantro
    • lime juice
    • seasonings: cumin, chili powder, smoked or regular paprika, garlic.

    Pro Tip: for a meatless version, sub the chicken with a can of rinsed and drained beans (or just a lot of extra veggies!).
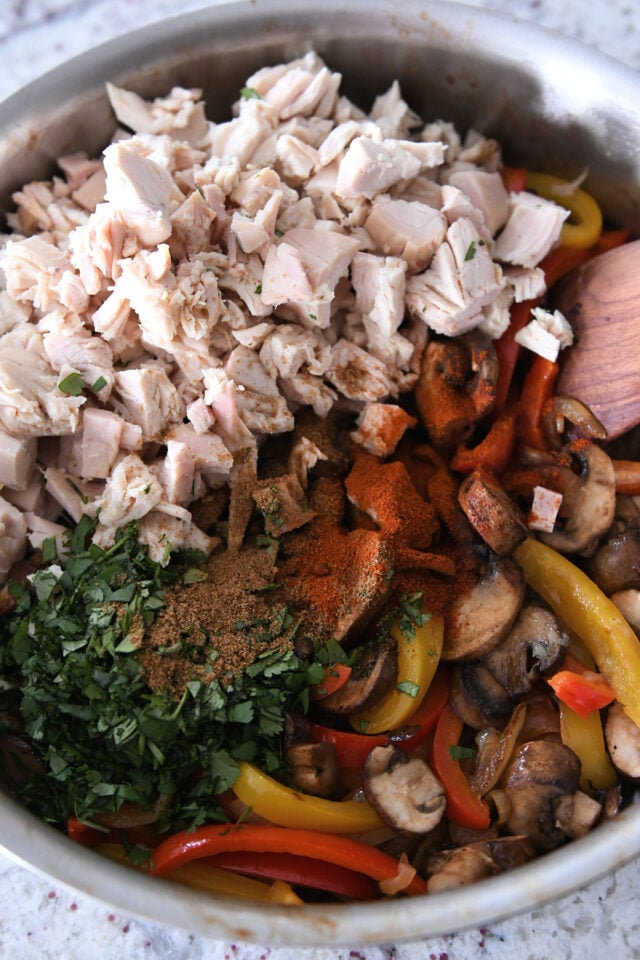
    Pan filled with sauteed bell peppers, mushrooms, cilantro, cumin, chili powder, and cooked chicken.

    Cooking the Sweet Potatoes

    The base of this yummy recipe is, of course, sweet potatoes (or yams 😉). *See the note in the recipe below for sweet potato substitutions.

    Cook the sweet potatoes on a greased and foil-lined half sheet pan for about an hour at 375 degrees F. While they cook, prepare that fajita topping like we just talked about!

    Cut the sweet potatoes in half and mess them up a bit with a fork so that the flesh is lightly mashed. Then, sprinkle with salt and pepper. DO NOT FORGET THIS STEP. It’s very important for overall flavor.

    Top each sweet potato half with a very heaping (yes, this is scientific) scoop of the chicken fajita filling. And then douse with a healthy sprinkle of shredded cheese.

    Sweet potatoes on sheet pan; veggies and chicken on sweet potatoes; cheese on veggies; everything broiled until golden.

    Broil those loaded chicken fajita sweet potatoes until the cheese is melted and bubbly and golden.

    Ermagersh. SO YUMMY.

    One sweet potato half is a very satisfying and abundant serving. They can be served as is or loaded with toppings of your choice: sour cream, avocado, cilantro, salsa.

    I highly recommend going the load-up-the-already-loaded-sweet-potatoes-with-more-toppings route.

    Top down view of sweet potato loaded with chicken, veggies, sour cream, salsa, and avocado.

    Loaded Sweet Potatoes

    Digging into these flavor blasted sweet potato bombs is a bit chaotic and messy. It’s all part of the delicious journey.

    I am, admittedly, a huge fajita fan. But these loaded chicken fajita sweet potatoes are next level delicious.

    The leftovers (sans sour cream and avocados) reheat amazingly well and make for literally the best lunch in the history of ever. Which also means this recipe makes me a leftover hoarder for which I will not apologize.

    Can’t wait for you to make these! You’re going to love them!
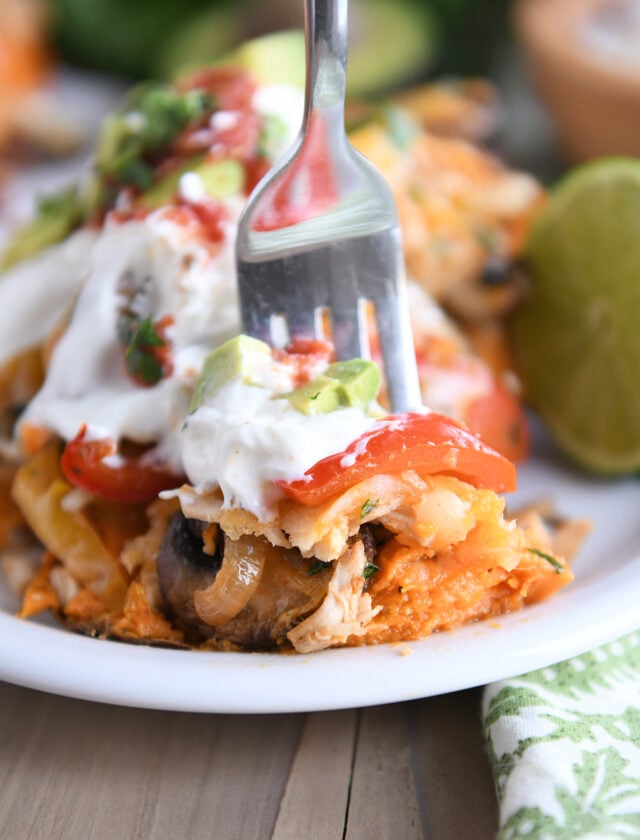
    Fork taking bite of sweet potato with bell peppers, mushrooms, sour cream and avocados.

    One Year Ago: Red Velvet Cheesecake Brownies
    Two Years Ago: Triple Chocolate Scones 
    Three Years Ago: Veggie Turkey Taco Lettuce Wraps 
    Four Years Ago: The Best Swig Sugar Cookies Copycat Recipe
    Five Years Ago: Amazing Instant Pot Indian Butter Chicken and Potato Curry
    Six Years Ago: One-Bowl Monster M&M Cookies Gluten-Free
    Seven Years Ago: Baked Garlic and Fontina Spaghetti
    Eight Years Ago: Curried Lentil and Sausage Soup with Toasted Almonds 
    Nine Years Ago: Classic Crème Brulee
    Ten Years Ago: Cheesecake Stuffed Strawberries 

    Several sweet potatoes on white tray with mushrooms, bell peppers, and cheese.

    Loaded Chicken Fajita Sweet Potatoes

    • 4 medium sweet potatoes (see note)
    • 1 tablespoon olive oil
    • ½ medium onion, cut into half moon slices
    • 2 large bell peppers, any color, cored and sliced into thin strips
    • 2 cups sliced mushrooms
    • 2 to 3 cups cooked, shredded or chopped chicken
    • 1 teaspoon ground cumin
    • ½ teaspoon chili powder
    • ½ teaspoon smoked or regular paprika
    • ½ teaspoon garlic powder
    • 1 to 2 tablespoons fresh lime juice
    • ½ cup chopped cilantro
    • 1 ½ cups shredded Mexican blend cheese (see note)
    • Toppings: sour cream, avocado, cilantro, salsa, etc.

    Prevent your screen from going dark

    • Preheat the oven to 375 degrees F. Line a half sheet pan with foil and grease with cooking spray. Poke a few holes in each sweet potato with the tines of a fork. Place the sweet potatoes on the sheet pan and bake until tender, about 1 hour.

    • While the sweet potatoes cook, heat the olive oil in a deep skillet over medium heat. Add the onion and peppers and cook until tender, 3-4 minutes, seasoning with a pinch of salt and pepper. Remove to a plate and return the skillet to the heat.

    • Add another splash of olive oil, if needed. Add the mushrooms and cook, without stirring (for more golden color), for 1-2 minutes. Stir or flip and continue cooking for a few more minutes until golden and tender. Season with a pinch of salt and pepper.

    • Add the onions and peppers back to the skillet with the mushrooms. Add the chicken, cumin, chili powder, paprika, garlic powder, lime juice and cilantro. Season to taste with salt and pepper!

    • Preheat the oven broiler and position a rack in the upper middle position in the oven.

    • Cut each sweet potato in half lengthwise and place on the baking sheet cut side up (replacing the foil, if needed). Scrape the flesh of the sweet potato with a fork until it is lightly mashed. Sprinkle with a pinch of salt and pepper.

    • Divide the chicken/veggie mixture evenly among the sweet potatoes, piling it high.

    • Sprinkle cheese over the top. Broil until the cheese is golden and bubbling (watch closely!), 2-3 minutes.

    • Serve immediately with toppings of your choice (sour cream, salsa, avocado, cilantro, etc).

    Potatoes: I haven’t tried subbing out the sweet potatoes for russets, yukon golds or another variety, but it’s worth a try if that’s your preference. And if you really want a wild potato variation, try the fajita topping over tater tots (top with cheese and broil per the recipe). 
    Veggies: the vegetables in this recipe are totally customizable. Veggies you don’t like or don’t have on hand can be swapped out for others (like zucchini, broccoli, carrots, etc). 
    Meatless: this meal can easily be made meatless just by leaving out the chicken. A can of beans, rinsed and drained, could also be added (with or without the meat). 
    Cheese: Monterey Jack and cheddar can be subbed for the Mexican cheese blend.

    Serving: 1 serving, Calories: 252kcal, Carbohydrates: 28g, Protein: 16g, Fat: 9g, Saturated Fat: 4g, Cholesterol: 44mg, Sodium: 239mg, Fiber: 5g, Sugar: 8g
    Disclaimer: I am a participant in the Amazon Services LLC Associates Program, an affiliate advertising program designed to provide a means for me to earn fees by linking to Amazon.com and affiliated sites. As an Amazon Associate I earn from qualifying purchases.
    Source link

  • Hot Honey Chicken Wings

    Hot Honey Chicken Wings

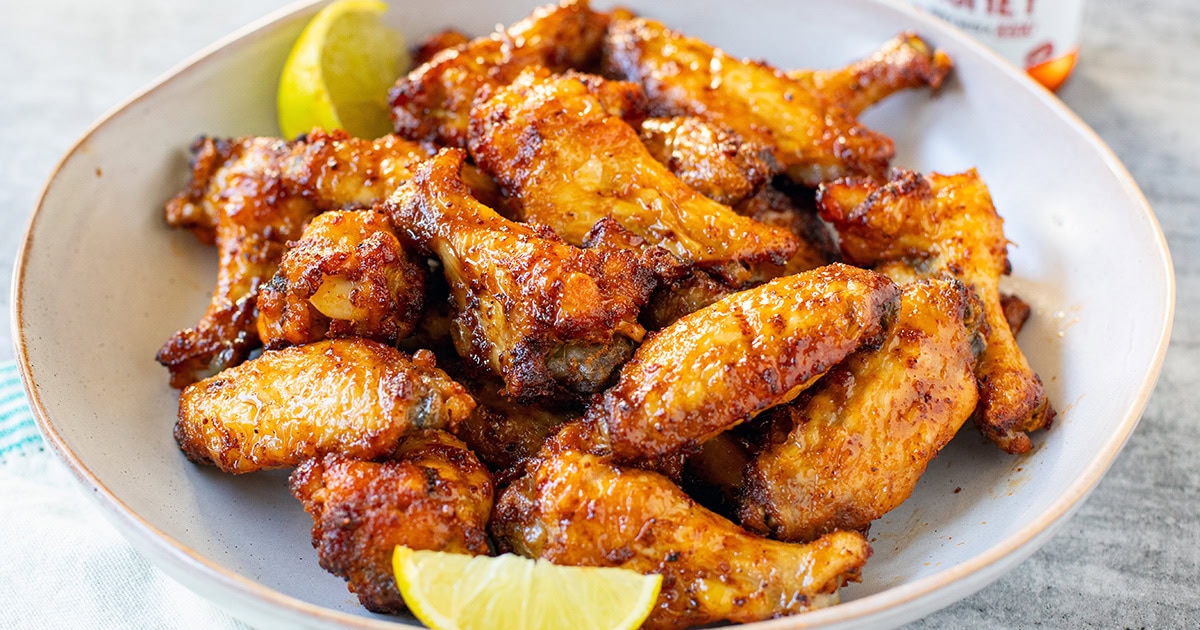
    These hot honey chicken wings are crispy, sticky, sweet, and just the right amount of spicy. They’re baked (not fried!) and basically disappear the second you put them out.


    Jump to: ℹ️ Overview | 🛒 Ingredients | 📷 How To Make | 📹 Watch The Video | 👩‍🍳 Recipe Tips | 🥗 Serving Suggestions | 📝 Full Recipe Card | 🍽 More Chicken Recipes


    These hot honey chicken wings are the kind I make when I want something super tasty with minimal fuss. They’re crispy on the outside (thank you, baking powder trick!), juicy on the inside, and coated in a sticky glaze that’s sweet from the honey, tangy from lime, and has just enough heat to keep things interesting. This flavor combo is also used in my super popular boneless skinless chicken thighs recipe.

    The flavor hits all the right notes — savory, spiced, a little smoky. Plus, no deep-frying required. You can make them in the oven or air fryer, and they’re way lighter than traditional wings. I’ve made these a bunch of times now for dinners and parties, and people always go back for seconds (and thirds).

    Each serving is about 220 calories with 15 grams protein, 4 grams carbs, and 15 grams fat—so it’s a pretty decent macro balance, too.

    👩‍🍳 You might also like: salt and pepper chicken wings, hot honey chicken tenders, air fryer bbq chicken wings, dry rub chicken wings, baked honey soy chicken wings, sticky Portuguese chicken wings, or paleo chicken wings.

    What You’ll Need

    Here is what you’ll need for this hot honey chicken wings recipe. Find the full measurements in the recipe card below.

    • Chicken wings – I usually buy pre-cut chicken wings, but you get whole wings and cut them yourself.
    • Olive oil – Helps the seasoning stick and promotes crispiness.
    • Spice Rub: Salt (essential for flavor), garlic powder and onion powder for that savory backbone, smoked paprika (a little smoky, a little sweet), and baking powder – not a flavor ingredient, but it gives you that bubbly, golden, crispy skin.
    • Glaze: Hot honey – Store-bought or homemade (I’ve got a recipe if you want it) and lime juice for bright, tangy finish that balances the sweetness.

    Swap tips: Don’t have smoked paprika? Regular sweet paprika will work. You can use lemon juice instead of lime in a pinch. No hot honey? Use regular honey and chili powder, or Sriracha hot sauce.

    How To Make Hot Honey Chicken Wings

    Find the full recipe and nutritional information below. Here are some handy step-by-step photos for hot honey chicken wings.

    • Preheat oven to 410°F / 210°C and place a wire rack on a lined baking sheet. You can use foil or baking paper to catch the drippings.
    • Mix salt, garlic powder, onion powder, smoked paprika, and baking powder in a small bowl.
    • Pat wings super dry, then toss with olive oil and spice mix.
    • Arrange on the rack in a single layer, skin side up.
    • Bake 22 minutes, flip, and bake another 20 minutes until crispy and browned.
    • Toss with hot honey and lime juice while hot. Serve!

    Watch The Video

    Recipe Tips

    • Don’t skip the drying step — extra moisture = less crisp.
    • Baking powder is the secret to that crackly skin without frying.
    • For even crispier wings, let them sit uncovered in the fridge for an hour or two after seasoning. Kind of like a dry brine.
    • Want more heat? Use extra hot honey or add a pinch of cayenne or chili powder to the spice rub.
    • Try them in the air fryer: cook in two batches at 400°F (200°C) for about 18–20 minutes, flipping halfway.
    • Storage tips: Store leftover wings in an airtight container in the fridge for up to 3 days. Reheat in the oven or air fryer to bring back the crisp!
    • Make-ahead tips: You can season the wings ahead of time and refrigerate them for up to 24 hours before baking. Even better for crispiness. Just glaze them right before serving.

    Serving Suggestions

    These are so good on their own, but I also love them with:

    💬 If you’ve tried these hot honey chicken wings or any other recipe on the blog then don’t forget to rate the recipe and let me know how you got on in the comments below, I love hearing from you! You can also FOLLOW ME on Instagram, Facebook, Pinterest, YouTube, and or sign up to my Newsletter to see more of my delicious food.

    Want to Save This Recipe?

    Enter your email & I’ll send it to your inbox. Plus, get great new recipes from me every week!

    By submitting this form, you consent to receive emails from Cooked & Loved

    These hot honey chicken wings are crispy, sticky, sweet and just the right amount of spicy. They’re baked (not fried!) and basically disappear the second you put them out. Find step-by-step photos and more recipe tips above.

    • Preheat your oven to 410°F / 210°C. Line a baking tray with foil or parchment and place a wire rack on top. Spray with oil if needed.

    • In a small bowl, mix together the salt, baking powder, garlic powder, onion powder, and smoked paprika.

    • Pat the chicken wings dry really well using paper towels. (This is key!)

    • Toss the wings in a large bowl with olive oil, then add half the spice mix. Flip and add the rest, tossing to coat evenly.

    • Arrange wings skin side up on the rack in a single layer.

    • Bake for 22 minutes, flip, then bake for another 20 minutes until crispy and browned.

    • Remove from oven and place half the wings in a bowl. Drizzle with 2 tablespoons of hot honey and juice of half a lime. Toss to coat. Repeat with the rest.

    • Serve hot and sticky!

    • Can I use drumsticks or boneless chicken? You can! Just adjust the cooking time — drumsticks take longer, boneless less time. Keep an eye on them so they don’t dry out.
    • What if I don’t have hot honey? Mix regular honey with a little hot sauce (like sriracha or Frank’s), red chili flakes, or cayenne. Taste and tweak until you love it.
    • Why use baking powder? It is the secret to that crackly skin without frying. It reacts with the skin and moisture to create tiny bubbles—aka crispy magic. Just make sure it’s aluminum-free to avoid any odd aftertaste. 
    • Can I freeze these? You can freeze the cooked, unglazed wings. Reheat in the oven, then toss with glaze once hot.
    • Don’t skip the drying step — extra moisture = less crisp.
    • For even crispier wings, let them sit uncovered in the fridge for an hour or two after seasoning. Kind of like a dry brine.
    • Want more heat? Use extra hot honey or add a pinch of cayenne or chili powder to the spice rub.
    • Try them in the air fryer: cook in two batches at 400°F (200°C) for about 18–20 minutes, flipping halfway.
    • Storage tips: Store leftover wings in an airtight container in the fridge for up to 3 days. Reheat in the oven or air fryer to bring back the crisp!
    • Make-ahead tips: You can season the wings ahead of time and refrigerate them for up to 24 hours before baking. Even better for crispiness. Just glaze them right before serving.

    Calories: 262kcal | Carbohydrates: 14g | Protein: 15g | Fat: 17g | Saturated Fat: 4g | Polyunsaturated Fat: 3g | Monounsaturated Fat: 8g | Trans Fat: 0.2g | Cholesterol: 63mg | Sodium: 661mg | Potassium: 163mg | Fiber: 0.4g | Sugar: 12g | Vitamin A: 368IU | Vitamin C: 2mg | Calcium: 132mg | Iron: 1mg

    Keywords: hot honey chicken wings, baked chicken wings, crispy hot honey chicken wings, baked hot honey chicken wings

    More Chicken Recipes


    Source link

  • Creamy Chicken Alfredo Soup in One Pot

    Creamy Chicken Alfredo Soup in One Pot

    This website may contain affiliate links and advertising so that we can provide recipes to you. Read my disclosure policy.

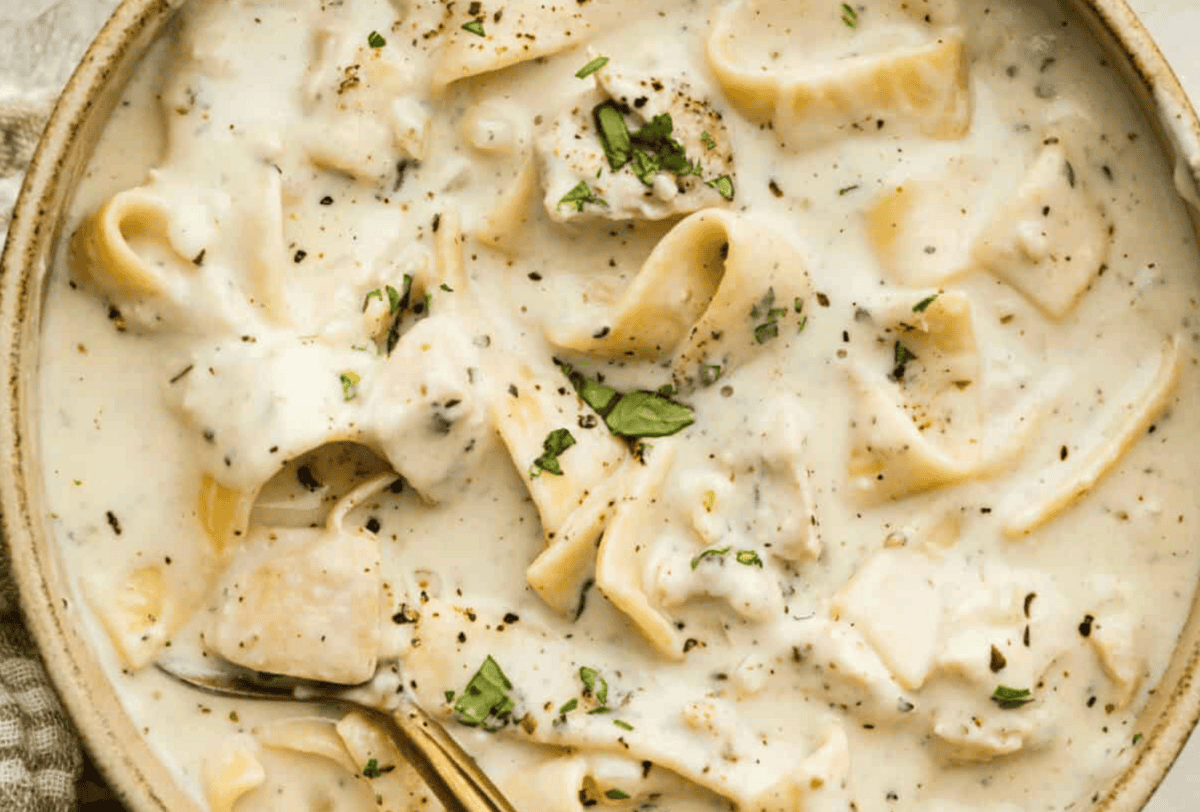
    You guys are obsessed with my homemade alfredo sauce. So I had to make this creamy, cheesy chicken Alfredo soup! Tender chicken, rich broth, and pasta all come together in just 30 minutes!

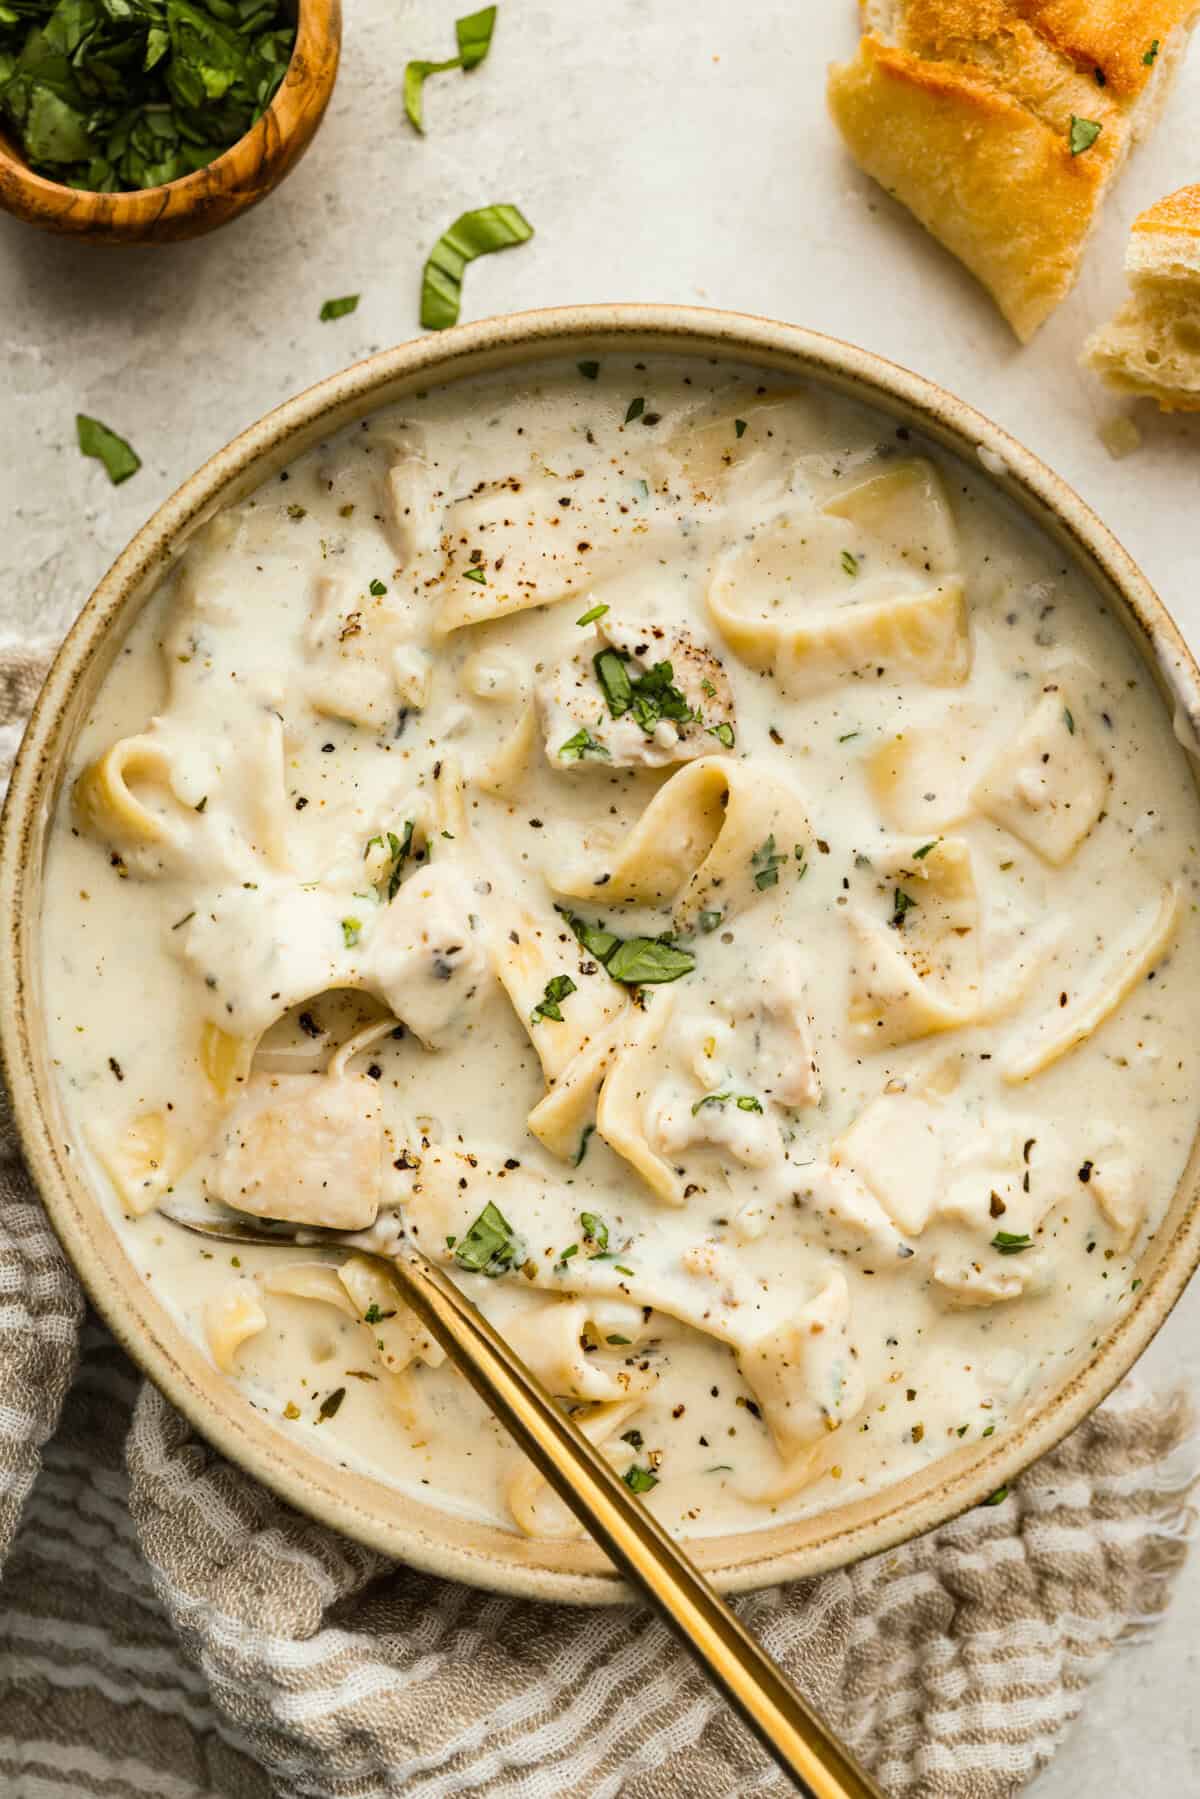
    Serving of chicken Alfredo soup in a bowl.

    Why This Soup is a Weeknight Wonder

    • All-in-One Pot: Everything cooks together in a single pot, making cleanup a breeze while delivering layers of creamy, cheesy flavor.
    • Perfect Family Dinner: Hearty and satisfying, it’s a simple meal everyone will love. Pair it with easy no-knead bread, my Grandma’s homemade bread, or these rolls.
    • Make it Your Own: Add extra veggies, swap in your favorite pasta, or spice it up!

    Ingredients for Chicken Alfredo Soup

    Overhead shot of labeled ingredients.
    • Half and Half: Half and half makes this soup creamy but not overly rich. You can make your own half and half if you don’t have any.
    • Pasta: Use any pasta shape for this. I love using wide egg noodles. Other great options are bowtie, rotini, or even cheese tortellini.
    • Chicken: This is a great recipe to use up leftover rotisserie chicken or make a quick batch of my air fryer chicken.

    How to Make Chicken Alfredo Soup

    One pot, simple ingredients, and big flavor! This creamy chicken Alfredo soup is a quick way to everyone’s heart! It’s so good and feels like a warm hug!

    1. Sauté the Onions: In a large pot over medium heat, melt the butter. Once melted, add diced onion and garlic. Cook until the onions begin to soften, about 2-3 minutes. Sprinkle all-purpose flour over the onions. Stir and cook the flour for 1-2 minutes.
    2. Add Seasonings: Add Italian seasoning, garlic powder, salt, and pepper to taste. Then slowly whisk in chicken broth and half and half.
    3. Cook: Bring to a boil and then add uncooked pasta. Reduce to a simmer and cook until the pasta is al dente.
    4. Finish with Chicken and Cheese: Add cooked chicken, grated parmesan cheese, and shredded mozzarella cheese, then cook until the cheese is melted. Add fresh basil and parsley and serve.

    Pin this now to find it later

    Pin It

    Pot of chicken Alfredo soup.

    More Cozy Soup Recipes

    best_chicken_noodle_soup_recipes

    Slow Cooker Chicken Fajita Soup

    4 hours 10 minutes


    Source link

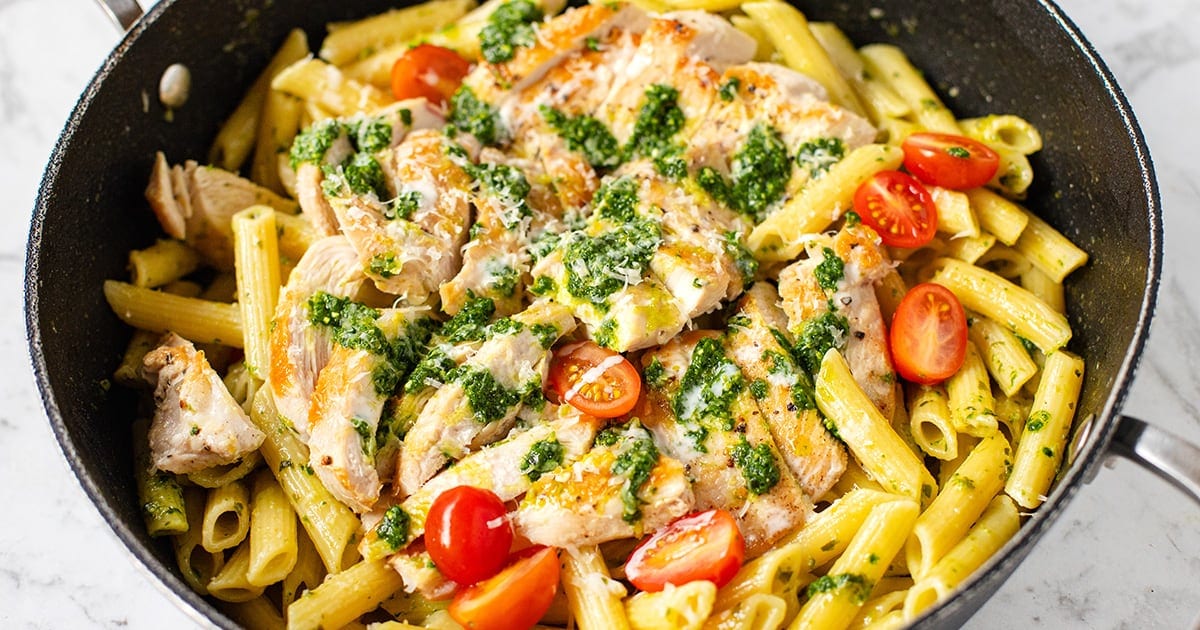
  • Creamy Chicken Pasta With Pesto

    Creamy Chicken Pasta With Pesto

    This creamy chicken pasta with pesto is fresh, vibrant, and perfectly comforting. It’s family-friendly, high in protein, satisfying, and everyone at my table gobbled it up (including my 4-year-old).


    Jump to: ℹ️ Overview | 🛒 Ingredients | 📷 How To Make | 📹 Watch The Video | 👩‍🍳 Recipe Tips | 🥗 Serving Suggestions | 📝 Full Recipe Card | 🍽 More Chicken Recipes


    This creamy chicken pasta with pesto is something I make often, and it never fails me. It’s got that gorgeous fresh basil flavor from pesto, balanced with a light cream sauce that clings to every bite of tender chicken and penne.

    Unlike heavier Alfredo-style pastas, this one feels just right — creamy but not overwhelming. A bit of lemon keeps it bright, and a sprinkle of Parmesan ties it all together.

    My kid always asks for seconds, and I secretly love that it packs in protein without feeling too rich. Each serving hits that sweet spot of about 30 grams of protein and enough carbs to keep you full. Honestly, it’s one of those recipes you’ll tuck away and keep coming back to.

    👩‍🍳 You might also like these pasta dishes: creamy Italian sausage pasta, Marry Me chicken orzo bake, chicken pasta Alfredo with broccoli, garlic Parmesan chicken and pasta, lemon chicken orzo pasta, butternut squash pasta, and veggie pasta bake. You may also want to check out these chicken pasta recipes and crock pot Marry Me chicken.

    What You’ll Need

    Here is what you’ll need for this creamy chicken pasta with pesto recipe. Find the full measurements in the recipe card below.

    • Pasta – I like penne pasta, but you could use fusilli or rigatoni — anything that holds sauce nicely.
    • Chicken – Boneless chicken breast (you could use boneless thighs if you prefer juicier meat), and you will need salt and pepper for seasoning and a little olive oil for cooking. PS. For a speedy version, slice up some store-bought rotisserie chicken and skip the chicken cooking step altogether!
    • Basil pesto – Store-bought basil pesto is fine, but homemade makes it special. If buying store-bought, I highly recommend fresh pesto you would get in the refrigerated section, it’s more pungent and vibrant green.
    • Also for creamy pesto sauce – garlic (for that savory backbone), lemon zest and juice (brightens up the cream), chicken stock (adds depth and volume), light cream (or use half-and-half), and Parmesan cheese (for salty, nutty richness).
    • To Serve – Cherry tomatoes (I love the pop of color) and extra Parmesan (never too much cheese).

    How To Make Creamy Chicken Pasta With Pesto

    Find the full recipe and nutritional information below. Here are some handy step-by-step photos for how to make creamy chicken pasta with pesto.

    • Cut chicken breasts horizontally for even cooking, season with salt and pepper.
    • Sear chicken in olive oil until golden and cooked through, about 5 minutes each side; set aside.
    • In parallel, cook pasta until just al dente; set aside.
    • In the same pan, add a little extra oil and sauté garlic and lemon zest gently.
    • Pour in chicken stock, half the pesto, light cream, lemon juice, and Parmesan.
    • Simmer 4–5 minutes until the sauce is slightly thickened.
    • Slice chicken, return to pan with juices (you can also pop the chicken on top of the pasta later).
    • Stir in cooked pasta and remaining pesto.
    • Top with extra pesto, Parmesan, and cherry tomatoes.

    Watch The Video

    Recipe Tips

    • Make it extra creamy: Swap light cream for heavy cream if you want indulgence.
    • Protein swap: Try shrimp or rotisserie chicken (this will make things even easier as you won’t need to cook the chicken). If using shrimp/prawns, pan-fry for 2 minutes each side.
    • Veg it up: Stir in baby spinach or peas at the end. Try adding some sun-dried tomatoes.
    • Pasta water: If your sauce feels too thick, add a splash of pasta cooking water to loosen it.
    • Leftover pesto: Freeze in an ice cube tray for quick flavor boosts.
    • Storage tips: Leftovers keep well in the fridge up to 3 days. Reheat gently on the stovetop with a splash of stock or cream. I don’t recommend freezing—cream sauces can separate.
    • Make-ahead tips: You can cook the chicken and make the sauce a day ahead—just reheat gently before tossing with pasta. Even the pasta can be cooked in advance and lightly oiled to prevent sticking.

    Serving Suggestions

    I like serving this with a simple side salad or a green salad and maybe a hunk of crusty bread to mop up the sauce. A glass of chilled white wine doesn’t hurt either.

    💬 If you’ve tried this creamy chicken pasta with pesto or any other recipe on the blog then don’t forget to rate the recipe and let me know how you got on in the comments below, I love hearing from you! You can also FOLLOW ME on Instagram, Facebook, Pinterest, YouTube, and or sign up to my Newsletter to see more of my delicious food.

    Want to Save This Recipe?

    Enter your email & I’ll send it to your inbox. Plus, get great new recipes from me every week!

    By submitting this form, you consent to receive emails from Cooked & Loved

    This creamy chicken pasta with pesto is fresh, vibrant, and perfectly comforting. It’s family-friendly, high in protein, satisfying, and everyone at my table gobbled it up (including my 4-year-old). Find step-by-step photos and more recipe tips above.

    • Cook Pasta: Cook the penne according to package directions until al dente. Drain and set aside.

    • Prepare Chicken: Cut the chicken breasts horizontally so they cook evenly. Season both sides with salt and pepper.

    • Sear Chicken: Heat 1 tablespoon olive oil in a large sauté pan over high heat. Add chicken, reduce heat to medium-high, and cook about 5 minutes per side. Remove thinner pieces early if needed. Transfer all chicken to a plate and rest.

    • Make Sauce: Lower heat to medium. Add 1 teaspoon olive oil, garlic, and lemon zest. Sauté until fragrant.

    • Build Sauce: Pour in chicken stock, half the pesto, cream, lemon juice, and Parmesan. Simmer for 4–5 minutes until slightly reduced.

    • Finish Chicken: Slice cooked chicken. Return to pan along with any juices. You can also return the juices to the sauce and reserve the chicken to serve on top like I did (for nicer presentation).

    • Combine Pasta: Add pasta and remaining pesto. Toss to coat.

    • Serve: Top with extra Parmesan, cherry tomatoes, and another drizzle of pesto.

    • Can I use jarred pantry pesto rather than fresh? Absolutely! Just look for one with good olive oil and real Parmesan.
    • What’s the best pasta shape? I like penne or rigatoni because they hold the sauce nicely.
    • Does this reheat well? Yes! We always enjoy the leftovers — just warm it gently on the stove with a splash of stock or cream.
    • Make it extra creamy: Swap light cream for heavy cream if you want indulgence.
    • Protein swap: Try shrimp or rotisserie chicken (this will make things even easier as you won’t need to cook the chicken). If using shrimp/prawns, pan-fry for 2 minutes each side.
    • Veg it up: Stir in baby spinach or peas at the end. Try adding some sun-dried tomatoes.
    • Pasta water: If your sauce feels too thick, add a splash of pasta cooking water to loosen it.
    • Leftover pesto: Freeze in an ice cube tray for quick flavor boosts.
    • Storage tips: Leftovers keep well in the fridge up to 3 days. I don’t recommend freezing—cream sauces can separate.
    • Make-ahead tips: You can cook the chicken and make the sauce a day ahead—just reheat gently before tossing with pasta. Even the pasta can be cooked in advance and lightly oiled to prevent sticking.

    Calories: 519kcal | Carbohydrates: 47g | Protein: 31g | Fat: 22g | Saturated Fat: 8g | Polyunsaturated Fat: 1g | Monounsaturated Fat: 6g | Trans Fat: 0.01g | Cholesterol: 92mg | Sodium: 896mg | Potassium: 534mg | Fiber: 2g | Sugar: 3g | Vitamin A: 663IU | Vitamin C: 3mg | Calcium: 123mg | Iron: 1mg

    Keywords: creamy chicken pasta with pesto, chicken pesto pasta, creamy pesto chicken pasta, chicken pesto, creamy chicken pasta

    More Chicken Recipes


    Source link

  • Keto Chicken Yakitori – All Day I Dream About Food

    Keto Chicken Yakitori – All Day I Dream About Food

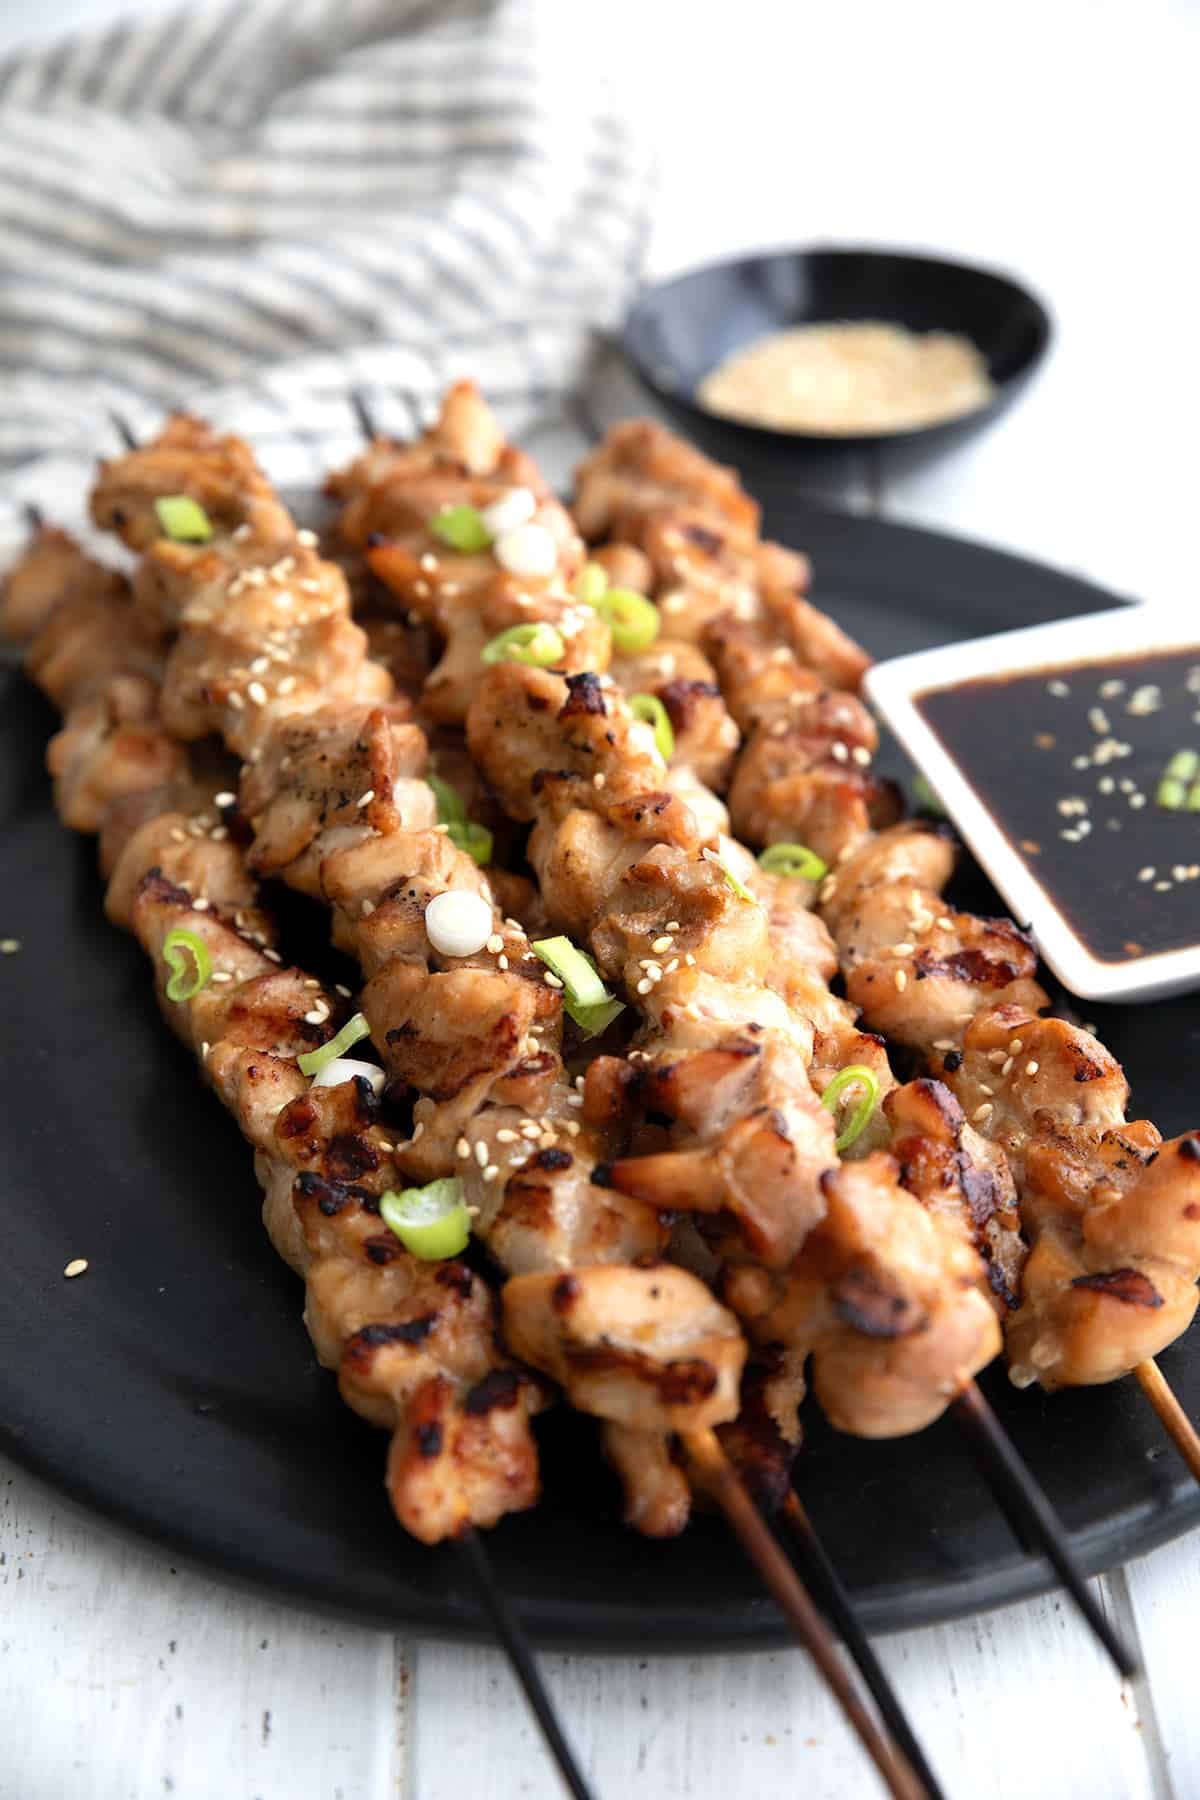
    Easy Chicken Yakitori goes low carb with a delectable sugar-free glaze. These juicy grilled chicken skewers have authentic Japanese flavor for a simple keto dinner or appetizer.

    Chicken Yakitori Skewers on a black plate with a white bowl of dipping sauce.

    When I make over a conventional recipe, I work hard to stay as true to the original as possible. And this mouthwatering chicken yakitori recipe keeps all of the luscious umami flavor while cutting out the unnecessary sugars.

    Yakitori is a classic Japanese street food featuring juicy grilled chicken skewers brushed with a savory-sweet glaze. Similar to Keto Teriyaki Wings or Asian Steak Bites, it has that irresistible sticky, caramelized finish.

    Eat it as an appetizer or serve with some Chili Garlic Green Beans or some Keto Sesame Noodles for a light and healthy meal!

    Keto Chicken Yakitori skewers on a black plate on a white wooden table.

    And the best part? My whole family loves it, even my three picky teenagers. That’s a rare phenomenon, as many parents would know. They devoured the skewers hot of the grill and requested it again the very next week. It’s a huge win when I can serve something that’s low carb enough for me and gets thumbs up from the kids.

    Reader’s Thoughts

    “This is NOT an understatement… You are a genius and have made our keto diet manageable. Tonight we enjoyed your chicken yakitori along with the buster bar. Thank you for sharing your talents with us all!” — Karen

    A red pastry brush brushing glaze over keto chicken skewers.

    Why we love this recipe

    • Juicy and tender: These easy chicken skewers are cooked quickly over a hot grill to lock in the juices and flavors.
    • Easy to make: Prepare the sauce and marinate the chicken. Then three onto skewers and you’re ready to go!
    • Flavorful sauce: It has all the salty-sweet flavor of the original without the added sugar.
    • Grill or broil: It’s great for grilling season but you can also cook them in the oven.
    • Low carb: Swapping out the sugar for keto-friendly sweeteners means it won’t spike your blood sugar.
    • High protein: When served as a full meal, this chicken yakitori recipe has 35 grams of high quality protein per serving.

    Ingredient Notes

    Top down image of ingredients for keto chicken yakitori.
    • Soy sauce: I know many keto and paleo proponents recommend coconut aminos but it simply doesn’t have that classic umami flavor, and I find it a weak substitute for keto Asian recipes. Additionally, it has more carbs than real soy sauce or tamari (gluten-free soy sauce).
    • Sweetener: I used brown sugar substitute, with a bit of allulose to make the sauce more syrupy and sticky.
    • Toasted sesame oil: Toasted sesame oil has more flavor. You could use another oil like avocado if you prefer.
    • Flavor: Fresh garlic, ginger and hot pepper flakes.
    • Xanthan gum: This is used to thicken the sauce. You could also try using glucomannan in the same amount.
    • Chicken thighs: I like using boneless chicken thighs for more succulent, juicy skewers.
    • Garnishes: Toasted sesame seeds and green onions.

    Overview: How to Make This Recipe

    A collage of 4 images showing how to make keto chicken yakitori.
    1. Prepare the sauce: Combine the tamari, water, sweeteners, sesame oil, garlic, ginger, and hot pepper flakes and bring to a boil. Sprinkle the surface with the xanthan gum and whisk vigorously to combine. Cook until somewhat thickened then remove from heat and cool completely.
    2. Marinate the chicken: Combine chicken with 2/3 of the sauce and chill for 2 hours to marinate.
    3. Grill: Thread the chicken onto the skewers and grill over medium high heat, brushing the chicken with the marinating liquid.
    4. Serve: Remove to a platter and sprinkle with sesame seeds and scallions. Serve with the reserved sauce at the table.
    Top down image of Japanese chicken skewers a black plate with dipping sauce.

    Tips for Success

    Appetizer size: This makes a wonderful appetizer when served on smaller skewers. You would likely get 12 to 15 skewers out of this recipe.

    Oven-baked method: You can easily cook these skewers in the oven as well. Heat the broiler to high and place on a broiling rack 8 to 10 inches from the heat. Broil about 4 minutes per side, until nicely browned. Be sure to keep your eye on them as broilers differ in intensity.

    Sweetener options: You can sweeten the sauce with any sweetener you like best. However, I find that brown sweeteners give a deeper flavor and a little allulose (or xylitol) helps to give it that sticky Asian quality.

    Frequently Asked Questions

    What is yakitori made of?

    These Japanese skewers are traditionally made with many parts of the chicken, including gizzards and hearts, along with thigh and breast meat. Sometimes it includes pieces of green onion as well. It’s all cut into bite-sized pieces, and then basted in a sweet and savory sauce and grilled over charcoal.

    Do you need to soak the skewers before grilling?

    If you are using bamboo skewers, be sure to soak them for at least half an hour before threading the meat onto them. Soaking them ensures that they don’t catch on fire over the hot flames.

    How many carbs are in Keto Chicken Yakitori?

    This keto chicken yakitori recipe has 1.1g of carbs and 0g of fiber per serving.

    Chicken Yakitori Skewers lined up on a black plate.

    More delicious keto Asian recipes to try

    Chicken Yakitori Skewers on a black plate with a white bowl of dipping sauce.

    Keto Chicken Yakitori Recipe

    Servings: 6 servings

    Prep Time 15 minutes

    Cook Time 17 minutes

    Total Time 32 minutes

    Easy Chicken Yakitori goes low carb with a delectable sugar-free glaze. These juicy grilled chicken skewers have authentic Japanese flavor for a simple keto dinner or appetizer.

    Prevent your screen from going dark

    • In a medium saucepan over medium heat, combine the tamari, water, sweeteners, sesame oil, garlic, ginger, and hot pepper flakes. Bring to a boil.

    • Sprinkle the surface with the xanthan gum and whisk vigorously to combine. Continue to boil 2 to 3 minutes until somewhat thickened. Remove from heat and cool completely.

    • Place the chicken in a bowl and toss with 2/3 of the sauce. Refrigerate 2 hours to marinate. Reserve the remaining sauce for serving with the chicken.

    • If you’re using bamboo skewers, place in a pan with water to soak for at least an hour. You will need 6 to 8 large skewers or 12 small appetizer-sized skewers.

    • Preheat the grill to medium high and grease the grates to prevent sticking. Thread the chicken onto the skewers. Place the skewers on the grill and brush the the marinating liquid.

    • Grill 5 to 6 minutes per side, brushing frequently with the marinating liquid. Remove to a platter and sprinkle with sesame seeds and scallions. Serve with the reserved sauce at the table.

    Storage Information: Store the leftovers in a covered container in the fridge for up to 5 days. 

    Serving: 1serving = 1/6th of recipe | Calories: 278kcal | Carbohydrates: 1.1g | Protein: 35.8g | Fat: 11.9g

    Nutritional Disclaimer

    Please note that I am not a medical or nutritional professional. I am simply recounting and sharing my own experiences on this blog. Nothing I express here should be taken as medical advice and you should consult with your doctor before starting any diet or exercise program. I provide nutritional information for my recipes simply as a courtesy to my readers. It is calculated using MacGourmet software and I remove erythritol from the final carb count and net carb count, as it does not affect my own blood glucose levels. I do my best to be as accurate as possible but you should independently calculate nutritional information on your own before relying on them. I expressly disclaim any and all liability of any kind with respect to any act or omission wholly or in part in reliance on anything contained in this website.

    Free Bonus: Secrets to Keto Baking!

    Sign up for your favorite recipes delivered straight to your inbox plus get our FREE bonus: Secrets to Keto Baking!


    Source link

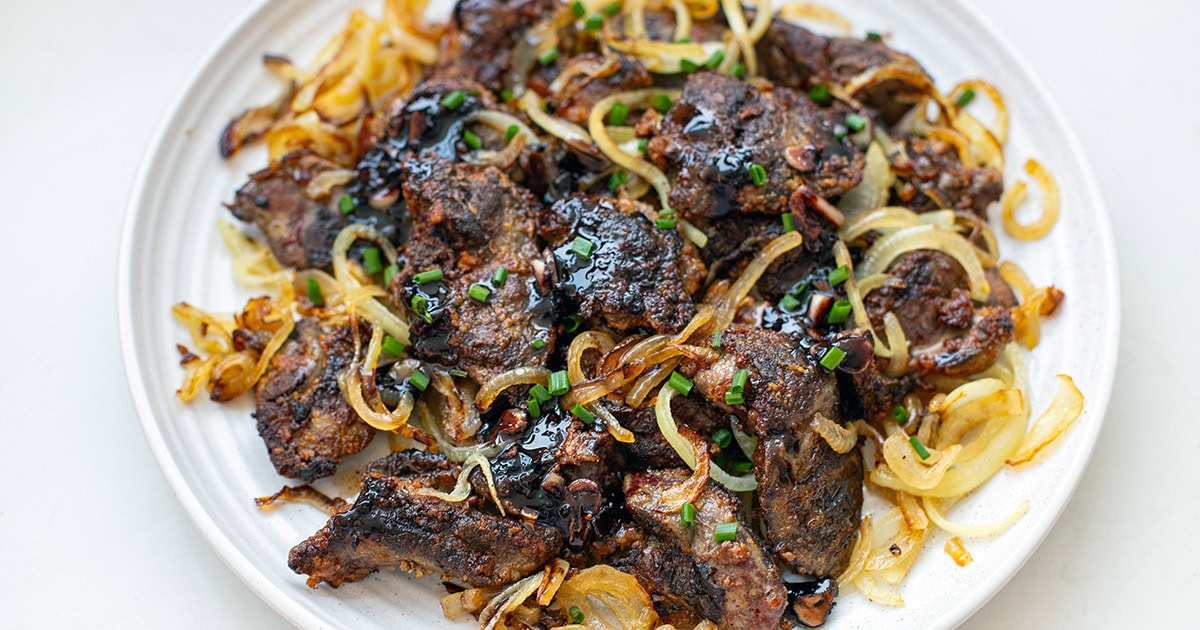
  • Chicken Livers and Onions

    Chicken Livers and Onions

    Pan-fried chicken livers and onions with a sweet and tangy balsamic wine glaze. A simple, nutritious, and surprisingly delicious dinner worth trying.


    Jump to: ℹ️ Overview | 🛒 Ingredients | 📷 How To Make | 📹 Watch The Video | 👩‍🍳 Recipe Tips | 🥗 Serving Suggestions | 📝 Full Recipe Card | 🍽 More Healthy Chicken Recipes


    If you’ve never been big on liver, this is the recipe that might change your mind. This is probably my favorite way to cook chicken livers, and they always come out creamy in the center with a little crispy edge — exactly how they should be.

    The sweet, sautéed onions and the balsamic wine glaze balance the savory, lightly gamey flavor so perfectly that even my partner — who’s definitely not a liver fan — said this dish was delicious.

    Chicken liver is budget-friendly and nutrient-packed (hello, iron and B vitamins!), and this dish comes together in about 30 minutes. Serve it over buttery mash or crunchy toast, and you’ve got yourself an old-school comfort meal that feels a little fancy.

    👩‍🍳 You might also want to check out these liver recipes: Asian-style chicken livers, chicken liver skewers, or beef liver recipes. Learn more about the liver benefits here.

    What You’ll Need

    Here is what you’ll need for this chicken livers and onions recipe. Find the full measurements in the recipe card below.

    • Chicken Livers — the star of the dish, rich in nutrients; I used fresh, but you can thaw out frozen livers. Newbie tip: While chicken livers might look slimy due to their shiny appearance, they are actually quite firm and easy to work with. They feel better than they look.
    • Milk or lemon water — for soaking chicken livers to mellow flavor and tenderize.
    • Plain flour — for a light, crispy crust, can be swapped with gluten-free flour, cornstarch, or tapioca flour.
    • Spices: garlic powder, onion powder, smoked paprika — for savory depth, and salt and pepper for seasoning.
    • Onions — yellow or white onion—sliced thin for caramelized sweetness.
    • Olive oil — for sautéing and frying.
    • For the Glaze: Red wine—adds acidity and richness, garlic for aromatic kick, butter (makes the glaze velvety), aged or regular balsamic vinegar for that tangy-sweet finish, and a little honey to balance out acidity. Red wine can be swapped with chicken broth.

    How To Cook Chicken Livers & Onions

    Find the full recipe and nutritional information below. Here are some handy step-by-step photos for how to make pan-fried chicken livers and onions.

    • Rinse and trim chicken livers; remove some of the visible connective tissue. I like to cut them into 1-inch pieces. Soak in milk 10 minutes, then pat dry. Soaking helps to mellow out the flavor and tenderize the livers.
    • Slice onions and onions until golden, set aside.
    • Season chicken livers with salt, spices, and coat with flour.
    • Heat oil in another pan; cook livers in batches over high heat — about 3 minutes per side, until crispy and golden. Don’t overcook as they can get gritty and rubbery.
    • Remove livers; deglaze the pan with red wine and add butter, garlic, balsamic, and honey. Stir and bring to a simmer, allowing to bubble and caramelize slightly.
    • When it starts to look glossy and thick, return livers and onions, or serve them topped with the glaze.
    • Eat while hot, although I’ve enjoyed snacking on them cold out of the fridge.

    Watch The Video

    Recipe Tips

    • Don’t overcrowd: Cook livers in batches so they brown, not steam. Leave enough space between livers.
    • Use high to medium-high heat: For that lovely crust outside.
    • Soak in milk: It really helps mellow the strong flavor.
    • Try variations: Add crispy bacon, mushrooms, or a splash of cream to the glaze.
    • Test doneness: Cut into the thickest piece—it should be a little pink and creamy.
    • Storage tips: Store leftovers in an airtight container in the fridge for up to 3 days. Reheat gently in a skillet. I don’t recommend freezing—they’ll turn grainy.
    • Make-ahead tips: You can soak and prep the livers (trimmed and coated) a few hours ahead. Keep them in the fridge until ready to cook. Onions can be sautéed in advance and reheated.

    Serving Suggestions

    I love these with my sour cream mashed potatoes or thick slices of crusty bread to mop up all that glaze. They’re also great alongside creamy green beans or a simple cheesy leafy green salad for freshness.

    💬 If you’ve tried this chicken livers and onions or any other recipe on the blog then don’t forget to rate the recipe and let me know how you got on in the comments below, I love hearing from you! You can also FOLLOW ME on Instagram, Facebook, Pinterest, YouTube, and or sign up to my Newsletter to see more of my delicious food.

    Want to Save This Recipe?

    Enter your email & I’ll send it to your inbox. Plus, get great new recipes from me every week!

    By submitting this form, you consent to receive emails from Cooked & Loved

    Pan-fried chicken livers and onions with a sweet and tangy balsamic wine glaze. A simple, nutritious and surprisingly delicious dinner worth trying. Find step-by-step photos and more recipe tips above.

    • Rinse chicken livers if you like. Trim off fat or any green bits. Cut larger pieces in half.

    • Soak in milk for 10 minutes. Drain and pat dry well.

    • While soaking, cook onions: heat 1 tablespoon oil in a skillet, sauté onions with salt for 5–8 minutes until golden. Set aside.

    • Season livers with salt, garlic powder, onion powder, and smoked paprika. Sprinkle with flour and toss to coat evenly.

    • Heat 2 tablespoons olive oil over high heat. Add livers in batches — don’t crowd the pan. Cook about 3 minutes, flip, and cook 2–3 minutes more until browned outside and creamy inside. Transfer to a plate.

    • Deglaze pan with red wine, scraping up browned bits. Add butter, garlic, balsamic, and honey. Simmer 30 seconds until slightly thickened.

    • Serve livers with onions and drizzle glaze over the top (or toss everything in the pan to coat).

    • Enjoy hot (or cold).

    • Newbie tip: While chicken livers might look slimy due to their shiny appearance, they are actually quite firm and easy to work with. They feel better than they look.
    • How do I know when chicken livers are cooked? They should be browned on the outside and a little pink and creamy inside. Overcooked livers turn grainy and dry.
    • Can I skip the milk soak? Technically, yes—but soaking helps mellow the stronger flavor and tenderize them.
    • What if I don’t want to use wine? Use chicken or beef broth instead. The glaze will still be delicious.
    • Are chicken livers good for you? Definitely! They’re one of the most nutrient-dense foods — high in iron, vitamin A, and B vitamins. Check out these 50 nutrient-dense foods.
    • Can I freeze cooked chicken livers? I don’t recommend it; the texture suffers. It’s best eaten fresh or reheated within a day or two.
    • Don’t Overcrowd: Cook livers in batches so they brown, not steam. Leave enough space between livers.
    • Use High to Medium-High Heat: For that lovely crust outside.
    • Try Variations: Add crispy bacon, mushrooms, or a splash of cream to the glaze.
    • Test Doneness: Cut into the thickest piece—it should be a little pink and creamy.
    • Storage tips: Store leftovers in an airtight container in the fridge for up to 3 days. Reheat gently in a skillet. I don’t recommend freezing—they’ll turn grainy.
    • Make-ahead Tips: You can soak and prep the livers (trimmed and coated) a few hours ahead. Keep them in the fridge until ready to cook. Onions can be sautéed in advance and reheated.

    Calories: 344kcal | Carbohydrates: 16g | Protein: 22g | Fat: 20g | Saturated Fat: 6g | Polyunsaturated Fat: 3g | Monounsaturated Fat: 10g | Trans Fat: 0.2g | Cholesterol: 402mg | Sodium: 652mg | Potassium: 410mg | Fiber: 1g | Sugar: 6g | Vitamin A: 12946IU | Vitamin C: 23mg | Calcium: 63mg | Iron: 11mg

    Keywords: chicken livers and onions, balsamic-glazed chicken livers, chicken livers with onions, pan-fried chicken livers

    More Healthy Chicken Recipes


    Source link

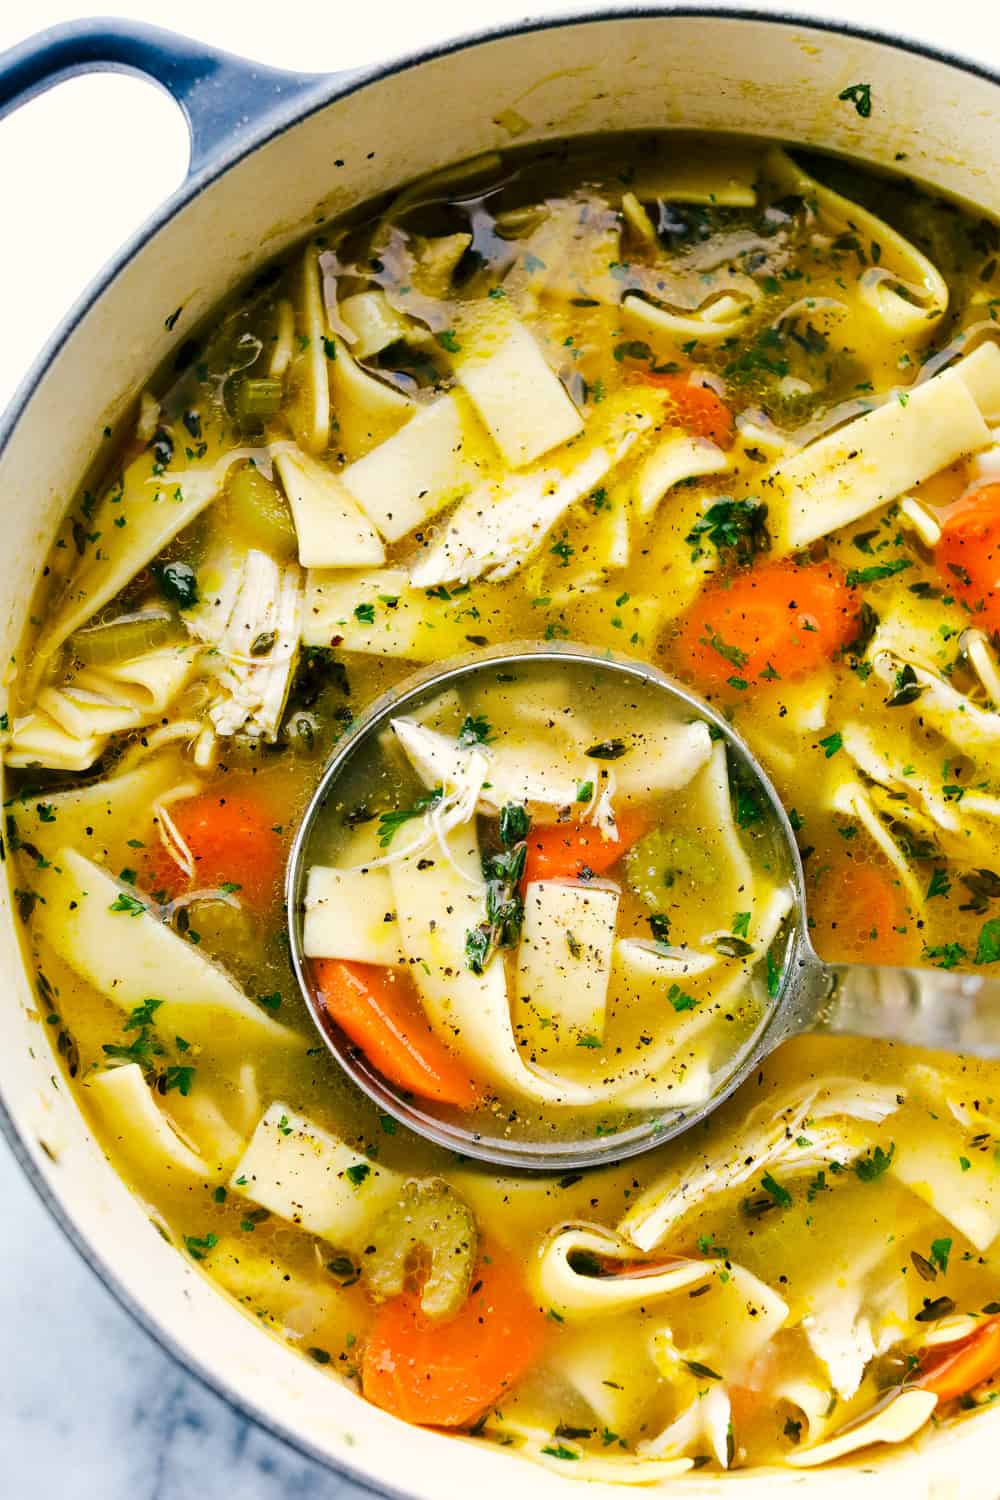
  • The Best Chicken Noodle Soup Recipe

    The Best Chicken Noodle Soup Recipe

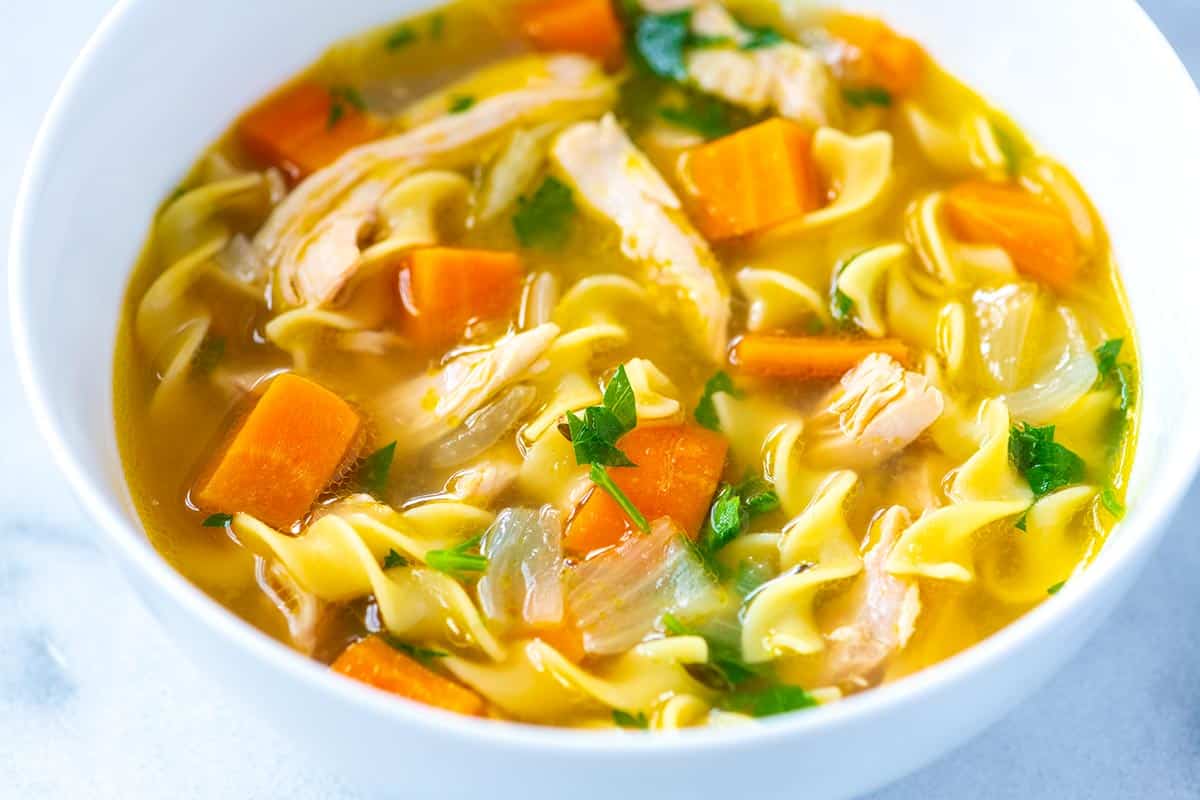
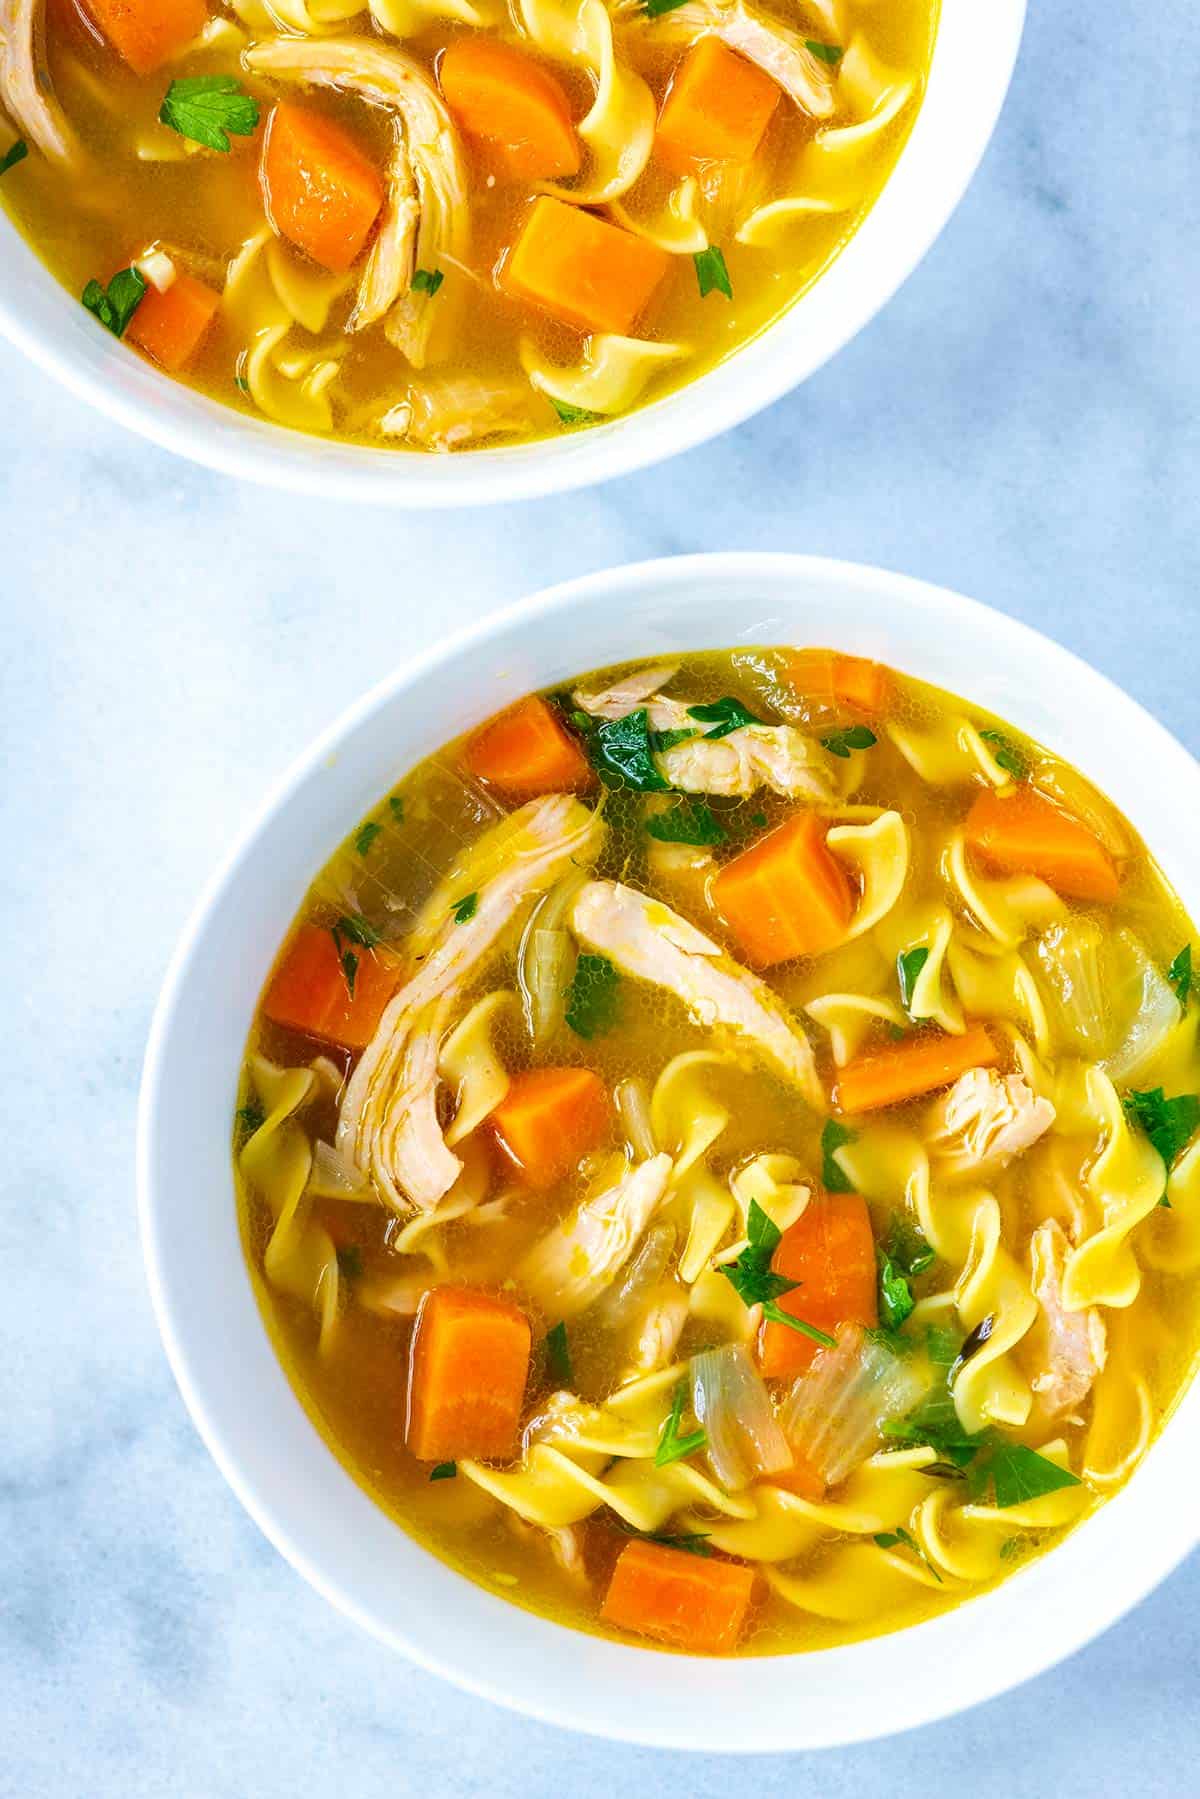
    Our easy homemade chicken noodle soup recipe has tender chicken, fresh veggies, and the most delicious broth that tastes like it’s been cooking for hours.

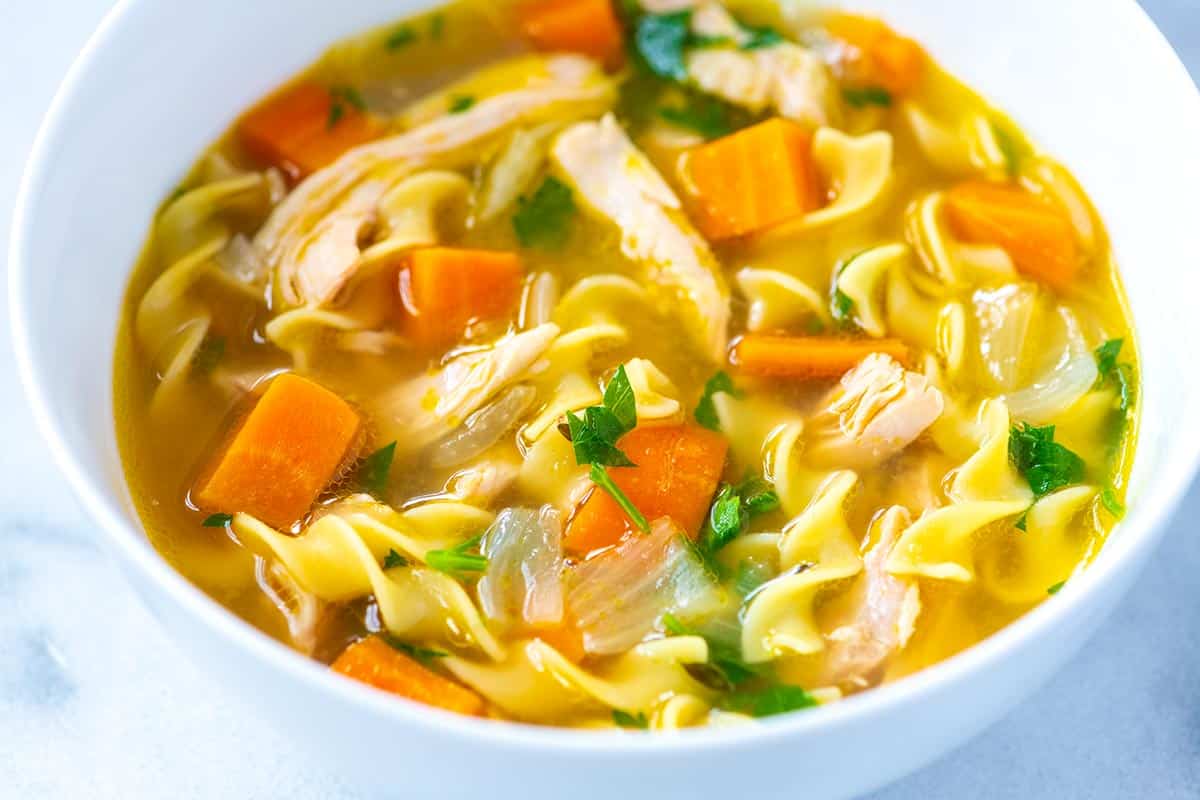
    Homemade chicken noodle soup

    This homemade chicken noodle soup makes me smile just thinking about it! Our family has been making this for years! Not to mention it’s my go-to soup whenever it’s chilly or someone is sick.

    It tastes way better than store-bought and it’s fast! The secret is chicken thighs! They guarantee a ridiculously flavorful broth that’s ready in under 40 minutes, with most of the time being hands-off. For a creamier soup, I highly recommend this incredible creamy chicken noodle soup. For another classic chicken recipe, see this chicken pot pie.

    Key Ingredients

    • Chicken Thighs: My secret for the best soup! Chicken thighs get super soft and delicious. You can make this soup with a whole chicken, but usually I don’t have time for that, so chicken thighs are my answer. They have a little fat, add lots of flavor, and stay tender.
    • Chicken Stock: I highly recommend homemade chicken stock or chicken broth, but store-bought works! When shopping for stock, darker broth or bouillon usually means more flavor. I also love boxed bone broths (or you can make bone broth).
    • Egg Noodles: I love them, but you can always substitute your favorite pasta. I’ve even swapped the noodles for tortellini like in our veggie tortellini soup!
    • Veggies: I keep this soup simple with onion, celery, carrots, and garlic. Feel free to add more, but these four will get you to that classic chicken soup flavor. When I have them in the fridge, I often stir in a few handfuls of fresh spinach or kale leaves.
    • ThymeBay Leaves, and Parsley: These add a little backbone to the broth. I love fresh thyme and parsley, and then use dried bay leaves. For more of a herby soup, stir in chopped mint, basil, cilantro, or a combination just before serving.

    Find the full recipe with measurements below.

    How to Make the Best Chicken Noodle Soup

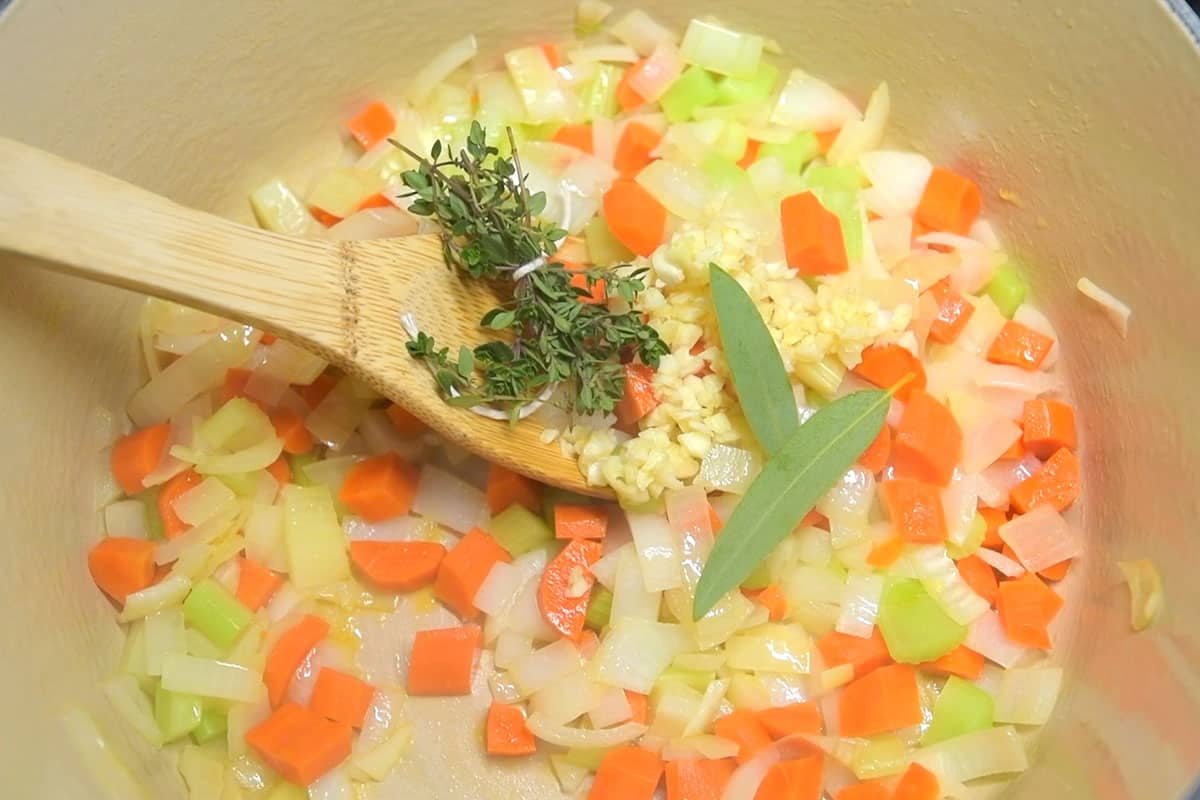
    Tip 1: Start your vegetables in butter. For the best flavor, I always sauté my vegetables in butter before adding any broth. You’re not really looking to brown them, just soften them a bit and cook off that raw onion and garlic flavor. If you have rendered chicken fat (schmaltz) on hand, use it instead of butter for even more flavor.

    Step for making chicken noodle soup - cooking onion, carrot and celery in a pot

    Tip 2: Taste your broth early. Once you add the broth to your softened vegetables, taste it. Store-bought broths can be light on flavor, so seasoning early helps you build a more flavorful broth. Add a little salt now, then continue adjusting as the soup cooks. This simple step separates an okay soup from one that tastes truly great.

    Tip 3: Gently poach the chicken thighs. Here’s why I love using chicken thighs for this soup. They fit nicely in the pot, cook through in about 20 minutes, and release lots of flavor into the broth as they simmer. They are easy to shred, too, which is why I also use them to make our favorite shredded chicken.

    Adding chicken thighs to broth for chicken noodle soup

    Tip 4: Add the noodles last. To keep your noodles from turning mushy, add them about 10 minutes before serving. I like cooking them directly in the soup so they soak up all that delicious chicken flavor. They also release just a little starch into the broth, giving the soup a lovely, silky texture.

    Adding noodles to a soup pot

    Tip 5: Don’t be shy with seasoning. Before serving, taste your chicken soup one last time. If it doesn’t make you smile, it probably needs a touch more salt, or a little something extra. A few dashes of fish sauce (my secret weapon) work wonders in this soup. Or brighten things up with a squeeze of lemon juice or a dash of hot sauce.

    A pot of homemade chicken noodle soup

    Recipe Variations

    Use rotisserie chicken: For an even faster chicken soup, skip poaching and stir in shredded rotisserie chicken or leftover roast chicken toward the end of cooking. It’s a great shortcut for busy nights and still adds plenty of flavor.

    Add extra vegetables: Make this soup even more nutritious and hearty by adding extra veggies. Mushrooms, spinach, kale, peas, and corn all work beautifully. Cook heartier vegetables like mushrooms with the onions and garlic, then add the quicker-cooking ones toward the end so they stay bright and tender.

    Make it creamy: Stir in a splash of cream or half-and-half at the end, just like we do in our creamy chicken noodle soup. It gives the broth a silky texture and makes it more luxurious.

    Substitute the noodles: Try swapping them for another pasta shape, or even broken spaghetti. For a lighter, low-carb option, use spiralized zucchini or spaghetti squash strands. Or make it more filling with cooked rice, quinoa, or barley instead of noodles.

    More Favorite Soup Recipes

    Easy Chicken Noodle Soup

    The Best Chicken Noodle Soup

    • PREP
    • COOK
    • TOTAL

    You will love this homemade chicken noodle soup, which skips cooking a whole chicken and calls on boneless, skinless chicken thighs instead. The soup tastes incredible, satisfying, and classic, and the significantly reduced cooking time makes it perfect for a weeknight. If you love creamy soups, take a look at this creamy chicken noodle soup, which uses the same base recipe as this one.

    6 Servings

    Watch Us Make the Recipe

    You Will Need

    1 pound skinless, boneless chicken thighs, 4 to 5 thighs (450g)

    5 ounces egg noodles or pasta of choice (140g)

    2 tablespoons butter, chicken fat, or olive oil (28g)

    1 large onion, chopped

    2 large carrots, chopped

    2 ribs celery, chopped, optional

    1 heaped tablespoon minced garlic, 4 cloves

    2 bay leaves

    3 sprigs fresh thyme or use 1/2 teaspoon dried thyme

    8 cups chicken stock or broth, low sodium, or use homemade stock (1.89L)

    Salt and pepper, to taste

    1/4 cup fresh parsley, finely chopped

    Directions

      1Cook the vegetables: Melt the butter in a large pot or Dutch oven over medium heat. Add the diced onions, carrots, and celery, and cook, stirring every few minutes, until the onions turn translucent and the vegetables begin to soften, about 5 to 6 minutes.

      2Stir in the garlic, bay leaves, and thyme, and cook for another minute until the garlic smells fragrant.

      3Add the broth: Pour in the chicken stock and bring the soup to a gentle simmer (you should see small bubbles breaking on the surface). Taste the broth and adjust with salt and pepper as needed. Depending on your stock, you may need to add a teaspoon or more of salt to build a rich, flavorful broth.

      4Poach the chicken thighs: Nestle the chicken thighs into the pot so they’re fully submerged in the broth. Bring the soup back to a low simmer, then partially cover the pot, leaving a small gap for steam to escape.

      5Cook, stirring occasionally, until the chicken is cooked through and tender, about 20 minutes. Transfer the chicken to a plate. If the broth reduces too much, add a splash of stock or water and lower the heat to medium-low.

      6Add the noodles: Stir the noodles into the simmering soup and cook until tender, about 6 to 10 minutes, depending on the type of noodles you’re using (check the cook time on the package).

      7Shred the chicken: While the noodles cook, shred the chicken into bite-size pieces using two forks (or dice it into cubes if you prefer).

      8Finish the soup: Return the shredded chicken to the pot and taste again for seasoning. Add more salt and pepper if needed. Stir in fresh parsley, then ladle your chicken soup into bowls and enjoy!

    Adam and Joanne’s Tips

    • Storing: Refrigerate chicken noodle soup in an airtight container for 3 to 4 days. Or freeze for up to 3 months. As the soup sits, the noodles soak up the broth. When you reheat, add a splash of extra broth or water.
    • Make ahead: Follow the recipe above, but do not add the noodles. Refrigerate or freeze the soup. When ready to reheat, bring the soup to a low simmer and add the dried noodles. Cook until they are done, and enjoy.
    • Seasoning: If you feel the soup is missing some zing, add a bit more salt. You can also add a pop of flavor with a squeeze of fresh lemon juice, a dash of fish sauce (we use this trick for store-bought stocks and broths often) or Worcestershire sauce.
    • Using rotisserie chicken: Add two to three cups of shredded or diced cooked chicken to the soup when you add the dried noodles and reduce the simmer time by 10 minutes. (I also love using leftover roasted chicken!)
    • The nutrition facts provided below are estimates.

    Nutrition Per Serving
    Serving Size
    1/6 of the recipe
    /
    Calories
    298
    /
    Total Fat
    11.4g
    /
    Saturated Fat
    4.4g
    /
    Cholesterol
    97.7mg
    /
    Sodium
    748.7mg
    /
    Carbohydrate
    22.9g
    /
    Dietary Fiber
    1.7g
    /
    Total Sugars
    7.5g
    /
    Protein
    24.8g


    AUTHOR:

    Joanne Gallagher

    Source link

  • BBQ Chicken Pineapple Skewers

    BBQ Chicken Pineapple Skewers

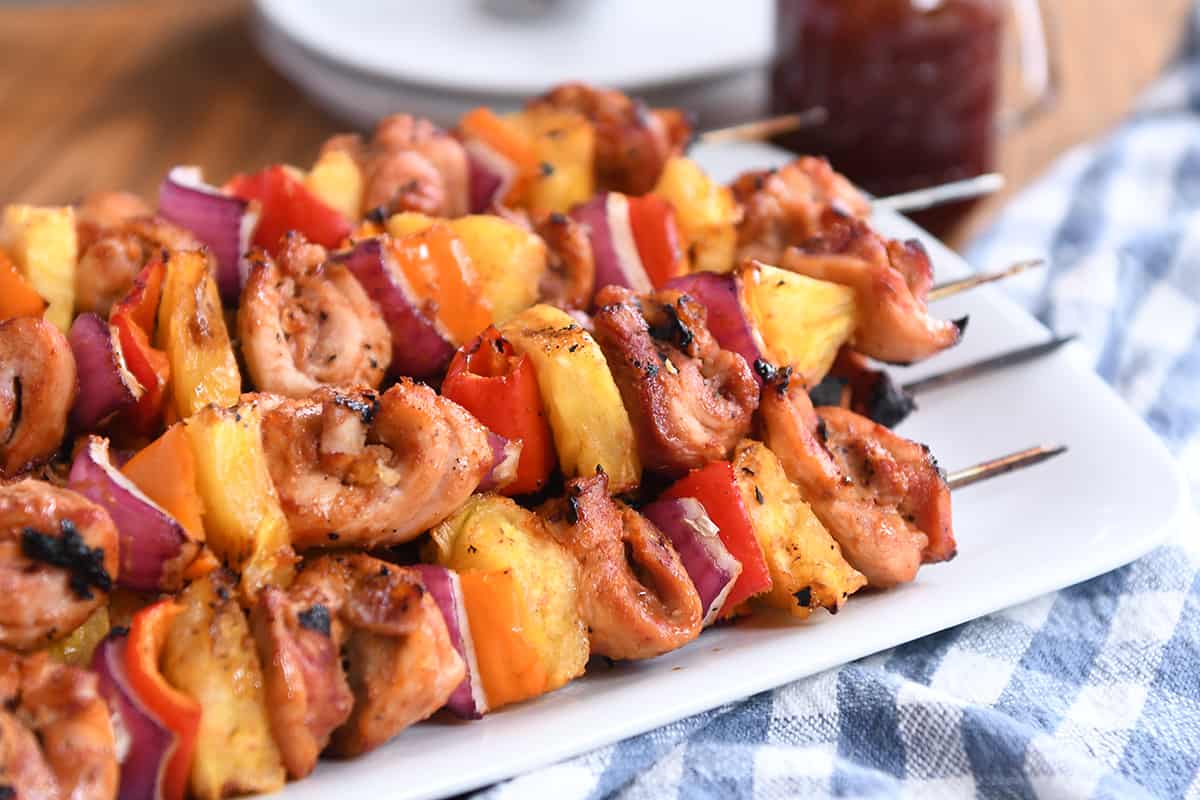
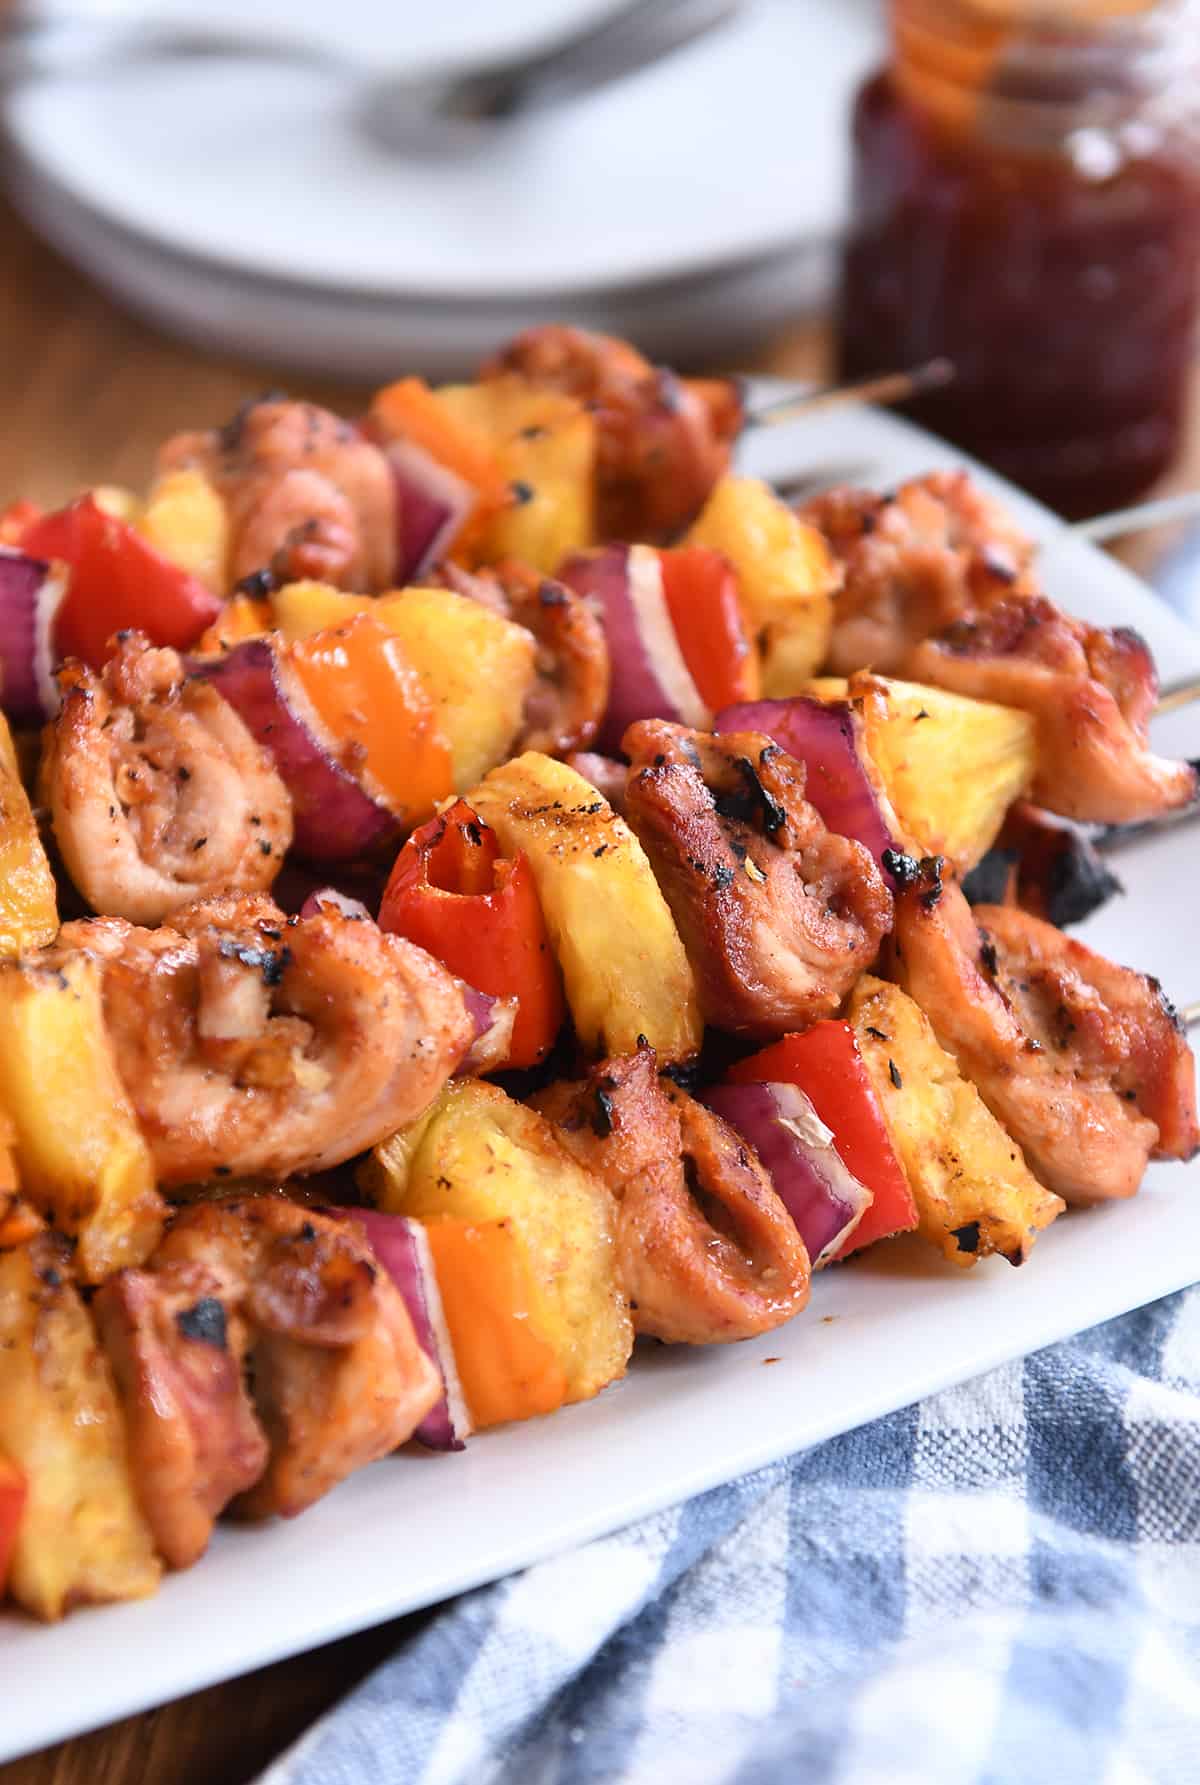
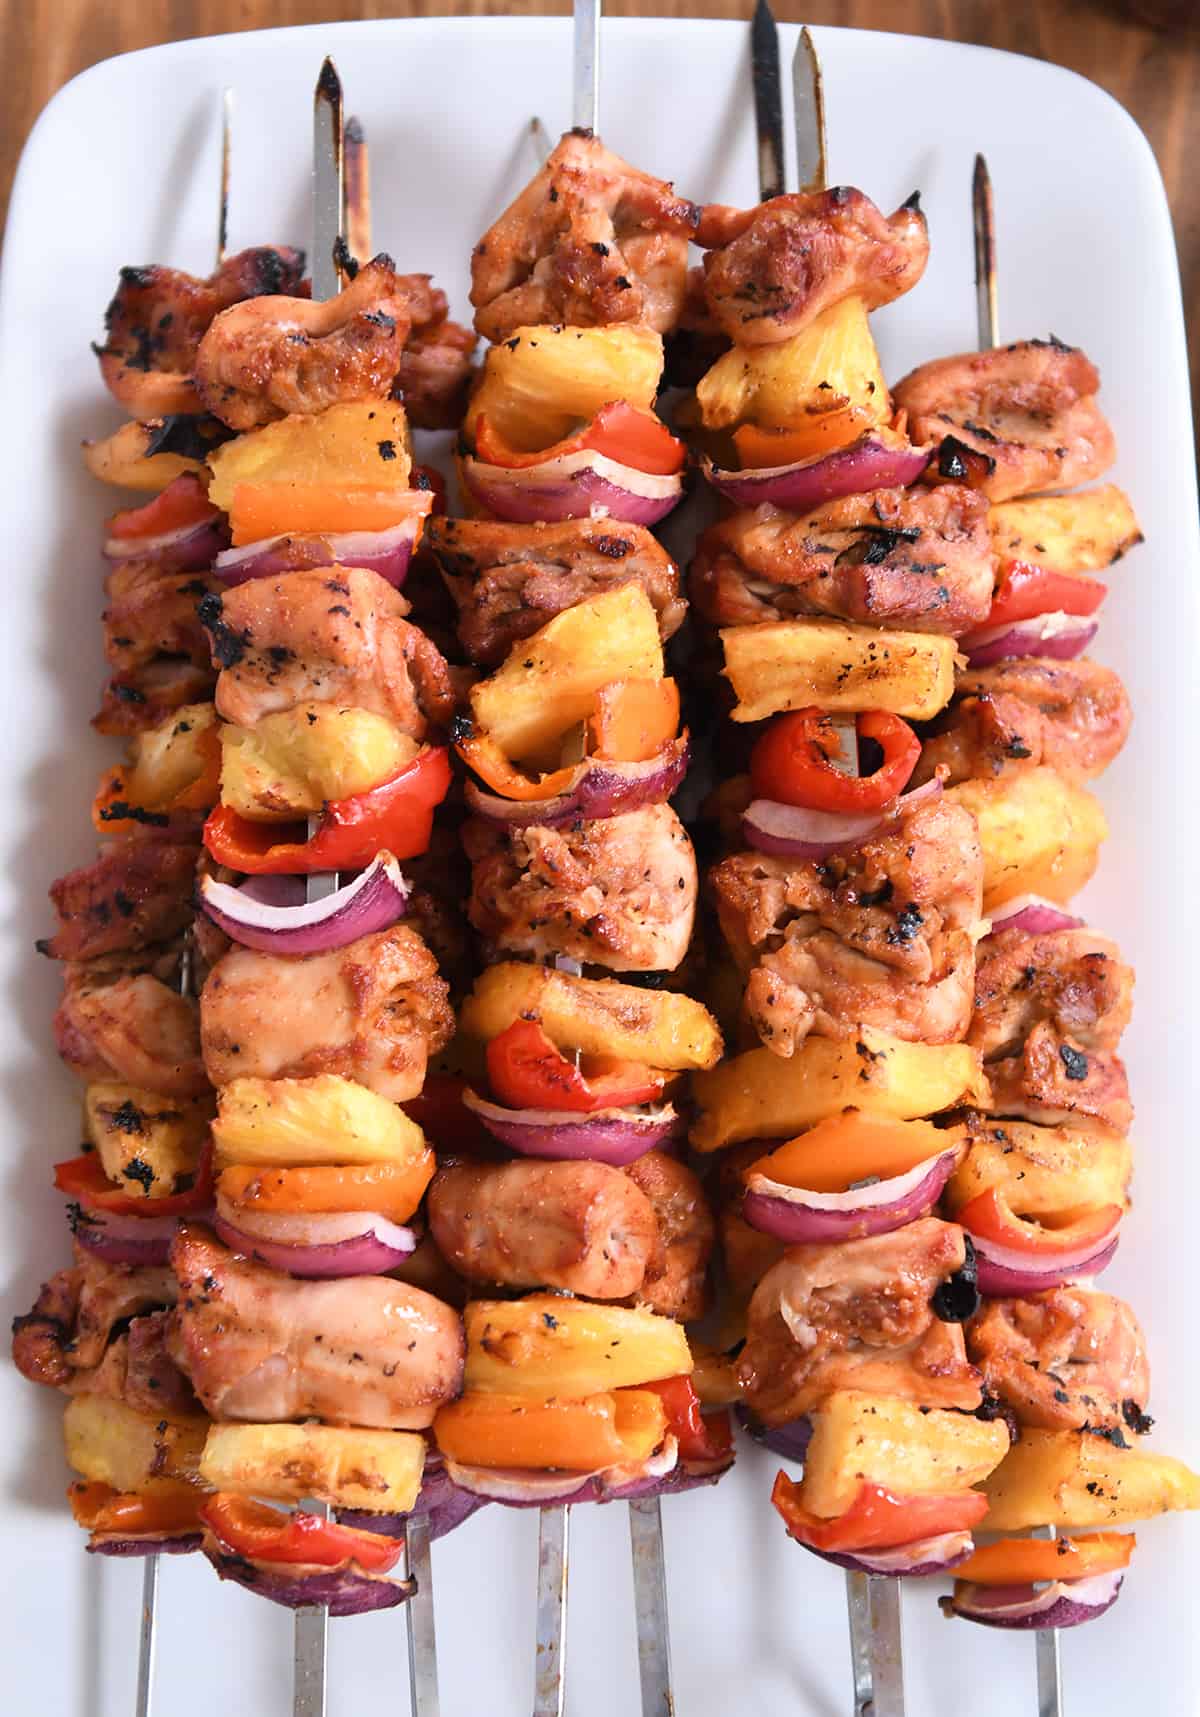
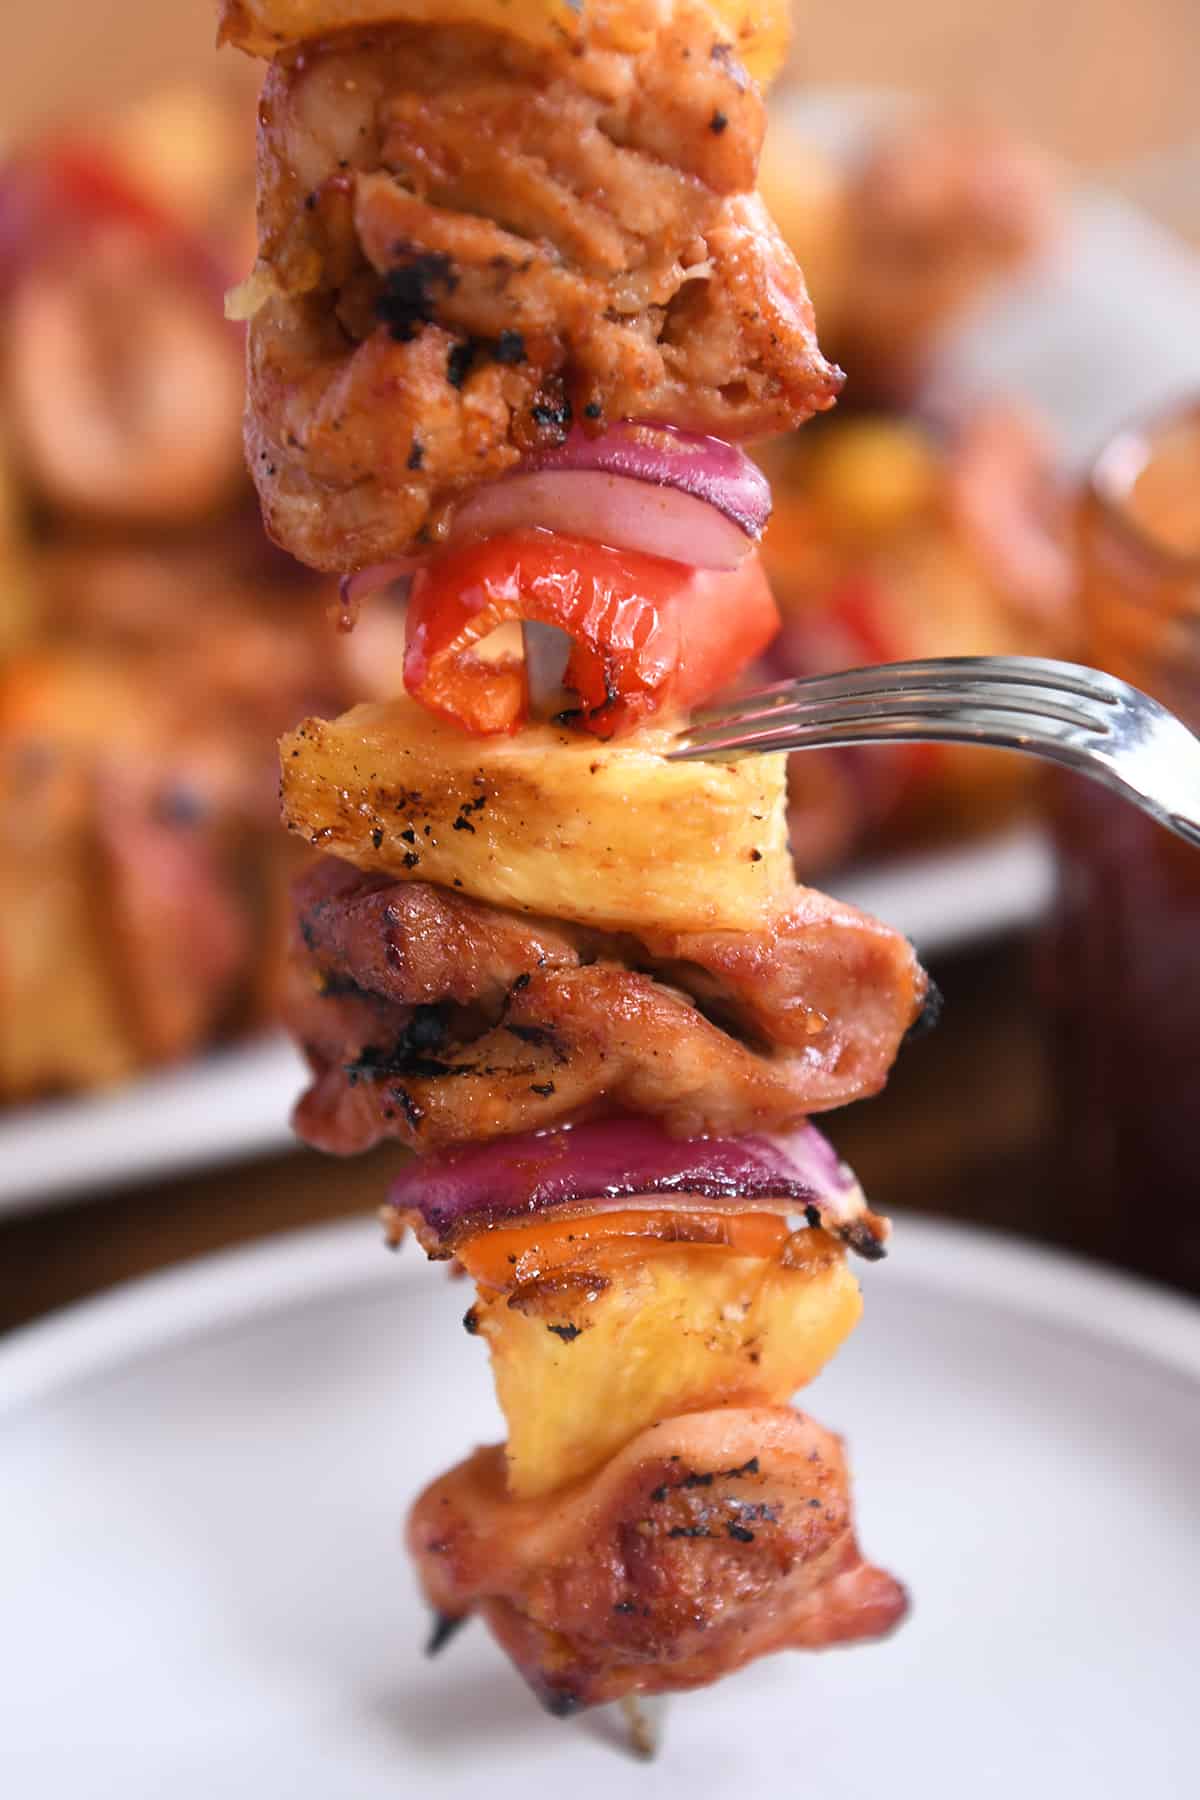
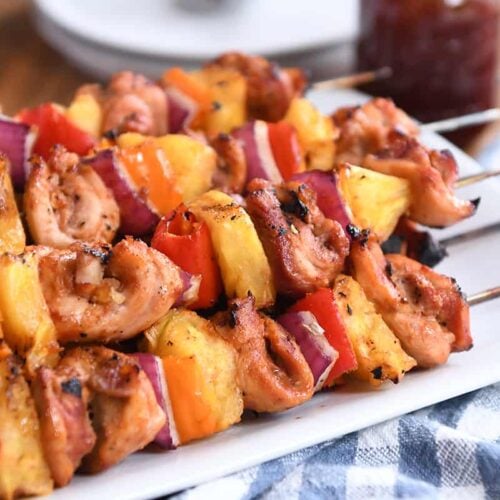
    These easy BBQ chicken pineapple skewers are fantastic! Moist, flavorful chicken pieces next to the sweet, juicy pineapple make it the perfect summer meal.

    Not only are these tasty little BBQ chicken pineapple skewers perfect for a summer holiday cookout, but they are excellent (and easy enough) for a refreshing weeknight dinner. My family goes crazy for them!

    A Simple Marinade

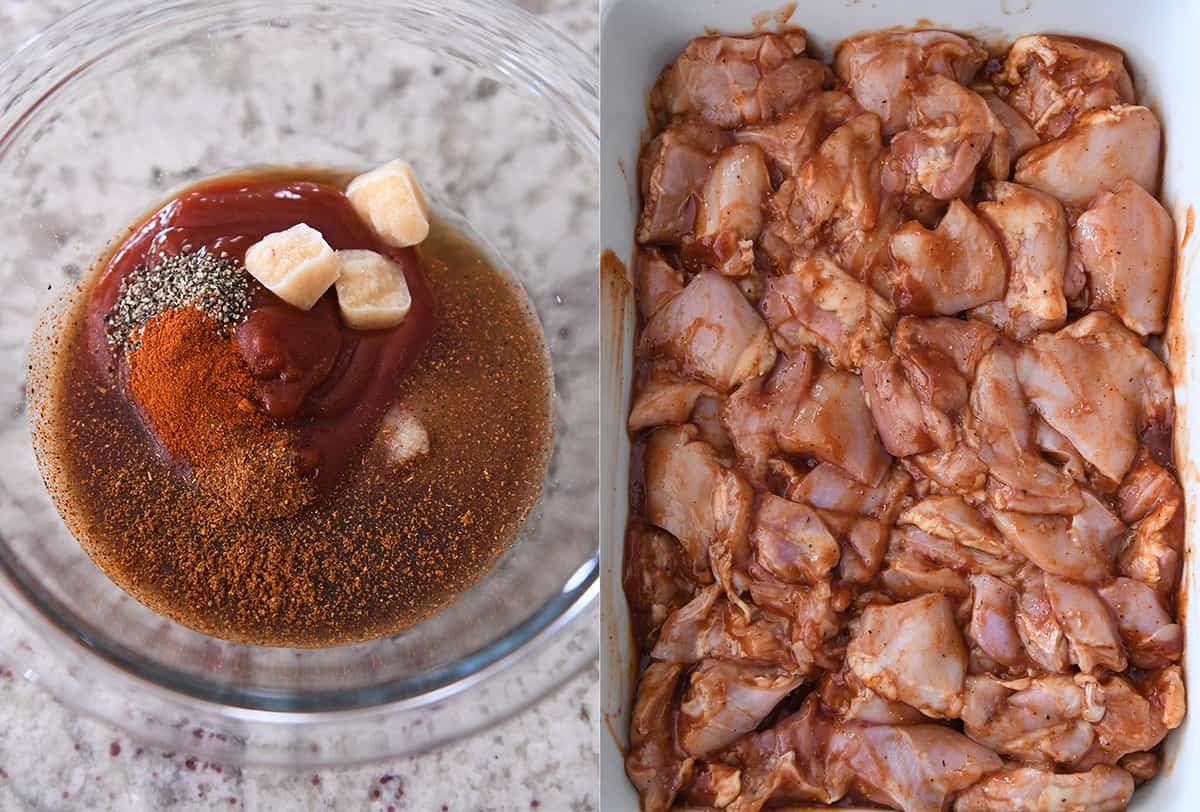
    The secret to these easy BBQ skewers is the marinade. It is zesty and flavorful!

    • ketchup
    • honey
    • vinegar
    • worcestershire sauce
    • garlic
    • paprika + chili powder + salt + pepper

    The frozen cubes in the bowl of marinade below is frozen garlic (courtesy of Trader Joe’s – one of my favorite things to buy there and gives all the fresh garlic flavor without any fuss).

    Marinade the chicken pieces for at least two hours but up to 24 hours.

    Chicken Breasts vs Chicken Thighs

    For these skewers, I definitely think chicken thighs are just a touch better, but I’ve made them with both cuts of meat, and you can’t go wrong with either.

    If using chicken breasts, take care not to over cook the skewers. The small pieces of meat will cook pretty quickly!

    One of the great advantages to using chicken thighs is that they they don’t dry out like chicken breasts (unless vastly overcooked). Don’t be that person. 😉

    To be honest, while I can appreciate that many people consider thighs to be the superior cut of chicken to use, and I also enjoy the flavor and juiciness, I only use them occasionally because I don’t love the fat-trimming process. Even pre-trimmed chicken thighs get an extra trimming in my kitchen.

    Whichever cut of chicken you choose, the results will be spectacular if you keep an eye on the cooking time!

    Grilling/Cooking Options

    I exclusively use a pellet smoker/grill for all my grilling. For this recipe, I cook the skewers at 375 degrees F for a few minutes on each side.

    A regular propane or charcoal grill will work just fine, too.

    If you don’t have a grill, try broiling the skewers on a foil-lined and greased baking sheet for 3 to 4 minutes per side (watch closely).

    I think the chicken, pineapple, pepper and onion pieces could also get tossed into an air fryer (sans the skewer) and cooked that way, too. It’s a very forgiving recipe!

    There are few things I love in this life more than grilled pineapple, and while the flavorful, tender chicken is very, very good, it’s the juicy, caramelized pineapple that really gets me.

    To be sure, the entire combination of zesty BBQ flavors, sweet/juicy pineapple, and crisp-tender veggies is an absolute winner.

    We love these skewers and make them all the time. They are way too good to relegate to holiday BBQ’s and cookouts only!

    One Year Ago: Cheesy Zucchini Spaghetti Casserole 
    Two Years Ago: My Favorite Chicken Salad 
    Three Years Ago: Jalapeño Cheddar Turkey Burgers 
    Four Years Ago: Crazy Good Korean Beef Tacos with Quick Slaw and The Sauce to End All Sauces
    Five Years Ago: Steak Fajitas with Chipotle Sour Cream
    Six Years Ago: The Best Zucchini Muffins {Whole Grain}
    Seven Years Ago: BBQ Chicken Salad Cilantro Lime Rice Bowls
    Eight Years Ago: Skillet Turkey Meatballs with Lemon Rice
    Nine Years Ago: Brookies {Brownie + Chocolate Chip Cookies} 
    Ten Years Ago: Brazilian Lemonade

    BBQ Chicken Pineapple Skewers

    • cup (180 g) ketchup
    • 1 tablespoon honey
    • 1 tablespoon rice vinegar or apple cider vinegar
    • 1 tablespoon Worcestershire sauce
    • 1 tablespoon garlic, finely minced (or 1 1/2 teaspoons garlic powder)
    • ½ teaspoon sweet or smoked paprika
    • ½ teaspoon coarse, kosher salt
    • ¼ teaspoon chili powder
    • ¼ teaspoon black pepper
    • 1 ½ to 2 pounds boneless skinless chicken breasts or chicken thighs cut into 1 1/2-inch pieces
    • 1 medium pineapple
    • 2 medium bell peppers, any color
    • 1 medium red onion

    Prevent your screen from going dark

    • In a medium bowl, whisk together the ketchup, honey, vinegar, Worcestershire sauce, garlic, paprika, salt, chili powder and black pepper.

    • Place chicken pieces in gallon-size resealable bag or shallow dish. Pour the marinade over the chicken and toss to coat evenly. Seal the bag or cover the dish and refrigerate for 2 to 24 hours.

    • Preheat a pellet grill or regular grill to medium/medium-high heat.

    • Cut the pineapple, peppers and onions into 1 to 1/2-inch pieces.

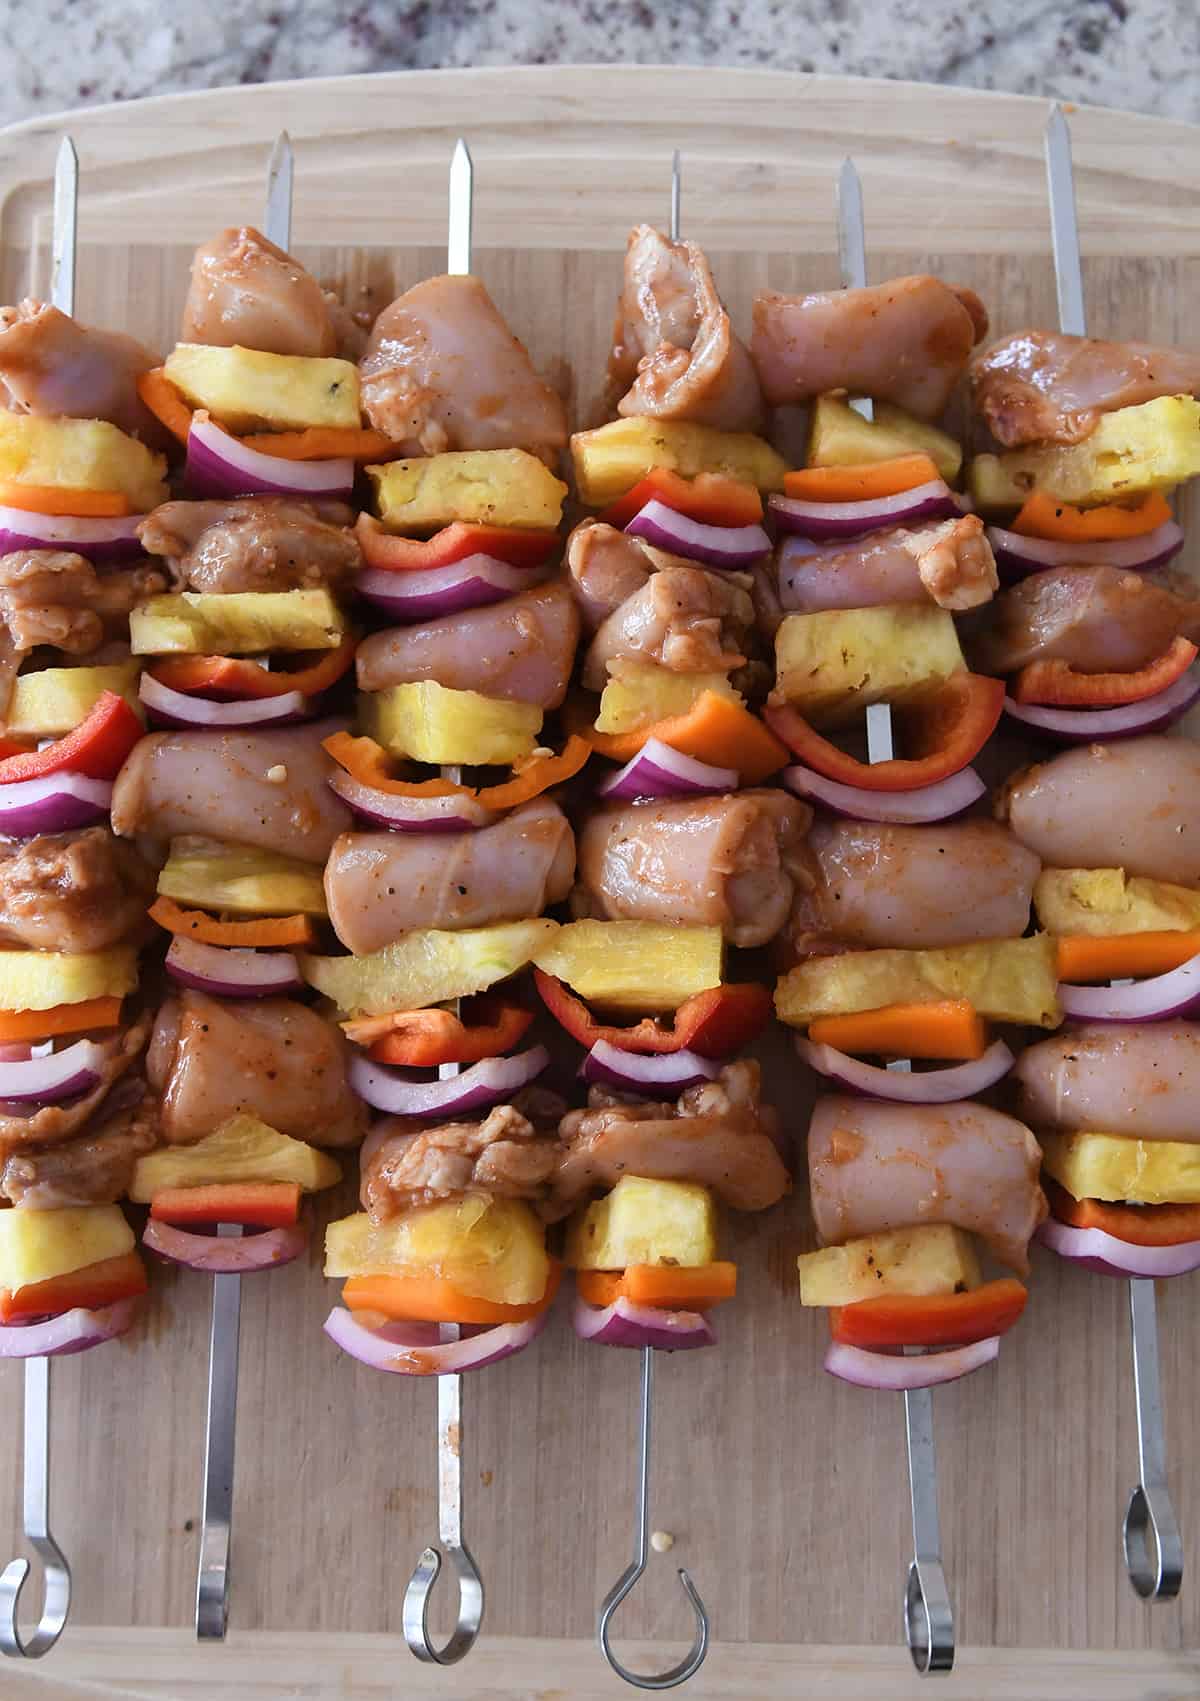
    • Thread the chicken, pineapple, peppers and onions onto skewers. The order doesn’t necessarily matter, but I thread as follows: onion, pepper, pineapple chicken (repeated about 4 times for 12-inch skewers). If any of the chicken pieces are really long, fold them in half before threading onto the skewer.

    • Grill the skewers, flipping once, until the chicken is cooked through, about 4 to 5 minutes per side for chicken breasts and 6 to 7 minutes per side for chicken thighs. Serve immediately.

    Pineapple: depending on the size of the pineapple, you may have some leftover so take care to keep it uncontaminated during the threading process (with the raw chicken); the leftover fresh pineapple can be served alongside the grilled skewers, if desired. I haven’t tried this recipe with canned pineapple chunks but I’m guessing they should work ok if you don’t have fresh pineapple.
    Veggies + Onions: the bell peppers and onions add great flavor (plus they are really delicious grilled), however, they can be left off, if desired. 
    Chicken: the chicken marinade is really tasty and would also be delicious for whole grilled chicken breasts or thighs. 

    Serving: 2 skewers, Calories: 388kcal, Carbohydrates: 50g, Protein: 39g, Fat: 5g, Saturated Fat: 1g, Cholesterol: 109mg, Sodium: 824mg, Fiber: 5g, Sugar: 37g

    Disclaimer: I am a participant in the Amazon Services LLC Associates Program, an affiliate advertising program designed to provide a means for me to earn fees by linking to Amazon.com and affiliated sites. As an Amazon Associate I earn from qualifying purchases.
    Source link

  • Cheesy Chicken Fritters – All Day I Dream About Food

    Cheesy Chicken Fritters – All Day I Dream About Food

    These easy Chicken Fritters are crispy on the outside, tender on the inside, and packed with savory flavor. Made with keto-friendly ingredients, they come together quickly for a delicious low carb meal or appetizer. Perfect for meal prep or dipping in your favorite sauces, these fritters will be a hit with the whole family!

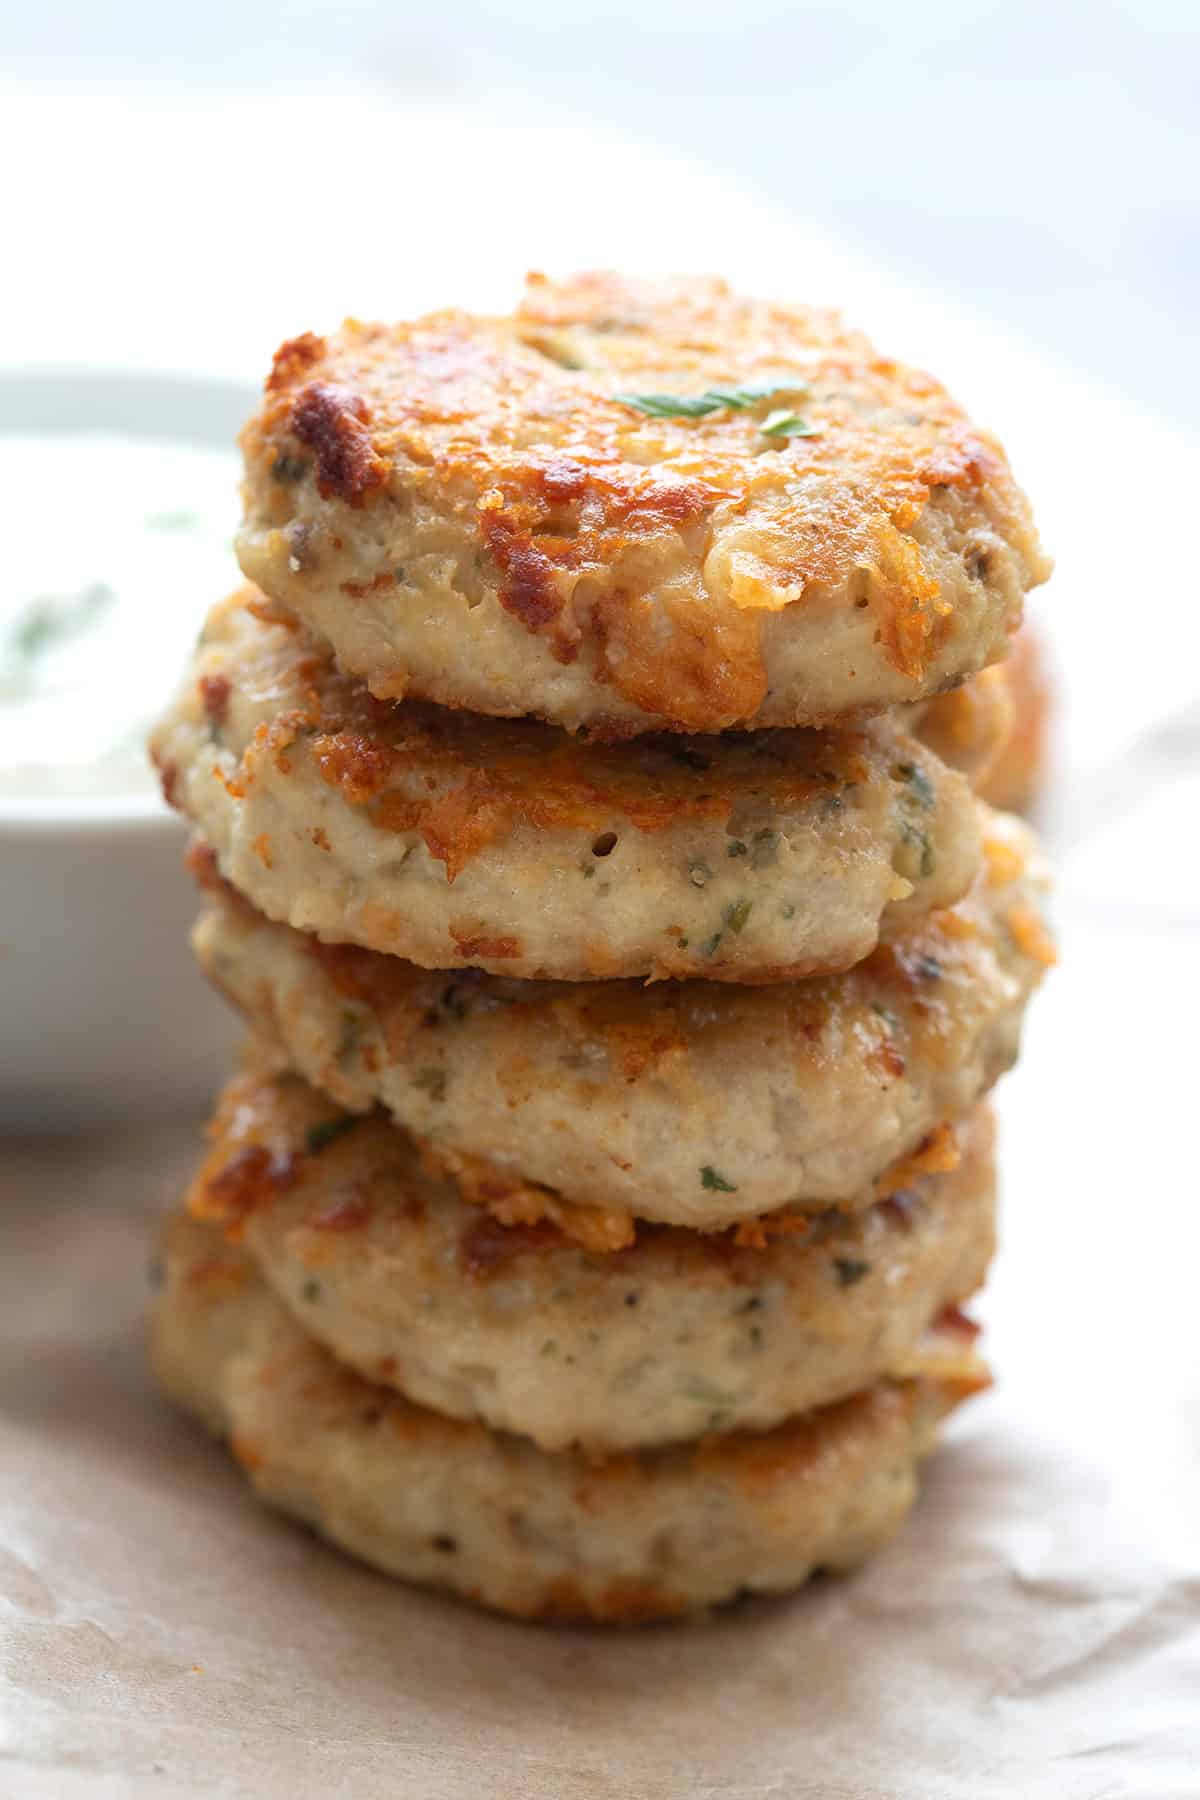
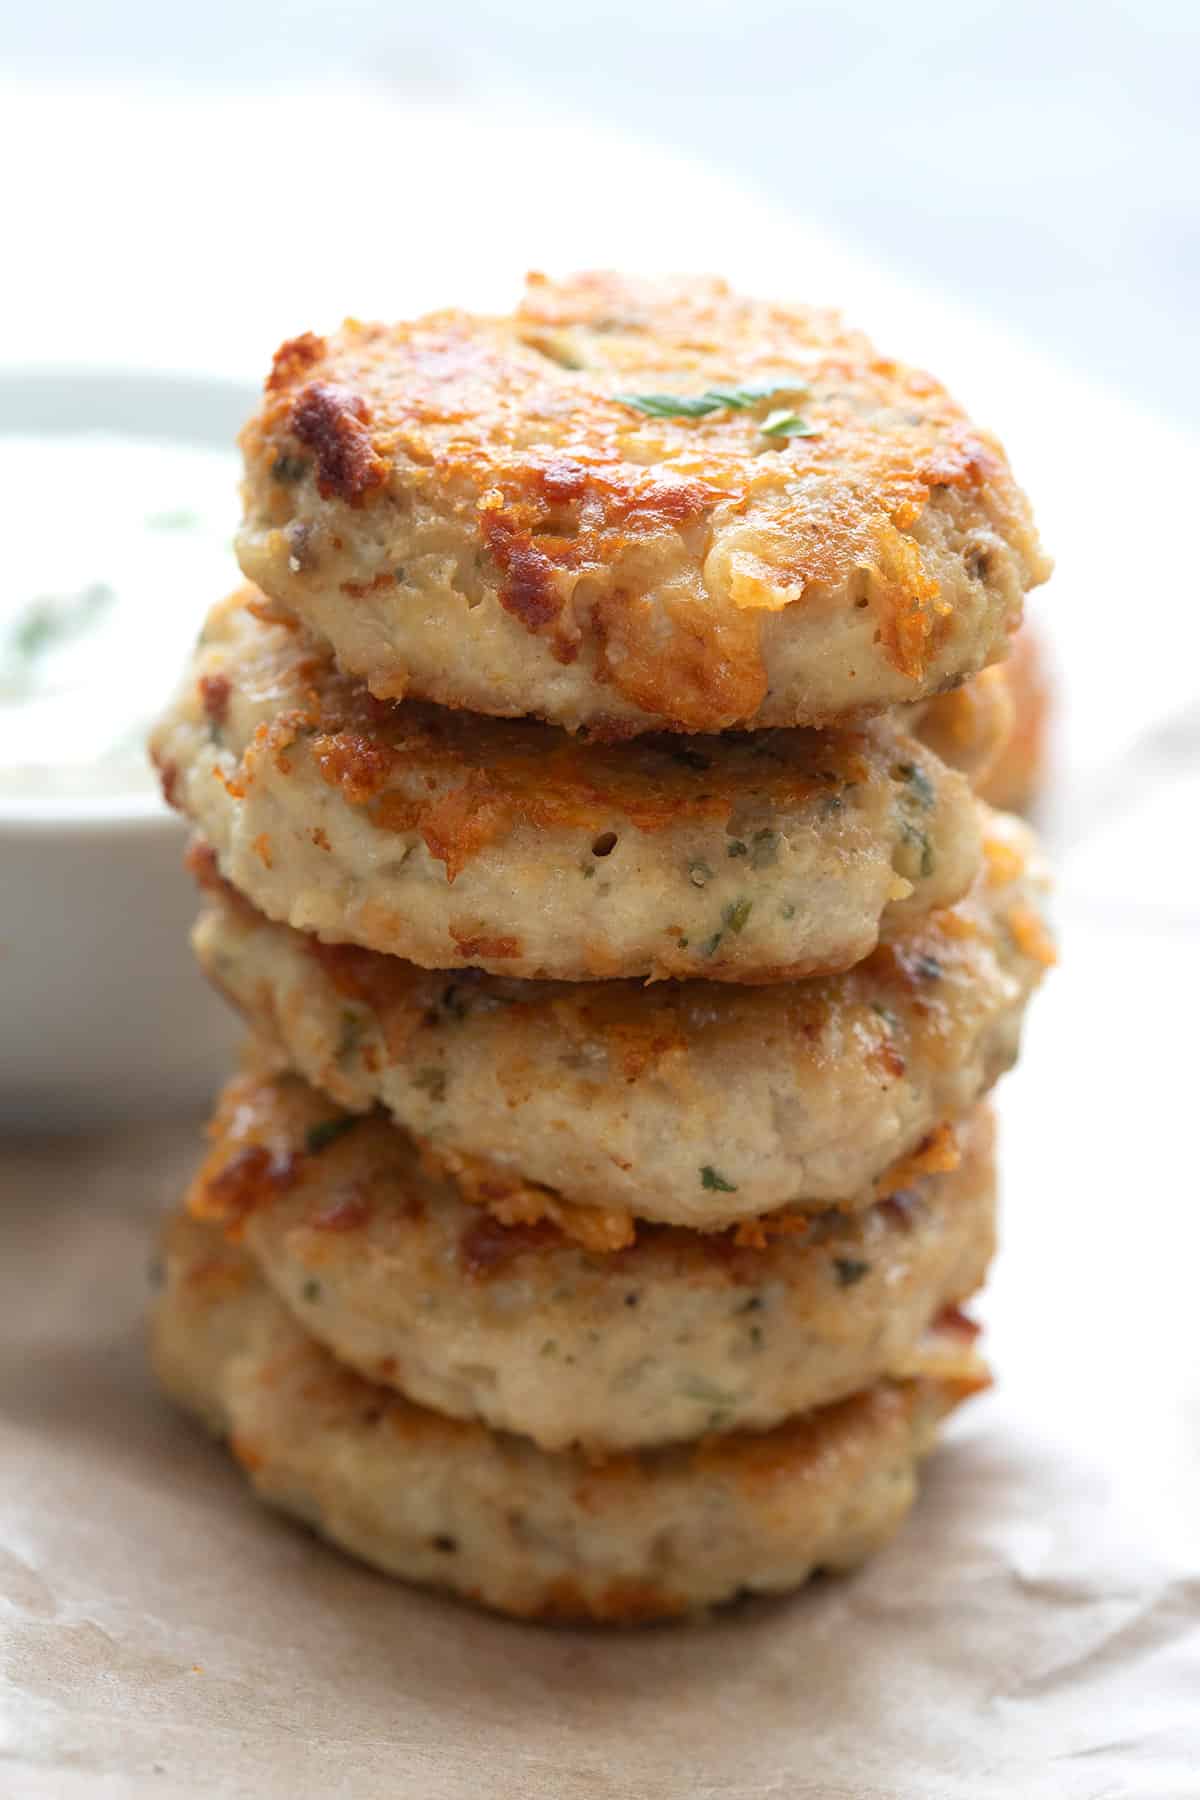
    Close up shot of a stack of Keto Chicken Fritters.

    Let me give you a little bit of advice, my friends. Head to your kitchen right now and whip up a batch of these Chicken Fritters. You will be so darn happy that you did! These tasty nuggets are crispy on the outside, tender on the inside, and packed with cheesy goodness.

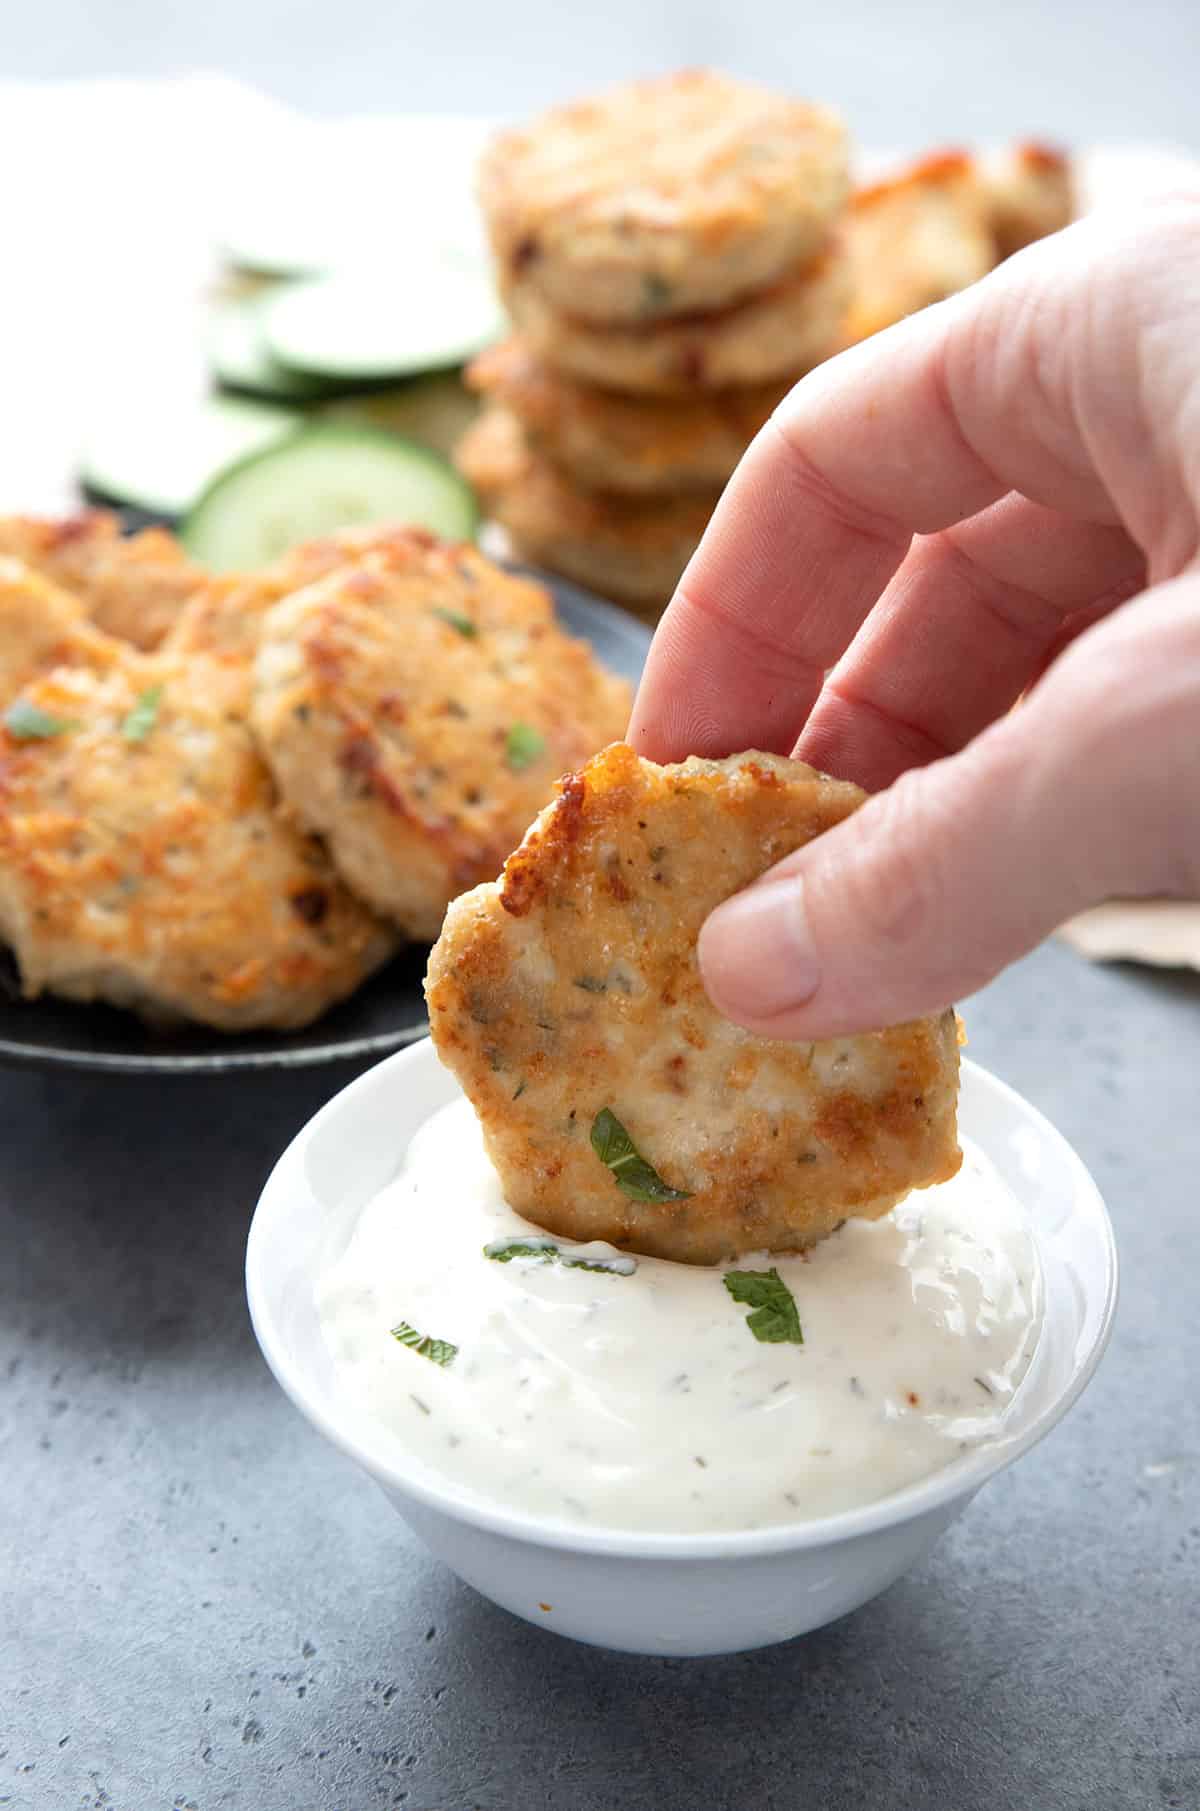
    Make a big batch to serve to friends with some feta dressing or chipotle ranch dressing for dipping. Or keep them all for yourself for quick lunches or high protein snacks. They’re great over salad too!

    Susan says:

    “These are literally the BEST. I’ve made them so many times as a meal. Side of steamed garlic broccoli, & serve with ranch, bleu cheese, au jus, all of the above, whatever. Whole family loves them. So much flavor.”

    A stack of easy chicken fritters.

    These keto chicken fritters have been insanely popular from the moment I hit publish. And it’s not hard to see why. They’re made with simple, wholesome ingredients. And the cheddar melts into the fritters as they cook, creating a crispy golden crust and a tender, cheesy interior.

    It’s easily one of my most popular keto appetizer recipes. One bite and you’ll be hooked. And if you watch the video and see me doing the happy dance, you might just want to groove along with me!
    Top down image of chicken fritters on a piece of brown parchment, with a bowl of ranch dressing.

    Why readers love this recipe

    • Fabulous flavor: These chicken fritters are made with sharp cheddar, garlic, and red pepper flakes, for bold savory flavor.
    • Wonderful texture: Crispy on the outside, tender and cheesy on the inside!
    • Easy recipe: Using ground chicken makes these fritters come together quickly and easily.
    • Healthy ingredients: No special ingredients in this recipe. Just some chicken, cheese, almond flour, and some seasonings.
    • Gluten-free: Great for people who can’t tolerate wheat or gluten.
    • Customizable: Feel free to use ground turkey or a different cheese like pepper jack. I have one reader who made a Tex Mex version!
    • Make ahead: You can easily prep these ahead for easy appetizers or family-friendly dinners.
    • Great macros: With 19 grams of protein and less than 2 grams of carbs per serving, these chicken fritters are ideal for low carb and keto-friendly diets.

    Ingredient Notes

    Top down image of ingredients for low carb gluten-free chicken fritters.
    • Ground chicken: This simplifies the process, as there is no need to chop the chicken or to process it in a food processor.
    • Sharp cheddar: I grated a full block of sharp cheddar (Cabot Seriously Sharp!) for these fritters and they were seriously amazing. They had a crispy cheese crust as they came out of the pan that was absolutely delectable. 
    • Almond flour: Almond flour or another nut or seed meal will help bind the mixture together. I don’t recommend coconut flour, as it will make the fritters dry and tough. Instead, try using another nut or seed meal, or even ground pork rinds.
    • Egg: This is the glue that binds the patty mixture together.
    • Seasonings: Garlic, parsley, red pepper flakes, salt and pepper
    • Oil and butter for frying

    Overview: How to make Chicken Fritters

    A collage of 6 images showing how to make keto chicken fritters.
    1. Combine the ingredients: Combine the chicken, cheddar, almond flour, egg, garlic, parsley, salt, pepper, and red pepper flakes. Mix with your hands to make it all nicely uniform.
    2. Form the patties: Use about 2 tablespoons of the mixture at a time and form into small patties about 2 ½ to 3 inches across. Place a baking sheet lined with parchment paper and refrigerate one hour.
    3. Cook the patties: Heat the oil or butter in a large skillet and add butter. When melted and hot, brown the chicken patties until cooked through.
    4. Drain: Place the patties on a paper towel lined plate to drain off any residual oil.
    A hand dipping a chicken fritter into ranch dressing.

    Tips for Success

    An hour in the fridge allows the fritters to firm up hold together better when frying. But you can make the patties up to a day in advance of cooking.

    Make them any size! I like the small fritters for appetizers and snacks but many readers turn them into full size burgers.

    You should get 24 to 26 small patties, and you can cook 8 to 10 at a time in a large skillet, so you will need to work in batches. I recommend scraping out some of the stuck-on cheese between batches, to avoid burning it.

    Yes, you can air fry them! Grease the basket well and then brush a little melted butter over the fritters to help them brown. I suggest cooking them at 400ºF for 10 to 12 minutes, flipping them halfway through cooking.

    A hand holding up a chicken fritter with a bite taken out of it.

    Frequently Asked Questions

    How long will chicken fritters keep?

    Store any leftovers in an airtight container in the fridge for up to 5 days. Reheat gently in a warm oven. You can also freeze the cooked chicken fritters for several months. Use a heavy duty freezer bag and remove excess air to avoid freezer burn.

    How many carbs are in Keto Chicken Fritters?

    This keto chicken fritter recipe has 1.7g of carbs and 0.6g of fiber per serving. If you count net carbs, that comes to 0.9g carbs for 2 fritters.

    Close up shot of keto chicken fritters in a white serving tray.

    More keto fritter recipes

    Close up shot of a stack of Keto Chicken Fritters.

    Chicken Fritters Recipe

    Servings: 12 servings

    Prep Time 15 minutes

    Cook Time 18 minutes

    Total Time 33 minutes

    These easy Chicken Fritters are crispy on the outside, tender on the inside, and packed with savory flavor. Made with keto-friendly ingredients, they come together quickly for a delicious low carb meal or appetizer. Perfect for meal prep or dipping in your favorite sauces, these fritters will be a hit with the whole family!

    • 2 lb (907.18 g) ground chicken
    • 8 ounces (226.8 g) Cabot Seriously Sharp, grated
    • ½ cup (56 g) almond flour
    • 1 large (1) egg
    • 3 cloves garlic, minced
    • 2 tsp dried parsley
    • 1 tsp salt
    • 1 tsp pepper
    • ½ tsp (0.5 tsp) red pepper flakes
    • 3 tbsp olive oil
    • 1 ½ tbsp (1.5 tbsp) butter

    Prevent your screen from going dark

    • Line a large baking sheet with parchment or waxed paper.

    • In a large mixing bowl, combine the chicken, cheddar, almond flour, egg, garlic, parsley, salt, pepper, and red pepper flakes. Use your hands to mix everything well.

    • Using 2 tablespoons at a time, form the mixture into small patties about 2 ½ to 3 inches across. You should get 24 to 26 patties. Place on the prepared baking sheet and refrigerate one hour.

    • Set a large skillet over medium heat and add 1 tablespoon of the oil and ½ tablespoon of the butter. Once hot, add 8 to 10 of the chicken patties. Cook about 3 minutes per side, until cooked through (the internal temperature should reach at least 165ºF on an instant read thermometer).

    • Place the finished patties on a paper towel lined plate to dry and repeat 2 more times, until all of the patties are cooked. Note: you may want to scrape out some of the baked-on cheese between batches, to avoid burning it.

    • Serve warm, with some ranch or bleu cheese dressing for dipping.

    Serving: 2fritters | Calories: 235kcal | Carbohydrates: 1.7g | Protein: 19.3g | Fat: 15.6g | Fiber: 0.6g

    Categories:

    Appetizers & Snacks,

    Nutritional Disclaimer

    Please note that I am not a medical or nutritional professional. I am simply recounting and sharing my own experiences on this blog. Nothing I express here should be taken as medical advice and you should consult with your doctor before starting any diet or exercise program. I provide nutritional information for my recipes simply as a courtesy to my readers. It is calculated using MacGourmet software and I remove erythritol from the final carb count and net carb count, as it does not affect my own blood glucose levels. I do my best to be as accurate as possible but you should independently calculate nutritional information on your own before relying on them. I expressly disclaim any and all liability of any kind with respect to any act or omission wholly or in part in reliance on anything contained in this website.

    Free Bonus: Secrets to Keto Baking!

    Sign up for your favorite recipes delivered straight to your inbox plus get our FREE bonus: Secrets to Keto Baking!


    Source link

  • Marry Me Chicken Orzo Bake

    Marry Me Chicken Orzo Bake

    Marry Me chicken orzo bake is a creamy one-pot pasta dinner made with chicken thighs, sun-dried tomatoes, garlic, and orzo baked in a luscious sauce.


    Jump to: ℹ️ Overview | 🛒 Ingredients | 📷 How To Make | 📹 Watch The Video | 👩‍🍳 Recipe Tips | 🥗 Serving Suggestions | 📝 Full Recipe Card | 🍽 More Pasta Recipes


    This Marry Me chicken orzo bake has all the classic marry me chicken vibes — garlicky, creamy, herby, and just a little fancy thanks to sun-dried tomatoes.

    The twist? Instead of serving it over plain pasta, it gets baked right into a saucy orzo casserole where the pasta soaks up all that flavor. I use skinless, boneless chicken thighs to keep things juicy and a touch lighter, plus a splash of light cream to make it luscious without feeling heavy.

    The chicken gets seared, then everything simmers and bakes in one pan. It’s cozy, high-protein, and crazy satisfying. And yes, I tested this a few times — and every time it turned out like a hug in a bowl.

    👩‍🍳 You might also like these: crock pot Marry Me chicken, chicken pasta recipes, lemon chicken orzo pasta, boursin orzo bake, lemon chicken orzo soup, chicken asparagus risotto, other chicken and rice recipes, and even more orzo recipes here. Check out my creamy Italian sausage pasta as well.

    What You’ll Need

    Here is what you’ll need for this creamy chicken orzo bake recipe. Find the full measurements in the recipe card below.

    For the Chicken:

    • Boneless, skinless chicken thighs — juicy and flavorful, a bit lighter without the skin; chicken breast works too, but I find thighs more forgiving.
    • Olive oil, salt, pepper, smoked paprika — classic flavor trio to season the chicken and add warmth.

    For the Sauce & Pasta:

    • Onion + garlic — your flavor base, don’t skip them!
    • Sun-dried tomatoes (oil-packed) — salty, tangy, and slightly sweet. These are the flavor bombs.
    • Dried Italian herbs + oregano — herby backbone. You can also use dried thyme if you don’t have mixed Italian herbs.
    • Chicken stock — flavorful liquid that orzo soaks up like a sponge.
    • Light cream — gives it that creamy, velvety sauce without the heaviness.
    • Orzo (or risoni) — the tiny pasta that cooks like rice. Soaks up everything.
    • Parmesan — salty, nutty, and so perfect melted into the sauce.
    • Chili flakes (optional) — for a bit of warmth if you like a tiny kick.

    To Finish:

    • Fresh herbs (basil, chives, parsley) — freshness to balance all that creamy richness.
    • Extra Parmesan — always.

    How To Make Marry Me Chicken Orzo Bake

    Find the full recipe and nutritional information below. Here are some handy step-by-step photos for how to make this one-pot baked chicken and orzo recipe.

    • Dice the onions and garlic so these are ready to go. Strain sun-dried tomatoes (if they are packed in oil) and chop them into smaller pieces. Set aside while we move onto the chicken.
    • Preheat oven to 350°F (180°C fan).
    • Season chicken thighs and pan-sear 2–3 minutes per side in a large oven-safe pan. I use cast iron low casserole pan.
    • Remove chicken; sauté onions first and then add garlic in the same pan. Add a little extra oil if needed.
    • Add chopped sun-dried tomatoes, herbs, and a pinch of chili flakes.
    • Pour in chicken stock (reserving a bit), cream, and Parmesan. Simmer briefly.
    • Taste the sauce and adjust seasoning; it should be salty as orzo absorbs a lot of the flavor.
    • Stir in orzo and nestle chicken back in.
    • Cover and bake for 15–20 minutes until orzo is tender and chicken is fully cooked. I think I did mine for 18 minutes.
    • Rest a few minutes, then sprinkle with herbs and more Parmesan. Dig in!

    Watch The Video

    Recipe Tips

    • Use an oven-safe deep pan or French (or Dutch) oven pot if you’ve got one — one less dish!
    • Don’t worry if the sauce looks a bit runny at first — orzo thickens a lot as it sits. If however it looks like it’s soaked up a lot of the stock, add a few splashes at the end to thin it out.
    • Want it spicier? Add more chili flakes or a pinch of cayenne.
    • Chicken breast? Sure, just don’t overcook it. Bone-in thighs also work but will need more time.
    • Want more veg? Stir in chopped spinach or baby kale before baking.
    • Make-ahead tips: You can pre-sear the chicken and make the sauce a day ahead. Store separately or all together (without the orzo) in the fridge, then mix in orzo and bake when ready.
    • Storage tips: Store leftovers in an airtight container in the fridge for up to 3 days. Reheat with a splash or two of broth or cream to loosen the orzo. Freezing is okay, but orzo can get soft. I don’t recommend.

    Serving Suggestions

    I love serving this with a bright, crunchy salad (lemon vinaigrette all the way – check out my asparagus salad) or simple steamed green beans, sauteed asparagus, or broccolini with garlic and lemon. It’s rich, so a little citrus on the side balances it beautifully.

    💬 If you’ve tried this Marry Me chicken orzo bake or any other recipe on the blog then don’t forget to rate the recipe and let me know how you got on in the comments below, I love hearing from you! You can also FOLLOW ME on Instagram, Facebook, Pinterest, YouTube, and or sign up to my Newsletter to see more of my delicious food.

    Want to Save This Recipe?

    Enter your email & I’ll send it to your inbox. Plus, get great new recipes from me every week!

    By submitting this form, you consent to receive emails from Cooked & Loved

    Marry Me Chicken Orzo Bake is a creamy one-pot pasta dinner made with chicken thighs, sun-dried tomatoes, garlic, and orzo baked in a luscious sauce. Find step-by-step photos and more recipe tips above.

    • Preheat oven to 350°F (180°C fan).

    • Season chicken with salt, pepper, and smoked paprika.

    • Heat a tablespoon of olive oil in a large oven-safe sauté pan or Dutch oven over medium-high heat.

    • Sear chicken on both sides until golden (2–3 mins per side). Remove and set aside.

    • Lower heat to medium, add extra oil if needed, and sauté onions until soft (3–4 mins). Add garlic and cook for 30 seconds.

    • Stir in chopped sun-dried tomatoes, Italian herbs, oregano, and chili flakes (if using).

    • Add stock (3 cups), cream, Parmesan, and bring to a gentle simmer. Season to taste — it should be slightly salty.

    • Add orzo and stir to combine. Nestle seared chicken on top.

    • Cover and bake for 15–20 minutes until orzo is tender and chicken is cooked through. I did mine for 18 minutes.

    • Optional step: splash extra stock around the edges if it looks dry near the end. Orzo tends to soak up more liquid around the edges of the pan as it’s hotter.

    • Let rest for 5 minutes. Garnish with herbs, more Parmesan, and a drizzle of cream if you’re feeling extra.

    • Can I use chicken breast instead of thighs? Yes! Just don’t overcook it — thighs are more forgiving and juicier. Bone-in thighs also work but will need more time.
    • What if I don’t have light cream? Use half-and-half or mix milk with a bit of heavy cream. Even evaporated milk works.
    • Why is it still saucy out of the oven? That’s perfect! Orzo keeps absorbing liquid after baking. The extra sauce keeps things creamy.
    • Can I make this dairy-free? You can try using coconut cream and skip the Parmesan, but the flavor will change quite a bit.
    • Can I double the recipe? Yes, just use a larger baking dish or split between two. Add a few extra minutes to the bake time.
    • Use an oven-safe deep pan or Dutch oven if you’ve got one — one less dish!
    • Don’t worry if the sauce looks a bit runny at first — orzo thickens a lot as it sits. If however it looks like it’s soaked up a lot of the stock, add a few splashes at the end to thin it out.
    • Want it spicier? Add more chili flakes or a pinch of cayenne.
    • Want more veg? Stir in chopped spinach or baby kale before baking.
    • Make-ahead tips: You can pre-sear the chicken and make the sauce a day ahead. Store separately or all together (without the orzo) in the fridge, then mix in orzo and bake when ready.
    • Storage tips: Store leftovers in an airtight container in the fridge for up to 3 days. Reheat with a splash or two of broth or cream to loosen the orzo. Freezing is okay, but orzo can get soft. I don’t recommend.

    Calories: 528kcal | Carbohydrates: 48g | Protein: 36g | Fat: 21g | Saturated Fat: 9g | Polyunsaturated Fat: 2g | Monounsaturated Fat: 8g | Trans Fat: 0.02g | Cholesterol: 152mg | Sodium: 868mg | Potassium: 1234mg | Fiber: 4g | Sugar: 11g | Vitamin A: 743IU | Vitamin C: 10mg | Calcium: 157mg | Iron: 4mg

    Keywords: chicken orzo, Marry Me Chicken Orzo Bake, chicken orzo bake, baked chicken orzo, chicken with orzo pasta

    More Pasta Recipes


    Source link