Tag: Chicken

  • Air Fryer BBQ Chicken Wings

    Air Fryer BBQ Chicken Wings

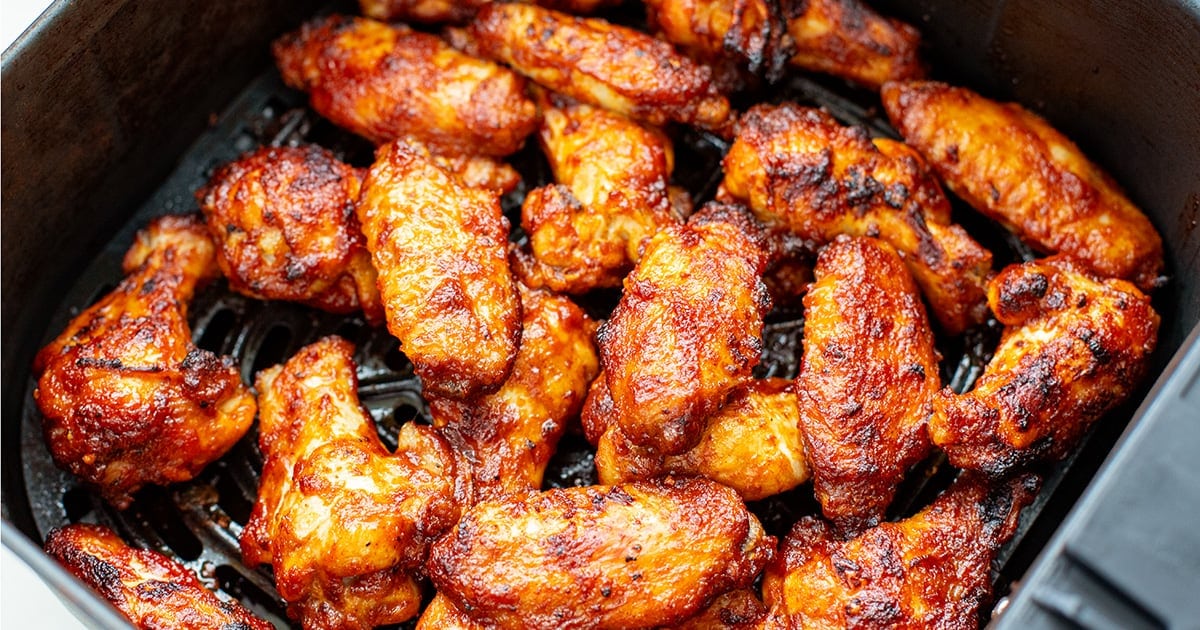
    These air fryer BBQ chicken wings are tender and juicy inside, crispy on the outside, and slathered in the most finger-licking homemade BBQ sauce that clings to every bite. No oven. No deep frying. Just YUM.


    Jump to: ℹ️ Overview | 🛒 Ingredients | 📷 How To Make | 📹 Watch The Video | 👩‍🍳 Recipe Tips | 🥗 Serving Suggestions | 📝 Full Recipe Card | 🍽 More Chicken Recipes


    Every time I make these air fryer BBQ chicken wings, someone asks me for the recipe. They taste indulgent and naughty, but because they’re not deep-fried, you could practically call them healthy.

    The wings get crispy on the outside, stay tender and juicy inside, and then get tossed in a smoky, tangy, slightly sweet BBQ sauce that’s made from scratch (or store-bought if you’re in a rush). It’s ideal for hot summer days when you don’t want to turn on the oven. Oh, and if you want to flex a little, toss them on the grill after saucing for that fire-charred finish.

    Each serving has solid protein and way less fat than fried wings. Trust me, they’re a crowd-pleaser!

    👩‍🍳 You might also like: salt and pepper chicken wings, hot honey chicken wings, dry rub chicken wings, honey soy chicken wings, my healthy Paleo chicken wings, or Portuguese-style spicy sticky chicken wings. Check out this air fryer kielbasa as well.

    What You’ll Need

    Here is what you’ll need for these air fryer BBQ chicken wings. Find the full measurements in the recipe card below.

    • Chicken wings – wingettes and drumettes, the perfect combo of meaty and crispy.
    • Olive oil – helps the seasoning stick and gives that golden crisp. You can use oil spray here.
    • Spice rub – Smoked paprika adds that subtle BBQ smokiness, while garlic and onion powders give you that classic flavor base for savory oomph. Plus, salt and pepper – never skip, flavor starts here.

    For the Homemade BBQ Sauce:

    • Ketchup for the sweet-tangy tomato base (tomato sauce in Australia is a-okay!)
    • Molasses adds rich, smoky sweetness and dark color. Treacle works too. You will find these in the baking sections of the supermarket. No molasses or treacle? Use extra brown sugar.
    • Brown sugar – optional, for a sweeter finish. I add a tablespoon or so. Use only molasses if you want a less sweet, old-school flavor.
    • Vinegar (white wine or apple cider) – gives that signature tang.
    • Worcestershire sauce – for depth and umami (basically magic).
    • Garlic and onion powders, smoked paprika, cayenne – spice it your way.
    • Salt and pepper – again, don’t skip.
    • Speed hack: You can use store-bought BBQ sauce if you’re in a rush.

    How To Make Air Fryer BBQ Chicken Wings

    Find the full recipe and nutritional information below. Here are some handy step-by-step photos for how to make chicken wings in the air fryer.

    • Pat the wings dry (this is THE trick to getting that crisp skin).
    • Toss with oil, spices, salt, and pepper.
    • Air fry at 390°F (200°C) for 20–25 mins, shaking halfway.
    • Meanwhile, simmer all the sauce ingredients in a small saucepan or pan until slightly thickened (about 5–8 mins).
    • Toss the cooked wings in the BBQ sauce.
    • Air fry again for 2–3 minutes to caramelize the glaze.

    Watch The Video

    Recipe Tips

    • Dry your wings well — moisture = sogginess.
    • Don’t sauce the wings before air frying the first time or you’ll end up with burnt sugar.
    • If you’re BBQ-ing: toss the wings in sauce after air frying, then finish on the grill.
    • Use both molasses and brown sugar if you like a thicker, richer sauce. Or skip the sugar entirely for a more savory profile.
    • Storage tips: Store leftovers in an airtight container in the fridge for up to 3 days. Reheat in the air fryer for 5–7 minutes at 350°F (175°C). You can freeze them, but fresh is best for crispiness.
    • Make-ahead tips: The BBQ sauce can be made up to a week ahead — store in the fridge. Wings can be seasoned and refrigerated (uncooked) for up to a day in advance.

    Serving Suggestions

    These wings are the life of the party all on their own, but they’re also great with:

    💬 If you’ve tried these air fryer BBQ chicken wings or any other recipe on the blog then don’t forget to rate the recipe and let me know how you got on in the comments below, I love hearing from you! You can also FOLLOW ME on Instagram, Facebook, Pinterest, YouTube, and or sign up to my Newsletter to see more of my delicious food.

    Want to Save This Recipe?

    Enter your email & I’ll send it to your inbox. Plus, get great new recipes from me every week!

    By submitting this form, you consent to receive emails from Cooked & Loved

    These air fryer BBQ chicken wings are tender and juicy inside, crispy on the outside, and slathered in the most finger-licking homemade BBQ sauce that clings to every bite. No oven. No deep frying. Just YUM. Find step-by-step photos and more recipe tips above.

    • Prep the wings: Pat them dry with paper towels (don’t skip this — it’s key for crispiness).

    • Season: Toss wings with olive oil, smoked paprika, garlic powder, onion powder, salt, and pepper.

    • First fry: Air fry at 390°F (200°C) for 20–25 minutes, shaking halfway through. Check at 15 minutes — air fryers vary.

    • Make the sauce: Combine all sauce ingredients in a saucepan over medium heat. Simmer 5–8 minutes, stirring occasionally, until thickened and glossy. Taste and tweak.

    • Toss & finish: Toss crispy wings in the sauce. Return to air fryer for 2–3 minutes to caramelize the glaze.

    • Molasses adds rich, smoky sweetness, depth and dark color. Treacle works too. You will find both in the baking sections of the supermarket. No molasses or treacle? Use extra brown sugar.
    • Brown sugar – optional, for a sweeter finish. I add a tablespoon or so. Use only molasses if you want a less sweet, old-school flavor.
    • Dry your wings well — moisture = sogginess.
    • Don’t sauce the wings before air frying the first time, or you’ll end up with burnt sugar.
    • If you’re BBQing: toss the wings in sauce after air frying, then finish on the grill.
    • Use both molasses and brown sugar if you like a thicker, richer sauce. Or skip the sugar entirely for a more savory profile.
    • Storage tips: Store leftovers in an airtight container in the fridge for up to 3 days. Reheat in the air fryer for 5–7 minutes at 350°F (175°C). You can freeze them, but fresh is best for crispiness.
    • Make-ahead tips: The BBQ sauce can be made up to a week ahead — store in the fridge. Wings can be seasoned and refrigerated (uncooked) for up to a day in advance.
    • Can I use frozen wings? Yes, but thaw them fully and pat them dry before seasoning.
    • Why do I need to air fry them twice? The first fry gets them crispy. The second caramelizes the sauce without burning it.

    Calories: 273kcal | Carbohydrates: 18g | Protein: 16g | Fat: 16g | Saturated Fat: 4g | Polyunsaturated Fat: 3g | Monounsaturated Fat: 7g | Trans Fat: 0.2g | Cholesterol: 63mg | Sodium: 1081mg | Potassium: 378mg | Fiber: 1g | Sugar: 14g | Vitamin A: 695IU | Vitamin C: 3mg | Calcium: 38mg | Iron: 2mg
    Keywords: Chicken Wings, BBQ chicken wings, air fryer BBQ chicken wings, air fried chicken wings

    More Chicken Recipes


    Source link

  • Crockpot Poppy Seed Chicken (Easy Slow Cooker Dinner)

    Crockpot Poppy Seed Chicken (Easy Slow Cooker Dinner)

    This website may contain affiliate links and advertising so that we can provide recipes to you. Read my disclosure policy.

    If you love my classic poppy seed chicken casserole, this crockpot poppy seed chicken is the easiest way to make it. Same creamy, buttery flavor. Same cozy comfort.

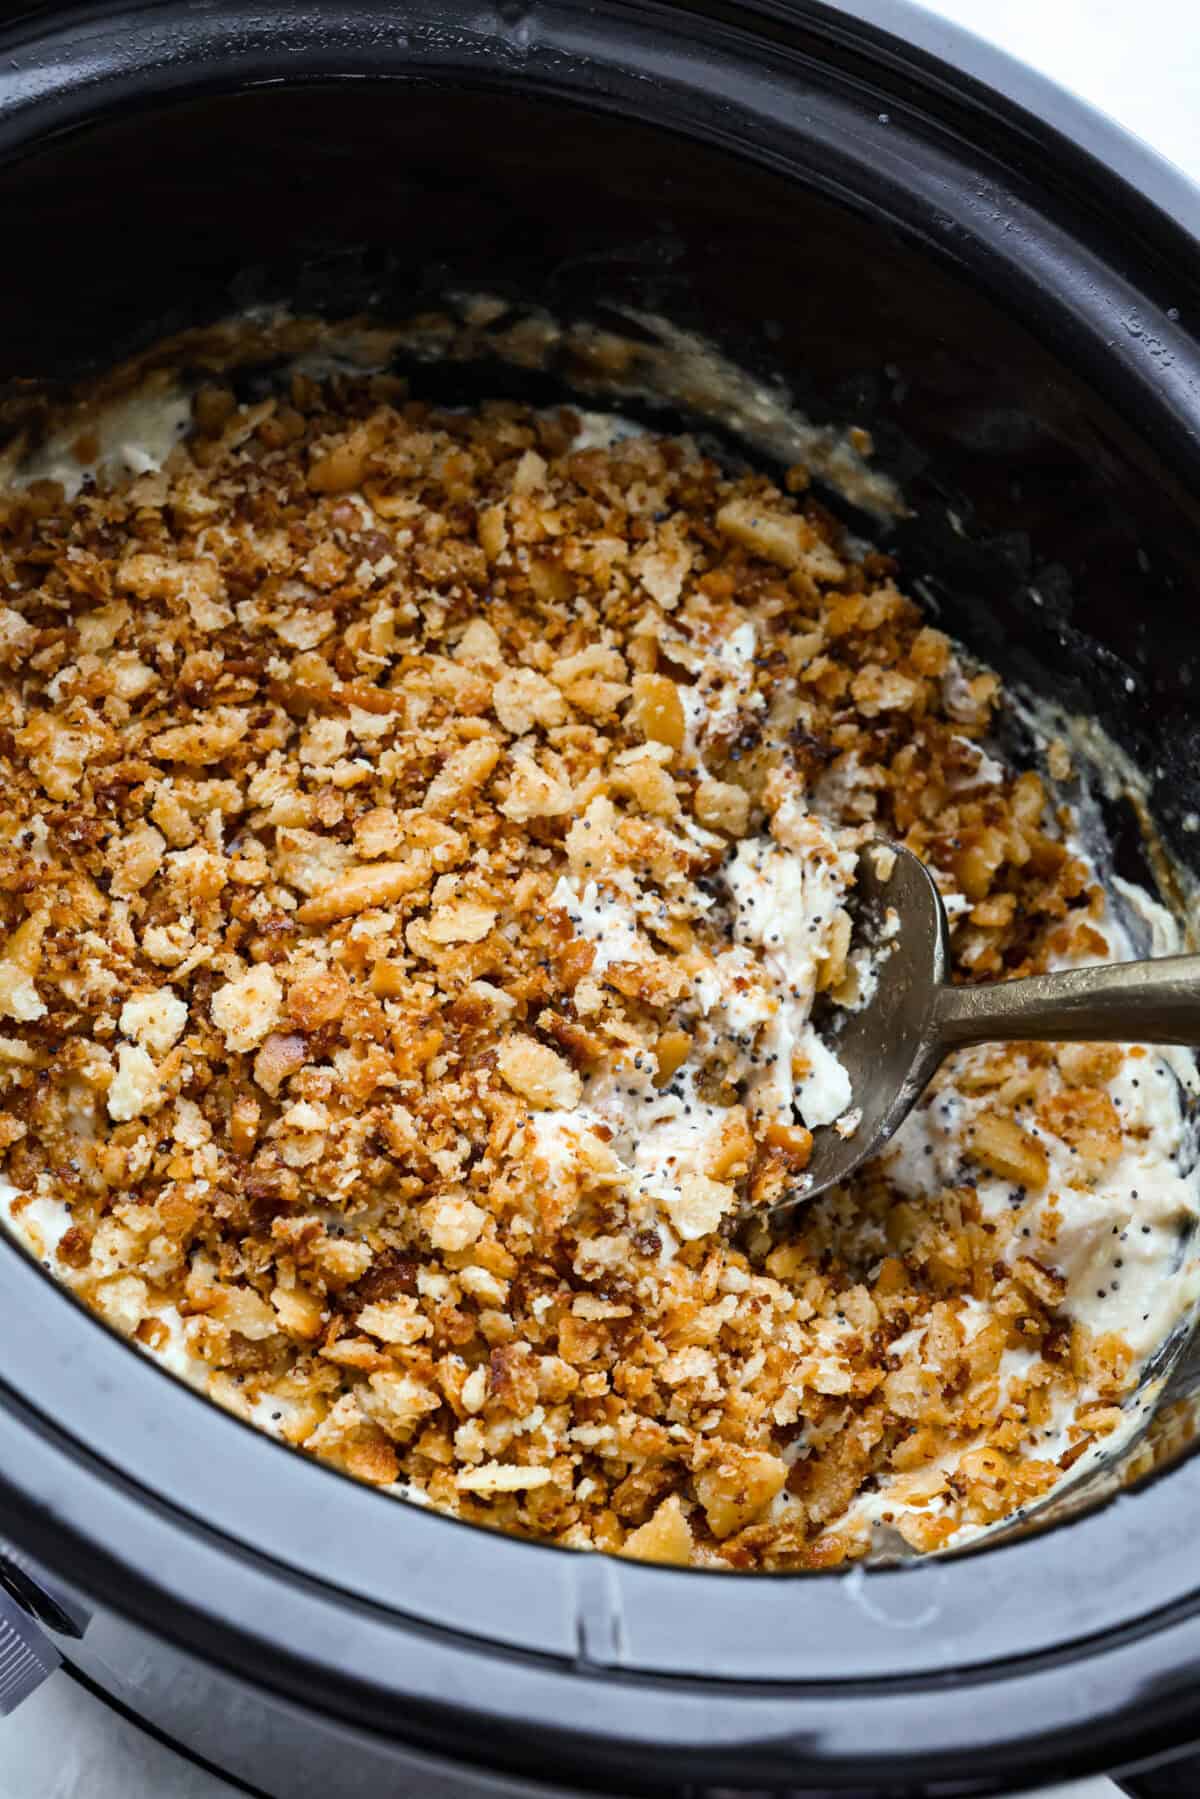
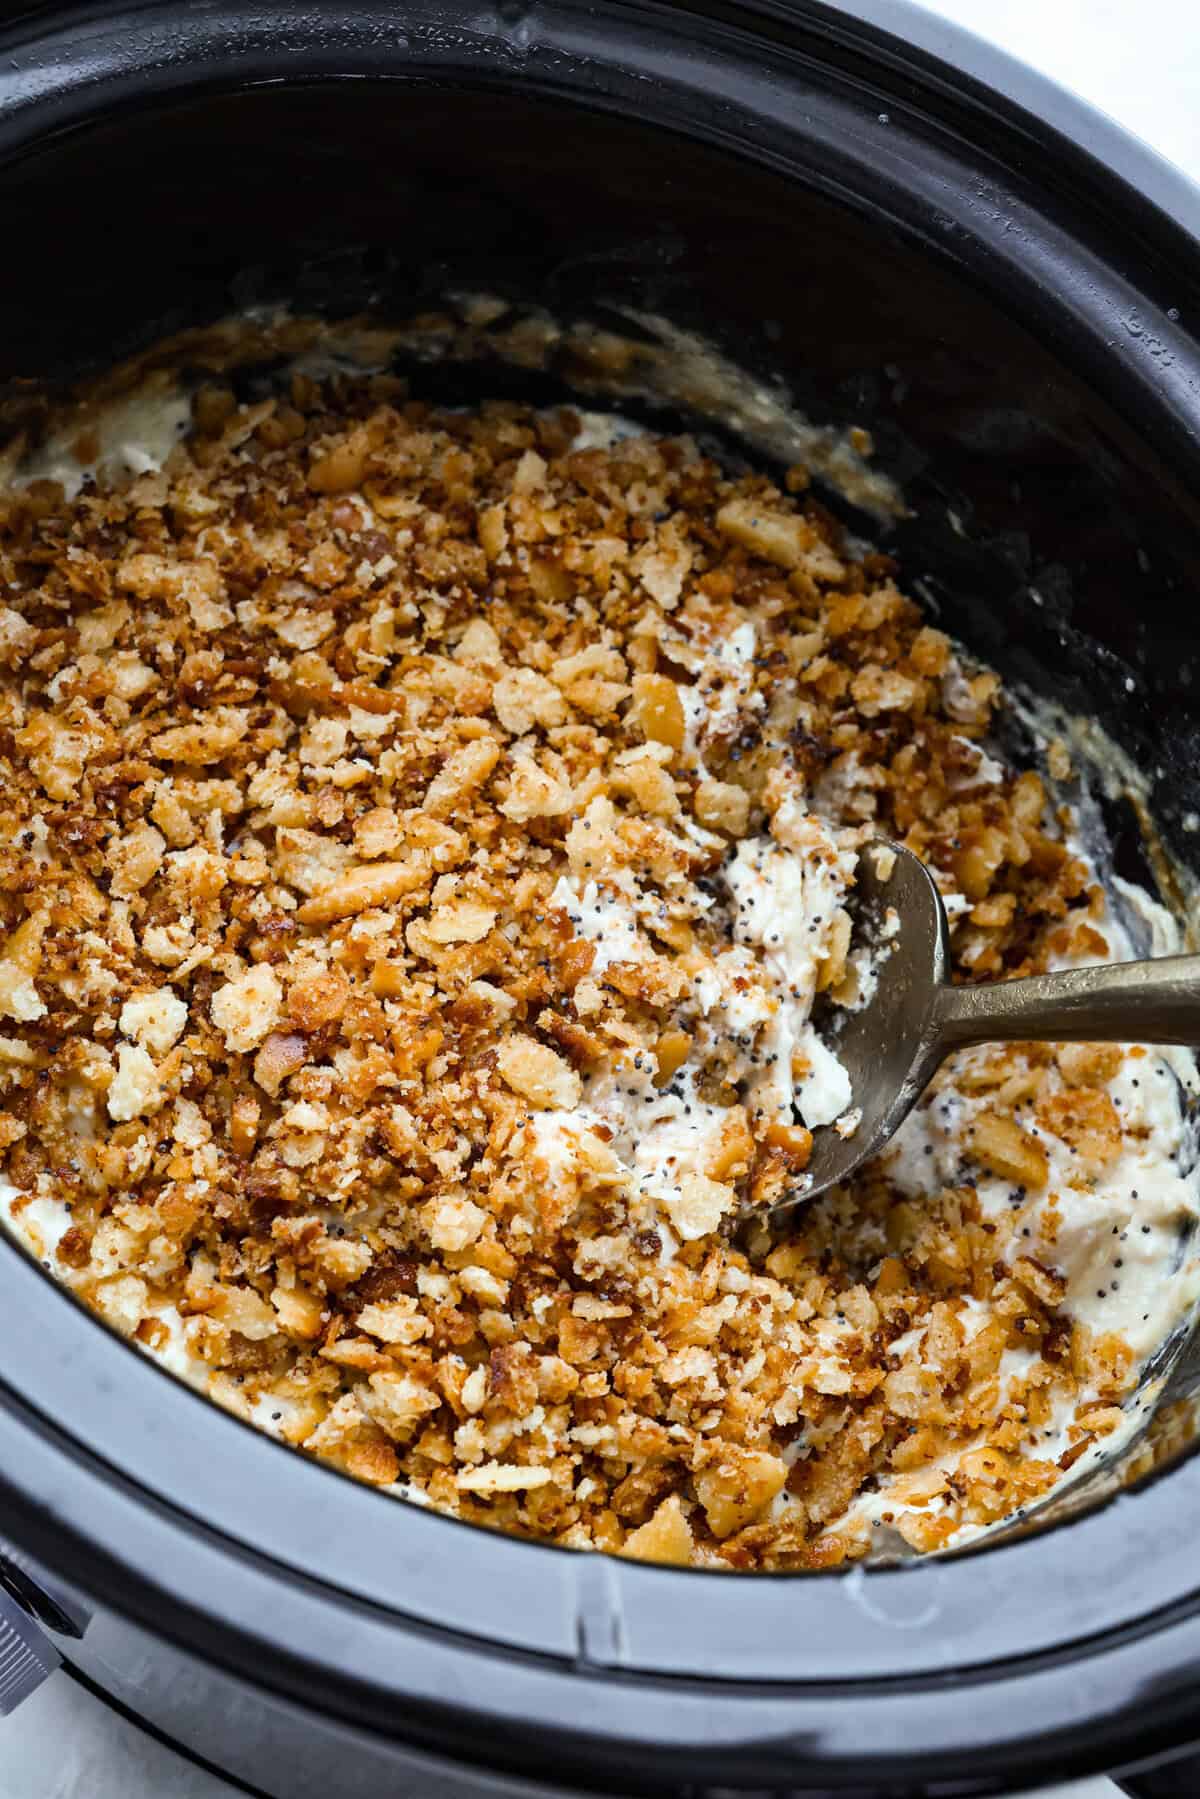
    Overhead shot of someone taking a scoop of poppyseed crockpot chicken out of the slow cooker.

    Why My Crockpot Version Is Better

    • The topping is actually crunchy! Most crockpot versions dump crackers on top and call it done. I toast mine so they stay crunchy!
    • Classic Casserole Favor! Creamy sauce, tender chicken, poppy seeds, and that buttery topping. This tastes like the baked version you already love, just made in the slow cooker.
    • It’s still hands-off where it counts! The chicken cooks low and slow while you’re busy. The quick skillet topping only takes minutes.

    Crockpot Poppy Seed Chicken Ingredients

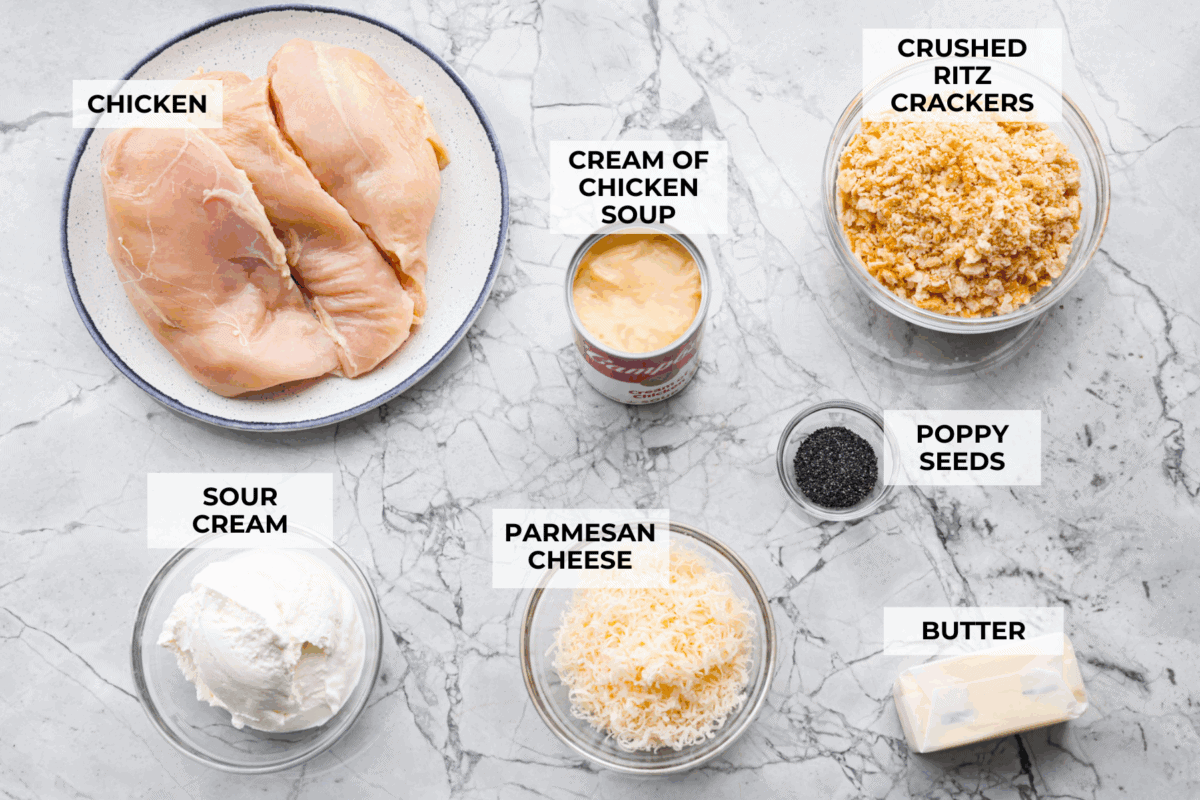
    Overhead shot of labeled crockpot poppyseed chicken ingredients.
    • Ritz Crackers: Buttery crackers like Ritz add a tasty butter flavor and texture as they get toasted!

    Crockpot Poppy Seed Chicken Recipe

    This fan favorite, dump-and-go version of the classic poppy seed chicken is going to become your new go-to weeknight dinner! Make some soft homemade rolls and a fresh salad while the chicken cooks.

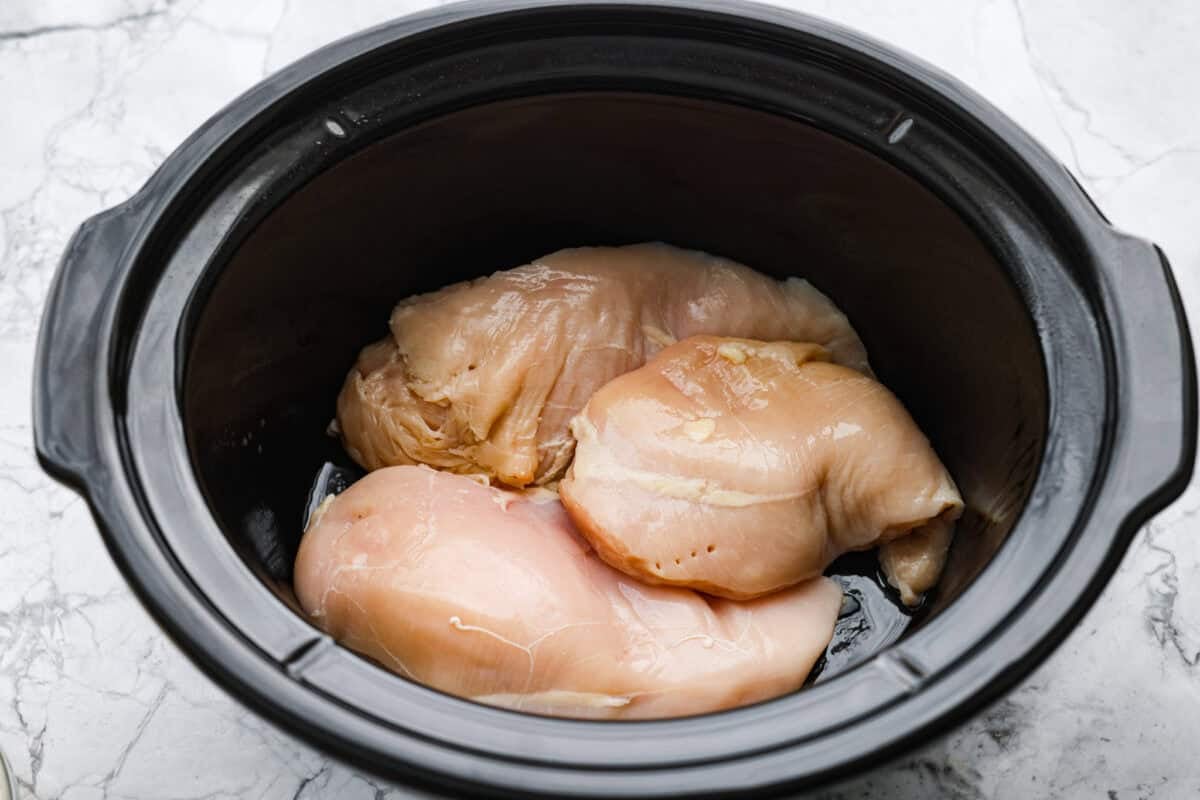
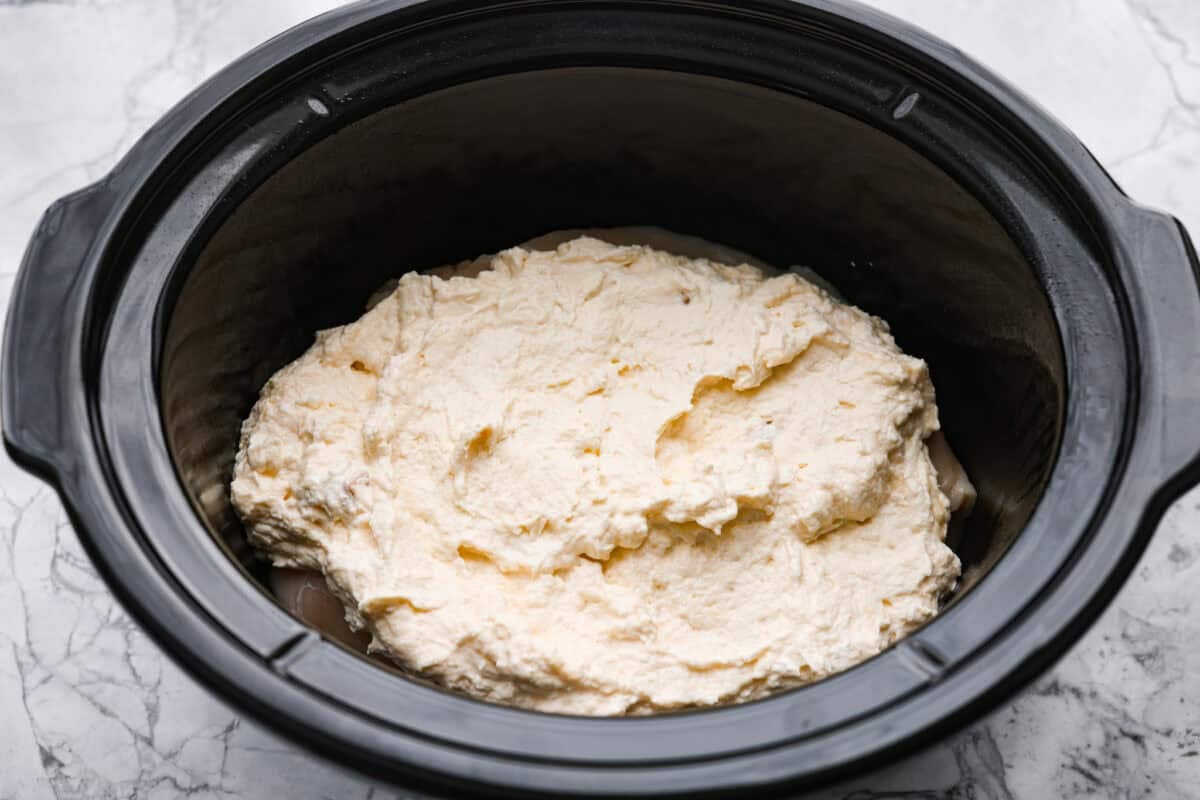
    1. Add the Chicken: Spray the bottom of a slow cooker with nonstick cooking spray and place chicken breasts in the bottom.
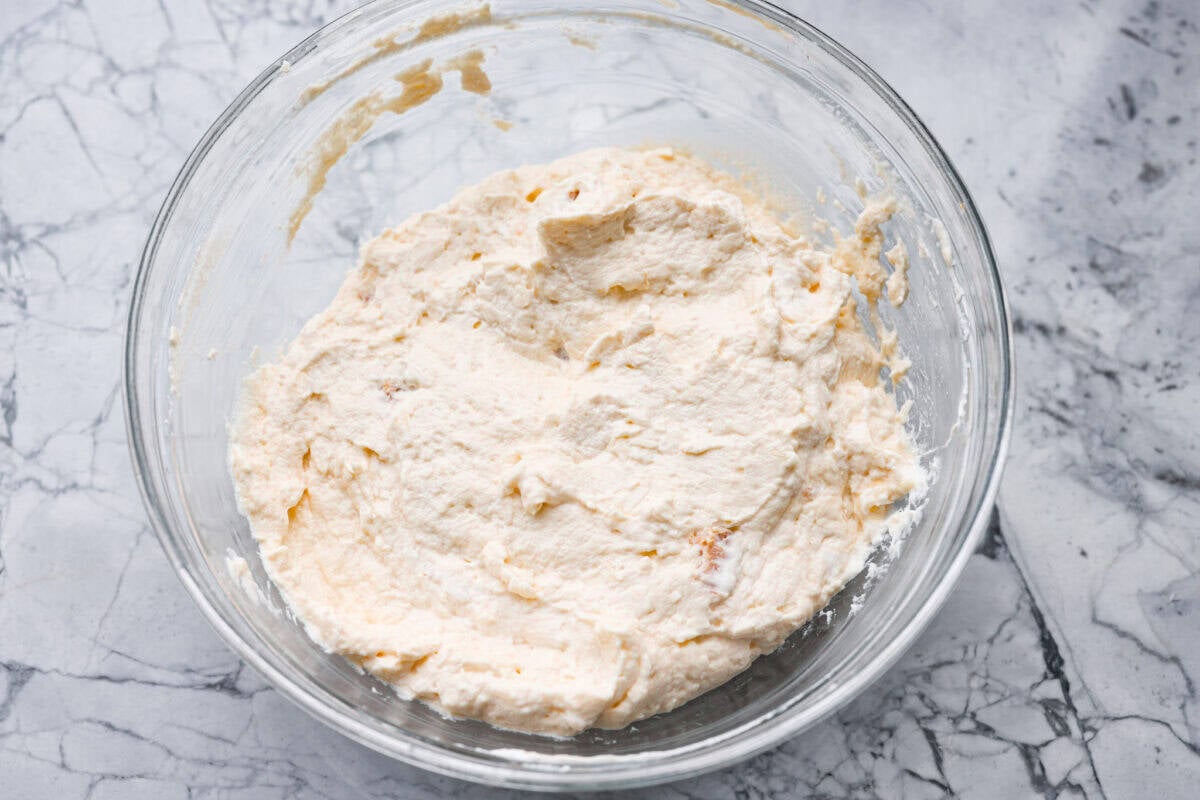
    2. Combine: In a medium bowl, stir together the sour cream, cream of chicken soup, and shredded parmesan cheese. 
    3. Pour Over the Chicken: Pour the sour cream mixture over the chicken in the crockpot.
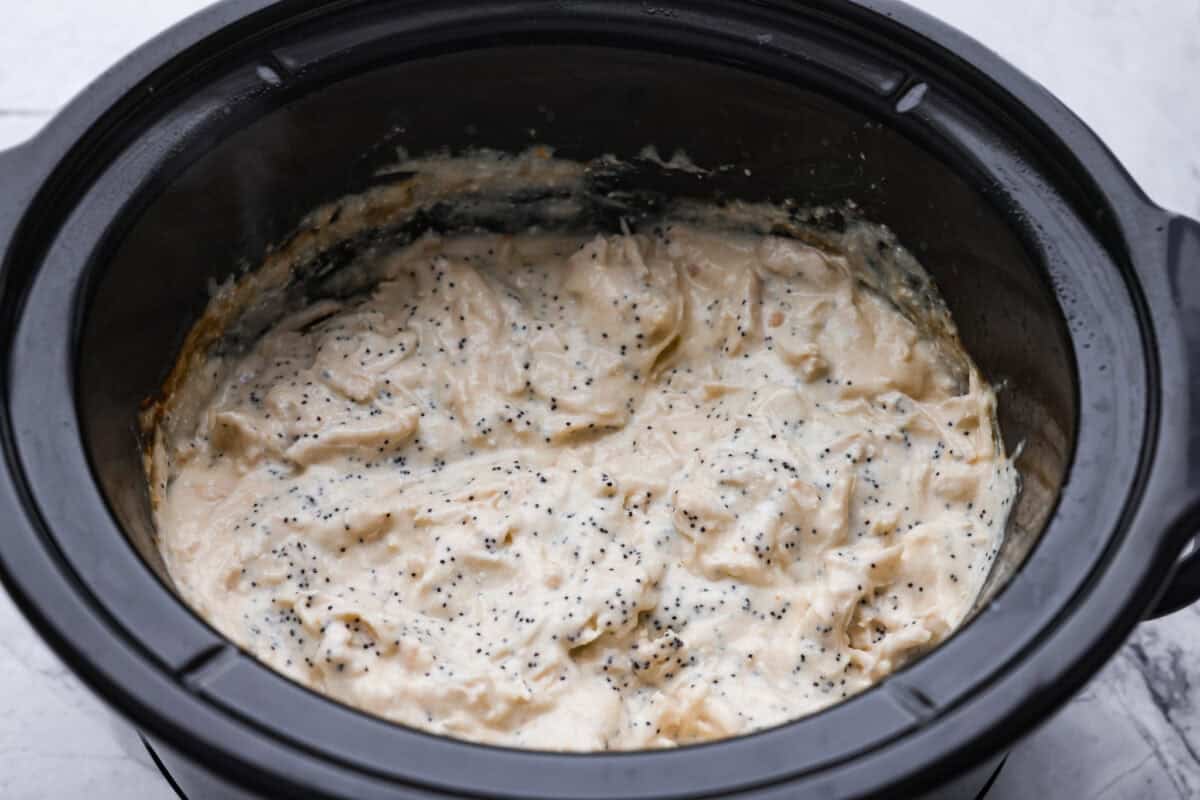
    4. Cook: Place the lid on the crockpot, then cook on LOW for 5-6 hours, or HIGH for 3-4 hours. When it’s done, remove the lid and shred chicken with two forks. Stir in 2 teaspoons of poppy seeds.
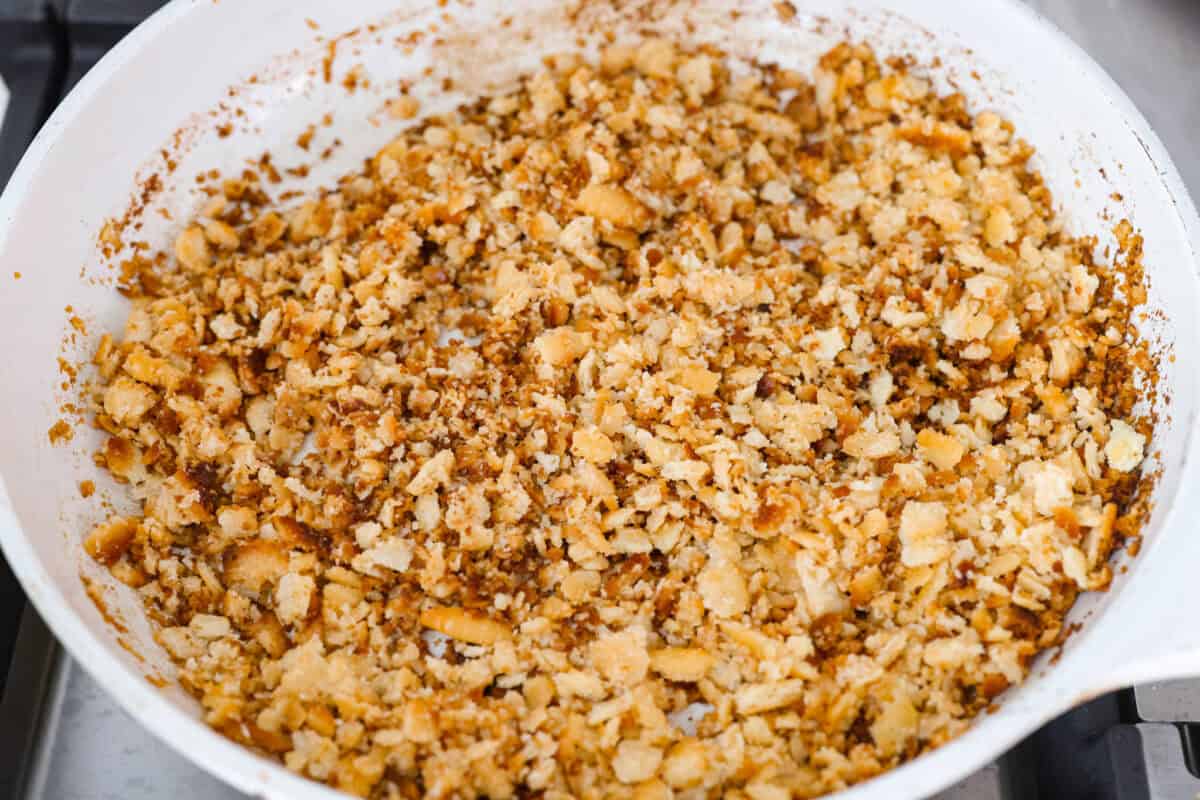
    5. Toast the Crackers: In a large skillet, add the butter and melt over medium heat. Once the butter is melted, add 1 sleeve crushed Ritz Crackers and toss to coat in the butter. Toast the cracker mixture for 2-3 minutes until golden brown.
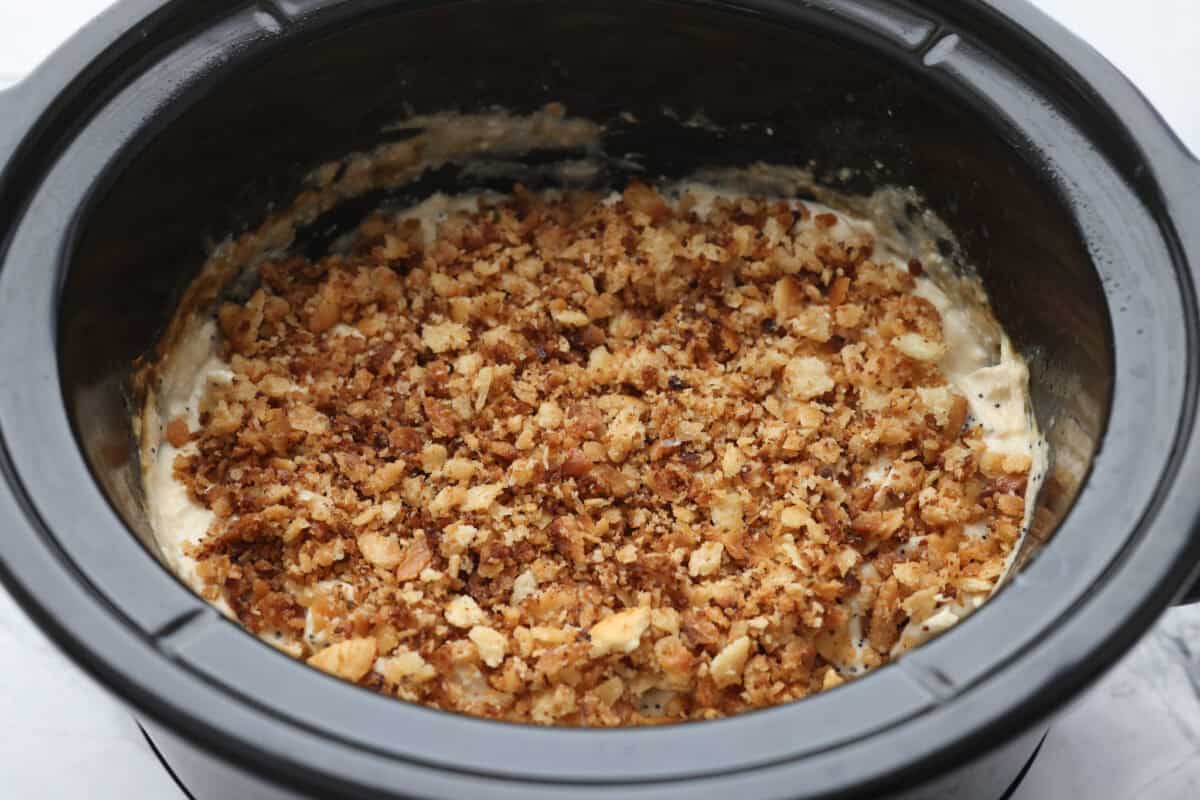
    6. Topping: Sprinkle the cracker mixture over the top of the chicken mixture. Season with salt and pepper, if needed, and serve over potatoes or rice!

    Perfect for Doubling!

    This recipe is perfect for meal prep or feeding a crowd! Just double all of the ingredients to make a big batch.

    Instructions:

    1. Add & Mix: Add the sour cream, cream of chicken soup, and parmesan cheese to a gallon-sized, freezer-safe, sealable storage bag and mix well.
    2. Coat Chicken & Freeze: Add the chicken to the bag with the sauce and mix to coat the chicken in the sauce. Press out as much air as possible, seal the bag, and freeze it flat for better storage.

    Reheat:

    1. Thaw Slightly: Pull the bag out of the freezer one hour before cooking to let it thaw slightly on the counter before cooking.
    2. Cook: Place the contents of the bag into the crockpot. Cook on LOW for 6  hours or HIGH for 4 hours, until the chicken is cooked through and shreds easily.
    3. Shred & Stir: Remove the chicken from the crockpot and shred it. Return the shredded chicken to the crockpot and mix to coat it in the sauce. Season to taste with salt and pepper, if needed. Stir in the poppy seeds.
    4. Cook Topping: In a large skillet, add ½ cup butter and melt over medium heat. Once the butter is melted, add 1 sleeve crushed Ritz Crackers and toss to coat in the butter. Toast the cracker mixture for 2-3 minutes until golden brown.
    5. Top & Serve: Sprinkle the cracker mixture on top of the chicken mixture. Serve over rice or potatoes! 

    Pin this now to find it later

    Pin It

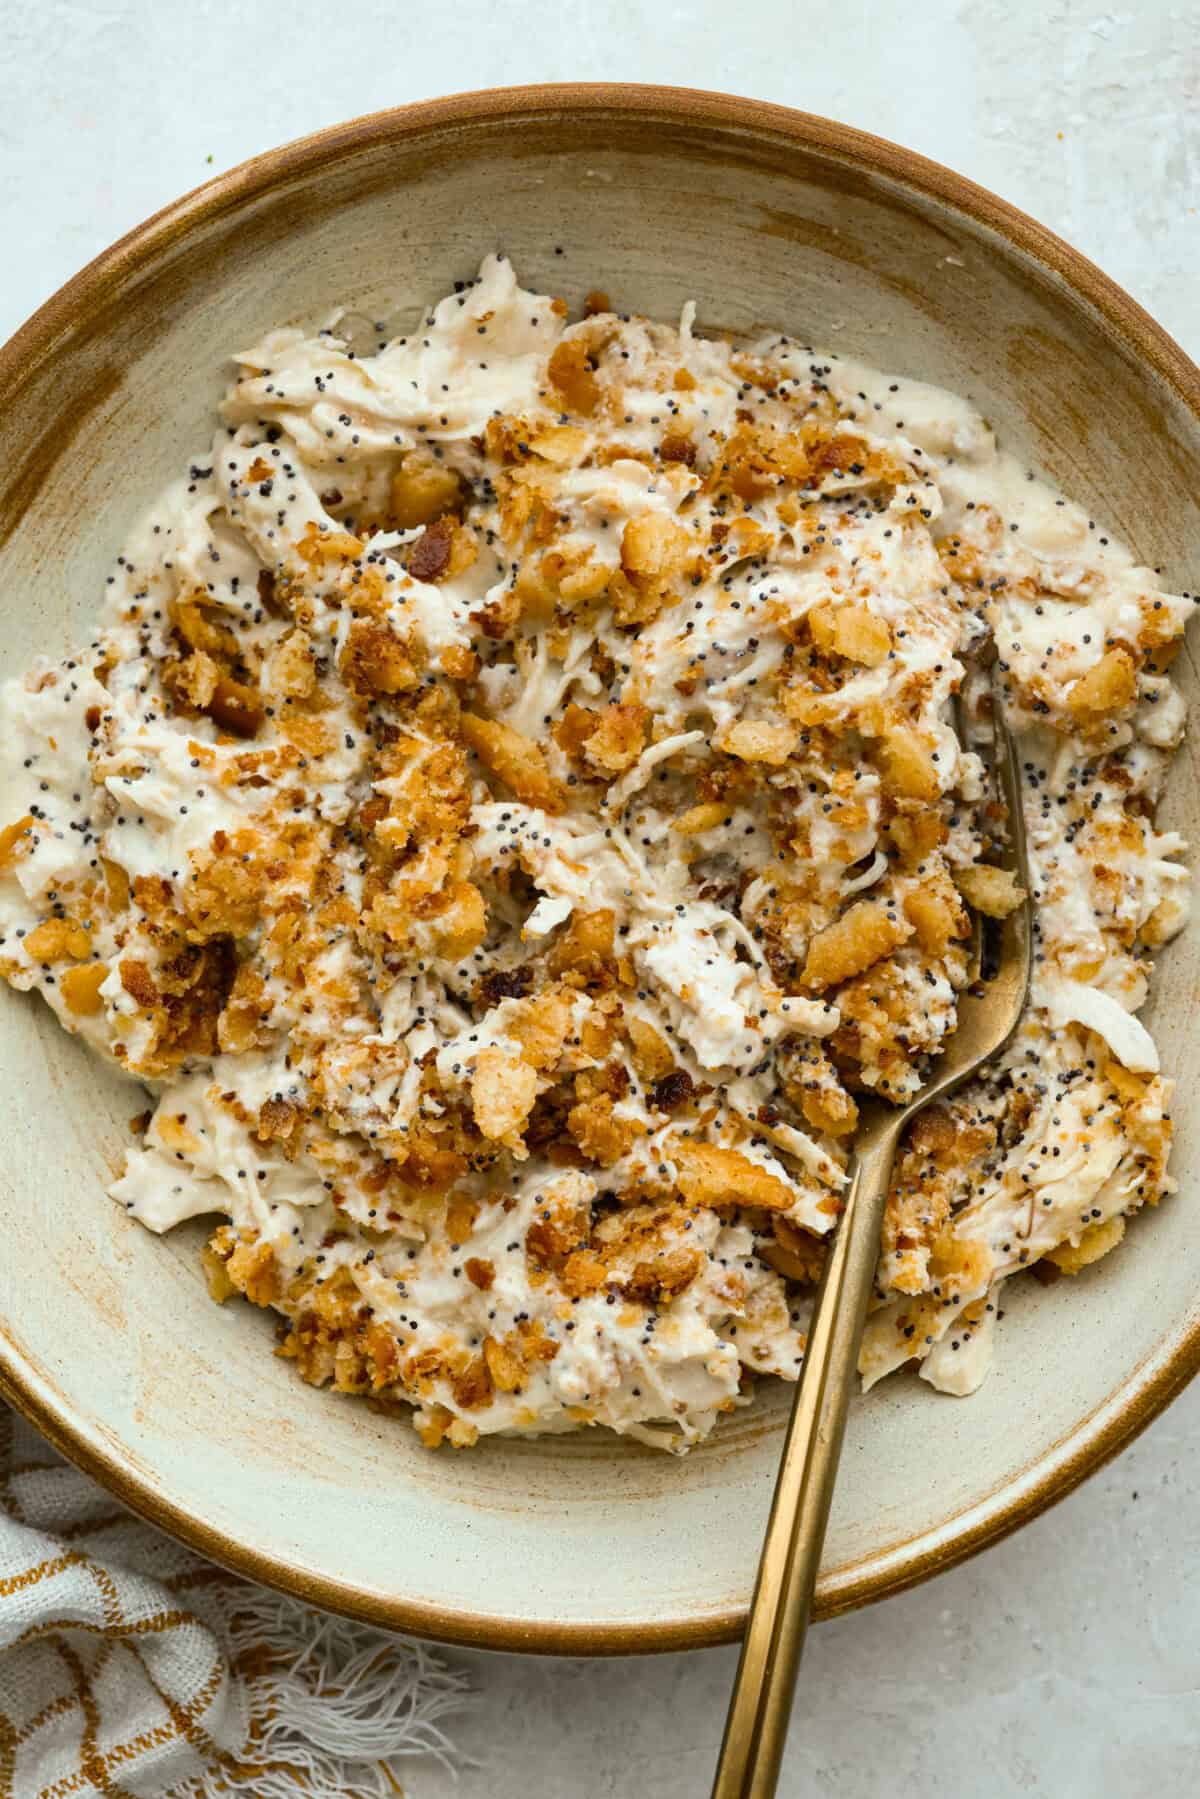
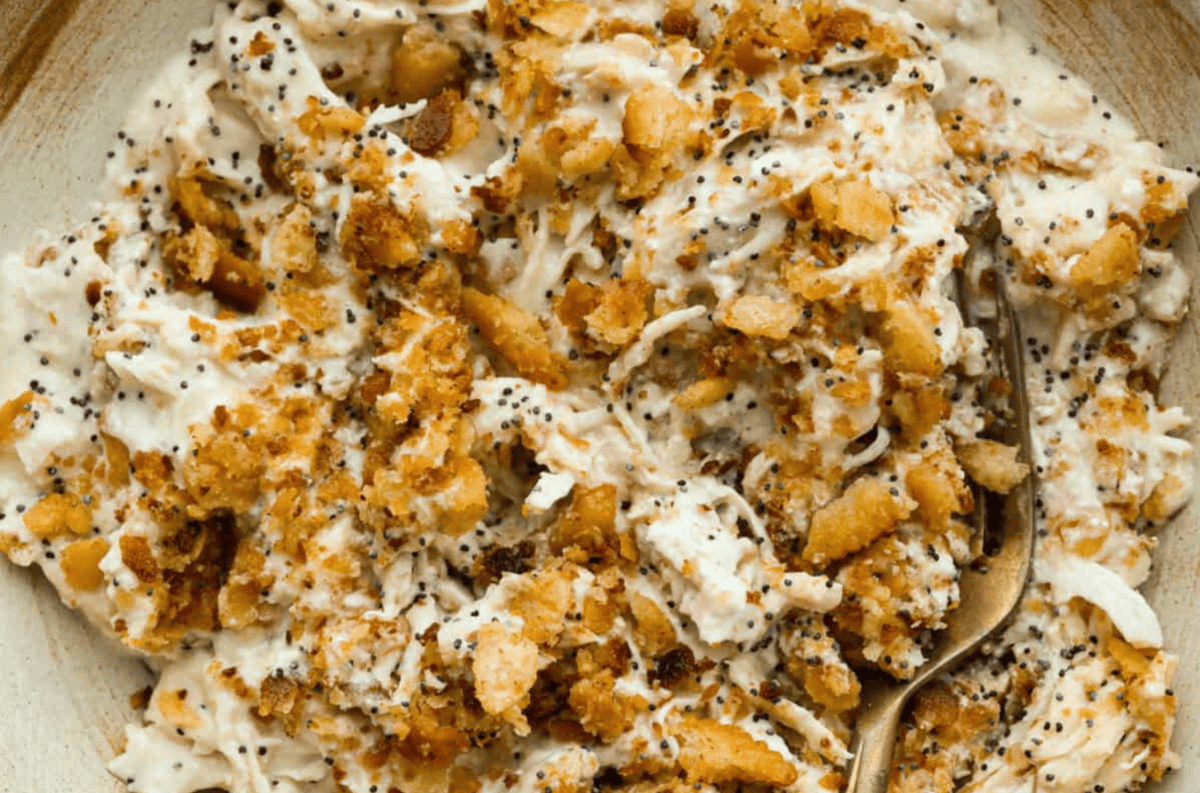
    Serving of crockpot poppyseed chicken in a serving bowl.

    More Easy Crockpot Chicken Recipes

    Crockpot Olive Garden Chicken with Pasta

    6 hours 20 minutes


    Source link

  • Grilled Chicken Caesar Salad | The Recipe Critic

    Grilled Chicken Caesar Salad | The Recipe Critic

    This website may contain affiliate links and advertising so that we can provide recipes to you. Read my disclosure policy.

    Fresh and delicious Grilled Chicken Caesar Salad is a crowd-pleasing hearty salad with tender grilled chicken, crisp romaine lettuce, cherry tomatoes, shredded parmesan cheese, and crunchy croutons!

    Satisfying and flavorful salads like this one never go out of style. They make the perfect lunch or light dinner! Try out this greek broccoli pasta salad, this delicious honey mustard chicken salad, and this amazing Portillo’s chopped salad.

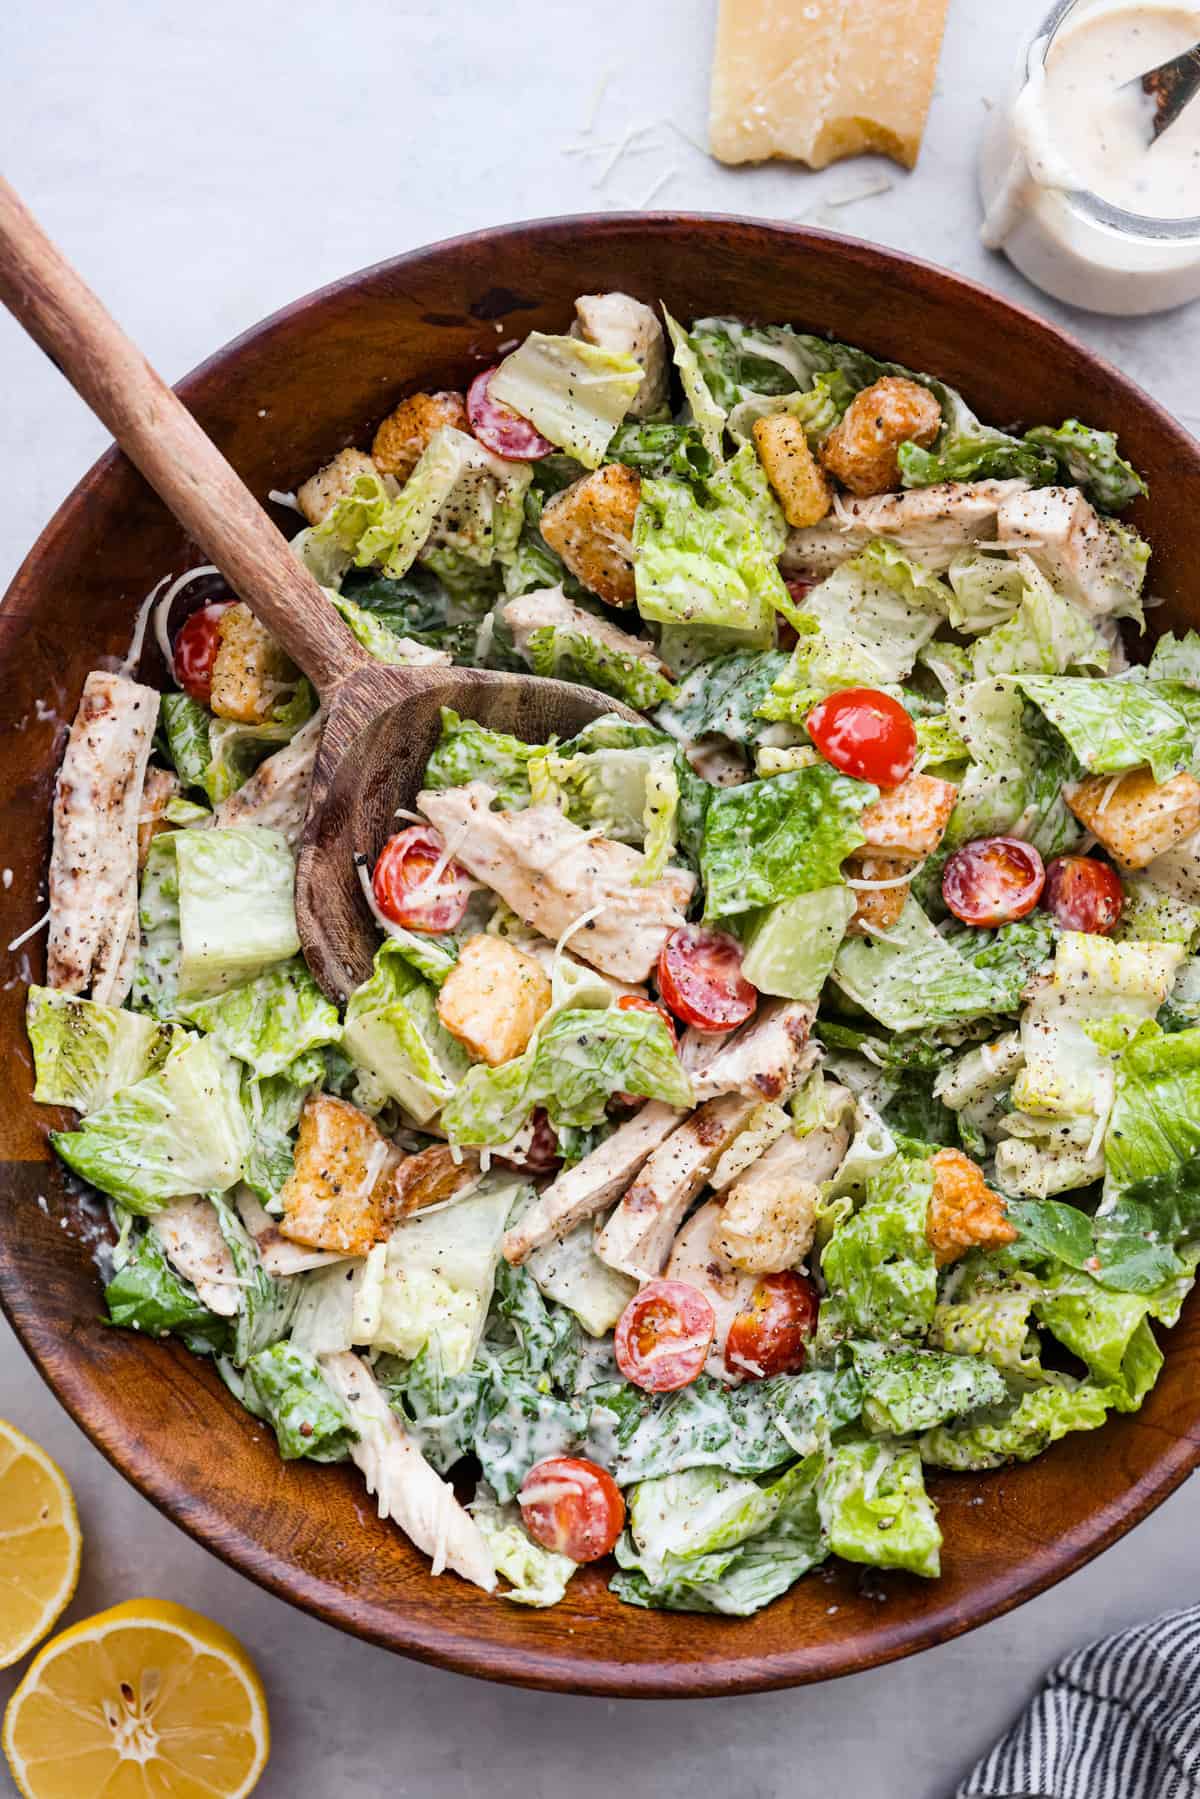
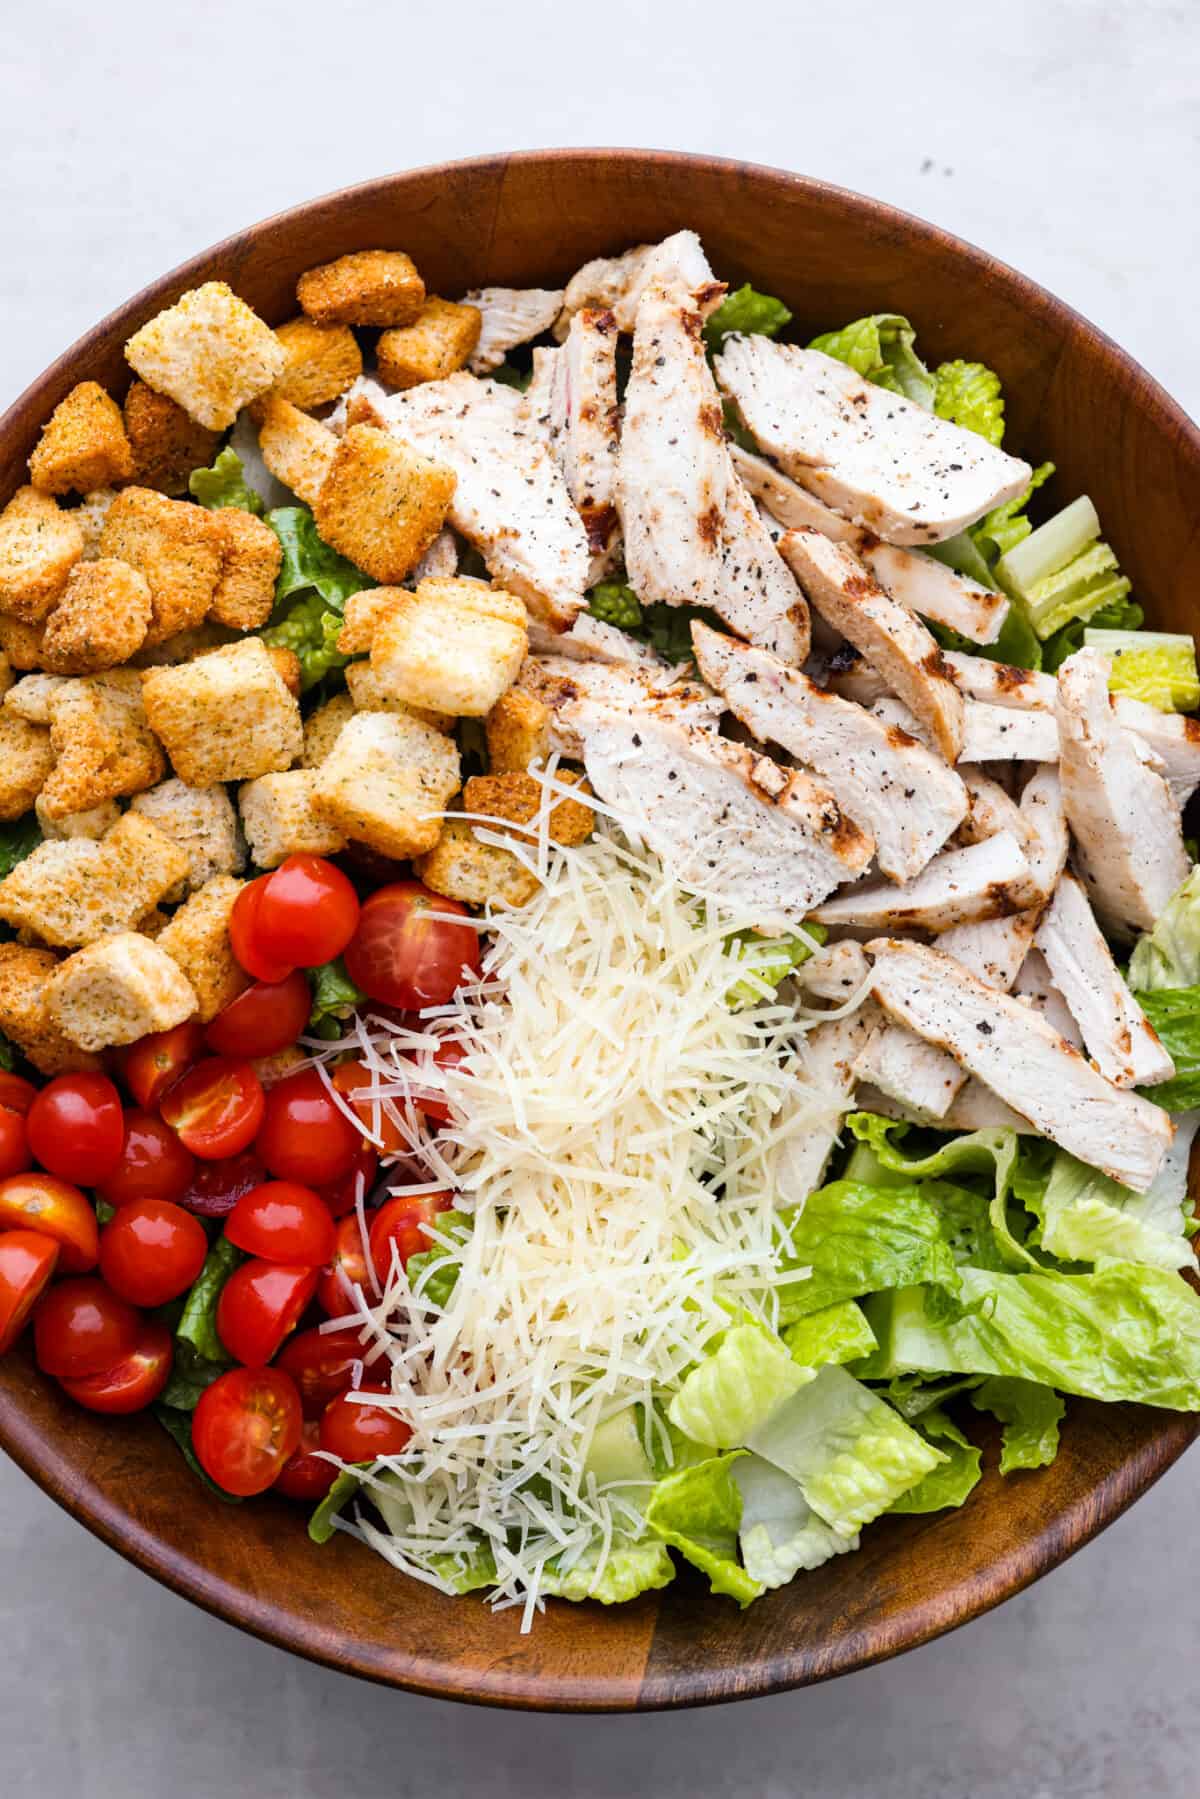
    Top view of a chicken caesar salad in a wooden bowl with a wooden spoon in it.

    Reasons to Make This Salad

    • It’s so filling: This chicken Caesar salad includes vegetables, lean protein, and many essential vitamins and minerals. It’s one of those salads that will fuel you for hours.
    • So delicious: The combination of crisp romaine, juicy tomatoes, flavorful chicken, delicious parmesan cheese, and crunchy croutons creates a mouthwatering flavor profile that’s a hit with almost everyone.

    Grilled Chicken Caesar Salad

    This grilled chicken Caesar salad is my favorite refreshing meal when the weather starts to warm up! I’ve always been a huge fan of a good classic Caesar salad, but this one with juicy, flavor-packed grilled chicken and juicy tomatoes is on a whole new level.

    It’s actually pretty easy to make, too! Let the chicken marinate in Caesar dressing to add plenty of that delicious Caesar flavor. Then, once the chicken is grilled, everything comes together in minutes. Serve it alone or with some crusty buttered sourdough bread on the side.

    Ingredients in Chicken Caesar Salad

    This grilled chicken salad recipe is the absolute best! The ingredients are simple and come together with very little effort. Check out the recipe card at the bottom of the post for exact measurements.

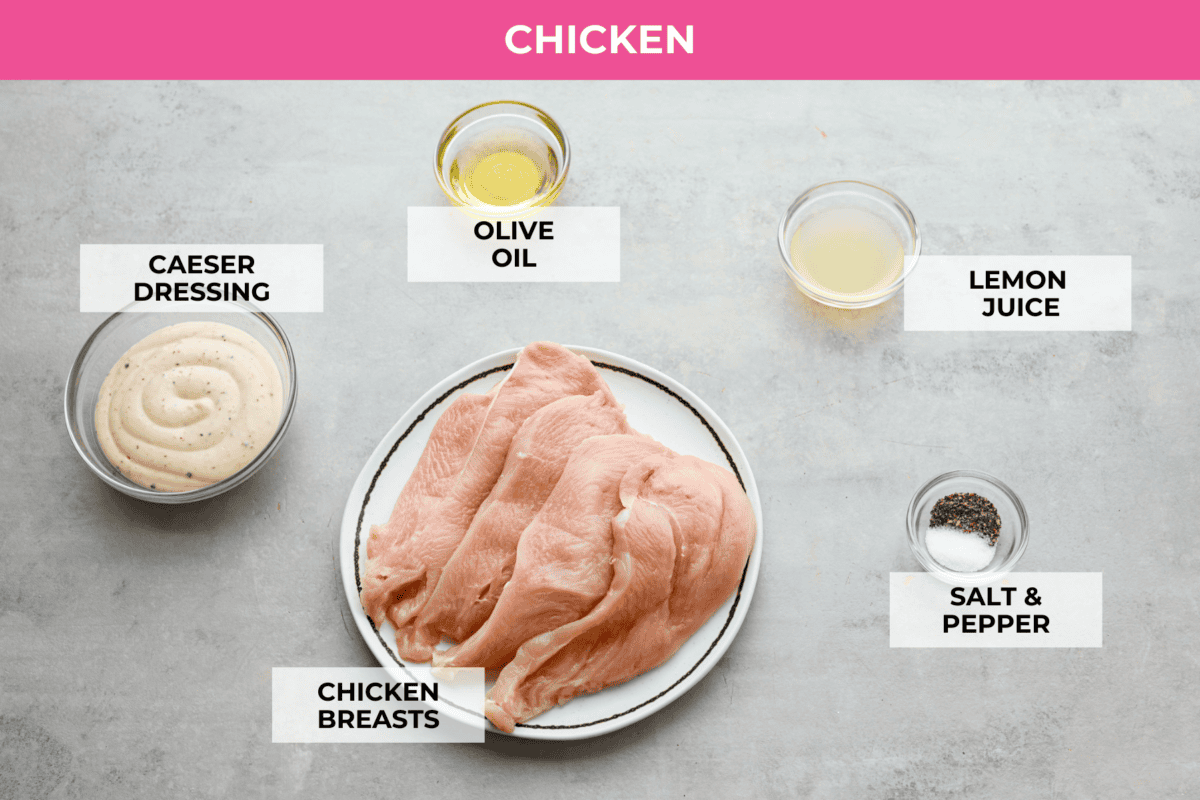
    Chicken

    • Caesar Dressing: You can use store-bought dressing, but we highly recommend this homemade Caesar Dressing. It’s perfectly creamy with incredible flavor!
    • Olive Oil: Smooths out the marinade and adds some necessary fat for juicy grilled chicken.
    • Lemon Juice: All good marinades have just enough acidity to tenderize the meat.
    • Salt & Pepper: Brings out all of the delicious flavor.
    • Chicken Breasts: These will marinate in the dressing for at least 1 hour making them tender, juicy and full of flavor.
    Top view of ingredients for chicken marinade.

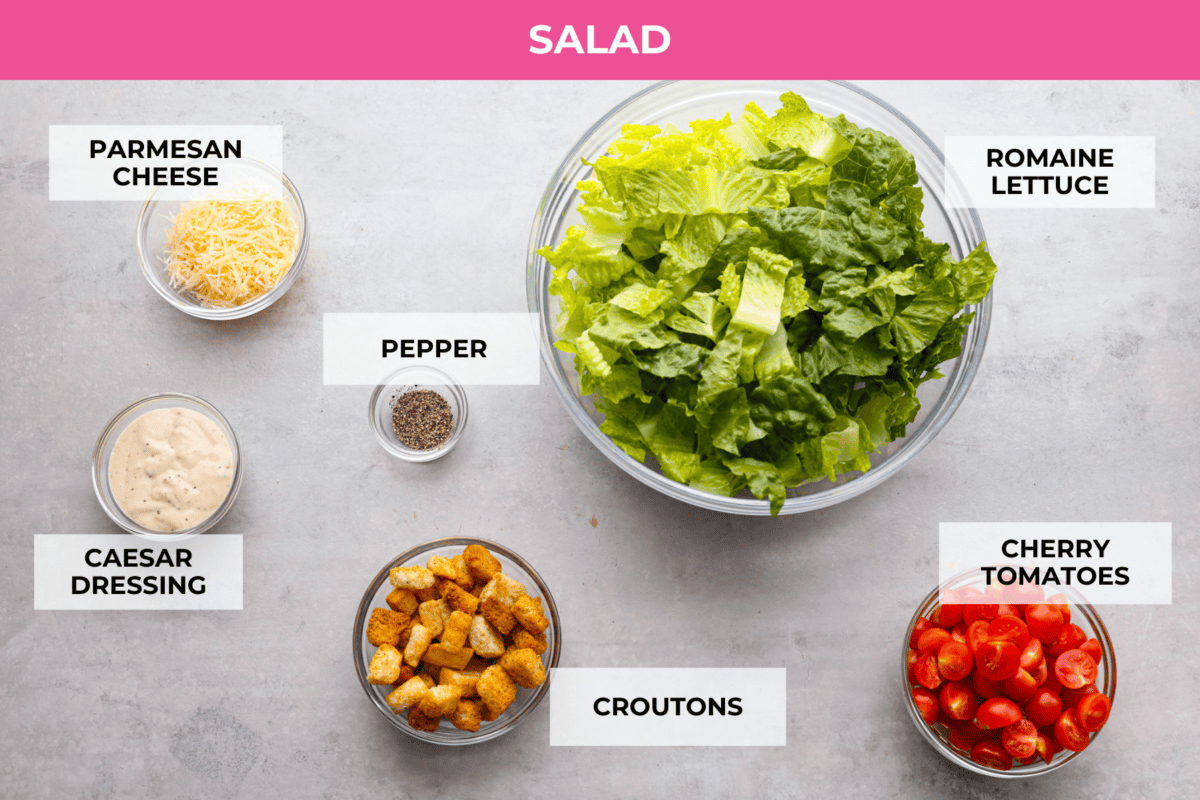
    Salad

    • Romaine: Chopped romaine adds bright green color and makes the salad fresh and crisp.
    • Cherry Tomatoes: For juicy bursts of sweetness.
    • Croutons: I love using my homemade croutons to add plenty of crunchy texture.
    • Parmesan Cheese: Add shredded or shaved parmesan cheese for a bit of nutty sharpness that enhances the flavor of the dressing.
    • Caesar Dressing: You can’t have a Caesar salad without Caesar Dressing! It adds the most wonderful briny, tangy and rich taste.
    • Black Pepper: Freshly cracked black pepper is the perfect finishing touch!
    Top view of labeled ingredients for the salad.

    How to Make a Grilled Chicken Caesar Salad

    Just five simple steps and you’re well on your way to the best salad of your life! This is one of those salads that even the kids will love. It’s that good! Here’s the easy process of how everything comes together:

    For the chicken

    1. Make the Marinade: In a large sealable bag or container, mix together the Caesar dressing, olive oil, lemon juice, and salt and pepper.
    2. Marinate the Chicken: Add the chicken breasts to the bag or container and coat each breast evenly. Place the chicken in the fridge to marinate for at least 1 hour.
    3. Grill: Heat a grill up to 375 degrees Fahrenheit. Once the chicken is ready, remove it from the marinade and grill for about 6-8 minutes on each side. Discard the marinade.

    For the salad.

    1. Slice Chicken: Once the chicken is grilled, let it rest at least 5 minutes before slicing into ½ inch strips.
    2. Assemble and Toss Salad: To a large bowl add the chopped romaine, cherry tomatoes, croutons, parmesan cheese, sliced chicken and caesar dressing, top with freshly cracked black pepper and toss.
    Grilled chicken caesar salad in a bowl.  ready to be mixed.

    Tips and Variations

    With a joining of fresh ingredients and a flavorful, creamy salad dressing, this is definitely my new favorite salad recipe! Here are some helpful tips and ways to make it your own!

    • Using Homemade Dressing: I like to use my homemade dressing, but a store-bought dressing works just as well! The same goes for the croutons. 
    • Marinating the Chicken: Your chicken can marinate for up to 4 hours, but 1 hour is sufficient. If you’re in a hurry, even 30 minutes will be okay, but not quite as good.
    • Salad Greens: Romaine is classic in Caesar salads; however, any favorite greens will work. You can even use a combination of several varieties.
    • Precooked Chicken: You can totally use pre-cooked chicken or rotisserie chicken for this recipe, but what makes it special is the marinated grilled chicken.

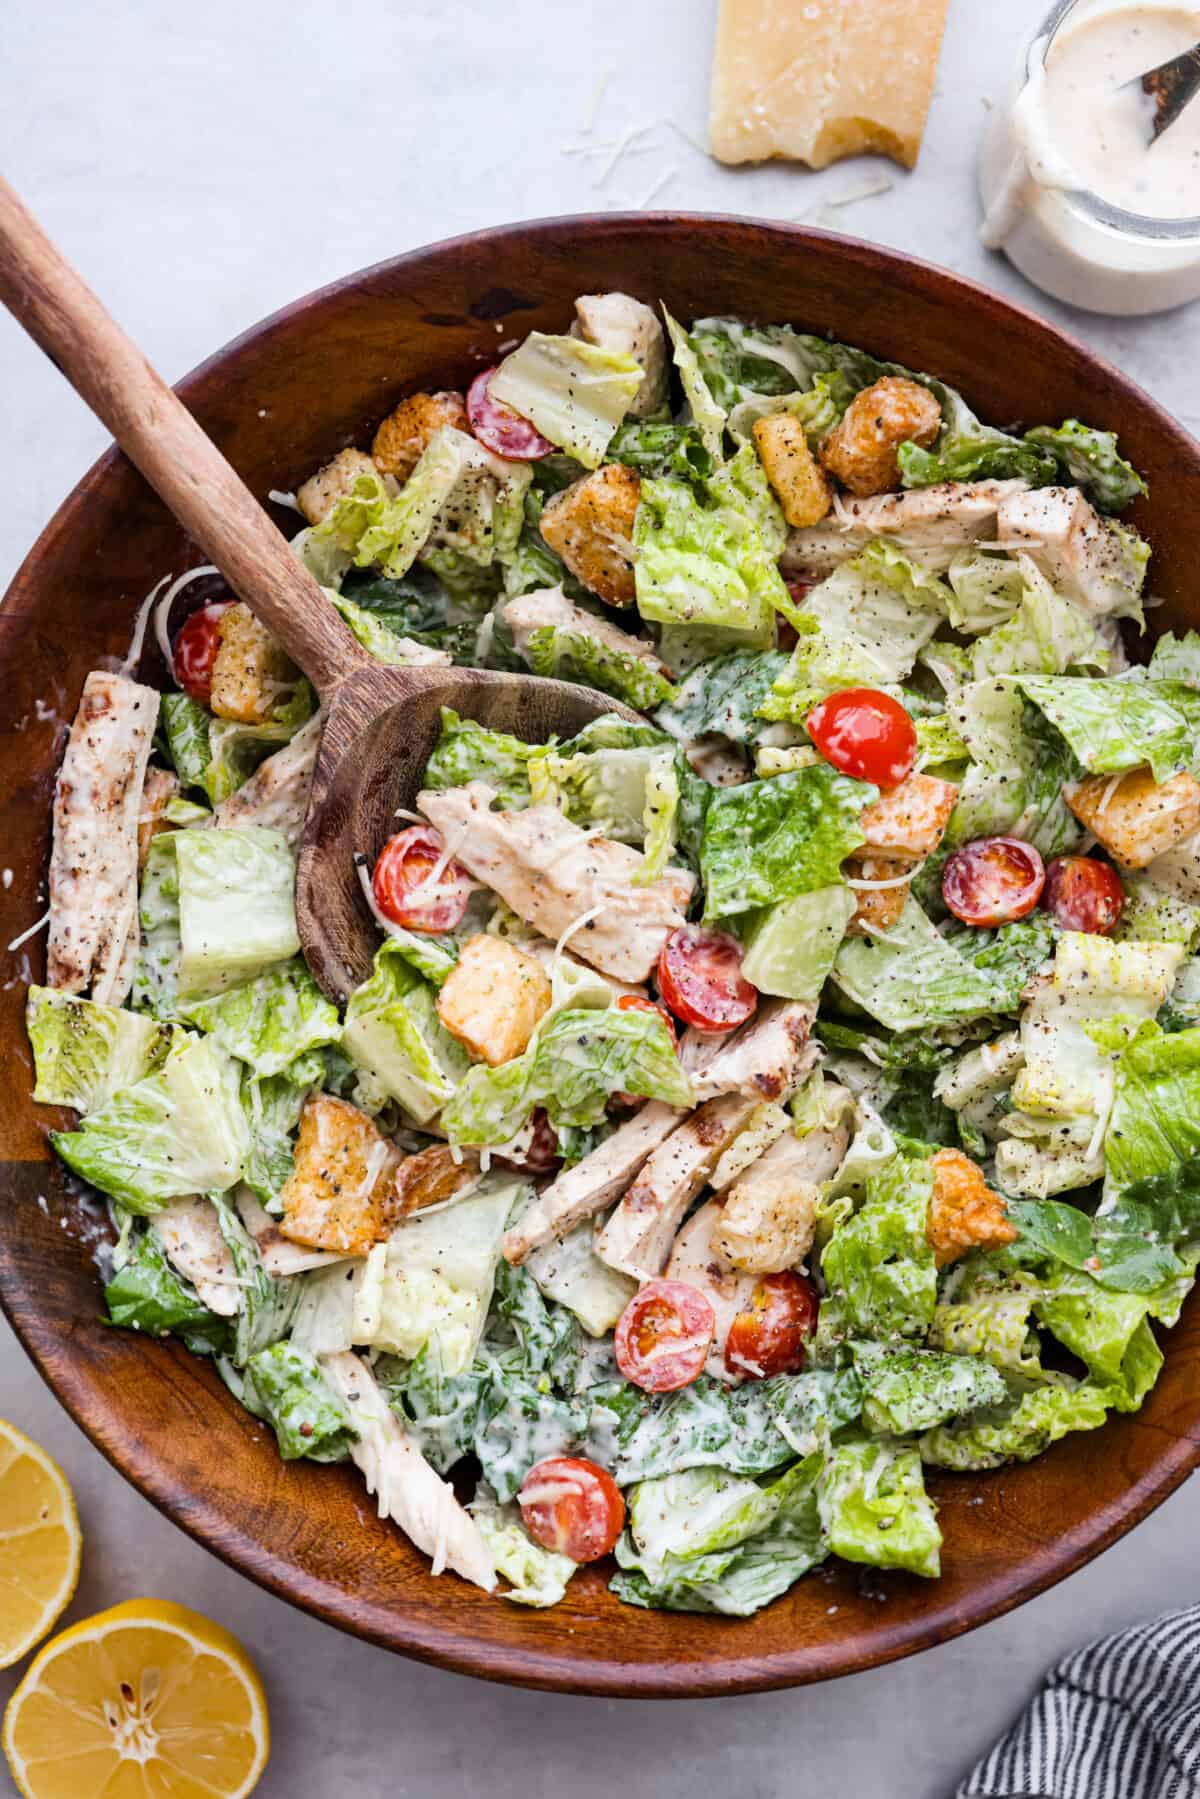
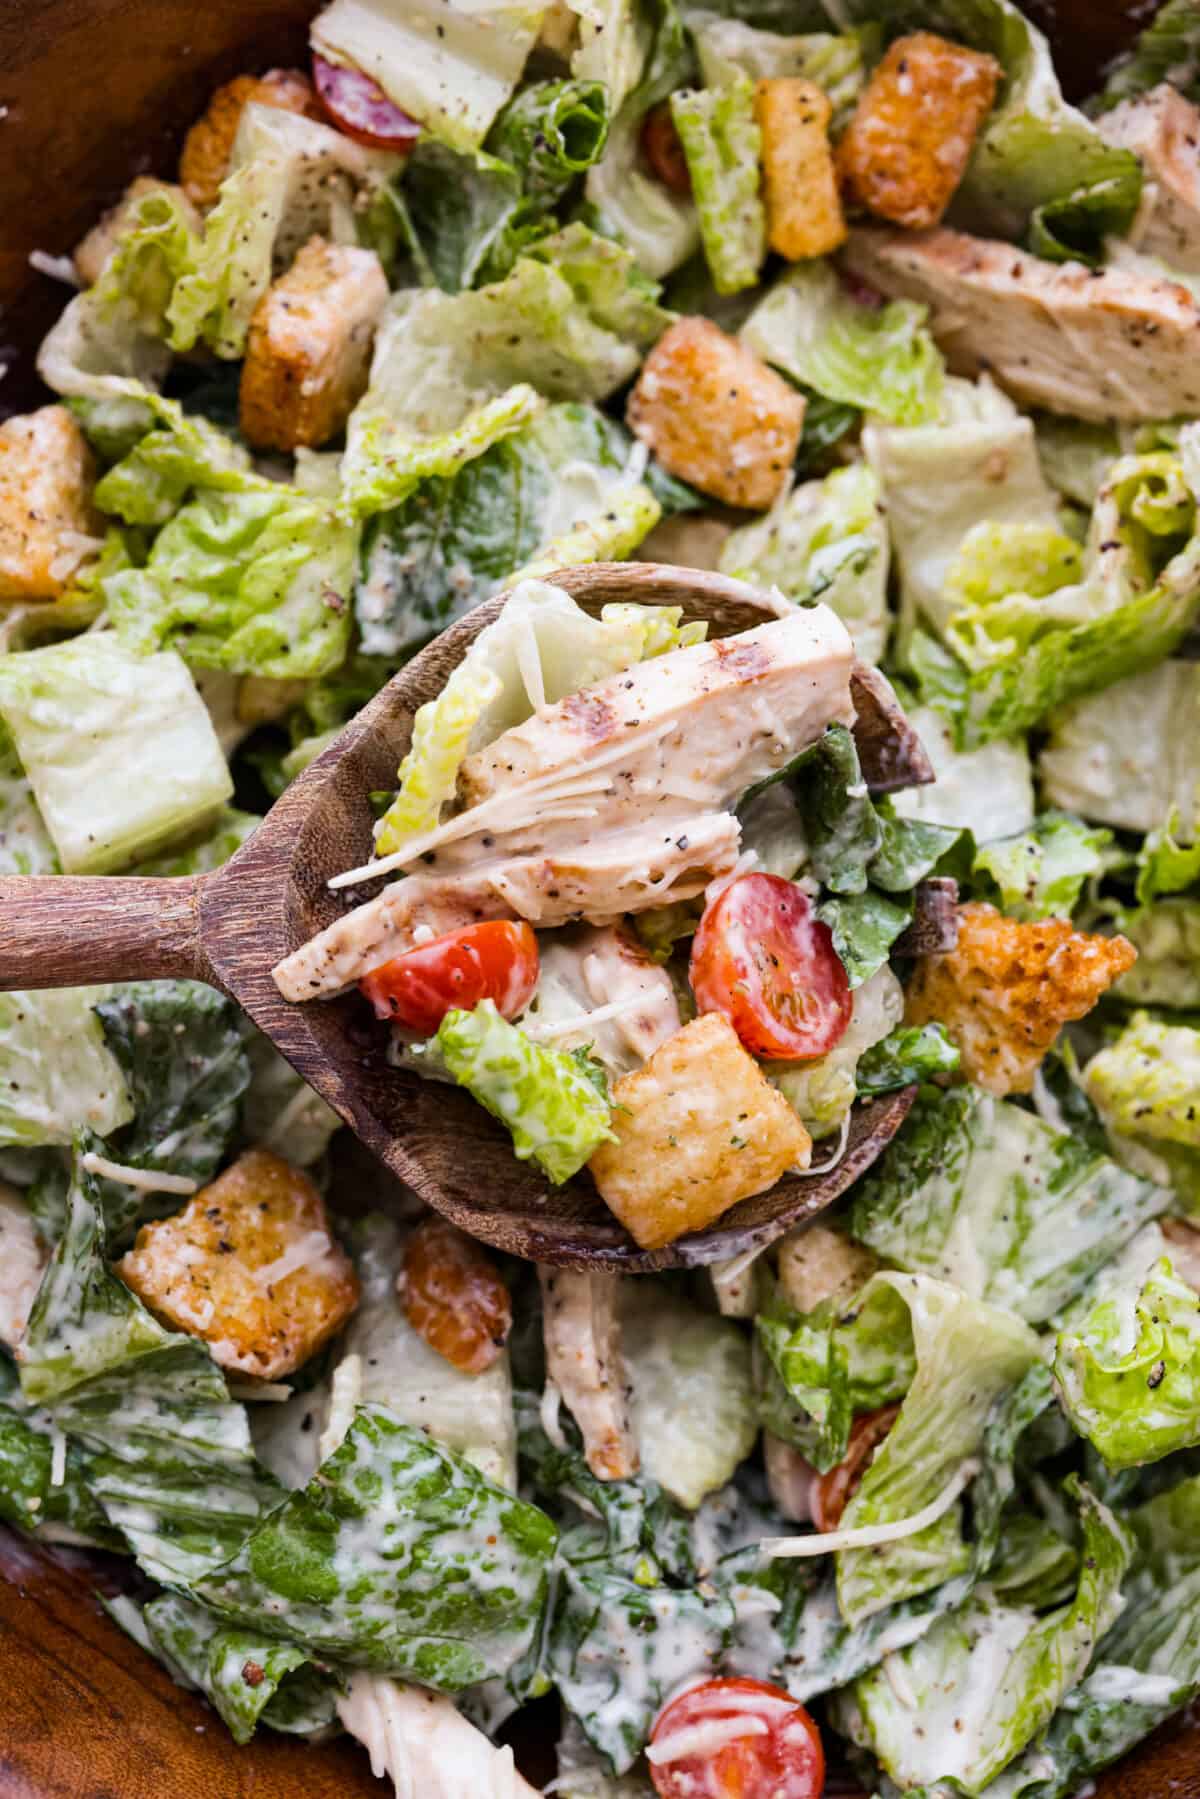
    A close up of grilled chicken caesar salad in a bowl being scooped with a wooden spoon.

    Make Ahead & Storing Leftovers

    • Make Ahead: Get a head start by making the dressing and grilling the chicken a day or two ahead, and store each separately in airtight containers in the refrigerator. You can also chop the lettuce and tomatoes beforehand. Then, when it comes time to serve, pull everything out of the fridge, assemble, and enjoy!
    • Leftovers: Once the salad is tossed, it’s best enjoyed the day it’s made, but you can keep leftovers in an airtight container in the fridge for up to 3 days. It’s best to store the dressing separately from the salad.

    More Delicious Caesar Recipes

    The garlicky, smoky, salty and lemony flavors that make up that classic Caesar taste we all know and love is one of my favs. Anything with that delicious Caesar flavor and I’m bound to be obsessed!

    Grilled Caesar Salad

    19 minutes

    Pin this now to find it later

    Pin It


    Source link

  • Honey Soy Chicken & Rice Bowls

    Honey Soy Chicken & Rice Bowls

    These honey soy ground chicken rice bowls are sweet, salty, garlicky, and come together fast — perfect for healthy weeknight dinners that don’t taste “healthy” but actually are. This recipe is part of my high-protein, high-fiber meals series.


    Jump to: ℹ️ Overview | 🛒 Ingredients | 📷 How To Make | 📹 Watch The Video | 👩‍🍳 Recipe Tips | 🥗 Serving Suggestions | 📝 Full Recipe Card | 🍽 More Healthy Chicken Dinner Recipes And More Rice Bowls


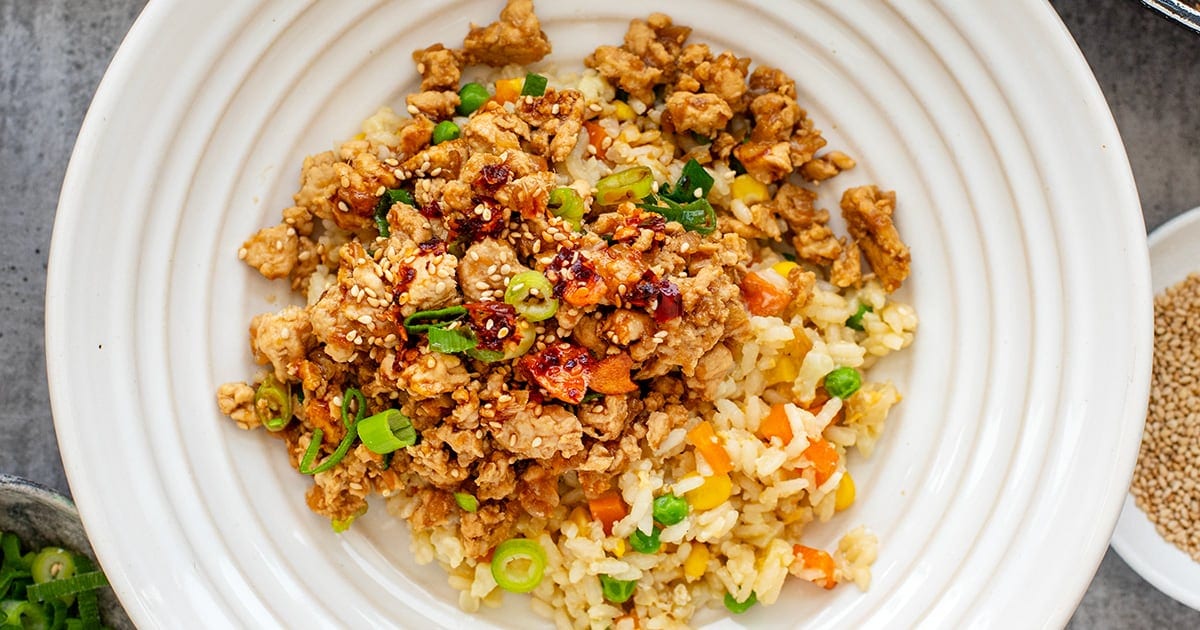
    This honey soy garlic ground chicken and rice bowl situation is what I call a weeknight win. It’s fast, family-friendly, packed with flavor, and sneaky healthy — the kind of thing you’ll make once and then start craving weekly.

    The chicken is juicy and saucy with that perfect salty-sweet garlic-ginger thing going on, and the rice? It’s kind of like fried rice but a healthy version. It’s a “dump and cook” version that steams right in the pan with veggies and stock, meaning less oil and way less effort.

    It’s giving: takeout vibes but lower in calories, higher in protein and fiber, and way more satisfying. Plus, it uses super accessible ingredients (hello freezer peas and corn, and pantry soy sauce) and makes great leftovers. Basically: healthy dinner gold.

    Nutrition per serving: 550 calories, 32 g protein and 5 g fiber.

    👩‍🍳 You might also like these chicken and rice recipes: chicken shawarma with baked rice, coconut chicken & cauliflower rice, chicken rice bowls, gochujang chicken, or ground chicken stir fry. You might also like my turkey baked meatballs & potatoes with garlic yogurt.

    What You’ll Need

    Here is what you’ll need for this honey soy chicken & rice bowls recipe. Find the full measurements in the recipe card below.

    For the honey soy chicken

    • Ground chicken – Lean but still juicy; loaded with protein.
    • Onion, garlic & ginger – The holy trinity for depth and umami.
    • Light & dark soy sauce – Light for salty goodness, dark for richness and color.
    • Honey – Balances the saltiness and adds that sticky-glaze texture.
    • Sesame oil – A finishing oil that adds major aroma.
    • Chicken stock – Helps create a saucy coating; water will work, too.
    • Green onions – For color and a mild oniony bite.

    For the healthy “fried” rice

    • Butter – Just a tiny bit for richness and flavor.
    • Garlic – For the base of the rice.
    • Medium grain rice – It cooks right in the pan and soaks up all the flavor. I prefer medium grain but long-grain rice will work, too. Brown rice will take much longer to cook, so you could pre-cook it partially separately ahead of time.
    • Carrot & cauliflower – Add texture, fiber, and natural sweetness.
    • Frozen peas & corn – No prep, all the goodness, extra protein and fiber.
    • Chicken stock + water – Steams the rice and veggies without needing to fry.
    • Light soy sauce, oyster sauce, sesame oil – For that fried rice taste, without actual frying.
    • Whisked egg – Adds protein and that classic fried rice finish.

    To serve

    • Toasted sesame seeds, chili crisp, chopped green onions – Optional but highly recommended for extra flavor and crunch.

    How To Make Honey Soy Chicken & Rice Bowls

    Find the full recipe and nutritional information below. Here are some handy step-by-step photos for this ground chicken and rice dinner.

    For the rice

    • Sauté garlic in butter.
    • Add rice, veggies, stock, sauces, and seasoning.
    • Cover and simmer until liquid is absorbed.
    • Add peas and corn, cook a few more minutes.
    • Pour whisked egg over the top, cover briefly.
    • Finish by stirring through on high heat to cook the egg.

    For the chicken

    • Sauté onions until soft.
    • Add garlic and ginger.
    • Add chicken, break it up and cook until browned.
    • Pour in sauces, honey, stock.
    • Simmer until sticky and saucy.
    • Stir in green onions.

    To serve

    • Spoon rice into bowls, top with chicken, and finish with sesame seeds, chili crisp, and green onions.

    Watch The Video

    Recipe Tips

    • Short on time? Use pre-chopped veggies or frozen cauliflower rice.
    • Swap it up: Ground turkey or beef would also work well here.
    • Make-ahead: The chicken keeps great for up to 3-4 days and rice for 1-2 days. Store separately and reheat together.
    • Low-carb option: Swap rice for all cauliflower rice — just reduce the stock and cook for less time.
    • Extra veggies: Throw in chopped spinach or kale at the end.

    Serving Suggestions

    This bowl is a full dinner meal on its own — protein, carbs, veggies, all in one. But if you’re feeling fancy, you could serve it with a quick cucumber salad or some steamed edamame on the side. A fried egg on top wouldn’t hurt either. I always love extra veggies, so you could try one of these side dishes.

    💬 If you’ve tried this honey soy chicken & rice bowls or any other recipe on the blog then don’t forget to rate the recipe and let me know how you got on in the comments below, I love hearing from you! You can also FOLLOW ME on Instagram, Facebook, Pinterest, YouTube, and or sign up to my Newsletter to see more of my delicious food.

    Want to Save This Recipe?

    Enter your email & I’ll send it to your inbox. Plus, get great new recipes from me every week!

    By submitting this form, you consent to receive emails from Cooked & Loved

    These honey soy ground chicken rice bowls are sweet, salty, garlicky, and come together fast — perfect for healthy weeknight dinners that don’t taste “healthy” but actually are. This recipe is part of my high-protein, high-fiber meals series. Find step-by-step photos and more recipe tips above.

    To make the rice:

    • Heat butter in a deep frying pan over medium-high.

    • Add garlic and stir for 30 seconds.

    • Add rice, carrot, cauliflower, chicken stock, water, soy sauce, oyster sauce, sesame oil, and white pepper if using.

    • Bring to a boil, cover, then reduce heat to medium-low and cook for 10 minutes.

    • Uncover, add peas and corn, stir, cover again for 5 more minutes.

    • Pour whisked egg evenly over rice. Cover for 1 minute.

    • Increase heat to medium-high, uncover, and stir through to cook the egg.

    To make the chicken:

    • Heat oil in a pan over medium-high. Add onions and cook until soft.

    • Add garlic and ginger, stir for 30 seconds.

    • Add chicken and increase heat. Break it up as it cooks.

    • Cook for about 6–7 minutes until golden and mostly cooked through.

    • Add soy sauces, honey, sesame oil, and stock. Stir and simmer for 2–3 minutes until saucy.

    • Finish with green onions.

    • Can I use another protein? Yes! Ground turkey, pork, or beef would all work. Just adjust the cooking time slightly if needed.
    • Can I make this gluten-free? Use tamari instead of soy sauce and double-check your oyster sauce (or sub with a gluten-free black bean or stir-fry sauce).
    • Is this spicy? Not at all! It’s very mild and kid-friendly. Add chili crisp or sriracha on top if you like some heat.
    • Can I use leftover rice instead? Absolutely. If using cooked rice, sauté your veggies first, then stir in rice and sauces to warm through.
    • Short on time? Use pre-chopped veggies or frozen cauliflower rice.
    • Swap it up: Ground turkey or beef would also work well here.
    • Make-ahead: The chicken keeps great for up to 3-4 days and rice for 1-2 days. Store separately and reheat together.
    • Low-carb option: Swap rice for all cauliflower rice — just reduce the stock and cook for less time.
    • Extra veggies: Throw in chopped spinach or kale at the end.

    Calories: 558kcal | Carbohydrates: 65g | Protein: 32g | Fat: 19g | Saturated Fat: 5g | Polyunsaturated Fat: 4g | Monounsaturated Fat: 9g | Trans Fat: 0.2g | Cholesterol: 146mg | Sodium: 1371mg | Potassium: 1109mg | Fiber: 5g | Sugar: 12g | Vitamin A: 2857IU | Vitamin C: 33mg | Calcium: 60mg | Iron: 5mg

    Keywords: Honey Soy Chicken & Rice Bowls, Ground Chicken Rice Bowls, ground chicken and rice recipes, honey soy garlic chicken

    More Healthy Chicken Dinner Recipes

    More Rice Bowls


    Source link

  • Skillet Lemon Parmesan Chicken and Zucchini

    Skillet Lemon Parmesan Chicken and Zucchini

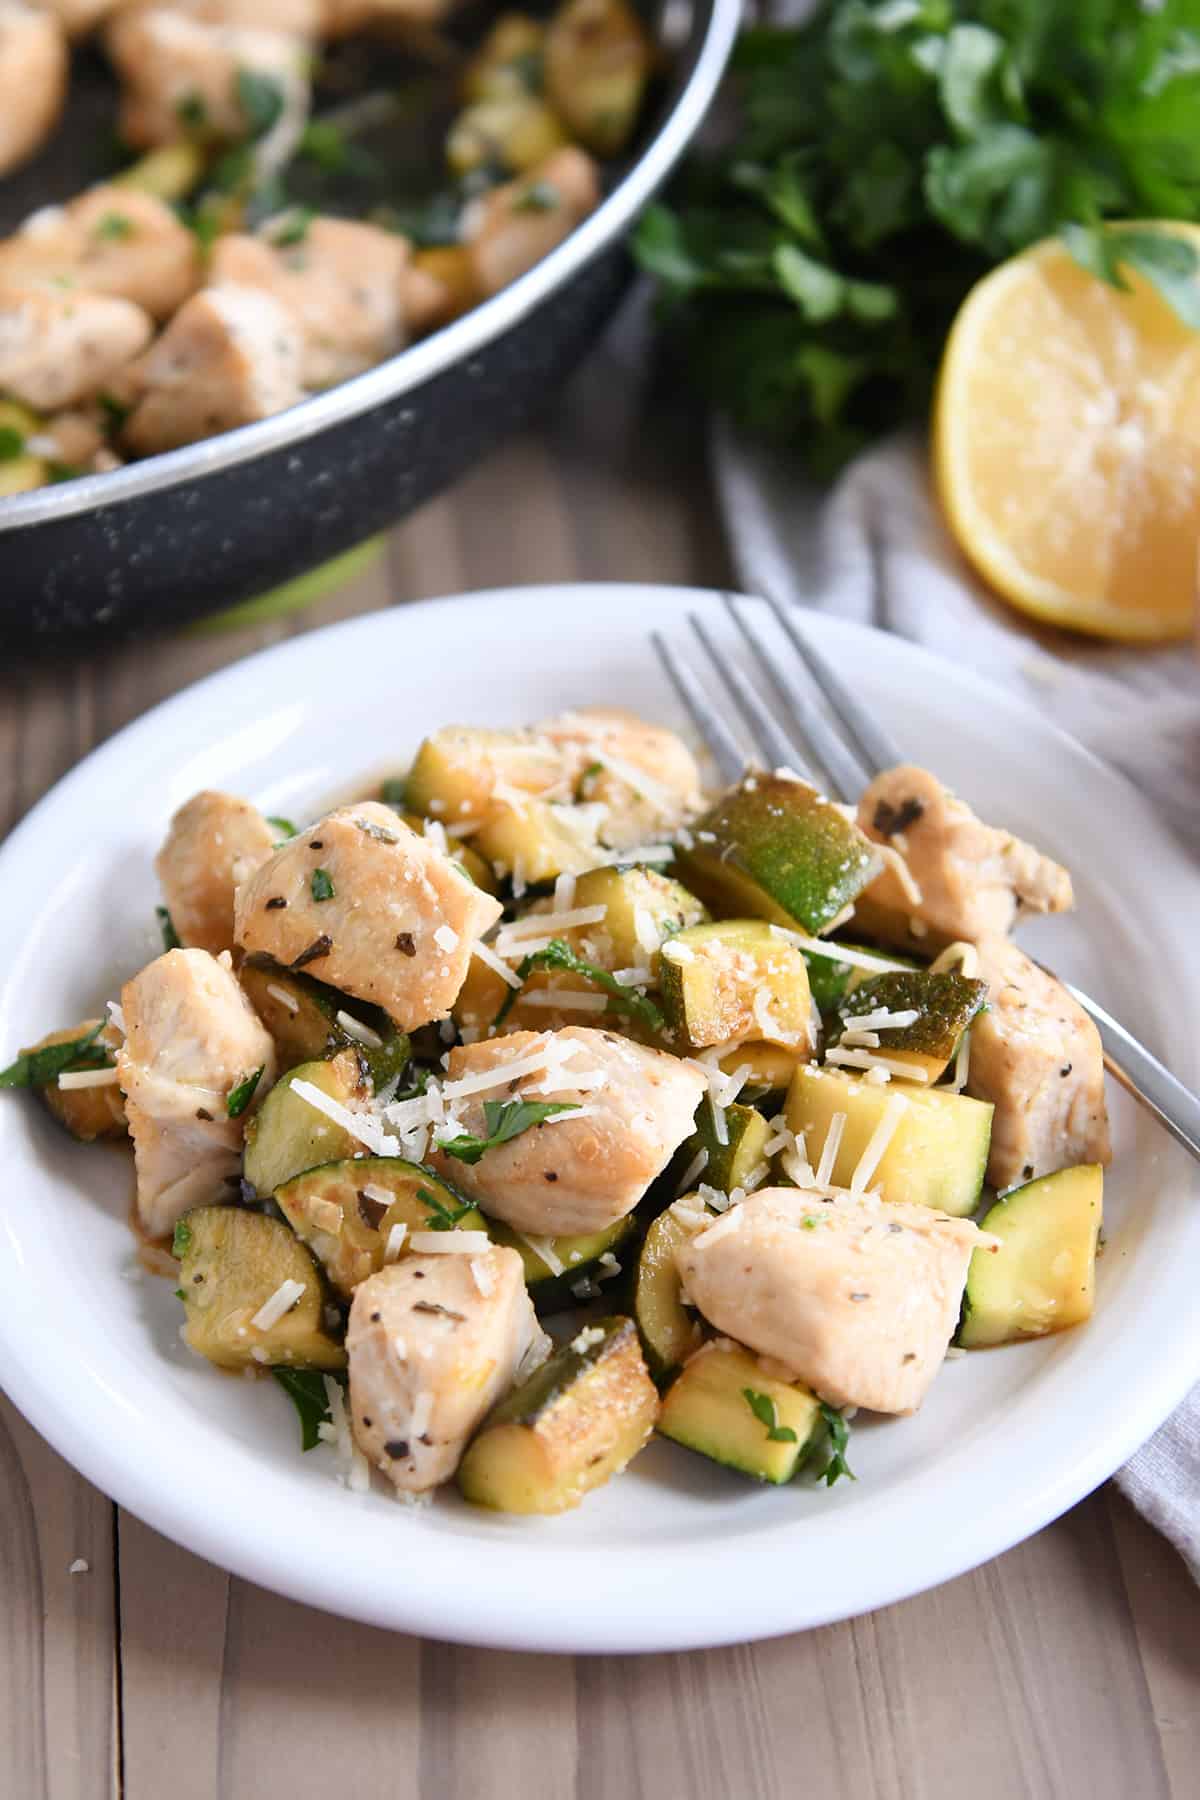
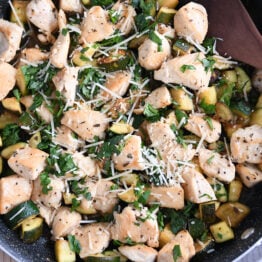
    This quick and light skillet lemon parmesan chicken and zucchini is fantastic! So delicious, the bright lemon and deeper savory flavors are perfect!

    Let me kindly introduce you to the meal I could every day for the rest of forever and still be left wishing I had it on the menu plan again.

    It.is.so.yummy. (And ridiculously easy!)

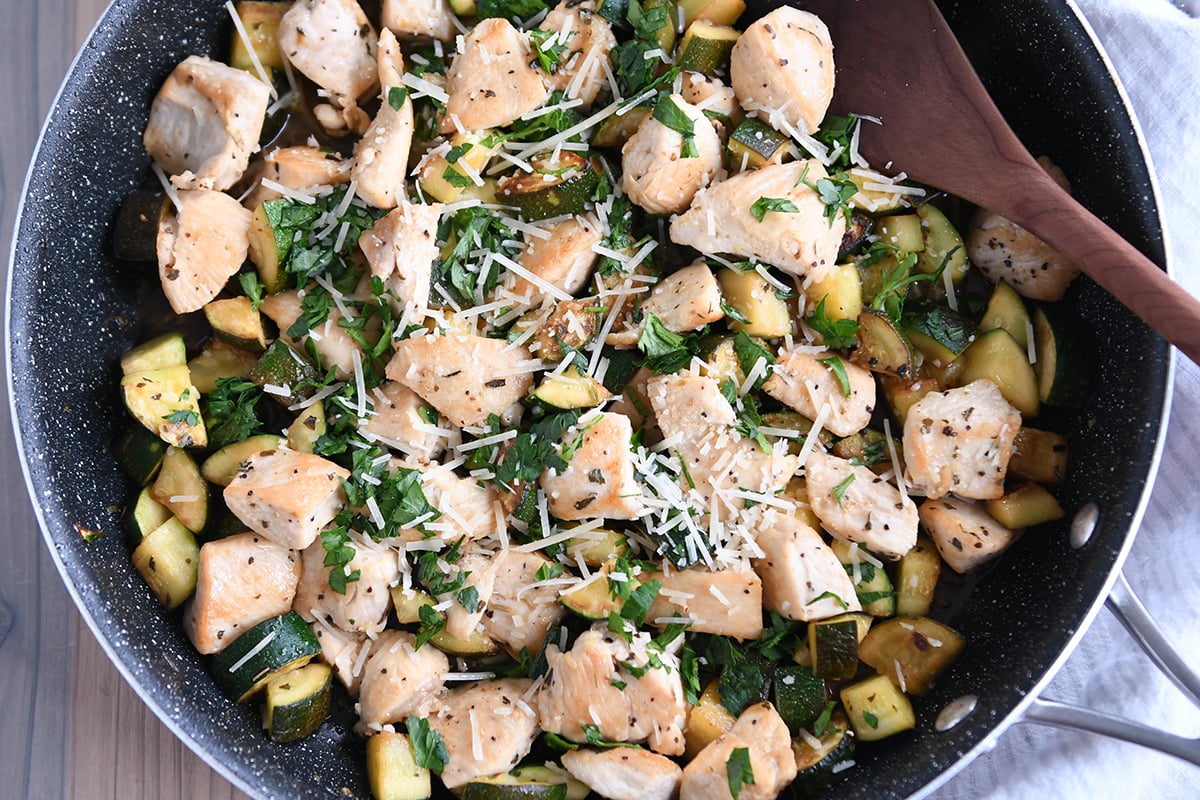
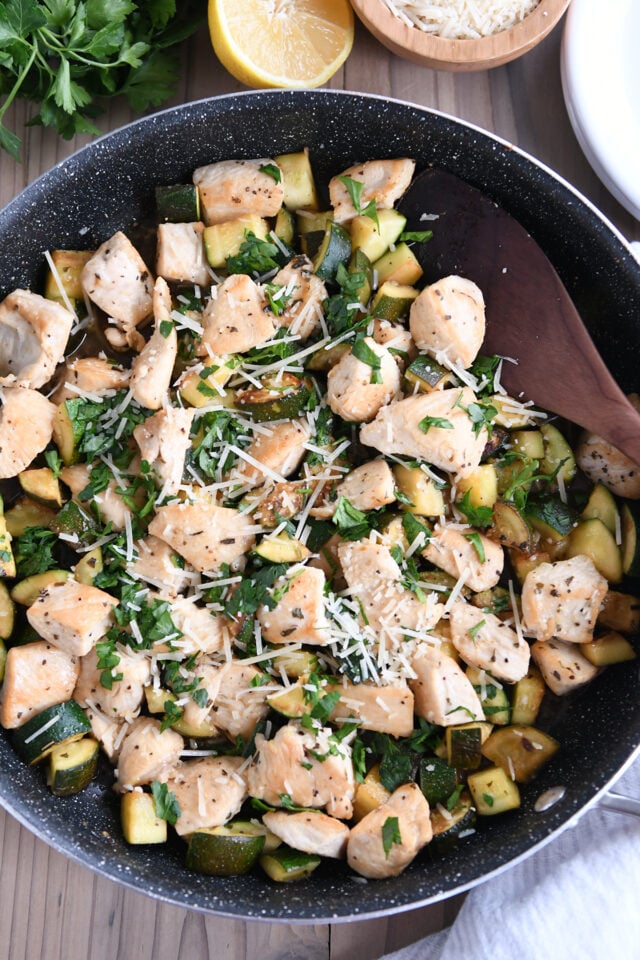
    Top down view of nonstick skillet with chicken, zucchini, parsley and parmesan.

    Tips for Skillet Success

    This recipe relies on a few things for optimum flavor.

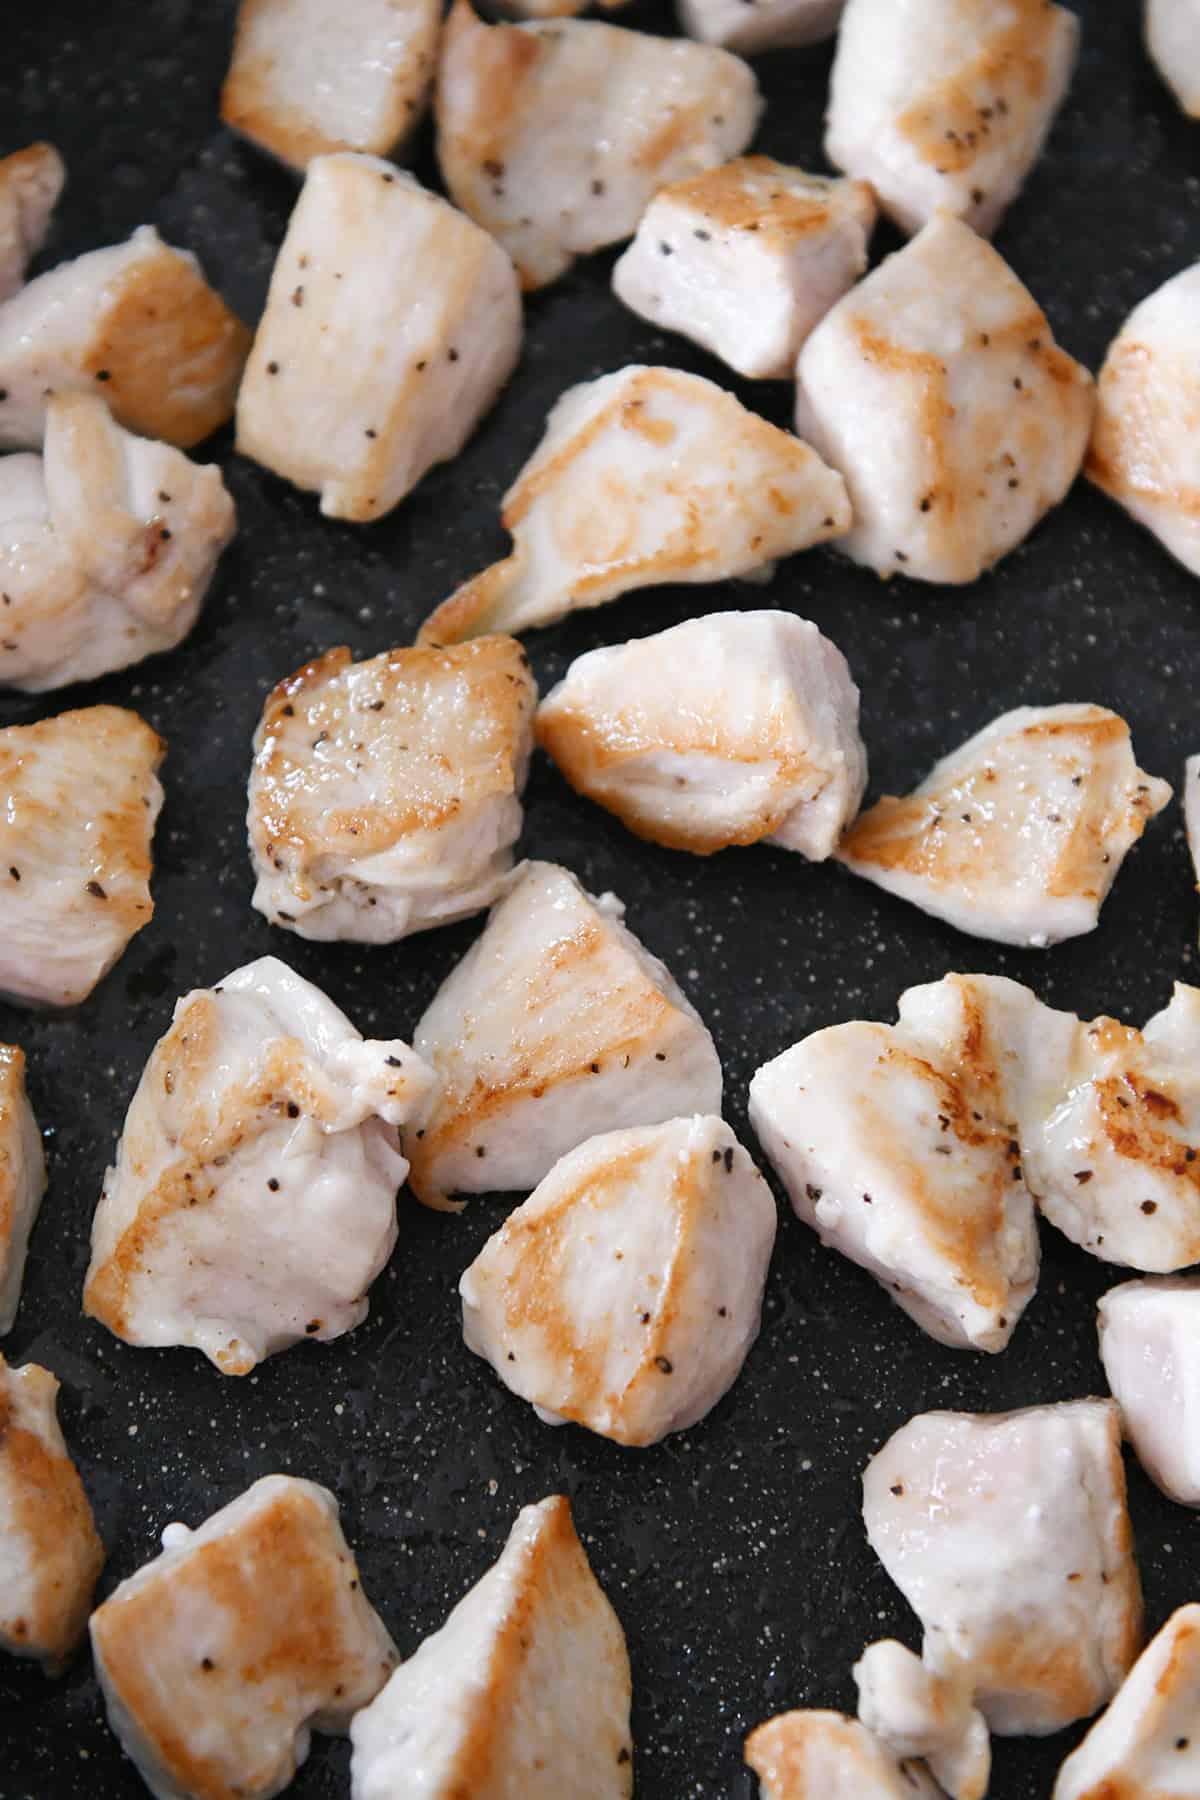
    The first is browning the chicken and zucchini in a hot skillet so they develop that beautiful golden color (and flavor!).

    To do this, heat the oil until rippling and hot and then add the chicken in a single layer. Make sure to pat the chicken dry! It helps the chicken to sizzle and sear instead of steam in liquid.

    Let the chicken cook WITHOUT STIRRING until golden. Flip and cook on the other side.

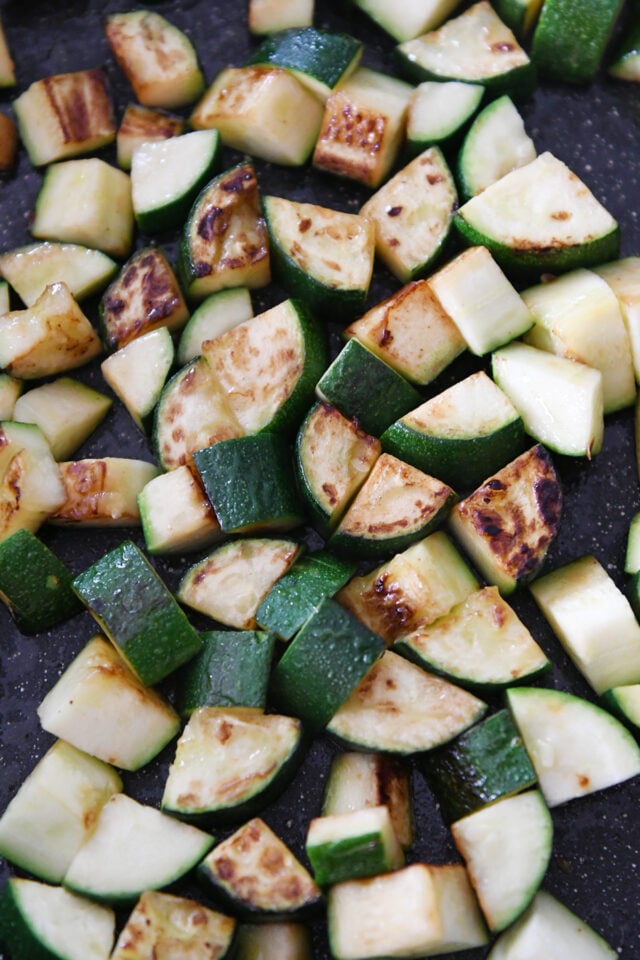
    You’ll do the same thing with the zucchini! The only difference is you can cook the zucchini for less time than the chicken.

    The zucchini is quite delicious cooked until just al dente. Say no to mushy zucchini!

    Golden cooked zucchini pieces in skillet.

    Layers of Flavor

    Once the chicken and zucchini have goldened up to perfection, stir in:

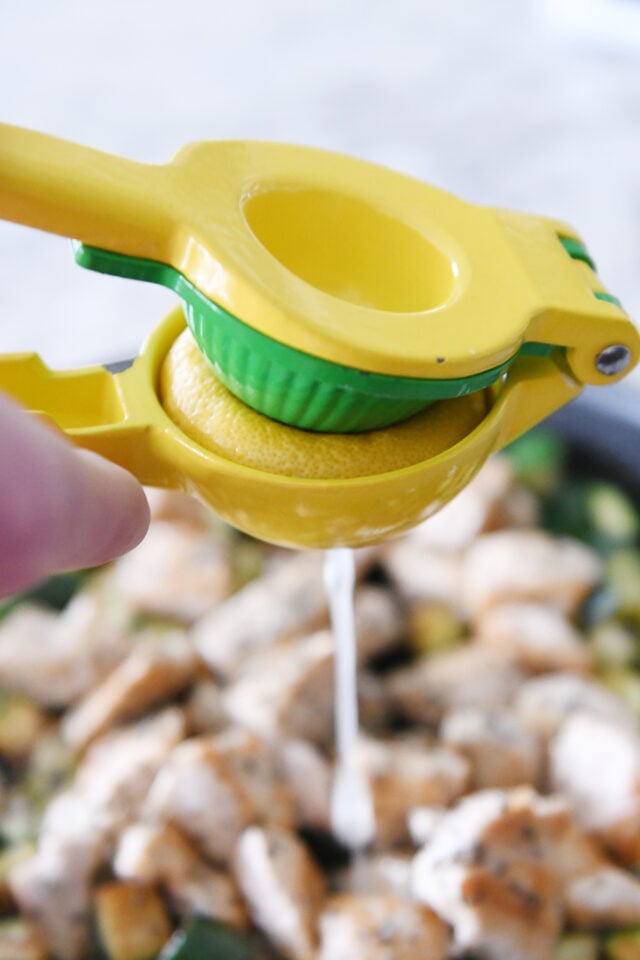
    • fresh lemon juice
    • a little dash of soy sauce (or a gluten-free alternative)
    • dried basil and a tiny bit of dried oregano

    Crank the heat up and let the ingredients sizzle until the liquid thickens slightly.

    Squeezing lemon through citrus press.

    At the very end, sprinkle with Parmesan cheese and fresh basil or parsley (optional but ultra-delish).

    And don’t forget to sample a little taste and add additional salt and pepper, if needed!

    This skillet lemon parmesan chicken and zucchini meal is so, so simple, but as tasty as a meal that takes hours!

    I could literally eat it every day.

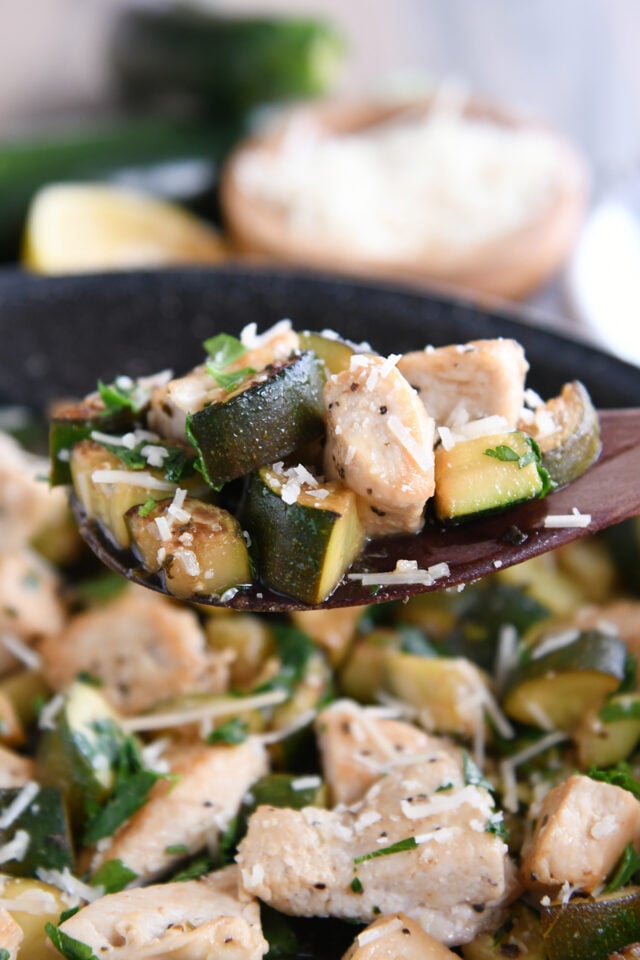
    Wooden spoon with zucchini, chicken and parmesan cheese.

    Low Carb Skillet Meal

    While this recipe is naturally low carb, when I make it for dinner for the family, I usually alter the carb eco-system and serve it alongside jasmine or brown rice or sometimes flatbread.

    For the last few weeks, I’ve been making large batches of this and eating the leftovers for lunch all week with cottage cheese and cherry tomatoes on the side. (And yes, I eat the leftovers cold straight from the fridge because I’m a monster like that. 😂)

    You could easily vary the protein (use ground meat or shrimp, etc) as well as the veggies (yellow squash, broccoli, etc). It’s simple, fast, and amazing!

    One Year Ago: Quick and Easy Chinese Chicken and Broccoli 
    Two Years Ago: Amazing Instant Pot Lemon Curd
    Three Years Ago: Loaded Cheesy Cauliflower Soup
    Four Years Ago: Healthy Egg and Veggie Muffins
    Five Years Ago: Tender Greek Pork Instant Pot or Slow Cooker
    Six Years Ago: Chicken Tortilla Soup Instant Pot, Stovetop, Slow Cooker
    Seven Years Ago: Cashew Chicken Lettuce Wraps 30-Minute Meal
    Eight Years Ago: Korean Beef and Rice Or Quinoa: Simple 20-Minute Meal 
    Nine Years Ago: Tuscan Sausage and White Bean Soup
    Ten Years Ago: Asian Chicken Lettuce Wraps Quick and Delish

    Skillet with chicken, zucchini, parmesan and wooden spoon.

    Skillet Lemon Parmesan Chicken and Zucchini

    • 1 tablespoon olive oil
    • 1 ½ pounds boneless chicken breast or thighs
    • Salt, pepper, and garlic powder
    • 3 small zucchini (about 1 pound total)
    • 2 tablespoons fresh lemon juice
    • 1 tablespoon soy sauce
    • 1 teaspoon dried basil
    • ¼ teaspoon dried oregano
    • ½ cup shredded Parmesan cheese
    • Fresh parsley or basil, chopped (optional)

    Prevent your screen from going dark

    • Pat the chicken dry and cut into bite-size pieces. Toss with a couple pinches of salt, pepper and garlic powder. Chop the zucchini (discarding end with the stem) into 1/2-inch pieces. Set aside.

    • Heat the oil in a 12-inch nonstick skillet over medium heat until hot and rippling. Add the chicken pieces in a single layer. Let them cook WITHOUT STIRRING for 2-3 minutes until golden on one side. Flip and cook for another 2-3 minutes until cooked through. Remove to a plate reserving as much oil/liquid in the pan as possible.

    • Return the skillet to medium heat and add the zucchini in a single layer. Again, let the zucchini cook WITHOUT STIRRING (to maximize that golden color) for 1-2 minutes. Flip or stir and continue cooking for another minute or two until the zucchini is tender (but not mushy – don’t over cook).

    • Add the chicken back to the skillet and add the lemon juice, soy sauce, basil, and oregano. Stir to combine.

    • Increase the heat to medium high and cook until sizzling and the liquid thickens just a bit, 1-2 minutes.

    • Sprinkle with parmesan cheese and fresh herbs, if using. Season to taste with additional salt and pepper, if needed.

    Serving: 1 serving, Calories: 196kcal, Carbohydrates: 3g, Protein: 28g, Fat: 8g, Saturated Fat: 2g, Cholesterol: 78mg, Sodium: 438mg, Fiber: 1g, Sugar: 2g

    Recipe Source: from Mel’s Kitchen Cafe

    Disclaimer: I am a participant in the Amazon Services LLC Associates Program, an affiliate advertising program designed to provide a means for me to earn fees by linking to Amazon.com and affiliated sites. As an Amazon Associate I earn from qualifying purchases.

    Source link

  • Honey Lime Chicken Thighs (Boneless, Skinless)

    Honey Lime Chicken Thighs (Boneless, Skinless)

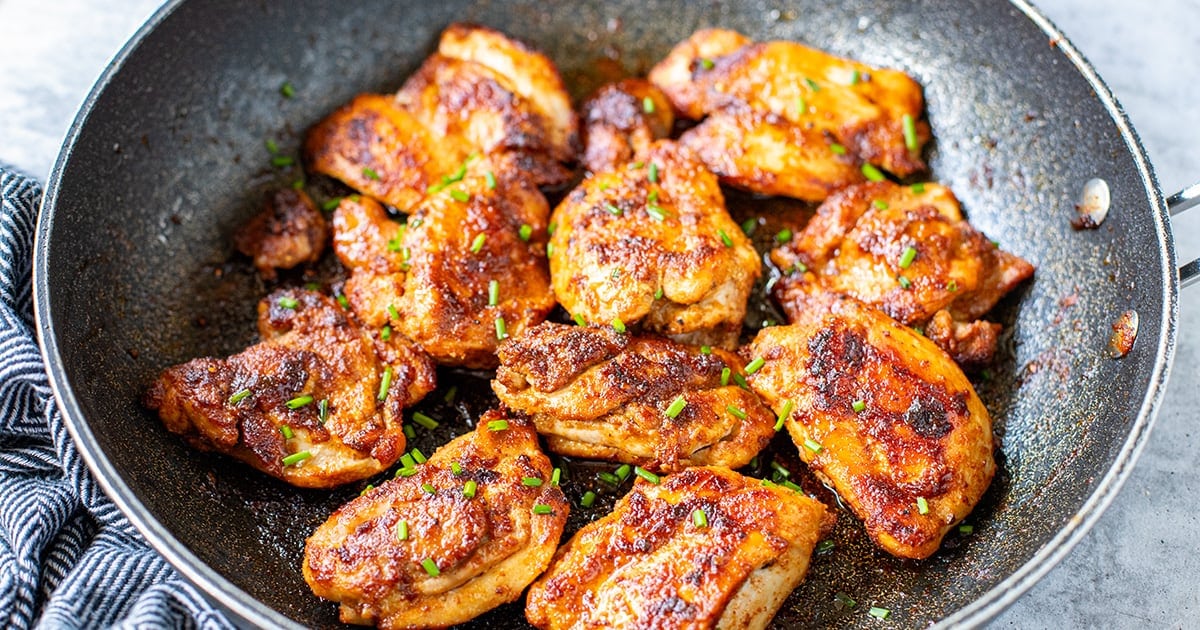
    This recipe is the reason people ask me why my honey lime chicken thighs are so good — bold spices, crispy edges, and that sticky-sweet zingy glaze at the end. Plus, made with boneless, chicken thighs, so this recipe is quick and with a few calories.


    Jump to: ℹ️ Overview | 🛒 Ingredients | 📷 How To Make | 📹 Watch The Video | 👩‍🍳 Recipe Tips | 🥗 Serving Suggestions | 📝 Full Recipe Card | 🍽 More Chicken Recipes To Try


    These honey lime chicken thighs are my weeknight secret weapon. The bold spice rub and pan-frying make the chicken sooo flavorful – tender and juicy on the inside with golden, slightly charred bits on the outside, and then boom — sweet and tangy honey lime glaze at the end to take it all to the next level.

    It’s savory, a bit sweet, a bit spiced, and honestly tastes like something you’d get at a great little bistro. The best part? It’s made with boneless, skinless chicken thighs (so fast and fuss-free), and it’s high-protein, low-carb, gluten-free, and paleo-friendly. I’ve made this chicken thigh recipe more times than I can count and people always ask for the recipe, so I hope you give it a go!

    👩‍🍳 More recipes with chicken thighs: honey lemon garlic pepper chicken thighs, chicken and potato bake, roasted chicken thighs (with oregano garlic marinade), coconut chicken and cauliflower rice, Spanish chicken and rice and baked chicken thighs (with special green sauce).

    What You’ll Need

    Here is what you’ll need for this honey lime chicken thighs recipe. Find the full measurements in the recipe card below.

    • Boneless, skinless chicken thighs – juicy, quick-cooking, and lower in calories than the bone-in kind.
    • Olive oil – for that perfect sear. You can also use avocado oil or ghee. You don’t need a lot!
    • Spices (the flavor bomb rub): Smoked paprika adds a smoky depth, cumin powder is warm and earthy, onion and garlic powder are base flavor magic, and salt and pepper to season.
    • For the glaze: Honey gives that sticky caramelized finish while lime juice is bright and tangy to balance the sweet; you can use lemon if you like.

    How To Make Boneless Skinless Chicken Thighs With Glaze

    Find the full recipe and nutritional information below. Here are some handy step-by-step photos for how to cook the best boneless, skinless chicken thighs with honey lime glaze.

    • Cut chicken thighs in half and trim large bits of fat.
    • Mix all spices with salt and pepper, then rub evenly on both sides of the chicken.
    • Heat a large skillet with olive oil on high, then reduce to medium-high.
    • Cook chicken for 8–10 minutes per side (in batches if needed).
    • Flip, add more oil if needed, and cook through until golden.
    • Drizzle over honey and lime juice, toss to coat, and let the glaze bubble up.
    • Let rest for 1 minute, then serve whole or slice up.

    Watch The Video

    Recipe Tips

    • Don’t overcrowd the pan—space equals better sear.
    • Thin thighs cook faster—watch them so they don’t dry out.
    • If you’re air-frying, they’ll still be great but a little less juicy.
    • Add chili flakes or sriracha to the glaze for a spicy twist.
    • You can double the spice mix and keep some in a jar for next time!
    • Storage Tips: Leftovers will keep in the fridge for 3-4 days. Reheat gently in a skillet or microwave. You can freeze them too—just thaw overnight in the fridge and reheat as above.
    • Make-Ahead Tips: You can season the chicken and store it in the fridge for up to 24 hours before cooking. You can also cook the whole thing and slice it ahead for easy lunch meal prep bowls.

    Serving Suggestions

    Slice it up for chicken rice bowls (my fave!), wrap in tortillas, toss over a salad, or pop it in a sandwich. It also makes a killer protein addition to scrambled eggs (check out my curried scrambled eggs or scrambled eggs with zucchini) or even a breakfast taco (try my chorizo breakfast tacos).

    💬 If you’ve tried these honey lime chicken thighs or any other recipe on the blog then don’t forget to rate the recipe and let me know how you got on in the comments below, I love hearing from you! You can also FOLLOW ME on Instagram, Facebook, Pinterest, YouTube, and or sign up to my Newsletter to see more of my delicious food.

    Want to Save This Recipe?

    Enter your email & I’ll send it to your inbox. Plus, get great new recipes from me every week!

    By submitting this form, you consent to receive emails from Cooked & Loved

    Boneless, juicy chicken thighs pan-fried to crispy perfection and finished with a honey-lime glaze that’s sweet, tangy, and seriously addictive. Find step-by-step photos and more recipe tips above.

    • Cut chicken thighs in half and trim any large fat pieces.

    • Season both sides of chicken evenly with the spices, salt, and pepper. Rub it all in well.

    • Heat 1 tablespoon olive oil in a large skillet over high heat. Lower to medium-high and add chicken without overcrowding.

    • Cook for 8–10 minutes on one side, then flip and add remaining 1 tablespoon oil. Cook for another 8–10 minutes or until nicely browned and cooked through.

    • In the last minute, drizzle over honey and lime juice. Toss the chicken around in the glaze until slightly caramelized.

    • Let it rest a minute, then slice or serve whole.

    • Don’t overcrowd the pan—space equals better sear.
    • Thin thighs cook faster—watch them so they don’t dry out.
    • If you’re air-frying, they’ll still be great but a little less juicy.
    • Add chili flakes or sriracha to the glaze for a spicy twist.
    • You can double the spice mix and keep some in a jar for next time!
    • Storage Tips: Leftovers will keep in the fridge for 3-4 days. Reheat gently in a skillet or microwave. You can freeze them too—just thaw overnight in the fridge and reheat as above.
    • Make-Ahead Tips: You can season the chicken and store it in the fridge for up to 24 hours before cooking. You can also cook the whole thing and slice it ahead for easy lunch meal prep bowls.
    • Can I use chicken breast instead? You can, but thighs stay juicier and have more flavor. If you use breast, be careful not to overcook.
    • Is it spicy? Not really—just a touch of warmth from the paprika and cumin. Add chili flakes if you want heat!
    • Can I cook this in the oven? You can bake at 425°F (220°C) for about 20-25 minutes, then broil for a few minutes to get the caramelization.
    • What oil can I use instead of olive oil? Avocado oil, canola, or even ghee work well.

    Calories: 195kcal | Carbohydrates: 5g | Protein: 22g | Fat: 10g | Saturated Fat: 2g | Polyunsaturated Fat: 2g | Monounsaturated Fat: 5g | Trans Fat: 0.02g | Cholesterol: 107mg | Sodium: 490mg | Potassium: 320mg | Fiber: 0.4g | Sugar: 3g | Vitamin A: 283IU | Vitamin C: 1mg | Calcium: 20mg | Iron: 1mg

    Keywords: honey lime chicken thighs, skinless honey lime chicken thighs, boneless honey lime chicken thighs, honey lime chicken, boneless skinless chicken thighs, pan-fried chicken thighs

    More Chicken Recipes To Try


    Source link

  • Chicken & Prawn Laksa (Paleo, Gluten-Free) –

    Chicken & Prawn Laksa (Paleo, Gluten-Free) –

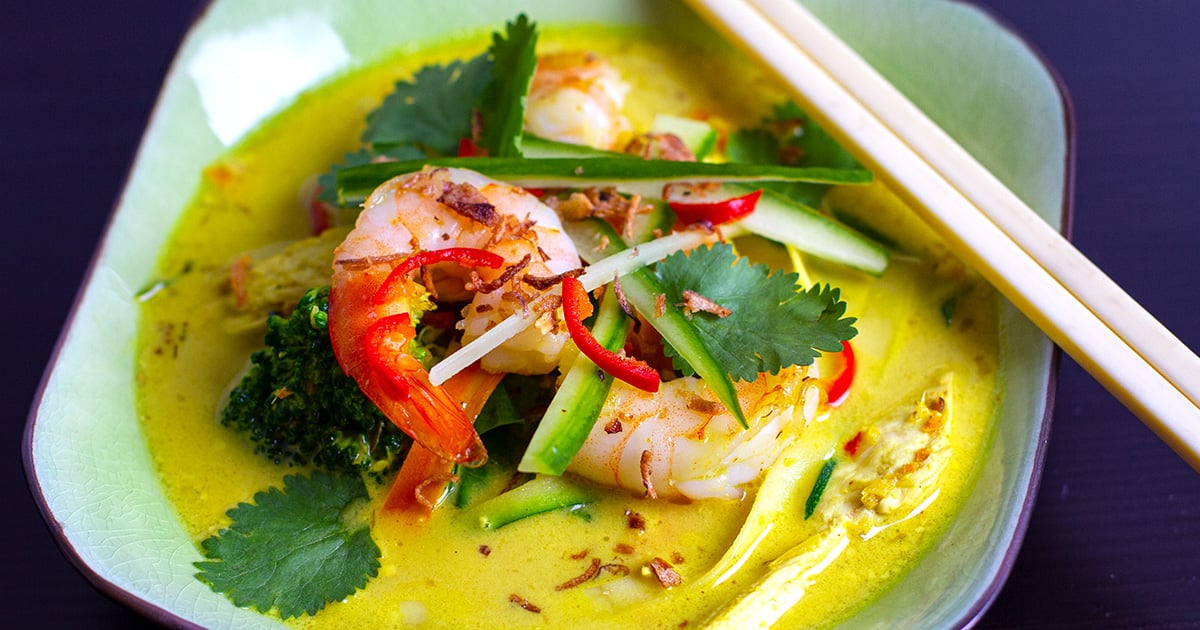
    Adapted from a classic South Eastern recipe, this chicken and prawn laksa soup delivers beautiful Thai flavours and all the nutrients. The aromatic coconut curry broth is served with low-carb zucchini and carrot noodles and healthy protein. This recipe is paleo, gluten-free, and keto-friendly (can be modified for a Whole30 version).


    What Is Laksa?

    If you had to pick your ‘last meal’, what would it be? For me, Laksa would have to be in the top five. If you haven’t heard of or tried Laksa before, it’s a coconut-based curry soup from Malaysia, which fuses Malay, Thai and Chinese flavours and ingredients.

    Very common and popular in Australia, the dish features a handful of noodles, tofu puffs, bean sprouts, crispy vegetables and a selection of meats or seafood served in the most glorious, fragrant, spicy coconut soup.

    I seriously want to sing Hallelujah when I sip a good Laksa broth. I love its rich flavours and the warmth you get from all the spices and the chilli. And although many would argue of what the authentic Laksa should taste like, the truth is that it comes in many varieties and even the most typical Laksa Lemak can be cooked in many different ways. For example, although it’s a Malay dish, I often order it in Thai restaurants.

    The best part is that Laksa is easily adapted to be a paleo, low-carb and gluten-free dish. Swap the noodles and tofu for extra veggies, add some protein and et voilà – you have a delicious meal with the desired ratio of proteins, carbs and fats.

    Sure, it’s much easier to go and get a bowl of Laksa in Chinatown or from your local Thai take away shop, but there is something super cool about making it from scratch. And you know what? It’s actually very easy if you give yourself enough time and you can get the right ingredients.

    Tips For Making Thai Laksa At Home

    The foundation of any Laksa soup is a Laksa curry paste, which I make from scratch and you can find the recipe here. You can also use a store-bought Laksa paste or a mixture of red and green curry pastes, as that’s the closest to Laksa flavours.

    My Laksa paste is not as spicy as some of the imported varieties, so 5 tablespoons of serious red curry paste might blow your head off. Start with 2-3 tablespoons if you’re not sure and always have a little taste of the paste itself. If you can’t find all the ingredients, you can use mild curry powder, some fresh garlic and ginger, and whatever other ingredients from the laksa paste that you can find.

    To use the laksa paste in a curry stew,  simply add coconut milk or cream with just a little bit of stock for a rich, thick gravy.

    Other Laksa Ingredients You Need

    I used a little bit of palm sugar to balance out the salty and sour flavours, it’s the most authentic sweetener. By all means, leave the sugar out if you want, or replace it with honey or coconut sugar, and it will still taste pretty damn good. You can check out this coconut palm sugar.

    I used full-fat coconut oil from a can (look for 55-70% coconut content) and I put one of the cans in the fridge to thicken, and that’s where I scooped out the coconut cream from. The other can is simply shaken, and that’s your coconut milk.

    You will need a large pot or a saucepan to fit all of the soup, plus meat and veggies. I used chicken and prawns in this recipe, but you can easily replace those with beef, scallops and fish.

    I used salt-reduced chicken stock as I like to control how much and what type of salt I add to the dish. Pre-packaged stocks have so much sodium and it is often disguised by sugar and other things, so I would rather use more fish sauce for both saltiness and flavour. 

    Finally, Chinese broccoli can be replaced with collard greens or Swiss chard. You can use a vegetable spiralizer to prepare carrot and zucchini noodles, which would work fabulously in this soup.

    I hope the whole process doesn’t intimidate you too much. It really is a lot of fun to make your own Laksa and you should get your family and friends involved in the kitchen.

    More Healthy Thai recipes:

    Chicken Larb Salad With Red Cabbage
    Spicy Pumpkin Coconut Soup
    Coconut Yoghurt Chicken
    Paleo Satay Sauce
    Roasted Lemongrass Short Ribs

    Want to Save This Recipe?

    Enter your email & I’ll send it to your inbox. Plus, get great new recipes from me every week!

    By submitting this form, you consent to receive emails from Cooked & Loved

    Aromatic, creamy and full of flavour, this chicken and prawn Thai laksa soup is a healthy version of the classic. This recipe is paleo, gluten-free, keto and Whole30 friendly. Omit coconut palm sugar for keto and Whole30 versions.

    • Heat coconut oil in a large saucepan over medium heat. Add the laksa paste and cook over medium heat for about 30 seconds, stirring continuously to prevent sticking or burning. This process toasts the spices and releases all those beautiful flavours and aromas. Add more coconut oil if the mix dries up.

    • Increase the heat to medium-high and add the chicken. Stir through for a minute.

    • Pour in the stock, and add the fish sauce, palm sugar and juice of 1 lime. Bring everything to a boil.

    • After a couple of minutes, turn the heat to low and add the coconut milk and cream. Stir through and turn the heat down to low heat and simmer for 10 minutes, lid on.

    • You can prepare the vegetables and garnishes while the soup is cooking away. Have a few thin slices of chilli and fresh coriander leaves ready for garnish.

    • It’s time to finish off the cooking. Bring the heat back up to medium-high and add the Chinese broccoli, regular broccoli and carrots to the soup. Stir and cook for 1-2 minutes.

    • Add the prawns and zucchini last as they require minimal cooking, about 2 minutes. A good way to tell if the prawns are cooked (besides actually tasting one) is to look for when they start to curl and change to white/pinkish colour. Turn the heat off at this stage.

    • Serve a mix of chicken, prawns and vegetables with a couple of ladles of soup, garnished with fresh cucumber, coriander and chilli on top.

    Calories: 560kcal | Carbohydrates: 22g | Protein: 42g | Fat: 37g | Saturated Fat: 29g | Polyunsaturated Fat: 1g | Monounsaturated Fat: 3g | Trans Fat: 0.02g | Cholesterol: 180mg | Sodium: 2177mg | Potassium: 1377mg | Fiber: 5g | Sugar: 8g | Vitamin A: 6945IU | Vitamin C: 89mg | Calcium: 202mg | Iron: 6mg

    Keywords: Soup, Keto, Paleo, Shrimp, Chicken, Thai, Laksa

    Save This Recipe To Pinterest

    Source link

  • Chicken Alfredo Ravioli Casserole (Easy Cheesy Dinner Bake)

    Chicken Alfredo Ravioli Casserole (Easy Cheesy Dinner Bake)

    This website may contain affiliate links and advertising so that we can provide recipes to you. Read my disclosure policy.

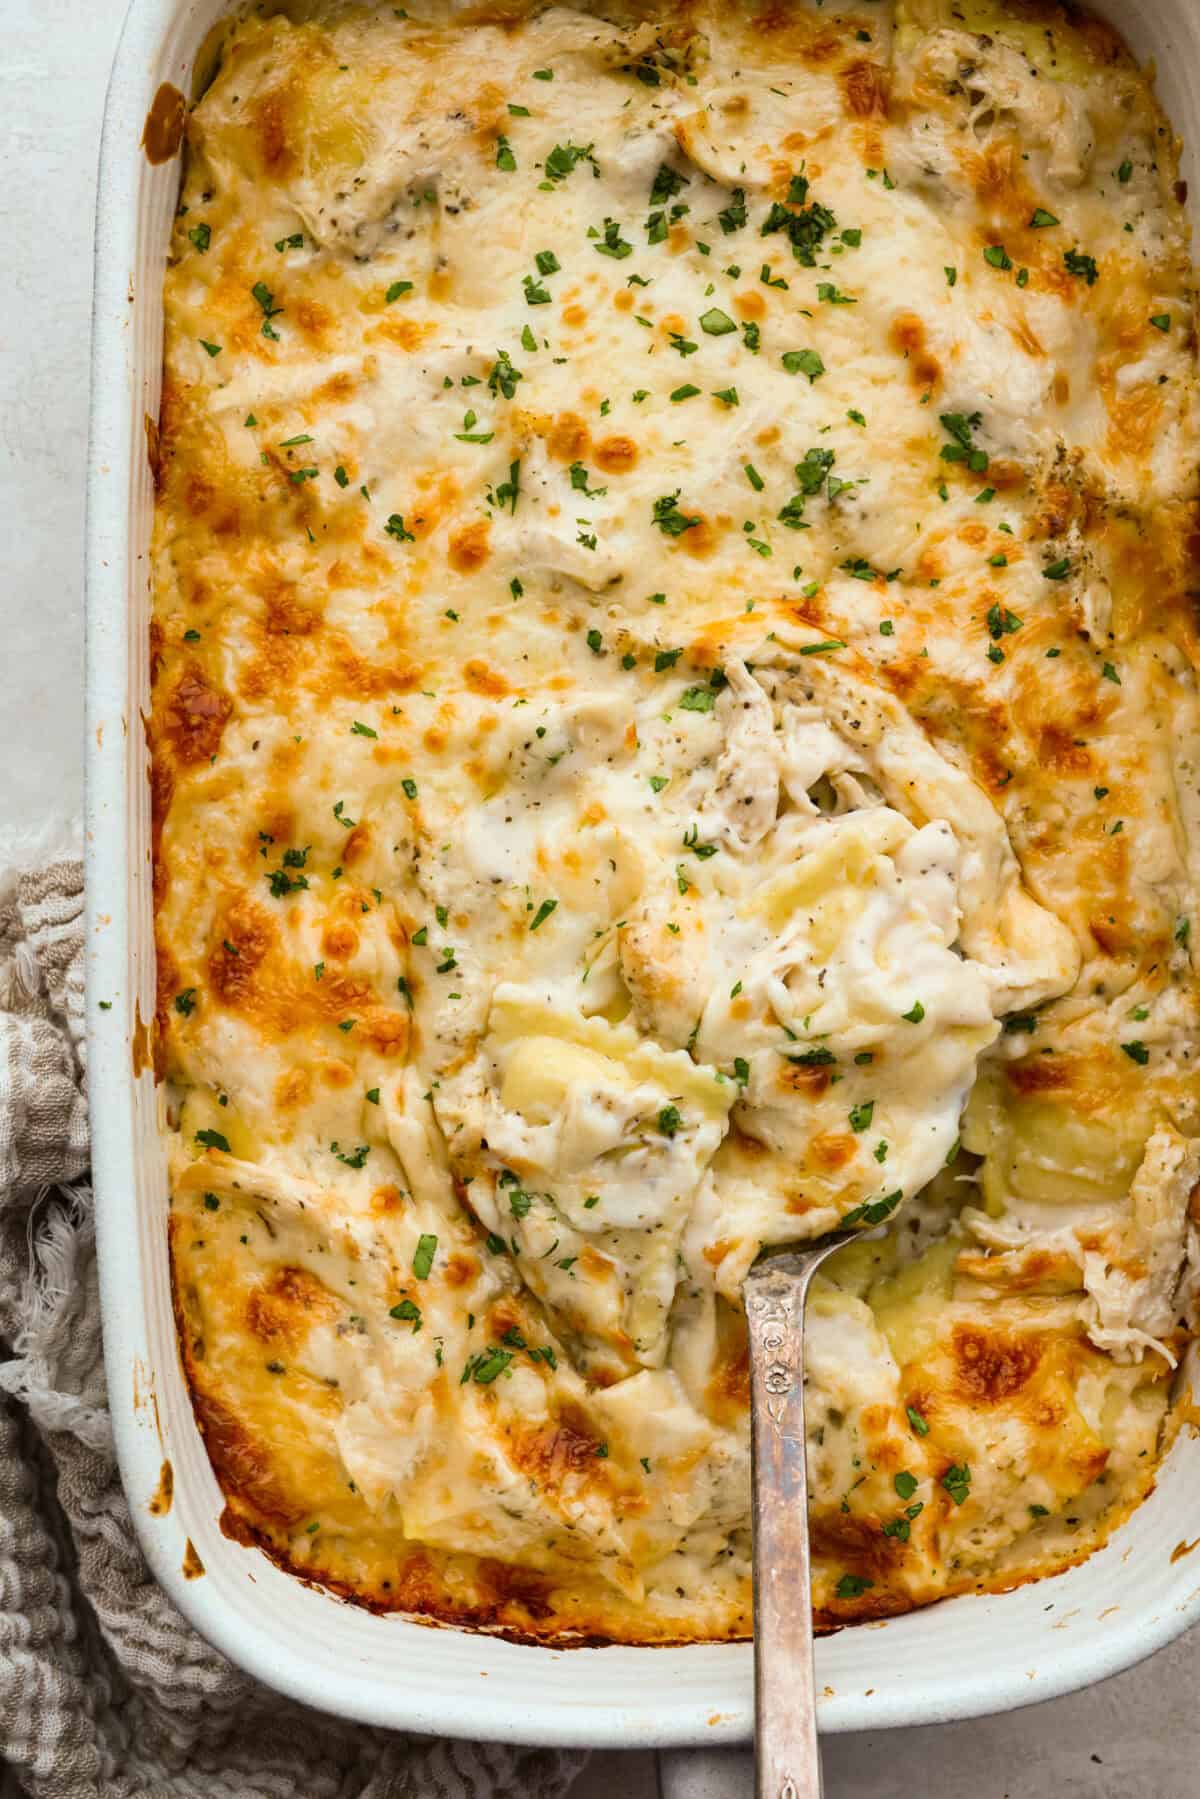
    By the end of the day, I’m wiped and still expected to make dinner. This Alfredo ravioli casserole swoops in and saves the night. Just layer everything, bake it, and dinner is done.

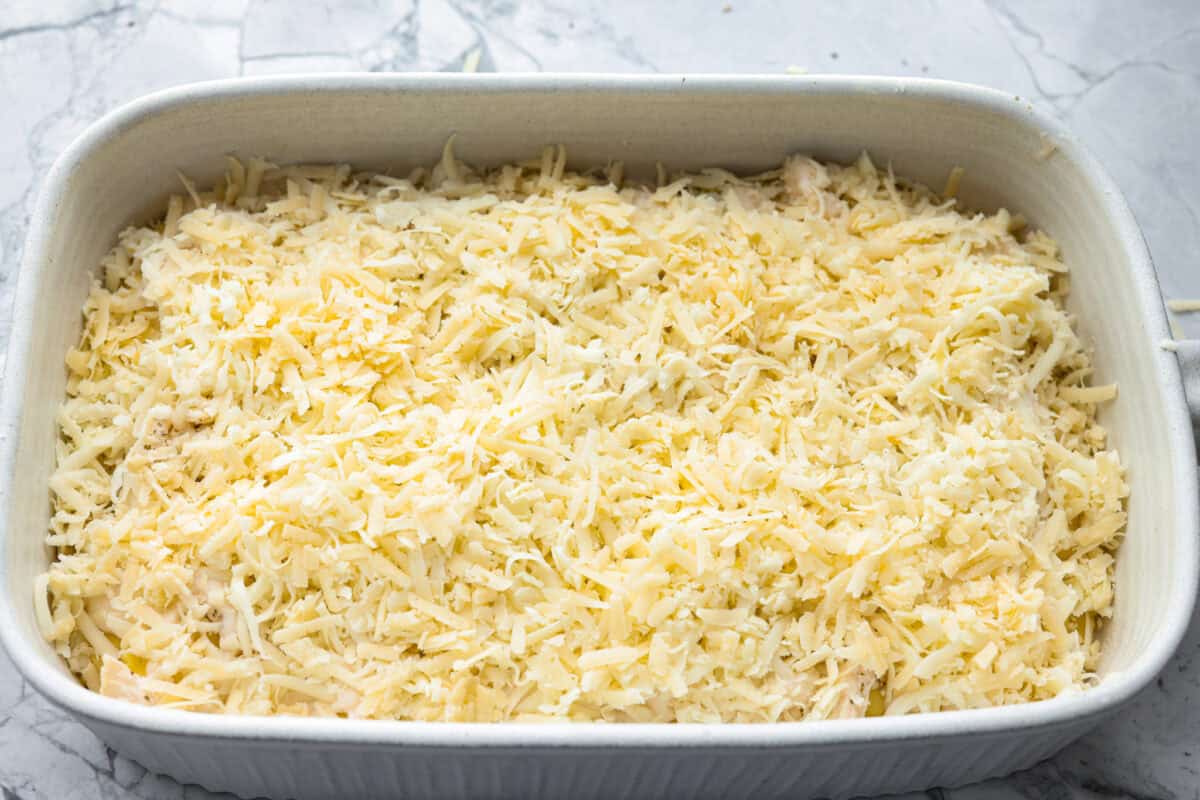
    Top down shot of the baked Alfredo ravioli casserole.

    Why This Recipe Will Save the Day

    • Shortcut Ingredients: Using frozen ravioli, pre cooked chicken, and jarred Alfredo keeps this recipe fast without giving up any flavor.
    • Just Layer and Bake: No boiling pasta, no raw chicken, no homemade sauce. Everything goes straight into the dish, and the oven does the rest.
    • Seasoned for Extra Flavor: The Italian seasoning takes the sauce to a whole new level, so it’s not just straight from the jar like other recipes.

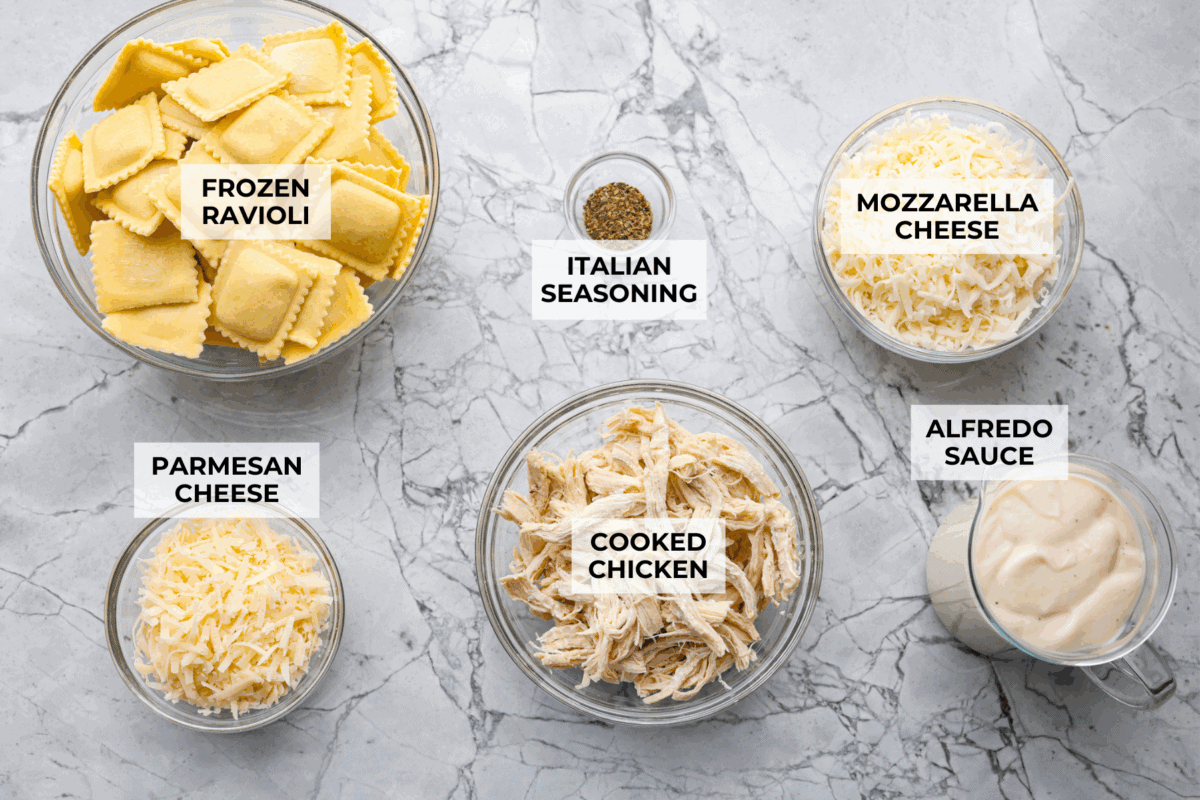
    Alfredo Ravioli Casserole Ingredients

    Overhead shot of labeled ingredients.
    • Alfredo Sauce: Use jarred or homemade.
    • Ravioli: Use one with your favorite filling. I used cheese filled ravioli. Fresh ravioli will work as well.
    • Protein: Rotisserie chicken works, or you can swap it for Italian sausage or leave out the meat and use spinach instead.
    • Seasoning: I love adding Italian seasoning for extra herby flavor. You can also add some fresh herbs or use your favorite blend of dried.

    How to Make Alfredo Ravioli Casserole

    This is one of the easiest recipes to put together when you are short on time. Premade sauce and rotisserie chicken make this come together so easily! While it’s baking, you can make this wedge salad and some garlic bread to go with it!

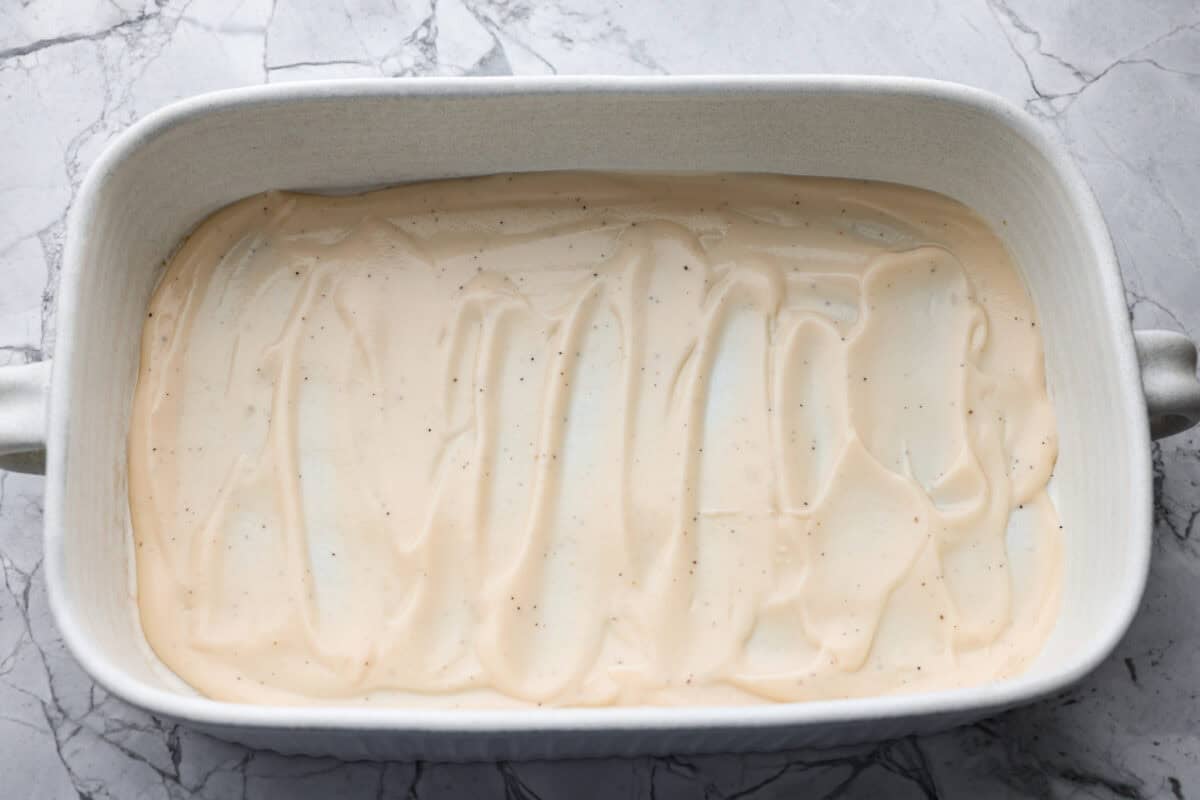
    1. Prep: Preheat the oven to 350°F. Spread ⅓ of the Alfredo sauce on the bottom of a 9 x 13-inch baking dish.
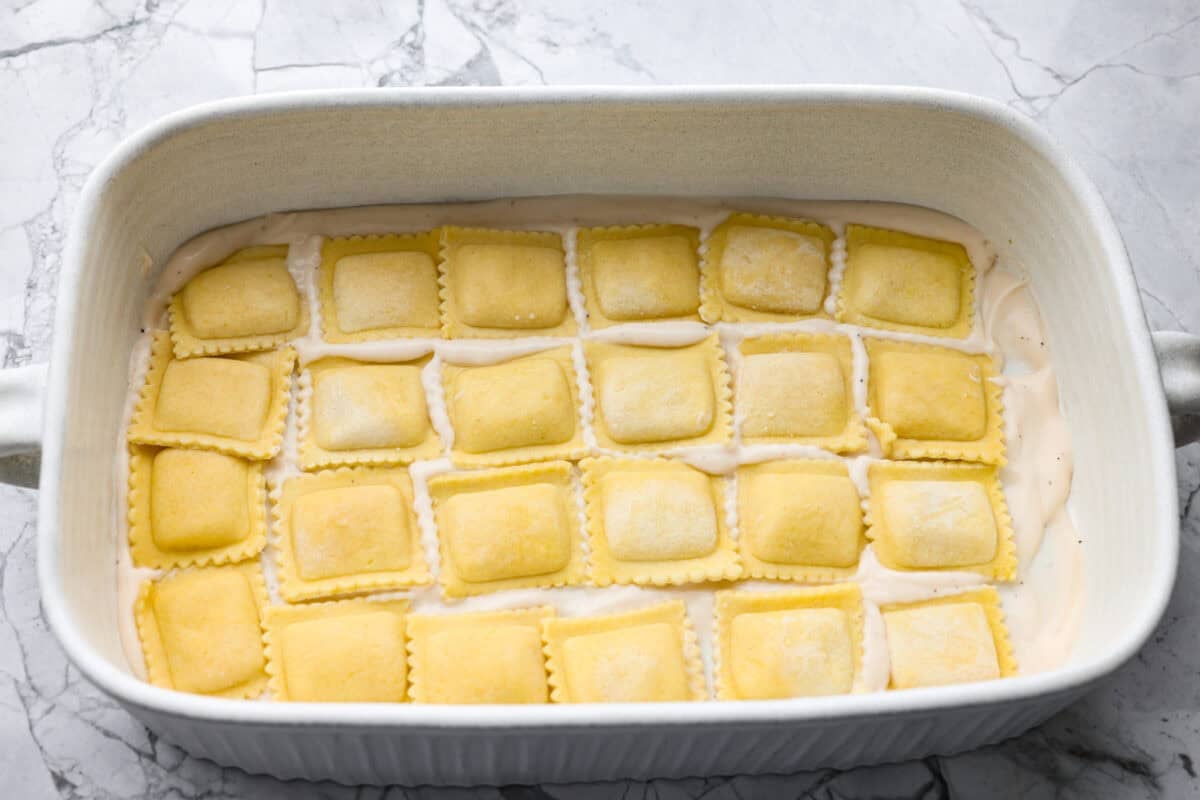
    2. Add: Layer half of the frozen ravioli over the sauce.
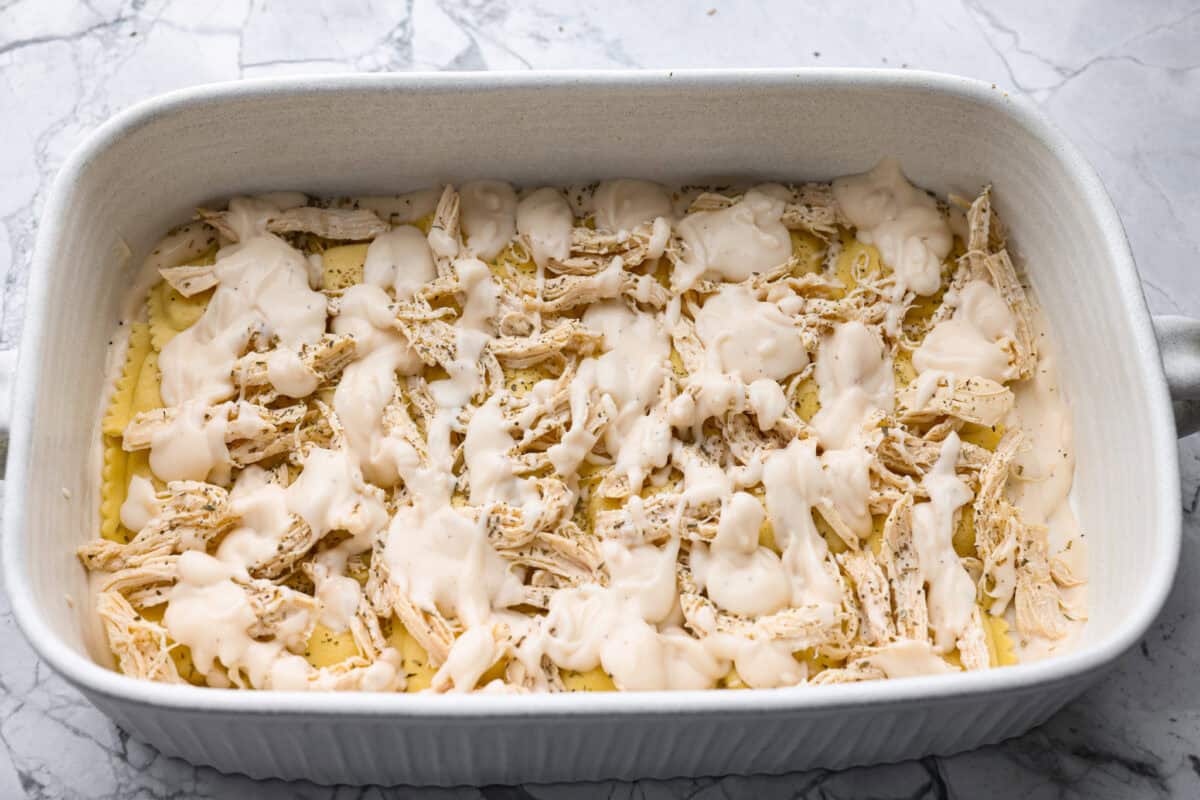
    3. Layer: Add half of the cooked chicken. Sprinkle with half of the Italian seasoning. Drizzle another ⅓ of the Alfredo sauce on top.
    4. Repeat & Bake: Repeat the layers, starting with the ravioli, then top with mozzarella and Parmesan. Cover with foil and bake for 30 minutes. Uncover and bake for an additional 5-10 minutes, until the top of the alfredo ravioli casserole is golden and bubbly.

    Pin this now to find it later

    Pin It

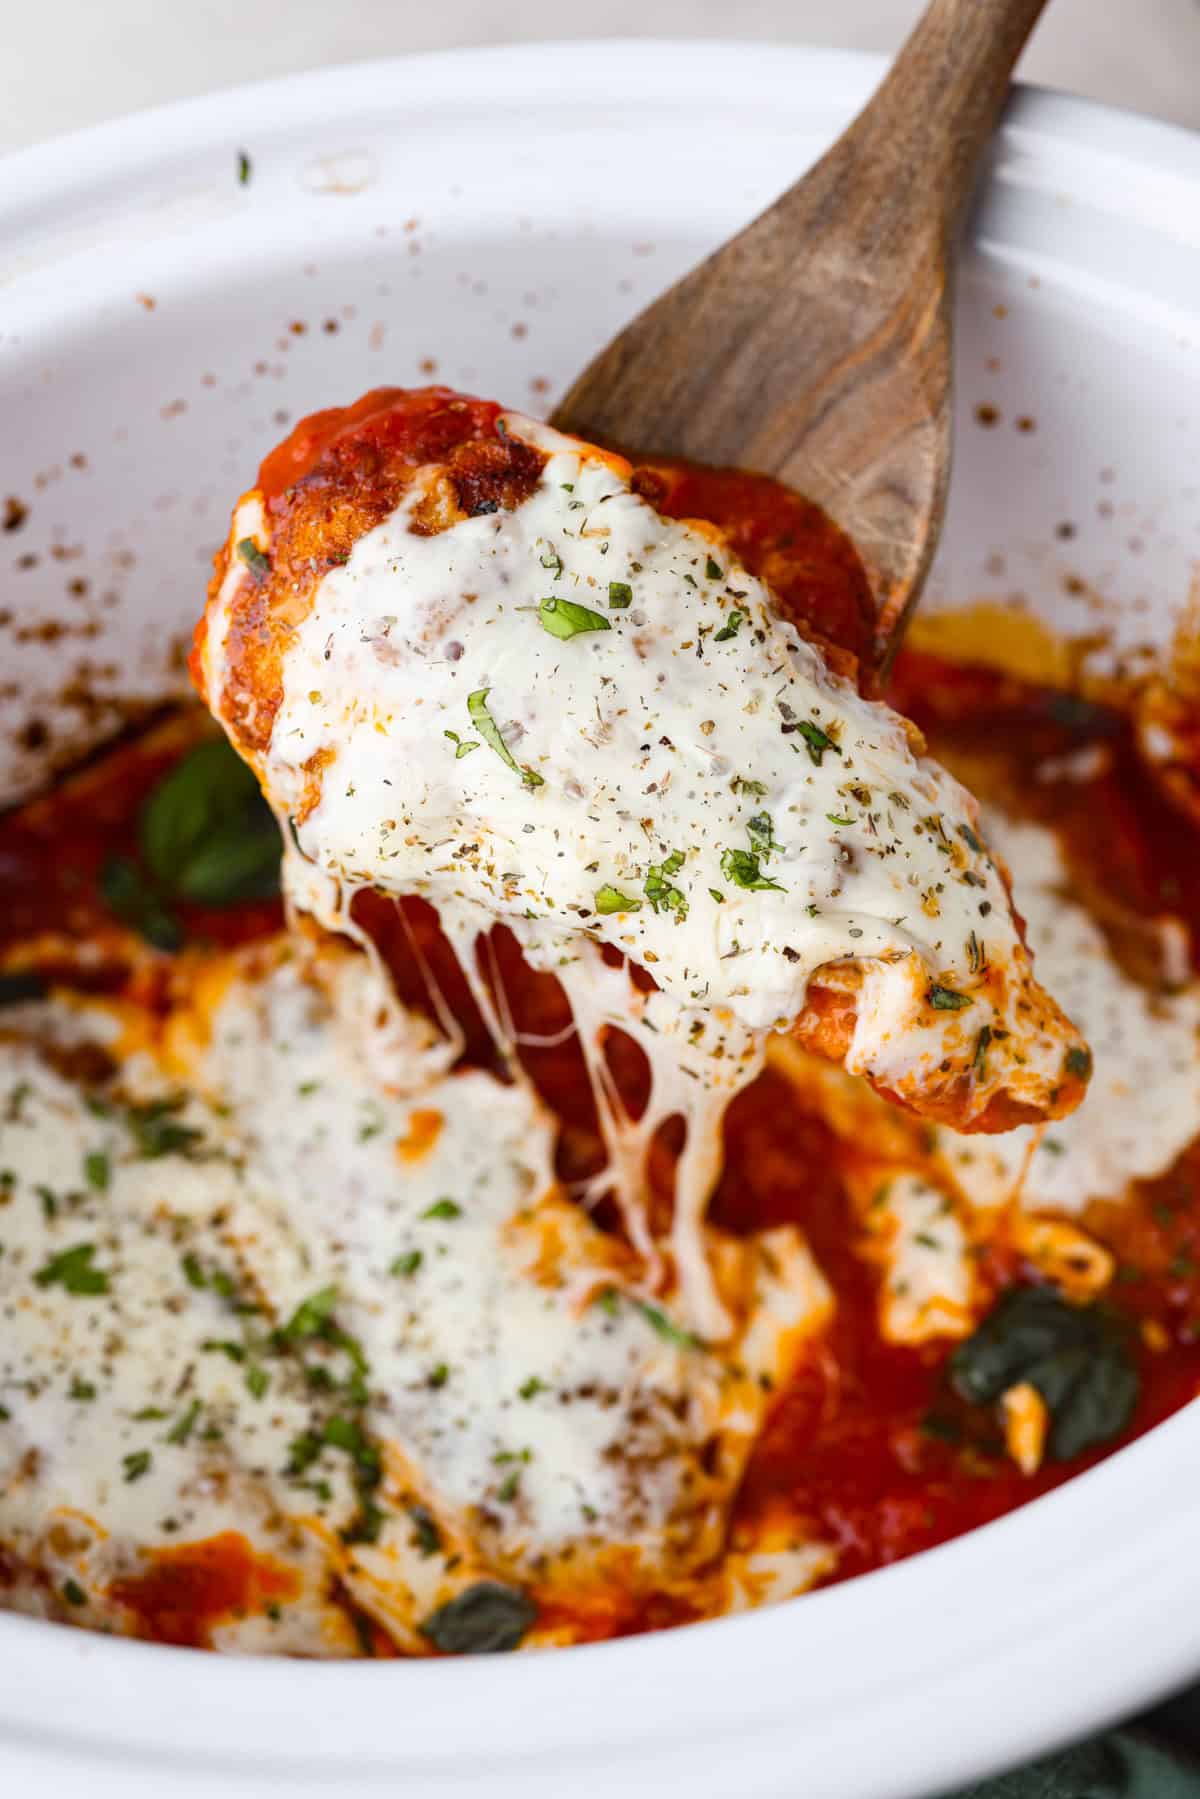
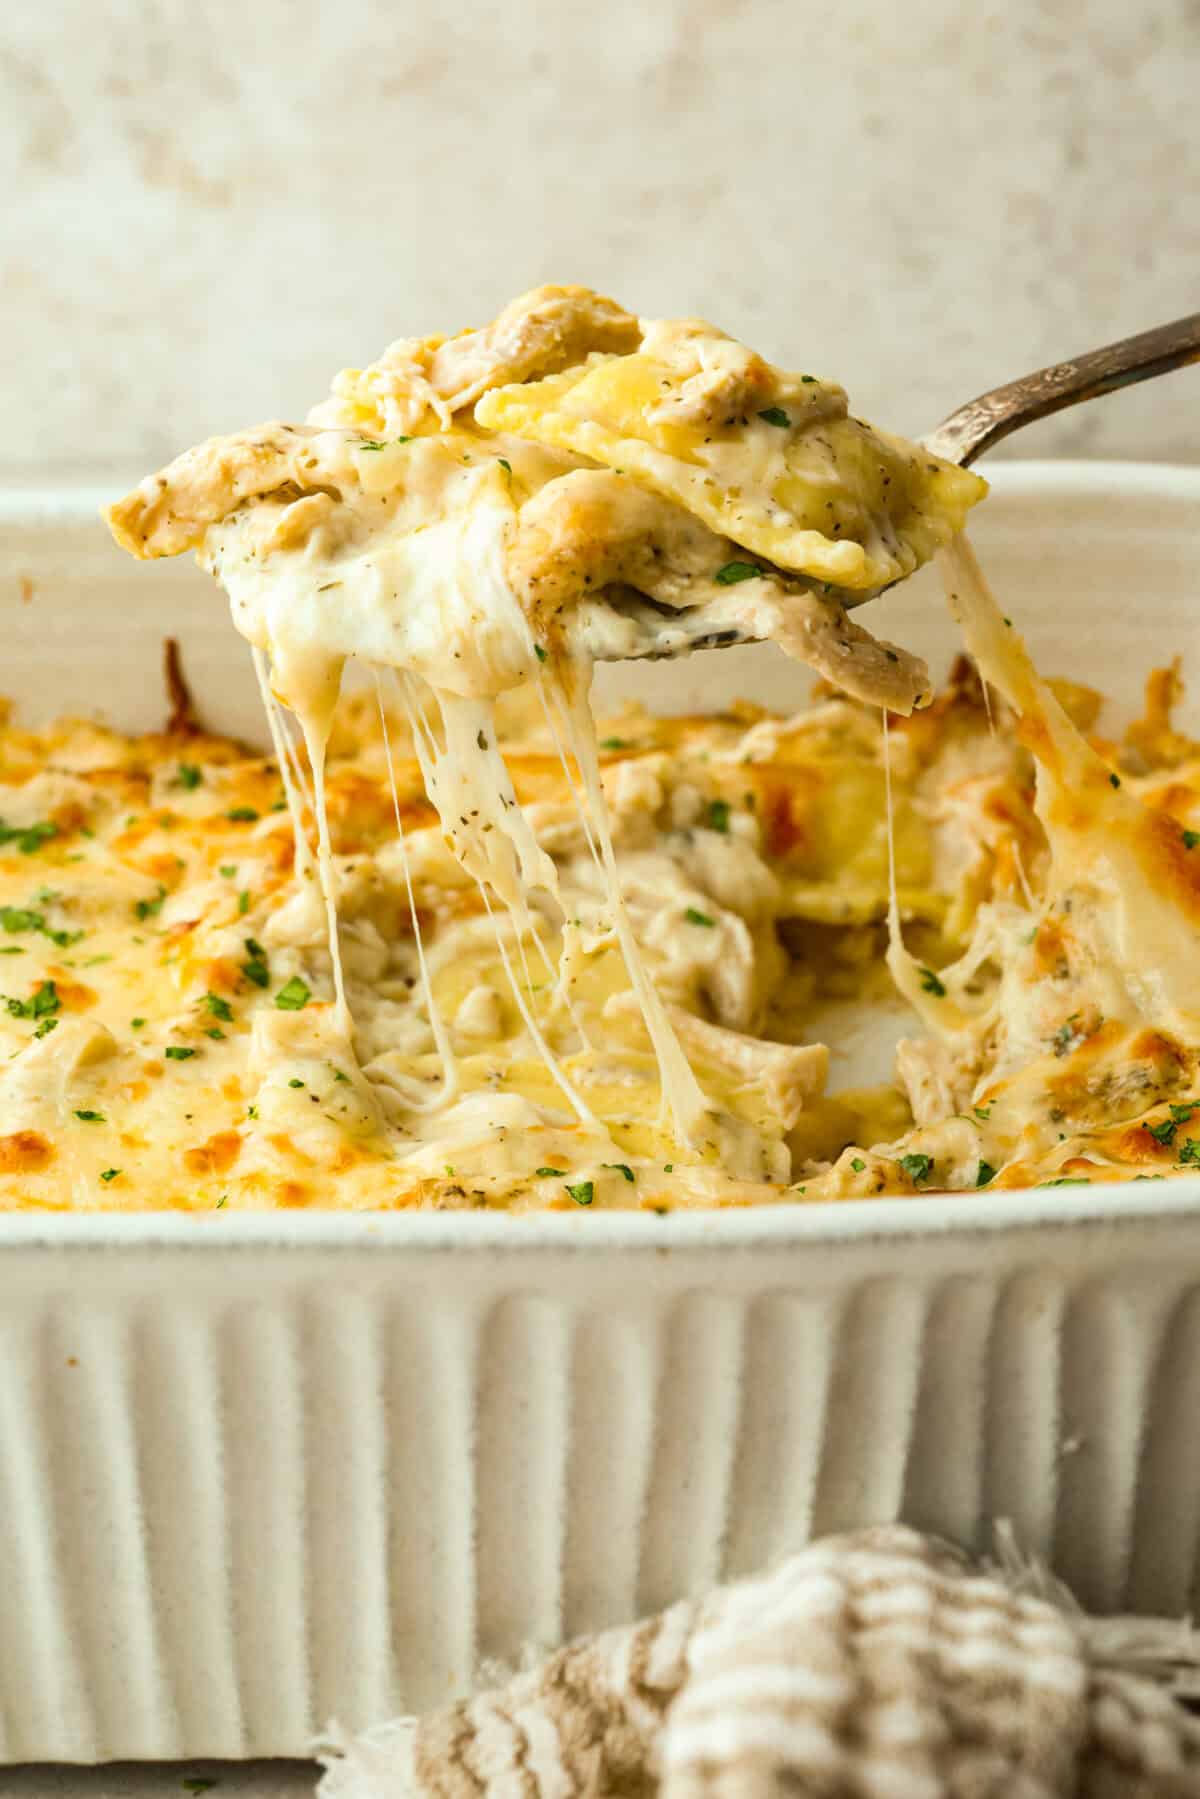
    Someone scooping a portion of alfredo ravioli casserole from the baking dish.

    More Quick & Easy Casseroles

    I am seriously done by the end of the day. Juggling dance and soccer, homework and my work, I need something simple to make for dinner. The best part about a casserole is that I can prep it ahead of time, throw it in the oven, and dinner is on!

    Baked Pierogi Casserole

    50 minutes


    Source link

  • Lemon Chicken Orzo Soup

    Lemon Chicken Orzo Soup

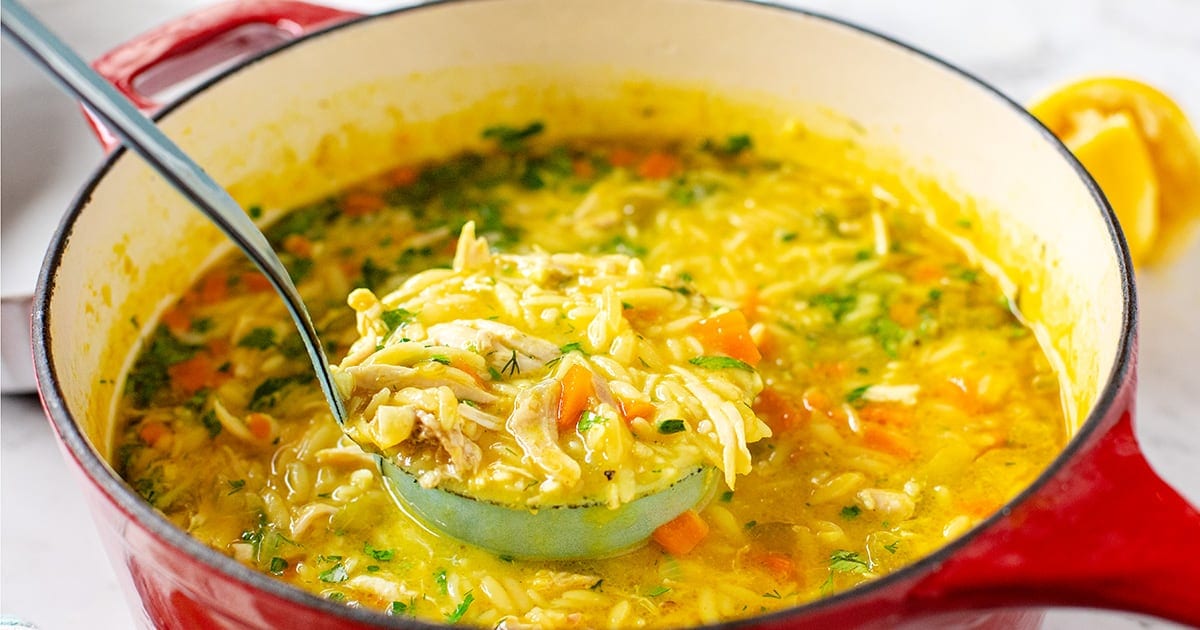
    This lemon chicken orzo soup is bright, cozy, and always gets thumbs up from my 4-year-old daughter. Everyone who tries it asks for the recipe, and it’s become one of our all-time family favorites.


    Jump to: ℹ️ Overview | 🛒 Ingredients | 📷 How To Make | 📹 Watch The Video | 👩‍🍳 Recipe Tips | 🥗 Serving Suggestions | 📝 Full Recipe Card | 🍽 More Recipes With Orzo


    I make this lemon chicken orzo soup on a regular basis, especially in winter, and every single time, my family practically inhales it. It’s also one of those soups I make for a friend or family member who needs a little care and nurturing.

    It’s a little bit creamy from the Parmesan and the starch in the orzo, with that lovely, bright hit of lemon that keeps it from feeling heavy. The broth is rich and full of umami from chicken stock and sautéed veggies — sweet onions, carrots, celery — and it gets an aromatic lift from fresh herbs if you want to toss them in.

    I often use leftover roast chicken or a rotisserie chicken to keep things simple, but you can cook fresh chicken right in the soup. One batch makes enough to feed my family of four with leftovers. Pro tip: undercook the orzo just a bit, because it keeps soaking up the broth as it sits.

    Nutrition-wise, it’s got good protein, some veggies, and that soul-soothing quality only a big pot of homemade soup can deliver.

    👩‍🍳 You might also like garlic chicken soup, chicken lentil soup, fall-off-the-bone chicken soup, chicken potato soup, paleo chicken tortilla soup, and check out these other soup recipes with chicken or these winter soups. You may also like this high-protein butternut squash soup.

    What You’ll Need

    Here is what you’ll need for this lemon chicken orzo soup recipe. Find the full measurements in the recipe card below.

    • Base veggies: onion (sweetness and depth), carrot (mild sweetness), celery (savory backbone), and garlic (flavor boost).
    • Fats: Olive oil + Butter (richness and aroma).
    • Seasonings: Salt, black pepper, bay leaves, and optional turmeric (gives that gorgeous yellow color).
    • Lemon: Zest and juice for brightness.
    • Broth: Chicken stock or homemade broth (the heart of the soup). I often use stock cubes when low on broth.
    • Protein: Shredded cooked chicken or raw chicken breast.
    • Pasta: Orzo, also known as risoni, or you can sub with other small-shaped pasta. Learn about orzo here. If you have any leftover, you may also want to try this Marry Me chicken orzo bake.
    • Cheese: Parmesan (creaminess and umami).
    • Herbs: Dill, parsley, chives (freshness at the end), feel free to omit or just use one of these.

    How To Make Lemon Chicken Orzo Soup

    Find the full recipe and nutritional information below. Here are some handy step-by-step photos for how to make chicken orzo soup.

    • Dice up vegetables, garlic, and herbs.
    • Heat olive oil and butter in a big pot.
    • Sauté onion, carrot, and celery with salt until golden and soft.
    • Add garlic, lemon zest, bay leaves, turmeric, dry orzo, and all the broth.
    • Bring to a simmer and cook until the orzo is just al dente (about 8 minutes). While cooking, shred the chicken, grate Parmesan, and squeeze lemon juice.
    • Stir in chicken, Parmesan, and lemon juice.
    • Adjust salt, pepper, or extra lemon if you like.
    • Finish with fresh herbs and serve with extra lemon wedges and Parmesan.

    Watch The Video

    Recipe Tips

    • Parmesan rind: Toss it in while simmering—huge flavor payoff.
    • Make it lighter: Use more veggies and less orzo.
    • Make it heartier: Add extra chicken or even chickpeas.
    • Kid-friendly: Serve herbs on the side if your kids are picky.
    • Undercook the orzo just a bit, because it keeps soaking up the broth as it sits and will continue to soften and puff up.
    • Throw in extra veggies: Peas, diced asparagus, broccoli, or cauliflower will work well.
    • Storage Tips: Our leftovers don’t last very long, but you can store this soup in the fridge for up to 3 days. When reheating, add a splash of broth or water since the orzo will thicken the soup. It also freezes well (though the pasta gets softer).
    • Make-ahead tips: Obviously, as with most soups, this is a great make-ahead recipe. But, if you just want to do a few steps early on, you can prep the veggies and shred the chicken ahead. Store separately in the fridge for up to 2 days. You can even cook the broth with veggies and freeze, then reheat and add orzo and chicken when ready.

    Serving Suggestions

    To be honest, you don’t really need a lot more to go with this soup. Personally, I love a drizzle of chili oil or some chili, which I don’t add to the soup as I make it kid-friendly. You can also serve it with a chunk of crusty bread or a side of garlic toast. For a lighter meal, serve it with a crisp green salad. Don’t skip a sprinkle of fresh herbs and extra lemon at the table — it brightens up everything.

    💬 If you’ve tried this lemon chicken orzo soup or any other recipe on the blog then don’t forget to rate the recipe and let me know how you got on in the comments below, I love hearing from you! You can also FOLLOW ME on Instagram, Facebook, Pinterest, YouTube, and or sign up to my Newsletter to see more of my delicious food.

    Want to Save This Recipe?

    Enter your email & I’ll send it to your inbox. Plus, get great new recipes from me every week!

    By submitting this form, you consent to receive emails from Cooked & Loved

    I’ve made this lemon chicken orzo soup more times than I can count — it’s bright, cozy, and always gets two thumbs up from my 4-year-old daughter. Everyone who tries it asks for the recipe, and it’s become one of our all-time family favorites. Find step-by-step photos and more recipe tips above.

    • Heat olive oil and butter in a large pot over medium-high heat. Add onion, carrot, and celery. Season with ⅓ teaspoon salt (or 1 teaspoon if using low-sodium stock). Cook 6–7 minutes until golden and softened.

    • Add garlic, lemon zest, bay leaves, turmeric, orzo, and all the chicken stock. Stir and bring to a simmer.

    • Cook for about 8 minutes until orzo is just al dente. I suggest undercooking orzo by a minute as it will continue to absorb liquid and soften after cooking.

    • While cooking, shred the chicken, grate Parmesan and squeeze lemon juice.

    • Stir in shredded chicken, Parmesan, and lemon juice. Warm through.

    • Taste and adjust seasoning. If you like it thinner, add a splash of hot water or broth. If you like it more tangy, add a bit more lemon juice.

    • Finish with fresh herbs and extra pepper. Serve with lemon wedges and more Parmesan.

    • Lemon: If using a smaller lemon, zest 2/3 to 1 lemon but if using a larger lemon, you only need to zest 1/2 of it. Lemon juice wise, I suggest adding two tablespoons to begin with, then taste and add more to your liking it. I like it quite lemony so I will often add 3-4 tablespoons but it’s better to add gradually. If you add too much and find it too lemony, simply add more stock.
    • Parmesan rind: Toss it in while simmering—huge flavor payoff.
    • Make it lighter: Use more veggies and less orzo.
    • Make it heartier: Add extra chicken or even chickpeas.
    • Kid-friendly: Serve herbs on the side if your kids are picky.
    • Undercook the orzo just a bit, because it keeps soaking up the broth as it sits and will continue to soften and puff up.
    • Throw in extra veggies: Peas, diced asparagus, broccoli or cauliflower will work well.
    • Storage Tips: Our leftovers don’t last very long but you can store this soup in the fridge for up to 3 days. When reheating, add a splash of broth or water since the orzo will thicken the soup. It also freezes well (though the pasta gets softer).
    • Make-ahead tips: Obviously, as with most soups, this is a great make-ahead recipe. But, if you just want to do a few steps early on, you can prep the veggies and shred the chicken ahead. Store separately in the fridge for up to 2 days. You can even cook the broth with veggies and freeze, then reheat and add orzo and chicken when ready.
    • Can I use raw chicken? If you’re starting with raw chicken breasts (1 breast) or thighs (3 thighs), slice them into thin pieces so it cooks quickly. Nestle them into the simmering broth right after you add the stock and orzo. Lift the larger pieces out and shred or dice, then stir the meat back into the soup before with Parmesan and lemon juice.
    • Can I use rice instead of orzo? Sure — just cook the rice longer until tender. It will thicken the soup a lot as it sits.
    • How do I make it dairy-free? Skip the Parmesan or use a dairy-free cheese alternative. Butter is very low in lactose but feel free to use ghee or extra olive oil.

    Calories: 464kcal | Carbohydrates: 40g | Protein: 32g | Fat: 19g | Saturated Fat: 7g | Polyunsaturated Fat: 2g | Monounsaturated Fat: 7g | Trans Fat: 0.1g | Cholesterol: 75mg | Sodium: 1024mg | Potassium: 648mg | Fiber: 2g | Sugar: 7g | Vitamin A: 2322IU | Vitamin C: 4mg | Calcium: 214mg | Iron: 2mg
    Keywords: chicken soup, lemon chicken orzo soup, lemon chicken, orzo soup, lemon chicken soup, chicken soup with orzo

    More Recipes With Orzo


    Source link

  • Crispy Sweet Chili Chicken (Easy, Sticky, Better Than Takeout)

    Crispy Sweet Chili Chicken (Easy, Sticky, Better Than Takeout)

    This website may contain affiliate links and advertising so that we can provide recipes to you. Read my disclosure policy.
    Saucy and packed with flavor, this sweet chili chicken is a weeknight winner! Tender chicken bites get a crunchy coating, then get tossed in a sticky, sweet, and slightly spicy sauce. YUM!

    Pan of sweet chili chicken garnished with green onions.

    3 Reasons This Chicken Beats Takeout

    • Less Oil: A light cornstarch coating creates golden chicken using just a little oil, no deep frying needed.
    • Flavor Explosion: Sweet, tangy, and just the right amount of spice make every bite of this sweet chili chicken dish irresistible.
    • Easy to Customize: Serve over rice, with noodles, or stir fry vegetables, and tweak the heat to your taste for the perfect family friendly meal.

    Ingredients for Sweet Chili Chicken

    Overhead shot of labeled ingredients.
    • Chicken: Boneless skinless chicken thighs can be used in place of the chicken breast if you prefer.
    • Oil: Vegetable or canola oil is best for frying the chicken! Add more oil, if needed, to prevent the chicken from sticking.
    • Sweet Chili Sauce: Store-bought bottled sauce makes this recipe super easy, but if you prefer homemade, use my recipe!

    How to Make Sweet Chili Chicken

    This sweet chili chicken recipe is quick, easy, and packed with sticky, sweet goodness that clings to every crispy bite. Serve it with fried rice and Kung Pao Brussels sprouts for an Asian inspired meal.

    1. Season Chicken: Place chicken pieces into a large bowl, then season with garlic salt and paprika. Crack 1 large egg on top of the chicken and massage it in with your hand to coat the chicken evenly.
    2. Coat in Cornstarch*: Transfer the chicken to a large Ziplock bag. Add 1 cup of cornstarch to the bag, then seal it and shake to coat the chicken well.
    3. Pan Fry Chicken: In a medium sized frying pan over medium high heat, add vegetable oil for frying. Add the coated chicken and cook 7-8 minutes, or until cooked through and browned.
    4. Add Sauce & Serve: Pour Thai sweet chili sauce and toss to coat well. Garnish with diced green onions, if desired. Serve sweet chili chicken over rice and enjoy!

    Alyssa’s Pro Tip

    *Cornstarch Tip: Coating each piece of chicken in cornstarch gets you the “fried” texture. It’s important to shake off any excess cornstarch before cooking the chicken.

    Pin this now to find it later

    Pin It

    Bowl of a serving of sweet chili chicken.

    More Easy Chicken Recipes

    3 Packet Crockpot Chicken

    4 hours 5 minutes


    Source link