Category: Healthy

  • Roasted Cabbage With Parmesan Sauce & Pangrattato

    Roasted Cabbage With Parmesan Sauce & Pangrattato

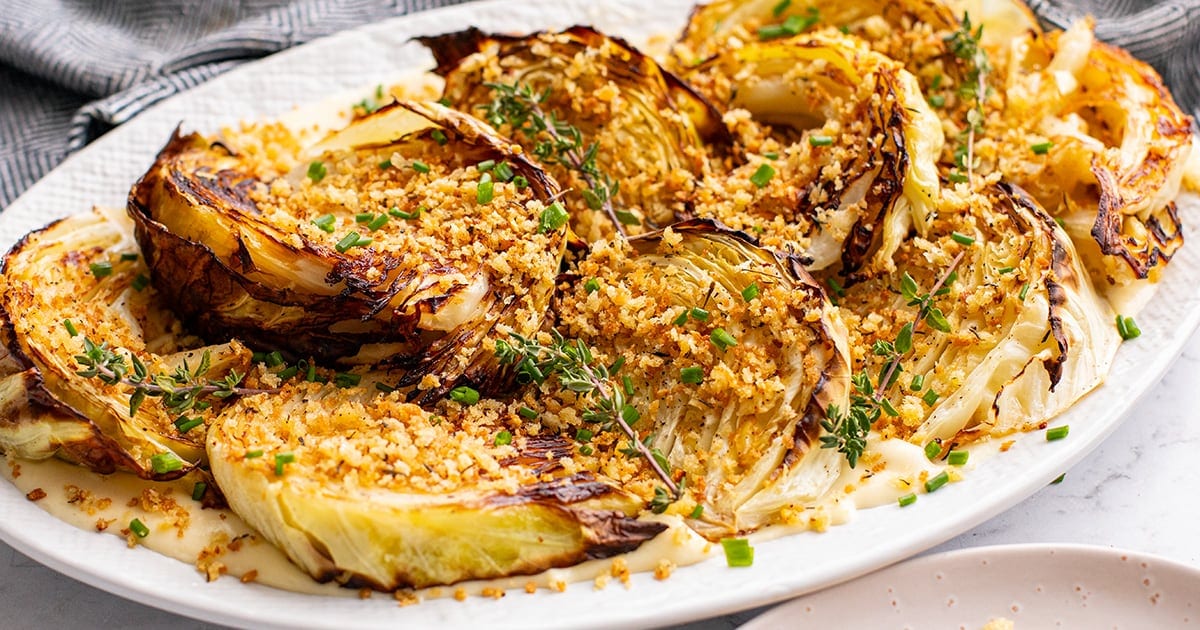
    Roasted cabbage with parmesan sauce and pangrattato (Italian breadcrumbs) – a flavor-packed, crunchy, creamy side dish perfect for holidays or cozy Sunday dinners.


    Jump to: ℹ️ Overview | 🛒 Ingredients | 📷 How To Make | 📹 Watch The Video | 👩‍🍳 Recipe Tips | 🥗 Serving Suggestions | 📝 Full Recipe Card | 🍽 More Vegetable Side Dishes


    This roasted cabbage is cheesy, crunchy and straight-up delicious. It’s the kind of dish that makes people ask for the recipe.

    You’ve got wedges of cabbage roasted until golden and just-tender, with charred edges that add a smoky sweetness. Then there’s the Parmesan sauce: creamy, garlicky, and packed with umami. And to top it off? Pangrattato. Italian breadcrumbs that are garlicky, crispy, herby, and salty in the best way. It’s giving gourmet but without the fuss.

    I’ve made this for Sunday roasts and dinner parties—people always go back for seconds. Bonus: it’s vegetarian-friendly and surprisingly filling, so you can serve it as a centrepiece dish.

    Tip: You can repurpose this recipe to make roasted Brussels sprouts or roasted cauliflower with parmesan sauce.

    👩‍🍳 You might also like these cabbage recipes: cabbage pie, tuna and cabbage patties with spicy garlicky mayonnaise, sautéed cabbage with garlic, lemon, and butter, Indian cabbage, Japanese cabbage, or these other cabbage recipes. Check out my parmesan crusted Brussels sprouts sides as well.

    What You’ll Need

    Here is what you’ll need for this roasted cabbage with parmesan sauce and pangrattato recipe. Find the full measurements in the recipe card below.

    For the roasted cabbage:

    • White cabbage – like Drumhead; it softens beautifully and holds shape. Can sub with Savoy or even red, but not Napa. I have this lovely Napa cabbage recipe for you to try.
    • Olive oil – helps get those crispy edges.
    • Salt & pepper – don’t skimp; they bring everything to life.

    For the pangrattato:

    • Olive oil & butter – for rich flavor and golden crumbs.
    • Garlic – adds that punch.
    • Dried thyme – earthy and herby.
    • Panko breadcrumbs – extra crunchy; regular crumbs work too, just not as light.

    For the parmesan sauce:

    • Butter & flour – classic roux base for creamy sauces.
    • Garlic – just a touch, but adds that lovely aroma.
    • Chicken stock – adds depth (use veg stock for full veg version).
    • Light cream – for a silky finish.
    • Parmesan – salty, nutty, umami magic.

    How To Make Roasted Cabbage With Parmesan Sauce & Pangrattato

    Find the full recipe and nutritional information below. Here are some handy step-by-step photos for roasted cabbage with parmesan sauce and pangrattato.

    • Preheat oven to 395°F / 200°C.
    • Cut cabbage into 1-inch wedges or steaks.
    • Brush with olive oil, season both sides, roast 25 minutes middle rack.
    • Move to top rack for another 5 minutes to get crispy edges.
    • Meanwhile, make the pangrattato: sauté garlic in olive oil and butter, then add breadcrumbs, thyme, salt, and pepper. Cook until golden and crispy.
    • For the parmesan sauce: melt butter, whisk in flour, then garlic. Slowly whisk in chicken stock, followed by cream and parmesan. Stir until smooth and melty.
    • To assemble: spread sauce on a platter, top with cabbage wedges, and sprinkle generously with pangrattato. Or layer it however you like.

    Watch The Video

    Recipe Tips/Variations

    • Cabbage cuts: Steaks work just as well as wedges, just watch for thickness—about 1 inch is ideal.
    • Make-ahead: Roast the cabbage and prep the pangrattato in advance. Reheat cabbage in the oven and crisp pangrattato in a dry skillet.
    • Storage: Keep leftovers in the fridge for up to 3 days. Reheat in the oven to maintain crispness.
    • Add-ins: A pinch of nutmeg in the sauce or a squeeze of lemon before serving adds extra zing. Crispy bacon or pancetta would add a little extra saltiness.
    • Make it vegetarian: Use veggie stock in the sauce, and you’re good to go.

    Serving Suggestions

    This dish shines as a holiday side (hello Thanksgiving or Christmas!), but I also love it as a meatless main with roast potatoes and a big leafy salad. It’s also a dream alongside grilled chicken or a juicy steak. Basically? It plays well with so many things.

    💬 If you’ve tried this roasted cabbage with parmesan sauce and pangrattato or any other recipe on the blog then don’t forget to rate the recipe and let me know how you got on in the comments below, I love hearing from you! You can also FOLLOW ME on Instagram, Facebook, Pinterest, YouTube, and or sign up to my Newsletter to see more of my delicious food.

    Want to Save This Recipe?

    Enter your email & I’ll send it to your inbox. Plus, get great new recipes from me every week!

    By submitting this form, you consent to receive emails from Cooked & Loved

    Roasted cabbage with parmesan sauce and pangrattato (Italian breadcrumbs) – a flavor-packed, crunchy, creamy side dish perfect for holidays or cozy Sunday dinners. Find step-by-step photos and more recipe tips above.

    • Preheat oven to 395°F / 200°C.

    • Line a flat baking tray with parchment or lightly grease it. Arrange cabbage wedges cut-side down.

    • Brush both sides with olive oil, sprinkle with salt and pepper.

    • Roast on the middle rack for 25 minutes, then move to a higher rack for 5 more minutes to crisp up.

    • For the pangrattato, heat olive oil and butter in a skillet. Add garlic, cook 10 seconds. Stir in breadcrumbs, thyme, salt, and pepper. Cook 2–3 minutes until golden. Set aside.

    • For the sauce, melt butter in a saucepan. Add flour and stir into a roux. Add garlic, then slowly whisk in stock until smooth. Stir in cream and parmesan. Let it melt, taste and season as needed.

    • To serve, spread sauce on a serving dish, top with roasted cabbage, and sprinkle over pangrattato. Garnish with fresh thyme if you like.

    • Can I cut the cabbage in steaks instead of wedges Absolutely. Just keep them about 1 inch thick so they hold together well and cook evenly.
    • Can I make this dairy-free? Yes – use plant-based butter and cream, and a vegan parmesan or nutritional yeast.
    • Make-ahead: Roast the cabbage and prep the pangrattato in advance. Reheat cabbage in the oven and crisp pangrattato in a dry skillet.
    • Storage: Keep leftovers in the fridge for up to 3 days. Reheat in the oven to maintain crispness.
    • Add-ins: A pinch of nutmeg in the sauce or a squeeze of lemon before serving adds extra zing. Crispy bacon or pancetta would add a little extra saltiness.
    • Make it vegetarian: Use veggie stock in the sauce, and you’re good to go.

    Calories: 260kcal | Carbohydrates: 16g | Protein: 7g | Fat: 20g | Saturated Fat: 9g | Polyunsaturated Fat: 1g | Monounsaturated Fat: 8g | Trans Fat: 0.2g | Cholesterol: 43mg | Sodium: 862mg | Potassium: 315mg | Fiber: 4g | Sugar: 5g | Vitamin A: 581IU | Vitamin C: 52mg | Calcium: 195mg | Iron: 1mg
    Keywords: Roasted cabbage with parmesan sauce and pangrattato, Roasted cabbage with parmesan sauce, oven-roasted cabbage

    More Vegetable Side Dishes


    Source link

  • Salmon Tacos Recipe (My Whole Family Loves These!)

    Salmon Tacos Recipe (My Whole Family Loves These!)

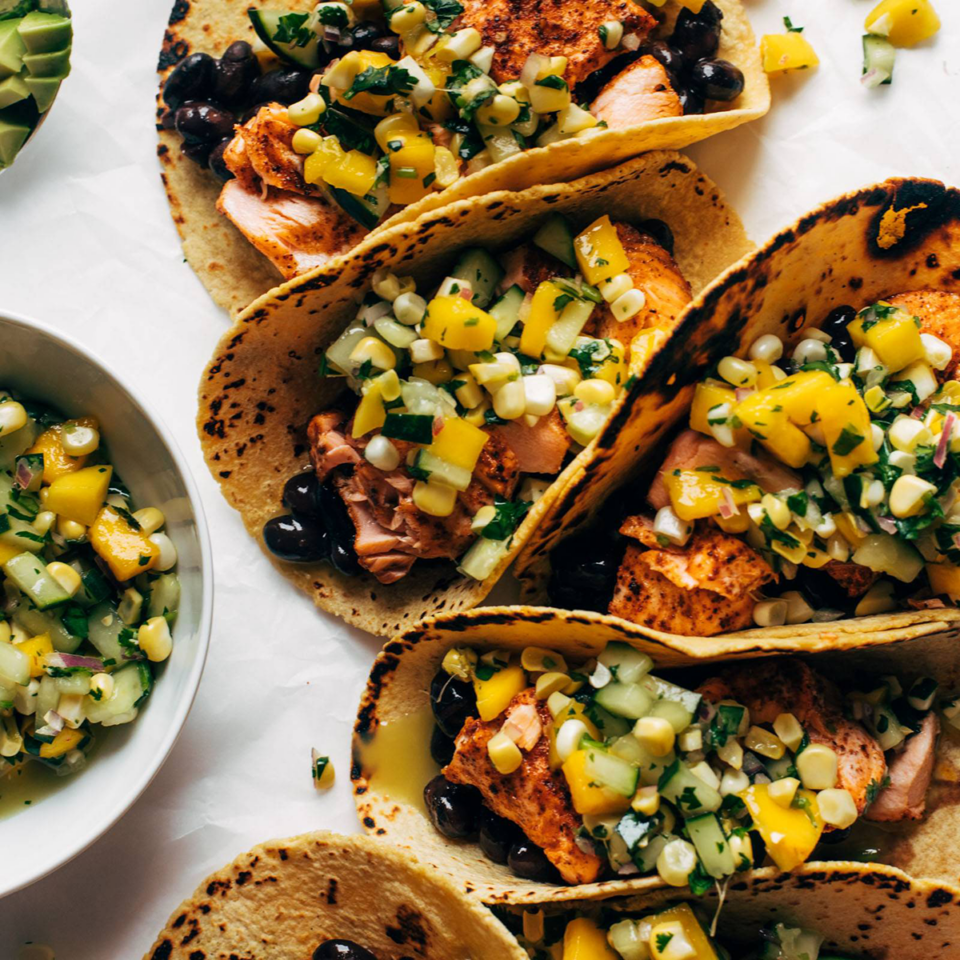
    Super easy salmon tacos loaded with a mango, sweet corn, and cucumber salsa!

    This is a brand new recipe that’s part of our Spring 2023 SOS Series – in other words, EASY recipes! View our full collection of SOS recipes here.


    In This Post: Everything You Need For Salmon Tacos


    Salmon Tacos Video


    Lindsay’s Notes

    These tacos are THE dinner for me right now!

    A few nights ago, I made them (again), and I set the sheet pan of salmon down on the table and my whole family literally descended upon it and started grabbing at the salmon with their hands and forks as I stood by watching in half shock, half pride. It was a feeding frenzy.

    Of course, we love salmon. It’s a great source of nutrition and protein and, when cooked well, it gently slides apart into buttery, juicy, delightful little flakes.

    But I’m not going to lie to you: the main event here is that mango corn salsa.

    The salmon itself is completely SOS (taco seasoning and THAT’S IT), which is why I think it makes sense to put all your effort and energy into the salsa. This salsa is also the thing that’s going to keep you sitting at the table long after you’re done eating tacos, just scooping some extra salsa bites all on its own and suddenly thinking of it as more of a salad? It can be a salad, right? I would totally eat this salsa on its own as a salad.

    In general, I’m a believer that salmon and mango are a match made in heaven.

    Each bite is extra crispy and unexpected from the raw sweet corn and cucumber with a little burst of juicy flavor. But it’s also mainstream enough with the mango that my two young kids are usually happy to devour it right along with us.

    I love a million sauces on my tacos (okay, fine, on every recipe). But with this one, all it needs is a bit of extra lime and honey to finish it off. Simple, minimal effort, max deliciousness.


    Looking For More Dinner Ideas?

    Check out our collection of 30+ top dinner recipes!


    Print

    clock clock iconcutlery cutlery iconflag flag iconfolder folder iconinstagram instagram iconpinterest pinterest iconfacebook facebook iconprint print iconsquares squares iconheart heart iconheart solid heart solid icon

    Description

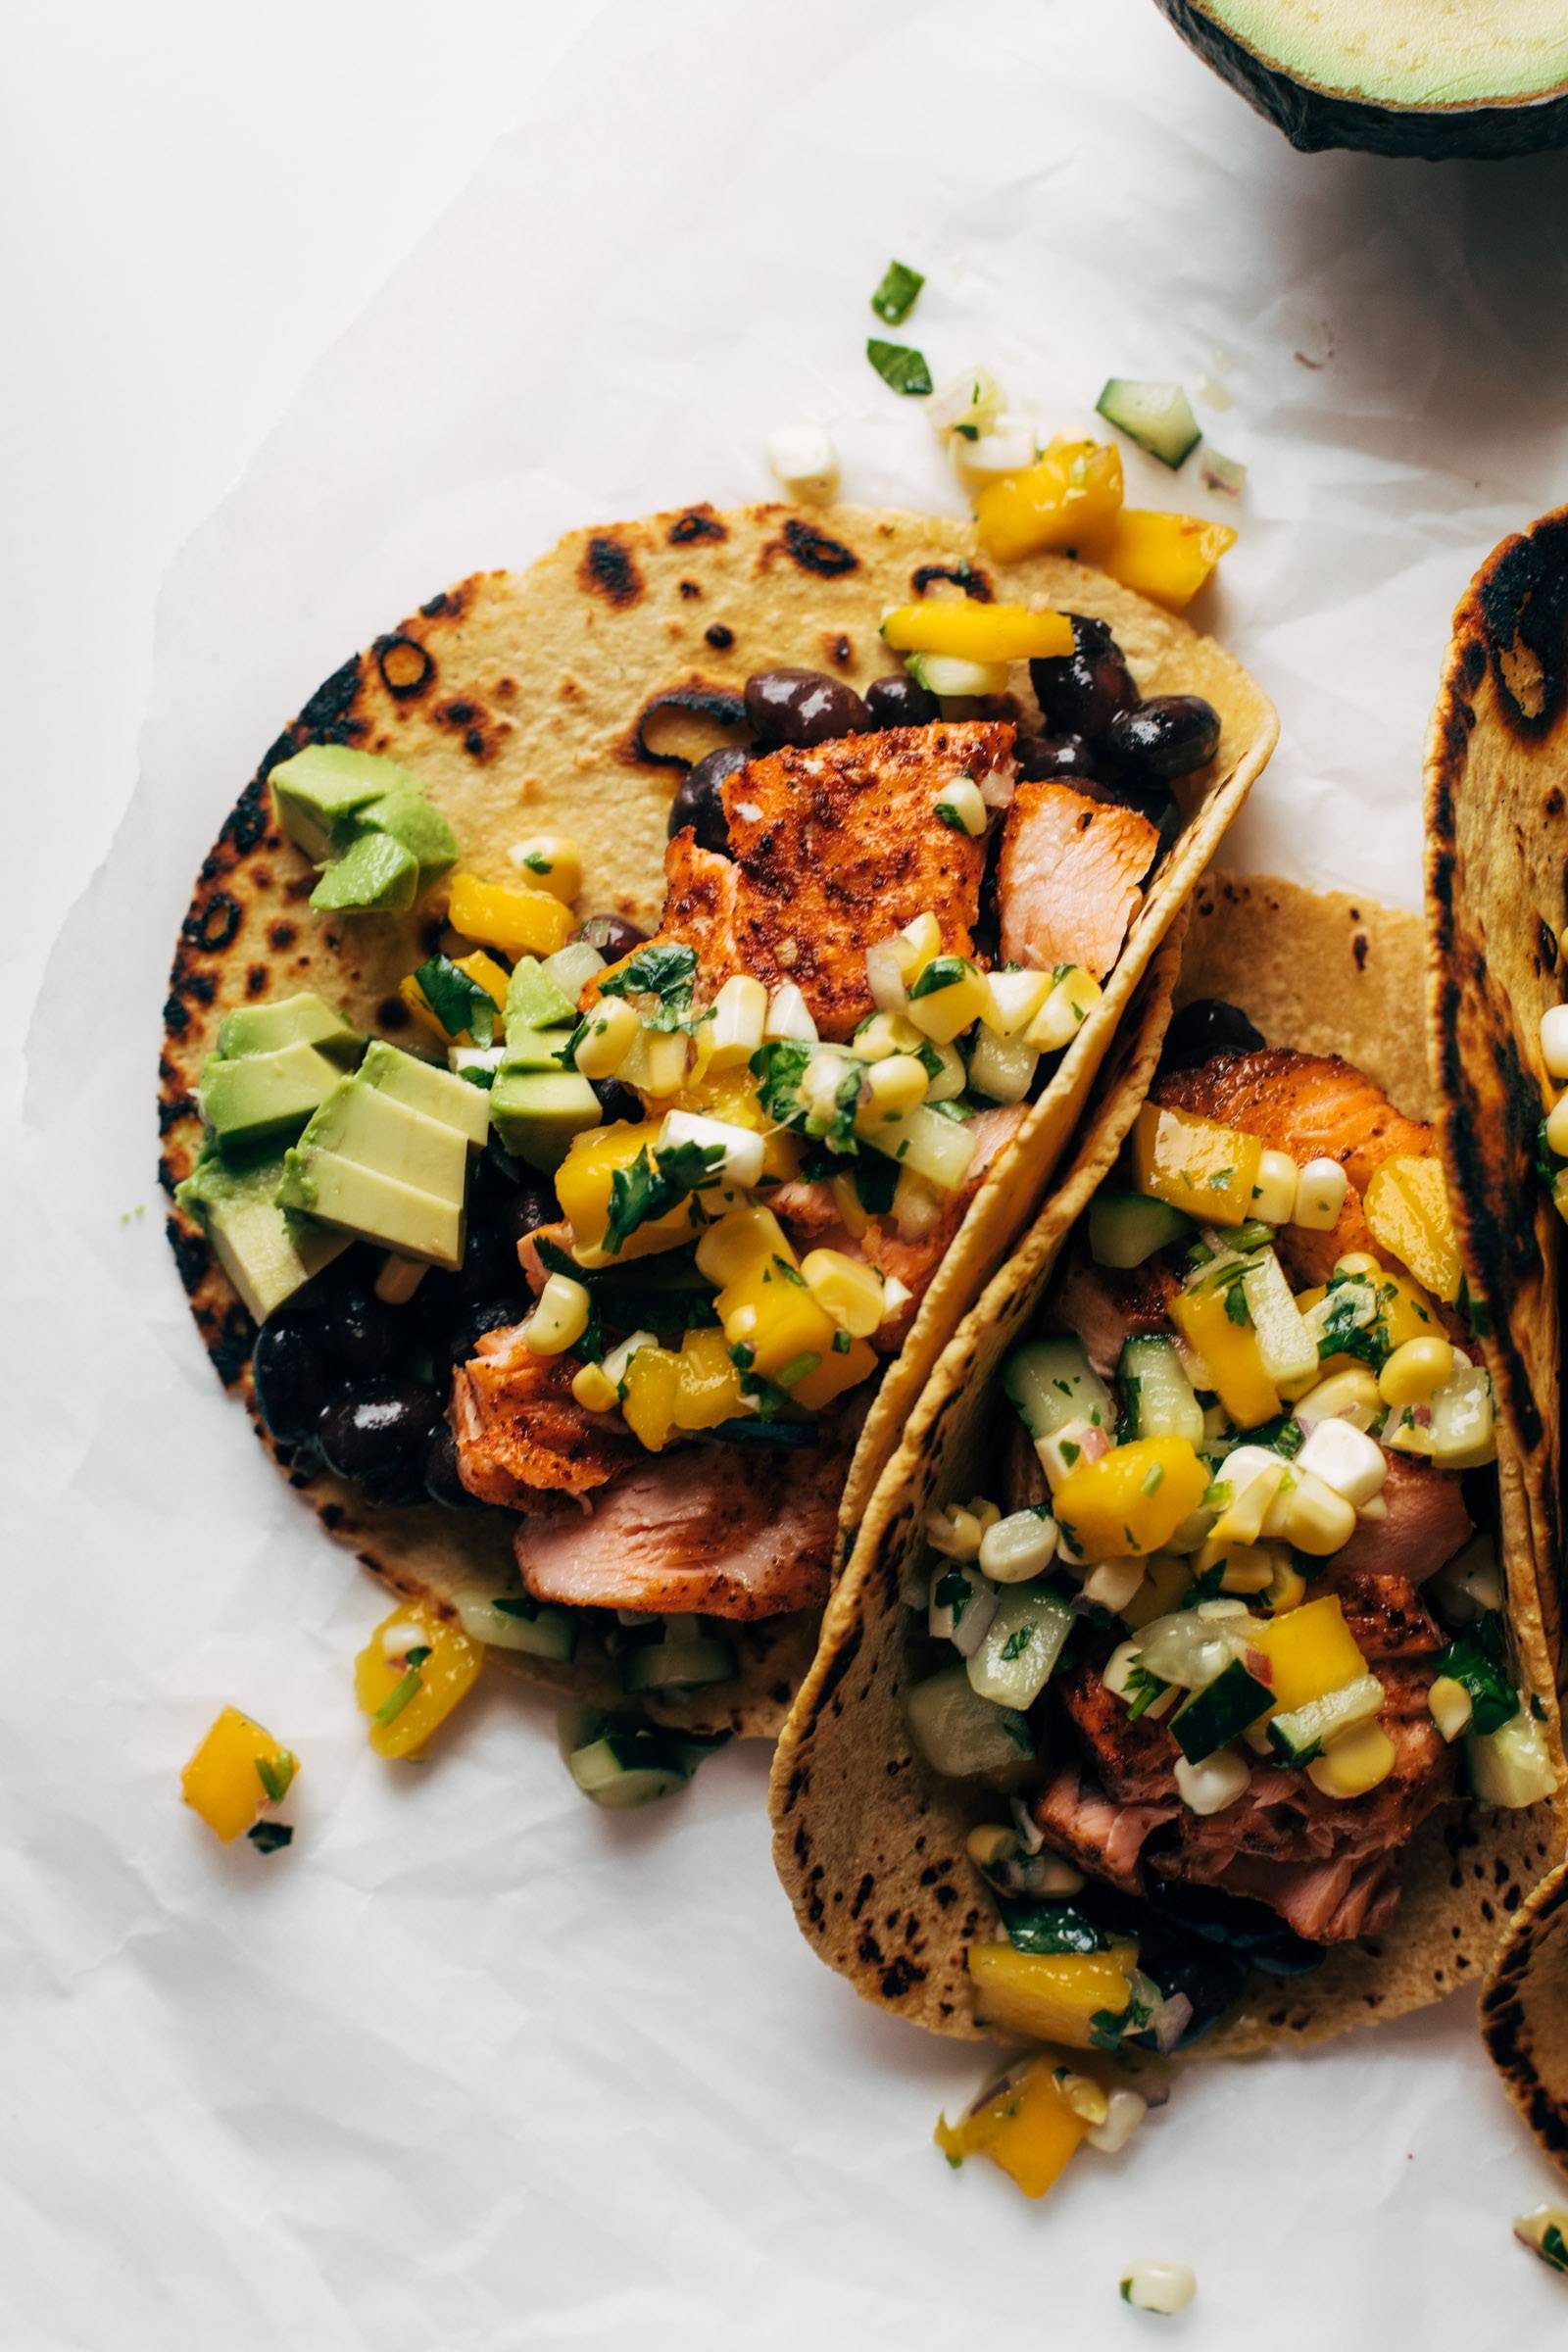
    Super easy salmon tacos loaded with a mango, sweet corn, and cucumber salsa! Perfect with black beans or avocado tucked into a corn tortilla.


    Salmon Tacos:

    Mango Corn Salsa:

    Extras:


    1. Prep: Preheat the oven to 425 degrees. Line a baking sheet with parchment paper.
    2. Season the Salmon: Toss the salmon with the taco seasoning and avocado oil until well-coated – you can do this in a bowl or directly on the baking sheet. If your taco seasoning does not have salt, add some salt to the salmon.
    3. Bake the Salmon: Bake the salmon for 8 minutes, close to the top of the oven, or until it slips apart easily when pressed with a fork. 
    4. Make the Salsa: While the salmon is baking, chop up your salsa ingredients and toss together in a bowl. Season to taste.
    5. Soften the Tortillas: To soften the corn tortillas, I usually heat up some oil in a large skillet and then give the tortilla a very quick one-sided dip into the hot oil and transfer to a paper-towel lined plate. I stack them up as I go so the heat and oil kind of distributes between all the tortillas. You can also wrap the tortillas in a few damp paper towels and microwave for 30 seconds to steam them so they become more pliable and yummy to eat. 
    6. Assemble the Tacos: Mash avocado or spread refried beans on the bottom of the tortilla. Add a couple pieces of salmon; press to gently smash them. Top with a big scoop of the salsa. I often finish these with lime squeezes and a drizzle of honey!

    Notes

    Purchasing Salmon: For this recipe, I look for salmon fillets that are nice and thick so you can cube it! I usually cut the skin off and then cut into large cubes; I love the cube shape because they cook nice and evenly and make for a fun shape to squish apart in the taco. It’s also totally fine to just sprinkle your seasonings onto a thinner fillet and flake the fish apart to put into the tacos.

    Salmon Doneness: People cook salmon to varying degrees of doneness depending on your preferences and the quality of the salmon. I like to cook it to medium well, where everything is almost totally cooked through but it’s nice and soft and slips apart easily when you press it with a fork. Here’s a guide with more info on cooking salmon and how to tell when it’s done.

    Salsa Spiciness: As written, this salsa is not spicy at all, but a jalapeño would be a great addition! I keep it mild for my kids, but if that is not your journey, go for the heat!

    Tortillas: In the photos, I was using a thicker type of tortilla (corn and flour blend) that I charred in a dry cast iron skillet. When I usually make this, I use regular corn tortillas and I follow the recipe directions for softening them.

    Taco Seasoning: All brands are different, but if you’re using a mild one and you want more going on with your salmon, sprinkle it with some extra chili powder, onion powder, and garlic powder. *chef’s kiss*

    Air-Frying The Salmon: This would work well using this Air Fryer Salmon recipe. Just replaced the seasonings in that recipe with the taco seasoning in this one!

    • Prep Time: 15 minutes
    • Cook Time: 10 minutes
    • Category: Tacos
    • Method: Bake
    • Cuisine: Caribbean-Inspired

    Keywords: salmon tacos, salmon recipe, mango salsa

    Close-up of salmon tacos with salsa

    What Taco Seasoning Do You Like?

    Lately I’ve been using the one from Kowalski’s (a local grocery store) – that’s my favorite in this recipe right now.

    I also like the Siete brand mild taco seasoning (affiliate link) – the spicy one is a bit much for my kids, but the mild is great.

    What Tortillas Do You Like?

    In these photos, I’m using the La Tortilla Factory corn and flour blend tortillas! They are a bit thicker than your average tortillas and they hold up well, which is why I picked them for the photos.

    If I’m making these at home, no photos necessary, I usually use just a standard yellow corn tortilla.

    Can I Use Something Else Besides Salmon?

    Yes, this would be delicious with chicken or shrimp! Just adjust your baking time a bit – chicken needs more like 10-12 minutes (depending on the size of your pieces) and shrimp would be about 8 minutes.

    Can I Make This Vegetarian?

    I would roast up some cauliflower in place of the salmon, following the same method of coating it with the taco seasoning and increasing the roasting time to 25-30 minutes.

    If you’re looking for extra protein, tofu would also be good. Here’s our guide to cooking tofu – I would recommend the crispy baked method!

    Can I Make This Gluten-Free / Dairy-Free?

    It should be both gluten-free and dairy free as written!

    Double-check your taco seasoning and your corn tortillas for any added wheat or dairy; otherwise, all the other ingredients are good to go!

    How Does This Keep As Leftovers?

    I wouldn’t recommend this as a leftovers meal. The salsa gets a bit soggy and the salmon doesn’t do great reheated (everyone is different, but this is just my personal opinion).

    If you are cooking for one or two people, I would just keep the salsa ingredients separate and toss them before serving, and maybe even keep the extra salmon un-baked until right before serving.

    Can I Air-Fry The Salmon?

    Yes! And I highly recommend it! Here’s how to make air fryer salmon. I’d just replace the seasonings in that recipe with the taco seasoning in this recipe.


    More Tacos To Love

    Source link

  • Steph’s Chickpea Curry with Spinach and Rice Recipe

    Steph’s Chickpea Curry with Spinach and Rice Recipe

    Amazingly creamy, saucy chickpea curry served over rice with a dollop of chili crisp and a side of cucumber salad. Ready in 20 minutes!

    In This Post: Everything You Need For Chickpea Curry


    Chickpea Curry Video


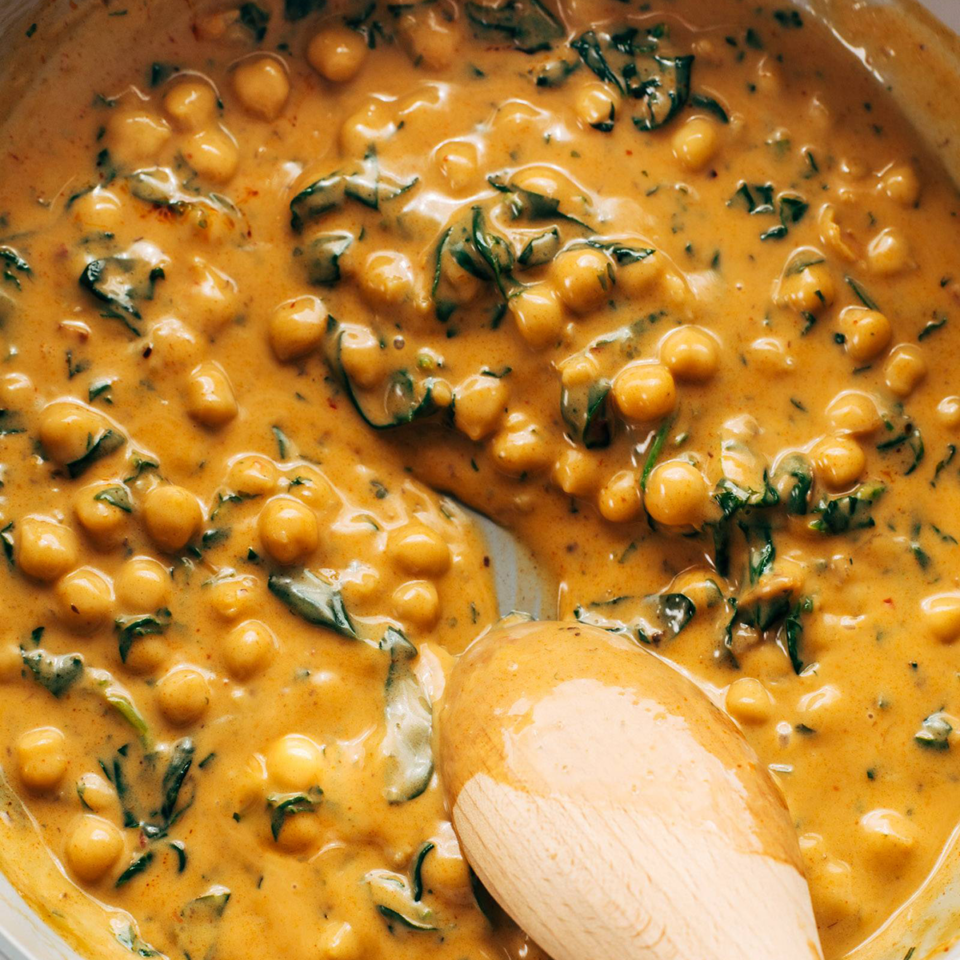
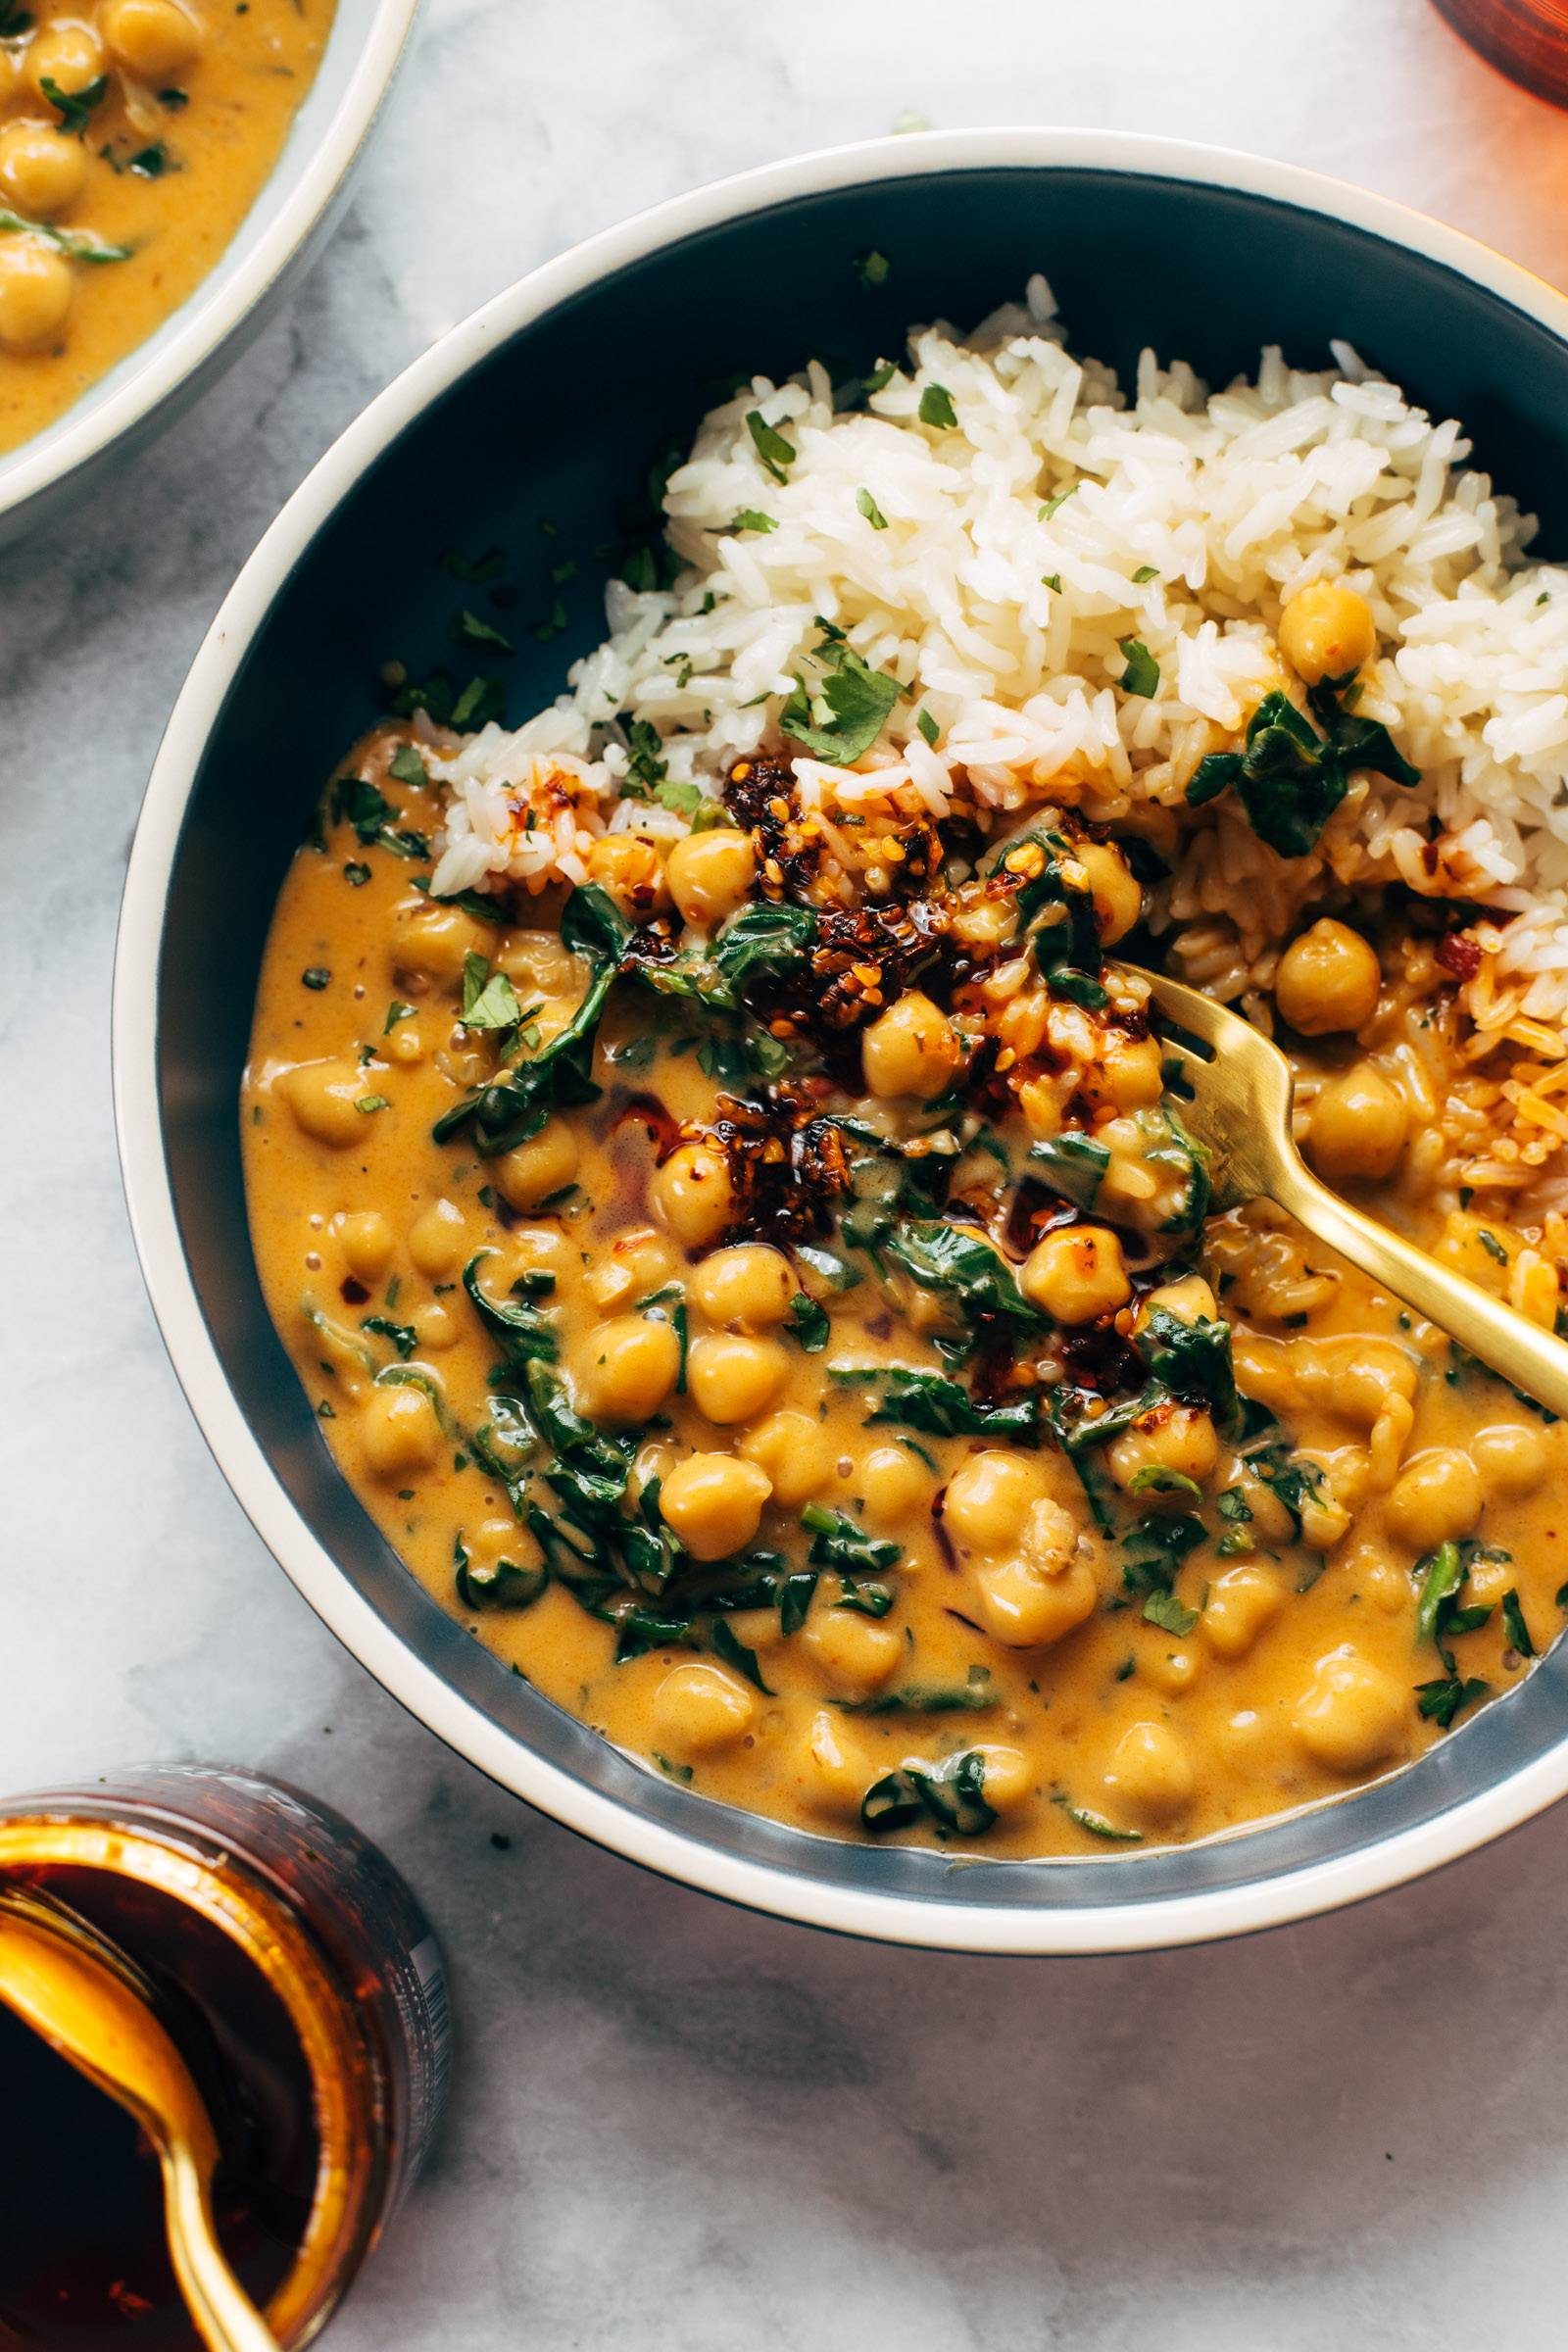
    Bowl of coconut curry chickpeas

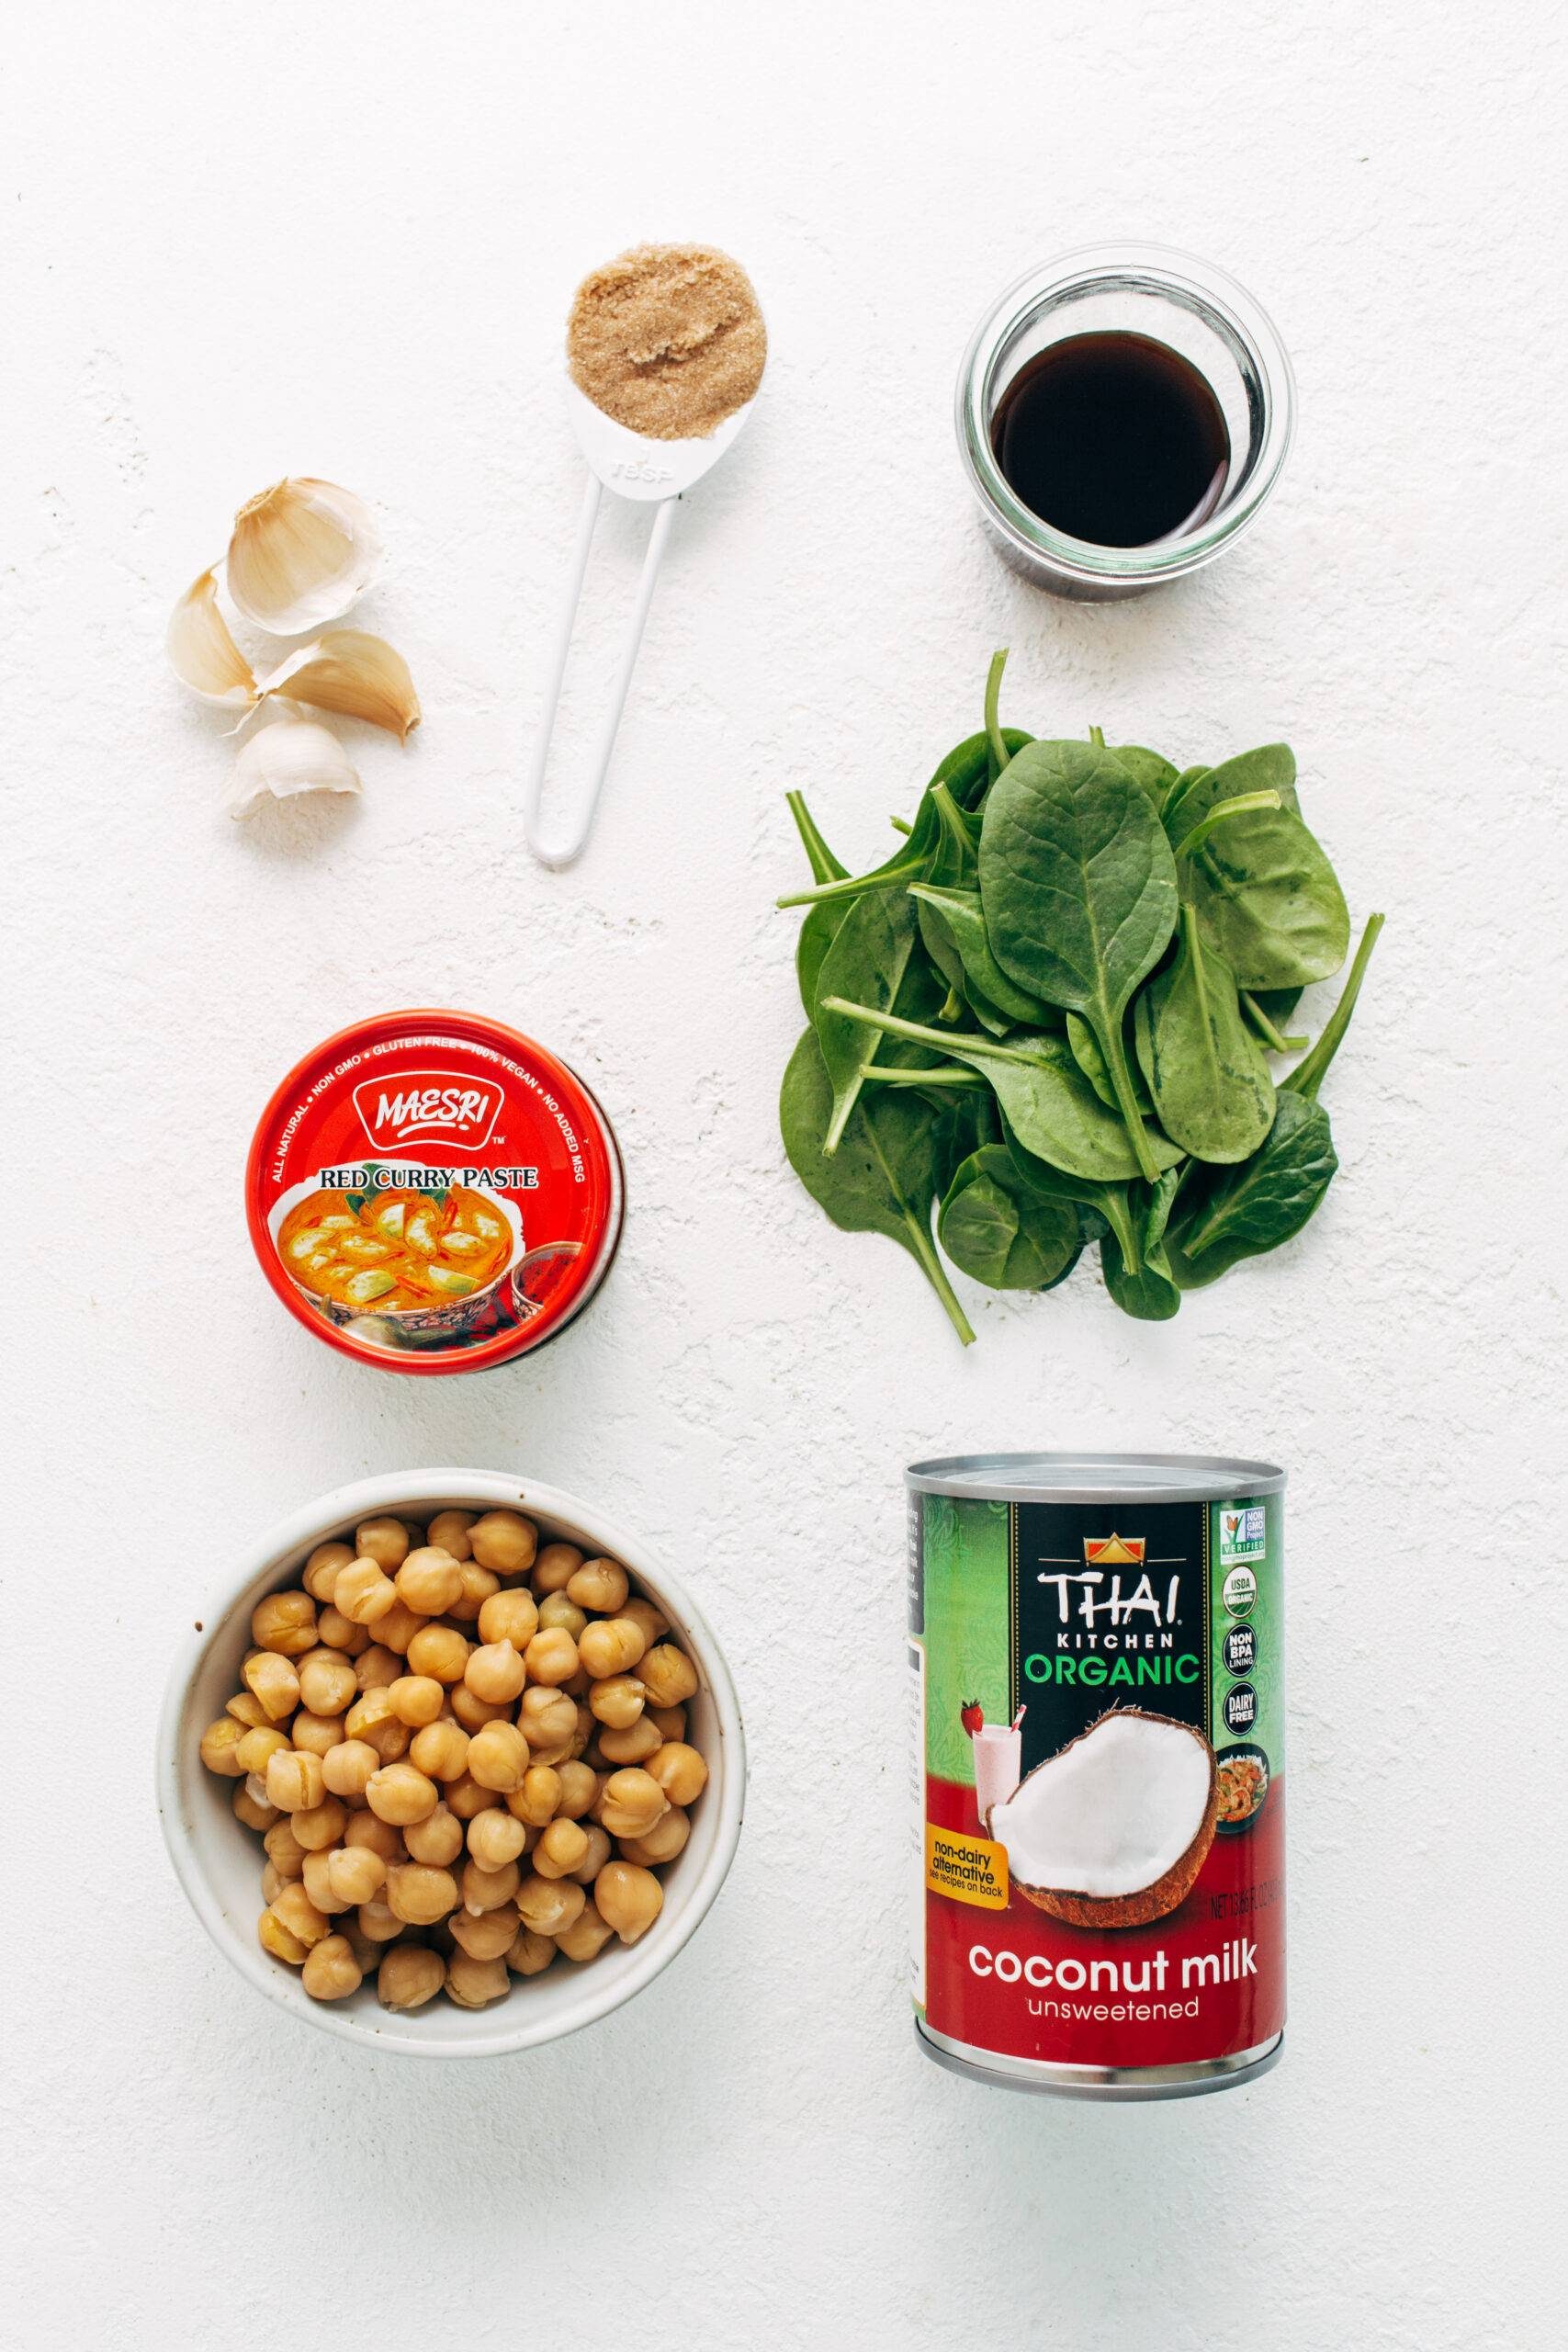
    Ingredients For This Recipe

    Brown Sugar

    The perfect little bit of sweetness. The brown sugar helps offset the spiciness and makes everything just deliciously rich.

    Curry Paste

    This recipe uses red curry paste. Any brand will work, but I usually opt for the Thai Kitchen brand that I can find pretty easily at my local grocery store.

    Coconut Milk

    Please, please use full-fat coconut milk in this recipe. The perfect thickness and sauciness!

    Soy Sauce

    We’ve got sweetness, we’ve got richness, we’ve got spiciness, and this is where the saltiness comes in!

    Chickpeas

    Just one can of chickpeas – my favorite easy plant-based protein.

    Spinach

    I love adding spinach to this for a little bit of veg. Other veggies you could use: green beans, broccoli, cauliflower, or carrots.

    Cilantro

    A sprinkling of cilantro finish everything off!

    Rice

    Heap this delicious mixture over a mound of fluffy rice, and that’s it!

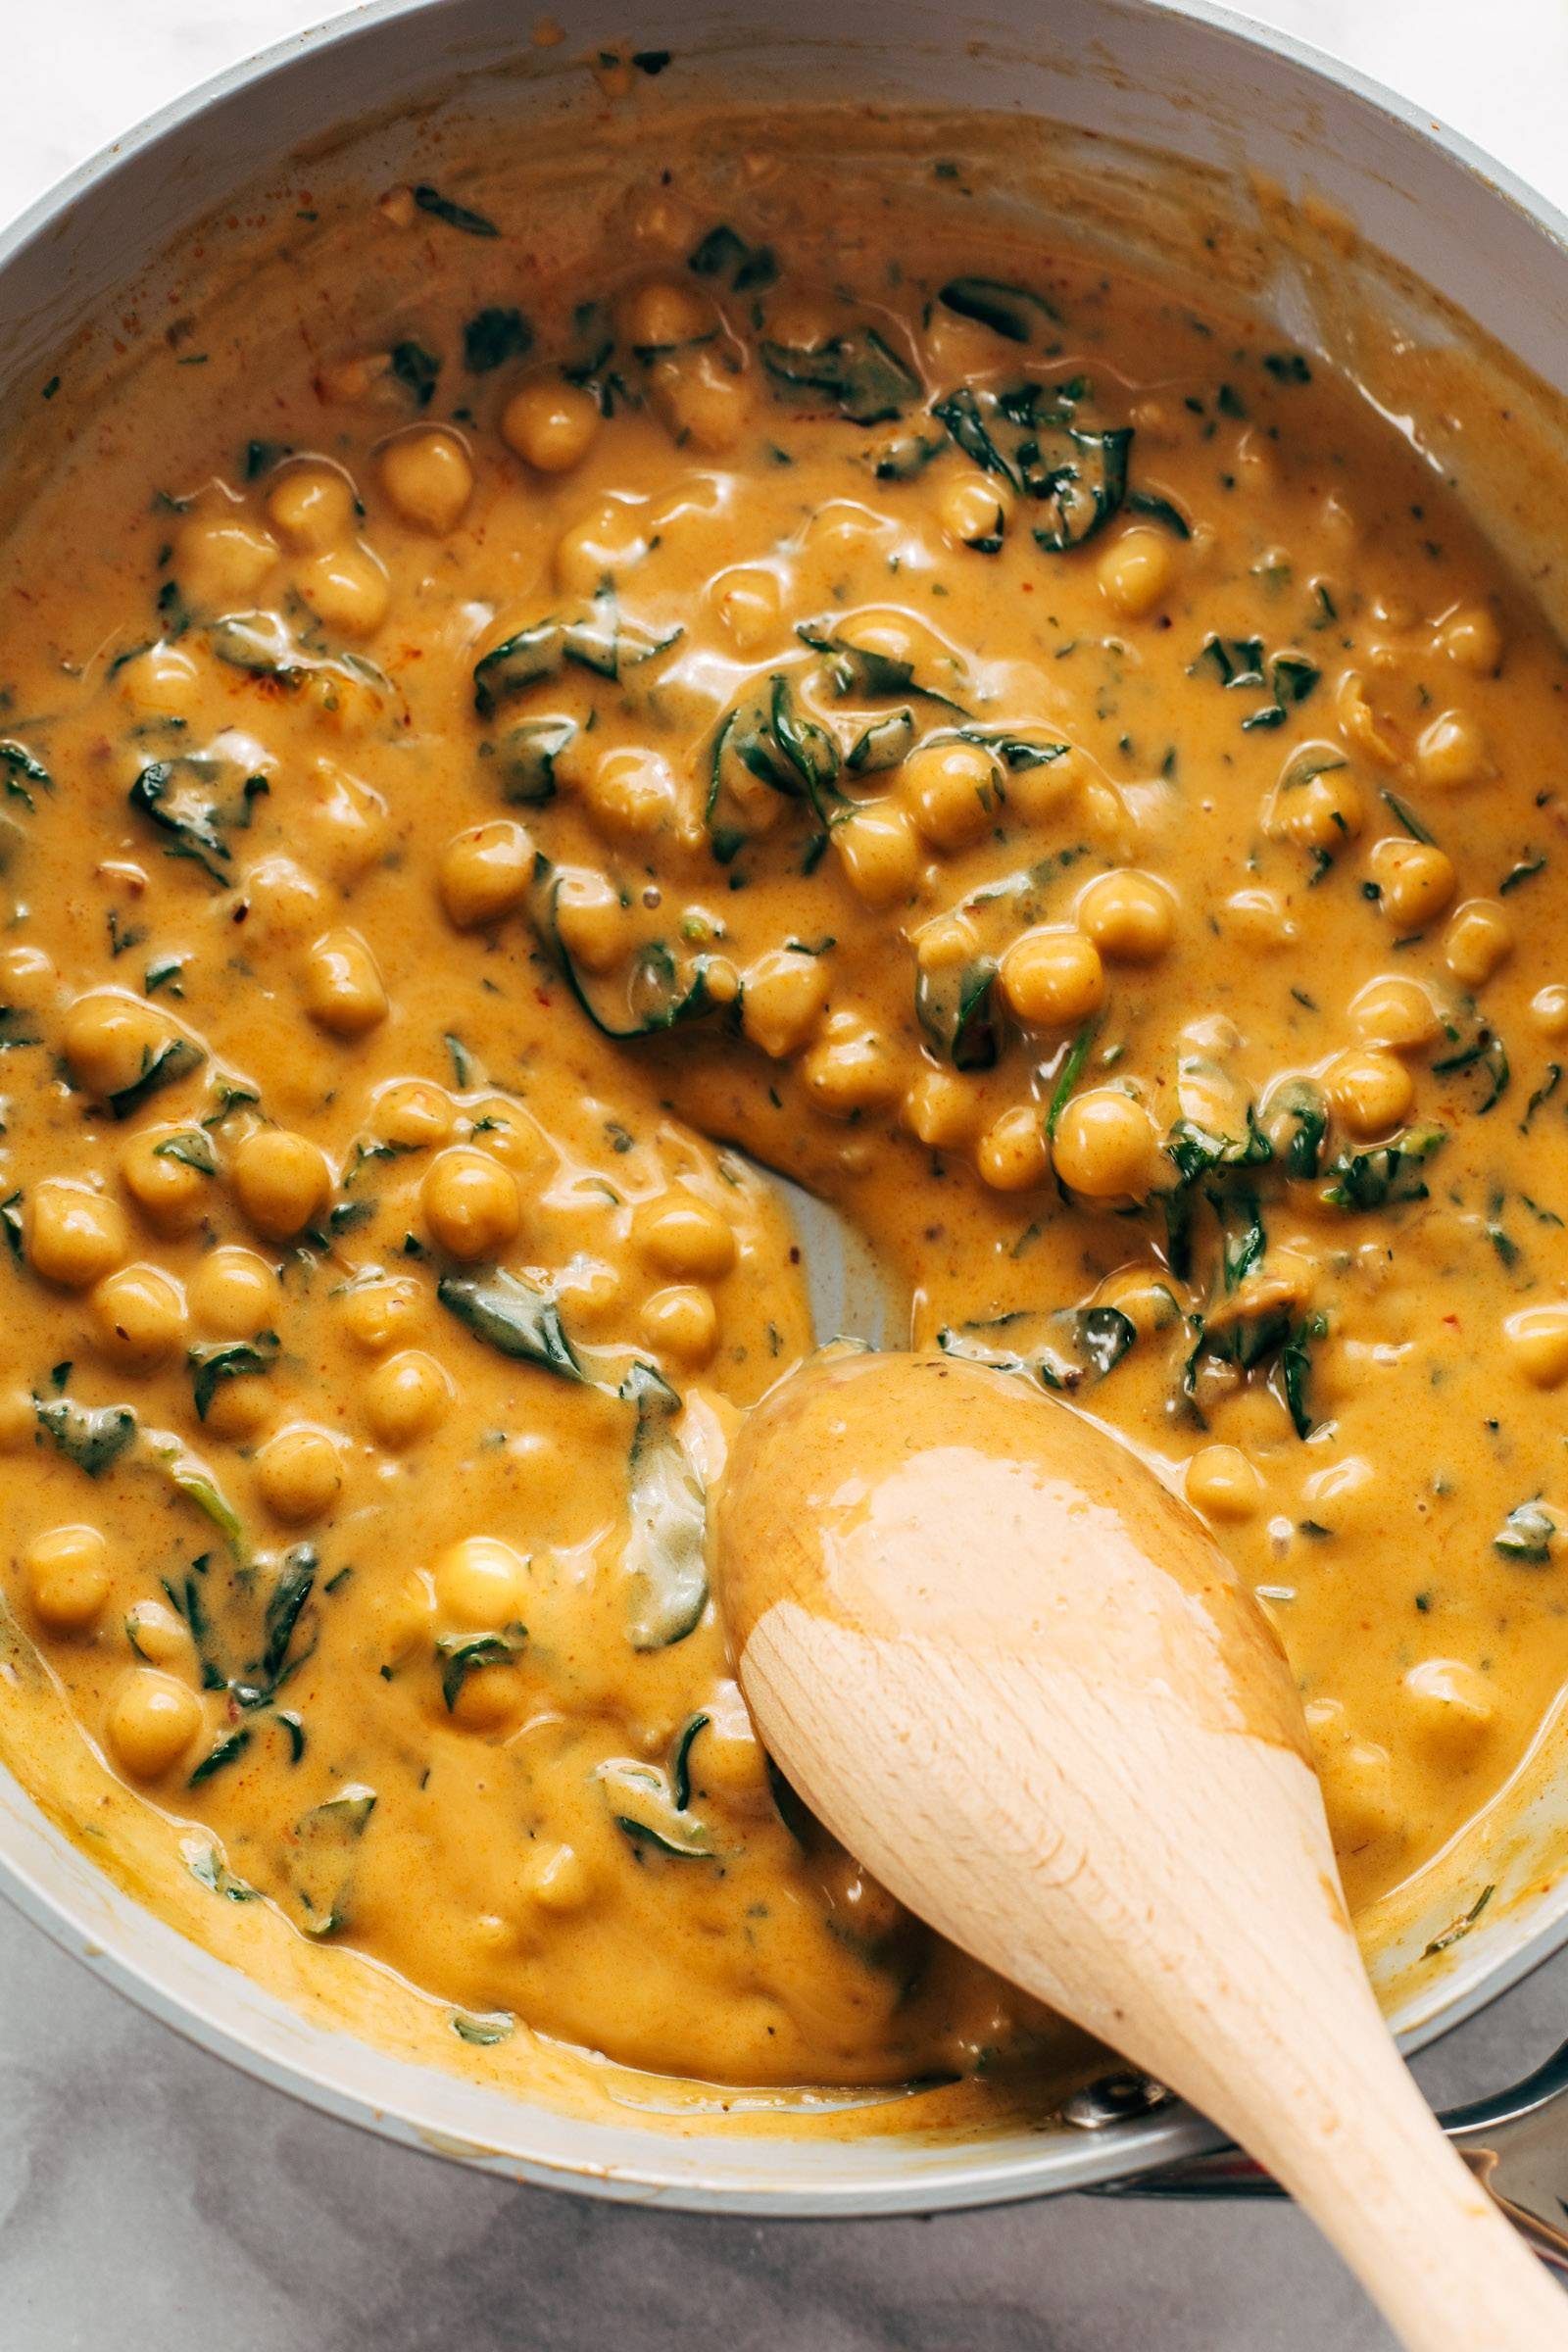
    Coconut curry chickpeas with spinach in a pan.

    Lindsay’s Notes

    How it happened is that I asked my sister Steph what she’s been making for dinner lately, and she said, “I make that salmon recipe but I just use a can of chickpeas instead to keep it easy.” And now, if you ask me what I’m making for dinner lately, I’m going to say the exact same thing because okay wow that is very delicious and it only takes ten minutes.

    STEPH FOR PRESIDENT!

    This chickpea curry is, well, it’s everything. It’s cozy, it’s pantry-friendly, and maybe even a little elegant? *hair toss* even though it’s super super easy? It’s comforting without being heavy, nutritious without being boring, and beautiful without being high maintenance. I’m no stranger to a delicious chickpea curry, but this one takes it to the next level.

    I came into this realization too late to include it in the photos here, but serving this with a little side of pickled cucumber salad (sliced cucumbers, sliced red onion, white vinegar, olive oil, salt, and sugar) is *chef’s kiss* SOS perfection. (I also love this little cucumber salad with these beef skewers. SO GOOD.)

    With or without the cucumber salad, I can definitely say that swooping the wooden spoon leisurely through that luscious sauce, piling the saucy goodness of chickpeas and spinach over steaming rice, and then drizzling the chili crisp (affiliate link) over the whole thing… it’s definitely a living-my-best-life type moment.


    Print

    clock clock iconcutlery cutlery iconflag flag iconfolder folder iconinstagram instagram iconpinterest pinterest iconfacebook facebook iconprint print iconsquares squares iconheart heart iconheart solid heart solid icon

    Description

    Amazingly creamy, saucy chickpea curry served over rice with a dollop of chili crisp and a side of cucumber salad. Ready in 20 minutes!


    1. Cook rice according to package directions.
    2. Heat the avocado oil over medium heat. Add the garlic and curry paste; sauté until softened and fragrant, about 1-2 minutes.
    3. Add the brown sugar, coconut milk, and soy sauce. Bring to a low simmer until thickened slightly.
    4. Add chickpeas, spinach, and cilantro; cook until chickpeas are heated through and spinach is wilted. Mash the chickpeas ever so slightly with the back of a wooden spoon if you want to change up the texture and make it more creamy.
    5. Taste and adjust to your liking – we often add a squeeze of lime or some extra ginger or lemongrass, but it’s really not necessary. The flavor is totally there even with the most basic ingredient list. Serve over rice with a dollop of chili crisp (affiliate link) and a side of pickled cucumber salad if you want (and I promise you do want this – see notes). Top with more cilantro, if you want! 

    Notes

    For the pickled cucumber salad, thinly slice 3 small cucumbers and a small chunk of red onion on a mandoline. Toss sliced cucumbers and red onion with 1 tablespoon white vinegar, 2 tablespoons avocado oil, and 1/2 teaspoon salt and 1/2 teaspoon sugar. Let them hang out for 20-30 minutes (more if you have time) and just serve with the curry! So good. My kids love these, too!

    1 1/2 cups of rice will give you a bit more than you technically need – it’s 4 hearty portions or 6 regular portions. We always use this amount, though, because my girls often want to eat the rice plain, and I’d rather have a bit of extra rice instead of not enough rice!

    If your sauce is too runny, this is likely because of the brand of coconut milk. Typically when I use Asian brands of coconut milk (Aroy D or Chaokoh) I do not have this issue, and the sauce consistently turns out thick and luscious and creamy, almost like a gravy. If you find yourself with a runny sauce, just whisk one tablespoon of cornstarch into one tablespoon of cold water and add it to the bubbling sauce in the pan. Within a minute or two of gentle heat, you’ll see it start to thicken up. Works like a charm.

    • Prep Time: 5 minutes
    • Cook Time: 15 minutes
    • Category: Dinner
    • Method: Saute
    • Cuisine: Asian-Inspired

    Keywords: chickpea curry, curry recipe, vegetarian curry

    Chickpea Curry: Frequently Asked Questions

    What is the best kind of coconut milk to use?

    The texture of the sauce will vary a bit depending on brand. I like Aroy-D or Chaokoh canned coconut milk (full fat). If you use a coconut milk that is more on the runny side and the sauce isn’t thick enough for you, you can add the cornstarch slurry as directed in the recipe notes.

    Can you use light coconut milk?

    Personally I prefer full-fat coconut milk for this (and most) recipes. If you do use light coconut milk, it will probably need a bit of thickener such as the cornstarch to get it creamy and saucy as pictured.

    Can you use a different protein besides the chickpeas?

    Yes, absolutely. I love this with just about everything – tofu, chicken, shrimp, salmon, etc. It is a magical sauce that makes everything taste amazing.

    How could I add more vegetables to this?

    I have added sliced bell peppers to the sauce, sautéing them first so they are nice and soft. This sauce also goes well with broccoli.

    I also love serving this with a little pickled cucumber salad – instructions for that are in the recipe notes.

    How do the leftovers keep?

    This recipe makes for awesome leftovers. I especially like this for leftovers because the chickpeas do better in the fridge for longer than chicken or shrimp. This works great to make ahead and keep in the fridge for a week’s worth of lunches! Store it separately from the rice, or just side-by-side in individual containers.

    If you can, you may want to hold off on adding the spinach until just before serving – it’s not necessary, but it would ensure that you don’t encounter any mushy or slimy spinach in your leftovers.

    Can I make this vegan?

    Yes! That said, all curry pastes are different in what ingredients they use (and some do have fish products in them, like fish sauce or shrimp paste), so just be sure to check your curry paste to make sure that it is vegan.

    Can I make this gluten-free?

    To make this gluten free, just skip the soy sauce and double-check that the curry paste is gluten-free! (Use fish sauce or coconut aminos in place of the soy sauce.)

    Ingredients for coconut curry chickpeas.

    If You Like This, You Should Try:

    Source link

  • BBQ Chicken Pineapple Skewers

    BBQ Chicken Pineapple Skewers

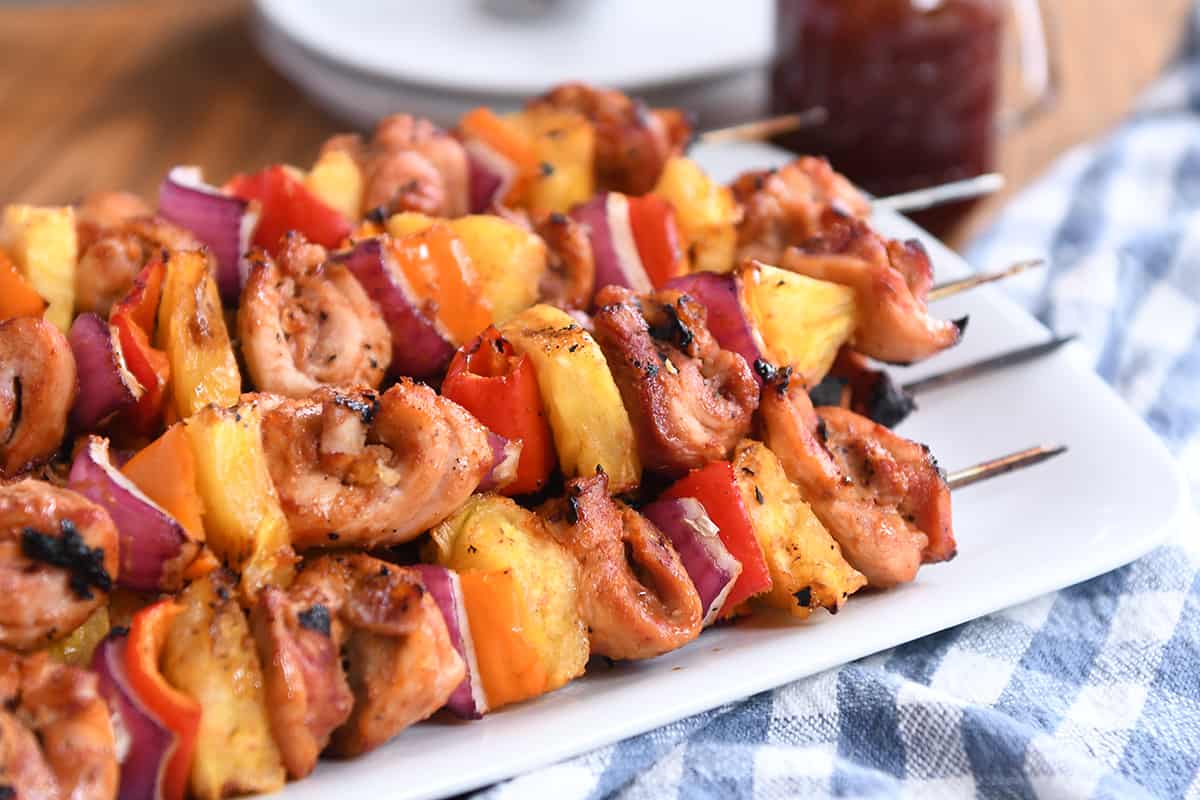
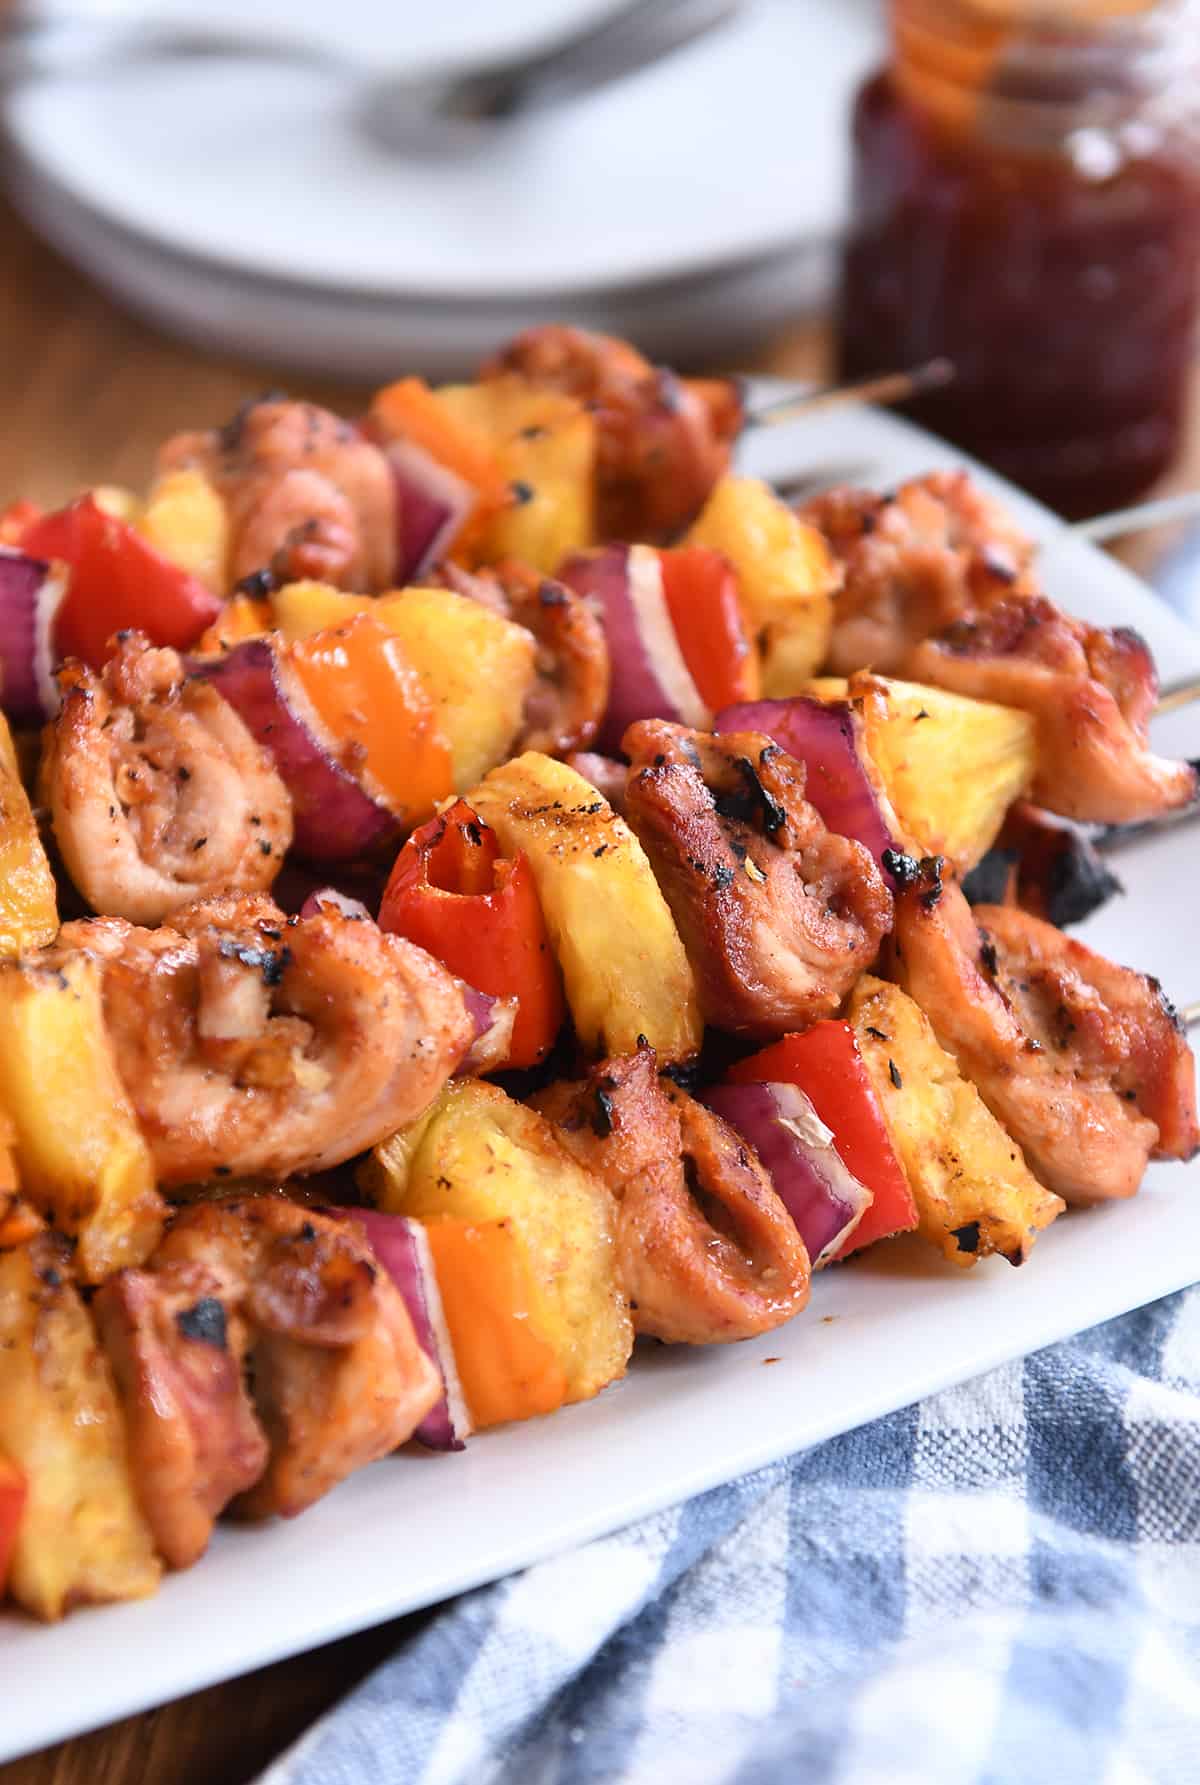
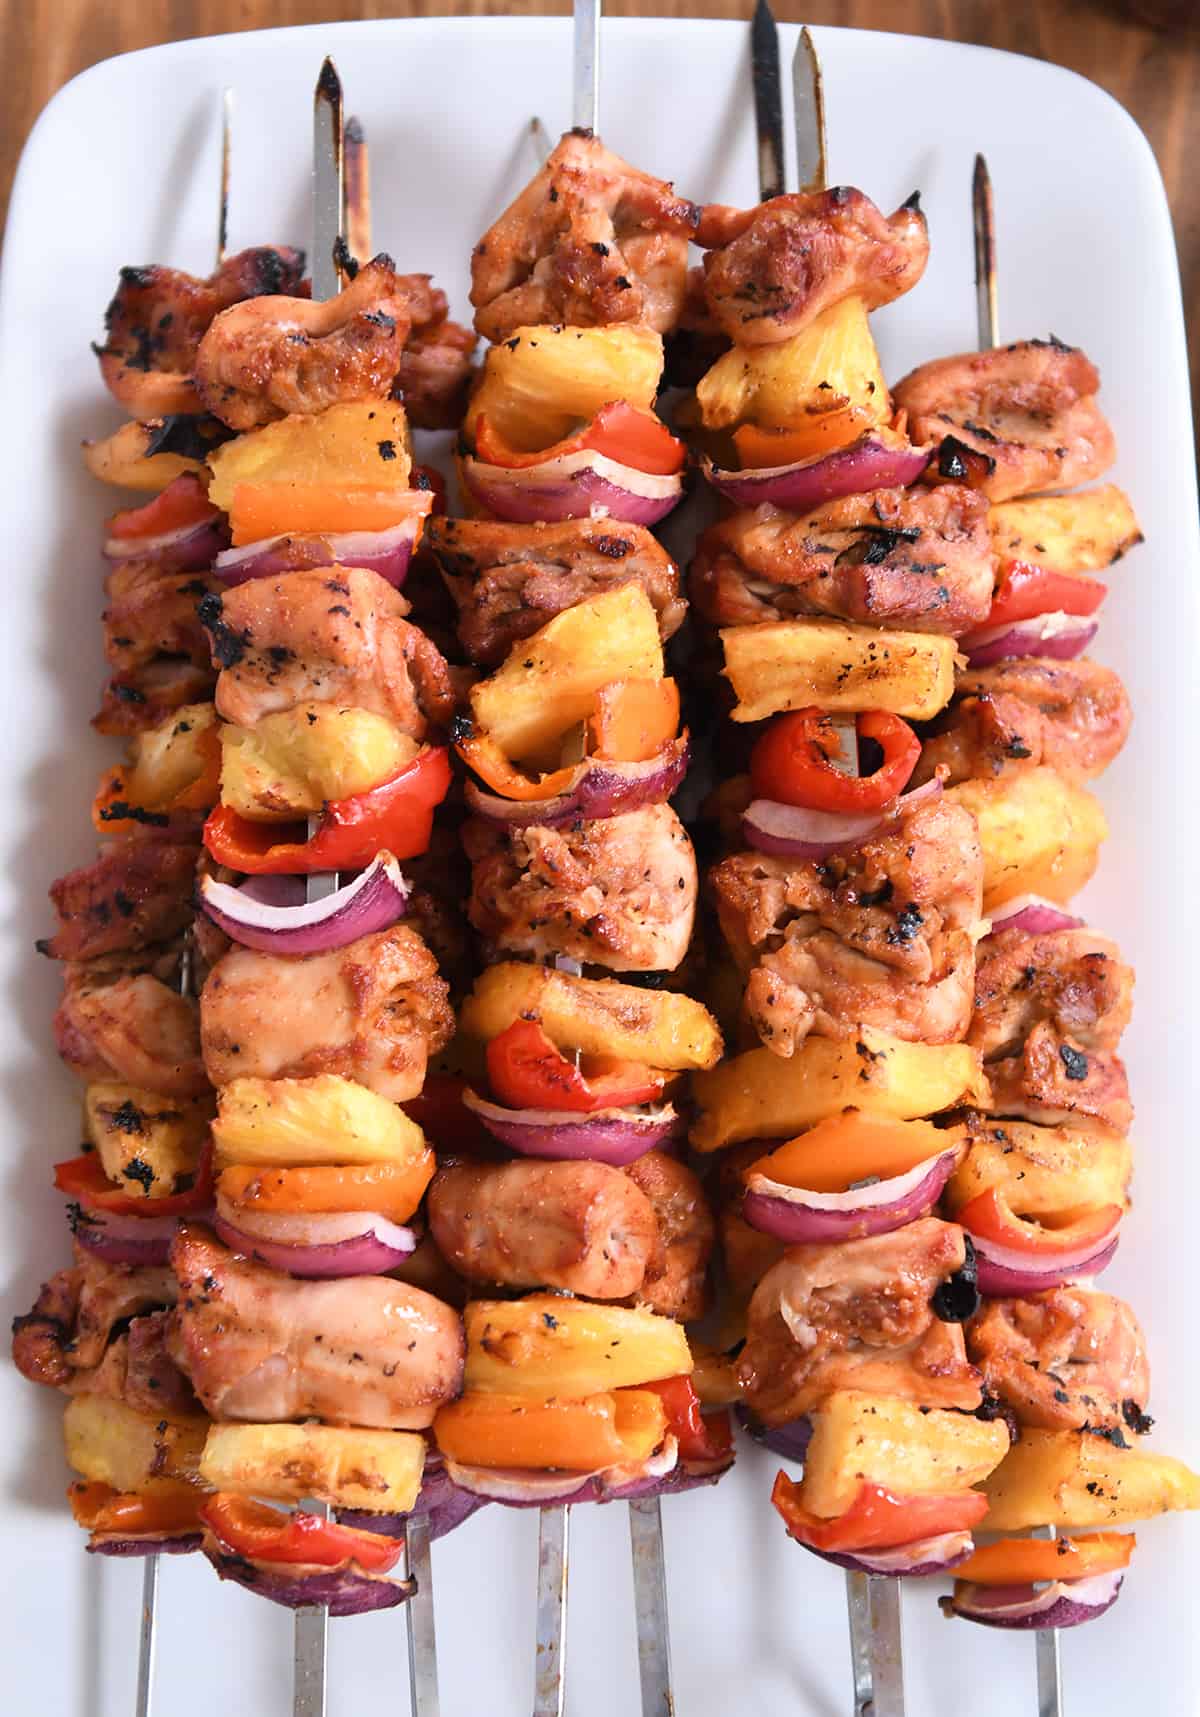
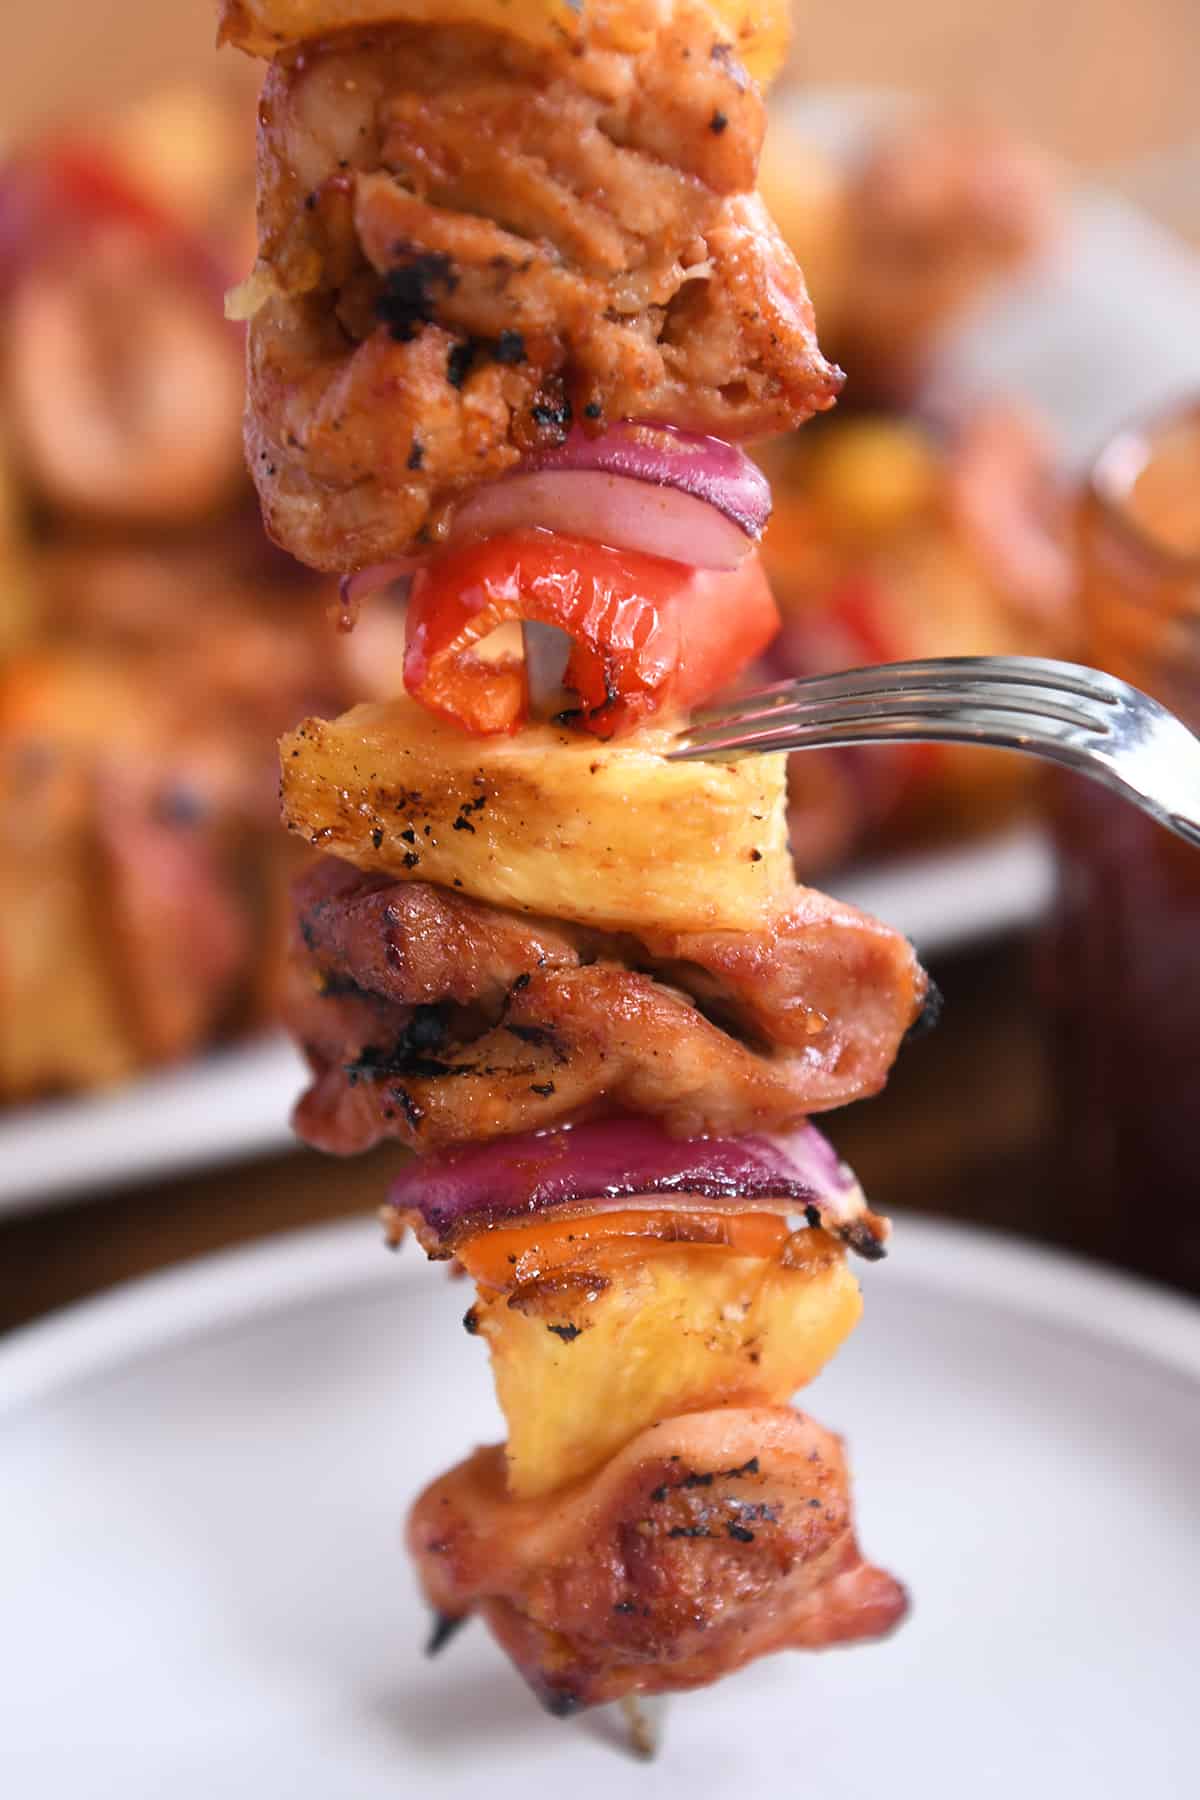
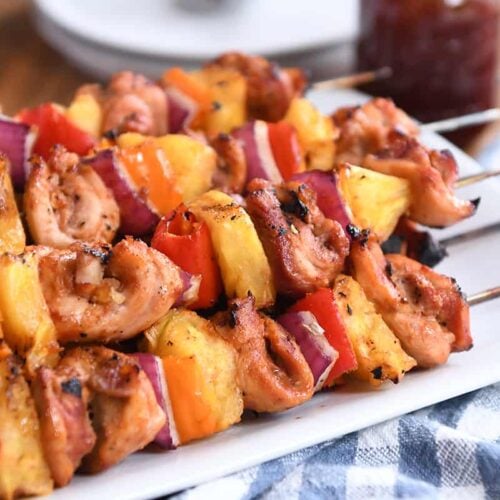
    These easy BBQ chicken pineapple skewers are fantastic! Moist, flavorful chicken pieces next to the sweet, juicy pineapple make it the perfect summer meal.

    Not only are these tasty little BBQ chicken pineapple skewers perfect for a summer holiday cookout, but they are excellent (and easy enough) for a refreshing weeknight dinner. My family goes crazy for them!

    A Simple Marinade

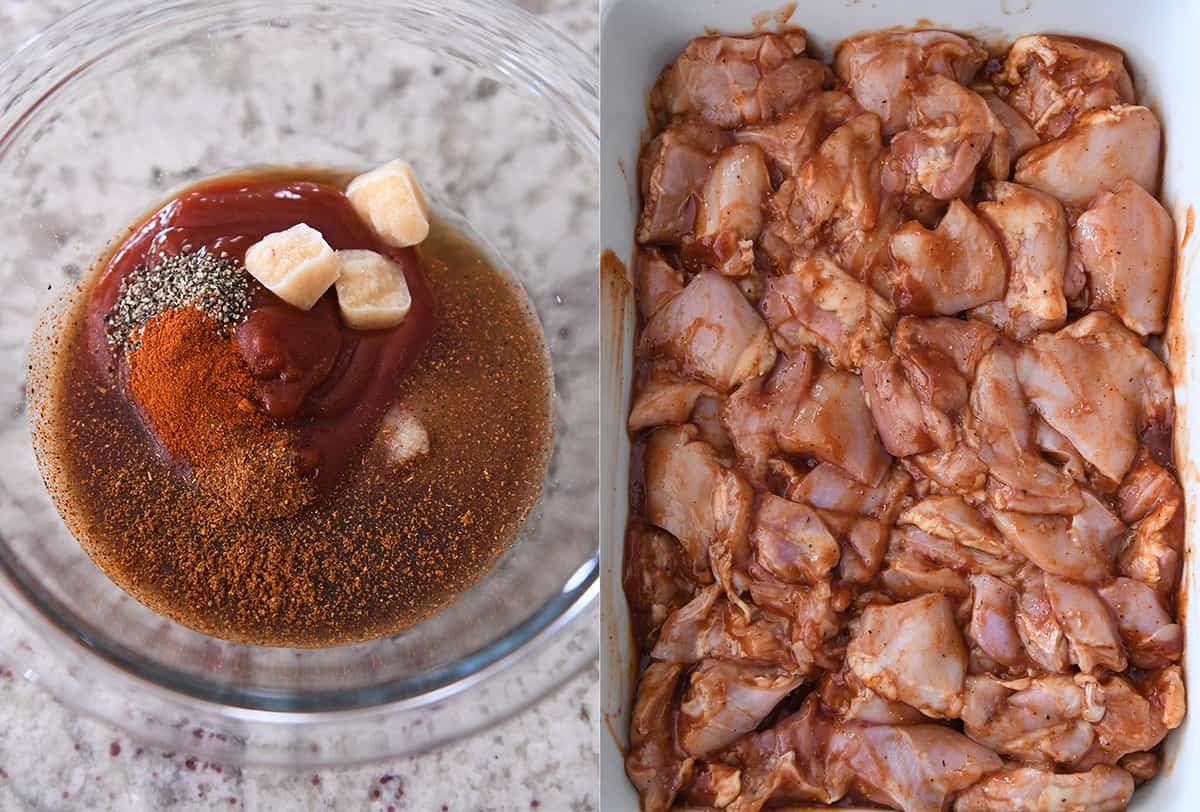
    The secret to these easy BBQ skewers is the marinade. It is zesty and flavorful!

    • ketchup
    • honey
    • vinegar
    • worcestershire sauce
    • garlic
    • paprika + chili powder + salt + pepper

    The frozen cubes in the bowl of marinade below is frozen garlic (courtesy of Trader Joe’s – one of my favorite things to buy there and gives all the fresh garlic flavor without any fuss).

    Marinade the chicken pieces for at least two hours but up to 24 hours.

    Chicken Breasts vs Chicken Thighs

    For these skewers, I definitely think chicken thighs are just a touch better, but I’ve made them with both cuts of meat, and you can’t go wrong with either.

    If using chicken breasts, take care not to over cook the skewers. The small pieces of meat will cook pretty quickly!

    One of the great advantages to using chicken thighs is that they they don’t dry out like chicken breasts (unless vastly overcooked). Don’t be that person. 😉

    To be honest, while I can appreciate that many people consider thighs to be the superior cut of chicken to use, and I also enjoy the flavor and juiciness, I only use them occasionally because I don’t love the fat-trimming process. Even pre-trimmed chicken thighs get an extra trimming in my kitchen.

    Whichever cut of chicken you choose, the results will be spectacular if you keep an eye on the cooking time!

    Grilling/Cooking Options

    I exclusively use a pellet smoker/grill for all my grilling. For this recipe, I cook the skewers at 375 degrees F for a few minutes on each side.

    A regular propane or charcoal grill will work just fine, too.

    If you don’t have a grill, try broiling the skewers on a foil-lined and greased baking sheet for 3 to 4 minutes per side (watch closely).

    I think the chicken, pineapple, pepper and onion pieces could also get tossed into an air fryer (sans the skewer) and cooked that way, too. It’s a very forgiving recipe!

    There are few things I love in this life more than grilled pineapple, and while the flavorful, tender chicken is very, very good, it’s the juicy, caramelized pineapple that really gets me.

    To be sure, the entire combination of zesty BBQ flavors, sweet/juicy pineapple, and crisp-tender veggies is an absolute winner.

    We love these skewers and make them all the time. They are way too good to relegate to holiday BBQ’s and cookouts only!

    One Year Ago: Cheesy Zucchini Spaghetti Casserole 
    Two Years Ago: My Favorite Chicken Salad 
    Three Years Ago: Jalapeño Cheddar Turkey Burgers 
    Four Years Ago: Crazy Good Korean Beef Tacos with Quick Slaw and The Sauce to End All Sauces
    Five Years Ago: Steak Fajitas with Chipotle Sour Cream
    Six Years Ago: The Best Zucchini Muffins {Whole Grain}
    Seven Years Ago: BBQ Chicken Salad Cilantro Lime Rice Bowls
    Eight Years Ago: Skillet Turkey Meatballs with Lemon Rice
    Nine Years Ago: Brookies {Brownie + Chocolate Chip Cookies} 
    Ten Years Ago: Brazilian Lemonade

    BBQ Chicken Pineapple Skewers

    • cup (180 g) ketchup
    • 1 tablespoon honey
    • 1 tablespoon rice vinegar or apple cider vinegar
    • 1 tablespoon Worcestershire sauce
    • 1 tablespoon garlic, finely minced (or 1 1/2 teaspoons garlic powder)
    • ½ teaspoon sweet or smoked paprika
    • ½ teaspoon coarse, kosher salt
    • ¼ teaspoon chili powder
    • ¼ teaspoon black pepper
    • 1 ½ to 2 pounds boneless skinless chicken breasts or chicken thighs cut into 1 1/2-inch pieces
    • 1 medium pineapple
    • 2 medium bell peppers, any color
    • 1 medium red onion

    Prevent your screen from going dark

    • In a medium bowl, whisk together the ketchup, honey, vinegar, Worcestershire sauce, garlic, paprika, salt, chili powder and black pepper.

    • Place chicken pieces in gallon-size resealable bag or shallow dish. Pour the marinade over the chicken and toss to coat evenly. Seal the bag or cover the dish and refrigerate for 2 to 24 hours.

    • Preheat a pellet grill or regular grill to medium/medium-high heat.

    • Cut the pineapple, peppers and onions into 1 to 1/2-inch pieces.

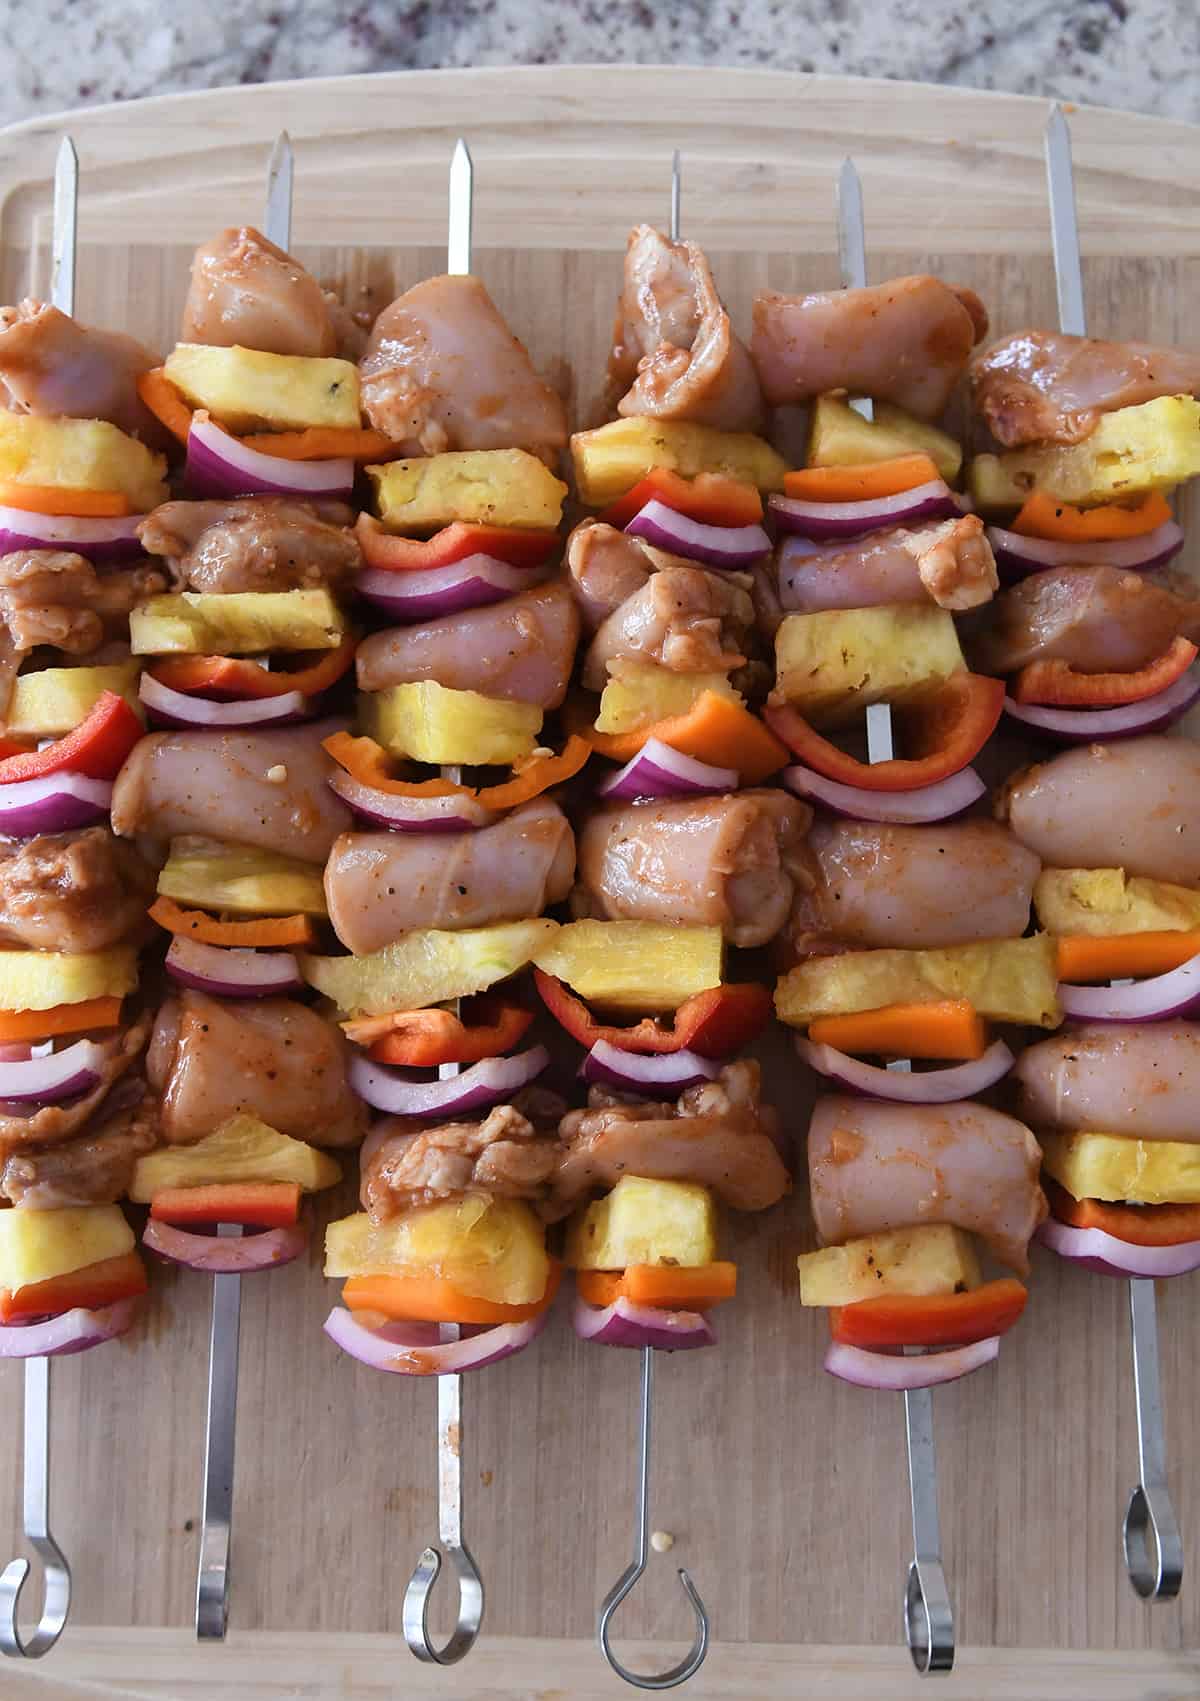
    • Thread the chicken, pineapple, peppers and onions onto skewers. The order doesn’t necessarily matter, but I thread as follows: onion, pepper, pineapple chicken (repeated about 4 times for 12-inch skewers). If any of the chicken pieces are really long, fold them in half before threading onto the skewer.

    • Grill the skewers, flipping once, until the chicken is cooked through, about 4 to 5 minutes per side for chicken breasts and 6 to 7 minutes per side for chicken thighs. Serve immediately.

    Pineapple: depending on the size of the pineapple, you may have some leftover so take care to keep it uncontaminated during the threading process (with the raw chicken); the leftover fresh pineapple can be served alongside the grilled skewers, if desired. I haven’t tried this recipe with canned pineapple chunks but I’m guessing they should work ok if you don’t have fresh pineapple.
    Veggies + Onions: the bell peppers and onions add great flavor (plus they are really delicious grilled), however, they can be left off, if desired. 
    Chicken: the chicken marinade is really tasty and would also be delicious for whole grilled chicken breasts or thighs. 

    Serving: 2 skewers, Calories: 388kcal, Carbohydrates: 50g, Protein: 39g, Fat: 5g, Saturated Fat: 1g, Cholesterol: 109mg, Sodium: 824mg, Fiber: 5g, Sugar: 37g

    Disclaimer: I am a participant in the Amazon Services LLC Associates Program, an affiliate advertising program designed to provide a means for me to earn fees by linking to Amazon.com and affiliated sites. As an Amazon Associate I earn from qualifying purchases.

    Source link

  • How To Cook Oyster Mushrooms

    How To Cook Oyster Mushrooms

    Learn how to cook oyster mushrooms with this pan-fried recipe that makes them crispy, golden, and ridiculously delicious! Eat them straight from the pan or dress them up with balsamic and Parmesan for a fancy little appetizer. PS. More cooking methods provided below.


    Jump to: ℹ️ Overview | 🛒 Ingredients | 📷 How To Make | 📹 Watch The Video | 👩‍🍳 Recipe Tips | 🥗 Serving Suggestions | 📝 Full Recipe Card | Oyster Mushrooms FAQs | More Cooking Methods | 🍽 More Recipes With Mushrooms


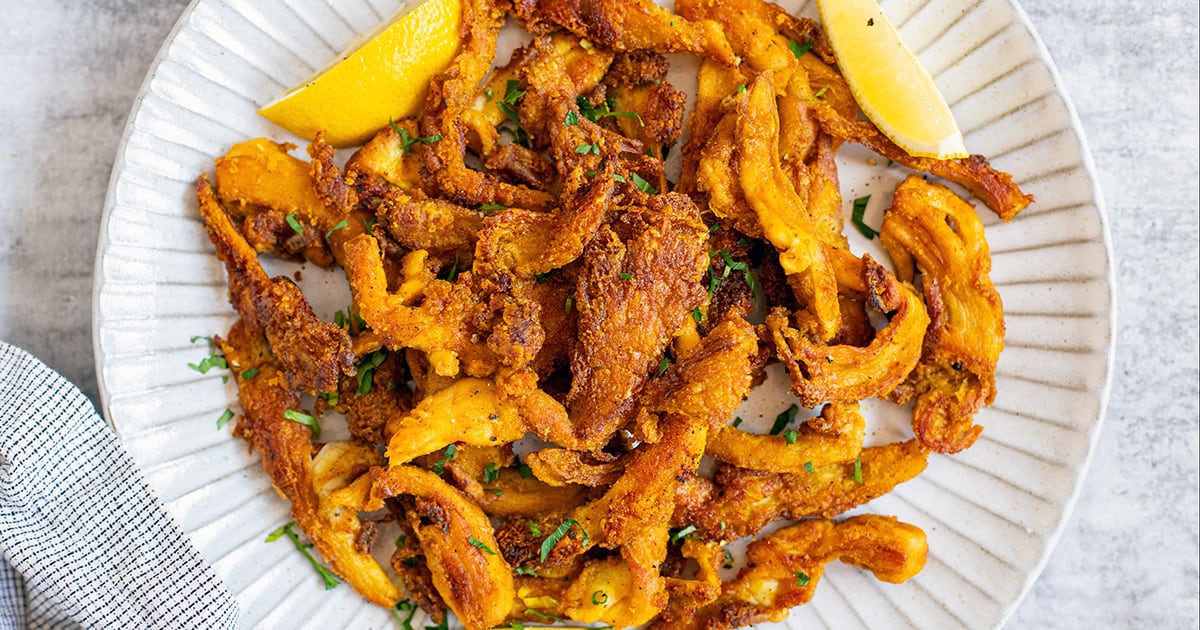
    These pan-fried oyster mushrooms are my absolute favorite way to cook them—crispy, golden, and packed with savory goodness. Lightly coated in a bit of flour and seasoned with garlic, paprika, and soy sauce, they develop a flavorful crust while staying tender and meaty inside.

    You can serve them as a snack with a squeeze of lemon, toss them into salads and sandwiches, or level them up with a drizzle of balsamic and some Parmesan.

    Oyster mushrooms are naturally vegan (minus the cheese) and full of umami, making them a great plant-based alternative to crispy chicken.

    Below the recipe, I will also share a few more tips and ways for how to cook oyster mushrooms.

    👩‍🍳 You might also like these mushroom recipes: my thyme mushrooms or chili garlic mushrooms, this amazing vegetarian mushroom sandwich, this hearty mushroom stew, or my vegetarian Stroganoff. Oh, and this beef and mushroom stew is kickass if you eat meat. Want to try another unique fungi, try this Lion’s Mane mushroom recipe (from a fellow blogger).

    What You’ll Need

    Here is what you’ll need for this pan-fried oyster mushroom recipe. Find the full measurements in the recipe card below.

    • Oyster Mushrooms – The star of the show! Use whole or tear larger ones into bite-sized pieces for even cooking. If using King Oyster mushrooms, slice them into thin strips.
    • For flavor – Garlic powder, onion powder, smoked paprika, turmeric, cumin, salt, and pepper for a balanced, earthy, and slightly smoky taste. Add a pinch of chili flakes if you like a little heat.
    • Binding and coating – A little olive oil and soy sauce help the seasoning stick, while flour gives the mushrooms their crispy crust. Swap soy sauce for tamari or coconut aminos for a gluten-free option. Use cornstarch instead of flour for an extra crispy, gluten-free coating.
    • For serving – Lemon wedges for a bright finish, or go fancy with aged balsamic and grated Parmesan.

    👩‍🍳 What Are Oyster Mushrooms?

    Oyster mushrooms are delicate, fan-shaped fungi with a mild, slightly sweet, and umami-rich flavor. They have a tender yet meaty texture, making them a great plant-based substitute for chicken. Popular varieties include pearl, king, and blue oyster mushrooms, each slightly different in shape and size but all equally delicious.

    How To Prep

    • If the mushrooms are large, tear them into smaller pieces for even cooking (see pictures and my video below).
    • No need to wash them—just wipe off any dirt with a damp paper towel. Mushrooms absorb water quickly, so avoid soaking them!
    • Separate the caps from thick stems if needed, as the stems take longer to cook.

    How To Make Pan-Fried Oyster Mushrooms

    Find the full recipe and nutritional information below. Here are some handy step-by-step photos for pan-fried oyster mushrooms.

    • Place mushrooms in a bowl and drizzle with olive oil and soy sauce.
    • Sprinkle with garlic powder, onion powder, smoked paprika, turmeric, cumin, salt, and pepper. Add flour and toss everything together.
    • Heat 2-3 tablespoons of olive oil in a large frying pan over medium-high heat.
    • Once the oil is hot, arrange the mushrooms in a single layer with space between them.
    • Cook for 2-3 minutes per side until crispy and golden. Add more oil if needed.
    • Transfer to a paper towel-lined plate to absorb excess oil.
    • Serve with lemon wedges and flaky salt, or drizzle with balsamic and top with Parmesan.

    Watch The Video

    Recipe Tips

    • Don’t overcrowd the pan! Mushrooms release moisture when cooking, and too many in one pan will steam instead of crisp up.
    • Use high heat for the best golden-brown crust. Medium-high is your friend here.
    • Keep them moving—some parts of the pan might be hotter, so shuffle the mushrooms around for even cooking.
    • For extra crunch, let them sit in the pan for a few seconds before flipping.
    • Storage tips: Store leftovers in an airtight container in the fridge for up to 3 days. Reheat in a pan or air fryer to bring back crispiness. Freezing is not recommended, as they can become soggy when thawed.
    • Make-ahead tips: You can season and coat the mushrooms with olive oil and soy sauce ahead of time, but not the flour! Store them in the fridge for up to a few hours before cooking. Coat with flour just before cooking. Cook them fresh for the best texture.

    Serving Suggestions

    💬 If you’ve tried these pan-fried oyster mushrooms or any other recipe on the blog then don’t forget to rate the recipe and let me know how you got on in the comments below, I love hearing from you! You can also FOLLOW ME on Instagram, Facebook, Pinterest, YouTube, and or sign up to my Newsletter to see more of my delicious food.

    Want to Save This Recipe?

    Enter your email & I’ll send it to your inbox. Plus, get great new recipes from me every week!

    By submitting this form, you consent to receive emails from Cooked & Loved

    Learn how to cook oyster mushrooms with this pan-fried recipe that makes them crispy, golden, and ridiculously delicious! Eat them straight from the pan or dress them up with balsamic and Parmesan for a fancy little appetizer. Find step-by-step photos and more recipe tips above.

    For Balsamic Parmesan Oyster Mushrooms:

    • If mushrooms are large, tear them into 2-3 pieces. Wipe clean with a damp paper towel.

    • In a bowl, toss mushrooms with olive oil, soy sauce, spices, and flour until evenly coated.

    • Heat 2-3 tablespoons olive oil in a frying pan over medium-high heat.

    • Add mushrooms in a single layer, leaving space between them. Cook for 2-3 minutes per side until crispy and golden brown.

    • Transfer to a plate lined with paper towels.

    • Serve with lemon wedges and flaky salt, or drizzle with balsamic and sprinkle with Parmesan.

    • Don’t overcrowd the pan! Mushrooms release moisture when cooking, and too many in one pan will steam instead of crisp up.
    • Use high heat for the best golden-brown crust. Medium-high is your friend here.
    • Keep them moving—some parts of the pan might be hotter, so shuffle the mushrooms around for even cooking.
    • For extra crunch, let them sit in the pan for a few seconds before flipping.
    • Storage Tips: Store leftovers in an airtight container in the fridge for up to 3 days. Reheat in a pan or air fryer to bring back crispiness. Freezing is not recommended, as they can become soggy when thawed.
    • Make-Ahead Tips: You can season and coat the mushrooms with olive oil and soy sauce ahead of time, but not the flour! Store them in the fridge for up to a few hours before cooking. Coat with flour just before cooking. Cook them fresh for the best texture.

    Calories: 92kcal | Carbohydrates: 10g | Protein: 4g | Fat: 5g | Saturated Fat: 1g | Polyunsaturated Fat: 1g | Monounsaturated Fat: 3g | Cholesterol: 2mg | Sodium: 698mg | Potassium: 358mg | Fiber: 2g | Sugar: 2g | Vitamin A: 306IU | Vitamin C: 0.2mg | Calcium: 34mg | Iron: 2mg

    Keywords: oyster mushrooms, pan-fried oyster mushrooms, crispy oyster mushrooms

    More Ways to Cook Oyster Mushrooms

    Pan-frying is my favorite way to cook oyster mushrooms, but there are plenty of other ways to enjoy them!

    • Sautéed – Cook them in a pan with a little olive oil or butter, garlic, and a splash of soy sauce or lemon juice for a simple, flavorful side dish.
    • Deep-fried – Dip them in a light batter or seasoned flour and fry until crispy. These make an amazing vegan alternative to fried chicken!
    • Grilled – Brush with olive oil, season with salt and pepper, and grill until they develop a smoky, slightly charred edge. Perfect for BBQs!
    • Air-Fried – Toss with a little oil and seasoning, then air fry at 375°F (190°C) for 10-12 minutes, shaking the basket halfway through.
    • Roasted – Spread them on a baking sheet, drizzle with olive oil, and roast at 400°F (200°C) for 20-25 minutes until golden brown.
    • Braised – Simmer them in a flavorful broth with soy sauce, garlic, and ginger for a rich, umami-packed dish.

    Each method brings out a slightly different texture and flavor, so try them all and see which one you love best.

    FAQs

    What do oyster mushrooms taste like?

    They have a mild, slightly nutty, and umami-rich flavor with a tender yet meaty texture.

    Why are they called oyster mushrooms?

    Because their shape resembles an oyster shell!

    How do oyster mushrooms grow?

    They grow in clusters on decaying wood, often in forests or commercial farms using controlled environments.

    Are oyster mushrooms healthy?

    Yes! They’re low in calories, high in fiber, and packed with antioxidants, vitamins, and minerals.

    How long do oyster mushrooms last?

    Fresh ones last about 5-7 days in the fridge when stored in a paper bag.

    Can you eat oyster mushrooms raw?

    Technically, yes, but cooking enhances their flavor and makes them easier to digest.

    Do oyster mushrooms have to be cooked?

    Not necessarily, but they taste much better when pan-fried, roasted, or sautéed!

    More Recipes With Mushrooms


    Source link

  • Raw Vegan Carrot Cake Bites Recipe

    Raw Vegan Carrot Cake Bites Recipe

    Raw Vegan Carrot Cake Bites that are chewy, cinnamony, cake-bally, and just the right amount of sweet. Perfect on-the-go snack for spring!

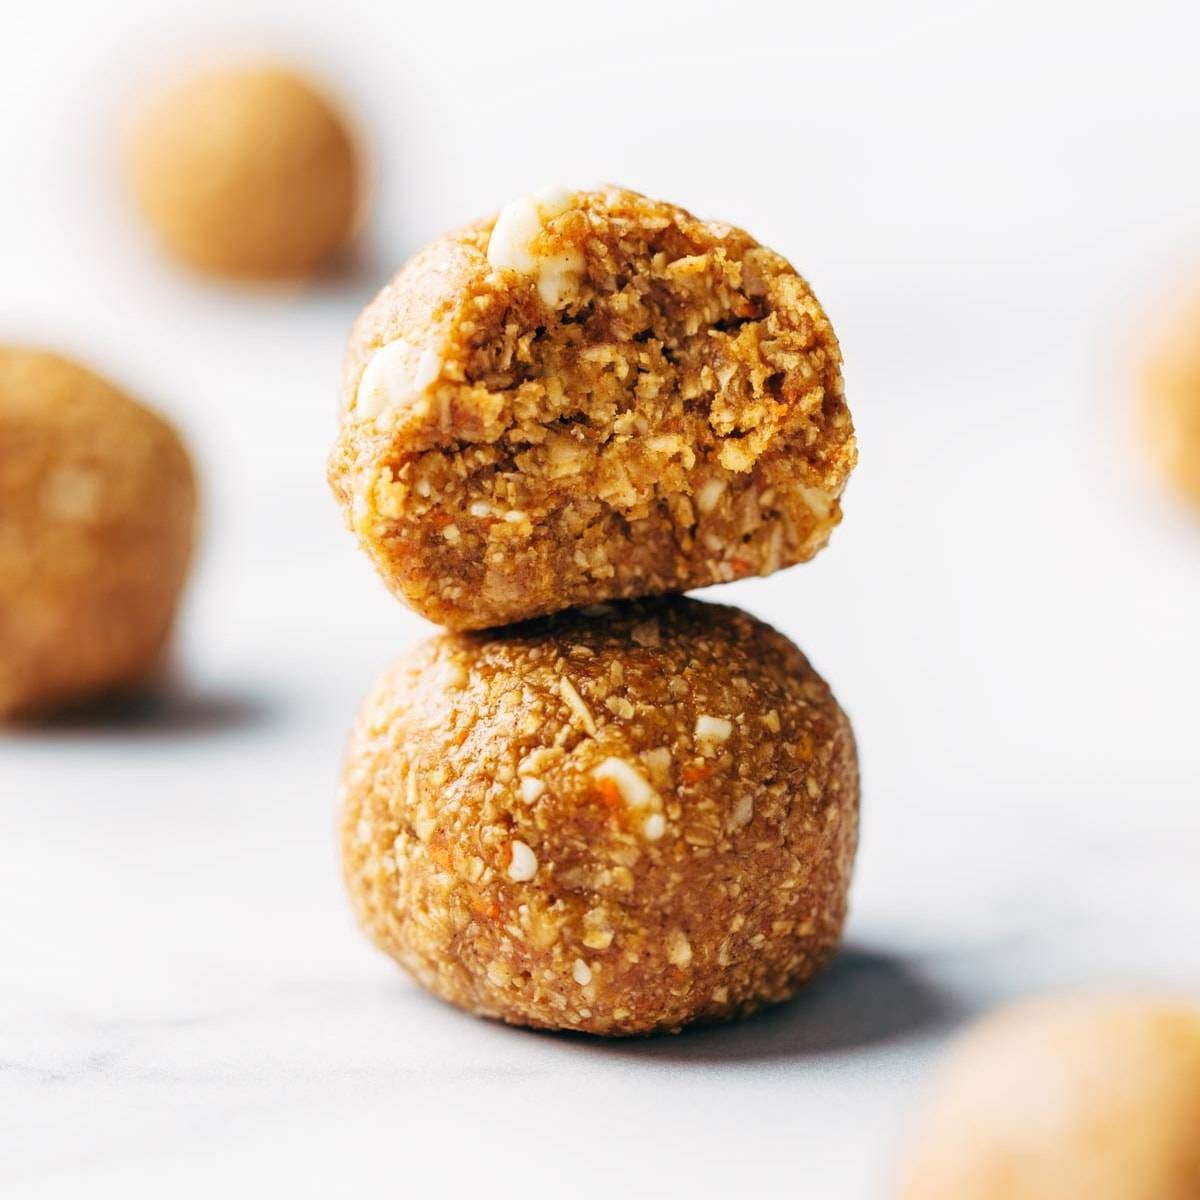
    These carrot cake bites are chewy, cinnamony, cake-bally, and just the right amount of sweet. They are flecked with coconut and oats and made creamy with almond butter. The carrots are there, but they’re not excessively salady – they just add some specks of color, flavor, and texture to an almost-cookie-dough-like bite of joy that lives in a little jar in your fridge, waiting for that 3pm moment to make your day a little brighter.

    Breakfast bites, snack-with-coffee bites, desserty bites… with these little gems, all of it is fair game.

    I mean, the thing about real carrot cake is that you want it, and you want it loaded with cream cheese frosting. Lots of cream cheese frosting. And then you finally have it and it is, in fact, so so good. But then you spike, crash, and can’t shake the feeling that you need to go to the dentist immediately? I don’t know, maybe that’s just me.

    Guess what is there for you in a more wholesome, sustaining, but still tastes like yummy carrot cake way?

    THESE BITES. These raw, vegan, delicious carrot cake bites.

    How To Make Carrot Cake Bites That Are Vegan and Raw and Delicious

    You 100% need a food processor for these. You guys know I LOVE MY FOOD PROCESSOR. Please buy yourself a food processor. This is the one I have. (This is an affiliate link.)

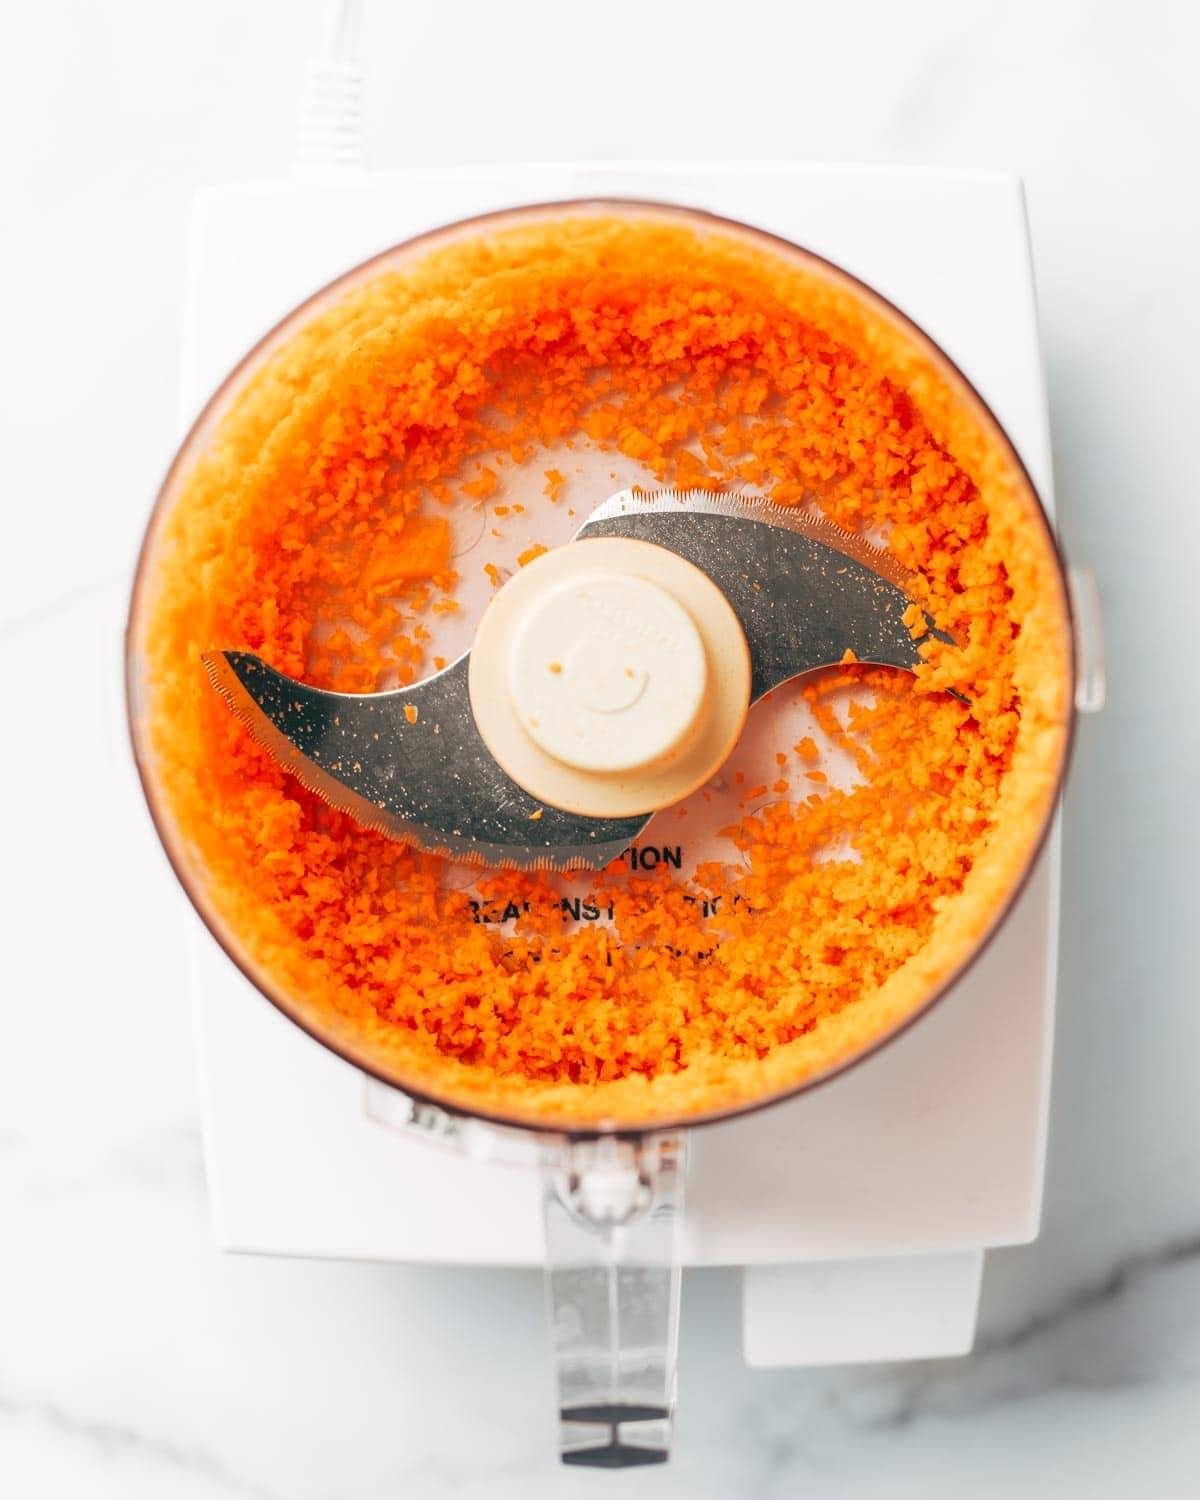
    First up: carrots. Just pop in the food processor and go. I seriously hate grating carrots so I will not ask you to do any of that.

    Carrots pulsed in a food processor.

    Next up: clean out the carrots and pulse up your oats and coconut, so it’s kind of like a flour.

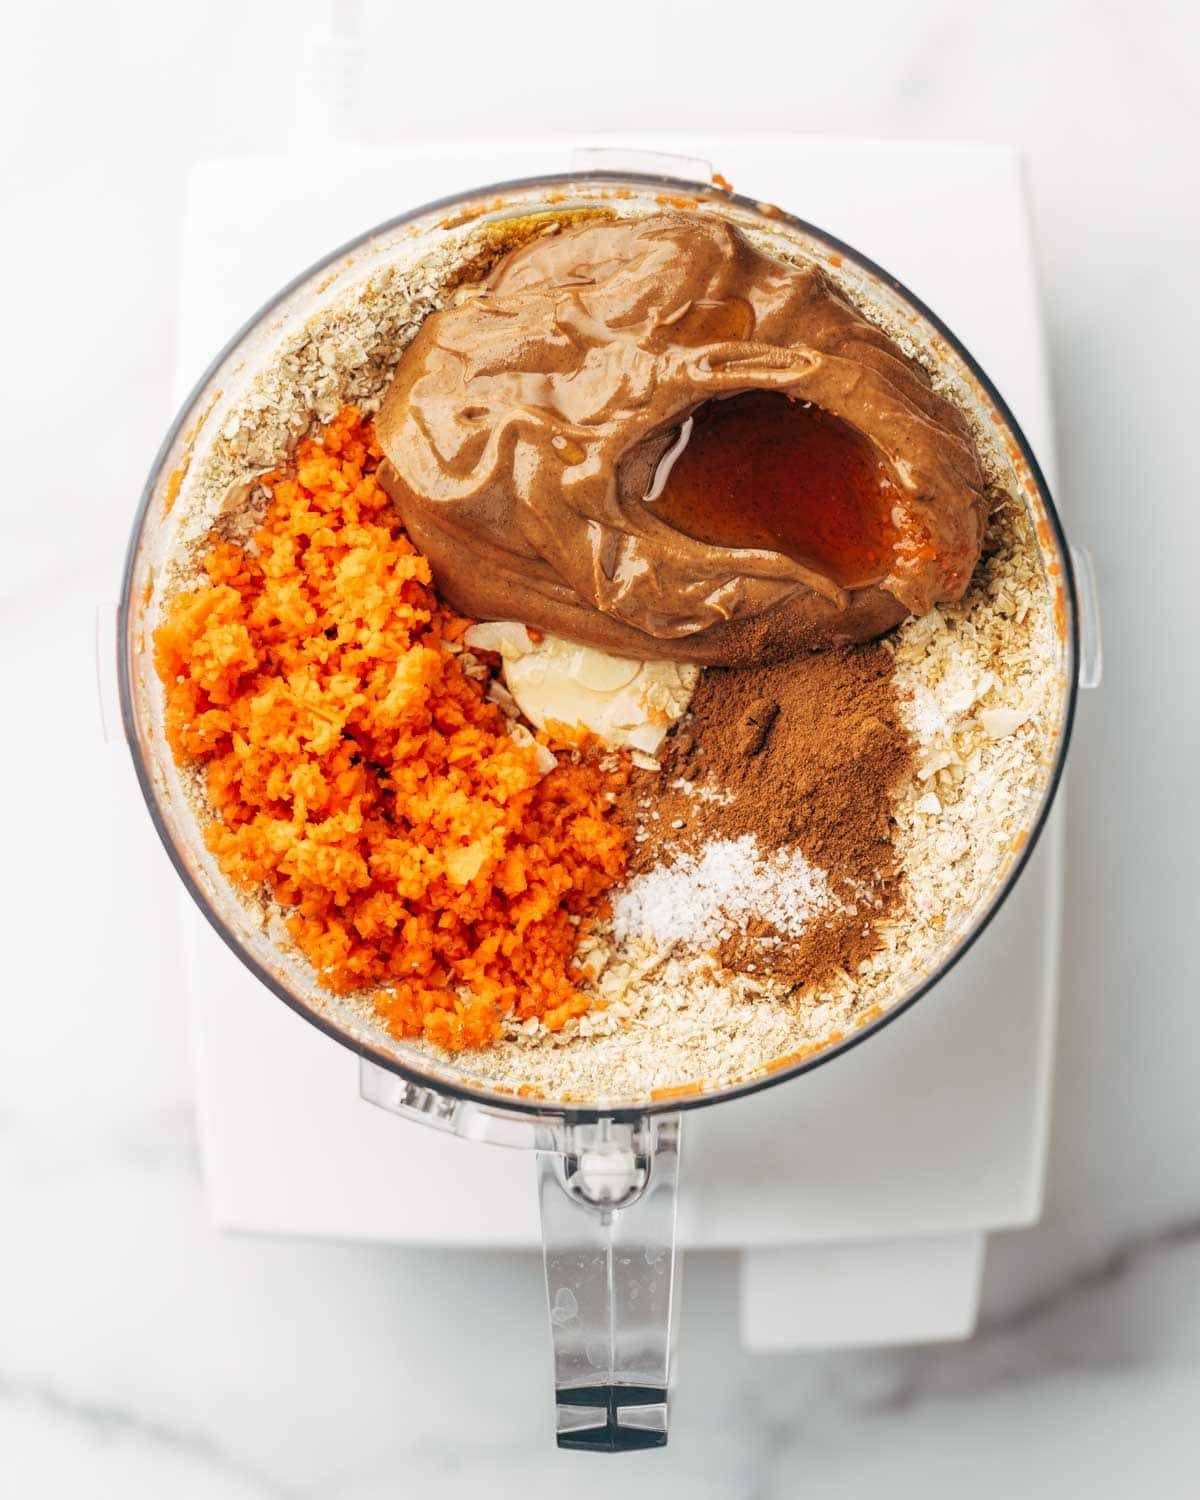
    And now: everybody in.

    Ingredients for carrot cake bites in a food processor before blending.
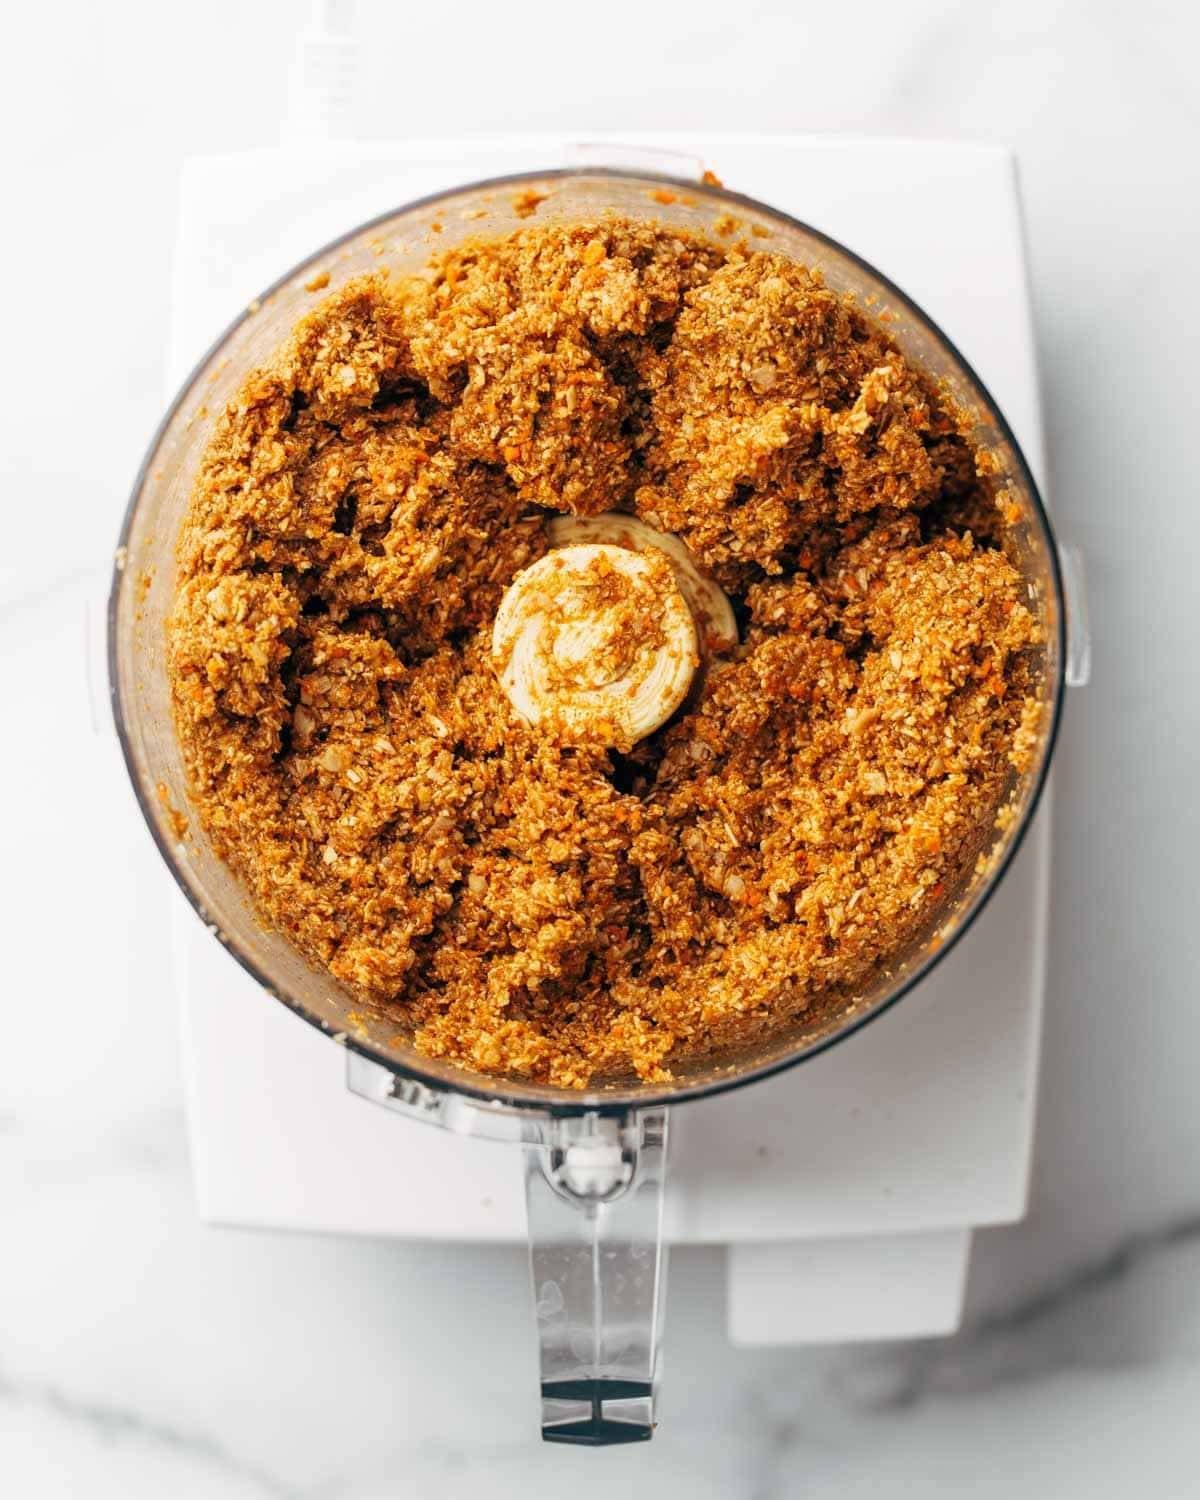
    Carrot cake bites in a food processor after blending.

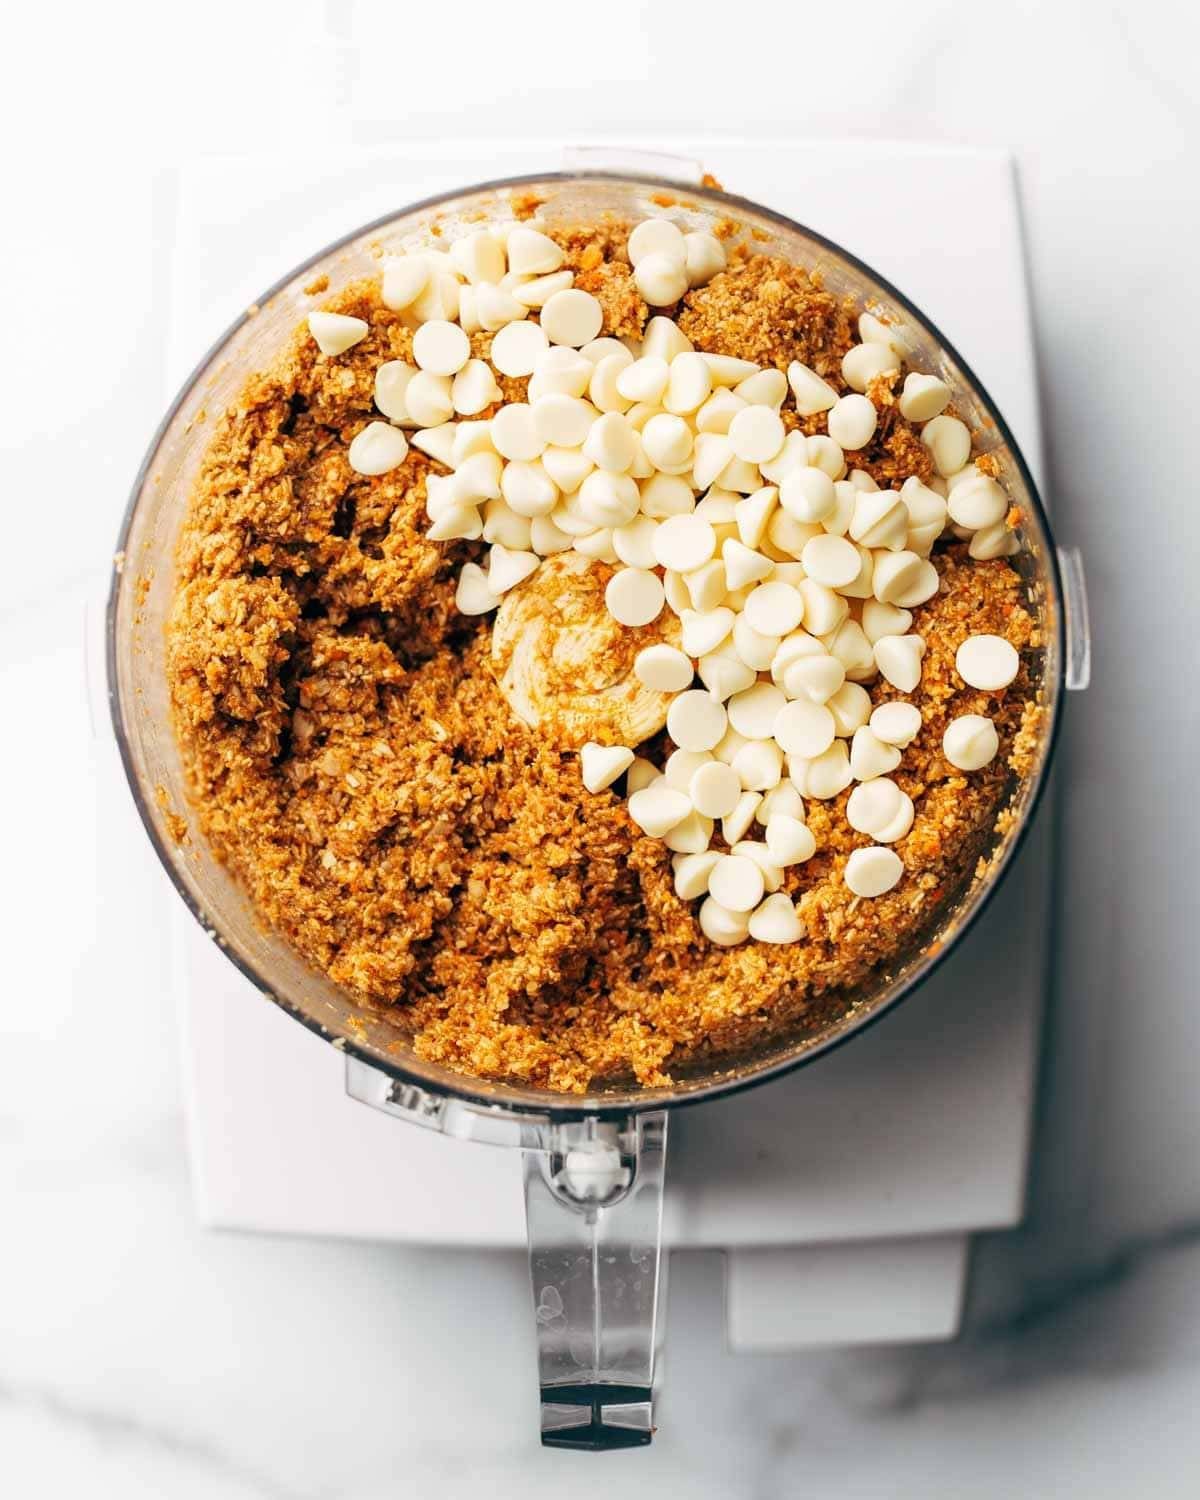
    Finally: white chocolate chips for the people who like to be extra.

    If you’re vegan or want to keep it totally clean, go for some chunky nuts, cacao nibs, or vegan chips instead.

    Carrot cake bites in a food processor with white chocolate chips.

    Roll, refrigerate, and done.

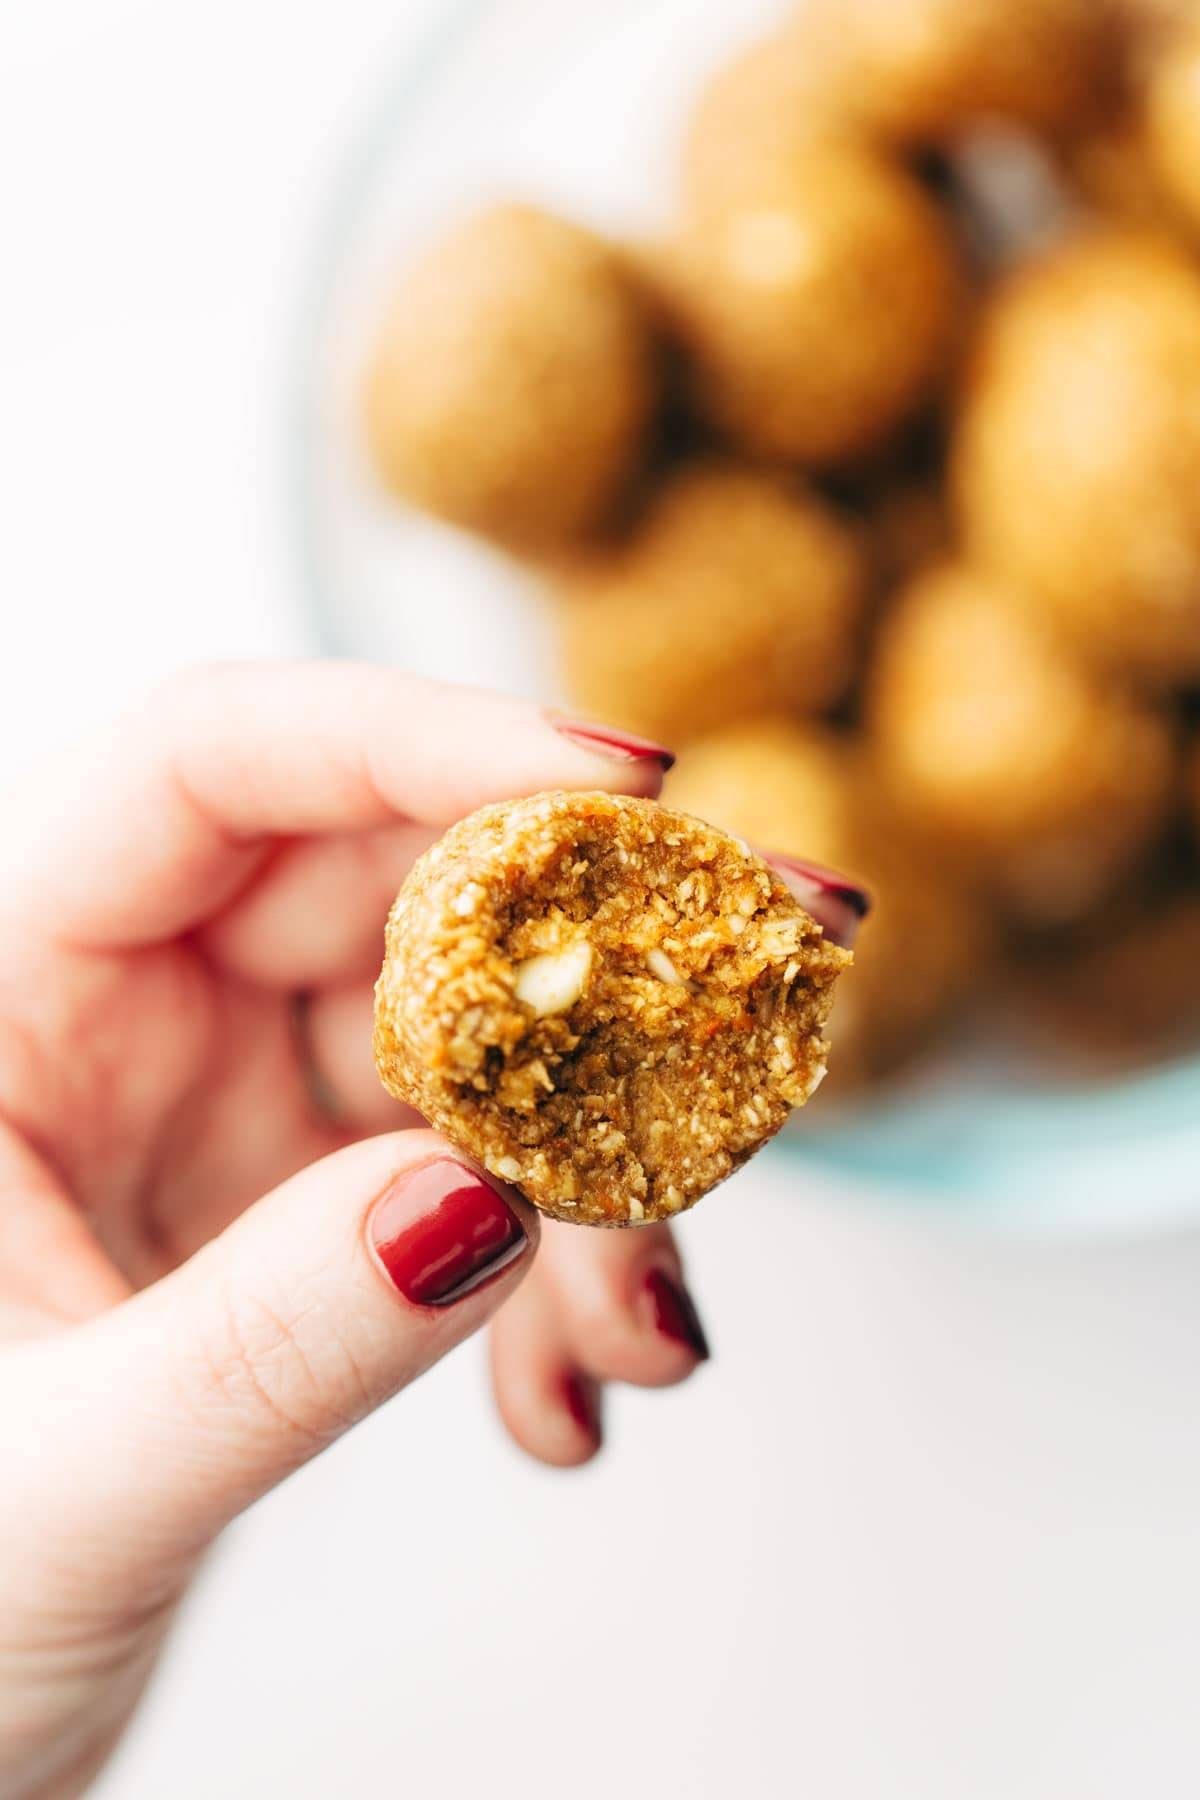
    Carrot cake bite with bite taken out.

    Yep, I’d say the spring snacking season is off to an excellent start. Carrot cake bites for all!

    Check Out Our Video For How To Make Carrot Cake Bites:


    Print

    clock clock iconcutlery cutlery iconflag flag iconfolder folder iconinstagram instagram iconpinterest pinterest iconfacebook facebook iconprint print iconsquares squares iconheart heart iconheart solid heart solid icon

    Description

    Raw Vegan Carrot Cake Bites that are chewy, cinnamony, cake-bally, and just the right amount of sweet. Perfect on-the-go snack for spring!


    1. Add carrot chunks to the bowl of a food processor and pulse until finely chopped. (You should have a generous 1/2 cup.)
    2. Remove carrots and set aside. Add oats and coconut. Pulse until coarsely ground.
    3. Add all other ingredients, including the chopped carrots. Pulse until a smooth-ish, sticky “dough” forms. (You might have to push it down with a spatula a few times to help it along.)
    4. Add white chocolate chips and pulse until chopped.
    5. Roll into balls. Store in the fridge or freezer. Mwah! This week is looking good.

    • Prep Time: 15 minutes
    • Category: Snack
    • Method: Mix and Roll
    • Cuisine: American

    Keywords: raw vegan carrot cake bites, carrot cake bites, healthy carrot energy bites


    One More Thing!

    This recipe is part of our collection of best healthy snacks. Check it out!

    Source link

  • Hawaiian Chicken and Veggie Teriyaki Bowl

    Hawaiian Chicken and Veggie Teriyaki Bowl

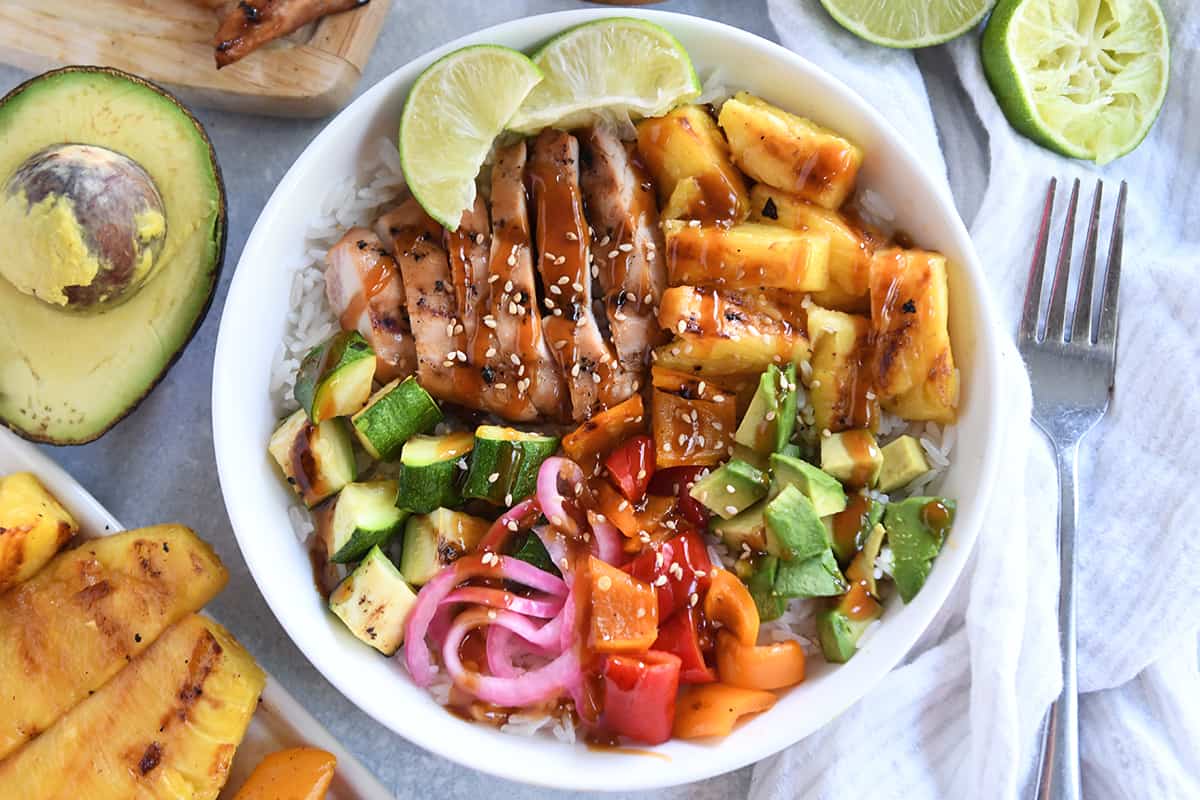
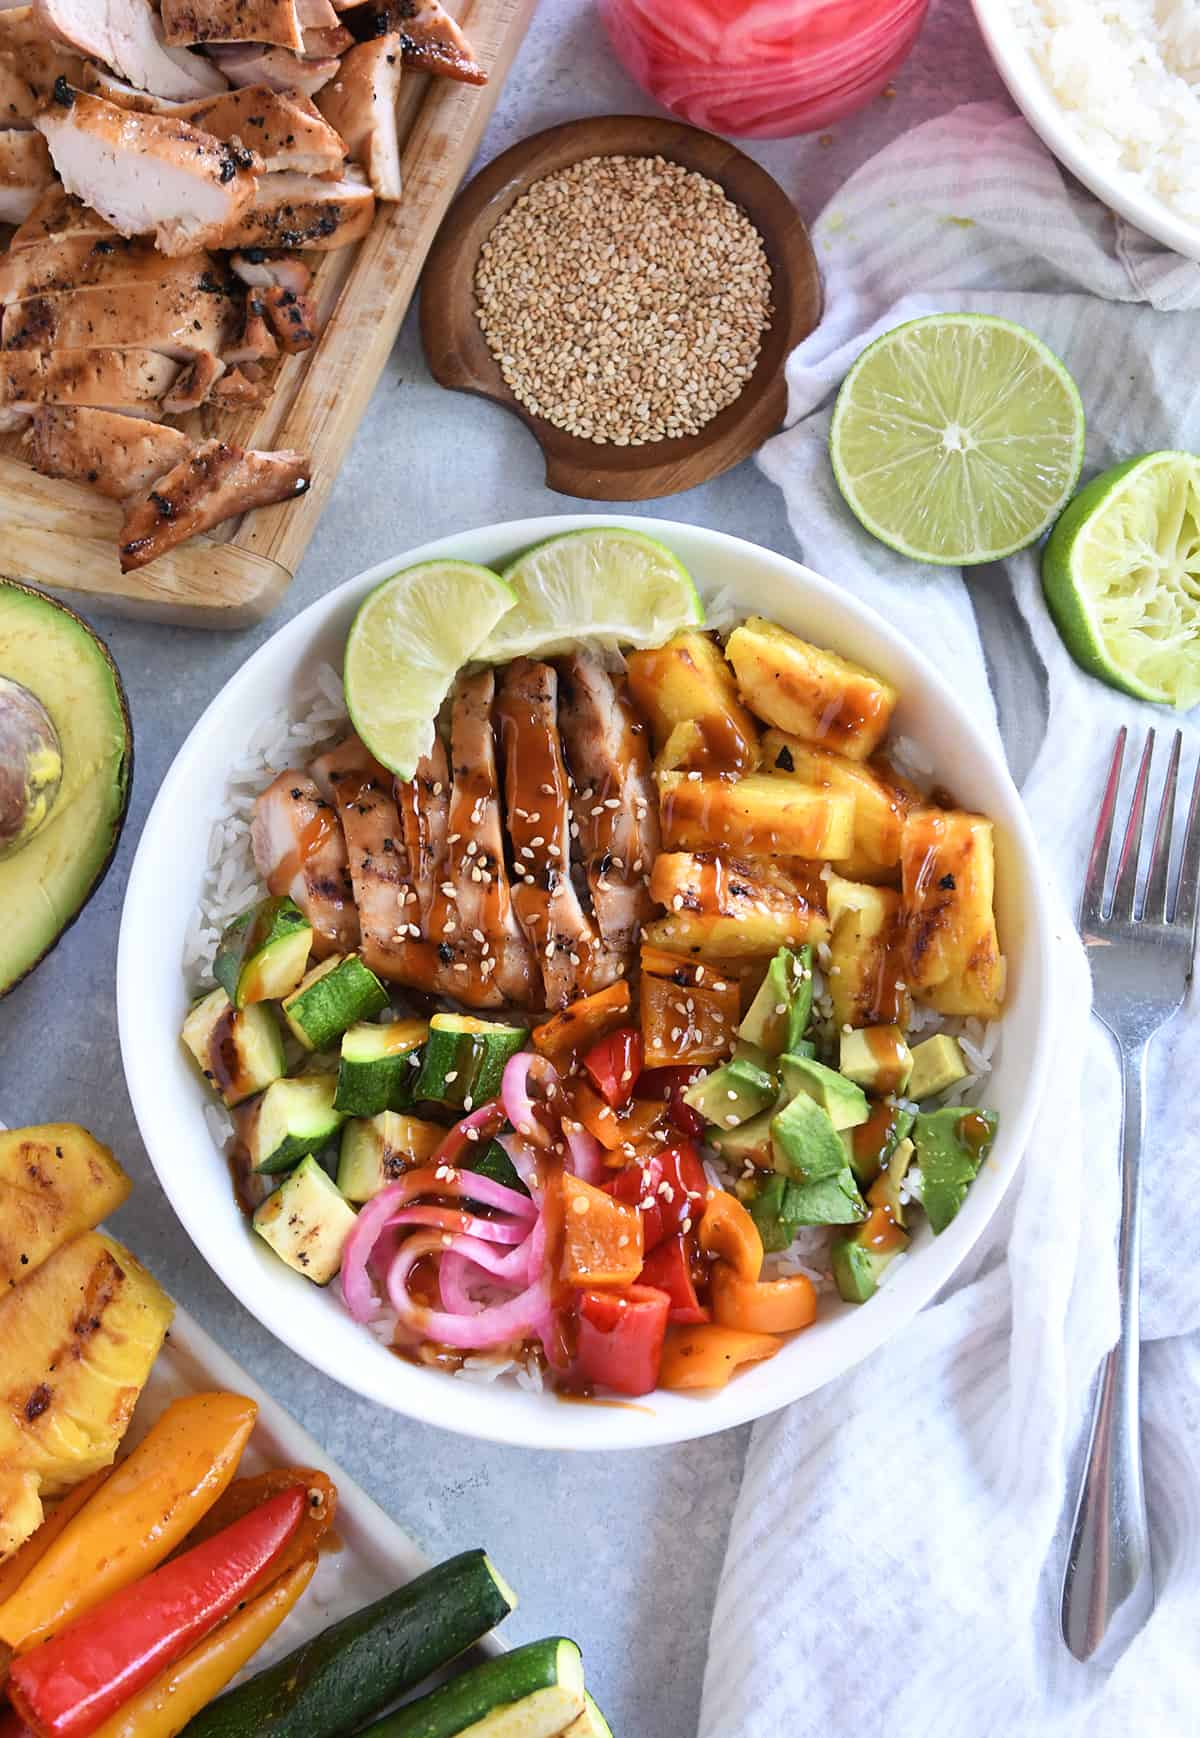
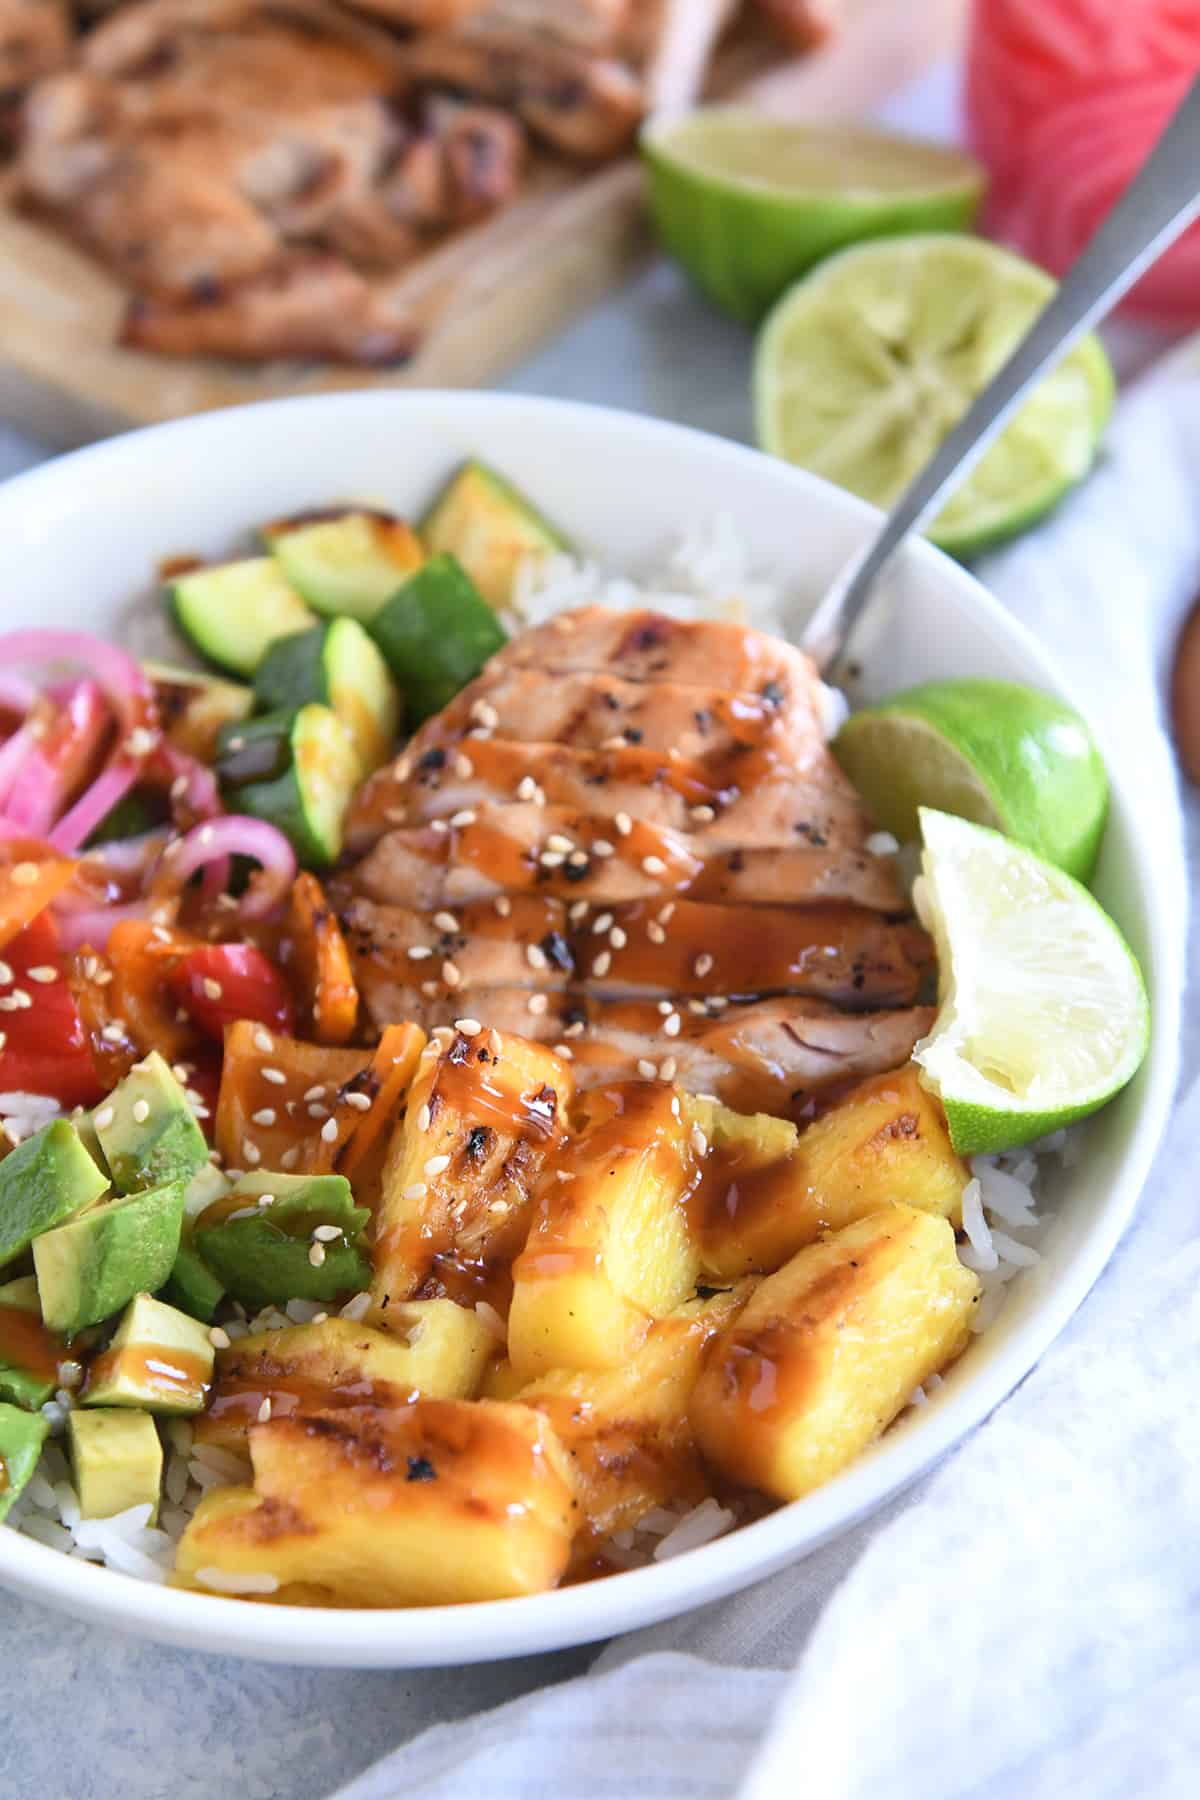
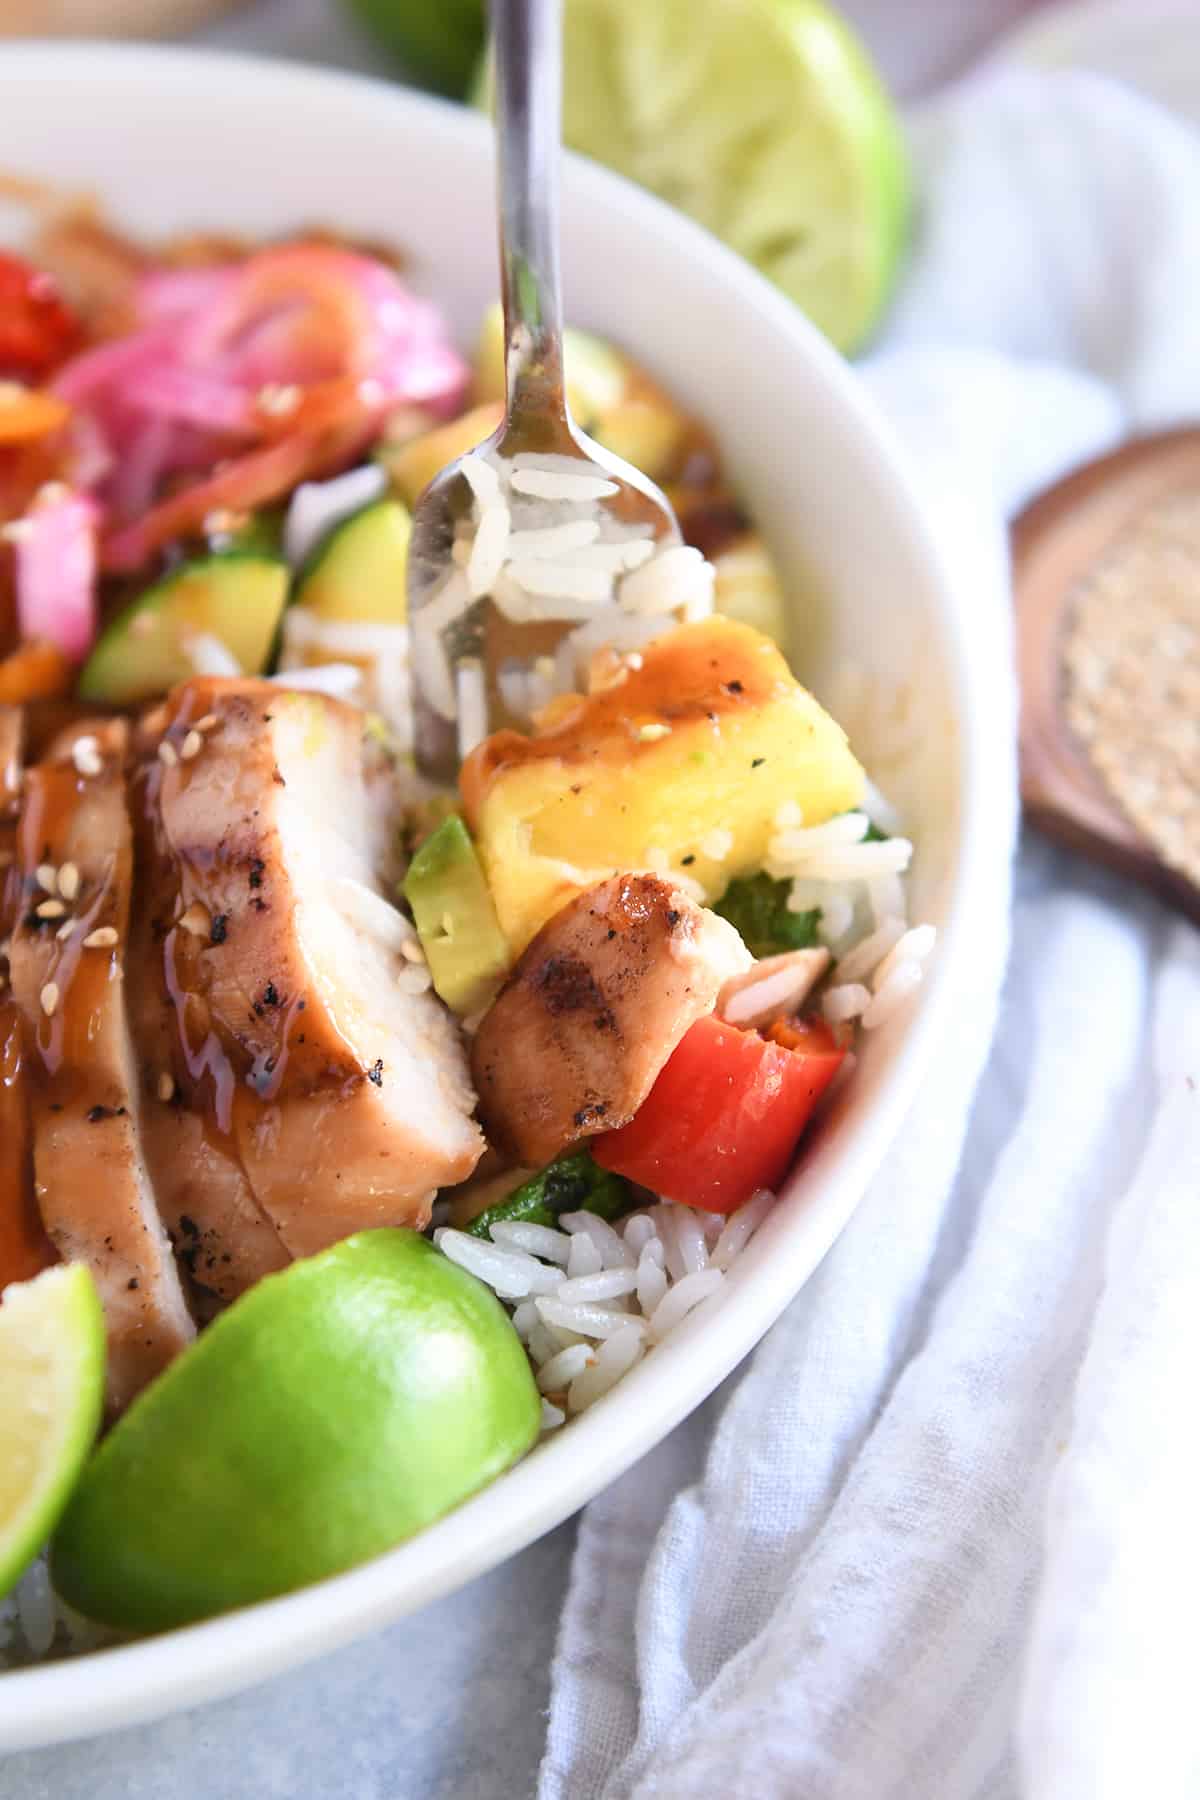
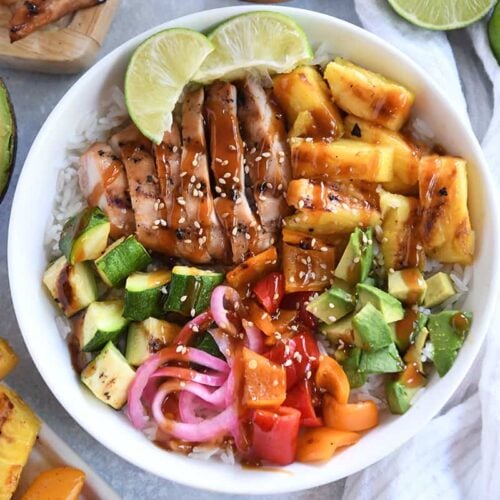
    These Hawaiian chicken and veggie teriyaki bowls are loaded with so many delicious ingredients and fresh flavors. Easily customizable to your liking!

    Please meet one of the best things I’ve eaten this year. This is the summer meal of my dreams! I could eat it every day for the rest of forever and still be wishing for more. IT IS SO AMAZING!

    Hawaiian Chicken Marinade

    I took two of my favorite recipes (this one and this one) and merged them to get the perfect marinade for this flavorful chicken.

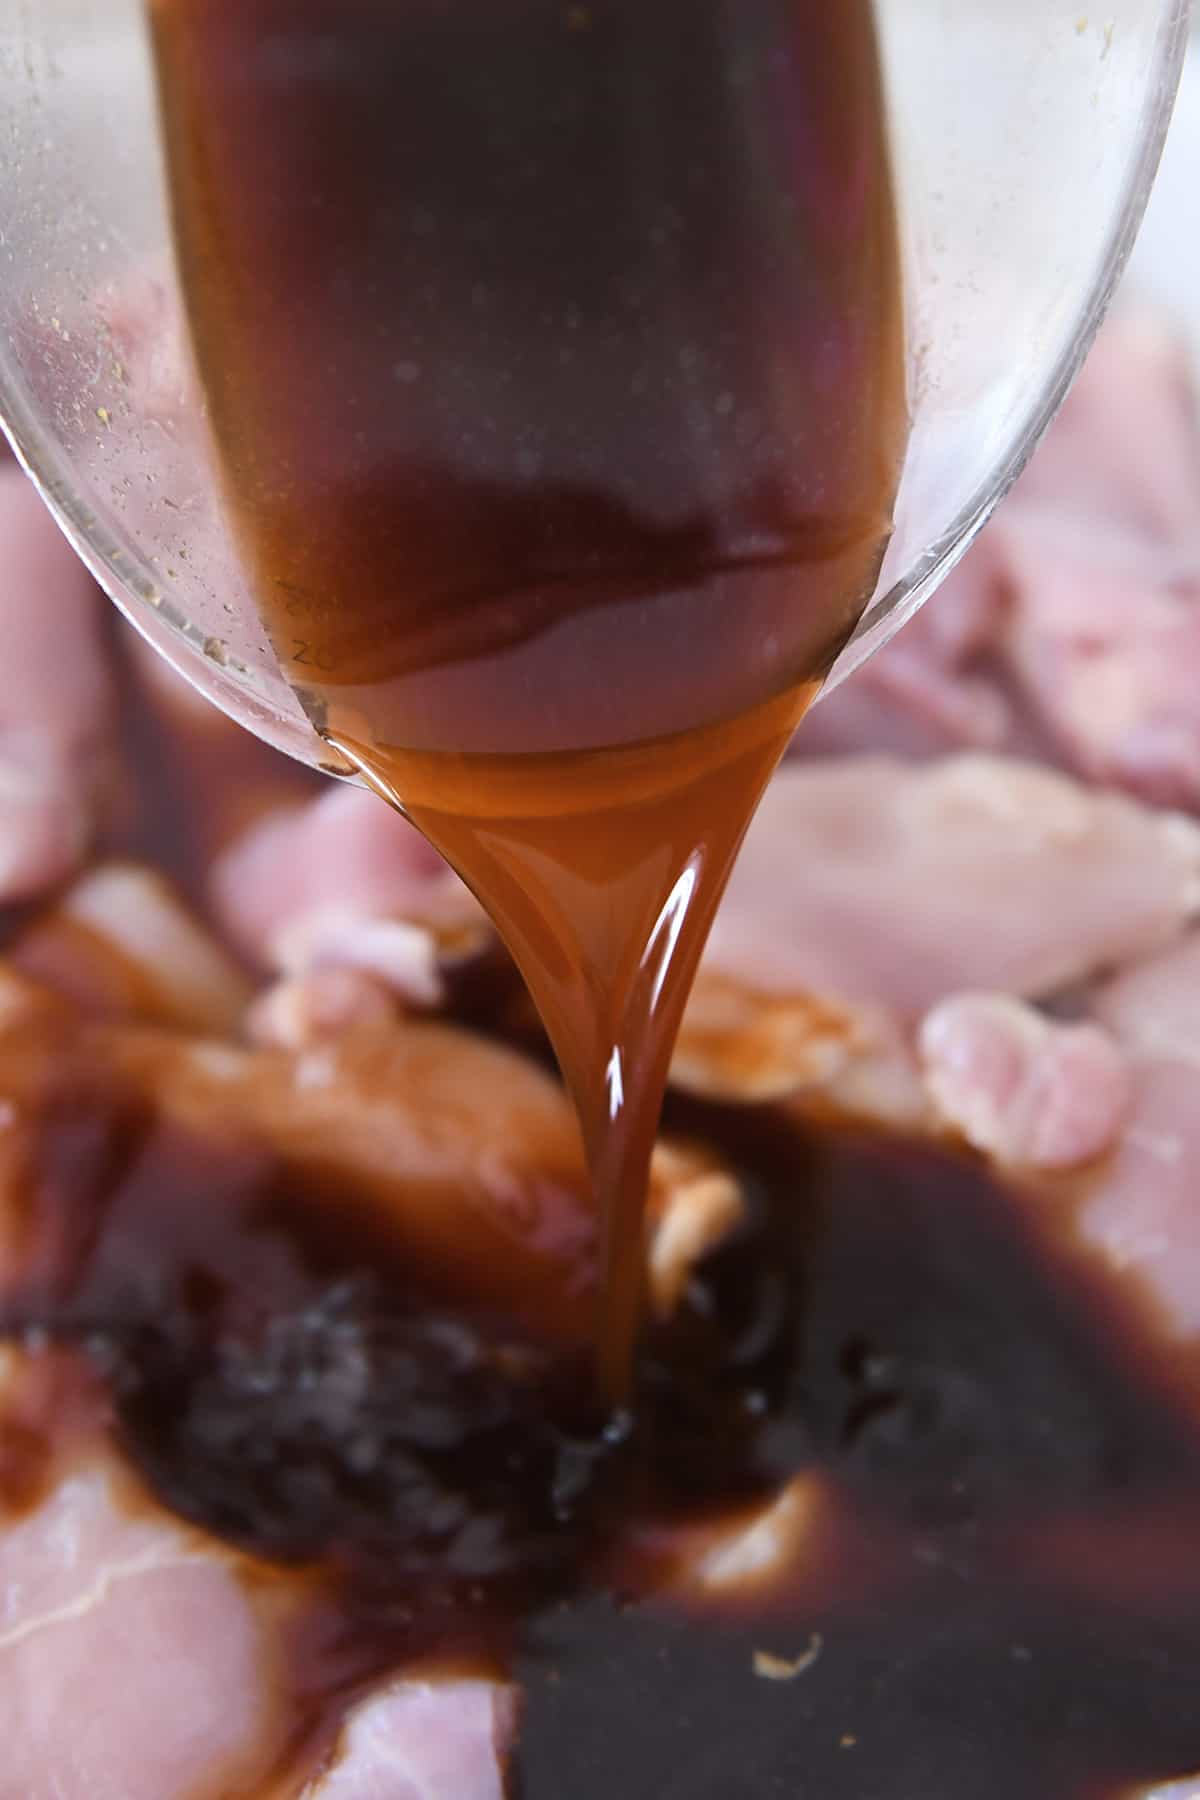
    Marinade ingredients:

    • soy sauce (I always use low-sodium)
    • pineapple juice
    • brown sugar
    • unseasoned rice vinegar
    • garlic
    • ginger

    This marinade packs a punch of incredible flavor! Let the chicken marinate for at least one hour but preferably longer (up to 24 hours).

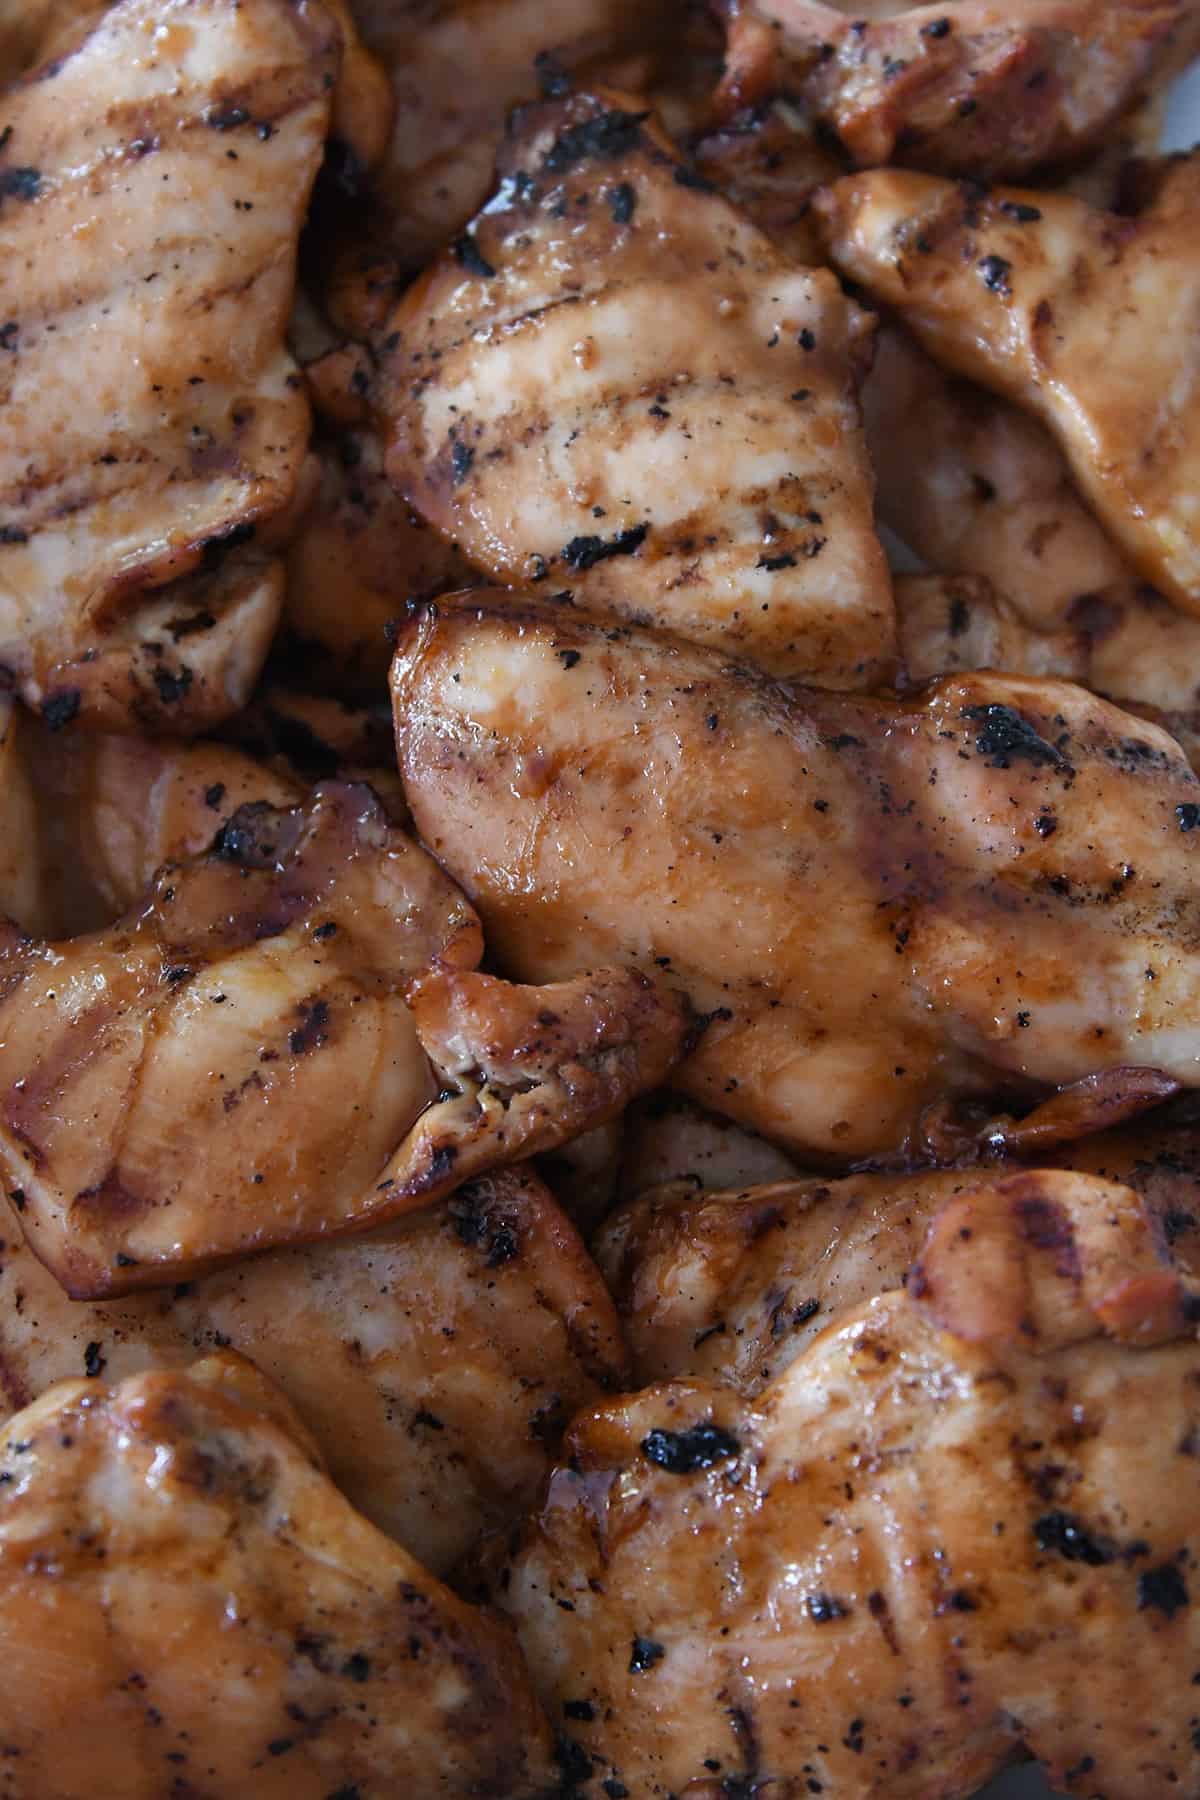
    What Type of Chicken to Use

    This recipe works great with boneless, skinless chicken thighs, chicken breasts or chicken tenders.

    The cooking time will vary based on the type of chicken used, so keep a close eye on that. Cook until an instant-read thermometer registers 165 degrees F at the thickest part.

    I use a pellet grill and preheat to 375 degrees F. for this recipe, but other cooking methods can be used as well:

    • air fryer
    • oven broiler (line a sheet pan with foil and grease with cooking spray)
    • indoor grill pan

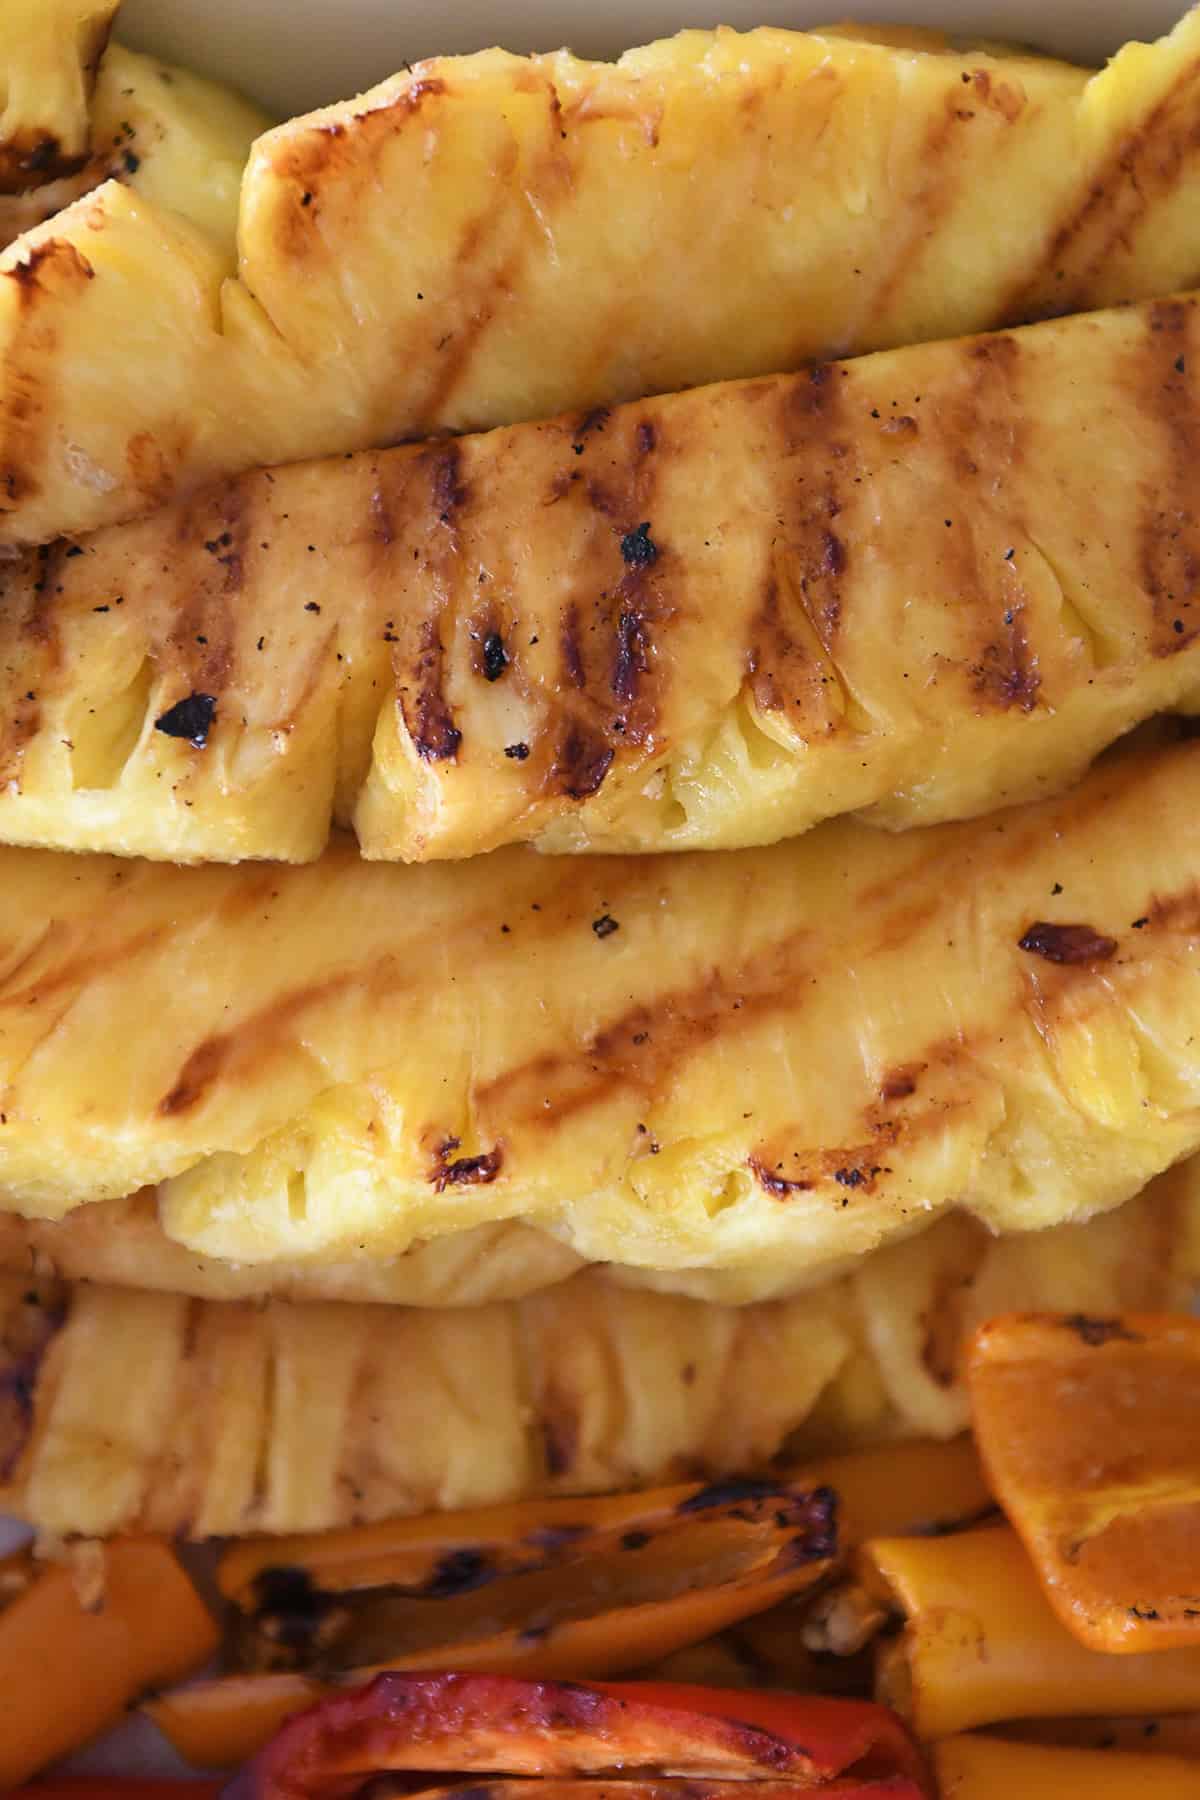
    Grilled Pineapple and Veggies

    The real star of this recipe is the grilled pineapple. 😍 It might be the most delicious stuff on the planet.

    Pineapple is incredibly delicious on its own, but when it is grilled, the natural sugars caramelize making it extra sweet, extra juicy, and extra yummy.

    Bell peppers and zucchini are also grilled for this recipe, and lest they be forgotten in the shadows of the almighty pineapple, let it be known that they are lovely in their own right.

    Cut the pineapple, zucchini and bell peppers in spears or thick strips for easier cooking (especially on the grill!).

    The pineapple and veggies are brushed with reserved teriyaki marinade while grilling/cooking for an extra boost of flavor.

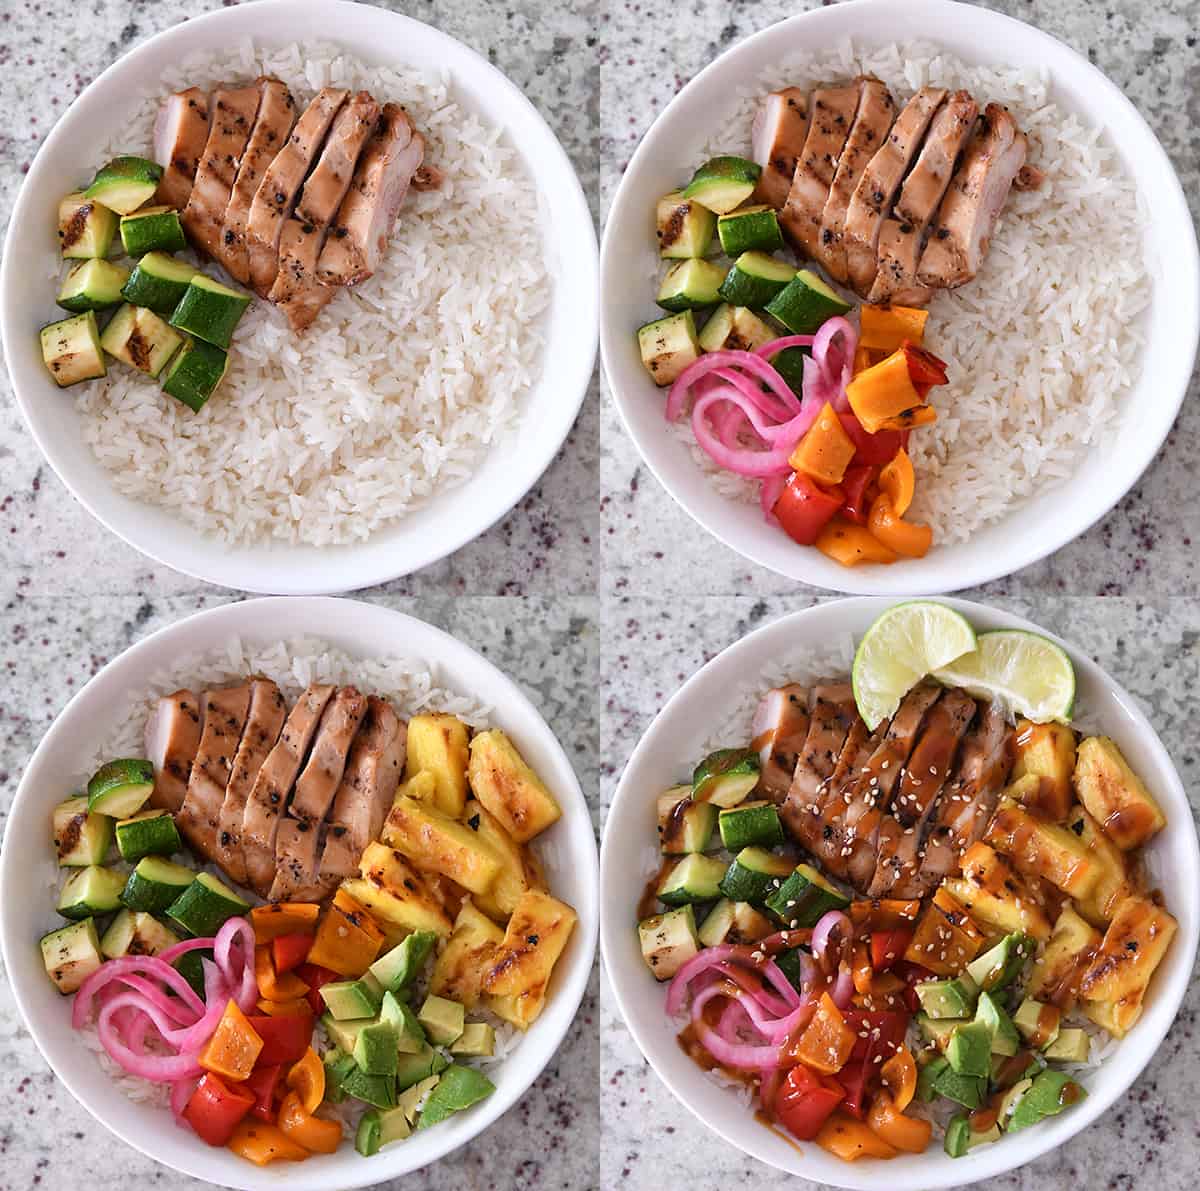
    How to Assemble Hawaiian Chicken Teriyaki Bowls

    To assemble the bowls, first spoon in a bit of hot, cooked rice.

    Brown or white rice can be used here – for a delicious variation, try cilantro lime rice or coconut rice.

    After the rice, add:

    1. grilled teriyaki chicken
    2. grilled zucchini and bell peppers
    3. pineapple
    4. other add-ins like: red onion*, avocados, fresh lime wedges, extra teriyaki sauce, toasted sesame seeds, etc.

    If using red onions, they can be cut into rounds and grilled with the other veggies, thinly sliced and served raw or easily pickled (details in the recipe notes!).

    An Easily Customizable Meal

    Like, how is this meal even legal??

    It is gorgeous, yes. But more importantly, it is unbelievably and astoundingly delicious.

    The beauty of these Hawaiian chicken and veggie Teriyaki bowls is how easy they are to customize to your taste preferences or what you have on hand.

    This recipe could easily be made with extra veggies (mushrooms, asparagus, eggplant, yellow squash) or without the chicken, and the rice could also get nixed for a lower carb meal. The secret is in the flavorful marinade.

    Everything about this meal speaks to my soul. I can’t wait for you to make it – and to make it your own!

    It is a fantastic meal to serve when you need a build-your-own style meal for a crowd…or just for a family with varied taste preferences/picky eaters.

    We do a lot of build-your-own meals for dinner, because it allows everyone to customize their own plate and avoids drama and speculation, like “how many veggies did you hide in this casserole, mom, and will I be able to pick them out?” 👀

    I do hope even the pickiest eaters will give the grilled veggies and pineapple a chance, though. Even my hesitant-veggie kids agree that every part of this is delicious when smothered in extra teriyaki sauce. Enjoy!!

    One Year Ago: Greek Pasta Salad 
    Two Years Ago: Blueberry Muffin Bread 
    Three Years Ago: Soft Peanut Butter Sugar Cookies with Chocolate Frosting {No Rolling or Cutting Out}
    Four Years Ago: Zucchini Banana Bread 
    Five Years Ago: One Pot Creamy Tomato Basil Pasta 
    Six Years Ago: Falafel Meatballs with Easy Tzatziki Sauce 
    Seven Years Ago: Grilled Sesame Herb Chicken
    Eight Years Ago: Balsamic Beef {or Chicken} Kebabs
    Nine Years Ago: Sweet Corn Salad with Radishes, Jalapeno and Lime 
    Ten Years Ago: Amazing Gluten-Free Chocolate Cake with Whipped Chocolate Frosting 

    Hawaiian Chicken and Veggie Teriyaki Bowls

    Chicken + Marinade:

    • 1 ½ to 2 pounds boneless, skinless chicken breasts, tenders or thighs
    • 1 cup low-sodium soy sauce
    • 1 cup pineapple juice
    • ½ cup lightly packed light brown sugar
    • cup unseasoned rice vinegar
    • 1 tablespoon finely grated ginger (see note)
    • 1 tablespoon finely minced fresh garlic (see note)

    Veggies + Rice:

    • 1 small pineapple, peeled and cut into wedges or thick spears
    • 2 to 3 medium zucchini, cut into spears
    • 2 medium bell peppers, any color, cored and cut into thick strips
    • 3 cups hot, cooked rice (see note)
    • Other: diced avocados, fresh or pickled onions, toasted sesame seeds, fresh lime wedges, extra teriyaki sauce.

    Prevent your screen from going dark

    • Place the chicken in a shallow dish. Combine all the marinade ingredients and whisk until the sugar is mostly dissolved. Pour half of the marinade into a container to use later; cover and refrigerate. Pour the remaining marinade over the chicken. Toss to coat evenly. Cover and refrigerate for at least an hour or up to 24 hours.

    • Preheat an outdoor grill, indoor grill pan, air fryer, or oven broiler to medium or medium-high heat. I use a pellet grill and preheat to 375 degrees F.

    • Cook the chicken until cooked through, flipping once and brushing with reserved marinade the last 1-2 minutes of cooking (discard the marinade used for the chicken). Exact cooking times will vary based on the thickness/type of chicken used; an instant-read thermometer should read 165 degrees F when inserted at the thickest part of the chicken. Remove the chicken, tent with foil, and let rest for 10 minutes while cooking the veggies.

    • Add the pineapple, zucchini, and bell peppers to the grill (can also use a grill pan or any of the aforementioned cooking methods in step #2). Brush with reserved marinade. Cook for 2-3 minutes, flip, brush with marinade, and continue cooking until crisp-tender, another 3-5 minutes. Remove to a pan.

    • If desired, pour the remaining marinade (that was used for brushing the chicken, pineapple and veggies) into a small saucepan and simmer for a couple of minutes until reduced slightly.

    • To serve, slice the chicken into strips. Chop the pineapple, bell peppers and zucchin into bite-size pieces.

    • Add a scoop of rice to a serving plate or bowl followed by chicken slices, pineapple, bell peppers, zucchini, and any other add-ins like diced avocados, red onion slices, fresh lime wedges.

    • Drizzle with remaining teriyaki marinade/sauce and toasted sesame seeds, if desired. Serve immediately.

    Ginger + Garlic: if using fresh ginger, it works best to freeze the ginger (no need to peel) and then grate the frozen ginger on the small holes of a box grater or rasp grater (again, no need to peel). The frozen cubes of ginger and/or garlic from Trader Joe’s and other grocery stores work great in the marinade, too. I have not used dried/ground ginger or garlic for this recipe, but it might work – feel free to experiment. 
    Rice: this recipe is fantastic with cilantro lime rice, coconut rice, or plain, cooked white or brown rice. The rice can easily be left out for a lower carb meal.
    Teriyaki Sauce: having a favorite storebought brand of teriyaki sauce on hand can help with the extra drizzle of sauce at the end if all the marinade was used for brushing chicken/pineapple/veggies.
    Pickled Onions: peel and thinly slice red onions. Pack them into a pint jar. Combine the following and heat through on the stovetop or in the microwave until sugar and salt are dissolved – 1/2 cup water, 1/2 cup unseasoned rice or apple cider vinegar (or a combo), 1 tablespoon granulated sugar, 2 teaspoons coarse, kosher salt. Pour the hot mixture over the onions. Cover. Refrigerate at least an hour but preferably up to 8 hours before serving. They keep in the fridge for several weeks.

    Serving: 1 serving, Calories: 390kcal, Carbohydrates: 60g, Protein: 30g, Fat: 4g, Saturated Fat: 1g, Cholesterol: 73mg, Sodium: 909mg, Fiber: 4g, Sugar: 29g

    Recipe Source: from Mel’s Kitchen Cafe

    Disclaimer: I am a participant in the Amazon Services LLC Associates Program, an affiliate advertising program designed to provide a means for me to earn fees by linking to Amazon.com and affiliated sites. As an Amazon Associate I earn from qualifying purchases.

    Source link

  • Sheet Pan Meatballs with Tomato Salad and Green Sauce Recipe

    Sheet Pan Meatballs with Tomato Salad and Green Sauce Recipe

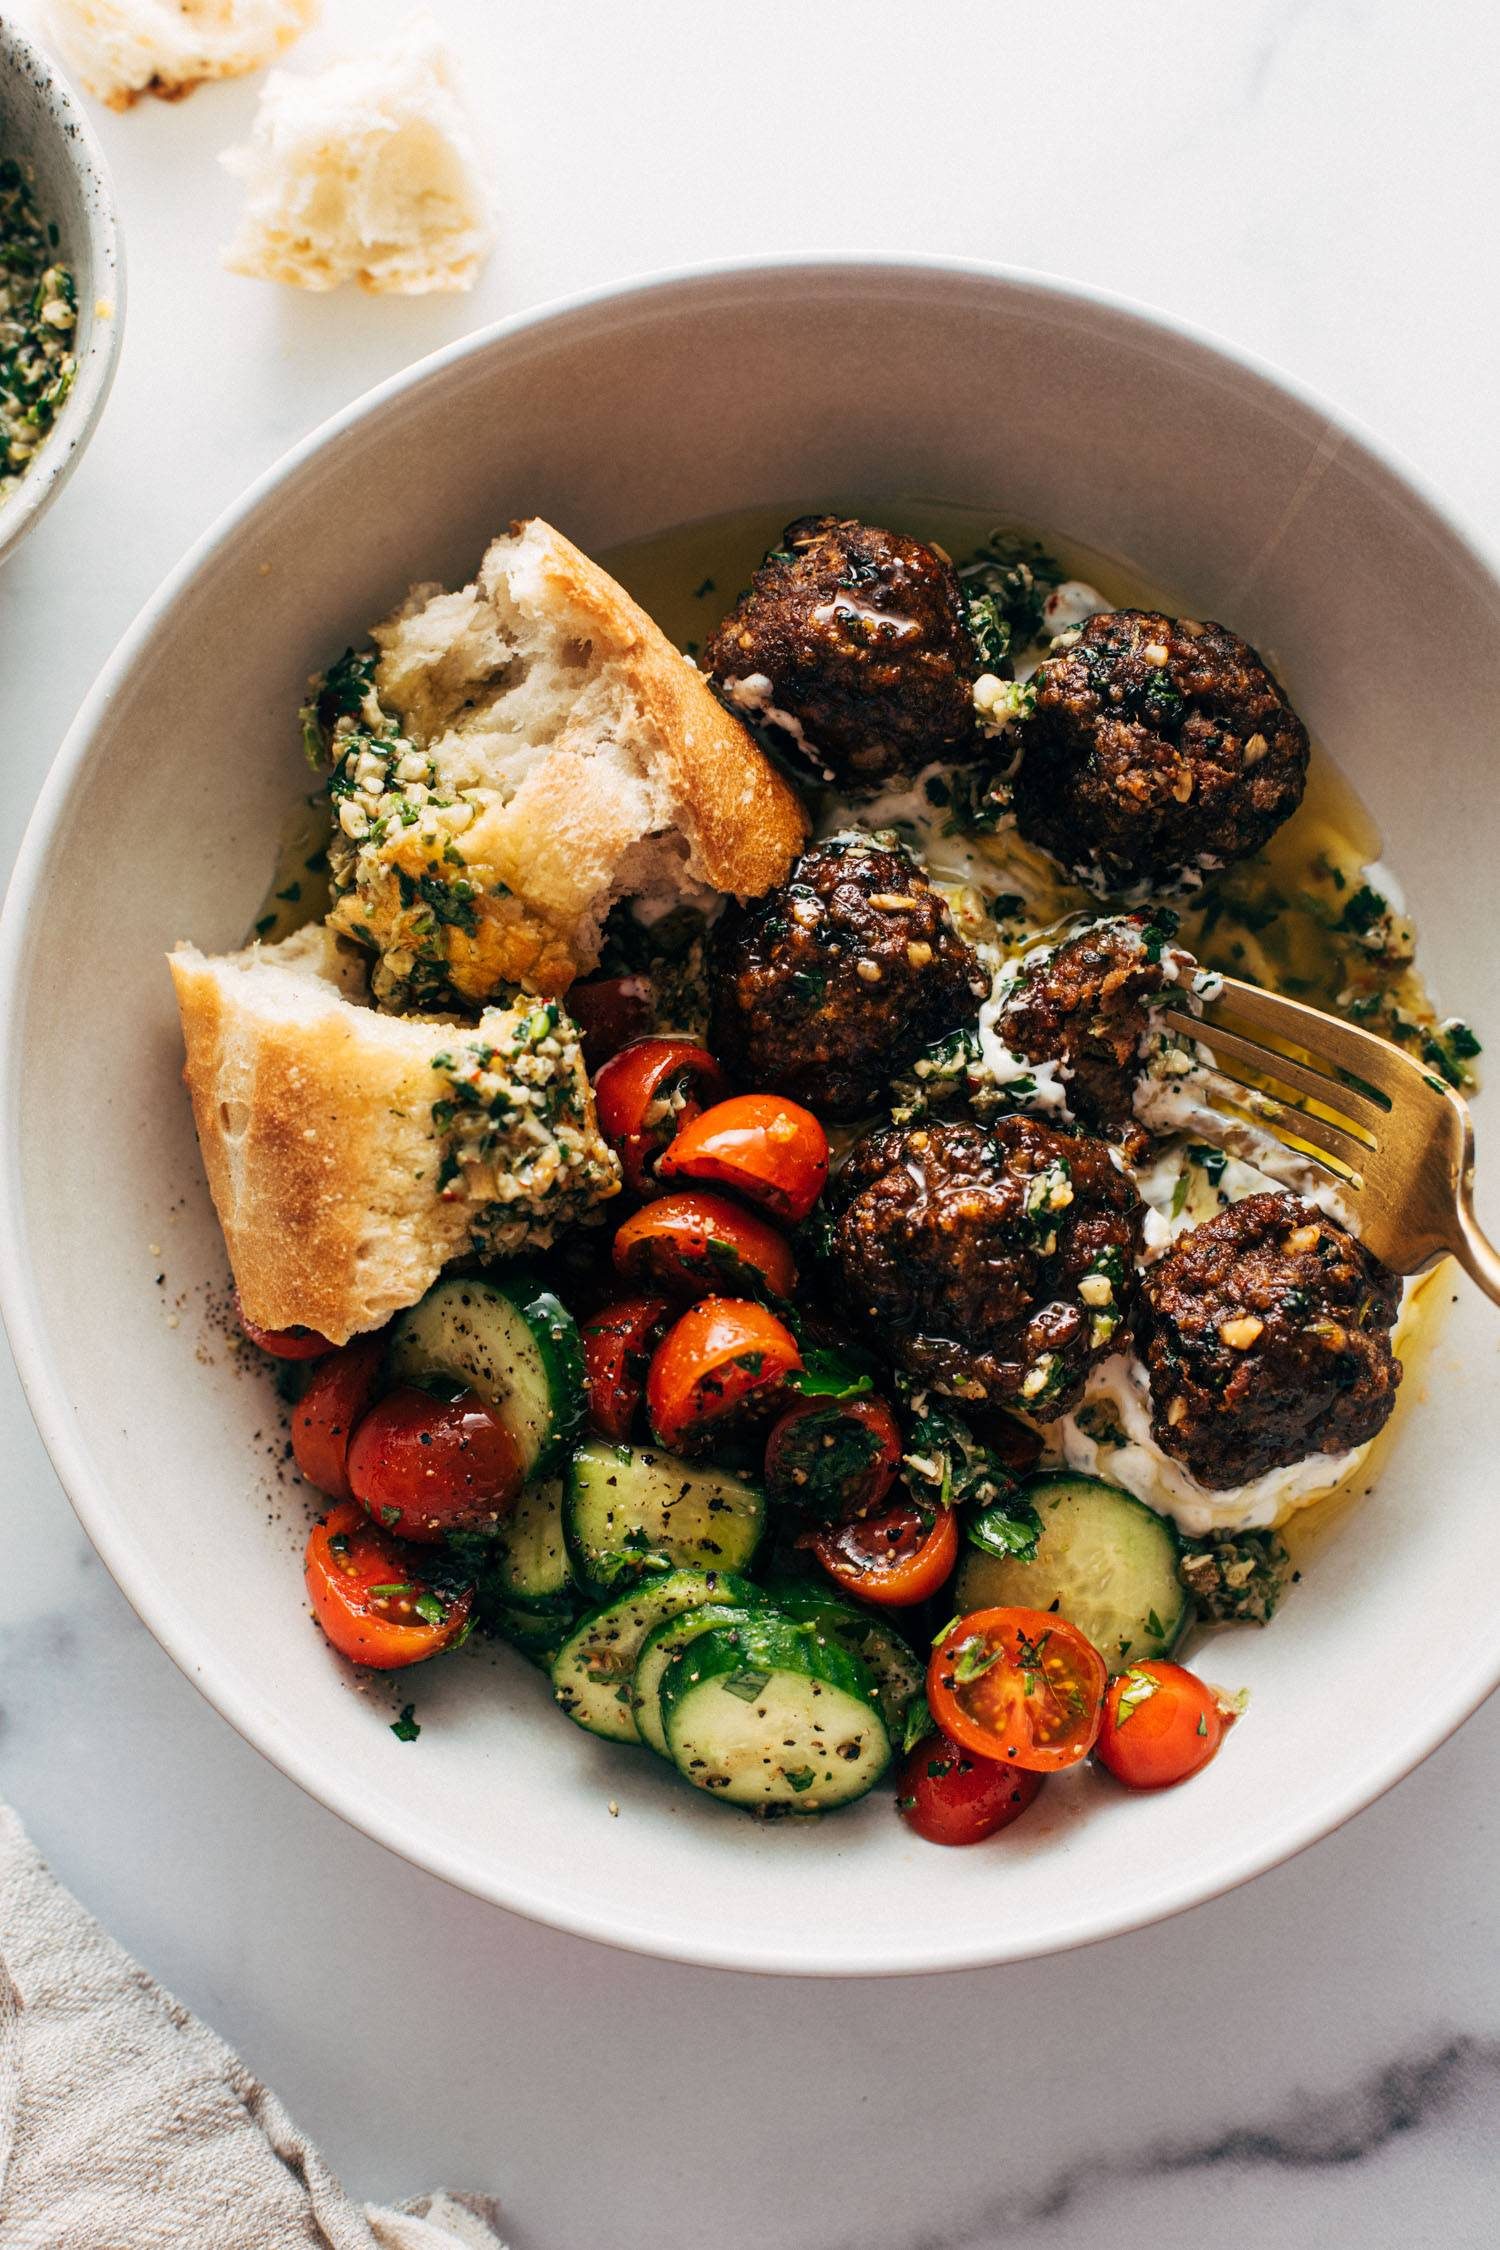
    Juicy little sheet pan meatballs that are salty, zesty, briney, and so so delicious. Pile them on tzatziki, spoon some punchy green sauce over top, and serve with a simple salad and crusty bread.

    This post is sponsored by ButcherBox

    We’re no strangers to sheet pan meatballs around here. We love to love them! Easy clean-up, no frying mess, but still oven-crisp goodness, and they’re always the easiest option for straight-off-the-pan sneaks.

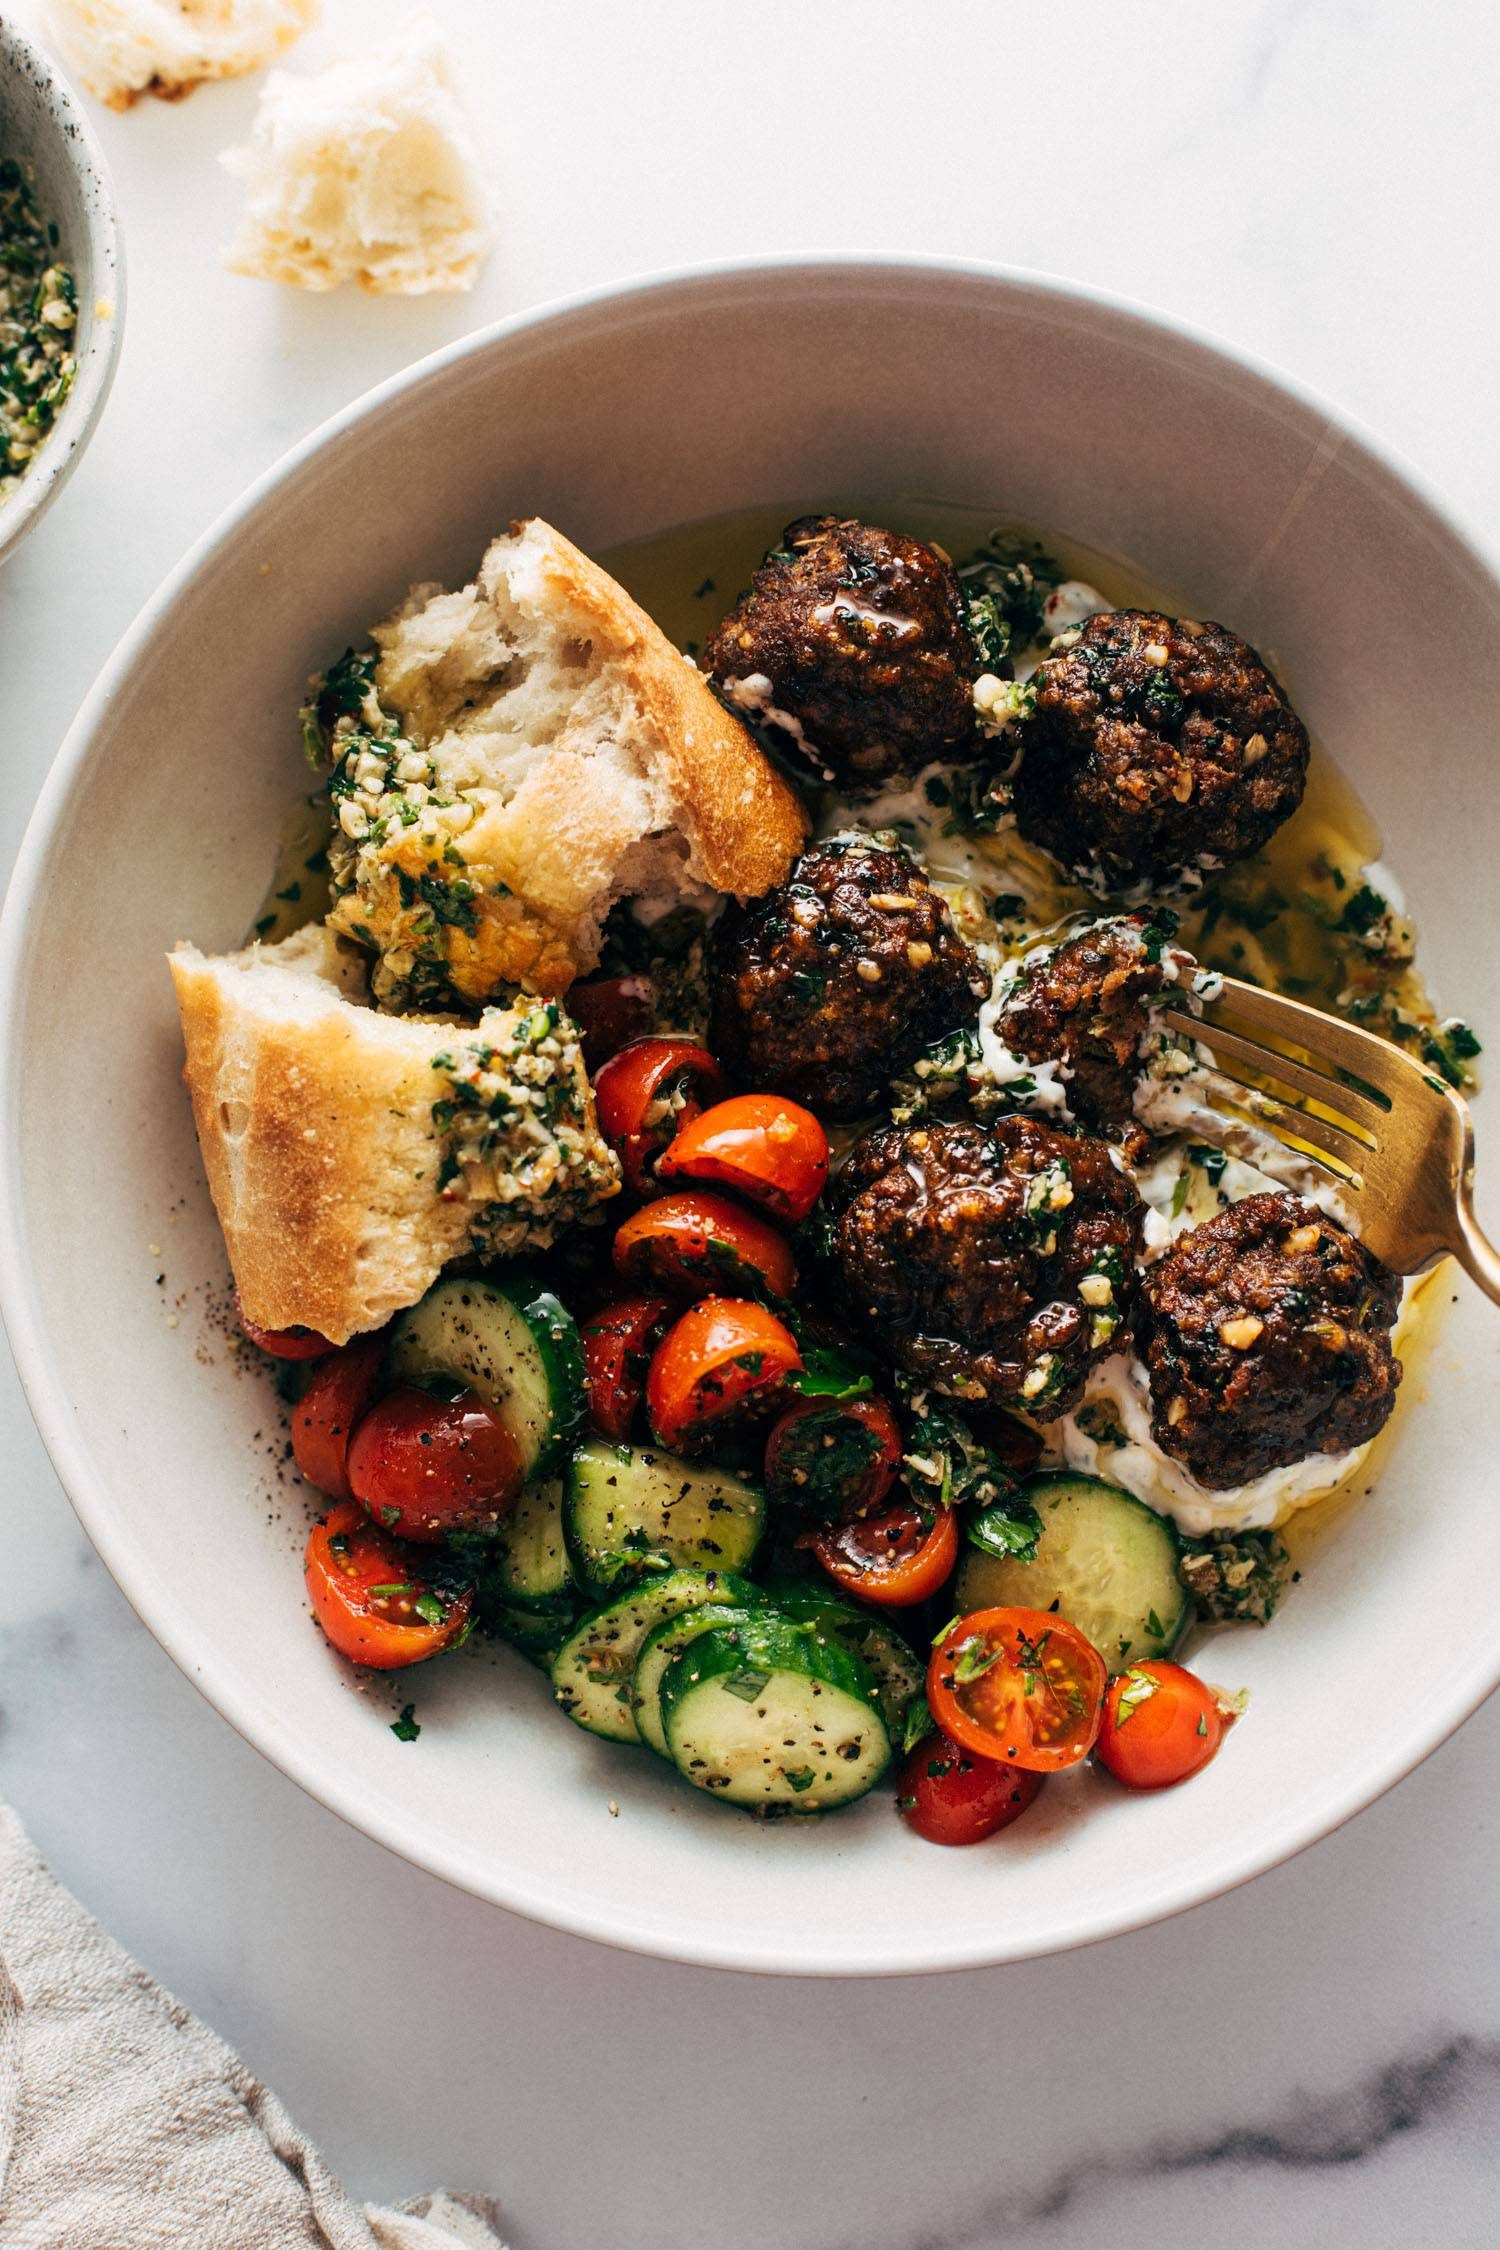
    Super juicy and deeply flavored thanks to some delicious briney green sauce – made with parsley, cilantro, walnuts, capers, garlic, and more – that will go not only inside but also on top of these little beauties. Serve them alongside some juicy marinated tomatoes, swoop them through tzatziki, douse them in that green sauce, grab yourself a buttery hunk of crusty bread, and let’s have the best meatball party in town, shall we?

    Salty, Zesty, Briney Goodness

    This isn’t just any old meatball. Not only is the quality of beef A+ (we’re using ButcherBox Grass-Fed Grass-Finished – more on that later), but that little green sauce magic concoction in the mixture brings a whole explosion of flavor with salty brininess from the capers, a little zest from the lemon, and our favorite punch of all punches, the garlic punch. It all just sort of swims together to bring maximum flavor to this little guy. It’s like a whole meal of tastes in one bite!

    And you better believe you save some of that green sauce to put on top of your meatballs, and bread, and any kind of veggies. We’re nothing if not sauce hogs.

    Prefer To Watch Instead Of Read?

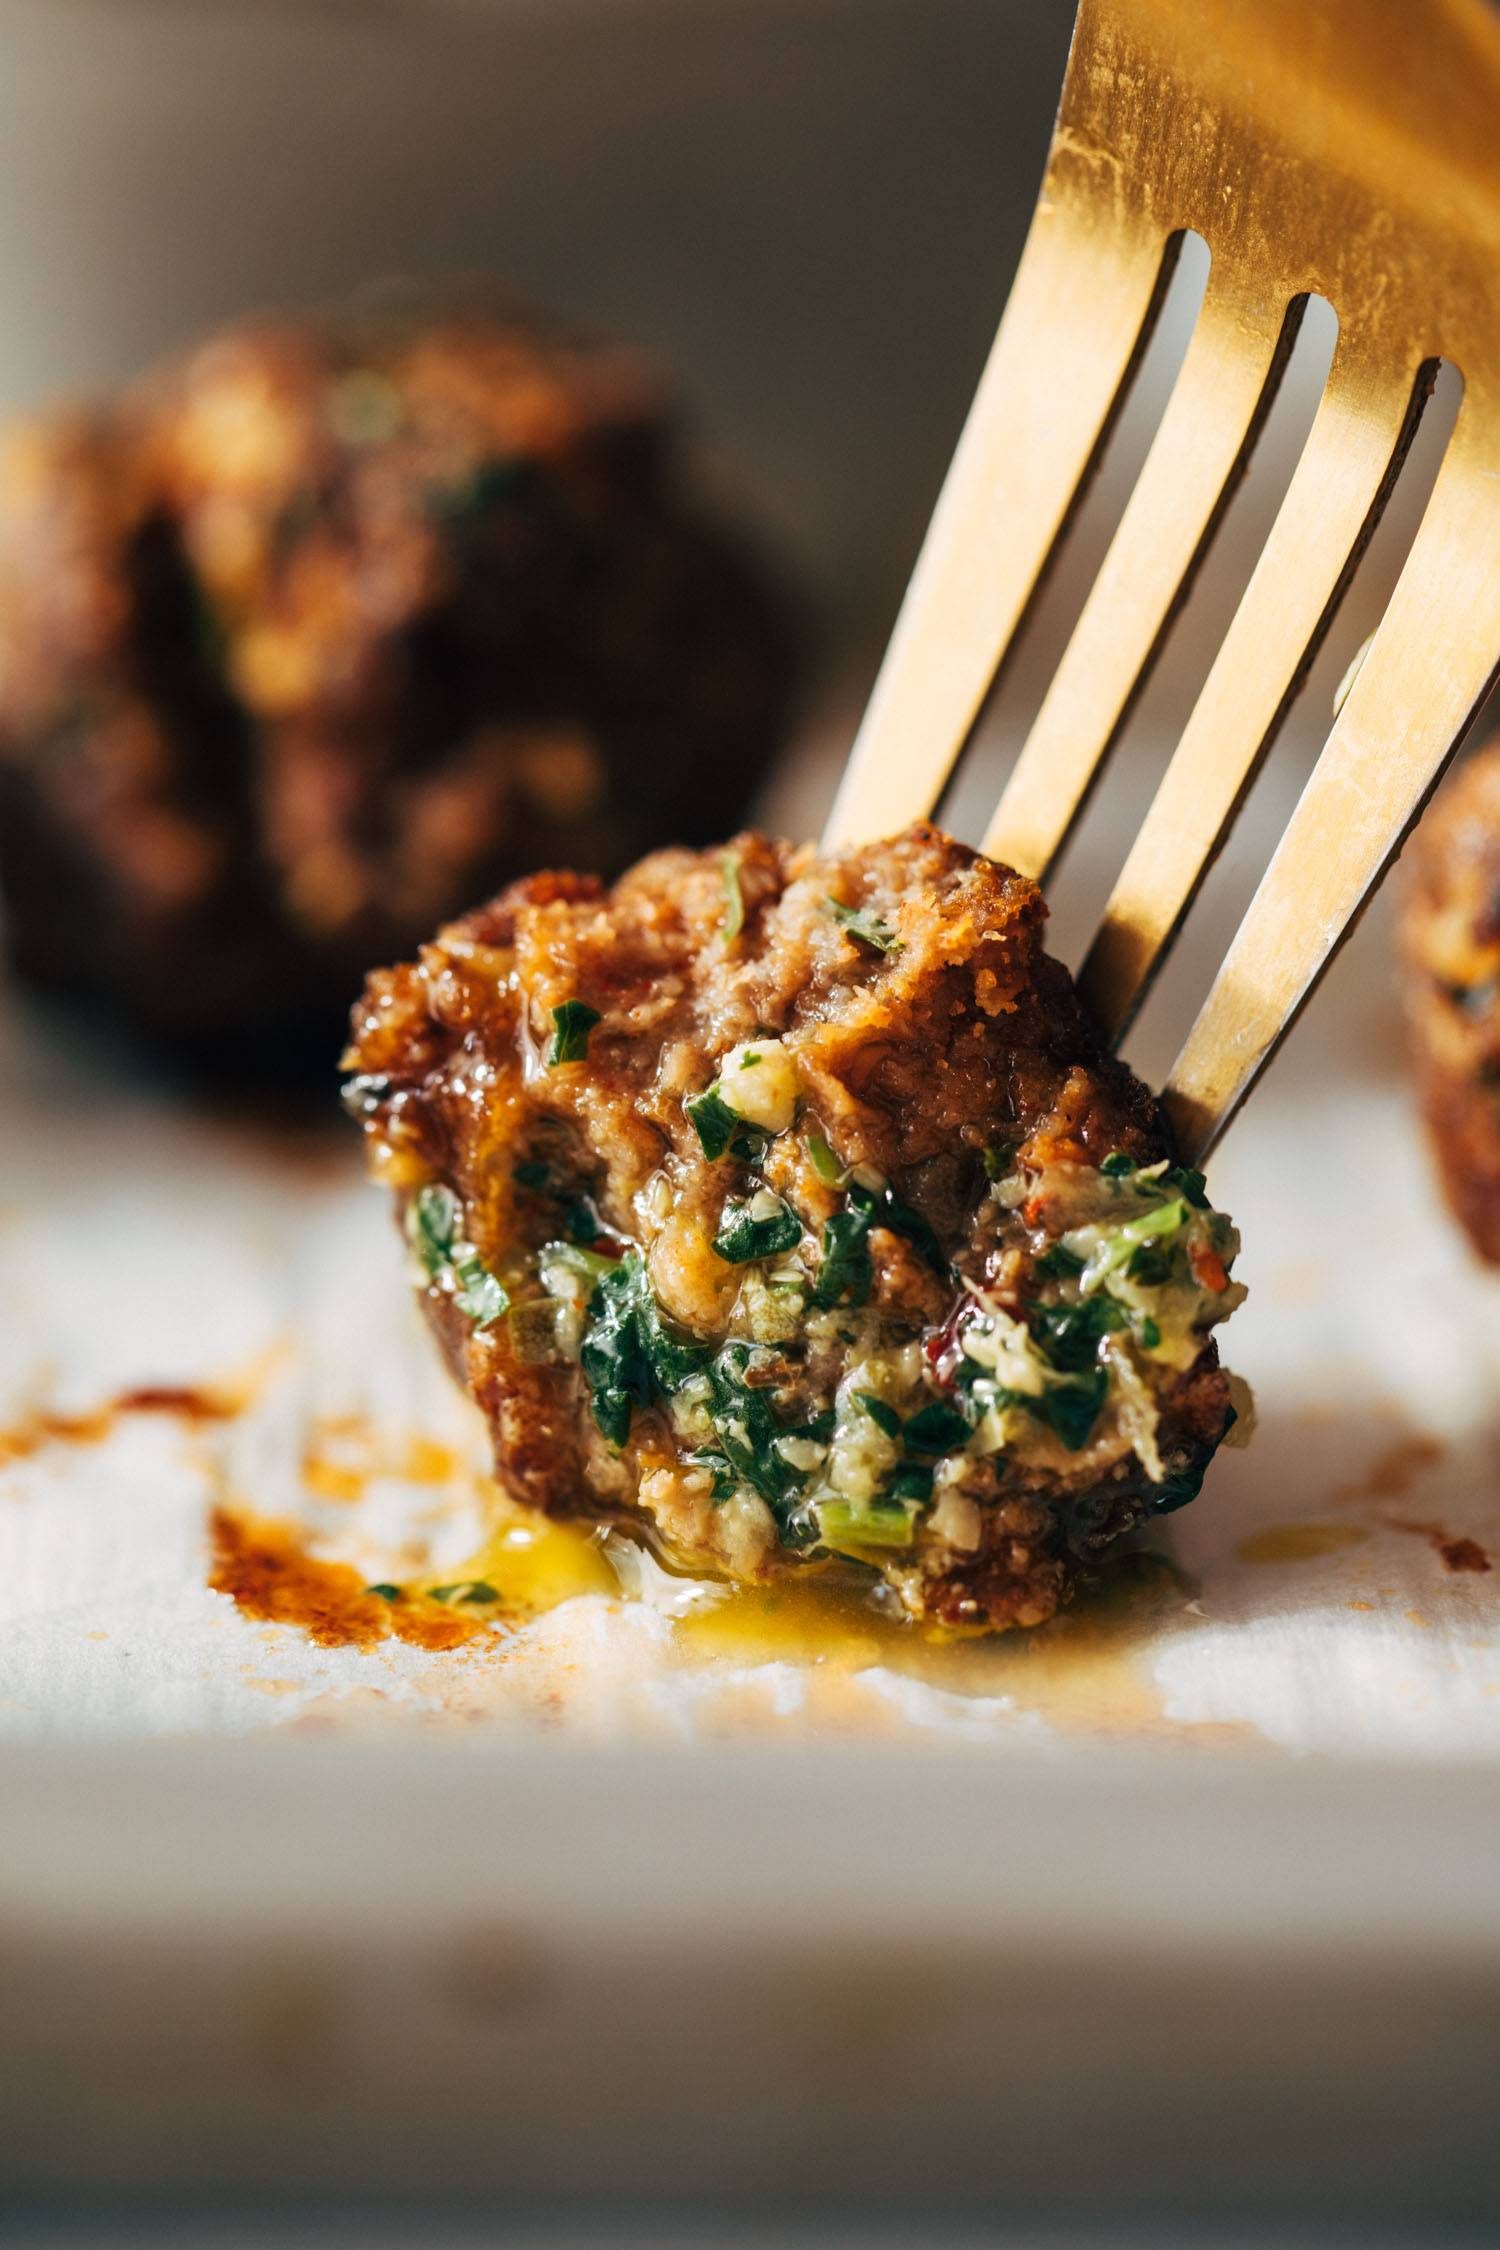
    Fork piercing a meatball

    A Word About This ButcherBox Beef

    Okay, if you’re not on the ButcherBox train yet, we highly recommend you climb aboard! The quality of their meat and seafood is top-notch.

    This is why we love them:

    • They are a certified B Corp company, which means they are mission-driven to do some environmental good in this world and that is always something we can get behind.
    • They source from family farms and are committed to humane practices, and have a focus on sustainability for their seafood offerings which we also feel really good about!
    • Plus, sustainable and recyclable insulation and packaging whenever possible? Yes, please.

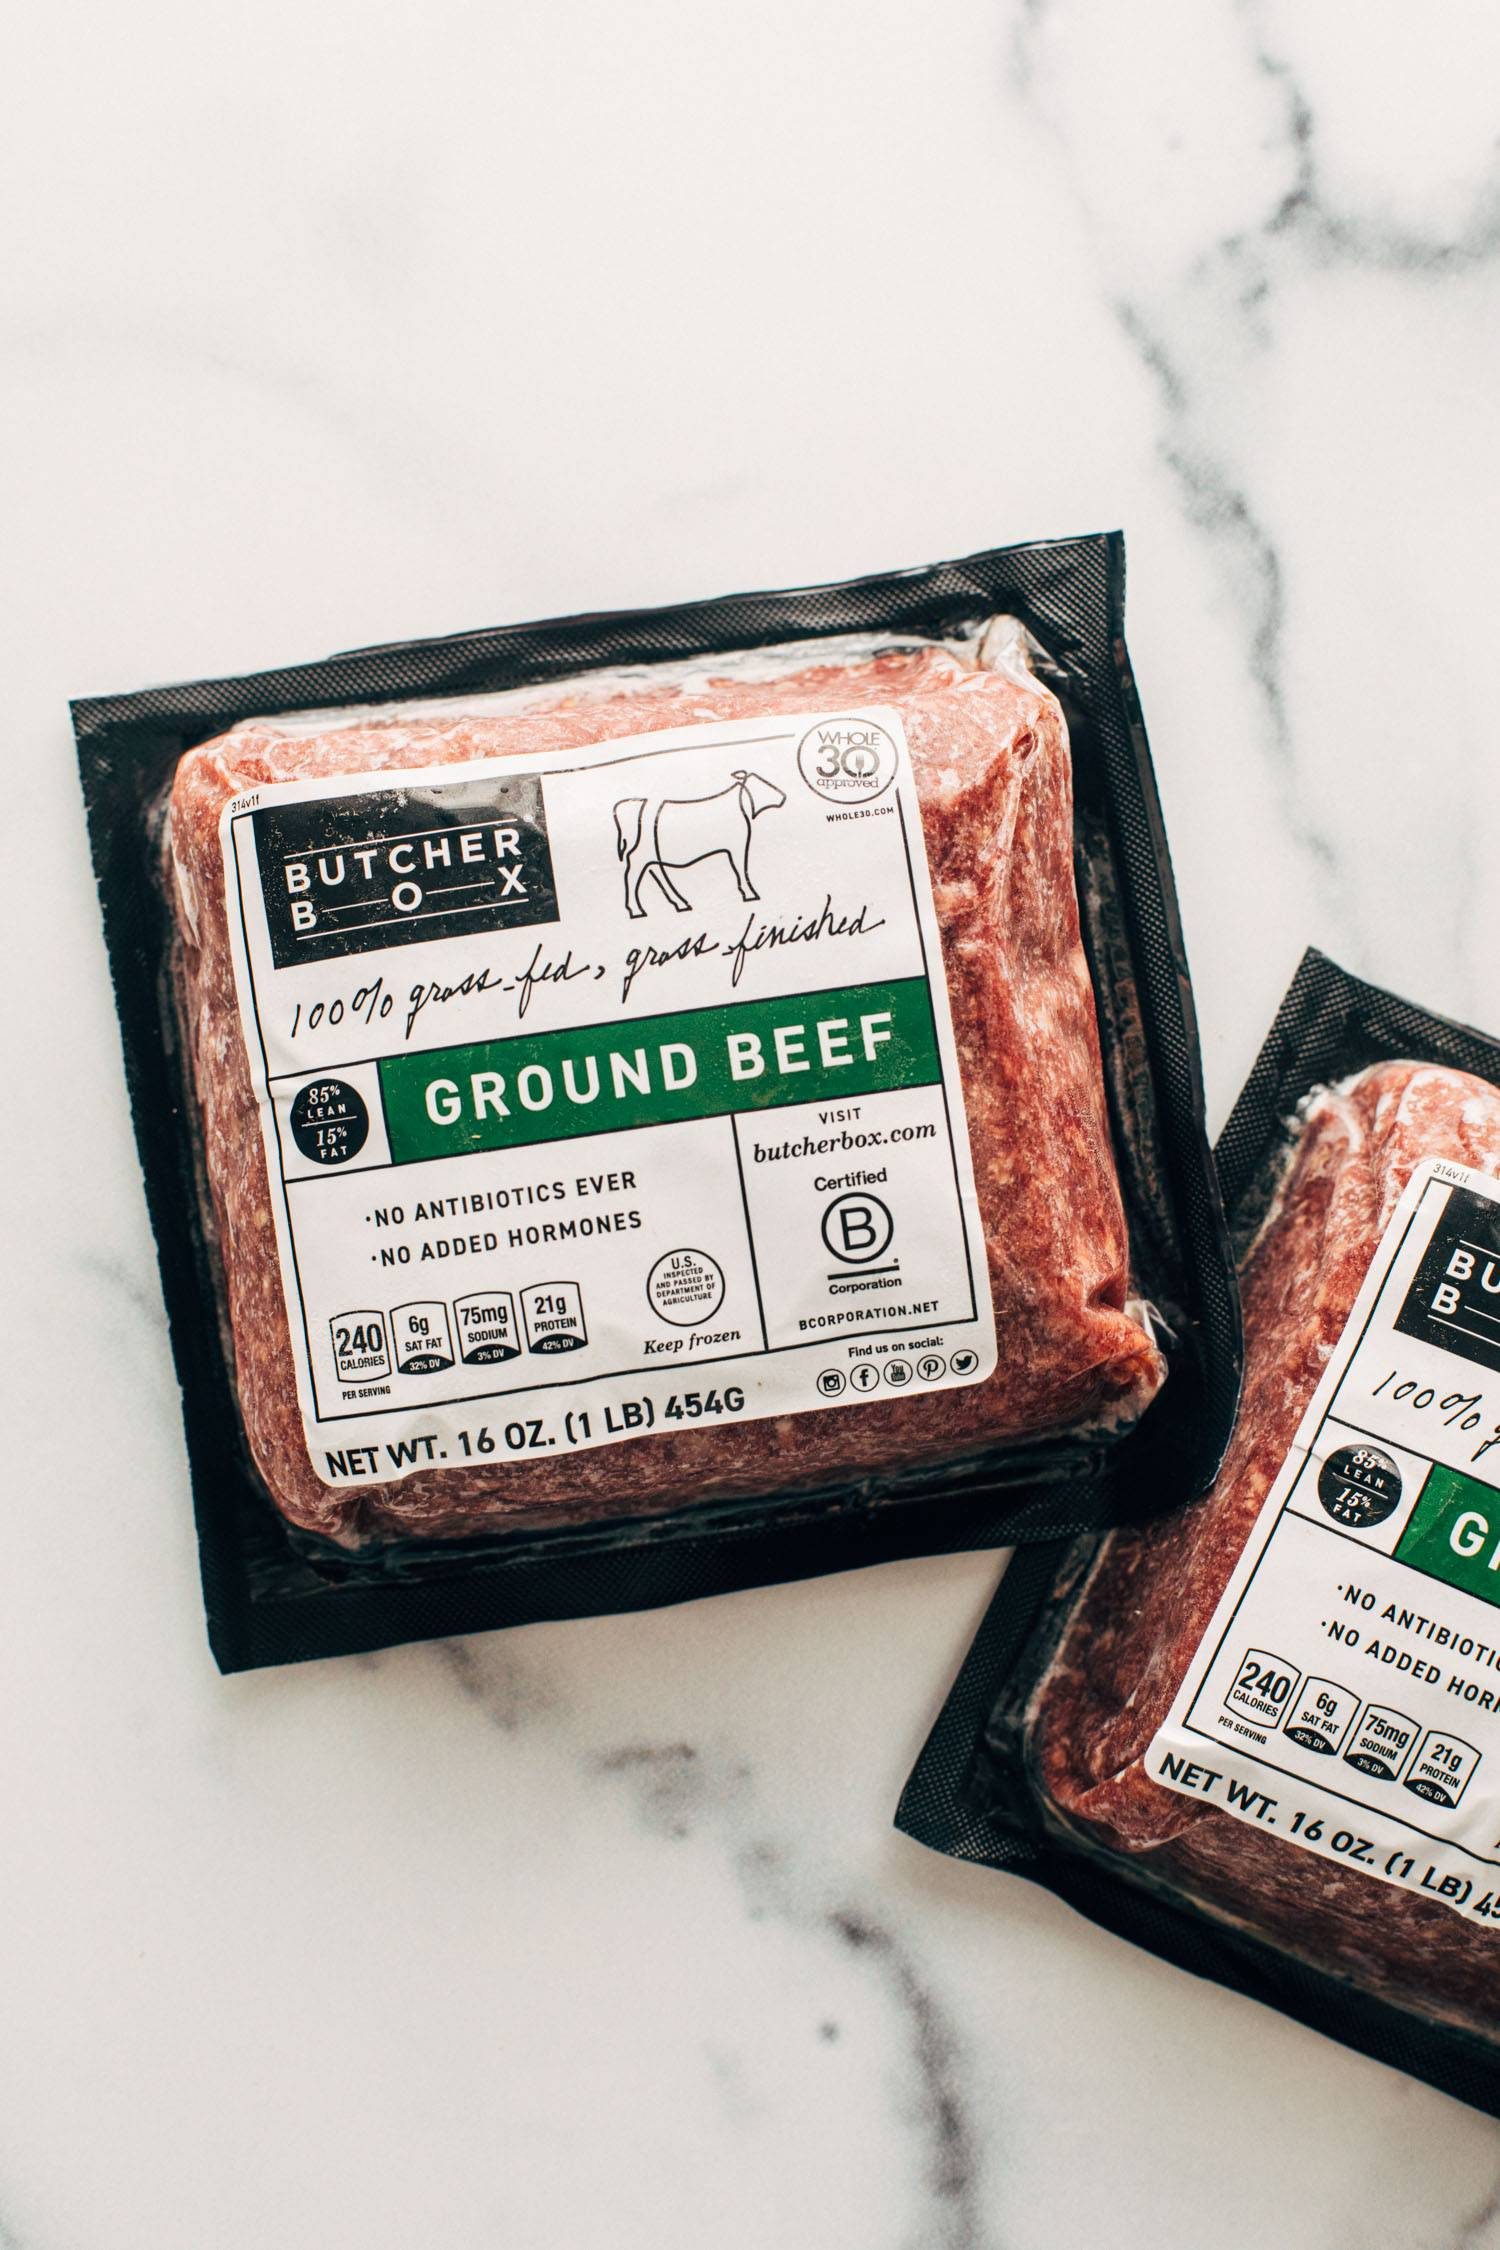
    There is so much care put behind their product and it really shows. And, ultimately, this grass-fed, grass-finished ground beef is SO flavorful and cooks up beautifully.

    ButcherBox has a deal going right now where you get two pounds of free (yes, FREE) grass-fed grass-finished ground beef in every single box for the life of your membership. WHAT.

    Click here to learn more about the boxes (or add this deal to your existing membership)!

    For burgers, for spaghetti, for meatballs, and everything else in between, this ground beef is such good quality and it is a total freezer essential. And it’s free in every box right now. Do not miss this deal!

    ButcherBox ground beef packages

    How To Make These Meatballs (Sheet Pan FTW!)

    Get your sheet pans and your food processor at the ready and let’s get down to business.

    1. Green Sauce. Pulse everything up in a food processor until chopped very finely (but not a paste). This is your flavor base! Transfer half of the flavor base to a large bowl for the meatballs and then use the rest make your sauce.
    2. Meatballs. Mix the egg, paprika, salt, panko, ground beef, and reserved flavor base green sauce in a bowl until evenly distributed. Roll into balls. Place the rolled meatballs on sheet pan, brush with olive oil, and bake!

    Then serve those meatballs over creamy tzatziki, heavily dolloped with your green sauce, along with a pile of tzatziki and simple tomato salad, add a big torn-off hunk of rustic bread, and oof, what a satisfying flavor extravaganza you’re in for!

    Meatballs in a bowl with a tomato salad, fork, and bread

    Will these juicy delicious little sheet pan meatballs absolutely steal your hearts? Yes. Does green sauce, just in general, make the world better? Also yes. Let’s get to it, pals.


    Print

    clock clock iconcutlery cutlery iconflag flag iconfolder folder iconinstagram instagram iconpinterest pinterest iconfacebook facebook iconprint print iconsquares squares iconheart heart iconheart solid heart solid icon

    Description

    Juicy little sheet pan meatballs that are salty, zesty, briney, and so so delicious. Pile them on tzatziki, spoon some punchy green sauce over top, and serve with a simple salad and crusty bread.


    1. Preheat the oven to 425 degrees. 
    2. Make your tomato salad and throw in some sliced cucumbers too!
    3. Pulse the garlic, parsley, cilantro, capers, and walnuts in a food processor until chopped very finely (but not creamy / not a paste – you just want a fine chop! and you could do this by hand as well). This is your flavor base!
    4. Transfer half of the flavor base to a large bowl for the meatballs. Add all other meatball ingredients and mix thoroughly with your hands to combine. Roll into balls and bake for 10-12 minutes.
    5. Add the other half of the flavor base to a smaller bowl; add lemon zest and lemon juice, olive oil, and salt and pepper to taste to make your sauce. Add red pepper flakes for heat if you want. It should look similar to a loose pesto or chimichurri.
    6. Serve meatballs over a swipe of tzatziki, with a hunk of rustic bread and a scoop of tomato salad. And drizzle, dip, and swish all of it through that punchy green sauce! BIG, BIG FLAVORS! So good!

    • Prep Time: 15 minutes
    • Cook Time: 30 minutes
    • Category: Dinner
    • Method: Bake
    • Cuisine: Mediterranean-Inspired

    Keywords: sheet pan meatballs, meatball bowls, green sauce

    Thank you to ButcherBox for sponsoring this recipe!


    More Meatball Recipes We Can’t Stop Talking About

    Source link

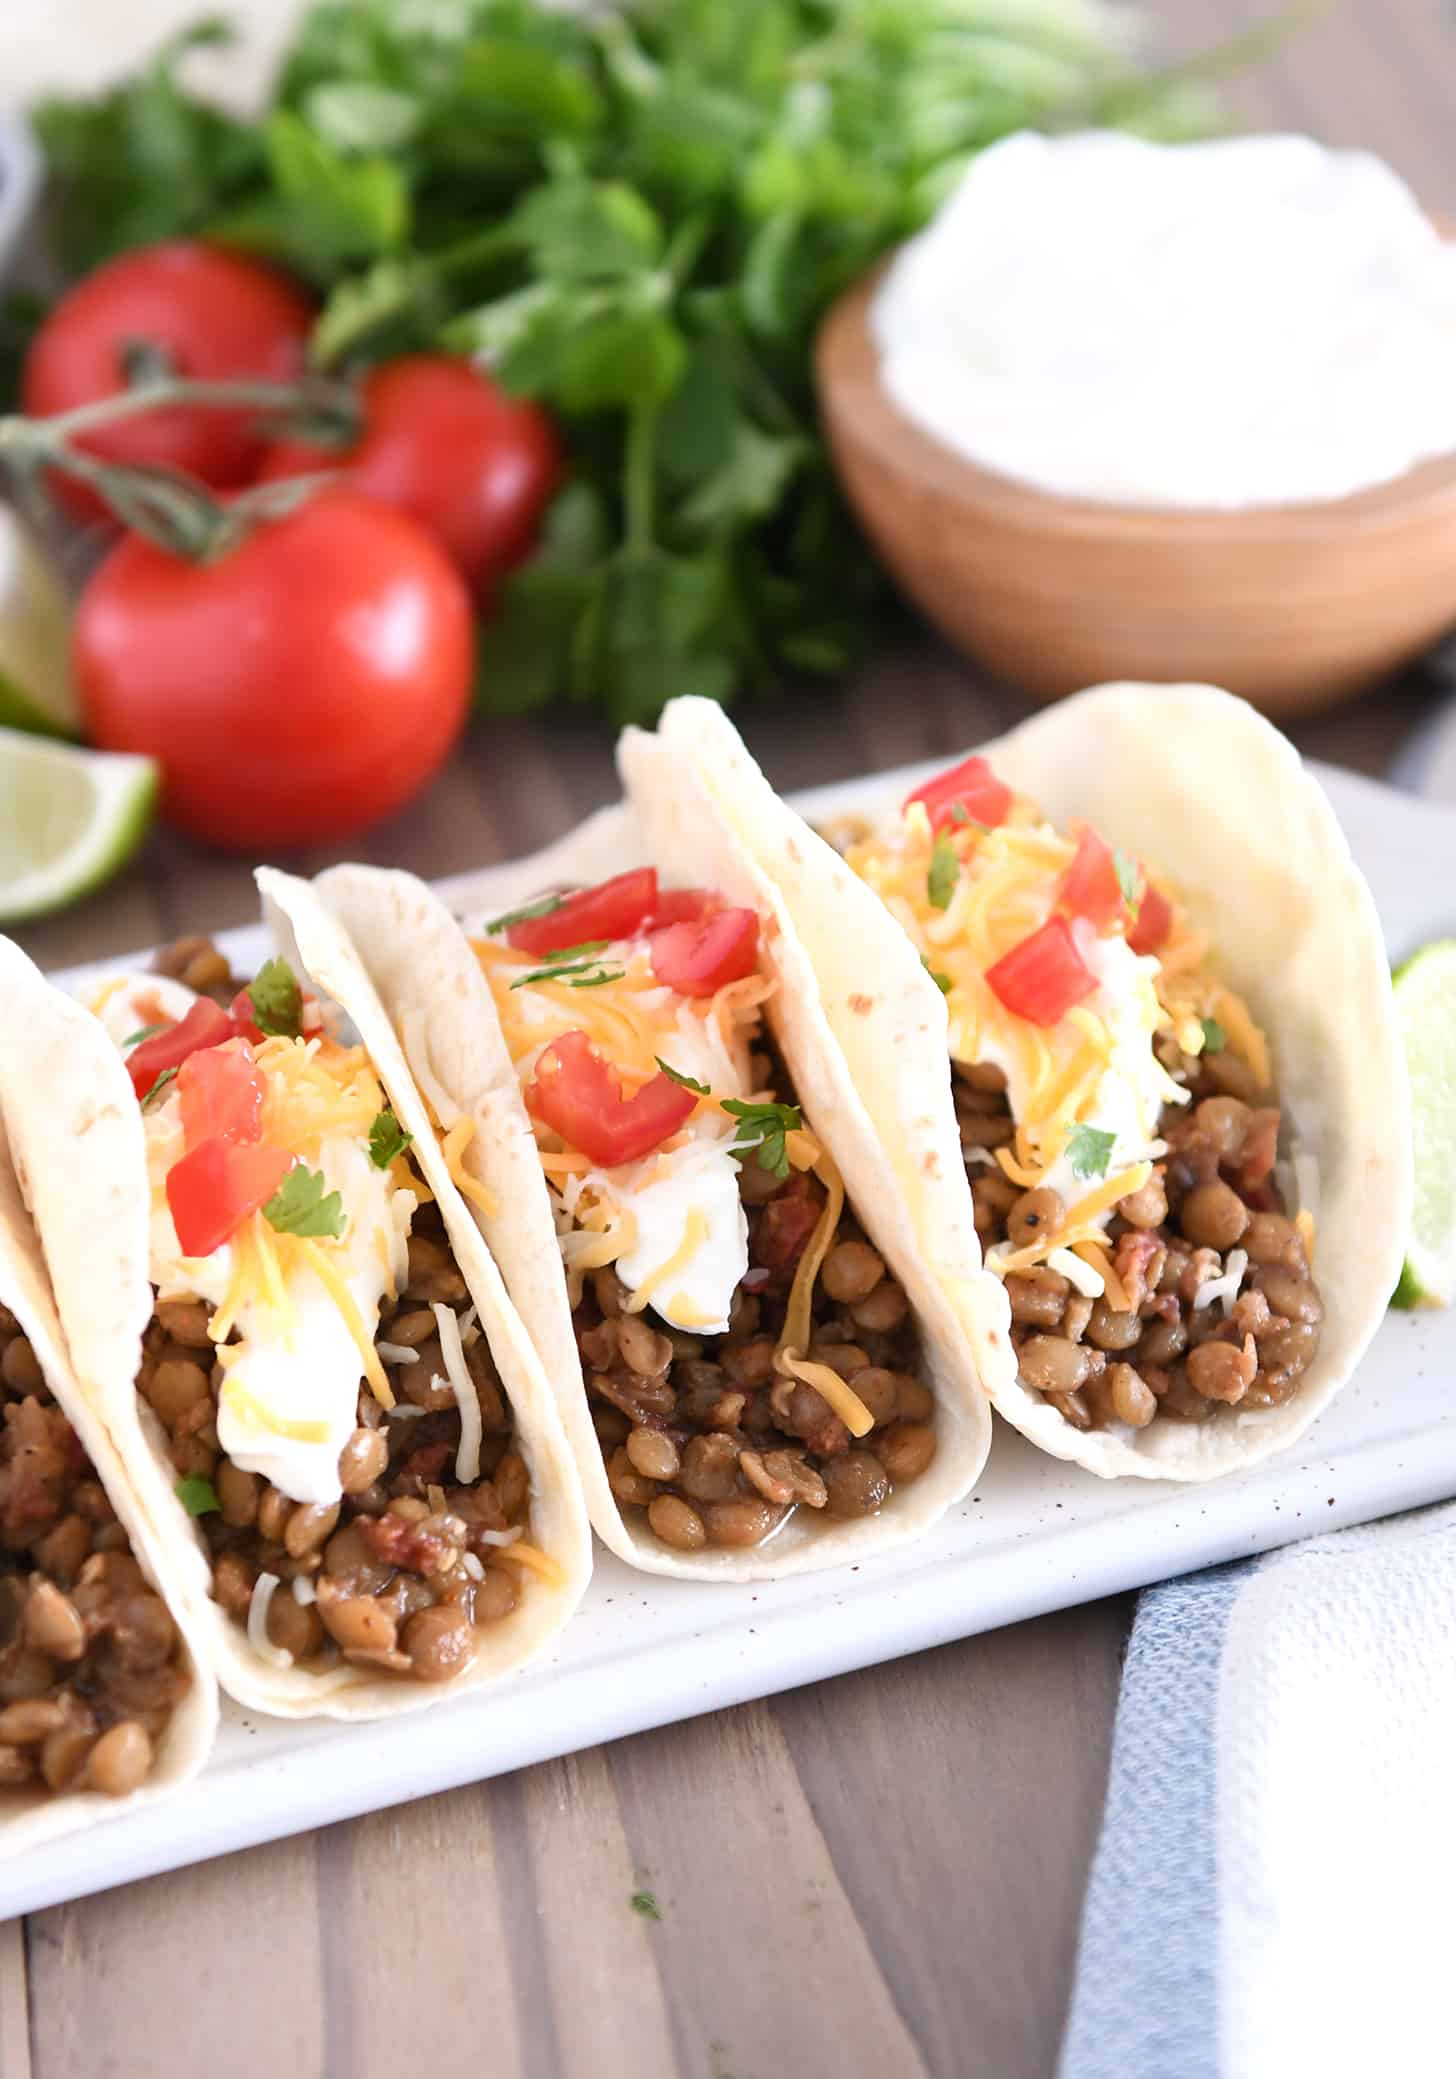
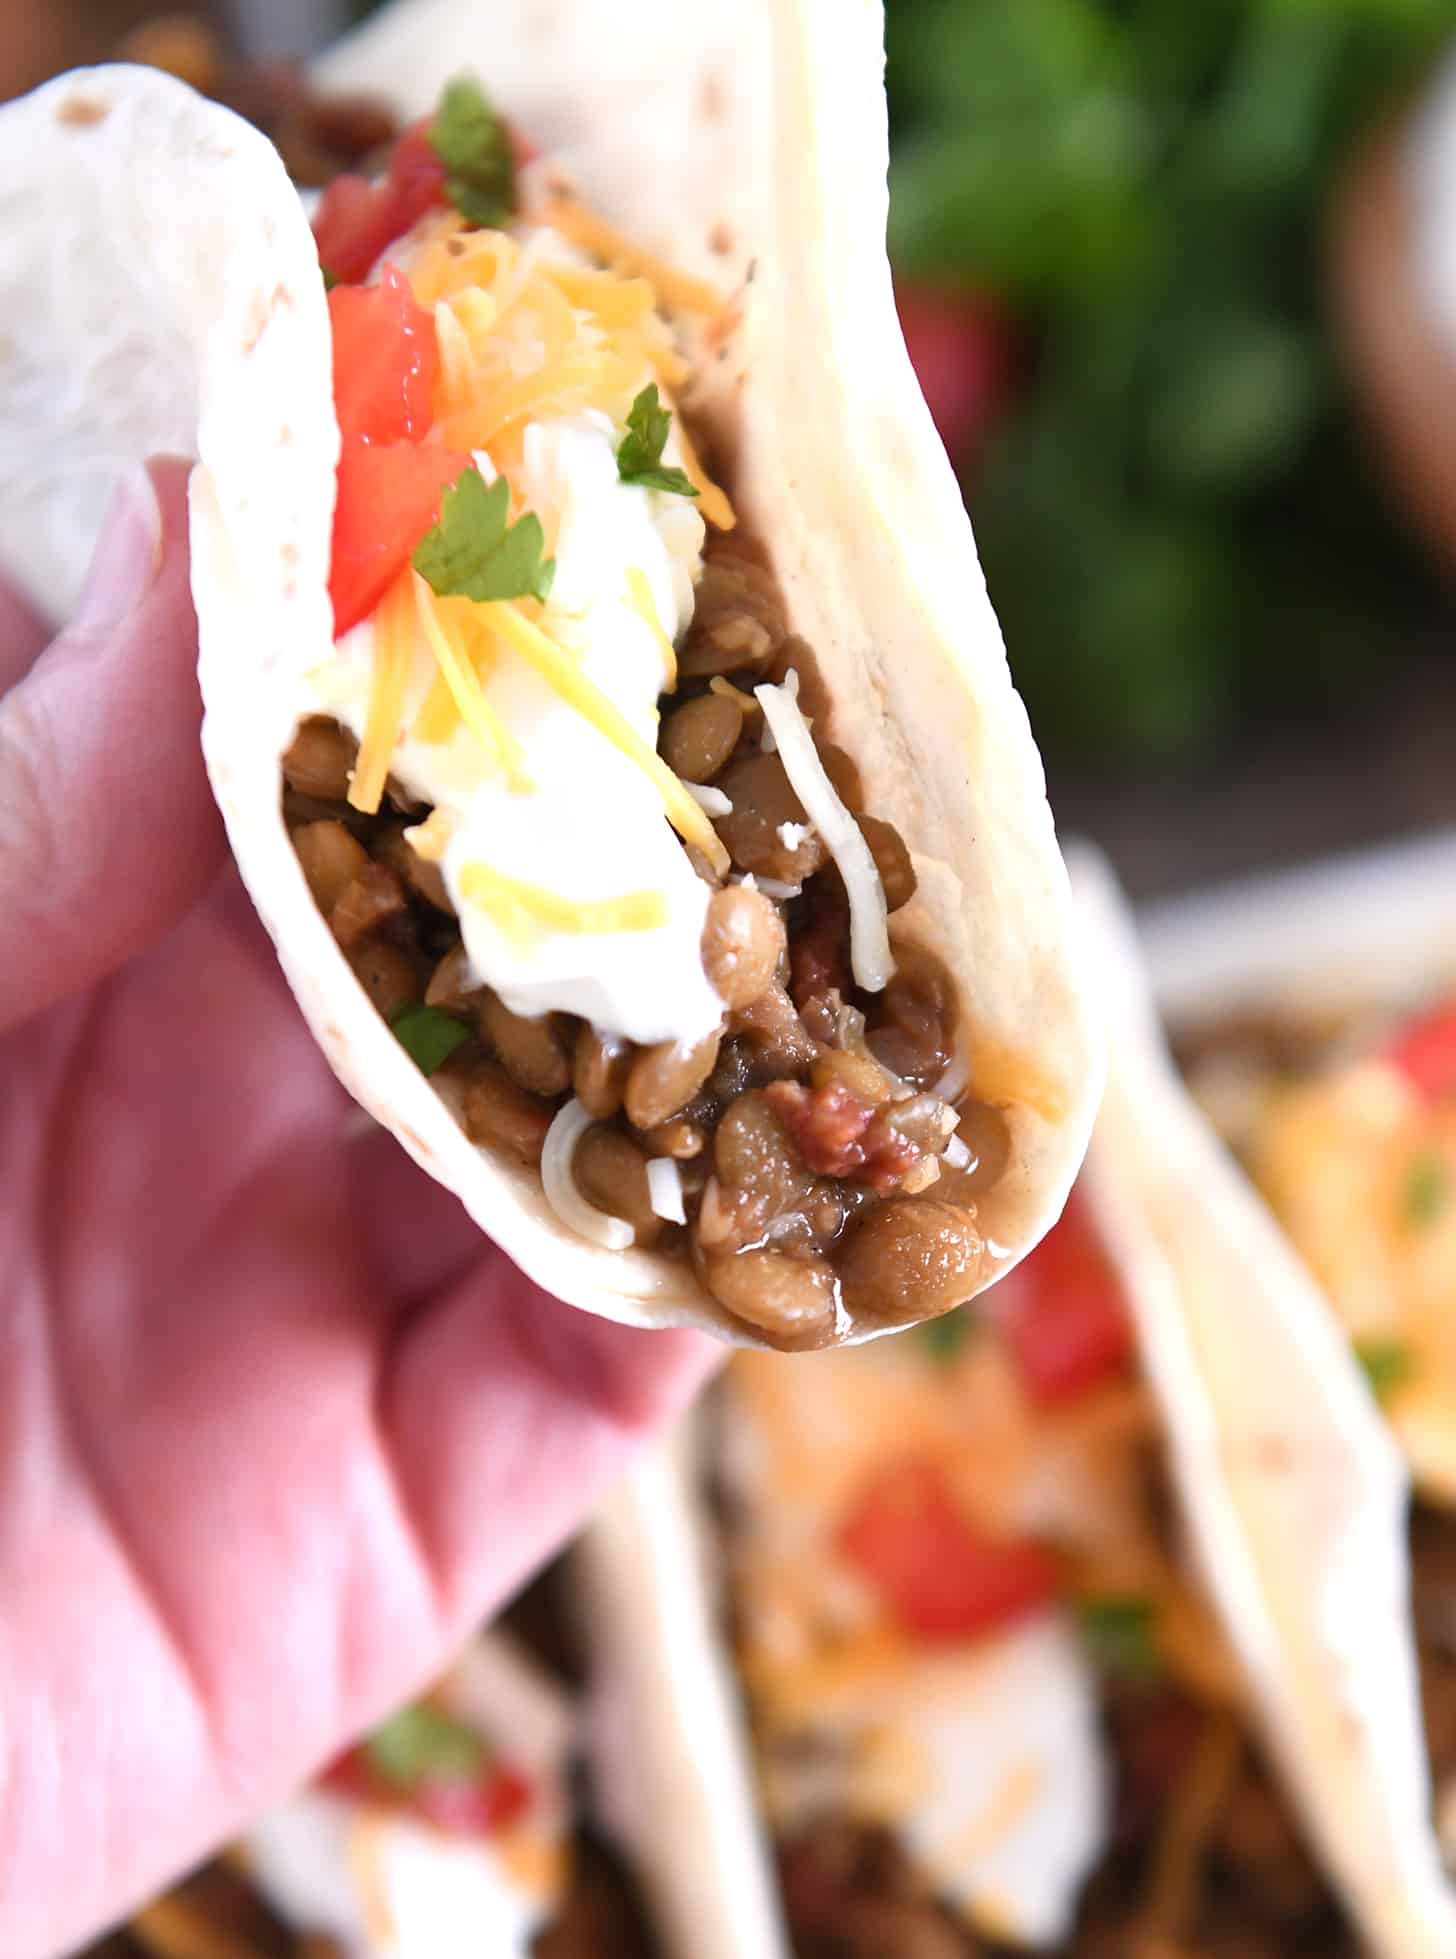
  • Amazing Instant Pot Lentil Tacos

    Amazing Instant Pot Lentil Tacos

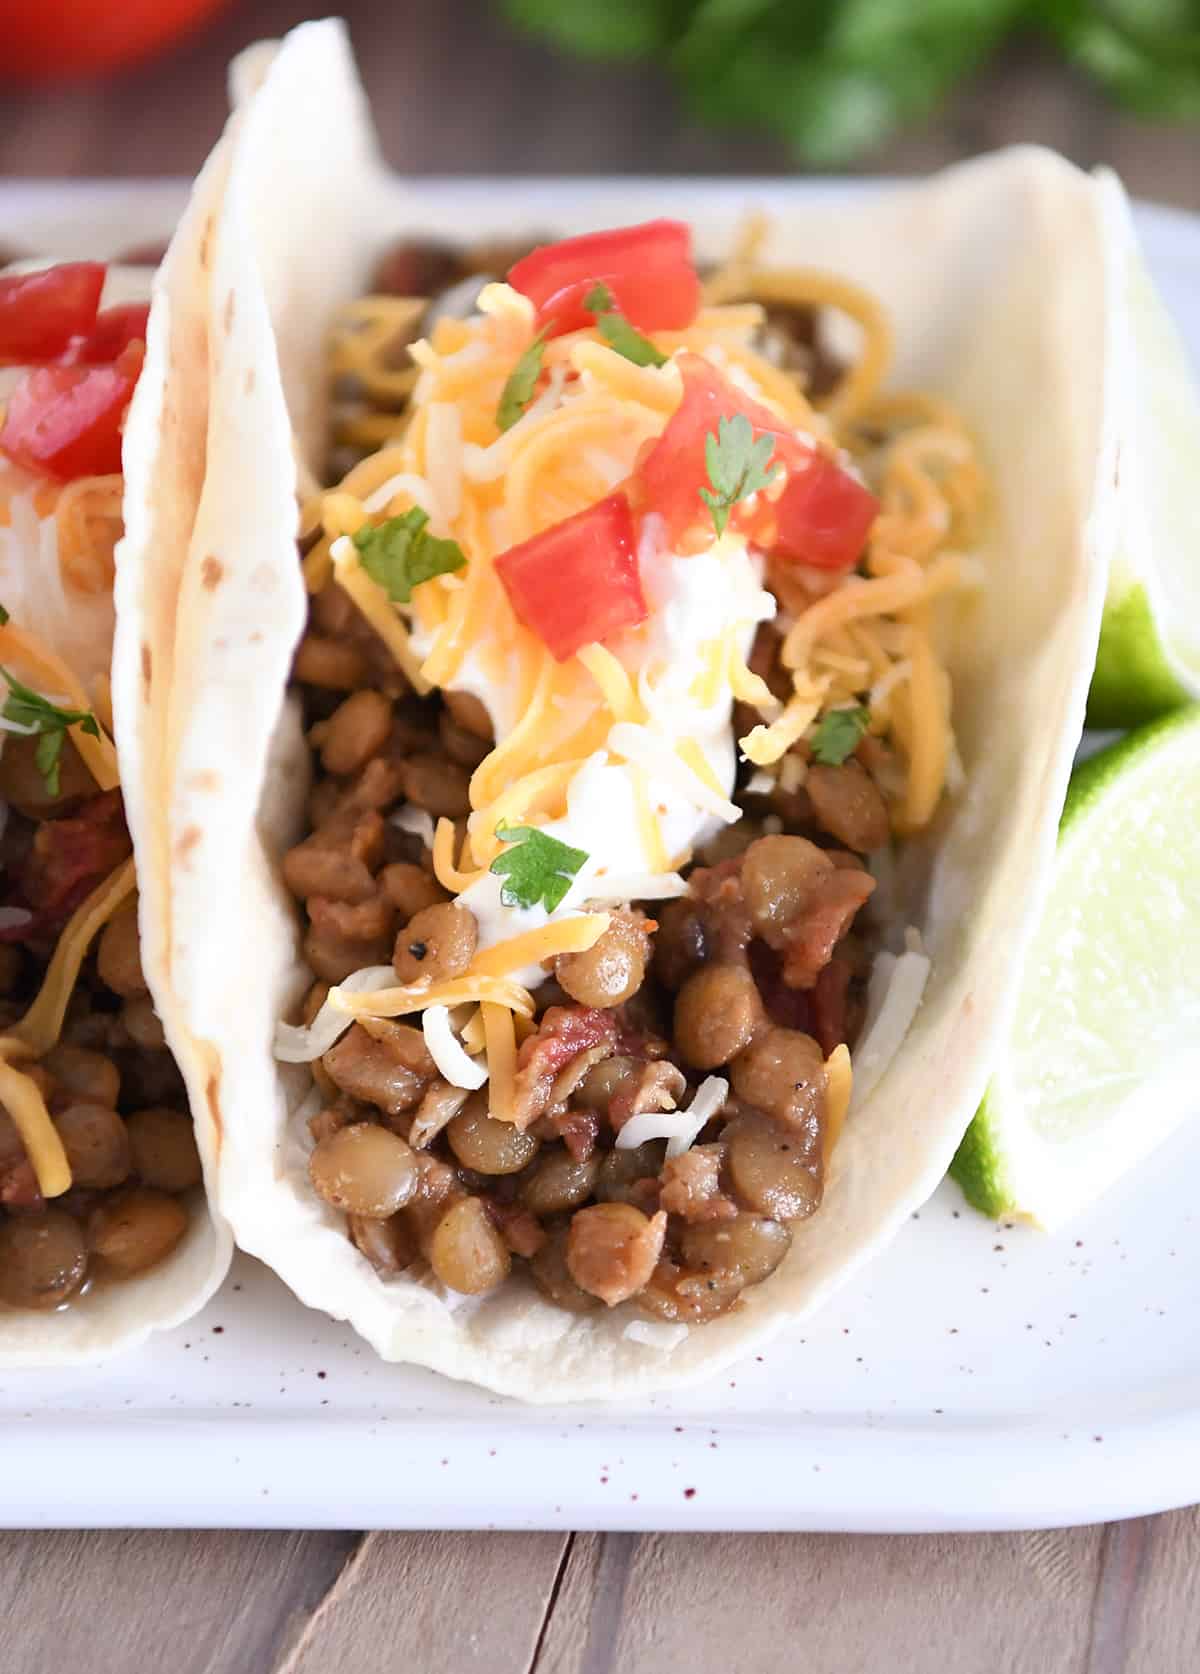
    These delicious and hearty lentil tacos can be made in a pressure cooker or on the stovetop. They are so easy to make, and the warm, smoky flavors are amazing!

    Have you had lentil tacos before? You won’t even miss the meat. They are so flavorful and so good!

    How to Make Lentils for Tacos

    The easiest way to make the filling for these lentil tacos is in a pressure cooker!

    Using this cooking method is hands off and so much faster than cooking on the stovetop (although I do have instructions for that, if you need!).

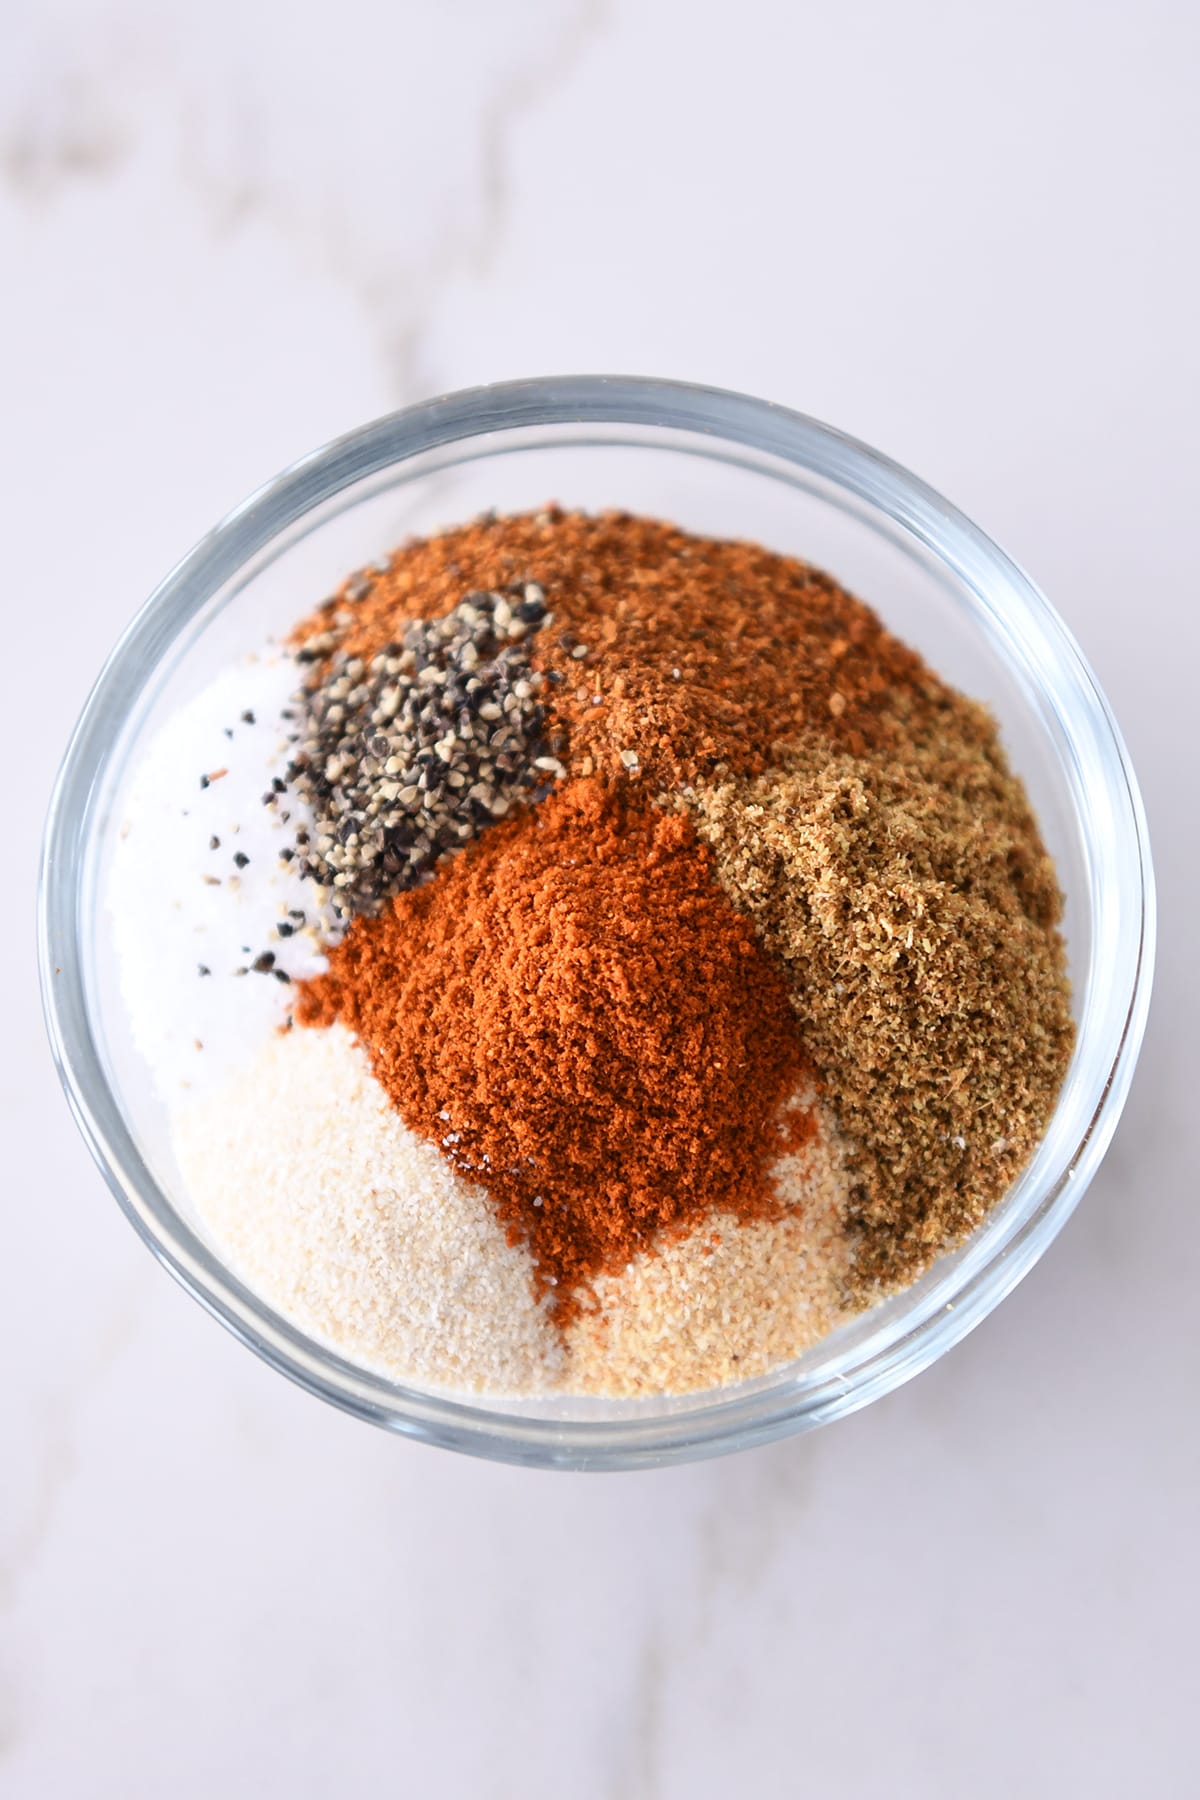
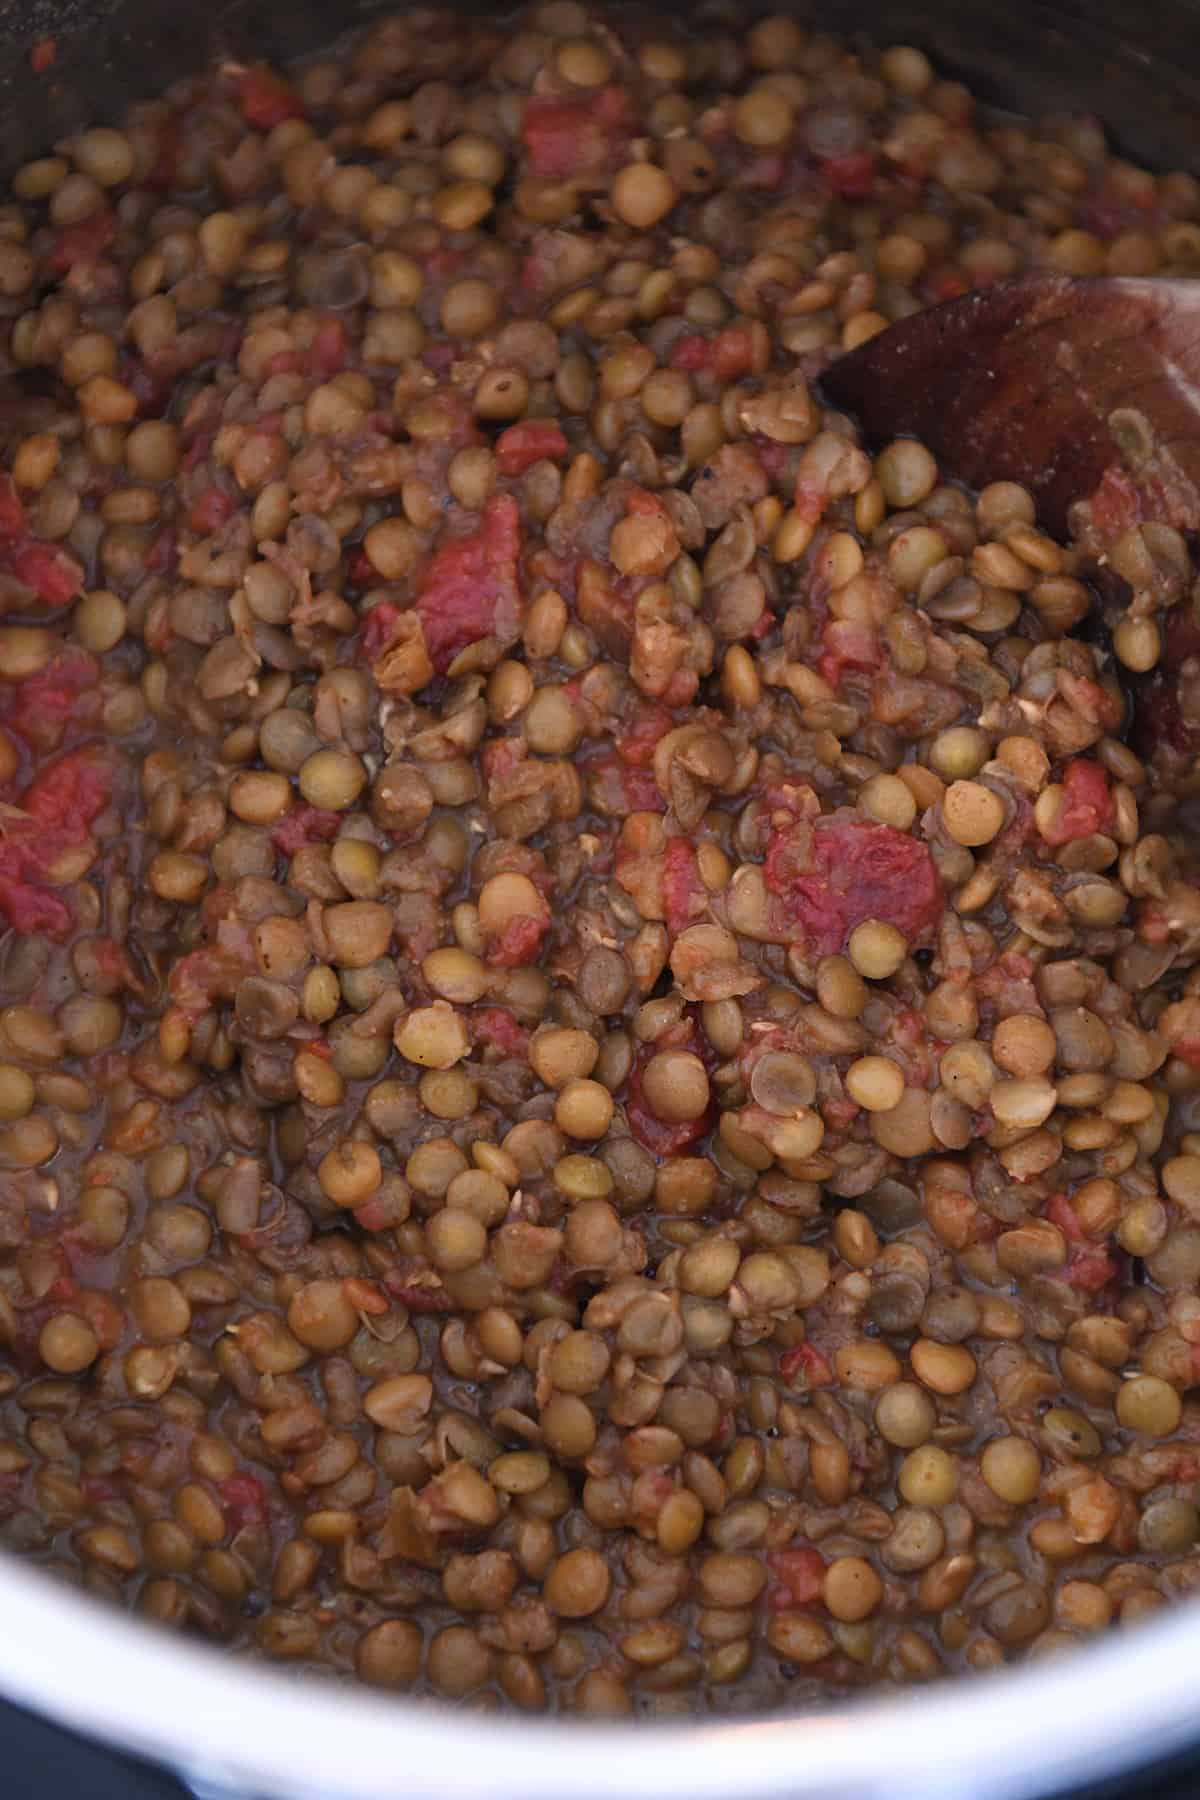
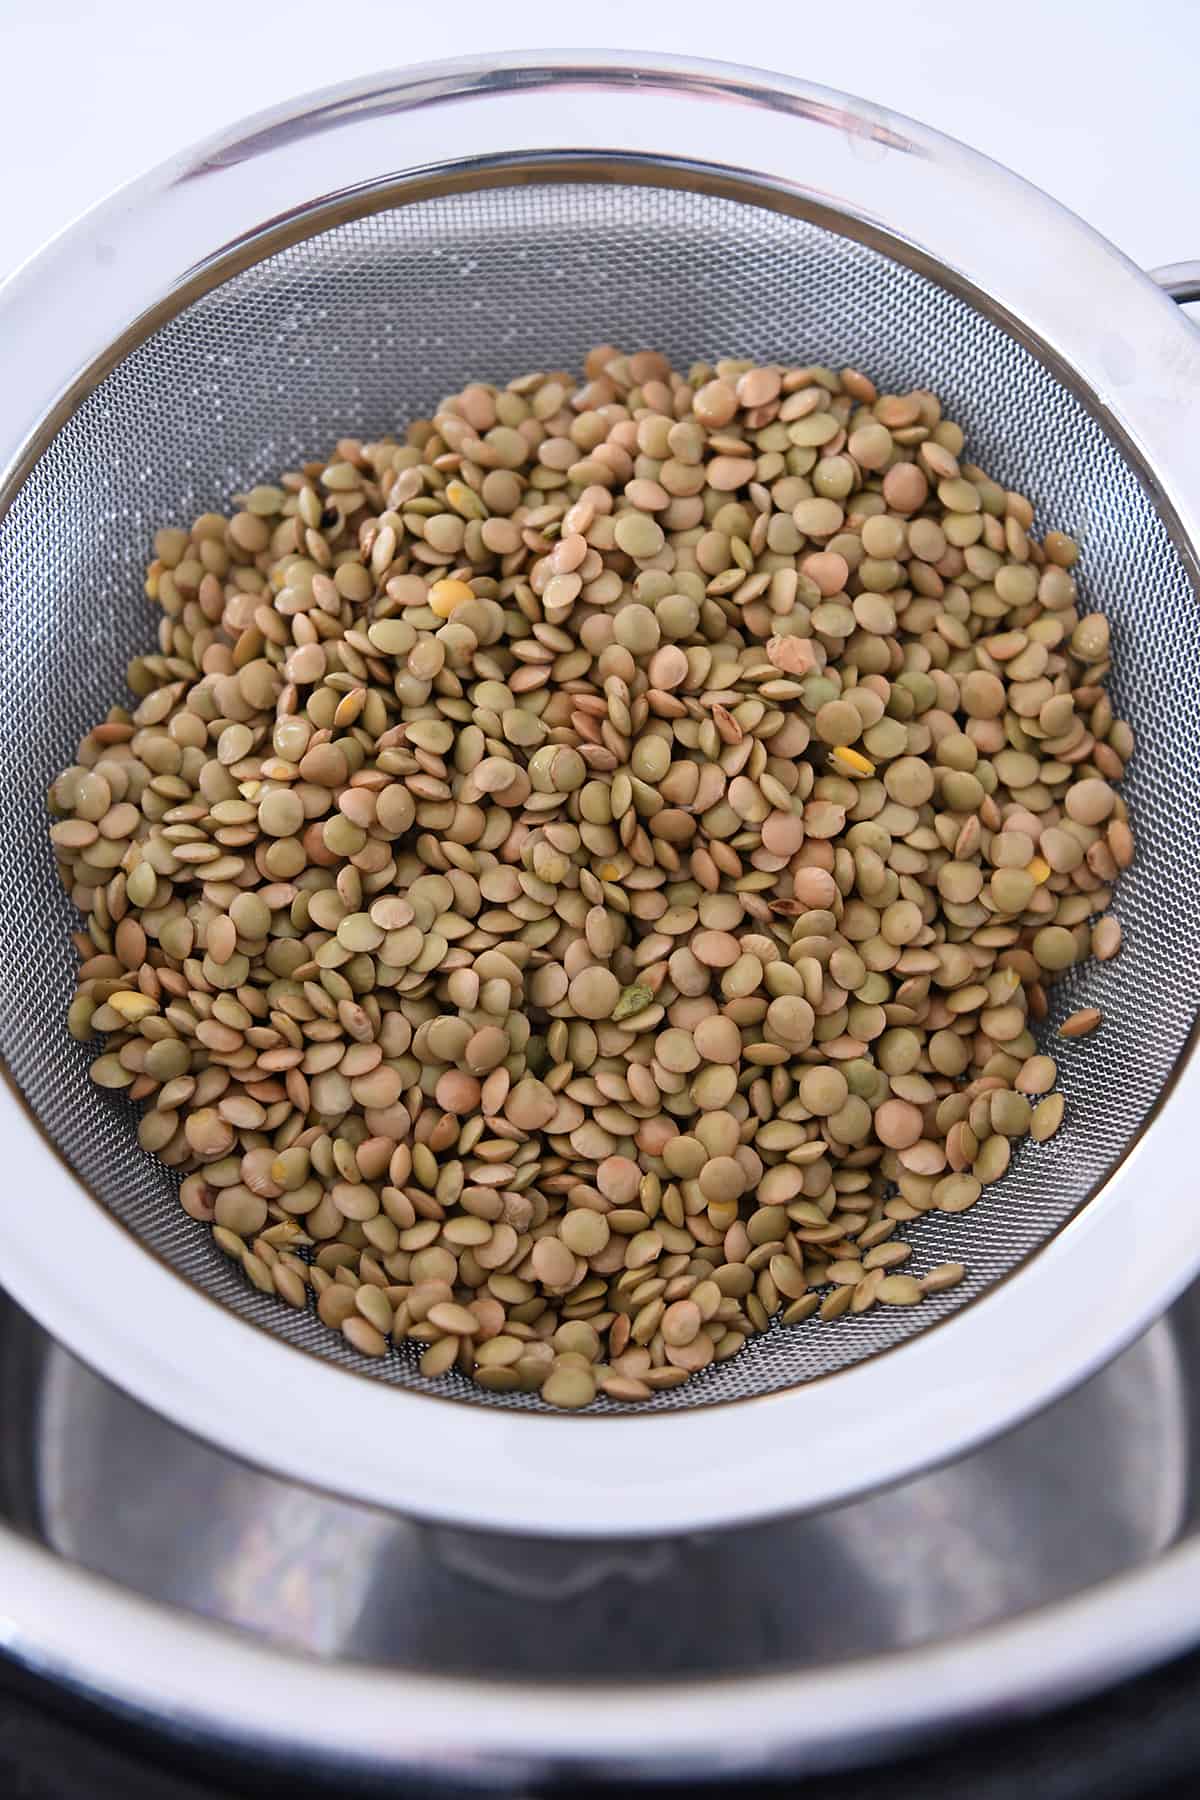
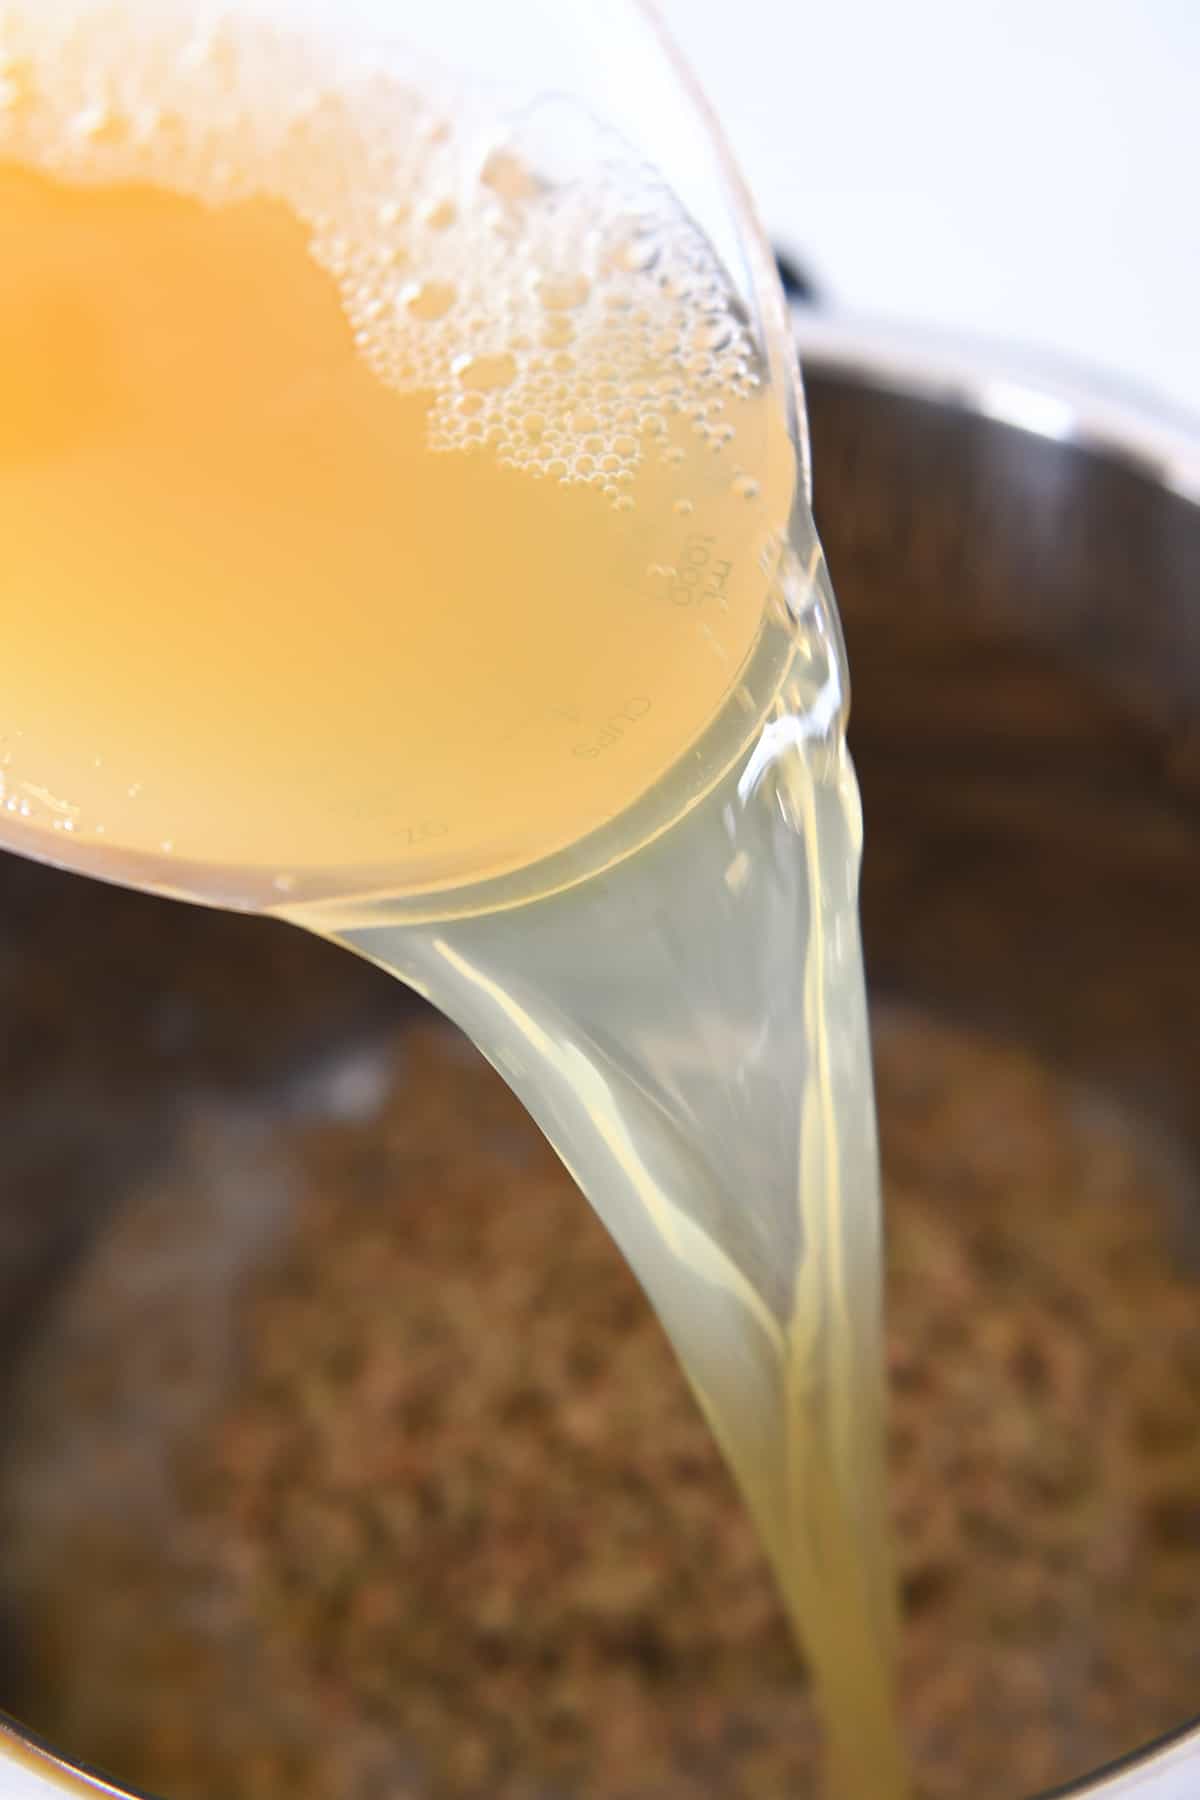
    1. Combine brown or green lentils, broth and simple pantry seasonings in a pressure cooker.
    2. Secure the lid and valve and cook for 12 minutes.
    3. Let the pressure naturally release 10 minutes before releasing the remaining pressure.
    4. Stir in salsa for a boost of fresh, yummy flavor.

    For the stovetop, combine the lentils, broth and seasonings in a saucepan. Bring to a simmer, cover, reduce the heat to medium-low, and cook for 40 to 45 minutes until the lentils are tender. Stir in the salsa.

    A Few Bonus Tips for Success

    I have a few things to say. I think you should listen. (If you’ve identified a “mom voice” you are really dialed in – these two sentences are repeated often at my house – I’m not entirely sure how often the listening part happens but it doesn’t stop me from saying what I have to say. 🤣)

    First, make sure to choose a brand (or homemade recipe) of broth and salsa that has great flavor. Both will have a significant impact on the overall flavor of the lentils.

    Second, if you are unsure what kind of lentils to use, brown or green lentils will work best in this recipe. Red or yellow lentils break down quite a bit more and may have a mushy consistency in this recipe.

    Third, make sure to season the lentil mixture with additional salt and pepper before serving, if needed!

    Serving Suggestions

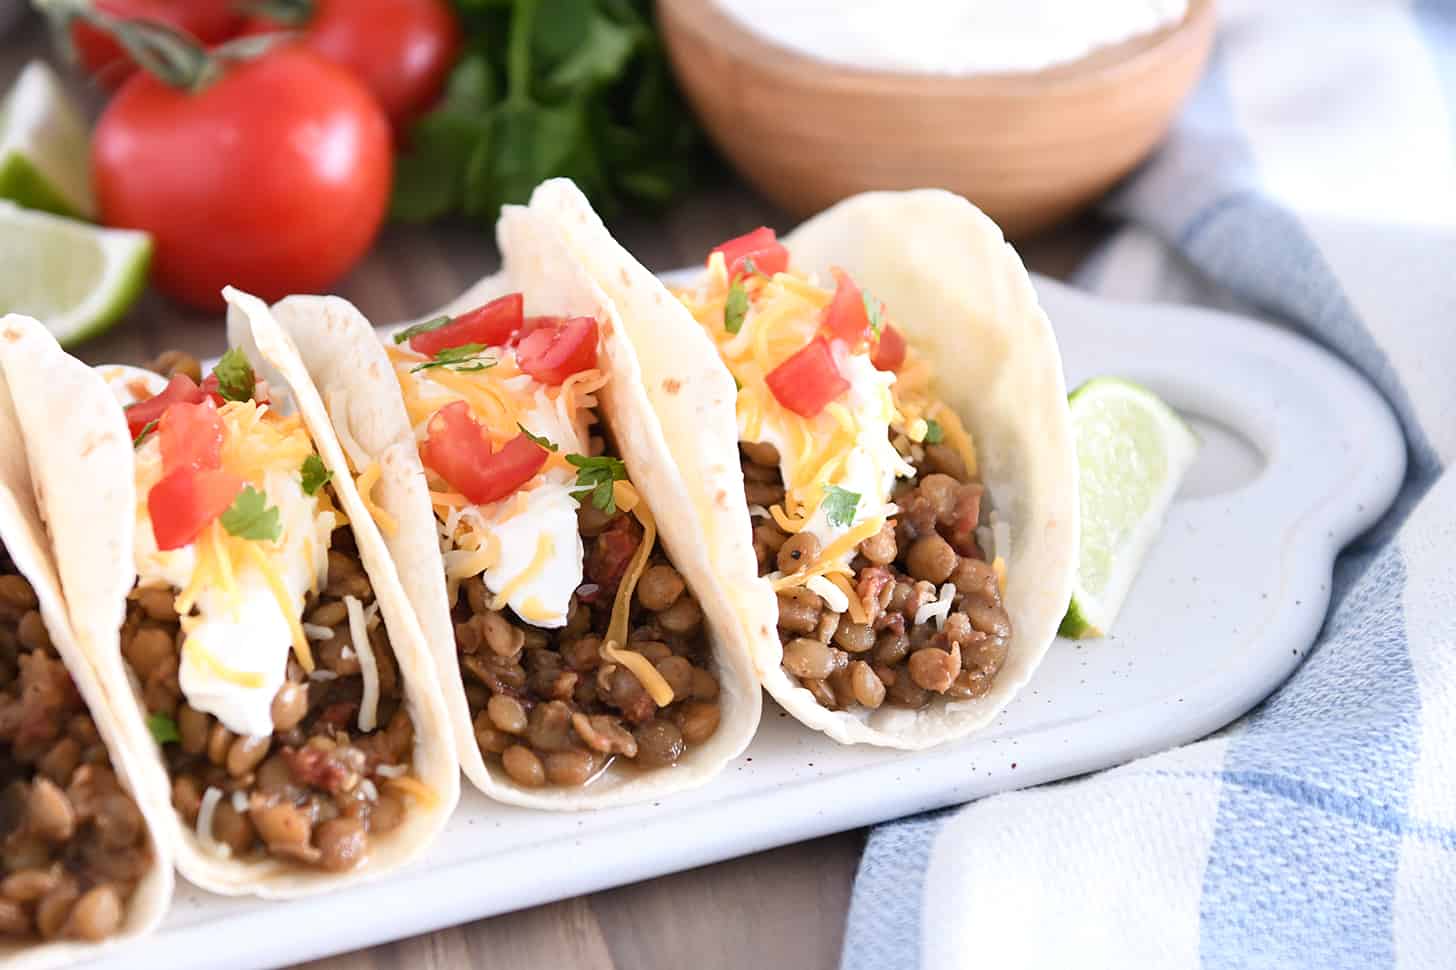
    The flavorful lentils can be served in hard or soft tortilla shells with taco toppings of your choice and they work beautifully in taco salad, as well.

    I often eat the leftover lentil mixture alongside eggs with a sprinkle of cheese for breakfast or lunch. A terrific combo!

    If you are looking for meatless meal inspiration, these lentil tacos should be at the top of your list! They are so simple and fast to make, and they provide a wonderfully nutritious and hearty meal.

    I promise, you won’t even miss the meat. However, if you are currently learning to embrace meatless meals (or training your family to do so 😉), these lentils can be combined with ground beef or cooked chicken for an extremely yummy compromise.

    One Year Ago: Creamy Beef and Tomato Noodle Soup
    Two Years Ago: Crazy Good Kale and Wild Rice Salad 
    Three Years Ago: Peanut Butter Banana Bread
    Four Years Ago: Banana Cream Cheese Coffee Cake with Chocolate Chip Streusel
    Five Years Ago: Chicken and Vegetable Dumpling Soup 
    Six Years Ago: Sheet Pan Balsamic Chicken + Veggies Dinner {30-Minute Meal}
    Seven Years Ago: Yum Yum Bowls with Knockoff Cafe Yumm Sauce
    Eight Years Ago: German Pancake {Whole Grain Option} with Butter Syrup
    Nine Years Ago: Amazing Romaine Salad with Light Poppy Seed Vinaigrette 
    Ten Years Ago: Roasted Maple-Glazed Pork Tenderloin 

    Instant Pot Lentil Tacos

    • 1 ½ cups (300 g) dried brown or green lentils, rinsed and drained
    • 3 ½ cups chicken or vegetable broth (see note)
    • 2 teaspoons chili powder
    • 1 teaspoon ground cumin
    • ½ teaspoon salt
    • ½ teaspoon smoked or sweet paprika
    • ½ teaspoon garlic powder
    • ½ teaspoon onion powder
    • ¼ teaspoon coarsely, ground black pepper
    • 1 cup red or green salsa (preferably thick and chunky vs thin and watery)
    • 12 to 15 soft or crunchy taco shells
    • Taco toppings of choice

    Prevent your screen from going dark

    • In a 6-quart electric pressure cooker, combine the lentils, broth, chili powder, cumin, salt, paprika, garlic powder, onion powder and pepper.

    • Secure the lid and valve and cook on high for 12 minutes. Let the pressure naturally release for 10 minutes before releasing remaining pressure.

    • Drain off any excess liquid, if desired. Stir in salsa and season to taste with additional salt and pepper, if needed (this is important for flavor!).

    • Optional: lightly mash the lentils, if desired.

    • The lentil mixture will thicken a bit if left to sit/keep warm in the pressure cooker.

    • Serve the lentils warm in taco shells with your choice of toppings.

    Stovetop Variation: bring the lentils, broth and seasonings to a simmer in a medium saucepan. Cover, reduce the temperature to medium-low, and cook for 40 to 45 minutes until the lentils are tender. Stir in the salsa, season with additional salt and pepper, if needed, and mash the lentils, if desired. 
    Broth: each brand/variety of broth will have a distinctive flavor, so make sure to use a broth that you already know you like the flavor of, as it will impact the overall flavor of the lentils. 
    Salsa: see above note for broth. Same applies for the salsa. Use one you love! It is preferable to use a thick and chunky variety here so there isn’t excess liquid in the lentil mixture. 
    Refrigerate or Freeze: the cooked lentils keep well in a covered container in the fridge for several days (the flavor gets even better!). They can also be frozen to thaw, reheat and serve later.

    Serving: 1 taco (lentils only), Calories: 98kcal, Carbohydrates: 17g, Protein: 7g, Fat: 0.4g, Saturated Fat: 0.1g, Sodium: 246mg, Fiber: 8g, Sugar: 2g

    Disclaimer: I am a participant in the Amazon Services LLC Associates Program, an affiliate advertising program designed to provide a means for me to earn fees by linking to Amazon.com and affiliated sites. As an Amazon Associate I earn from qualifying purchases.

    Source link

  • Greek Butter Beans

    Greek Butter Beans


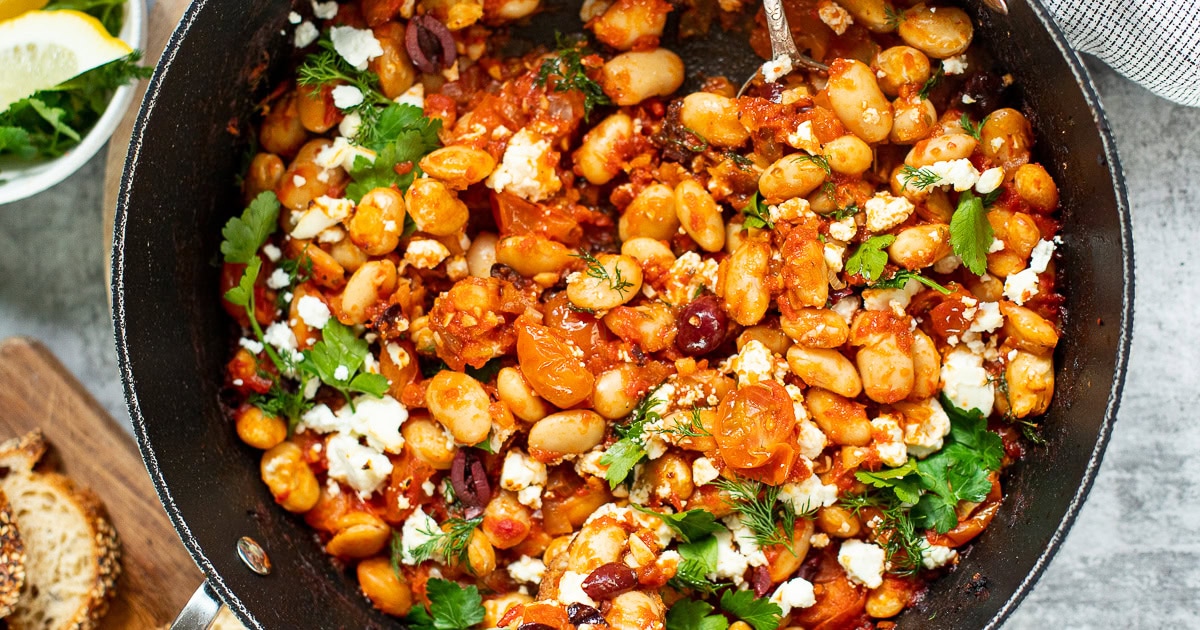
    This butter beans recipe is inspired by shrimp saganaki, a Greek dish that features shrimp (or prawns) cooked in a rich tomato sauce with garlic, onions, and plenty of feta cheese. The word “saganaki” actually refers to the type of pan used to cook the dish. A saganaki is a two-handled frying pan traditionally made of heavy materials like cast iron or copper. In Greek cuisine, “saganaki” can refer to any dish cooked in this type of pan, but it’s most famously associated with fried cheese (like in cheese saganaki) or seafood dishes like shrimp or mussels saganaki.

    In this version, I used tender canned butter beans, which I cooked in a rich tomato sauce, garlic, and onion, then topped with briny Kalamata olives and creamy feta cheese. Fresh dill and parsley add a burst of vibrant herby flavor, making this dish not only hearty but also incredibly refreshing. Seriously, for something so simple, this dish is sooooo tasty and was a hit even with my non-bean-loving partner!

    Oh, and I used my oven-proof sauté pan, which happens to be two-handled so this dish is as close to saganaki as I am going to get!

    Greek butter beans is a perfect cosy dinner, easy enough for a weeknight meal. Serve it with crusty bread to soak up every last bit of the flavorful tomato sauce. It’s equally good the next day so you can enjoy it for breakfast with some fried or poached eggs or simply spread over toasted sourdough. And don’t forget to pop some in your lunchbox for a satiating, nutritious protein kick.

    👩‍🍳 You might also enjoy these Mediterranean recipes: eggplant & chickpea salad, Greek roasted potatoes, herby and lemony chickpea soup, Persian salad, Greek quinoa breakfast bowl, or this couscous salad. You will also find some fun ideas in this healthy chickpea recipes roundup.

    What You’ll Need

    Here is what you’ll need for this Greek butter beans recipe. Find the full measurements in the recipe card below.

    • The foundation of flavor: olive oil (use good quality here), onion and garlic.
    • Spices and seasonings: salt, crushed red pepper flakes (or chili flakes), dried oregano and sweet paprika.
    • Tomatoes: Cherry tomatoes and canned diced tomatoes, I love a combination of both.
    • Sweetener: Honey (maple syrup works as a vegan alternative), don’t skip it if you can!
    • Main ingredients: Butter beans (cannellini beans, white beans or even chickpeas can work too), feta cheese (swap with goat cheese or omit for a vegan version) and Kalamata olives (green olives work too).
    • Fresh herbs: fresh dill and fresh parsley, lemon wedges. I highly recommend dill but the dish will still work without.

    How To Make Greek Butter Beans

    Find the full recipe and nutritional information below. Here are some handy step-by-step photos.

    • Prep: Chop and dice all the ingredients.
    • Sauté the veggies: Heat oil in an oven-safe skillet, it needs to be fairly deep. Cook onion with salt until softened, then add garlic and cook until fragrant.
    • Make the sauce: Add spices, honey, cherry tomatoes, and cook briefly. Stir in canned tomatoes and simmer until the sauce thickens.
    • Combine and grill: Mix in beans and olives, add dill, top with feta, and broil/grill in the oven until the cheese browns slightly. The grilling part is optional!
    • Garnish and serve: Sprinkle with more dill and parsley and serve with lemon wedges and crusty bread.

    Watch The Video

    Recipe Tips

    • You can substitute the butter beans with other white beans like cannellini or great northern beans for a slightly different texture. Chickpeas also work in this recipe.
    • For a vegan version, use a plant-based feta cheese or skip the cheese altogether and sprinkle with nutritional yeast.
    • Add a pinch of smoked paprika or cumin for an extra layer of flavor.
    • Feel free to add more vegetables like spinach or zucchini for added nutrition and variety.
    • This dish pairs wonderfully with a side salad, quinoa, or rice for a more filling meal.
    • Chili flakes and honey – both are optional but in my opinion, they are needed to experience the full flavor potential of this recipe. Feel free to adjust the chili flakes or add them when serving.

    Serving Suggestions

    Serve this butter bean saganaki with crusty bread or pita bread to soak up the sauce. It also pairs well with grilled fish, rice, or a fresh side salad. For breakfast, I love the leftovers with some fried or poached eggs and I will often spread some of these butter beans on toasted sourdough as a quick protein snack. Don’t forget to add these to your lunchbox, too!

    💬 If you’ve tried this butter beans recipe or any other recipe on the blog then don’t forget to rate the recipe and let me know how you got on in the comments below, I love hearing from you! You can also FOLLOW ME on Instagram, Facebook, Pinterest, YouTube and or sign up to my Newsletter to see more of my delicious food.

    Want to Save This Recipe?

    Enter your email & I’ll send it to your inbox. Plus, get great new recipes from me every week!

    By submitting this form, you consent to receive emails from Cooked & Loved

    This Greek butter beans recipe is inspired by the traditional Greek shrimp saganaki. The beans are cooked in a rich and flavourful tomato sauce with refreshing notes of dill and parsley and the salty finish of feta cheese. Enjoy as a vegetarian main or as a side dish, spread it on toast or serve with eggs for a Mediterranean breakfast.

    • Sauté Vegetables: Heat olive oil in an oven-safe skillet over medium heat. Add diced onion and season with ½ teaspoon of salt. Cook until soft (about 7 minutes), then add sliced garlic and cook for another 1 minute until fragrant.

    • Make the Sauce: Add crushed red pepper flakes, paprika, dried oregano, honey and cherry tomatoes. Cook for 30 seconds to a minute, stirring through. Add diced canned tomatoes and season with another ½ teaspoon of salt. Stir and simmer (uncovered) for 8-10 minutes until some liquid evaporates and the tomato sauce thickens a bit.

    • Combine and grill: Fold in the butter beans and olives, then add a few sprigs of dill. Top with crumbled feta and place the skillet under the hot broiler (grill in the oven) for about 5 minutes until the cheese melts and browns slightly. This step is optional as the beans are technically ready to eat and you can serve with feta without grilling the top.

    • Garnish and serve: Remove from oven, sprinkle with more fresh dill and parsley. Serve with lemon wedges and crusty bread.Enjoy this flavourful and hearty butter bean saganaki with some crusty bread or a side dish to fish, rice or potatoes.
    • Storage tips: Store leftovers in an airtight container in the refrigerator for up to 3 days. Reheat on the stove over medium heat until warmed through. You may need to add a splash of water or broth to loosen the sauce. Avoid microwaving as it may alter the texture of the beans and cheese.
    • You can freeze the dish without the feta cheese for up to 2 months. Freeze it in airtight containers or freezer bags. To serve, thaw overnight in the refrigerator, reheat on the stove, and add fresh feta and herbs before serving.
    • Make-ahead tips: You can make the sauce and beans ahead of time and store them in the refrigerator for up to 3 days. When ready to serve, reheat gently on the stove and add fresh herbs and feta before serving. Broil just before serving to refresh the dish.

    • You can substitute the butter beans with other white beans like cannellini or great northern beans for a slightly different texture. Chickpeas also work in this recipe.
    • For a vegan version, use a plant-based feta cheese or skip the cheese altogether and sprinkle with nutritional yeast.
    • Add a pinch of smoked paprika or cumin for an extra layer of flavor.
    • Feel free to add more vegetables like spinach or zucchini for added nutrition and variety.
    • This dish pairs wonderfully with a side salad, quinoa, or rice for a more filling meal.
    • Chili flakes and honey – both are optional but in my opinion, they are needed to experience the full flavor potential of this recipe. Feel free to adjust the chili flakes or add them when serving.


    Serving: 6servings | Calories: 150kcal | Carbohydrates: 13g | Protein: 4g | Fat: 10g | Saturated Fat: 3g | Polyunsaturated Fat: 1g | Monounsaturated Fat: 5g | Cholesterol: 17mg | Sodium: 799mg | Potassium: 329mg | Fiber: 3g | Sugar: 7g | Vitamin A: 936IU | Vitamin C: 31mg | Calcium: 155mg | Iron: 2mg
    Keywords: Greek recipes, Green beans, Butter beans recipe, butter beans, saganaki, bean recipes, tomato beans

    Butter Beans FAQs

    What are butter beans? Can I use a substitute?

    Butter beans are large, creamy beans also known as lima beans. They have a smooth, buttery texture that’s perfect for soaking up flavors. If you can’t find butter beans, you can substitute them with cannellini beans, great northern beans, or even chickpeas for a slightly different texture and taste.

    Is this butter beans recipe vegan?

    The traditional recipe is vegetarian since it includes feta cheese. To make it vegan, simply omit the feta or replace it with a vegan cheese alternative. Also, substitute honey with maple syrup or agave nectar if used in the recipe.

    What does ‘saganaki’ mean?

    ‘Saganaki’ refers to a variety of Greek dishes that are prepared in a small, two-handled frying pan of the same name. The most famous saganaki dish is the fried cheese appetizer, but the term is also used for other dishes like shrimp saganaki and this butter beans version, all typically featuring a rich tomato-based sauce.

    Can I add other vegetables to the dish?

    Absolutely! Spinach, bell peppers, zucchini, or eggplant make great additions and can enhance the nutritional value and flavor complexity of the dish. Add them during the sautéing stage to ensure they’re cooked properly.

    Can I use fresh tomatoes instead of canned ones?

    Yes, you can use fresh tomatoes. You’ll need about 4-5 medium-sized ripe tomatoes, chopped. Keep in mind that fresh tomatoes may make the sauce lighter and may require a longer cooking time to break down and thicken properly.

    More Vegetarian Dinner Recipes


    Source link